Skip to content
    • About

NebraskaPeteGeek

  • American Pipe Makers
  • British pipe Makers
  • Danish pipe Makers
  • French Pipe Makers
  • German Pipe Makers
  • Irish Pipe Makers
  • Italian Pipe Makers
  • Others or Unknown Pipe Makers
  • Restorations
  • A Commissioned Stanwell 32 Button Repair – acrylic welding

    August 19th, 2025

    Photographed and Written by

    John M. Young

    I was recently approached by a fellow member of the Facebook (FB) group The Real American Pipe Smokers (RAPS) to repair a chipped button on a Stanwell bulldog.  The pipe’s owner, named Cash, had shown the chipped stem to other restorers or repairmen and they recommended stem replacement.  Very understandably, Cash did not want to lose the brass inlaid Stanwell stem.  I said that I thought that I could repair the chipped button making it usable again without a stem replacement.  I do love a challenge.  Cash and I never discussed the cost of this project.

    Shipping was arranged and Cash sent the pipe off from Alabama to the wilds of southeast Nebraska.  When the box arrived I was surprised by the size of the box.  When I lifted it I was even more surprised by the weight.  I wondered if a new packing material had been developed in Alabama which would replace the air filled bubbles with tungsten.  Upon opening the box I was astounded by the number of pipe tobacco tins that had been included for me to sample.  I immediately replied to Cash saying, “Good Lord, man.  You sent me enough tobacco for a couple of full restores.  Thank you so much.  I have always wanted to try a couple of those.  I am plotting a couple of “best ways” to fix the Stanwell as I type.”  Cash’s reply spoke to  his generosity, “Sharing is part of the fun and enjoyment of it haha.  Glad you like it, can’t wait to see what you come up with for the pipe.”  

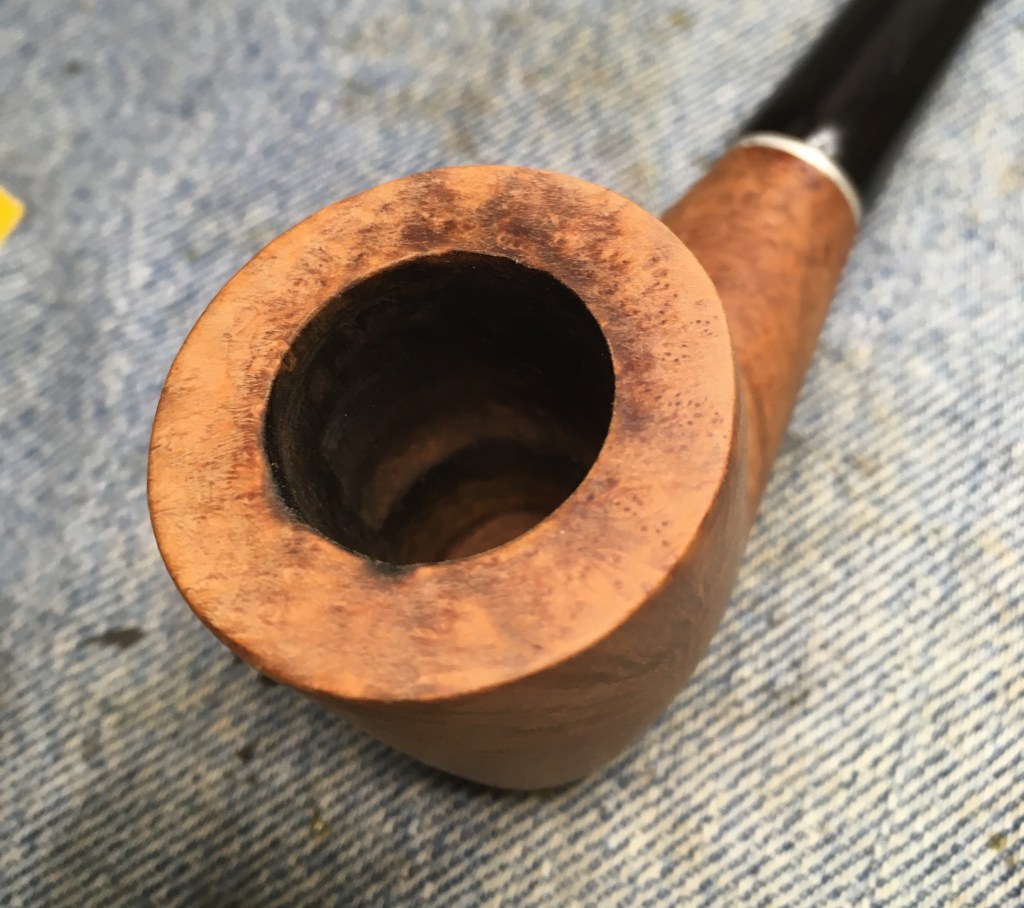
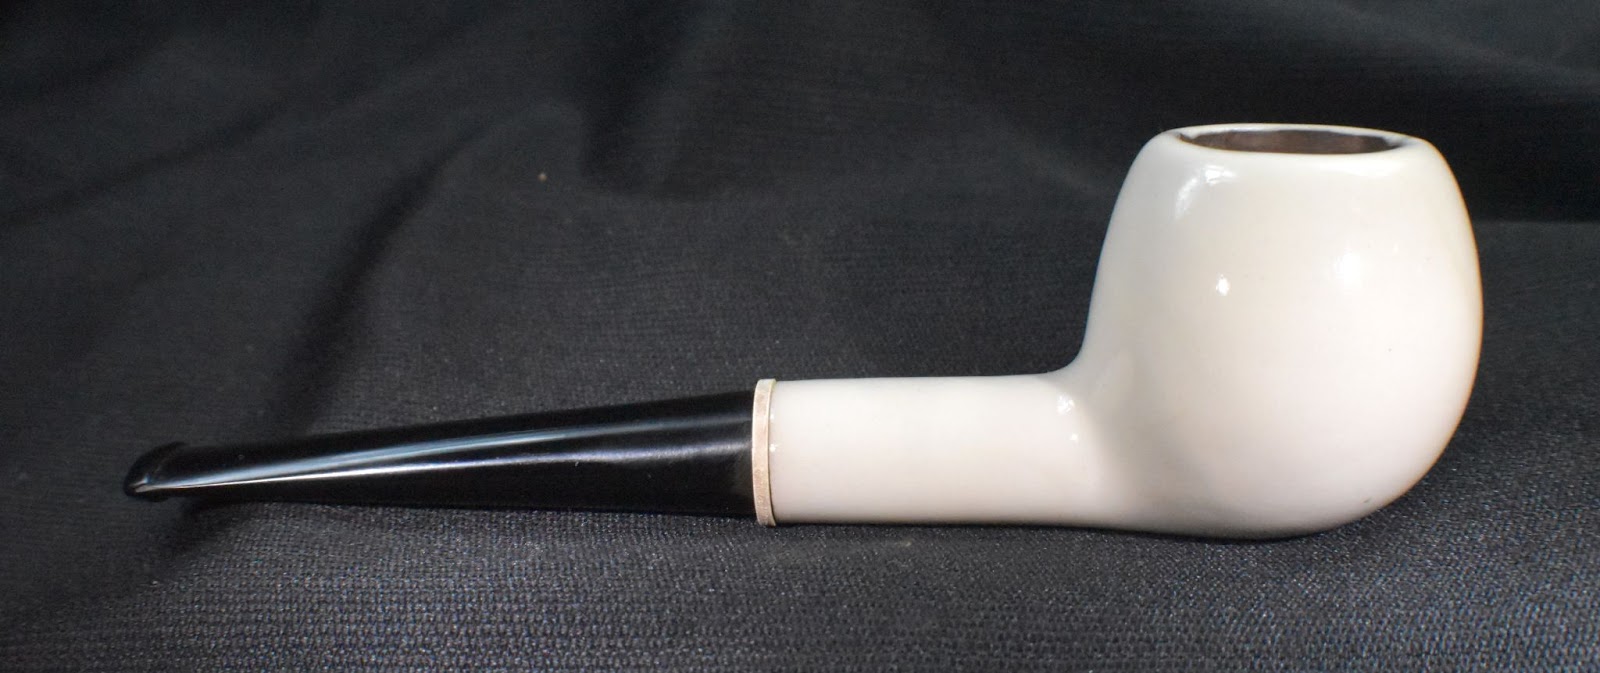
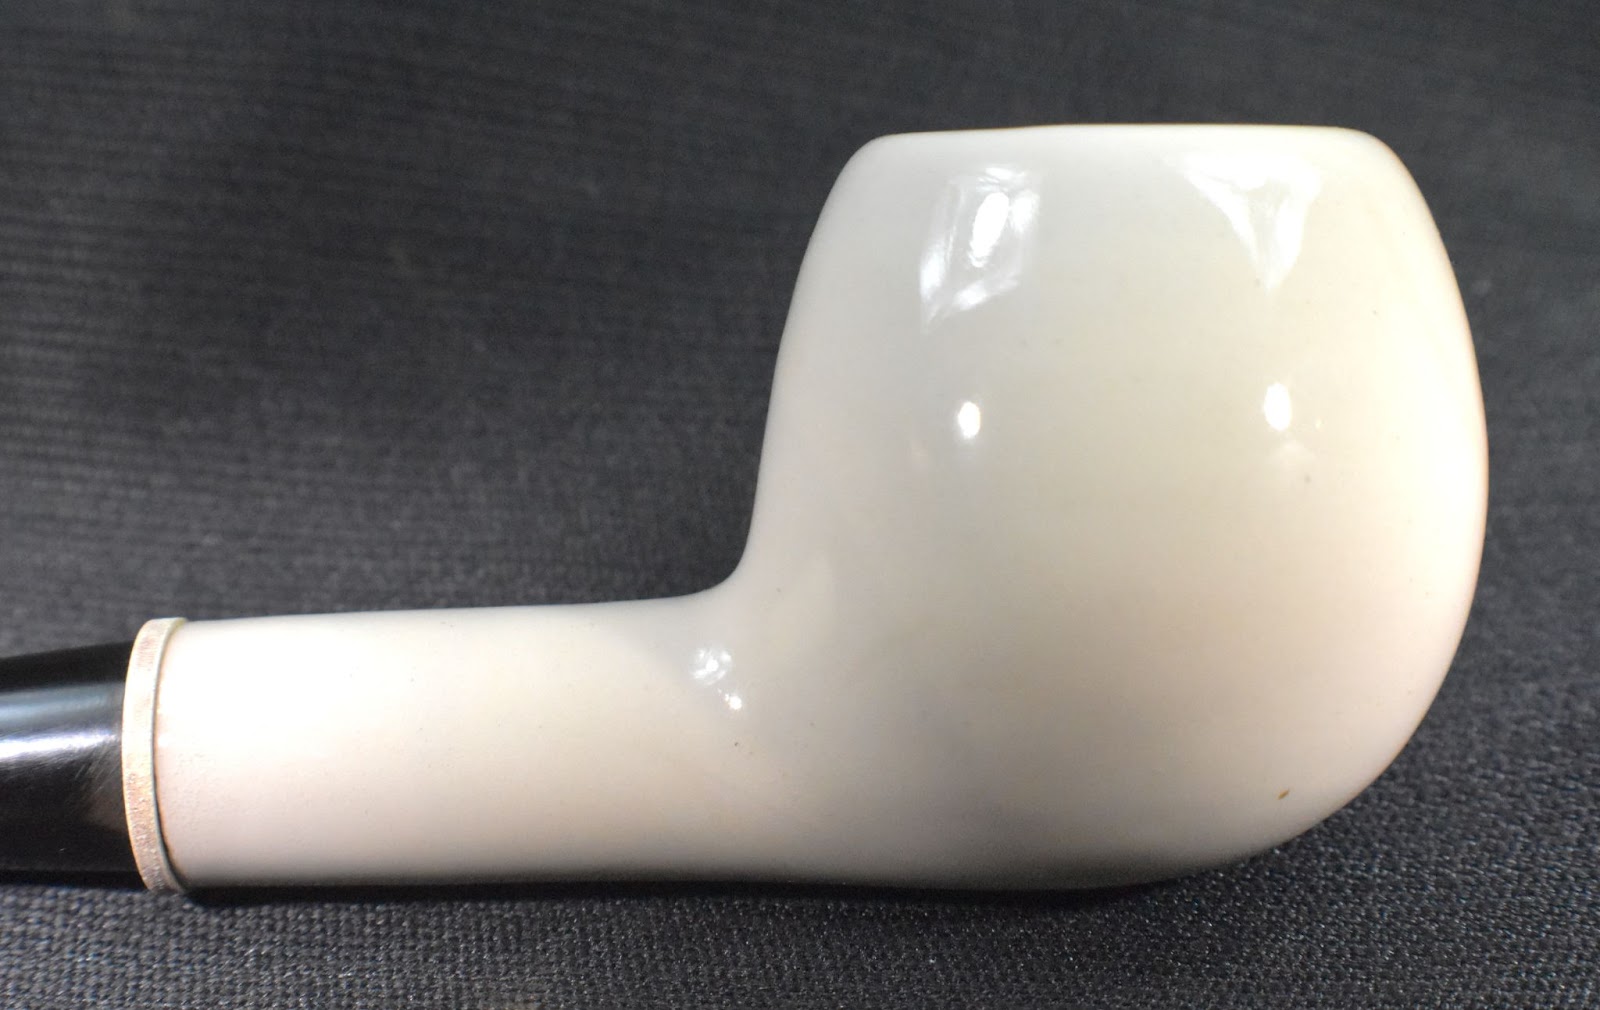
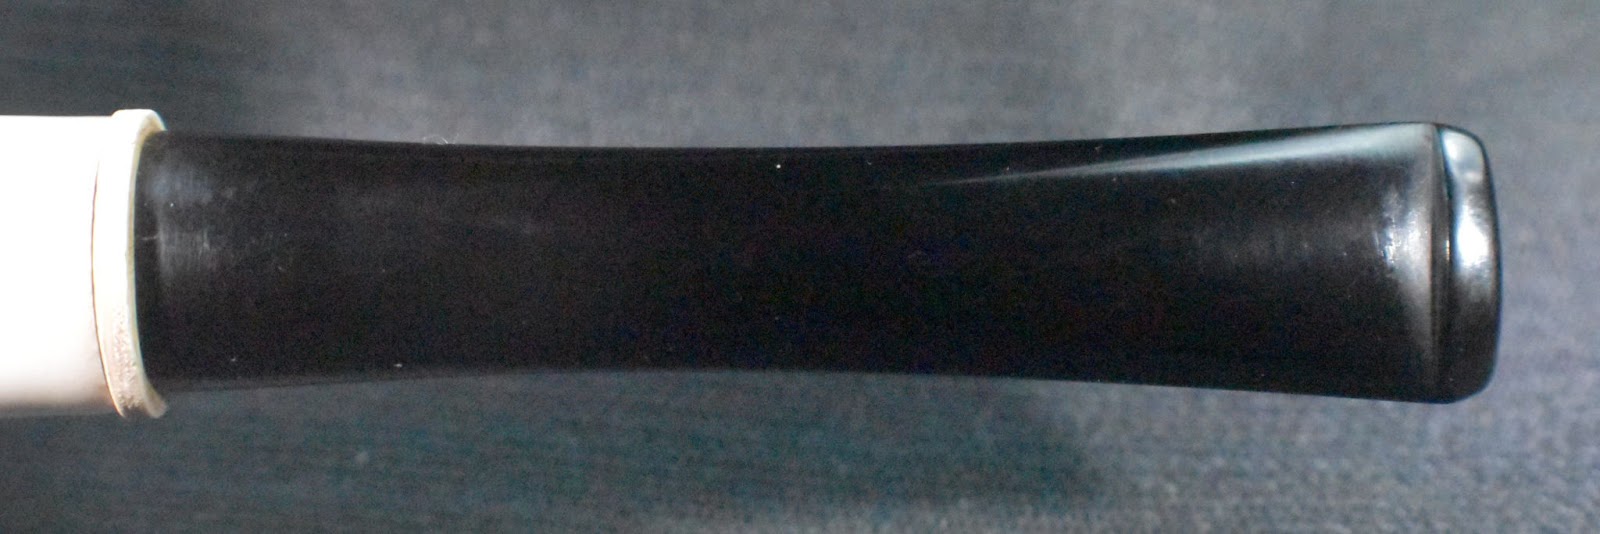
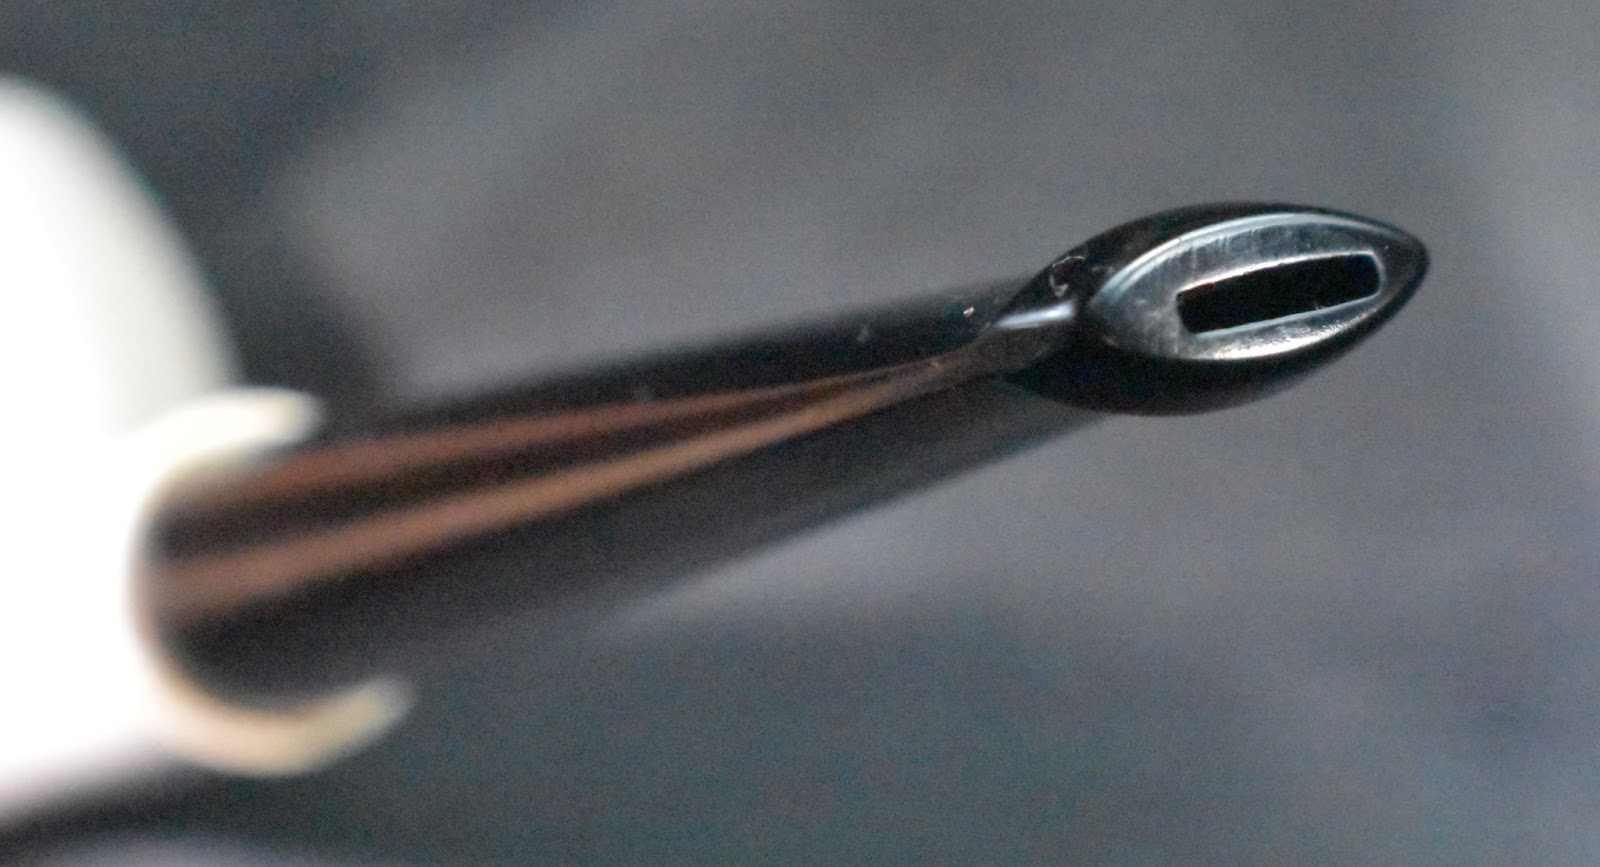
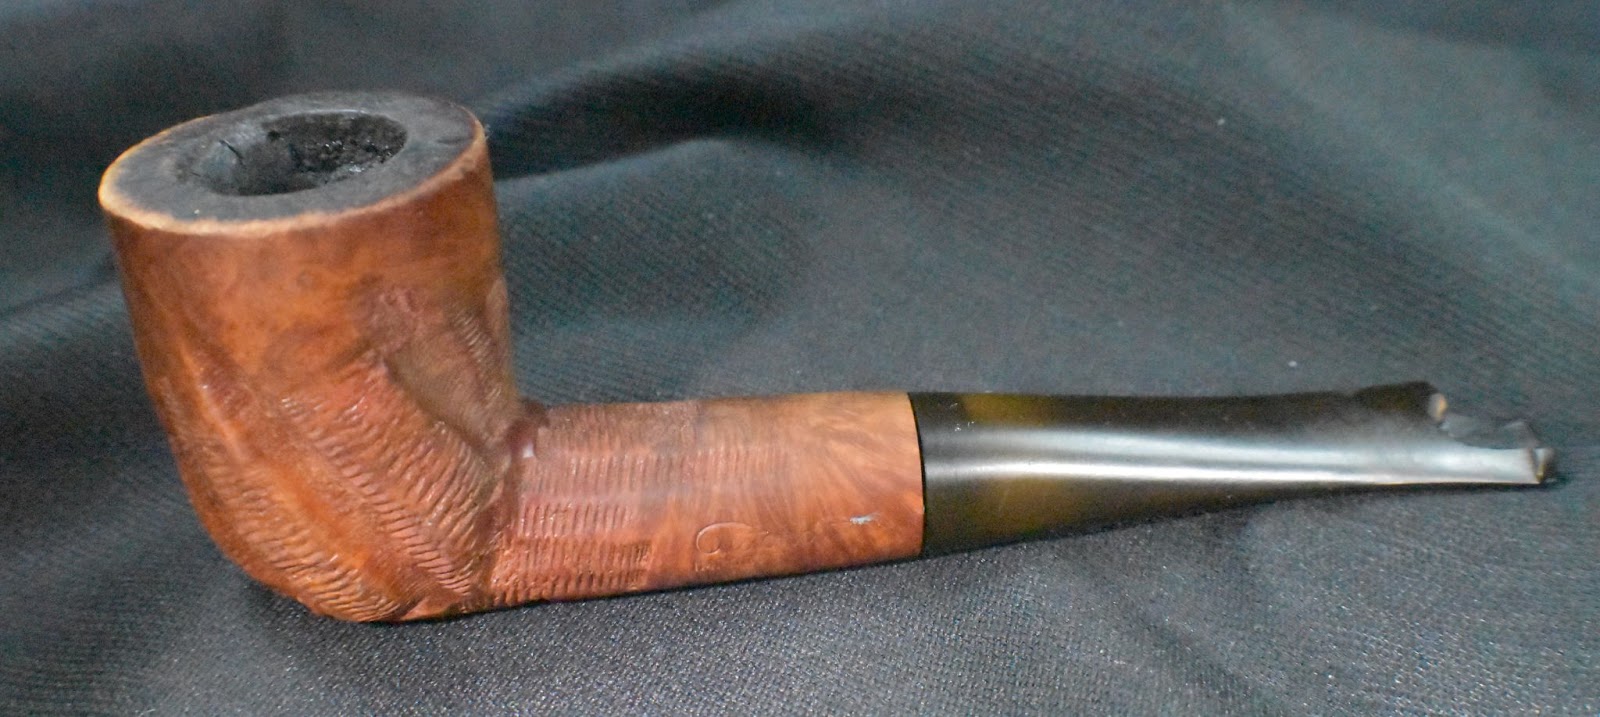
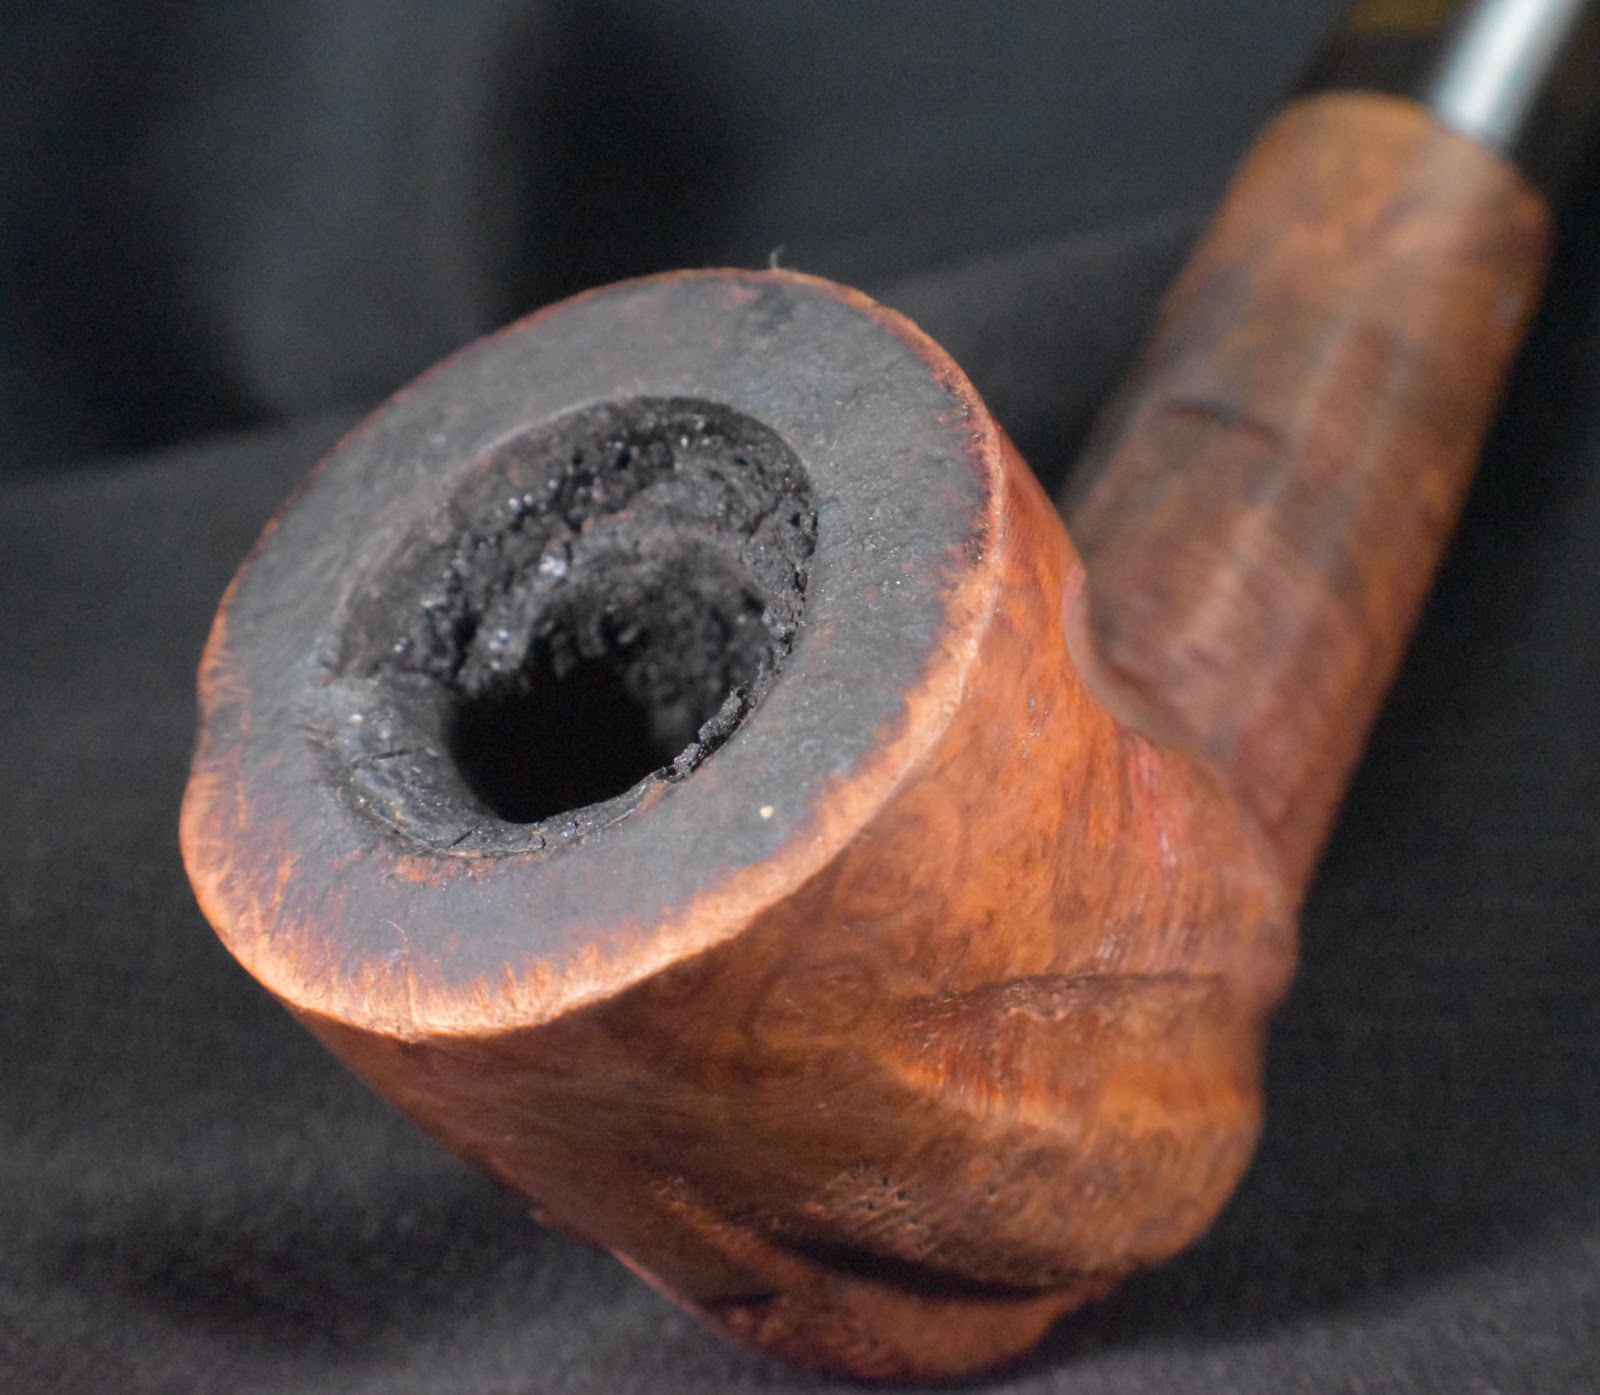
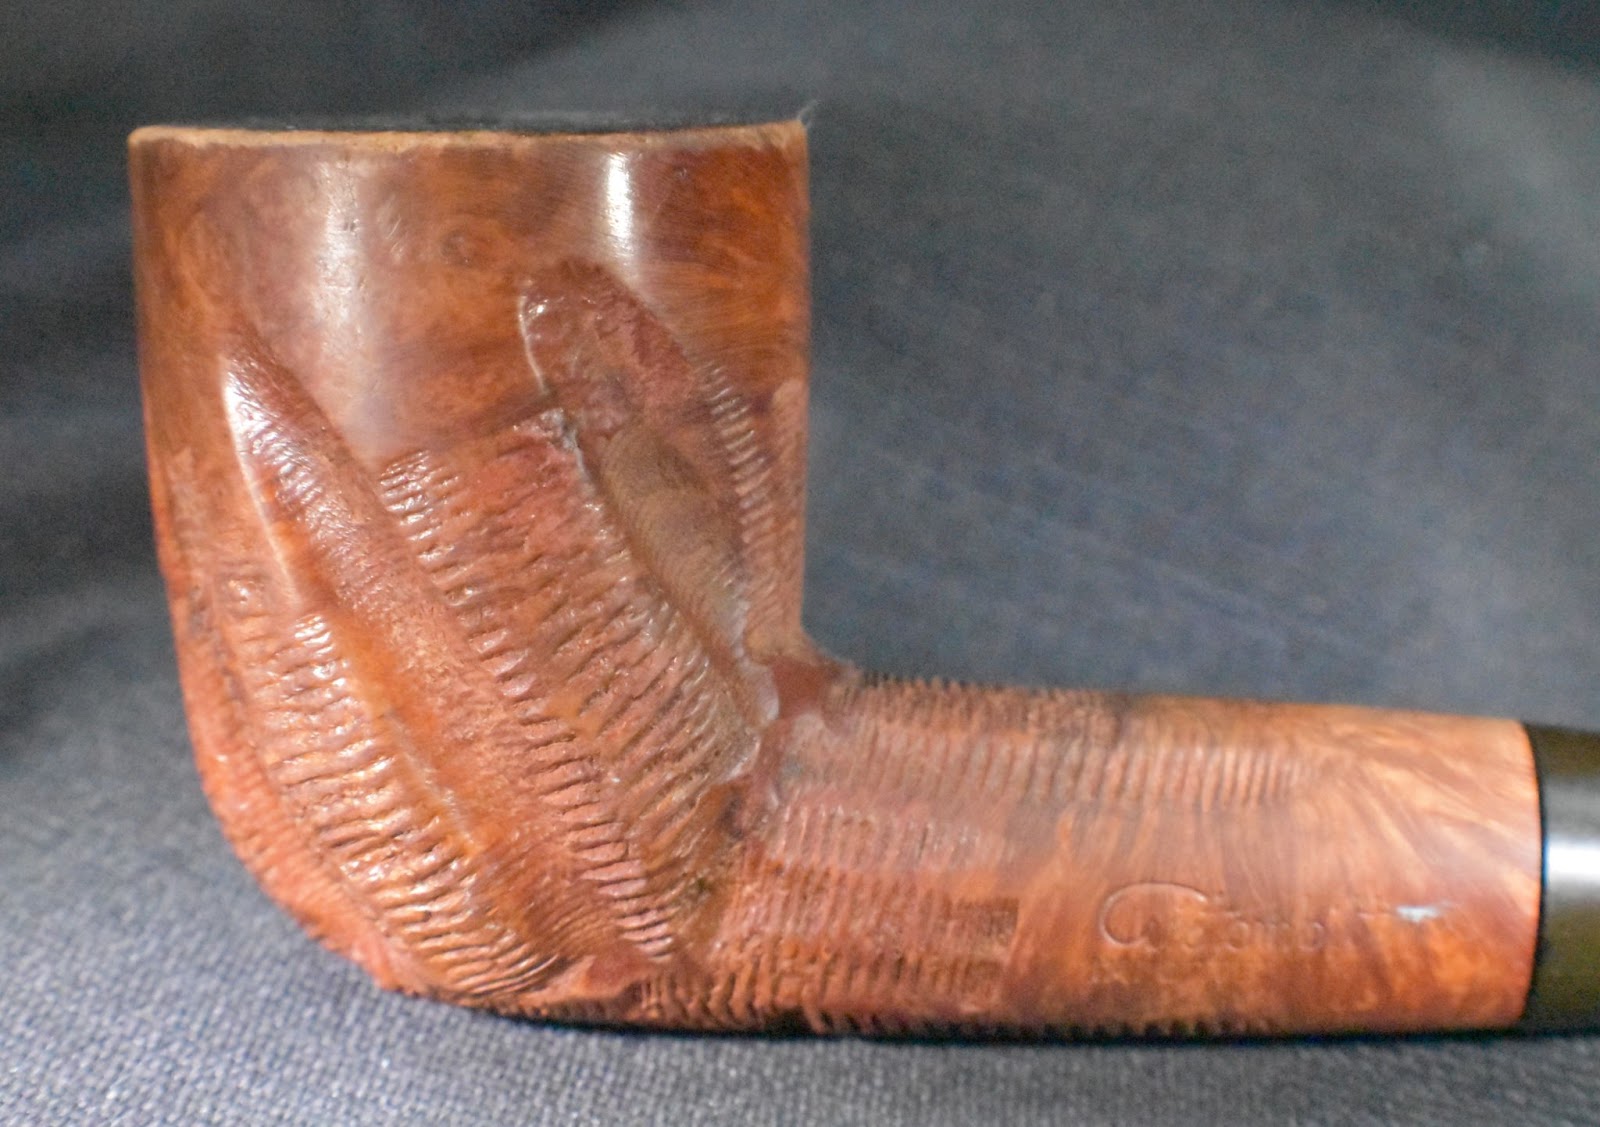
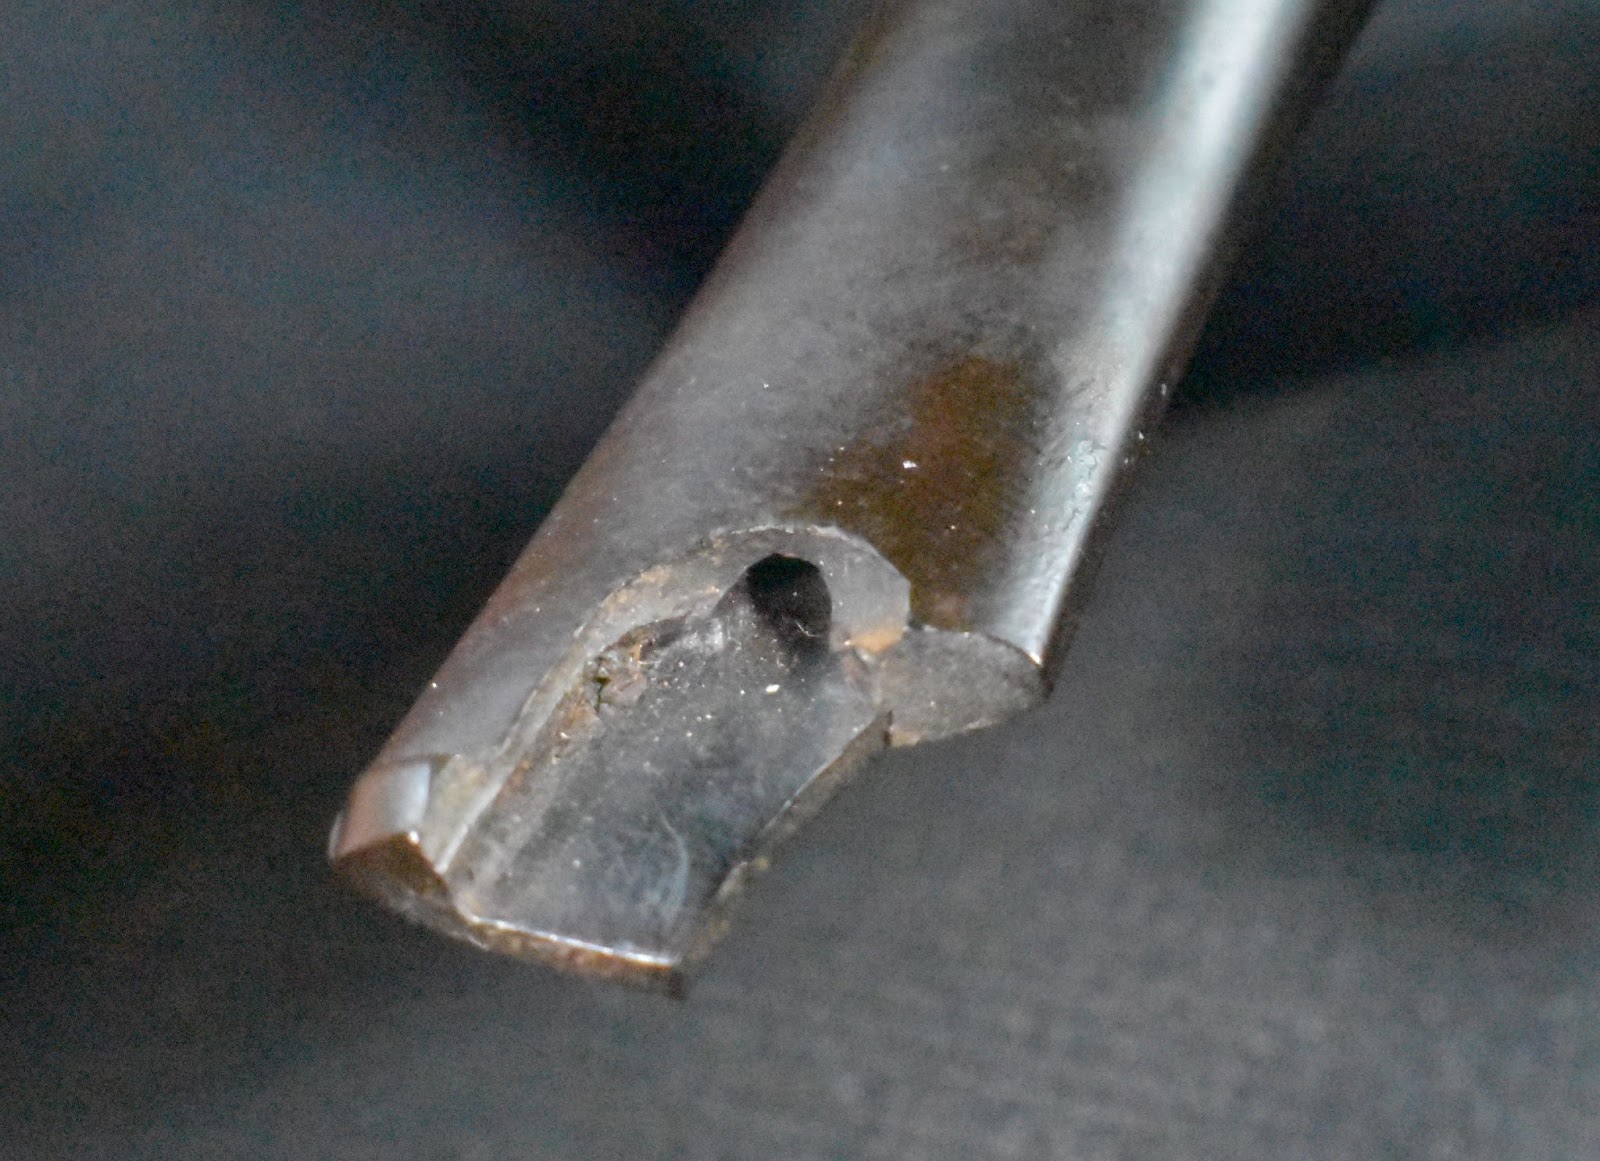
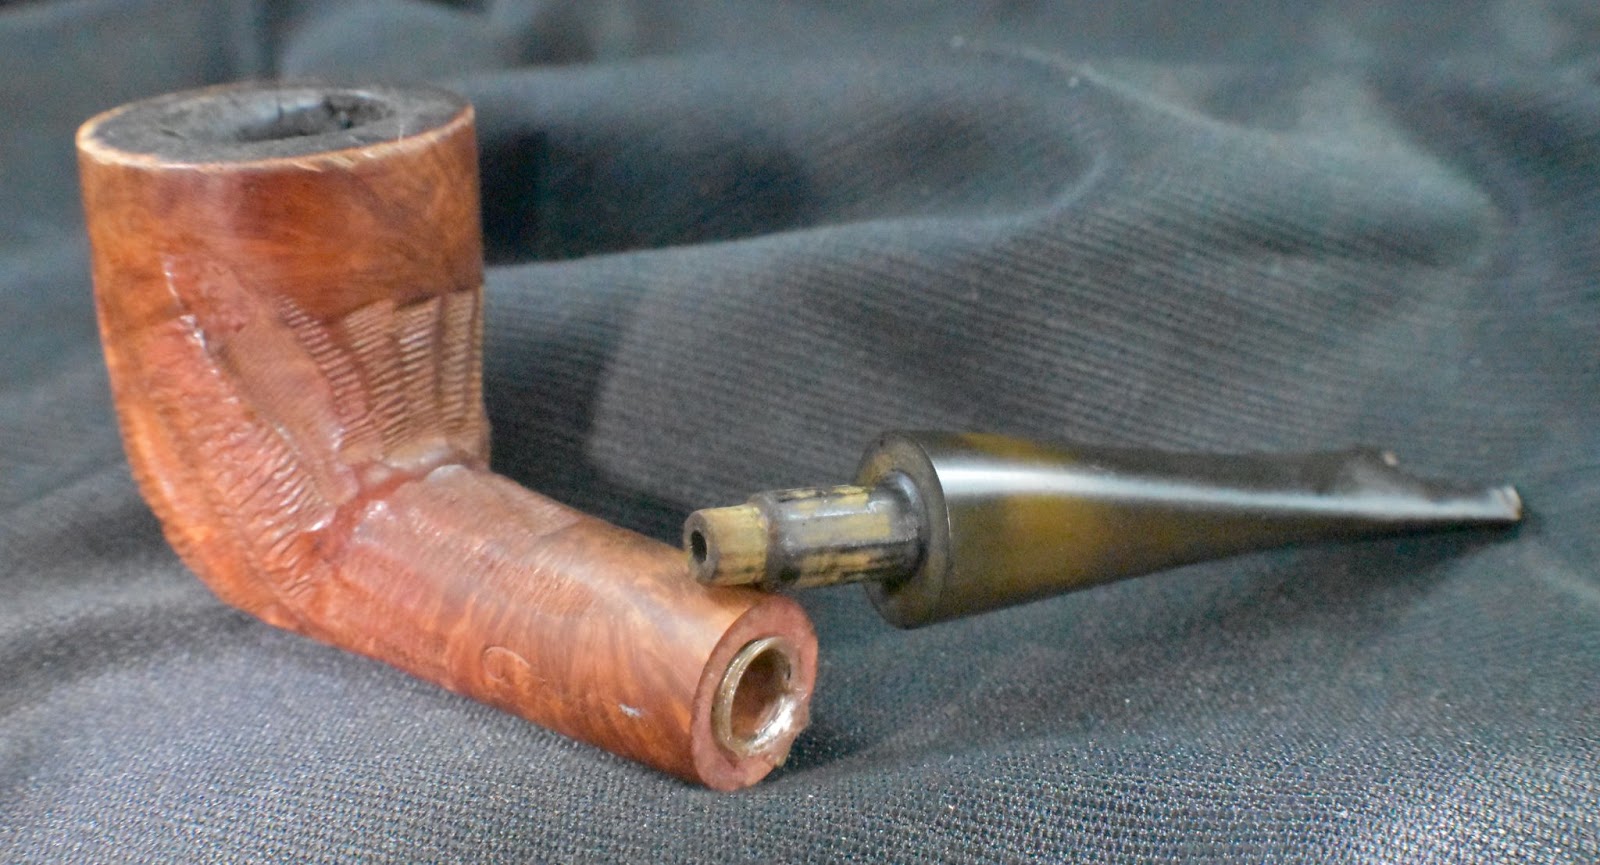
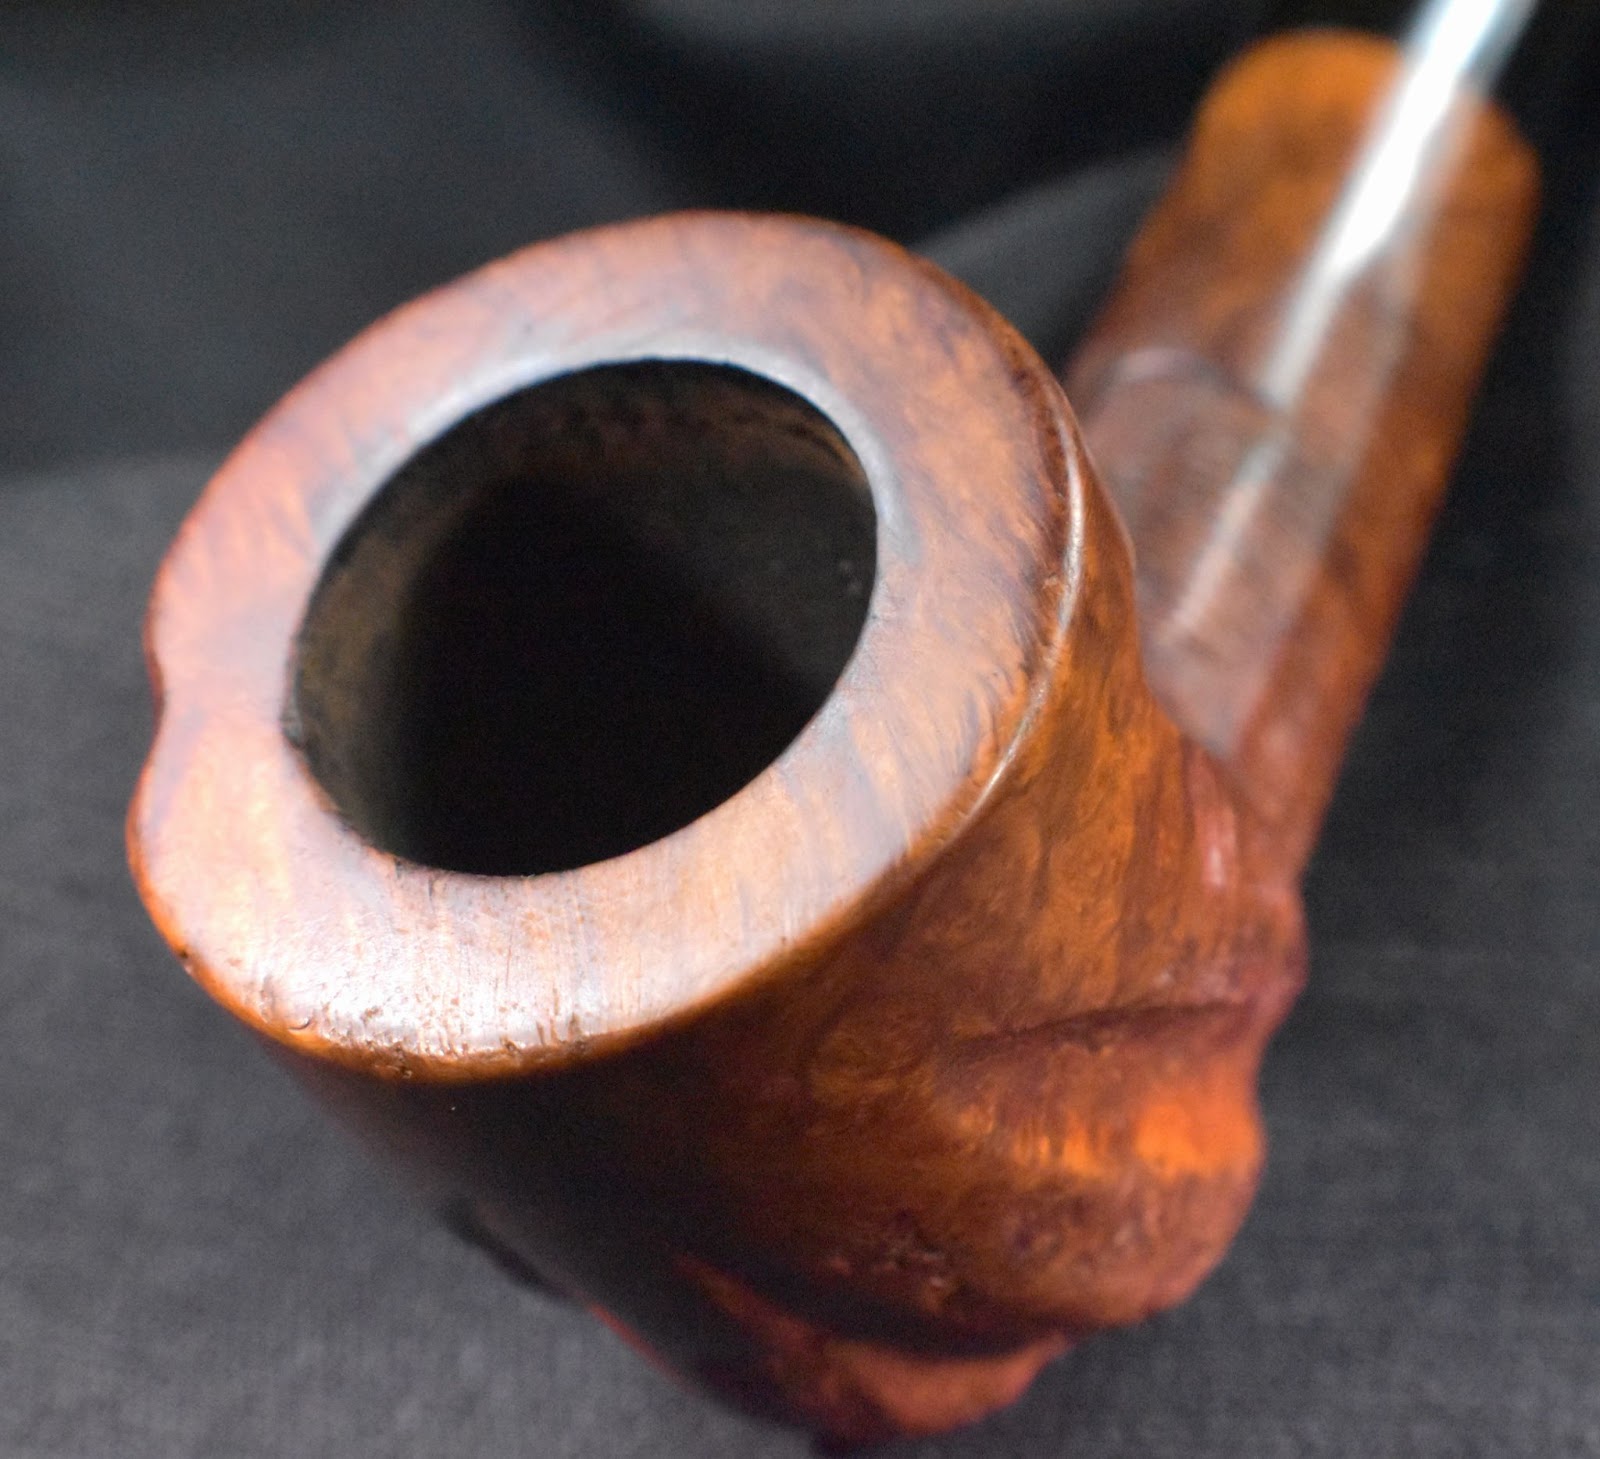
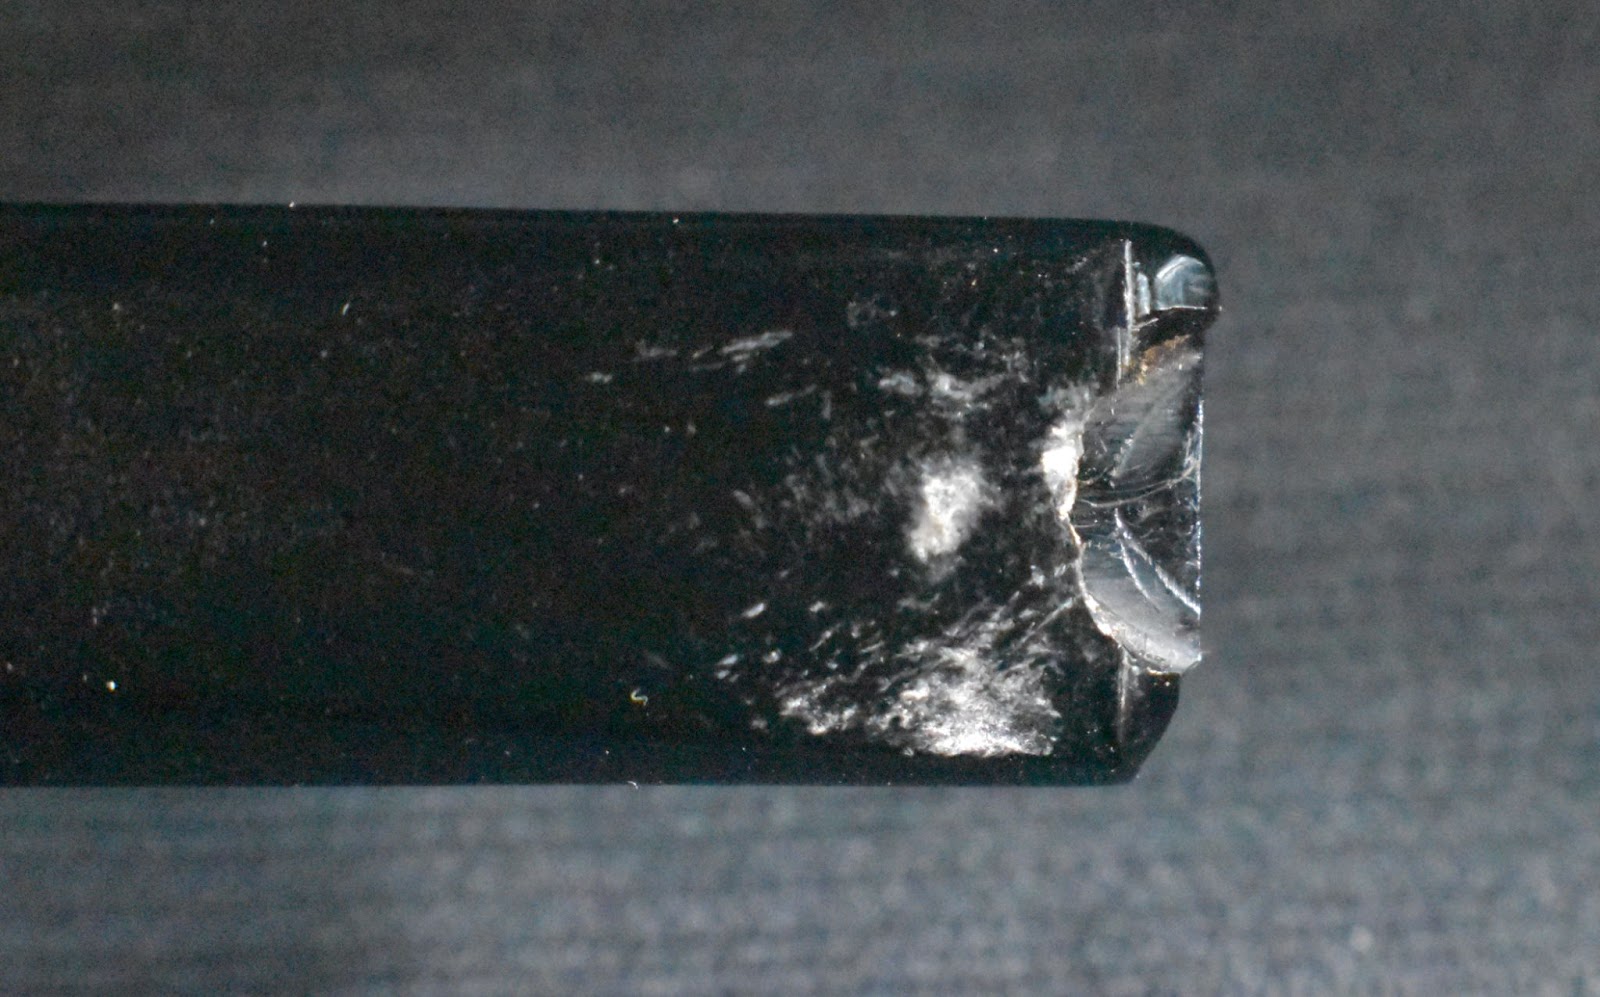
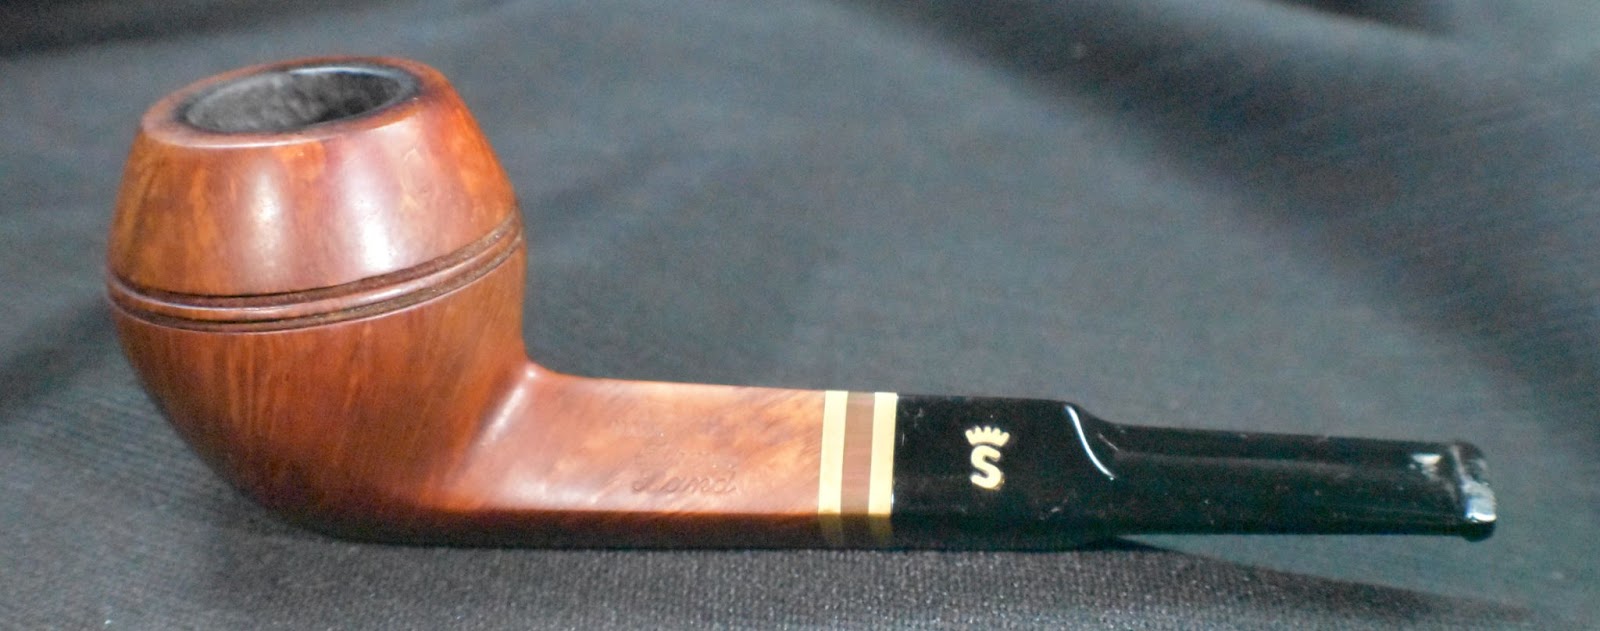
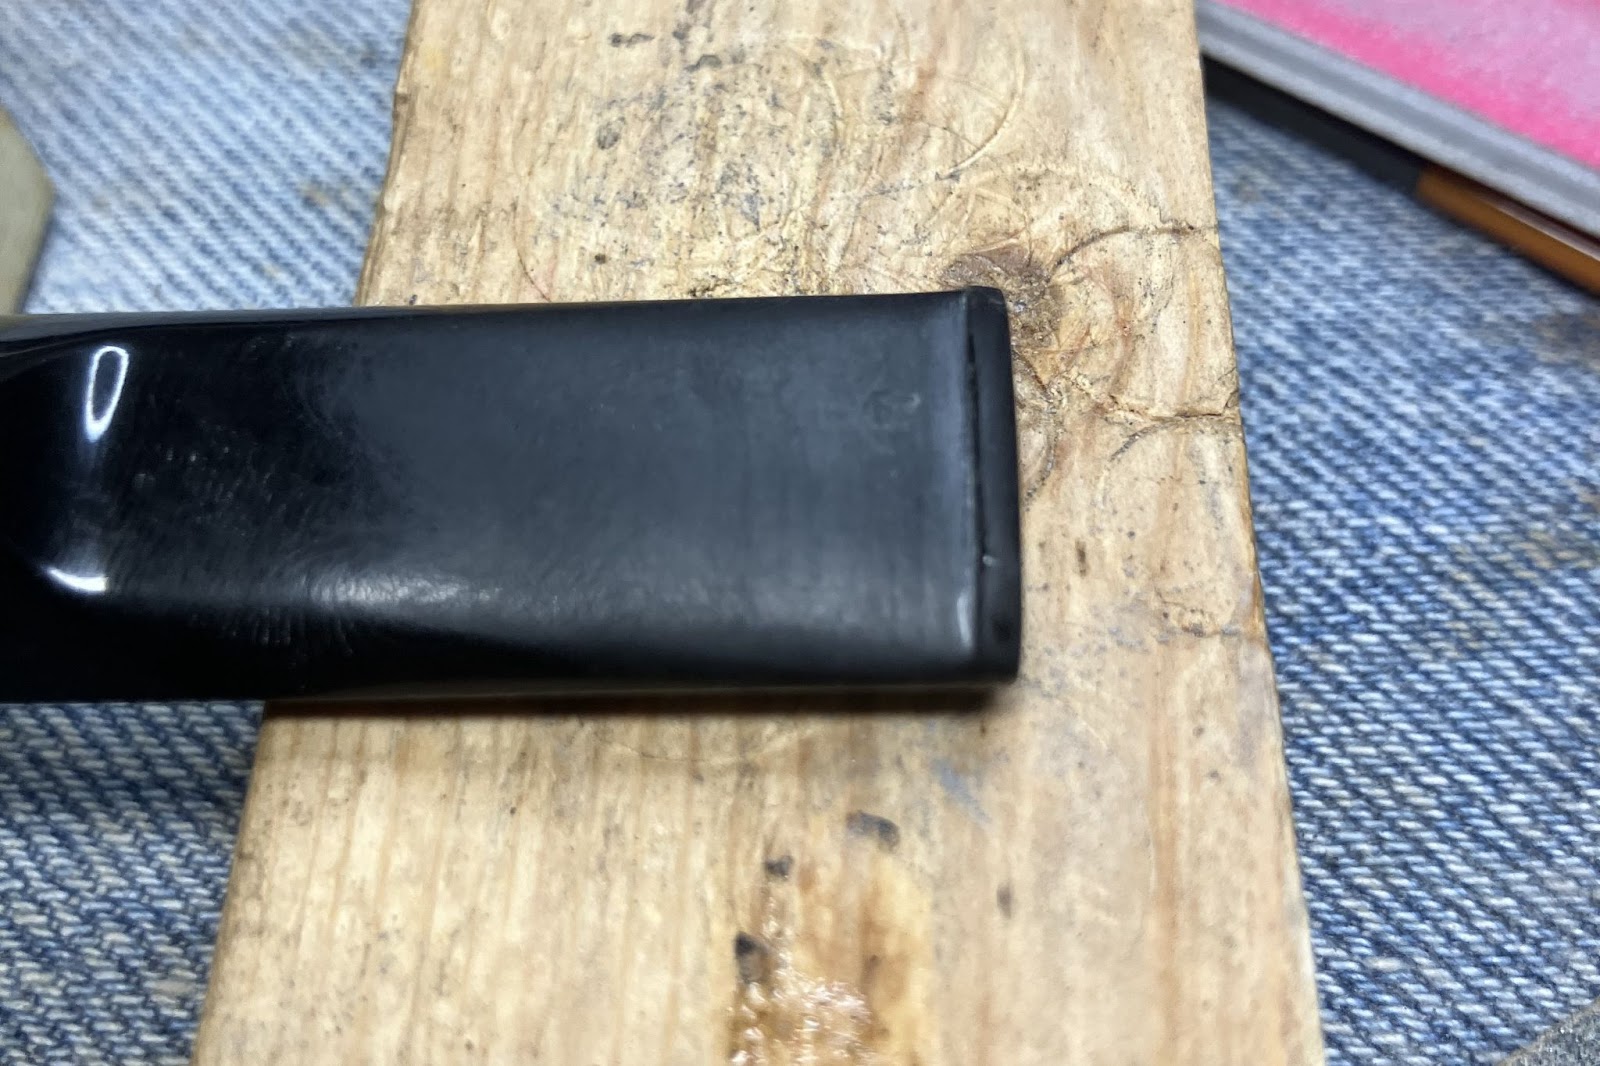
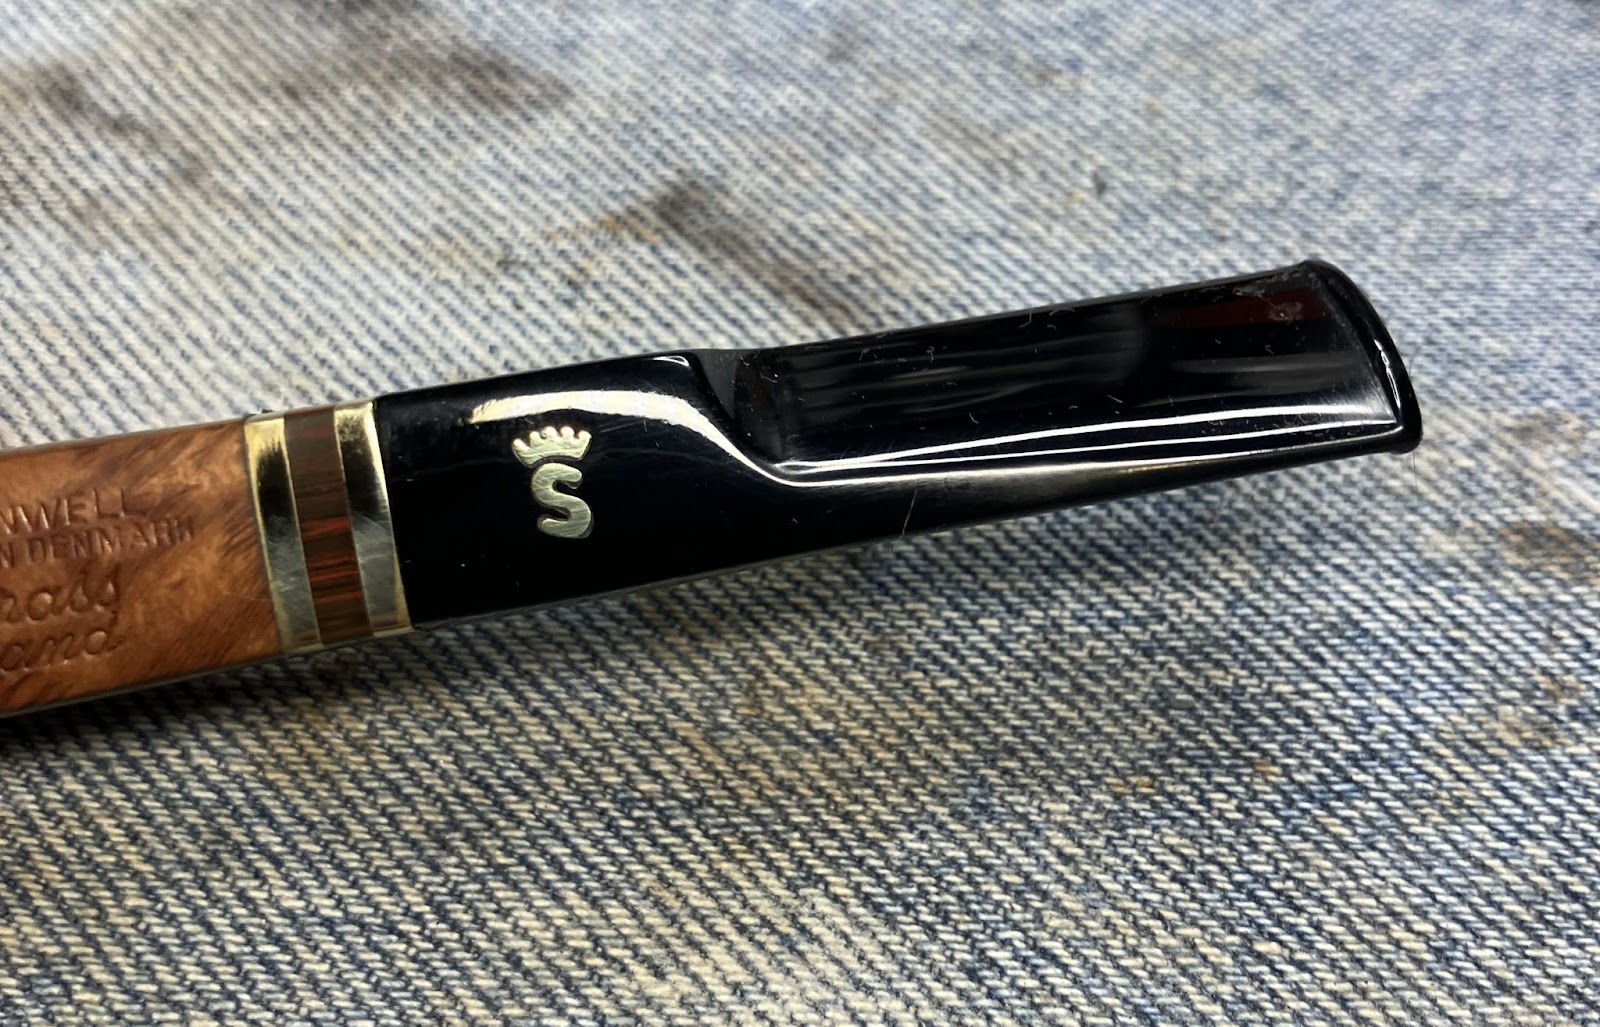
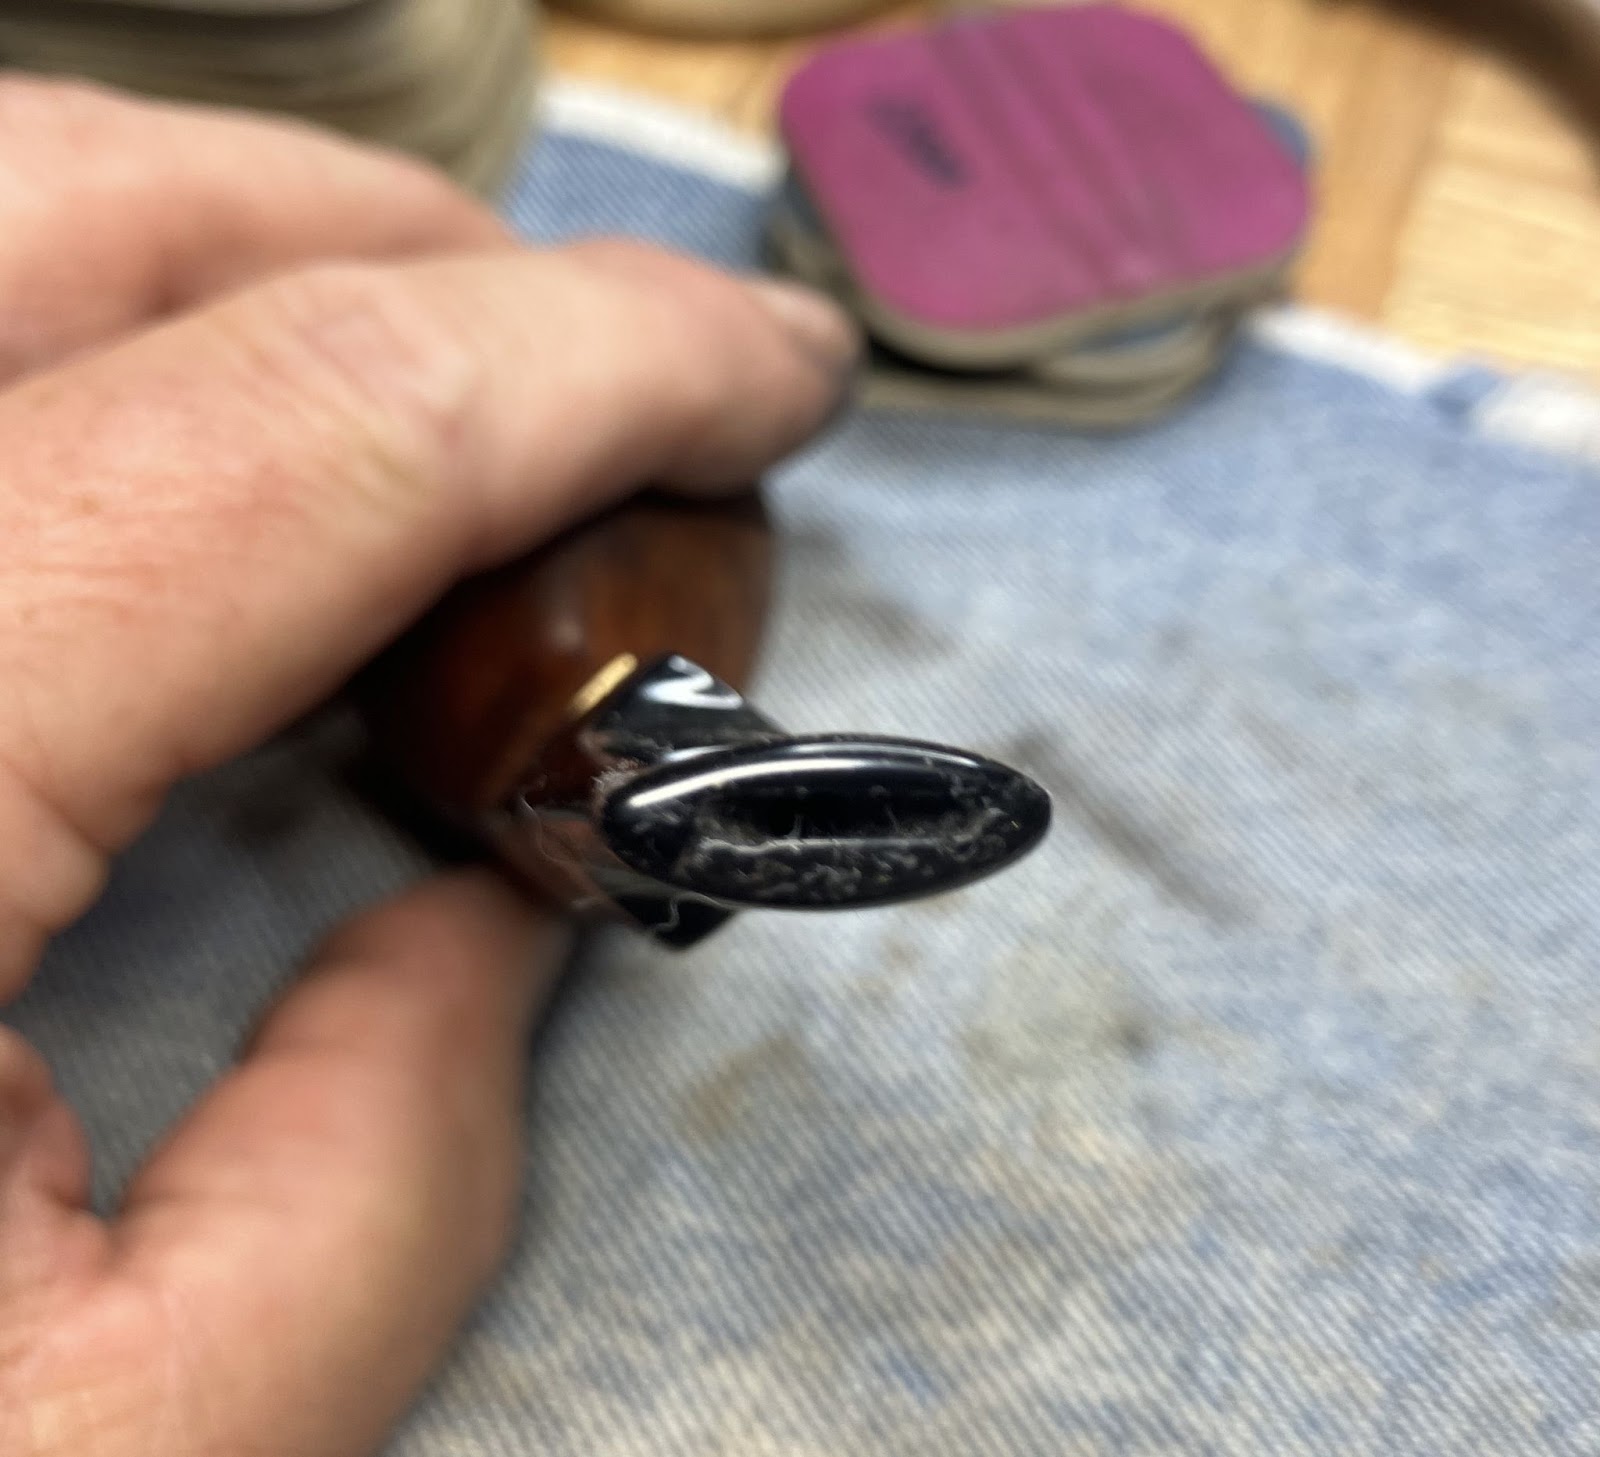
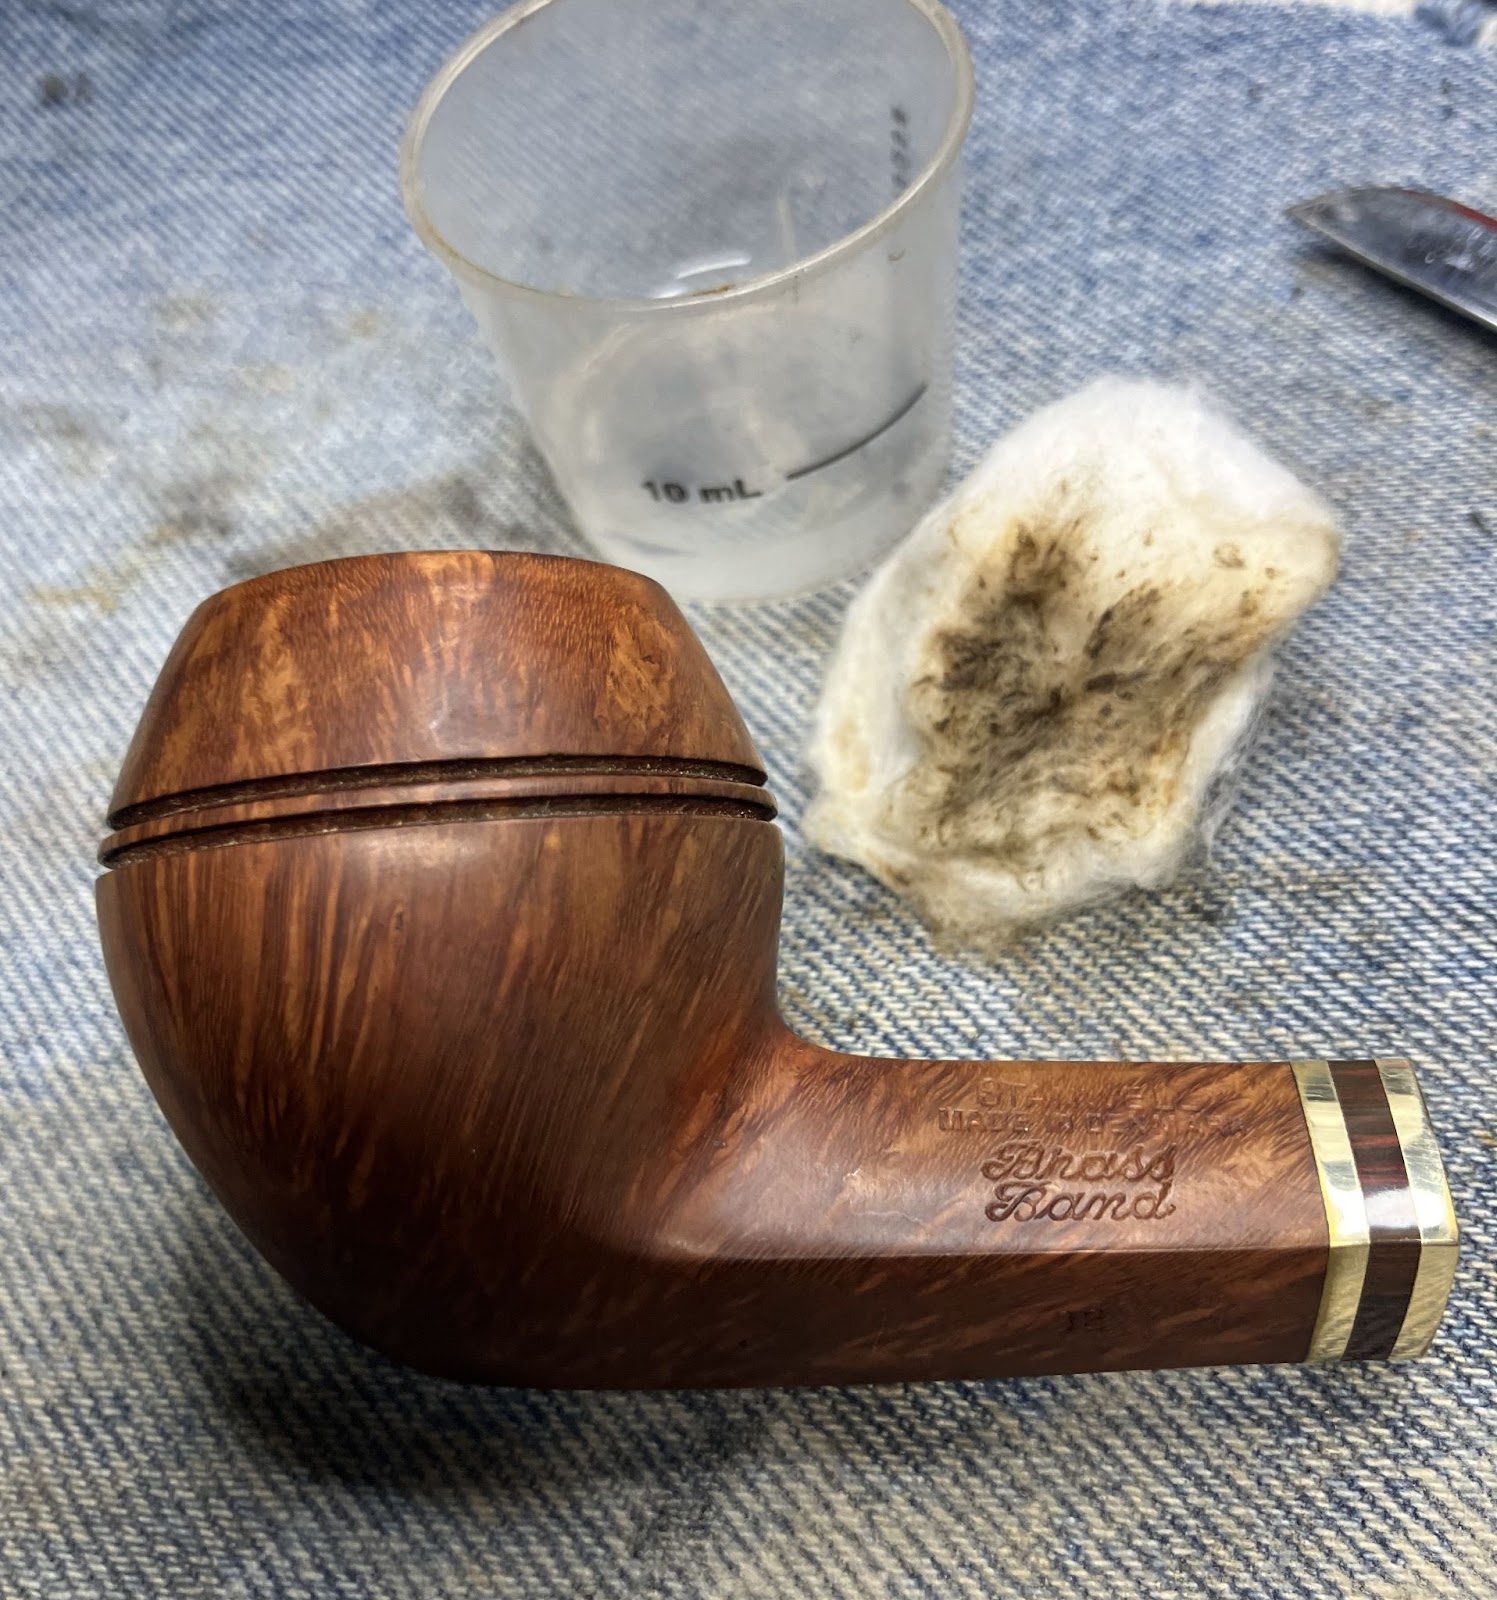
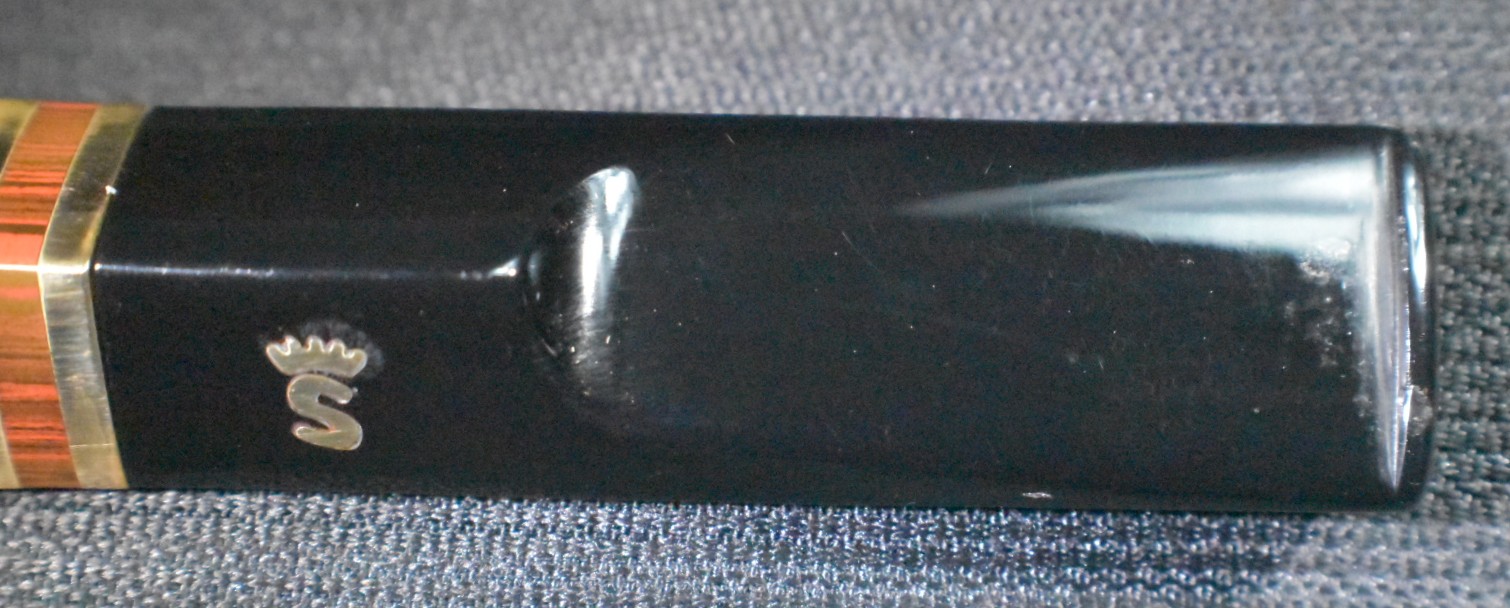
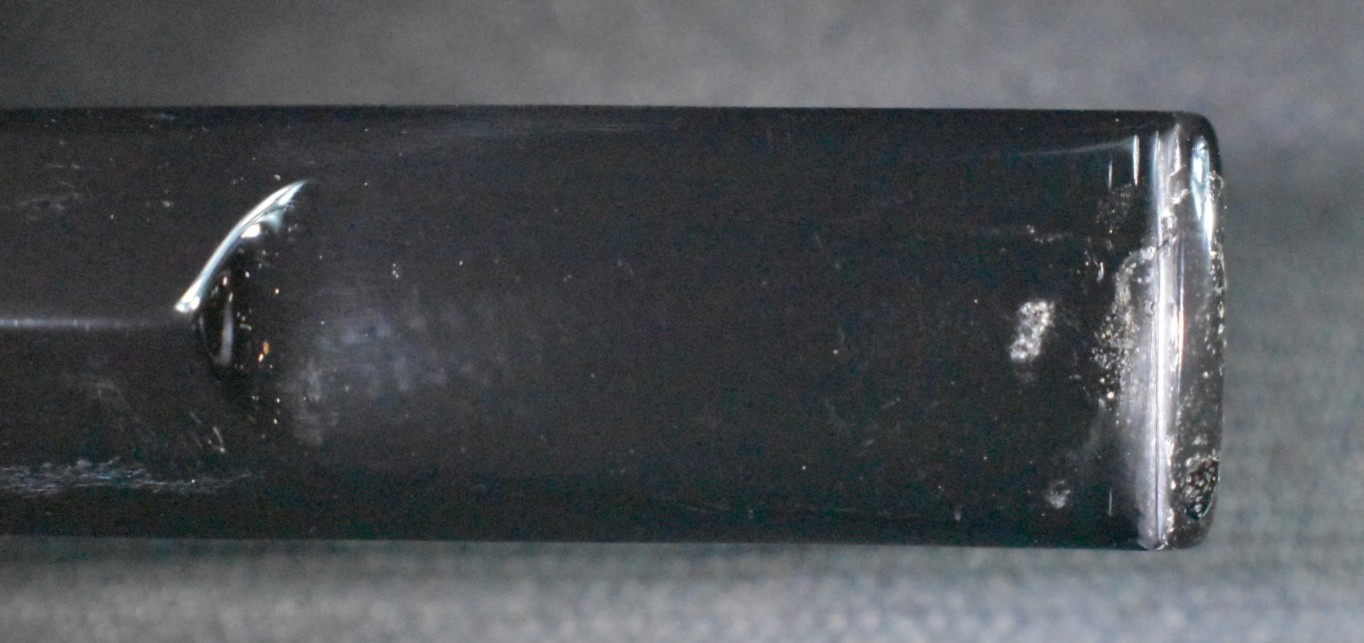
    The Stanwell was a delightful 02 shape.  The shank had a double brass band separated by a zebra-wood band (I think it is zebra-wood).  The stem was a polished acrylic with an inlaid S topped with the Stanwell crown.  It was a stunning pipe.  A stunning pipe that had a chipped button problem.  There was also tooth chatter on both the top and bottom of the bite zone.  This was a well loved stunning pipe.  Below are some photos of the pipe prior to any work done.

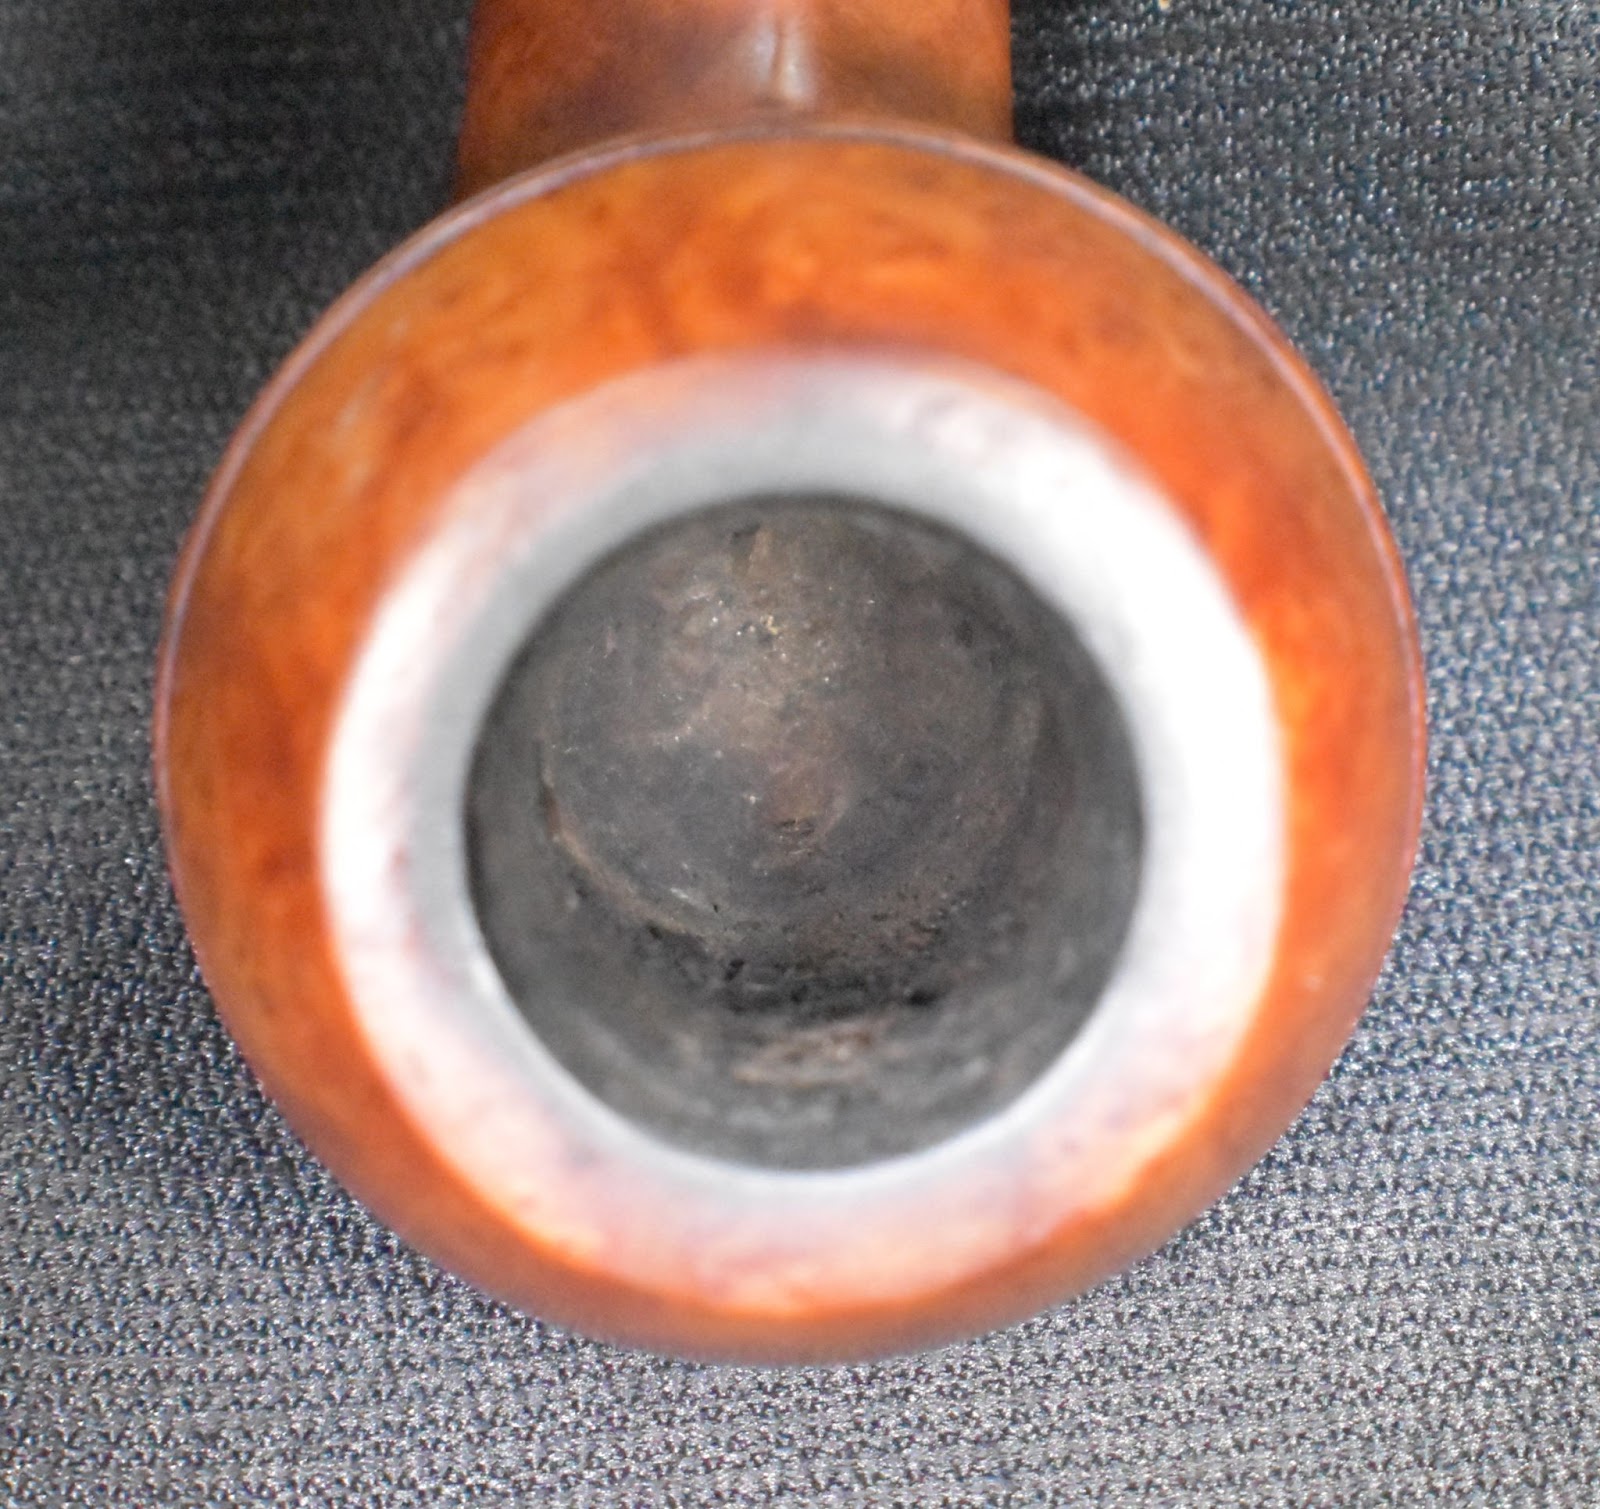
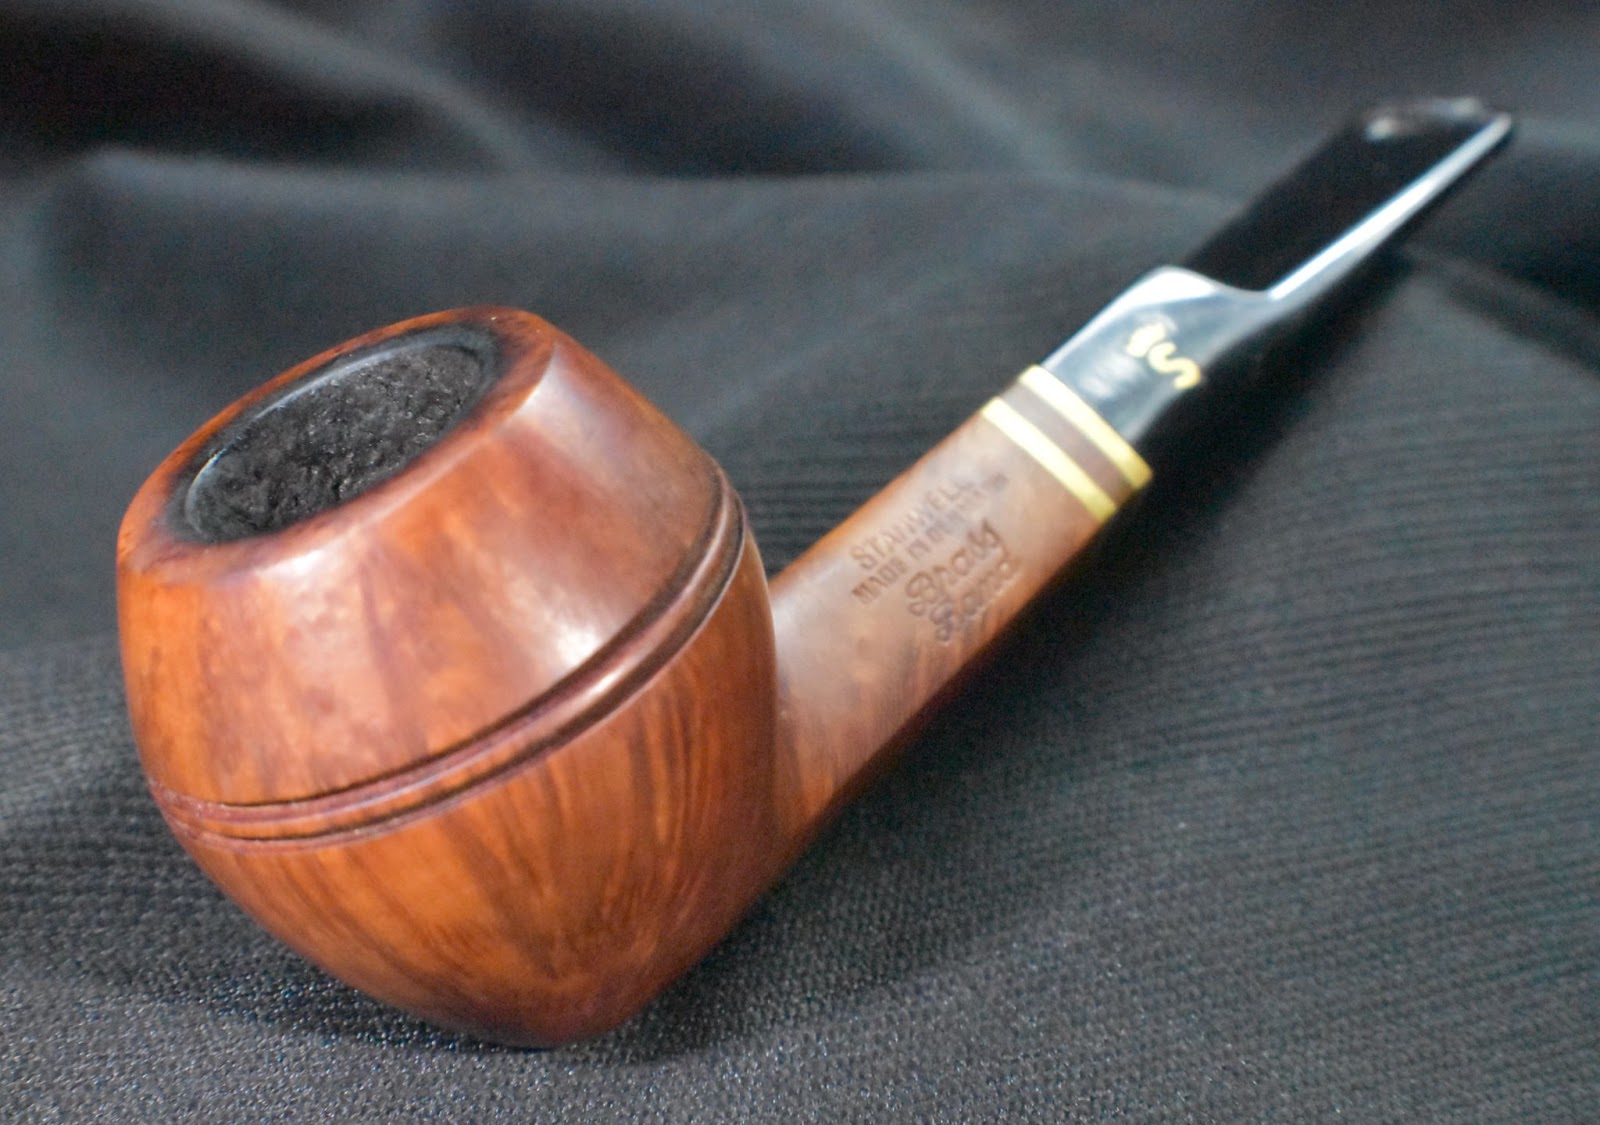
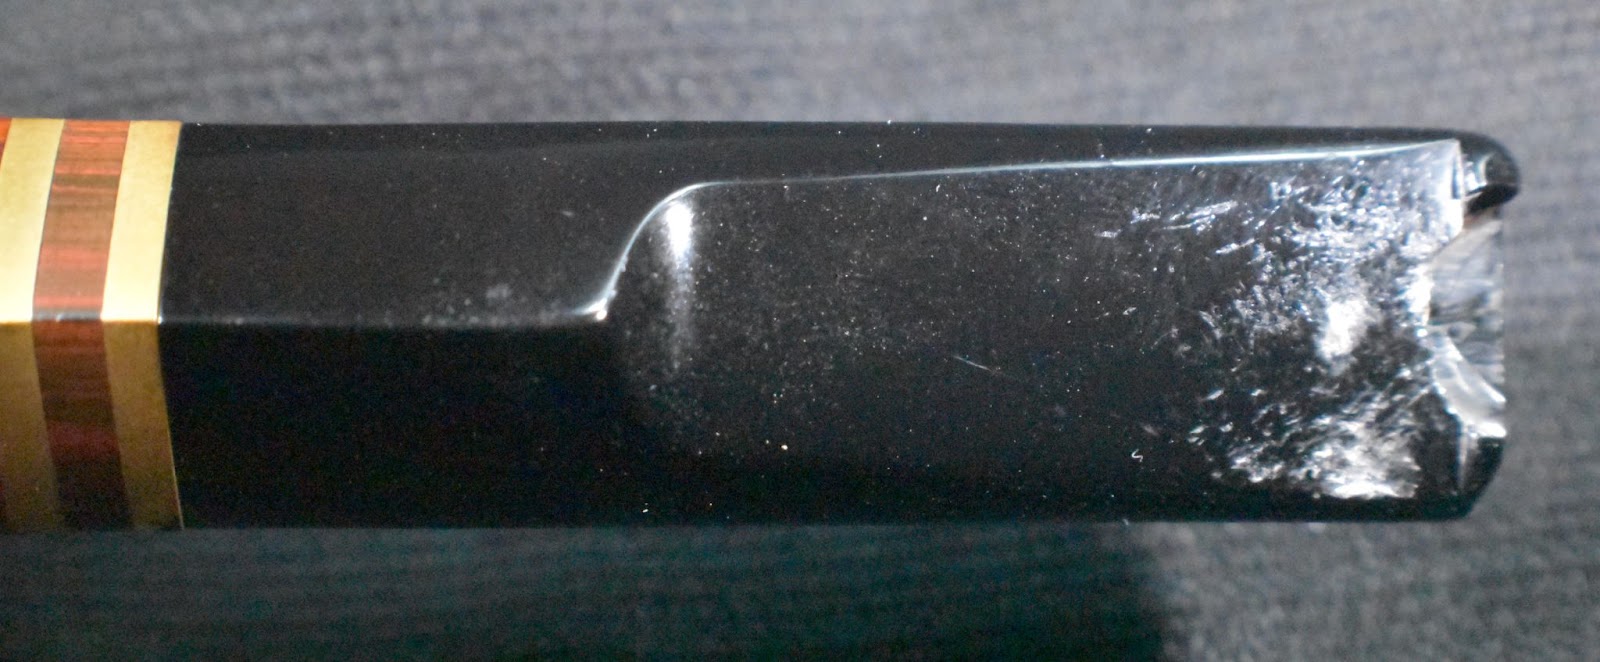
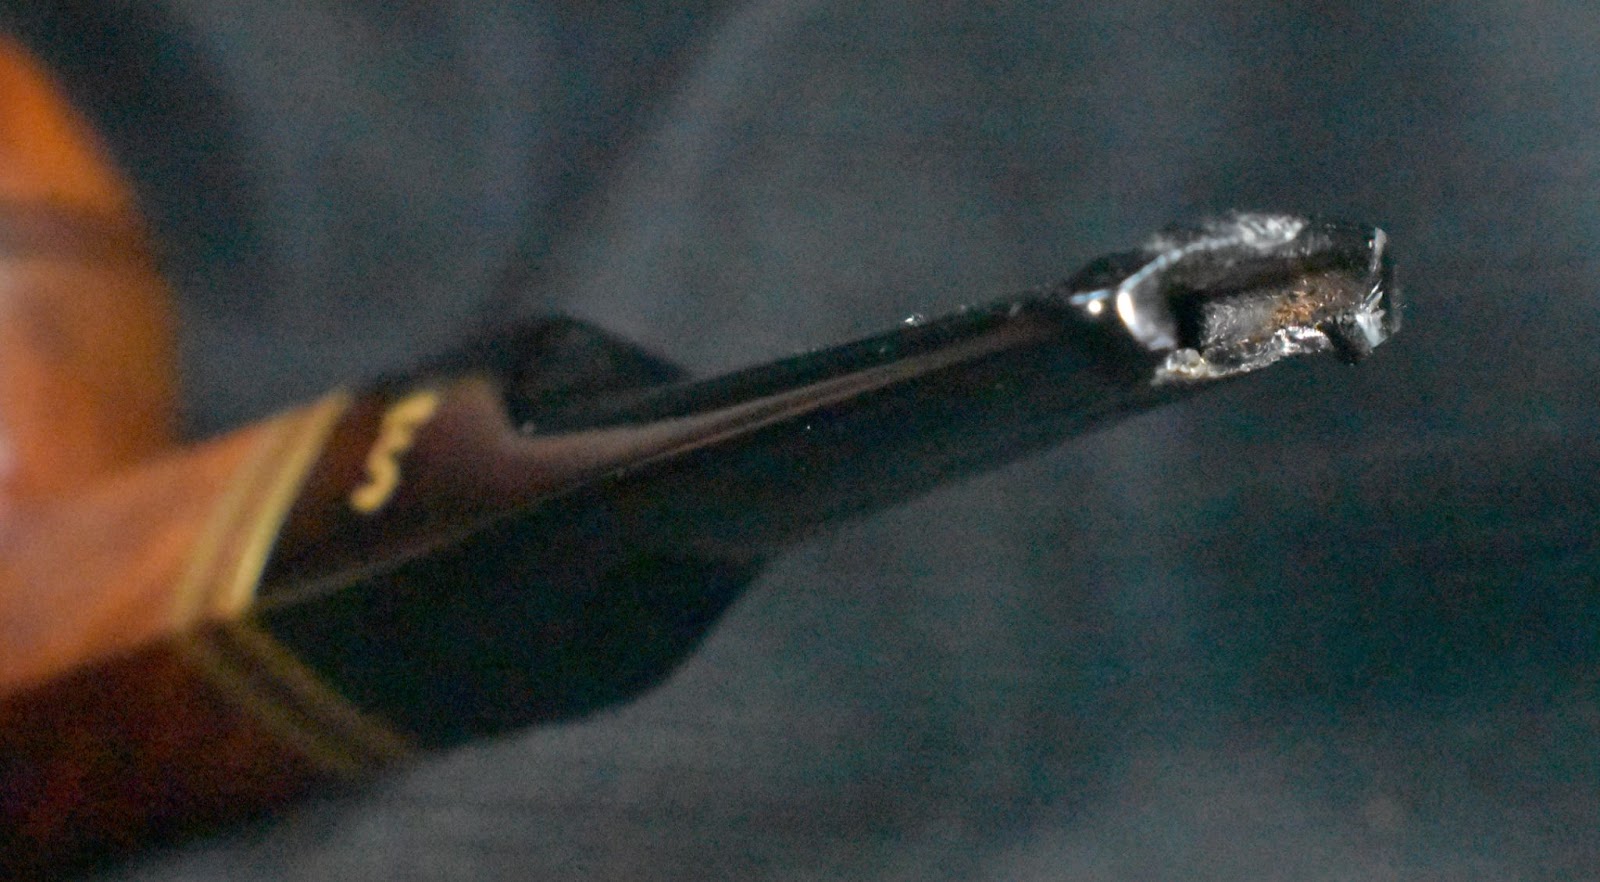
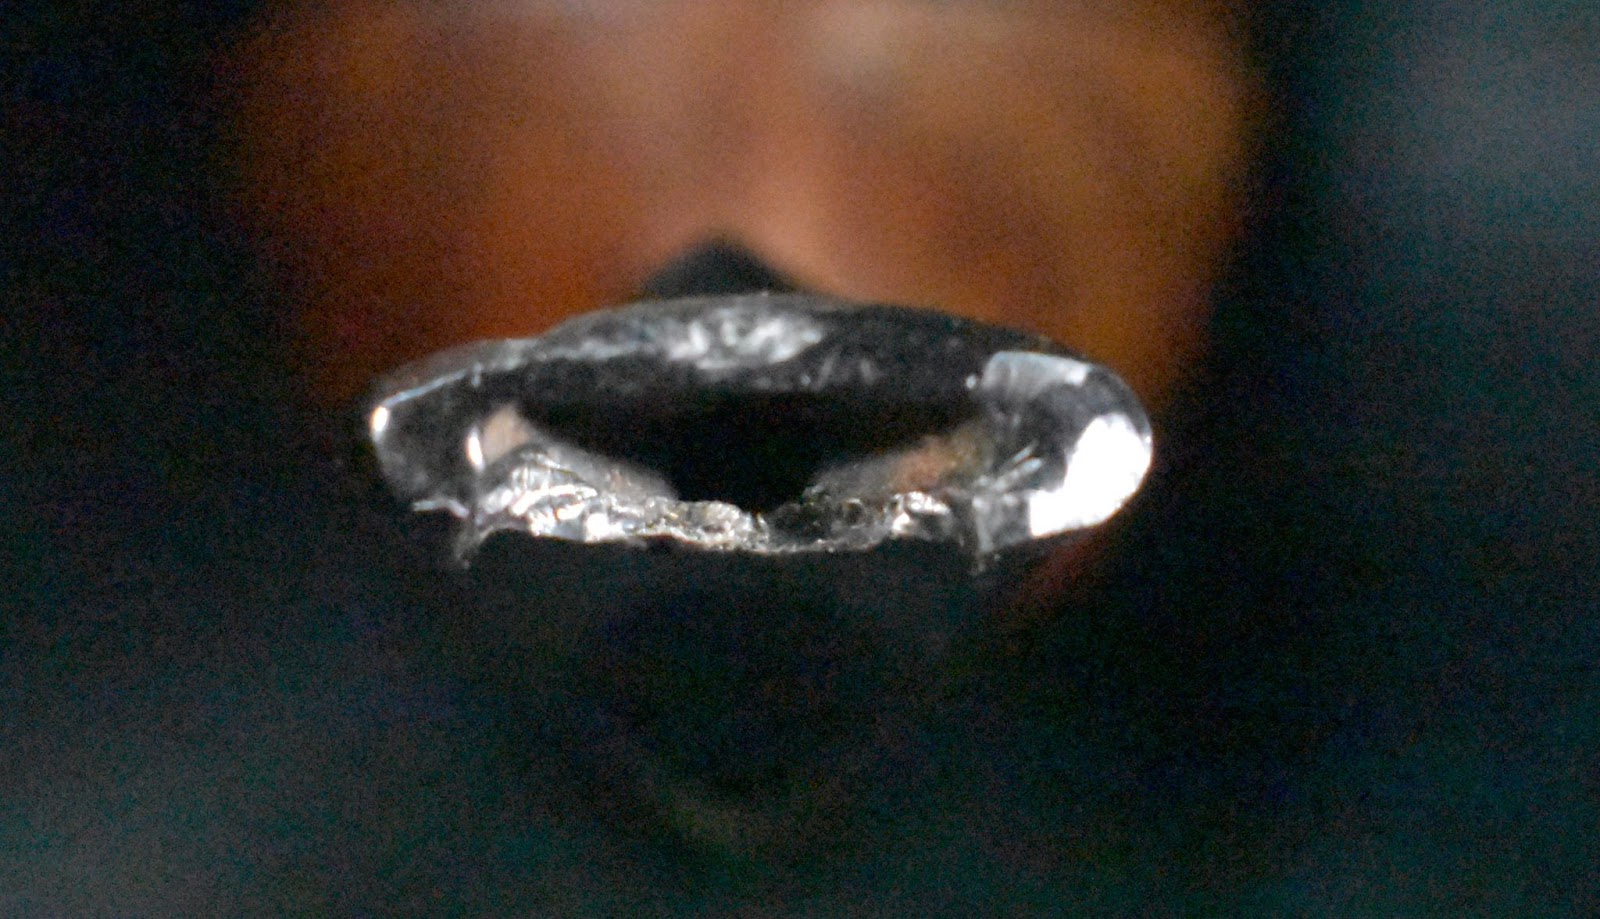
    The only significant issue was the chipped button.  Other than that the pipe was in very good and very clean condition.  Sure there was some tooth chatter on the stem which I would remove and a general cleaning followed by some polish and waxing.  The stem repair was the reason for the commission.

    Background

    I will not bother you with a history of Stanwell pipes.  If you are interested in this truly illustrious brand, I will include a link here:  Stanwell – Pipedia.

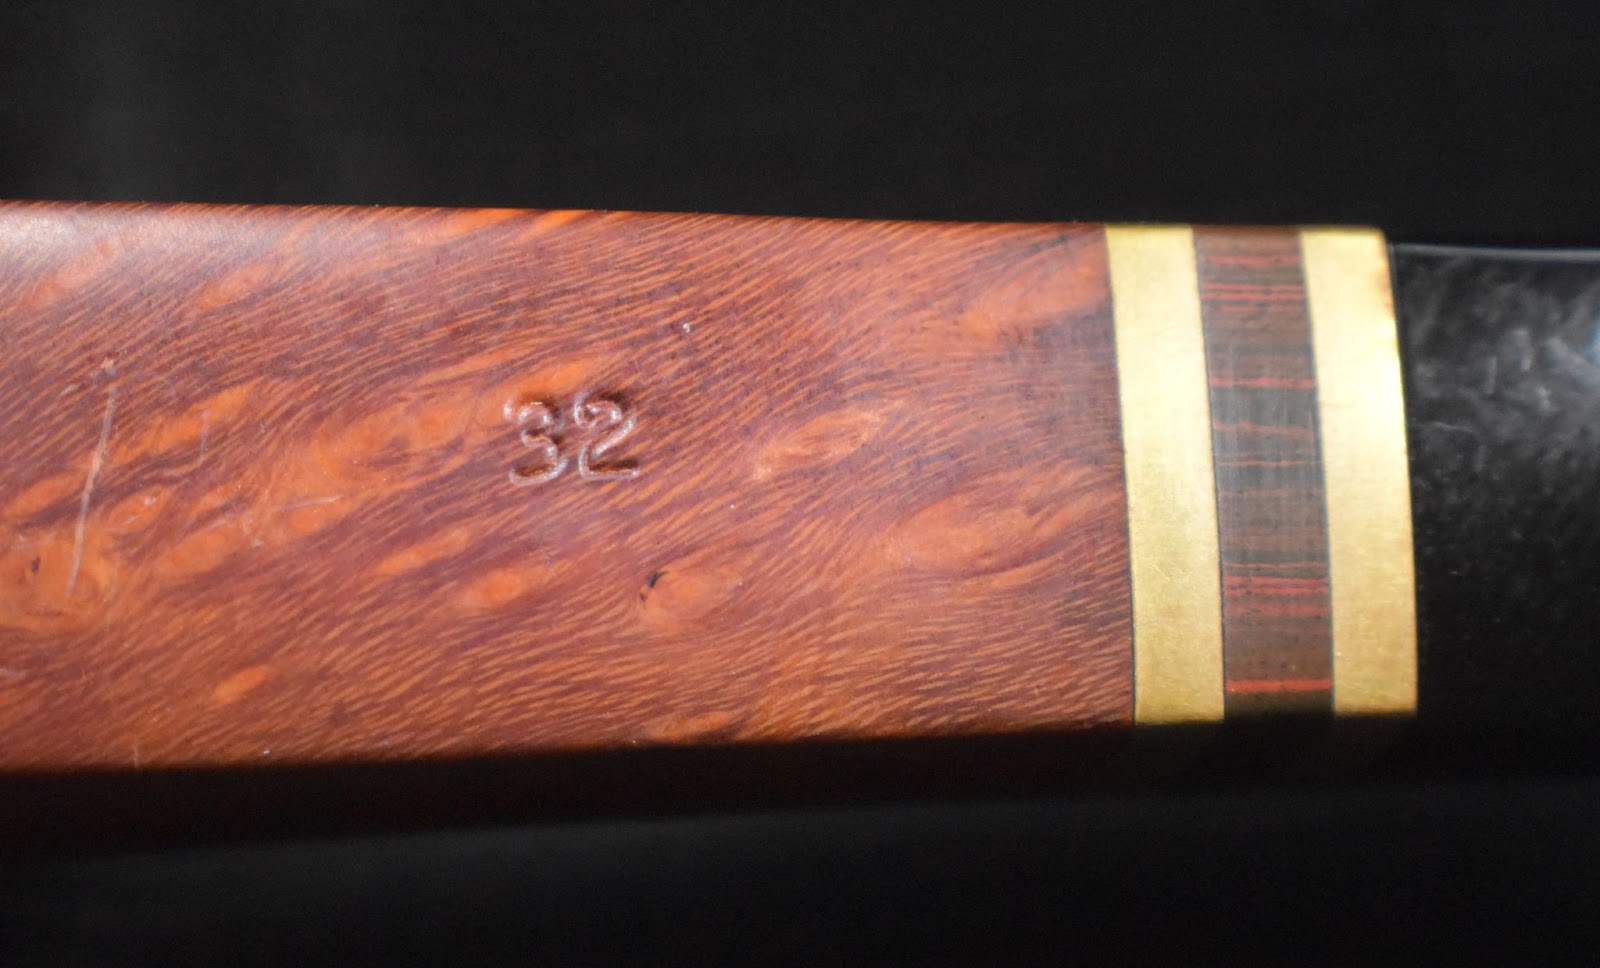
    This pipe is one of the oldest shapes in the Stanwell line-up.  According to pipedia.org’s Stanwell Shape and Designer page,

    “32. Two versions of this shape number:

    a) Straight bulldog with a saddle stem; Stanwell’s first pipe shape (originally designed in 1942).

    b) Bent Dublin-strawberry hybrid with a rounded rim and saddle stem, by Sixten Ivarsson. Redesigned by Tom Eltang in the early 1990s.”   (Stanwell Shape Numbers and Designers – Pipedia).

    This pipe is most certainly a member of the “a” club.

    The Repair

    The chip, which is the focus of this repair, spanned the lower button.  With a normal repair I would have thought about bridging the span with a 2 mm brass rod set into the button then overlaid the brass with layers of black cyanoacrylate or black epoxy to conceal the brass.  Finally reshaping the button back to its original shape.  The Stanwell button, with a smaller, more delicate button had less material in which to conceal a 2 mm brass reinforcing rod.  Now the pressure was really on me.  I remember lying in bed thinking about potential repairs:

    1. The standard black cyanoacrylate material build-up and reshaping.
    2. An epoxy material build-up and reshaping.
    3. Using a brass pin to reinforce the button underneath the new material. 
    4. A new idea formed in my sleepy brain, this stem is acrylic.  What is the melting point of acrylic?  What if a sample of black acrylic were to be melted and that was the source of the new material/replacement material build-up?  Hmm, something to think about while more awake.  Molten black acrylic material build-up and reshaping.

    The next morning I researched the melting point of acrylic or Polymethyl methacrylate (PMMA) specifically.  (Acrylic Melting Point | A Comprehensive Guide)  According to this site the melting point was dependent on additives, which would alter the physical properties of the plastic by changing the flexibility, glossiness, hardness, etc…  In general the melting point was about 320 degrees Fahrenheit.  That was a relatively easy temperature to work with.  I immediately started thinking about ways to achieve and maintain that temperature.  I did not relish the thought of running my oven in the heat of August but this was for science!

    Option 4, was seeming like more and more of an interesting potential solution.  I would definitely want to test the technique on a guinea pig stem before trying on Cash’s Stanwell.  I may have been born at night but not last night.  I knew that this was all just an idea between my ears.  One of the benefits of having no formal training in pipe restoration is that I have no set or “right” way of doing a repair.  I reached out to Steve Laug and asked him if he had ever heard of using molten acrylic to rebuild a stem.

    Sidenote:

    Now, you are probably wondering if this is going to be a blog about repairing an acrylic stem using molten acrylic.  Well, at this point, I had no idea.  I was just waiting to hear back from Steve.

    A return to critical thinking and scientification, Steve got back to me and said, “Yes.  But have never tried it” (Laug, Steve.  Personal communication).  Hmm, Steve had heard of this idea.  Good thing I didn’t say, “A return to original thinking and scientification.” He  did make a good point though, I wondered “how will the molten plastic affect the hard cool acrylic I put it on.”  That made me think that heating the receiving stem to around 280F would be a good idea.  Why 280F?  I don’t know, but it sounds good.  Okay, enough thinking, time for some doing. 

    As if by coincidence and not by some algorithm the following link came up on my computer later that same day:

    Beginners’ Guide to Melting HDPE – How to Make a Recycled Plastic Pen

    Not being one to give credit to conspiracy theories, I thought why couldn’t Al Gore write a better computer program and hook me up with a more appropriate “Repairing a Chipped Acrylic Pipe Stem Using Molten Acrylic” article.  Maybe he is too busy saving the world from global warming or shopping for additional sea side properties and just had some lackey intern write it for him.

    Another sidenote:  In the previous blog:  A Royal Danish 913 Pear Restoration – NebraskaPeteGeek  I discussed and photographed the process of collecting acrylic material from fitting a new acrylic stem to replace a damaged vulcanite stem.  This was the source of acrylic for the next portion of my experimentation. 

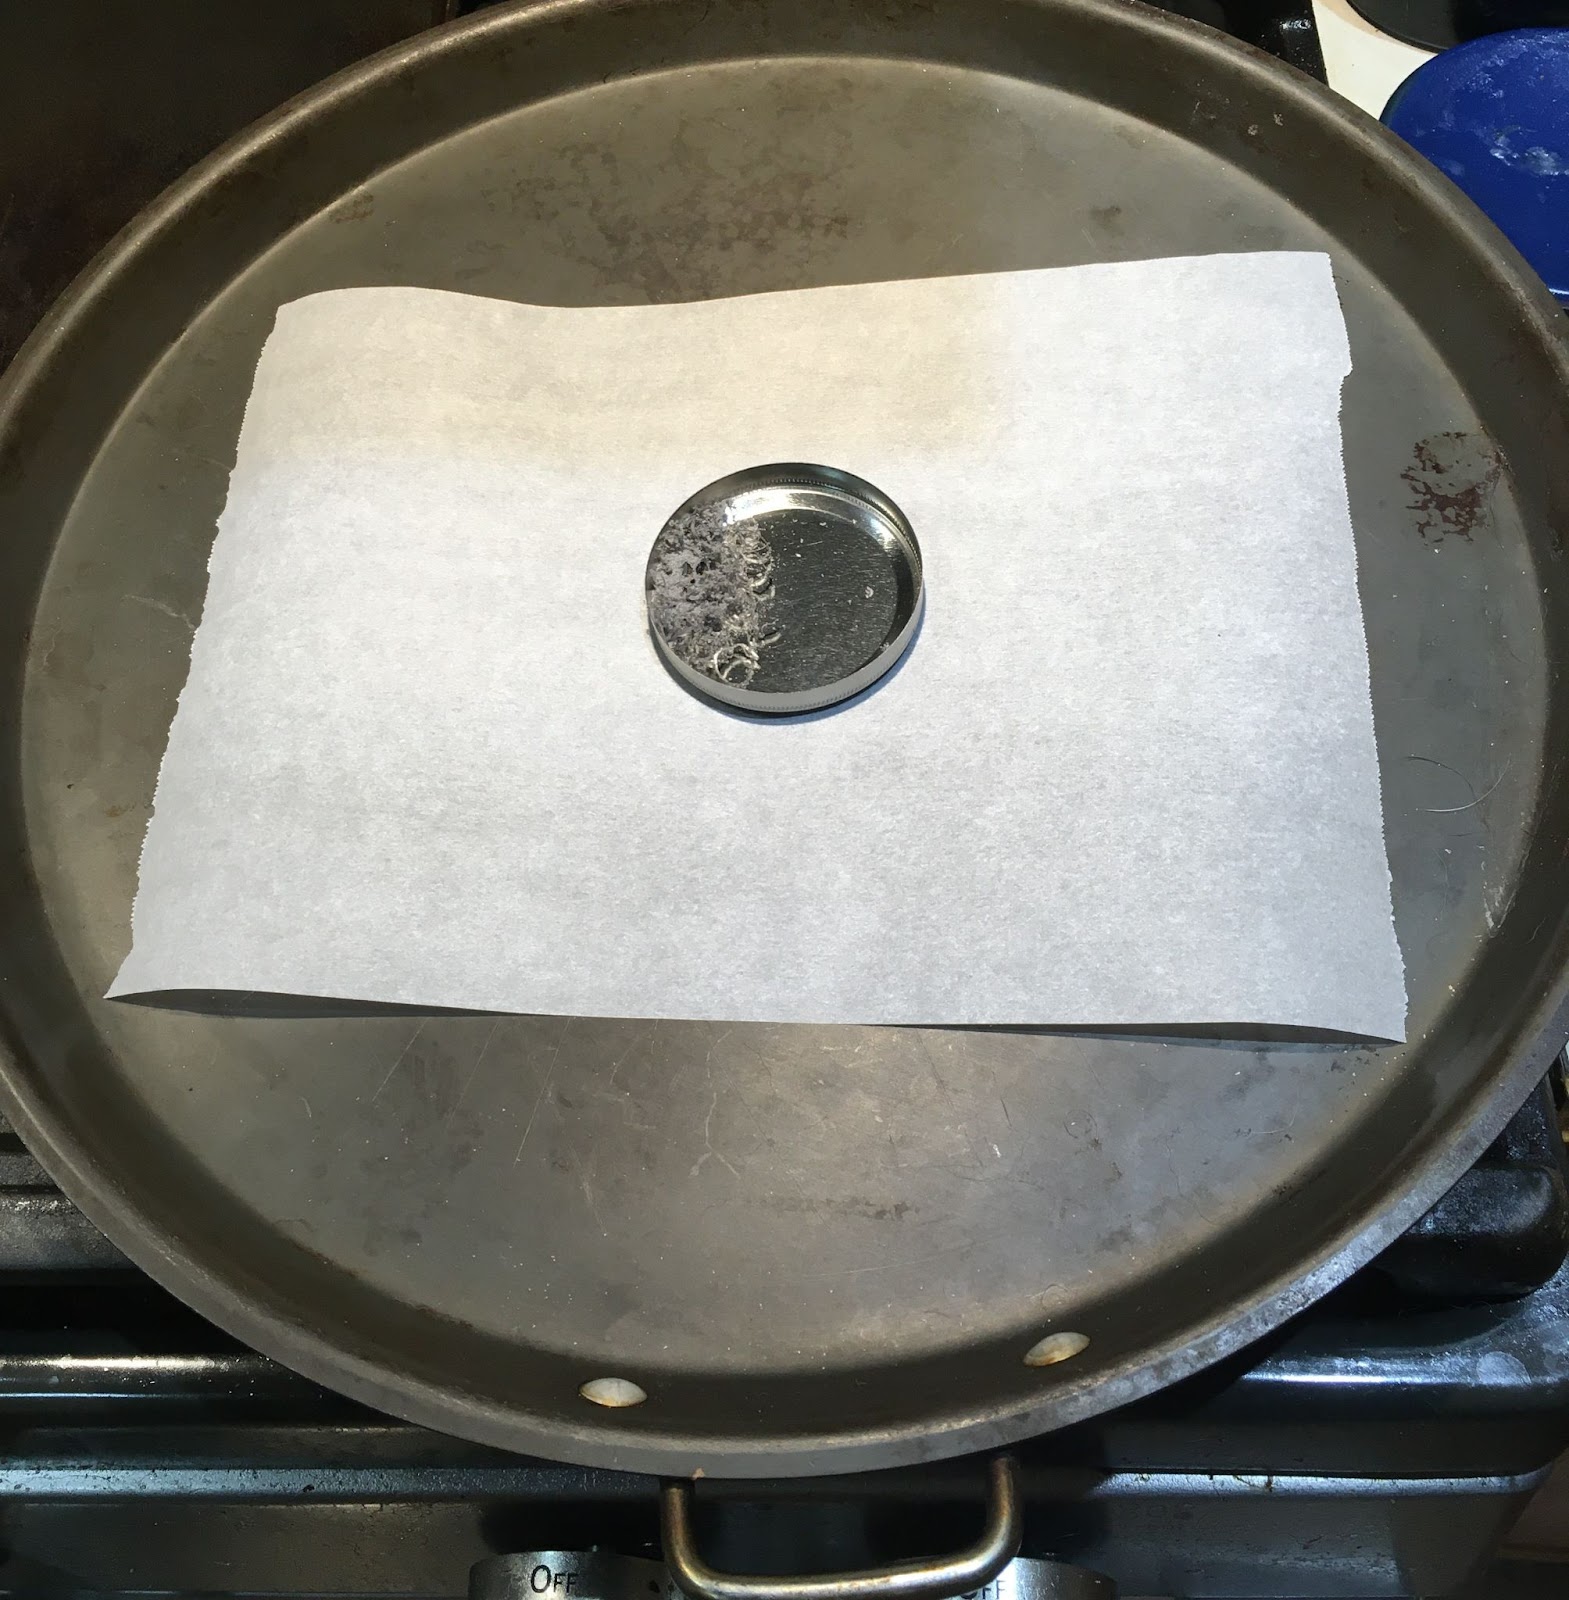
    I turned my scientificating brain toward the melting of the acrylic turnings I had generated.  One article said that acrylic melted at 320℉.  I set the oven to 320℉ and placed the snuff tin with acrylic shavings on a parchment covered pizza pan into the oven.  I expected the acrylic to melt like a thick liquid like hot tar.  

    It didn’t.  Hmm.  

    I raised the temperature10℉.  And continued my expectation.  Expectation dashed.

    I raised the temperature to 340℉.  At this point expectations were still alive though some life support may have been required.  Another 10 minutes and another dashed expectation.  Hmm.

    I tried raising the oven temperature to 360℉.  Still nothing, though the acrylic shavings were far more pliable (when poked with a knife) and seemed to be kind of flattening on the snuff tin.  Hmm. 

    380℉ Seemed like the next logical step.  Would you like to guess what happened?  If you guessed nothing you would be quite correct.  Running the oven for over an hour in August was proving to be another in a long list of poor choices that I had made.  I called it quits, turned off the oven and left the acrylic in there until morning.

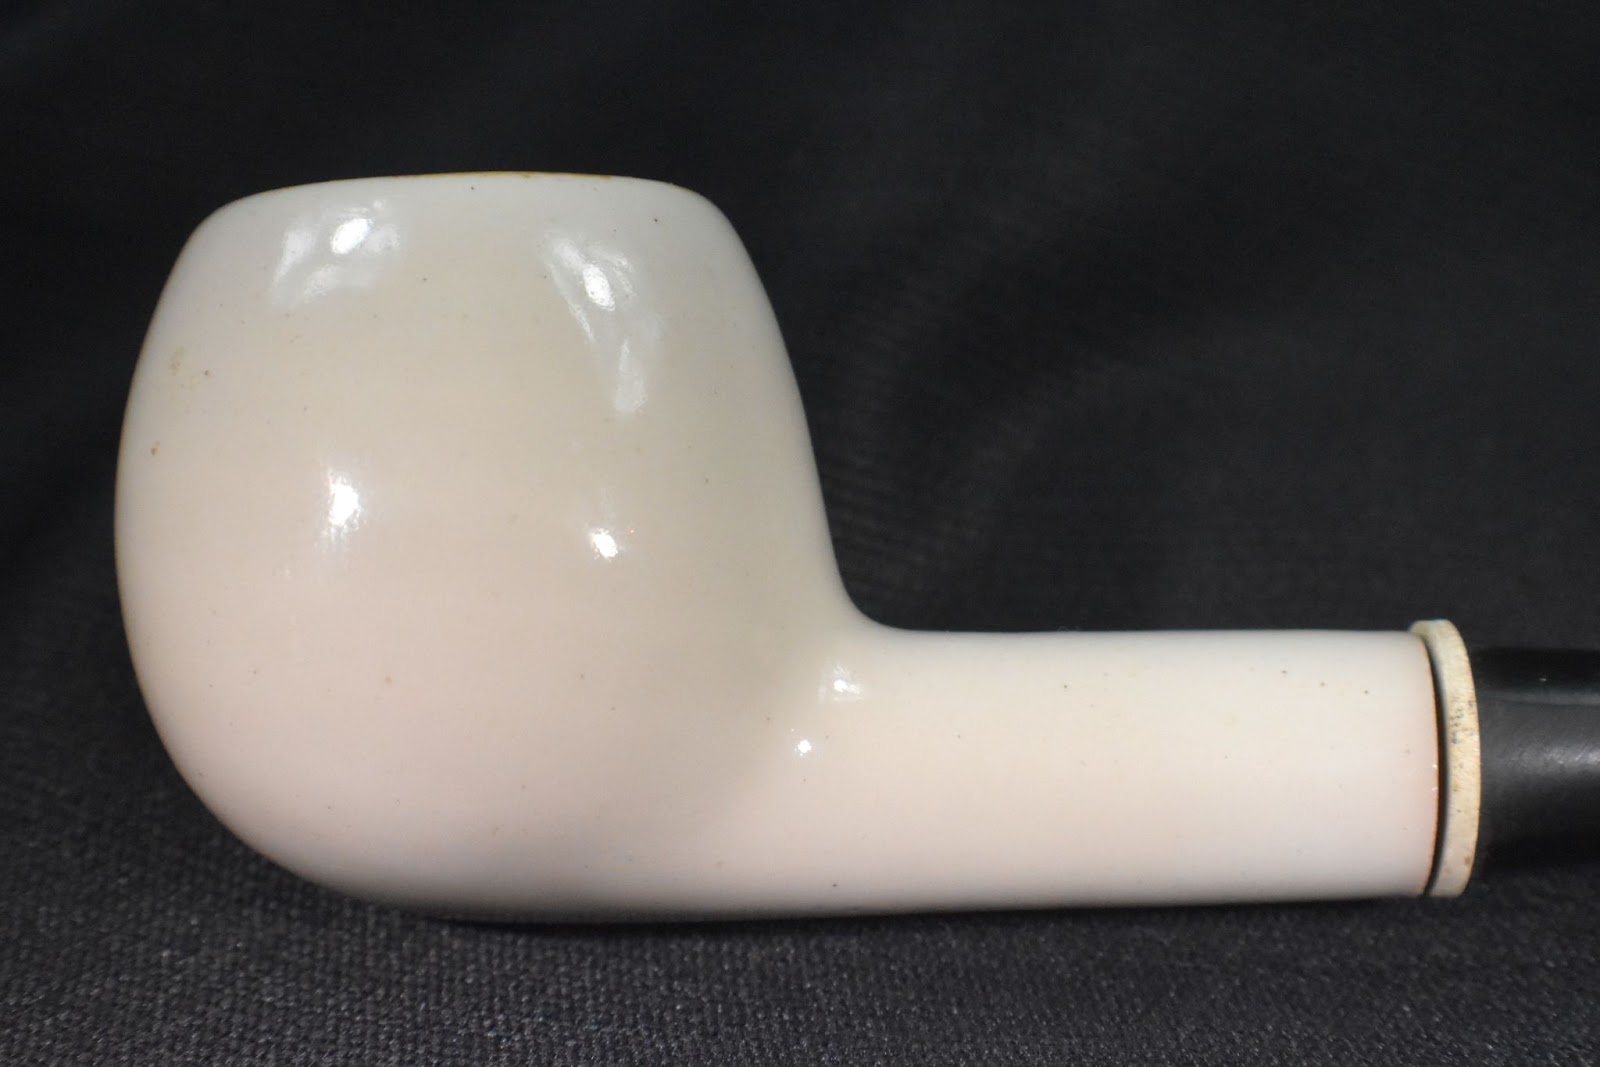
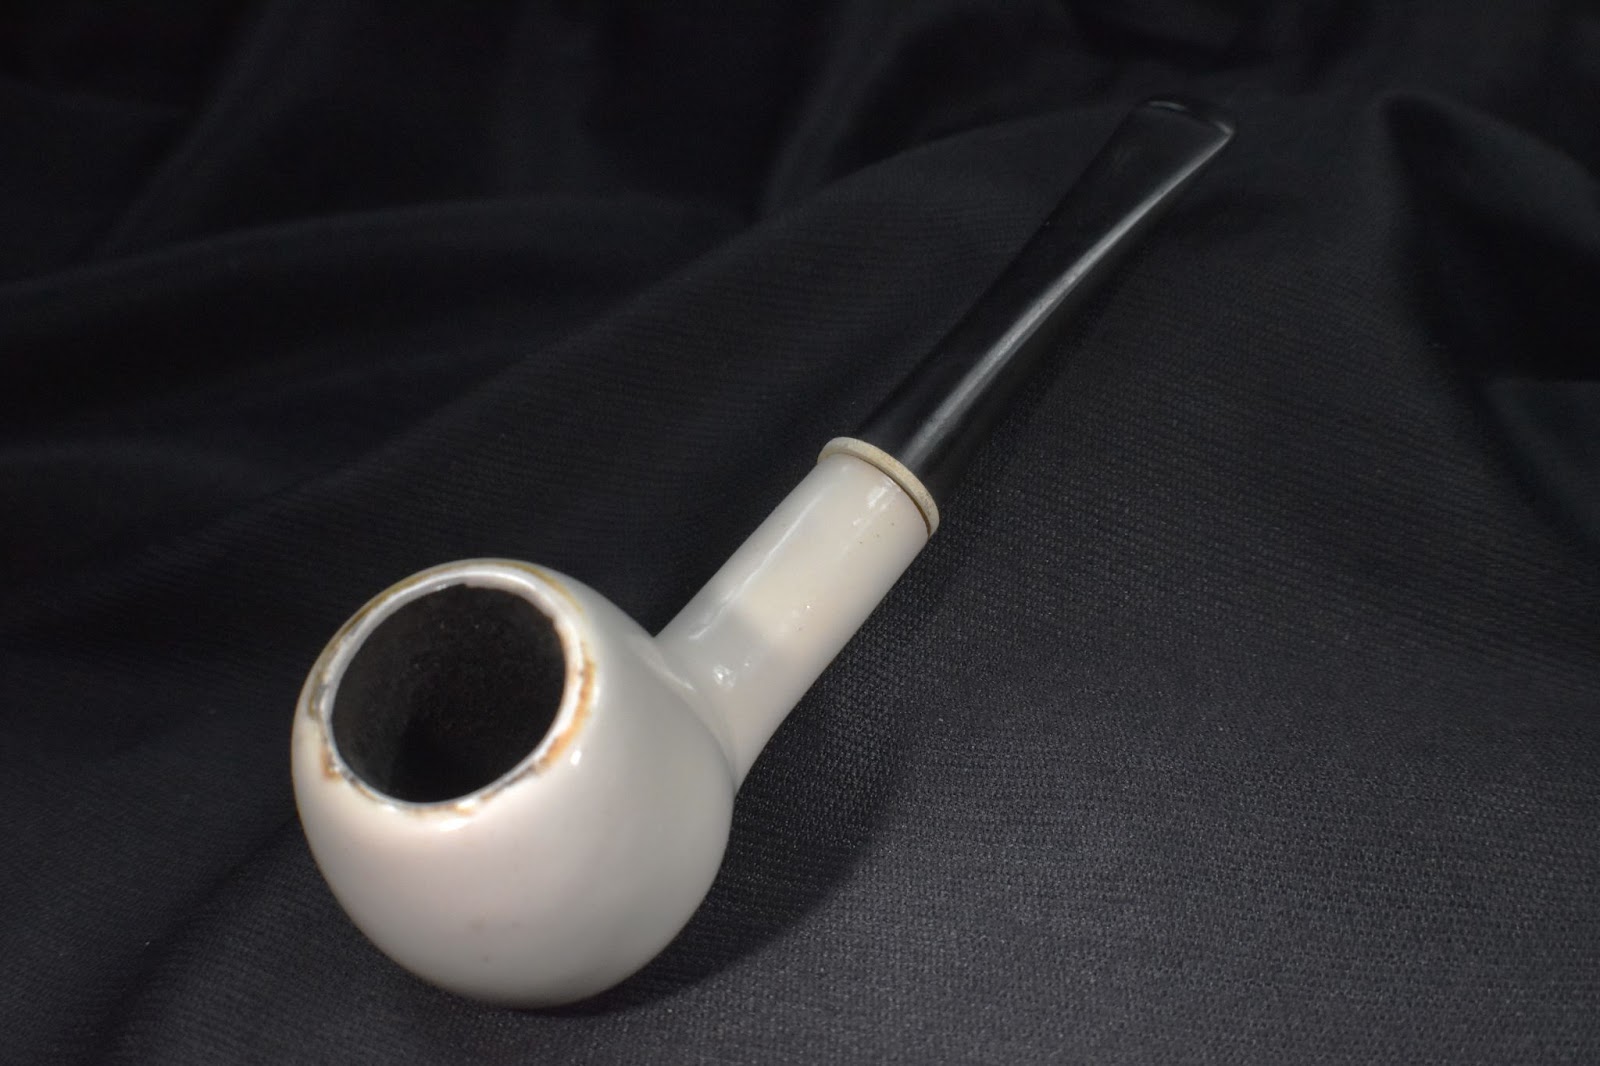
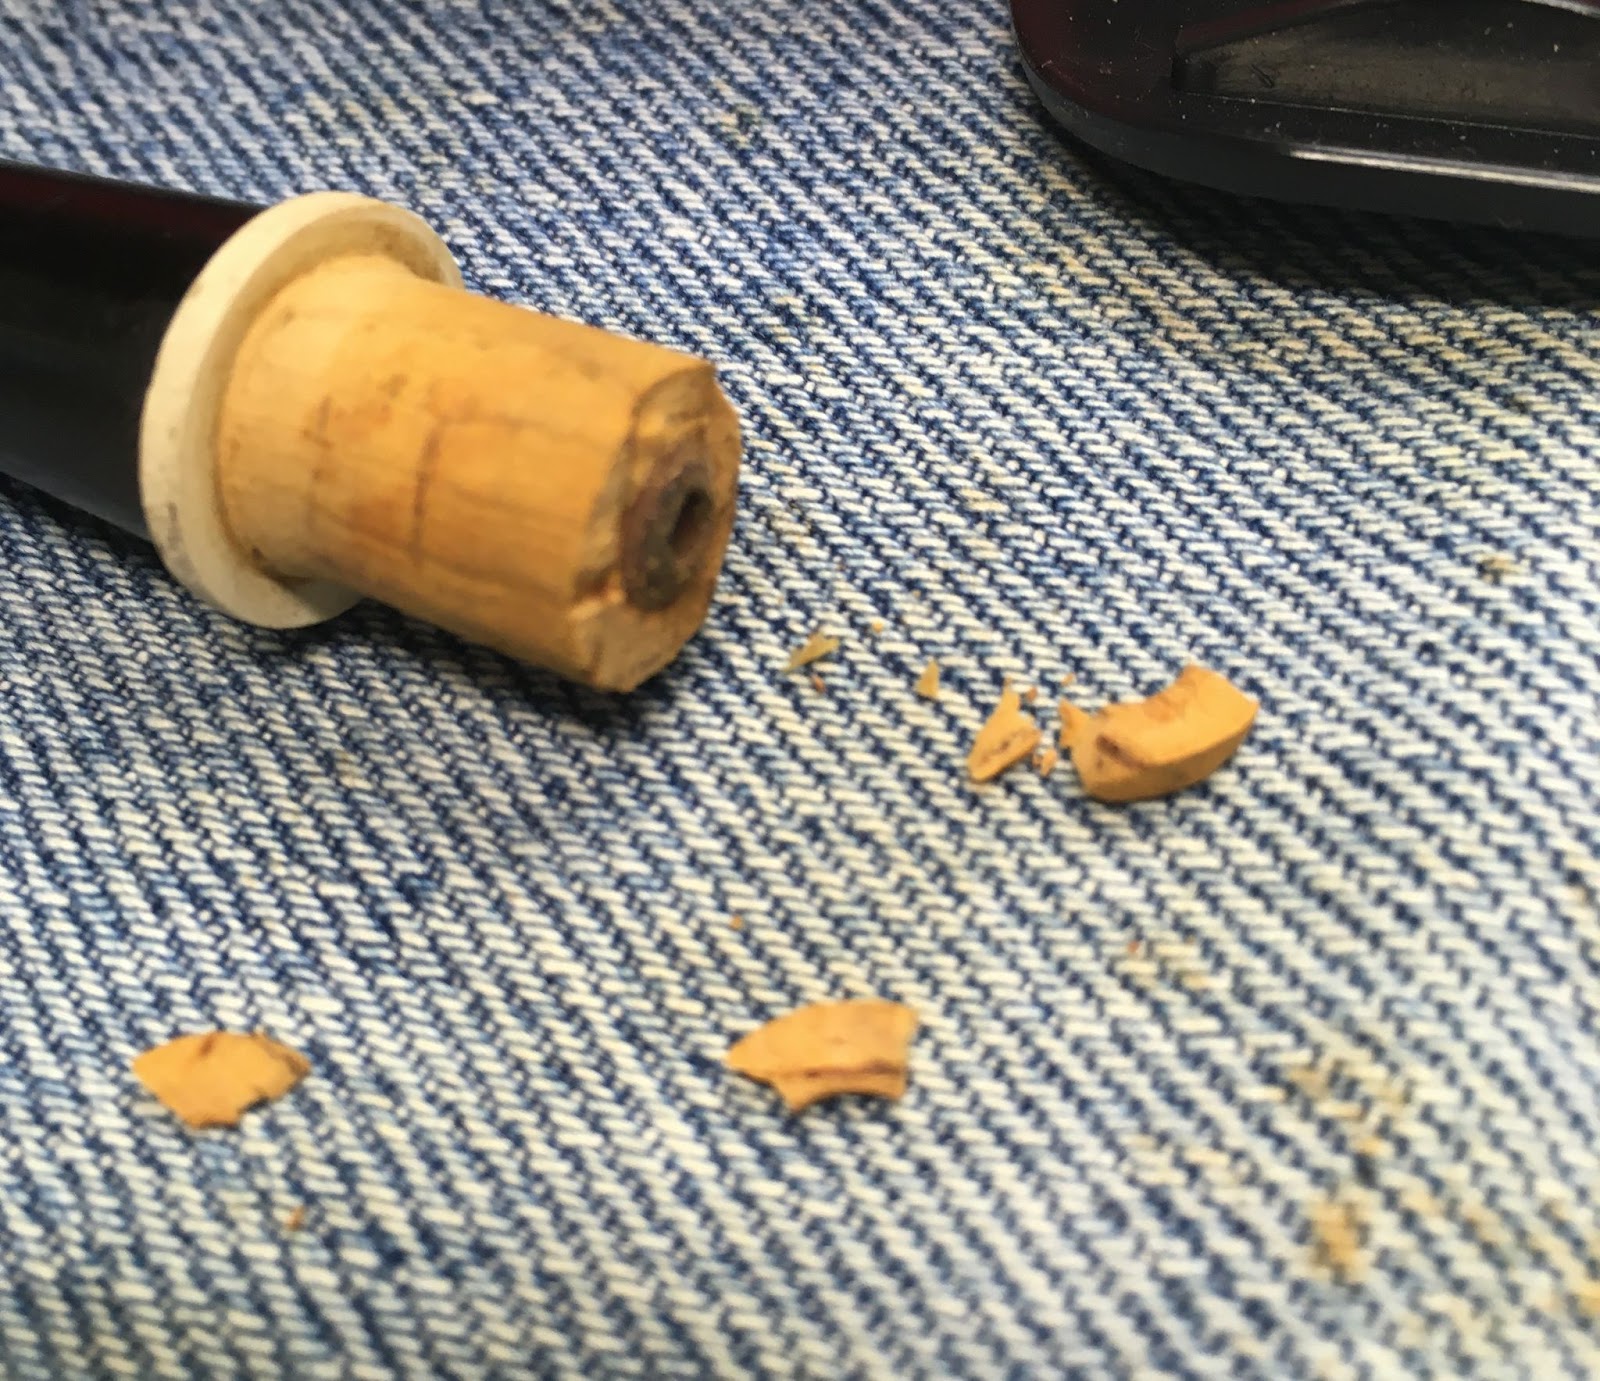
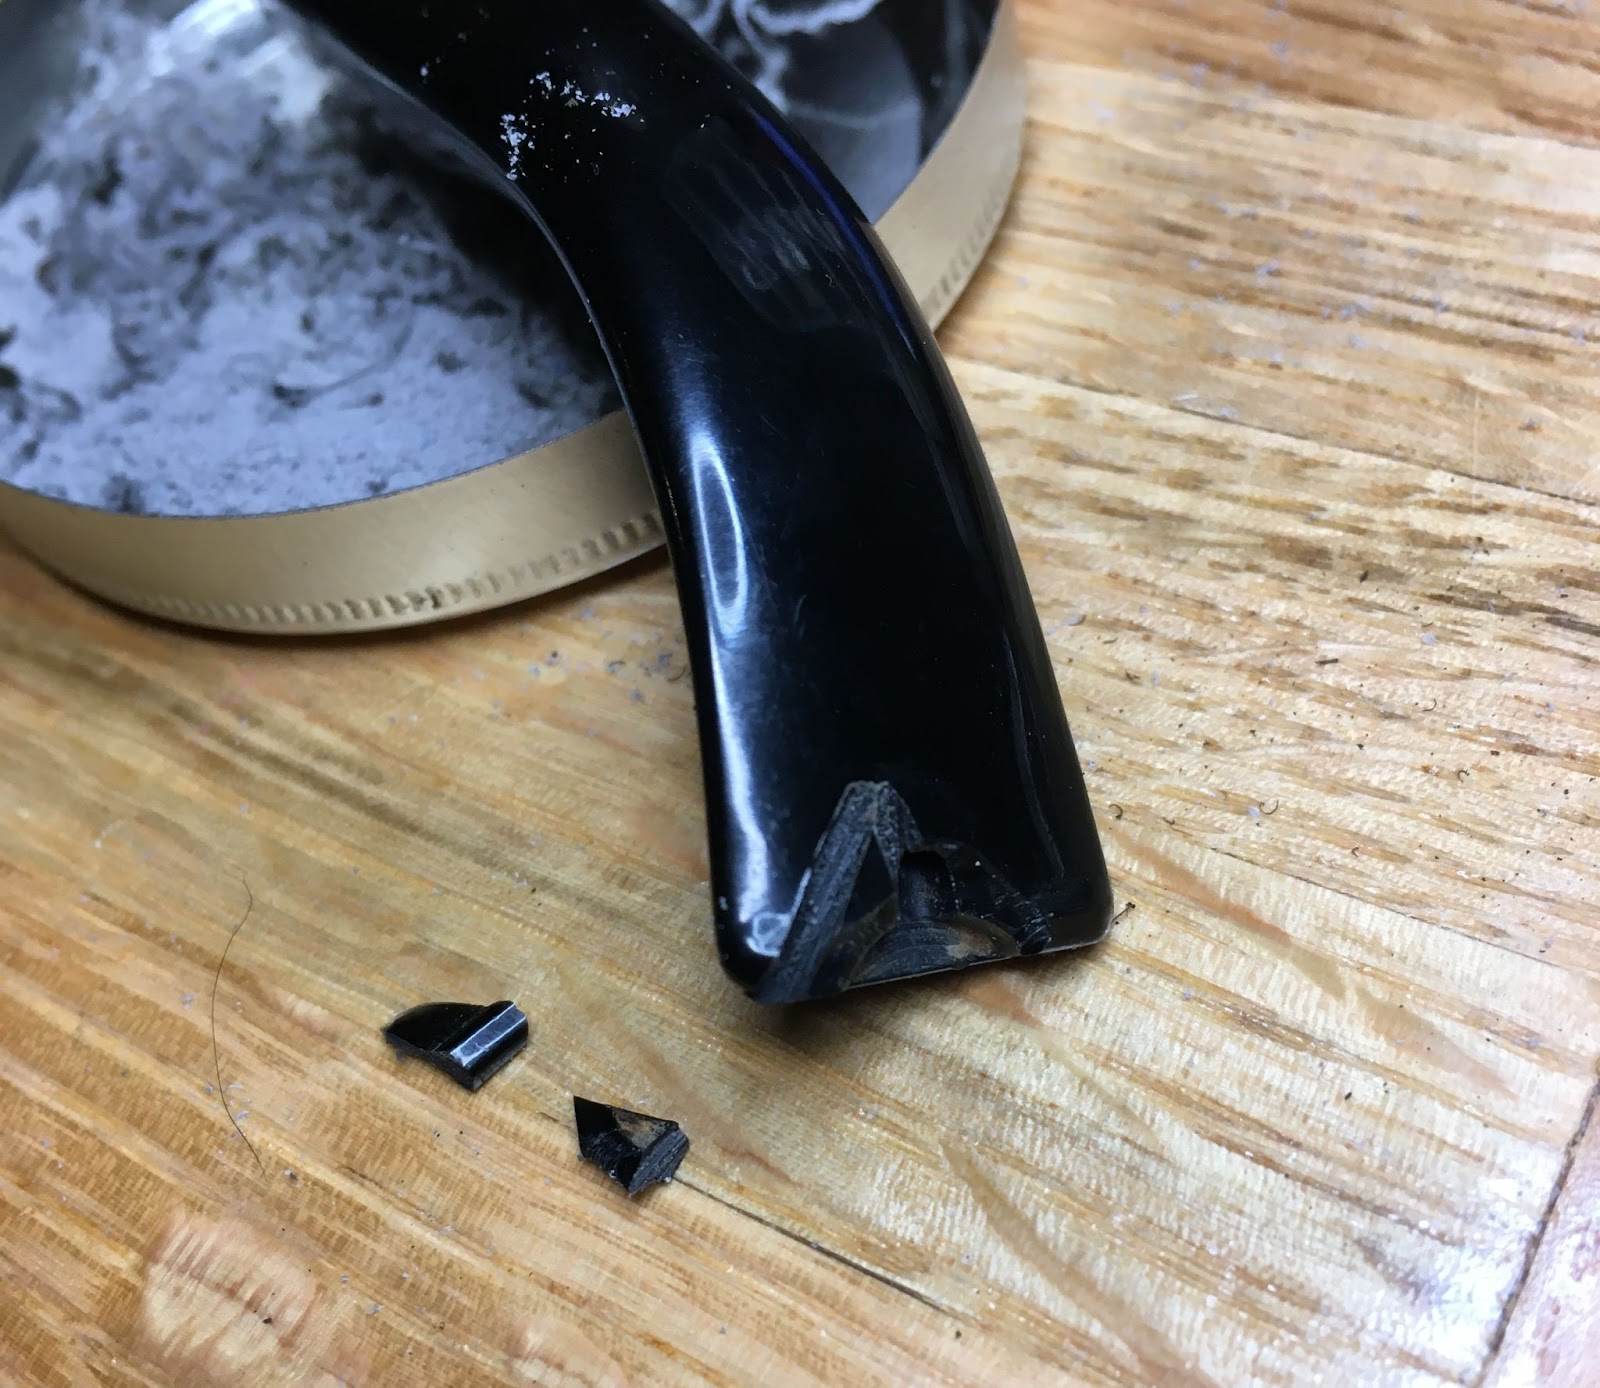
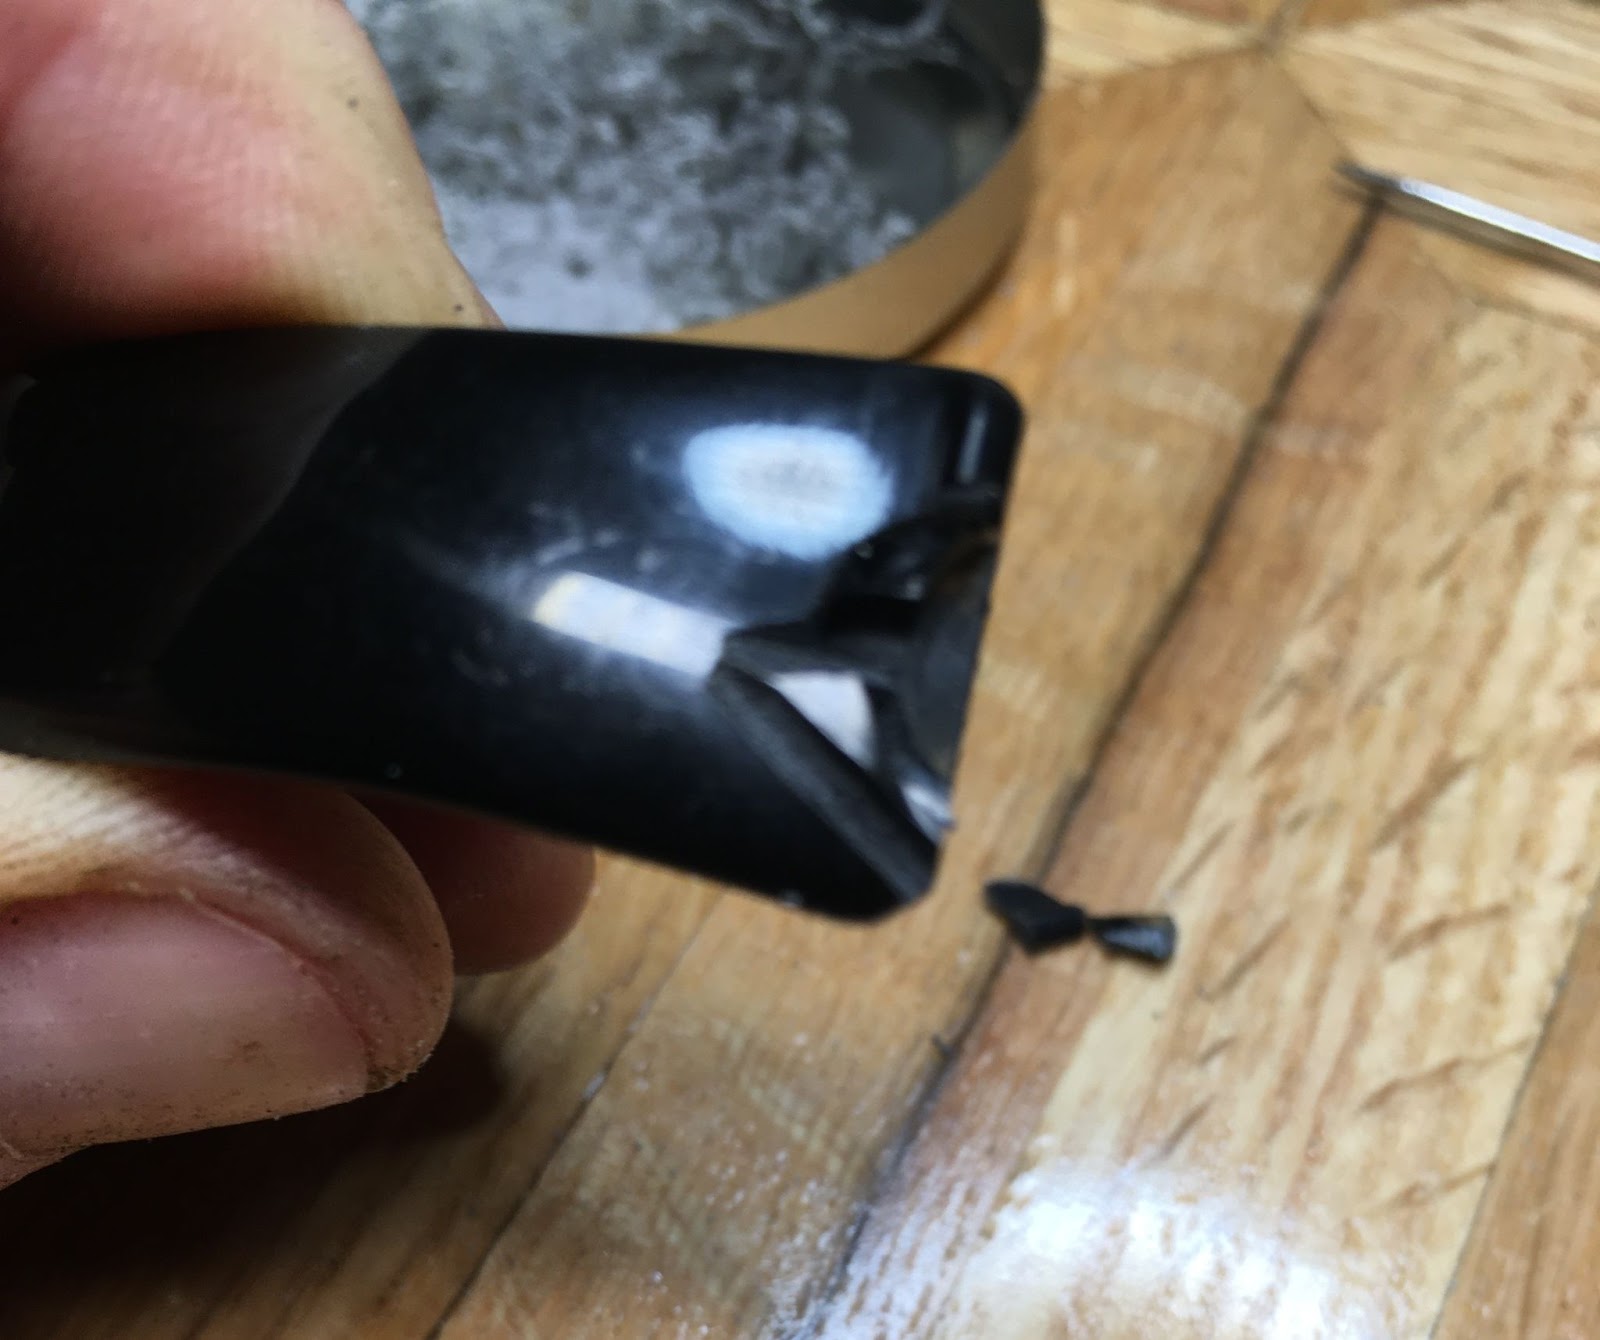
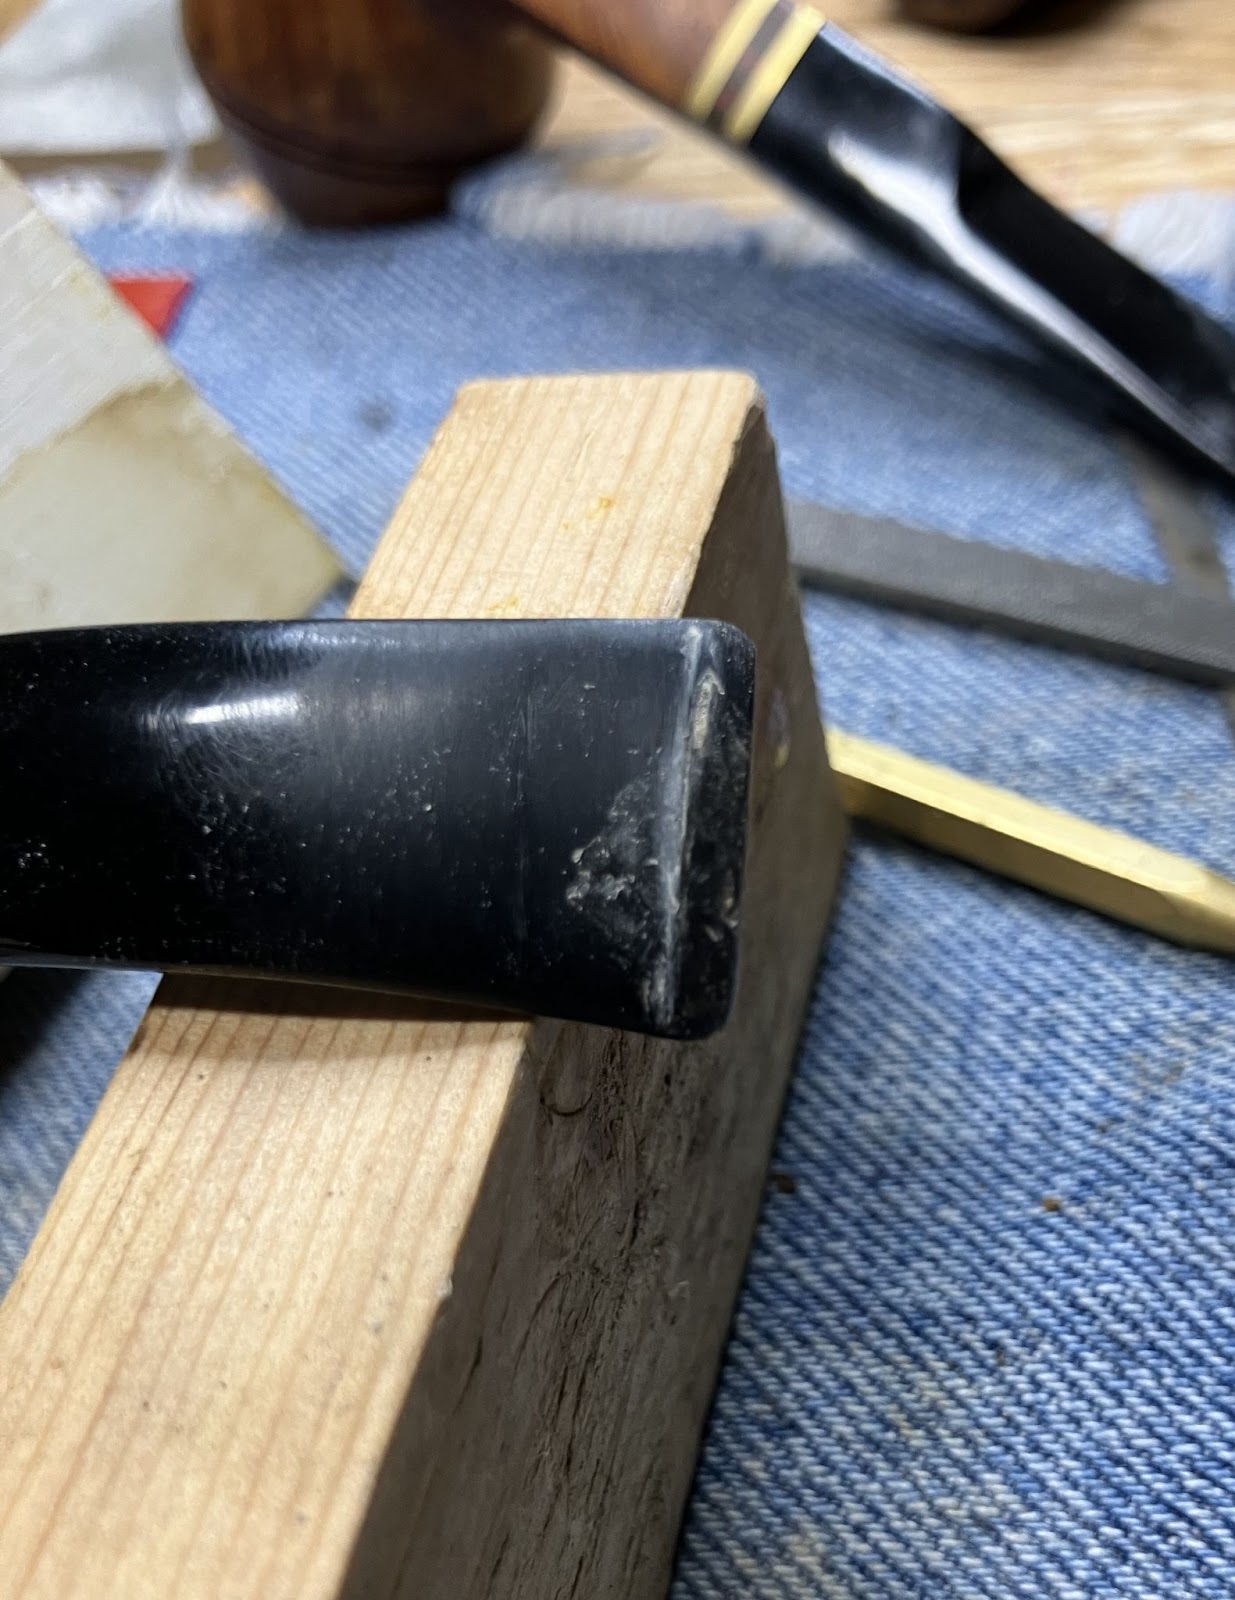
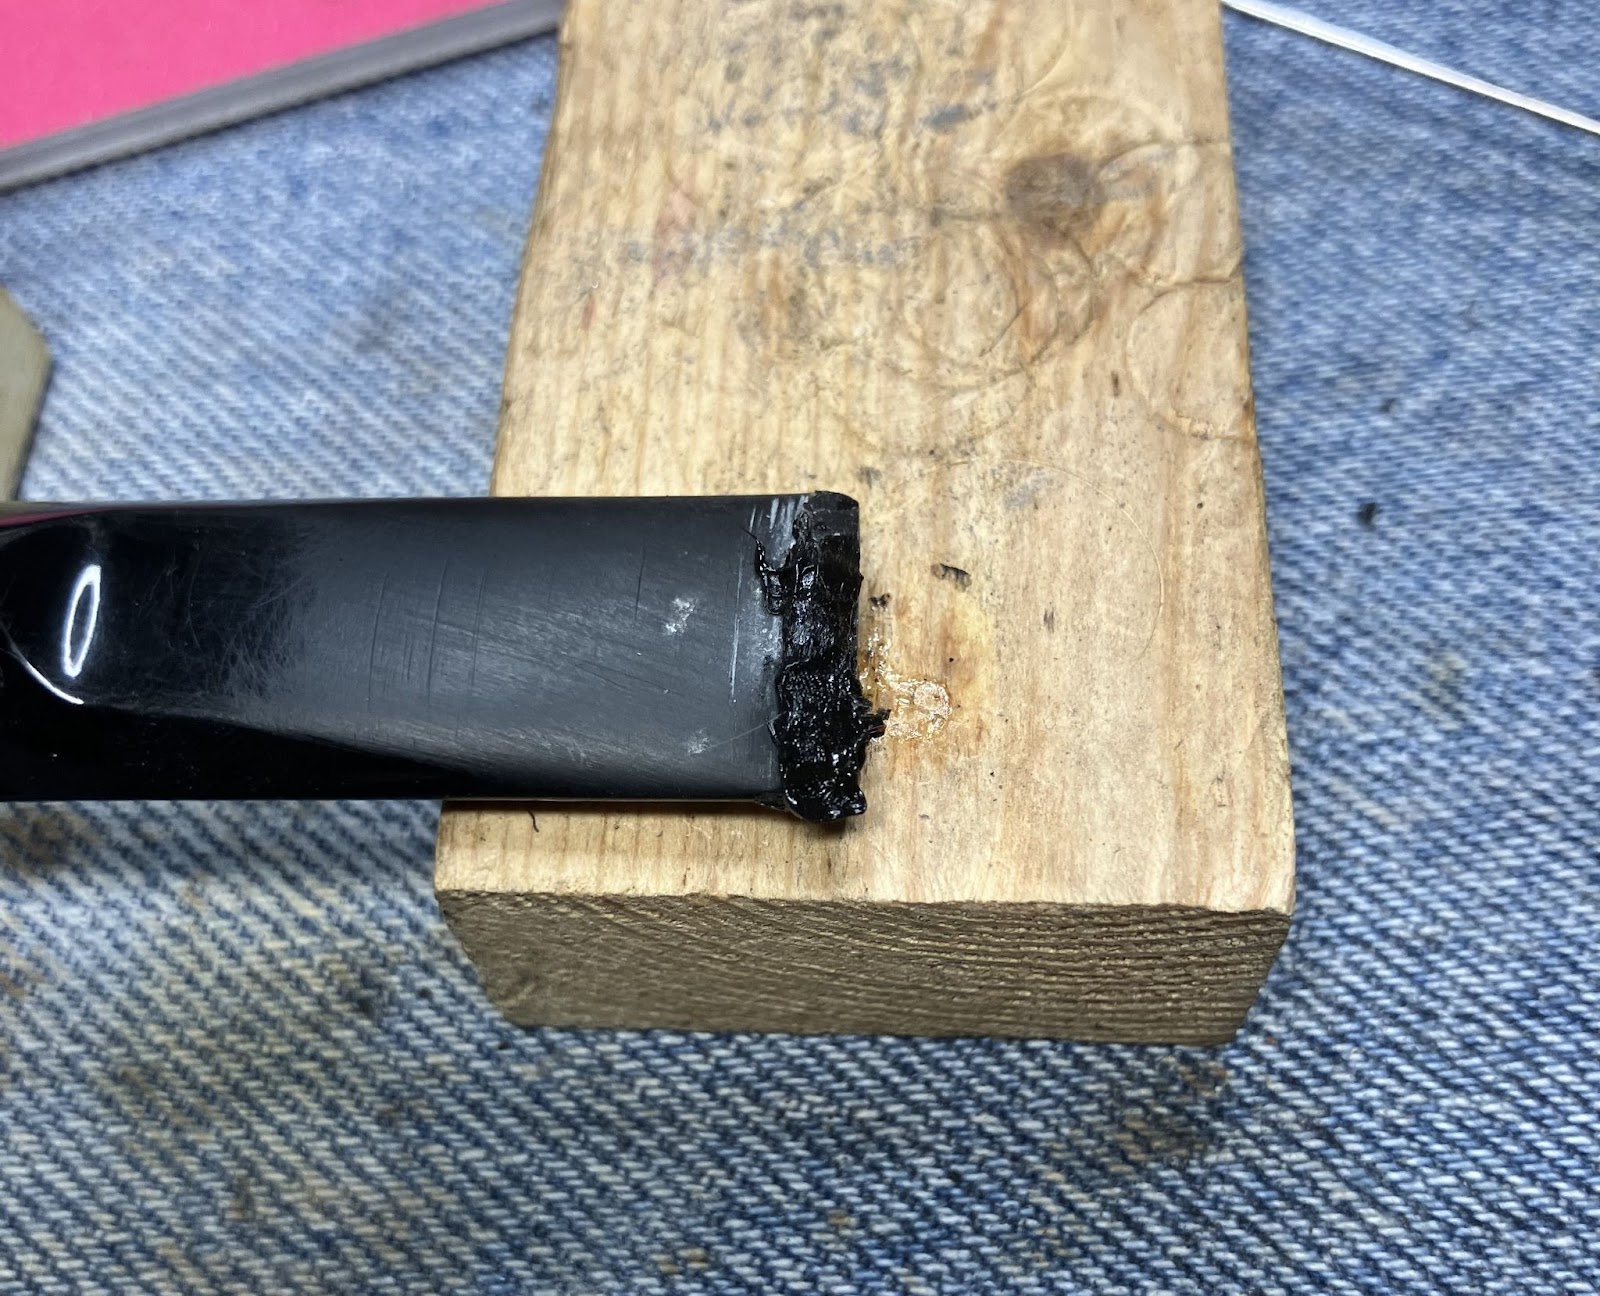
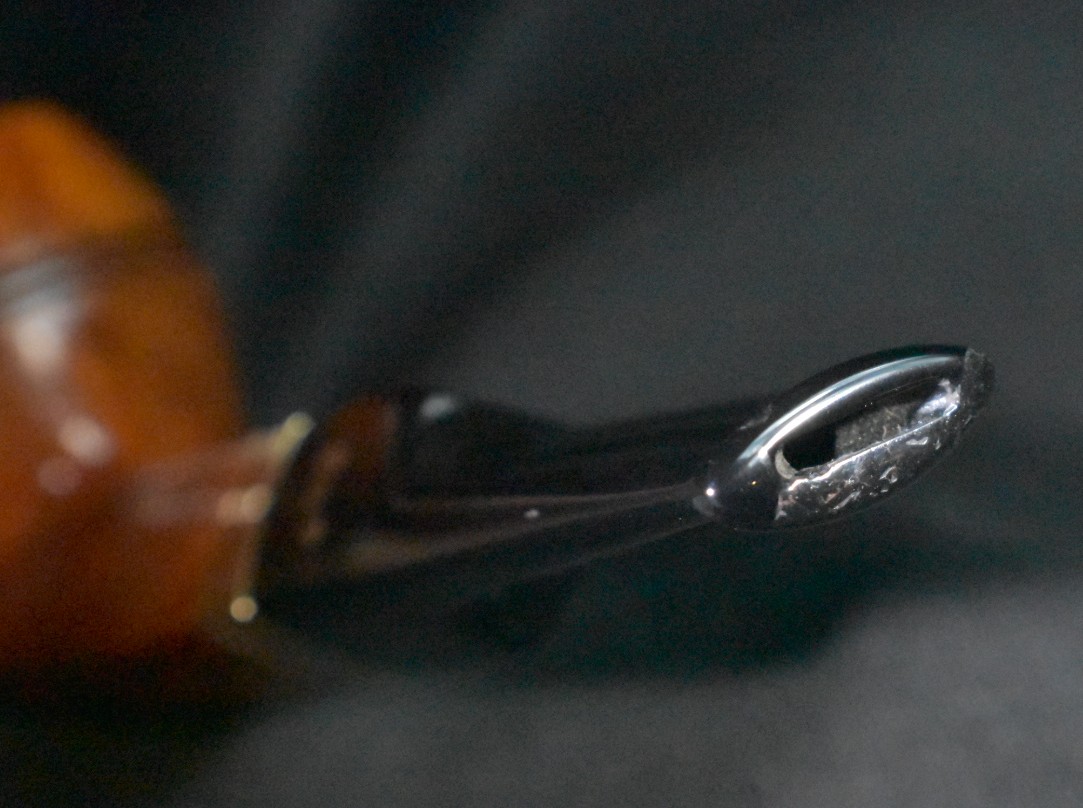
    The next day I thought that maybe a small soldering iron would be a better tool for melting acrylic.  My imagination ran through various unfounded thoughts.  I decided that the imagination needed to take a back seat to good old scientification trial and error with an emphasis on error.  Not wanting to try anything new and untested with a client’s pipe, I set out to practice on a sacrificial pipe stem.  An acrylic test victim was selected from some pipe stems I had.  Using a screwdriver, I broke out a portion of the practice stem.  I then used a Dremel rotary tool and cut a gash into the button as well.  This gave me two areas to attempt repairing with molten black acrylic and a soldering iron.

    Using a pencil electric soldering iron, I applied the heated tip to the acrylic turning.  They melted and stuck to the tip.  I thought, “Success”.  Now to transfer this material to the area on the practice stem.  It transferred pretty easily.  Two problems quickly became evident though:  

    1. The turnings were full of air pockets as they were like ribbons or shavings.  
    2. I wanted to make sure and melt the original stem acrylic also to bond the new and old together.

    Solutions:

    1. I found that by pressing the soldering iron down and rolling the tip, I could force the turnings into place and press out possible air trapped in the acrylic.  There could still be unseen bubbles that would only be discovered when pressure was applied to the stem from biting down on the button and cracking through the thin unseen bubble. 
    2. I tried heating the original stem, melting the new and old acrylic together.  That worked

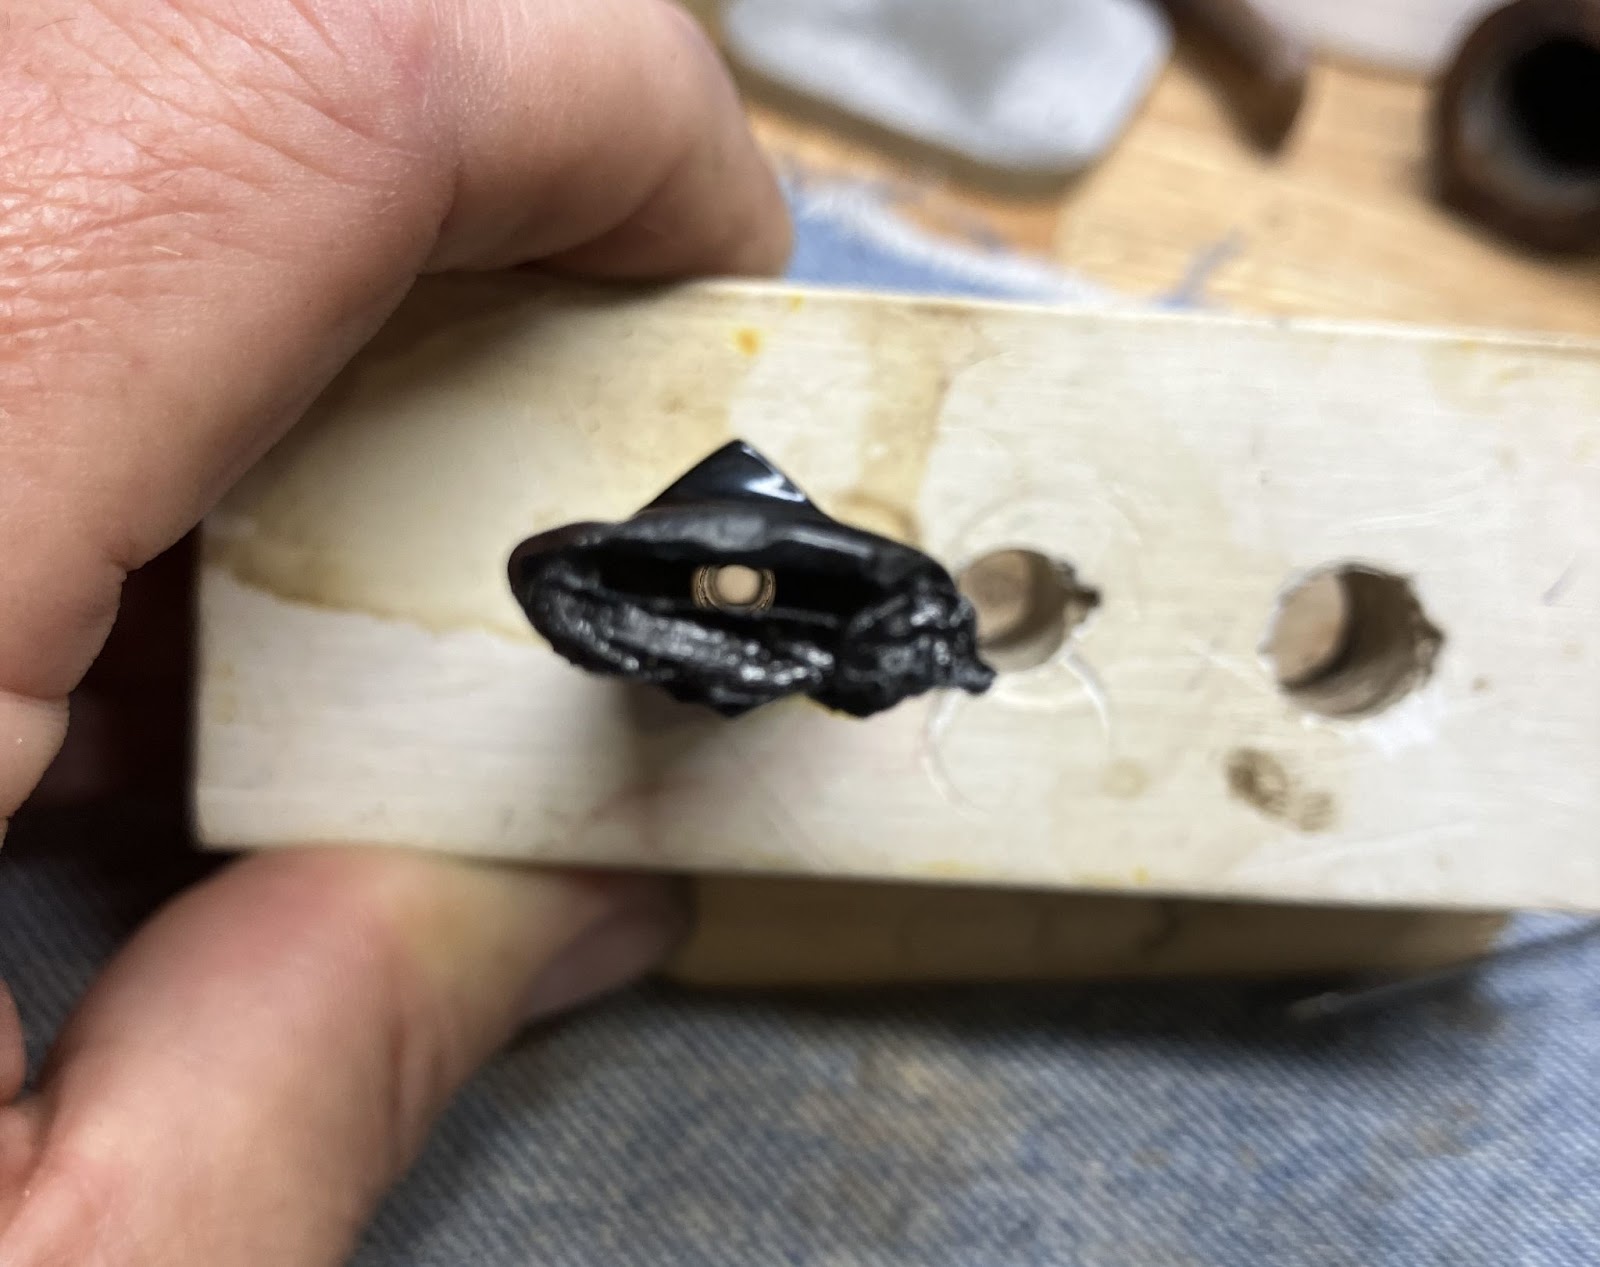
    I failed to photograph the developing soldering iron techniques but did take a few photos of the “welded” practice stem.  The first two photos below show my attempts to fill the voids and file the added acrylic with a small flat file, reshaping the button. 

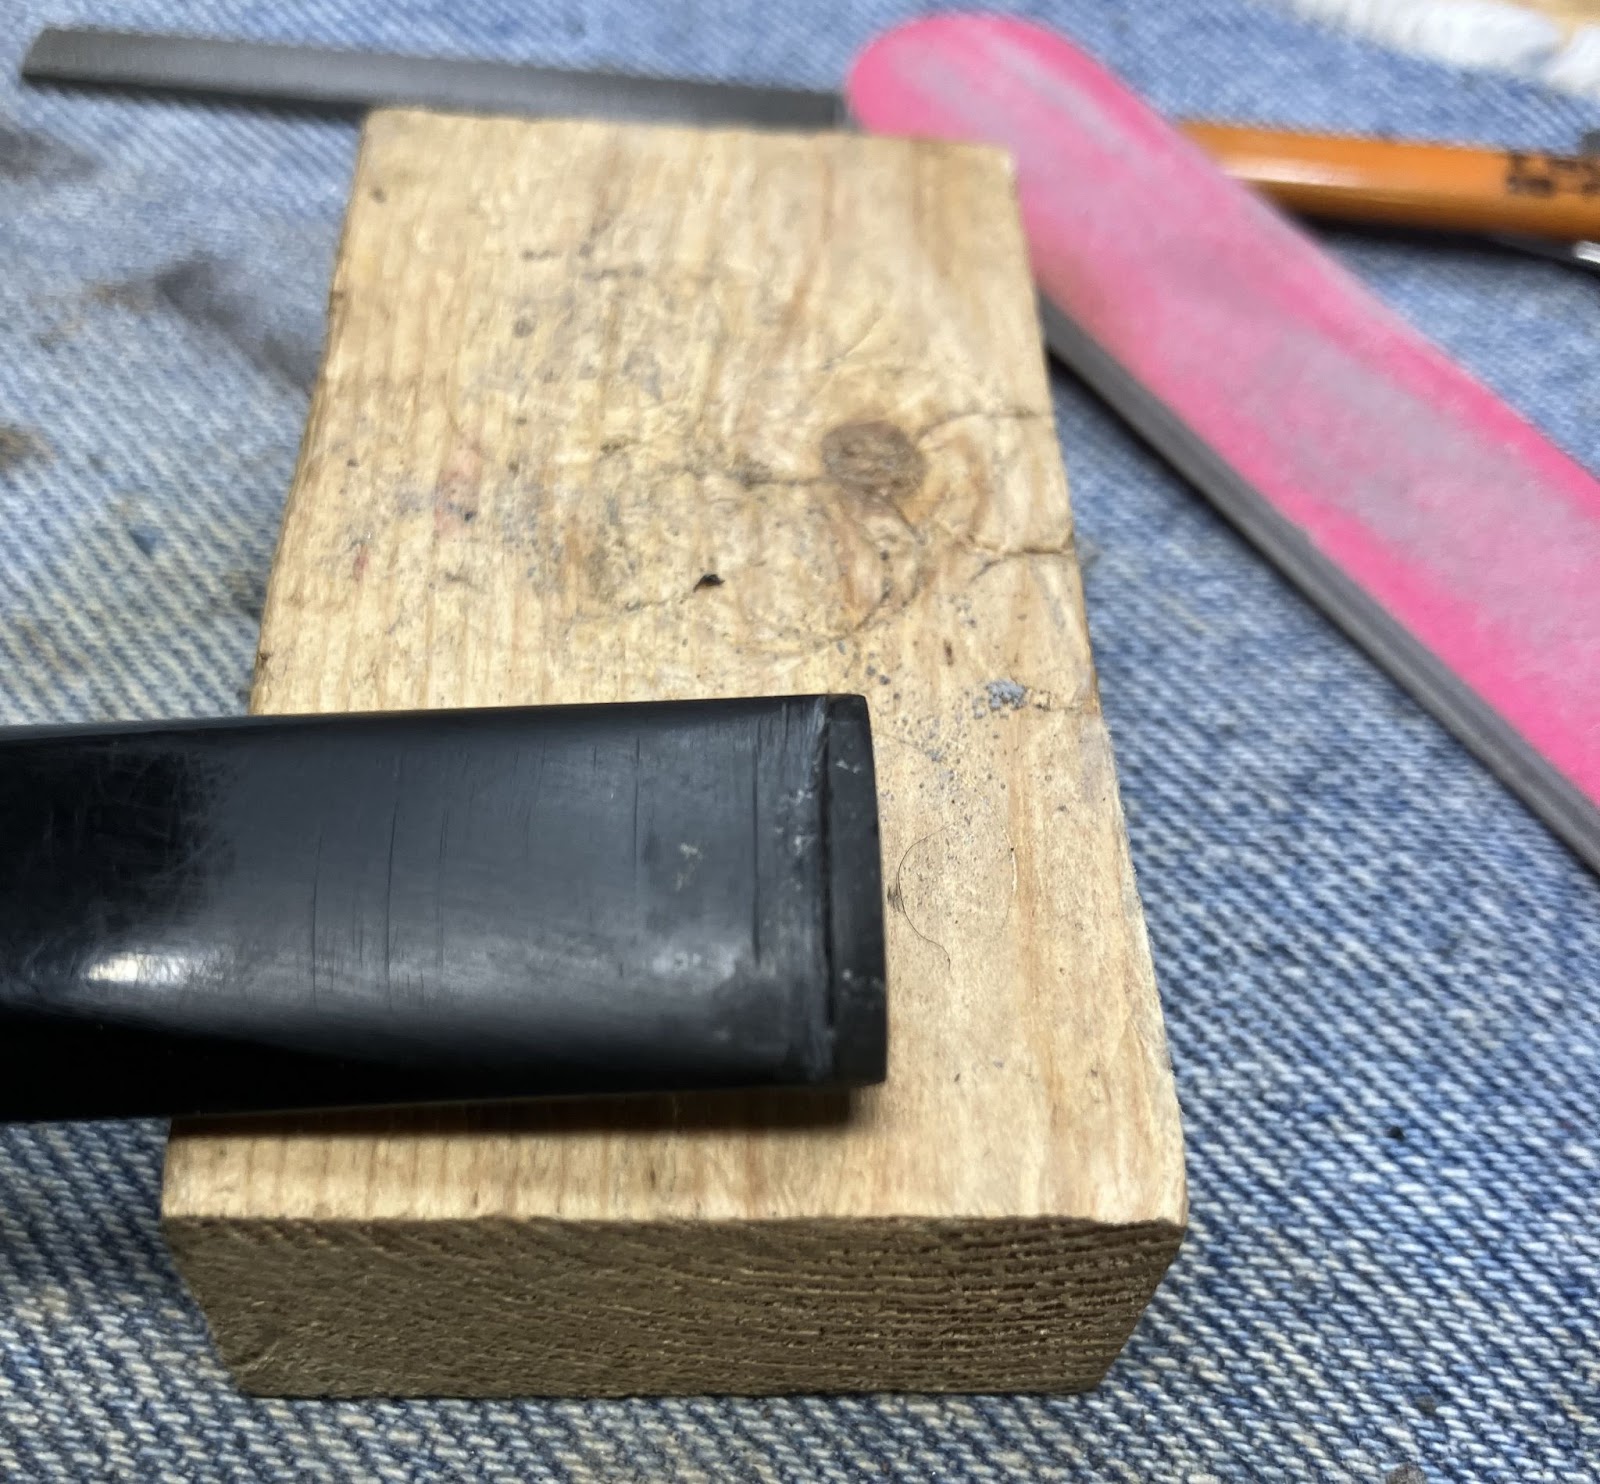
    The third photo shows the same fill but here I had gone over the previous fill and remelted the filled area and added additional weld acrylic.  I tried to press the new material into the existing material with more force, hopefully pressing out any air pockets and smoothing the weld more than the previous attempt.  The button was reshaped using the same file.

    The rebuilt patch was finished with an application of black cyanoacrylate (CA, super glue).

    The CA was spritzed with a cyanoacrylate drying accelerator.  This made the CA harden almost immediately.  The hardened CA was then shaped with a small flat file and sanded.

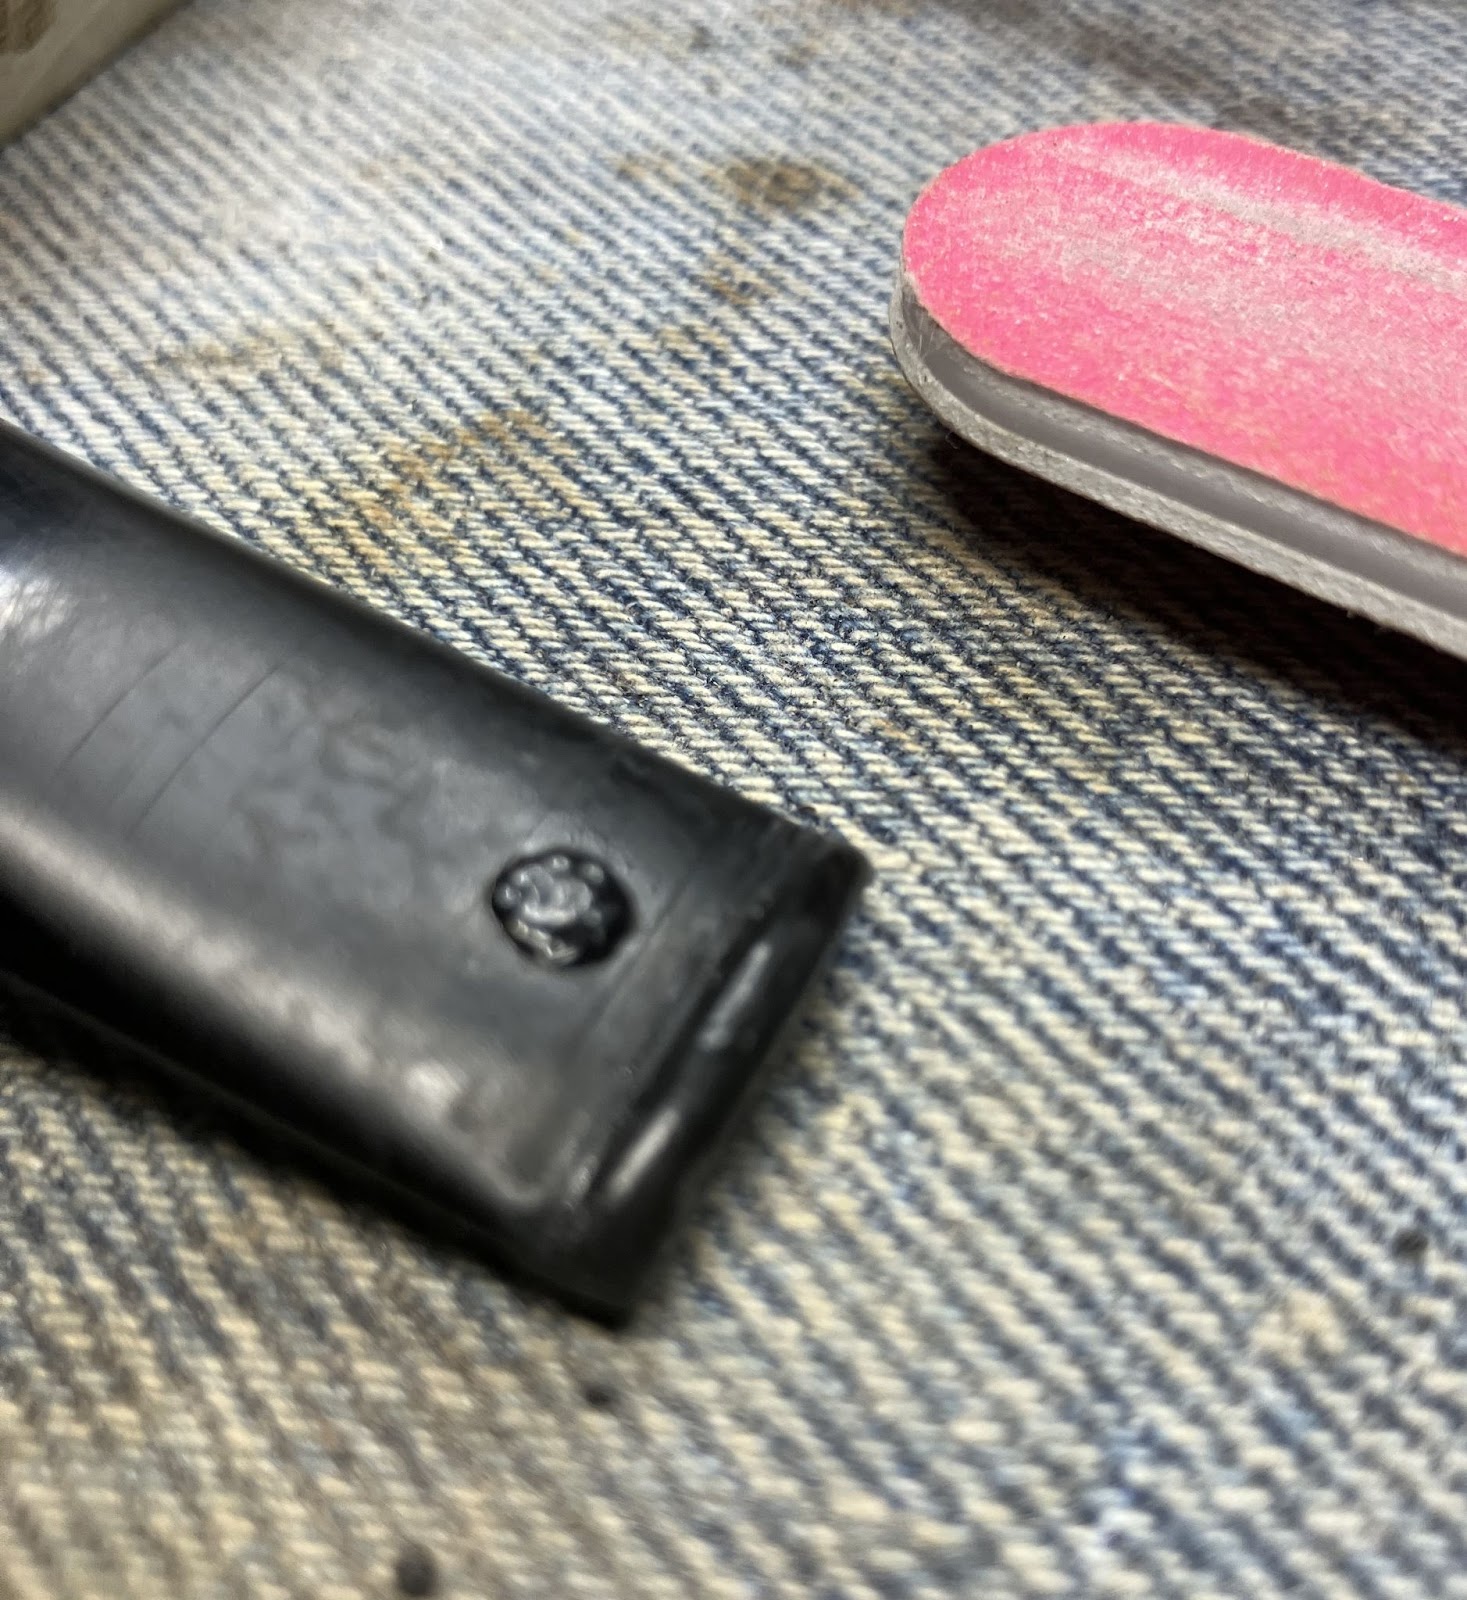
    The airway was rough.  Unseen air bubbles within the weld were probably responsible. 

    I used a Dremel rotary tool and a small cutoff bit to reshape the end of the button.

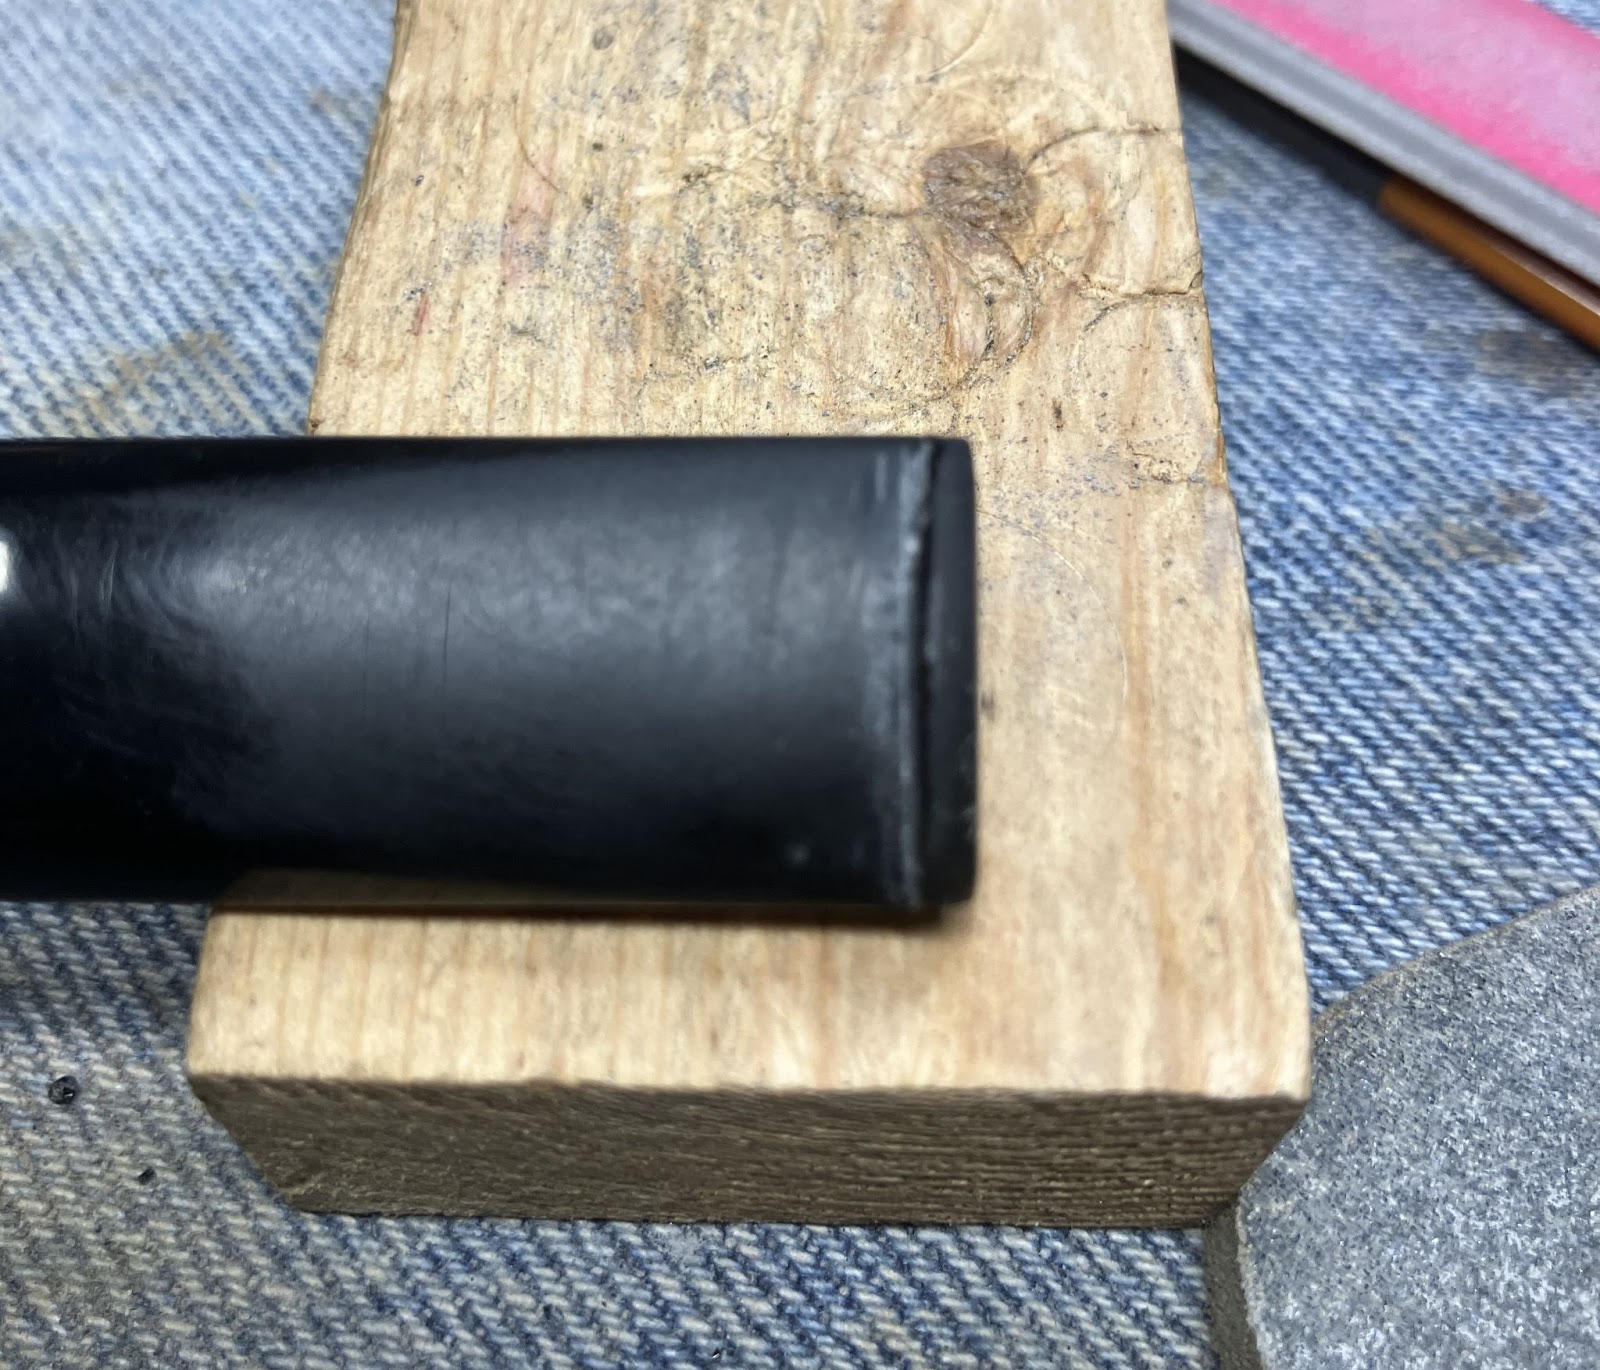
    Below is the reshaped button.

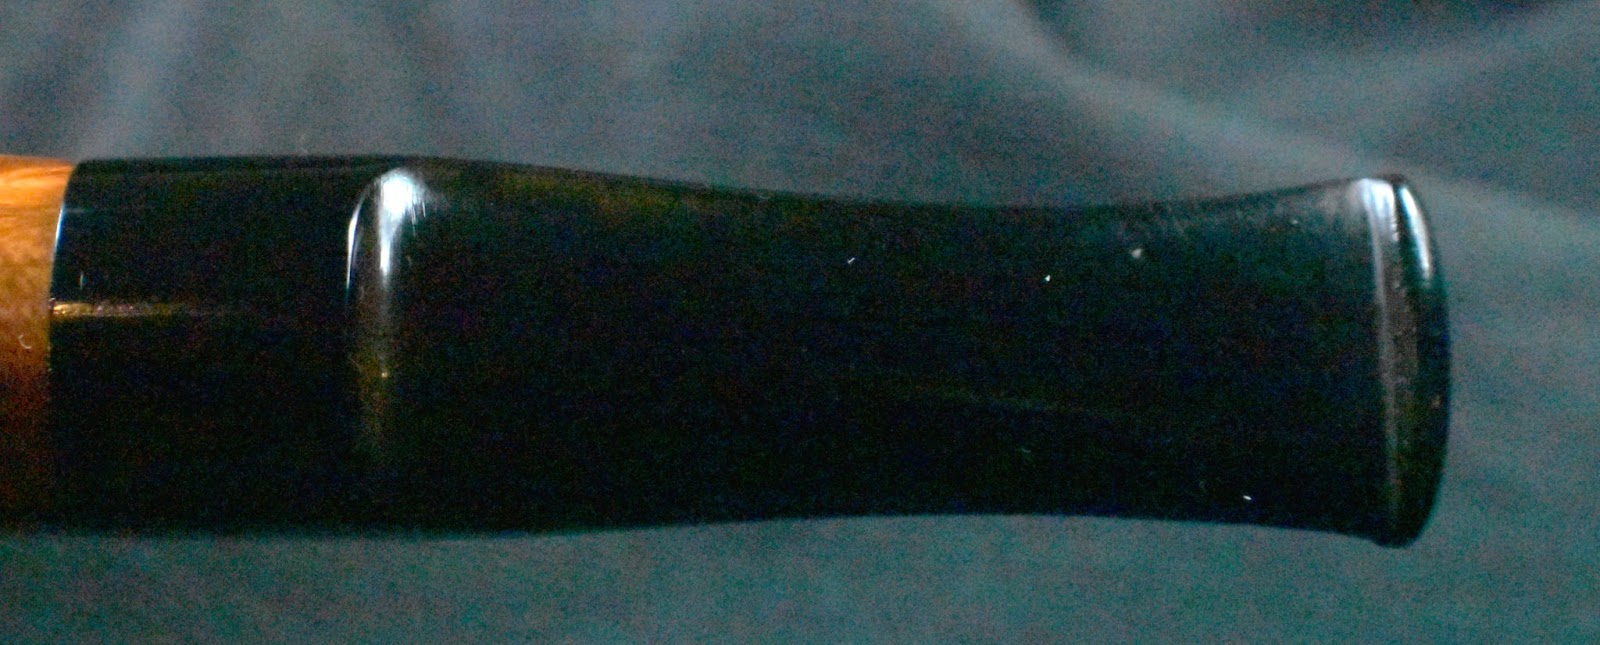
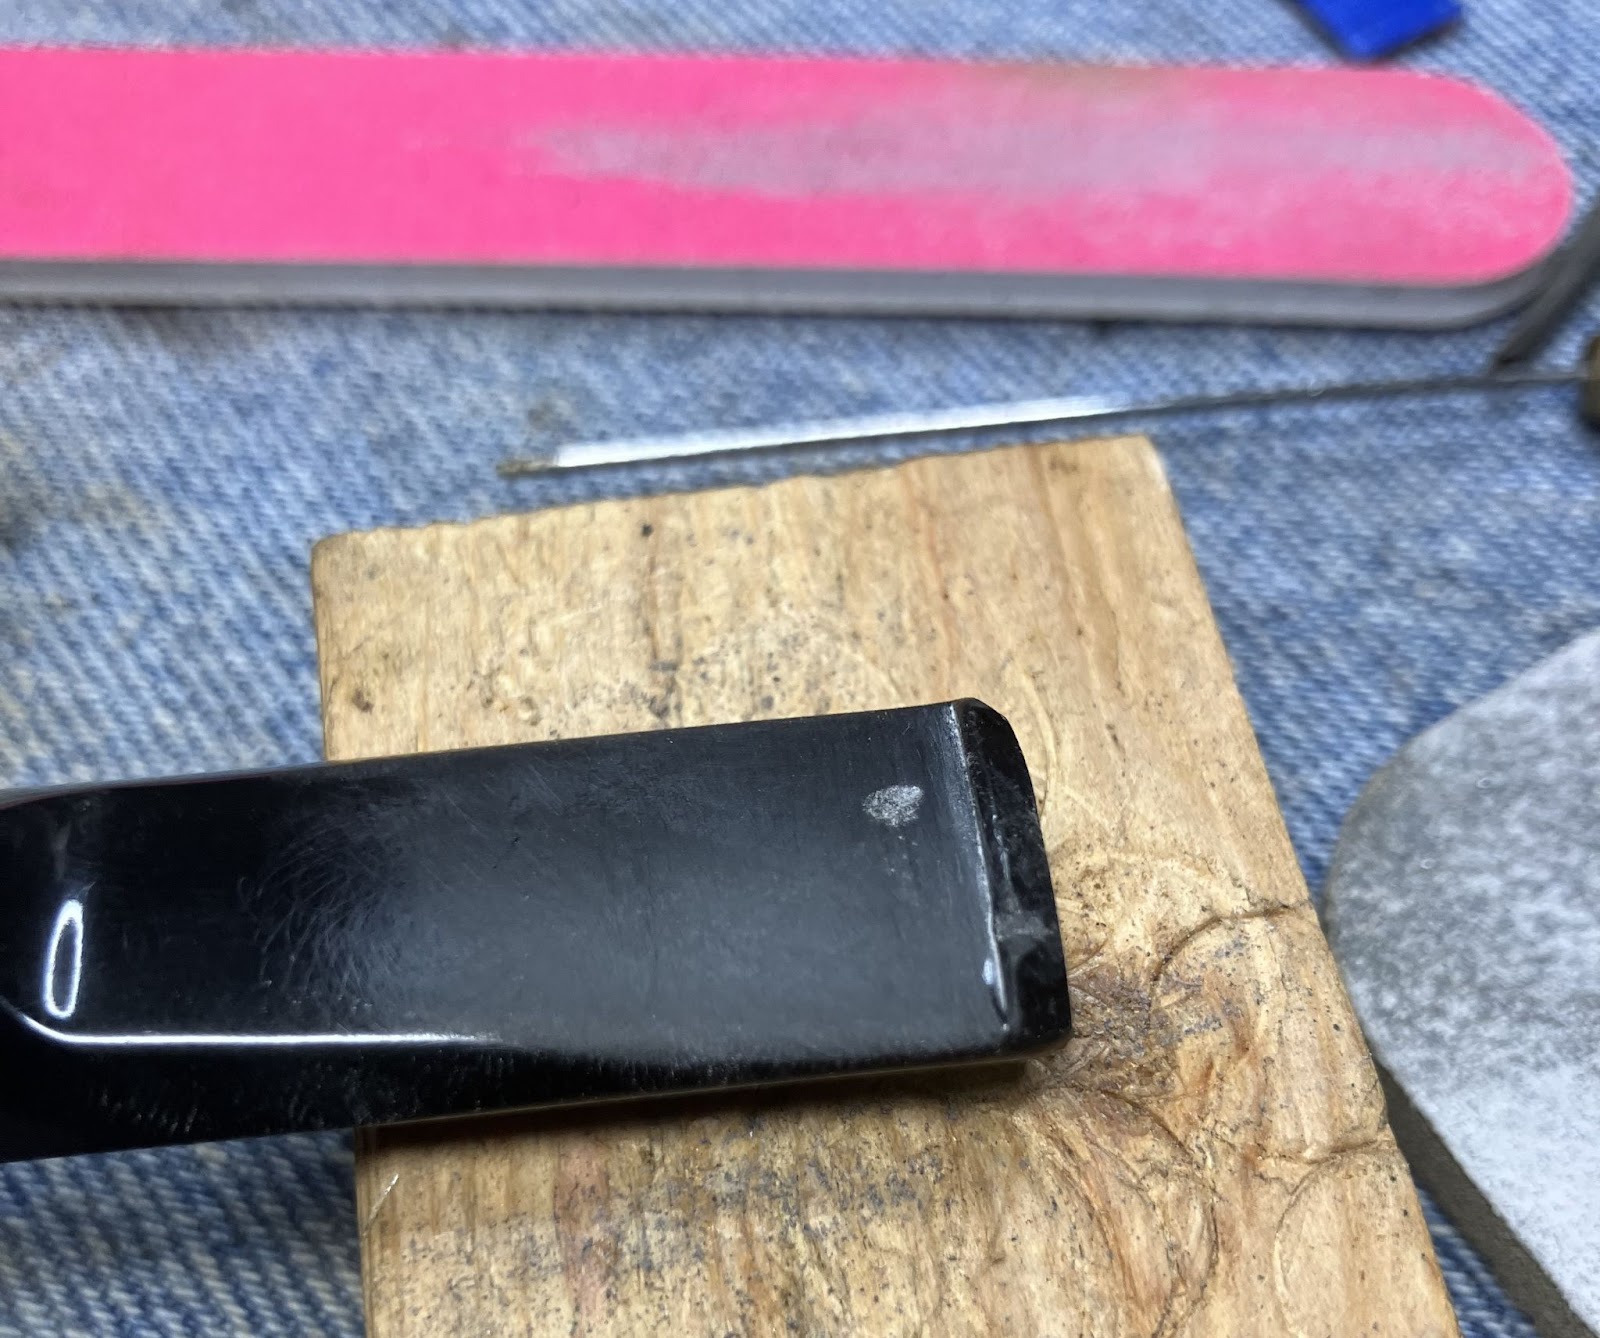
    After further sanding and polishing, the stem repair looked pretty good.

    A scar of the repair was visible, but only upon close inspection.

    Below are two photos of the polished button.

    I tested the fill by biting done on it simulating normal force applied during clenching.  The fill seemed solid.  I was and still am unsure how the weld will hold up over time and extended clenching. 

    Yet another sidenote:  I am sure that you are wondering, “Good lord, man.  41 pages in and you still haven’t started the repair on this poor guy’s pipe!”  Hmm, I wonder if I was a bit frightful of doing irreparable harm to the Stanwell?

    I sent my preliminary findings and photos to the client, Cash.  I wanted his opinion regarding this as a possible repair solution.  He consented to the application of melted acrylic.  More pressure but at the same time I thought I was onto a very workable solution to the problem at hand.  One thing I had ordered since I started this project was a couple of ½ inch rods of black acrylic.  I thought that the rods might be useful as a source of acrylic welding material where I did not have to deal with the problems with the turnings, aka, air bubbles within the weld.

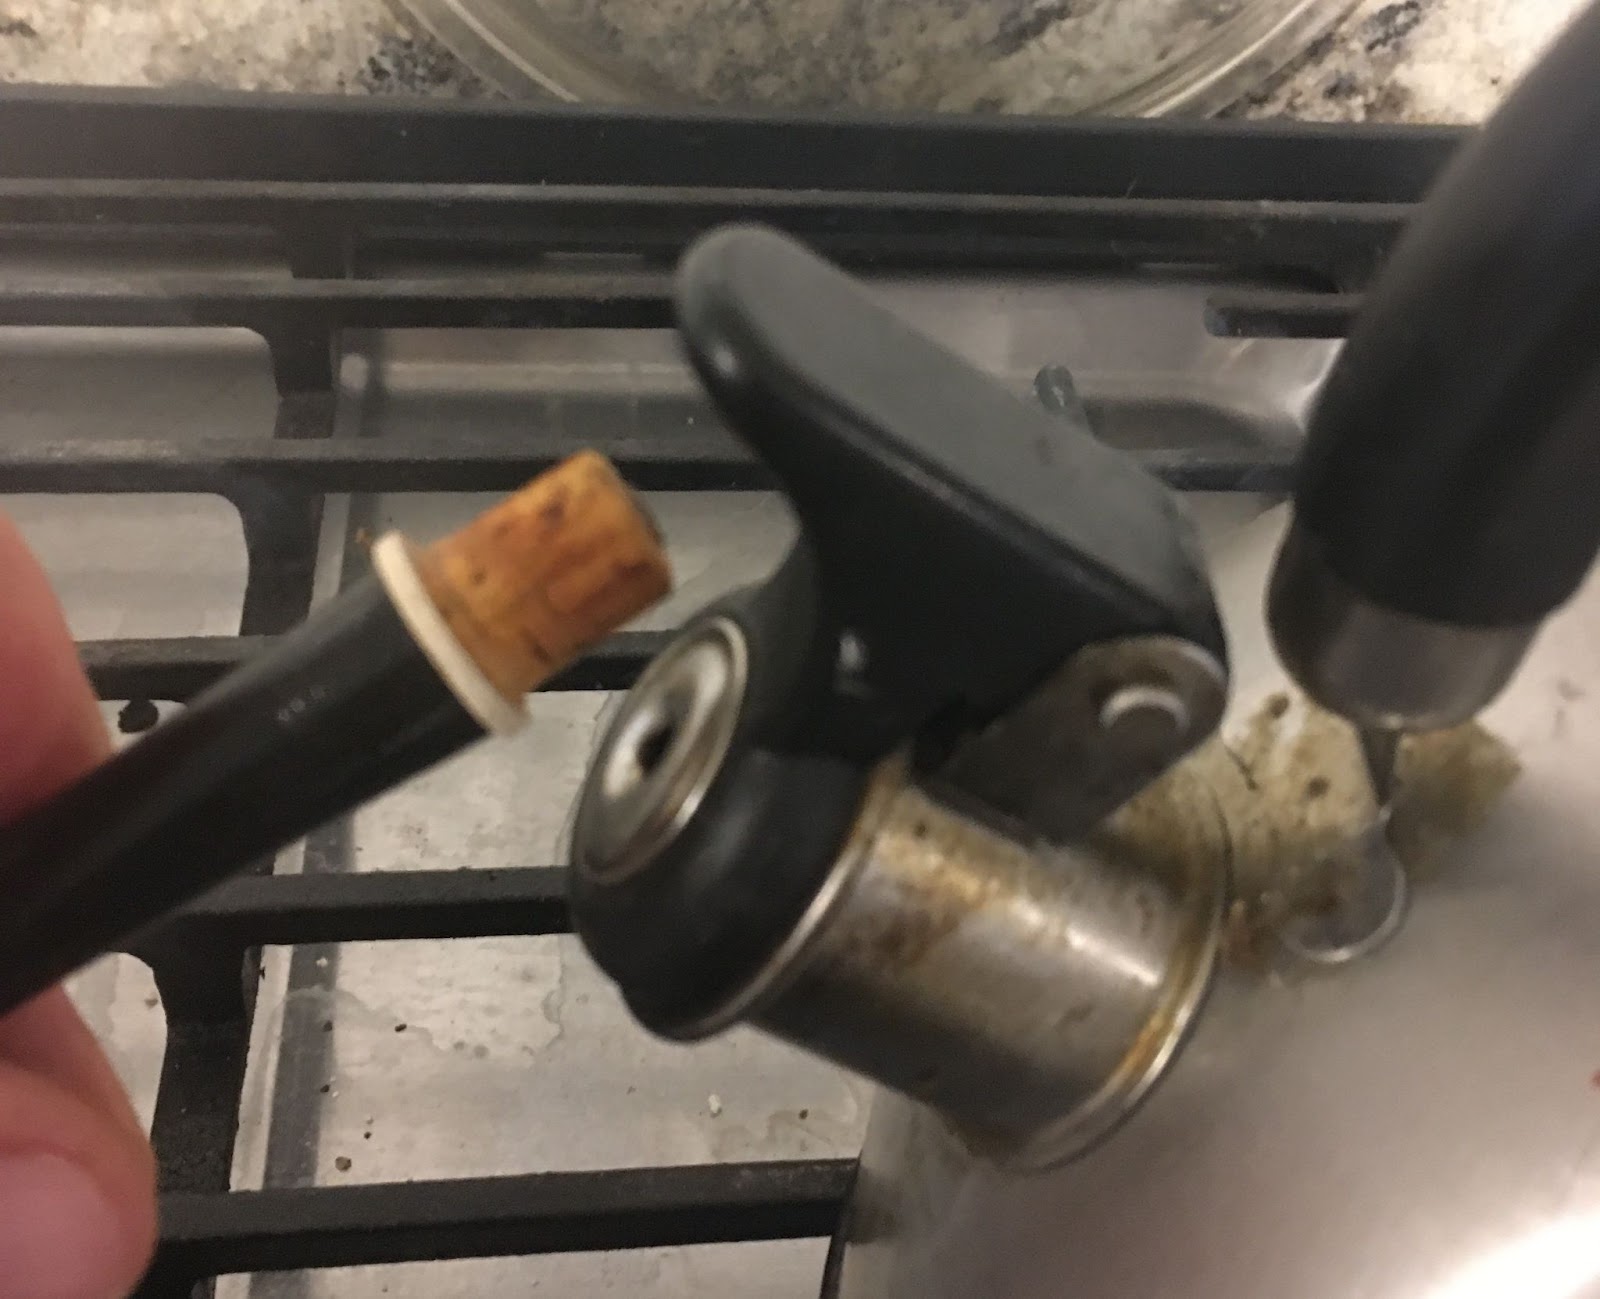
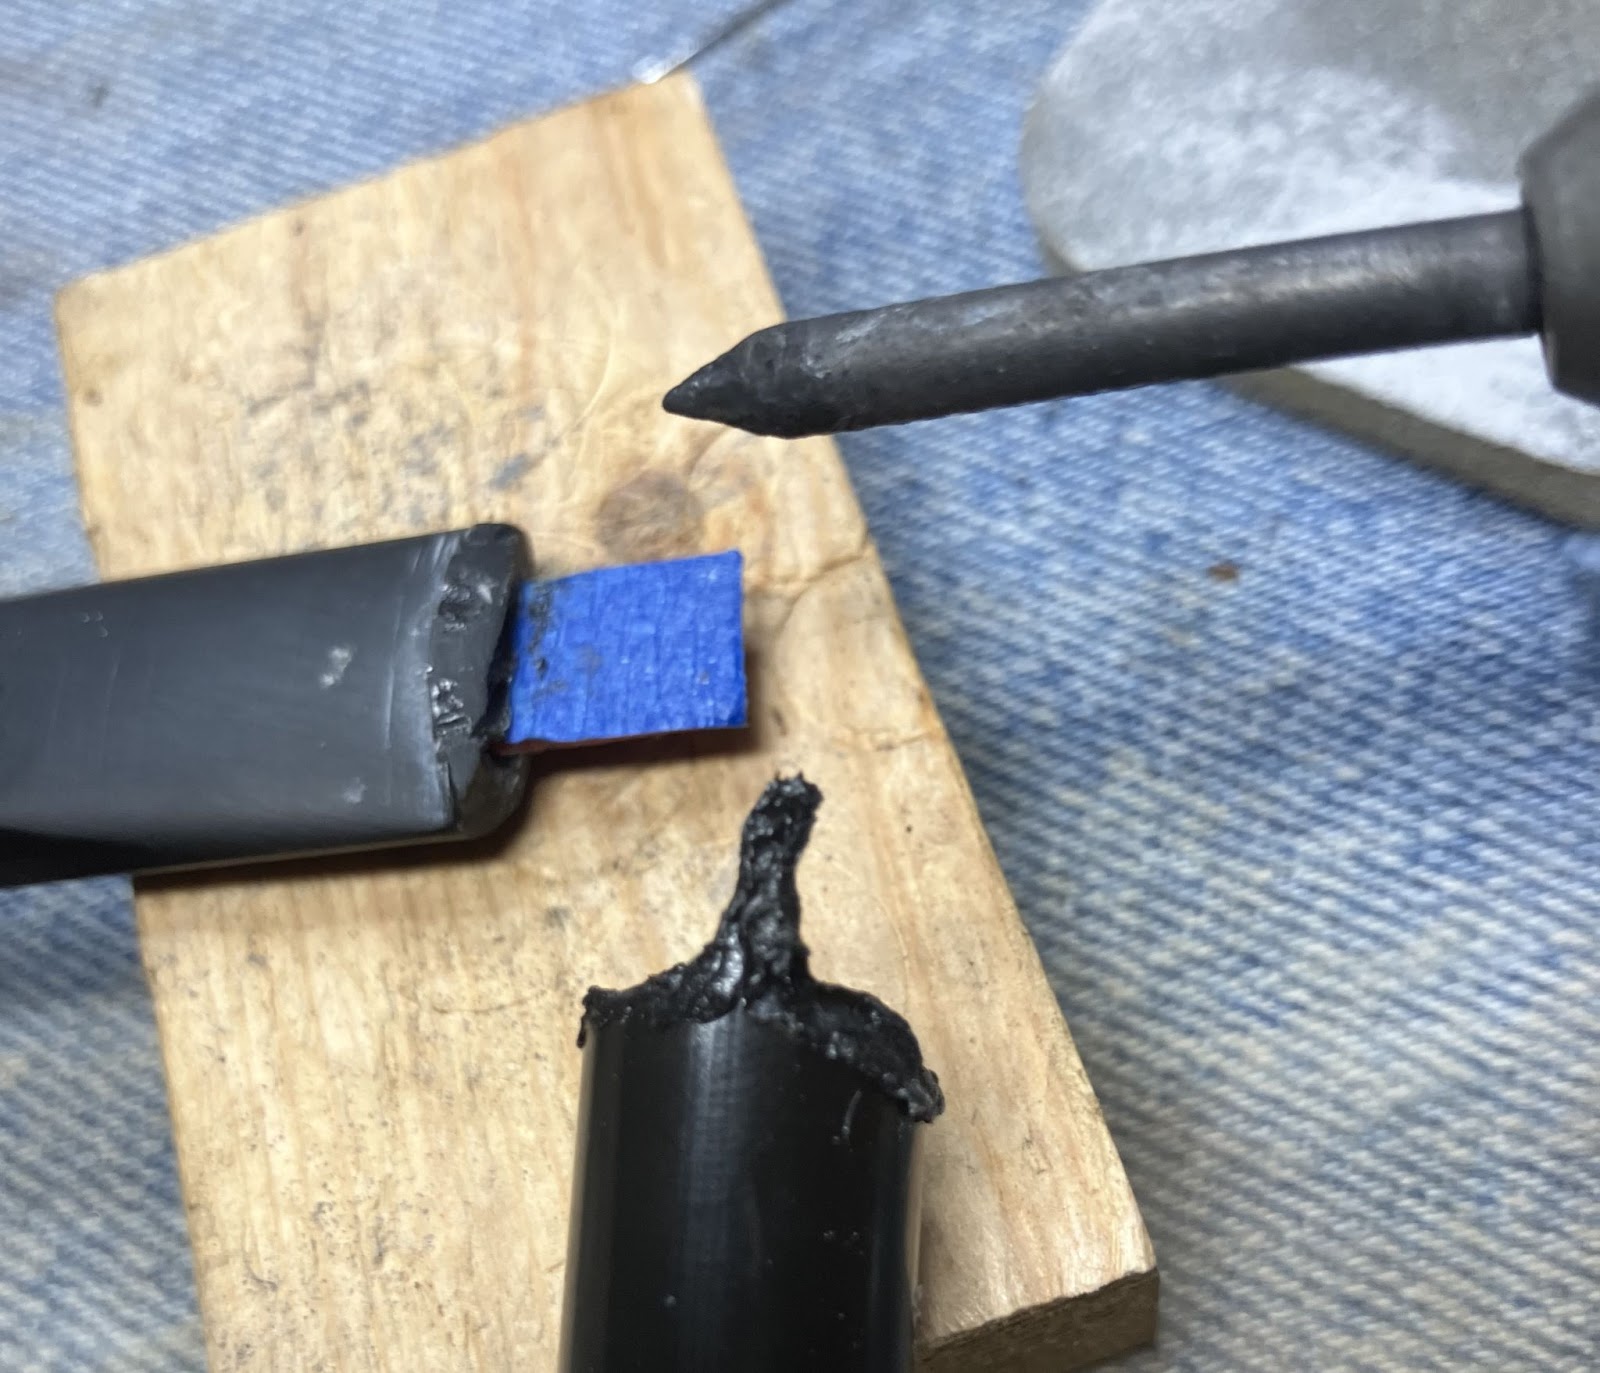
    The moment of truth had arrived.  I was going to use the new black acrylic rods as a source for acrylic to fill the void in the Stanwell.  I plugged in the soldering iron and patiently waited for it to heat.  Testing the soldering iron on the acrylic rod allowed me to gain a feel for how the acrylic melted and the pressure I needed to shape it.  

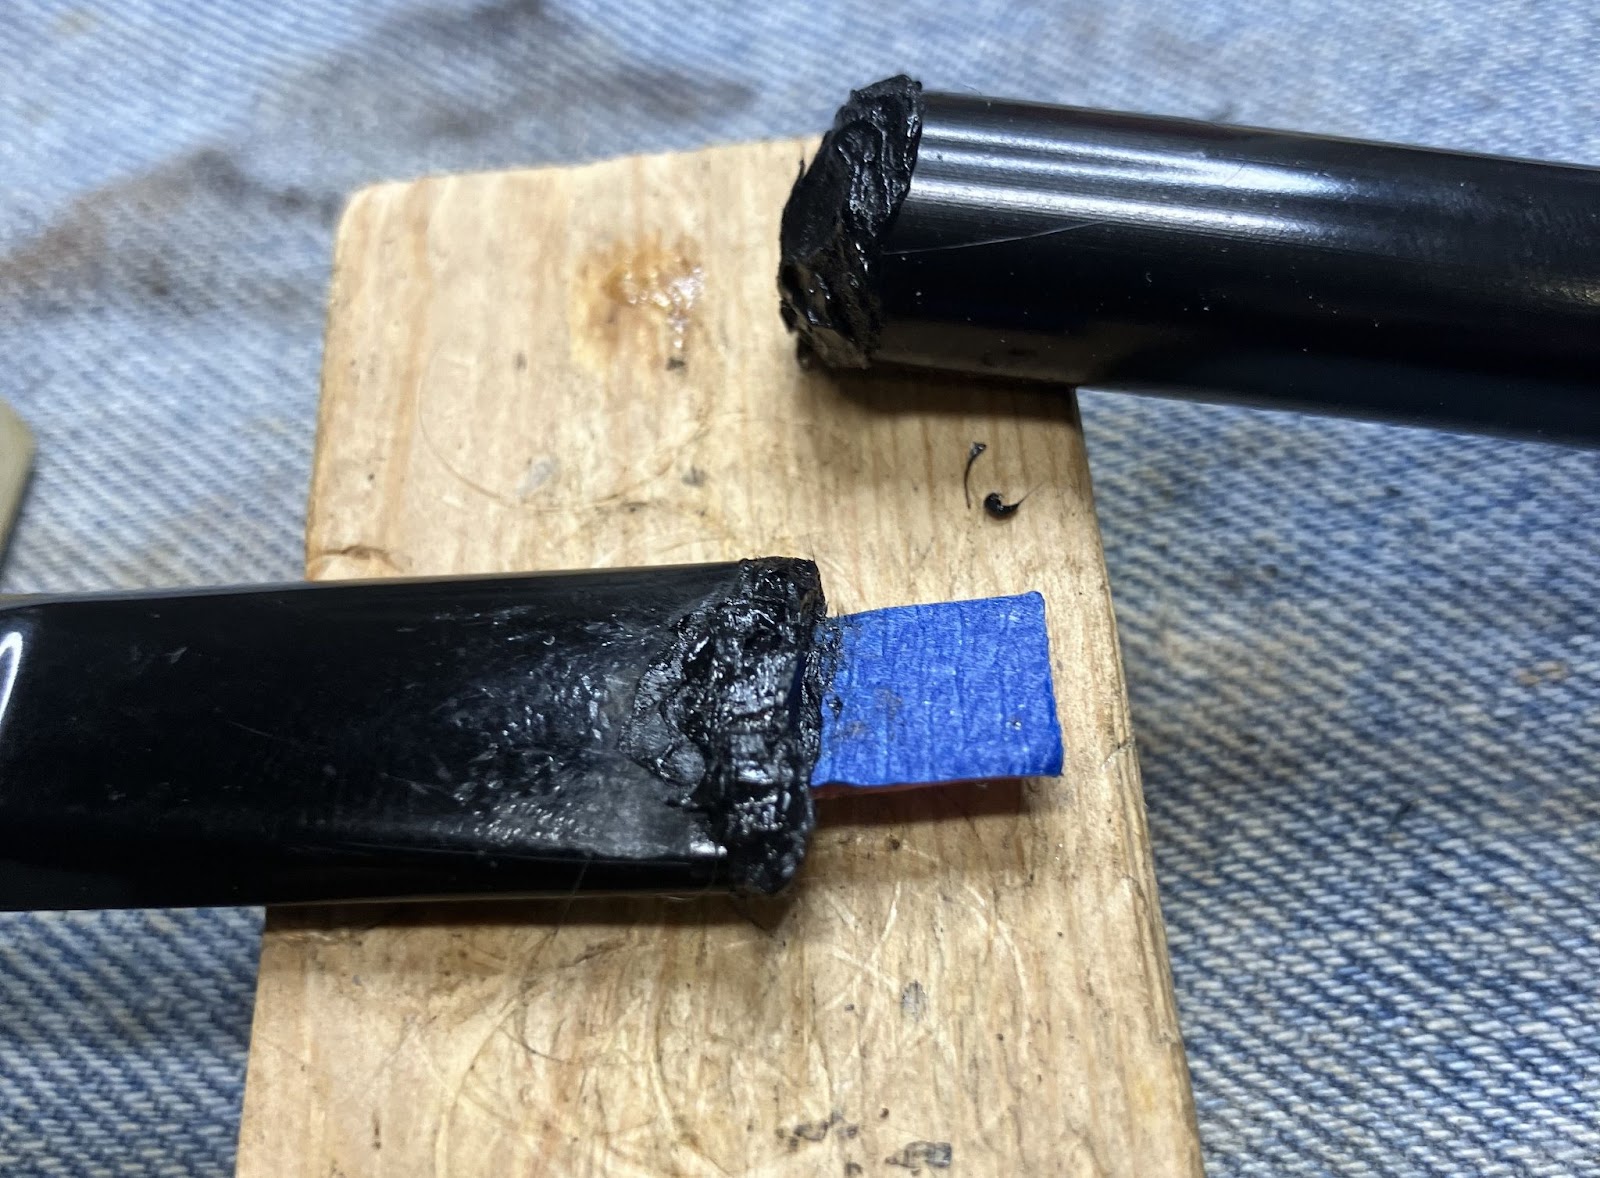
    I had previously cut a plastic lid and applied layers of painters tape to thicken it until I had the thickness I wanted.  This would act as a dam and provide a surface on which I could weld to while filling the void left by the chip.  

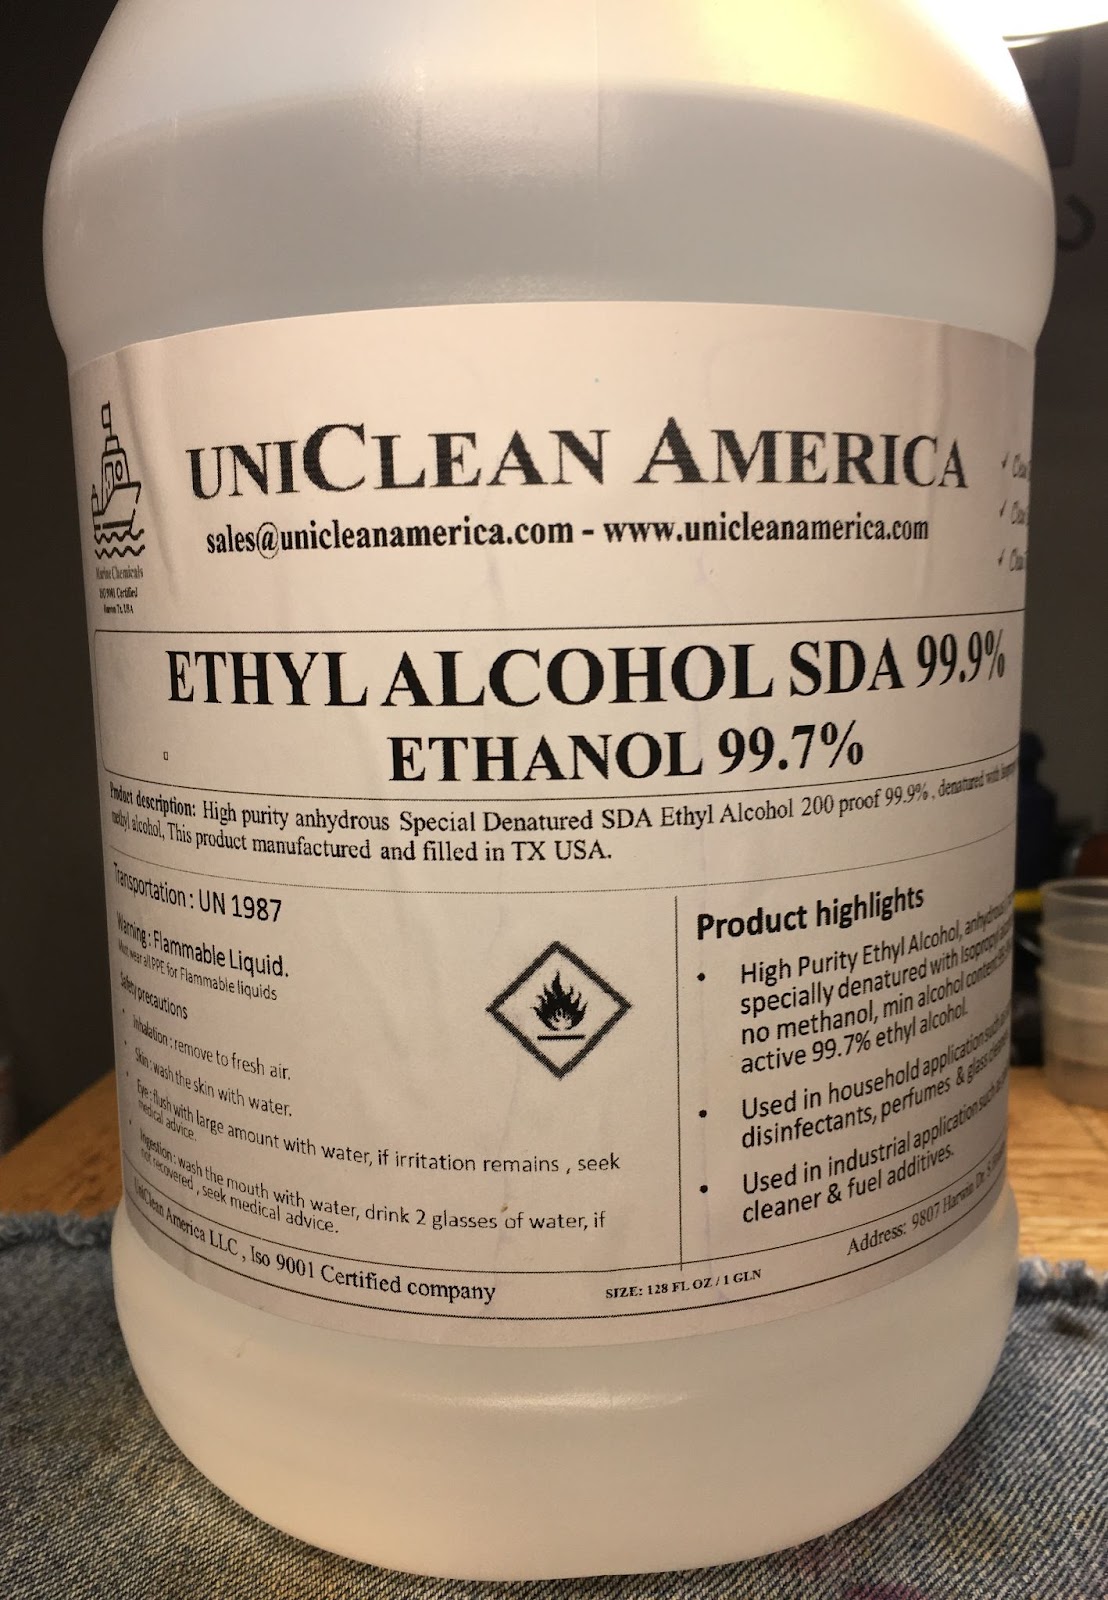
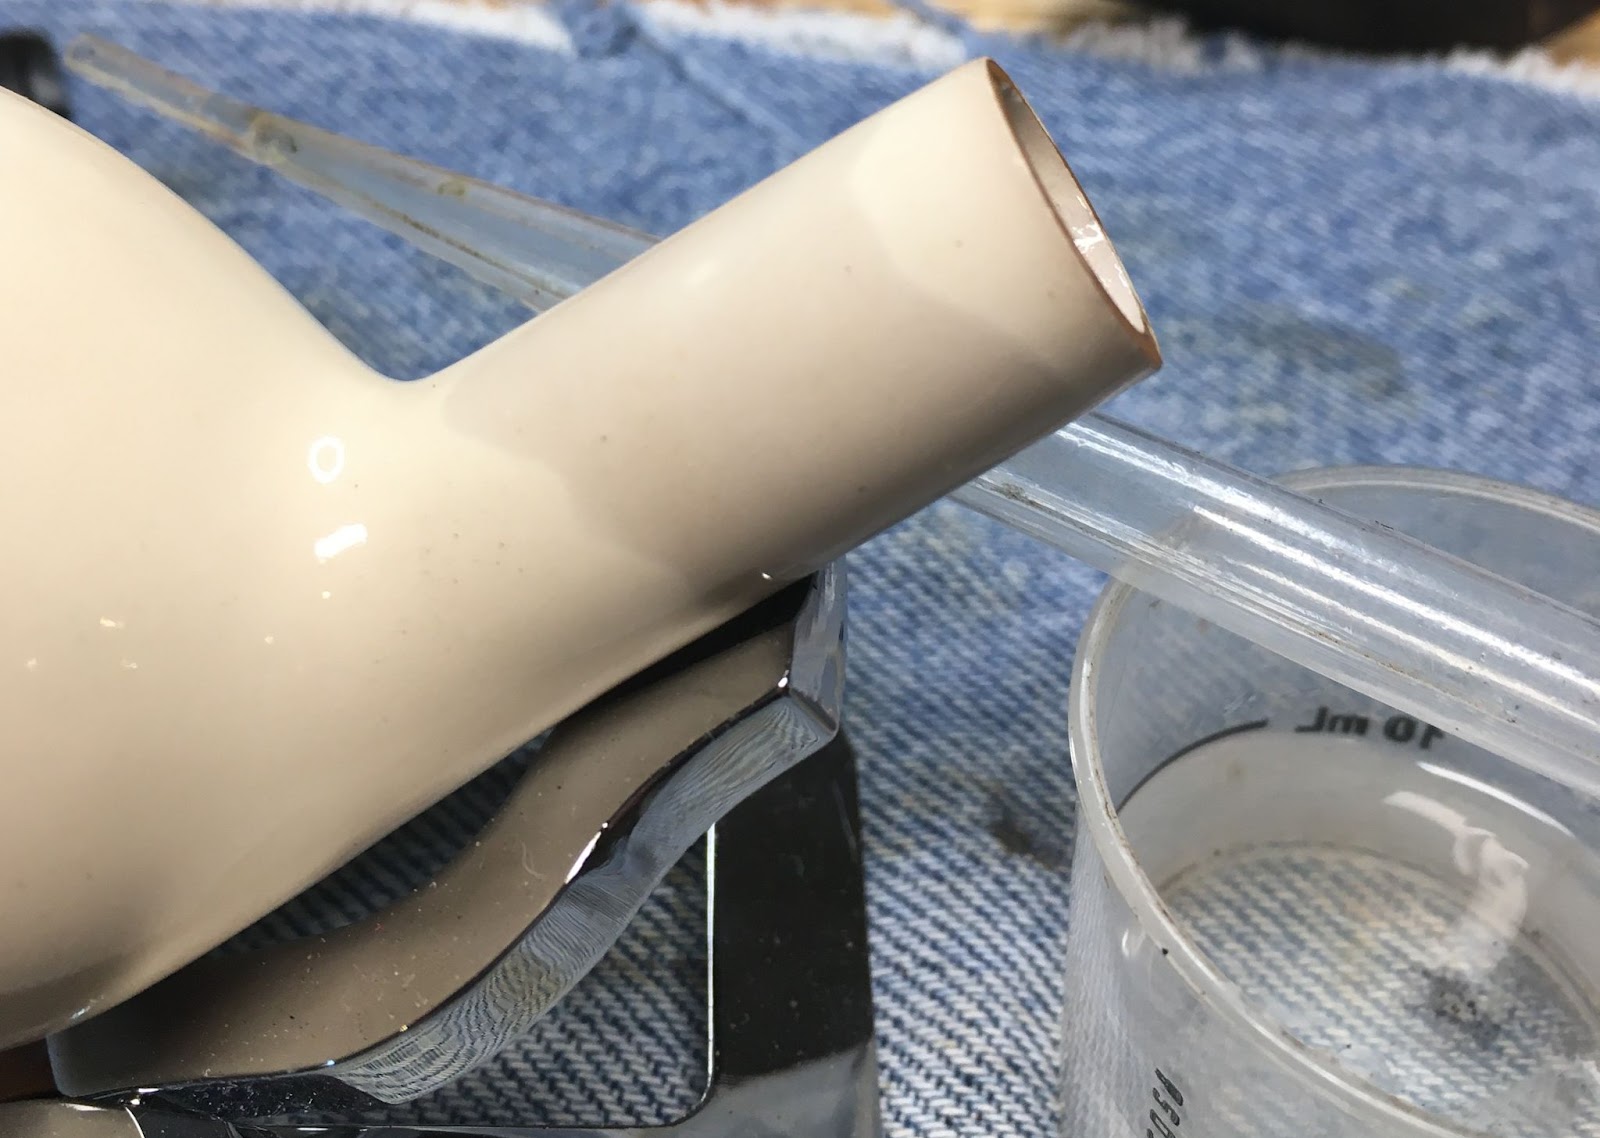
    I cleaned the shipped stem with bristle pipe cleaners dipped in 99% ethyl alcohol making sure to carefully clean the broken surfaces.  I also examined the area to make sure no pipe cleaner fibers were present. 

    With the dam in place and a feel for the melting of the acrylic rod, I was as ready as I could get to try welding with someone else’s pipe.  I started melting material from the acrylic rod and moving it to the stem.  Once there, I worked the material with the tip of the soldering iron into the existing stem acrylic by heating both and melting them together.  Additional acrylic was added to fill the void again, remelting applied material and adding new.  Yeah, at this stage it was quite ugly.

    Slowly this process built up acrylic into the void.

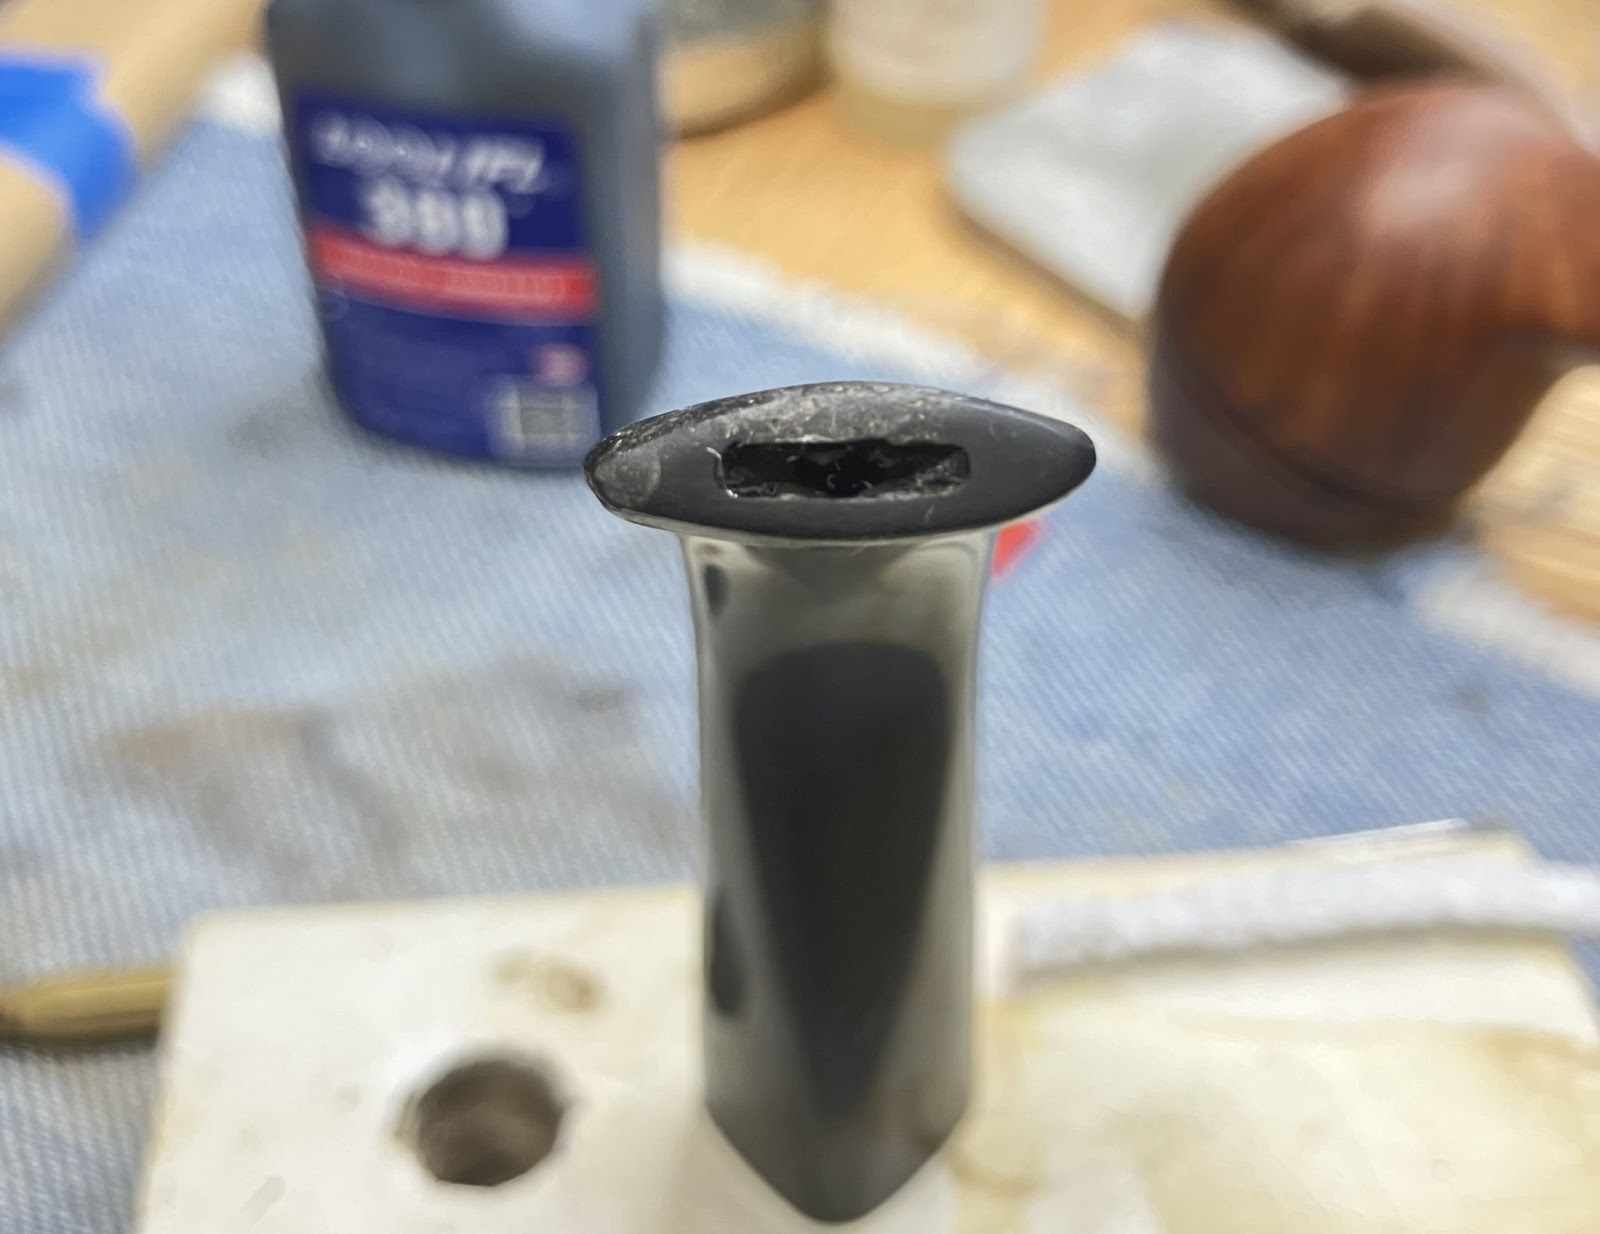
    The dam was removed to check its performance.  Below you can see through the airway.

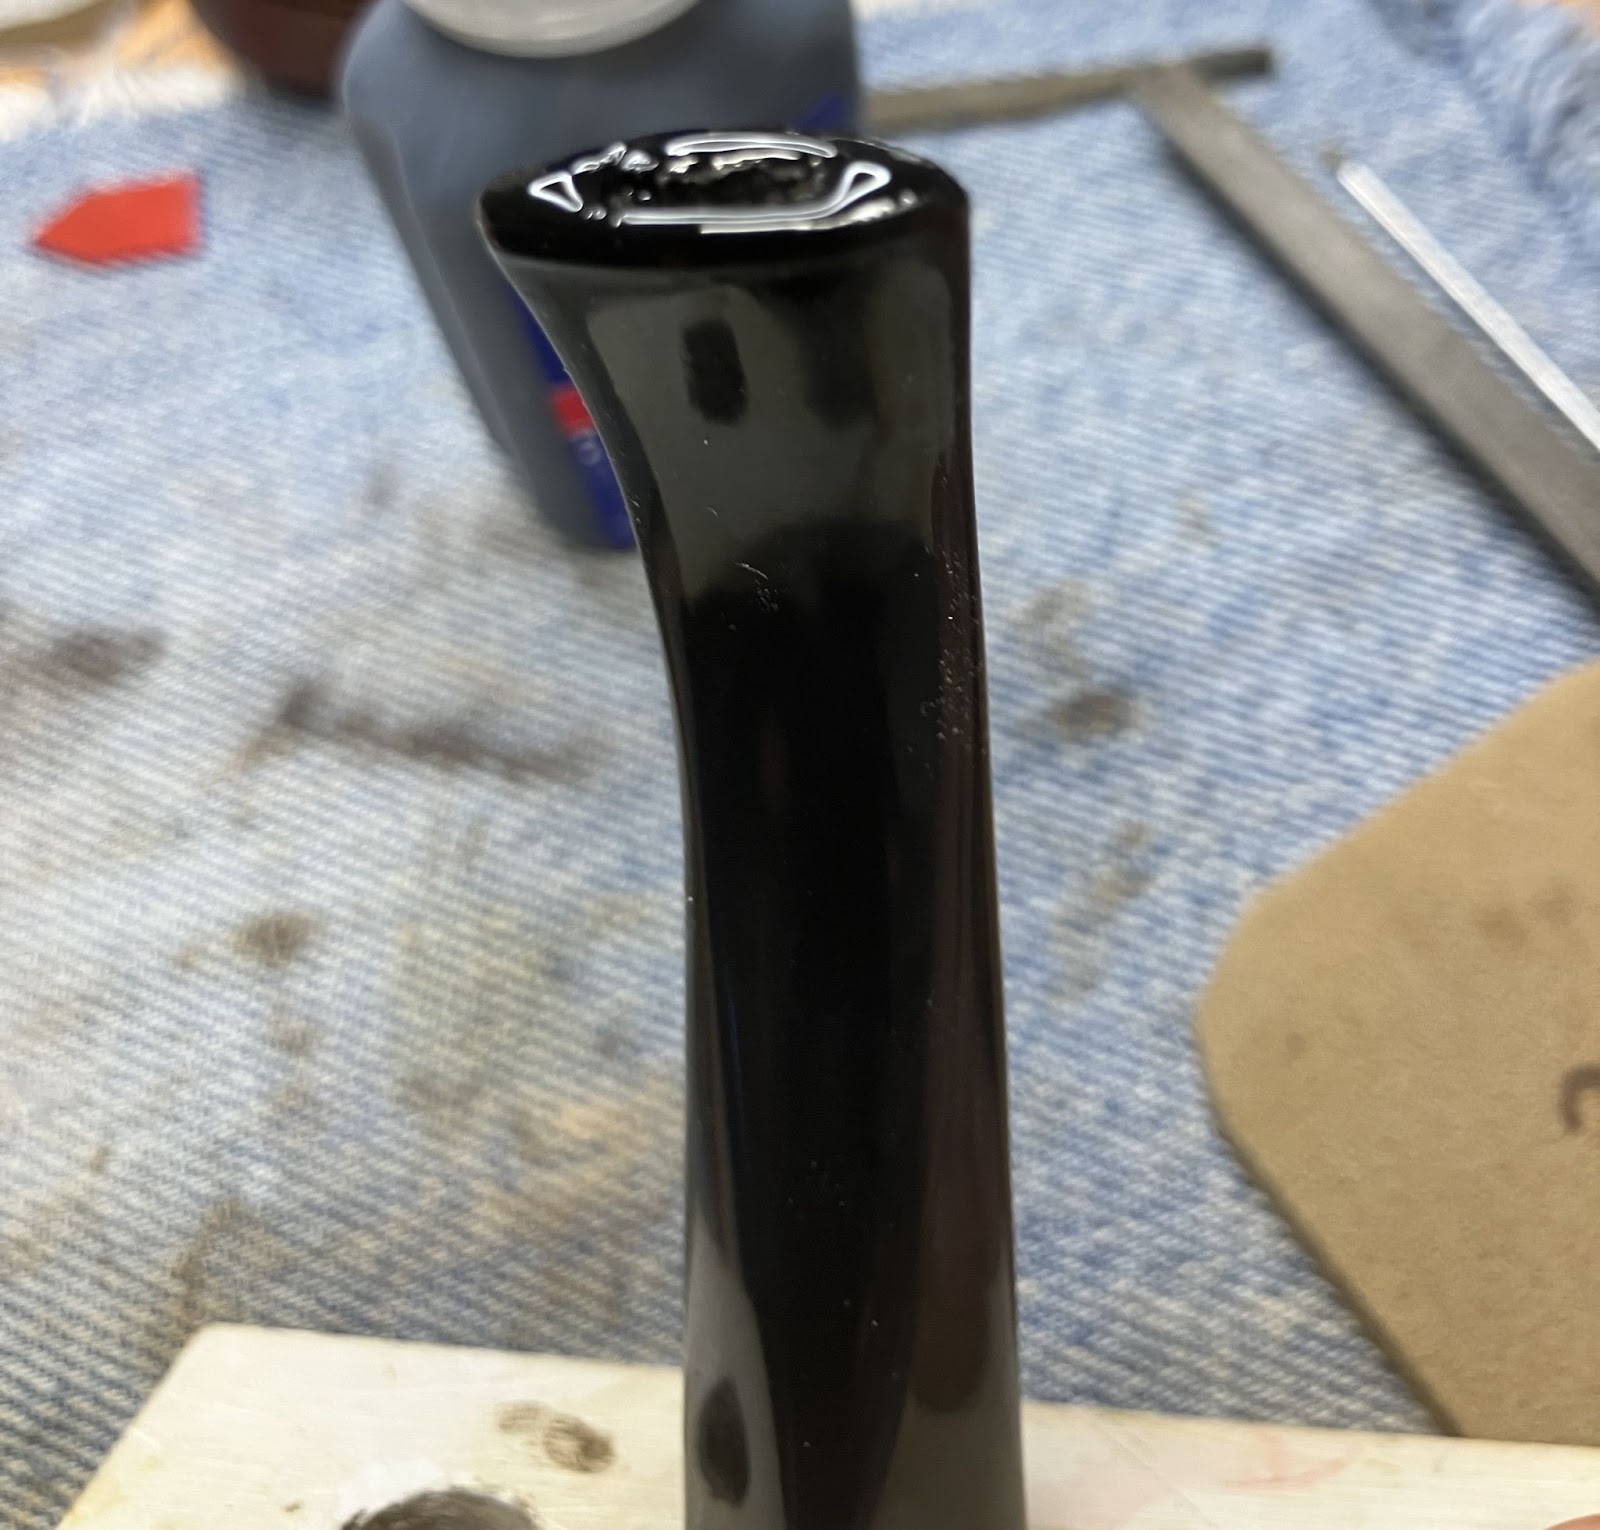
    Once sufficient acrylic was added, it was time for some button reshaping.  I used a small flat file, emery board and a 320 grit sanding sponge for the reshaping.  Below is the stem top view.

    And here is the stem bottom where the majority of material had been added.  There were a couple of spots where additional acrylic was needed.

    While doing the reshaping of the button a chip of new acrylic broke off from the button on the left side of the below.  This re-emphasized that I needed to re-melt the existing material when applying additional acrylic to get the two layers to bond.

    I used the soldering iron to create a narrow point of melted acrylic on the acrylic rod’s end to aid in the application of additional material to the stem.  I wondered if an ⅛ inch diameter acrylic rod was available.  This would be much more useful in future projects..

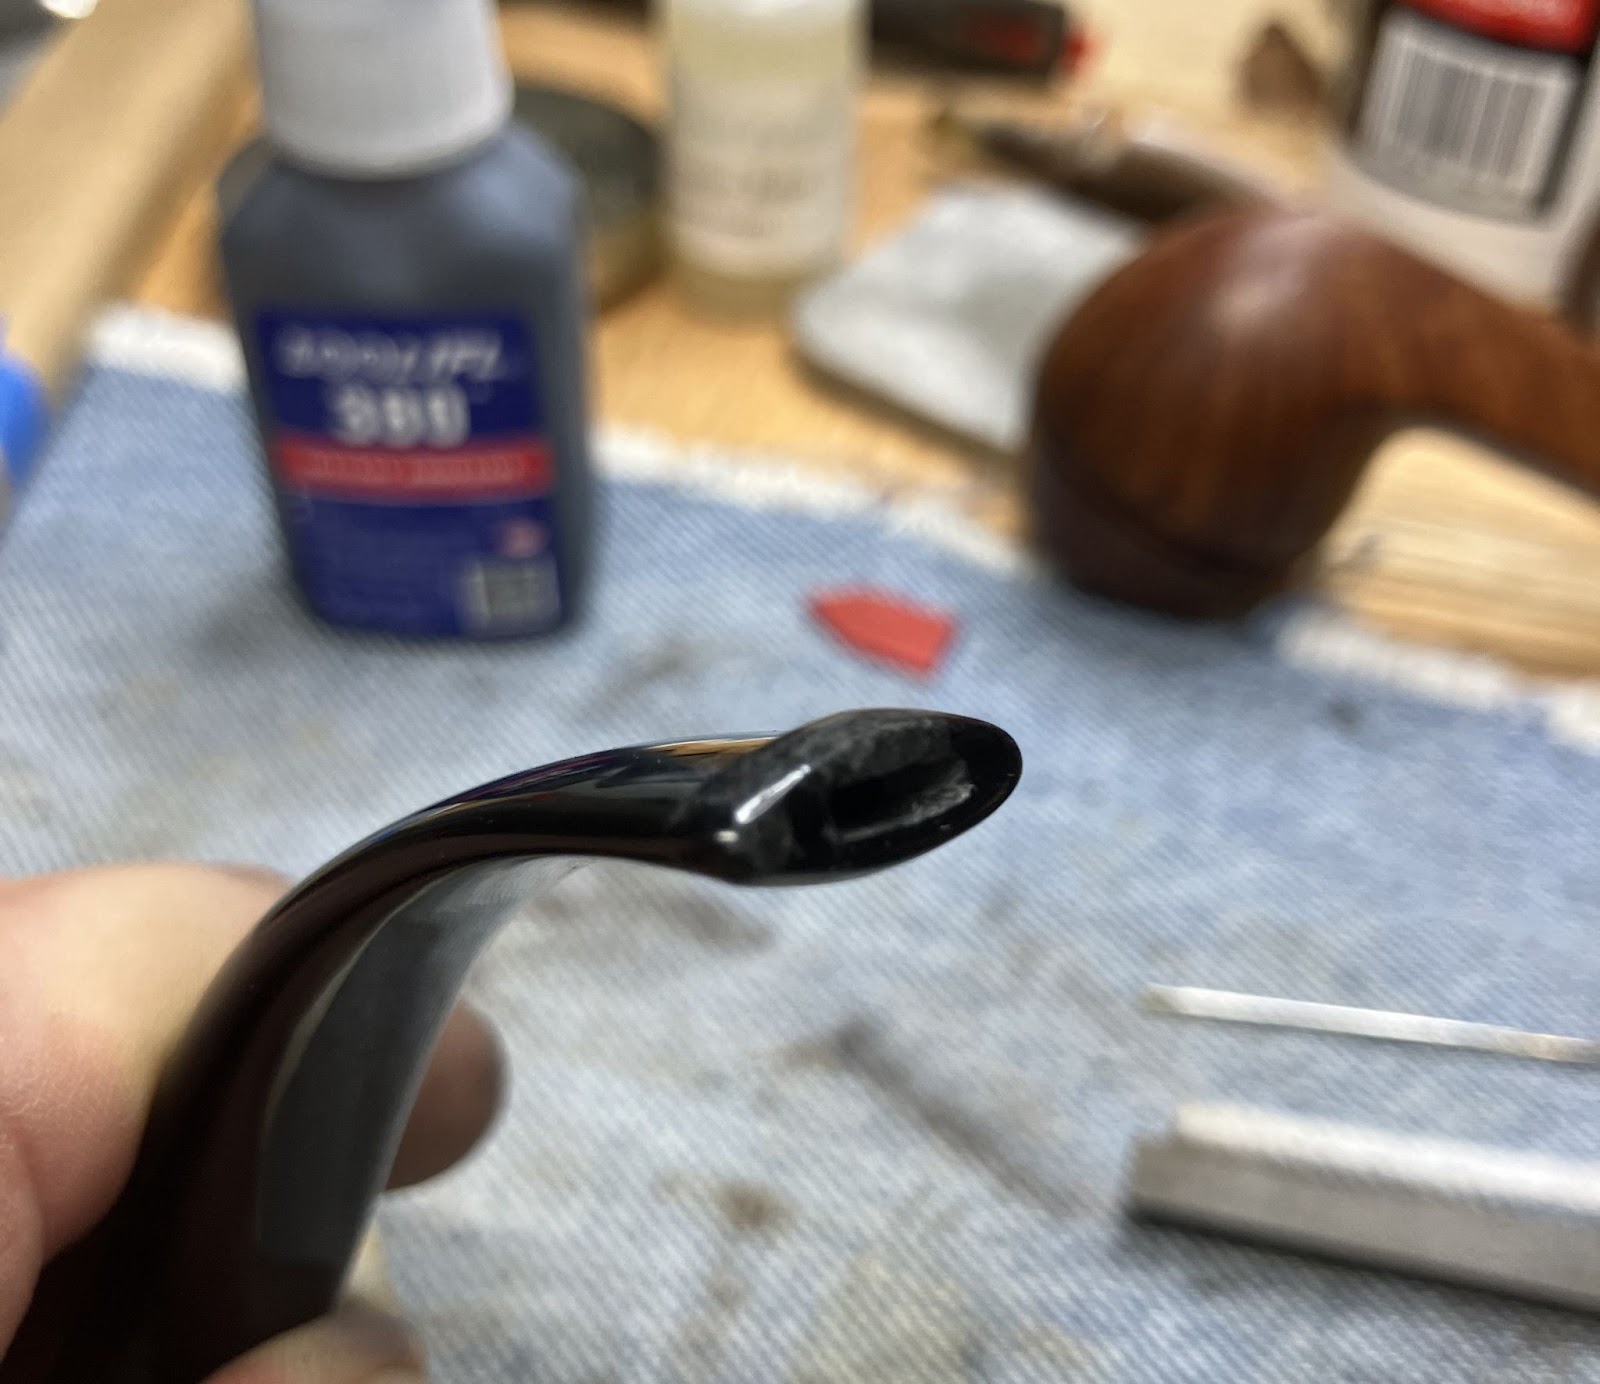
    Below is the button after the second application of more acrylic.

    Below is a photo of the end of the button after the second application.

    And the bottom of the button after the reshaping of the second application.

    Below is a stem top view of the reshaping after the second application.

    The shape was getting there.  In the below photo you can see seems where air bubbles were present.  The end would need further sanding and a bit more shaping.

    Eventually I had to call it quits on the shaping.  There remained some small flaws in the new acrylic.  To fill these, I chose to apply a thin coating of black CA.  I hoped this would flow into any small seams and bubble voids.  The CA was allowed to cure on its own for an hour.

    Once fully cured the CA on the top and bottom was filed smooth with a small flat file.

    The filed CA looked good and was only noticeable with close examination. 

    I wanted to clean up the slot at the end of the button.  I did this, as with the practice stem, using a Dremel rotary tool and a small round cut-off bit.

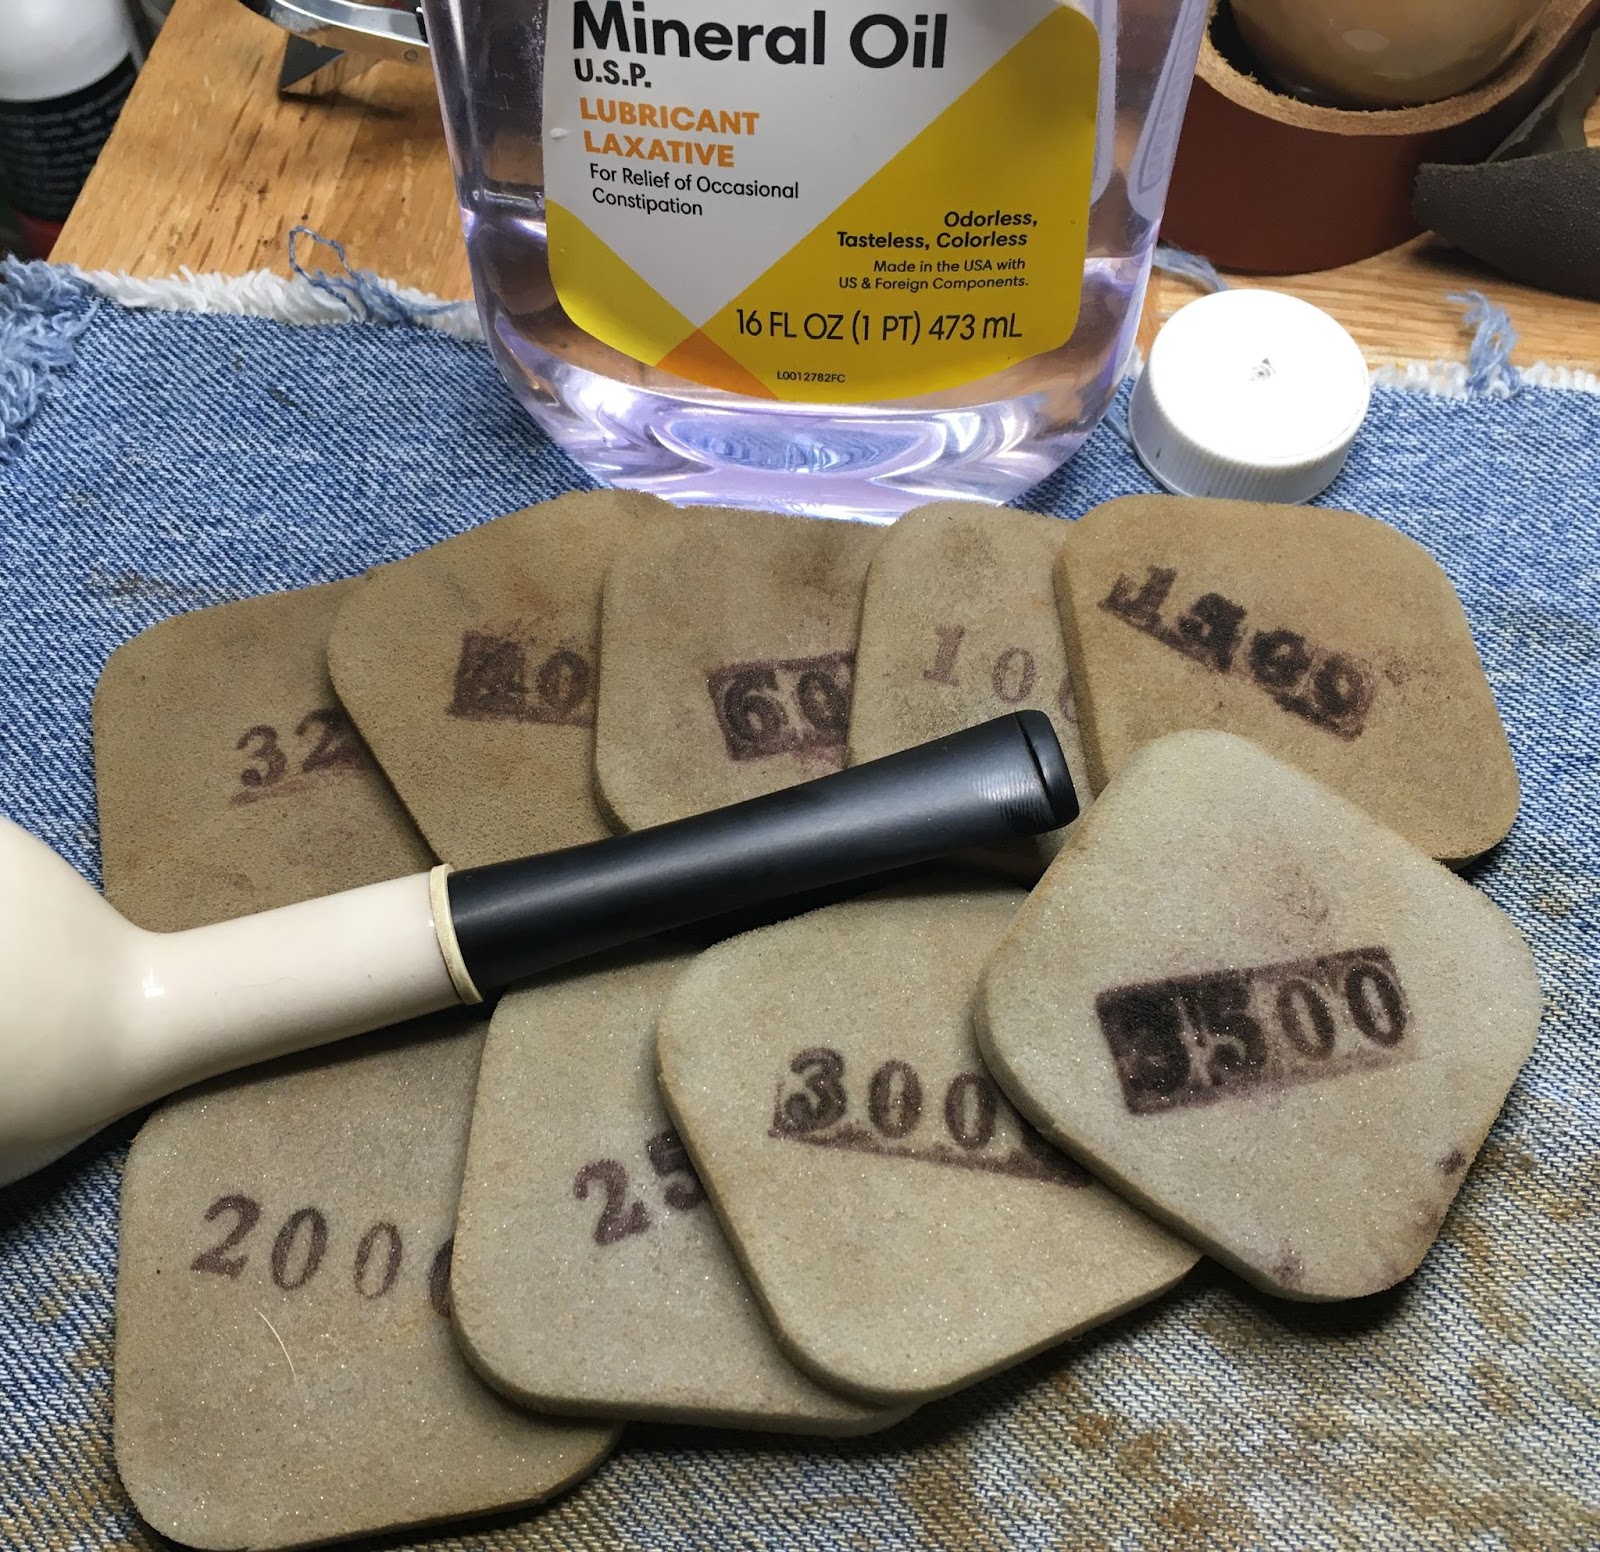
    The stem was then sanded with a series of sanding sponges in grits of 320-3500.  I saw no reason to sand the stem above the saddle so it was not sanded.  Between each sponge I wiped any sanding debris from the stem with an alcohol wetted cotton ball.

    I proceeded to work the stem with 4000-12000 micro-mesh pads.  Here I worked the stem along the full length.  I applied masking tape to the shank to avoid any damage to the stamped areas.  Again, between each pad I wiped the stem of any debris between pads.

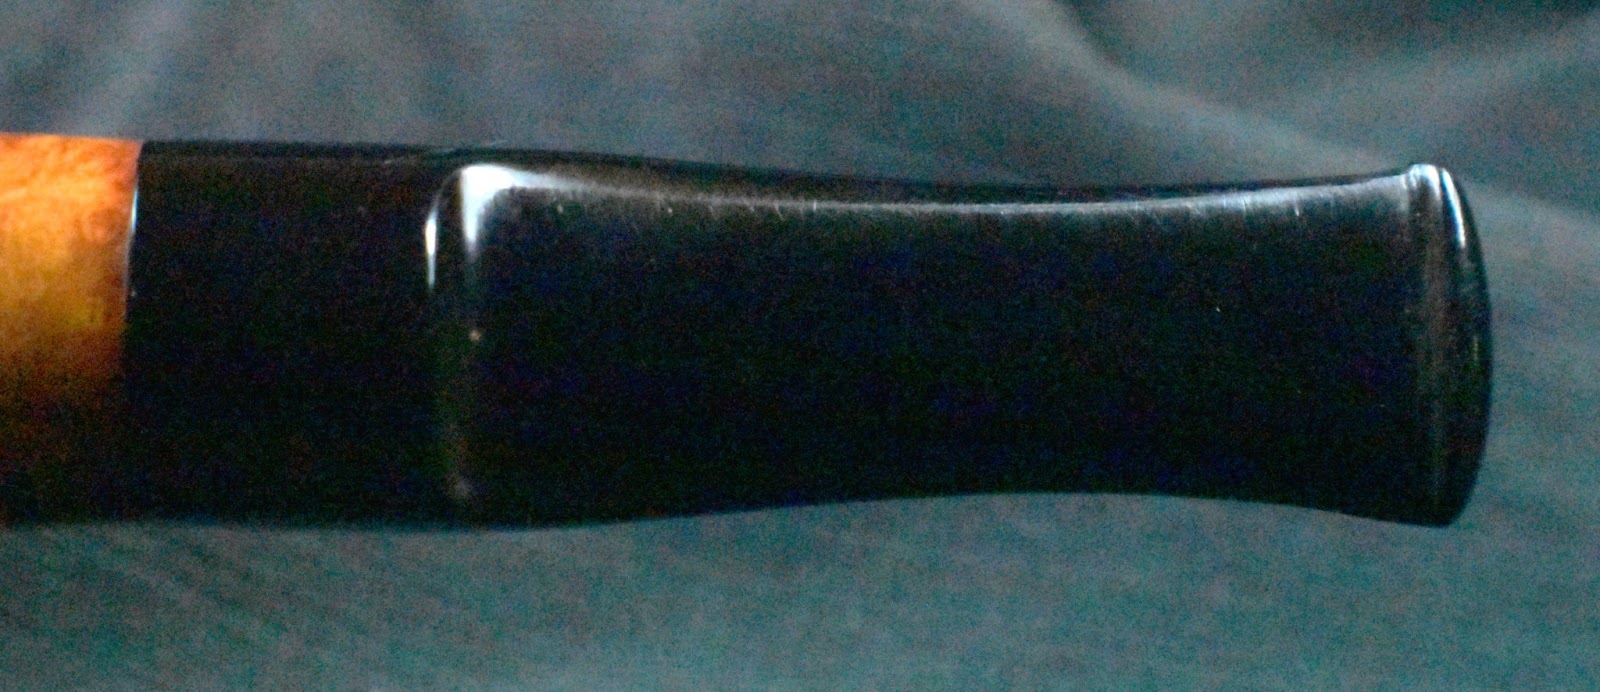
    The masking tape was removed and the pipe taken to the buffer where I buffed the bands and stem with white buffing compound.  The next two photos show the stem, top and bottom, after buffing.

    And the button after buffing.

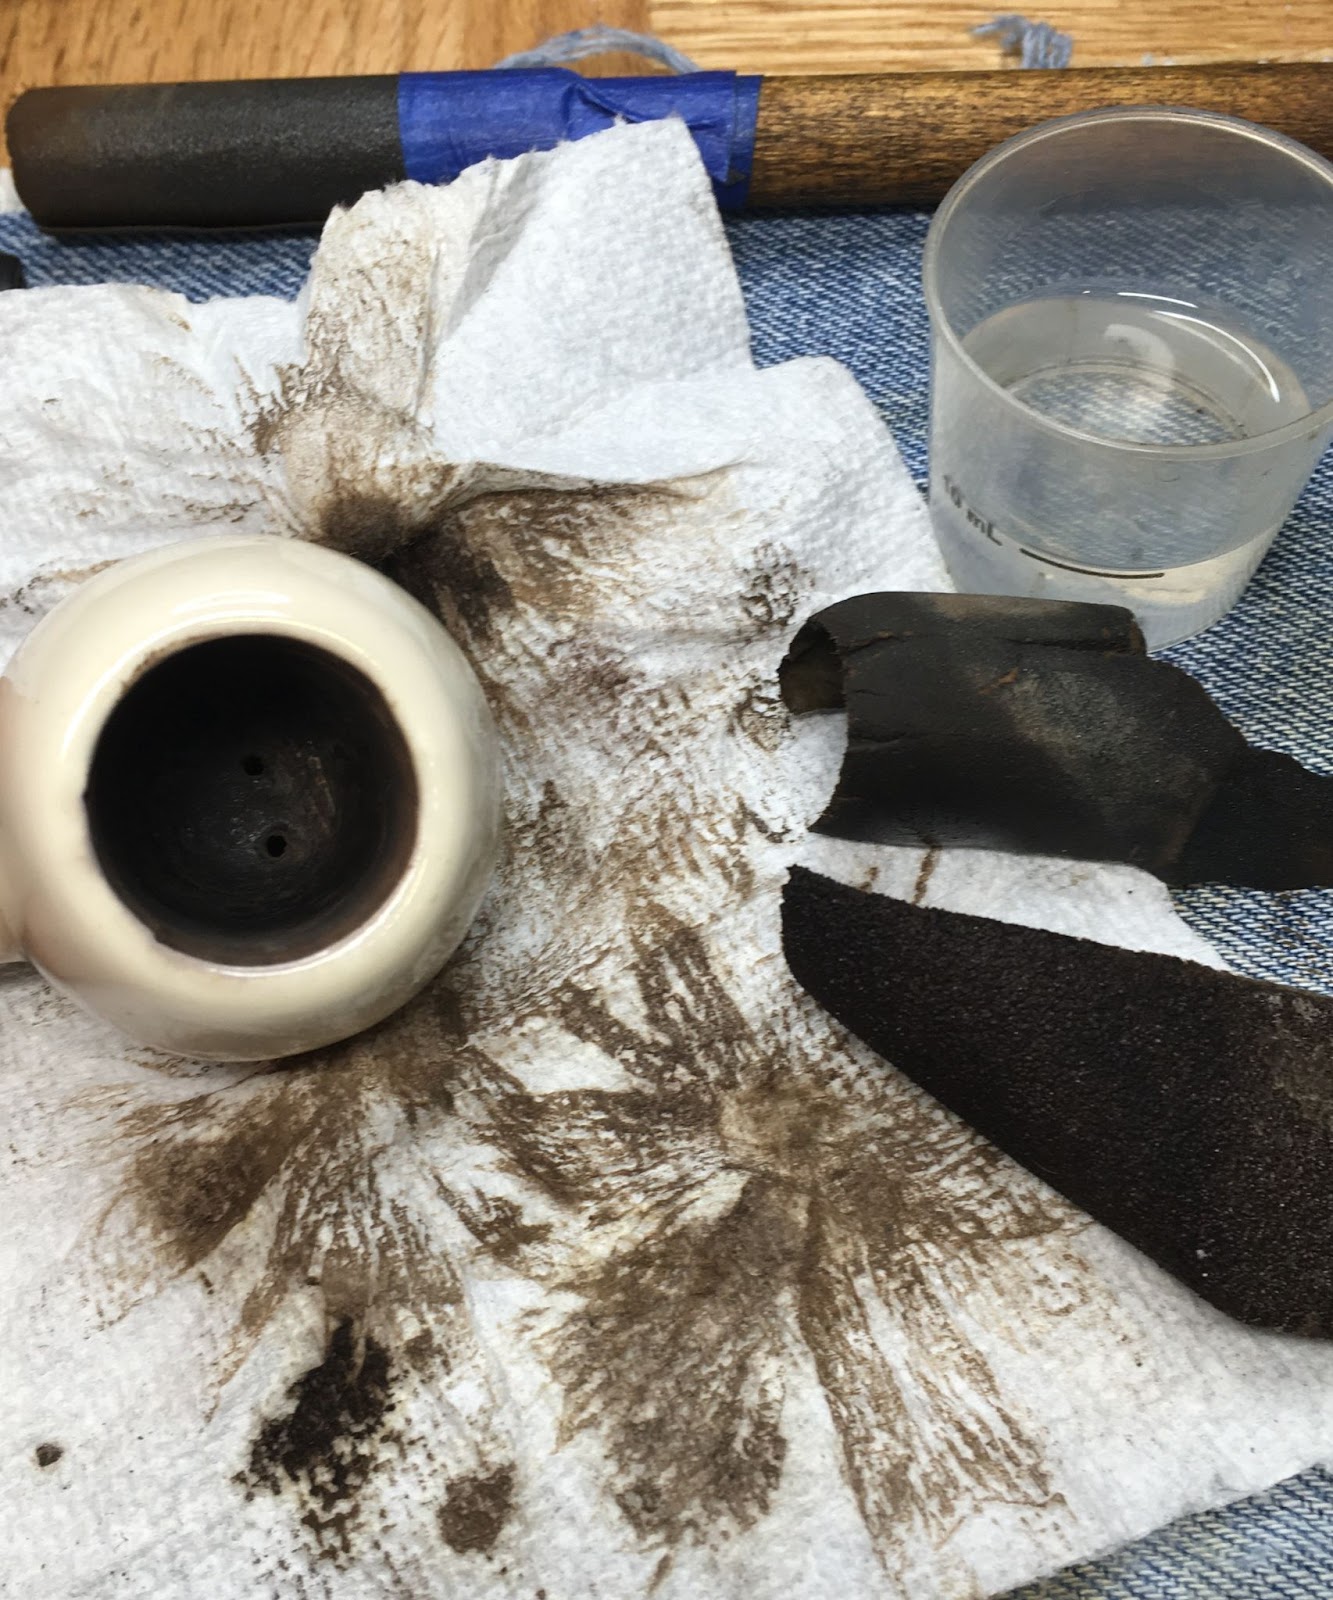
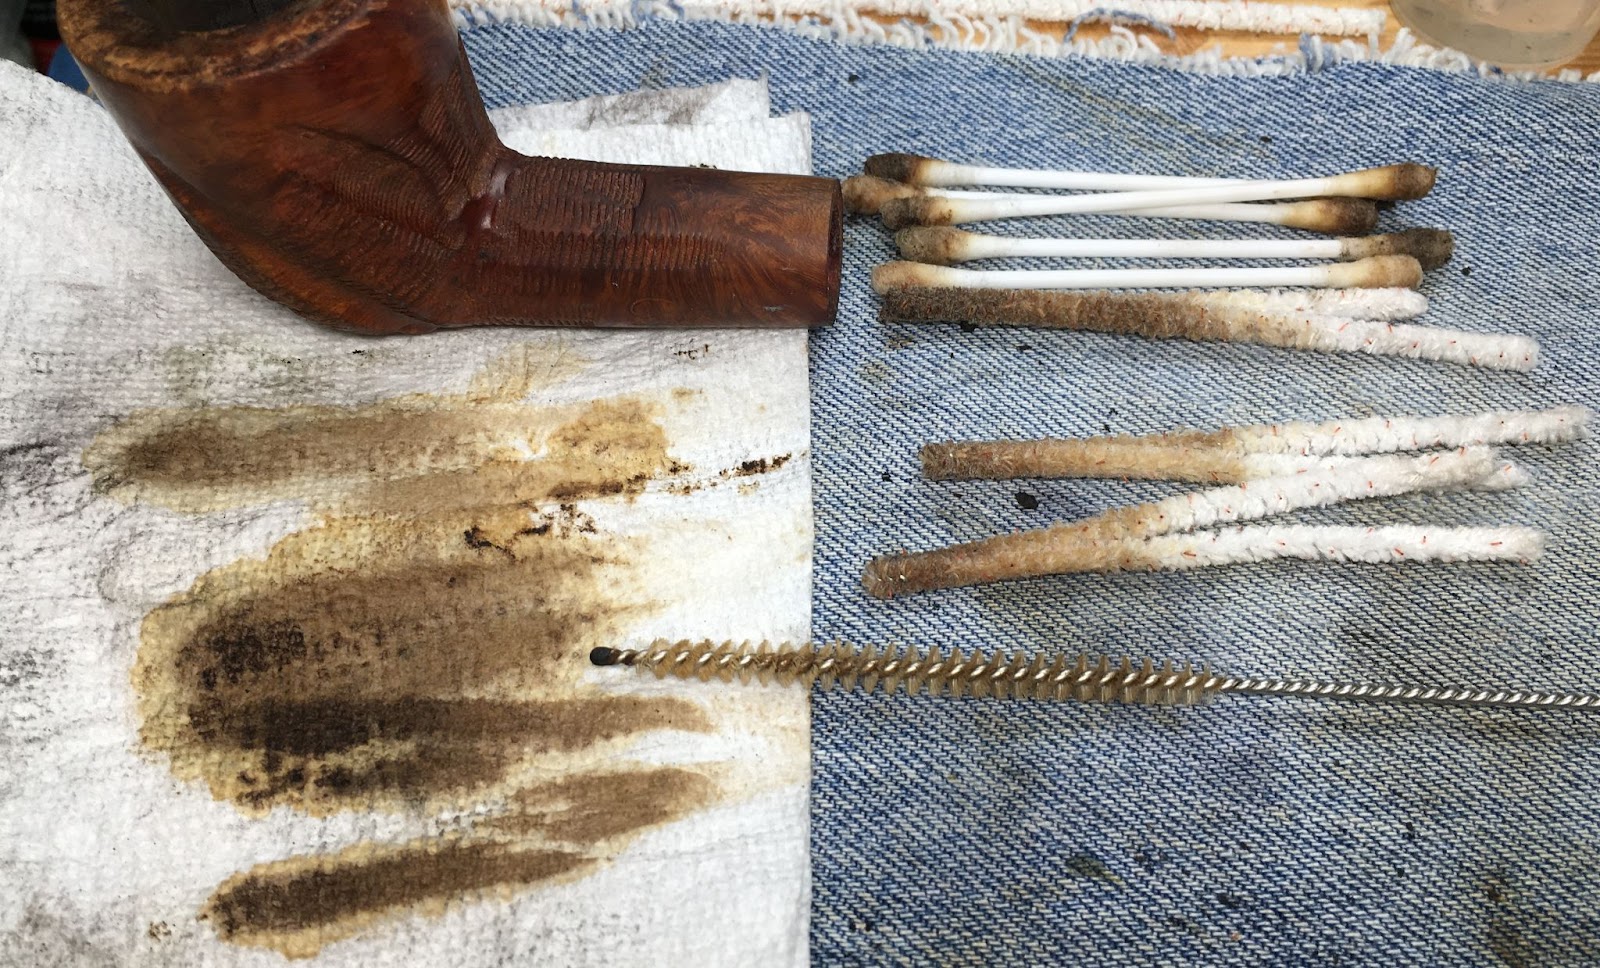
    I cleaned the airway of the shank with a nylon shank brush, bristle pipe cleaners and cotton swabs all dipped in 99% ethyl alcohol.

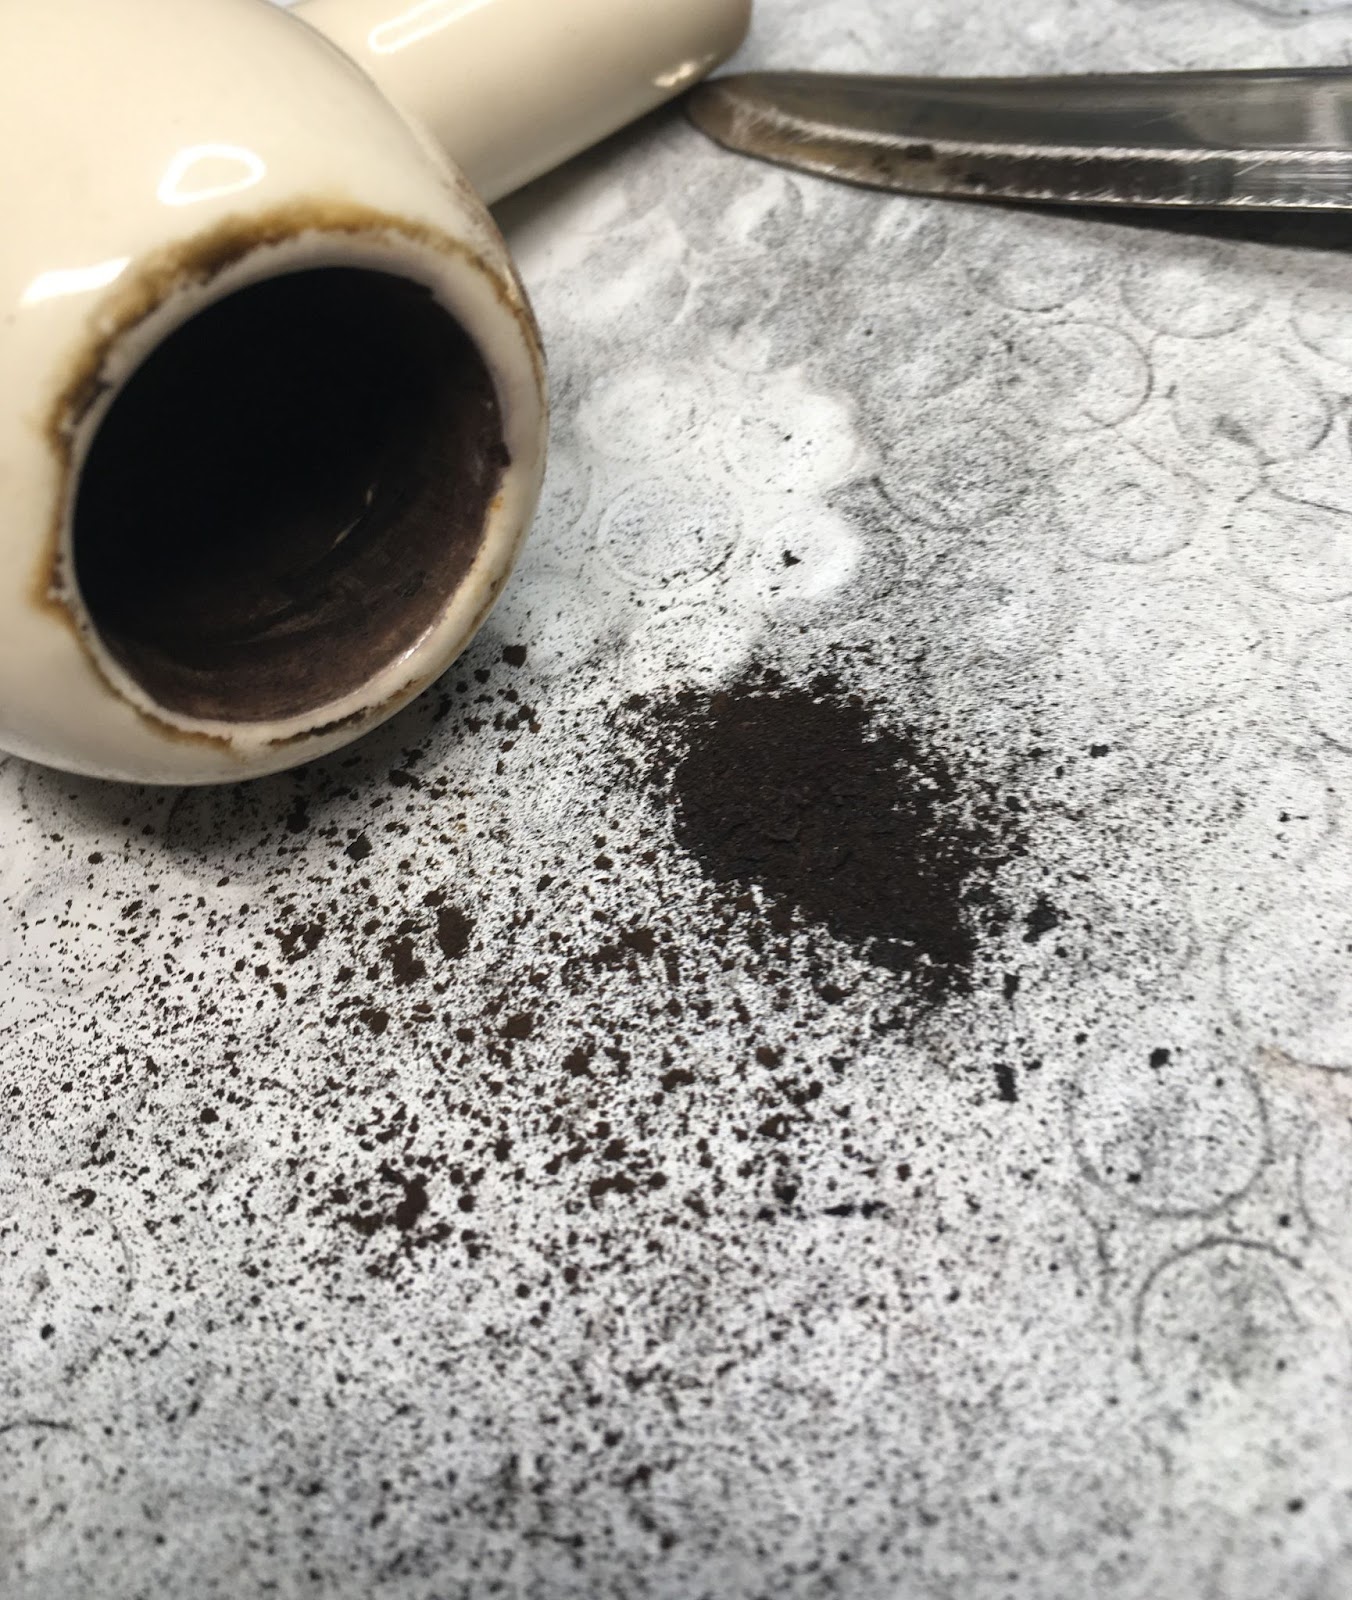
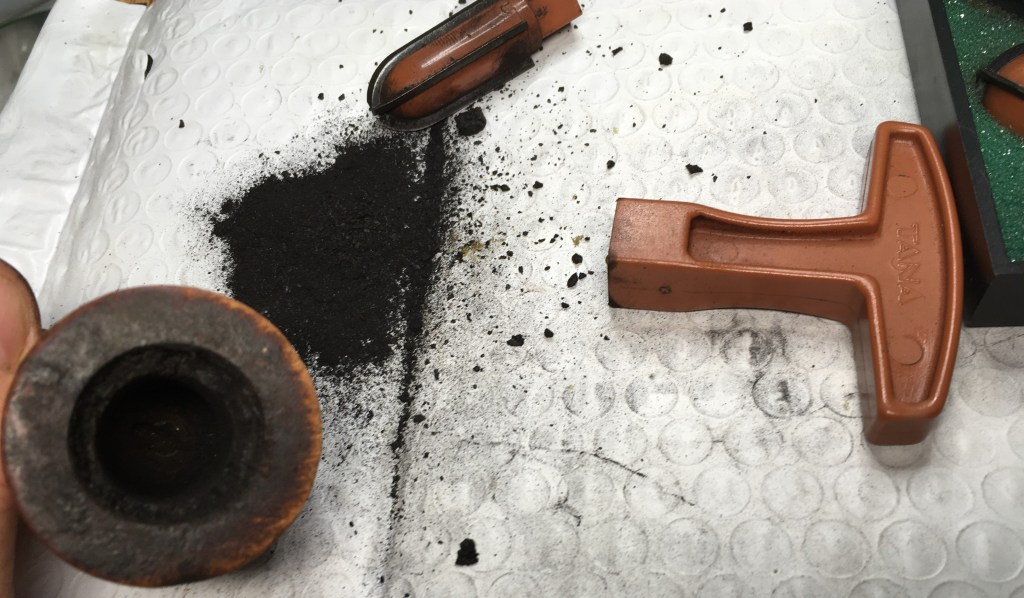
    The tobacco chamber was reamed with the standard ream team.

    The narrow chamber of the Stanwell only allowed the #1 blade of the PipNet with the remaining work done by the Smokingpipes Low Country reamer.  I did not take the tobacco chamber back to bare briar and left a thin layer of cake.

    The rim had a light layer of lava.  

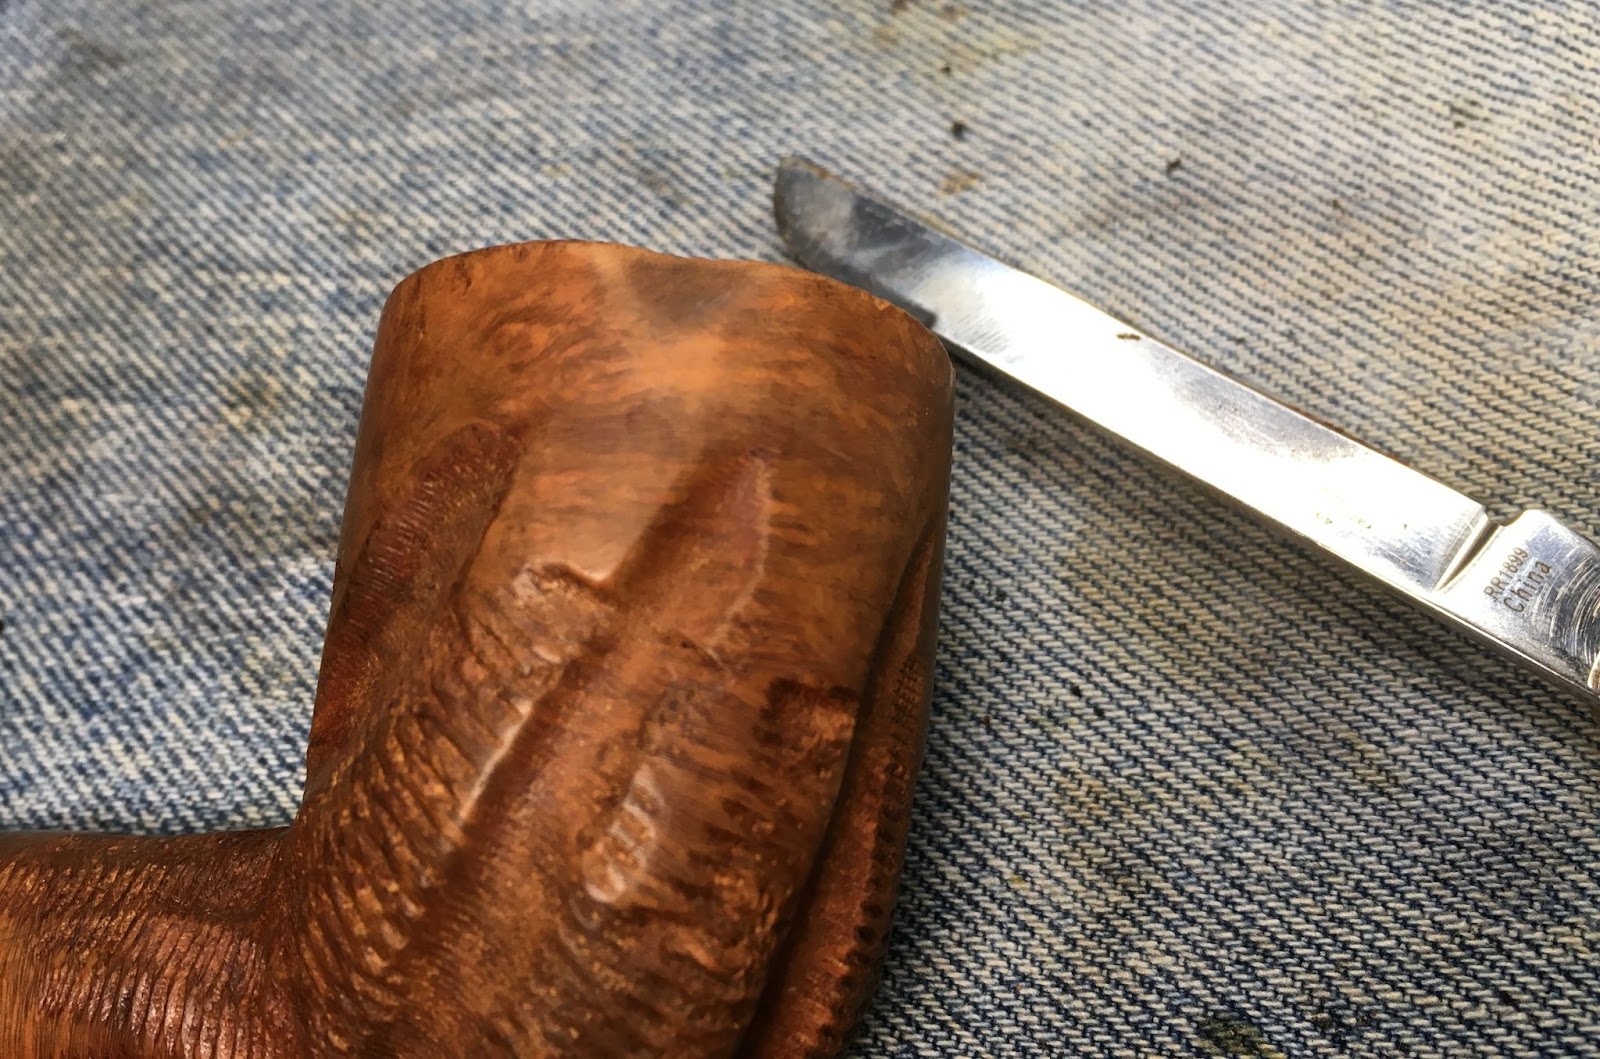
    I moistened this with saliva and carefully scraped it with a sharp pocket knife blade.

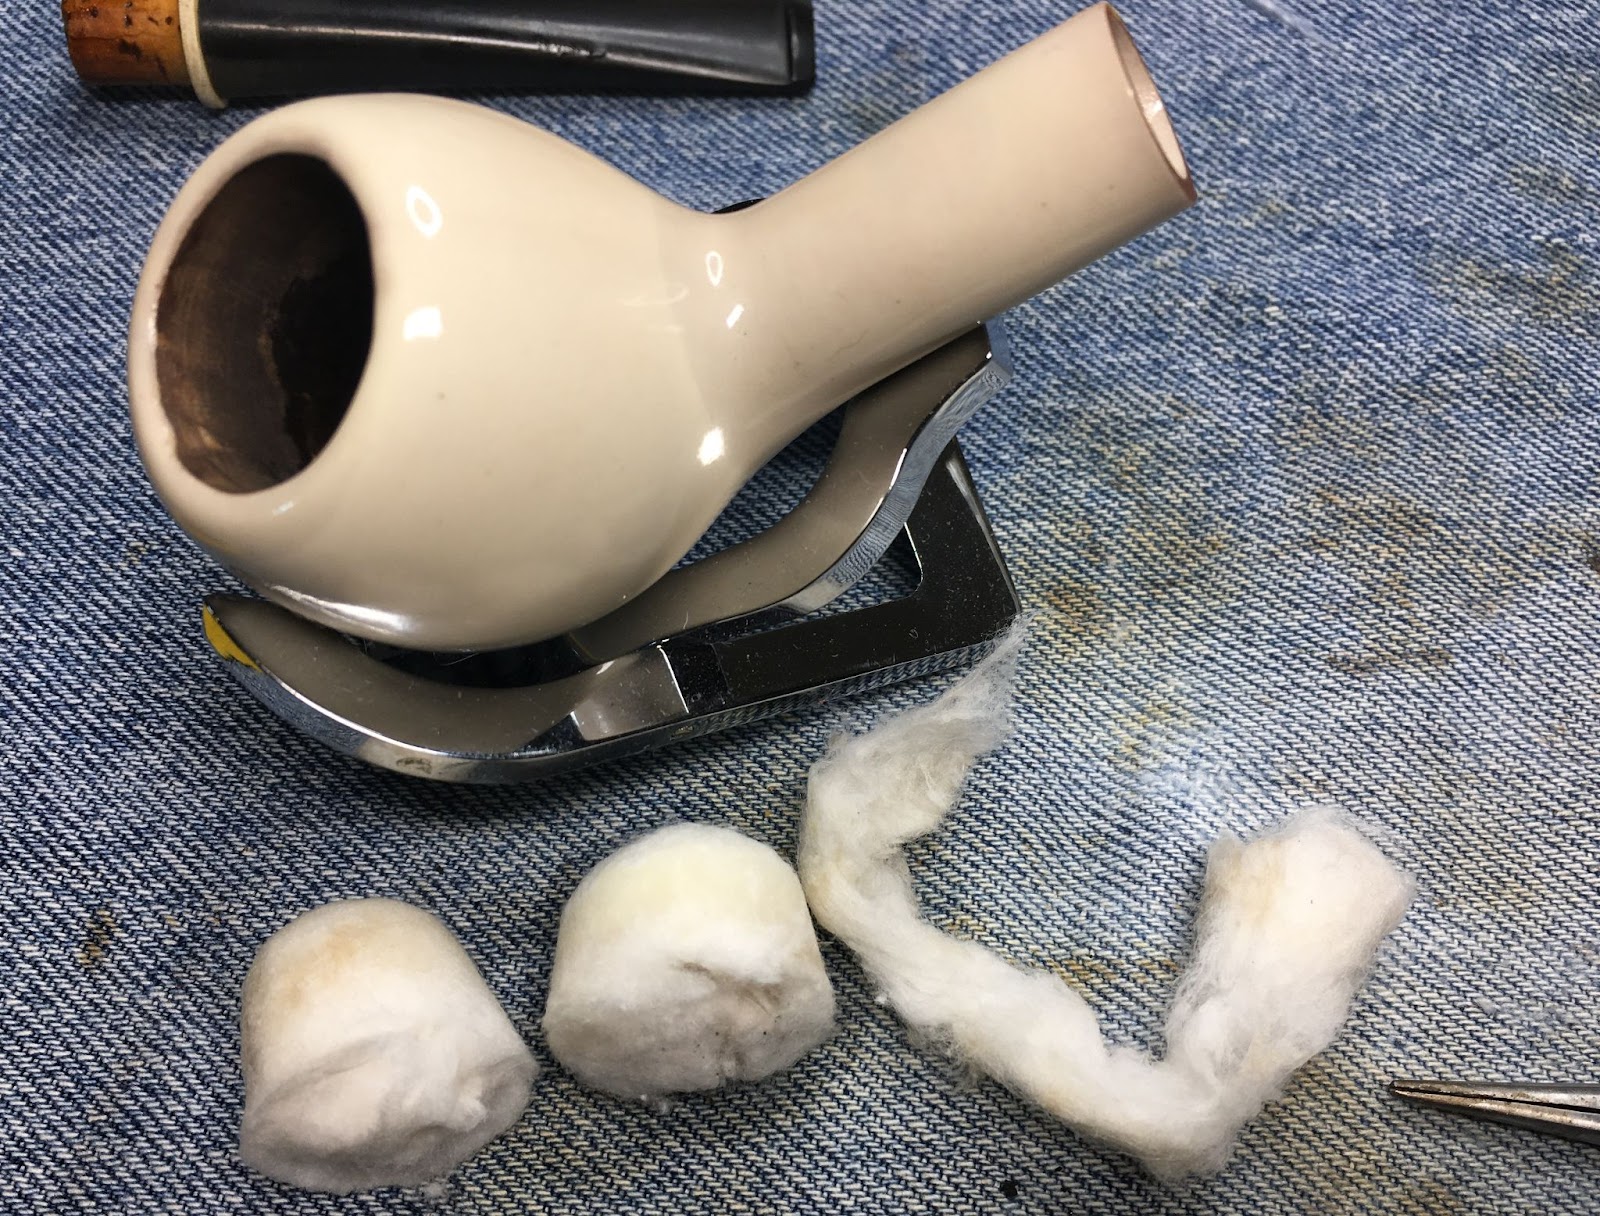
    The stummel was then wiped with an alcohol wetted cotton ball to remove surface dirt and grime.  Most of this was probably deposited by me.

    The stummel then received a coating of Before and After Restoration Balm which was allowed to do the magic that it does for 15 minutes.

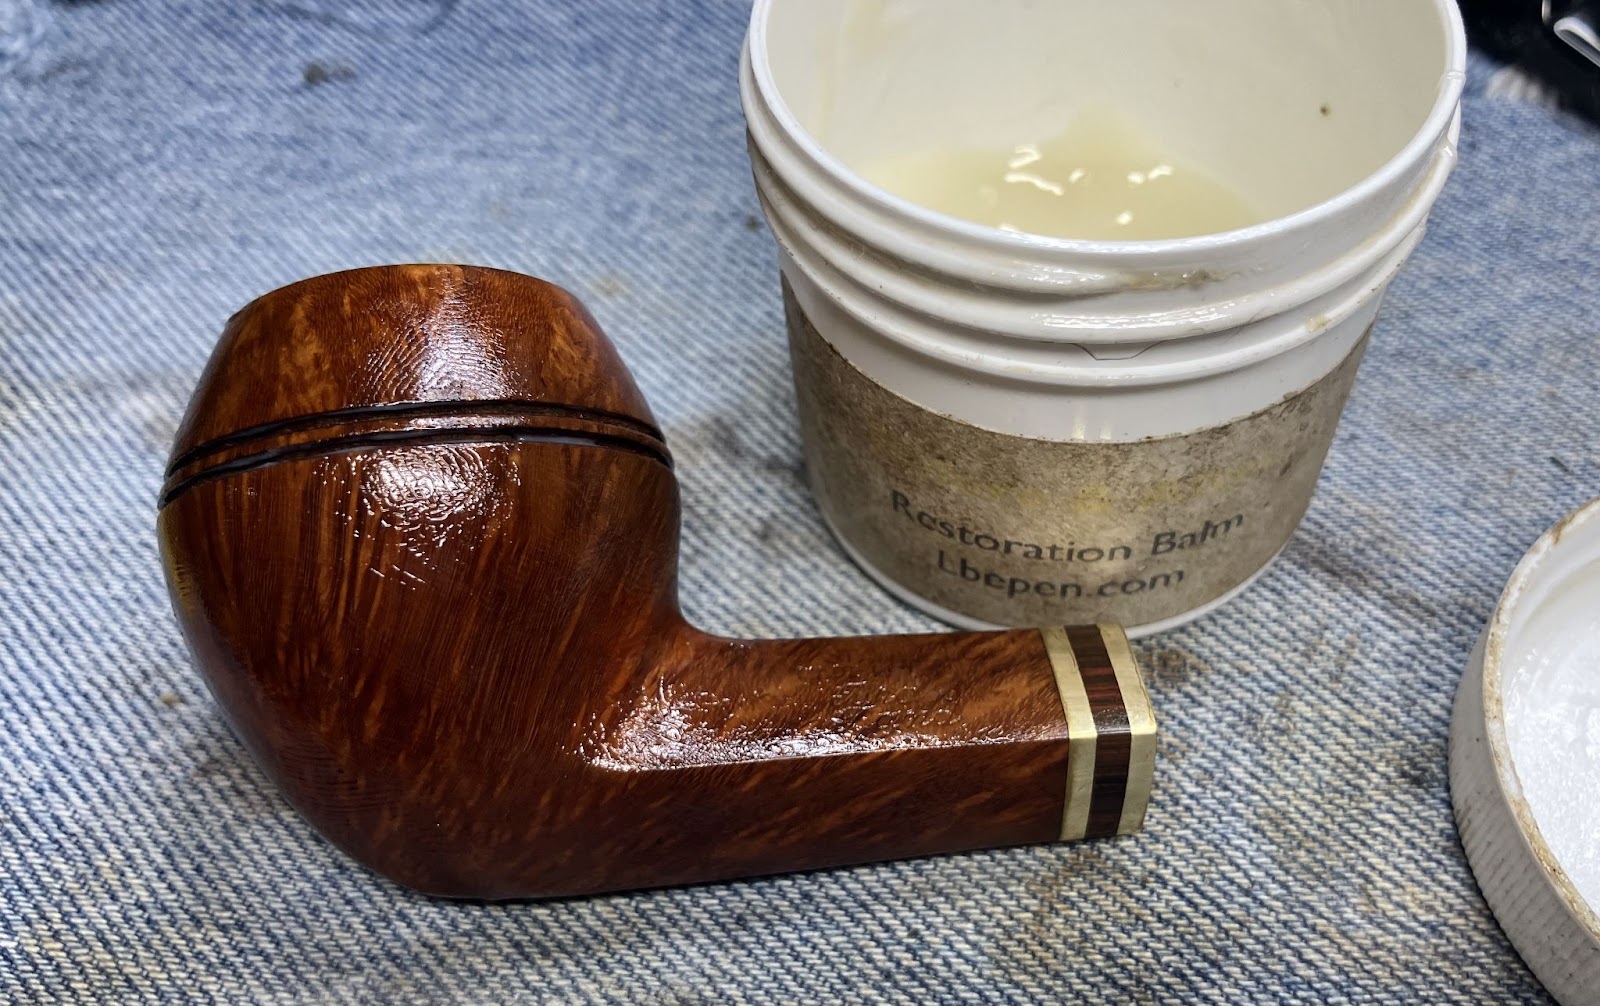
    The balm was removed by a hand buffing with an inside out athletic sock.

    The pipe was then taken to the buffer for several coats of carnauba wax.  The final step was a hand buffing with a microfiber polishing cloth to further raise the shine.

    Well, there it is.  The repair of a pipe stem by welding black acrylic onto a chipped stem.  The page counter says 92 pages.  If you stuck through the whole thing, thank you.  I had my doubts that it would work.  In the end, I think it worked quite well.  I am glad to know that I now have another tool in my toolbox for repairing pipes.  I am imagining using this technique of vulcanite, as I type this.  I’m also glad to know that Cash was very pleased with the photos I sent him of the finished pipe.  I have no idea how many hours were spent on this project.  Given, a good deal of it was practicing on a sacrificial stem and not actually working on the Stanwell.  I consider Cash’s account paid in full, with all of the wonderful tobacco he sent me.  Besides, how else was I going to learn a new trick?  Now don’t get crazy and say, “You should be paying him for this opportunity.”  Don’t make me stop this blog and spank you.  (That’s what my dad always used to say to me when I was brothering/bothering my little sister, in the car.  Except, not the “blog” part)  The dimensions of this Stanwell 32 are:

    Length:  5.00 in./ 127.00 mm.

    Weight:  1.32 oz./ 37.42 g.

    Bowl Height: 1.80 in./  45.72 mm.

    Chamber Depth: 1.48 in./ 37.59 mm.

    Chamber Diameter:  0.69 in./ 17.53 mm. 

    Outside Diameter:  1.53 in./ 38.86 mm.

    I do hope that you have found something here useful to your own pipe care, maintenance or restorations.  If you like this sort of thing, please click the like and subscribe buttons.  Thank you for reading the ramblings of an old pipe lover.

    Loading…

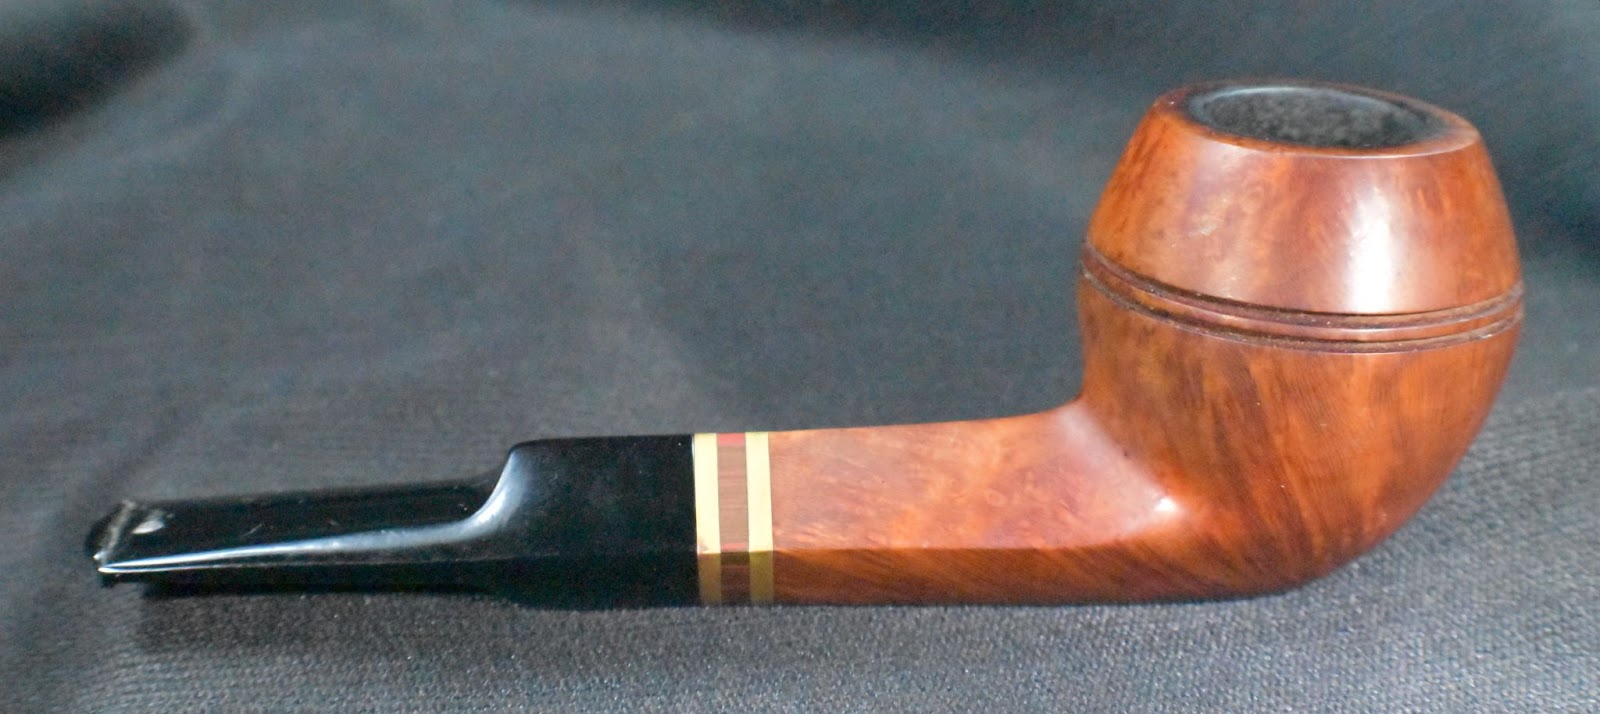
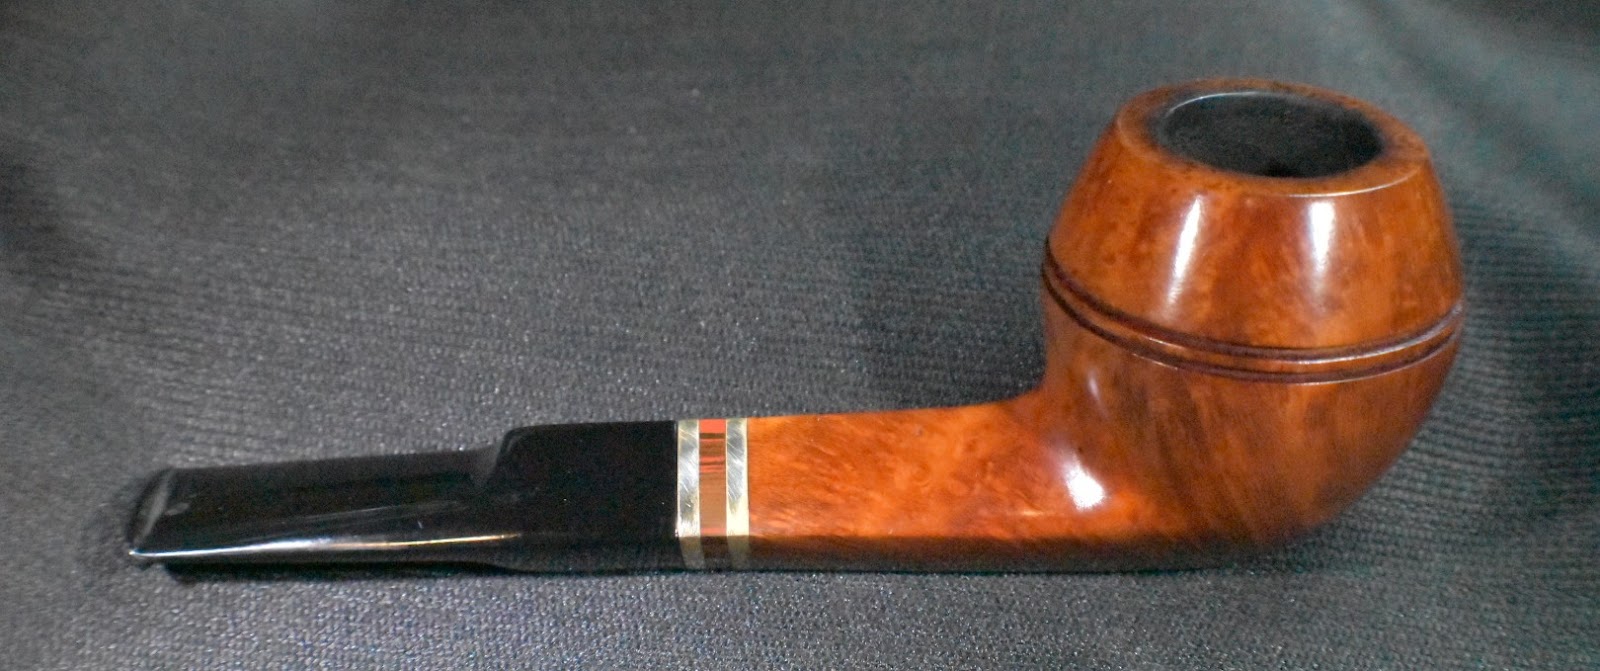
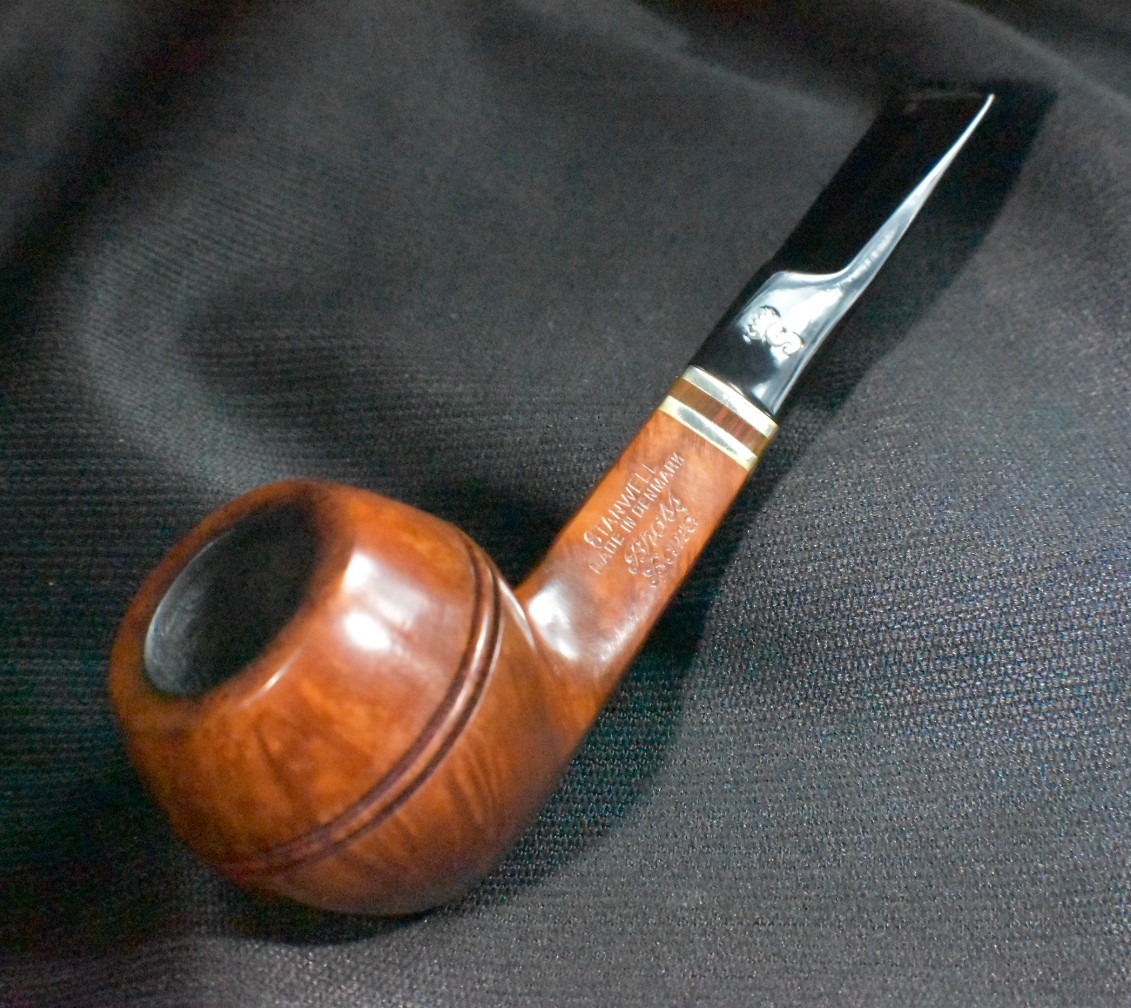
    Below are some photos of the finished commissioned Stanwell 32.

  • A Royal Danish 913 Pear Restoration

    August 14th, 2025

    Photographed and written by

    John M. Young

    This is a restoration that didn’t start out as a restoration.  It didn’t even start out as a restoration of this pipe.  Now, if you were to say, “Huh?” I would completely understand.  As it isn’t a normal restoration, the format is a bit different.  I never photographed a set of “before” shots, only photos of the restoration and the “finished” pipe.  I know, total slacker move but I think you will find the process informative or at least worthy of constructive ridicule.  I mean constructive criticism.

    The pipe had sat at the front of the queue and on the workbench in front of me for quite some time.  

    I always seemed to find another victim, I mean subject, to work on and skipped over this one.  Probably because I liked the shape but felt that it would be a lot of work to repair this Danish darling and once done, I doubted anyone would want to buy it.  

    Anyway, a commission came in for a stem repair on a lovely Stanwell pipe.  

    This new job once again trumped the poor Royal Danish.  Trust me, this is related and not just rambling.  The Stanwell needed a button rebuild on an acrylic stam.  The owner did not want to have the pipe re-stemmed out of love for the pipe and the fact that the original stem was inset with a brass “S” and crown.  I don’t blame him, the stem was a beauty. 

    In thinking of ways to repair the Stanwell, I wondered about welding some black acrylic onto the original stem and reshaping the welded acrylic to a new button.  To do this, I needed some black acrylic that I could melt and use as “welding” material.  Stick with me, I know this sounds convoluted.  The Royal Danish needed a replacement stem for a severely chewed vulcanite original stem.  In looking through my stock of extra stems, I found a close match that was black acrylic.  This new acrylic stem would need to have the tenon cut to fit the Royal Danish and quite a bit of shaping.  This, I thought, would provide me with a good deal of black acrylic “welding” material.  So, you see my plan?  Re-stem the Royal Danish with a new acrylic stem, use the trimmings to see if Welding acrylic would actually work, then weld black acrylic to the commissioned Stanwell.  Clear as opaque black acrylic?

    Background

    The stamp on the bottom of the Royal  Danish is shown below and reads 913, offset to the left and Royal Danish in a cursive script over MADE IN DENMARK.

    Pipedia.org states that “Royal Danish is a Stanwell sub-brand.” (Royal Danish – Pipedia).  Photos from the above link show similar stampings .

    I then went to the “Stanwell Shape Numbers and Designers” entry on pipedia.org.  I had a bit of confusion with the shape number “913” for this pipe as there was no 913 listed as a shape number on the Stanwell pages.  Then I noticed that all of the Royal Danish pipes began with a 9.  

    I returned to the Stanwell shape numbers page on pipedia.org and found the 13.  Below is that:

    • 13. Three versions of this shape number:

    a) Short cutty with a saddle stem (early 1950s – see catalog).

    b) Slightly bent pear with an oval shank and a saddle stem, by Sixten Ivarsson (pictured, right).

    c) Large billiard with a saddle stem.

    (Stanwell Shape Numbers and Designers – Pipedia)

    (Stanwell Shape Numbers and Designers – Pipedia)

    That is a near perfect match to the pipe in hand.  And, a Sixten Iverson shape as well.  I knew I liked it for a reason.  Alas, when this pipe will be finished it will no longer have that iconic saddle stem but a graceful taper instead.

    The Restoration

    After searching through my stems I found a possible replacement.  As stated earlier, this new stem was an acrylic as compared to the vulcanite original.  It also lacked the chewed through areas on both the top and bottom.  I considered this a good thing.

    Though not a perfect match, the cross section was close and could be shaped to fit without altering the shank.  Well, I hoped to not alter the shank.

    At this point I was still not set in restoring the Royal Danish.  I was more interested in getting the acrylic stem trimmings to try melting them into a usable form for the commissioned Stanwell pipe.  The next step was to generate the trimmings by fitting the stem to the Royal Danish.

    To do this I used the (Adjustable Tenon Turning Tool & Parts – Vermont Freehand). This tool fits into the chuck of an electric hand drill.  I planned on collecting the turnings in a metal snuff can lid, seen below.  The steel guide rod of the tenon cutter was the correct size to fit into the airway of the acrylic stem.  The 3 allen wrenches were used to adjust the tenon cutting tool while the drill bit seen below is the same size as the guide.

    The guide rod did not fit the original vulcanite stem, it was larger.  This meant that the first step would be to drill out the old stem so it would fit onto the guide rod.  This may seem unnecessary but the old stem fits the mortise of the Royal Danish.  I planned to set the adjustable tenon cutter using the old stem as a guide or template for cutting the acrylic stem. 

    Using the drill bit that came with the tenon cutter, I drilled out the vulcanite tenon to fit the tenon cutter’s guide rod.

    Below are the two allen screws which are used to adjust the carbide cutter of the tool.

    The metal snuff can lid worked beautifully.

    With several attempts at adjust/trim/check fit/readjust/retrim/recheck fit, I finally achieved a good fit with the acrylic stem.

    This sem would also provide me with additional acrylic material from the filings which would soon be produced.

    Another source of acrylic.

    So, the filing began.  The shank was wrapped in painters tape to protect the briar for what was to come.

    I quickly realized that recovering acrylic filing was much easier from a smooth surface than a denim covered surface.

    The file did exactly what files are supposed to do, remove material.

    The tape did exactly what tape is meant to do, protect what is underneath it.

    I had to remove and reapply the tape several times.  Oh, and look at all of that acrylic material.

    The filing of the shank was necessary to fit the new steamboat just a small amount on the upper corners of the shank.  You may also notice that I used a thinner masking tape for shank protection.  This was done to reduce the step from shank to stem.

    It was here that this project had temporarily ended.  I had what I was after – acrylic material to test my Acrylic welding idea.  I’ll write more about that fiasco in the commissioned Stanwell restoration.  

    The restoration of the Royal Danish did resume after a brief hiatus.  I will continue that story now.  

    Having decided to actually restore the Royal Danish, I re-started by collecting the ream team

    The PipNet proved most useful at removing the accumulated cake.  The Smokingpipes Low Country reamer did a small amount of scraping at the bottom of the tobacco chamber and the General triangular scraper was used for a bit of chamber clean-up along the upper sides.

    The reamed tobacco chamber is seen in the below photo.

    I sanded the chamber with 320 sandpaper wrapped around a wood dowel.  The resulting bare briar showed no signs of damage from excessive heat.

    The airway of the shank was cleaned with several bristle pipe cleaners , cotton swabs and a shank brush.  All of these were dipped in 99% ethyl alcohol.

    The stummel was scrubbed with undiluted Murphy Oil Soap and a nylon brush.  The accumulated grime of the pipe can be seen below on my fingers and the brush.  This pipe was quite dirty/  The soap was rinsed with warm water and the stummel dried with a cotton hand towel.

    Back at the workbench I wiped the outside of the stummel with a cotton ball dipped in 99% ethyl alcohol.  I then decided to do a cotton alcohol soak.  The tobacco chamber and the shank were stuffed full of cotton.

    About 10 ml of 99% ethyl alcohol was poured into a medicine cup.  I guessed this would be the amount needed.

    The alcohol was applied to the cotton with a disposable pipette.  

    Alcohol was added until the cotton was saturated.  The stummel was then set aside overnight to allow the alcohol to evaporate.  This would draw out and dissolve the tar still in the briar then transport and deposit it to the cotton as the alcohol evaporated.

    Upon returning to the pipe, I removed the now dry cotton with a forceps.  The shank was again cleaned with alcohol dipped cotton swabs and bristle pipe cleaners.

    I sanded the stem with a series of sanding sponges in grits400-3500.  Between each sponge, I wiped the stem with an alcohol wetted cotton ball to remove sanding debris.

    The stem was then worked with 4000-12000grit micro-mesh pads.  Again the stem was wiped with a cotton ball between pads.

    The smooth panel on the stummel had scratches and pits or dents which were no more obvious after the scrubbing.

    I tried steaming the briar with a heated clothing iron on top of a water dampened hand towel.

    The below two photos show the steamed panels.  The steaming did raise some of the dents.

    There remained three dents on the left panel which I filled with brown cyanoacrylate (CA, super glue).  This was allowed to cure/harden.

    The CA was filed smooth using a small flat file.

    The CA was then sanded smooth with a 400 grit sanding sponge.

    The rim was lightly topped with 320 followed by 400 grit sandpaper laid on a flat countertop.  The inner rim was beveled using 320 sandpaper wrapped around a small wood sphere.

    The panels and rim were further sanded using 400-1000 sanding sponges.

    The stem was taken to the buffer and buffed with white compound.

    I then coated the stummel with Before and After Restoration Balm and allowed it to sit for 15 minutes.

    The remaining balm was removed by hand buffing the stummel with an inside out athletic sock.

    The below photo shows the pipe after the hand buffing next to the original stem.  A slight improvement was noted,  Okay, more than slight.

    The last things done to the pipe were an application of  several coats of carnauba wax, then hand buffing with a microfiber polishing cloth.

    Not too shabby for a restoration that never really started and had starts and stops along the way.  The distinctive shape is pleasing to view and to hold.  The sandblast  rustications, though worn, are comfortable.  I think I would prefer a complete sandblast finish over the smooth panel but the panels are attractive and show off a little bit of the briar grain.  The stem turned out nicely.  The luster of the acrylic is beautiful and the fit is good.  Yeah, the pipe is missing the original saddle stem but I confess that without more specialized tools like a belt sander, I did well.  The dimensions of this Royal Danish 913 Pear are:

    Length:  6.14 in./ 155.96 mm.

    Weight:  1.61 oz./ 45.64 g.

    Bowl Height: 1.86 in./  47.24 mm.

    Chamber Depth: 1.67 in./ 42.42 mm.

    Chamber Diameter:  0.72 in./ 18.29 mm. 

    Outside Diameter:  1.51 in./ 38.35 mm.

    I do hope that you have found something here useful to your own pipe care, maintenance or restorations.  If you like this sort of thing, please click the like and subscribe buttons.  Thank you for reading the ramblings of an old pipe lover.

    Loading…

    Below are some photos of the finished Royal Danish 913 Pear.

  • A Design by Curtis Aluminum Pipe Restoration

    August 12th, 2025

    Photographed and written by

    John M. Young

    Yeah, metal pipes intrigue me.  I don’t have many and frequently smoke even fewer.  There is just something about them that makes me think of George Jettson, space age polymers and TANG.  Although this pipe dates back farther than the 1960s space age, more on that in the background.  Last winter I got a wild hair (sorry, American idiom meaning spontaneous enthusiasm) and decided that I needed to work on metal pipes.  Like a typical ADHD gerbil (another idiom meaning, I have too short of an attention span), I lost interest after acquiring several in-need–restoration Kirstens and a bag of a dozen metal pipes that I purchased from Steve Laug (reborpipes.com).  I sharpened my very dull metal polishing skill with some encouraging words and over the phone instruction from Doug Bisbee (dkmetalpipes.com/Estate Vintage Metal Tobacco Pipe Restoration & Sales).  A couple of restorations later I had moved on to other projects and interests.

    For some reason this pipe yelled out to me from a box on the shelf and demanded that I move it to the front of the queue.  The pipe was one that I’d received from Steve Laug.  It looked dingy and oxidized but I thought that it showed promise.  On the bottom of the pipe was stamped Design by Curtis in a cursive script over PAT. PEND.  Below are some photos I took prior to working on the pipe.

    The aluminum was oxidized.  So much so that I actually rubbed the pipe with a dry towel before photographing it on the black fabric.  I didn’t want to get white aluminum oxide all over the fabric.  The internals showed signs of dried hard smoking residue.  I was sure that the pipe should disassemble more than I did in the above photos but the residue had stuck some parts together.  The stem had tooth chatter top and bottom with a couple of deeper dents.  This looked like it would be a great project allowing me to stay in the basement workshop and avoid the heat of August.

    Background

    The previously mentioned Doug Bisbee not only runs dk Metal Pipes but also is the manager or administrator of SMOKING METAL TOBACCO PIPE COLLECTORS & FANATICS.  This is a repository of an immense collection of metal tobacco smoking pipes.  It is also my “go-to” source whenever I want to learn anything about a metal pipe.  According to the Smoking Metal site,

    “The Curtis Custom-Built Pipe Model 100

    Manufactured by Curtis Industries of 1120 East 222nd Street, Cleveland 17, Ohio. First seen around 1946

    The actually markings are �Design by Curtis PAT .PEND. �.

    The bowl insert appears to be briar, despite having only had many examples am still unable to get the bowl apart, I am loathe to risk damage. The top plate does revolve but whether it is a screw attachment or a push fit cannot yet be ascertained

    The interior of the stem is more complicated, taking an inline filter inside the tube. The shape of the end plug makes it more than interesting to undo. On many examples this part is the piece most damaged by pliers

    With so many threads in the �gunk� part of the pipe it can be a problem to clean.

    25 Dec 1945 US patent # D143257 Inventor Howard Abrams, University Heights, Ohio” (CURTIS)

    The smokingmetal  site also had a photo of an old Curtis pamphlet.  Though a bit difficult to read it is an interesting source of information from the origins of the company.

    (CURTIS)

    Inventor Howard Abrams applied for the patent on September 10, 1945 and received the patent, astonishingly quickly on Decemper 25 1945.  A Google patent search resulted in the following:

    (USD143257S – Design foe a smoking pipe – Google Patents)

    (USD143257S – Design foe a smoking pipe – Google Patents)

    With my search providing the above information and a definitive date I turned to the restoration.

    The Restoration

    As usual the pipe made its way to a cleaned denim piece at the workbench.

    I started with cleaning the chassis.  I do not know if that is the proper term for the main body of this pipe as Howard Abrams failed to leave us a labeled diagram of the parts of his innovation.  Perhaps that is how he got it approved so quickly.  I could not get the conical endcap to loosen at all during the cleaning so I let it soak in the 99% ethyl alcohol.

    I call this stem assembly.  The end of the assembly did come off, let’s call it the nozzle.  The stem will accept a Medico filter if 0.58 inches or 15 mm of the filter is cut off.  

    The stem nozzle was also soaked in ethyl alcohol while I cleaned the stem with cotton swabs and bristle pipe cleaners dipped in alcohol.

    The aluminum of the stem would be buffed with white compound along with the rest of the aluminum eventually

    The stem’s bite zone had significant tooth dents on both the top and bottom along with the typical chatter.  The top dent was deeper and small.

    The bottom dent was broader but shallower.

    Both bite zones were filed with a small flat file then sanded with a 320 grit sanding sponge.

    The sanding debris was cleaned off with a cotton swab dipped in ethyl alcohol.  A small drop of black rubberized cyanoacrylate was placed on each depression.

    Both drops were allowed to cure and harden on their own.

    While that was curing, I turned to the rim.  It just needed some scrubbing.  The little bit of lava was moistened with saliva and rubbed with a paper towel.  Then I realized that I could use the alcohol freely since there wasn’t a finish to protect .

    Tada, not perfect but far better.

    The bottom of the bowl required several cotton swabs and more ethyl alcohol.  It was pretty gunked up with smoking residue and tar.

    I used the PipNet with the #2 blades to ream the tobacco chamber.  It was a narrow bowl and had a surprisingly flat bottom.  The General triangular scraper with its tip ground off with a grinder helped return the chamber to briar.  At least I thought it was briar.  Sanding the chamber walls with 320 sandpaper wrapped around a wood dowel confirmed that the wood had the color of briar.  The sanding also revealed no signs of heat damage.  This was not surprising considering how well I imagined the pipe would remove heat via the conductive aluminum.

    I took all of the aluminum parts to the buffer and polished the metal using white buffing compound on the flannel wheel dedicated to buffing this the white compound.  I neglected to photograph any of this process partly out of the embarrassment caused by the oxymoronic black colored white compound wheel and partially/mostly because I forgot to.  At this stage in a restoration I find it very helpful to go fishing during the half hour before and after sunset.  This vital break allowed the CA the curing time it needed and me a break from sitting on my lazy butt.  

    Later that night, I returned to the now hardened CA to file it smooth with a small flat file and sand the fill with 320, 400 and 600 grit sanding sponges.  The fill looked good.

    The above process was repeated with the bottom fill.

    The stem was coated with mineral oil and I went to bed.

    The following day, I returned to the workbench and sanded the stem with a series of sanding pads from 320-3500 grits.  Between each sponge the stem was rubbed with mineral oil and wiped with a dry paper towel.

    The nicely polished aluminum of the stem was masked out of habit.  I took it to the buffer and the oxymoronic black white compound wheel.  Feel free to ask, “why did you mask the aluminum?”  Because of habit and the fact that I’m not too bright.  Anyway, the stem was buffed and looked very nice.  Well, not so nice in the photo below but after the buffing compound was removed, it really did look good.

    After the buffing compound was wiped from the stem, I unwrapped the tape and wiped the whole pipe with a cotton ball dipped in ethyl alcohol.  The pipe was then returned to the buffer for several coats of carnauba wax.  The final step was a hand buffing with a micromesh polishing cloth.

    I have to say that this pipe looks stunning in person.  My ability to capture the polished surface of the pipe with my camera is mediocre at best.  This pipe will certainly turn heads if smoked out in public.  The aluminum polished up very nicely.  Yes, there were a couple of places where the aluminum was pitted by oxidation and these are visible.  The stem also polished very nicely and is an amazing contrast and accent to the aluminum.  Here the CA repairs are only discernable upon very close inspection.  I admit to being unable to free the conical endcap from the grip of the smoking residue.  I will continue to soak the chassis in alcohol hoping this will eventually release the threads.  Doug Bisbee said to soak it for a week and try again.  The dimensions of this Design by Curtis are:

    Length:  6.42 in./ 163.07 mm.

    Weight:  1.65 oz./ 46.78 g.

    Bowl Height: Attached to chassis 1.97 in./  50.04 mm. Separated 1.42 in./ 36.07 mm.

    Chamber Depth: 1.03 in./ 26.16 mm.

    Chamber Diameter:  0.61 in./ 15.50 mm. 

    Outside Diameter:  1.48 in./ 37.60 mm.

    I do hope that you have found something here useful to your own pipe care, maintenance or restorations.  If you like this sort of thing, please click the like and subscribe buttons.  Thank you for reading the ramblings of an old pipe lover.

    Loading…

    Below are some photos of the finished Design by Curtis.

  • A Brigham 202 Billiard Restoration

    August 7th, 2025

    Photographed and written by

    John M. Young

    I’ve put a few bits in my mouth which were designed for denture wearers.  Usually these are uncomfortable for me and my complete natural teeth.  Heck, I’ve never even had a cavity.  I know, hard to believe but true.  I did try the bit of this Brigham and was surprised how good it actually felt.  I am again getting ahead of myself.  This restoration is of a 202 Brigham Two Dot Billiard pipe.  It was another pipe that came from an estate lot.  It was not the target specimen of the lot but more just a member of a group and subsequently got neglected in a box until I rediscovered it over the years later.  I do not keep good records of when various pipes were purchased or from where.  That may be a 2026 New Year’s resolution which I’ll likely forget to ever make much less abide by.  Anyway, the pipe was stamped 202 (rather haphazardly on its bottom) to the right appears to be a double stamping of MADE IN CANADA, in a straight line over or under a more clear Brigham over CANADA.  The photos show this more clearly than my description.  Below are photos of the pipe prior to work being done:

    The pipe had obviously been a well loved and well smoked pipe.  The tooth chatter and oxidation of the stem proved that.  The amount of lava on the rim also was an indicator of the use this pipe had experienced.  The tobacco chamber had been well maintained and looked fairly clear of a thick cake.  This told me the previous owner liked a cleaned chamber and judging by the lack of any deep groves cut into the chamber they also had used appropriate tools to keep the chamber clean.  The aluminum of the Brigham system was mostly free of oxidation externally and generally clean on the inside as well.  This looked like it would by a straightforward restoration of a classic Brigham pipe.

    Background

    I admit that being my lazy self, I did a search on pipephil.eu for Brigham logos, knowing full well that this is a Brigham pipe.  

    (Brigham — Pipes : Logos & Markings)  The pipephil page had entries for the 1-6 dot pipes as well as some additional specialty pipes.  The two shapes from the “Two dot” entry appeared to have a “2” as their prefix.

    I stopped being quite so lazy and got out my Brigham Pipe – A Century of Canadian Briar book to look for the 202 shape.  Hmm, there was no 202 but there was an 02 Billiard offered since a 1939 Brigham brochure (Lemon, Charles. Brigham Pipe – A Century of Canadian Briar. Copywell, Woodbridge ON. Second Printing, October 2023. Page 17).  My conclusion is that the Two dot Brigham is thus stamped 202.  A three dot Brighan with an 02 Billiard shape would be stamped 302. Now, enough guessing.  I decided to re-read the book.

    The ultimate source of information on Brigham pipes is Charles Lemon, the author of Brigham Pipes – A Century of Canadian Briar.  This wonderful book is available from Mr. Lemon on his website, Books, from smokingpipes.com (Brigham Pipes – A Century of Canadian Briar | Smokingpipes) if you need to increase the total of your purchase to get the ever popular free shipping, and other various sources.  I am unsure about Canadian immigration rules but I think this book should be required reading for prospective immigrants to Canada, especially if they are pipe smokers.   

    I could go on and quote Charles Lemon’s book extensively but that would require me to do so much typing and I have said it before and likely will say it again, I am a proud Generation-X slacker.  Copy and Paste is so much easier.  I will say that Lemon’s work is outstanding and it was a pleasure to read and in my case re-read, since old slacker minds apparently don’t hold as much information as they should.  The re-reading was done to remind me how the shape numbering system works and to find references to the dental button.  This elusive detail was not found and remembered from the first reading and failed to be found on the second round.  I resorted to emailing Charles Lemon from the “contact” button on his website, www.DadsPipes.com.  Mr. Lemon responded quickly to my request about information concerning the dental button of this pipe.  I did include photographs of the pipe, stampings and button in my groveling email which also included a misspelling of the work “bok”.  Yeah, it was supposed to say “book”, darn slackers…

    Taking apparent pity on my groveling and lack of ability to spell, general ignorance about Brigham pipes, or maybe because he just a great guy, Charles Lemon replied with the following:

    “Your pipe dates to the 1980s, and I suspect from the early 1980s. The 02 shape represents Brigham’s smallest Billiard, a shape that fell out of favour in later years as pipes became larger overall. 

    I don’t have any specific information about Brigham’s use of dental bits but I do know that Brigham offered a choice of stem shapes to clients when they ordered a pipe, dating to at least the 1960s. I suspect that your 202 is either one of the last of the optional stem offerings or a custom request. With the factory attached to the main retail outlet at the time, Brigham had an amount of flexibility to accommodate this sort of request if they chose to. 

    Hope that helps, It’s not a definitive answer, I know, but it is in keeping with how the company operated at the time. For what it’s worth, I have a small number of dental bits in the shop if you’re interested.” (Charles Lemon personal email)

    Wow, is all I could say.  Well, I did reply and say more than “wow”.  There was also a thank you involved and probably some additional groveling.

    That email response provided a pretty definitive date and explanation of the dental bit.

    The Restoration

    The restoration should have been a rather simple affair and as usual it started with a laundered denim piece on the workbench.  Well, the stem got to sit on the denim at least.

    I started to clean the stem airway with a bristle pipe cleaner dipped in 99% ethyl alcohol.  It was a tight fit at the slot then it became much easier after a tiny “tick” was heard.  “Oh crap”, was probably the next sound heard.  I had chipped the vulcanite at the slot with my rambunctious behavior.  At least that is what my mom always said after I broke something, “Stop being rambunctious!”  Hmm, why didn’t she yell that before I broke something?  The chip was tiny and fit back together very nicely so I set it aside where it would be safe.

    I continued on filing the tooth chatter and smoothing the area above the button.  Two small files, one flat the other a tapered ½ round.  The rounded file fit the rounding of the underside of the dental button nicely.  These areas were also sanded with a 320 sanding sponge as I went.

    I then proceeded to clean the stem, with less rambunctiocity.  Wow, spell check didn’t say that wasn’t a word.  

    The stem was allowed to soak in Before and After Extra Strength Deoxidizer.  It went in on a Sunday late afternoon.  I had to attend a funeral for a cousin in northeast Iowa so it sat in the deoxidizer for about 30 hours.

    Upon returning to the wilds of southeast Nebraska, I took up the restoration the next night.  If you look carefully at the below photo you can see the chip from the stem propping the pipe up.  Apparently that was the safe stop to keep the chip.  I cleaned out the shank with a shank brush, cotton swabs and bristle pipe cleaners all dipped in 99% ethyl alcohol.  If you are wondering about the purple on the cotton swabs it is probably potassium permanganate (KMnO4).  Here is a quote from a chemical supplier who still sells KMnO4  “Potassium Permanganate is a dark purple solid. Dissolving 1 ounce in a pint of water is used to stain woods a pleasant brown. The Potassium Permanganate decomposes on contact with the wood and leaves a brown residue that stains the wood. If the color is too dark it can be lightened by washing the wood with a strong solution of hypo. The brown color imparted to fairly woods will gradually fade when exposed to direct sunlight. Mix only enough solution to do the job at hand as the solution on long standing will lose its effectiveness. Use it with caution as it is a strong oxidizer.” (POTASSIUM PERMANGANATE | WoodFinishing Enterprises)

    Next came the assembling of the ream team.

    The PipNet with its #1 and #2 blades did most of the work.

    The Smokingpipes Low Country reamer and the General triangular scraper were used to touch-up the tobacco chamber. 

    The reamed chamber looked very good and showed no signs of any heat damage.

    I sanded the interior of the chamber with 220 sandpaper wrapped around a wood dowel followed by 320 sandpaper wrapped around a Sharpie marker.  

    The bare briar indeed was free from any damage.

    The rim would hopefully be also free of damage under the layer of smoking residue, aka lava.

    The lava was moistened with saliva and gently scraped with a sharp pocket knife.

    The stummel was then taken to the sink for a scrub with undiluted Murphy Oil Soap and a nylon brush.  The soap was rinsed with warm water and the stummel dried with a cotton hand towel.

    Back at the workbench, I wiped the stummel with an alcohol wetted cotton ball.  Some color came off the pipe.  I did not want to change the look of this pipe by removing and rebuilding the finish.

    I gave the stummel a coating of Before and After Restoration Balm and set it aside to work its magic overnight.  Hey look, that little ship is still there.  Safe and sound.

    After the funeral, still the next day though, I returned to working on the pipe.  I saw a small black fleck on my denim and threw it into the trash.  Stupid little black flecks.  I then wiped the remaining Before and After Restoration Balm off of the stummel using an inside out athletic sock.

    I retrieved the stem from the Before and After Extra Strength Deoxidizer.  I’m just going to call it deox from here on.  Nothing personal to Mark Hoover, but that is just too much to type.  I placed the still wet with deox solution on my favorite coarse shop rag.  The deox on the aluminum had foamed up, presumably a reaction of oxidized aluminum to the deox solution. 

    I vigorously rubbed the vulcanite with the coarse gag.  This absorbed excess deox and abraded away some of the oxidized rubber.  Actually a lot of the oxidized rubber.

    Back at the workbench, I cleaned the interior of the stem with several thick pipe cleaners then coated the stem inside and out, with Before and After Hard Rubber Balm (HRB, henceforth).  This is another great product from Mark Hoover.  I like it best as a preservative on a finished stem to combat oxidation but it works well on a stem fresh out of deox too.

    The deox had left a mark of the aluminum of the Brigham system.  The cleaner shiny aluminum clashed with the more dull original aluminum.

    I hand buffed this using Before and After Fine Polish on a paper towel.  Tada, much better.

    I looked over the tooth chatter and cleaned the HRB from the bite zone with alcohol on a cotton swab.  I was prepping the area for a small drop of black cyanoacrylate (CA, super glue) to fill the depression.

    It was about here that I realized the little black fleck that I threw away was the chip from the button.  “Oh crap!”, may have been spoken.  The poor little chip had evaded trouble by staying in its safe place for a couple days before some rambunctious oaf displaced it.

    Hmm, how hard could it be to find a tiny black fleck in the trash bin of… a guy who dumps lots of black powdery debris… in the trash bin.  Oh crap.

    I set out a piece of scrap packing paper and went through the trash, shaking the bigger pieces to dislodge a small black fleck.  Eventually I dumped the reaming debris onto the paper, got down on my less than flat belly and started sifting through the black powder searching for a fleck.

    Hah!  Victory.  I actually found the little bugger.  By the way, if you think that it’s easy being this dumb, you would be mistaken.  It takes years of training and classes in rambuctiocty from the local community college.

    And it still fits.

    The wound was cleaned with alcohol in preparation of the regluing.  I thought about drilling and reinforcing the chip with a 2 mm brass pin but the rough surface of the break and the contours of the fit seemed like they would provide good support on all three sides.

    I used a plastic lid cut-out inserted into the slot to keep the CA from being rambunctious.  Yeah, I’m going to see how many times I can use that word.

    The glue of choice was This rubberized CA from Bob Smith Industries.  It was getting a bit old and wasn’t as thin as it used to be but it coated the contact surfaces well.  A drop of the CA was placed on the disposable pipette bulb then applied to the stem with a fly tying bodkin.

    Once that CA had set, I applied a thinner black CA to fill the seams.

    Once the thinner CA set, I applied a bead of the first black CA to the edge of the button to address the rounding of that edge by previous tooth wear and tear.

    Once all the CA had cured, I again filed the CA with the two files used earlier then started the sanding with a series of sanding sponges.  Between each sponge I rubbed the stem with mineral oil then wiped it with a paper towel.

    I was still not happy with the seam of the glueing so I sanded that additionally with 400 grit sandpaper wrapped around the handle of an Exacto knife.  I kept my rambunctious nature in check and did not skewer myself with the blade.  Yeah, it would have been smart to remove the blade but, it is me we’re talking about here…  I then polished the stem with new micro-mesh pads in grits of 4000-12000.  

    To avoid having another pipe cleaner chipped button incident, I used a cut-off bit in the Dremel rotary tool which was a fraction of a mm thicker than the original slot.  This widened the slot enough to pass a pipe cleaner, even bristled, more easily.  The slot was polished with a thin folded piece of 400 grit sandpaper.

    The pipe was then taken to the buffer for several coats of carnauba wax. This was then hand buffed with a microfiber polishing cloth.

    I do hope that you had fun reading about the trials and tribulations of not being the sharpest tack in the pack.  I will continue making mistakes and documenting them in hopes that you can learn from them in a less painful fashion than I.  This Brigham was actually a fun little pipe to work on.  The fact that it was a non-typical version with a dental stem made it more interesting to me.  Thank you again Charles Lemon for the insights into Brigham pipes.  The pipe itself is a lovely example of a two dot Brigham.  The rustication provides an attractive and comfortable bit of briar and the stem though lacking the robustitude to weather a rambunctious restorer still turned out very nicely.  The dimensions of this Brigham 202 are:

    Length:  6.49 in./ 164.87 mm.

    Weight:  1.33 oz./ 37.06 g.

    Bowl Height: 1.72 in./  43.69 mm.

    Chamber Depth: 1.41 in./ 35.81 mm.

    Chamber Diameter:  0.72 in./ 18.29 mm. 

    Outside Diameter:  1.30 in./ 33.02 mm.

    I do hope that you have found something here useful to your own pipe care, maintenance or restorations.  If you like this sort of thing, please click the like and subscribe buttons.  Thank you for reading the ramblings of an old pipe lover.

    Loading…

    Below are some photos of the finished Brigham 202 with a dental stem.

  • A Micoli Restoration

    August 5th, 2025

    Photographed and written by

    John M. Young

    The best man in my wedding is an artist.  The creativity that artists have is an innate ability to create beauty from nearly anything.  I was always amazed by this superpower.  When I first saw this Micoli pipe I thought, “that carver is an artist, how in the world did he come up with that?”  I merely have the ability to repair the toll of time on things of beauty and a sense of practicality.  Though this Micoli pipe is an incredible pipe to look at, the carvings do not meet my sense of practicality.  Aesthetic beauty and useful practicality are often at odds and this pipe strikes me as an example of that conflict.  For whatever reason; desire to work on a Micoli pipe, infatuation with a truly artistic creation or “dang, that’s cool”, I had to have this pipe when I saw it on eBay.  After the winning of the auction the waiting for arrival began. Five days seemed to go more slowly than usual, perhaps I have discovered a remedy for aging? The relatively short trip from Saint Charles, Illinois to the wilds of southeast Nebraska was done and below is what the pipe looked like upon its arrival.  The only stampings were a signature style “Micoli” over “Fre…” I could not make-out the last letters of the lower word.

    I wasn’t and still am not sure if the stem is intended to be a reverse tenon push stem or a threaded tenon.  Maybe the artist designed it to be either or.  The pipe looked to be in better condition than the eBay photos indicated.  Minimal oxidation of the stem, good news.  A nice polish to the smooth sections, I do hope that is just a very thick carnauba wax…  A slight cake in the bowl, more good news.  This looked like an “easy button” restoration. 

    Background

    Micoli has an active website:  Micoli is a master carver of freehand pipes

    According to the site,

    “Micoli or “Mic” as he is called by family and friends, has aquired the reputation of being one of the best  American pipe makers. He is appreciated by the most prominent of collectors. Educated in the arts, He started this adventure in 1968. His craftsmanship and artistry were dedicated to over twenty years of full time pipe making, with no two alike. In the last thirty years plus he has been partially retired and limits carving to a few pipes a month. ​He has continued sculpting animals and other subjects fom brair and other rare woods.  

    Micoli is now 79years” (About Micoli)

    That woud make chronological sense, I was born in 1966 and if he started carving in/after college he’d be about 79.  Yeah, math works.  The site has photographs of a lot of Micoli carved pipes.  These were fun to look through though I did not find one similar to the pipe in hand.  That is not too surprising since no two pipes look alike and the various styles are a veritable kaleidoscope of shapes.

    For further information I checked pipephil.eu.  Here I found the following quote and images:

    “Artisan: Robert Eugene (Mic) Burns carved pipes at least from the early 1970’s. Last news about him dates from November 2001. His son Ryan Burns stated in a forum his father is still (2009) very much alive and is in excellent health.

    The deeply Dremmel carved pipes are typical of R. Burns’ work.

    Micoli’s second: E. Oslo” (Mi-Mk — Pipes: Logos & Markings)

    The final search was at pipedia.org, where the below was taken along with several photographs.  Hmm, it sounds remarkably like his own website.  Darn these lazy writers…  Oh wait, I’m one of them.

    “Micoli or “Mic” as he is called by family and friends, has acquired the reputation of being one of the best American pipe makers. He is appreciated by the most prominent of collectors. Educated in the arts, He started this adventure in 1968. His craftsmanship and artistry were dedicated to over twenty years of full time pipe making, with no two alike. In the last twenty years plus he has been partially retired and limits carving to a few pipes a month. ​He has continued sculpting animals and other subjects from brair and other rare woods. Micoli is now 72 years old.​

    Micoli 01.jpg
    Micoli 01b.jpg
    Micoli 03a.jpg
    Micoli 03b.jpg
    Micoli 05.jpg
    Micoli 05a.jpg
    Micoli 13.jpg
    Micoli 13a.jpg

    The signature of Burns’ work is the specific way of rustication he worked out using a Dremel power tool. (The Dremel had been introduced to pipemaking by Teddy Knudsen.)

    Burns / Micoli also made the E. Oslo pipes. These can be considered his entry-level pipes as he did not carve these from scratch but rather purchased run-of-the-mill standard shapes from Italian and English pipe makers, such as Savinelli and Comoy’s, and dremeled his signature magic on them. The pipe shown was very likely a Savinelli 111 KS.”

    • Example and detail, courtesy Doug Valitchka
    Micoli01.jpg
    Micoli07.jpg
    Micoli08.jpg
    Micoli15.jpg

    (Micoli – Pipedia)

    The Restoration

    I took the pipe parts to the workbench and gave them a cleaned denim piece.  

    Looking over the pipe with a more critical eye, I again inspected the tobacco chamber.  I hoped that the darkened rim was just a deposit of lava and that there was no charred wood beneath.    

    I reattached the stem and tried the draw.  Yikes!  There was barely any airflow.  I pulled the stem and tried it.  The stem was clear.  I looked into the mortise.

    I heard Jed Clampitt saying, “What in tarnation?” in my mind.  I grabbed a thin forceps and grabbed at the obstruction.  A wadded up abraded piece of plastic came out.  It looked as if someone had been trying to get it out for some time and had scratched and pushed the piece of plastic into the airway.  “Odd”, I thought.

    The air way was now open and had a normal draw.

    The ream team was gathered.

    The PipNet #3 and #4 blades got used but not much.  The wide bowl of this pipe was cleaned out with a little help from both the Smokingpipes Low Country reamer and the General triangular scraper.

    Below is the condition of the reamed tobacco chamber.

    I sanded the interior of the chamber with 320 sandpaper wrapped around a wood dowel.  The briar showed no signs of heat damage.

    I ran an alcohol dipped pipe cleaning into the shank and it went straight in but not into the bowl. Hmm, that is odd.  “What is this little depression in the tobacco chamber and why is it wet?”

    And why are there two airways?  Those two pipe cleaners were not going through the same hole.

    Here you can see two pipe cleaners in the bowl.  Well, one complete pipe cleaner and the emerging tip of the second.

    The correct airway was a bit difficult to get a pipe cleaner into with the Delrin tenon screwed into place.  I bent the tip of the pipe cleaner downward and it would go through.

    Below you can see a slightly bent pipe cleaner going through the airway.

    It is kind of hard to make out in the photo below but if you use your imagination you can see two airways.

    I used a length of aluminum tube which was 0.13 inches in outside diameter to go through the drillings.  This was done so I could envision what in the heck was going on inside this shank.  It was weird, there were two airways.  One was only accessible if the Delrin tenon was removed.  This one angled down from the shank-end and to the bottom of the tobacco chamber.  The other drilling was straight inline with the Delrin tenon if it was screwed in place.

    The below three photos with overlaid diagrams are representations of what I think the airway was like and how I thought repairs might proceed.

    The first diagram is how the carver drilled the stummel.  The angle is not precise nor probably to scale but for visualization purposes it works.

    This second diagram shows what was done to the stummel by a previous owner.  The angle here would follow the straight line entrance of a pipe cleaner or drill bit inserted through the threaded reverse tenon if it were screwed into the shank.

    This photo shows the stummel with the threaded Delrin reverse tenon fitting.

    This last diagram attempts to show my idea of a repair.  I thought that I could use a disposable pipette to deliver J-B Weld epoxy and fill the incorrectly drilled hole, shown in dark gray, into the existing upper drilling.  This would fill the hole and seal off the incorrect airway.  The epoxy is inert and heat resistant.  I would sand any epoxy that extruded into the tobacco chamber.  This seemed like a grand idea if I could get the thick viscous epoxy to flow enough to use a pipette to deliver it into the hole.

    For this plan to work the epoxy would have to be drawn up into a disposable pipette.  I had two types of pipettes on hand, one with a larger diameter tip and one that was smaller.  I thought the larger would work.  If it did not, I figured I could cut the tip back a little and make the opening wider.

    I needed to be careful not to get any epoxy onto the threads or into the correct airway.  I made a tool to clear the correct airway of any stray epoxy by plugging the end of a 0.14 inch, outside diameter brass tube with a cotton swab.  

    I snipped off the extra cotton and hardened it with a drop of thin cyanoacrylate (CA).  Once hard I sanded the CA hardened cotton smooth.

    I had a plan now to see if the pipette would be able to deliver the epoxy.  I measured out the epoxy.

    Then mixed the two parts for 30 seconds as per instructions.

    The moment of truth, would the plan work or force a “Plan-B” into effect?  Success.  The epoxy did flow up into the pipette.  Very slowly and probably only for about 5 minutes but it was working.

    Using the bright workbench lights I was able to see into the mortise of the shank, insert the pipette into the hole and deliver some of the epoxy.  This was repeated a few times before the epoxy became too thick to be drawn into the pipette.  The below photo shows the wet epoxy filled hole at the 10:00-11:00 position.

    I checked the correct airway with the “brass correct airway clearing tool” (I wonder if there is a market for these?).  It came through clean and epoxy free.

    Next I cleaned the threads of the epoxy which I had carefully and purposely spilled using acetone on a cotton swab.  Okay, that isn’t true.  I did not purposely spill anything.

    I set the stummel in a pipe holder and let the epoxy set-up for about 20 minutes.  This was done so the epoxy would not flow out of the hole.  Gravity can, on occasion, be your friend.  

    Once the epoxy was set-up, I held the stummel up to the light so that I could see light coming through the correct airway.  Again, success.  I thought that I had better quit.  This many successful outcomes usually indicates a major FAIL in the near future.  The pipe was set aside for 12+ hours giving the epoxy time to cure completely.

    The next day I sanded the spot where epoxy had come through the hole into the tobacco chamber.  I thought that I might have to use a bowl coating to cover this slight imperfection.

    I also disassembled the “brass correct airway clearing tool” by dipping the tip in acetone and pulling the cotton swab with a pliers.  Weird how my marketing team has not gotten back to me about the prospects of a nationwide campaign for  “brass correct airway clearing tools”.  O, yeah, I forgot, I don’t have a marketing team.

    It was time to get this restoration back on track.  The whole “easy button” theme had been severely violated.  The stem was cleaned with ethyl alcohol dipped pipe cleaners and cotton swabs.  All one each of them.  You can tell I am not used to clean pipes.

    The stummel was taken to the sink for a scrubbing with undiluted Murphy Oil Soap and a nylon brush.  The soap was rinsed with warm water and the stummel dried with a cotton hand towel.

    Back at the workbench the stummel was wiped with a cotton ball dipped in 99% ethyl alcohol.  Very little color came off on the cotton indicating that the stummel was free of any finish or wax.

    I was very happy to see that the rim had not been charred much by use and that the lava coating the surface was mostly removed.  

    The stummel was sanded with a series of sanding sponges from 400-3500 grit.  Between each sponge the briar was wiped with an alcohol dampened cotton ball to remove sanding debris.

    The stem was also sanded with a series of sanding sponges.  Between sponges the stem was rubbed with mineral oil and wiped with a paper towel.

    The stem and stummel were worked with micro-mesh pads 4000-12000.  I don’t know why there was no photograph documenting the micro-meshing of the stummel.  Perhaps the photography team is off cavorting with the marketing team.

    The stummel was then given a coating of Before and After Restoration Balm while the stem was coated with Before and After Hard Rubber Balm.  Both the stem and stummel were then abandoned because the fishing team needed a guide.

    Okay, there isn’t really a fishing team but there was fishing.  The next day I wiped the remaining Before and After balms from the pipe with an inside out athletic sock.

    I wanted to give the smooth parts of this pipe a nice coating of carnauba wax but I did not want the wax to gum-up the carvings.  My solution was to mask off the carvings with masking tape.

    The smooth shiny parts received their carnauba coatings and they looked marvelous.

    The last steps were to remove the masking tape and to hand buff the pipe with a microfiber polishing cloth.  That made the shinies even shinier.

    This Micoli was a treat to work on.  Sure, the whole repair of a second airway was a pain but I learned that epoxy can be applied via a disposable pipette.  Besides, I think the repair was a fun challenge and keeps my old brain working on problems that need solving.  The grain on this Micoli is nearly flawless. Perhaps he carved away flaws but I do not think that was why he carved like he did.  I think the artist was just being an artist and I got to share in that process.  The stem polished-up beautifully.  There is one tiny metal inclusion in the vulcanite that is reminiscent of the recycled rubber from wartime pipes.  Overall the pipe is a whimsical adventure of flowing lines.  I am not sure if this piece will enter my personal collection or if it will go on to another owner.  I’ll just have to see if someone reaches out to me about purchasing it.  Pipes like politicians are nearly all for sale.  The dimensions of this Micoli are:

    Length:  6.08 in./ 154.43 mm.

    Weight:  1.43 oz./ 40.54 g.

    Bowl Height: 1.87 in./  47.50 mm.

    Chamber Depth: 1.43 in./ 36.32 mm.

    Chamber Diameter:  0.88 in./ 22.35 mm. 

    Outside Diameter:  1.54 in./ 39.12 mm.

    I do hope that you have found something here useful to your own pipe care, maintenance or restorations.  If you like this sort of thing, please click the like and subscribe buttons.  Thank you for reading the ramblings of an old pipe lover.

    Loading…

    Below are some photos of the finished Israeli Bent Billiard.

    Yeah, I still don’t know what that second word is.  I did email The carver via his website but have not heard back.

  • An Israeli Bent Billiard Pipe Restoration for the Real American Pipe Smokers (RAPS) Facebook group

    July 29th, 2025

    Photographed and written by

    John M. Young

    This is the third, though not likely final, restoration of a pipe for the Real American Pipe Smokers (RAPS) Facebook (FB) group.  This pipe was sent to me by a fellow member who had asked if I’d be willing to restore some pipes to be given away to RAPS members.  I love to work on pipes that I find interesting and doing so for a good cause is even better.  The three pipes arrived and were indeed interesting.

    The top and bottom pipes were blogged about last week and were a Porcelain Apple and a J. Rettke, Feel free to click those names for links to the respective restorations.  The final pipe is a large bent billiard with a chimney-like bowl.  The only identifying stamp of the pipe was ISRAEL on the underside of the shank.  Below are some photos of the pipe before I began work on it.

    The stem had been chewed on a great deal this normally would indicate a pipe that had been smoked a great deal.  However the tobacco chamber appeared fairly cake free.  The rim did have a layer of lava and the rim edges showed signs of being knocked against hard rough surfaces.  Perhaps I had come across a heavily smoked pipe which had been owned by someone who appreciated a clean pipe?  There was also a dreaded clear coat finish on this pipe which would have to go.  I know, my job is to restore, but I have a disdain for heavy clear coat finishes.  The stem did look salvageable and I hadn’t restored one that was this chewed up for a while.  Oh, the things I consider fun…  I was worried about the ISRAEL stamp surviving the finish removal.  Oftentimes the stamping is done on top of the clear coat and the briar below does not preserve the stamp very well. 

    Background

    The number of Israeli pipe making companies is pretty easy to count, one.  According to pipedia.org:  

    “Not much is known about Israel’s sole pipe factory though it’s reported to have operated quite successfully on international markets.

    Beside the brand “Shalom” the mainstay brand was Alpha – especially well known in the USA. Alpha was popular for a range of fresh and unusual shapes. Series (afaik): Caprice (s), Citation (s), Classic (b), Pedestal (s), Regent, Region (b), Rex (s). (1)

    (1) (b) = blasted, (s) = smooth

    Alpha also produced at least one of its Citation forms for Carey’s “Magic Inch” series.

    Mentioned in context with Shalom Pipe Factory was a Danish pipemaker named ‘Muki Liebermann’, who later lived and worked in the USA. Muki is known for his unique briar bending technique and his original shapes that gave inspiration to many of the most praised Danish pipemakers.

    Shalom was taken over by Robert L. Marx of New York City, later Sparta, NC, then of Mastercraft. Mastercraft continued the Alpha pipes introducing new lines.” (Shalom Pipe Factory – Pipedia)

    Also at the bottom of the pipedia.org entry is a blurb about other Israeli brands.  It is not clear that these are lines which Shalom produced or if they are separate companies.  I assume that they are Shalom lines.  

    “Other brands from Israel:

    • Andersen
    • Burl King (Best known for their Danish-looking “thumbhole” pipes with plateau tops.)
    • Fader (Presumably for Fader’s Tobacco Shop, Baltimore. Also known: Fader – Made In Denmark.)
    • Goliath Briar (huge pipes)
    • Krisson
    • Mastersen
    • Trophy” (Shalom Pipe Factory – Pipedia)

    The Restoration

    As usual the pipe got herself a cleaned denim piece, more for the protection of the workbench than for the pipe’s comfort.

    I decided to work on the stem first as I thought it would require the most effort.  The top was lightly chewed but had pretty significant calcium deposits.

    The bottom side was really chomped on and would need to have black cyanoacrylate (CA, super glue) built up and then reshaped.

    I started with a cleaning of the stem with bristle pipe cleaners dipped in 99% ethyl alcohol.

    The calcium deposits were scraped off with a sharp pocket knife.

    The top and bottom were then filed with a small flat file to remove most of the teeth marks.

    Rubberized black CA was used to build up material in the indentation on the bottom surface and button.

    The built-up material was filed flat.

    Additional black CA was added to allow for smoothing the underside of the stem.

    This built-up area was then filed smooth and blended with the existing stem.

    The whole area was sanded to check the blending of the vulcanite to the CA seams.  It did not look bad.  I had not started on the button as of yet.

    To better blend the seams I applied a coating of thin CA.  This penetrates any tiny crack of seams and would further blend the two materials with finer grade sanding.

    The stem was sanded with a series of sanding sponges from grits 400-3500.  Between each sponge I rubbed the stem with mineral oil and wiped it with a paper towel.  The last thing I did, at this stage, was to apply a coating of Mark Hoover’s Before and After Hard Rubber Balm.  Mark sent me this product to try and I think it does a very nice job at preserving a polished stem and keeping oxidation at bay during normal pipe smoking.

    I turned my attention to the stummel.  The reaming tools were gathered and included the PipNet, Smokingpipes Low Country Reamer and the General triangular scraper.

    All three tools were used and the Kleen-Reem reamer was pulled into the fray because of the bowl depth and slightly conical boring.

    The rim looked like it had suffered frequent hard knocks on concrete or stone surfaces. This roughened rim also had a coating of lava.  Scraping lava from a flat surface is pretty easy but scraping lava from a rough surface is a different matter.

    I tried to use the traditional scraping method of using saliva to moisten and soften the lava then scrape it with a sharp pocket knife.  With the surface being as rough as it was, I met with limited success.

    Normally a light topping of the rim would be done with 320  sandpaper but this rim was rounded and dented.  Due to the very deep bowl, I decided that there was plenty of briar there and filing the rim would be a faster was to smooth the surface.

    One smoothed with a flat file I topped the rim with 320 followed by 400 grit sandpaper.

    The shank was then cleaned with several bristle pipe cleaners and cotton swabs dipped in 99% ethyl alcohol.

    Next up was the scrubbing of the stummel with a nylon brush and undiluted Murphy Oil Soap.  The soap was rinsed with warm water and the stummel dried with a cotton hand towel.

    I wiped the stummel with a cotton ball wetted with ethyl alcohol.  The alcohol has no effect on the clear coat.  Bah.  In the next couple of photos you can see where the finish had been worn off the briar.

    Since the ethyl didn’t affect the finish, I tried acetone.  It did soften the finish but very slowly and with a great deal of work.  I decided to give the whole stummel a bath in acetone.  The old jar was not large enough so I had to make use of a wide mouth pint jar acetone bath.

    I let the stummel soak for over an hour in the acetone before removing it.  Apologies for the poor focus.  I’d blame the nitrile glove but I was only wearing one.  There was still a lot of finish remaining on the briar.  I thought, “why the heck did they apply the finish so thick?”

    The good news was that the soaking made the old fills easy to remove.  Well, easy if I moved quickly before the acetone evaporated.

    There were several deep pits in the briar.

    The pits were pretty evenly distributed over the whole stummel and as I said, deep.

    At least they didn’t use the bright pink fill that you often find on old pipes.  Below are a few of the remnants of fill material.

    I sanded the remaining finish from the briar using sanding sponges that I usually never would use on a pipe, 180 and 280 grit.  The little 320 sanding sponge just couldn’t cut through the thick hard finish.  You can also see the depth of the pits on the shank in the below photo.

    Eventually the stummel was sanded with 320 and 40 grit sanding sponges and the fills were refilled with briar dust and brown CA.  I could have sworn that I photographed the filling of the pits but I failed to.

    I also sanded the interior of the tobacco chamber and discovered some pits there as well. Imperfections in a chamber like this can cause the briar to burn and smolder with the tobacco.  That extra surface area is something I wanted to eliminate.

    I mixed up a small batch of black J-B Weld epoxy to press into the pits within the tobacco chamber.  I used the mini popsicle stick as an applicator to “squeegee”  the epoxy into the pits.

    After the epoxy had dried for 24 hours I would sand away the excess.

    With the epoxy hardening I turned my attention to redoing the color scheme of the pipe.  The plan was to use a base coat of black Fiebing’s Leather Dye.  This would be buffed and lightly sanded, dying the softer grained briar black while removing the outer surface of the harder, less susceptible briar.  Next a coating of Mahogany, again lightly sanded and finally a top coat of orange.  The goal was to have a pipe with dark grain highlighted with an orange mahogany.  It worked well in my imagination and it should conceal all those dark spots that were the new fills.

    The first step, black Fiebing’s looked as expected.

    After buffing with a rouge buffing compound and wiping with ethyl alcohol cotton balls the black had indeed penetrated the softer grain.

    A light sanding brought out the lighter grained areas more to my liking.

    Next came the mahogany dye.

    Below is the mahogany after a light sanding and alcohol pad wipe.

    Finally the orange top coat.

    I discovered why the Israelis had applied such a thick clear coat to this stummel while I was sanding it.  The briar was extremely soft and very difficult to work with.  Sanding would remove one scratch and create two more.  I decided that maybe a couple coats of Danish Oil would help to toughen the briar.

    Below you can see how I hung the stummel on a vice for drying.  I applied three coats of Danish oil to the pipe and the stummel looked like it had never even seen a drop of Danish oil.  Good lord this briar was a pain to work with.

    The final steps to the restoration included a trip to the buffer for several coats of carnauba was and a hand buffing with a microfiber polishing cloth.  It was at this point that I realized how completely unhappy I was to have forgotten to bend the stem to what I thought was a better bend.

    I used a heat gun to heat the stem until it was pliable.  I then bent the stem to have a more attractive and more comfortable shape. 

    The stem before the bending:

    And, after the bend:

    Of course the heating and bending of the vulcanite ruined the finish of the fill work that I had done to the stem.  That was all resanded, a touch of thin CA, and some more sanding then rebuffed.  This then led to a rewaxing and re-hand-buffing.  Oh, for the love of transparency!  I could have left all my mistakes out but then I’d feel dirty or something…

    I think that the briar used in this Israeli pipe was the same or similar to the briar used by  Robert Marxman, in other words it is Algerian briar.  This briar is known to be a great smoking briar but is also known to be very difficult to work with due to the very soft nature of the wood.  Think about the heavily rusticated pipes of Marxsman or the Custom-bilts.  Those carving techniques were utilized to conceal the soft and imperfect grains of those pipes.  Though they are renowned as great smokers, this pipe has the same cinnamon-cardamomscent as my Marxmans.  The difficulties in trying to get this pipe to have a flawless smooth surface was difficult and I completely understand the Israeli’s use of a heavy masking clear coat.  In the end I think that I did maintain the color scheme of the original pipe though I did lose the stamping, ISRAEL.  The stem is another problem area.  This vulcanite just would not lend itself to the high gloss sheen that I strive for.  Overall I am sure this pipe will provide a great smoking experience but it does not have the aesthetic that I would be proud of.  I guess I should be happy by giving this undoubtedly a “basket pipe” a new lease on life and provide its next owner with a good quality pipe. 

    The dimensions of the Israeli Bent Billiard are:

    Length:  5.64 in./ 138.18 mm.

    Weight:  2.10 oz./ 42.24 g.

    Bowl Height: 2.35 in./  49.02 mm.

    Chamber Depth: 2.09 in./ 38.35 mm.

    Chamber Diameter:  0.73 in./ 18.54 mm. 

    Outside Diameter:  1.57 in./ 34.54 mm.

    I do hope that you have found something here useful to your own pipe care, maintenance or restorations.  If you like this sort of thing, please click the like and subscribe buttons.  Thank you for reading the ramblings of an old pipe lover.

    Loading…

    Below are some photos of the finished Israeli Bent Billiard.

    I included the next two photos to show what the finished tobacco chamber fills looked like after the sanding.

  • A Rettke Pipe Restoration for the Real American Pipe Smokers (RAPS) Facebook group

    July 24th, 2025

    Photographed and written by

    John M. Young

    This is the second pipe of the Real American Pipe Smokers Facebook (RAPS & FB) group set of pipes.  The first pipe of this series was a porcelain apple ().  All three pipes will be given away to RAPS members in the near future.  This one is a real treat for me to work with.  I love to play/work with pipes with what I call crazy gimmicks.  I’m sure that the inventors would call them “creative innovations”, or some-such, rather than crazy gimmicks – tomayto, tomahto.  Whatever you call them I find these creations fascinating.  Going all the way back to Charles Peterson’s 1890 patent for the reservoir in Peterson pipes.  Okay, that one is NOT a crazy gimmick but a heavenly inspired stroke of human genius.  

    (US519135A – Charles peterson – Google Patents)

    Hey, I have the title Nebraska Pete Geek, Certified Pete Geek (CPG) for a reason.  I think the heyday for these “innovations” was from the turn of the last century to the 1960s.  This was a time of far more people smoking pipes and a period where new materials, like plastics, were coming to market.  The age-old issues of heat, “impurities” and steam had a myriad of cures put forward by imaginative pipe inventors.

    Now, this Rettke pipe reminds me of two other pipes I have restored; the Samharra and the Needham pipes.  All three share a similar double drilled shank.

    (A SAMHARA Pipe Restoration – NebraskaPeteGeek)

    (A Needham Restoration – NebraskaPeteGeek)

    The Rettke is the most recent patent with a 1962 stamping.  OK, I’m getting ahead of myself again, let me get back on track.  This pipe was sent to me by RAPS member Jonathan “Fuzzy” Polak, along with two others.  The pipe was stamped with RETTKE over WASHINGTON MO. on the left bottom and PAT. JUNE 12 1962 on the right bottom.

    Below are some photos I took of the pipe prior to work beginning.

    Overall the pipe looked to be in very good condition.  The typical reaming and tobacco chamber sanding would be done.  A thorough cleaning of the interior and exterior.  Sanding of the stummel and a polishing of the stem.  The exciting part, for me, would be the exploration of the drillings involved with making this pipe.

    Background

    I started my research on Rettke pipes with a pipedia.org search on “rettke”.  Below is the short entry from that site.

    “J. Rettke, Washington MO, PAT. June 12 1962. The silver colored thumbscrew below the stem unscrews and is a 2⅜” corkscrew like device. The company is now gone having been purchased by Missouri Meerschaum. This odd looking pipe is made of briar and has a lower chamber with a metal condenser and an upper chamber that contains a filter. The smoke leaves the bowl thru the lower chamber then into the upper and out the stem. It smokes dry and cool. It has a large bowl.”

    (Rettke – Pipedia)  I could not read the above newspaper article even by zooming in.  

    The next search was using Google patent and searching for “Rettke 1962”.  This search turned up the original patent diagrams:

    (1498404097506821639-D0194174)

    My next search was for Steve Laug’s Rebornpipes.com.  Steve Laug did a Rettke restoration back in 2017 and contained links to the State Historical Society of Missouri.  I could not get this site to produce the same document or to even display the link Mr. Laug has in his blog post.  I will link Steve Laug’s blog here:  Restoring a J. Rettke Patent Pipe from Washington, Missouri | rebornpipes.  It is a very well written and researched piece that does contain a transcript of the newspaper article as well as several photographs of Julius Rettke and the pipe making process.

    My favorite quotes from the newspaper article are,

    “The work is done in Mr. Rettke’s basement of his home at Third and Market streets. He doesn’t work at it every day only when he feels like it. He likes to fish and that comes before his pipes in the summer.”

    I can completely understand the lack of enthusiasm for pipe work when fishing is taking a priority.

    And this quote:

    “Mr. Rettke received his patent on his pipe in 1962. What makes his pipe different from others on the market is the path the smoke takes from the bowl, and the passage of smoke through a twisted piece of aluminum, or a “whirler.” The smoke also travels through a standard filter in a standard hard-rubber stem. The “whirler” has a rubber tip that shows on the outside of the pipe under the stem. The “whirler” also can be used as a pipe cleaning tool. It pulls out easily for cleaning purposes.”  Here the newspaper article talks about a rubber tipped “whirler”.  That is how the whirler of my pipe is made.  The other Rettke pipes I saw in photos all had a knurled aluminum tip.  This little fact is mostly non-important, I just found it interesting.

    Now for the fun part:  How does this pipe work?  In the news article transcript it said, “four holes are bored.” under the photo of J. Rettke at the drill press.  I read that after I had done my exploration of the stummel and it was in near complete agreement of what I observed.

    Using the above photo, I overlaid some image features to indicate the “four” drillings.  

    Not to be a smart ass, but I think Mr. Rettke would agree that there were actually 5 drillings.  The final hole would be a hole at the bottom of the tobacco chamber connecting the airway to the lower chamber.  I’ll blame the reporter for the oversight and not Mr. Rettke.

    The Restoration

    The Rettke made its way to the workbench and received its complimentary denim piece.

    I started with cleaning the whirler, as Julius Rettke called it.  There was a shellac like coating from smoking residue on the aluminum indicating that it did actually work.

    The whirler was placed in a medicine cup with 99% ethyl alcohol and allowed to soak.

    Using the same alcoholI started cleaning the two shank airways or, the upper and lower chambers if you are thinking about my amazing diagram from above.

    This pipe had been used but not very heavily.  The cleaning went quickly.  Oh yeah, I also cleaned out the connecting airway with bristle pipe cleaners also dipped in ethyl alcohol.

    I gathered the ream team.

    The number 2 blades for the PipNet was the perfect size for most of the tobacco chamber,  Julius Rettke may have had a custom drill bit for boring the tobacco chamber as it appeared to have a flat button and a slight taper at the bottom quarter of the chamber.  According to the newspaper article he was a machinist for Missouri Meerschaum so who knows, maybe it was a custom built bit?  

    The photo below attempts to show the tobacco chamber’s shape after the reaming.

    The below photo of the sanded tobacco chamber better shows the flat bottomed chamber.  The chamber was sanded with 320 sandpaper wrapped around a wood dowel and with small pieces of sandpaper by hand.

    The sten was placed into Briarville’s Pipe Stem Oxidation Remover and allowed to soak overnight.

    The stummel was taken to the sink for a scrub with a nylon brush and undiluted Murphy Oil Soap.  The soap was rinsed with warm water and the stummel dried with a cotton hand towel.  The photo below shows how dirty the stummel actually was with the lather colored brown from dirt and maybe a bit of stain

    Back at the workbench the stummel was wiped with a cotton ball dipped in 95% ethyl alcohol.  A little bit more stain was removed but the wood grain looked very good.  I also noticed that this pipe had no discernable fills.  Thank you, Mr. Rettke for selecting quality briar.

    I figured that I should give this pipe a full cotton/alcohol treatment due to the fact that there was additional length to the airway.  I didn’t want any of the previous tobacco smoked to influence future smoking.  I packed the tobacco chamber with cotton.

    I then packed cotton into the lower, connecting and upper chambers.  The cotton was then saturated with 99% ethyl alcohol and allowed to sit overnight.

    The next day I returned to the workbench to find the alcohol had done its job of dissolving smoking residues then depositing those residues onto the cotton as it evaporated.

    The cotton in both chambers looked as did the tobacco chamber.

    Upon removing all of the cotton, I could see that the cotton/alcohol treatment was both needed and successful at removing more yuck from the airway.

    I used alcohol dipped cotton swabs to clean the airways again.

    The stem was removed from the Briarville solution and vigorously rubbed with a coarse shop rag.

    I applied some Before and After Hard Rubber Balm to the stem to see how it would react with the vulcanite.

    This is how the pipe sat for several days.  I had a week-long trip to east Tennessee for family matters.  When I returned I had all the post-vacation abandoned house/yard nonsense and some fishing to catch up with.  I can say that the stem seemed to react positively to the time spent soaking up the Before and After Hard Rubber Balm.  The restoration got back on track with a topping of the rim.  3200 and 400 grit sandpaper were used with the pieces laid flat on a countertop.  I also used a wood sphere and 320 sandpaper to give the inner rim a slight bevel and conceal the two slightly charred spots.

    The pipe stem was reattached to the stummel for the sanding.  A series of sanding sponges in grits 320-3500 were used on both the stem and stummel.  Between each sponge I wiped the stemmel with a cotton ball wetted with ethyl alcohol while the stem was rubbed with Obsidian Oil and wiped with a paper towel.  These wipings were done to remove and sanding debris.

    After the sanding the pipe was worked with micro-mesh pads 4000-12000.  The same wiping between sponges was employed between pads.

    The pipe was then coated with Before and After Restoration balm.  This magic elixir was allowed to sit for 30 minutes.  After the sit time excess balm was wiped away with an inside out athletic sock.

    The pipe was then taken to the buffer for several coats of carnauba wax.

    I placed a drop of Before and After Hard Rubber Balm on the rubber end of the whirler and rubbed it in.  Yeah, this rubber is not “hard” but I figured that it would work well here too.

    The whirler was reinserted and the entire pipe was hand buffed with a microfiber polishing cloth which raised the shine on this lovely pipe.

    Of the many gimmick pipes I’ve had the pleasure of working on, I think this one would actually be an effective system for condensing steam.  It just makes sense.  That said, I did not try it out as it is intended to be a pipe given to a RAPS member.  I did try the draw both with and without a new Medico filter and both were very nice.  By the way, If you are interested in becoming a member give FB “The Real American Pipe Smokers” a look and join up with this interesting group of pipe smokers.  This J. Rettke pipe has very pretty grain on the left and decent birdseye’s on the right.  The Medico stem polished up well and can be used with or without a Medico filter.  Looking closely at the stamp on the pipe’s bottom, I do think that the stamping should look like the other examples of Rettke pipes and read J. RETTKE.  The J. is just too faint to be seen.  Overall this is a very nice and interesting historical pipe.  I would consider this an artisanal pipe from a time before artisanal was cool.

    The dimensions of the J. Rettke are:

    Length:  5.44 in./ 138.18 mm.

    Weight:  1.49 oz./ 42.24 g.

    Bowl Height: 1.93 in./  49.02 mm.

    Chamber Depth: 1.51 in./ 38.35 mm.

    Chamber Diameter:  0.73 in./ 18.54 mm. 

    Outside Diameter:  1.36 in./ 34.54 mm.

    I do hope that you have found something here useful to your own pipe care, maintenance or restorations.  If you like this sort of thing, please click the like and subscribe buttons.  Thank you for reading the ramblings of an old pipe lover.

    Loading…

    Below are some photos of the finished J. Rettke pipe.

  • A Porcelain Apple Restoration for the Real American Pipe Smokers (RAPS) Facebook group 

    July 22nd, 2025

    Photographed and written by

    John M. Young

    In February of 2024 I joined the Facebook (FB) group Real American Pipe Smokers.  I found my first post in that group, below:

    I have found in this group a unique group of about 1,600 folks that are open to others and even accept pipe smokers who like Captain Black Grape.  Yeah, I know, crazy right.  Oh, by the way, I have a jar of Captain Black Grape and a dedicated MM cob for that aromatic delight.  The members are everything someone like me is looking for in a FB group, a bunch of friendly, funny, knowledgeable, giving individuals who put up with my nonsense.

    Anyway, I have been part of a cabal within the group who has been giving away some of the pipes I have restored and various other items like tobacco, tampers, rare bourbon samples, etc…  I was recently asked if I would be interested in restoring three pipes, donated by another member, which we could in turn give away to group members.  I said, “Sure”.  So the next three restorations will be those pipes.  Here is a photo taken of the three:

    The first pipe I decided to work on was the porcelain apple, thus the title and subject of this posting.  Below are some photos of the pipe before I did anything with it.

    This restoration looked to be more of a cleaning and stem polishing than a true restoration.  Some work would have to be done to improve the fit of the cork tenon.  Other than that there was not a lot that the pipe needed.  

    Background

    There really isn’t much I can say about this pipe without a whole bunch of imaginative conjecture.  This pipe has no identifying stamps or marks.  If I had to venture a guess, I’d say this pipe was made in Europe post WWII to 1980.  I have included some links for those interested in porcelain in general and a couple more specific to pipes below.

    Porcelain – Wikipedia

    List of porcelain manufacturers – Wikipedia

    Amsterdam Pipe Museum – Royal Goedewaagen,

    Catalogue | Porcelain Tobacco Pipes

    The Restoration

    The pipe began on the workbench with a cleaned denim piece.

    An Exacto knife kit was broken out for a little bit of cork trimming.

    The cork tenon had a rough and unsightly end.  This would need to be trimmed and sanded.

    The cork proved to be very dry and brittle leading me to think that it was probably at least 50 years old.

    With the cork trimmed and sanded, I cleaned out the stem using bristle pipe cleaners and 99% ethyl alcohol.  I had been using 95% ethyl and recently switched to this product.

    To address the dryness of the cork I got out the trusty old tea kettle and started some water on the stove.

    The cork was steamed for about 5 minutes.  This is precisely the amount of time it takes for the kettle’s whistle to become so annoying that you have to stop or become patient at Homicidal Acres Home for the Mentally Unstable.

    I then rubbed some petroleum jelly onto the cork to hopefully preserve the now swollen cork.  This did greatly improve the fit of the stem to the stummel.

    Next came the reaming of the tobacco chamber.  Porcelain is a hard material but in my mind, it is also brittle.  I’ve never broken a porcelain pipe during cleaning but I have only worked with one other so my experience was rather limited.  I chose to treat it more like a meerschaum pipe and only used the Smokingpipes Low Country reaming knife to scrape the chamber.

    A small amount of cake had been deposited within the chamber.

    Alcohol dipped cotton swabs removed the smaller particles and more soluble cake remnants.

    I used 3200 sandpaper wrapped around a wood dowel and a piece of sandpaper wetted with alcohol to sand the interior of the tobacco chamber.

    And some more sanding.  The carbon cake seemed to be well on its way to becoming diamond.

    I eventually called it quits on the sanding and thought that perhaps a cotton stuffing and alcohol soak treatment might soften the remaining cake and remove any residual “old tobacco” aroma.

    The tobacco chamber and shank were stuffed with cotton and then saturated with the 99% ethyl alcohol.

    The unglazed porcelain of the shank began to discolor from the alcohol.  I did not think this would be permanent with the evaporation of the alcohol.

    I compared my other example of a porcelain pipe to this pipe.  I was struck by the color difference.  My bent pipe has been smoked numerous times and it has taken on a very nice creamed coffee color.  It was originally a bright white as well.  The apple had obviously been smoked but had not experienced the same coloring.

    After allowing the alcohol to work its magic overnight, I removed the now dry cotton.  As you can see in the photo below very little smoking residue was absorbed by the cotton.  The discoloration on the shank had also disappeared.

    I turned my attention to the stem.  I filed the tooth chatter with a small flat file and lightly sanded the bite zone with a 320 grit sanding sponge.

    The stem was then worked with sanding sponges from 320-3500 grits.  Between each sponge I rubbed the stem with mineral oil and wiped it with a paper towel.

    The stem was then worked with micro-mesh pads in grits of 4000-12000.  Between these pads I rubbed the stem with Obsidian Oil and wiped with a paper towel.

    I rubbed a coating of Before and After Hard Rubber Balm onto the stem and let it sit overnight.

    The next day the  pipe was taken to the buffer where I applied several coats of carnauba wax to the stem and stummel.  The final step was to hand buff the pipe with a microfiber polishing cloth.

    I think the porcelain pipe is a unique piece of our hobby and history.  I only have a single example of my own and I have mixed feelings about it.  I do like how mine has colored over time, taking on a creamed coffee color.  I do worry about the fragility of the porcelain and my tendency to drop things.  This porcelain apple is a wonderful shape and size.  The exterior is a brilliant glossy white.  The tobacco chamber interior has discolored and I suppose that I could have been more aggressive with the restoration but I did not want to damage the porcelain.  My inexperience with this material kept me from “tough love” during the chamber restoration.  The expansion of the cork tenon worked well and the stem polished up very nicely.  The black and white of the piece is truly eye-catching.  The double holes at the bottom of the tobacco chamber provide an exceptionally smooth draw and I am sure that this pipe will treat its new owner with years of contemplative relaxation.  The dimensions of the Porcelain apple are:

    Length:  5.78 in./ 146.81 mm.

    Weight:  1.45 oz./ 41.11 g.

    Bowl Height: 1.64 in./  41.66 mm.

    Chamber Depth: 1.17 in./ 29.72 mm.

    Chamber Diameter:  0.77 in./ 19.56 mm. 

    Outside Diameter:  1.62 in./ 41.15 mm.

    I do hope that you have found something here useful to your own pipe care, maintenance or restorations.  If you like this sort of thing, please click the like and subscribe buttons.  Thank you for reading the ramblings of an old pipe lover.

    Loading…

    Below are some photos of the finished Porcelain apple.

  • A Custombilt Restoration and Stem Replacement

    July 17th, 2025

    Photographed and written by

    John M. Young

    I suppose some people dream about finding an original unsmoked CUstom-bilt pipe in an antique shop with a price of $5 hung delicately from a tag on a string.  That sounds to me more like a nightmare.  Well, the $5 would be okay, I guess but finding a Custombilt that didn’t need to have hours of work done sounds terrible.  They are fun pipes to work on and I am a restorer.  Sure, I am self-proclaimed lazy and like to work on an easy restoration on occasion but still, it is a restoration.  Bringing an abused greatly loved pipe back to life so that it can be greatly loved some more is what I look forward to.  And today’s restoration was just that.  This Custombilt had been smoked quite heavily in its day.  A three tier wedding cake had nothing on the cake in this pipe’s bowl.  This pipe came as part of a trio, 2 Custobilts and a third “look-alike” back in March.  This pipe wears a Custombilt, all one word no hyphen, over IMPORTED BRIAR stamped on the left shank.  No other stamps were found.  Below are some photos taken prior to work being done on the pipe.

    Now, you may think this looks like a nightmare.  For me, the stuff dreams are made of.  The pipe would need a replacement stem.  Remember when I said this was part of a trio?  The other Custombilt in the trio was a stem donor.  I am still not sure if that pipe can be saved but it certainly can donate its saddle stem for this recipient.  The bowl would definitely need a good reaming.  Here is to not finding any charring in that well used tobacco chamber.  The rim was quite lava encrusted, probably concealing a charred rim.  Some people call me a pessimist, I call myself a realistic optimist – always expecting the worst thus avoiding the horror of disappointment.

    Background

    Back on January 2, 2025 I did a blog on a Custom-Bilt pipe.  Below you will find the “Background” information from that restoration.  Being a proud Generation X slacker type, I will include it here rather than try to come up with something original.

    “The standard starting point for researching a pipe typically includes pipedia.org.  The query of Tracy Mincer, originator of Custom-Bilt, will take you to this brief entry:

    “Tracy Mincer started the original Custom-Bilt pipe company in 1934. In 1946, the name was changed to Custombilt after Mincer began an association with Eugene J. Rich, Inc. There were some big changes in advertising and distribution. The slogan “AS INDIVIDUAL AS A THUMBPRINT” began at this time as well.

    In the early 1950’s, Tracy Mincer developed severe financial problems that caused him to stop making the Custombilt, and he lost the name. n 1952, Mincer began a new pipe, The Doodler, that due to the holes in the bowl had to made primarily in a billiard type shape in three sizes. In the early 1950s, National Briar was turning the bowls for Mincer. Based upon the documentation, it appears that Mincer made the pipe until the mid 1960s, when National Briar Pipe Co., Inc. began making and selling the Doodler.

    Mincer died in 1964. Based upon the information provided, Mincer seemed to always have money, production, distribution and other problems. Mincer was probably a terrific craftsman but a very poor businessman and administrator. To me, Mincer sounds like your typical small business entrepreneur who always knew what was right and if you disagreed¼problems. Mincer always seemed to be on the brink of going out of business, not meeting payroll and so on.

    Claude Stuart purchased the Tracy Mincer Pipe Company and began making pipes using the Tracy Mincer stamp. Stuart finished nearly all the pipes produced, mostly carved and textured bowls and the occasional straight grain. Claude made the Tracy Mincer Pipe Company a moderate success. Stuart became ill and in 1990 The Tracey Mincer Pipe Company went out of business. Currently, Jim Tedesco owns the Tracy Mincer name.

    These interesting examples bellow are pipes made with the Tracy Mincer stamp. If you any additional information about these pipes, or can otherwise add to the history of this interesting pipe man, please add it here, or send it to sethile.pipes@gmail.com, and we can add it for you.” (Mincer – Pipedia).  

    There is a book written by William E. Unger, Jr.,Ph.D titled “As Individual As A Thumbprint”: The Custom-Bilt Pipe Story.  This book appears to be self published by Dr. Unger at The Graphic Touch, of Columbus, Ohio.  Printed in 2001 and bound with a black plastic spiral, the book states that the entire contents are “All rights reserved…without permission in writing from the author”.  Dr. Unger passed away January 1, 2013 (obituary:  https://www.legacy.com/us/obituaries/dispatch/name/william-unger-obituary?id=12197453) and the book is no longer in print.  This unfortunately means that I will not be including any quotes from the book.  We’ll see how I get around that, I guess.   I got lucky and purchased a copy from eBay for under $30 (with shipping) earlier this year, after watching several copies sell for what I considered astronomical prices.  The book is a remarkable piece of work and is the definitive history of the Custom-Bilt pipe.  The research that Dr. Unger put into getting the story correct is amazing.  Fortunately there were several past employees, friends and relatives associated with Tracy Miller and the company that were able to give interviews and explanations to the inner workings of the company.

    In regards to the stamps on the pipe in hand, I will speak to what I have found in Unger’s book, without quoting any of it.  The first thing that needs clarification is the Custom-Bilt vs. Custombilt name.  I’ll paraphrase William Unger here, the first stamps used by Tracy Mincer were “Custom-Bilt”.  These were used from 1938-1946 definitively and less definitively prior to 1938.  You could, perhaps, find reference to this in the book on page 91.  There, I think that should give me legitimacy and keep any lawyers at bay.  Next we examine the IMPORTED BRIAR stamp on the bottom of the pipe.  Unger states that he has inspected a large number of Custom-bilt pipes and that about ½ of them do not have this stamp.  He declares that he is at a loss to explain either their absence or presence  This lack of explanation might be seen towards the bottom of page 114.  The final stamp on this Custom-Bilt is the geometric circle stamped on the shank.  Certainly these stamps have some utilitarian meaning.  Nope.  Unger declares that he is not able to explain any system where shapes such as circles, triangles, stars, rectangles, half moons or even trapezoids have any systematic meaning.  This may or may not be seen on the top of page 114. 

    Pipephil.eu does allow quotations with proper referencing and shows nice examples of the above-mentioned geometric stamps.

    (Cos-Cz — Pipes : Logos & Markings)”  (Young, John M. A Custom-Bilt Circle Stamped Restoration – NebraskaPeteGeek)

    Regarding this pipe, I looked at the stamp diagrams from Unger’s book and matched this pipe with stamps from the Wally Frank years.  This would date this pipe to 1974-1987 and most likely put production at the Weber factory in New Jersey.

    The Restoration

    The pipe made the 20 foot trip from the photos table to the bench and received a cleaned piece of denim.

    I reexamined the cellophane tape spacer in the mortise.

    I had no plans of attempting to salvage that mouthpiece and that tape had to go.  I removed it with gentle pressure and forceps.

    The old adhesive gave way and the tape was removed in a single piece.

    The reaming tools were gathered.  I planned on using the PipNet blades in sequential order from smallest to largest with each one removing a layer of the overabundant cake.

    The first blades did a fine job. It was here that I decided that I wanted to know how much cake was actually present.

    I started pouring the removed cake into an empty snus container for weighing at the end of the reaming.

    The 2nd blade also did a fine job.

    With the results deposited into the plastic cup.

    Of course the 3rd blade came next and performed valiantly.

    I was accumulating quite the pile of cake.

    Finally the fourth blade, the poor fourth and often unused blade that infrequently is not needed, got his chance to shine.

    There it was the collection of all four PipNet blade’s work.

    I took it up to the electronic balance and was surprised to see 0.22 ounces or 6.24 grams of cake.  Dang near a quarter ounce.  I wondered, “how much tobacco did that take?”

    Back to work.  The tobacco chamber was sanded with 32 sandpaper wrapped around a wood dowel.  The chamber looked good but…

    On both the left and right sides of the interior front of the chamber there were signs of “spider web” cracks from excessive heat. 

    The spider webbing was light and superficial.  That thick layer of cake had protected the briar quite well.  I did think that a good bowl coating would be in order at the end of this restoration.

    Next came the scraping of the rim.  The lava was moistened with saliva and allowed to sit for a few moments while I put away all the reaming tools.  I then used a sharp pocket knife to carefully scrape the lava from the rim.  There was one large char area at the 8:00 position on the outside edge of the rim.  This was likely due to a lighter. 

    The shank cleaning was next and after the condition of the tobacco chamber, I had visions of using boxes of cotton swabs and liters of alcohol.  I used a couple of alcohol dipped cotton swabs to moisten the residues in the airway and ran the Kleen-Reem shank drill through the airway.  It brought out a good deal of crusty yuck.  Additional scraping was done with a dental scraper.

    I then used a nylon shank brush dipped in alcohol.  You can see from the photo below that this started out very dirty.  Folded bristle pipe cleaners along with more cotton swabs and a good dose of ethyl alcohol helped clear the filth  Within a few scrubbings the airway was cleaned.

    The stummel was then taken to the sink for a scrub with undiluted Murphy Oil Soap and a nylon brush.  The soap was rinsed with warm water and dried with a cotton hand towel.

    Back at the workbench the stummel was wiped with a cotton ball wetted with 95% ethyl alcohol.

    The rim looked much better than it did but would require a light topping with 320 then 400 grits sandpaper.

    The charred spot on the outer rim was scraped with a sharp pocket knife then sanded with a 400 grit sanding sponge.

    The rim was topped with 320 and 400 grit sandpaper laid flat on a countertop.

    It was time to find a donor.  Fortunately this CustomBilt arrived with another.  This other had a saddle stem and a crack through the bowl on both the front and back.  I have tried to reduce and compress these cracks to no avail.  I have pretty much set the cracked CustomBilt aside and think about potential fixes now and again.  The stem from the cracked pipe seemed like a near perfect fit to the Custom Bilt at hand.

    I realized that the original stem was a taper and this replacement was a saddle stem but they were both CustomBilts of the same era.

    The fit of the donor stem was slightly larger than the shank of the original pipe.

    Since I know of no way to increase the diameter of a shank, I do know how to reduce the diameter of a vulcanite stem.

    First things first.  I had to snug up the tenon so that it was a nice solid fit to the mortise.  I decided to do this by thickening the tenon with black cyanoacrylate (CA, super glue).  A thin bead of black CA was added to the tenon

    I used a curved dental scraper to evenly spread the CA over the tenon.

    The wet CA was spritzed with a CA drying accelerator then sanded with a 400 grit sanding sponge.  The new fit was very good.

    With the stem securely attached to the stummel I could start the shaping of the stem.  I wrapped the shank in masking tape to protect it from the activities with the file.  The tape had to be replaced several times to keep the shank covered.

    Eventually I stopped filing and started smoothing the stem with emery boards for finger nail filing.  

    To make the seam even better fit, I use Scotch tape as it is even thinner than the masking tape.

    Eventually I removed the tape altogether and sanded the shank and the stem in unison.  This worked because there was no rustications or stampings on the end of the shank.  I had little fear of blending the briar from the old finish to the new.  The stummel and stem were worked with a series of sanding sponges from 320-3500 grits.  Between each sponge the stummel was wiped with a cotton ball moistened with alcohol.  The stem was rubbed with mineral oil and wiped with a paper towel between sponges.

    The stummel was given a coating of Before and After Restoration Balm applied with a soft bristle toothbrush and allowed to sit for 20 minutes

    The excess balm was wiped from the stummel using an inside out athletic sock.

    The shank and stem were buffed using white buffing compound on the buffer.  Next, several coats of carnauba wax were applied to the pipe.  The final step was another hand buff with the microfiber polishing cloth then a return to the photography table for the finished pipe photo shoot.

    I realize that I changed the appearance of this pipe quite a bit by replacing a taper stem with a saddle stem but I feel that since they were both original CustomBilt stems it was more acceptable.The notch on the rim doesn’t detract from the appearance and almost looks like it is supposed to be there.  The rustications cleaned up very nicely and look great with the freshly sanded smooth portions.  The replacement stem also polished up very well and it looks good with the stummel.  I think this restoration was a great success and will allow some new owner to make and have many memories of their own with this wonderful old pipe.  The dimensions of the now saddle stem CustonBilt are:

    Length:  5.65 in./ 143.51 mm.

    Weight:  1.79 oz./ 50.75 g.

    Bowl Height: 2.09 in./  53.09 mm.

    Chamber Depth: 1.71 in./ 39.88 mm.

    Chamber Diameter:  0.88 in./ 22.35 mm. 

    Outside Diameter:  1.56 in./ 39.62 mm.

    I do hope that you have found something here useful to your own pipe care, maintenance or restorations.  If you like this sort of thing, please click the like and subscribe buttons.  Thank you for reading the ramblings of an old pipe lover.

    Loading…

  • A Woodsman Restoration

    July 15th, 2025

    Photographed and written by

    John M. Young

    This pipe screamed at me when I first saw it on eBay.  I have no idea why.  I am not a huge fan of billiards but there was just something about the extended shank that said, “Hey you, check this out.”  Everything about the pipe said that it was a WWII era pipe.  The rustication, the non-briar look about the shank grain and the use of so much aluminum.  I had neer heard of “Woodsman” as a maker or line of pipes.  More on that in the “Background” section.  This pipe demanded that I work on it.  I’d have to ship it in from Canada and I doubted that I’d ever even break even if it sold.  Still, it beckoned.  Well, long story short, I bought it and waited for the arrival of another pipe to entertain me.  Upon arrival the pipe looked as described; dirty, used  and with faint stamps.  The stamps read, Woodsman, in script on the left and GENUINE over BRIAR in a circle on the right shank.  The below photos show the Woodsman before any work was done.

    The pipe would need a reaming and an assessment of the condition of the tobacco chamber.  There appeared to be a crack in the bow; on the right side of the bowl but it did not appear that the crack went all the way to the rim.  The stamps were faint but still legible so extra care would have to be taken to preserve these.  The stem had some light tooth chatter and minimal oxidation.  The aluminum would need some buffing for scratch removal and polishing.  A thorough cleaning and general refinishing were also on the menu.  Overall it looked like a general restoration of a 75 year old used pipe.

    Background

    The research of the name, “Woodsman” produced nothing on either pipedia.org or pipephil.eu.  A Google search did produce a result on Worthpoint.com and is shown below:

    “

    WOODSMAN D&P GENUINE BRIAR SMOKING PIPE From the research I gathered this pipe (D&P “Woodsman”) was probably made just after WW2. It has a genuine briar bowl and a Mt. Laurel shank. D&P made pipes mostly from Mt. Laurel from about 1942 until just after WW2. NEEDLESS TO SAY THIS IS AN EXTREMELY HARD TO FIND UNSMOKED PIPETOTAL LENGTH APPROXIMATELY 6″ LENGTH OF MOUTH PIECE IS ABOUT 1-1/2″ HAS A 7/8″ INSIDE ALUMINUM INSERT BETWEEN THE MOUTH PIECE AND THE PIPE STEM SPORTS A NICE SILVER BAND WEIGHS 1 OUNCE EXCELLANT CONDITION LIKE NEW NEVER SMOKED – VERY, VERY NICE” (Vintage smoking Pipe WOODSMAN D & P GENUINE BRIAR NEVER SMOKED | #1903579341)

    I was not sure where the author of the above got the D&P but it does seem likely.  The “D&P” comes from David and Paul Lavietes originators of Sparta Pipeworks, predecessor of Sparta Industries.  I’ll let the pipedia.org site explain that history, below:

    “Sparta Industries is based in Sparta, NC. It was created in the 1940s by David and Paul Lavietes, and originally called D&P Pipeworks. It began production in 1943 and at the end of the 1950s. From 1943-1946 D&P made the Spartan Pipe from locally sourced rhododendron a.k.a. “mountain laurel”. These pipes were very utilitarian and blocky, the bits were made of maple and featured a military mount. Pipes made from rhododendron had to be boiled in a boric acid solution to keep them burning when smoked. Both Rhododendron wood and Boric acid are known to be toxic to humans, though there is no evidence that there were any issues with the Spartan pipes. While some Spartan pipes were sold on the domestic market they were mainly produced to be sent to the war effort in Europe and were often included in C-Rations. Once the European briar shortage ended and shipments to the US began again D&P shifted production to traditional pipes made from real briar. Dr. Grabow took it over, at the end of the 1970s Sparta became one of the biggest pipe makers in the USA, and the Dr. Grabow brand was the number one in sales in the country. Today it makes various brands, producing over a million pipes a year, perhaps the largest amount from just one factory.

    The company was bought in the 1990s by Lane, Ltd., a giant in the North American distribution sector. It produces and represents various brands, such as Aldo Velani, Alpha, Cesare Barontini, and Mastercraft.” (Sparta Industries – Pipedia)

    The Woodsman pipe in hand, has what appears to be an extended shank of non-briar wood.  I say this because the grain of the shank looks unlike briar.  I’ve restored several pipes made from both Mission Briar and Mountain Laurel.  Both of these woods have grains without the birdseye grain.  I will link a post by Dave Tabler writing for Appalacianhistory.net for a fascinating read about the use of Mountain laurel and the pipes made from it in North Carolina – This is not a pipe… – Appalachian History –.

    As a bonus feature I’ll link to an article on the curing of wood used for pipe making – Curing – Pipedia.  Yeah, you can continue down that rabbit hope if you like.  And if that were not enough I’ll throw in another restoration I did of a Trapwell pipe made of the “World’s Best Briar” that ain’t briar at all:  A Trapwell Large Apple Restoration – NebraskaPeteGeek.

    The Restoration

    Things started well with the typical denim piece.

    The ream-team was assembled.

    This pipe needed the #2 and #3 PipNet blades.  The Smokingpipes Low Country reamer and the General triangular scraper also got to see some action due to the concave nature of wear and charring.  

    The below photo is very misleading.  The reamed tobacco chamber was not a cylindrical drilling any longer.

    The below photo shows the tobacco chamber sanded.  The charred areas were sanded to remove as much of the charred briar as I was able.  I was not sure how to proceed with repairing the chamber and needed some pondering time.

    Shank cleaning usually is a good activity for me to do pondering.  This one started out by running the Kleen-Reem tool’s shank drill through the airway.

    Below you can see the tip of the drill in the button of the chamber.

    Next came the cotton swab dipped in alcohol to soften the remaining smoking residue.  Then the scraping with a dental scraper.  This produced a great deal of yuck.  I tried scrubbing with folded bristle pipe cleaner dipped in alcohol and a shank brush.  More yuck.  Then moved to a .25 caliber brass bore brush mounted to a wood dowel.  The Airway was filled with alcohol during the brushing and drained on the paper towel.  Did I mention the amount of yuck removed?

    At this point I thought maybe some hot water would help.  So I took the stummel to the sink for the undiluted Murphy Oil Soap scrub with a nylon brush.

    The stummel remained full of grime so the scrub was repeated with Murphy’s and a brass brush.  The soap was rinsed with warm water and the stummel dried with a cotton hand towel.

    Dang!  Look at that crack.  Well, does it go all the way through the chamber?

    Oh man.  The water really made the spider webbing show up too.  What have I got myself into?

    I then wiped the stummel with a cotton ball dipped in 95% ethyl alcohol.  This colored the cotton some but not terribly.

    I poured some alcohol into the tobacco chamber to see if the crack was all the way through the bowl.  Alcohol leaked right through the side.  

    I was not leaking through just one point but the length of the crack.

    What about the other side?, I asked.  Yep, that one too was leaking alcohol through the bowl.  Not as bad but still not a positive development.

    Hmm, more to ponder.  Needing additional pondering time, I turned to cleaning up the stem.  I soaked the aluminum tube extension in alcohol to soften the residue. 

    The shank was very dirty so I thought packing the tobacco chamber and airway with cotton then saturating the cotton with 95% ethyl alcohol might help dissolve some of that.

    The above 10 ml of alcohol were added to the cotton stuffed chamber and shank.

    Some of the alcohol was seeping through the crack on the right side of the bowl.  This leaking alcohol was undoubtedly carrying tars and other smoking residues to the outside of the bowl.  That would require more cleaning.

    A lesser amount of alcohol was seeping through the left side.  This just added to the pondering.

    Maybe stem cleaning would help the pondering process.  The stem was also pretty filthy.  Numerous bristle pipe cleaners all dipped in alcohol were used before the stem was cleaned.

    I was still pondering tobacco chamber fixes.  Hmm, maybe ridding the stem of the tooth chatter would help the pondering.  The bite zone was filed with a small flat file.

    On one side there remained three dents which would require filling with black cyanoacrylate (CA, super glue).

    I applied a layer of black CA to the dents.  This was allowed to cure or dry.

    The cured black CA was then filed with a small flat file and sanded with a 600 grit  sanding sponge.

    Maybe the pondering organ would come up with a great solution in the morning.  I let the alcohol do what it does in the tobacco chamber and shank overnight.  The next morning I removed the now dry cotton.  The cotton in the bowl was daily clean but the shank cotton was full of yuck.

    I started the shank airway cleaning process again.  Many cotton swabs dipped in alcohol and a good deal of scraping later the airway was more clean.

    Still, the shank was dirty.  I thought, “maybe another cotton alcohol soak would work.”  I repacked the shank and chamber with clean cotton then added another 10 ml of 95% ethyl alcohol and let it sit overnight.

    Another day later, I returned to the pipe and removed the cotton.  I considered this a great success.  The cotton was stained but it had removed nearly all of the smoking tars.  Subsequent cotton swabs came back much cleaner.  Victory!

    All my pondering came up with the following plan for the cracked and leaking tobacco chamber:  Water Glass, also known as sodium silicate (Na2SiO3).  The idea would be to

    1. Coat the interior of the tobacco chamber with a layer of Na2SiO3 allow it to dry or harden 
    2. Sand the chamber smooth.  
    3. Repeat until the tobacco chamber is smooth and a uniform cylinder. 

    This sounded very reasonable and like a good solution.

    Below is a photo of the warnings from the bottle label.

    I applied the Na2SiO3 using a folded pipe cleaner.  I vigorously rub the pipe cleaner to remove any loose fibers.  The Na2SiO3 is thicker than water, more like a syrup, in consistency.  

    The Na2SiO3 dried quite quickly and was hard within 30 minutes.

    I then used brown CA applied with a fly tying bodkin to carefully fill the crack along the outside of the bowl on the right side.

    I used a brass brush to add texture to the CA after it had dried.  I had to apply a second coat to fill the void at the outer rim.

    I sanded the interior of the tobacco chamber using a ¾ inch wood dowel wrapped in 220 sandpaper.  Below is a photo of the first sanding of the first application.

     A second application of Na2SiO3 was done, followed by a second sanding.  This was followed by a third application and sanding.  The ¾ inch dowel wrapped with sandpaper allowed me to re-establish an even cylindrical shape to the tobacco chamber.

    With the tobacco chamber situation resolved I wondered if oxalic acid would lighten the color of the wood.  I didn’t call the wood briar because I do not think it is briar.

    The oxalic acid was worked into the stummel with a cotton swab.  Below you can see the discoloration on the cotton.

    When working the oxalic acid into the bowl the wood lightened almost immediately on the front and the back of the bowl.

    The sides remained darker.  I was not sure if this was due to smoking residues seeping through the cracks from previous use, the cotton-alcohol treatments or a combination of the two.

    Below is the oxalic acid treated front of the bowl.

    Below is the oxalic acid treated rim.

    I let the oxalic acid sit for 30 minutes then scrubbed the stummel with copious water and a nylon scrub brush.

    Once dry the stummel did indeed appear lighter in color.  I call this a success.

    The brown CA filled crack appeared worse for wear after the oxalic acid.  I touched up the light area of the crack with a Furniture touch-up marker.

    The stampings were covered with masking tape for their protection.

    I then reattached the stem and took the pipe to the buffer for a buffing with rouge compound.  Once buffed the tape was removed and the wood wiped with an alcohol dipped make-up pad to remove and rouge residuals.  The wood was coated with Before and After Restoration Balm and set aside for 20 minutes.

    An inside out athletic sock was used to remove any remaining Restoration Balm.

    To finish the restoration of the tobacco chamber I decided to use a bowl coating.  100% maple syrup and charcoal powder were chosen as the bowl coating.  The chamber was coated with a light layer of syrup using a cotton swab.

    To keep the charcoal powder out of the airway a pipe cleaner was inserted into the airway.  A capsule of charcoal powder was poured into the chamber.  The rim was covered with a piece of painters tape.  The stummel was then shaken for a couple of minutes.  I also tilted and tapped the bowl with the rubber coated handle of a file to make sure the powder was evenly distributed on the entire bowl surface.

    The tape was removed and the excess powder was dumped.  I reinserted the stem and gave a couple of hard puffs of air through the stem to clear remaining carbon powder.  The finished bowl coating is shown in the photo below.

    The pipe was taken to the buffer where several coats of carnauba wax were applied to the pipe.  The final step was another hand buff with the microfiber polishing cloth then a return to the photography table for the finished pipe photo shoot.

    This restoration ended up being much more extensive than I originally thought.  The tobacco chamber was in far worse shape and the cracks in the bowl were more severe than I expected.  This is probably not a pipe that I would sell to anyone who has not read and understands all of the procedures done to it.  I do think that steps taken to restore this pipe will provide many years of use to an otherwise worn-out old pipe.  I have not taken it out for a test-smoke yet but I do plan to soon.  The pipe remains a very unique historical example of the ingenuity of pipe makers during the drought of briar caused by World War 2.  It really is a lovely pipe with great billiard lines.  The stem polished very nicely and is a pretty contrast to the aluminum bands.  The extended shank is, I believe and attempt to use non-briar in the manufacture of the pipe.  I cannot determine if the bowl is actually briar or not and the rustication doesn’t allow a solid identification by the wood’s grain.  The dimensions of the are:

    Length:  6.02 in./ 141.22 mm.

    Weight:  1.02 oz./ 49.33 g.

    Bowl Height: 1.69 in./  45.47 mm.

    Chamber Depth: 1.60 in./ 39.88 mm.

    Chamber Diameter:  0.80 in./ 21.34 mm. 

    Outside Diameter:  1.28 in./ 36.57 mm.

    I do hope that you have found something here useful to your own pipe care, maintenance or restorations.  If you like this sort of thing, please click the like and subscribe buttons.  Thank you for reading the ramblings of an old pipe lover.

    Loading…

    Below are some photos of the  finished Woodsman Billiard.

←Previous Page
1 … 3 4 5 6 7 … 26
Next Page→

Blog at WordPress.com.

Privacy & Cookies: This site uses cookies. By continuing to use this website, you agree to their use.
To find out more, including how to control cookies, see here: Cookie Policy

Loading Comments...

    • Subscribe Subscribed
      • NebraskaPeteGeek
      • Join 40 other subscribers
      • Already have a WordPress.com account? Log in now.
      • NebraskaPeteGeek
      • Subscribe Subscribed
      • Sign up
      • Log in
      • Report this content
      • View site in Reader
      • Manage subscriptions
      • Collapse this bar
    %d