Have you ever had what you think is a great idea, one that you are sure will work, but that no one else thinks is plausible? Well, that is how this project started. If you’ve read my ramblings for a while, you have probably read about discussions with Sascha Mertens. He is a fellow piper and restorer from Germany. Although we have never met face-to-face we have been chatting online for well over a year. I value Sascha’s ideas, techniques and criticisms. We have sent various gifts to one another across the Atlantic like pipes and tobaccos which neither of us has easy access to. Sascha appreciates a good corn cob pipe and has mentioned that he likes how my Missouri Meerschaum (MM) Freehand
looks. Sascha also, like many Germans, prefers to smoke pipes with filters. That sparked my interest in converting a MM Freehand into a 9mm filtered pipe.
I started with an imagined solution: Drilling out the shank to a diameter which would fit a 9mm filter. Next came a bunch of measurements with my MM Freehand and the idea started taking root.
For this scheme to work I would need to drill out the shank and shorten the tenon on the existing bit. I didn’t like that idea, but it should work.
I sent the photos and ideas off to Sascha and he reaffirmed that it wouldn’t work. O ye of little faith. I think the doubt came from my placing of the filter in the shank rather than in the stem. Stem placement is more typical and standard. Not being standard, nor typical, I proceeded on with my grand plan.
I sent Sascha several options of available MM Freehands from various sellers:
His response was simple and language-free:
The order was placed and the idea went to the back burner for a couple of weeks.
Last night, the patient made her way to the operating table. Apologies, I am getting ahead of myself, again.
The patient first had a date with the camera for some “before” photos.
The Freehand looked typical for a new MM pipe. I was not impressed with the fit of the nickel collar. That would have to be redone and straightened. The stem was a beautiful dark grey metallic swirl stem, though it did fit rather tightly. The draft hole of the shank was slightly obstructed with drilling debris, an easy fix. I also debated myself about chiseling out the shank-end at the bottom of the tobacco chamber. Hmm, we’ll have to see if I want Sascha to experience the not so wonderful flavor of hardwood smoke when his first couple of bowls of tobacco burn the shank end. Muwahaha.
After the photo session the MM Freehand made its way to the workbench and its denim piece.
The collar came free with a little effort and strong finger nails.
Come one MM, I think your quality control could be a little better for your high-end cobs. Maybe I am too demanding or “high-end cob” is an oxymoron. The dented shank shows the ill fit of the collar better than my earlier photos.
I only have 3 varieties of 9 mm filters and one, a Denicotea, I can’t find, so I used the Peterson and Stanwell filters as my guides.
The filters have a diameter of 8.03 mm. I am not sure why they call these 9 mm filters.
The Peterson has ceramic end caps with 5 holes.
While the Stamwell has a 6 axial snowflake pattern. Both filters fit well in the shank mortise.
Both filters were also 1.409 mm in length.
Or, 35.80 mm, for those of the European persuasion. Okay, I know that the US is nearly alone in retaining standard units and I fought students, for 33 years as a science teacher, to use metric units. Still, I am American and stubborn as a Scotts Irish Polack, because that is what I am. We kind of ignore the German heritage of my mother’s side because they were the boring relatives.
The mortise was drilled to a depth of 1.482 inches.
Yeah, that’s 37.64 mm.
The filter diameter of 8.03 was paired with my 8 mm drill bit. I wanted to extend the mortise drilling further into the shank to allow the filter and the tenon of the bit/stem. I marked this depth with a German made Staedtler pen. See, I am so multicultural…
The drill bit was then taped off with painters tape for depth management.
The drilling went smoothly with just a hand drill, due to that is all I have. There was a slight step where the two hold met within the shank. This step provided just enough friction to stop a filter from being dropped into place. Bah. I used a small rat-tail file and a small tapered half-round file to smooth off the step. It took what seemed to be hours but was probably ½ hour.
Finally the filter would drop in but not drop back out. Tapping the shank of the workbench freed the filter. Bad news: My worry was that during smoking the filter would swell with moisture and lodge itself in the shank. Good news: At least I know that the airflow is going through the filter and not around it. Okay, that is kind of a reach for the good news.
I thought that maybe more sanding of the new “filter chamber would improve the filter’s release and removal. I made a sanding tool from an Exacto knife handle (with the blade removed). I applied a contact adhesive to the 2 cm at the end of the handle. I then applied more contact adhesive to the back of a piece of sandpaper. Once they were both diy I rolled the sandpaper onto the Exacto handle. This gave me a sanding tool which would only sand the first 2 cm of the filter chamber and not make the mortise any more loose.
The sanding continued and the filters would slip in without any difficulty. When the stem was completely inserted it pushed the filter further into the shank. I would then remove the stem and the filter would be stuck in the shank of the pipe. I could wiggle it, showing that it was loose but the filter would not simply slide back out. I found the best way to remove it was to use very fine tipped forceps to reach into the shank and grab the filter. The fine tips would slip into the holes of the ceramic filter and the filter could then be twisted and pulled free. This was not an ideal situation but it appeared to be the best case scenario of converting this pipe to a 9mm filter pipe. I ordered a fine tipped “filter extractor” (AKA, forceps) to include in the package for Sascha.
I think the conversion of this Missouri Meerschaum Freehand to accept 9mm filters was a success. Sure, it was done in a non-traditional way. Fitting a filter into the shank of a pipe is not the normal way to fit a filter. However, I was able to maintain the original stem and shank of the pipe. By just looking at this pipe, you would never know that it has been altered. I remain uncertain about the need for a filter. Perhaps there are more people who inhale pipe smoke than I think. I will continue to not inhale pipe smoke and use filters infrequently, but certainly not judge anyone who prefers them. I enjoy Carey Magic Inch pipes with their papyrus filter and I will occasionally insert a 9 mm filter into my Peterson Pipe of the Year 2017. The short stem of this pipe is made a better smoking pipe with a filter.
I do hope that you have found something here useful to your own pipe care, maintenance or restorations. If you like this sort of thing, please click the like and subscribe buttons. Thank you for reading the ramblings of an old pipe lover.
I remember the first cherry wood pipe that I restored, several years ago. I was bummed that one was in the estate lot, but I figured that it would be good practice if nothing else. When I finished working on it I tried smoking it. I was surprised at how well the pipe smoked. I was not expecting that. That was also the first time I tried banding a cracked shank. That was long before I started documenting restorations but here are three recent photos of that pipe:
I would like to think that my stem work and banding skills have improved since then. Feel free to criticize, I can take it.
Back to the subject of this restoration blog, The French mMade Cherrywood Demichurchwarden. This pipe also came to me as part of an estate lot. The target of the lot was not this pipe. I wanted the Marxman Monk figural from a couple of blogs ago. This pipe did strike my fancy though. The sweeping curve of the stem and the long shank were both good looking and felt good while clenching. The pipe was only marked with a single stamp reading MADE IN FRANCE. Below are some photos of the pipe prior to working on it.
The Cherry Wood was in very good condition. This is most likely due to it having not been used. There was some chatter on the mouthpiece and the bowl had obviously seen fire and tobacco, but I would wager less than 5 times. The stem would require the most work and that was quite superficial. The tobacco chamber would be reamed and sanded and the airway cleaned, other than that this was more of a cleaning than a restoration.
Background
Ropp is the pipe maker that comes to my mind whenever I see one of these pipes. Lacking anything other than the “MADE IN FRANCE” stamp, I searched “Ropp” in pipedia.org and found the following:
“Eugène-Léon Ropp (1830 – 1907) had acquired a patent for a cherrywood pipe (wild cherry, lat.: Prunus avium) in 1869. In 1870 he established a workshop to manufacture such pipes in Büssingen (Bussang, Vosges mountains). Around 1893 the business moved into the former mill of Sicard (part of the community of Baume-les-Dames – Département Doubs, Upper Burgundy – from 1895 on).
The pipes were a big success in the export as well. Shortly before 1914 Ropp designated A. Frankau & Co. (BBB) in to be the exclusive distributor in the UK and it’s colonies.
Probably in 1917 a workshop in Saint-Claude in the Rue du Plan du Moulin 8 was acquired to start the fabrication of briar pipes. In 1923 a small building in the environment of Saint-Claude, serving as a workshop for polishing, was added.
Circa 1920’s 1930’s catalog in PDF, courtesy, Joseph Morris: Early Ropp Catalog
Even though cherrywood pipes were the mainstay of Ropp until the company finally closed down in September 1991. The company was taken over by Cuty-Fort Entreprises (Chacom, Jeantet, Vuillard, Jean Lacroix…) in 1994.” (Ropp – Pipedia). The entry did contain one advertisement which looked rather familiar.
I wondered if the logo on the stem of this pipe would provide any additional information. The pipedia.org entry had several Ropp logos, but none of them were a match for this pipe. Sure this might be a replacement stem. The issue with that hypothesis is, “Why would you need to replace a stem on a pipe that has almost never been smoked?” I went to pipephil.eu, the source of all things “logo” and did a search for Ropp. There were only two photos of Ropp pipes with circle or bullseye logos:
Ropp was certainly the prominent cherry wood pipe maker but, after 20 years patents expired and pipe makers countrywide could copy Ropp’s style and cash in on the market for these pipes. I assume that is what this pipe represents. Ropp does not appear shy about stamping their name upon their pipes. There are a large and diverse set of Ropp stem logos but they always seemed to have stamped the name on their pipes.
The Restoration
The restoration, if you can even call it that, began as usual with a clean denim piece.
Now before we begin, I have to start with some operational definitions. “What are those?” you ask. Operational definitions are words or phrases used in scientific writing where the author uses a specific definition of a word and how they will be using it in the article. As an example, I’ll refer to this mortise as the threaded mortise.
The shank tenon is also threaded. The stem has another tenon thus will be called the stem tenon.
Finally the shank mortise is unthreaded and fits with the stem tenon. Double the pleasure, double the fun.
As you can see from all those mortises and tenons, the pipe was really clean. I looked at the draft hole; it was drilled offset to the front of the pipe’s tobacco chamber.
Here it is with the stem attached allowing a better look at what I mean. Weird, but I suppose it does line-up well with the stem.
I started with the stem. It was very clean and only required a single alcohol dipped pipe cleaner.
Next I tried the shank. It too only needed a single pipe cleaner.
I had a foreboding feeling like something terrible was going to be discovered. Nope, it was just a barely smoked pipe. I started to scrape the tobacco chamber. I used the General triangular scraper. I rounded the tip of this frightening tool off on the neighbors grinder since I am far too lazy to swap out my buffing spindle for the grinding wheel. Lazy and honest.
After the scraping, I sanded the chamber with 320 sandpaper wrapped around a wood dowel and a couple of small pieces of sandpaper with the not-so-nimble fingertip.
The stem and stummel were taken to the sink for a scrubbing with a nylon brush and undiluted Murphy Oil Soap. Both pieces were rinsed of soap with warm water and then dried with a cotton hand towel.
I lightly sanded the surface of the stem with a 320 sanding sponge, while avoiding the stem logo.
The stem was then placed into Briarville’s Pipe Stem Oxidation Remover solution, also known as deox. I originally thought I’d leave it in for a couple of hours, but this turned into a 18 hour stay.
After the stem went into deox, I coated the stem and stummel with Before and After Restoration Balm. The dry cherry bark absorbed the balm very quickly, taking much more than I thought it would. The balm was applied with a baby toothbrush to work the product into the nooks and crannies of the bark.
After about 20 minutes the surfaces of the stem and stummel were hand buffed with an inside out athletic sock to remove excess balm.
I wanted to coat the bark with something to hold up to frequent handling. I thought that a couple of coats of Danish Oil might be good. I found a spare stem that fit the stem mortise to act as a handle while I applied the oil.
The Danish Oil was applied with a folded pipe cleaner.
The spare stem was clamped in a vice to hold the pipe as the Danish Oil dried.
The next day, I removed the stem from deox and placed it on a coarse shop rag. The stem was vigorously rubbed with the rag to remove oxidized material which the deox had softened.
Back at the workbench the airway of the stem was cleaned with a pipe cleaner.
The stem was then sanded with a 400 grit sanding sponge and oiled with mineral oil to see how the deox had worked. The answer, very well.
I taped the shank and stem logo with masking tape after reinserting the sten into the shank. This was done to protect those two from the stem sanding.
The stem was then sanded with a series of sanding sponges in grits 400-3500. Between each sponge the stem was rubbed with mineral oil and wiped with a dry paper towel to remove sanding debris.
The stem was loose fitting. To address this I used a couple of drops of black cyanoacrylate (CA, super glue) applied to the tenn. The blac CA was spread evenly onto the tenon with the edge of a fly tying bodkin. Once the CA had dried I sanded the surface with a 1000 grit sanding sponge and tested the fit.
The fit was better, but still loose. I then switched to Thin CA applied and spread as before. This was also sanded with a 1000 grit sponge.
Better, but still loose. One more time. Perfect fit was achieved.
I took the stem to the buffer where it was buffed with a blue buffing compound and the dedicated blue compound wheel. The shine was great but the logo had suffered. Before repainting it with white acrylic model paint, I cleaned the logo with 99% ethyl alcohol on a cotton swab.
The paint was applied and worked into the stamp with the fly tying bodkin.
The acrylic paint dries quickly and was rubbed with a soft cotton rag to remove the excess paint.
I returned the pipe parts to the buffer where they were waxed with carnauba wax. I worked the wax into the bark with and against the grain. Using very light coatings of wax and working it into the slightly rough texture of the bark. The stem was also given several coats of wax.
I used a cotton hand towel to hand buff the stem and stummel to make sure there were no areas of wax build-up. The final step was a hand buffing, with a microfiber polishing cloth, of the stem, shank and stummel.
I think this Cherrywood demichurchwarden turned out very nicely. The pipe feels great in both the hand and between the teeth. The rustic look of the bark covered cherry wood is both attractive and functional. I find the rustic charm similar to a corn cob pipe but with a European flair. The relatively unused bowl should provide years of use. The stem polished beautifully and the high gloss black finish accentuates the rustic nature of the rest of the pipe. The dimensions of this French made Cherrywood pipe are:
Length: 7.34 in./ 186.44 mm.
Weight: 1.52 oz./ 43.09 g.
Bowl Height: 2.02 in./ 51.31 mm.
Chamber Depth: 1.02 in./ 25.91 mm.
Chamber Diameter: 0.70 in./ 17.78 mm.
Outside Diameter: 1.33 in./ 33.78 mm.
I do hope that you have found something here useful to your own pipe care, maintenance or restorations. If you like this sort of thing, please click the like and subscribe buttons. Thank you for reading the ramblings of an old pipe lover.
Loading…
Below are some photos of the finished French-made Cherrywood Demichurchwarden.
I am not only a pipe restorer but also a Nebraska Master Naturalist. “What the heck is that?” you ask. The Nebraska Master Naturalist Program was started by a longtime friend, Dennis Ferraro (PhD) the official Nebraska Herpetologist as a way to certify non-academic citizens and get them involved in citizen science, volunteering, education and promoting the wild flora and fauna of Nebraska. “Herpetology. What the heck is that?” you ask. Herpetology is the study of reptiles and amphibians. Since the mid-1980s I have pursued reptiles and amphibians across Kansas, Nebraska and Wyoming. My interest has always been more biogeography. “Biogeography, what the heck is that? You ask. Goodness, you ask a lot of questions. I’m interested in the geographic ranges of reptile and amphibian species within Nebraska. Believe it or not, Nebraska has a very diverse set of physical features with numerous isolated pieces of specific habitat removed from where they would normally be found. This leads to species also found outside of their expected or documented ranges. That is what I enjoy doing, field biology searching for and documenting reptile and amphibian ranges. So, when I saw this rattlesnake Marxman, I knew I had to have it even though it bears little resemblance to a real rattlesnake. Yeah, I help Dr. Ferrao out every spring and fall with Prairie Rattlesnake (Crotalus viridis) research in western Nebraska.
Here is what a researcher cabin looks like, every red bucket has one or more C. viridis in it.
The subject of this post is a figural Marxman pipe that showed up on eBay last August. Won and delivered for under $50, I was quite pleased. The pipe came from Newark, Delaware. The only rattlesnake in Delaware was the Timber Rattlesnake (Crotalus horridus) which is probably extirpated from the state (Snakes to Watch Out For – DNREC).
The stampings on the bottom of the pipe were MARXMAN (with the arrow passing through) over IMPORTED BRIAR over HAND CARVED (curved) over U.S.A.. The MARXMAN and the HAND CARVED were faint. There was also a carving at the heel of the pipe which I think, is supposed to represent the end of a log. This was an interesting feature. Below are several photos taken prior to any work done.
The pipe was in good shape. It had been smoked as evidenced by the light cake in the tobacco chamber, the light lava deposits on the snake’s head and the smoking residue on the stinger. I wondered if the stinger should be renamed fang? Anyway, the oxidation of the stem was not too bad. The pipe did show signs of having extensive fills done. This was seen as the pinkish red spots that were carved through but remained as discolored patches. I knew that I did not want to pick the old fill material out and redo the fills. The recarving would likely look atrocious.
Background
I have done a lot of Marxman restorations. Next to Peterson pipes I am sure Marxman pipes come close as to numbers. I have also written about the history of Robert Marx and how he formed and built up the company during World War Two, not an easy task considering the main material of his production was nearly inaccessible during the war years. If you would like more information I think I did an acceptable job on Marxman history in the following blog: A Marxman Dublin Gold Band Restoration – NebraskaPeteGeek. Yeah it’s still written by me, but it’s pretty good for a change.
As for Marxman figurals I have done a camel and a monk/friar. This is the first snake pipeI have gotten to work on. I am guessing this pipe was made in New York City. The home of Marxman during the years of production before Robert Marx sold the company to MasterCraft in 1953. Again guessing, but with conviction, the pipe was made between 1938 and 1953. Based on the inclusion of what looked like metal flecks in the rubber, I think the pipe was likely made during or shortly after WWII due to the recycling of rubber from tires and the accidental inclusion of metal in the stem.
The Restoration
After the before photos the pipe was taken to the workbench and a clean denim piece.
I removed the stem then pulled the stinger. It looked like it was coated in a brown lacquer of smoking residue. I placed the stinger in a medicine cup with 99% ethyl alcohol.
The ream team was gathered and consisted of the PipNet with the #2 blades, Smokingpipes Low Country reamer and the General triangular scraper.
There was very little cake to actually remove.
Below you can see the reamed tobacco chamber with some lava deposits around the inner edge of the rim.
The chamber was sanded with 320 sandpaper wrapped around a wood dowel. No damage to the tobacco chamber was noticed.
The shank was surprisingly clean and took only a couple of cotton swabs dipped in alcohol to remove the accumulated residue.
The airway was a little more dirty but again quickly cleaned with a nylon shank brush and bristle pipe cleaners dipped in alcohol.
The stummel was taken to the sink for a scrubbing with Murphy Oil Soap, undiluted and a nylon brush. The soap was rinsed with warm water and the stummel dried with a cotton hand towel.
Back at the workbench the stummel was wiped and scrubbed with a make-up pad wetted with 99% ethyl alcohol. The discoloring of the make-up pad can be seen below. Very little stain came off the briar.
I removed the stinger from the alcohol and used the same make-up pad to clean the aluminum. The stinger left more yuck on the pad than the entire stummel did.
The stem was cleaned with bristle pipe cleaners and more alcohol. The button end of the airway drilling would not pass a pipe cleaner smoothly. I remedied this with a slot tool and a sliver of an emery board.
The outside of the stem was lightly sanded with a 320 grit sanding sponge in preparation for the Briarville Pipe Stem Oxidation Remover bath.
I placed a pipe cleaner in the tenon to aid in the retrieval of the stem. I figured that I would leave the stem in the solution until the next day.
In the photo below you can see the pink-stuff used as a filler. When I scrubbed the pipe I did not want to use a more aggressive brass brush for fear of removing too much of the filler.
Normally, I like to remove this unsightly pink-stuff but doing so with this pipe would mean that I would have to re-fill the material with cyanoacrylate and briar dust then carve the new fill to match the original carvings. I strongly doubted my ability to do that, so leaving it alone seemed my best option.
Well, there was another option: Use a furniture touch-up marker to dye the pink-stuff to mask its unsightly pinknocity. Wow, spellcheck thinks pinknocity is a word.
This is what the pink-stuff looked like with a walnut colored touch-up marker. Much better.
The side, too, looked dramatically better.
The following day, nearly 24 hours to the minute, I removed the stem from the Briarville solution. I like to call this deox, poking fun at the detox of drug or alcohol abuse. Yeah, been there, done that. I also like to use a coarse texture shop rag to vigorously rub the stem while it is still wet with the deox solution. This removes some of the oxidized vulcanite as can be seen in the photo below.
The stem had pits where the oxidized material was chemically softened and removed from the stem and fleck of metal.
I used several make-up pads doused with Soft Scrub cleanser to scrub away more of the oxidized vulcanite. The color was more of a dark greenish than the typical dark reddish brown of vulcanite.
I oiled the stem with mineral oil and allowed it to soak in the oil for about 30 minutes.
There was not much that I could do with the carvings of the stummel but give it a coating of Before and After Restoration Balm. I worked this wonder-product into the crevices of the briar with a baby toothbrush. The stummel then was set aside for 30 minutes.
The stummel was wiped and hand buffed with an inside out athletic sock to remove excess Restoration Balm.
I used masking tape to protect the shank from the sanding which the stem would undergo. The sanding was done with a series of sanding sponges in grits from 320-3500. Between each sponge I rubbed the stem with mineral oil and wiped it dry again with a paper towel. This removed any of the sanding debris. The stem looked better but the pitting was deep enough that the only way to remove it and retain the smooth feel from the shank to the stem would have been to also sand the shank briar. I did not want to do that and risk removing detail from the carving. Instead I took the pipe to the buffer and worked the stem with red buffing compound followed by blue buffing compound on their respective buffing wheels. The results looked better but not great.
The stummel was waxed with Renaissance Micro-Crystalline wax again applied with a baby toothbrush. I did have to clean the baby toothbrush using alcohol before and after the wax.
The final step was a hand buffing with a microfiber polishing cloth.
This Rattlesnake figural by Marxman, though anatomically incorrect, is still a fun pipe for me. Sure the stummel is full of the dreaded pink-stuff fills and the vulcanite of the stem is lower quality recycled tires, I still enjoy it. The dying of the pink-stuff did improve the look, some, and the stem did polish-up, some, they are still nothing to brag about. The carving of the snake is pretty impressive with the checkering over the entire curved body. That is impressive. The details like the rattle on the tail, the texture along the log and the end of the log are also quite impressive and well done. The snake is a caricature of the elegant serpent with the head being comically misshapen. I will say that the pipe feels very good and substantial in my hand and the weight is comfortable for short periods of clenching. The dimensions of the Marxman figural Rattlesnake pipe are:
Length: 5.58 in./ 141.73 mm.
Weight: 1.94 oz./ 55.00 g.
Bowl Height: 1.73 in./ 43.94 mm.
Chamber Depth: 1.56 in./ 39.62 mm.
Chamber Diameter: 0.73 in./ 18.54 mm.
Outside Diameter: 1.61 in./ 40.89 mm.
I do hope that you have found something here useful to your own pipe care, maintenance or restorations. If you like this sort of thing, please click the like and subscribe buttons. Thank you for reading the ramblings of an old pipe lover.
Loading…
Below are the finished photos of the Marxman Rattlesnake Figural Pipe.
My affection toward Peterson pipes is hardly a secret, you could even say that I wear it on my sleeve. Though it is more literally on my hat.
That said, I have restored dozens of Peterson pipes and I always enjoy doing it even when it is more of a pursuit of folly trying to salvage a very abused old implement rather than refreshing someone’s dear old frien.The subject of this blog is a Captain Pete I found last May on eBay. I probably paid more for it that I’d like to admit and certainly more than what I would have 3 years ago. Regardless, after a short trip from Englewood, Florida the not so lovely old pipe arrived. The stampings were mostly clear and read “CAPTAIN (0ver) PETERSON” on the top left shank. I’m not sure why the Peterson stamp folks like their quotation marks but they seem to. The stem was stamped with a worn and paint worn-off circled C. On the right shank the stamp read “A PETERSON PRODUCT” over MADE IN ENGLAND with an offset 046. The country of manufacture (COM) stamp is what intrigued me the most. More on that in the “Background”. The photos below show the pipe prior to any work.
This pipe appeared to look rough. The stem was severely oxidized, I feared saving the logo would be difficult at best. The bowl had been reamed but not very well. There was a layer of lava on the rim which looked like it had been removed and redeposited. I think what was thinking is that this l pipe appeared to have been smoked a lot but kind of kept up and cleaned on occasion.
Background
Back on December 21, 2023 I wrote a blog about a Captain Peterson apple. That blog is linked for those interested. In that blog I said the following about the Captain Peterson line:
“I highly recommend the book The Peterson Pipe, by authors Mark Irwin and Gary Malmberg as well as a reading of pipedia.com’s Peterson pages. According to Mark Irwin and Gary Malmberg, the Captain Pete:
“This line’s name was derived from the nickname of Charles Peterson, known affectionately as “Captain Peterson.” The first issue, c. 1940-62, was in a smooth finish produced for Rogers Imports with a white stamped P inside C, or a circled P on the mouthpiece. CAPTAIN over PETE on shank, and a MADE IN IRELAND in a circle. English made versions show CAPTAIN over PETE on shank or “CAPTAIN PETERSON” and A PETERSON PRODUCT over MADE IN ENGLAND or LONDON MADE over ENGLAND. The second issue (1998-), features an XL bowl with Sherlock Holmes shapes and compact stems, in rustic or combination of smooth and rustic, with a nickel band between two narrow brass bands.” (Irwin and Malmberg p.295)” (A Peterson Captain Pete Restoration – NebraskaPeteGeek)
This example of a Captain Peterson is described above and likely dates from 1940-62 and was made in London. These dates can be further narrowed down by reading p.149-150 in The Peterson Pipe, where the London production of pipes is discussed at length. Here, Irwin and Malmberg say, “Apparently, the London factory did not order a MADE IN ENGLAND die until after the war. Any Peterson stamped with an English COM must be no older than the later 1940s” (Irwin, p.150). This would mean that this pipe dates from 1945-1962 as 1962 was when Peterson shuttered the London factory.
The Restoration
After the before photos the pipe made its way to the workbench and a clean denim piece.
I began work with the stem due to thinking that the stem would require the greatest amount of time. The cleaning was done with bristle pipe cleaners and 95% ethyl alcohol. The stem was very fouled with tar and smoking residue.
The stem has some tooth chatter on the bit above the button on both the top and bottom surfaces as the two below photos show in all of their poorly focused glory.
The bits of the top and bottom surface were filed with a small slat file to remove most of the chatter.
The stem was suspended in Briarville’s Pipe Stem Oxidation Remover solution and allowed to soak for 24 hours. This solution is lovingly referred to as deox.
The next day the stem was removed and rubbed with a coarse shop rag. This removed a great deal of the oxidized vulcanite and can be seen on the rag in the photo below.
The airway of the stem was again cleaned with alcohol dipped bristle pipe cleaners.
I was pleased to see that the logo stamped on the stem remained intact after the time in deox.
To further reduce the amount of oxidized vulcanite, I rubbed the stem with Soft Scrub cleanser on make-up pads. The oxidized vulcanite can be seen darkly coloring the pads.
The stem was oiled with mineral oil to keep the vulcanite from further oxidation.
The tooth chatter that was not filed from the bite zone was filled with black cyanoacrylate (CA, super glue). This was spritzed with a CA drying accelerator. The hardened CA was then filed with a small flat file to smooth and reshape the stem.
The shank of the pipe was wrapped with masking tape to protect the briar and allow me a handle while sanding. The stem logo was also masked for its protection. The stem was sanded with a series of sanding sponges from grits 400-2000. Between each sponge the stem was rubbed with mineral oil and wiped with a paper towel to remove sanding debris.
The sanding continued through the 3500 grit sponge with oiling and wiping as above.
The stem was buffed using blue buffing compound on a low speed buffer with a flannel wheel dedicated to the blue compound.
The stem was wiped of any residual buffing compound and the logo area cleaned with alcohol on a cotton swab. I used a white acrylic model paint to repaint the imprint of the logo.
The white acrylic dried quickly and was hand buffed with a soft cotton cloth to remove the paint from the stem outside of the stamp.
The sequence of this restoration had me a bit out of sorts, but it was apparently time for the reaming. The tools were gathered.
The Pipnet #2 blade was the only one that fit and did most of the reaming. Both the Smokingpipes Low Country reamer and the General triangular scraper were used but just for clean-up.
Below the reamed tobacco chamber can be seen.
The chamber was sanded with 320 sandpaper wrapped around a wood dowel. I saw no signs of damage within the chamber. The lava on the rim was softened with saliva and allowed to soak for a couple minutes.
The rim was then scraped using the edge of a sharp pocket knife blade. There were some rough spots on the rim but they looked superficial and easily removed with a light topping.
The stummel was taken to the sink for a scrubbing with a nylon brush and undiluted Murphy Oil Soap. The soap was rinsed with warm water and the stummel dried with a cotton hand towel.
I packed the stummel with cotton and saturated it with 99% ethyl alcohol. This was allowed to sit overnight.
The next day the cotton was stained telling me the treatment had worked.
The cotton was removed and was far dirtier than I was used to. I could have sworn that I had cleaned the shank, yet I had no recollection of doing it. Remember when I said the sequence of this restoration had me out of sorts? It was apparently worse than I thought.
The airway was filthy and tar infested. The good news was that the tar was very soft due to the extended soaking in alcohol. The scraping with a dental scraper was very productive. The cotton swabs eventually started to lighten as more of the tars were removed.
I cannot say if this was a superior order to use than my normal sequence; reaming the chamber, then, clean the shank airway then alcohol/cotton treatment is needed for ghosting of severe dirtiness. In this case it worked well. The softening of the tar did make for easier cleaning.
There were several small dents, scratches or pits on the surface of the stummel. These revealed themselves more and I had started sanding. I had covered the stamps with masking tape for their protection. For the fills, I applied small amounts of thin CA using a long narrow applicator on the CA bottle. Immediately after application I used a dust sanding sponge to sand the fill area. The sanding sponge supplied the briar dust to join with the CA and for a fill. This method only works if the spots to be filled are very small and the sander has total disregard for their sanding sponges as some of the CA and briar dust will certainly get on the sponge making it have nonabrasive spots. I wonder if I will ever learn to use a piece of sandpaper like I did before I had sanding sponges. The next three photos show the fills.
The stummel was then sanded with the full series of sanding sponges from 400-3500 grit. The stummel was wiped with a make-up pad wetted with alcohol between each sponge
I removed the masking tape and cleaned any adhesive left behind by the tape. I then worked the stummel with micro-mesh pads 4000-12000. Again I wiped the stummel between pads with alcohol on a make-up pad.
The stummel was coated with Before and After Restoration Balm and allowed to sit while I went out in search of a couple of evening Largemouth bass. This is also called my stroll with a pole and of course a pipe.
About an hour and a half later I returned and wiped the remaining Restoration Balm from the stummel with an inside out athletic sock. There is the photobombing fishing pipe lurking in the background. If you are curious it is a Peterson 127.
The pipe was taken to the buffer where a couple of coats of carnauba wax were applied.
I carefully dragged a knife blade around the beading to remove accumulated wax from the grooves. The final step was another hand buff with the microfiber polishing cloth then off to the final photo shoot.
This beautiful English made Captain Peterson 046 bulldog is a great example of post World War Two English workmanship. The walnut stain of the original pipe was maintained and was finished with careful sanding and just carnauba wax. The stem was deoxidized, sanded and polished to a gorgeous glossy luster. Though lacking any stunning briar grain the wood is solid and the few dents from wear were filled with minimal disruption to the original. The dimensions of the Peterson Captain Peterson Made in England 046 bulldog are:
Length: 5.71 in./ 145.03 mm.
Weight: 1.62 oz./ 45.93 g.
Bowl Height: 1.96 in./ 49.78 mm.
Chamber Depth: 1.65 in./ 41.91 mm.
Chamber Diameter: 0.73 in./ 18.54 mm.
Outside Diameter: 1.64 in./ 62.89 mm.
I do hope that you have found something here useful to your own pipe care, maintenance or restorations. If you like this sort of thing, please click the like and subscribe buttons. Thank you for reading the ramblings of an old pipe lover.
Loading…
Below are some photos of the finished Peterson Captain Peterson Made in England 046 bulldog.
I did not want to affect the stamps here, so the existing scratches were not sanded away like I would have preferred to do.
I had never worked on this shape before, some might call it a pot, others a bullnose. Either way I found it interesting and I have a soft spot for basket pipes with an interesting shape. The thick walls and wide acrylic stem were the clincher. And honestly, the double brass bands just were an elegant bonus. This beauty was spotted on eBay and I was able to collect the prize as I was the only bidder and a tough over $15 seemed like a good deal. After the obligatory wait for shipping, The chubby cherub arrived. The only stamps were MADE IN ITALY on the bottom of the pipe. Below are some photos of the pipe in the pre-work or before condition.
The stem looked to be in very good condition, slightly oxidized, maybe. The stummel on the other hand showed signs of extensive fills. The gloss clear coat was an obvious attempt to conceal the fills and perhaps to help “glue” them together. The tobacco chamber seemed quite out of round. I couldn’t tell by initial inspection that the rim was all filled, charred or just lava covered. Oh well, it would still be a fun project.
Background
Pipes like this are nearly impossible to research. No shape number and a very standard country of manufacture (COM) stamp provide little to work with. I thought maybe, the double brass band would provide a clue.
The Restoration
The pipe made it to the workbench and a clean denim piece.
I examined the drillings. The draft hole was well centered and looked good.
The hole through the stem was off centered, but there was a nice chamfer cut.
I assembled the ream team. This tobacco chamber was wide and would require the PipNet #3 blade and perhaps the #4.
It turned out that the #3 PipNet was sufficient. A little bit of clean-up was done with the General triangular scraper.
The chamber was sanded with 320 sandpaper wrapped around a wood dowel.
At the point I wondered if I should scrap the whole project. There were two surface cracks in the briar within the chamber. These would most likely be a source of chamber charring or burning with use.
There was a third pit within the chamber on the opposite side. This would be another spot where damage from smoking the pipe could lead to issues.
The “out of round” issue was mainly cosmetic and on the rim, not the tobacco chamber itself.
The rim looked to be encased in a layer of lava or smoking residue.
I moistened the rim with saliva and allowed it to soften the lava for a couple of minutes. The rim was then carefully scrapped with a sharp pocket knife blade. The result allowed me to see that the rim was indeed heavily filled with putty or filler.
I cleaned the shank with several cotton swabs, a nylon shank brush and a dental scraper. There was also copious amounts of 99% ethyl alcohol used.
The stummel was taken to the sink for a scrub with undiluted Murphy Oil Soap and a nylon brush. The soap was rinsed with warm water.
The stummel was dirty, so a second scrub with more Murphy’s and a brass brush was used. This was then rinsed with warm water and the stummel dried with a cotton hand towel.
Back at the workbench the stummel was wiped with a make-up pad wet with 99% ethyl alcohol. Little color was removed and the remaining finish seems to be unaffected by the alcohol.
I tried a wipe with acetone on a make-up pad. This did have an effect on the finish.
I decided to let the stummel soak in an acetone bath for a couple of hours.
During this down time, I worked on cleaning the stem. The stem access through the slot was difficult, at best. I could barely get a pipe cleaner through. This was not due to dirtyness, just a poorly made draft. I used an emery board to sand the interior of the button and improve the daft.
I finally got the draft opened up with Falcon Extra Thin Pipe cleaner, the Vermont Freehand slot tool and more sanding with the emery board.
I filed the end of the stem above the button to smooth it on both the top and bottom sides.
The initial carving of the stem was not very smooth. After my file work it was much improved.
Below you can see the reshaped stem after sanding with 300 and 400 sanding sponges.
The stem was sanded with a series of sanding sponges from 320-1000 grits. Between sponges the stem was wiped with a paper towel to remove sanding debris.
After the sanding I reattached it to the pipe and took the stem to the buffer. Here I used red compound to polish the stem. I have been working on bettering my stem polishing skills. Like nearly everything, practice makes perfect. I will never claim perfection, but I am getting better at buffing and polishing stems.
After two hours in the acetone, I removed the stummel. The clear coat that the Italian maker used was some darn tough stuff. I rubbed the stummel with a make-up pad wetted with acetone.
I then used the brass brush dipped in acetone to remove more of the clear coat as well as some of the fill material.
The fills were very soft and I picked out much of the material.
Below you can see more of the grooves left by picking out soft fill.
There was one large surface crack that was picked free of fill, seen below along the front rim. I decided to fill in the cracks and pit within the tobacco chamber with J-B Weld epoxy. I figured that I could do the same with the crack on the rim.
Below is the one pit in the chamber now filled with epoxy.
Below are the two cracks within the chamber also filled with epoxy. I also built up the rim with a bead of epoxy in an attempt at concealing the “out-of-round” rim.
24 hours later, I used a sharp knife to shave away most of the excess epoxy. I then sanded it smooth to the surface with 320 sandpaper.
The rim was re-beveled with a small wooden sphere wrapped in sandpaper.
Once I was pleased with the sanding, I prepped for dying the briar. I know the original pipe was red with brown but I wanted to conceal all the fills so I went with an all black. Fiebing’s Black Leather Dye was the choice. A folded pipe cleaner was the applicator. A wine pottle cork was used to plug the bowl to keep dye from the tobacco chamber and a lighter was used to flame the dye, burning off the solvent/alcohol.
I left a bit of the original brown at the shank end. My plan was to lightly sand the high spots of the rustications allowing the brown to peek through the black. Three coats of dye were applied and flamed.
The dye was flamed then allowed to dry for an hour.
Once dried, I lightly sanded the stummel revealing the browns underlying the new black dye.
The stummel was then wiped with a make-up pad wetted with 99% ethyl alcohol.
I gave the pipe a total of three coats of Danish oil applied with a cotton swab.
Below is the pipe and its first coat drying.
Below is the third coat drying.
The pipe was then given a couple of coats of carnauba wax. Extra care was given to buff with the grain of the sandblast patterns to avoid building up wax in the grooves.
The final step was a hand buffing of the pipe with a microfiber polishing cloth.
This pipe with its various pits, cracks and flaws was nearly discarded. I am glad to say that it smokes wonderfully and has now become another fishing pipe. Yeah, that is hardly a great endorsement or title, but I spend a good deal of time fishing and typically do not want to subject my best quality pipes to those less hospitable conditions. The wide stem is very comfortable to clench and the bend makes it even better. I love the wide bowl for my favorite Balkan and English blends. This old pipe will not be a winner of a beauty pageant even with the beautifully polished stem and brass bands, but she is more than a utilitarian addition to the fishing pipe club.
The dimensions of this No Name Italian Bullnose are:
Length: 5.19 in./ 131.83 mm.
Weight: 2.06 oz./ 58.40 g.
Bowl Height: 1.51 in./ 40.64 mm.
Chamber Depth: 1.20 in./ 38.35 mm.
Chamber Diameter: 0.80 in./ 20.32 mm.
Outside Diameter: 1.75 in./ 44.45 mm.
I do hope that you have found something here useful to your own pipe care, maintenance or restorations. If you like this sort of thing, please click the like and subscribe buttons. Thank you for reading the ramblings of an old pipe lover.
Loading…
Below are some photos of the finished No Name Italian Bullnose.
I really like Brick and Mortar (B&M) pipe shops and the thought of major pipe manufactures stamping individual shop’s name on a pipe for their store is a walk into the past for me. I cannot imagine that pipe smoking has become so popular again as to allow pipe shops to place an order for a large number of pipes with the name of the shop stamped on them. Ah, the good old days. When I saw this pipe listed on eBay in June of
2025, I thought it looked interesting. I bid and won. I knew that Briars and Blends was not a pipe maker but the shape looked very familiar. It was a ¼ bent bulldog with classic English lines and an eye-catching grain. Upon arrival the pipe looked as though it had been pretty well cared for or cleaned. The seller made no claim to have cleaned nor restored the pipe, which is usually better for me. The stampings were kind of a confusing double stamp but BRIARS ‘N’ BLENDS could be made out on the left shank. I did use a hand lens in sunlight. On the right shank was the words MADE IN over LONDON as a circle, over ENGLAND. Offset toward the bowl was 409. Below are some photos of the pipe prior to any work.
This looked like it would be a nice relaxing restoration. The stem was in need of the majority of the work. It was heavily oxidized, chewed on and had calcium deposits. The stumble looked great save for the faint double stampings.
Background
Last summer I worked on a Telford’s Canadian pipe (linked if you are interested). Telford’s is a pipe and tobacco B&M outside of San Francisco, CA. I talked to the owner on the phone and “He said that this pipe would have been for the 1970-1980s. During this time Comoy’s would offer lots, usually a gross, of their “seconds”. These were pipes that had imperfect blasts or fills which made them ineligible for sale as “Comoy’s” pipes. Mr. Telford explained that Comoys made a stamp for Telford’s and stamped the pipes for the shop (personal communication with Brian Telford 7-30-2024).” (A Telford’s Canadian Restoration – Google Docs). The “this pipe” referred to by Brian Telford was the Telford’s Canadian.
I thought that the Briar ‘N’ Blends pipe looked like a Comoy’s bulldog. It was just a feeling and though I have been quoted as saying, “feelings are irrelevant” by a daughter who is now okay, thanks to years of therapy, they can on occasion be useful. I used pipedia.org’s Comoy’s Shape Number Chart for the below screen shots:
Next I wanted to find out anything I could about Briars ‘N’ Blends tobacconist. The only “hit” that I felt (oh no, another feeling) good about was one for Briars and Blends Cigar Shop of St. Louis, Missouri.
“Briars & Blends Cigar Shop LTD was founded in 1990. At this location, Briars & Blends Cigar Shop LTD employs approximately 3 people. This business is working in the following industry: Tobacco stores. Annual sales for Briars & Blends Cigar Shop LTD are around 807,000.
The “Permanently Closed” was saddening (ahh, another feeling). The date fell later than the 1970s-1980s referred to by Brian Telford as when his shop arranged to have Comoy’s stamp pipes for his shop, but it was fairly close. The 1990 were the boom years of the most recent cigar movement.
So, what does this tell us about the Briars’N’Blends bulldog? It is probably a Comoy’s 409 shape from the 1990s, made in London, England and was about to get a restoration.
The Restoration
I was really impressed by the grain of this pipe and was eager to get it restored.
The first task was to submerge this stem into the Briarville Pipe Stem Oxidation Remover. Before I could do that though I wanted to clean the airway and lightly sand the outermost oxidation from the stem. The airway was surprisingly clean. The calcium deposits were scraped with a sharp pocket knife and the stem sanded with a 320 grit sanding sponge.
I placed a pipe cleaner in the tenon for ease of removal from the Briarville solution (deox) after an overnight bath.
The ream team was collected. This pipe’s bowl was wider and would require the #2 and #3 PipNet blades.
There was not very much cake accumulated in the tobacco chamber and it was quickly removed.
Below is a photo of the reamed chamber.
The chamber was sanded with 320 sandpaper wrapped around a wood dowel. The bare briar showed no signs of any damage from use.
The rim had light deposits of smoking residue or lava and showed no signs of charring.
The lava was moistened with saliva and allowed to soften for a couple of minutes. The rim was then lightly scraped with a sharp blade of a pocket knife.
The shank was cleaned using 99% ethyl alcohol cotton swabs and bristle pipe cleaners. It was also quite clean. The first cotton swab below, blackened, was due to debris dislodged from the reaming and did not indicate a grimy airway.
The stummel was taken to the sink and scrubbed with a nylon brush and undiluted Murphy Oil Soap. The soap was rinsed with warm water and the stummel dried with a cotton hand towel.
Below is a photo of the stummel after being scrubbed. I thought that there may have been a clear coating on the briar, but it must have just been a layer of wax.
I wiped the stummel with a make-up pad wetted with 99% ethyl alcohol. Only a slight color came off the briar, probably some of the stain used in the manufacture of the pipe.
The next day, I removed the stem from deox. I vigorously rubbed it with a coarse shop rage. This rubbing helps to remove oxidized vulcanite and is left on the rag.
I ran a pipe cleaner through the airway to rid the stem of any deox solution. As it dried, there remained a stubborn layer of oxidized material on the stem. I wonder if it is time to replace my Briarville solution or, if this stem was just that badly oxidized.
To remove the oxidation I used Soft Scrub cleanser on make-up pads. The stem was energetically scrubbed with these pads and produced a good deal of oxidized vulcanite.
And more oxidized vulcanite.
Finger cramping from scrubbing, I switched to some sanding of the stem. I wanted to keep the joint where the stem met the shank crisp so I sanded the stem intact. I wrapped the shank with masking tape to protect the briar.
The freshly sanded stem was coated with mineral oil to keep further oxygen away. It was looking much better.
To deal with the bite marks I painted the dents with the flame of a lighter. The heating and expanding of the rubber can sometimes reduce the dent. It had little effect. Rather than filling these dents with cyanoacrylate, I decided to file the whole area flat and smooth. The stem material was thick enough and the dents were not severe.
In the below photo you can still see the slight indentations from the tooth dents but it was very minimal. The stem was sanded with a series of sanding sponges from 320-1500 grit. Between each sponge the stem was rubbed with mineral oil and wiped with a paper towel.
The sanding continued from 2000-3500 grit with the same oiling and wiping.
The stummel did not really need much sanding. There were no fills and only one little dent or pit which was so close to the shape number that I thought the risk of obscuring the stamping was worse than the pit. The stummel was sanded with a series of sanding sponges from 600-3500. I am not sure why the 3500 sanding sponge didn’t make the photograph, shy perhaps. The stummel was wiped with an alcohol wetted make-up pad between sponges to remove sanding debris. I should add that I did not sand the shank where there were any stampings. Only the bowl and lower shank was sanded.
The stummel was then coated with Before and After Restoration balm while the stem was coated with Before and After Restoration Balm while the stem was coated with Before and After Hard Rubber Balm. These products remained on the pipe for about two hours as I had to go fishing for my evening attempt at catching catfish.
Upon my return, the Restoration Balm and the Hard Rubber Balm were hand buffed and wiped away with an inside out athletic sock.
The pipe was taken to the buffer for several coats of carnauba wax. After waxing I ran the flytying bodkin around the beading grooves to remove accumulated carnauba wax.
The final job was to hand buff the entire pipe with a microfiber polishing cloth.
I think that this Briars ‘N’ Blends Bulldog is a gorgeous pipe. The shape is great to look at and it has a wonderful feel in hand. The briar grain is truly beautiful with the tiger-stripe shank and flame grain bowl. The walnut color is darker but still is contrasted well. The glossy black vulcanite polished-up better than I thought it would and the 1/4 bend curves of the stem give the pipe a smooth flowing appearance. This pipe will serve a new owner for many years to come and shows why Comoy’s has a look all its own.
The dimensions of this Blends’N’Briars Bulldog are:
Length: 5.51 in./ 139.95 mm.
Weight: 1.38 oz./ 39.12 g.
Bowl Height: 1.60 in./ 40.64 mm.
Chamber Depth: 1.31 in./ 33.27 mm.
Chamber Diameter: 0.76 in./ 19.30 mm.
Outside Diameter: 1.61 in./ 40.89 mm.
I do hope that you have found something here useful to your own pipe care, maintenance or restorations. If you like this sort of thing, please click the like and subscribe buttons. Thank you for reading the ramblings of an old pipe lover.
Loading…
Below are some photos of the finished Blends’N’Briars Bulldog.
Decisions, decisions. I had the urge to work on a bulldog this week but which one from the queue would be the lucky victim?
I had worked on Peterson and Marxman pipes recently, so they were out of the running. That left the Briars and Blends pipe (bottom) and the Captain Fortune (top). Well, from the title of this blog you have probably surmised my choice. TheCaptain Fortune was a purchase made to help out a Nebraska antique dealer I came across while looking for restoration subjects. I don’t usually opt to lend a hand to specific businesses but these guys were new, from Nebraska and had a pipe that I found interesting. Below is the original listing:
After submitting an offer, which was accepted, The pipe was on its way from northeast to southeast Nebraska. Upon arrival the pipe looked like the below photos.
The pipe had definitely been used. The condition of the stem with its calcium deposits, discoloration and bite hole on the underside indicated that. The bowl, as well, showed substantial cake. The rim had a lava deposit and several chips indicating that the dottle was knocked out on hard rough surfaces. There was also an area on the inside front of the rim that looked like charring from lighting the pipe from the front with a non-pipe lighter. The stinger looked surprisingly clean but oxidized. Perhaps the previous owner loved this pipe and a clean airway. That would explain the lack of smoking residue on the stinger. I doubted that the additional markings of Rudy and 1977 were factory marks, but they did add some context to the age of the pipe and when it was being smoked.
Background
Captain Fortune is a brand of pipes made by John Redman Ltd. and British Empire Pipe company. According to pipedia.org’s brief entry,
“Other lines include Aristocrat, Buckingham, Buckingham Palace, Canberra, Captain Fortune, Dr John, Golden Square, Redonian, Richmond (not Sasieni), Twin Bore
Former factory located at 3-11 Westland Place, Hackney, London N1 7LP” (John Redman Ltd./British Empire Pipe Co. – Pipedia). That was not much to work with then I recalled working on another John Redman pipe back in December of 2024. I will link to that restoration here. The research for that pipe was more productive and I will include a quote from it below:
“My thirst for knowledge remained unfulfilled. I tried searching the internet without a guide and found a wonderful article by an anonymous author on the vkpipes.com site.
“This famous picture above is perhaps the only broad known illustration to materials about John Redman LTD & British Empire Pipe Co. And the majority of sources doesn’t move usually far beyond a couple of sentenses: this company did really exist, it was located at this address and there is their former building. However…
However, this Edwardian building on Westland Place was only an annex and no actual manufacturing was located there. The principle place of business and offices were located in Whitecross Street 123/5/7, within 15 minutes of slow walking from Westland Place. Therefore, one of their series was named Whitecross – you may find it in the catalogue below. The building on Whitecross St. still stands there and you may see it on the picture below. The crossing street is the Fortune St., so we have got an explanation of another Redman’s brand name – Captain Fortune.
Indeed, many Redman’s brands bear such toponomical signs: the “Golden Square” series comes from the Golden Square located between the Lower John and Upper John streets, “Dr. John” is the most probably related to the abovementioned John streets. There are also Canberra road and Canberra House in London (which might inspire stamping of the famous Canberra pipes) as well as Canterbury House (Canterbury series). Burlington pipes named after the Burlington Arcade (see also H. Simmons). The majority of them are located quite close to John Redman’s main office. No wide explanations are needed for the series Westminster and Kensington. And of course, some British imperial charm was added with names Aristocrat, Redman’s Royal, King’s Ransom.
John Redman (as it happened later to Eric Nording) was both a carver and an owner of a business of the same name. The first pipes were born in 1934, but personal efforts appeared soon to be insufficient, what inevitably led to emerging of the name John Redman LTD. Unfortunately, we don’t have artifacts, which could be unambiguously carried to the “pre-war” period. In the WWII years the company could hardly got to the list of lucky manufacturers, who received scarce briar from the state.
But by the end of 1950s John Redman’s firm offered a well balanced portfolio – from popular and practical “Captain Fortune”, “Dr John”, “Golden Square” to top graded Redman’s Royal made of best briar and almost without any stains (comparable to GBD Virgin, but the “Royals” were usually much larger and carved in their own unique style). And of course, we shouldn’t forget about qualitative and still affordable Redonians, Aristocrats and Canberras – a very strong middle (and upper middle) segment. More details, list of offered brands as well as presentation and gift sets can be seen in the catalogue.
It is known that in late sixties and later a part of the production was ordered from subcontractors, for example Blakemar Briars, and since 1992 trademarks of John Redman were taken over by Gerald Grudgings of Loughborough; this company wasn’t a top manufacturer, but many sources attribute the invention of the lovat shape to it.
As the conclusion we are proud to express our sincere and warmest thanks to Robert Deering, who worked for John Redman in 1960s and gave us a number of very important directions.
Now, the Captain Fortune pipe in hand has what I assume to be an owner’s autograph and a date etched into the briar along the underside of the shank. It reads “Rudy” and “1957”. I am going to go out on a limb here and say that those are not factory originated marks. I am also going to say that 1957 was the year that that date was inscribed. That would place this pipe squarely into the time quoted by the above article as of the , “end of 1950s John Redman’s firm offered a well balanced portfolio – from popular and practical “Captain Fortune…” This supposition and the apparent age of the pipe itself would make this Captain Fortune bulldog produced in London during the latter 1950s.
The Restoration
The captain Fortune made its way from the photo table to the workbench, a grueling 18 foot distance and to its denim piece.
Once at the workbench I removed the stem and gathered my official Stinger Extraction Device (SED). The SED is actually a strip of thick leather used to protect the aluminum of a stinger from the jaws of a pliers.
The suckedness of this stinger led to absolute failure in its removal. Not wanting to risk breaking the vulcanite, I devised plan B.
Being a big believer of Plan Bs, in general, I chose to soak the stinger and end of tenon in a medicine cup with 99% ethyl alcohol. Now, I know what you are thinking, “That stem is too heavy to stay in that little medicine cup.” Trust me, it will be fine.
PipNet led the ream team with the #1 blades.
That was until I realized that the cake was much thicker than I thought it was. The PipNet #2 blades came out and earned their keep. The Smoking pipes Low Country reamer was great for the curve at the bottom of the chamber and the General triangular scraper did cleanup on the interior walls.
The tobacco chamber looked much better and more spacious.
The chamber was sanded with 320 sandpaper wrapped around a wood dowel.
Now, normally sanding does create some shaking of the workbench. This shaking was just enough to tell me that the stinger was ready to come out of the stem. No, the top heavy stem did not tip over the medicine cup of alcohol and spill the alcohol all over the workbench. That would indicate that the restorer was a total clutz and perhaps an idiot. No, let’s just say that after some using alcohol to clean the top of the workbench the stinger was ready removed using the official SED.
Now, back to the sanding. Things looked pretty good until I used alcohol wetted cotton swabs to clean out the sanding debris from the tobacco chamber. As the alcohol evaporated I saw several spiderweb patterns of heat damage to the chamber.
The below photo shows the webbing while the alcohol was evaporating, making the lines look darker. There were more spider webs on the interior right than left. None of them were very bad nor deep. The chamber felt nice and smooth to my finger. I thought that I should give this pipe a bowl coating to protect it and aid in the formation of a light cake.
Cleaning the shank came next. This was done with several bristle pipe cleaners and cotton swabs all dipped in 95% ethyl alcohol. There was also some scraping with a dental scraper. Every successful scrape removed reduced the cotton swabs and pipe cleaners needed dramatically.
Next came the rim. I was a bit worried what I’d find under that layer of lava.
The lava was moistened with saliva and allowed to soak for a couple of minutes. Then I lightly scraped with a very sharp pocket knife. This did reveal some charring but not as bad as I had feared.
The stummel was taken to the sink for a scrubbing with a nylon brush and undiluted Murphy Oil Soap. The soap was rinsed with warm water and the stummel dried with a cotton hand towel.
Returning to the workbench, the stummel was wiped with an alcohol wetted make-up pad. This removed remaining wax and some lingering grime.
I turned my attention to the stem. This was cleaned with bristle pipe cleaners and 95% ethyl alcohol. The stem was surprisingly clean.
I inserted a pipe cleaner into the tenon for easier removal of the stem in the morning. The plan was to leave it in deox, that’s what I like to call time spent in Briarville’s Pipe Stem Oxidation Remover. I have to say, this product is a good one and is available here: Briarville Stem Oxidation Remover 8oz | Briarville, Inc. And no, your’s will not come looking like this, it will be a bright yellow.
I thought this pipe would benefit from an alcohol cotton treatment so I stuffed the bowl and the shank with cotton.
I then poured out 10 ml of 95% ethyl alcohol into a medicine cup, thinking that would be about the amount needed. A disposable pipette was used to transfer the alcohol to the cotton.
Lucky guess, you say. I say I missed it by 1 ml. This needed to sit and evaporate overnight and the stem was soaking overnight, I guessed it was time for me to end this session.
In the morning the cotton was no longer white. The evaporating alcohol had worked to dissolve the tar and smoking residues from the briar and move them into the cotton.
I removed the cotton and cleaned the airway with a cotton swab. It came back with minimal residue.
The stem was retrieved from deox and vigorously rubbed with a coarse shop rag. This removed quite a bit of the oxidized vulcanite.
The stem logo was still visible but it was more faint. Extra care would have to be used to keep this stamp.
I used a piece of a plastic lid to act as a dam to keep the cyanoacrylate (CA. super glue), that I planned on using to fill the hole, from entering the airway.
I added several layers of painters tape to thicken the dam to achieve a tight seal.
The Bob Smith black CA was the product of choice due to having rubberizing agents in the formula. This gives it a bit more flex than regular CA. I applied the CA to the gap with a fly tying bodkin. I intended to allow the CA to cure on its own but after 15 minutes, I got impatient and spritzed it with a CA drying accelerator. I removed the dam and squirted some accelerator into the airway as well to assist in speeding up the curing process.
Once hardened, I filed the fill with a small flat file. There remained a small depression and the button also showed signs of wear.
A second application of the black CA to both the depression and the button edge was done with the fly tying bodkin.
Again lacking patience I spritzed the wet CA and sped the curing along.
The small flat file was again used to smooth the fill and reshape the button and an emery board for getting the angle of the button right.. Ahh, much better.
In preparation of the stem sanding, I covered the stem logo with a small piece of painters tape.
The shank was also masked off to keep the briar stamps from the evils of sanding.
The sanding was done with a series of sanding sponges in grits of 400-1500. Between each sponge the stem was rubbed with mineral oil and wiped with a paper towel. Yeah, the stem logo protector had to be replaced more than once.
The sanding continued with sanding sponges 2000-3500. The oiling and wiping were continued as well.
The next step in sanding/polishing the stem was a series of micro-mesh pads 4000-12000. After the 4000 pad, I removed the masking tape from the logo and cleaned the logo with alcohol.
The 4000-12000 micro-meshing continued. After each pad, I rubbed the stem with Obsidian Oil and wiped the stem with a paper towel.
The stem was looking very good. I now turned to the stummel. There were no areas which required filling but there was a damaged rim to address. The inner front of the rim was charred from a flame and the outer rear was damaged from dottle knocking. I planned on addressing these with a three pronged attack:
Topping the rim.
Using a wooden ball and sandpaper to establish an inner rim bevel, and
Use CA and briardust to build up the damaged outer rim.
Here you can see how the triploid plan is progressing.
And a close-up of the outer rim reconstruction.
Time to sand the stummel. I used a series of sanding sponges here as well. O didn’t mask the shank as the stamping covered the whole length. What I did instead was not sand it. The sanding was only done on the bowl. Between sponges I wiped the sanding debris from the stummel with a make-up pad dipped in alcohol.
The final sanding was done with sponges 2500-3500 with the same wiping as earlier.
The briar was finally micro-meshed with pads 4000-12000. Between each pad I continued to wipe with the alcoholic make-up pad.
The stummel was then coated with Before and After Restoration Balm. This is another great product and since I gave a shout-out to Briarville, I feel I owe one to Mark Hoover as well. Restoration Balm can be found here: Restoration Balm | La Belle Epoque
I waited about 30 minutes for the balm to do its magic before wiping the excess away using an inside out athletic sock.
The pipe was then taken to the buffer where it received several coats of carnauba wax.
The final step was to hand buff the pipe with a microfiber polishing cloth. I then took the pipe to the photography table for the “finished” photos. Upon seeing that I forgot to do the bowl coating I immediately went back to the workbench. DOH! I used a cotton swab to apply a light coat of pure maple syrup to the interior of the tobacco chamber.
I then plugged the airway with a pipe cleaner and dumped about ½ of an activated charcoal capsule into the chamber. The rim was covered with a piece of painter’s tape. The stummel was then vigorously shaken for about a minute. The tape and pipe cleaner were removed then the stem reinserted and given a puff of air to clean excess carbon from the chamber.
The final touch was to hand buff the entire pipe with a microfiber polishing cloth, AGAIN.
This pipe turned out beautifully. I am sure Rudy would agree. I decided to leave the etched name and date because it told a bit of history about the pipe. I doubt any one named Rudy will buy this pretty Captain Fortune but, you never know. The briar has lovely grain and a rich color. The stem polished up beautifully and I think the repair will hold and enable years of faithful use. The dimensions of this Captain Fortune Bulldog are:
Length: 5.60 in./ 142.24 mm.
Weight: 1.02 oz./ 28.92 g.
Bowl Height: 1.64 in./ 41.66 mm.
Chamber Depth: 1.42 in./ 36.07 mm.
Chamber Diameter: 0.72 in./ 18.29 mm.
Outside Diameter: 1.43 in./ 36.32 mm.
I do hope that you have found something here useful to your own pipe care, maintenance or restorations. If you like this sort of thing, please click the like and subscribe buttons. Thank you for reading the ramblings of an old pipe lover.
Loading…
Below are some photos of the finished John Redman Captain Fortune Bulldog.
Yeah, those first two photos were taken before I realized that I had not done the bowl coating.
The above photo was also taken before the bowl coating was done.
As a little kid I used to sit with my father at his reloading bench while he reloaded rifle shells. It was my job to line up empty cases in straight little rows. Important work, to be sure. Later in life I too shared my father’s love of high power rifles, reloading and the study of reloading manuals. I remember shooting my first deer with a hand loaded 25-06 Remington. To this day, I can recall the load: 54 grains of 4831, Federal large rifle primer, 100 grain Nosler Boat Tail Ballisting Tip bullet. I cannot recall the muzzle velocity, like I used to but I still do have the Yugoslavian made Mauser rifle imported by Interarms. “What the heck does all that have to do with a du Pont Explosives promotional pipe?” you demand to know. Well, du Post explosives were not only the reason for the pipe but they also manufactured gun powder. A lot of it. Long before Dwight Eisenhower warned us against the influence of the military industrial complex du Pont was the largest US maker of black powder
Background
I have to admit that I was surprised that there was anything written about this pipe. The first place I looked was pipedia.org and low and behold, I got a hit. Below is the full text.
“du Pont Explosives pipes were given out as souvenir pipes by the Explosives Department of the du Pont Company between 1912 and 1933. (Source: Debra Hughes, Curator of Collections and Exhibits, Hagley Museum and Library, Wilmington, DE USA.) The original maker is unknown.
The shape is apparently intended to resemble an 18th or early 19th Century gunpowder barrel. Poker and bent shapes are represented. Some pipes may have ferrules. They are stamped with the duPont logo and “REG. US. PAT. OFF. EXPLOSIVES” on one side and “GENUINE FRENCH BRIAR” on the other side. Stems are vulcanite or similar material.”
Example du Pont Explosives pipe bowl
Example gunpowder keg with extra bands to prevent staving
An unsmoked example, courtesy Brian Robertson Collection
Well, that pretty much sums up everything I wanted to know. That dated the pipe to 1912-33 and put the production in the USA, probably. I can’t imagine a foreign carver being too concerned with US patent registration. The 1912-1933 dates would precede the briar shortages of World War 2. I have not read anything about briar shortages caused by World War 1 but I am certain that they would have existed. One other thing I found interesting was the painting of the indentations of the stamp, as seen in the photos above. There was no sign of any remnant paint in the stamp on the pipe in hand. I was not sure how to or if to replicate this on the restored du Pont pipe.
The Restoration
Much to my chagrin, I worked on two pipes simultaneously. I normally do not like to do this as I inevitably forget steps or the photographing of steps, but my schedule has included a couple of fishing tournaments as of late. Priorities, priorities… Both pipes shared a denim piece on the workbench.
The first task was to prepare the stem for a bath in Briarville Pipe Stem Oxidation Remover. To do this I wanted the stem clean. I first tried my standard treatment of 99% ethyl alcohol on pipe cleaners. The stem started to feel slick in my fingers. The ethyl alcohol was dissolving the surface material on the stem. “Okay”, I thought and remembered the quote from the pipedia.org, “Stems are vulcanite or similar material” (DuPont Explosives promotional pipes – Pipedia). Hmm, I switched over to a 91% isopropyl alcohol thinking that the larger molecule would be less likely to act on the rubber. It worked and after several bristled pipe cleaners dipped in the 91% isopropyl alcohol the stem was clean.
Both stems were dropped into the bottle of Briarville Pipe Stem Oxidation Remover. I will refer to this as deox from here out.
I thought back to April, 2025 after Briarville gave me a bottle of their product to try. Usage had discolored it severely but it was still working. Sorry, I digress. The stems were to be left in deox overnight.
The ream team was assembled. The PipNet #2 and #3 blades were the proper size.
The PipNet did its job of removing the cake, admirably. The General triangular scraper was just used to clean up at the bottom of the chamber.
The reamed chamber looked good but the rim definitely needed some work.
The lava on the rim was softened with saliva. After a couple of minutes the lava was scraped with a sharp pocket knife.
The cleaning of the shank airway was done with 99% ethyl alcohol on a nylon shank brush, bristle pipe cleaners and numerous cotton swabs. A dental scraper was also used.
After the shank cleaning, I sanded the tobacco chamber with 320 grit sandpaper wrapped around a wood dowel. The bare briar showed no sign of heat damage. Below are photos showing the left and right chamber walls.
Next, the stummel was taken to the sink where it was scrubbed with undiluted Murphy Oil Soap and a nylon brush. The soap was rinsed with warm water and the stummel dried with a cotton hand towel.
I wiped the surface of the stummel with a make-up pad dipped in 99% ethyl alcohol. The pad showed some sign of remaining grime. I wiped it a couple more times to remove whatever the scrubbing missed.
I was not convinced that the airway was completely rid of the smoking residues. The pipe also still had an aroma of old aromatic tobacco. Though not unpleasant, I wanted to remove them. TO do this I packed the tobacco chamber, airway and shank with cotton.
The cotton was saturated with about 10 ml 99% ethyl alcohol applied with a disposable pipette. This was allowed to evaporate overnight.
The next day revealed that the alcohol had worked at dissolving the yuck (technical term for smoking residue) from the walls of the airway and deposited said yuck into the cotton.
The yuckified (the technical term for cotton soiled with dissolved smoking residue) cotton was removed.
I ran an alcohol dipped bristle pipe cleaner through the airway and scrubbed with a cotton swab also alcohol fortified. Both devices returned with little yuck. Triumph!
The inner and out rims of the bowl showed signs of abuse. I lightly topped the rim but refused to top it severely enough to remove all trace of the damage. That would have shortened the height of the bowl by nearly an 1/8th inch or 3 mm. Instead, I slightly beveled the inner and outer edges with a file and sandpaper.
The stem was taken from deox and vigorously rubbed with a coarse shop rag. This removed a good deal of the oxidized material from the surface of the stem.
Below shows the pre-sanded but oiled stem and stummel.
I tried to paint the tooth dents on the stem with a soft flame lighter. This rarely makes a big difference but it’s fun to do.
The tooth chatter was filed with a small flat file and the edge of the button was slightly defined on both the top and bottom sides. These were also lightly sanded with a 320 sanding sponge.
Here is a great example of why I do not like to do two pipes simultaneously. I failed to document the application of the cyanoacrylate (CA, super glue) to fill in the deeper tooth dents. Rather, all you get to see is the filled and filed smooth result.
With the fills on the stem complete, I turned to the one big fill on the left rear of the stummel. The old fill material was picked out using a fly tying bodkin. This new fill would certainly leave a scar but it would be a smooth shiny scar.
I used a fine applicator tip on a bottle of Thin CA to apply a tiny bit of CA into the depressions. I then placed briar dust on top of the wet CA. The excess dust was brushed off. I topped the briar dust with additional Thin CA.
The new fill was sanded to see where additional CA and briar dust would be required. Oh yeah, the reason for the masking tape of the stamps was to protect them from my sanding.
The stem and stummel were sanded simultaneously with a series of sanding sponges in grits 400-3500. Between sponges the stummel was wiped with a make-up pad wetted with alcohol while the stem was rubbed with mineral oil and wiped with a paper towel.
After the sanding the pipe was worked with micro-mesh pads 4000-12000. The wiping between pads was done as with the sanding sponges except the stem was oiled with Obsidian Oil.
The stummel was then coated with Before and After Restoration Balm and allowed to soak in that balmy goodness for 20 minutes.
The remaining Restoration Balm was wiped from the stummel with an inside out athletic sock.
The pipe then received several coats of carnauba wax applied with the buffer.
The final step was a hand buffing with a microfiber polishing cloth.
This du Pont pipe was a fun restoration. Not only did it allow me to reminisce about my father and reloading but also gave me the chance to work on a pipe that was probably 100 years old. This old gal is still quite pretty and the bent poker, that’s what I am calling it, shape is intriguing and fun. The briar grain is mostly concealed by the ring carvings of the “gun powder barrel” but the shank sides show lovely bird’s eyes. The hard rubber of the stem did polish-up nicely and provides a fine accent to the natural color of the briar. This historical sitting pipe will make its next owner a fine and historical tobacco enjoyment tool. The dimensions of this du Pont Explosives promotional pipe are:
Length: 4.70 in./ 119.38 mm.
Weight: 1.53 oz./ 43.36 g.
Bowl Height: 1.79 in./ 4.47 mm.
Chamber Depth: 1.58 in./ 40.13 mm.
Chamber Diameter: 0.80 in./ 20.32 mm.
Outside Diameter: 1.30 in./ 33.02 mm.
I do hope that you have found something here useful to your own pipe care, maintenance or restorations. If you like this sort of thing, please click the like and subscribe buttons. Thank you for reading the ramblings of an old pipe lover.
Loading…
Below are some photos of the finished du Pont Explosives promotional pipe.
The story of the Ugly Duckling seems to come to my mind when I think of Peterson Irish Seconds. Though in the case of this pipe it’s more like an ugly duckling that got chewed on by a snapping turtle down at the pond.
Well, this looks like it might be another tough restoration. The reason this pipe didn’t make it as a “real” Peterson might have been the deeper than normal blastings at the front left of the pipe. In a couple of places the briar looks like the blasting cut deeper into the briar. I am no expert on Peterson quality control but that did seem suspect. As for what I planned to do was the following: A thorough cleaning of the pipe inside and out, a refinishing of the briar, and a rebuilding of the stem. This rebuilding would allow me to try to weld vulcanite kind of like I welded acrylic on a previous restoration (A Commissioned Stanwell 32 Button Repair – acrylic welding – NebraskaPeteGeek).
Background
Being a rather typical member of Generation-X, sometimes called lazy slackers, I will refer you to what I wrote about Peterson Irish Seconds in a previous blog,
I cannot begin to describe the history nor impact of the Peterson pipe company. I can tell you what I think is the best source of information on the subjects and that is Mark Irwin and Gary Malmberg’s book, The Peterson Pipe The Story of Kapp & Peterson. According to the authors,Peterson’s seconds are as follows,
“Seconds Peterson seconds are pipes of all shapes with briar flaws deemed unacceptable for ordinary models and sold at reduced prices, sometimes unstained, fit with fishtail or round button mouthpieces. Since the early 1990s they have only been available in Ireland. Occasionally they are described in Peterson catalogs under different names, and documented specimens have various stampings. In roughly chronological order these include:
Stamped arched KAPP & over straight PETERSON”S over arched DUMMIES An early specimen preserved at the Peterson museum with this stamp has a round-button mouthpiece.
IRISH FREE STATE stamp (1922-37) COM stamp with no brand or model name. Documented with or without nickel bands.
System Reject (1968-) Noted first in the Price List for January 1968 as being available in all six system shapes. Also found in the ‘80 Peterson-Glass Price List.
Erica System Reject (1987-98)Noted in two US distributor catalogs. Fishtail mouthpiece, unstamped nickel band, with COM of MADE IN THE over REP. IRELAND or with no COM.
Irish Seconds (1982-98) Classic Range shapes stamped with no brand name , fishtail mouthpiece, in unstained, black rustic or dark brown finishes, no band. (Irwin, Mark and Malmberg, Gary (2018). The Peterson Pipe The Story of Kapp & Peterson, First edition, second printing 2021. Briar Books Press, Canada. p312).
Mark also writes a weekly blog titled Peterson Pipe Notes. If you have not already subscribed I highly recommend it. It will be one of the best $0 purchases you can make and is a vault of information on all things Peterson and various other topics. I am not just saying that because Mark has posted a few of my restorations either. His blog concerning the Irish Seconds is very well researched, written and can be found here: https://petersonpipenotes.org/tag/irish-seconds/. (Young, John. An Irish Seconds Oom Paul (Peterson 02) Restoration – NebraskaPeteGeek).
As for this pipe, I believe it to be a Peterson 312 shape. The dimensions and shape match the 312 Bent Billiard. According to the official Peterson website,
“One of our largest and most robust variations on the classic, this bent Billiard offers a generous fire hole with thick insulating walls, as well as a more tubular transition and muscular shank that capture our House Style. Though bold and substantial, its half-bend lends it a natural impression when clenched in the teeth.” (Peterson Pipes: System Standard Heritage (312) P-Lip).
The shank is drilled with a reservoir making me think that the pipe was not intended as an Irish Seconds but as a 312 but it just didn’t make the quality control cut after the blast. That is all conjecture on my part though.
The Restoration
As much as I do not like to work on more than one pipe at a time, due to old brain issues, I did indeed do these two pipes simultaneously.
Stem cleaning was the first priority as I wanted to get this stem into the Briarville’s oxidation remover solution. I was looking forward to trying the vulcanite welding.
The exterior was lightly rubbed with 0000 steel wool to remove the outermost oxidation.
The stem then was placed into the Briarville Pipe Stem Oxidation Remover, or Deox, as I like to call it. I planned to leave it in the solution overnight.
I then turned to gathering the ream team.
The PipNet’s #1 and #2 blades did most of the work with the General triangular scraper doing clean-up.
The rim had lava deposits, but with its rusticated rim, it would be tough to scrape clean.
The scraping of the rim, once softened with a bit of saliva, was partially productive.
The tobacco chamber was sanded with 320 sandpaper wrapped around a wood dowel. The sanding revealed the briar and no damage due to heat.
No damage is always welcome.
Next came the cleaning of the air way within the shank. This was more difficult. Peterson pipes with their reservoirs are frequently difficult to clean. I do wish that their owners would have taken a few minutes to swab out the reservoir with a tissue or napkin as recommended, but I too have neglected to do this after a smoke. The airway was cleaned with a dental scraper, nylon shank brush, bristle pipe cleaners and cotton swabs all doused with liberal amounts of 99% ethyl alcohol.
The stummel was then taken to the sink for a scrub with a nylon brush and Murphy Oil Soap, undiluted. The soap was rinsed with warm water and the stummel dried with a cotton hand towel.
The deeper parts of the sandblast and the rim did not look like they were as clean as I would have liked so a second scrub was done with a brass brush and the Murphy’s. The rinsing and drying remained the same.
Back at the workbench the stummel was wiped with a make-up pad dipped in 99% ethyl alcohol. This did remove some of the black stain from the briar.
Still not happy with the cleanliness of the airway, I thought maybe a cotton and alcohol treatment would soften and draw out remaining tars from the briar.
The bowl, airway and shank were stuffed with cotton. The cotton was then saturated with about 10 ml of 95% ethyl alcohol and allowed to sit overnight. With the stem and stummel both soaking overnight with their treatments, I called it a night.
Remember I said that I was working on two pipes at the same time? Well, I continued the next morning. The cotton had done its job of absorbing the tars dissolved by the alcohol as it did its job of dissolving the tars and moving them to the cotton as it evaporated.
The cotton was removed.
I then cleaned the airway as before and was pleased that it took little effort.
The stem was retrieved from deox and placed on a coarse shop rag where it was rubbed vigorously. This helped remove some of the oxidation loosened by the deox solution.
The stem was filed and sanded exposing a cleaned surface to work with.
The same filing and sanding was done to the underside.
I cut a “dam” from a plastic lid to fit into the slot and block off the airway from unwanted welding material.
Below you can see the airway filled with the dam.
I selected a vulcanite stem from my extras.
The surface material was filed and sanded from the stem to expose clean fresh vulcanite.
I tried melting the vulcanite with a soldering iron, as I had successfully done with the acrylic. It did not work. I then tried to heat the vulcanite with a heat gun to soften it before using the soldering iron. This too met with failure.
All that it did was to make the surface of the vulcanite surface get rough, as if it were bubbling up. I could not get any material to melt off the stem for use as welding material for the Peterson’s stem.
Plan B began to form in my Multiple Sclerosis damaged brain. What if I cut a piece of vulcanite from an existing stem and welded it in place with rubberized cyanoacrylate (CA, super glue)? Hmm, the damaged brain thought this might work. I set off to find an appropriate donor stem. The donor’s button was removed with a cut-off tool with the dremel rotary tool. This also gave me a feel for cutting vulcanite.
I measured and drew out the piece which I wanted the donor to donate.
Except for a small chip off the donor piece where I tried to hold it in a forceps, it looked good and fit well. Okay, there was actually a lot of trimming and shaping with the dremel.
The Bob Smith rubberized CA was the glue of choice.
The CA was applied to the seam around the donor piece. The dam would hopefully keep the CA from dripping into the airway. Also from previous experiences the CA does not stick to this plastic.
After about 30 minutes I couldn’t wait anymore so I spritzed the CA with a drying accelerator. This hardened up the CA in moments. The plastic dam was pulled free.
I filed the repair with a small flat file and checked the airway. Everything was going according to the imagined plan.
A second application of black CA was applied to fill and blend the repair. I also added a line of CA to the back side of the button to re-establish its shape.
The underside of the stem was also coated with a thin layer of CA to fill the multitude of dents caused by the snapping turtle attack.
After the CA had cured it was again filed and sanded with 320 and 400 grit sanding sponges. The repair looked better than I had thought it would.
The underside was also filed and sanded.
WIth the stem issues resolved, I turned my attention to the refinishing of the briar. This pipe had some serious wear issues. The black stain had been worn away completely from the left rear side of the stummel.
I used Fiebing’s black Leather Dye diluted about 50% with ethyl alcohol.
I initially thought to just apply the dye to the areas where the finish had been worn away but as I did this I realized that blending the old and new finishes would be impossible. The best solution was to apply the black dye to the whole stummel.
Well, the whole stummel minus the lighter shank end. The dye was flamed with a lighter to burn off remaining alcohol and to help set the dye into the briar. After the flaming I wiped the surface with a make-up pad wetted with ethyl alcohol. I was not concerned with the dye drying because I wanted to remove the dye from the high spots of the blast. The lower spots would dry on their own accord.
After the stummel had dried, I lightly sanded the high spots and contours with a 400 grit sanding sponge.
This light sanding removed the black dyed briar from the surface revealing the lighter briar underneath.
The worn briar of the left side of the stummel looked much better.
The stem was then sanded with a series of sanding sponges. I did not worry about taping the shank as the sanding there would improve the lightening of the briar at the shank end. Between each sponge I rubbed the stem with mineral oil and wiped it with a dry paper towel.
The sanding continued through the finest grit sanding sponge, 3500. The oiling and wiping also continued between sponges.
I buffed the stem with white buffing compound to further polish the vulcanite.
The stummel was coated with a layer of Before and After Restoration Balm and allowed to sit for 30 minutes.
The remaining Restoration Balm was hand rubbed with an inside out athletic sock to remove the excess.
The stem was waxed with several coats of carnauba wax applied with the buffer.
I did not want to wax the stummel with carnauba due to the deeper recesses of the blast. I opted to use Renaissance Micro-Crystaline Wax. This product was applied with a baby toothbrush.
I used a shoe buffing pad to hand polish the Renaissance.
As a further buffing attempt, I used shoe buffing brushes to work the wax and raise the shine.
The final touch was to hand buff the entire pipe with a microfiber polishing cloth.
My struggle to repair the damage caused by the snapping turtle attack on this poor Peterson was complete. Overall I think it turned out very nicely. Given, I will probably not sell this specimen as the stem repair was a technique that I have not tried before and have not tested sufficiently. I was disappointed by my failure to weld the damage with vulcanite but will probably do more research and attempt it again. The stem did polish-up very well and looks dramatically better than it did. I am sure the repair will hold and should be strong enough to combat the forces of extended clenching. The refinishing of the stummel also turned out very nicely. The definite deep blast is a feature that I really like the look of. Though this may have been the reason for this pipe being classified as an Irish Second. The dimensions of this Peterson Irish Seconds Bent Billiard are:
Length: 5.50 in./ 139.70 mm.
Weight: 1.83 oz./ 51.88 g.
Bowl Height: 1.75 in./ 44.45 mm.
Chamber Depth: 1.54 in./ 39.12 mm.
Chamber Diameter: 0.72 in./ 18.29 mm.
Outside Diameter: 1.32 in./ 33.53 mm.
I do hope that you have found something here useful to your own pipe care, maintenance or restorations. If you like this sort of thing, please click the like and subscribe buttons. Thank you for reading the ramblings of an old pipe lover.
Loading…
Below are some photos of the finished Peterson Irish Seconds Bent Billiard.
I am not a big fan of figural pipes in general. However, as a Marxman fan, I cannot help but try my hand at bidding when one comes up on eBay for a reasonable price. That was the case with this charming cherub. This little cheeky monk showed up with three other pipes. The Marxman was the obvious target of the acquisition but the other two also looked interesting.
I won’t say what I ended up paying for the trio but it was far less than I was willing to pay for the funky monk. A road trip from Decatur, Georgia to the wilds of southeast Nebraska later the pipes arrived. I also like to think this freewheeling friar made a detour through Sherwood Forest to visit a certain hooded robbing Robin. Now my imagination is running rampant. The stampings on the bottom of the pipe were a nice sharp MARXM with the fletchings of an arrow on the left. The last couple letters of MARXMAN and the arrow tip looked to be the victim of an incomplete stamp. Below this was IMPORTED BRIAR. Anyway, below are some photos of the chubby cheeked monk before he had any work done.
Yeah, this one had some issues. The stem was obviously not the original. There was a visible crack in the shank, likely the reason for the also not original band. The pipe had been smoked as indicated by both the cake in the bowl and the lava on the rim. There also appeared to be a cigarette burn on the right side of the stummel. The carving itself looked good although the small hole exiting the monk’s lips gave me concern. I worried that this irregularity in the tobacco chamber might lead to charring around the hole. Well, I’d cross that stream, without crossing quarter staves with Little John, during the reaming. See that? Another Robing Hood tidbit. I wonder if there will be more.
Background
I keep hoping that an author will write a comprehensive history of Robert Marx and Marxman Pipes, similar to:
Until then I will have to use less glamorous means of documentation. Heck, I’ll even quote myself, how is that for less-than-glamorous? Below are links to previously written blogs with more complete histories of Marxman pipes, for those interested in reading more about Robert Marx and his company.
As for this particular pipe, I’ll refer to a c. 1950 Marxman catalog,
(File:MarxmanCatalog4.jpg – Pipedia). This is why I titled this blog “A Marxman Carved Head – Monk Restoration”. The catalog calls these pipes “CARVED HEADS” rather than figural pipes and I used that nomenclature. I am assuming that this pipe is from around the 1950 date, prior to the acquisition of Marxman by Mastercraft in 1953. After the acquisition Marxman pipes were manufactured in France and Italy and bear a country of manufacture (COM) stamp indicating the COM. Since this pipe is lacking a COM, I assumed that it was carved in New York City.
The Restoration
The Monk made its way from the photo table to the workbench and received a cleared denim piece.
The first thing I did was look through my limited stock of pipe stems for suitable replacement stems. The stem that was on the pipe was already a replacement stem likely from a Comoy pipe. Comoy had several brands or seconds that used three bars on their stems. I found two then fit the mortise and would require less work on my part to fit the stem to the pipe.
The first was a black hard rubber, non-vulcanite, saddle stem. All of the Carved Heads had a taper stem, according to the photos from the catalog, though some of the animal versions appeared to have saddle stems. This stem would provide a more original look to the piece.
The second was a short briar wood stem. This stem was interesting and would make the pipe into a cute nose-warmer.A very non-traditional look, but one that was intriguing.
Below is a photo of the briar stem from the rear.
I asked the monk which he preferred and got the silent treatment. Not even a, “To Nottingham.” Perhaps he’d taken a vow of silence…
I tried both stems for size and feel.
The nosewarmer version was OK to clench with its short, less leverage physics. The Saddle stem also clenched well and did maintain the standard look of a Marxman. I was still undecided.
Maybe some reaming would cure my indecision.
The reaming was done with the PipNet #1 and #2 blades. The Smokingpipes Low Country reamer and the General triangular scraper.
The reamed tobacco chamber looked pretty good. Just some lateral rings had been lightly cut into the briar.
Sanding the tobacco chamber with 320 sandpaper wrapped around a wood dowel took the briar to bare wood and revealed no damage to the chamber from heat. Also, the small hole leading to the monk’s mouth seemed completely fine.
I turned to cleaning the airway of the shank. This was done with several bristle pipe cleaners, a nylon shank brush, several cotton swabs all dipped in 99% ethyl alcohol. There was also some scraping of the airway with a dental scraper. The alcohol softened the glue holding the band. This was removed and dropped into the alcohol.
After soaking in alcohol, the band was cleaned with a cotton swab and a light rubbing with 0000 steel wool.
I wondered how the band would look buffed, so I took it to the buffer and lightly worked it with white buffing compound. It shined up nicely.
I tried both stems with the polished band.
I had decided. The replacement of the replacement stem would be the saddle stem. It would require some file work though.
I thought to myself, “Hi self, You know that band would look much better if it were brass.” I couldn’t help but agree. I went through the bras tube stock and found a piece that would fit with minimal shank filing. I used a pipe cutter to cut off a section to fit the monk’s shank.
The new band was too tight to allow a good fit, Some cleaning and then filing and sanding would be required.
The monk still needed a tiny bit of dental work. The small hole in between the lips would not pass a pipe cleaner through to the inside of the tobacco chamber. I used a couple of alcohol dipped pipe cleaners then used a Vermont Freehand slot tool (Slot Tool (with handle) – Vermont Freehand). To clean-up the inside of the hole.
The stummel was taken to the sink for a scrubbing with Murphy Oil Soap and a nylon brush. The soap was rinsed with warm water and the stummel dried with a cotton hand towel.
Returning to the workbench, I wiped the stummel with a cotton make-up pad dipped in 99% ethyl alcohol.
I was not happy with how the shank cleaned up so I thought that a cotton alcohol treatment would loosen up the tar deposits in the airway. The tobacco chamber and the airway were packed with cotton from a few make-up pads. I thought that 10 ml of alcohol would suffice. The alcohol was transferred via a disposable pipette.
I used a pipe stand to elevate the shank end to be about the same level as the rim as the pipe was now filled with alcohol saturated cotton.
Usually I allow the alcohol to evaporate overnight. This pipe sat for seven hours until I returned to it. The monk, not like Friar Tuck from the stories, didn’t seem to be able to handle his alcohol and was face down.
Upon returning I could see that the evaporating alcohol had done its job of liberating the tars from the briar and moving them to the cotton as the alcohol evaporated.
The shank too, looked like the treatment had been successful.
The cotton was removed and with it a good deal of tar and smoking residue. I again cleaned the shank with alcohol dipped cotton swabs and bristle pipe cleaners.
I masked the shank and band for their protection. The replacement stem was fitted using a small flat file.
Once filed to fit I smoothed the saddle with 320 and 400 grit sanding sponges. The stem was rubbed with mineral oil and wiped with a paper towel to remove sanding debris.
It was time to glue the new band in place. The fit was tight and required me to place a wood block against the end and tap the band into place with a hammer. I decided to go with brown cyanoacrylate (CA, super glue).
My brown CA is getting old and it is like applying warm tar. I used a fly tying bodkin to apply the CA around the end of the shank leaving a couple mm for the CA to move when the band was pressed on.
The seating of the band went well. After allowing it to set-up for an hour I wetted a soft cloth with acetone and wiped the band and shank. Acetone will dissolve CA, especially before it is completely hardened.
The replacement stem was sanded with a series of sanding sponges. The first were 320-600 grits. Again between each sponge I rubbed the stem with mineral oil and wiped the stem with a paper towel.
The next set of sponges were 1000-2500 grits. Again the oil and wiping was done between each sponge.
The final sanding was done with 3000 and 3500 grit sanding sponges with the same oiling and wiping.
I worked the stem with micro-mesh pads 4000-12000. In between each pad I rubbed the stem with Obsidian oil and wiped it with a paper towel.
The stem and band were then buffed with white buffing compound.
The buffing compound was removed with vigorous hand buffing with a cotton cloth. The stummel then received a coating of Before and After Restoration Balm applied with a baby toothbrush to get the balm into all of the nooks and crannies. This sat overnight.
The next day, I used an inside out athletic sock to remove the remaining Restoration Balm.
The pipe was then taken to the buffer for several coats of carnauba wax.
The final step was a hand buffing with a microfiber polishing cloth.
As always, I enjoyed working on this Marxman pipe. The figurals, though not my favorite, were fun and kind of whimsical. I couldn’t help but think about all the adventures of Robin Hood while I was working on this pipe. I know it is not made in the image of Friar Tuck from the Robin Hood tales but, that is what was running through my mind. The carvings are of good quality with well defined cuts and contours. The briar is of good quality and was generally free of pits and fills. The replacement stem polished up nicely and does look like it belongs with this pipe. The band also turned out well and should provide years of beauty and security from further cracking. The dimensions of this Marxman Carved Head – Monk are:
Length: 4.99 in./ 126.75 mm.
Weight: 1.64 oz./ 36.49 g.
Bowl Height: 1.75 in./ 44.45 mm.
Chamber Depth: 1.51 in./ 38.35 mm.
Chamber Diameter: 0.72 in./ 18.29 mm.
Outside Diameter: 1.56 in./ 39.62 mm.
I do hope that you have found something here useful to your own pipe care, maintenance or restorations. If you like this sort of thing, please click the like and subscribe buttons. Thank you for reading the ramblings of an old pipe lover.
Loading…
Below are some photos of the finished commissioned Stanwell 32.


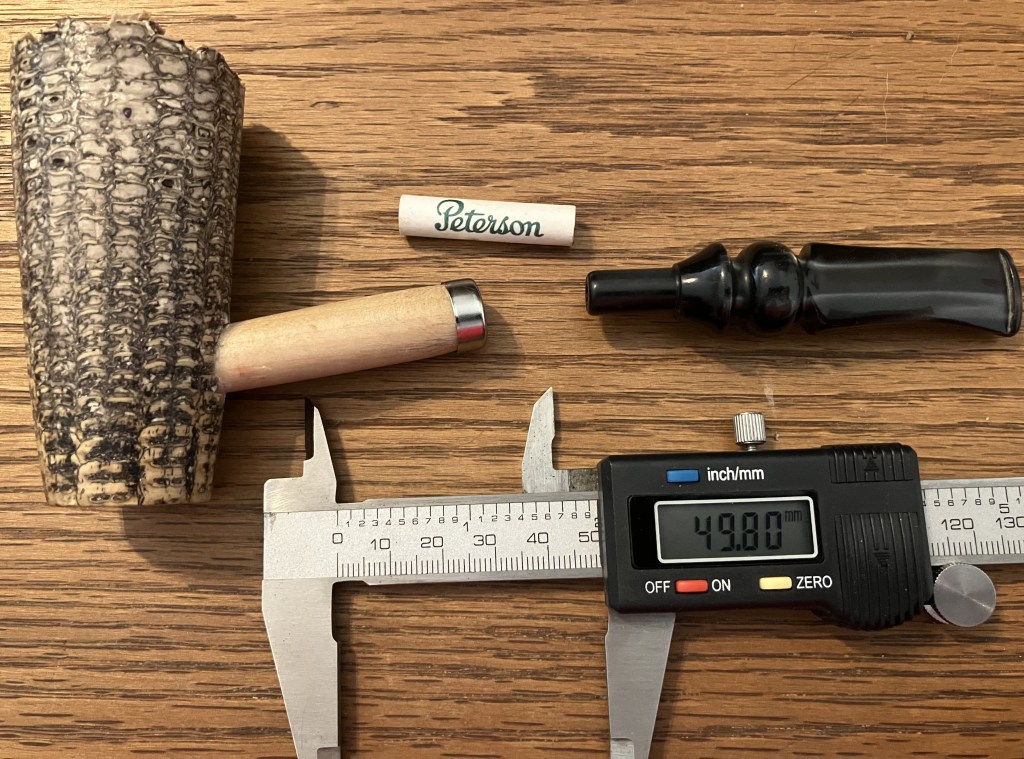


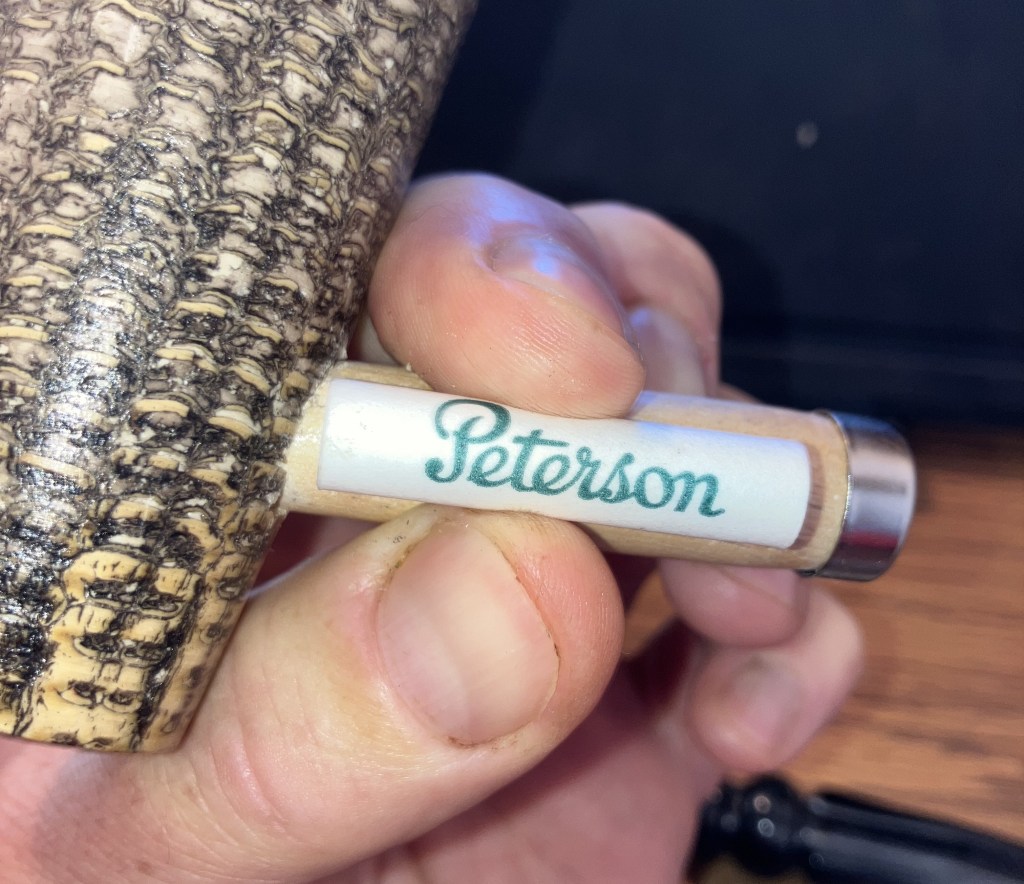
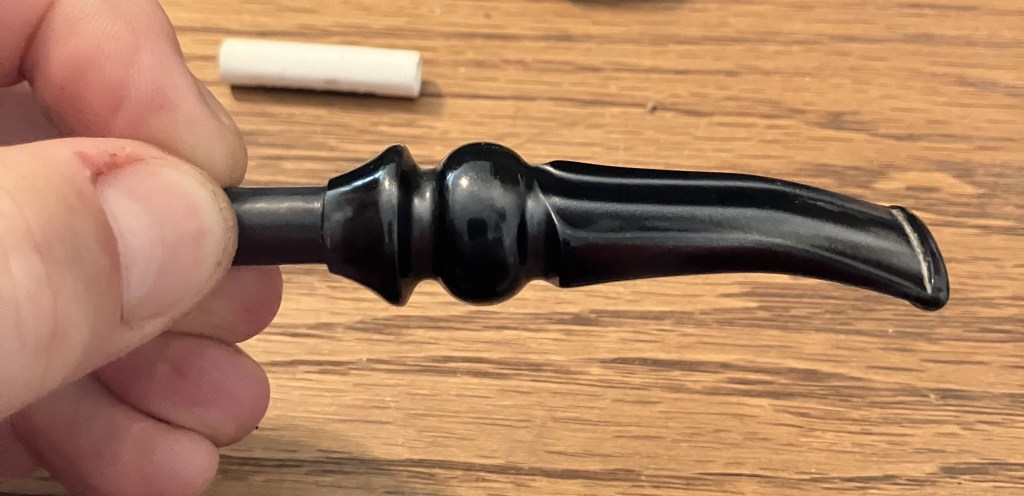

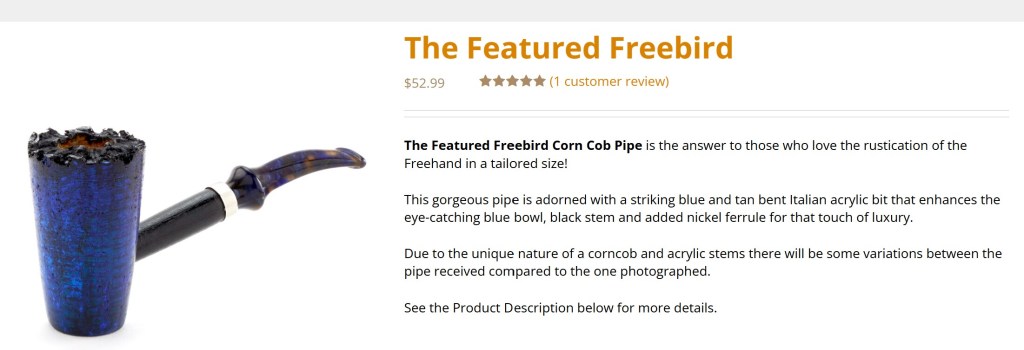
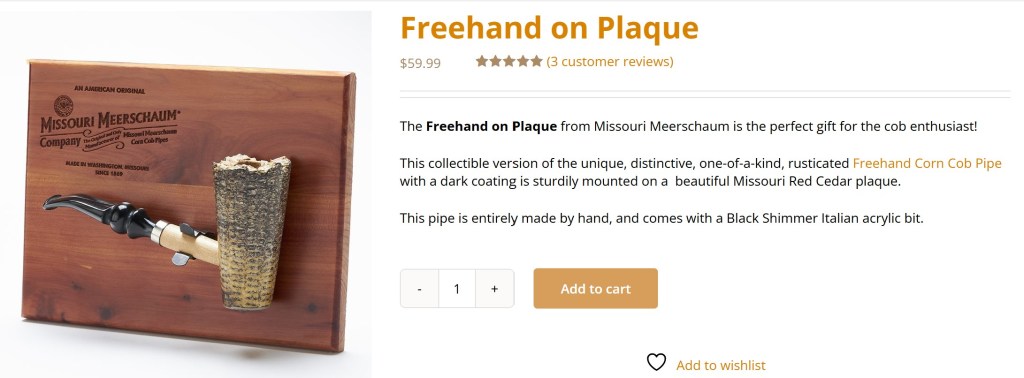

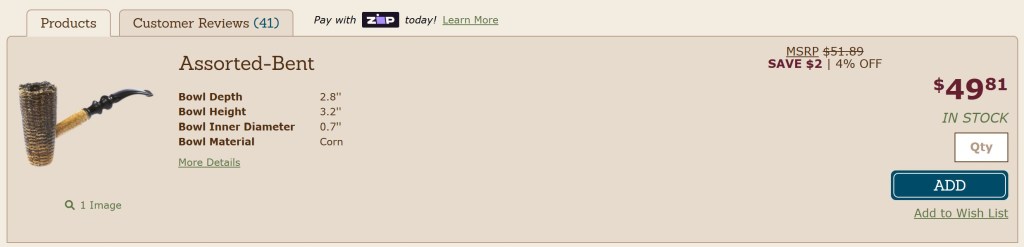
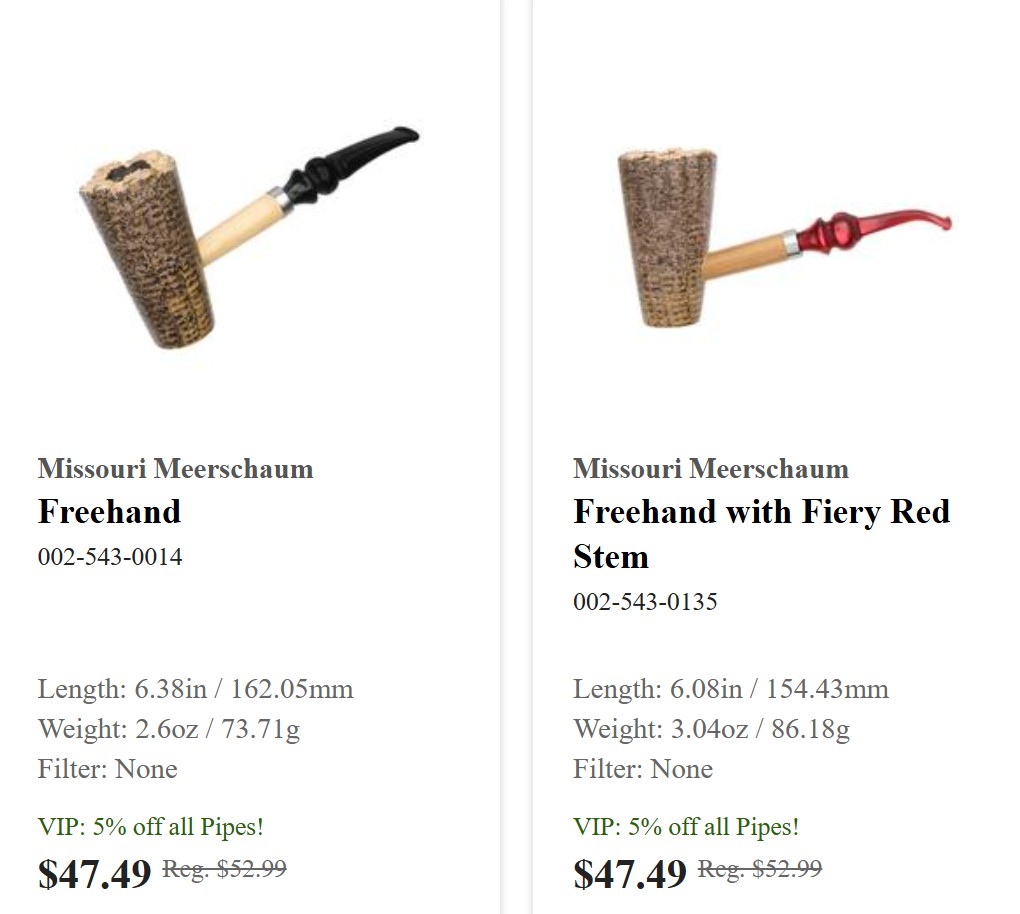
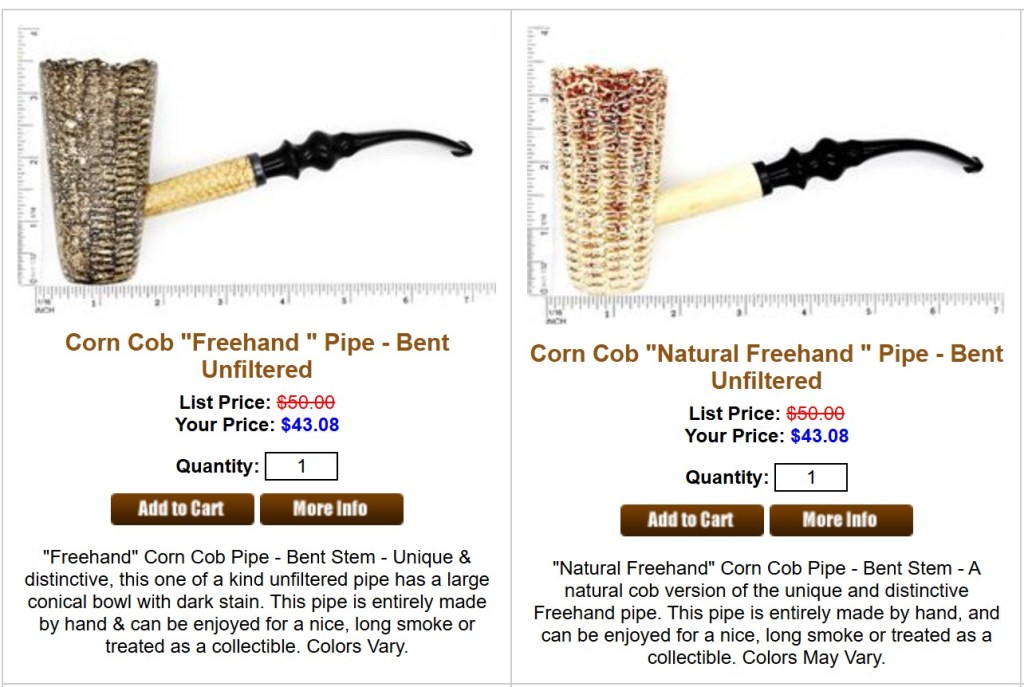
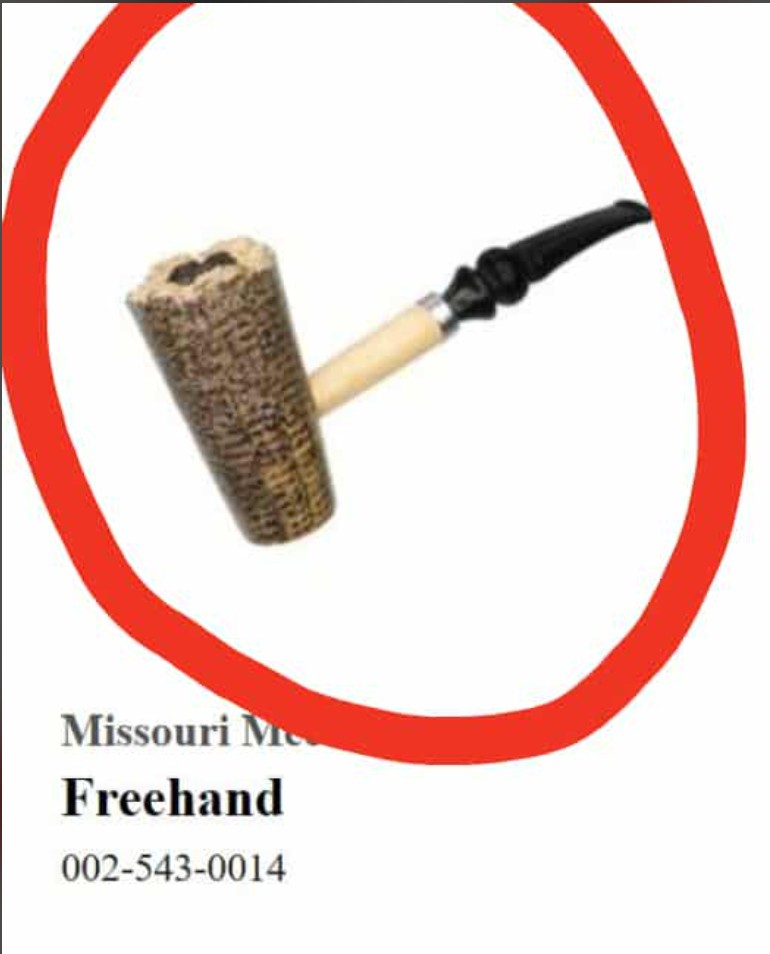
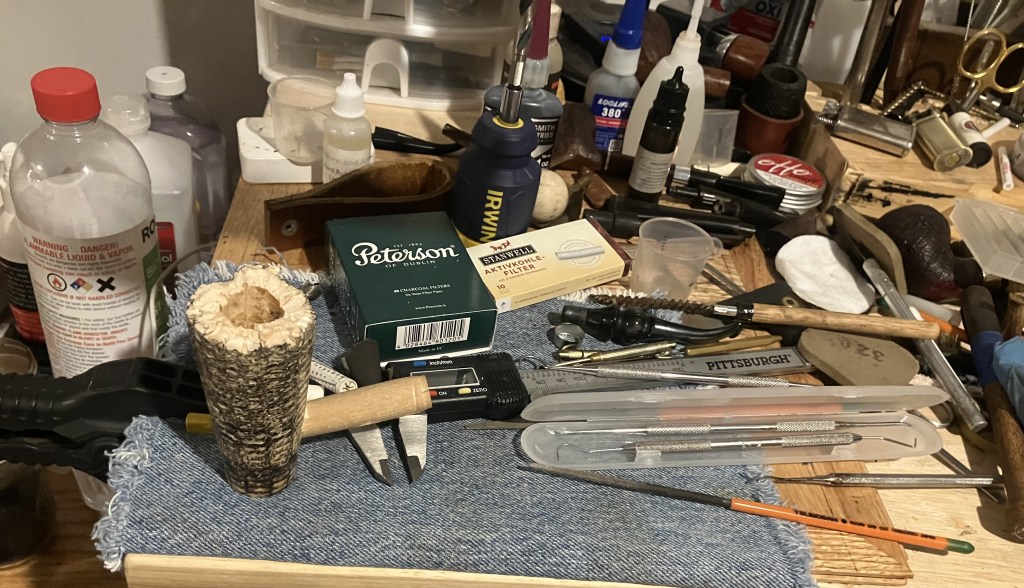


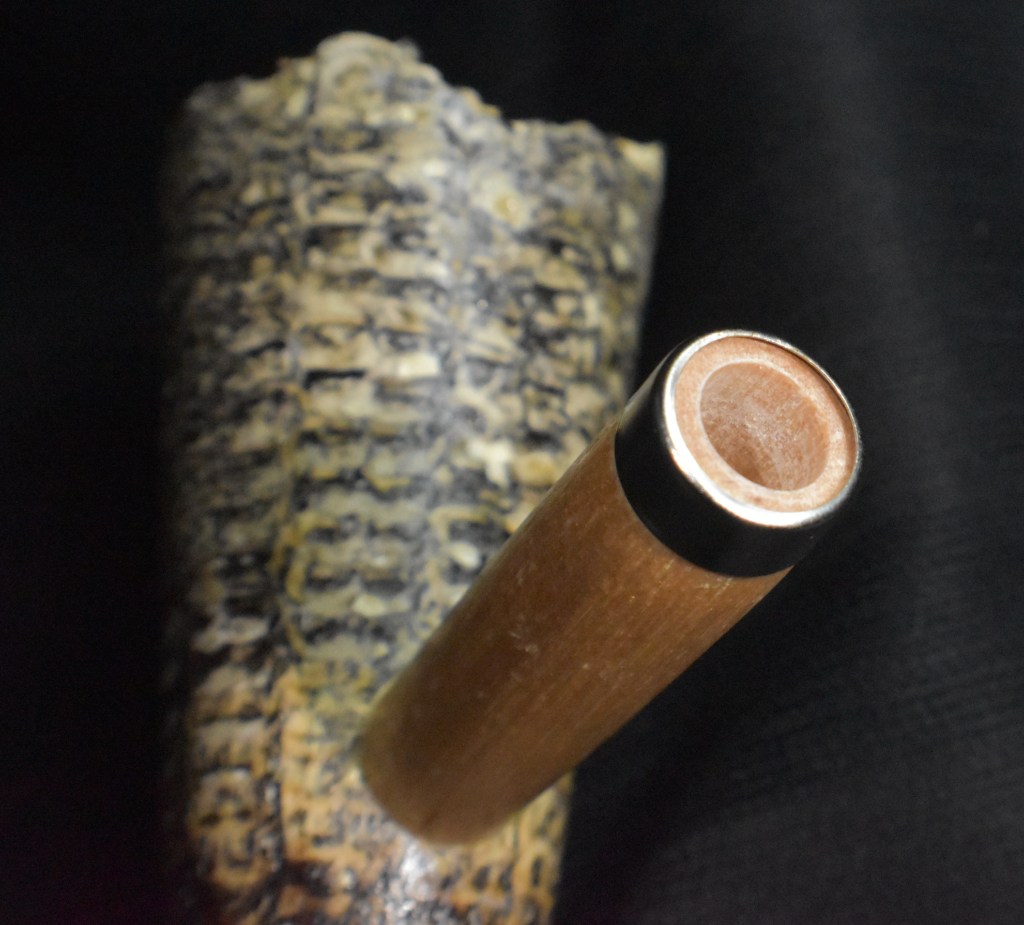


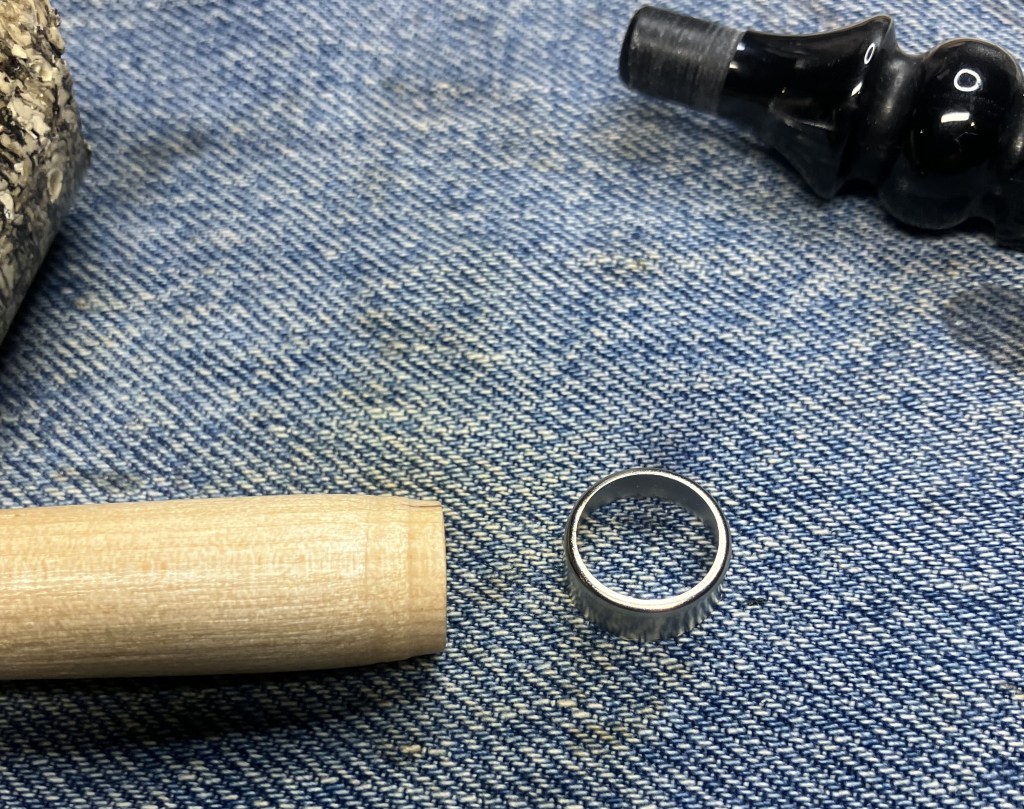
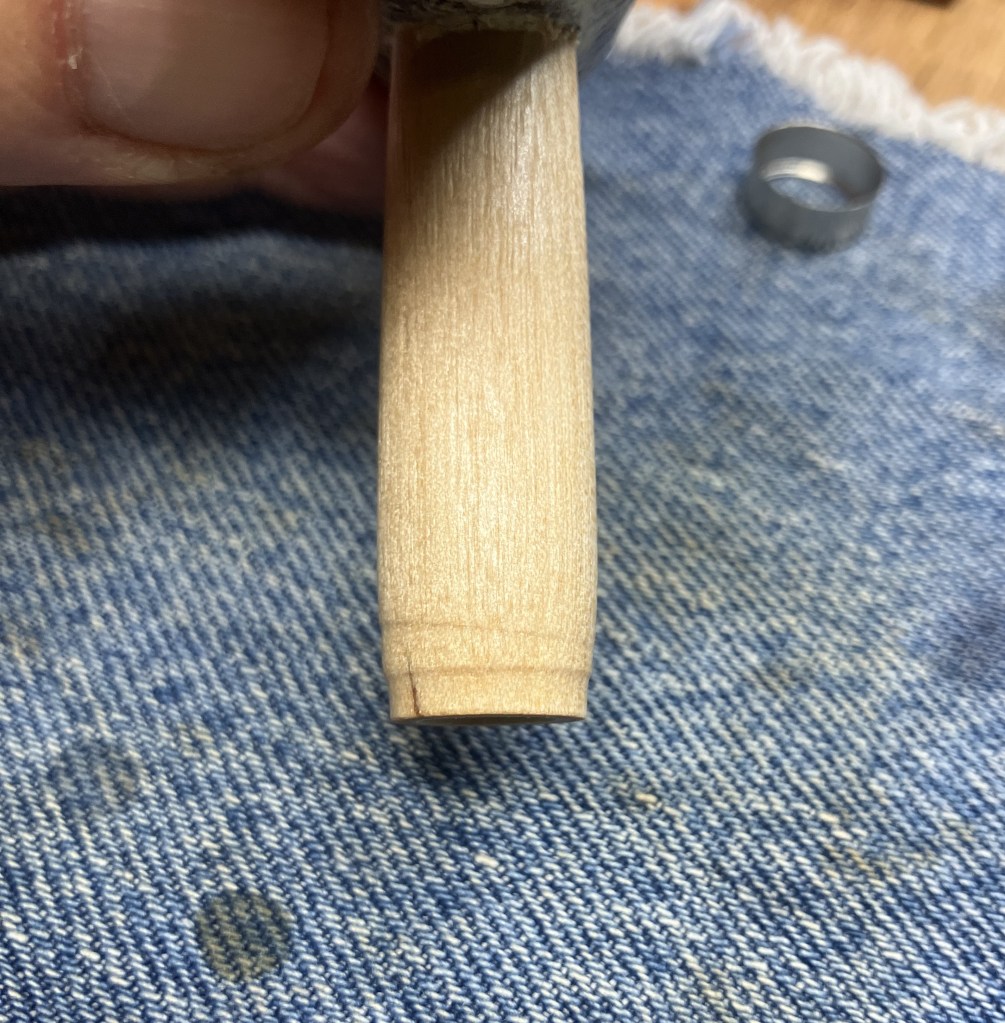

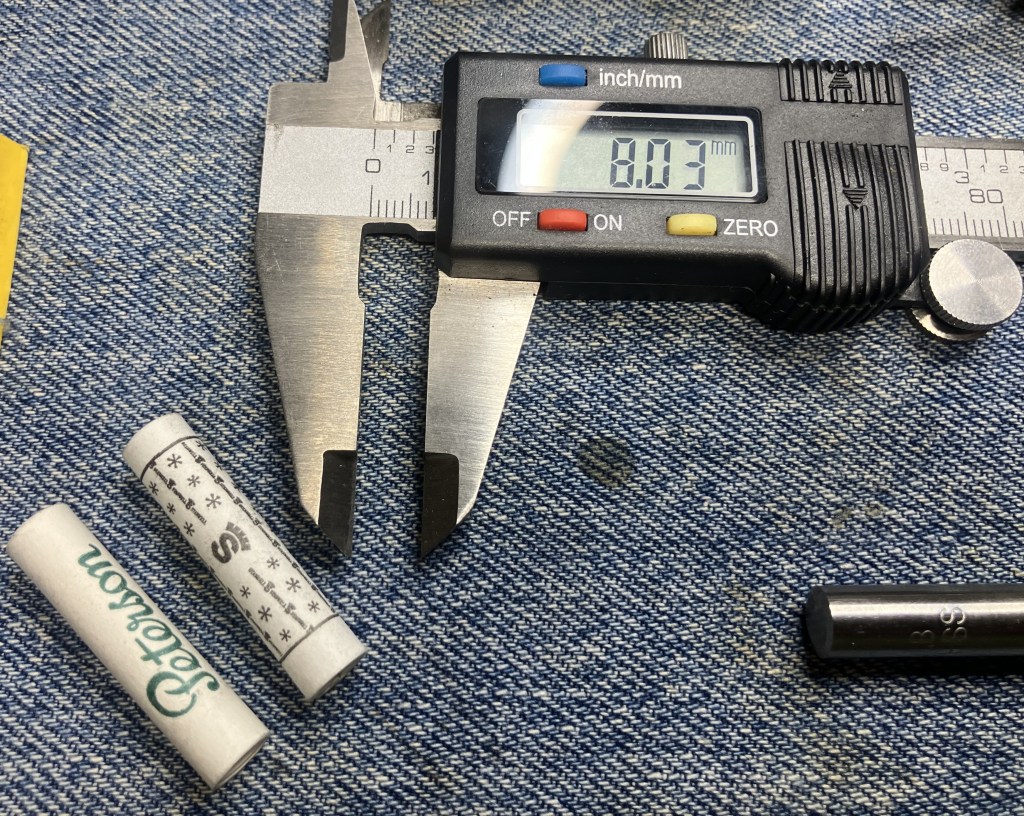

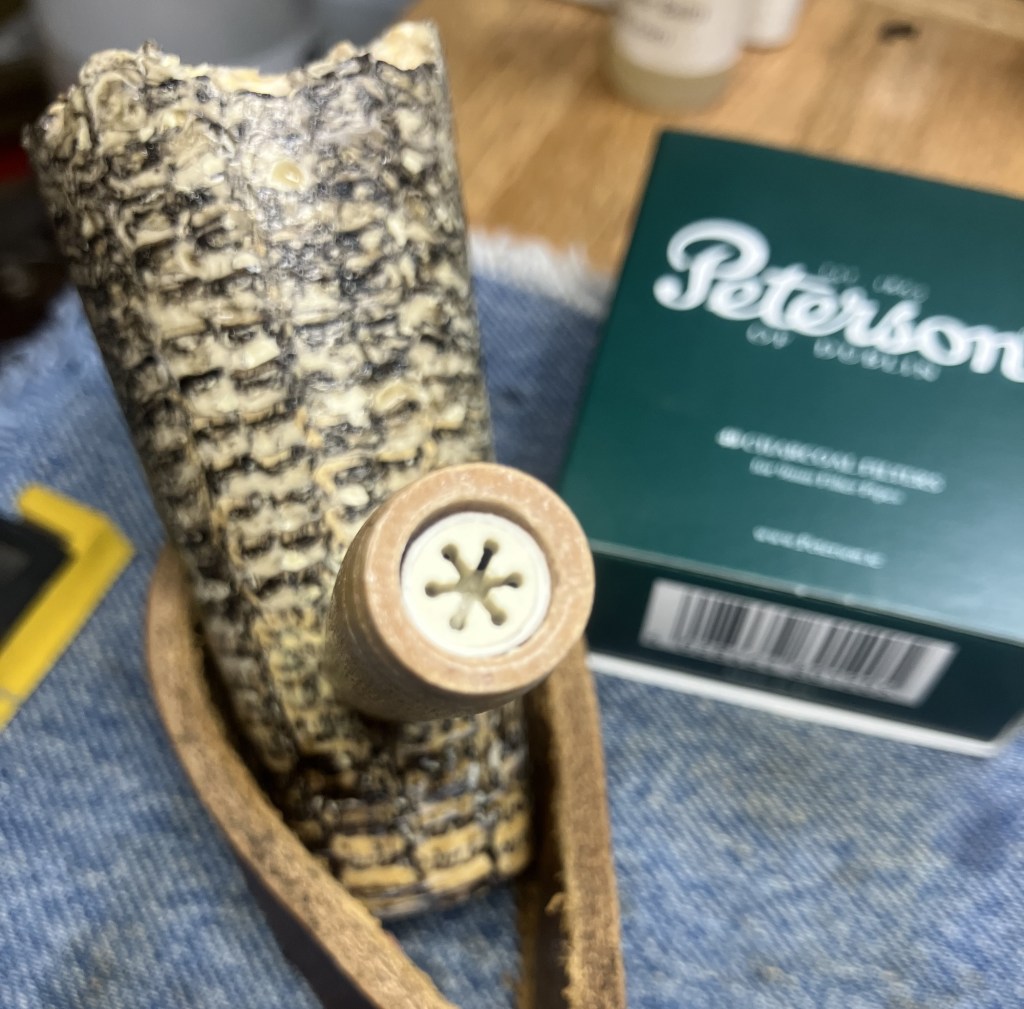


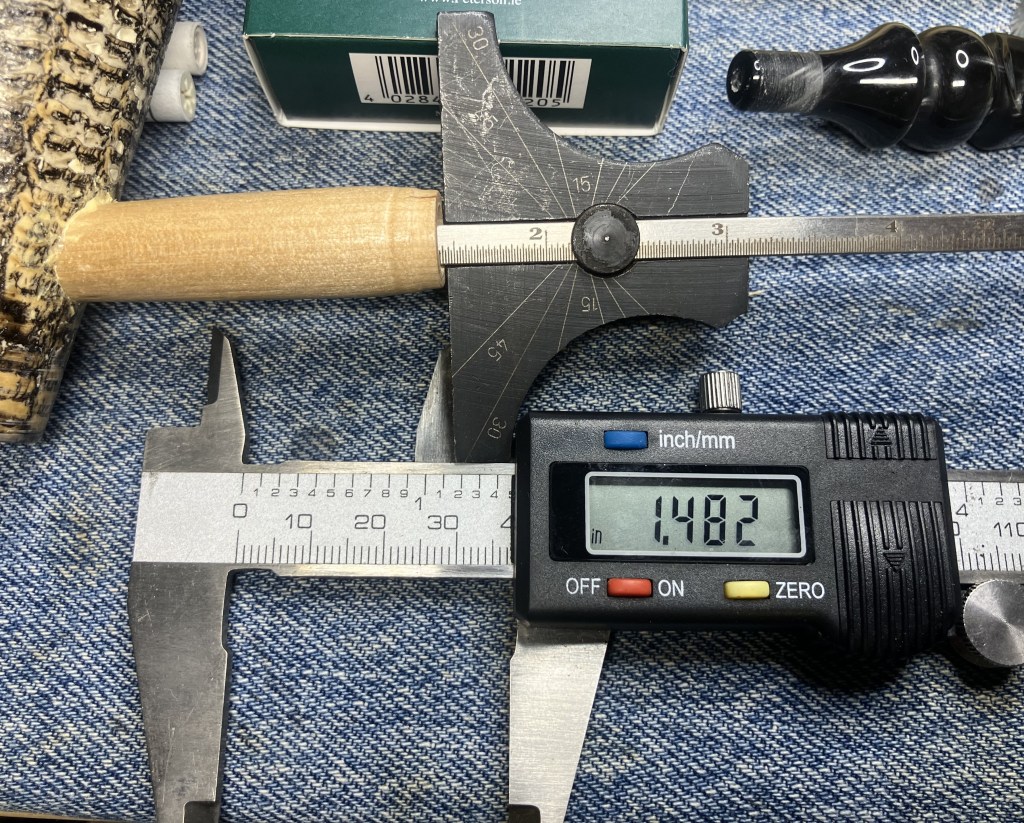
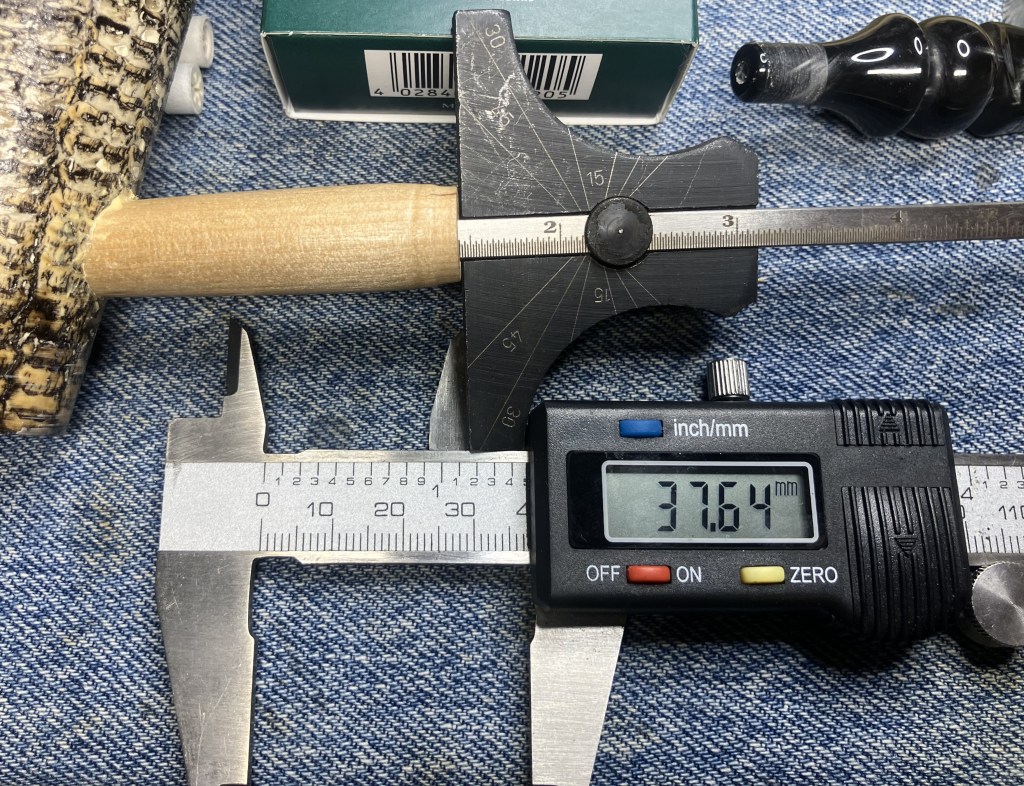


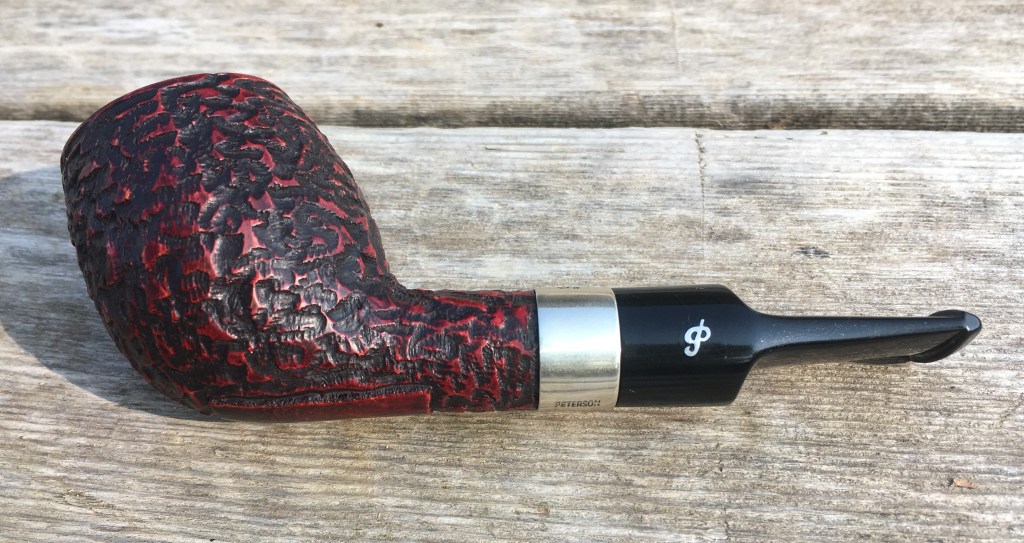
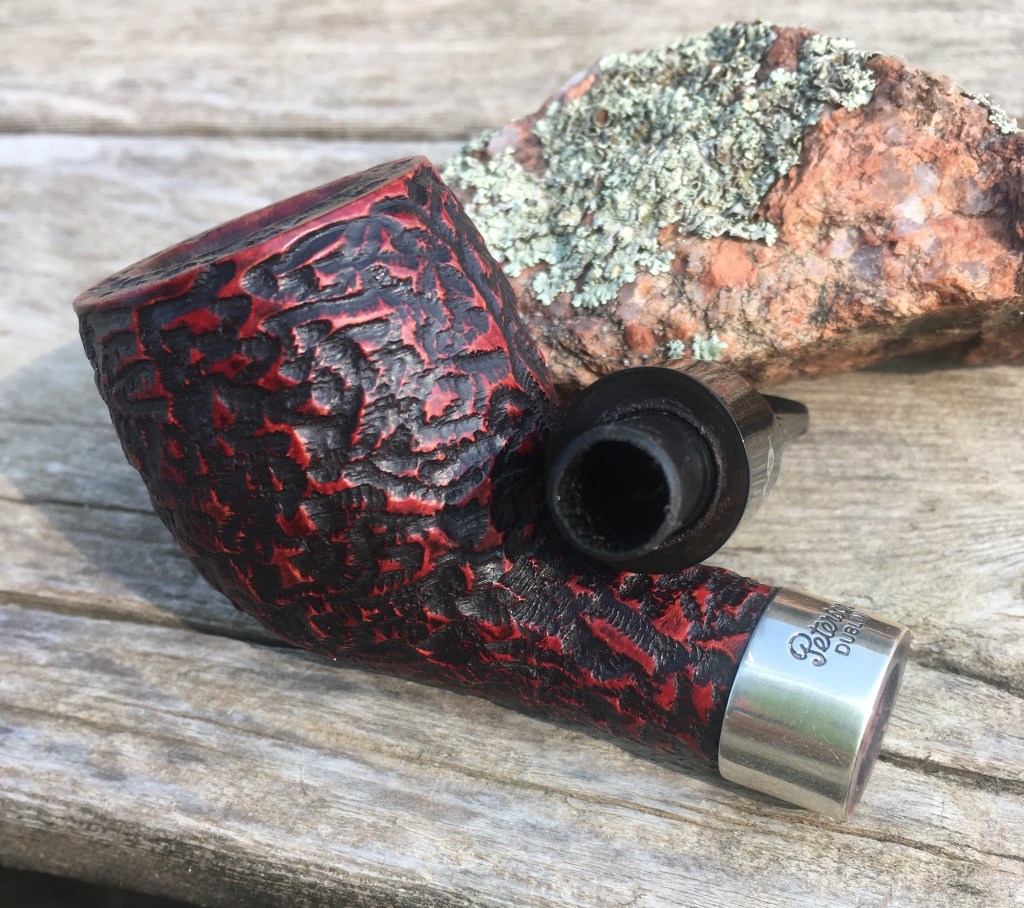


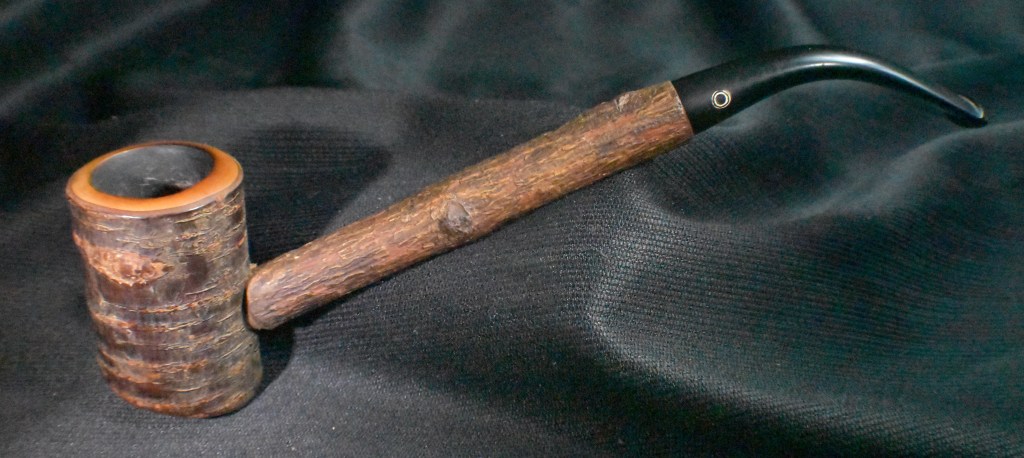
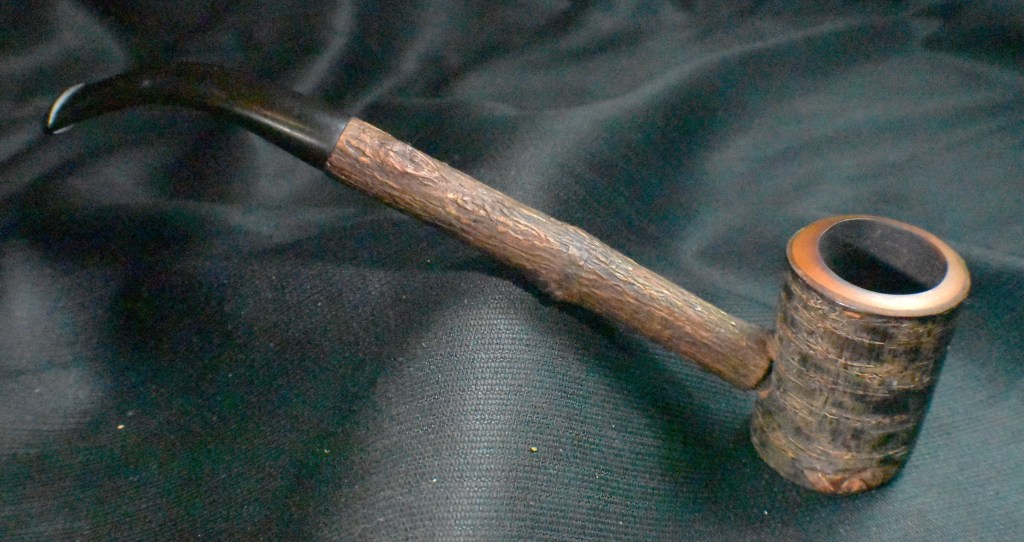

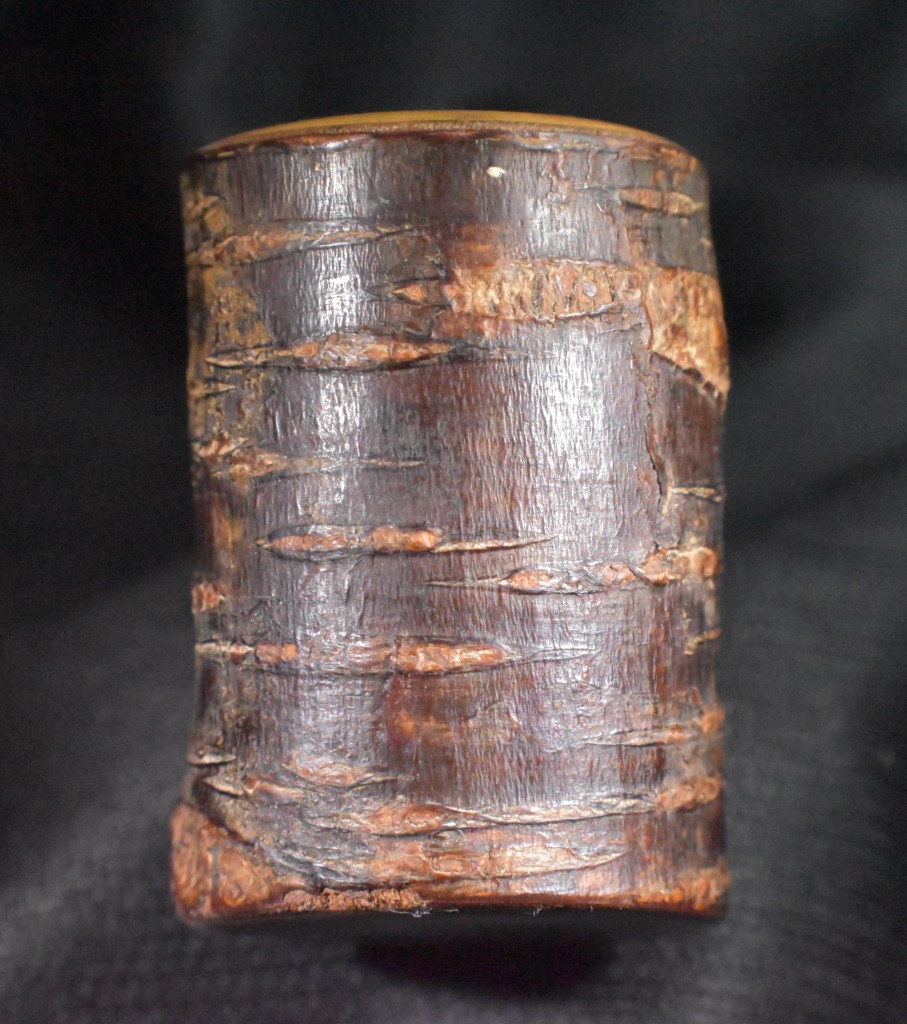

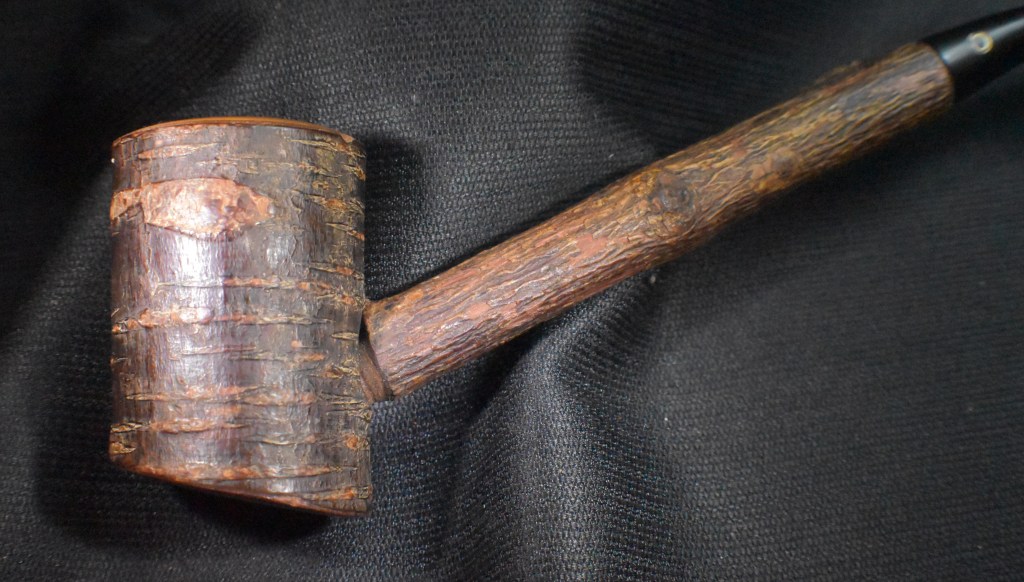


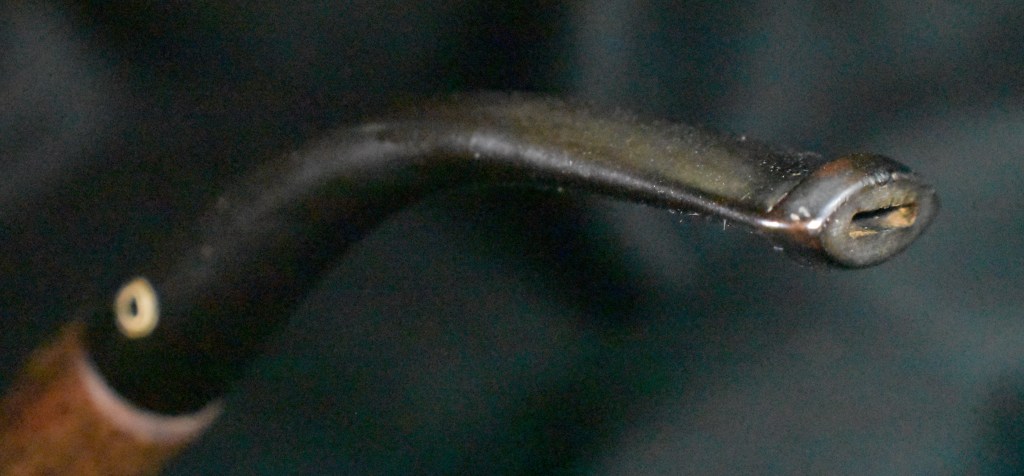


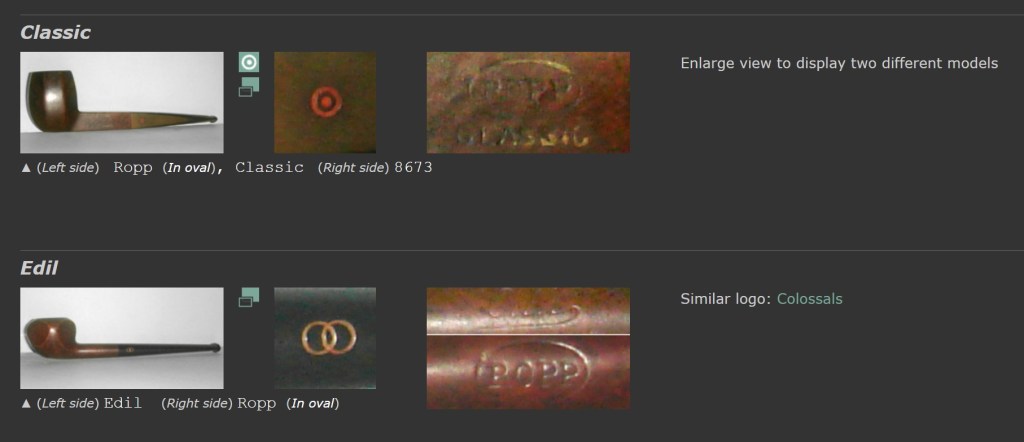


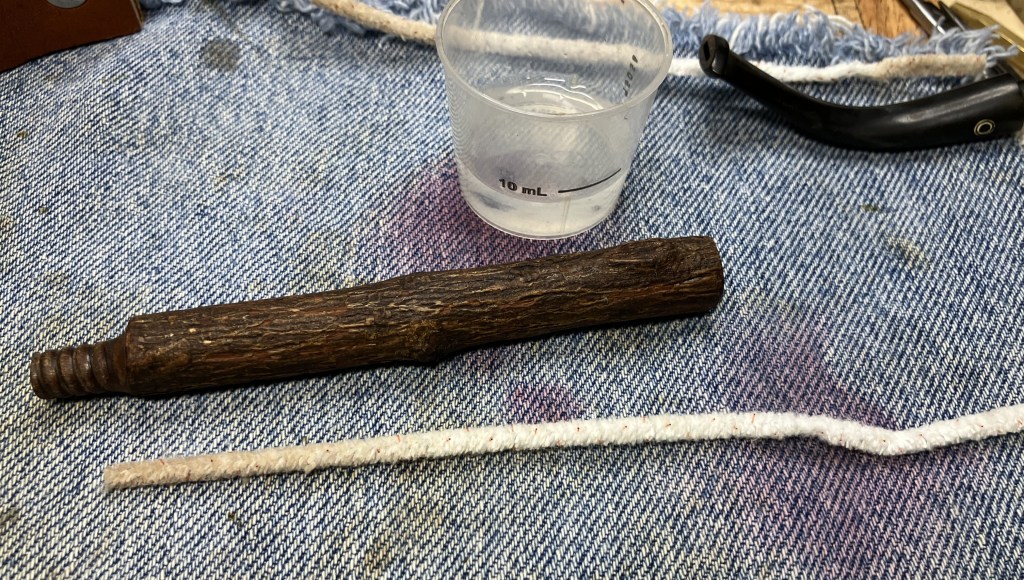


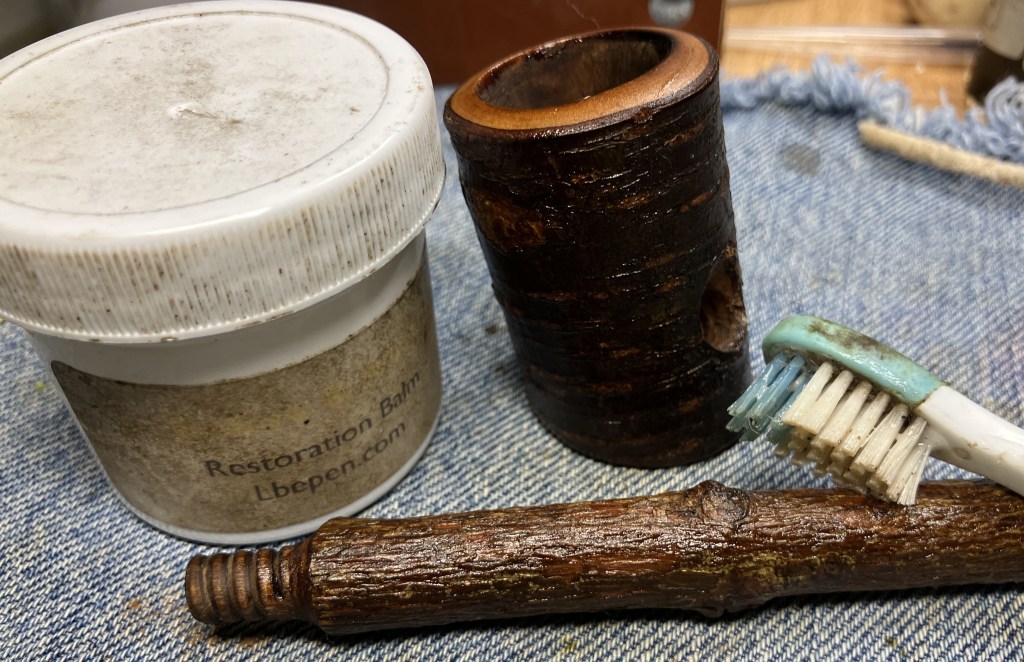

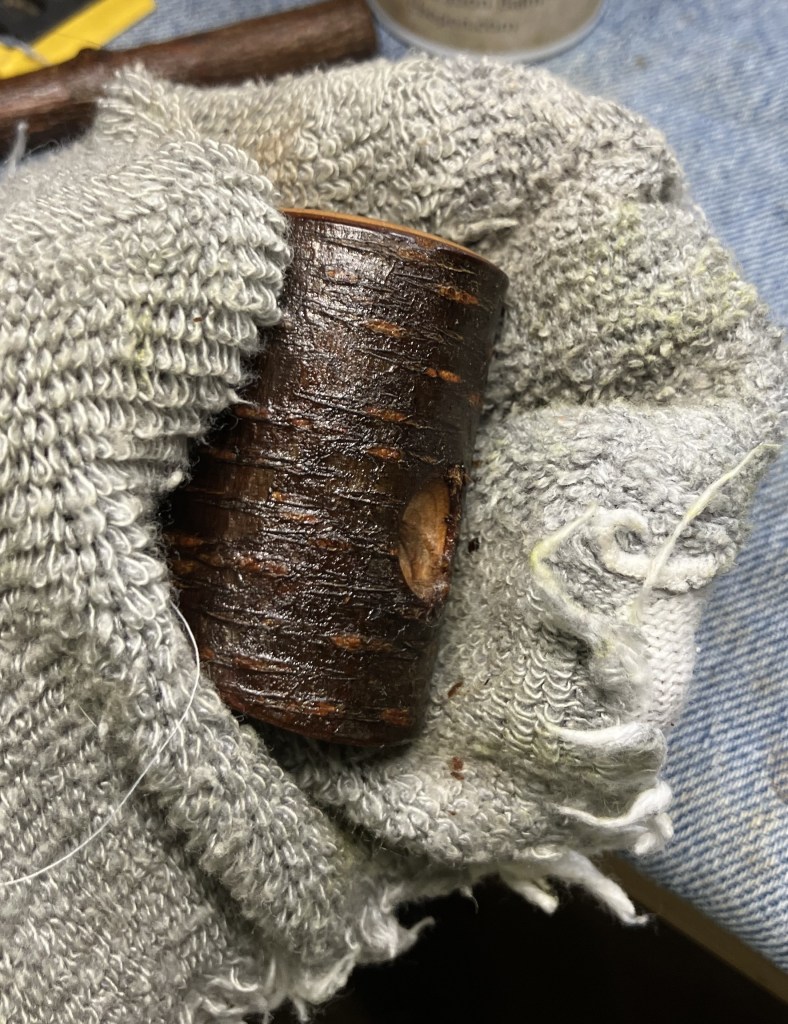

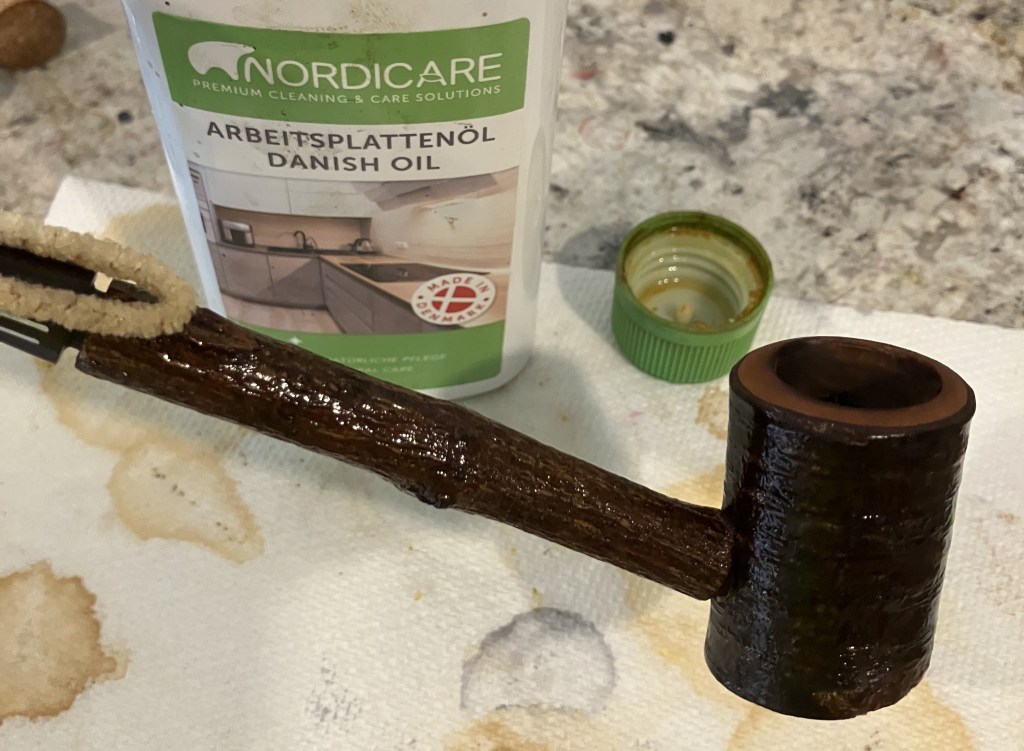
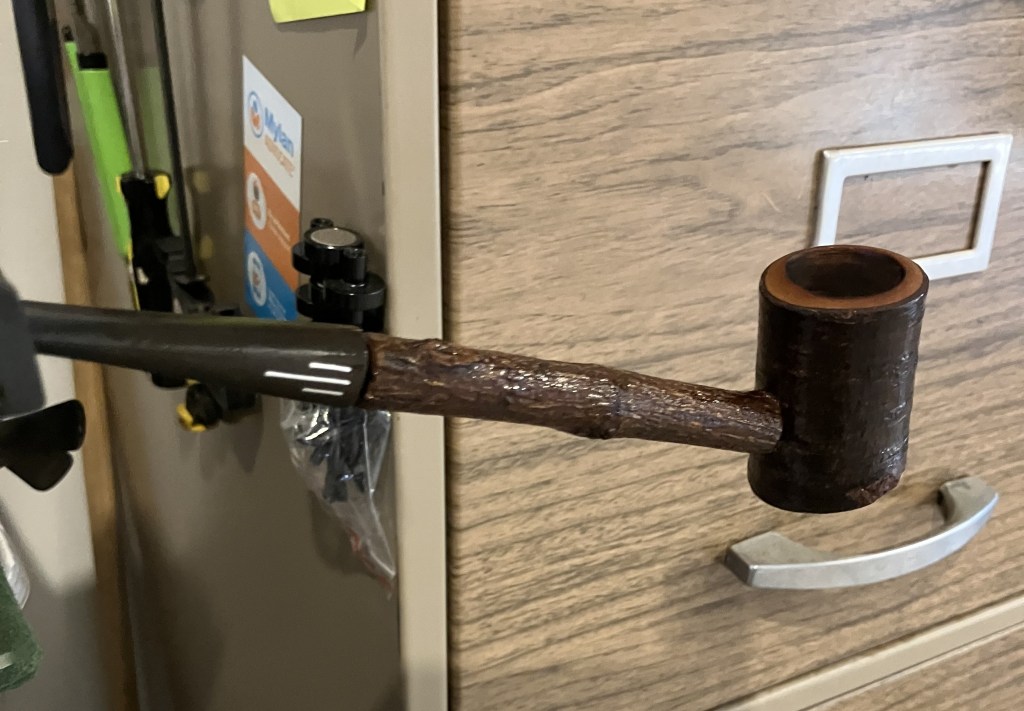
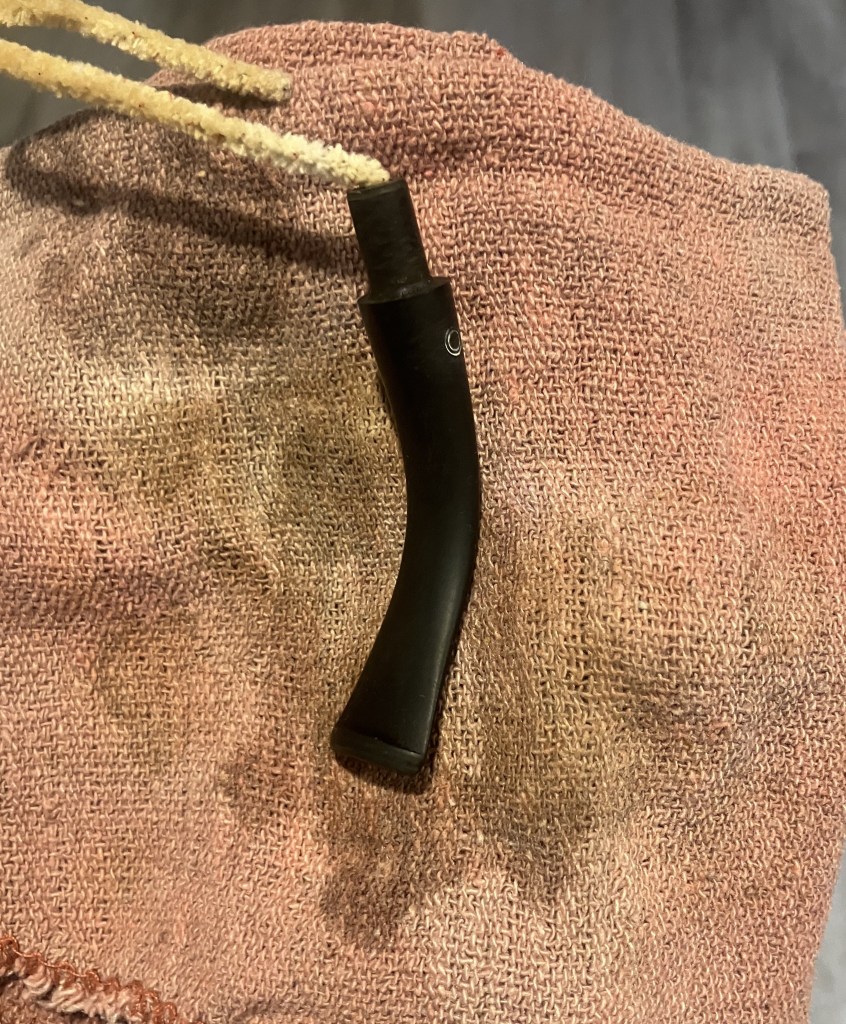

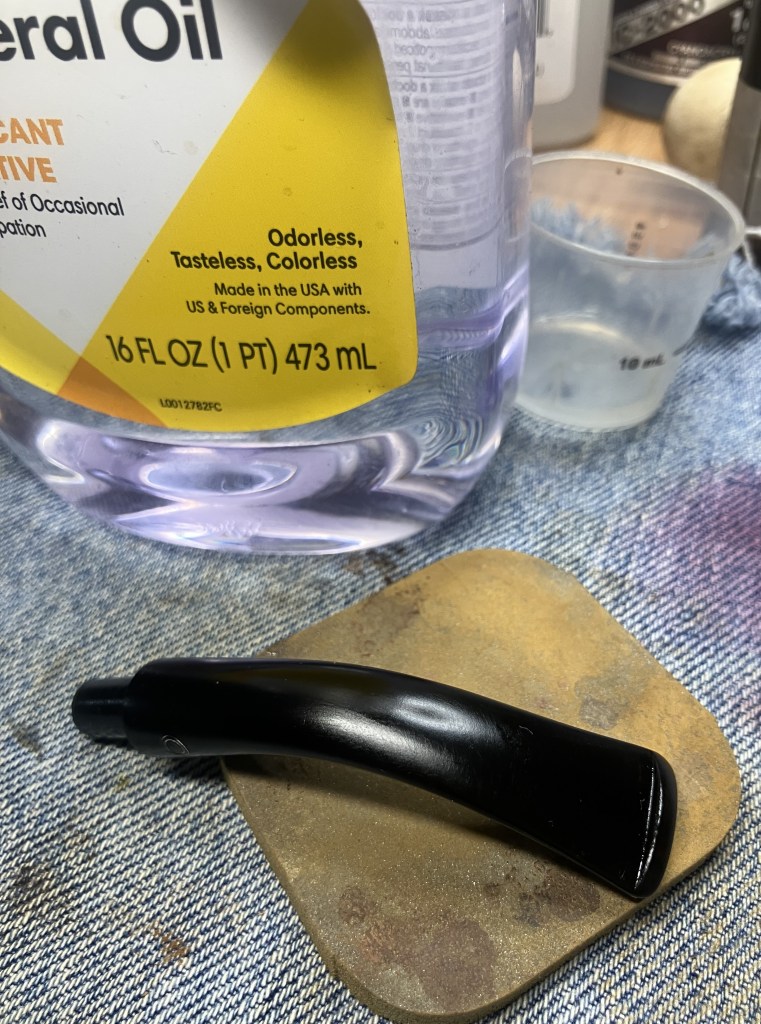


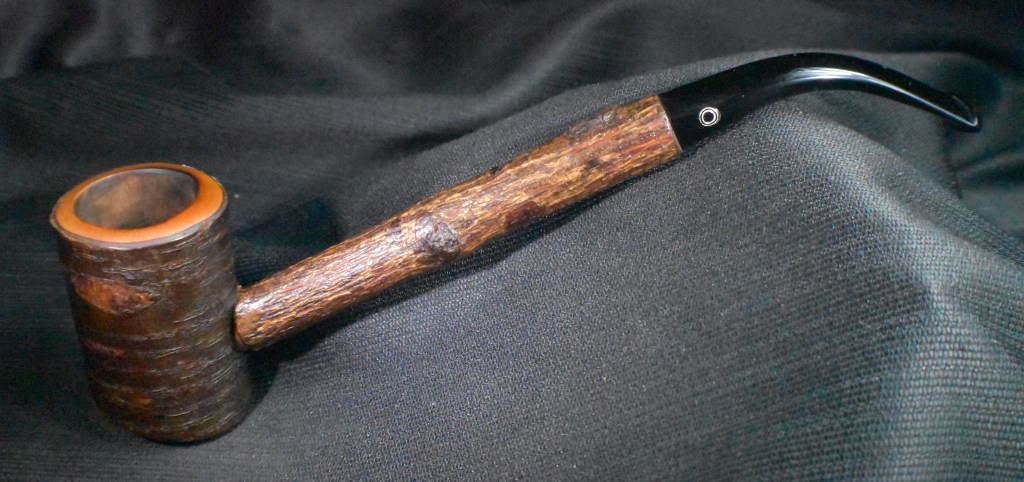


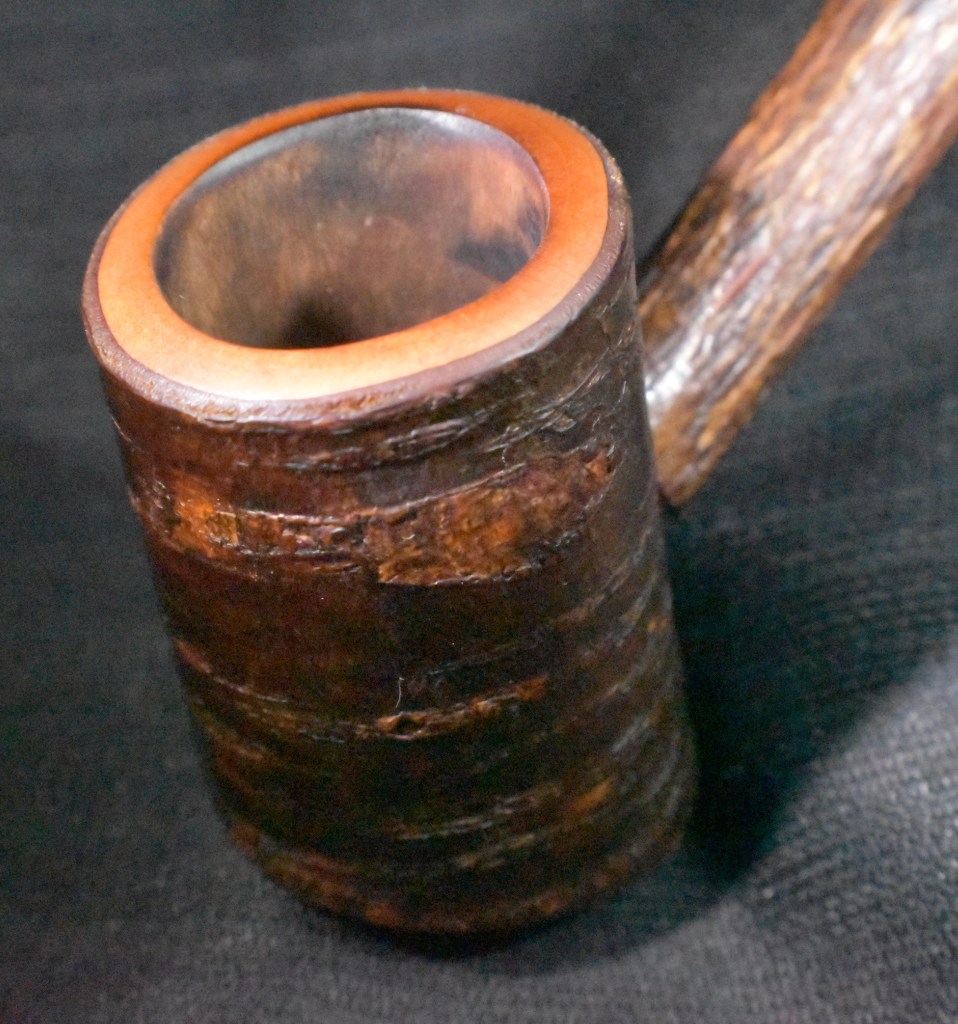
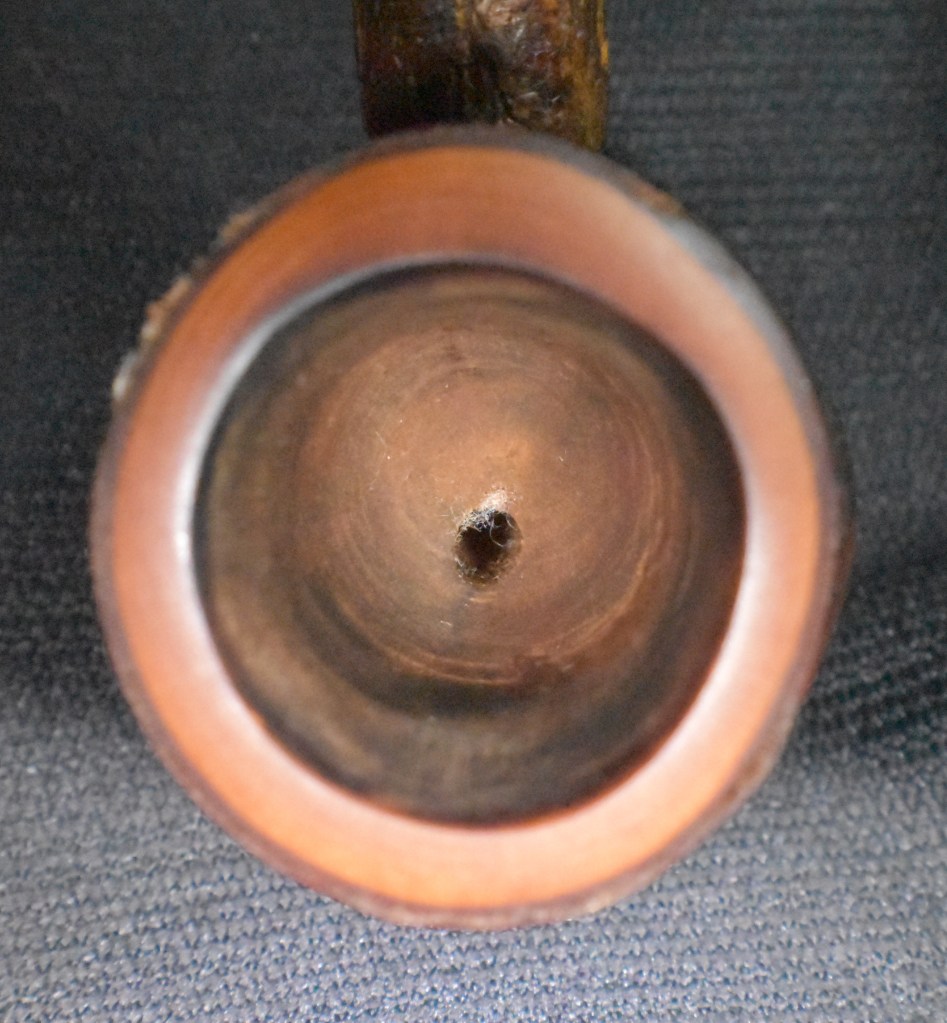

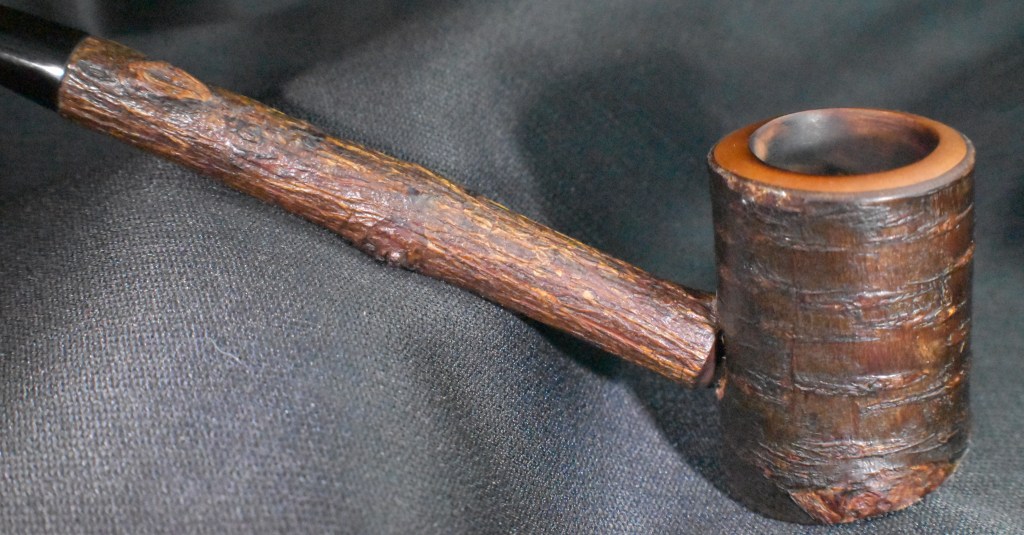

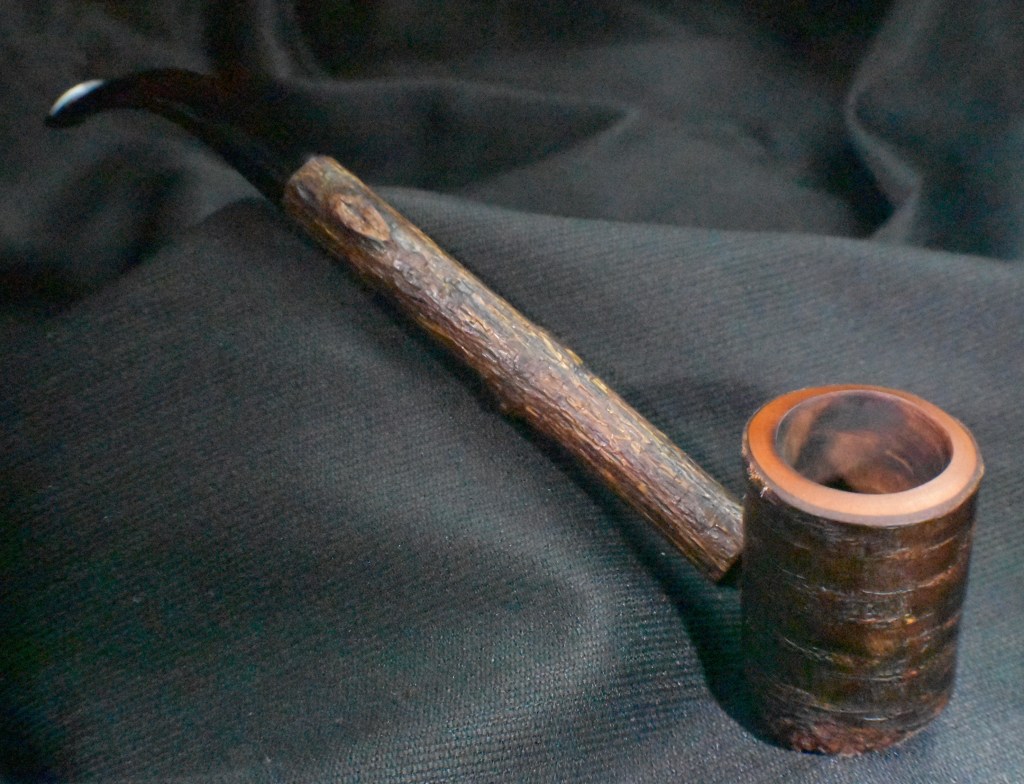


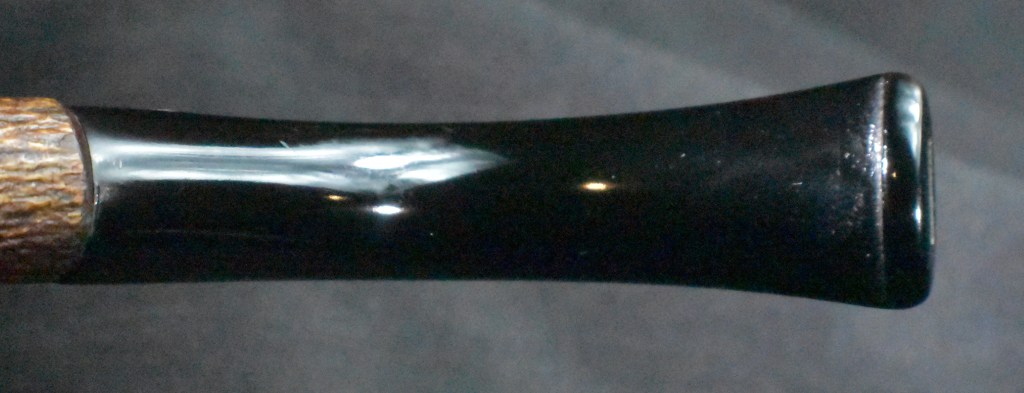


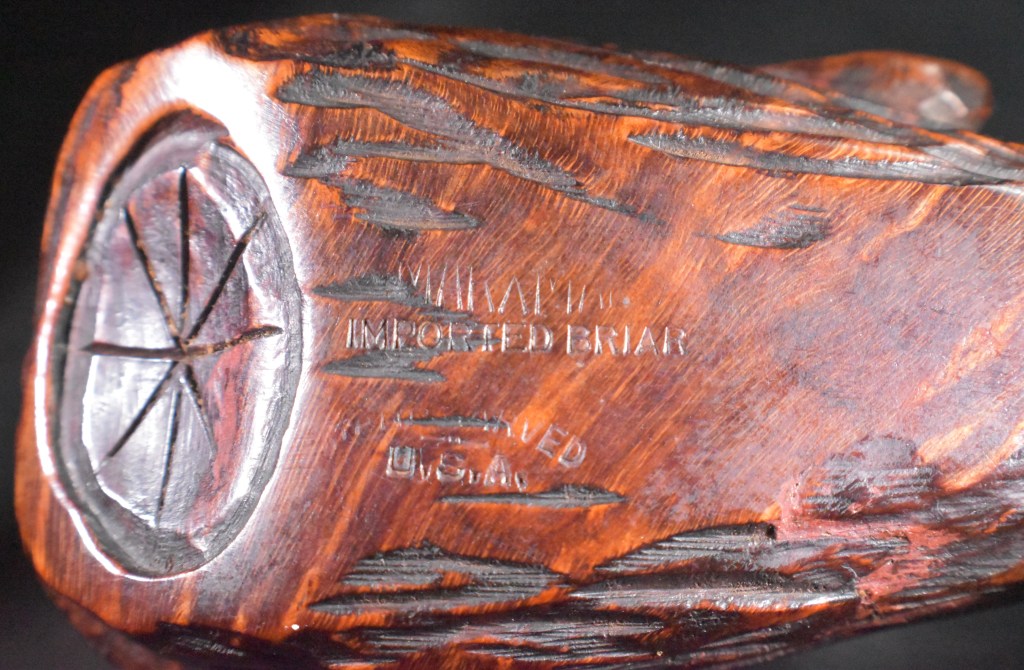


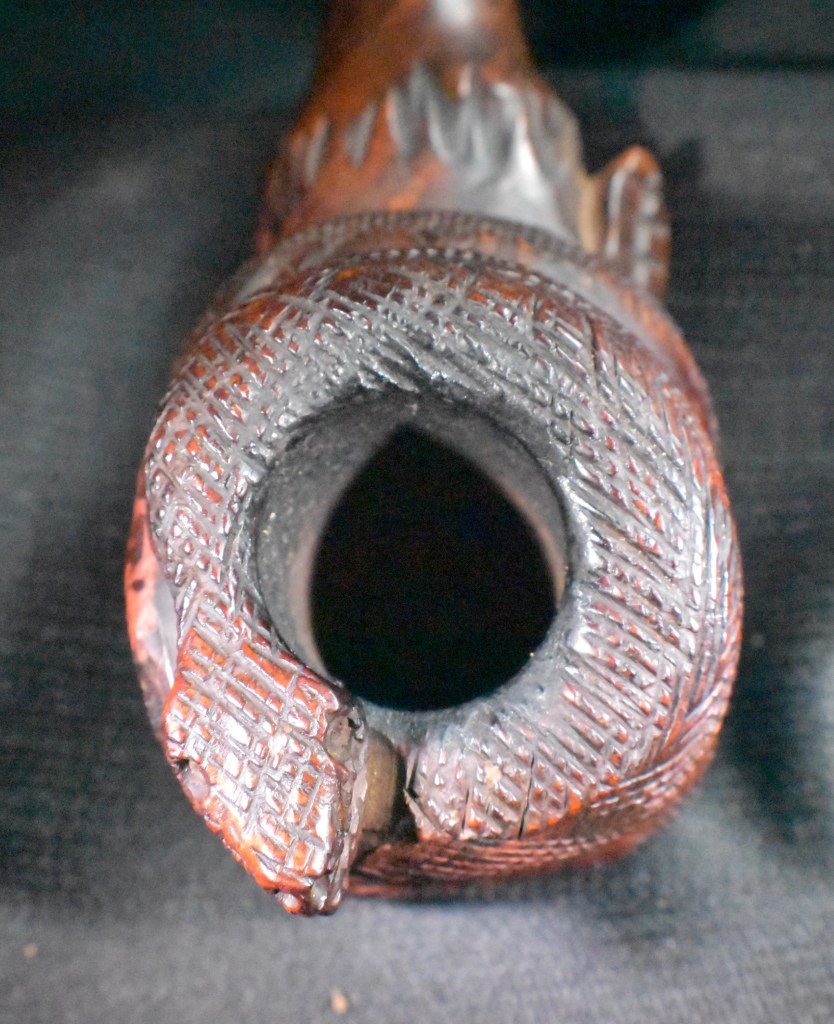


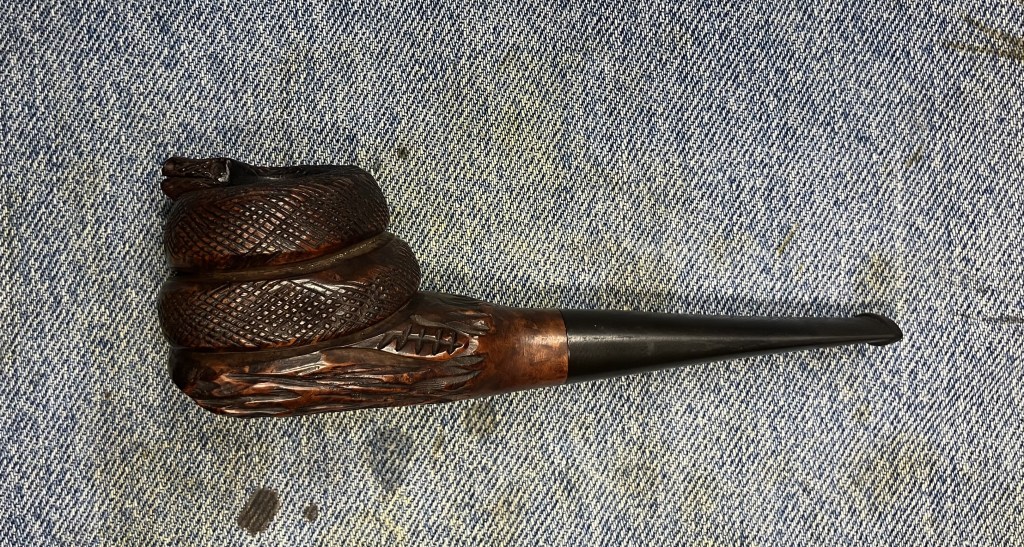

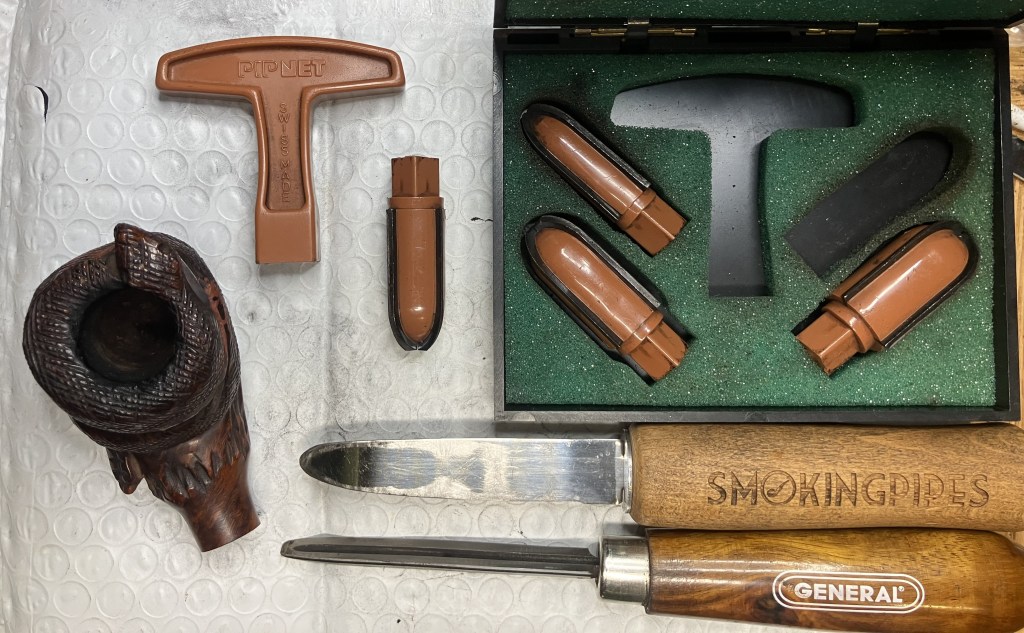


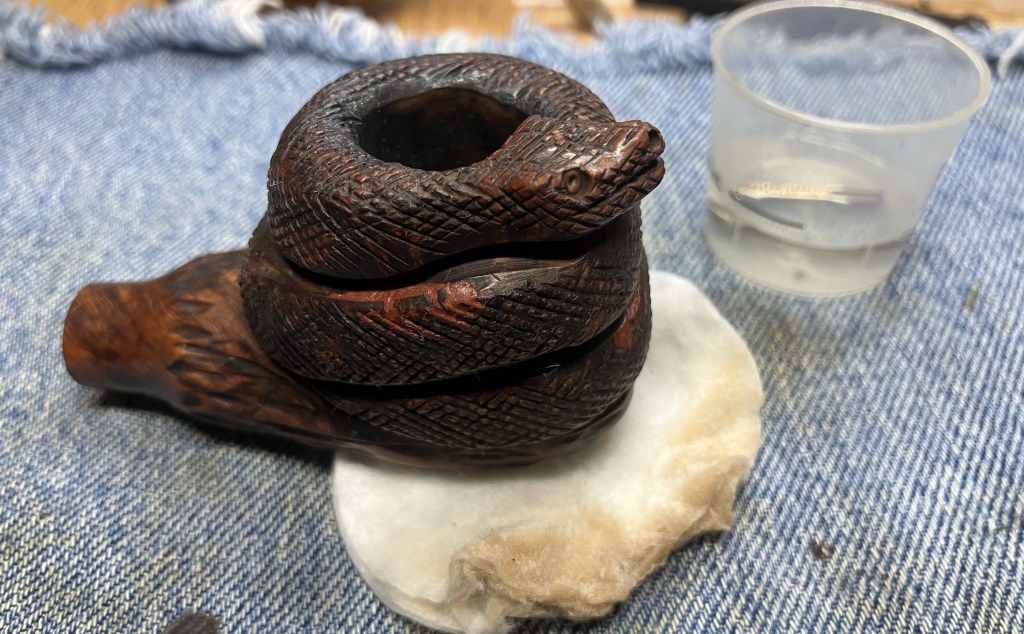

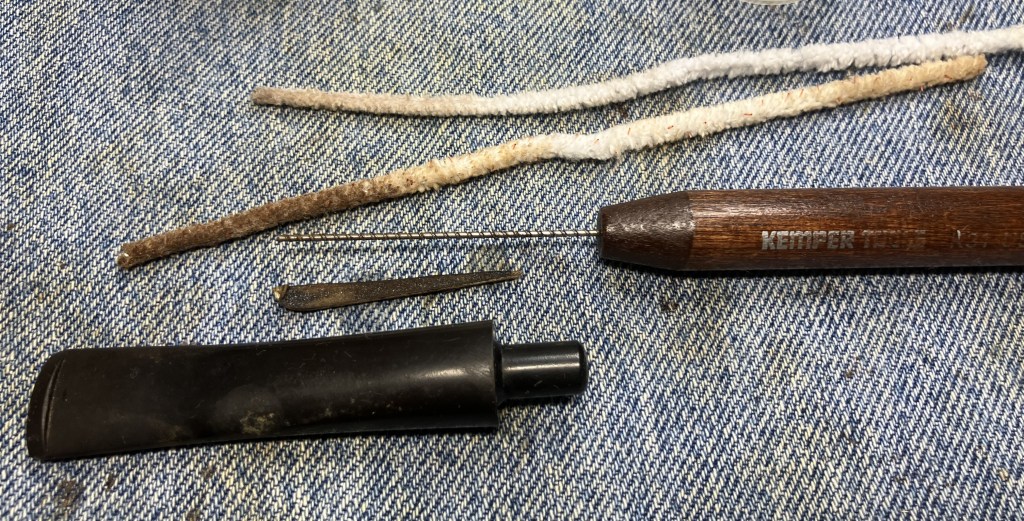


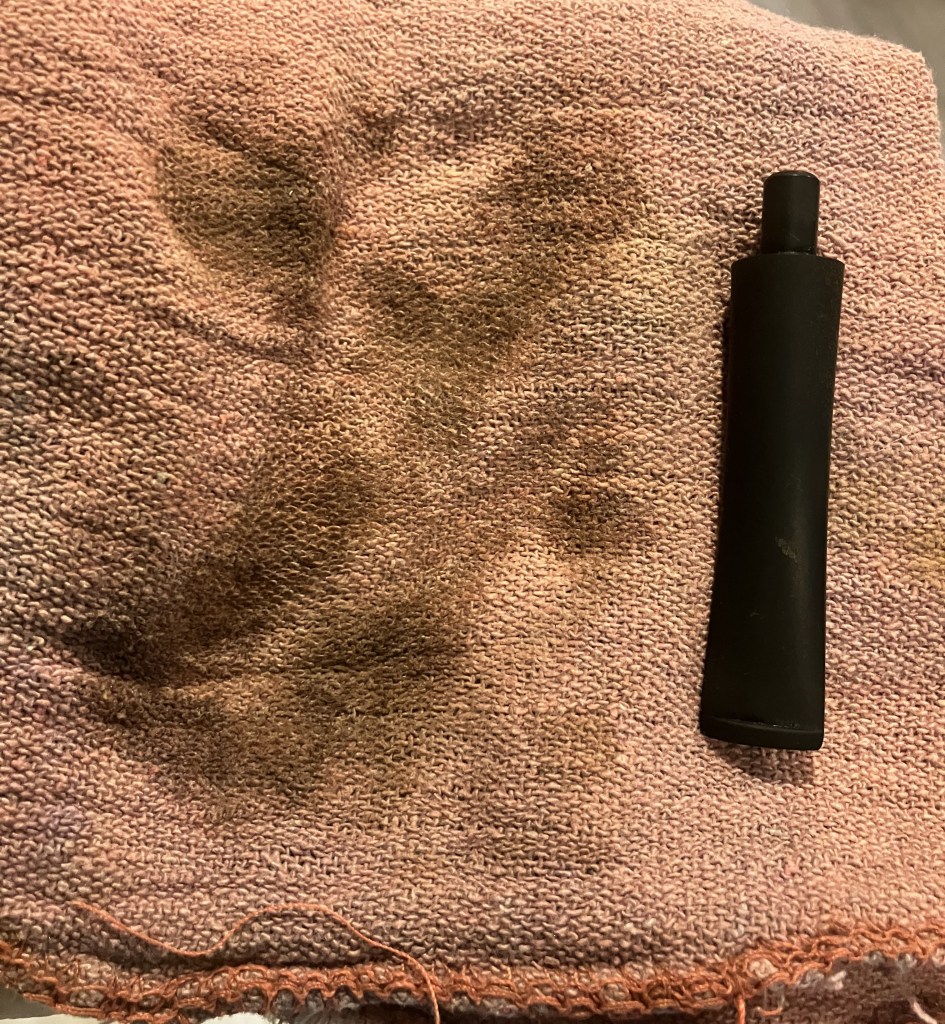


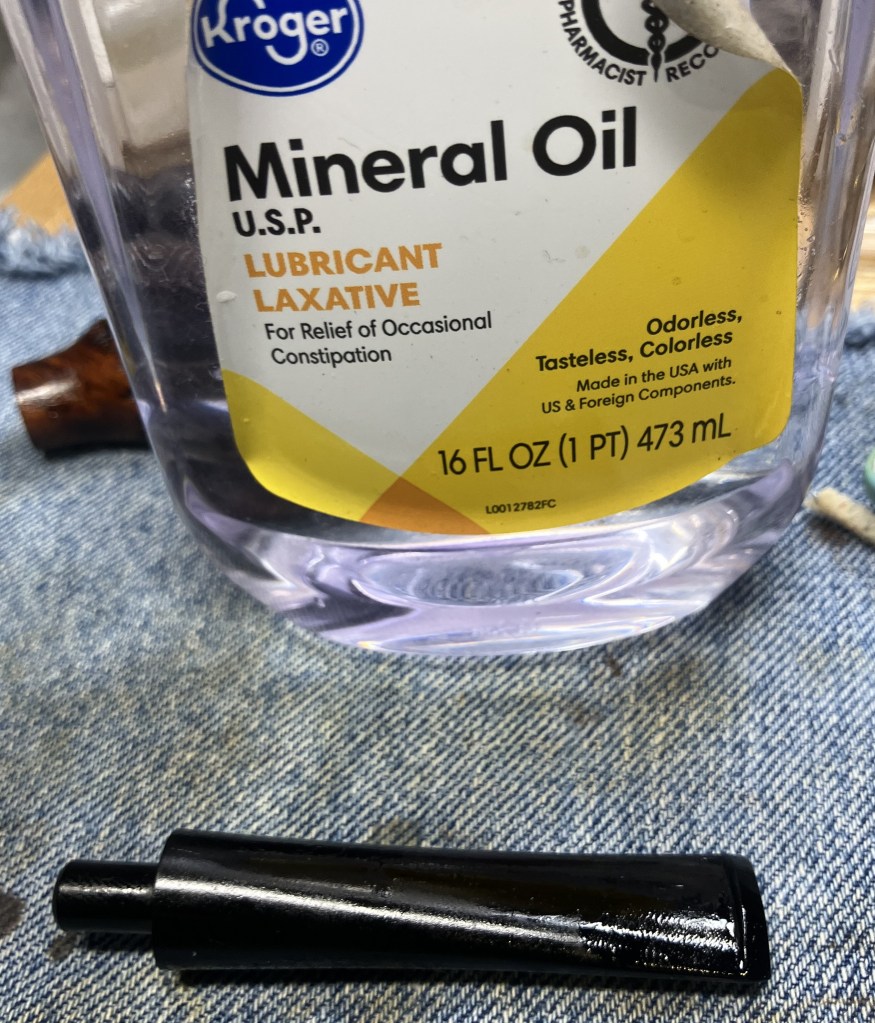


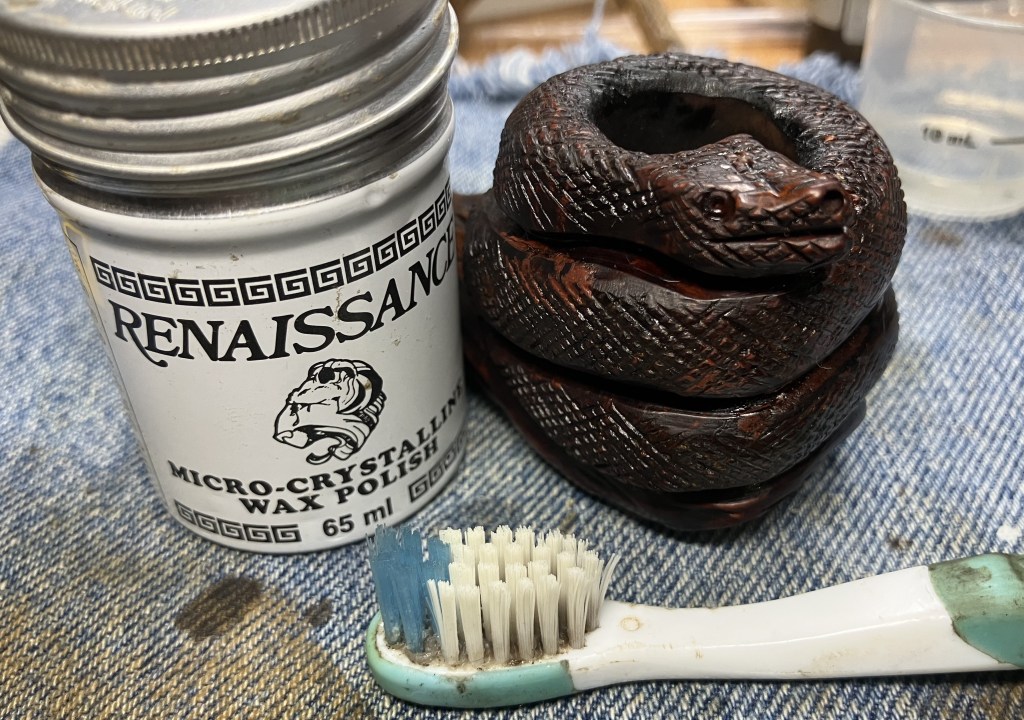

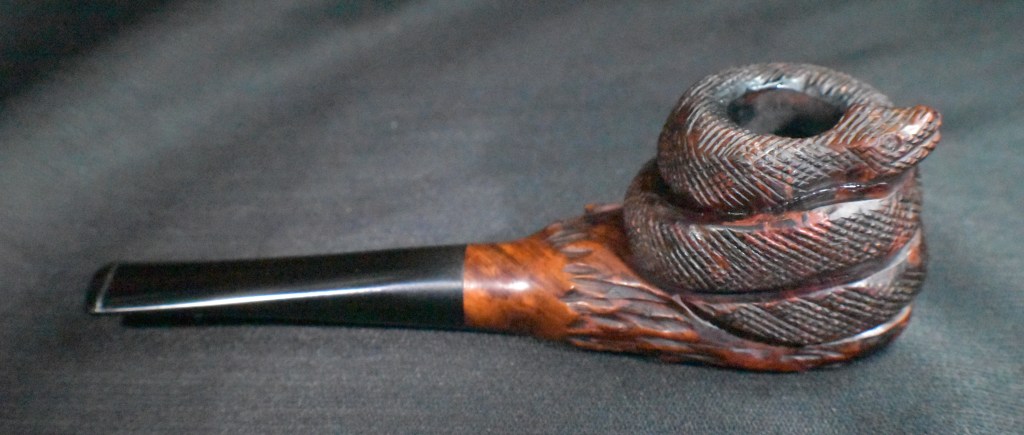
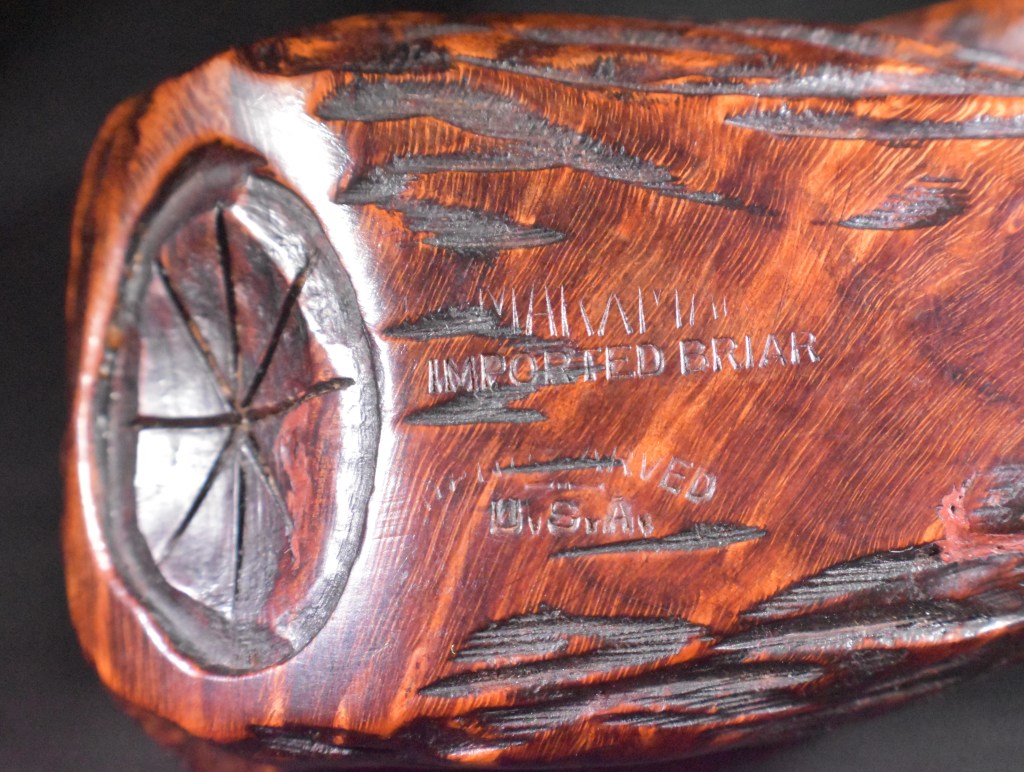
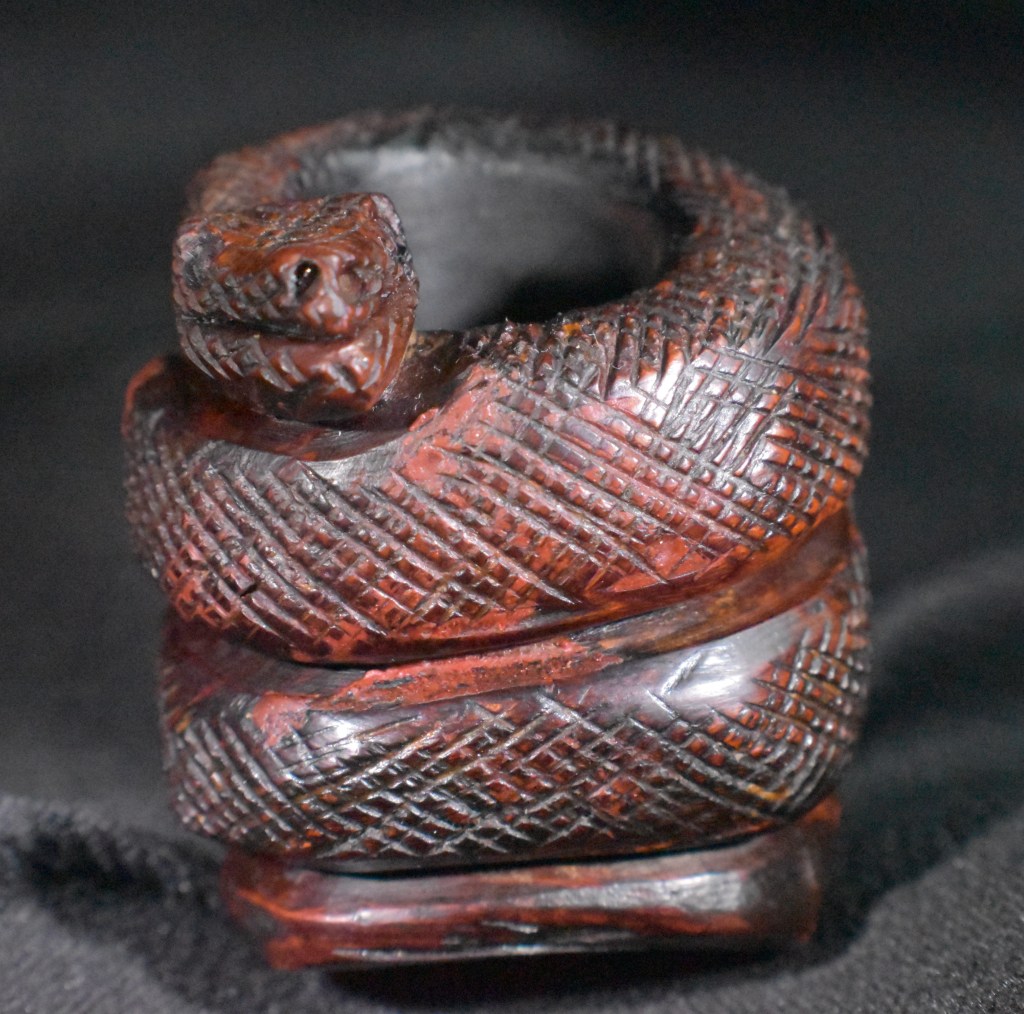
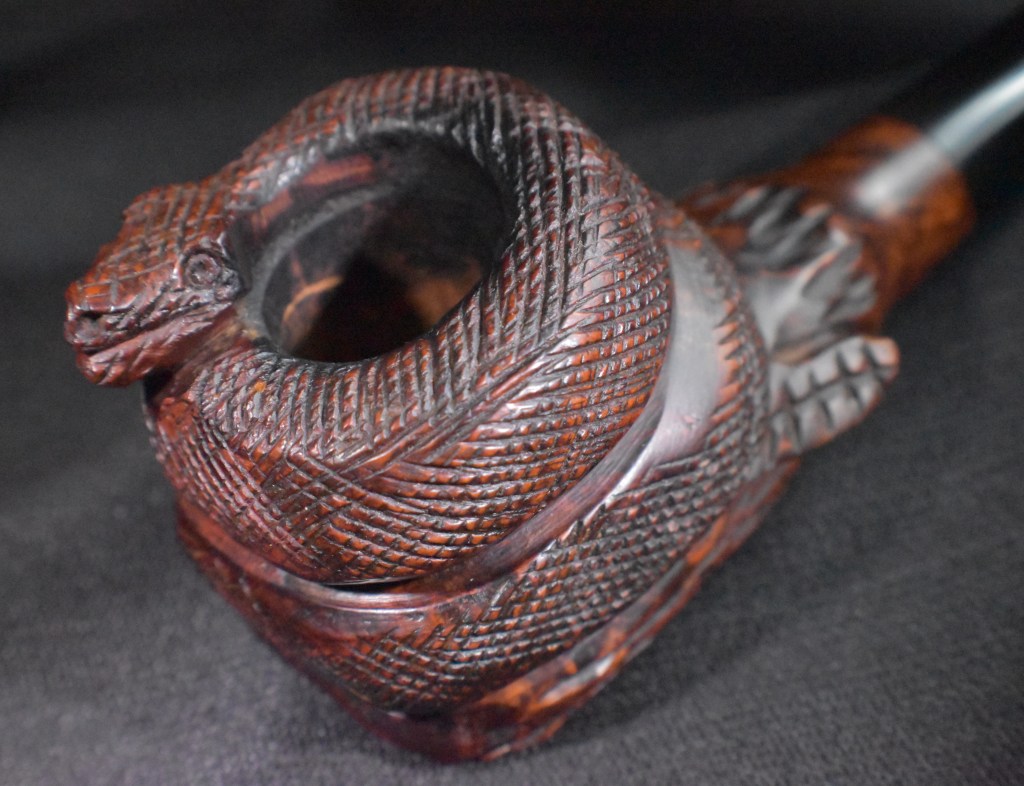

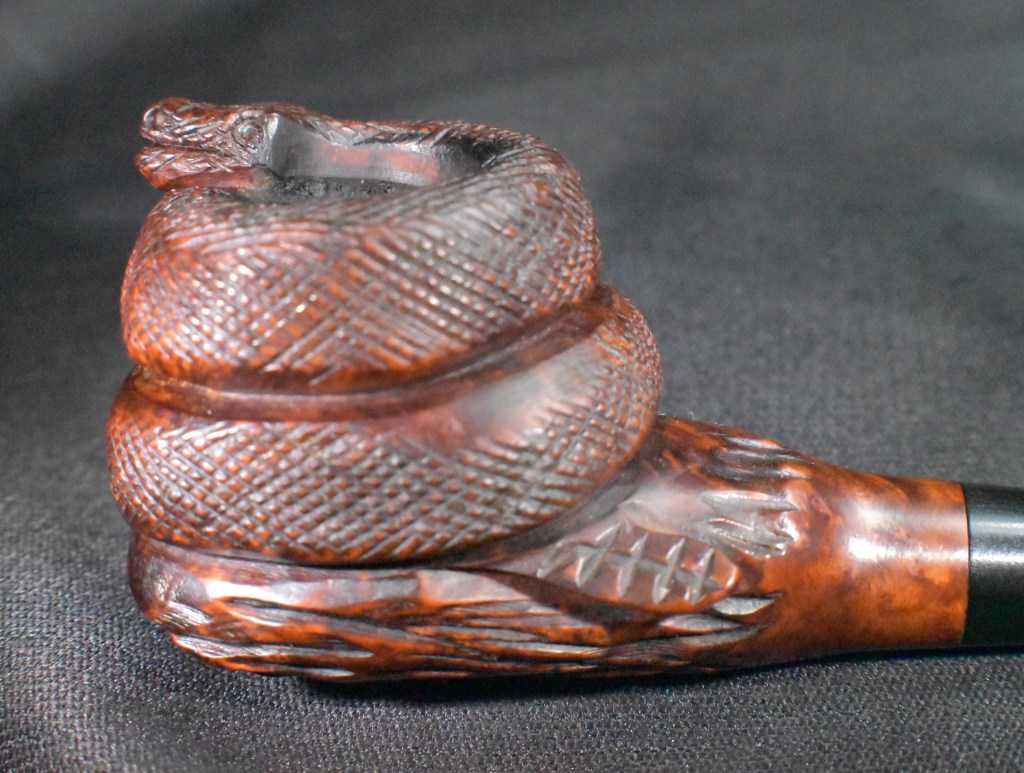
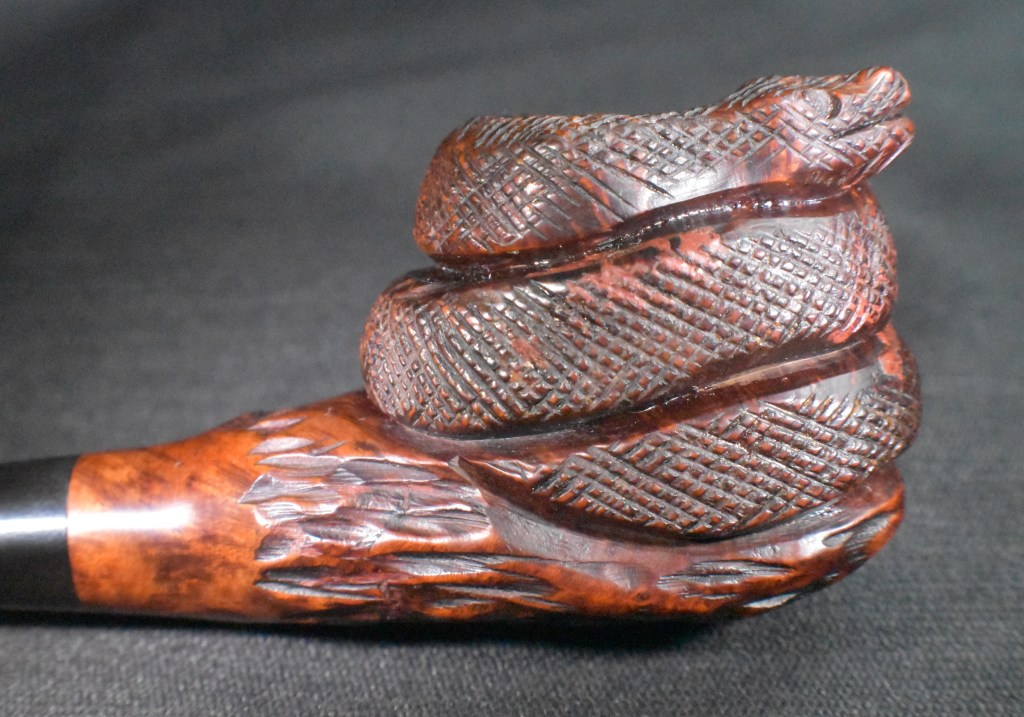
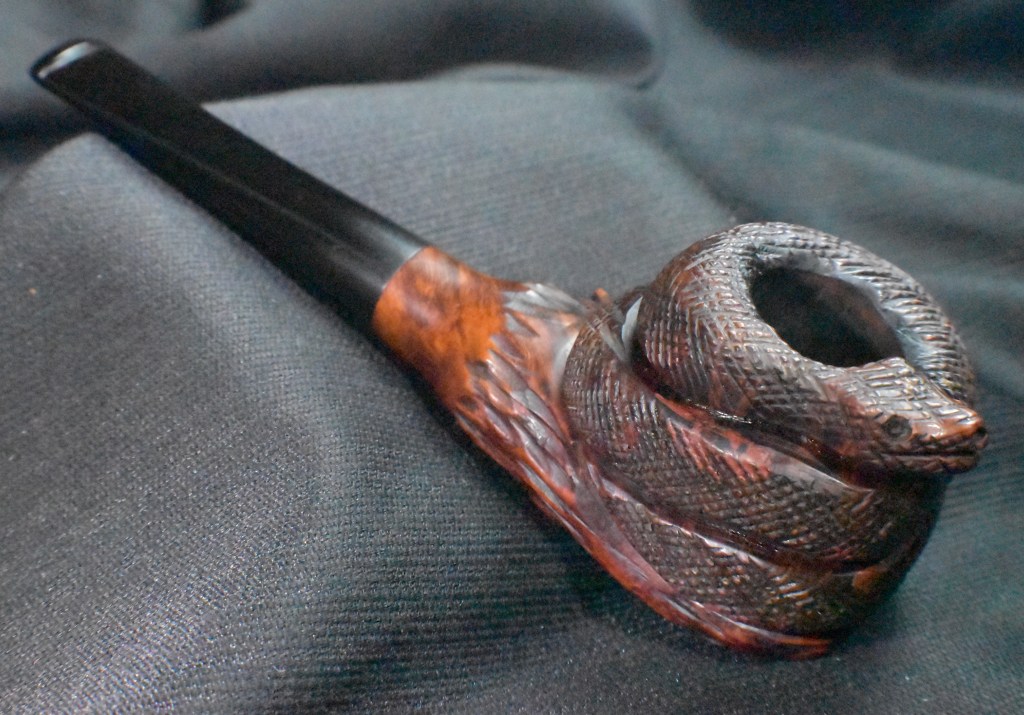


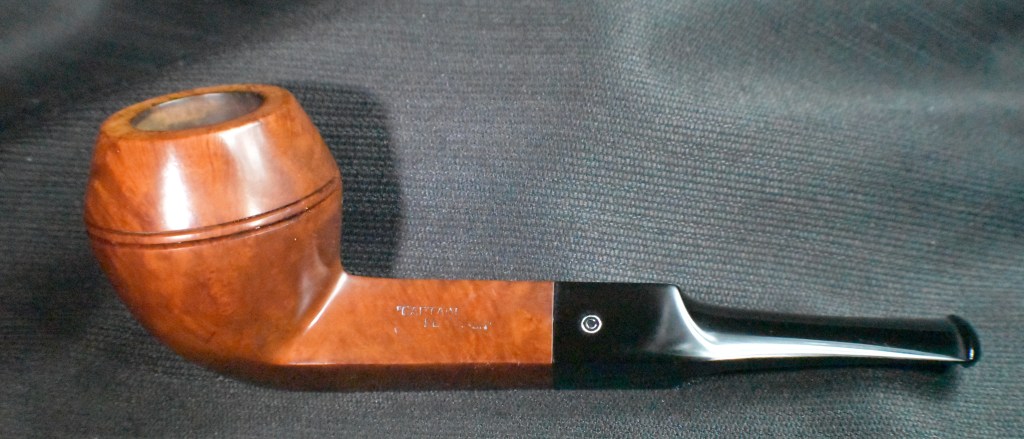
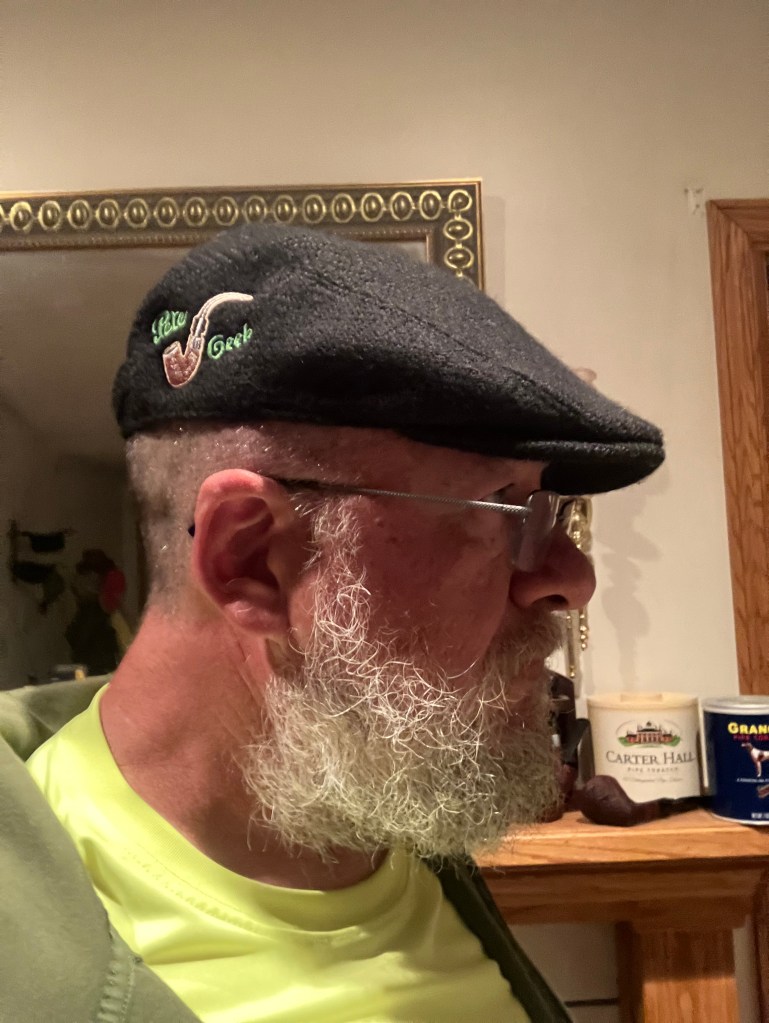
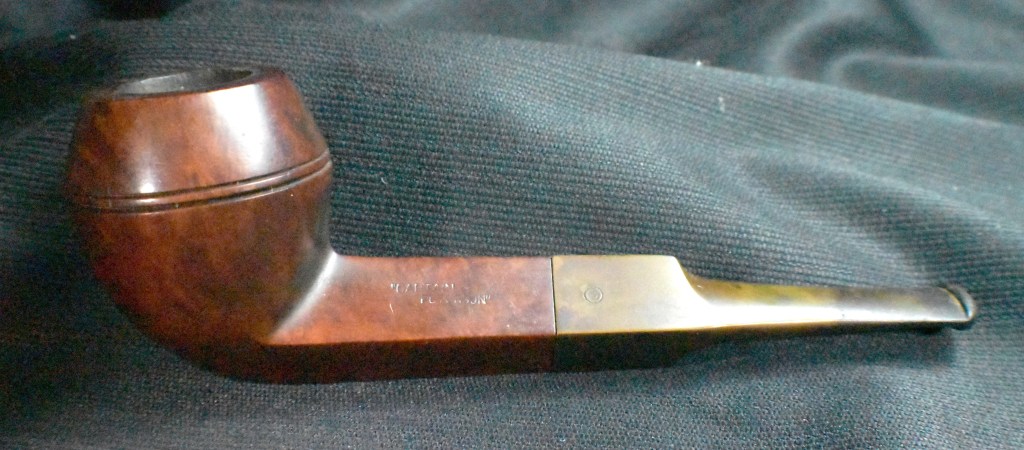
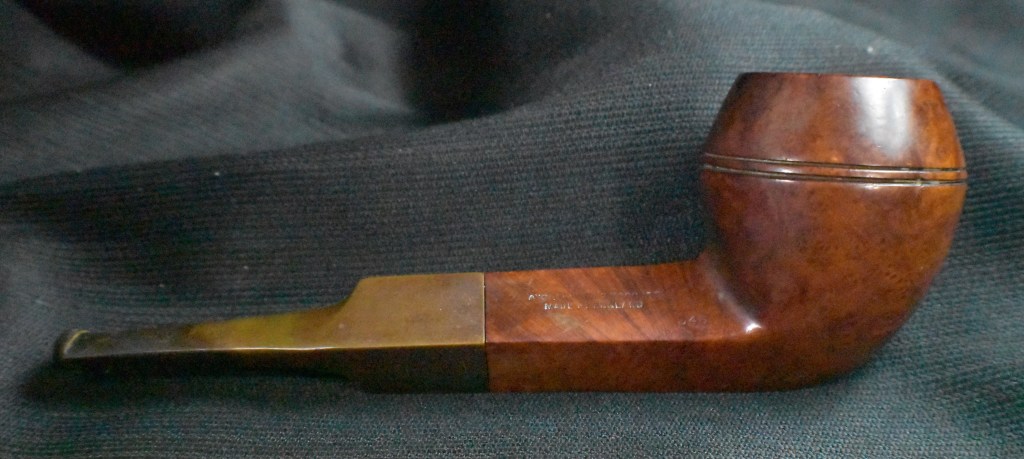

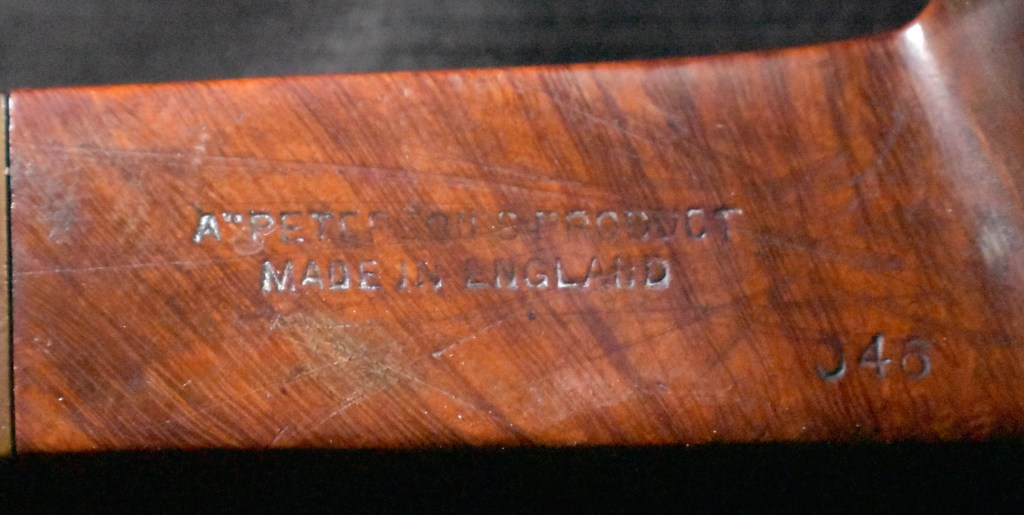

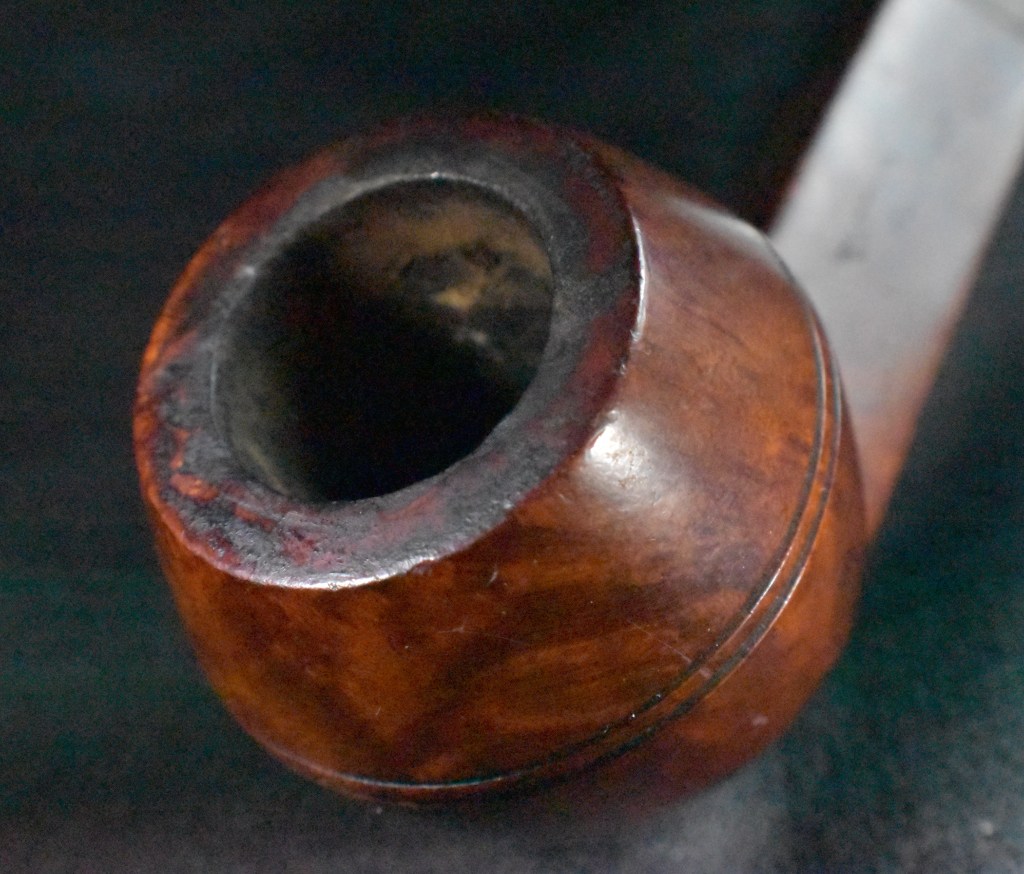
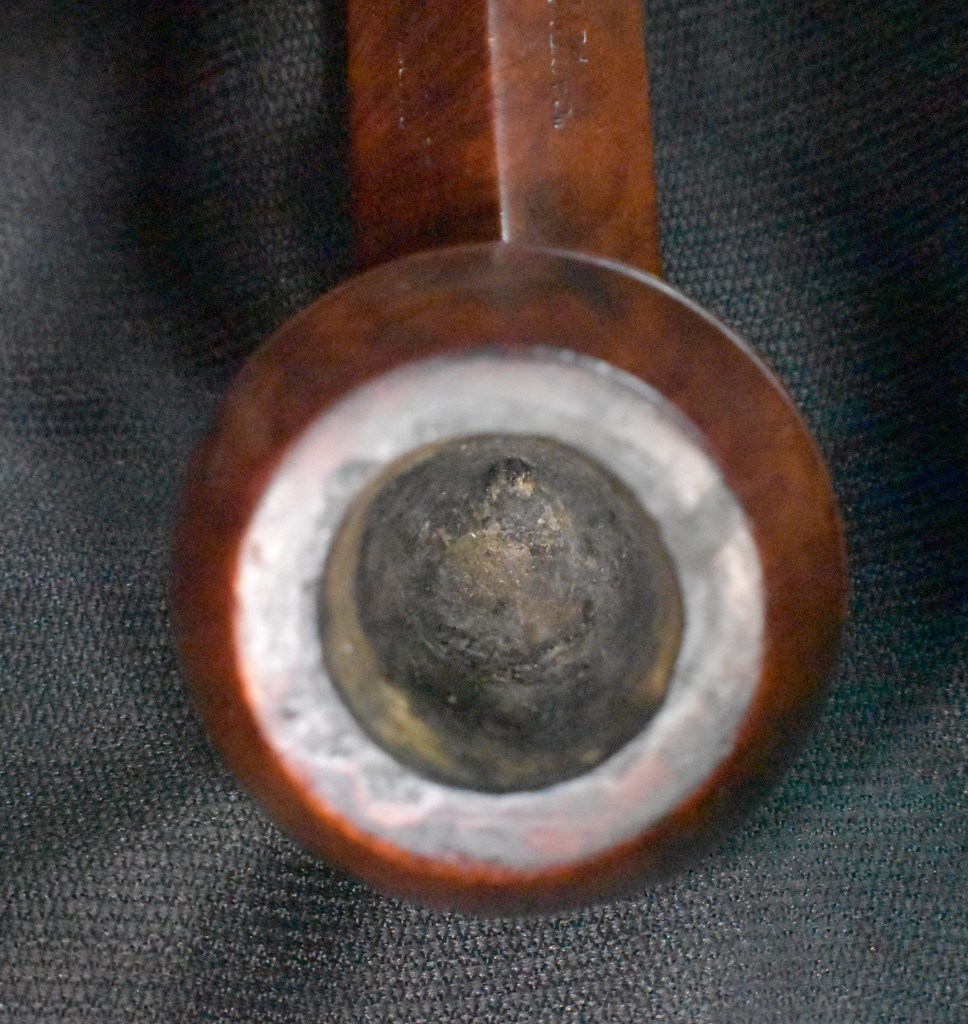


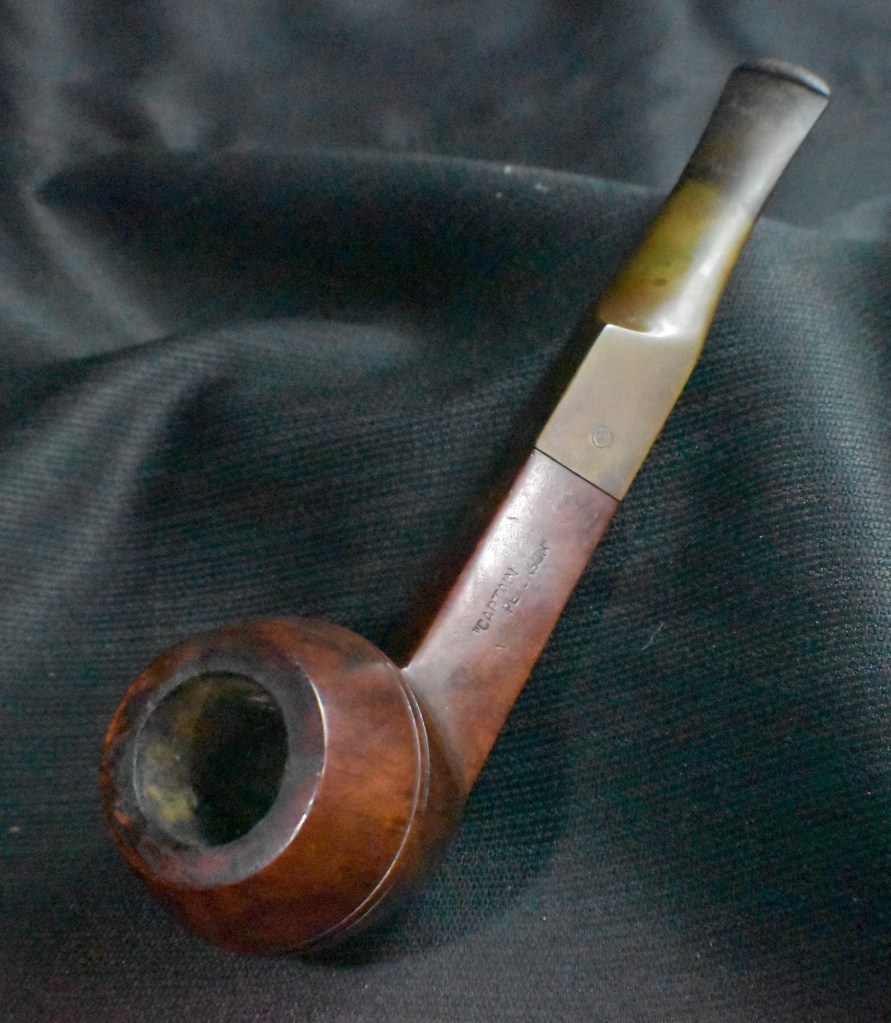


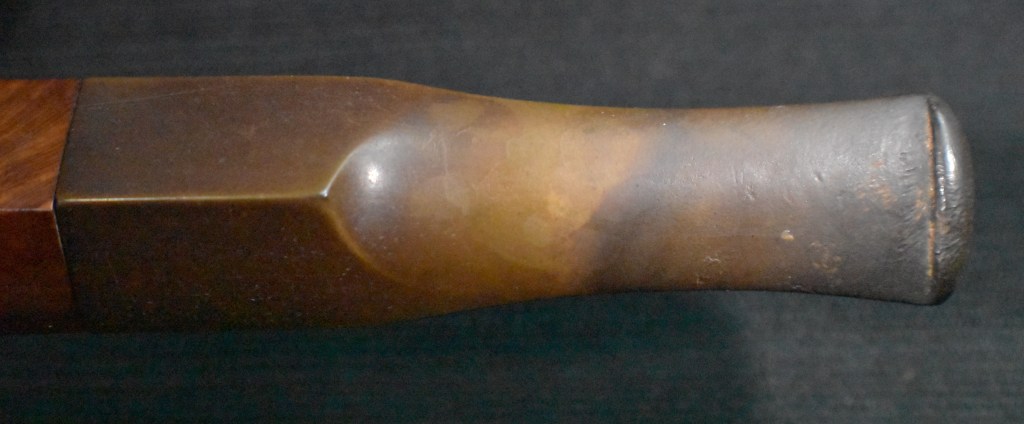
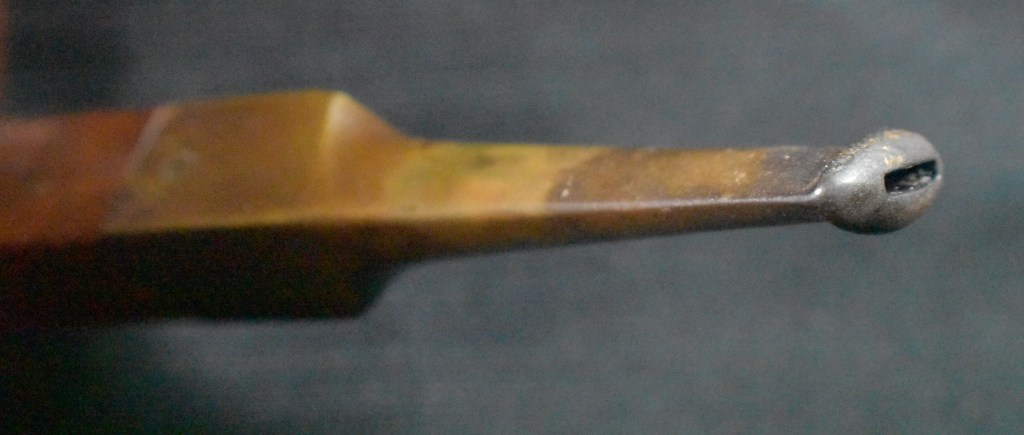

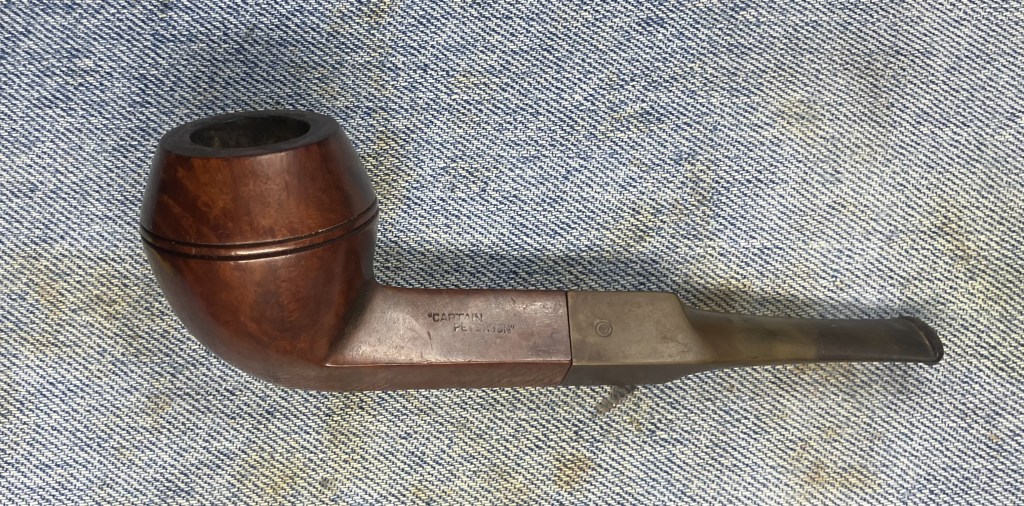


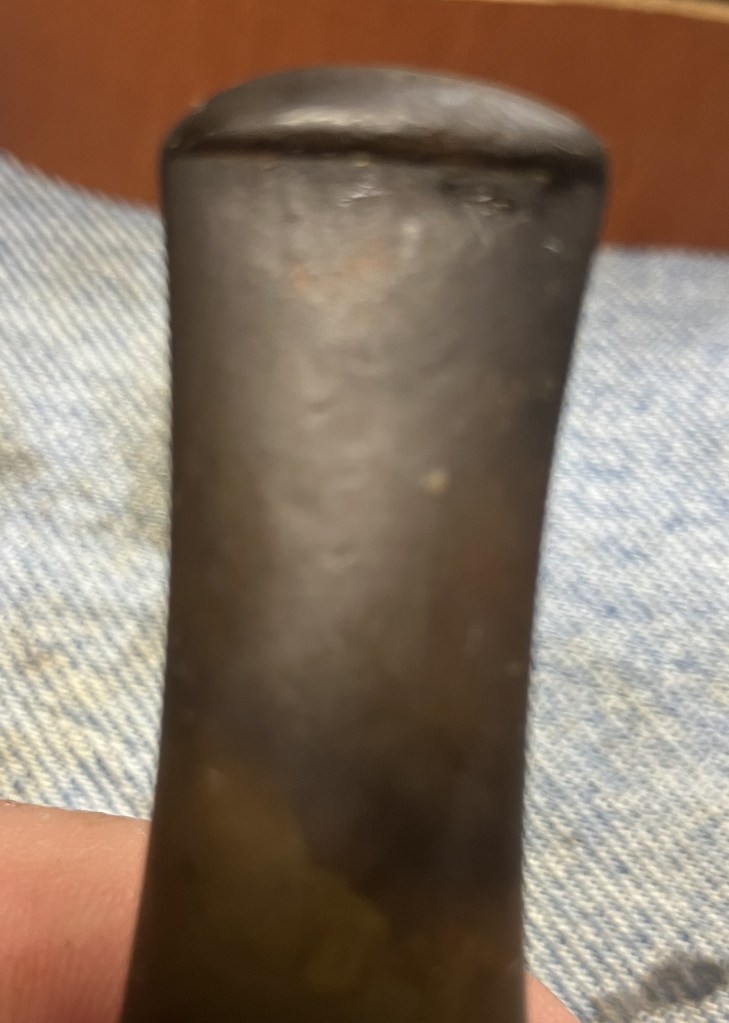
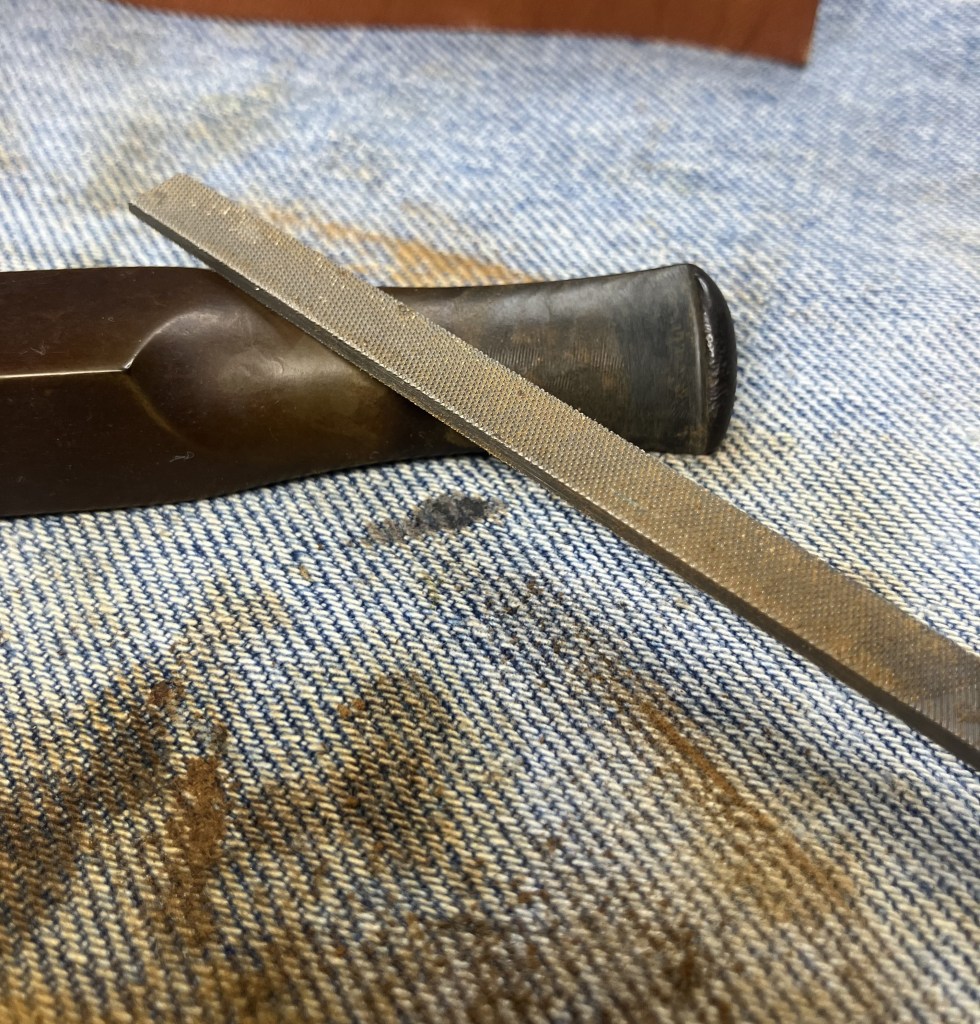
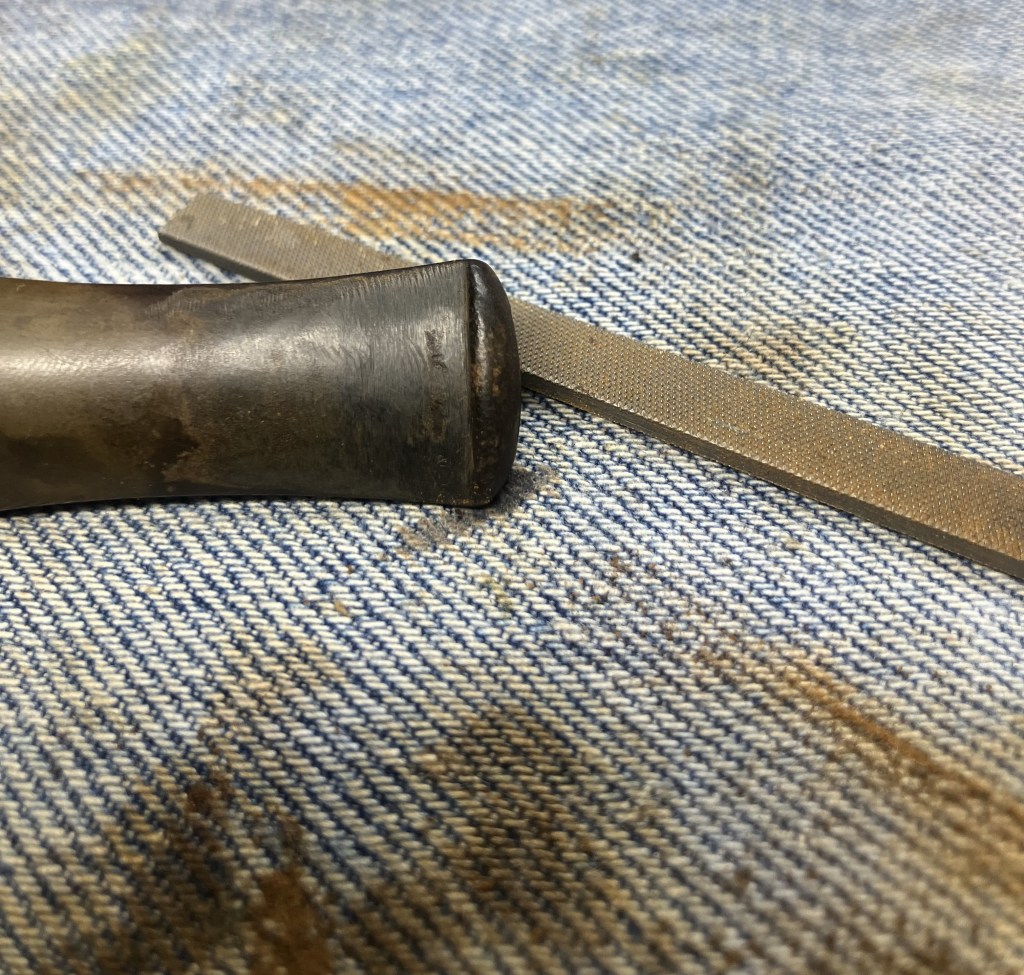


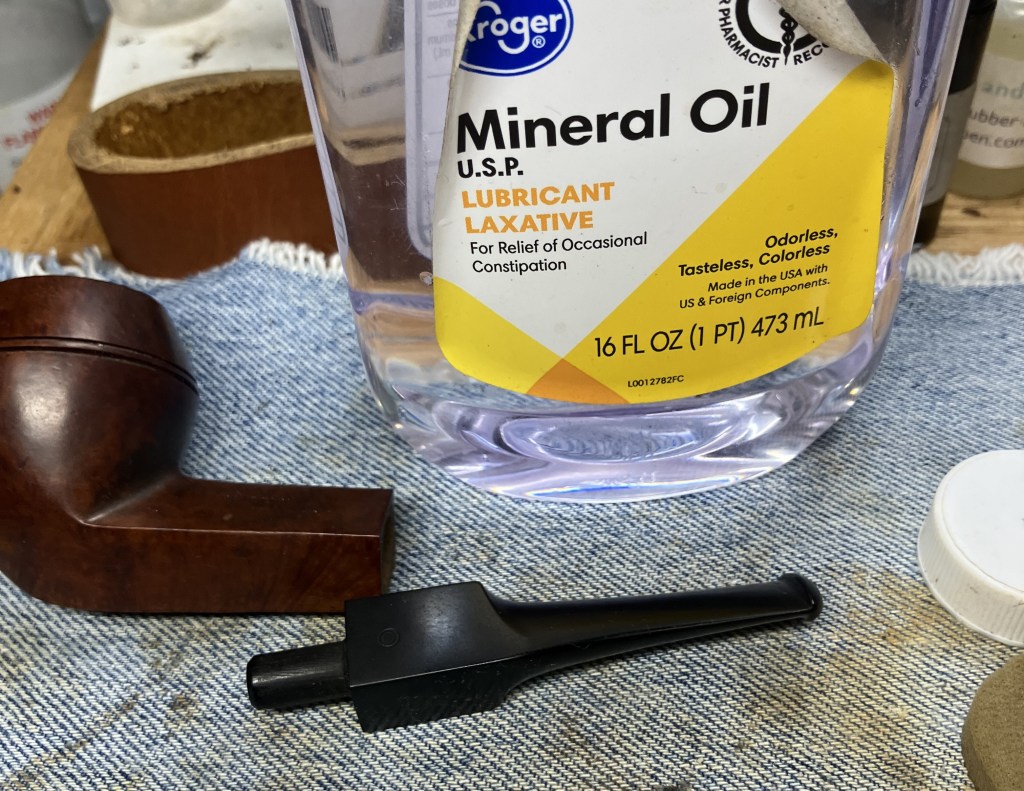


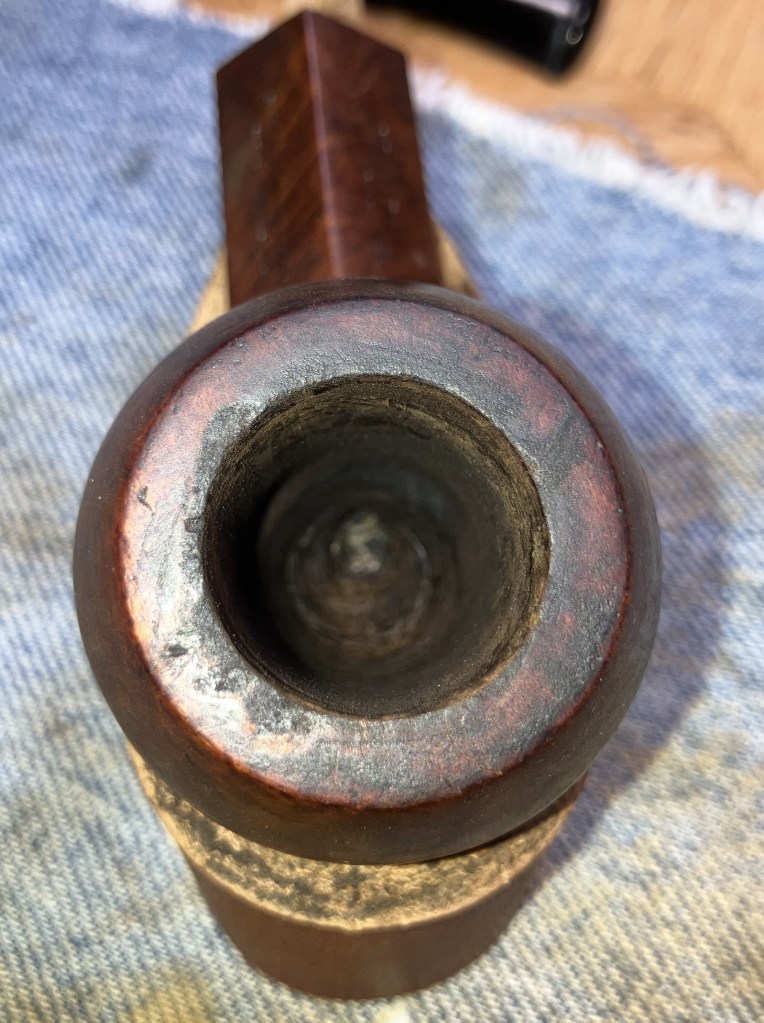
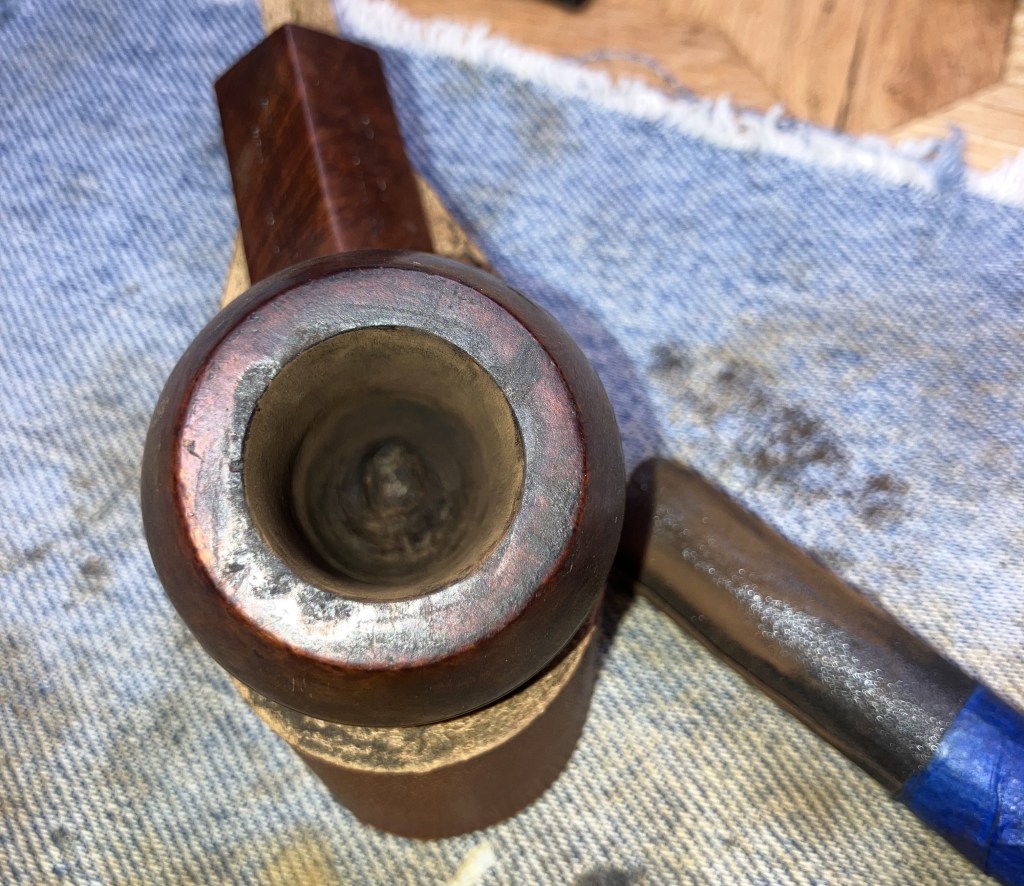
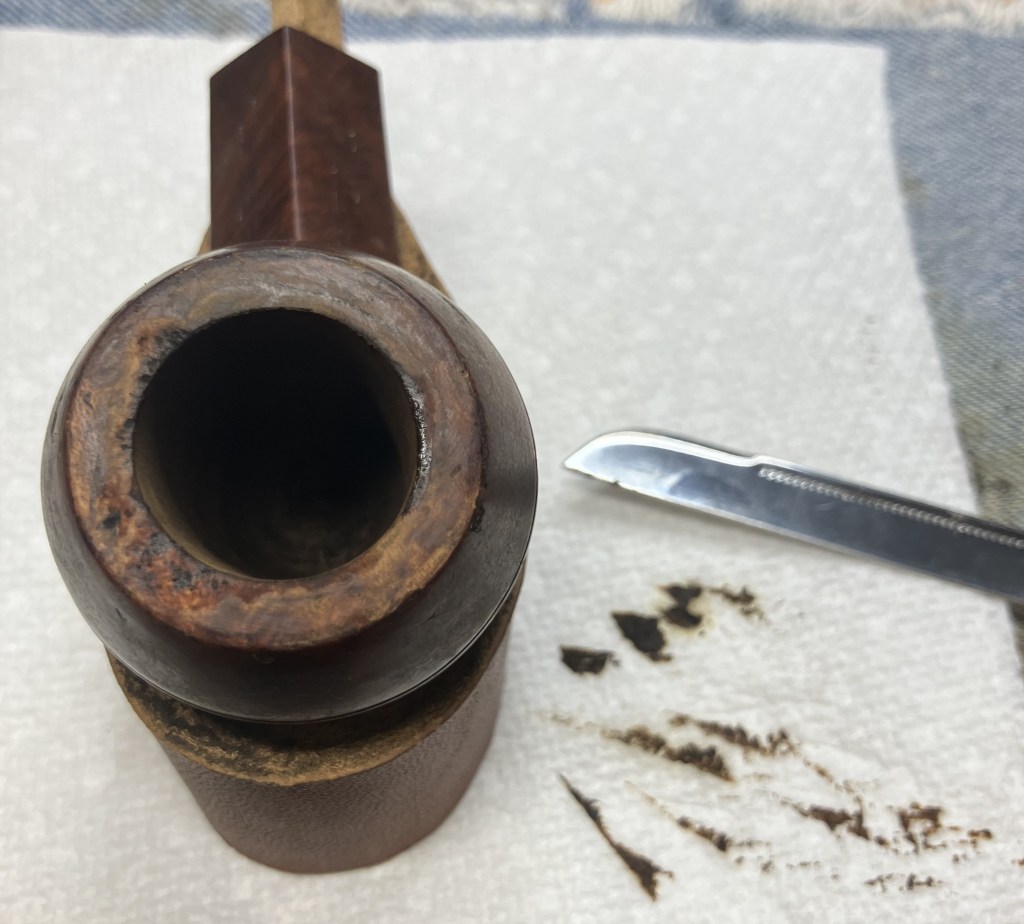
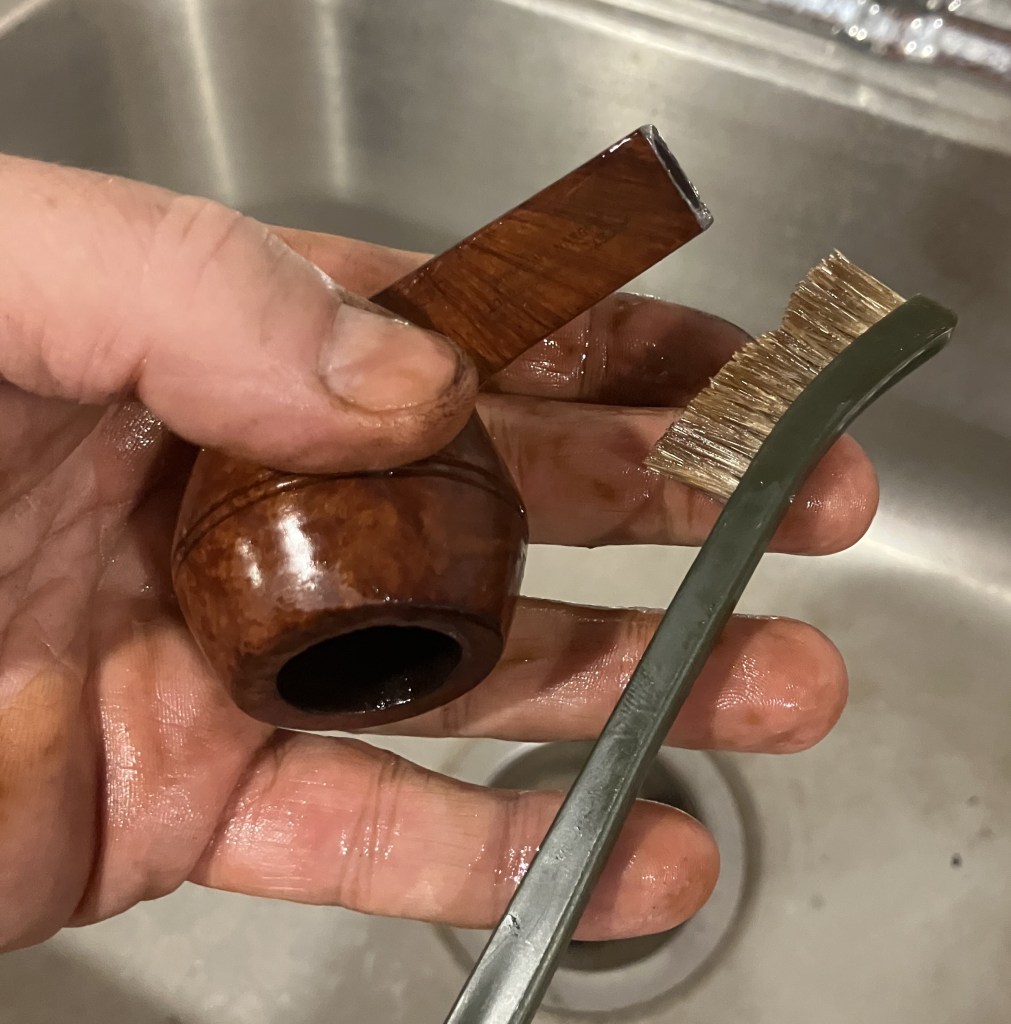


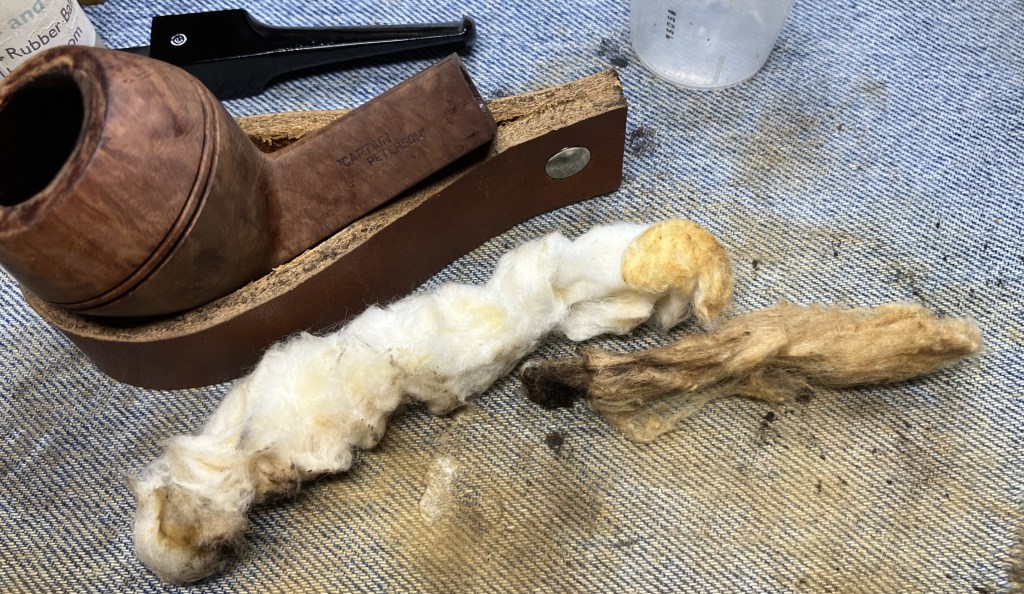


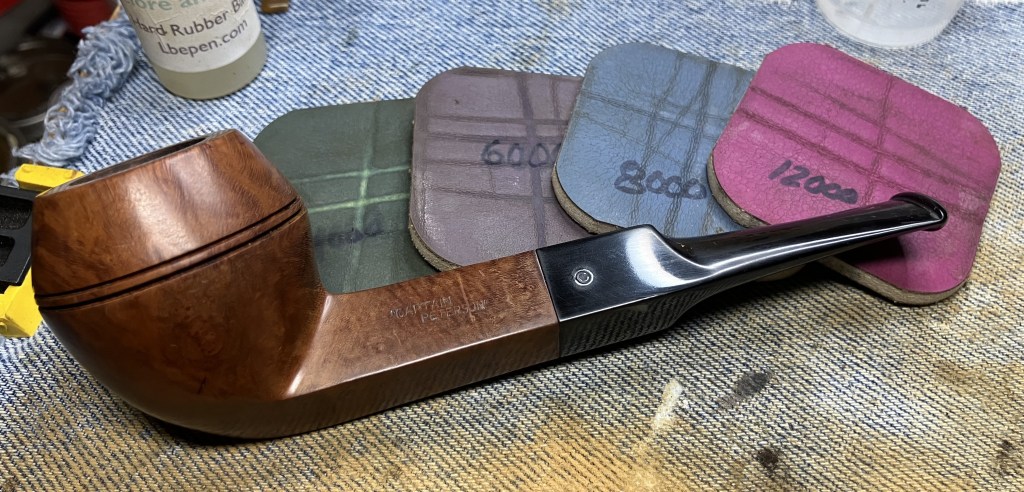
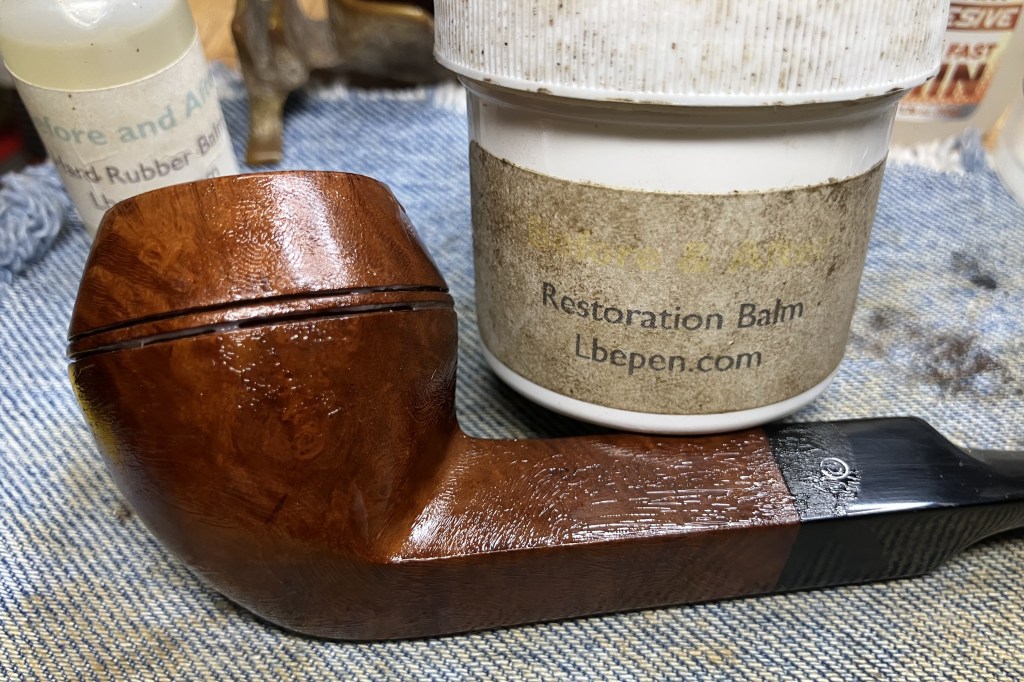
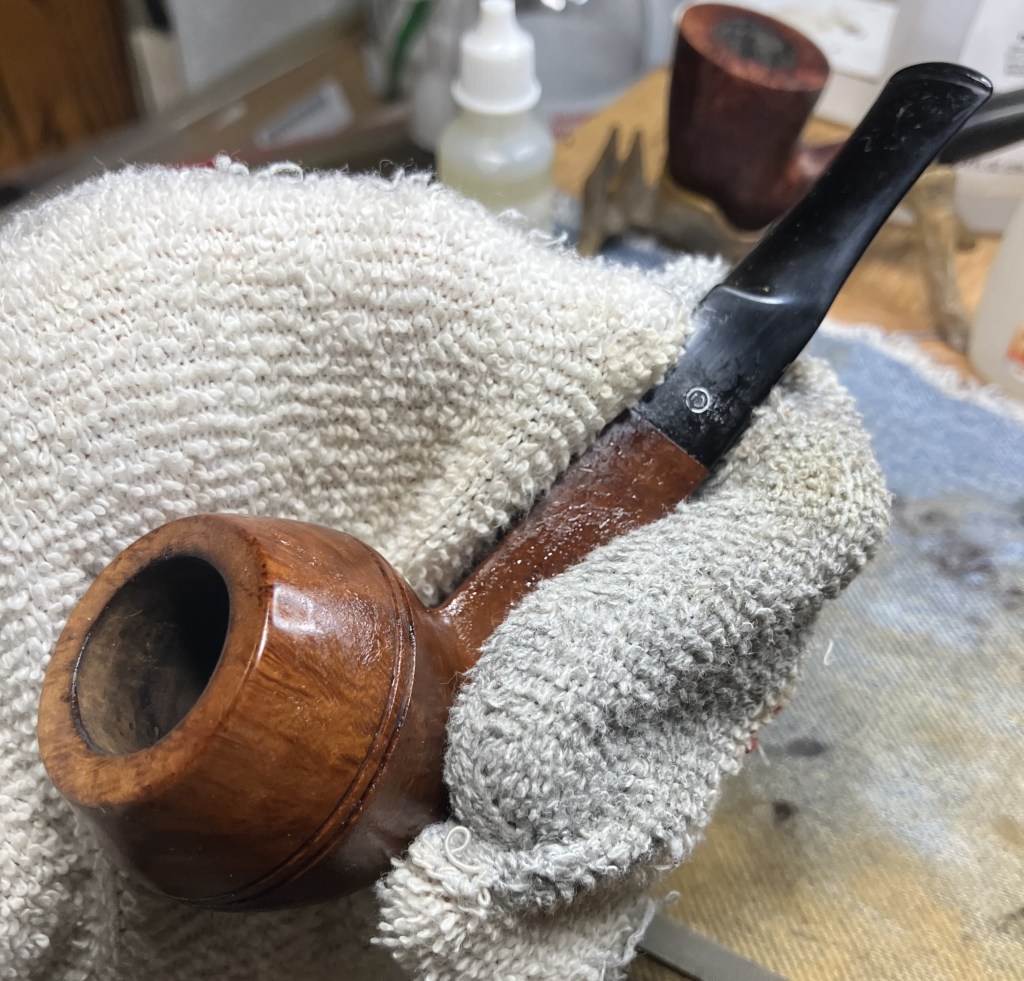
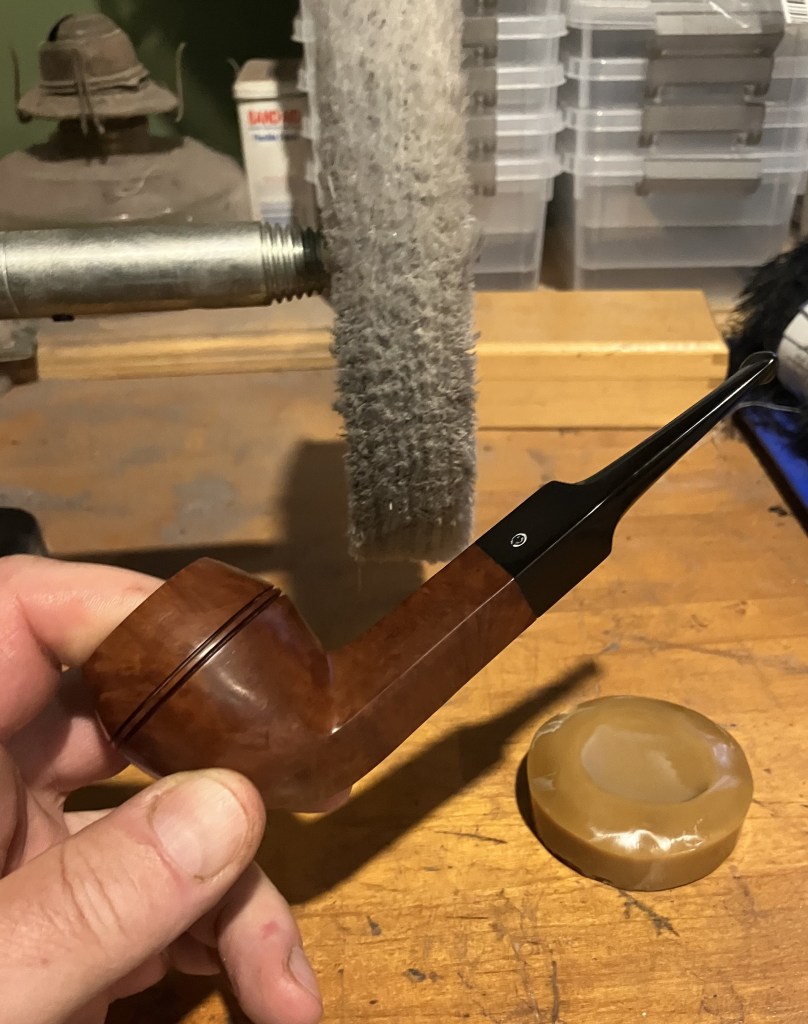


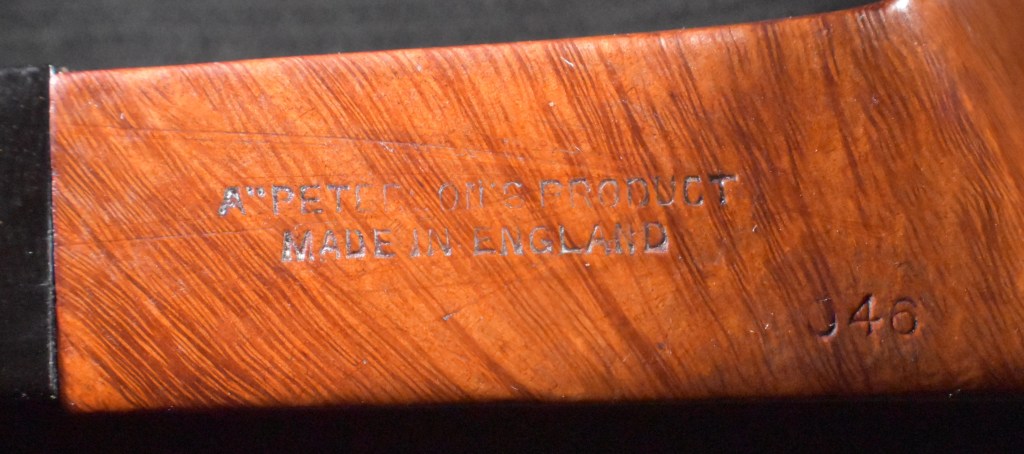


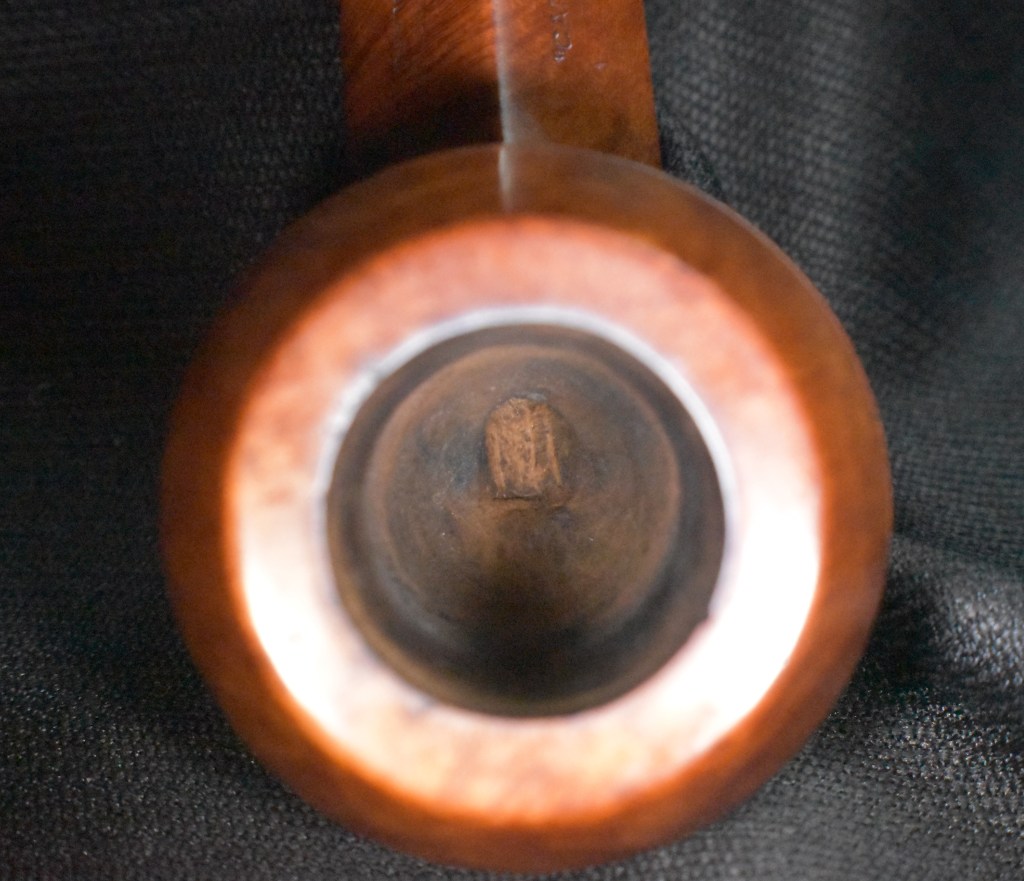
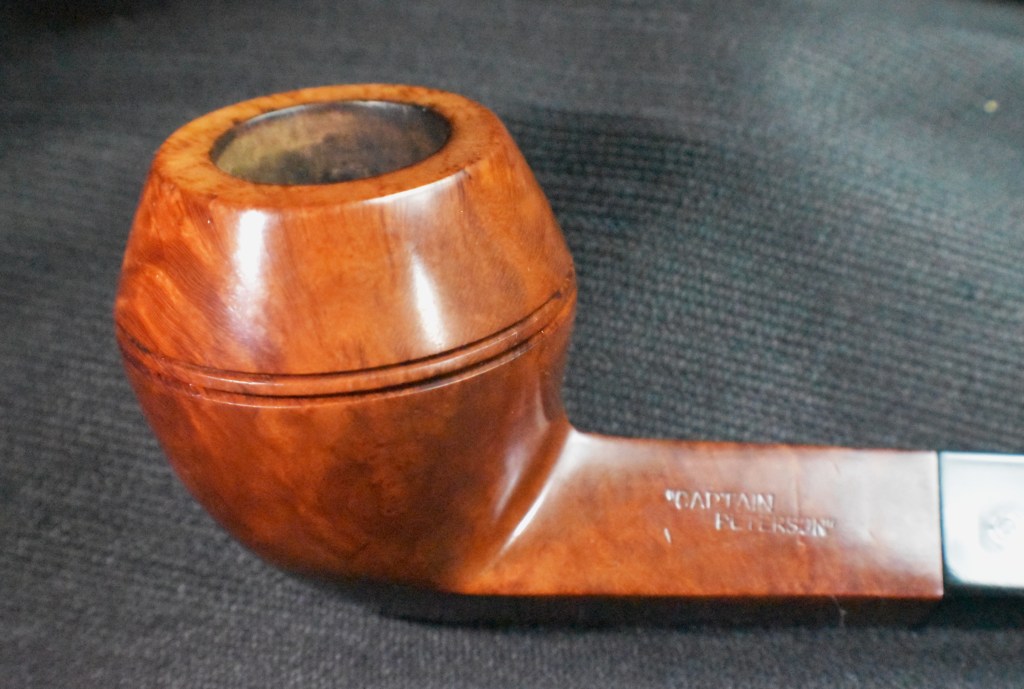


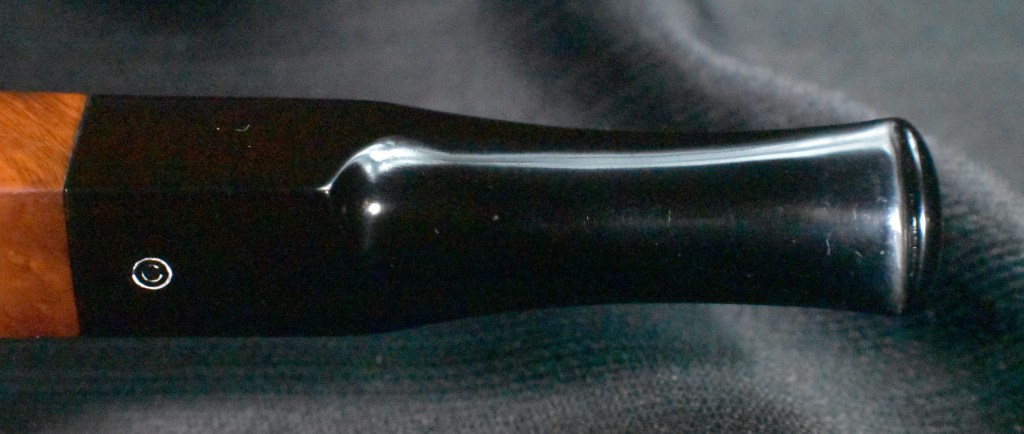

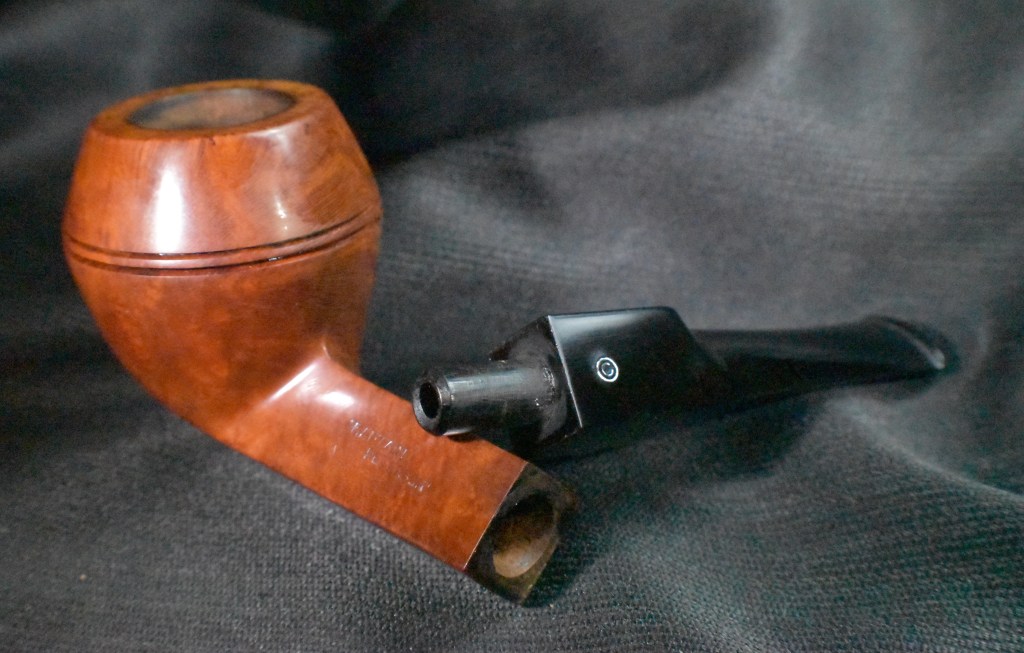

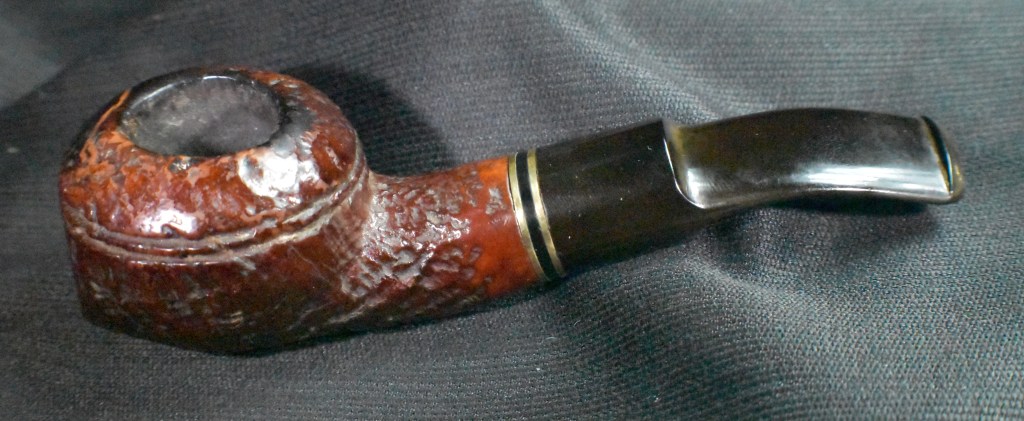
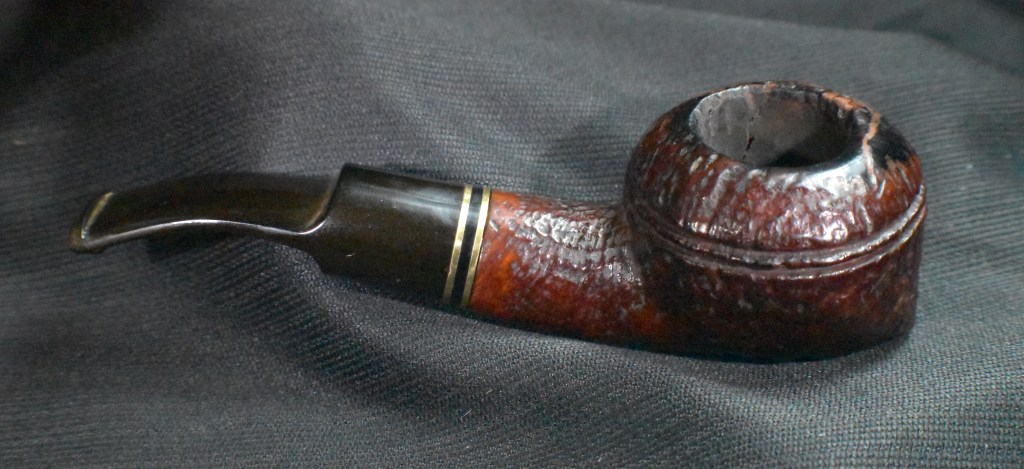

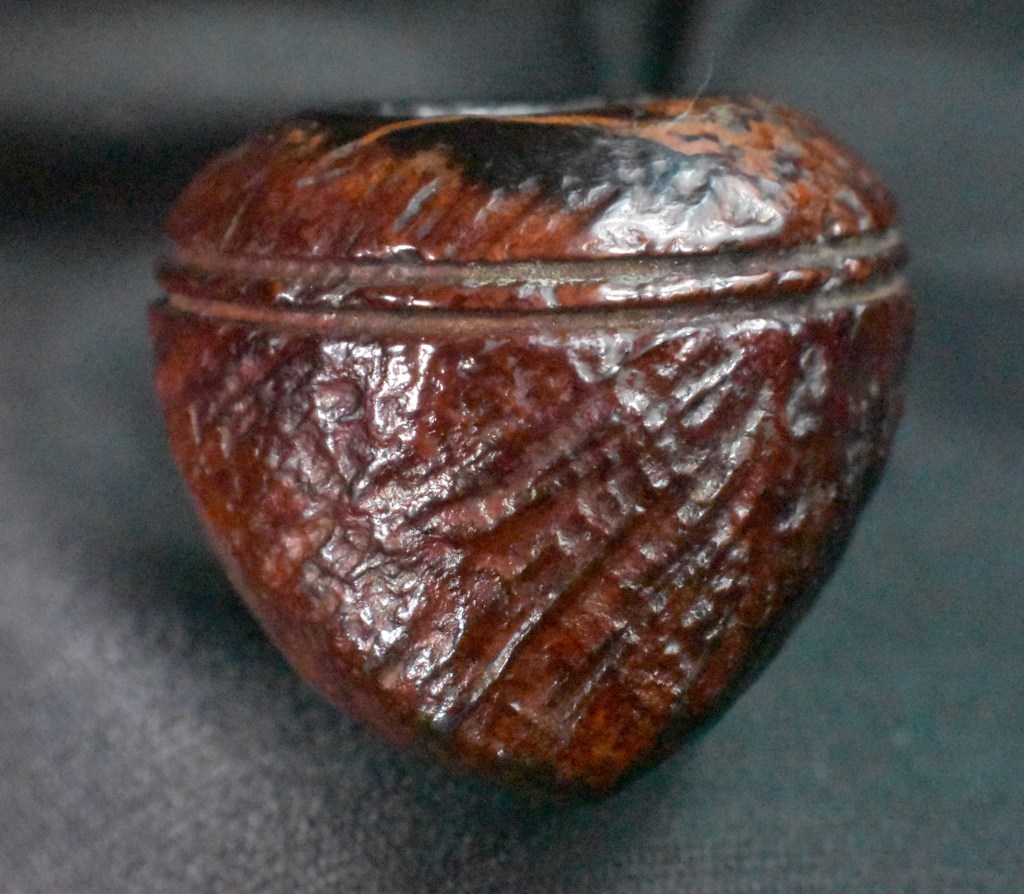
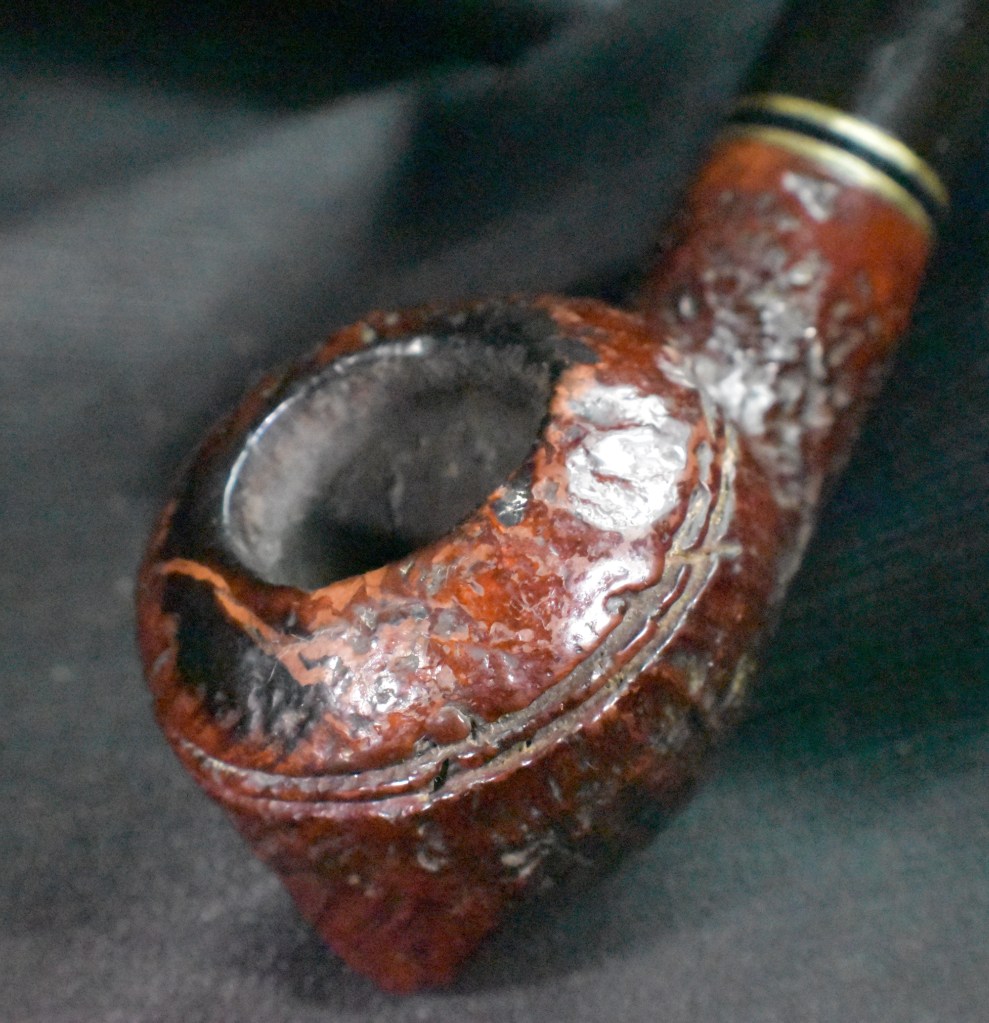
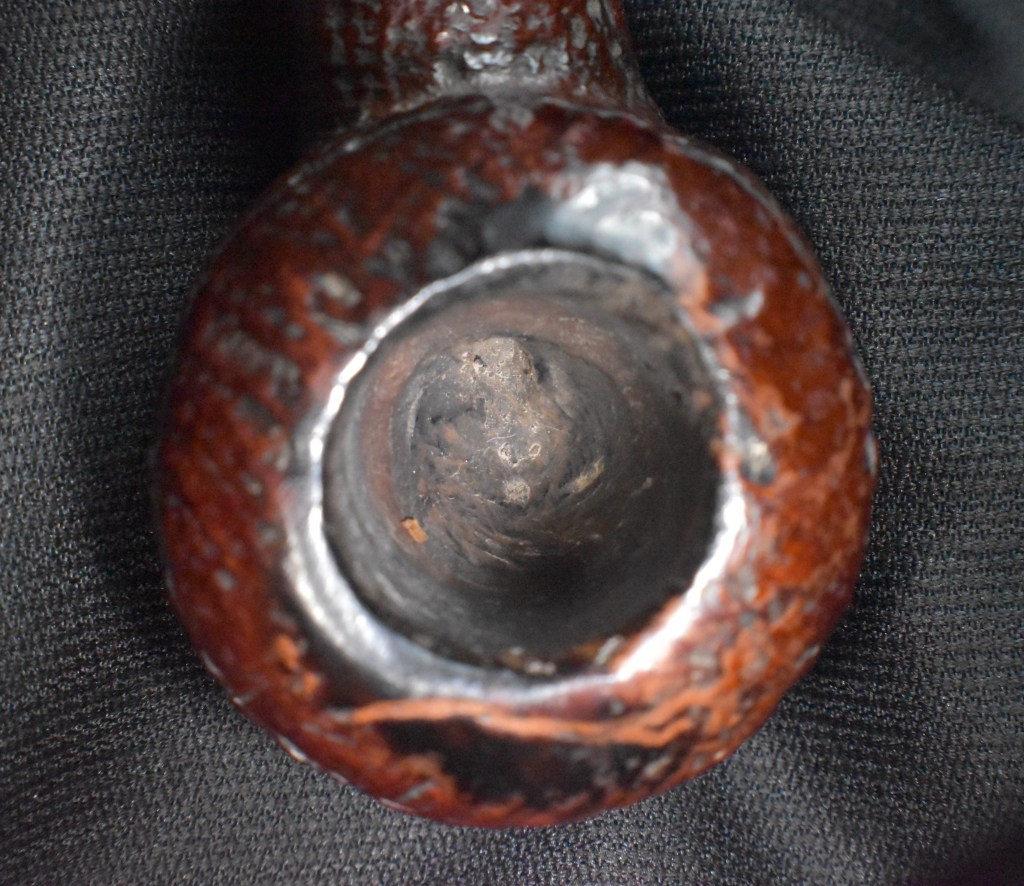
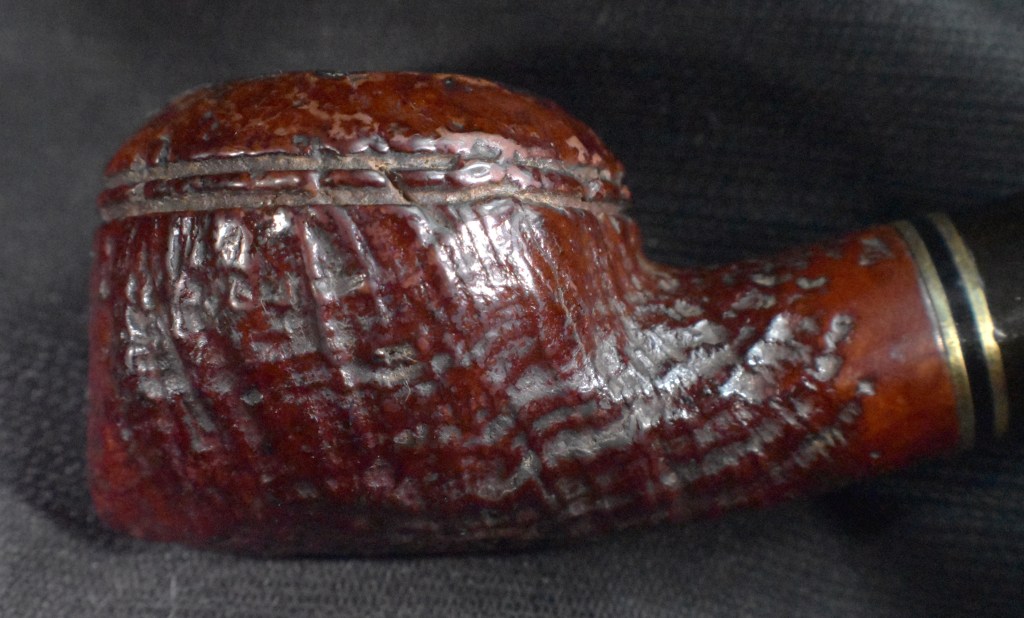


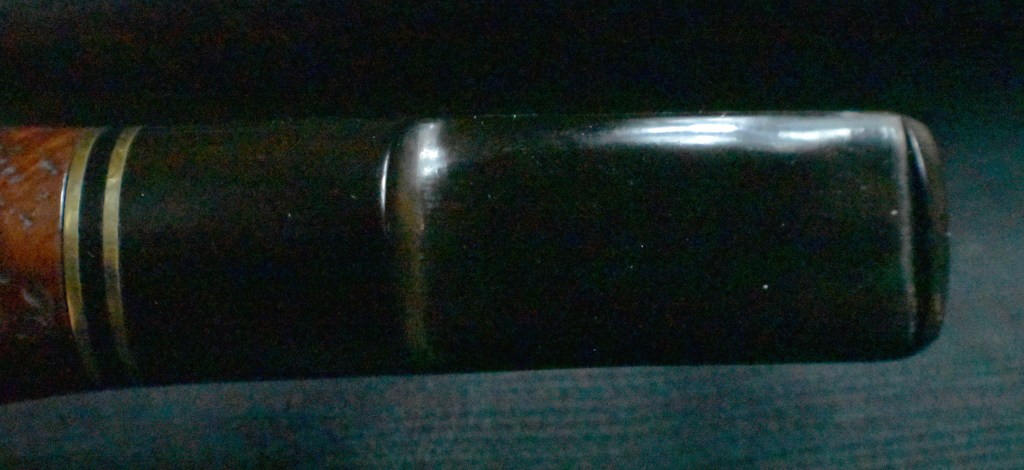
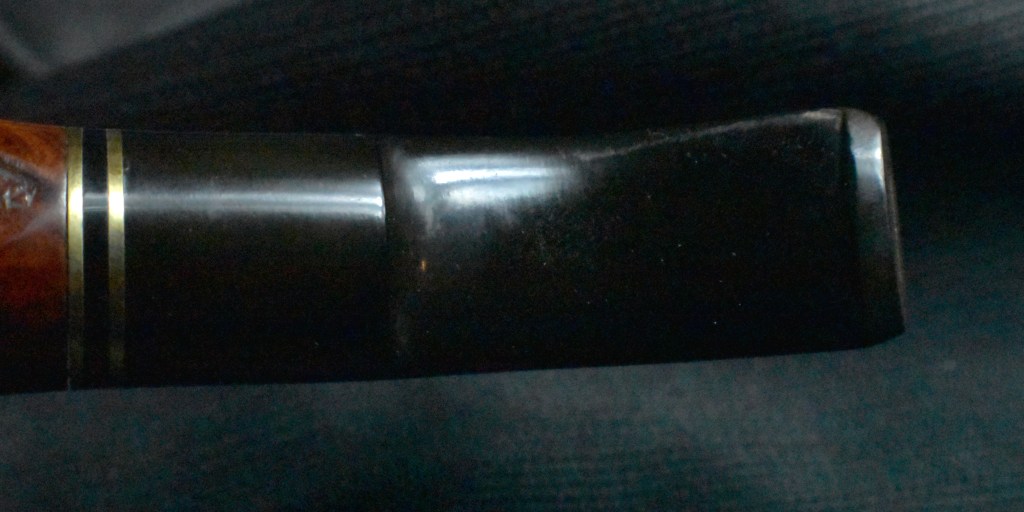
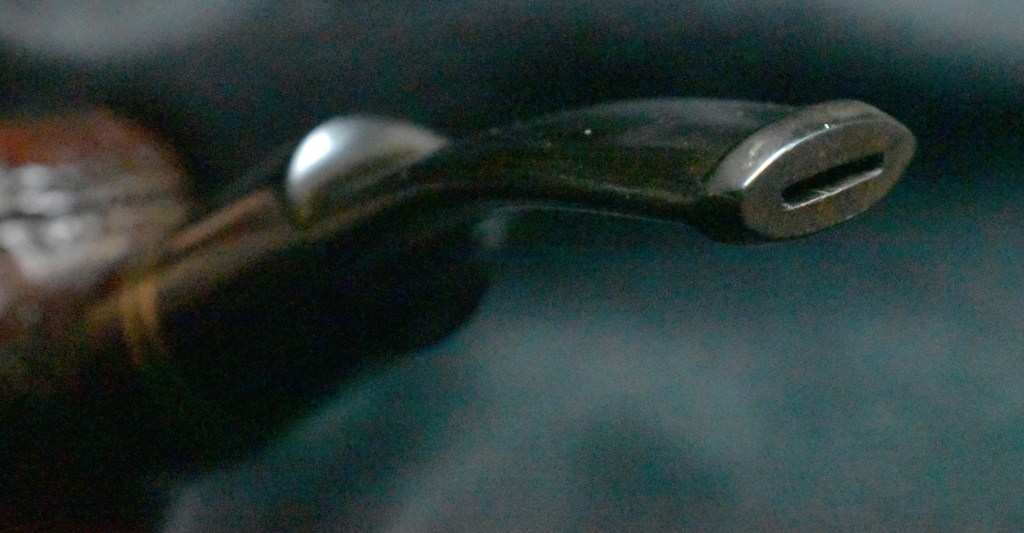
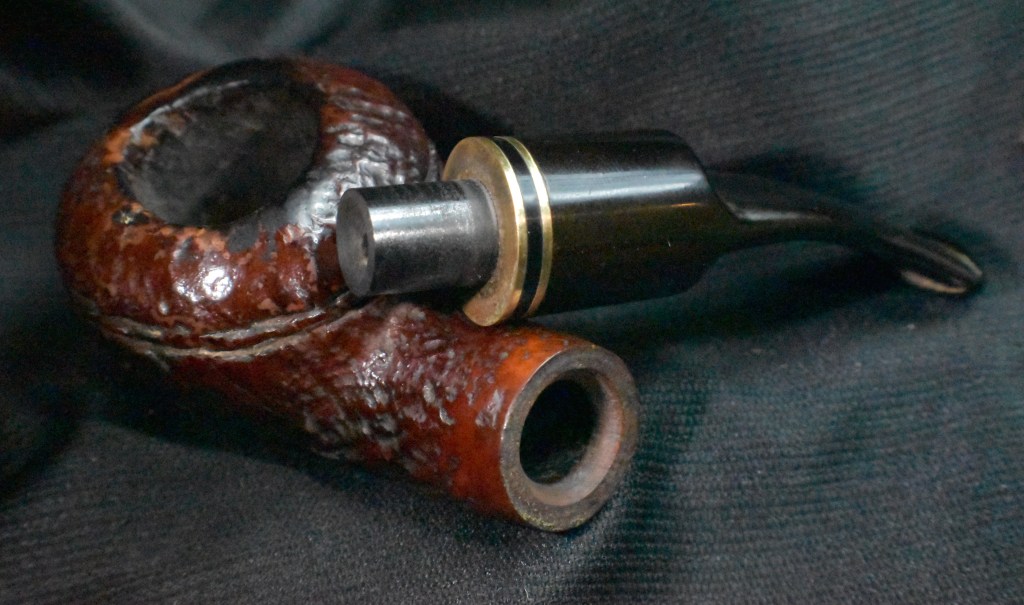

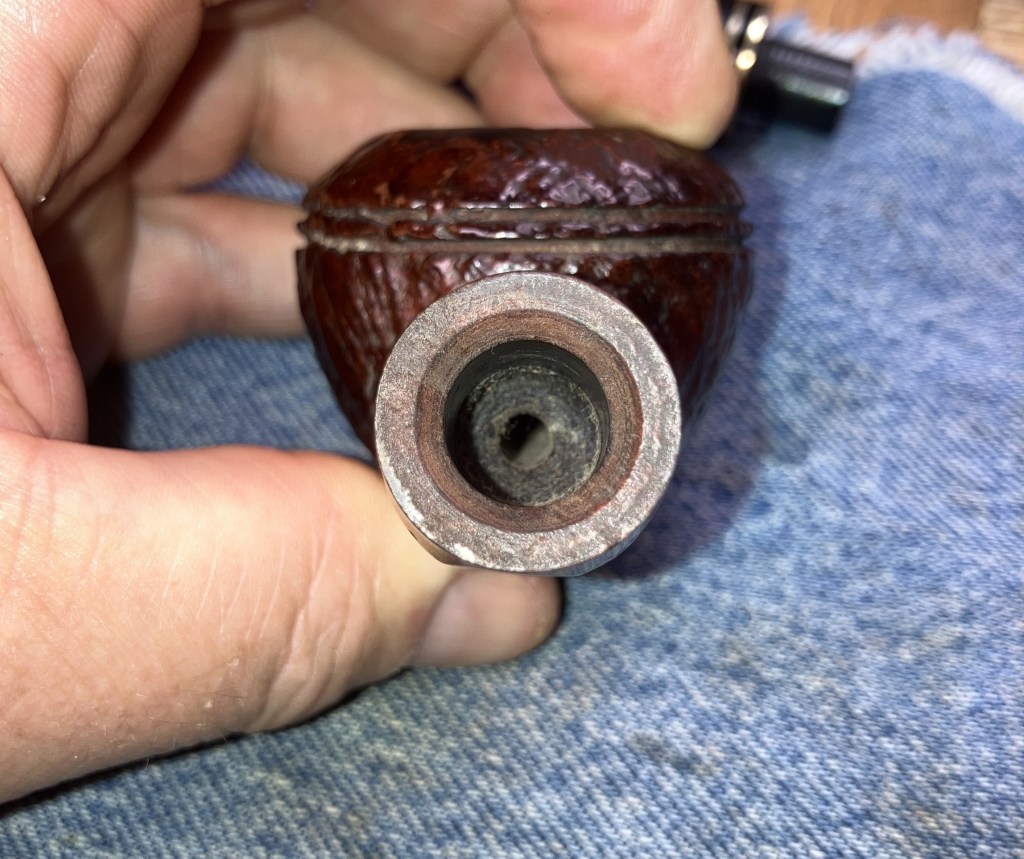


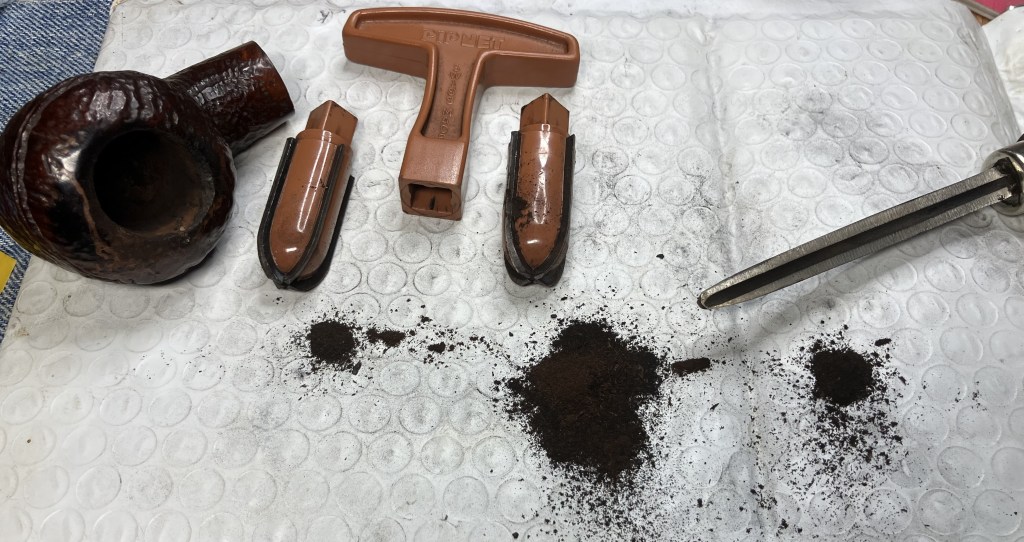

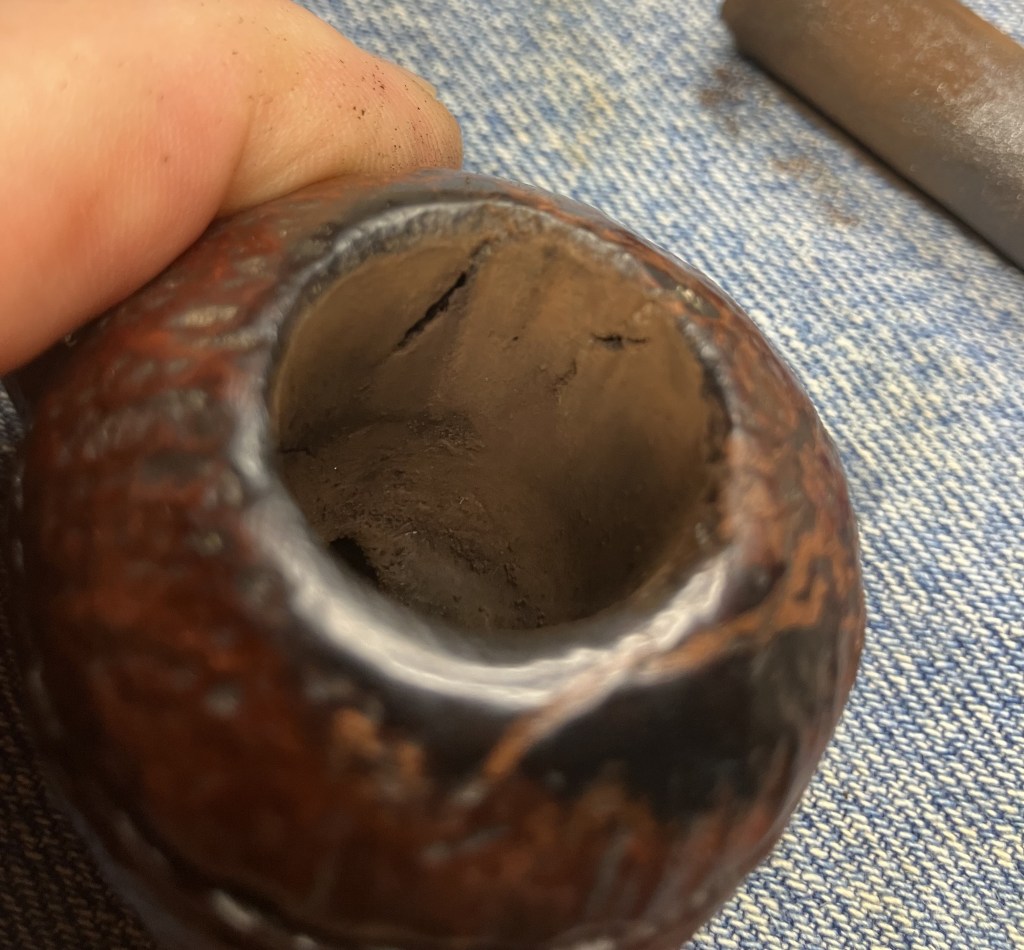


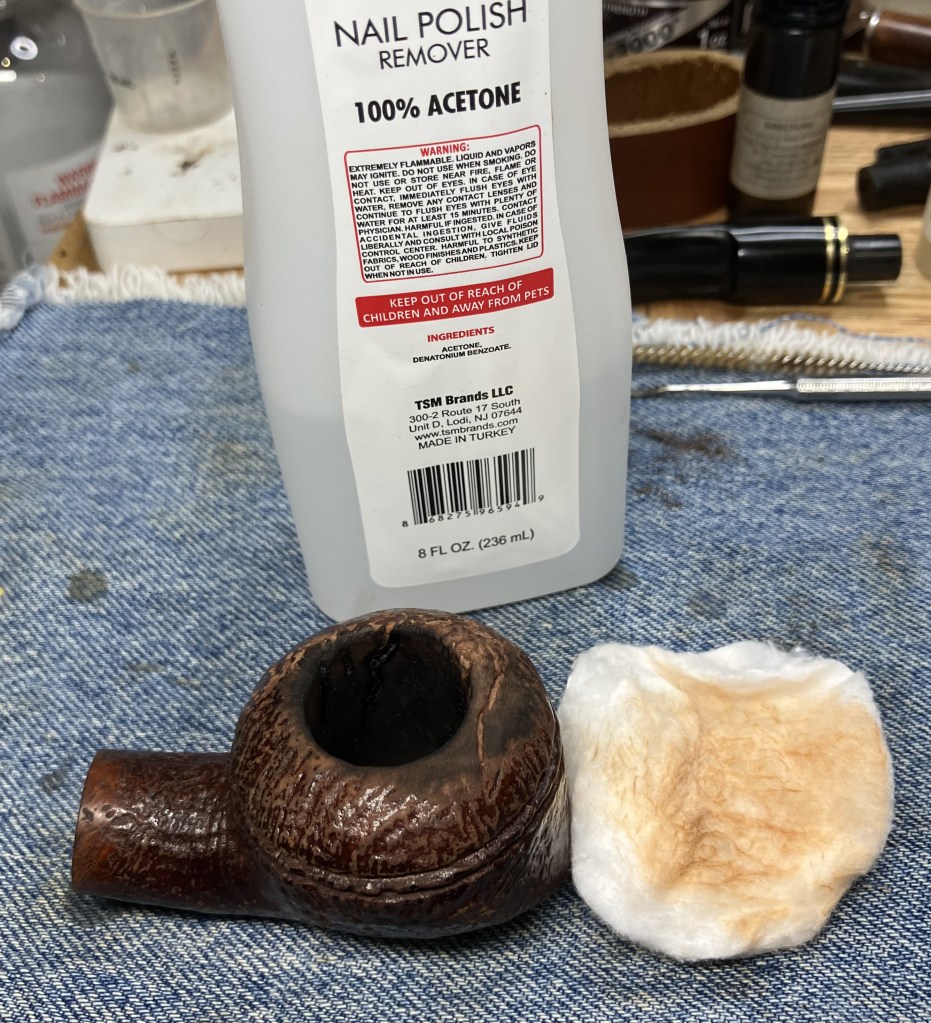

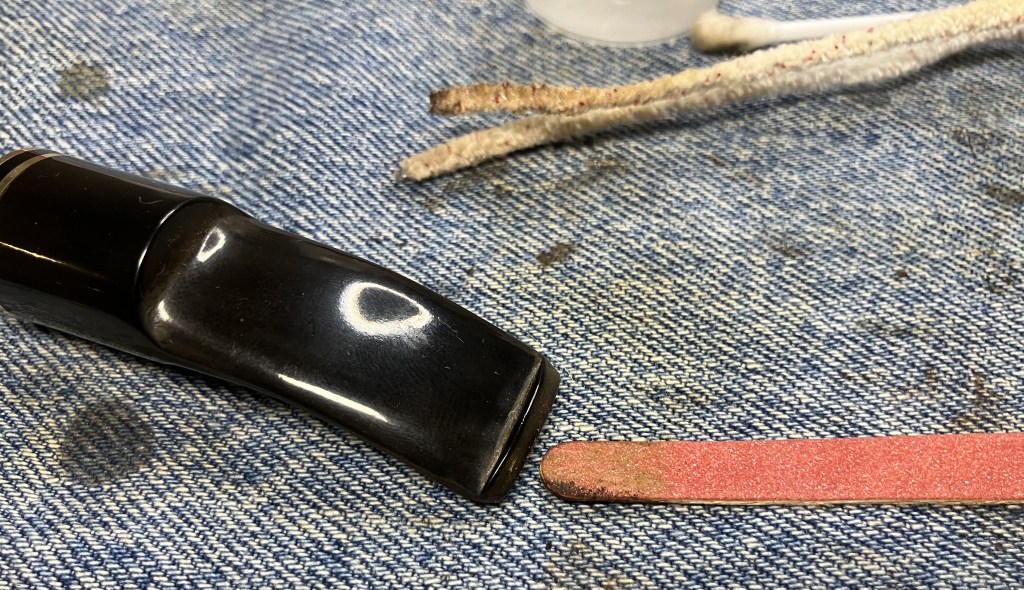

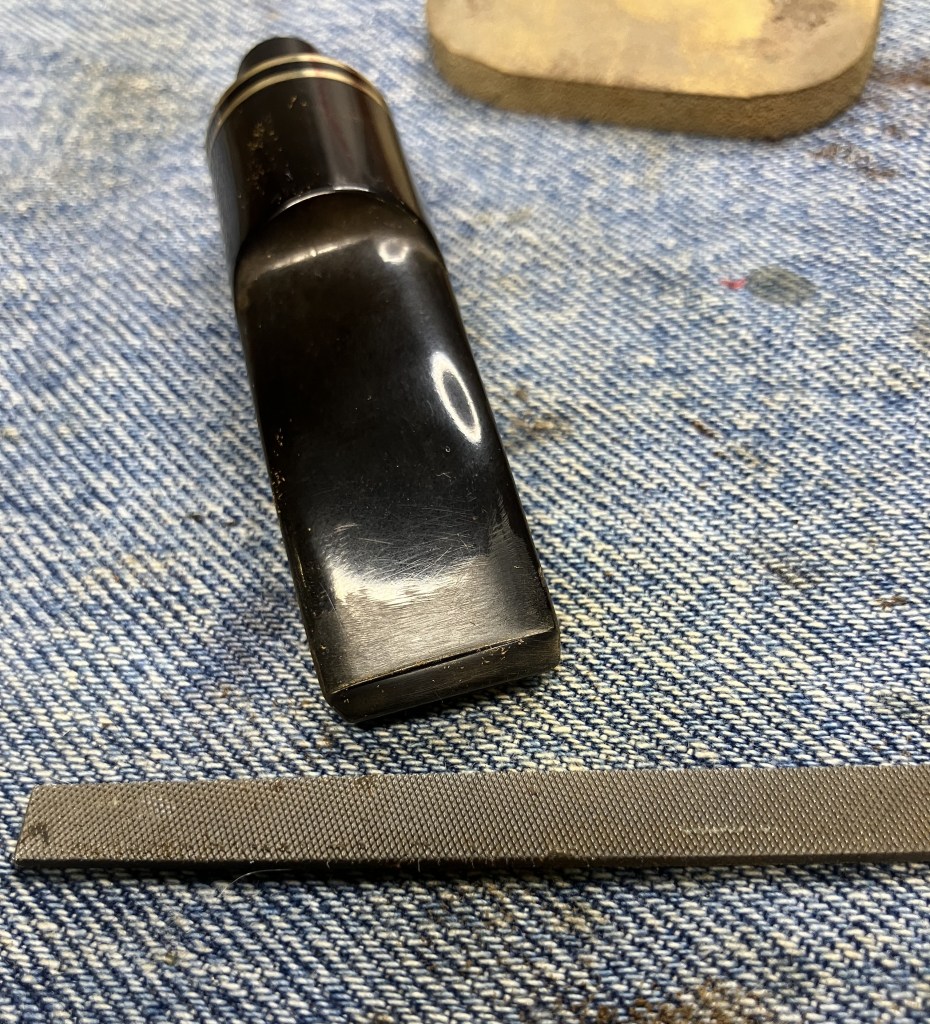


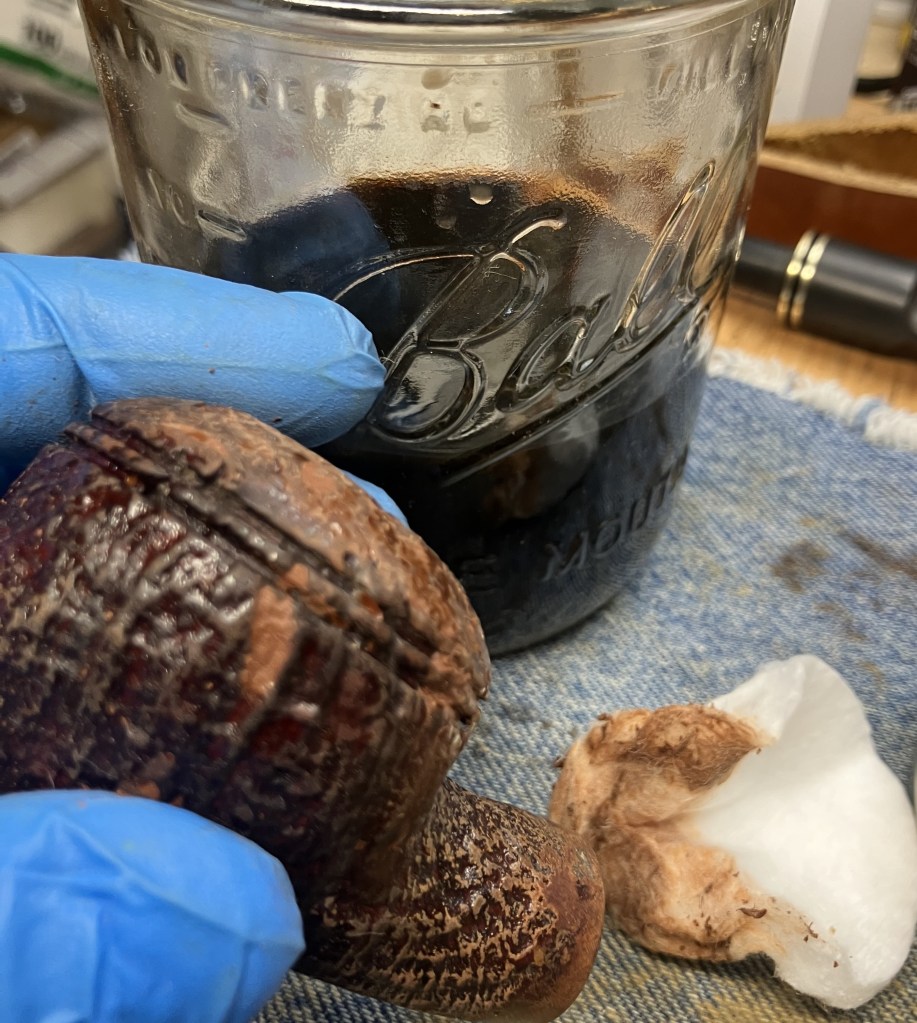
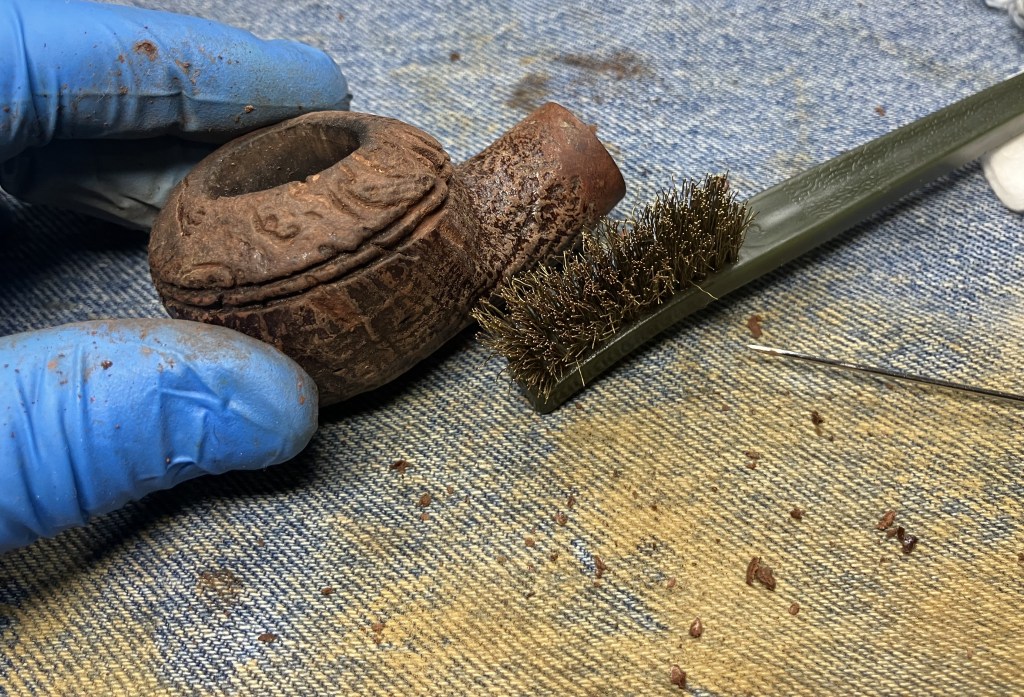

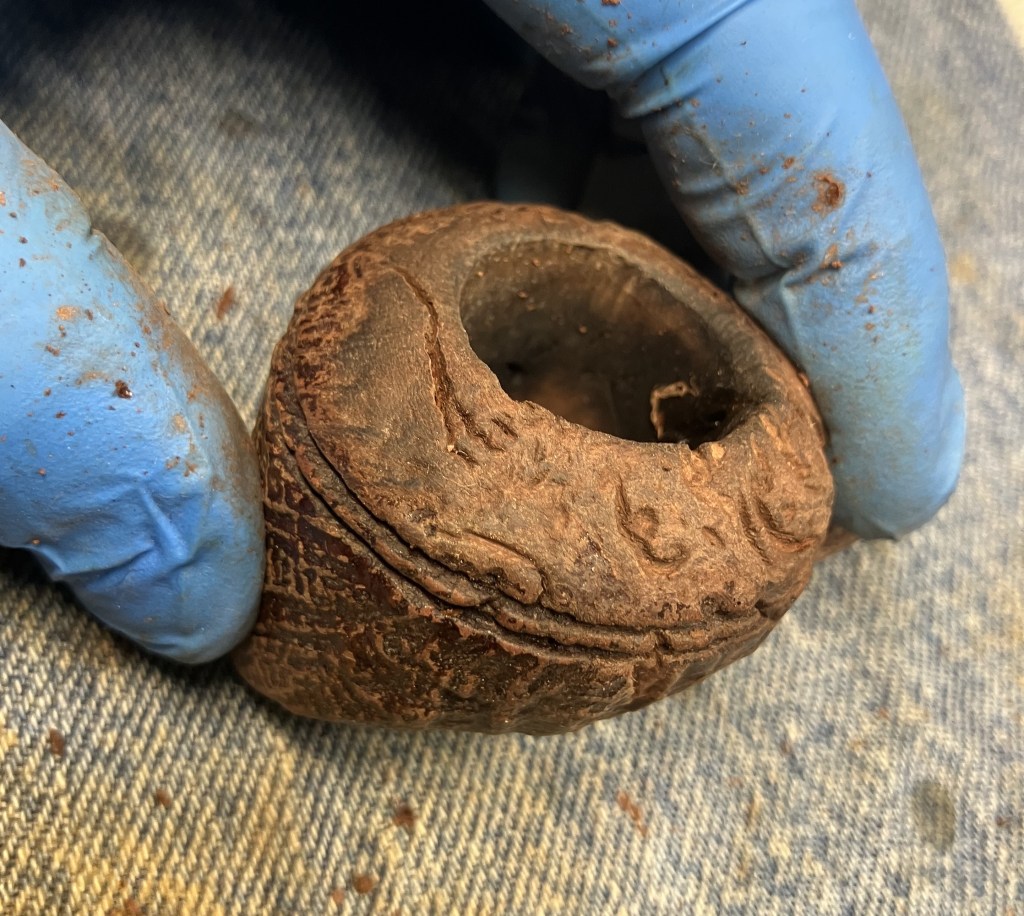


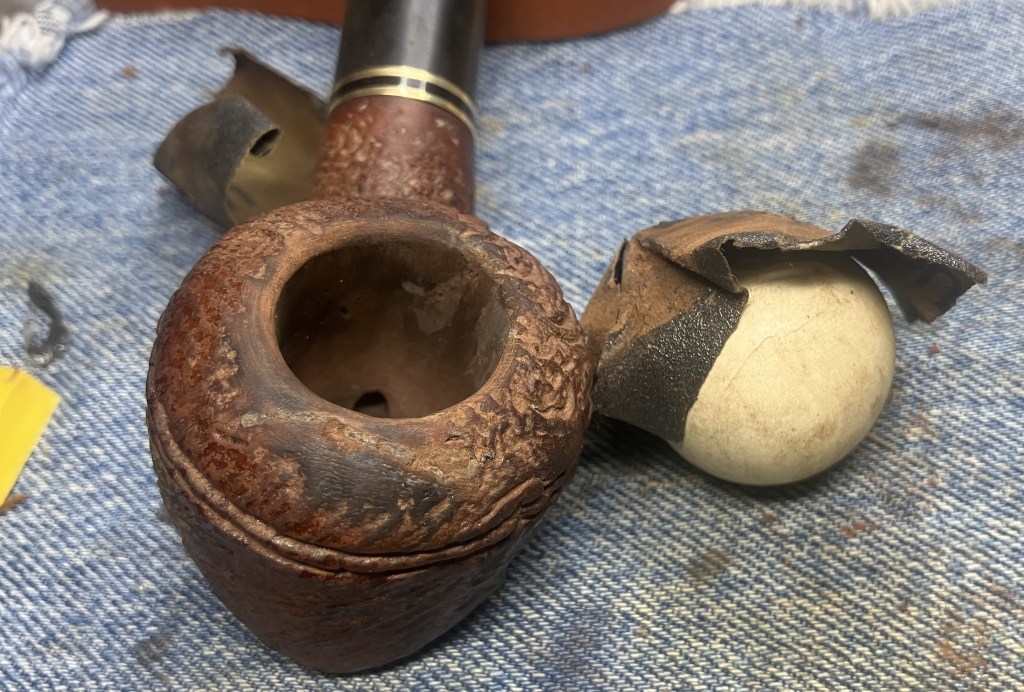


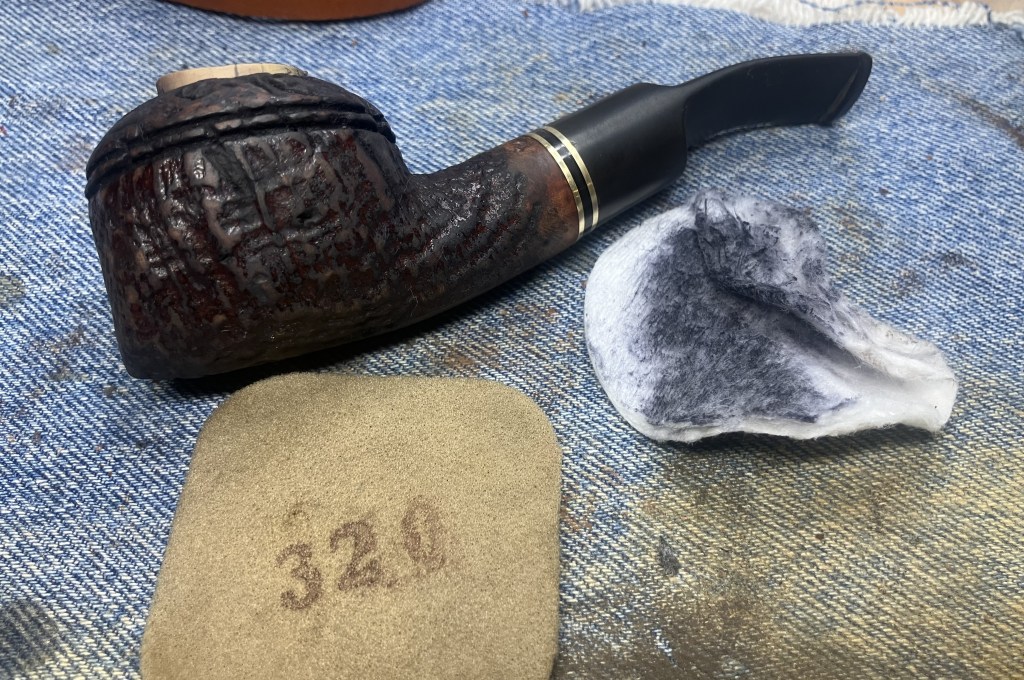

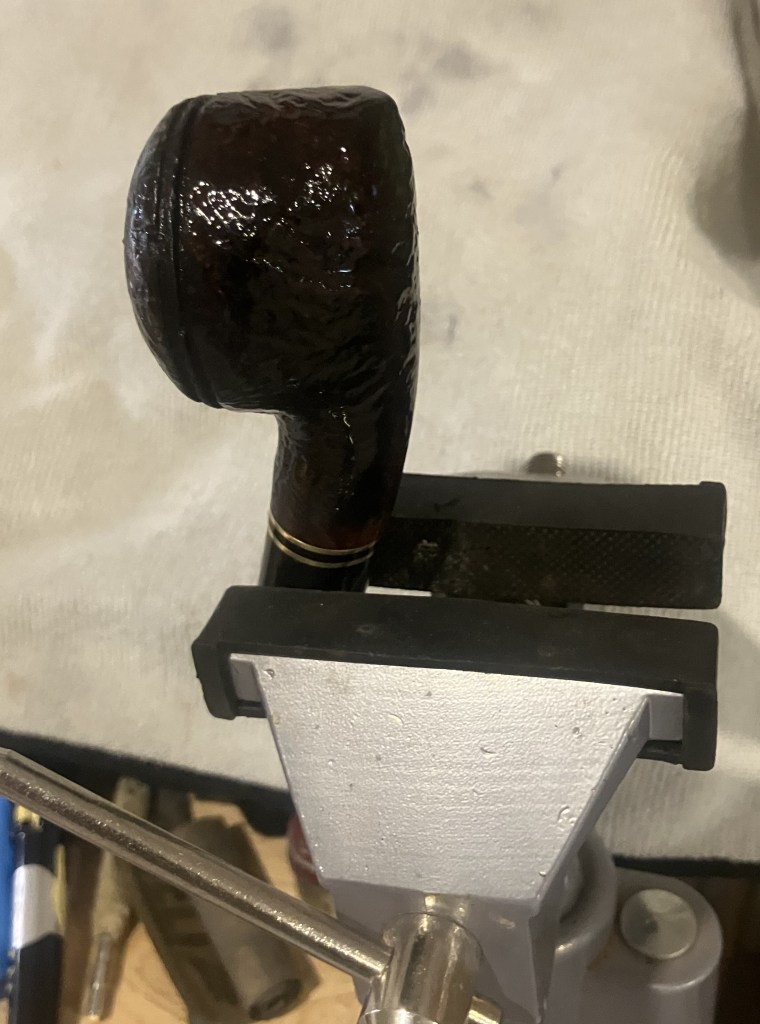
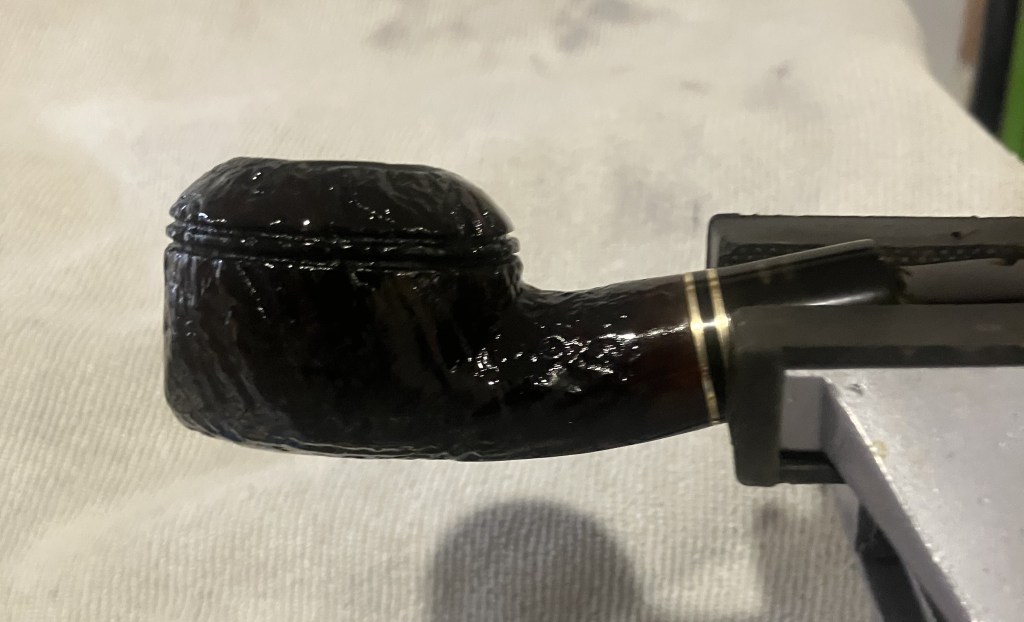
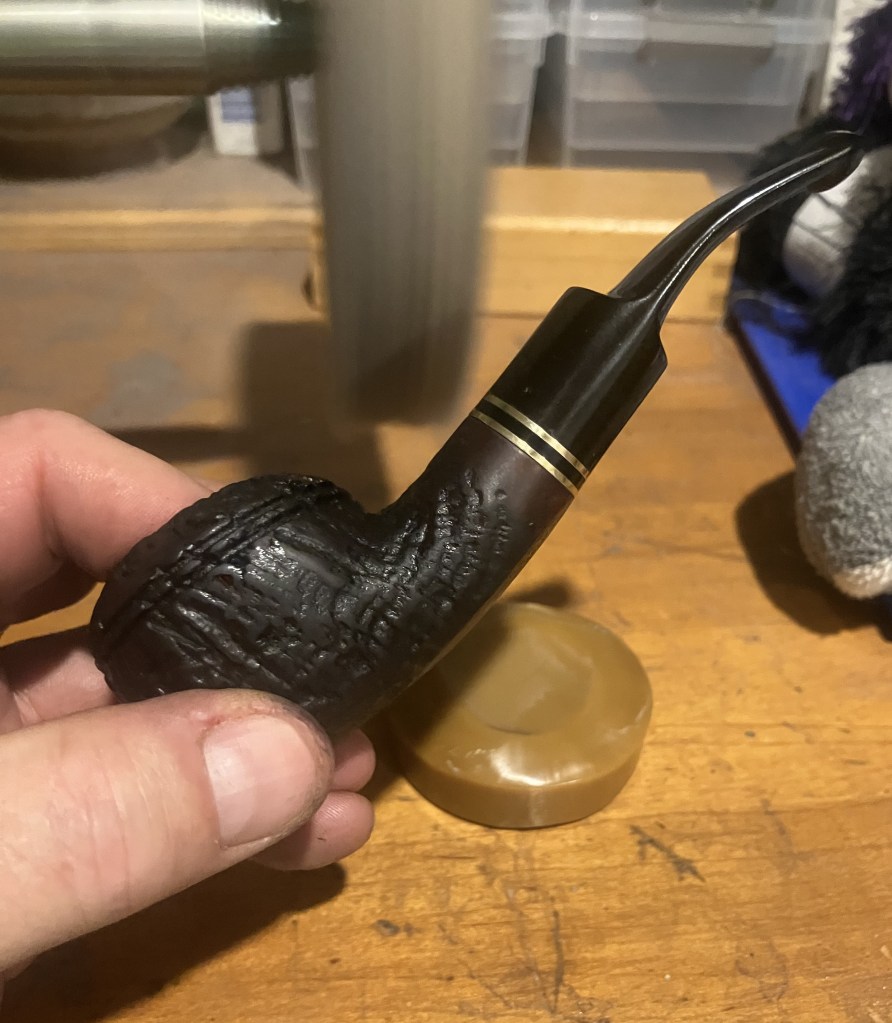
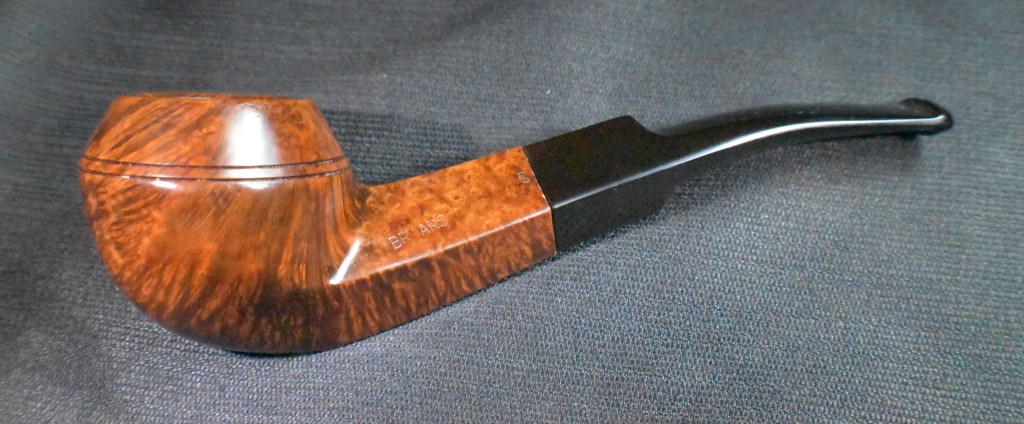


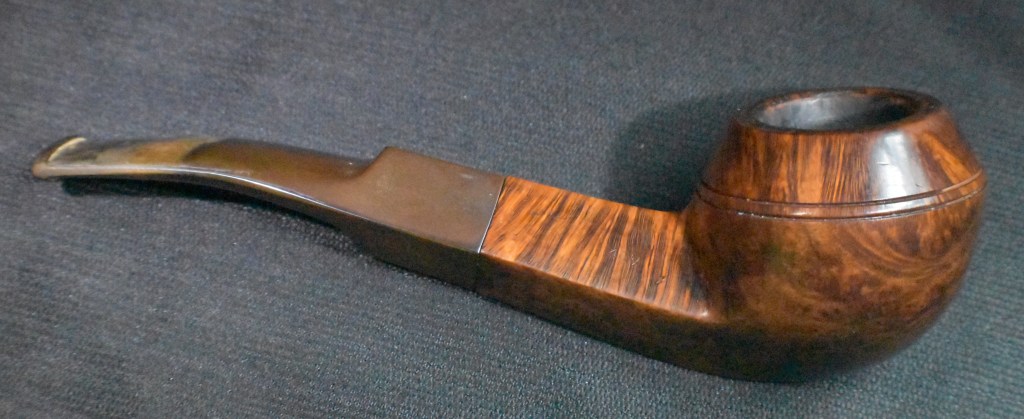
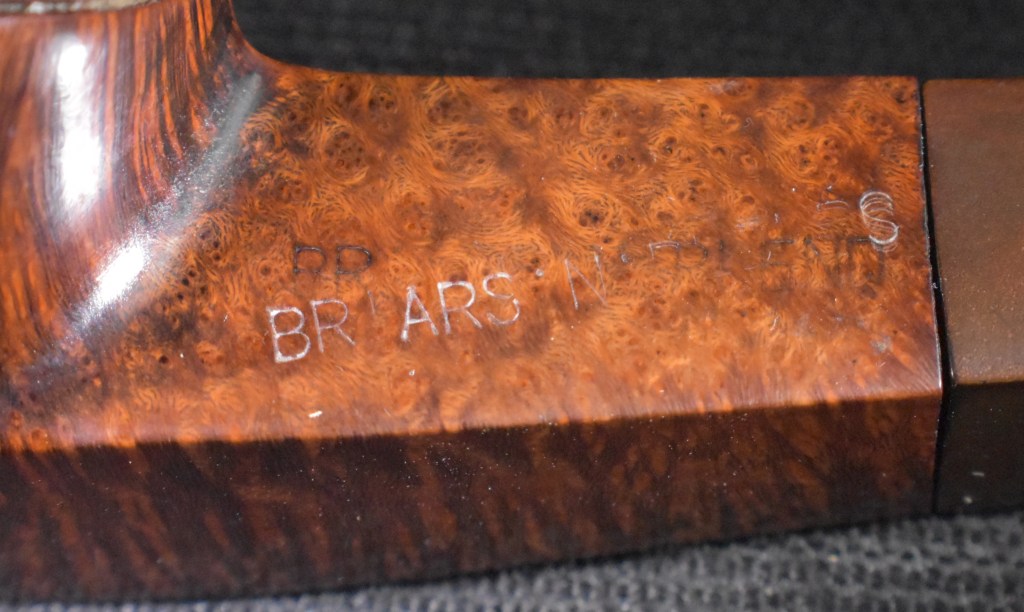
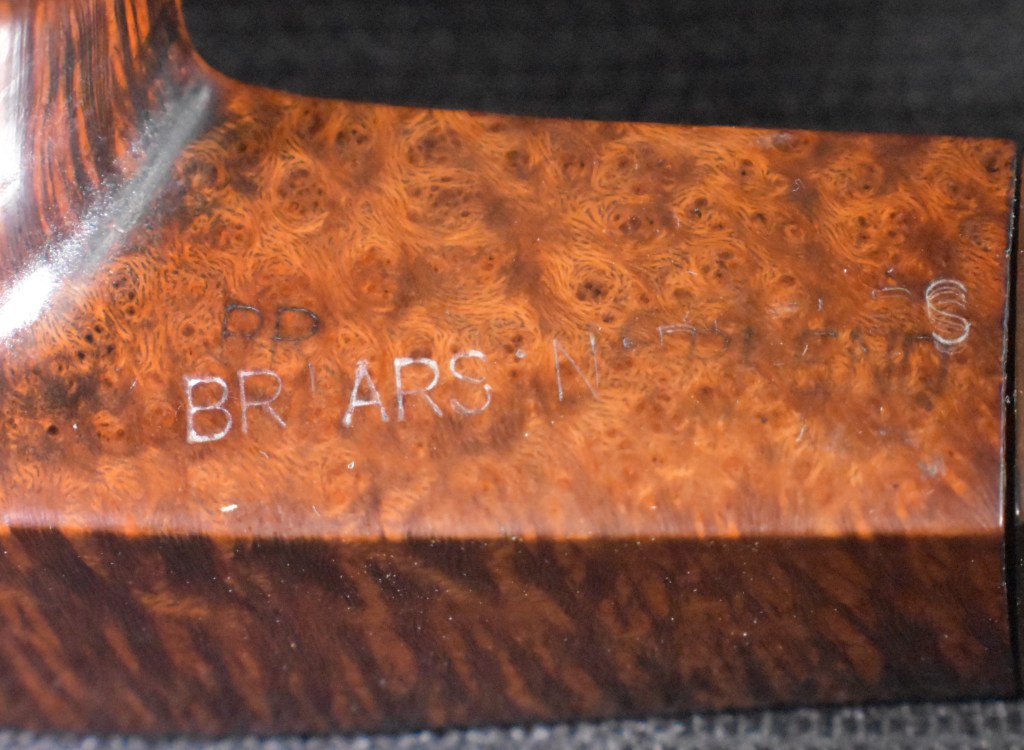


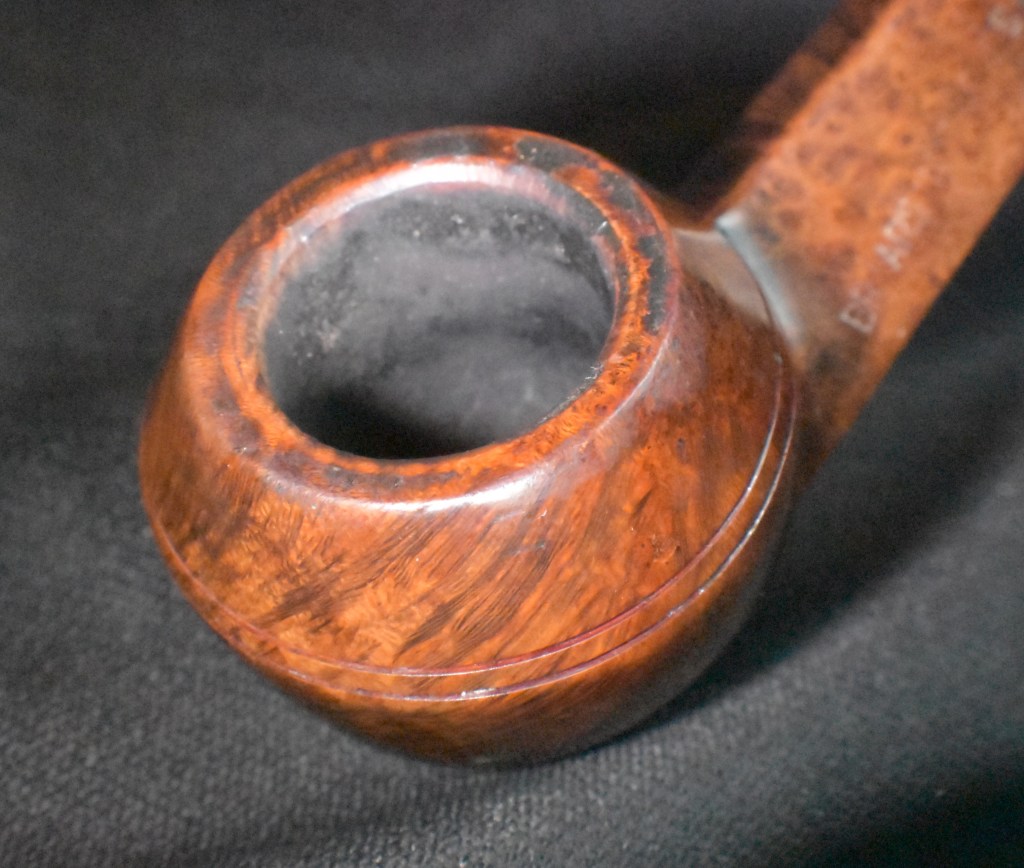

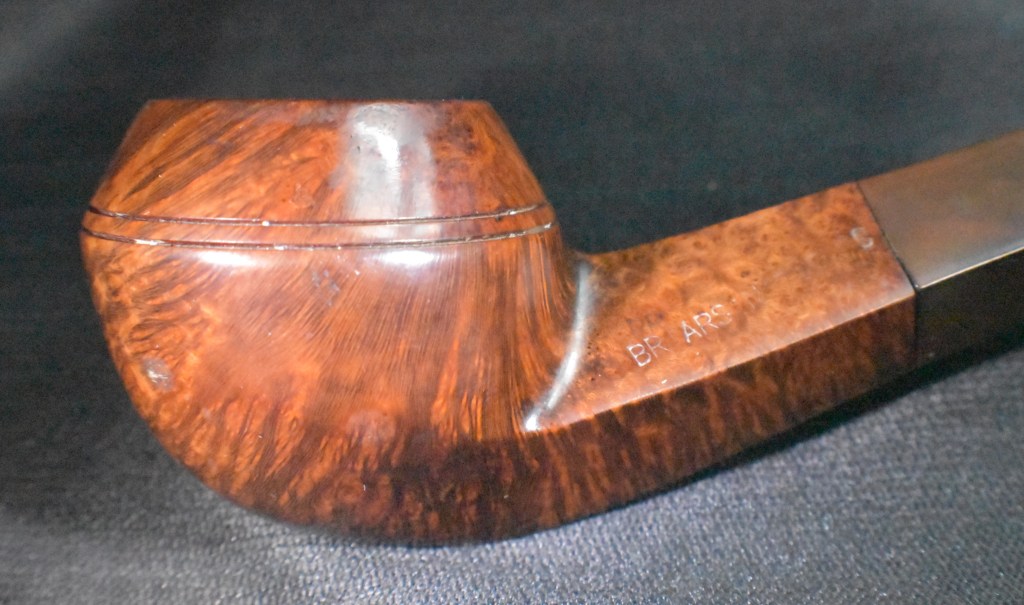


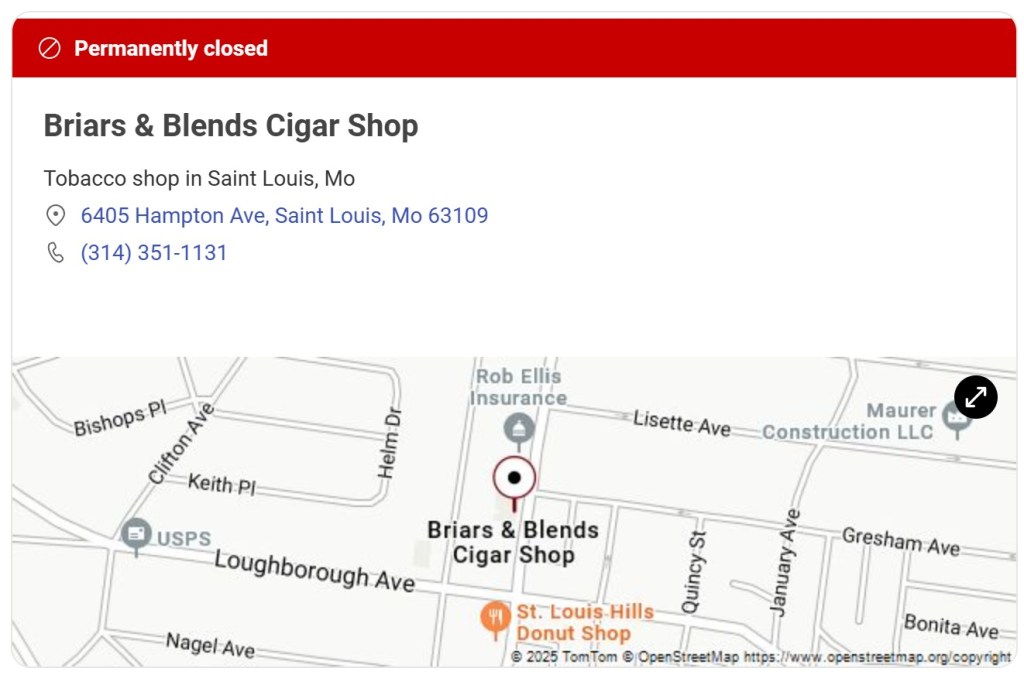


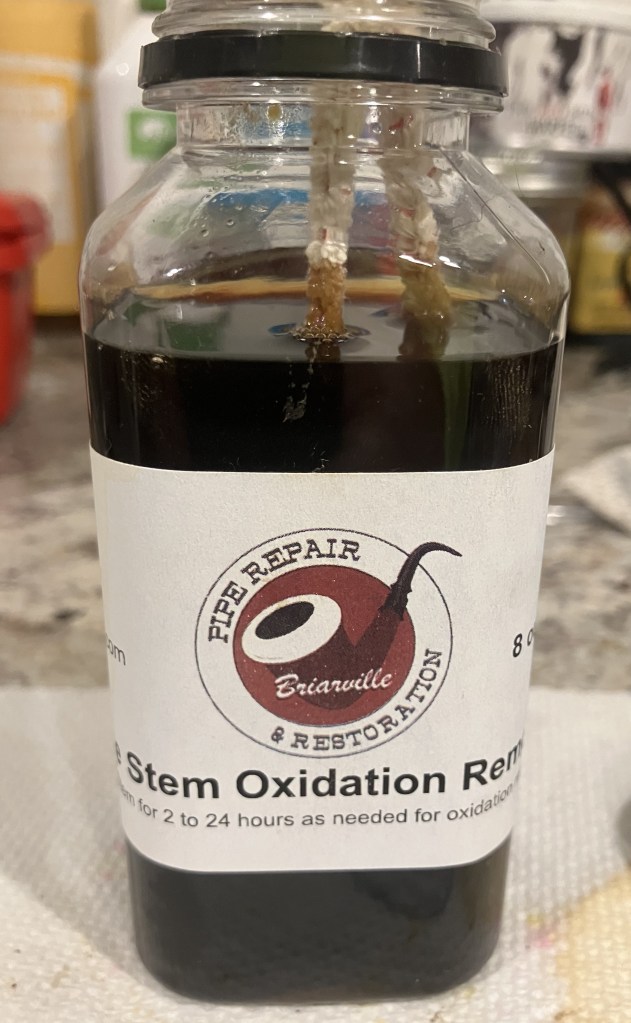
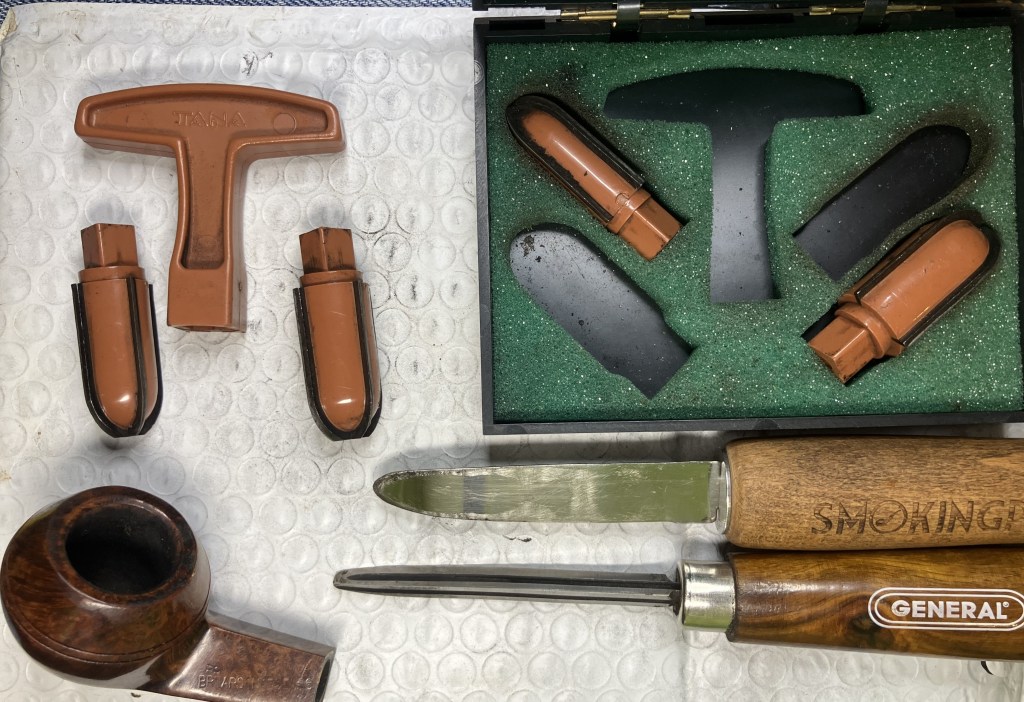

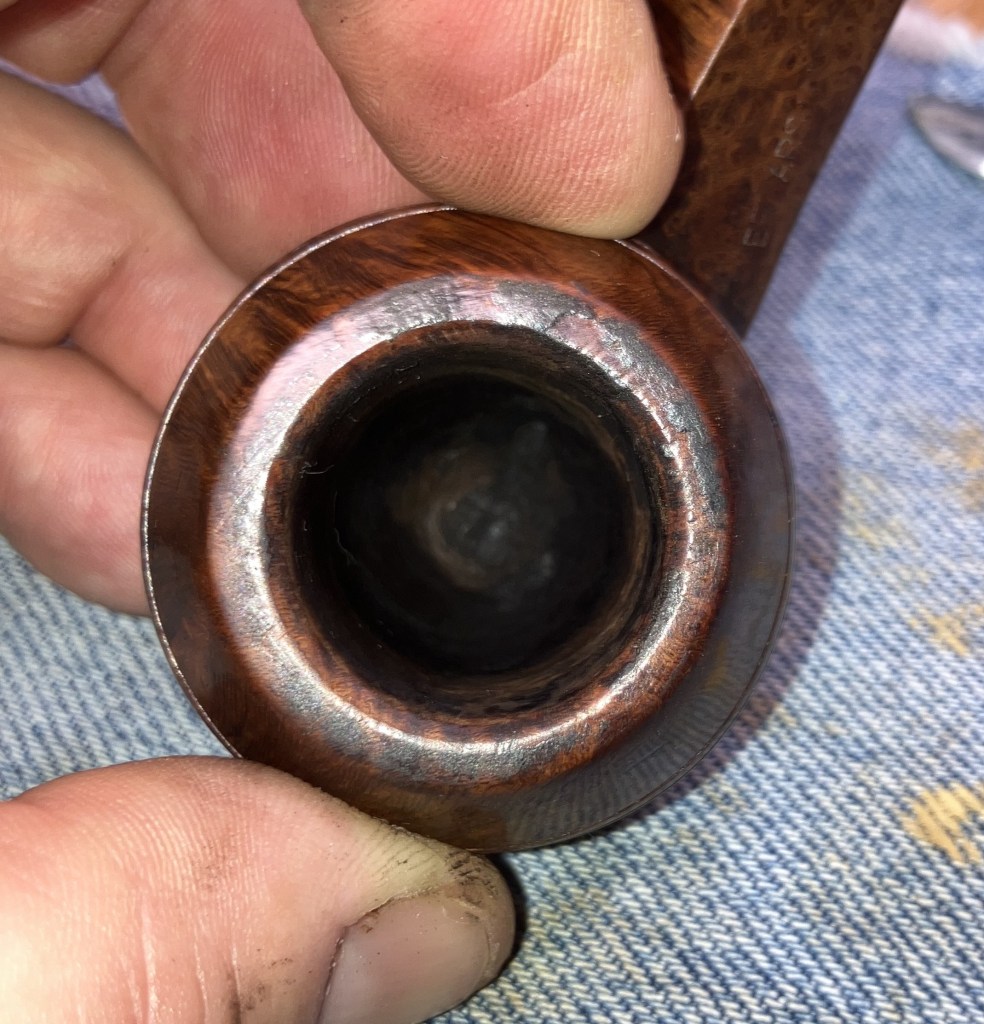
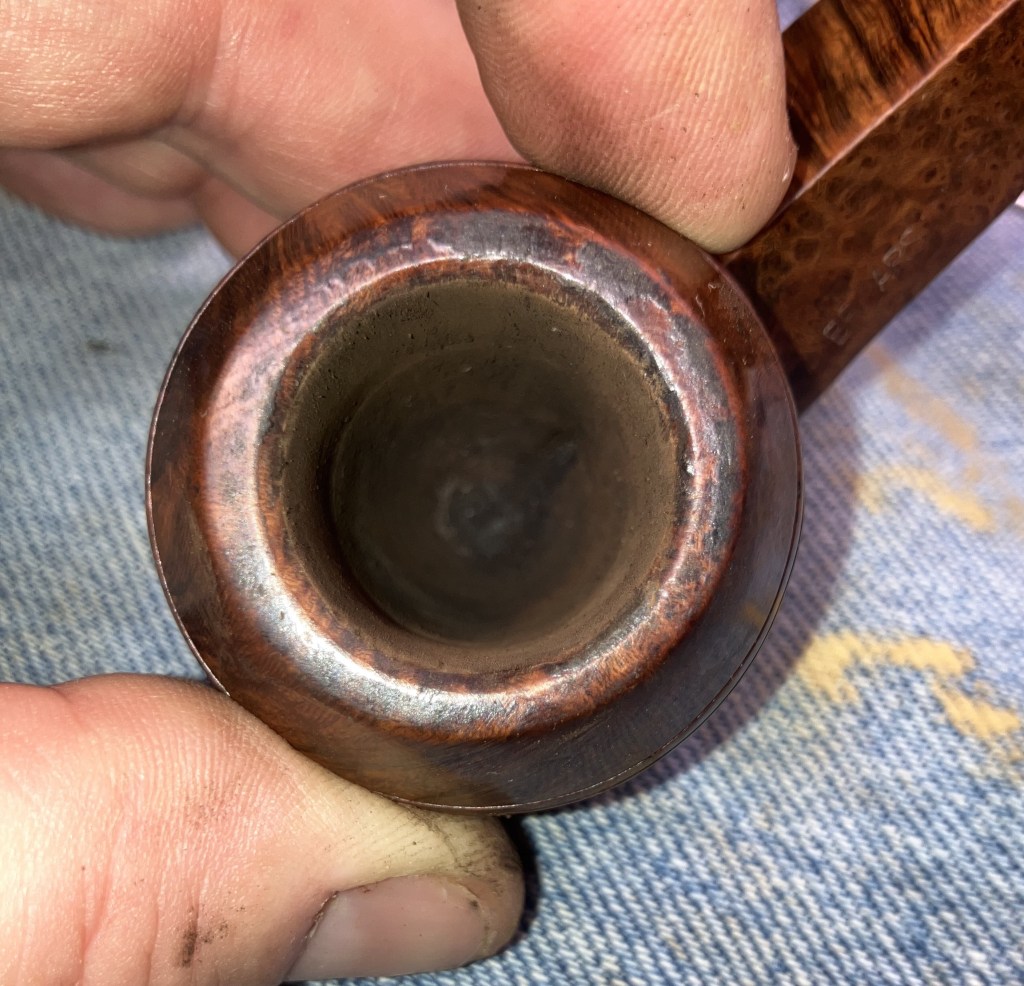

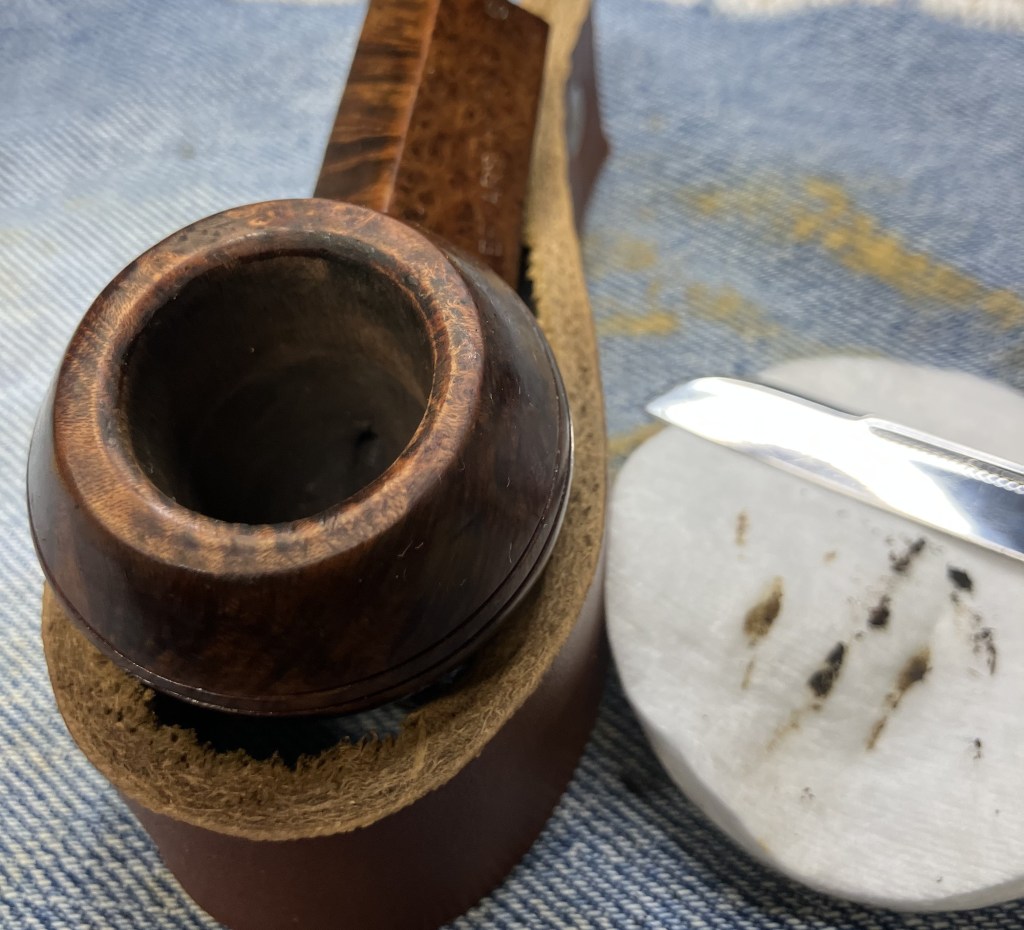
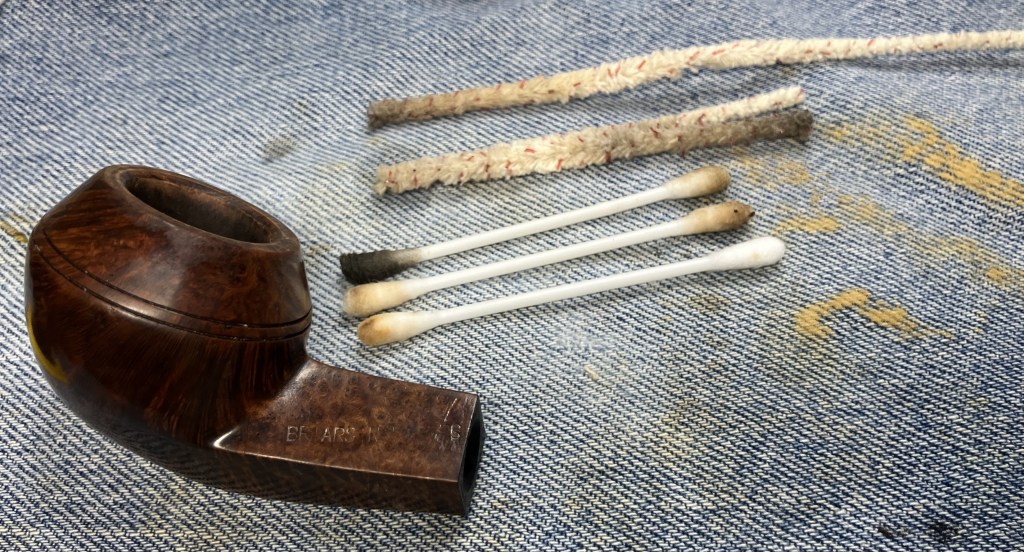
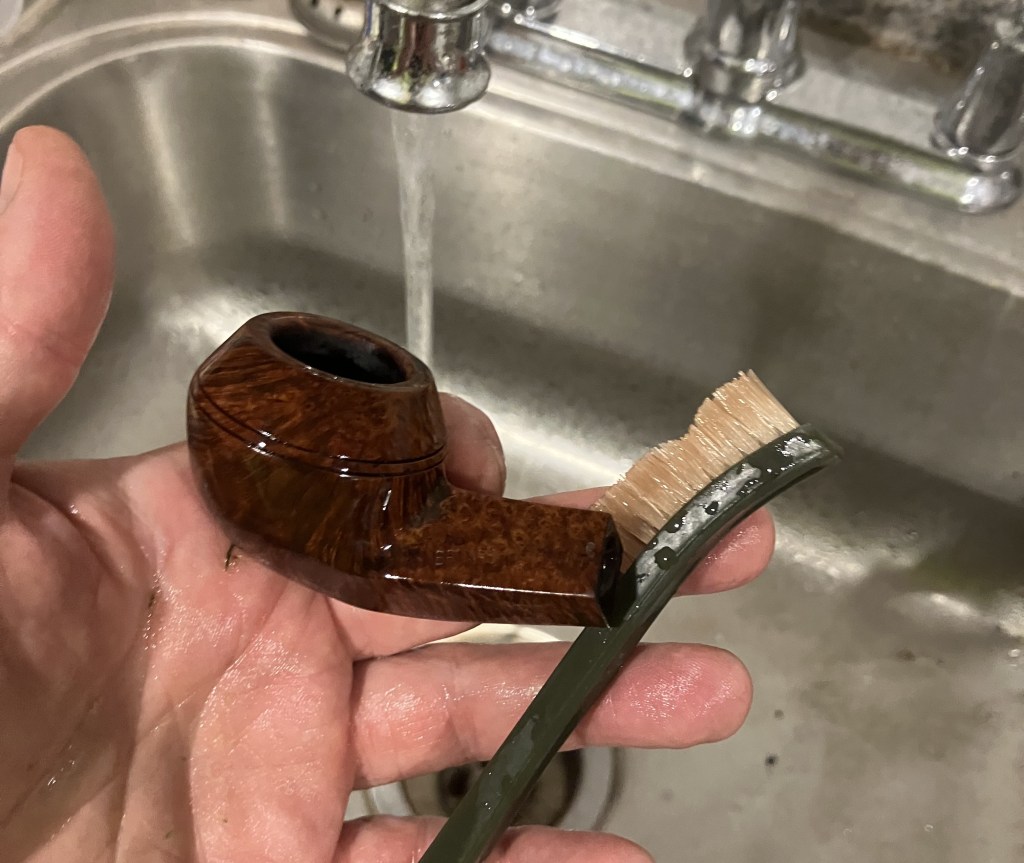
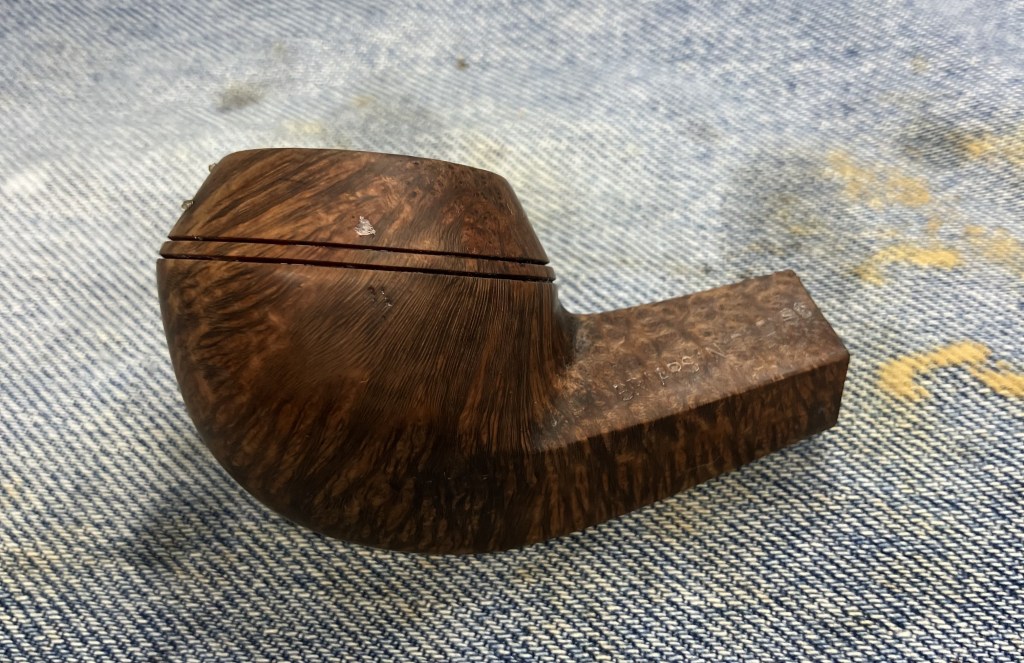


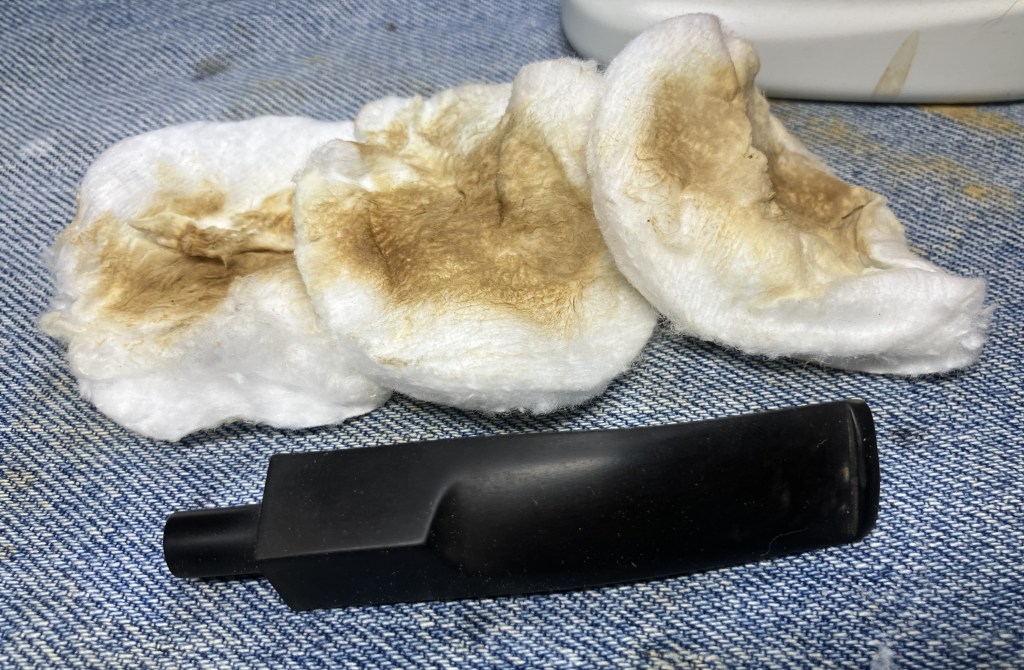
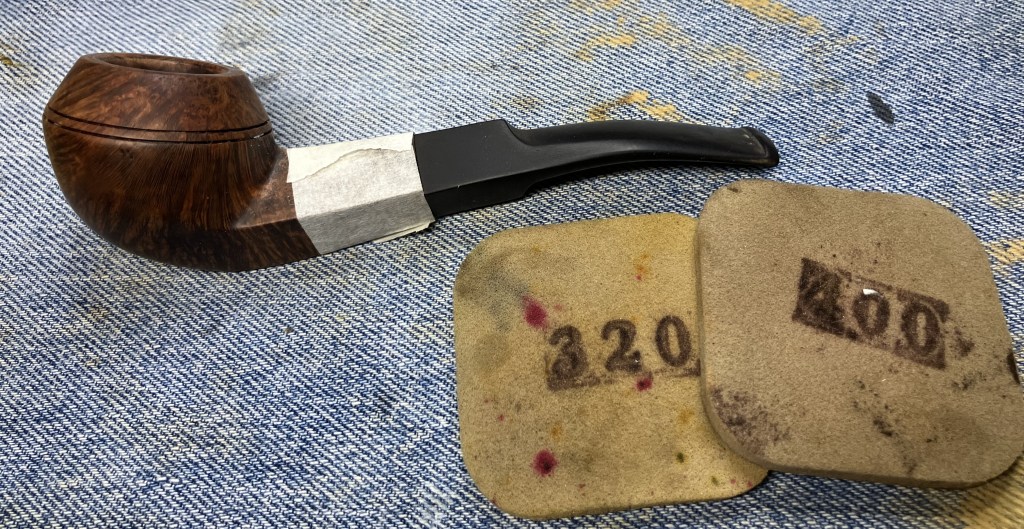


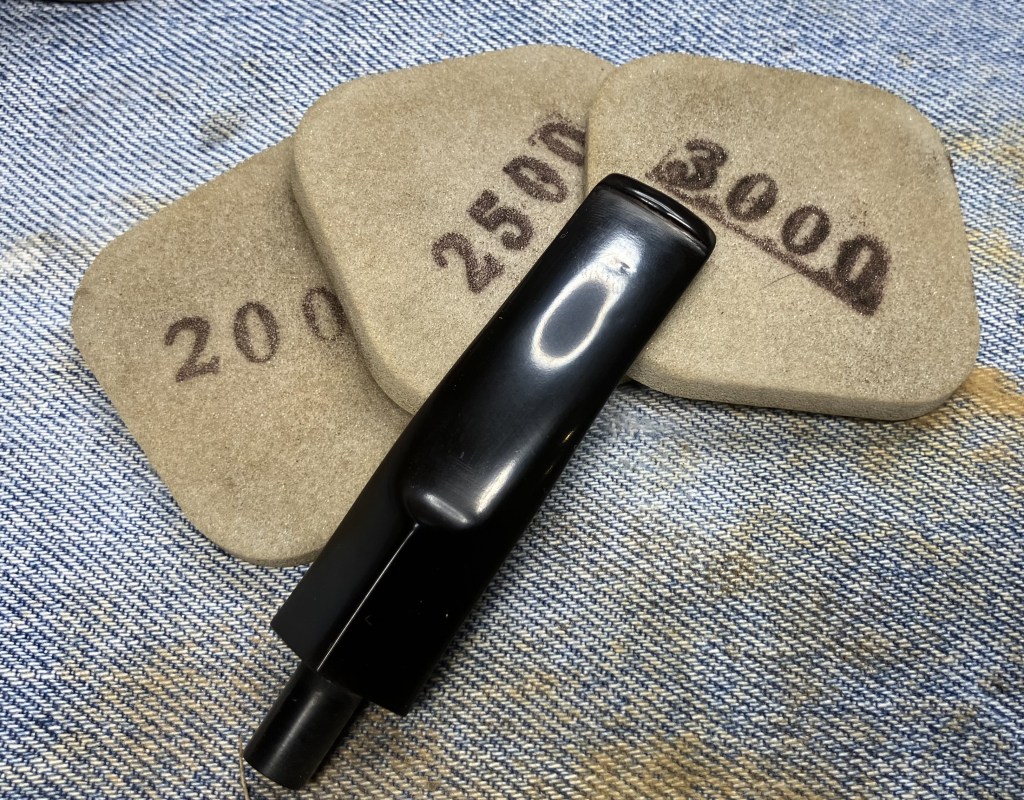


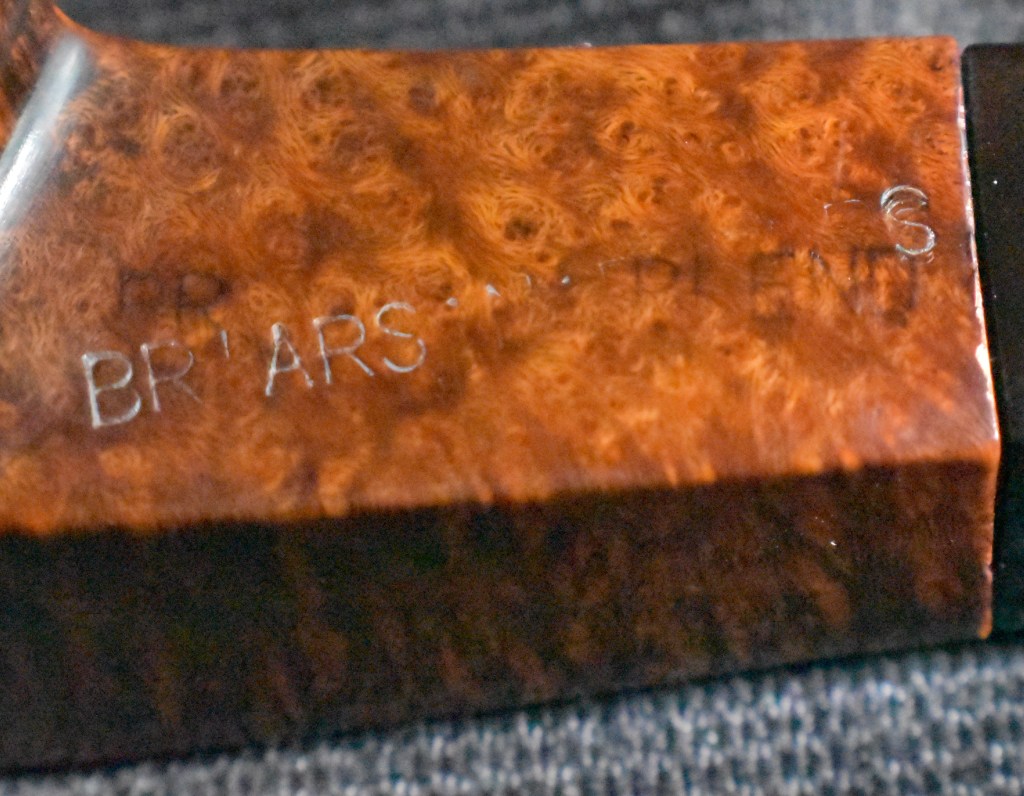


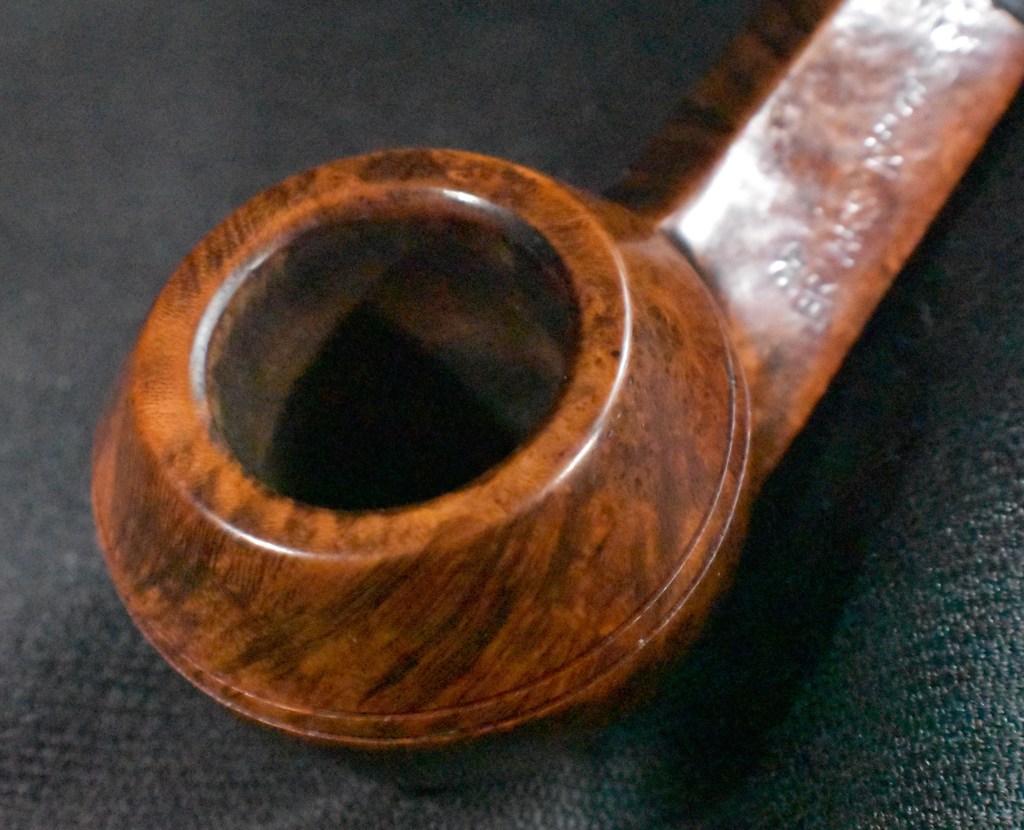
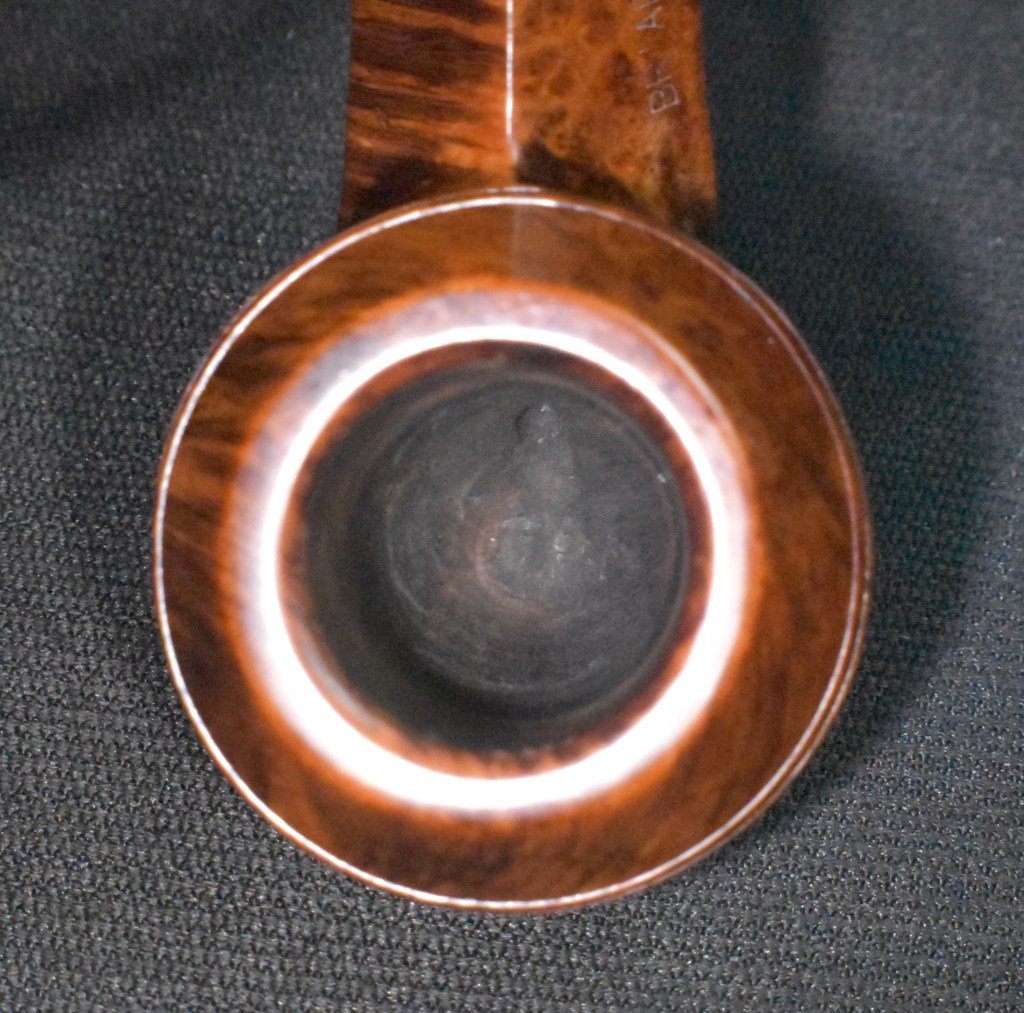
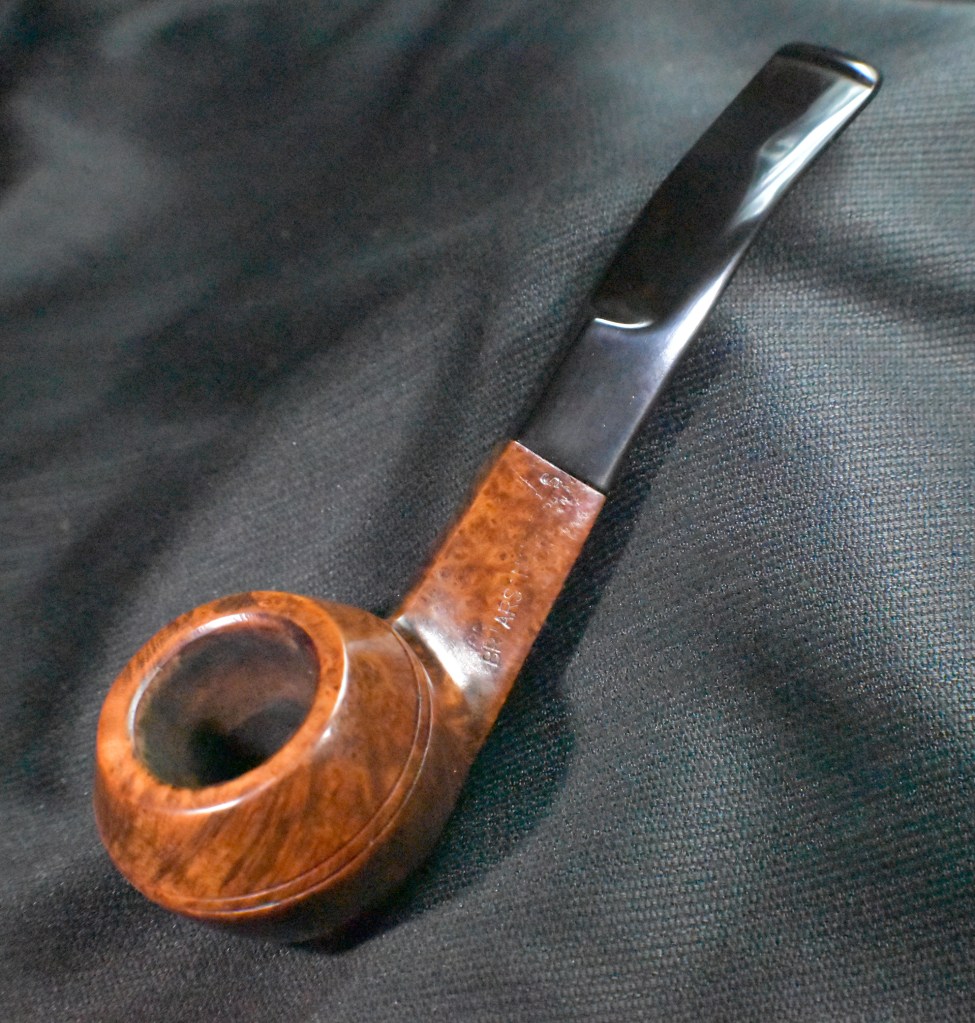
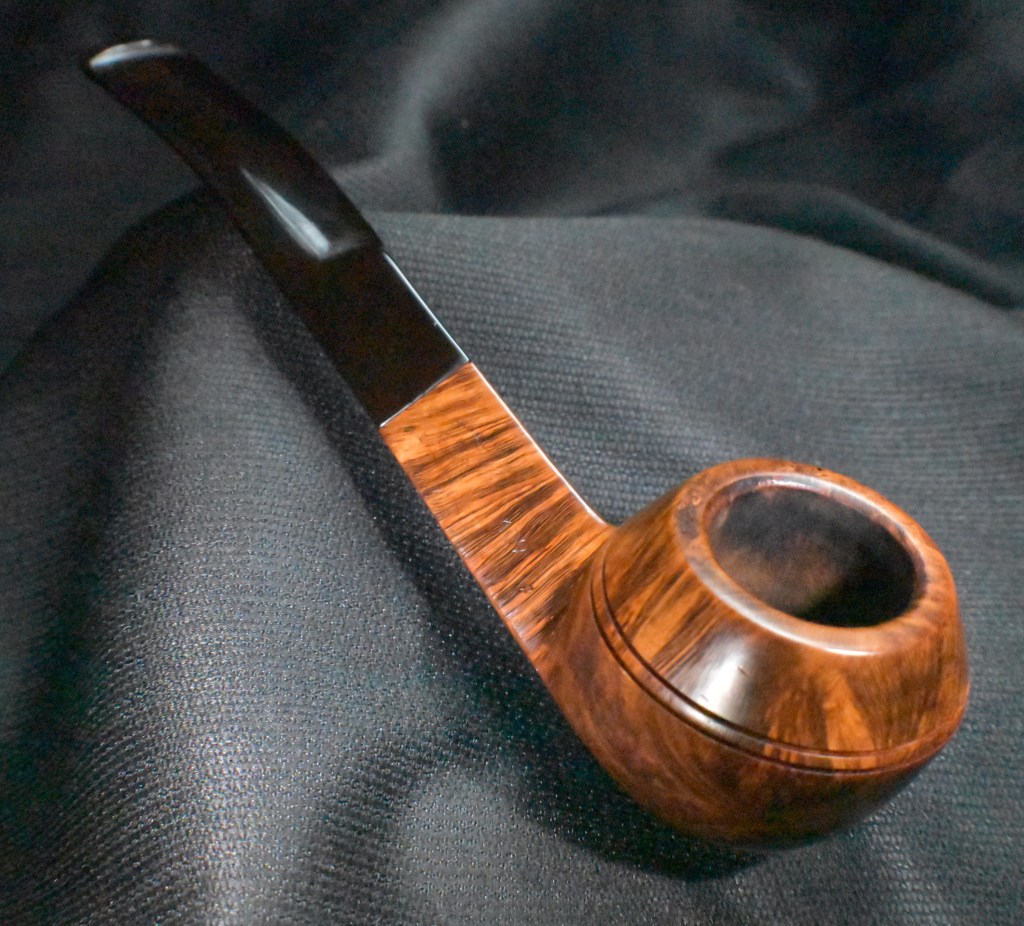


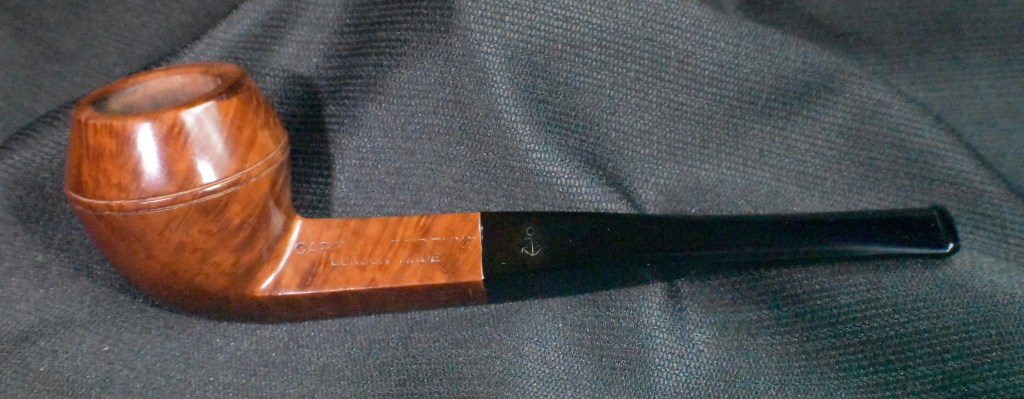


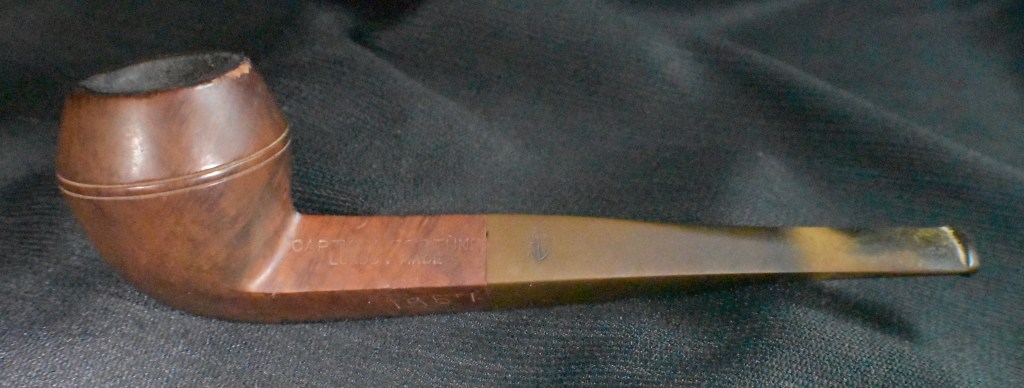
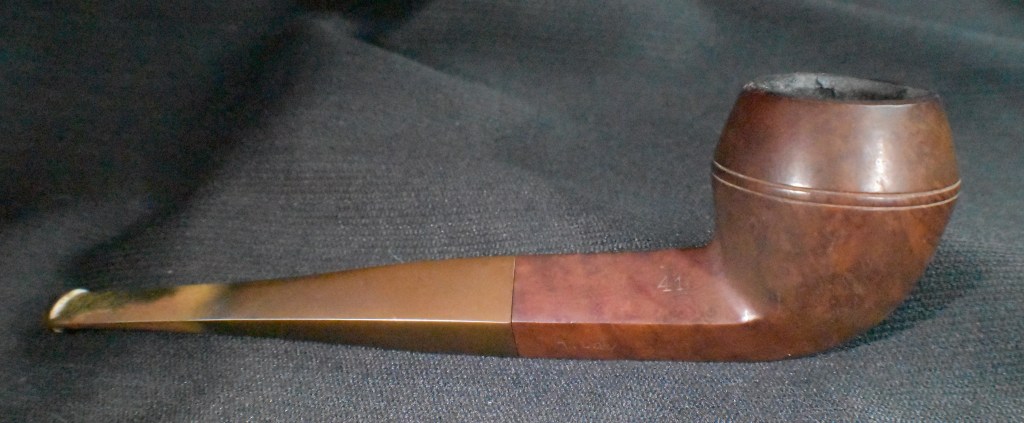
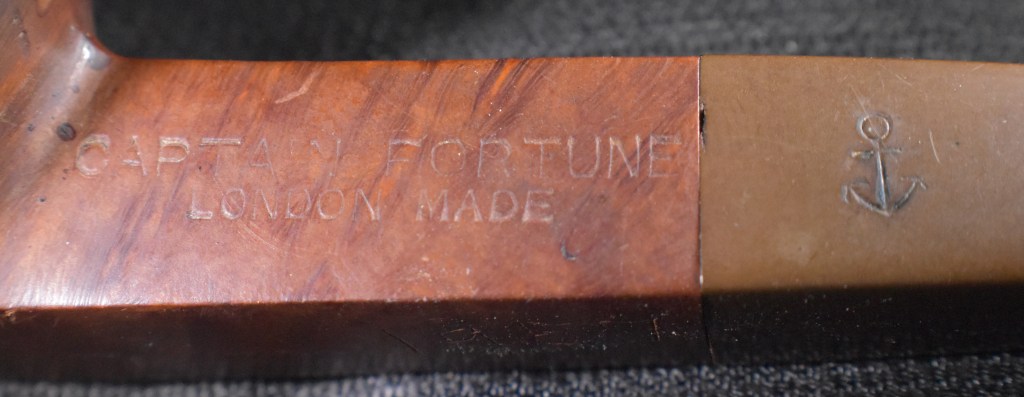


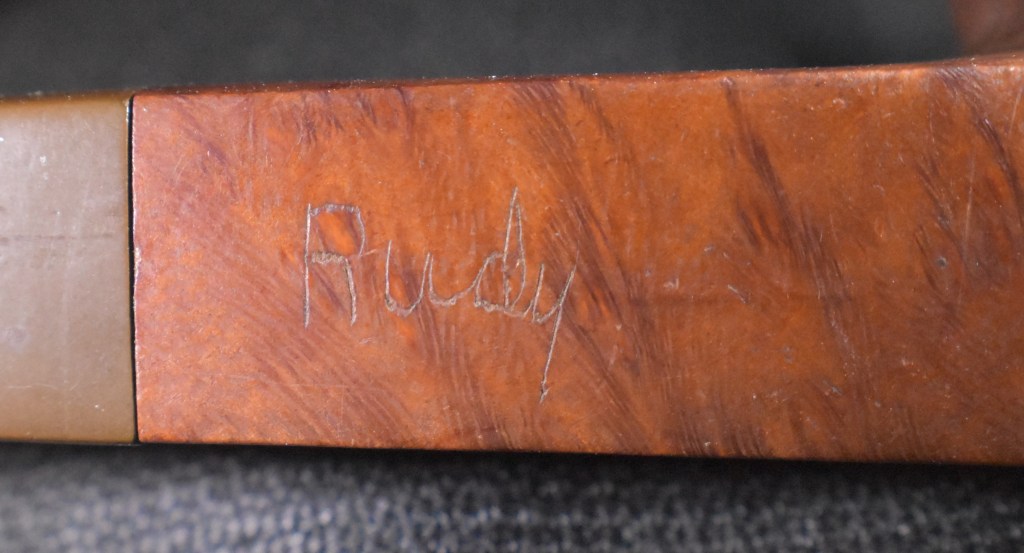
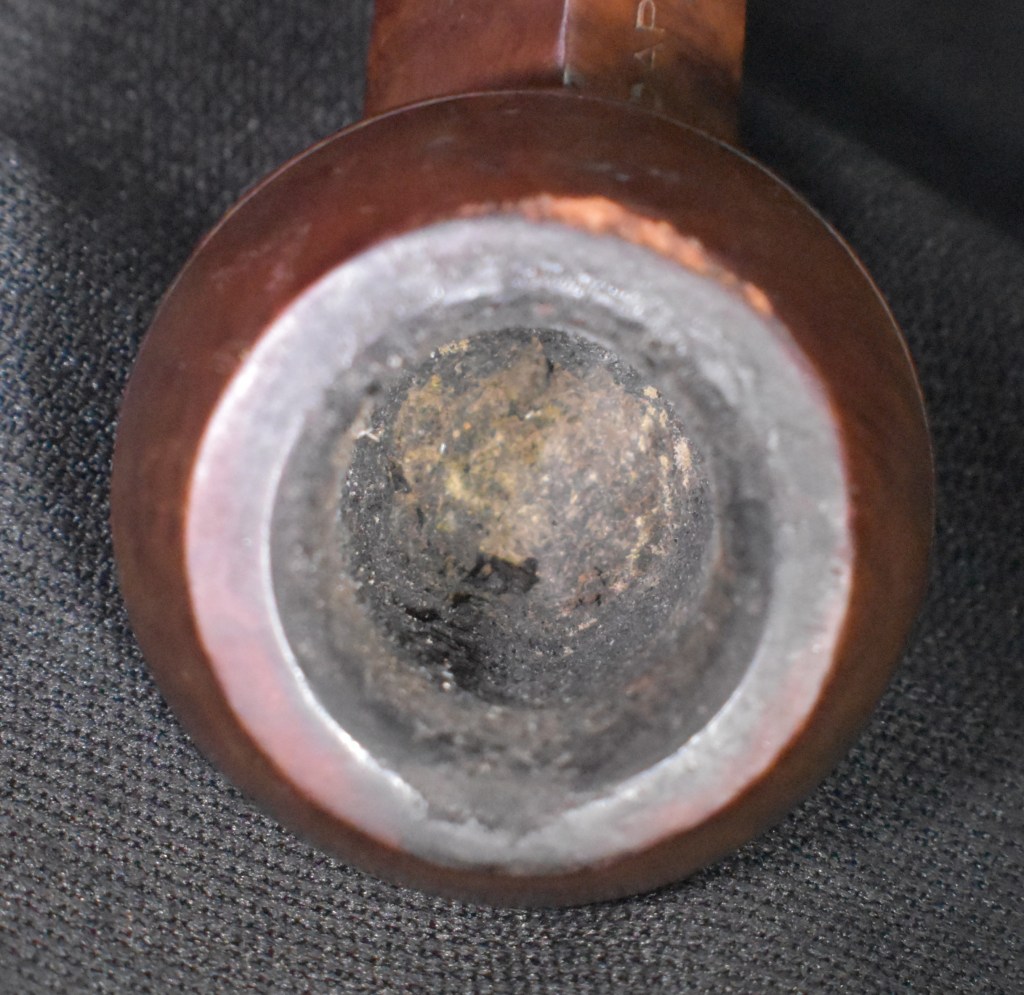

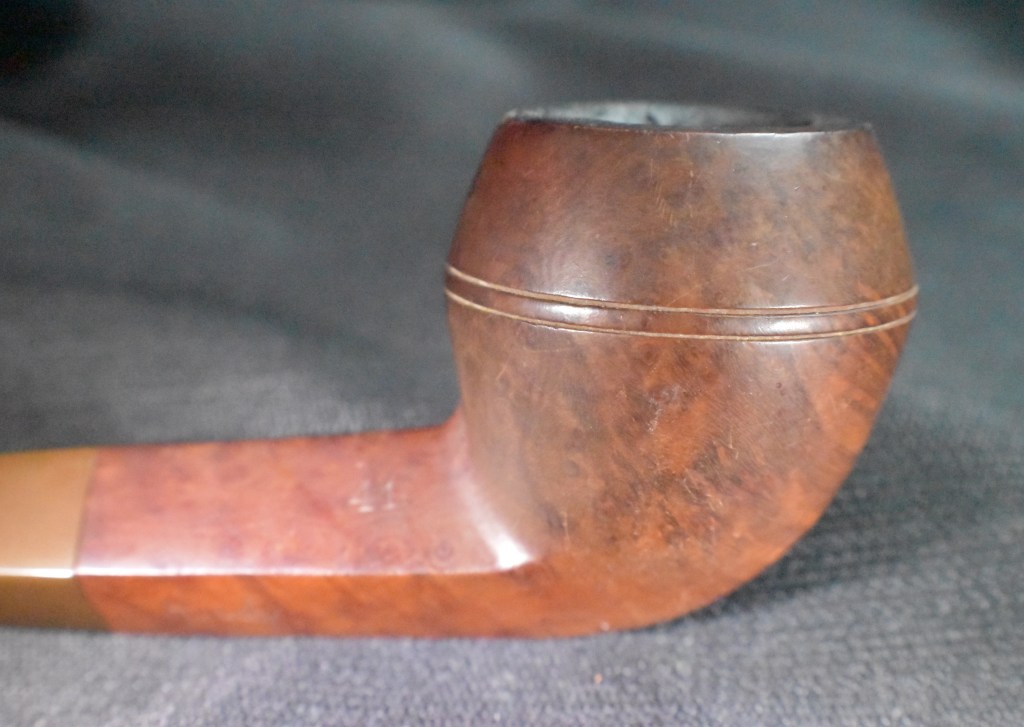


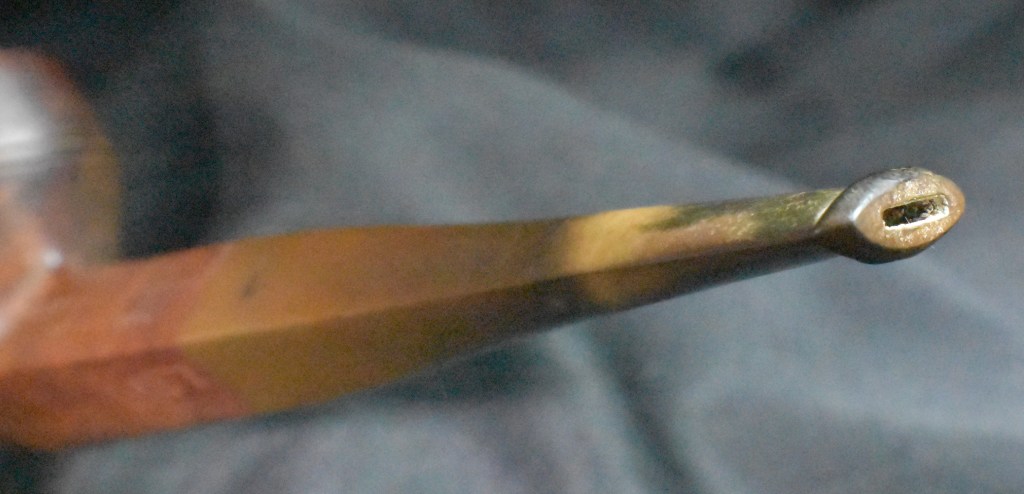


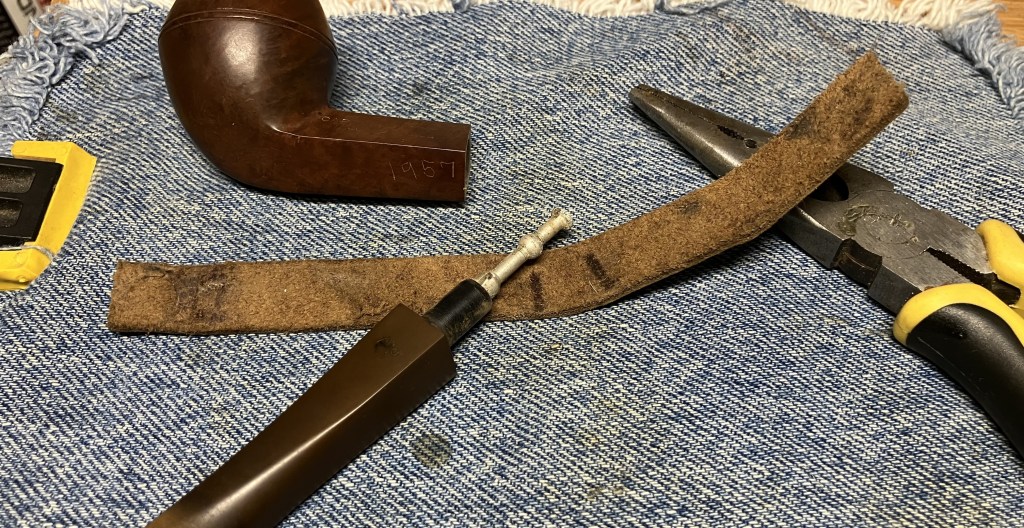


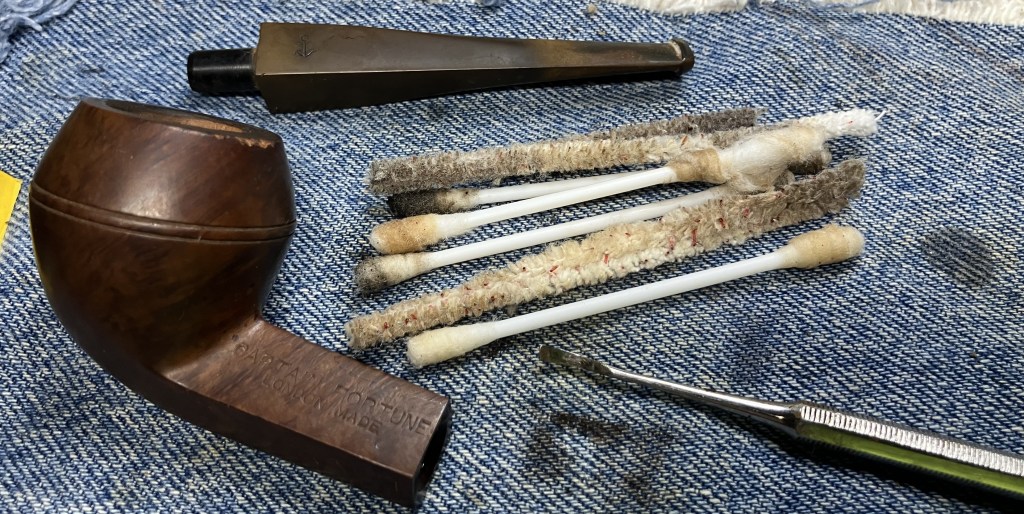

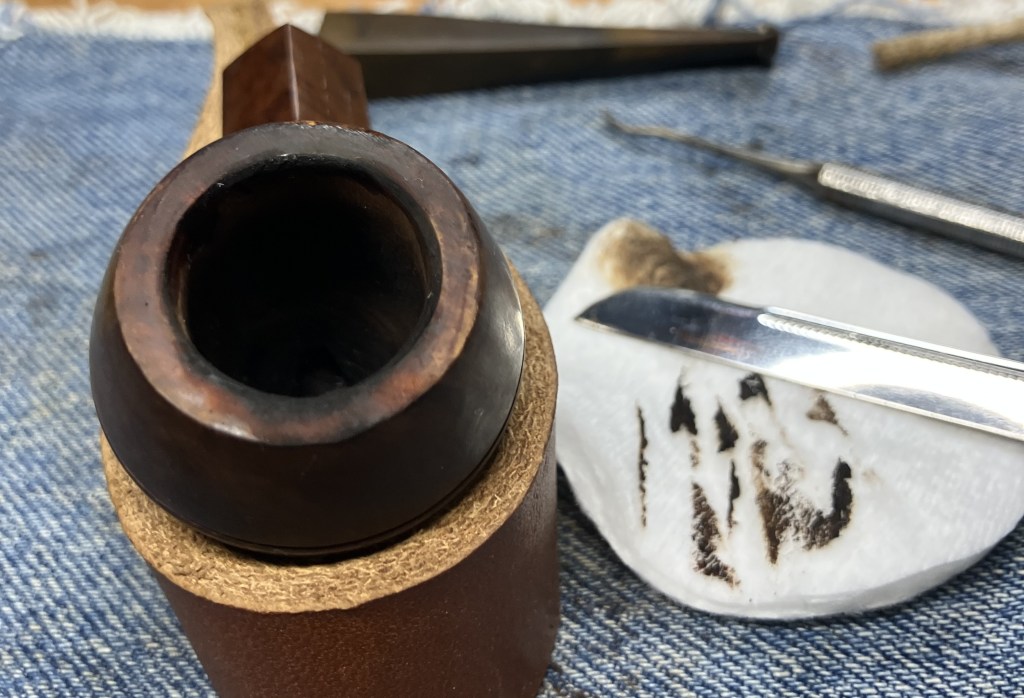
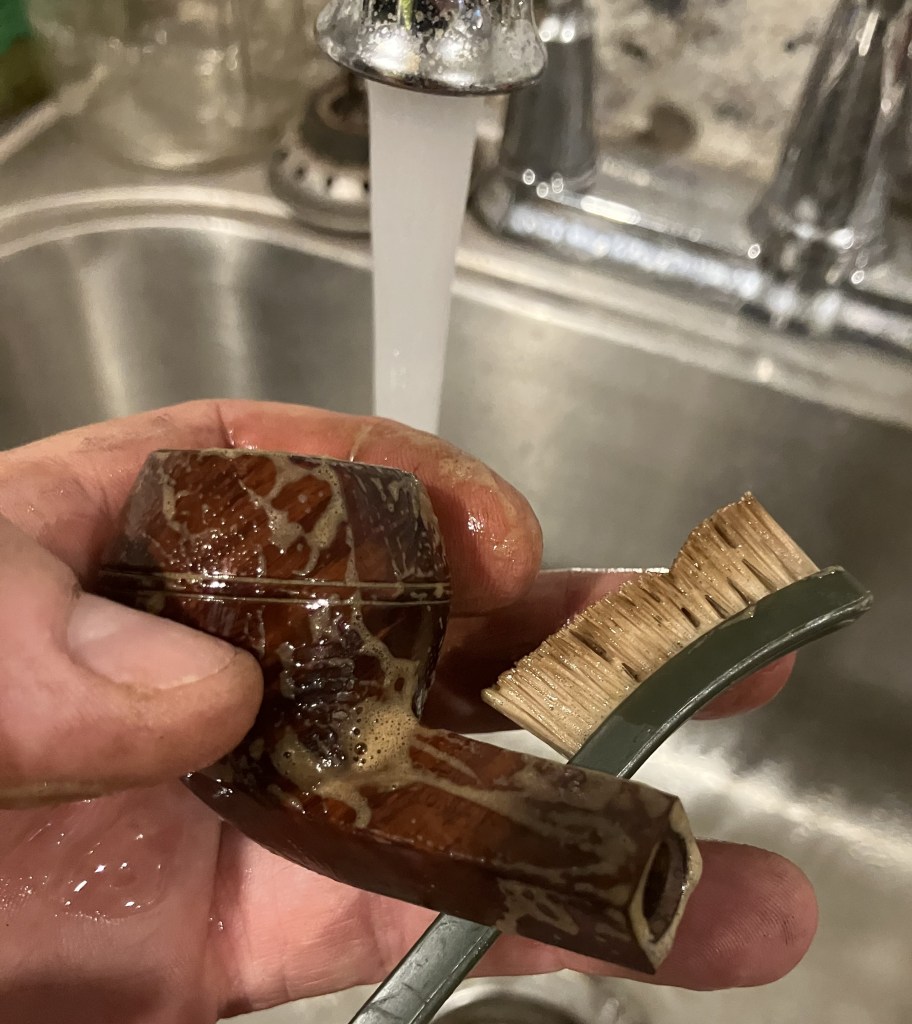


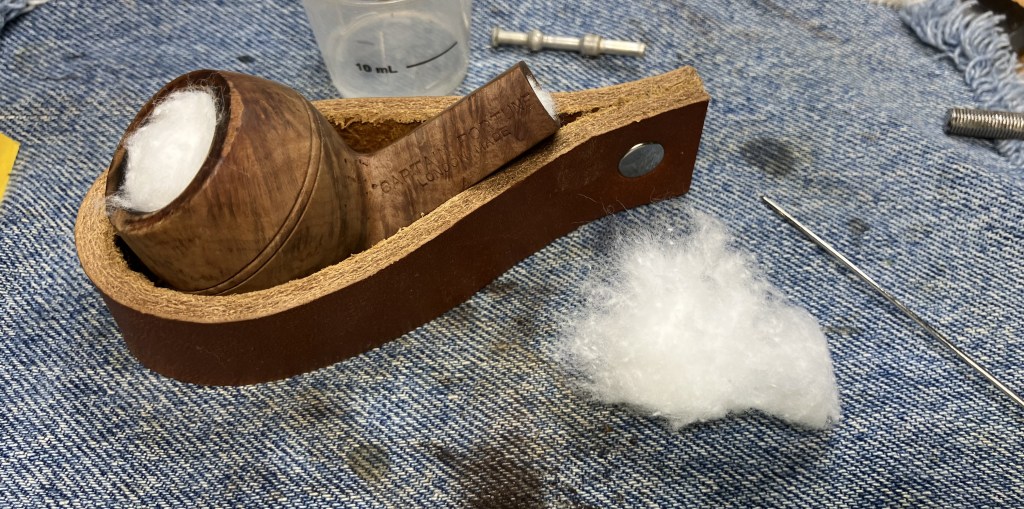
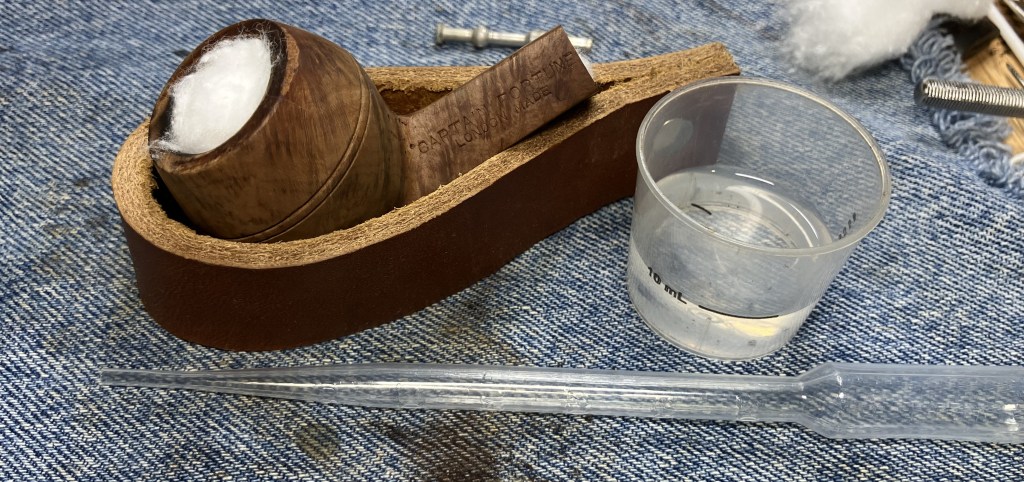


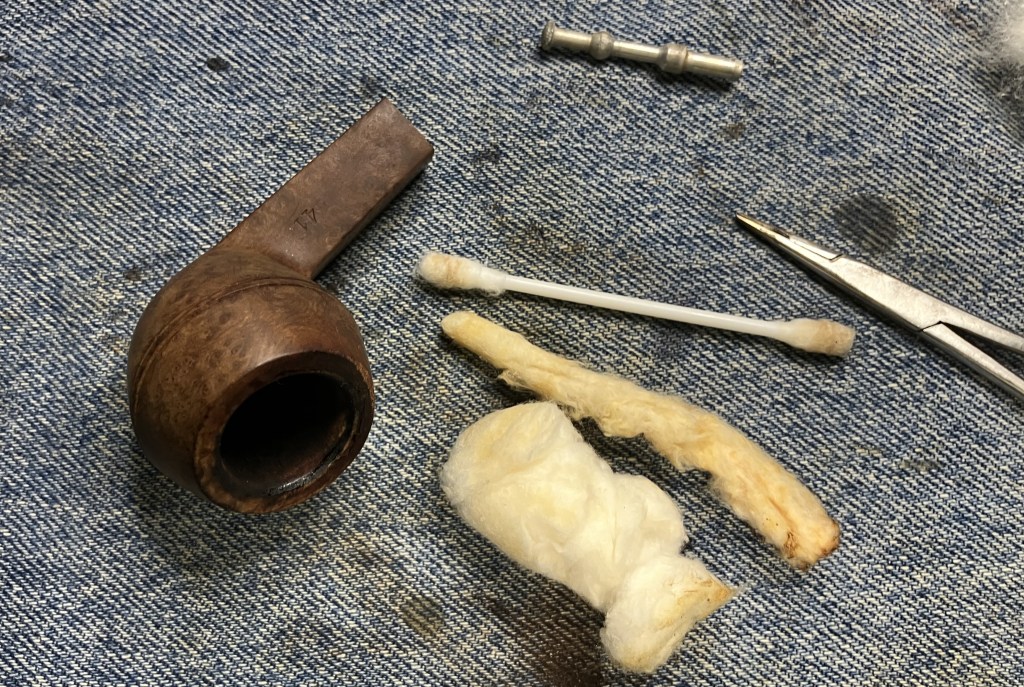
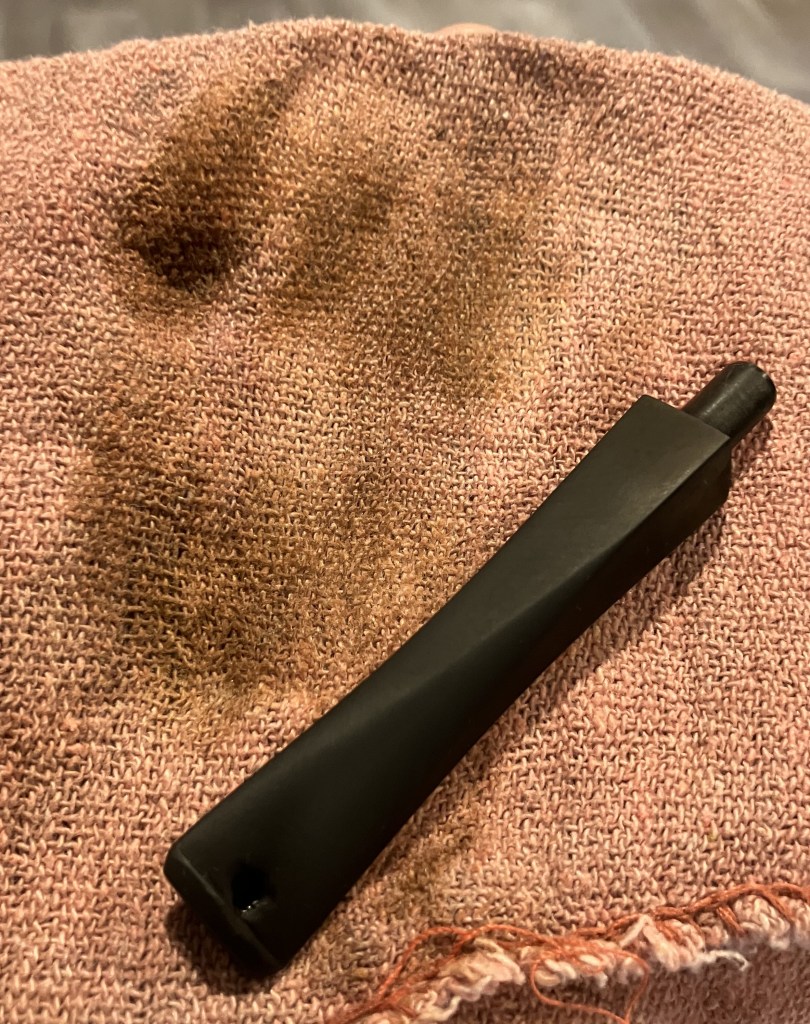
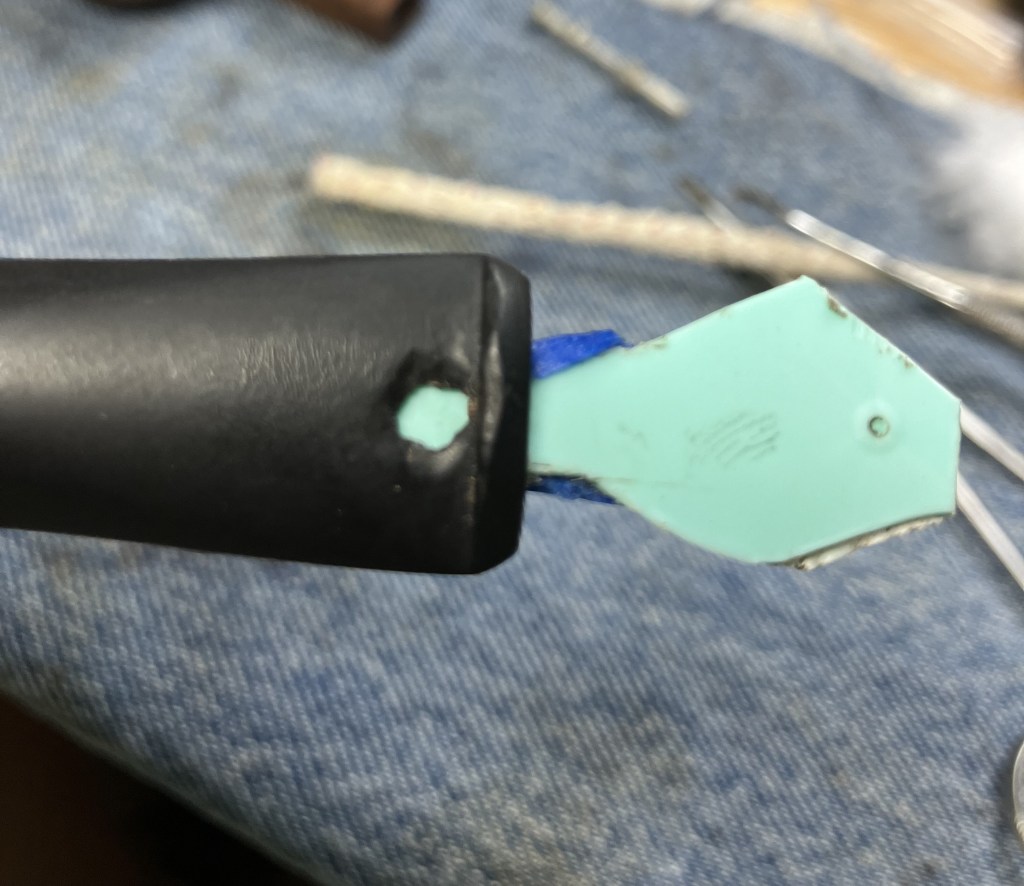


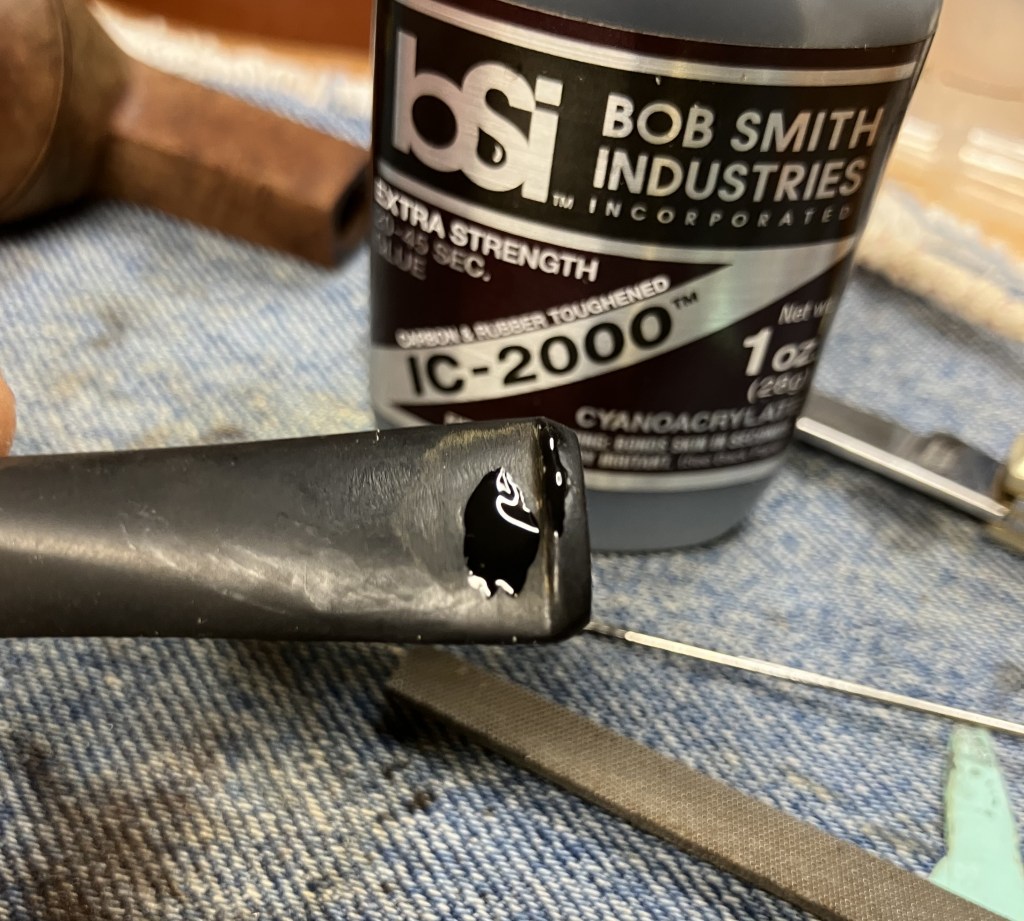

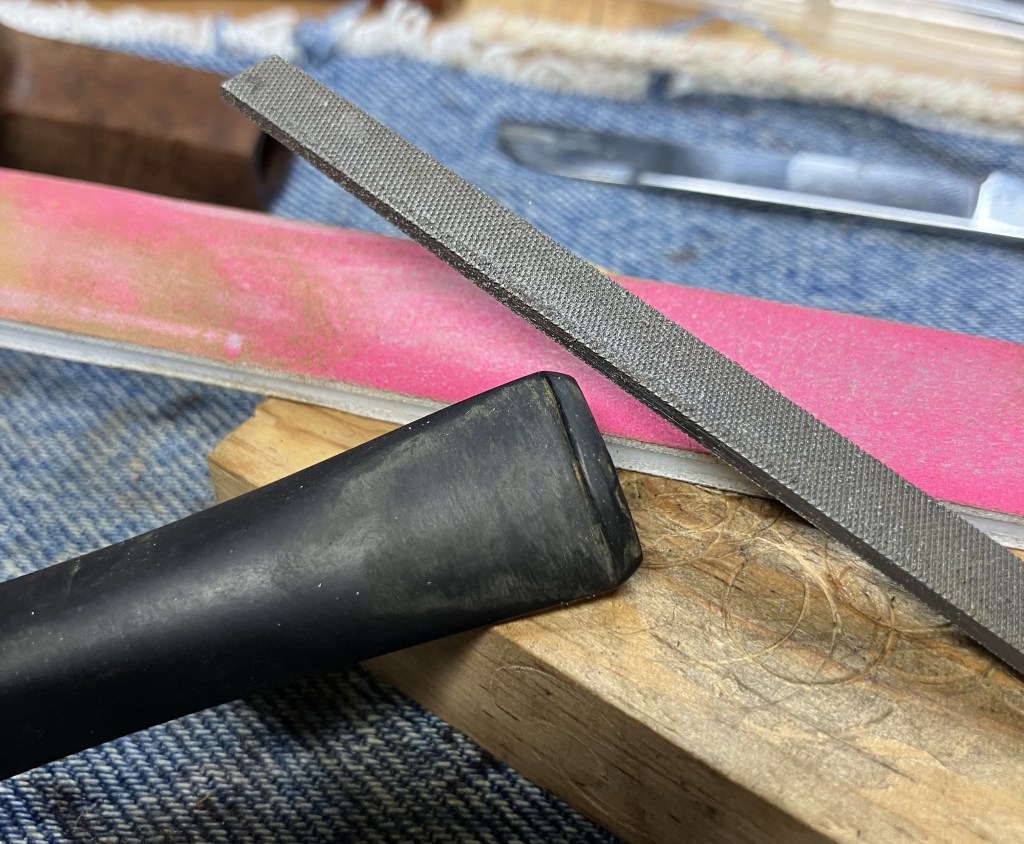

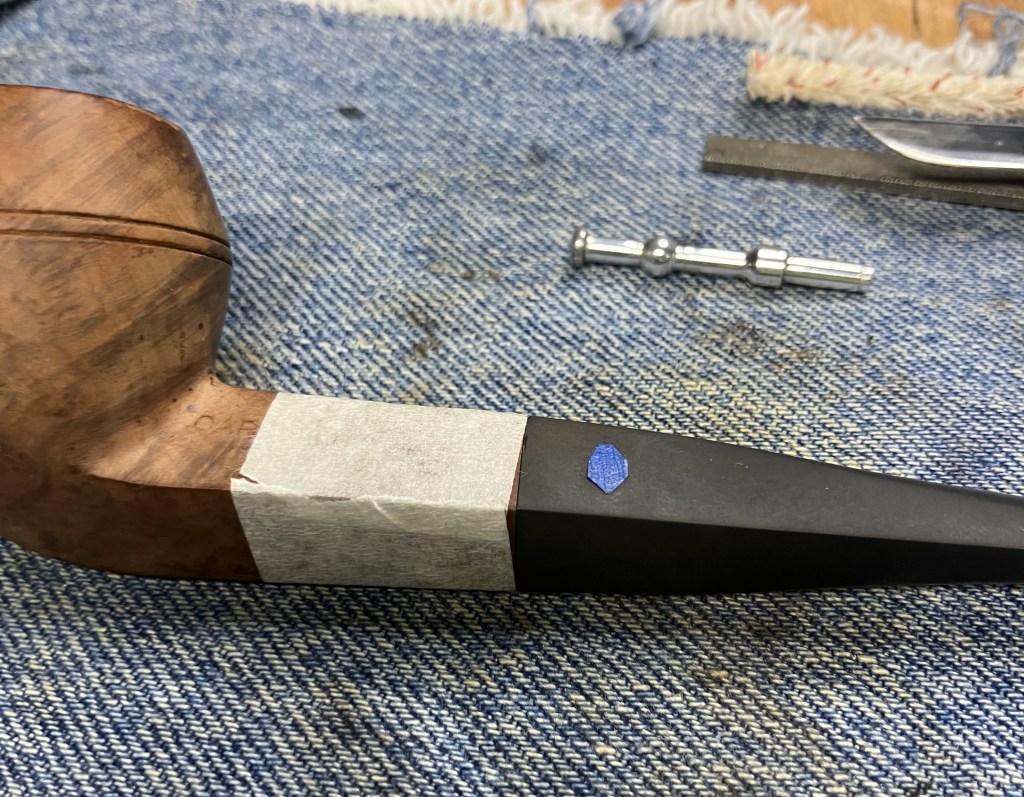
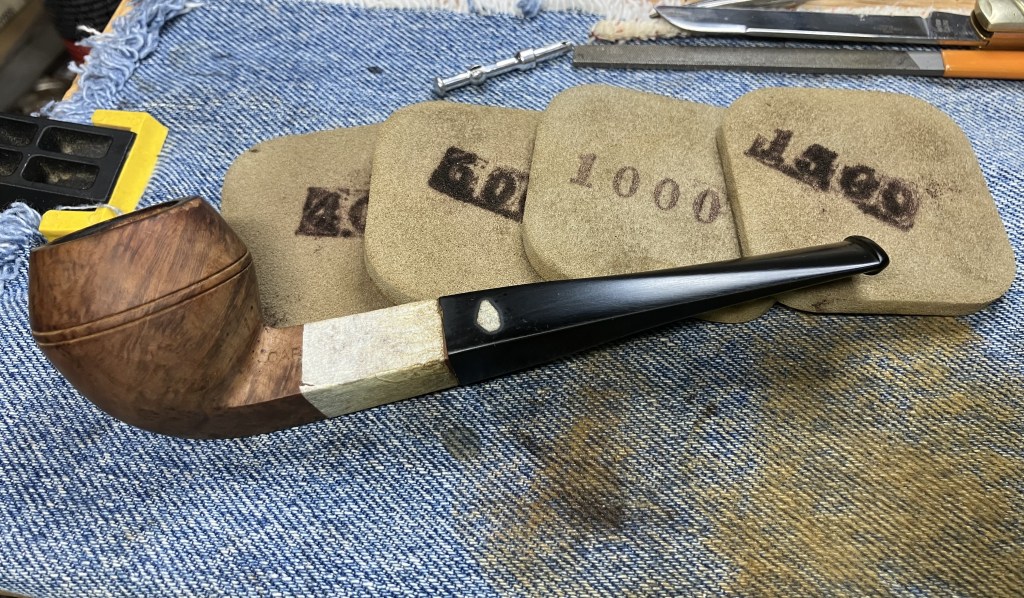


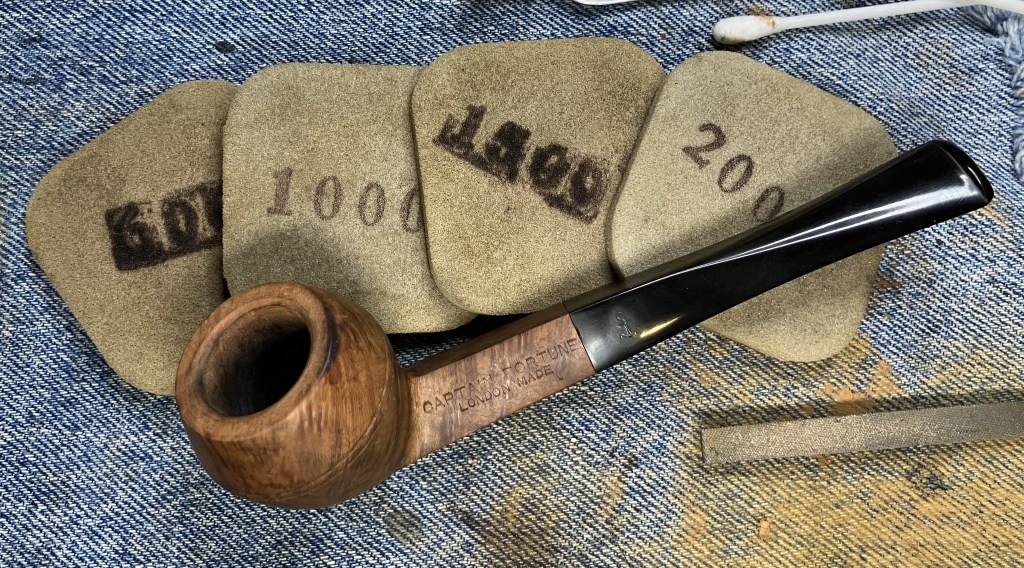

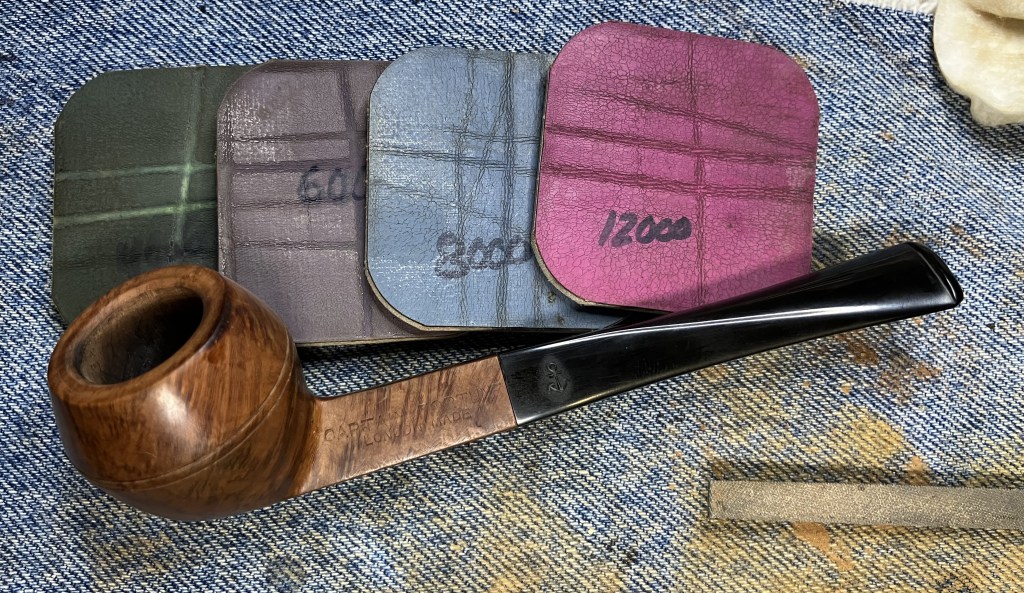
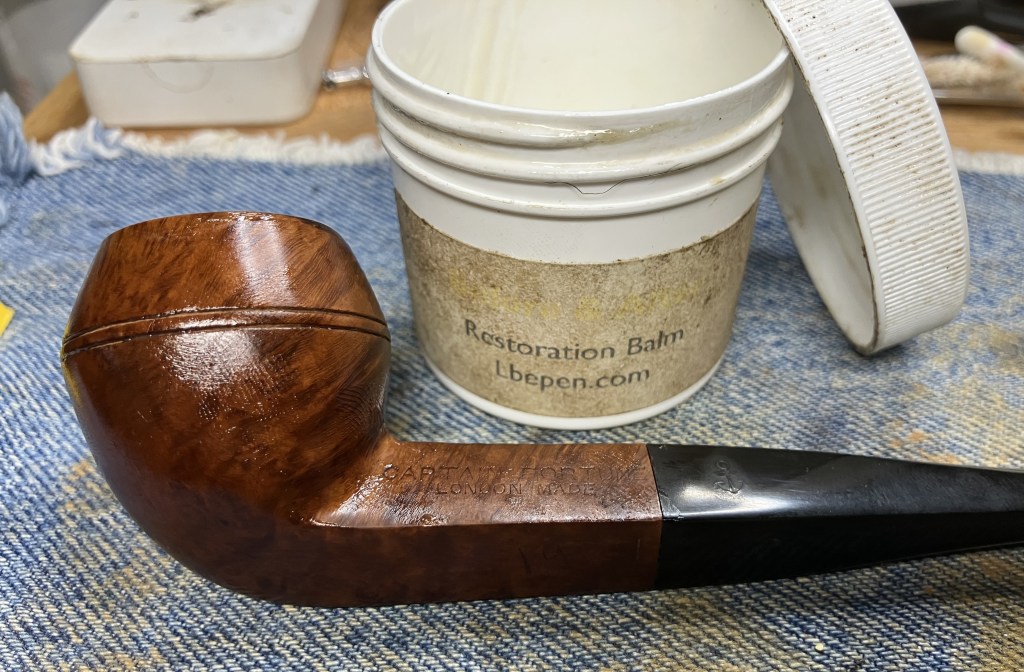


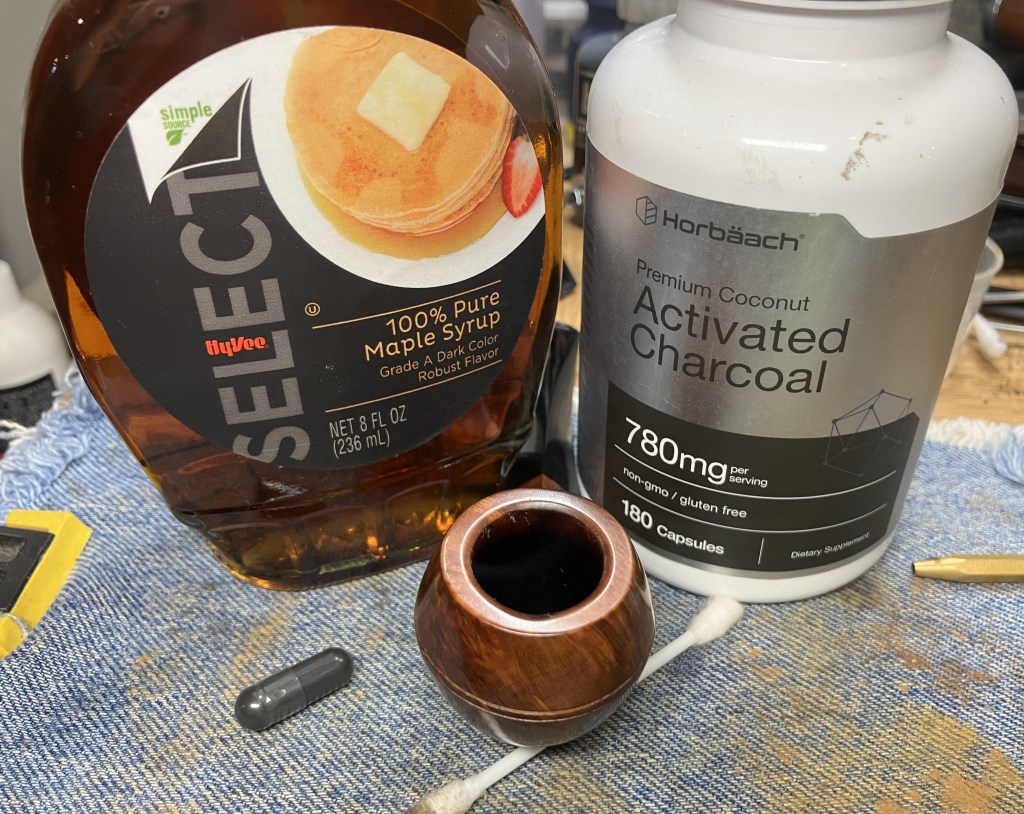


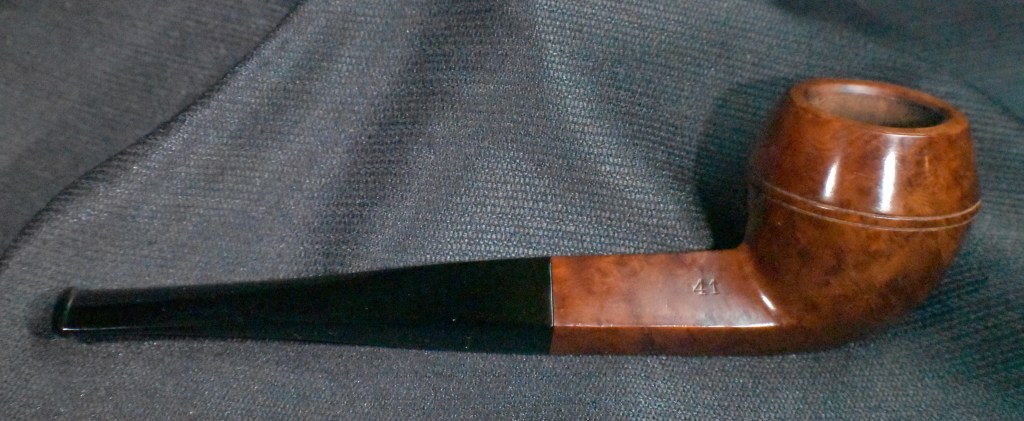
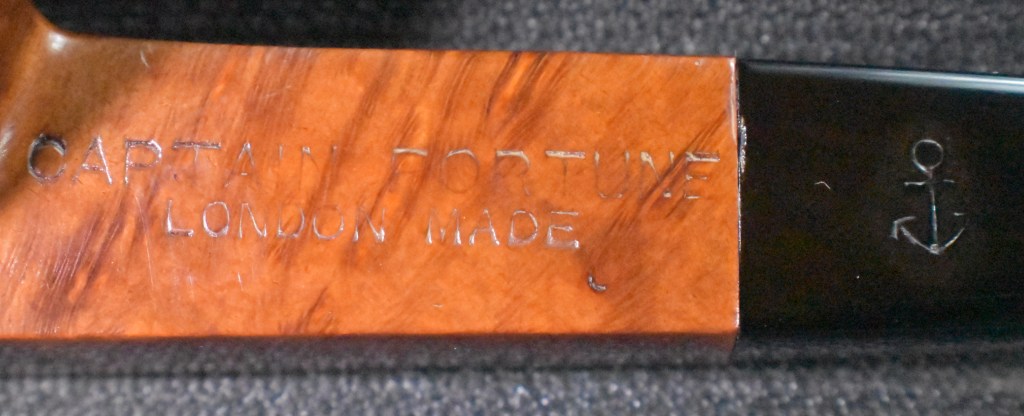

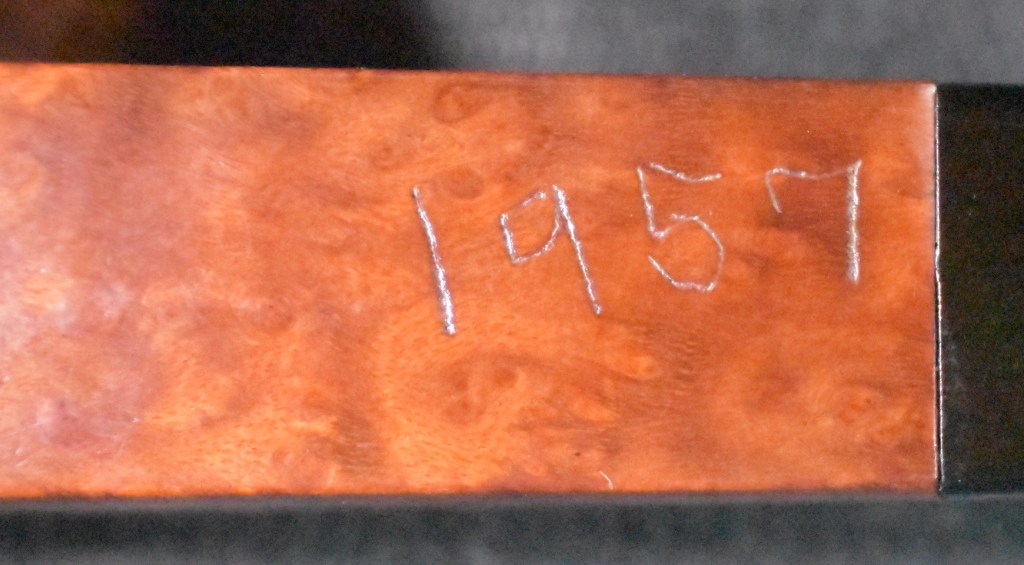


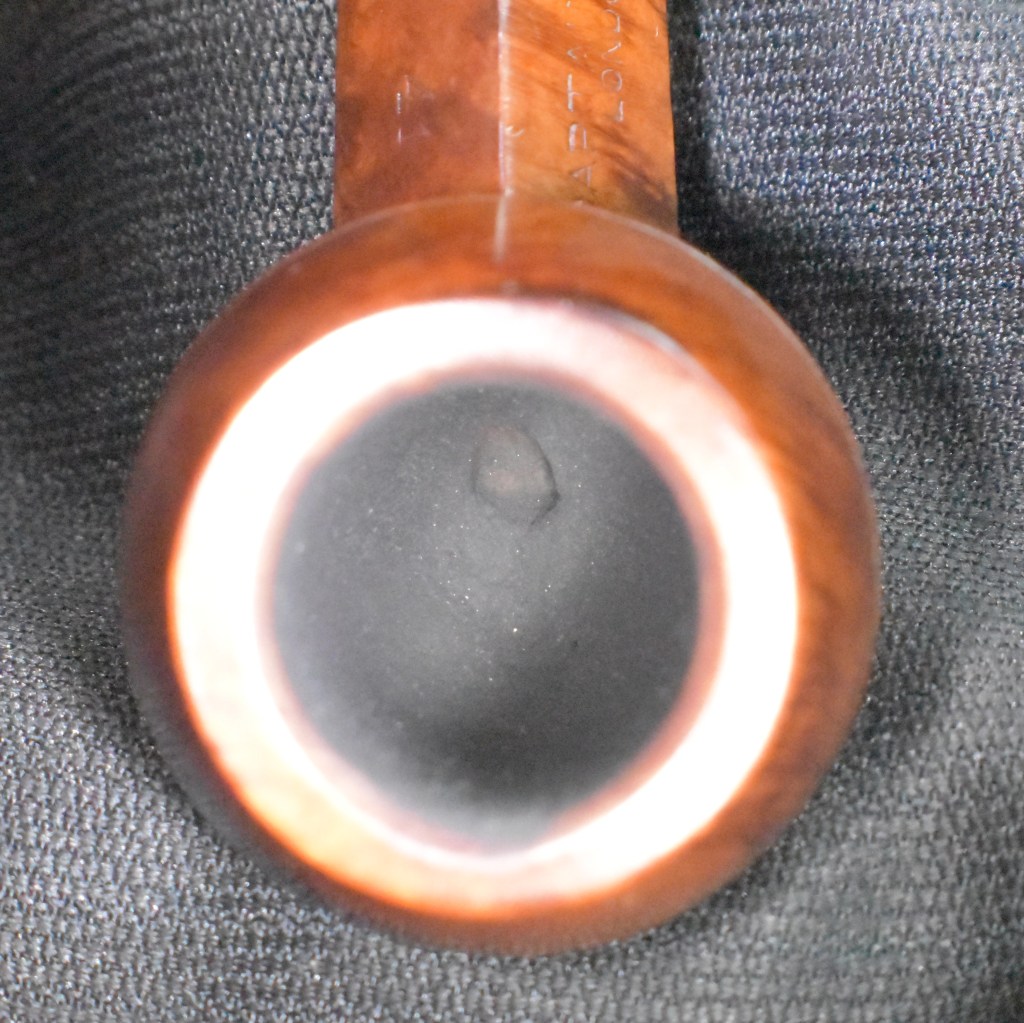


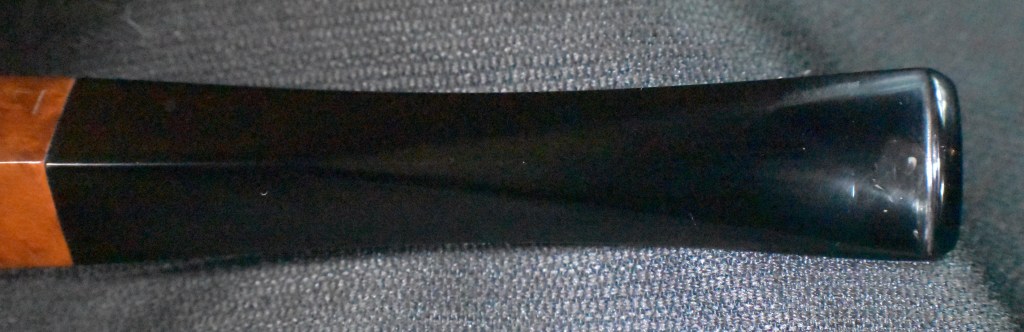


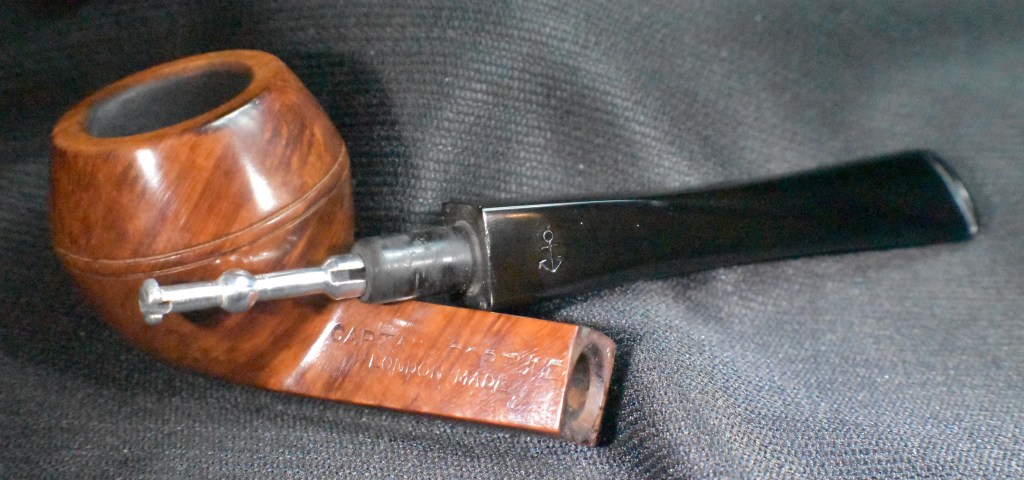


