This Brebbia was picked-up as an estate pipe bound for my personal collection. I thought I needed a panel and had been searching for a Savinelli Ottogono bent billiard for what seemed like a couple of years. I saw this little darling and thought, “that is a great shape”. The auction timed out with no one wanting to pay the buyer their asking price. I watched and waited for another posting period or two and the pipe remained. I finally broke-down and made an offer that I thought was reasonable. The offer was accepted and the Brebbia made it’s way to the wilds of southeast Nebraska. Upon arrival I was amazed at the condition of the pipe. It looked far better than the description or photos indicated. Happy, but I have to admit, disappointed at the same time for the restoration would be so uneventful. Actually a cleaning and polishing would be a better description than calling this a restoration. Anyway, The below photos were taken of the pipe prior to it being worked on.
It really did look like a new pipe. You could tell that it had been smoked a couple of times by the condition of the tobacco chamber, the light cake build up and sure there were a couple of light tooth marks on the stem, but this pipe was in great shape. This one was going to be a breeze.
Background
The official Brebbia site, Pipe Brebbia | Official Website and Online Shop has a very nice history of the company section, History. This is recommended reading for those more interested in the brand and history. In a nutshell, Brebbia and Savinelli are like siblings. They grew up together then split off and went their separate ways. Like I said, a nutshell – a very small one too.
Additional reading about Brebbia can be found at Brebbia – Pipedia. As for the Brebbia logos, Brebbia — Pipes : Logos & Markings has a nice selection of photos including this one showing both the stem logo and the “Golden Gnome” as on the Brebbia in hand:
(Brebbia — Pipes : Logos & Markings). As for the date of production of this pipe, I could not find anything specific to the Sabbiata line other than the following:
After the photo shoot for the before photos the Brebbia made it to the workbench. The verdict is still out on the new cloth surface protection towels. They look OK for photography but everything seems to snag on the fabric and wants to lift the cloth from the surface. I think I prefer the denim pieces but they were getting very stained.
A look down the mortise showed a very clean shank.
The tobacco chamber was also clean but did show signs of use.
The only tool I used for reaming was the Smokingpipes Low Country reamer. And it didn’t have much to do.
I started swabbing the chamber out with cotton swabs dipped in 99% ethyl alcohol and discovered that Bebbia used a rather thickly applied bowl coating.
The coating must have been sprayed into the bowl and allowed into the shank because cleaning it with the same method provided the same black stained cotton swabs.
Some of the coating must have also made its way into the stem.
With that bowl coating stuff removed, I was able to say, “To the sink!” Here the stummel was scrubbed with undiluted Murphy Oil Soap and a nylon brush. The soap was rinsed away with warm water and the stummel dried with a cotton hand towel.
The stem showed ever-so-light tooth chatter scars.
I did not think that sanding or micro-meshing was necessary to address this and that buffing with Blue Diamond compound would take care of the marks.
A couple of coats of carnauba wax at the buffer and the stem looked like new.
That’s it. That is all I did. I didn’t even bother taking a full set of after photos since the pipe didn’t look enough different to warrant taking them. I can say that it is a fine smoker and will be used and enjoyed for many years to come (hopefully).
The dimensions of the Brebbia Sebbiata 880 are:
Length: 5.78 in./ 146.81 mm.
Weight: 2.06 oz./ 58.40 g. (with band)
Bowl Height: 2.03 in./ 51.56 mm.
Chamber Depth: 1.64 in./ 41.66 mm.
Chamber Diameter: 0.75 in./ 19.05 mm.
Outside Diameter: 1.60 in./ 40.64 mm. (each facet was slightly different)
I do hope that you have found something here useful to your own pipe care, maintenance or restorations. If you like this sort of thing, please click the like and subscribe buttons. Thank you for reading the ramblings of an old pipe lover.
Loading…
Below are some photos of the finished Brebbia Sabbiata 880:
I have wanted to work on a cavalier style pipe for quite some time. Unfortunately, they always seem to exceed what I am willing to pay for them. Perhaps this is what piques my interest even more, peoples’ apparent desire to obtain a cavalier. They must be good smokers, eh? Well, I came across this estate lot on eBay and it had a cavalier, along with a couple of other interesting pipes. The description called it a “Bireba” and it had a wonky looking band. I figured what the heck, I’d never heard of Bireba and it looked like a fun pipe to work on.
I won the auction for what I considered a reasonable price and the pipes made the short 185 mile journey from Lawrence Kansas to the wilds of southeast Nebraska. Upon arrival I couldn’t figure out why such a poor fitting band was even put on this pipe. I first thought that it was a repair of a cracked shank. The mortise was in perfect condition. Then I thought, decorative, but why such a poor fit.
The band seemed too loose to be of any real purpose. The finish was worn away from the band sliding up and down the shank. It was while inspecting the stampings under the band that I discovered this pipe was actually a Brebbia. I thought, “Cool, I’ve never worked on a Brebbia before” and “Sweet, I didn’t pay what Brebbias normally cost.” The stampings read, BREBBIA over ITALY offset was the Alpina in a scrolling cursive with the tail of the final “a”sweeping below forming an underline. Anyway, here are a few photos of the pipe prior to working on it.
A shot of what I first saw.
Here is a shot with the band in its “proper” place.
Finally a photo of the stampings without the band.
Bah, cavalier pipes are difficult to photograph. This pipe was in relatively good condition. Yeah, the finish was worn through the factory black dye, especially where the band rubbed through. The tobacco chamber looked either recently reamed or seldom used. The stem has some minimal oxidation and a couple of tooth dents. Overall this looked like a relaxing restoration.
Background
I started researching Brebbia with a look at what pipephil.eu had to say. Brebbia appears to have used a wide array of stamps, lines and logos over the years, here are a few: Brebbia — Pipes : Logos & Markings. Alas, none of the examples were of a Brebbia Alpina.
Next stop on the research express was pipedia.org. This entry was relatively short, so I included it in its entirety, minus the photos:
“Pipe Brebbia Srl, or better the M.P.B. (Manifattura Pipe Brebbia) was born in 1953 from the denouement of the association between Achille Savinelli and Enea Buzzi in 1947, where the first was employed in the marketing and the second in manufacturing of pipes under the name of Savinelli. It was made in exclusive up to 1953 and extended without further rights up to 1956.
The production, which is always careful and perfect, has continued in a traditional way for 60 years, using old lathes for the first steps, but finishing every piece by hand.
The secret of their manufacture, if we may put it this way, is the respect for the traditions with the experience acquired in several years of successful work, which could be summed up in two words: high quality.
The factory is currently managed by Enea’s son, Luciano.
For the last few decades, many of Brebbia’s pipes have been made by a number of small, otherwise independent pipe manufacturers, being marketed under the trade name Brebbia. For the northern European market, 9mm filter pipes are being produced, some of which employ VAUEN‘s Konex system (which ensures a good seat of the filter).” (Brebbia – Pipedia)
I was unable to find any information about the Alpina line. A quick Google search of “Brebbia Alpina tobacco pipe” did turn up this:
Before I begin the next section, I think a quick diagram of the drillings of this pipe might be helpful. Below, I took a photo of this pipe and overlaid the drillings (not perfectly to scale). The tobacco chamber and the draft through the shank are in a light green. The drilling of the draft hole from the tobacco chamber to the shank is done in a light gray. If you want a pipe that you can run a pipe cleaner through the stem and exit via the tobacco chamber, this pipe is not for you.
The Restoration
The pipe made its way to the workbench and a cleanish piece of denim. The confusing band was removed.
I began with reaming the tobacco chamber. I thought that the PipNet would be the correct tool.
The conically drilled chamber proved my supposition wrong. The Kleen-Reem was the correct tool. Either way there was little for the reamer to do.
The scrapers were used to remove the little cake at the button of the chamber.
Sanding with 320 sandpaper wrapped around a wood dowel showed that the chamber had no signs of any heat damage.
Next came the shank cleaning. This was surprising. There was some cake in the tobacco chamber. Given, not much, but the shank was much cleaner than I would have thought.
Surprise number two, was the depth that the shank was drilled.
Nearly an entire cotton swab fit into the drilling.
I was not expecting that.
I used a forceps to hold the cotton swabs and dipped them in 99% ethyl alcohol. This pipe was showing signs that it had either been well cleaned by a previous steward or it had not been smoked very much.
The stem cleaning was next. Here I used bristle pipe cleaners and 99% ethyl alcohol.
The mortise was drilled slightly smaller than the draft hole.
The stummel was taken to the sink for a scrubbing with a nylon brush and undiluted Murphy Oil Soap. The soap was rinsed with warm water and the stummel dried with a cotton hand towel.
Back at the workbench it was obvious that the scrub had removed even more of the black finish.
A thorough wiping with a make-up pad dipped in alcohol removed a little more of the black.
Below are photos showing the sides, front and back of the pipe.
To remedy the worn black finish, I chose to apply Fiebing’s Black Leather Dye. Below is the dye kit; a cork to plug the tobacco chamber, a folded pipe cleaner as the applicator and a lighter to flame the dye heating it and evaporating the dye’s solvent (alcohol).
Several coats of black dye were applied with a couple flamings. The stummel was allowed to dry for about an hour.
Yeah, there is a reason I need at least 3 layers of paper towels under me when dying a stummel.
During the drying time, I turned my attention to the stem. There was bite damage to the top of the button.
To hold the stem I used a wood block in which I had previously drilled various size holes for this very purpose.
The underside of the stem had additional bite marks.
I used a fine flat file and sanding to try to reestablish the button and remove the tooth damage
This met with success except for one small tooth dent that I needed black cyanoacrylate (CA, super glue) to fill and repair.
One drop of black CA is all that was needed.
This drop was spritzed with a CA drying accelerator.
The drop was then filed and sanded smooth.
I rubbed on a little bit of Obsidian Oil to see if the fill was noticeable. It was nearly invisible.
I retrieved the stummel. The black dye looked good and the wear marks were gone.
Next, I masked off the shank and fitted the stem. I had sanded the bite zone of the pipe to 1000 grit with sanding sponges during the repairs to the button. I thought that the rest of the stem would be fine if I just buffed the stem at the buffing wheel. Besides, I wanted to work on my buffing skills.
Starting with the rouge buffing compound and the dedicated rouge wheel, I buffed the stem.
I wiped the rouge compound from the stem then switched wheels and proceeded to use white compound.
The stem looked great. I removed the masking tape and applied a coat of Before and After Restoration Balm with a baby tooth brush. This was allowed to rest for 20 minutes.
After the resting, the stummel was hand buffed with an inside out athletic sock to remove the excess balm.
I figured that I should buff the band as well. Maybe the next owner of this pipe would want the band and if so, it should look good. I used a corn cob pipe shank to hold the band during the buffing.
The band fit over the cob’s band and was snug.
Back to the buffer.
Below you can see the polished band on the pipe.
And the pipe without the band.
Well, it looks like someone came and used my baby tooth brush and did not clean it when finished. Hmm, I wonder who that could have been? Oh well, cleaning the brush was done by dipping it in 99% ethyl alcohol and brushing the denim work-top protector a couple of times.
I like using Renaissance Micor-Crystaline Wax for rusticated pipes. “How much wax?”, you ask. About this much.
Baby tooth brush time, the little brush works very well to work the wax into all of the rustication crevasses.
As per the label instructions the wax was hand buffed with a soft cloth.
A little bit of shoe shine brush work to make sure there is no accumulated wax “white” film in the depressions.
The stem and stamping area received several coats of carnauba wax applied with the buffer.
Normally this would be the end but I wanted to clean the baby toothbrush after the Renaissance Wax in case the granddaughters come over for a grandpa sleep-over. Just kidding, I have toothbrushes for them.
This Brebbia Alpina Cavalier turned out very beautifully. I still don’t know what is going on with the band but then my input wasn’t asked for or needed when this pipe was made. The black dye returned the pipe to its original colors. The button reshaping turned out very nicely and appears as original as well. The stem polished up very nicely and the glossy black provides an interesting contrast with the rusticated black briar. The drillings of this pipe should allow the moisture from the smoke to condense out and drip the liquid into the large chamber or shank extension. This should act as a very large reservoir for accumulating liquid. Kind of like a Peterson System pipe on steroids. The band could be customized and included if the next owner would prefer it on or off. The dimensions of the Brebbia Alpina Cavalier are:
Length: 5.76 in./ 146.30 mm.
Weight: 1.55 oz./ 4394 g. (with band)
Bowl Height: 1.78 in./ 45.21 mm.
Chamber Depth: 1.36 in./ 34.54 mm.
Chamber Diameter: 0.71 in./ 18.03 mm.
Outside Diameter: 1.39 in./ 35.31 mm.
I do hope that you have found something here useful to your own pipe care, maintenance or restorations. If you like this sort of thing, please click the like and subscribe buttons. Thank you for reading the ramblings of an old pipe lover.
Loading…
Below are some photos of the finished Brebbia Alpina Cavalier.
Finally, photos of the finished pipe with and without the band. If you are interested in this pipe let me know which you would prefer. I can glue the band in place for you, if that is the way you would like it or leave it off. I will include it with the pipe if you prefer it unattached.
In all honesty, this is hardly a restoration. It is more of a cleaning and polishing. The pipe had never been fired. Why someone would do that is beyond me but after the last restoration I appreciate something that is more like pushing the easy button. I am not really sure when this pipe arrived other than it was at least a year ago. My record keeping started out very good when I began restoring pipes then went downhill quickly. Below are some photos of the Brigham billiard prior to starting work.
I am sure you noticed that the stem was not completely seated in the above photos. That is because it wouldn’t press into place without excessive force. The aluminum tenon was oxidized and I thought it best not to force it. The only other issue was the slight oxidation of the stem which made it look rather dull. Those were the only real things this pipe needed; aluminum polishing/oxidation removal and a stem polishing. Yay!
Background
Back on August 7, 2025 I wrote about a Brigham 202 Billiard with a dental bit. It is linked for those interested in that restoration. Anyway, I discussed The ultimate guide to Brigham pipes, a book by Charles Lemon. Here is a quote from that blog:
“The ultimate source of information on Brigham pipes is Charles Lemon, the author of Brigham Pipes – A Century of Canadian Briar. This wonderful book is available from Mr. Lemon on his website, Books, or from smokingpipes.com (Brigham Pipes – A Century of Canadian Briar | Smokingpipes) if you need to increase the total of your purchase to get the ever popular free shipping, and other various sources. I am unsure about Canadian immigration rules but I think this book should be required reading for prospective immigrants to Canada, especially if they are pipe smokers. ” (A Brigham 202 Billiard Restoration – NebraskaPeteGeek)
I once again found myself rereading Mr. Lemon’s work. My mind is far better at relearning than it is at remembering, Though I admit to being able to find the information much faster this time. The 1990s to early 2000s brought unique challenges and opportunities to Brigham. According to Charles Lemon, “ The company rounded the decade with two major introductions. The first, in response to demand for a lower-priced pipe, was the Italian-made Brigham System Pipe”, the first Brigham pipe made completely outside of Canada. The second and more far-reaching change was the development of the composite tenon, still in use today.” (Lemon, Charles. Brigham Pipe – A Century of Canadian Briar. Copywell, Woodbridge ON. Second Printing, October 2023. Page p. 51). So this dates the Brigham System pipe to the late 1990s. The next page narrows the latest possible production date to 2001.
Again referring to Lemon, “In all, Brigham tested ten different composite formulas before landing on a material that was less expensive than aluminum, strong, lightweight and tolerant of high heat levels. The new composite tenons generated quite a stir among Canadian pipe smokers when introduced in 2001, but the benefits, especially the much lower risk of a cracked shank, outweighed the initial resistance from Brigham pipe fans” (Lemon, p.52). One other dating quote from Mr. Lemon is in regards to the stem logo:
“”Brigham System” Pipes (late 1990s to early 2000s) were the first Brigham pipes made entirely in Italy. These were entry-level pipes available in 12 shape sand marked first with a yellow star on the stem, which later changed after 2001 to a maple leaf.” (Lemon, p. 55)
Since this pipe is clearly stamped as a Brigham System with a country of manufacture (COM) of Italy, a yellow star stem logo and an aluminum tenon it must have been made in the late 1990s to 2001.
The Restoration
From the photo table to the workbench, a scenic journey of about 15 feet, the pipe made it without incident.
I chose to work on the oxidized tenon first.
Using 0000 steel wool the oxidized aluminum was cleaned up and polished.
The mortise showed signs of some oxidized aluminum residue within.
I used a .22 caliber rifle brass bore brush to clean the mortise.
The shank was then cleaned with cotton swabs dipped in 95% isopropyl alcohol.
Once the mortise and tenon were cleaned up the two joined as they should.
I wanted to revitalize the stem with some buffing. I did not want to affect the finish on the shank, so I taped the end of the shank with masking tape.
Being the lazy bum that I am, I didn’t replace the buffing wheel and just used the white wheel and white buffing compound on the stem.
The yellow painted stem logo did take a slight beating from the buffing. I used some Pale Saffron acrylic modeling paint to refresh the logo. This color was a nearly perfect match to the original color. The acrylic paint was allowed to dry for a few minutes.
The excess paint was removed using micro-mesh pads. These were fine enough that the finish from the buffing was not noticeable.
The stem then received several coats of carnauba wax at the buffer. The stummel also was waxed with carnauba but very lightly as I did not want to fill the rustications with wax deposits.
The final step was to hand buff the pipe with a microfiber polish cloth.
This Brigham System pipe is one of the last Brighams made using the aluminum tenon. With its traditional internals and a very traditional billiard shape it is a very well balanced pipe with great hand feel. The texture does not show any real briar grain and the dye is rather artificial in appearance; it would certainly make an excellent working pipe for those projects in the yard or garage. I have had experience with the Brigham maple inserts and found that they do remove liquids and tar from the smoke effectively. The stem of this pipe polished-up very nickel and overall it looks like a brand new pipe. Which, never having been smoked, it really is. The dimensions of this Brigham System are:
Length: 5.95 in./ 151.13 mm.
Weight: 1.42 oz./ 40.26 g.
Bowl Height: 1.85 in./ 46.99 mm.
Chamber Depth: 1.66 in./ 42.16 mm.
Chamber Diameter: 0.84 in./ 21.34 mm.
Outside Diameter: 1.44 in./ 36.58 mm.
I do hope that you have found something here useful to your own pipe care, maintenance or restorations. If you like this sort of thing, please click the like and subscribe buttons. Thank you for reading the ramblings of an old pipe lover.
Loading…
Below are some photos of the finished Brigham System Billiard.
I think I have only worked on 6-10 Savinelli pipes. There have been four that I have blogged about, including this one, and another 3 or 4 that I restored before I was writing about the restorations. Some of those early Savinelli restorations were Dry System pipes, Savinelli’s take on the Peterson System and a Punto Oro Mister G. In general I have nothing but praise to give Savinelli pipes except for their vulcanite. Savinelli’s acrylic stems are a thing of beauty with wonderful color schemes and excellent workmanship. Their vulcanite on the other hand is shaped with care and precision but the darn stuff is nearly impossible to restore to the original gloss black. I think I am getting ahead of myself again. This Savinelli Extra 616 KS is an amazing pipe due to its incredible shape. It’s classified as a bent billiard but that doesn’t do it justice. It has wonderfully thick walls and a very substantial shank, making it similar in size to a Peterson 307 but larger in all the right places. Yeah, I had to compare it to a Peterson since my experience with Petes is far more extensive than with Savinelli. I picked this pipe up by making an offer on the poor pipe which no one was bidding on. The seller accepted and the rest is history. Upon arrival I took some photos of the pipe prior to working on it.
I could definitely see why many people like this shape, it has wonderful proportions and feels great in hand. This one needed some work, though. The vulcanite stem was severely oxidized. I hoped my previous experiences with Savinelli vulcanite would be different this time. The stummel had a few dents which looked easy to fill and the existing fill were all secure and intact. The tobacco chamber had a layer of cake which I hoped would not reveal hidden damage. The rim looked good with only minor lava deposits. Overall, this looked like a pretty easy restoration.
Background
Re-reading the blog about the Savinelli Porto Cervo, I thought, “why rewrite good information?” So I didn’t. Below is what I said about Savinelli in March 9th of 2024:
“First off , let me provide some history of Savinelli. As usual I employed pipedia.org and pipephil.eu for source information. The pipedia.org section of Savinelli is well written and very informative. I know I said I wanted to keep this brief but much of this is worthy of repeating, especially the “origins” of the company in 1876 and the post-WWII company as we know it.
Early Origins
“1876 was a year of breakthroughs: Thomas Edison patented the mimeograph, Julius Wolff-Eastport canned sardines for the first time, Alexander Graham Bell made the first telephone call,
Pyotr Ilyich Tchaikovsky completed Swan Lake, Melville Bissel patented the first carpet sweeper, Mark Twain published Tom Sawyer, and in Milan, Italy, Achille Savinelli opened one of the first shops exclusively focused on tobacco and smoking accessories.
That last item may seem relatively unimportant in the global scheme of advancements, but for those of us who love pipes, it was a monumental achievement, made even more difficult by the Italian government, which held a monopoly on tobacco. In addition, Achille was convinced that briar pipes represented the future of pipe smoking at a time when the market was dominated by clay and meerschaum. It may not have been obvious in 1876, but Achille Savinelli’s commitment to briar pipes would prove to be visionary.
He soon began designing his own pipes (different from the styling we associate with Savinelli today) and arranged their manufacture by local pipemakers in the Varese district of north-west Italy. The pipes became so popular that some were exhibited at the 1881 Esposizione Industriale Italiana (Italian Industrial Exposition)—the precursor to today’s Milan Fair, one of the largest trade fairs in the world.” (https://pipedia.org/wiki/Savinelli)
Post-WWII
“With his two best friends, Amleto Pomé and Mario Vettoruzzo, he assembled a team of fifteen employees to start a new business in the Varese region—the same area of northwest Italy in which his grandfather, Achille Sr., commissioned his own designs more than 60 years before.
Savinelli Pipes began production in 1948 and, although the pipes were of a superior quality and unique in their aesthetic, the brand wasn’t an immediate success. Few new brands are. It takes time for the public to catch on. Retailers were skeptical of placing Italian pipes alongside their best sellers from England or France, and customers, in turn, were hesitant to purchase a Savinelli over pipes by already established, foreign brands. Achille Jr. stood by his product, however; he knew it was only a matter of time before the world realized that these pipes were of a far superior quality, capable of competing with even the most well-established pipe manufacturers in the world. As it turns out, he was right. In less than a year, Savinelli pipes gained prestige in markets all across the world—heralded for their delicate balance of innovation and tradition, of form and function. Savinelli pipes were placed alongside the likes of Dunhill and Comoy’s in tobacconists from the United States to Europe, and, in time, this exposure modified Italy’s reputation; it was not only the premier exporter of briar, but now a premium source of fine briar pipes.” (https://pipedia.org/wiki/Savinelli)
Yeah, I know, that was kind of lazy. Now about this pipe: Savinelli Extra 616 KS. According to the official Savinelli site, “Model 616 KS is one of the biggest models which Savinelli offers to its customers. The big and deep chambered cylindrical bowl is visually balanced by a thick and robust cylindrical shank. A really masculine style.” (Savinelli Pipe – FORESTA 616 KS). The number of Savinelli lines, brands, sub-brands etc… is dizzying:
(Savinelli – Pipedia). How anyone, even master factory craftsmen, can keep track of all that is remarkable.
The Restoration
The Extra 616 KS made its way to the workbench.
I started with the stem. The good news was there was no real tooth chatter. I used a flat file to redefine the button and remove the general tooth denting.
A wood block was used to help hold the stem for some light sanding to remove the surface oxidation.
The airway of the stem was cleaned out with bristle pipe cleaners and 99% ethyl alcohol.
I thought a 24 hour dip in the Before and After Extra Strength Deoxidizer would be adequate.
Returning to the stummel I started cleaning the shank with the unused ends of the bristle pipe cleaners left from the stem.
Numerous cotton swab, and shank brushing, all with 99% ethyl alcohol along with a good deal of scraping with a dental scraper helped clear the accumulated smoking residues.
The reaming tools were assembled.
The PippNet with it’s #2 and #3 blades did the majority of the reaming.
I used the General triangular scraper and the Smokingpipes Low Country reamer for some clean-up.
The reamed tobacco chamber looked much better.
The chamber was sanded to bare briar using 320 sandpaper wrapped around a wood dowel. No heat damage was evident.
With the amount of tar and yuck in the shank airway I thought it would be best if I gave the stummel a cotton alcohol treatment. The airway and tobacco chamber were stuffed with cotton.
Normally 10 ml of 99% ethyl alcohol would be sufficient for this but the 616 KS has a very substantial bowl, so 15 ml were measured out. The alcohol would be applied via a disposable pipette.
The cotton was saturated with alcohol and would be left overnight.
The next day the cotton showed the tell tale color of the deposited tars removed by the alcohol.
The cotton was removed and the airway was again cleaned using alcohol dipped cotton swabs and some more scraping.
The Savinelli made its way to the sink for a scrub with undiluted Murphy Oil Soap and a nylon brush. The soap was rinsed with warm water and the stummel dried with a cotton hand towel.
The dried stummel looked far better.
A wipe down with a make-up pad dipped in 99% ethyl alcohol removed a bit of color, probably wax and some remaining grime.
This did allow me a better look at the dents and dings in the briar.
The two old fills remained quite secure and I decided to leave them in place, even though I truly dislike their pink color.
The stem was removed from the Before and After Extra Strength Deoxidizer (deox) and allowed to drip excess solution from the stem using the patented Drip-O-Matic.
The stem was vigorously rubbed with a coarse shop rage to remove some of the oxidized vulcanite and the remaining solution. The oxidized rubber can be seen on the rag in the photo below rag
Returning to the workbench, the stem was worked with Soft Scrub cleanser on make-up pads to remove more of the oxidized material.
A liberal coating of mineral oil was applied to the stem to curtail further oxygen attack.
To further remove the oxidation I sanded the stem with 320-600 sanding sponges. The stem was secured to the shank and the shank masked with masking tape to prevent excessive sanding of the briar. Between each sanding sponge the stem was rubbed with mineral oil and wiped with a paper towel.
Now, under normal room light the stem looked pretty good but when placed under the bright lights of the photography table the brown of oxidation was very evident. Darn that Savinelli vulcanite.
I wiped the stem with a make-up pad dipped in alcohol to remove the oil and reintroduced the stem to the Before and After Extra Strength Deoxidizer. I left it in the solution for another 12 hours.
This gave me plenty of time to work on the stummel. To fill the dents and dings, I used thin cyanoacrylate and briar dust. The new fills were filed with a small flat file and sanded smooth with sanding sponges.
The rim was lightly topped with 400 grit sandpaper laid flat on a counter and the inner rine bevel reestablished using a small wood sphere and sanding sponges in grits 320 and 400.
The stamps were taped over with masking tape for their protection.
12 Hours later the stem was removed from deox again and allowed to drip for a few minutes.
Back onto a clean side of the coarse shop rag.
More vigorous rubbing yielded more oxidized vulcanite.
Under normal lighting it looks good.
Under bright photo lighting, not so much. Darn Savinelli vulcanite.
The stem and stummel both met the serials of sanding sponges from 320-3500. The stem was again rubbed with mineral oil and wiped with a paper towel between sponges. The stem was wiped with an alcohol wetted make-up pad between sponges to remove sanding debris.
The stem was then taken to the buffer where I used a rogue buffing compound to buff the stem.
I switched wheels and then buffed with white buffing compound. The buffing had the desired effect of giving the stem a wonderful gloss finish but under bright light, brown oxidation could still be seen. Darn Savinelli vulcanite.
I returning to the workbench the stummel was coated with Before and After Restoration Balm and the stem coated with Before and After Hard Rubber Balm. These were allowed to sit for 30 minutes.
Both balms were hand buffed with an inside out athletic sock to remove the excess balms.
The pipe was returned to the buffer for several coats of carnauba wax.
The final step was to hand buff the pipe with a microfiber polish cloth.
I would love to say that I think this Savinelli turned out great. Unfortunately, the oxidation of the stem stops me from saying great. Acceptable, is a better term. The stummel turned out very nicely and the polish of the stem is beautiful. I think the only way to remove the oxidation would be to sand the shank and stem together and reduce the thickness of both to get to non-oxidized vulcanite. This would alter the dimensions of the pipe overall and I do not think that is worth it. I again say, “darn Savinelli vulcanite”. For those thinking about purchasing an estate Savinelli, I recommend going with models which have acrylic stems unless the oxidized vulcanite suits your fancy. This is still a wonderful pipe and will be a great smoker.
The dimensions of the Savinelli Extra 616 KS are:
Length: 5.58 in./ 141.73 mm.
Weight: 2.25 oz./ 63.79 g.
Bowl Height: 2.13 in./ 54.10 mm.
Chamber Depth: 1.84 in./ 46.74 mm.
Chamber Diameter: 0.83 in./ 21.08 mm.
Outside Diameter: 1.74 in./ 44.20 mm.
I do hope that you have found something here useful to your own pipe care, maintenance or restorations. If you like this sort of thing, please click the like and subscribe buttons. Thank you for reading the ramblings of an old pipe lover.
Loading…
Below are some photos of the finished Savinelli Extra 616 KS.
I had never worked on this shape before, some might call it a pot, others a bullnose. Either way I found it interesting and I have a soft spot for basket pipes with an interesting shape. The thick walls and wide acrylic stem were the clincher. And honestly, the double brass bands just were an elegant bonus. This beauty was spotted on eBay and I was able to collect the prize as I was the only bidder and a tough over $15 seemed like a good deal. After the obligatory wait for shipping, The chubby cherub arrived. The only stamps were MADE IN ITALY on the bottom of the pipe. Below are some photos of the pipe in the pre-work or before condition.
The stem looked to be in very good condition, slightly oxidized, maybe. The stummel on the other hand showed signs of extensive fills. The gloss clear coat was an obvious attempt to conceal the fills and perhaps to help “glue” them together. The tobacco chamber seemed quite out of round. I couldn’t tell by initial inspection that the rim was all filled, charred or just lava covered. Oh well, it would still be a fun project.
Background
Pipes like this are nearly impossible to research. No shape number and a very standard country of manufacture (COM) stamp provide little to work with. I thought maybe, the double brass band would provide a clue.
The Restoration
The pipe made it to the workbench and a clean denim piece.
I examined the drillings. The draft hole was well centered and looked good.
The hole through the stem was off centered, but there was a nice chamfer cut.
I assembled the ream team. This tobacco chamber was wide and would require the PipNet #3 blade and perhaps the #4.
It turned out that the #3 PipNet was sufficient. A little bit of clean-up was done with the General triangular scraper.
The chamber was sanded with 320 sandpaper wrapped around a wood dowel.
At the point I wondered if I should scrap the whole project. There were two surface cracks in the briar within the chamber. These would most likely be a source of chamber charring or burning with use.
There was a third pit within the chamber on the opposite side. This would be another spot where damage from smoking the pipe could lead to issues.
The “out of round” issue was mainly cosmetic and on the rim, not the tobacco chamber itself.
The rim looked to be encased in a layer of lava or smoking residue.
I moistened the rim with saliva and allowed it to soften the lava for a couple of minutes. The rim was then carefully scrapped with a sharp pocket knife blade. The result allowed me to see that the rim was indeed heavily filled with putty or filler.
I cleaned the shank with several cotton swabs, a nylon shank brush and a dental scraper. There was also copious amounts of 99% ethyl alcohol used.
The stummel was taken to the sink for a scrub with undiluted Murphy Oil Soap and a nylon brush. The soap was rinsed with warm water.
The stummel was dirty, so a second scrub with more Murphy’s and a brass brush was used. This was then rinsed with warm water and the stummel dried with a cotton hand towel.
Back at the workbench the stummel was wiped with a make-up pad wet with 99% ethyl alcohol. Little color was removed and the remaining finish seems to be unaffected by the alcohol.
I tried a wipe with acetone on a make-up pad. This did have an effect on the finish.
I decided to let the stummel soak in an acetone bath for a couple of hours.
During this down time, I worked on cleaning the stem. The stem access through the slot was difficult, at best. I could barely get a pipe cleaner through. This was not due to dirtyness, just a poorly made draft. I used an emery board to sand the interior of the button and improve the daft.
I finally got the draft opened up with Falcon Extra Thin Pipe cleaner, the Vermont Freehand slot tool and more sanding with the emery board.
I filed the end of the stem above the button to smooth it on both the top and bottom sides.
The initial carving of the stem was not very smooth. After my file work it was much improved.
Below you can see the reshaped stem after sanding with 300 and 400 sanding sponges.
The stem was sanded with a series of sanding sponges from 320-1000 grits. Between sponges the stem was wiped with a paper towel to remove sanding debris.
After the sanding I reattached it to the pipe and took the stem to the buffer. Here I used red compound to polish the stem. I have been working on bettering my stem polishing skills. Like nearly everything, practice makes perfect. I will never claim perfection, but I am getting better at buffing and polishing stems.
After two hours in the acetone, I removed the stummel. The clear coat that the Italian maker used was some darn tough stuff. I rubbed the stummel with a make-up pad wetted with acetone.
I then used the brass brush dipped in acetone to remove more of the clear coat as well as some of the fill material.
The fills were very soft and I picked out much of the material.
Below you can see more of the grooves left by picking out soft fill.
There was one large surface crack that was picked free of fill, seen below along the front rim. I decided to fill in the cracks and pit within the tobacco chamber with J-B Weld epoxy. I figured that I could do the same with the crack on the rim.
Below is the one pit in the chamber now filled with epoxy.
Below are the two cracks within the chamber also filled with epoxy. I also built up the rim with a bead of epoxy in an attempt at concealing the “out-of-round” rim.
24 hours later, I used a sharp knife to shave away most of the excess epoxy. I then sanded it smooth to the surface with 320 sandpaper.
The rim was re-beveled with a small wooden sphere wrapped in sandpaper.
Once I was pleased with the sanding, I prepped for dying the briar. I know the original pipe was red with brown but I wanted to conceal all the fills so I went with an all black. Fiebing’s Black Leather Dye was the choice. A folded pipe cleaner was the applicator. A wine pottle cork was used to plug the bowl to keep dye from the tobacco chamber and a lighter was used to flame the dye, burning off the solvent/alcohol.
I left a bit of the original brown at the shank end. My plan was to lightly sand the high spots of the rustications allowing the brown to peek through the black. Three coats of dye were applied and flamed.
The dye was flamed then allowed to dry for an hour.
Once dried, I lightly sanded the stummel revealing the browns underlying the new black dye.
The stummel was then wiped with a make-up pad wetted with 99% ethyl alcohol.
I gave the pipe a total of three coats of Danish oil applied with a cotton swab.
Below is the pipe and its first coat drying.
Below is the third coat drying.
The pipe was then given a couple of coats of carnauba wax. Extra care was given to buff with the grain of the sandblast patterns to avoid building up wax in the grooves.
The final step was a hand buffing of the pipe with a microfiber polishing cloth.
This pipe with its various pits, cracks and flaws was nearly discarded. I am glad to say that it smokes wonderfully and has now become another fishing pipe. Yeah, that is hardly a great endorsement or title, but I spend a good deal of time fishing and typically do not want to subject my best quality pipes to those less hospitable conditions. The wide stem is very comfortable to clench and the bend makes it even better. I love the wide bowl for my favorite Balkan and English blends. This old pipe will not be a winner of a beauty pageant even with the beautifully polished stem and brass bands, but she is more than a utilitarian addition to the fishing pipe club.
The dimensions of this No Name Italian Bullnose are:
Length: 5.19 in./ 131.83 mm.
Weight: 2.06 oz./ 58.40 g.
Bowl Height: 1.51 in./ 40.64 mm.
Chamber Depth: 1.20 in./ 38.35 mm.
Chamber Diameter: 0.80 in./ 20.32 mm.
Outside Diameter: 1.75 in./ 44.45 mm.
I do hope that you have found something here useful to your own pipe care, maintenance or restorations. If you like this sort of thing, please click the like and subscribe buttons. Thank you for reading the ramblings of an old pipe lover.
Loading…
Below are some photos of the finished No Name Italian Bullnose.
I cannot say how many times I had picked up this London Briar apple and appreciated its dimensions and contours. Yet, time and again I set it aside to work on another pipe. The apple shape is a favorite of mine and this pipe has nearly perfect “apple” archetypal lines. Perhaps it fell to the wayside because of its more generic heritage and my snobbish attitude. Then I think back to my list of favorite brands and lines: Peterson, Marxman, Dr Grabow, Yello-Bole. Hmm, that pretty much rules out the snobbery, eh?
This pipe came as part of an estate lot. One of those purchases where it was along for the ride and not the object of my desire of the lot. Below are some photographs I took of the pipe before work was started.
Overall, the pipe was in very good condition. The acrylic stem was pretty much impervious to oxidation, saving me a good deal of work. Another positive was that the stem had not been the victim of chewing. It did have a dark streak from smoking residue though. The stummel had been given a clear coat finish which I do not like and will typically remove. There did not appear to be any significant fill which would require attention. The tobacco chamber was also quite clean and the rim looked nearly pristine. This had all the earmarks of a nice relaxing restoration.
Background
I cannot say that there is a lot of information out there on this pipe. Searches on both pipephil.eu and pipedia.org came up with nothing. Fortunately there is the great Steve Laug who has restored a very similar pipe and chronicled it very well. Here is the link to Steve’s restoration blog:
“I had not seen the stamping London Briars before so I did some hunting on the web for the brand and found that the brand was made by/for Gauntleys of Nottingham. They sold new for £31.95 Here is the link to their site: https://cigars.gauntleys.com/uk/offer/gauntleys-london-briar-pipes
I quote directly from the site: Gauntleys London Briar Pipes – Our London Briar pipes have become very popular since we introduced them just a few months ago. Each is made from selected second briar blocks from one of the country’s largest and most respected pipe makers.
If the briar was flawless these pipes would sell for over £250. These are from briar with small flaws in the grain or needing small amounts of filler so are great value. The briar is some of the finest in the world and can be up to 80 years old.
Each pipe is hand made in a range of classic English shapes and comes in a number of finishes from Smooth Brown to Black (Shell Briar) Sandblasted.
If you are looking for a first pipe or something to use around the house or garden the Gauntleys London Briars are very affordable and smoke like an entry level premium briar. Each pipe comes boxed with a silk bag.” (Didn’t Break a Sweat Cleaning this London Briar Brandy | rebornpipes).
The Restoration
The restoration of this great apple shaped piece began with a cleanish denim piece on the workbench.
The pipe’s tobacco chamber looked pretty clean but I kept getting whiffs that it may have been used for the smoking of non-tobacco. I have had experiences with marijauna smoking residue and it is never easy nor pleasant to deal with. This pipe had a slight aroma of the wacky weed yet there were tobacco fragments in the chamber. If it had been used for non-tobacco it was infrequent. I gathered the “ream team”, which included the PipNet, Smokingpipes Low Country reamer and General triangular scraper.
The number 2 blades of the PipNet made short work of the tobacco chamber with the Low Country reamer used for the bottom part of the chamber.
Below is a photo of the reamed chamber.
The draft hole was constricted so I used the Kleen-Reem draft hole drill to clear it.
Below is a photo of the drill in the airway.
The airway was cleaned with several bristle pipe cleaners, cotton swabs, both dipped in 95% ethyl alcohol, and some scraping with a dental scraper.
This stummel had a clear coat finish that I wanted to remove. I tried ethyl alcohol on a make-up pad and that didn’t touch the finish. I then tried acetone on a make-up pad. This too had little effect. I decided that a bath in acetone for 30 minutes would loosen or dissolve the finish.
While waiting for the acetone to do what it does, I started cleaning the stem. This was done with bristle pipe cleaners and 95% ethyl alcohol. The before photos show a distinctive dark stained airway. Once cleaned out the stem showed no signs of the dark streak.
After 30 minutes in the acetone I wiped the stummel with a make-up pad and some color and finish did come off but not enough for my liking, so I went back into the acetone for another 30 minutes.
After another 30 minutes the clear coat was relinquishing its hold on the briar. A light sanding while the finish was still soft removed it from the bowl. The finish remained on the shank.
The below photos indicate that further sanding and acetone wipes were needed.
Eventually the clear coat was removed. Below, you can see that the stem was reattached to preserve the joint where the stem meets the shank as well as the painters tape protecting the stamps.
WIth the finish removed I sanded the stem and stummel with a series of sanding sponges in grits from 320-3500. Between each sponge I wiped the pipe with a make-up pad wetted with ethyl alcohol.
After the sanding sponges I worked the pipe with micro-mesh pads 4000-12000, again wiping the pipe as above.
I gave the stummel a coating of Before and After Restoration Balm and allowed it to sit for 20 minutes.
The Restoration Balm was wiped from the stummel using an inside out athletic sock.
The pipe was then taken to the buffer where the stem was buffed with white buffing compound before the entire pipe was given several coats of carnauba wax. The final step was a hand buffing of the pipe with a microfiber polishing cloth raising the shine to the levels which can be seen below in the “finished” pipe photos.
There is something about the apple shape that just fits for me. Perhaps it is because I share a well rounded shape. This apple caught my eye as a wonderful example of the shape and turned out beautifully. The acrylic stem cleaned up nicely and demanded attention with its bright pearlescent yellow. The briar grain, though not unattractive, is rather muted. I wonder if I should have tried to accent the grain more with a contrast dye. Still the cross grains at the front and rear of the bowl are pretty. The best part of the pipe is the hand feel, this apple just fits in the hand with the perfect plumpness. The dimensions of the London Briar Apple are:
Length: 5.74 in./ 145.80 mm.
Weight: 1.52 oz./ 43.09 g.
Bowl Height: 1.66 in./ 42.16 mm.
Chamber Depth: 1.49 in./ 37.85 mm.
Chamber Diameter: 0.74 in./ 18.80 mm.
Outside Diameter: 1.55 in./ 39.37 mm.
I do hope that you have found something here useful to your own pipe care, maintenance or restorations. If you like this sort of thing, please click the like and subscribe buttons. Thank you for reading the ramblings of an old pipe lover.
Loading…
Below are some photos of the finished London Briar Apple.
I am not sure why but it happens with some frequency, I’ll look at an estate lot and one pipe just jumps out at me as being more attractive than the rest. This singularly attractive pipe turns out to be an EA Carey Magic Inch. Now, I am far from an expert on design or aesthetics but I do know what I like. The strangest part is that I have only ever kept one EA Carey pipe as a companion and that one was “restored” many years ago. I say “restored” because I don’t really remember anything of the restoration other than recognizing the repaired fills. I got the pipe out and smoked it as research for the writing
(above image is the only EA Carey pipe that I’ve kept for use)
of this blog. It performed well though I am still not sure what to think of the Magic Inch system. The pipe had a new papyrus filter and after the smoke the filter appeared nearly as it did before the smoke. The pipe had a very nice draw and the vent along the stem did cool the smoke. I tried covering the vents with my finger and thumb, rather than covering the rim to increase the ember, this worked well. I was just using the vents as more of a carburetor.
Over the years I have accumulated a few EA Carey pipes and they sat in a cardboard box. I guess it was time for one to hit the workbench. The EA Carey that I selected can be seen in the photos below prior to any work done. This pipe is an Italian product as indicated by the stamp of the bottom of the pipe. The stampings read, EA CAREY over MAGIC INCH over PAT. No 3267941 with an ITALY offset to the right.
This pipe appeared to have been smoke but not heavily. There was a light cake built up in the tobacco chamber and a light lava deposit on the rim. The mouthpiece had some teeth chatter indicating that it had been clenched but not mauled. The finish was worn either from handling or from being pushed around in a drawer. The plastic stem was not subject to oxidation. This looked to be a relatively easy restore.
Background
The history search began with pipephil.eu. Here I found a matching set of stamps but a different country of manufacture (COM). This indicated to me that EA Carey was importing pipes to their specifications.
Next I went to pipedia.org for their general history. The entry here suggested it was written by EA Carey advertising folks though no source was mentioned.
“Magic Inch” System has been a Carey’s tradition for over 50 years, with over 1,000,000 sold. The “Magic Inch” is an air chamber inserted between the imported briar bowl and the vented mouthpiece which allows cool outside air to enter and mix with the warm tobacco smoke inside the “Magic Inch” chamber. Tobacco tars, oils and moisture, are squeezed out of the smoke. The residue drops to the bottom of the chamber and is absorbed by the Papyrate sleeve. From its rich tradition and thousands of satisfied customers, this pipe is sure to be your smoking favorite for life.
Carey Magic Inch pipes can be readily identified by a boxed letter C on the stem, along with a distinctive series of three vent slits and the Carey Magic Inch name stamped into the side of the bowl.
Finally I turned to the EA Carey official website. I guess I should have started with looking at the “horse’s mouth” rather than using second party information. Since Ea Carey is still in business and selling their signature tobacco blends, pipes and various sundries their website, EA Carey’s Online Smoke Shop | Best Pipe Tobacco | Briar Pipes is kept relatively current with weekly specials. For a great article on the history of EA Carey
“The “Magic Inch” System has been a Carey’s tradition for over 50 years. Hundreds of thousands of these smoking pipes have been sold, beginning with the very first billiard shape back in 1948. Based on the original “Magic Inch” System, the improved modern design provides the coolest and driest smoke ever found in a pipe.
1. Improved Ventilator Action 2. Papyrate
3. The “Magic Inch” 4. The Carey Mouthpiece
Improved Ventilator
Each Carey “Magic Inch” system begins with a scientifically metered amount of air into each puff of smoke. The Carey “Magic Inch” System, with the new Papyrate, controls air better and more accurately…for improved drawing and smokeability!!
Papyrate
The all new Papyrate…the heart of the “Magic Inch” System, features new and improved 2-ply construction. You get improved rigidity for ease of fit and removal. You get extra absorbency for dryer smoking and longer lasting quality between Papyrate changes…made especially for your new Carey pipe.
The “Magic Inch”
The “Magic Inch”, unmistakably superior for 38 years, now achieves a new and better level of performance. The outer shell of the Papyrate filters and meters air with 50 micron precision. The “Magic Inch” unique “moisture ports” dissipates moisture, tar, and nicotine into the 2-ply Papyrate, protecting the smoker from unwanted materials. And finally, the unique Carey “Magic Inch” evaporation chamber releases moisture through evaporation during resting periods between smokes. Not a filter, not a standard “push bit”…the unique “Magic Inch”…producing an all new level of smoking quality.
The Carey Mouthpiece
Now you can enjoy new mouthpiece construction for added comfort and durability. Made of Zytel 101, this new mouthpiece has depth of color, outstanding durability, and a bit thickness of only .380 inches. The result is added comfort, outstanding durability and a color that never tarnishes and never needs to be polished.”
Okay, I stand corrected. The papyrate is not a filter and my expectation of it absorbing moisture or tars from the smoke was explained in the above quote from EA Carey. A second bowl of EA Carey Gold blend was smoked the next day. This time I checked the Papyrate more frequently. It did appear to be absorbing moisture. As I thought about it, it made sense, the cooler incoming air from the vents would mix with the smoke. This would cause moisture to condense out of the smoke and form along the nylon Magic inch. The ports along the Magic Inch would allow the moisture to flow through and be absorbed by the Papyrate. Definitely not a filter. In my two smoking sessions, I did not note any real discoloration of the papyrate as would be expected from a filtering of the smoke.
As for the dates of the pipe in hand, I have little idea. Other than it being stamped with the patent number. Assuming that the stamping was a marketing strategy and that patents are valid for 20 years from the filing date, I can assume the pipe dates from 1948-1968. I would not expect the company to continue stamping the patent number after the expiration of the patent though I could be very wrong about that..
The Restoration
The EA Carey billiard made its way to the workbench and a laundered denim piece.
The ample bowl of the billiard demand the #3 PipNet blades.
Reaming was completed with the PipNet, Smoking pipes Low Country reamer and General triangular scraper.
The tobacco chamber was sanded with 320 sandpaper wrapped around a wood dowel and with 320 sandpaper by hand. The sanded chamber showed no signs of heat damage or charring.
The rim showed only minimal lava in the rustications.
This was cleaned by moistening the rim with saliva and scrubbing with a brass brush.
The rim was wiped with a paper towel and looked a little better.
I took the stummel to the sink for a scrubbing with undiluted Murphy Oil Soap and a nylon brush. The soap was rinsed with warm water and dried with a cotton hand towel.
The plastic stem was also scrubbed with soap and a shank brush and rinsed with warm water.
Returning to the workbench I wiped the stummel with a make-up pad dipped in 95% ethyl alcohol. I was surprised to see a dark purple color on the cotton. The black stain must have actually been a dark purple. There remained some very shiny spots of finish on the briar.
Also more observable were old fills of pits in the briar. Below is one pit on the front of the stummel.
And a second large pit on the left side.
Below you can easily see the shine I was referring to above. There was some kind of clear coat on this pipe.
Below another look at the remaining shine where the shank meets the bowl.
I needed to think about shine removal so I started cleaning the shank, figuring that I could think while doing a repetitive task. The Magic Inch system made shank cleaning more difficult since I could not use any scraper to access the airway. I placed a few milliliters of alcohol in the tobacco chamber and allowed it to flow into the shank but not through. Using the alcohol, I scrubbed the airway with a nylon shank brush. The alcohol was poured into an empty medicine cup. This was repeated a few times. I also ran folded bristle pipe cleaners through the airway. These were also dipped in 95% ethyl alcohol.
With the shank cleaned and the ponder still in process, I decided to try removing the clear coat with acetone. I tested the susceptibility to the finish with a cotton swab dipped in acetone. It did remove some of the finish but that clear coat was tough. It also looked like the clear coat itself was dyed purple.
More acetone, this time on a make-up pad did remove more purple but the only way to ensure the total removal was with an acetone bath. I opted against this in fear of the effects of the acetone on the nylon Magic Inch and the acrylic shank extension. I also worried about the acetone affecting the glue holding all of those components in place.
I chose to use a 400 grit sanding sponge to sand the high spots of the rustication. This would allow the briar to peek through in those places at least. It also took a bit of the shine away from the shiny spots.
Next came the restoration of the stem. I have found that this type of plastic can be filed and sanded but that only with very fine abrasives. Coarse grits or files cut deeply into the softer plastic and are a pain to remedy. My small flat file was fine enough to not create an issue. In sticking with this “finer is better” mentality, I opted against sanding sponges altogether. Micro-mesh pads were used andonly from 1800-12000.
I thought that I would have to accept the old fills because I could see no way for me to retexture and match the existing texture. I worked Before and After Restoration Balm into the rustications with a baby toothbrush. The balm was allowed to sit for 15 minutes.
The remaining excess balm was removed using an inside out athletic sock and hand buffing.
The rustications were shallos so I thought that carnauba wax would be acceptable to use as a preservative. I did take my time and buff in the direction of the rustication. The stem was also waxed with carnauba on the buffer.
The final step was another hand buff with the microfiber polishing cloth.
The EA Carey Billiard has very traditional shaping. Traditional in the sense that it is well thought out and very pleasing to the eye and hand. The thickness of the bowl at the rim is 0.27 inches (6.86 mm) and at the swell of the bowl it increases to 0.48 inches (12.19 mm). This gradual thickening of the briar is a nice way to keep the pipe feeling cooler throughout the smoke. As I would expect the thicker briar to absorb additional heat during the smoking of a bowl of tobacco. The rustication allows for a nice grip and good hand feel though it looks rather like a factory mass produced texture. The stem did polish up nicely and looks good. The feel of this plastic is good, softer and more flexible than vulcanite. Overall this is a very nice pipe that will serve its next owner many years of service. The dimensions of the EA Carey Billiard are:
Length: 6.10 in./ 154.94 mm.
Weight: 1.41 oz./ 39.97 g.
Bowl Height: 1.85 in./ 46.99 mm.
Chamber Depth: 1.65 in./ 41.91 mm.
Chamber Diameter: 0.80 in./ 20.32 mm.
Outside Diameter: 1.46 in./ 37.08 mm.
I do hope that you have found something here useful to your own pipe care, maintenance or restorations. If you like this sort of thing, please click the like and subscribe buttons. Thank you for reading the ramblings of an old pipe lover.
Loading…
Below are some photos of the finished EA Carey Billiard.
As a child of the 1970s I grew up with the series The Six Million Dollar Man. For those who never heard of this, it was a TV series where an astronaut crashes his ship and is badly damaged. He is rebuilt using “bionic” parts allowing him superhuman abilities. During the title sequence a narrator explains, “”We can rebuild him. We have the technology. We can make him better than he was. Better . . . stronger . . . faster.” For some reason this line kept going through my head during this restoration. Given the “faster” doesn’t work but the other two, most definitely. The pipe was one of 13 pipes won in an eBay auction from Germany. I was hoping to acquire some lesser known makers or lines of pipes to the US market.
The shape of this pipe is a tough one for me, it is a dainty pipe with a curved bowl. Is it a bent tulip, a chimney, a billiard? Heck, I don’t know, I’ll just use the 8497 stamped on the shank to identify the shape. As for the other stamps there was “Spitfire” in a flowing cursive script and GENUINE over BRIAR as a circle on the underside of the shank. Below is a screenshot of this pipe from the original eBay listing. It shows a repaired stem from a break, a chipped shank end and a good deal of excess glue, perhaps a failed clenching experience while mowing the lawn.
Below are some photos of the Spitfire before work had begun. Well, that is not entirely true. The break was held together by the glue until I tried to remove the stem. The stem was quite stuck. Unaware of my incredible strength, the glue broke while I tried to free the stem. Umm, there may have been a slight exaggeration there about my strength. The stem remained stuck within the shank piece as seen in the photos below.
Ok, you can see there are some issues here that will have to be addressed; the stem stuck in the broken shank and the broken shank being the greatest. The lesser issues include general dirtiness, stem oxidation, excess glue removal, tobacco chamber reaming and other typical restoration stuff. This is going to be a fun project.
Background
The first place that I searched was pipephil.eu for the name “Spitfire”. There I found the following:
(Sn-Ss — Pipes: Logos & Markings). Here you can see the same script style in the “Spitfire” stamping. The GENUINE BRIAR stamp is not represented but the four digit shape number is present. There is also a slight difference in the logo coloration of the bottom image from pipephil.eu. The bullseye shown is more indicative of the colors used by the British Spitfire fighter aircraft in World War Two.
I assume that the blue coloration of the logo in this Spitfire had merely faded over the years.
The next search site was pipedia.org. There “Spitfire” resulted in:
(Italian Pipe Brands & Makers R – S – Pipedia). The Lorenzo link took me to a nice bit on the history of the predecessors of and the formation of Lorenzo Pipes in 1969. Also, there was the following quote specific to the Spitfire line:
“A somewhat more bargain series was given its own brand name: Spitfire. Spitfires displayed 1:1 transferred Lorenzo models (mainly for 9mm filter) as well as smaller, more classically shaped pipes. These were also extremely popular.” (Lorenzo – Pipedia). The store takes a more tragic turn in 1983,
“In 1983 Lorenzo Tagliabue came to bitter grief: his little daughter, the only child, died of cancer. He lost all interest in the business and retired still in 1983, leaving no heirs who wished to continue the business. Lorenzo Pipes was licensed for and continued for a shorter period by Comoy’s of London (Cadogan / Oppenheimer Group). Then Lorenzo Pipes almost disappeared and Lorenzo Tagliabue passed away in 1987.
But this wasn’t the end. In 1988 Riccardo Aliverti and his wife Gabriella purchased all rights to the Lorenzo trademark from the Tagliabue family and production of the renown Lorenzo Pipes resumed.
The Aliverti family is involved in pipemaking since Romolo Aliverti, the father of the current owners, joined the Lana Brothers in 1920. He later reached the rank of technical director. No wonder that his son Riccardo showed an interest in pipe making. Riccardo began learning the pipemaking trade in 1954 at the age of fourteen under his father’s watchful eyes and succeeded him as technical director upon his father’s retirement in 1973.
Today the third generation of the Aliverti family is working for the company. Massimo Aliverti, Riccardo’s son, has been with the company as sales director since 1991. He works closely with his father and knows all phases of production. Massimo has established a broad customer base for Lorenzo around the world.
As far as the informations are reliable, Lorenzo’s better lines (One Star, Two Star, Three Star, Moscato, Spumante and the Grand Canadian) are made in Italy while the cheaper ones (New Era – Riesling, New Era – Poggio, Angera, Angera Satinato, Cadry, Churchwarden, Filtro, Arena, Cadore, Sport PS and Garden) are made in Albania by Tomori to benefit from the rich deposit of briar in Albania.
The website of Lorenzo’s American distributor SMS Pipes gives a good impression of today’s Lorenzo Pipes. SMS also offers a wide range of Meers.” (Lorenzo – Pipedia).
I think that it is safe to say that this pipe was made in Italy by Lorenzo most likely between the early 1970s-1983.
The Restoration
Breaking a pipe is seldom fun and breaking one while removing a stem is less fun than that. I suppose I could take some consolation in the fact that it had already been broken and the attempted repair was what had actually broken. Regardless, the pipe made it to the workbench. I immediately dropped the shank piece and tenon end into a small medicine cup with 95% ethyl alcohol. Apologies for not photographing that step. The alcohol worked quickly in freeing the stem from the broken piece of shank. The below photo has the broken piece of shank pressed in place though not glued, for the photograph.
I began with reaming the tobacco chamber. I thought the PipNet and the #1 blade would be narrow enough for this petit chamber. It was for the first 1- 1.5 cm then the chamber tapered.
I used a Tsuge reaming tool for this narrow chamber. This was followed up with the General triangular scraper.
I remember picking up the Tsuge tool after my first PipNet set lost the #1 blade to breakage. The chamber was then sanded with 220 and 320 sandpaper wrapped around a wood dowel and a Sharpie marker, respectively. There was no damage from heat or charring in the chamber but there were a couple of places where the chamber had experienced small dings, likely from previous clumsy reaming/scraping.
The shank was cleaned with cotton swabs and bristle pipe cleaners dipped in 95% ethyl alcohol.
The stummel was then taken to the sink for a scrubbing with undiluted Murphy Oil Soap and both a nylon brush and a brass wire brush. The soap was rinsed with warm water and the stummel dried with a cotton hand towel.
Back at the workbench the stummel was wiped with 95% ethyl alcohol on a make-up pad. This removed some stain from the briar.
The plan to repair the shank was this:
Glue a ¼ inch or 6.5 mm brass tube into the mortise well past the break.
Glue the broken shank end into place.
Fill the seams with cyanoacrylate (CA, super glue) and briar dust.
Recarve the rustication and redye the shank.
The mortise of the Spitfire was drilled at ¼ inch or 6.5 mm. I needed to deepen the mortise to implement my fix. I used a Brad Point Drill Bits 1/4-Inch Hex Shank Stubby Drill Bit in a screwdriver handle to extend the mortise approximately 1.4 inch (6.5 mm) past the furthest edge of the break.
The brass tube was slid into position to test the fit. So far, so good.
The pieces of briar refused to align precisely. Bah! Hmm, there was a layer of glue from the previous fix on the briar which kept the broken pieces from aligning correctly.
I began soaking the broken edges with acetone to soften the old glue.
While the glue was soft I worked it with a nylon brush. This helped peel the edges of the glue from the briar. The acetone would evaporate quickly so I had to soften and scrub quickly. Eventually the glue was removed.
The brass tubing was cut to length using a tubing or pipe cutter.
The brass tube was scratched up with 80 grit emery paper to increase the surface area for the glue to adhere to. The tube was pressed into place without the broken shank piece and Thin CA was allowed to seep into the joint. The broken shank piece was slid over the brass tube and situated correctly. Additional Thin CA was applied to these seams. The two pieces of briar were then clamped and allowed to cure.
As the CA was curing I began cutting the tenon to fit into the brass tube. This required the use of the VermontFreehand Adjustable Tenon Turning Tool. I made several cutts adjusting the cutter very slightly (approximately 1/8th turn of the adjustment screw). I feared taking too much material off and shattering the thin tenon. Once the tenon was close to the right size I began filing the new tenon and smoothing it with 400 grit sandpaper.
When the CA that set, I used a countersink bit to hand bevel the inner edge of the mortise.
The stem was pressed into place and the fit was not too bad. I had to file the top of the stem to fit the shank. This was done by wrapping the shank with a layer of masking tape and filing the stem with a small flat file. The lower edge of the joint would have to wait until I had the chip filled before I could fit it to the stem.
Since the seam where the two shank pieces joined was adjacent to the stamps care had to be taken to keep from damaging the stamp. I applied brown CA with the tip of a fly tying bodkin to the seam. Briar dust was then pressed into the wet CA. The briar dust caused the CA to cure almost immediately. The excess dust was brushed off with a brass brush. This was repeated to fill the seam in very small increments.
The same process was used on the carved surface seams.
To fill the chipped shank end, I applied a bead of brown CA to the area that I wanted filled. This wet CA was then pressed into the box of briar dust. The excess dust was brushed off with a nylon brush and another thin layer of CA was applied. This wet CA was again pressed into the briar dust. Once the chip in the shank end was filled with CA and briar dust the end was filed with a small flat file. The final fill was topped with a coating of Thin CA to seal the layers of brown CA and briar dust.
At this point I was getting impatient to get a look at the finished pipe. I opted to try buffing the stem’s oxidation into submission. In hindsight, this was a mistake. I describe it here so that you can avoid being as dumb as me.
I wrapped the shank with masking tape to protect it from the buffing.
Using a rouge compound I buffed the stem until I thought I’d removed the oxidation.
The problem was, the stem looked shiny but shiny brown. I wanted shiny black. I wetted a few make-up pads with Soft Scrub cleanser and scrubbed the stem. They removed a great deal of oxidation.
“Okay, I’ll quit being in a hurry and do it right,” I said to myself. I suspended the stem into the Before and After Extra Strength Deoxidizer (I refer to this as deox). It was allowed to soak overnight.
The next day I removed the stem and allowed it to drip excess solution back into the jar.
I like to scrub the remaining deox from the stem with vigorous use of a coarse shop rag.
The coarse texture of the rag absorbs the solution and removes more of the oxidized rubber as can be seen below.
The stem was certainly looking more black this time. There remained brown areas especially on the top side of the stem. I sanded the stem with a series of sanding sponges from 400-1000 grit. The zone immediately (1 cm) below the button was filed using the small flat file and further sanded. Once sanded I returned to the buffer and buffed the stem with white compound.
Pleased with the stem, I turned my attention to recarving the rustications on top of the fills. I used the Dremel rotary tool and a sharp carving bit.
I tried to keep the lines pretty much the same but to carve through the fill material. I very much wanted to eliminate any shiny CA spots.
The newly carved textures looked good but their color was off when compared to the rest of the shank.
I used a Mahogany Furniture Touch-up Marker to re-stain the briar to match the existing color.
Not bad.
Not bad, at all.
The stummel was given a coat of Before and After Restoration Balm, applied with a baby toothbrush and allowed to sit for 20 minutes.
20 Minutes later the Restoration Balm was hand buffed from the stummel using an inside out athletic sock.
The baby toothbrush was cleaned using 95% ethyl alcohol. Renaissance Micro-Crystalline Wax was applied to the stummel using the baby toothbrush. I applied two coats of wax allowing 10 minutes between coats.
The stummel was taken to the buffer where it was buffed using a clean flannel wheel. While there I applied several coats of carnauba wax to the stem and the stampings on the underside of the shank.
To address those two rough spots from previous reaming/scraping inside the tobacco chamber, I opted to use a maple syrup and charcoal bowl coating. I applied a very thin coating of syrup to the chamber using a cotton swab.
I then used a capsule of Activated Charcoal dumped into the chamber. Oh, note the pipe cleaner in the shank. This keeps the charcoal from getting into the airway. I covered the rim with a piece of masking tape and vigorously shook the stummel for several seconds to distribute the charcoal powder evenly onto the wet syrup.
After removing the tape, dumping the excess charcoal and giving the stem a good blow, don’t draw in, you’ll get a mouthful of charcoal. The final step was a hand buffing done with a microfiber polishing cloth.
This was a long and troublesome restoration. Little things like; not having the ¼ inch brass tubing and waiting for it to arrive, the old glue removal, fitting the brass reinforcement tube, cutting the tenon, and being dumb and skipping steps, made the whole process last for many days. In the end, I think the pipe turned out well. Yeah, like the pipedia.org article says, “A somewhat more bargain series”, it is a cheaper pipe. I enjoy the challenge of returning a pipe like this to working condition. The re-carvings turned out very nicely as did the re-staining. I think you would be hard pressed to notice the break repair if you could not see the seam on the smooth stamp surface. The stem also did polish up fairly well. The brass reinforcement will certainly add strength to the pipe and should keep it from having another break. It is still a dainty little pipe which would probably be a great addition to someone who loves Virginia flake tobacco in a tall narrow bowl. The dimensions of the Lorenzo Spitfire Bent Billiard 849 are as follows:
Length: 5.37 in./ 136.40 mm.
Weight: 0.87 oz./ 24.66 g.
Bowl Height: 2.02 in./ 51.31 mm.
Chamber Depth: 1.75 in./ 44.45 mm.
Chamber Diameter: 0.61 in./ 15.49 mm.
Outside Diameter: 1.24 in./ 31.50 mm.
I do hope that you have found something here useful to your own pipe care, maintenance or restorations. If you like this sort of thing, please click the like and subscribe buttons. Thank you for reading the ramblings of an old pipe lover.
Loading…
Below are some photos of the finished Lorenzo Spitfire Bent Billiard 8497.
This is one of those pipes that I had always wanted to lay my hands on and restore. The novelty of these pipes are whimsical and a bit dark at the same time. I mean, who really wants to put the barrel of a pistol in their mouth? While at the same time they are fun looking and sure to draw comments from folks who observe them. A Facebook friend, Stacy Reddig, posted that he had picked up a pair of pistol pipes at a local antique shop and included photos. Once again, I was immediately jealous as I have only found two pipes at my local antique shops that were slightly interesting. Anyway, I commented that I’d always wanted to do a restoration on one of those. A couple of weeks later a package arrived. Inside was one of the two pistol pipes. Oh, this was a surprise and the highlight of my day. The pipe had only one identifying stamp, Italy. Below are some photos of the pipe prior to any work done.
I was not sure what material the pipe was made from. I had read of gutta-percha and Bakelite and knew both materials had histories in pipe making. The moldings of the pipe were of impressive intricate detail and appeared to be in great condition. There was some discoloration towards brown from what I assumed was an original black. The briar was of lesser quality judging from the number of pits and fills. The drillings were a bit irregular and out of round. The stem/button area had a few tooth marks from having been clenched. The pipe also showed typical signs of age and accumulated dirt and grime from its assumed 100’ish years on this planet. Alltold, this was going to be fun.
Background
Surprisingly little information could be found on the Italian Revolver pipe. Oh, there were plenty of revolver type marijuana or “weed” pipes as evidenced in the photo below.
I also found historic evidence of a revolver pipe similar to the pipe in hand on pipedia.org. This example was French made by the Colossus Pipe Factory. The information on Colossus is included below in its entirety:
“There is not much known about the Colossus Pipe Factory. By the mid 1890’s it was owned by Kaufmann Bros. & Bondy. Bill Feuerbach has an old invoice from KB&B dated 1898 that has “C.P.F.” in the upper corner, with Trademark underneath. So they owned the brand by then. It could have been a company that was acquired by KB&B or possibly even founded by them.
Bill is a VP at S. M. Frank & Co. (Kaywoodie) and has also provided the evidence to the name Colossus below.
I have always been under the impression that the intials C.P.F. stood for Consolidated Pipe Factory. Many pipe collectors that I know believe the same thing. However only this week I had that cleared up. A pipe collector friend in Seattle emailed a scan of a page from a trade magazine called “The Jeweler’s Circular”, dated August 23, 1899. A reader wrote in the following question, “Please inform us who manufactures briar pipes with trademark, C.P.F.?” The answer was, “These letters stand for Colossus Pipe Factory, the business being conducted by Kaufmann Bros. & Bondy, 129 Grand Street, New York.”
I have seen pipes with both the C.P.F. logo and KB&B logo on them that date to pre-1900. This may have been a way to let the public now that the companies were affiliated. As far as I can tell, the C.P.F. brand was discontinued sometime in the 1910-1920 range.
It has been said that imitation is the sincerest form of flattery. The thing that many people do not realize is that that saying is incomplete. The entire quote is often attributed to Oscar Wilde and should read, “Imitation is the sincerest form of flattery that mediocrity can pay to greatness”. There is quite a bit of discussion about the origins of this quote and that it is not due to Oscar Wilde. If you would like to read about that, I included the link to a blog by Terence Eden, here. Whomever first said it, matters little to me. The point I’ll emphasize is the mediocrity of the imitation solely, based on the quality of the briar. Now this could also be the case where the Italian maker was indeed the first and CPF merely imitated their original. Without any documentation proving otherwise I’ll have to consider CPF as the originator and the poor little Italian Revolver as the imitator. As for the date of production, I would hazard a guess to the later 1920s-1940s.
The final question I had was,”what is the body of the pipe made of?” Materials of the era would have most likely been gutta-percha or Bakelite. Gutta-percha was an older latex derived early plastic which was used from the 1840s-early 1900s (gutta-percha history). According to wikipedia, “Bakelite was one of the first plastic-like materials to be introduced into the modern world and was popular because it could be moulded and then hardened into any shape.” (https://en.wikipedia.org/wiki/Bakelite). An easy test to see if a plastic is Bakelite is to slightly moisten a cotton swab with water and touch it to baking soda, rubbing this on the surface of Bakelite will produce a yellow or brownish-yellow smudge on the cotton swab. I tried this and the cotton was indeed yellow-brown. Positive test? Yes. Positive identification of Bakelite? No, but quite probable.
The Restoration
As usual I started with a cleaned denim piece to protect the work surface.
Reaming the tobacco chamber was the first job undertaken. The PipNet blades #1 and #2 did the job nicely.
The interior of the chamber was sanded with 220 sandpaper wrapped around a wood dowel. There was no indication of any damage to the chamber.
Unscrewing the bowl from the body of the pipe revealed a piece of fabric. Under this fabric were several pieces of what looked like charcoal.
The fabric and charcoal were removed.
The airway was cleaned with bristle pipe cleaners dipped in 95% ethyl alcohol.
The pipe was then taken to the sink for a scrubbing with a nylon brush and undiluted Murphy Oil Soap. The soap was rinsed with warm water and the pipe dried with a cotton hand towel.
Back at the workbench the pipe looked clean but now had a dry, oxidized appearance to the Bakelite.
I tried to clean the surface of the pipe with a cotton swab wetted with ethyl alcohol.
To get in the smaller crevasses I also used a bristle pipe cleaner.
The molding seams or ridges were filed with a small rat tail file to make them less noticeable. These were sanded with a 400 grit sanding sponge to further smooth the surfaces.
The old fills were soft and very light colored. I picked the old fill material out with a fly tying bodkin.
New fills would be done with brown cyanoacrylate (CA, super glue) and briar dust.
The fly tying bodkin was used to apply a small drop of CA to the pit. Briar dust was then piled onto the wet CA and pressed into the pit.
The cured CA/briar dust fill was then filed with a small flat file and sanded with a 400 grit sanding sponge. For deeper fills I used a second application of CA and briar dust.
The new fills were hard and secure but do stand out as dark spots on the stummel.
The bowl was then sanded with a series of sanding sponges from 600-3500 grits. Between each sponge I wiped the bowl with a make-up pad wetted with alcohol.
The button and mouthpiece area were sanded with a series of sanding sponges from 600-3500 grits, to remove the tooth chatter and to smooth the stem. I did not want to sand the other surfaces of the Bakelite in fear of rounding the edges.
The bowl and mouthpiece area were worked with micro-mesh pads 4000-12000. Between pads I wiped the bowl with an alcohol wetted make-up pad. The Bakelite was wiped with a paper towel between pads to remove debris. I did use the micro-mesh pads on the flat surface of the barrel and the top of the pistol.
I used Before and After Fine Polish, which is a fine abrasive buffing polish on a cotton swab to polish the surfaces of the Bakelite. I could have sworn that I photographed this but could find no photos as I transferred the photos to the computer. Darn old people or gremlins…
The entire pipe was given a coating of Before and After Restoration Balm and allowed to sit for an hour.
The remaining Restoration Balm was hand buffed from the pipe with an inside out athletic sock. The pipe was then taken to the buffer where several coats of carnauba wax were applied to the bowl. The pipe was hand buffed with a microfiber polishing cloth as a final step.
Overall I am happy with how this pipe cleaned-up. The bowl looks much better. I cannot say that I am pleased with the brownish looking pistol parts of the pipe. I am uncertain how to clean and polish Bakelite without damaging the detail of the piece. I thought about using a buffing wheel with a buffing compound on the Dremel rotary tool but again feared that I would inadvertently remove detail from the molding. If this were my own pipe, I might have taken more risks with the material. It was a fun little project and another pipe which I can remove from the list of “pipes I want to restore”. The dimensions of the Italian Revolver pipe are:
Length: 5.09 in./ 140.46 mm.
Weight: 1.57 oz./ 44.51 g.
Bowl Height: 1.58 in./ 40.13 mm. (bowl only) 2.75 in./ 69.85 mm (connected)
Chamber Depth: 1.08 in./ 27.43 mm.
Chamber Diameter: 0.74 in./ 18.80 mm. (Conically bored diameter is at the top)
Outside Diameter: 1.22 in./ 30.99 mm.
I do hope that you have found something here useful to your own pipe care, maintenance or restorations. If you like this sort of thing, please click the like and subscribe buttons. Thank you for reading the ramblings of an old pipe lover.
Loading…
Below are some photos of the completed Italian Revolver pipe.
This slightly brutalized bent beauty was part of an estate lot of 13 pipes from Germany. I was interested in getting some pipes less common in the United States. The first from this lot that drew my attention was this rusticated bent pipe with a unique briar ring adorning the stem. The pipe was marked with what appeared to be a signature though I had trouble making out the name. The only other markings on the pipe were a 5 digit number around the bottom of the shank. Below are some photos of the pipe prior to being worked on.
Based on previous experience a heavily smoked pipe is frequently a very good smoking pipe. Then again it could just be a heavily smoked pipe by a slob. The rim was heavily layered in lava, the tobacco chamber well caked and the shank to stem joint looked like it had issues retaining a tight seal. When I pulled the stem from the stummel I saw a replaceable filter which someone must have thought to be irreplaceable. The briar ring on the stem appeared to have been a two piece ring glued together and since separated slightly. The most redeeming quantity was that the stem did not appear to be chewed on. My vivid mental image of the previous owner was a German tweed jacket wearing man with a bottomless tobacco pouch and no teeth. Well, this was going to be an interesting restoration.
Background
For researching this pipe, the first place I visited was pipephil.eu. Not sure how to proceed without a logo, name or country of manufacturer (COM), I started with a hunch, Germany. I had no evidence that this pipe had a German provenance but I had to start somewhere and the pipe did come to me from Germany. I clicked the German flag in the section that read “Search by country”.
Denicotea? Barontini? Molina? I have the song Synchronicity by the Police blaring in my head after I read those three names. I had just recently restored a Barontini pipe, and last Saturday I received a brand new Molina pipe and the next pipe in the restoration queue is a Denicotea. Good thing I like the Police, the genius of Sting, the amazing guitar work by Andy Summers and the incredible drumming by Stuart Copeland – what’s not to love.
Back to the pipe, I continued to pipedia and searched Aldo Morelli. Here I found the following:
“Aldo Morelli is a fictional name. The brand Aldo Morelli has been registered for Denicotea on February 26th, 1992.[5]
Stefan Petzuch points out this brand appears to have similarities to the Mauro Cateni pipe brand, in particular they are both fictional Italian brands by German companies, and both have the “HAND CUT” imprint on the stem as seen below. This may connect the Aldo Morelli brand to Gebr. Heinemann KG in Hamburg, who had registered the Mauro Cateni brand. Or perhaps there is a connection between Denicotea and Gebr. Heinemann KG, or perhaps these pipe brands simply used “Hand Cut” stems from the same source.” (Denicotea – Pipedia)
Like I said earlier, “this was going to be an interesting restoration”. I now had an imaginary signature on an imaginary brand for an Italian made German pipe. All I could think was, “What the heck?” Continuing down this rabbit hole, I typed in “Denicotea” into pipedia.org and was rewarded with,
“Willy Heineberg founded the company Denicotea in 1932 and began manufacturing and selling smoking accessories such as filters, filter inserts, cigarette holders and pipes.[1] The company headquarters was initially in Cologne, but was relocated to Bergisch Gladbach after the Second World War.[2]
Denicotea is actually the name of a silica gel filter, cigarette holders and care products for pipes and cigarette holders.
I still find it a bit confusing as Denicotea seems to be a company[3] and a brand as well which is operated by COMPOSING-STUDIO GmbH[4].” (Denicotea – Pipedia)
This brought me back to the whole musical synchronicity idea, a composing studio, really? Just when you think that reality can’t match fiction something like this smacks you in the head. Anyway, this pipe is likely to have been made in the 1990s in Italy by Cesare Barontini, Gigi or Molina Pipe for Denicotea Gebr. Heinemann KG in Hamburg. Confused? I was.
The Restoration
The pipe was taken to the workbench where a cleaned denim piece was laid to protect the work surface.
The poorly fitting stem made me think that was where I should begin. The tenon and stem face were heavily fouled with smoking residue. Thinking back to the disgusting filter from the “before” images, I thought that a saturated filter would allow moisture and dissolved yuck to seep around the tenon. This also made me wonder about the condition of the airway.
The tenon was far more dirty than one would expect.
And, the separating briar band would have allied more seepage of smoking residues.
I started cleaning the stem with 95% ethyl alcohol,cotton swabs and bristle pipe cleaners. The tenon was as dirty inside as outside.
I tried to lightly sand the stem face but this seemed like a bad idea since I was sure that I could not keep from sanding one side more than the other and affecting the overall fit of the stem to the shank.
My home-grown solution was to drill a 10 mm hole in a hardwood block of wood. This would fit the tenon snugly. And keep the stem perpendicular to the stem face.
The fit was good.
I then placed a piece of sandpaper over the block and used a cork hole borer to cut a hole in the sandpaper.
The problem of sanding unevenly was solved.
I carefully topped the shank face with a piece of sand paper laid flat on a countertop.
The subsequent fit of the mortise and tenon was restored and the fit was good.
The stem cleaning continued with a lot of 95% ethyl alcohol, cotton swabs and bristle pipe cleaners.
The fit and briar ring itself needed a bit of polyvinyl acrylate (CA, super glue) to help make them look finished. I used brown CA to fill in the gaps in the briar ring and black CA to fill the area between the acrylic stem and the briar ring. I first applied a layer of transparent tape to the stem. Then cleaned out the gap with alcohol and a cotton swab. Using a fly tying bodkin I applied brown CA to the briar ring on both gaps. This was then spritzed with a CA drying accelerator.
The gap between the stem and the briar ring was then filled with black CA again using the fly tying bodkin. This too was spitzed with a CA drying accelerator.
While the CA was still soft, I removed the tape. The black CA that lay outside of the gap on the tape peeled off with the tape, limiting the sanding I would have to do to the stem.
With the stem now looking much better, I turned my attention to the stummel. The reaming kit was gathered.
The PipNet did most of the work here.
The Smokingpipes Low Country Reamer and the General triangular scraper finished the scraping of the tobacco chamber. The chamber was then sanded with 220 sandpaper wrapped around a wood dowel. The below photo shows a strange step at the bottom of the tobacco chamber.
Looking at the opposite side, there is no step but a patch of slight charring was evident.
The rim also appeared charred.
The stummel was taken to the sink for a scrubbing with a nylon brush and undiluted Murphy Oil Soap. The color of the nylon brush indicates how dirty the stummel was. The sap was rinsed with warm water and the stummel dried with a cotton hand towel.
A second scrubbing of the stummel was done using the same process. The nylon brush was less colored this time indicating progress.
Back at the workbench the stummel looked much better but the rim damage could also be clearly seen.
The rim was charred. This changed my vivid mental image again, now the previous owner was a German tweed jacket wearing man with a bottomless tobacco pouch and no teeth and clutched a torch lighter.
I lightly topped the rim on a piece of 220 sandpaper laid flat then started the shank cleaning. Both removed a lot of black material from the stummel. The airway of the shank was very encrusted with tar and required significant scraping with the dental scraper.
The topping of the rim with sandpaper was insufficient to redeem it. I used a couple of files to remove the charred briar. The bevel of the inside rim was gained using a 2 inch PVC pipe cap wrapped in sandpaper.
In an attempt to lighten or bleach the darkened briar I applied a saturated solution of oxalic acid by cotton swab.
I wetted the rim with several applications of the oxalic acid solution and let it sit for 45 minutes. The solution was then scrubbed and rinsed with copious amounts of tap water.
There remained a darkening which I did not like. I thought back to several conversations with Sascha Mertens about removing charred wood. Sascha is a German pipe restorer and all around great guy. Although he may start charging me consultant fees as he is becoming more well known here in the States and Canada and has helped big name restorers like Steve Laug recently. Anyway, He frequently uses a technique where petroleum jelly is applied to the charred area and allowed to sit. The charred area is then carefully scraped with a sharp knife to remove the char.
I did all of the above and as can be seen below it did indeed remove more of the darkened briar.
I finally gave up on trying to make the rim look pristine. The darkened briar would have to be worn as a mark of honor signifying the scars of previous battles. Next I wanted to further clean out any remaining residues from the bowl and shank so I packed both with cotton and saturated the cotton with 95% ethyl alcohol. While this was sitting, I also coated the briar of the stummel and stem ring with a layer of Before and After Restoration Balm. These were allowed to sit overnight.
The following day the cotton showed signs that additional tars had been liberated from the briar and deposited in the cotton.
The cotton was removed and the bowl and shank were cleaned again with alcohol dipped cotton swabs and pipe cleaners.
The remaining Restoration Balm was hand buffed from the stummel using an inside out athletic sock.
The stem pipe was taken to the buffer where I buffed the stem with white jewelers rouge. The pip then received several coats of carnauba wax applied with the buffer. The final step was a hand buffing of the pipe with a microfiber polishing cloth.
This pipe turned out pretty well overall. I am still thinking about what to do about the interior of the tobacco chamber. That step in the drilling bothers me perhaps, a sanding or maybe filling the step with JB Weld? If someone wants to adopt this pipe, I will let them decide. The small spot of charred briar would be taken care of with a bowl coating of a light layer of maple syrup and carbon powder. No sense in applying a bowl coating though before the step is addressed. The pipe feels wonderful in hand. The heavy shank fit for a 9mm pipe filter gives the piece a substantial heft. The rusticated finish is very pretty and is well accentuated by the smooth panel with the Aldo Morelli signature, the briar ring and the glossy black acrylic stem. The dimensions of the Aldo Morelli Bent pipe are:
Length: 5.53 in./ 140.46 mm.
Weight: 2.36 oz./ 66.91 g.
Bowl Height: 1.99 in./ 50.55 mm.
Chamber Depth: 1.68 in./ 41.91 mm.
Chamber Diameter: 0.80 in./ 20.32 mm. (Conically bored diameter is at the top)
Outside Diameter: 1.57 in./ 39.88 mm.
I do hope that you have found something here useful to your own pipe care, or restorations. If you like this sort of thing, please click the like and subscribe buttons. Thank you for reading the ramblings of an old pipe lover.
Loading…
Below are some photos of the completed Aldo Morelli Bent pipe.

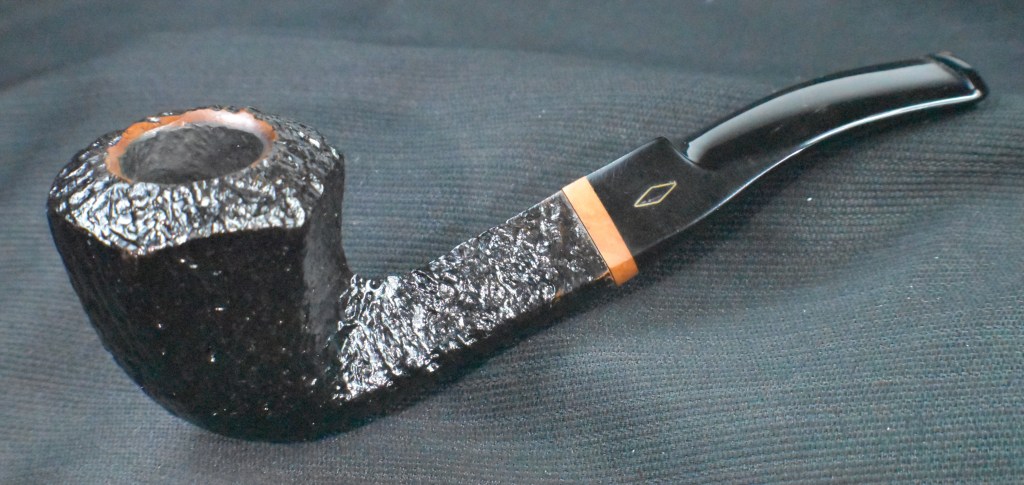
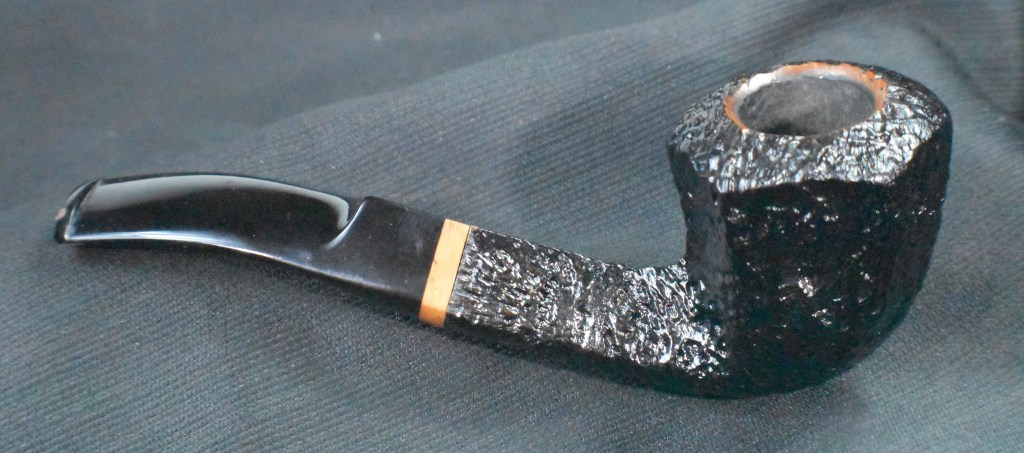
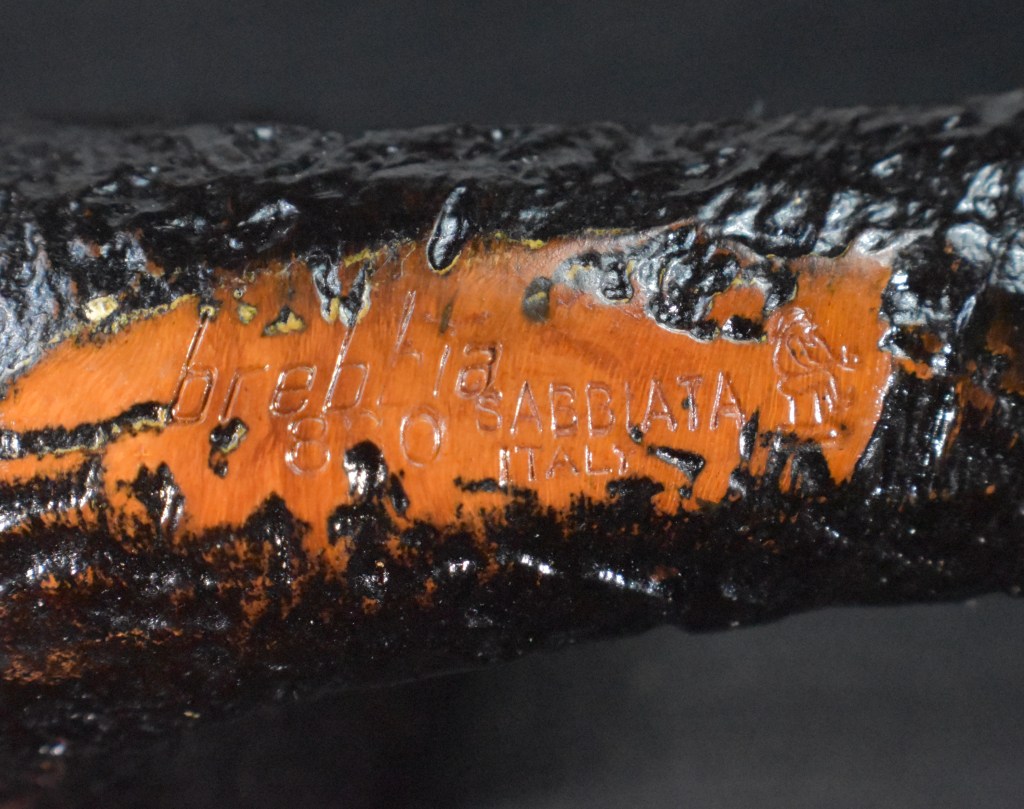
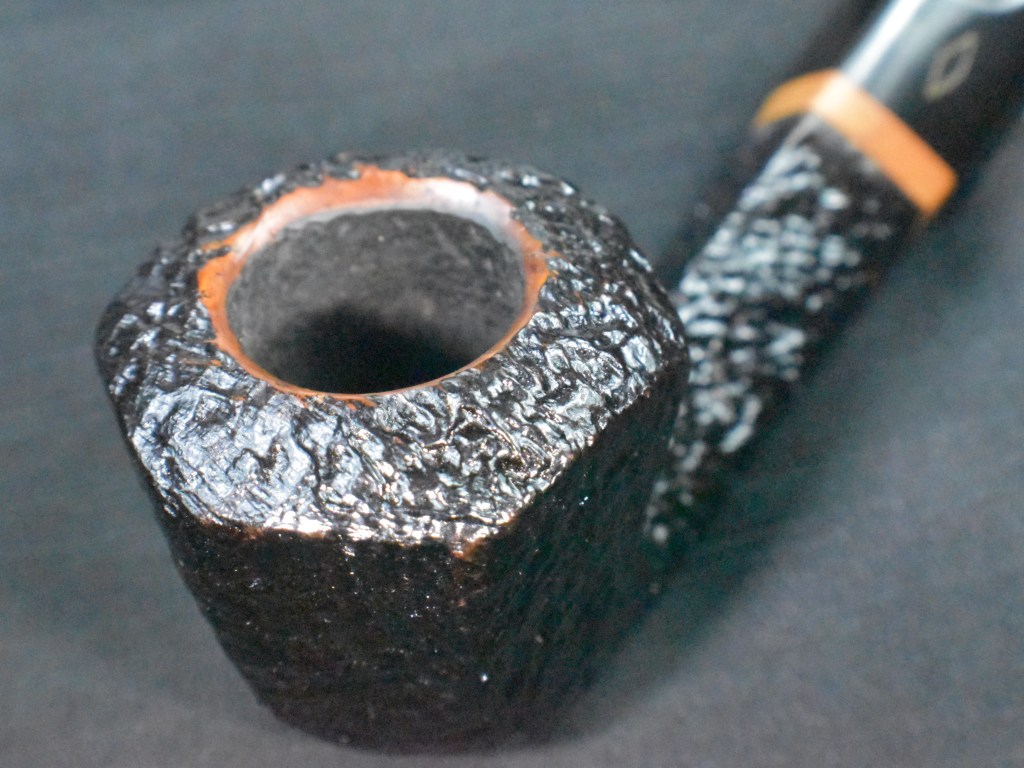
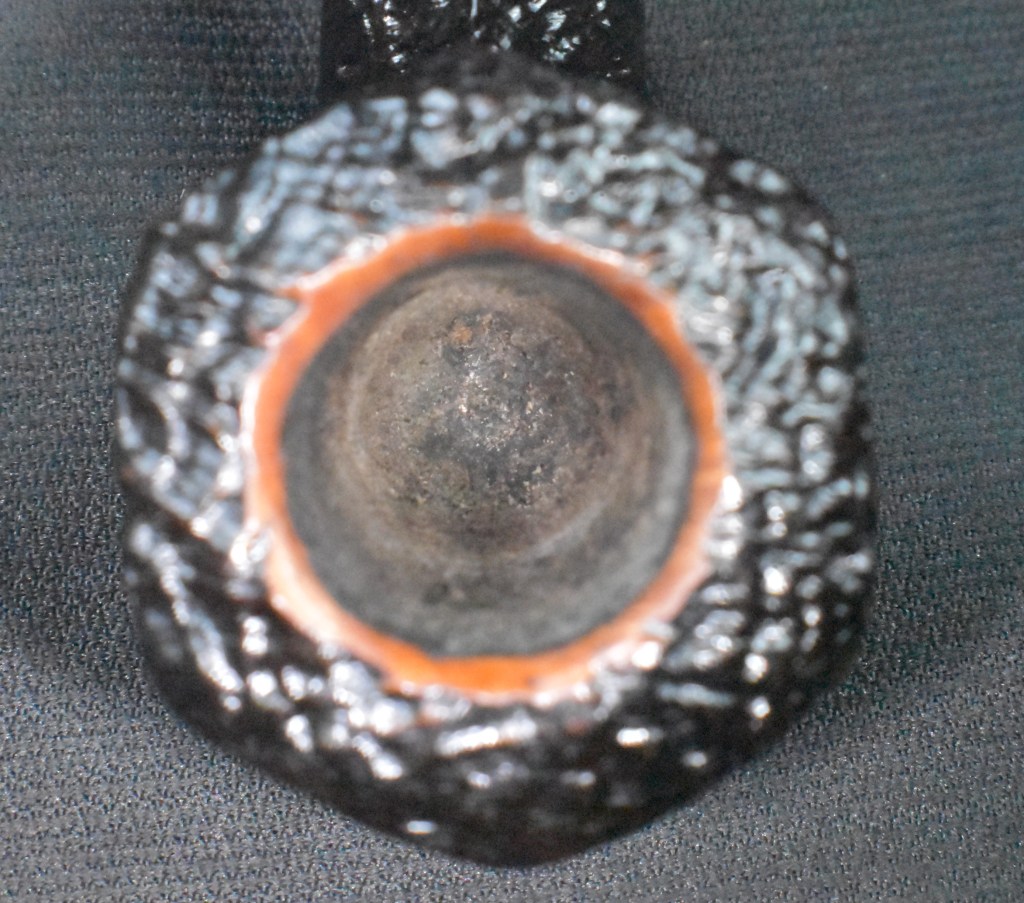
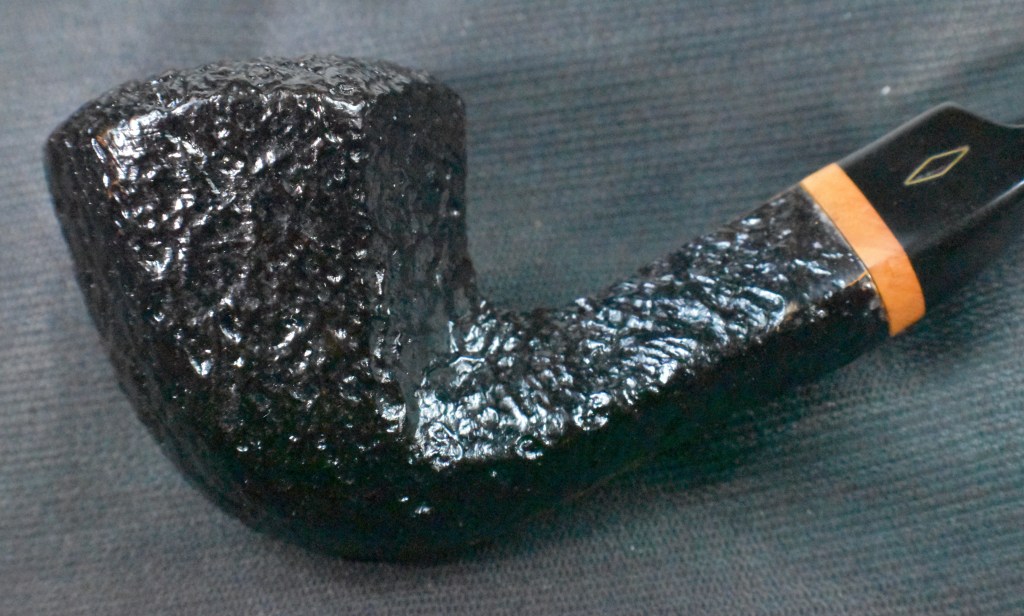
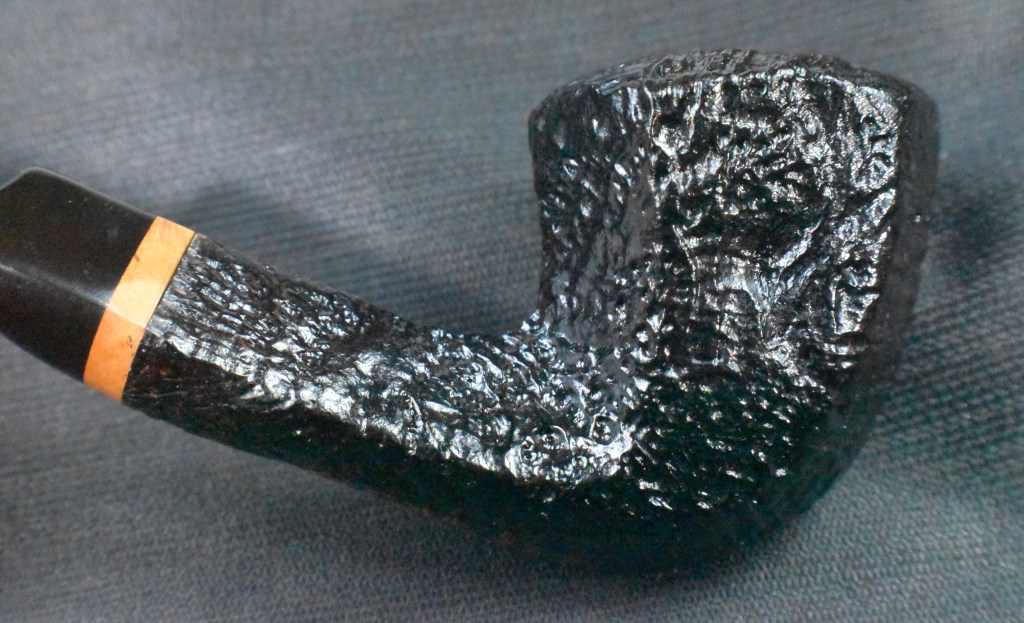
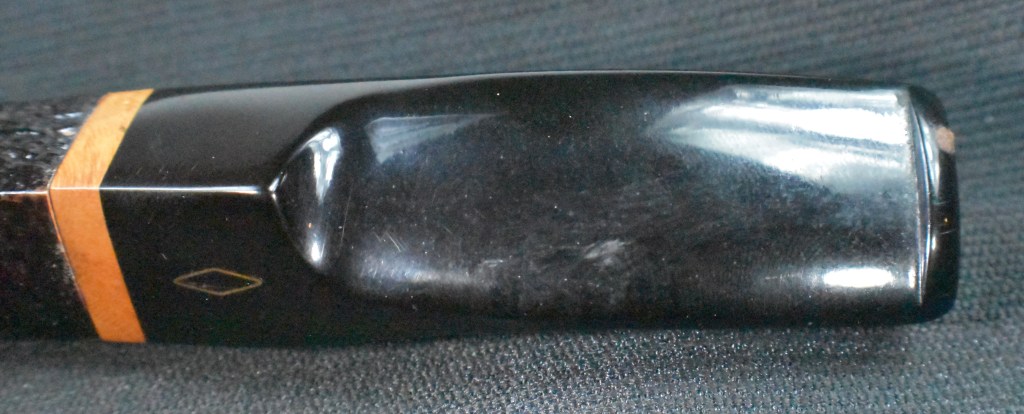
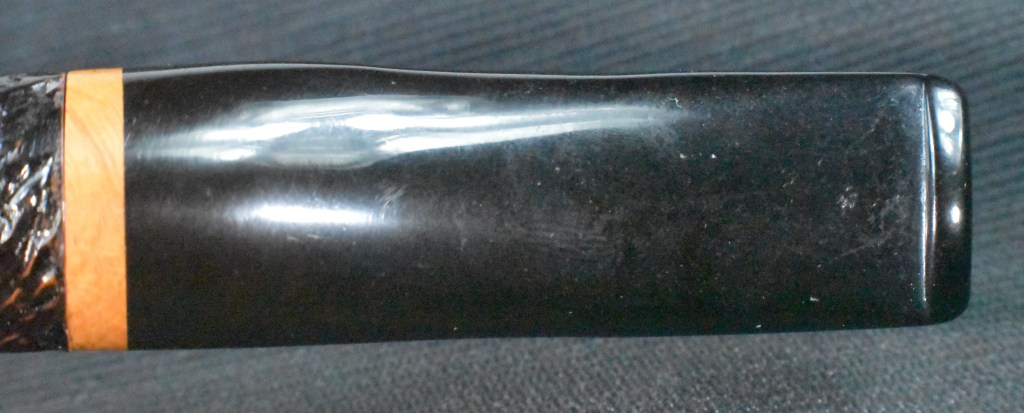
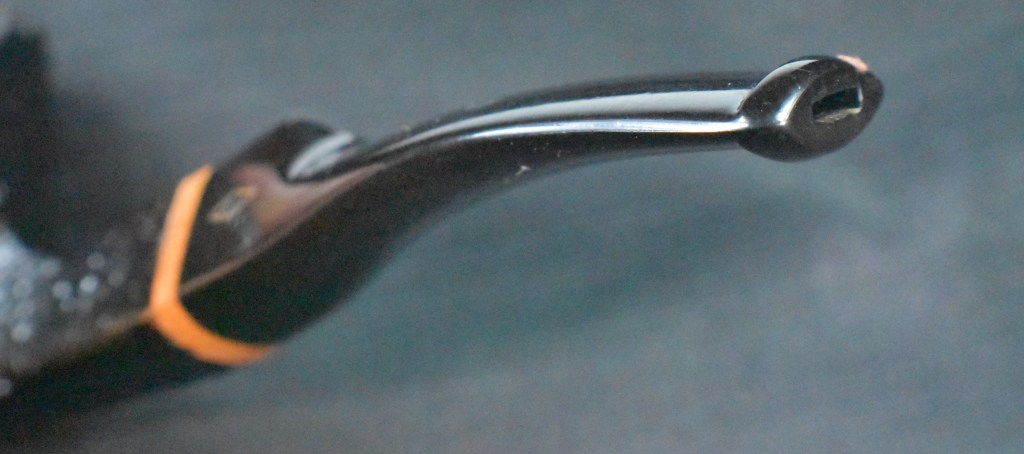
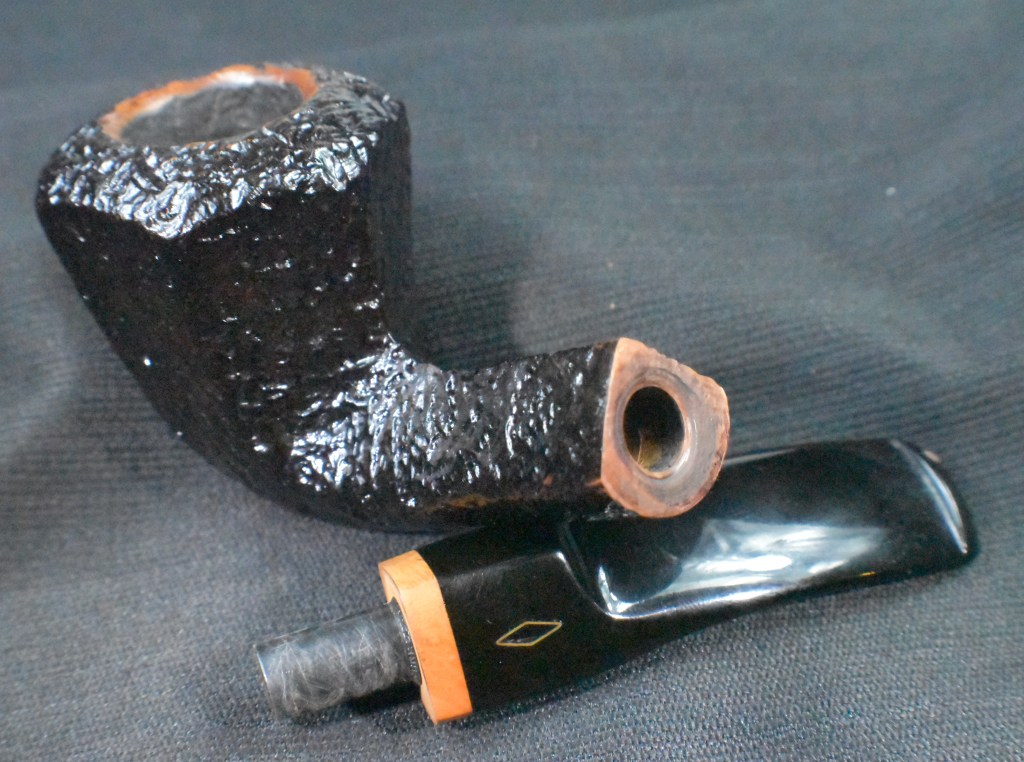
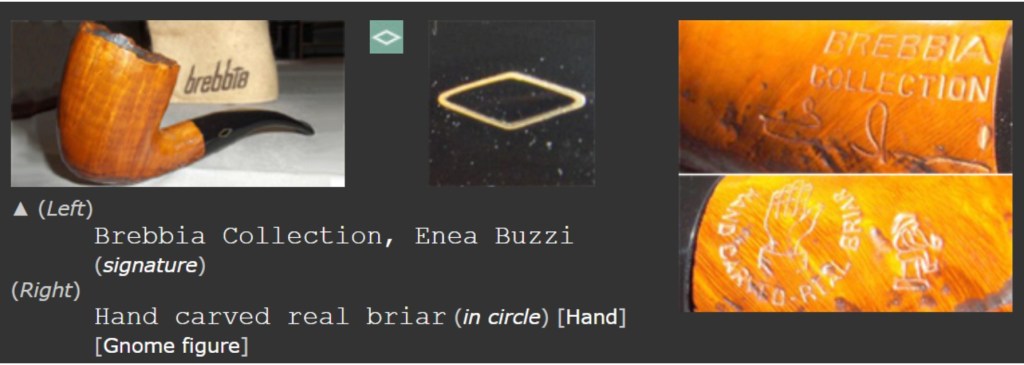

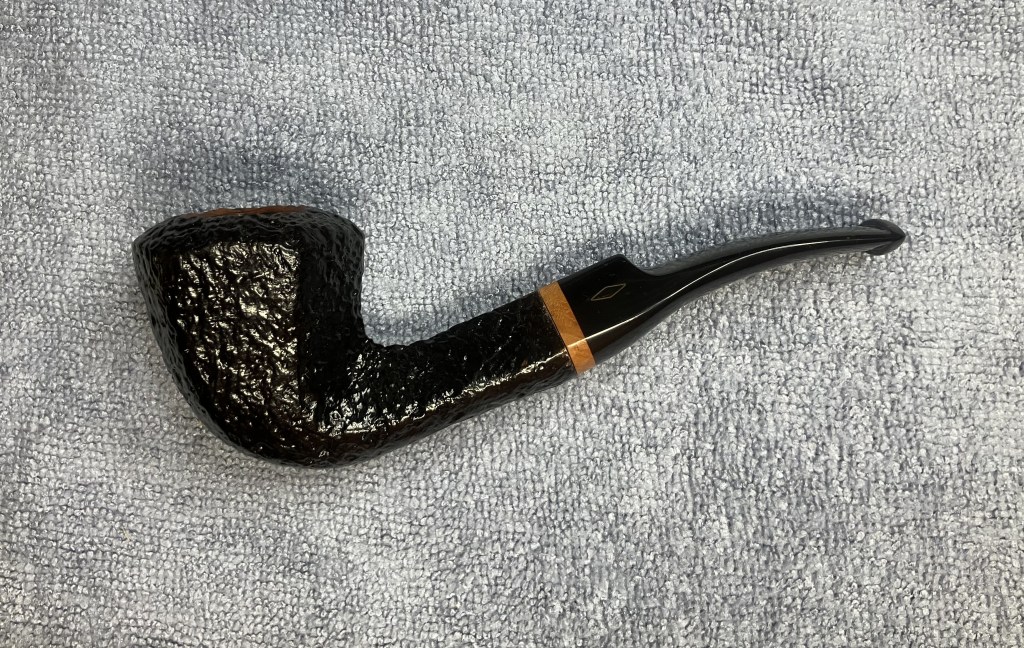
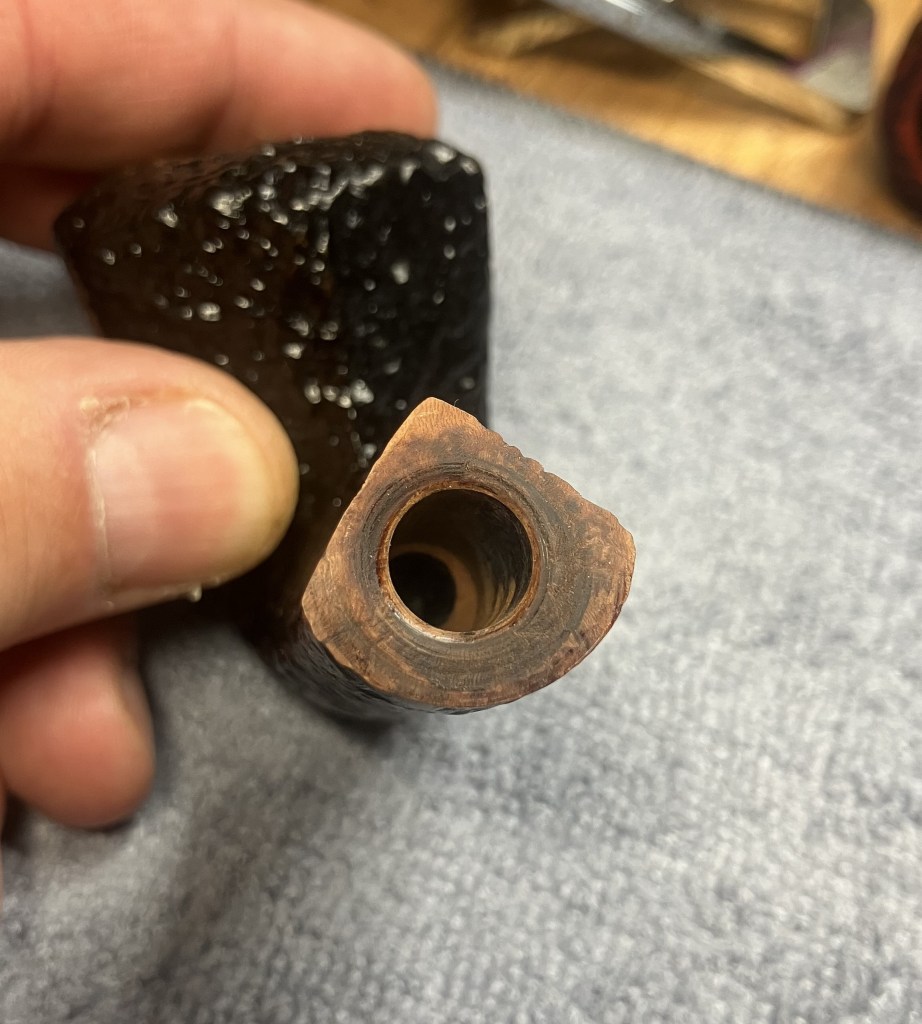
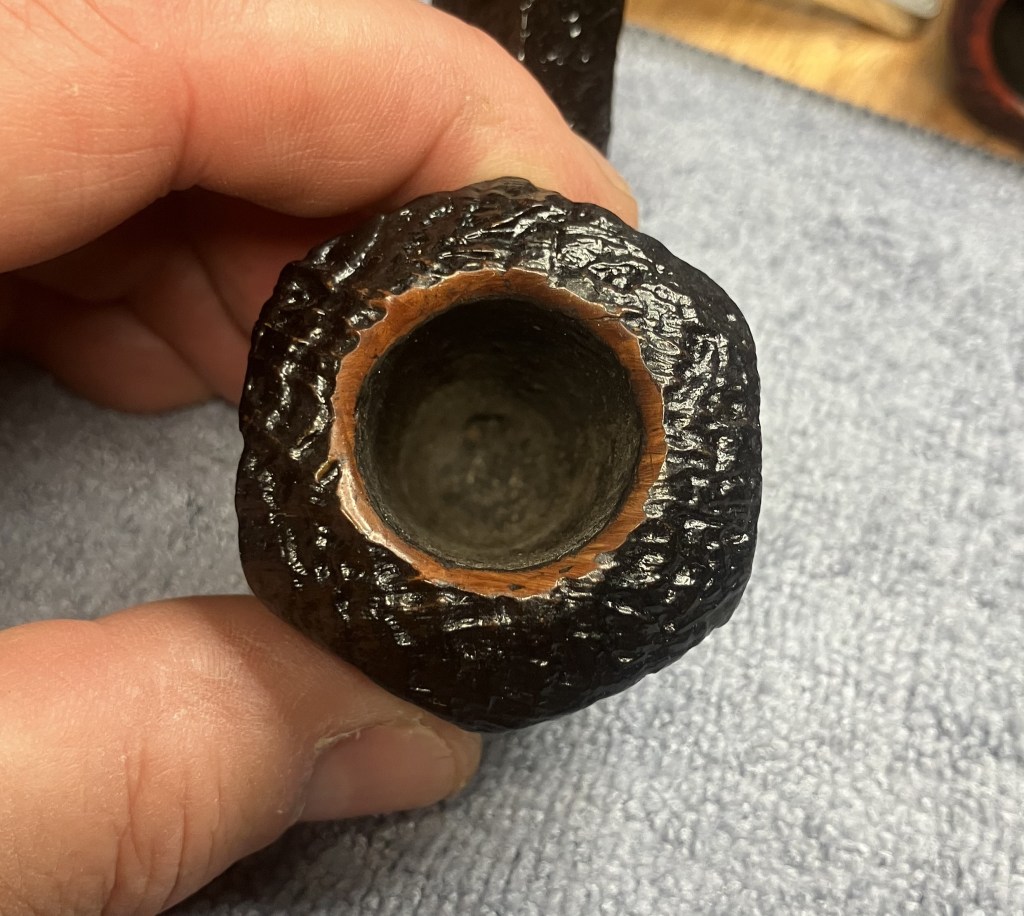
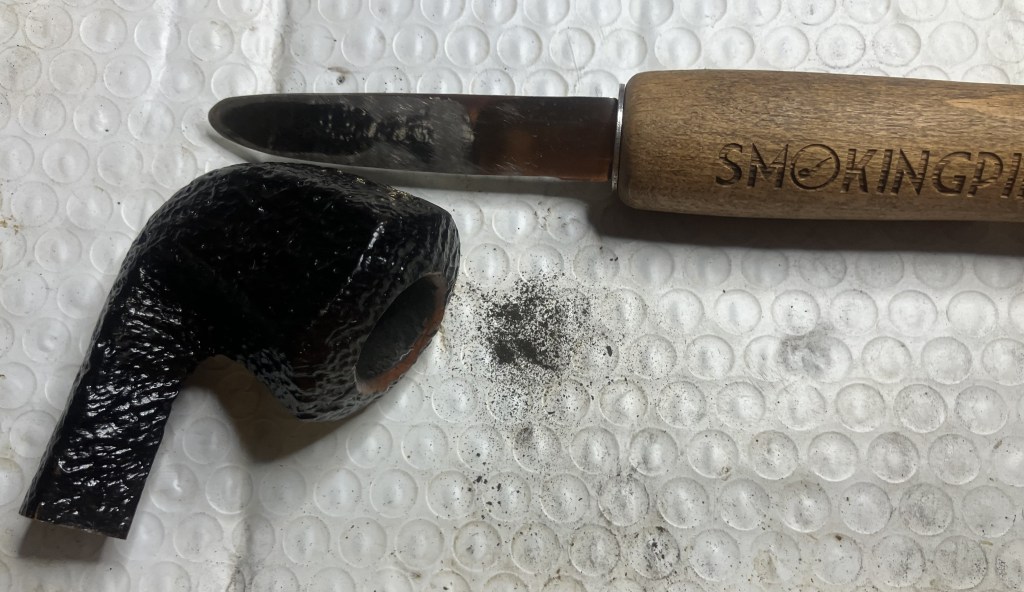
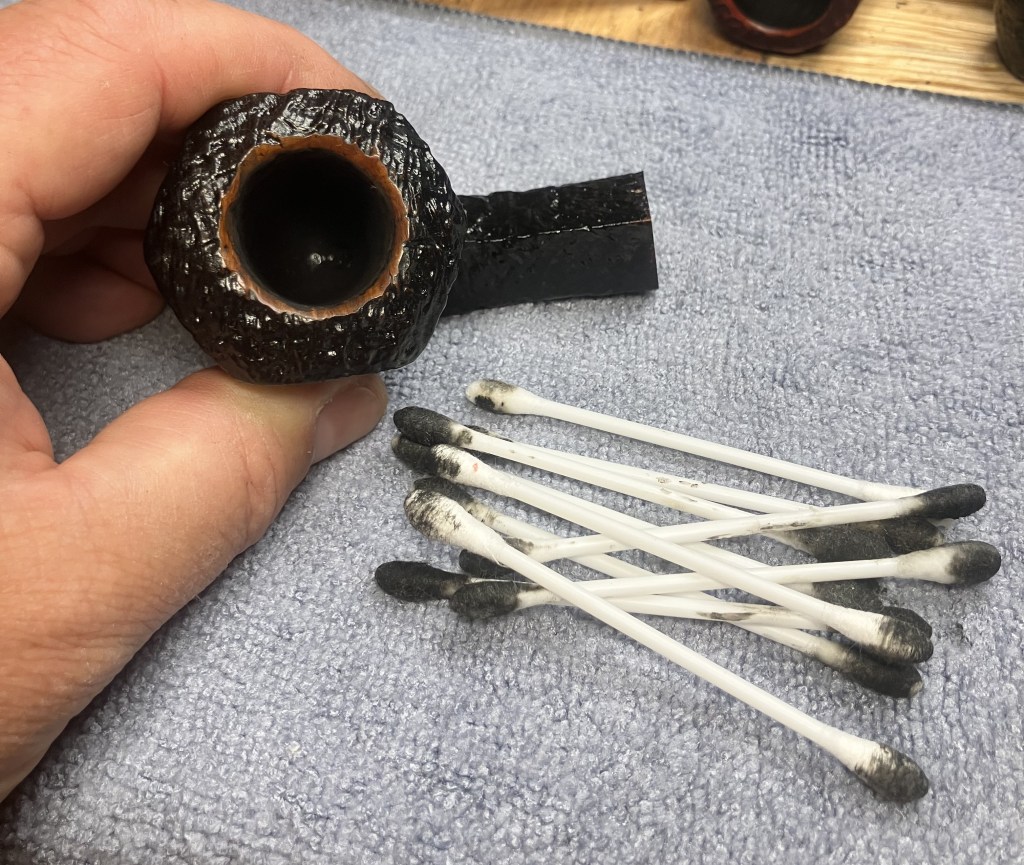
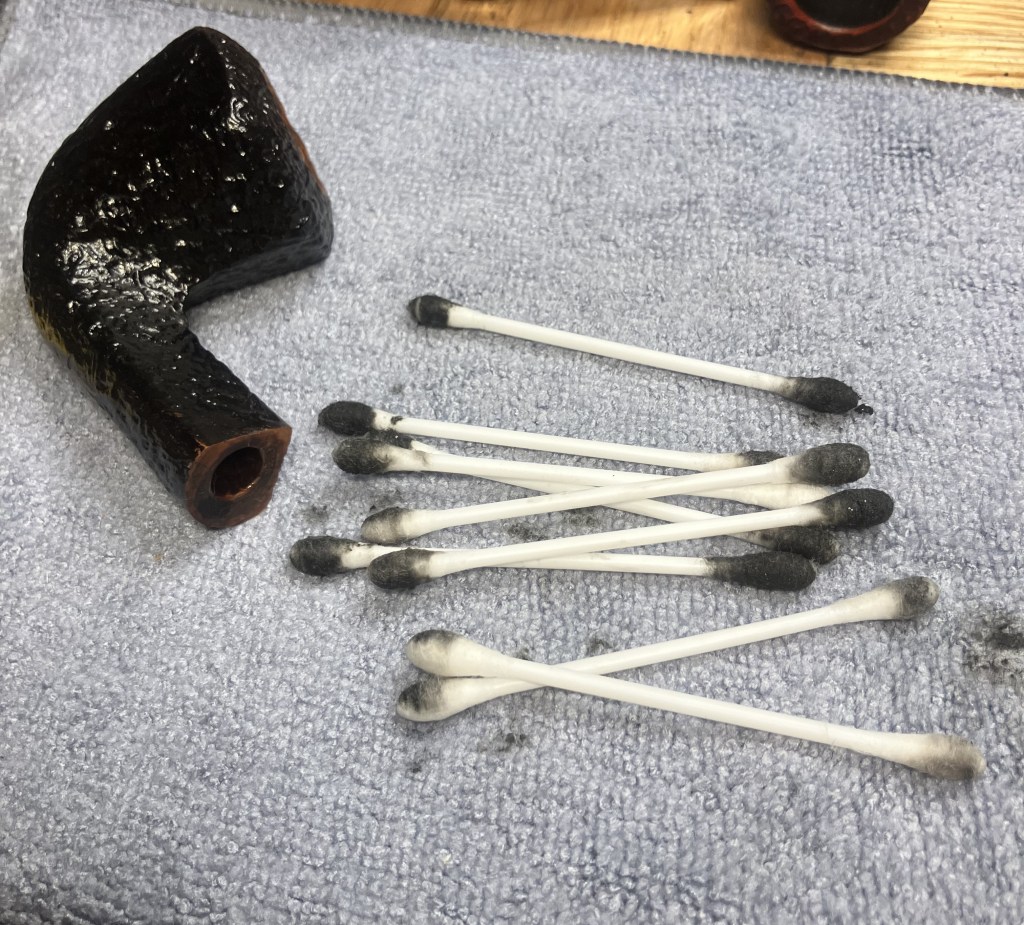
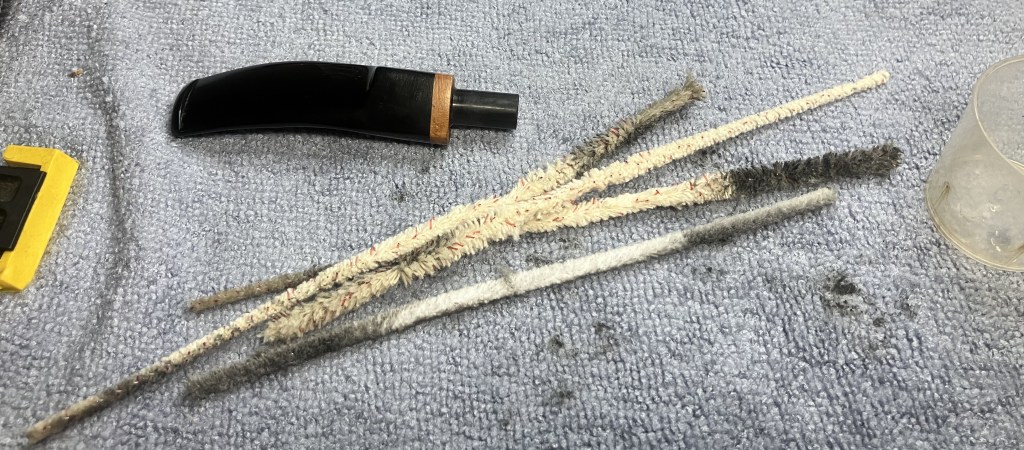
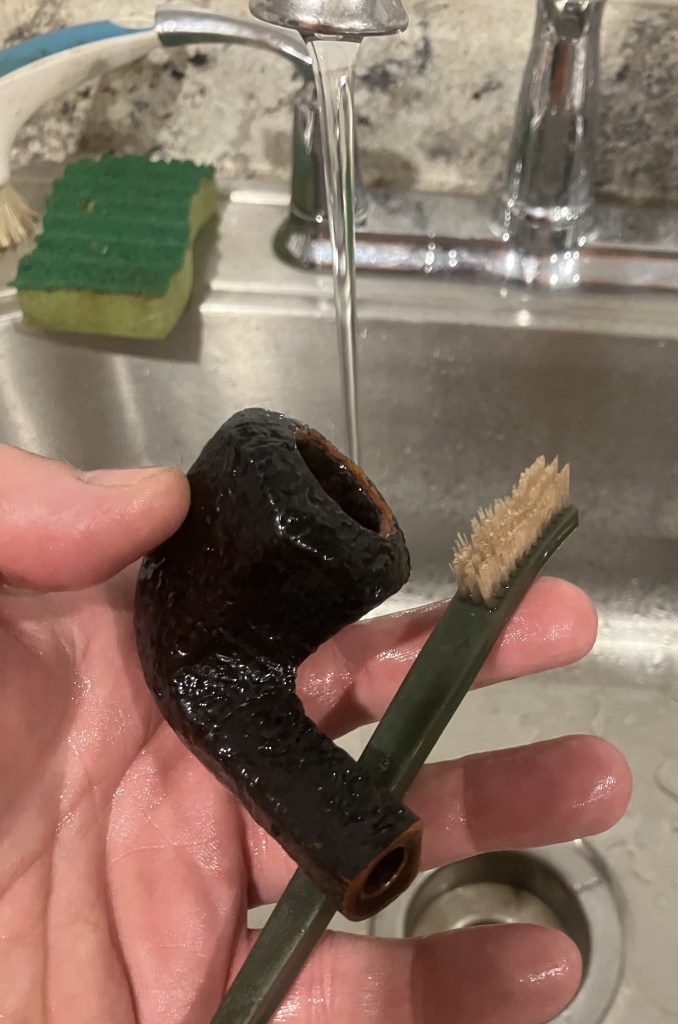
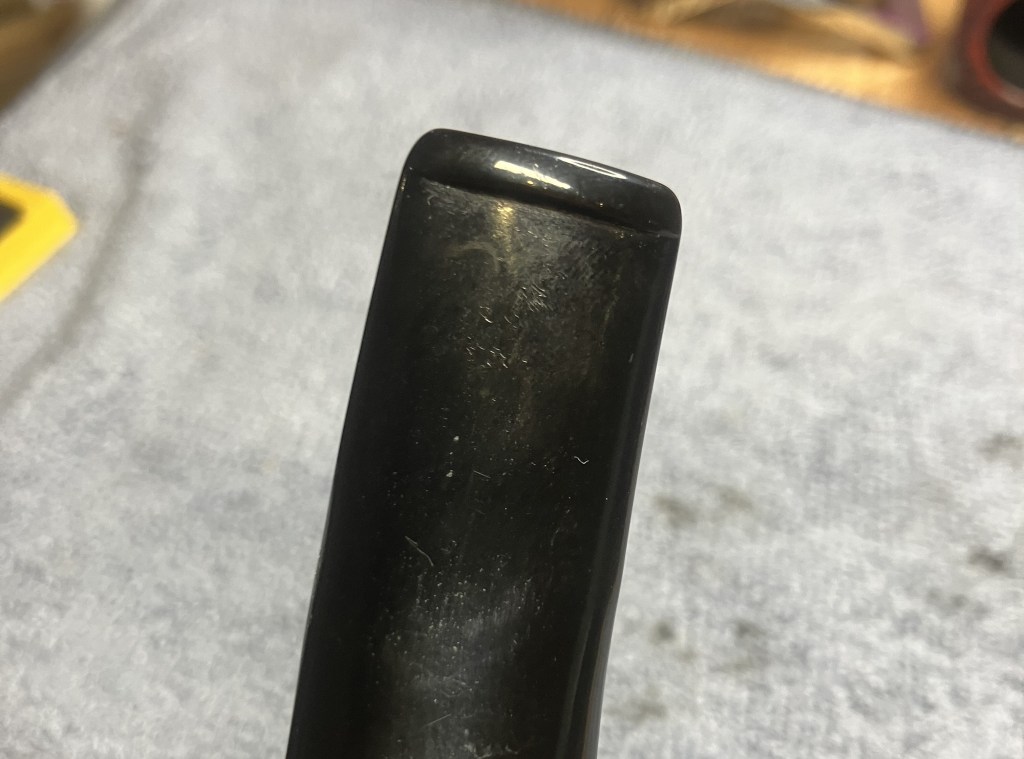
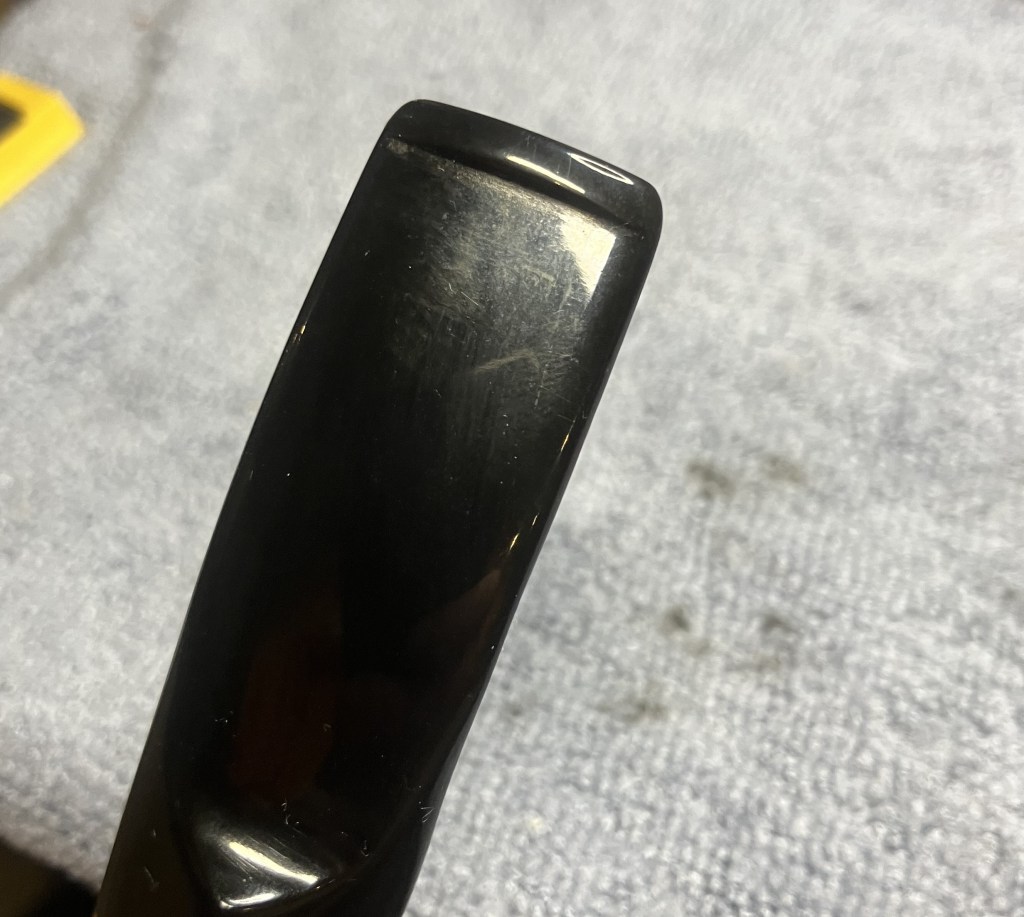
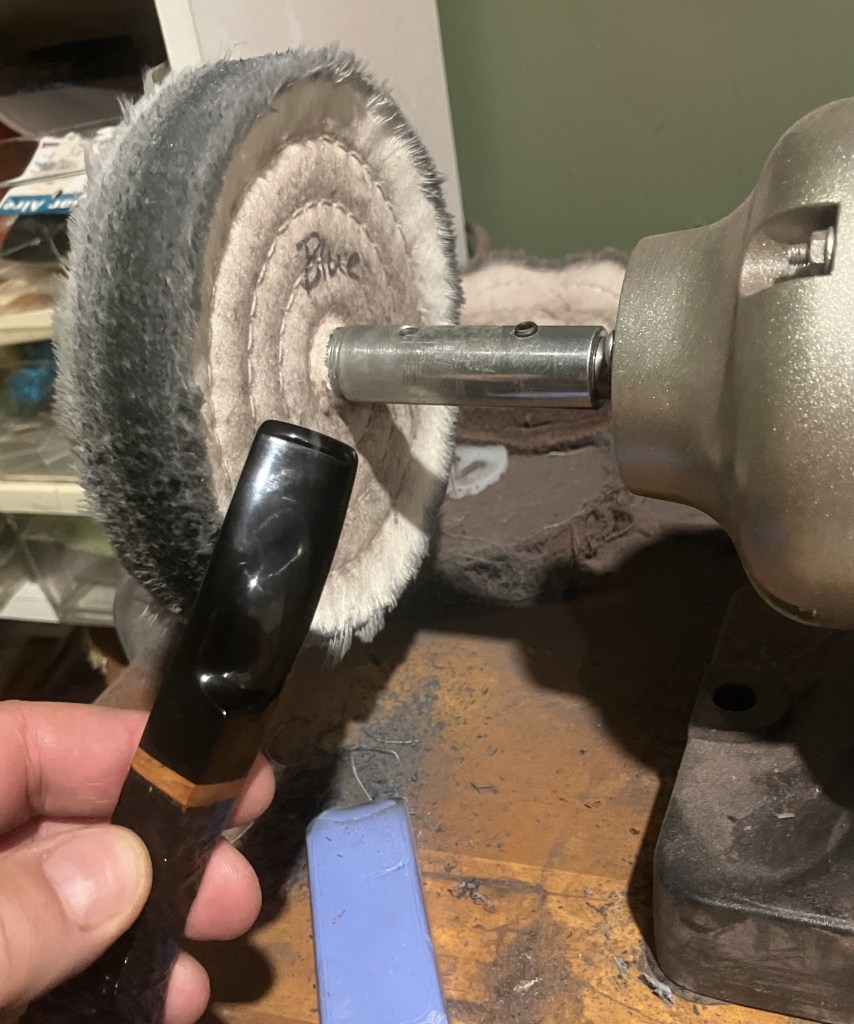
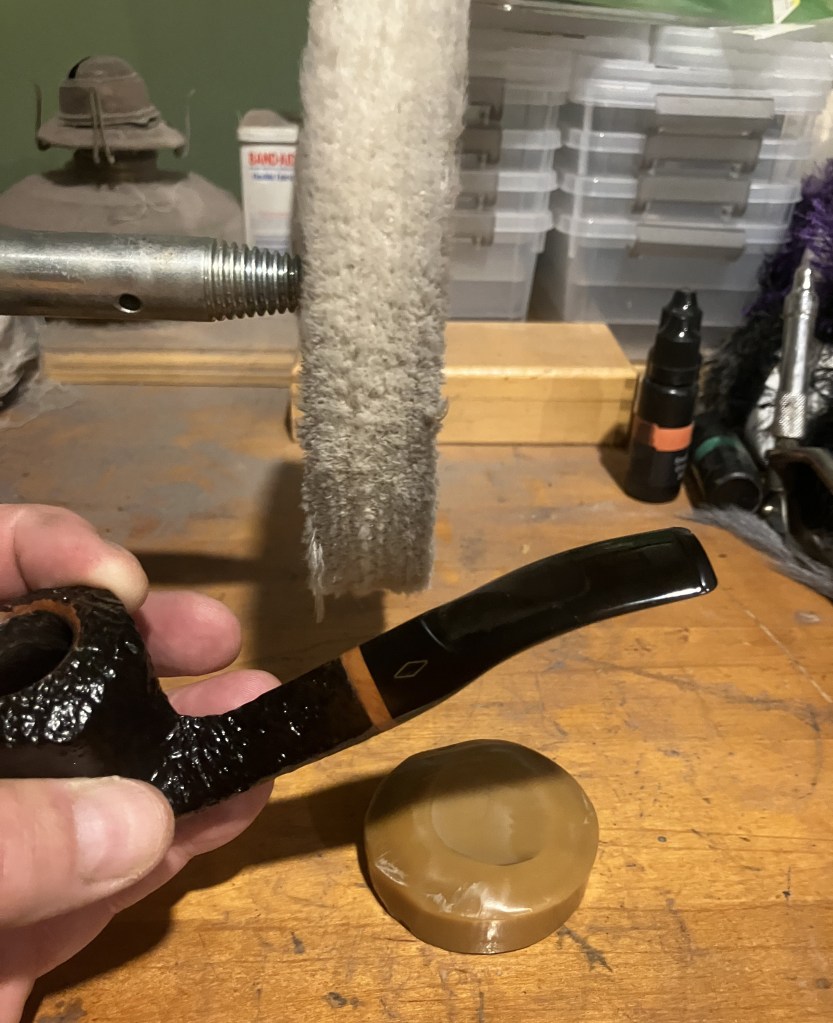
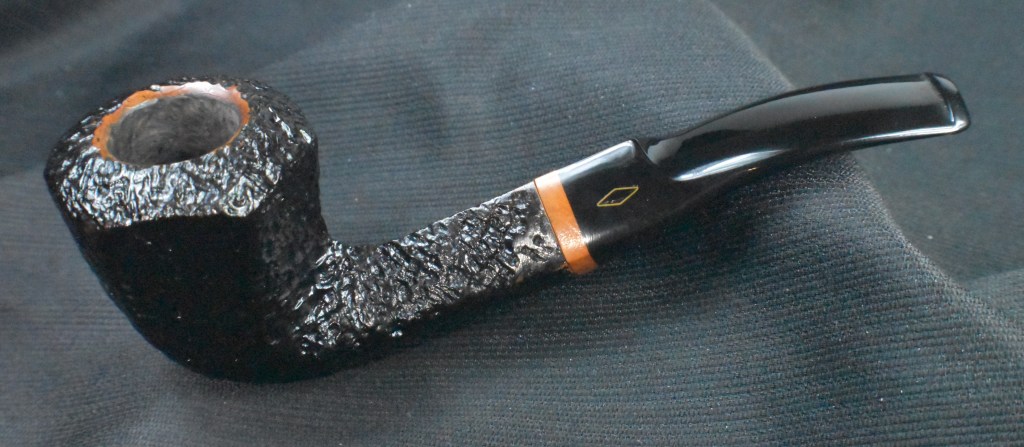
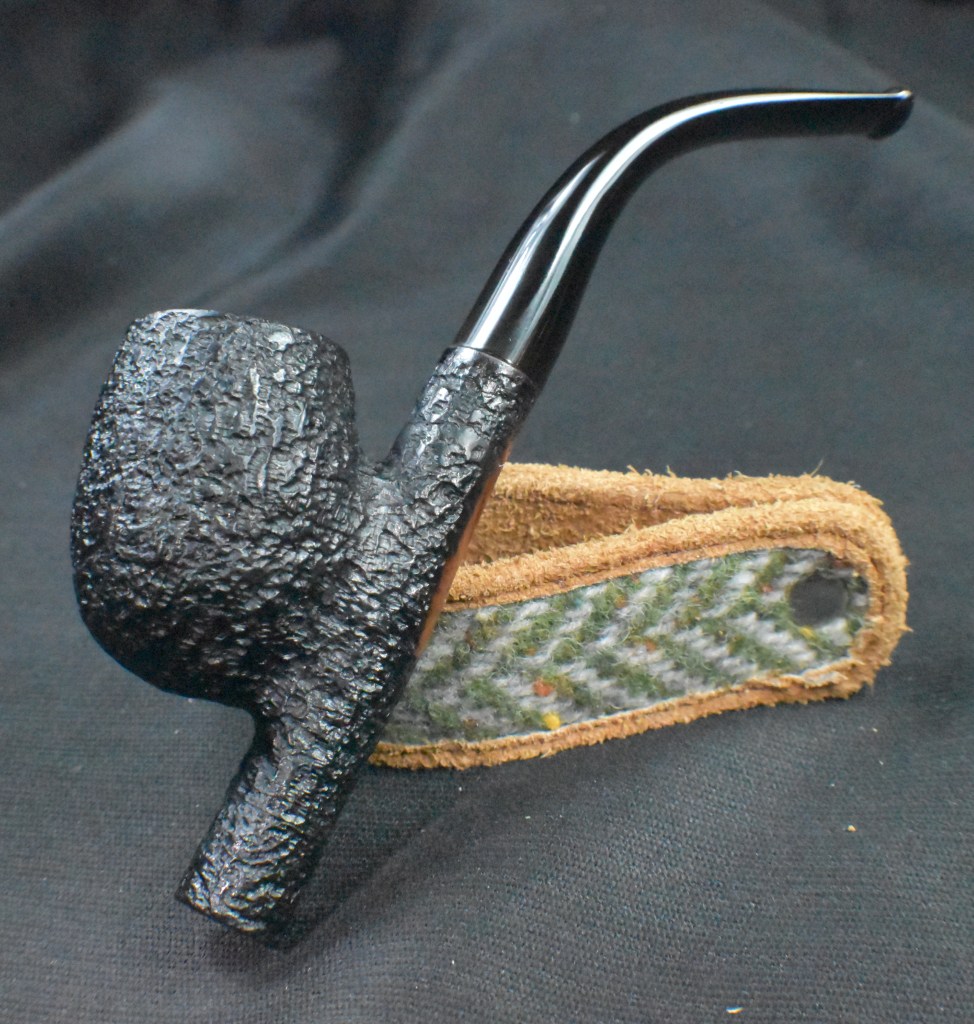

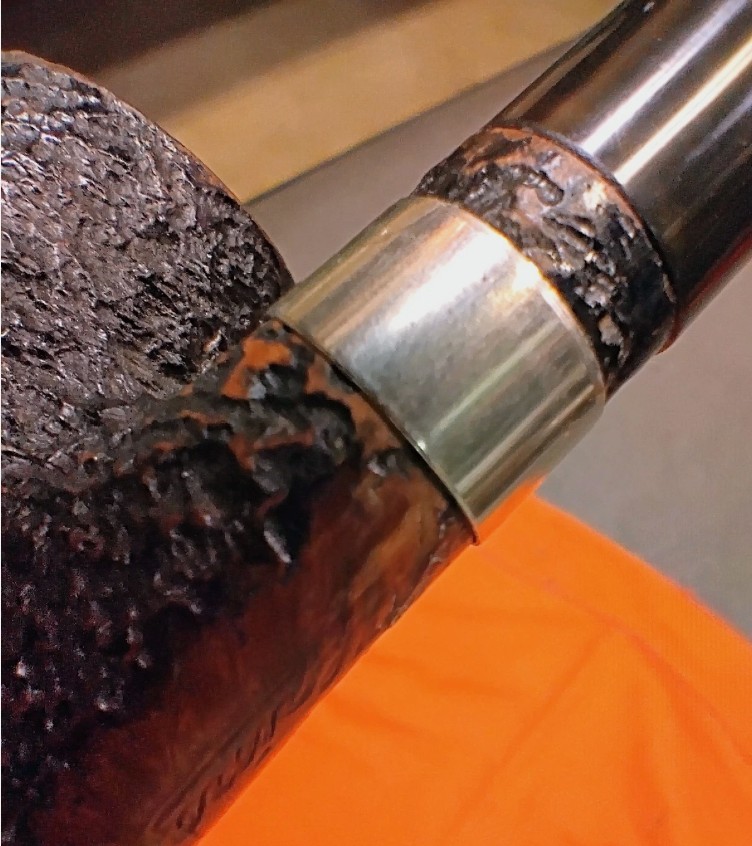
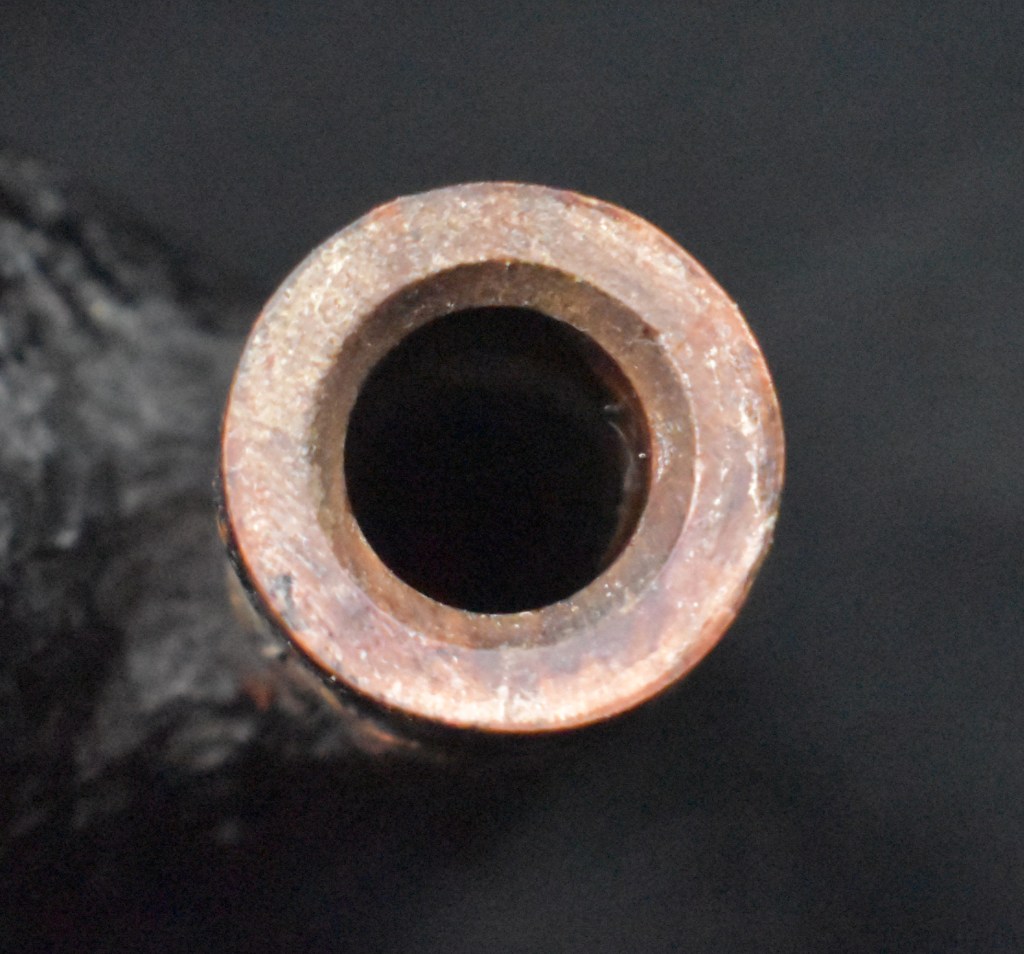
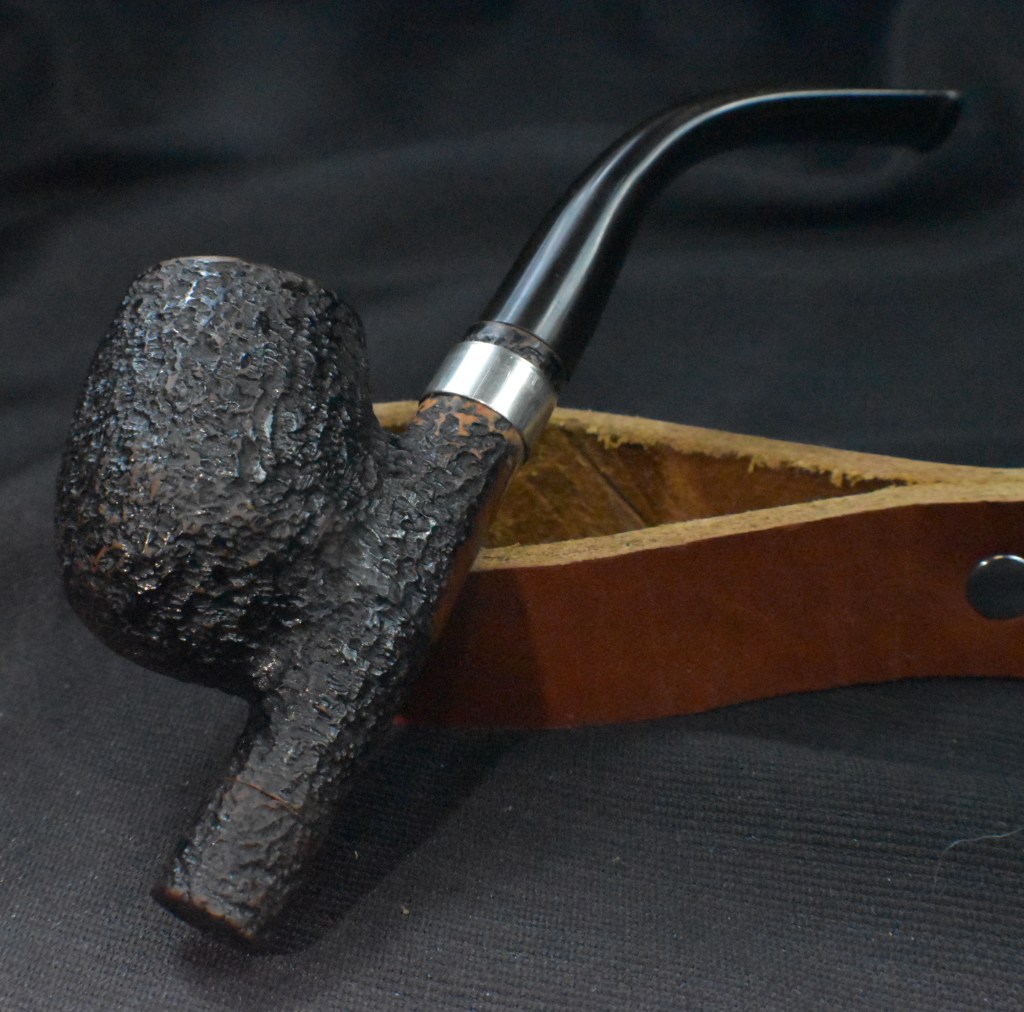
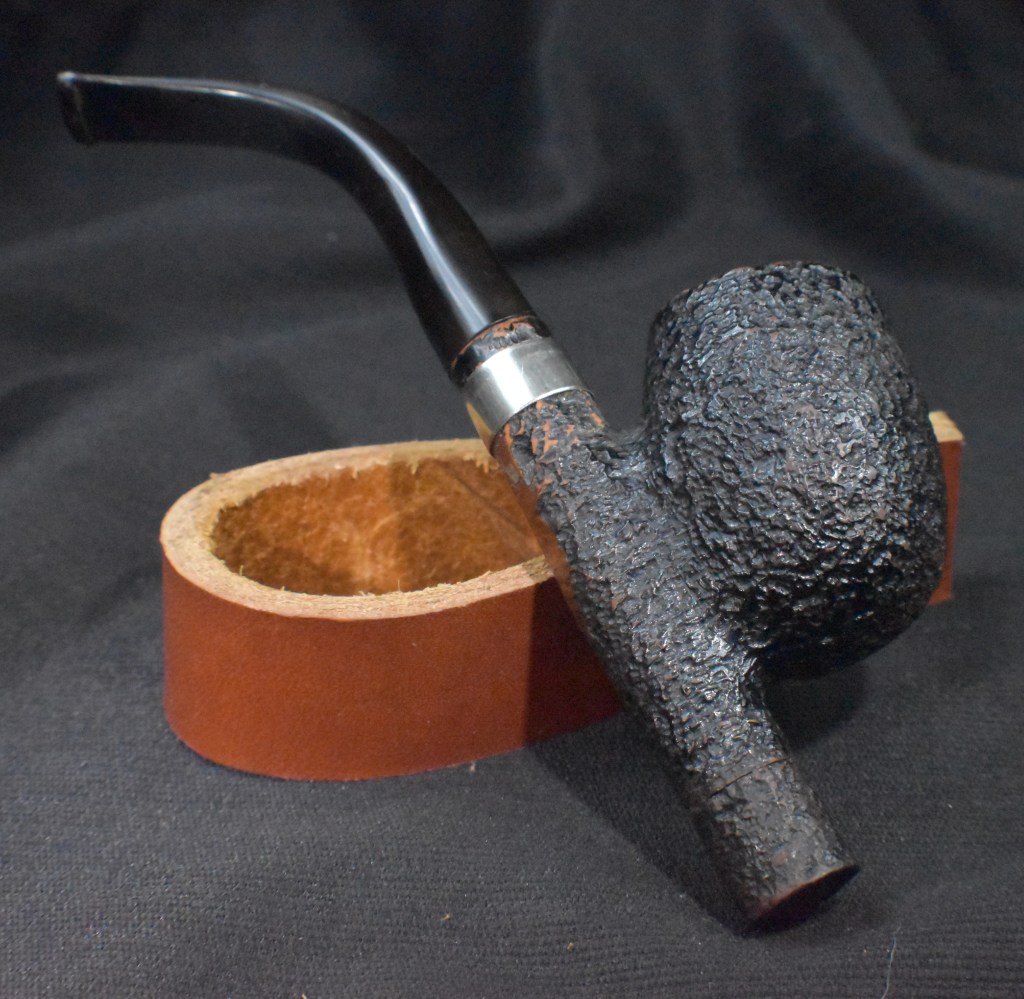
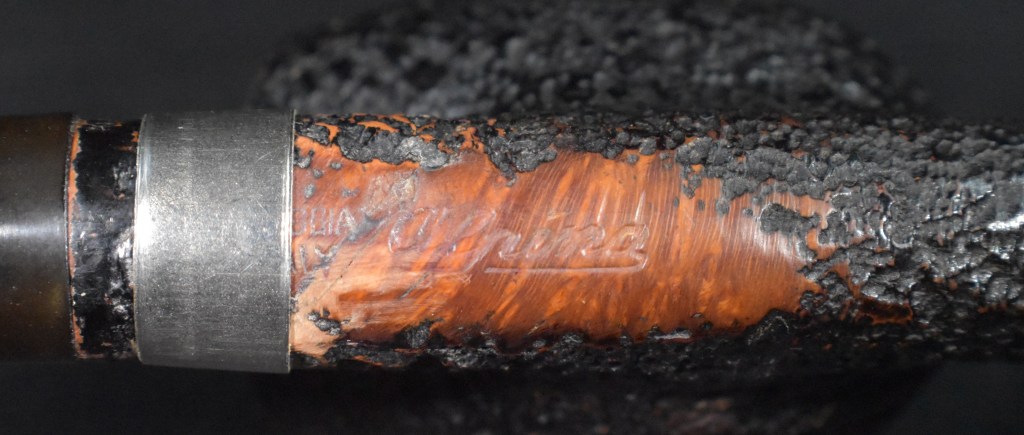
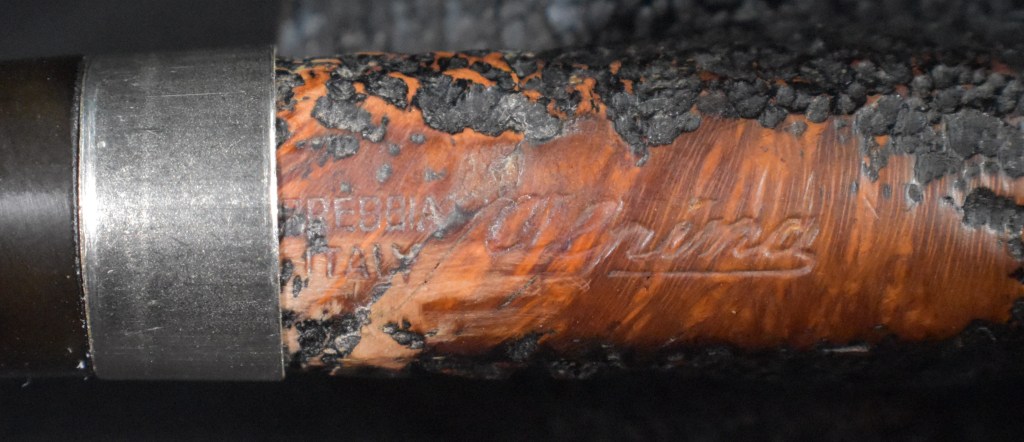
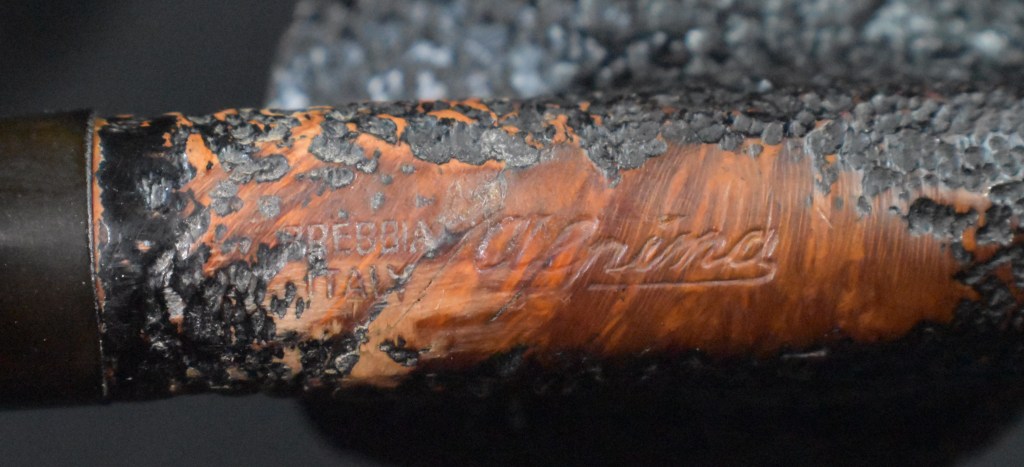
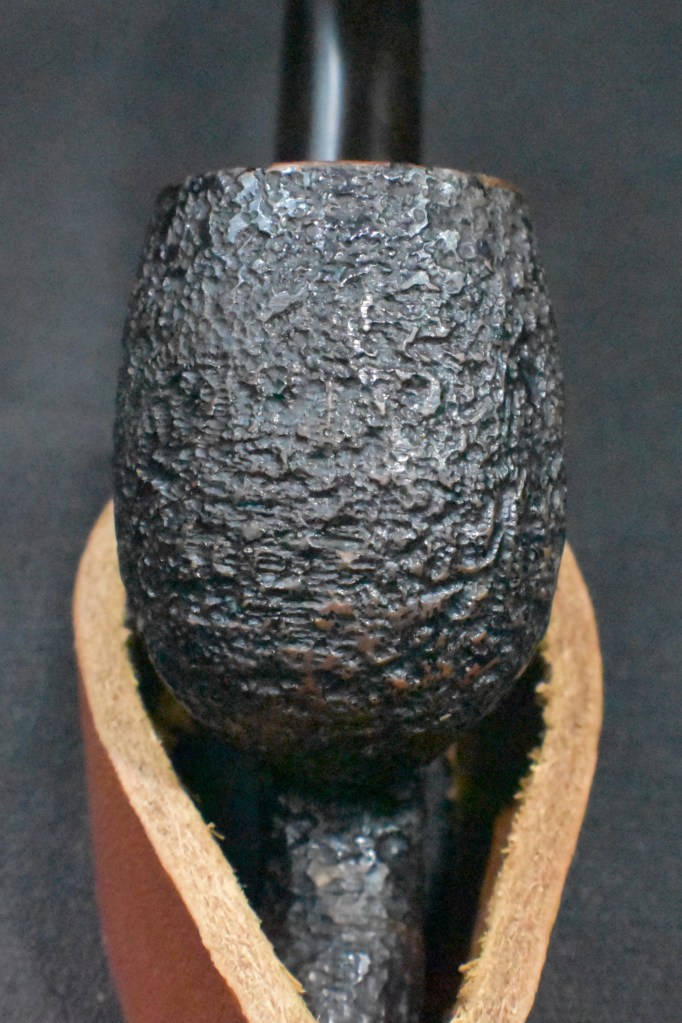
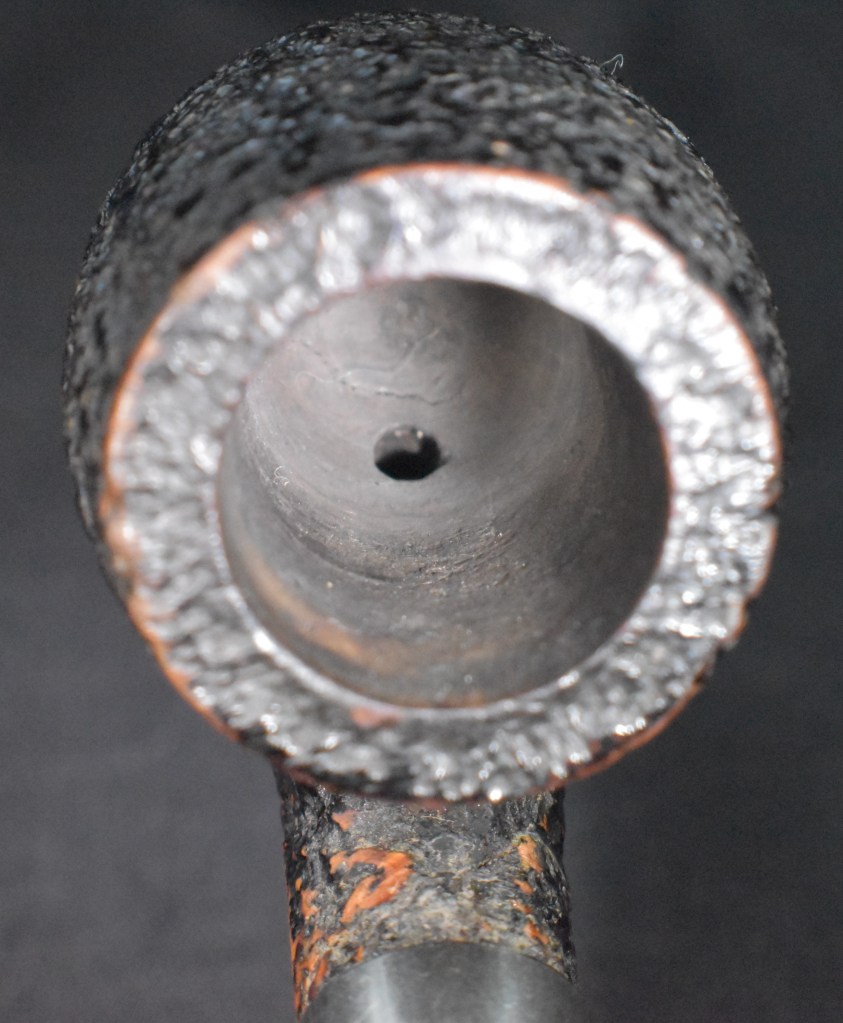
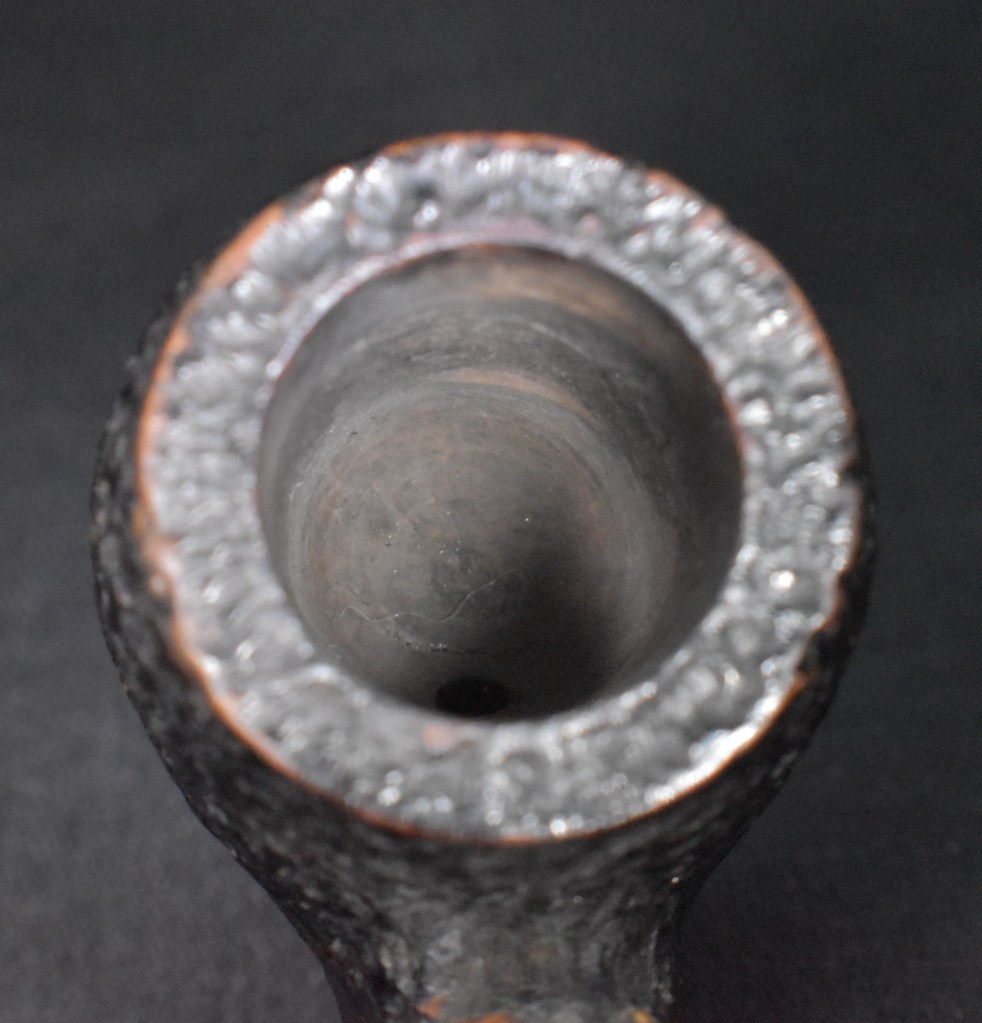
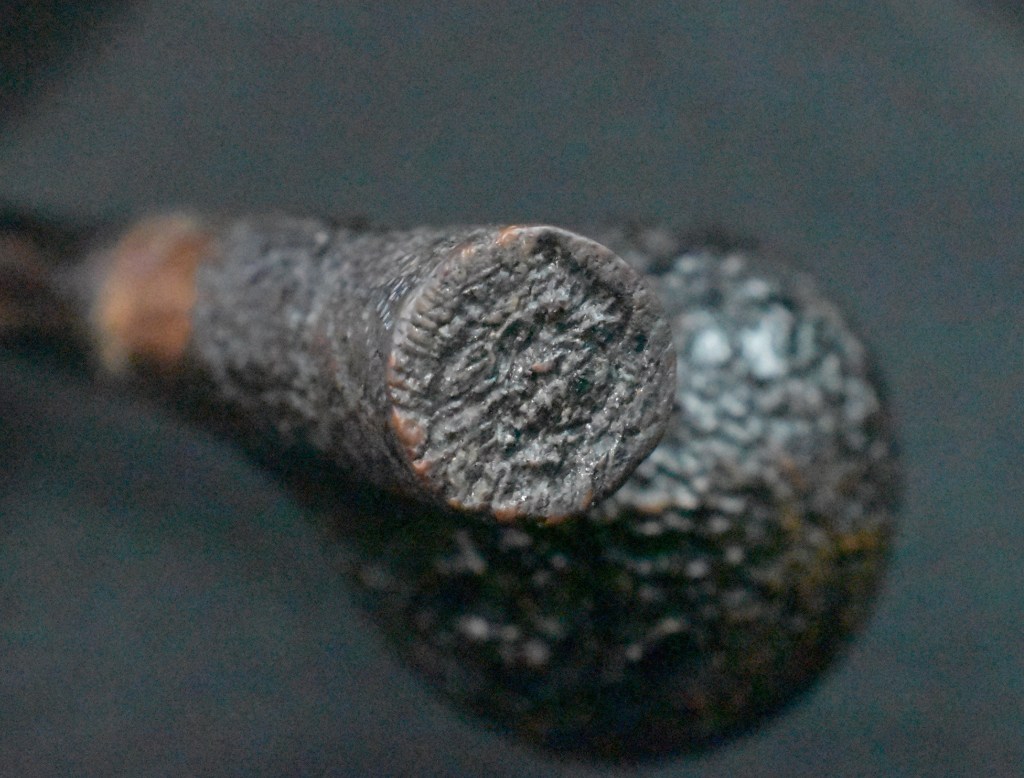
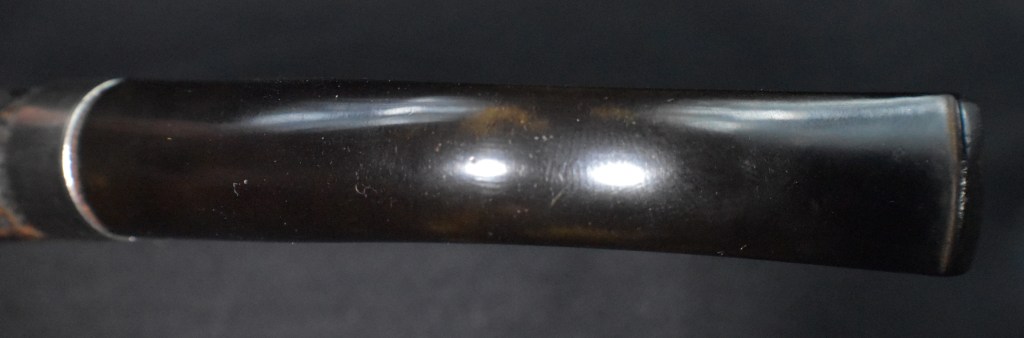

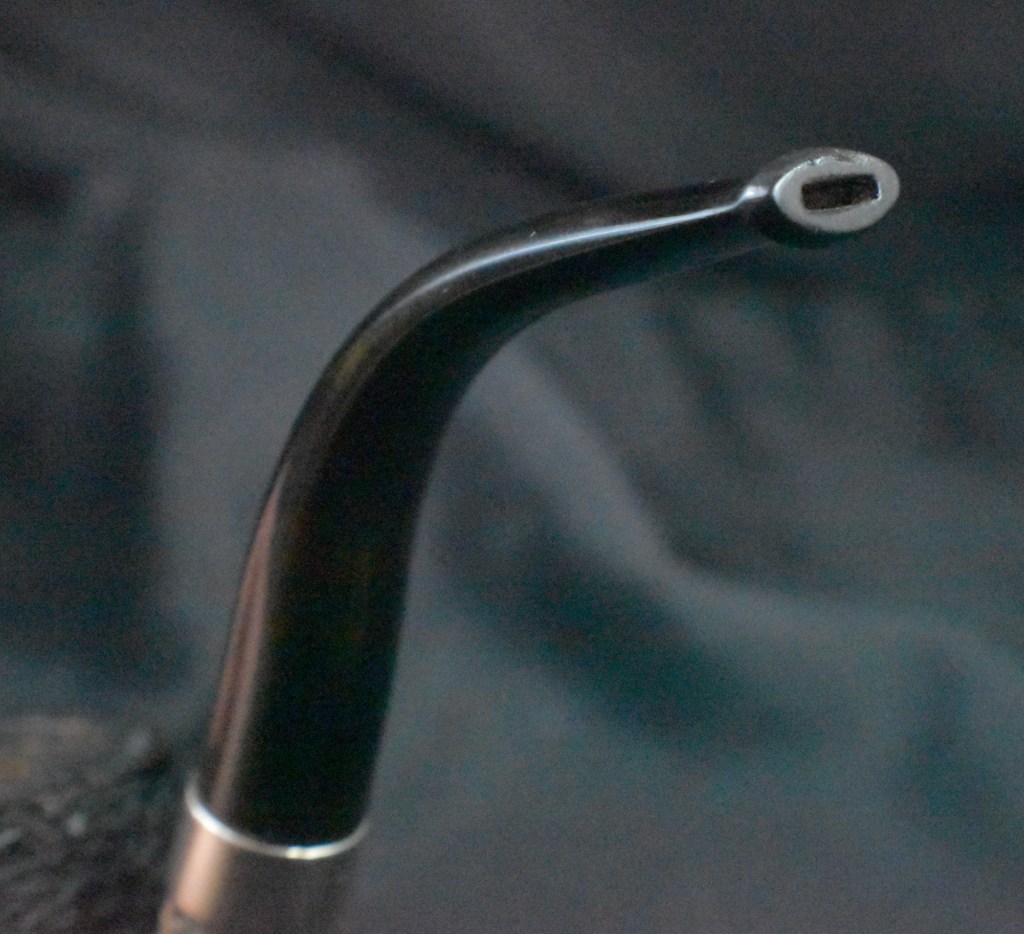
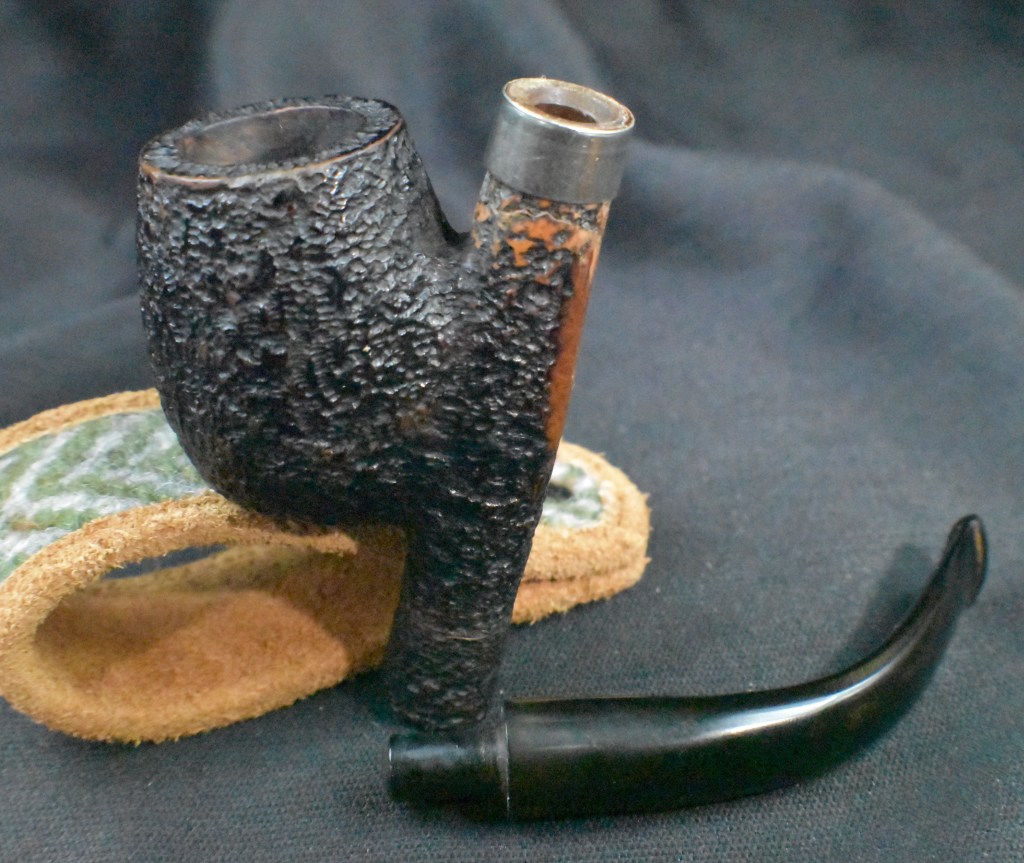
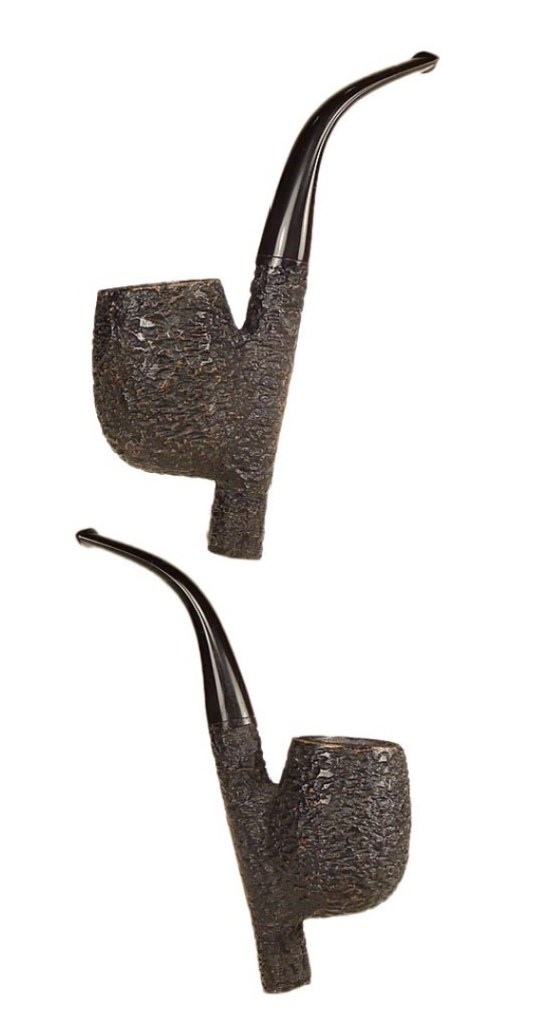
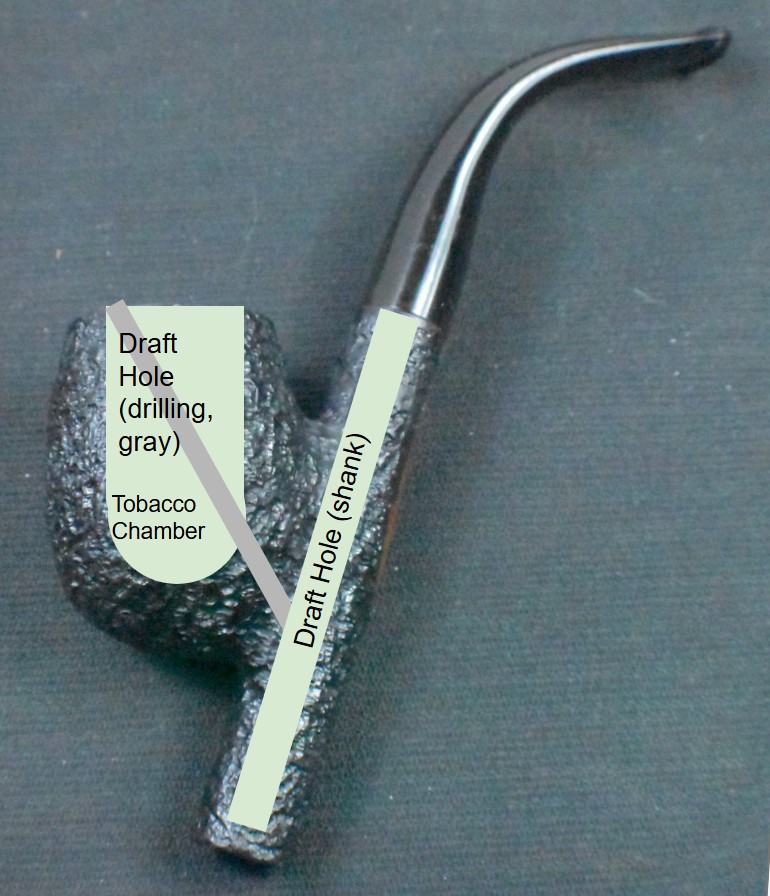
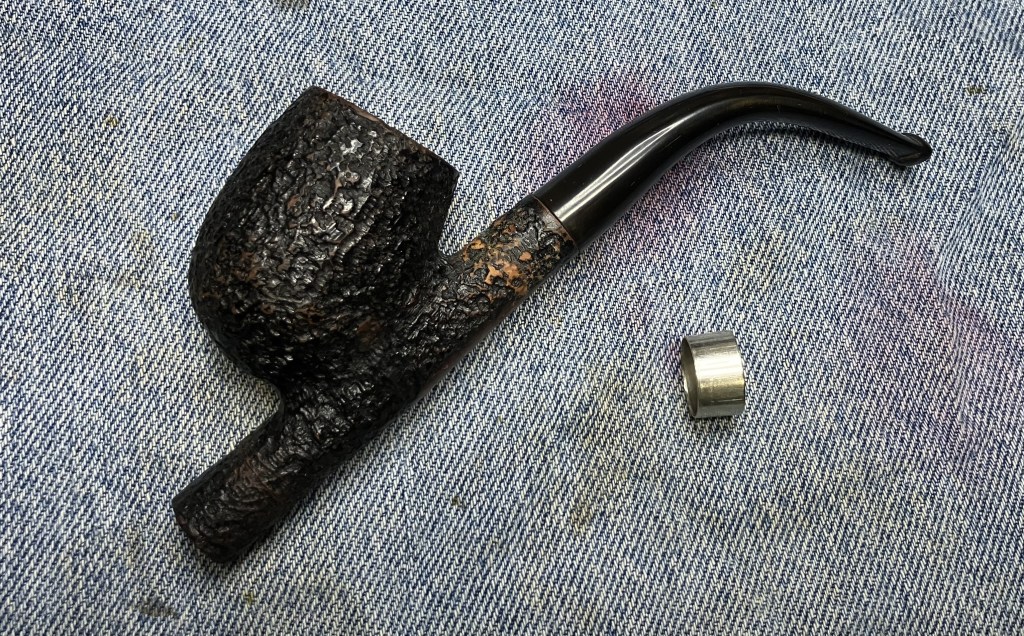
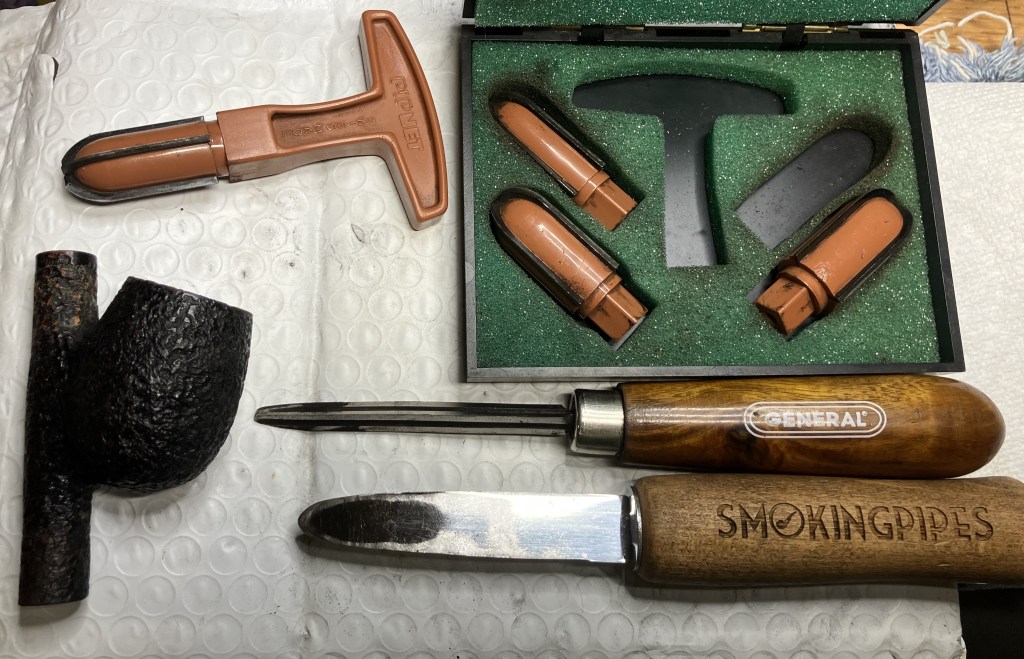
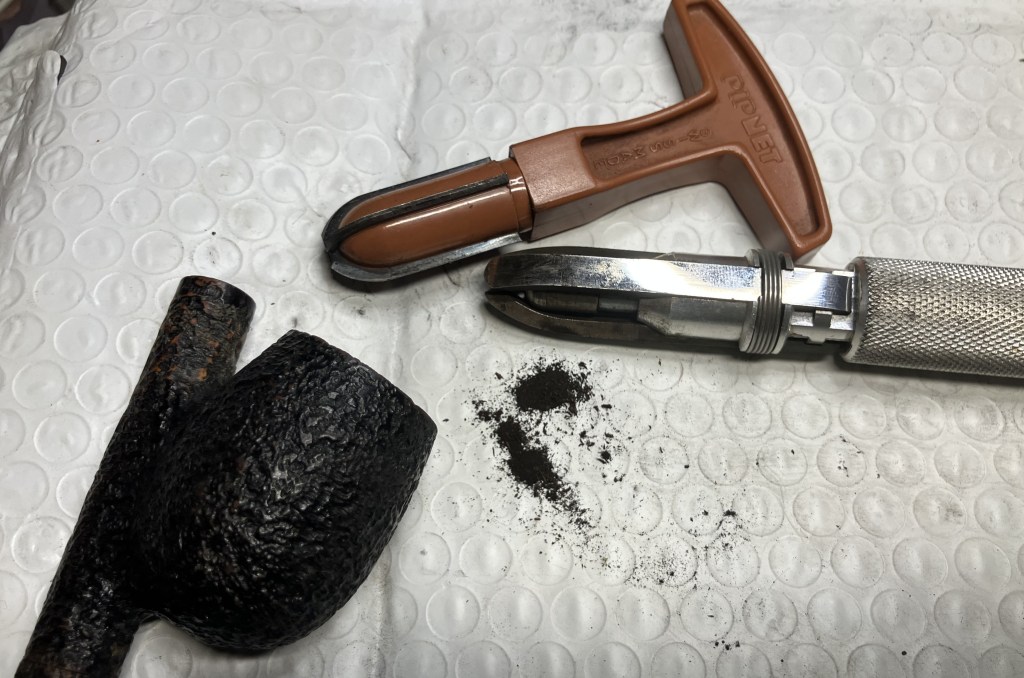
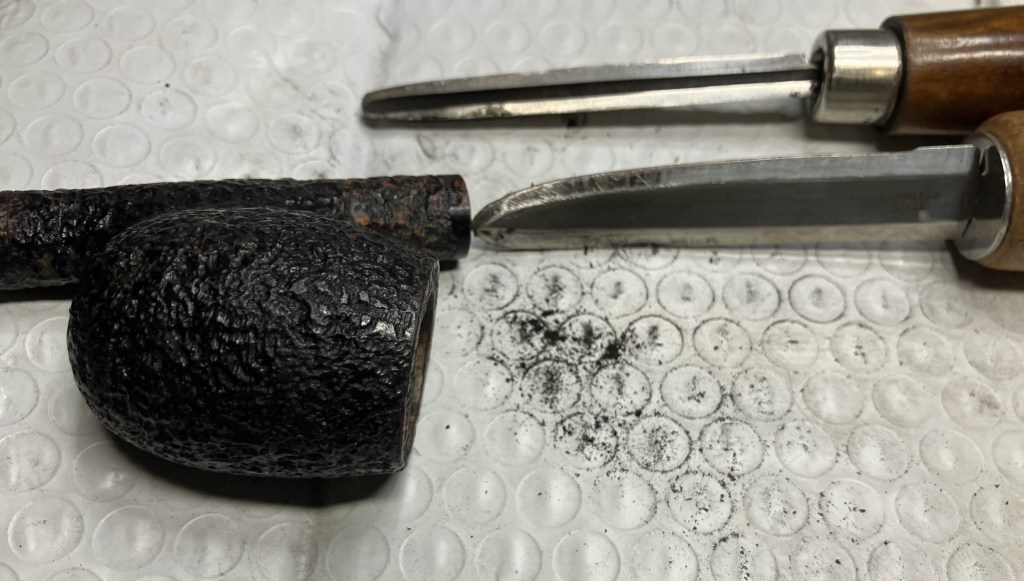
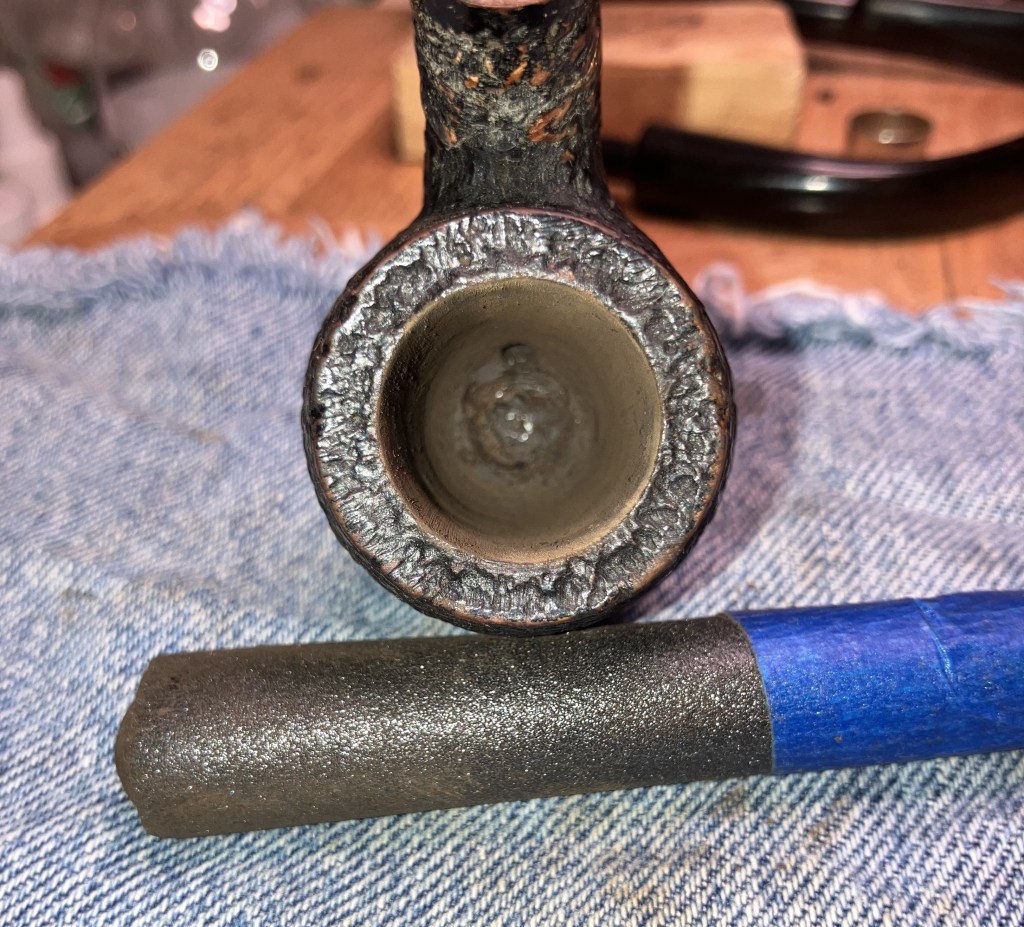
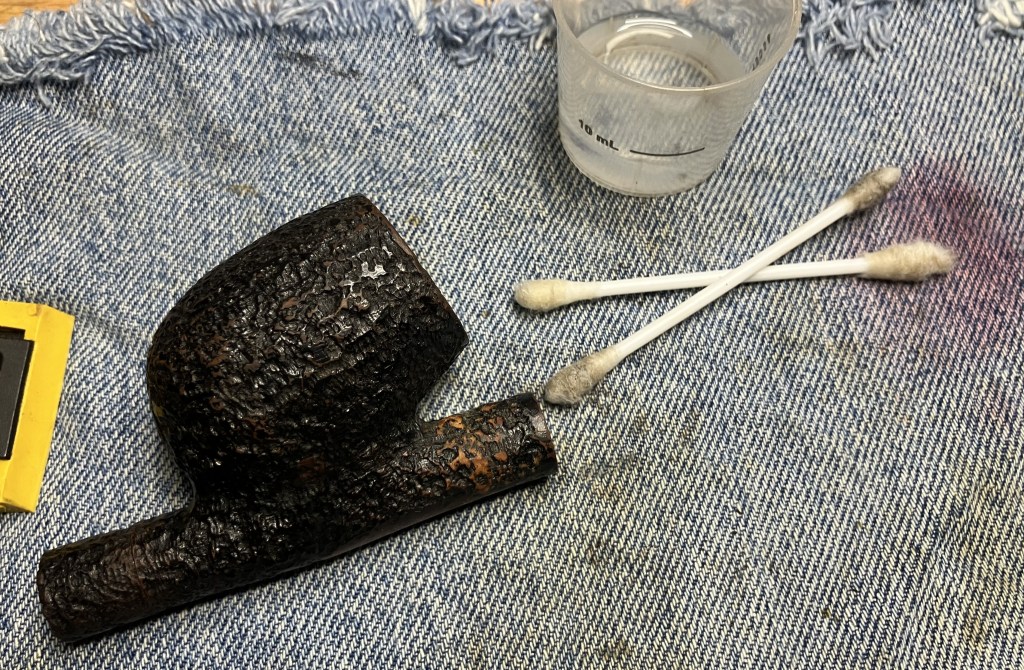
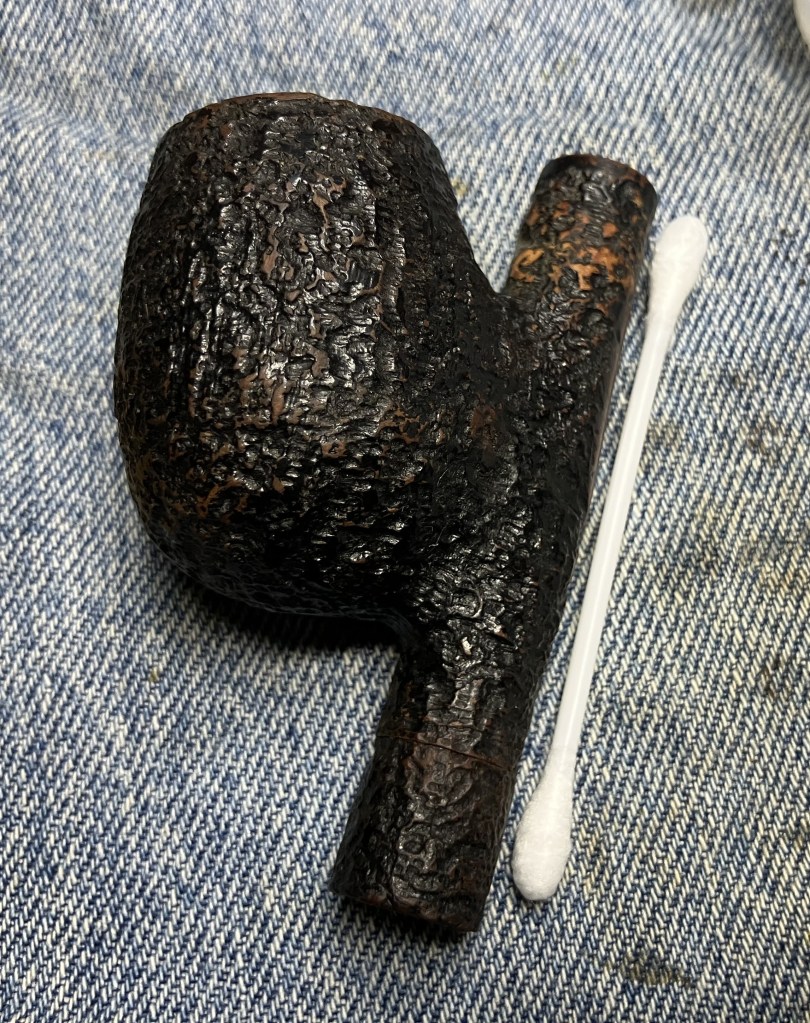
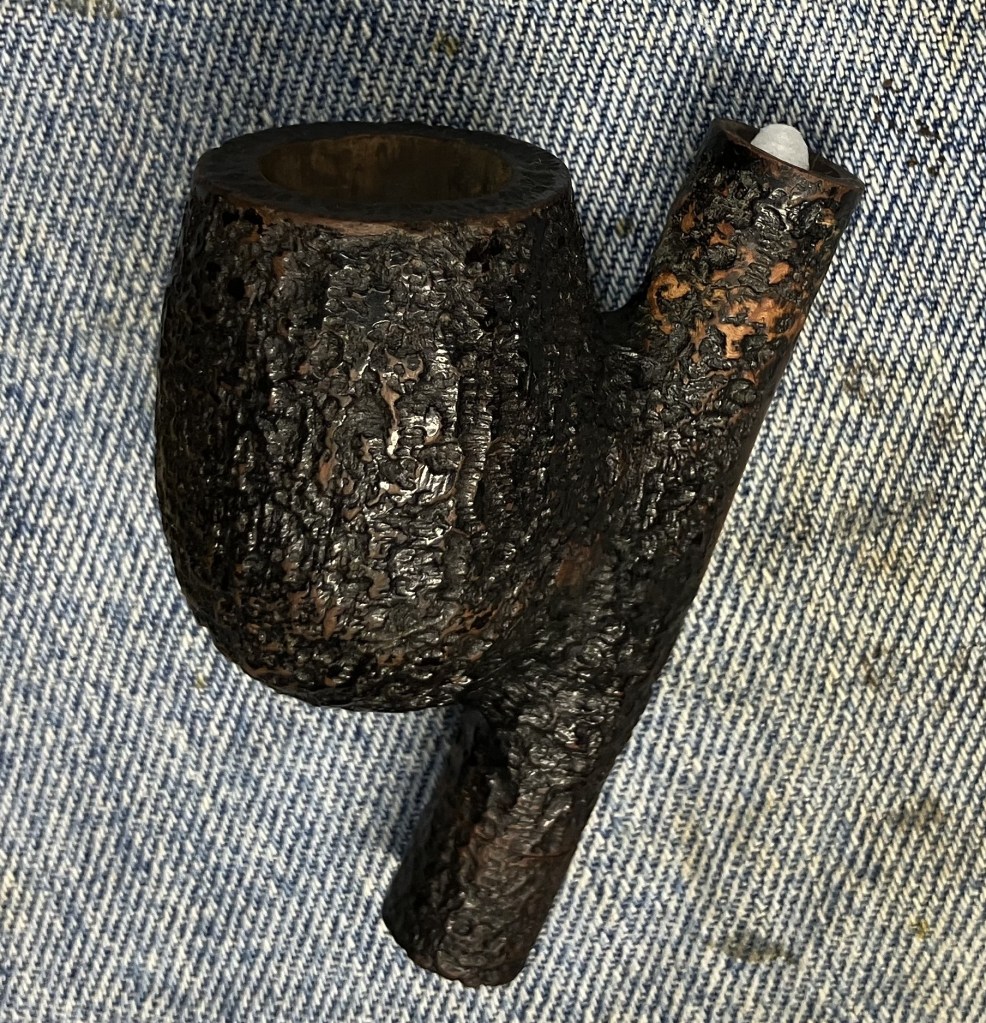
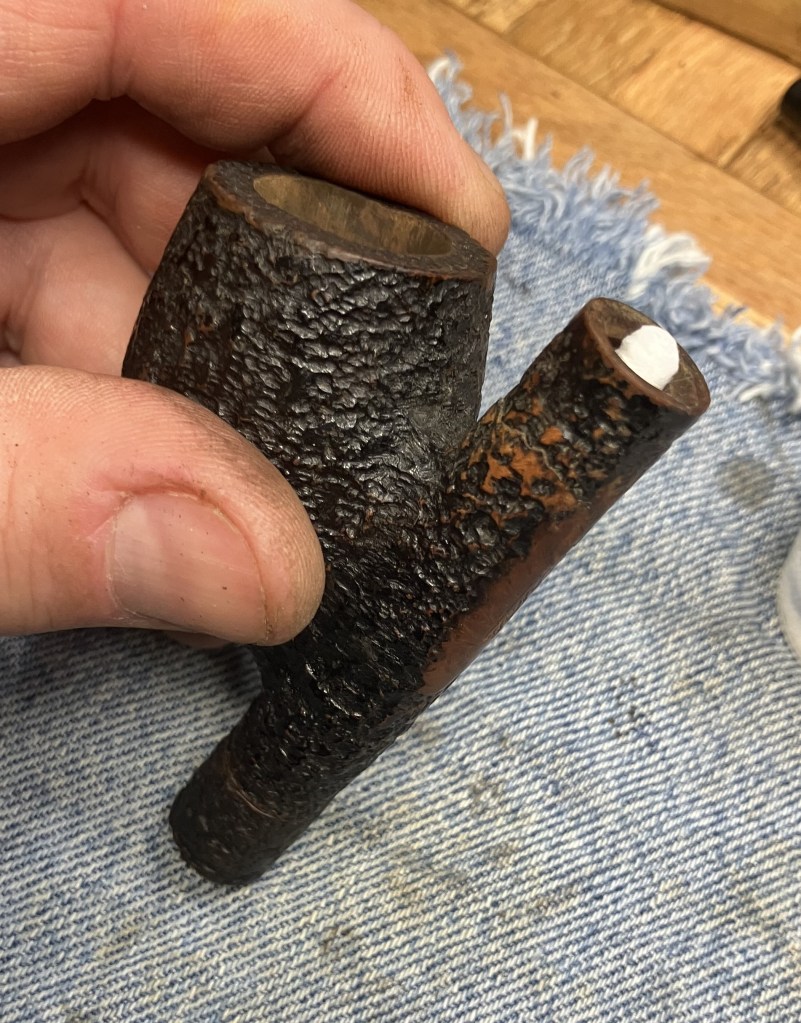
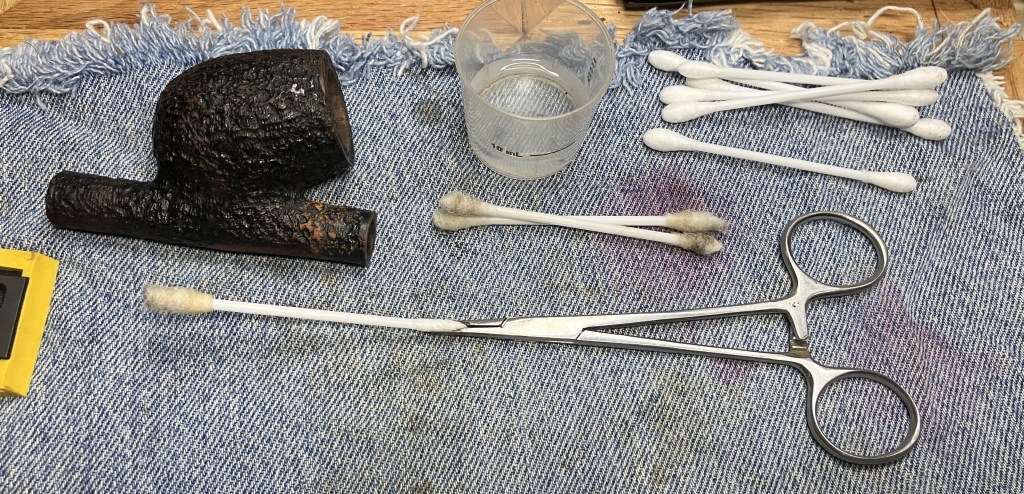
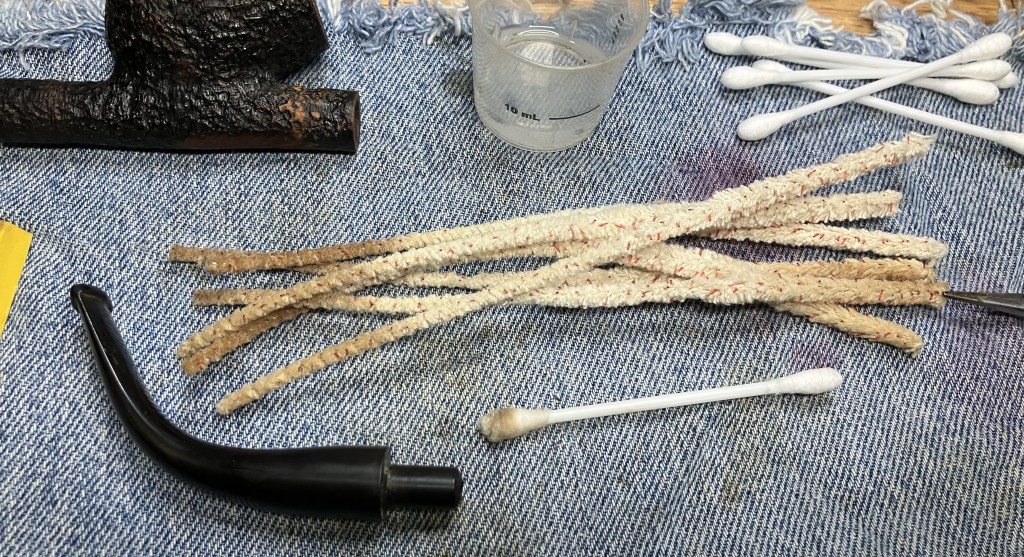
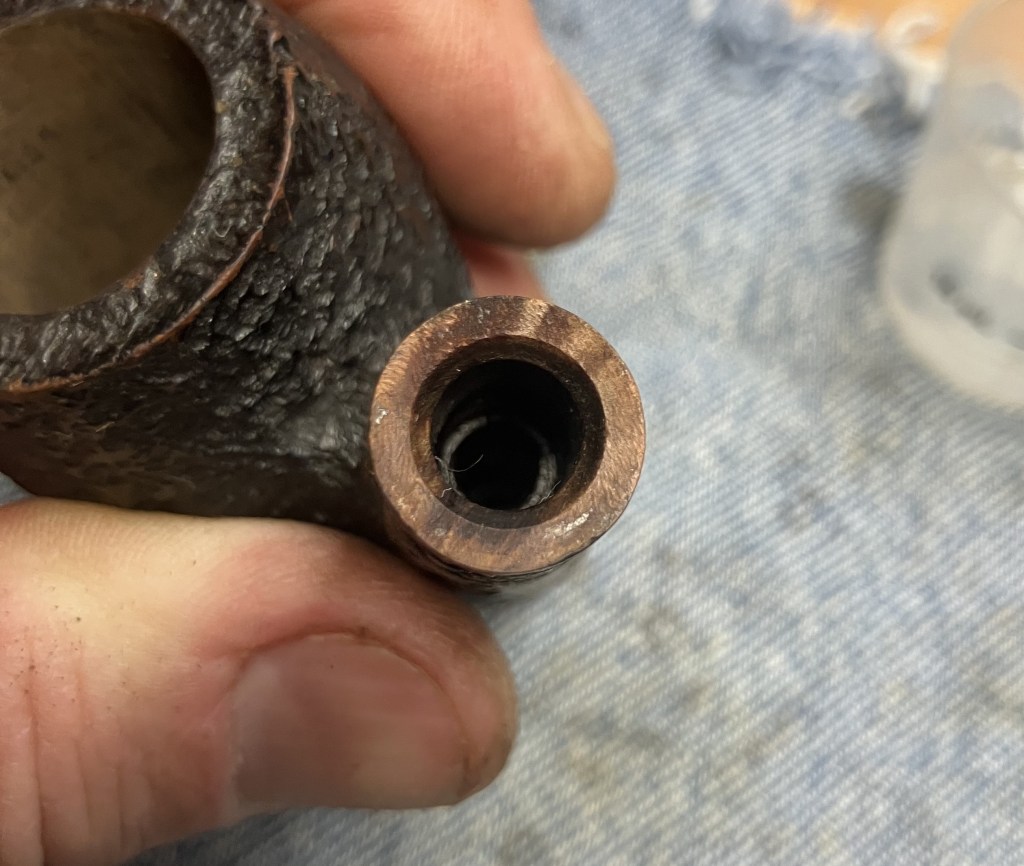
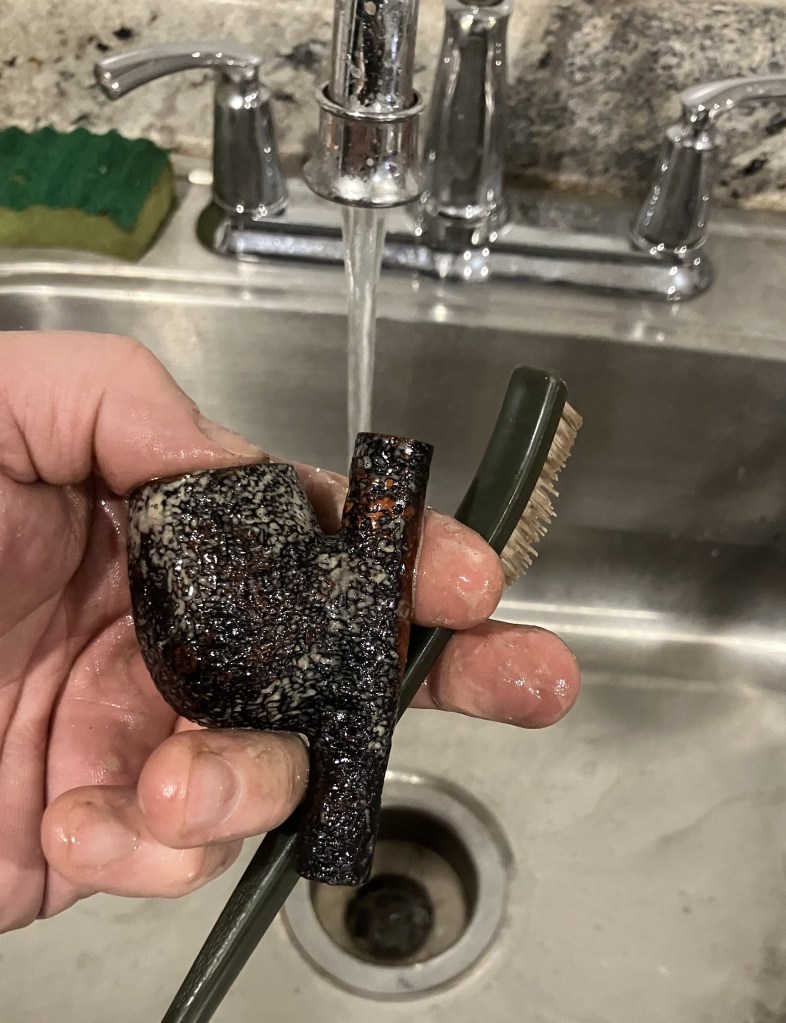
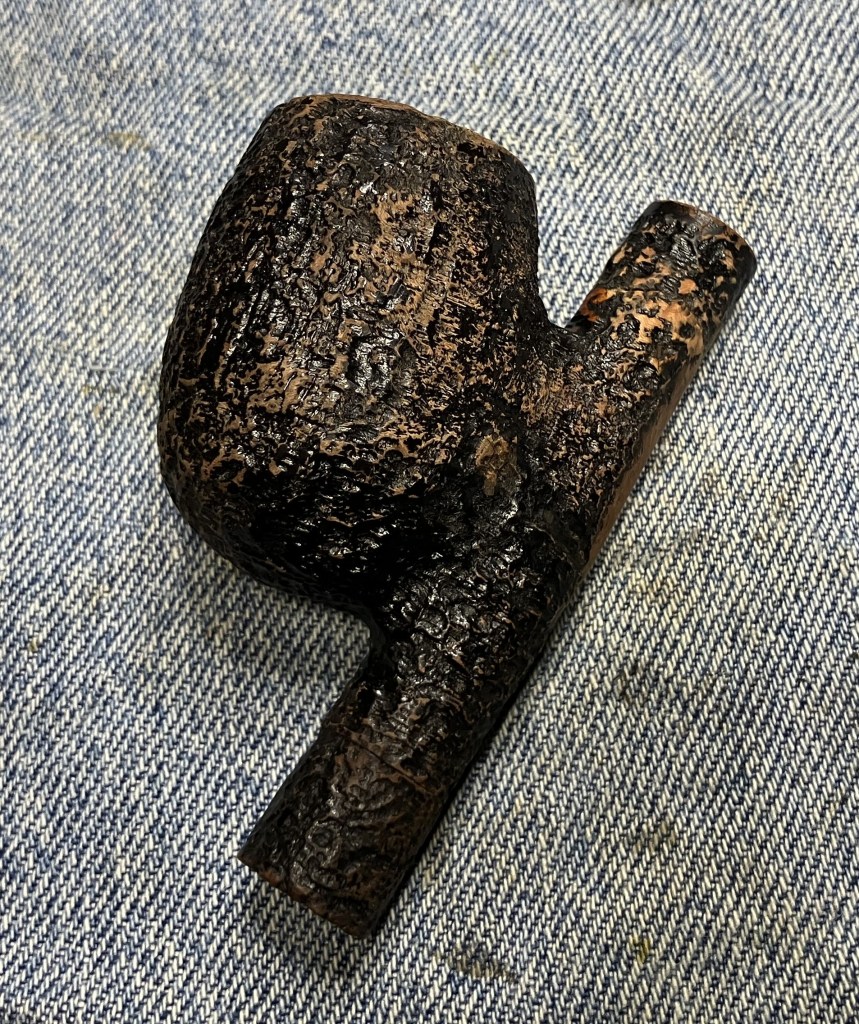
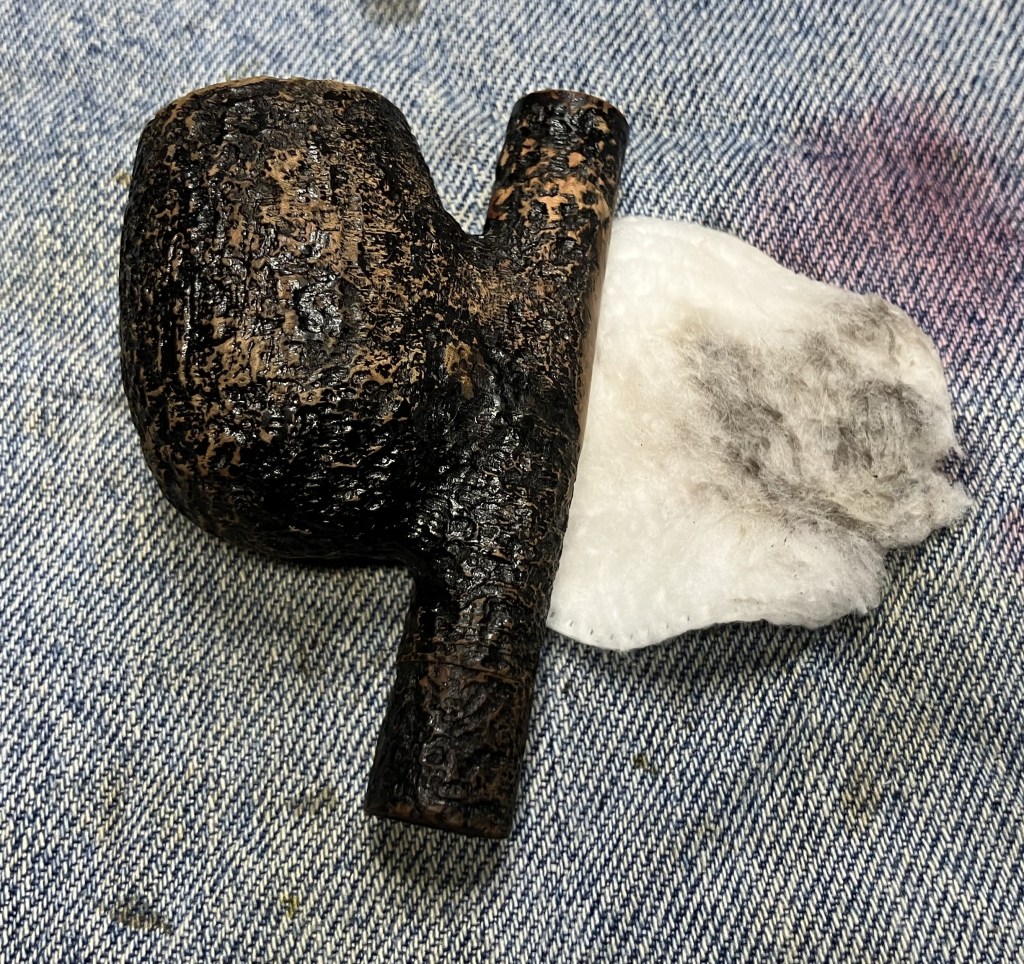
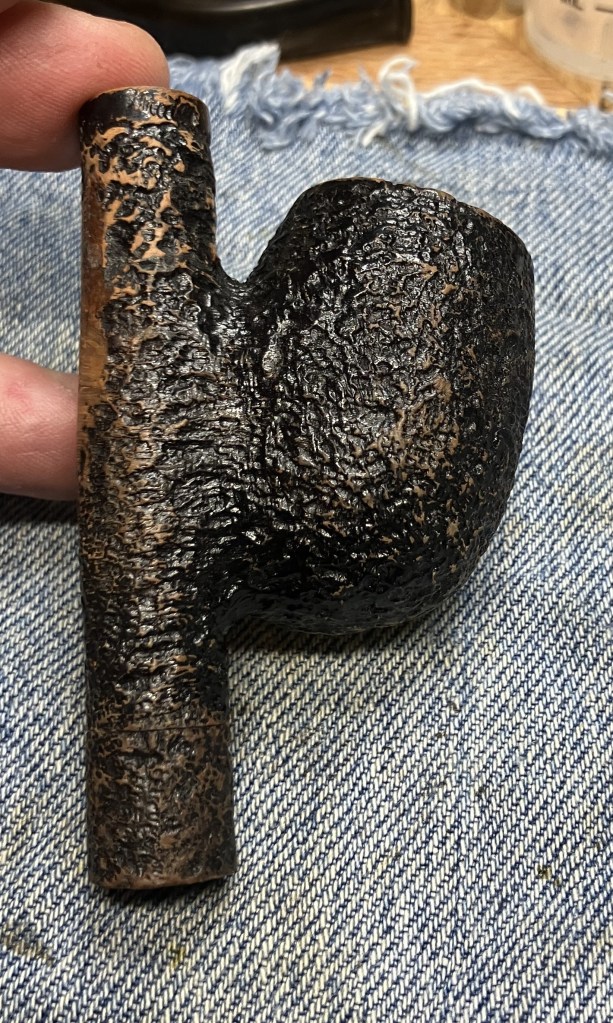
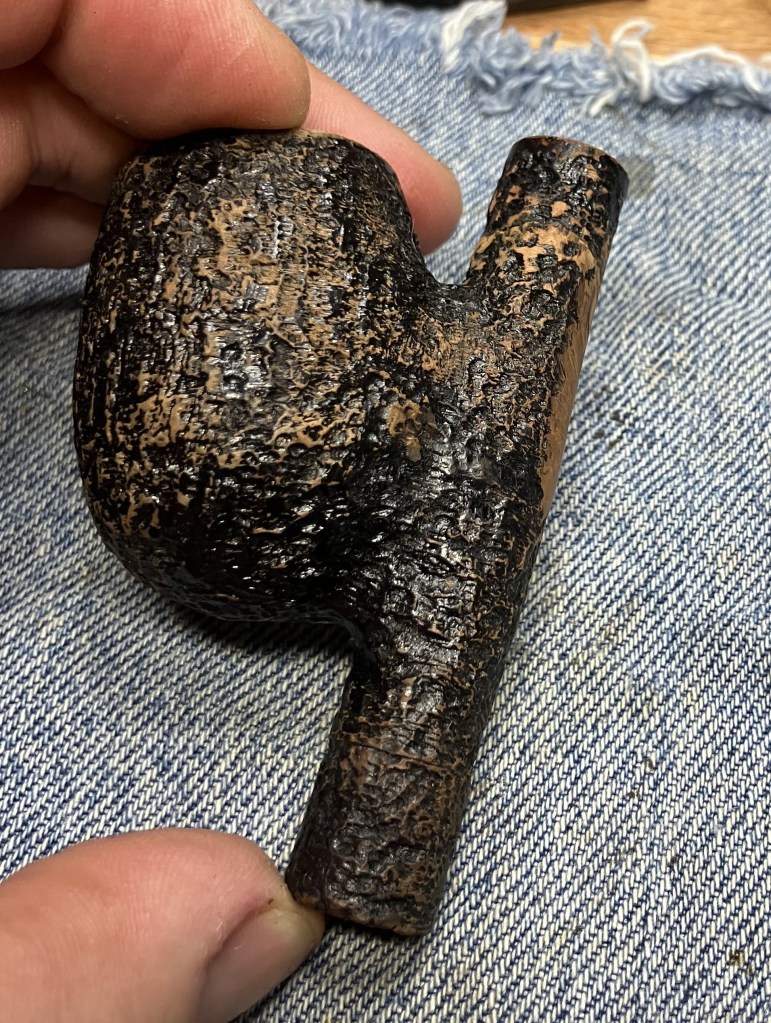

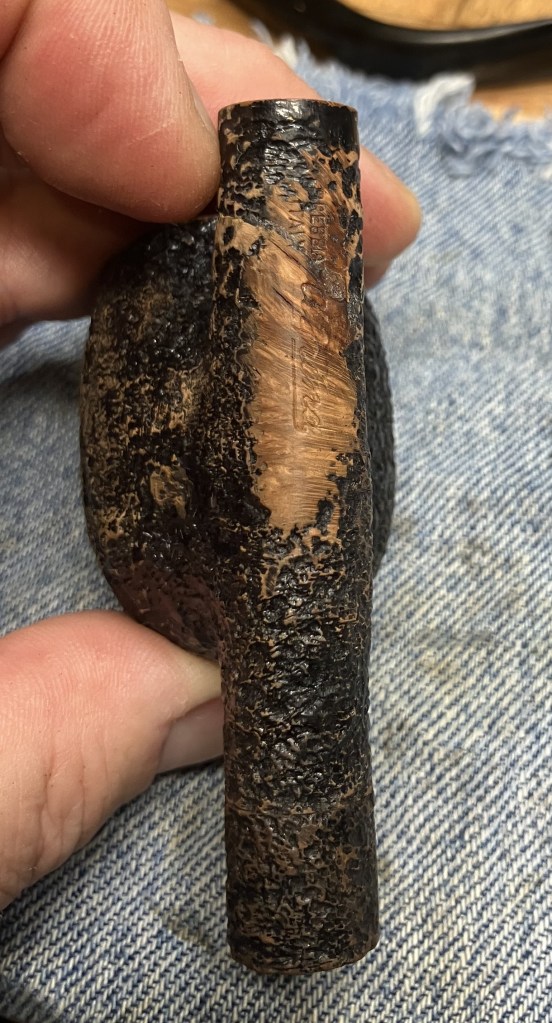
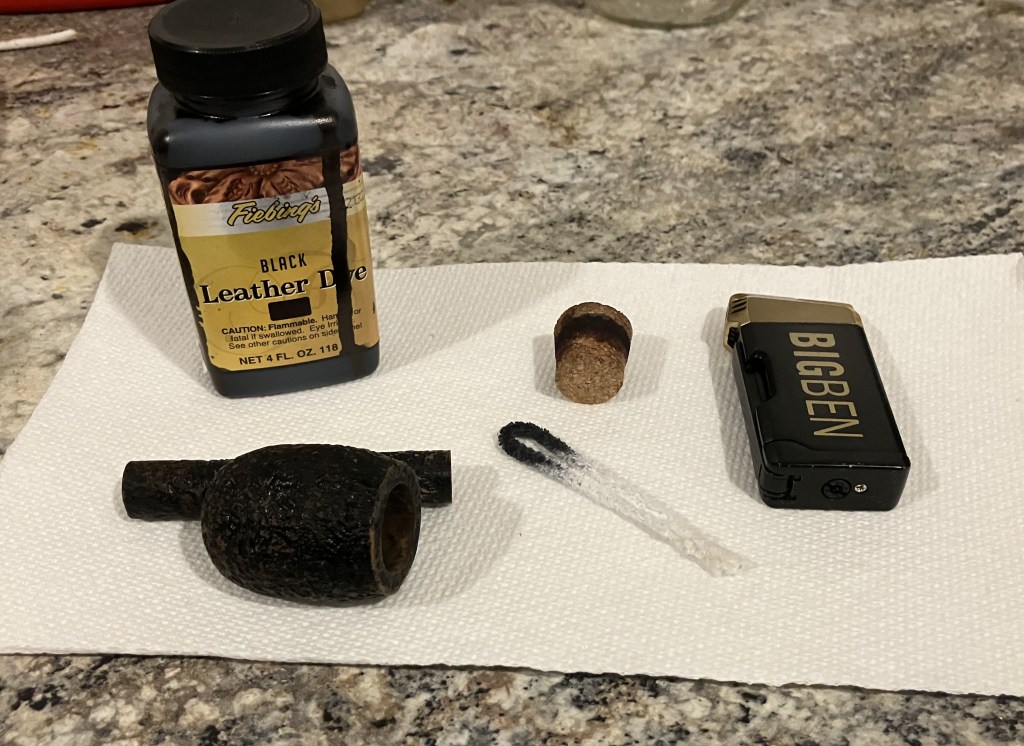
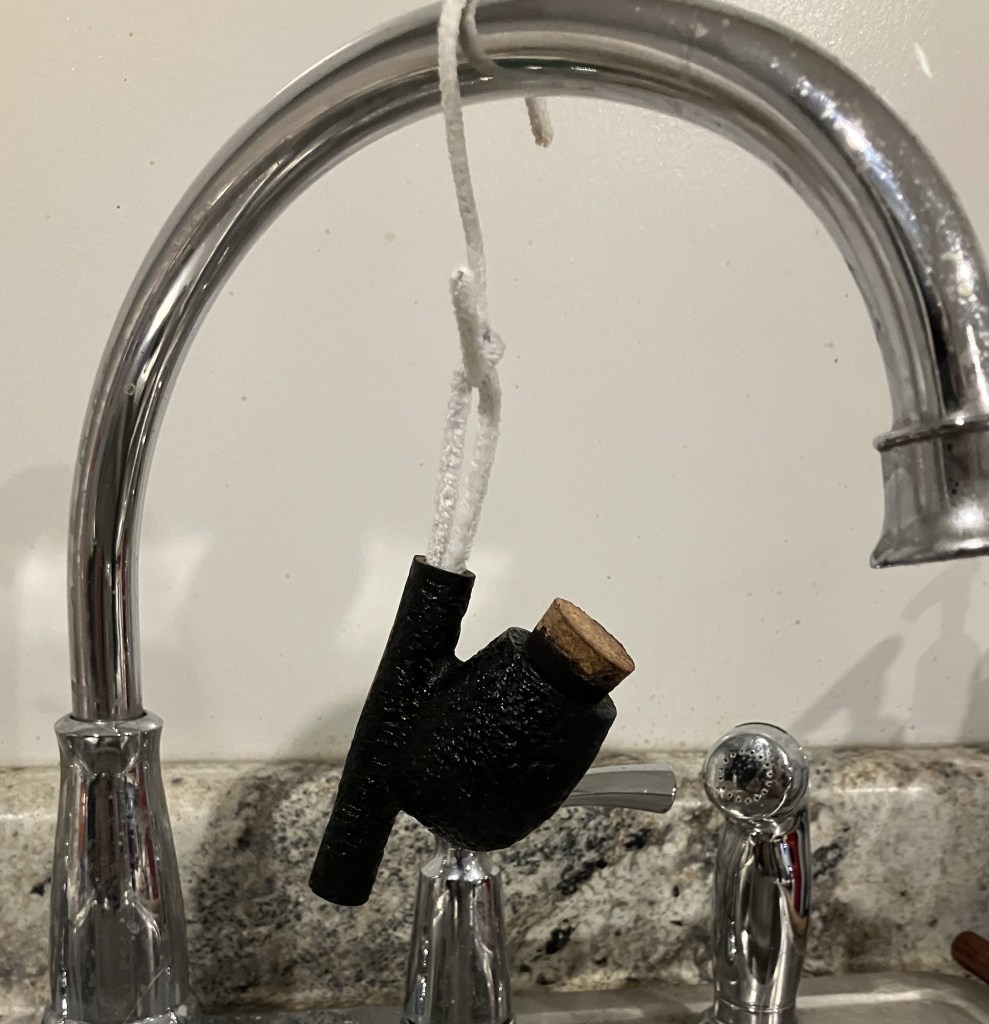

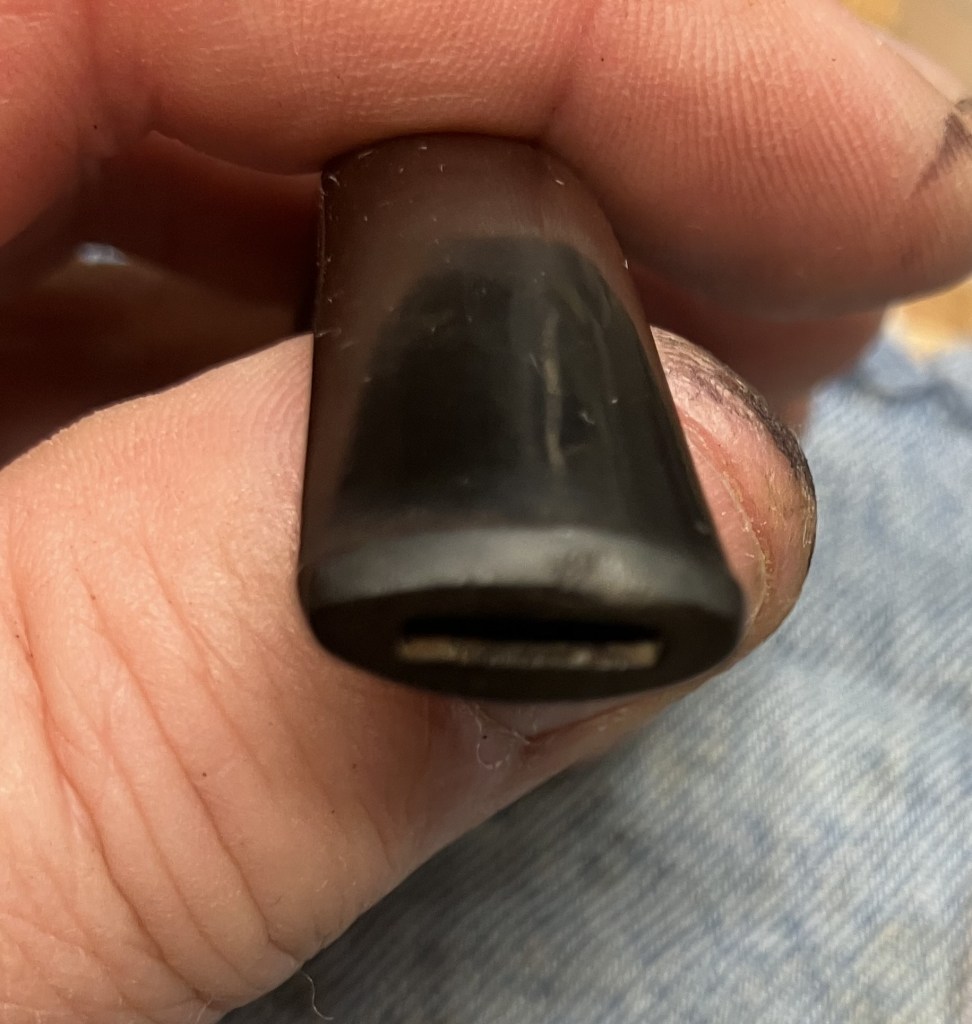
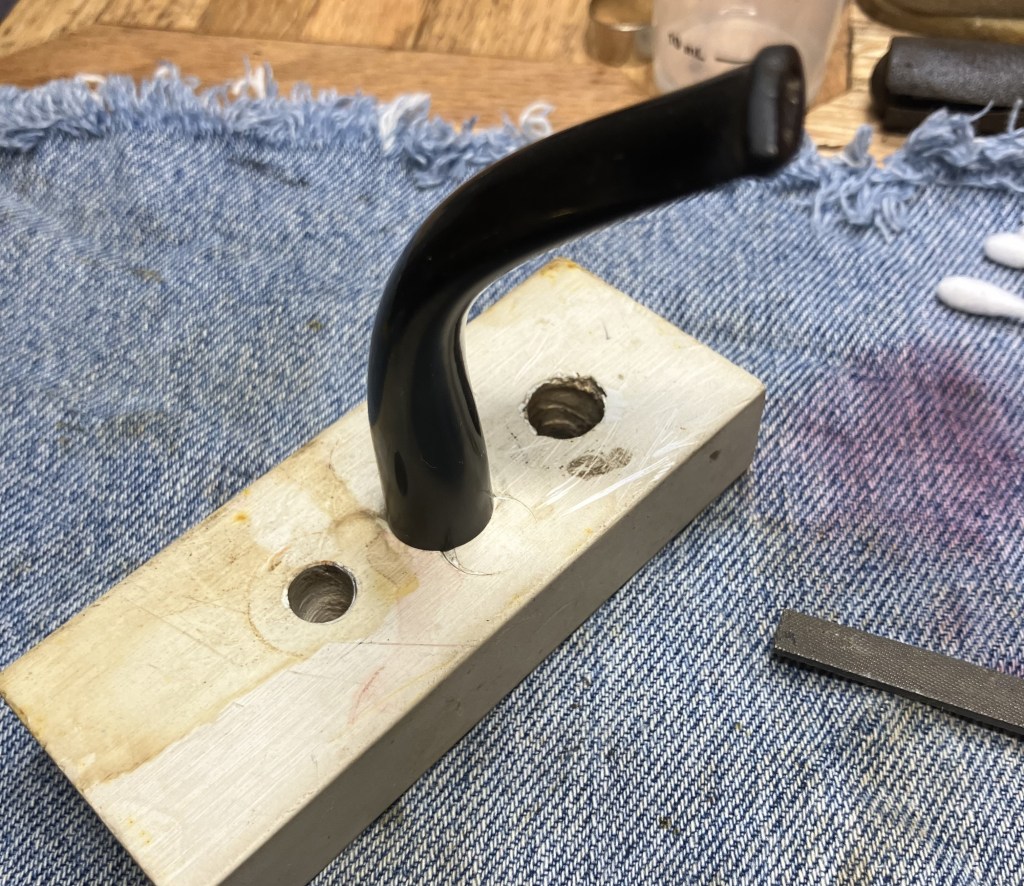
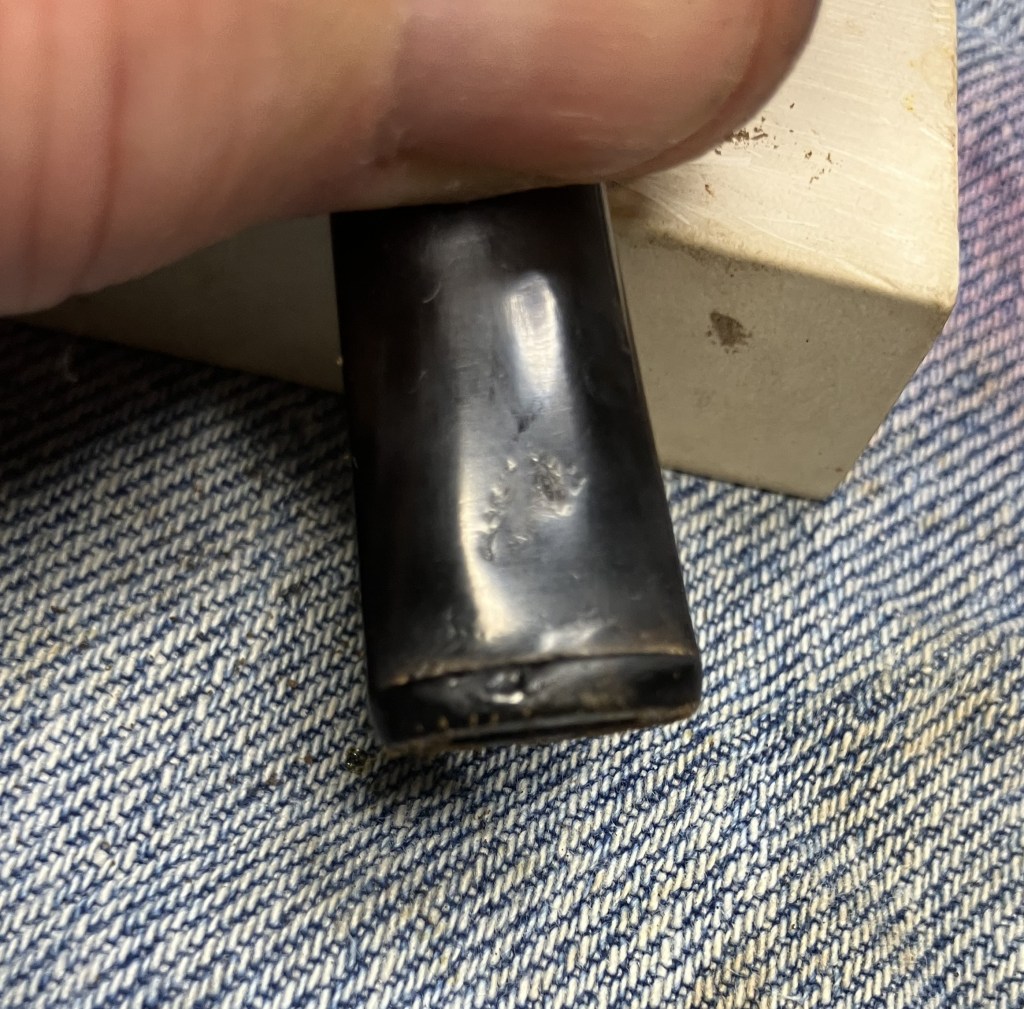
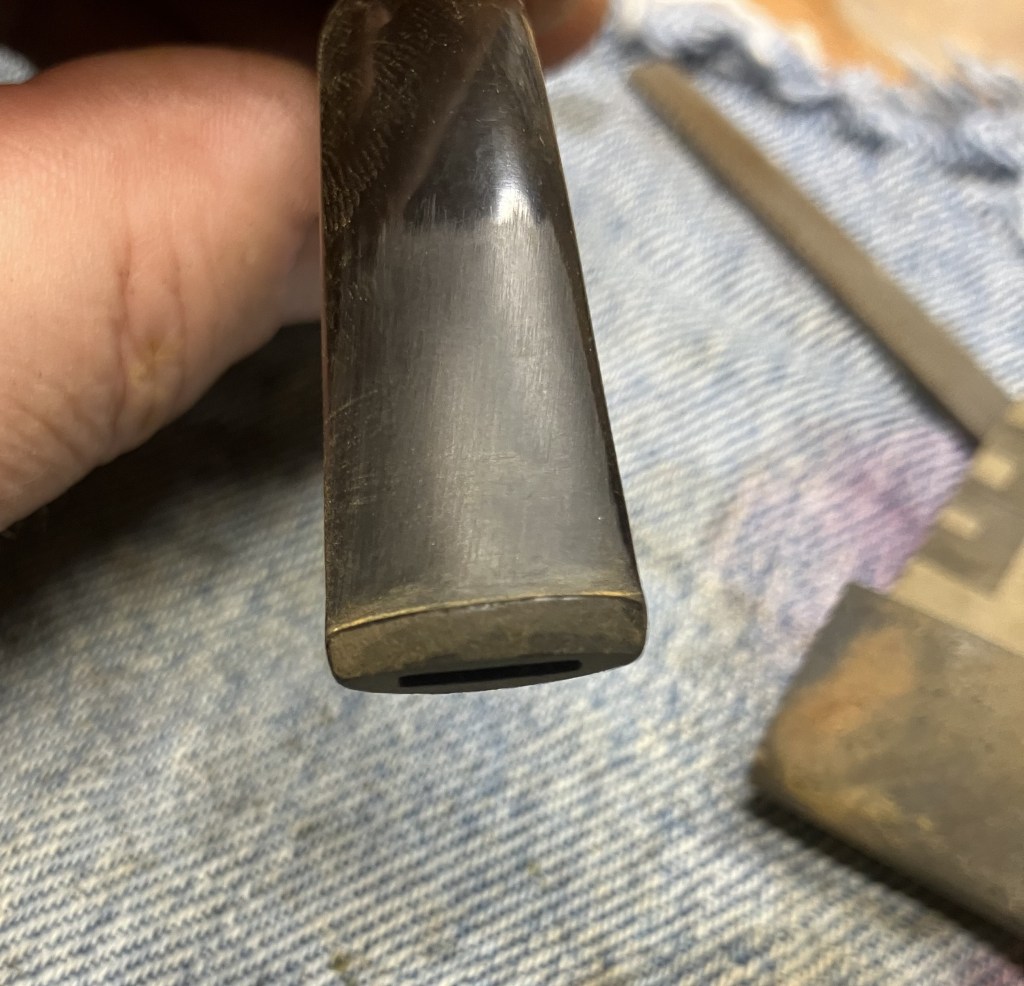
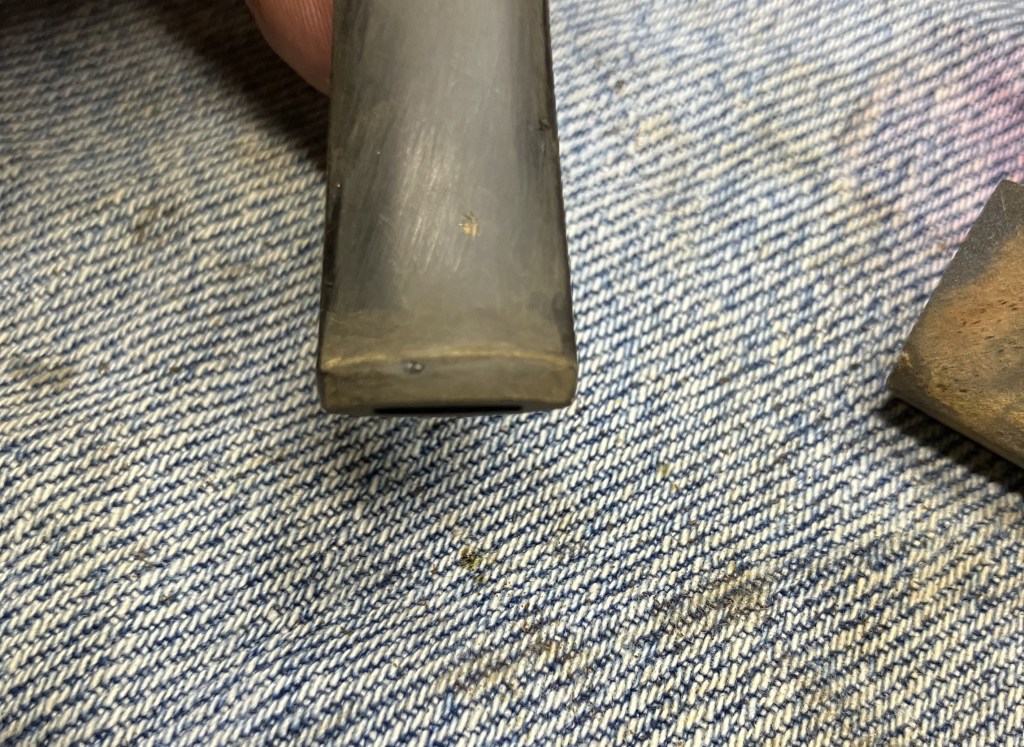
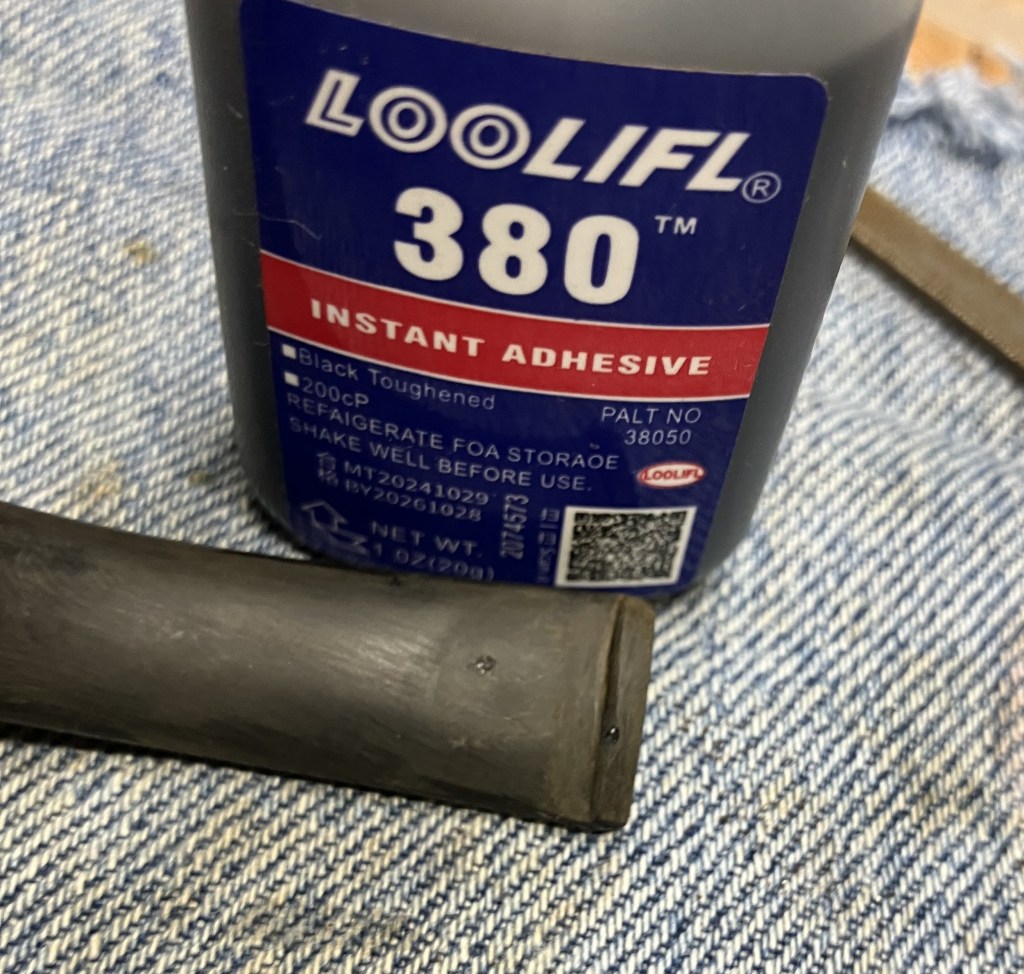
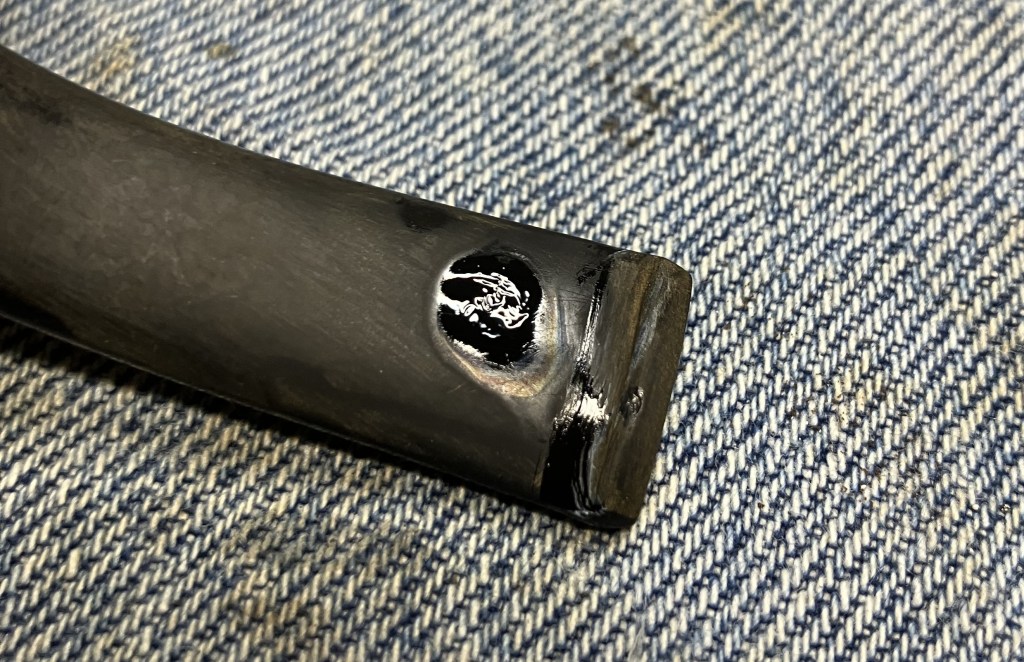
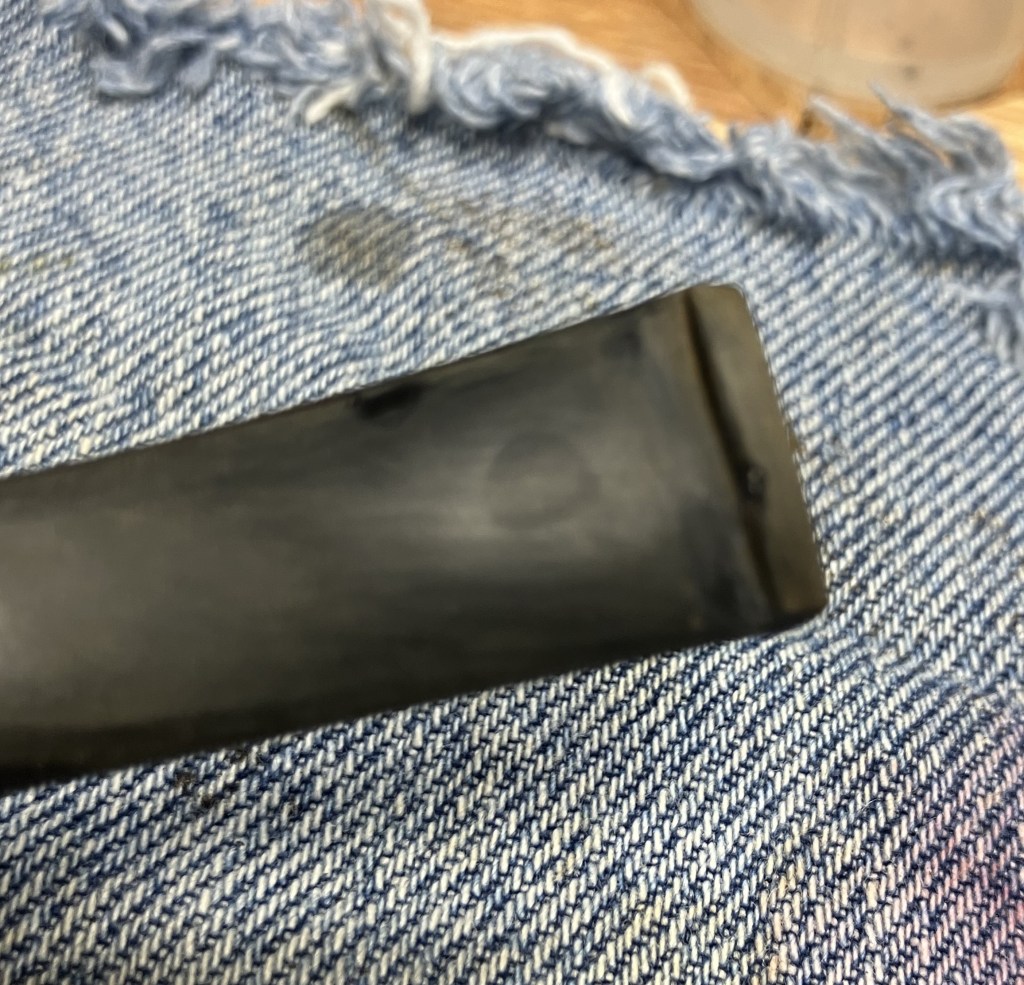
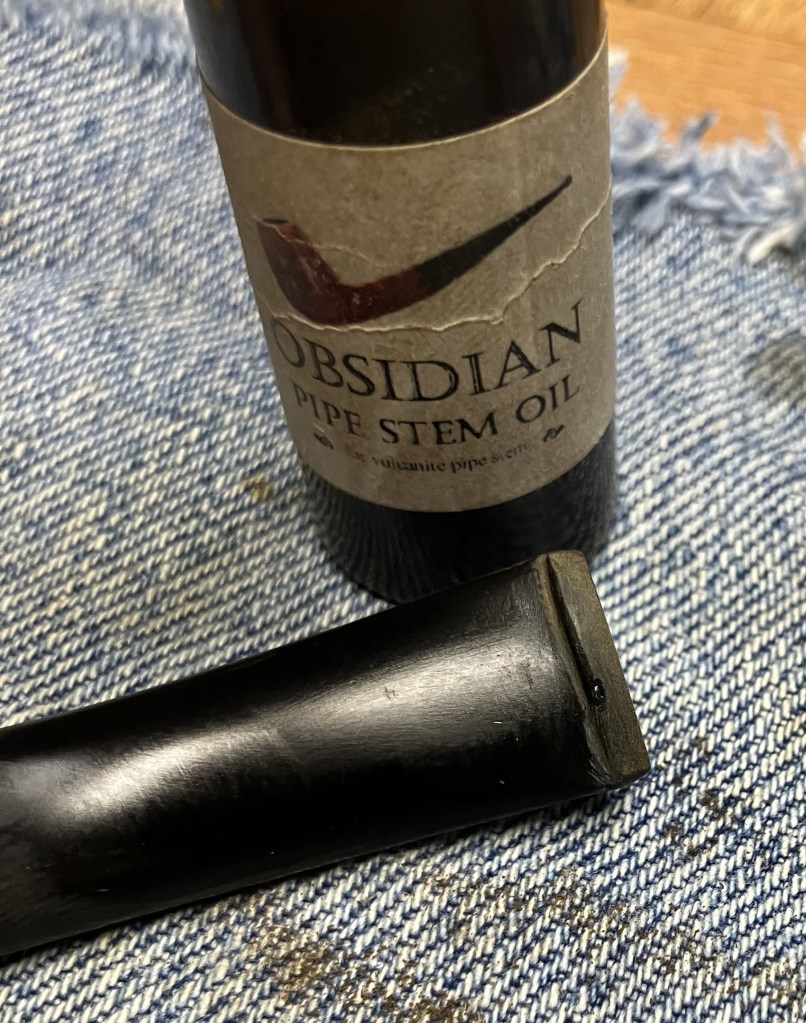

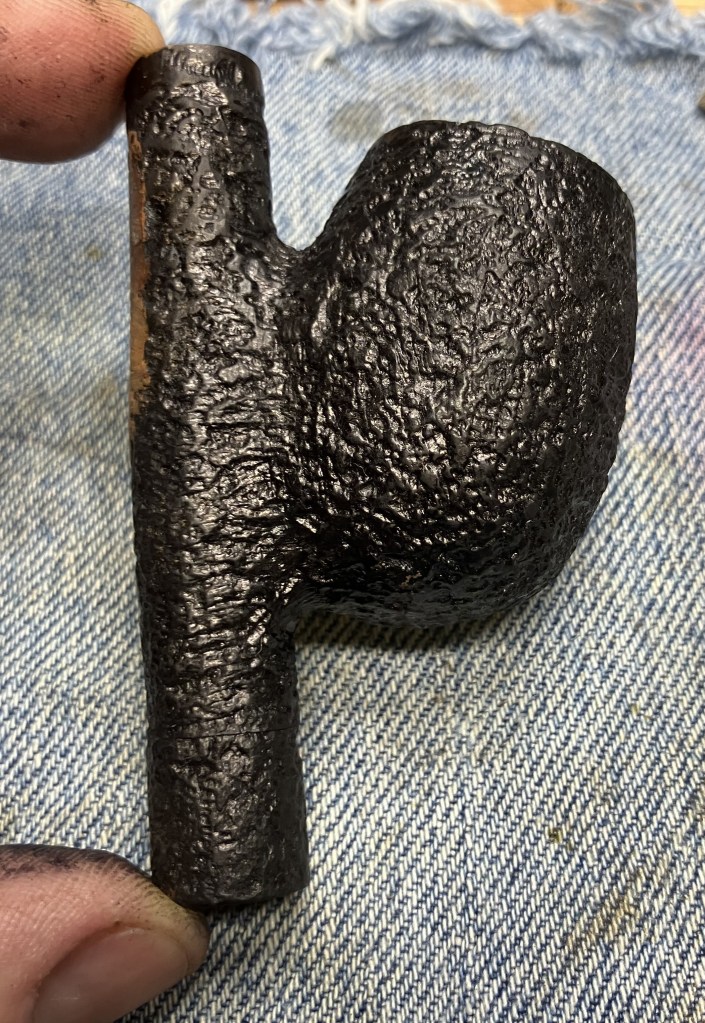
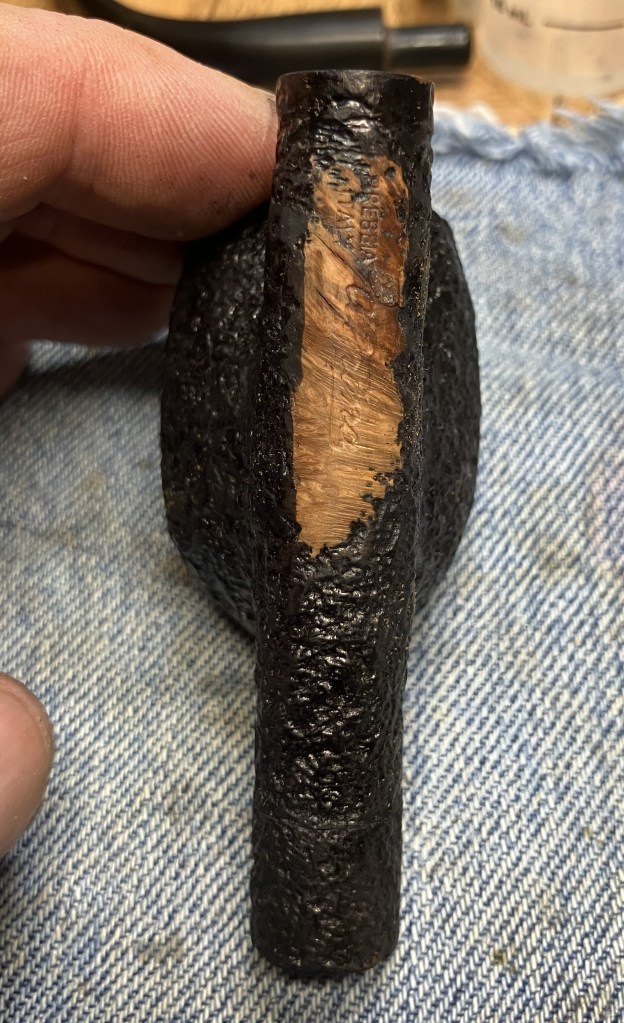
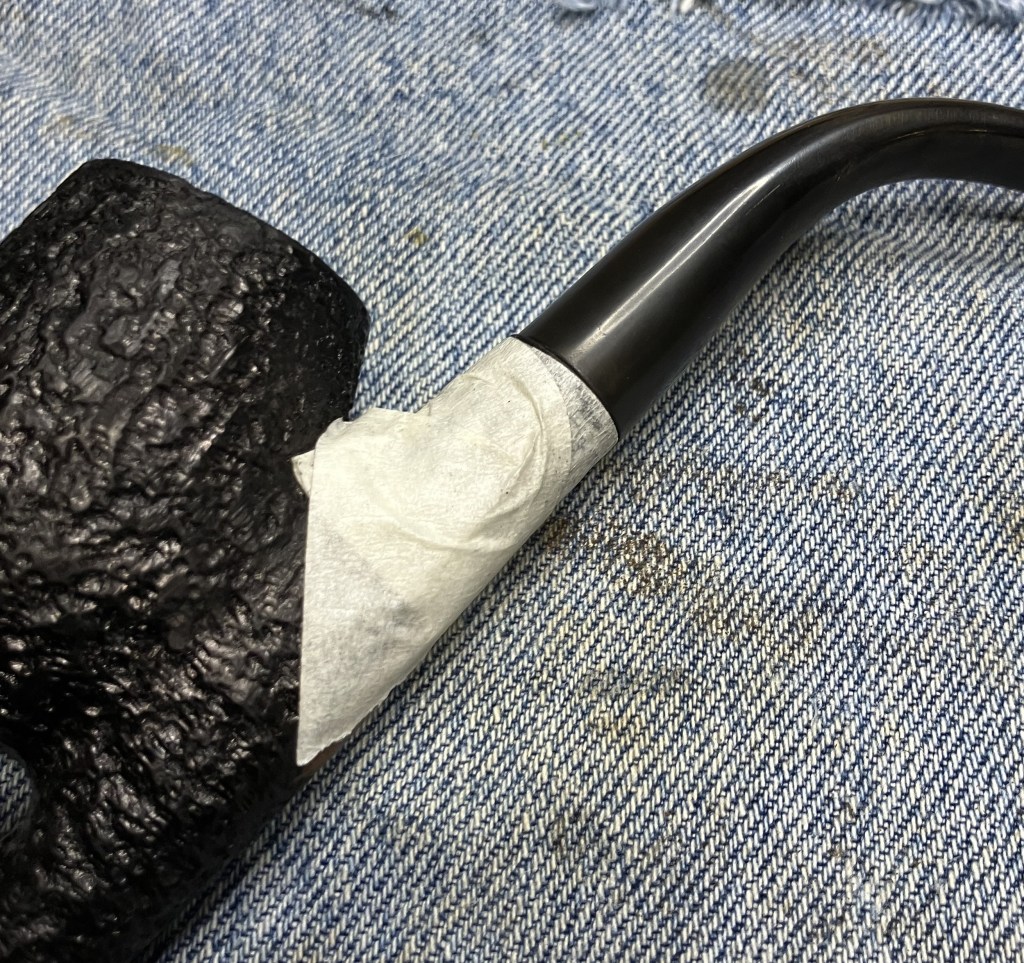
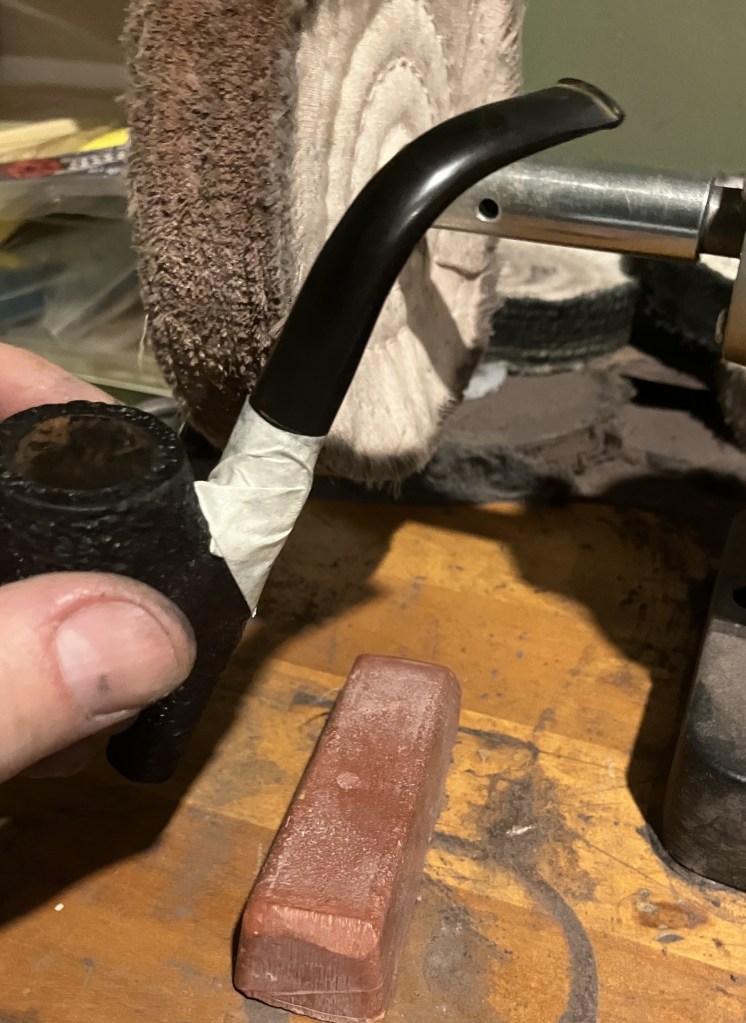
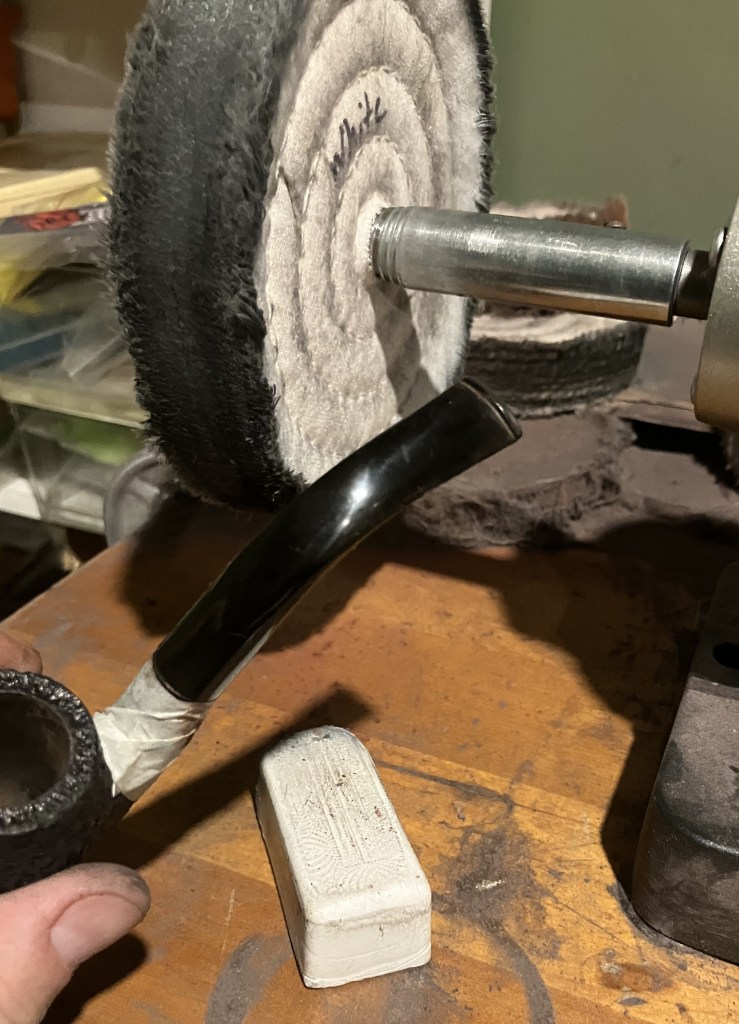
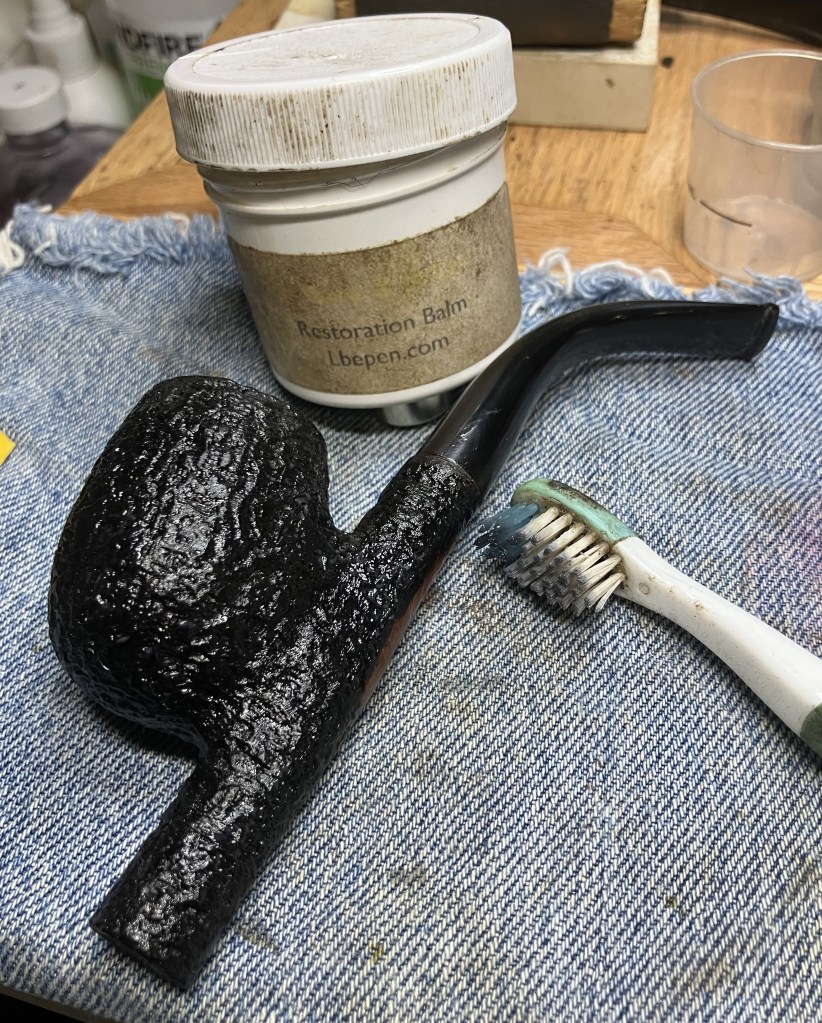
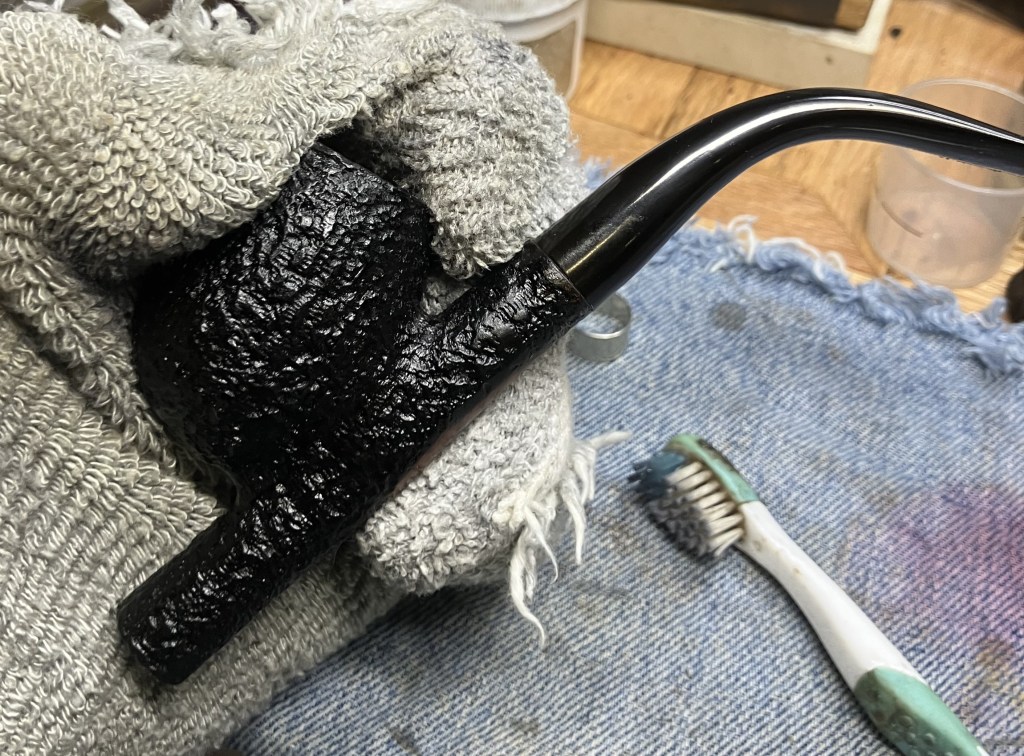
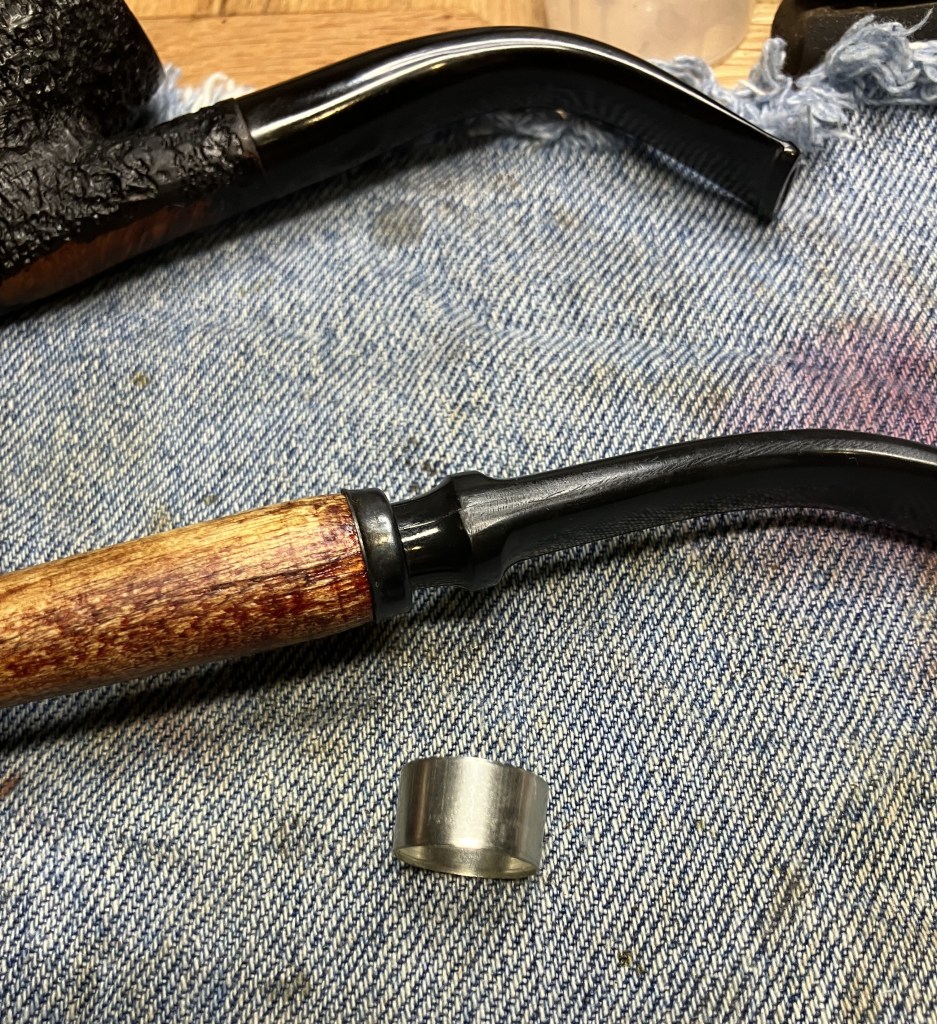
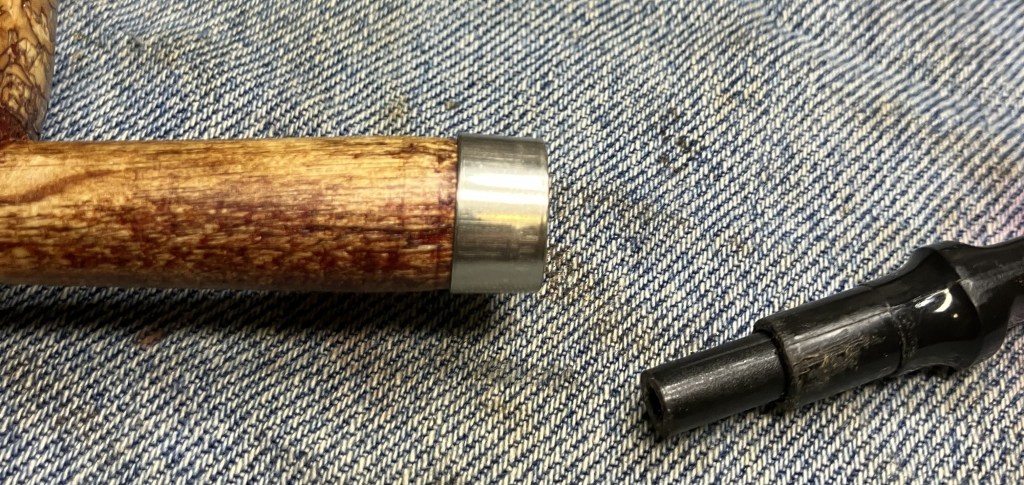
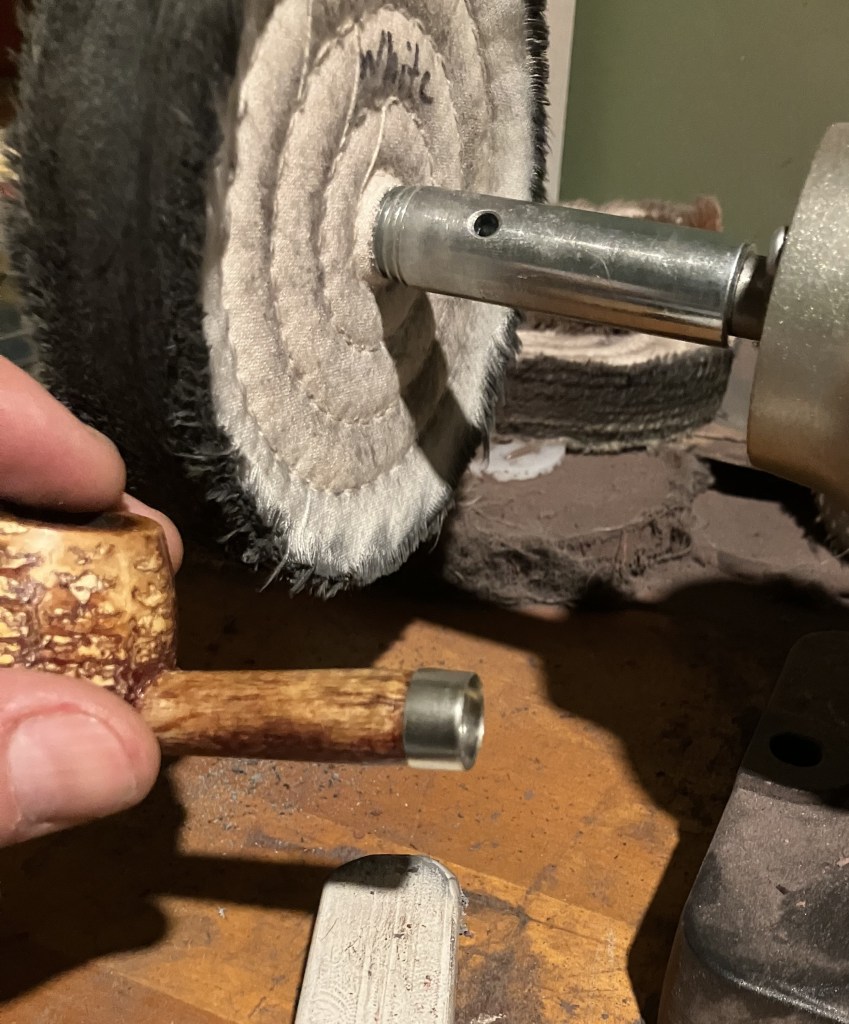
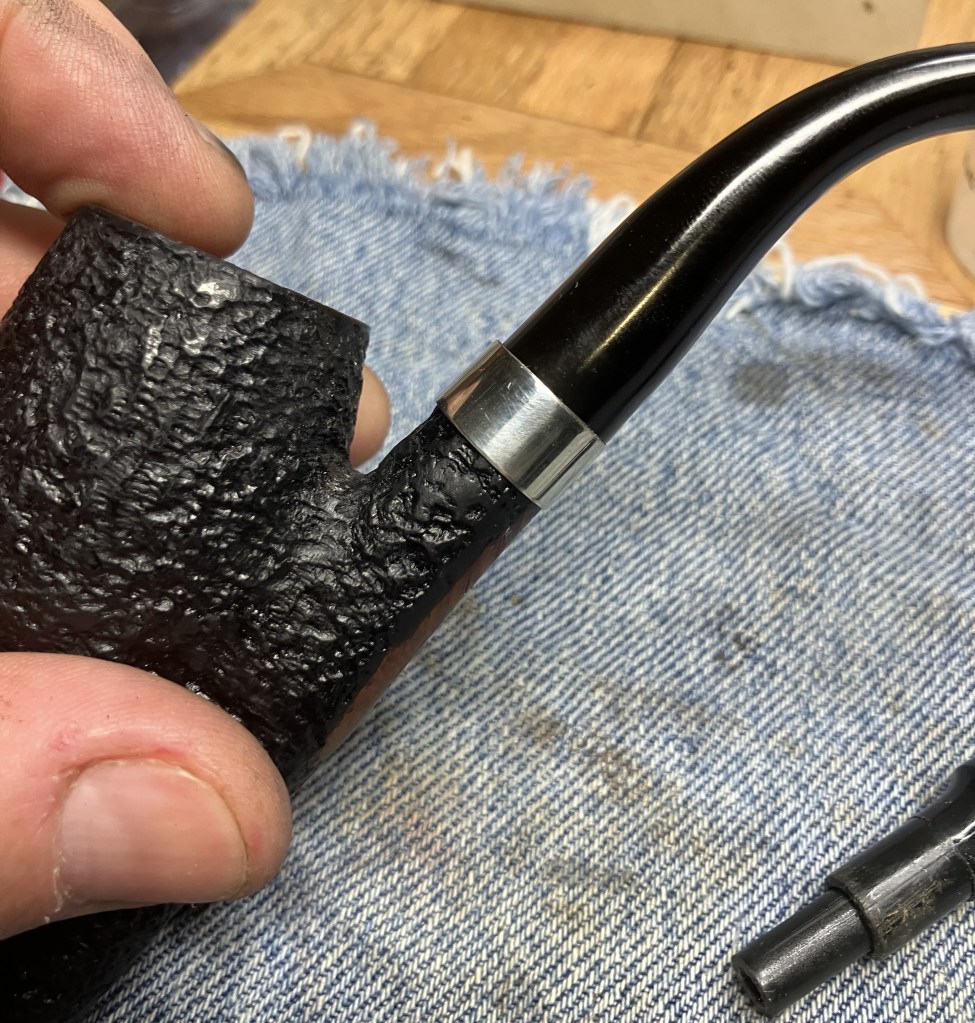

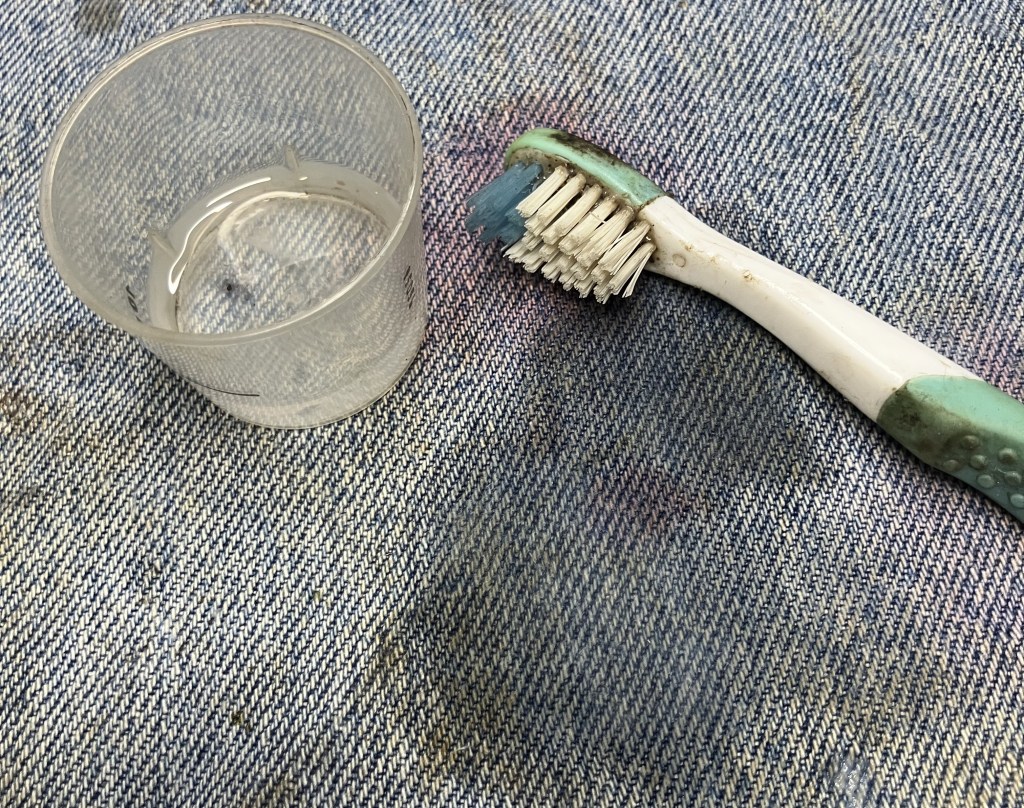

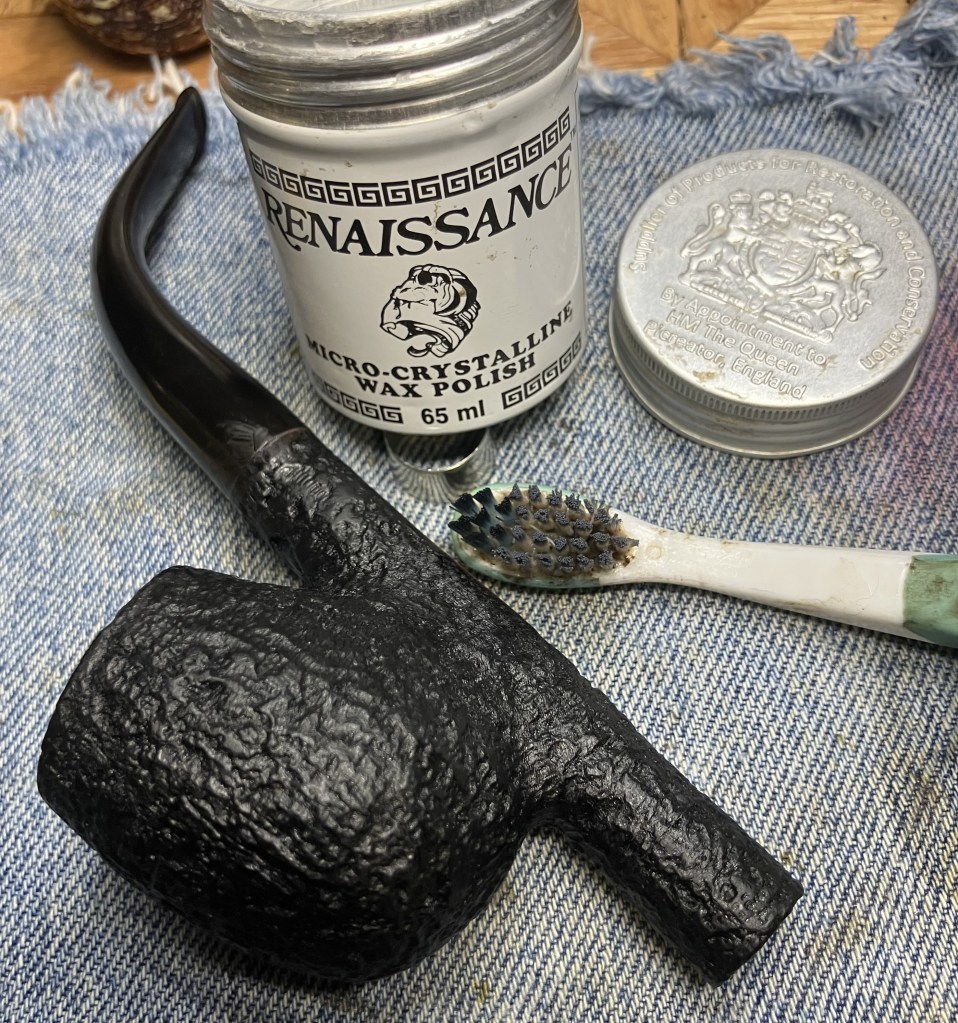
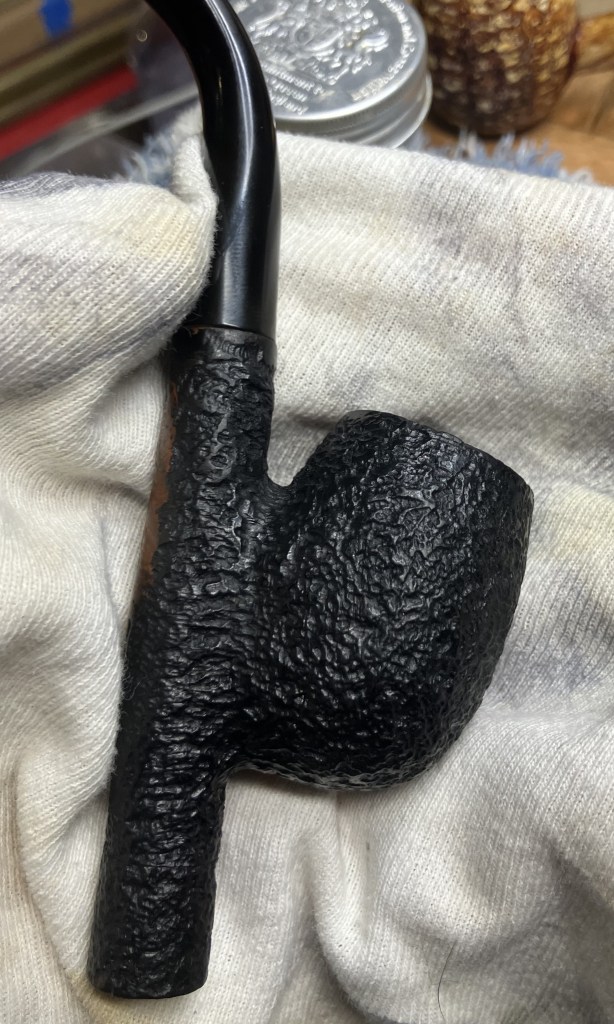
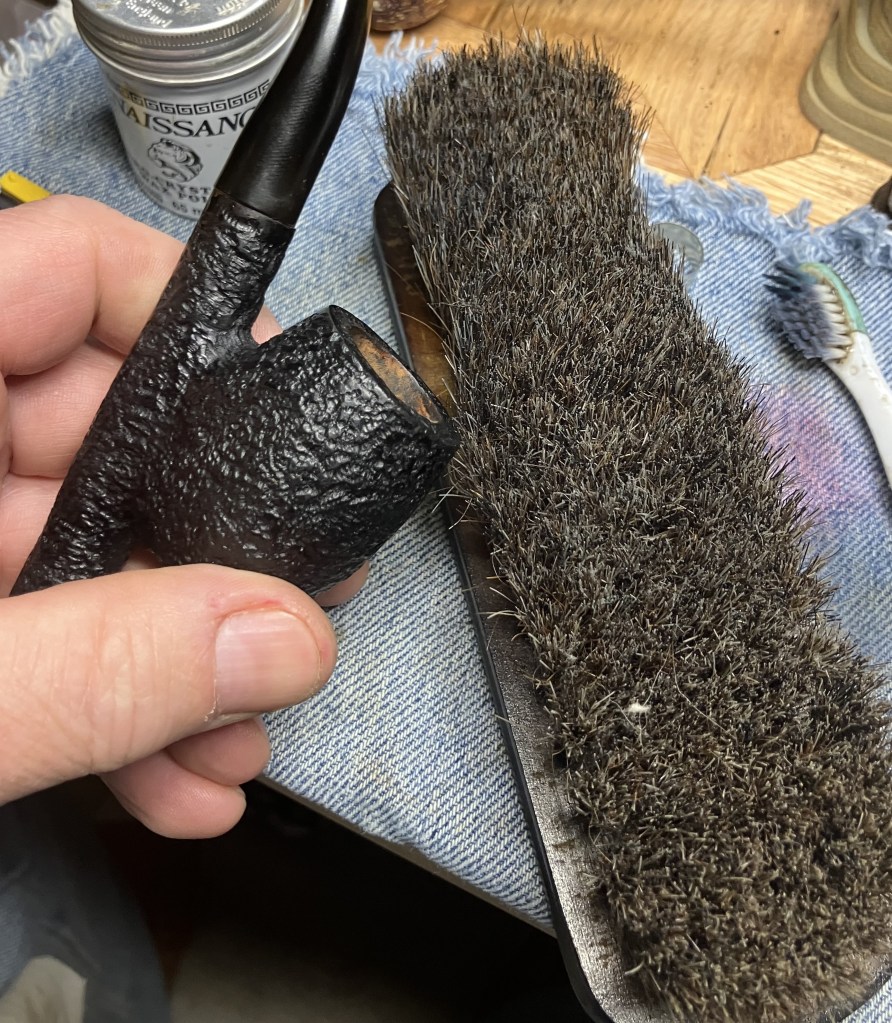
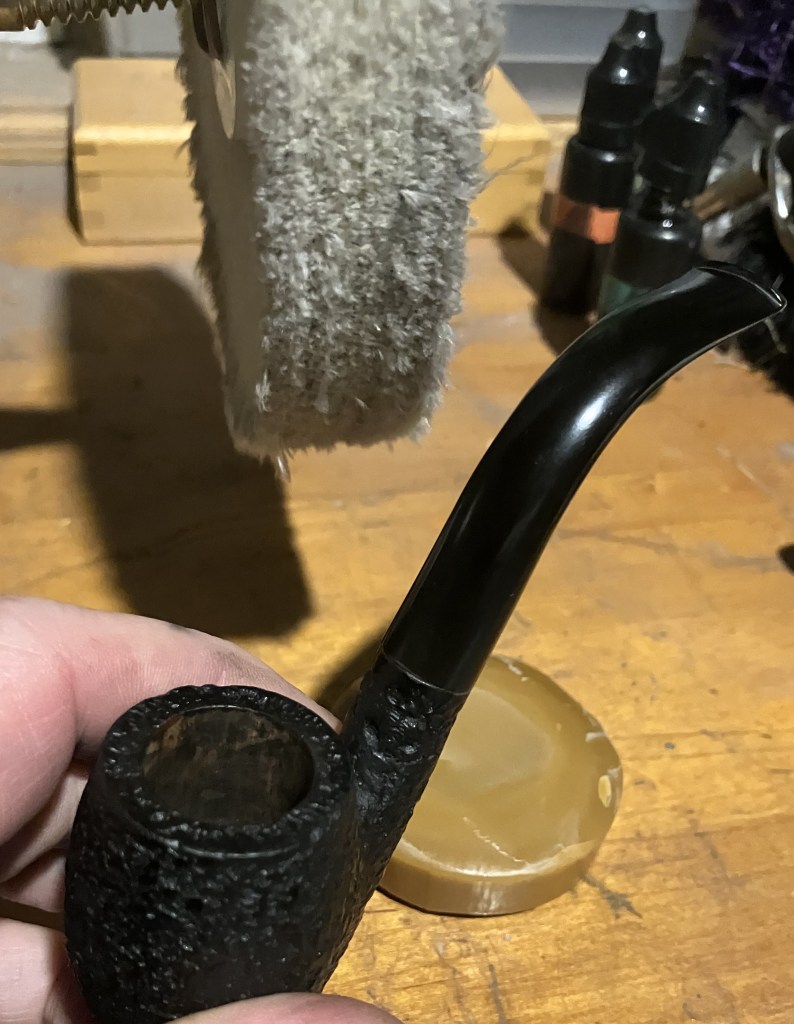

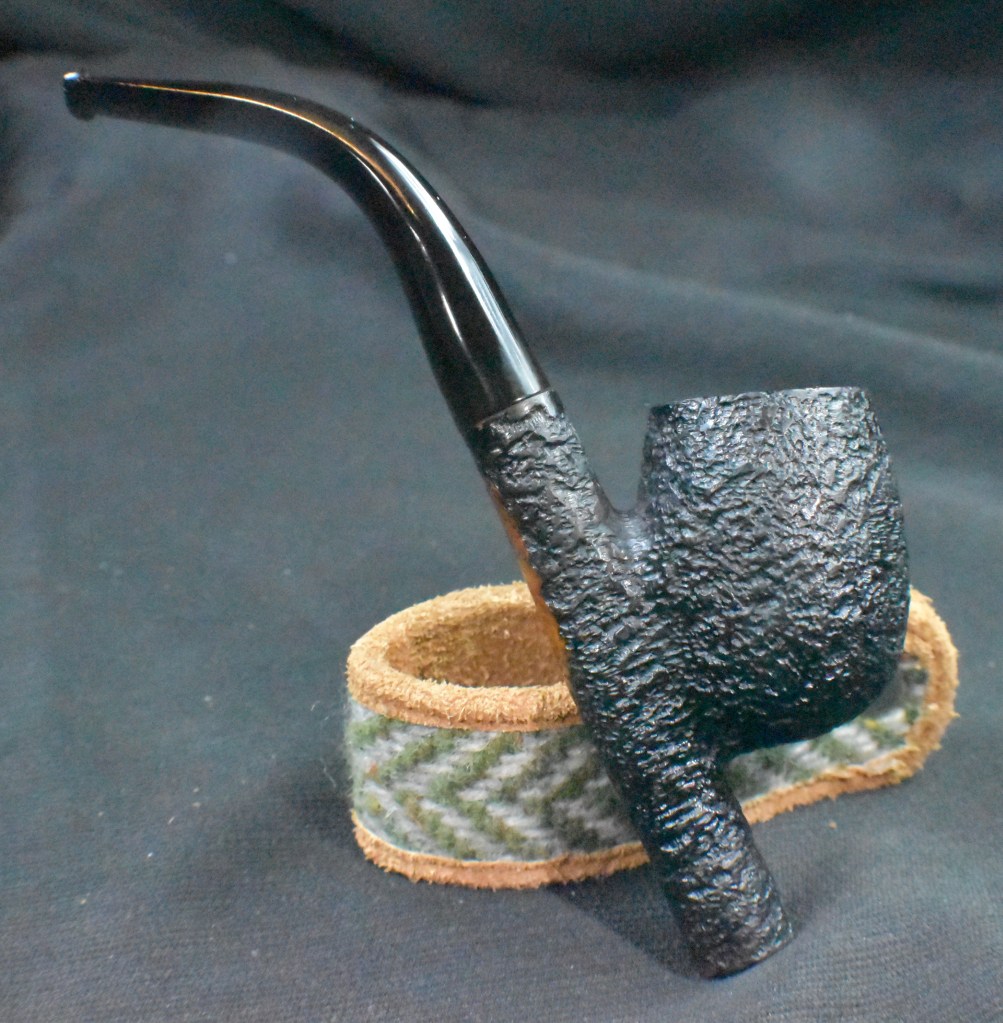
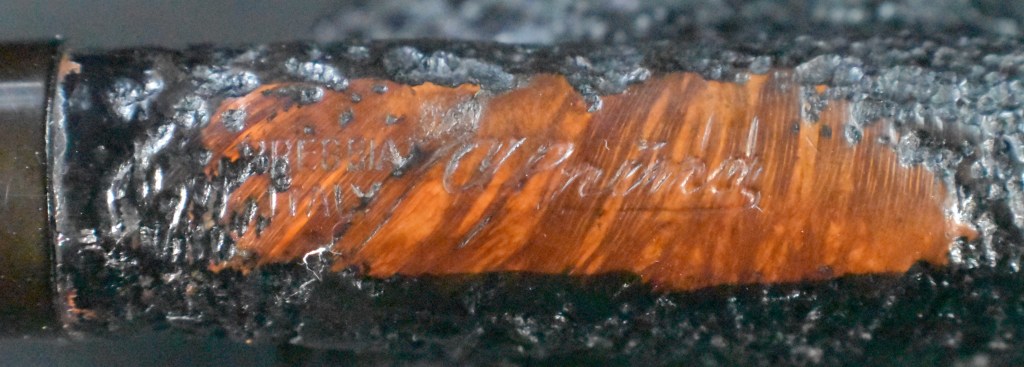
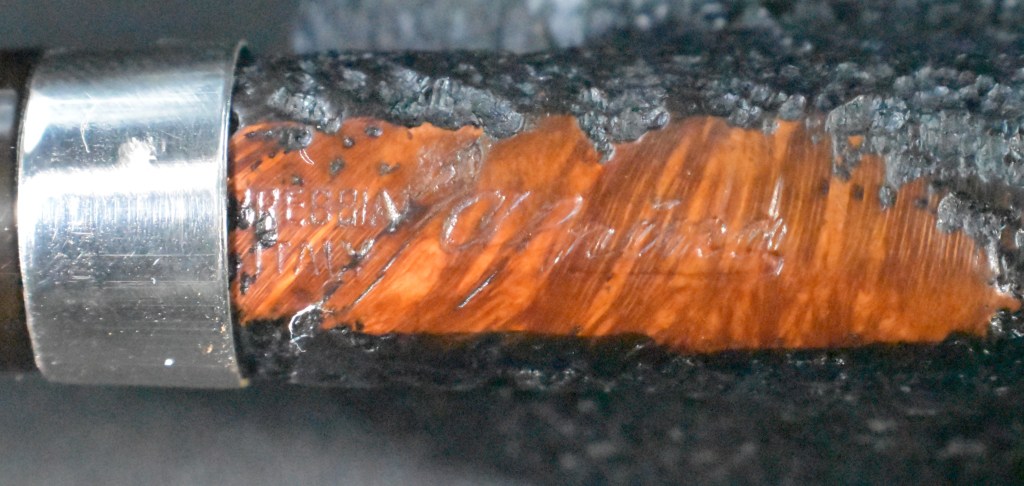
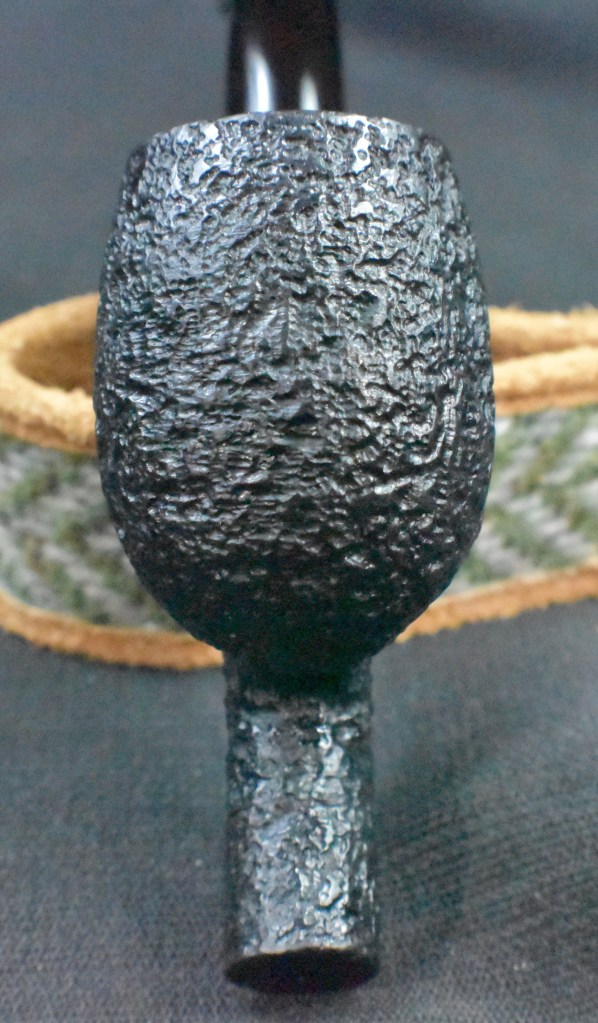
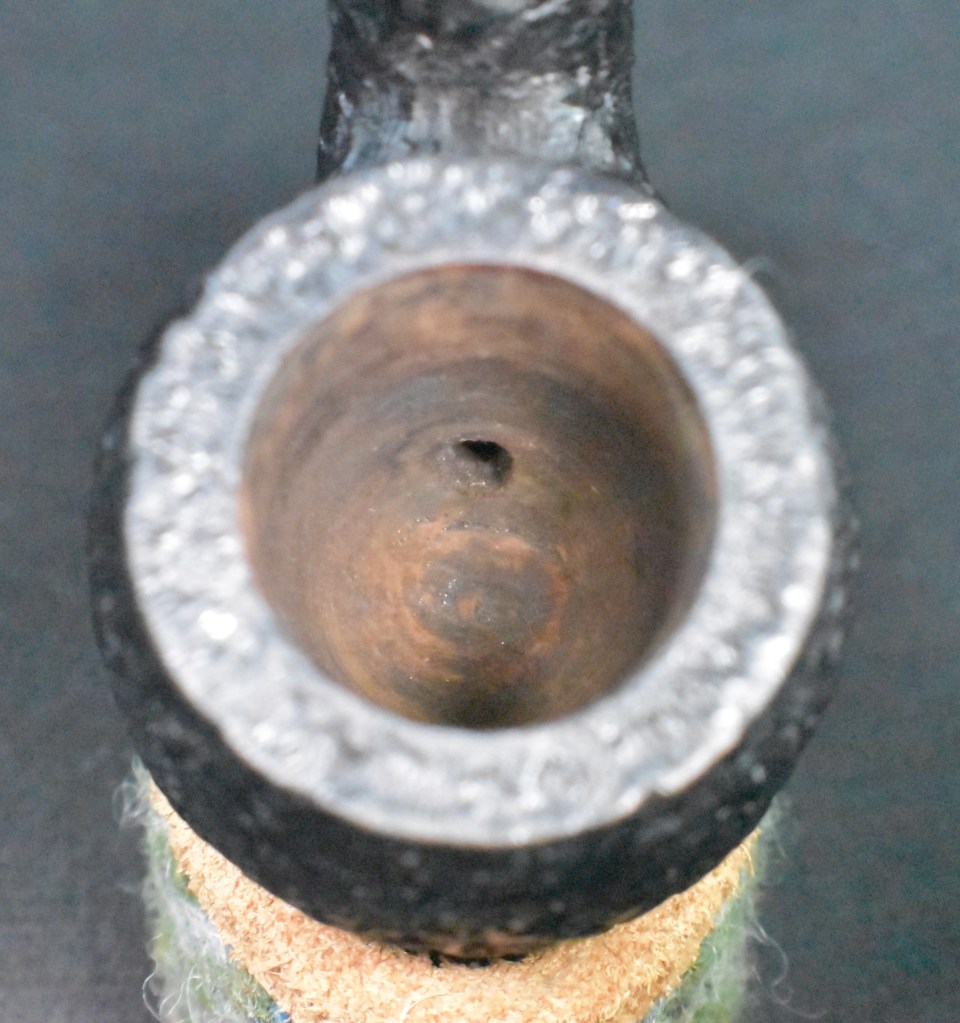

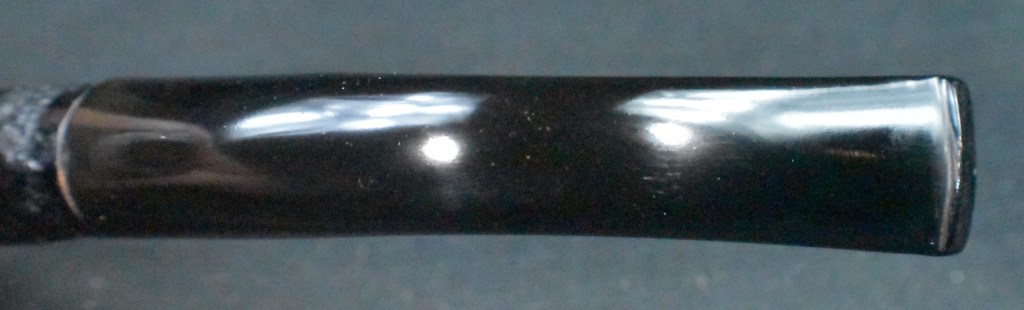
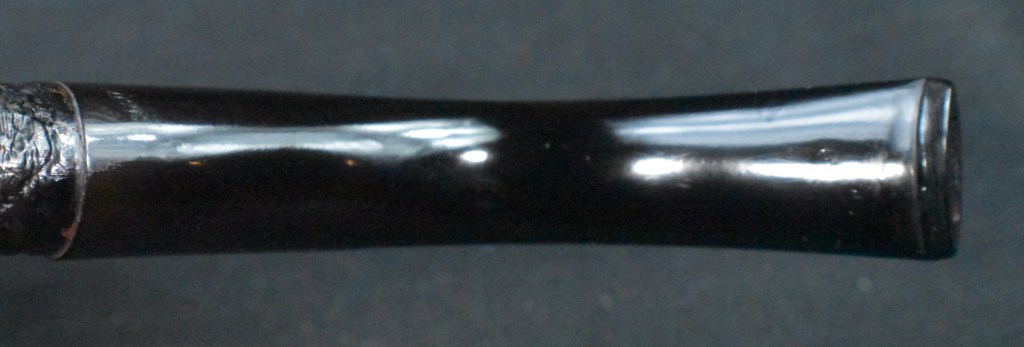
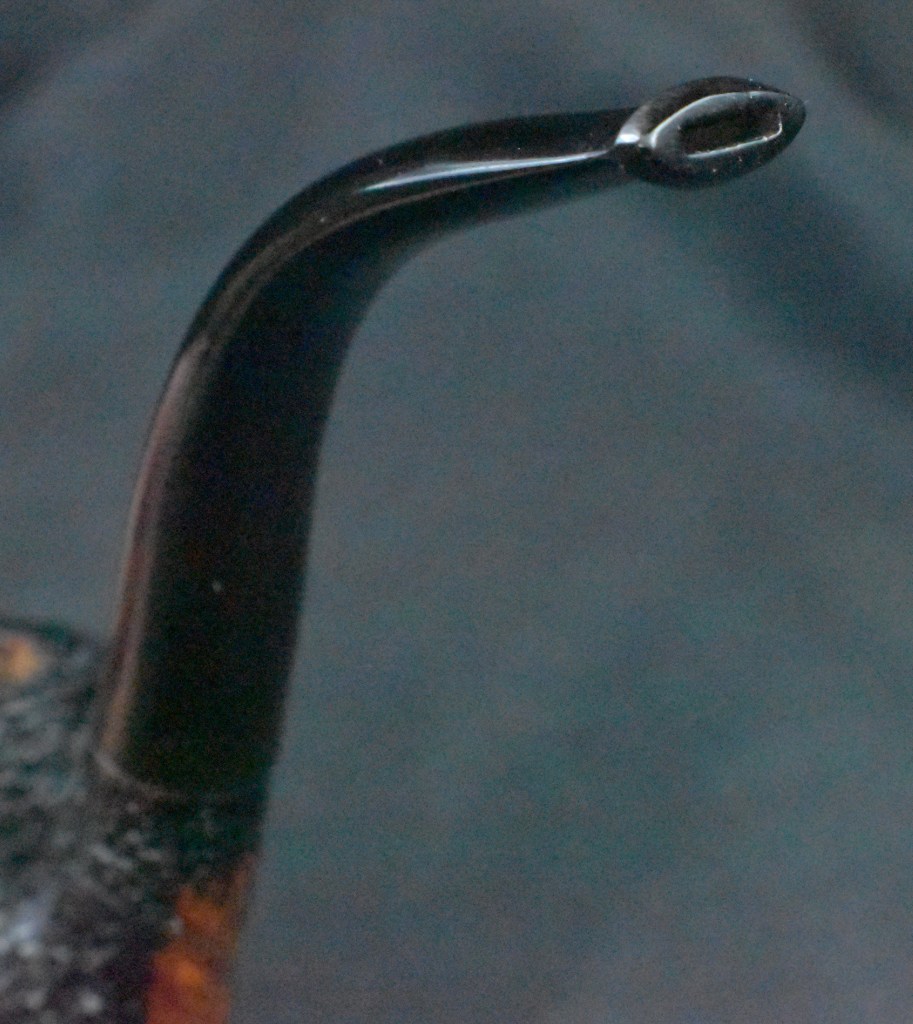
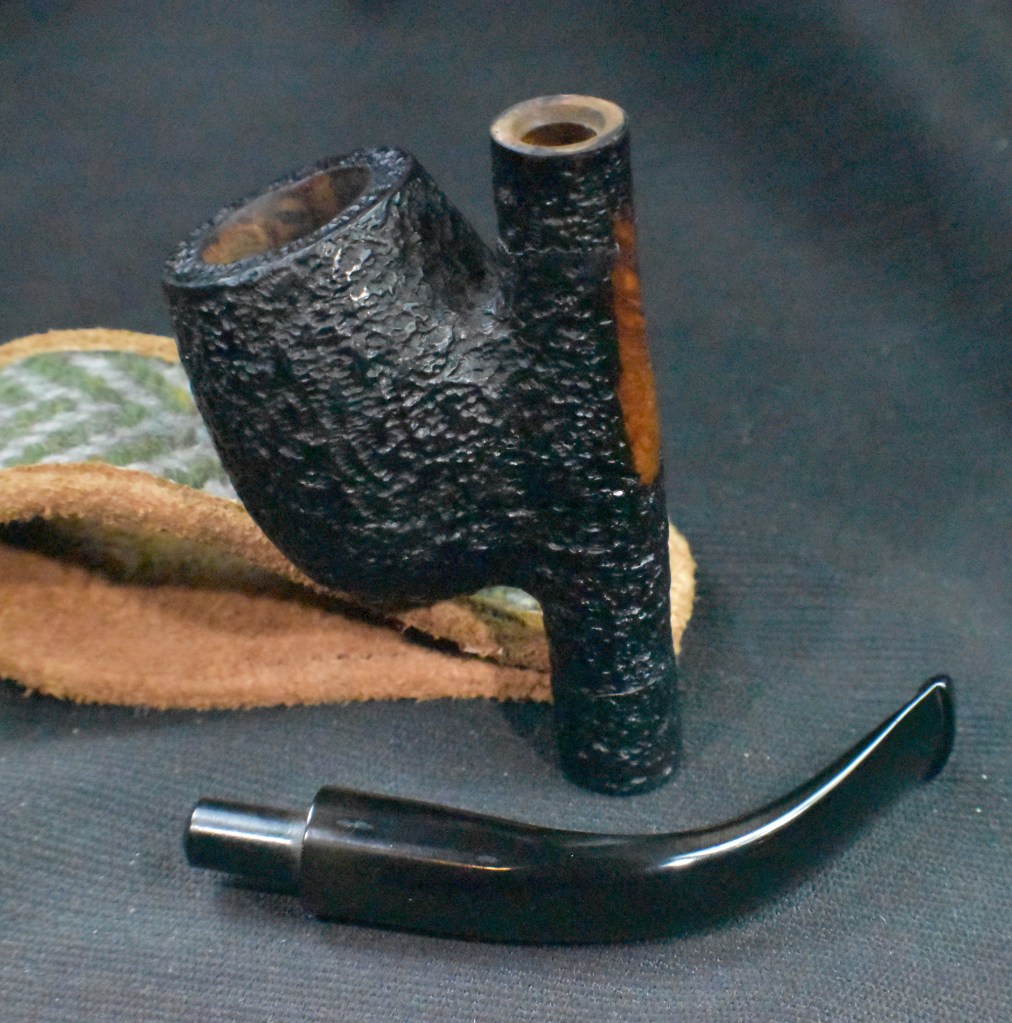
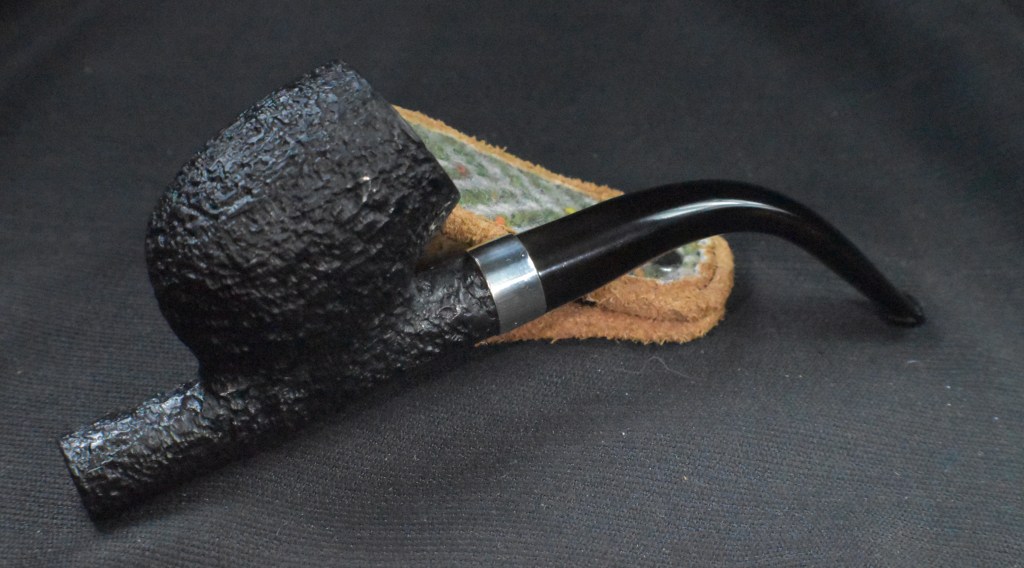
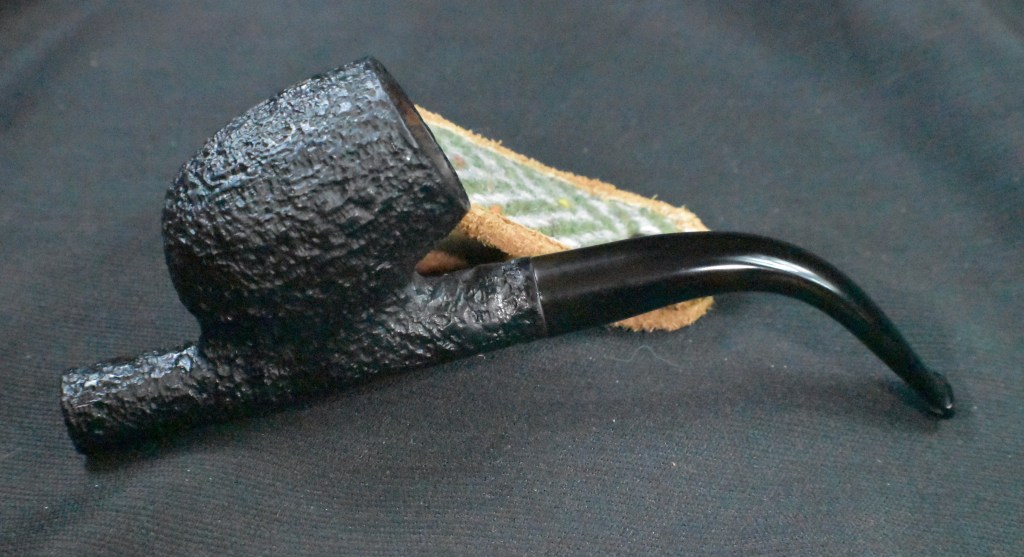

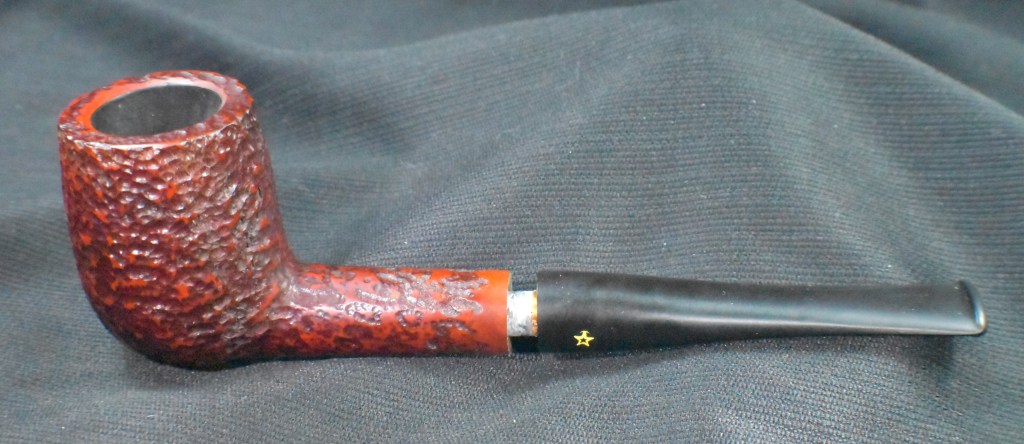
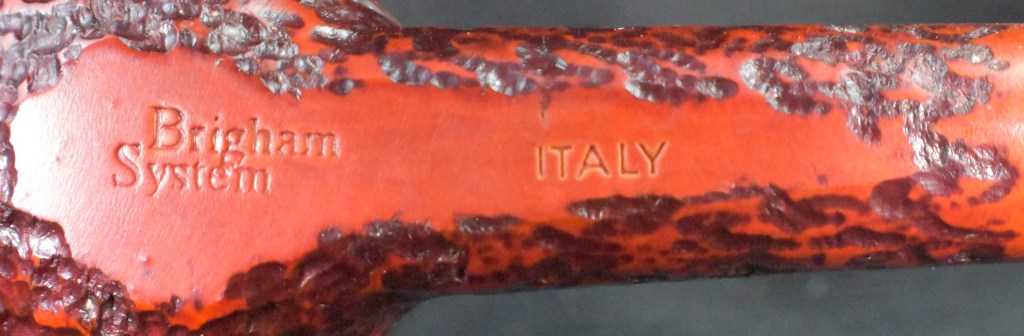

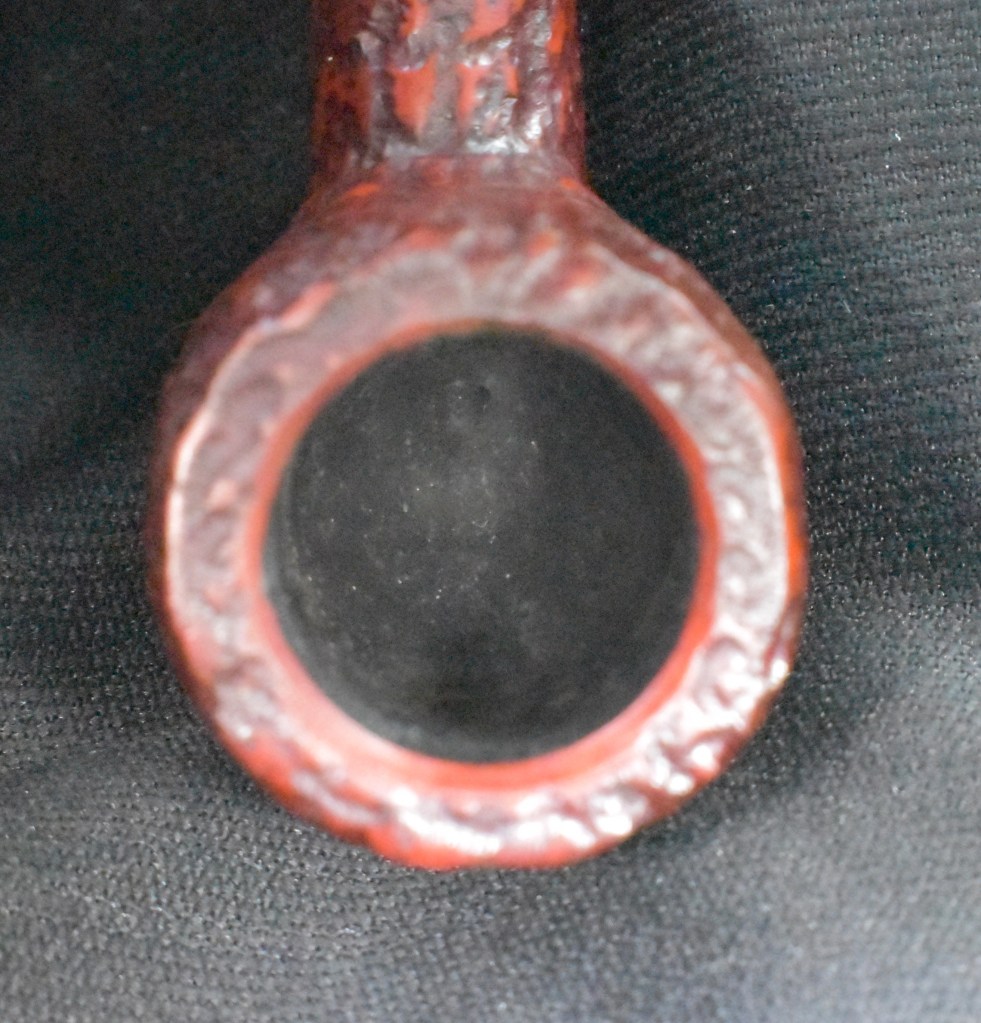
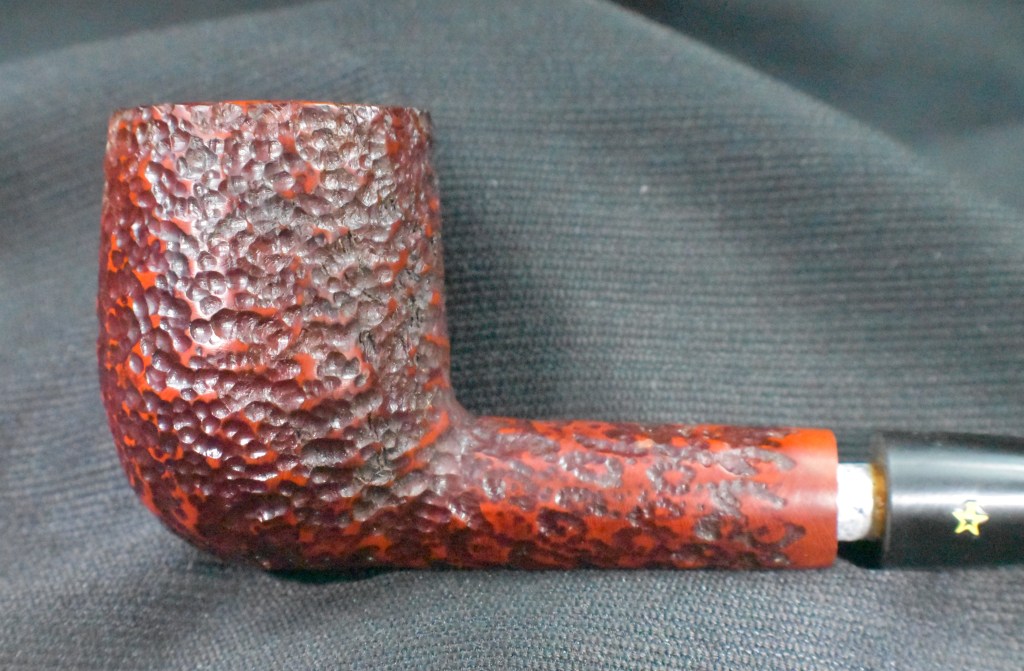

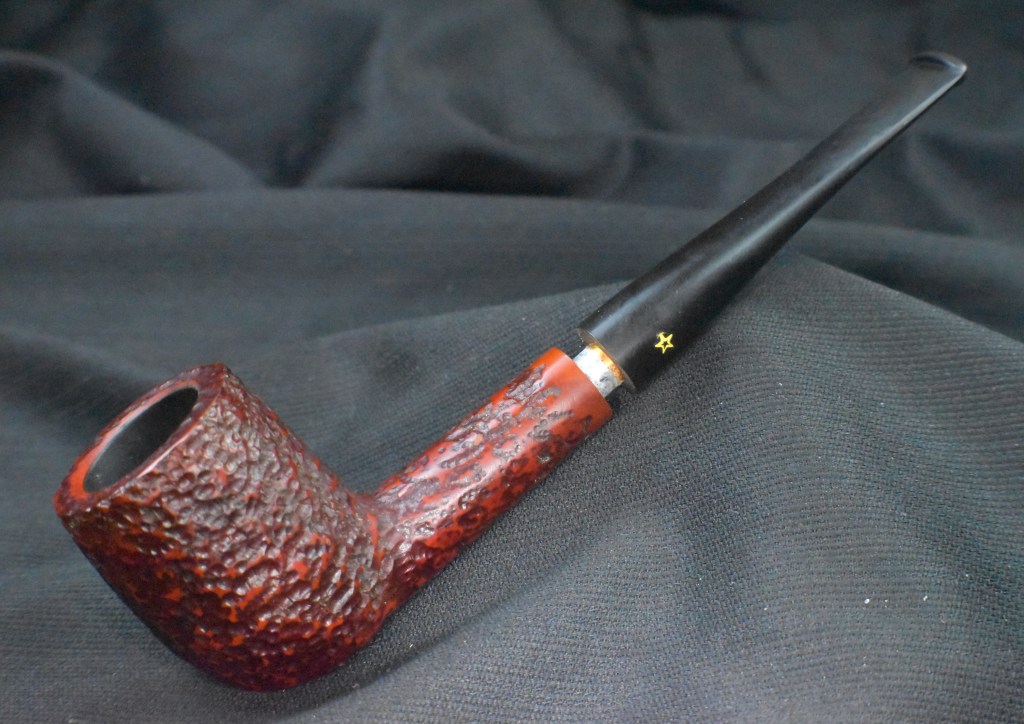
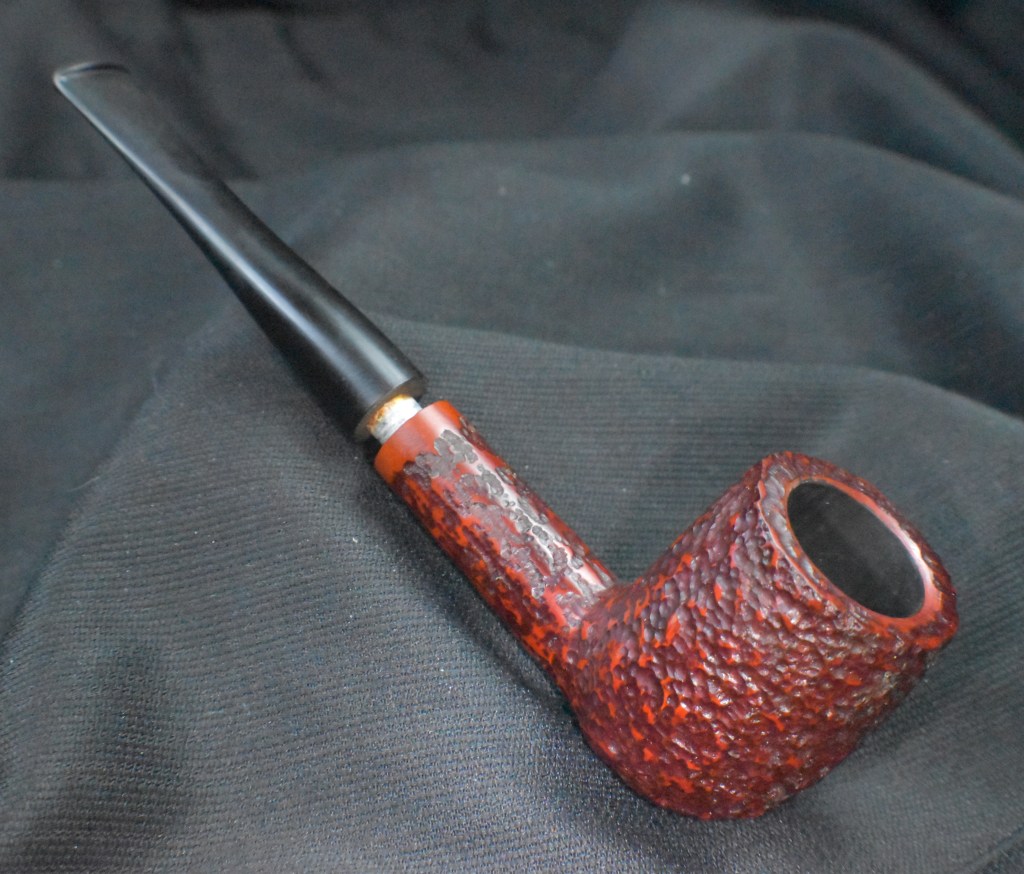
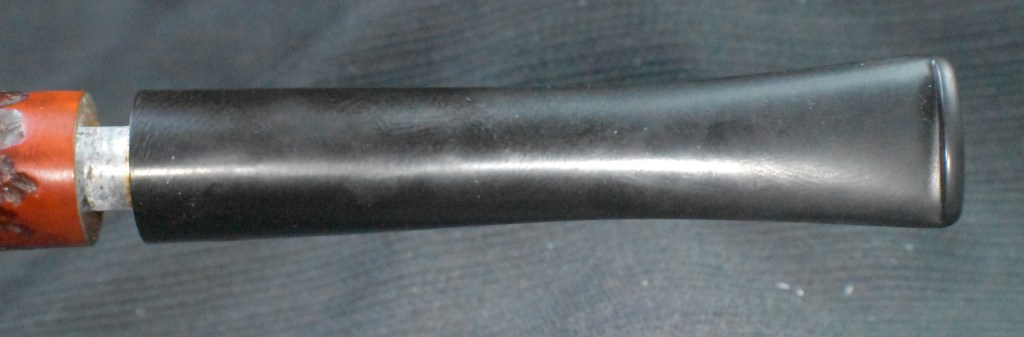
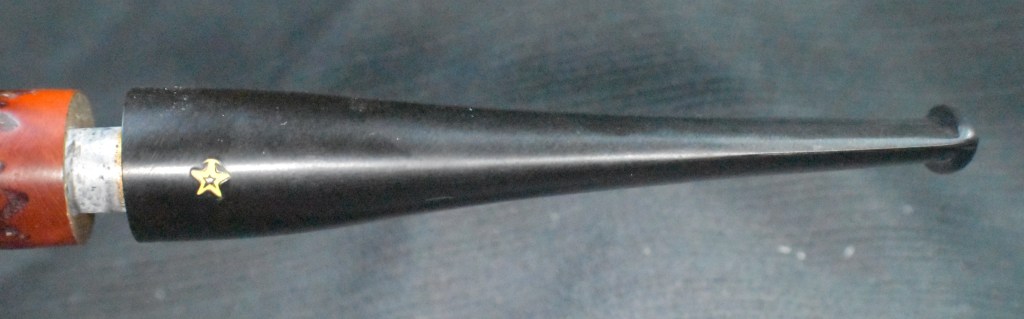
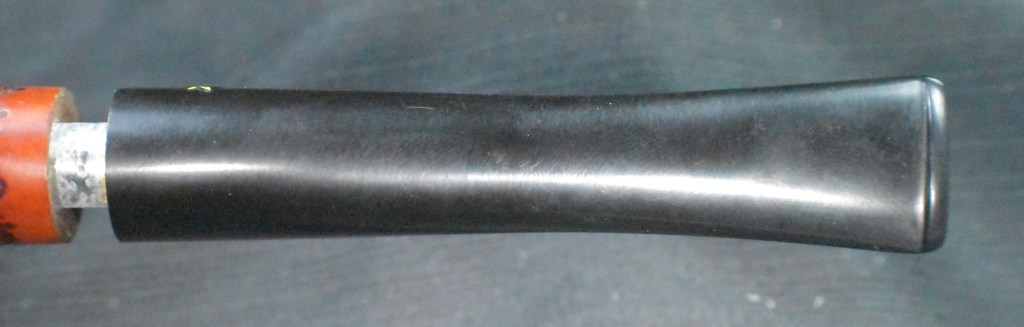
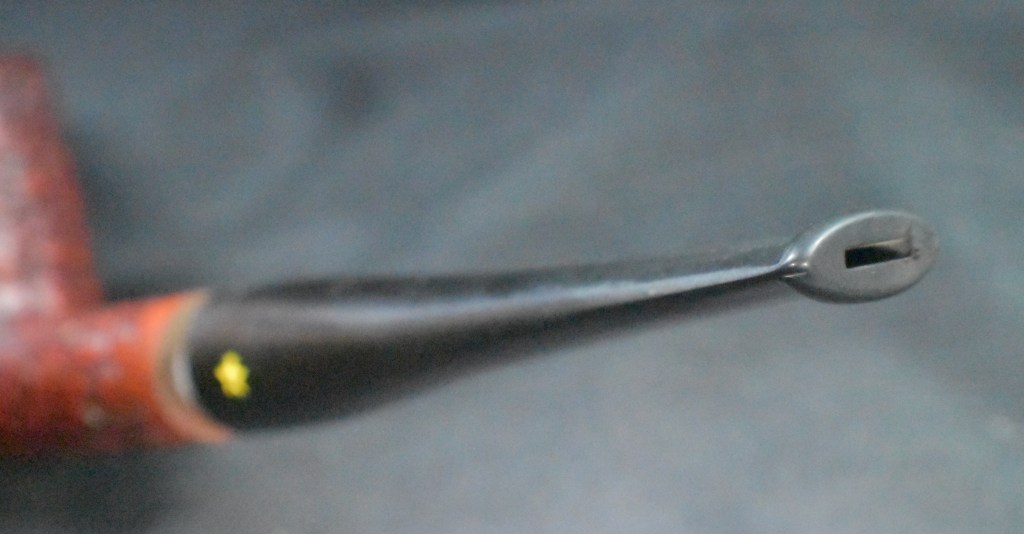
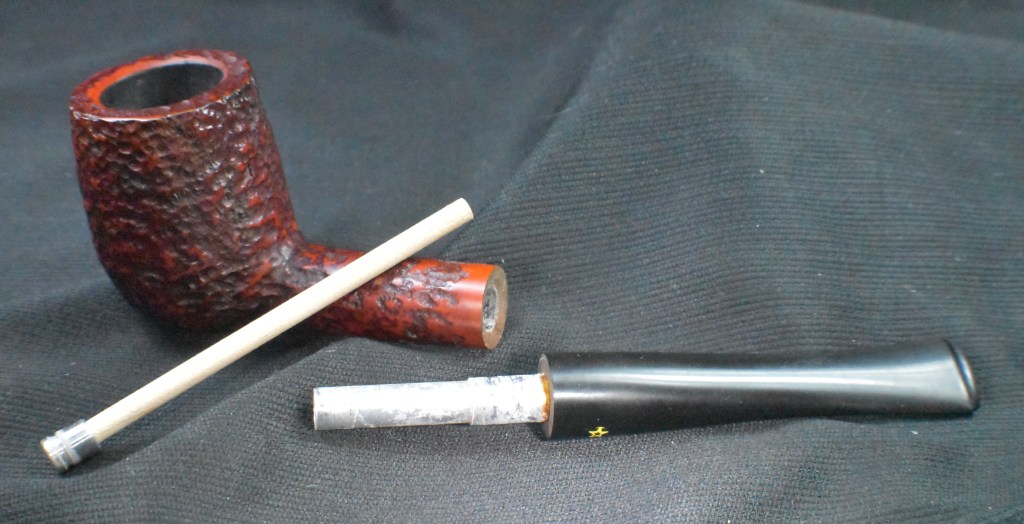

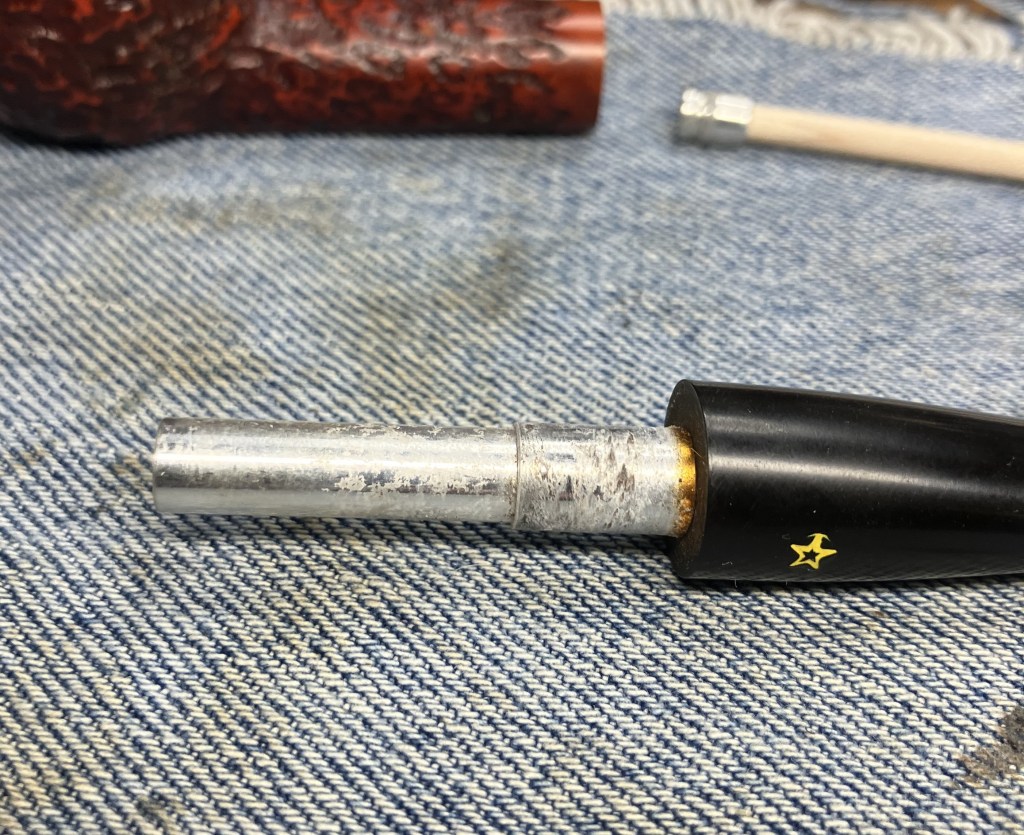

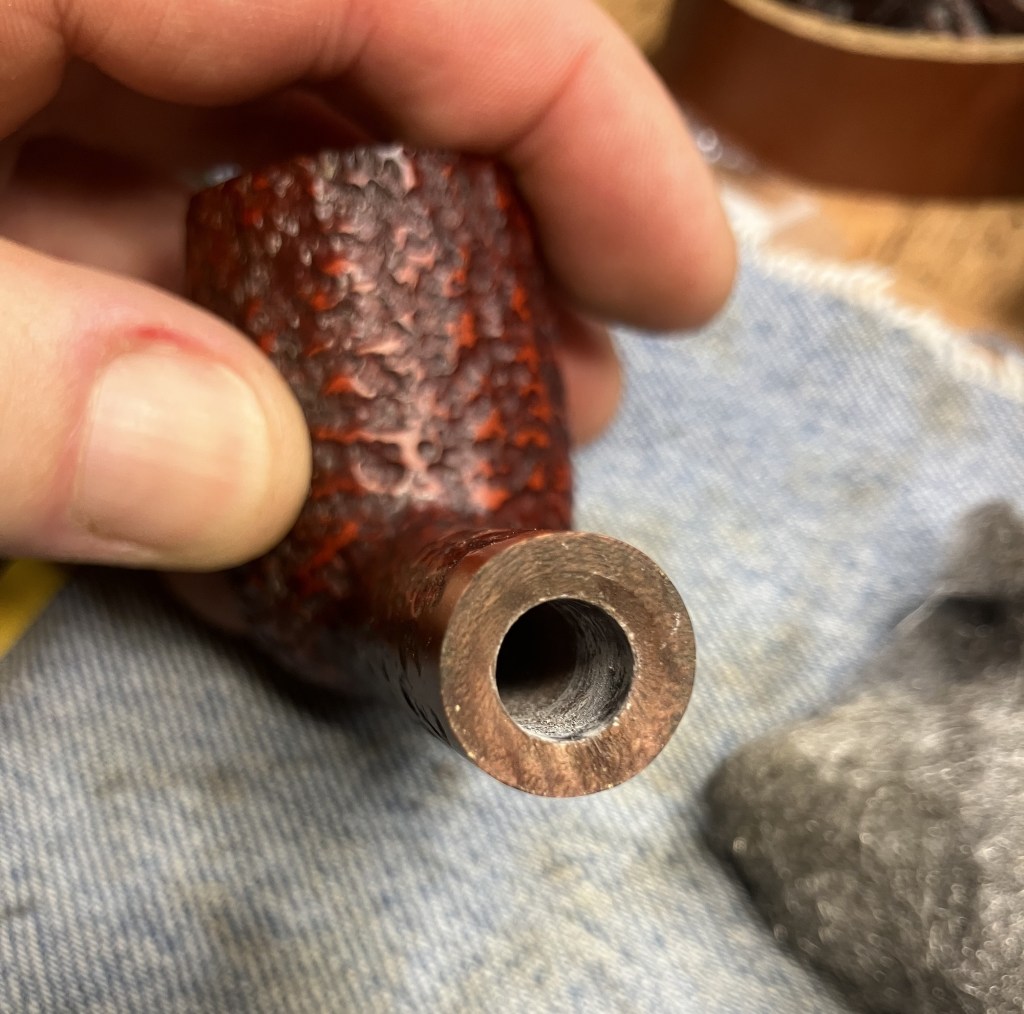

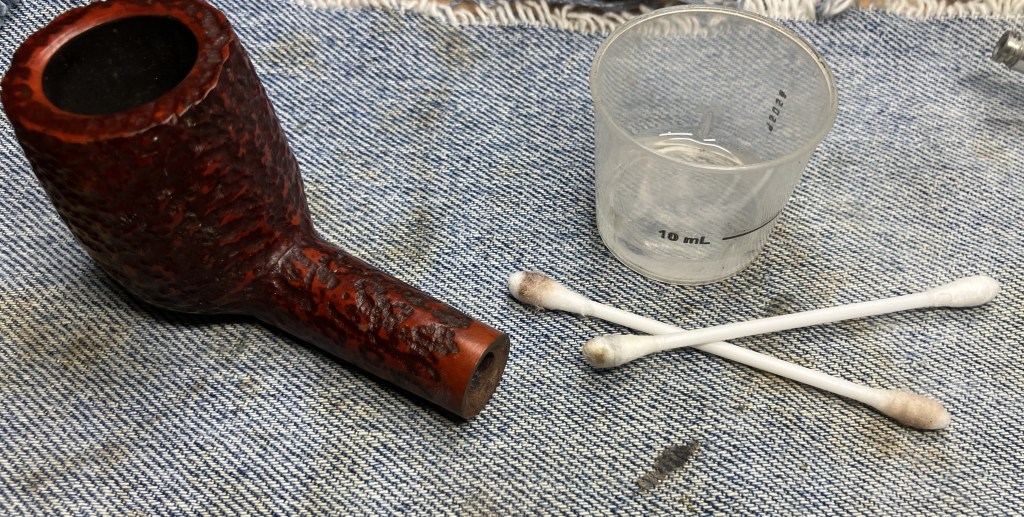
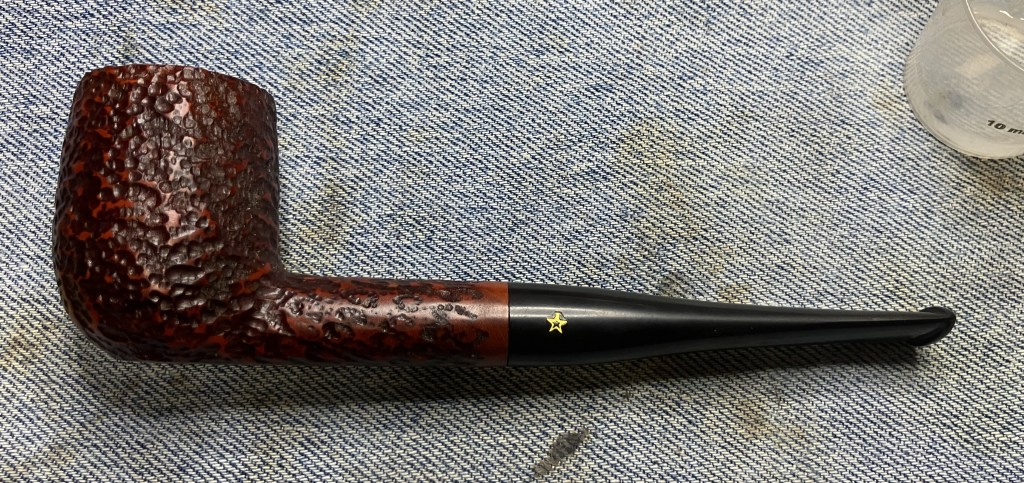
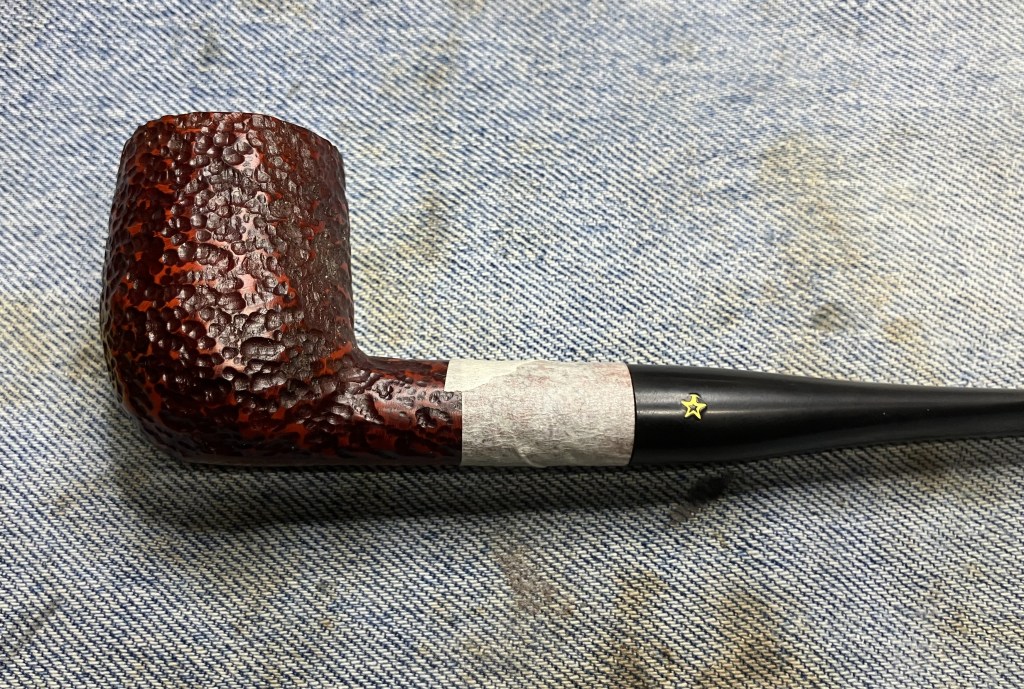
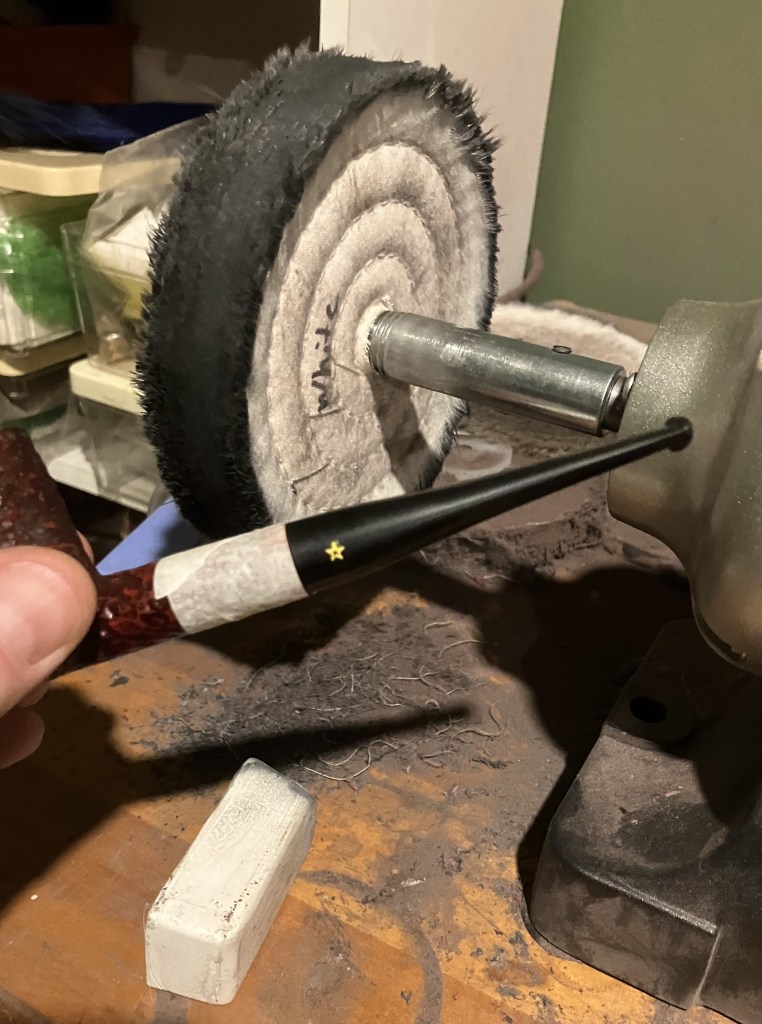
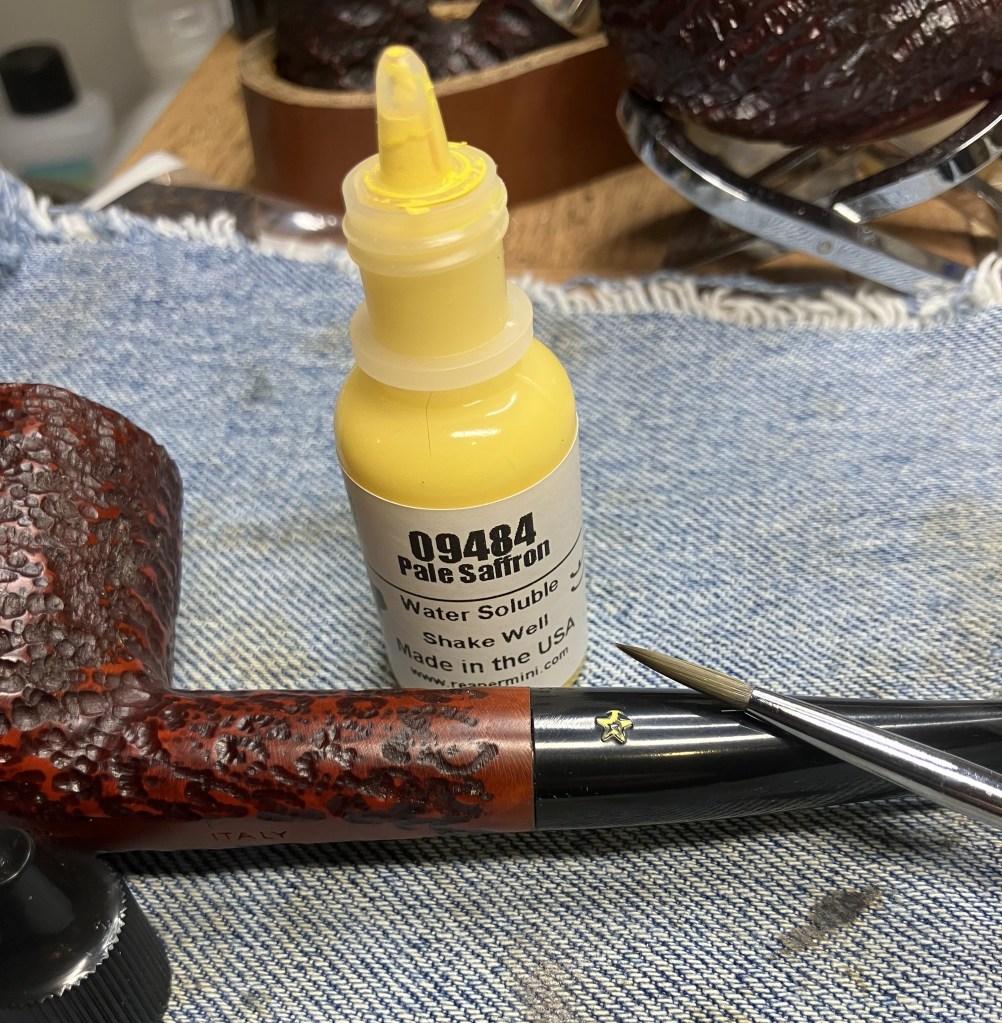
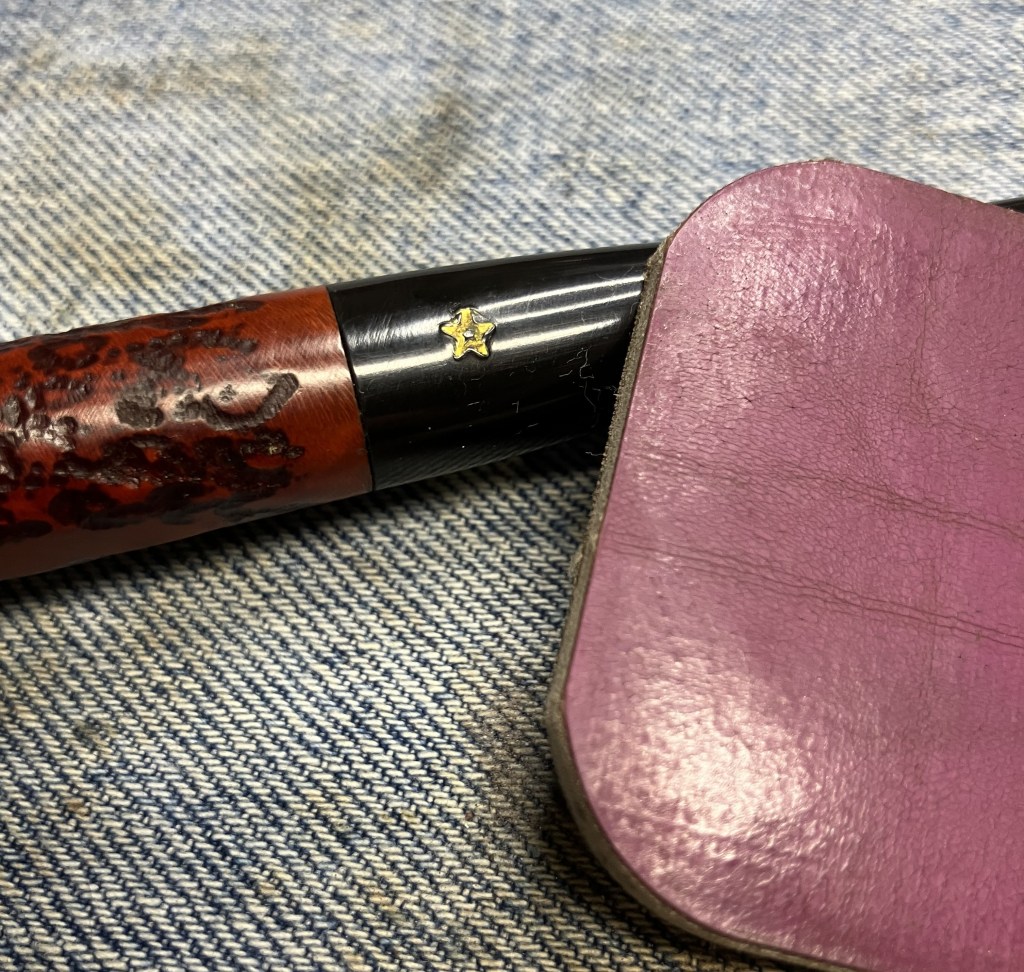
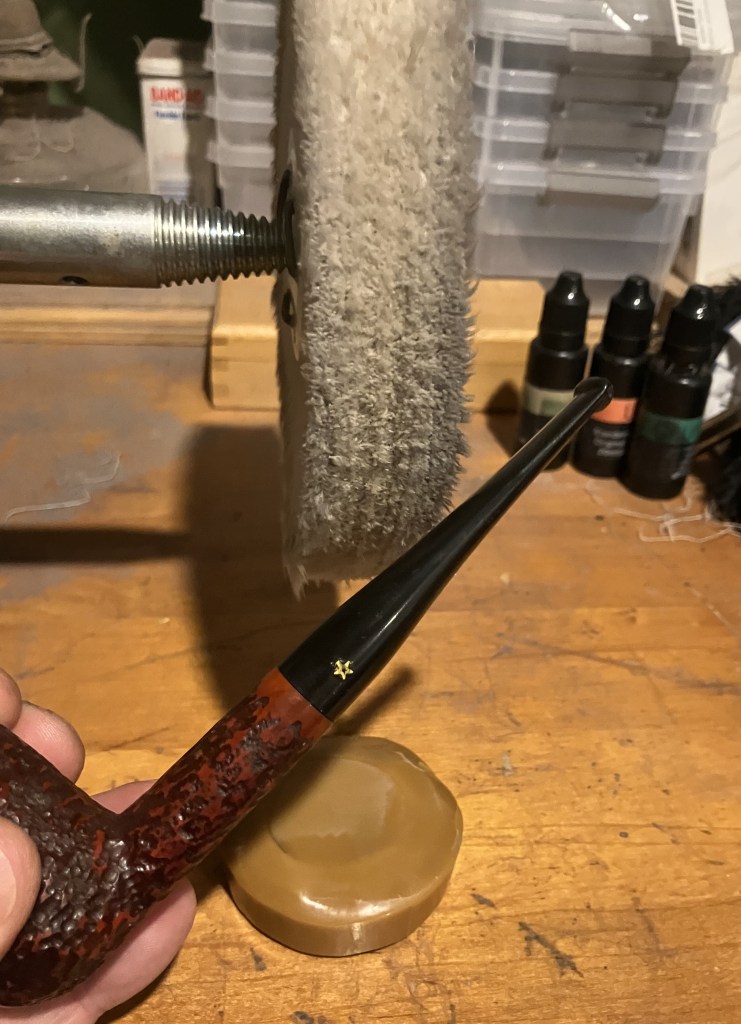
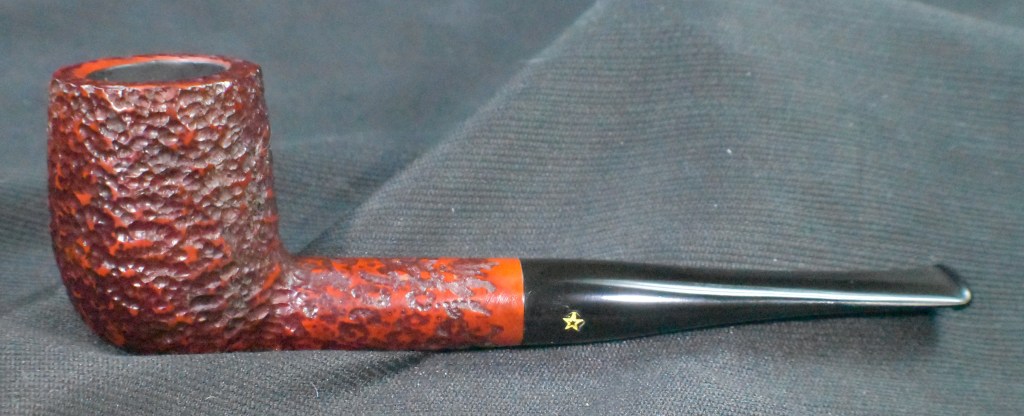
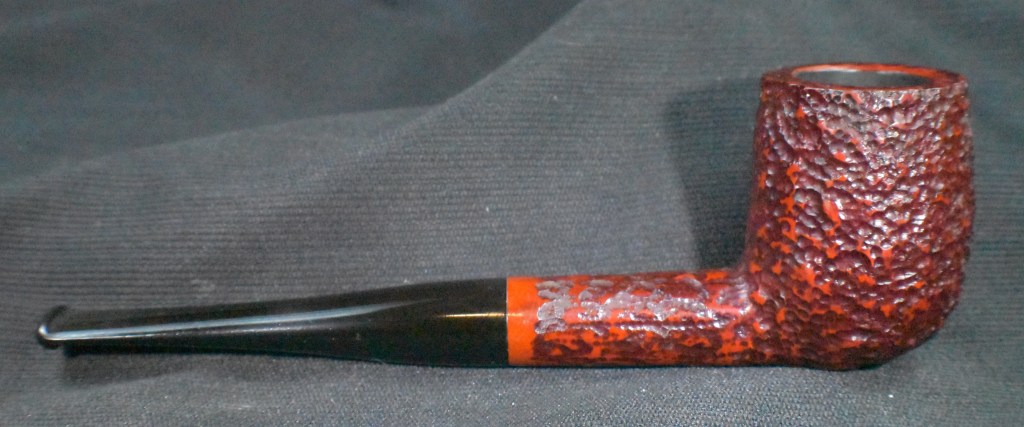
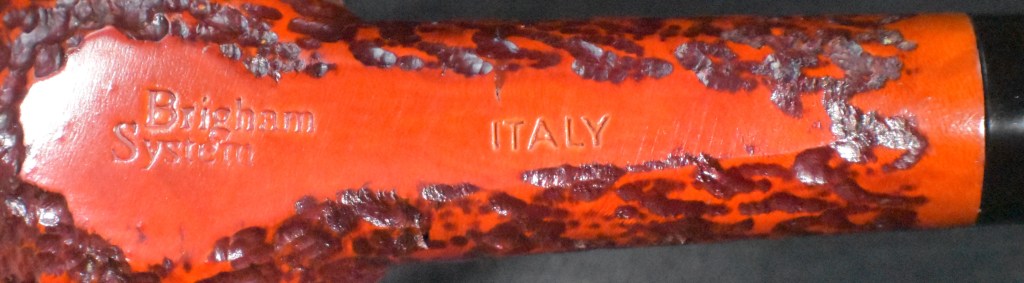
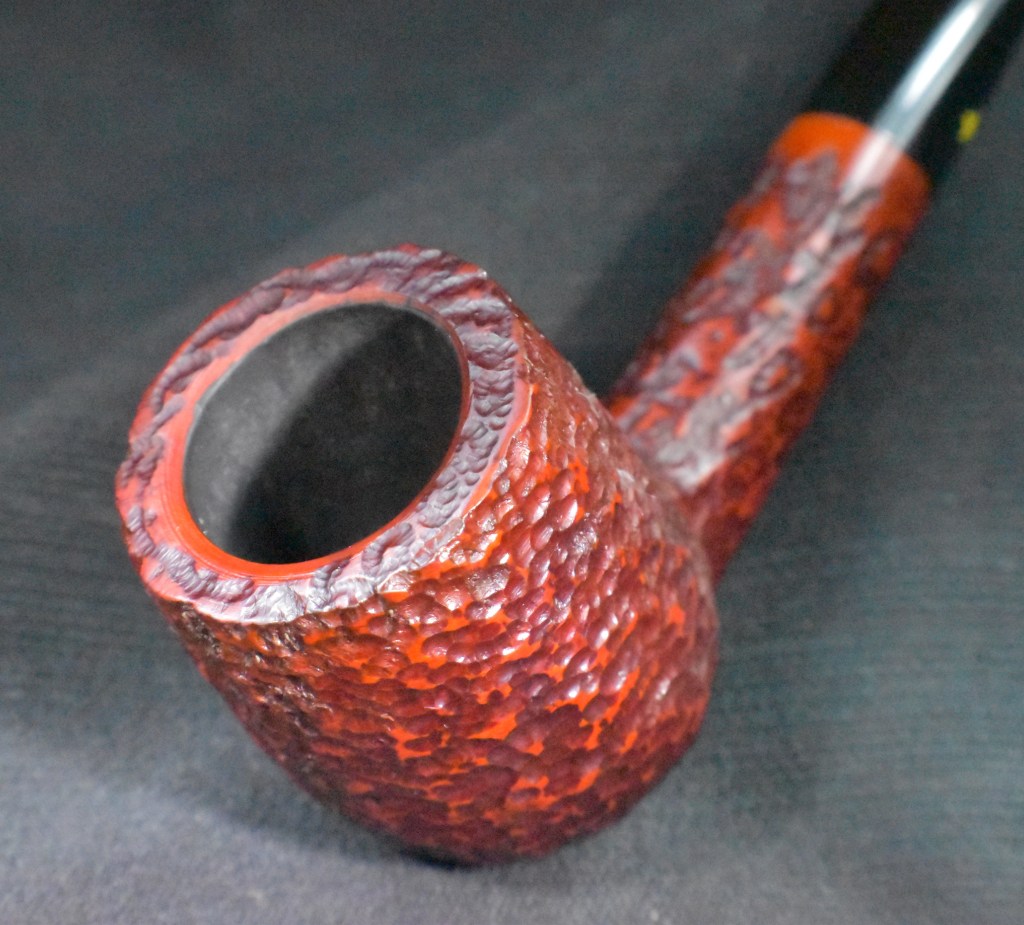

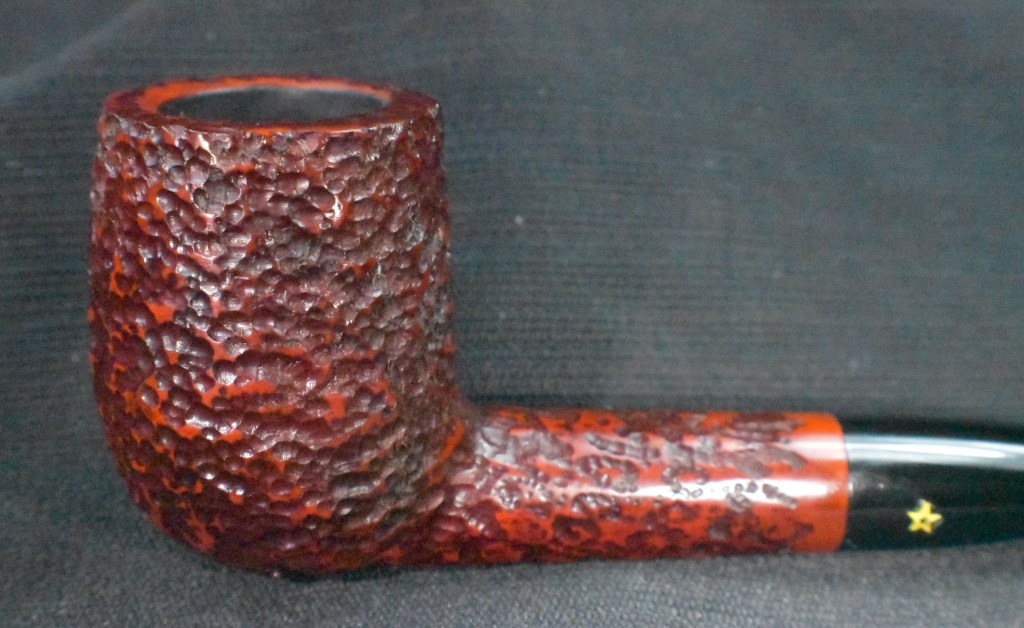
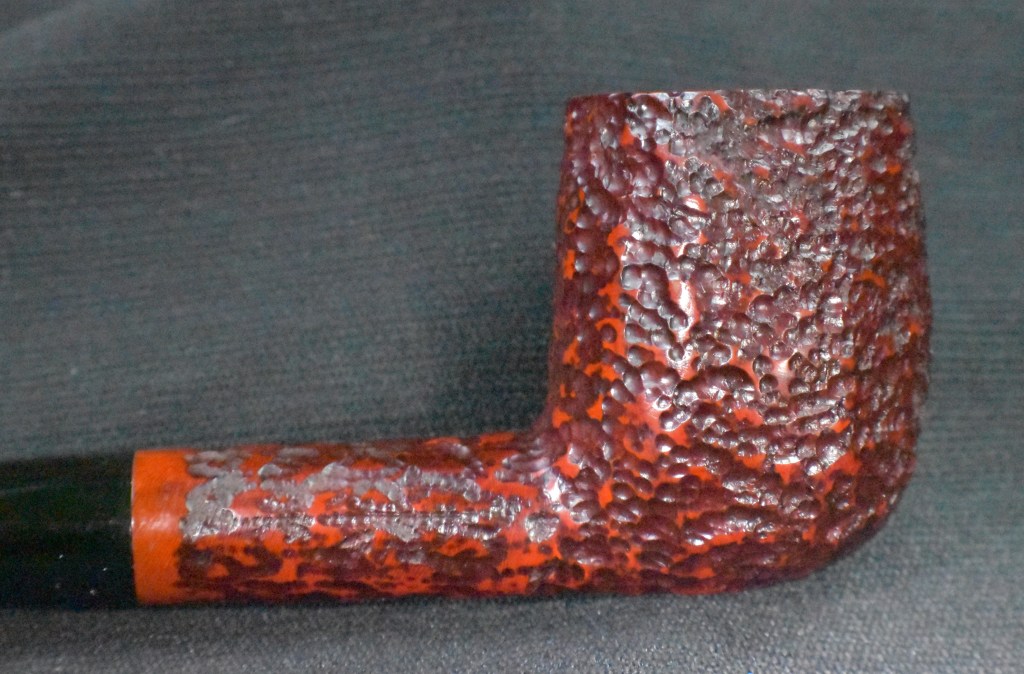
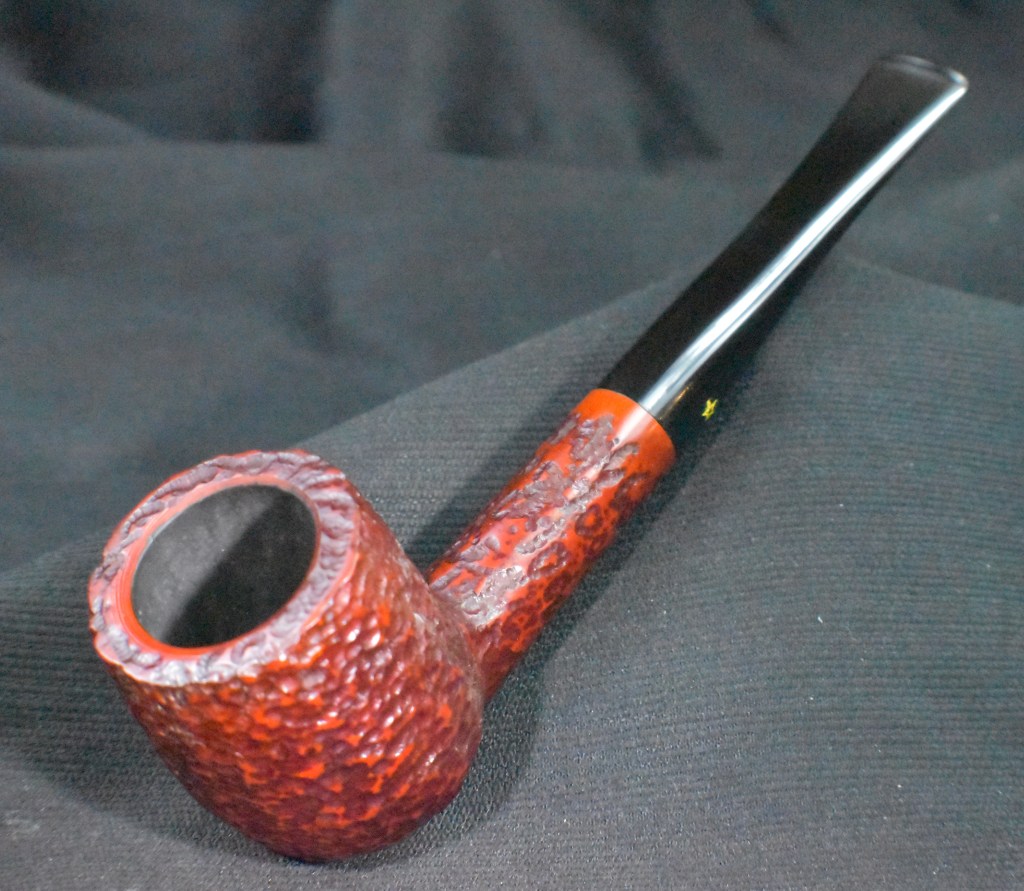
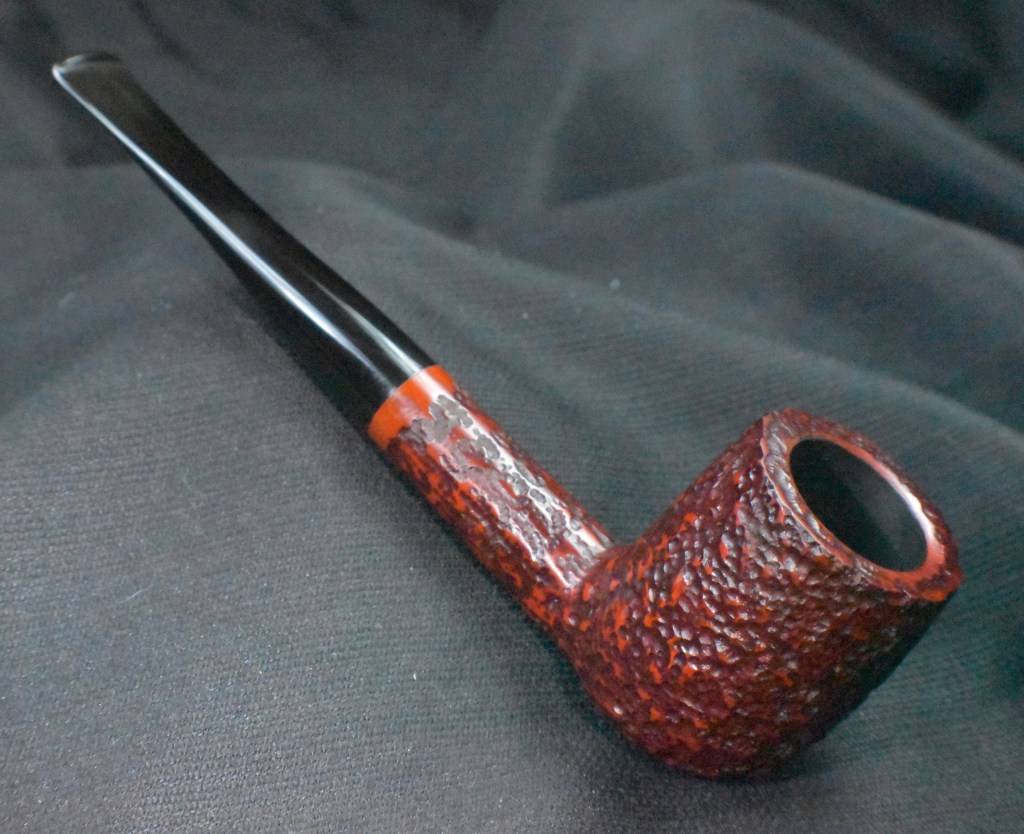

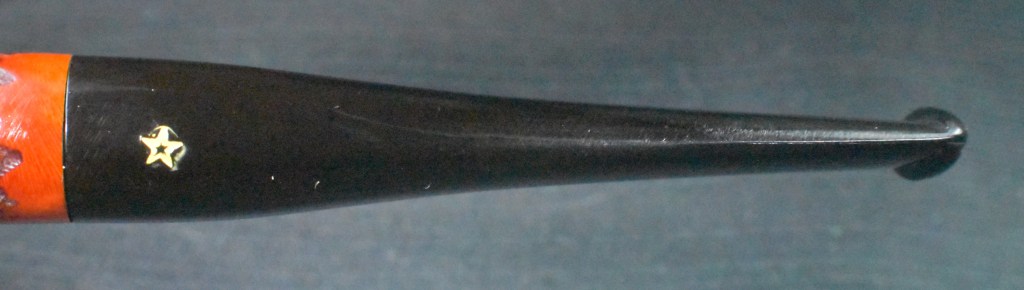

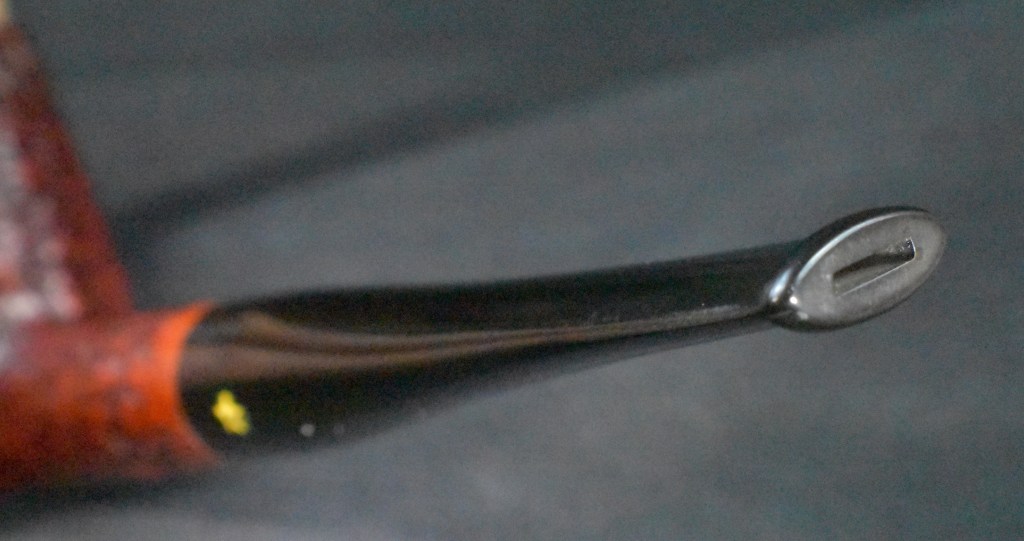


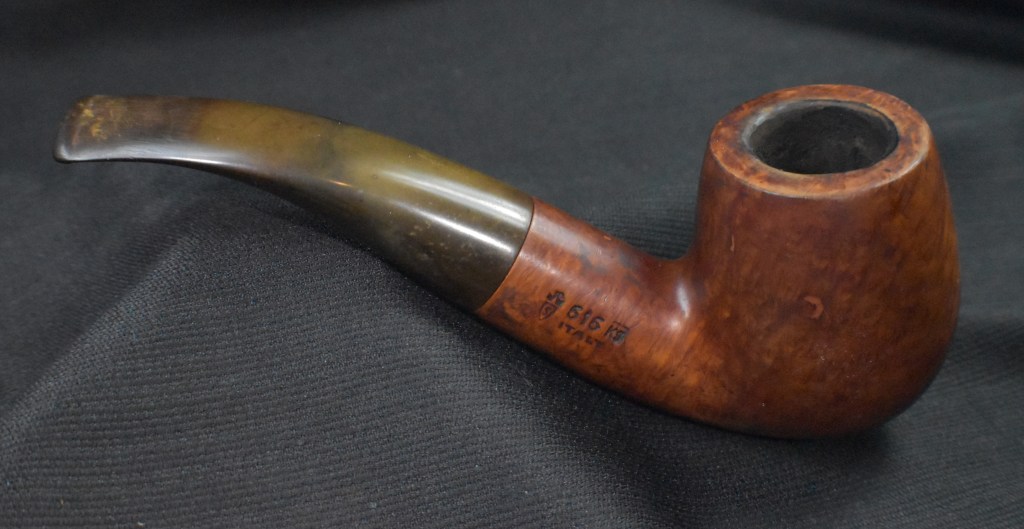
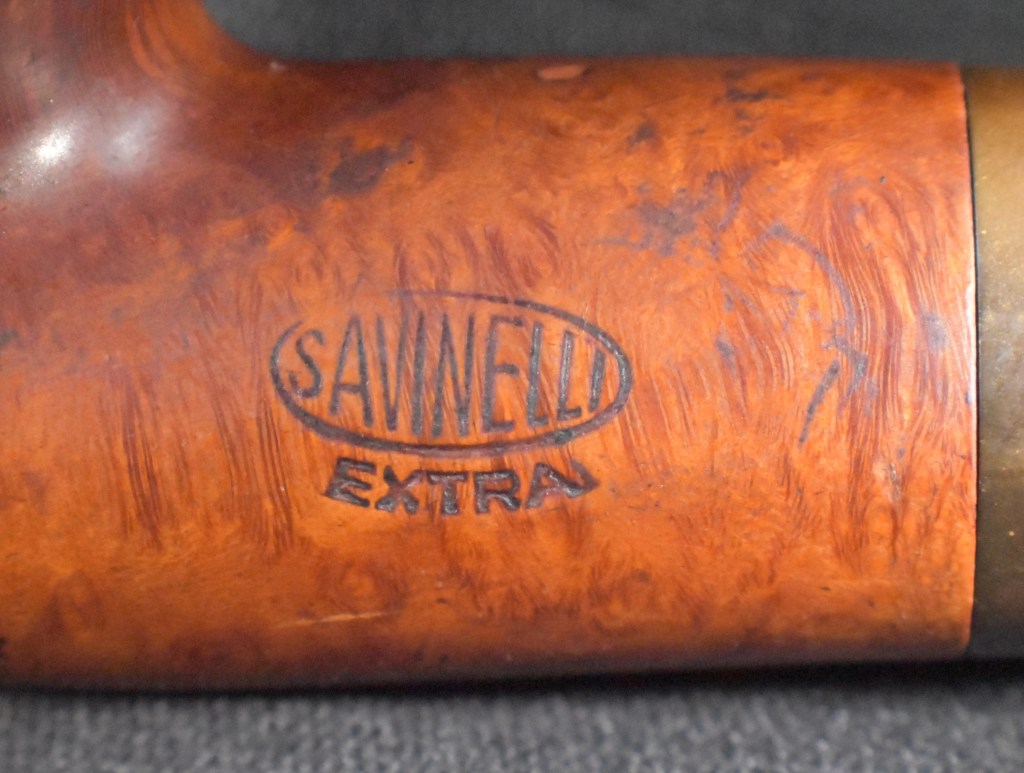


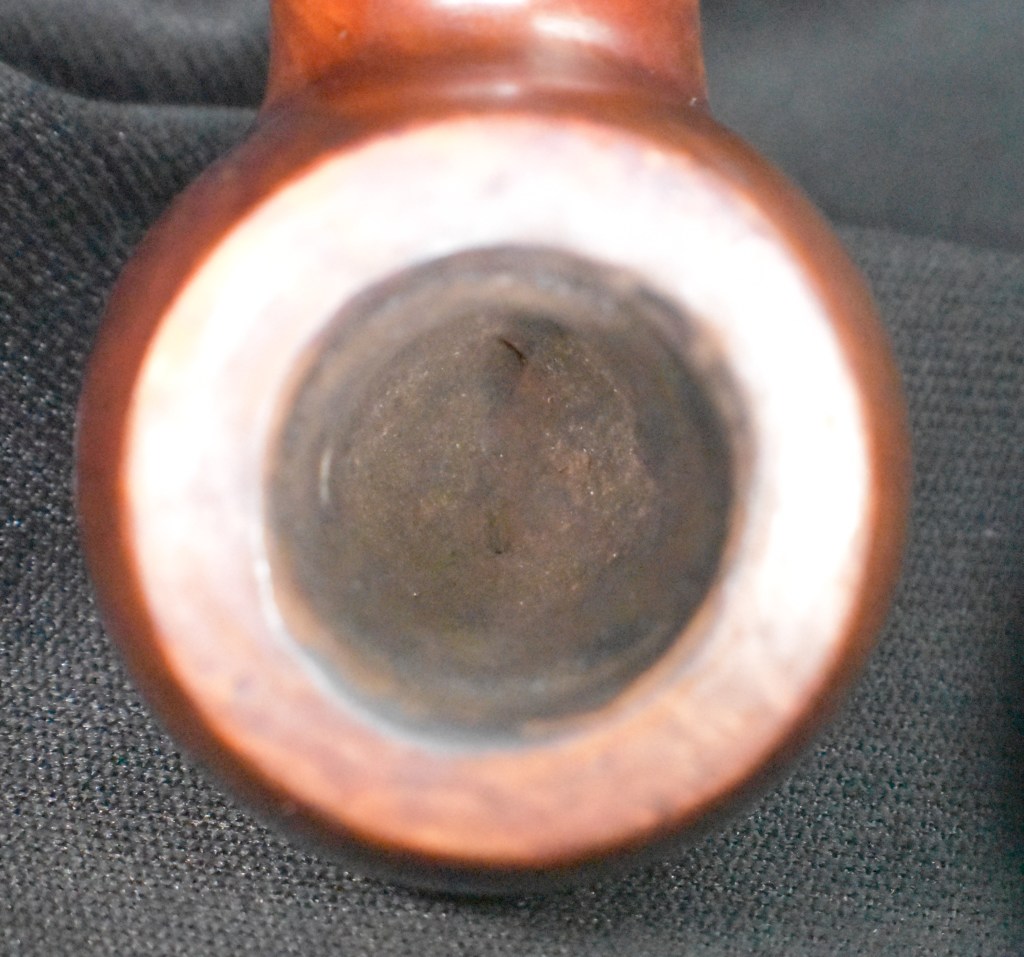
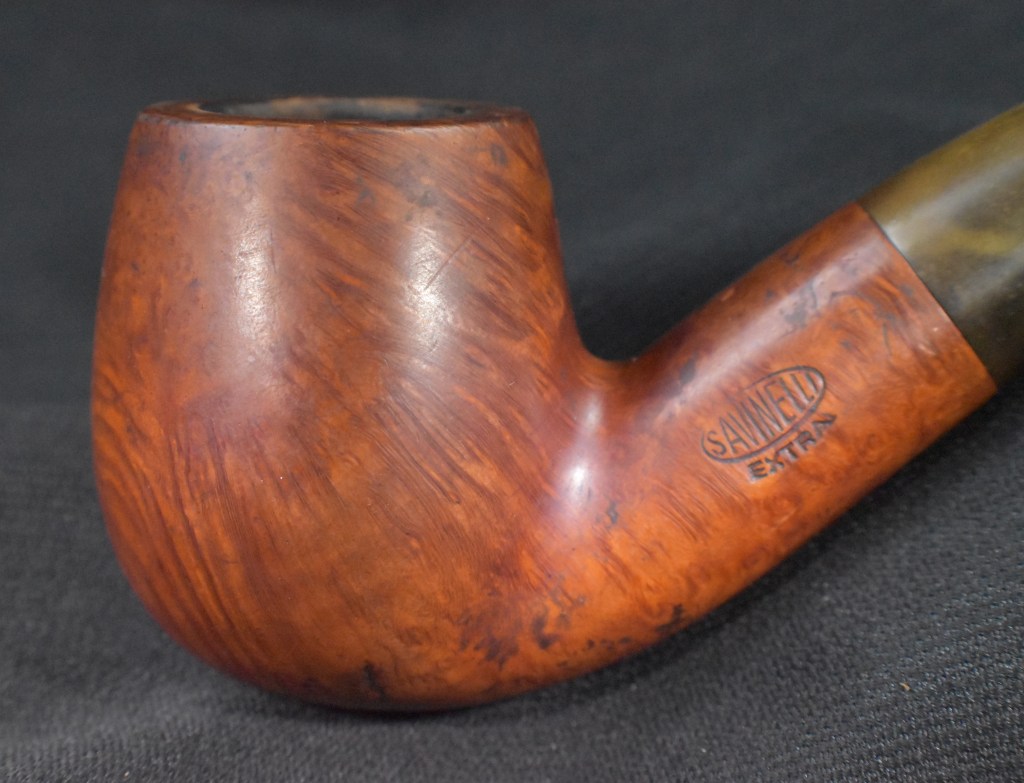
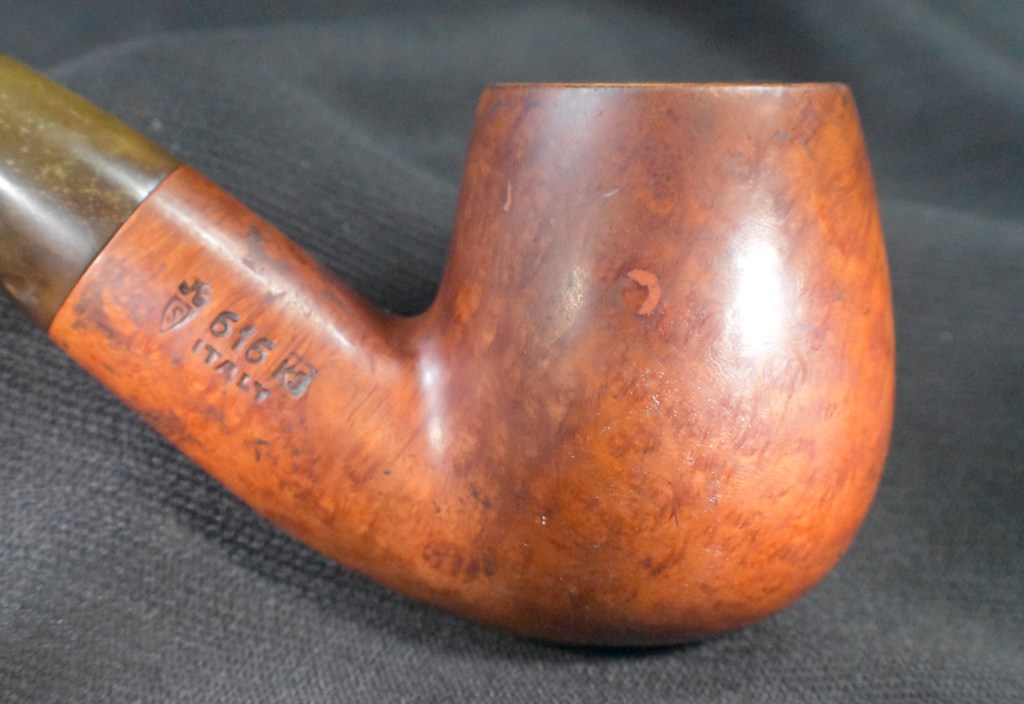


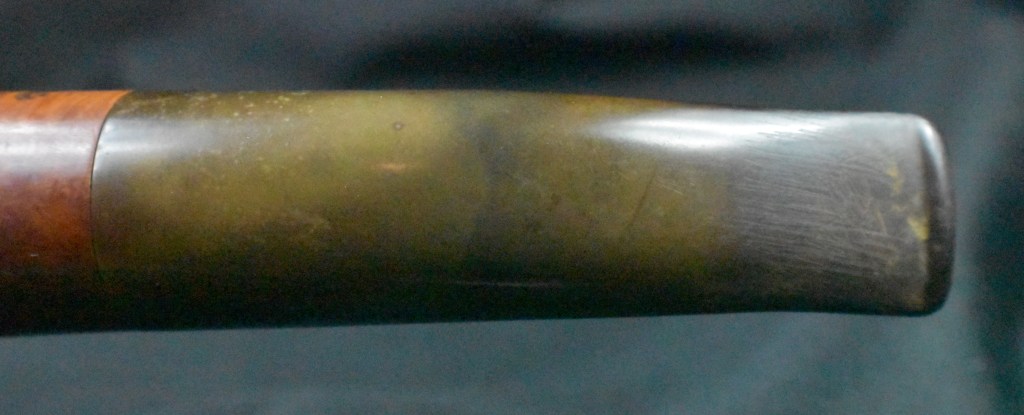
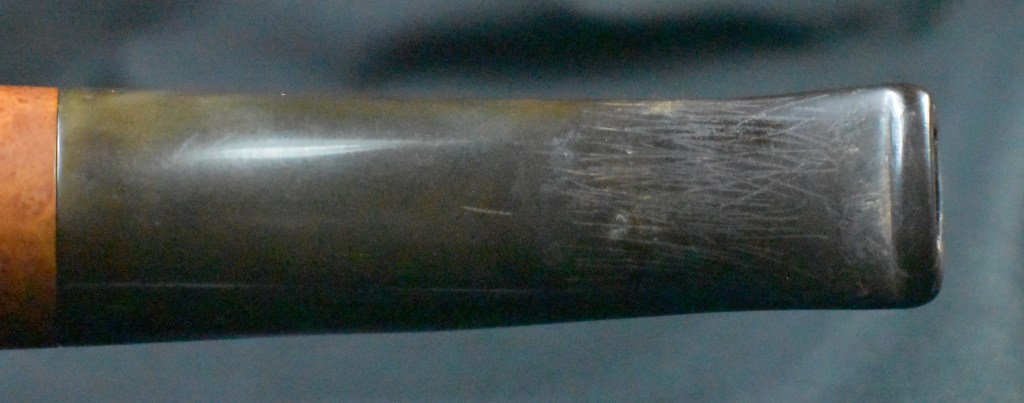


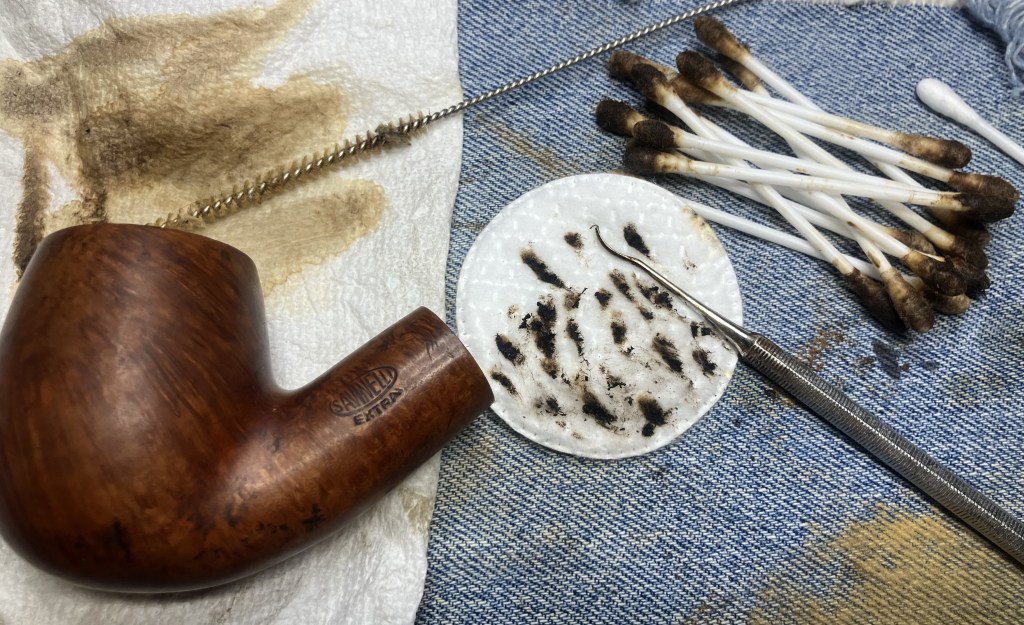

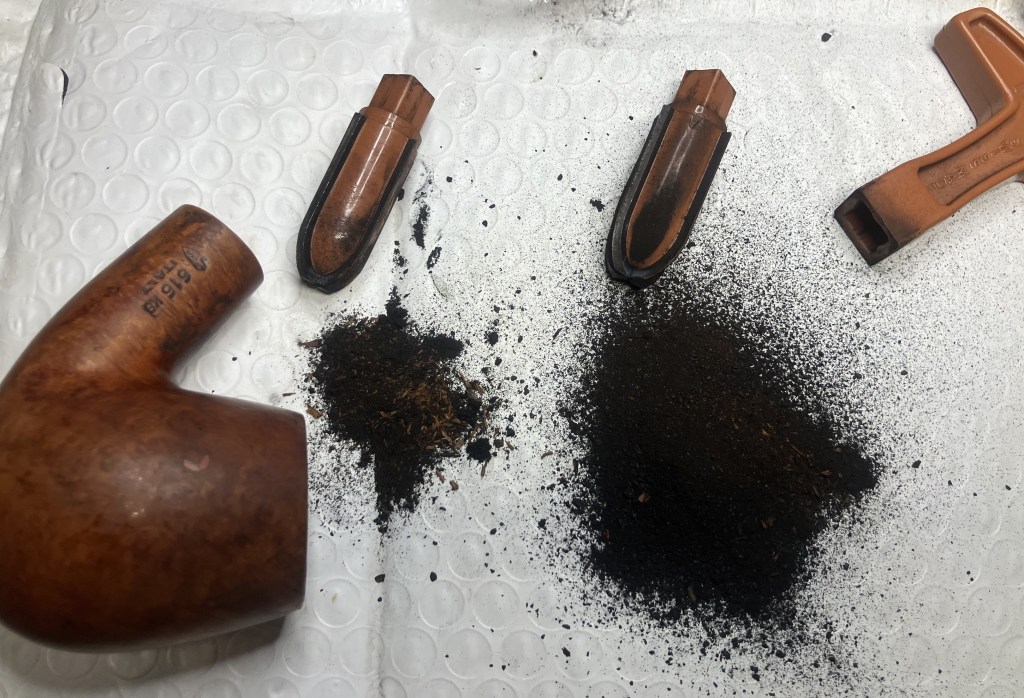
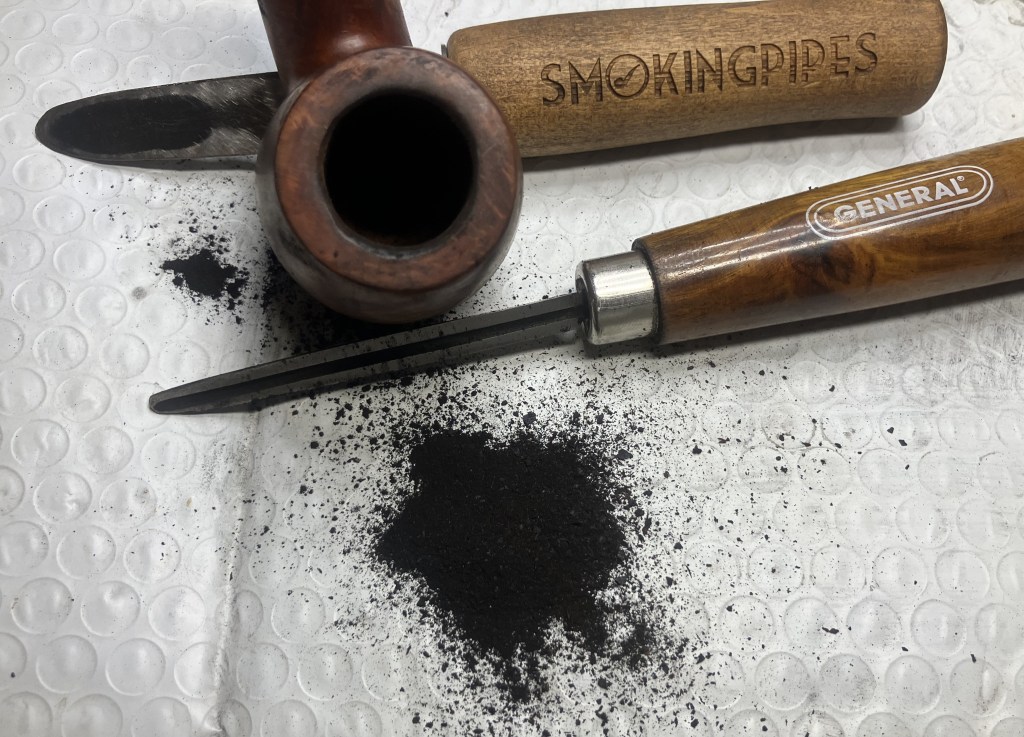


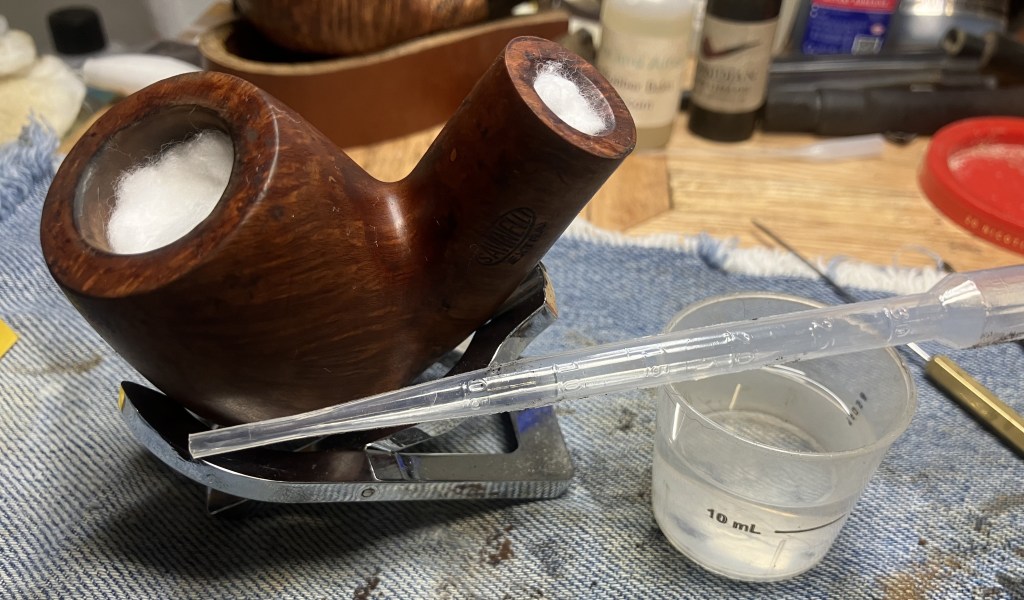
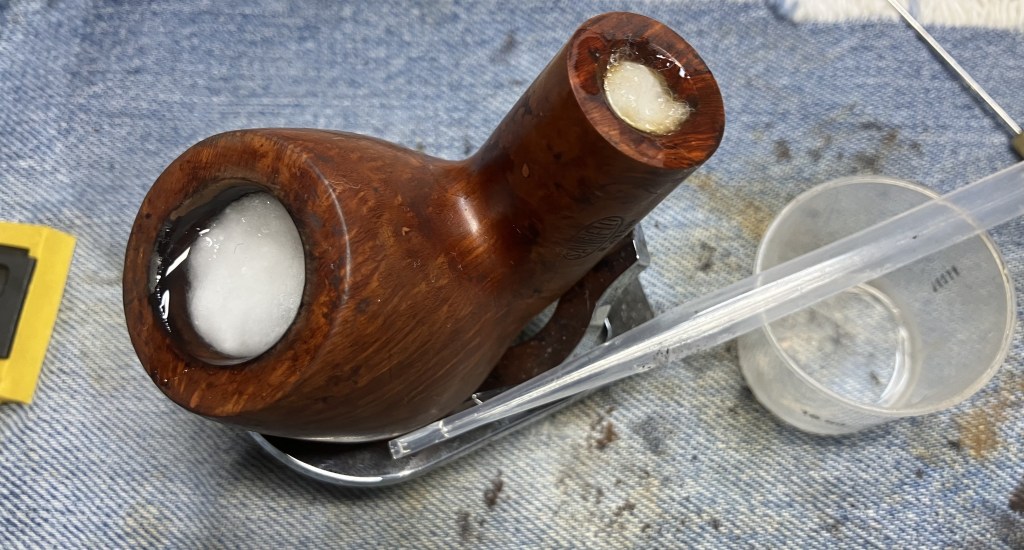
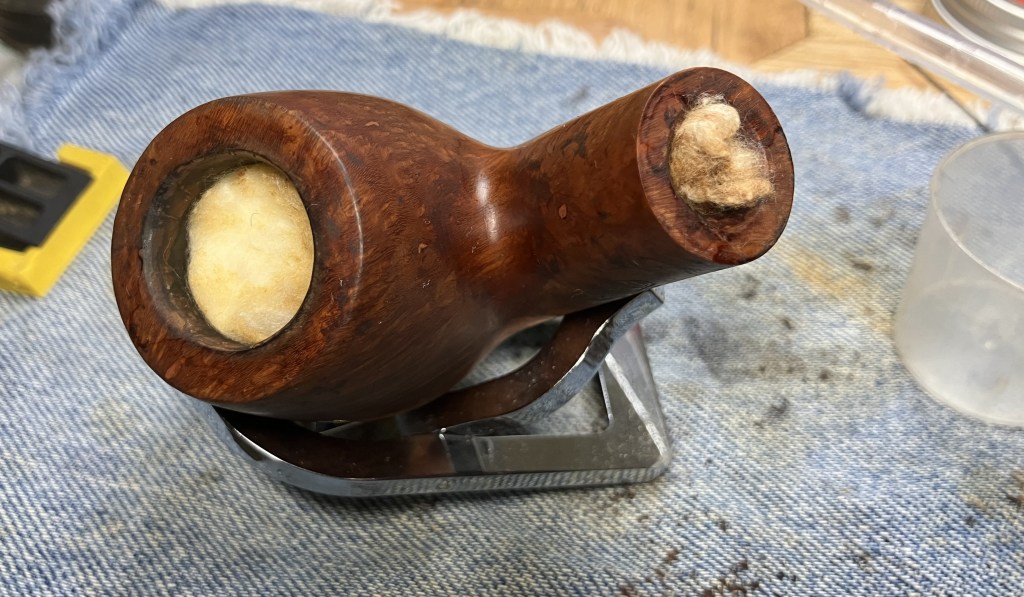

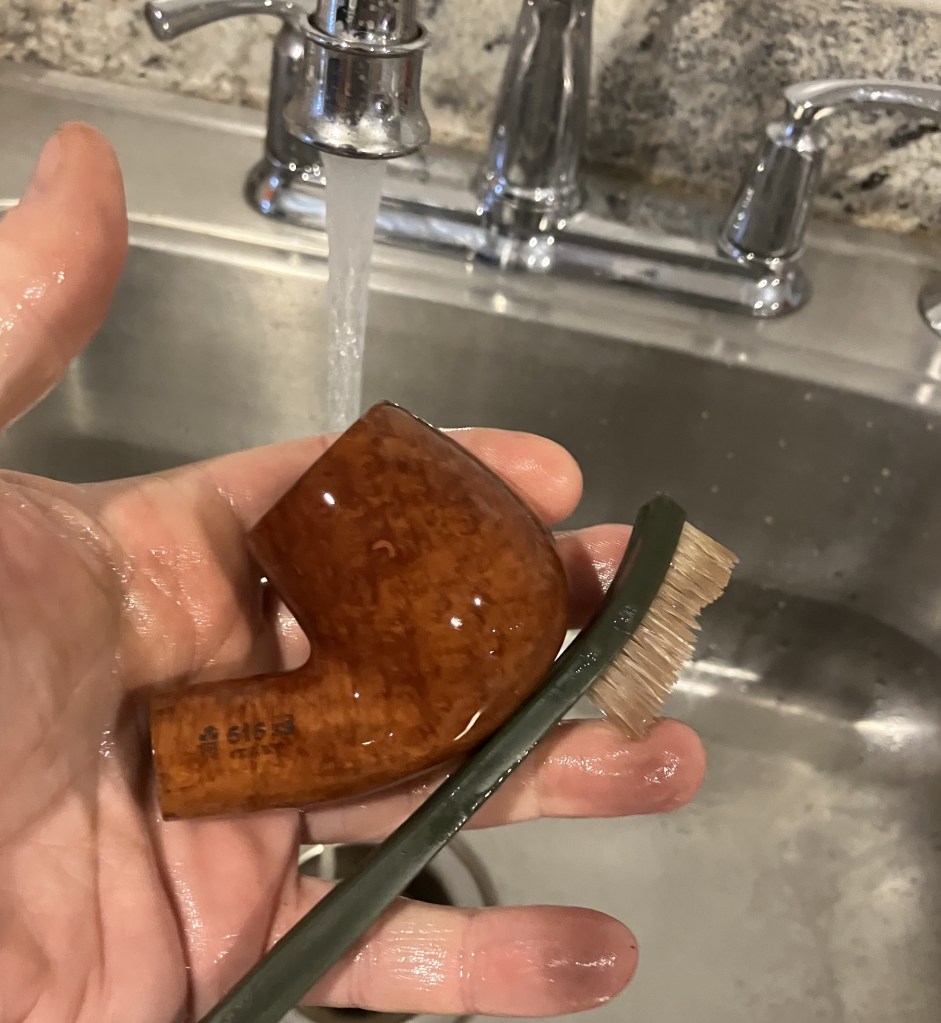
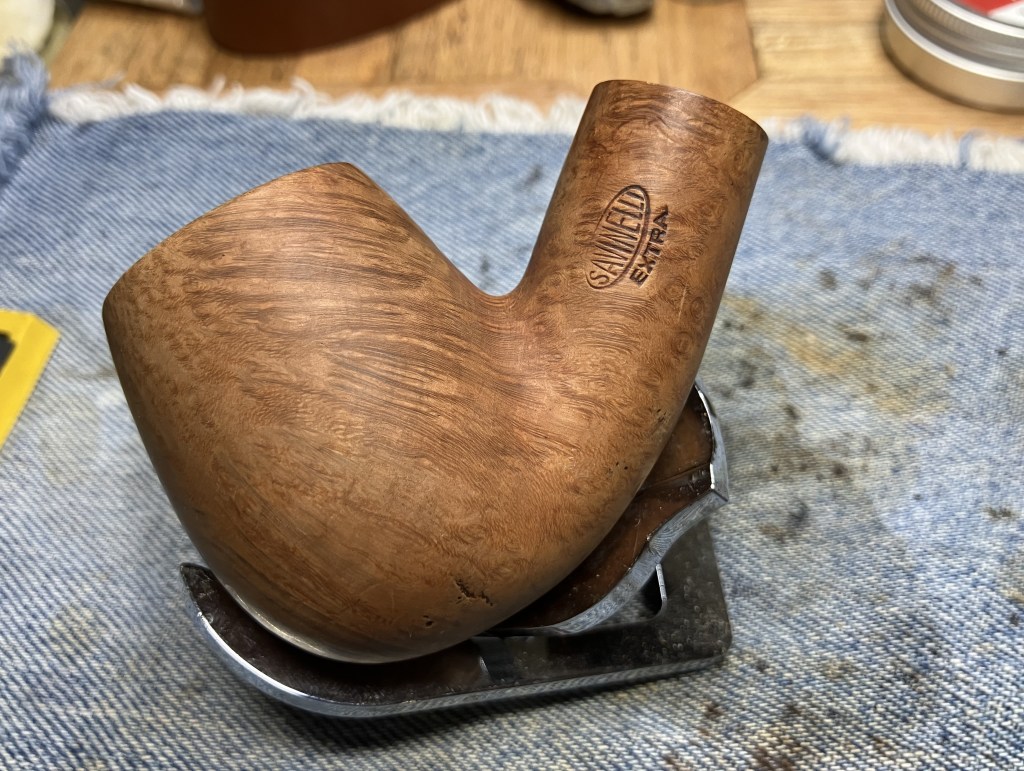
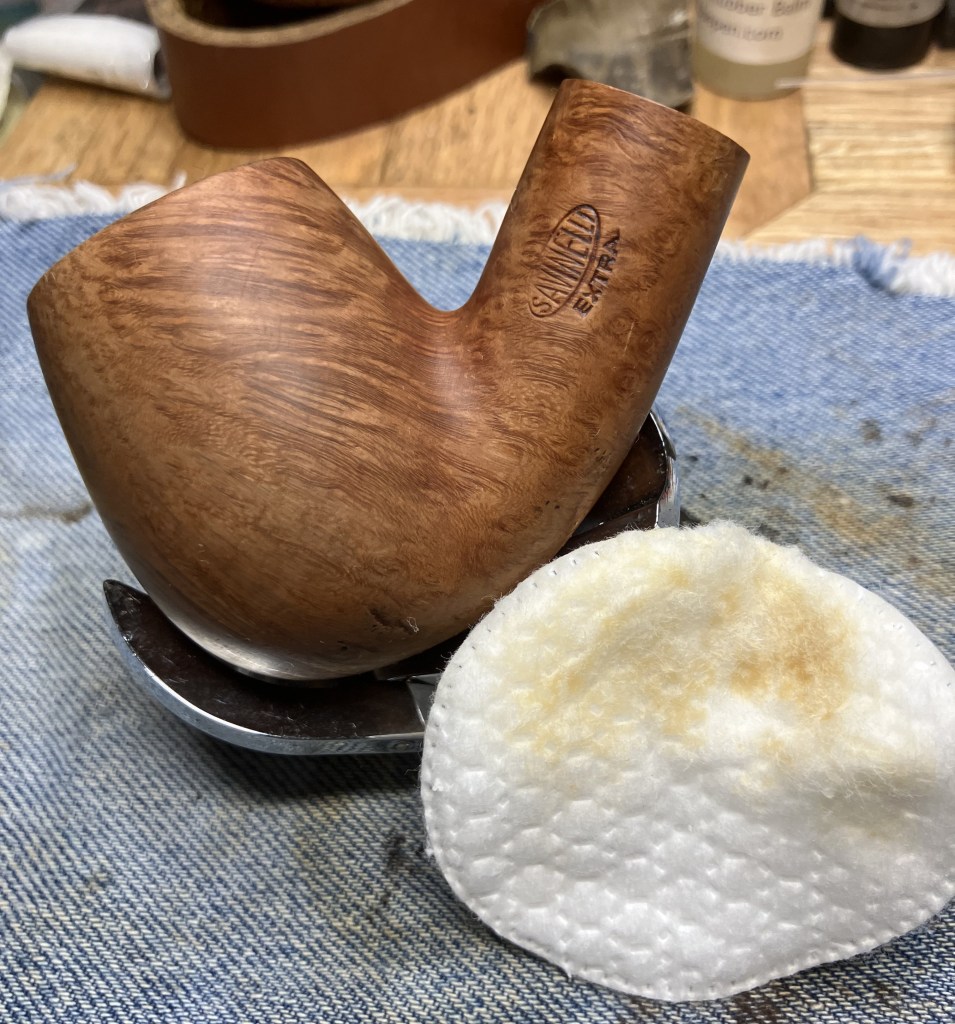


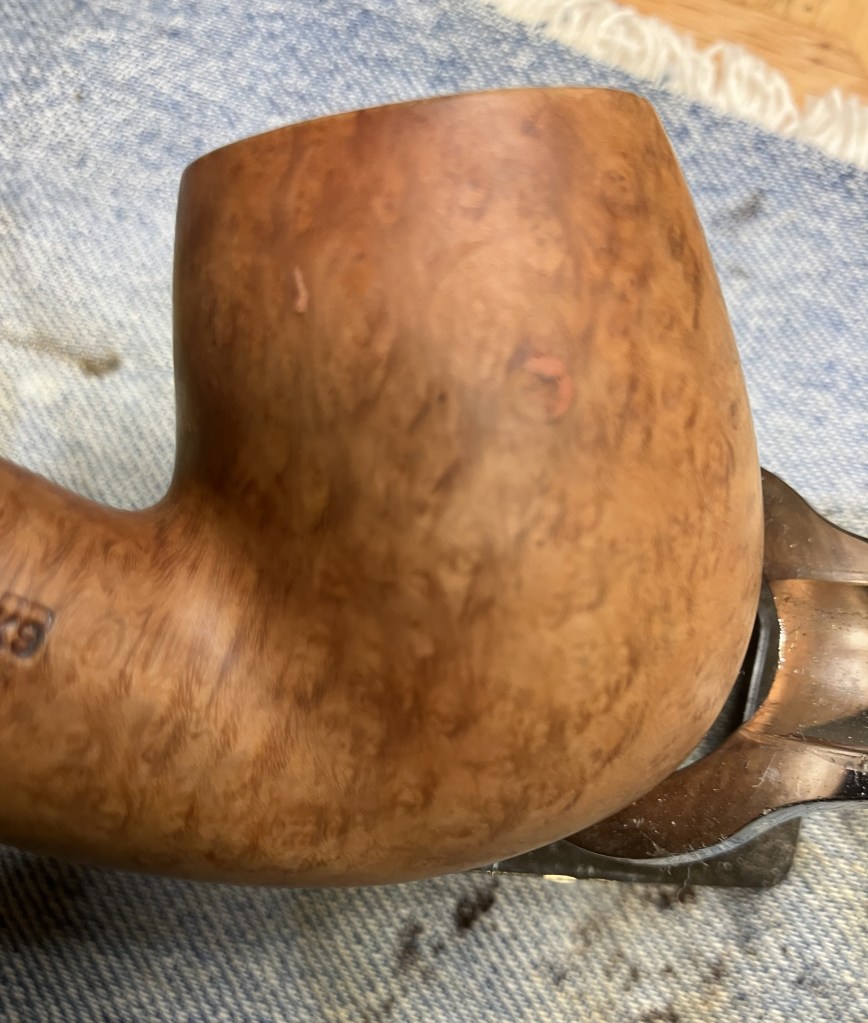


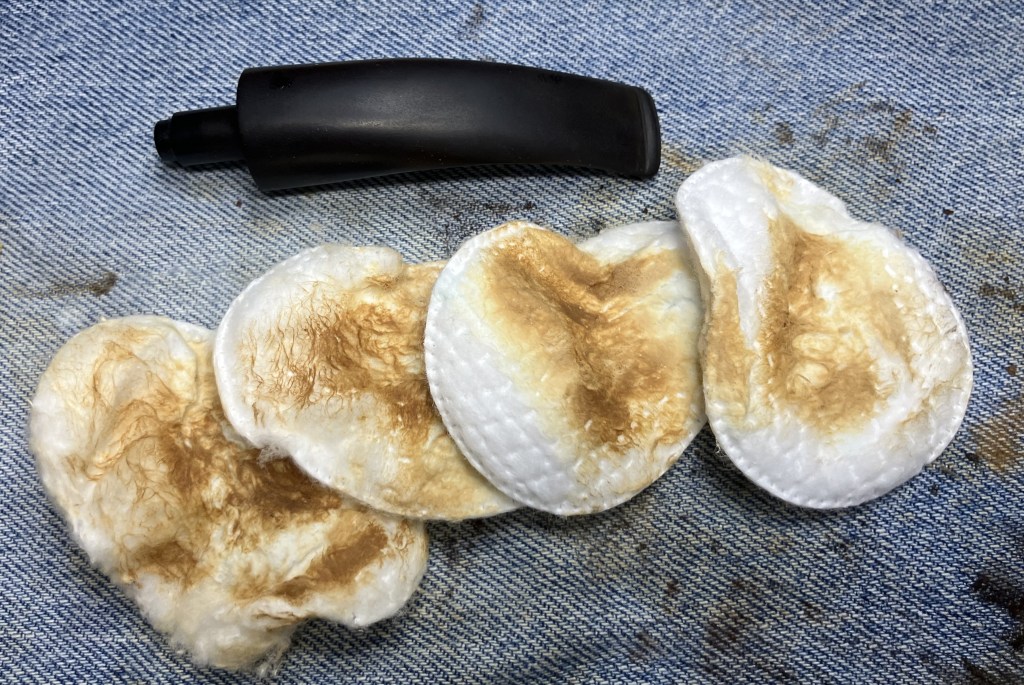
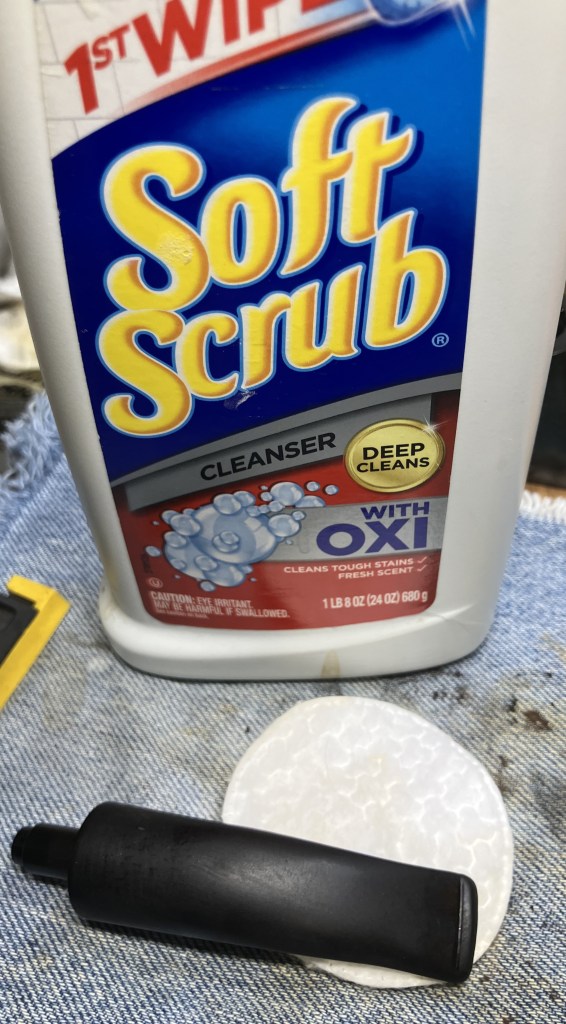
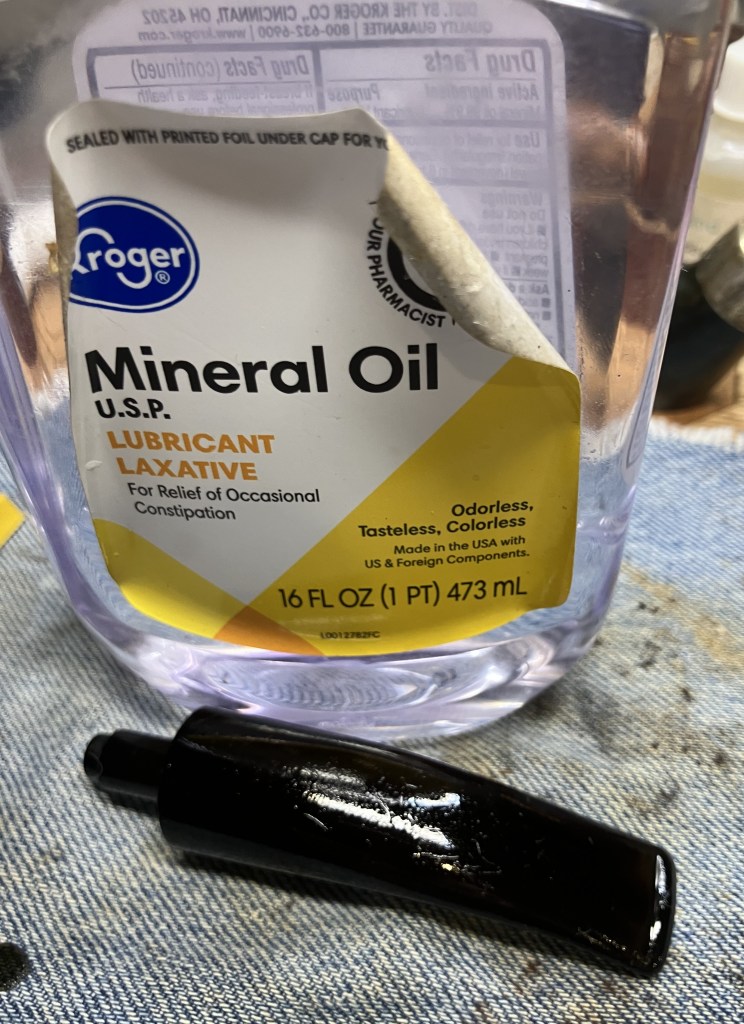
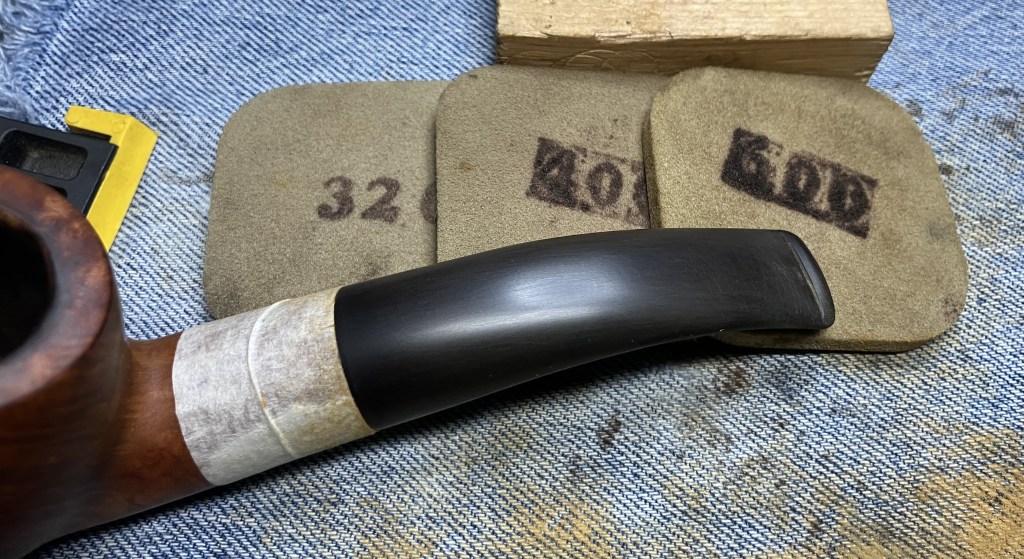
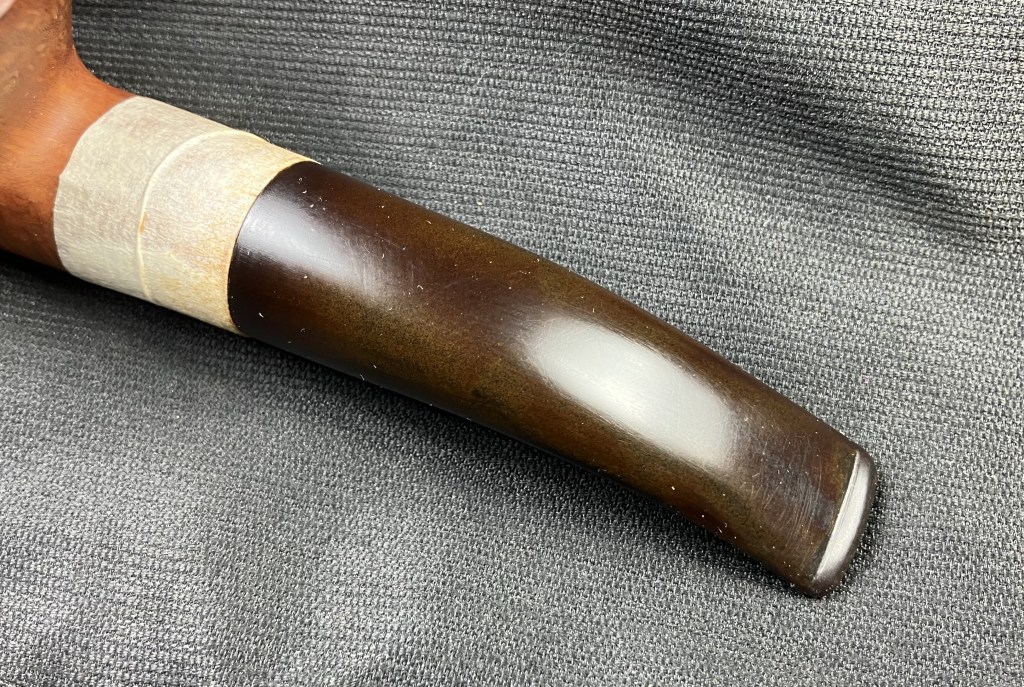

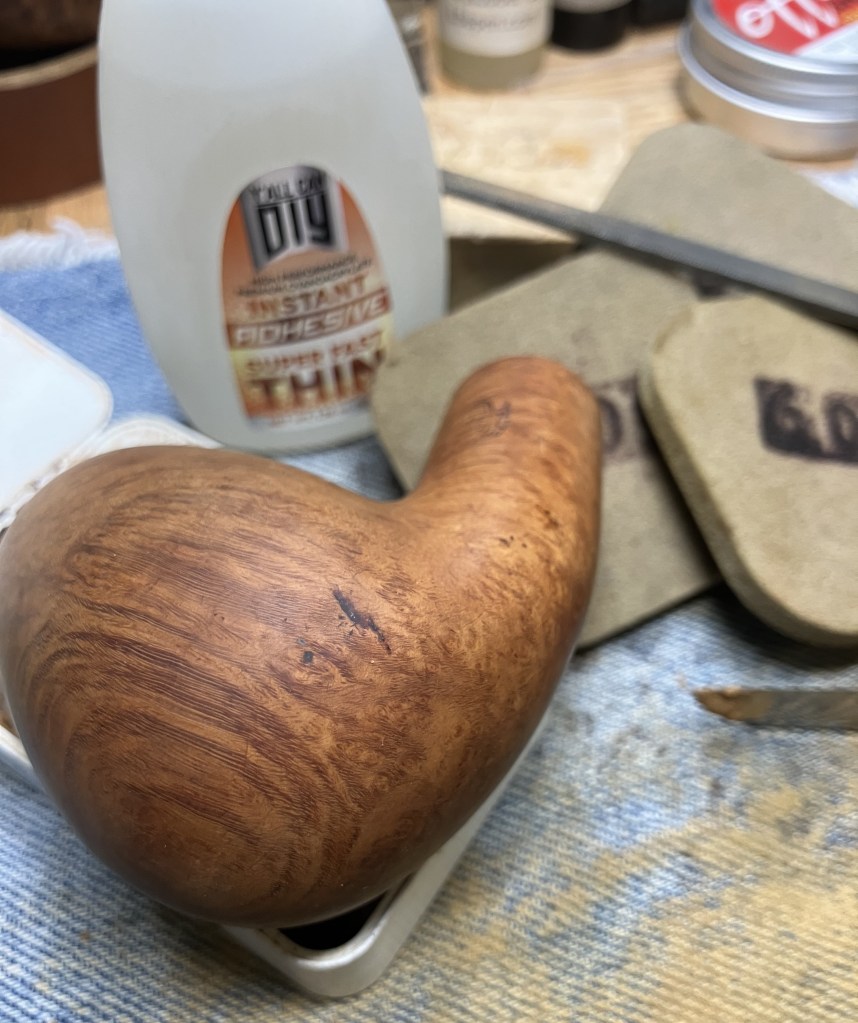
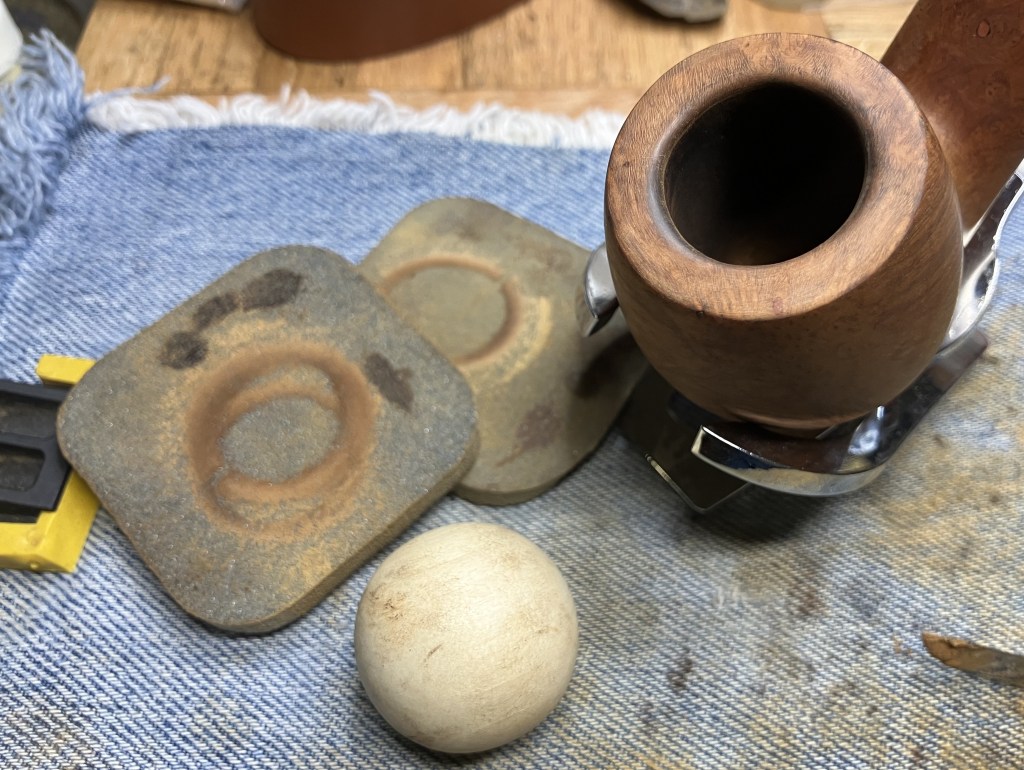
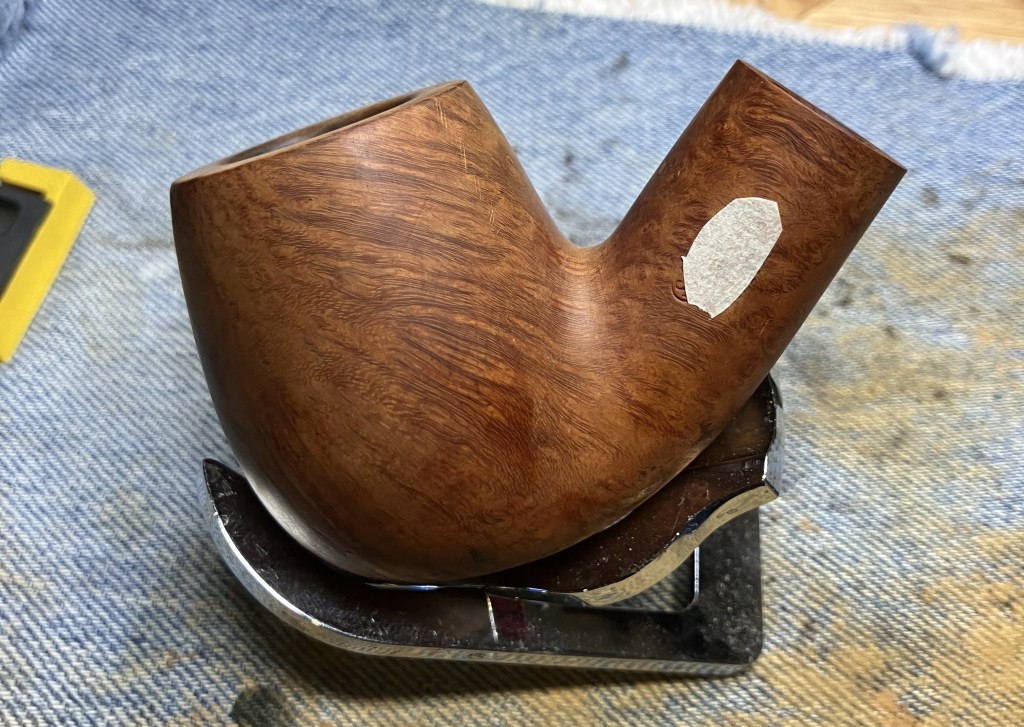


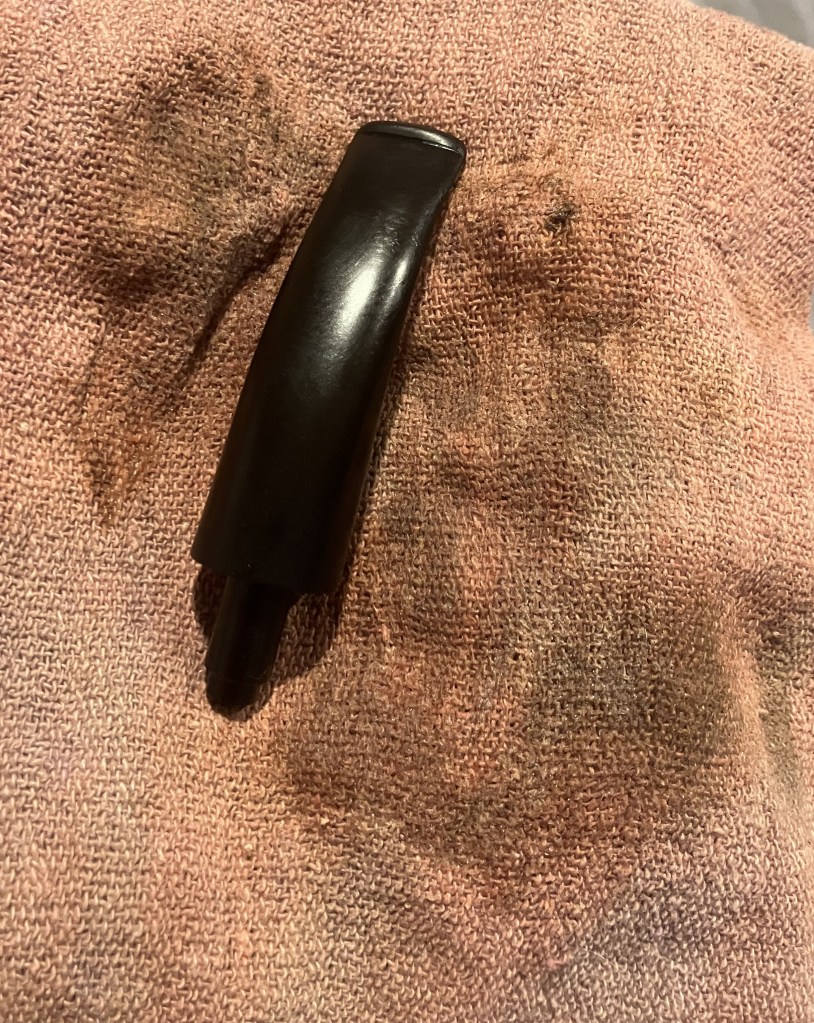


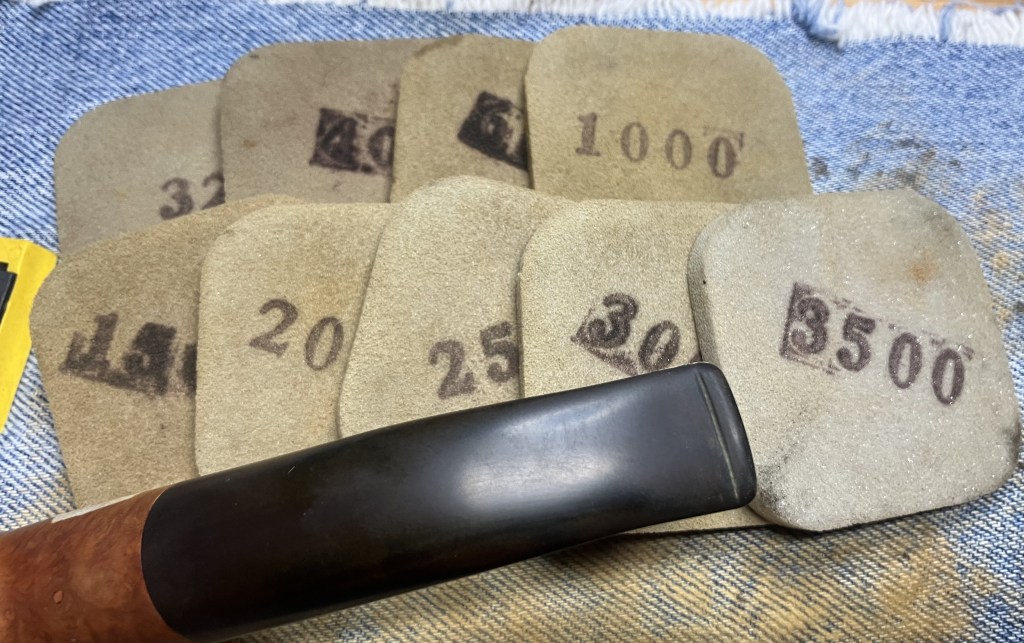
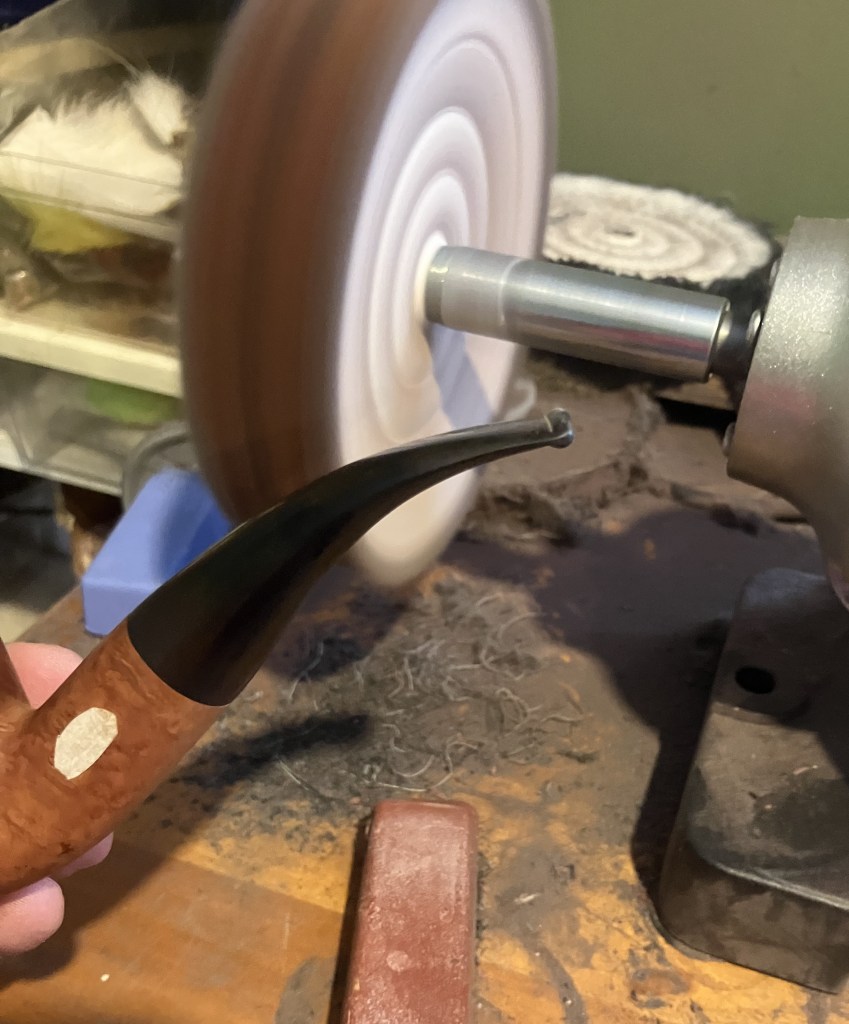


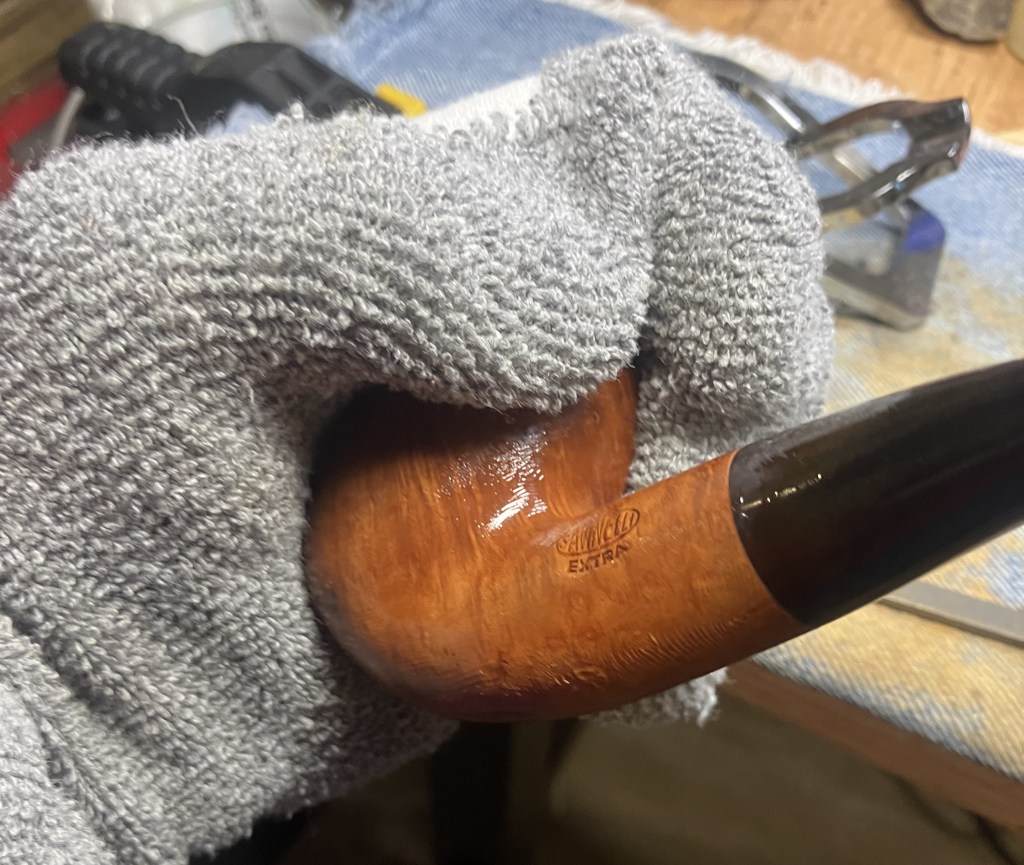
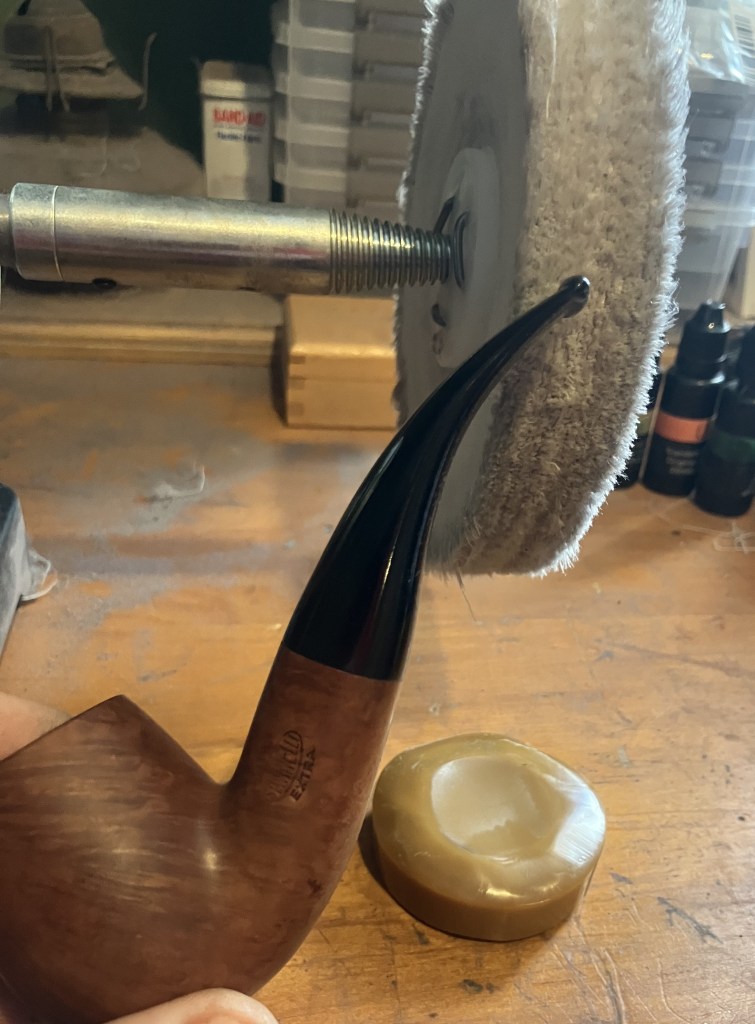
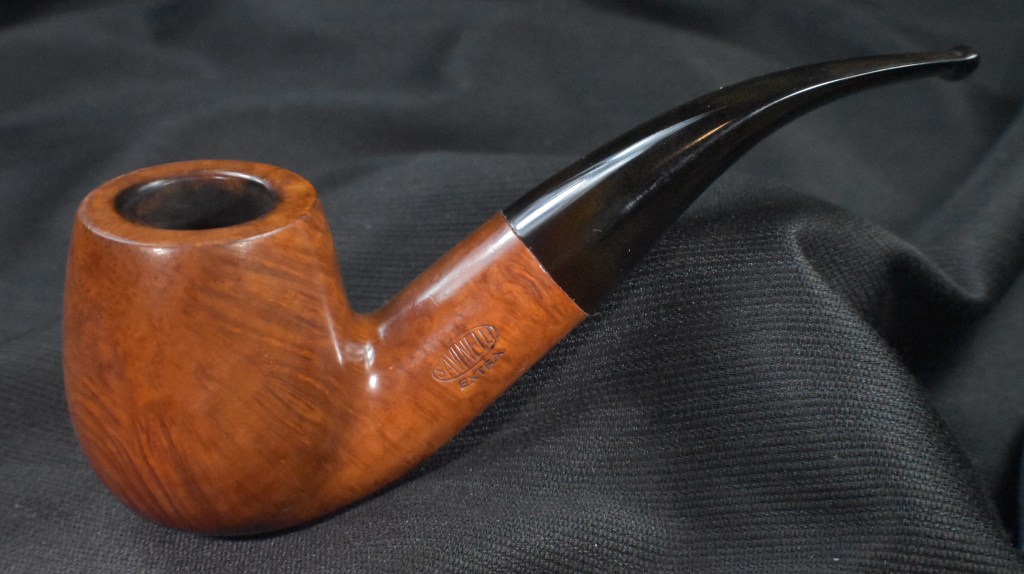

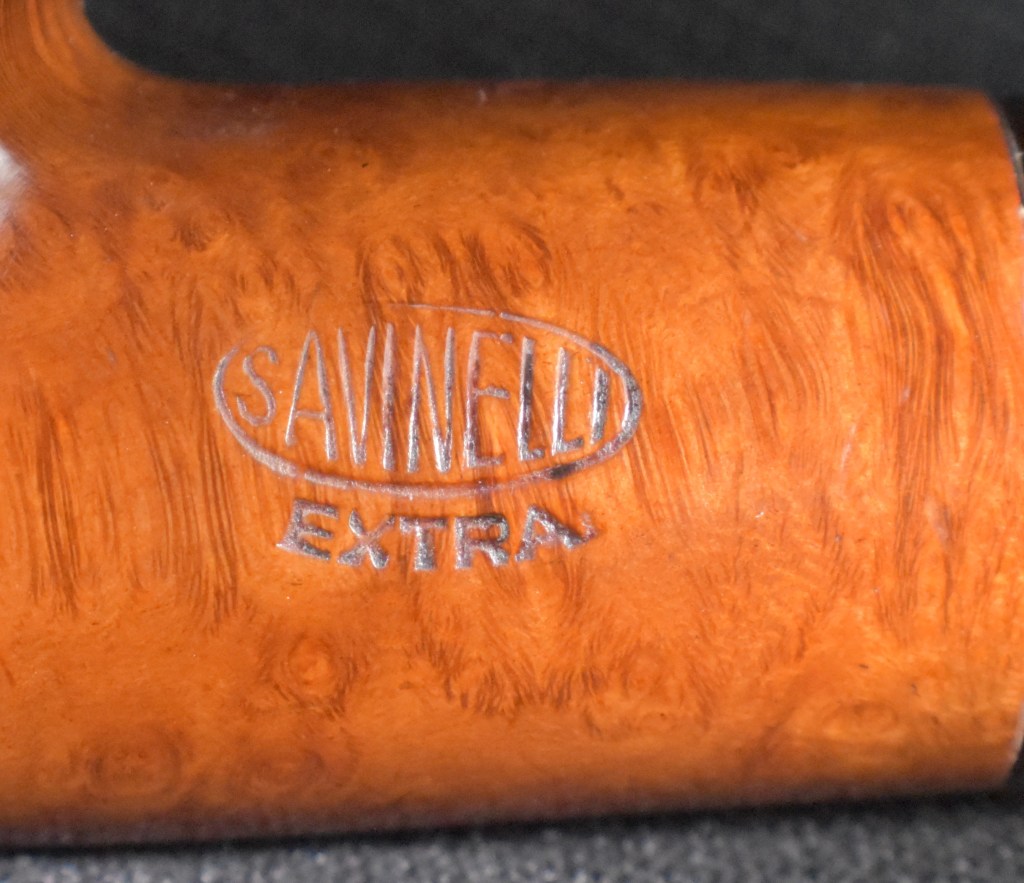


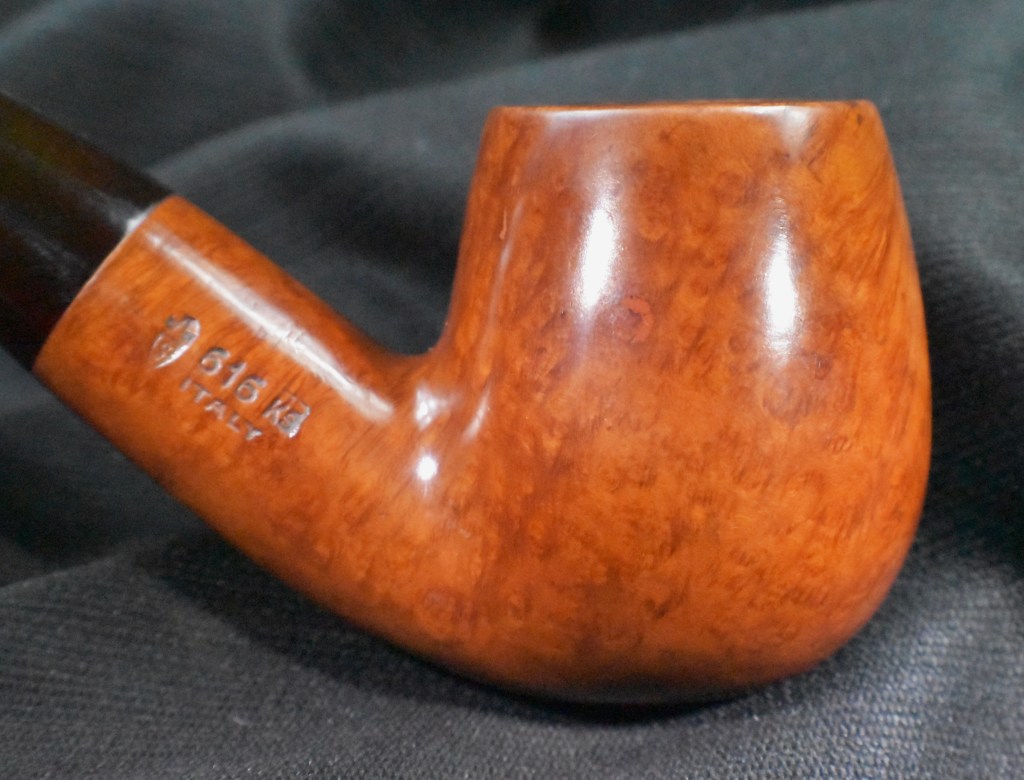
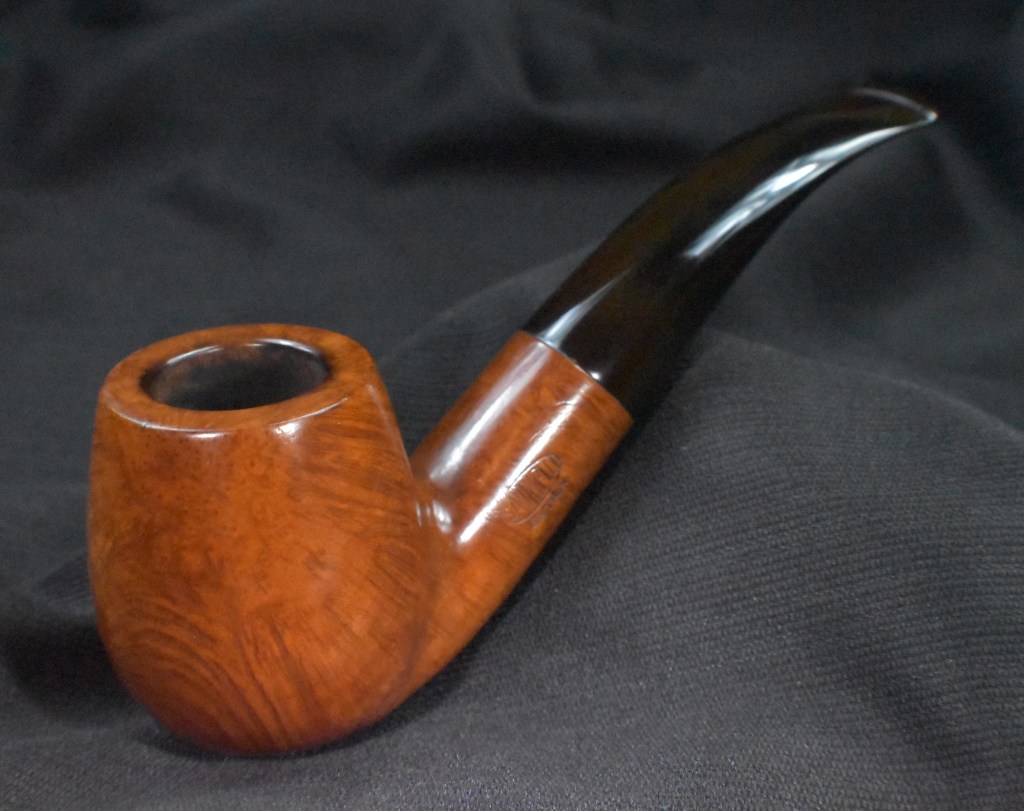
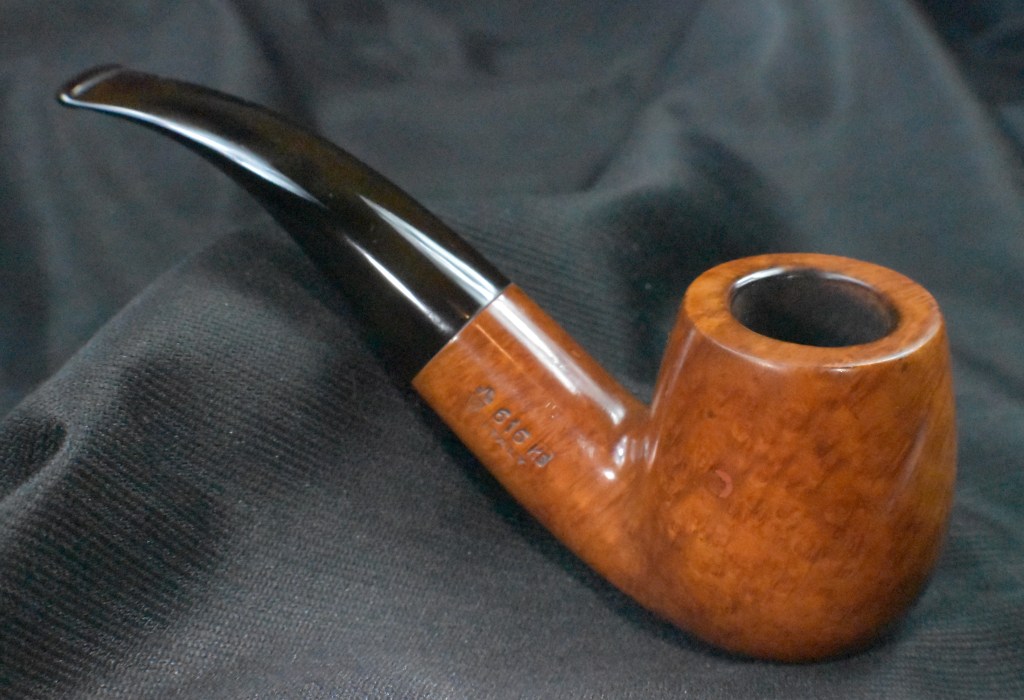


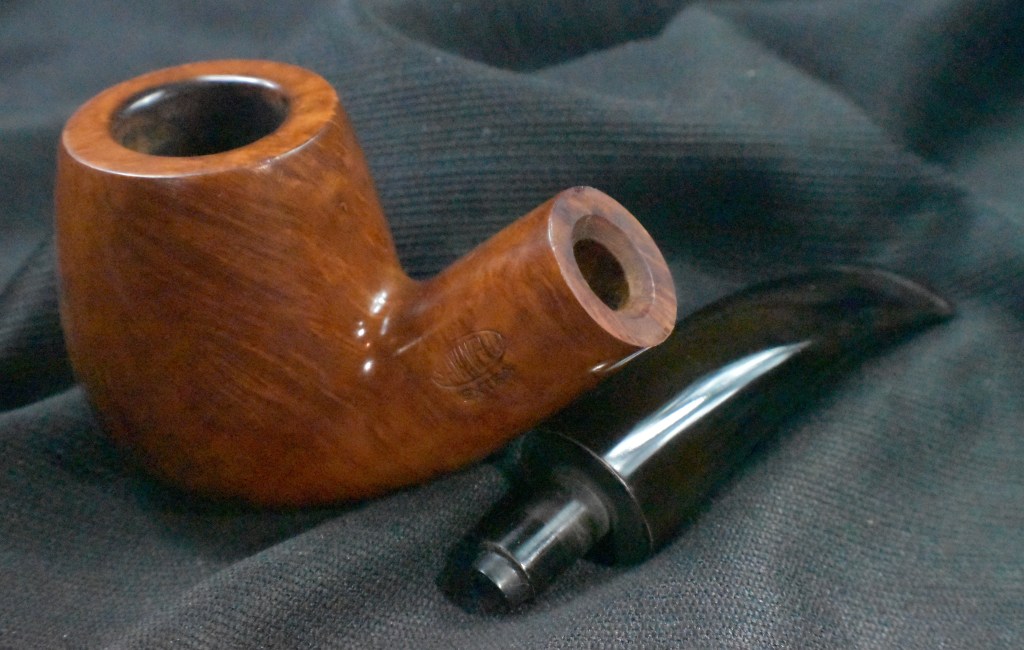

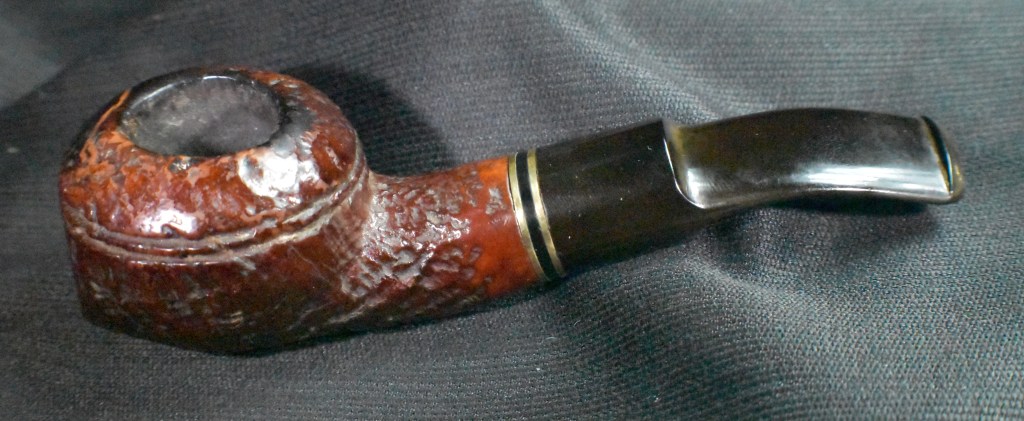
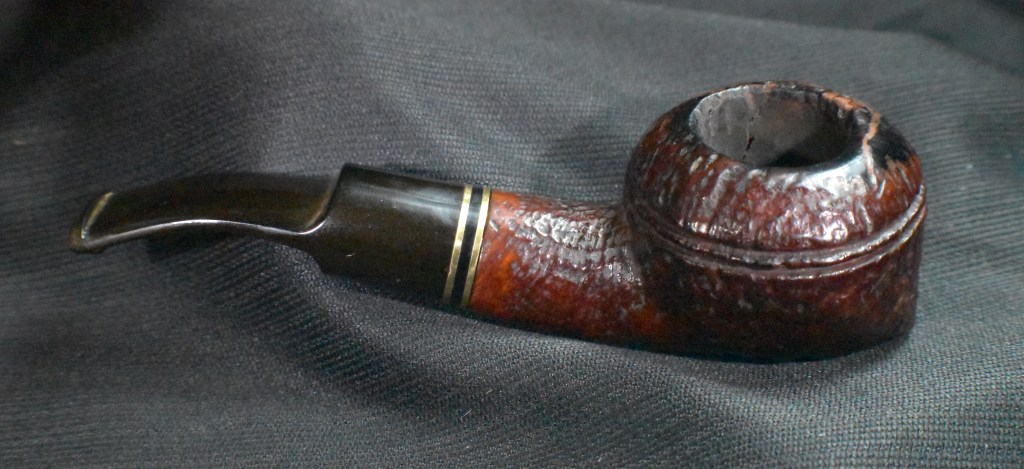

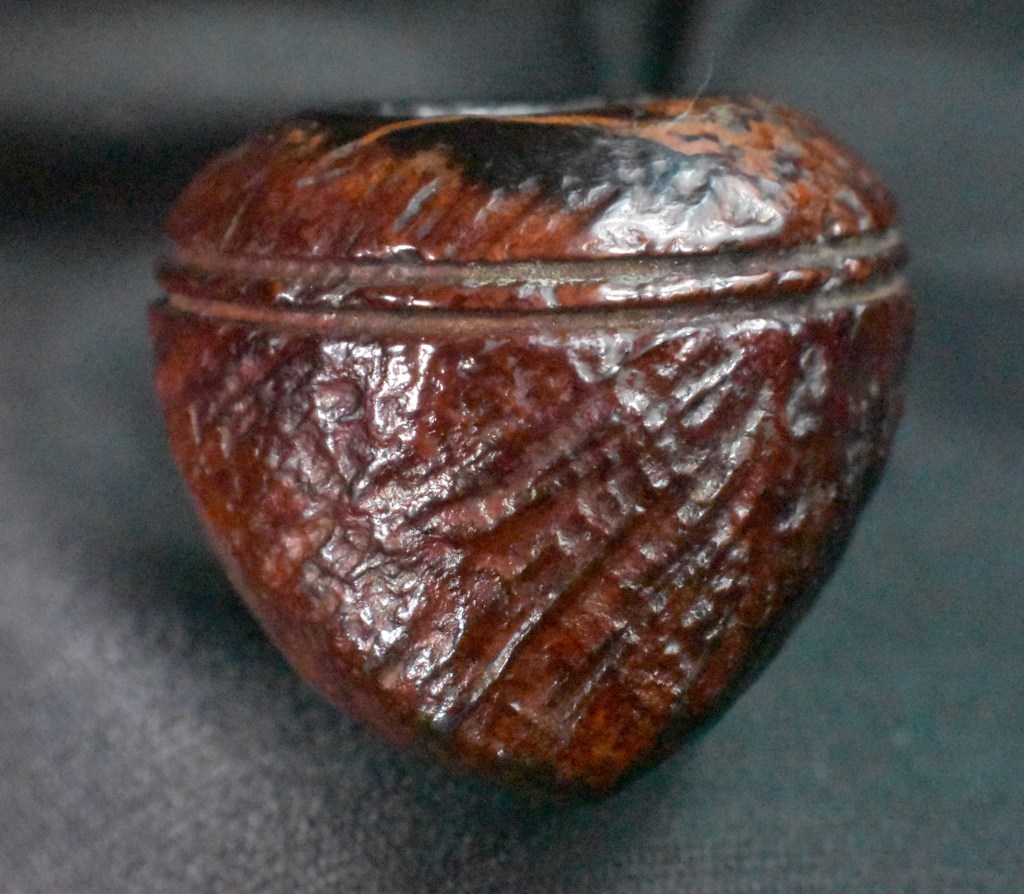
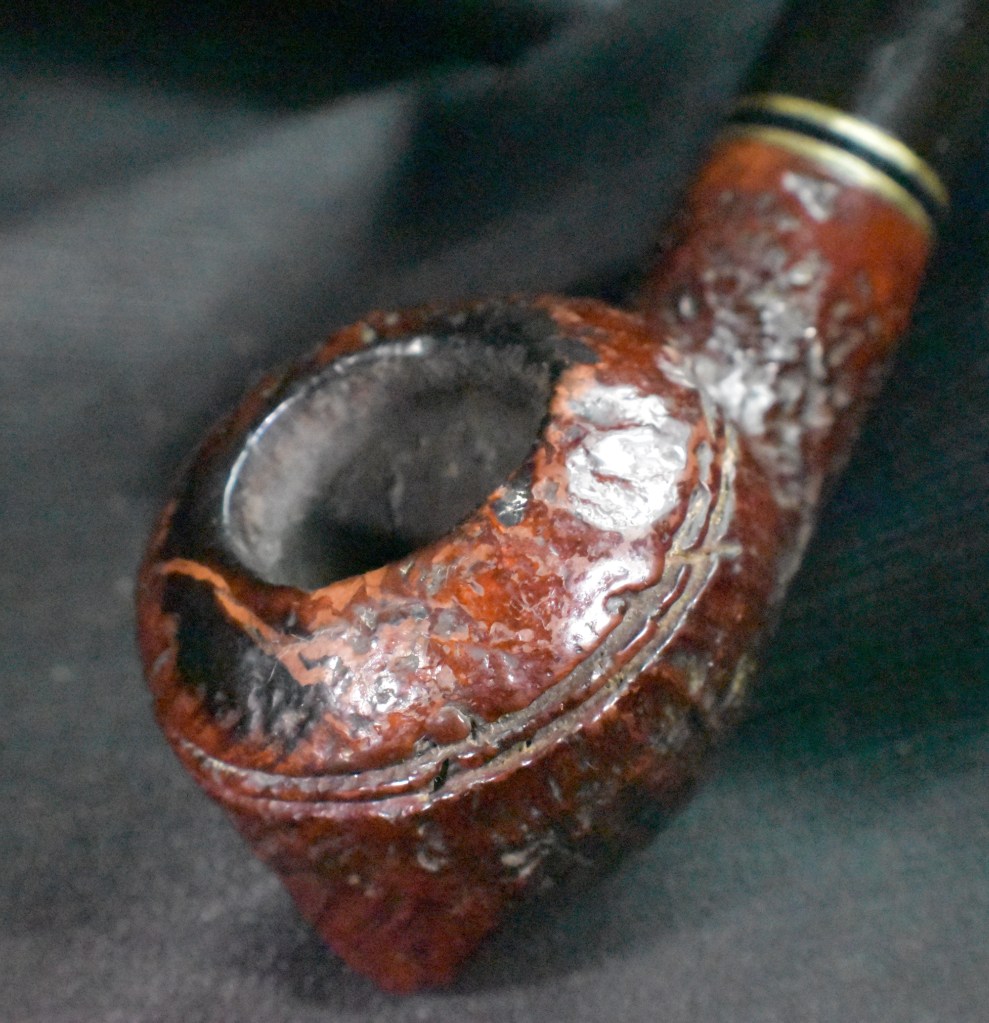
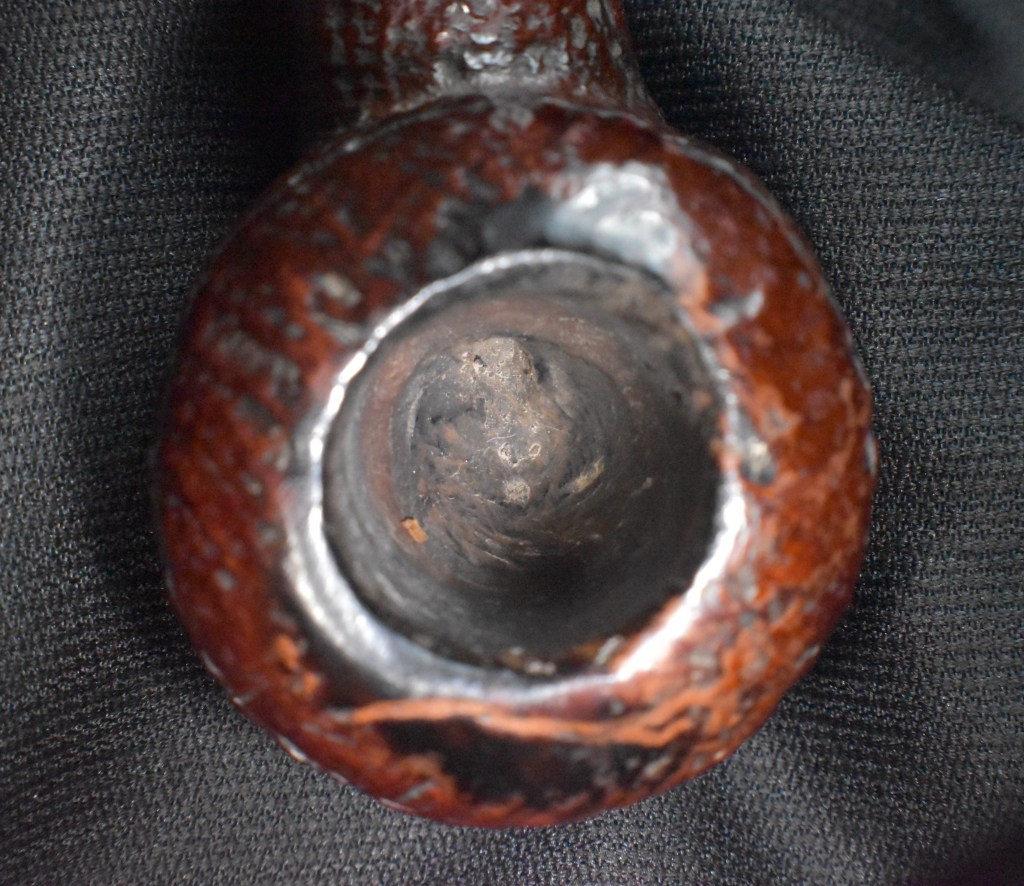
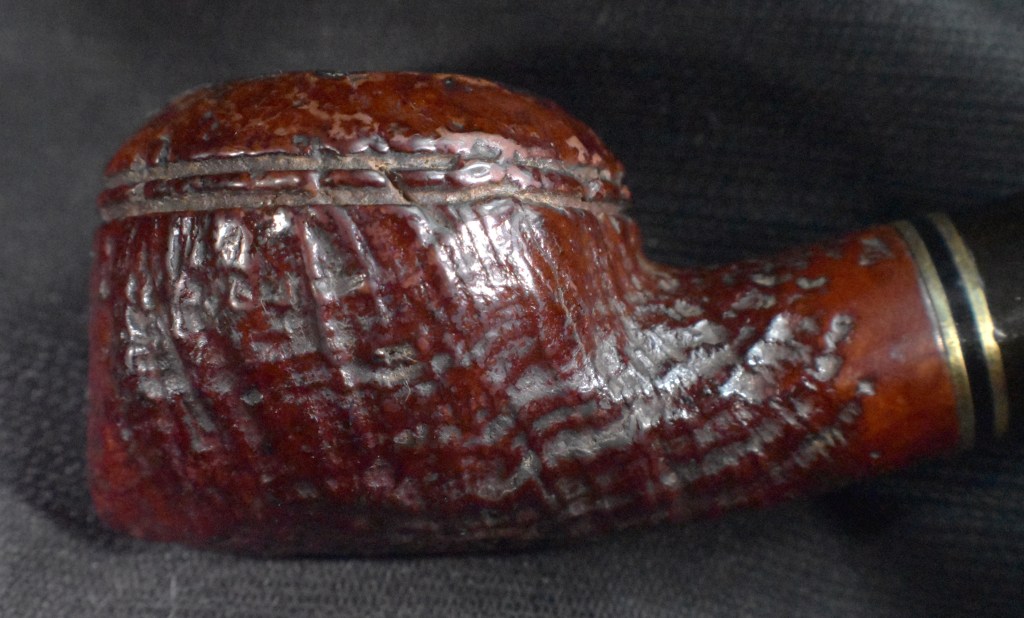


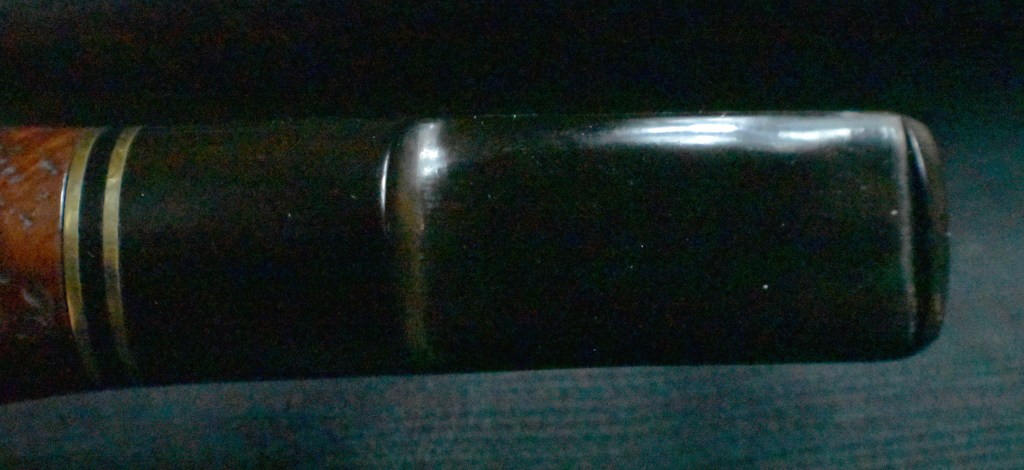
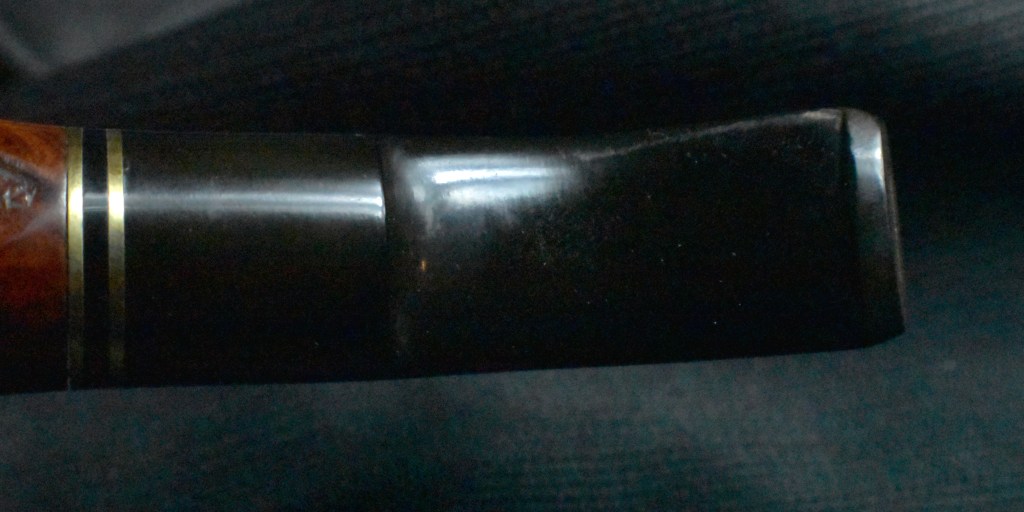
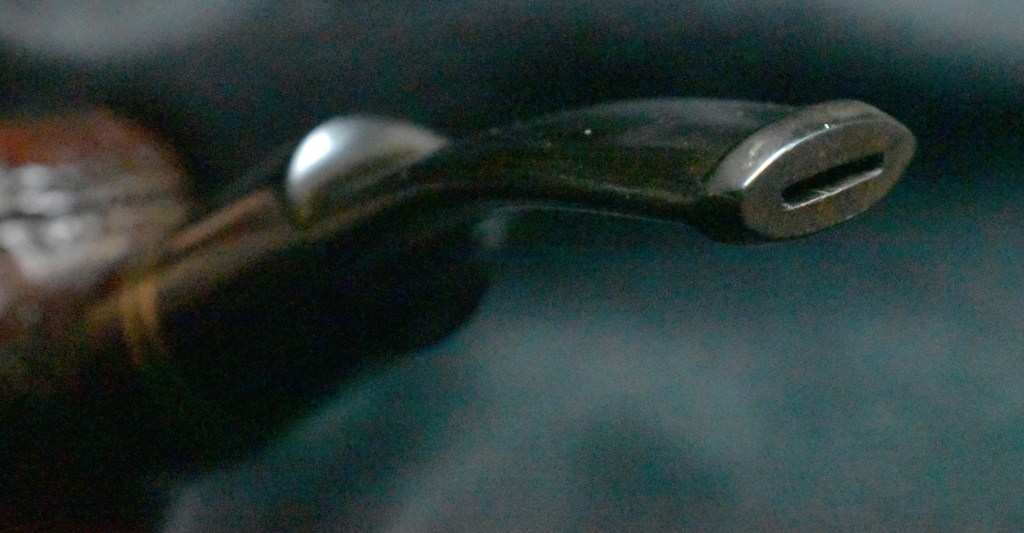
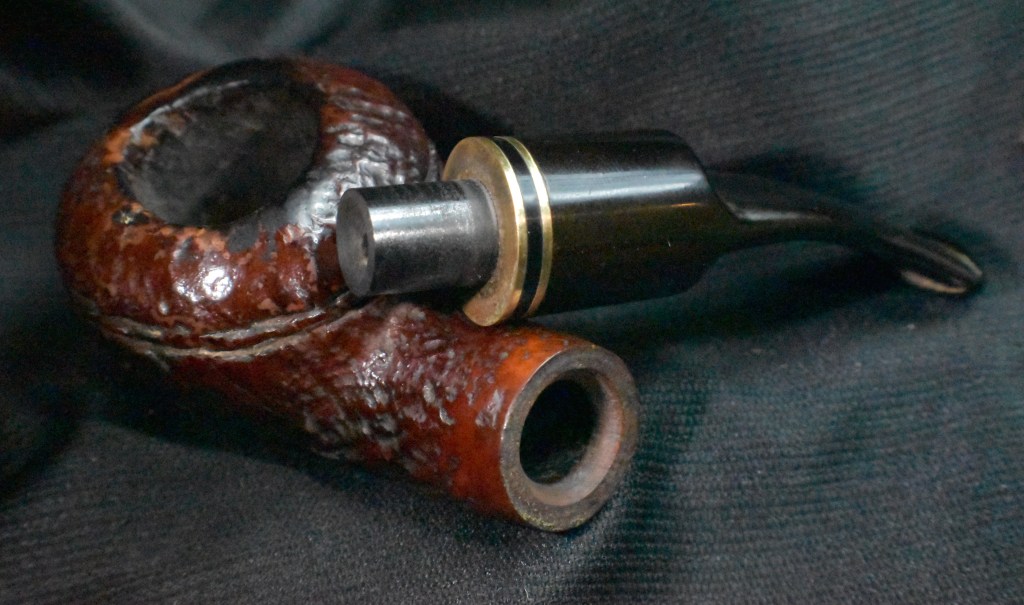

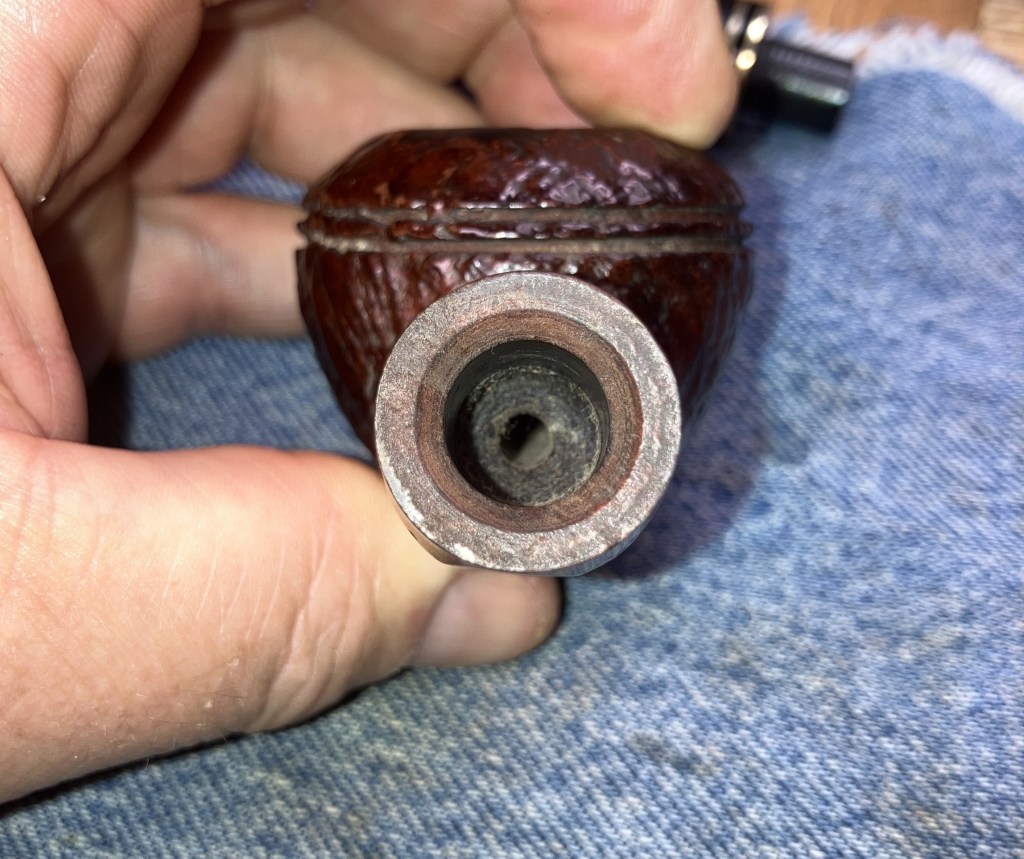


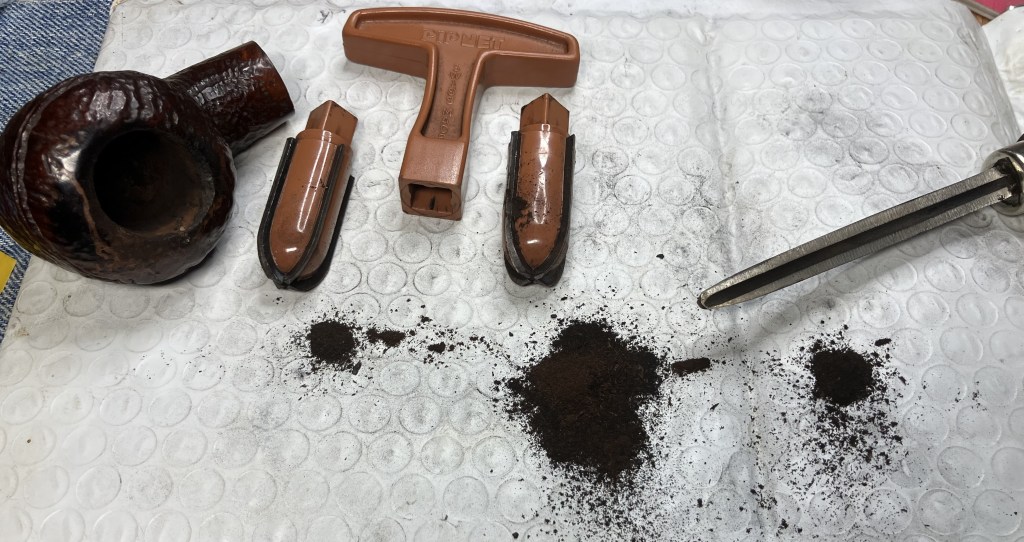

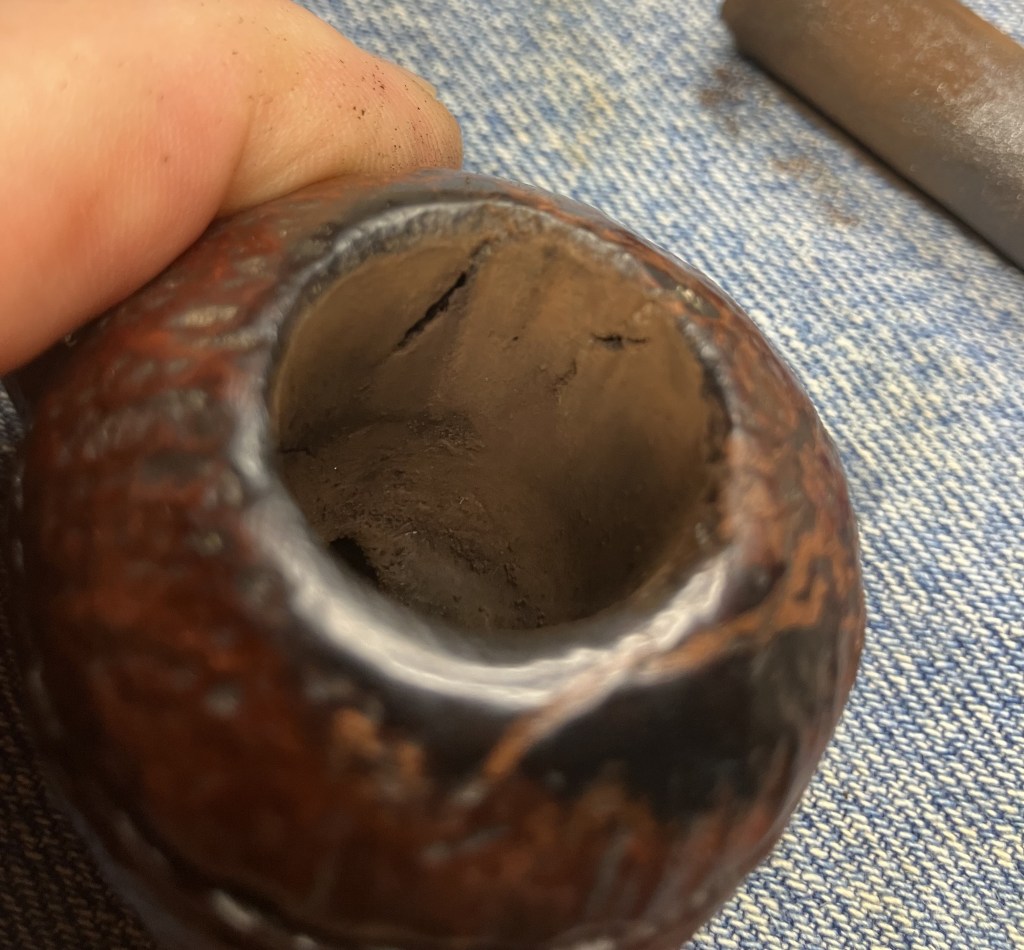


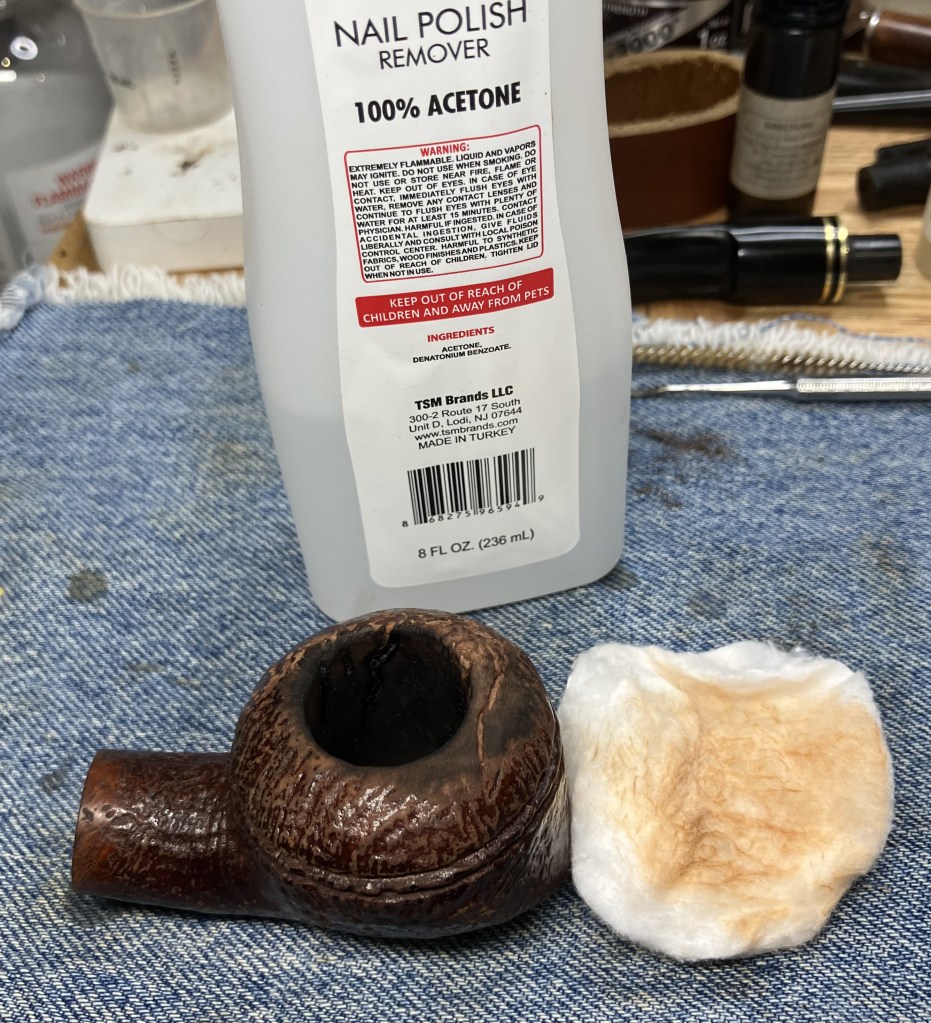

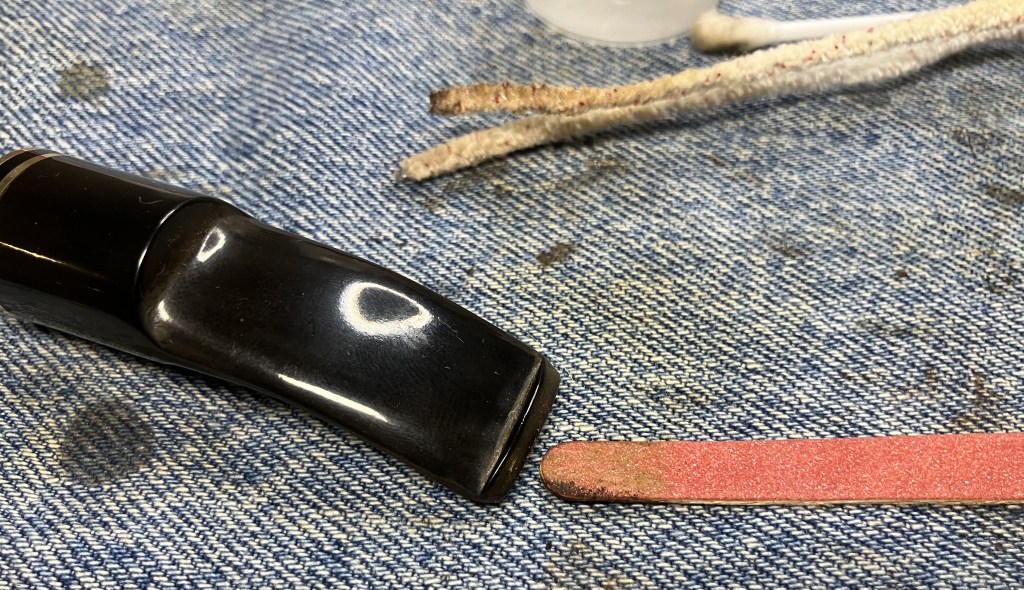

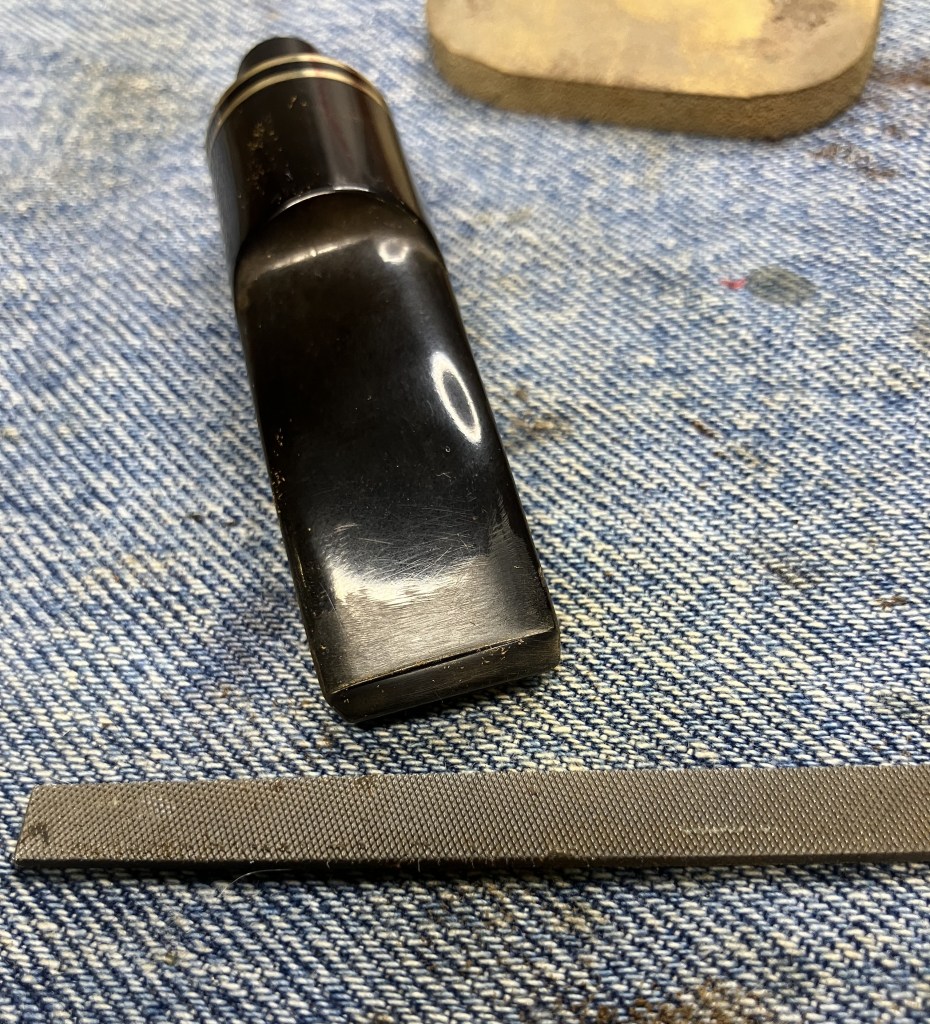


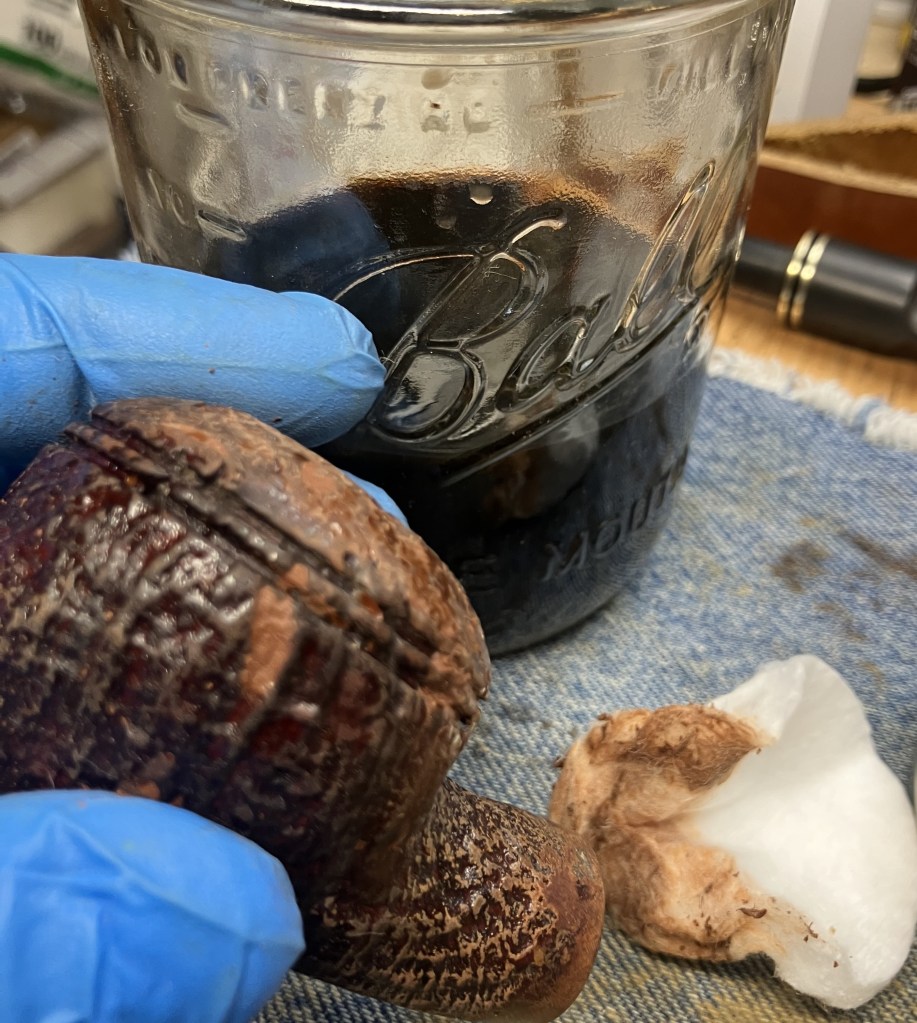
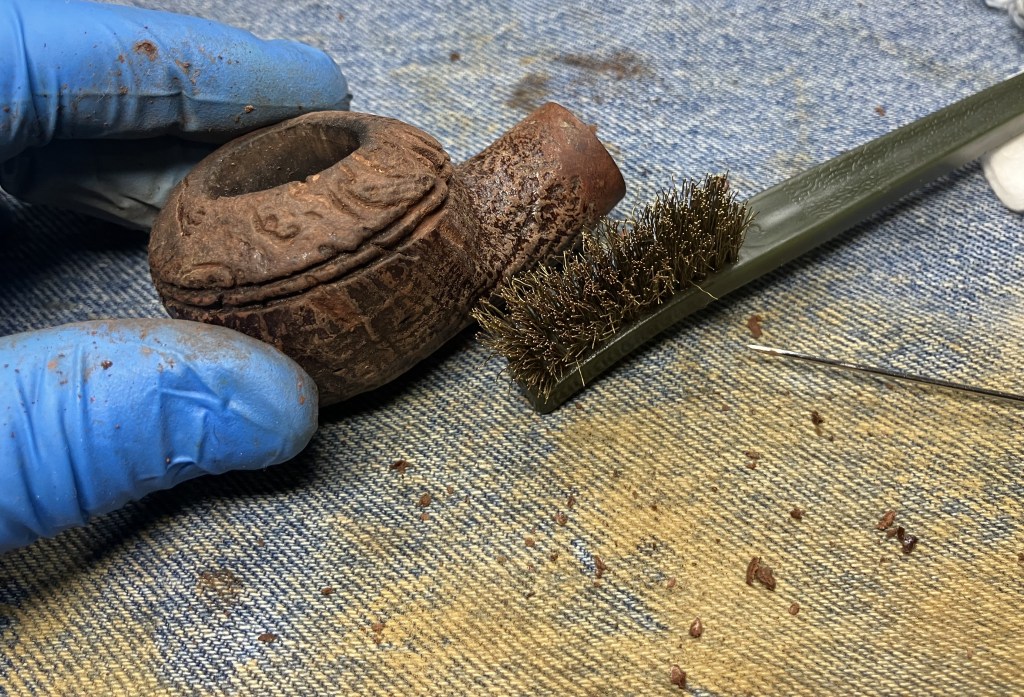

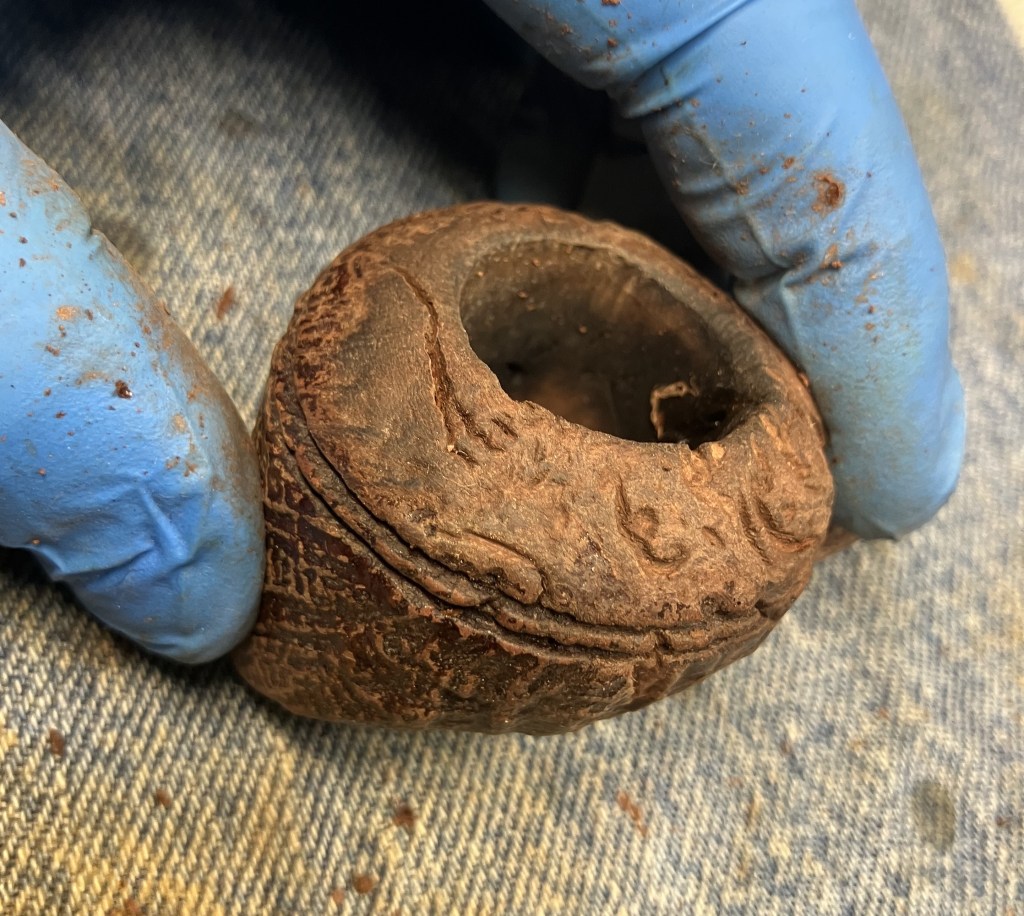


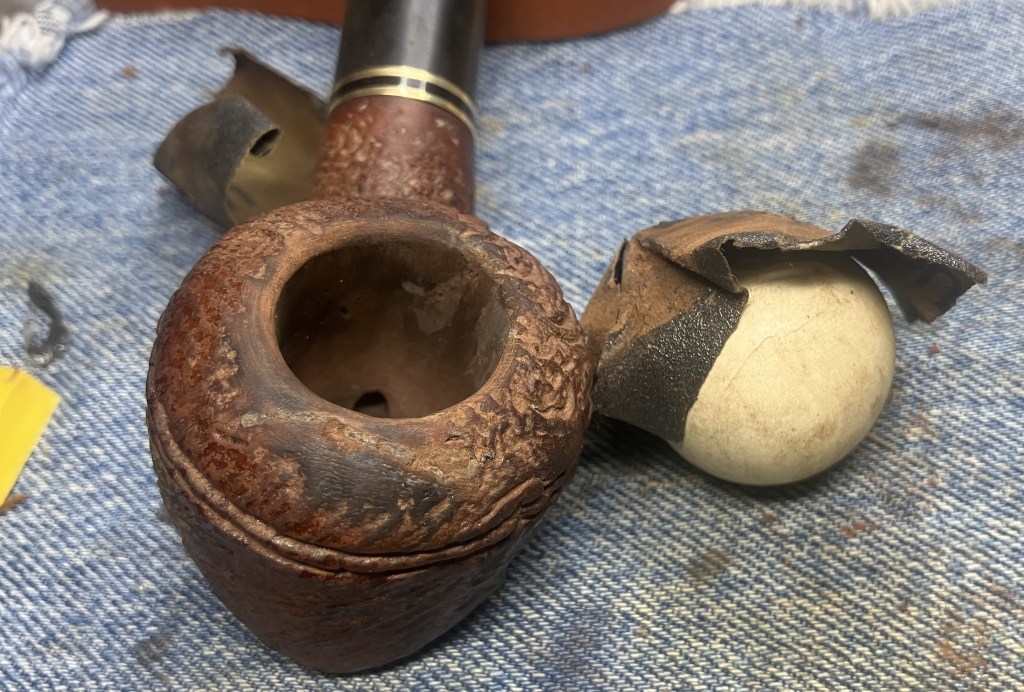


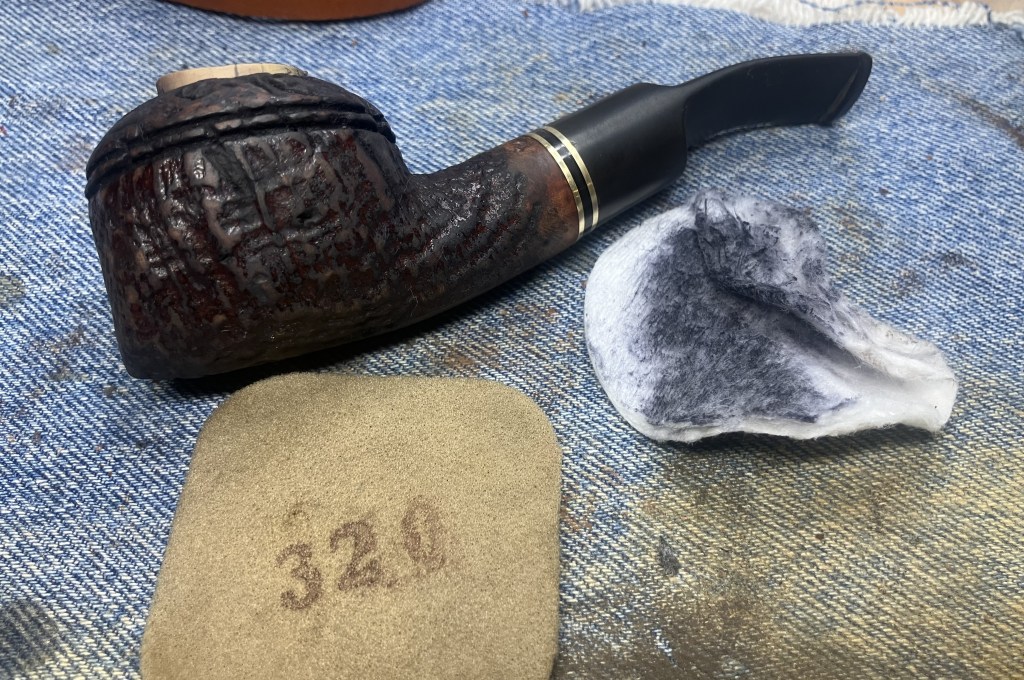

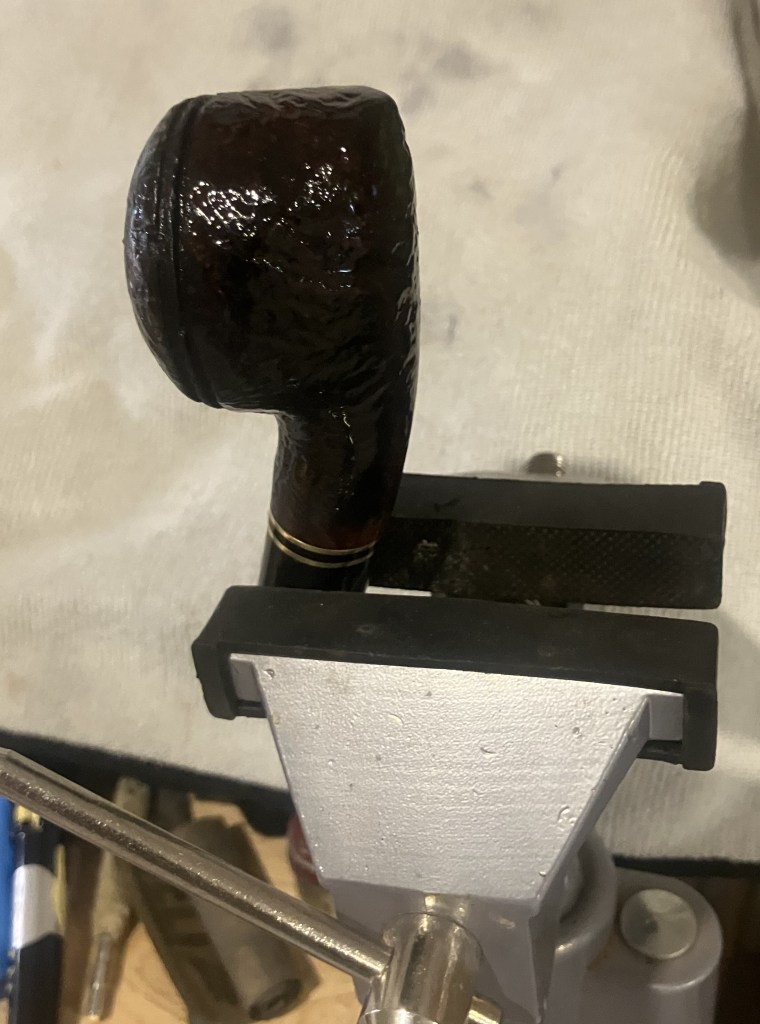
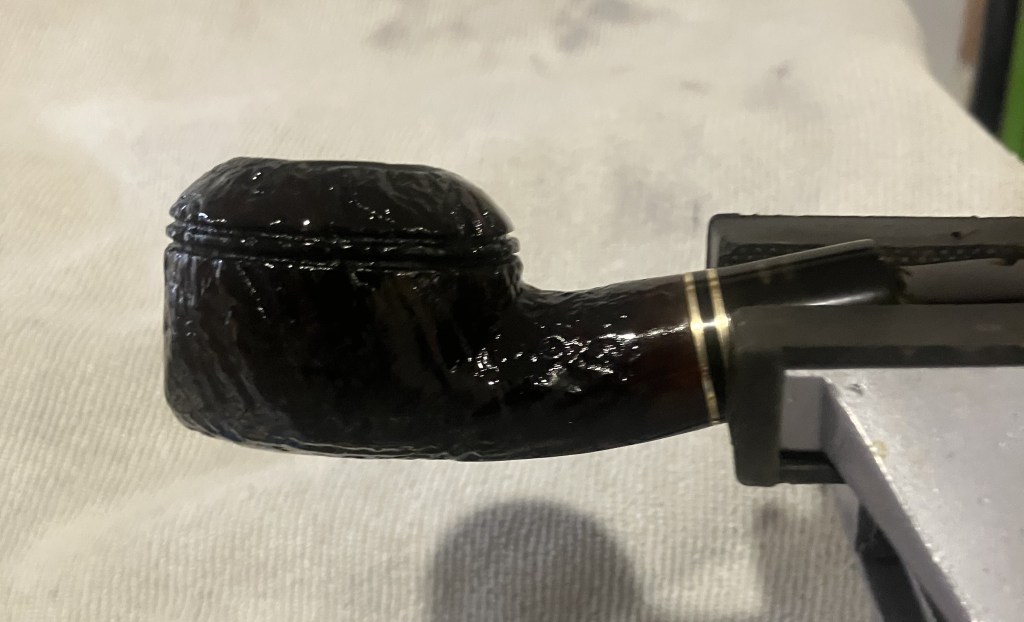
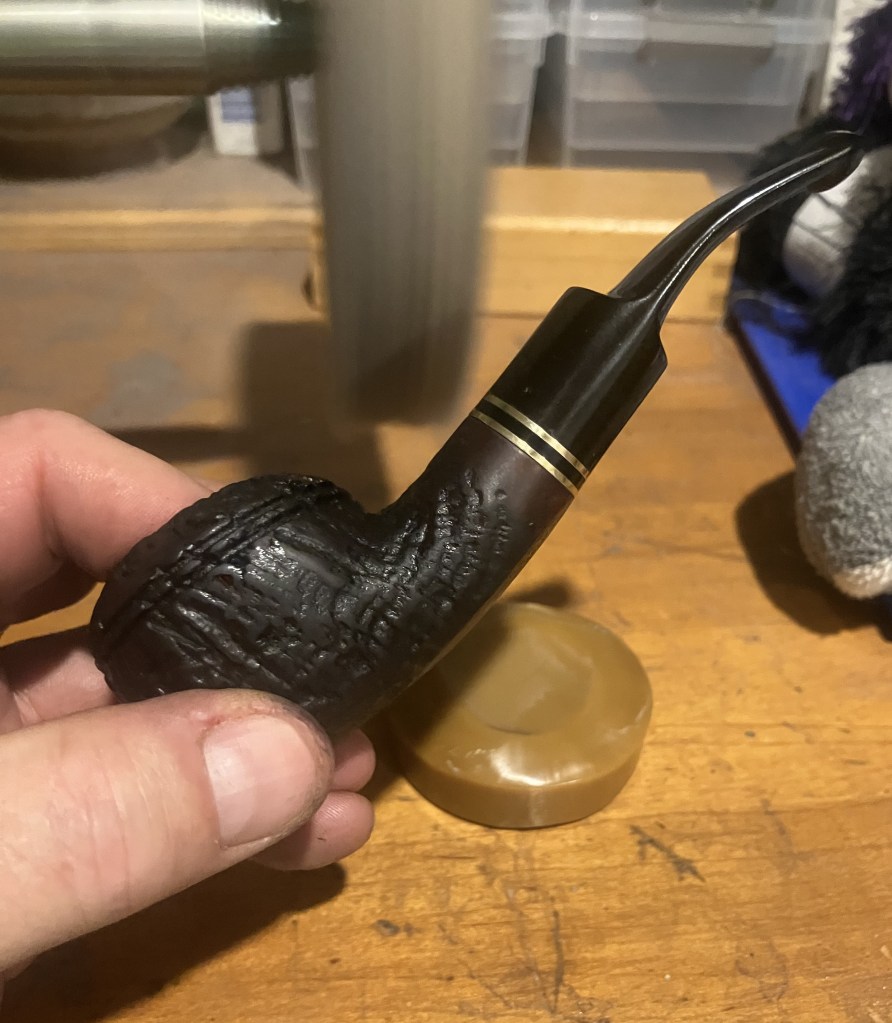


 (
(


