Skip to content
    • About

NebraskaPeteGeek

  • American Pipe Makers
  • British pipe Makers
  • Danish pipe Makers
  • French Pipe Makers
  • German Pipe Makers
  • Irish Pipe Makers
  • Italian Pipe Makers
  • Others or Unknown Pipe Makers
  • Restorations
  • A Yello-Bole Aristocrat Airograte Restore

    October 30th, 2023

    Written and photographed by John M. Young

    I am not sure why I am drawn to metal pipes.  I love the all-briar classics as well as the artisanal briar and exotic material pipes that are being produced by true artists.  There is just something nostalgic about the old Falcons, Vikings, Kaywoodie Filters and this Yello-Bole that draws me in.  Perhaps it is a childhood memory of the next door neighbor, Mr. Chase as he smoked his metal pipe smelling oh so good as he worked on his yard.  

    Over the summer of 2023 I came across this Yello-Bole.  The Ebay listing showed a dull gray pipe with a nearly black bole.  The starting bid was under $10.  How could I refuse?

    Screen snip of photo taken from Ebay listing 

    The Yello-Bole Aristocrat Airograte can be seen here in an advertisement from 1966.  

    File:Yello Bole AirOGrate 1966.jpg – Pipedia

    Pipedia also states the following about Yello-Bole’s metal pipes:

    “The Yello Bole Aristocrat Airograte: An Aluminum and wood pipe with a twist. This pipe doesn’t have a bowl per say, but more a briar cylinder that screws into the base of the body. At the bottom of the bowl is a metal grate, thus allowing air to be pulled through all the tobacco and reducing any chance of clogging. The lower bowl catches all moisture and tar reducing bite. These pipes can be had in a silver/chrome finish as well as a soft gold finish. The stem of these pipes has cooling fins up each side, and can be found in a straight or bent form.”

    • Two Examples and details, courtesy Chris Rigol
    • Yello-bole 20230531 181813.jpg
    • Yello-bole 20230531 181928.jpg 
    • Yello-bole 20230531 182016.jpg 
    • Yello-bole 20230531 182029.jpg 
    • Yello-bole 20230531 182038.jpg 

    Yello-Bole – Pipedia

    I was the only bidder on this auction.  Perhaps this should have told me something.  The anticipation for the arrival of my prize was short and upon arrival I initially thought that this would be a quick and easy addition to my collection.  Sure, it was oxidized and dirty but estate pipes usually are.  Below are some photos of how the pipe appeared when it arrived.

    Nothing too bad, right?  Sure, the aluminum had oxidation, a bit of “lava” on the rim and the need for light reaming, no problem. The nylon mouthpiece looked good.  As I began closer examination of the pipe my thoughts of “quick and easy” started to dissolve.  Upon disassembly I said, “Wow, this bowl is really stuck to the aluminum.”   The bowl had enough shellac to drown an entire Erica Arborea plant and what is that build-up in the bowl?

    The gunk in the bottom of the bowl was just unsmoked tobacco.  That came out easily.  The aluminum reservoir was thickly coated in a dried smoke condensate of tar.  The screen was dirty with tobacco and a good deal of tar.  I assumed that the tar was also throughout the shank and stem as well.  This looks like a job for some 99% ethyl alcohol.  I first tried a bit of alcohol on a paper towel inside the reservoir.  This did little other than making the paper towel dirty.

    I decided that the shank/stem and aluminum screen needed to soak in the alcohol bath for an hour or so..

    While the alcohol softened and started to dissolve the tars I began working on the wooden bowl.  The bowl had a little bit of lava on the rim and a light cake build-up inside the tobacco chamber.  I used the PipNet reamer and the Smokingpipes knife to clean out the tobacco chamber.

    I then took the bowl over to the sink and used Murphy’s Oil Soap and a medium stiffness toothbrush to remove the dirt and grime from the bowl as well as the lava from the rim.  After a rinse of warm water the bowl came back to the bench.  I tried to remove the “shellac” from the bowl with a cotton boll soaked in alcohol.  What I assumed was a thick coating of shellac turned out to be some other type of clear coating as this should have readily dissolved with alcohol had it been shellac.  If alcohol doesn’t work then try acetone.  Bingo, the clear coat was not clear at all but, red.  After numerous acetone soaked cotton bolls I could see wood.

    This also revealed the fills that the finish had concealed.

    I decided to leave them for the time being and see what they looked like after the Restoration Balm did it’s magic.  

    After the aluminum shank had soaked for about an hour I removed it from the alcohol bath.  The tars had softened and dissolved quite well.  I began cleaning the reservoir with cotton bolls and cotton swabs soaked in clean alcohol to further rid the aluminum of it’s tar.   This worked quite well.  The screen was a different matter.  Upon removing it from the alcohol bath and scrubbing it with alcohol soaked cotton bolls it still remained yellow with several screen holes filled with tar.  I used the toothbrush and Dawn dish soap to scrub the screen.  This worked on getting rid of the last of the tars and yellow color but many holes remained filled.  I returned to the bench and used a fly tying bodkin to clear out the remaining “clogs”.  After needling the screen clean I rinsed it with clean alcohol.

    The draught of the pipe was remarkably clean.  Perhaps the alcohol bath had worked better there or the previous owner was not averse to running a pipe cleaner through the stem.  Either way the draught was cleaned out with bristle pipe cleaners soaked with alcohol.  

    The nylon mouthpiece was in quite good shape which was nice as nylon is not very easy to return to a pristine condition.  All that was done there was to clean it well with the toothbrush Dawn dish soap and alcohol.  

    I worked some Before & After Restoration Balm (Lbepen.com) into the wood bowl with my finger tip.  I allowed this to sit for 30 minutes.  While waiting for the Restoration balm to do its work I took the aluminum to the buffer.  I used white diamond buffing compound to clean away the oxidation from tha aluminum.  All of the corners were tedious to work through but eventually a nice bright polish was seen on the aluminum again.  After the restoration Balm had done what it does, I buffed the excess off with a cotton towel and was glad to see that the wood had some of it’s luster returned.  

    Here are some photos of the finished Yello-Bole Aristocrat Airograte:

    As you can see the old girl has returned to some semblance of her factory fresh glory.  I now understand where the term “Airograte” comes from.  The screen, or grate, allows for the airflow.  As this is a pipe that I planned to keep for my personal collection and use I did not spend time trying to make the nylon stem new again.  Overall I am very pleased by how she turned out.  Thank you for reading the ramblings of an old pipe lover.

  • A Dr. Grabow Westbrook Restoration.

    October 30th, 2023

    Written and photographed by John M. Young

    We all know of Dr. Grabow pipes and likely have our own opinions of them.  Anyway you look at it Dr. Grabow pipes are an American icon.  I do not feel the need to examine the history of the brand and am including links regarding history for those who are interested.

    History:   

    Tobacco Pipes:  https://www.tobaccopipes.com/dr-grabow-history/#:~:text=The%20famous%20smoking%20pipe%20brand,US%20patent%20number%201.896%2C800.

    Pipedia:

    https://pipedia.org/wiki/Dr._Grabow

    Pipedia timeline: 

    https://pipedia.org/wiki/Dr._Grabow_Pipe_History_Timeline

    Current Dr. Grabow:

    https://www.drgrabow.net/

    After I retired from being a high school science teacher for 32 years I started restoring estate pipes.  As part of my education in the realm of restorations I came across the blogs of Seve Laug (https://rebornpipes.com/).  I have to say how impressed I was at his knowledge and skills.  Unfortunately my own knowledge and skills were quite undeveloped.  Fortunately, ignorance is curable.  Through the avid consumption of articles and practice restoring estate pipes I developed a passable set of skills of my own. I received this Dr. Grabow Westbrook as part of a “grab bag” of pipes for restoration from Steve Laug’s partner, Kenneth Lieblich (kenneth@knightsofthepipe.com).  

    The Westbrook series began in the mid-1950’s.  I have to admit that I was drawn to them because of the orange spade.  Amazingly, my attraction to them was shared by Dr. Grabow aficionados and according to Dr. Grabow Models (Series,Line) Names Through the Years:  “WESTBROOK (c1955? to about 1985 or so) — One of the earliest RJR pipes and very sought after even today, long after the special offer program stopped.” https://pipedia.org/wiki/Dr._Grabow_Models_(Series,Line)_Names_Through_the_Years 

    So either I accidentally chose a good one or there are a lot of folks who like orange.

    This old Westbrook looked dirty and well worn or, as my father used to say “rode hard and put away wet”.  

    Upon reaming the bowl with a PIPNET I discovered that the previous owner liked to scrape the bowl with a sharp tipped knife.  There was a hole all the way through the briar.  The edges did not appear charred so I figured he was just a scraper.  The next step was to clean away the years of accumulated dirt, oils and grime.  This was done using a medium stiffness toothbrush and Murphy’s Oil Soap.  Since the pipe was rusticated I also used a brass brush, 12 gauge shotgun bore brush, with the oil soap to get the “lava” from the rustication on the rim and the deeper grooves.  The following two photos show the hole after the pipe was cleaned and reamed. 

    At this point I was faced with a decision.  Should I:

    1. Scrap the whole restoration and use the pipe as salvage/parts.
    2. Fill the bottom of the bowl with J-B Weld and top that with a “pipe mud”.
    3. Drill out a regular hole in the bowl and make a briar plug and fit it to the hole.

    I have a thing for old Dr. Grabow pipes and Westbrooks in particular, so option 1 didn’t seem very good.  I had used the J-B Weld method with pipes that had suffered the scrapings of misguided owners before and had good results but, never with a hole all the way through.  I had never tried to fashion a plug so, I went with the “let’s make a plug” method, option 3. Maybe I could also build some new skills.

    Not having access to a drill press I tried drilling out the hole by stepping up larger and larger drill bits with a hand drill.  This worked ok until I got to the final bit, ⅜  inch.  The final bit chipped the briar making the hole irregular.  Hmm, does this warrant the purchase of a drill press?  Anyway, I can always fill rough spots.

    It was time to find a suitable plug doner.  I had an old no-name bullnose that I had previously used for a piece of briar and the bottom looks to be nice and thick.  Four cuts later I had the beginnings of a plug.

    Shaping of the plug was done with small needle files of various shapes and sand paper.  This did  lead to cramping of the hands. The small notch that you can see on the second photo below was the original draught hole.  I kept it intact as a reference point to line up with the Westbrook’s draught hole.

    Eventually the plug was fit as well as I was going to get it.  I put a bead of J-B EWeld around the sides of the plug and fit it into place using the draught groove to align it to the Westbrooks draught hole.  The inside looked good.

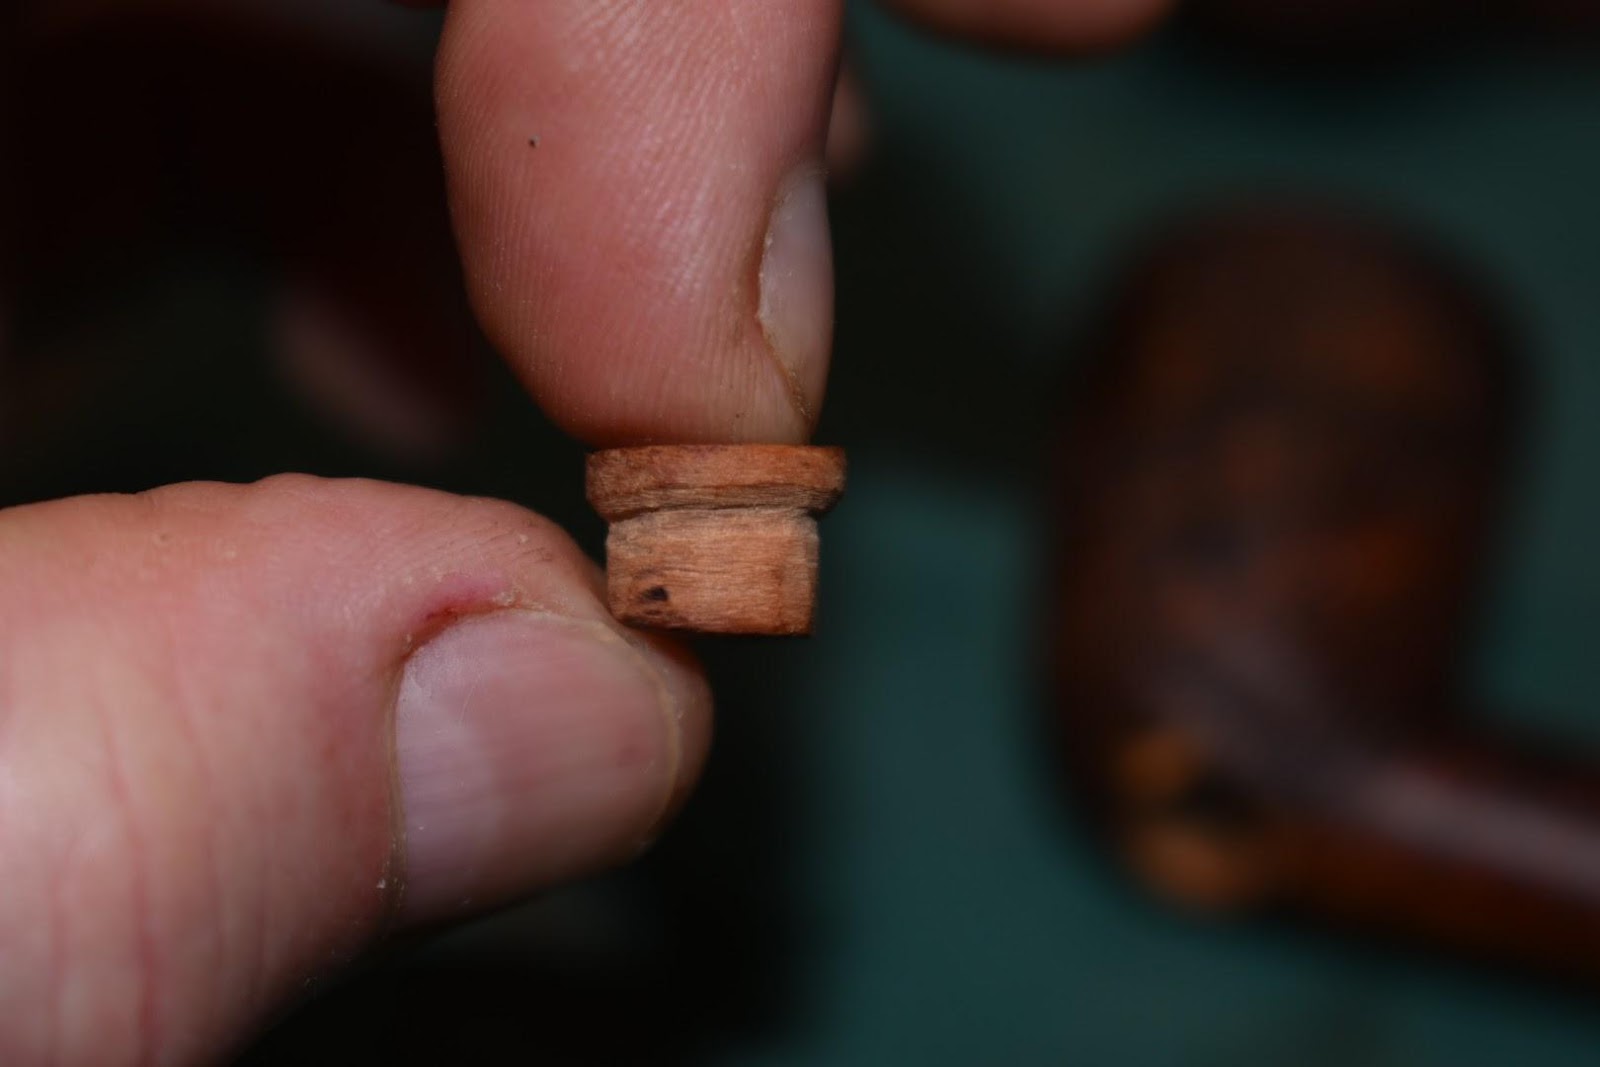
    It turned out that the plug was not quite thick enough to completely fill the hole on the bottom of the pipe.  This led me to do some creative fill work.

    I had had enough hand cramping and fiddling with small pieces of wood.  At this point I decided to make a slurry of clear J-B Weld mixed with briar dust from other restore projects.  I filled in the remaining hole with this slurry and allowed it to dry for several days.  Eventually it became hard enough to file and sand.  

    During the drying I had plenty of time to address a very used and abused stem.  The good news with the stem was that the orange clover leaf Dr. Grabow logo lined up perfectly with the shank.

    I neglected to take pictures throughout the restoration of the stem.  I started by carefully scraping the worst of the calcium deposits and oxidation with a sharp knife.  After that I used a wet/dry 220 sandpaper with a light touch to remove the oxidation.  I then dropped the stem into Before & After Extra Strength Deoxidizer (For Sale | La Belle Epoque (lbepen.com) for about an hour. After removing the stem from the deoxidizer I let the stem drip much of the chemical back into the container.  After the drip dry, I vigorously rubbed the remaining chemical with a cotton rag and ran pipe cleaners through the draught hole.  As soon as I had removed all the deoxidizer with the rag and pipe cleaners I applied a coat of mineral oil to the stem and ran a wet-with-mineral-oil pipe cleaner through the stem.  To repair the hole chewed through the mouthpiece, I used a piece of plastic cut from a plastic container.  Here are a couple of examples with different pipe stem for scale:

    I coated the narrow part of the plastic with petroleum jelly and inserted it into the mouthpiece.  I  then used STARBOND black cyanoacrylate (super glue, abbreviated CA) to build up the missing material.  The CA does not adhere to petroleum jelly.  I will usually do a light coat of CA and spray it with STARBOND Accelerator to get it to dry almost instantly.  Repeat as necessary to fill in the missing material.  The repaired spot is then filed with a fine flat needle file and sanded with 220 then 400 grit wet/dry sandpaper.  After the sandpaper, I used micromesh pads with grits 1500-12000.  Obsidian Oil is used on a cotton cloth between each micromesh pad.  The final polishing was done with Before & After Fine Polish and Extra Fine Polish (Lbepen.com).  The finished stem looked good.

    After the J-B Weld had completely cured and hardened I was able to shape it with a file and sandpaper.  The J-B Weld/briar-dust patch was significantly darker than the existing briar..  Fortunately the rustication allowed me to conceal the patch with a few cuts made with a cut-off wheel on the Dremel MultiPro and applications of Fiebing’s Light Brown Leather Dye blended the patch fairly well.

    I admit to not being a woodcarver nor having the best tools for the job.  It did however work well enough for this old Westbrook and my approval.  Due to the rustication of the pipe there was minimal sanding to be done.  I did lightly hit the high points with the 3200 and 4000 micromesh pads.  After that light sanding I wiped the whole pipe off with 99% ethyl alcohol.  I rubbed in a liberal amount of Before & After Restoration Balm (Lbepen.com) with my fingertips and let it dry for an hour.  I Rubbed away excess balm and buffed the bowl with the inside of a cotton athletic sock.  The final treatment of the wood was a light coat of Decatur Pipe Shield No Buff Wax applied with my finger and worked into the rustication with a toothbrush.  The wax was allowed to dry for 30 minutes then was buffed off with a shoe-shine brush.

    Below are some photos of the finished pipe:

    She may not look as good as she did when she left the factory but she smokes very nicely and has many years and many bowls of tobacco in her future.  Thank you for reading the ramblings of an old pipe lover.

    John

  • A Peterson Cara 314 Restore

    October 30th, 2023

    Written and photographed by John M. Young

    In April of 2023 I came across an Ebay auction of this lovely Peterson’s Cara.  The birdseyes caught my eye and I decided that I’d give bidding a try.  The original photos showed a dark spot on the bottom of the stummel and in the description the seller mentioned that the dark spot may indicate a plug. 

    Upon winning the auction and receiving the pipe it did indeed appear that a previous owner had plugged the bottom of the stummel.  An inspection of the inside of the bowl did not immediately explain why a plug would have been necessary.  As I was cleaning the pipe I discovered that there were two draught holes.  The top one was completely choked with tar and smoking residue.  The bottom draught hole started at the bottom of the well and connected to the bottom of the tobacco chamber.  Strange, indeed.  

    I used a reaming tool to open the top draught hole.  This top hole is the correct or factory draught.  The two draught passageways ran parallel to one another together and were separated by about 1/16th an inch of briar along their lengths.  You will have to forgive the lack of photos documenting this as I do not have a camera nor lighting adequate to show what I was seeing with my eyes.  Hopefully the diagrams will clarify any confusion.  Confusion is something I had quite a bit of at this point.  Below (Figure 1) is an image of a Peterson system similar to that of the Cara (figure 1).  It is not exactly what I had to deal with but it is very similar.

    Figure 1*

    I again focused my attention to the bottom of the tobacco chamber.  The bottom of the chamber did have a hole drilled into it.  This hole was obviously not something of Peterson’s doing.  The drilled hole ran directly into the second, lower, draught hole and lined up with the hole all the way through the stummel which was not a hole as it had been plugged.

    I then began to piece together what I believe to have happened to this poor old Cara. I think that the top draught hole had become clogged with use.  The owner, not understanding the inner workings of a Peterson system, decided that a new hole was needed.  My guess is the poor fellow thought the bottom of the well was where the draught hole should be.  He then began drilling a hole to open up the airway.  Or in this case to make a new airway.  He missed the bottom of the tobacco chamber due to the angle of the ferrule, his drill bit, geometry and physics.  See figure 2.  The red lines represent the new airway that was drilled.

    Figure 2

     To solve this problem he then drilled a hole in the bottom of the tobacco chamber to connect to his new airway.  This is when he drilled all the way through the stummel.  See figure 3.  The light blue area shows the connecting hole drilled that went through the bottom of the stummel.

    Figure 3

    Upon seeing his new creation he decided to plug the hole.  This he did with a piece of briar and cyanoacrylate glue.  His plug worked well although he decided that sanding the plug smooth was an unnecessary step.  Figure 4 shows the plug in brown.

    Figure 4

    His drilling had accomplished what he wanted, an airway that connected the bottom of the tobacco chamber to the mouthpiece.  How long the previous owner used the pipe this way is unknown.  I do give the guy credit for solving the problem of a clogged airway but wish he would have had a better understanding of the Peterson system.  The Cara line of pipes originally was released in 1980, long before the availability of internet searches.  

    I figured the best way to resolve this whole two hole problem was to completely fill the second draught hole and the hole in the bottom of the tobacco chamber with J-B Weld.  I mixed the two part epoxy as per the instructions.  I then used a plastic pipette to slowly draw-up the epoxy into the pipette. I then carefully inserted the pipette into the well and slowly injected the J-B Weld into the hole.  I repeated this with the hole through the tobacco chamber.  Eventually I was able to fill the holes with the epoxy.  I have tried to show this in figure 5.  The brown section shows the plug while the green area shows the J-B Weld.

    Figure 5

    The plug scar after sanding and Restoration Balm:

    Repaired interior of well:

    It is hard to see but, the dark circle, center, is the draught hole.  The bit of reflection is light reflecting off the J-B Weld repair.

    Repaired interior of the tobacco chamber:

    The cleaning and restoration of the exterior of the Cara 314 were much more typical of any older pipe.  The first step was to ream the tobacco chamber with the PipNet reaming tool and Low Country Reamer (reaming knife from smokingpipes.com).  The interior was then sanded to inspect for interior charring, none was found.  The well and draught  were scrubbed with Dawn dish soap and appropriately sized nylon bore brushes and rinsed with warm water.  The well and draught were further cleaned with cotton swabs and pipe cleaners dipped in 99% ethyl alcohol.  The ethyl alcohol, being hydrophilic, absorbs and removes much of the water used during the previously mentioned rinsing.  

    The exterior of the stummel was scrubbed with a medium stiff toothbrush and Murphy’s Oil Soap to remove the oils and dirt from years of handling.  The top of the bowl did have some lava build up which came off nicely with the oil soap.  This revealed an area of charring at the rear of the rim.  I topped the entire stummel using gentle sanding with 220 wet/dry sandpaper on a table top.  This was followed by sanding with 400 wet/dry sandpaper also on a table top.  The rim of the pipe was then restrained using stain markers (Diaxism Total Furniture Repair System) in Cherry and Oak stains.The entire stummel was sanded with micromesh pads from 1800-6000 grit.  The wood was then rubbed with Restoration Balm and allowed to dry for 30 minutes.  The Balm was buffed with the inside of a cotton athletic sock.

    The exterior of the stem was in remarkably good condition.  Perhaps the seller of this pipe had access to a buffer and had buffed some of the oxidation off prior to posting the pipe on Ebay.  The interior of this stem was very restricted with tars and tobacco smoking residue.  I scrubbed the interior with nylon brushes and Dawn dish soap for quite some time.  Finally after numerous scrub/rinse cycles the stem was appearing cleaned.  I then ran several bristle pipe cleaners dipped in ethyl alcohol through the stem until they were clean.  The water and alcohol from all this cleaning did accentuate the oxidation on the outside of the stem.  I rubbed down the stem with 0000 steel wool and dropped it into the Before & After deoxidizing solution for about an hour.  Upon removing it I allowed the solution to drip from the stem.  Vigorous rubbing with a cotton rag removed the remaining deoxidizer.  The inside of the stem was cleaned of deoxidizer with several pipe cleaners.  Both the interior and exterior were liberally coated with mineral oil after the rubbing.  

    After the oxidation was removed I worked the stem with 1500-12000 grit micromesh pads.  I wiped the stem with Obsidian oil on a cotton make-up removal pad in between each micropad.  Finally I used Before & After Fine and Extra Fine polishes with a cotton cloth.  After the extra fine polish was removed I applied a final coat of Obsidian Oil to the stem and let it stand for 20 minutes.  

    Photos of the finished Peterson Cara:

    The old Peterson Cara 314 turned out quite nicely.  The birdseyes are numerous and very attractive.  The pipe now smokes very well and is a pleasure to add to my collection.  I have to admit that she took a lot more work and hours than I originally thought she would, however, she comes from a grand old pipemaker and has many years ahead of her.  Thank you for reading the ramblings of an old pipe lover.

    *The original Peterson system crossection diagram was taken from:  https://www.smokingpipes.com/smokingpipesblog/single.cfm/post/the-complete-guide-the-peterson-system-pipe-startling-revelations-about-charles-petersons-greatest-invention 

←Previous Page
1 … 24 25 26

Blog at WordPress.com.

Privacy & Cookies: This site uses cookies. By continuing to use this website, you agree to their use.
To find out more, including how to control cookies, see here: Cookie Policy
  • Subscribe Subscribed
    • NebraskaPeteGeek
    • Join 40 other subscribers
    • Already have a WordPress.com account? Log in now.
    • NebraskaPeteGeek
    • Subscribe Subscribed
    • Sign up
    • Log in
    • Report this content
    • View site in Reader
    • Manage subscriptions
    • Collapse this bar