Skip to content
    • About

NebraskaPeteGeek

  • American Pipe Makers
  • British pipe Makers
  • Danish pipe Makers
  • French Pipe Makers
  • German Pipe Makers
  • Irish Pipe Makers
  • Italian Pipe Makers
  • Others or Unknown Pipe Makers
  • Restorations
  • A WDC Waldorf Restoration

    November 24th, 2023

    Written and photographed by John M. Young

    Waldorf you say.  Isn’t that the brand that everyone has heard of?  That great artisanal craftsman from way up in the mountains of the Danish Low Lands?  Umm no, not that guy.  Okay, I confess that my stock box of pipes to restore has dwindled as of late.  I was focusing on specific brands and shapes and not picking up estate lots over the past couple of months.  I still completely love descending down to my basement work area to diligently ignore my daily chores while restoring just about any old pipe.  I also confess that I am not yet independently wealthy, something that is a bit difficult to obtain on a public school teacher’s salary and now pension.  Regardless, the muse directed me to this abandoned and ignored little pipe.  I have no recollection of when I got it nor from where.  I am assuming it was part of an estate lot or perhaps a pipe in a grab bag from Steve Laug’s partner in restoration Kenneth.  I did purchase a mystery bag from Kenneth once, great fun, that. They are occasionally available at https://rebornpipes.com/rebornpipes-store/pipe-restoration-grab-bags-tools/# If you want to give this restoration thing a go.

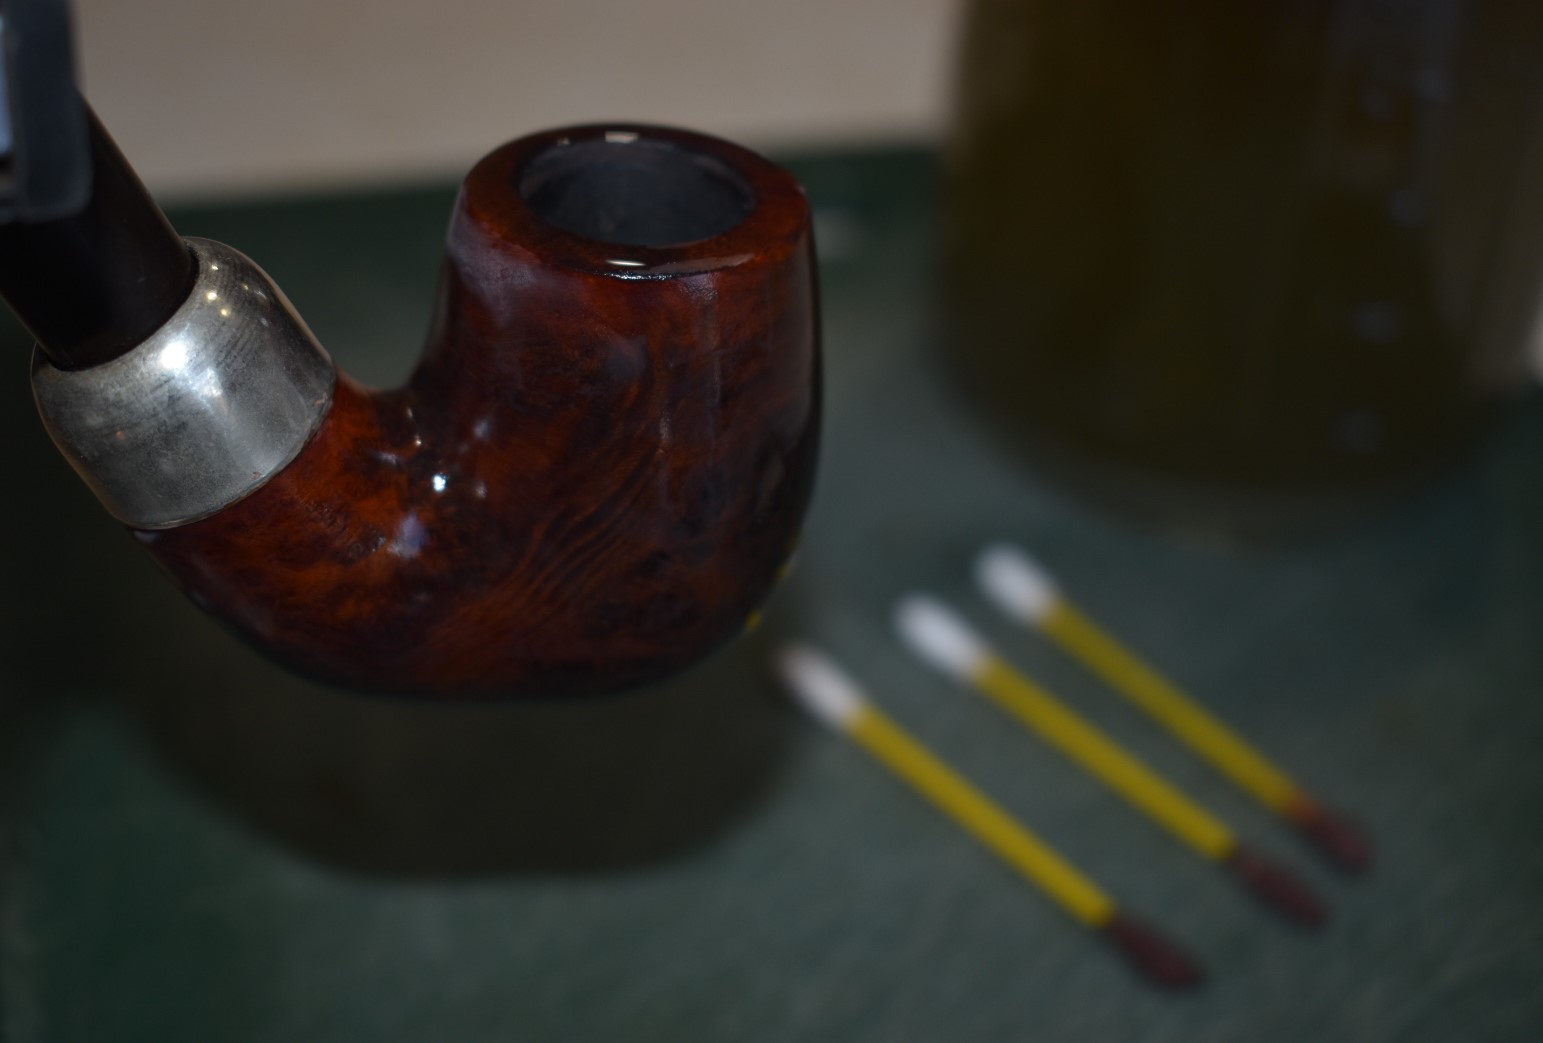
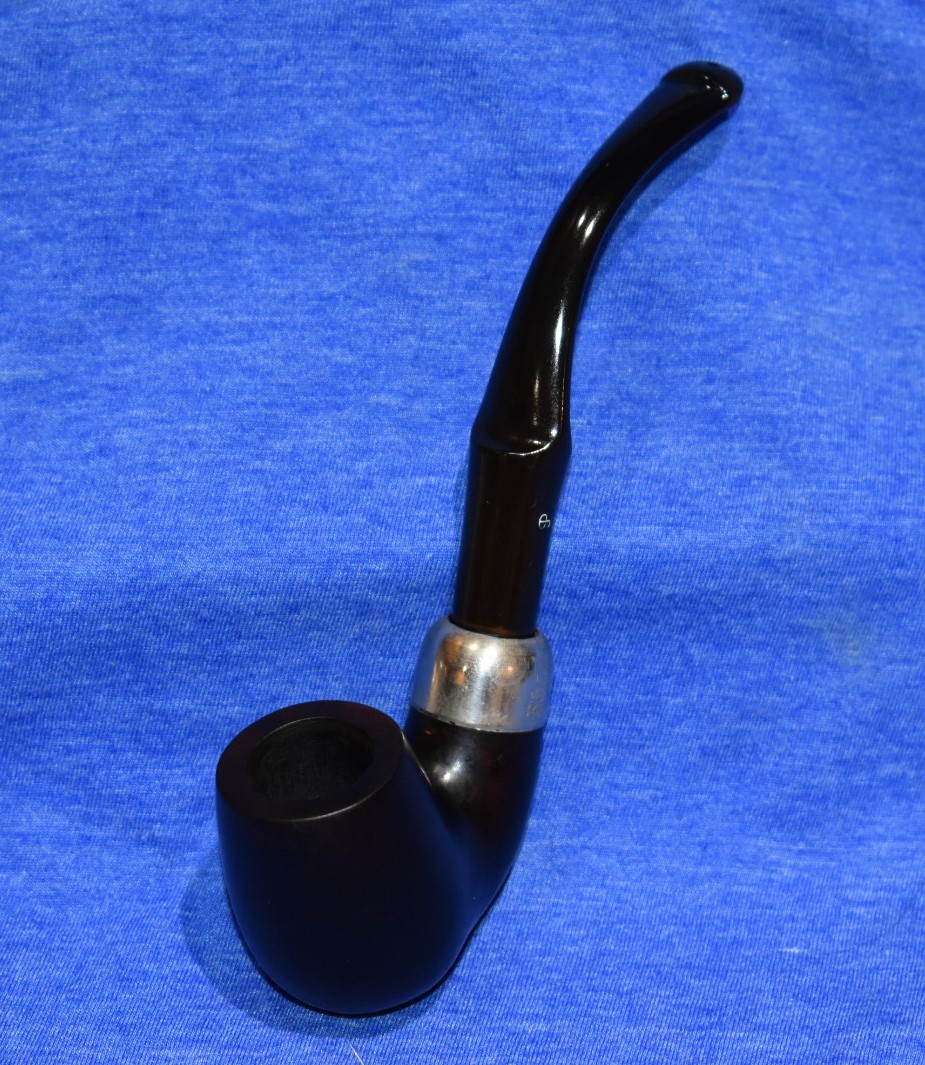
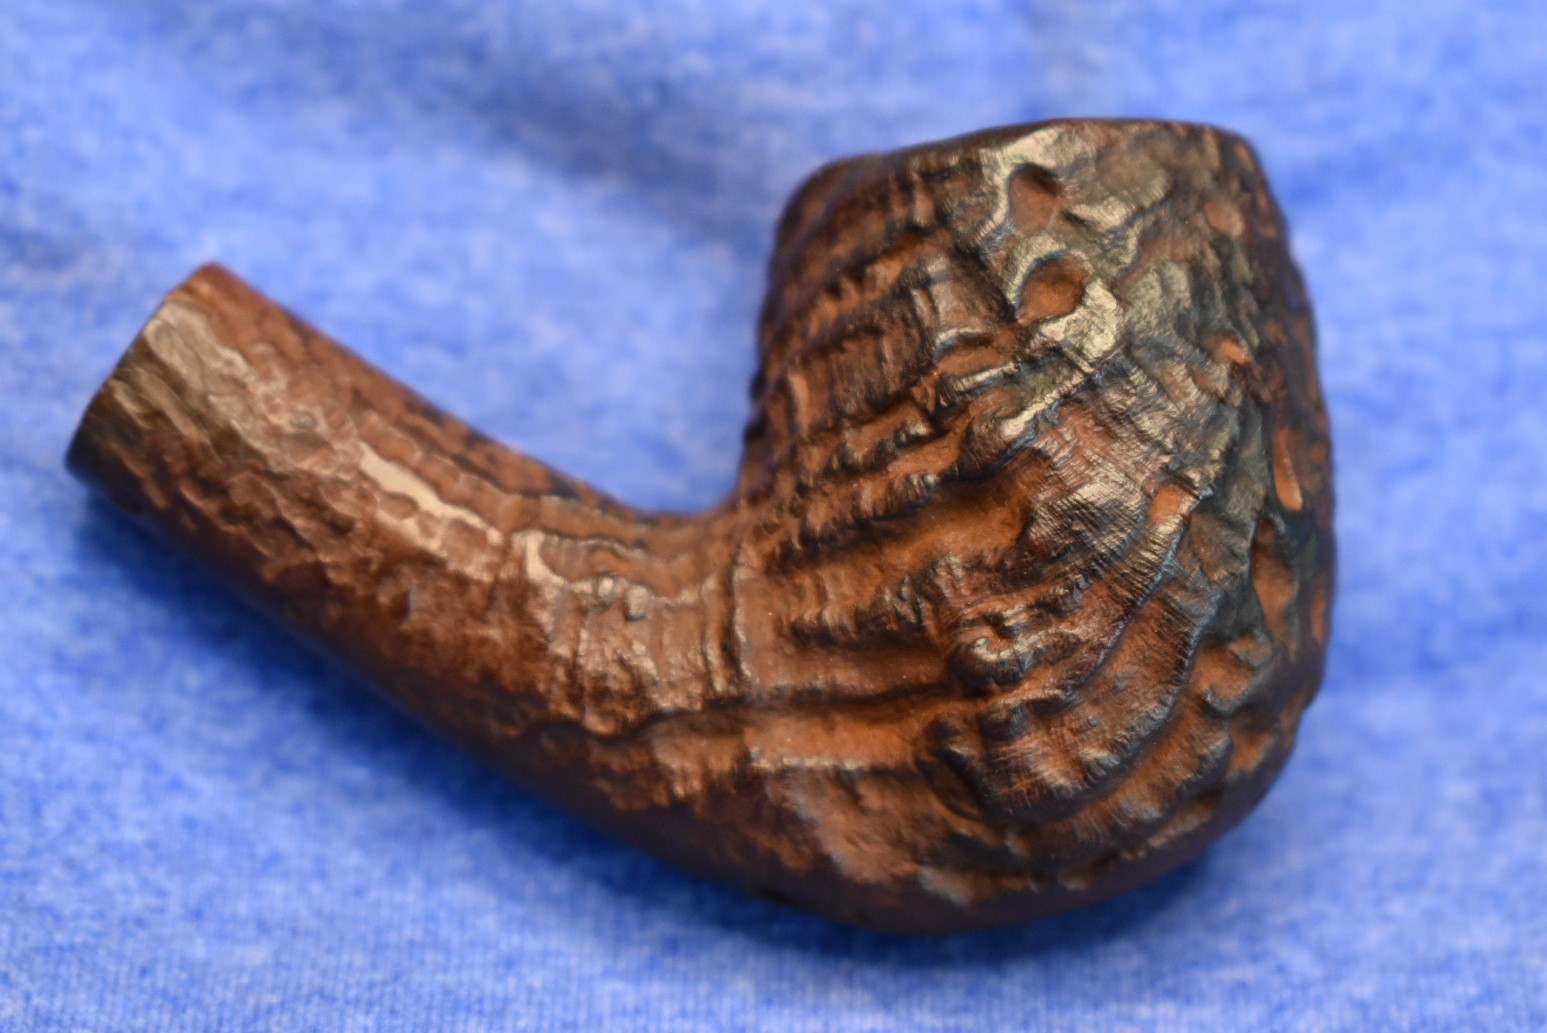
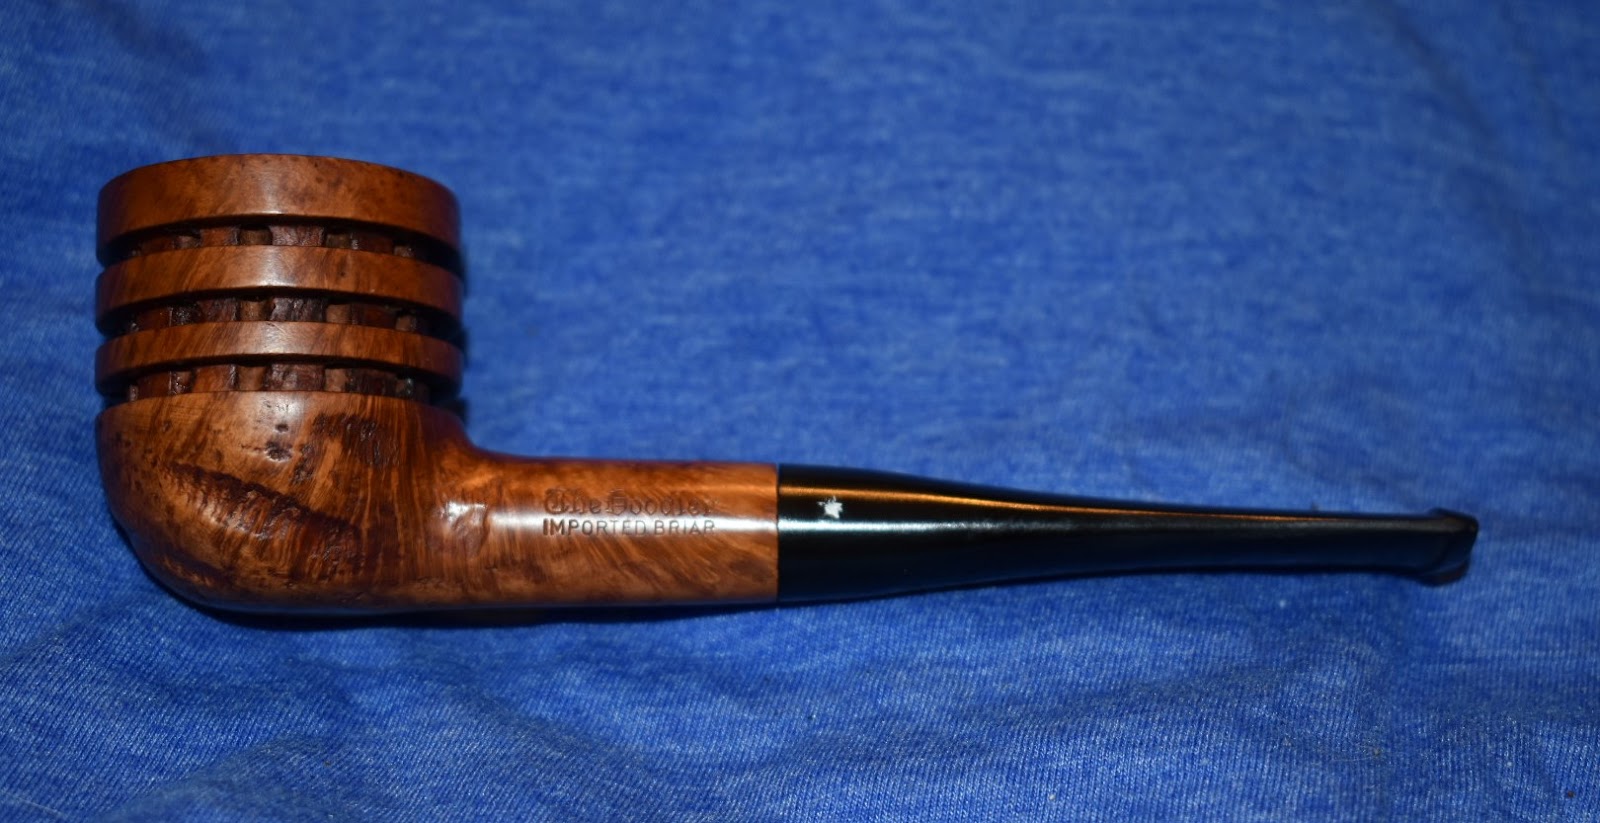
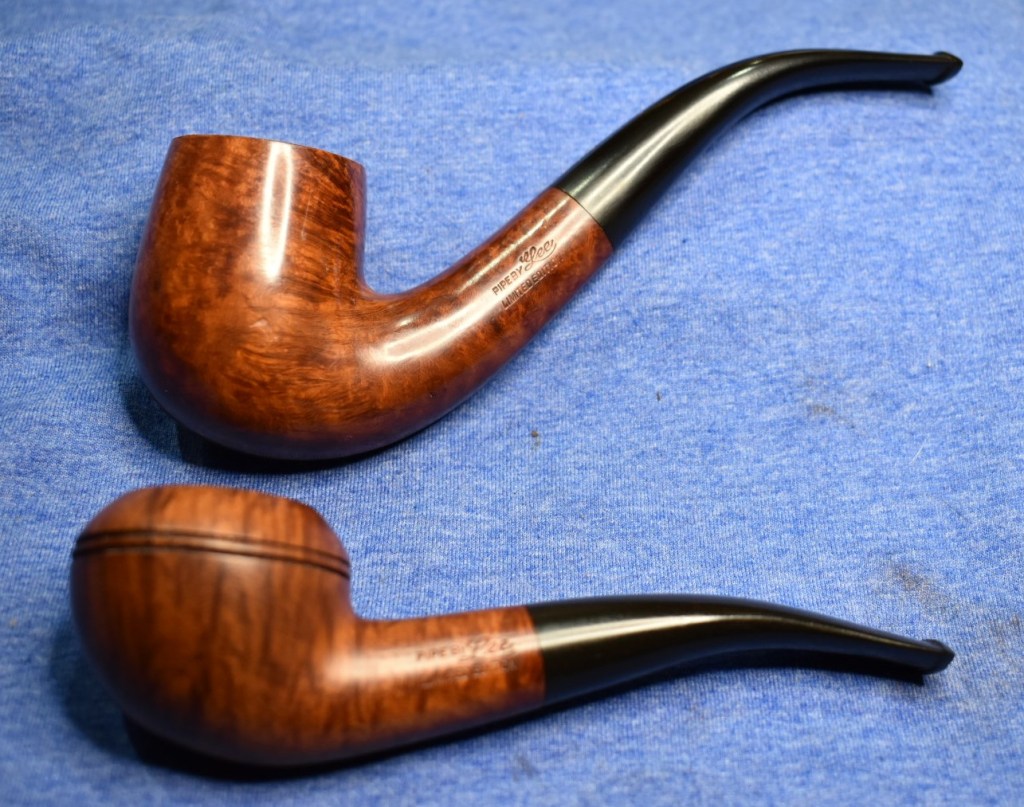
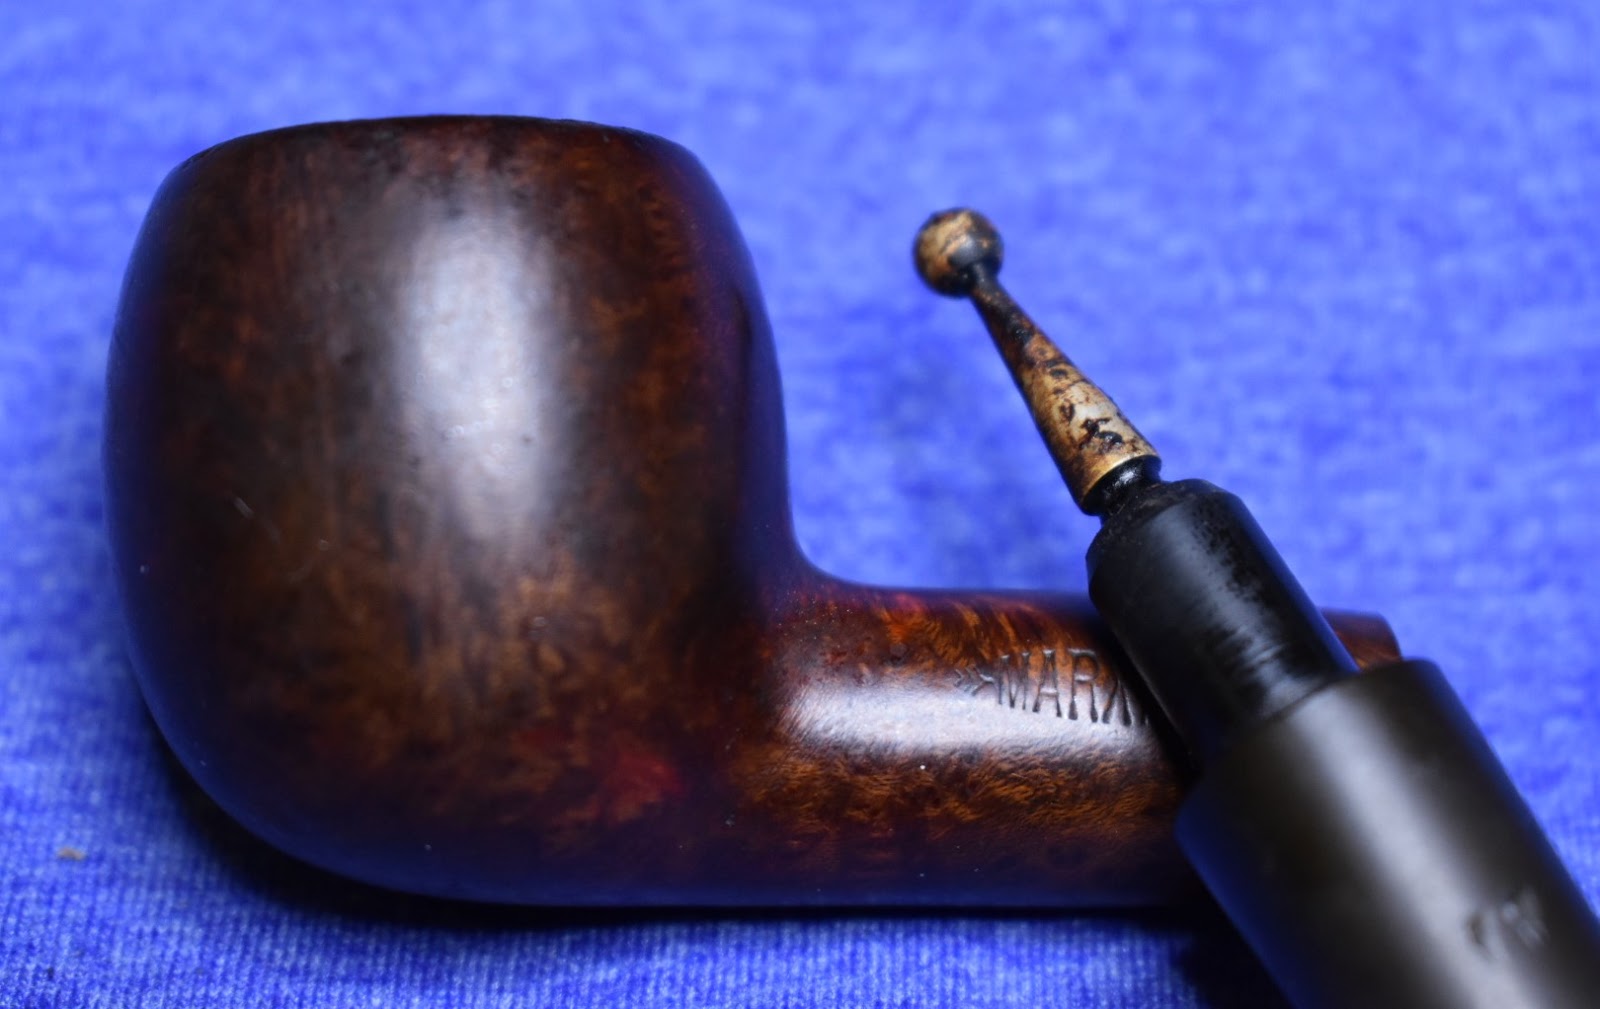
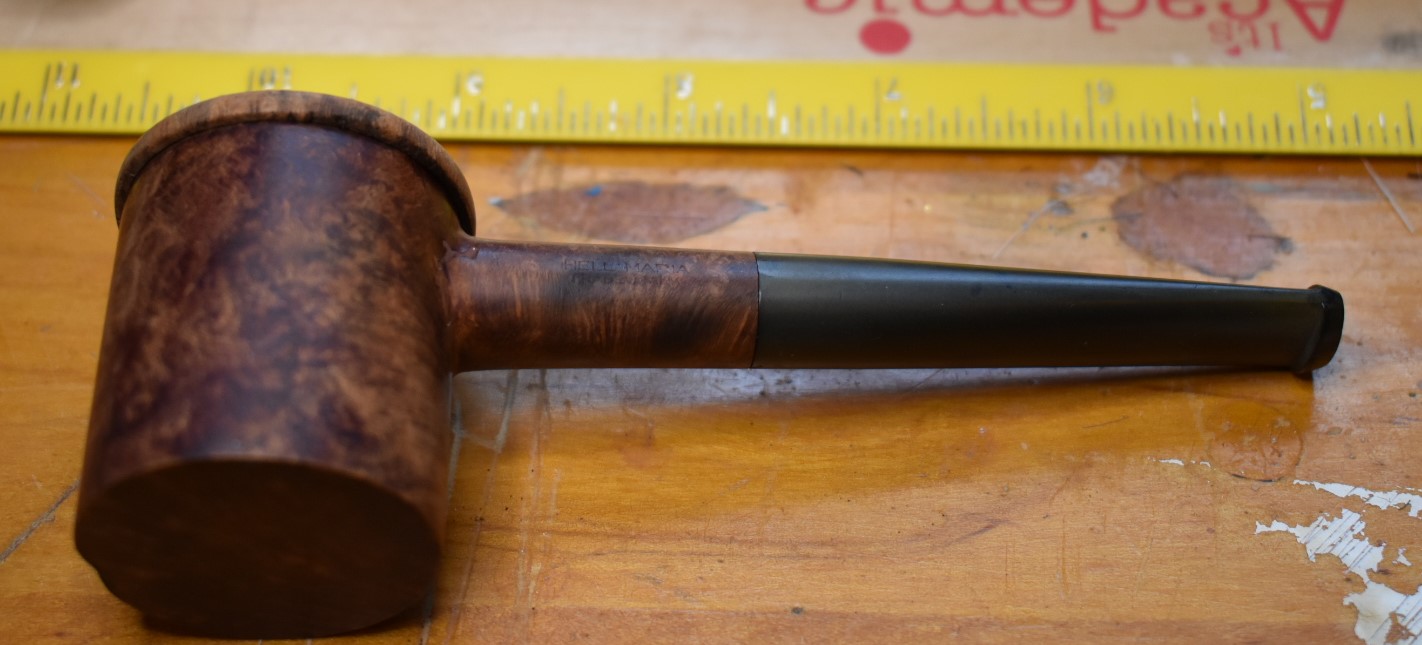
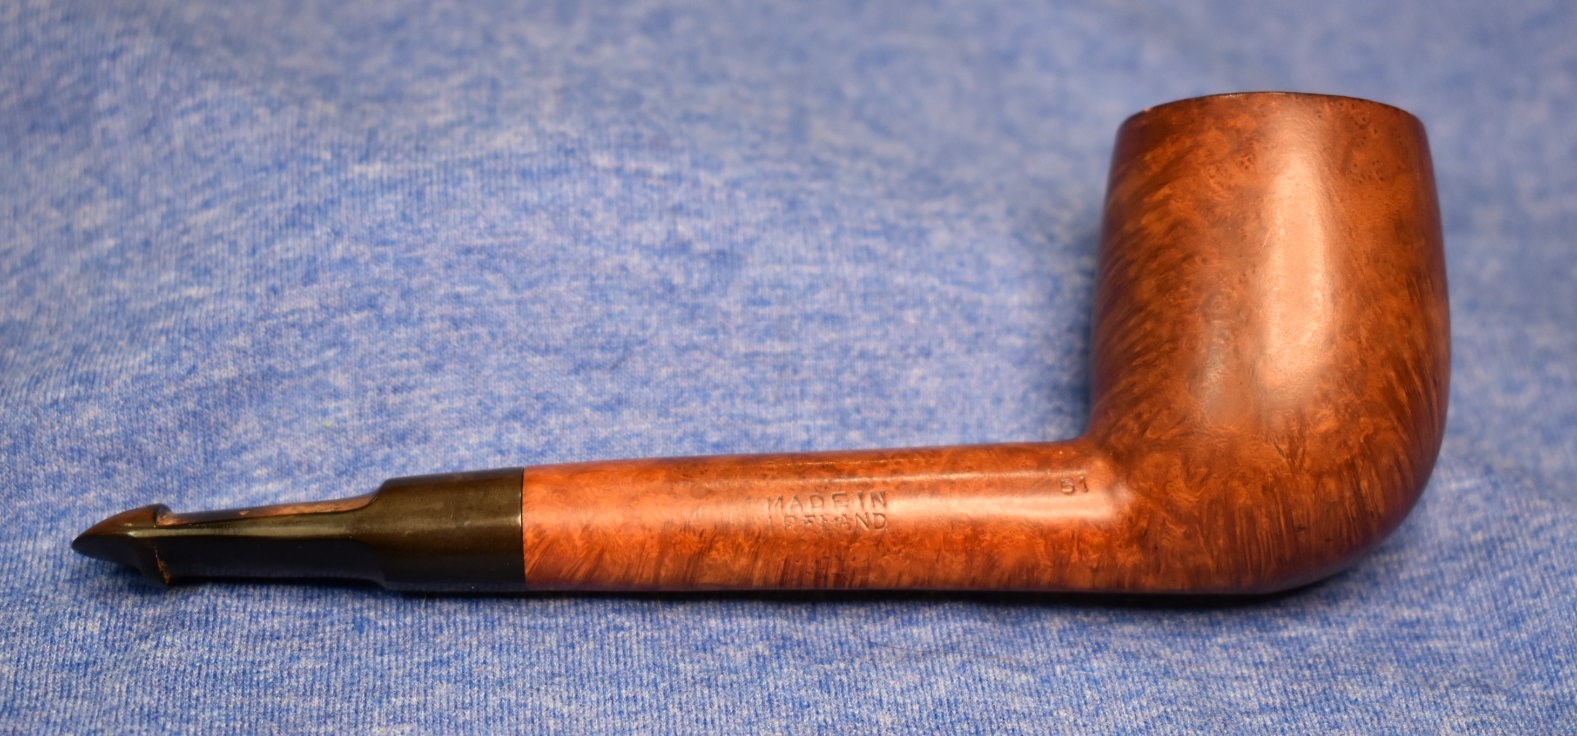
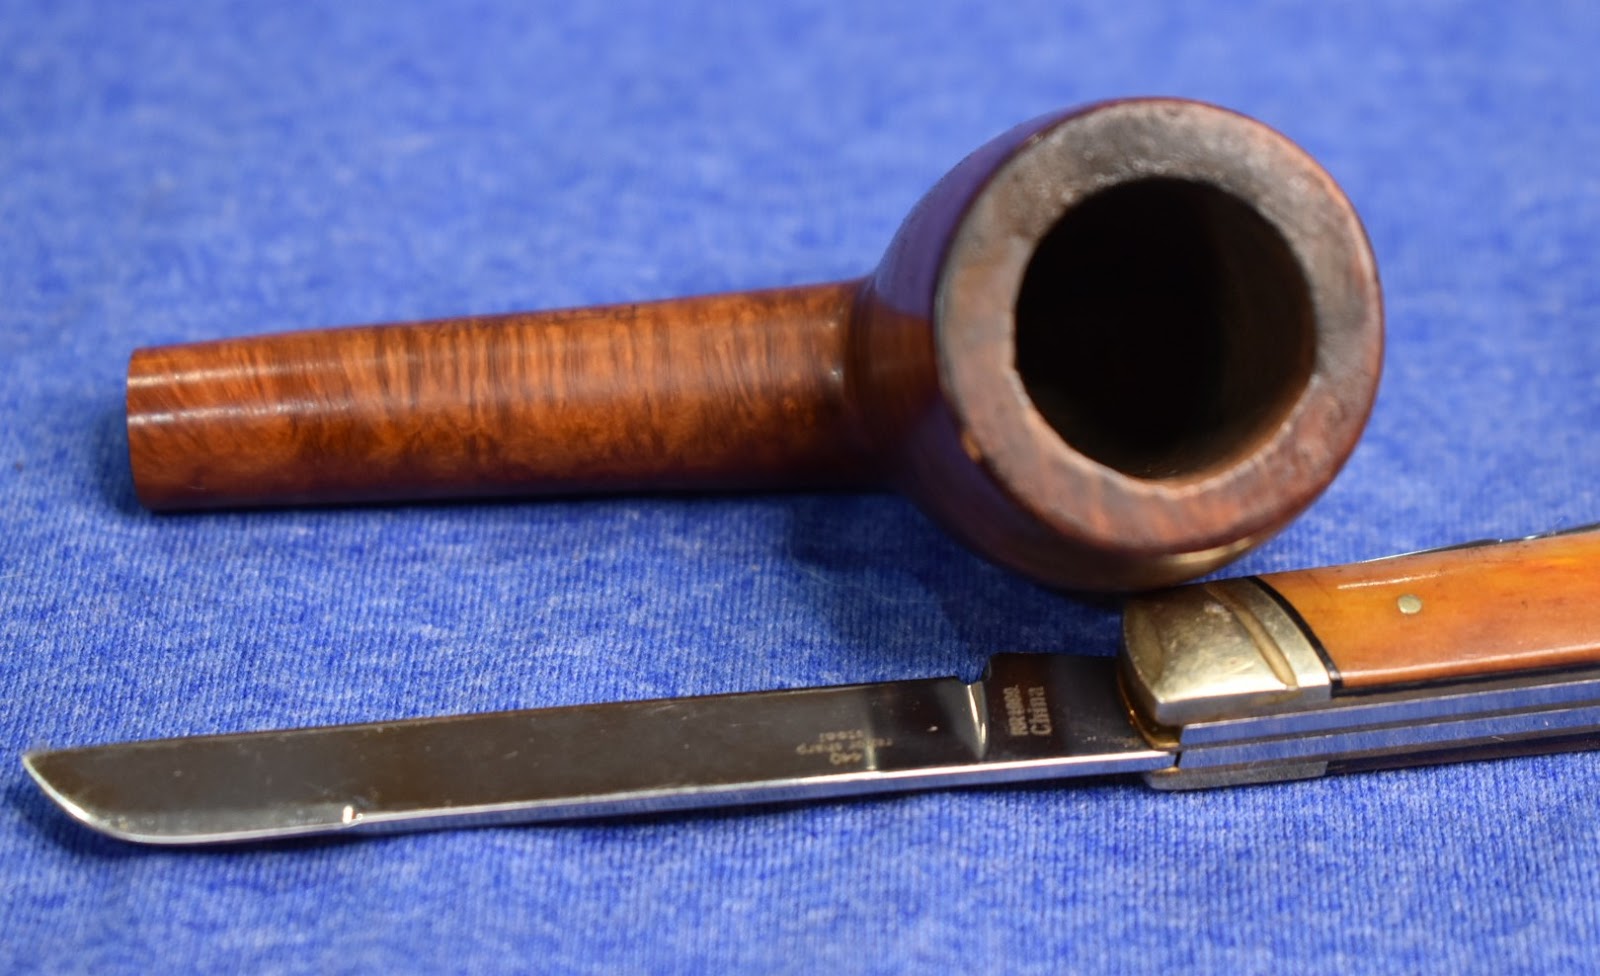
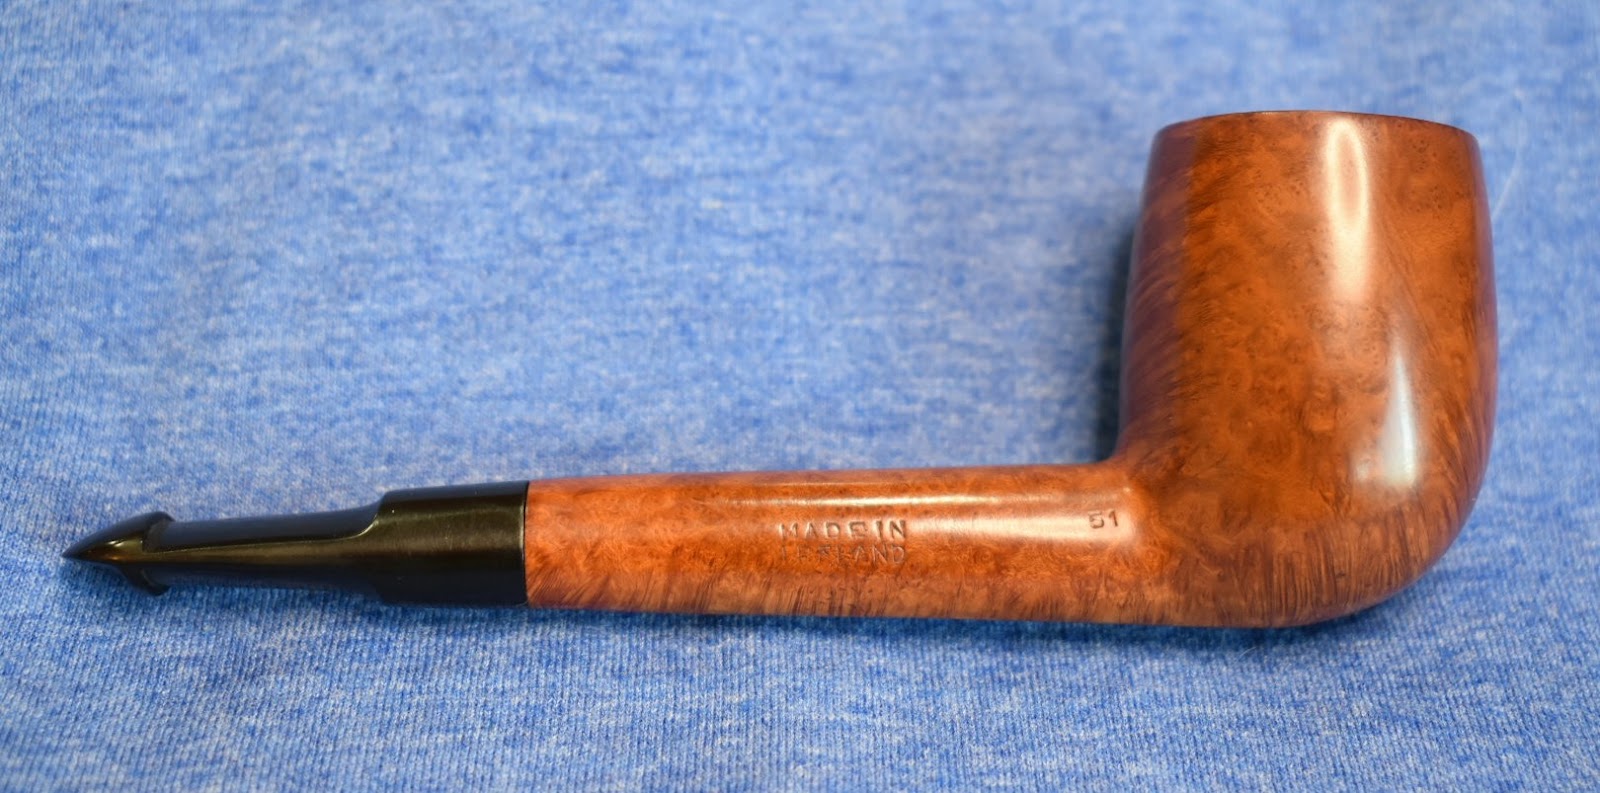
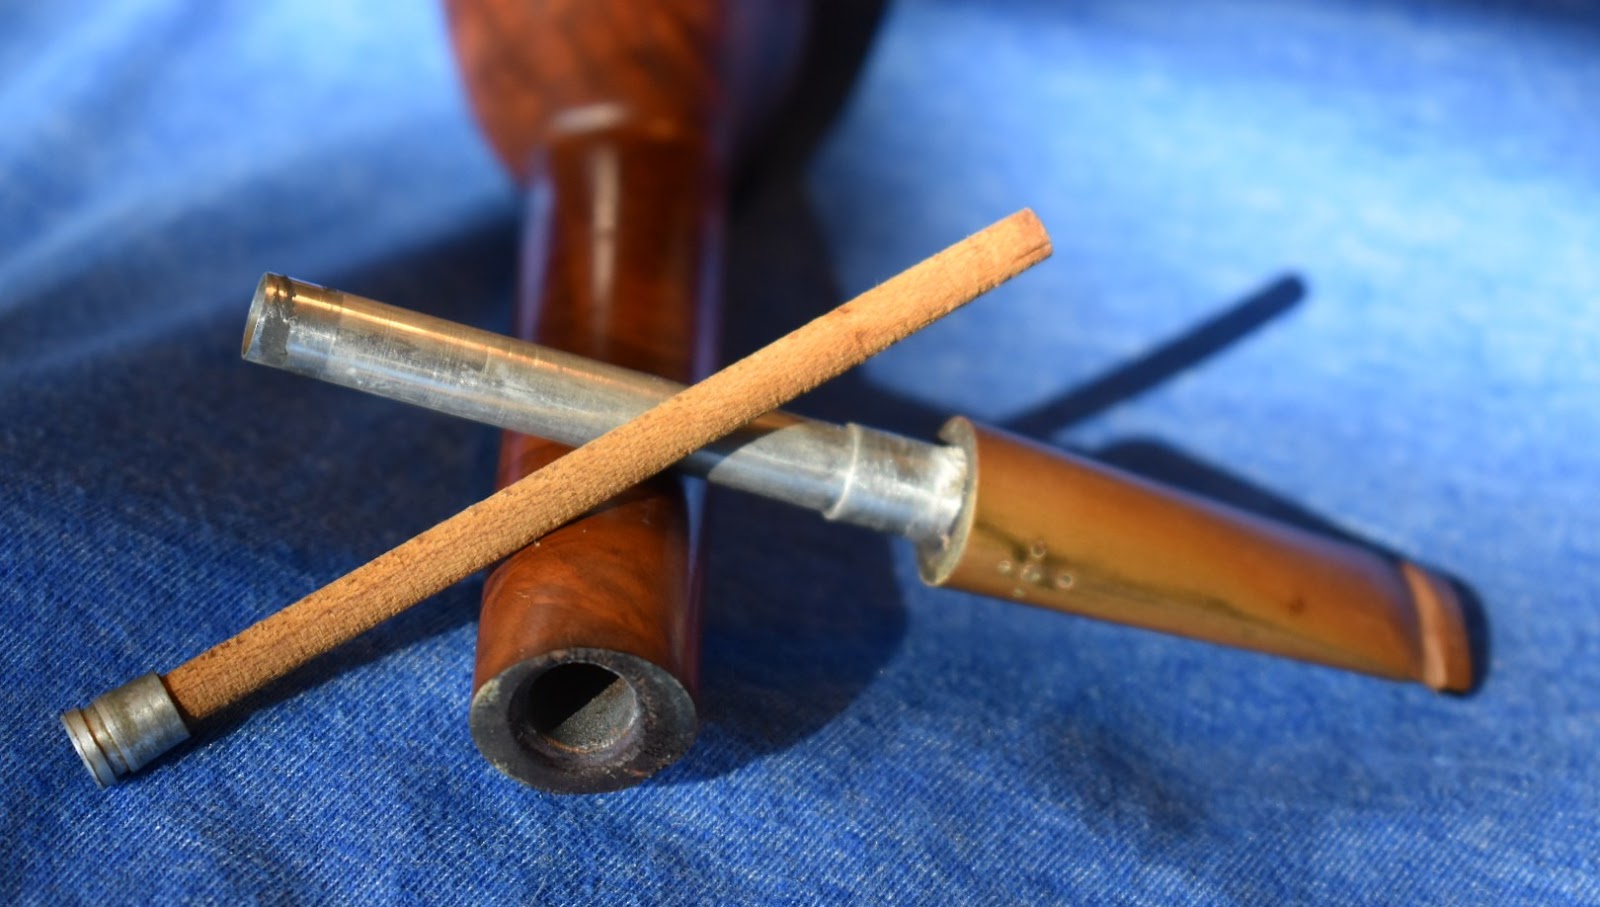
    Here was what I pulled from the box.
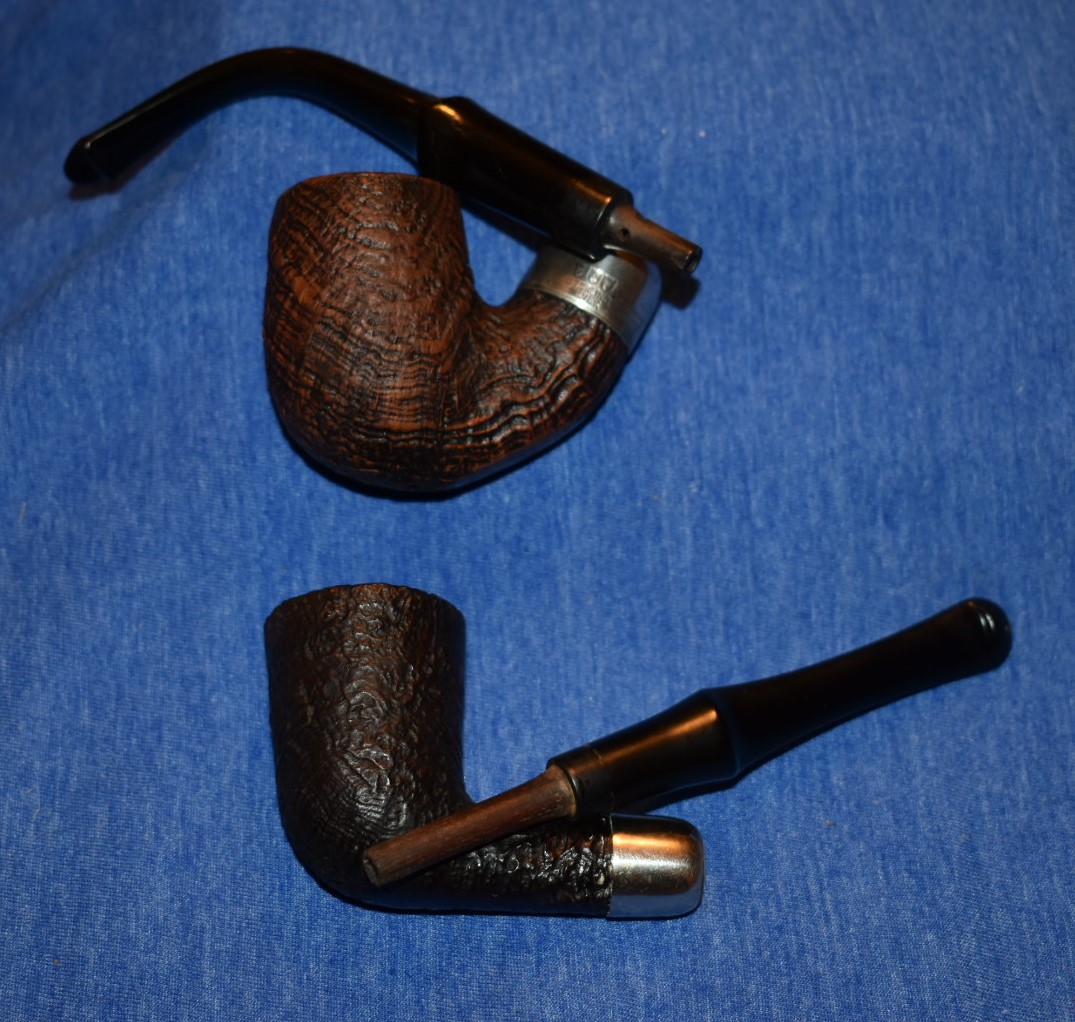
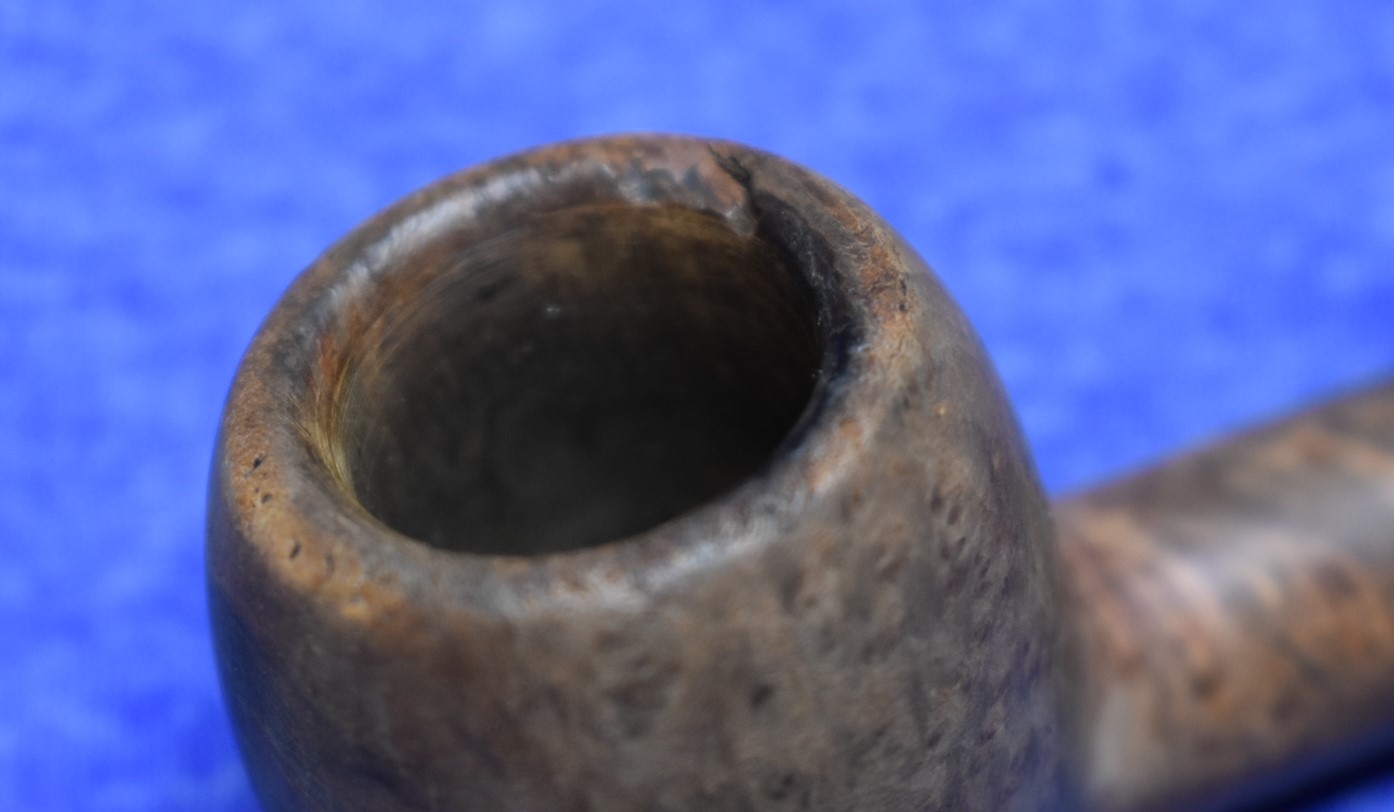
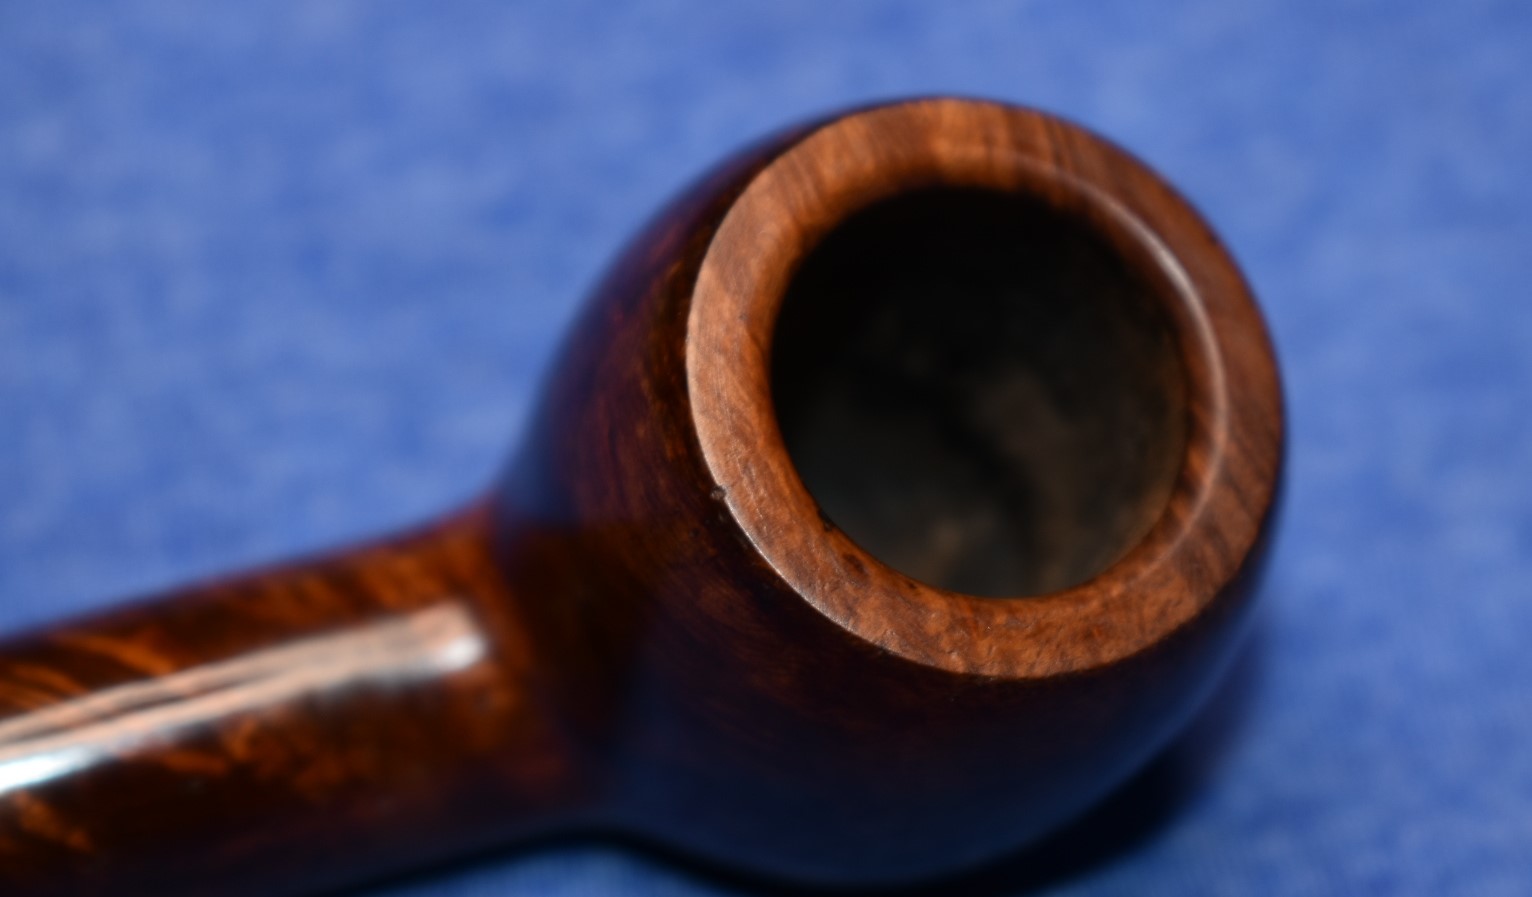
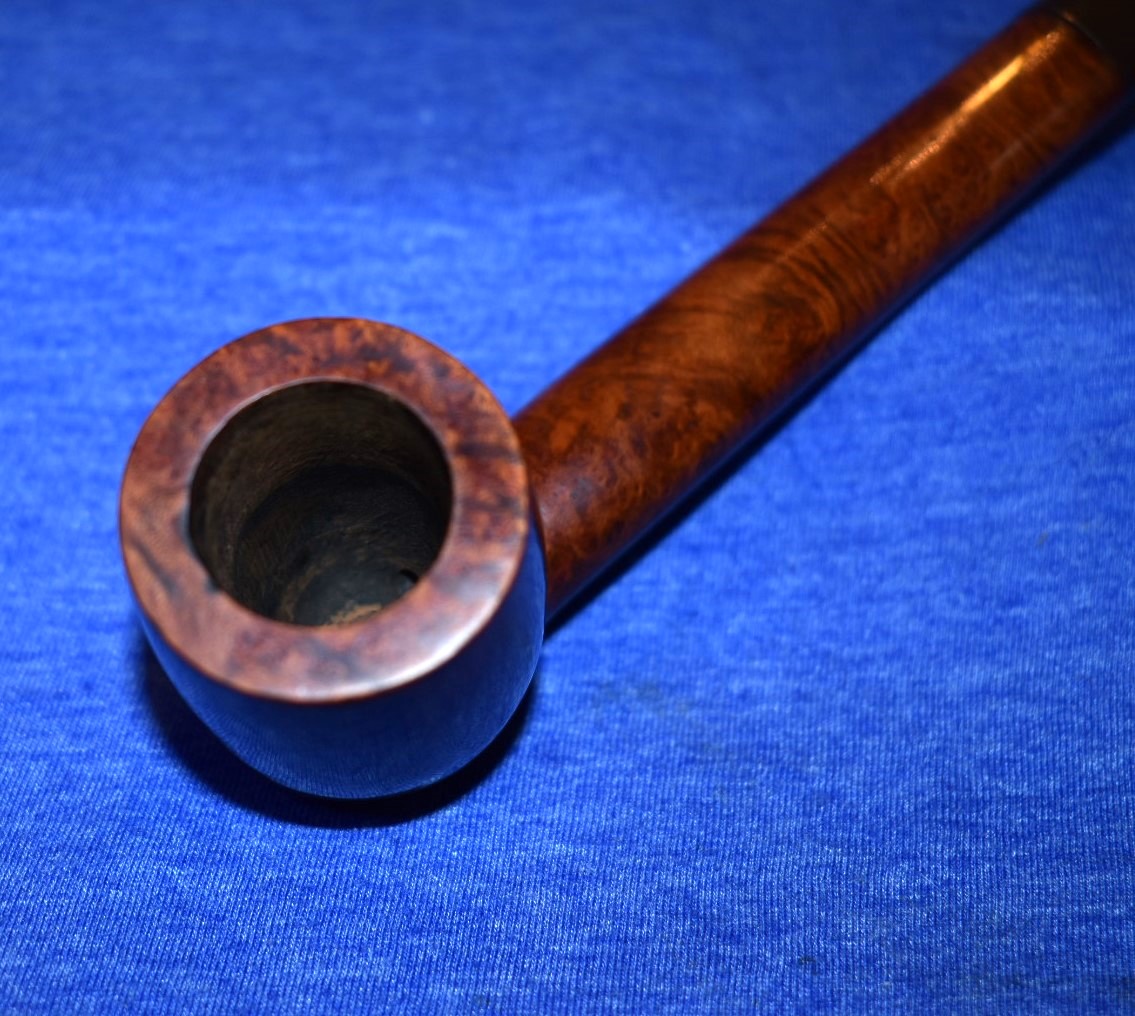
    Nice deep blast.

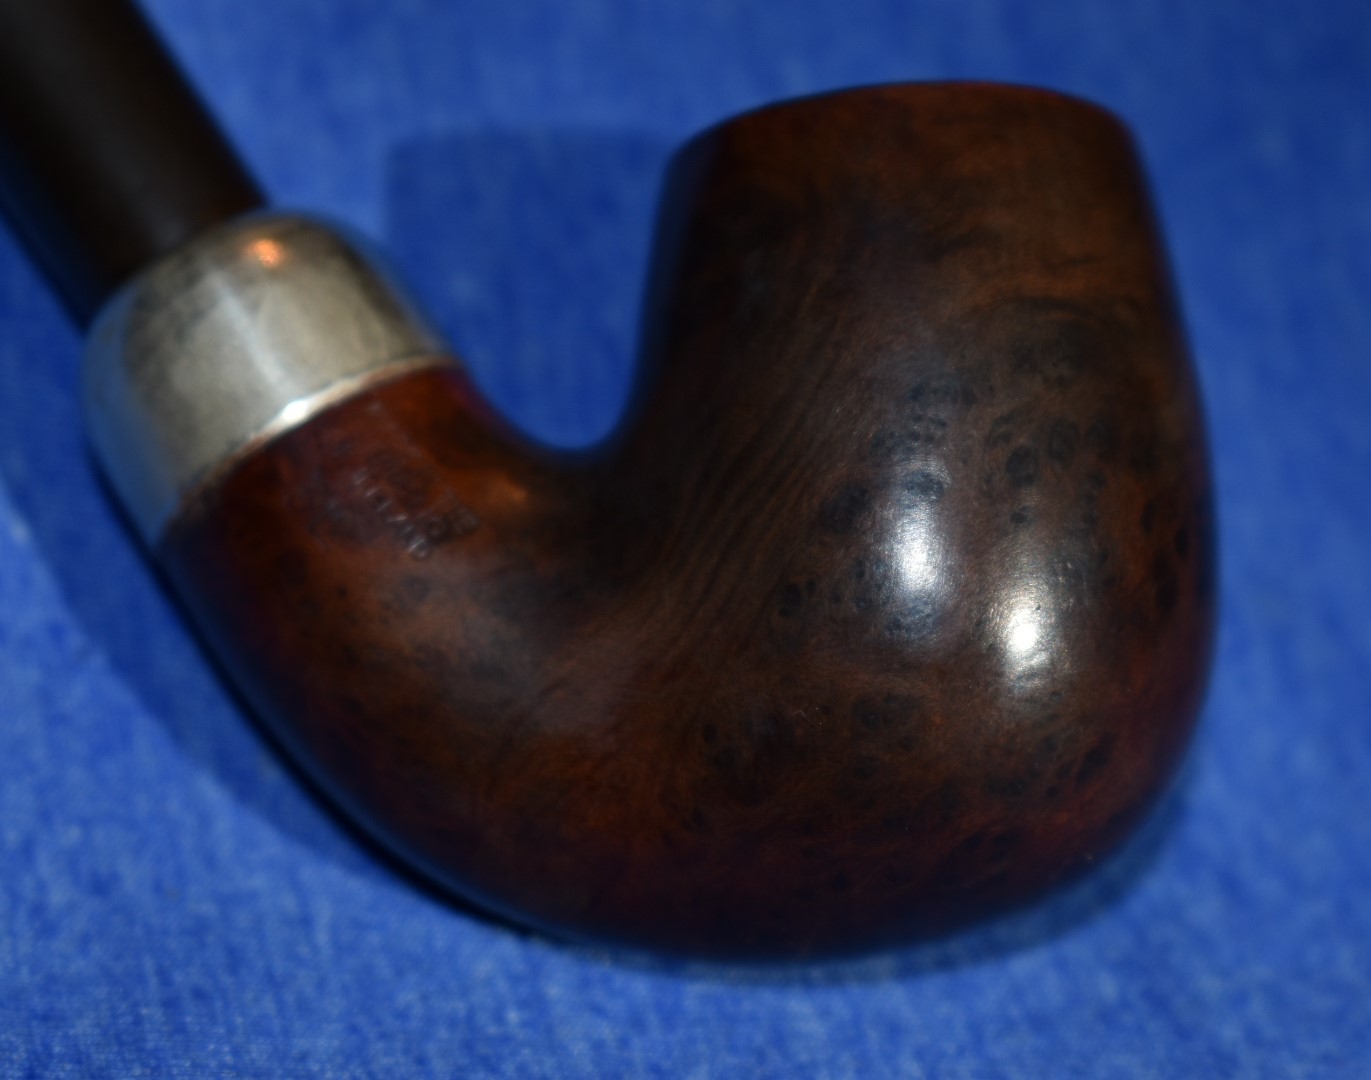
    That’s odd.  What kind of cheap briar did these poor Italians have to work with?

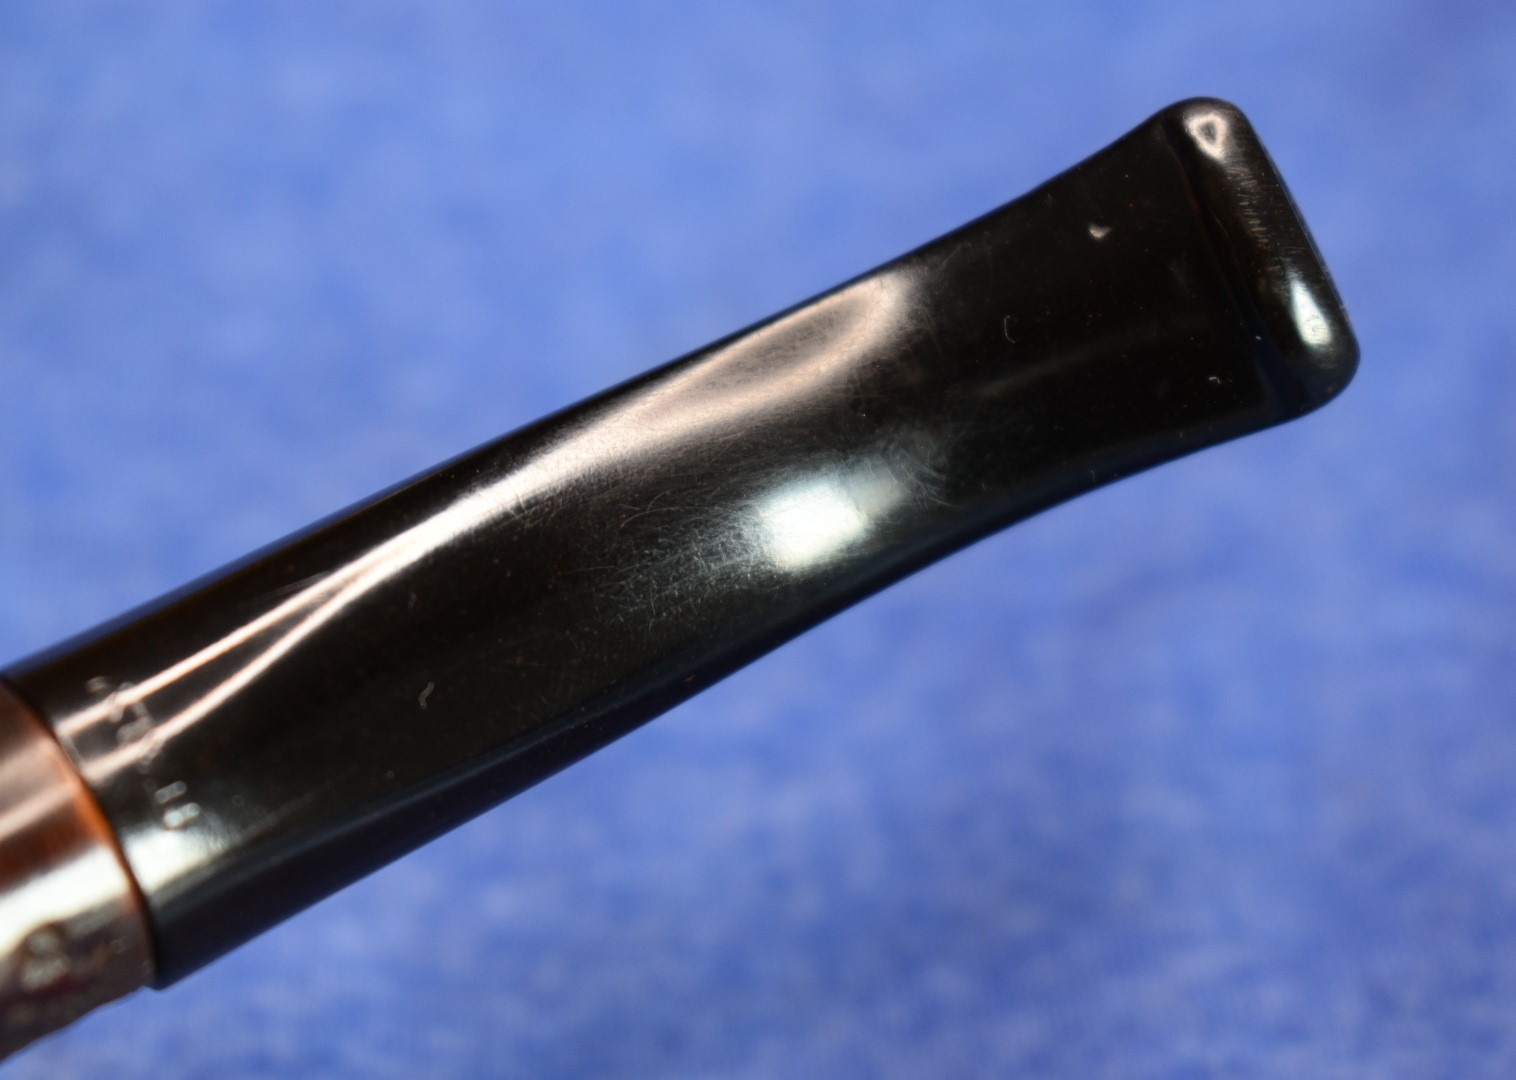
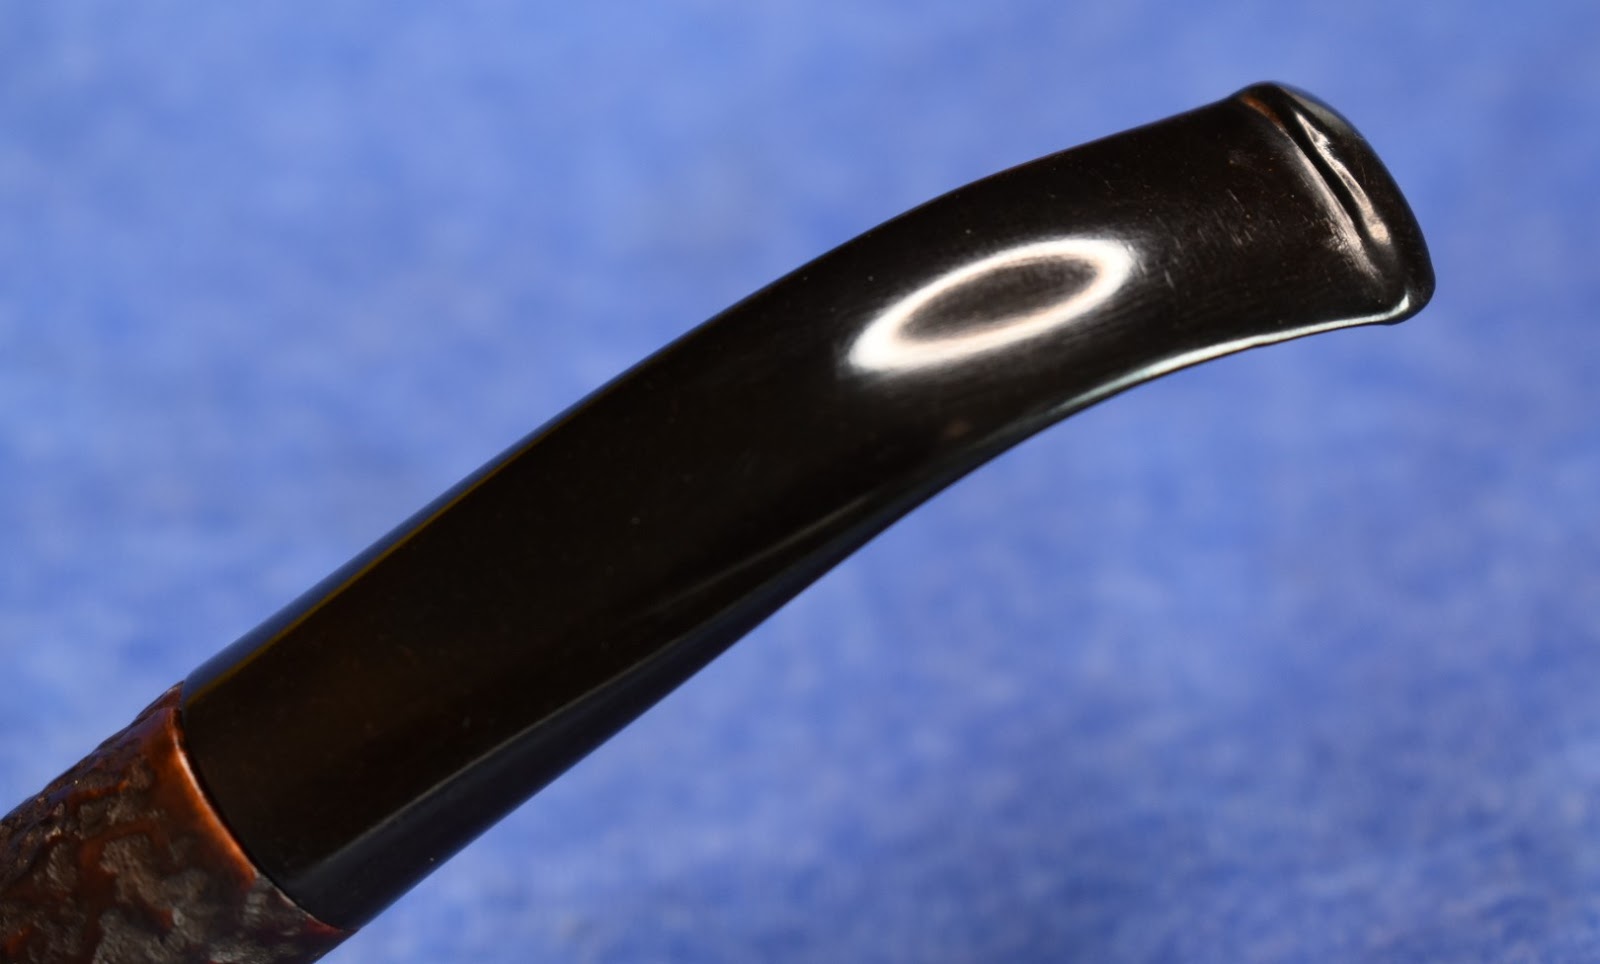
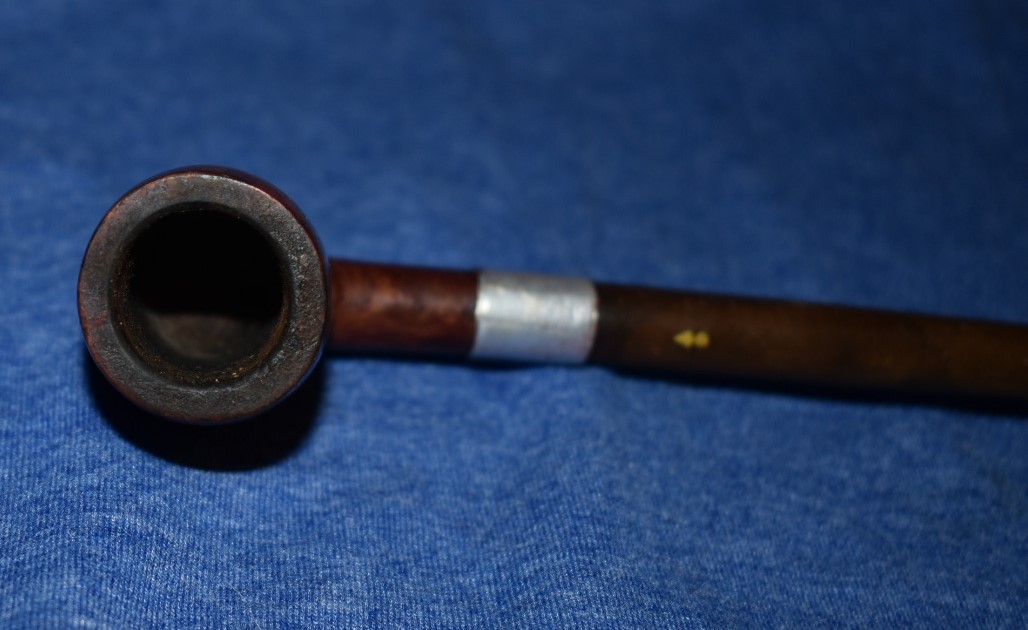
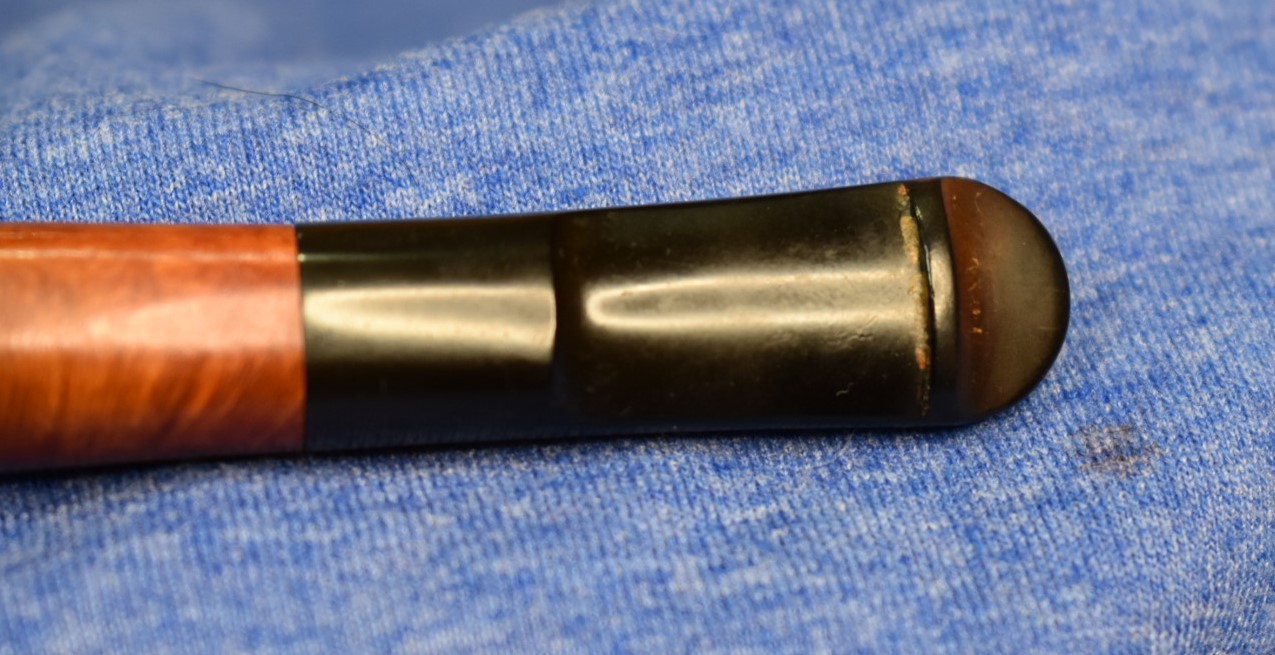
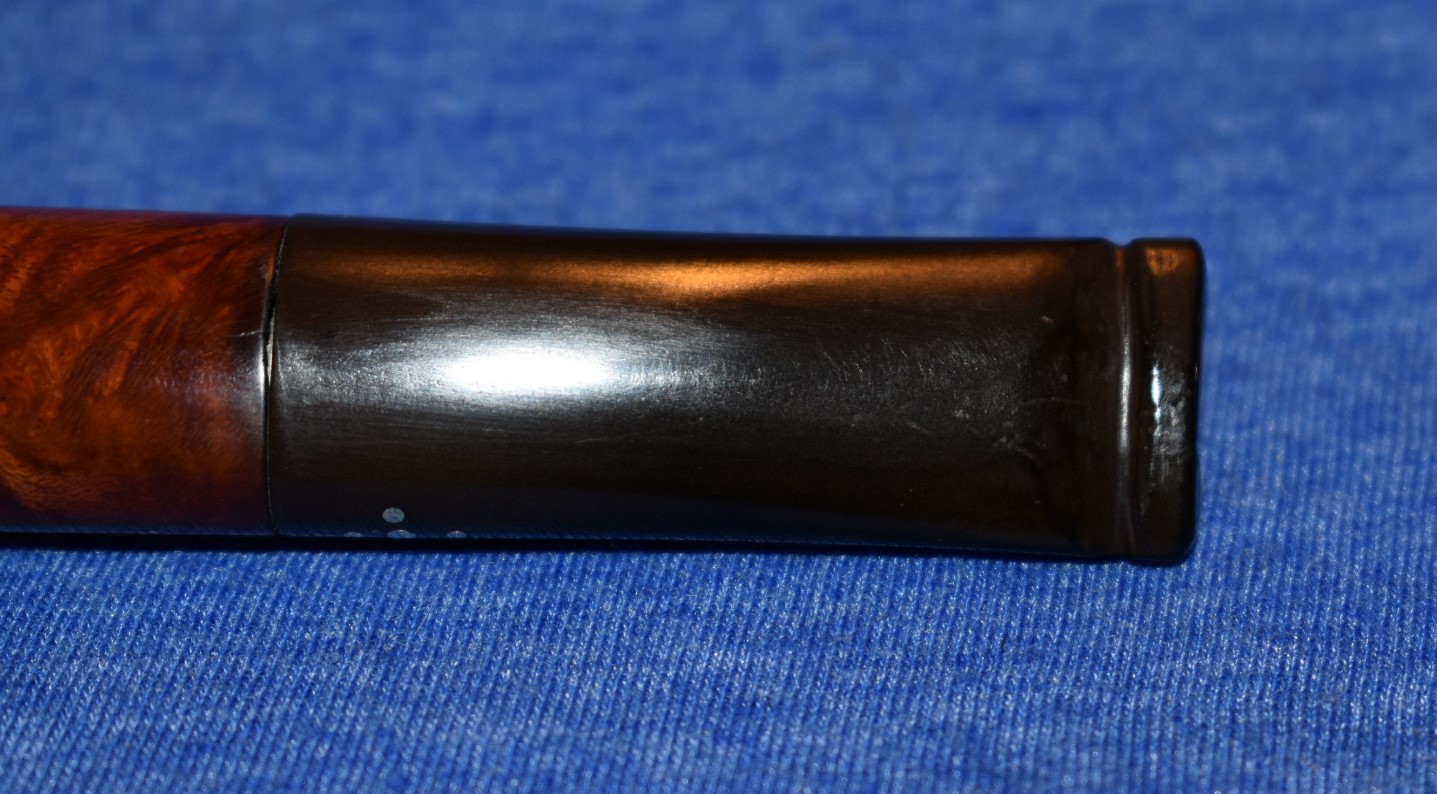
    Some oxidation on the stem and a few tooth marks.

    A little lava but no sign of charring.

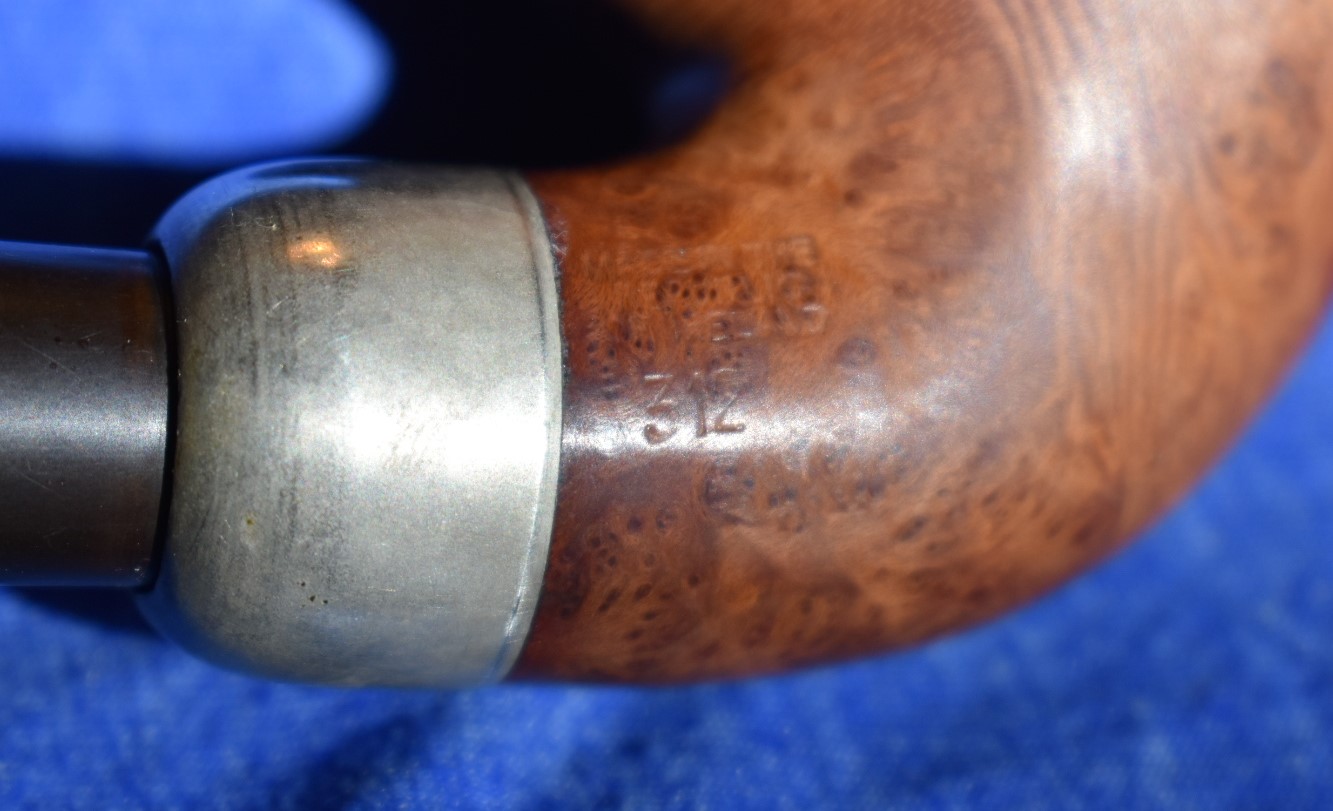
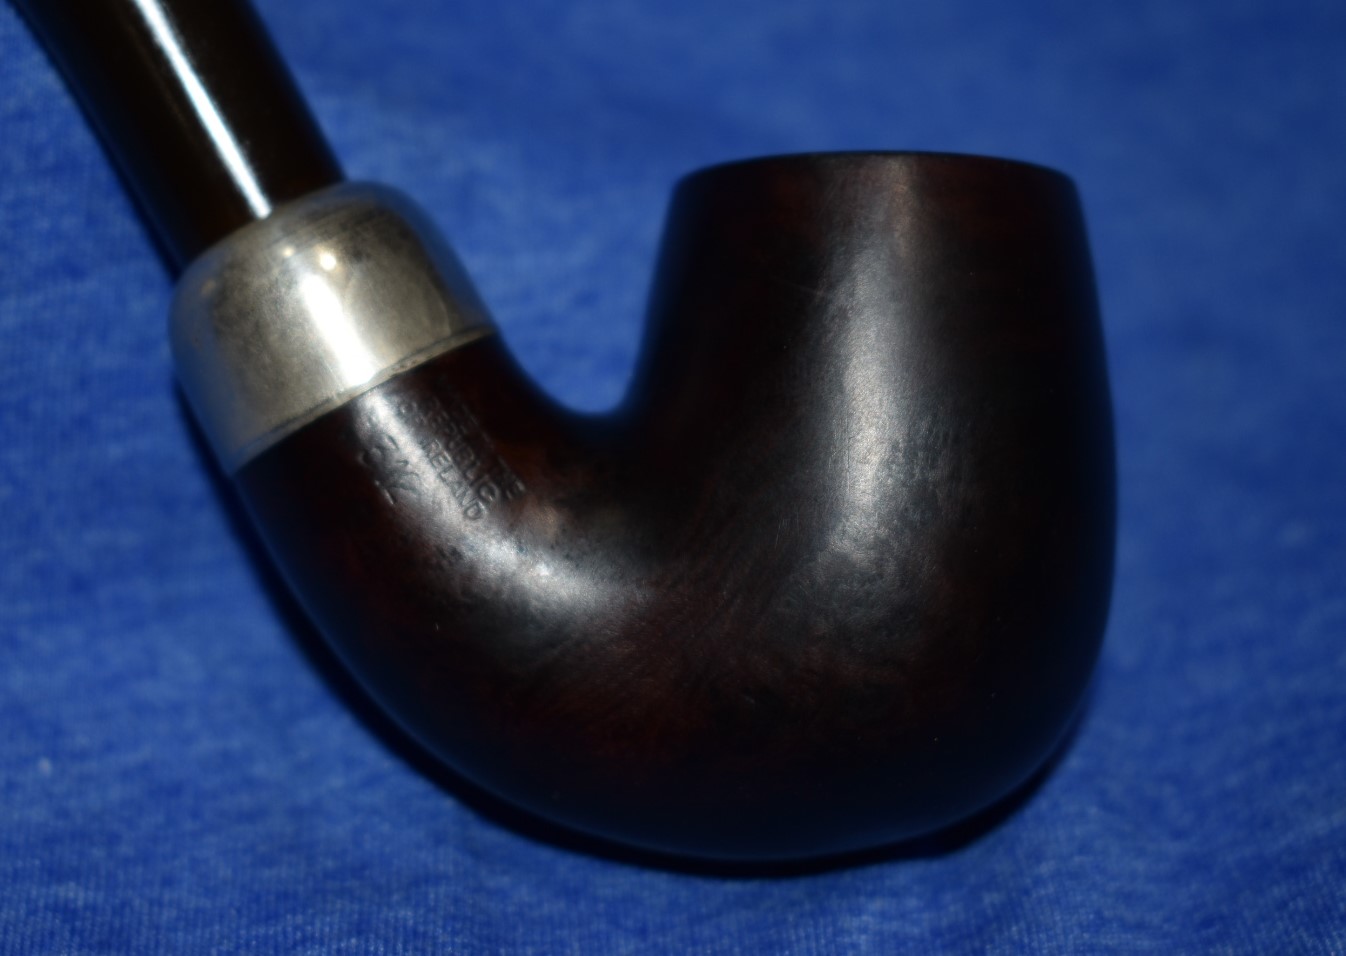
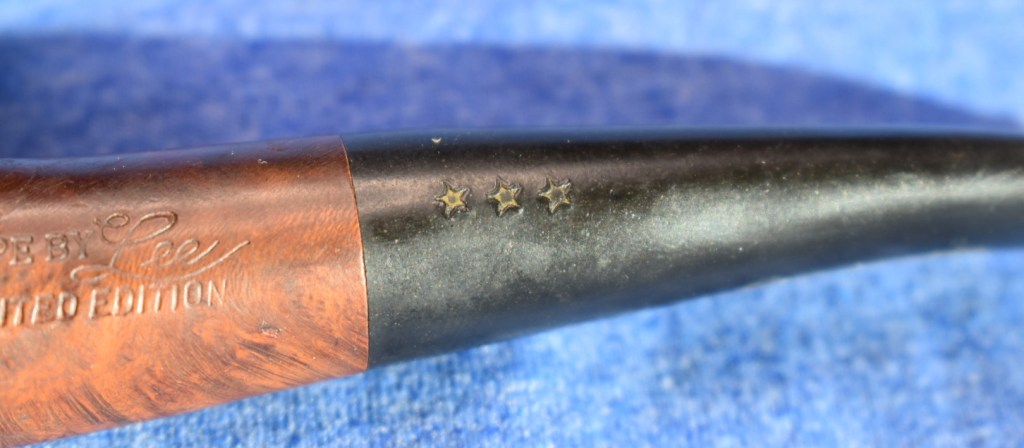
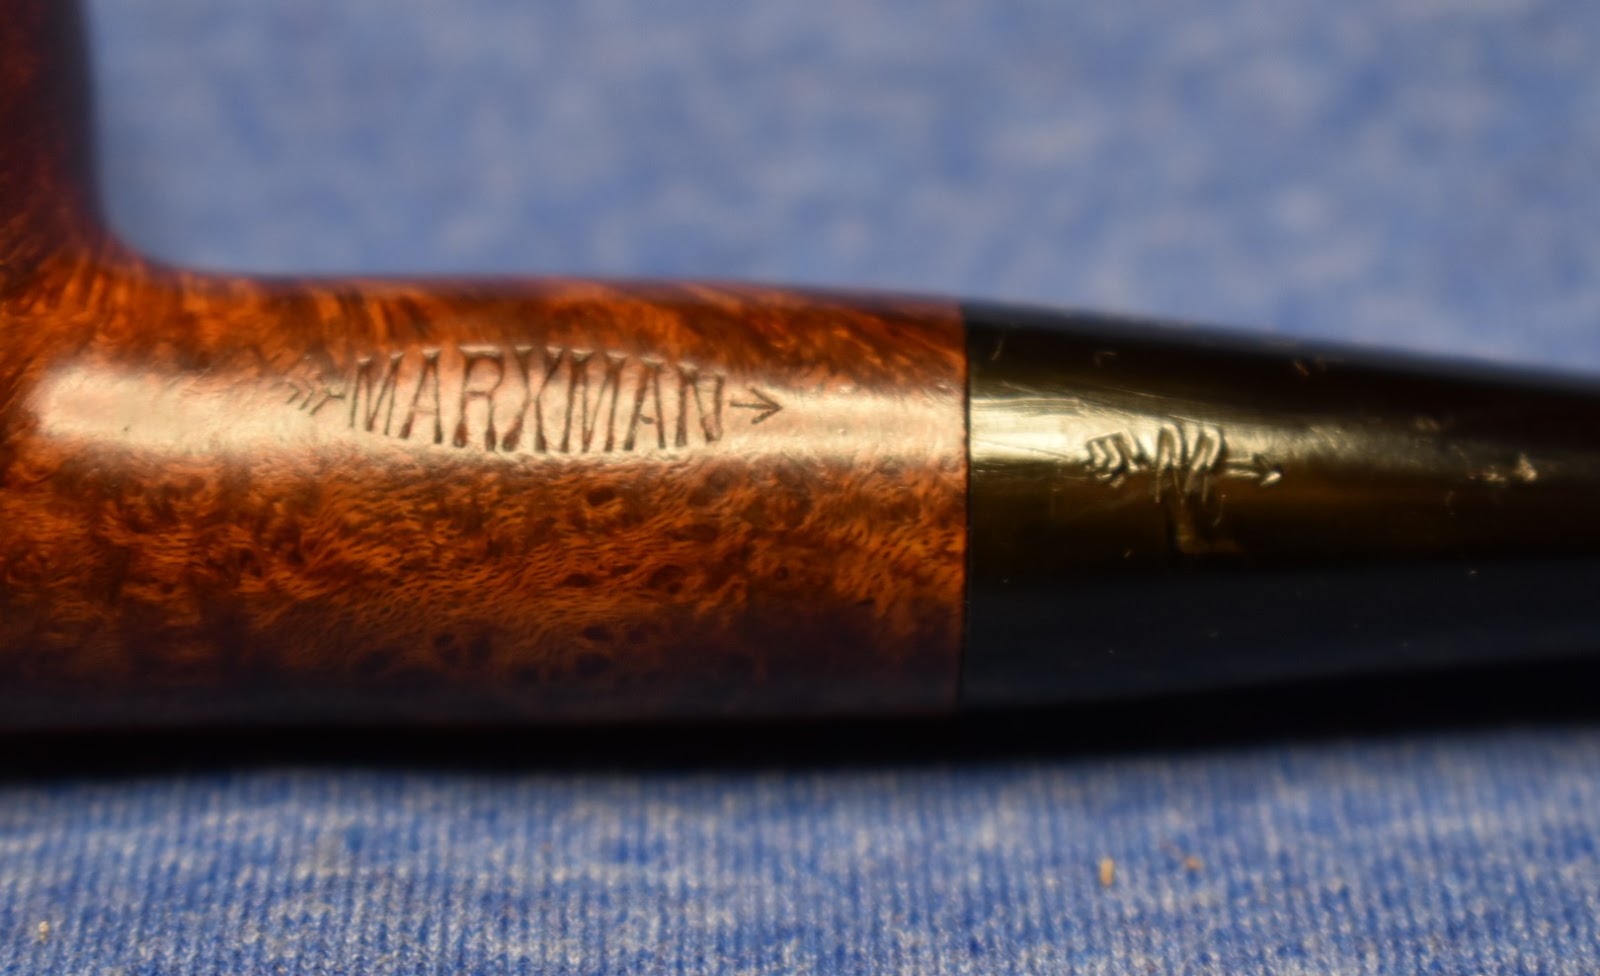
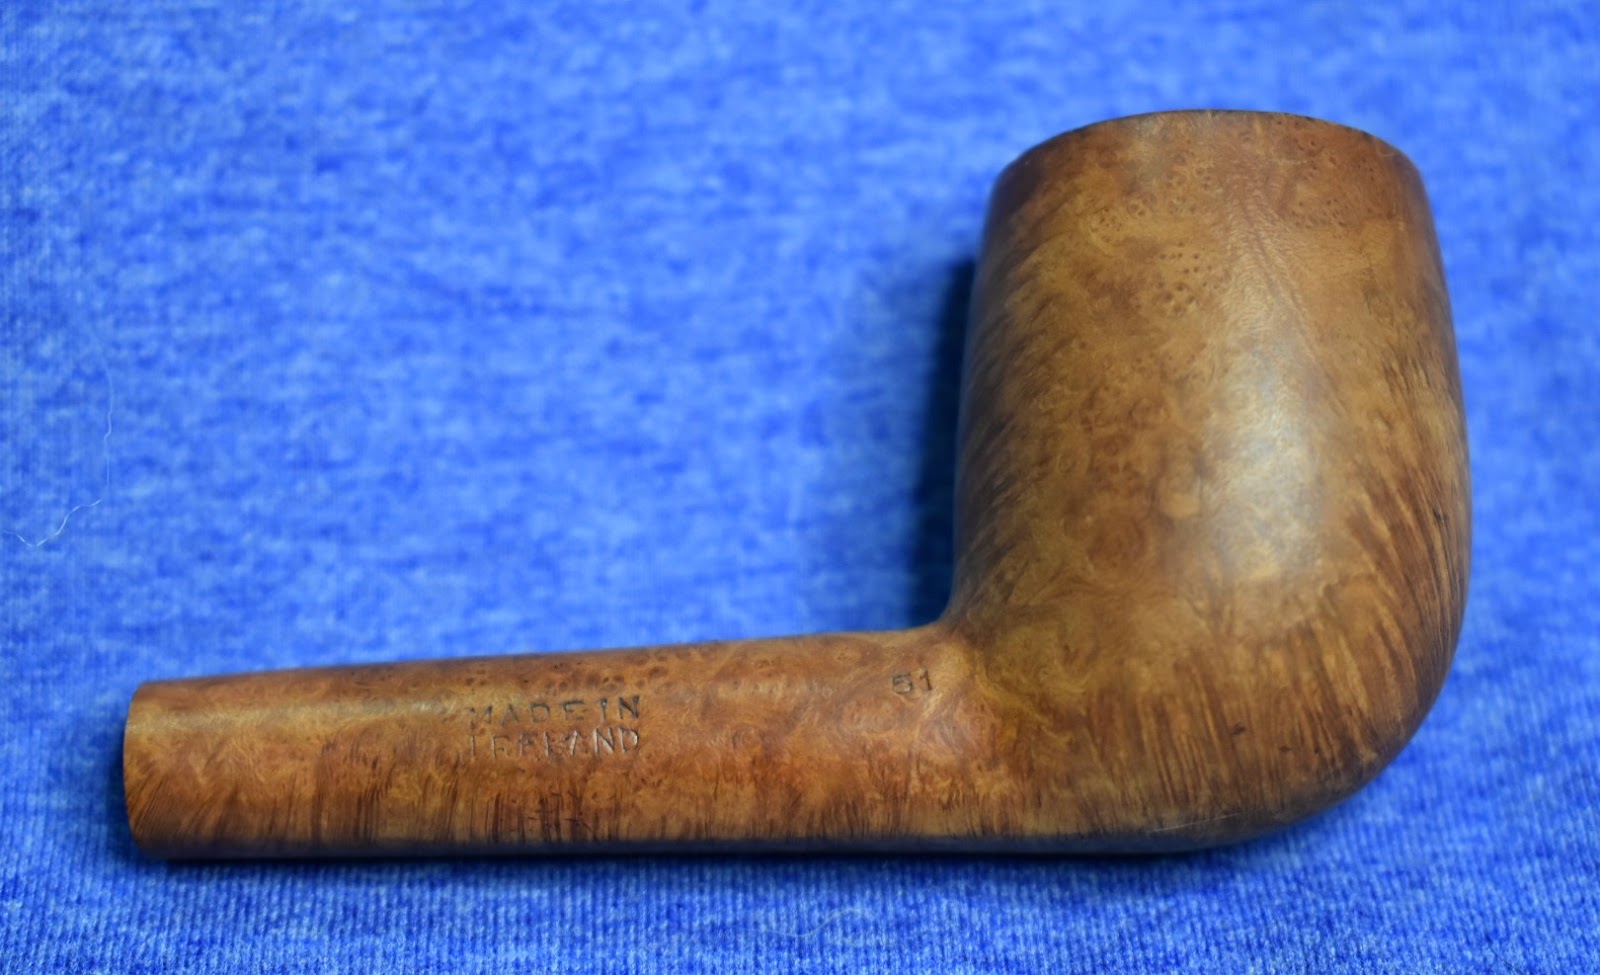
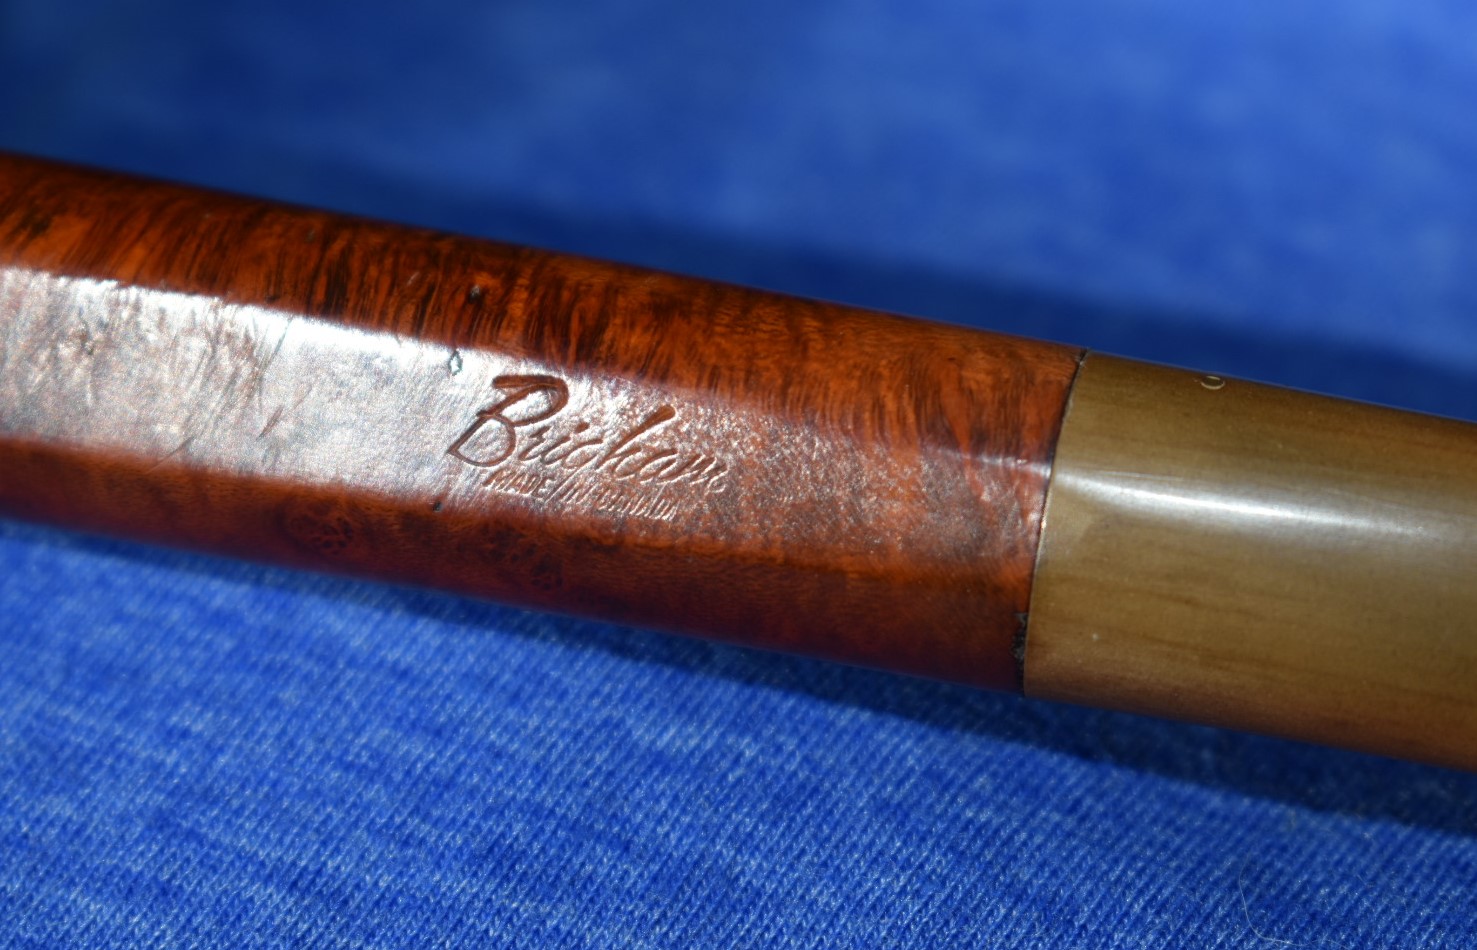
    Hey, I recognize that upside down triangle.  That is the WIlliam Demuth and Company logo.  A quick search on W-Wd — Pipes: Logos & Markings (pipephil.eu) confirmed my observation.

    (W-Wd — Pipes: Logos & Markings (pipephil.eu))

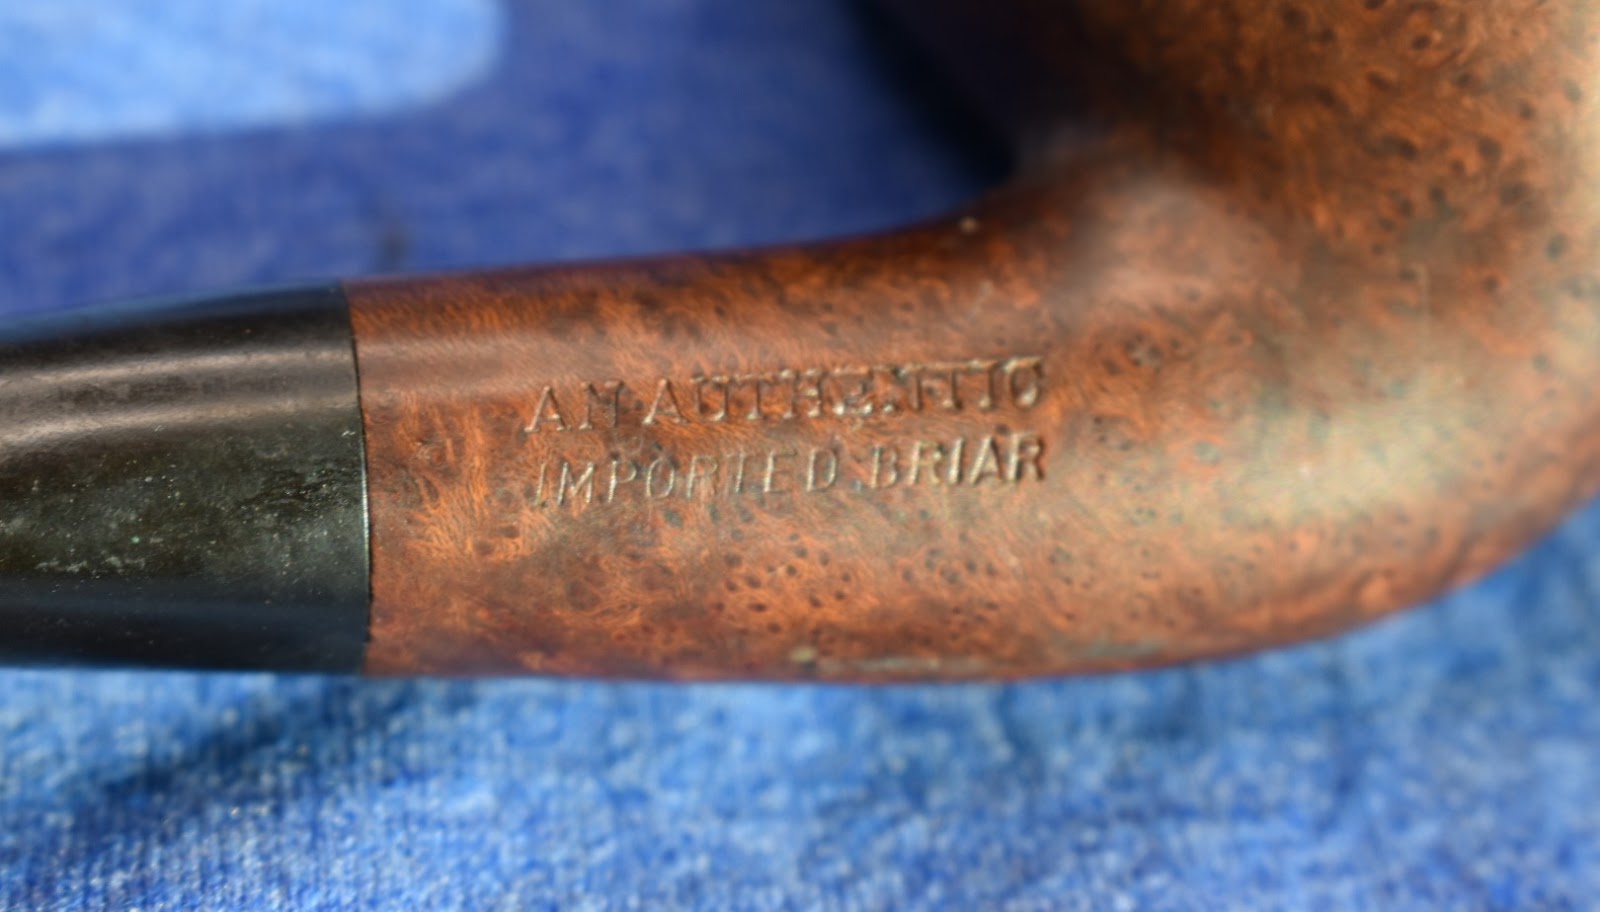
    The Waldorf brand pipes appear to have been just a stamp that WDC would stamp on low end imported pipes from Italy and France.  Here is another Waldorf stamp from a different pipe.

    (W-Wd — Pipes: Logos & Markings (pipephil.eu))

    A little bit about WDC.  William Demuth and Company was founded by William in 1862.  According to Pipedia.org:

    “(Wilhelm C. Demuth, 1835-1911), a native of Germany, entered the United States at the age of 16 as a penniless immigrant. After a series of odd jobs he found work as a clerk in the import business of a tobacco tradesman in New York City. In 1862 William established his own company. The William Demuth Company specialized in pipes, smoker’s requisites, cigar-store figures, canes and other carved objects.” (https://pipedia.org/wiki/William_Demuth_Company)

    “In time, several trade journals called the company “the largest tobacco pipe manufacturers in the world,” and Demuth was identified as “the richest pipe merchant on the East Coast.”   (https://pipedia.org/wiki/A_Demuth%E2%80%94Dunhill_Connection%3F)

    “The company went through a period of changeovers. David A. Schulte (Schulte Cigar Stores) purchased the company in 1927. As of 1929, Demuth and S.M. [Samuel Morris] Frank were two of the five companies that controlled the domestic briar pipe industry. In 1937, Frank became Demuth’s president by purchasing the factory in Queens—to combine Frank (Kaywoodie pipes) and Demuth pipe production—and Demuth became a subsidiary company. The Company officially disappeared in 1972, but Frank continued to produce Wellington pipes from the Demuth factory until 1976; in the 1980s, the Wellington was revived for a brief time.”  (https://pipedia.org/wiki/A_Demuth%E2%80%94Dunhill_Connection%3F)

    As for the little darling that this blog is about, I can safely say that she has been sandblasted.  When did pipe makers start blasting?  There is some contention around that.  It can be be stated without much argument that Dunhill was the first to utilize and market the technique  Again Pipedia.org states the following:

    “Dunhill did not fully develop the sandblasting techniques until the mid-1920s.”  (https://pipedia.org/wiki/The_History_of_Dunhill%27s_Shell#:~:text=The%20blasting%20technique%20was%20invented,apply%20the%20concept%20in%20pipes.)

    So, that brings in the dates 1920s -1972.  Narrowing it down further would be conjecture.  I can imagine that it would take several years for the industrial equipment and the capital to acquire it would reach smaller pipe makers throughout the pipe production area of southern France and Italy.  Then you have the war years to contend with.  With those factors in mind I think it would be safe to assume that this little Waldorf was likely made between 1950 and 1972.

    Whatever became of the pipe manufacturing factory that WDC and S.M. Frank had built?  Well there are still remnants of their past glory.

    “In early 1937, the City of New York notified S.M. Frank & Co. of their intent to take by eminent domain, part of the land on which the companies pipe factory was located. This was being done to widen two of the adjacent streets. As a result of this, Frank entered into negotiations to purchase the Wm. Demuth Co.’s pipe factory in the Richmond Hill section of Queens. It was agreed upon that Demuth would become a subsidiary of S.M. Frank and all pipe production of the two companies would be moved to DeMuth factory. New Corporate offices were located at 133 Fifth Avenue, NYC.

    Demuth pipes continued to be made at the Richmond Hill plant till December 31. 1972. Then the Wm. Demuth Company met its official end as a subsidiary company by liquidation.”  (https://pipedia.org/wiki/William_Demuth_Company)

    “Initially located downtown on Pearl St. and on Broadway near Duane St., S. M. Frank & Co. moved uptown to 17th St. in 1904, then to this building with entrances on both 21st St. and Broadway in 1912, where they remained for about 10 years. The sign, then, dates from this period, possibly as early as 1912 and no later than 1922.” (https://www.14to42.net/21street.html)

    “The factory building in Queens became apartments, some of which have a magnificent view of Forest Park. The complex was converted into apartments in 1987, and is called the Park Lane South Condominiums.”

    Queenswalk: William Demuth/S.M. Frank & Co. Factory in Richmond Hill (https://www.brownstoner.com/history/queenswalk-william-demuths-m-frank-co-factory-in-richmond-hill/)

    Imagine the owners of one of those condominiums surprise when asked:.  “Do realize that you live in the same place where most of the tobacco pipes made in the 1920s-30s were produced?”  I’m sure their reaction would be a “so?”  I’d like to think some people would say, “cool”.

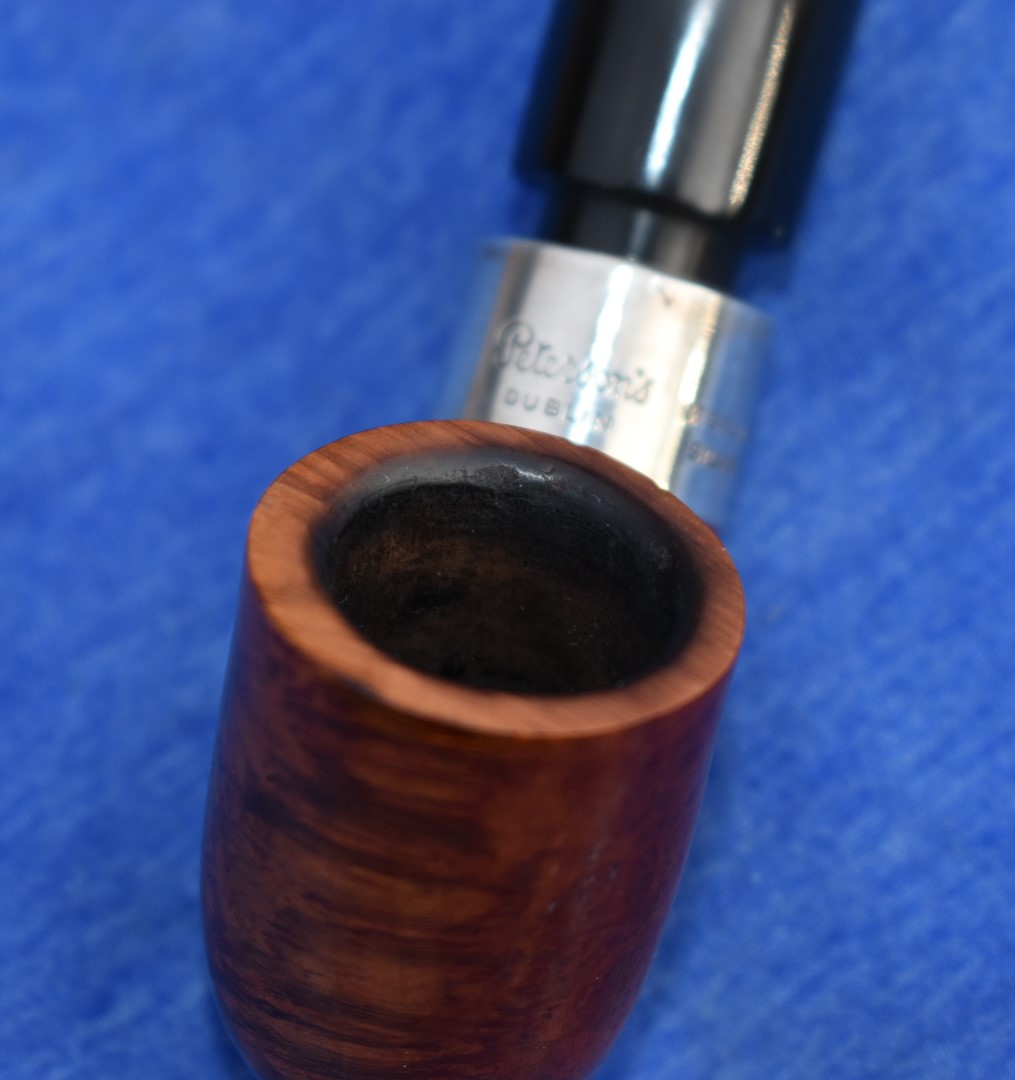
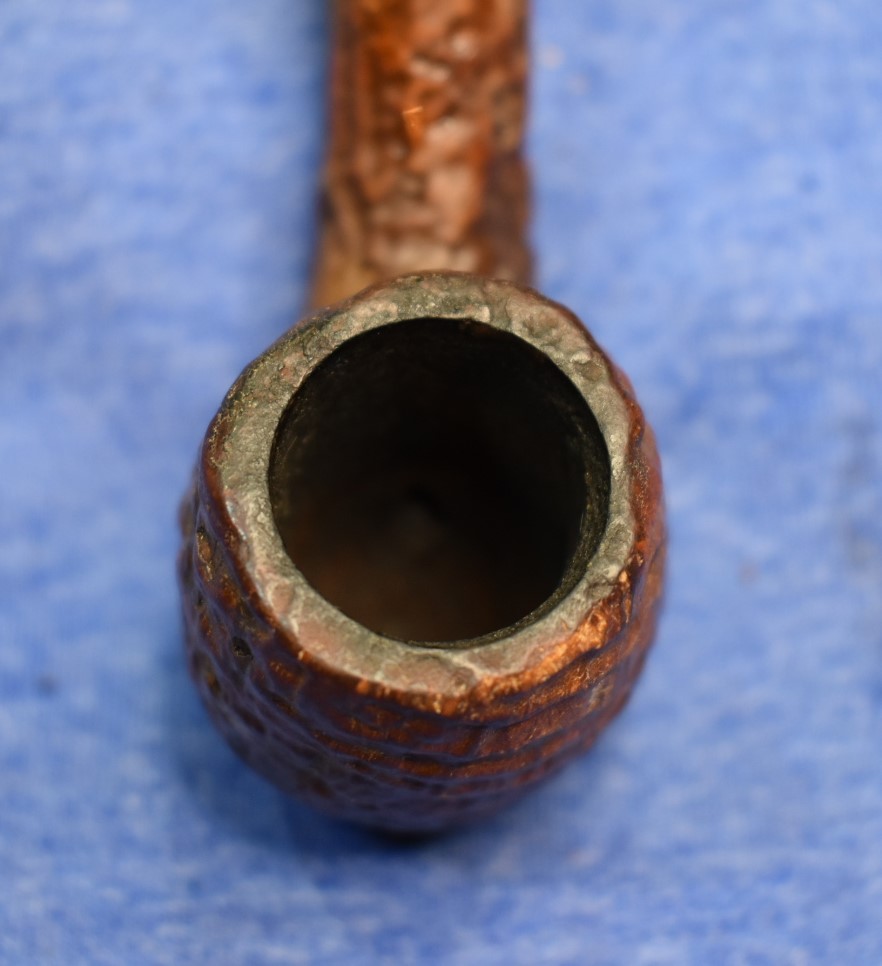
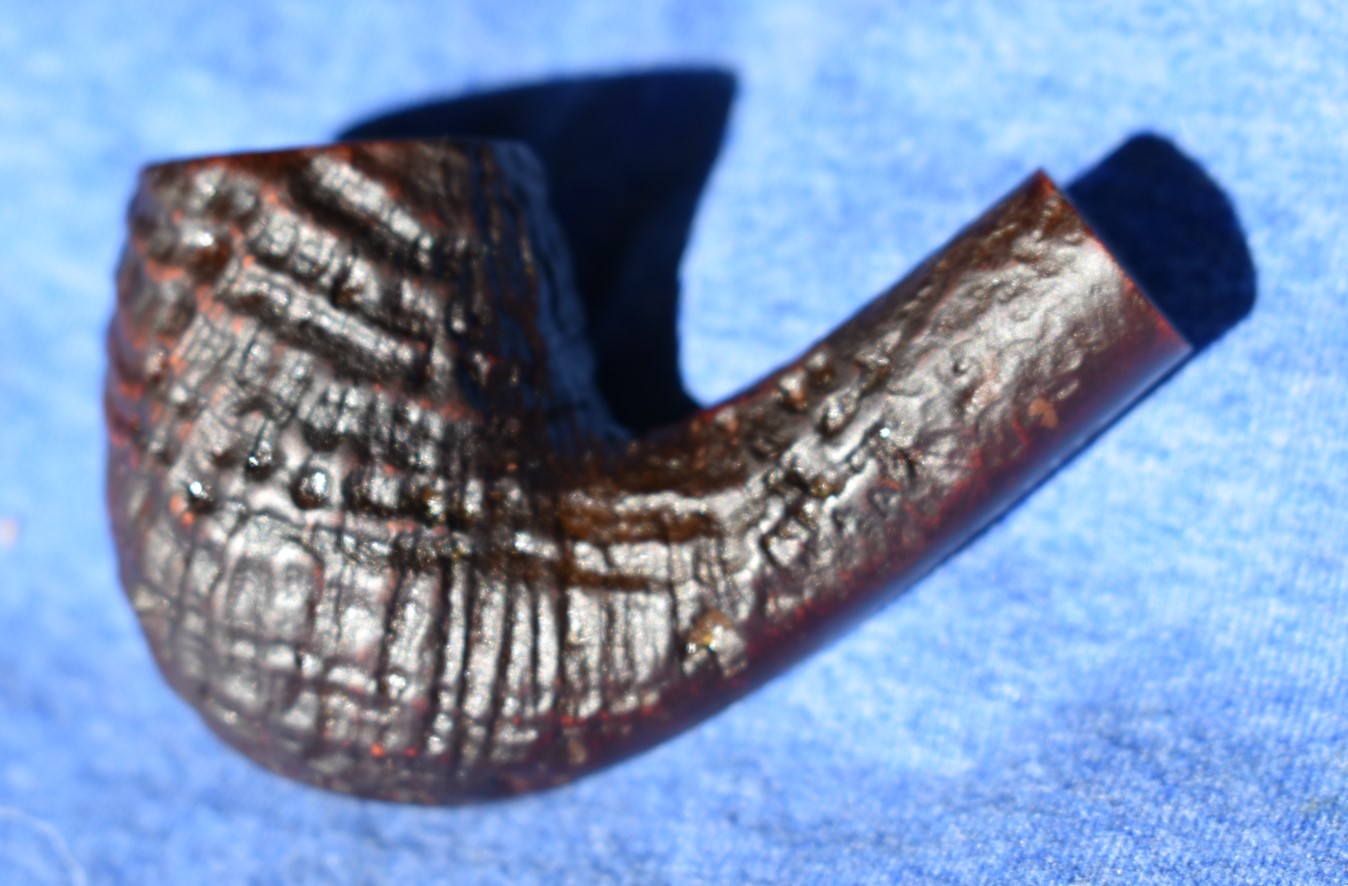
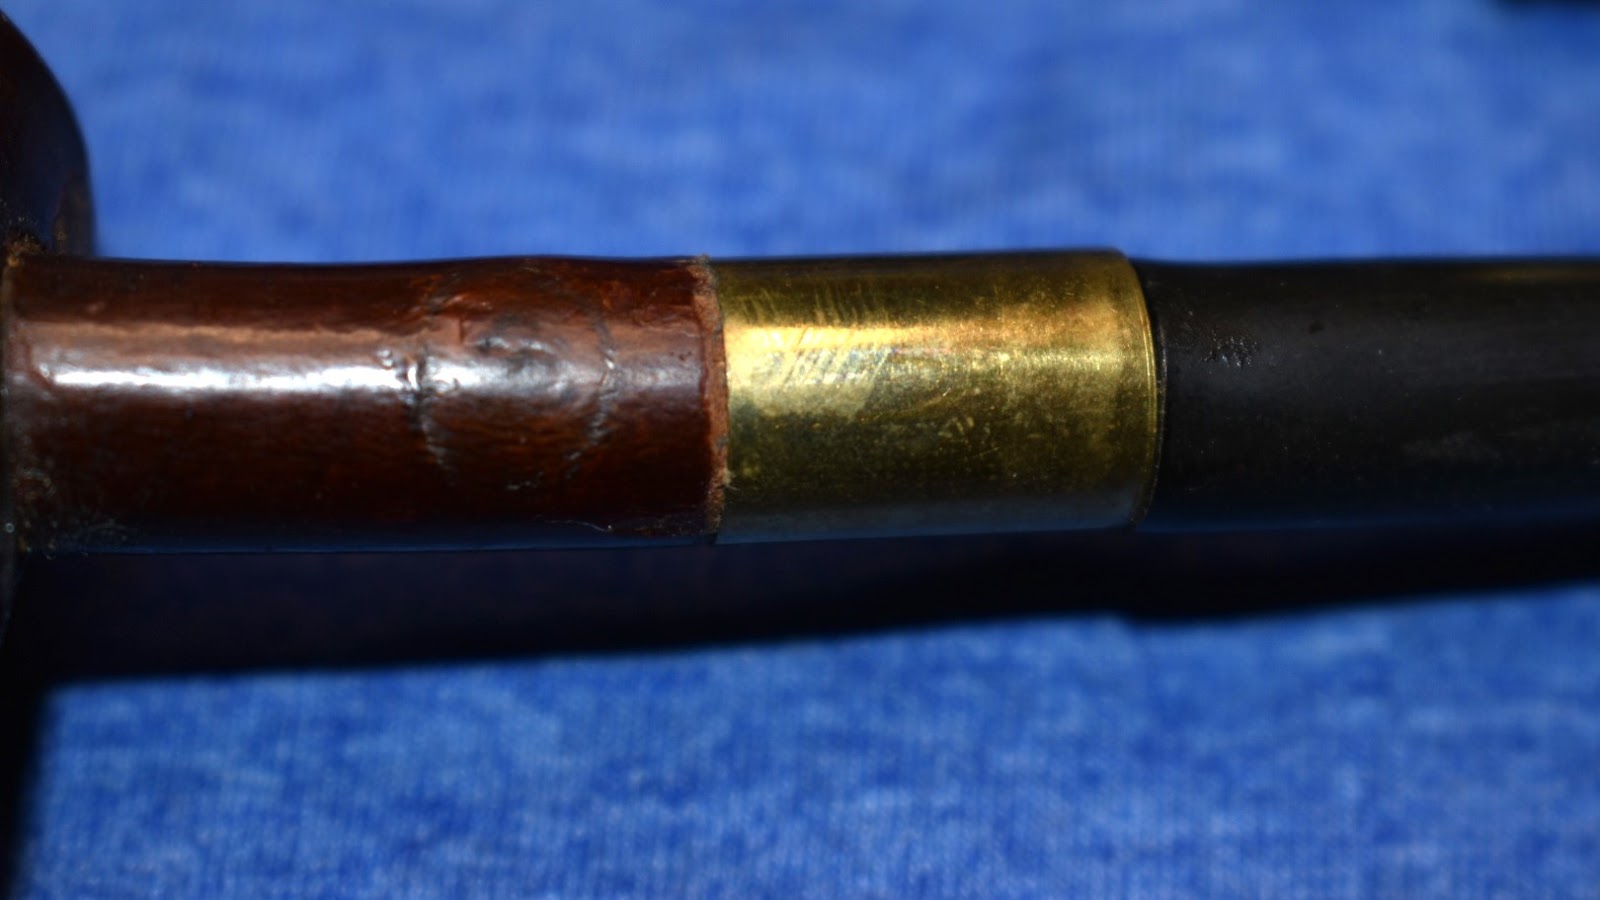
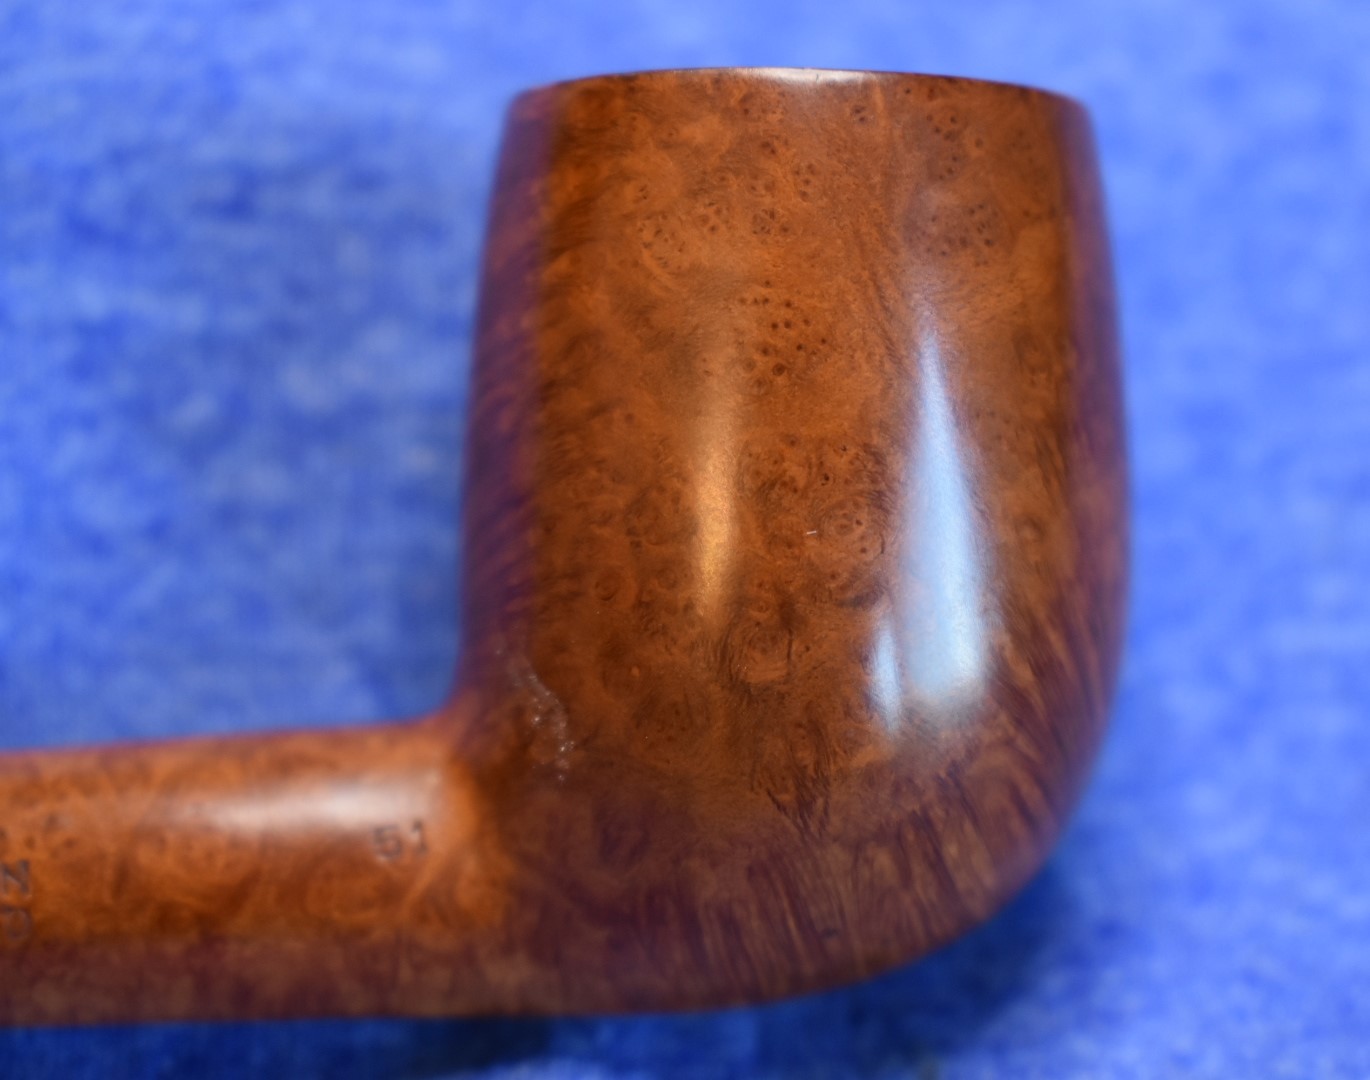
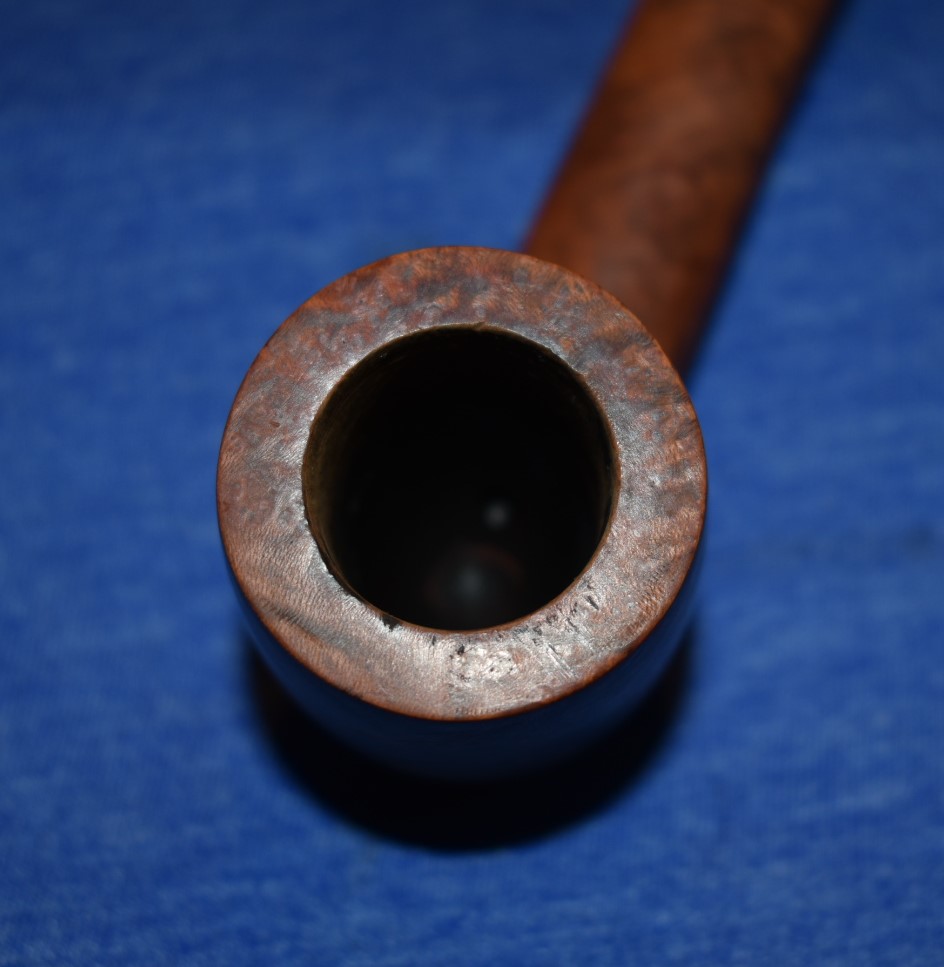
    To the restoration.  As you can see from the photos the Waldorf was not in bad shape.  It did have a weird looking patch of briar on the left side from the

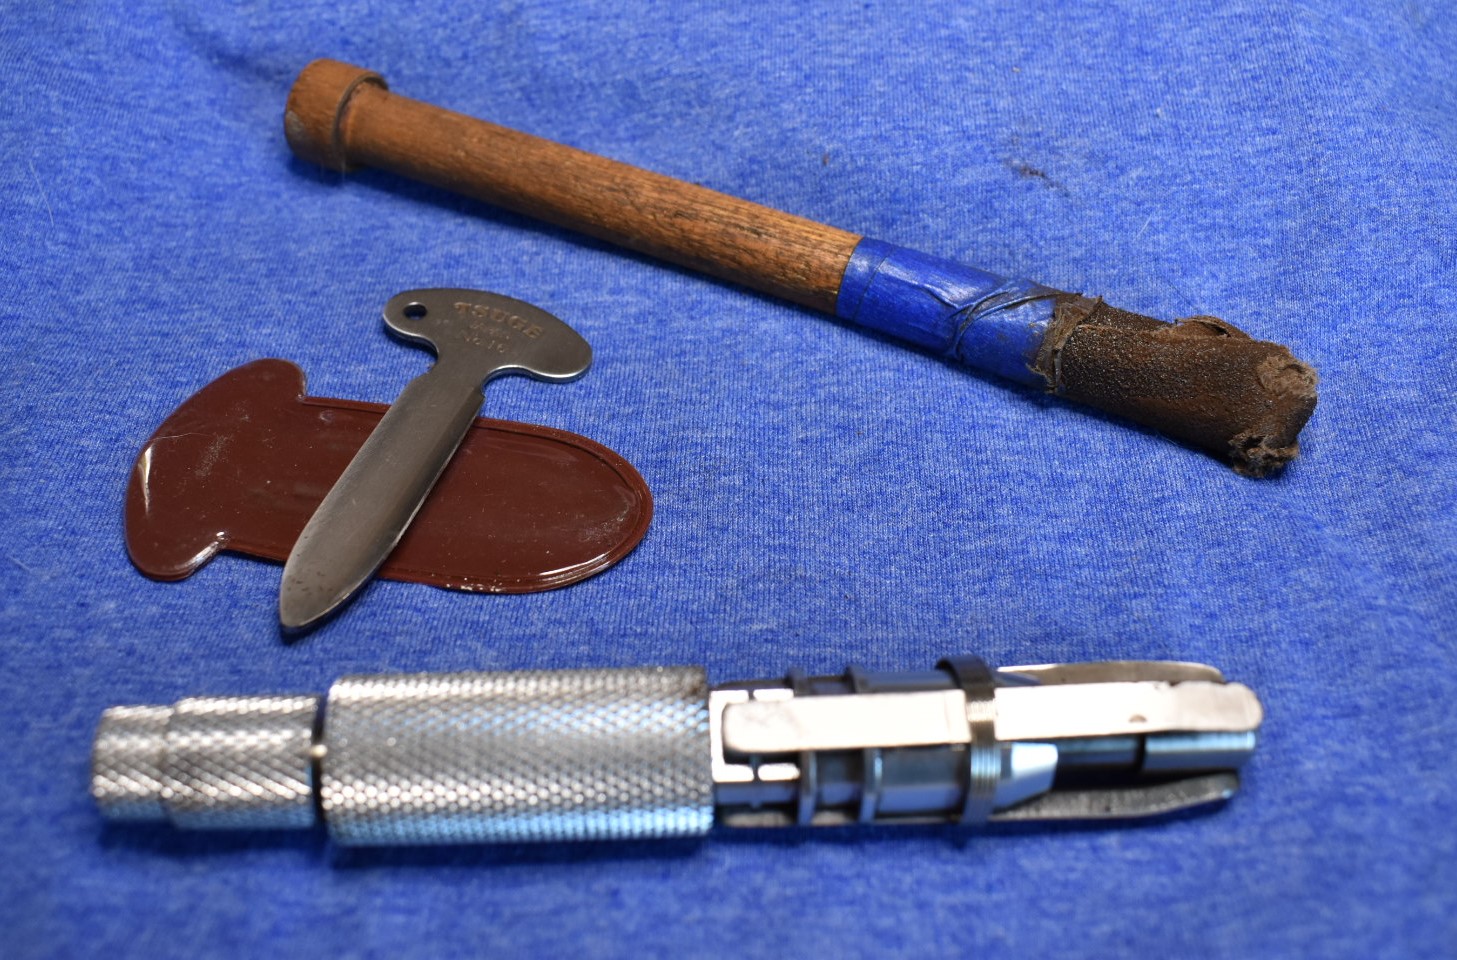
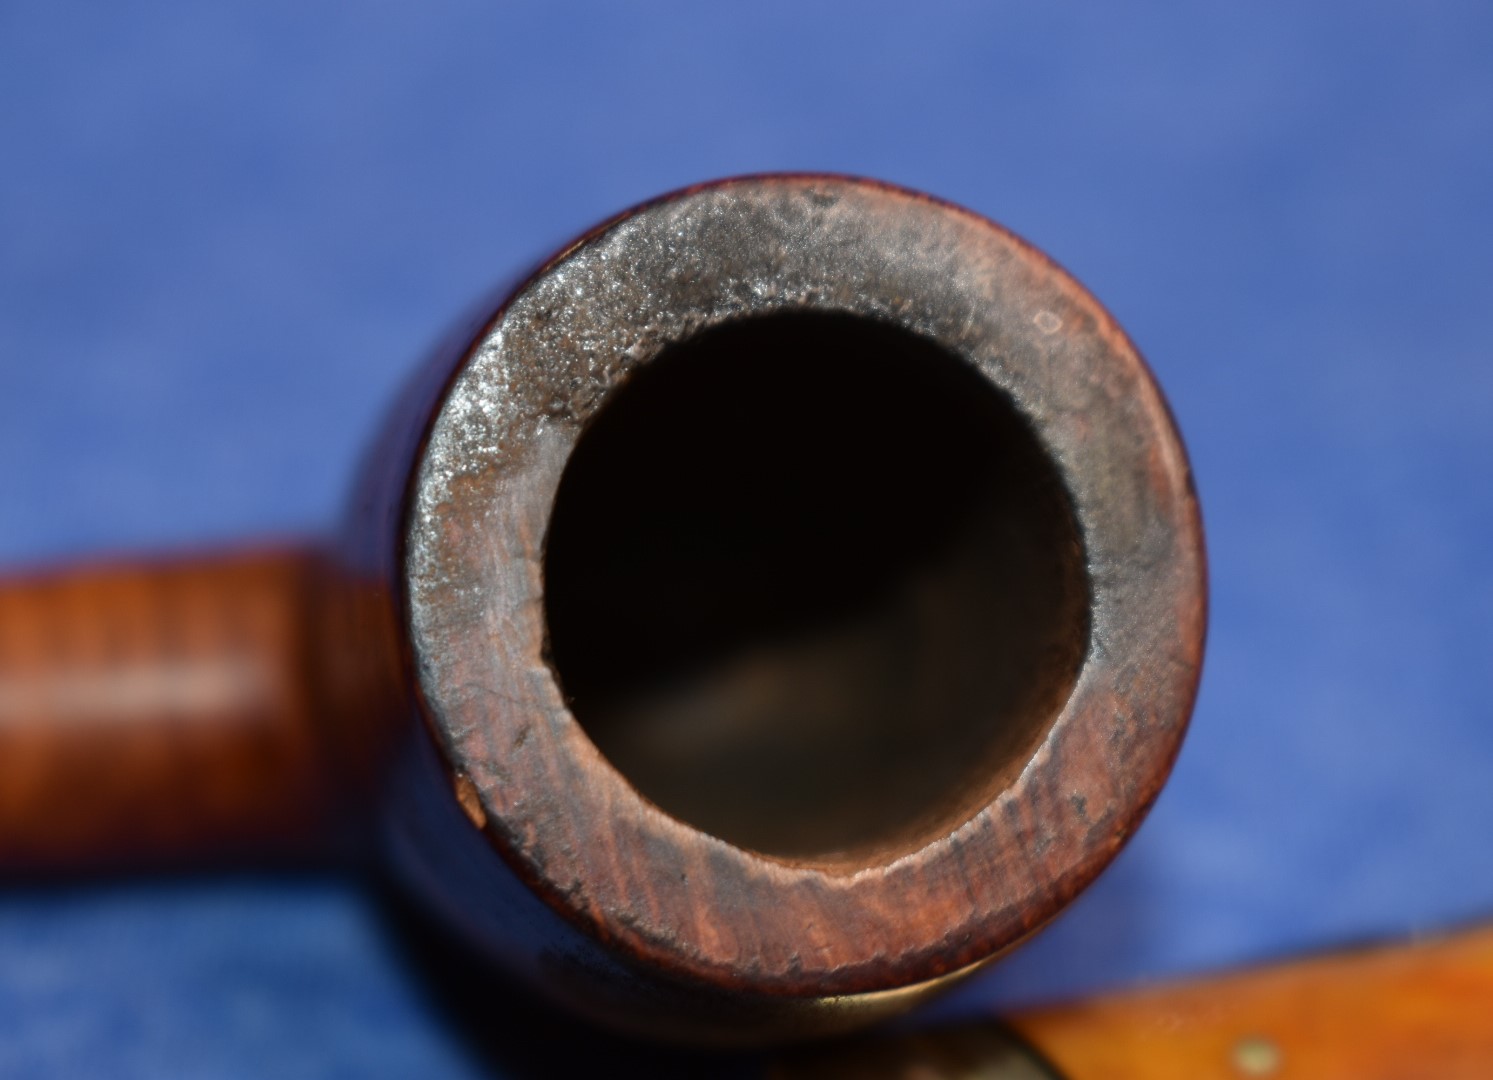
    stummel to the heel.  It also had what looked like a thick coat of lacquer applied over the entire stummel.  I removed the stem and set it aside.  I began working on the tobacco chamber.  I grabbed the PipNet reaming tool only to

    find that the chamber was too large for the second size reaming blade and too small for the third size.  This meant that the Scotte tool was the tool for this job.

    The Scotte kind of worked.  This bowl was slightly larger than the Scotte tool as well.  I was able to use the Scotte by pushing it to one side of the bowl as I rotated the stummel.  The remaining

    cake had to be scraped with the SmokingPipes Low Country Knife.  After the reaming I sanded the interior with 220 sandpaper wrapped around a wooden dowel.

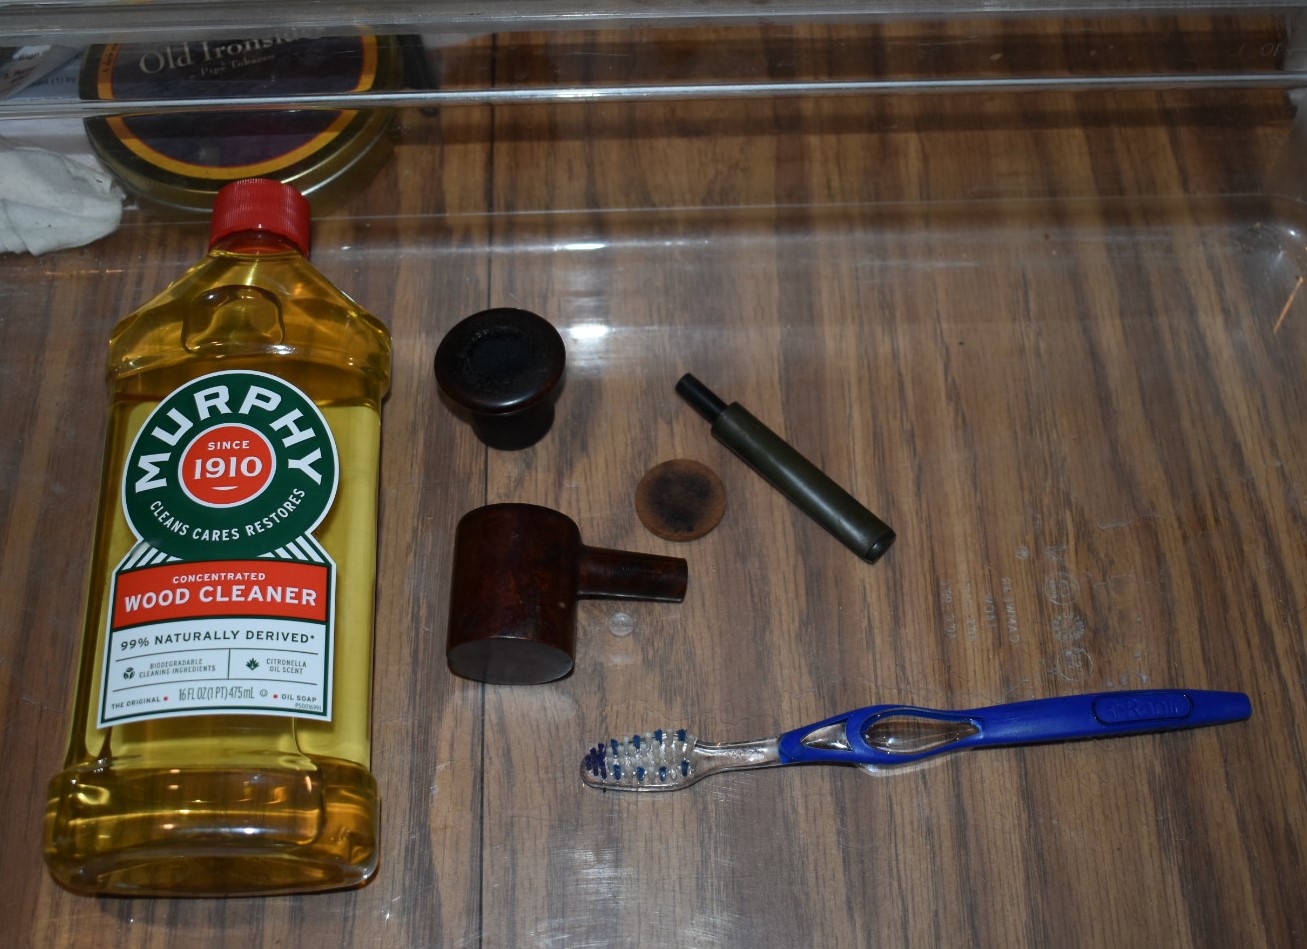
    Next stop on the restoration express was the sink for the Murphy Wood Cleaner and a toothbrush routine.  The Murphy’s is used undiluted and the

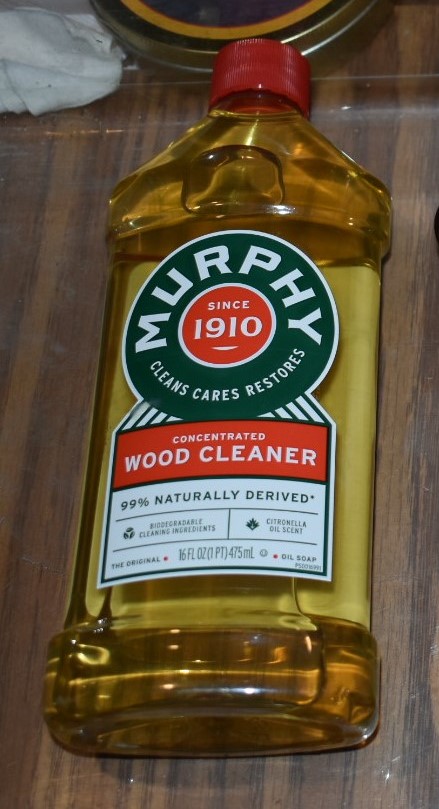
    toothbrush is a medium stiff bristle brush.  The Murphy’s is rinsed with Warm water.  While I was at the sink I put a little bit of Dawn dish soap on a nylon shank brush and worked it through the airway.  I figured that since the tobacco chamber was not very badly caked that the shank might also be lightly coated with tar.  The brush foamed up white then it quickly changed to brown.  I worked the brush in and out and then spun in to have the bristles working in both directions.  This was then rinsed with warm water and repeated.  The third time the foam did not change color to the “chocolate milk” color so I assumed I was making progress.  The final dish soap was again rinsed with warm water.  The whole stummel was dried with a cotton dish towel with the tobacco chamber dried with a paper towel.  

    I returned to the workbench and poured about 3 ml of 99% isopropyl alcohol into the tobacco chamber.  I let the alcohol slosh around in the chamber and move into the shank.  I plugged the mortise end with a finger to keep the alcohol inside the stummel.  I do this to allow the alcohol to pull some of the water out of the briar.  99% isopropyl or the 95% ethyl are very hydrophilic solutions.  That means the water will readily leave the wood and dissolve into the alcohol.  I think this speeds up the drying process significantly.  I finished cleaning the airway and shank with alcohol soaked cotton swabs and pipe cleaners until they came out clean.

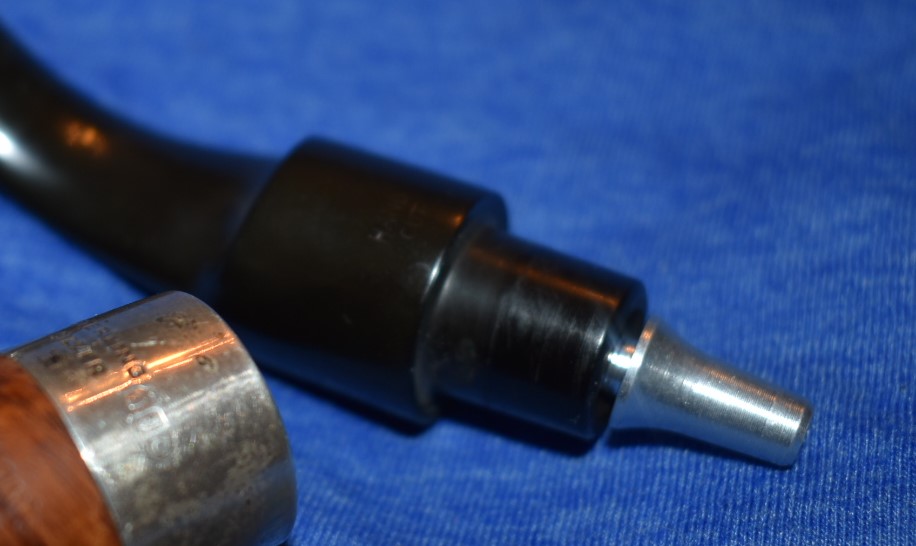
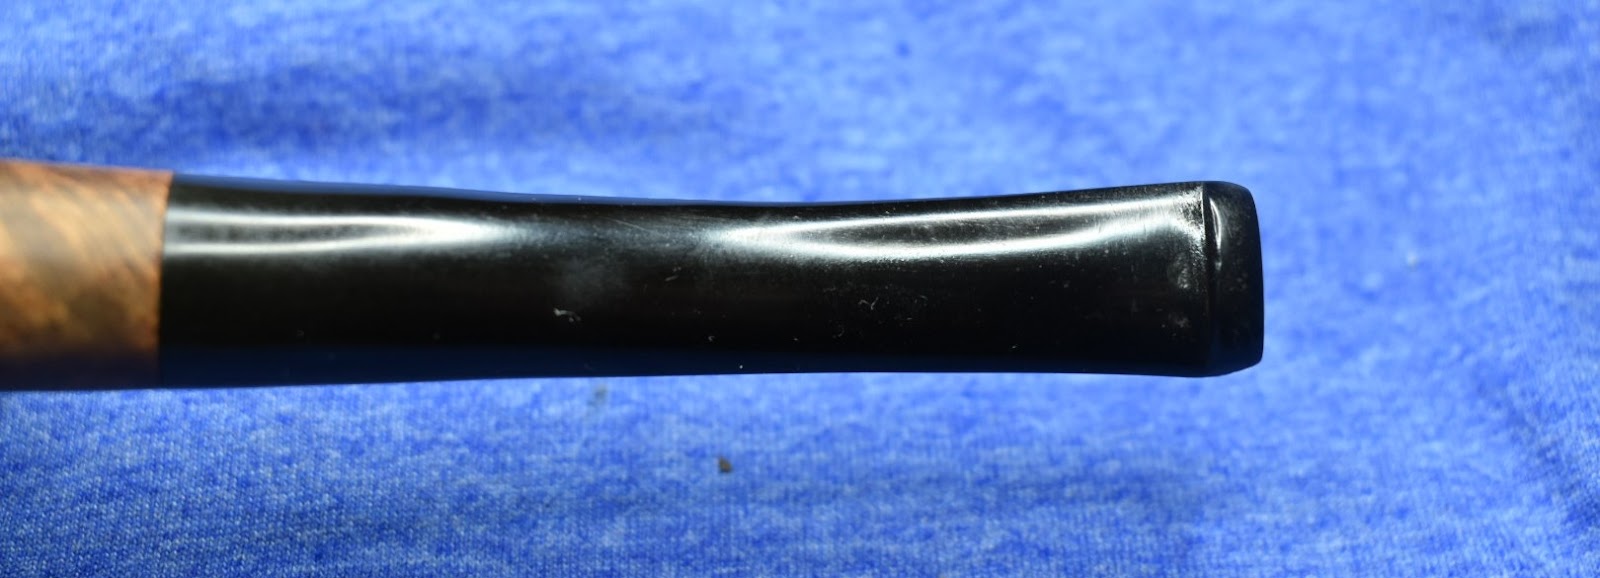
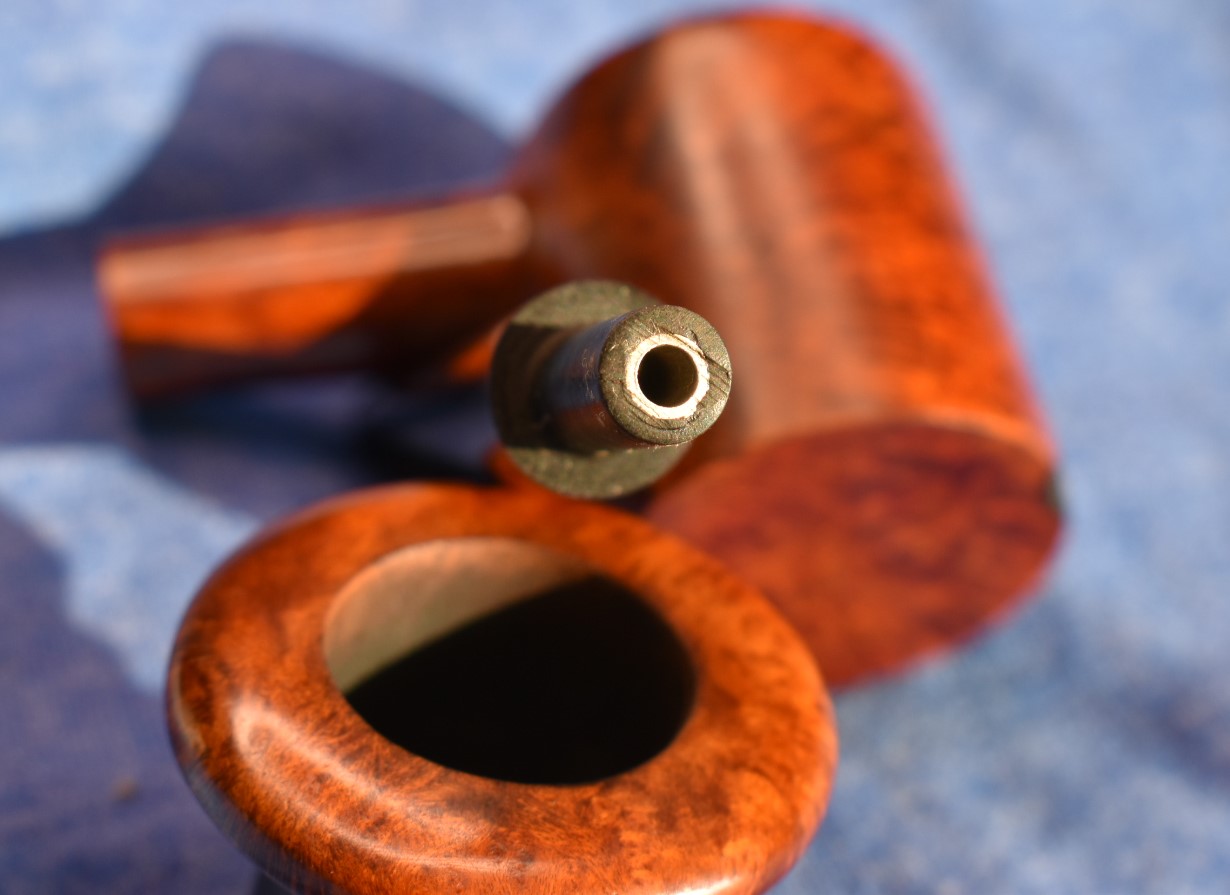
    This brings us to the stem.  The tooth marks were small and not too deep so I tried to lift them by “painting” them with the flame from a disposable lighter.  It helped but they might still require light filing and sanding.

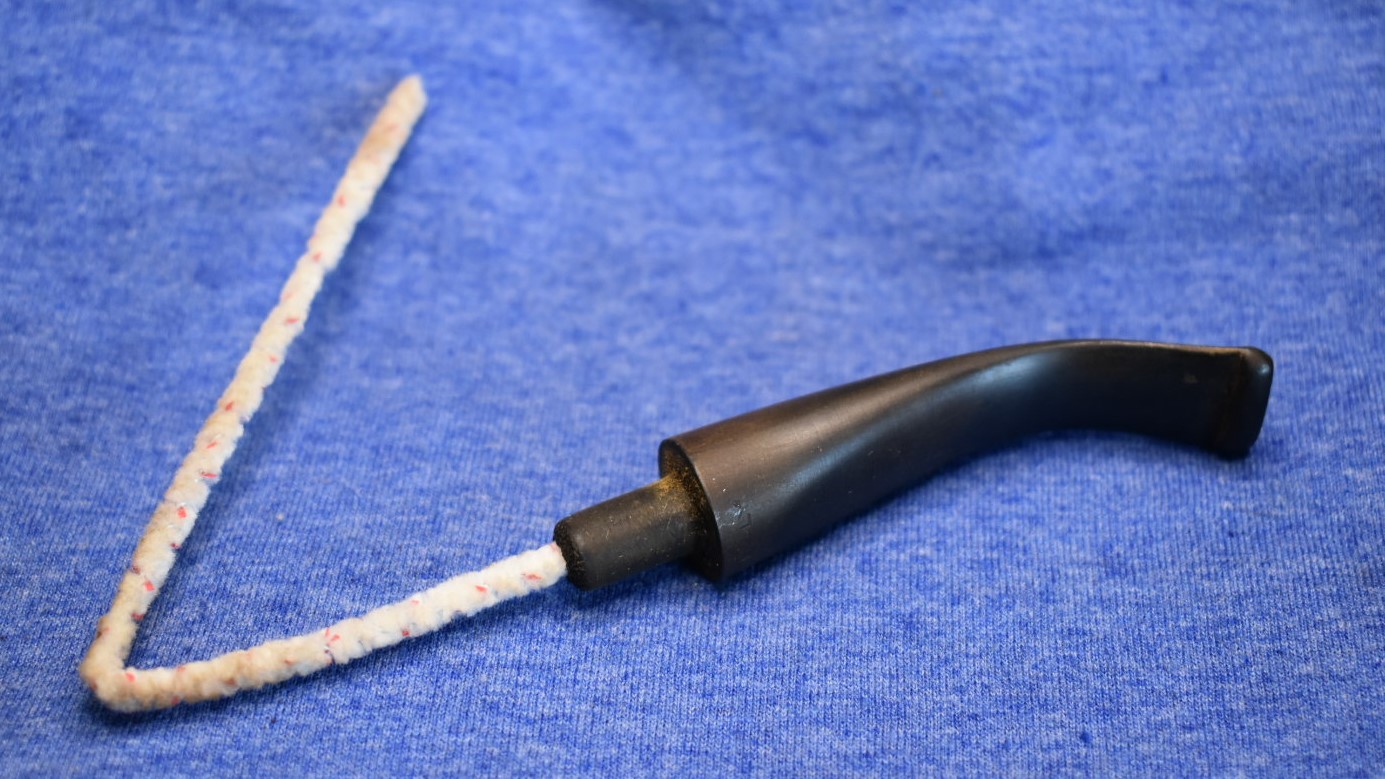
    I rubbed the entire stem with 0000 Steel wool to remove the surface oxidation and some of the rough area.  Next I pushed a pipe cleaner into the stem from the tenon.  This would be the hook from which I would hang the stem into the jar of Before and After Deoxidizing Solution.

    I figured that I would leave the stem in the solution for an hour.  

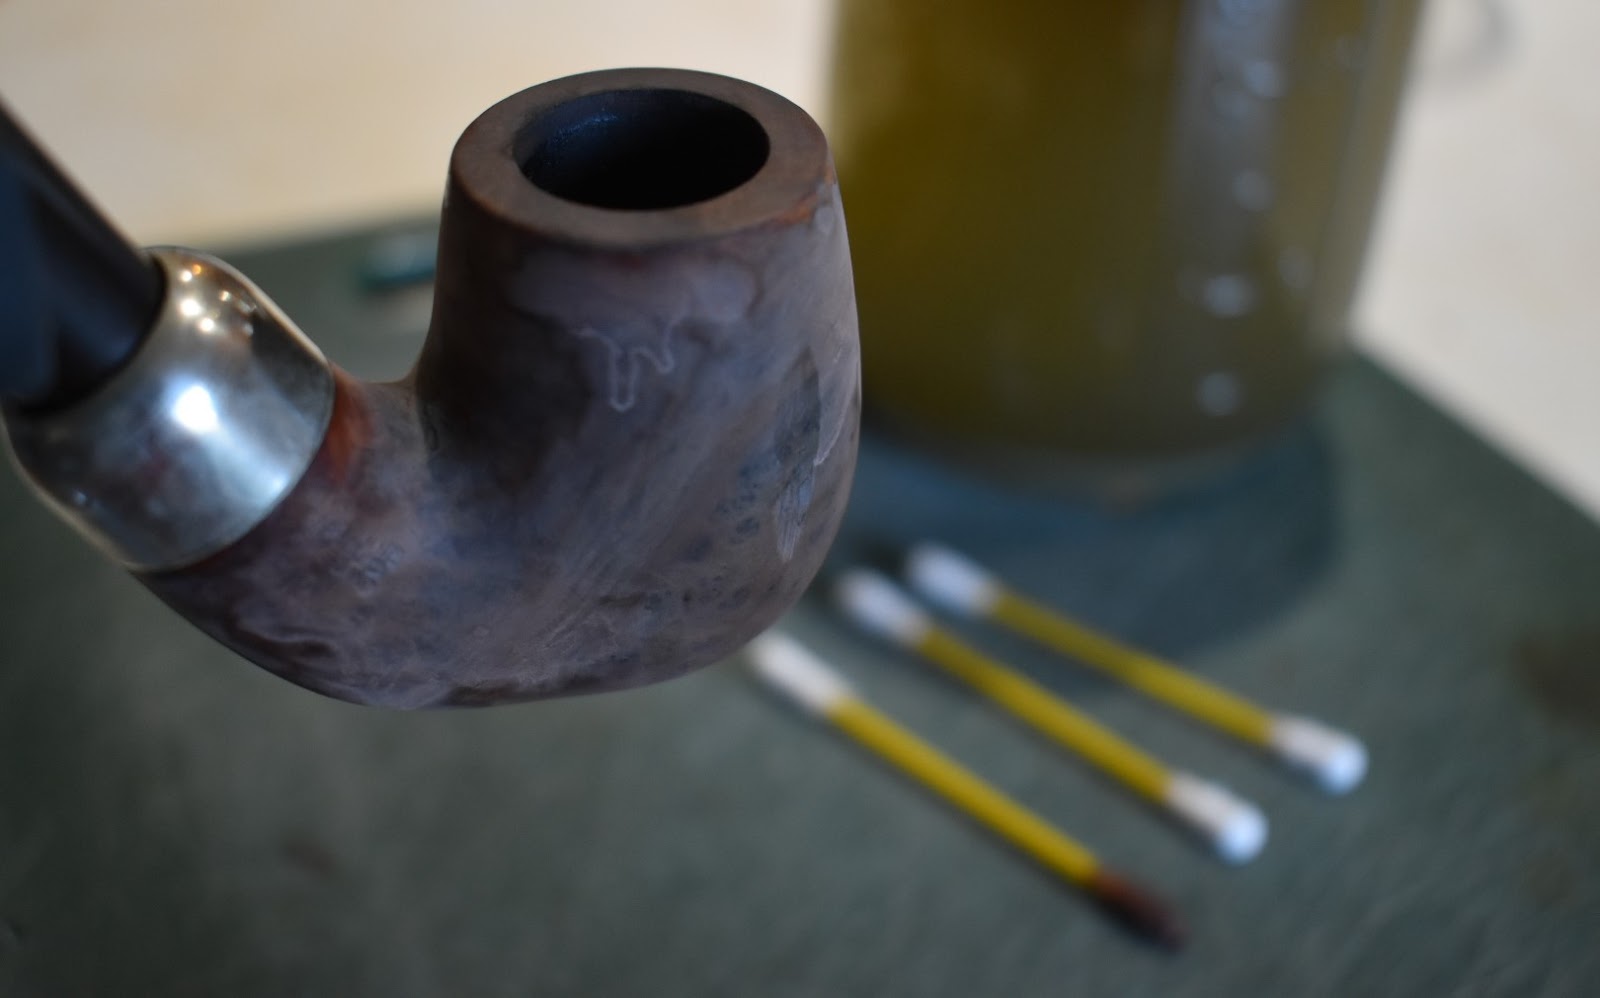
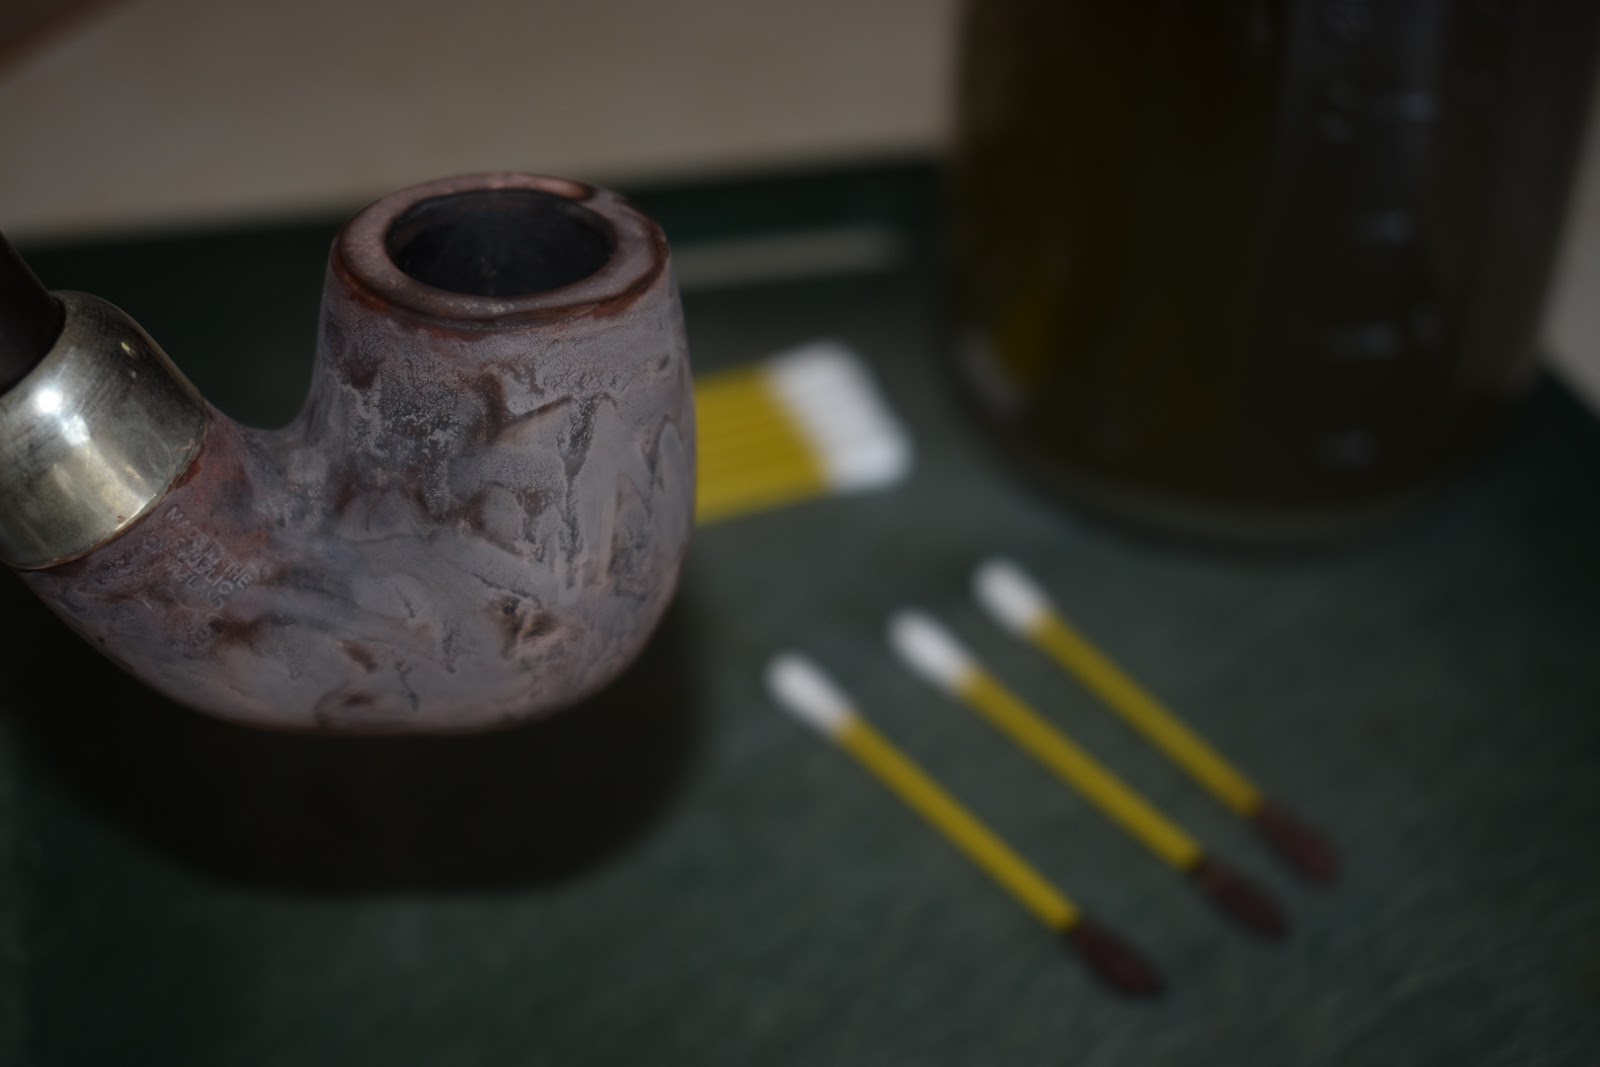
    While the stem was in deox (like detox for people) I returned my attention to the stummel.  I wanted to see what solvent would have the best effect at removing the layer of varnish that still covered the stummel.  The 99% Isopropyl didn’t seem to do much to it so, I went for the acetone.  I moistened a make-up removal pad with acetone and was very surprised at what came off of the stummel.  I was like I was wiping off a layer of dark mud.  The acetone would evaporate quickly from the pad, as acetone does but, while moist it removed something from the stummel. It was crazy.  Where is this stuff coming from?

    I thought “I’ve never seen this before.”  I figured I’d just let the whole thing soak in acetone.  I have canning jars with ethyl alcohol and acetone (EtOH

    organic chemistry abbreviation for ethyl).  I was still thinking that this was the lacquer finish.  I thought, “Maybe back when this pipe was made they mixed the dye in the lacquer and killed two birds with one stone or spray.”  I let the pipe soak and occupied myself with some of the chores I had been neglecting.  After about 30 minutes I returned and pulled the stummel from the acetone jar.  I put on a nitrile glove on my left hand. And started rubbing with the an acetone moistened make-up pad.  “What the heck?” is all I could think.  It was like the stummel was dissolving in my hand.  I gave up on the pad and grabbed the brass wire brush (AKA 20 gauge shotgun bore brush), dipped it in the acetone and started scrubbing.  “What is happening?” I

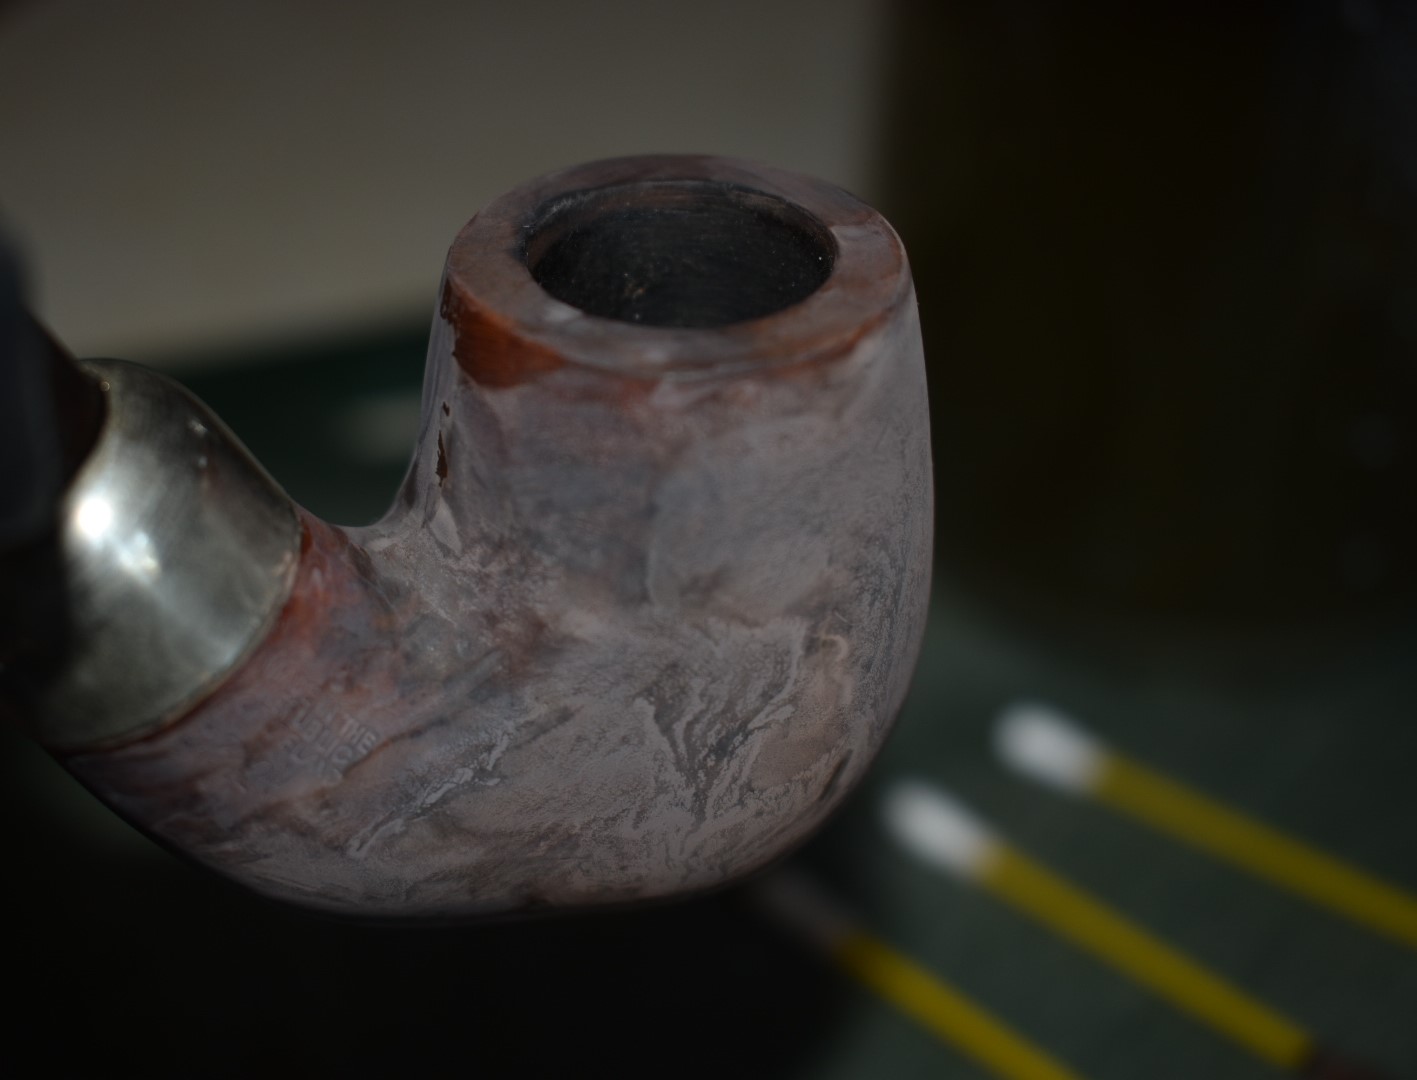
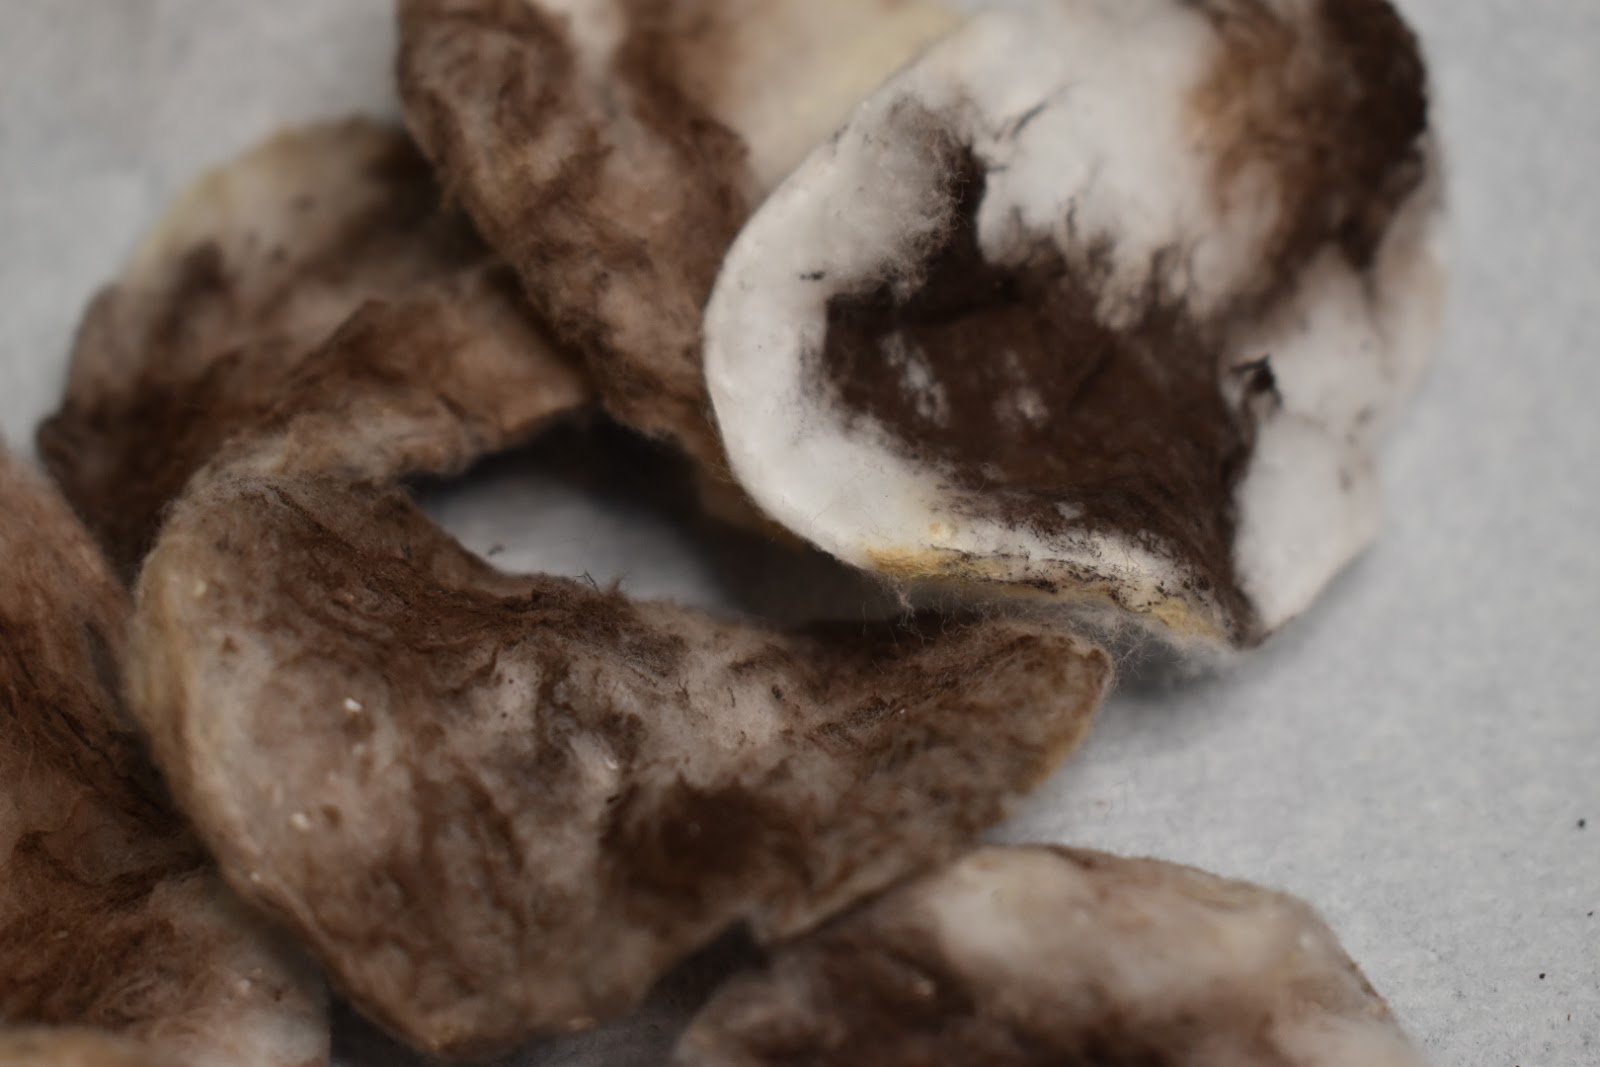
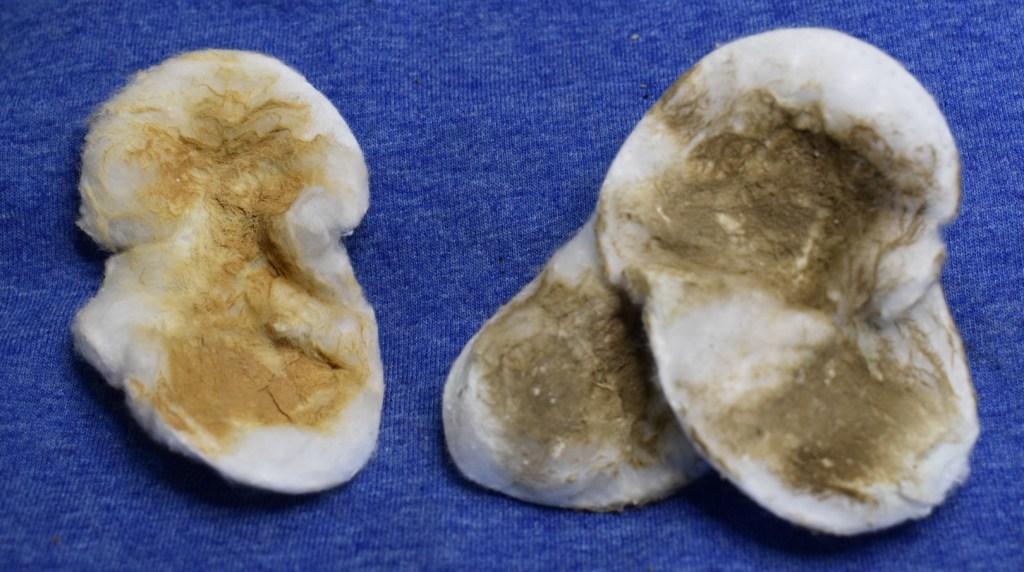
    wondered.  I was holding the stummel in my nitrile gloved hand with a paper towel to catch the liquid and solids that were coming off the stummel.  The phot left shows the paper towel.

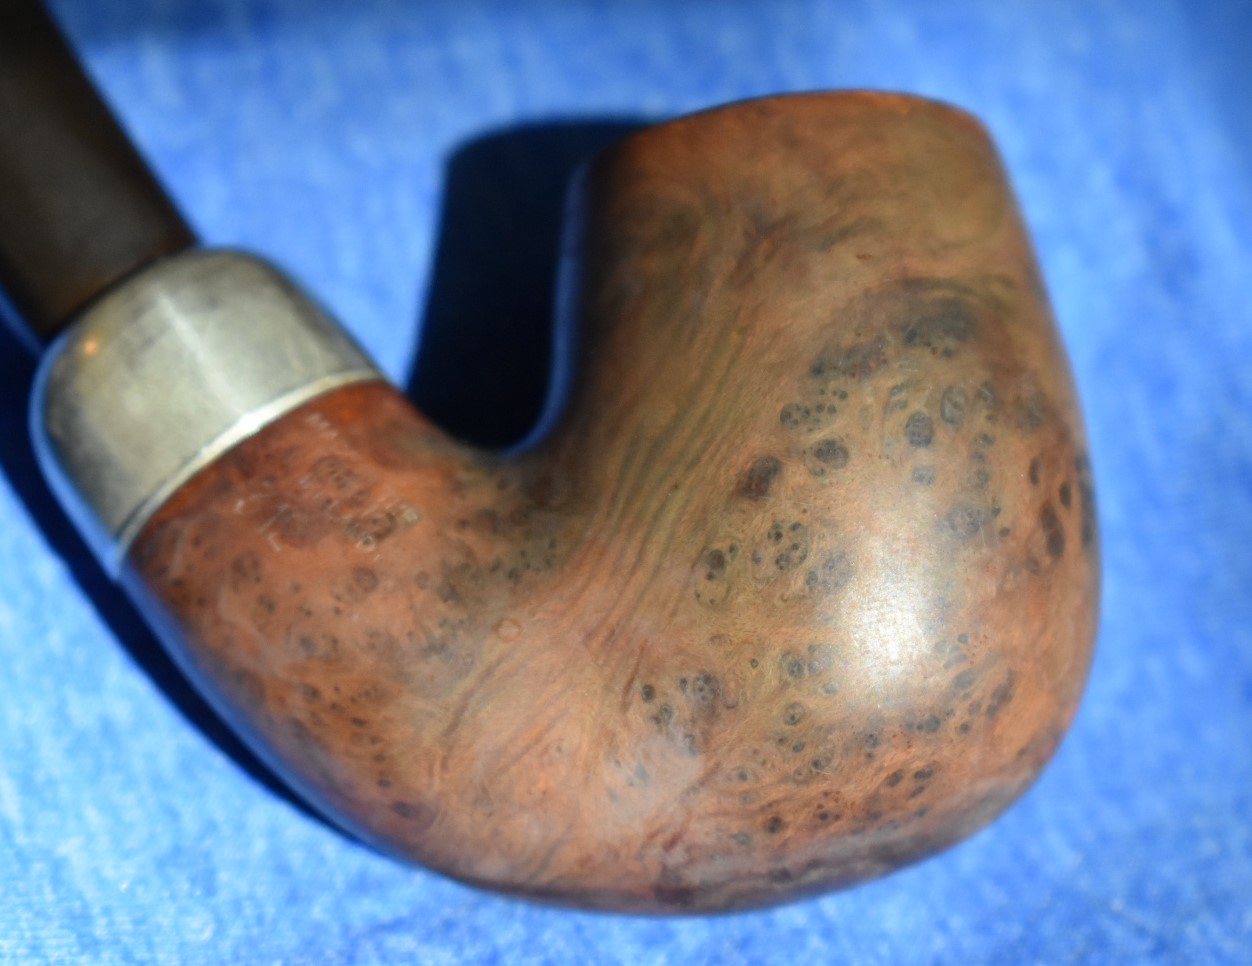
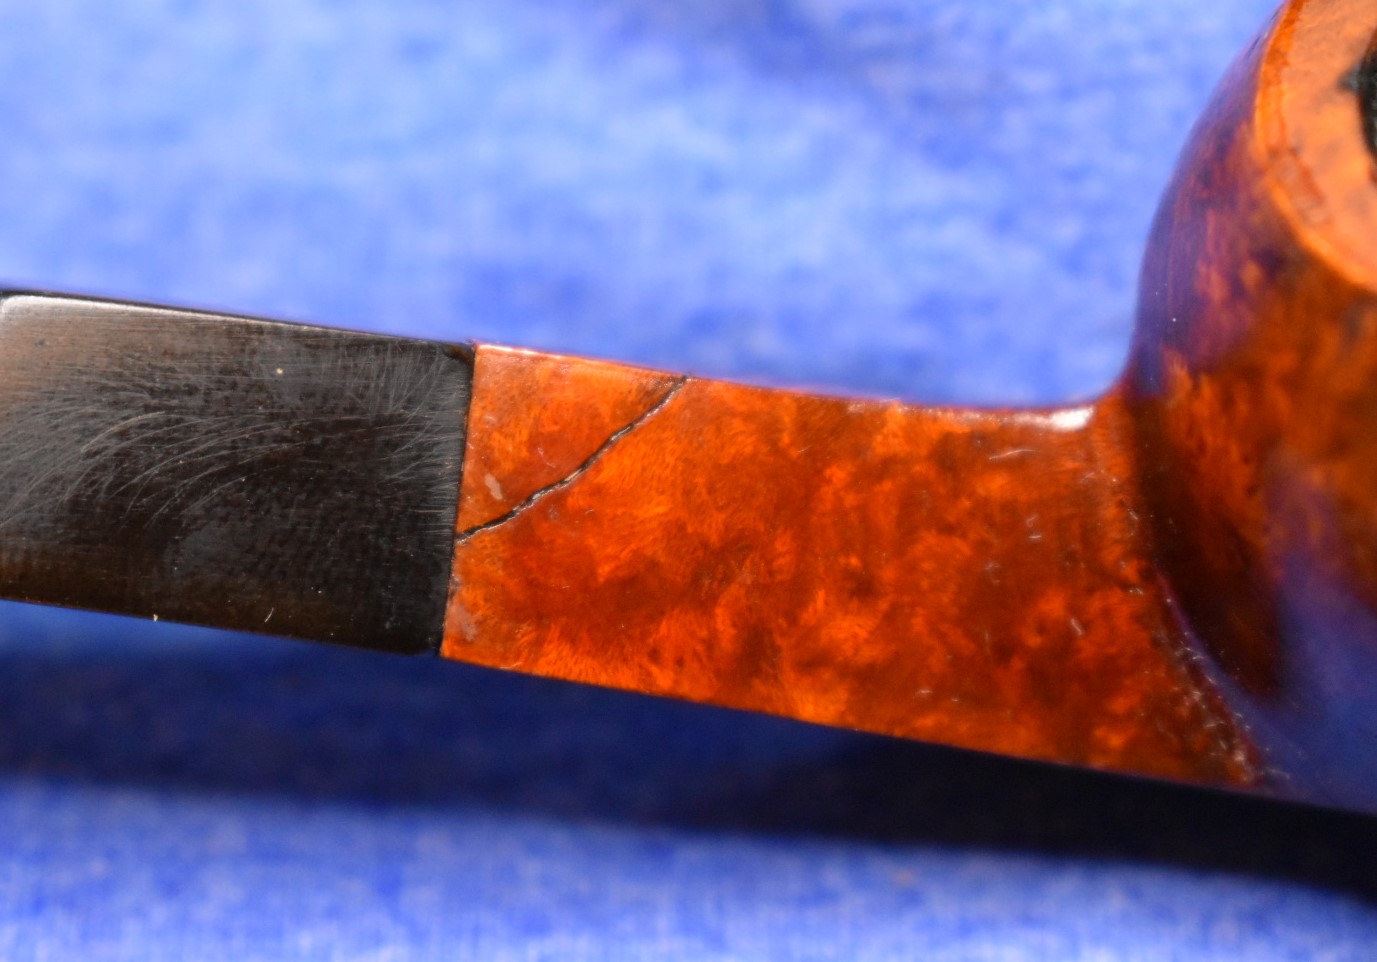
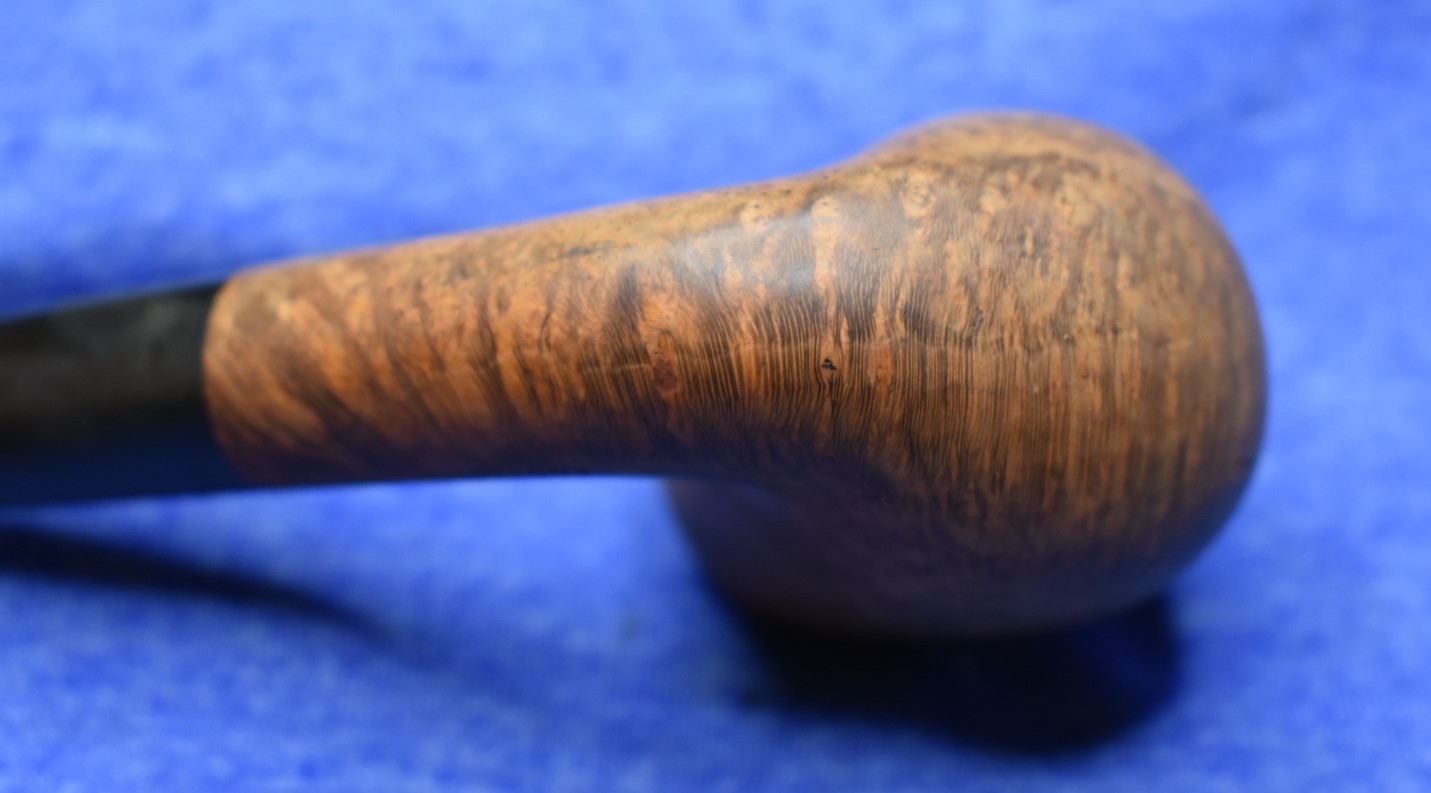
    I let the whole mess evaporate and started to look closely at the stummel.  Large areas that previously had no ring grain from sandblasting now had ring grain.  “That can’t all be a fill?”  I pondered.  “Oh yes it can and it is!” I replied.  I think the acetone fumes were making me loopy. I had to break up two altercations that were happening with the voices in my head.  

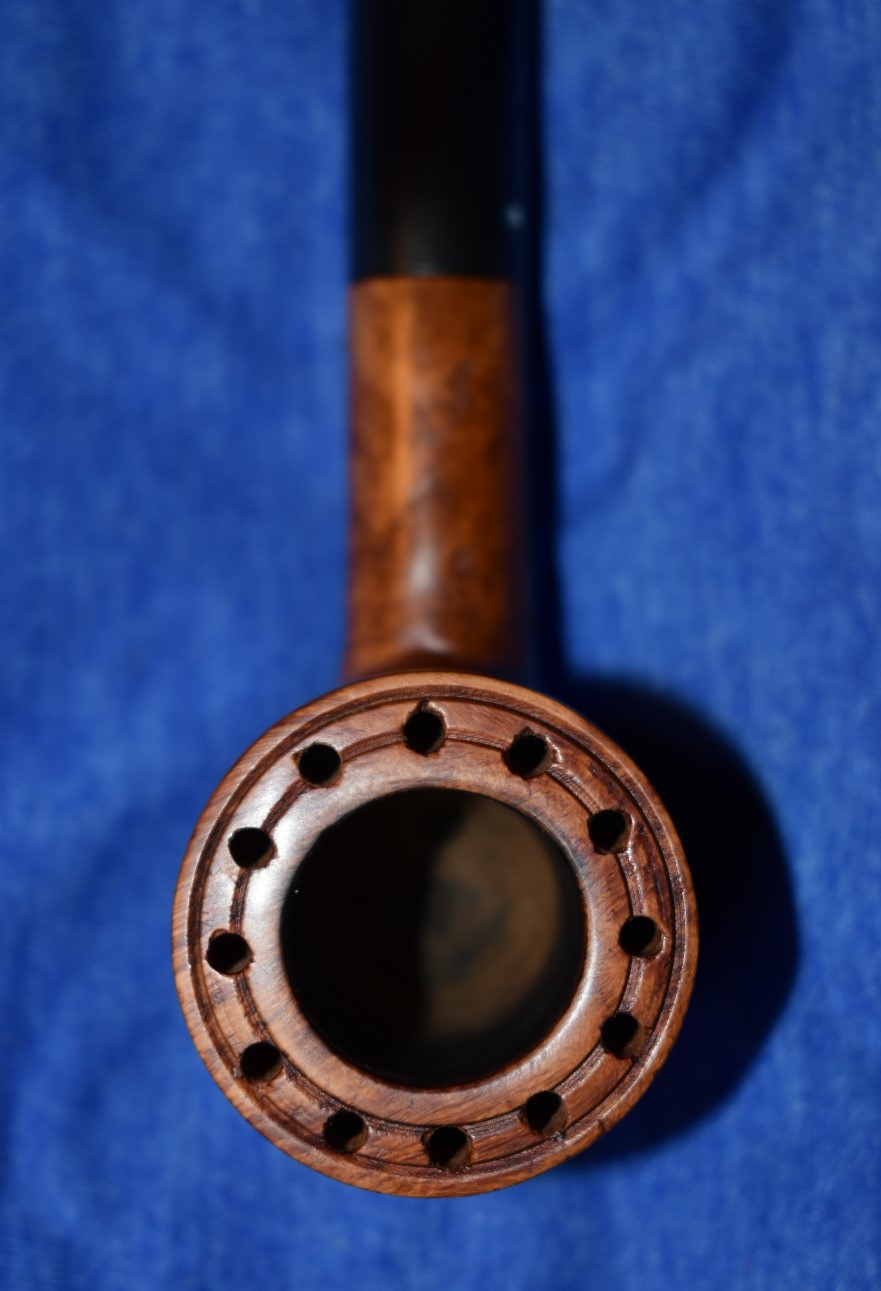
    I took the dental pick to the fill.  Again, remember the photo with the circle?

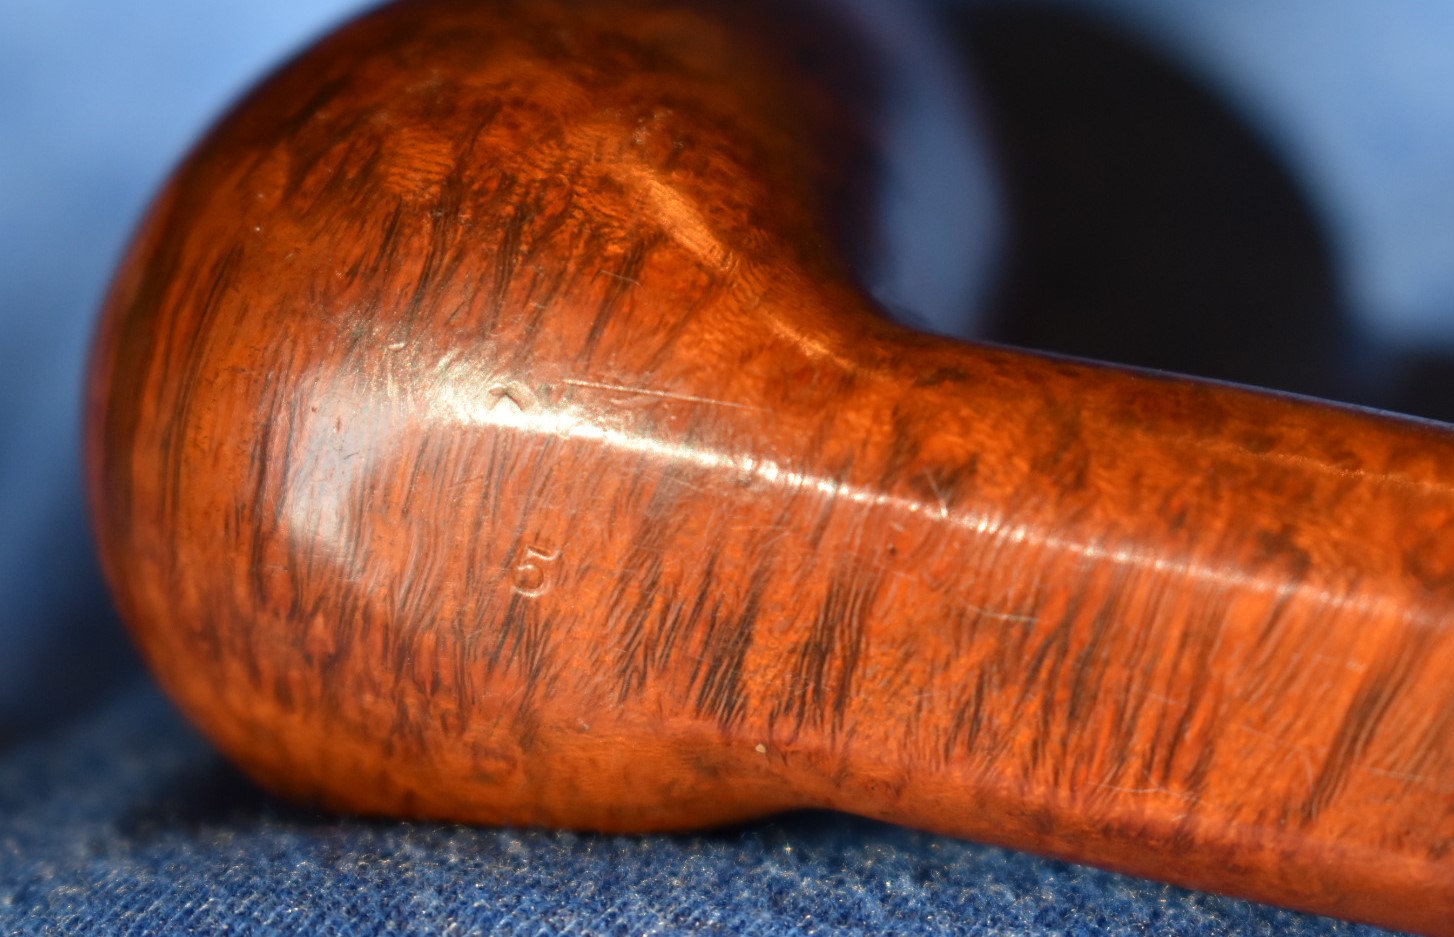
    The whole area was a fill.  And it was not just a little surface fill of a mm or two deep.  Oh no, it was at least 6 mm at the deepest.  The filler that was used had either been mixed with the lacquer or the lacquer had penetrated into the putty,  all the way down to the briar.  It was only soft when wet with acetone.  Once the acetone evaporated it returned to hard putty/fill.  I soaked the stummel again for 15 minutes. After removing it from the acetone I went quickly with the brass brush trying to maximize my time before the putty hardened back up.  The next three photos I called “Scrub 1”  as I was labeling them.

    You can still see places where the lighter pink colored fill is still present in some of the depressions.  I repeated this another two times.  The later times I also used the dental pick to loosen larger area,  I would get pieces off that

    were 2-3 mm in size.  I did not know how to proceed.  These were uncharted waters, for me.  I took the stummel to the sink, thinking,

    “Maybe some Murphy’s and a toothbrush would help”.  I started arguing with myself again, 

    “What are you doing, dummy?” 

    “I’m trying to use soap.”  

    “Yeah, did it do anything different THIS TIME?  You already did that, dummy.”  I blame the acetone fumes. 

    I went back to the workbench and tried ethyl alcohol instead of isopropyl.  That seemed to work about as well as the acetone.  Good thing I did not have any methyl alcohol.  I probably would have forgotten the glove and absorbed just enough to blind one eye.  

    There were many dippings on the brass brush in acetone and scrubbings.  There were many pickings with the dental pick.  There were probably more arguments with myself.  In the end.  I called these next two photos “Scrub 2” when labeling them:

    Oh no, the stem is still  in deox!  It had been in there for over two hours.  In my acetone crazed state I had completely forgotten about it.  I went to retrieve the stem from the solution.  I was still there.  It had not completely dissolved.  Whew.

    I lifted the stem by it’s hook and let it drip off most of the solution.  I placed the wet stem on the coarse shop rag used for deoxidation solution removal.  I then rubbed vigorously until the stem no longer had any solution on it.  I then place two pipe cleaners through the stem moving them side to side and the button to get all the solution from the button.

    The stem looked good but I could still see a few places that had the tinge of brown rather than the black of non-oxidized vulcanite.  I took two make-up removal pads and dosed one with a dollop of Soft Scrub.  I rubbed the stem in a non friendly fashion trying to scrub off the remaining oxidation.  After the Soft Scrub scrub, I coated the whole stem with mineral oil.  I also ran a mineral oil wetted pipe cleaner through the airway.

    The stem was at a place where I could leave it and get back to the stummel.  I had soaked and scrubbed, soaked and picked, soaked and scrubbed some more all for a pipe that I would never sell to someone.  

    I had visions of what had happened in that little pipe workshop in Italy.  The father was showing his son how to use the new sandblaster.  He explained about the pressure, nozzles, and blast medium.  He diligently went over all of the safety equipment and features.  

    “Stop, wait a minute.  Next you are going to tell them he discussed the material safety data sheet.  There were no MSDS in 1950.” 

    “Stop arguing with me, this is my vision.” 

    “Yeah, your stupid vision.”

    Hmm, I wonder if acetone poisoning causes permanent brain damage.  

    “You already got brain damage, dummy.” 

    And the son, being the fine young man that he was, paid apt attention to it all.  His father said, “Son, your mother needs an expensive operation that we can only afford if we sell all of the pipes.”  “Yes, Pappa” replied the son.

    “Hey why did everybodys’ mom need expensive surgeries in 1950?”

    “I don’t know, but they did.” 

    “OK, go on with your story then.”

    There was Sonny, blasting away with the new equipment, feeling like a responsible real young man.  When Ophilia walked by the large front shop window or, should I say sauntered by the front window.  Sonny’s eyes couldn’t help but follow that seductive swaying form. In that moment of distraction, the blast had cut too deep for the accepted norms of those times.  Father shrieked in terror and fell to his knees.  “Oh my wife, I cannot go on raising this boy without you” he wailed.  The son grabbed the filler putty and screamed “No Pappa, I can fix it.  See, Mamma, will get the operation and live.”

    Good story, eh?

    “Yeah, you got the brain damage.” 

    I decided to lightly top the rim of the pipe.  I did  this using  a piece of 400 wet/dry sandpaper on the counter top.  I moved the stummel in a circular path rotating my grip on the stummel to evenly distribute the force of the sanding.  After that I thought about filling the numerous sand pits.  Then I thought “The last thing this pipe will ever need is more fills.  Leave it.”  So I did.

    I started thinking about what shade of brown to use.  I thought of a nice dark brown Fiebing’s Leather Dye as a base color with maybe a light brown for the high areas after I sanded away the dark brown from the high spots.  It sounded good.  I assembled the staining gear. Nitrile gloves, a lighter, a folded

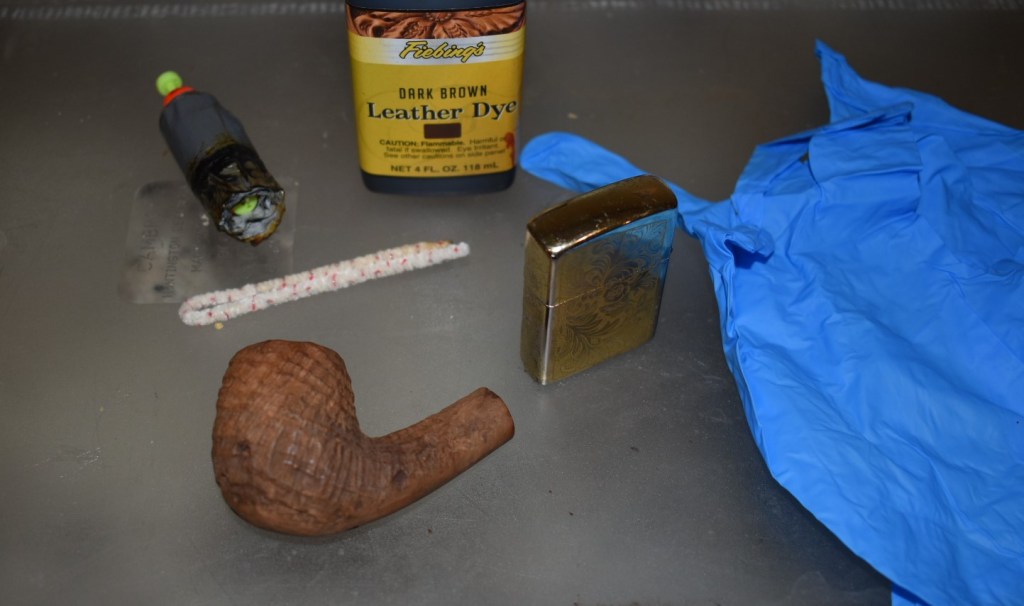
    pipe cleaner for an applicator, the dye and my make-shift duct tape wrapped fishing bobber to plug the tobacco chamber and act as a handle.  All of this was placed on an upside down plastic container to protect my counter top from spills.

    The Process of staining a stummel is pretty straightforward:

    1. Place a wine cork (or bobber in my case) into the  tobacco chamber to keep the dye from getting in there and to act as a handle. 
    2. Fold a pipe cleaner in half as the dye applicator.
    3. Put on nitrile gloves.  (Trust me on this one)
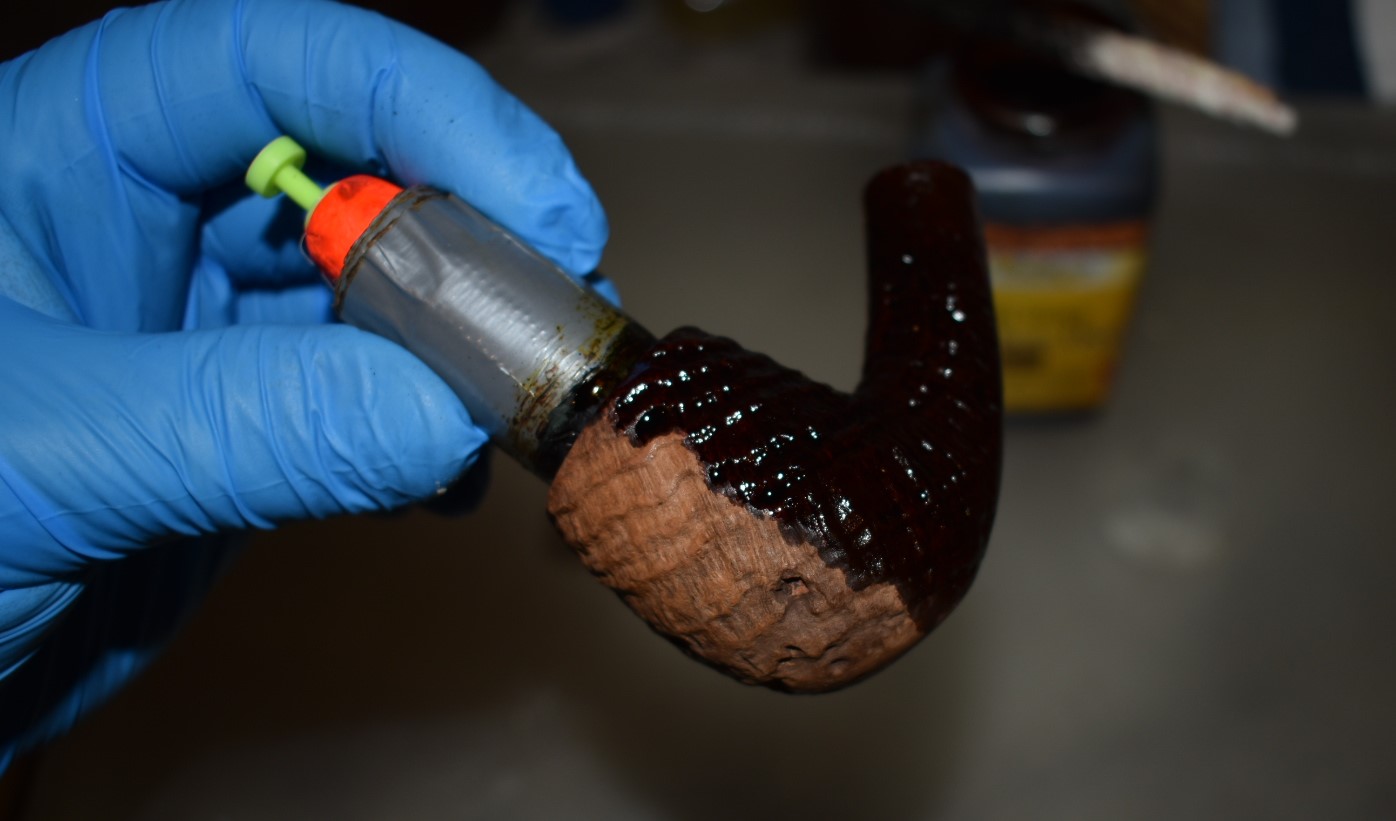
    4. Dip the folded part of the applicator into the dye and apply liberally to the stummel.
    5. After all the exterior of the stummel is wet with dye, Strike a flame with the lighter or a lit candle and light the wet dye on fire.
    6. Avoid running around with the blue flaming stummel trying to show someone how cool it looks.
    7. Repeat steps 1-6 as desired.

    Well, at least that is what I did.  Here are some photos:

    I neglected to get a photo of the flames as I was busy running around looking for someone to show how cool it looks.  I set the stummel aside to let the dye do what it does to the briar for about an hour.

    After the dye had dried and set, I dampened a make-up pad with 99% isopropyl alcohol to wipe away any dye then was still on the surface of the stummel.   I did not want any dye to pass from the stummel to a person’s hands while they were handling the pipe.  The pad came back very well stained with excess dye, so I repeated it with another pad. 

    Here are some photos of the stained stummel:

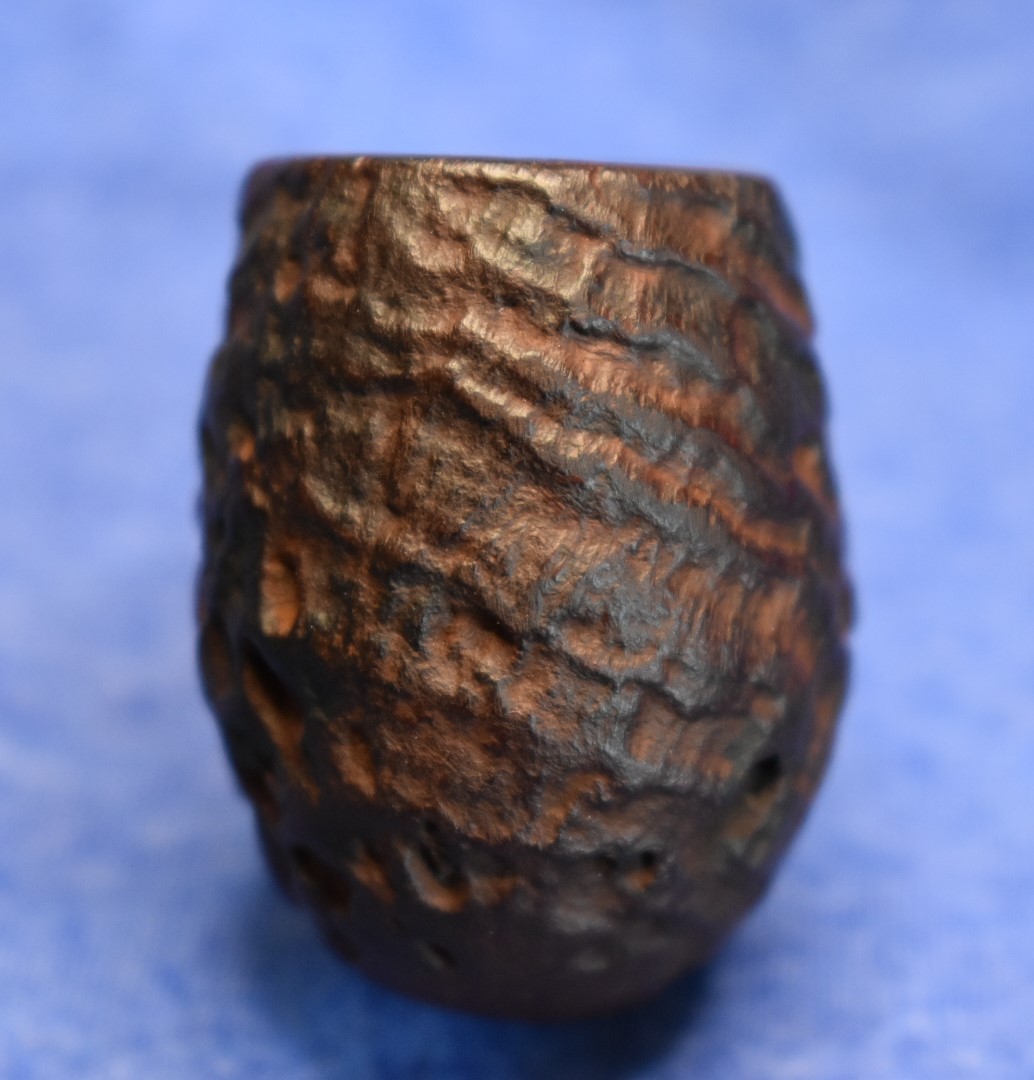
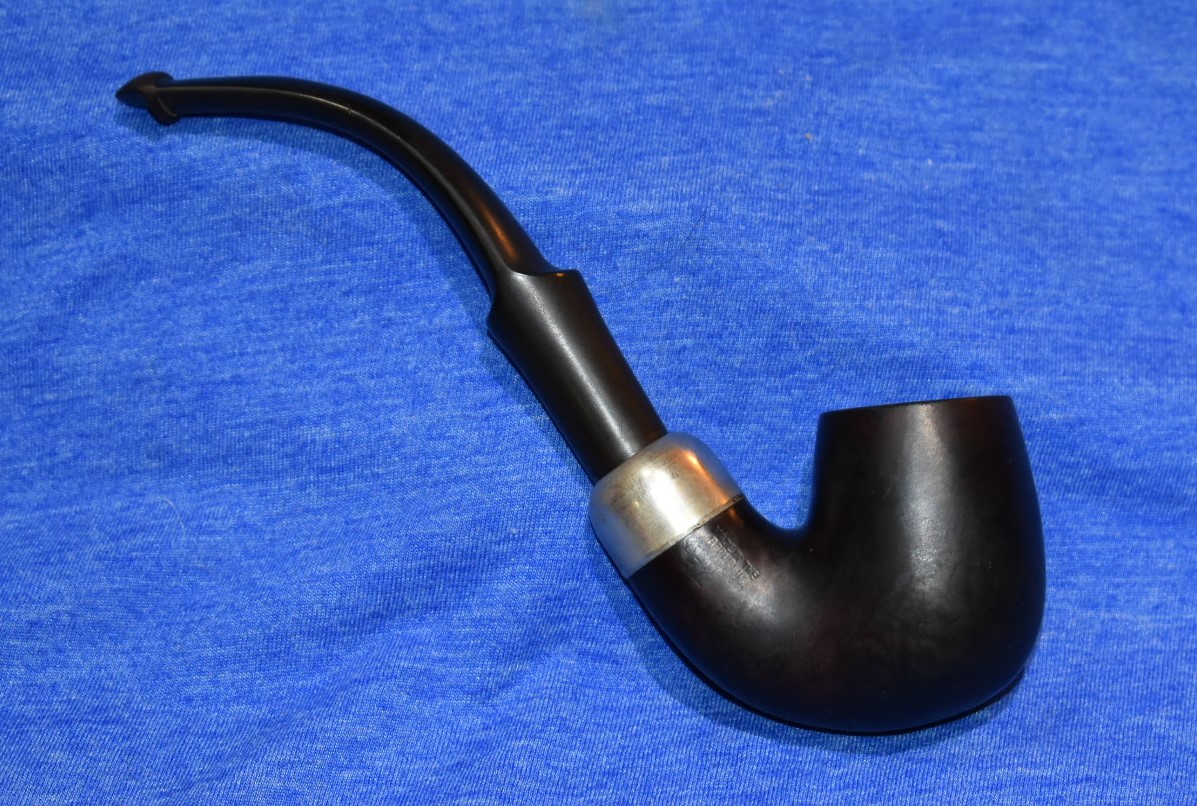
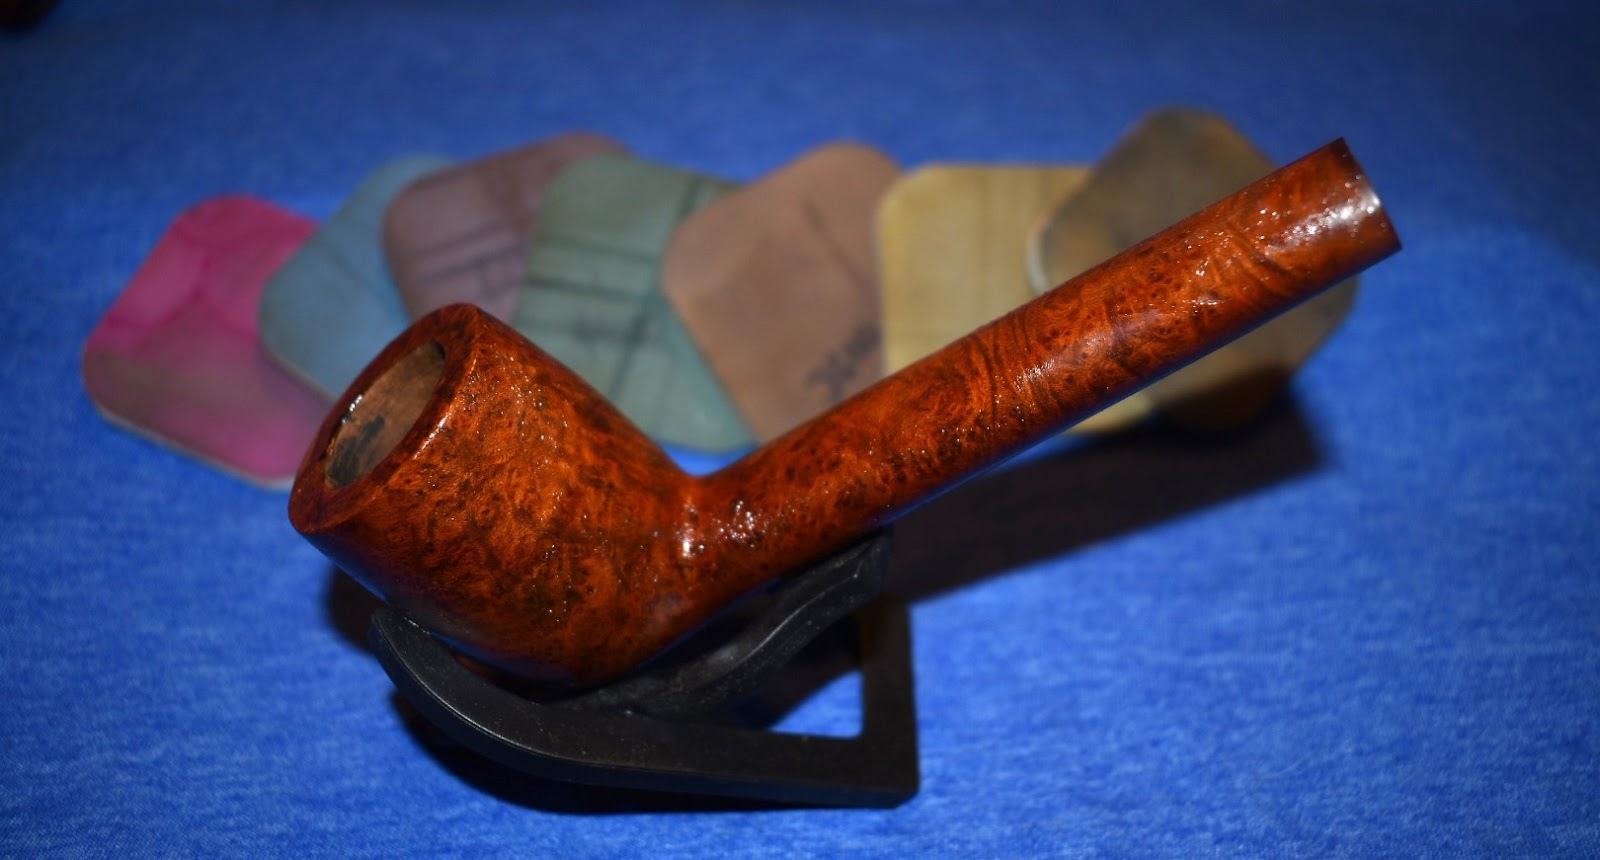
    I tried to lightly sand the high spots and expose unstained wood underneath.  This met with complete failure.  The high areas seemed to have absorbed the dye deeply into the wood.  I scrapped the idea of highlighting with another color and called this shade of brown “perfect”.  I vigorously rubbed the entire stummel with a clean dish towel to make sure that no dye remained.  I then used my fingers to apply a relatively thick coat of Before and After Restoration Balm to the stummel.  I used a soft bristle toothbrush to work the balm into all of the low spots.  I let the balm do it’s magic on the stained briar for 20-30 minutes.  After this time I used an inside out athletic sock to buff away the extra balm.  Below are the photos of the stummel at this point.

    I took two additional photos of the stummel in the sunlight.

    The last task was to rid the stem of the tooth chatter and micro-mesh and polish it.  All of my diligent photography fell short of documenting this stage of the restoration.  “Hey, claim the brain damage made you do it.  Or, not do it.” The mineral oil was wiped off the stem.  I had already painted the tooth chatter with a lighter earlier.  I did not think that the remaining tooth chatter was deep enough to require rebuilding the stem or filling of the dents with cyanoacrylate.  I used an emery board to remove material around the dents

    on both sided of the stem.  I moved the board in a circular motion rather than in straight lines.  After reshaping the area around the dents I used a finer grit emery board to start removing the scratches from the coarser grit again using small circles.  I then turned to the 220 sanding pad and sanded the area.  The button also needed to be slightly reshaped to define it’s edges.  I used the emery board here as well followed by sanding with the 22 sanding pad.

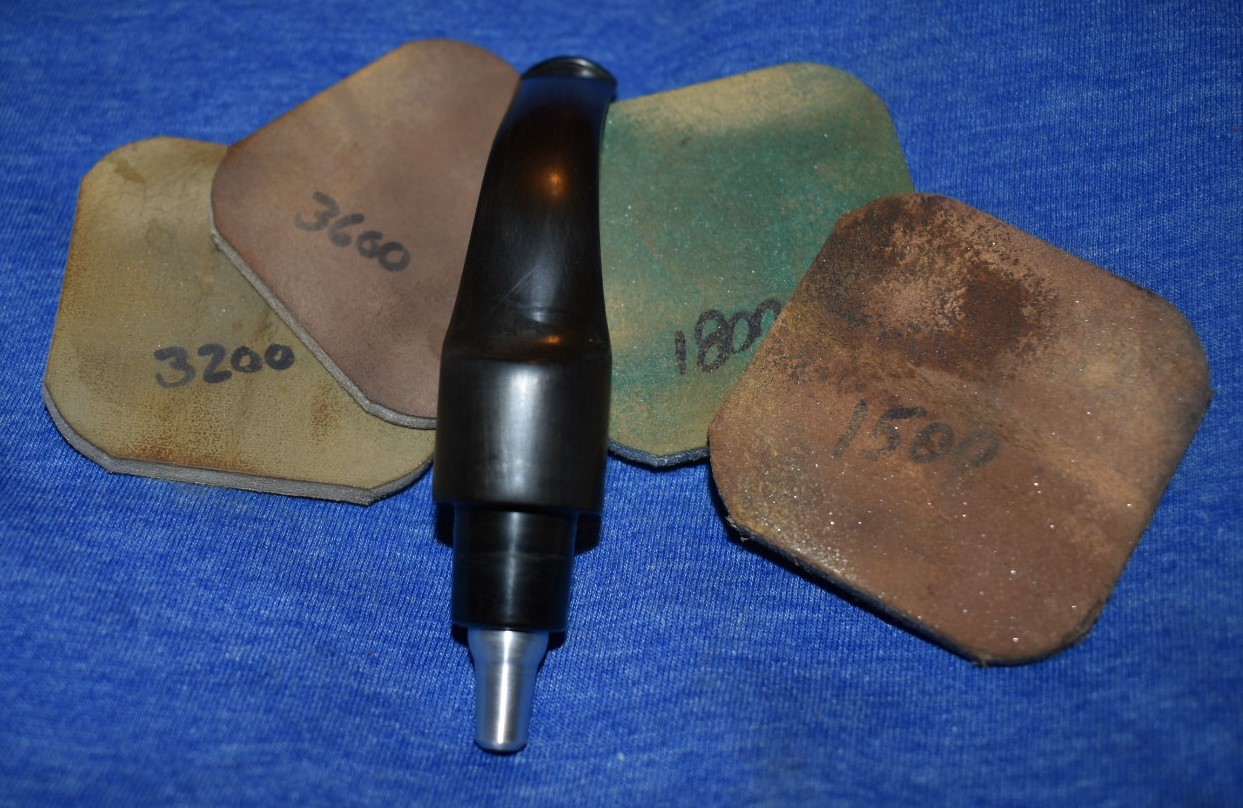
    Happy with the dent removal and button redefining, I moved on to the micro-mesh pads.  I started with the 1500 and 1800 pads wet.  In between

    each pad I would apply a drop of Obsidian oil, rub it around with my fingers and wipe it with a clean make-up pad.  I used the pads in order from the 2400-

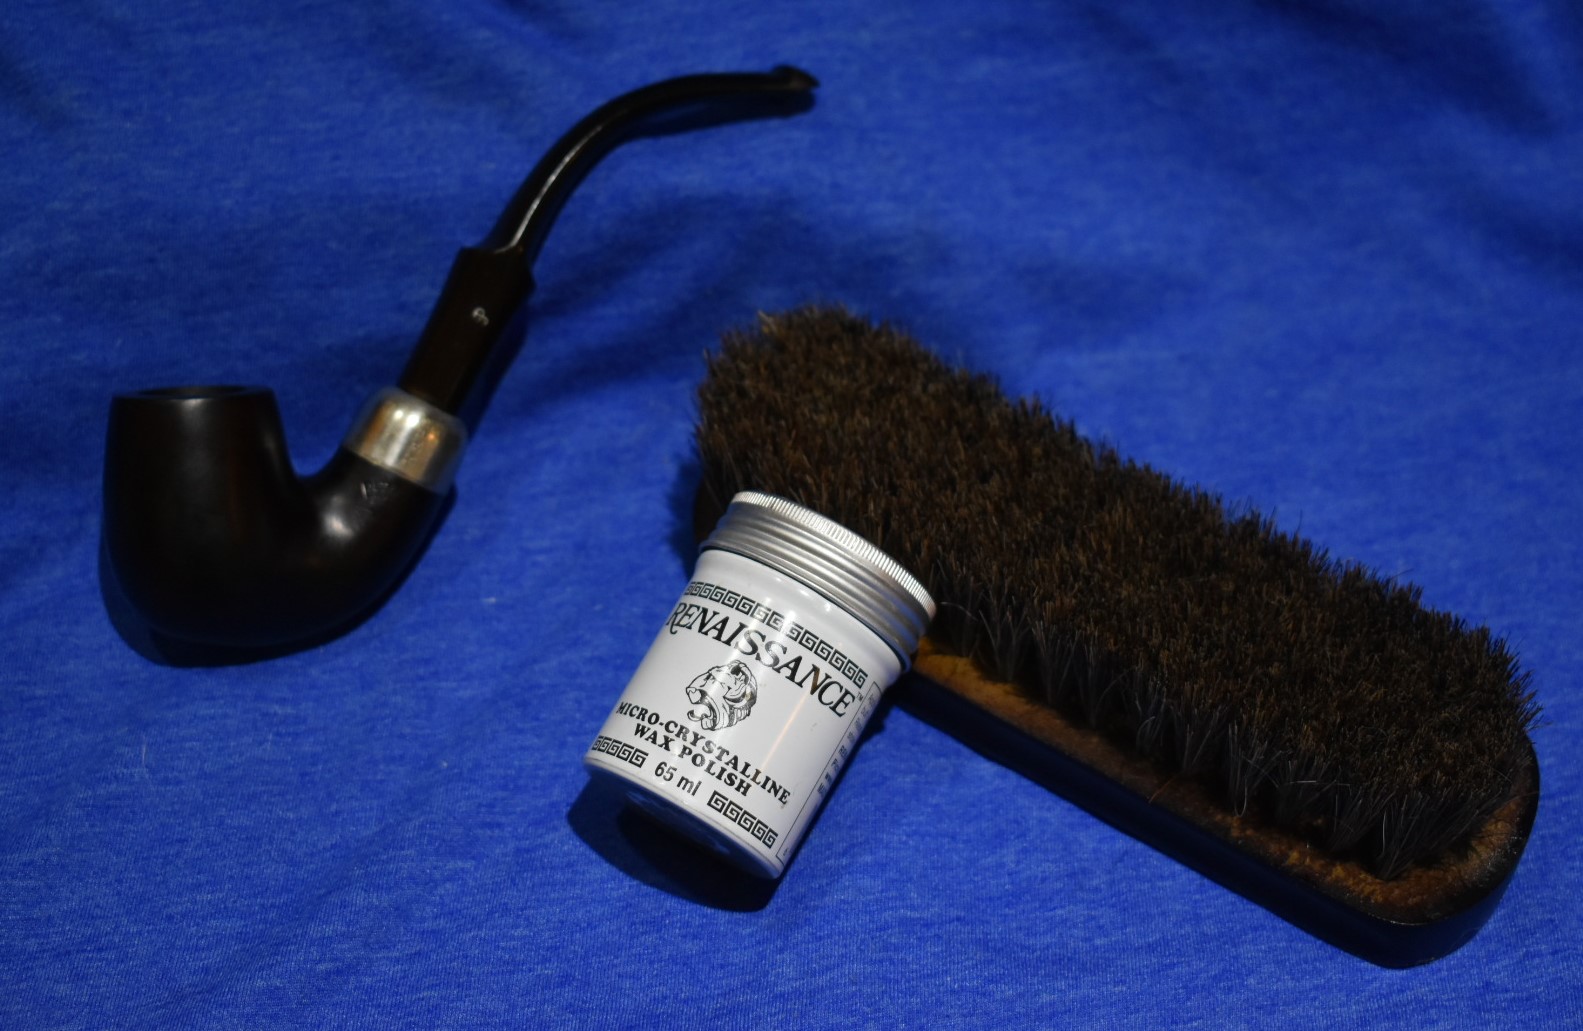
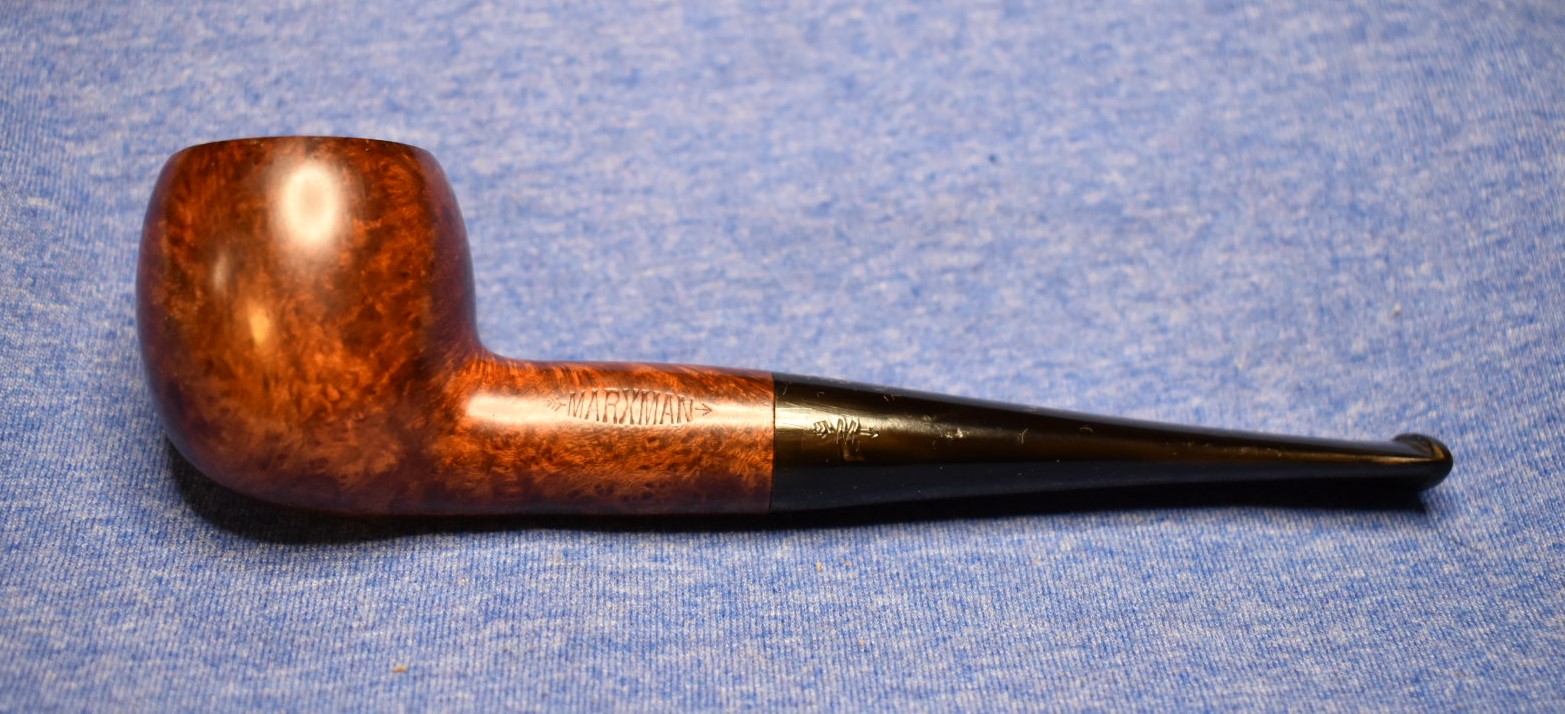
    12000 dry.  Again  repeat the the Obsidian Oil rub between each micro-mesh pad.  I took the stem to the buffer and buffed it with white diamond buffing compound.  Normally I use the Before and After Fine followed by the Extra Fine polish.  I wanted to see if there was a noticeable difference between the two methods.  I could not determine a difference.  After buffing I used a cloth to wipe any buffing compound from the stem.  I reattached the stem and gave the entire pipe a couple of coats of carnauba wax with the buffer.

    This was a fun and surprising restoration.  I had never come across fills of this magnitude and extent.  I In the end I have a pipe that I will probably give to someone who has a real love for the deep sandblast finishes.  Thank you for reading the ramblings of this old pipe lover.  If you like this content please hit the “like” and or “subscribe” buttons.  You will be alerted when a new post is published and be the first to read another ramble.

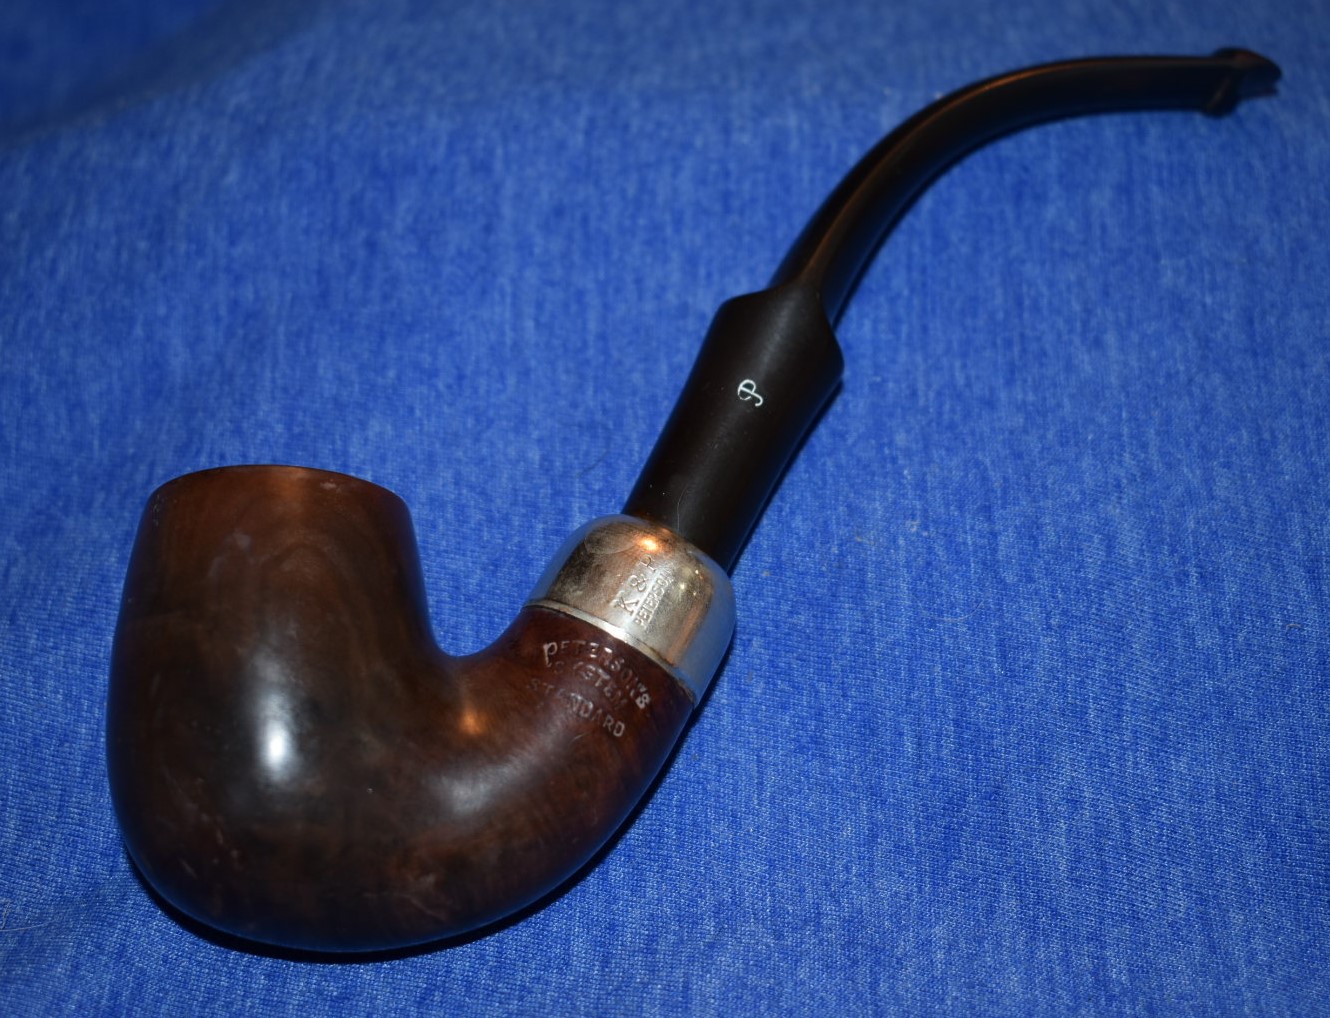
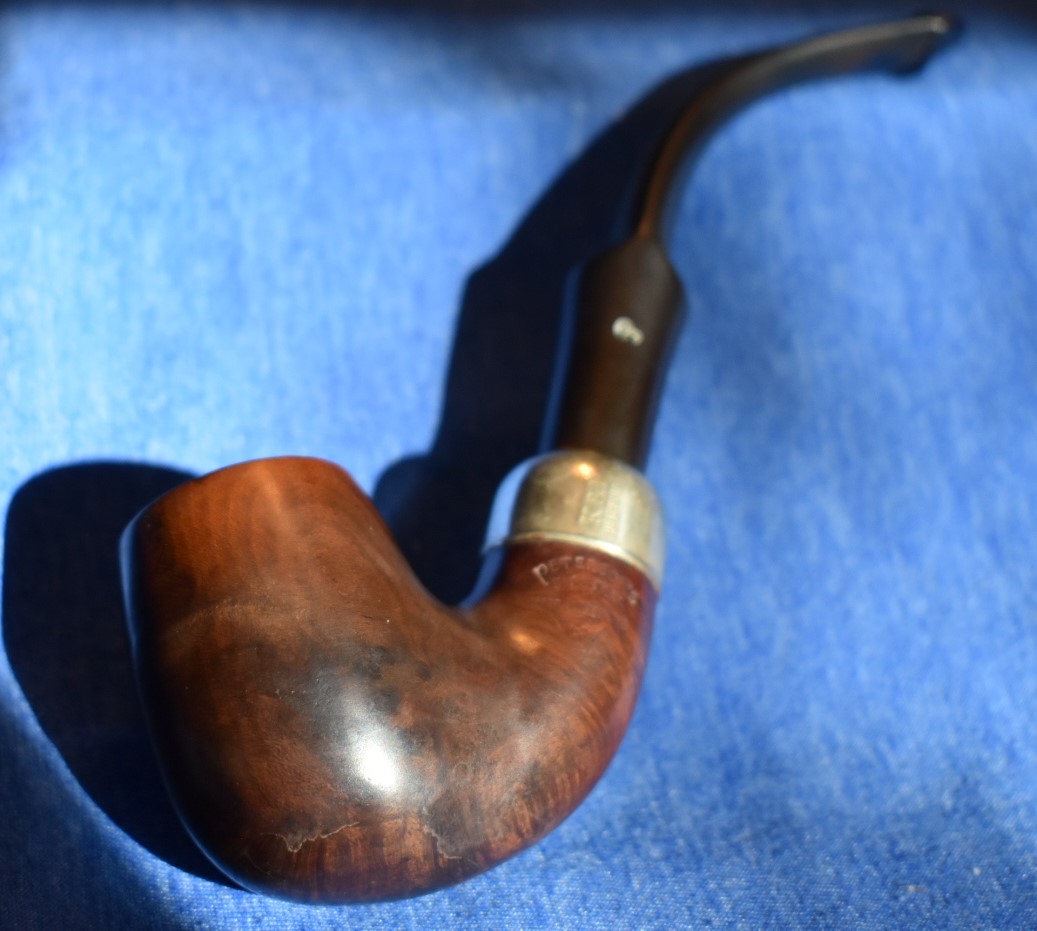
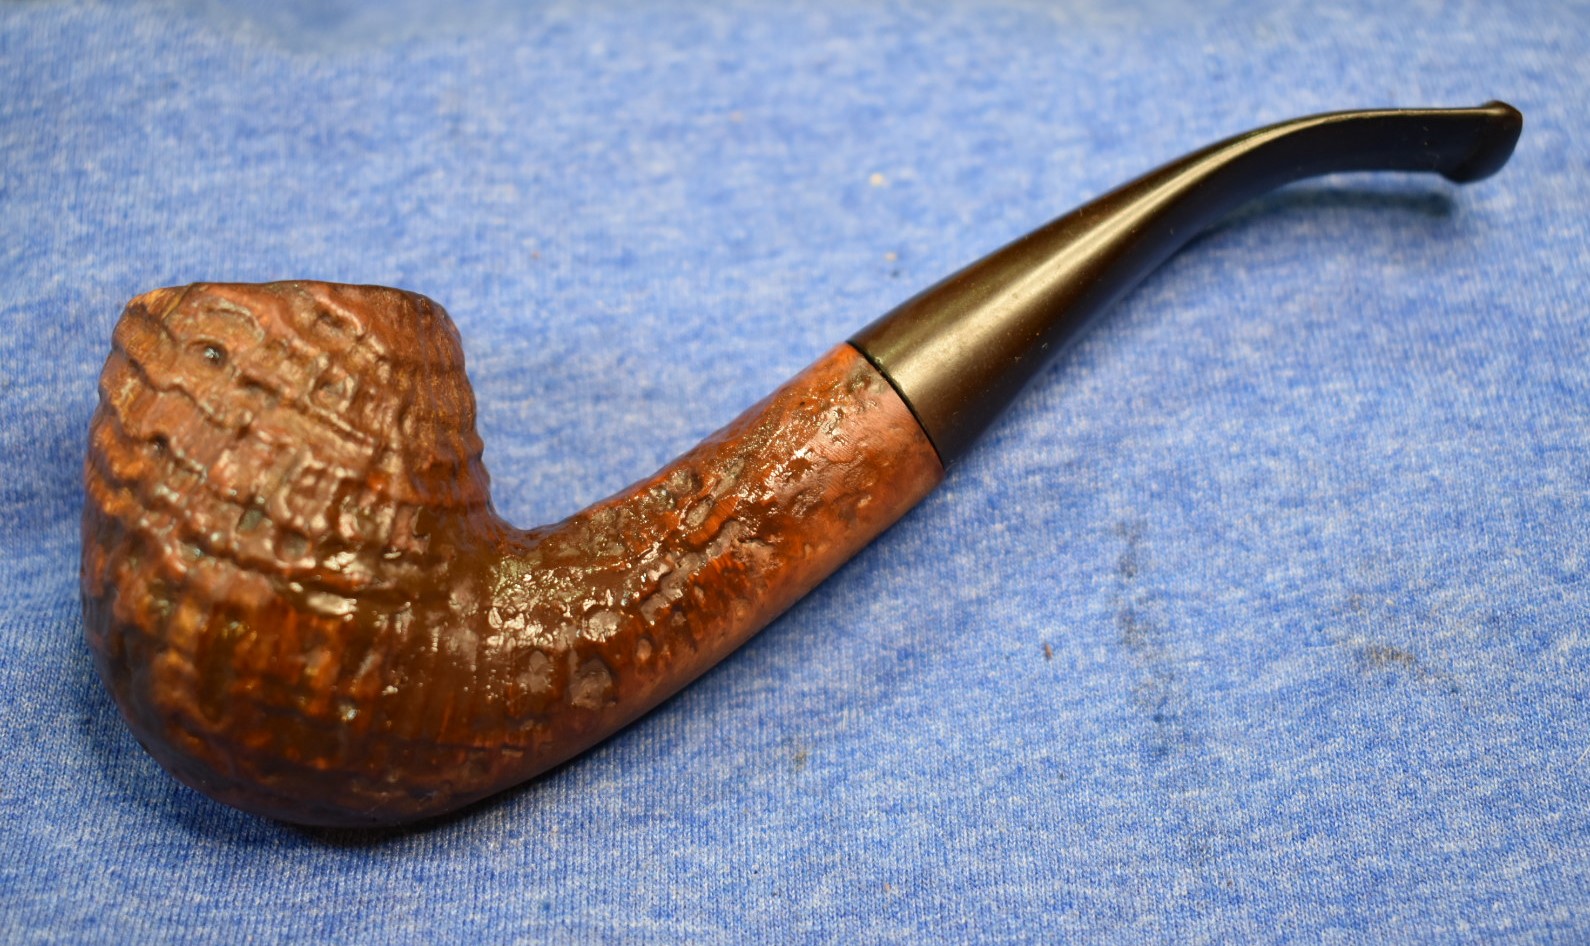
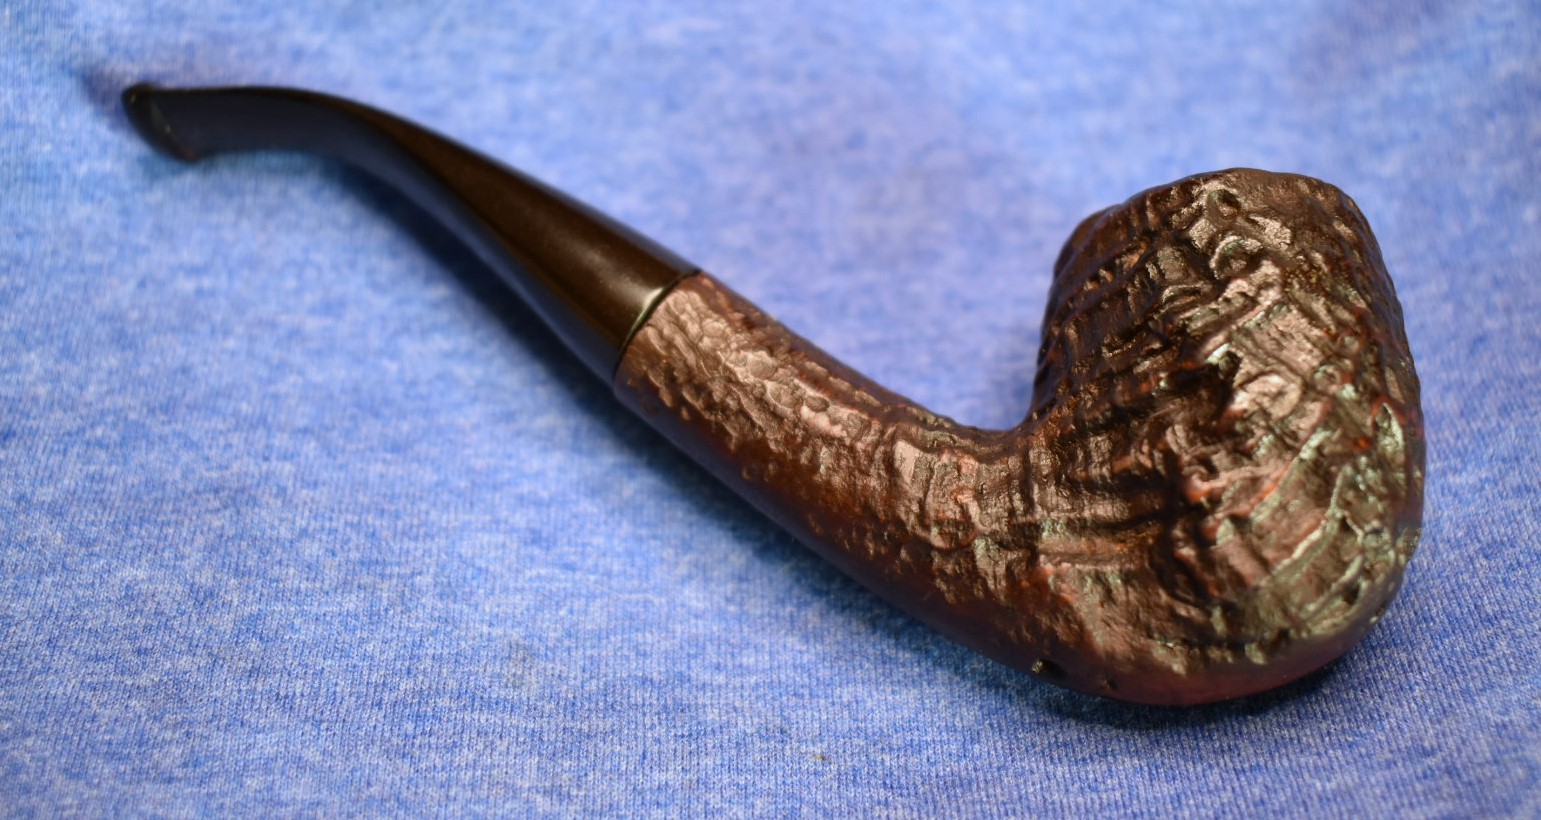
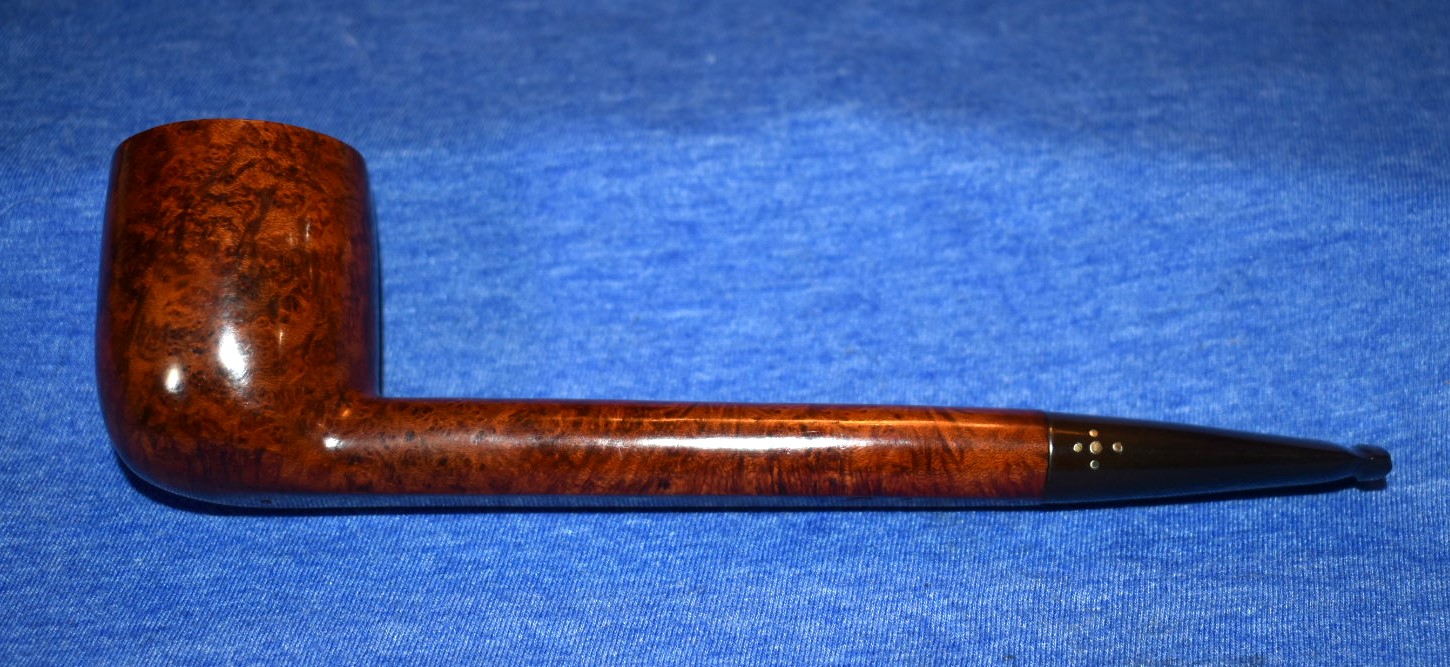
    Below are the photos of the finished Waldorf.

  • A Kaufmann Bros. & Bondy (KB&B)? Churchwarden Restoration

    November 23rd, 2023

    Written and photographed by John M. Young

    The first time I ever publicly wrote anything about pipe restoration was in a forum at SmokingPipes.com back on October 21 2022.  I guess I was feeling pretty proud of myself and wanted to brag a little.  I titled the post “You did what to a what with a what?”  The following is that post in its entirety:

    It was bound to happen: I finally got a Ropp cherry wood branch with an auction and no, that was not the pipe in the lot I wanted. Anyway, the old Cherry was kind of cute. I felt obliged to give her a little bit of love. A little bowl reaming followed by the old Murphy’s oil soap with a toothbrush routine and the obligatory removal of the electrician tape in front of the mouthpiece revealed a – dramatic pause – a cracked shank. Who saw that one coming? Hmm, how much obligation do I really have for this old girl? I mean, we just met…

    Well, lets see how bad the crack is. Hmm, half an inch. Internet search for a ring shows that the Vermont Freehand boys are going to be in Las Vegas for a few days and this old Cherry needs a doctor “stat”. What else could I use? Hey, what is that old .357 cartridge doing in my pipe cleaning tool box? The caliper says that .375 would require a whole bunch of file work and sanding to make a ring. Hmm, last time I checked a .44 Mag case is wider than a .357. Wheels turning, let’s visit the reloading bench. Sure enough, a .44 is bigger than a .375 and would only require a little bit of filing and sanding. Hmm, now all I need is a son-in-law who is a plumber with a pipe cutter. Oh yeah, he’ll be home at 4:30. Snippity snap I have a .44 cal, I mean a brass ring for the patient. Doctor, I think she is going to pull through.

    I hope you had as much fun reading as I did restoring this old Cherry. And for the record, she smokes pretty well.

    From south east NE,

    John

    I am guessing that you can relate if you have purchased an estate lot or two.  You get that pipe with tape around the shank right there at the mortise.  You think to yourself, “I bet the previous owner just liked tape.” Yup, da Nile is a river in Africa.  Then you carefully peel the tape off, certain that if you go slowly the crack will have healed over time, you continue, slowly, slowly.

    Visions of Brad Pitt pop into your head. You continue undaunted, a little more.  Then there it is in all of its eldritch horror. – a shank crack.  You are sure that the crack is so large the previous owner probably fell into it and may still be trapped down there. 

    Okay, maybe I have a tendency to over exaggerate – the Nile is mainly in Egypt.  But, the rest is exactly how I felt the first time I discovered a shank crack.  Learning to deal with them allows our darlings to live again regaining some of their smokey glory.  After having glued and clamped one successfully.  I thought, “this isn’t so bad”. That first glue job is still together after well over 2 years. 

    Then you find another crack and try to fashion a band and that works out pretty well too.  You try a few more and sure enough, shank cracks are just another little thing that we have to deal with.  I still recommend checking to make sure the previous owner isn’t trapped in there before you glue and clamp it up.

    That brings us to the pipe of the day, a lovely old KB&B churchwarden (?) with a metallic tape shank.  Not just scotch tape for this girl, no sir.  Real duct

    tape. And under that tape, you guessed it – a shank crack.  I failed to take a picture of just the crack so you get to see what I did to the end of the crack.

    Sorry if that kind of ruined the surprise.  I am getting ahead of myself.  Let me start with the photos of the pipe when she arrived:

    She’s a long one, coming in at just under 12 inches (30ish cm)an she had all of the things that you expect from an old pipe:  Dirt and grime, a caked bowl, lava on the rim, an oxidized stem, dents and dings, dirty internals and a cracked shank.  Now the title of this blog contains a question mark because the stummel is not stamped with the KB&B clover nor with KB&B anywhere.  The only stamping on the stummel is the “CHURCHWARDEN”.  There is no country of manufacture (COM) nor any shape number.  So, “why are you calling her a KB&B?”, you rightfully ask.  Because the logo on the stem matches the logo for Kaufman Bros. & Bondy from their pre Kaywoodie days.

    (https://pipedia.org/wiki/Kaufmann_Bros._%26_Bondy)

    It is also true that there were two KB&B seconds brands which also used this logo.  The first is Dorset.  Here you can see the same logo but in light blue. 

    (Do-Dq — Pipes : Logos & Markings (pipephil.eu)) 

    The second is the Hamilton, here the logo is in yellow.  The yellow looks to be the same as the first emblem pictured. 

    (H-Hd — Pipes : Logos & Markings (pipephil.eu))

    Both the Dorset and the Hamilton are stamped with the KB&B cloverleaf. It does bother me that there are no other stampings on this churchwarden to verify this claim.  According to the KB&B page at Piedia, 

    “The trademarks, for the inlaid cloverleaf and the cloverleaf with the KB&B initials inside, were issued in 1881.” (https://pipedia.org/wiki/Kaufmann_Bros._%26_Bondy)

    KB&B had used the cloverleaf logo for many years prior to the origination of Kaywoodie and Yello-Bole.

    This could have been an old stem that was slapped onto some no name stummel at any point in the previous century.  I am not claiming that this is a true Pre-WWI or WWII KB&B and listing it up for auction.  This is a pipe that I enjoyed working on and continue to enjoy smoking.  As for the history of the piece, It may be lost to the mists of time.

    To the restoration.  I apologize in advance for the lack of step by step photos.  This was another of my earlier restorations before I started proper documentation. 

    The first thing that I did was to remove the tape.  I think I covered that ordeal pretty well earlier.  The crack was approximately one half an inch (1.25 cm) long.  Normally I will ream the tobacco chamber first but, I wanted to see to this crack.  The tape must have been applied shortly after the shank had cracked and the owner applied a good amount of force when taping the shank back together.  They had obviously enjoyed smoking this pipe and tried to the best of their ability to fix her up and get her back into the game.  There was very little debris in the crack.  

    I started cleaning out the airway with cotton swabs dipped in 99% isopropyl alcohol.  They were pretty dirty.  I then poured about 3 ml of the alcohol into the bowl and held the pipe at an angle that would not dump the alcohol all over the workbench.  I retrieved a small nylon shank brush.  With the alcohol pooled up in the shank, I started scrubbing with the brush.  You could feel the alcohol doing its job as the brush became more and more easy to move back and forth.  I dumped the alcohol into a medicine cup knowing the color would be dark, it was.  I poured another 3 ml of alcohol in and repeated the airway scrub.  This time the alcohol came out more brown than black.  I repeated the process again and the alcohol was more golden.  Progress.  After the third alcohol shank scrub I then was able to use the cotton swabs to finish cleaning out the airway.  I figured that all of this alcohol would also be cleaning out and rinsing the crack as I was cleaning the airway.  I used a longer bristle brush to work alcohol into the crack and clean it out as well as I could.  I used the fine dental pick to see if there was anything else that could be removed.  The crack appeared clean.

    I started on the tobacco chamber next. I used the PipNet reamer.  All the alcohol had softened up the cake nicely and the reaming went without any

    issues.  I gave everything a final scrape with the SmokingPipes Low Country Reamer.  The final step was to use 220 sandpaper wrapped around a wooden dowel to return the chamber to bare briar and inspect for any damage.  The interior of the chamber looked good and showed no signs of damage.

    I then took the stummel to the sink for its bath.  The bath is a serious scrub with undiluted Murphy Wood Cleaner and a medium stiff toothbrush.  This

    will usually remove the years worth of dirt and accumulated grime.  Again the lava on the rim had also been softened by all the alcohol from earlier and it too scrubbed off nicely.  The rim did look like it was in need of a topping as the years of use had given it a charred taper rather than a nice sharp edge.  After the Murphy’s scrub the stummel was rinsed with warm water and dried with a cotton dish towel.  

    The stummel returned to the workbench looking clean and finish free.  I started to rub down the stummel with cotton make-up removal pads soaked in 99% isopropyl alcohol.  There did not appear to be any finish remaining on the briar.  I wanted the wood to be completely dry before addressing the crack so, I set it aside and turned my attention to the long churchwarden stem.

    Typically I would rub the length of a stem with 0000 steel wool and give it a soak for an hour or so in the Before and After Deoxidizing Solution.  This stem was far to long to fit in the jar.  Which meant that it would have to be done with Soft Scrub and cotton pads.  The thought that made my finger start cramping in anticipation.  I decided to make an OxyClean solution in a large ZipLock bag and soak the stem in the solution in an attempt at softening up the oxidized vulcanite.  I put about a heaping tablespoon of OxyClean in about ¾ cup of warm water.  Yes, I know, exact measurements are helpful.  I figured that I’d let it soak for an hour then see how it was progressing.

    The OxyClean soak did work at softening the oxidation.  I set to work with the make-up removal pads and the Soft Scrub.  Many pads later and a couple breaks, not of the stem but breaks for my hands, the stem was looking much better.  I oiled the stem thoroughly with mineral oil and mentally prepared myself for the stem airway.  Knowing how grimy the shank was I had kind of

    https://www.piggypolish.com/channeling-scrubbing-bubbles/

    been putting off the stem airway cleaning.  I did hope that the OxyClean solution would have been like the scrubbing bubbles on the old commercials. 

    I got a medicine cup filled with about 5 ml of alcohol, a pipette for dropping more alcohol on the length of the pipe cleaner and a new bag of churchwarden bristle pipe cleaners.  Long pipe cleaners work well if they do not get a bend in them.  This means the you are pushing less than one centimeter at a time into the stem.  It was a long and tedious process with many bent stems and additional drops of alcohol but I finally got one pipe cleaner through.  I remembered seeing a

    video somewhere about clamping the end of a pipe cleaner in a vice while holding the other end of the clamped cleaner and moving the stem up and down along the pipe cleaner.  If I recall correctly the guy in the video was talking about polishing the airway.  I did this with the churchwarden stem.  I added additional alcohol to the top and slid the stem up and down on the clamped pipe cleaner.  Several pipe cleaners later the airway was clean. The next job was to micromesh the stem.  I started with the 1500 followed by the 1800 micro-mesh pads.  These were both wetted with a couple of drops of water.  After the 1500 I wiped the stem with Obsidian Oil before proceeding to the 1800.  After the 1800 micro-mesh the Obsidian Oil was used again.  The remaining pads were used in increasing numbers with Obsidian Oil applied between each pad.

    The following day, after the stummel had dried overnight it was time to address that crack.  To keep the crack from spreading I used the smallest drill bit I had and my Dremel rotary tool.  I drilled a small hole at the end of the crack.  This crack was wide enough that I thought J.B. Weld would be a better glue to use that cyanoacrylate (super glue).  I then mixed the two part epoxy on a small plastic tray with a toothpick.  I then worked the epoxy into the crack flexing it open and closed to allow the glue to penetrate the entire crack.  Once i was satisfied with the coverage I used a small clamp to squeeze the sides together.  To make sure there was no epoxy on the inside of the airway I used a couple of cotton swabs slightly moistened with acetone to wipe the excess glue from the airway.  This was set aside to allow the epoxy to cure.

    My next task was to cut a brass band.  I thought that brass would look slightly better that the aluminum tape band that the pipe had on arrival.  You my have noticed from the earlier photo of a few of my band projects they are made from spent cartridge brass.  That was the source of my brass bands

    prior to me actually buying several different diameters of brass tubing.  In the case of this KB&B (?) I used a 44 Remingth Magnum spent cartridge (pun intended) as the donor.  A pipe cutter was used to cut a piece that would cover the crack.  The cutter is nice as it gives the brass a little bend to the cut end and softens the edge.

    I allowed the epoxy to cure overnight before removing the clamp.  The instructions say that the glue sets-up after 15 minutes but I wanted to make sure the the stress of the wood would not spread the still soft glue and widen the crack.  The next day I removed the clamp and took a look at the glue seam.  

    It looked good.  I  sanded the excess glue on the outside of the stummel then sanded the area that would be under the band for a better fit.  The band went on without glue as it was a very tight fit.  I used a scrap wood block to press the band the final millimeters and t make it flush with the shank.

    With the band seated all that remained was the final micro-meshing of the stummel.  This process nearly the same as with the micro-meshing of the stem..  The difference was that rather than using Obsidian Oil between the micro-mesh pads I wipe the stummel with a make-up pad moistened with

    99% isopropyl alcohol.  After the 12000 micro-mesh pad and alcohol wipe I gave the stummel a liberal coating of Before and After Restoration Balm.  The balm was allowed to sit for 30 minutes.

    After the wait time I rubbed the remaining Restoration Balm off with an inside-out athletic sock.  I did not have a buffer at the time of this restoration.  I did have Renaissance Microcrystalline Wax.  The wax was applied and allied to dry to 10 minutes.  The wax was then hand buffed with a buffing pad.  This was repeated two additional times.  

    I have enjoyed smoking the this old pipe many times.  I certainly understand why the Germans call churchwardens “lesepfeife”, which means reading pipe.  They do make wonderful reading companions.  Other benefits include not getting smoke into your eyes when reading, not having to reach all the way to your face for a pipe and looking wizardly.  No, not like Gandalf.  In the J.R.R. Tolkien’s Middle-earth books Gandalf did not use a long stemmed pipe.  He had a small clay pipe that he tucked into his robe.  We can thank Peter Jackson for the image of Gandalf with a long stem pipe.  I don’t think I will ever be certain as to the pedigree of this churchwarden.  KB&B or not?  I don’t think it matters one bit to the pipe nor the tobacco and guess not me either.  Thank you for reading the rambling of this old pipe lover.  If you have any insights to the origin of this churchwarden please feel free to leave a comment.  If you like this sort of thing please click the “like” and or “subscribe” buttons.

    Below are photos of the finished KB&B (?) Churchwarden.

  • A Restoration of a Doodler

    November 20th, 2023

    Written and photographed by John M. Young

    The quest for a cooler smoke may lie at the heart of mans’ needs. Needs such as water, food, shelter, a mate, love, companionship, are there too.  Okay, maybe not the “heart” but, at least the appendix or the spleen of mans’ needs.  This quest has led to many unique inventions.  One of these is Tracy Mincer’s Doodler.  Tracy Mincer was the originator of the Custom-bilt pipes in 1934.  Interestingly, the same year that Robert Marxman began the Marxman pipes company.  The history of Tracy Mincer’s contributions to the estate pipes which we have available today can still be seen.  I have a saved search on Ebay that alerts me everytime a Custom-built or Custombilt (the hyphen was used until 1946) pipes are added to Ebay.  Today, thus far, four new listings have come up. 

    There is what sounds like a remarkable book about the Custombilt company by William Unger, Jr., Ph.D. titled, THE CUSTOM-BILT PIPE STORY.  Pipedia has information at the bottom of their “Custom-Bilt” page that states the following:  

    “Available from the author (order from). 263 pages, plastic spiral bound, 87 illustrations: pipe photographs and reproductions of rare ads and catalogs. Chapter One: The Companies; Chapter Two: The People; Chapter Three: The Pipes; A carefully researched history of these increasingly collectible pipes, from their beginning, with Tracy Mincer in 1929, to their last manufacture in 1998. A guide to the names and distinguishing features of the many different variations. Reviews by Richard Esserman, and Tony Soderman.”  (https://pipedia.org/wiki/Custom-Bilt)

    The “order form” link takes you to http://naspc.org/books.htm which unfortunately is not currently functioning.  However the site does say. “This page is currently blank – we are working on bringing content here, so stay tuned in the future.” (http://naspc.org/books.htm)  So, I will continue to check the site in hopes of a functioning webpage.  The reviews by the above gentlemen, Esserman and Soderman, are also quite interesting and make me wish I could obtain a copy of the book.

    As for the history of the Doodler, Pipedia states that: 

    “After his loss of the Custom-Bilt name in 1953, Tracy Mincer‘s next production pipe was The Doodler. The pipe was turned for Mincer by the National Briar Pipe Co. beginning in the early 1950’s, and that company eventually purchased the pipe design in approximately 1960. After that time Mincer’s former partner Claude Stewart began making a line of pipes called the Holeysmoke which were largely identical to the Doodler pipes, and National Briar continued to produce the Doodler. The pipe’s design centers around a series of vertically drilled holes in a ring around the combustion chamber, meant to provide airflow and a cooler smoke.” (The Doodler – Pipedia)

    In reading the Mincer page at pipedia, parts of this passage funny, 

    “in the early 1950’s, Tracy Mincer developed severe financial problems that caused him to stop making the Custombilt, and he lost the name. In 1952, Mincer began a new pipe, The Doodler, that due to the holes in the bowl had to made primarily in a billiard type shape in three sizes. In the early 1950s, National Briar was turning the bowls for Mincer. Based upon the documentation, it appears that Mincer made the pipe until the mid 1960s, when National Briar Pipe Co., Inc. began making and selling the Doodler.

    Mincer died in 1964.” (https://pipedia.org/wiki/Mincer)

    Not to make fun of the deceased but rather the writer of the piece.  Death in 1964 certainly would cause one to stop making pipes in the mid 1960s.  Even after his death the Tracy Mincer name was still used to market and sell pipes.  

    “Claude Stuart purchased the Tracy Mincer Pipe Company and began making pipes using the Tracy Mincer stamp. Stuart finished nearly all the pipes produced, mostly carved and textured bowls and the occasional straight grain. Claude made the Tracy Mincer Pipe Company a moderate success. Stuart became ill and in 1990 The Tracey Mincer Pipe Company went out of business. Currently, Jim Tedesco owns the Tracy Mincer name.” (https://pipedia.org/wiki/Mincer)

    The stamping on my Doodler was the same as those pictured on the Pipehil.eu site:

    (http://www.pipephil.eu/logos/en/logo-t4.html#thedoodler )

    This brings me to the conclusion that the pipe I have is a Doodler, profound, eh?.  I cannot be sure as to when it was made since the years of manufacture were from 1953 -1960s.  Mincer’s death in 1964 did not apparently end the production of Tracy Mincer’s pipes.  I like to think that the pipe I own was an earlier version due to the carved gouges at the bottom of the stummel or heel.  These are more reminiscent of the Tracy Mincer Custombilt pipes and may be a carry over from his experiences there.  This of course is all just conjecture.

    How did I come to own this particular Doodler?  I won it on an Ebay auction. The pipe had piqued my interest and I had been watching auctions for a

    couple of weeks.  Finally I won the pictured auction.  I know, big spender, right?  Well, I am a big believer in the saying, “better luck than good, anyday.”  The pipe arrived and I was quite pleased to see that the lighting in Ebay the photos were not very good and the pipe appeared far nicer than the photos.

    This appeared to be a nice easy restoration.  Actually, more of a clean-up.  A clean-up with a stem restoration. I started with reaming out the tobacco chamber.  There was minimal cake build up to remove.  Sorry for the lack of photos – this whole process went so quickly I kind of forgot to document the it.  After the minimal reaming I sanded the interior of the bowl with 220 sandpaper wrapped around a wooden dowel. 

    There was some charring or lava around the rim.  I figured I would start with the Murphy Wood Cleaner and see what that revealed.  The Murphys was applied to a medium stiff toothbrush undiluted.  This was used to scrub the entire exterior, without the stem. As usual I was amazed at how much grime a pipe that looked so clean actually has.  The deposits on the rim were just lava and came off easily with the scrubbing.  I rinsed the stummel with warm water and dried it with a cotton towel.  I returned to the workbench.  The amount of rinsing was minimal and the bowl was spacious enough that I dried the stummel more thoroughly with paper towels. Getting into all of the spaces between the rings was tedious but easy to accomplish.

    I did notice that the vertical holes drilled from the rim through the rings was not done with extreme care.  Most of the holes were rough with slightly chipped edges.  I figured a little bit of round needle filing would smooth them up a little bit making the final appearance more finished.  I don’t think it made as much of a difference as I thought it would.  Here are the before (left) and after (right) photos of the rim:

    I then began the task of cleaning out the shank.  The shank like the rest of the pipe was quite clean.  I used cotton swabs soaked in 99% ethyl alcohol.  The first couple came out as you would expect.  The tars that had accumulated were quickly removed and the whole stummel had no old tobacco smoke aroma.  

    I turned my attention to the stem.  The stem had obviously spent a good deal of time in someone’s mouth.  There was teeth chatter, calcium deposits and an oxidation pattern suggesting frequent use.  There were no deep dents

    indicative of long periods of rough physical work while clinching a pipe between the teeth.  I started imagining the owner of this Doodler sitting after dinner reading his paper while watching Leave It to Beaver, The Donna Reed Show, and The Adventures of Ozzie and Harriet.  Before going off to bed he would tap the bowl on a cork knob in his ashtray then run a pipe cleaner or two through the stem.  He would then carefully place his smoking buddy on a pipe rack and head to bed.  

    I used 0000 steel wool to rub away the calcium deposits and remove some of the worst oxidation.  I then took the stem to the Deoxidizer solution.  I ran a pipe cleaner into the stem from the tenon and left 3 inches to hang the stem from the edge of the jar.  I figured that I would hang the stem in the solution for an hour or so. 

    Sidenote:  I think that I have been remiss in explaining the source of the Deoxidizing solution.  I use Before and After Extra Strength Deoxidizer from https://www.lbepen.com/shop-5.  They have remarkable products mainly for the restoration of fountain pens.  I am also a big fan of their Before and After Restoration Balm (for the briar), Before and After Fine and Extra Fine Polish (for stems).

    While the stem was in the Deoxidizing solution I returned to the stummel.  You may have noticed a slight crack on the top of the shank. 

    I worried that this might be a more significant issue and the stummel got all cleaned-up.  I moistened a make-up removal pad with 99% ethyl alcohol and began to give the stummel a good alcohol scrub.  The only thing that came off the stummel was a little bit of what appeared to be stain.  It was very light and its absence did not seem to change the color of the briar.  There was no finish to be observed.  Bless you Mr. Mincer for not using a lacquer.  The crack that looked so ominous when it was dirty, now appeared to be completely superficial.  There were a couple of dents along the top of the shank.  I decided not to fill these as I thought they went with the rough carved heel of the pipe and I really do not like to do fills.  

    I started the sanding/micro-mesh process with 400 wet/dry sandpaper wet with a few drops of water being very cautious near the stampings.  After the light sanding I wiped the stummel with a make-up pad moistened with the 99% ethyl alcohol.  I continued to use the 1500 and 1800 micro-mesh pad also wet with the alcohol wipe between micro-mesh pads.  The 2200-12000 micro-mesh pads followed again with an alcohol wipe between each pad.  When finished I gave the stummel a coating of Before and After Restoration Balm with my finger and thumb.  I then switched to a baby toothbrush with Restoration Balm to work the balm into all the holes, rings and carvings.  The stummel was then set aside to allow the balm to do its thing.

    After about an hour I returned to the stem.  I lifted it from the Deoxidizing solution and allowed it to drip most of the excess back into the jar.  Nitrile gloves are recommended when handling the Deoxidizing solution.  I then use a more coarse cotton shop rag to wipe the solution from the stem.  It starts out feeling kind of tacky but as you rub the rag absorbs the solution and buffs away the oxidized vulcanite.  I rub quite vigorously until the stem feels smooth and dry in the rag.  After the outside of the stem was rid of the solution I used two absorbent pipe cleaners to run through the airway of the stem. Immediately after the deoxidizing solution is removed I dip my finger into mineral oil and give the stem a complete coating of oil.  I then dip a pipe cleaner in the oil and run it through the airway.

    The stem was ready for sanding, micro-mesh pads and polishing.  The stem had no deep tooth chatter or bite marks.  I was able to lightly sand with 400 wet sandpaper to remove the chatter quickly.  The stem was then wiped with a layer of Obsidian Oil from my fingers and wiped off with a clean make-up pad.  I then started the micro-mesh pads 1500 (wet) and 1800 (wet).  Between each pad I reapplied a light coat of Obsidian Oil and wiped it off with a make-up pad.  Those were followed with the remaining sequence of micro-mesh pads 2400-12000 with the same oiling and wiping between pads.

    Overall I was very pleased to have been able to restore a piece of pipe

    smoking history to its glory.  It really is a strangely beautiful pipe.  I don’t recall where but, I do remember reading that the whole Doodler rings and holes thing doesn’t really work.  I have yet to try the old girl out.  She has a place with a few other oddities of history up on the mantle.  Thank you for reading the ramblings of an old pipe lover.  If you like this restoration stuff please click the like and subscribe buttons.

    Below are photos of the finished Doodler.

  • A Pipe by Lee Restoration

    November 16th, 2023

    Written and photographed by John M. Young

    Pretty sneaky, eh?  Starting a post with a photo of an unfinished pipe slathered in Restoration Balm.  Well, maybe I am just trying to hook you then reel you in through the steps of the restoration then for the grand finale “WOW” you with a beautiful restored pipe.  I guess you will just have to see what happens.  As you can tell from the title or see from the above photo this restoration is dealing with a medium bent billiard shaped Pipe by Lee.  I have had the privilege of restoring two of Lee’s pipes previously.  A large bent billiard and a rhodesian both of the two star variety.  Here are the two

    previous subjects.  Both are quality briar but not without fills.  They are very nice pipes to smoke and I can highly recommend the Pipe by Lee brand if you are looking for a good quality piece of briar for a reasonable price.  

    Steve Laug wrote a guide back in 2017 about a beautiful, well, I’ll just show you the title and link; “A Pipe by Lee Limited Edition 2 Star Rhodesian worth restoring?” (https://rebornpipes.com/2017/10/06/a-pipe-by-lee-limited-edition-2-star-rhodesian-worth-restoring/?).  It is an excellent piece of work with a great deal of time spent on researching the brand: Pipe by Lee.  If you are interested in the history of the company it is all well laid out for you in Steve’s article.  Myself, I am a proud member of Generation X (AKA Slacker) and will gladly refer you to his article.  It is a fascinating read and really addresses the quality of the briar in comparison to the leading pipe makers of the 1940s-1960s.  It shows that Lee’s pipes were in the same ballpark as Kaywoodies and even Dunhills of comparable price.  Like I said, a very interesting read.

    Now, this three star darling that you see above came to me from very close to my home, geographically speaking.  I originally saw the Ebay auction for her and sent the seller an offer.  I assumed that was what the “make an offer” button was for.  This original offer was sent off in August.  The offer went unanswered.  The auction timed out and ended with no one wanting to adopt the three star of the show.  She was relisted.  I waited “watching” the auction.  When the end day was approaching, I made another offer as I assumed that is what the “make an offer” button was for.  This offer also went unanswered.  The auction timed out again and again, she was relisted.  This pattern continued until I got a message in November from Ebay saying that I only had one offer remaining for this item.  I winced. I made another offer as I assumed that is what the “make an offer” button was for and waited for the traditional un-answer.  This time the offer was accepted.  A few days later the no longer unadoptable Pipe by Lee had a home.  Remember I said geographically close?  It came from a seller in Omaha NE, less and an hour drive north of me.

    Upon her arrival I took some photos documenting my victory.  Here they are:

    The sun was shining in through the south windows making the light a little harsh but I was excited to finally make her acquaintance. The stem needed to be bent with a more appropriate curve, there were a couple of scratches, a weird stain on the front of the bowl and some lava on the rim but the wood grain looked good and the stem wasn‘t terrible.  “This is going to be an easy restore”, I thought.

    One of the things that I was really interested in examining was the quality difference in the briar between a 2 star and a three star Pipe by Lee.  In the history of the brand there were pipes rated from one to five stars.  I had never seen anything higher than a three, “how would they compare?” I wondered. Another thing that I noticed is that the stars were different.  Both of my 2 star pipes had five pointed brass stars embedded into the tops of

    their vulcanite stems.  This pipe had what looked like a hot foil pressing of stars onto the side of the stem.  That kind of struck me

    as a “lower quality” move by Lee.  “Well vulcanite is vulcanite, right?  What difference could that possibly make to the pipe?”,  I thought.  The two star bent billiard had the same “not enough” bend when she arrived and a little bit of heat gun and gentle pressure fixed her right up. 

    The first step was to get the pipe cleaned up so I could see if there were any larger issues at play.  I first used the PipNet reaming tool and Smokingpipes reaming knife to remove the cake from the tobacco chamber.  The chamber was quite clean and actually had a bit of tobacco and what looked like pocket lint.  Following the reaming, I used a wooden dowel wrapped with 220 sandpaper to sand the interior of the chamber.  After the sandpaper I wiped the chamber with a cotton make-up removal pad dampened with 99% ethyl alcohol. This showed me that there was no damage to the briar of the tobacco chamber.

    The rim was moistened with a bit of saliva and scaped with the edge of a sharp knife.  The knife  blade is straight, not curved, and is held perpendicular to the rim.  Very little pressure is applied so you can see that only the lava is removed.  The edge is wiped on a paper towel frequently to remove the lava from the surface.  The below photo shows a scraped rim with only a couple of spots of lava remaining.  This will be removed during the next phase of scrubbing.  

    Next the stummel needed to go to the sink for a scrub using Murphy Wood Cleaner and a medium stiffness toothbrush.  The Murphy’s is used undiluted and a dollop is poured directly onto the stummel.  I then brushed vigorously herding the Murphy’s at first then just scrubbing as the cleaner gets distributed over the surface of the pipe.  It is amazing how much dirt and grime are removed from a stummel that appears clean.  After the scrub I rinse with warm water.  I decided to run a nylon shank shank brush with a little bit of Dawn Dish Soap  through the shank.  As expected the Dawn foamed up and the foam quickly changed from a white to a foamy chocolate milk color.  By now my water was more hot than warm and I rinsed the shank with hot water.  This better removes the soap.  I applied a bit more Dawn and repeated the shank scrubbing followed by another rinse.  I rinsed the brush off separately and used it while rinsing the shank until I was confident that the soap was all rinsed away.  Many people shy away from using dish soap for internal pipe cleaning fearing that some soap residue may cling to the surface and affect the flavor of the pipe.  I contend that if properly rinsed the internals should be like the surfaces of our plates and flatware, free of soap and any taste associated with it.  The stummel exterior was dried thoroughly with a cotton dish towel while the tobacco chamber was dried with a paper towel.  I twisted the paper towel and inserted it into the shank to dry it and to see if the paper twist was discolored by smoking residue.  I did discolor, indicating that it would need a bit of additional cleaning.

    The stummel was returned to the workbench where I poured 5 ml of 99% ethyl alcohol into the chamber while plugging the mortis end of the shank with my finger.  I sloshed the alcohol around and allowed it to fill the shank.  I allowed the alcohol to slosh around inside the pipe for about a minute.  The purpose of the alcohol bath is twofold; 1) If there is remaining residue in the shank the alcohol further softens it and 2) the alcohol, being very hydrophilic, will draw the water from the briar into solution with the alcohol.  The alcohol was poured into a medicine cup. The exterior of the stummel next received a wipe down with a clean make-up removal pad dipped in the alcohol.  This allowed me to see if there was any finish remaining or lava as the alcohol evaporated.  I saw no remaining finish nor lava.  I then proceeded to use cotton swabs dipped in fresh alcohol to remove any residues inside the shank.  This pipe was fairly clean to start with and the dish soap worked well so, I only had to use 4-5 cotton swabs. Below are photos of the stummel after the scrub and alcohol wipe.  I did reinsert the stem for these photos.

    Next, I turned my attention to the stem.  I rubbed the entire surface of the stem with 0000 steel wool.  I planned to give the stem a dip into the Deoxidizing solution and the steel wool rub allows the removal of the outermost oxidized vulcanite prepping it so the solution can work its magic.  I placed a pipe cleaner into the tenon end of the stem, dipped the stem into the solution and bent the remaining pipe cleaner over the edge of the Deoxidizing Solution jar; the lid was then placed back on the jar.  I figured that since this stem was not too oxidized I would only leave it in the solution for 30 minutes to an hour.  Noting the time, I returned to the stummel.

    I examined the stummel for scratches and dings that I might be able to fill or repair.  There was one scratch/dent on the left side of the stummel that I thought looked especially deep.  I thought that I would try to raise this with a bit of steam.  I retrieved my old pencil soldering iron and plugged it in, to heat.  I then used a piece of denim cloth (old blue jeans rag) and soaked one corner with tap water.  When the soldering iron was hot I held the damped cloth to the surface of the stummel and applied the soldering iron to the damp cloth.  It steamed quite nicely and I was prepared for great things.  I moved the soldering iron over the area for approximately 10 seconds.  Upon removing the cloth I saw that I had completely missed the dent.  So much for great expectations.  Okay, try that again.  This time I was much more diligent in properly locating the dent and applying the heat.  Checking the location twice, I was on it, this time.  I again moved the soldering iron over the dented area for 10 seconds.  I couldn’t see much of a difference.  I repeated the steaming another 3 times, same results – not much improvement.  

    I thought, “If I fill that with briar dust and cyanoacrylate (super glue) it is going to be smooth but a dark mark will be there instead of a scratch”.  I decided to  leave it for now and see how it looked after the sanding.  The sanding went smoothly,  I started with 400 grit sandpaper dampened with water.  I was very careful to avoid the stampings,  After sanding I wiped the stummel off with an alcohol dampened make-up pad.  Next came the 1500 micro-mesh pad, also moistened with water, followed by another alcohol wipe.  This was followed by the 1800 micro-mesh, again dampened and another alcohol wipe.  I think you are starting to see a pattern.  I continued up through the micro-mesh pads, dry after the 1800, up to the 12000 micro-mesh pad.  

    Here is how she was looking at this time:

    I decided against filling the flaws.  One, because I don’t like fills and two for my own pipe, I’ll know the flaws are there whether they are filled or not.  Also I thought they added a bit of character to the pipe, showing her history, and umm – Slacker.

    Returning to the stem.  Having soaked in the Deoxidizing solution for close to an hour I figured the stem was ready to be beautiful.  I removed the stem from the solution and allowed it to dip the excess solution back into the jar.  Nitrile gloves are recommended when handling the solution.  After the drip I placed the stem onto a coarse shop rag. Using the rag I vigorously rubbed the solution from the sem.  It starts out feeling sticky but as it is buffed with the rag, the rag removes the oxidized layer and begins polishing the surface.  The interior of the shank also needed to have the solution removed.  For this I used a couple of  absorbent pipe cleaners run through the stem.  I try to work quickly and thoroughly because I want to get a layer of mineral oil onto the fresh vulcanite to keep it from oxidizing anew.  The mineral oil is rubbed onto the stem with my fingers while a mineral oil dipped pipe cleaner is run through the draft hole.  The photos below show the top and bottom views, respectively, of the stem at this time. 

    It was at this point I decided to use a little bit of Soft Scrub with Oxy on a make-up pad to se if there was still any oxidation remaining of the stem.  While rubbing with the Soft Scrub I noticed something peculiar:  The material on the pads had an off color.  The color was more of a greenish black.  Normally oxidized vulcanite has a golden brown color.  I took photos because it struck me as odd.

    In this first photo you can see normal oxidation from a vulcanite stem when rubbed with Soft Scrub.

    In this photo you see the odd colored oxidation that was removed from the stem of the 3 star stem.

    Here they are side by side.  There was definitely something different about the vulcanite used in the 3 star stem.

    The only areas that needed sanding more than just with the micro-mesh pads were the areas immediately around the button.  I used a Bic lighter flame to “paint” over the stem.  This is done by continuously moving the flame over the surface of the stem. Kind of like painting it.  The heat from the lighter can raise dents in the vulcanite.  It helped but did not eliminate the need for sanding.  I Started with 400 wet/dry sandpaper for the stem top. While on the bottom I started with a small flat needle file.  I gently removed material from the high areas around the dent.  Once smoothed then I lightly sanded with 220 wet/dry sandpaper moistened with water.  This was followed by 400 wet/dry sandpaper also moistened.  Here, I applied a light coat of Obsidian Oil allowed it to penetrate for about one minute and wiped it with a paper towel.

    Next was the systematic process of micro-meshing the stem.  I again started with the 1500 and 1800 pads used with water and wiped between with fresh Obsidian Oil.  After the initial two pads I move through the 2400-12000 micro-mesh pads with Obsidian Oil wipes between each pad.  At the end of this succession I use Lbepen Fine Polish and Extra Fine Polish on cotton rags to vigorously polish the stem.  Here is how the stem looked after the sanding and polishing:

    The end is nigh.  The application of the Restoration Balm to the stummel breathes life into the wood grain.  I used my finger tip to apply an even coating of the balm to the stummel and allow it to sit for 20 minutes to overnight depending on how late it has gotten.

    This brings us to where we began with the first photo.  After the Restoration Balm was rubbed from the stummel I wanted to add a bit more of a bend to the stem.  I wanted it to match the bend that I had done with the large bent billiard 2 star Pipe by Lee.

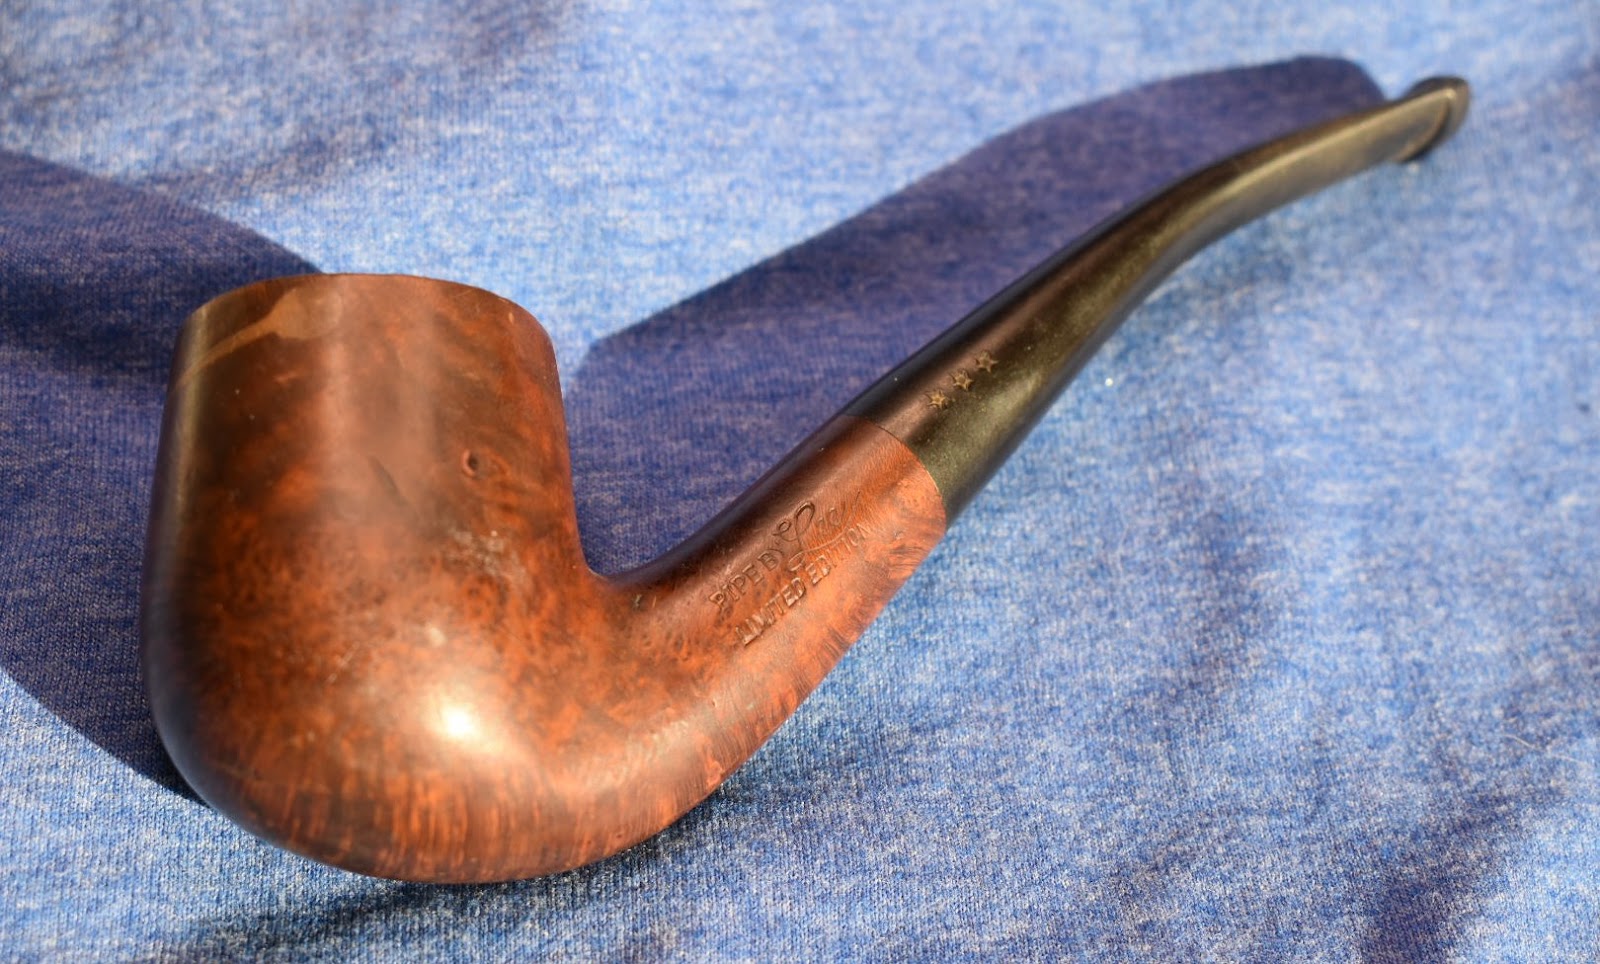
    Pipe by Lee 2 start bent billiard before bend

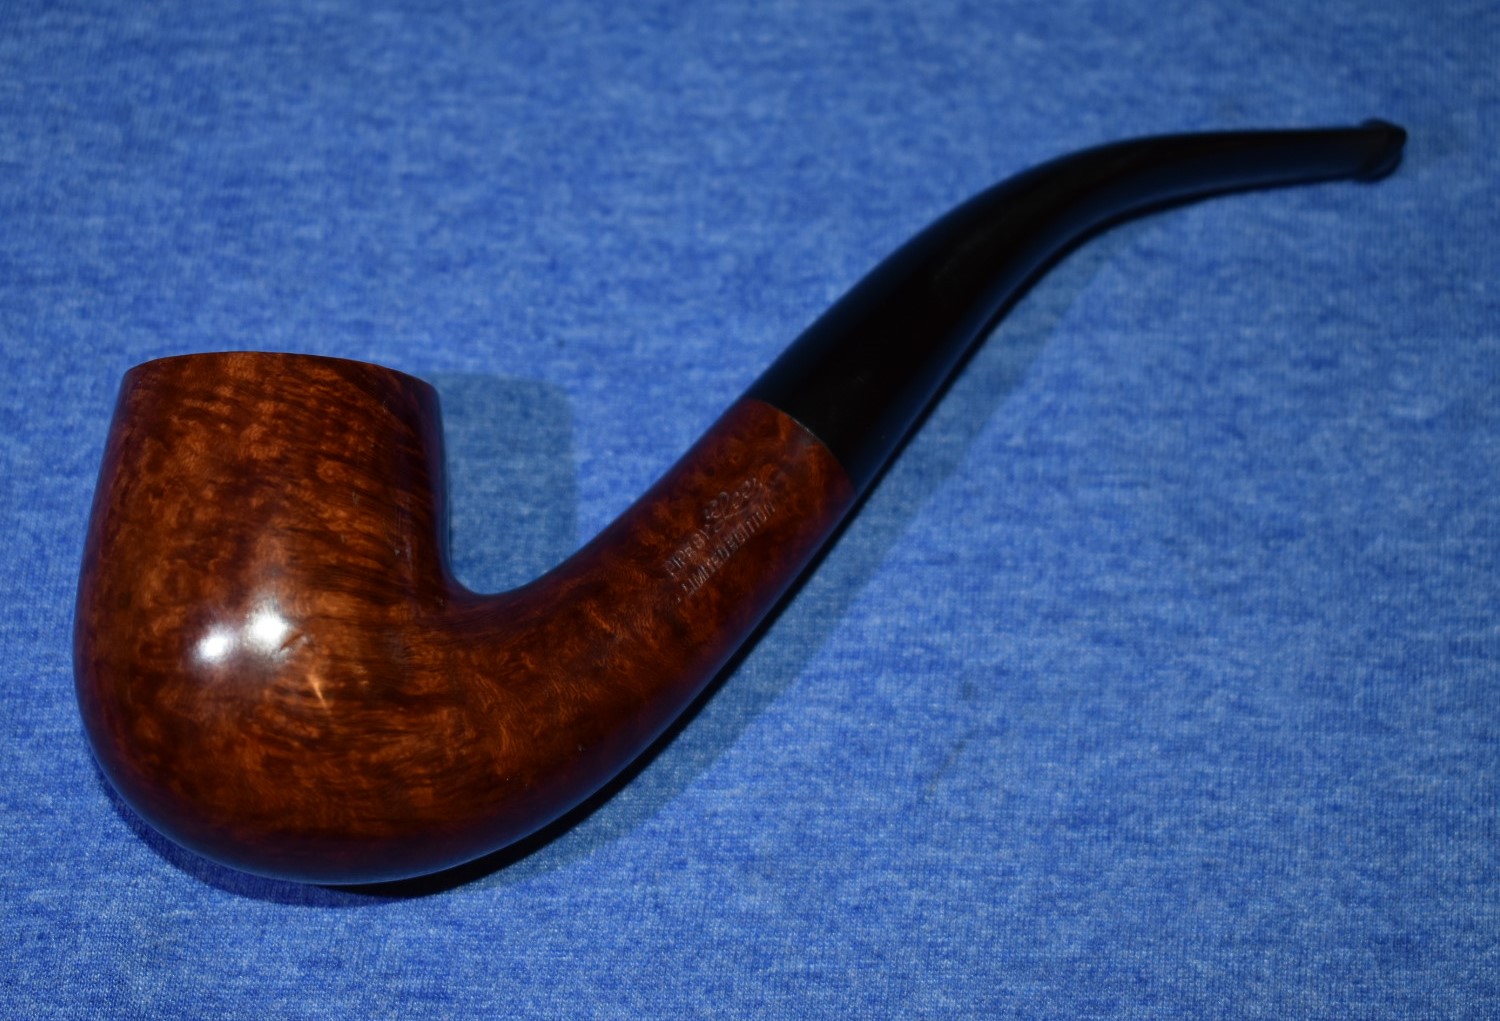
    Pipe by Lee two star bent billiard after bend

    Normally when bending a stem I used a heat gun to heat the stem.  I continually move the stem back and forth in the heat while rotating it in my fingers.  Every few seconds a bit of pressure is applied to see if the stem is warmed and is flexible enough to bend.  If not more heat is added.  Once the stem bends easily I used a jar as a guide for the curve.  When I am happy with the bend I cool the stem in flowing cold water from the faucet.  

    With the 3 star stem I proceeded to follow the above process.  The heating went as planned as did the bend over the jar.  I Figured I would just hold the stem on the jar for a few seconds extra to allow the stem to cool and set the bend before I moved it into the cold water stream.  That is when I heard and felt a pop.  Hmm, I guess this one is not going to match the 2 star bent billiard.

    I took this as a sign that I needed a reminder about  humility.  In the past few days I had been honored to have been mentioned in both Steve Laug’s Rebornpipes and in Mark Irwin’s Peterson Pipe Notes.  Thank you universe for the reminder. 

    Now, as a retired science teacher I am thinking about causes for this break:

    1. Heavy handedness has to be the number one reason.  I have bent many stems.  My early attempts were bent and then re-bent to fix mistakes from the first bend.  I had never experienced a break.  Also, of potential note, when the break occurred I was not applying additional pressure – I was maintaining pressure.
    2. I do have multiple sclerosis and have numbness in my fingers (24-7, as they say).  This could have contributed to the above #1.
    3. The 3 star stem was made of a different kind of vulcanite (lower quality?)
    4. The 3 star stem had a flaw that allowed it to break with heating, cooling and pressure.

    In the end, I do not think it really matters as to the cause.  The important part is how will the break be remedied.  This is also not the end.  I am thinking about ways to rejoin the above broken stem and I plan on posting about that restoration in the future.  Until then, I thank you for reading the ramblings of an old pipe lover, even if this episode has a less than happy ending.

    PS:  If you have any ideas or suggestions please feel free to leave them in the comments.  I will gladly give you credit for them in the upcoming restoration of the restoration.

  • A Marxman Regular Apple Restoration

    November 14th, 2023

    Written and photographed by John M. Young

    I remember when I first started down my pipe restoration path.  I’d picked up an estate lot figuring that would be the best way to practice and hone my skills.  Within the lot there was a dark dirty poorly grained small billiard pipe.  The stamping said “MARXMAN”.  It was quite nondescript.  I immediately had an aversion to the name, as many of my generation might, Carl Marx was no hero of mine.  I started researching Marxman pipes to find out more about this company which I hadn’t heard of.  As I read, I became fascinated.  Yes, many of the Marxman pipes were filled with fills, others so ugly that they were kind of cute, and there were the carved pipes of people (effigies that today would probably get you in trouble for being racist), animals and famous celebrities as well as the traditional pipe shapes.  Indeed something for everyone.  

    The history of Robert (Bob) Marxman was also intriguing.  To start a company at 29 years old and turn it into a successful business is impressive but to do that when the world is at war and the supply of your main material, briar, is cut off due to the war is even more impressive.  Then to see the marketing;  innovative, clever, good advertising all creating success.  I saw parallels in Marxman’s business to things we do in restoration –  like making the best with what you have.  I also discovered that there is no book about the history of Marxman.  There are great books that can be used to research Falcon pipes or Peterson pipes and web sites for Dr. Grabow and Custom-bilt pipes but alas, little to go on for Marxman.  All we have for certain are the dates of a beginning in 1934 and a merger with Mastercraft in 1953.  I guess that makes dating then easy.  (https://pipedia.org/wiki/Marxman)

    I have restored a number of Marxman pipes and find them fun and relatively inexpensive to practice with.  At the same time some are my favorite pipes to smoke.  The spigot and the chunky lovat, to the left, are great smoking pipes.  The lovat is one that I would surely be ridiculed for if I tried entering her in a beauty contest.

    This brings us to the Marxman Regular Apple, the topic of this restoration and the photo at the top of the page.  This little darling arrived as many Marxmans do – well used.  That is a polite way of saying beat-up and filthy.  She had a cake so thick that only a tiny bowl of tobacco could be smoked.  How she avoided a cracked bowl is amazing.  This cake was equally as thick as the briar walls of the tobacco chamber.  

    The bright lights used in these original photographs actually make her look better than the normal room lighting.  I could see very little grain of any kind.

    Then there was the condition of her stem – all I could think of was that a teenager with a channel-lock had heard there was a $20 bill in the shank and he was going to be the first to retrieve it.

    Of course the internals were in a condition that is expected of a pipe in this state.  

    Other than those issues this should be fun, although fun to a restorer may not be universally accepted.  

    Normally I start with a thorough cleaning of the exterior of the stummel.  This time I started with the reaming of the tobacco chamber.  I was actually afraid that it might just burst like a balloon cracking into several pieces.  Okay, slight exaggeration, there.  I began with the PipNet and the Smoking pipes knife.  I soon realized that I did not want to put that much pressure on the handle of my PipNet.  

    I got out the Tsuge reaming blade and the Scotte adjustable reamer.  I started opening up the chamber one step at a time and finished with the PipNet.  The aftermath of the reaming was a pile of carbon cake that if properly sequestered will aid with global carbon control.  The chamber was finally sanded with 220 sandpaper on a wooden dowel.  The chamber looked good with no signs of any damage from excessive heat.

    With the chamber reamed I turned my attention to reaming out the shank and draft hole.  I used the draft hole reamer from the Scotte tool to clear the airway.  It felt rather “greasy”.  I took this to mean that there was still a thick residue of tar and yuck in the shank.  I tried scraping the airway with a dental pick without much success.  

    To the sink.  I took the stummel to the sink to scrub the externals with Murphy Wood Cleaner and a medium stiff toothbrush.  Given, my hands still had carbon on them from the reaming but, wow.  The dirt and grime that came off the stummel with the soap was impressive.  It was still impressive with the second application of Murphy’s.  By the third time I removed the years of accumulated grime.  Now for the shank.  I started that with the nylon bore brush with Dawn dish soap.  The lather produced was dark brown.  This was rinsed with hot water.  The bore brushing with additional Dawn and rinsing continued several cycles.  Finally the lather was not brown.  I was sure that the entire stummel would need to be dried overnight with all of that exposure to water.  

    I returned the stummel to the workbench and proceeded to wipe it down with a make-up pad soaked in 99% ethyl alcohol.  The pad removed little else from the stummel, just picking up a very slight brown tint, probably a bit of dye from the wood.  I poured a couple milliliters of alcohol into the chamber and sloshed it about and allowed it to fill the draft hole with my finger plugging the mortise end.  The alcohol will draw much of the water out of the wood as it is very hydrophilic.  I poured the remaining alcohol into a medicine cup and used a paper towel to dry the remaining alcohol from the bowl.  I then used a small round needle file to feel for tar in the shank.  The needle file came back with tar embedded in the teeth.  Hmm, lets try a little technique I came up with – wrapping/rolling a piece of paper towel around the needle file, dip the tip in alcohol and scrub the shank.  It works and it allows you to put more pressure on than you can with a cotton swab. The tip end will absorb the tars and can be unwrapped, flipped over, rerolled for a clean side.  After doing this repeatedly I finally made progress cleaning the draft hole.

    Here is what the Marxman Regular Apple looked like after the scrubbing:

    You can really see that there is some wood grain and some big dings and chips to the rim.  To the topping table.  This is actually just a new piece of 220 sandpaper laid flat on the counter. I sanded in a circular pattern until I had removed most of the dings.  I rotated the stummel in my hand several times to keep the pressure even across the entire rim.  There was still the chip.  For that I sanded until the remaining chip could be removed by beveling the inside edge of the chamber using a wooden ball wrapped in a small piece of sandpaper. After the 220 sandpaper I repeat the process with 400 sandpaper.

    The left photo is topped only while the lower photo is topped and beveled.

    The sanding of the stummel was done starting with 400 wet dry sandpaper.  I was careful of the stampings as to not remove any material from them.  After the sandpaper the stummel was

    wiped off with an alcohol soaked make-up pad.  I then began using the micro-mesh pads.  The most coarse pad I have is 1500.  This pad was used with a couple drops of water on the pad.  Between pads the stummel was wiped off with the alcohol dampened make-up pad.  After the 1500 came the 1800, also with a bit of water.  I continued up through the micro-mesh pads to 4000, wiping between each with the alcohol.

    Once the stummel had been sanded and micro-meshed I gave it a coating of Restoration Balm and allowed it to marinade in the balm while I addressed the stem.  I did not soak the stem in the Deoxidizing solution since I knew that it was going to be sanded extensively in order to remove the numerous dents and teeth marks from what appeared to be pliers.  The cleaning of the stem began with the removal of the stinger.  Stingers or “metal filters” are

    kind of a misnomer as they hardly filter the smoke.  They most likely allow a surface onto which water can condense out of the smoke and maybe some smoking particles will absorb into this water but, filter?  They are usually press-fit into the stem.  This one was quite stuck.  I tried to soften the dried residue with alcohol and used a brass brush to clean it off.  Eventually I wrapped the stinger in a piece of denim and pulled it out with a pair of pliers.  I then dropped the stinger into a medicine cup with alcohol to soften the dried residue.  Knowing how dirty the shank had been and not wanting to use hot water on the stem and risk discoloring it.  I decided to use a technique with long churchwarden bristle pipe cleaners, a pipette with alcohol and a vice.  You clamp one end of the pipe cleaner in the vice, thread the stem onto the

    pipe cleaner, lightly moisten the pipe cleaner with alcohol (not dripping wet, just moist) then holding the free end of the pipe cleaner tight you vigorously move the stem along the full length of the long pipe cleaner.  This can be repeated as many times as needed.  After an alcohol soak the stinger cleaned easily and was re-inserted into the now cleaned stem.

    I had to be careful not to sand the tenon end of the stem as I did not want to change the shape or size of the stem to make fitting with the shank unsightly.  I used 180 sandpaper to roughly sand the problem areas.  This rough sanding was smoothed and blended by lighter sanding with 220 followed by 400 sandpaper.  This was a slow process and I was sure that the results would leave a stem that had waves along the surface where I had to remove so much material in order to erase the dents.  Eventually I got to the point where I was happy with the look of the stem.  I then proceeded to use the finer and finer grade micro-mesh pads.  The stem was wiped down with Obsidian Oil between each of the different micro-mesh pads.  When finished I could still see some of the dings from the abuse but overall I was pleased with the look of the finish. 

    With the stem in acceptable condition and the stummel well marinated, it was time to reassemble the renovated darling.  I wiped the remaining Restoration Balm off the pipe and gave it a good rub with the inside of a cotton athletic sock.  It always amazes me at how well the Restoration Balm breathes life back into a piece of dry briar.  Truly amazing stuff.  The pipe needed a few coats of carnauba wax applied via the buffer.  After the buffer waxing I hand buffed the entire pipe with a microfiber polishing cloth to add that little extra shine.

    If I were a professional restorer I would have been more inclined to strive for perfection.  The only problem there is how perfect can a well used 80 year old pipe get?  This one will most likely be either used by me as a work-in-the-yard/fishing pipe or it will be gifted to someone and I was quite pleased at the improvement.  Either way it has returned to the task that it was originally made for:  To be used to smoke tobacco and look darn good doing it.  I hope that you can use some of the techniques that you see here in your own work, were slightly entertained or both.  Thank you for reading the ramblings of an old pipe lover.

    PS:  Here are those books/websites I referred to earlier:

    Back From The Ashes: Uncovering the Lost History of G. L. Hunt and the Falcon Pipe,

    by Worth, K. A.

    Available at: https://www.amazon.com/Back-Ashes-Uncovering-History-Falcon-ebook/dp/B006VOOFNC/ref=sr_1_1?keywords=falcon+pipe+history&qid=1699996641&sr=8-1 ($2.99 digital version on Amazon)

    The Peterson Pipe: The Story of Kapp & Peterson,

    by Mark Irwin and Gary Malmburg

    Available at: https://www.smokingpipes.com/accessories/books/moreinfo.cfm?product_id=471478 (Still available from Smokingpipes.com, though not $2.99 it is a remarkable book)

    Review of:  THE CUSTOM-BILT PIPE STORY, by William E. Unger, Jr.,Ph.D

    https://pipedia.org/wiki/Custom-Bilt

    The Pipes of Sparta: Dr. Grabow, by Leigh Ann Henion https://www.ourstate.com/the-pipes-of-sparta-dr-grabow-tobacco-pipes-north-carolina/

    Below are some photos of the finished Marxman Regular Apple.

  • An MLC Hell Maria Restoration

    November 11th, 2023

    Written and photographed by John M. Young

    This was what may have been my first restoration.  It contains mistakes, early photographs and is written from a less than stellar memory.  With those  qualifiers or disqualifiers, I will continue.  Upon retirement from 32 years of teaching secondary science, I concluded that I needed more activities to fill

     my increased free time.  By the way, if you ever wondered what it looks like to turn-in one’s paperwork after 32 years of teaching here is a photo.  I had smoked a pipe on and off since 1991.  None of the earliest pipes remain as they were given away or lost to the ephemera of time. 

    As part of my learning how to restore pipes I went to the internet.  I do not recall many of my original searches but I do vividly recall reading Steve Laug’s  blog posts from https://rebornpipes.com/ and thought that he was a master of restoring old pipes and communicating the steps of these restorations.  I voraciously consumed his blog posts.  I have never been a big youtube watcher and found that the written blog format better suited my learning style.  Not that there are not great restoration videos out there.  There are and I have learned a great deal from the likes of Bare Pipe.  It has been said that imitation is the greatest form of flattery.  In looking up that quote it is important to use the whole sentence rather than just the first 7 words.  Oscar Wilde’s full quote reads: “Imitation is the greatest form of flattery that mediocrity can pay to greatness”.  I model my own restoration guides on the works of Steve Laug.  I accept my mediocrity and I hope that readers will find mediocrity useful in their own restorations.

    From reading Steve’s posts I noticed that many of his old pipe finds came from antiques shops.  There are a couple of shops in a town close to home, so I thought I’d give that a try.  I was walking down Main Street in Plattsmouth Nebraska and came across one of the antiques shops.  I went in and was wandering about kind of expecting to find the Holy Grail, an original copy of the Declaration of Independence or a vintage Dunhill.  Sadly I found none of those.  I did ask the proprietor if there were any “old pipes” in the shop.  Behind the counter she pulled down two quart sized Mason jars with some assorted pipes.  Nothing really caught my eye except this one weirdly shaped filthy pipe.

    The lighting in the shop was not conducive to details nor my old eyes and I asked if I could take the pipe to the south facing window to get a better look.  I had never seen a pipe like this and wondered “how did they drill this thing?”  Then I gave the top a twist and my question was answered.  The shop keeper had no information about the pipe nor did she know how much to charge.  A quick phone call to her son set the price firmly at $20.  I was pretty sure that it was robbery but I was fascinated and decided to help out a local small business in their fleecing of a local inhabitant.

    I got the little darling home and began examining and photographing the pipe.  As a note, this is prior to me having a work bench dedicated to pipes.  My fly tying bench was kind enough to donate space for the restoration.  Below are some of the early photos.

    Okay, my photos back then were not that great then again, neither was the pipe.  It was dark, dirty and just gross. In examining the pipe and its parts I was quite impressed with the delicate woodwork and the metalwork that had gone into this pipe.  The threads were cut from the briar in both the inner-bowl and the outer.  The aluminum bottom of the inner bowl and the aluminum sleeve in the stem all amazed me.  At this time I didn’t actually know there was an aluminum bottom to the inner bowl.  Below are several photos of the parts. 

    I had to find out more about this old pipe’s history.  Again turning to the internet I found a pipe that looked exactly like the pipe I was holding.  The site was http://www.smokingmetal.co.uk/pipe.php?page=520.  Since that time I have been in email contact with the proprietor of the Smoking Metal website, Tony Pringle.  In our last email he said the following:  

    “I have little with pipes for some years now, but like to keep the site going. Will sort my own out one of these days. Advancing nyears means I am currently tking steps to pass on the website to an American colleague as an insurance..so much work went into it and it seems to be used regularly still”  (personal email).  

    I do hope that Mr. Pringle continues to do well and can find a benefactor to continue the website.  The Smoking Metal site showed its Hell Maria with very clear stamps on both the left and right of the shank.  Mine was not quite as clear but obviously the same pipe.

    The stamp that I could not make out on my pipe was the MLC.  This stands for Mary Linkman & Company.  This is the same company formed by Louis B. Linkman, the originator of Dr. Grabow pipes.  In 1898 Linkman and August Fisher started a small business making pipes.  The business grew and, “in 1907 M. Linkman & Company was incorporated with Louis B. Linkman as president, August Fisher, vice-president…” (https://pipedia.org/wiki/M._Linkman_%26_Co.).  The M. Linkman & Company was a name used throughout the 1920-30s.  I remember finding a copy of a print ad from 1924, online.  It showed a drawn image of the Hell Maria but I cannot find it again.

    This clearly places the dirty and scarred Hell Maria from a shop in Plattsmouth NE to origins in the 1920s.  I was really beginning to wonder if I had bitten off more than I could chew with a pipe that old.  Then I looked at it and thought, “ I can’t make it any worse”.

    Using Steve Laug’s restoration guides as my guide I started where he usually did, with a cleaning of the pipe exterior.  I used undiluted Murphy Wood Cleaner (I remember the product being called “oil soap”)

    and a medium stiff toothbrush to rid the pipe of the layers of dirt and grime.  To my amazement it worked.  The soap and scrubbing converted my uniformly brown pipe into some very pretty wood.  It also uncovered fills and cigarette burns from time in an ashtray.  The scrubbing removed the lava deposits on the rim as well.  This actually took several applications of the oil soap.  I also remember the grime having a reddish color in it.  I assumed that that was from the dye or stain used to stain the briar.  After the Murphy scrub the pipe was dried and returned to the fly tying, um restoring bench.  I wiped down the exterior of the pipe with cotton balls soaked in 99% isopropyl alcohol.  When wiping the briar with the cotton balls They turned bright red with dye.  I remembered thinking that I did not want a red dyed pipe.  I wanted a pipe that was more of an orange-brown.  I also remember that it took a long time for the orange Fiebing’s Leather Dye to arrive.  Here are a few photos of what the pipe looked like at this stage.

    After the exterior of the pipe was cleaned I turned to the interior.  The only

    pipe reamer that I had at this time was a Scotte steel expandable reaming tool.  This reamer was fine for smaller tobacco chambers.  The Hell Maria was .25 inch larger than the reamer at its widest setting. This meant that I had to use a sharp knife and a delicate touch.  I also used a dowel rod wrapped in 220 sandpaper.  The chamber got cleaned out and I discovered the aluminum bottom on top of the briar in the bottom of the chamber. 

    These two photos kind of show what I had.    I never felt comfortable enough with the knife to really scrape the thin inner bowl with much force so I did not remove the aluminum bottom.  I did try to polish the aluminum with a 0000 steel wool pad held with forceps.  I used bristle pipe cleaners soaked in alcohol to clean out the 3 draft holes in the bottom of the inner bowl.

    The strange thing about a pipe like this is the number of surfaces that you have to clean.  Normally once you have cleaned the exterior and tobacco chamber you are pretty much finished.  Not with this one.  I realized that I had another outer and inner to scrub.  Back to the sink.  I again used the Murphy Oil Soap and toothbrush to scrub the inside of the exterior and the exterior of the tobacco chamber. At the bottom of the outer chamber, which is actually more like the inside of a calabash inner chamber, there was what appeared to be a cardboard-like disk.  I assumed that this disk was there to absorb condensed water from the smoke.  I kept it noting that any soap or water would likely disintegrate it.  Anyway, more scrubbing followed by wiping with alcohol soaked cotton balls.  The outside of the tobacco chamber actually did not look like wood at all.  It was black and had a very plastic-like feel.  I wondered if the makers had actually made the inner tobacco chamber as a cup of bakelite or some other 1920’s plastic and glued it to the briar rim with its threads.  Out of curiosity I started sanding the bottom of the tobacco chamber/cup.  It was infused with black smoking residue that had soaked into the briar.  Once sanded through you could see the whole piece was indeed a single machined piece of briar.  Amazing. 

    The shank was a nice straight tube with an opening at either end.  This proved quite easy to clean.  Given it had been smoked a great deal so there were a lot of cotton swabs soaked in alcohol and soaked bristle pipe cleaners but it eventually came clean.

    In the early days of my restoration hobby, pursuit, life-style(?) I had not yet purchased any deoxidizing solution.  In the early days I used a Rubbermaid tub with a solution of Oxy-Clean and water to soften the oxidation, then a liberal dose of elbow grease, Soft-Scrub and cotton balls.  The stem was in remarkably good condition making me think that it was a material other than vulcanized rubber.  Below are photos of the top and bottom of the stem.    

    I cannot remember how I cleaned the stem nor if I did actually use the Oxy water bath or not.  I also did not take any photos of this stage of the restoration.  I can say that I did use the micro-mesh pads on the stem as all of the tooth chatter was removed from the stem.  The process would have been to use 400 wet/dry sandpaper to remove the dents.  Then to start with the 1500 micro-mesh pad moistened with a drop of water.  I most likely wiped the stem with Obsidian oil and repeated with the next micro-mesh pad, 1800 (also moistened with water).  This would have been followed with the remaining pads in order of increasing fineness up to the 120000.  I did not have the  Lbepen’s Fine and Extra-Fine Polish nor did I have a buffer in those early days.  I would have been content with the final finish of the 12000 micro-mesh pad.

    I do recall that I used Fiebing’s Leather Dye to stain the stummel.  The original color must have been a dark red stain and I wanted it to be more of an antique orange-brown.  Looking back at my order history on Amazon I saw that I placed the order for the orange dye on September 15 and that it was not delivered until October 23.  As mentioned earlier, I did remember having to wait to finish this pipe, apparently about 5 weeks.  To stain with wood with the Fiebing’s Dye first the stummel would have been sanded and micro-meshed as with the stem.  With the exception of wiping between pads with an alcohol dampened cotton ball rather than Obsidian Oil.  I purposefully left a few of the scars on this old pipe.  There were cigarette burns along the shank,left side, and the front of the stummel at the base and a noticeable fill where the shank meets the vertical on the stummel.  I did not want to greatly alter the shape of the pipe with excessive sanding so these scars would be worn as signs of previous victorious battles. 

    The first step in staining is to prepare your work surface as the stain is near impossible to remove and is also near impossible to not drip.  I used cellophane food wrap to wrap a nylon cutting board.  This would be my working surface.  Nitrile gloves would be worn to keep me from matching the stummel.  I also got a disposable Bic lighter and several pipe cleaners.  I needed a way to hold the stummel and keep the dye from getting into the tobacco chamber.  Most people use a wine bottle cork to achieve this.  I don’t drink, so I had to find another material. I do quite a bit of fishing though, so I found a cork shaped styrofoam bobber and gave it a layer of duct tape.  A pipe cleaner folded in half was used as the applicator for the dye.

    With my equipment ready I proceeded to apply a coat of Fiebing’s Light Brown Leather Dye to the stummel.  It soaked into the wood and evaporated very quickly.  All of the articles I’d read and videos I’d watched said to “flame” the still wet stummel thus baking in the dye as the alcohol in the dye burned off.  There was nothing to burn off with my first application.  The second application allowed more of the liquid dye to remain and it was burned off as I had read/seen.  I have to admit it was pretty fun to see the first time.  After three applications and two successful burns I was satisfied with the staining.  I rubbed the surface with a paper towel and noticed a great deal of stain came off on the towel.  I then took the stummel to the bench where I moistened a cotton ball with alcohol and gave the stummel a rub.  More of the dye came off staining the cotton ball bright yellow brown.  This removed some of the stain but enough had penetrated the briar and had indeed stained the wood a light brown color.  I waited for what seemed like months for the orange stain to arrive.  When it did arrive I repeated the work surface preparation and gathering of equipment.  I then applied the orange dye to the stummel.  Nervously I flamed the pipe.  Upon wiping the stummel with an alcohol dampened cotton ball I saw the orange-brown I had hoped for.  The alcohol rub had blended the two dyes very nicely.   

    As stated earlier, I did not have a buffer so waxing the pipe was done with Johnson’s Paste Wax.  A coating of wax was applied and allowed to dry then was buffed off with a shoe-shine buffing brush.  This was repeated three additional times.  The final buffing was done with the inside of a cotton athletic sock.  

    Those were all of the photos that I had taken back then.  I have taken a few more recently and include them below.  I’d like to think that my restoration techniques, materials and tools used today are much better than they were when I started.  I have to add that I waited over two years before I finally smoked this old girl.  She actually smokes quite well.  Thank you for joining me and I hope that you have enjoyed reading the ramblings of an old pipe lover.

  • A Peterson Premier Selection 51 Restoration

    November 8th, 2023

    Written and photographed by John M. Young

    The below auction appeared in October of this year.  I had already exceeded the amount I budgeted for pipes but I justified it by saying, “They will be Christmas presents for someone.”  That was my story and I was sticking to it. Besides, how can I say “no” to a pair of classic Petersons who’s restoration would provide me with entertainment and a new shape for the

    collection.  Er, I mean a potential present to a loved one.  I already had a beautiful Peterson Deluxe 14S so the Kildare 14S would, most likely, become a present.  The Premier Selection 51, on the other hand, was awfully cute and a new shape for me.

    The auction was won and the two darlings arrived in short order.  The first pipe that I began working on was the 51.  She was in very good shape with clear stampings and I wondered what her history and pedigree were.  Obviously she was a Peterson and that meant that she was made by the oldest continuously operating briar pipe company in the world.  I got out Mark Irwin’s big The Peterson Pipe book and began researching the “Premier” line.  According to Irwin, the Premiers are:

    “A high-grade line of Classic Range shapes for the US market introduced by Rogers Imports in their 1953 catalog.  Offered in smooth or sandblast finish, a P-Lip mouthpiece with an aluminum P, the first occurrence of this logo in the ephemera.  The Tan Bark Premier appeared in the ‘69 Iwan Ries catalog.  COM of MADE IN over IRELAND, A PREMIER stamp also appears over SELECTION and will be distinguished by an inset brass P on the mouthpiece.” (Irwin 310) This pipe did not have the PREMIER over SELECTION as they were stamped in line.

    The term “Classic Range” refers to pipes not of the Peterson System variety.  This also indicated that the 51 was made for the US market in the ‘50-60 and imported by either Rogers Imports or Iwan Ries.  I wanted something more specific so I did a bit of looking into the 51 shape.  This led me to marking and tagging several pages in the big book.  The 51 shape was only shown in the 1953 Rogers Imports catalog. (Irwin pp.156-157)

    These catalog pages also illustrate “Peterson’s Comfort Bit”  which matches the bit for my pipe in the same catalog.  The problem is that this pipe does not have the aluminum P.  Looking at the Iwan Ries catalog photos there is no mention of shape 51.  The only Lovat is called “53 Large Lovat” (Irwin p.171).  

    The next stamp to examine is the Country of Manufacture (COM) stamp. 

    This 51 is stamped with MADE IN over IRELAND.  Pipedia claims “At the start of the 1950s, all pipes at Kapp & Peterson were stamped with “Made in the Republic of Ireland” stamp…” (Lilley)  Yet Irwin states:  “This stamp appears on many models spanning most decades of Peterson’s history” and that “Without hallmark dates or other clues, this stamp provides no reliable indication of a pipe’s age.” (Irwin p. 296).  Further evidence is the complete lack of a shape 51 in the 1975 Peterson Catalog.  This catalog was “Peterson’s first attempt since 1906 to illustrate their complete catalog.” (Irwin 160-161) The Lovat in these illustrations is now called shape 53. 

    I take all of this to mean that the Premier Selection 51 I have is from the Rogers Import times of 1953- 1968.   Why it dos not have the aluminum P on the mouthpiece and why the PREMIER and SELECTION are stamped in line are a mystery. With that bit of history finished.  I was off to work on the pipe.

    I began with an examination and photo shoot of the pipe.  Below you can see the “before” photos of how the 51 looked upon arrival.  The briar was in good shape, the rim had a significant build-up of lava, the tobacco chamber did not have a thick cake build-up and the mouthpiece had calcium deposits and oxidation issues.  Overall, I did not think there were any issues that would require abnormal work for restoration.

    The first step of this restoration was to ream the tobacco chamber.  This was done using the PipNet reamer and a reaming knife.  There was not a great amount of cake to remove and the process went quickly.  After the cake was

    removed I sanded the chamber with 220 sandpaper on a wooden dowel.  When finished sanding I wiped the chamber with a cotton make-up removal pad moistened with 99% ethyl alcohol.  Next was the lava build up on the rim.  I moistened the lava with a bit of saliva on my finger tip.  I then carefully began scraping with the edge of a sharp knife.

    Next was the shank interior.  I start out with a dental scraping tool.  If I can scrape out a little bit, that means my scrubbing is greatly reduced.  This one didn’t give me much scrapings but, judging from the lava on the rim I knew there was a bit of residue lurking inside.  I used cotton swabs soaked in 99% ethyl alcohol.  At first I thought, “this isn’t too bad”.  Then, I realized the alcohol had to soften the tars and residues.  Black, black and black was the only word to describe the cotton swaps.  Lots of them.  After about 15 there was a bit of improvement and a color change to brown – progress.  I needed a break from the shank so I decided to take the stummel to the sink and scrub the exterior.  This was more to use some different muscles in my cramping hands than for other real reasons.  

    At the sink I used Murphy’s Oil Soap (undiluted with water) on a medium stiffness toothbrush to scrub the stummel.  The rim had come mostly clean with the scraping but there was still some residual lava present.  Even with what looks like a clean pipe the Murphy’s Oil Soap does wonders at removing dirt and grime that I didn’t even realize was there.  I’ll usually run the warm water while I scrub so I can rinse with warm water.  After the initial rinse I used the oil soap a second time focusing on the rim.  Some of the warm water was allowed into the shank as well.  I figured that it might help loosen the stubborn residue inside as well as out.  After I’d rinsed the stummel for the second time I dried it is a cotton towel.  I then used a nylon bore brush and a small amount of Dawn Dish Soap to scrub the interior of the shank.  The scrubbing produced a brown lather that showed me that it was working.  This scrubbing was rinsed with liberal amounts of warm water with and without the brush until I was certain the soap had been washed away. 

    I returned to the bench and gave the stummel a vigorous rub with a make-up pad soaked in alcohol.  I then poured about 5 ml of the alcohol into the tobacco chamber and swirled it around.  I plugged the shank with my finger and heard the pip pip pip of air bubbles being replaced by alcohol all through the shank.  The alcohol is used to pull the water out of the briar.  99% Ethyl alcohol is very hydrophilic meaning that it will pull the alcohol out of the wood and into solution with the alcohol.  The alcohol then dries quickly leaving the wood dry after a few minutes. I hoped that all of my scrubbing had removed the residues within the shank.  It helped but there were still another 15 alcohol soaked cotton swabs before I considered the shank cleaned out.

    The below photos are what the Premier 51 looked like after the scrub-fest.  There was no finish remaining, there were a few scratches that would need sanding and the rim would require a light topping to remove the dents, dings and a bit of char.  Overall she was looking good .

    Topping the stummel required a new piece of 220 sandpaper laid flat upon the counter top and a light touch.  I Help the stummel firmly yet gently and sanded in a circular motion rotating the stummel in my hand every 2 rotations.  I wanted to sand the rim as evenly as possible.  After the 220 sandpaper I repeated the whole process with a new piece of 440 sandpaper.  I did not want to change the shape of the stummel and stopped sanding after most of the blemishes where removed.  The photo, right, shows what it

    looked like when finished.    Next came the sanding of the whole stummel.  Since the pipe was in good shape I did not start with sandpaper but rather the micro-mesh pads.  The 1500 was used first dampened with a bit of water.   After micro-meshing I wiped the stummel off with a make-up pad moistened with alcohol.  I repeated the same “wet” technique with the 1800 micro-mesh pad.  After those two I proceeded to use the pads dry in order of increasing fineness, always wiping between pads with the alcohol.  When finished with the micro-mesh pads I applied a coating of Lbepen’s Restoration Balm to the stummel and allowed it to do what it does to the wood. 

    With the stummel absorbing the Restoration Balm, I turned my attention to the stem.  It had calcium deposits and oxidation on its surface.  I used 0000 steel wool to lightly buff the entire stem.  I then inserted a pipe cleaner into the stem from the shank side and dipped it into the Lbepen Deoxidizing Solution.  I place the lid on the jar using the pipe cleaner as a suspension rack to hold the stem completely under the surface of the solution.  I left the stem in the solution for approximately an hour.  Upon removing the stem from the deoxidizing solution I allowed the excess solution to drip from the stem back into the jar.  I vigorously rubbed the remaining solution from the stem using a cotton rag.  I recommend using nitrile gloves for this as does the manufacturer.  The draft hole needed to be cleared of solution also.  This was done with a couple of pipe cleaners.  Immediately after removing the deoxidizing solution I wiped down the stem with my fingers dipped in mineral oil.  I also ran a pipe cleaner dipped in mineral oil through the stem.  The oil stops the vulcanite from further oxidizing with contact with the air.

    The stem looked nice and black with no signs of oxidation.  I then used the micro-mesh pads to smooth and polish the stem.  I began with the 2400 pad and proceeded through each pad up to the 12000.  In between pads I wiped the stem off with Obsidian Oil on a make-up pad.  Once the micro-mesh pads were each used I used Lbepen’s Fine Polish and Extra-Fine Polish with a cotton cloth.  These were applied like a rubbing compound to further polish the vulcanite.  When finished with the polishing I applied a final coating of Obsidian Oil to the stem and allowed it to sit for about an hour.  I am not sure if this is necessary but I think that allowing the oil to penetrate into the vulcanite provides a bit more protection from the effects of oxygen.

    The before and after photos show the great improvement of the restoration of the stem’s vulcanite.  

    It was time to wipe the remaining Restoration Balm off the stummel and reunite the stummel and stem.  They looked great together.  The next thing to do was to take the old girl to the buffer and apply a few coats of carnauba wax.  A final hand buffing of the entire pipe was done with a microfiber polishing cloth.  This added a little more depth to the final shine of the wax.

    I am very pleased at how well this restoration went.  There were no hidden issues and everything went smoothly.  The pipe turned out very well and should be a pleasure to smoke for many more years.  Thank you for reading the ramblings of an old pipe lover.  Below are a few photos of the finished Peterson Premier 51.  

    Irwin, Mark. The Peterson Pipe The History of Kapp & Peterson. First Edition, second printing 2021 ed., Canada, Briar Books Press, 2018.

    Lilley, Jim. “Peterson.” Pipedia, 23 October 2023, https://pipedia.org/wiki/Peterson#1950_-_1989_The_Republic_Era. Accessed 7 November 2023.

  • A Brigham Restoration

    November 4th, 2023

    Written and photographed by John M. Young

    It only seems fitting to do a Brigham restoration on a Canadian shape pipe as they are a Canadian company.  I have only smoked one Brigham pipe.  It is my Brigham 5 dot Bulldog, shape 526 and it is a joy to smoke.  I knew that Brigham was an old company and that they used their proprietary rock maple insert as some kind of “filter”. I also had some inkling that the brass dots that adorned the mouthpieces is an indication of the qualify of the briar used to make their pipes. Below is my Brigham bulldog.

    When I saw the Brigham Canadian shape 5, I thought, “I like Canadians and really only have 2 or 3.  I probably need another, eh?”  Okay, the “eh?” is terribly stereotypical but it made me smile.  For less than the price of a steak dinner I had the next subject of my hobby/obsession/calling(?) In my hands.

    The pipe (henceforth she/her) looked to be in good condition.  Her stem was very oxidized to a dark beige. Her briar looked good and the stampings were clear. She did have a bit of a lava coating on the rim and what could be a clear coat finish of some kind.  I hoped that it was just a thick layer of carnauba wax but, I know better.  She still had a rock maple insert in the stem and it was not dark brown or black.  Her tobacco chamber was not caked to any noticeable thickness. The latter two observations indicated that her previous owner smoked her infrequently but in the appropriate Brigham fashion – with an appropriate insert.  Here are some photos taken upon her arrival:

    Now for a little bit of Brigham history.  Just kidding, I won’t distract you with that.  I know you are dying to get to the restoration.  However, if you are interested, here are links to Brigham’s official history and from pipedia.org:  History | Brigham Enterprises Inc (brighampipes.com),  Brigham Pipes – Pipedia.  As for this pipe, she wanted to remain a bit mysterious.  Brigham pipes are supposed to have a 3 digit shape number.  This has been the case since 1938, the end of the “Patent Era”.  Very little data apparently survived from the origin of the company in 1906 through 1937.  This according to “Charles Lemon, originally appeared on: DadsPipes.com, and is used here by permission…here in its entirety.”  (Brigham Pipes – A Closer Look at Dots, Dates and Markings – Pipedia).  Anyway, this old girl has only a single number, 5.  The other stamps which are useful are the “Brigham” above “MADE IN CANADA”.  These stamps were used between the late 1960’s-1980. (Brigham Pipes – A Closer Look at Dots, Dates and Markings – Pipedia).  That means that this slightly mysterious gal was likely made between about 1970-1980.

    On to the restoration.  Normally I start by addressing the stummel.  This pipe had such a bad case of stem oxidation that I started with that.  I removed the stem and the rock maple insert.  I used a pad of 0000 steel wool to buff off some of the oxidation.  All that did was to make the oxidation angry and a bit shiny.  I folded a pipe cleaner in half and inserted the doubled end into the aluminum stem tube. I then hung the stem in the jar of Lbepen Deoxidizing Solution (lbepen.com).  I had an appointment that would take a couple of hours so, I figured two hours was the right amount of time to leave the stem in the deoxidizing solution. 

    Since I had a few minutes before I had to leave, I worked on cleaning up the stummel.  I reamed the tobacco chamber with the third largest reamer in the PipNet set and and reaming knife. The inside of the bowl was then sanded with 220 sandpaper around a wood dowel.  There was not much cake built up and the interior briar looked good after sanding.  Next was the interior of the shank.  I used 99% ethyl alcohol soaked cotton swabs to scrub the draught hole as far as I could reach.  They came out blackened with residue.  I stopped after using 5 cotton swabs as I thought I was not making much progress. Next was the rim.  There was a coating of dried smoking residue and tar, this is often referred to as lava.  The lava was moistened with a bit of saliva and gently scraped with a sharp pocket knife.  Using care to not scratch the underlying briar I removed most of the lava and I figured the remaining bit would come off with the next step of cleaning.   Get to your appointment!

    Notice the purple ring on the make-up pad, that comes up later.

    When I returned from the appointment I continued.  To the sink.  With the tobacco chamber reamed, lava removed and internals pretty much cleaned it was time for the Murphy’s Oil Soap. I applied the oil soap to a medium stiffness toothbrush and scrubbed the externals of the stummel.  The soap was used straight and not diluted with water.  After scrubbing the soap was rinsed with warm water.  I was not completely happy with the black residue inside the shank (from earlier) so I used Dawn dish soap on a nylon bore brush to scrub the interior of the shank.  Once everything had been scrubbed, it was all thoroughly rinsed with warm water and dried with a towel. 

    Water is often considered the enemy of fine wood.  To remove the water that had soaked into the briar I liberally dampened a make-up remover pad with 99% ethyl alcohol and wiped the externals of the pipe.  I then poured about 5 ml of alcohol into the tobacco chamber and swished it around allowing the alcohol to flow into the shank as well.  I just plugged the end with my finger.  After it had sloshed about, I dumped it into a medicine cup.  The reason for the alcohol swirly is that 99% alcohol is hydrophilic (water loving).  It will pull the water out of the wood and into the alcohol.  The remaining alcohol dries very quickly.  I also used the alcohol to wipe down the entire stummel to see if there was finish that remained after the scrubbing and to removed any last bits of lava from the rim.  This is when I noticed the bright purple on the make-up pad.  I thought, “that’s weird”.  Being a retired chemistry teacher I thought, “that looks like potassium permanganate purple” and In the recesses of my memory there was something about using it to stain wood.  Sure enough, a quick internet search of potassium permanganate reveals that it is used to stain wood.

    More like 3 hours later, I removed the stem from the deoxidizing solution and allowed it to drip, the solution is not cheap but, I am so, I try to reuse as much as possible.  The oxidized aluminum bubbled up a bit, you can see it in 
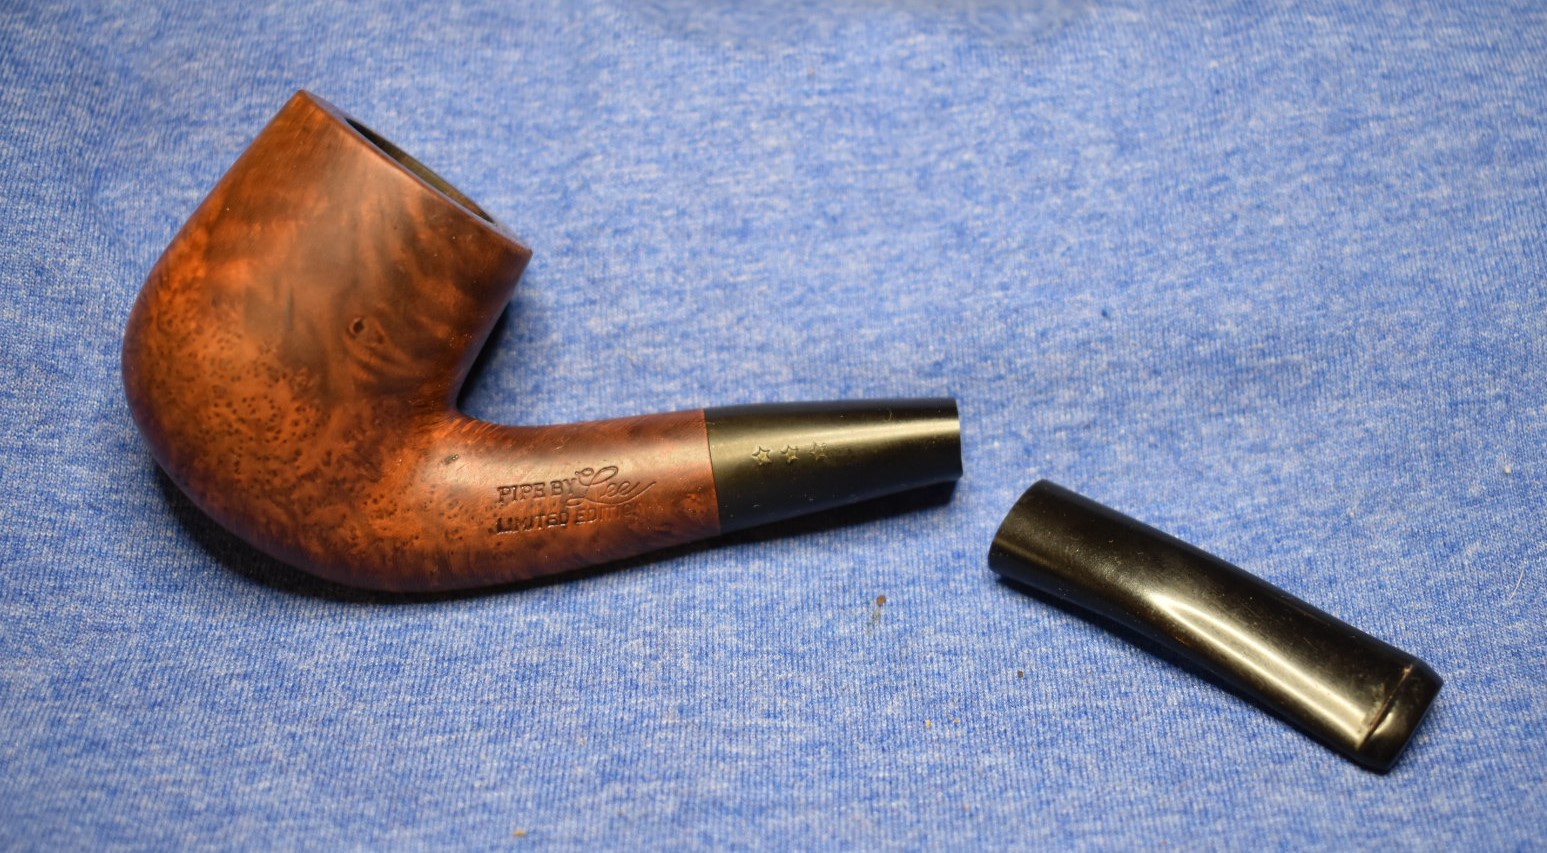
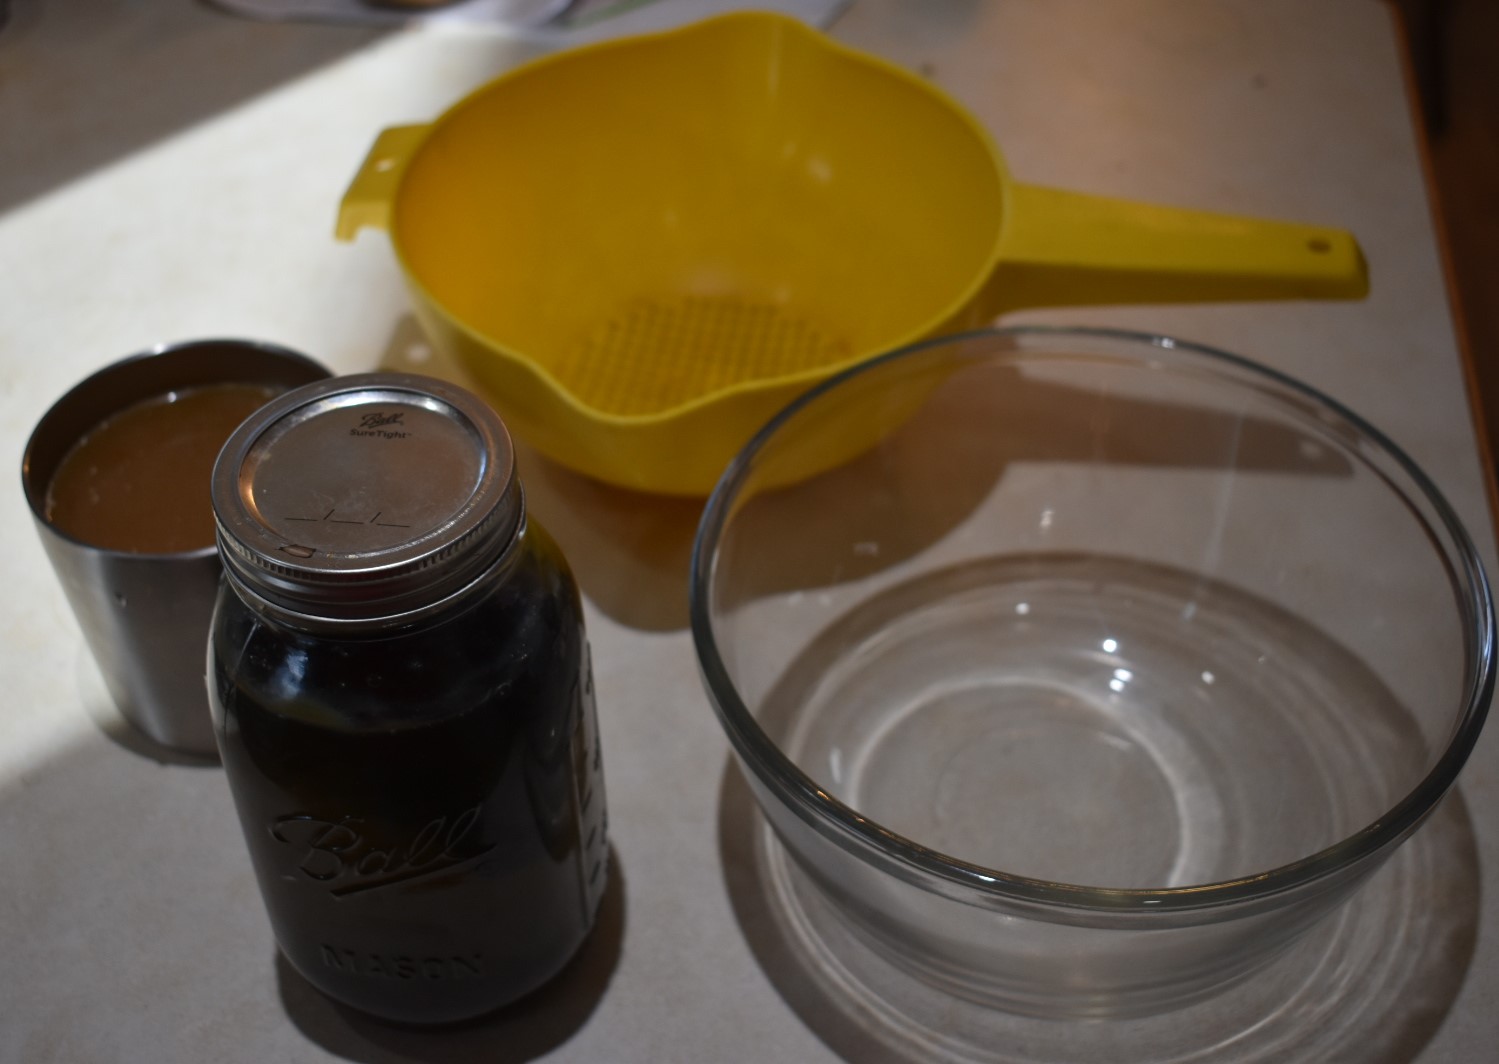
the photo, right. The solution is very viscous that requires buffing with a rag immediately after removal and dripping of excess.  I vigorously rubbed the stem to remove the solution.  I recommend using nitrile gloves for this.  The interior of the stem also needs to be rid of the solution.  This is done with a couple of pipe cleaners run through the stem.  After the solution is thoroughly removed I wipe the stem down with mineral oil or Obsidian Oil.  I will usually allow the oil to soak into the stem while I return to work on the stummel.

    Retuning to the stummel I wiped vigorously with alcohol dampened pads to see if I was removing any of the remaining finish.  The pads had a slight yellow-brown color to them.  I took this to be a little bit of shellac that remained after the oil soap scrub.  I then used a pad moistened with acetone to see if I got any additional finish off.  It was clean.  Good, no finish remained.  Time for the mico-mesh pads.  Since this stummel was in very good shape with no areas of deep scratching I did not have to start with 220 sandpaper.  I started with a 2400 micro-mesh pad slightly moistened with water. Being careful to avoid the stamped areas I continued using each of the pads in succession up to the 12000 grit pad.  In between each pad I wiped the stummel down with a make-up pad moistened with alcohol.  The final step with the stummel is to apply Lbepen’s Restoration Balm to the briar.

    Micro-mesh pads.

    Below you can see the cleaned pre-micro-mesh rim and the Restoration Balm coated stummel.

    I will usually allow the Restoration Balm to do what it does for 20 minutes to overnight.  In this case it was on for as long as it took me to finish the work on the stem.

    Returning my attention to the stem, I was not pleased with the level of oxidation removal.  It still appeared brownish in bright light.  I rubbed the oil from the stem with a clean dry cotton rag and re-dipped it into the deoxidizing solution.  This time I let it soak for about 30 minutes.  Upon removal I repeating the same steps as earlier.  This time it came out looking better but still some oxidation remained.  I knew this was going to be the most difficult part of this restoration.  I figured I’d try to remove more of the oxidation with Soft Scrub with Oxy-Clean.  A few make-up pads with Soft Scrub and a lot of elbow grease removed most of the oxidation. 

    I figured the rest would come off with the micro-mesh pads.  As with the stummel I began with a coarse grit, this time 1500, and worked my way finer and finer.  I rubbed down the stem with Obsidian Oil between each pad.  The final step in finishing the stem was to use Before and After Fine Polish  followed by the Extra Fine Polish.

    Stem done.  Stummel needs to have the Restoration Balm wiped off then this old girl can get reassembled and waxed.  I took the pipe to the buffer and applied several coats of carnauba wax.  When that was finished I final polished the wax with a microfiber polishing cloth to give it a little more shine.

    Overall, I am quite pleased to see how this 40-50 year old Brigham canadian turned out. I’m sure she will smoke quite well and continue to for many more years.  I thank you for reading the ramblings of this old pipe lover.  Below are some photos of the finished pipe.

  • A Peterson Pipe Notes Challenge: 

    November 2nd, 2023

    Ebony Finish of a Peterson Estate Pipe using Vinegar and Iron solution

    Written and photographed by John M. Young

    On October 9, 2023 Mark Irwin posed the following challenge in his blog: 

    “I’m offering a No Prize for anyone who cares to take up the Natural Ebony DIY Challenge with me. I’ve got an estate System on hand and want to try my hand at creating a genuine “Natural Ebony” using some of Adam’s iron vinegar finish. If you want to join me, I’ll run your post separately. Here’s the idea:

    • Use an estate P-Lip System
    • Remove the old finish
    • Create your own iron vinegar finish using Adam’s instructions (no Fiebings Black Dye allowed)
    • Use danish oil or other polish to bring up the shine
    • Document your work with photographs and your procedure
    • Submit photos and write-up to receive your No Prize”

    The above graphic and text are from Mark Irwin’s blog: https://petersonpipenotes.org/2023/10/29/367-a-history-of-petersons-ebony-finish-with-help-from-sykes-wilford-and-adam-davidson/

    Challenge accepted!  Being a retired science teacher and Certified Pete Geek, I couldn’t pass on this challenge.  

    Step 1) Make the solution.  

    The basics here are to put steel wool and vinegar into a 1 quart canning jar and wait.  Never having been a follower of “Keep It Simple Students” (KISS), I had to add a step.  I applied a bit of Dawn dishwashing detergent to two pads of 0000 steel wool.  The pads were then agitated with warm water and the soap to remove any oil on the steel wool. 

    Rinsing and rinsing removed the oil and most of the water.  The 2 pads were put into a 1 quart canning jar and 800 ml of vinegar (store brand, apple cider flavored, 5% acidity) was added.  This solution was allowed to sit for 36 hours with the lid loosely fixed on top.  Keep the lid loose as the reaction produces hydrogen gas.

    Speaking of reactions, what exactly is the vinegar doing with the steel wool?

    The reaction of iron and acetic acid is:

    Fe + 2 CH3CO2H → Fe(CH3CO2)2 + H2

    Solid aqueous solution aqueous solution gas

    After 24 hours, I was curious as to the effectiveness of the solution, so I applied a little bit on an unfinished piece of quarter round oak.  I applied a wetting coat to the oak and waited.  Overnight the wood had darkened significantly.  See figure below.

    I allowed the solution to react for an additional 12 hours and filtered the solution through a coffee filter and strainer.  

    Equipment used for first filtering.

    First filtering of solution.

    Residue from first filtering.

    The solution was then filtered through a second and subsequently a third coffee filter and funnel. 

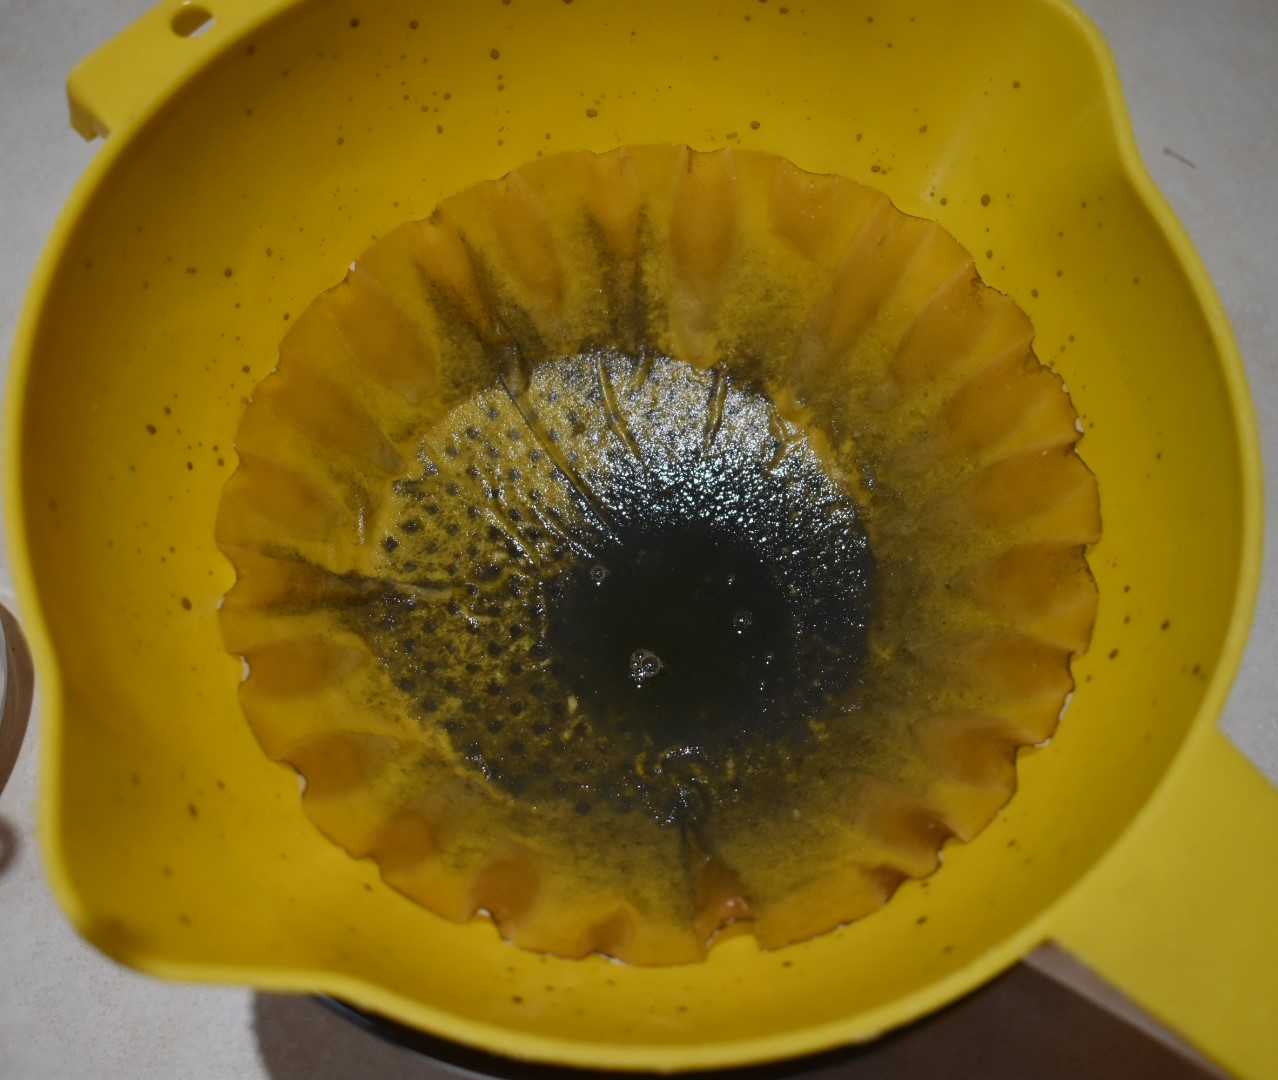
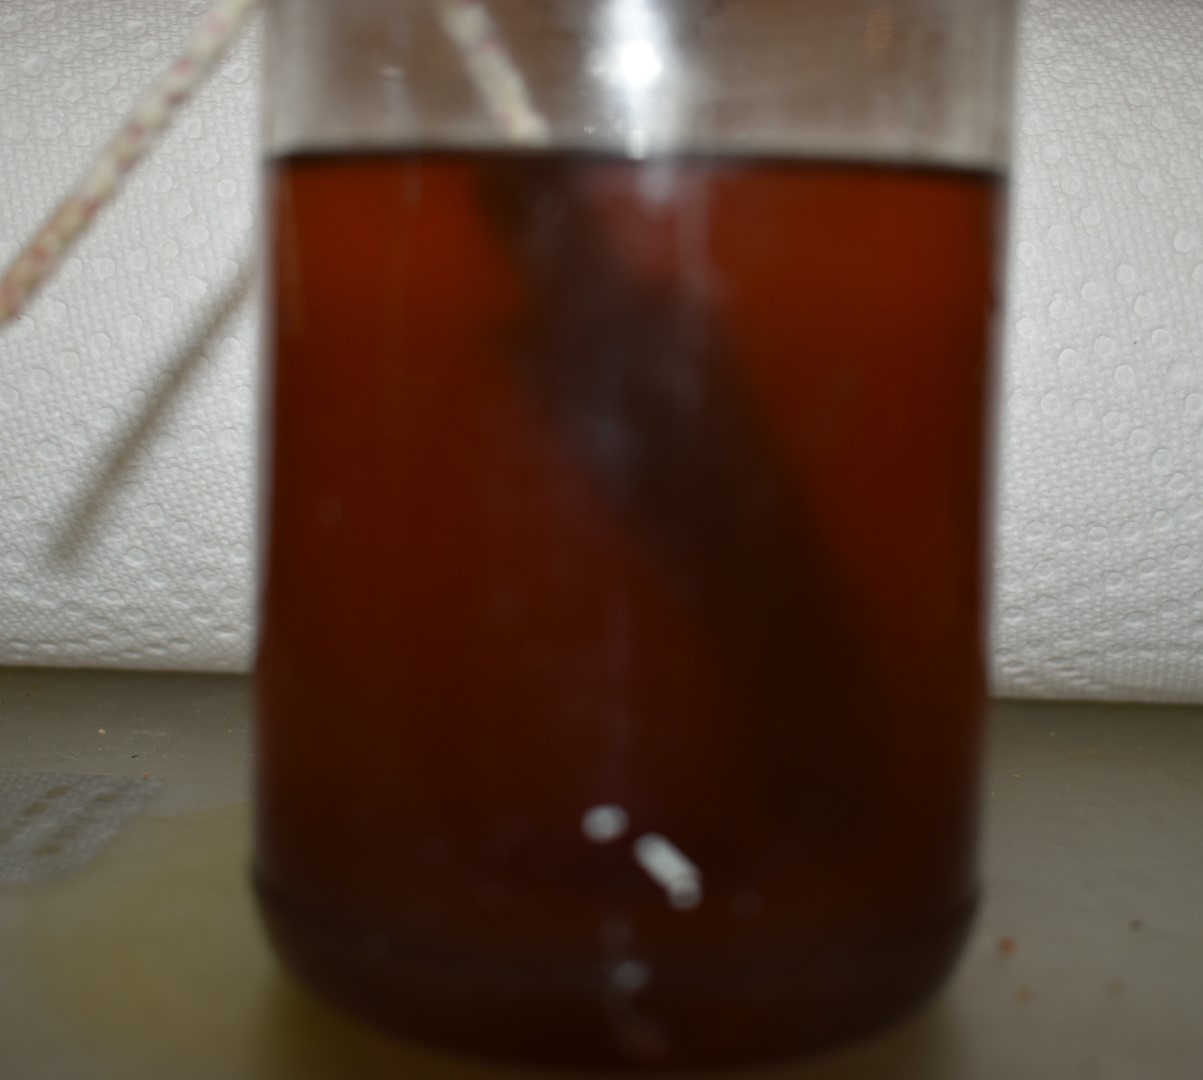
    Second and Third filtering with funnel and coffee filter.

    Step 2) Select and prepare a pipe.

    While the solution was developing I needed to find a worthy victim, I mean a worthy subject.  I have a few Peterson estate pipes so this shouldn’t be too difficult.  I settled on one of the first Peterson pipes that I purchased.  A System Standard 314 with a P-lip.  I originally won it at an auction and restored it years ago.  The stem had been cleaned with rough pipe cleaners so many times it had a very slight groove cut all the way through the stem ahead of the button.  I repaired this with cyanoacrylate.  The wood was in great shape.

    The first step here was to remove any finish from the stummel.  Originally, I had sanded this pipe all the way down to bare wood and worked it from 220 grit to 400 grit sand paper then from 1500-12000 grit micromesh pads.  The wood was then treated with Restoration Balm (Lbepen.com) and buffed with carnauba wax.  

    This finish had to be removed.  I used cotton make-up removal pads with 99% ethyl alcohol to remove the wax.  I followed this up with a vigorous rubbing of acetone on a make-up pad.  I allowed the stummel to dry overnight. 

    Step 3) Solution meet pipe.

    After the vinegar iron solution had been filtered, as described above, I set up a portable vice as a drying station.  A cutting board was used to keep any drips off the countertop.

    Time for the first application.  I decided to use a cotton swab as an applicator for the vinegar iron solution.  This also allowed me to photograph the used swab in frame to keep track of the number of applications and the corresponding photo.

    Stummel after application 1 while it is still wet.

    Stummel after application 1 had dried.

    At this point I wondered what the stummel looked like under that film that was on the stummel.  I used a cotton handkerchief and gently buffed off the film.  The stummel had darkened up a bit and showed what looked like a contrast stain.

    I then used a fresh cotton swab and reapplied the vinegar iron solution.  I allowed this to dry for 30 minutes and applied a third coat.  Below are the photos taken with each of the second and third coats.

    After application 2 wet.

    After application 2 dry.

    After application 3 wet

    After application 3 dry.

    At this time I decided to let the vinegar iron solution do what it was going to do for several hours.  Each time I applied a fresh solution the pipe appeared to have a walnut color stain.  Perhaps I needed to allow it time to oxidize or react with the wood to develop the “black” color goal.

    Four hours later I was curious about the state of the wood beneath that hazy film.  I again used a cotton handkerchief to buff away the film.  Wow, it is much darker this time.  For the Peterson aficionados out there, it looked like a Peterson Heritage finish.

    The above two photos are after 4 hours and buffed with cotton cloth.

    I applied the vinegar iron solution for the fourth time, allowed it to dry for 30 minutes and reapplied it.  This brought the total applications of solutions to five.  I decided to let the pipe sit overnight and to examine the color in the morning.  Well, that was the intent, I decided to give it one more coat before I went to bed thus, bringing the total to 6 applications.

    Now, I’ll wait till morning.

    Morning came and the Peterson 31 looked remarkably the same as it did last night.  I buffed off the hazy residue with a paper towel and the cotton handkerchief.  The color had darkened very slightly.  When examining the results in sunlight the color appears to be a very dark brown with the wood grain visible.  The below photos illustrate it nicely.

    I wondered about the sanding I had done to this stummel as part of it’s original restoration.  I had sanded all the way to a 12000 grit micro-mesh pad.  I was concerned that sanding that finely did not allow the vinegar iron solution to penetrate into the wood as well as if the stummel were only sanded to 220 grit sandpaper.  The decision I am now faced with is three-fold:

    1. Apply the Danish oil and see if it “blackens” the finish.
    2. Apply a tannin booster (strong black tea solution) then apply additional vinegar iron solution.
    3. Sand the stummel with 220 grit sandpaper, apply the vinegar iron solution then re-sand to the desired 12000 micro-mesh level of finish.

    Faced with the above dilemma, I emailed Mark Irwin and asked him the following question:  “Do you think that using a tannin booster, strong black tea solution, is breaking any of the rules of this challenge?”  He replied quickly with the following response:  “John, I think as long as you’re using the iron vinegar in the process, we will leave the rest to you.” (Mark Irwin personal response email).

    That settled it for me.  I used 8 bags of black tea with 500 ml of boiling water.  I decanted about 10 ml of the tea into a plastic bowl (green) and stirred it with a cotton swab that I touched to the tip of a liquid dish soap dispenser.  I wanted a touch of soap to break the surface tension of the water/tea.  I applied the tea solution to the stummel of the Peterson 312.  The cotton swab turned black nearly immediately.  There must have been enough residual vinegar iron solution on the stummel to trigger the bonding of the iron to the tannins of the tea.  See the below photo of the very dark cotton swab. 

    The above photo shows the stummel wet with the black tea solution.  The cotton swab at the bottom of the frame was the swab used to apply the tea.

    I allowed the black tea solution to soak in for several minutes.  I decanted about 10 ml of vinegar iron solution into a plastic bowl (blue) so as to not contaminate the jar of vinegar iron solution.  While the stummel was still damp with the black tea solution I applied a coat of the vinegar iron solution.  I allowed this to dry for one hour.

    Here you can see the two swabs used, bottom.  The left swab is the black tea on the dry stummel.  The right swab was used to apply the vinegar iron solution still damp-with-tea stummel.

    After the drying time I used the cotton handkerchief to rub away the hazy residue.  Disappointment!  The stummel was still brown.  A lovely dark shade of brown but still brown.  In the sunlight the brown was even more evident.

    Here was my thought process at this point:  

    1. I think the high level of sanding created a surface that is not allowing the infiltration of the vinegar iron solution.
    2. I don’t want to go back and sand this stummel from 220 – 12000.
    3. The black tea and the vinegar iron solution together did make the wood darker.
    4. Hot water makes wood expand.  Expanded wood would allow greater penetration of a solution into said wood.

    New procedure:

    1. Heat black tea to about 140 degrees Fahrenheit (60C).
    2. Dip the stummel into the hot tea allowing it to soak for 3-4 minutes.
    3. While it is still hot, apply vinegar iron solution.
    4. Allow to dry.
    5. Buff the hazy film off with a cotton handkerchief.

    That sounds reasonable.  It doesn’t change or break any of the agreed upon rules.  

    Okay, do it.   I did and here are the results after I had given the stummel a quick rub with Nordicare Danish Oil and allowed it to dry.

    It worked.  

    Now hopefully you have stuck with this long article and not tried to repeat everything that I have outlined above as a step by step guide.  Kind of like that test you heard about. The one where a teacher said to read every question before starting the test and then the final question says “Write your name on the space provided and turn in the test”.  Don’t do what I did.  If I were to do this whole challenge again I would treat the “estate P-Lip System” from Mark’s rules, as a pipe that you are going to restore.  I used a “estate P-Lip System” that I had restored.  I think my experiment may had been much easier if I had used a stummel which had only been sanded with 220 grit sandpaper.  I do not know this for certain but, I believe that was the cause of my difficulty.  The final 5 procedures, directly above the preceding 2 photos, are probably all that you will need.  Now, the one thing that I am not certain about is sanding the stummel after you have used the vinegar iron solution.  It may be that you sand away some of the ebonised briar leaving a stummel that looks more like a contrast stained piece.  That would require you to re-do the above procedures or, perhaps just reapply the black tea solution followed by a reapplication of the vinegar iron solution.  You may have to do some experimenting to perfect this.

    For the final finish of my 312, I wanted something softer than a high gloss carnauba wax finish.  I opted to not use the buffer; rather, I went with Renaissance Micro-crystalline Wax Polish buffed with a shoe shine brush.  I applied 3 coats of this wax buffing between coats.  It gave me the soft finish I was after while still protecting the wood.  

    I had fun messing around with this challenge.  I appreciate Mark’s posts and his timely response to my questions.  I thank you all for reading the ramblings of an old pipe lover.  If you found any of this interesting I have a few restoration guides at https://scimansays1787.wordpress.com/.  If you are reading this at the wordpress site, thank you for that.

    Finally, here are a few photos of my finished DIY Ebony Peterson System Standard 312.

  • A Peterson Deluxe 8S Restoration

    November 1st, 2023

    Written and photographed by John M. Young

    In October of 2023 I first lay eyes on this auction on eBay.  I bid and won the below Peterson 8S.  As far as restores go this one looked pretty easy and a Deluxe for under $100 is not too bad at all.  

    The photos all looked good for a pipe from the 1970s.  The one slight issue that I noticed right off was the missing aluminum chimney or stem extension.  I could see the stem was threaded and I know from experience that Peterson Deluxe pipe typically have the chimney.  I thought, “no problem.  I have a couple spare chimneys that I’d purchased from https://www.smokingpipes.eu.  The U.S. version (https://www.smokingpipes.com) is usually sold out whereas the Dublin shop usually has them in stock.  

    While waiting for the 8S to arrive I went through The Peterson Pipe (the Big Book) to refresh myself with the history and lore of the new acquisition.  The “8” is actually one of the original Peterson Patent shapes dating back to the 1896 catalog.  I went to the Peterson Pipe Notes, by Mark Irwin, for a more condensed rendering of this shape history.Inb Blog “146. A Guide to System Shapes, 1896 – 2019, Part 1 (The 300 Shape Group)” mark Irwin does a great job summarizing this original shape:  

    “313 Medium Bent Dutch. 1896-Present.

    Length: 4.94 in. / 125.48 mm.
    Weight: 1.40 oz. / 39.69 g.
    Bowl Height: 1.78 in. / 45.21 mm.
    Chamber Depth: 1.53 in. / 38.86 mm.
    Chamber Diameter: 0.70 in. / 17.78 mm.
    Outside Diameter: 1.19 in. /30.23 mm.

    The 313 is an original Patent dutch billiard bowl, pictured in the 1896 catalog as shape 8 and listed in the 1906 catalog as one of the small Patents. It was given its current shape number as a 2nd Quality pipe in the 1937 catalog, where it also appears as a 3rd Quality pipe with shape number 363. That catalog also gives shape number 8S to its De Luxe version, where it also appears as a Classic Range 2004B (K and 1st Quality) and 338 (Kapet and De Luxe). In the late 1970s it was released in the Dunmore System line as number 73.”

    Quote from: https://petersonpipenotes.org/2019/09/03/146-a-guide-to-system-shapes-1896-2019-part-1-the-300-shape-group/

    Looking at the photos from eBay, I could make out the third stamping from the hallmark as a “C”.  I think it must be a 1970 based on the size of the “c”.  The final warning came in the description and stated that the pipe had, “burnt marks around the bowl edge inside part .”  So, when it arrives we will see an old pipe that is missing a chimney, has a charred rim and worn hallmarks – sounds like fun.

    It finally did arrive and to no surprise it was an old pipe that was missing a chimney, had a charred rim and had worn hallmarks.  Here are some photos taken prior to restoration:

    As you can see the old 8S has some issues.  I began with the tobacco chamber.  It did not have a thick cake but I did want to see if the chamber had any charring issues of its own.  I used the PipNet reamer and the Smokingpipes knife to clean out the tobacco chamber (photo below).  After this was completed I sanded the interior of the tobacco chamber with 220 sandpaper on a wooden dowel.  The chamber looked good with no sign of any charring.  

    With the tobacco chamber finished I decided to clean the exterior of the stummel.  This was done using Murphy’s Oil Soap and a medium stiffness toothbrush.  The exteriors cleaned up without any issues.  The rim had some “lava”, the residue of dried tars.  However it was difficult to tell where the lava ended and the charring began.  I rinsed the exterior with warm water and used a damped finger to remove and sanding dust from the tobacco chamber.  Next was the draught hole.  I returned to the restoration bench and moistened a bristle pipe cleaner with 99% ethyl alcohol.  This was run through the draught hole to gauge how dirty it was.  The pipe cleaner came back quite blackened with tar.  Here I poured about 5 ml of alcohol down into the tobacco chamber.  Holding the stummel upright I used a small nylon brush to scrub and loosen/dissolve the old residue.  After a minute of scrubbing I would pour the alcohol into a small medicine cup and run a pipe cleaner through to check on the color of the pipe cleaner. Black = more scrubbing, brown = more scrubbing with progress, white = finished.  It was brown.  I refilled with another 5 ml of alcohol and repeated the scrubbing.  The result was cleaner than the first time.  I repeated with another 5 ml of alcohol.  Finally I started to get through the build-up of smoking residue.  I finished by using alcohol soaked bristle pipe cleaners until they cam out clean.  

    Next was the reservoir.  On a Peterson System pipe this is where the water from the smoke condenses and accumulates.  A diligent Pete smoker will twist a napkin or paper towel and dab out this condensate before dumping the ash or dottle.  All of my alcohol baths had softened the residues in the reservoir quite nicely.  I scraped with a round ended blade as much of the residue out as I could before using cotton swabs soaked in alcohol to clean out the reservoir.  After what seemed like hundreds of swabs was actually 15.  The reservoir was now clean. All of this soap, water and alcohol had taken quite a toll on the finish of the pipe.  I used a make-up removing pad dipped in alcohol to wipe away any wax that remained on the stummel.

    I decided to top the rim of the pipe using 220 wet/dry sandpaper on a countertop.  This ferrule is a little bit taller than the rim making topping a bit more difficult.  I wanted to apply a little bit more pressure to the charred areas closer to the ferrule while keeping the flat profile and altering the shape of the 8S as little as possible.  After I had sanded as much as I felt comfortable with the 220 grit I used a 400 grit paper to smooth out any scratch lines.  This left the stummel looking better but I was still not happy with the charred area.  I then used a small wood sphere wrapped in 220 sandpaper to chamfer the inside edge of the rim.  This helped but I was still not happy with the rim.  I quit worrying about it and moved on.  More on this later.

    With the finish removed it was time to start sanding the wood.  I noted exactly where the stamping were and made it a point to avoid sanding those areas.  I started with the 1500 grit micro-mesh sanding pad moistened with a few drops of water.  After sanding I wiped the stummel with a make-up pad moistened with alcohol.  I repeated the wet sanding with the 1800 grit micro-mesh pad and wiping with the make-up pad.  The subsequent micro-mesh pads were used dry with an alcohol wipe after each micro-mesh pad.  I worked up to the 12000 grit micro-mesh pad.

    The stem of this old 8S needed very little work.  First off, what is a Peterson chimney?  It is a tenon extension of the stem into the reservoir.  The tenon extension is called a chimney by employees at the Peterson factory.  They are part of Deluxe and Premier models.  Here you can see a diagram of a Peterson System pipe.  The chimney, though not labeled, is shown and I circled it in green.

    Photo from:  https://petersonpipenotes.org/2018/08/30/105-peterson-system-day-2018/

    Below are examples of Peterson System pipe chimneys.  The Straight System pipes in the 120 shape and the 31 shape also have tenon extensions, these are shown in the photos below.  Today all of the chimneys are made of aluminum.  Prior to 1960 the tenon extensions were made of bone.  I have a couple of bone chimneys on System pipes.  In each case the bone is fused to the vulcanite stem.  When these bone chimneys eventually crack or break I will have to drill them out and replace them with a new aluminum chimney.

    Top pipe is a Peterson 31 Straight System pipe.  Below is a Deluxe XL339.  Both showing aluminum chimneys.

    Top pipe is a Peterson Premier 312.  Bottom pipe is a Peterson Straight System 120.  Both pipes have bone tenon extensions.

    Okay, now that we have had our Peterson chimney primer let’s try a new Peterson chimney in the old 8S.  No luck there. The old style chimney is a slightly larger diameter than the new one.  The below photo shows the new chimney flopping about in the threads.

    Fortunately I have a friend, Christian Baxter, who is a machinist.  Normally he is building custom machines for testing prosthetics for humans.  When asked, he was glad to work on something “important” for a change.  Relativity, not just for physics.  Christian is an amazing machinist and showed me some true reality altering things that could be done with a metal lathe.  After a few minutes of work he had manufactured a very nice chimney for the 8S.

    The above two photos are Christian Baxter’s lovely work making a replacement chimney.

    The last thing that the stem needed was a good cleaning, micro-meshing and polish.  The cleaning was done with bristle pipe cleaners dipped in 99% ethyl alcohol.  These were run through the stem until the came out clean.  The micro-mesh sanding of the stem was done in the same way as with the stummel – starting with 1500-1800 (wet),  and working up to 12000.  I wiped the stem off with Obsidian Oil between each micro-mesh pad.  After the 12000 pad, I polished the stem using Fine Polish followed by the Extra Fine Polish from Lbepen.com. 

    The restoration was nearly finished.  Here are a few photos before the final buff and application of the carnauba wax.

    As previously stated, I was not happy with my attempts to repair the charred rim.  I mention this with some photos on a Facebook group that I frequent.  One gentleman there, Sascha Mertens from Germany, mentioned that he uses a technique where he applies petroleum jelly to the charred area then uses a sharp knife to very carefully scrape the charred wood leaving behind undamaged briar.  I had not heard of this technique and decided to give it a try.  My first step was to get out my old German Boker pocket knife and give it a very sharp edge.  It only seemed appropriate to use a German knife with this new German advice.

    Next, I applied the petroleum jelly and allowed it to soak the charred wood for a few minutes.  I then careful began using the edge of the knife, held vertically, to lightly scrape the charred areas.  I wiped the jelly/char off on a make-up removal pad and repeated the char scraping.  It worked just like Sascha said.  Below are the photos of the results.  

    The results were very nice.  I was at last happy with the way the rim looked.  Thank you Sascha Mertens.

    The final step was to apply a high quality carnauba wax with the buffer.  This step really made the 8S shine and returned her to the near glorious condition when she left the Peterson factory.  This project would not have been possible without the assistance of Christian Baxter, machinist extraordinaire, and Sascha Mertens.  Their advice and skills made this restoration a success.  And thank you for reading the ramblings of an old pipe lover.

    Here are some final photos of the Peterson Deluxe 8S. 

←Previous Page
1 … 23 24 25 26
Next Page→

Blog at WordPress.com.

Privacy & Cookies: This site uses cookies. By continuing to use this website, you agree to their use.
To find out more, including how to control cookies, see here: Cookie Policy

Loading Comments...

    • Subscribe Subscribed
      • NebraskaPeteGeek
      • Join 40 other subscribers
      • Already have a WordPress.com account? Log in now.
      • NebraskaPeteGeek
      • Subscribe Subscribed
      • Sign up
      • Log in
      • Report this content
      • View site in Reader
      • Manage subscriptions
      • Collapse this bar