Recently a reader, Sascha from Germany, messaged me in a Facebook group and mentioned that he liked my detailed descriptions of the processes used in restorations but he had never heard of some of the products I use. I thought, “Oh, yeah. Not everyone lives in southeast Nebraska.” That completely explains why the nearest town has a population of 480 people. If everyone lived here it would probably be more like 8 billion. Also, WordPress has a function where viewers’ countries are shown. My ramblings have been viewed by amazing people in 34 different countries. I find this astounding and I am glad that I don’t have to pay the postage for my blogs to reach each of you.
Well, back to Sascha’s concern. He was unfamiliar with Murphy’s Oil Soap. I quickly did a search for German equivalents of the Murphy’s and found that: Murphy’s Oil Soap = Schmierseife in German and suggested that he try Denkmit Schmierseife gold as a product. The logistics of me doing this for every product I use for 34 countries immediately made my head explode. Fortunately, there isn’t much inside my head so the clean-up of an exploded head was minimal.
I did figure that I would list the main products I use and a link to a supplier, typically Amazon. Now I realize that Amazon may not ship to all points on Earth so I typed in the most remote human habitation of Earth – Tristan Da Cunha. And then searched to see if Amazon delivers there. They do:
Amazon has recently expanded Amazon International Shopping, its selection of items from the main US Amazon store that can be shipped to Saint Helena Ascension and Tristan Da Cunha and other countries.
It’s a lot like a filtered version of the main Amazon website which simply excludes the items that can’t be shipped to Saint Helena Ascension and Tristan Da Cunha.
For things like cotton balls, cotton swabs, acetone and toothbrushes, I get them at the dollar store. You can also get the sponge backed emery boards, for filing fingernails, at the dollar store. I pick those up when I am buying birthday cards. Yeah, I’m cheap. Why pay $4.99 for a card when I can get one for $1? I can save the money for more Kleenex tissues for the tears generated by looking at pipes I can’t afford on eBay.
That is a list of stuff that took years to accumulate. I wouldn’t recommend purchasing it all at once or you may incur the wrath of a spousal unit. Or, you may decide that this restoration nonsense isn’t for you. The good news of changing your mind is that most of that stuff has uses besides pipe restoration. Well, maybe not the Pipnet reamer but, a lot of it does. You can always use the alcohol to burn everything thus getting rid of the evidence of your weird life choices.
I hope you have found this helpful in your quest of strange life choices. Thank you for reading the ramblings of an old pipe lover.
I know what you are going to say, “Good Lord man, another Kings Cross?” Well this is actually only the fifth one of a six pipe estate lot. All six of them, Kings Cross. I will probably spare you from the last pipe restoration as it is another saddle stem billiard with the same shape number as this pipe. Anyway, I thank you in advance for reading this. Maybe, I will be try something new, be especially insightful and humorous this time. That too is probably not going to happen. I’m just full of good new year cheer, eh?
Well, here we are again. The history of a Kings Cross pipe. The best part of this blog for me is that I am writing it while smoking the Pipe by Lee from the last restoration. Let me rephrase that, from the previous restoration. I bet you were thinking, “finally this guy’s last restoration. I figured he would be canceled after the second one.” Hah, still going strong with at least 5 more pipes in the restore box and another 4 due on Friday. Okay, I’ve been putting it off long enough. The history of Kings Cross pipe. Really, again?
These were pipes made by the Chapuis-Comoy company in both their English and French factories. The “FRANCE” stamped on the stem of this pipe indicates the Chapuis factory in France was the home of this pipe. Kings Cross pipes stamped “MADE IN ENGLAND” would be those made in the Comoy’s London factory. Pipe lovers of the world are indebted to the Comoy family for their contributions of bringing briar to the pipe making world. If you are interested in the Chapuis-Comoy family history, and it is amazing, take a look at these or these links:
The below photos show how the Chapuis Saddle Stem Billiard appeared upon arrival.
The pipe showed signs of regular use, well developed cake in the tobacco chamber, some calcium deposits and numerous tooth chatter marks on the stem. Overall, the pipe appeared in good condition and only needed fills in two spots. This looked like a straight forward restoration.
I began with reaming the tobacco chamber using the PipNet reaming tool with the number 2 blade, Smokingpipes Low Country reaming knife, General triangular scraper and the 220 sandpaper wrapped wood dowel. The cake was hard and required some knife work prior to the PipNet tool.
Next I removed the stem and began cleaning the airway within the shank with a dental scraper, nylon shank brush, cotton swabs and a good deal of 99% isopropyl alcohol.
The initial alcohol dipped cotton swabs came back dark with tar. The initial scrapings were also hard and dry. To soften the residues in the shank I poured approximately 3 ml of alcohol into the bowl and slightly rotated it to allow the alcohol to flow into the shank. While holding the bowl slightly lower than the shank I could keep the alcohol in the bowl and shank. I scraped the airway with the dental scraper, swished the alcohol into the shank then scrubbed with the shank brush. I would clean the brush by pinching it in a paper towel. After scrubbing with the brush I scrubbed the shank with the cotton swabs to absorb the loosened/dissolved tar and removing the 3 ml of blackened alcohol. I repeated these steps numerous times.
Eventually the shank was cleaned and a folded pipe cleaner dipped in alcohol came back without discoloration.
The stem was then cleaned with alcohol dipped bristle pipe cleaners, Again several pipe cleaners were used before the pipe cleaners went through the stem without discoloration. The stinger was soaked in alcohol to soften the residues on it. After softening the aluminum stinger was cleaned using a pocket knife blade in the grove and 0000 steel wool dampened with alcohol.
Wit the internals cleaned I took the stummel to the sink to scrub the externals with Murphy’s Oil Soap. The Murphy’s was used undiluted and scrubbed with a medium stiff bristle toothbrush. Once scrubbed the stummel was rinsed with warm water and dried with a cotton dish towel. I returned the stummel to the work bench and wiped the surface with a cotton make-up removal pad wetted with 99% isopropyl alcohol. The make-up pad came back with very slight discoloration.
The lack of color to the pad indicated that either there was little finish remaining on the stummel of that the alcohol did not dissolve the finish. I repeated the make-up pad wipe with acetone to see if that solvent would remove any additional finish. It too came back without much discoloration.
I placed protective painters tape strips over the stampings on the stummel and the stem. I wanted to sand/micro-mesh the stem and stummel together to avoid rounding the edges of the mortise/tenon contact. I sanded the pipe with sanding sponges with 600 grit followed by the 1000 grit sponge. The stummel and stem were wiped with an alcohol dampened make-up pad between and after the pads.
At this point I decided to try to give the stummel a contrast stain to liven-up the pipe a bit. The tape on the stummel was removed. I then prepped the area for dyeing. I use an upside down plastic tub as the work surface, paper towel base, black Fiebing’s Leather Dye, a folded pipe cleaner applicator and a disposable lighter. And, the official duct tape wrapped styrofoam fishing bobber for the tobacco chamber plug/ handle.
I applied one complete coat and flamed it with the lighter. I then allowed the dye to dry for about 5 minutes.
After it was dry I returned the pipe to the workbench and wiped off the excess dye with a couple of make-up pads wetted with 99% isopropyl alcohol. One really nice thing about a black stained pipe is how well they show off any flaws in the wood. I decided to fill the two spots now since I would be sanding for the next half hour anyway. This was done using cyanoacrylate (CA, super glue) and briar dust. I pressed some dust into the pit and dabbed a small drop of CA onto the briar dust. I used the 600 grit sanding sponge to smooth the fills and to remove the upper layer of dyed briar. Care was taken to avoid the stampings. Some sanding of these areas was necessary but done with a very light touch. The below photos show the stummel dyed and sanded with the 600 sponge.
With the dyeing and initial sanding complete it was time to sand and micro-mesh the stummel and stem. I was really wanting to see how this dye job would look. I used the sanding sponges 1000-3500 with an alcohol dampened make-up pad wipe between sponges. The stem was sanded at the same time with the same sponges. I did use a lighter touch on the stem than on the stummel. The stem was wiped off with a dry paper towel between sponges and a thin layer of mineral oil was applied to the stem with my finger tips then wiped again with a paper towel.
Once finished with the final micro-mesh pad I wiped the stummel with the alcohol pad then applied a coating of Before and After Restoration Balm to the entire pipe. I let this sit overnight as it was bedtime.
Morning came, as I find they always do. I wiped away the slightly more rigid Restoration Balm with the inside of an athletic sock and found a quite lovely finish. All this one needed now are a few coats of carnauba wax from a buffer. The below three photos are of the pipe after the balm was wiped off.
I took the pipe to the buffer for this carnauba wax application. I took my time making sure to apply wax to each side from different directions. I then used a polishing cloth to hand buff the pipe. I returned to the buffer for one more application of carnauba. Maybe, it was just to polish my own ego rather than the pipe. I was pretty pleased with how the stain looked. The contrast stain looked beautiful and the wax was giving it a glow. I looked at the finished pipe and thought “I don’t really care that I don’t know your exact providence. You are lovely.”
Overall I think this Kings Cross Saddle Stem Billiard turned out very nicely. I am glad that I did the contrast stain/dye. I think that it really made the grain show up beautifully. I often feel torn during a restoration that I should try to keep things as original as possible. In this case I am pretty sure that the original workmen would have approved. I was able to retain the stampings and showcase the natural grain in a way that accentuates the natural beauty of the briar. The polished black of the stem goes even better with the black from the contrast stain. I hope that there was something here that you can use in your own restorations or that you were entertained. Thank you very much for reading the ramblings of an old pipe lover. Oh yeah, I almost forgot the required if you like this sort of thing please click the like and subscribe buttons.
Below are some photos of the finished Kings Cross Saddle Stem Billiard.
Pipe by Lee is an interesting brand of pipe made in the 1940 and 1950s. According to the the go-to-information source, Pipedia.org,
“This brand was distributed by Stewart-Allen Co., Inc., NY. Grading (ascending): 1 to 5 stars. Early pipes have seven pointed stars, middle run have five points and later pipes are stamped with coloured gold stars. Lee seconds are: Briarlee, Gold Coast.” (Lee – Pipedia)
Examples of the stars from my own collection:
The first two photos are of brass stars inlaid into the stem. The third photo shows imprinted stars which were then painted. Notice the rubber of the stems on all three look rather porous.
The stampings one the shank of this pipe match the stampings from the pipehil.eu website.
The shape of this pipe looks very much like the Large Bull Moose from page 7 of the 1947 Pipe by Lee catalog. If you would like to see the entire 10 page catalog here is that link – Pipes by Lee Catalog – Pipedia.
The pipe before me today is a first run Pipe by Lee Lage Bull Moose from around 1947 Below are photos of this pipe upon it’s arrival:
This pipe was in relatively good condition upon arrival. There was minimal cake build-up in the tobacco chamber. The briar had some dents and dings with one spot on the heel that looked like it had been dropped onto concrete. The stem had the look of a porous old rubber of vulcanite. The end of the shank appeared to have a clear epoxy where either the threaded aluminum mortise was originally installed or a later repair was made. Overall this looked like just a clean-up and refinish restoration.
I started with the tobacco chamber reaming. The PipNet reaming tool made quick work of the hard cake. The Smokingpipes Low Country reaming knife and the General triangular scraper were used to scrape the remaining cake from the chamber. This was followed by a sanding of the chamber with 220 sandpaper on a wood dowel.
After the reaming I started cleaning the interior of the shank. The chamber had very little cake so, I was hopeful that the airway would be equally as easy – WRONG. The shank proved to be very tar encrusted. The first couple of cotton swabs dipped in 99% isopropyl alcohol came back very dark and began to soften the tarred airway. I then would repeat the following:
Pour about 3 ml of 99% isopropyl alcohol into the bowl. Allow the alcohol to slosh in the shank.
Use a dental scraper to scrape the walls of the airway, wiping off tar onto a make-up pad.
Use a nylon shank brush to scrub the newly scraped walls of the airway with the 3 ml of alcohol.
Remove alcohol using cotton swaps to further scrub the airway.
Repeat.
I did not keep track of the number of times I repeated this process but it was many. Eventually the airway was clean and the cotton swabs emerged non-tarified (pretty sure that needs to be a word).
Next was the scrubbing of the stummel with Murphy’s Oil Soap. This was done over a sink with a medium stiff bristle toothbrush. The scrub worked nicely to remove the accumulated dirt and grime from the briar. The stummel was rinsed with warm water and dried with a cotton dish towel. I then returned to the workbench and wiped the stummel with a make-up pad soaked in 99% isopropyl alcohol. I also poured a couple of ml of the alcohol into the bowl allowing it to slosh around the bowl and airway to pull some of the water from that briar. I prefer to use 95% ethanol for this step as I think it pulls the water from the briar more effectively than does the isopropyl but, I was nearly out of ethyl. The make-up pad showed some sign of removing something from the briar perhaps a little bit of stain or just the last of some old dirty wax. At this point I set the stummel aside to dry. Below are photos of the scrubbed stummel.
I turned my attention to the stem. The stem had the appearance of a rough porous rubber. I have seen this before with pipe from this era. I think it may be from the use of recycled rubber from war time rubber shortages. I used Soft Scrub with Oxy-clean on a make-up pad to scrub the stem. I repeated with a clean pad when the pad became discolored with oxidized rubber.
At this point I also wanted to address the tooth chatter near the button. I tried to paint the area with a disposable light in an attempt to raise the dents. This slightly helped but the areas still required some file work.
Once the oxidized surface had been scrubbed and the chatter filed, I returned to the workbench and liberally coated the stem with mineral oil. This old rubber seems to absorb oil.
With the stem sucking up oil I returned to the stummel. I gave the stummel a quick sanding with a 600 grit sanding sponge and wiped it with a make-up pad dampened with 99% isopropyl alcohol. I then examined the stummel for areas that needed to be filled. There appeared to be four areas which had been damaged and no old fills from the factory. This speaks rather well as to the quality of briar selected by Pipe by Lee carvers for this 3 star pipe. The damaged spots were all filled with cyanoacrylate (CA, super glue) and briar dust. In the deep dent by the rim the dent wall filled with briar dust pressed into the dent and This Clear CA was added to the dust. The other 3 areas I placed a small drop of Thin CA to the briar and sanded over the top of it with the 600 sponge. The dust was provided by the sanding sponge. After smoothing the fill I then looked to see if additional applications of CA and dust were required to fill the spot. Below are photos of the four fills.
The above photo shows what I think was evidence of a drop onto concrete.
With the fills taken care of it was time to give the pipe a sanding/micro-meshing. I cut two pieces of painters tape and placed them over the stamps for protection. I began the sanding with a 600 grit sanding sponge with a wiping the stummel with an alcohol dampened make-up pad afterward and wiping the stem with a dry paper towel and applying a drop of mineral oil with my fingers and wiping it again with a paper towel.. I repeated this with the 1500-3500 sanding sponges.
After the sanding sponges I moved to the micro-mesh pads starting with the 4000. I used the pads in the same way that I used the sponges, wiping the stummel and stem after each pad. I proceeded to use the pads from 4000-12000. Below are photos of the stummel after the sanding.
The stem was looking much better but I was still unsatisfied with the button. The years of use and clenching had flattened the button on both top and bottom. To address this damage I use scotch tape to mask the newly smoothed area above the button.
I then apply a drop of two of black CA. I immediately invert the stem so the drop hangs down but remains on the button with surface tension. I can then rotate the stem allowing the drop to hang lower on the portion of the button which requires more material. I then spritz the black CA with cyanoacrylate drying accelerant. This quickly sets and cures the CA. I does leave a more coarse surface than allowing it to cure slowly. While the CA is curing I quickly use a sharp knife to cut the edge of the button while the CA is still soft. You only have a few seconds to do this so the knife has to be readied before the spritz.
A few second after the cut the accelerant evaporates completely and the CA is cured. It’s a good idea to wipe the knife blade quickly to remove any CA that is on the blade. Acetone will dissolve CA especially prior to the complete curing. The tape is then removed. This leaves a nice straight edge with minimal filing and/or sanding required.
At this point I apply a new piece of scotch tape to the stem immediately above the button to protect it from filing and sanding. I then used a flat needle file to shape the button.
Once filed to shape the button was then sanded with the sponges and micro-meshed to the highly polished surface that I wanted.
At this point I figured that I would try something new. Well, new for me anyway. Briar Lee (his handle on the forums at PipesMagazine.com) said to me in a personal message, “PS Lees love grapeseed oil.” I decided to try this advice. The first phot below is the before photo. The second is a well grapeseed oil saturated pipe and the third photo is about an hour after the soaking. As you can see the briar proved quite absorbent to the oil. I added a second coating of oil and waited another hour. It too was absorbed with more in some areas than others. After the second hour, I wiped the pipe off with a clean dry cotton rag (piece of t-shirt).
Below are additional photos of the oiled and wiped off pipe. Notice that the briar does not look as if it has been micro-meshed to a high polish.
After a few minutes some of the surface became more oily so I wiped it again. The surface of the pipe did not look as if it had been micro-meshed at all. It seemed almost porous. I thought back to restorations of other Lee and Marxman pipes with a very similar briar. I recalled that they too seemed to have a softness of briar that was more porous. Perhaps that is why they smoke so well.
I took the pipe to the buffer to apply the carnauba wax. I applied several coats of wax. The pipe looked good but not what I would call great. I decided to let it sit and wait until morning to see if I was seeing things, too tired or a combination of the two. Old eyes late at night do make things appear differently.
In the morning I looked at the pipe again. It seemed as though it had been waxed but then hand buffed with a rough rag. I returned to the buffer and gave the pipe another couple of coats of carnauba wax. This time the finish looked much better. I hand buffed it with a microfiber cloth and took it upstairs for some photos. Under the lights it again appeared slightly dull. I decided to take it outside and see how it looked with natural light. That is apparently what it really needed. The sunlight really made the briar glow.
This pipe was purchased for my personal use. I really do love the way the old Lees and Marxman pipes smoke. And the thought of them being 80+ years old and still doing what they were intended to do warms my heart and hand. I am hopeful that in another 80 years someone, preferably a grandchild, will be able to continue appreciating this pipe. I do hope that you have found something here helpful to your own restorations or were entertained. If you enjoy this sort of thing please click the like and/or subscribe. Thank you for reading the ramblings of an old pipe lover.
Below are some photos of the finished Pipe by Lee Large Bull Moose.
I love to read old pipe advertisements from the 1940s and 1950s. Where else can you find gems like “bitter juices” and “trap unwanted moisture and slugs” in an ad for pipes?
Or, this one from 1946 Pipe Lovers Magazine ad: “YOU ARE EVERLASTINGLY SAFE from unsavory juices and bitter slugs when your pipe is a Royalton” (Pipe Lovers Magazine 1946 all numbers : Free Download, Borrow, and Streaming : Internet Archive, p.113). Apparently “slugs” were of a major concern to Royalton pipe smokers as well as gardeners in the 1940s. The advertisements illustrate the spending of the major suppliers of the 1940s pipe marketing world. Full page ads are seen by Marxman, Kaywoodie and HTL. Sterncrest, Weber and Kirsten frequent the magazines as well with frequent ½ and 1/4 page ads.
Henry Leoneard and Thomas Ltd. was the forebears of the great pipe dynasty Sparta Industries and would later become part of MasterCraft.
“Henry Leonard & Thomas, Inc. (HLT) was founded in Ozone Park, Queens, New York by Henry J. Lavietes and two partners on May 31, 1938. The company patented a stem design for pipes and cigarette holders designed by Henry on March 9, 1943. Henry was the son of David Lavietes, who moved to Sparta, North Carolina in the early 1940s to purchase laurel and rhododendron burl to ship back to his son and HLT. Lavietes decided to stay in Sparta and founded the D&P Pipe Works with his other son Paul, originally as a 15 person operation. David Lavietes was the inventor of the Ajustomatic feature incorporated into Dr. Grabow pipes even today.
In 1944, the trademark for the Royalton filter well was granted to HLT. Soon after, however, Henry Lavietes closed the New York operation with little warning and moved the entire production to Sparta, North Carolina. At this time in addition to the Royalton line, HLT was making many other lines of pipes.
In 1953, HLT acquired all assets and equipment of the Dr. Grabow company of Chicago, Illinois, and began production of Grabow and Hollycourt pipes. At the same time, they acquired the Continental Briar Company, owner of the Royal Duke, Duke of Dundee, and Honeydew pipe brands still evident in the common use of the word “Duke” to name Grabow pipes.
On October 21, 1969, United States Tobacco company, owners of the Mastercraft brand, announced that it had acquired HLT. It still ran as a separate company until 1985, however, when Sparta Pipes, Mastercraft and HLT were merged into Sparta Industries, Inc.
While, even after this time, the HLT brand was sold to Lane, and later, in 2006 to International Pipes & Assessories, the current owners, IPAL continues to make and sell the Royalton pipe with the original HLT logo as part of the Grabow line.” (Henry Leonard & Thomas Inc. – Pipedia)
Unfortunately I could find little else on the Royalton line of pipes. The HTL Royalton billiard breaks from the advertisement diagrams by having a cork mortise to seat the aluminum tenon. The use of cork indicates an older manufacture date. I searched the patent number stamped on the stem of the
Royalton “pat. Re. 21209” to no avail. The only thing I could find was a 1943 patent for a “SMOKER’S APPLIANCE”, which was actually for a cigarette holder and a pipe stem. Two separate items on the same patent form. The pipe stem is a complex piece of engineering with 3 beads within the stem, “The beads are somewhat smaller in diameter than the well, and may freely assume random positions, thus causing the smoke to take an indirect and tortuous or sinuous path around and through the beads. This helps cool the smoke and helps precipitate moisture, bits of tobacco, and nicotine.”. (https://image-ppubs.uspto.gov/dirsearch-public/print/downloadPdf/2313648).
I will just call this HT&L Royalton billiard produced prior to the factory move to Sparta, NC in 1944. I say this because for the first years after the move pipe production was mainly done with Mountain Laurel, not briar. After the war, pipe makers wanted to assure buyers that their pipes were actually made with briar and they stamped pipes to indicate this. This pipe is a rather large piece of briar, for the 1940s, and is not stamped with any “imported briar”, “genuine briar”, or any briar guarantee stamps.
I picked up this pipe in March of 2023. It must have been in response to my ongoing fascination with the old advertisements as I don’t remember being terribly familiar with the Royalton line. As you can see from the amount paid, I spared no expense for my new quest. The poor old pipe languished in a small cardboard box until a couple of days ago. I think I must have done a little bit of work on it as the tobacco chamber airway and stem were very clean. Perhaps, I felt overwhelmed by the amount of work that the stem would require or, at the number of fills or, I forgot what I was doing and threw it in a box. Whatever the reason, she is out now and ready to entertain.
Here is what she looked like upon her reemergence:
The one word that comes to mind is “Yikes”. Okay, recovered from that. What needs to be done? Reaming the tobacco chamber, cleaning of the airway, topping the bowl, stripping the finish, filling the pits/dents/dings, restain the stummel, rebuild the button, sand/micro-mesh the whole thing and finish with carnauba wax. That sounds like it. As good as that plan sounded, I was pretty sure that the deployment of the plan would go less smoothly than the writing of the plan.
The tobacco chamber had been mostly reamed though not sanded. I used the PipNet reaming tool pretty much just to let it think it was a necessary part of the restoration. It wasn’t needed. The General triangular scraper on
the other hand was quite useful as was the 320 sandpaper wrapped around a wood dowel. There was not much cake to remove and the chamber looked good except for a strange indented ring that ran around 1/3 of the tobacco chamber.
The next thing to address was the numerous fills. They ranged in size from pinpricks to a 5 mm chip. They were filled with a small drop of cyanoacrylate (CA, super glue) then a pinch of briar dust pressed into the CA. Once cured the CA/briar dust was filed and sanded smooth. The one exception to this fill technique was the large chip on the rim. For this one I pressed the briar dust into the hole then applied thin CA to the dust. The thin CA soaked into the dust and cured almost immediately. After smoothing a depression was observed it was again given a small drop of the CA and a second pinch of briar dust.
The fill in the middle of the stamp was troublesome. I wanted to retain as much of the stamp as possible. I concluded that part of the stamp would
have to be sacrificed. I used a piece of scotch tape and applied it to the stamp that I wanted to preserve. The lower part of the stamp was very light and couldn’t be read. I then filled the hole with briar dust pressing it into place with a dental scraper. I then used a fly tying bodkin dipped into the thin CA to hold a drop of the CA. I placed this drop onto the briar dust. It soaked it and cured immediately. I repeated the drop of CA to any areas that did not receive a good wetting of CA. With the tape still in place I carefully smoothed the CA briar dust fill with a flat needle file then 320 sandpaper and finally 400 sandpaper. I then removed the tape.
Once the fills were completed I topped the stummel using 220 sandpaper on a flat counter. I rotated the stummel in hand as I sanded with a circular motion. I continued until the majority of the rim dings had disappeared. I repeated the topping with 400 sandpaper to further smooth the new rim.
There remained some dings around the rim. I decided to remove them by adding a slight bevel to the outer rim. I used a piece of 220 sandpaper glued to the inside of a funnel. The stummel was rotated inside the funnel to bevel the edge of the rim. The inside rim edge was also slightly beveled using a wood sphere wrapped in 220 sandpaper then smoothed with 400 sandpaper.
With the rim reworked I sanded the stummel using a set of new sanding pads. Steve Laug recently mentioned these sanding sponges in a recent blog on rebornpipes.com and for $10 (6 sponges of each grit), I couldn’t pass them up. The sponges felt a bit more aggressive or coarse grit than the wet dry sandpaper so I started with the 1000 sponge and used it with a light touch. After sanding I wiped the stummel with a make-up pad moistened with 99% isopropyl alcohol.
I wanted this pipe to have a contrast stain more like it did originally. I didn’t think that the stummel retained enough of the original dark base stain after sanding the fills so I went with a black Fiebing’s Leather Dye as a base. I probably could have used Fiebing’s Dark Brown for this with equal results. I gathered the staining gear: An upside-down plastic tub was used as a base to protect the counter from spills, paper towel surface, the Fiebing’s, a pipe cleaner applicator, a disposable lighter and the official duct tape wrapped fishing bobber – most people use a wine cork.
I gave the stummel a complete coat of the Fiebing’s Black Leather Dye and flamed the dye to set the color.
Once dyed I set the stummel to dry for about an hour while I turned my attention to the pipe stem.
With it’s scary appearance, the stem had apparently daunted my restoration efforts since this pipe arrived. I began smoothing out the area near the button with a file. The plastic filed easily and I graduated to a finer flat needle file to remove the deeper smooth the filed area.
Once the dents had been smoothed I began sanding with 220 then 320 sandpapers.
This went much better than I had feared it would. I then tried the new sponges. This plastic was not affected by the 99% isopropyl alcohol so, I used the alcohol on a make-up pad to wipe the stem between sponges.
The button did need to be rebuilt. I failed to photograph the process used. I know, I am prone to forget to do this when rebuilding stems. I will include some photos illustrating the steps with a different pipe, a Marxman Super Briar bent bulldog. (That restoration can be seen here https://wordpress.com/post/scimansays1787.wordpress.com/949). Apologies.
To rebuild the button I used a technique that I have not seen other restorers use. I first smoothed the area below the button with 400 sandpaper.
Scotch tape applied to the stem immediately below the button.
Black CA applied to the button to build-up the area.
The CA was spritzed with accelerant and “cut” at the back of the button with an Exacto knife while the CA was still soft. You only have a few seconds between the spritzing and the curing of the CA. The “cut” needs to be made during these critical seconds when the CA is still soft.
Scotch tape removed along with the CA that was “cut”.
The new button is shaped with needle files and sandpaper.
The above process was the same as I used for this stem except I used clear CA rather than the black CA. To repair the damage to the opening of the button
I cut a piece of flat plastic lid to the shape of the interior of the button. This was then inserted into the airway. Clear gel CA was then worked into the gap around the insert. The CA was spritzed with CA curing accelerant. The insert was removed and additional accelerant was spritzed into the airway to harden any CA within the airway entrance. This was repeated for the top and bottom. Once the button airway had been reformed I used a thin strip of 400 sand paper folded in half, for stiffness, to smooth the airway inside the button.
After the stem work was finished I returned to the black dyed stummel, kind of regretting my decision to use the black dye. I wiped the excess dye off with a couple of make-up pads soaked in 99% isopropyl alcohol. Once evaporated I used the 600 sanding sponge to remove the black stain from the stummel. This was followed by an alcohol wipe and then sanded with the 1000 sanding sponge and again wiped with alcohol. Below are photos of the contrast staining.
I was pleased with how the black dye penetrated into the softer, more open grain of the stummel. I wanted a warmer look to the lighter briar. I decided to use a diluted Feibin’g Light Brown Leather Dye to give the highlights a more yellow, warmer contrast. I used 3 ml of 95% ethyl alcohol in a medicine cup. I dipped a bent clean pipe cleaner into the dye and stirred it into 3 ml of ethyl. I used this to apply a coat of light brown to the stummel. After flaming off the dye I wiped it down with an alcohol soaked make-up pad.
The results were what I was after. Maybe not as “orange” as the original but this was looking pretty close.
I worked the stummel sith the micro-mesh pads 4000-12000 with an alcohol wipe between each pad. After the final wipe I applied a coating of Before and After Restoration Balm to the stummel and set it aside to let the balm work it’s magic.
Returning to the stem I micro-meshed the plastic with the 3200-12000 micro-mesh pads with an alcohol wipe between pads. Once finished with the micro-meshing of the stem I wiped away the excess Restoration Balm from the stummel and reintroduced the two parts. The cork mortise was not very tight. This can be seen in the second photo below.
I did not have a wine bottle cork to use as a replacement to the existing cork. I thought about ways to expand the existing cork and thought that steam might do the trick. I put the kettle on the stove and heated the water.
The steam venting from the spout seemed like the perfect delivery method so I held the stummel allowing the steam to enter the shank. Holding it this way was a bit uncomfortable but after a couple of minutes I dried the stummel and tried the stem for fit. It worked beautifully. I applied a bit of petroleum jelly to the cork and allowed the pipe to dry for about 30 minutes.
The pipe still looked flat, for lack of a better word. Even after the restoration balm. I decided to give it a coat of Danish Oil in hopes of livening-up the grain. Below are photos of the stummel after the coat of Danish Oil had dried.
I returned the stummel to the workbench and reworked the surface with the 4000-12000 micro-mesh pads, with a slightly water dampened make-up pad. This brought out a much nicer shine to the stummel. All that was left to this restoration was to apply a few coats of Carnauba wax with the buffer.
Overall I am quite pleased with how this restoration turned out. The contrast stain shows off the briar’s grain. The rep plastic of the stem revitalized well and the rebuilt button is comfortable. The large number of fills blend away as well as can be expected and don’t draw too much attention away from the wood’s beauty. I was sad to see some of the stamping worn away but glad that I was able to preserve as much of it as possible. Fills and stamps do not go well together. This old pipe is now returned to proper condition for many more years of faithful service. I hope that some of the techniques used in this restoration are useful in your own work. If not, then I hope you were at least entertained. If you like this sort of thing please hit the Like and Subscribe buttons, below. Thank you for reading the ramblings of an old pipe lover.
Below are some photos of the finished Henry Leonard & Thomas Royalton Crown Billiard.
When I first started this blog back on October 30, 2023 one of the first pipes I discussed was a Dr. Grabow Westbrook Dublin. In that blog I wrote: “We all know of Dr. Grabow pipes and likely have our own opinions of them. Anyway you look at it Dr. Grabow pipes are an American icon. I do not feel the need to examine the history of the brand and am including links regarding history for those who are interested.” I think that sums up how I feel today as well as it did then.
The Dr. Grabow being restored here is a Grand Duke Medium Bulldog. This pipe was part of an estate lot and was not my “target” of the lot. It was just along for the ride. I have nothing against this pipe other than a dislike for heavy clear coat finishes. Here is what this Grand Duke looked like upon arrival:
As you can see from the photos this pipe was pretty much new perhaps, only smoked a couple of times. Judging by the tobacco chamber and the filter I am inclined to say maybe only smoked once. So, what are the steps for this restoration? I am thinking that I will: Ream the bowl, strip the finish, perhaps restain/dye the stummel, polish the stem, clean the minimal residues from the airway and finish with several coats of carnauba wax.
Heavy clear coat is frequently used to hide the blemishes of a flawed briar block. I remember the Waldorf restoration where the clear coat covered and supplied a “glue” to hold literally cubic centimeters of fill in place. I have also seen beautiful pieces of briar hidden from the world with indiscriminate applications of stain and heavy finish. This is not meant to be an indictment against factory made pipes. The turning out of thousands of pipes by using the briar that the company has purchased rather than the selecting the absolute best pieces to work with is how these companies produce mass market pipes and sell them for prices that nearly anyone can afford. This means that these pipes are more of a gamble – will you get lucky and have a “magic” piece of briar or a flawed piece that will serve its purpose?
I first cleaned out the tobacco chamber, reaming is hardly the term I would choose. There was
minimal residue accumulated in the chamber. I used a Smokingpipes Low Country reaming knife and a General triangular scraper for the scraping. I finished with a 320 sandpaper wrapped around a wood dowel. There was no damage to the interior of the chamber.
Next I wanted to determine which solvent would dissolve this type of finish. The easiest finish to remove is shellac. That is easily removed with 95% ethyl alcohol. Next on the “easy” scale is a varnish that is soluble in acetone. After that we move into the “poly” or as I call them “Space Age Polymers”. That is a tongue in cheek reference to the commercials advertising all kinds of crazy products during the 1960s and early 70s. I have a Kaywoodie with a finish
that I lovingly refer to as diamond coating as I cannot find anything that can affect it, short of sanding. I started the finish removal with 95% ethyl alcohol on a make-up removal pad. It had no effect on the Grand Duke finish. Next I tried acetone on a make-up pad. It did little at first but I could feel the surface becoming tacky as I rubbed. Okay, I think we have the solvent. The rubbing was far too slow a process so, I decided to submerge the stummel into an acetone bath. I keep glass canning jars of solvents for this purpose. The EtOH is an abbreviation for ethyl alcohol. I dropped the stummel into the acetone and topped it off with some fresh solvent to completely cover the stummel. I figured that I would see the results in an hour.
During the acetone bath I turned my attention to the stem. The stem was in excellent shape with only some scratches from light handling of jostling around in a drawer or shipping box. I started polishing with a 2400 micro-
mesh pad. The material was not vulcanite. It too is impervious to the ethyl alcohol but acetone quickly dissolved the plastic stem. Not to self, keep acetone away from the stem. I worked the stem with the 2400, 3200, 3600 and 4000 micro-mesh. Between each pad I would wipe the stem off with an alcohol dampened make-up pad.
After about an hour I used a forceps to remove the stummel from the acetone bath. The finish was very soft and tacky. The problem with acetone soluble finishes is
that they will re-harden with the evaporation of the acetone. That is exactly what this one was doing. I took a couple of paper towels and folded them in half to absorb the spent acetone. I then used a steel brush dipped into the acetone and lightly scrubbed the stummel. The brushing with wet acetone worked very well at removing the finish.
Once removed I sanded the stummel with 400 sandpaper and wiped the stummel down with a make-up pad moistened with alcohol. With no finish obstructing the
view, I could now see there were some serious fills that had been made to this pipe. Along the right side of the stummel there must have been a gouge that ran from about shank high to right above the bead. The rustication attempted to conceal the gouge but there had been some filling as well. I used a fly tying bodkin to remove some of the old fill material that was loose or softened. I then applied brown cyanoacrylate (CA, super glue) to the areas where there were small pits that I wanted filled. I quickly used the 1500 micro-mesh pad to smooth these areas. The dust from the micro-meshing was incorporated into the CA and filled the small pits. I allowed the stummel to dry overnight to rid it of the acetone that had soaked into the briar. Acetone is very volatile and would be completely gone by morning. Below are photos of the pipe stripped of finish.
In the morning. I reworked the rustication with a Dremel tool and a round carving bit. This would smooth the filled areas and better blend them to mask the flaws.
There was also a little bit of old filler in the bead cuts. This made them appear like they were “clogged”. I tried to open them more with a piece of folded sandpaper. Unhappy with the result I used a cutoff disk with the Dremel tool to open them. I sanded with the previously mentioned folded sandpaper and applied the black Fiebing’s Leather Dye to the bead cuts as well.
in the briar. I used Fieding’s Black Leather Dye applied with a detail paint brush to darken the recarved areas. When the dye had dried I dabbed the
newly dyed areas with an alcohol dipped make-up pad to blend the new dye with the older. After the dye had dried I again micro-meshed the stummel with the 1500 micro-mesh pad to remove any black dye from the high spots.
With the re-carvings done, I reattached the stem and masked the stamps on both sides of the stummel with painters tape. I micro-meshed the entire pipe from the 1800-3600 micromesh pads. Between pads I wiped the pipe with an alcohol
moistened make-up pad. When finished with the 3600 micro-mesh pad, I removed the masking tape and wiped the pipe with the alcohol. I finished the micro-meshing with the 4000-12000 micro-mesh pads, wiping between
each as before. The pipe was looking far better than when it arrived. I was debating whether to stain/dye the briar with a light brown leather dye. I decided to apply a coat of Before and After Restoration Balm to the pipe and see how the briar looked without a stain.
After a few minutes I used the inside of an athletic sock to remove the remaining Restoration Balm. The briar looked good, almost like a contrast stain had been used. I thought the light brown Fiebing’s unnecessary. A took the pipe to the buffer and applied several coats of carnauba wax. I normally do not use carnauba on a rusticated pipe but this one has enough smooth areas that it seemed worthwhile to do. The pipe was then hand buffed with a microfiber cloth to further enhance the shine of the smooth surfaces.
I admit that I really like the look of this Dr. Grabow Grand Duke Rhodesian. The remaining dark stain gives the natural briar the look of a light contrast stain which stands out against the dark depressions of the rustication. The highly polished stem just makes the whole pipe look even nicer. I think the restoration was a “grand” success in changing a cheap looking drugstore pipe into a pipe that will make people look twice. I love when a couple of hours work changes the subject from the old cast off or ordinary to something unique and pretty. I hope that you found something here that you can use in your own restorations or had an entertaining read. If you like this sort of thing please click the Like and Subscribe buttons. May you have a wonderful and prosperous New Year. Thank you for reading the ramblings of an old pipe lover.
Below are some photos of the finished Dr. Grabow Grand Duke Rhodesian.
The return of the Kings Cross collection. Back at the end of November, I had won an auction for a lot of 6 Kings Cross pipes. I have restored the 3 Square, Kruger and a Billiard from that lot. The next victim, umm, I mean subject, was this bulldog. It had very classic lines with a slightly forward cant to the bowl, very fine beading and a saddle stem. A very attractive traditional bulldog design. When it arrived here in south east Nebraska from Rutherfordton, North Carolina, it looked to be in good condition.
The bulldog would need the normal restoration attention including: Finish removal, tobacco chamber reaming/sanding/inspection, rim topping, airway cleaning, stem revitalizing with teeth chatter removal, refilling of fills, filling of pits, stummel sanding/micro-meshing, re-staining, and carnauba wax to finish. Plus any new issues which typically arise with closer inspection. In other words, this is an easy one.
A little bit about the history of the Kings Cross line. These pipes were manufactured by the Chapuis-Comoys company.
“Kings Cross is a brand made by both Chapuis-Comoy in France using Algerian Briar. Kings Cross is also a brand name used by Savinelli, which is more commonly seen in the U.S. market. Those pipes are made using Italian Briar” (Kings Cross – Pipedia)
Chapuis is the French factory while Comoy’s’ is the English factory. The pipe has the stamp showing it is ALGERIAN BRIAR and 238 shape. This fits with the above quote from pipedia.org concerning Algerian briar. The shape number Coincides with the Comoy shape chart
Briar, Erica arborea, grows throughout the Mediterranean. It survives on the rocky slopes where most plants would succumb to the dry windy conditions of the Mediterranean climate’s dry season. During the wet season, fall and winter, is the growing season. “Evergreen roots descend deep into the soil to retrieve water to sustain life in an area that varies in precipitation (Tett 2003). Little land is able to be used for agriculture. Only three percent of Algeria is deemed fit for agricultural use” (https://meteor.geol.iastate.edu/~kuballc/portfolio/406%20Version%202.pdf)
The history of Algerian briar is one of Imperialism, wild species harvesting, and war. There is an amazing article about Algerian briar found in the scanned copy of November 1948 Pipe Lovers magazine.
“As is well known, the ideal pipe wood is one which is fine-grained, tough, slow burning and sweet tasting Pipes made of briar root have been the preference of the majority of smokers for over a hundred years.
Of the many kinds of briar root, that grown in Algeria is considered today as being the finest for pipe making and pipe smoking. Although opinions among pipe experts differ, the best is still said to come from this French colony in Africa.
The primary reason isn’t because the country is named Algeria, or because the French own the land. It is simply because the terrain and climatic conditions are such that the wood grown in this section of the earth is most suitable for the creation of briar which comes closest to meeting the pipe smoker s exacting demands. (https://pipedia.org/images/7/7f/PL_NOV_48smaller-file.pdf, p. 327).
In the article the history of French imperialism coincides with the production of the briar for pipemaking, “The use of briar in pipe making began just prior to 1830, the year that the French first occupied Algeria”*. The timing of this article is interesting. The Second World War had ended in 1945. This article would have seen the drought of Mediterranean briar brought on by the War years ending. It would also include the curing time required for the first post war briar. So, this article heralds the reemergence of Mediterranean briar availability for European and American pipe makers. This boon of supply would come abruptly to an end for Algeria, as that country’s war of independence from France was just around the corner. 1954-1962 brought a brutal war with France to Algeria, followed by more years of internal civil conflict. All of these political instabilities further reduced the availability of this “worlds greatest briar” from the pipe makers of the world. *(https://pipedia.org/images/7/7f/PL_NOV_48smaller-file.pdf, pp. 327-328 & 346).
A manufacture date for this pipe remains elusive. I would hypothesize that it was made with Algerian briar harvested between the late 1940s to early 1950s and was produced in France after 1971. “In 1971, the London factory (see Comoy’s) became independent, and Yves Grenard, second cousin to Pierre, took over Saint-Claude” (Chapuis-Comoy – Pipedia). I added the bold blue to 1971.
On to the restoration. I began with the tobacco chamber. This bulldog had a well developed cake with some minimal lava deposits on the rim. The chamber was reamed with a PipNet reaming tool and it’s size 2 blade. It was further scraped with the Smokingpipes Low Country reaming knife and sanded with 220 sandpaper wrapped around a wood dowel. The inside of the tobacco chamber showed no signs of heat damage.
The rim was moistened with saliva and lightly scraped with the edge of a pocket knife. After these scrapings the stummel was taken to the sink for a scrub with Murphy’s Oil Soap and a medium bristle toothbrush.
For the shank cleaning I first turned on Roku and Netflix and brought up season four of The Last Kingdom. Though not a necessary part of the restoration, Saxons and Vikings, like a good black cavendish, make most things better. I began cleaning the interior of the shank with cotton swabs dipped in 99% isopropyl alcohol. The airway was dirty at what I would call an appropriate level. Several swabs and bristle pipe cleaners later, and a few more Saxons and Danes, the stummel was cleaned. Next, I lightly topped the rim with 400 sandpaper. Below you can see the sanded tobacco chamber and the topped rim.
Now for the part that I figured would be more difficult – removing the finish. This pipe had a healthy clear coat. I first tried 95% ethyl alcohol on a make-up removal pad to dissolve the finish. It was mostly ineffective. Next I tried acetone on a make-up pad – success. The acetone removed the clear coat. I blame Uhtred of Bebbanburg for me not photo documenting the removal of the finish with numerous make-up pads and more dips into acetone. Yes, I could have just dropped the stummel into the jar of acetone and let it soak for a couple of hours but, what would I have done while watching Uhtred? It took the better part of one episode and part of another to remove the finish.
With the finish removed I lightly sanded the stummel, avoiding the stampings, to look for areas that would need to be filled. There was a large existing fill along the bottom of the shank. I was mostly solid and I did not see any reason to try removing it completely. It had a small spot where some of the fill had gotten chipped out so I used cyanoacrylate (CA, super glue) and briar dust to fill that. I repeated this for the two other areas that I thought warranted filling.
Before sanding the entire stummel with the 400 sandpaper and micro-mesh pads I wanted to get the stem ready for sanding and micro-meshing as well. I wanted them attached when I sanded them to avoid rounding their adjacent contact edges.
I also wanted to retain the stampings, FRANCE and K within a circle, on the stem. This meant that I was only going to use Soft Scrub with Oxy-clean on a make-up pad. The scrubbing of the stem also required the death of a few Saxons and Danes, I mean the scrubbing of the stem occurred during the slaying of a few Saxons and Danes. No Danes or Saxons were harmed during the restoration of this Kings Cross Bulldog. I would scrub with the make-up pad until it was heavily discolored with oxidized vulcanite, reapply additional Soft Scrub and continue. Eventually the pads ceased to be discolored, brown. The area around the button needed to be sanded to remove the teeth chatter. I used 400 sandpaper wrapped around and an emery board to provide a stiffness. There were two spots that required black CA fills. A drop of black CA was placed on the depression and then it was spritzed with CA drying accelerant. Photos below before.
After the CA had set-up I filed the CA smooth with a flat needle file and smoothed it with 400 sandpaper. Photos below after.
With the stem’s oxidation removed and both the stem and stummel fills smoothed with 400 sandpaper I masked the stampings on the stem and stummel.
The entire pipe was then lightly sanded with the 400 sandpaper. Once finished I wiped the stummel with a make-up pad moistened with 99% isopropyl alcohol. I worked a drop of Obsidian Oil onto the stem and wiped away the excess with a paper towel. I then worked my way through the micro-mesh pads 1500-3600 with wiping of the stem and stummel as above.
After the 3600 pad I thought that I needed to give the stummel a little bit of dye. Along the keel at the front of the pipe there was an area that was strangely lighter and the fill at the front of the bowl, both could use some additional color.
I assembled the staining gear: Fiebing’s Light Brown Leather Dye, a medicine cup with 3 ml of 95% ethyl alcohol, a clean pipe cleaner, and a lighter (left photo). I dipped the pipe cleaner into the dye and transferred it to the 3 ml of alcohol. This was stirred to dilute the dye (right photo)
I didn’t want to darken the whole pipe, just to darken the light spots and blend it with the existing stain. I applied the diluted dye to the stummel. It took a couple of complete applications before the dye was pooling on the surface of the stummel. I then flamed the stummel with the lighter. I then went over the lighter area again.
After the dye I allowed the stummel to dry for about an hour. After the dry time I moistened a make-up pad in 95% ethyl alcohol and wiped the stummel. The pad was stained with dye it was removing from the briar. I repeated this two additional times. The stummel now looked uniform in color and shade.
I continued on with the micro-mesh pads 4000-12000 and repeated the wiping of the stem and stummel as described above between each pad. With the final wipe done I slathered the entire pipe with a coating of Before and After Restoration Balm.
After 30 minutes of letting the balm do the magic that it does I wiped the remaining balm from the pipe using the inside of an athletic sock. Yes, it was a clean one. The final stretch. The pipe looked very nice. The wood grain stands out from the glossy black stem. The stamps remained visible. All that remained was to apply several coats of carnauba wax with the buffer. After this was done I hand buffed the pipe with a microfiber polishing cloth and took it upstairs to photograph.
I hope that you readers are not getting tired of Kings Cross pipes. There are still 2 to be restored. Actually they are both the same shape so I will probably not do blogs on both of them. Although I could just say “See previous blog” for the second blog. This one was fun and not just because of Uhtred. I do love the bulldog shape and this one has some very nice grain. It also allowed me practice at stamp avoidance which is a necessary skill to hone and use. I do hope that you found some of the techniques used were helpful or at least entertaining. Thank you for reading the ramblings of an old pipe lover. I also hope you had a wonderful Christmas and wish you all a very happy New Year.
Below are some photos of the finished Kings Cross Bulldog.
This little Wally Frank came to me via an eBay auction recently. I feel a strange attraction to the oddities and this one is a bit odd. Firstly, the oval shape. Secondly, there is the wood itself, definitely not briar. Thirdly, there is the stem, oddly rounded. The second and the third “oddities” indicate the age of the pipe. I am going out on a speculative limb here and say that this old girl is from the World War II years.
Here is what the Wally Frank Oval looked like upon arrival:
Now let me address the points made in the introduction. Wally Frank was a tobacconist who started his career in the 1930s. I will use pipedia.org’s first paragraph to set the stage for the company,
“Wally Frank, Ltd. was one of America’s oldest and most respected names in pipes and tobaccos, beginning in the early 1930’s. Wally Frank operated a chain of tobacco stores in New York City (the flagship store was in Lexington Avenue) and had a vast catalog business for pipes and pipe tobaccos. Their numerous private-label pipes were made by many makers, including Charatan, Sasieni, Weber, and many others. Wally Frank, Ltd. also owned the Pioneer brand of meerschaum pipes, made from both Turkish and African meerschaum. In addition to importing pipes, he had many pipes made in his own name and also employed pipemakers like Peter Stokkebye, Svend Bang, and Ed Burak (who later became the owner of Connoisseur). As a result, each Wally Frank pipe must be individually evaluated on its own merit.” (Wally Frank – Pipedia)
I found a very interesting “Wally Frank story” from 1992. While the piece has no annotations and a few points in the article appear to be creatively written it does provide a very fun read of the history of the company. (A&MG_V4_I1.pdf (pipedia.org)). This is not the first Wally Frank pipe that I have blogged about. If you are interested in the previous blog, here is the link – https://wordpress.com/post/scimansays1787.wordpress.com/735.
I called this shape an Oval as I transferred and labeled the photos. There is no shape chart for Wally Frink pipes as Frank was not so much a manufacturer. He was a tobacconist who bought, imported and sold pipes. I correct the name Oval to Opera. The following describes the Opera.
Opera
Castello: ‘Castello’ Opera
The Opera is a pipe shape that, in profile, often resembles an Apple, but the sides have been compressed for a more slender overall width, creating an oblong chamber — though some renditions feature a standard circular chamber. The shape was designed for formal occasions to fit comfortably in the breast pocket of a jacket without disrupting the suit’s lines.
With the shape of the pipe established I will turn to the wood of this Opera. It does not appear to be Mediterranean briar. The pipe is natural or unstained and has the characteristics of Mountain Laurel. Mountain Laurel is a species, Kalmia latifolia, is in the same family as our beloved briar yet from North America. Steve Laug, of Rebornpipe.com, did a wonderful blog about alternate woods used in pipe making. I will link his blog here for those interested in the history of the plant in the Second World War.
I have a nice example of a Mountain Laurel pipe. It is stamped as “World’s Best Briar” which was Trapwell’s marketing ploy used during the war years. Here are photos of the Trapwell:
Notice the absence of bird’s eyes that are common in Mediterranean briar.
Lastly I referred to the stem as being different from modern pipes. The shape and the material are not like today’s stems. There are pieces or bits of metal in the rubber. This belies the fact that during WWII a great deal of rubber was going to the war effort. Here is a quote indicative of the times, “Likewise, vulcanite for stems was either rationed or forbidden, so that many, if not most of the pipes produced during the war were equipped with horn stems (horn is a very comfortable material, but is easily cracked).” (WWII Phase – Pipedia). Now, that quote was from England regarding Dunhill’s
production. The United States also had rationing and supply issues as well. I believe that the bits of metal in the stem were from recycled tires being used for other rubber products, in this case a pipe stem.
So here we have what I think is a 1940-1950 Wally Frank Opera made from North American mountain Laurel and recycled rubber. During the early sanding of this pipe I emailed Steve Laug about dyeing the wood and expressed my concerns, “I feel that might be near sacreligious.” In the end I did dye the pipe as you will read, below, and it improved the appearance significantly.
Normally when restoring a pipe I will begin with the tobacco chamber. In the case of this Opera the chamber had never been fired. Step one – easy mode. After the chamber I will move on to either a Murphy’s Oil Soap scrub or cleaning the airway in the shank. Step two and three – easy mode. After the scrub the pipe would normally return to the workbench for the wipe
down with an alcohol wetted make-up pad. I did this and very little color was present on the pad. So I repeated it with a pad moistened with acetone. The alcohol is on the left pad, acetone on the right. Neither solvent removed any stain, indicating that this was indeed an unstained piece of wood. The alcohol pad probably removed years of dust and maybe some surface wax applied at the factory.
Next, I started sanding the dents and ding this stummel had received over the years. I noticed a tiny hairline crack at the rim. The crack did not appear to
advance more that a couple of mm. I thought it best to use a drop of cyanoacrylate (CA, or super glue) to reinforce the area. Other dents were removed with 400 sandpaper. There was one other dent that was too deep to sand and one additional pit. Both were filled with CA and wood dust provided from sanding.
I attached the stem to the stummel to allow sanding them together. Before starting I taped the stamp with painters tape to protect the stamp from sanding. I started sanding around the button with 400 wet dry sandpaper. It would look good, I’d wipe it off with a clean paper towel and then work a drop of Obsidian Oil onto the surface. The stem appeared to absorb the oil. By the time I had tried to wipe off the excess oil the rubber would look black but nearly dry. The strangest part was that all of the sanding seemed to be in vain. The stem still appeared to have a rough surface with tiny cracks seeming to run perpendicular to the length of the stem.
I repeated the process with the entire series of micro-mesh pads. Between each pad I would apply a drop of Obsidian oil and wipe with a paper towel. I then used Before and After Fine Polish followed by the Extra-Fine Polish. The following photos are after the micro-meshing and polishing:
I am pretty sure if I had this on a t-shirt which said “Polished, WTF?”. I would sell out at a pipe restoration conference.
I continued with the stummel and the micro-mesh pads 1500-3600. Between each pad, I would wipe the stummel with an alcohol dampened make-up removal pad. Then proceed to the next pad. Needing a break from micro-meshing I and wondering how to address the stem issue moved on to coloring.
I decided that the stummel needed some color. I did not want to go too dark and settled with Fiebing’s Light Brown Leather Dye. One of the tips Steve Laug gave me was to heat the stummel prior to staining. The remaining dye gear is shown in the photo. A clean pipe cleaner was used as the applicator
and the lighter to flame the dye setting it into the wood. I first heated the stummel with the heat gun until it was too hot to hold the wood. I applied several coats of the dye to the stummel. With the first two the alcohol of the dye evaporated very quickly the third coat did allow me to flame the stummel with the lighter. I was worried that I had gone far too dark
with the stain. I allowed the stain to dry for 2 hours. I used an alcohol wetted make-up pad to remove excess dried dye from the stummel. I repeated this two more times. I then started to micromesh the stummel with the 2400 micromesh pad. The pad would quickly fill with dyed wood dust and was cleaned from the pad with a toothbrush dipped in alcohol. I removed the most heavily dyed wood from the surface revealing a slight contrast stained stummel. It was a great improvement over the original very blonde/bland grain of the natural wood.
I continued through the micro-mesh pad series from 4000-12000. Again , between each pad I would wipe the stummel with an alcohol dampened make-up removal pad.
“What to do with that stem?” kept running through my mind. I thought I would try an experiment on the bottom of the stem. I scrubbed the surface clean of any oil with an alcohol wetted pad. I then used a paintbrush to paint Clear Thin CA onto the surface. This was allowed to set and cure. I then repeated with a second coat to smooth the depressions in the first coat. The brush idea was not a good one as the brush gave a puff of magic smoke and set up within seconds of the first coat. After the CA had hardened, I used 400 sandpaper to smooth the CA. This was wiped with a dry paper towel. I then worked through the micro-mesh series. Between each pad I wiped with an alcohol dampened pad. Here are a couple of photos of the result. Much better than the polished version but I could still see the tiny fractures in the rubber. You can also see two of the small metal pieces in the rubber, Let’s just call them glitter.
I decided to repeat the whole process with the top surface. I repeated everything with the top surface with the same result. Great improvement over the original surface but still the tiny fractures were visible.
With the stem and stummel finished all that remained was to give the whole pipe a few coats of carnauba wax at the buffer. The wax brought the grain of the wood out even better and seemed to mask the stem fractures. After the application and buffing of the wax I hand buffed the pipe with a microfiber cloth.
This pipe while beginning in easy mode soon progressed into something a bit more complex. If any readers have insights as to working with rubber with these characteristics or flaws please feel free to mention it in the comments. I would love to hear how others have dealt with issues like this. The staining turned out well and my experimental CA fills of tiny fractures in the stem seemed to work. I have no idea what the long term effects will be. If you have found this helpful and or entertaining please click the like and subscribe. Thank you for taking the time to read the ramblings of an old pipe lover.
Below are some photos of the finished Wally Frank Opera.
It has been said that I suffer from Peterson Pipe Acquisition Disorder (PPAD). Though not a painful affliction, except in a financial way, it can prove detrimental to one’s long term mental stability. I believe the early symptoms include a strange desire to only smoke Peterson pipes. As the disorder progresses afflicted individuals feel a compulsion to own each of the Peterson 300 series shapes. In its latter stages individuals can become obsessed with owning an example of every Peterson pipe ever produced. These poor souls have been known to have and hoard hundreds of Peterson pipes which they refer to as “a collection”.
Fortunately, for myself, I seem to be in an early stage of the disorder and only have mild symptoms. This stage is often referred to as being a “Pete Geek”. Some symptoms in PPAD include rambling conversations with patients repeating the terms 1896, patents, well, chimney and P-lip. Some patients have been known to speak poorly pronounced Gaelic phrases like “Sláinte”, “Dia duit” and “Póg mo thóin!” In my case, I can still see the beauty of other brands and lines of pipes and, so far at least, not fallen into true Obsessive Compulsive Peterson Pipe Acquisition Disorder (OCPPAD).
The subject of this blog is a Peterson Captain Pete. The pipe was purchased via an auction from eBay. Peterson pipes have a long and storied history which is rich and fascinating. I highly recommend the book The Peterson Pipe, by authors Mark Irwin and Gary Malmberg as well as a reading of pipedia.com’s Peterson pages. According to Mark Irwin and Gary Malmberg, the Captain Pete:
“This line’s name was derived from the nickname of Charles Peterson, known affectionately as “Captain Peterson.” The first issue, c. 1940-62, was in a smooth finish produced for Rogers Imports with a white stamped P inside C, or a circled P on the mouthpiece. CAPTAIN over PETE on shank, and a MADE IN IRELAND in a circle. English made versions show CAPTAIN over PETE on shank or “CAPTAIN PETERSON” and A PETERSON PRODUCT over MADE IN ENGLAND or LONDON MADE over ENGLAND. The second issue (1998-), features an XL bowl with Sherlock Holmes shapes and compact stems, in rustic or combination of smooth and rustic, with a nickel band between two narrow brass bands.” (Irwin and Malmberg p.295)
Photos of this Peterson Captain Pete when it arrived are below:
As you can see from the photos and by comparing them to the description of Irwin and Malberg, this is a first issue 1940-1962 pipe. The condition of the pipe is remarkable. I would judge that it was only smoked a handful of times. The lathe marks inside the tobacco chamber are visible though not shown in the photos. The condition of the stem and lower bowl interior are nearly factory fresh. When I first examined this pipe I thought the only work that I would need to do was minimal. It included; redoing the factory fills, 8 of them in total, reaming the slight cake of the tobacco chamber, fine polishing of the stem with a logo touch-up painting and a thorough cleaning of the airway.
I began with a look at the airway. It was remarkably clean, after swabbing the shank with a cotton swab dipped in 95% ethyl alcohol and a pipe cleaner
dipped in the same alcohol I only got a slight discoloring of the swab and cleaner. Though not spotless far cleaner than I would have expected from a pipe that was 60-80 years old. I suspected that someone had cleaned this pipe recently.
Next on the agenda were the fills. I do not enjoy replacing fill. Yes, I know it is a part of my pursuit and that the very nature that creates this wonderful wood, briar, would not have the characteristics that we require if it were to grow in more hospitable, less sandy environs. I still do not like fixing fills. “Quit whining, ya big baby.” “Oh good, you’re back. I was beginning to think I was alone.” “You’re not getting paid by the word so knock it off and fix the dang pits.”
I tried to photograph the pits and their factory fills. They were not badly done, just done in a factory. I know this pipe would never have made the cut at Dunhill’s due to the sand pits but a Peterson isn’t a Dunhill. Although
the finished goal is to have a finish that rivals a smooth Dunhill. Anyway, I began by picking out any old fill material that was soft enough to remove with a fly tying bodkin. There were 8 pits in all. I used the same bodkin to place a small drop of brown cyanoacrylate (CA, super glue) into a pit. I then used nitrile gloved fingers to take a pinch of briar dust and forcefully press the dust into the CA filled pit. The CA sets up near immediately with the briar dust so the motion of placing and pressing must be done quickly. Once one was filled I moved on to the next pit. Once all were filled I allowed them to sit and cure for a few minutes.
The beautiful Captain Pete now looked like a pox ridden mess. I remember learning the word carbuncle in High school English, Chaucer’s Canterbury Tales, perhaps. For some reason that word popped back into my mind.
The next task was to file the majority of the CA and briar dust “new fill” from the stummel while doing as little damage as possible to the stummel. Slow and steady are the keys to this. Now, a normal person can do this by feel. The CA is much harder than the briar and I am sure it feels significantly different than filing the briar. I cannot feel very much with my fingers. They are perpetually numb due to me having multiple sclerosis (MS). I have to use my eyes and ears to see and hear the file working rather than relying on a sense of touch. Since the file is covering the area being filed it is mostly by hearing that I do this. Once filed smoothish I turned to the sandpaper. I
used nothing coarser than 320 and this only with a very light touch. 400 was mainly used after which I went directly to the 1500 micro-mesh pad. Once sanded smooth I then checked for any slight spots where the briar dust had left tiny pores in the surface. When a tiny pore or depression was found I would lightly touch it with the bodkin touched with, not dipped in, brown CA. These very small spots of CA were then allowed to sit for 15 minutes to cure. After curing they were again smoothed using the 2400 micro-mesh pad.
I was now ready to start the micro-meshing of the whole stummel. I used painters tape to mask the stampings and reinserted the stem. I also taped over the stem logo. I used the 1500 and 1800 micro-mesh pads dry with a very light touch. After the pads I wiped the stummel off with a make-up removal pad moistened with 99% isopropyl alcohol. The stem did not require micro-meshing at this coarse of a grit so it was ignored. The 2400 micro-mesh pad was used on both the stummel and stem. The wiping of the stummel remained the same while the wiping of the stem between pads was done with a drop of Obsidian oil rubbed in by fingers followed by a wipe with a clean paper towel. This continued through the 3600 micro-mesh pad with the above mentioned wiping between pads.
Upon finishing with the 3600 micro-mesh pad and wipe I removed all of the painters tape. I then repainted the logo with acrylic model paint. This was allowed to dry for 10 minutes.
Once the paint had dried I began micro-meshing the stummel and stem with the 4000-12000 micro-mesh pads. There were a couple of spots inside the logo that needed to have paint scraped off. This was carefully done with the edge of a pocket knife. Between each of the micro-mesh pads the stummel and stem surfaces were wiped as before.
In examining the pipe after the micro-meshing I was not happy with the briar color. There were light areas where I had sanded during the filling of blemishes that did not match the stummel. I thought it would be best to lightly restrain the stummel using a diluted Fiebing’s Leather Dye.
I poured 5 ml of 95% ethyl alcohol into a medicine cup. I then used a clean soft pipe cleaner as an applicator. The pipe cleaner was dipped into the Light Brown Fiebing’s and stirred into the 5 ml of ethyl alcohol. THe dye was then applied to the surface of the stummel.
Several coats were applied to achieve complete coverage. The wet stummel was then flamed with a disposable lighter to set the dye. I then allowed the dye to dry for 15 minutes. After 15 minutes I began wiping the stummel with a make-up pads wetted with 95% ethyl alcohol. The pads removed much of the dye and blended the area very nicely.
Once all of the alcohol had evaporated I slathered the entire pipe with Before and After Restoration Balm. The balm was allied to sit and do its magic for 20 minutes.
I was definitely in the home stretch and the pipe was looking good. I wiped off the Restoration Balm with a soft cotton rag. I then polished the stem using Before and After Fine Polish applied with my finger and rubbed with a cotton rag followed by the Before and After Extra-Fine Polish.
The final step was to apply several coats of carnauba wax with the buffer. After buffing the pipe was hand buffed with a microfiber cloth and taken upstair for a photo session.
Overall I am very pleased with how well this Captain Pete turned out. I had always wanted to restore one of these and can now check it off the list. I do think that the previous owner had cleaned up this pipe and perhaps tried their hand at a restoration. It was remarkably clean, except for the need of a reaming, when I received it. One other thing that I noticed when working with the stem was the lack of any oxidation. For a pipe that is 60-80 years old there should be oxidation. I could tell that the stem had been buffed with noticeable buffing marks running perpendicular to the length of the stem. These were all removed during the micro-meshing. I do hope that you have found this informative and or entertaining. If you like this sort of thing please hit like and subscribe. Thank you very much for reading the ramblings of an old pipe lover.
*Irwin, Mark, and Gary Malmberg. The Peterson Pipe The Story of Kapp & Peterson. First Edition, second printing ed., Canada, Briar Books Press, 2018.
Below are some photos of the finished Peterson Captain Pete.
The title of this one is a mouth full. I was happily calling this Marxman a pot throughout the photography, restoration and transfer of the images. When typing the restoration, I asked a Marxman connoisseur, Briar Lee of PipesMagazine.com forum fame, “What would this Marxman shape be called?” He quickly messaged me the answer: “That is a quarter bent Big Boy Rhodesian.” Firstly, thank you, Briar Lee. Secondly, now I have to go and change the titles of 56 computer files from “Marxman pot…” to “Marxman quarter bent Big Boy Rhodesian…”. Oh, if only there were an app for THAT.
This Marxman, not a pot, came to me via an eBay auction. If you have frequented this blog, you will have seen a couple of other Marxman pipes restored. If you are a new viewer, welcome. I love old Marxman pipes made before the founder sold the company to MasterCraft in 1953.
Yes, the big ugly chunky Marxman pipes. A buddy describes one of my Marxman pipesas, “It’s like a tank made love to a lovat.” and he continued. “Not a brand new tank. Like an old one that went through two or three world wars.” Thank you, Don Cole. He was referring to the beauty to the left. I don’t have to try very hard to see exactly what he meant.
I will again refer to the best sources for information available to pipe hobbyists pipedia.org and piphil.eu. Pipedia’s short history of Marxman pipes reads as thus:
“Marxman (Marxman Pipe Company) was created by Robert (Bob) L. Marx in 1934, when he was 29, and after he had worked for the William Demuth Company. His pipes were not outstanding because of the quality of their wood (probably Algerian), but Bob started making unique sculpted pieces, which brought the brand fame in the World of Hollywood cinema. Actors like Zachery Scott, Dennis Morgan, Jack Carson, Alan Hale, Joel McRae, and Ronald Reagan were some of the faces that appeared on the bowls. Bob new how to innovate and took full advantage of marketing and press advertising in order to sell the brand–one of his slogans being “Relax with a Marxman”.” (Marxman – Pipedia)
In my last Marxman blog (Marxman Super Briar) I discussed the prices of Marxman pipes and adjusted them to current U.S. dollars. Briar Lee messaged me with some thoughts of his regarding Marxman pricing and pipe lines.
“In my experience, how to tell … a Big Boy … Marxman is:
1. No size stamp. If there’s a B or C those were $7.50 or $10 pipes.
2. The inside of the bowl is at least .850. Most are bigger.
3. Most have thick shanks with saddle stems.
4. 60 to 90 grams. Two or three times more than usual 30 gram medium size.
5. Not always, but usually no Jumbo or Benchmade or Super Briar grade stamp. Most common is just Marxman with arrow over IMPORTED BRIAR.”
The stamping that Briar Lee is referring to is:
(photo by J.M. Young)
And,
“All the beautiful full page of a national magazine in color advertisements Marx ran in Look, the Saturday Evening Post and other such big circulation magazines would have the 400 at $25, a Jumbo at $10, a Benchmade at $7.50 and a Super Briar at $5 and a Mel-o at $3.50.
Not any mention of his figural pipes at all.
Sometimes in the fine print there was a $15 size.
My guess is almost all pipes over $5 were bought as gifts.
The B and C size Jumbos are big pipes, too.
But the $15 size were not just huge (for the forties) but magnificent, the ones in the top of the store display.” (Briar Lee, personal communication)
Using an inflation calculator and comparing November 1945 to November 2023 we can see that $3.50-$25 is equivalent to $59-$424. (https://www.bls.gov/data/inflation_calculator.htm) The $15 and $25 ($254 and $424) Marxmans were not the price ranges of lower quality pipes nor were they the pipes of the “everyman” who was having a pipe. These were the luxury items of their time. I could not find a 1945 Dunhill catalog but did find a 1951.
The prices are indicated in pounds. Below are historical exchange rates of the U.S. Dollar to the British Pound Sterling for 1950.
A £10 Dunhill in 1950 would have cost approximately $28.50 (10 / 0.3508) or a £50 Dunhill would be $142.50 (50 / 0.3508). In today’s dollars these would be $354 and $1,771.45 respectively. Dunhill, then and now, a luxury item.
The Marxman pipe that this blog is dedicated to is a quarter bent Big Boy Rhodesian. The date of manufacture would be between 1934 and 1953 and was probably a $15 pipe in 1945. Upon arrival the pipe looked like this.
The condition of the pipe was very good for a pipe of this age and use. The tobacco chamber appeared to have been either frequently reamed or seldom used. The rim had evidence of lava but no heavy deposits. The stem showed no heavy denting nor chatter from teeth. I was pretty sure this was going to be a simple restoration.
The first step was to completely ream the tobacco chamber and sand it to bare briar. This was done with a PipNet reaming tool with the largest size blade, Smokingpipes Low Country reaming knife and a General triangular
scraper. The reaming eliminated the minimal cake quickly. Further scraping with the knives was required as the chamber diameter was larger than the largest blade of the PipNet. The chamber was then sanded with 220 wet dry sandpaper and my finger. Those huge bowls are so nice and easy to sand with a finger.
With the reaming finished I took the stummel to the sink for a scrub with Murphy’s Oil Soap. The Murphy’s was used undiluted. The scrubbing was done with a medium bristle toothbrush. All of those nooks and crannies of the rustication trapped a significant amount of dirt and grime. After the first scrub I poured on another blob of Murphy’s and scrubbed the stummel a second time. The Murphy’s was then rinsed with war mater and dried with a cotton dish towel.
I returned to the workbench and used a 95% ethyl alcohol soaked make-up removal pad to vigorously rub the entire stummel. The pad was quickly shredded by the rusticated surface but little color came off the pipe indicating that there was no stain nor finish used on this briar. It probably was only treated with wax from the factory. At this stage the pipe stummel looked like this:
I thought, “wow, this is going fast and easy”. Yeah, I know, “why did you say that? Now the next thing you do is going to be terrible.” I am pretty sure those were the same words that George Armstrong Custer said prior to running into the Sioux nation on June 25th 1876. Okay, I think you can see where this is going and I admit to exaggeration. Custer didn’t run into the whole Sioux Nation, just a large number of irate Lakotas and some Cheyenne. I, on the other hand, narrowly escaped defeat with the cleaning of this shank.
The first thing to do when cleaning a shank is to moisten a cotton swab with alcohol and rub it around the inside of the shank. Often the first rub in the shank doesn’t look so bad as the alcohol is actually starting to dissolve the tars and dried oils in the airway. The second alcohol dipped swab then goes into the shank and gets introduced to the now softened yuck (technical term used in restoration for tars, oils or general filth). This poor second swab can
become very darkly stained and covered in yuck. That is exactly what happened except it wasn’t just the second cotton swab it was the 2nd through the 46th. To be fair, I alternated with using the dental pick to scrape the walls of the airway, filling the airway with alcohol and scrubbing it with a nylon brush, cotton swabbing, wrapping a piece of a paper towel around a round needle file and scrubbing with the paper towel then back to cotton swabs. In other words the
airway was doing a very good impression of the La Brea Tar Pits without any dead megafauna. After what seemed like eternity, I packed the tobacco chamber and shank with cotton and poured in 95% ethyl alcohol until the cotton was saturated and the alcohol pooled slightly. I then turned my back on the stummel and let it soak overnight.
In the morning, the cotton looked like this. I began with another alcohol soaked cotton swab. I quickly became loaded with dissolved tar and yuck. I
began scraping with the dental pick and then swabbing. Just when I was about to surrender the cotton swabs started to lighten. They
changed from dark brown to a lighter golden brown then to light brown, then tea stained, then clean. I was victorious, unlike Custer.
This whole filthy shank admittedly took me by surprise. The bowl had been in good condition, indicating a cleaning regimen, the stem did not appear heavy chewed on again indicating that care was taken with this pipe. Then to find a shank that had apparently never had any type of cleaning surprised me.
On to the stem. The draw of the stem seemed open but it did have the taste and smell of old tobacco residue and tar. I could see light through it so, how bad could it be? The first bristle pipe cleaner was dipped in alcohol and would not go all the was through. I just scrubbed back and forth with the length that would pass. Upon repeating I was able to get the next pipe cleaner further. The next went even further after 4, I could get a pipe cleaner through the entire stem. They were still coming out stained with the before mentioned yuck. Another two, still yuck. I then moved to a churchwarden bristle pipe cleaner. I dipped the pipe cleaner as far as possible into the alcohol bottle, clamped one end in the vice and threaded the stem onto the other end. Holding the free end in one hand I moved the stem up and down along the length of the pipe cleaner. This cleaned out the remaining residue. Subsequent normal pipe cleaners then came out clean.
The exterior of the stem was in good shape. It may not have been pretty but
There was not actually much to do. I used 0000 steel wool eliminate most of the surface oxidation from the vulcanite. I used a dental scraper to clean out the corners where the button meets the stem. Then I used Soft Scrub with OxyClean on make-up pads to vigorously rub/scrub the stem. The pads would quickly become discolored requiring me to use a clean spot on the pad or to replace the pad altogether. After 5 pads or so, the stem was really looking good. I then reattached the stem to the stummel. Hmm, all that stummel scrubbing must have made the stem fit a bit loose.
It might have tightened up with a smoke or two but I did not like the loose fit. I used a dry-brushing paint brush and black cyanoacrylate (CA, super glue) to increase the diameter of the tenon. I placed a drop of CA onto the
tenon and used the brush to paint a very thin layer onto the tenon. Avoiding the shoulder of the stem. The stem was then set aside to dry. I hardened within a few minutes. I then tried fitting tenon into the mortise. It was still loose, better but loose. I applied another drop of CA and “repainted” the tenon and allowed it to dry. After the second coat of CA i used a 3600 micro-mesh pad to polish the tenon then tested the fit. Perfect. The paint brush was cleaned with acetone after each use.
Okay, let’s try reattaching again. I reattached the stem to the stummel – nice. I was ready for the micro-mesh pads. I covered the MARXMAN stamp with painters tape to protect it from sanding. I remembered that I wanted to get
rid of 2 small sand pits on the rim and the one remaining dent on the inside rim. The photo doesn’t show the pits but trust me, they were there. I used a fly tying bodkin to apply a small drop of CA to the pits/dent, I then forced a pinch of briar dust into the CA wetted pit/dent. The CA sets up nearly instantly. The fill was then carefully filed using a flat needle file and sanded with 400 sandpaper. This briar that Marxman used is incredibly soft. You can easily dent it with your fingernail. This softness makes it difficult to work and if there is one grain out of place on your sandpaper it will scratch the surface.
The micro-meshing was tedious on the wide smooth rim due to the softness of the briar. The stem went quite well. I started with the 1500 micro-mesh pad after wards I wiped down the briar with an alcohol dampened make-up pad and I rubbed a drop of Obsidian Oil over the stem and wiped it with a paper towel. I then moved to the next micro-mesh pad. Each pad was used in succession with the same wiping between each. When I got to the 6000 micro-mesh pad I removed the painters tape from the stummel and wiped the area free of any adhesive with the alcohol pad. I then progressed through the remaining micro-mesh pads.
I took the pipe to the buffer for the application of several coats of carnauba wax. Once finished I gave the pipe a final buffing with a microfiber cloth. I took the pipe upstairs for some photographs. I had some sunlight to work with and wondered if I would like the lighting with the low angle nearly winter sun. With the bright light I could see oxidation on the stem below the button. I did not like this and returned the pipe to the workbench and the 400 sandpaper. After the sanding the same micro-meshing procedure was repeated for the upper end of the stem. That made it look much better in both normal and brightly lit settings.
Tis pipe proved to have hidden and unexpected issues regarding the level of yuck in its shank. Perhaps that is a sign from above, to remind me that things are not always as they seem. The same way that this less than beautiful pipe can provide unparalleled smoking pleasure. I actually smoked this pipe as I was typing this, earlier. Typical of a Marxman of this type and era it smoked amazingly. Cool and delightful are the words that come to mind. I immediately berated myself for complaining about the soft briar. That very briar is what makes these Marxman pipes the wonders that they are. I guess I will just have to smoke them more often to avert my forgetfulness. If you have found anything here useful or entertaining click that like and subscribe. Thank you so much for reading the ramblings of an old pipe lover.
Below are some photos of the Marxman quarter bent Big Boy Rhodesian, both with sun and without..
The stem photos in the sun were taken before redid the area near the button.
During the 1950s-1970s many popular tobacco companies would include offers for pipes in the packages of their tobacco. These coupon pipes include some of my favorites like the Dr. Grabow Westbrooks. These were pipes that were only available by redeeming the coupon through the mail. Amphora did the same. Below is the text from pipedia.org in reference to Amphora pipes:
“Amphora pipes are made in Holland by the Jos. Gubbels organization, the same company which makes the very well known and loved Amphora Pipe Tobaccos. The pipes are produced in relatively small numbers to a high standard and not commonly found. They were used primarily in promotions and incentives for Amphora tobacco.
The Royal Dutch Pipe Factory Elbert Gubbels & Sons B.V. is the only manufacturer of briarroot tobacco pipes in the Benelux countries where pipes of high quality are made under the brands Big Ben, Hilson, Royal Dutch and Amphora. They also supply numerous smokers’ accessories of high quality.“ (Amphora – Pipedia)
To think that someone around 1970 picked-up a pack of Amphora pipe tobacco, discovered inside a coupon/order form, filled it out and waited (8-14 weeks, most likely) for their prize. I can imagine the joy and anticipation when they opened the box to find the above Amphora 725 smooth finish bent billiard. They probably felt that this was a pipe made specifically for them as they got to choose the specific shape and finish.
Enough imaginative silliness. Let’s get to the restoration of this darling that came to me as part of an estate lot purchase from eBay. Shen the lot arrived this Amphora was not in factory fresh condition. It appeared as the photos below show.
The term ”well used” came to mind. I also wondered about the pipedia.org quote about “The pipes are produced in relatively small numbers to a high standard and not commonly found.“ (Amphora – Pipedia). Wondered about the 8 fills that I would have to deal with, that is. The inner voice chimed in, “Oh well, you were the one who always wanted to work on an Amphora.” “Yes, I do”, was my reply to myself.
I figured that I would start with the usual tobacco chamber reaming. This “usual” proved to be slightly less usual. Part of the material to be removed from the chamber was of spider origin. Undaunted, I continued with the PipNet reaming tool and the Smokingpipes Low Country reaming knife and General triangular scraper. The thick cake succumbed to the scrapings of the tools wielded by their primate operator. The chamber was further sanded with 220 sandpaper wrapped around a wooden dowel. The interior of the chamber had been protected by this cake and had not received any damage from the smoking of innumerable packages of Amphora pipe tobacco.
The rim was also scraped of some of its lava before heading to the sink for the Murphy’s Oil Soap scrub.
The Murphy’s was used undiluted and scrubbed with a medium bristle toothbrush. Particular attention was paid to the rim in an attempt at removing all of the lava. After the scrub the stummel was rinsed with warm water and dried with a cotton dish towel.
Returning to the workbench I could now see the damage done to the rim. Hmm, topping this rim would take at least an ⅛ inch or 3–4 mm off the top. I decided to give the rim a slightly “canted” appearance by filing the front off the stummel then reestablishing the beveled rim by sanding with a 1 ½ in PVC pipe cap topped with sandpaper. The newly sanded rim was then stained with Maple colored furniture repair stain pen. This was blended in with an alcohol soaked make-up pad.
I failed to take any photos of how well this worked at this stage of the restoration. You can jump down to the finished photos of the rim if you can’t wait. I don’t want to spoil the surprise for those with patience.
Next was dealing with the fills. I used a fly tying bodkin to pick out any fill material or to clean out the pits. None of them were really large fills, just little sand pits that I found annoying.
The easiest way to deal with them was to forcefully press briar dust into the pit and place a small drop of cyanoacrylate (CA, super glue) onto the briar dust filled pit.
Immediately after the CA was added I would press additional briar dust down onto the CA. There was still a small damaged area at the front rim which I also placed a dab of CA and then applied a pinch of briar dust. After all of these fills had cured I smoothed the CA off with a needle file then sanded with 400 sandpaper.
Next I started cleaning out the airway. This proved to be more troublesome than I initially thought. I don’t know why, I had seen the cake in the tobacco chamber and knew this pipe had seen heavy use. I guess “de nile” isn’t only for African geography students. The shank was heavily tarred. The short
version is; many alcohol soaked cotton swabs, a few visits to the sink with alcohol poured into the bowl and scrubbed with a nylon shank brush and more cotton swabs later the airway was cleaned.
The stummel was ready for finish sanding but the stem needed to be attached for that. This meant that the stem needed to be the next focus. There were no deep dents from clenching nor any significant tooth chatter. Oxidation
and calcium deposits were the only issues. I started by scraping the button edges with a sharp knife. Then gave the stem an energetic rub with 0000 steel wool to remove the calcium and outer oxidation. After the steel wool, I started rubbing the stem with Soft Scrub with Oxy-Clean on make-up remover pads. These came back with the dark golden brown indicating that they were removing oxidized vulcanite. I continued this until I was satisfied with the color of the stem. Since there were no dents requiring sanding I thought that I’d just use white diamond buffing compound and the buffer to polish the stem. It looked good so I gave it a drop of Obsidian Oil rubbed in with my fingers.
The stem was reunited with the pipe. I knew that I would probably scratch the just polished surface of the stem with the micro-mesh pads but was not concerned since the shank and stem would be smoothed evenly in the process. I masked off the shank stampings with painter tape and began with the 1500 micro-mesh pad. I used the pads dry in succession through the 3600. Between each pad I would wipe the stummel with an alcohol moistened make-up pad and the stem with a drop of Obsidian Oil followed by a paper towel. After the 3600 micro-mesh pad I removed the painters tape and cleaned off any adhesive residue with alcohol. I continued with the 4000-12000 micro-mesh pads again wiping with alcohol pads and Obsidian oil, as before.
At this stage I had what appeared to be a few spots of uneven color due to the sanding of the CA fills. The light spots were not very noticeable with the photos. Trust me, they were there. To address this I poured about 5 ml of 95% ethyl alcohol into a medicine cup. I then made a dye applicator from a pipe cleaner. I dipped the pipe cleaner into Fiebing’s Light Brown Leather Dye. I then stirred the 5 ml of alcohol with the dye soaked pipe cleaner. This acted to dilute the dye significantly. After stirring I applied the dye onto the stummel. I used two coats, flamed after the second coat. This was then wiped with an alcohol dampened make-up pad to blend the dye. It worked as planned, unfortunately I did not photograph this part. Apparently it was late and I blame sleepiness for my neglect.
When finished with the micro-mesh pads I slathered on a healthy coat of Before and After Restoration Balm and let it dry overnight. Bed time.
The next morning I wiped off the pipe with the inside of an athletic sock. I am beginning to think this may be the purpose for the terry cloth inside of socks. The pipe was really looking good. I took it to the buffer for several coats of carnauba wax on both the stummel and stem.
Overall the Amphora turned out very well. She is quite photogenic. The rich browns of the briar contrast nicely with the ebony stem and the grain patterns of the sides are mostly symmetrical and show off the swirls and bird’s eyes at the front. I neglected to repaint the logo. That will need to be done in the future. I have noticed two different colors when looking at old Amphora photos so, I am unsure as to which color would be more appropriate. I hope that you have found this restoration useful or at least entertaining. If you like this sort of thing please click the like and or subscribe, below. Thank you for reading the ramblings of an old pipe lover.
Below are photos of the finished (sans logo repainting) Amphora bent billiard.


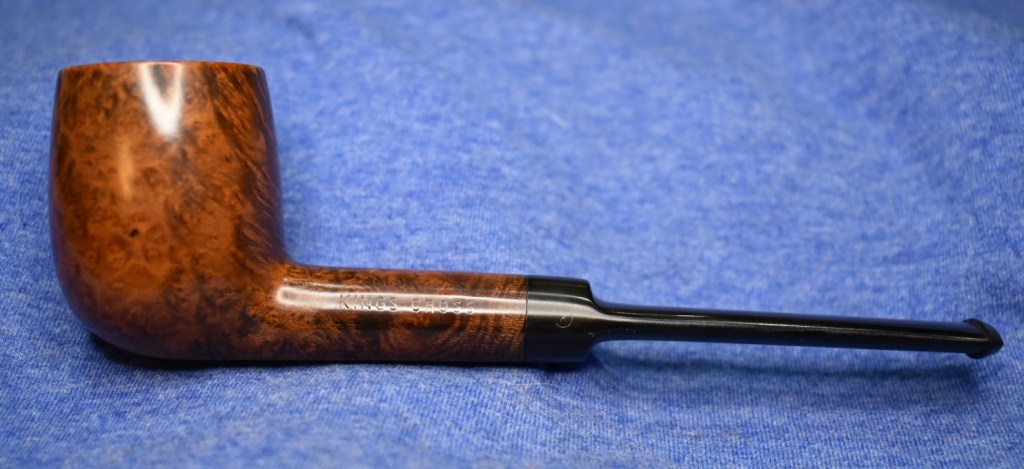


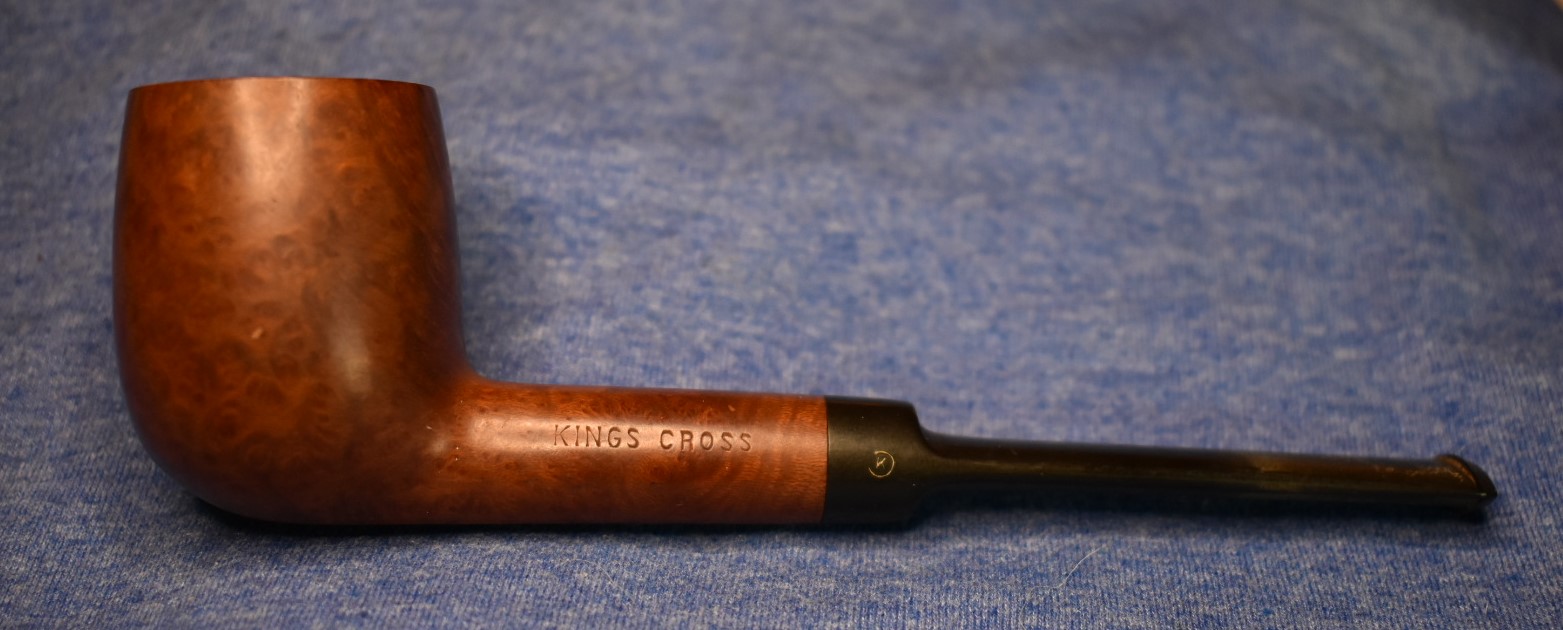
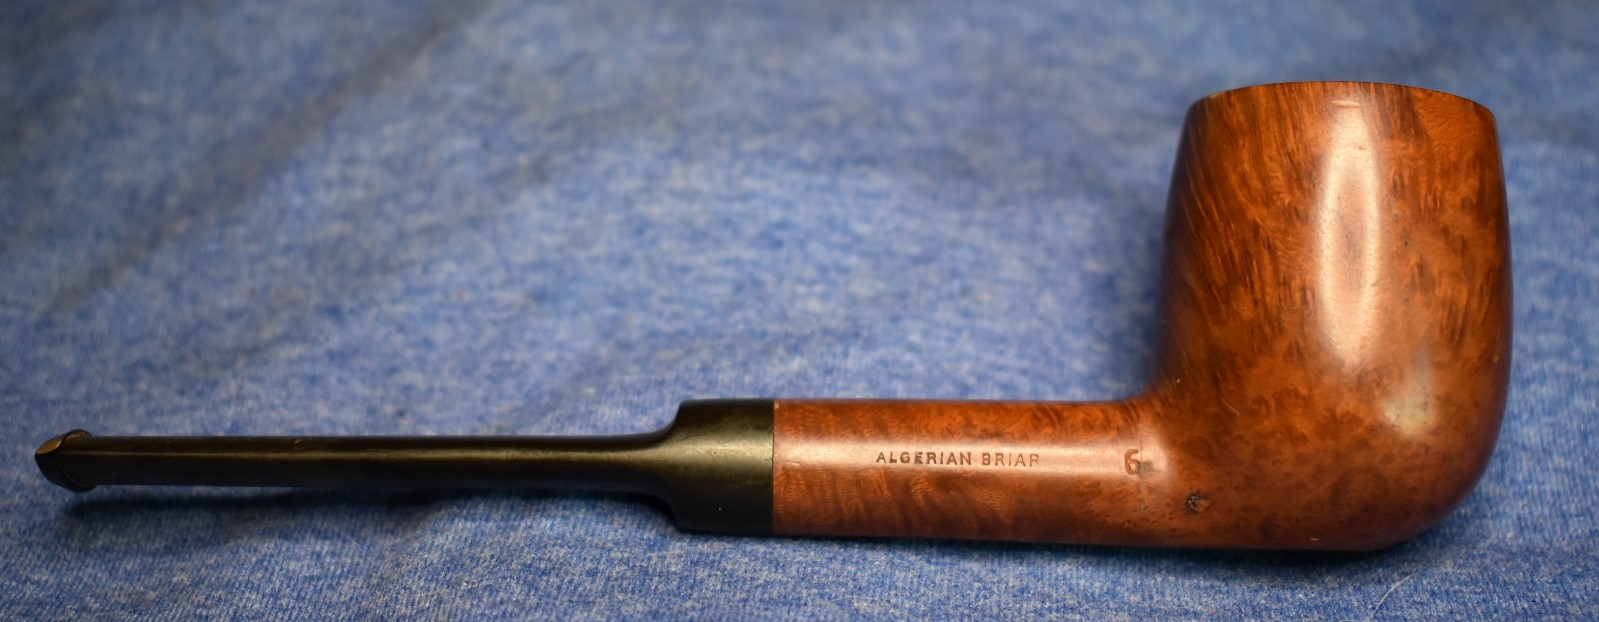
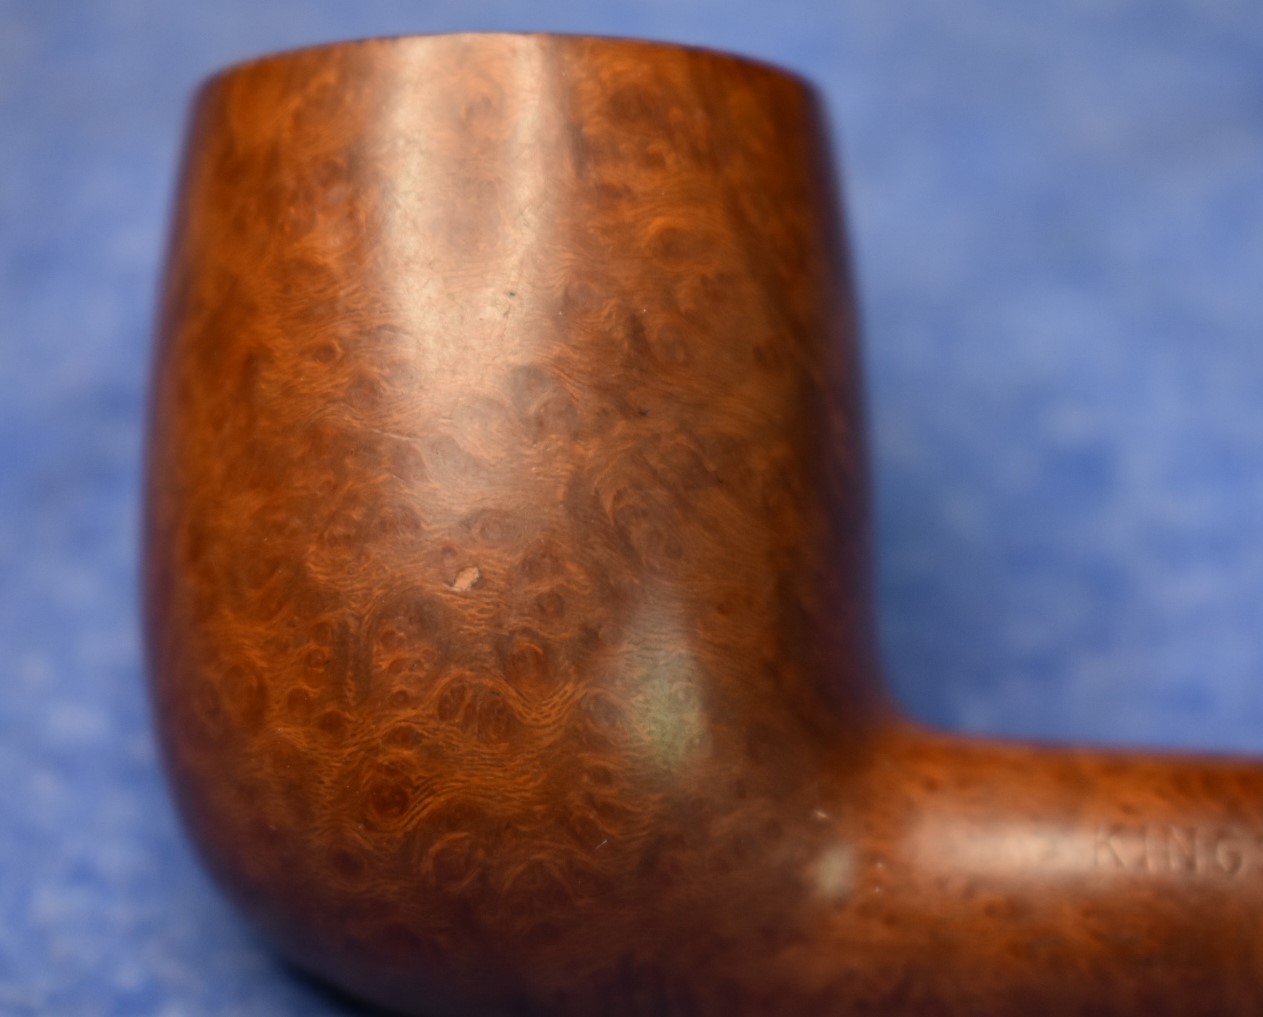


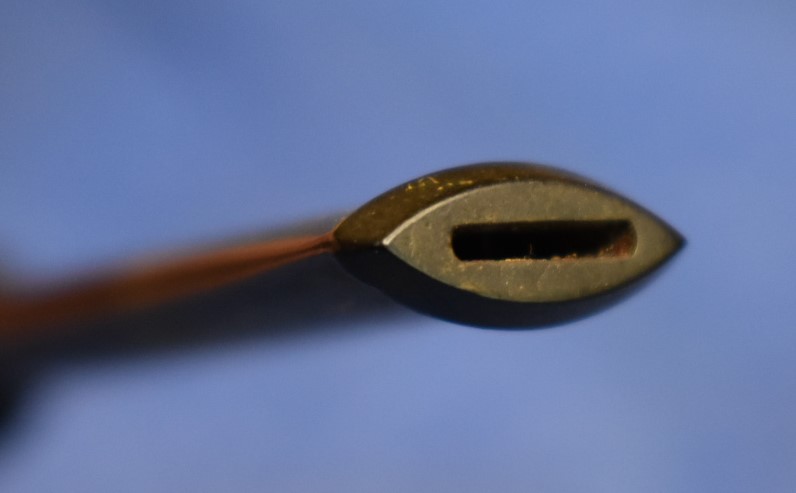


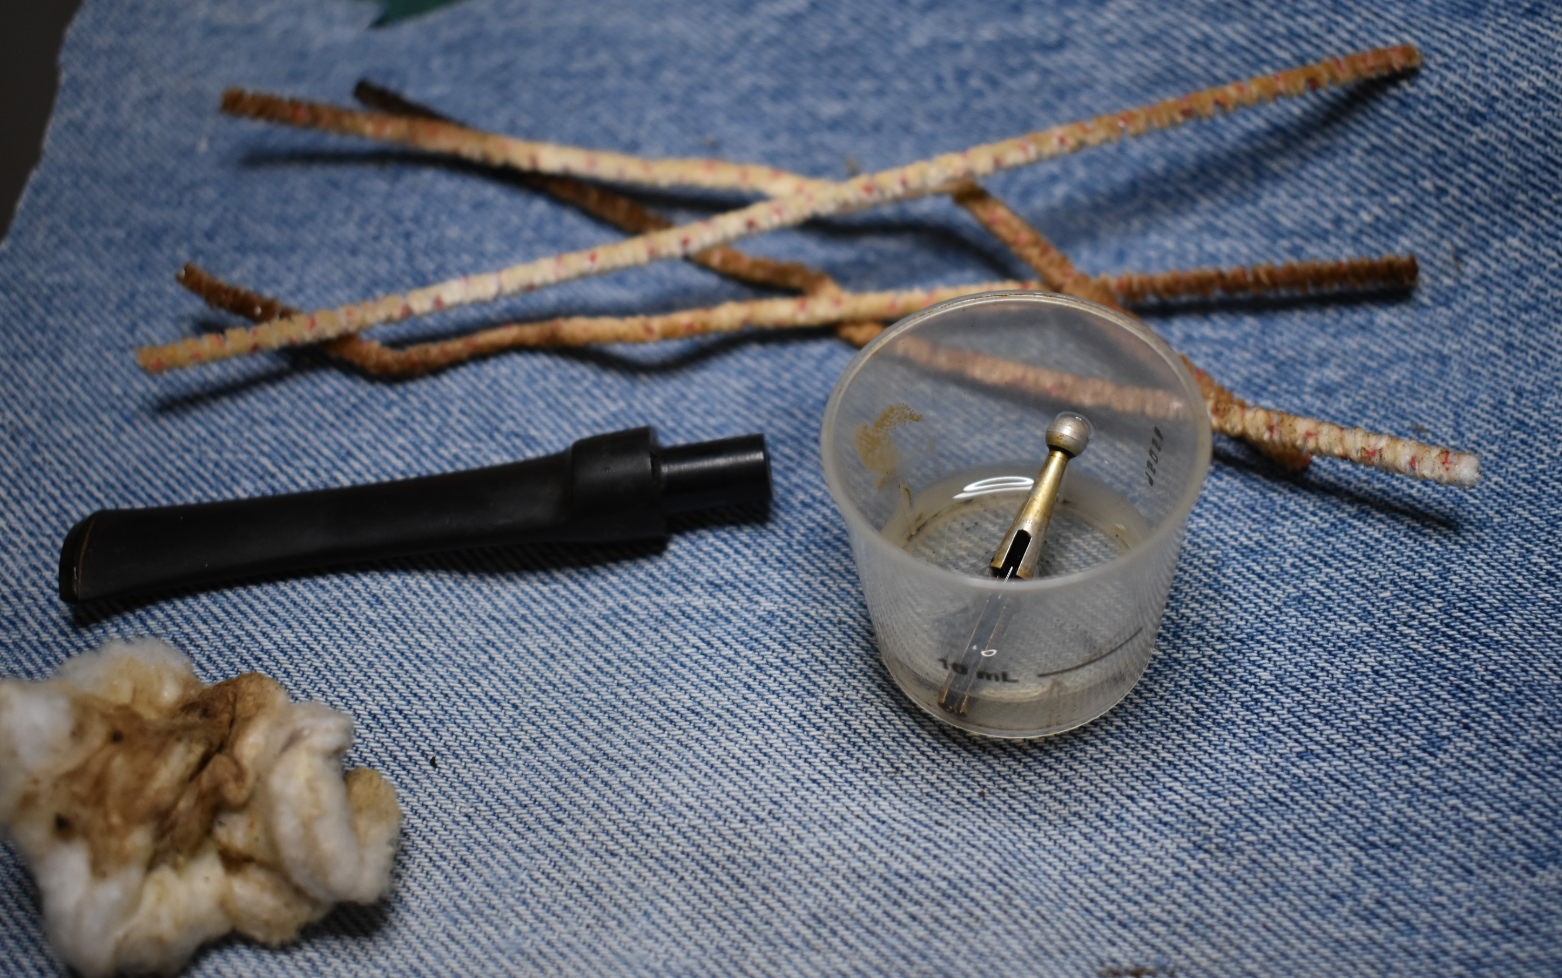


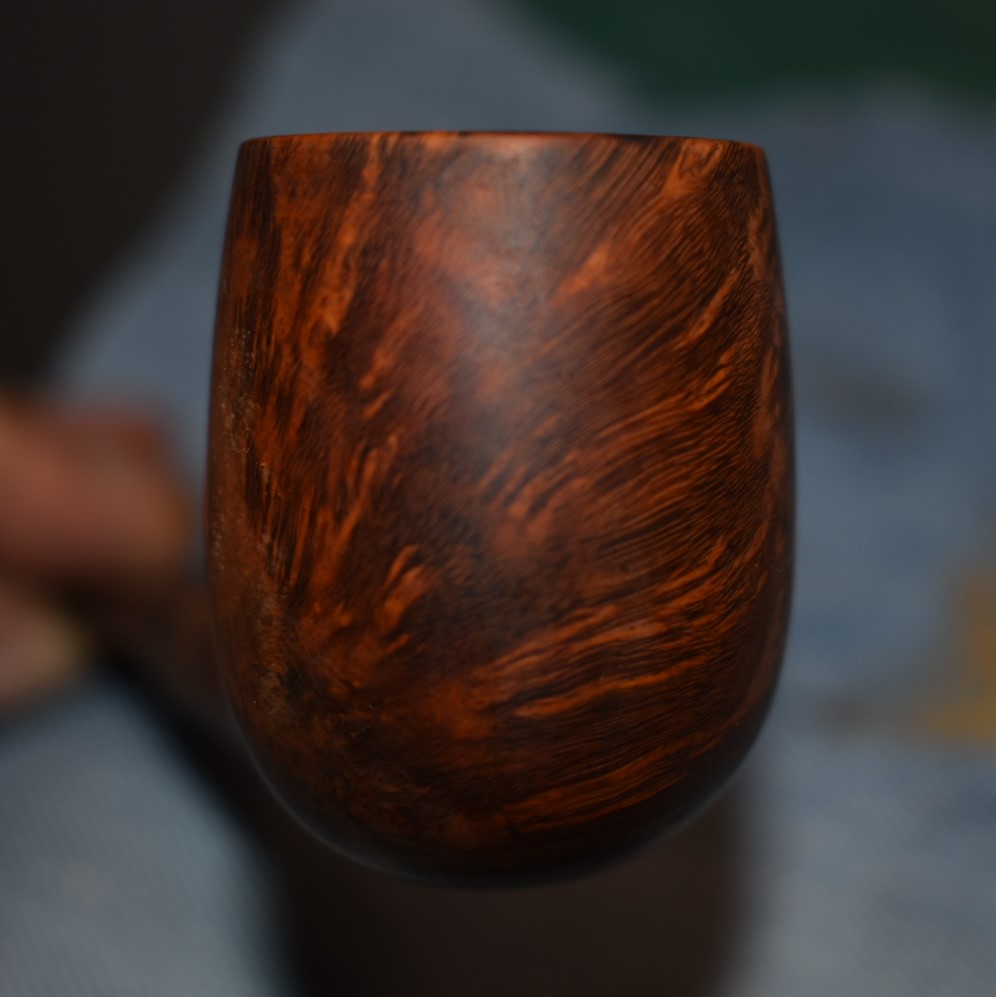


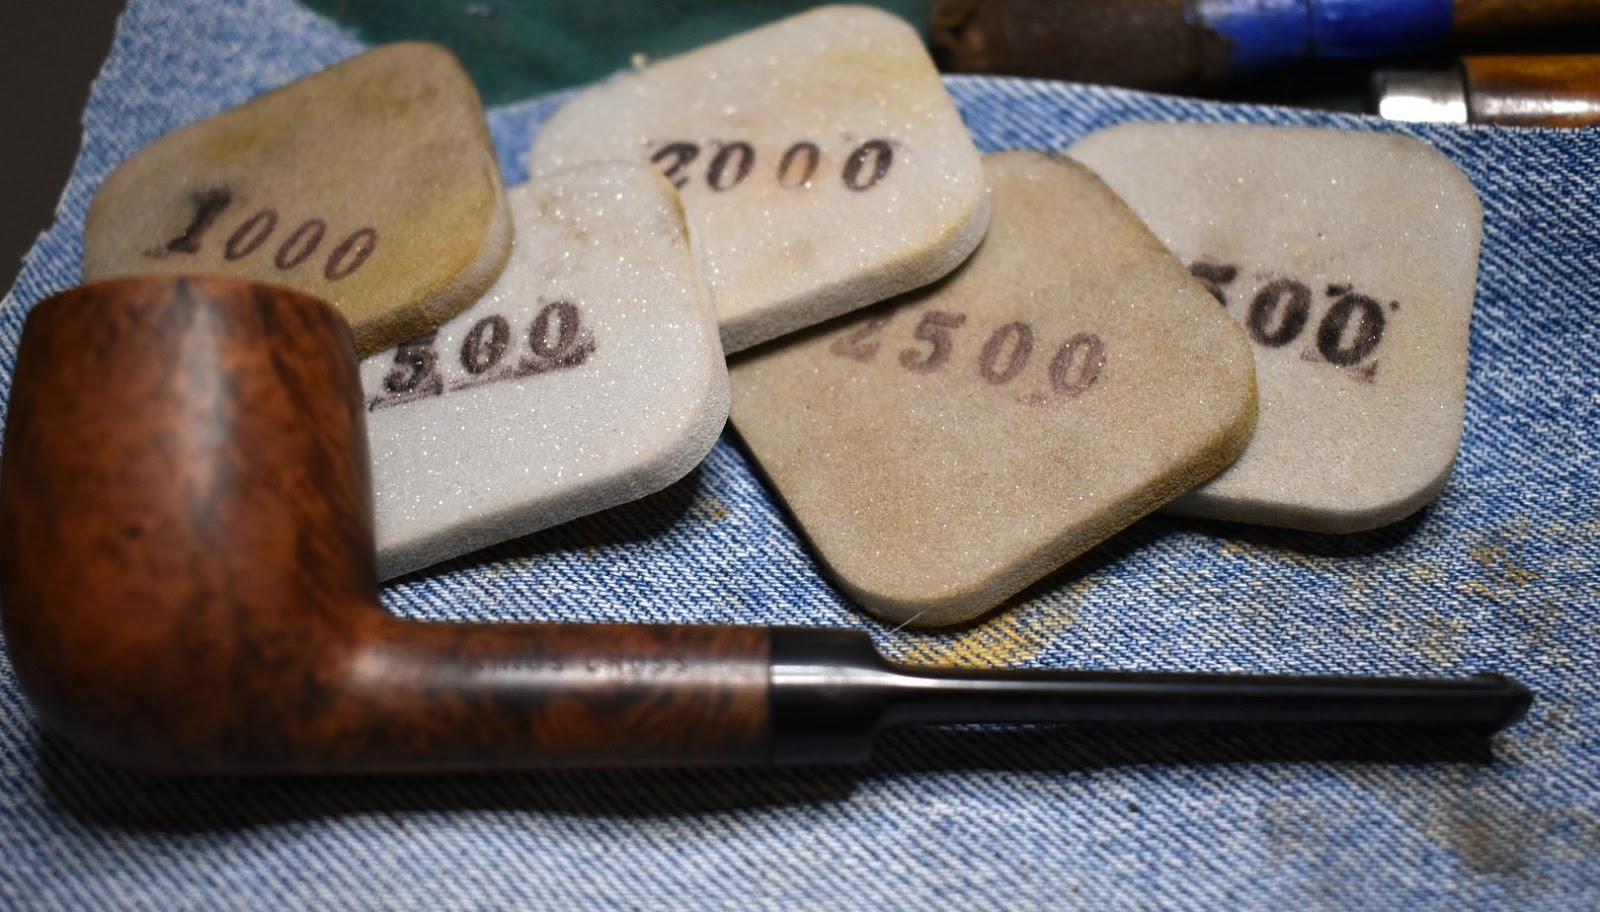


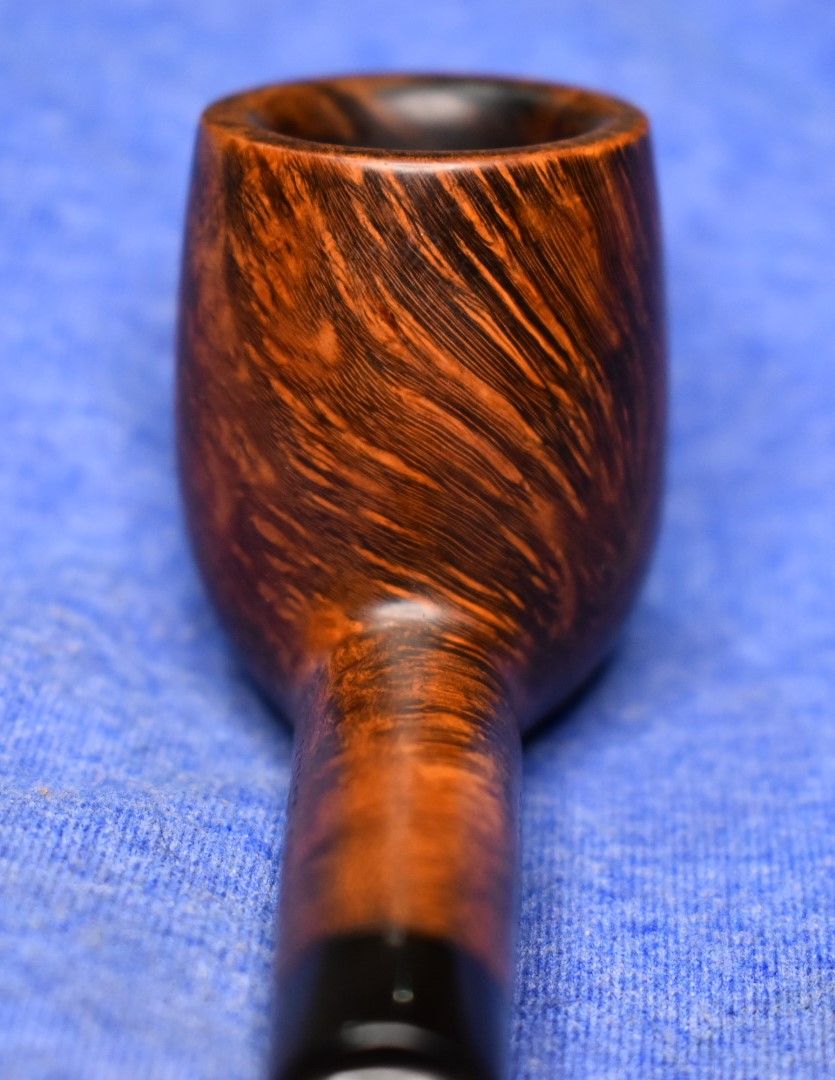


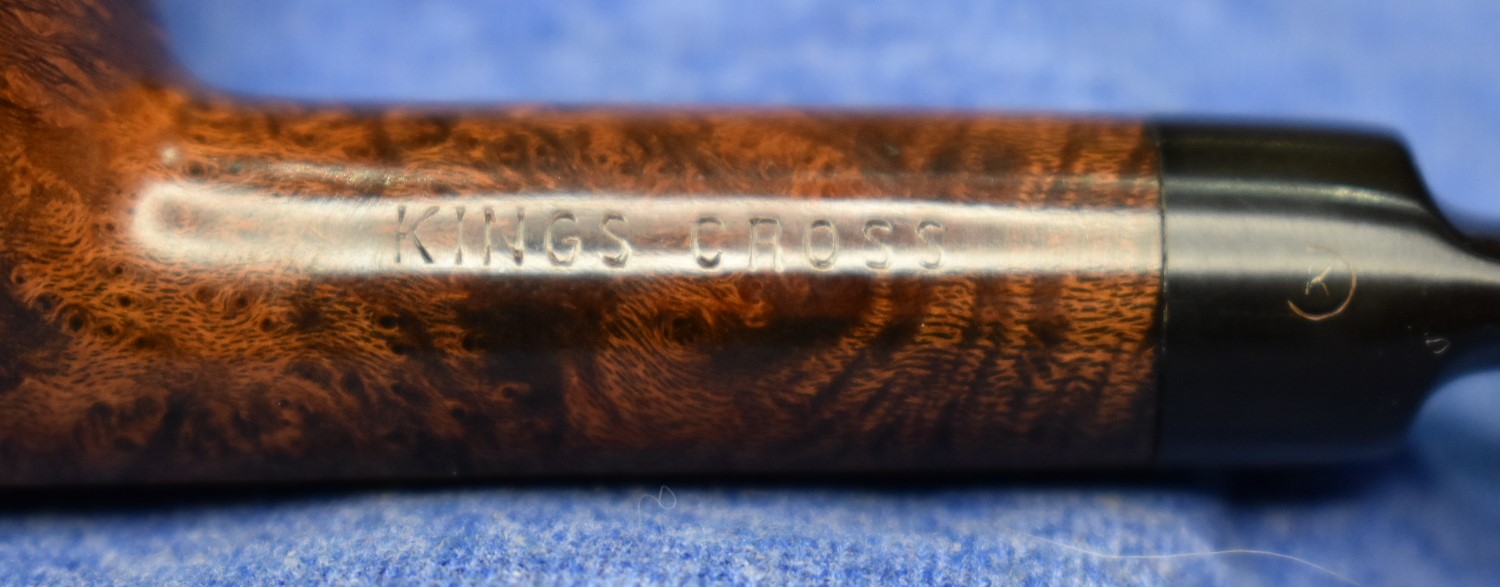


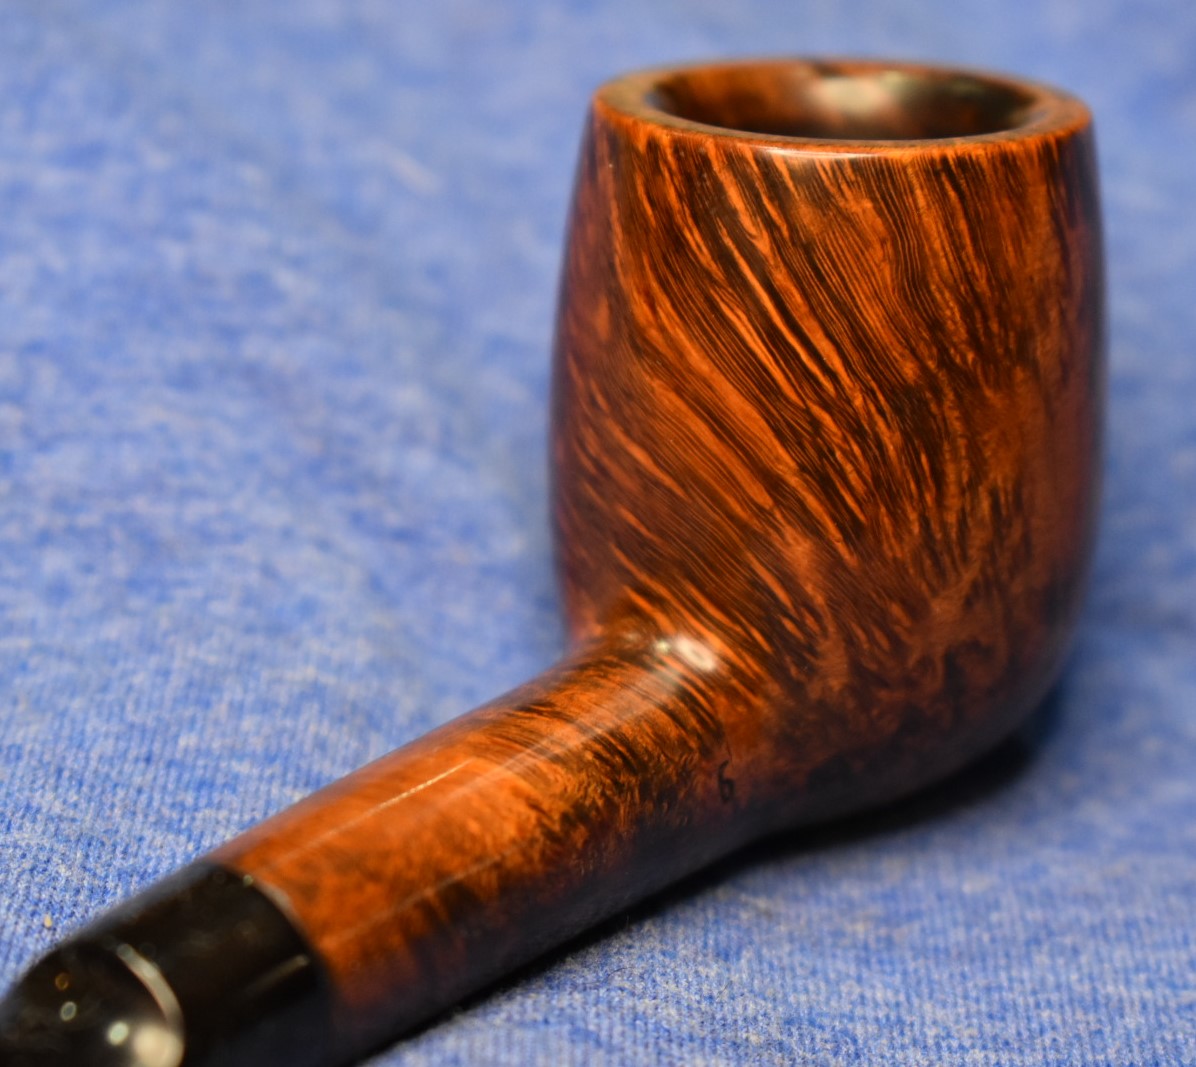


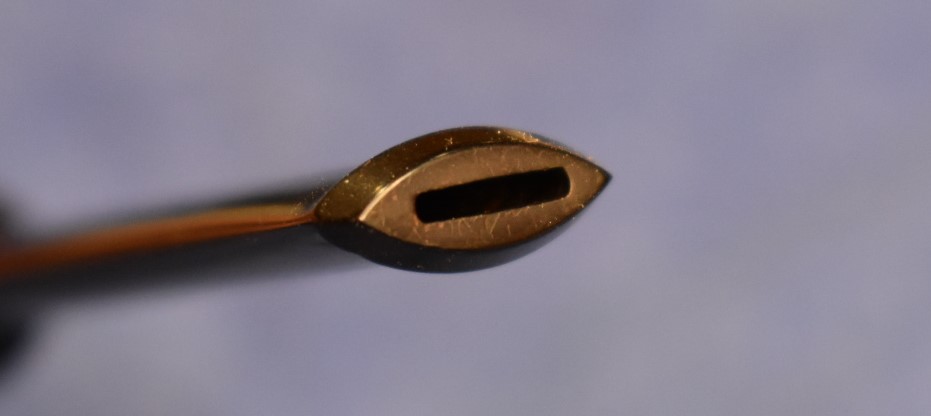


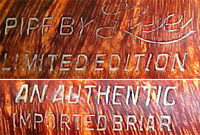


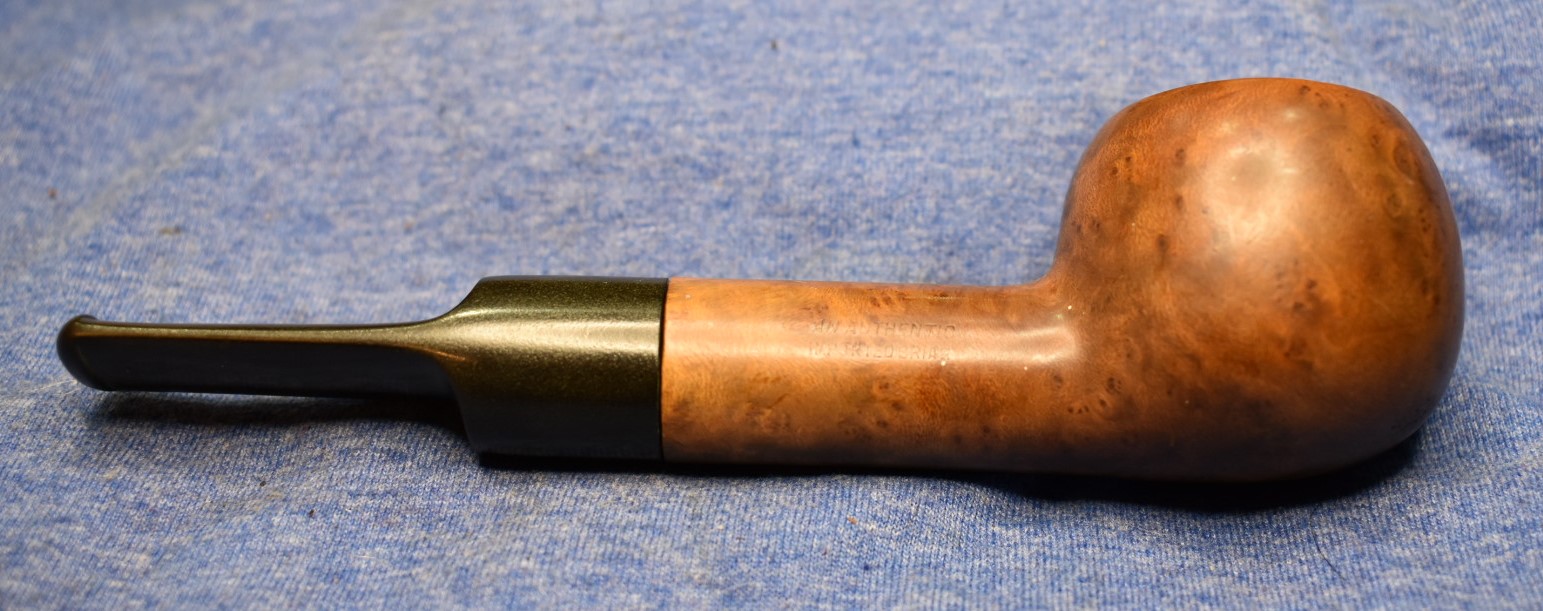
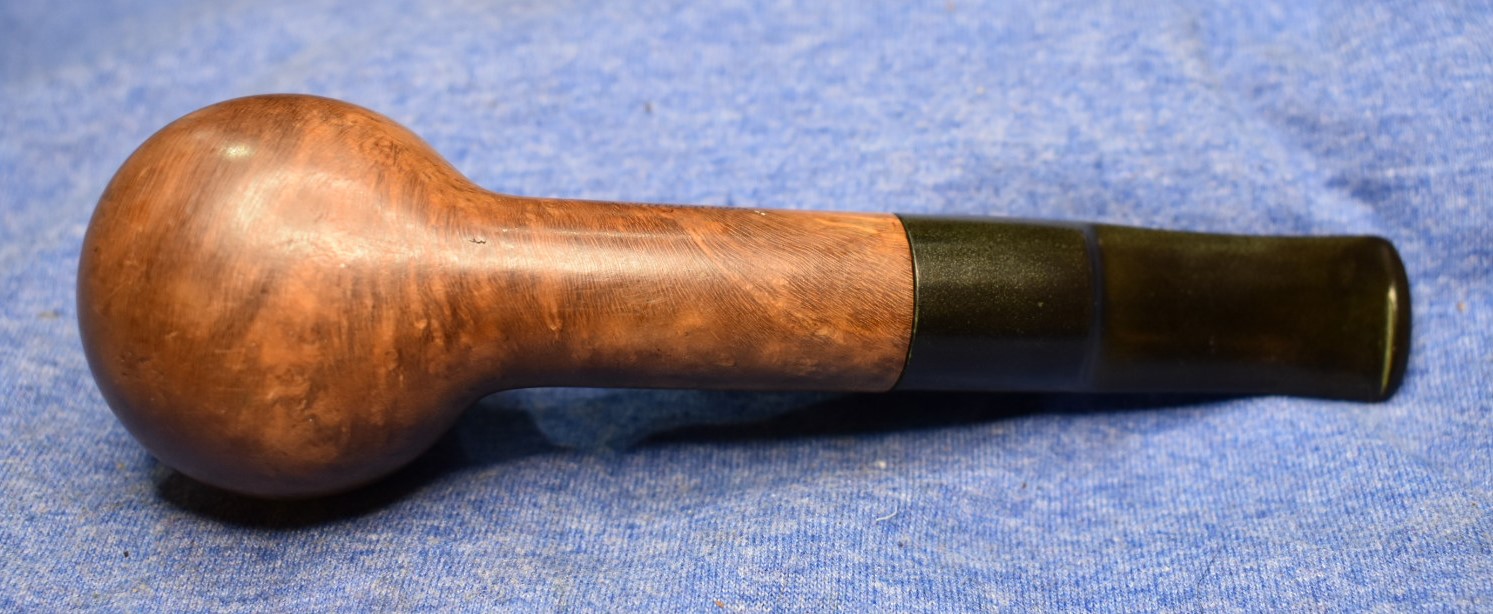


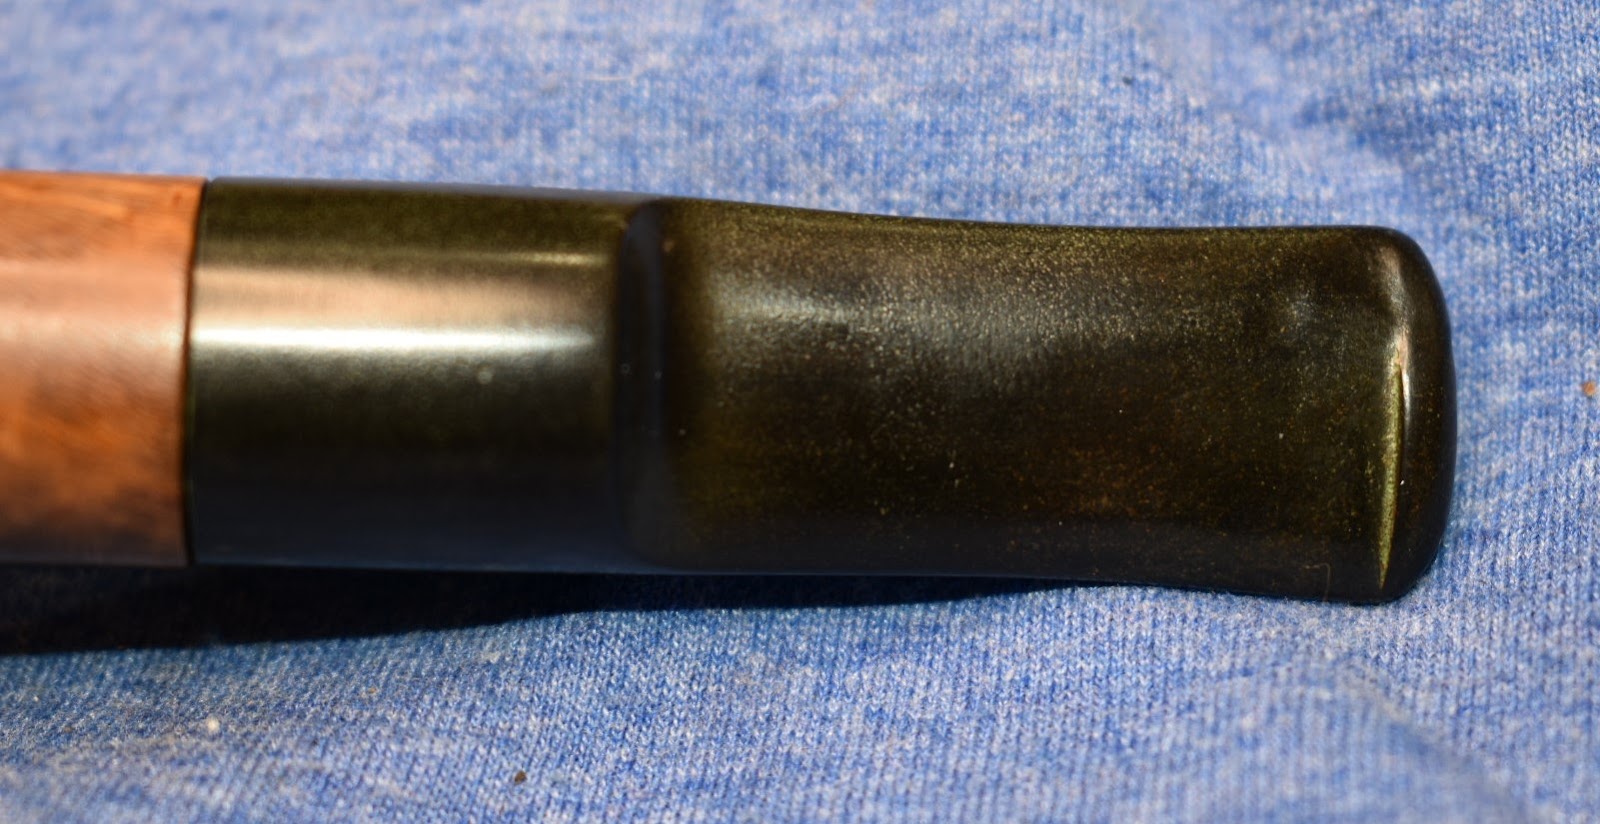


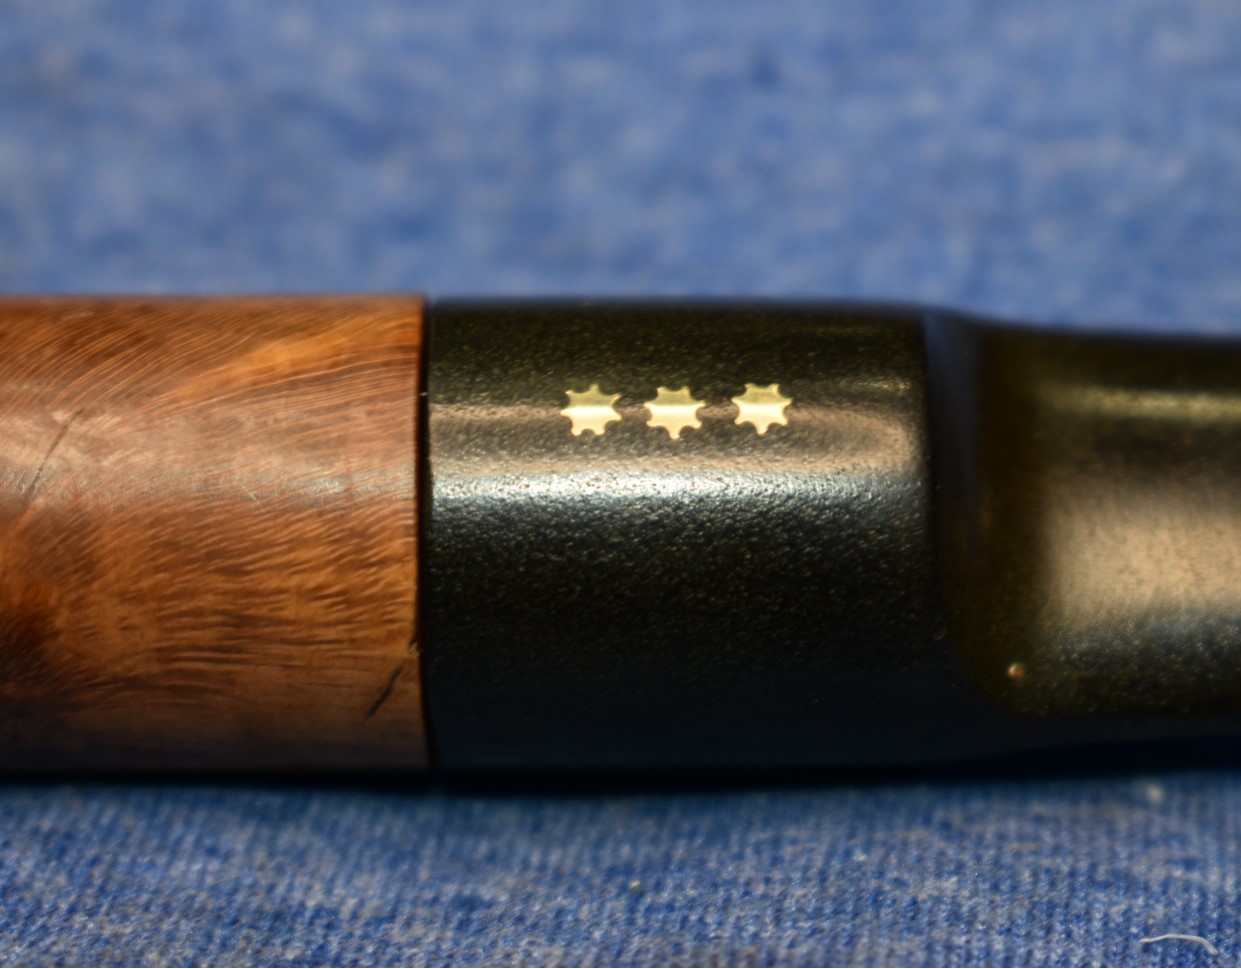


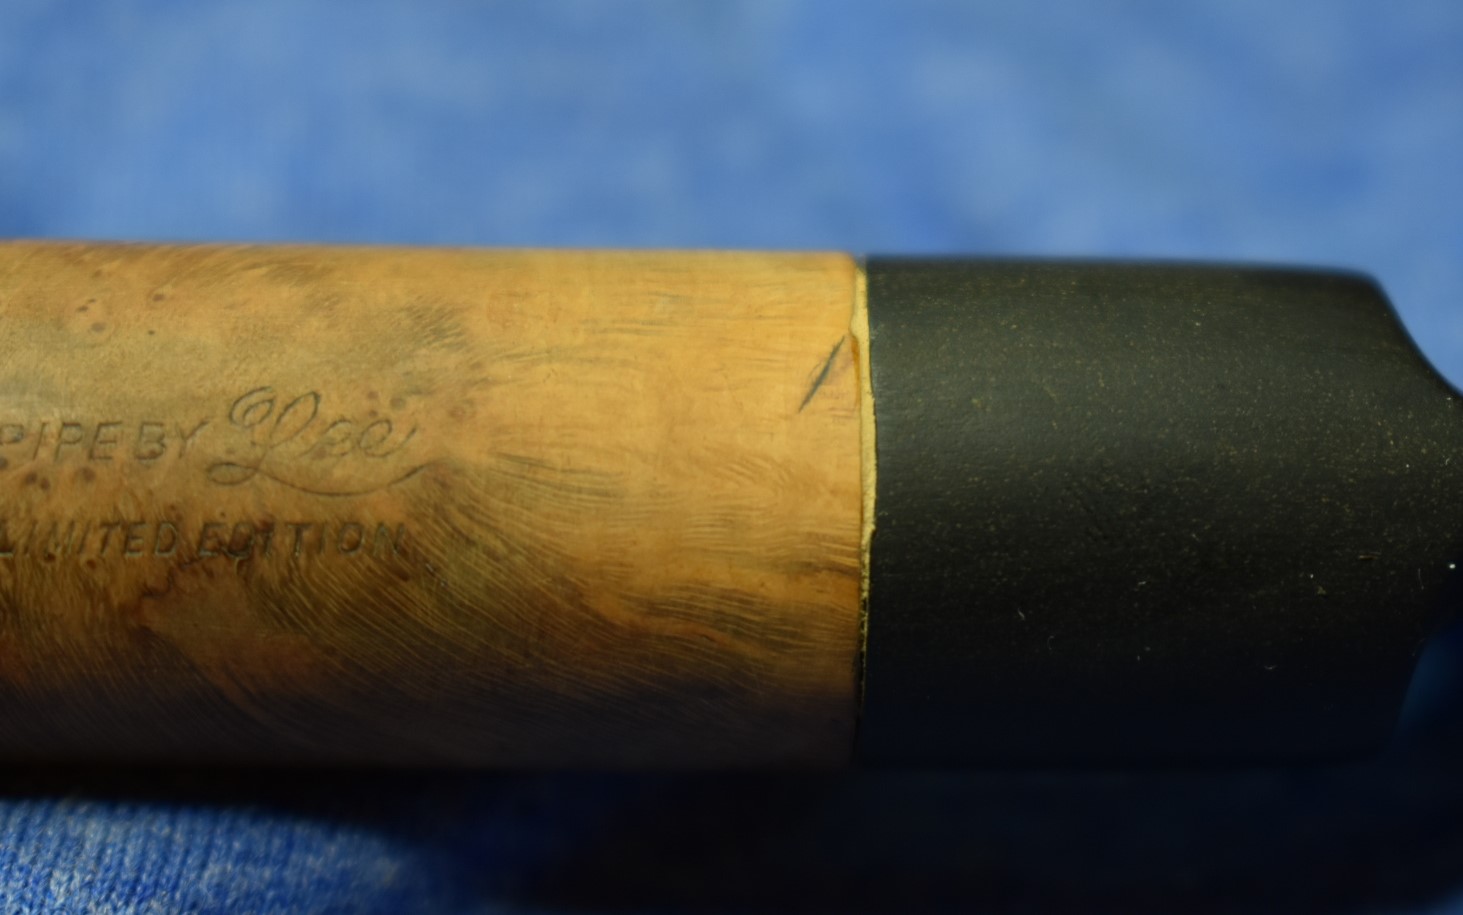


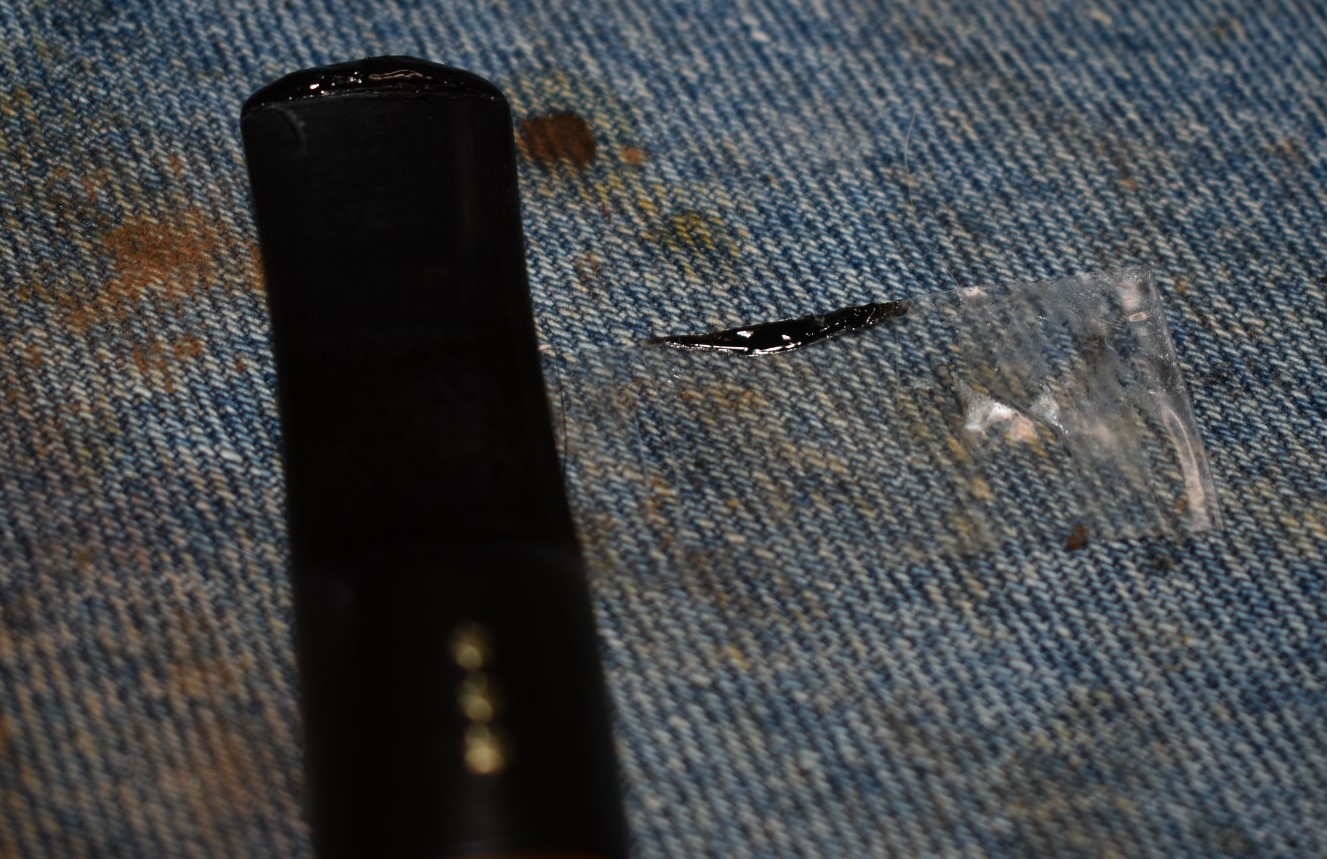


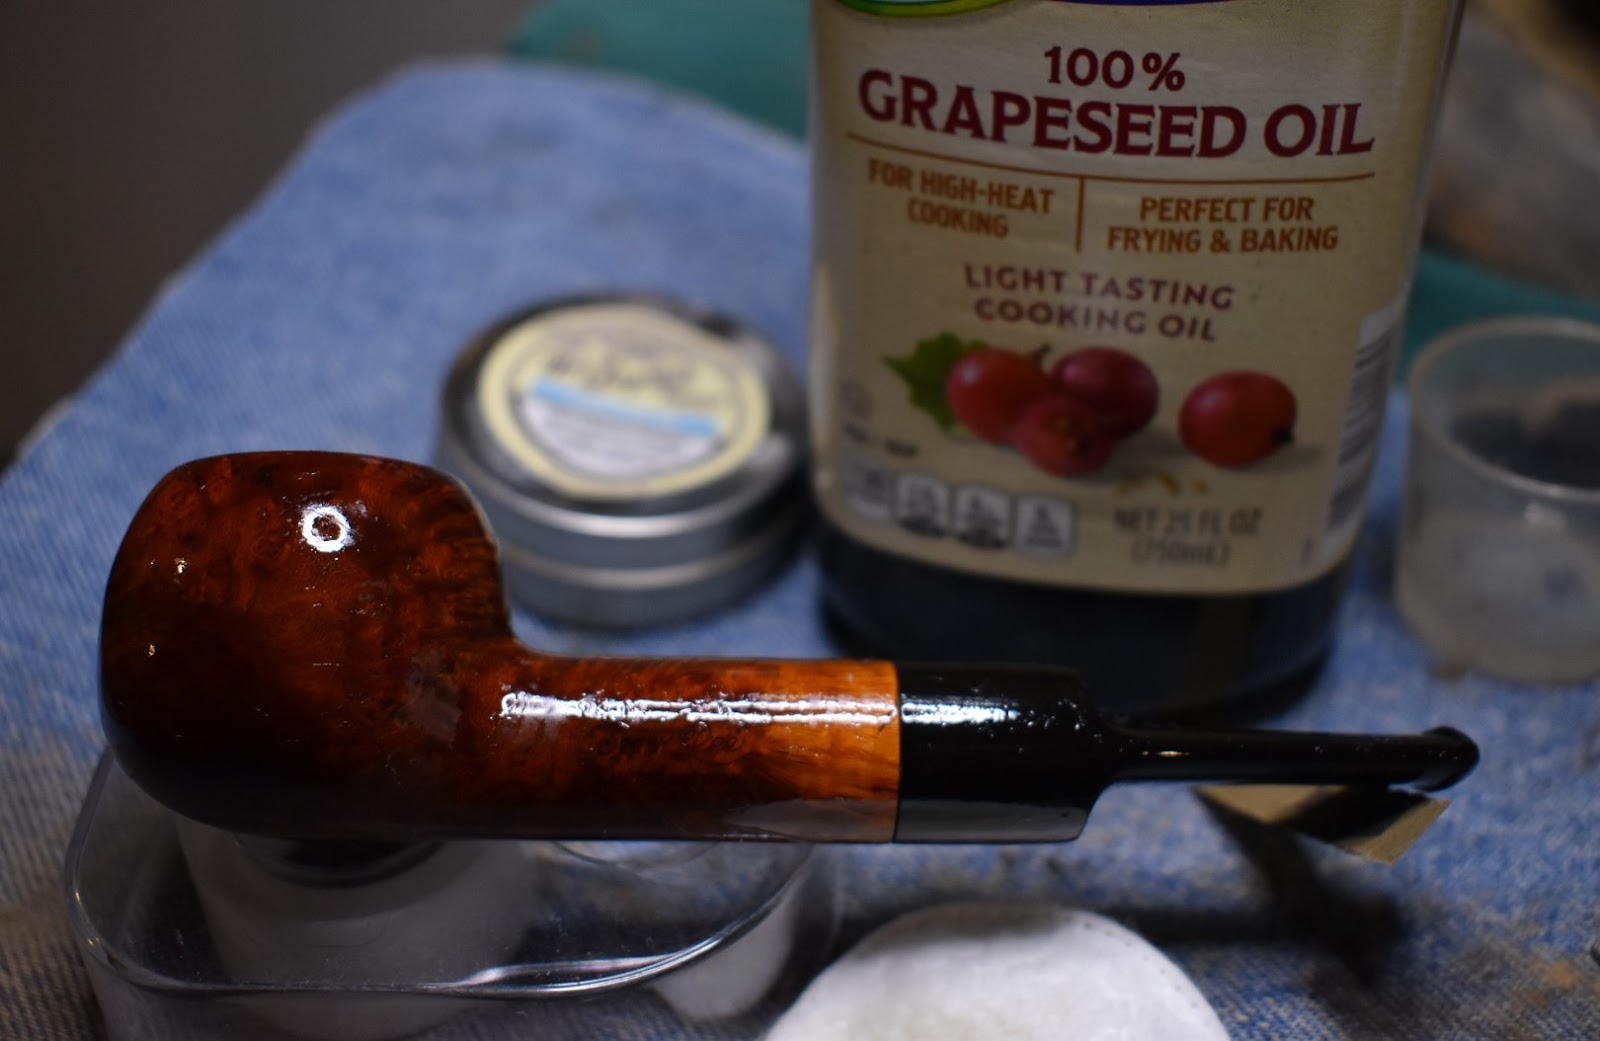
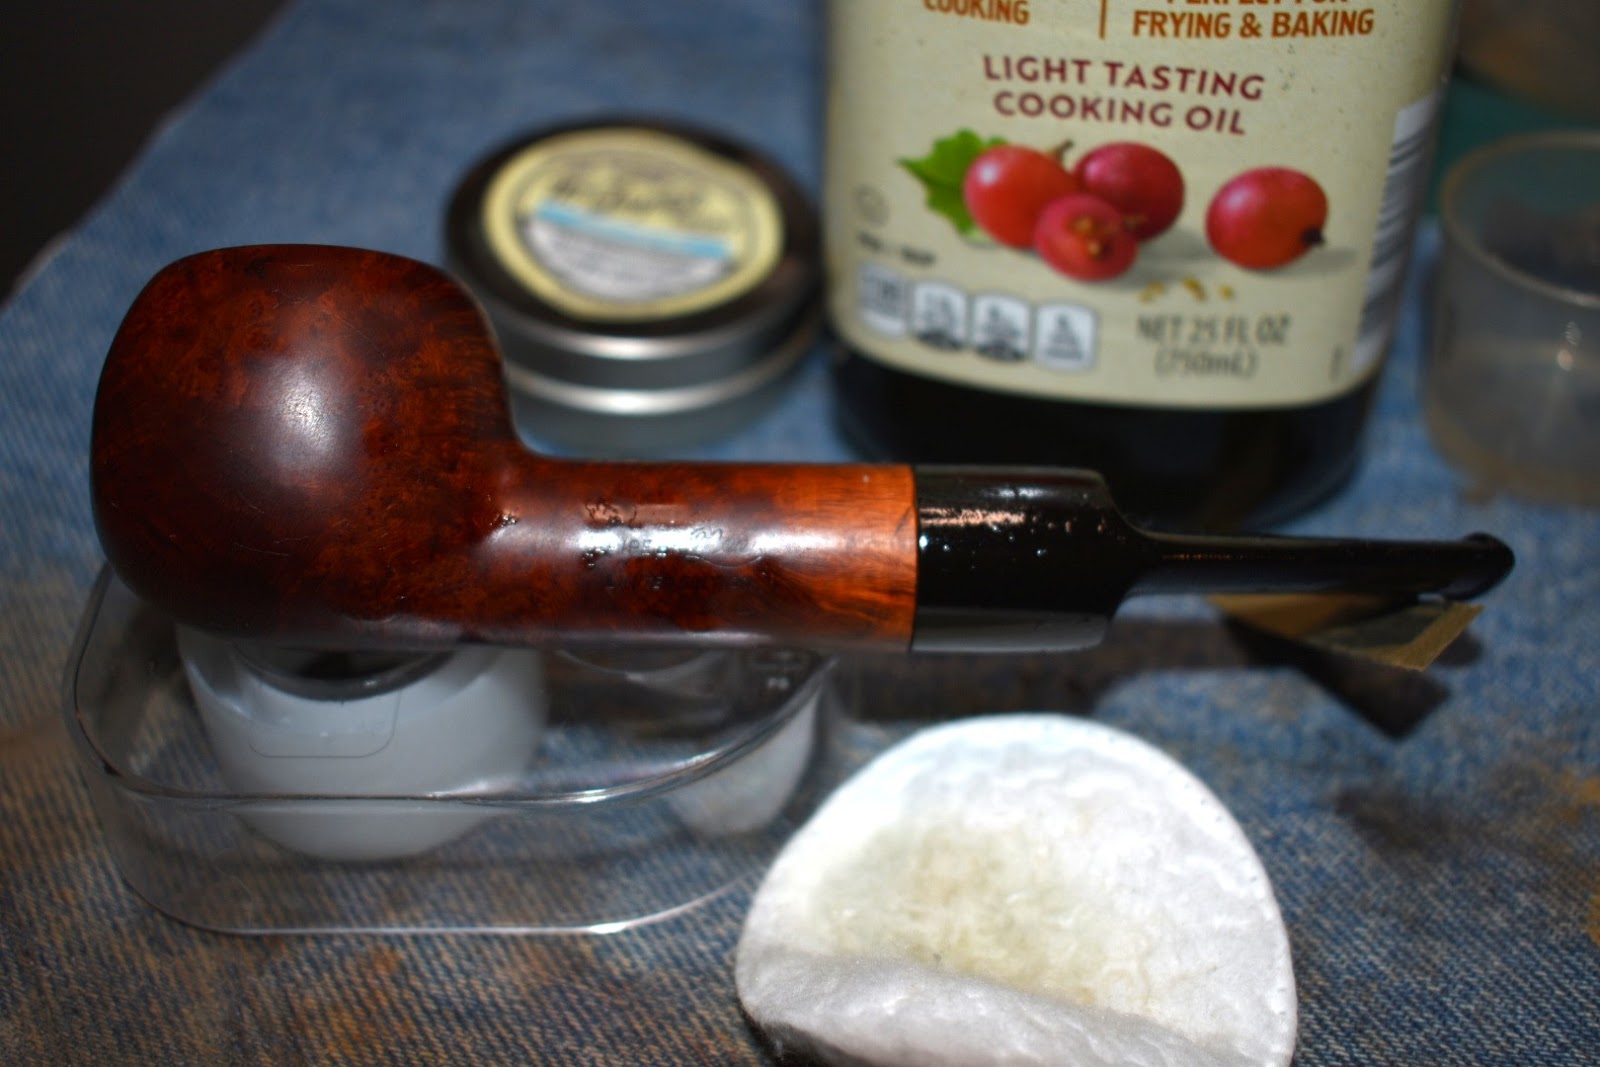


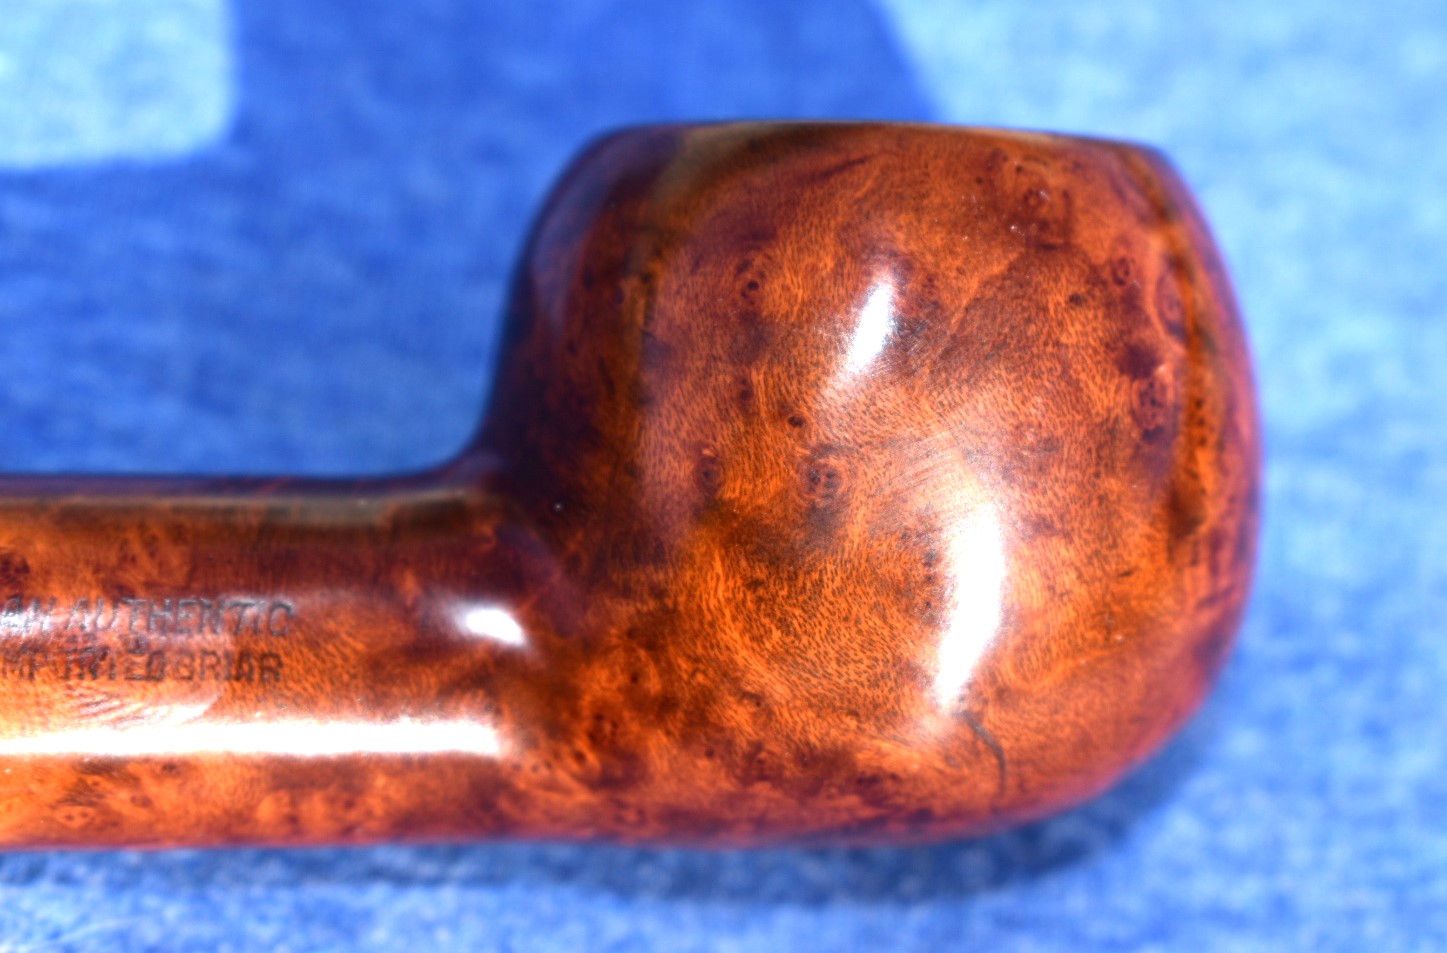
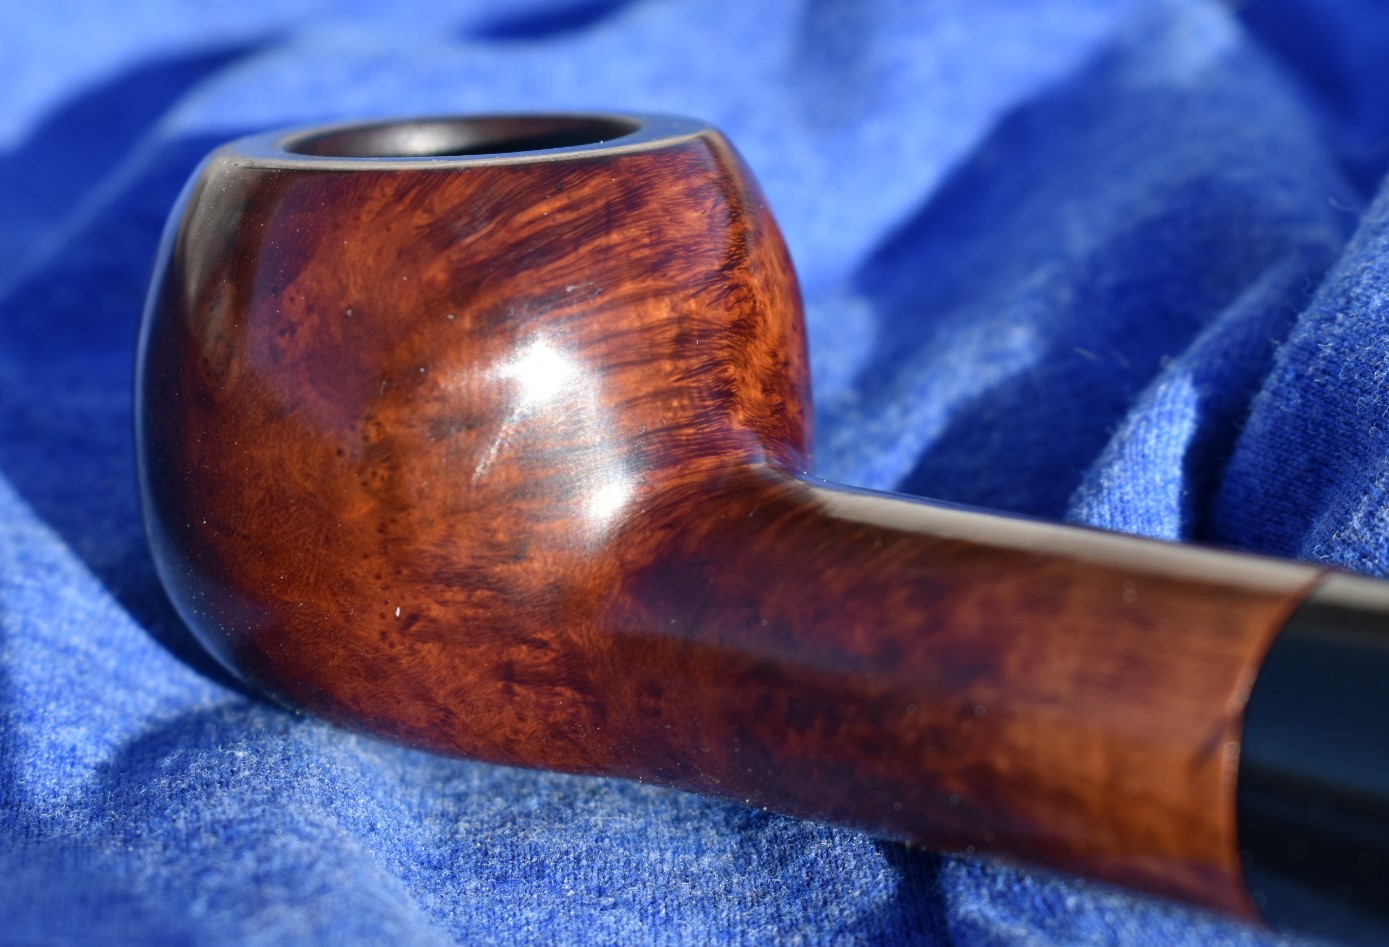
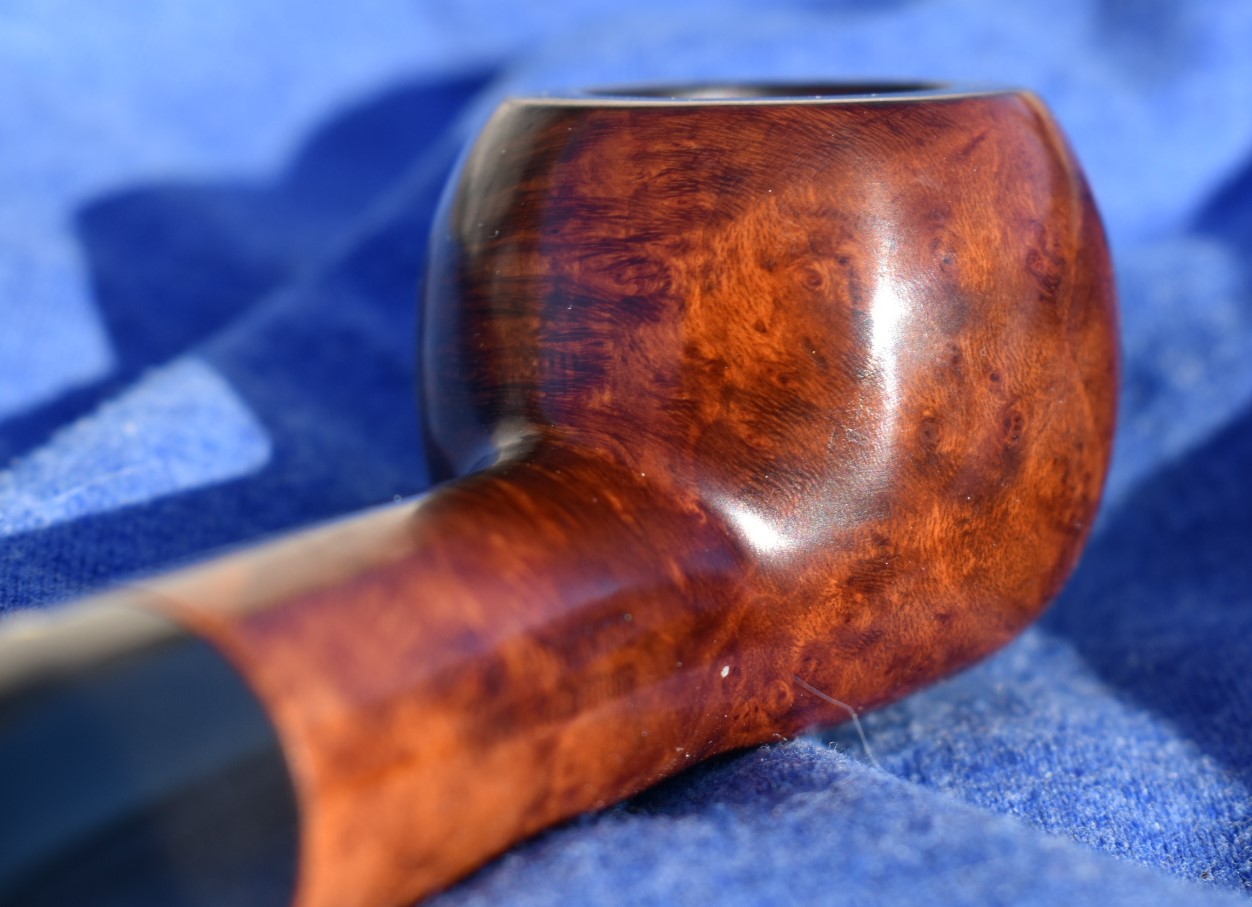

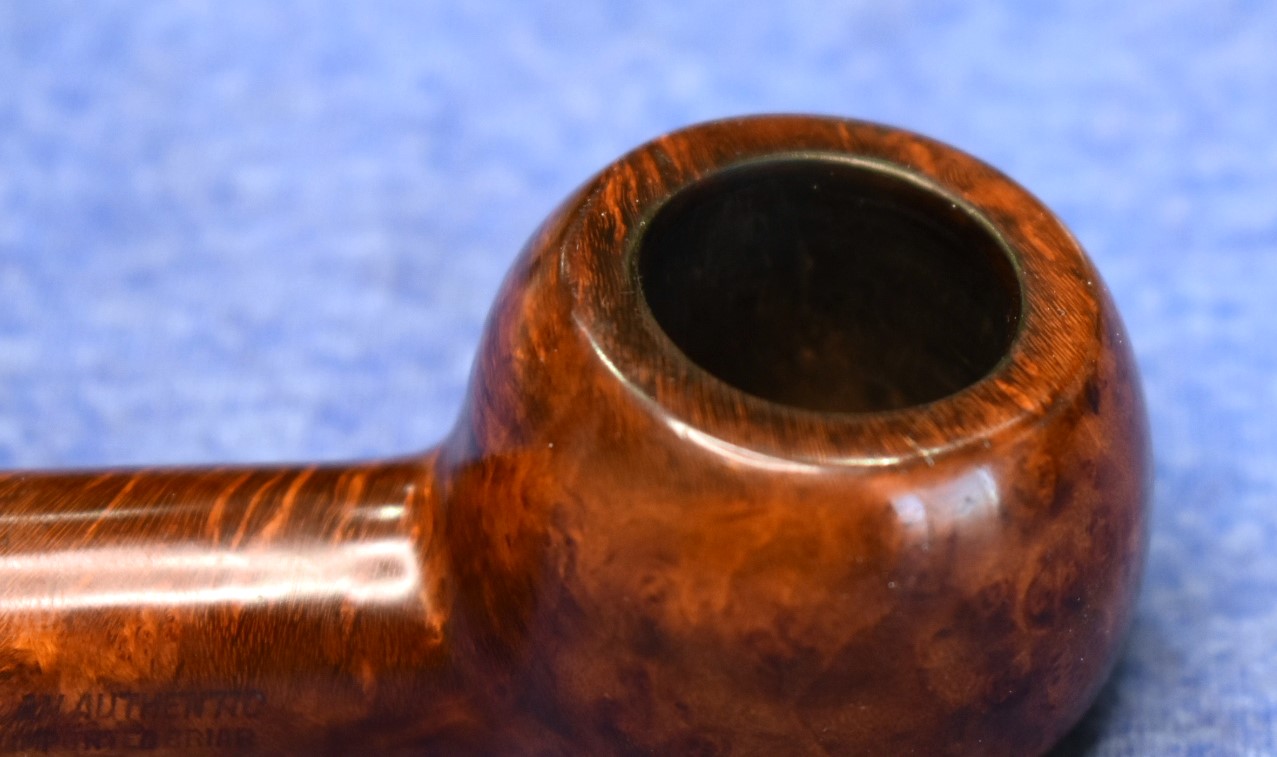

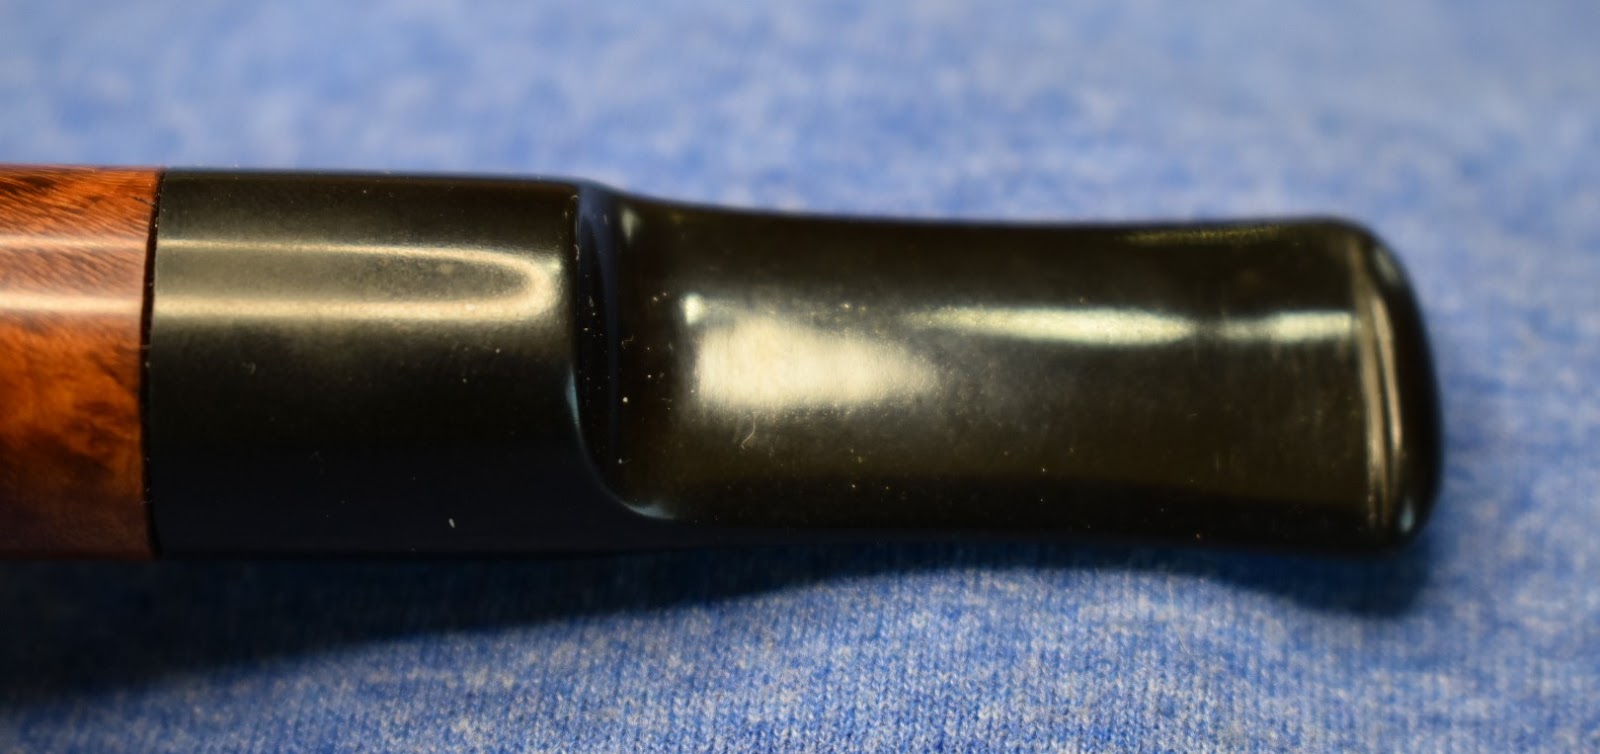


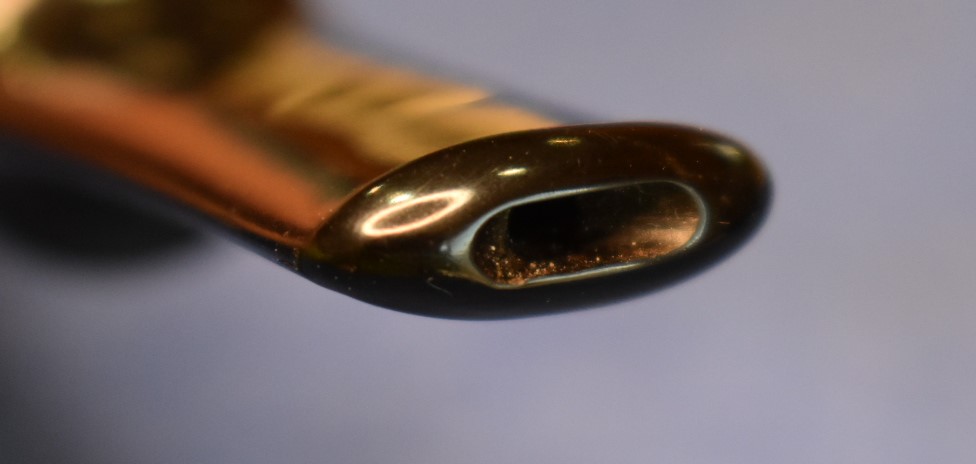


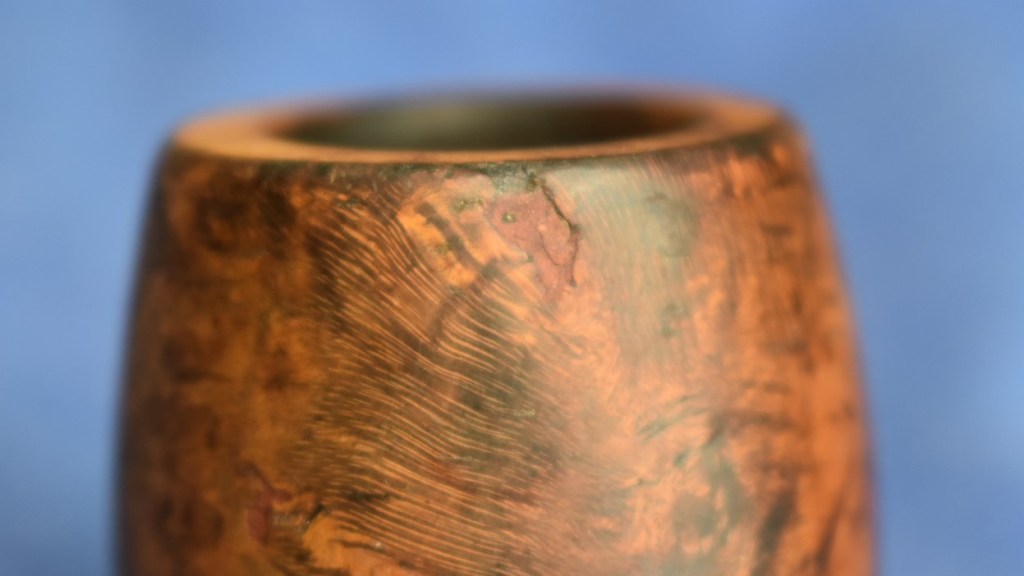

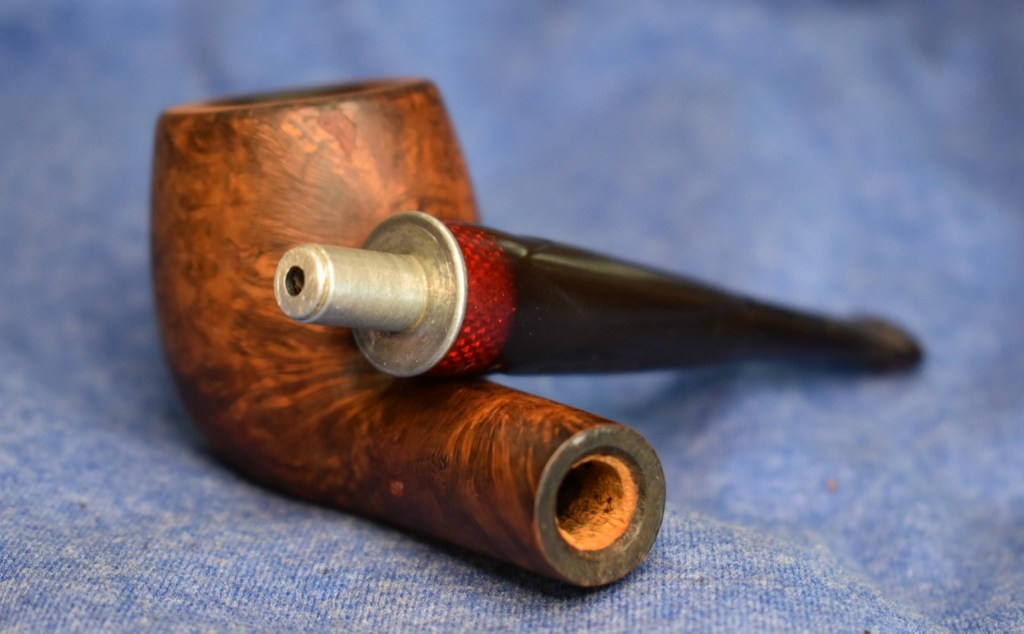
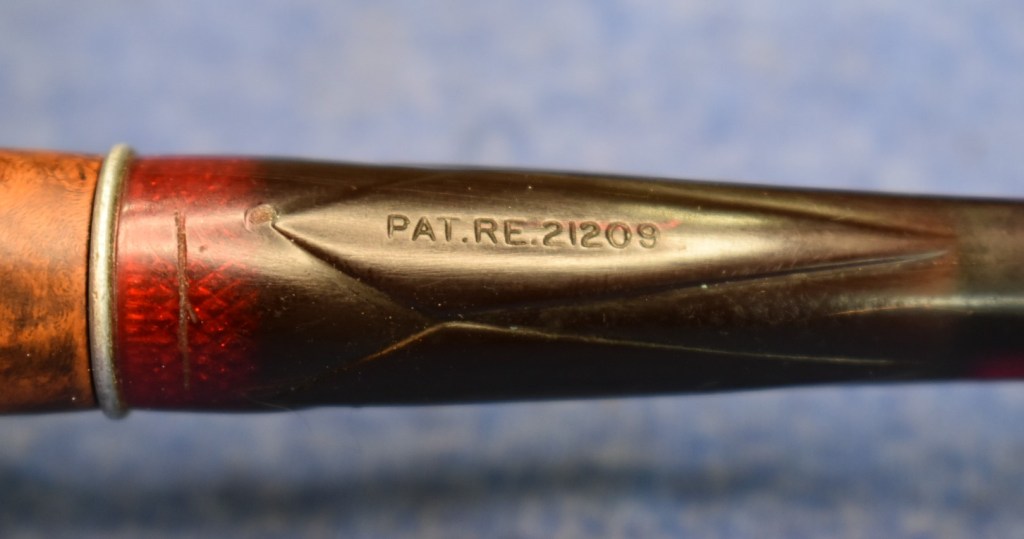

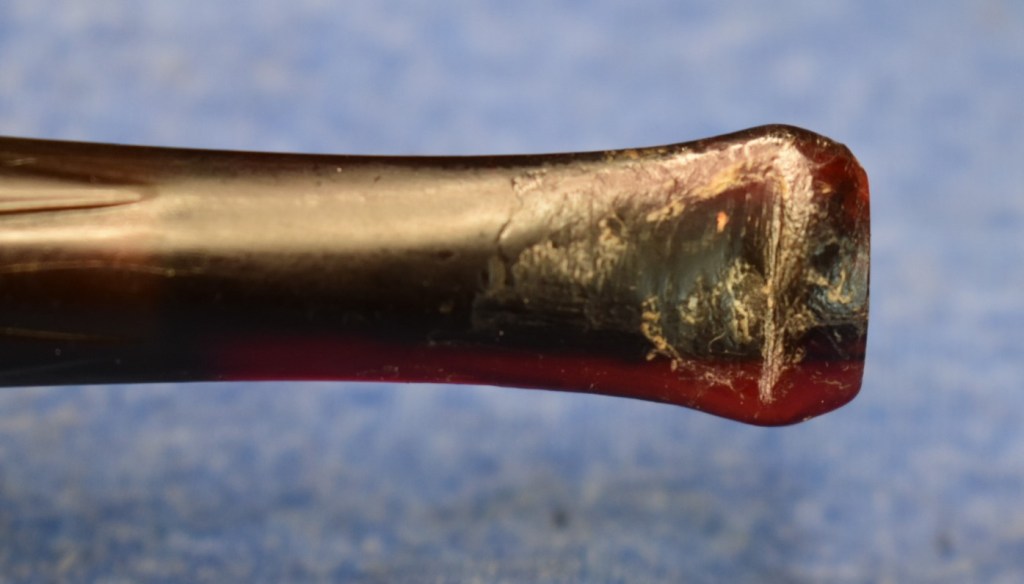
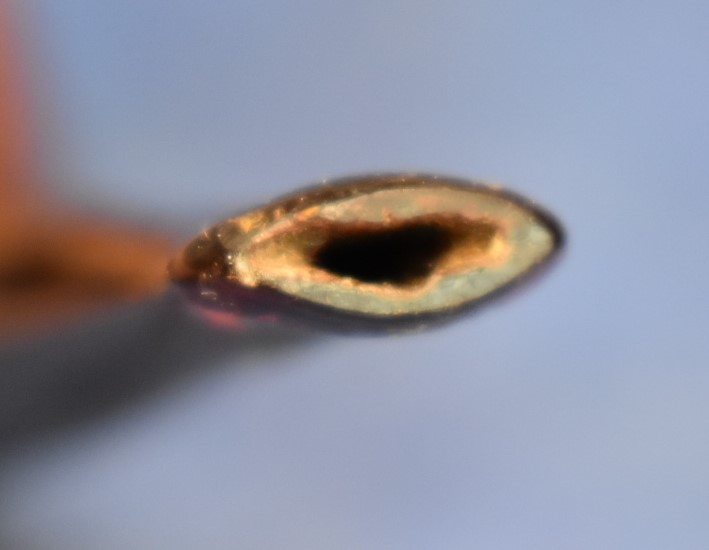


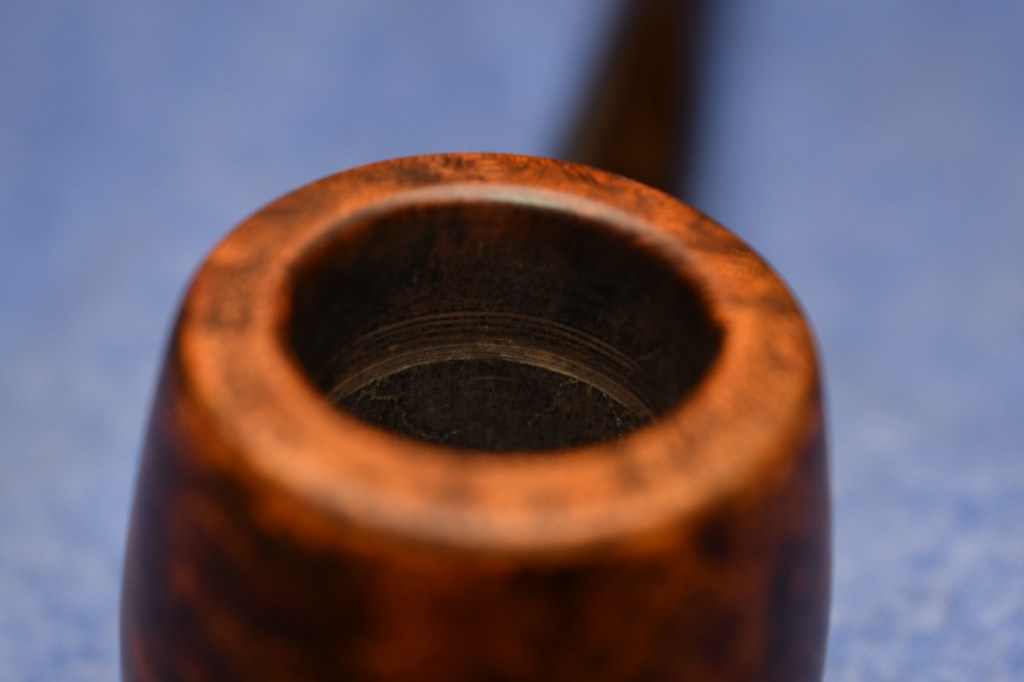


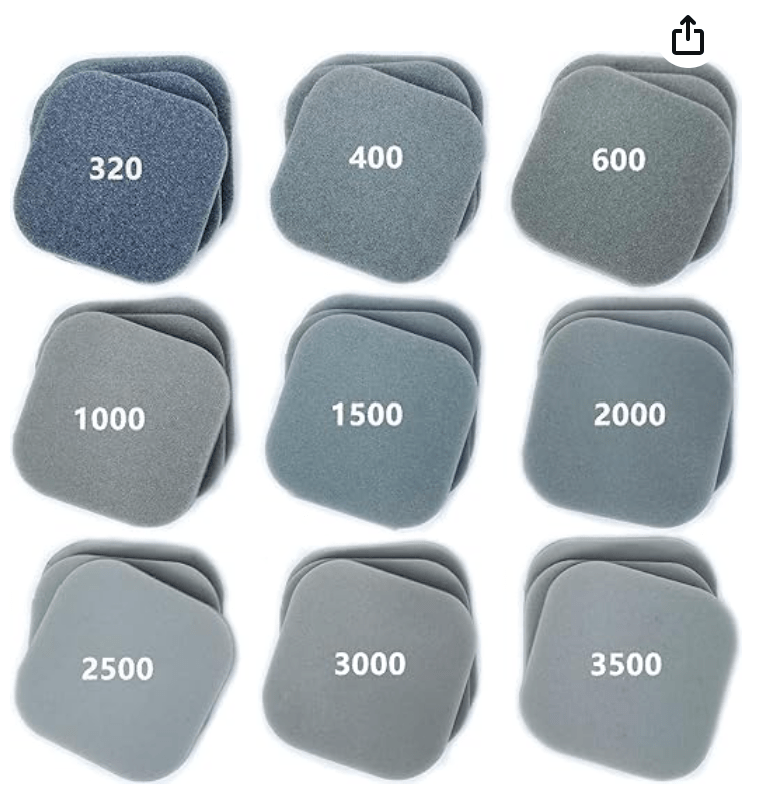

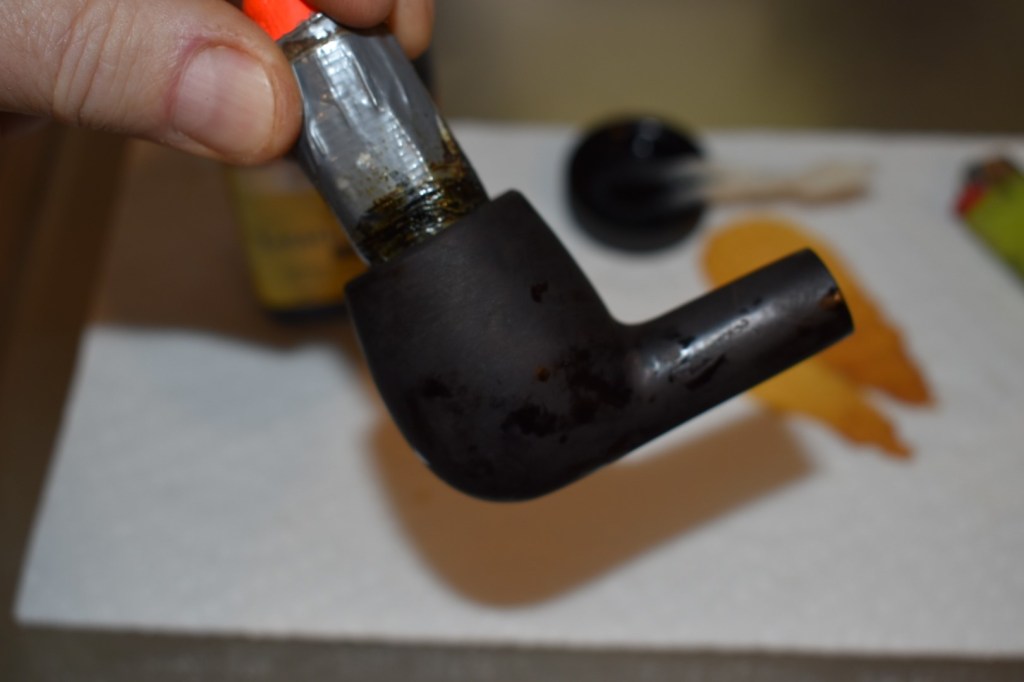


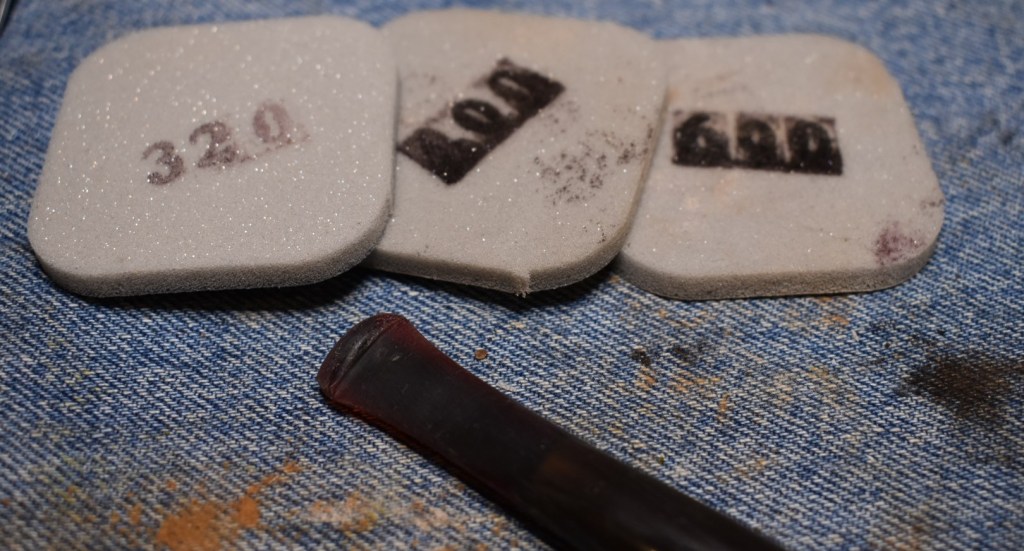


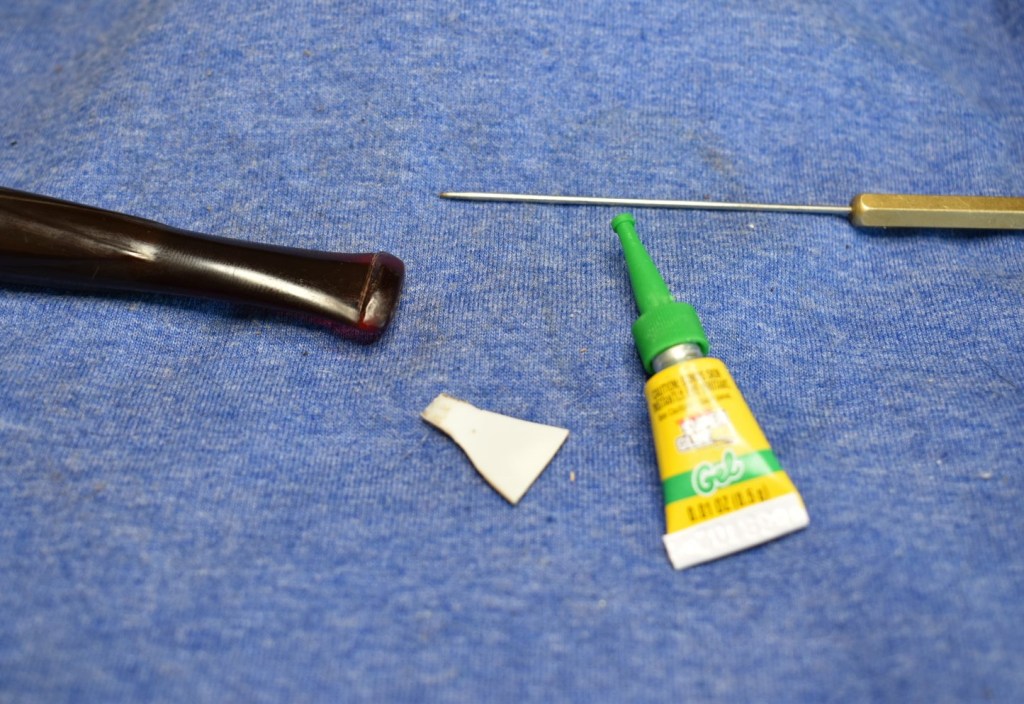


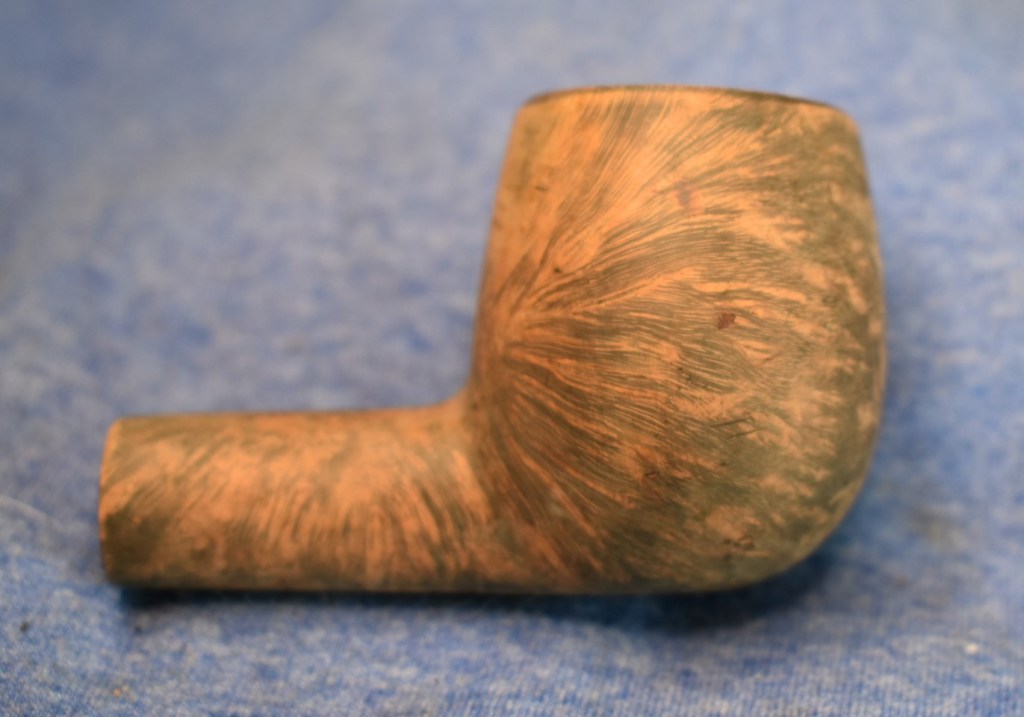


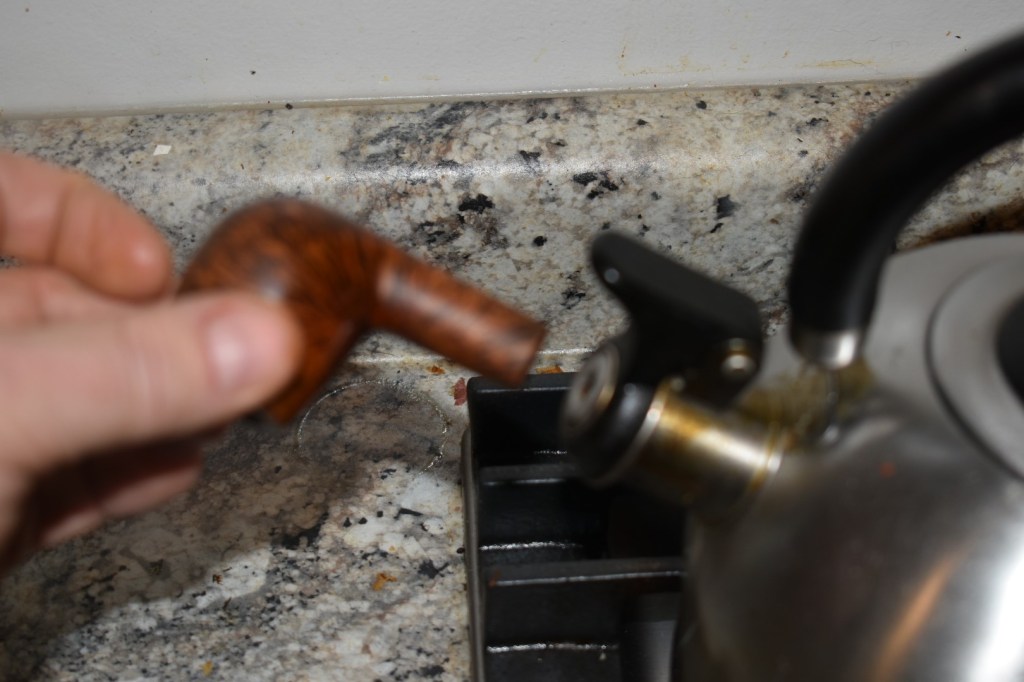


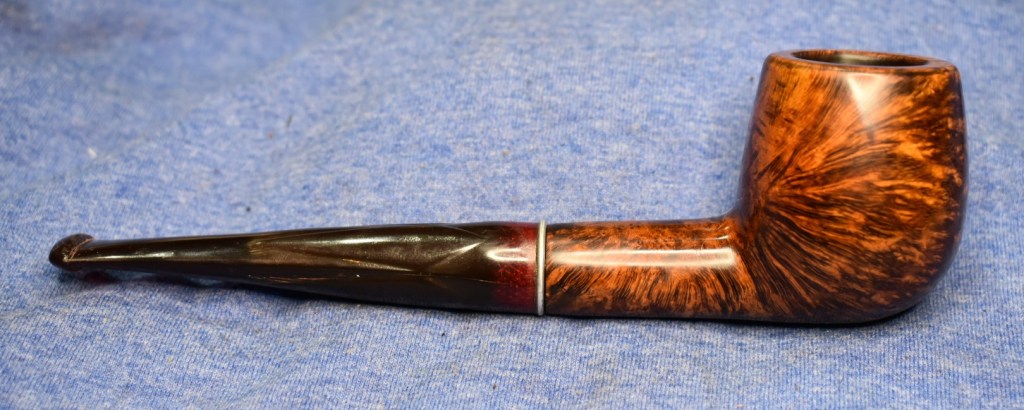


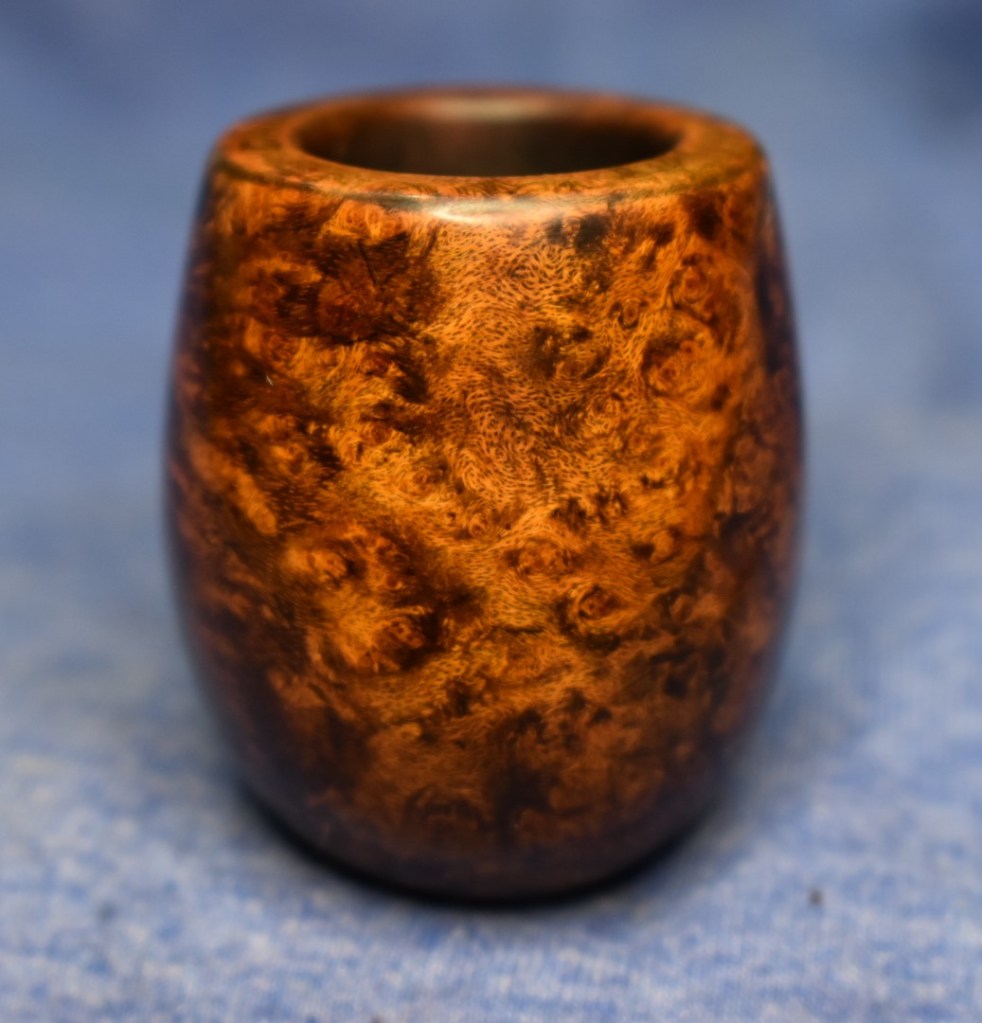


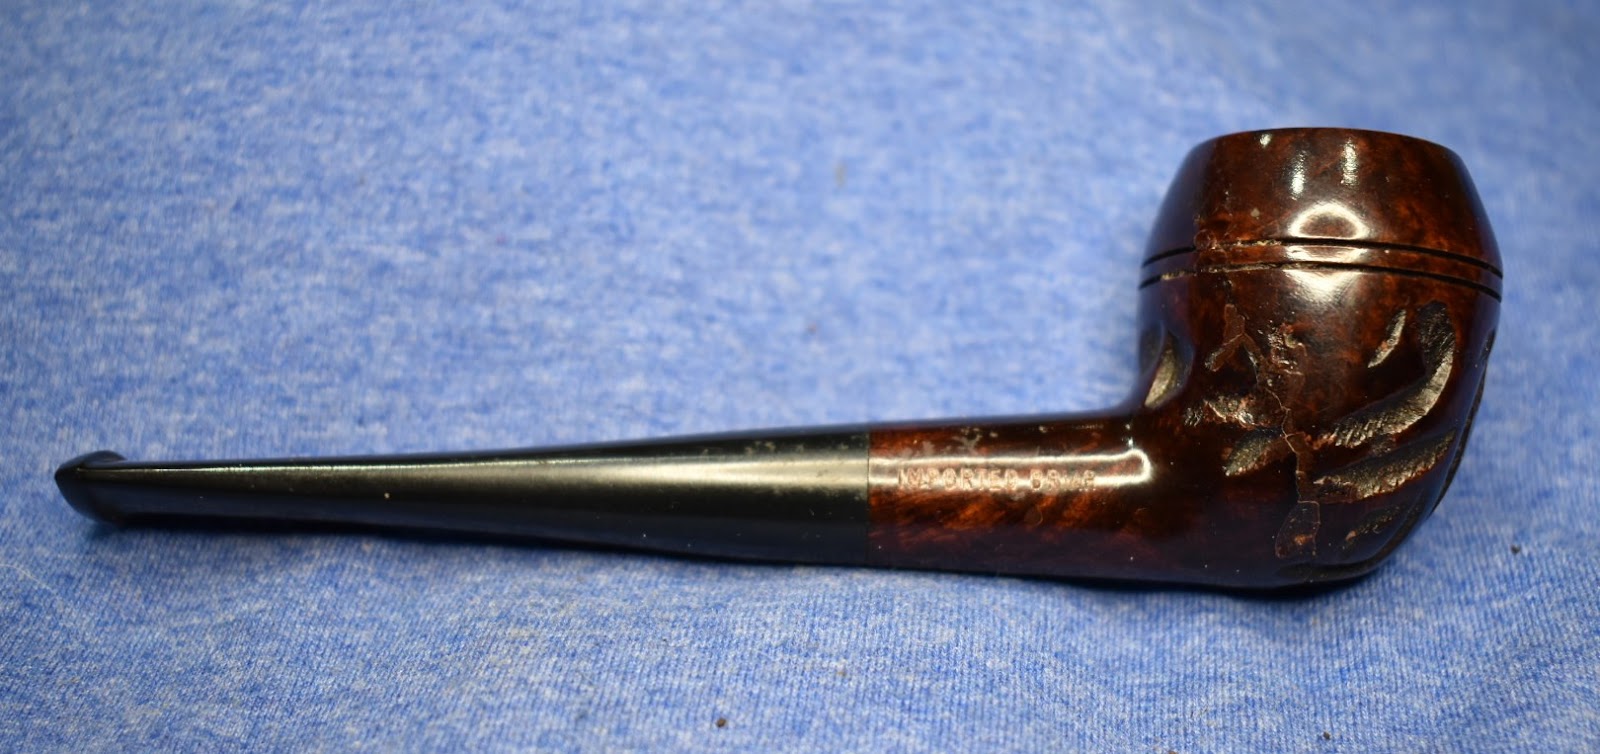
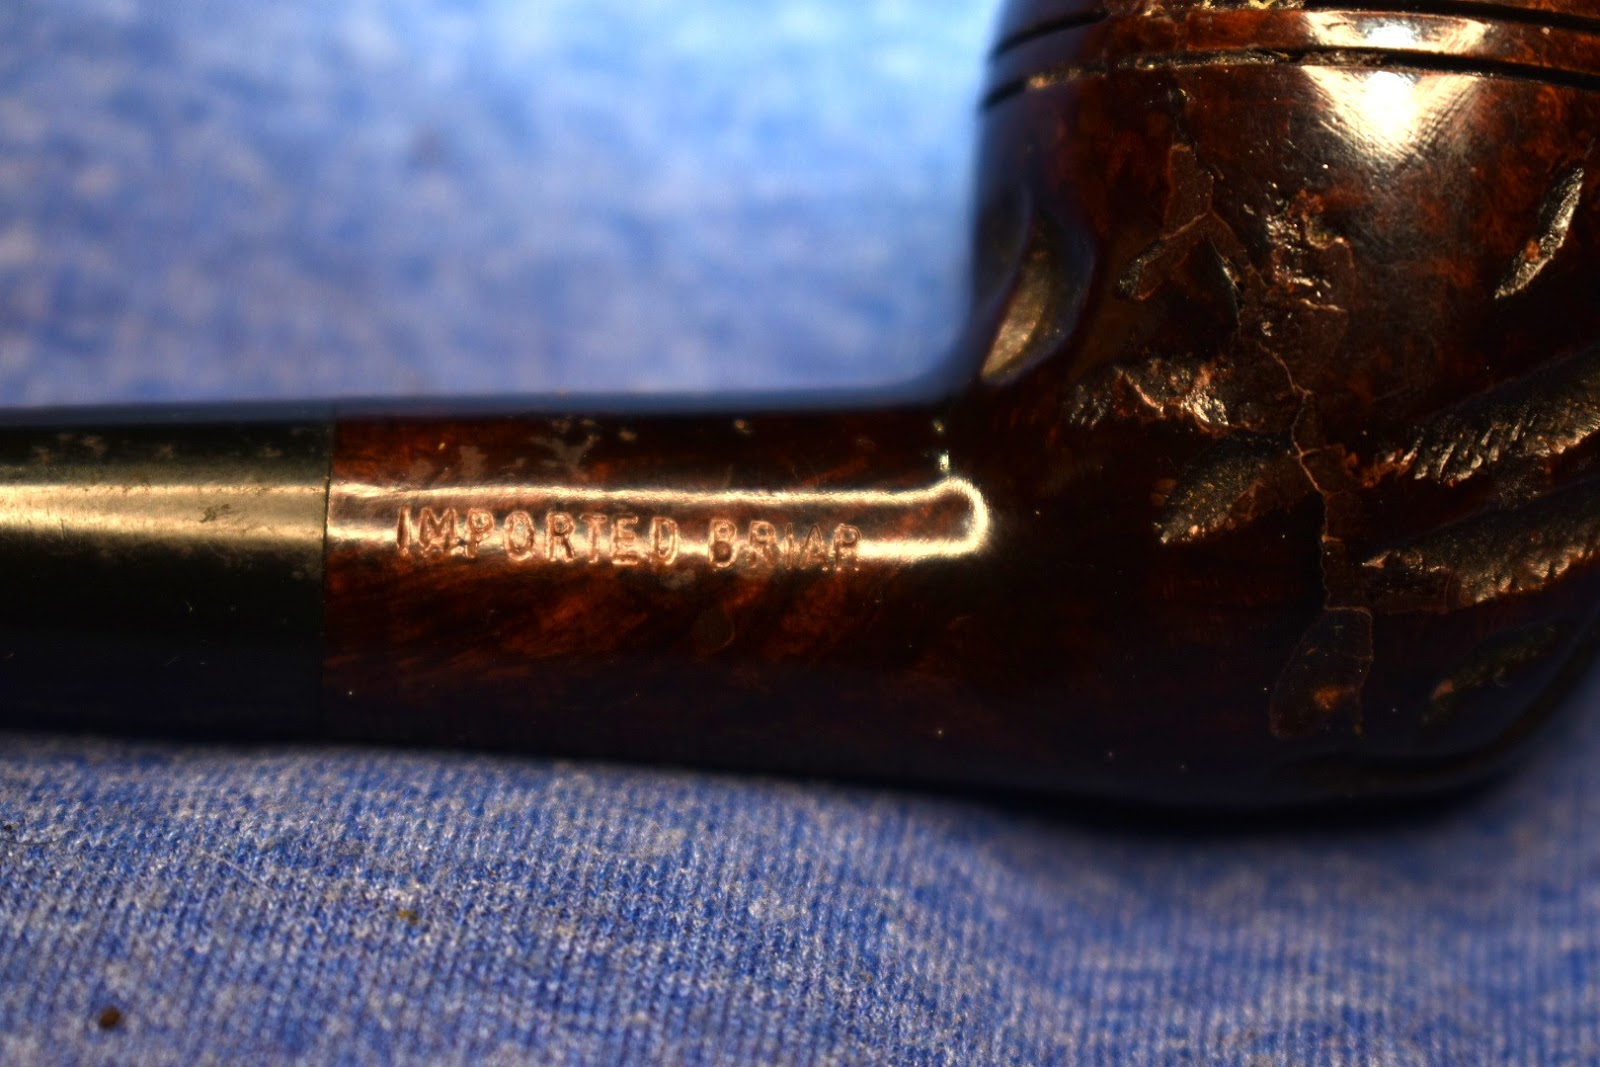


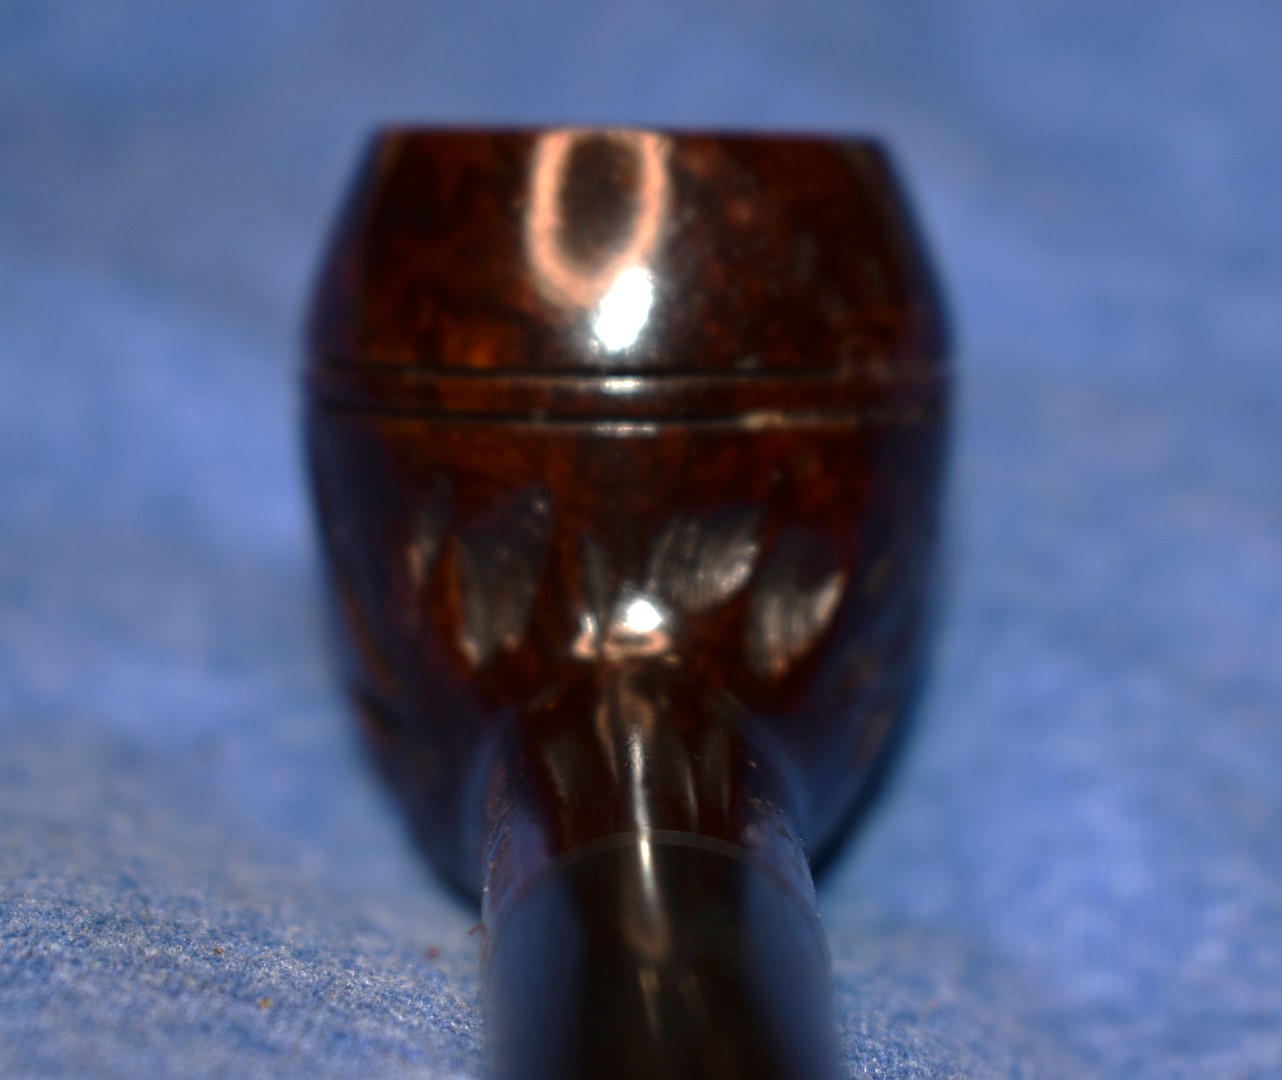
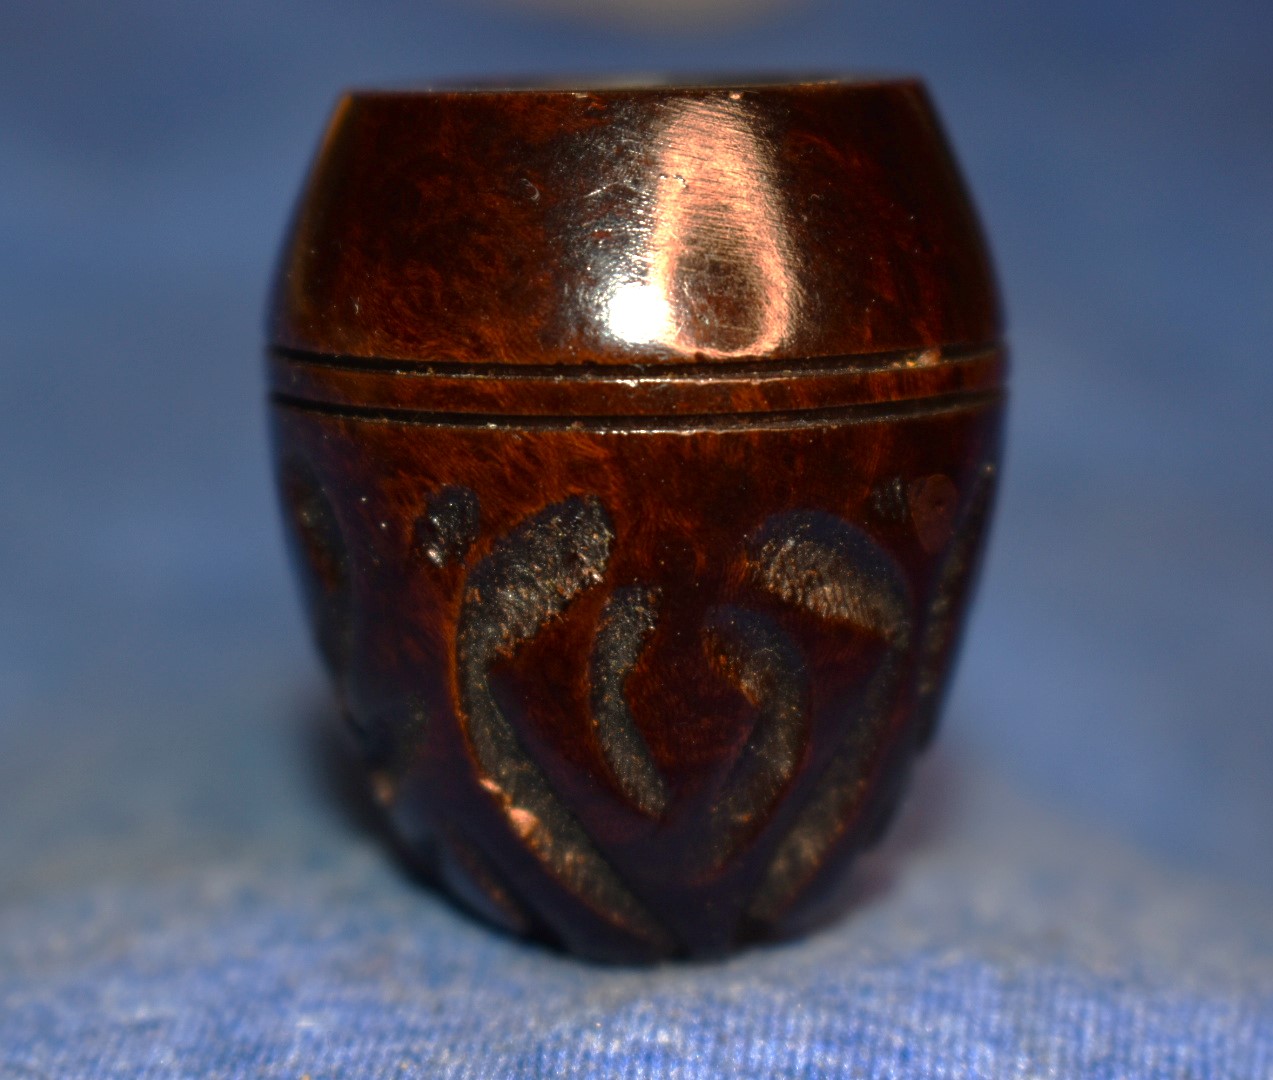
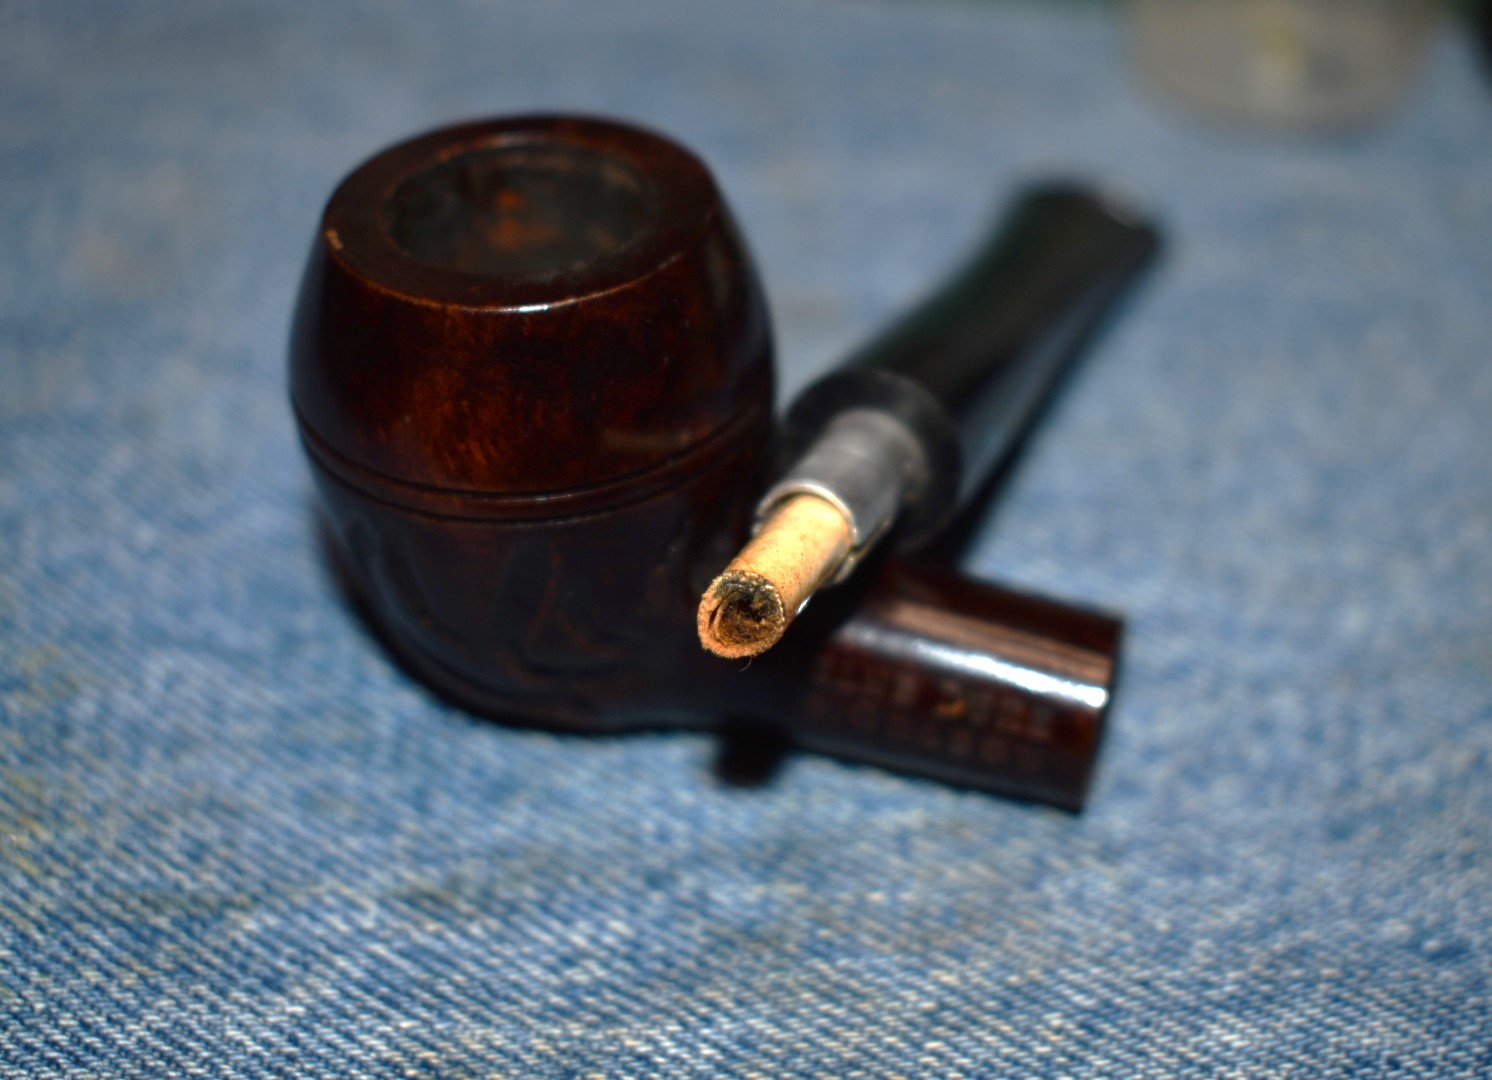


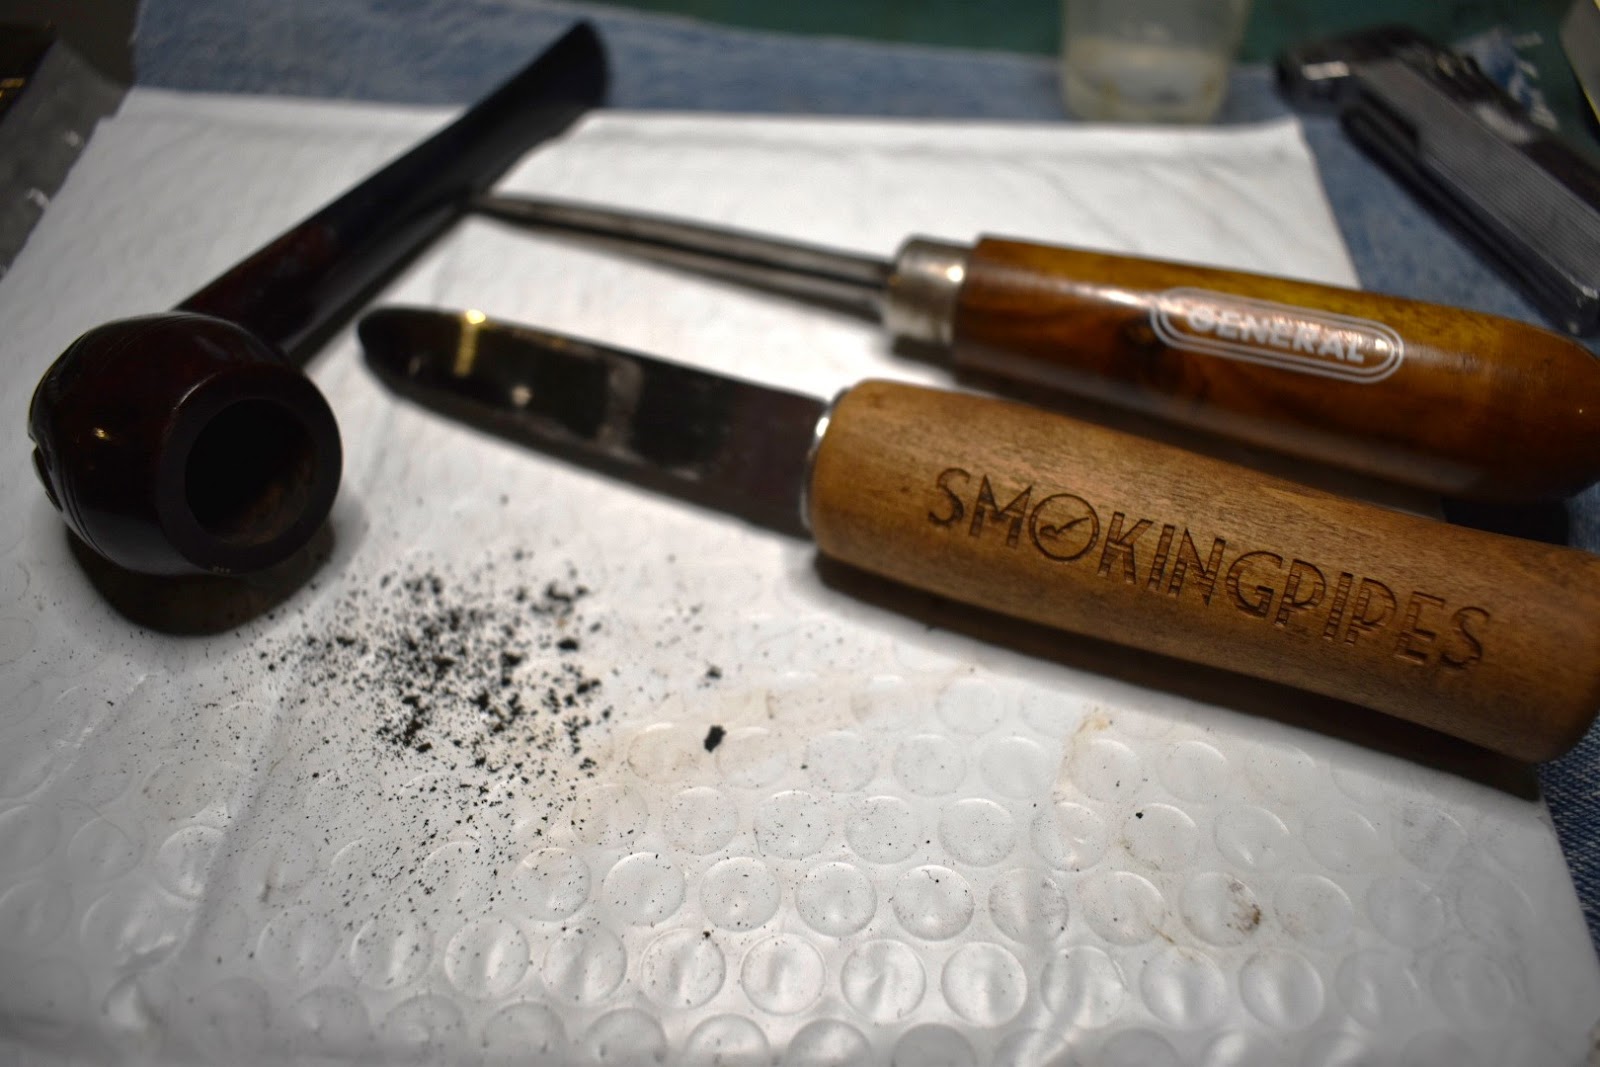
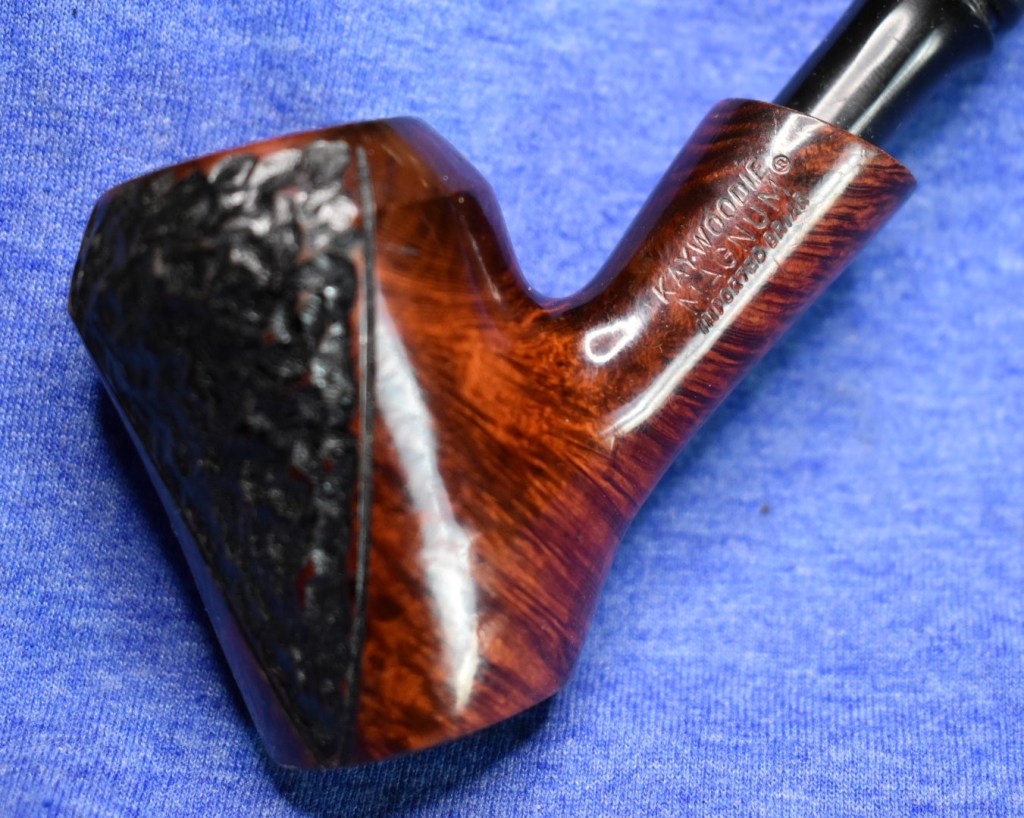


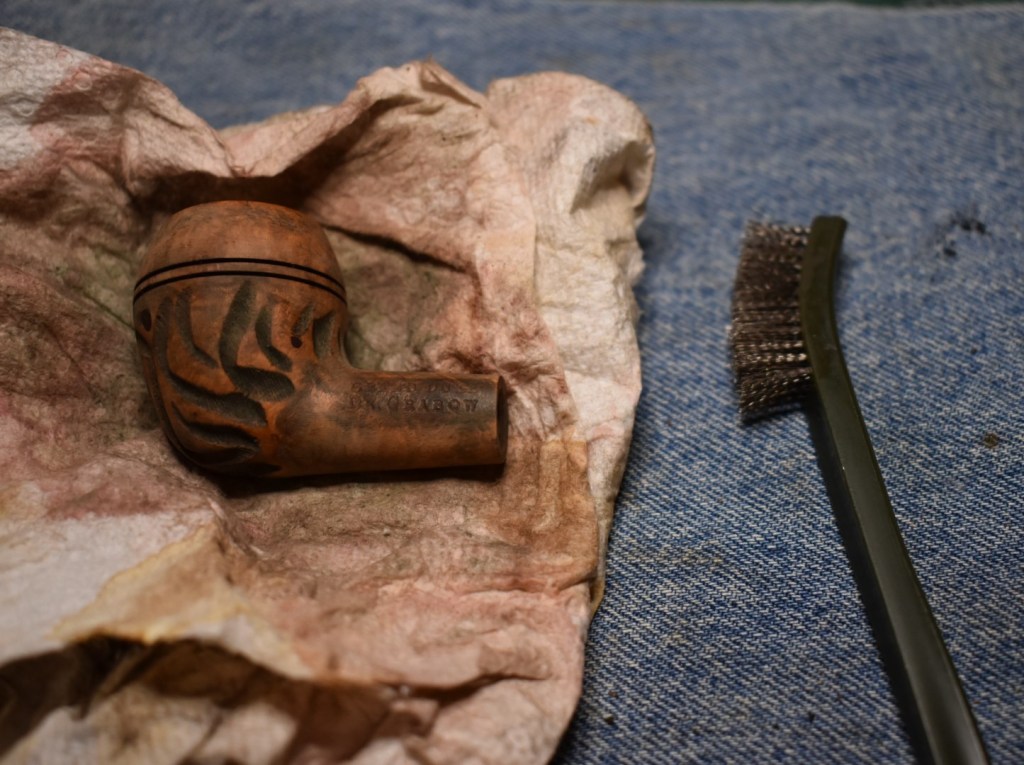


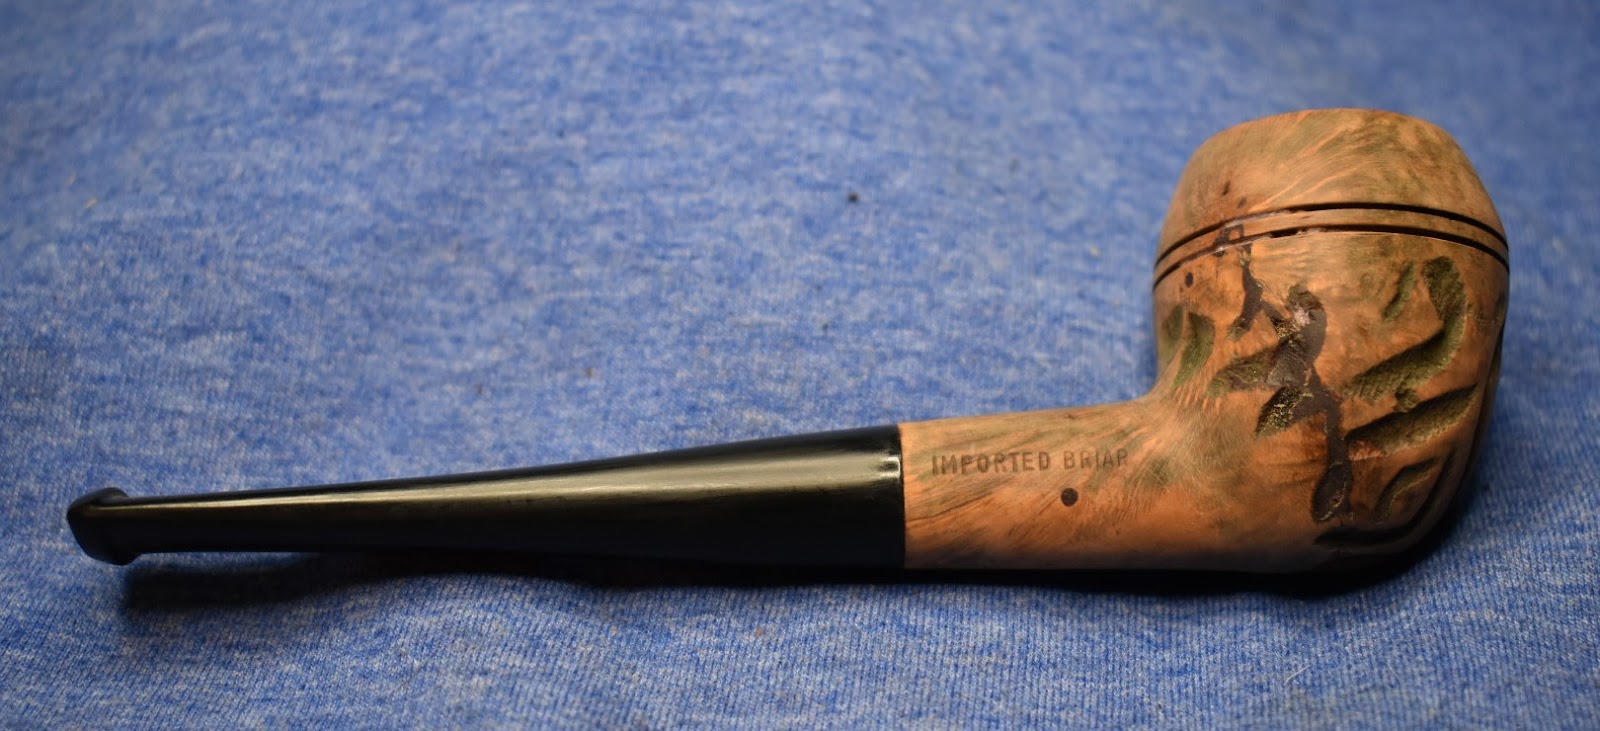
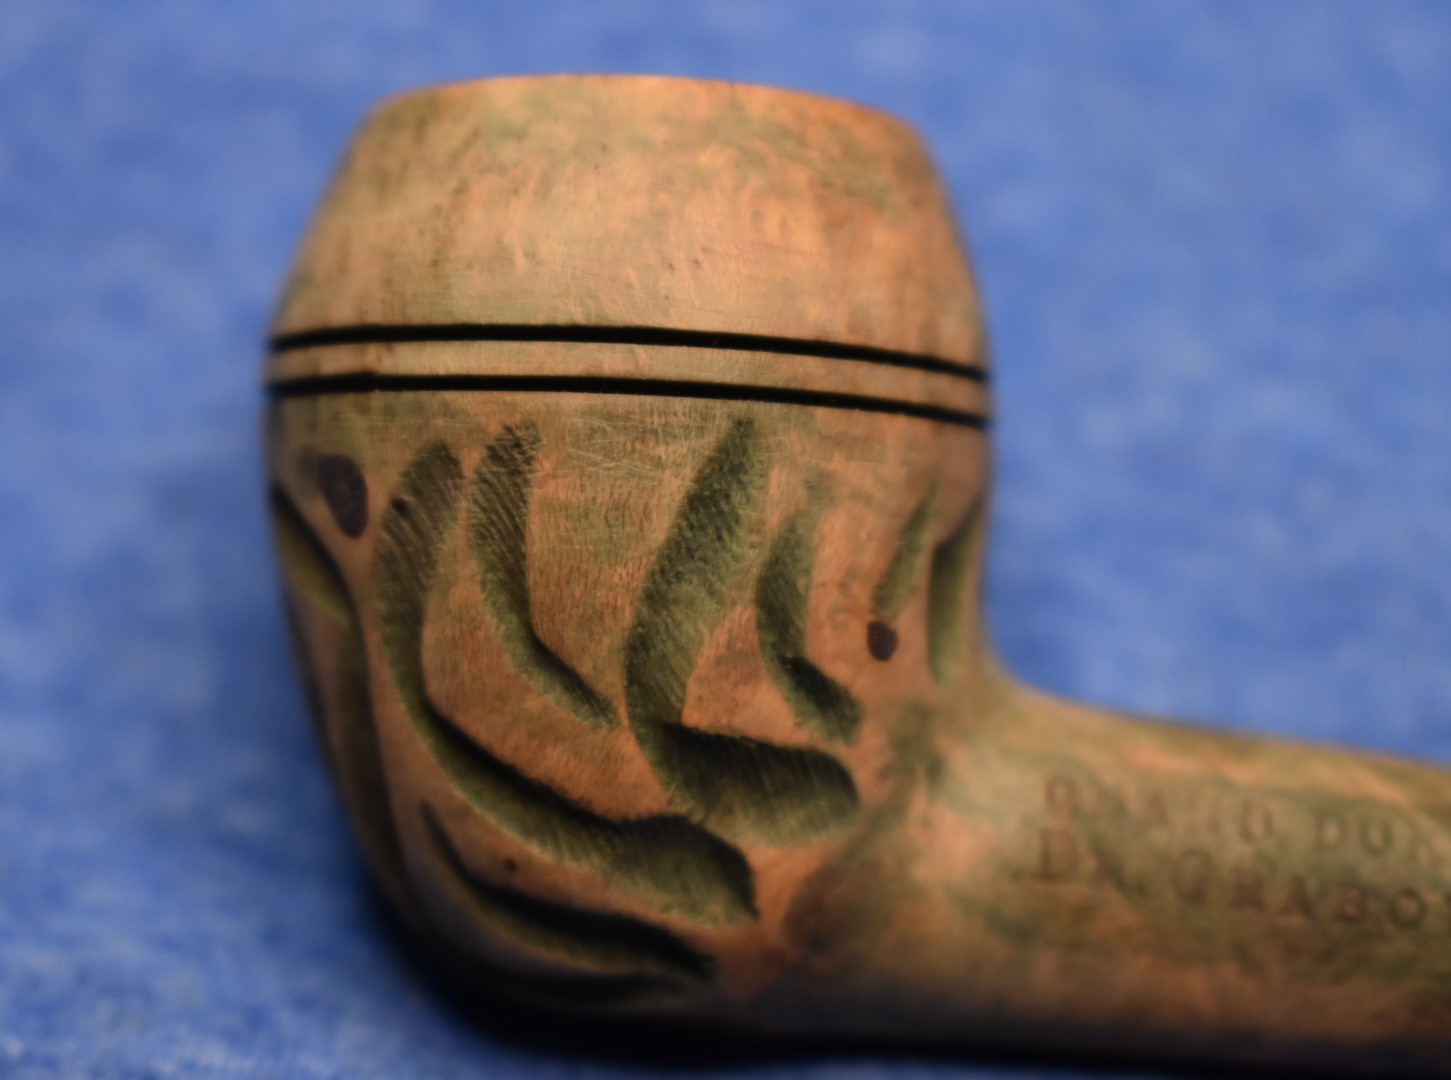


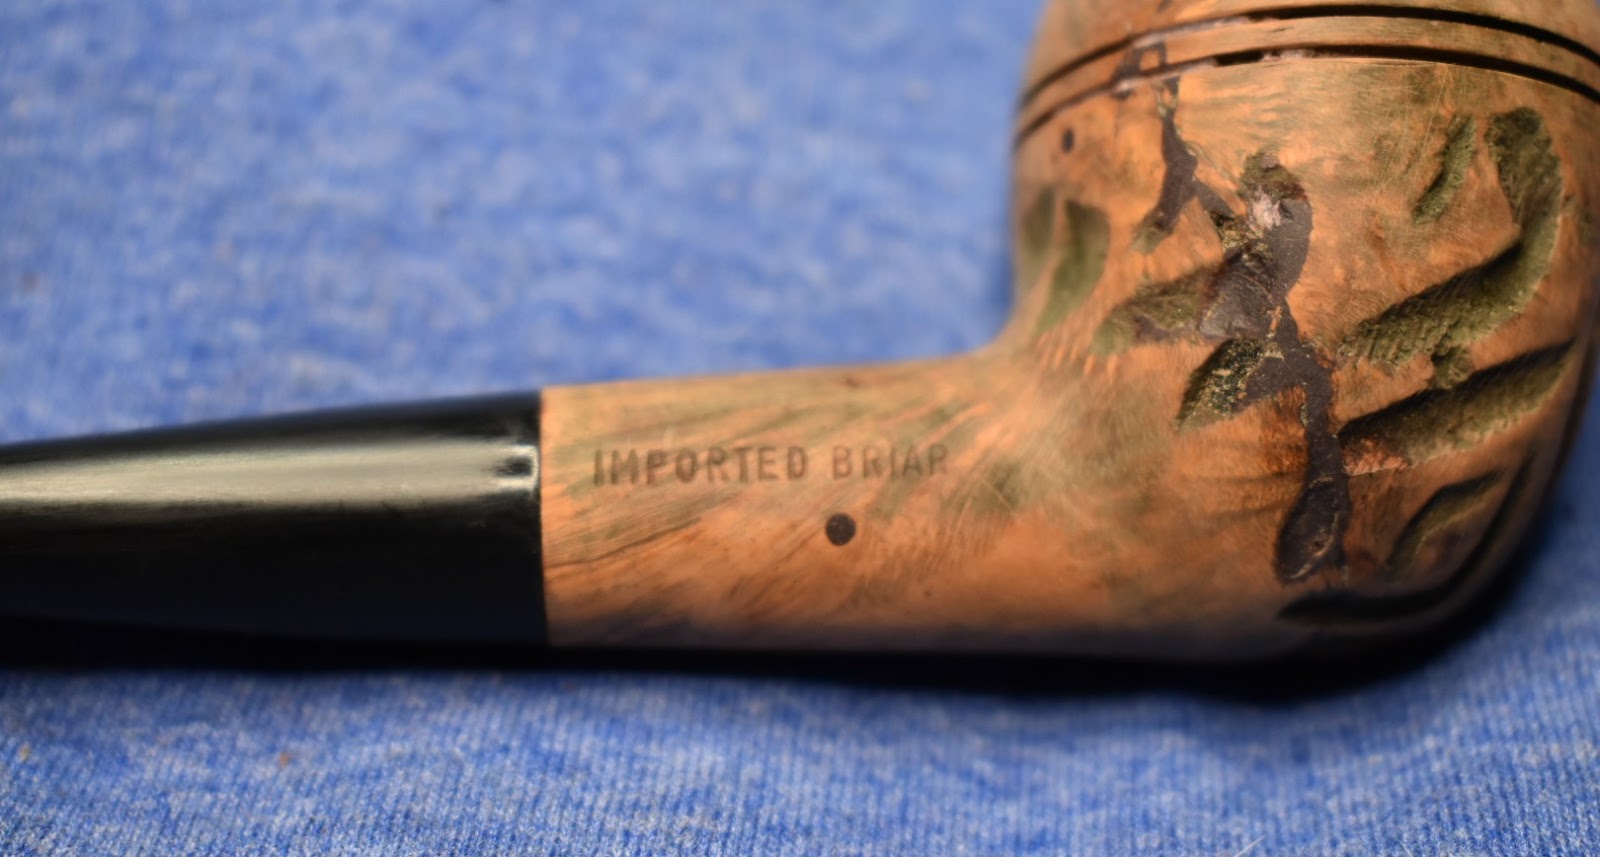
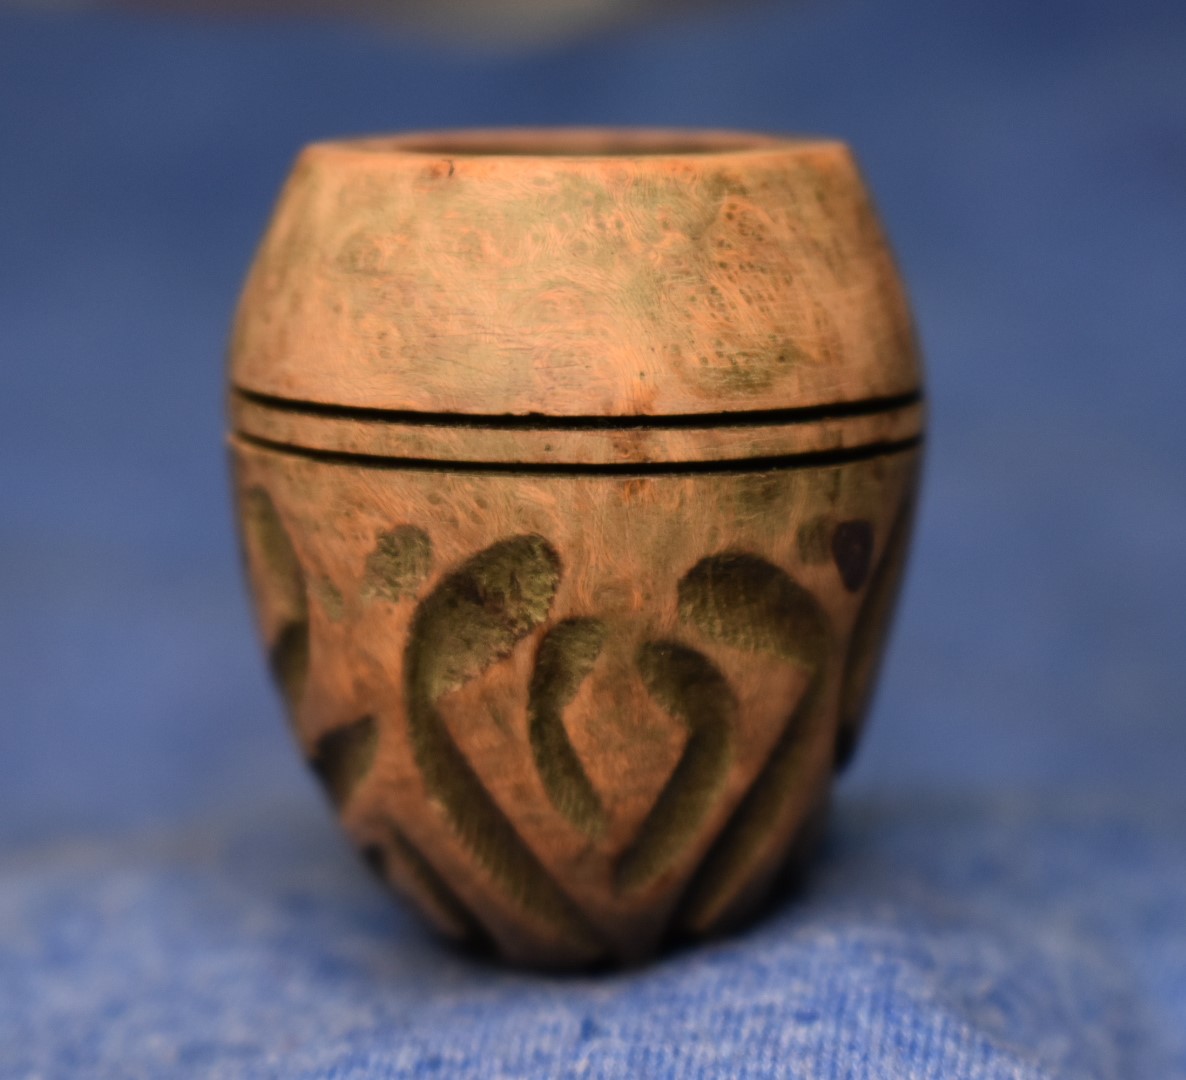


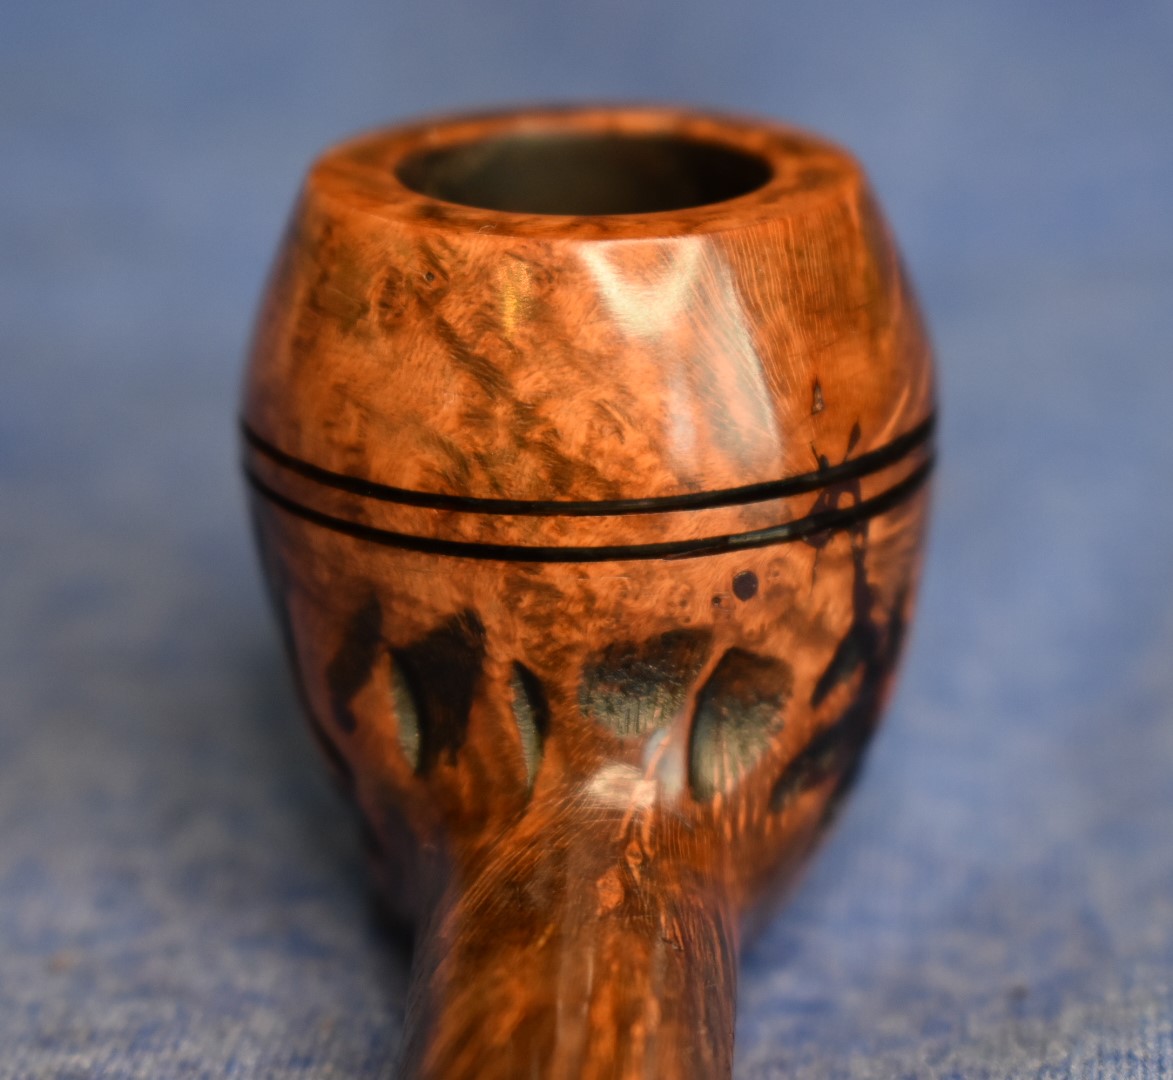


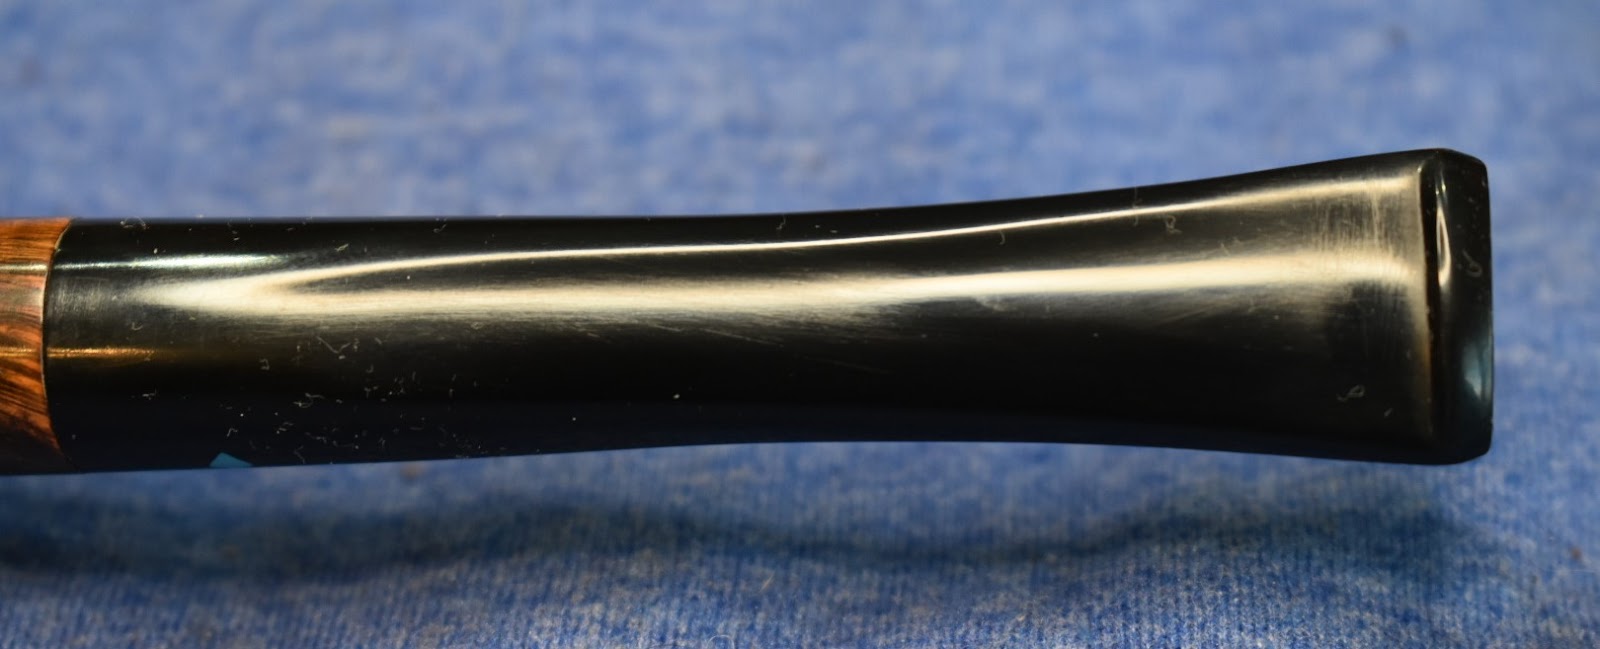


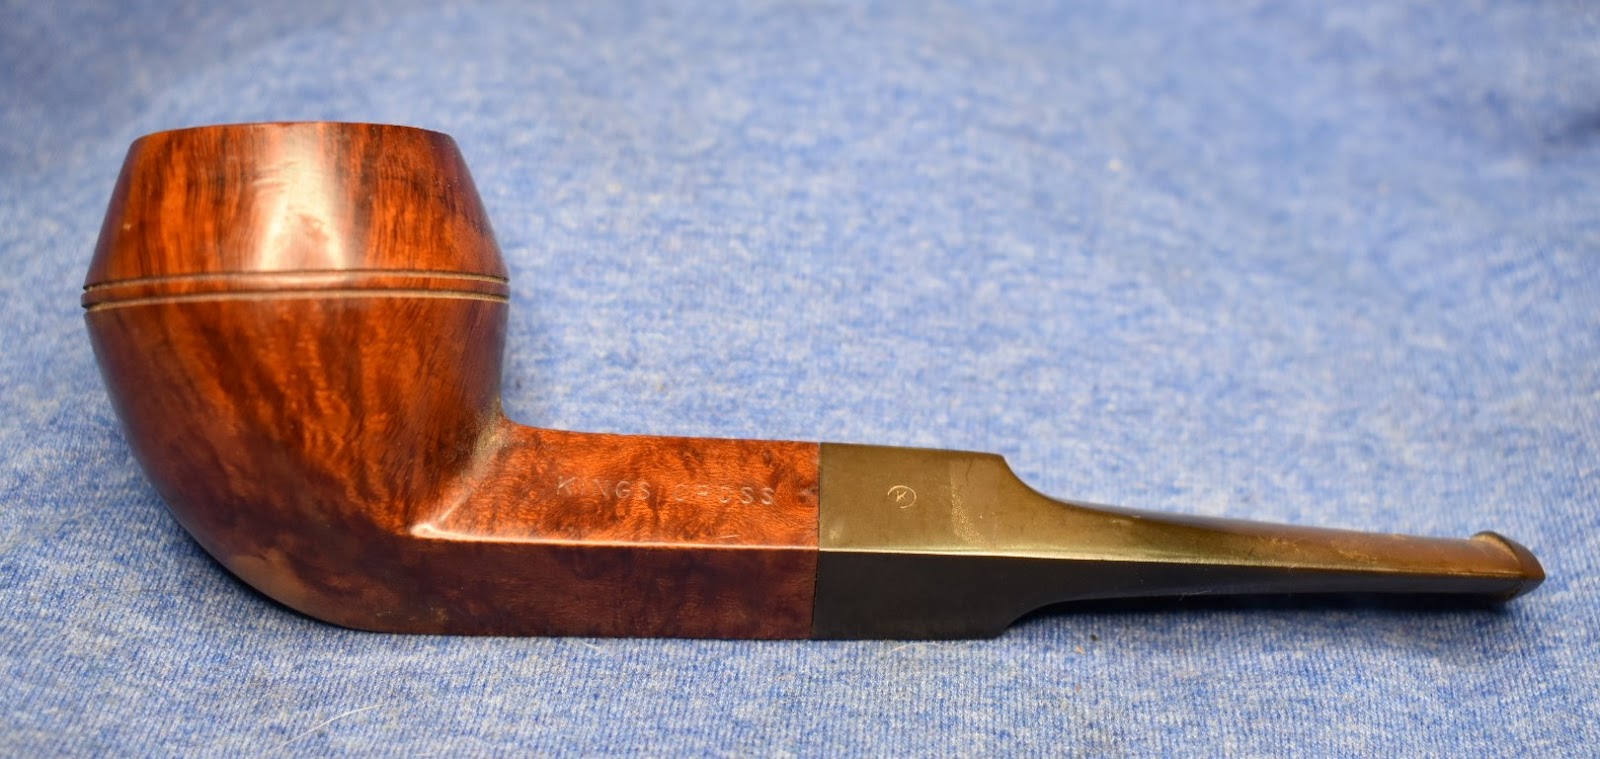


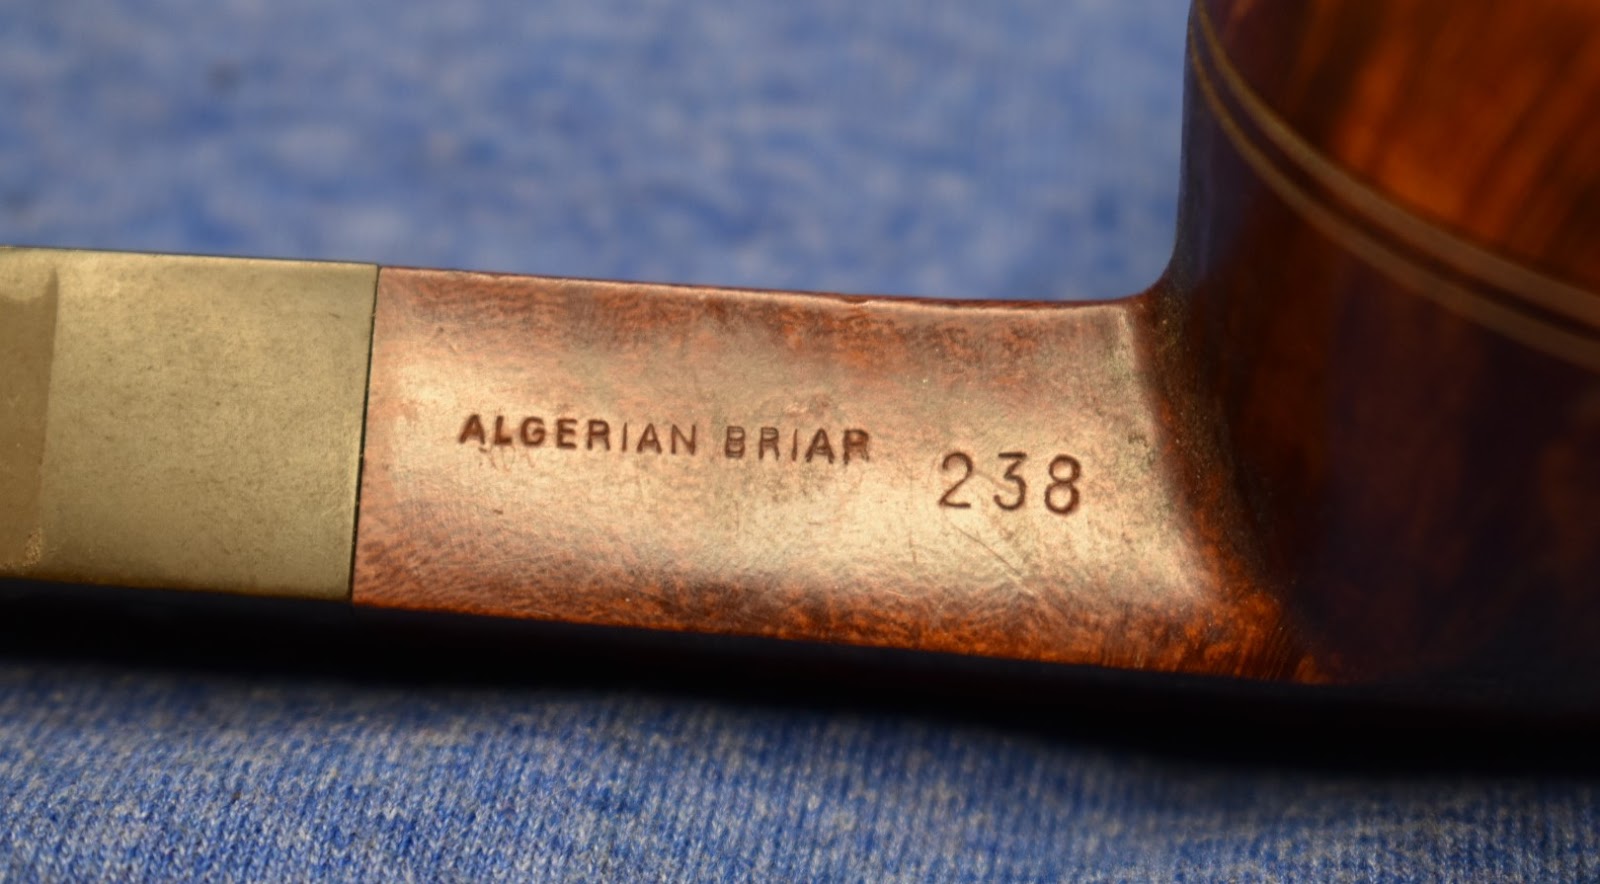

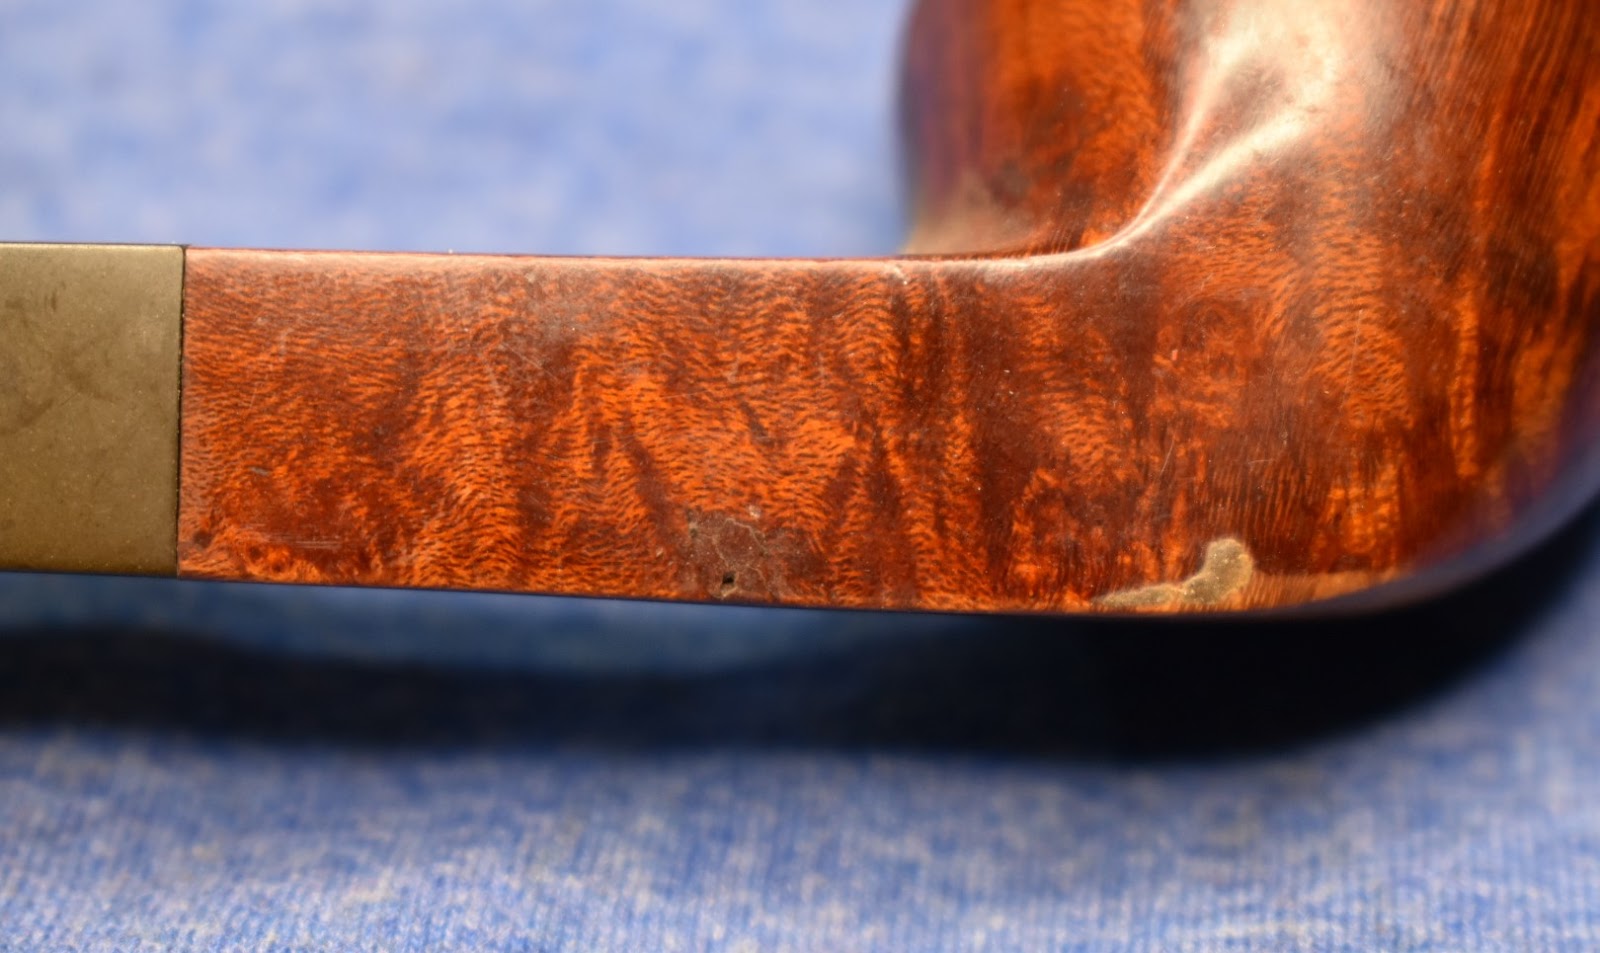
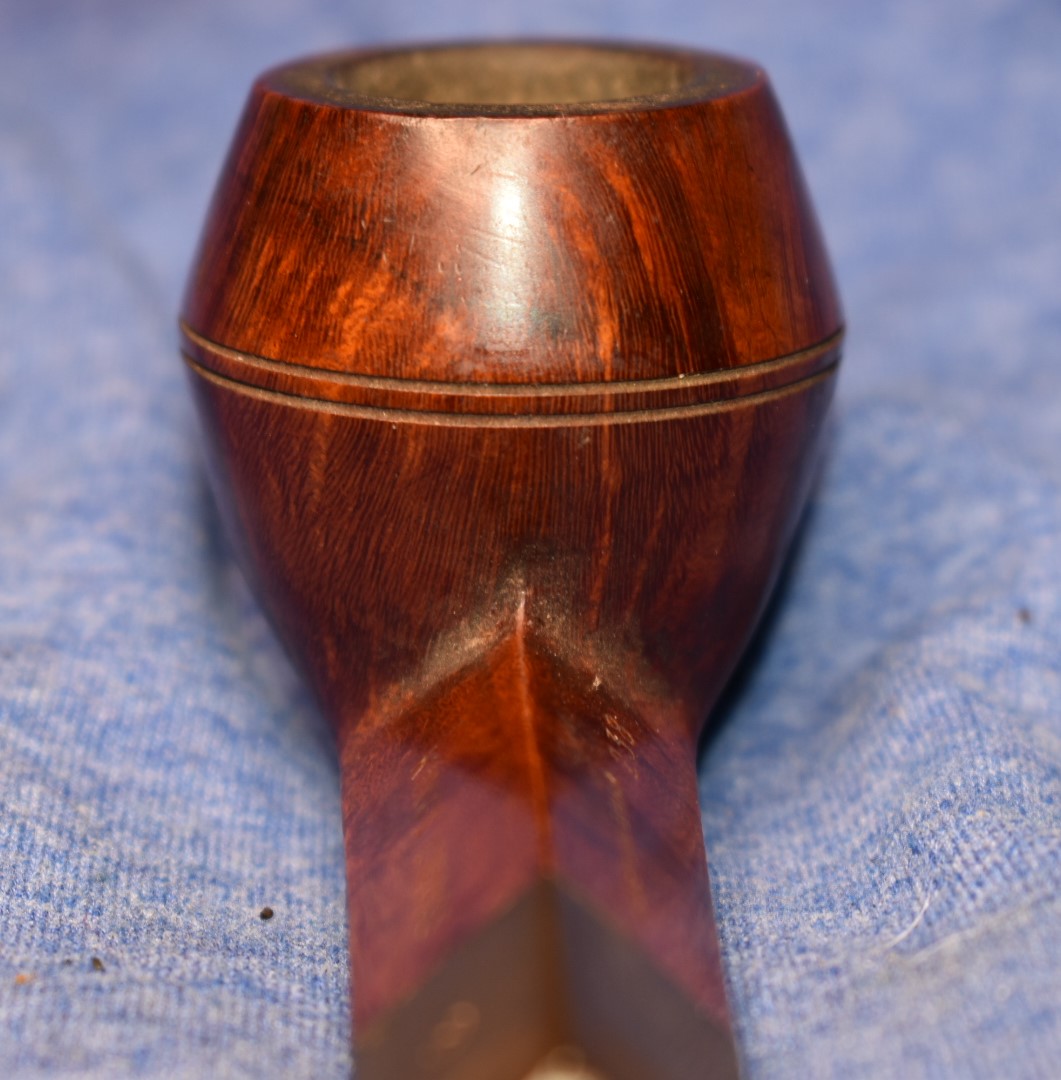


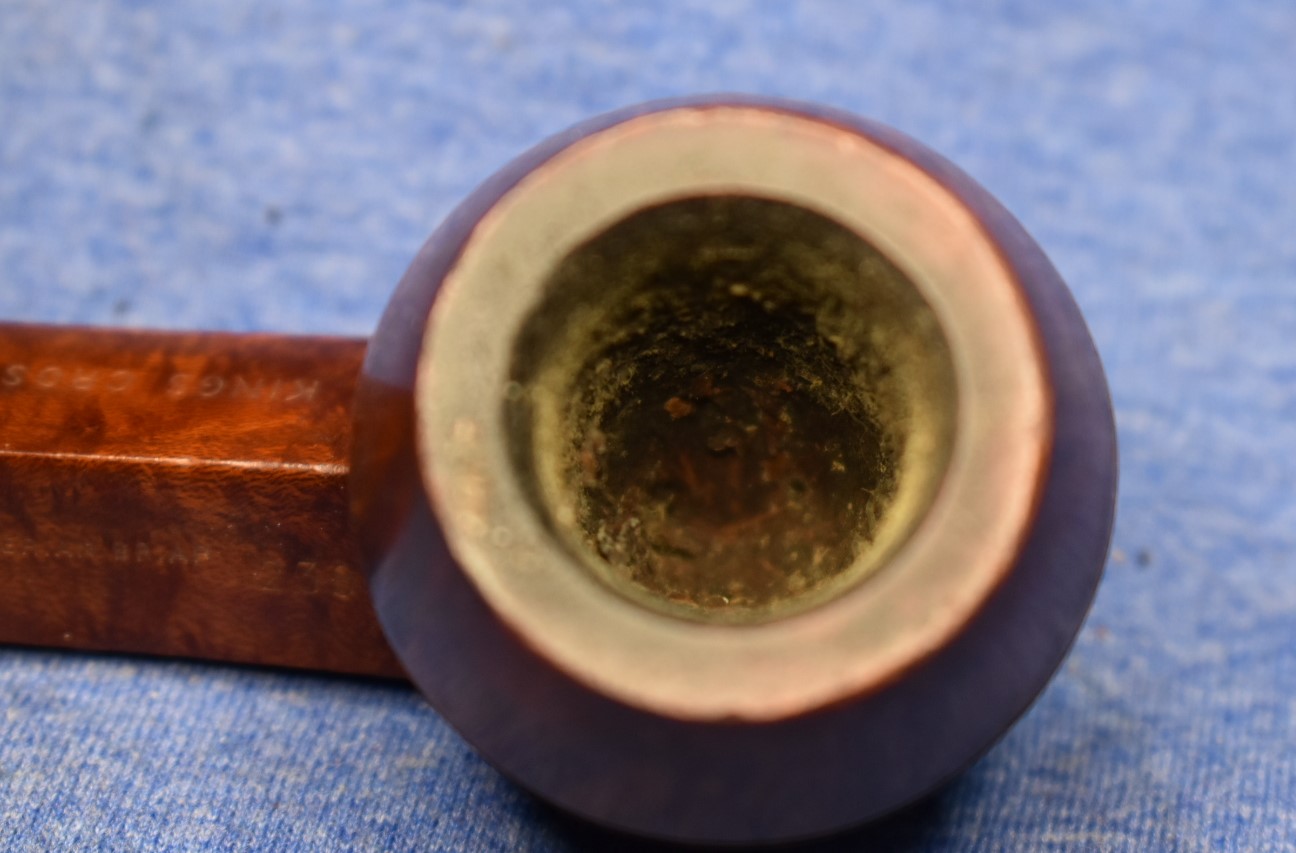


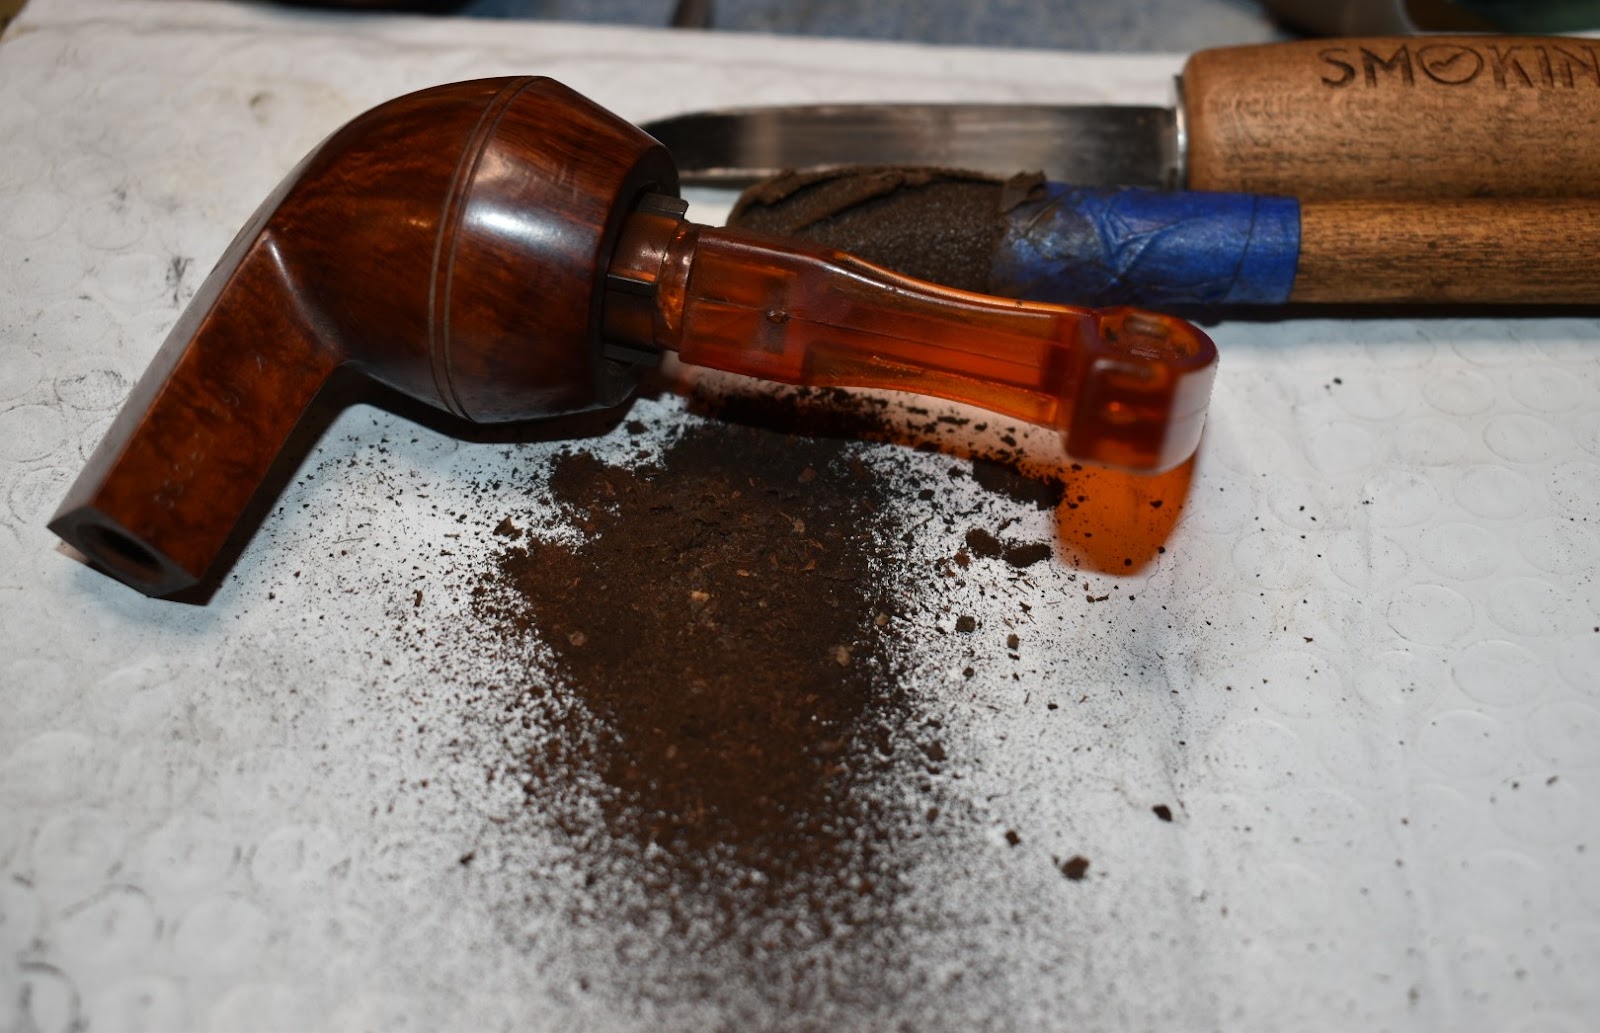
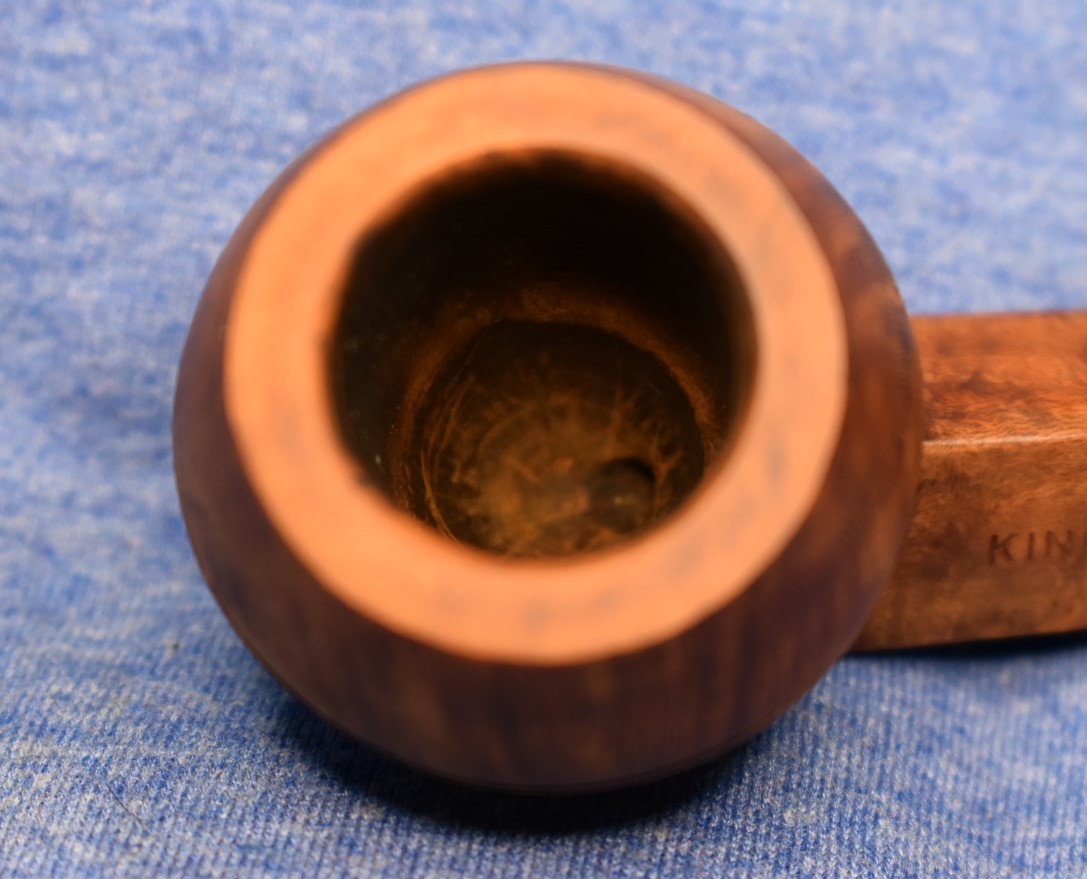
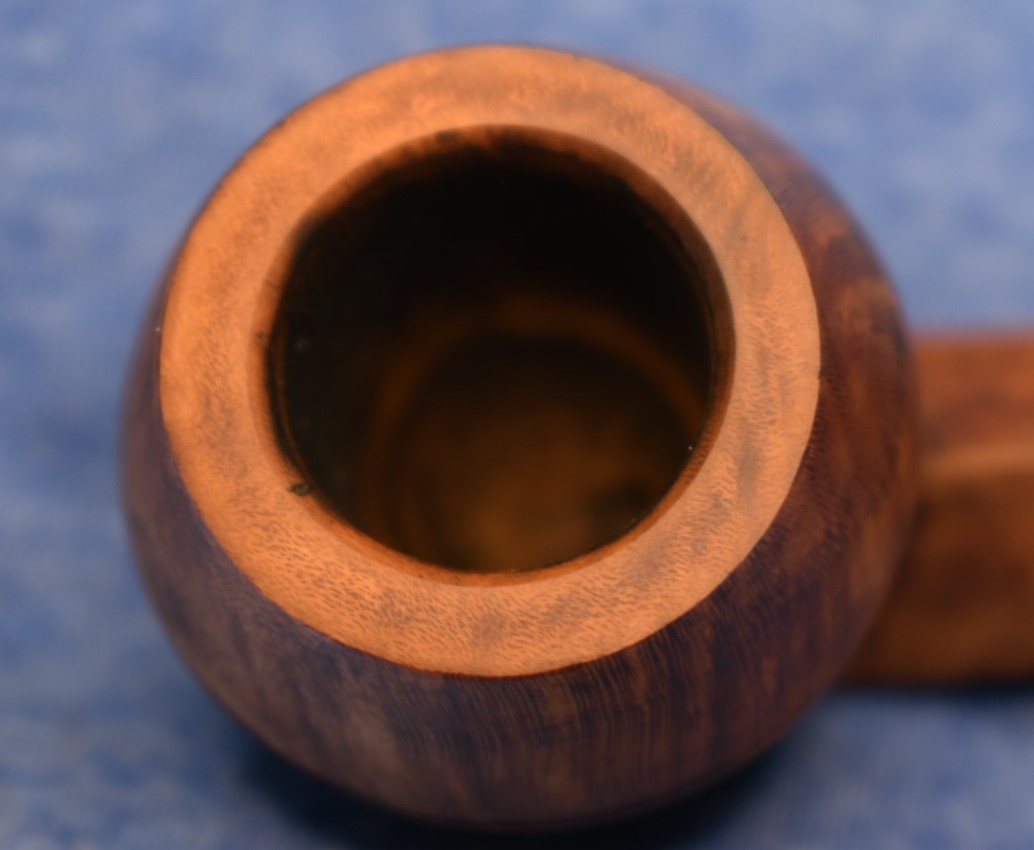
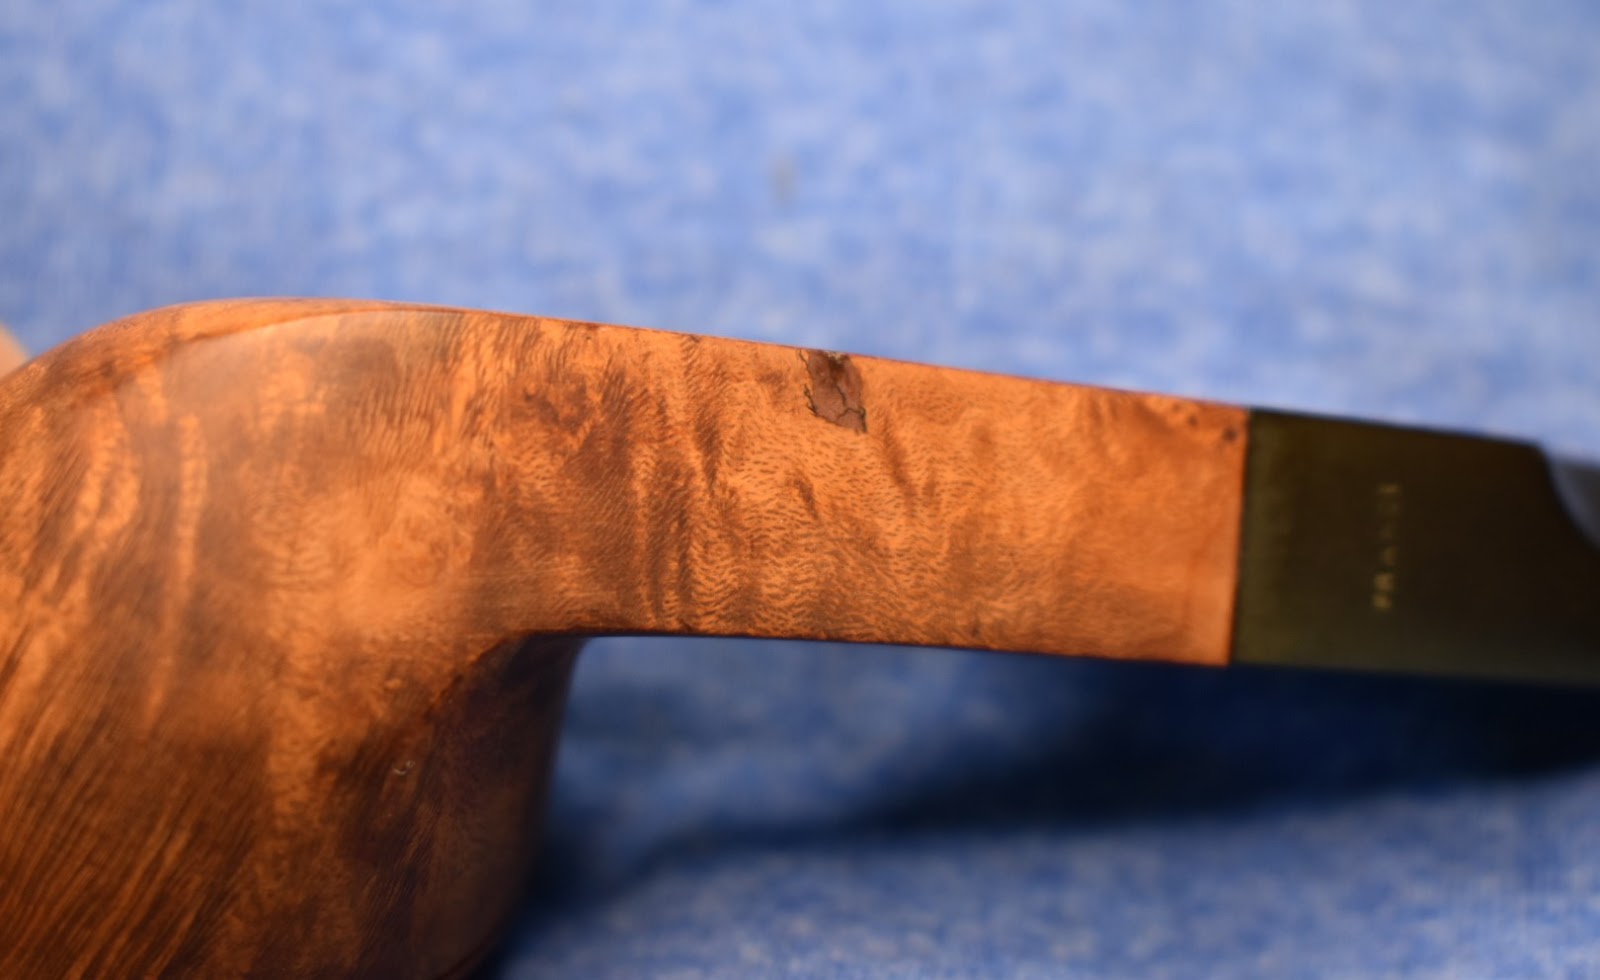
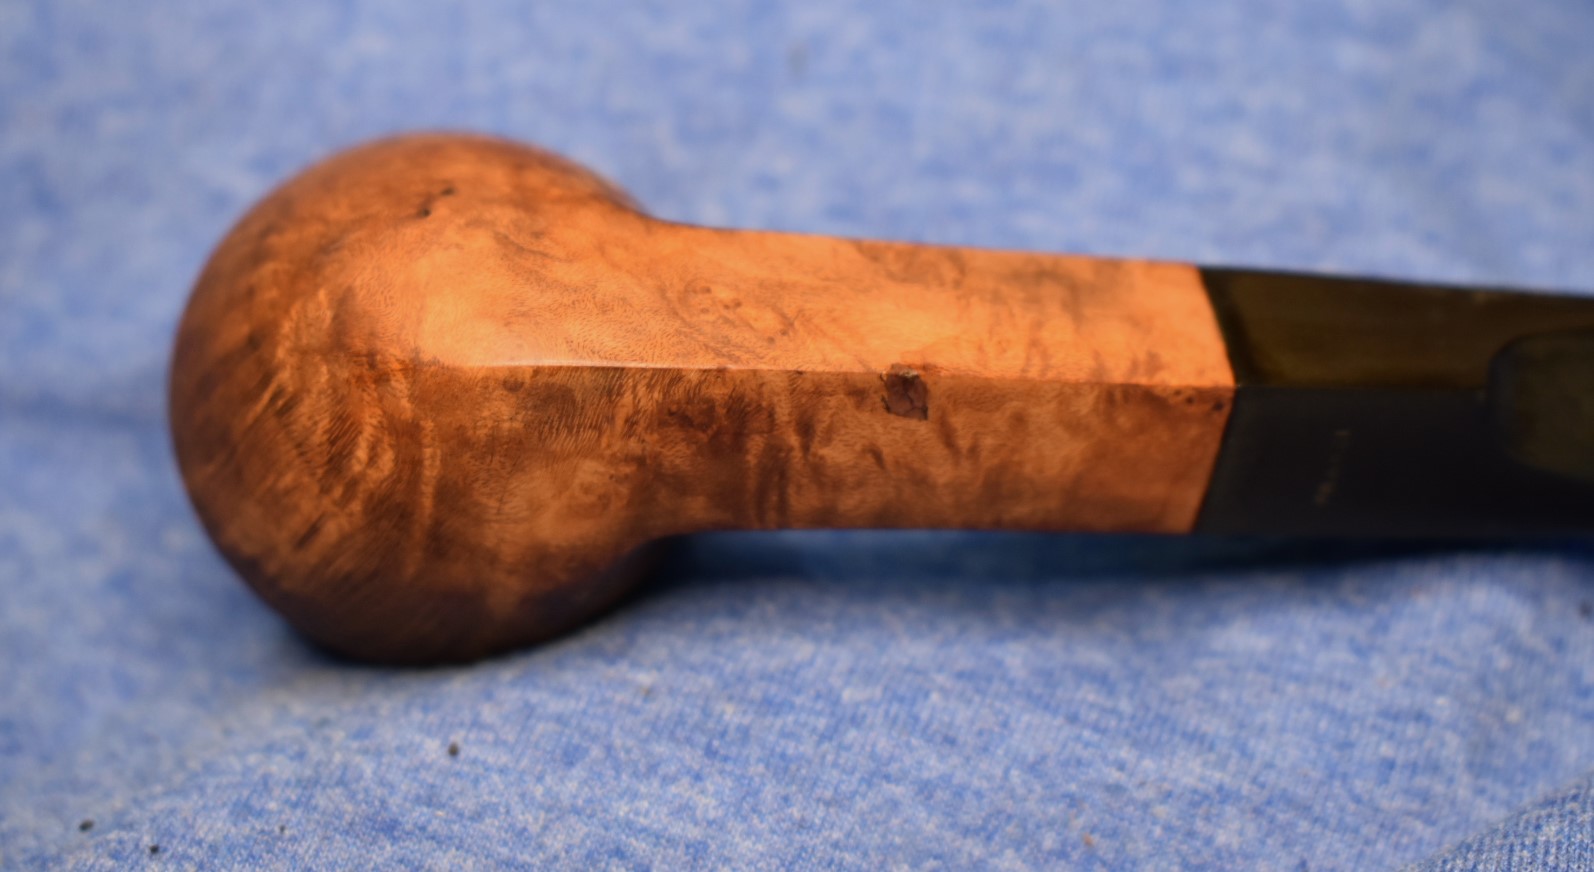


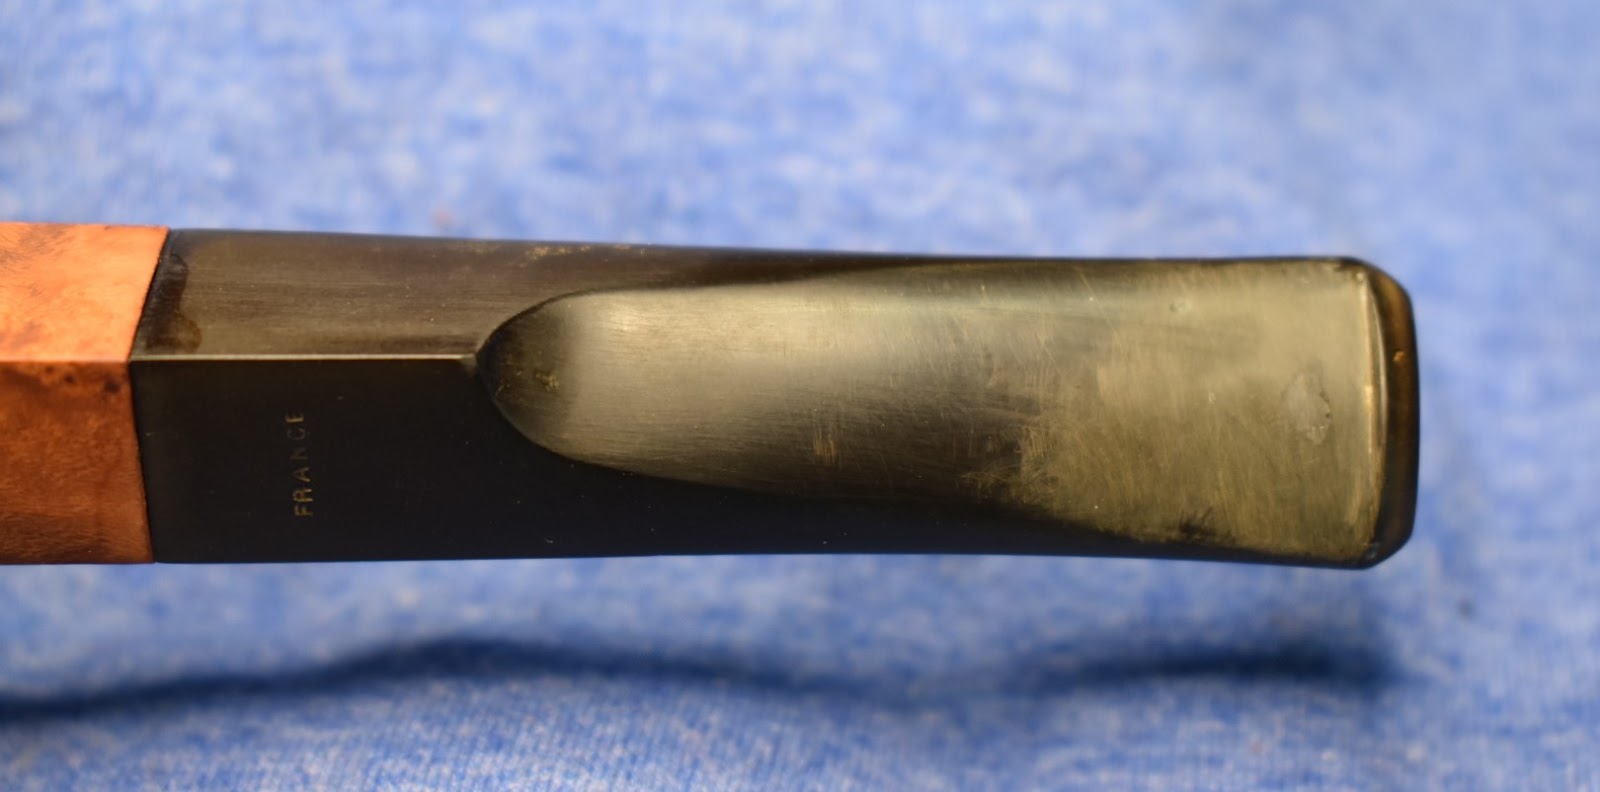


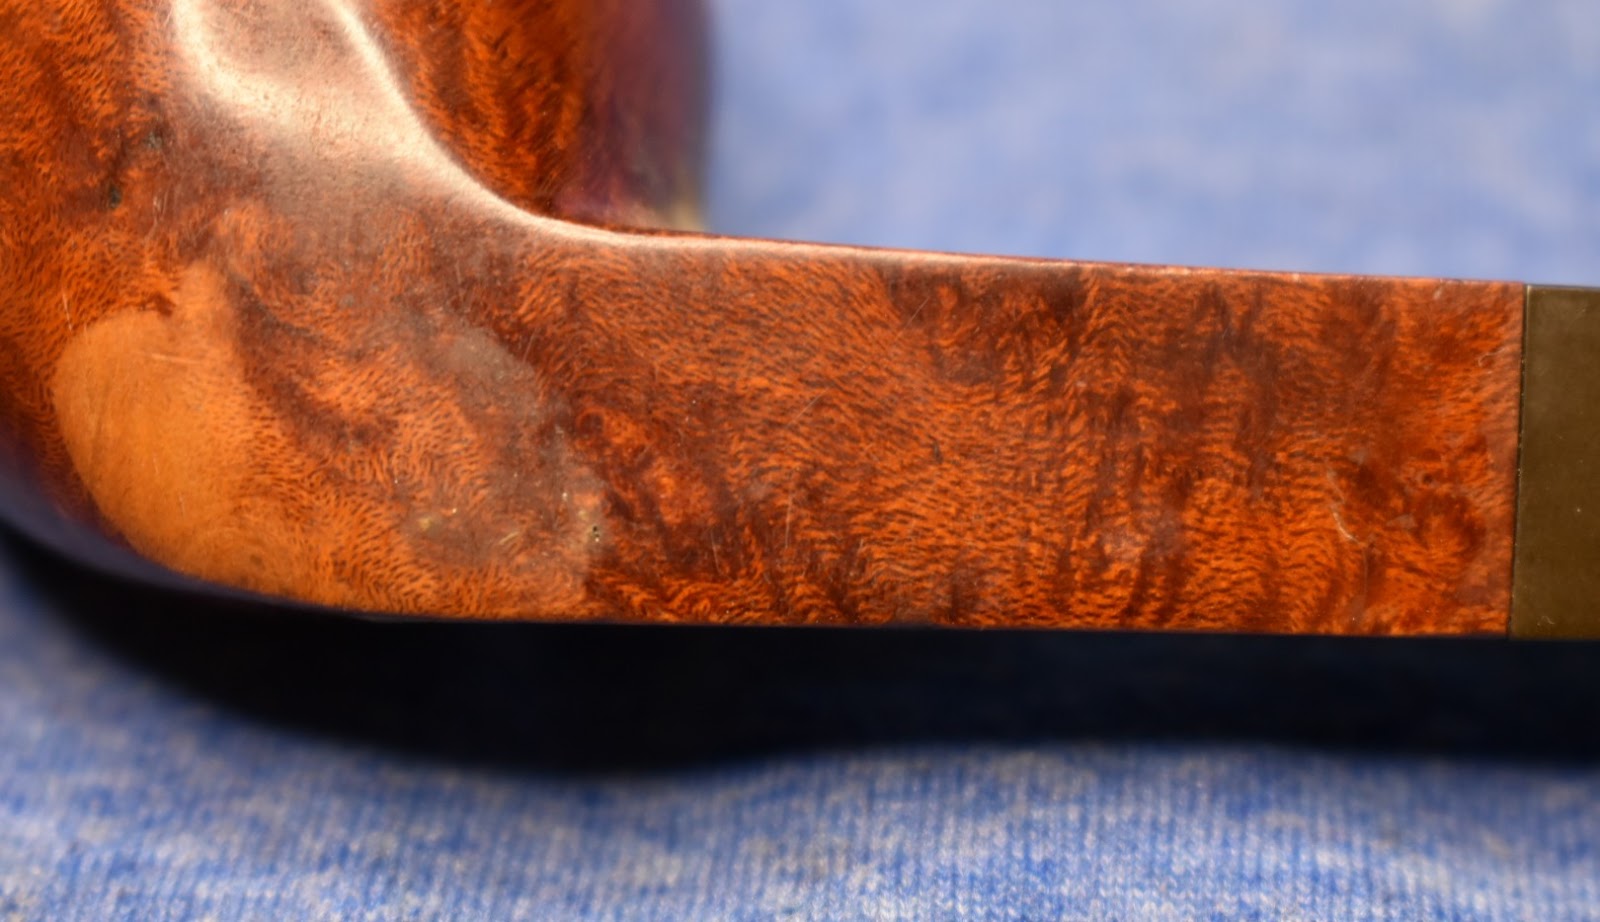
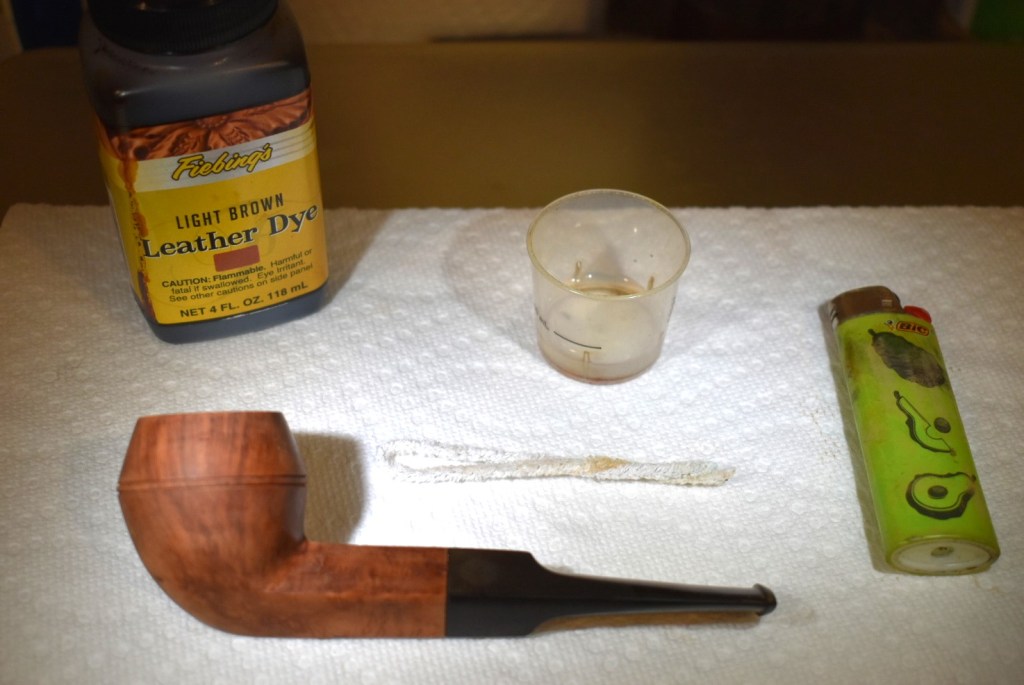

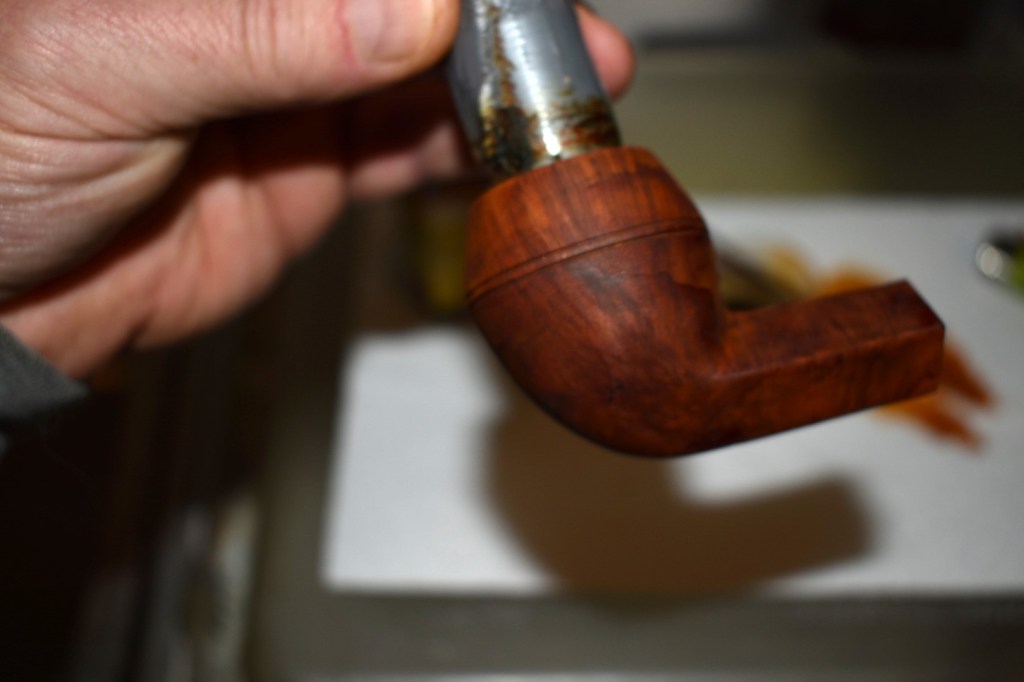


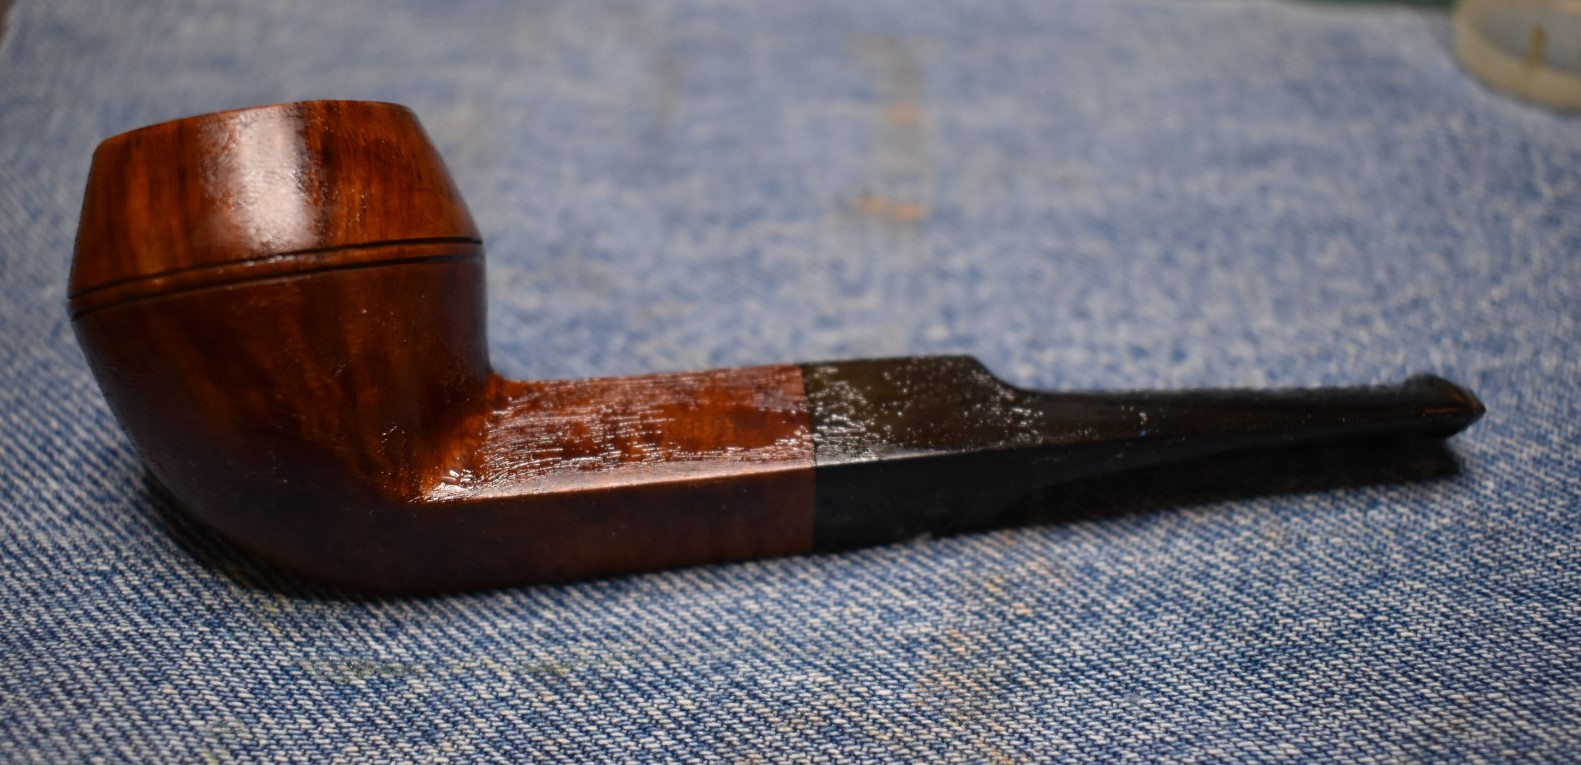
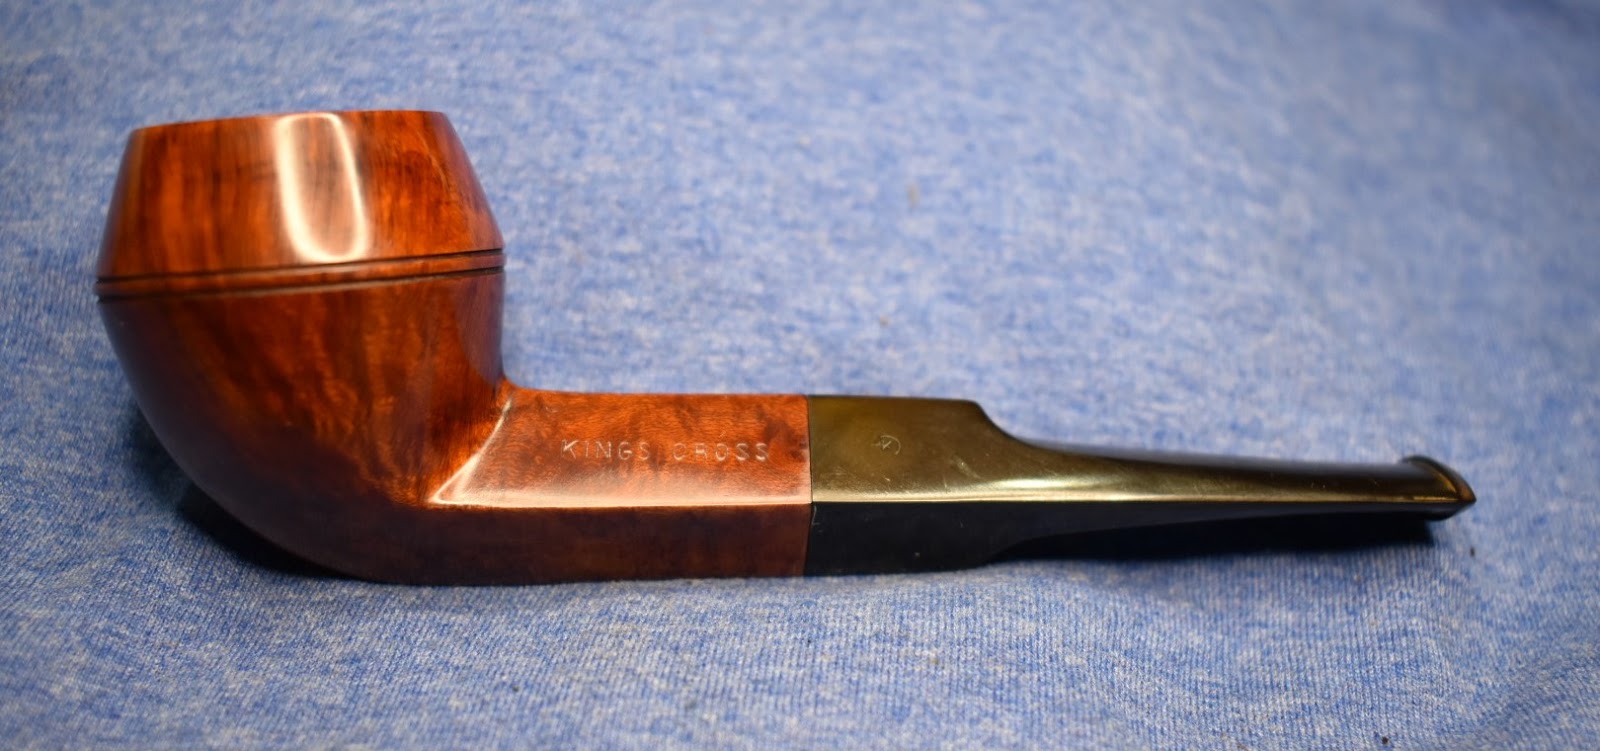


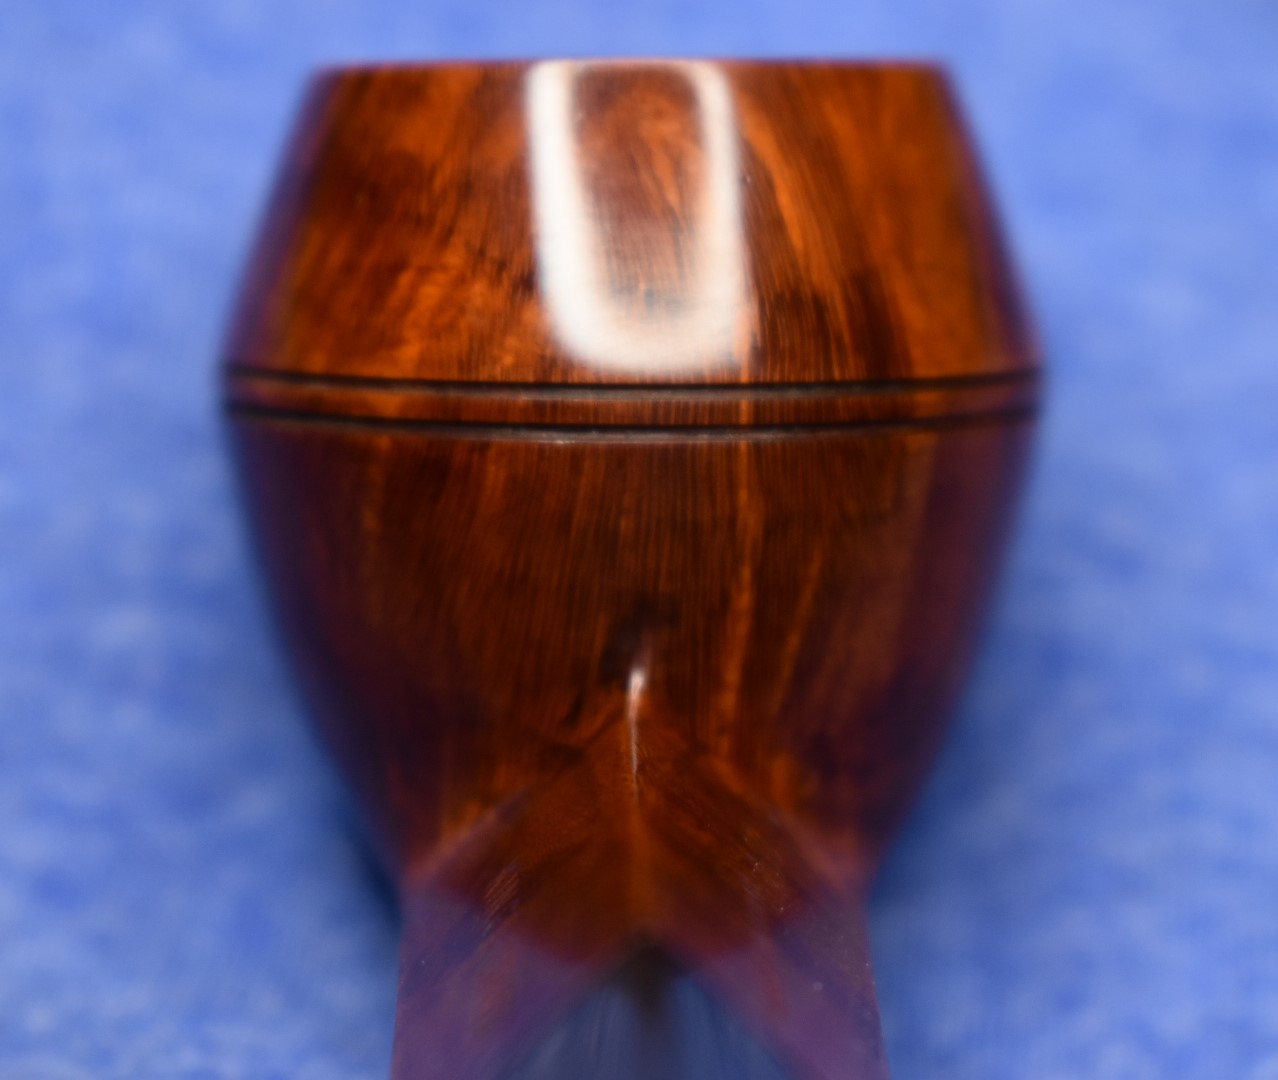
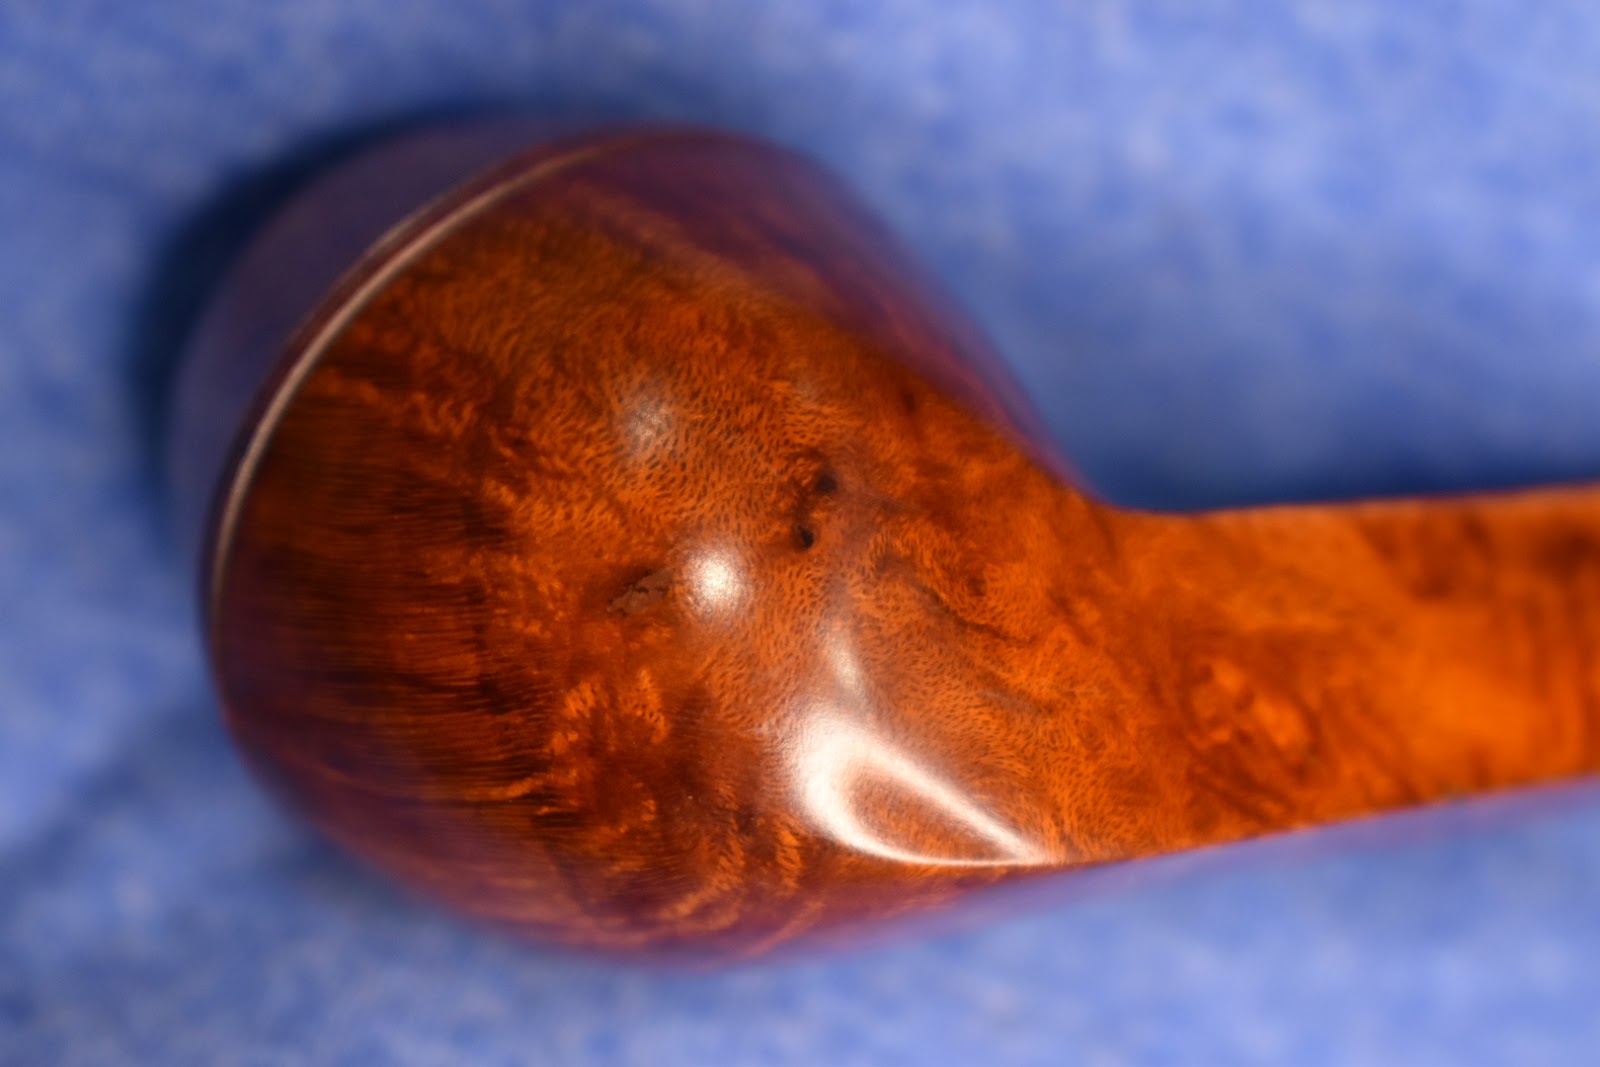
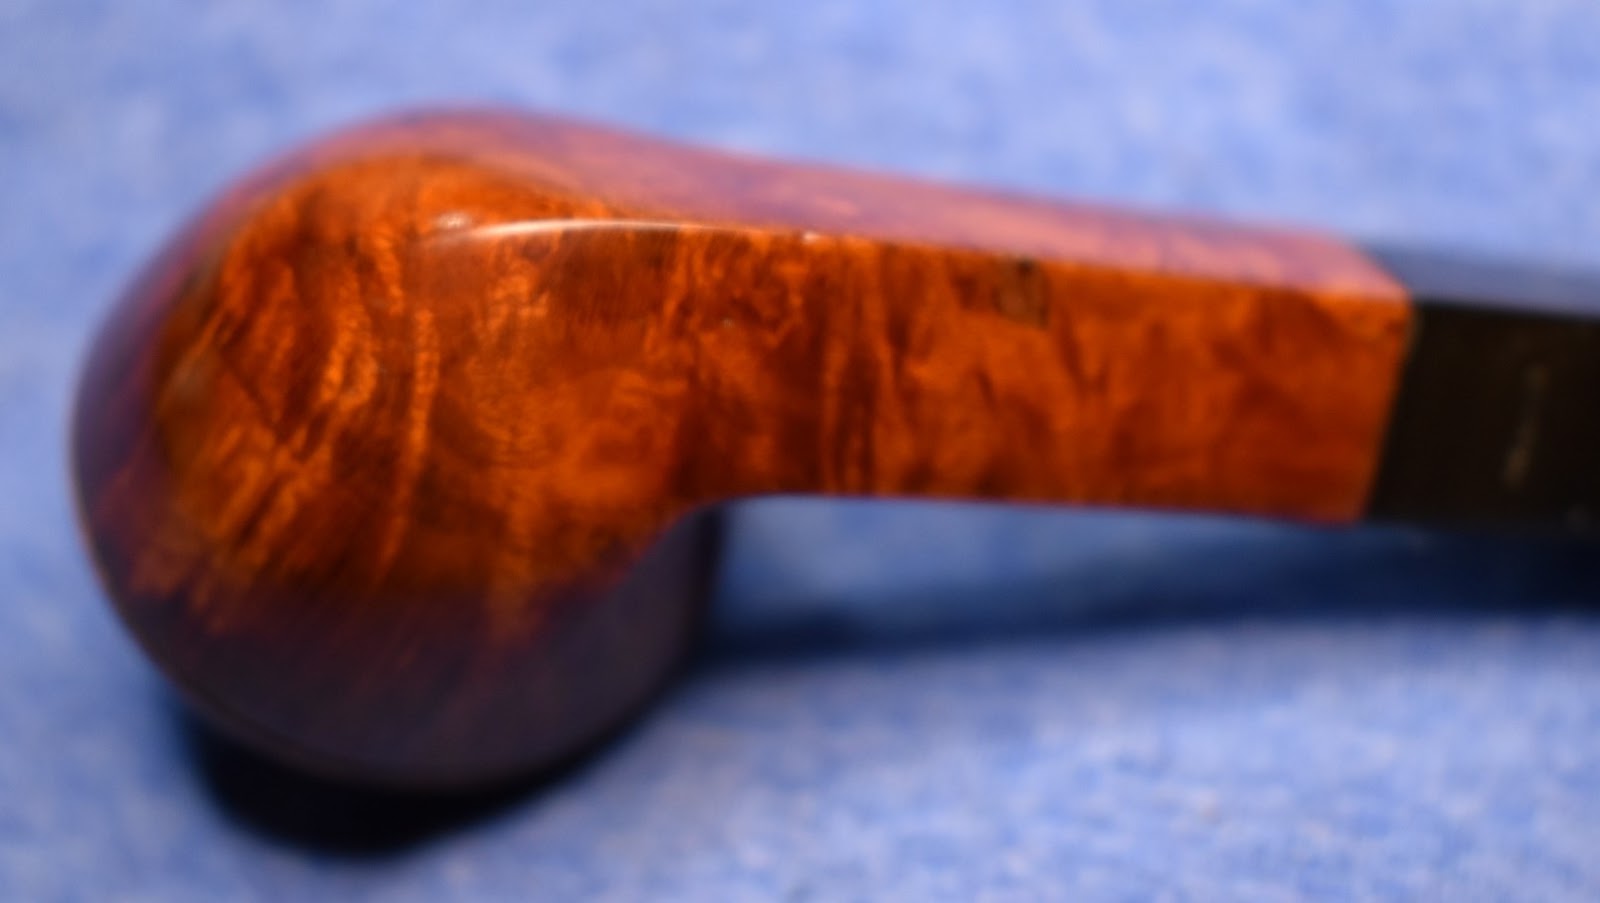


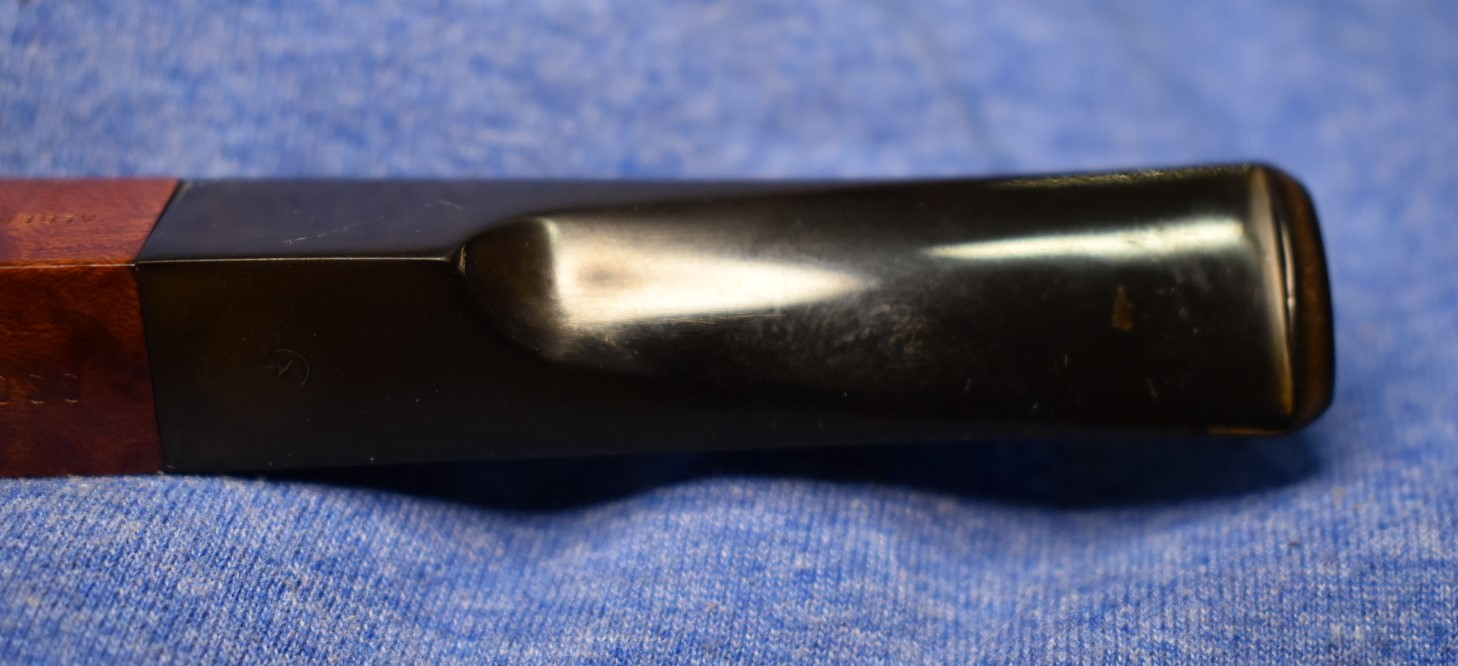
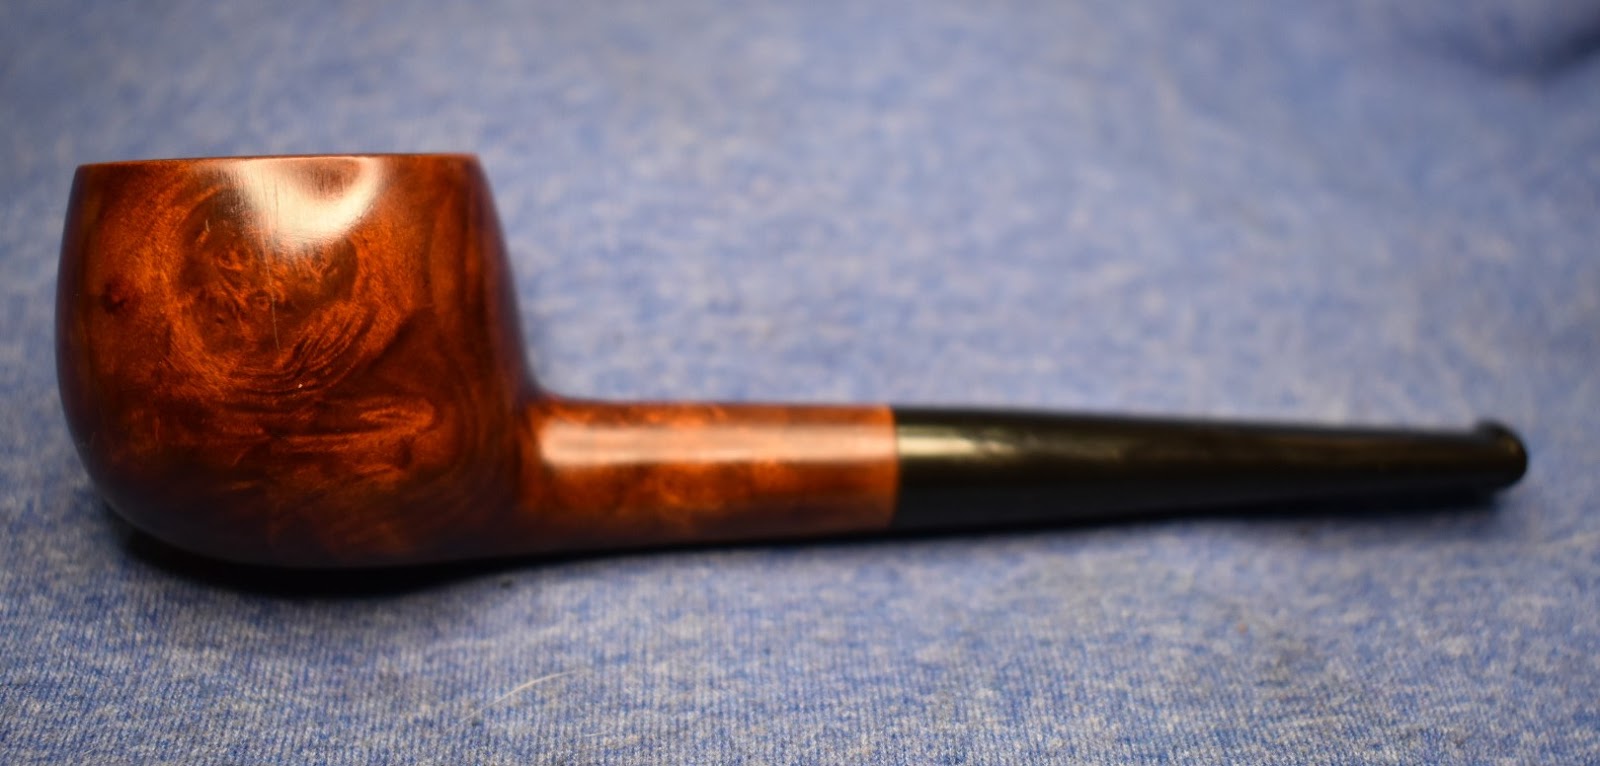


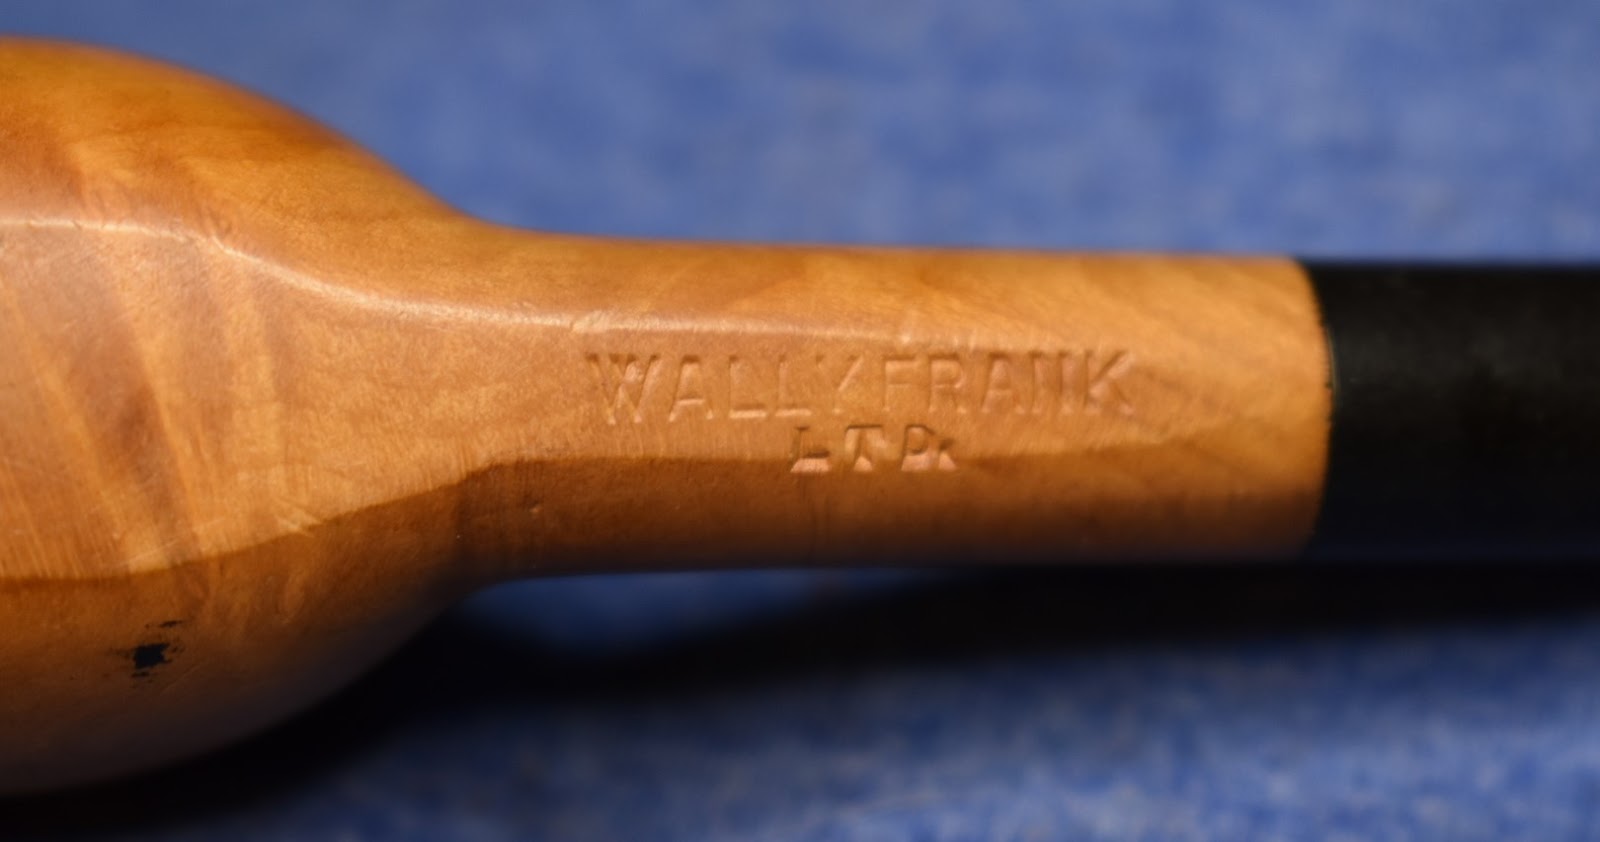

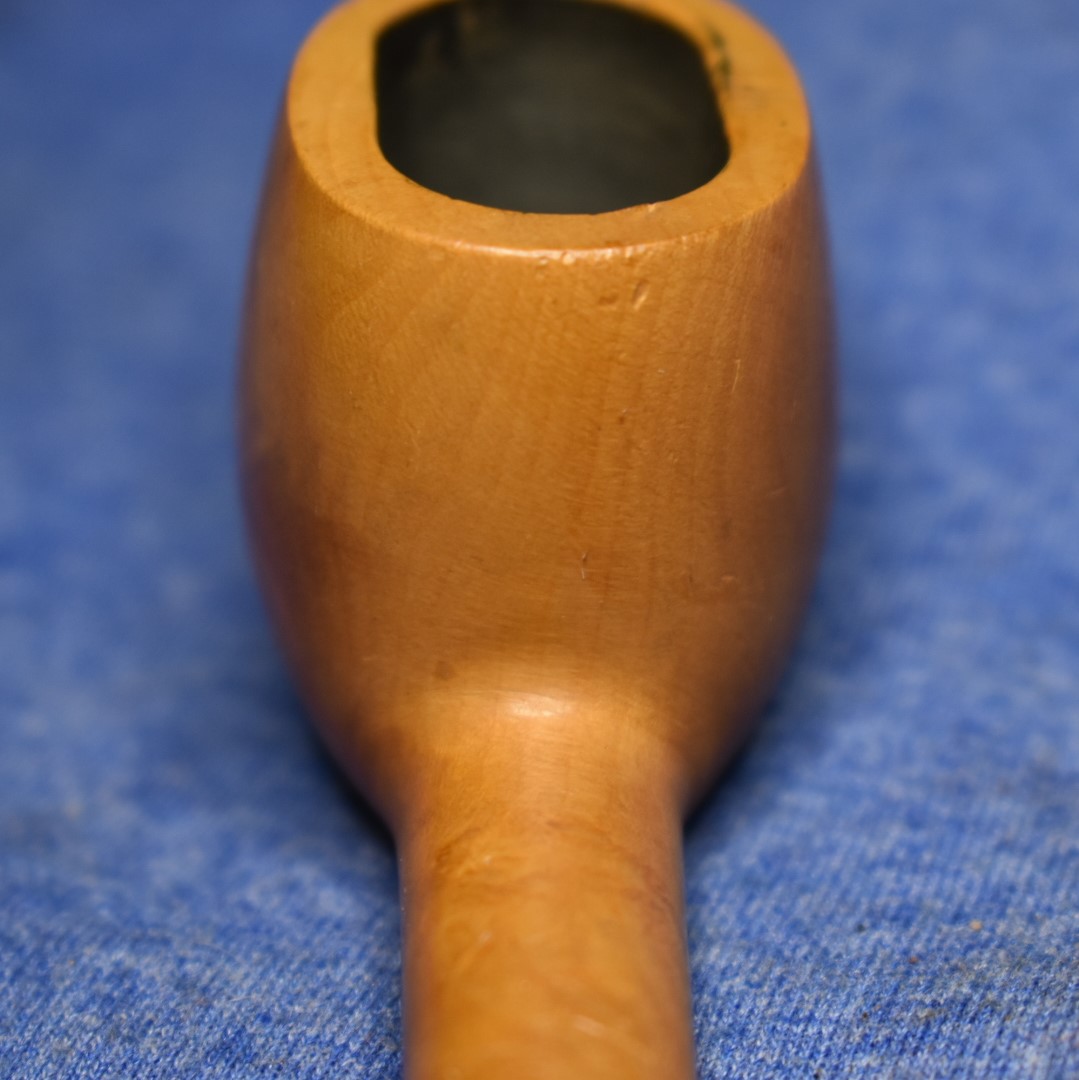


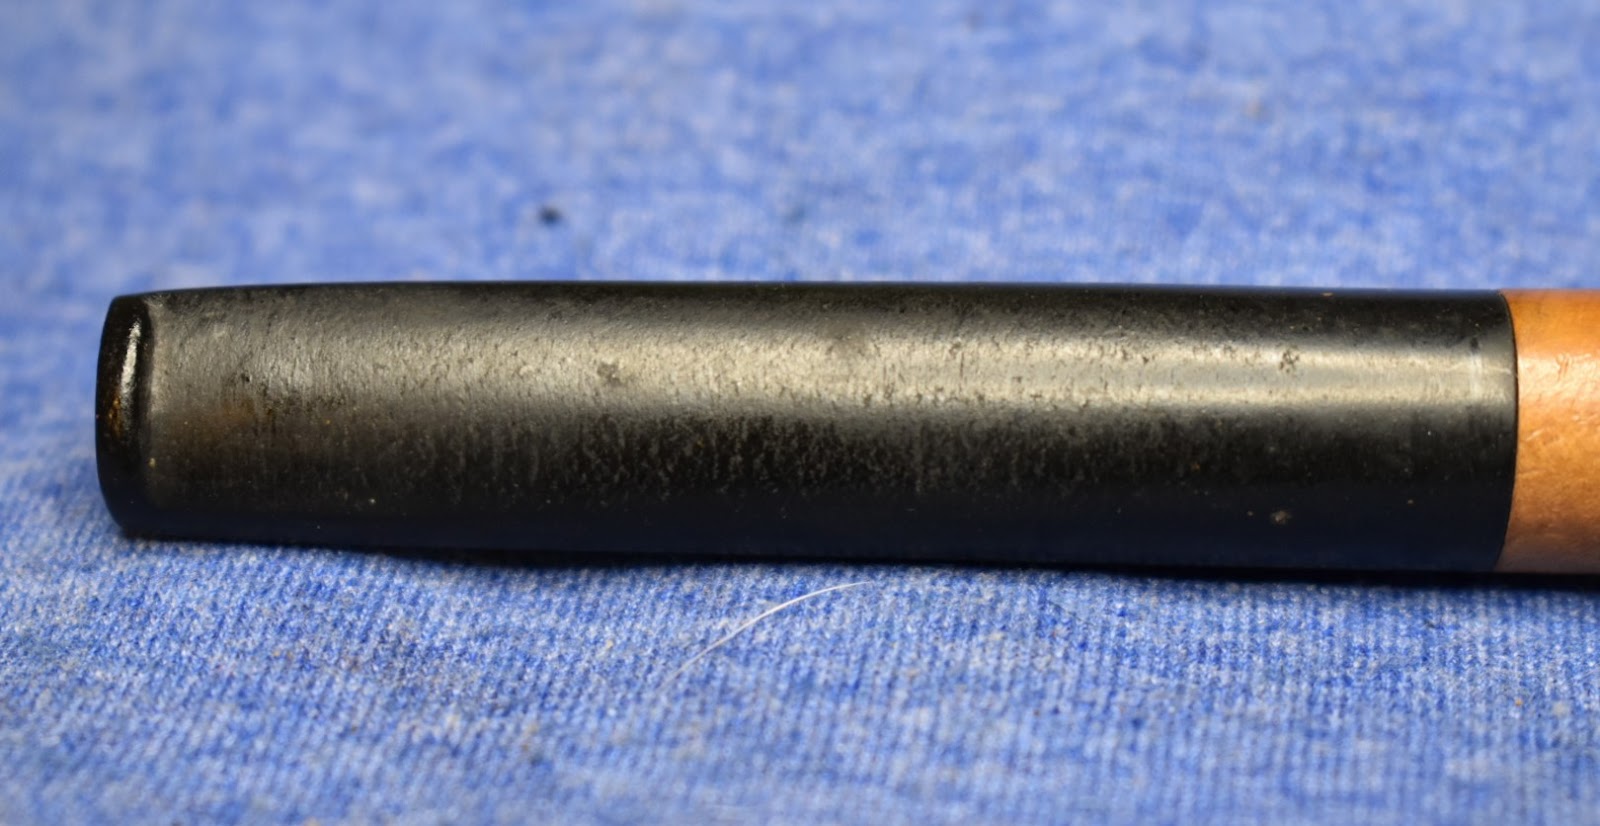

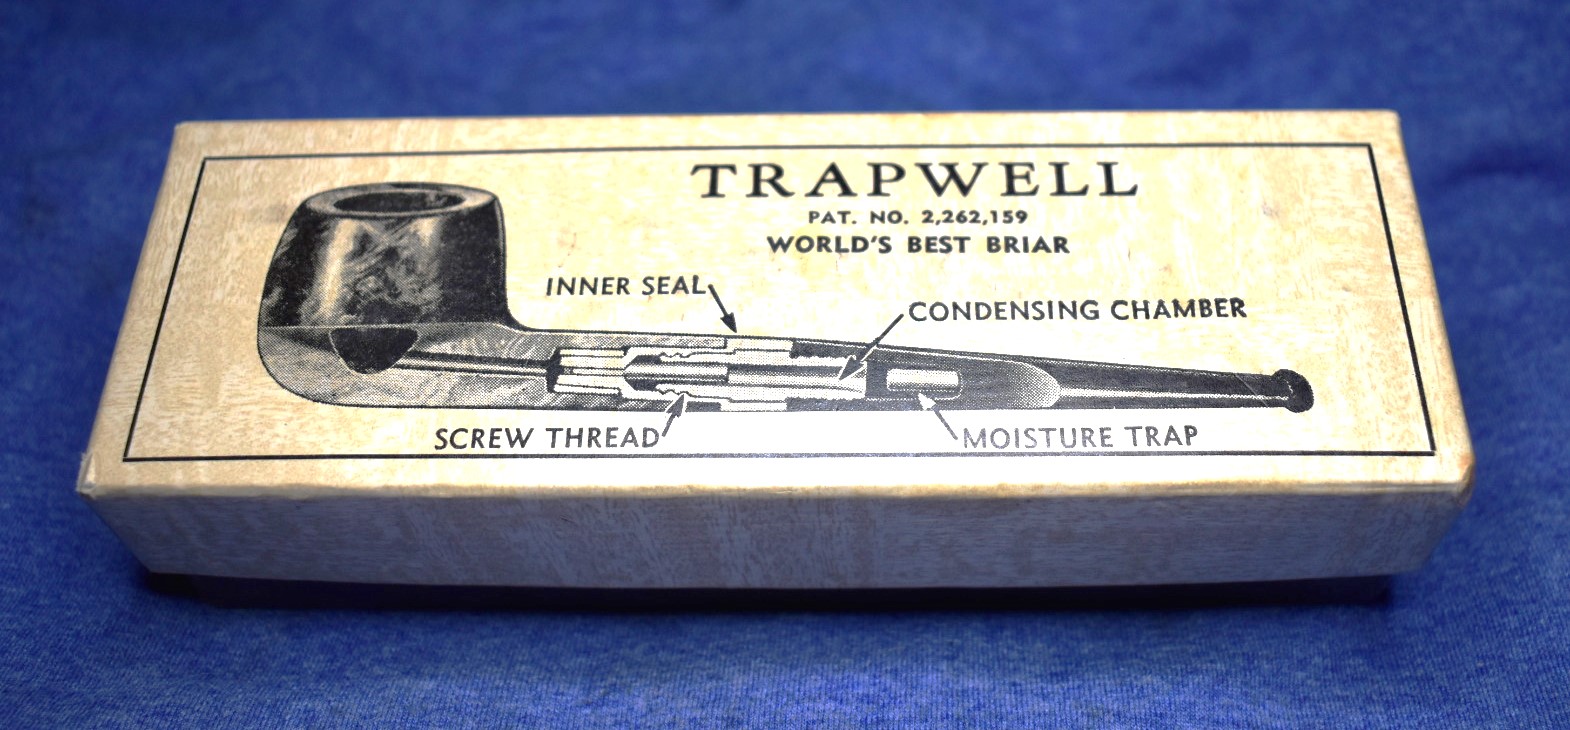
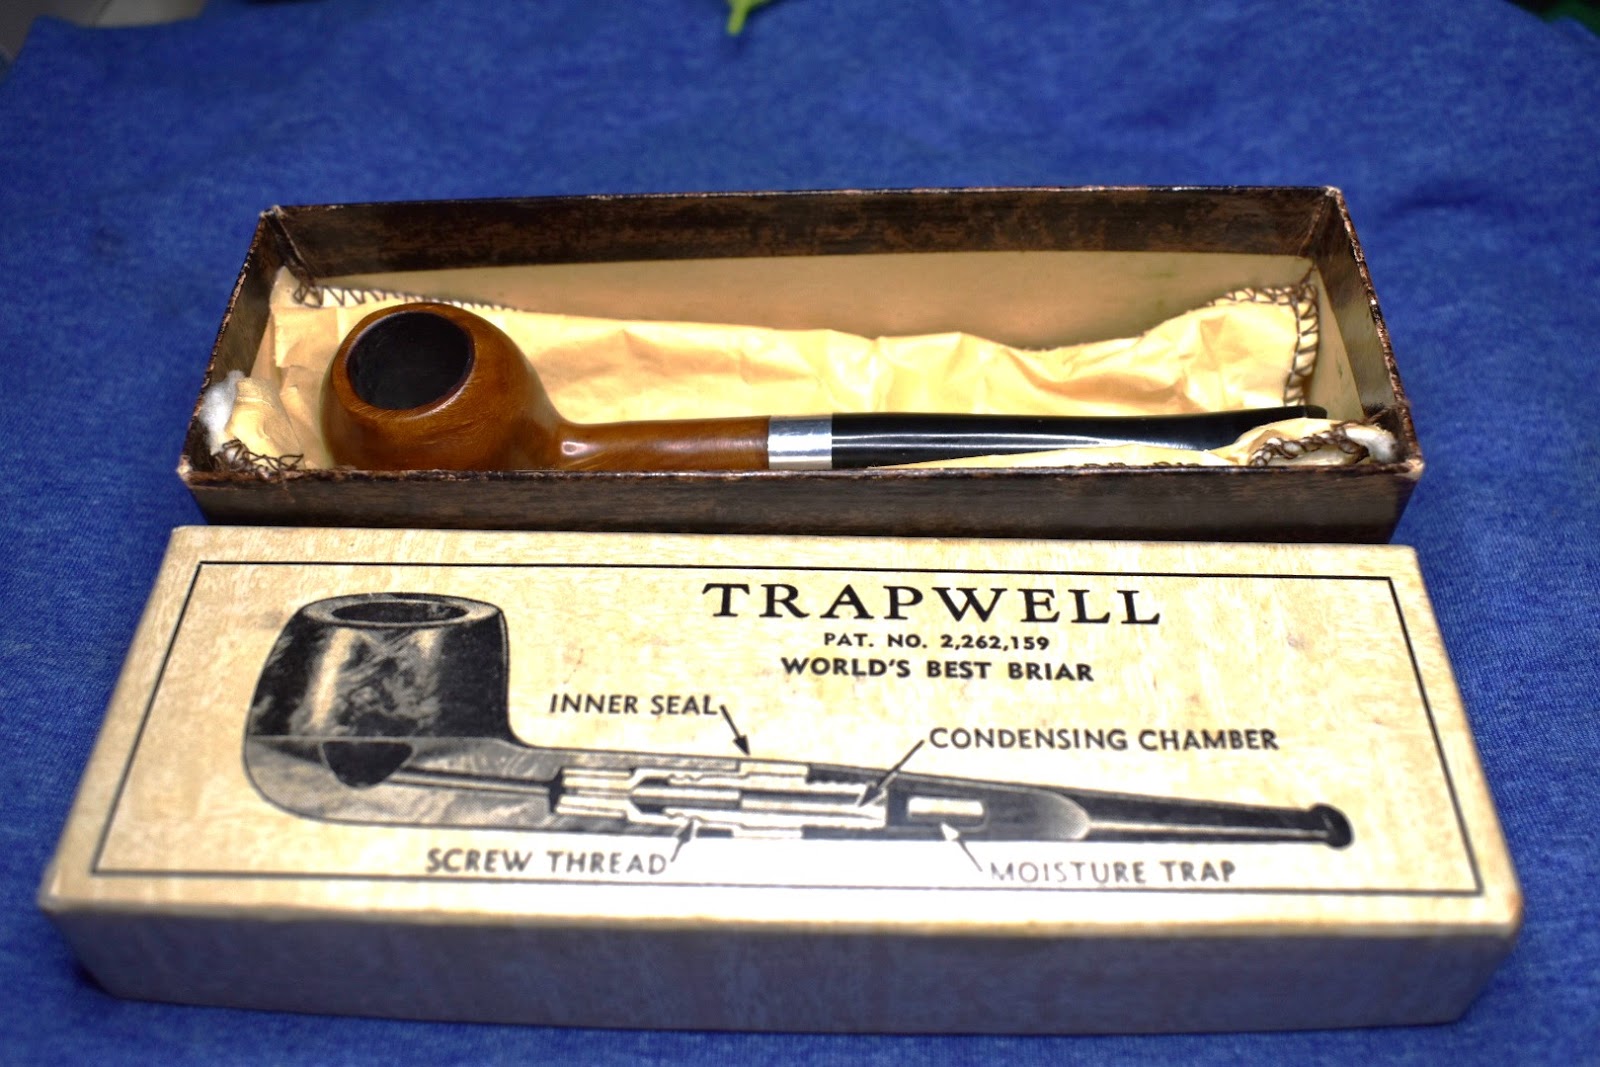


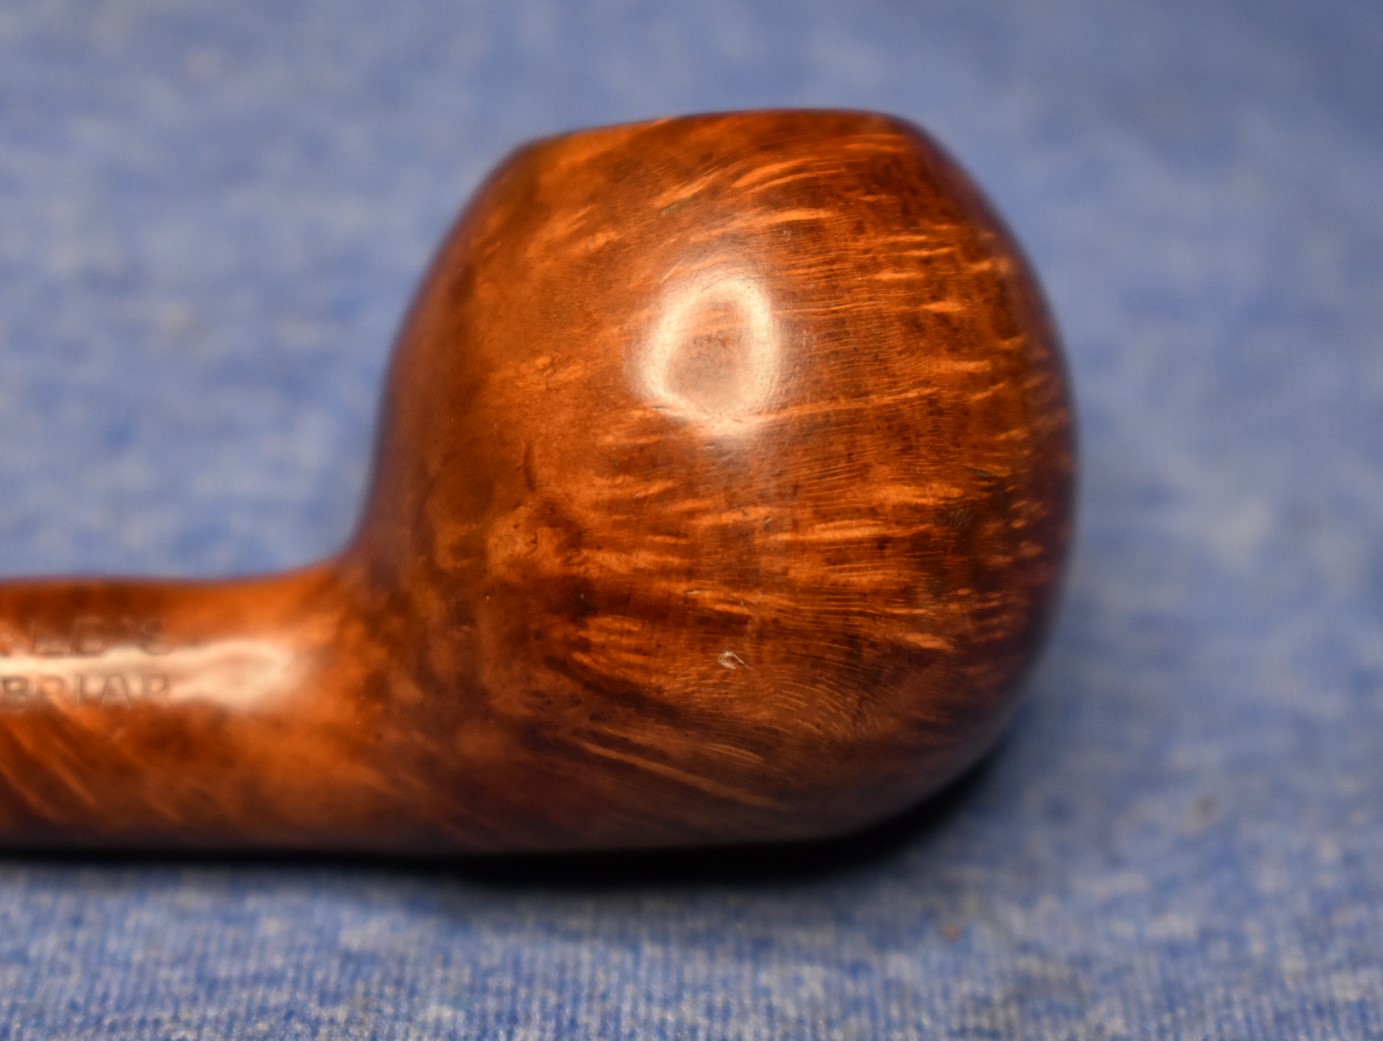

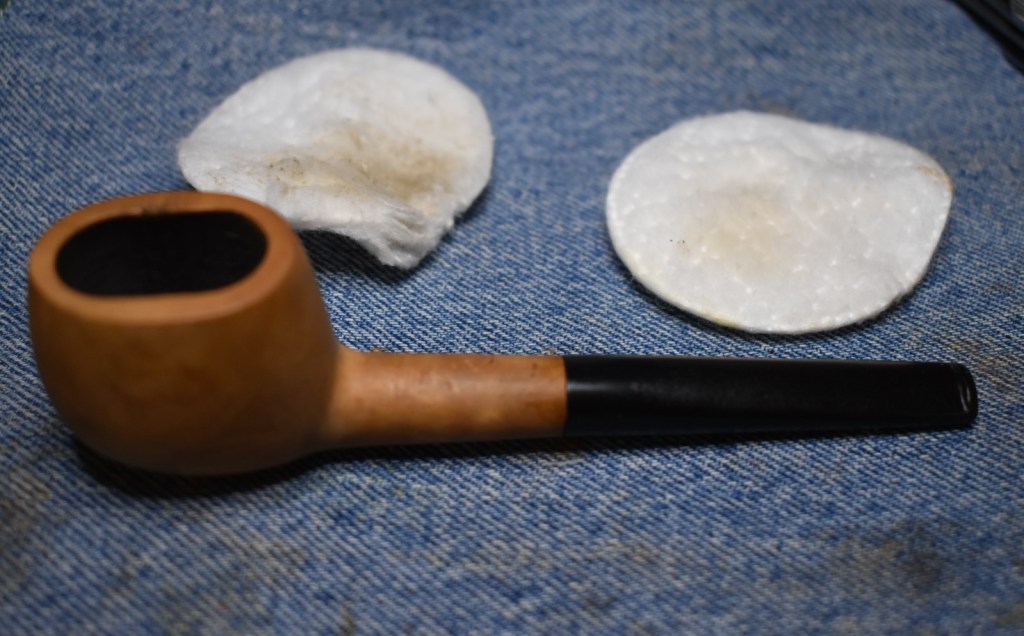
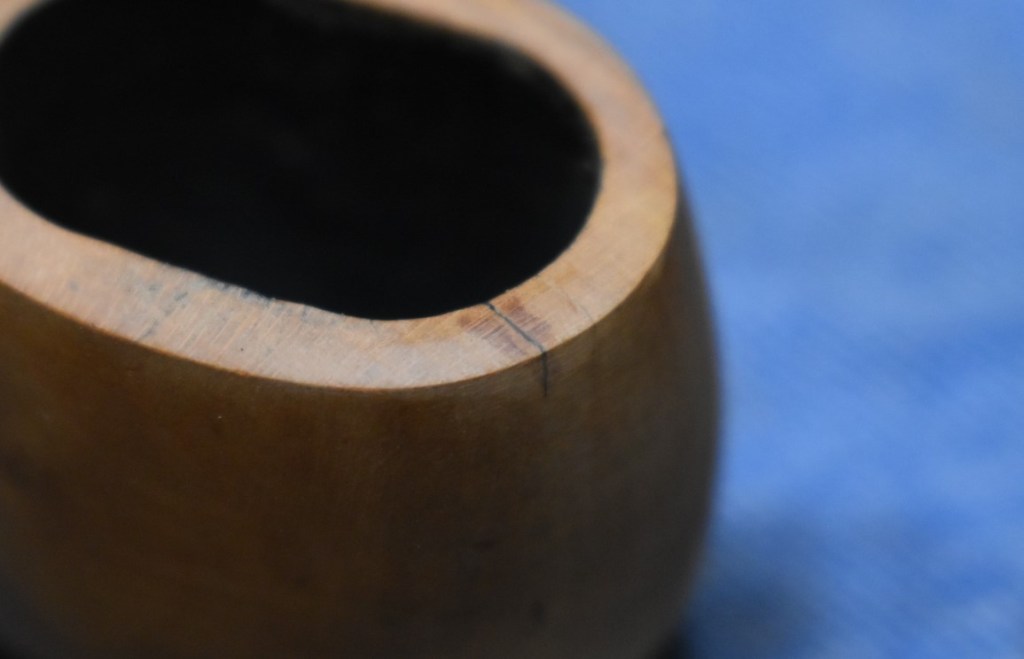
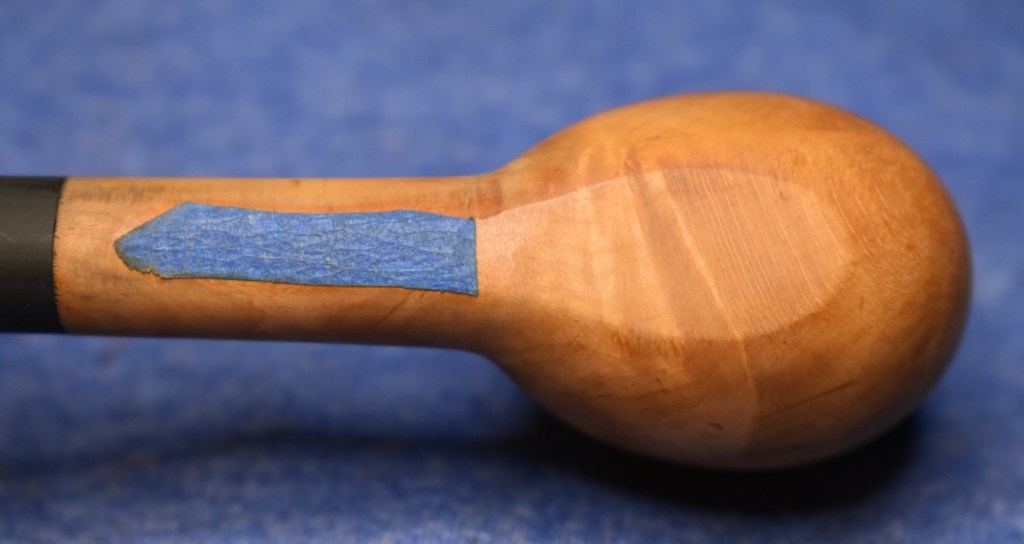

 I repeated the process with the entire series of micro-mesh pads. Between each pad I would apply a drop of Obsidian oil and wipe with a paper towel. I then used Before and After Fine Polish followed by the Extra-Fine Polish. The following photos are after the micro-meshing and polishing:
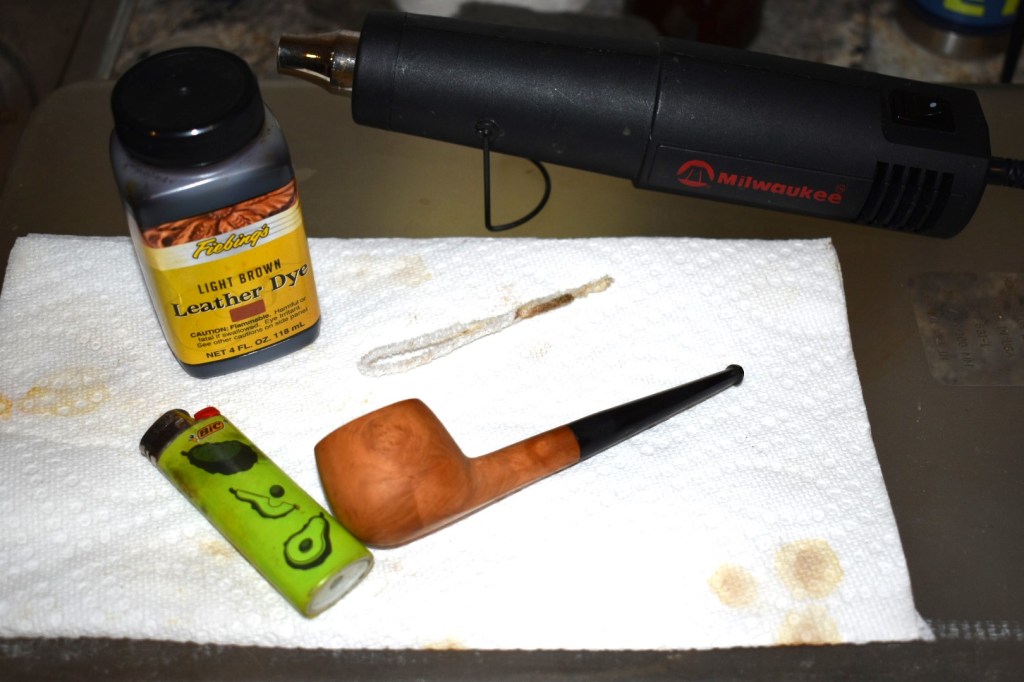

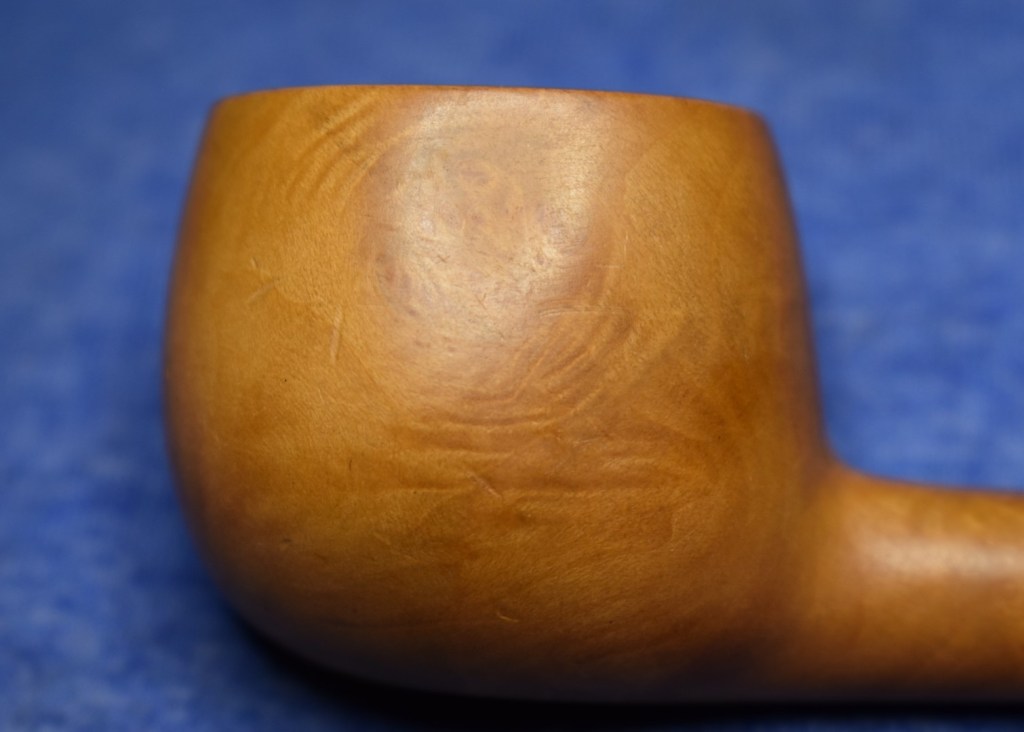


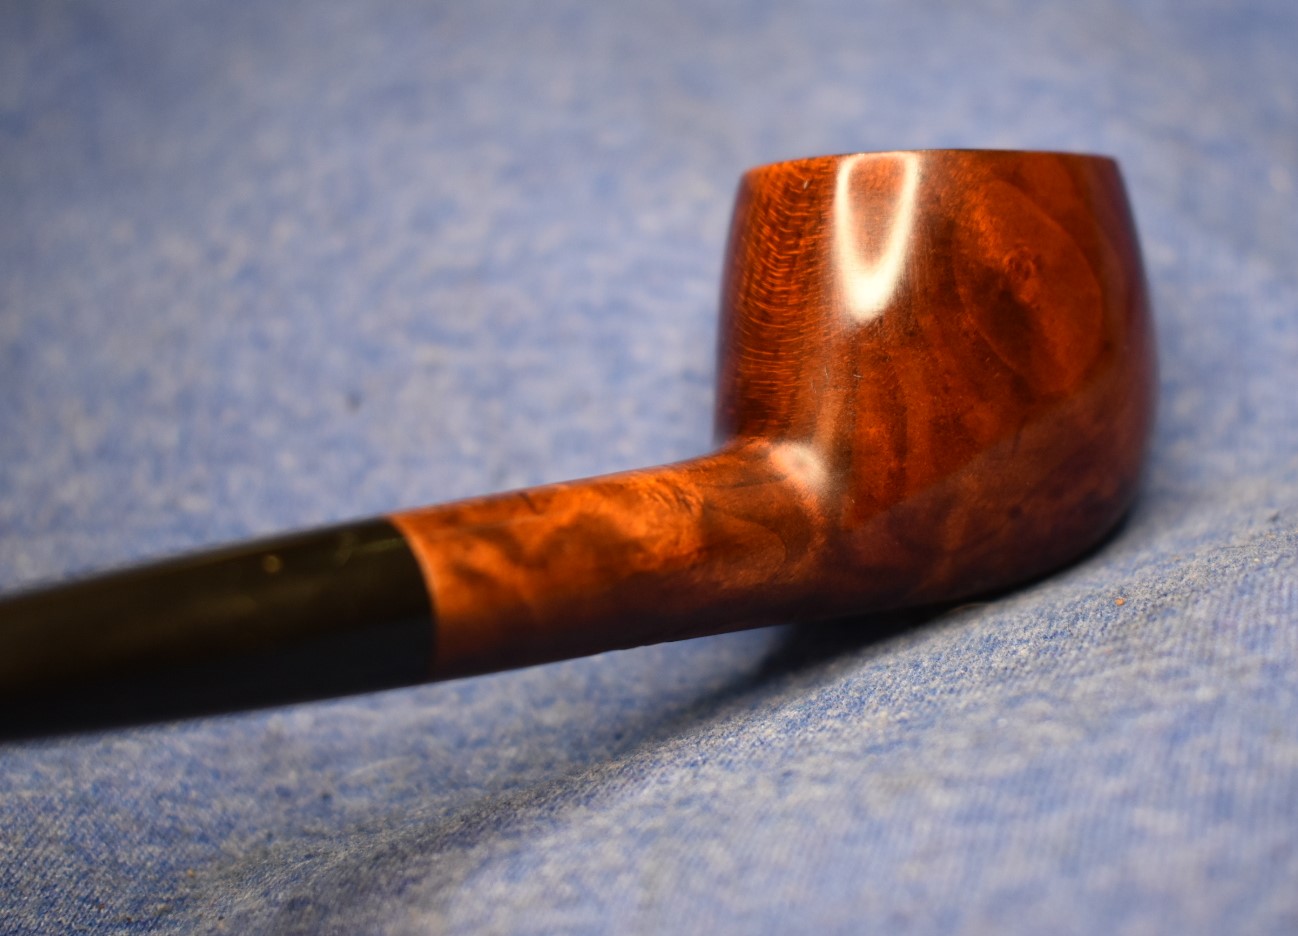

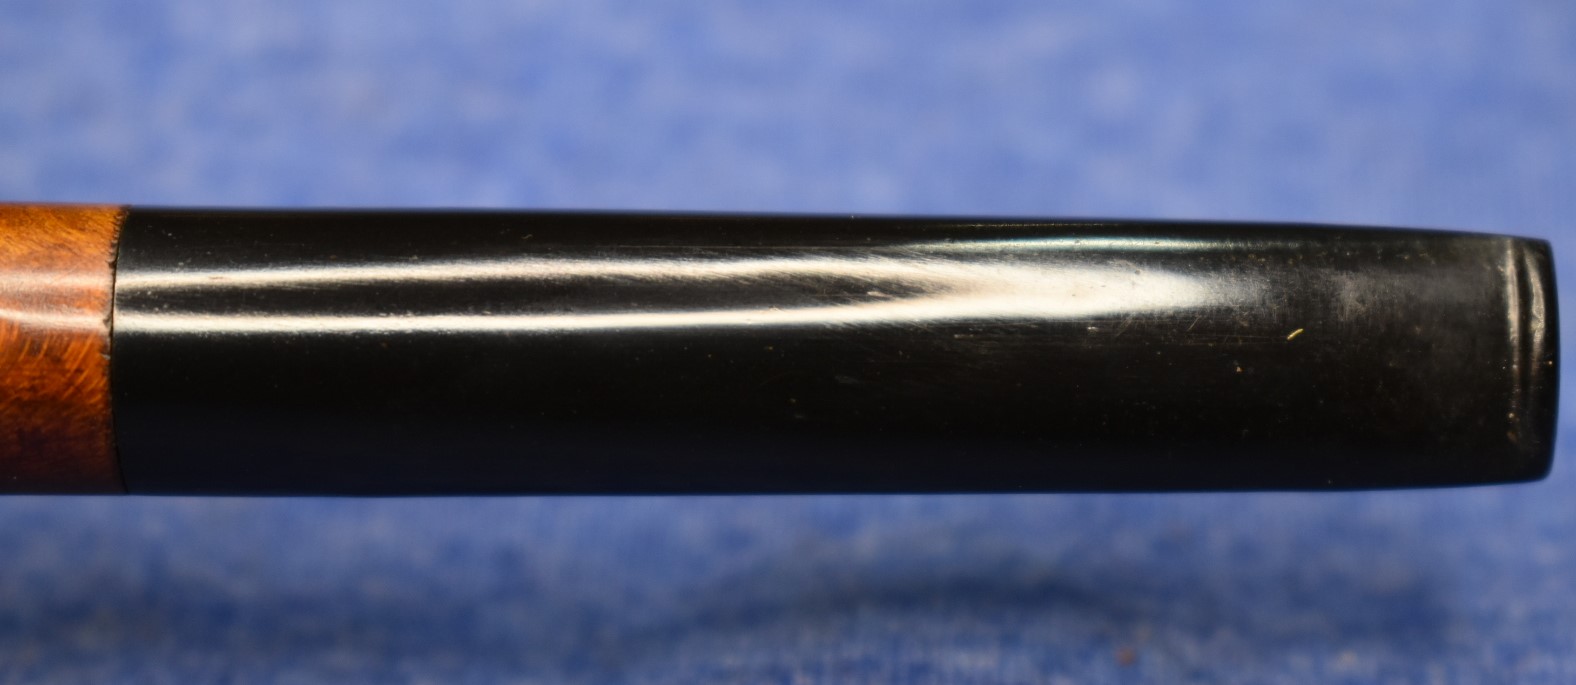
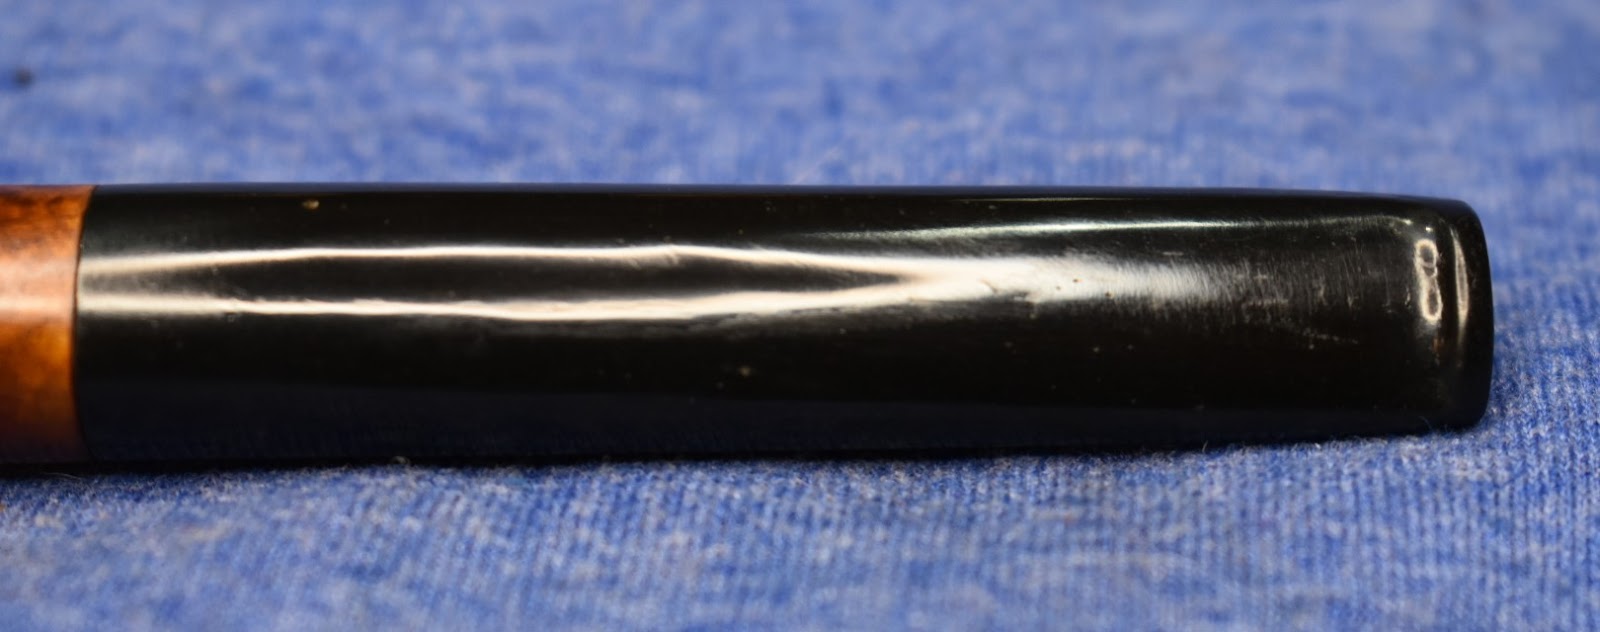

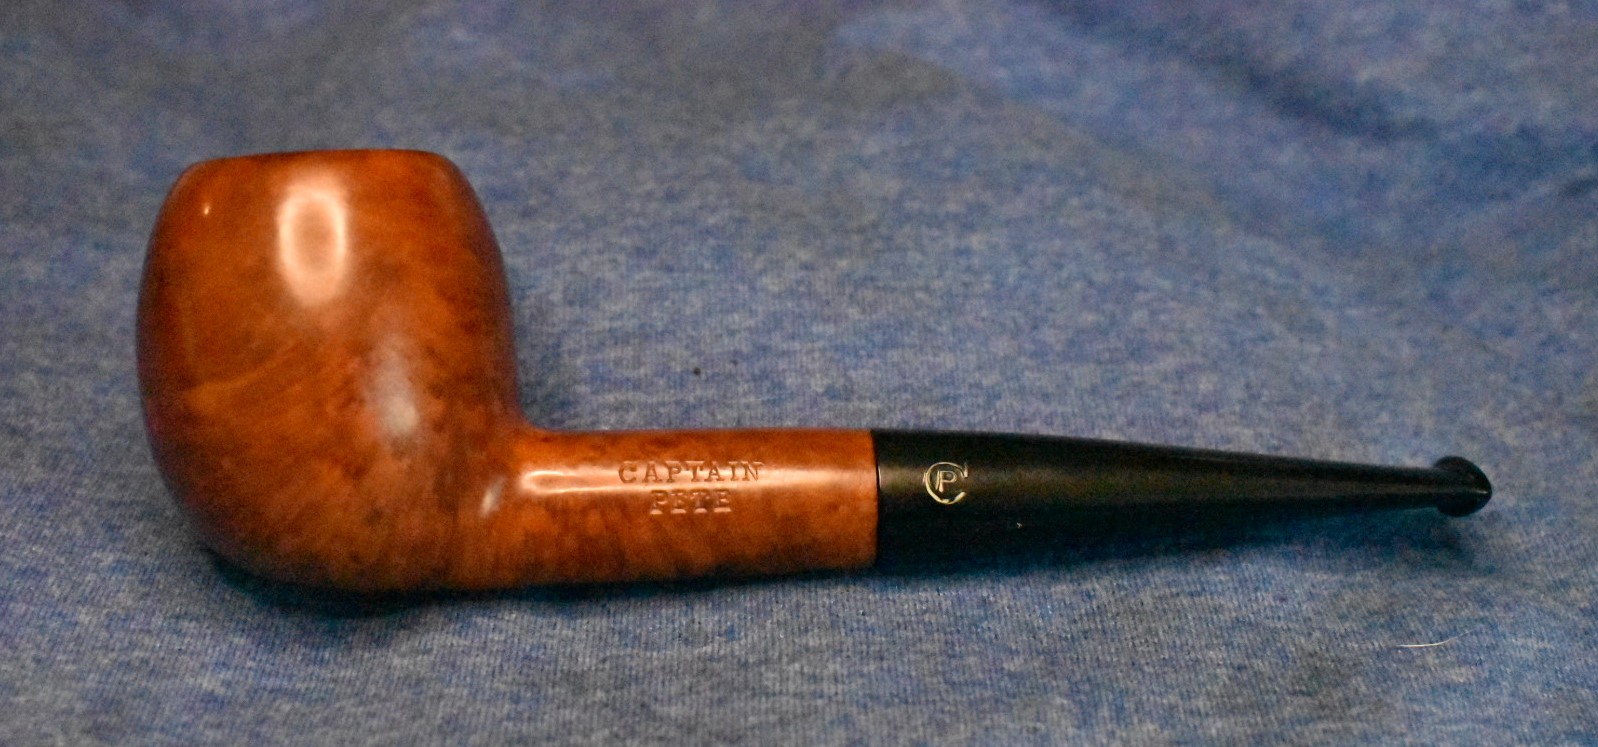
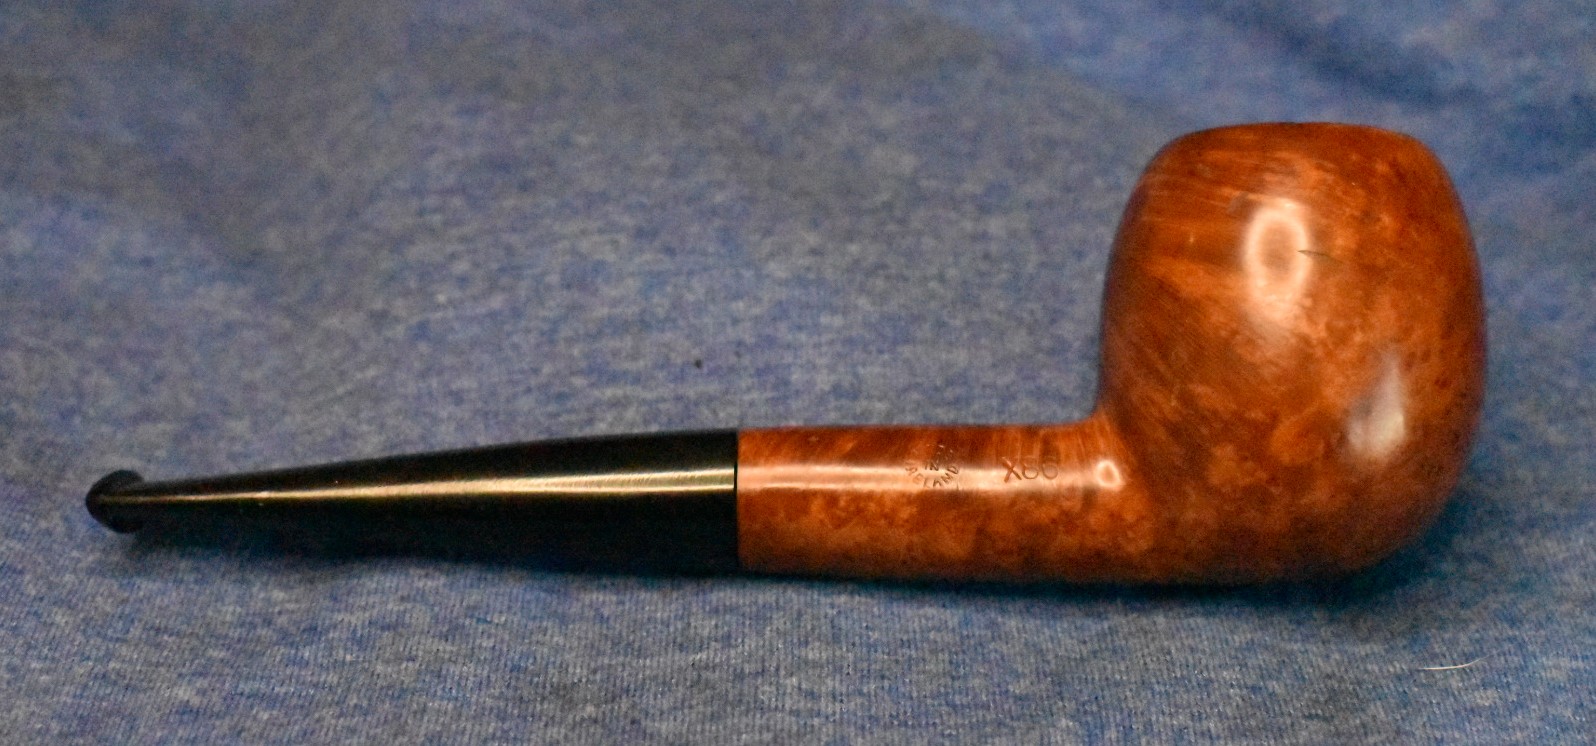


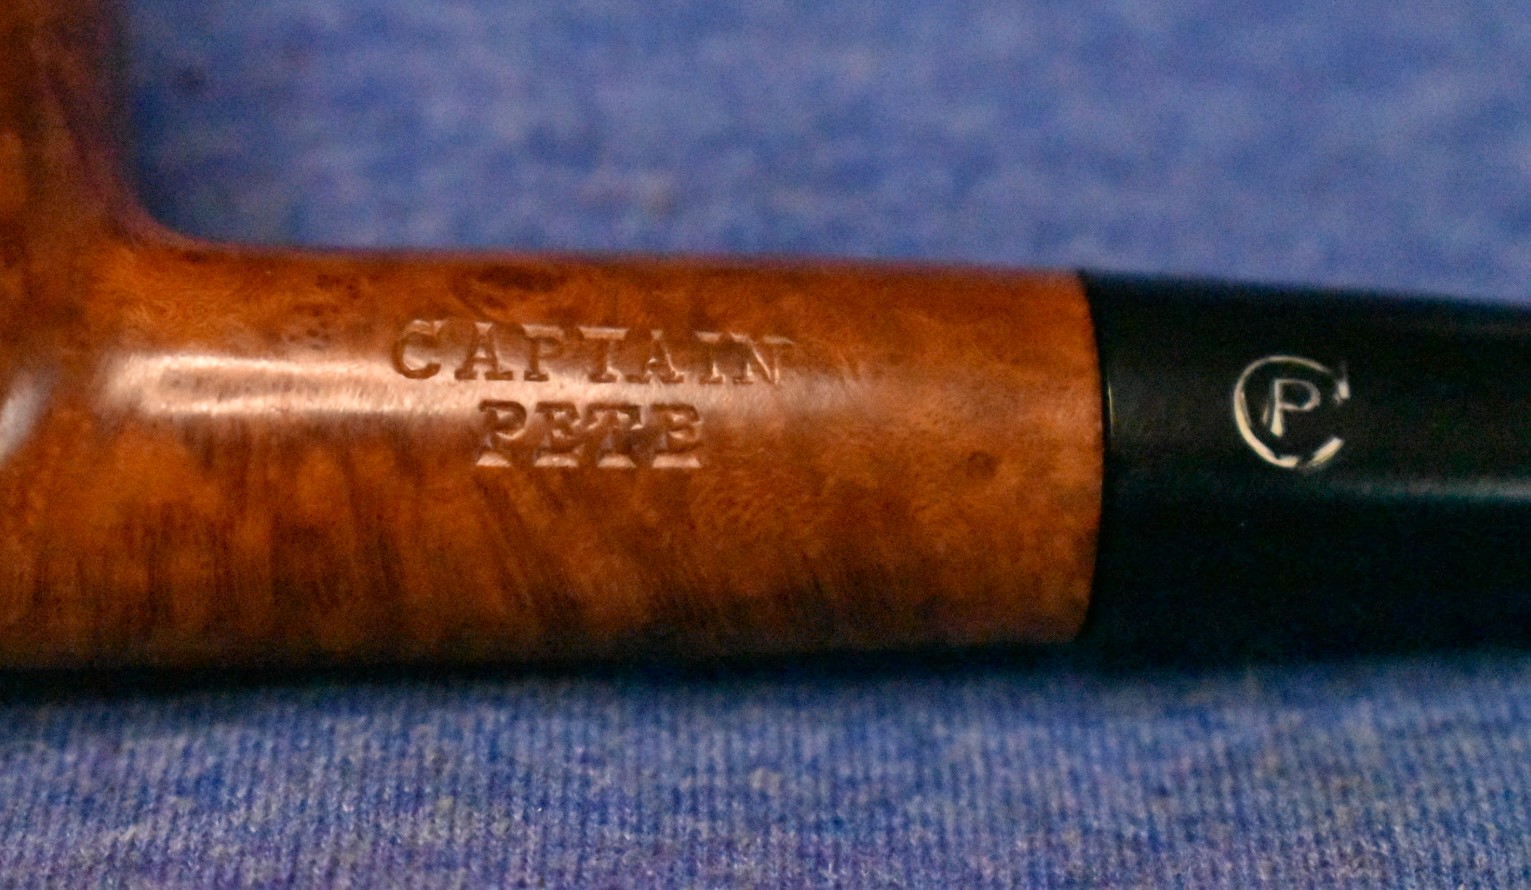
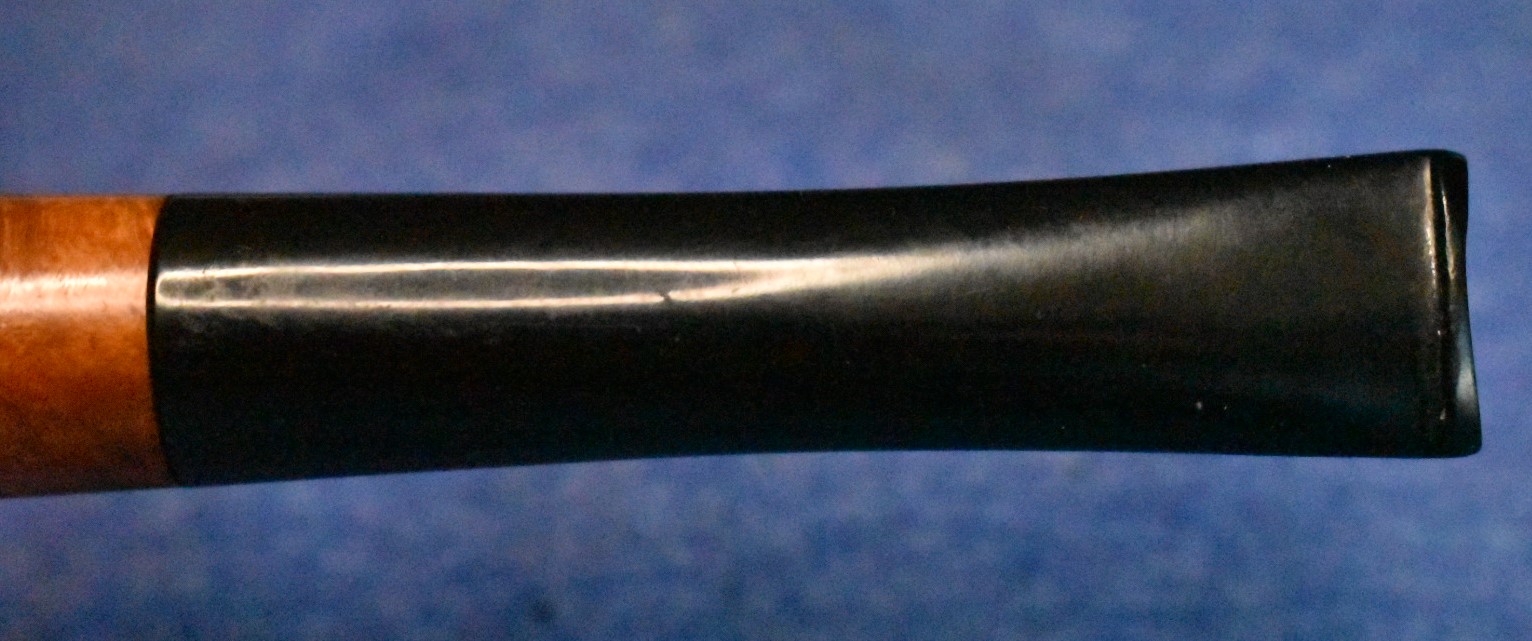


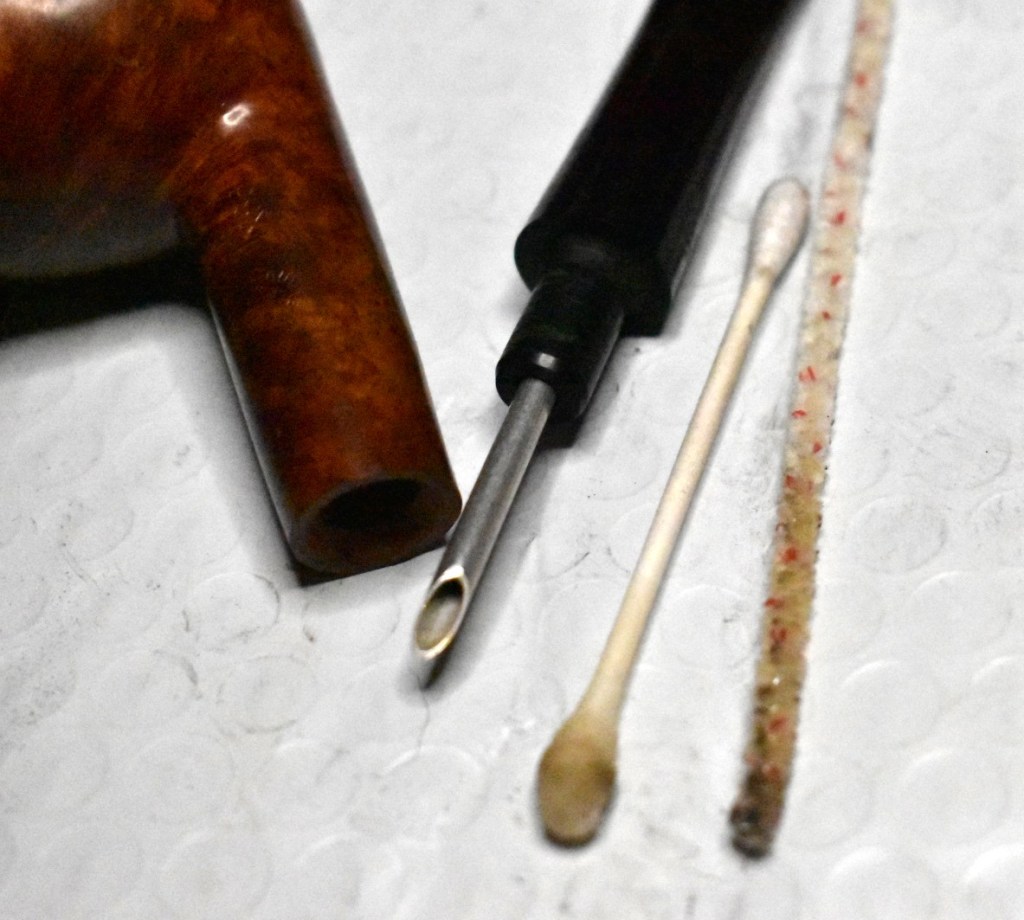
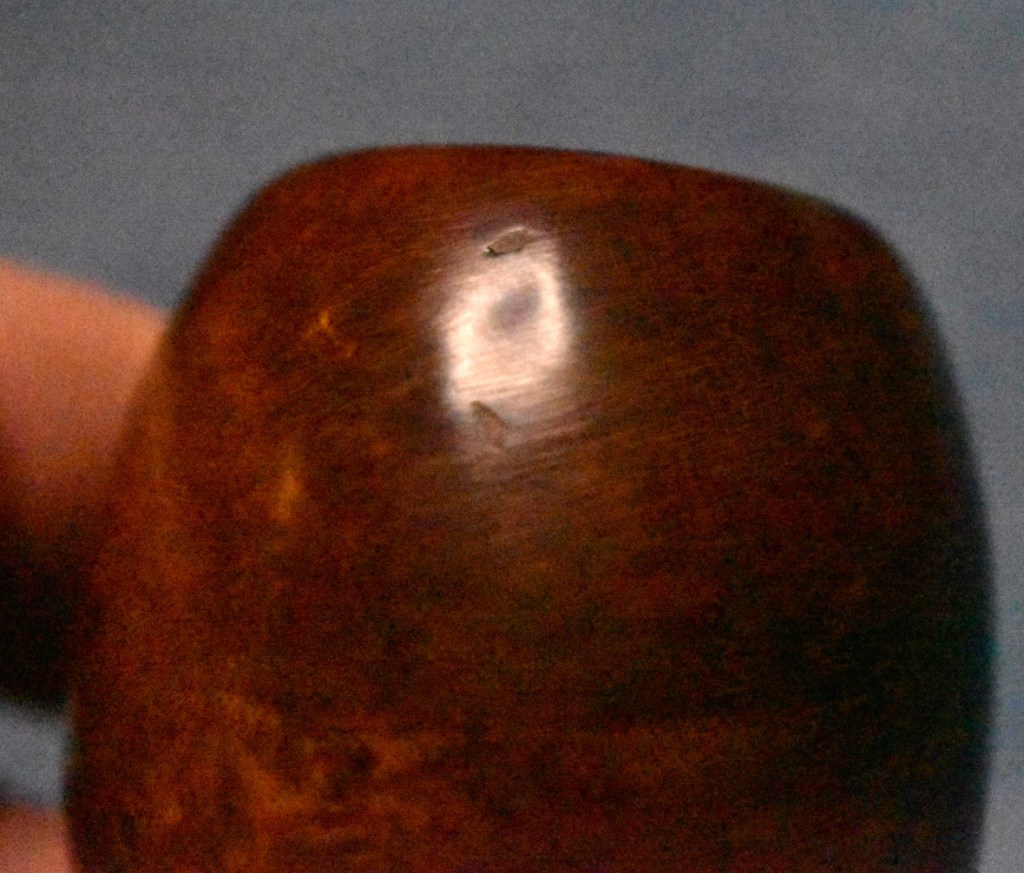
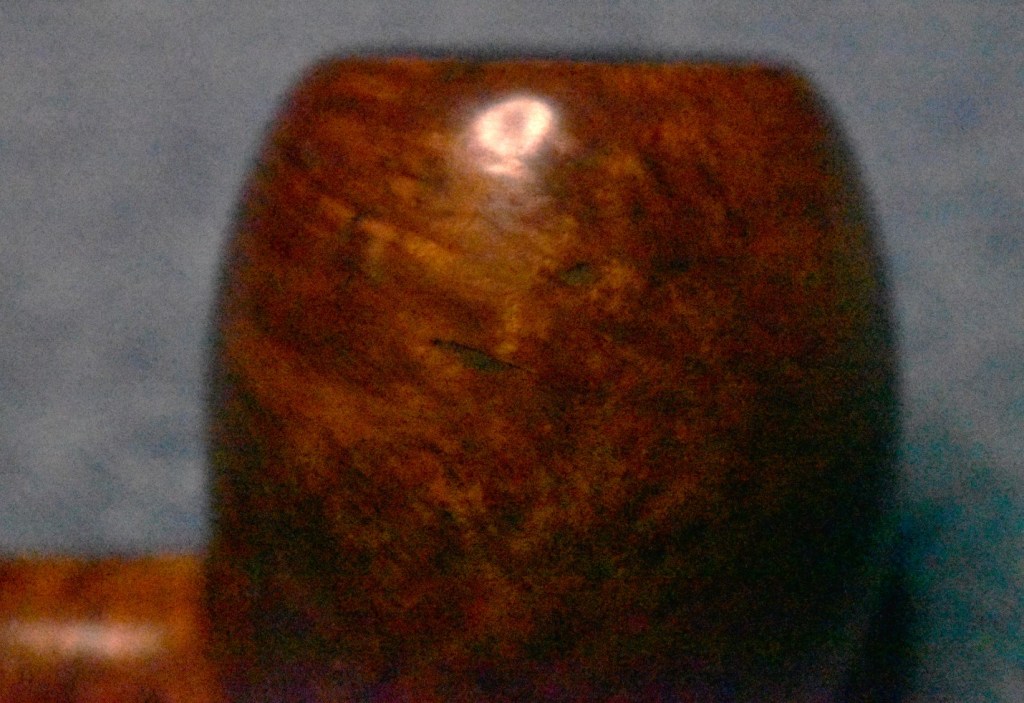


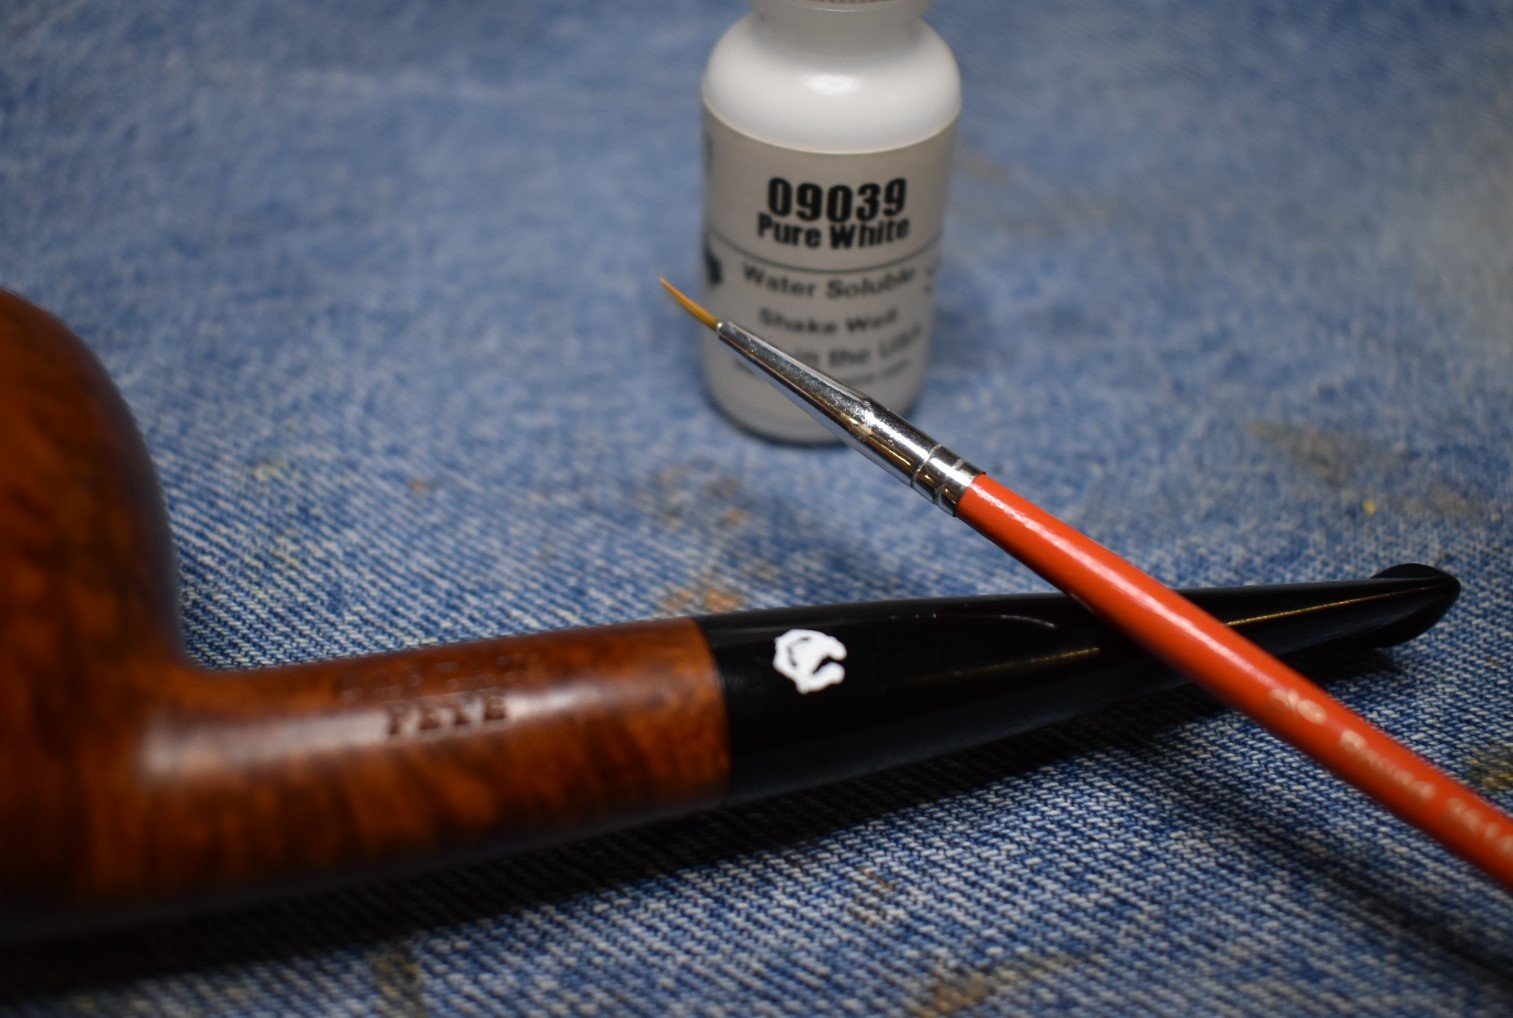
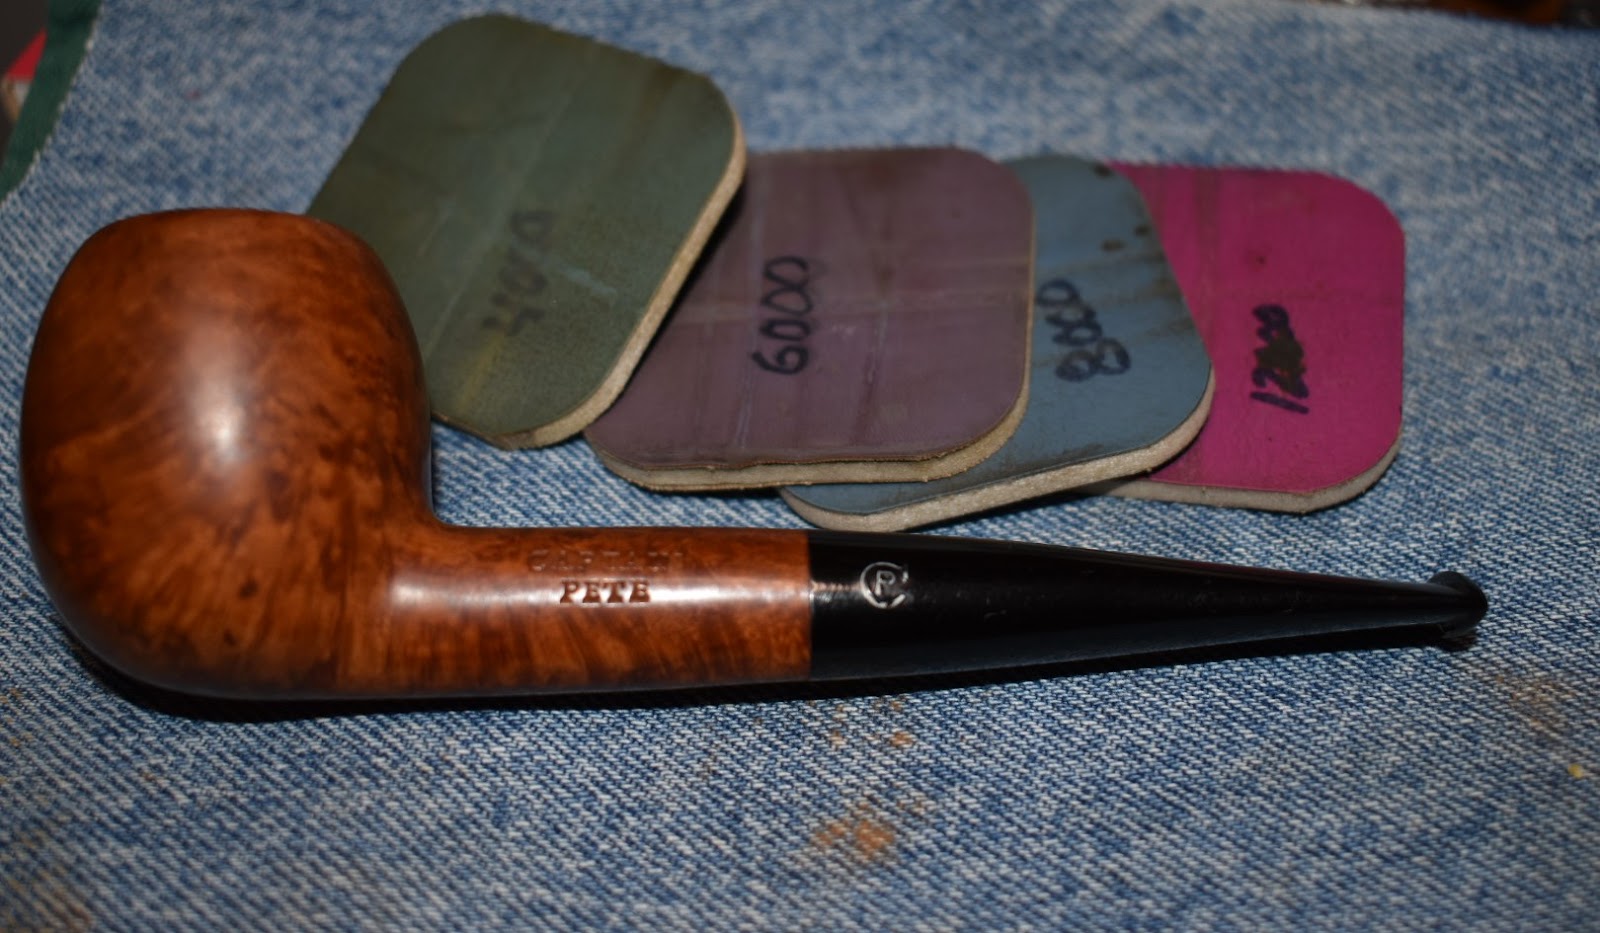


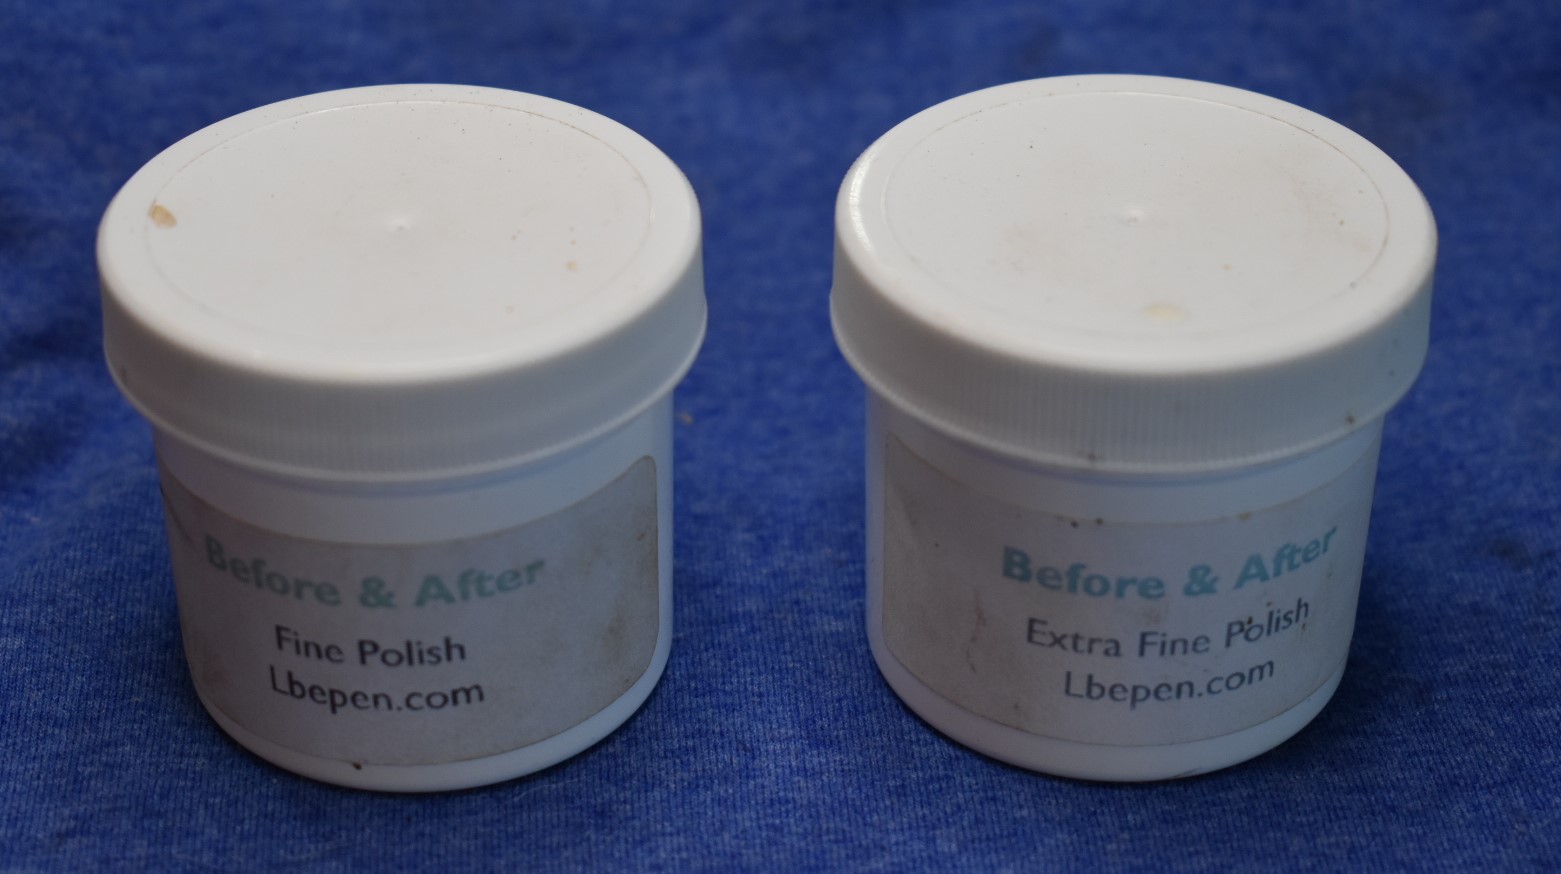
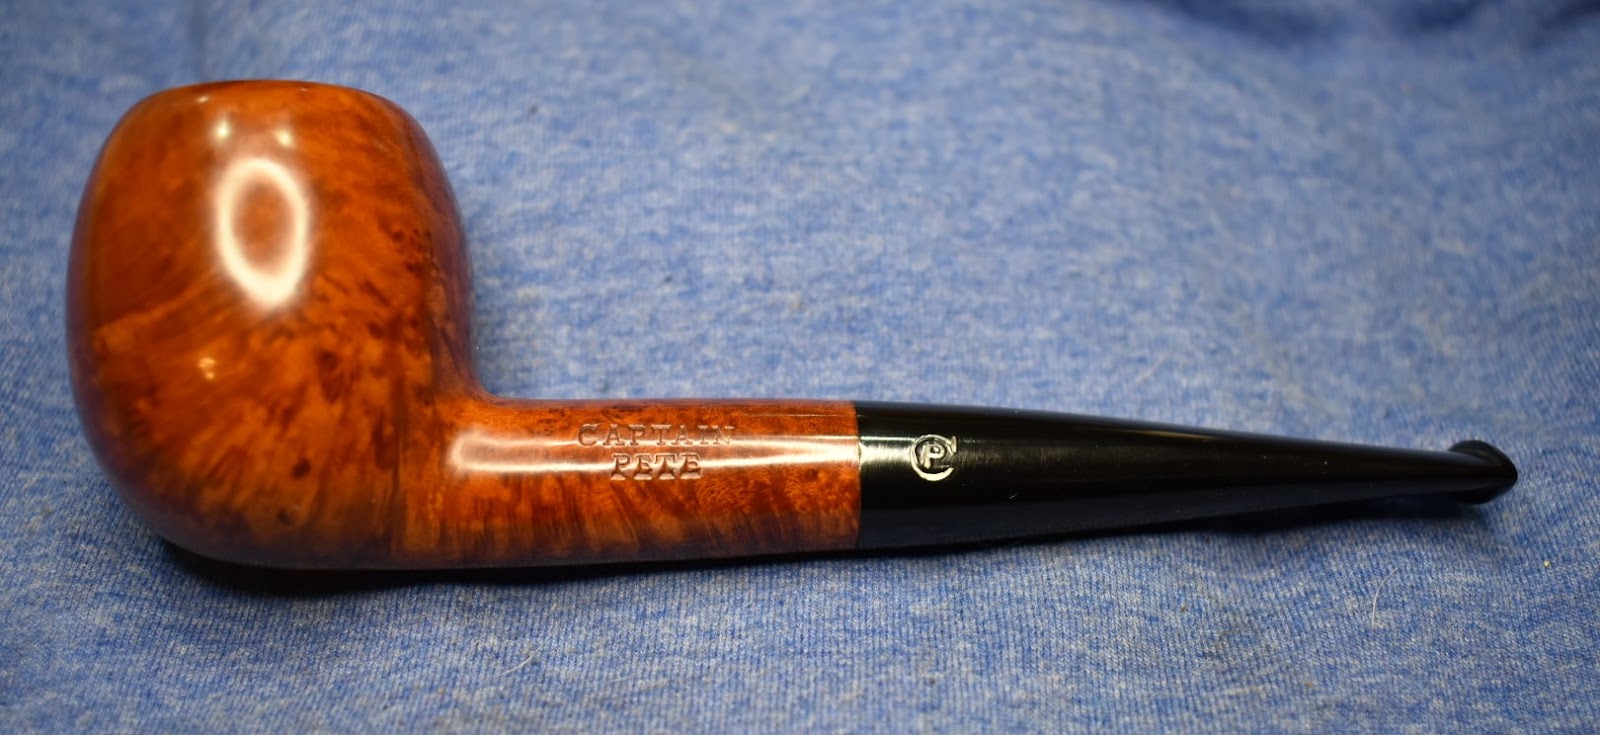


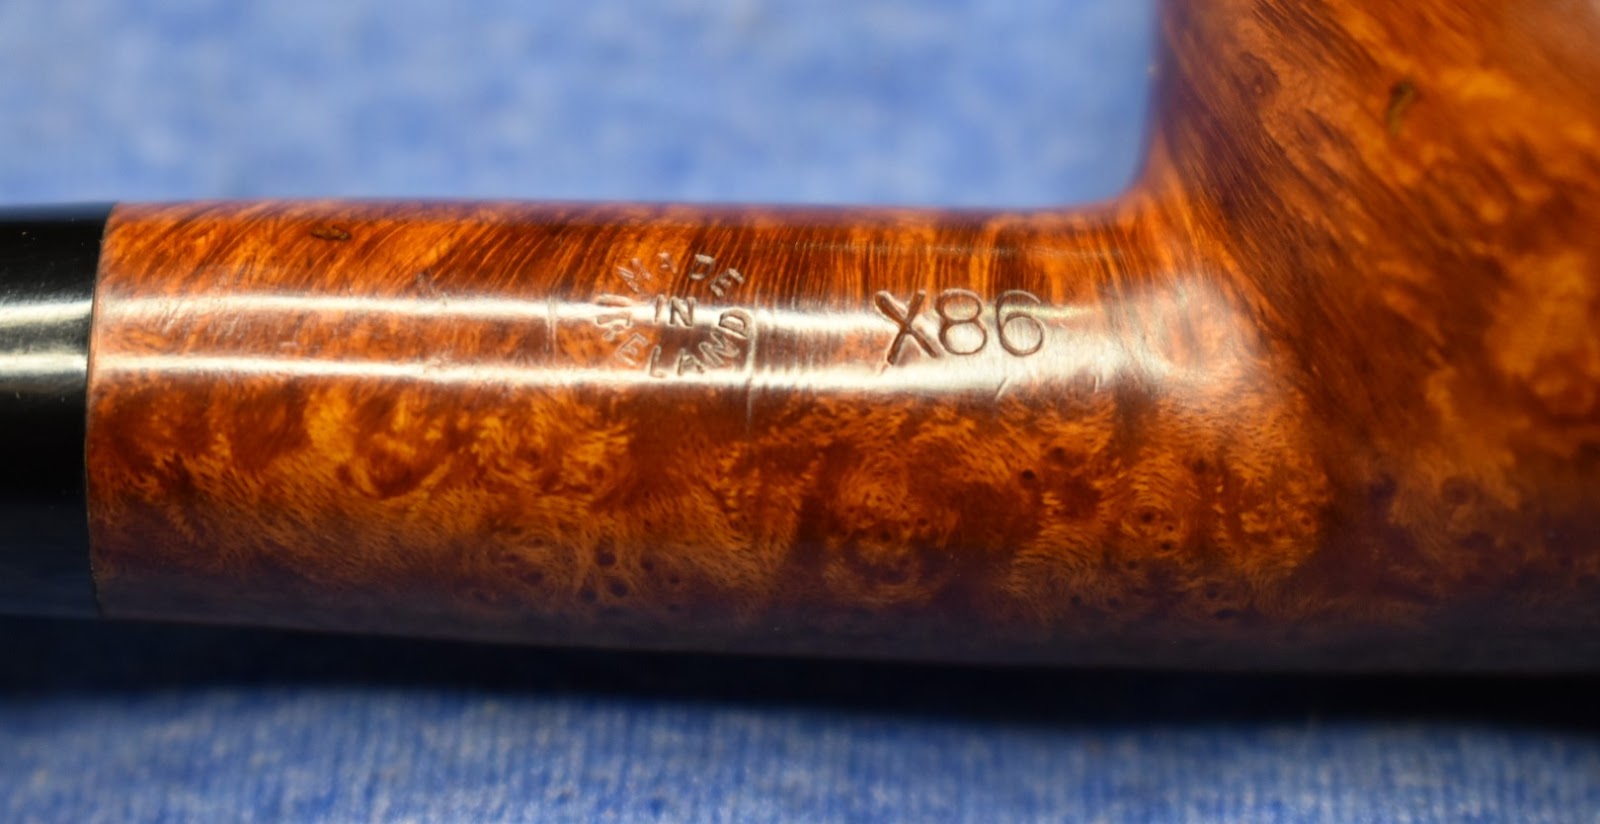


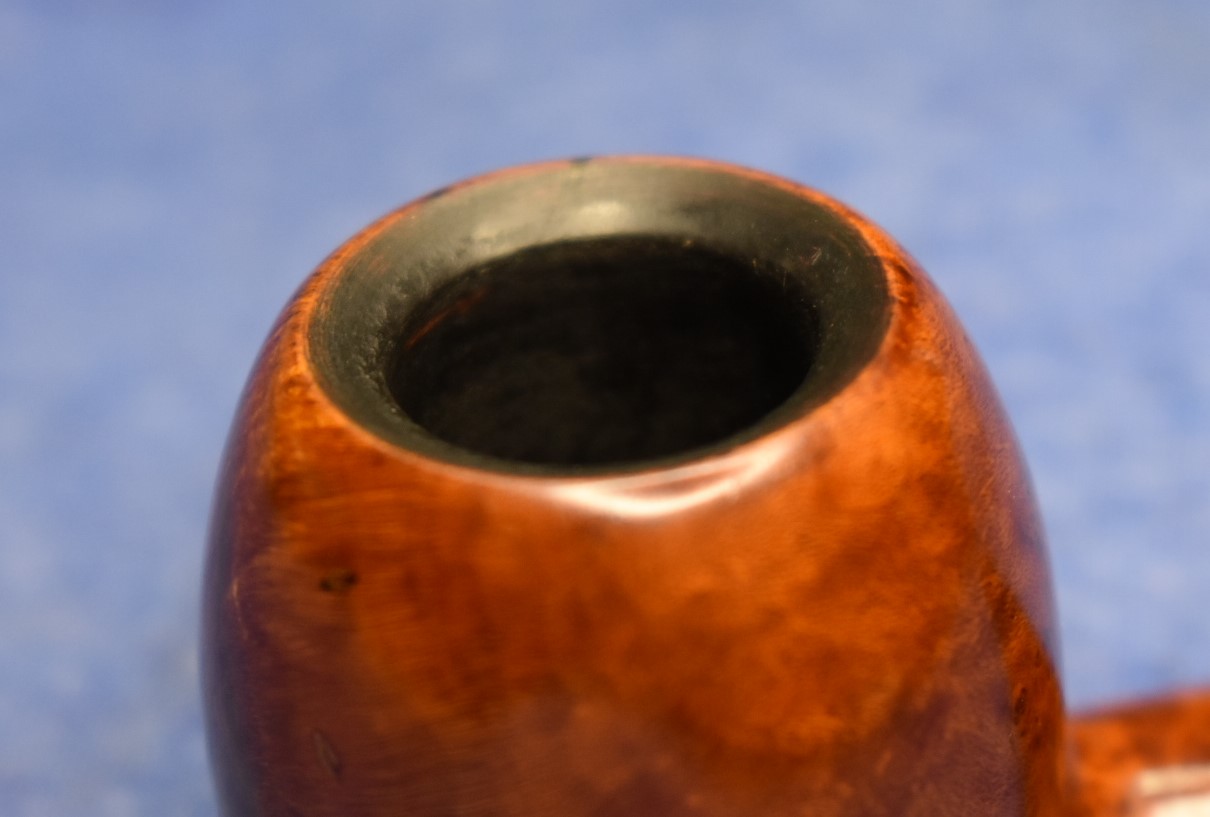


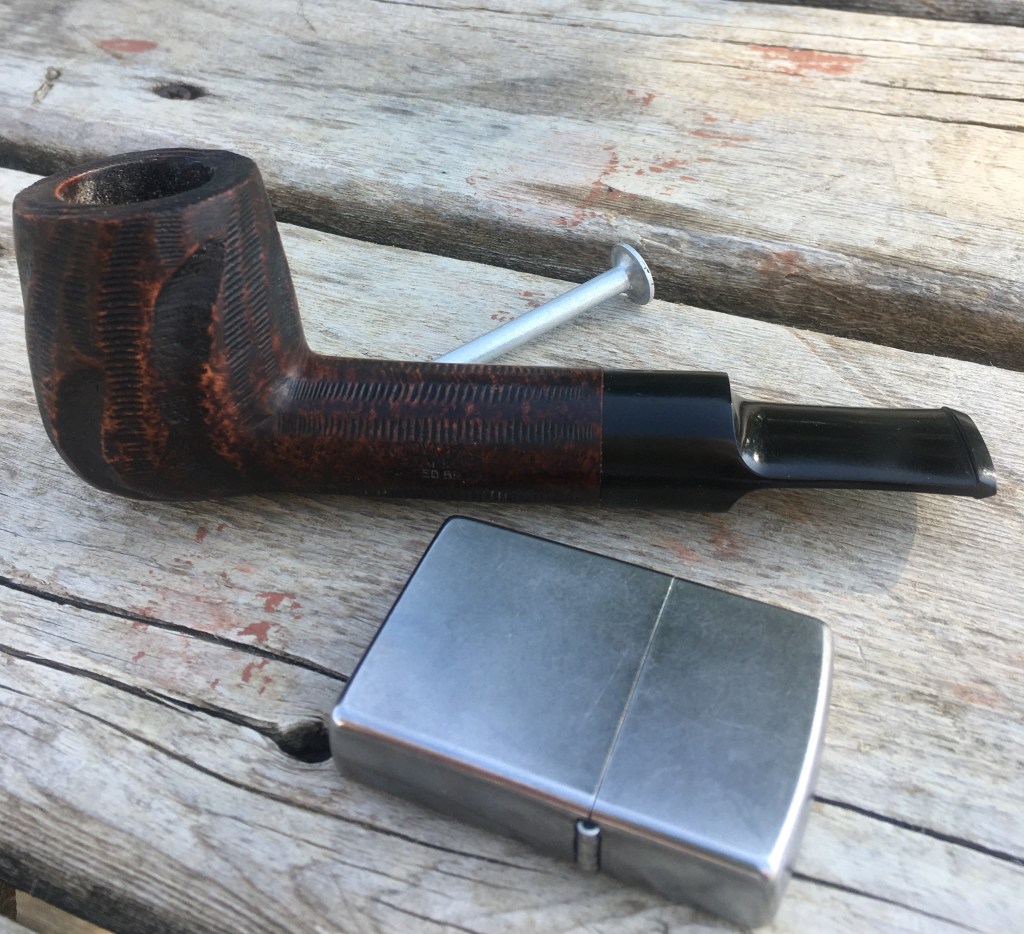

 (photo by J.M. Young)


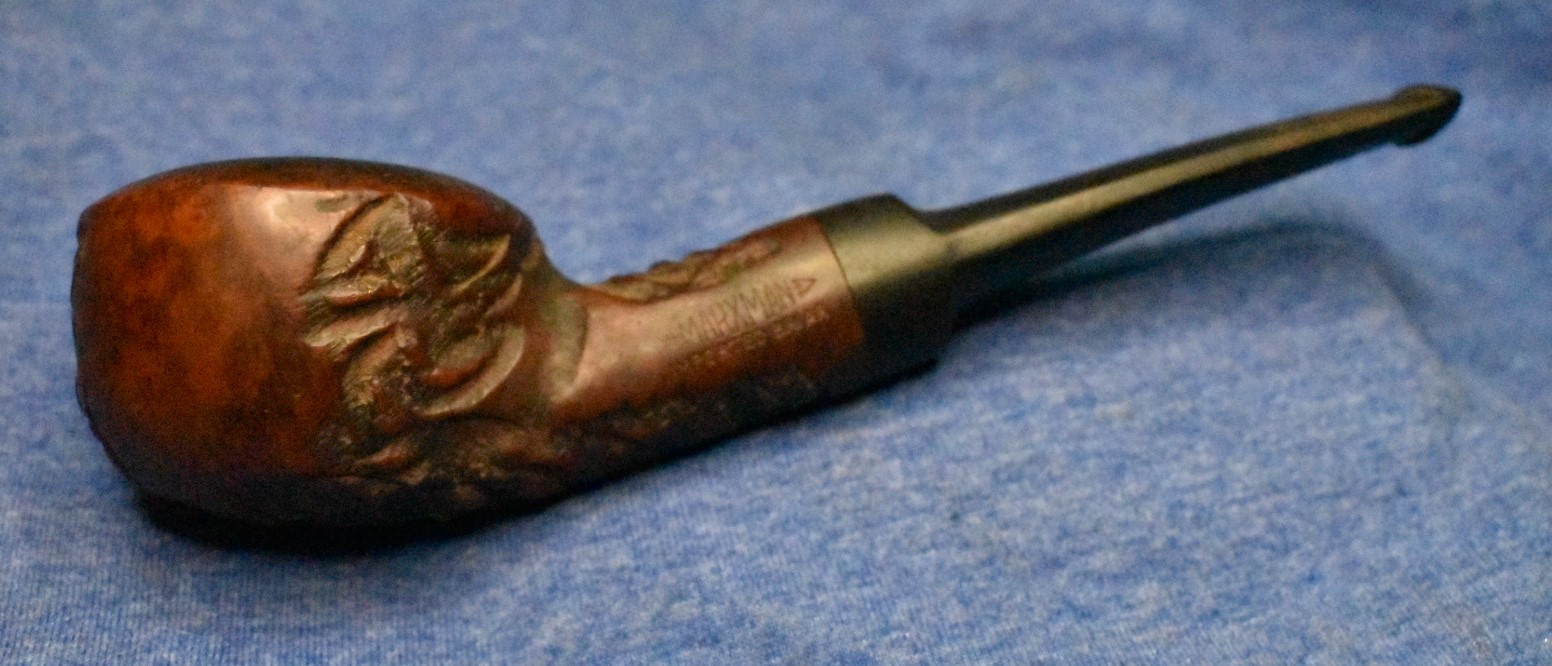

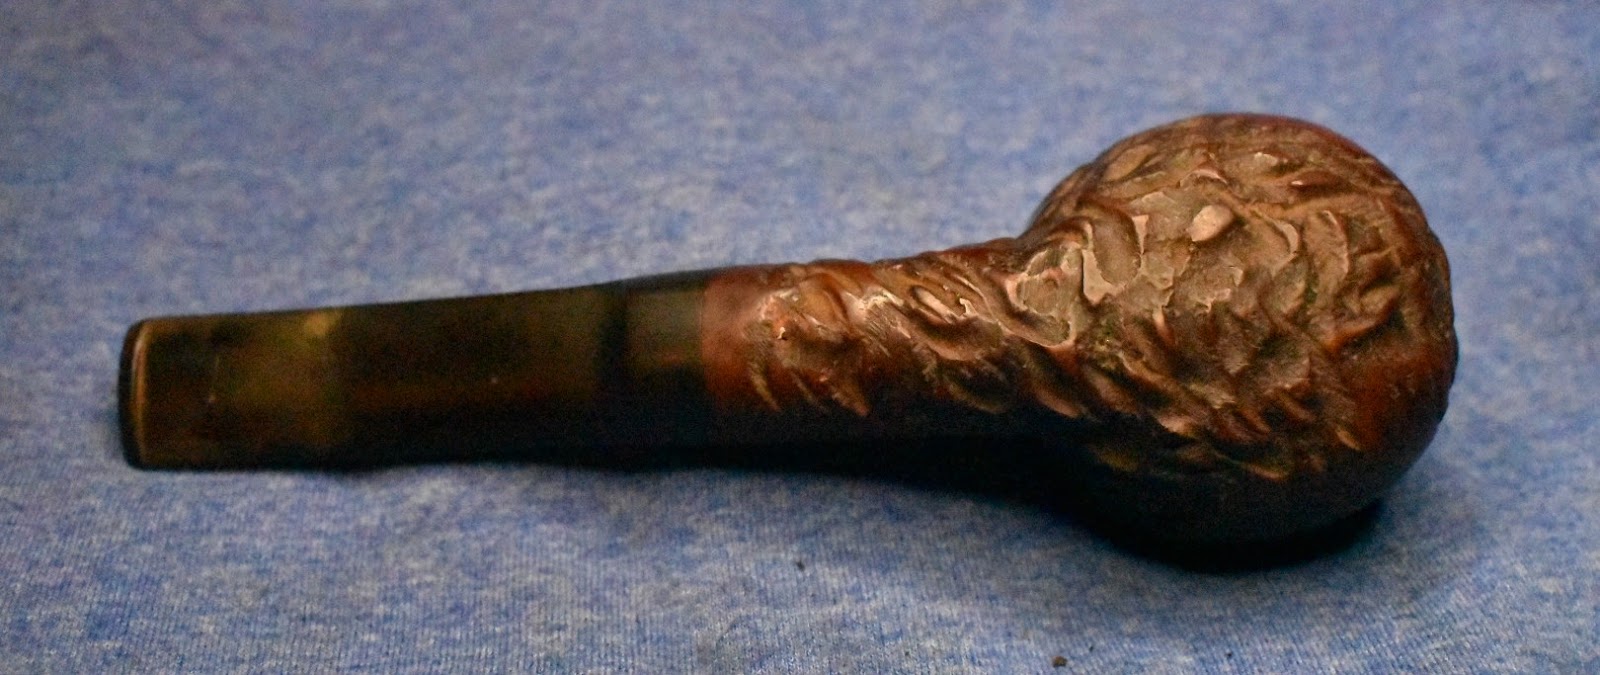

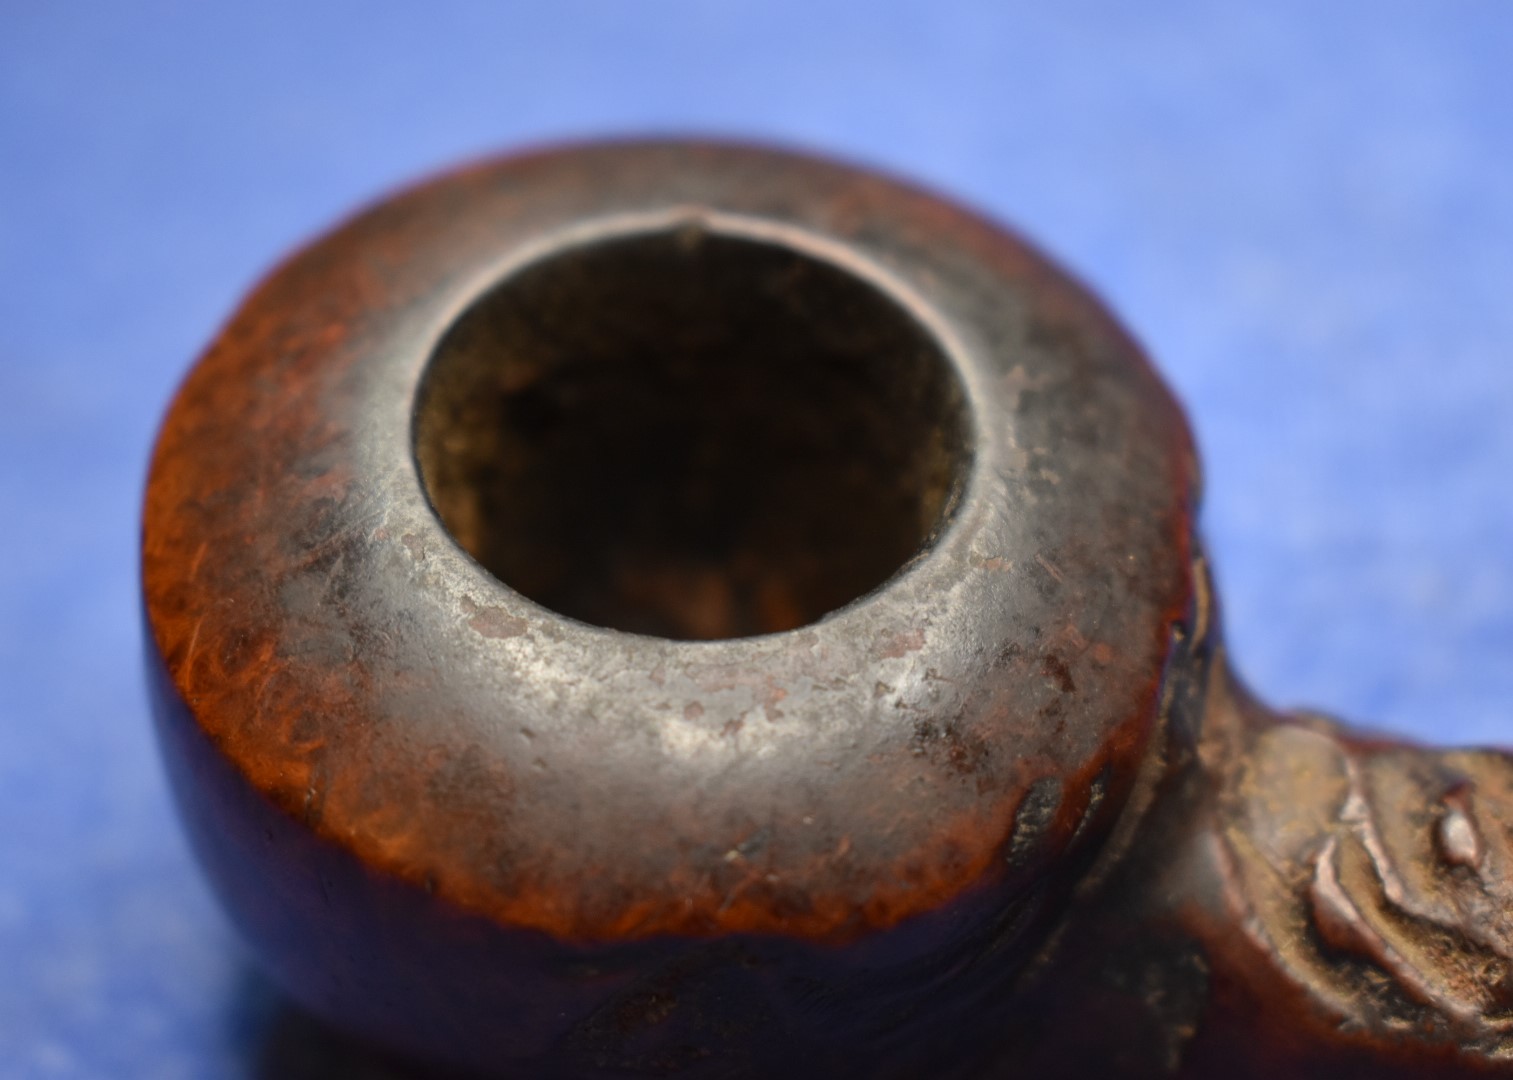
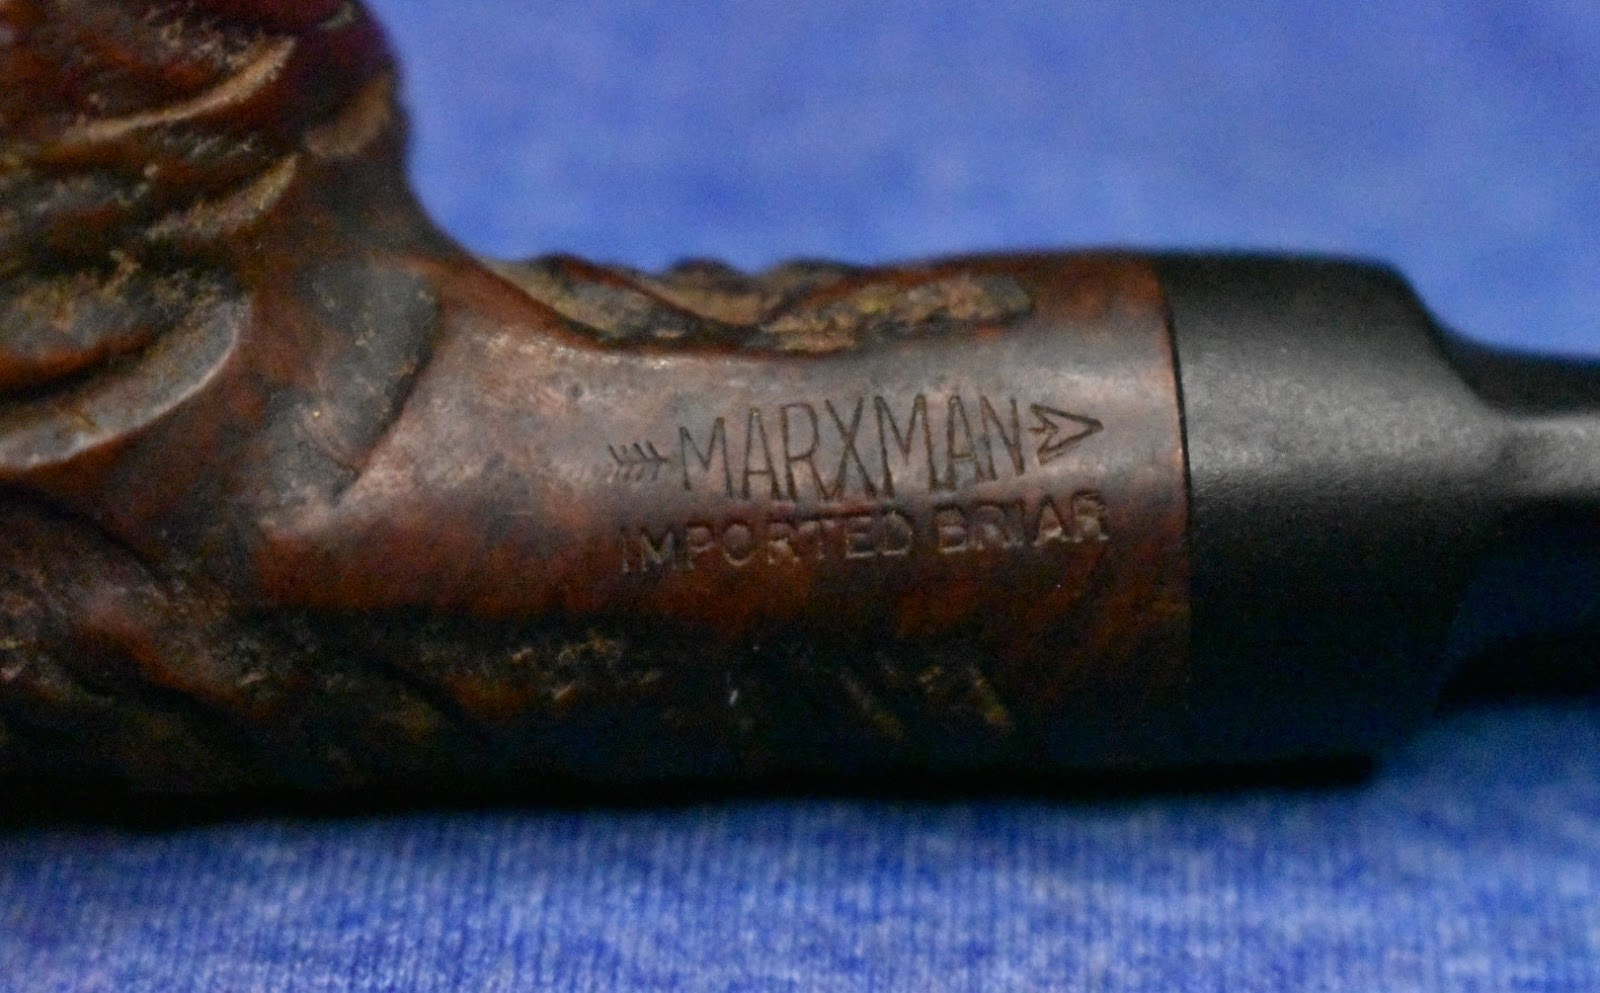
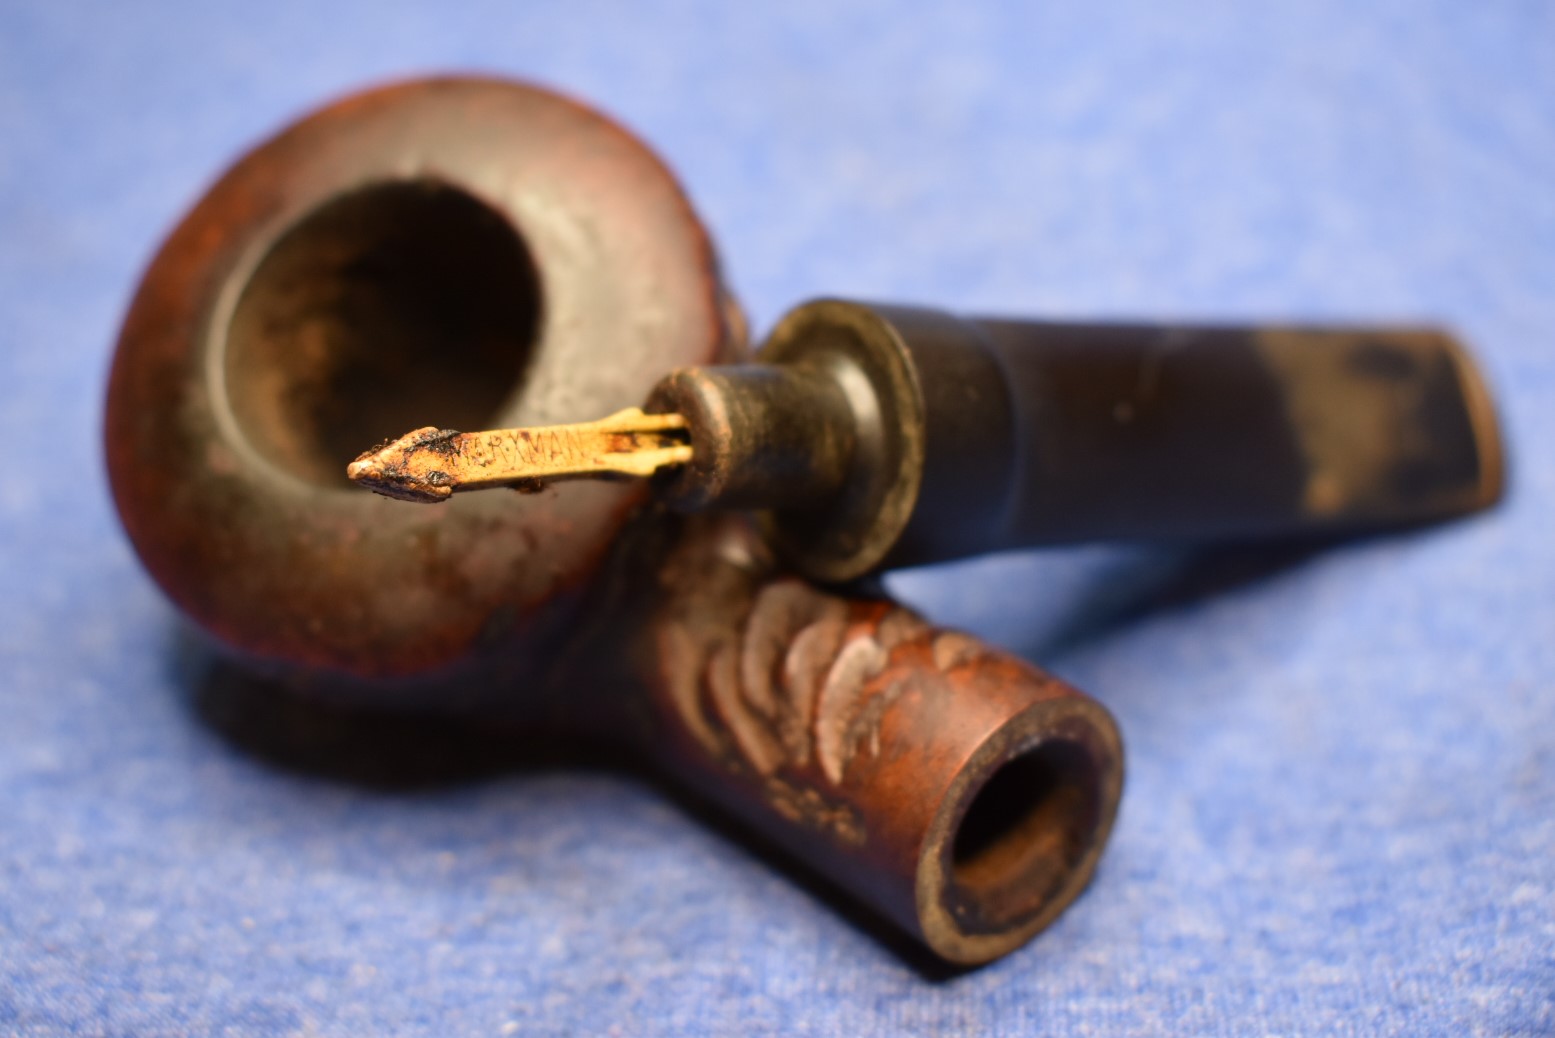


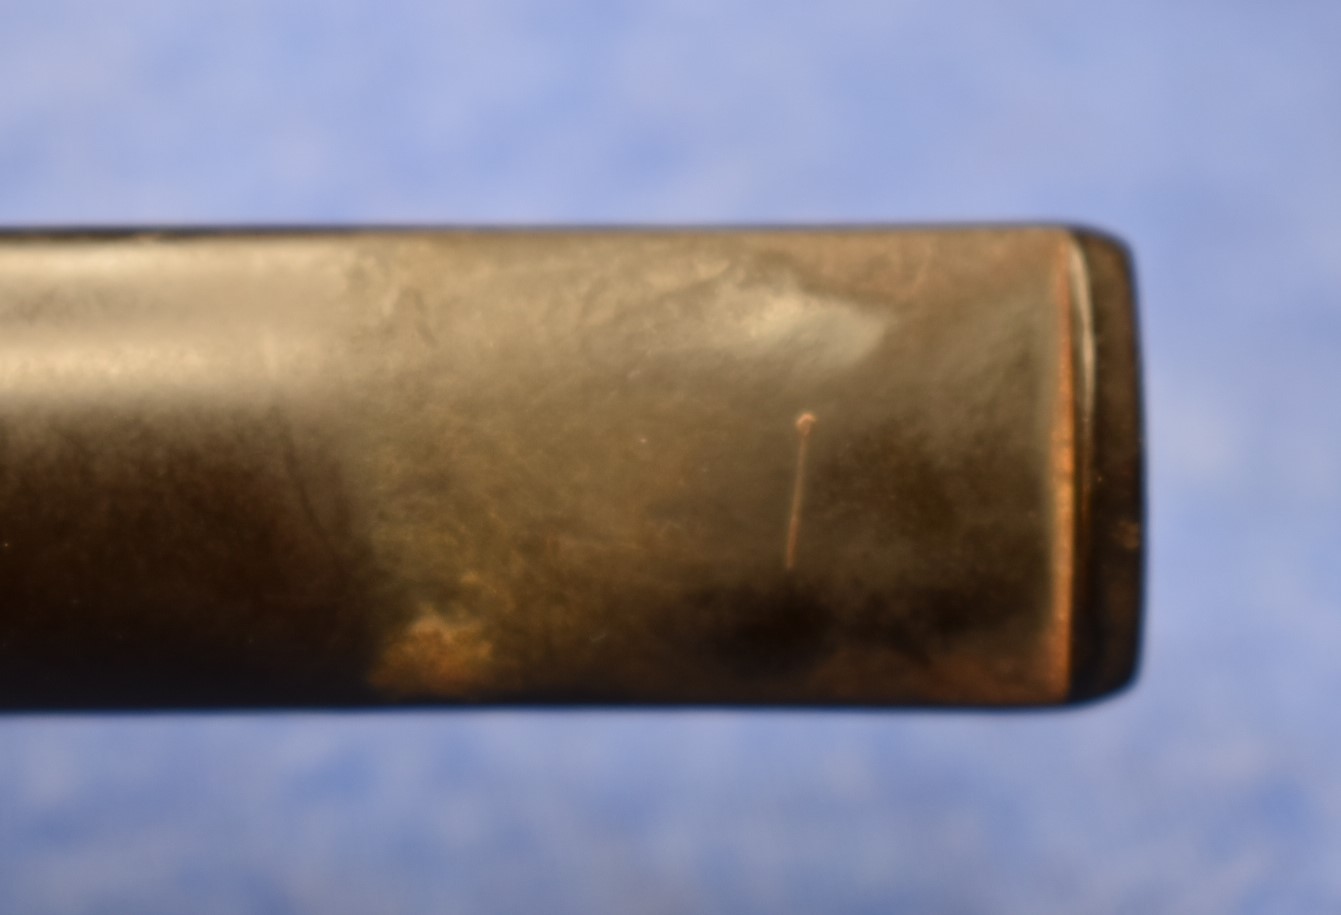


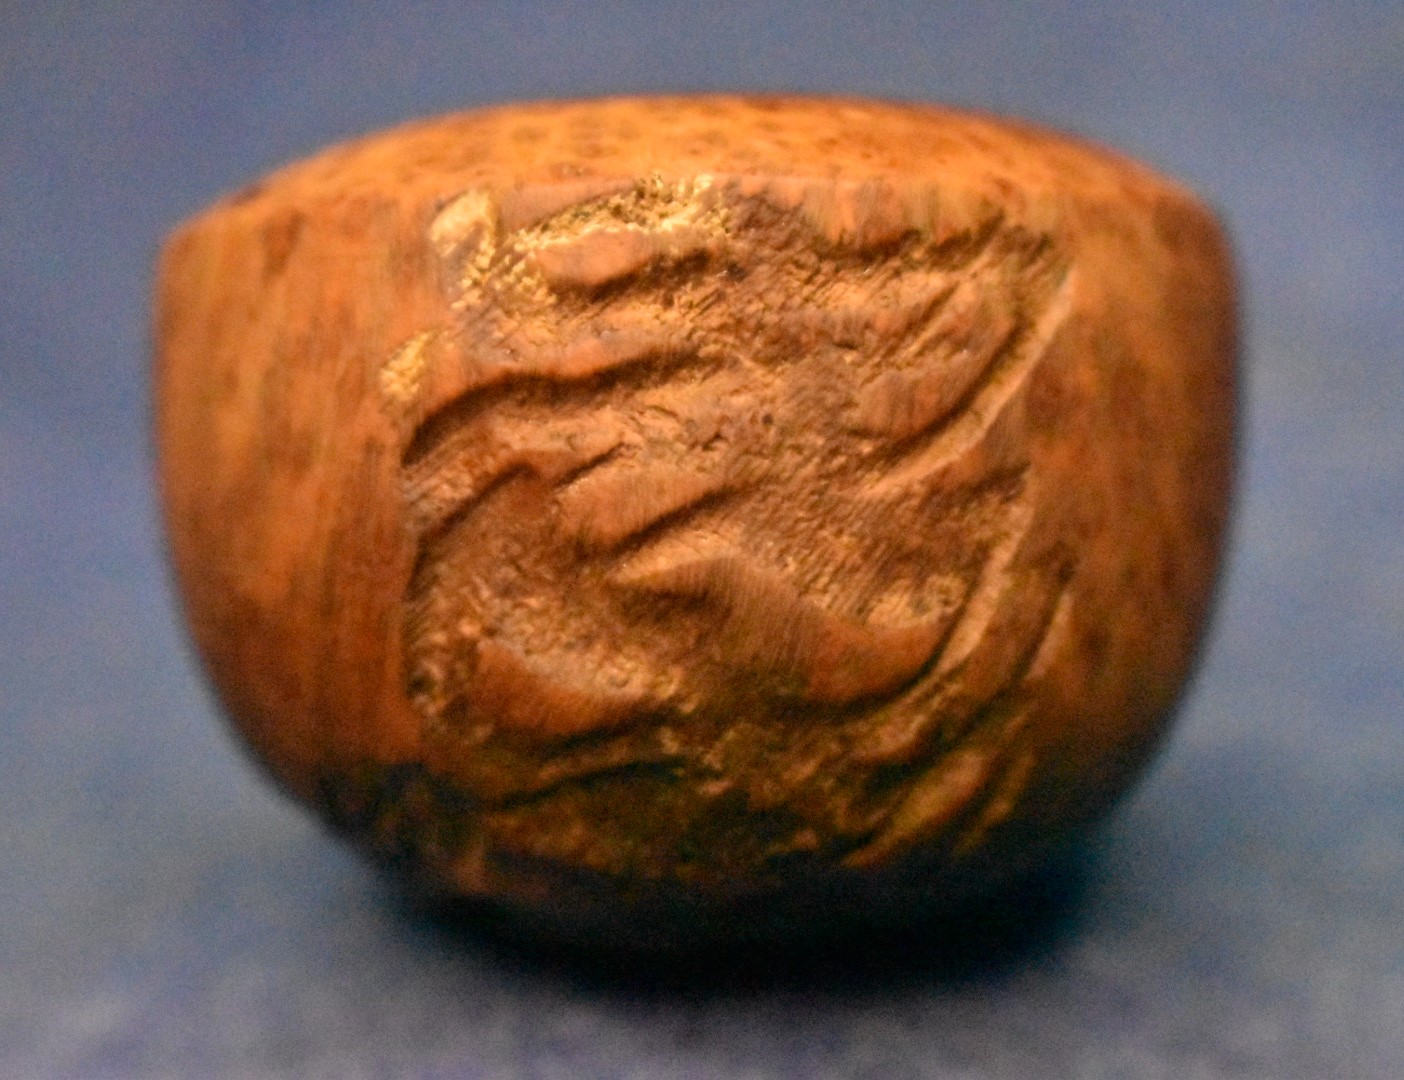


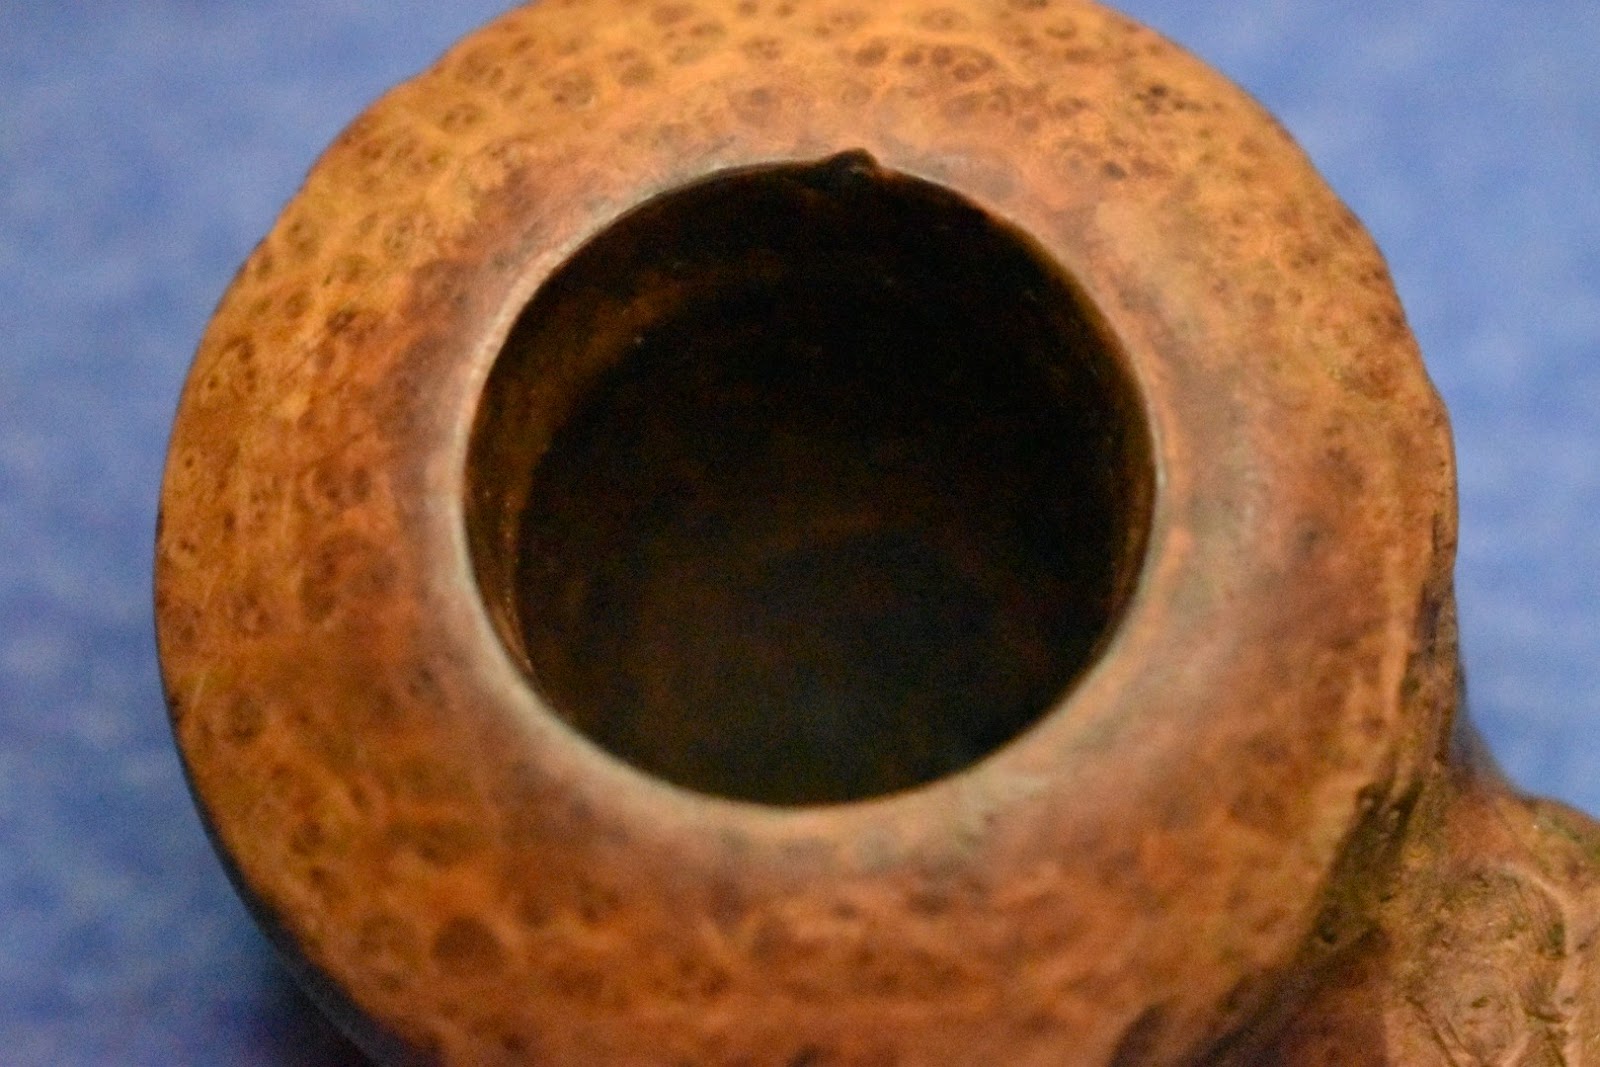


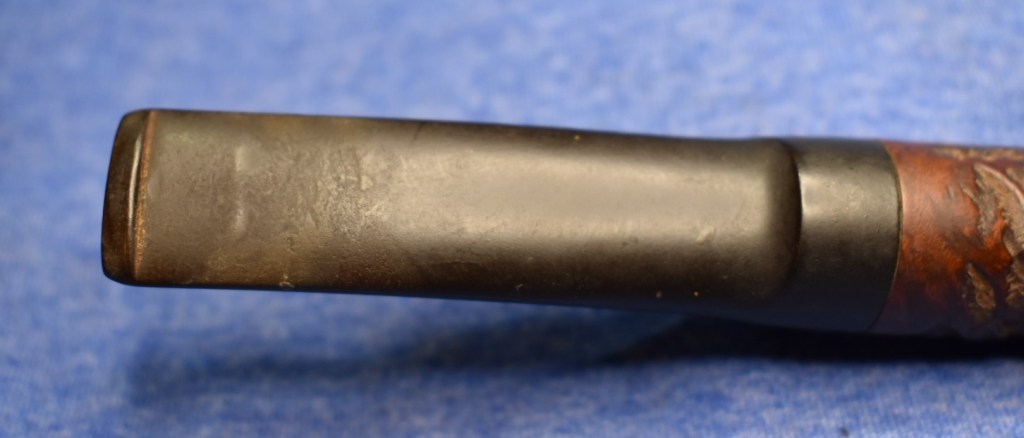

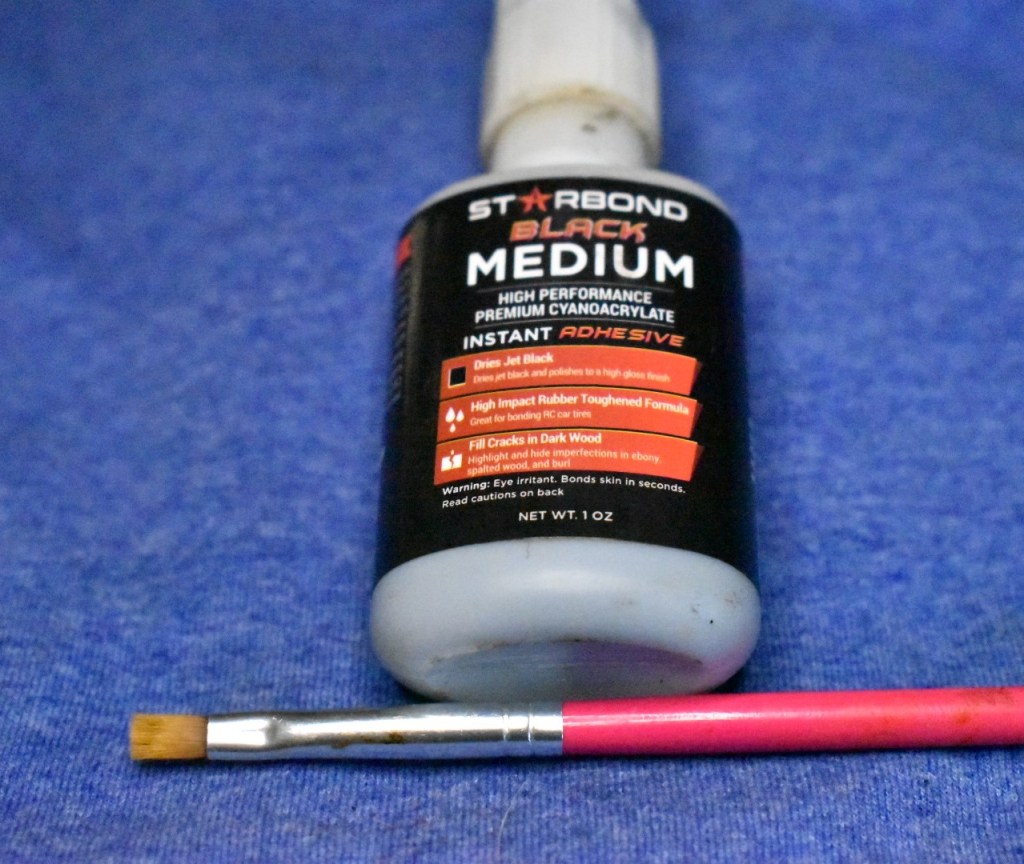


 I took the pipe to the buffer for the application of several coats of carnauba wax. Once finished I gave the pipe a final buffing with a microfiber cloth. I took the pipe upstairs for some photographs. I had some sunlight to work with and wondered if I would like the lighting with the low angle nearly winter sun. With the bright light I could see oxidation on the stem below the button. I did not like this and returned the pipe to the workbench and the 400 sandpaper. After the sanding the same micro-meshing procedure was repeated for the upper end of the stem. That made it look much better in both normal and brightly lit settings.


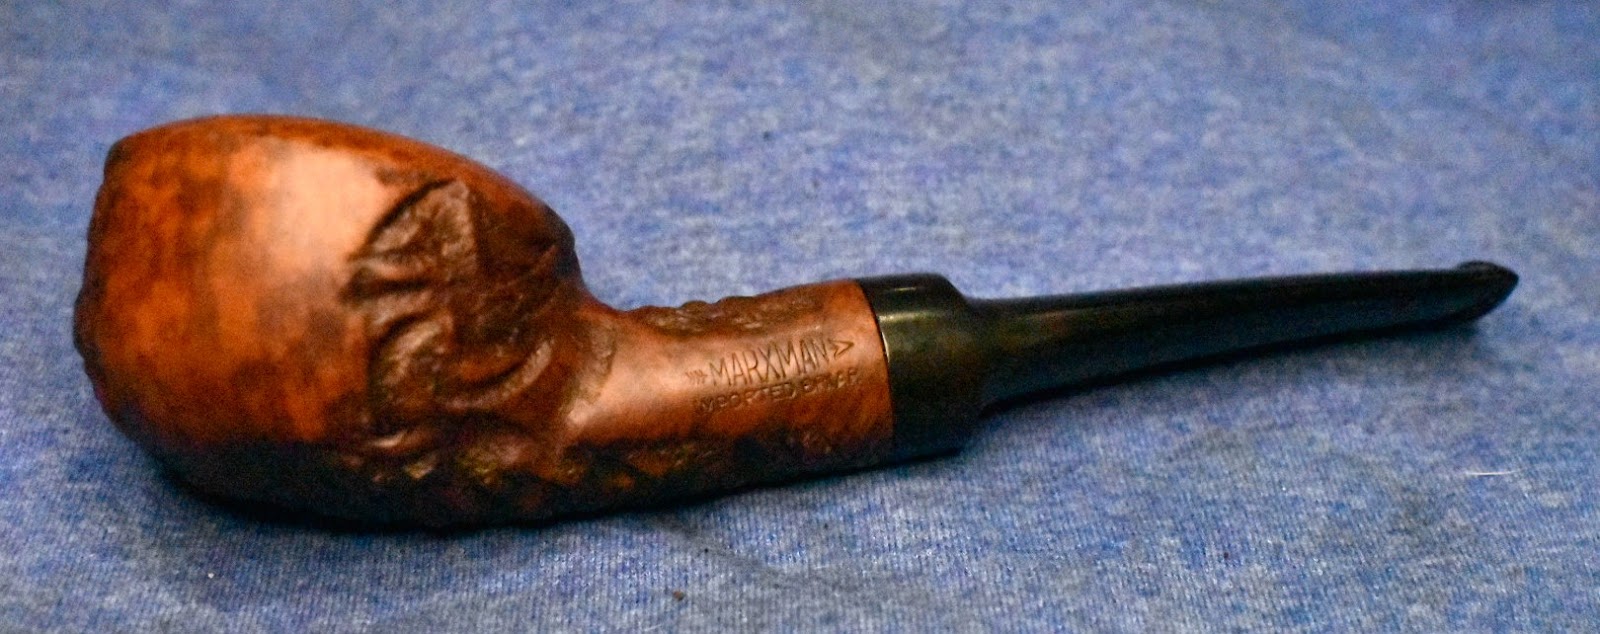


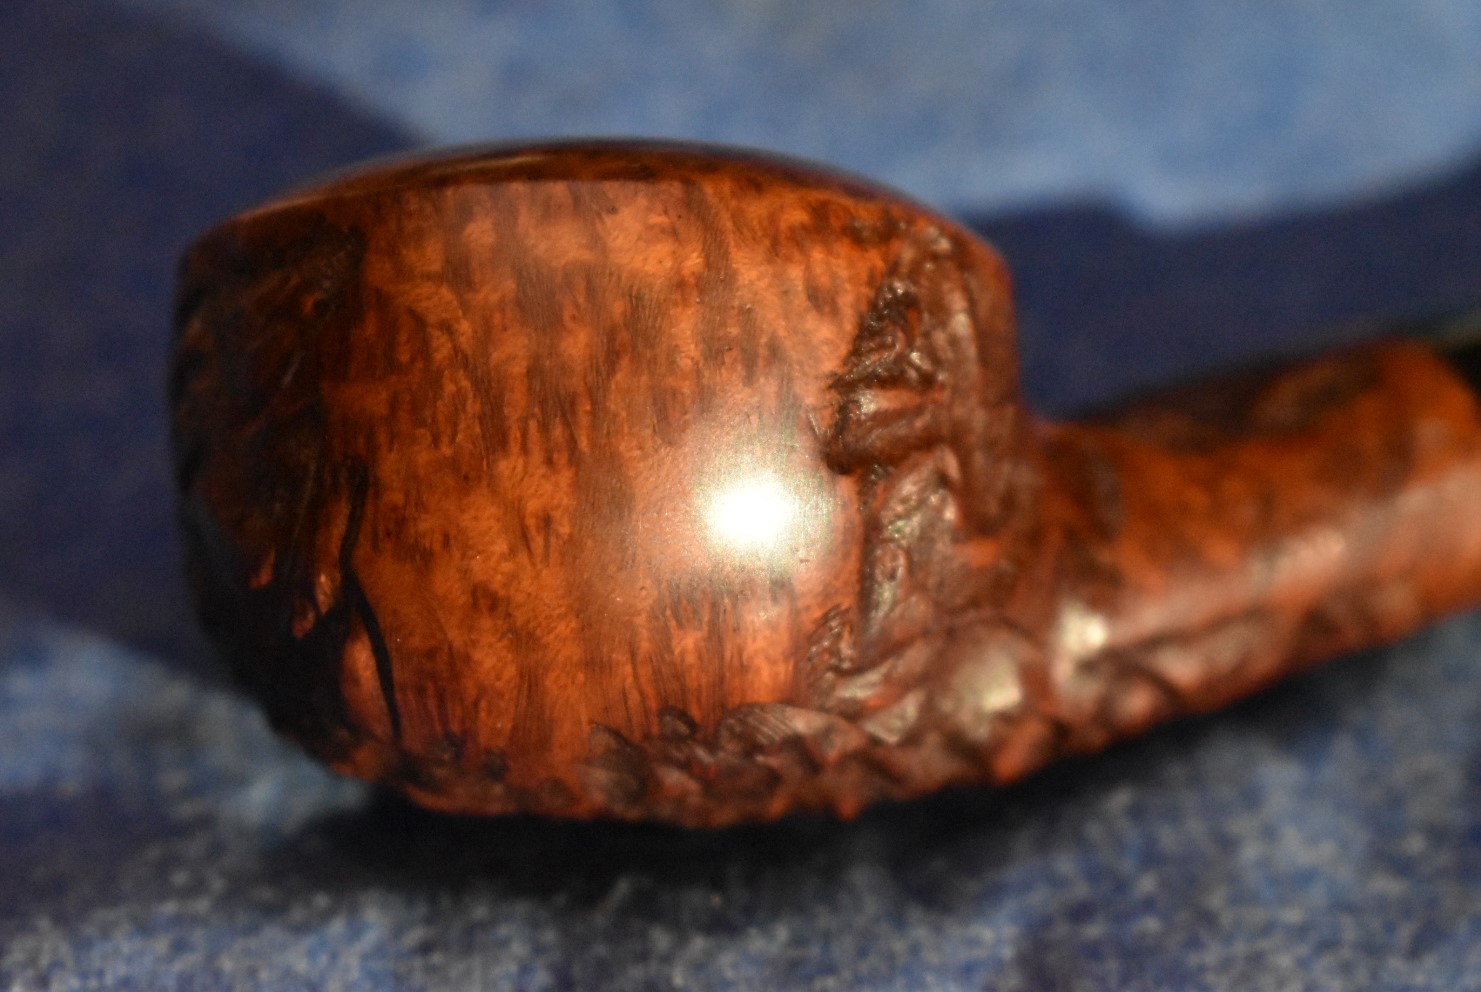

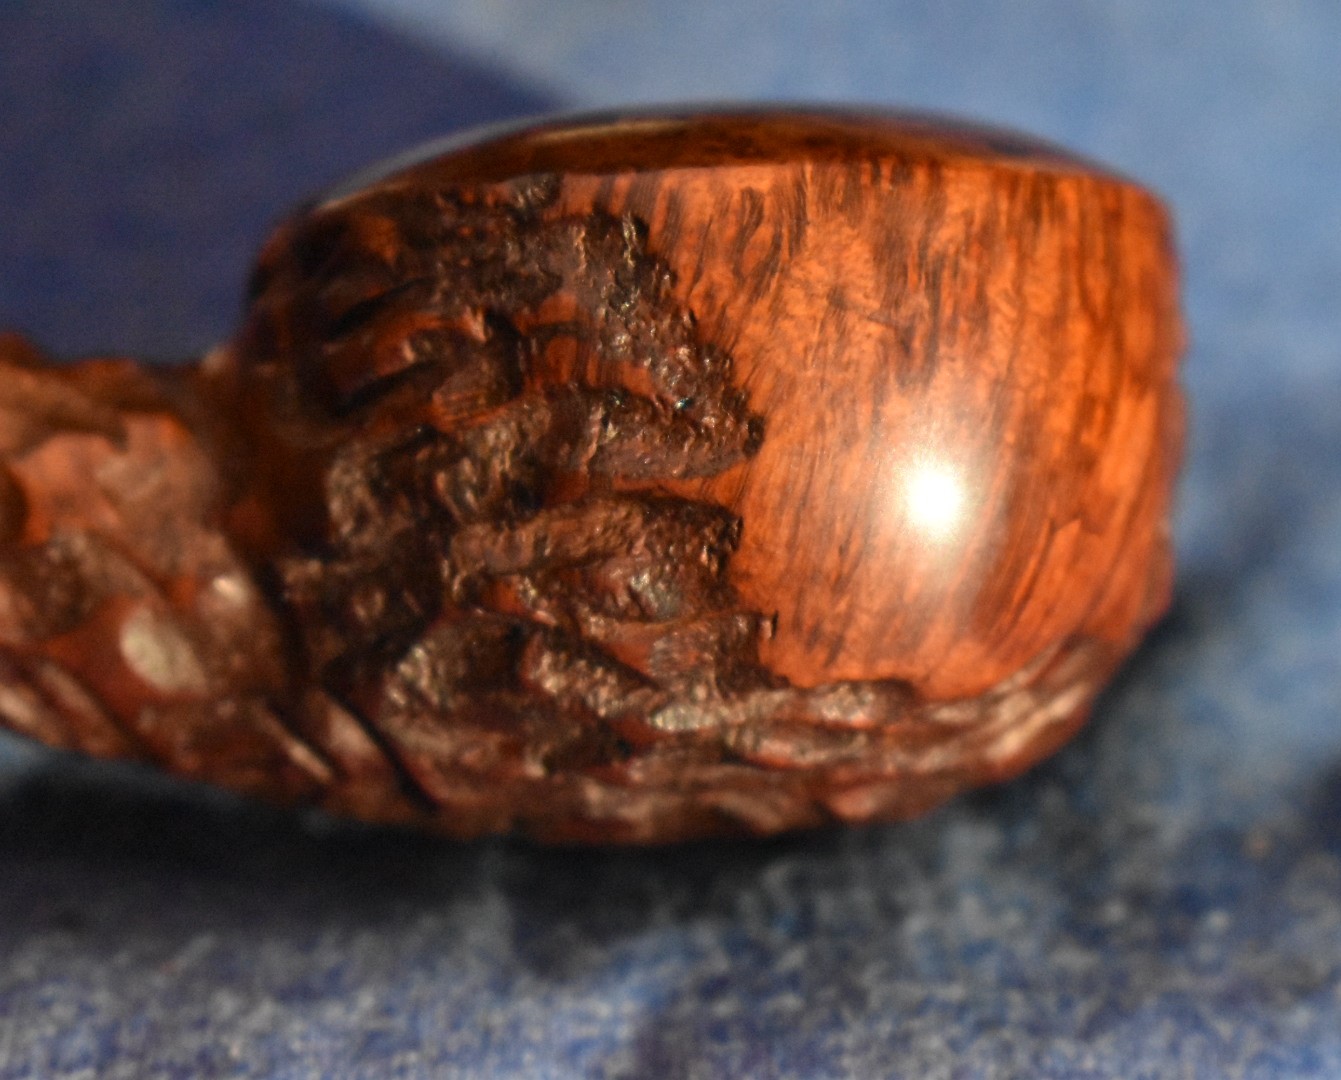
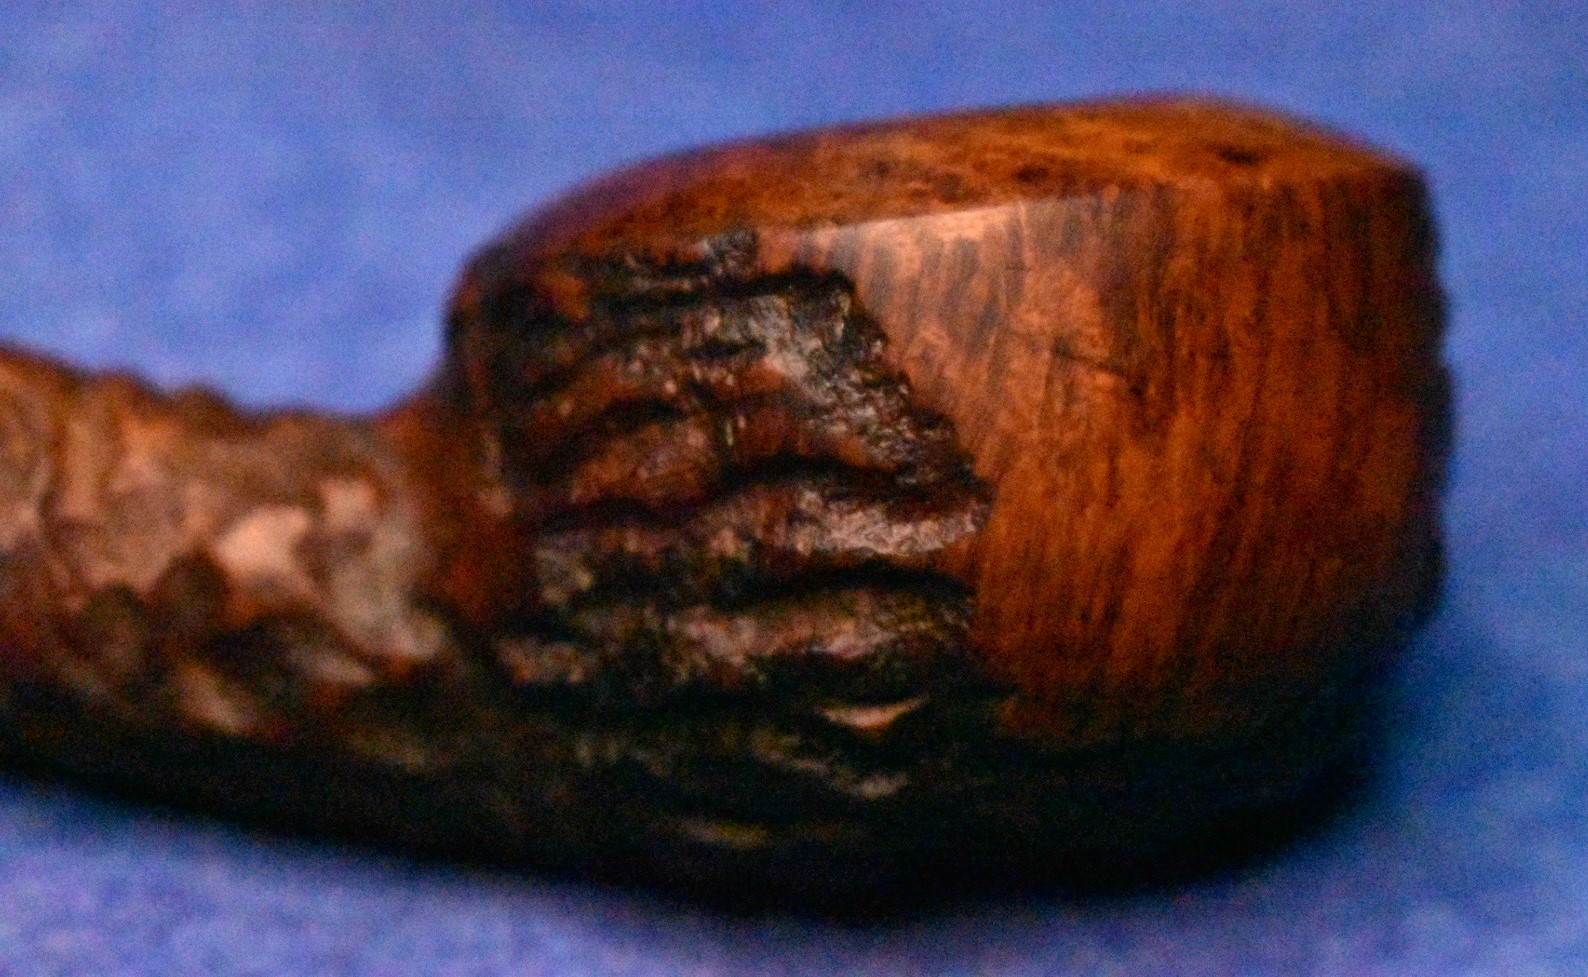

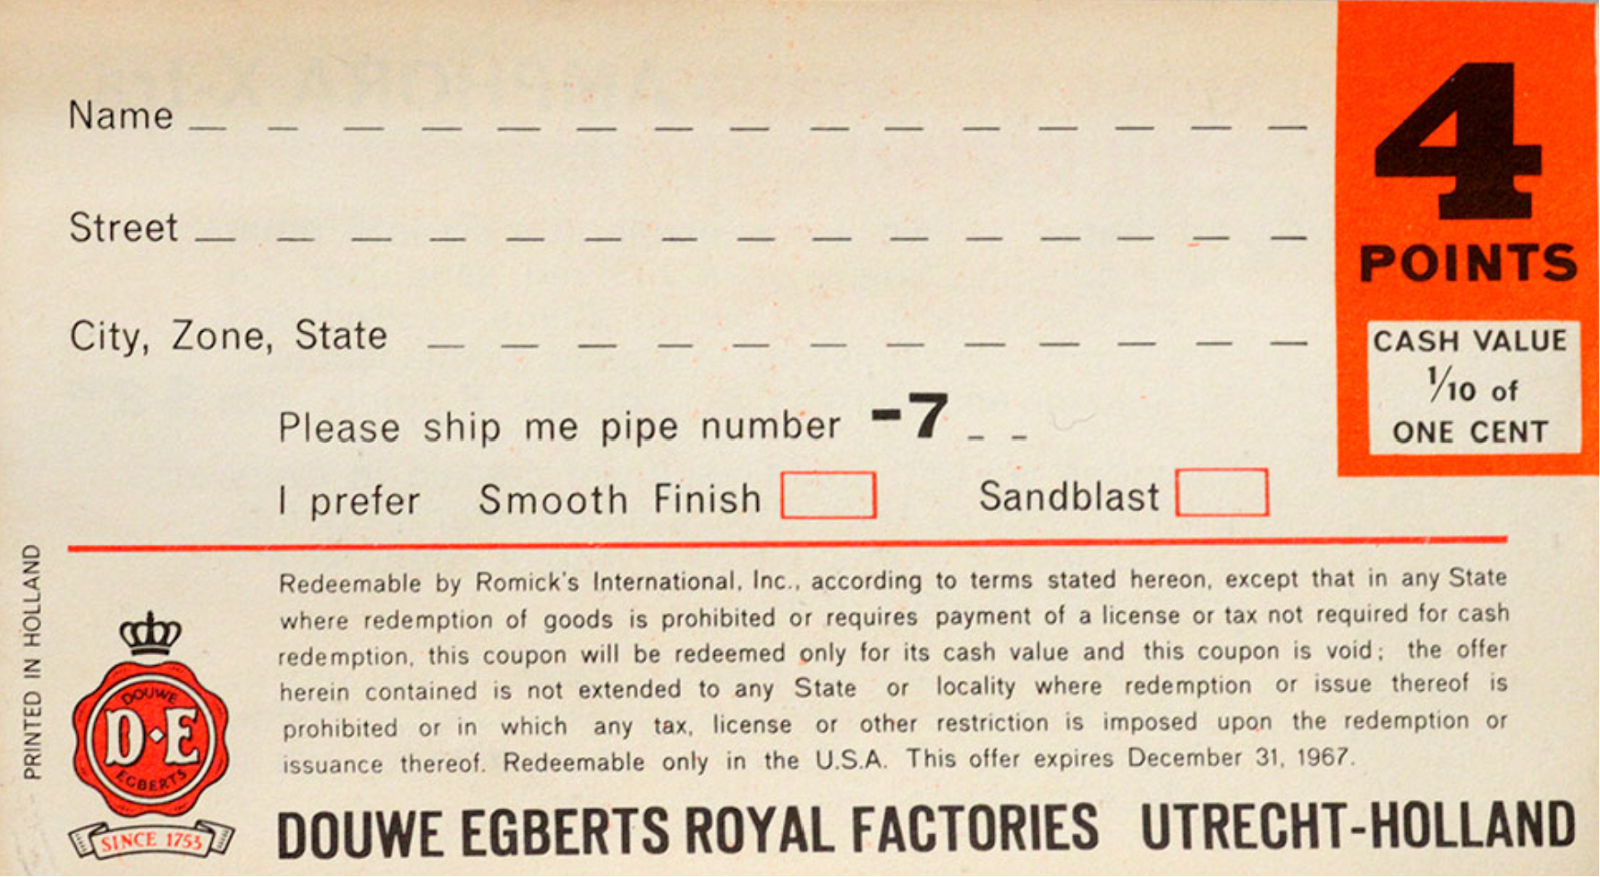
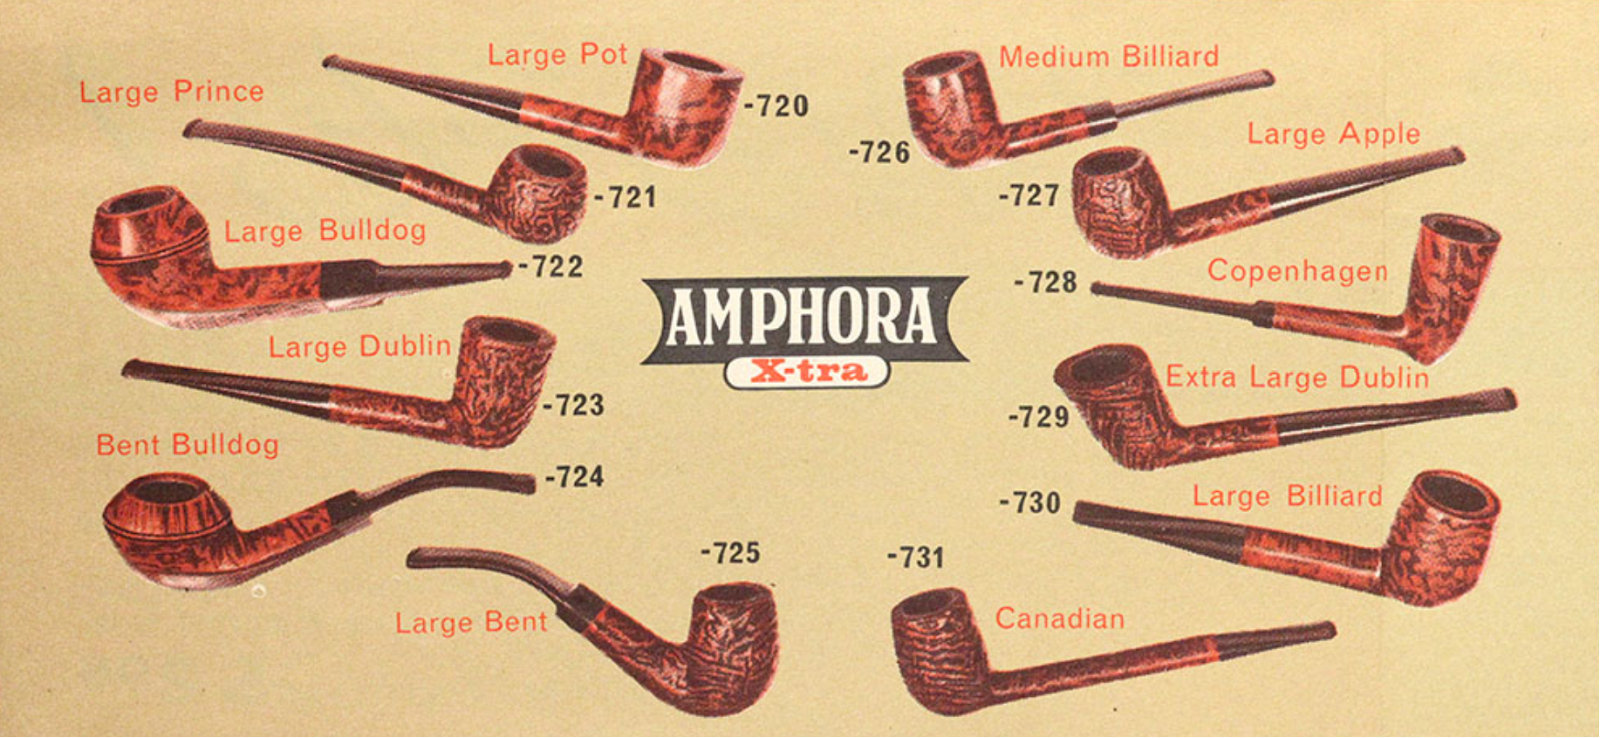

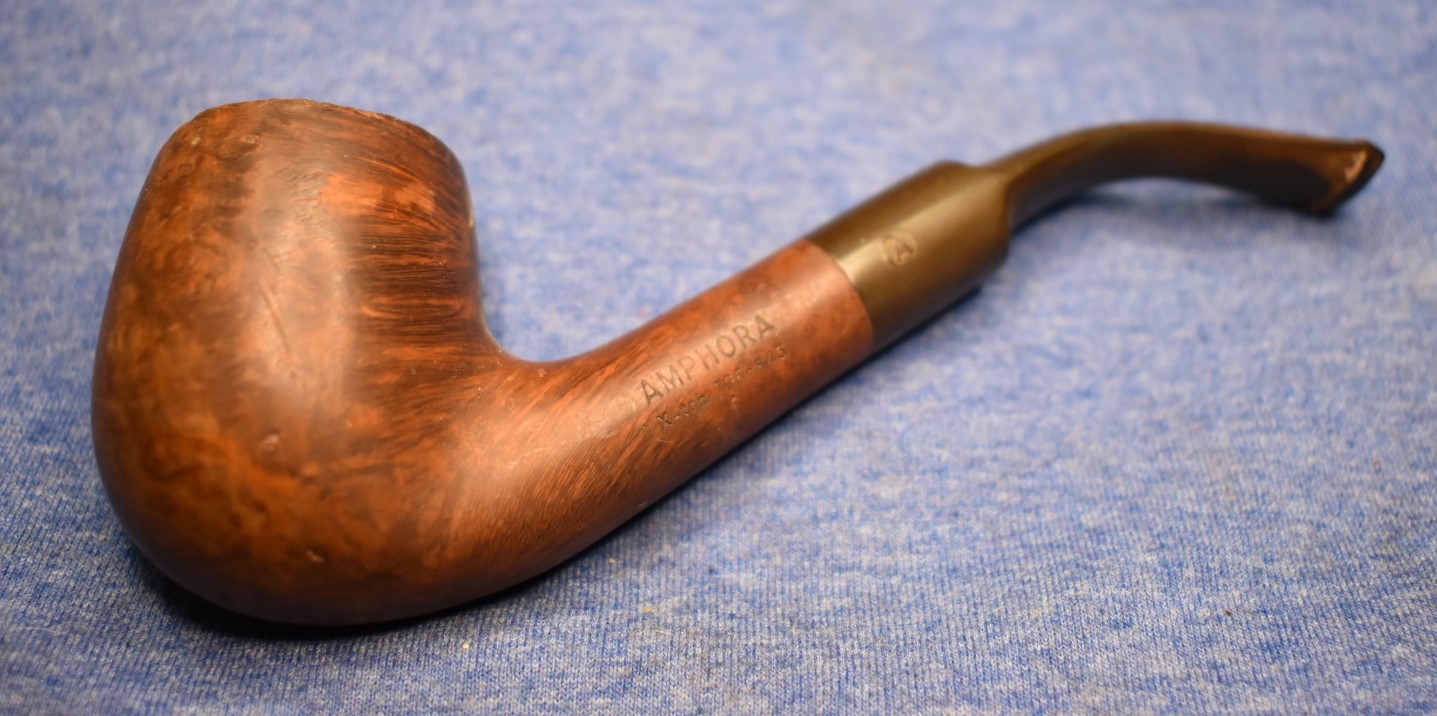

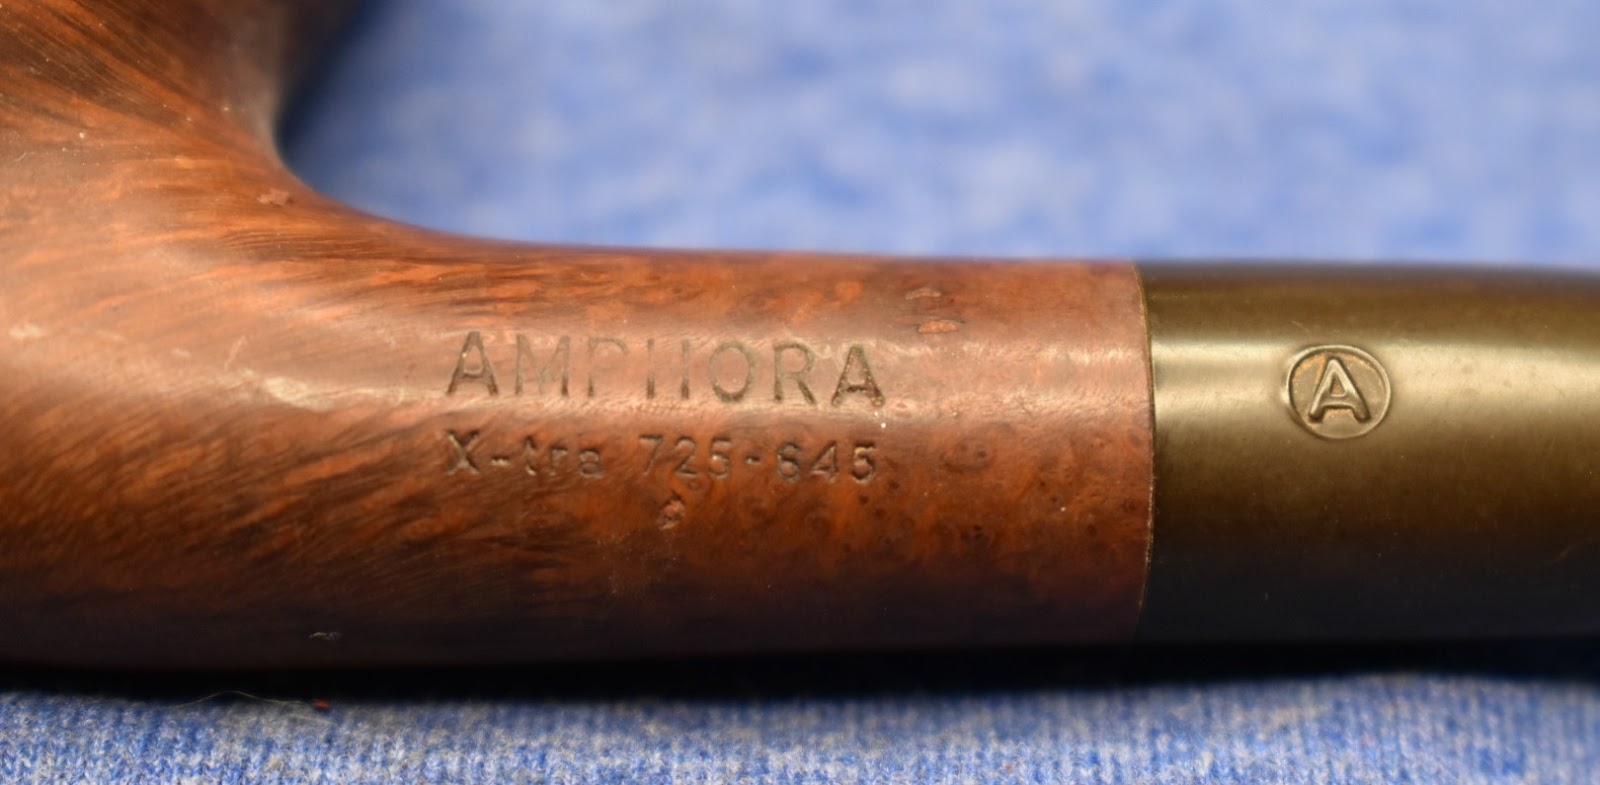

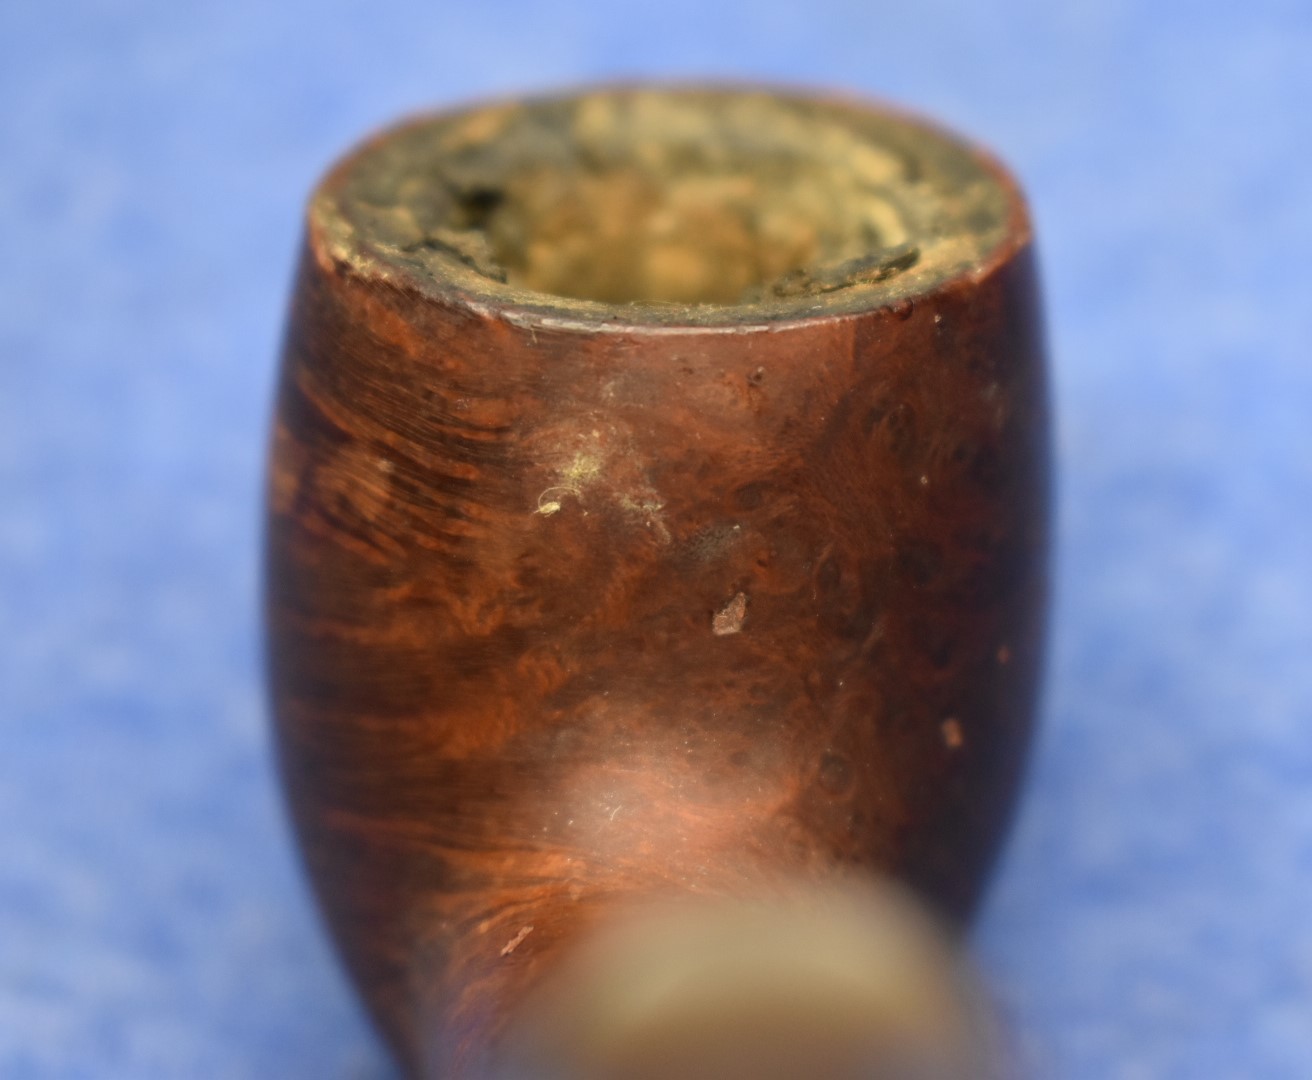
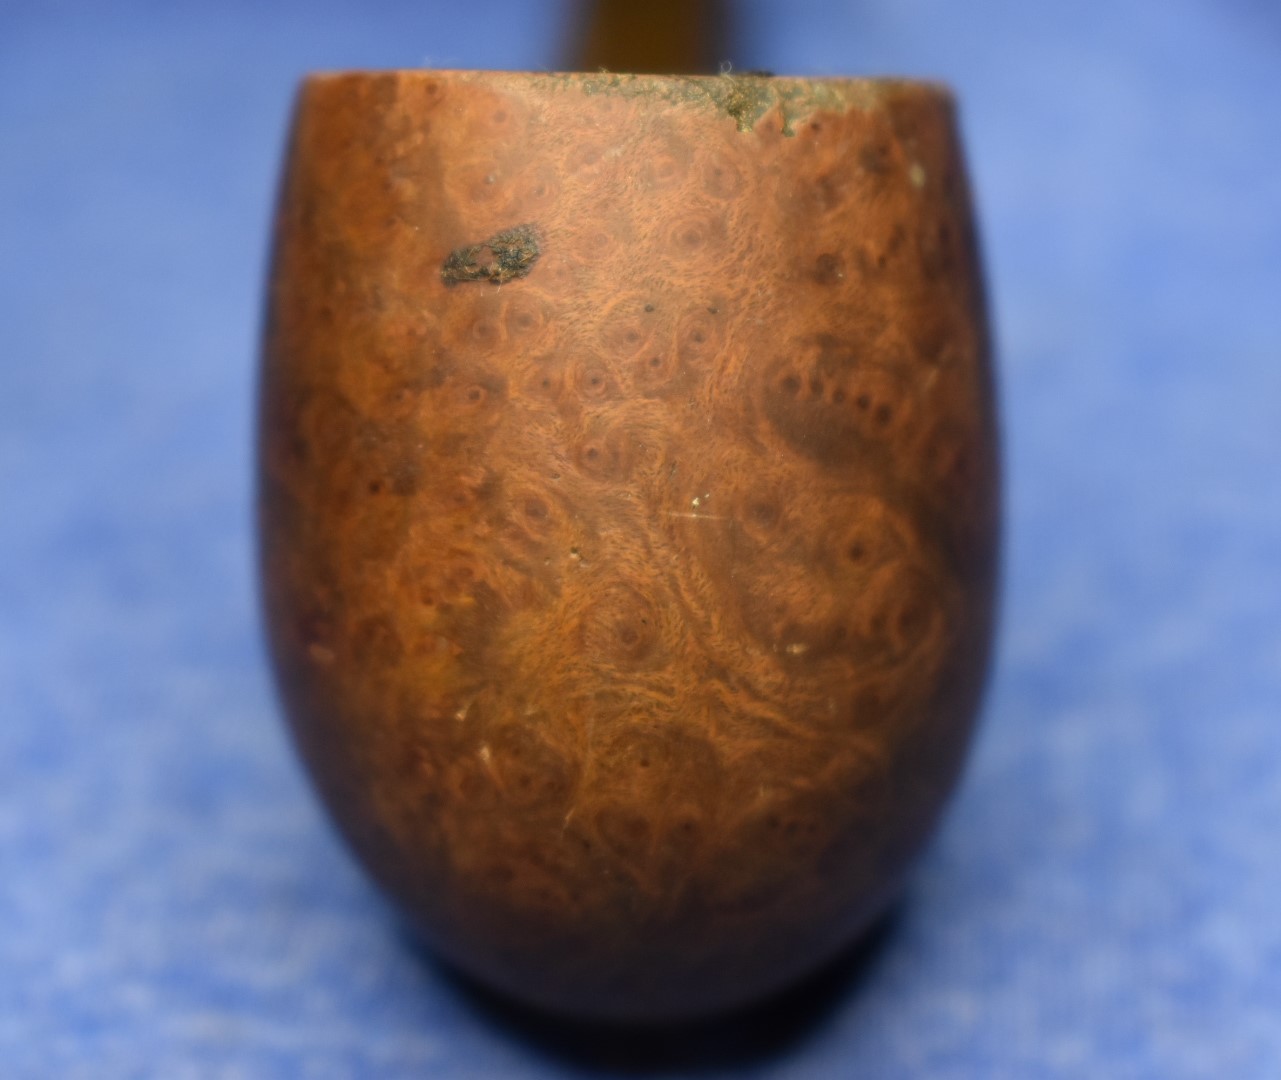

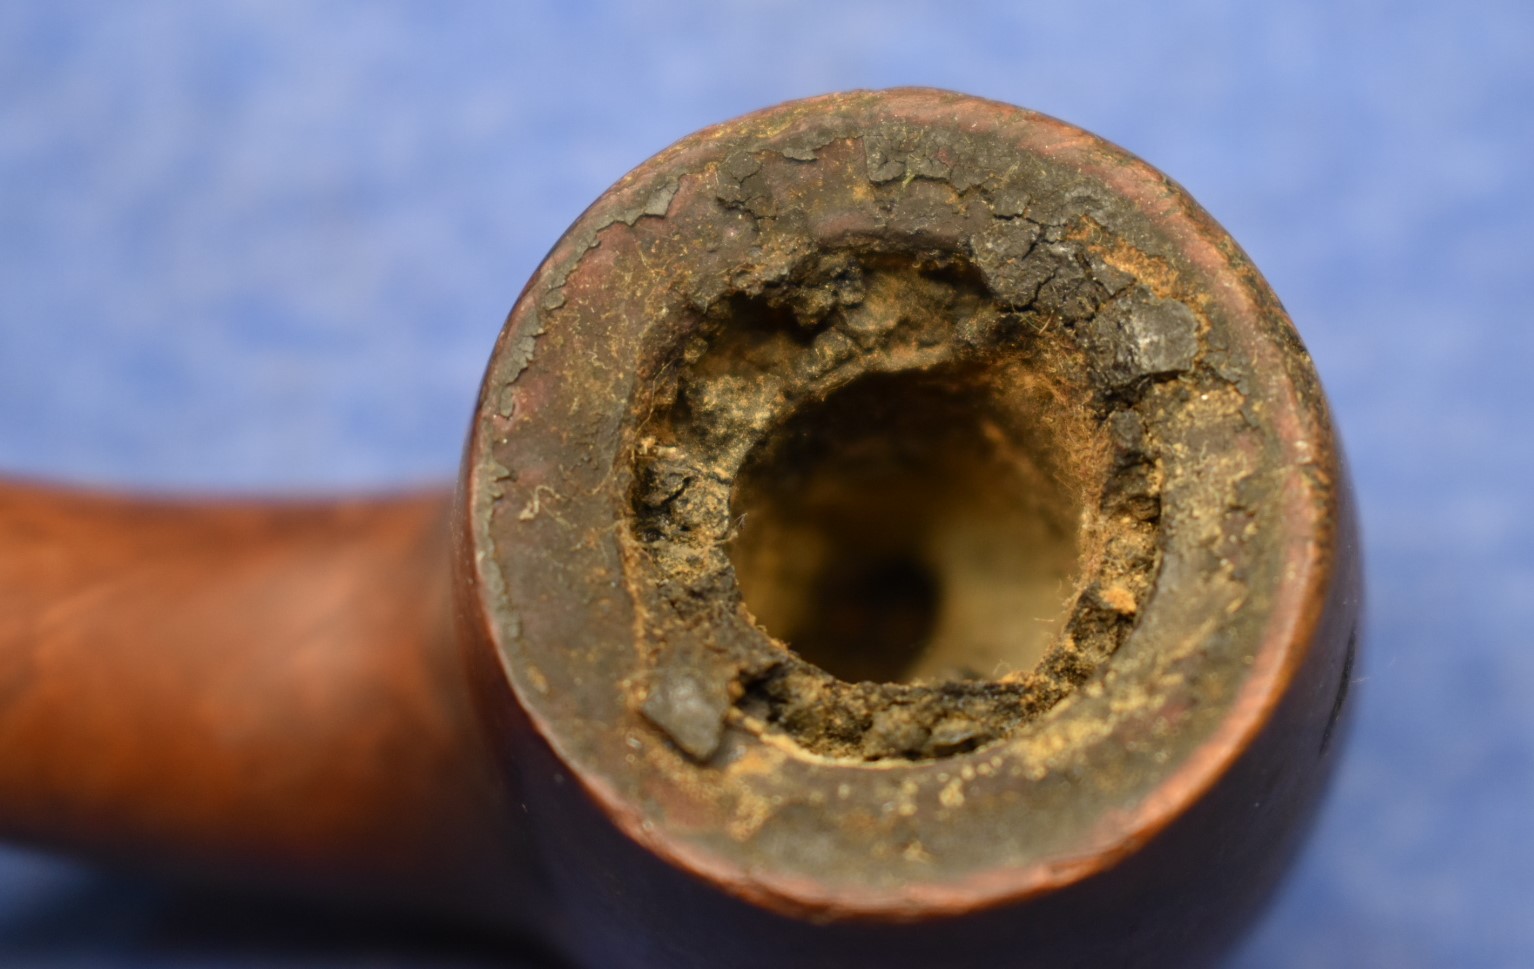
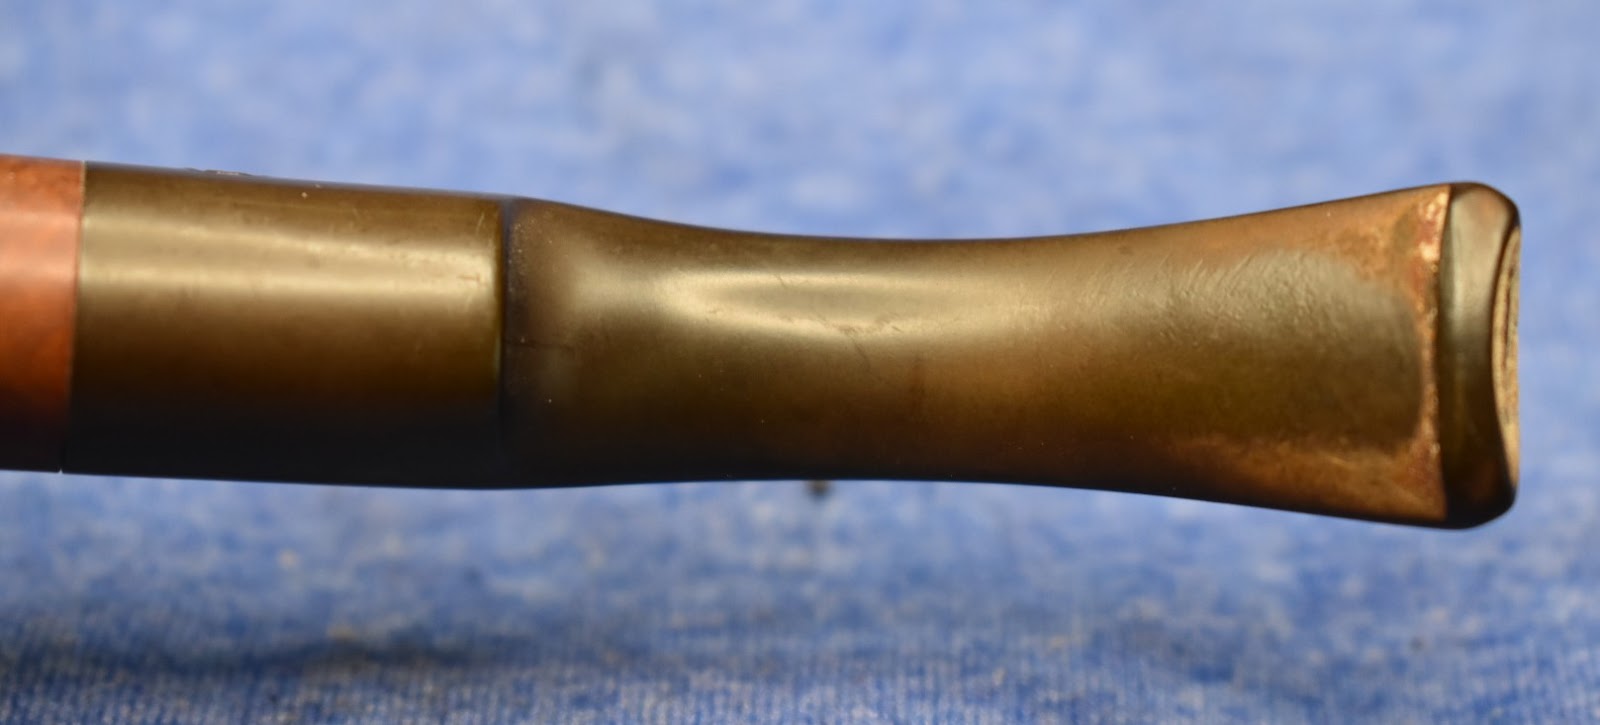


 Undaunted, I continued with the PipNet reaming tool and the Smokingpipes Low Country reaming knife and General triangular
  scraper. The thick cake succumbed to the scrapings of the tools wielded by their primate operator. The chamber was further sanded with 220 sandpaper wrapped around a wooden dowel. The interior of the chamber had been protected by this cake and had not received any damage from the smoking of innumerable packages of Amphora pipe tobacco.


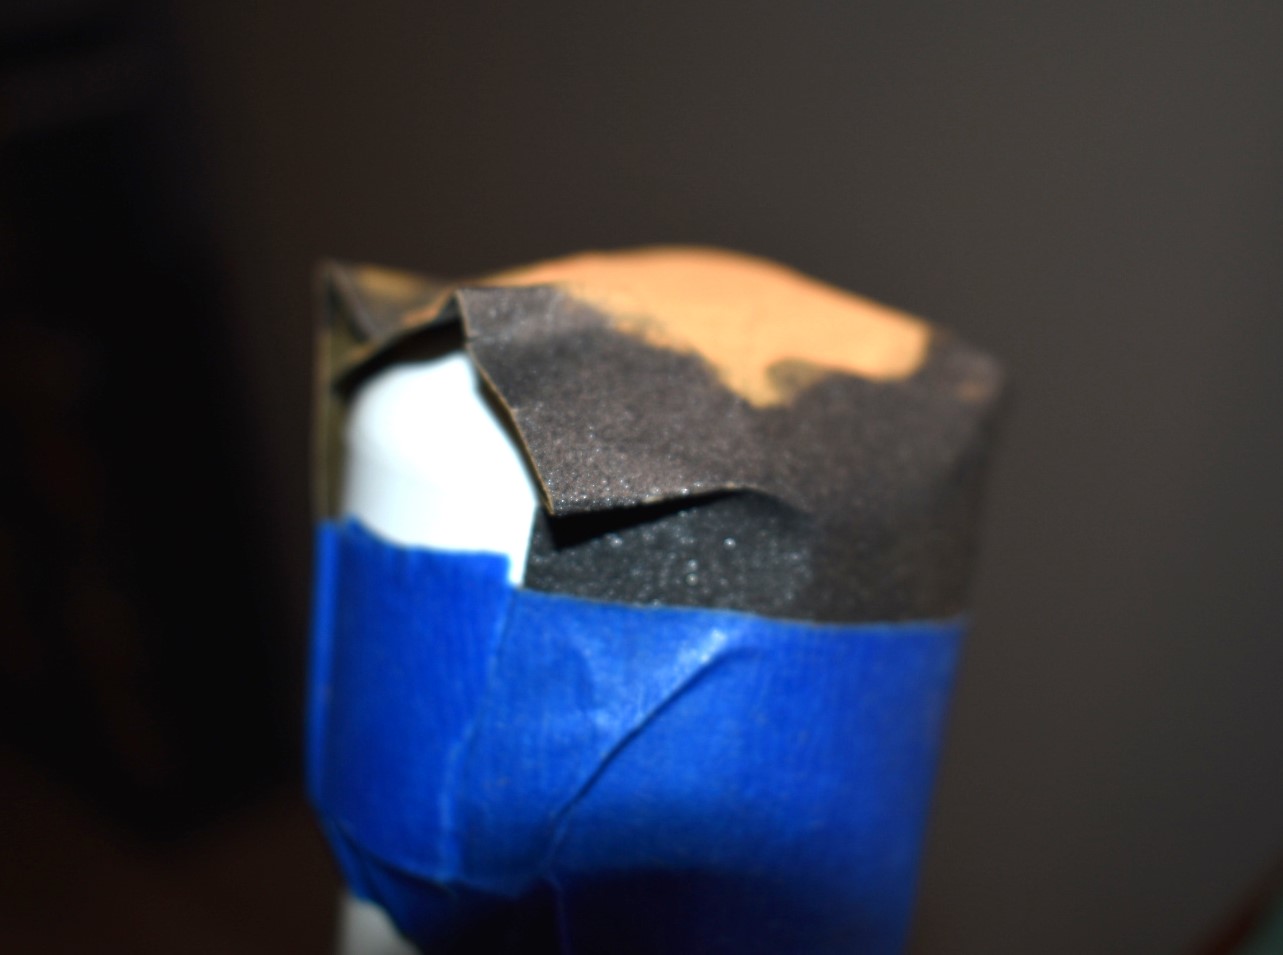


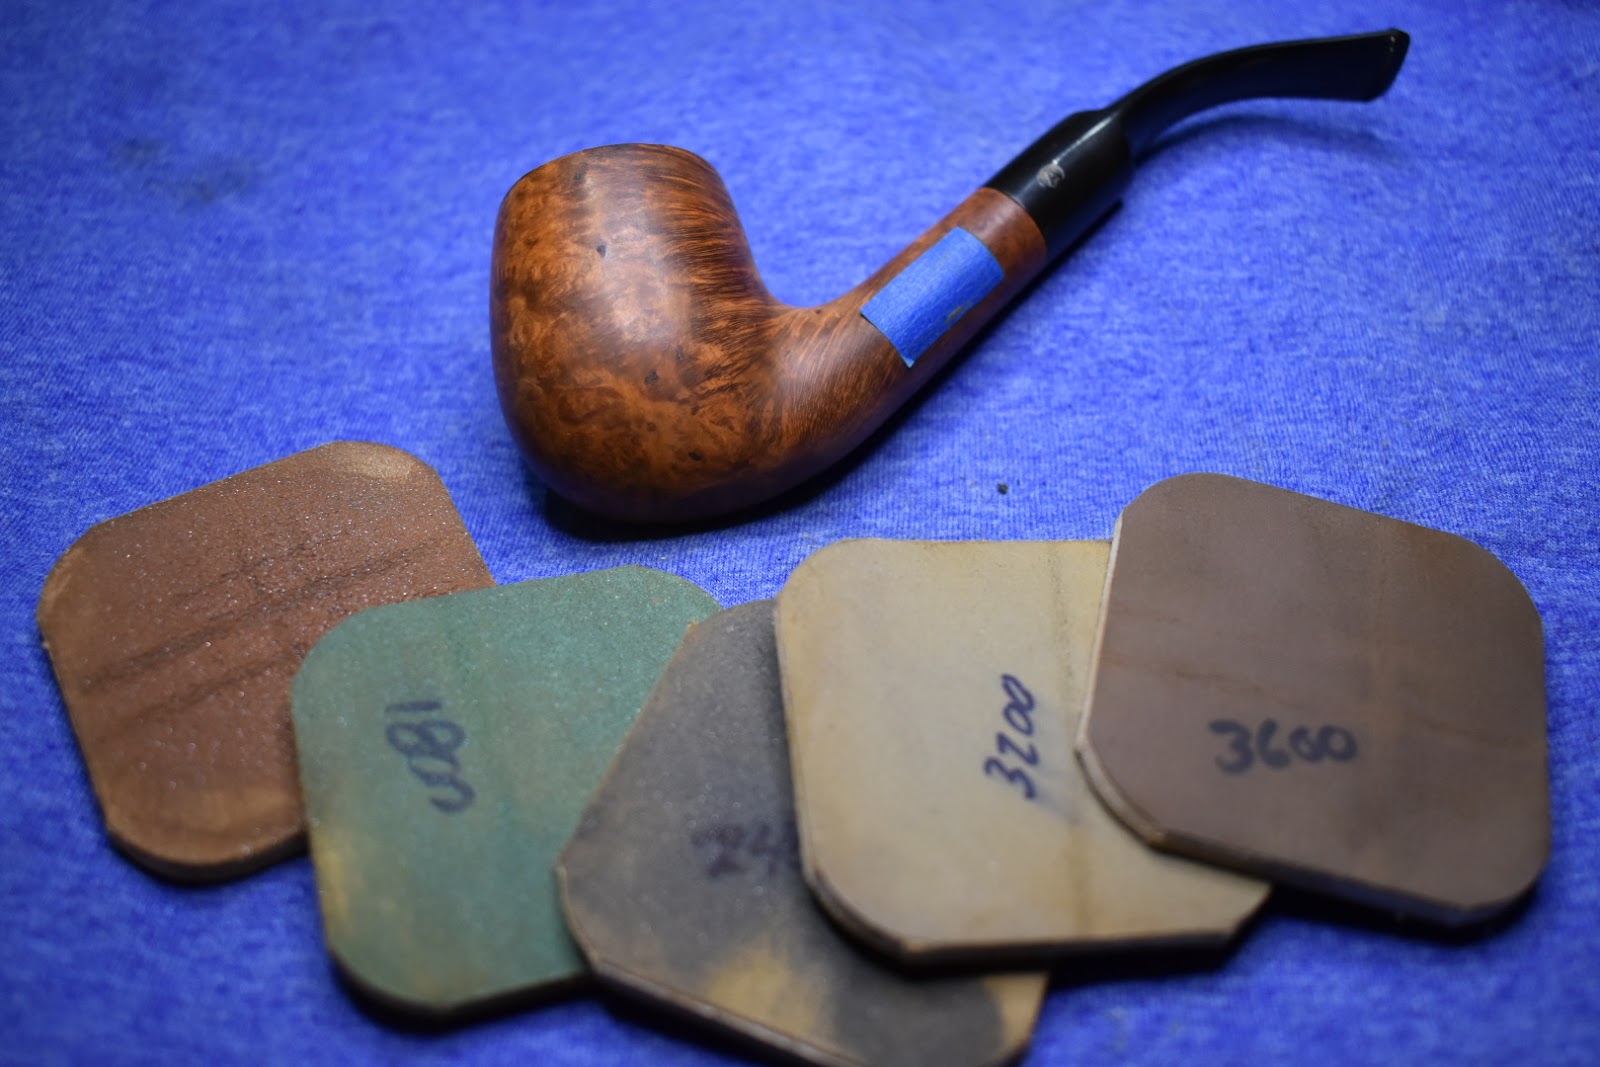
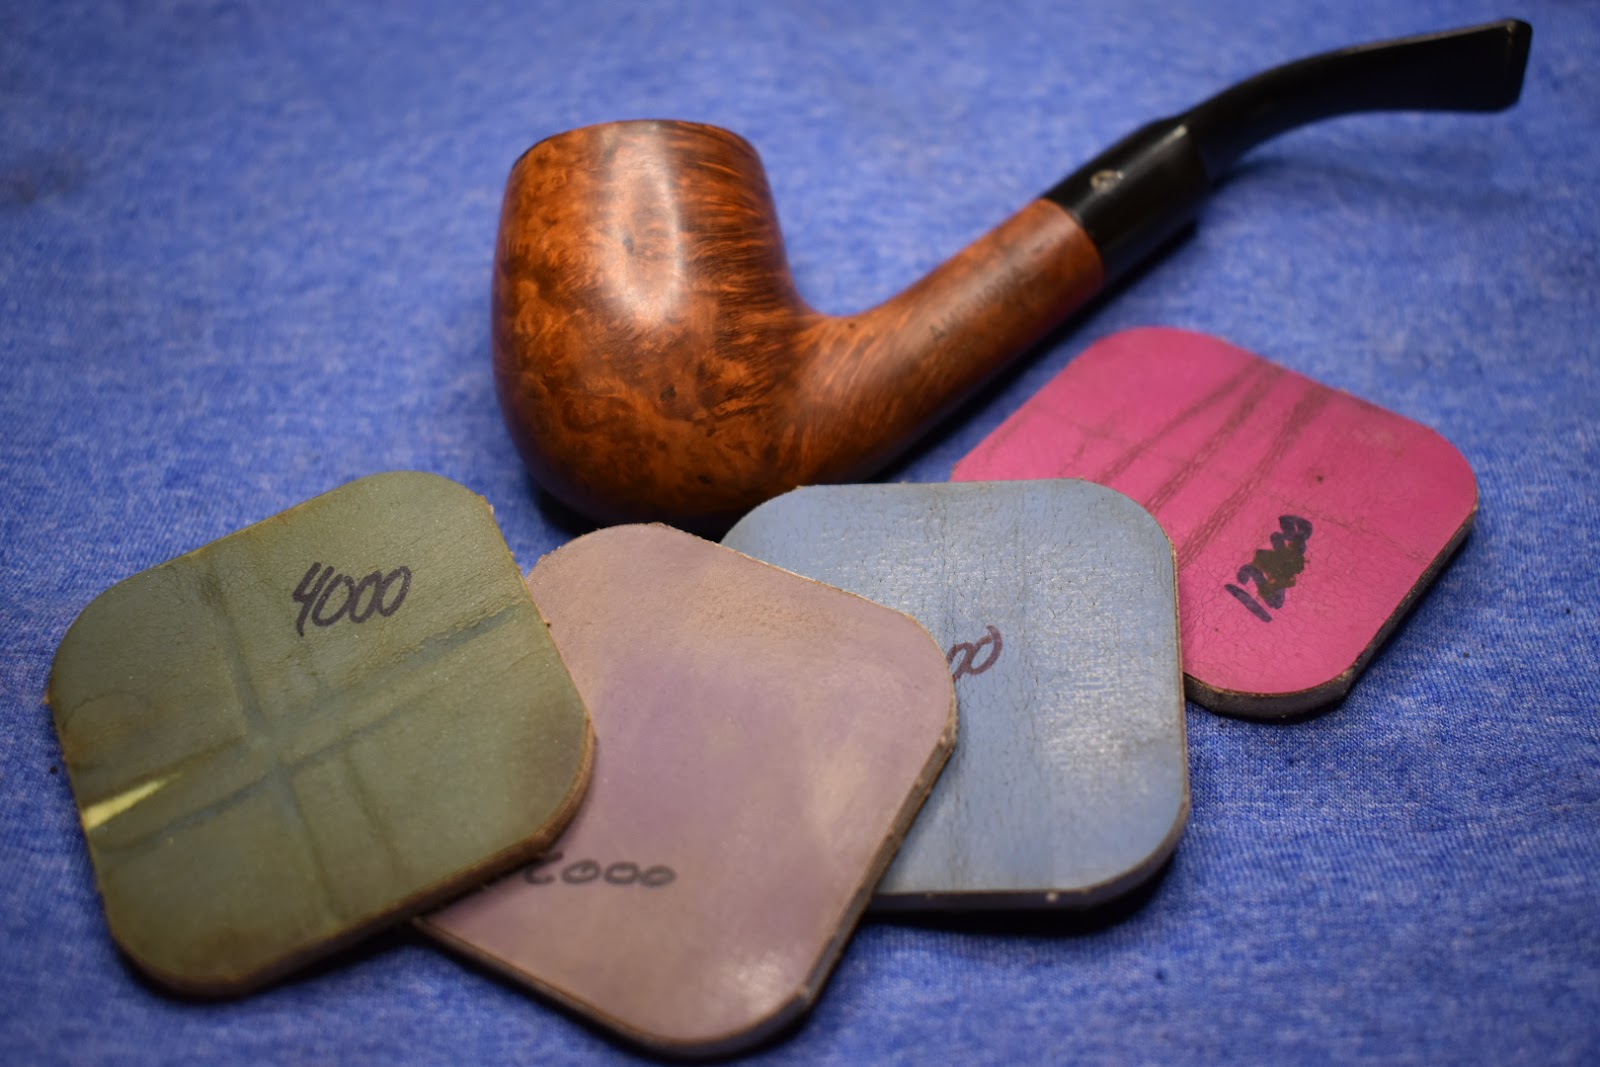
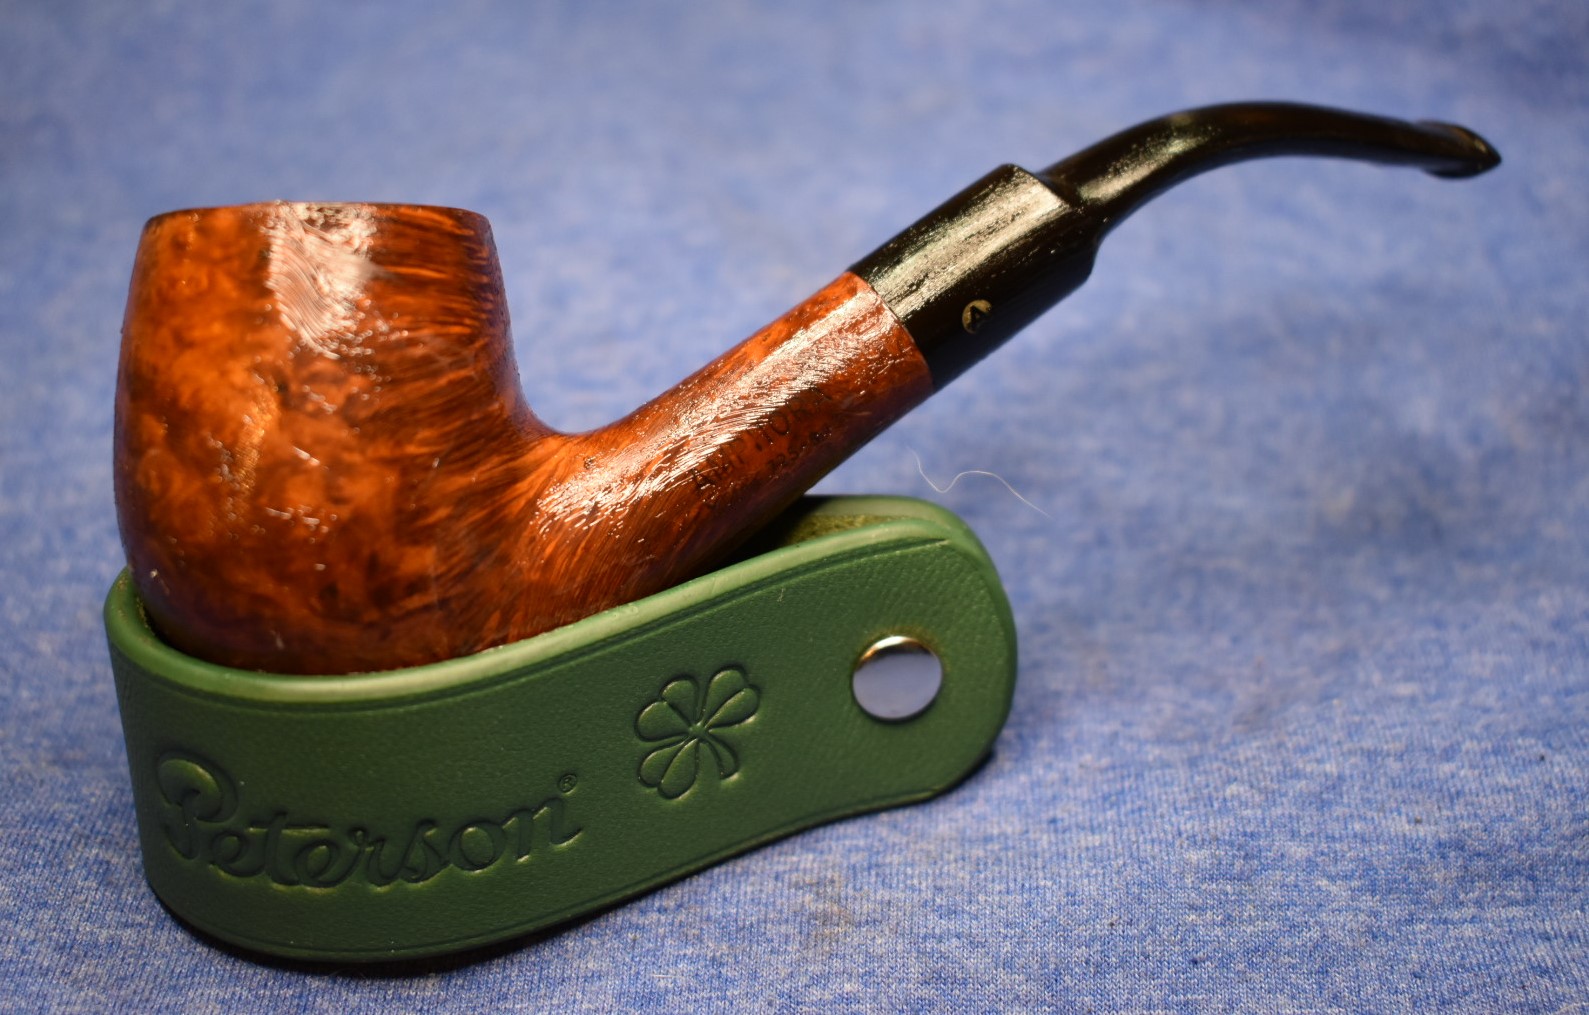


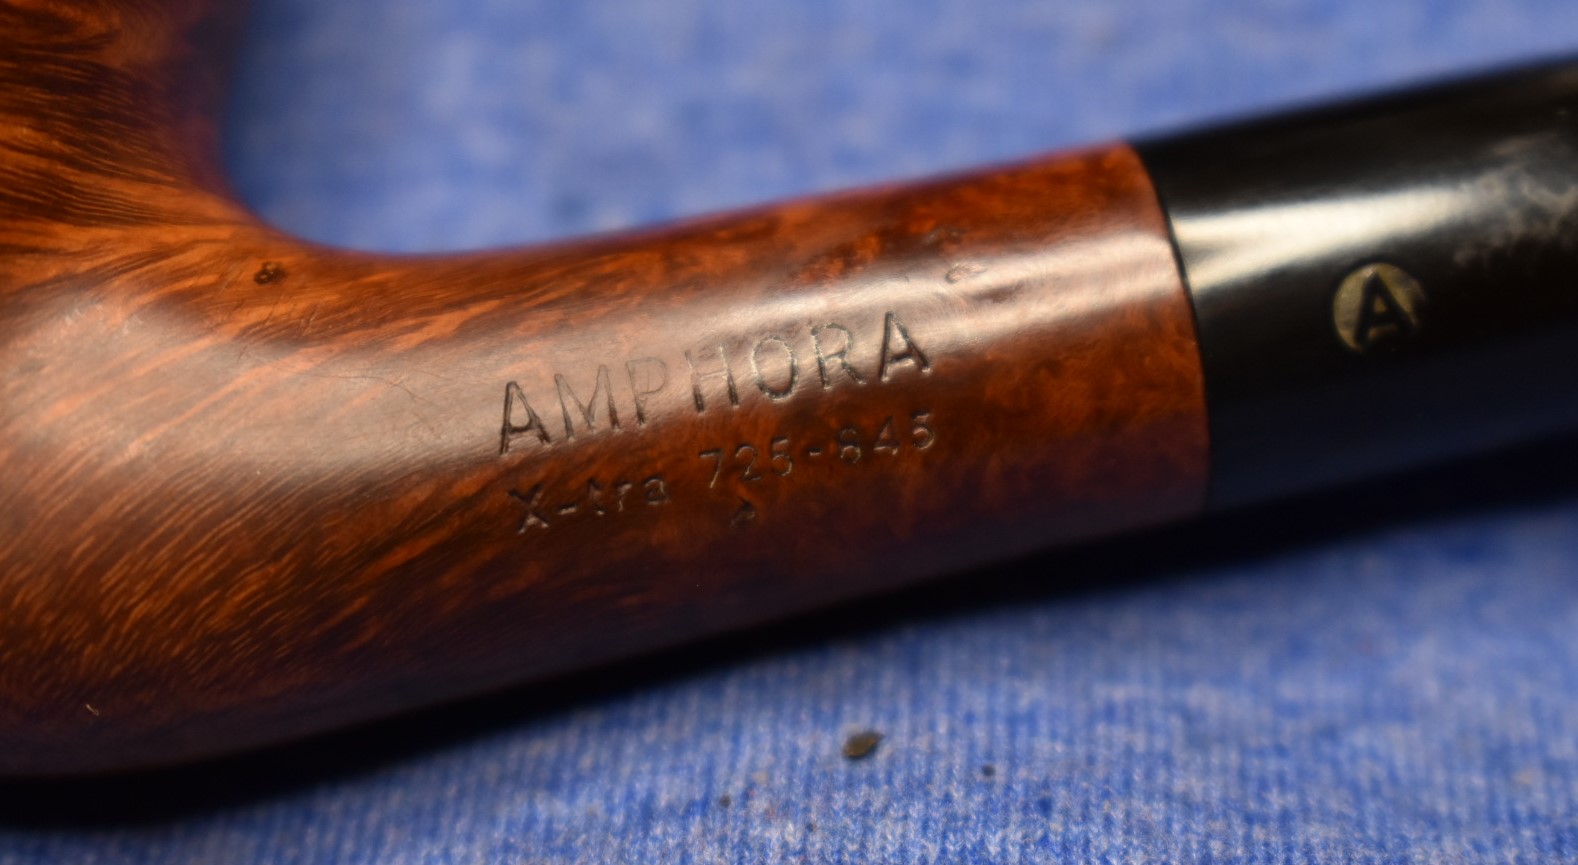


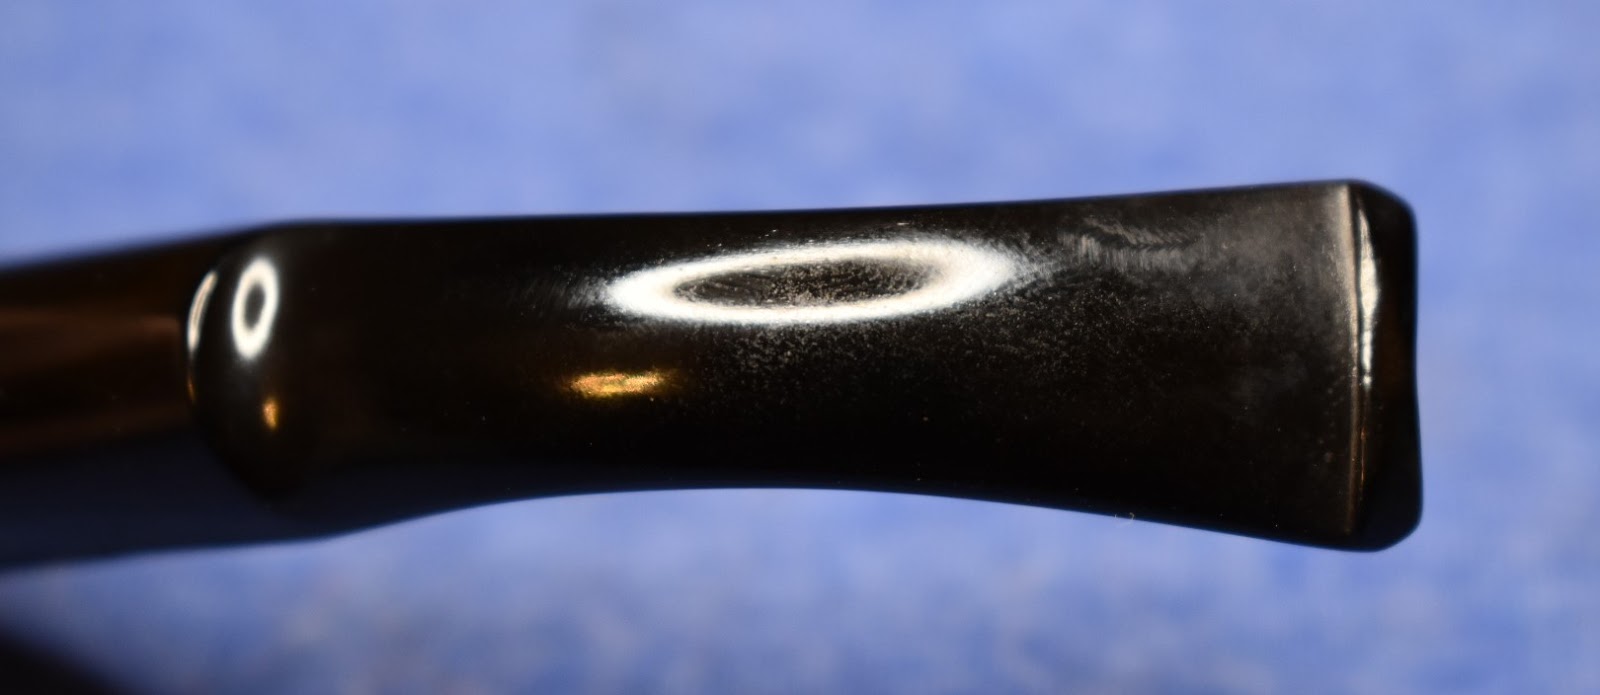
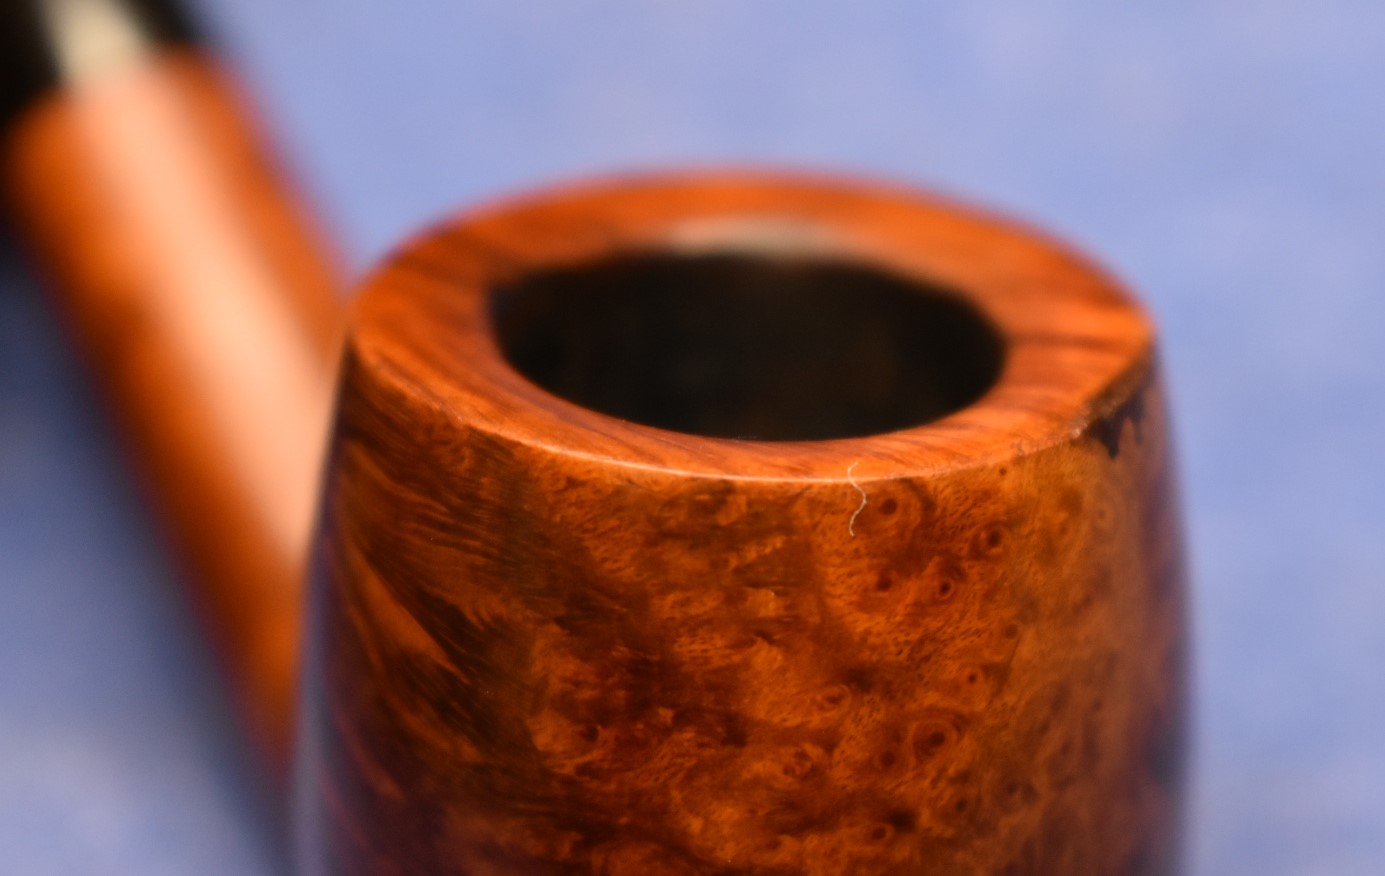
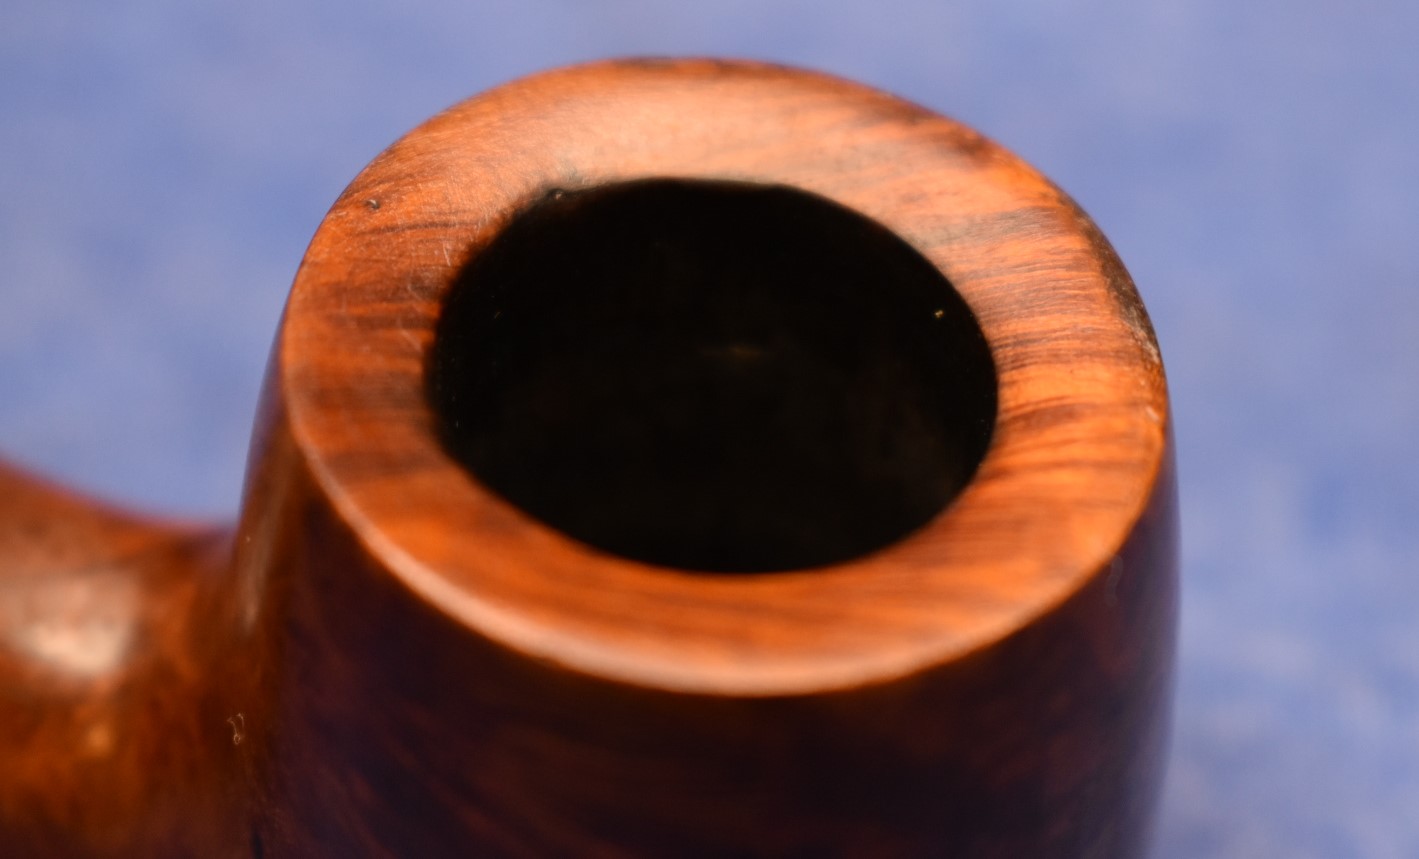


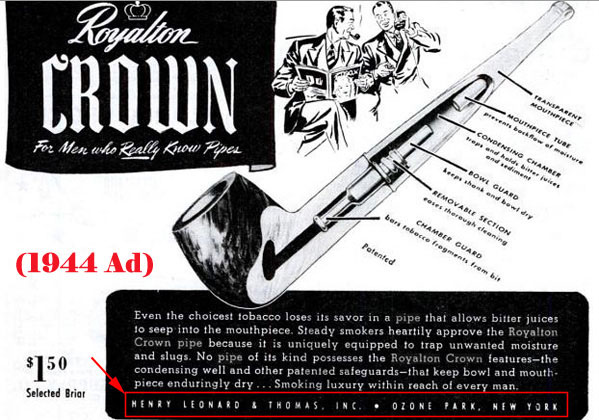