Skip to content
    • About

NebraskaPeteGeek

  • American Pipe Makers
  • British pipe Makers
  • Danish pipe Makers
  • French Pipe Makers
  • German Pipe Makers
  • Irish Pipe Makers
  • Italian Pipe Makers
  • Others or Unknown Pipe Makers
  • Restorations
  • A Danco Lovat Restoration

    January 19th, 2024

    Written and photographed by 

    John m. Young

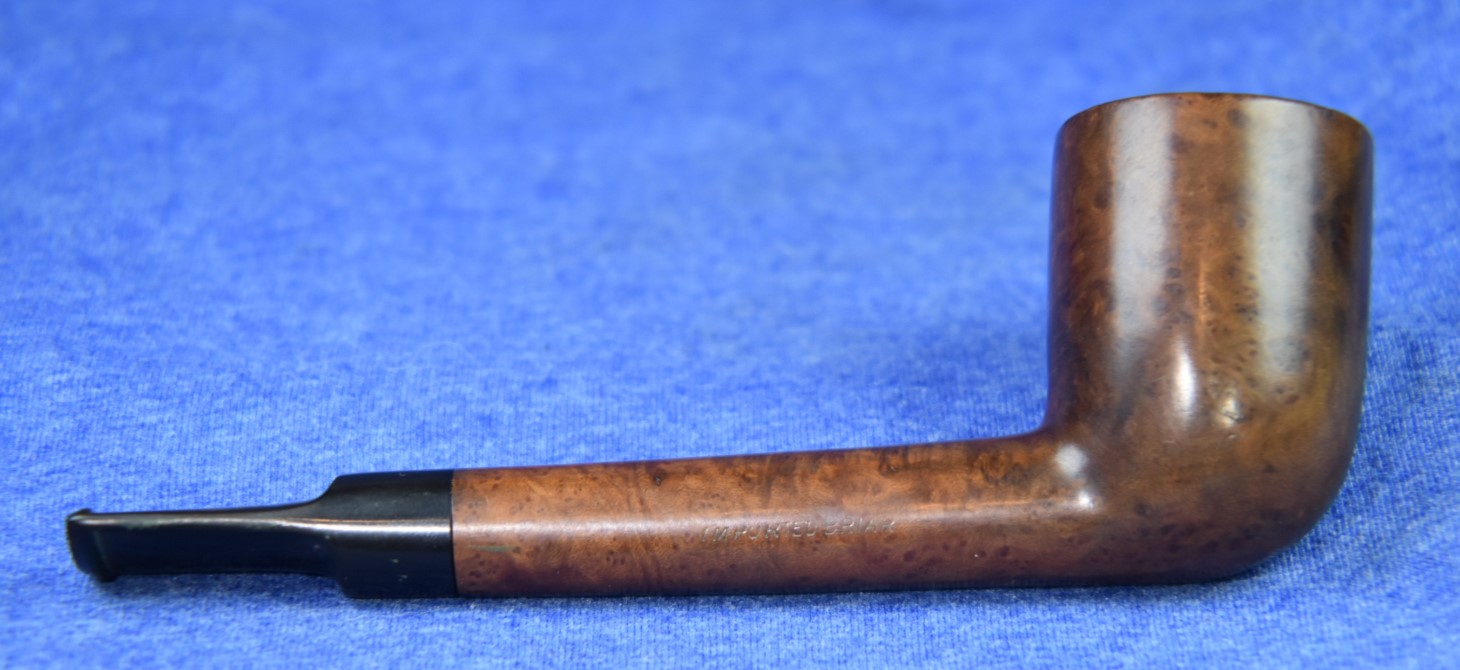
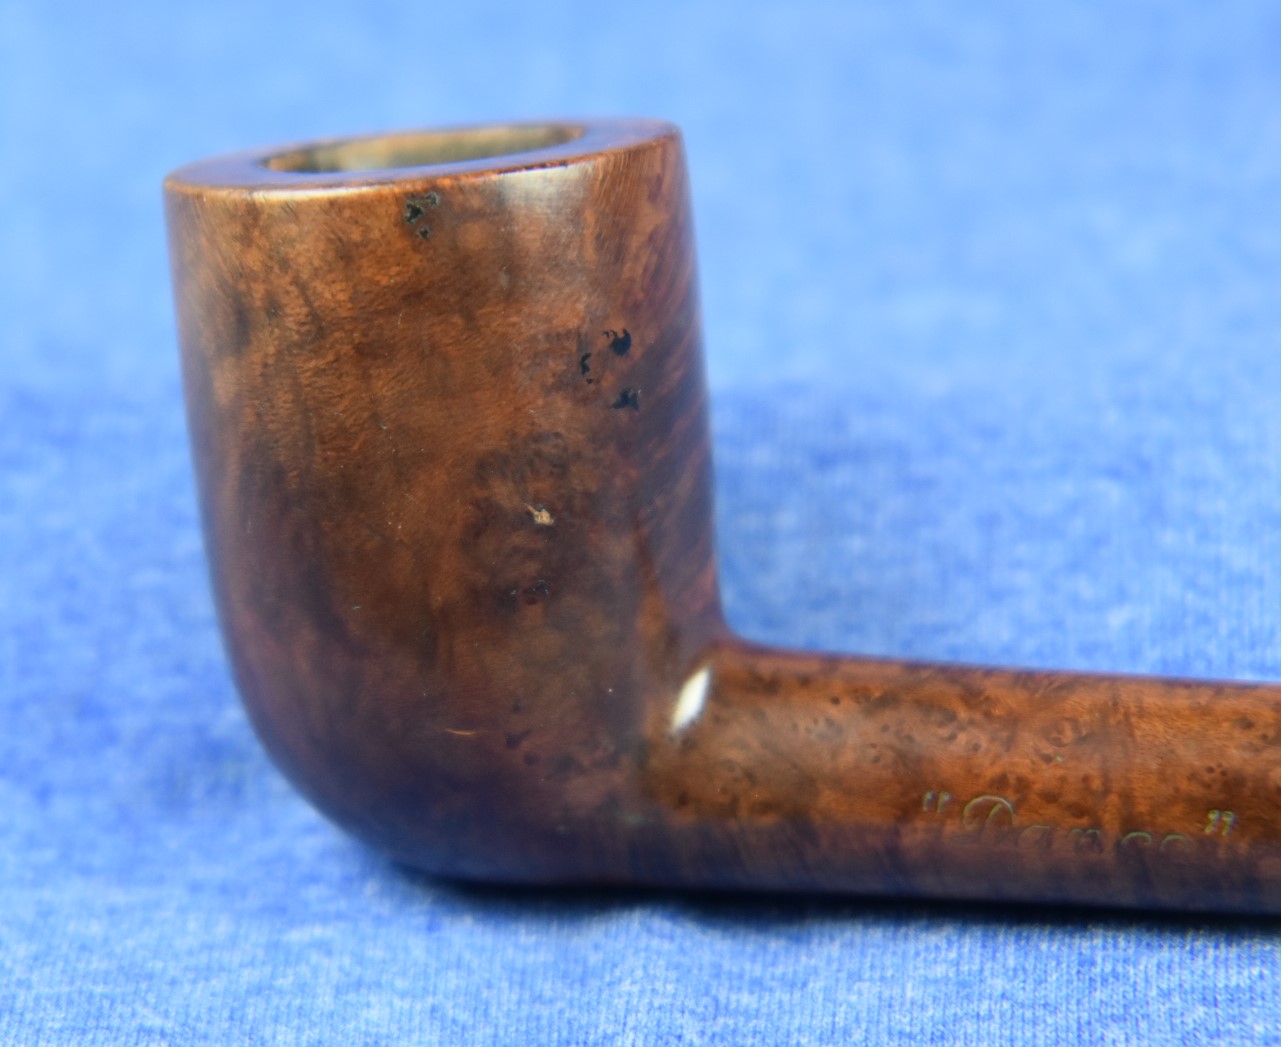
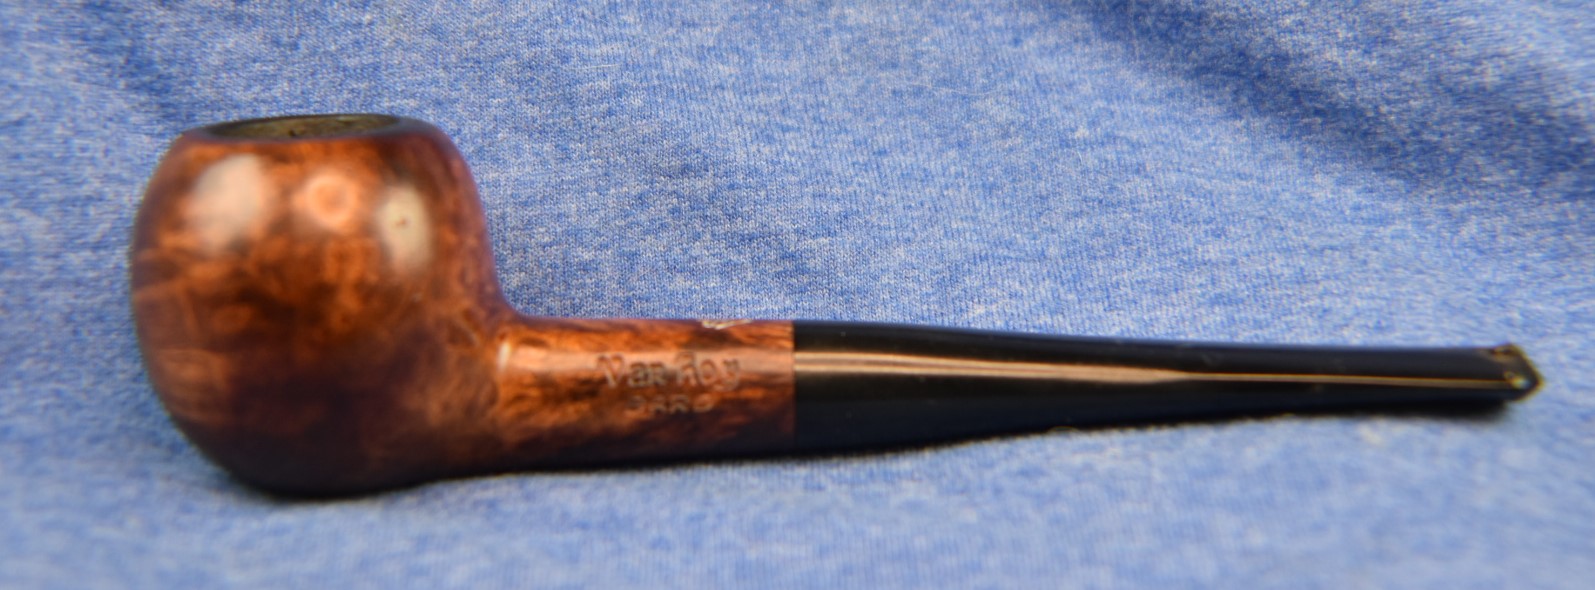
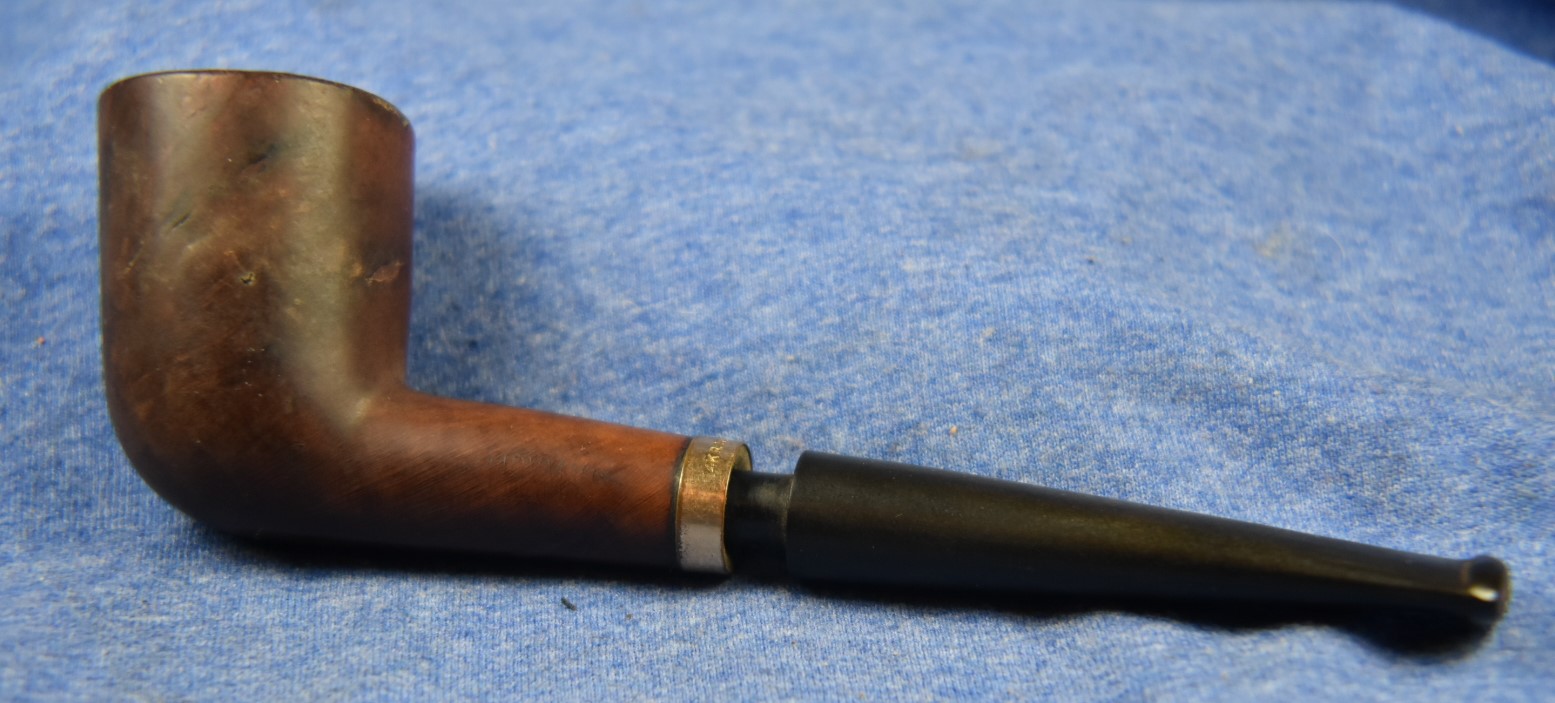
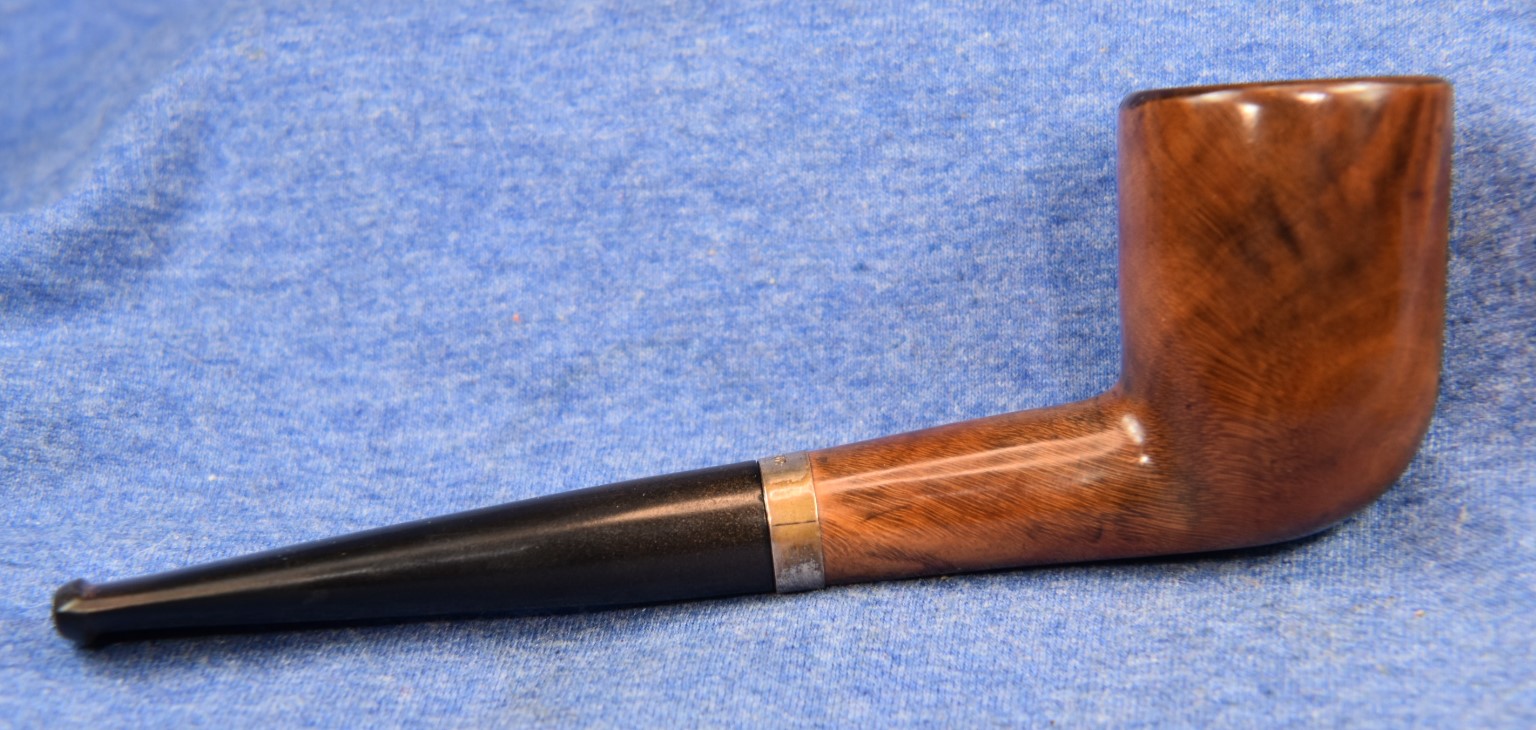
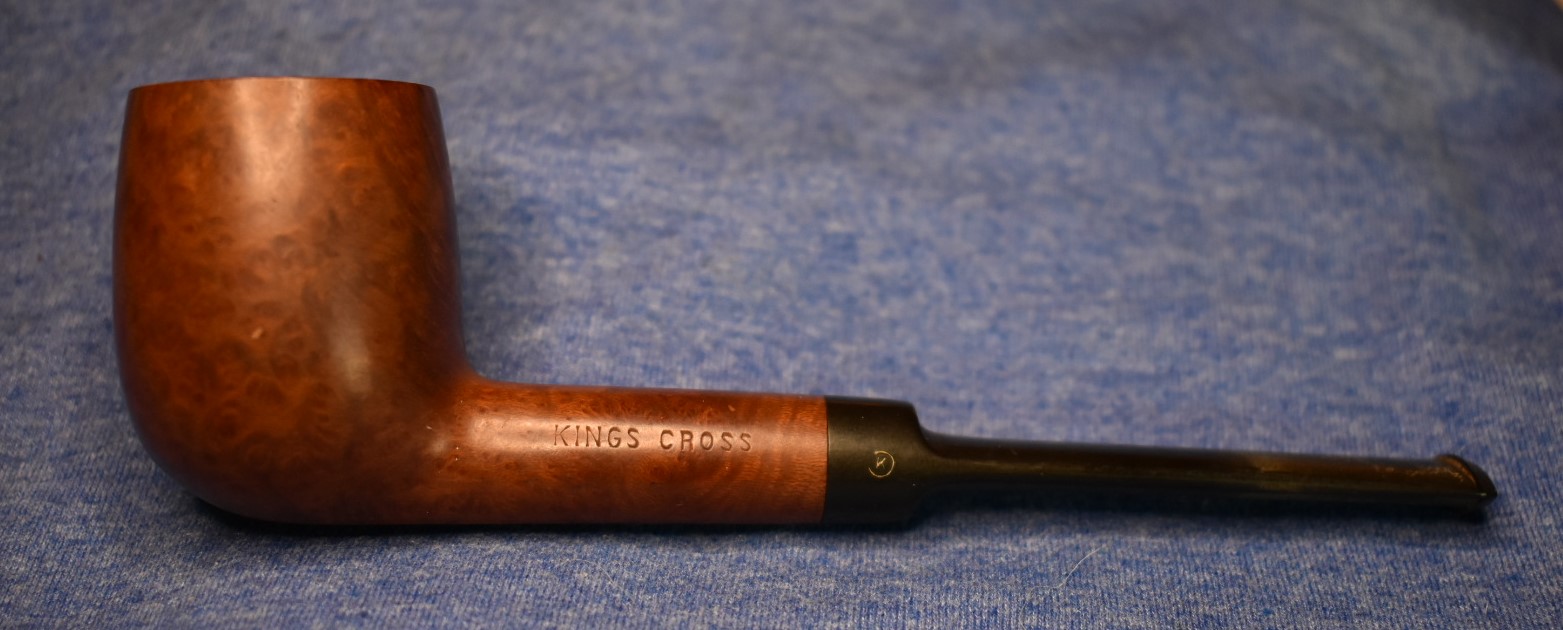
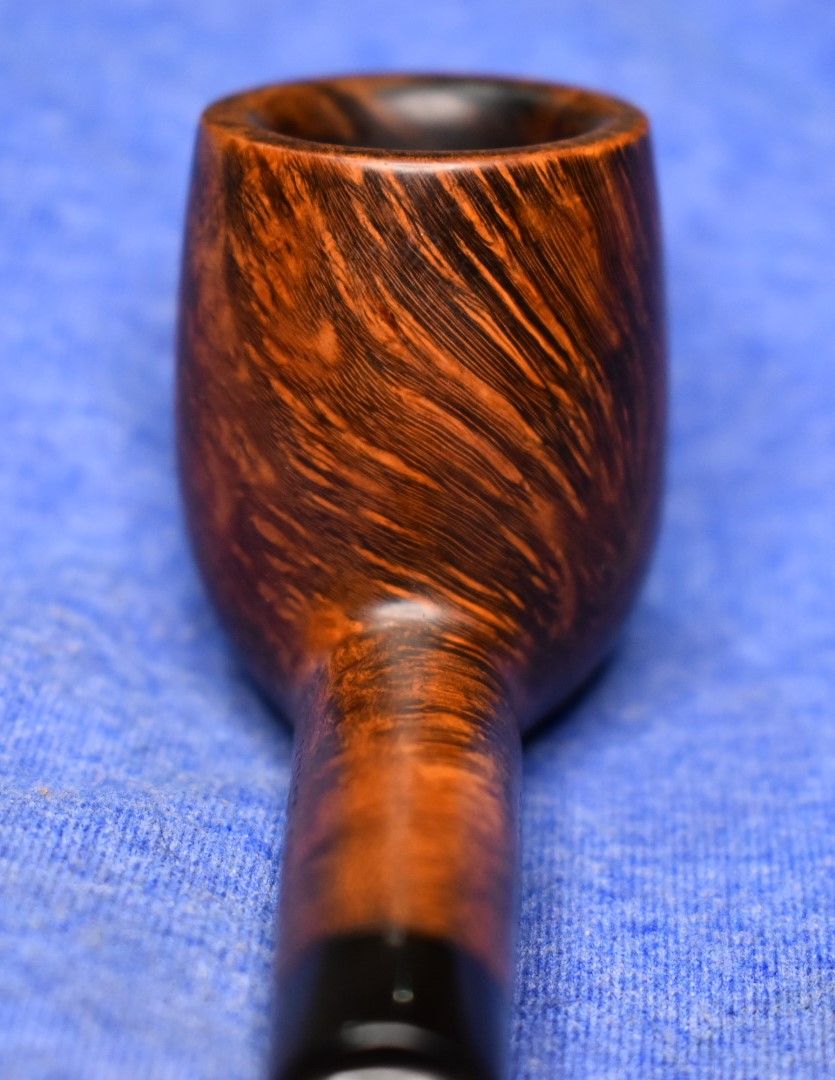
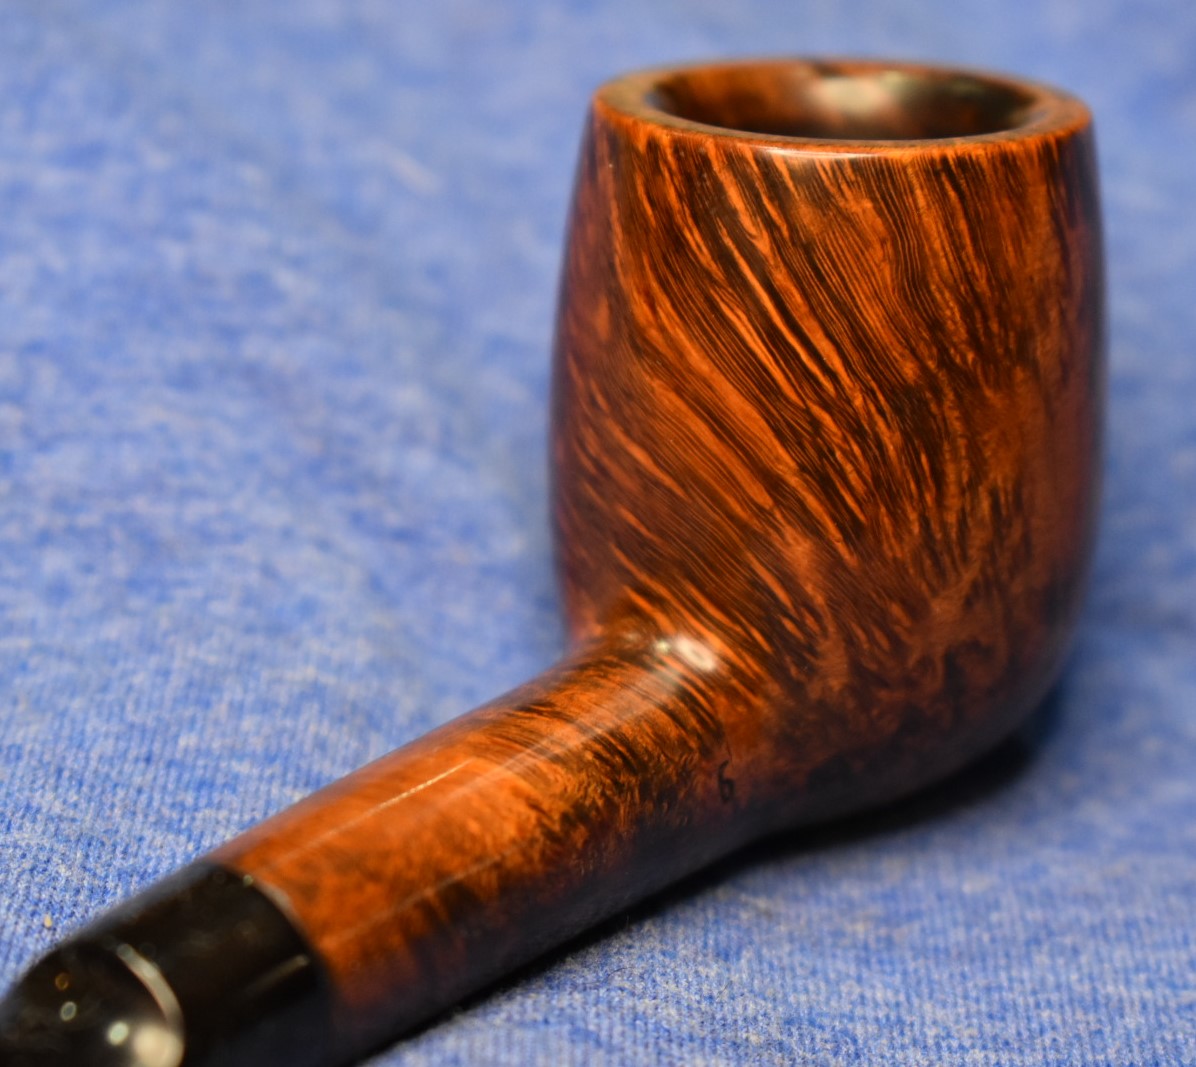
    I still appear to be stuck in  the 1940s.  Maybe stuck is the wrong term, that sounds a bit negative.  How about focusing on the 1940s?  That sounds better.  This restoration is all about this lovely lovat from Danco.  A beautiful little pipe won from eBay to further satisfy my quest for post-WWII artifacts.

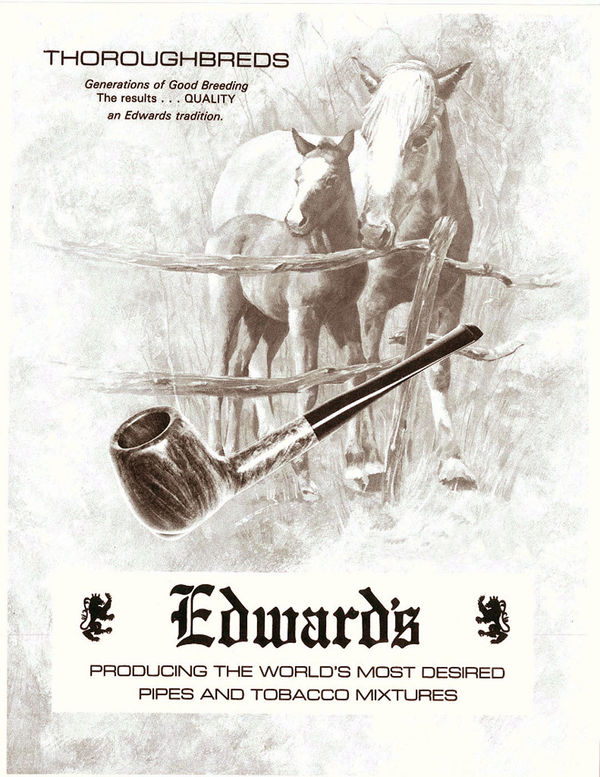
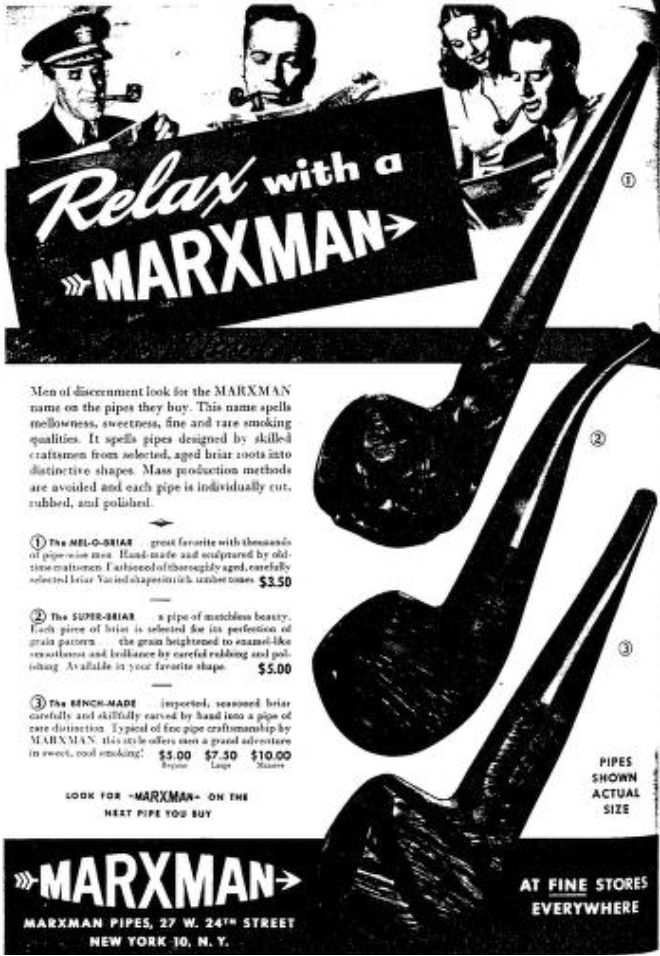
    Advertisements like this are what first drew me to Danco. “ Where There’s Smoke – There’s Danco”.  

    (Pipe Lovers Magazine 1947 all numbers : Free Download, Borrow, and Streaming : Internet Archive volume 1, p. 23)

    This large ¾ page advertisement was still working some 77 years after the original publication.  Well, I had the Danco in hand yet I wanted to know more about the company.  Pipedia.org had little to offer in the history of Danco. The short entry is as follows:

    “Some references to Danco pipes from the book “Who Made That Pipe?” and they put the manufacture of them in both Denmark and the US but do not attribute it to any specific maker. The adsn right indicate the location of the firm was on Hudson St., in New York.

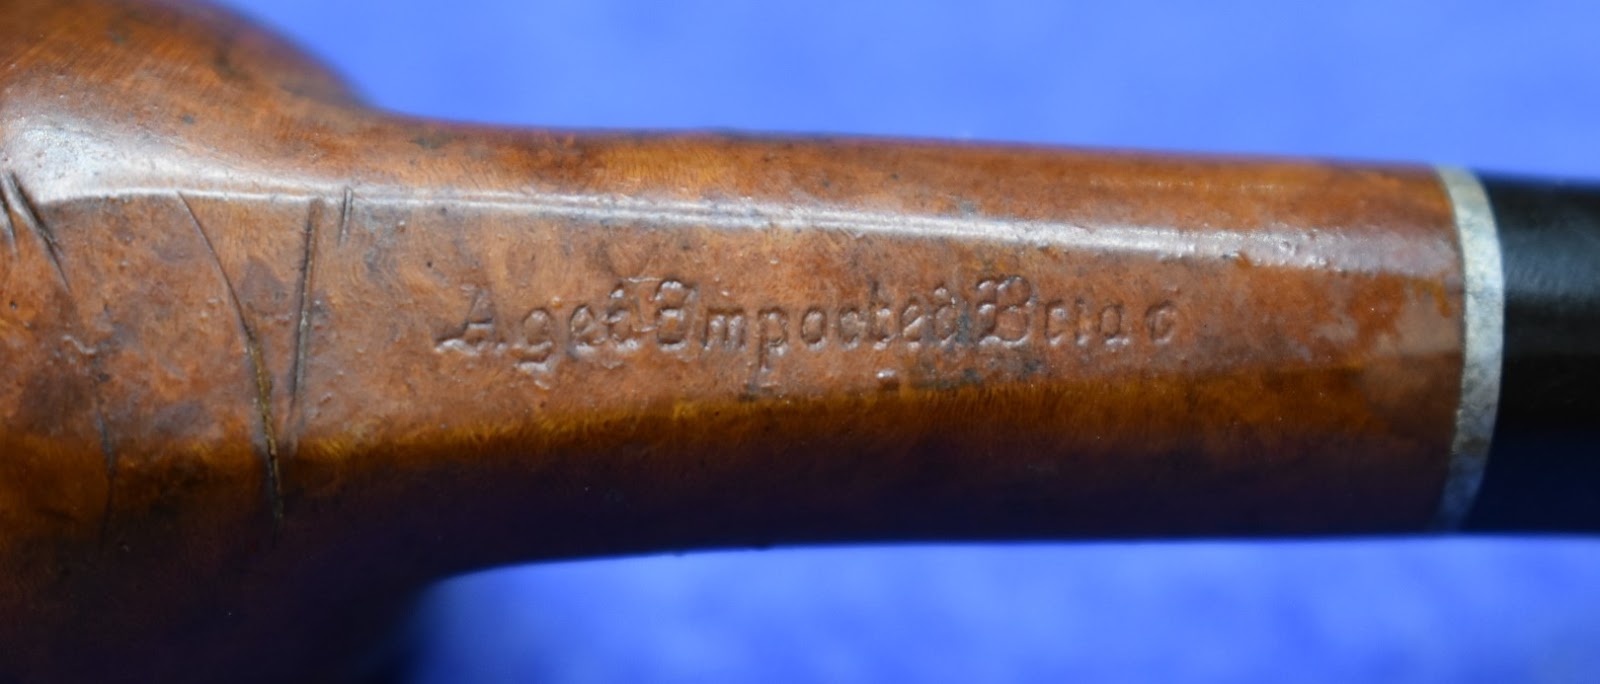
    Some Danco pipes are marked “Imported Briar” and that would suggest they are American made.

    Some Danco pipes that are marked “Italy” so the US Danco distributor/seller must have had some of the briar pipes they sold made in Italy.

    Danish Dancos should be stamped “Denmark.“

    ” (https://pipedia.org/wiki/Danco)

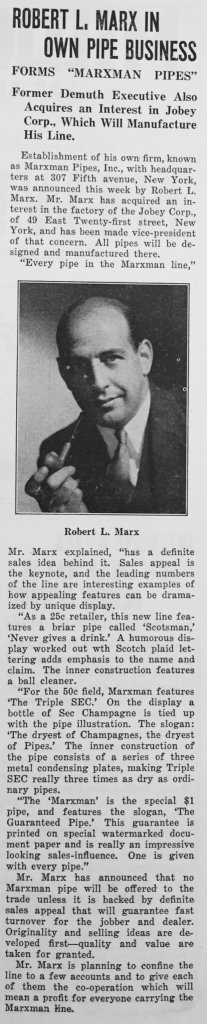
    Hmm, not much on a company that obviously had some market share, enough to warrant ad space in a nationally distributed magazine, anyway.  Next stop was to pipehil.eu, let’s see what they have to say.  Nothing.  That can’t be right.  Hmm, how about a blind search for “Danco” on Google.  Hmm, the pipedia.org page, an eBay listing and Steve Laug’s Rebornpipes.com.  I checked the Rebornpipes.com blog post and discovered that Steve had apparently experienced the same lack of historical context as I had.  Disappointed, I expanded the search to include “Danco pipes, New York, New York”.  Scrolling through those results I came across a receipt.

    (https://i.ebayimg.com/images/g/Y5EAAOSwotVka4-5/s-l1600.jpg)

    Evidence that Danco did exist.  Other than the pipe in hand, a pipedia blurb and a restoration by Steve Laug.  This led to a search for the Frankle Brothers Company.

    (https://metromonthly.wordpress.com/2013/03/14/photo-frankle-bros-in-downtown-youngstown/)

    (https://twitter.com/JoshLipnik/status/1423823946416377859)

    Well, they too did exist.  Apparently “did” was the key word.  Conjecture says that the first store was older than the second and neither remain today.

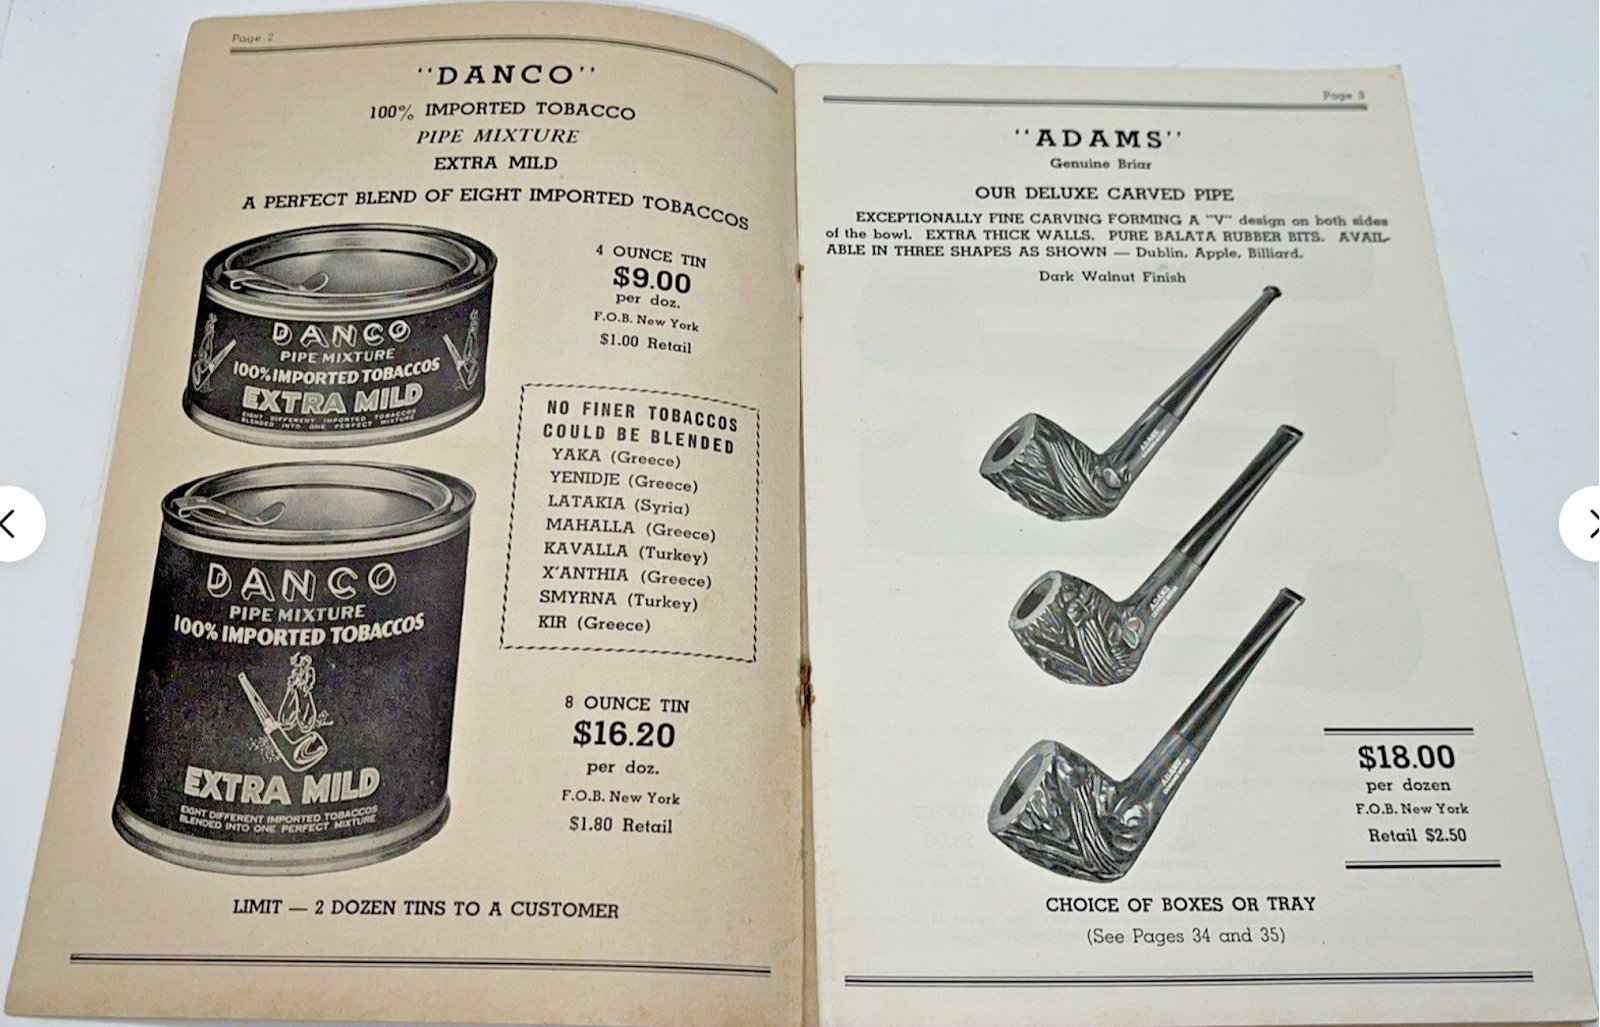
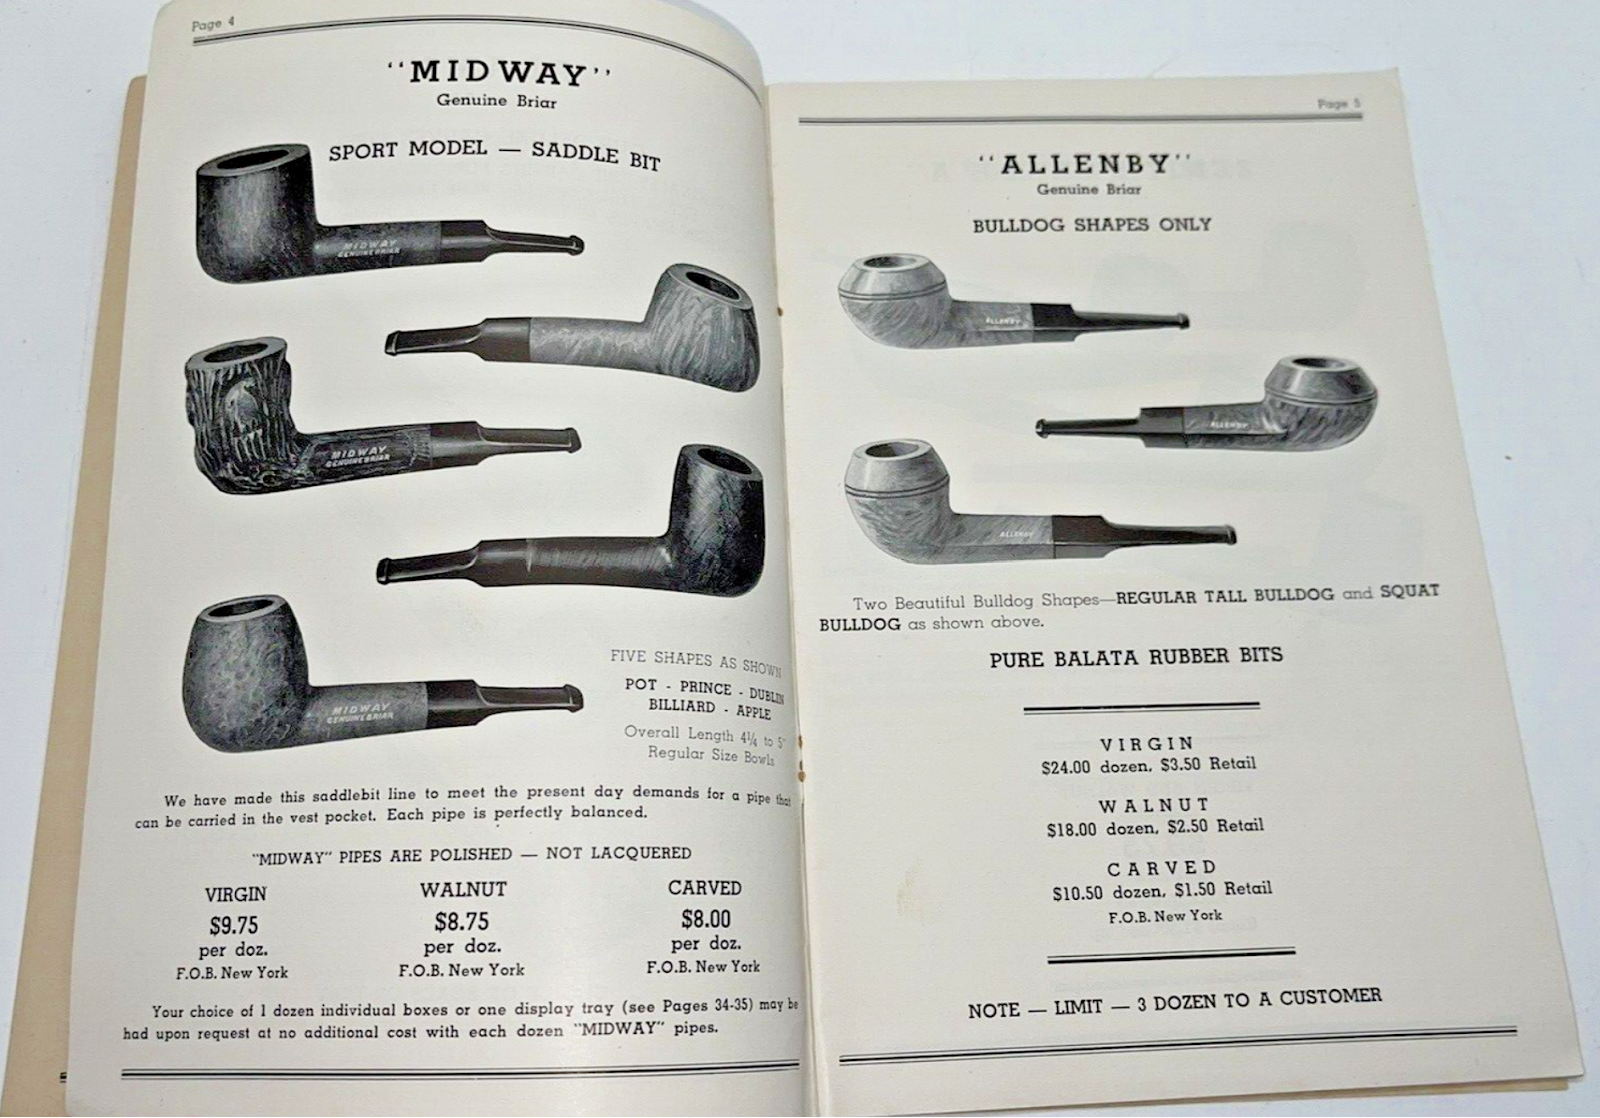
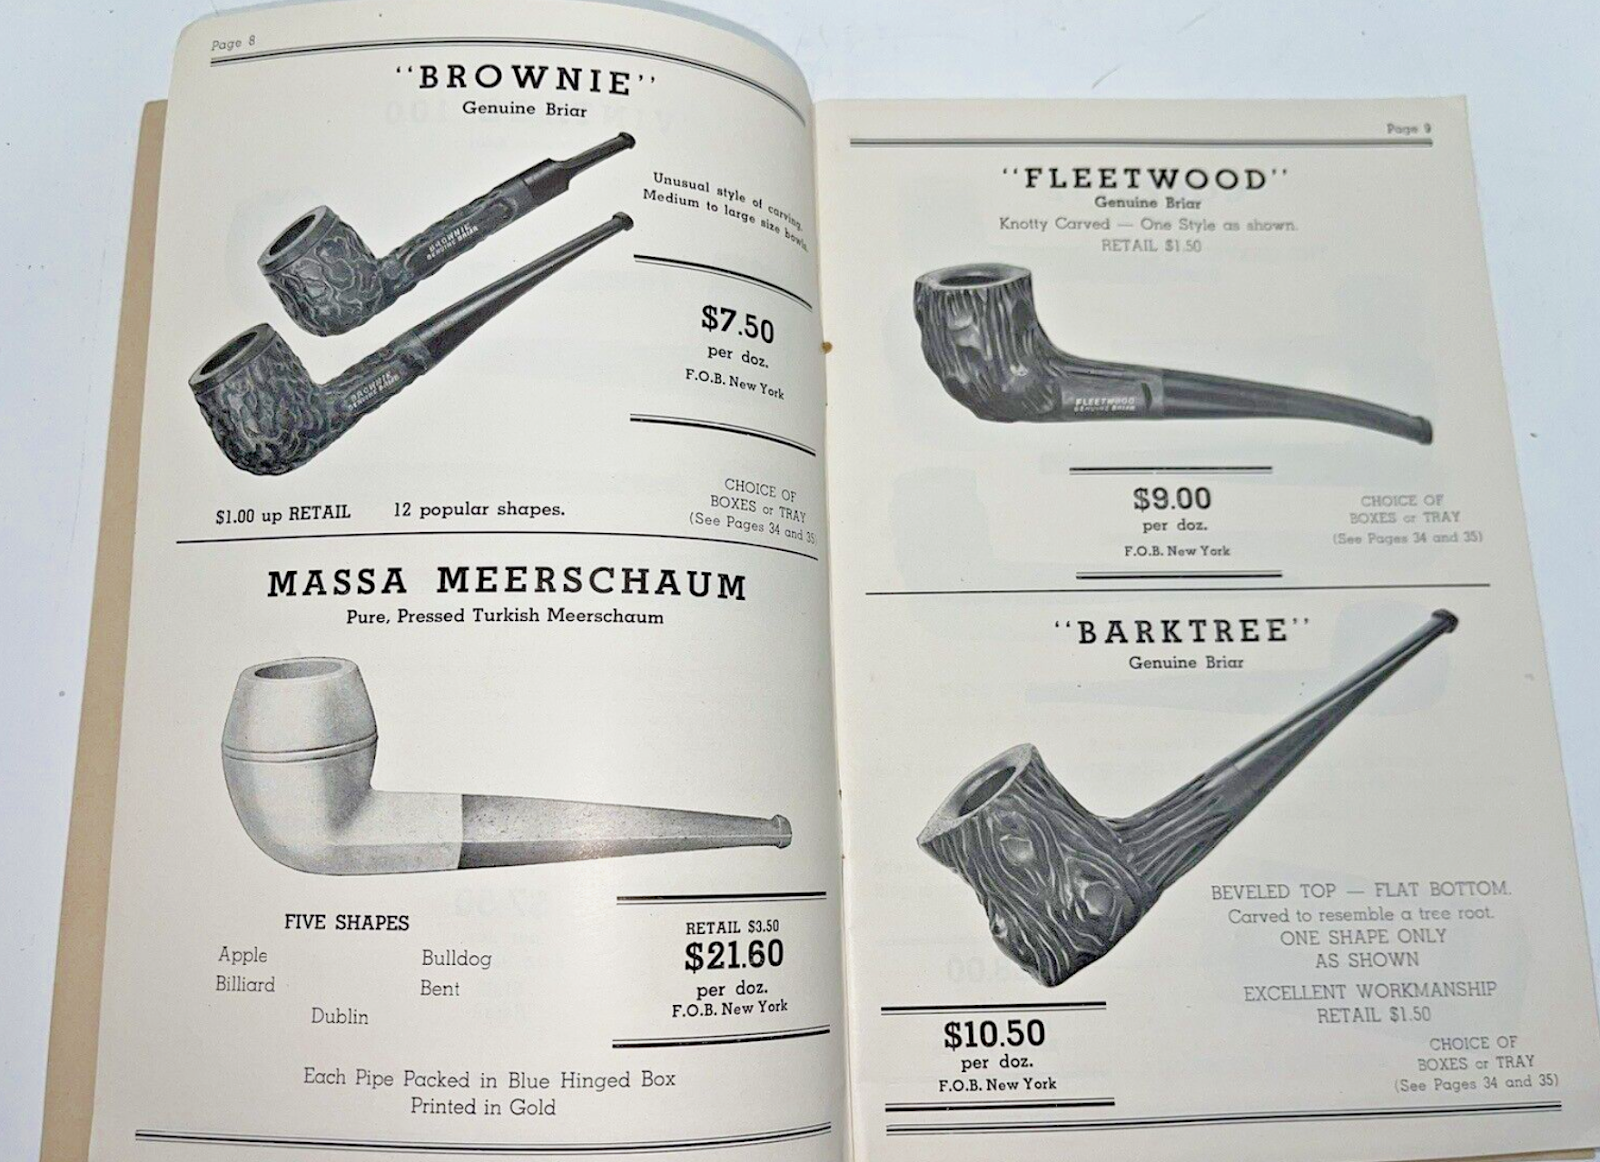
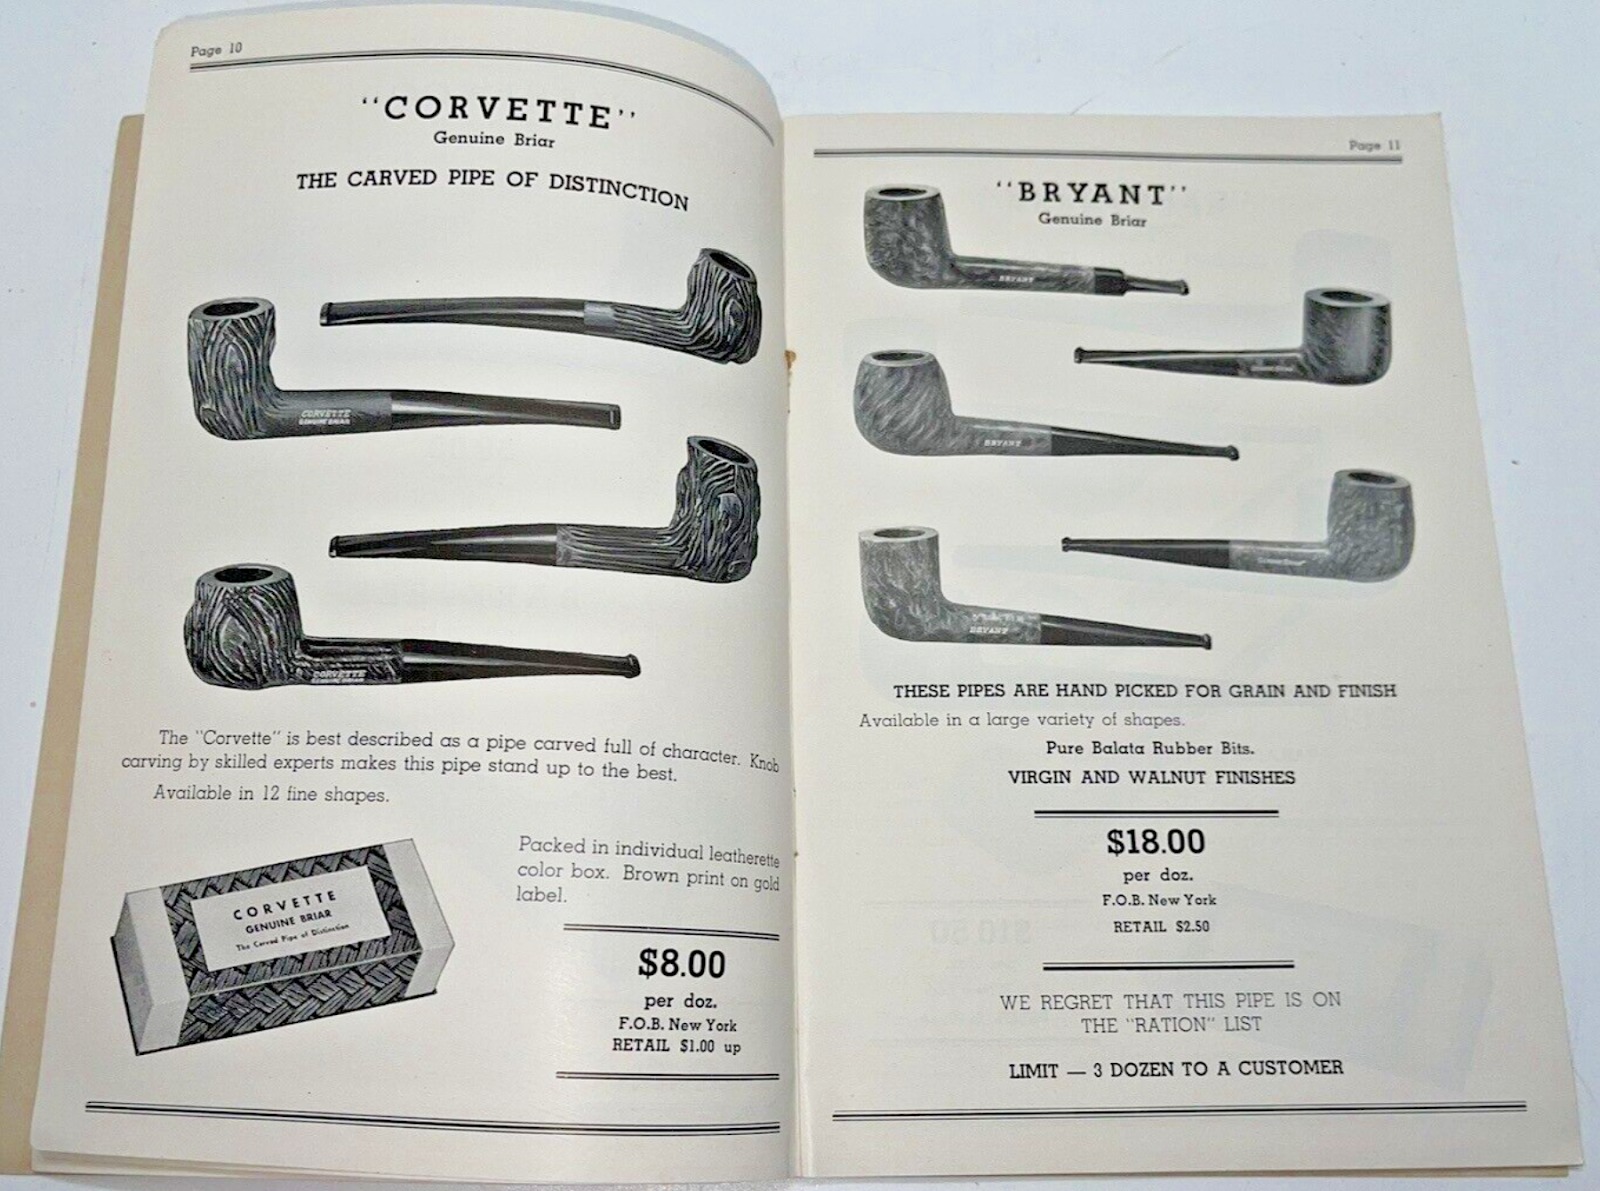
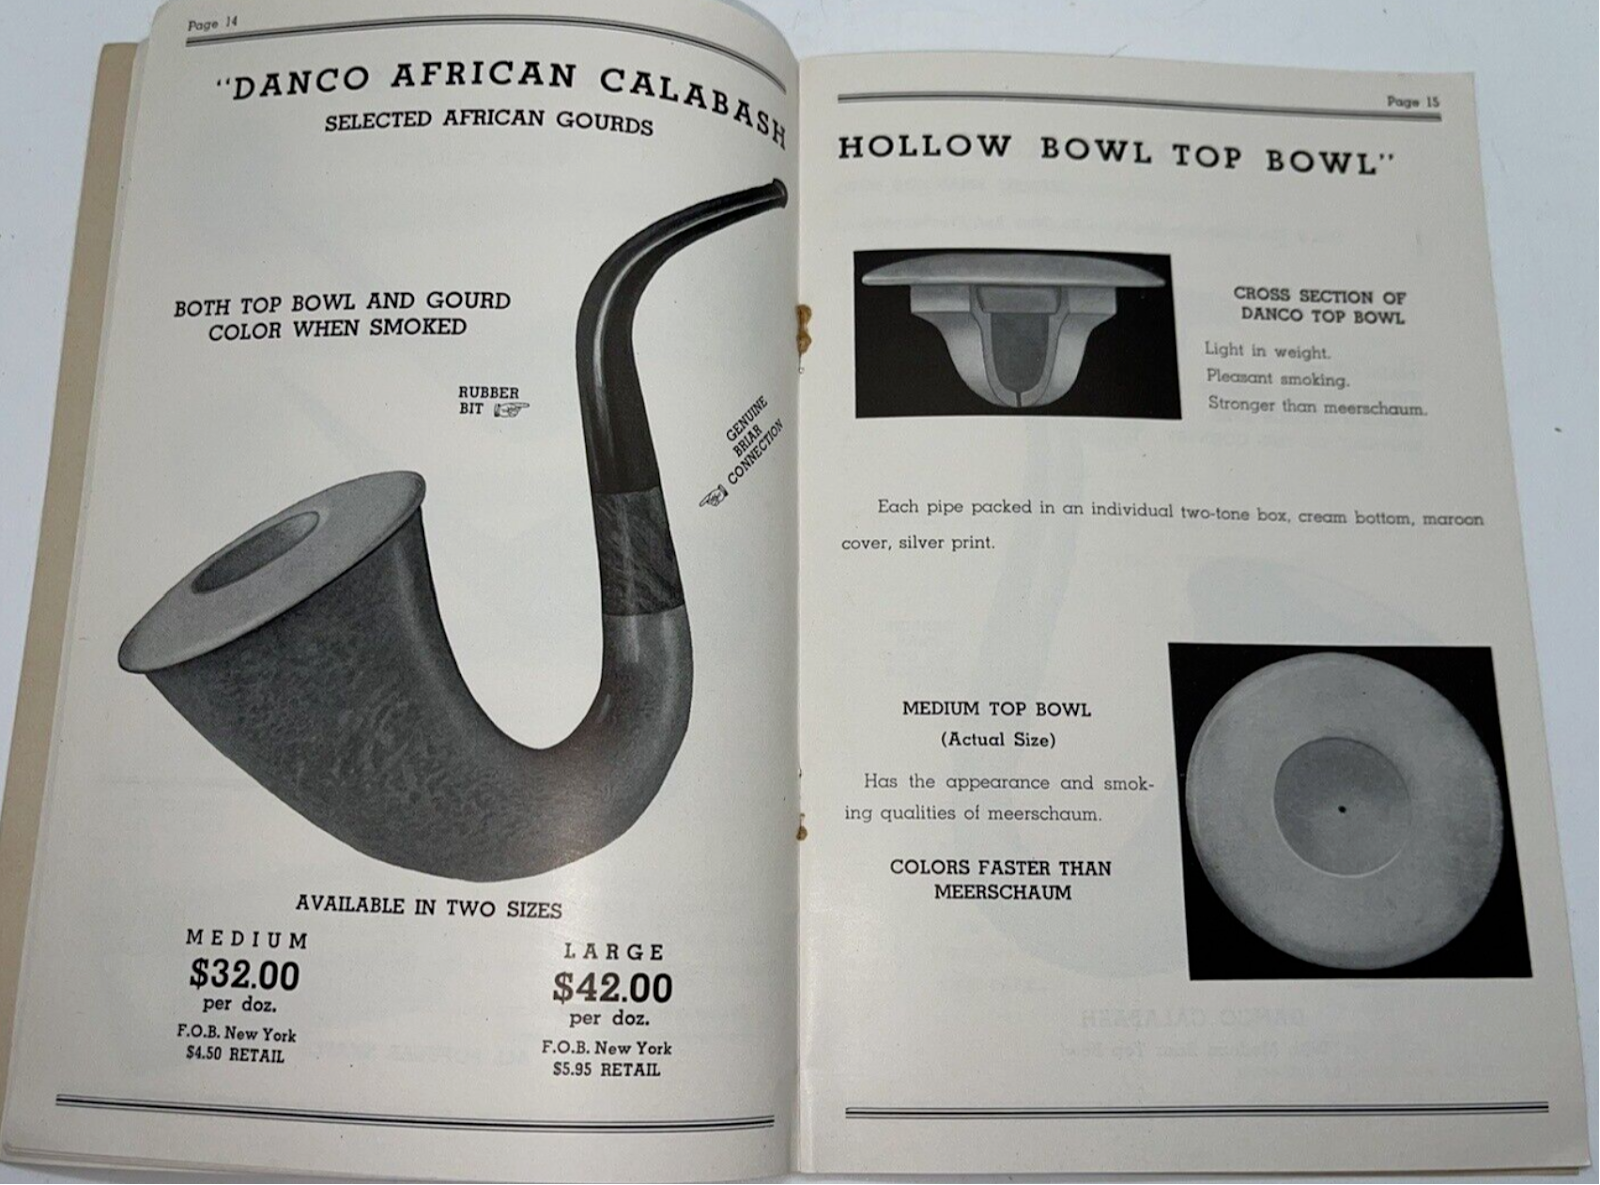
    Being innately stubborn I refused to give up.  I tried the eBay link.  Okay, that’s cool.  An original 1944 multi page catalog.  Obviously, a catalog meant for retailers buying pipes to sell at their shops and not a catalog for the consumer.  It even came with caricatures of Hitler, Hirohito and Mussolini. 

    Front and back covers

    (https://www.ebay.com/itm/225820042630?hash=item3493ec6586:g:ZLEAAOSwZlllLIRV&amdata=enc%3AAQAIAAAA8HDX52o7NBmnLkme%2F6V%2F6LYGBO5fjA4OCS6KUkTzzHJRuFb%2BwI5r5s%2F5e7%2F67hlIv0WW2MSJpoFjELxJB1MFVPZ%2BcAWyLNSK7ICRc%2F882anA9KTIREXR2zJSP3aMYiEDovYe74EFI%2BRXoz33y7Th0rGqFJzFp9CdPhGWnY9q58jop6z9mZxK9OyCHHi8lJw5IIOpc8kX3Xbz0NwimasIAqu%2FgprLGAZnrRNfB7GLV%2BQxxh98HKhUNm%2FDcY2neCRKxrYm9vUO6P0%2FV0TgE06j%2FdxNpsPZfurNa6rQzQ5m%2FMjEftqJoGNsqgf7kkjYc4D%2F%2Fw%3D%3D%7Ctkp%3ABFBMjLPz4aNj)

    Well, I am not sure how to credit the original source material of screen shots of auction items from eBay so, there’s the link.  If any lawyers come around asking, you don’t know anything, okay?  I mean these images were obviously put here by some Antarctican hacker attempting to interfere with democracy.

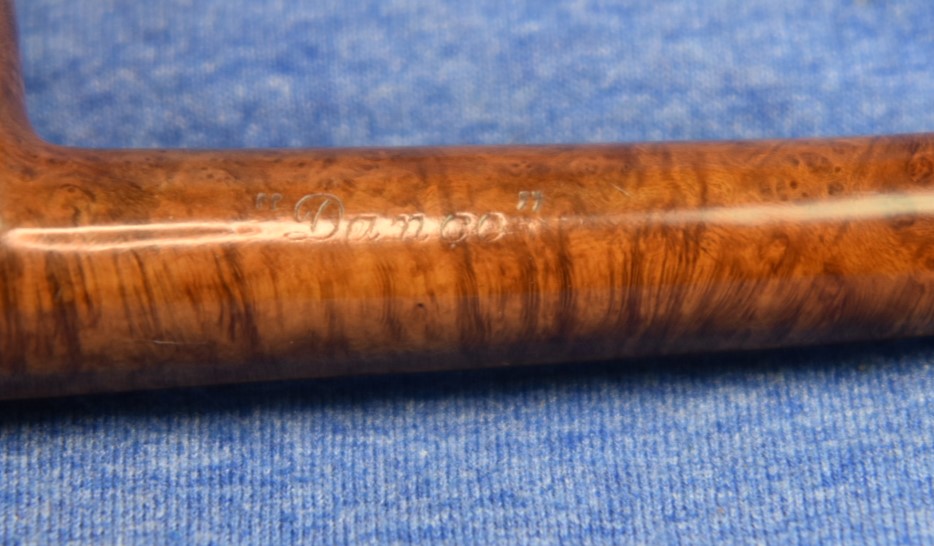
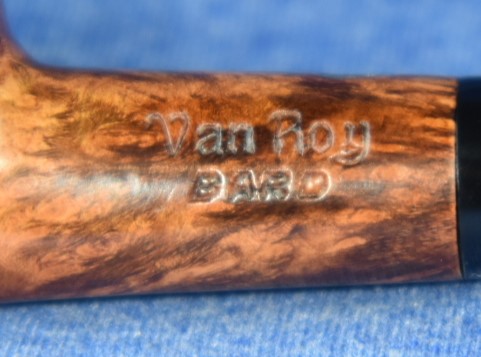
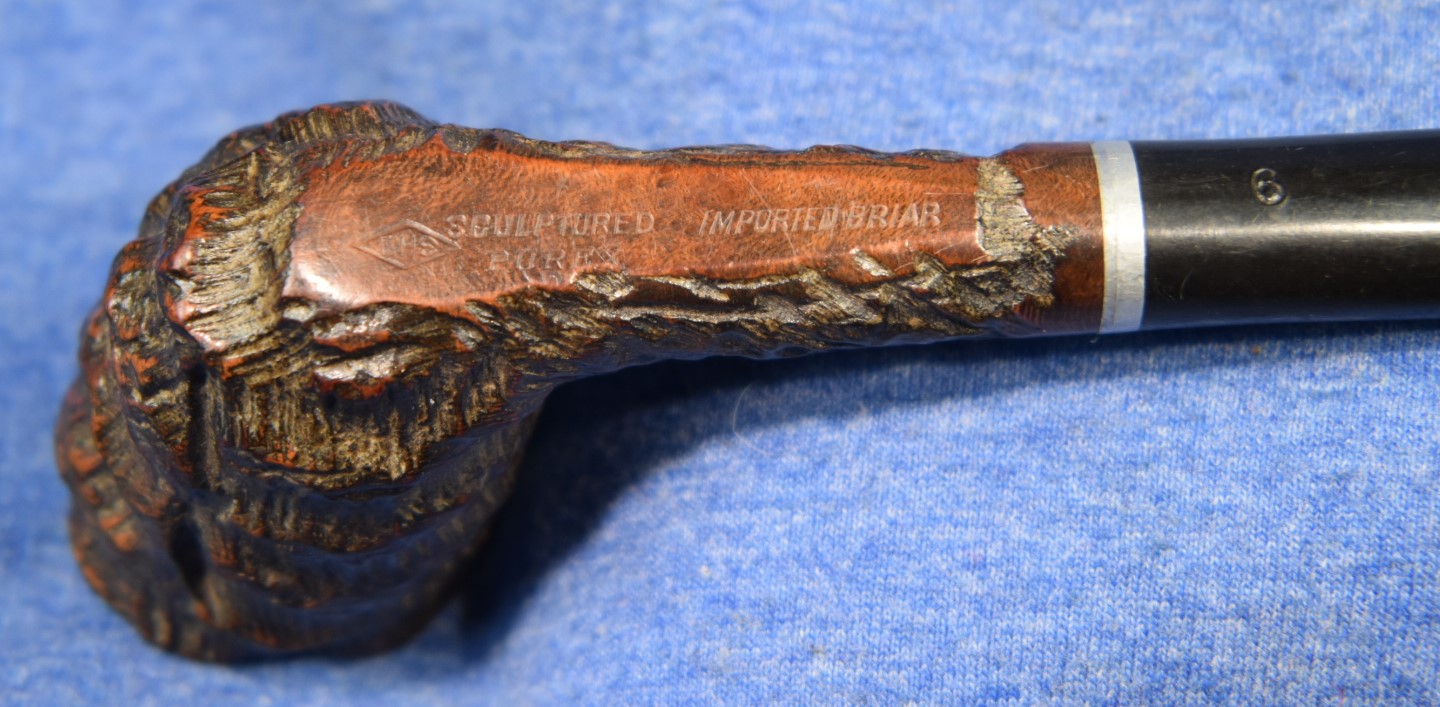
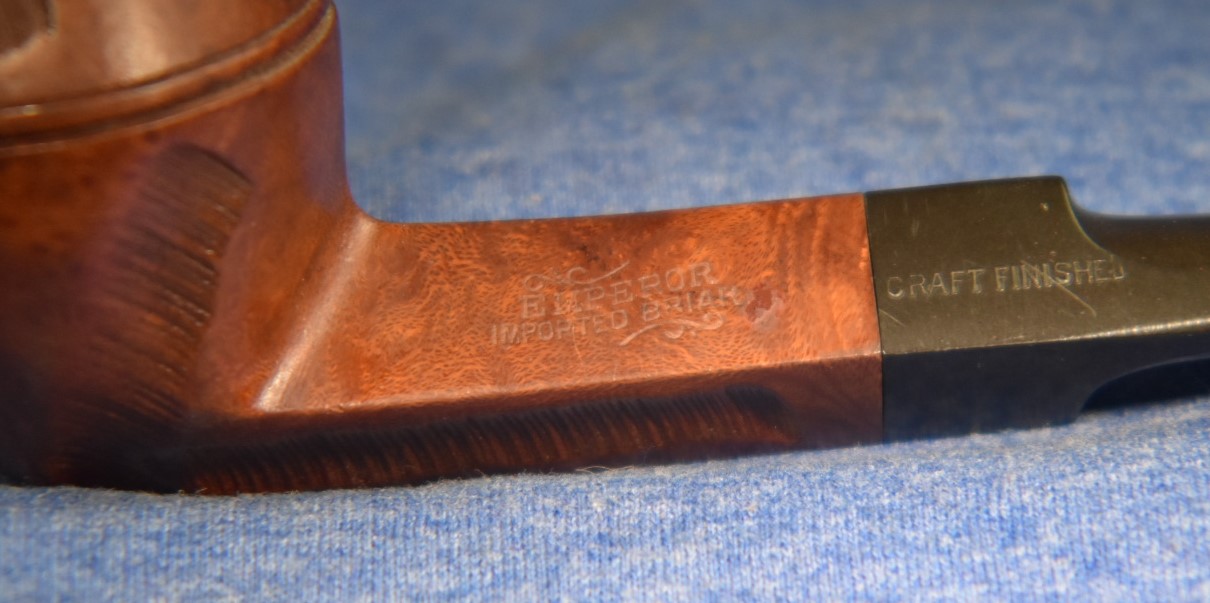
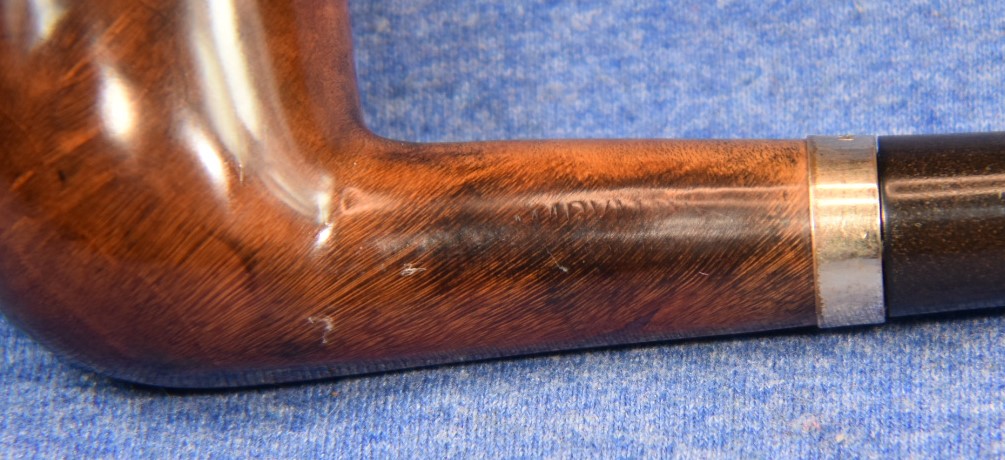
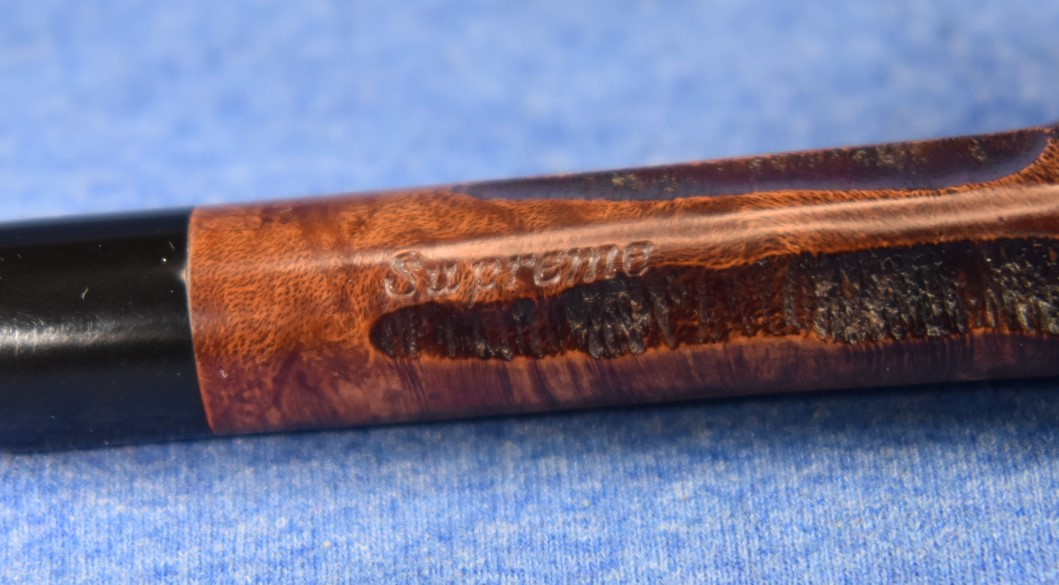
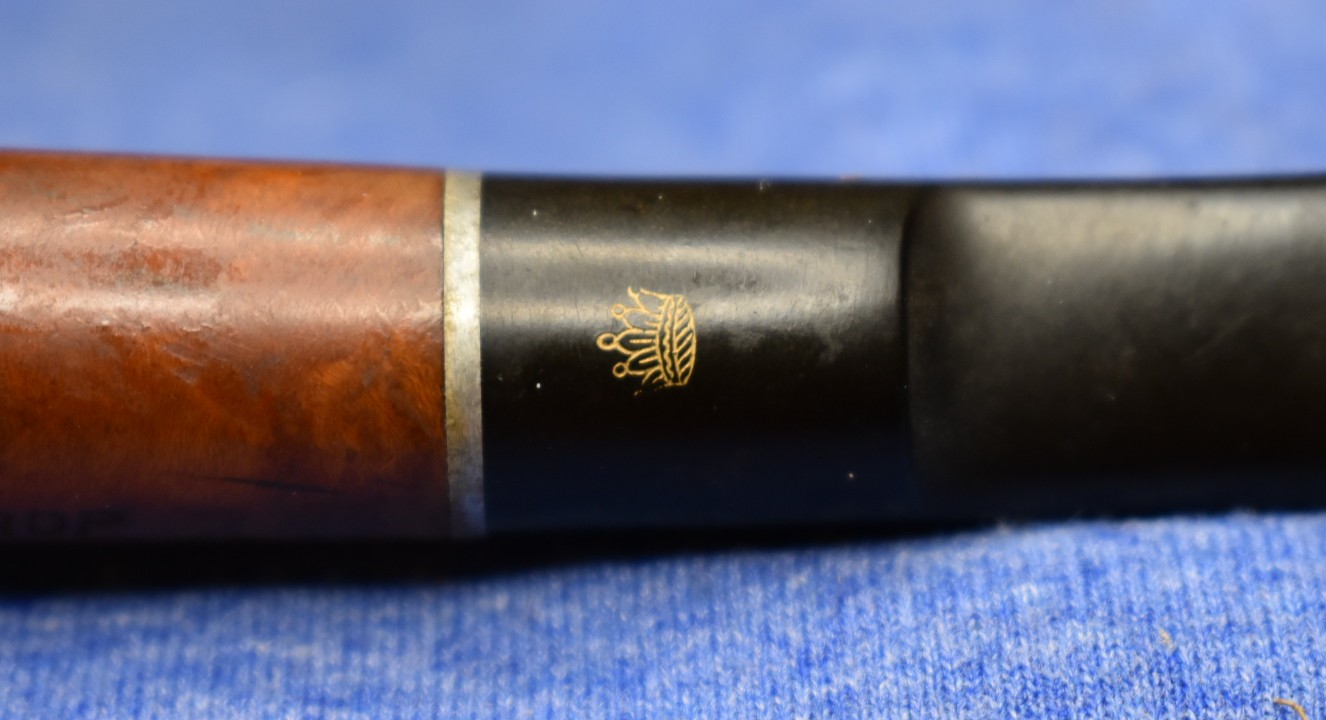
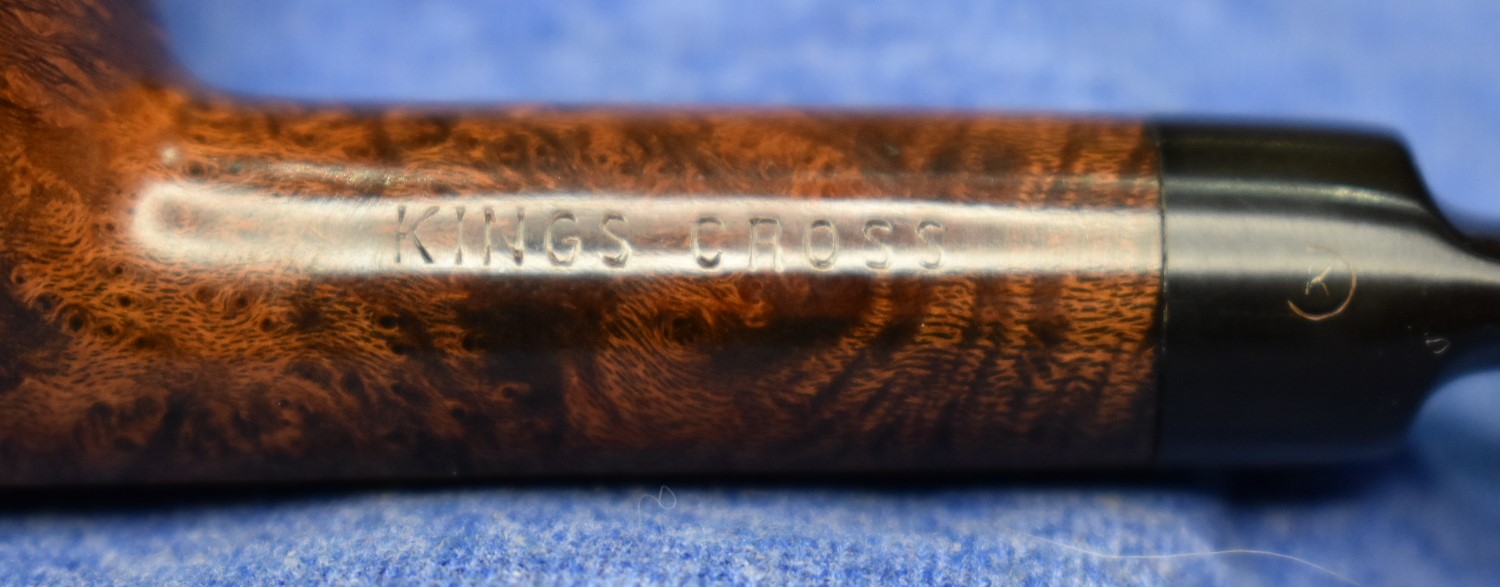
    The greatest let down of this whole research project has been the lack of information about the Danco Lovat sitting here next to me.  The catalog doesn’t even mention a lovat as a shape made by Danco.  At best, you could say page 4 has a “Sport model” “Billiard” that looks about the same.  All of the pipes in the catalog have a model/line associated with them.  Perhaps this pipe did as well but, the stamp below “Danco” is far too faint to know if there ever was a stamp there.  So let’s assume that this is a 1940’s Danco lovat.  Besides, that saves me the trouble of retitling this blog.

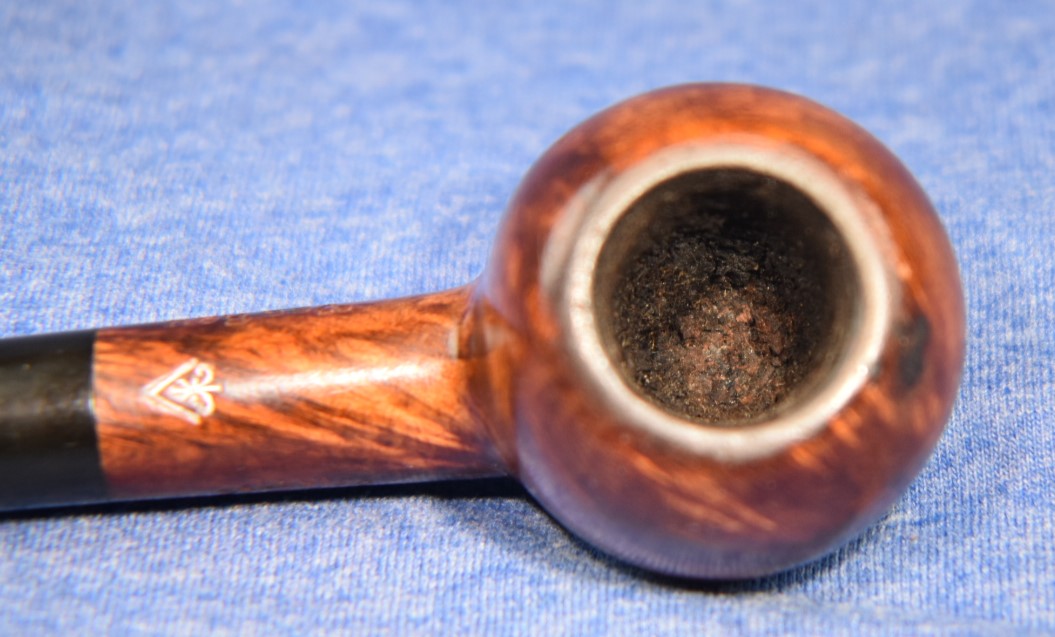
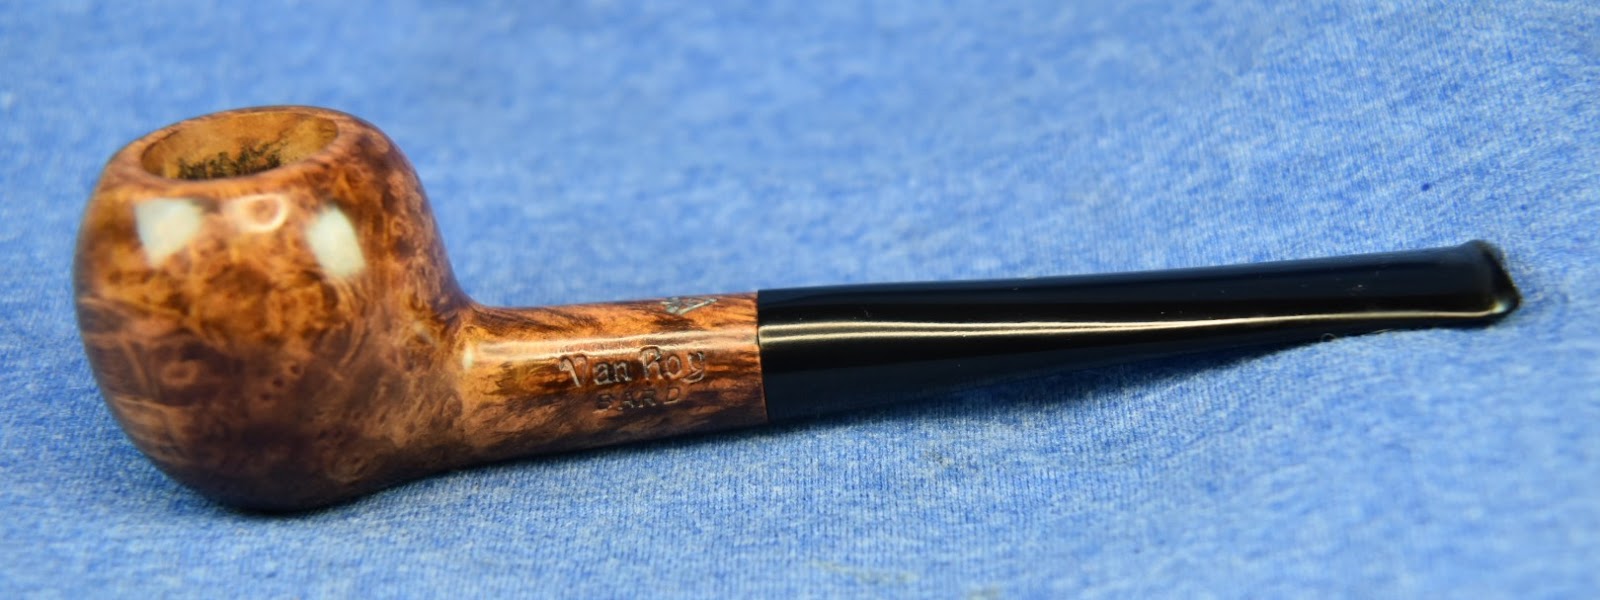
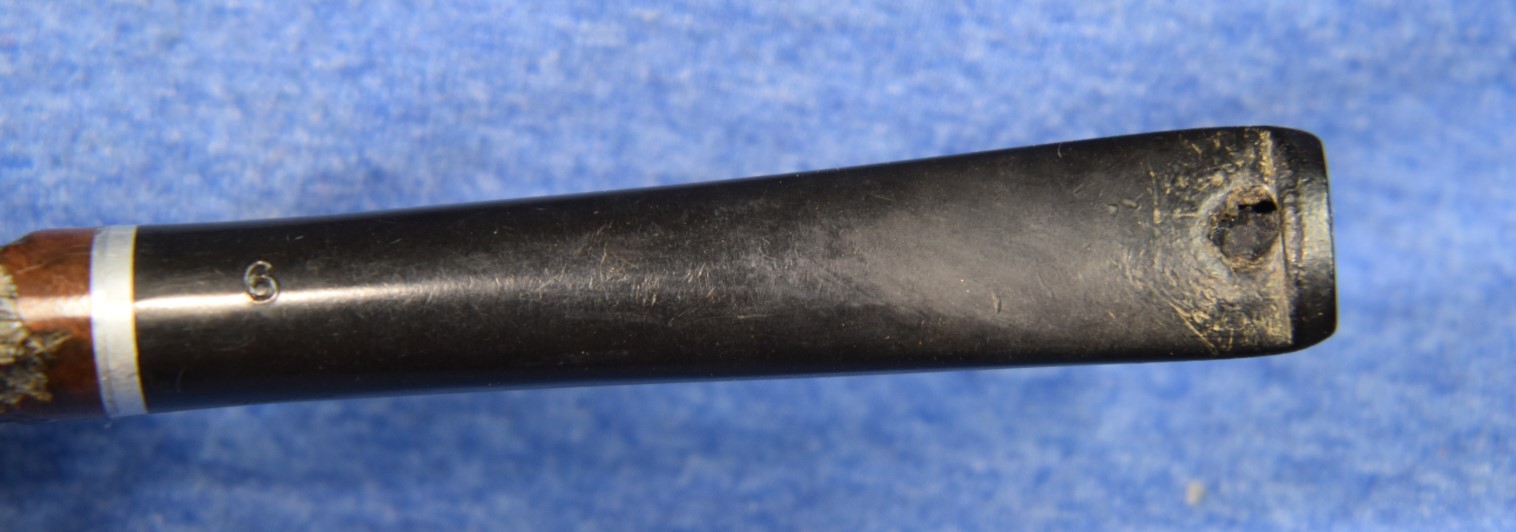
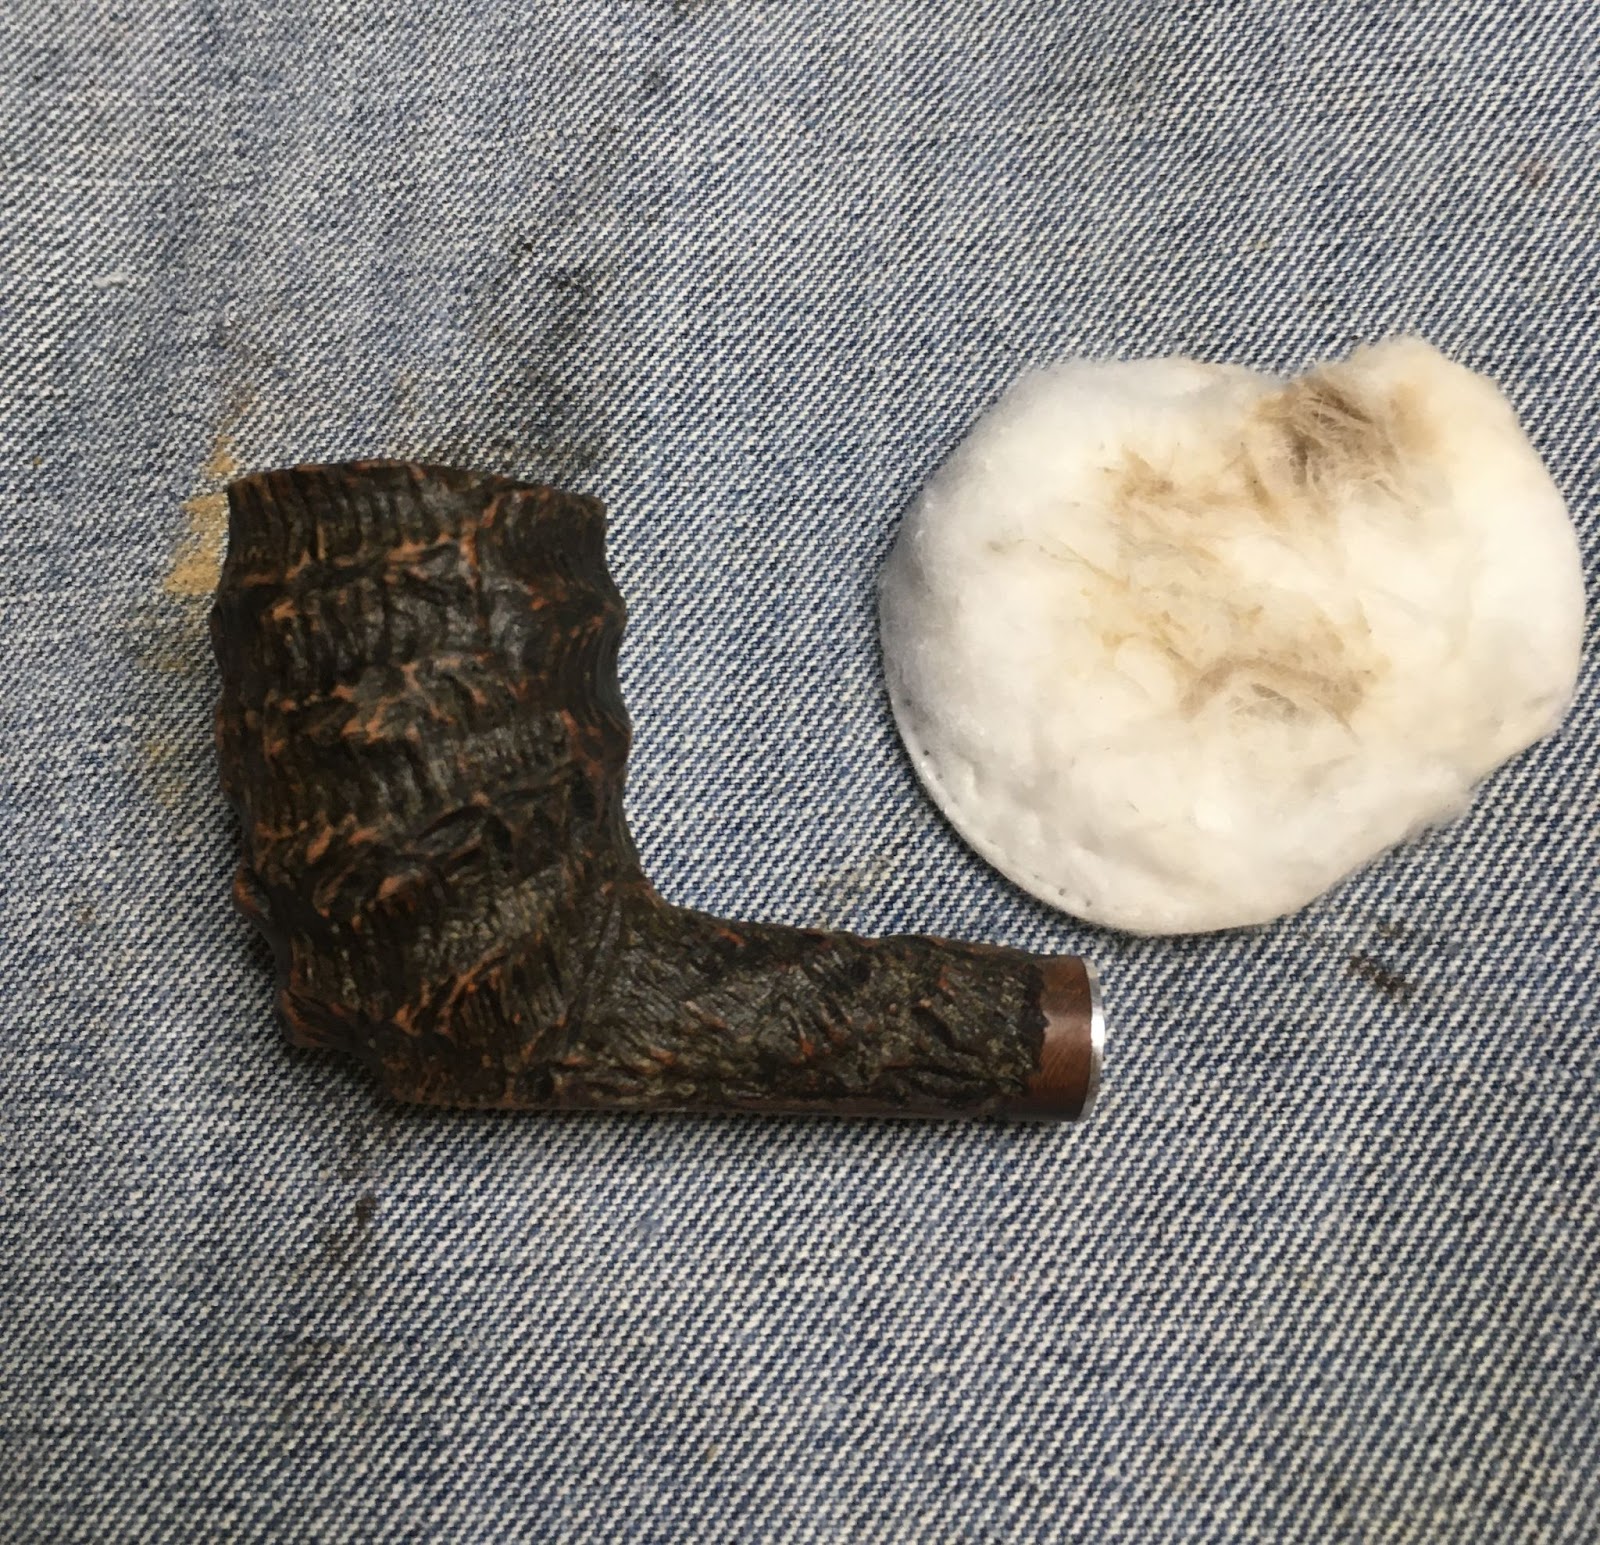
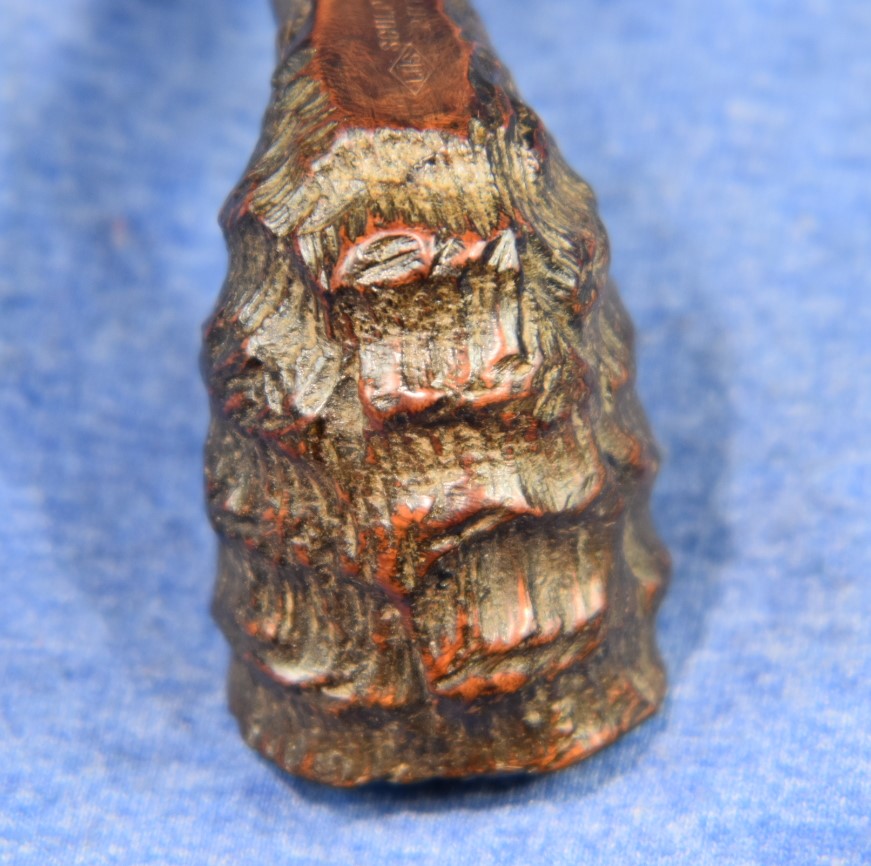
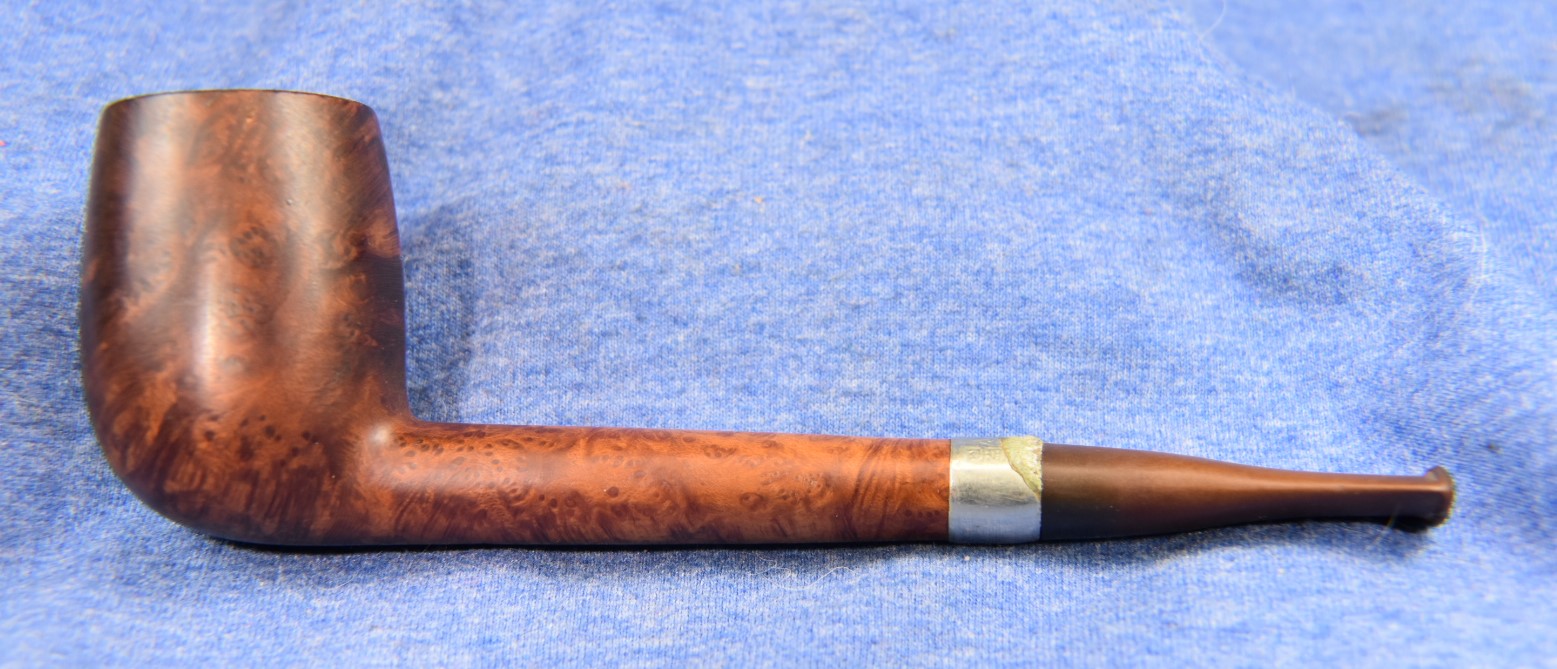
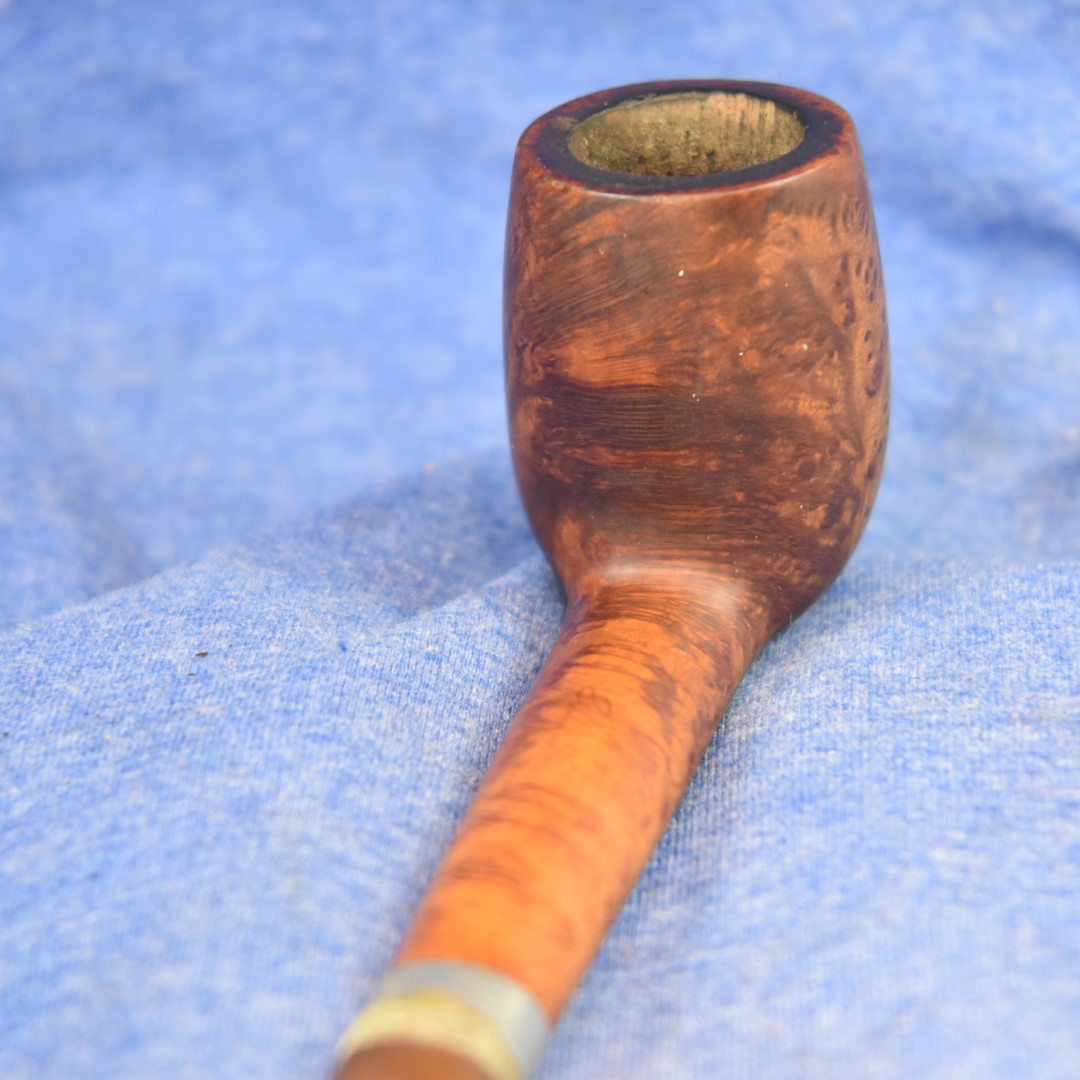
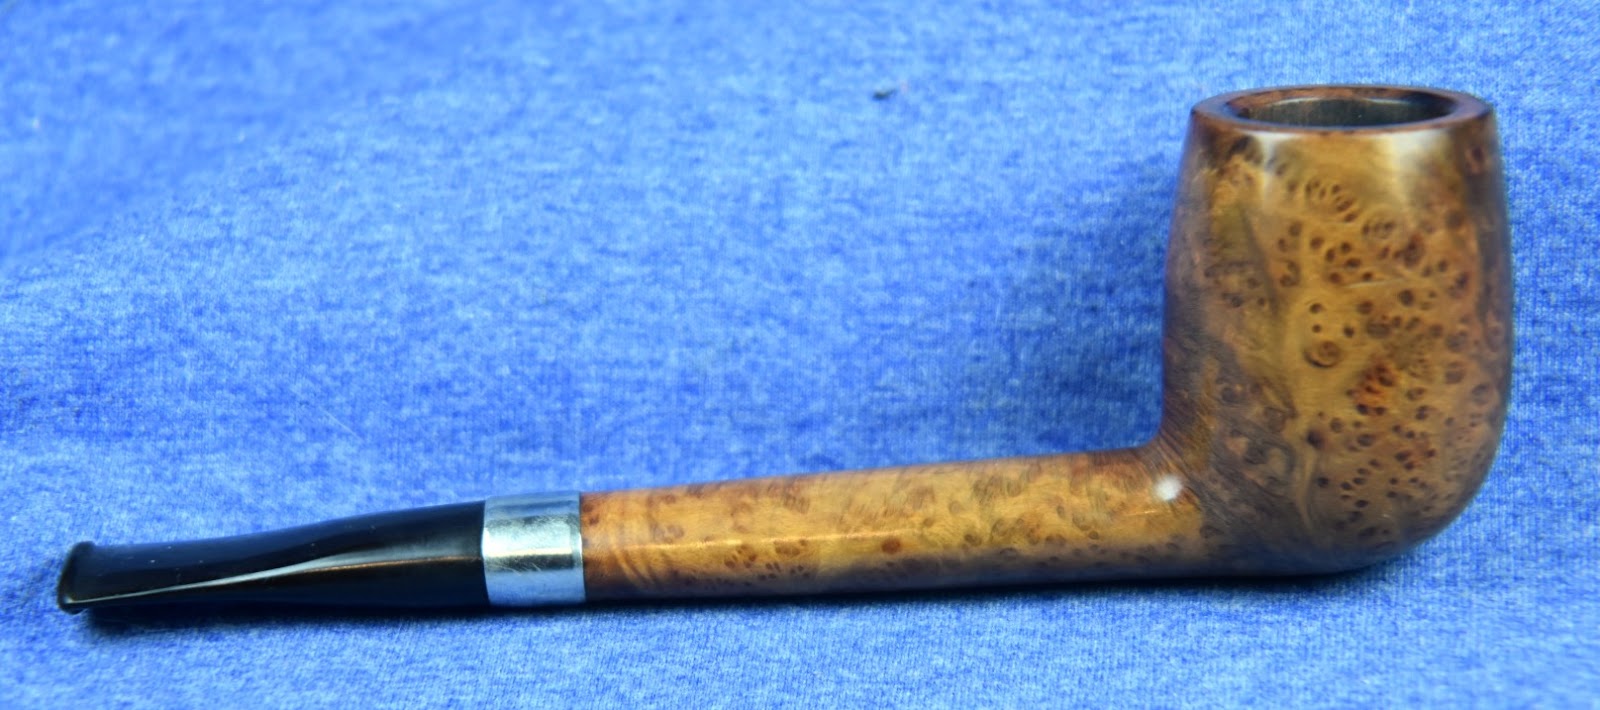
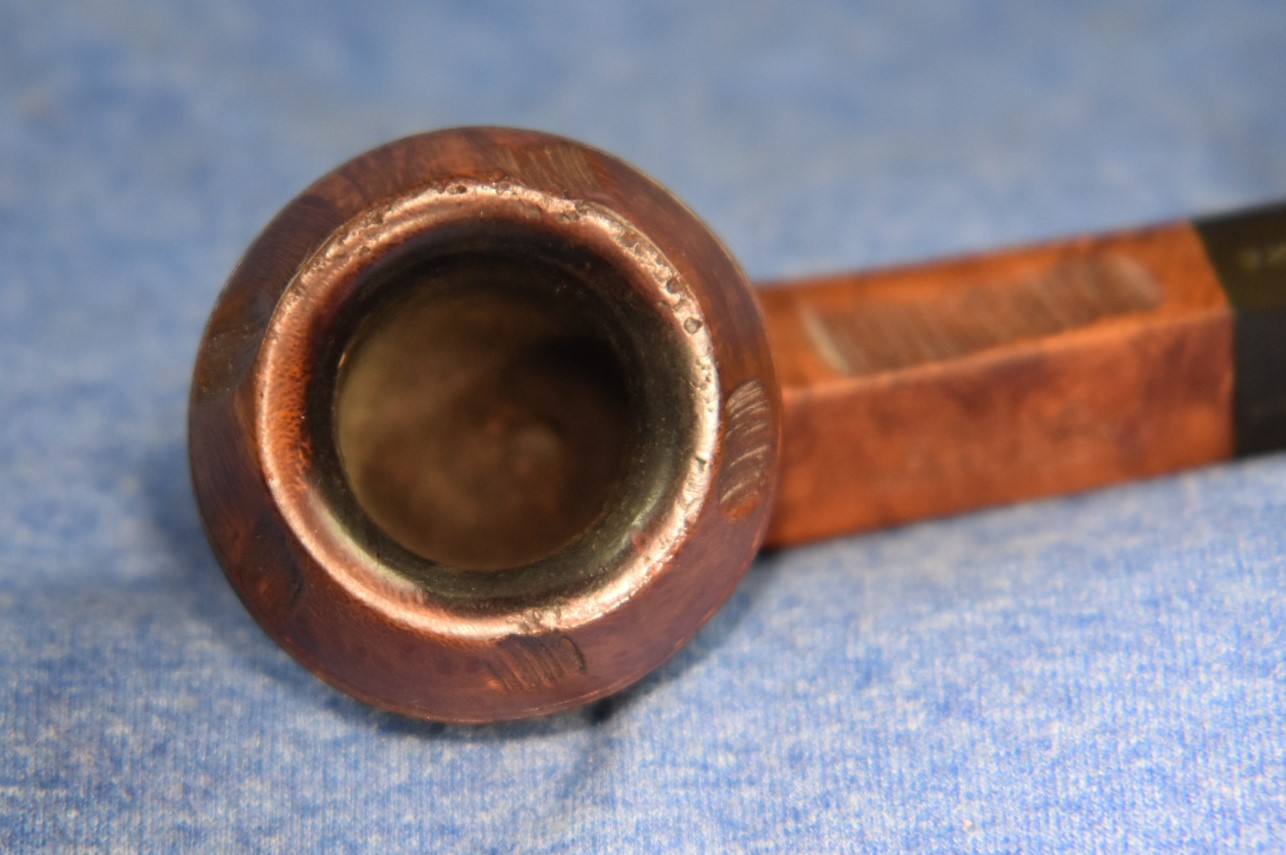
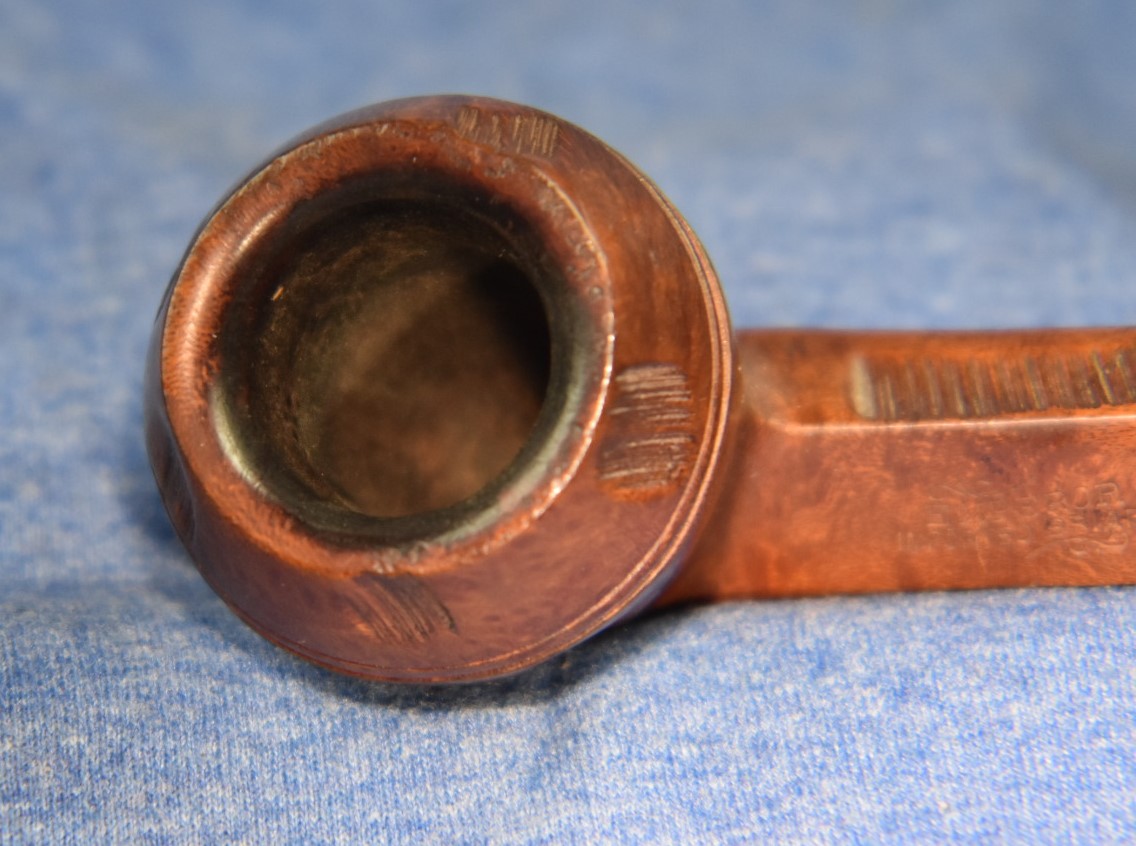
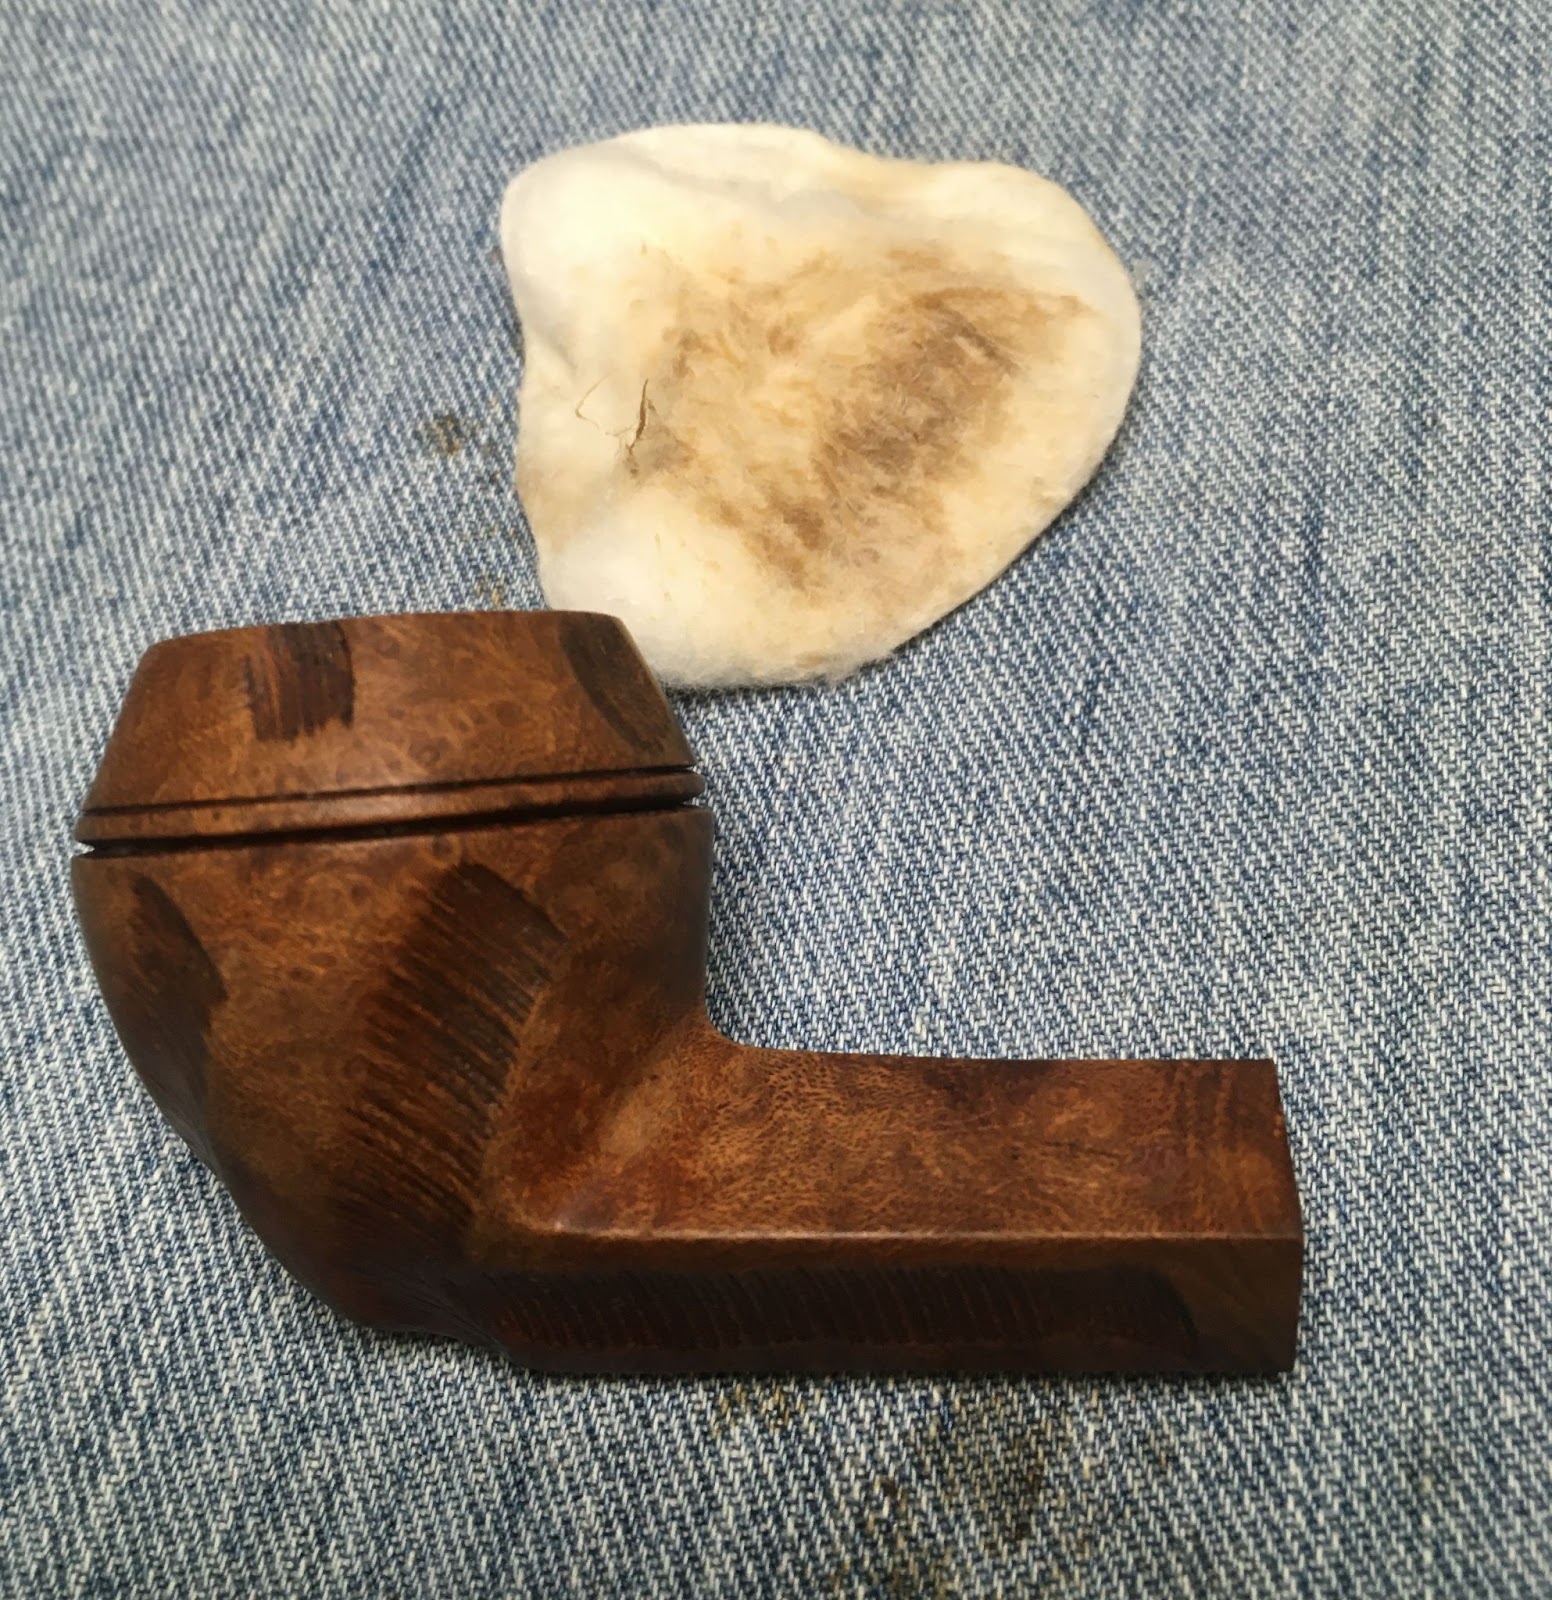
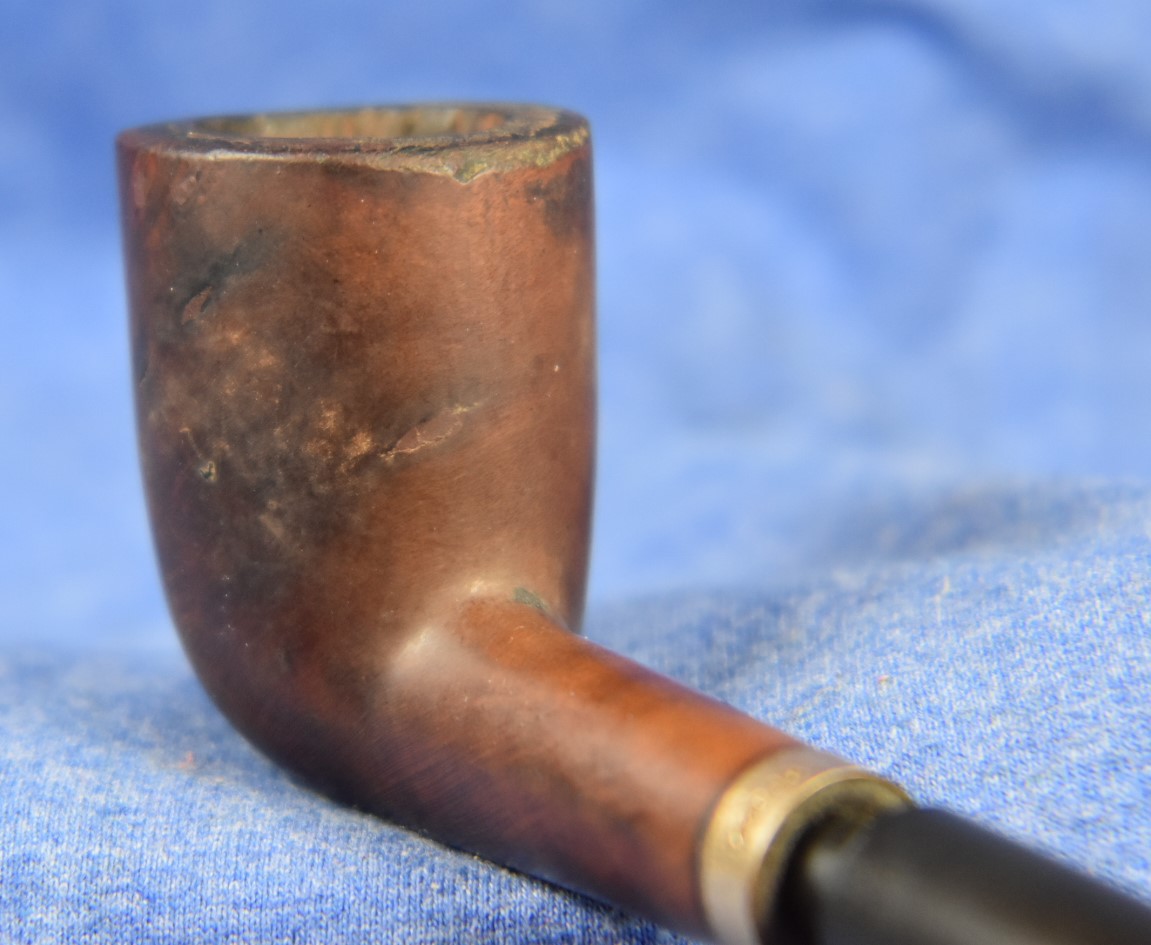
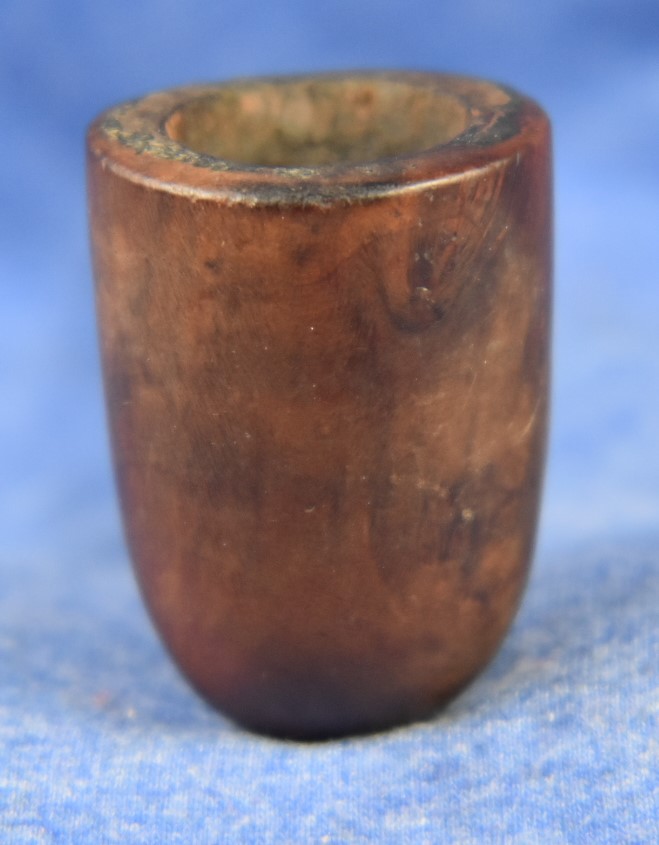
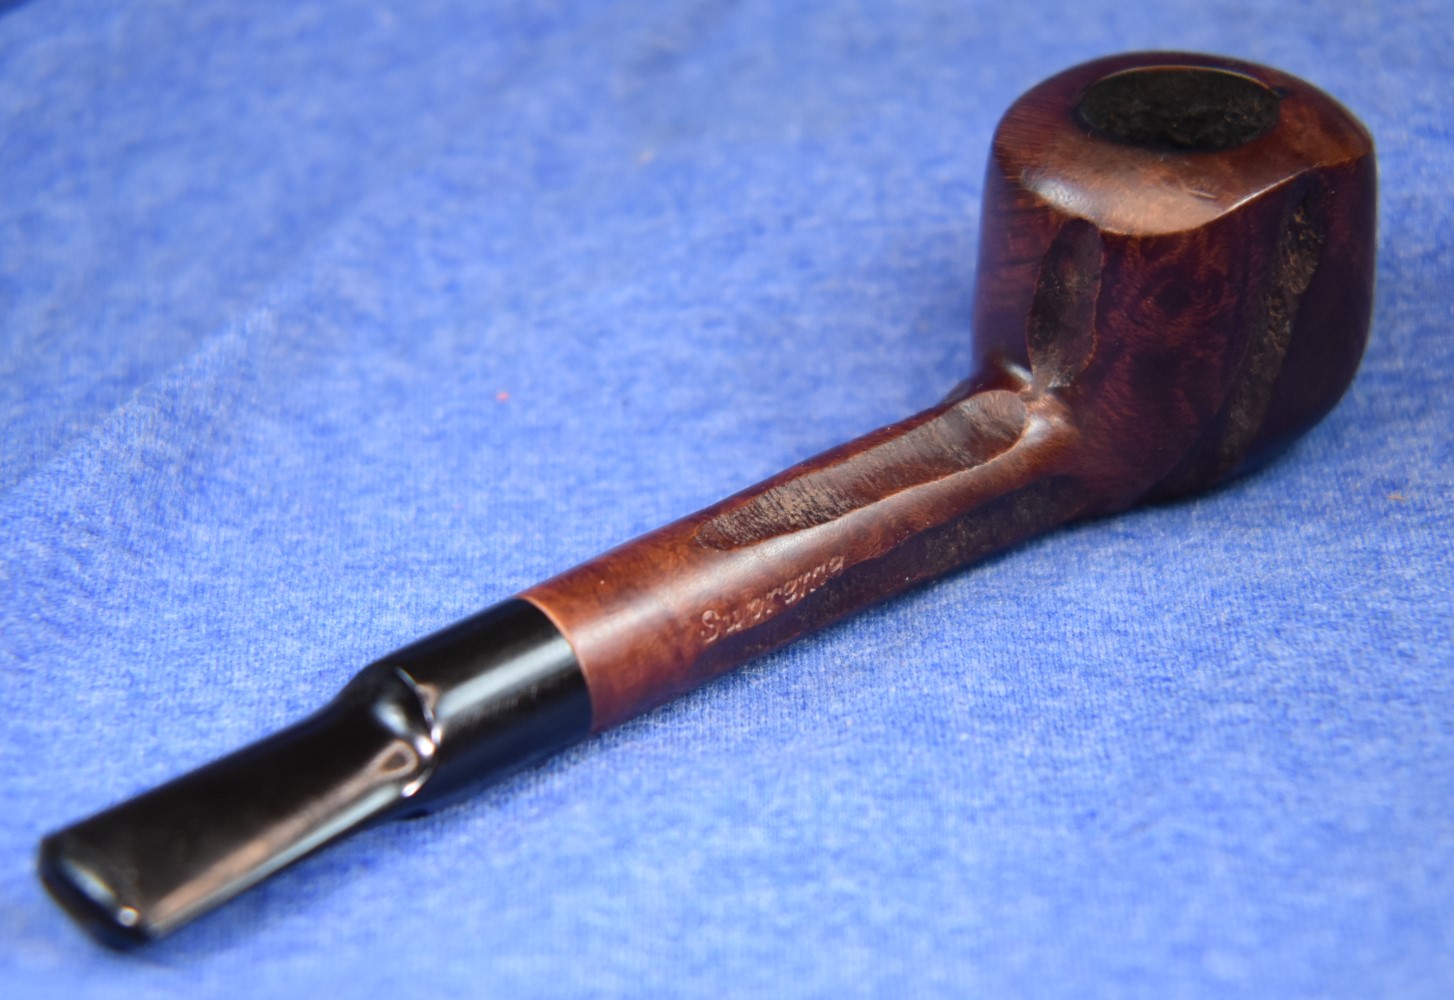
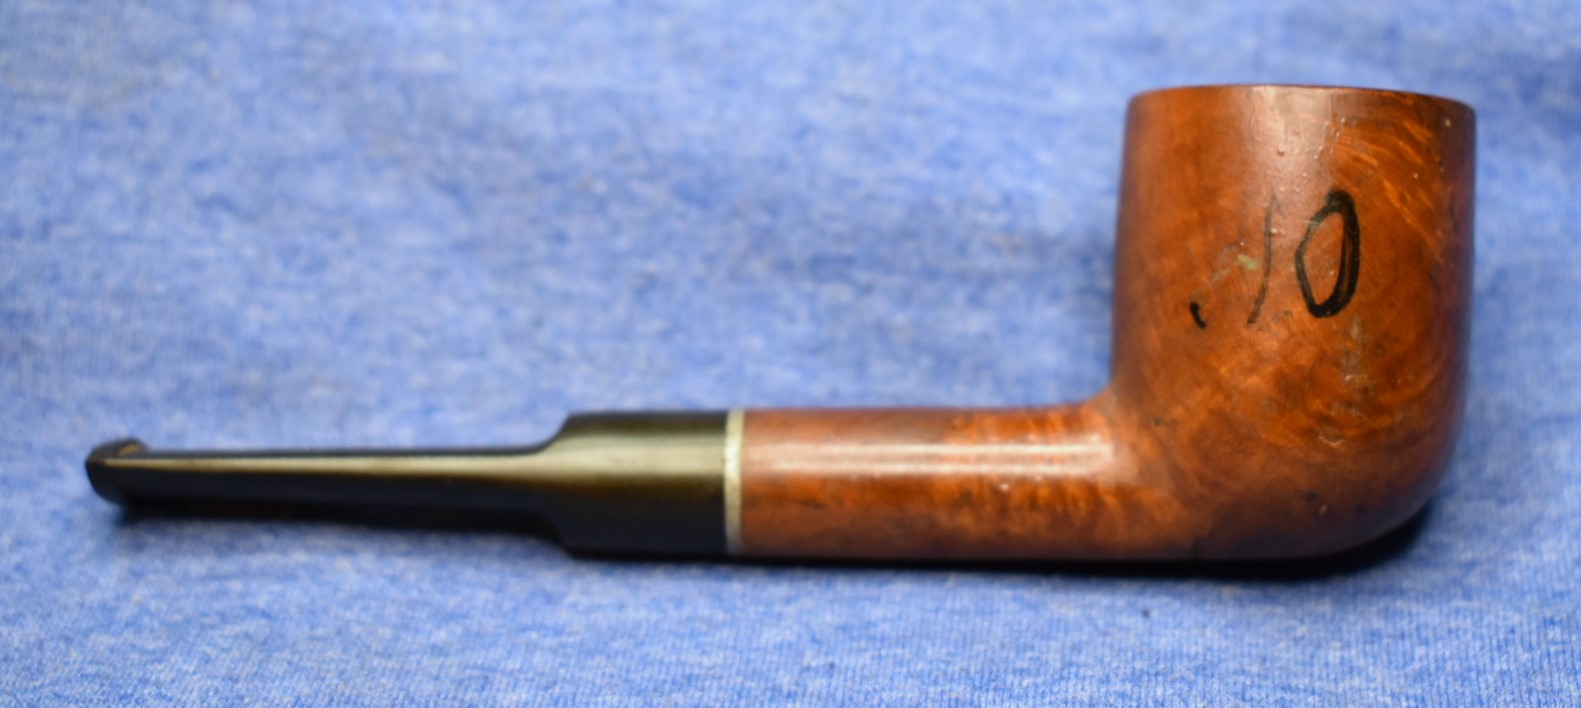
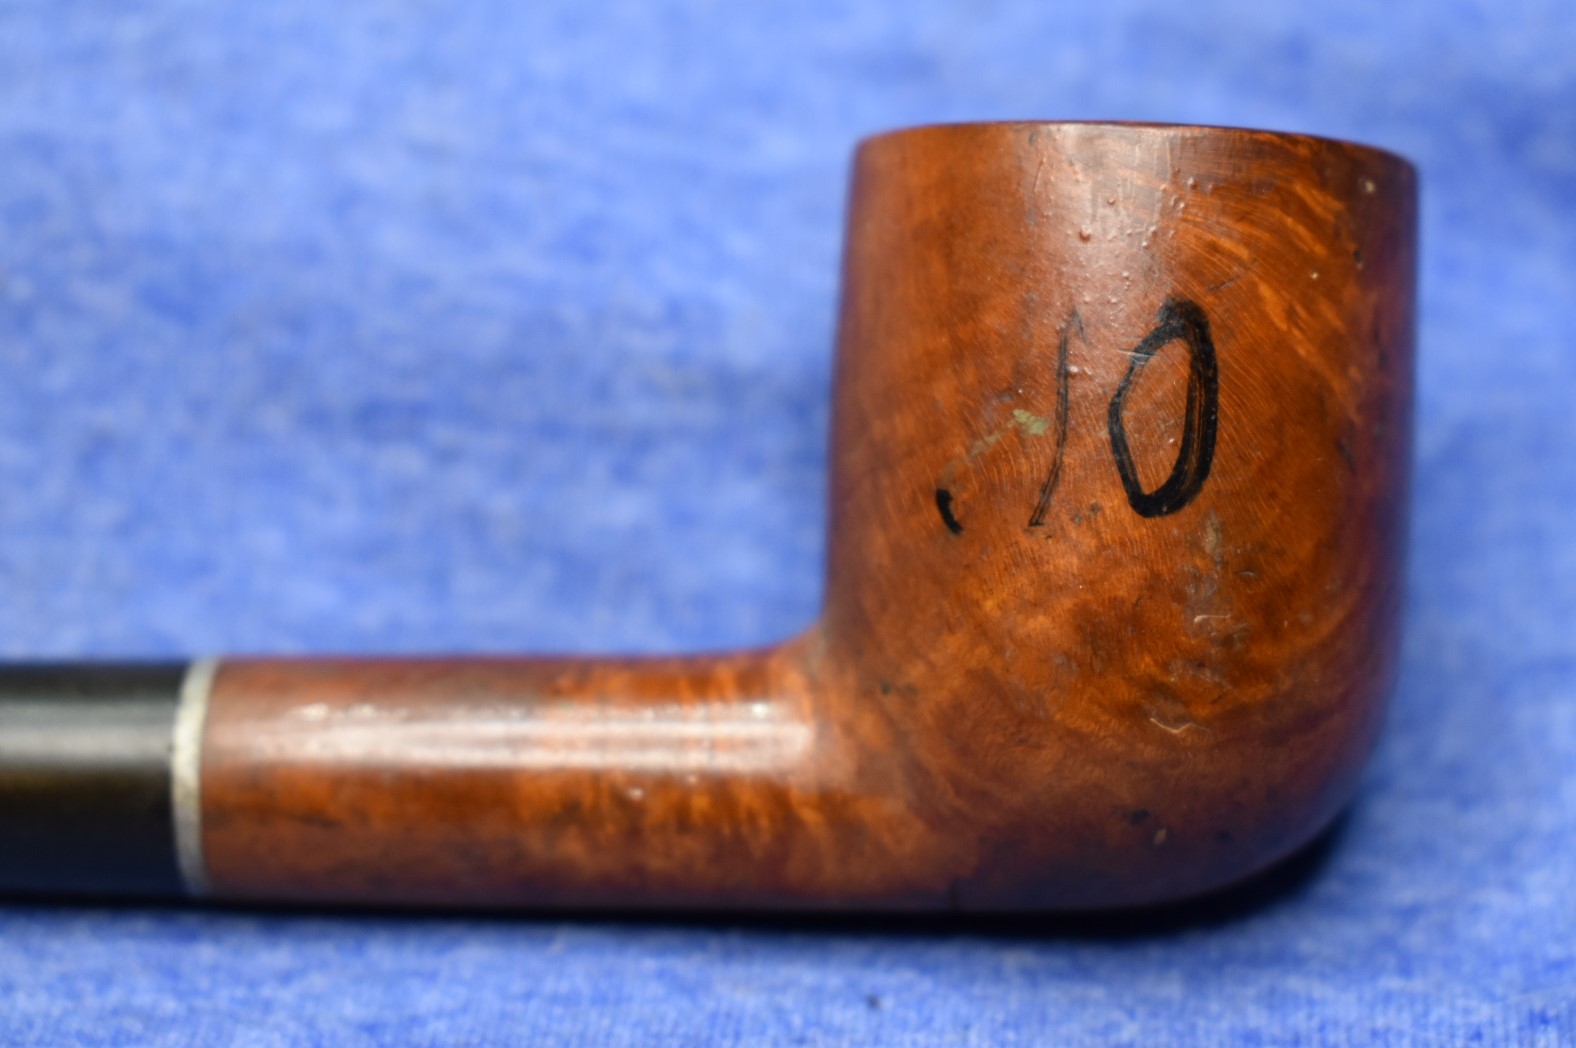
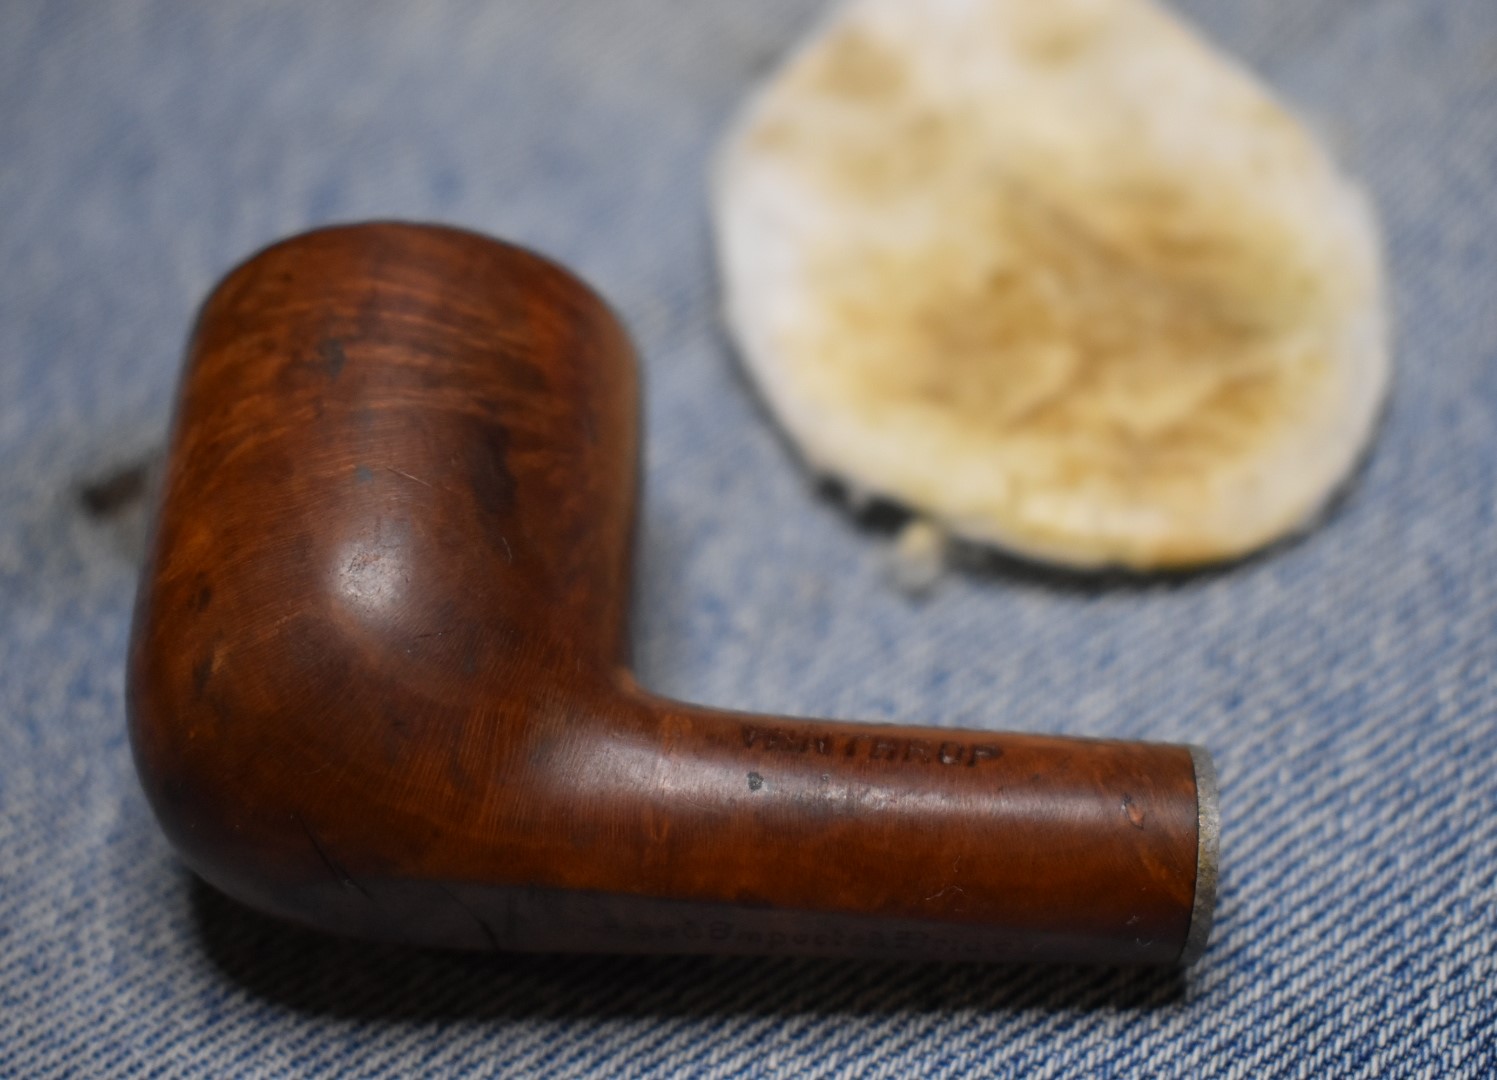
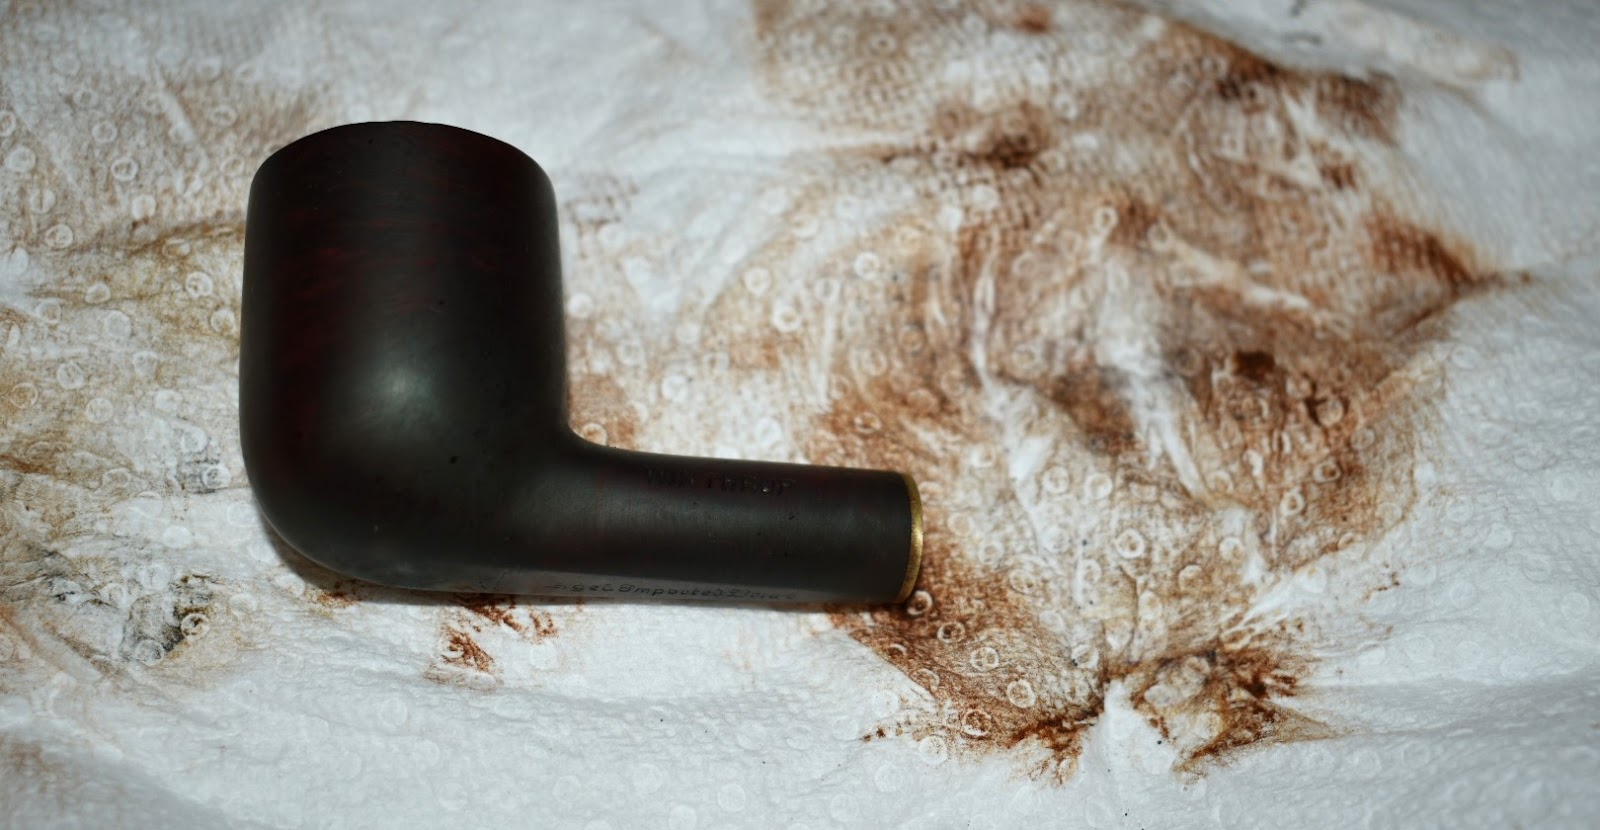
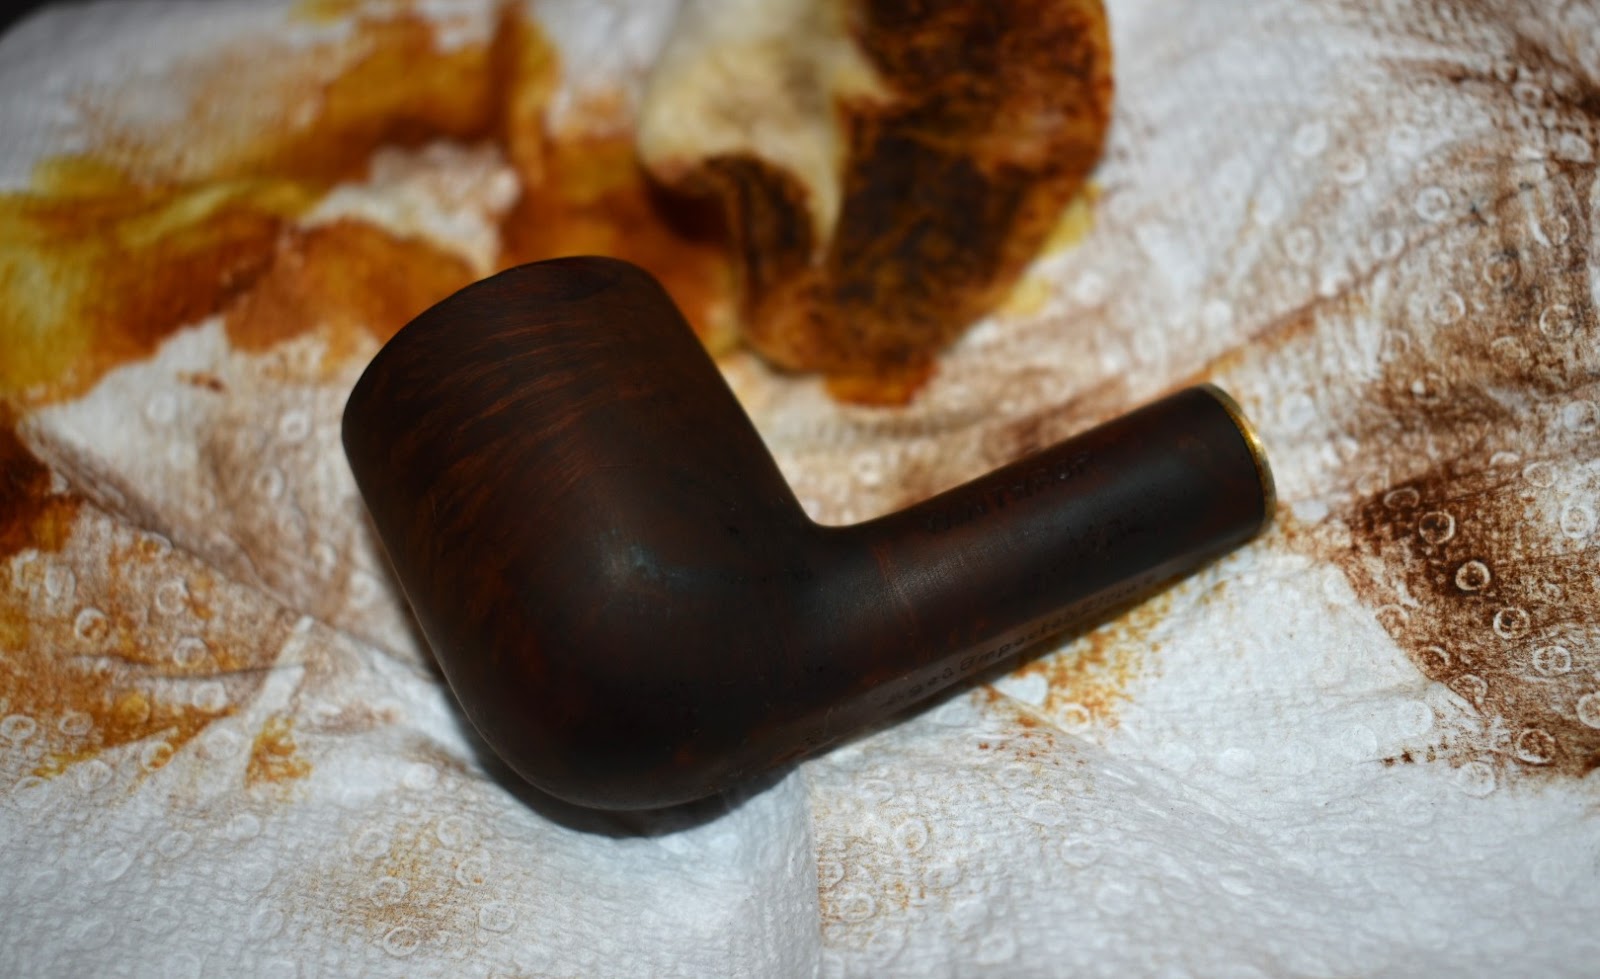
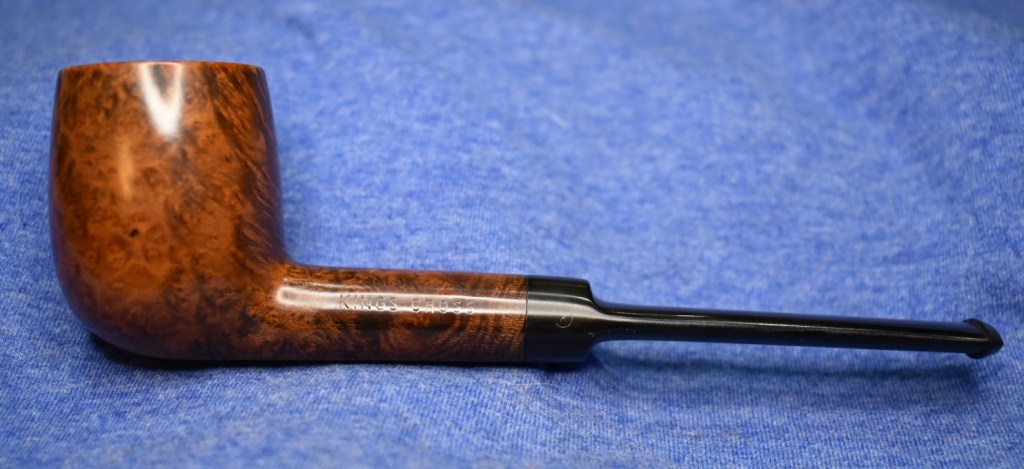
    Here is what the pipe looked like upon arriving here in southeast Nebraska.

    The Danco was in very good shape for a used 70+ year old pipe.  I thought the list of tasks would include reaming, airway cleaning, general cleaning, sanding, pit removal/refilling/filling, more sanding, micro-meshing, polish and wax.  A very standard restoration.  

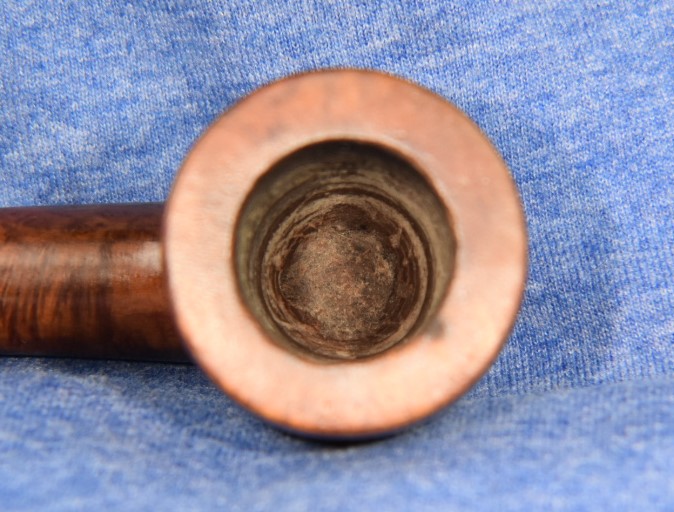
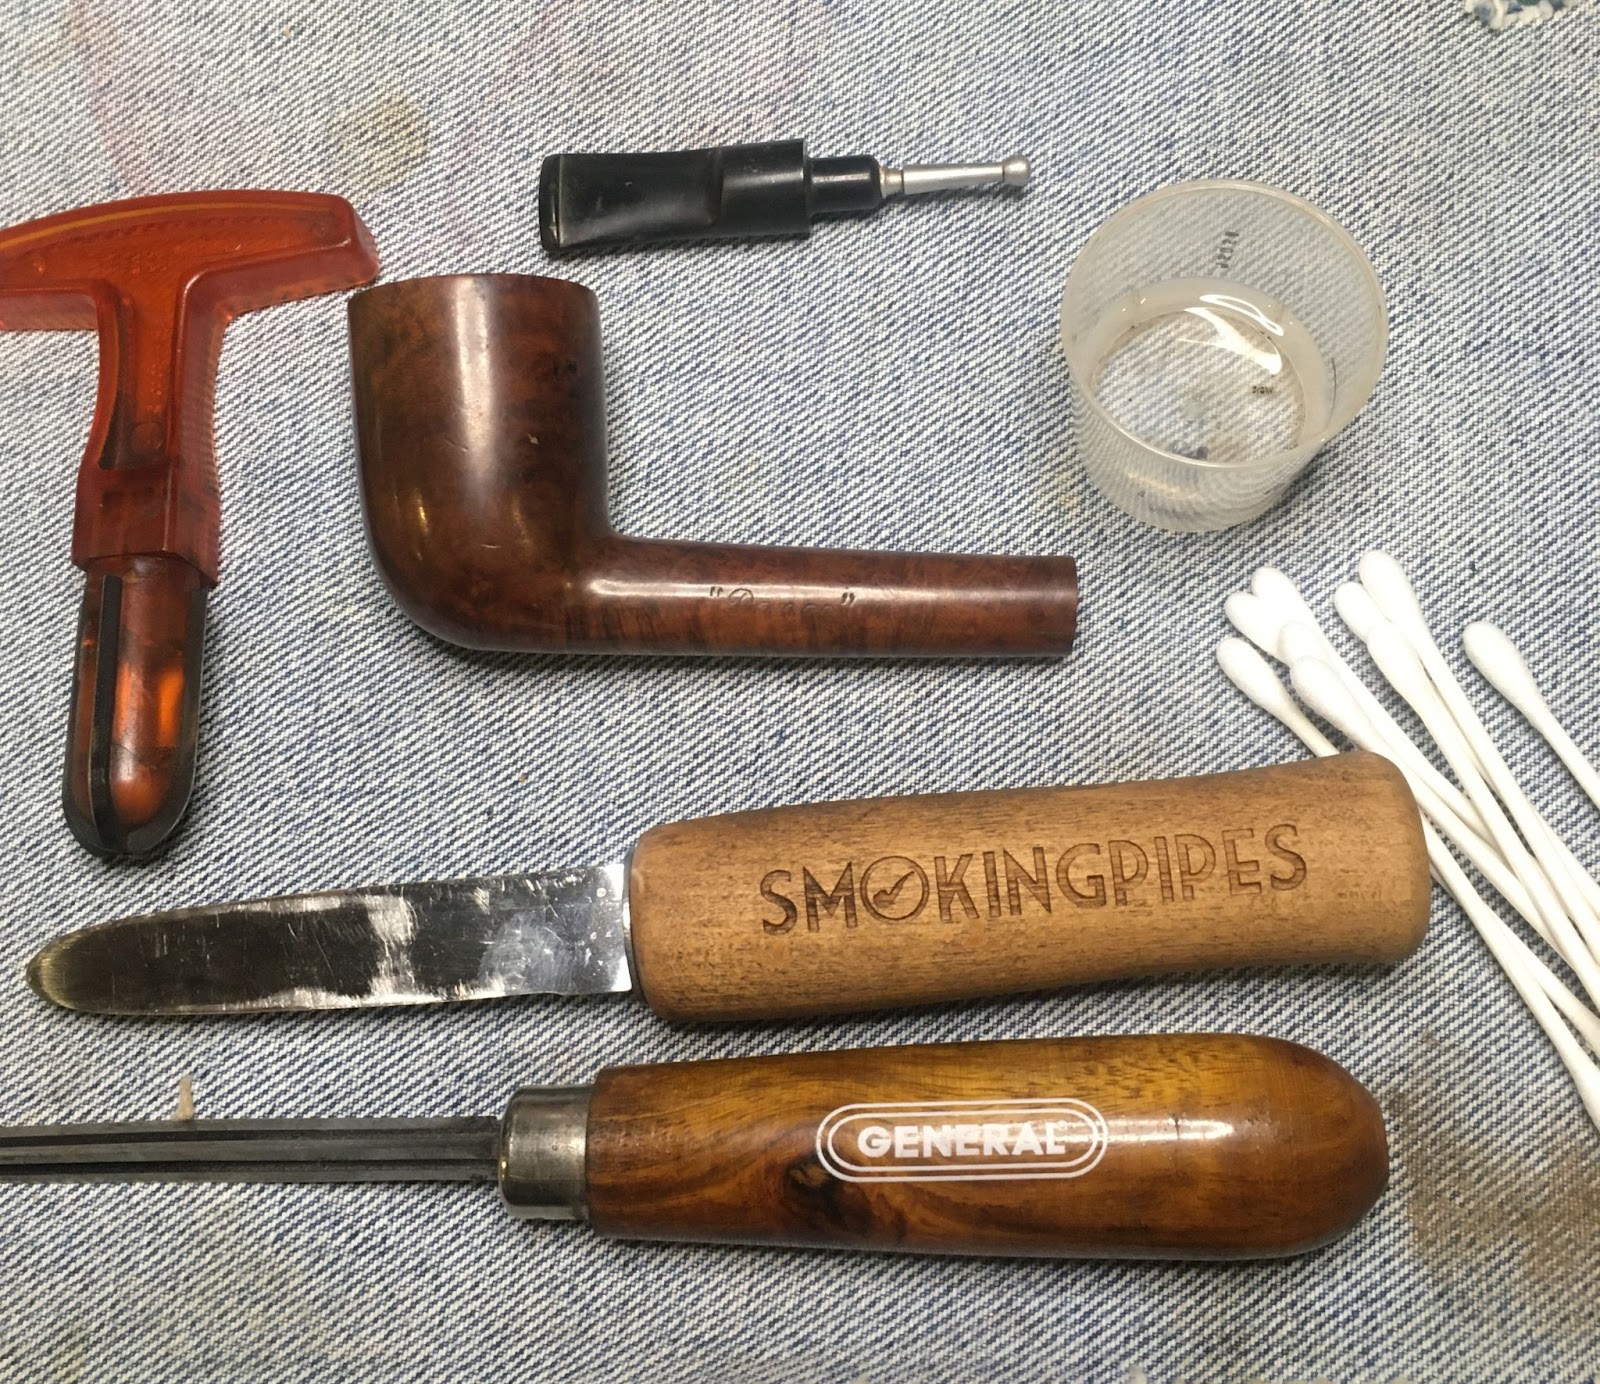
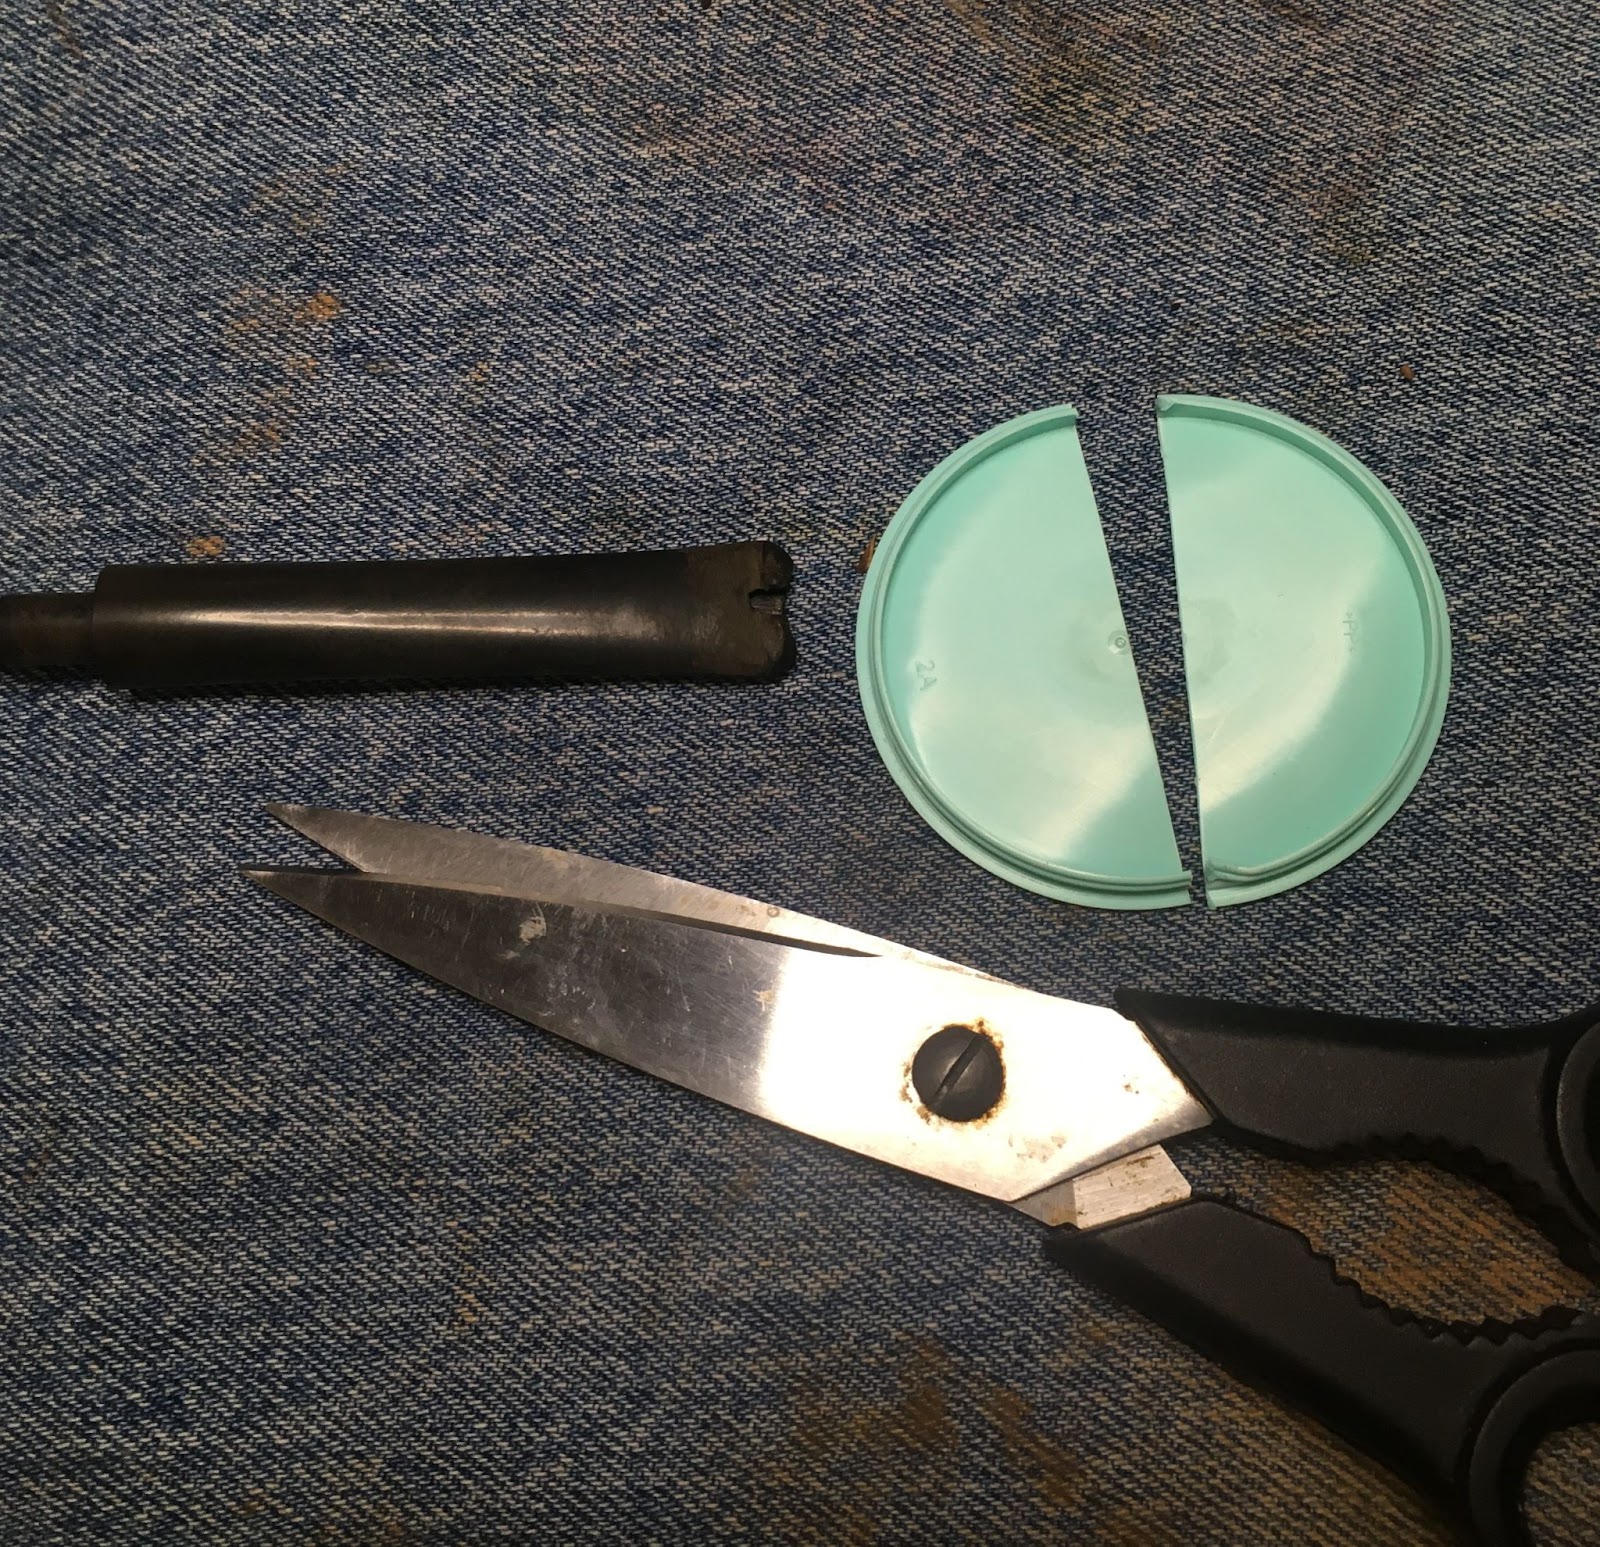
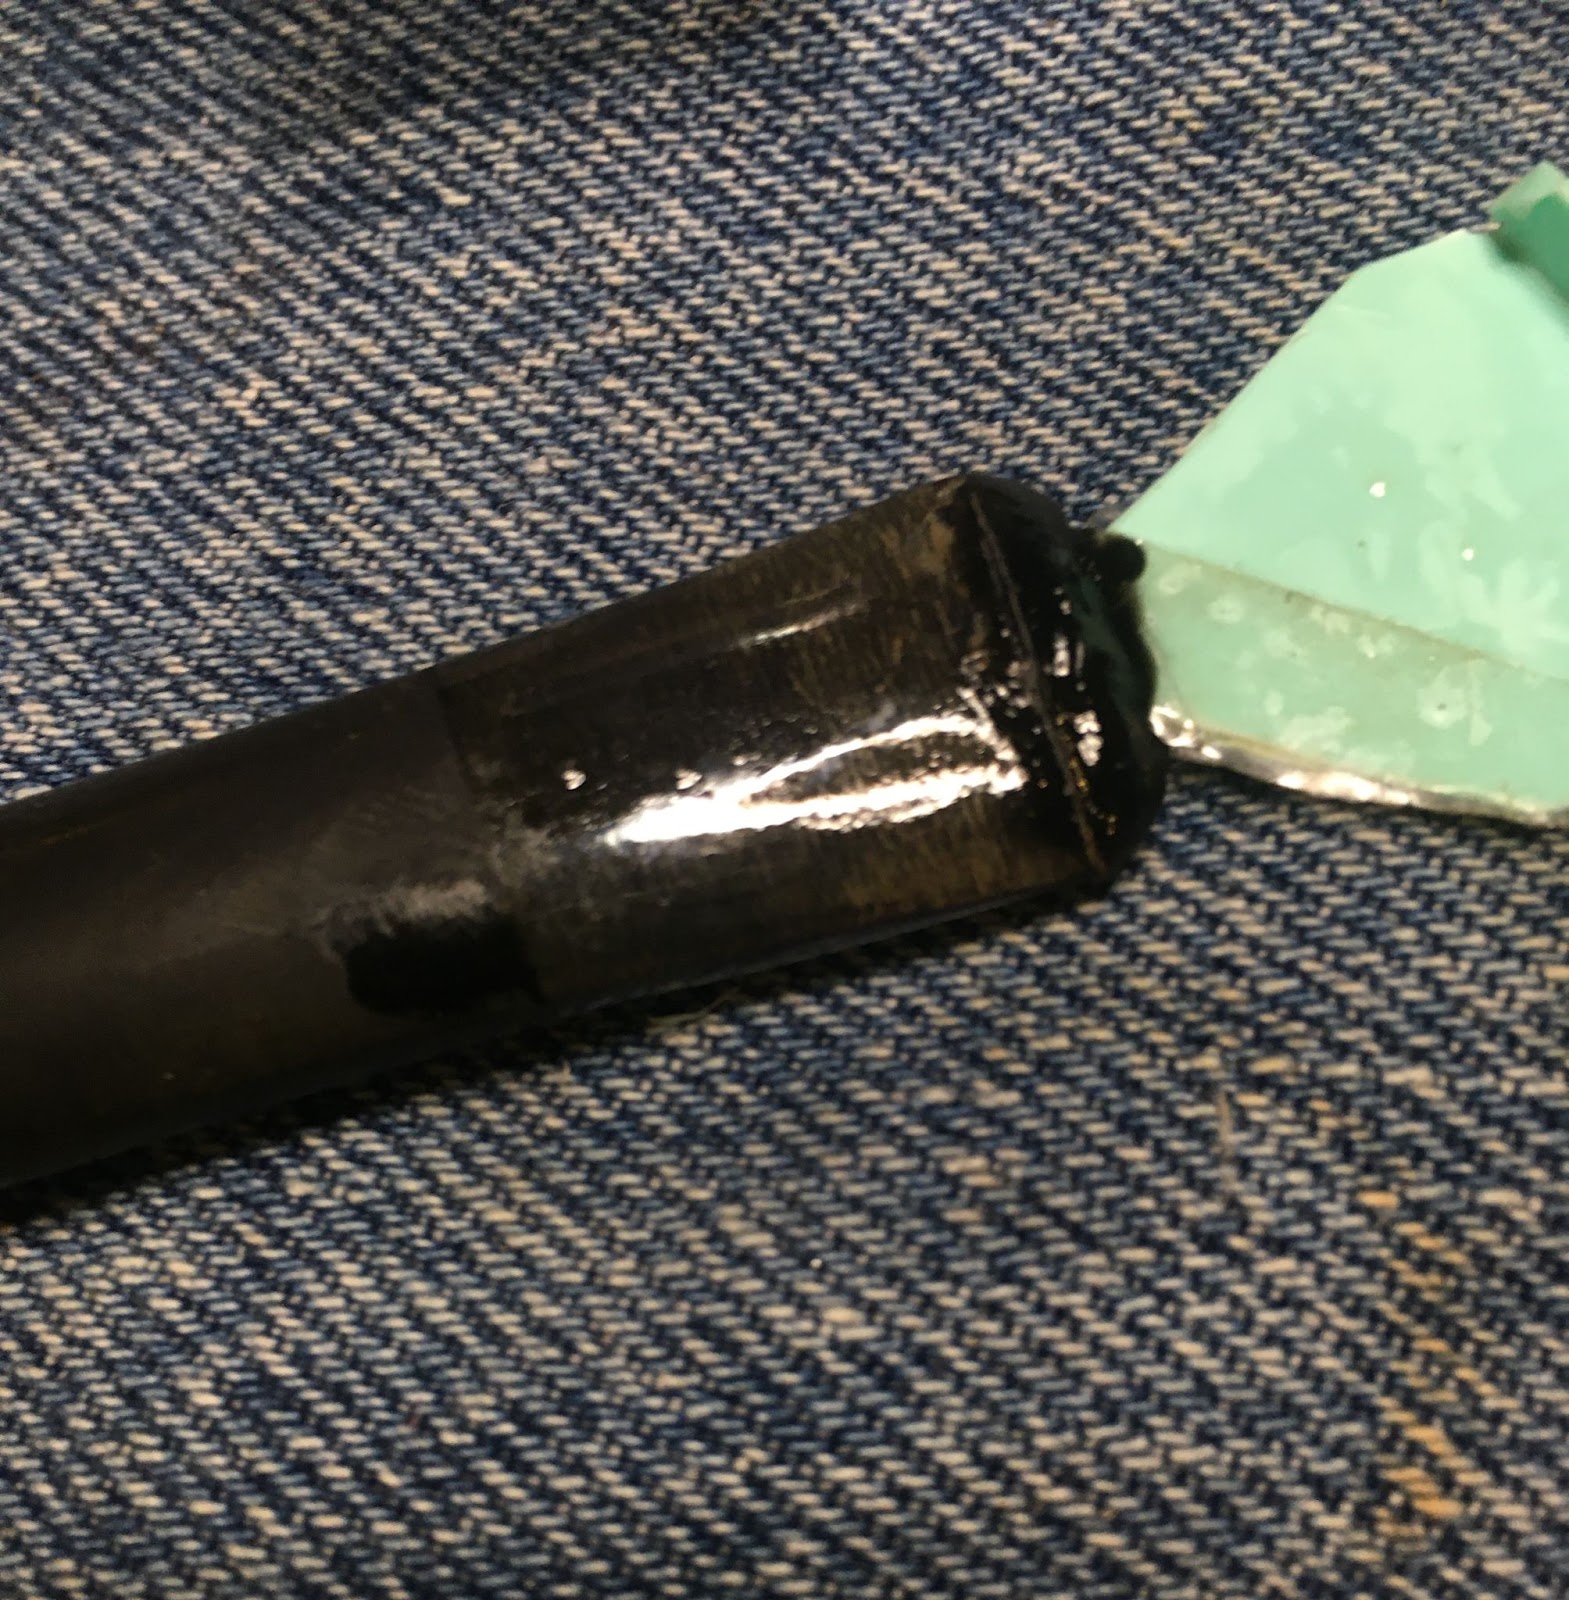
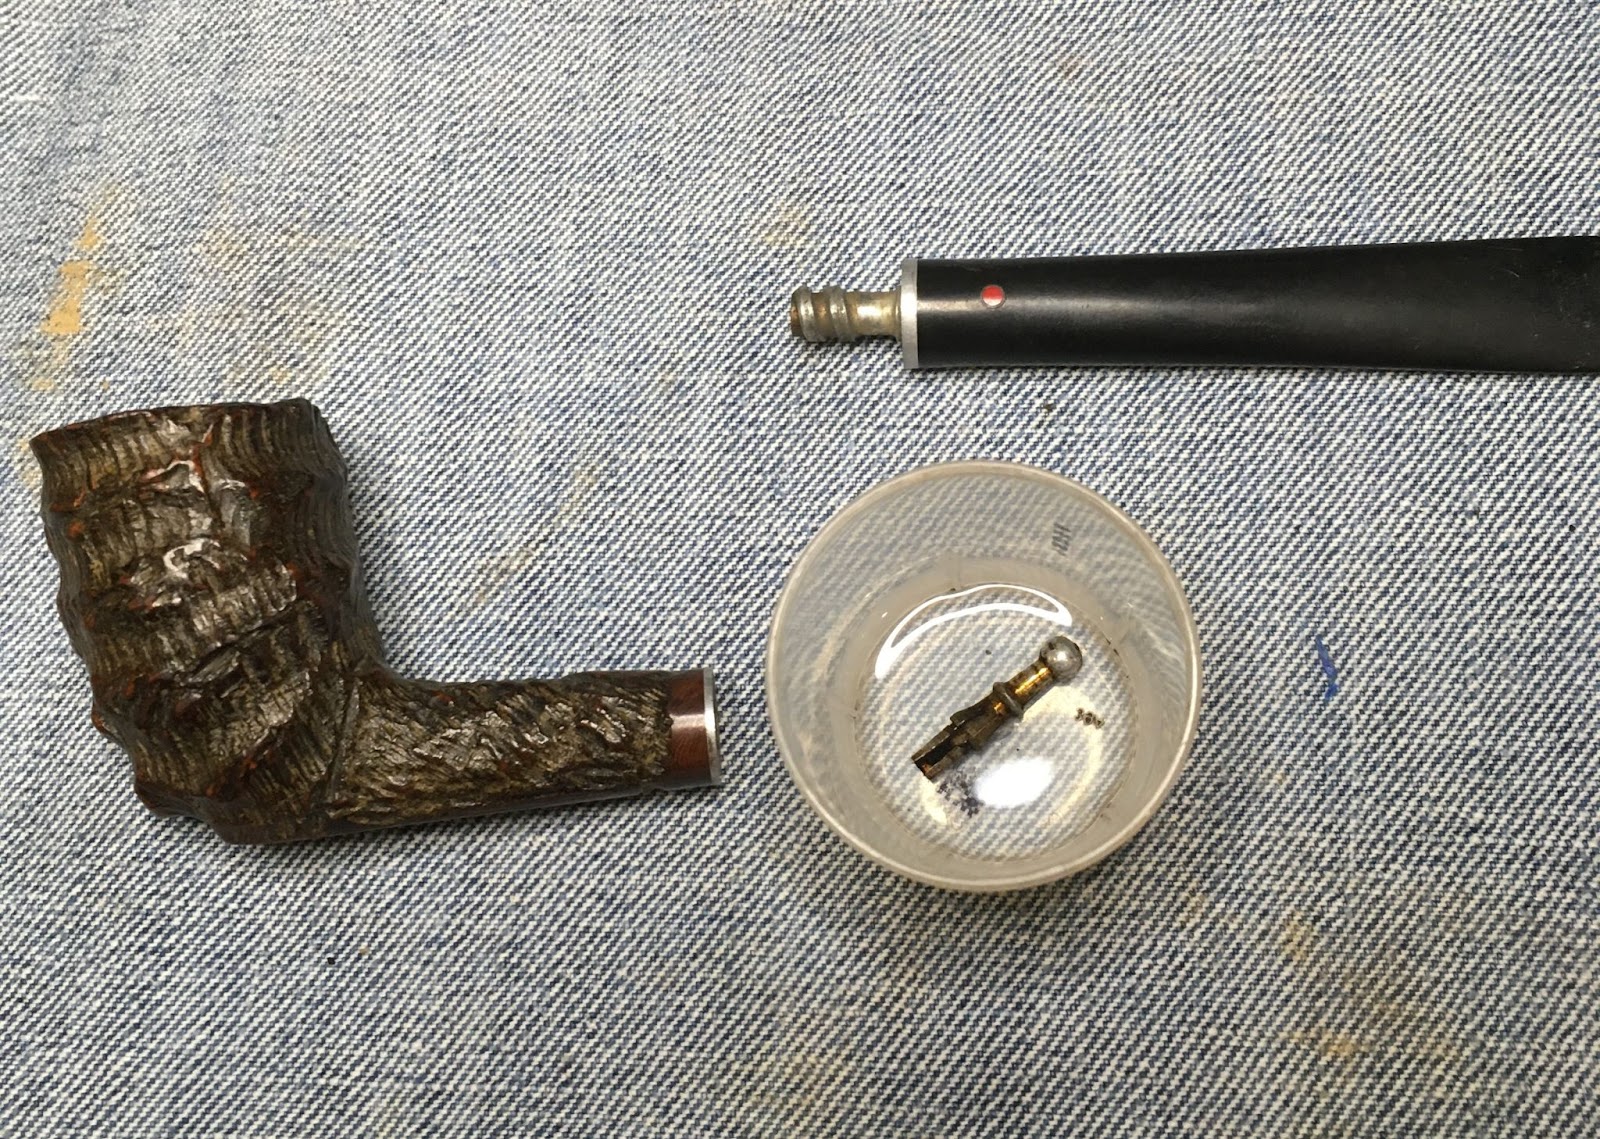
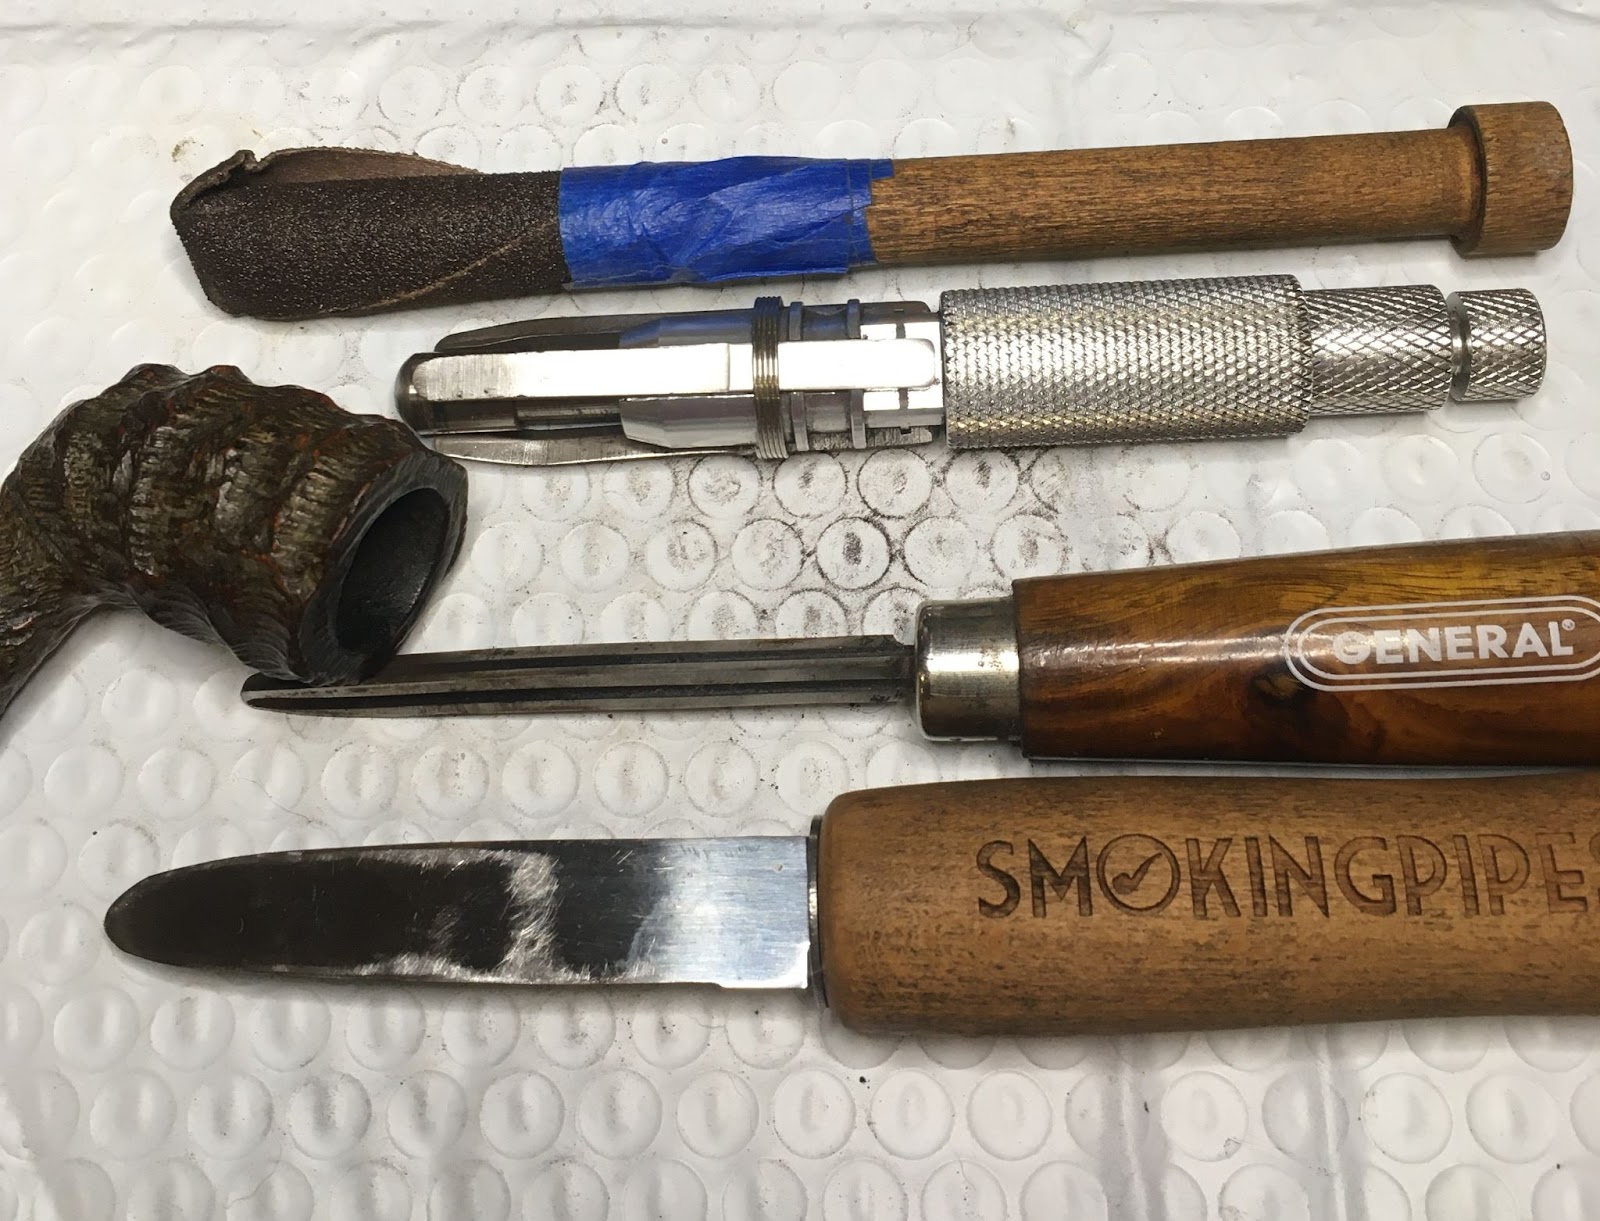
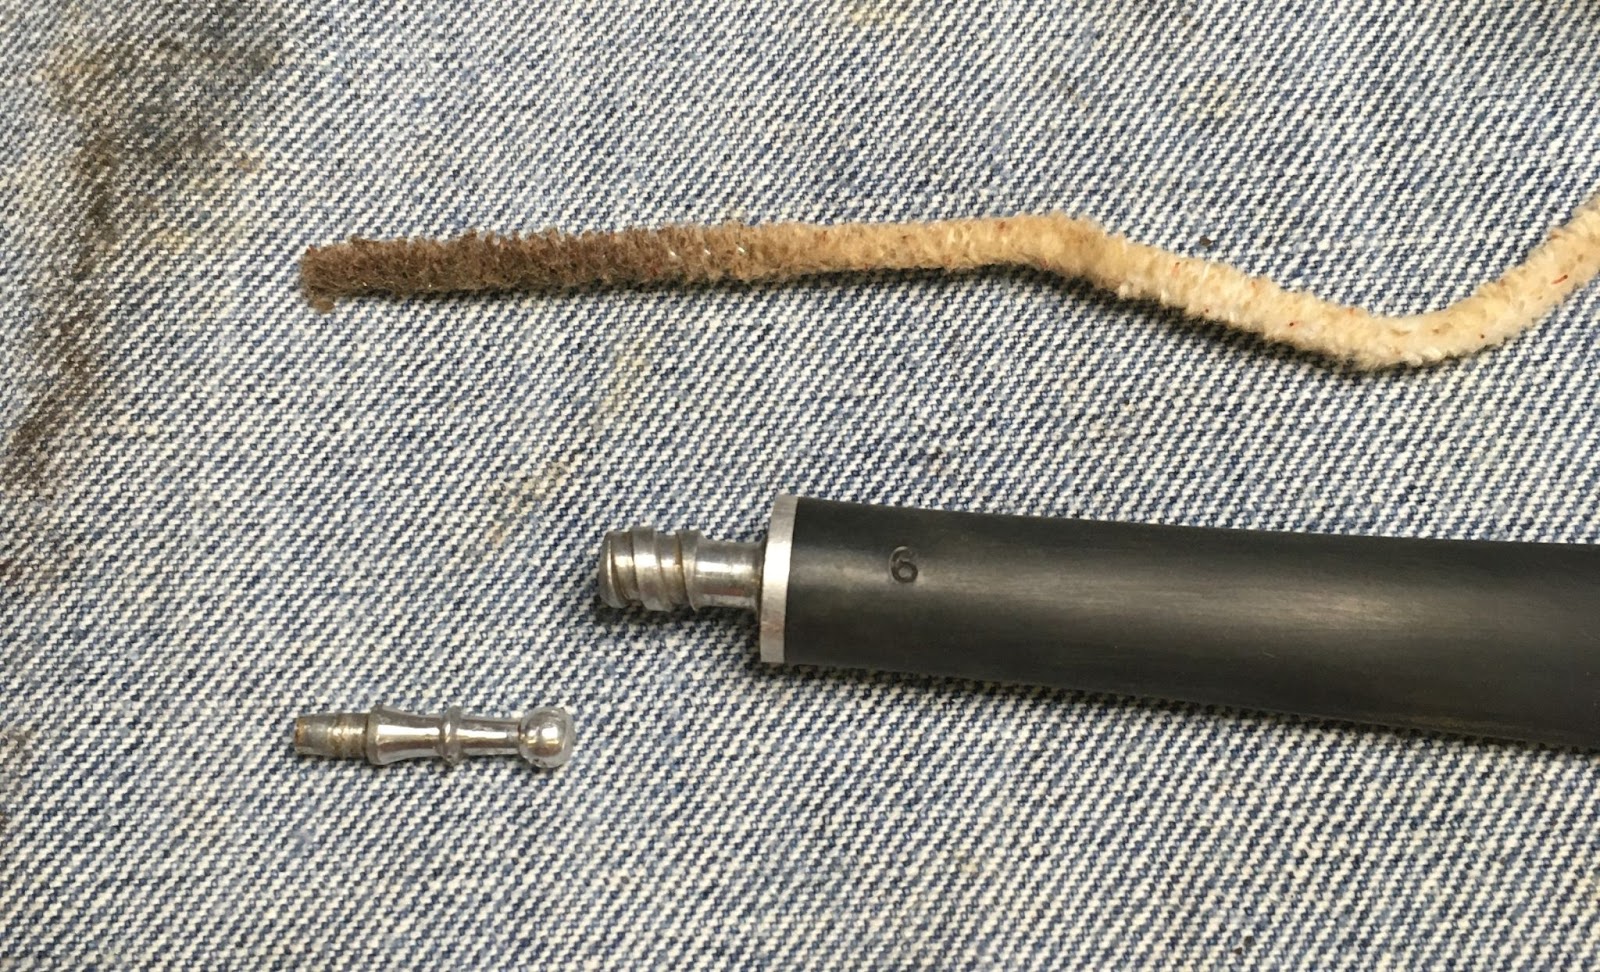
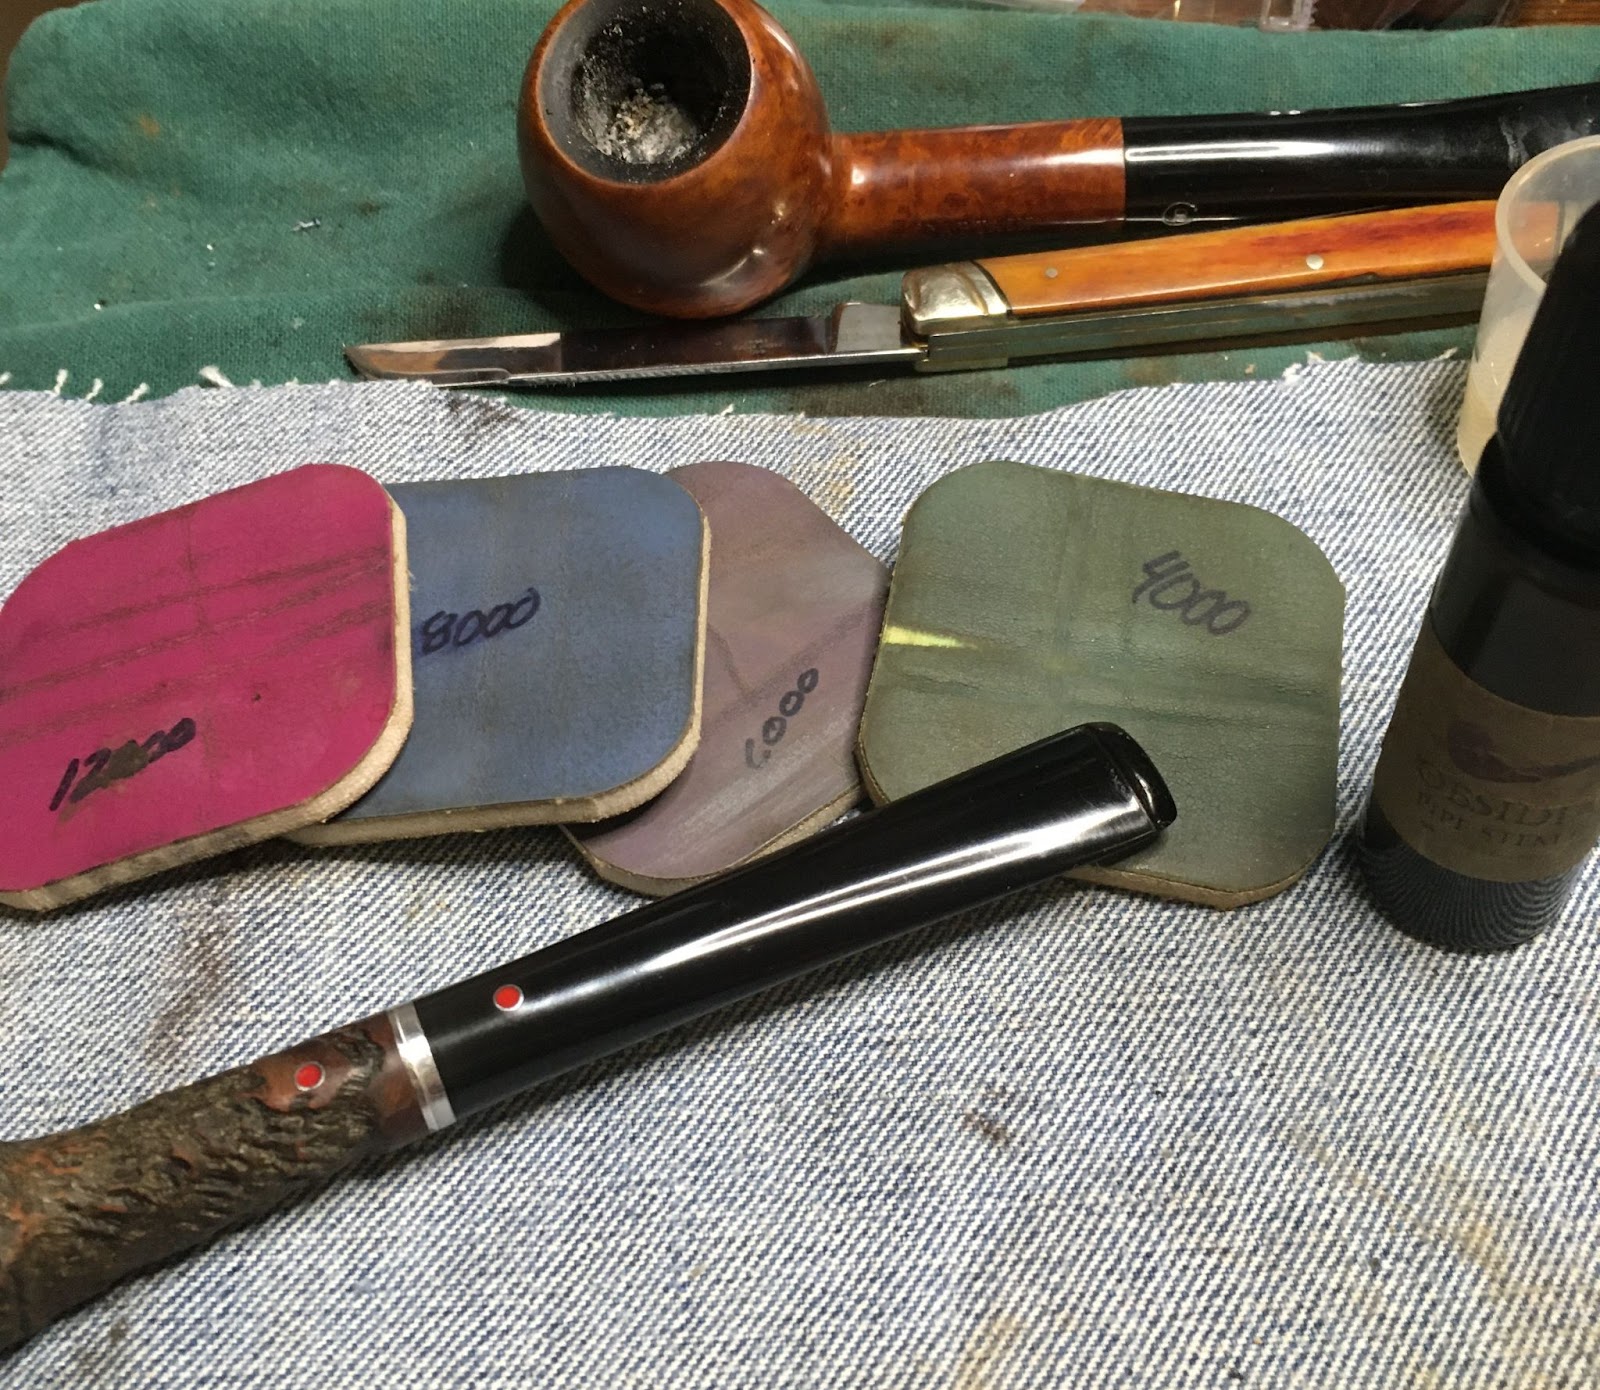
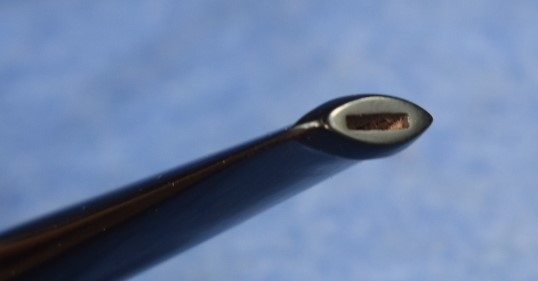
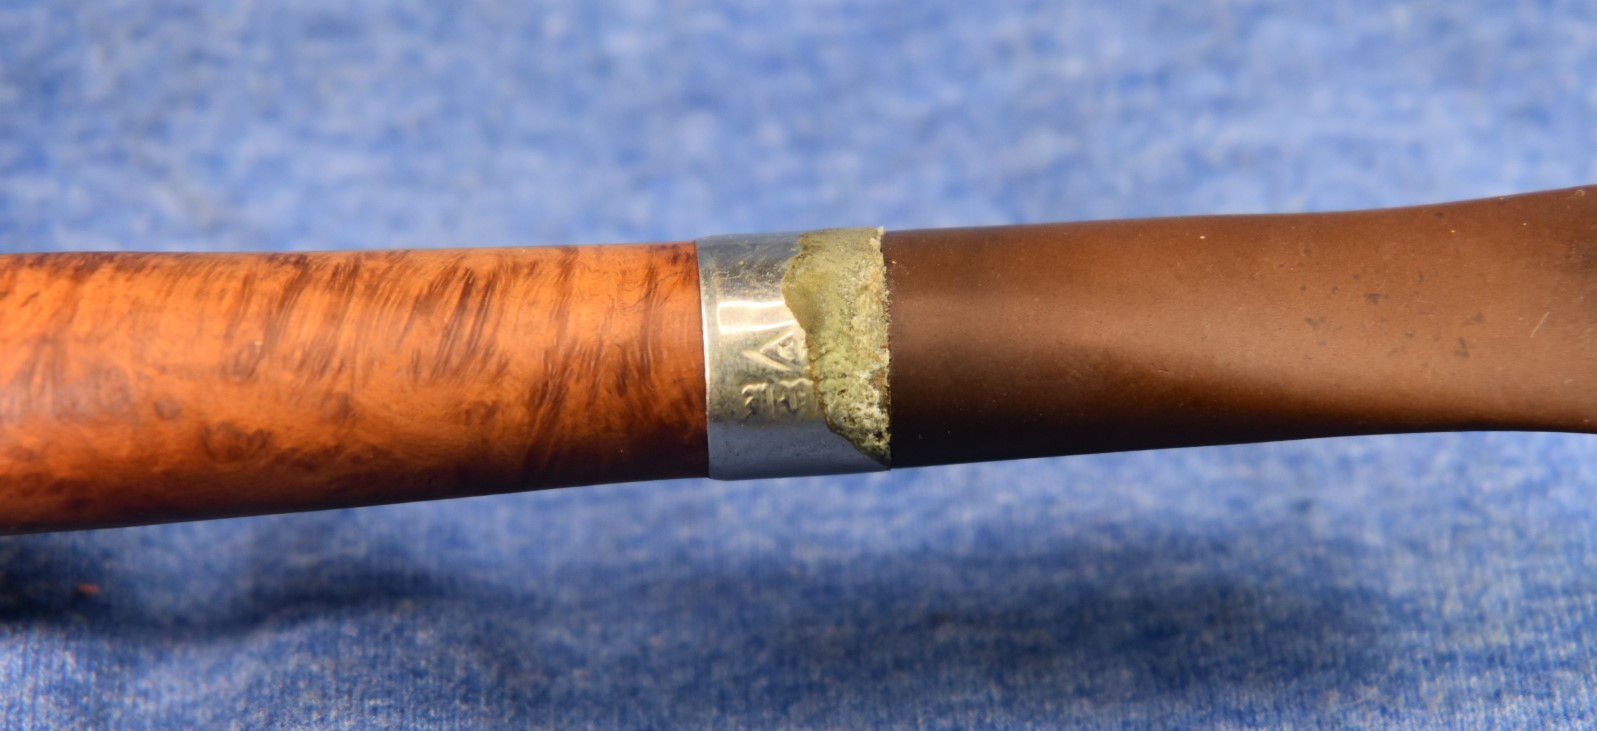
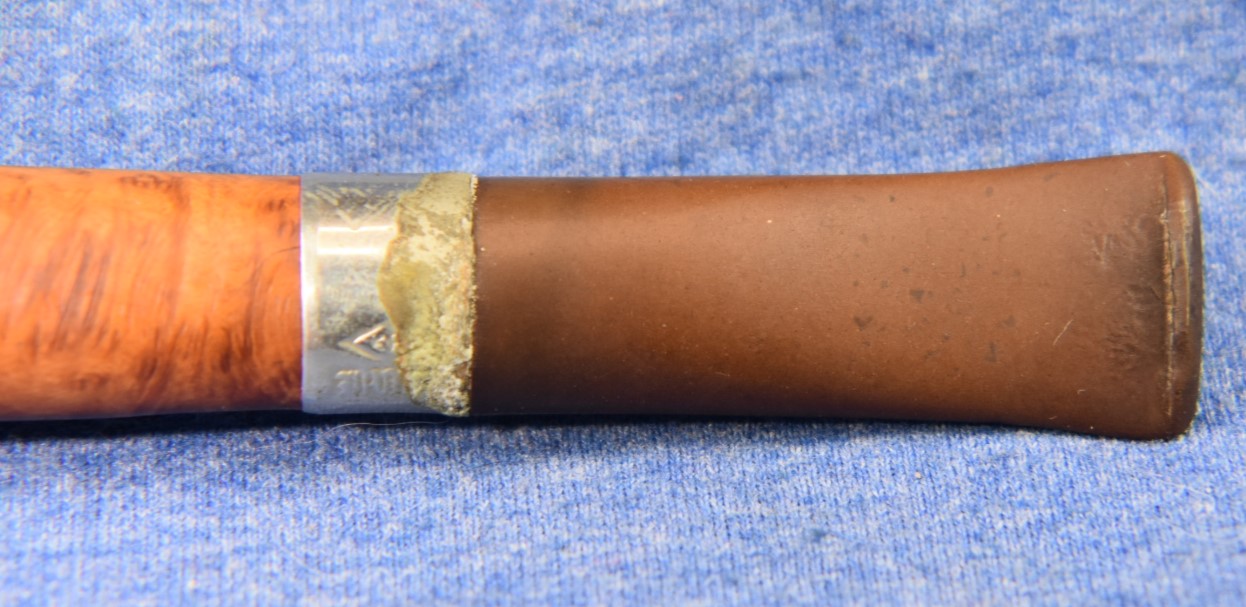
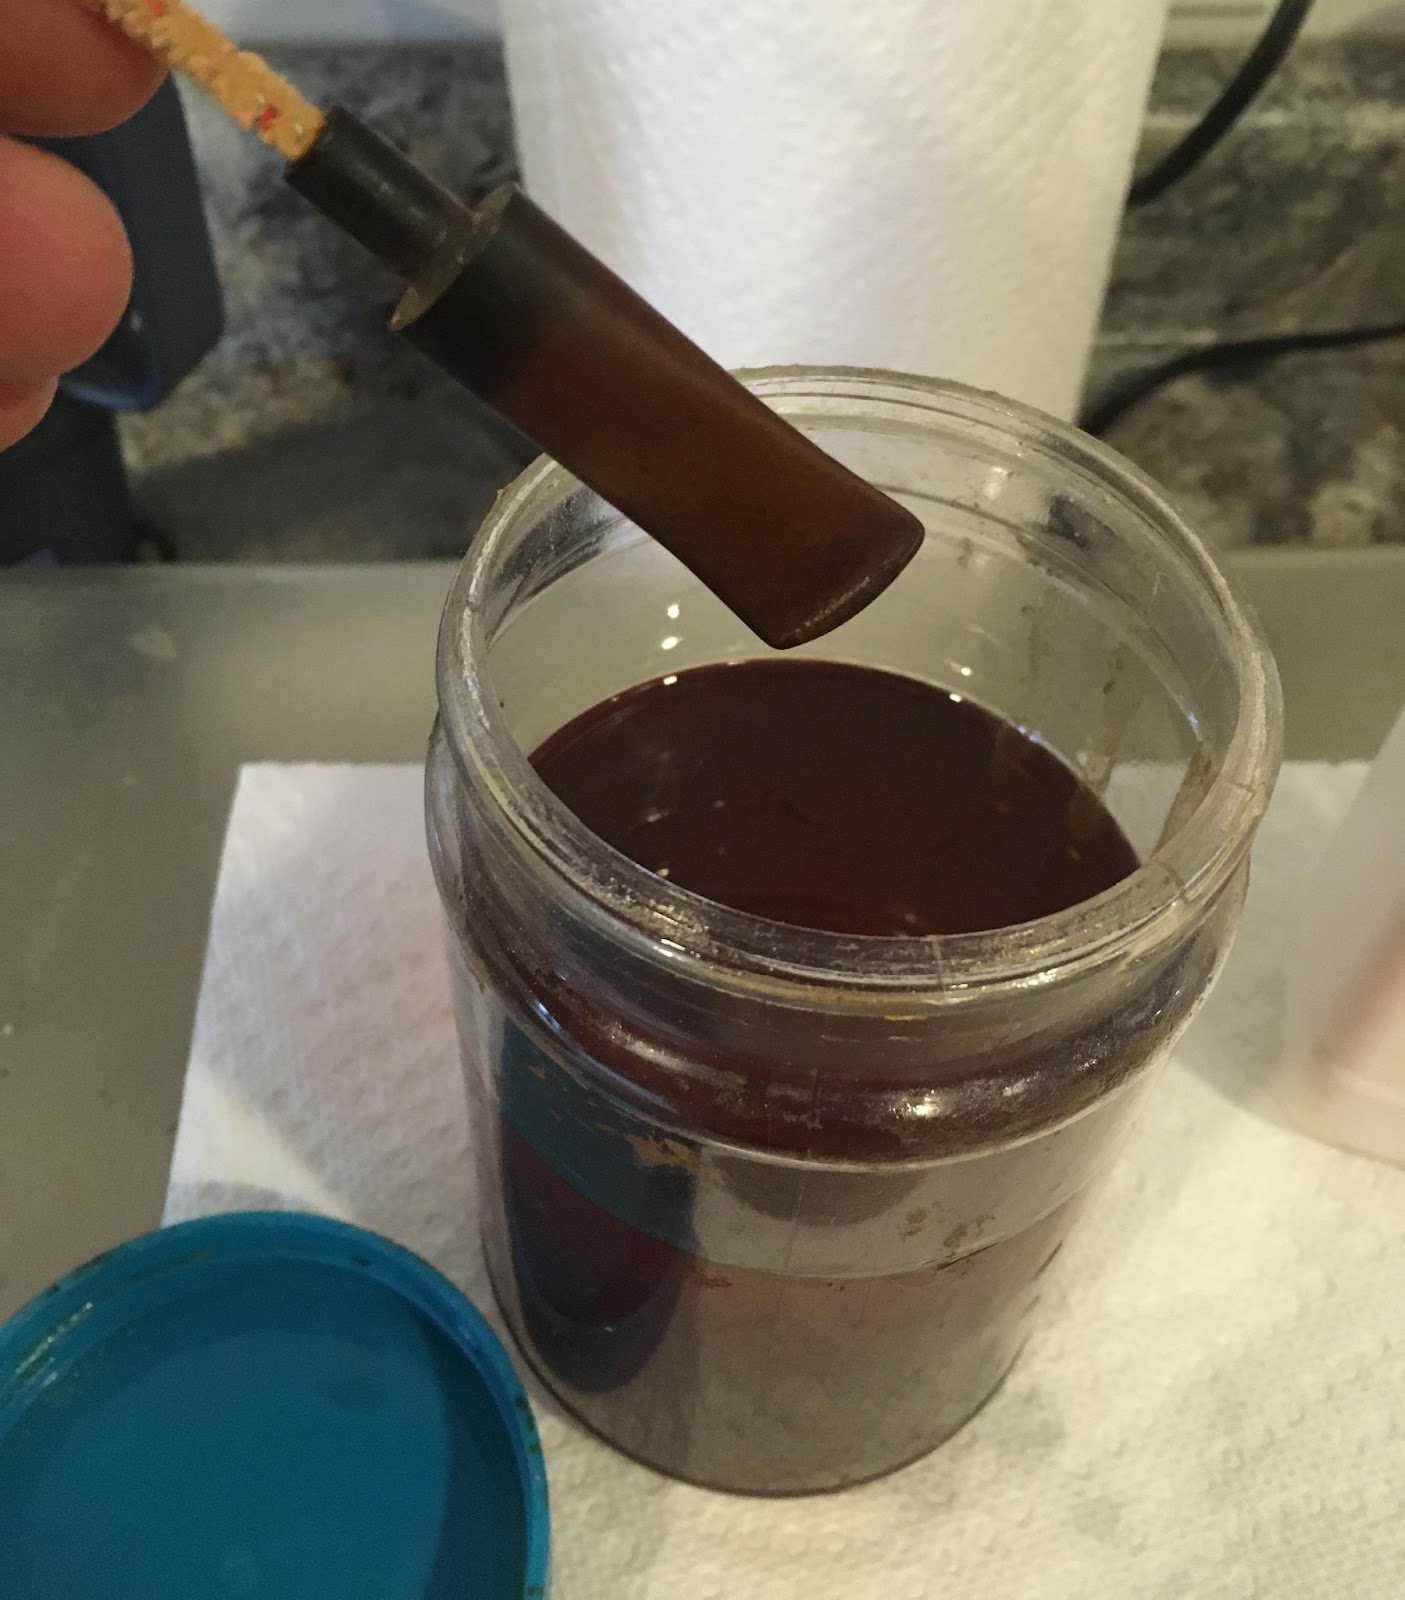
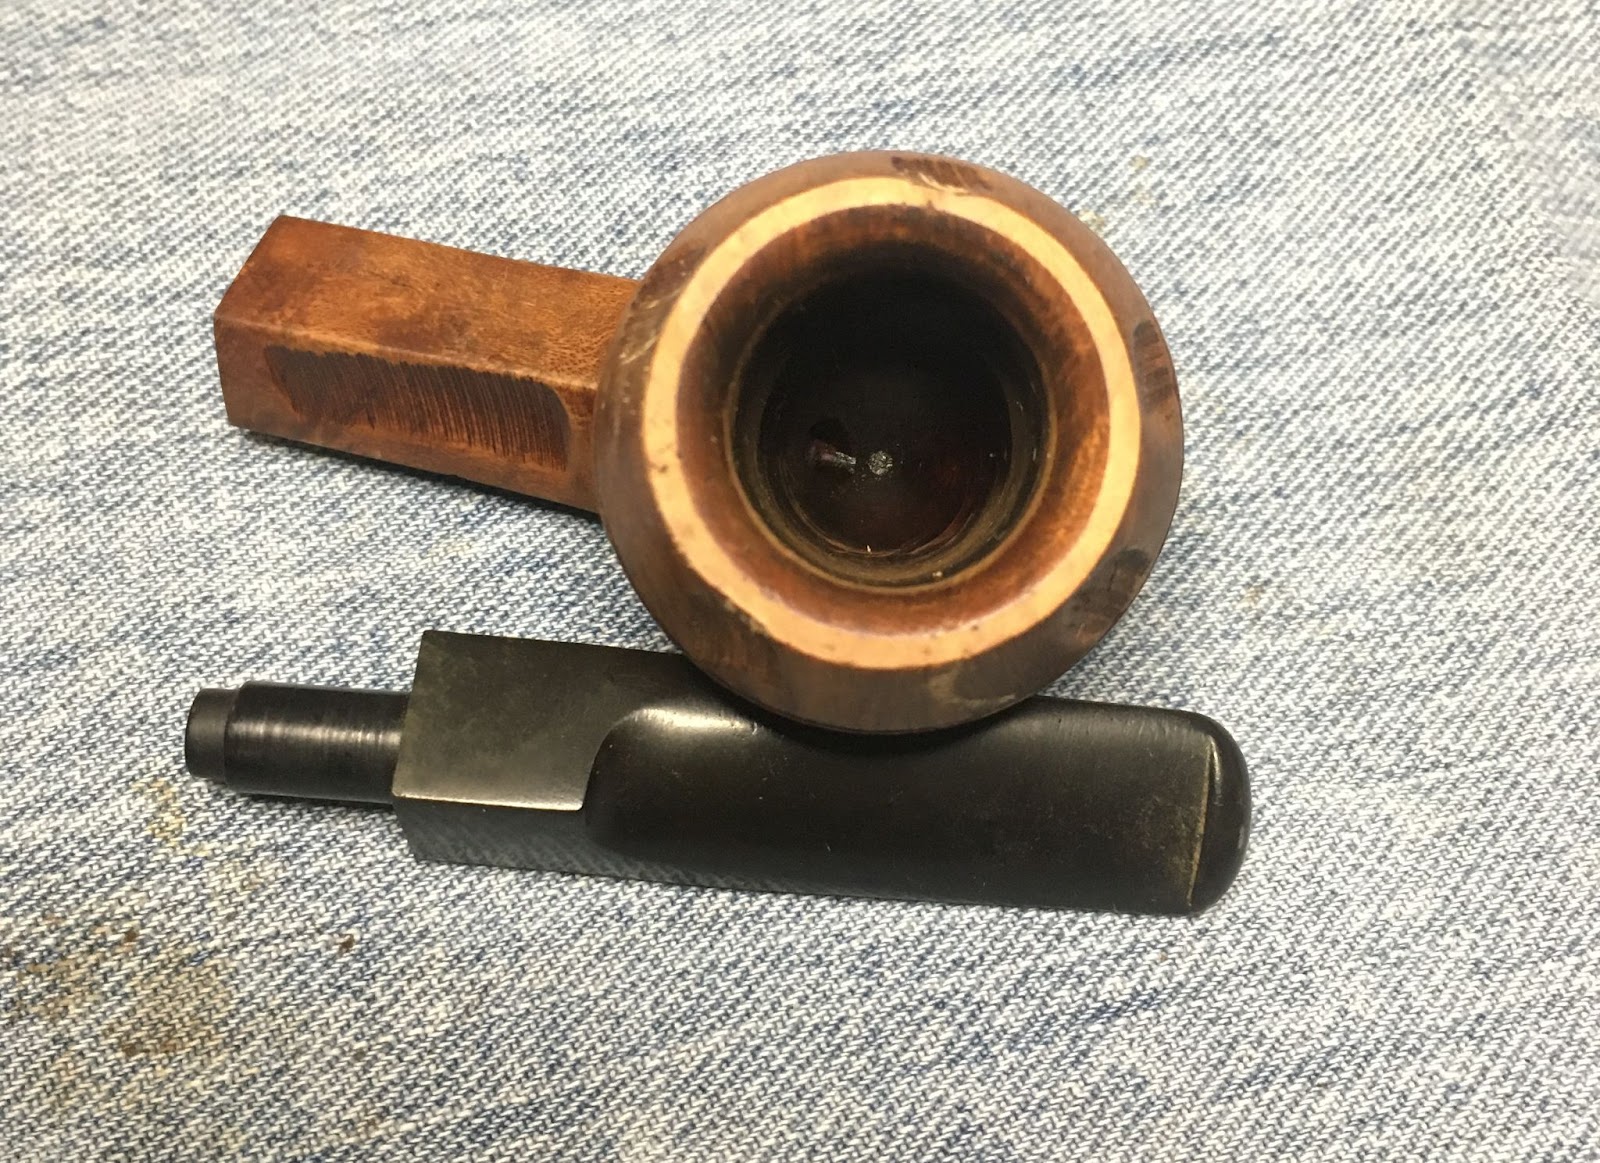
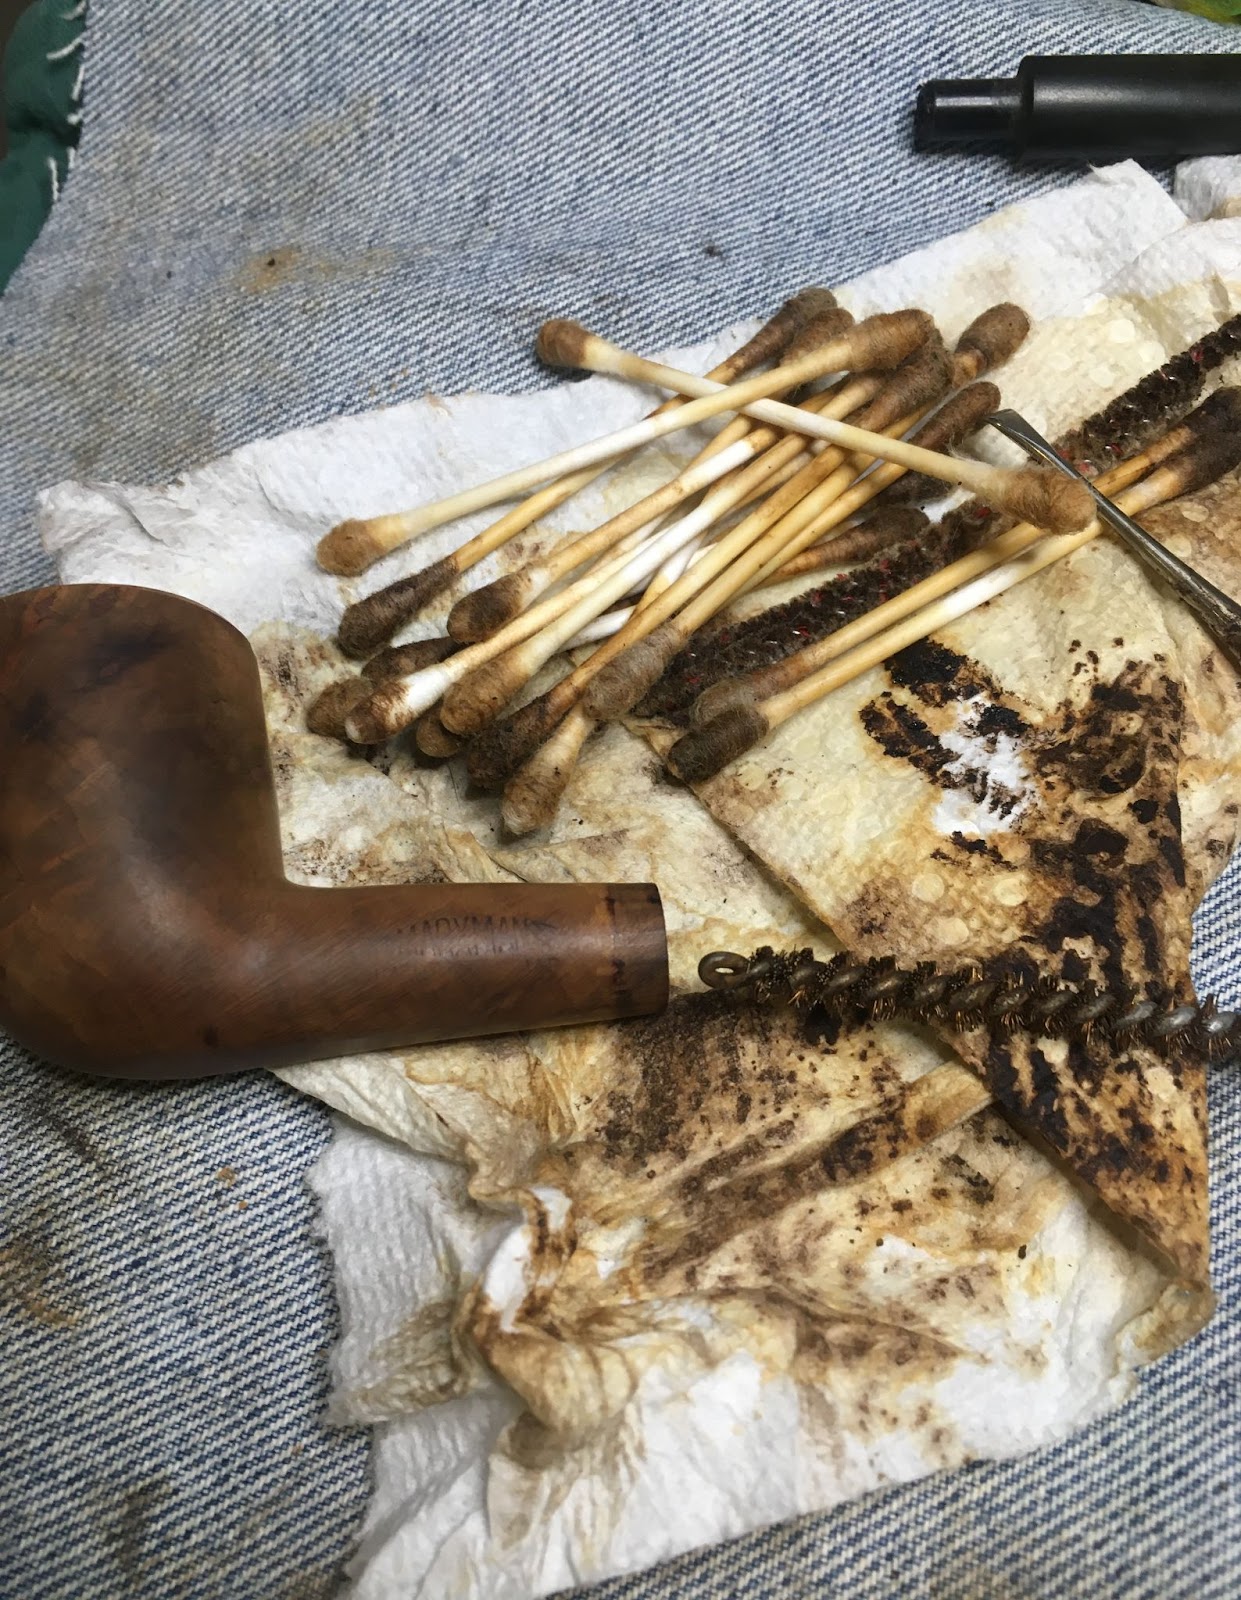
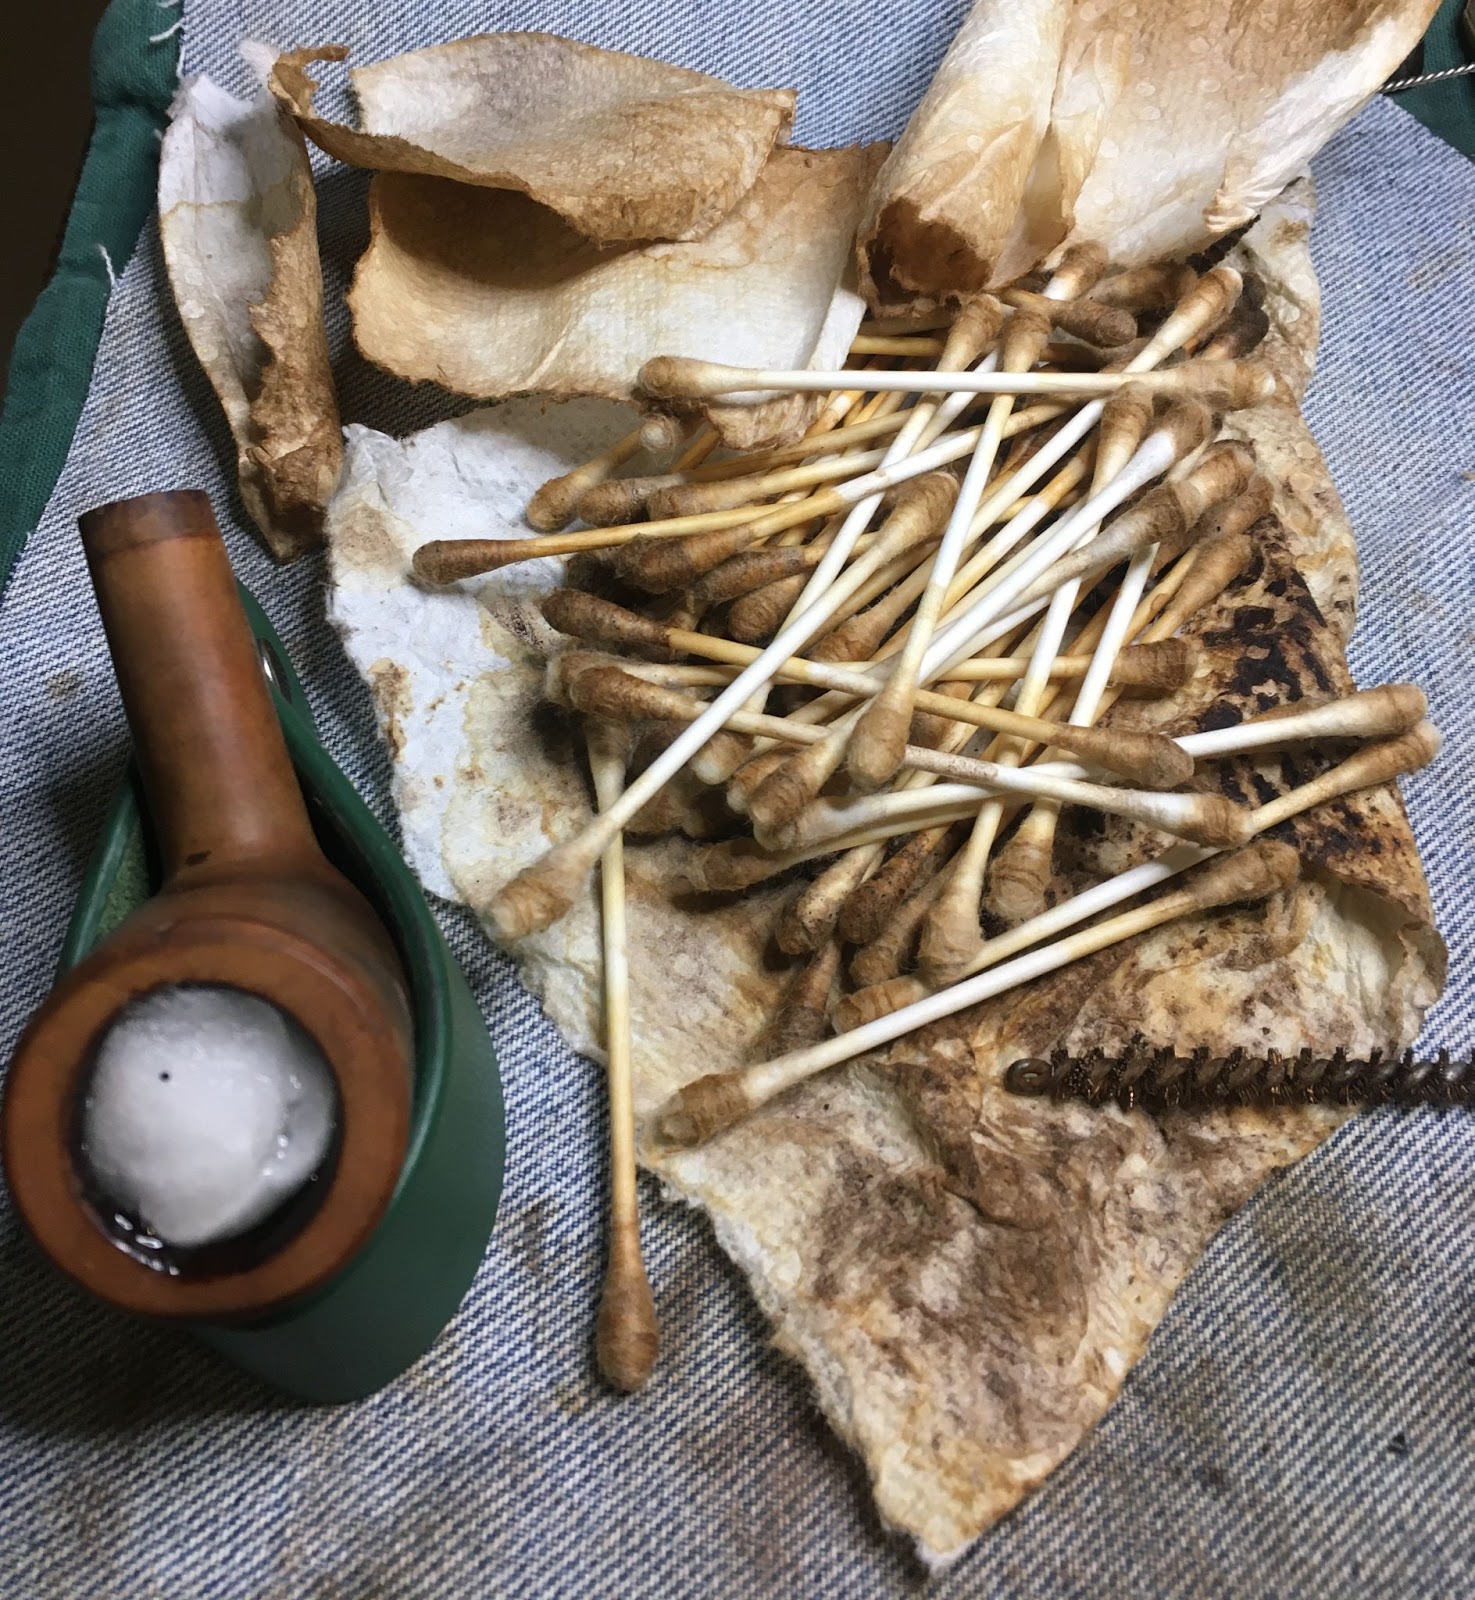
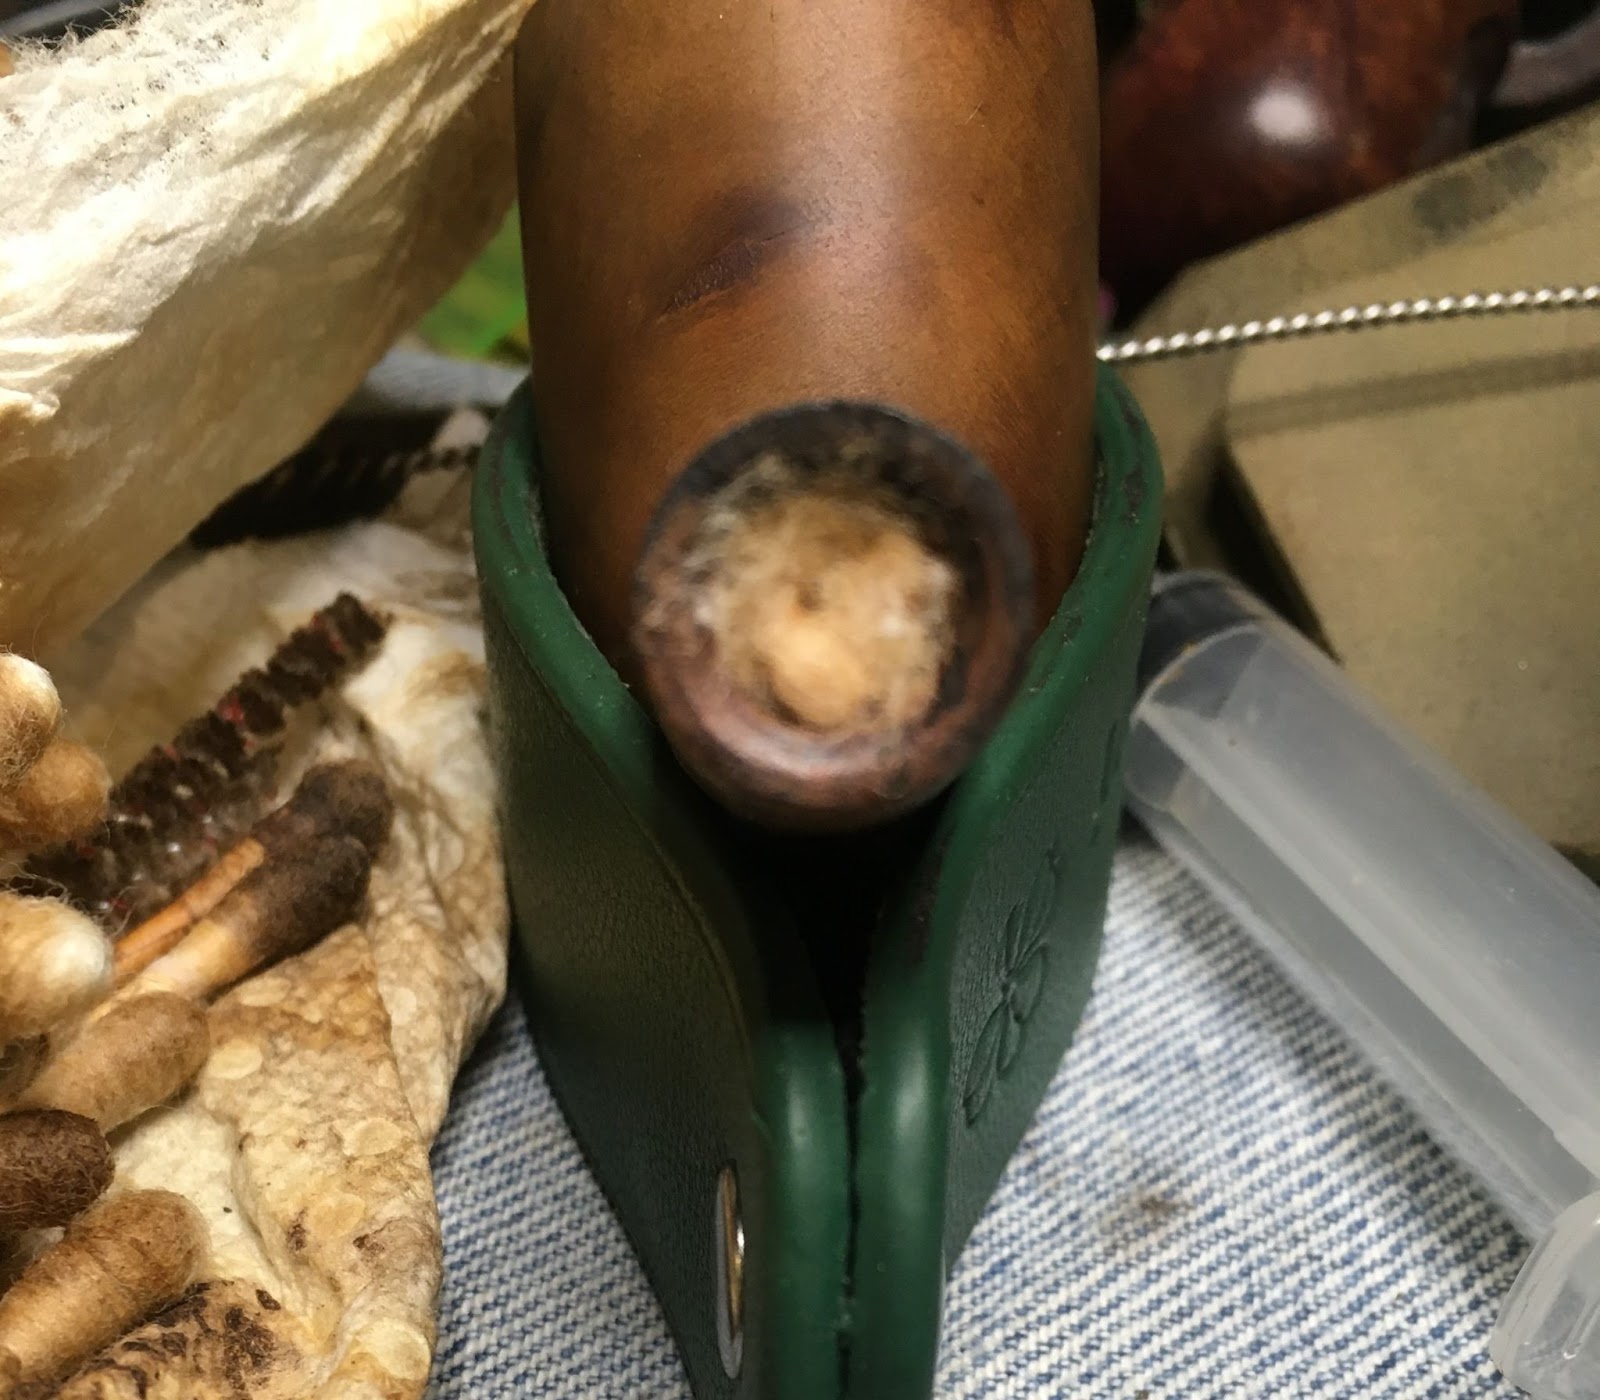
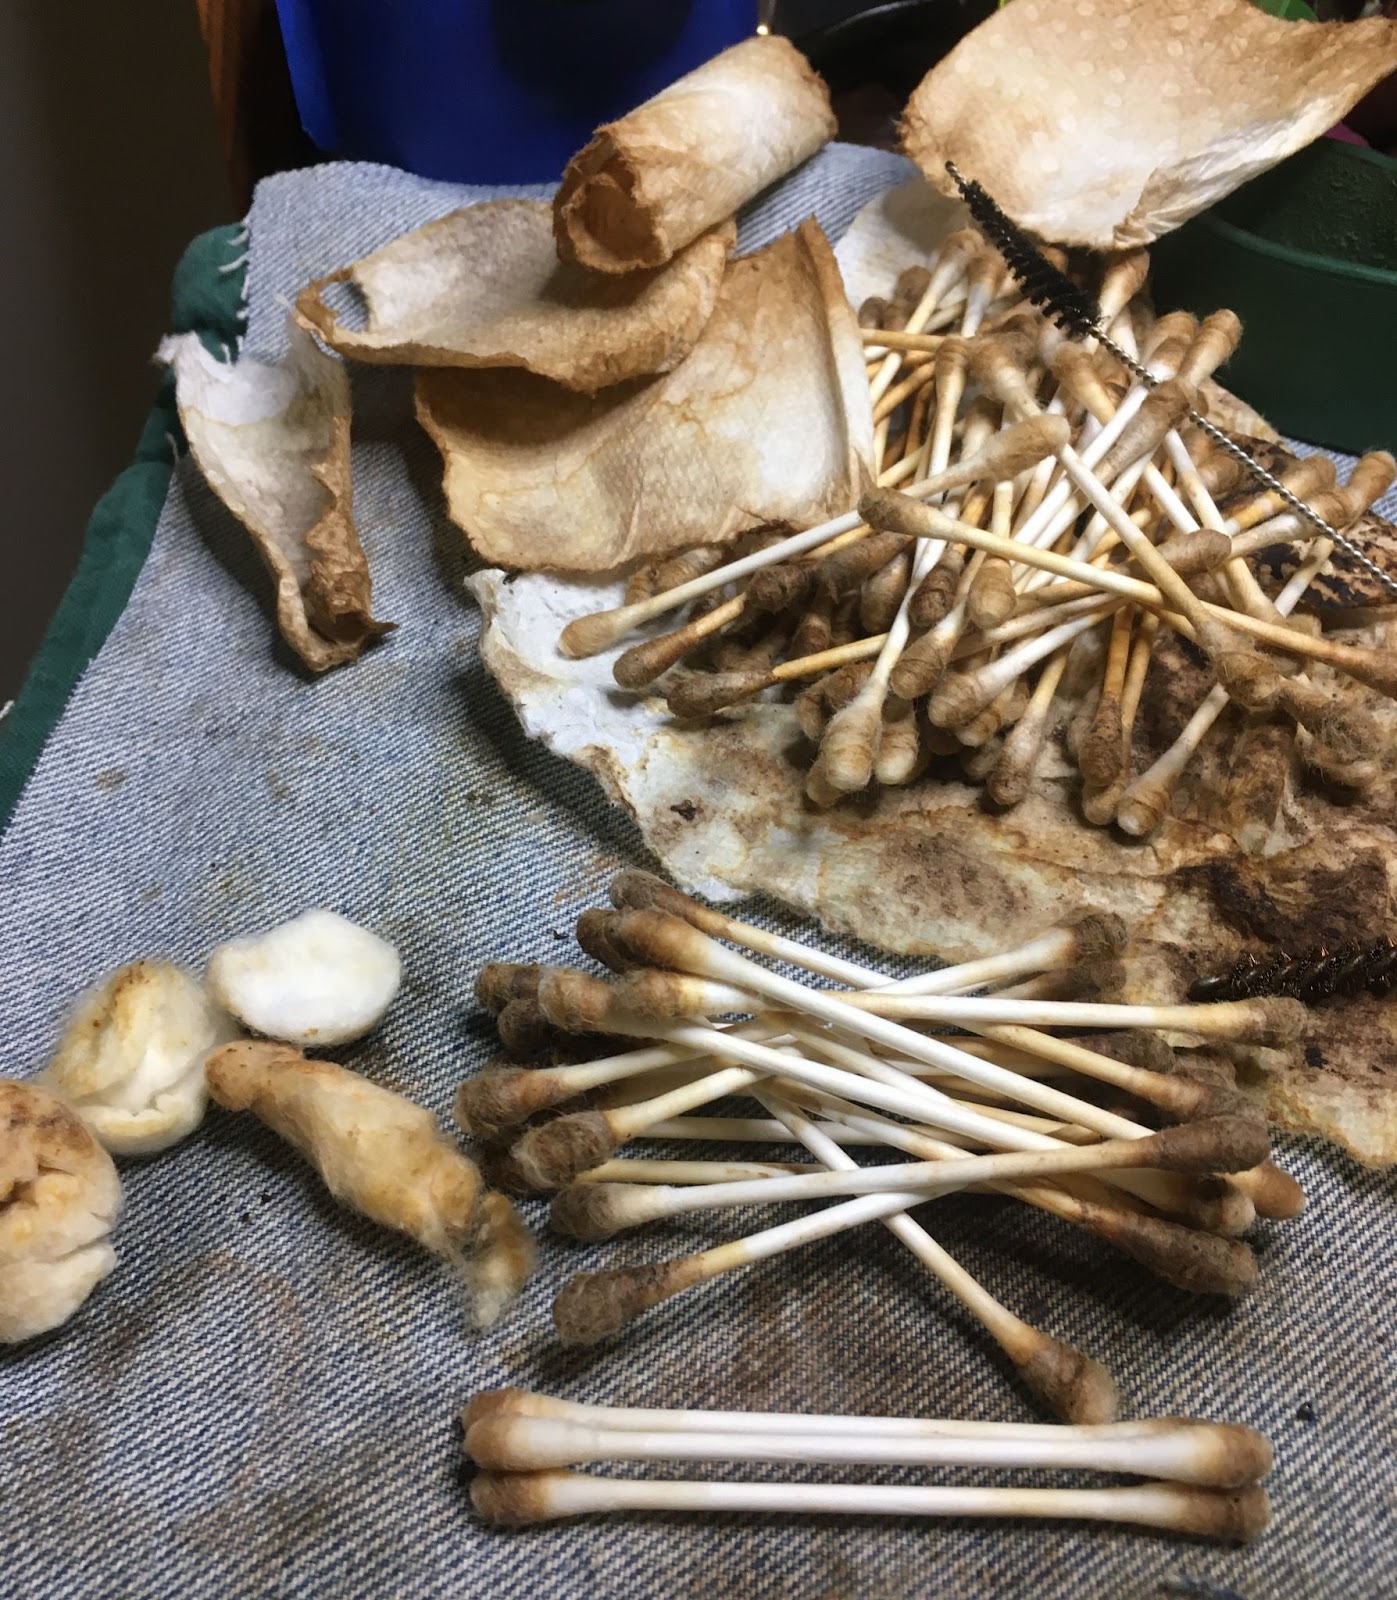
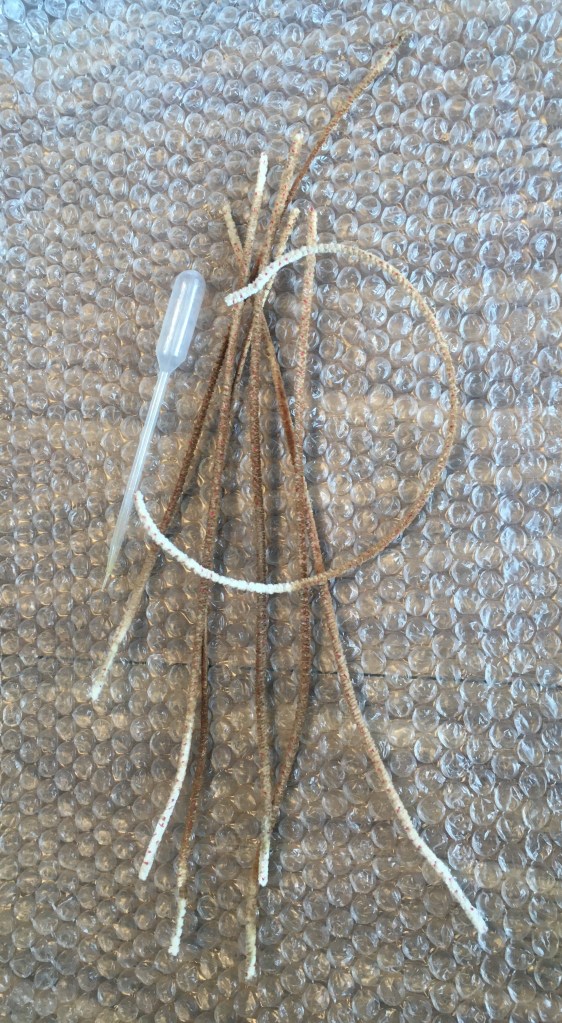
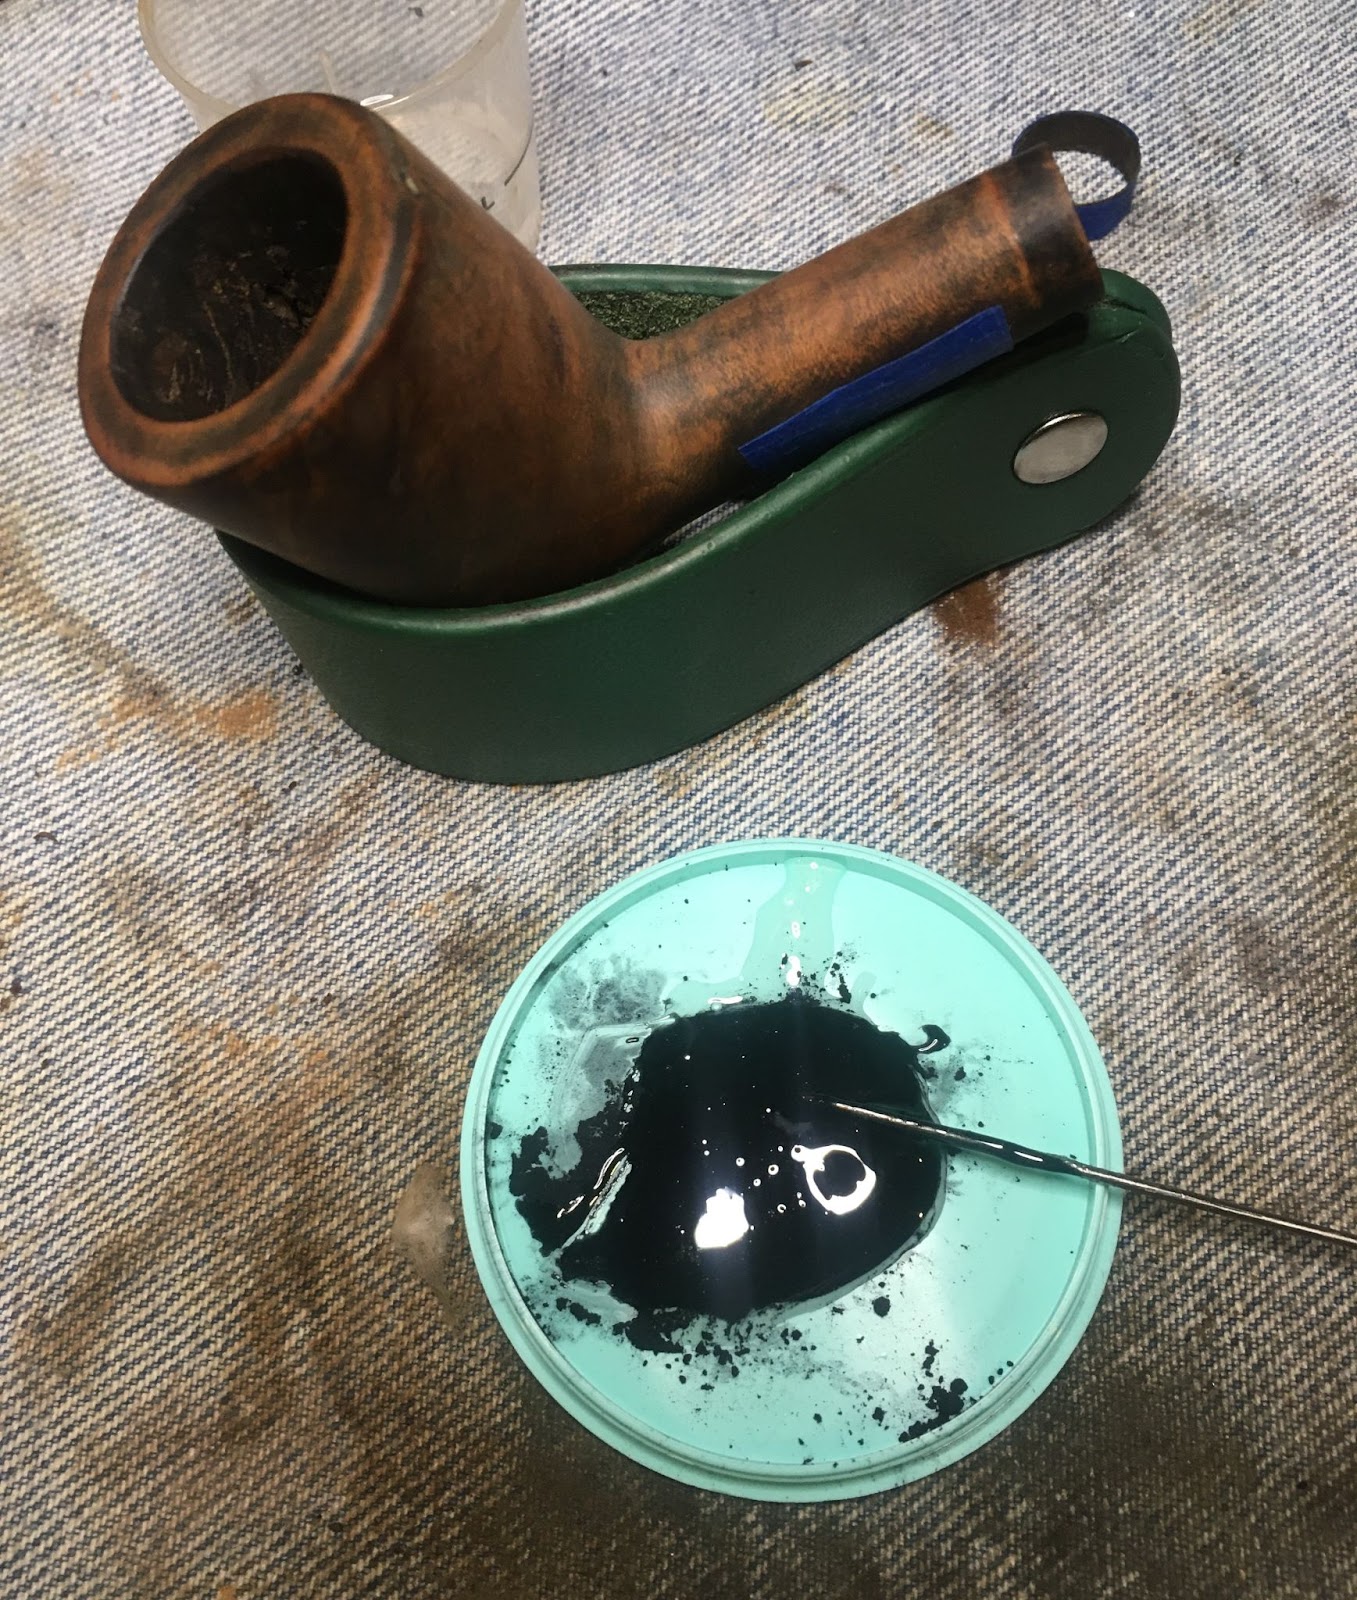
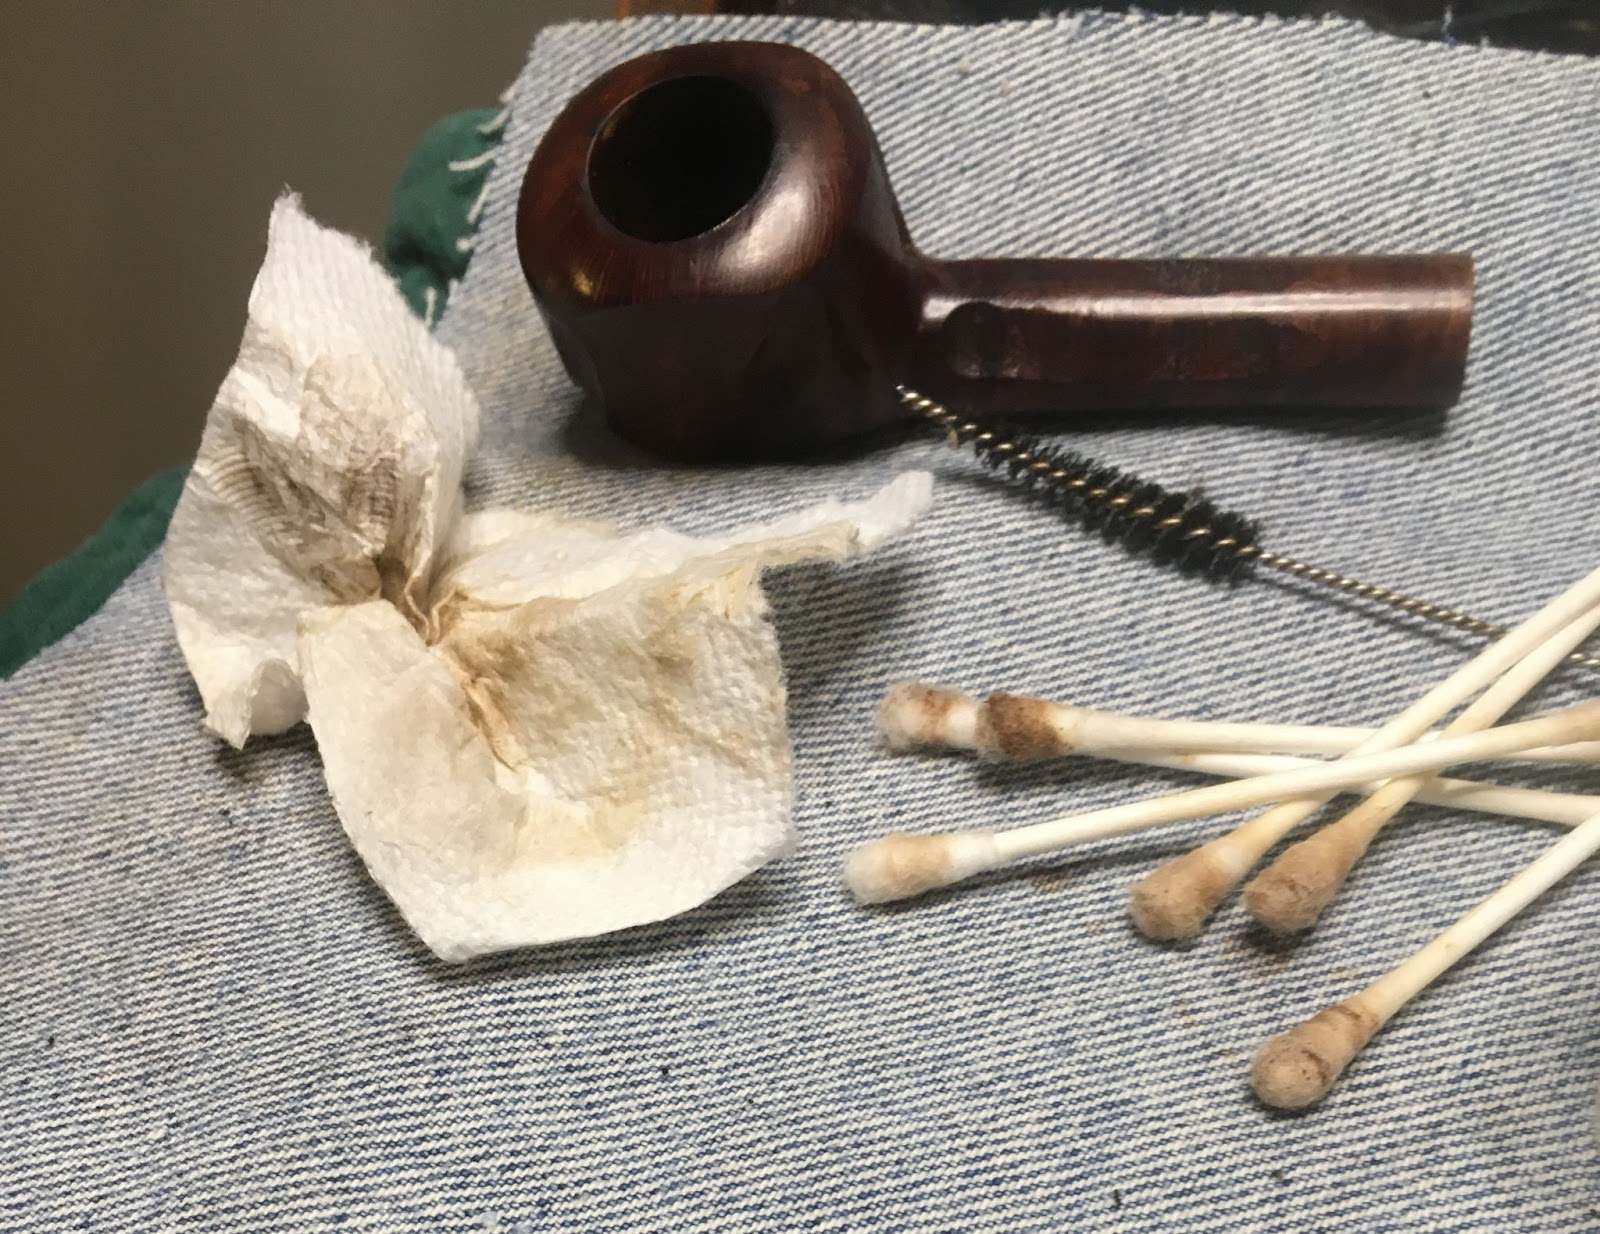
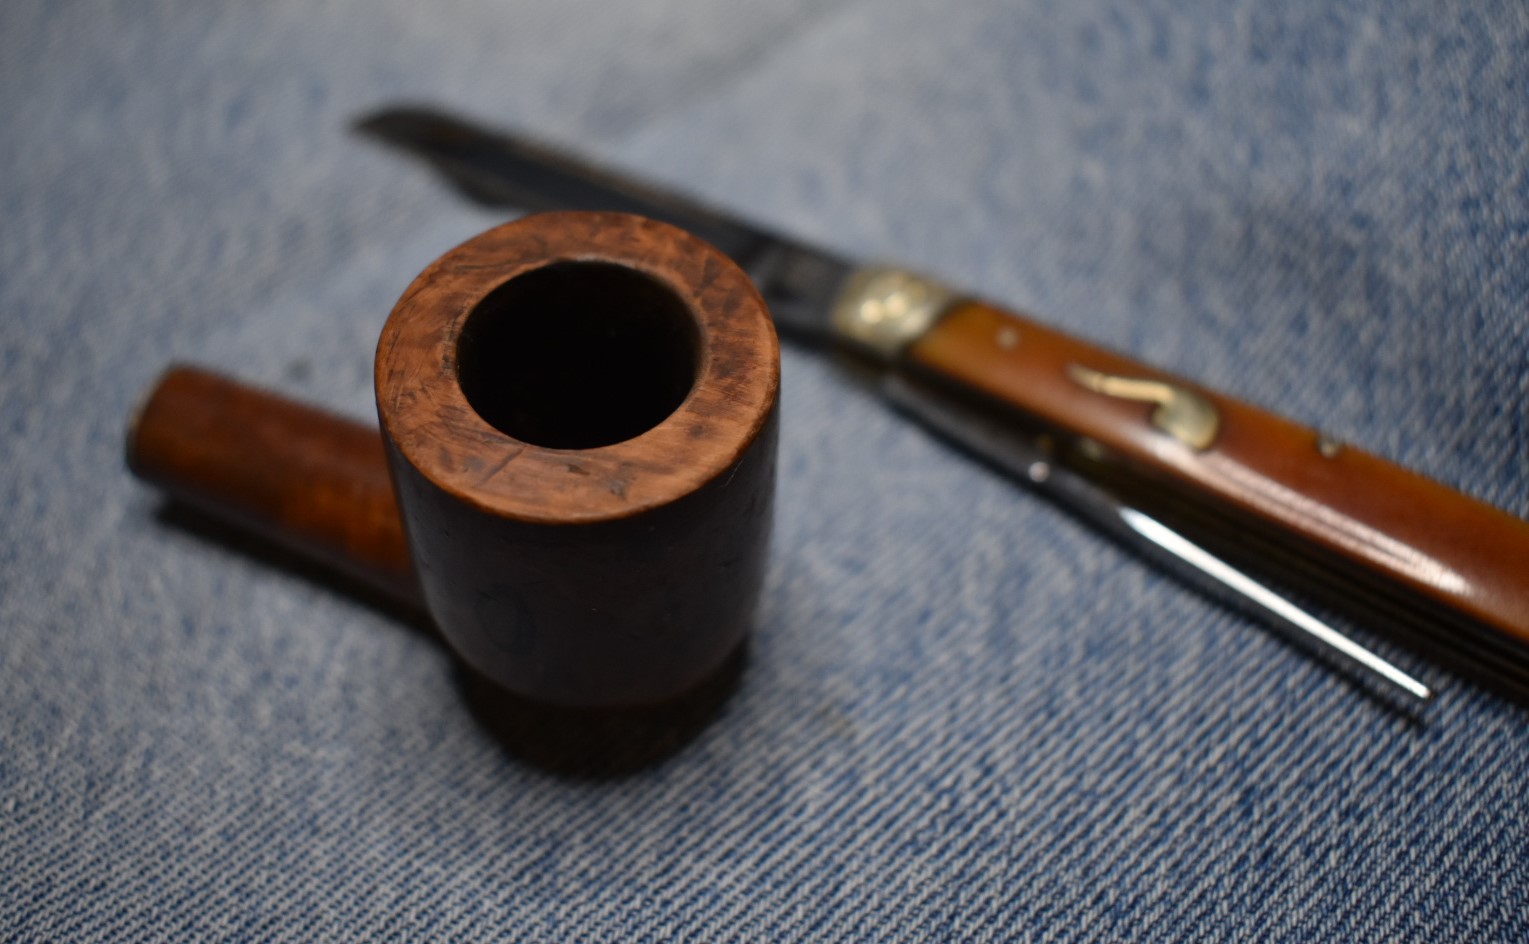
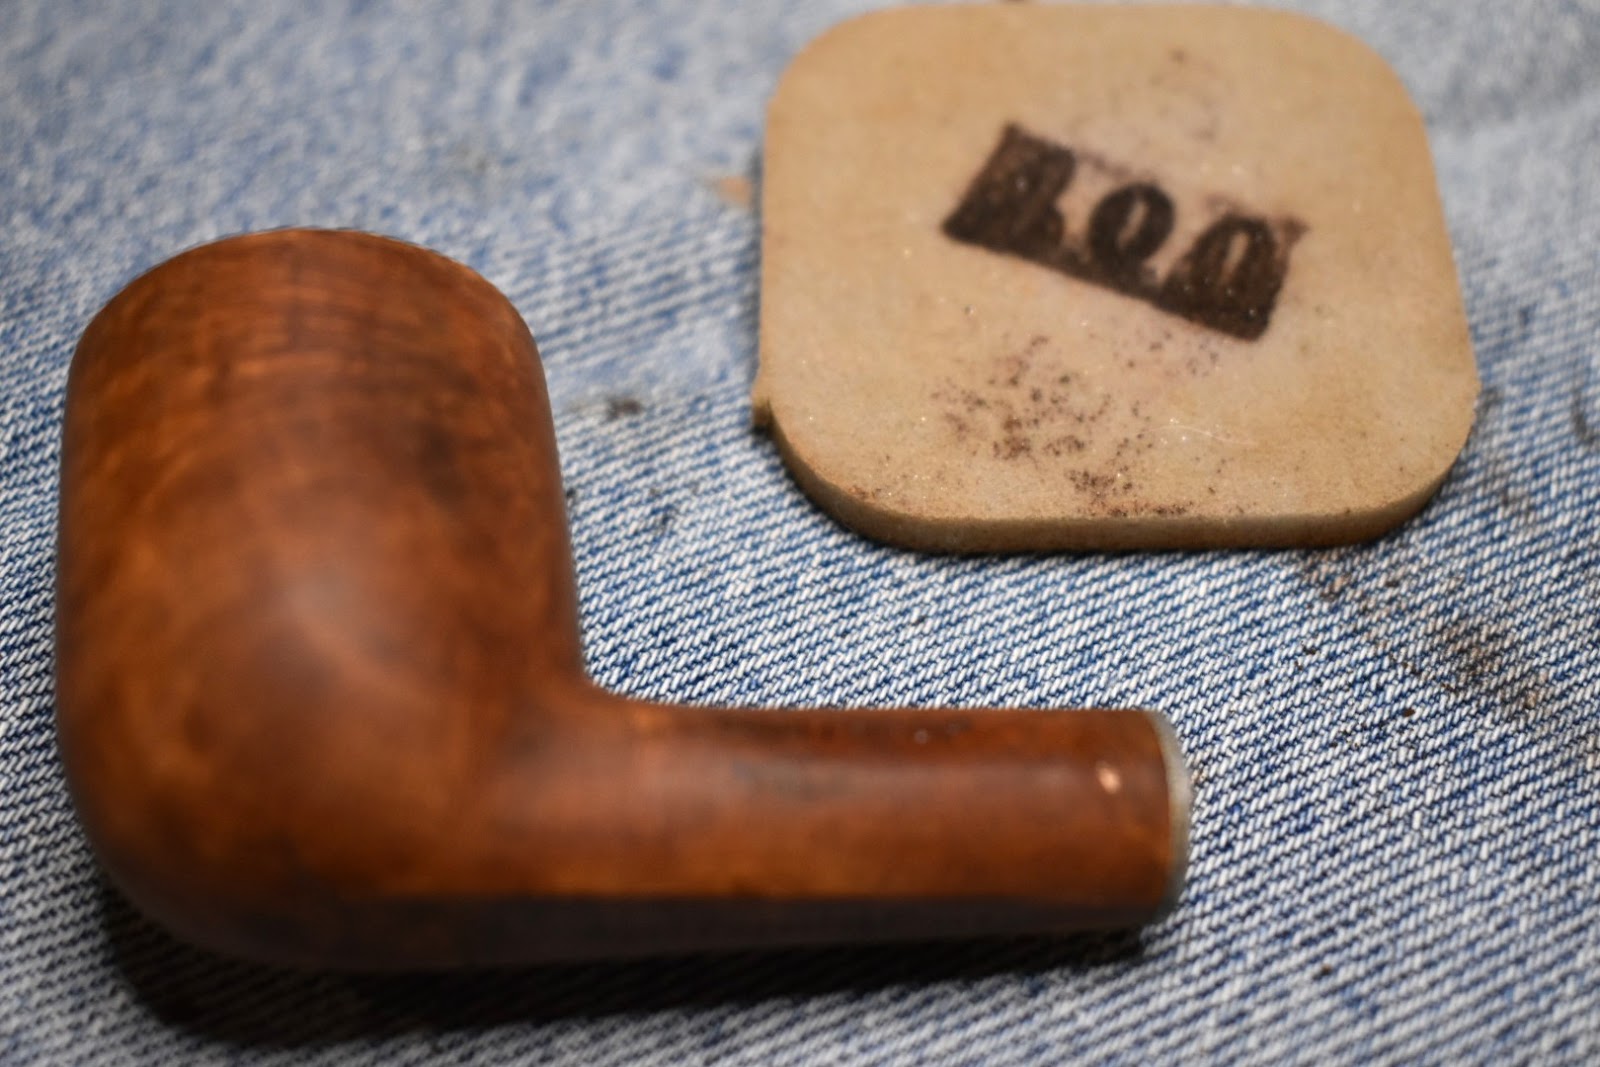
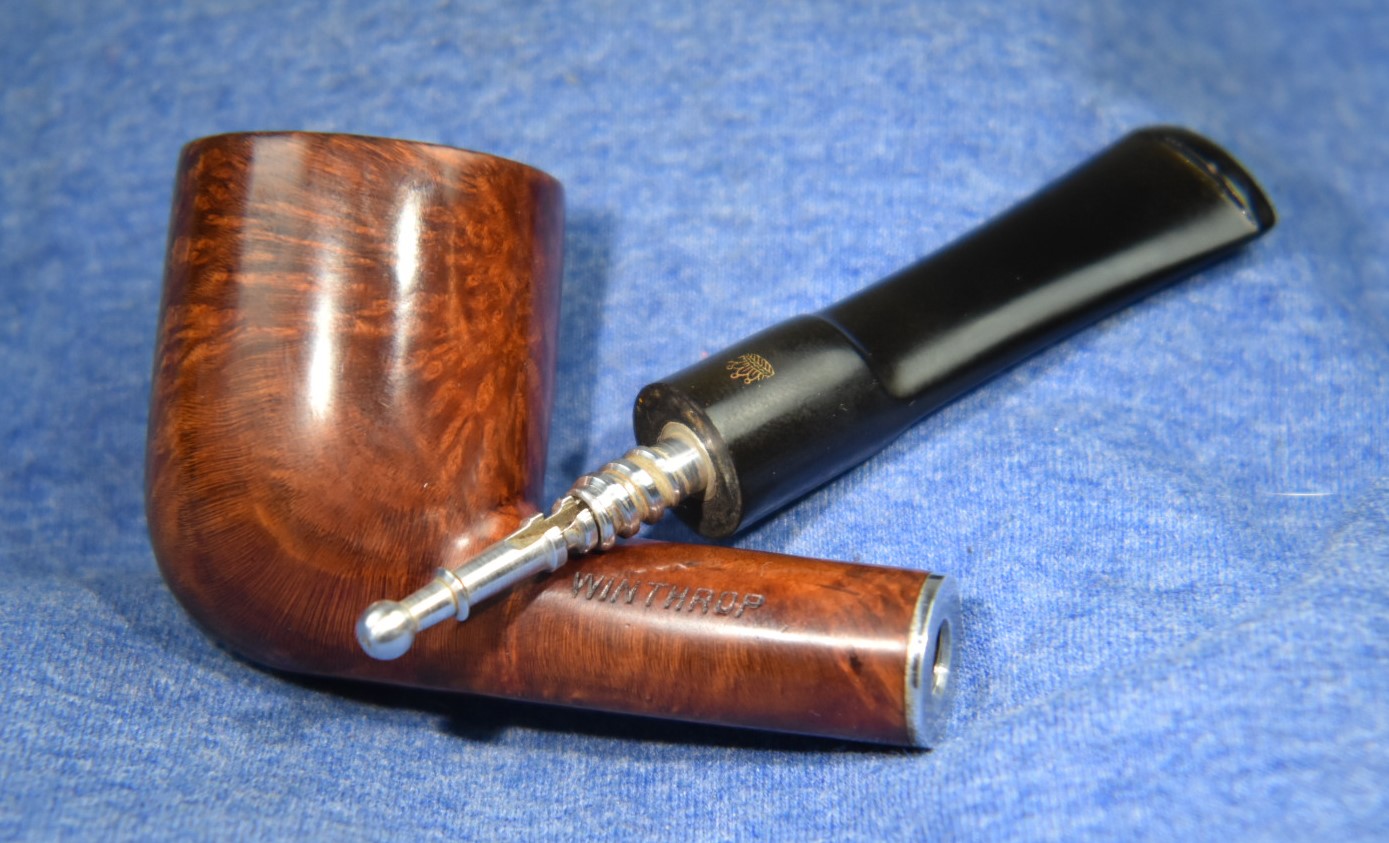
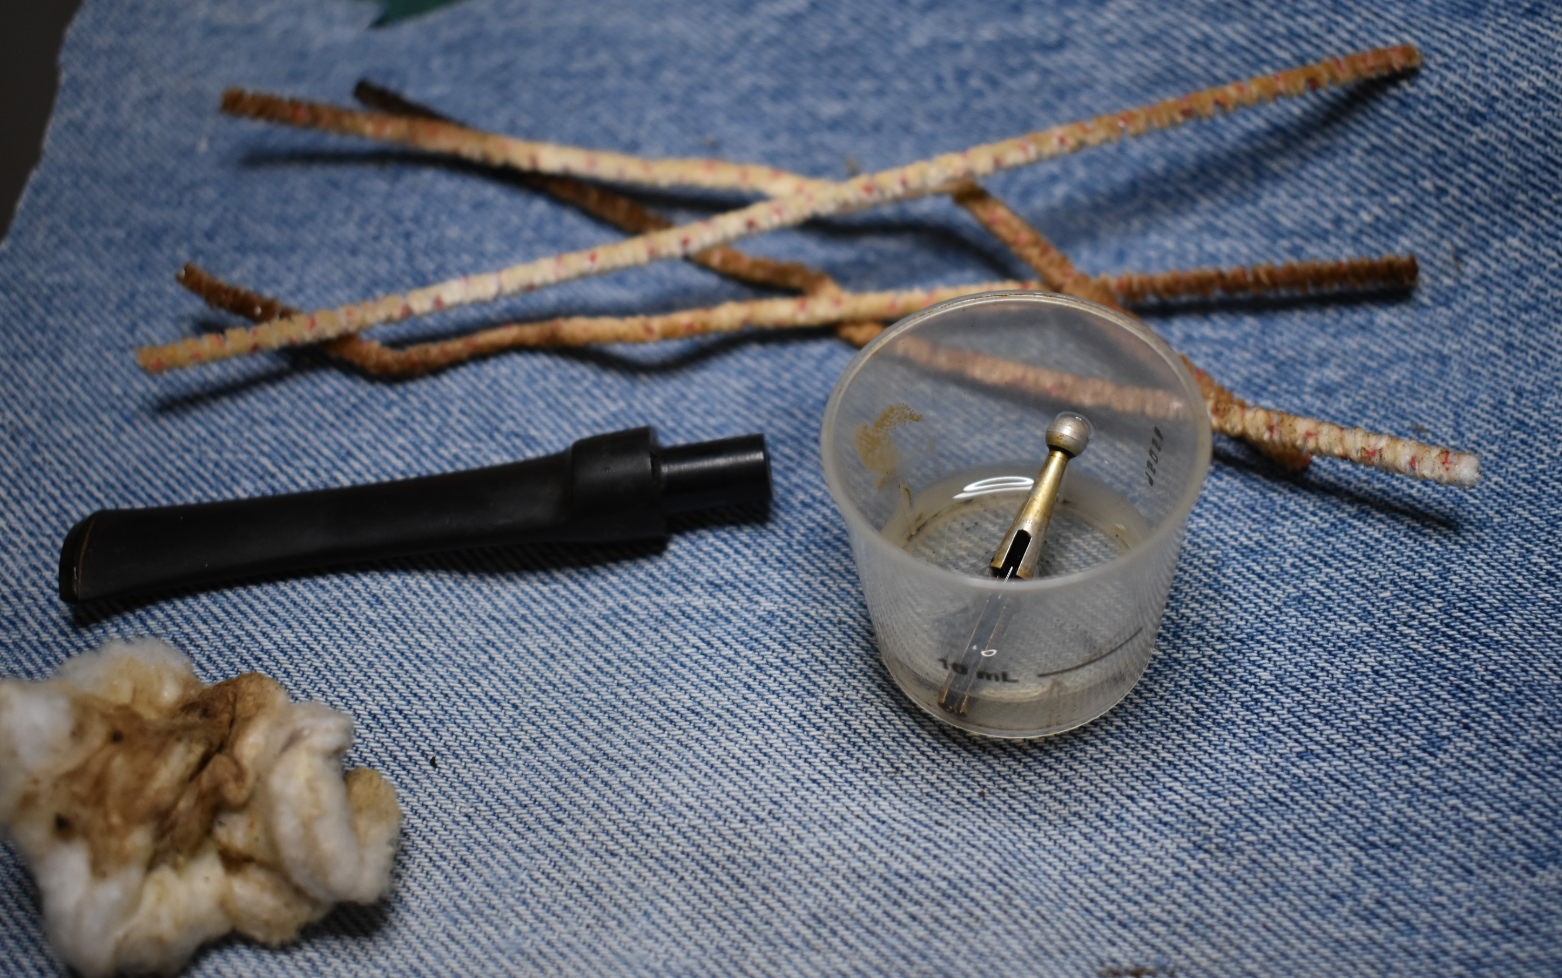
    I started with a new work surface denim piece, a disassembled pipe and  the reaming tools; PipNet with a #2 blade, Smokingpipes Low Country knife and the General triangular scraper.  Of course there was the ever-present medicine cup with 99% isopropyl alcohol and cotton swabs.  I could not get the aluminum stinger free from the stem.  This made cleaning a bit more difficult but still doable.

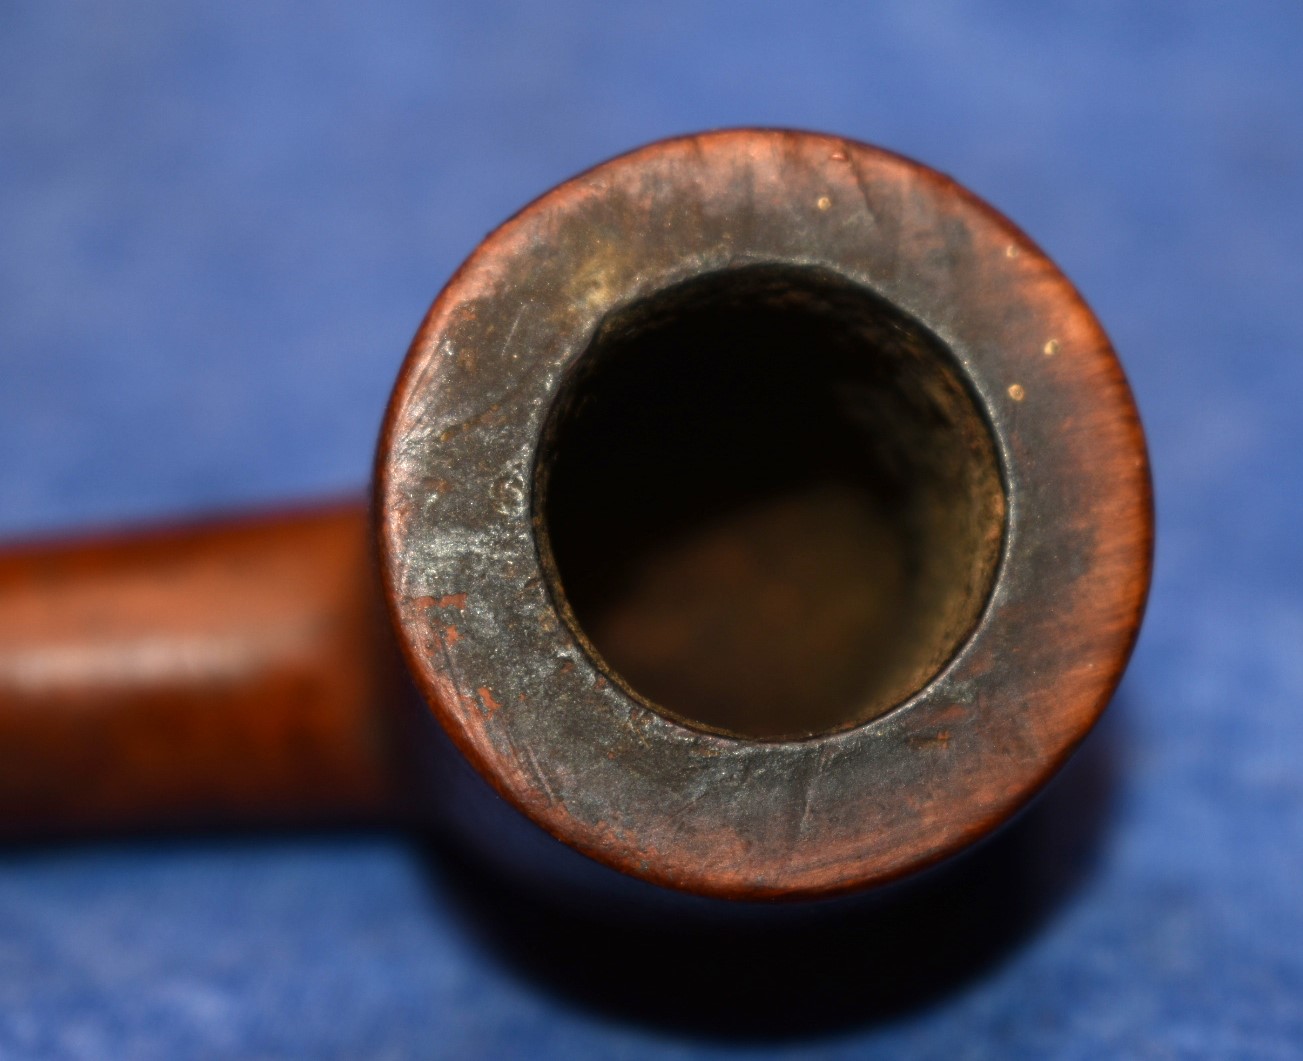
    The reaming was quick and easy due to there being nearly no cake present.  Most of the work was done with the General scraper.  After reaming the interior of the tobacco chamber was sanded using 220 sandpaper wrapped around a wood dowel.

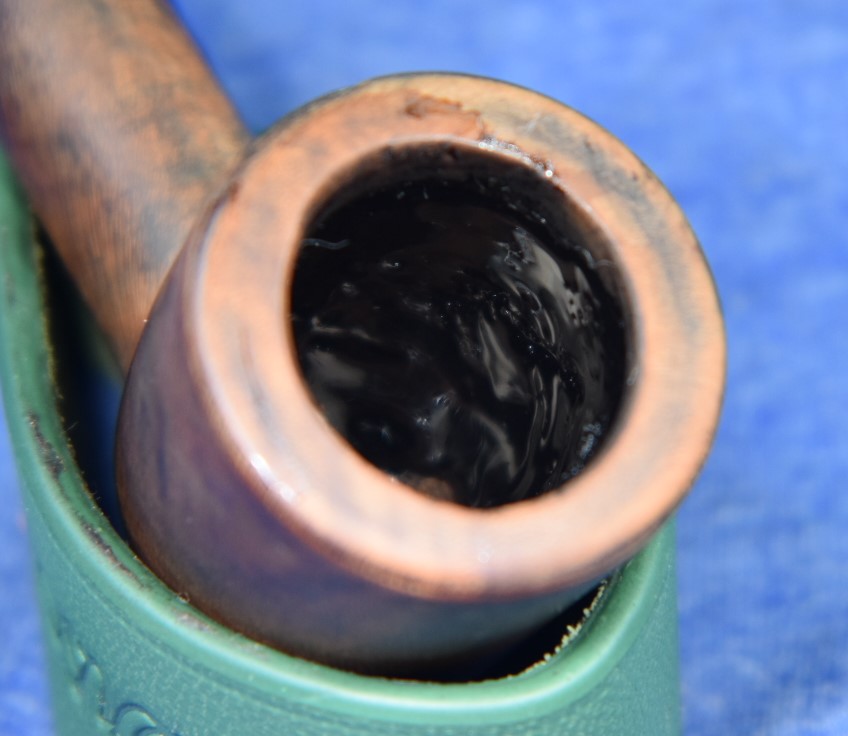
    Next I started cleaning the airway of the shank.  I used several cotton swabs dipped in alcohol to scrub the airway.  The effect of this was to slightly soften the tar and yuck (very technical pipe restoration term referring to undesirable deposits, usually black or dark brown in color and well, just yucky).  With the tobacco chamber being so clean I had no reason to think the shank would be this bad.  It was.  I repeated the following process:

    1. Pour 3 ml of alcohol into the bowl.  Allow the alcohol to flow into the shank.
    2. Spill a little bit of the alcohol onto my jeans
    3. Hold the stummel so the alcohol won’t spill.
    4. Scrub using a nylon shank brush with the alcohol.
    5. Use cotton swabs to absorb the remaining alcohol while scrubbing airway (this usually took 3-4 swabs)
    6. Repeat.

    Oh yeah, I forgot to say, get frustrated after about the 5 repetition and wrap a 2 inch x 2 inch piece of paper towel around the round needle file and scrub with that too.

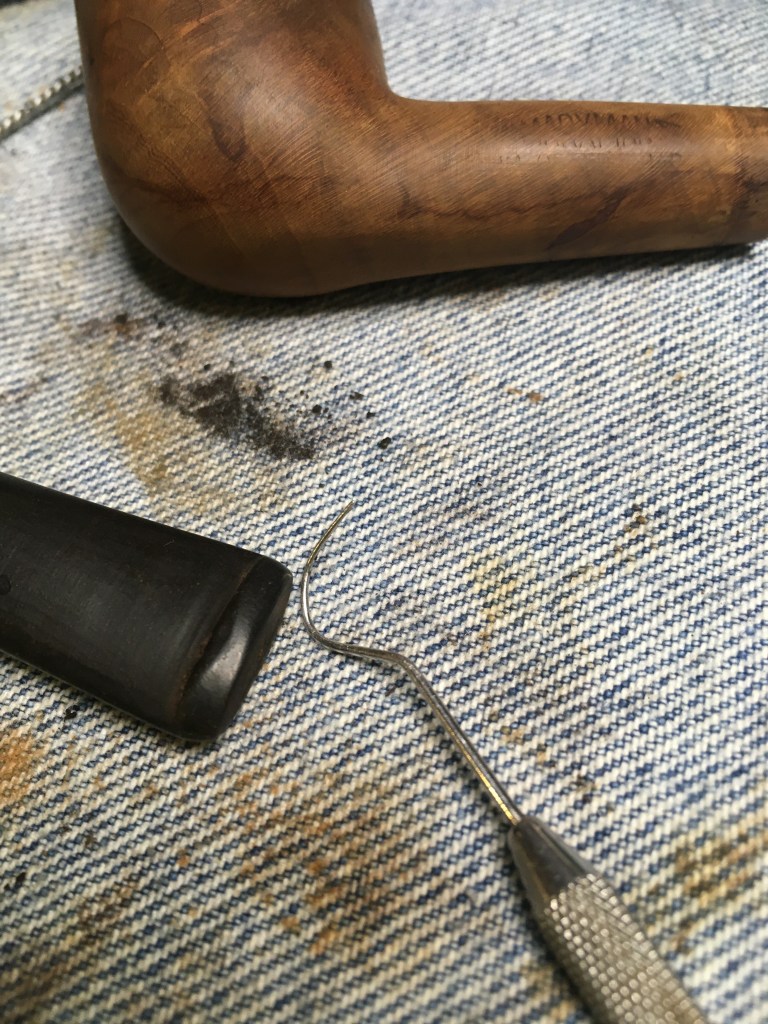
    Once I had emptied the box of cotton swabs and did not seem to be making any progress, I started to scrape the airway with a dental scraper then did the above steps 1-6.

    Being the person responsible to keep America’s cotton farmers and paper stick manufacturers going in these difficult economic times is a burden that I am willing to accept.  And, it may serve as time off of my sentence for the illegal crediting of source material for the Danco catalog.  Eventually the shank was cleaned.

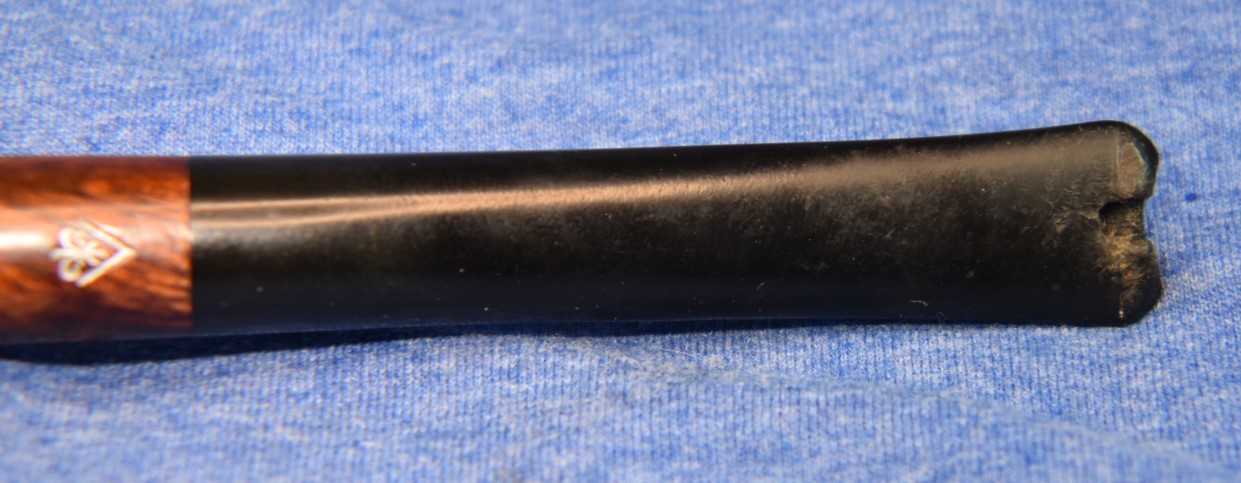
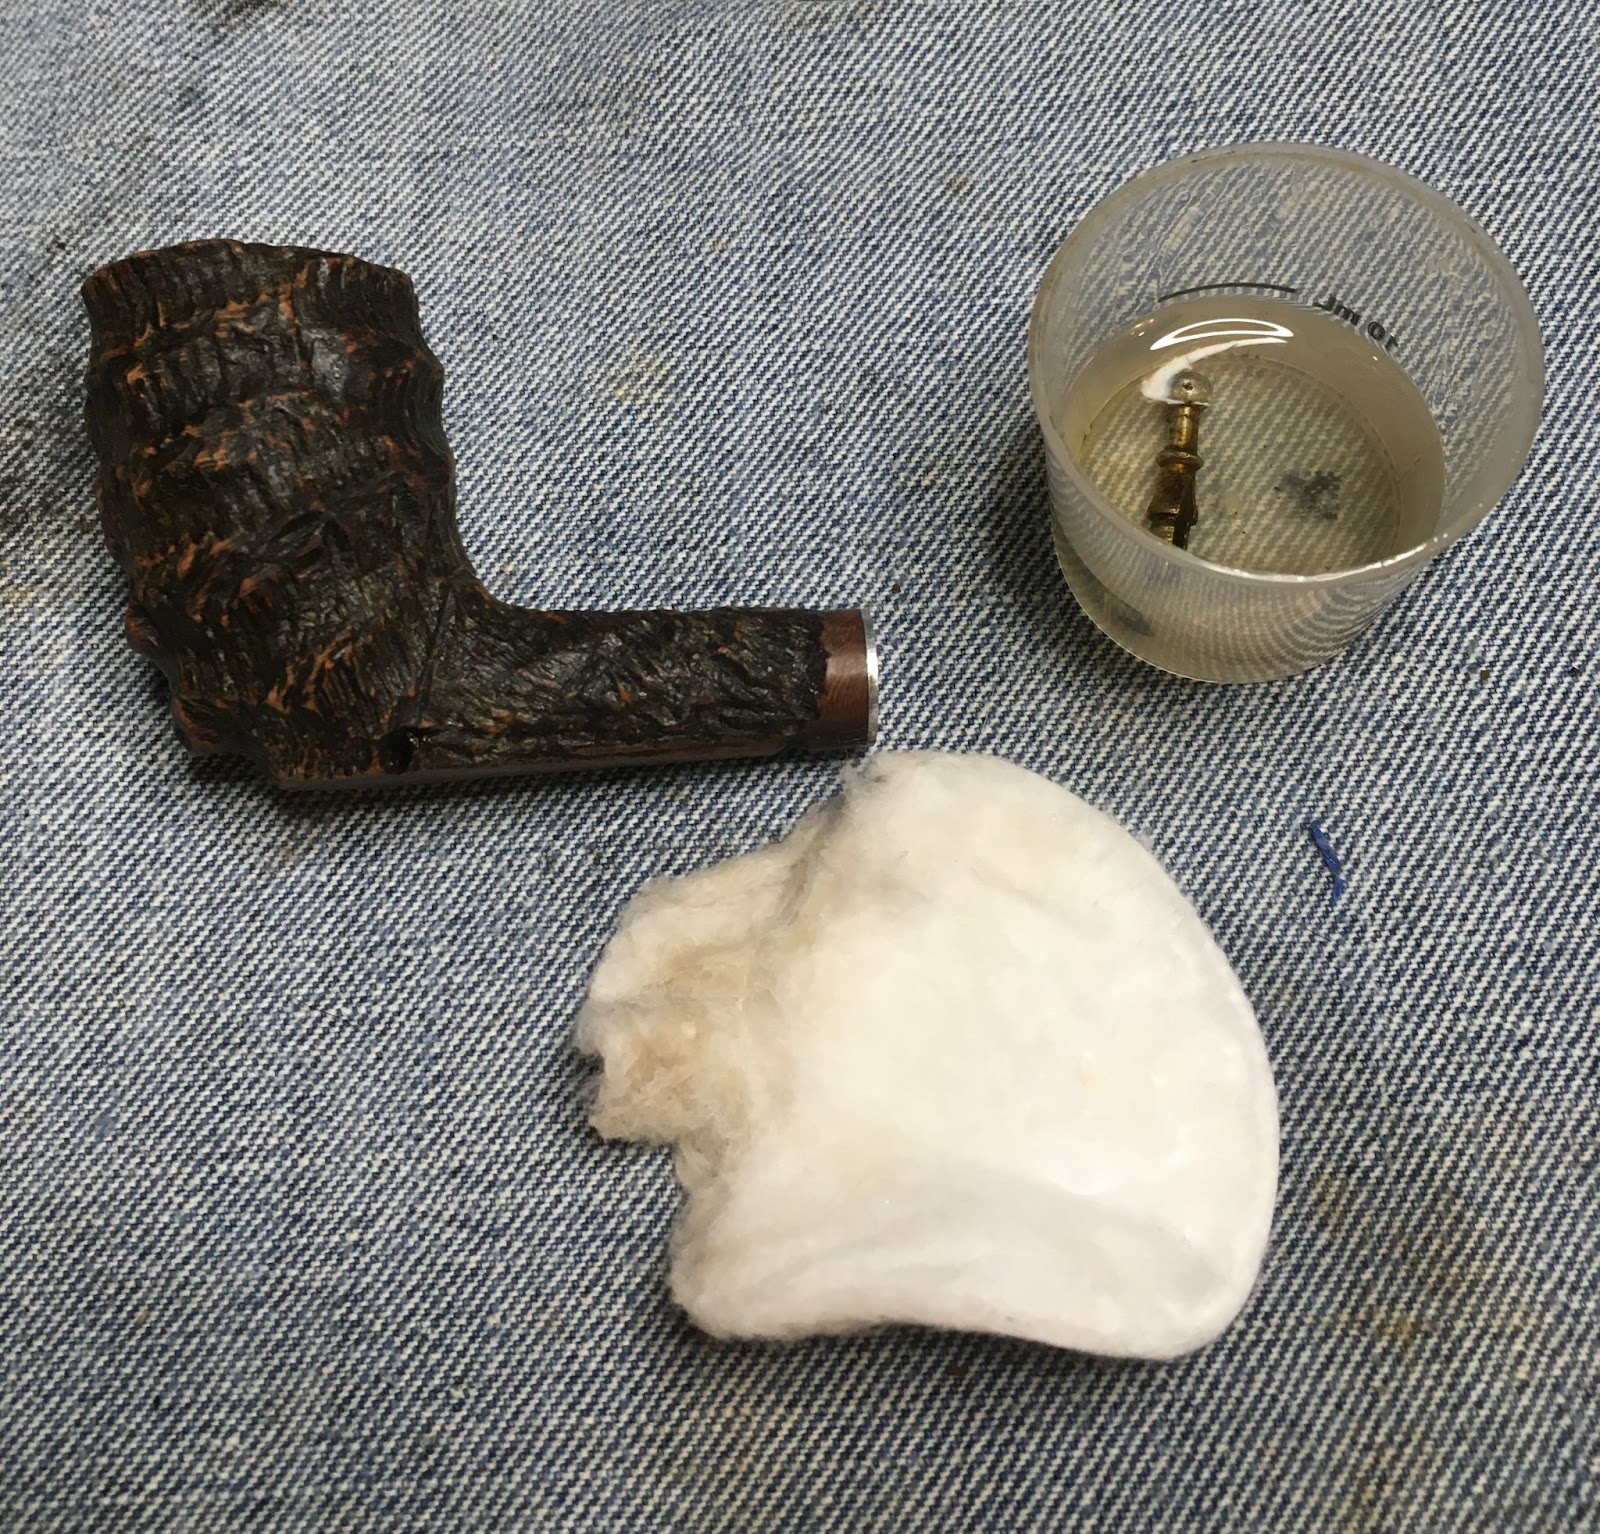
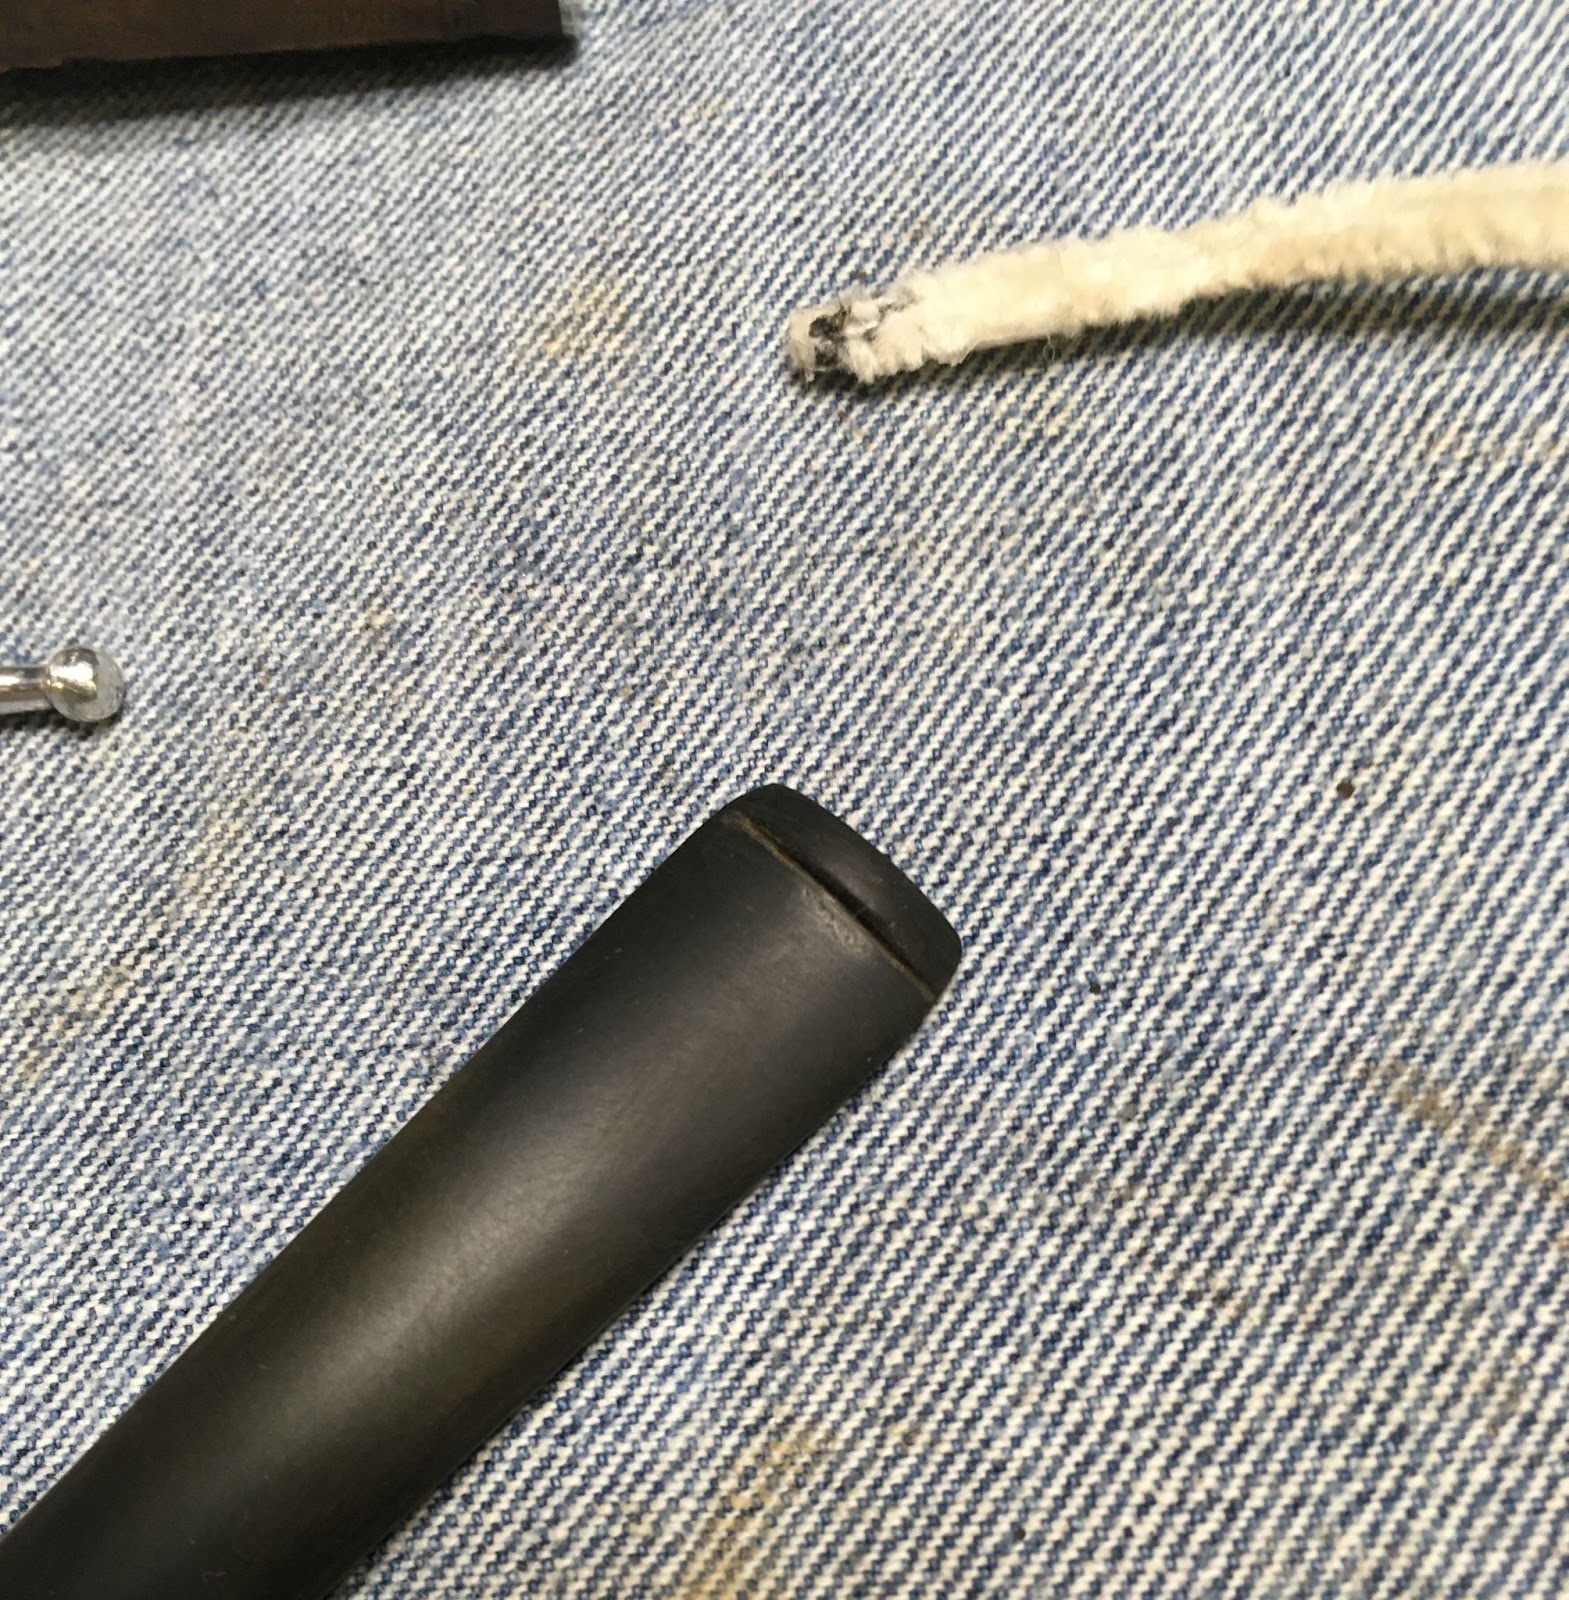
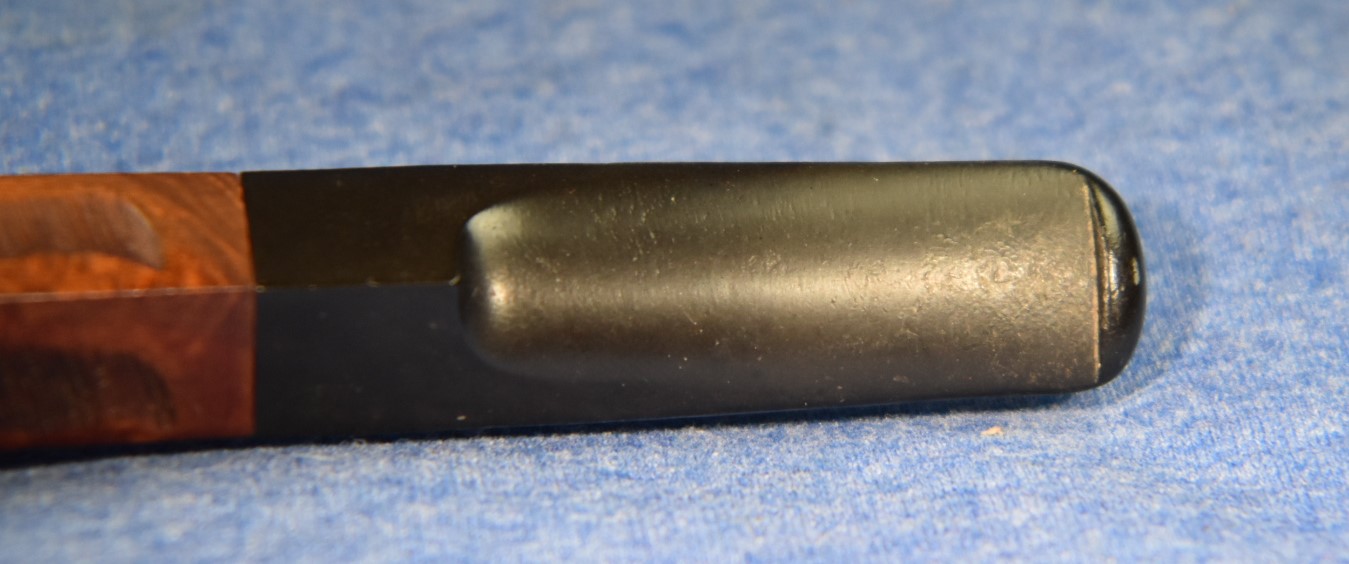
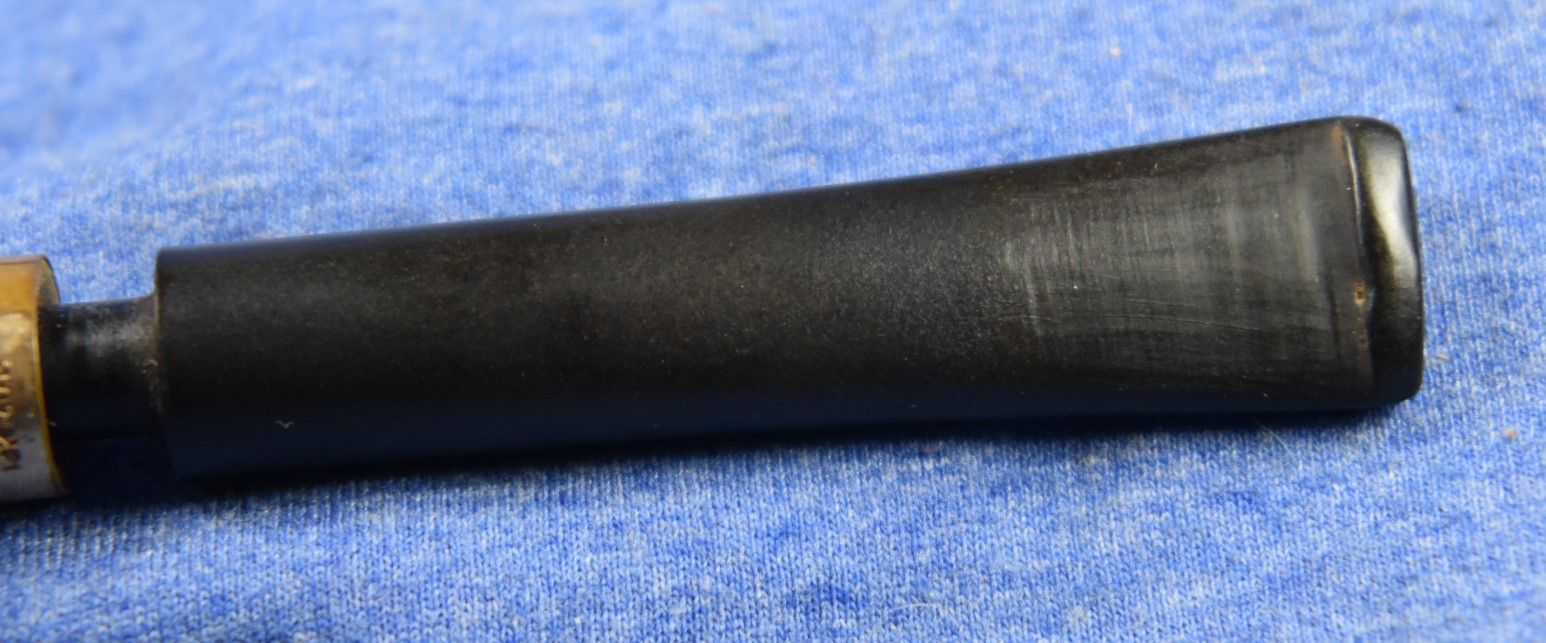
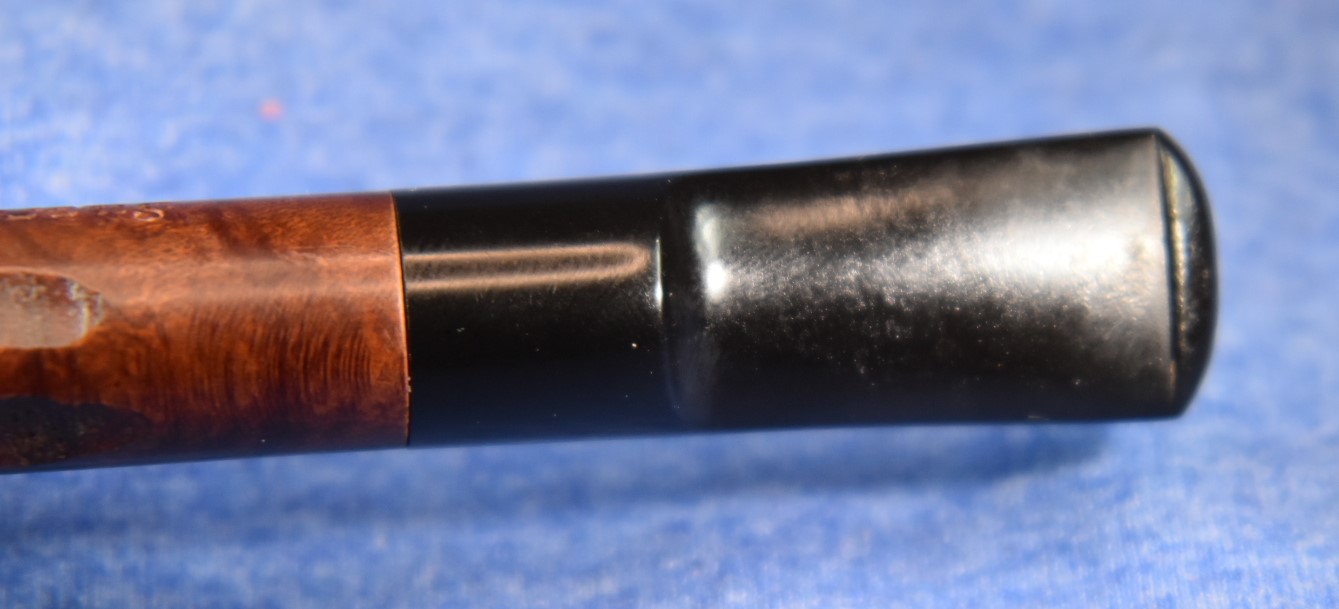
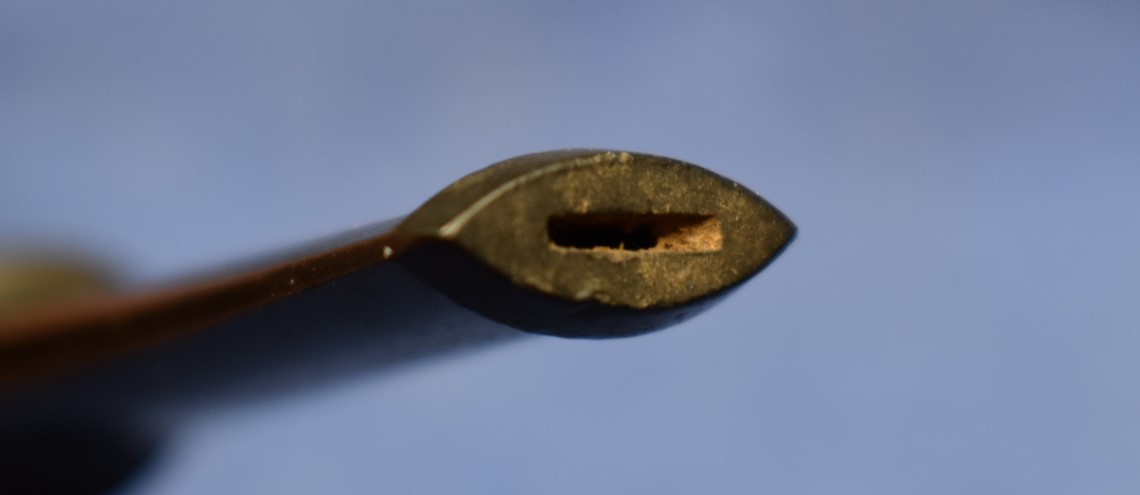
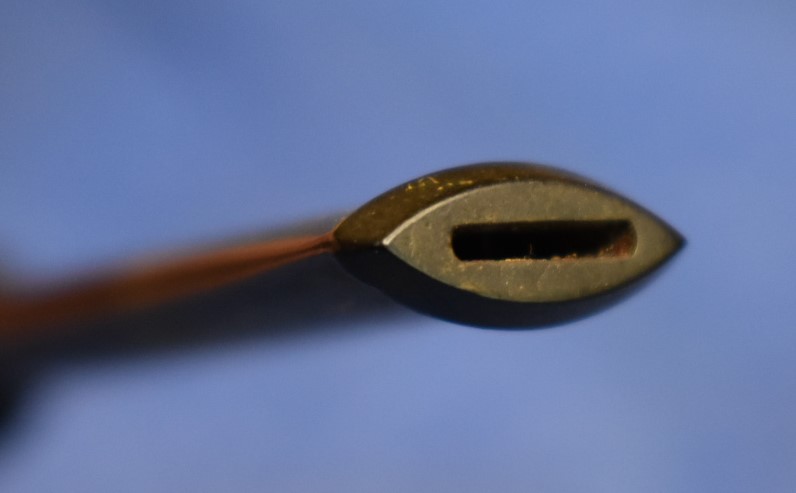
    I then turned my efforts to cleaning out the stem.  Try as I might, I could not get the stinger out of the stem.  I wrapped it with a rag and gripped it with a pliers and tried wiggling and twisting the stem.  I feared that applying too much pressure would break the tenon.  I surrendered and just cleaned from both ends.  The stem was not as bad as the shank had been but it did require several bristle pipe cleaners dipped in alcohol to rid it of the yuck.

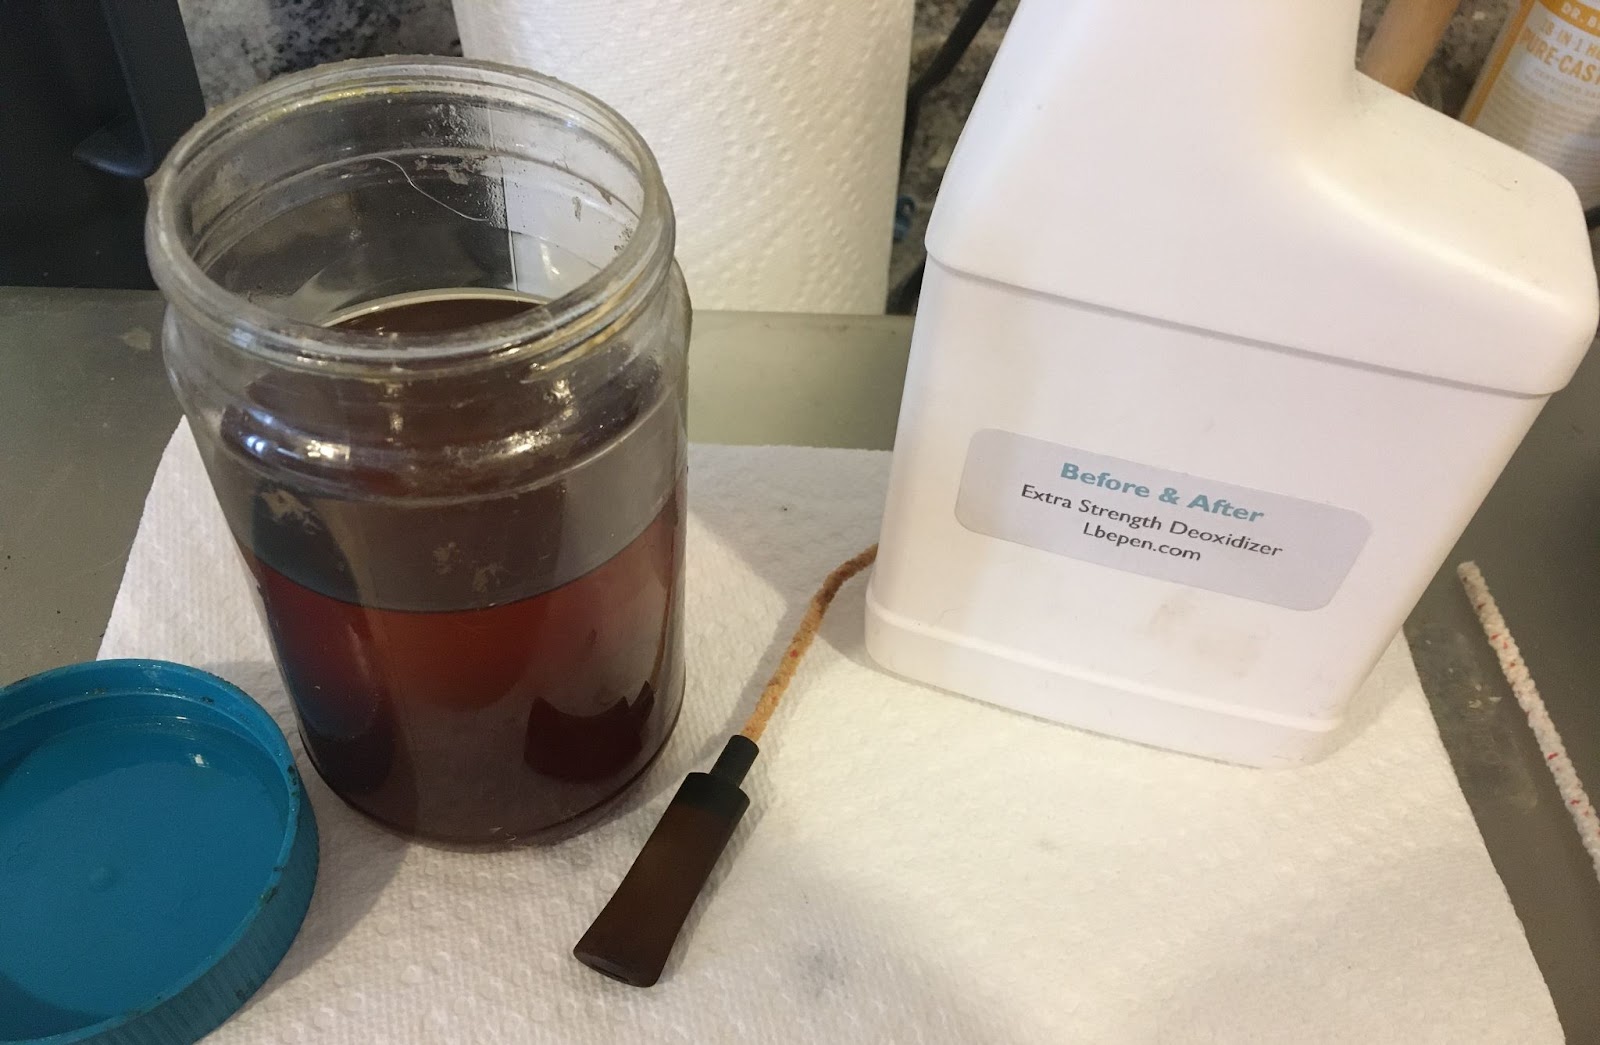
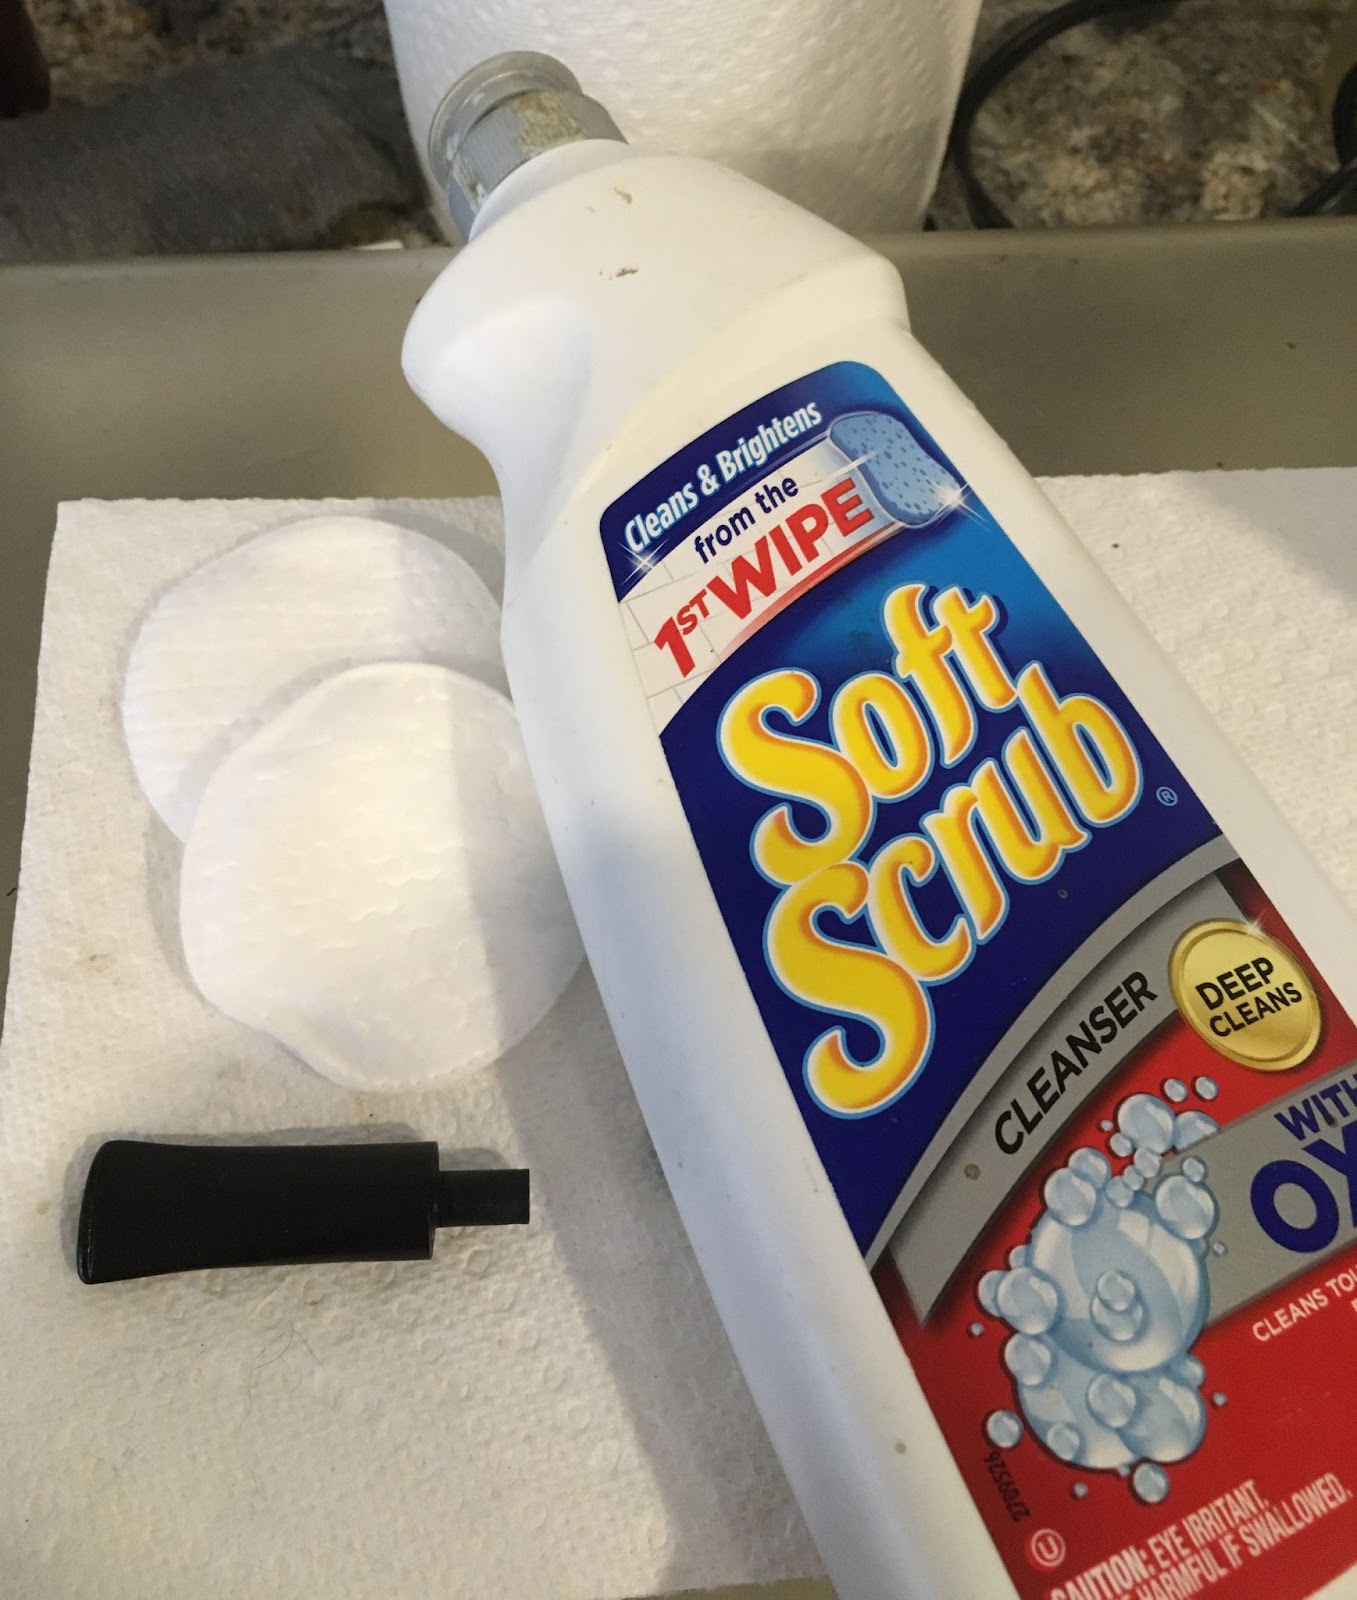
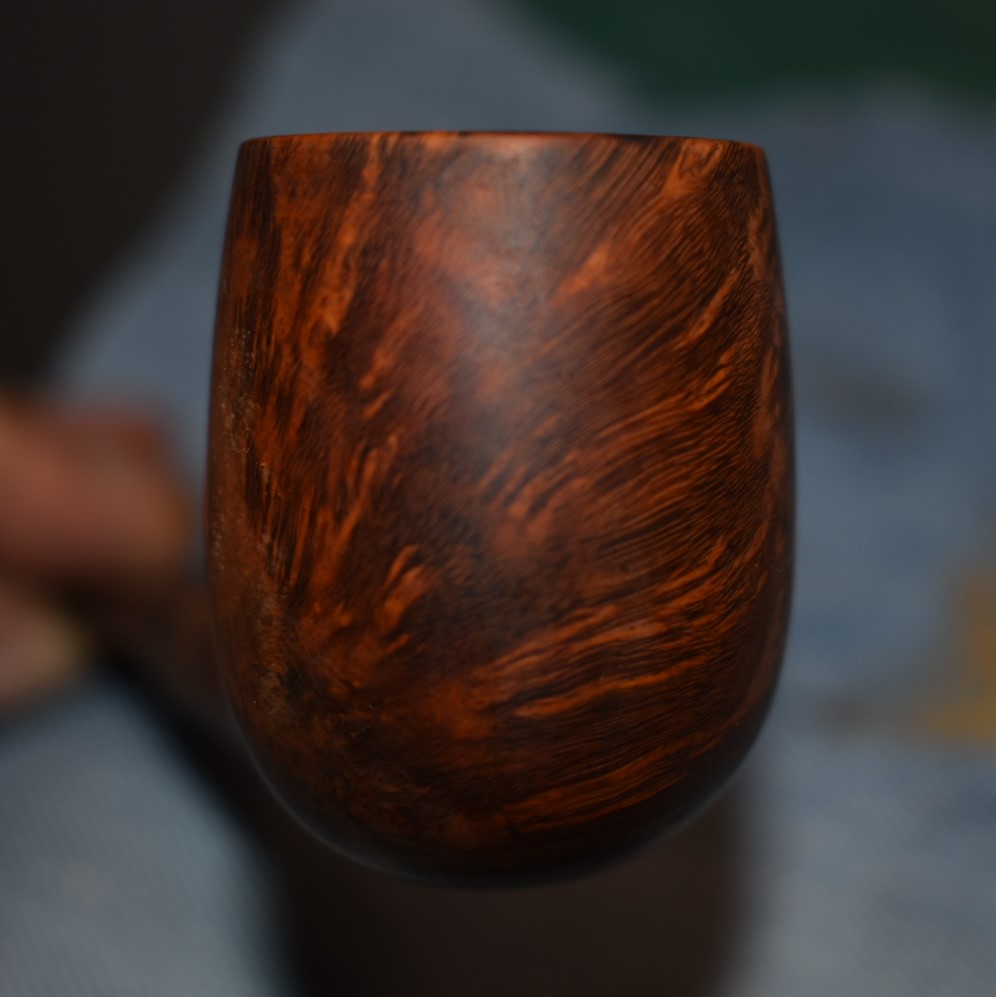
    With the interior of the stummel cleaned, next was the cleaning of the exterior.  This was done with undiluted Murphy’s Oil Soap and a medium stiff toothbrush.  I recommend doing this over the sink.  I applied the Murphy’s twice for this scrub since the stummel seemed to be very dirty.  I rinsed the Murphy’s off with warm water and dried the stummel with a cotton dish towel.  What I thought was a layer of finish was actually just a layer of oil, dirt and grime.  Once cleaned I returned to the workbench and wiped off the exterior with a make-up pad wetted with 95% ethyl alcohol.  The pad was remarkably clean and the stummel had the dry flat look of bare wood.

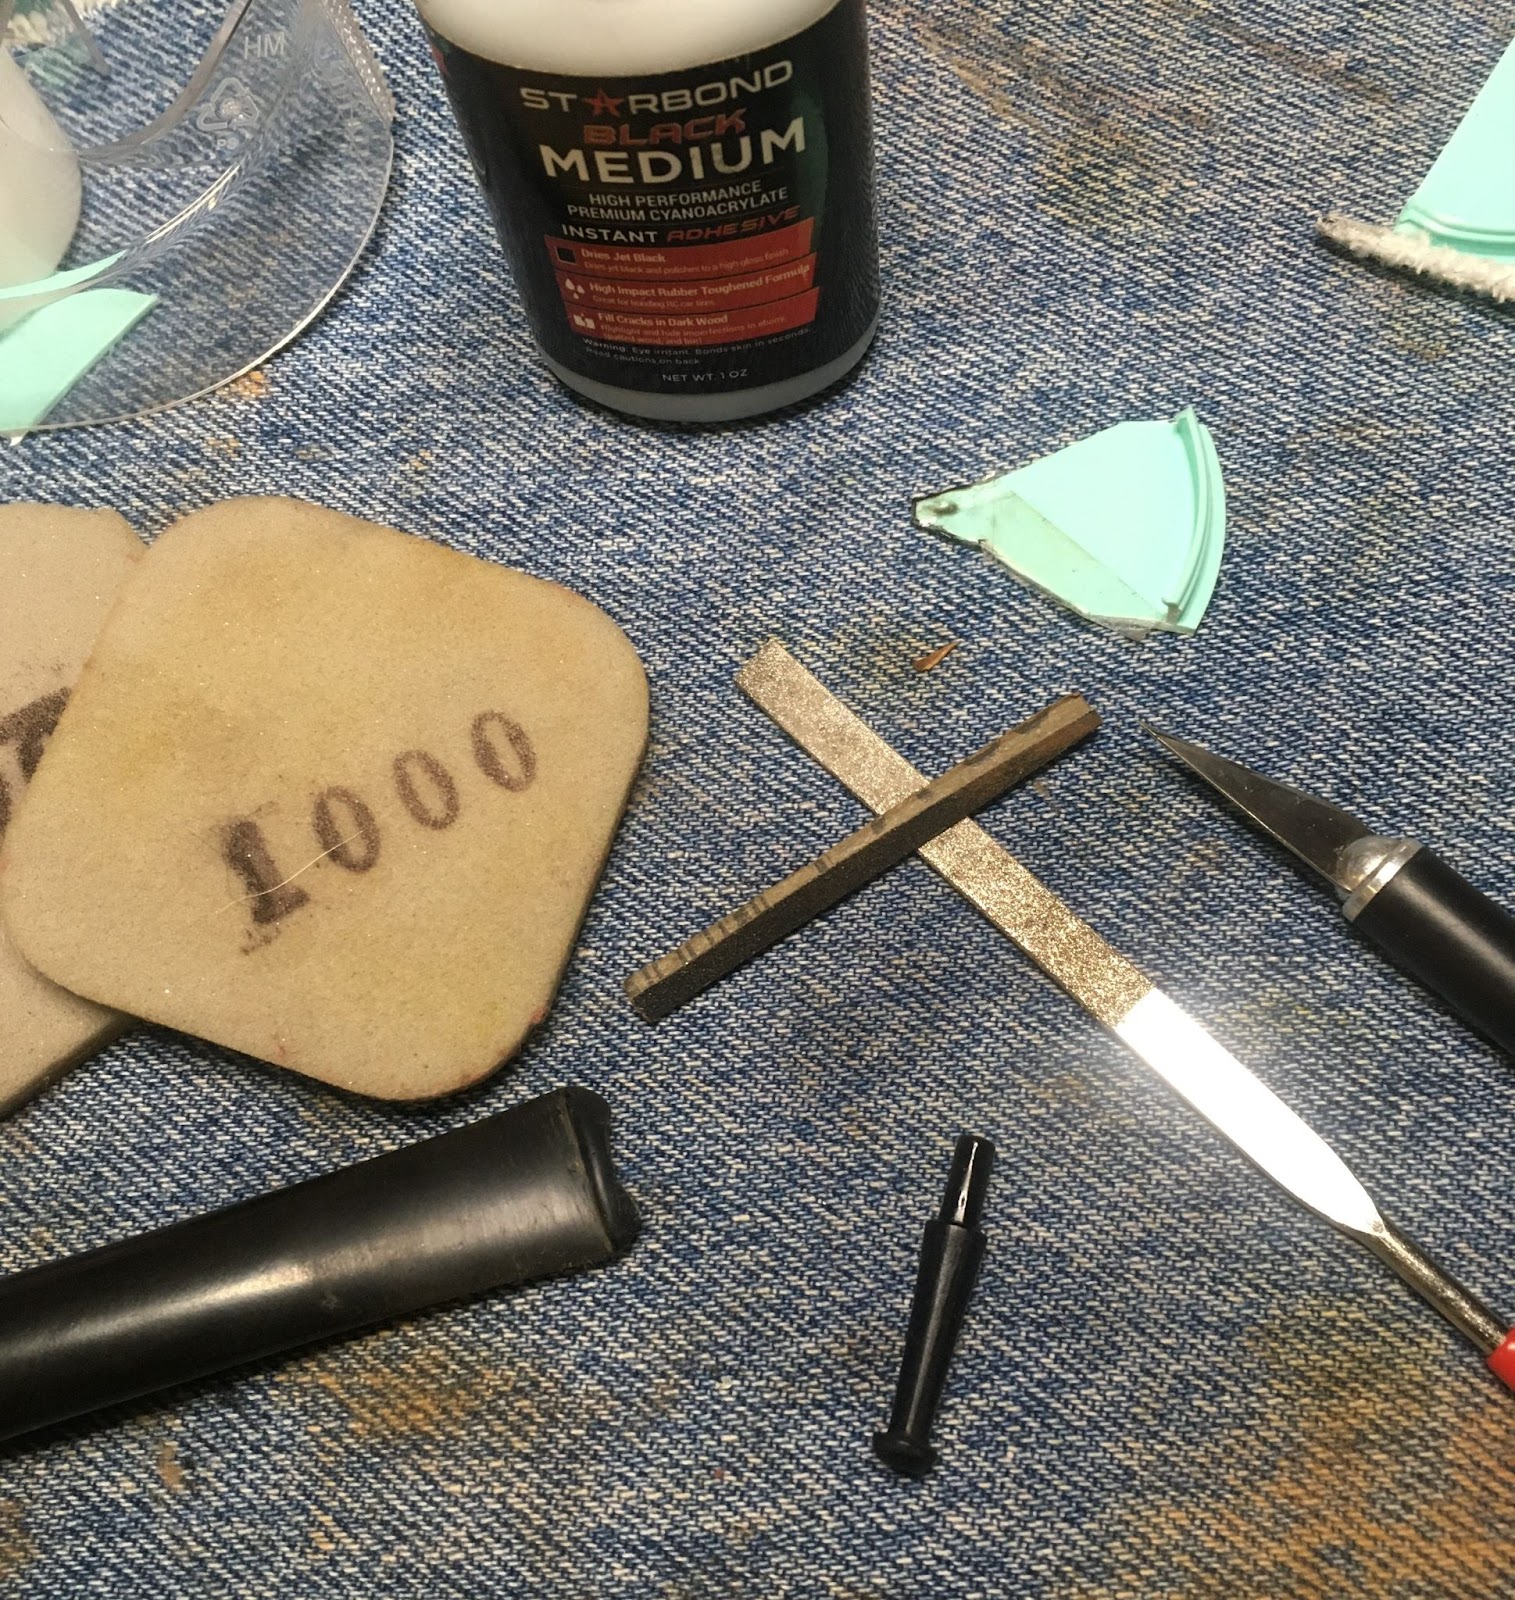
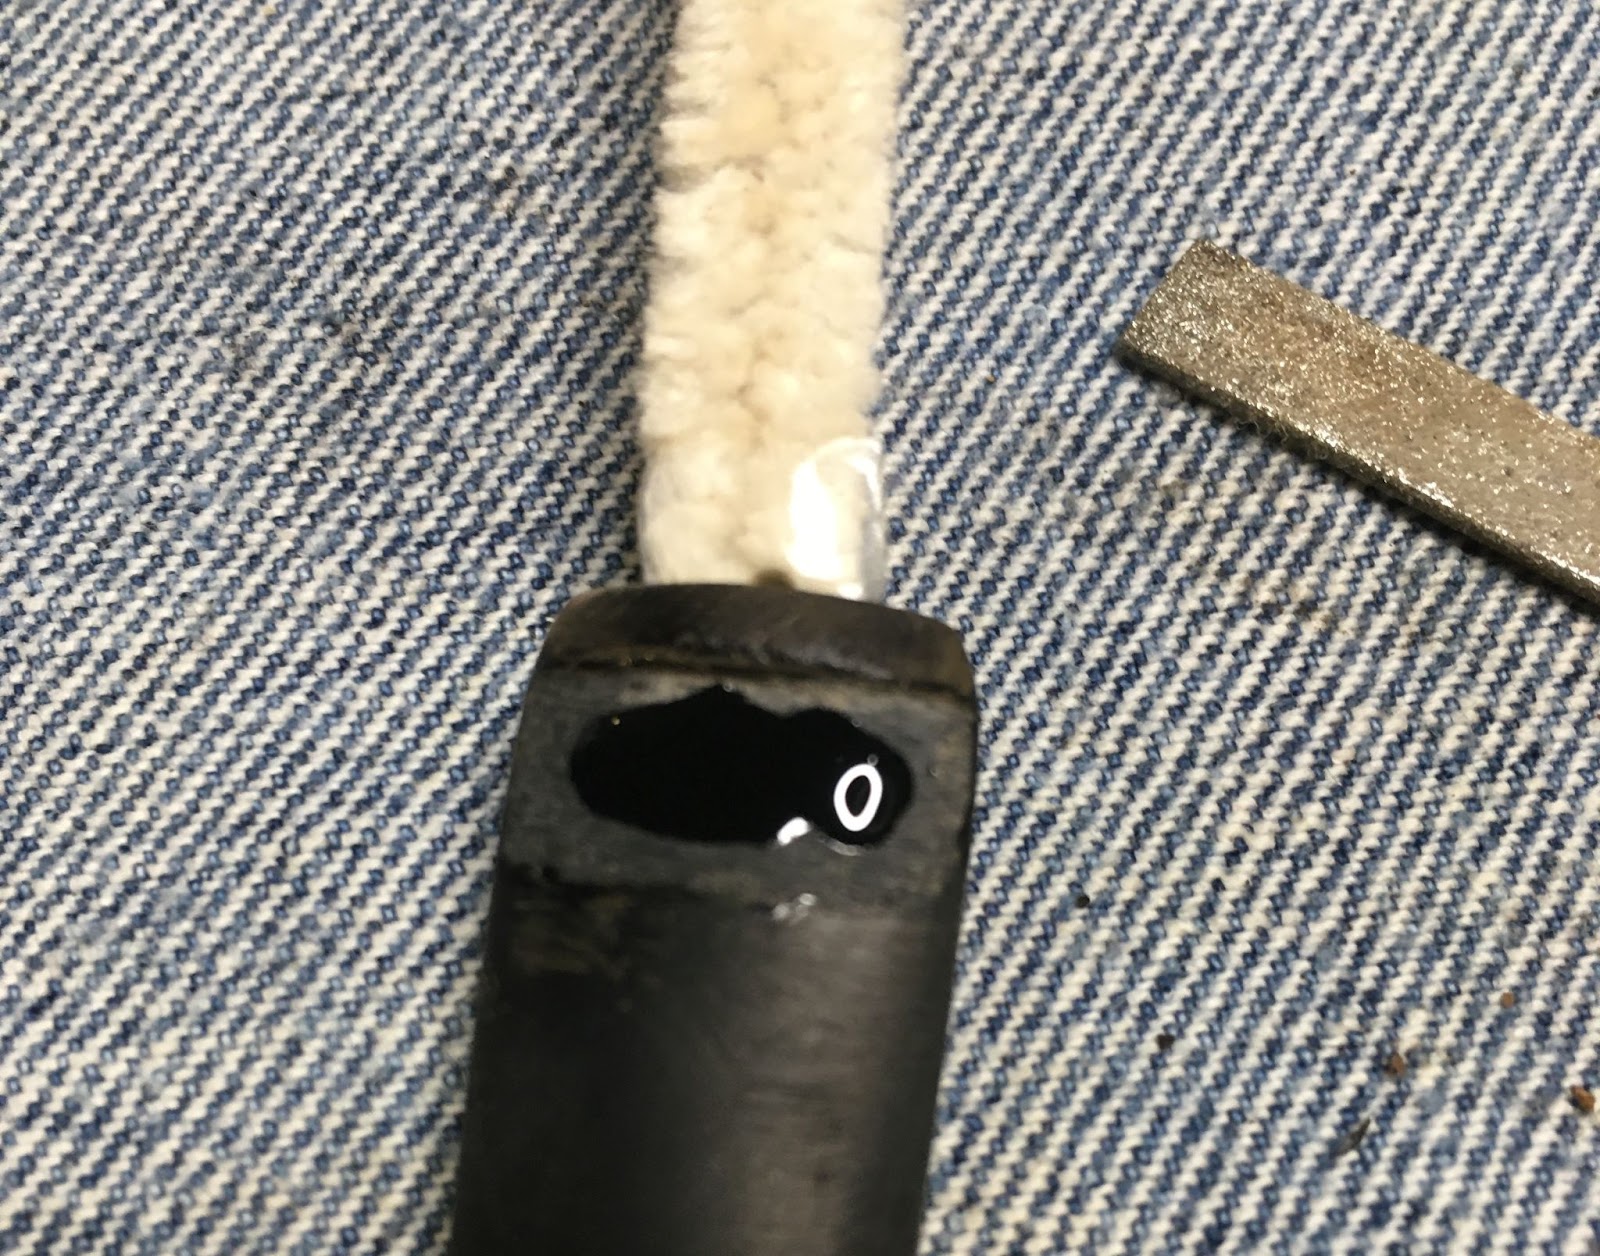
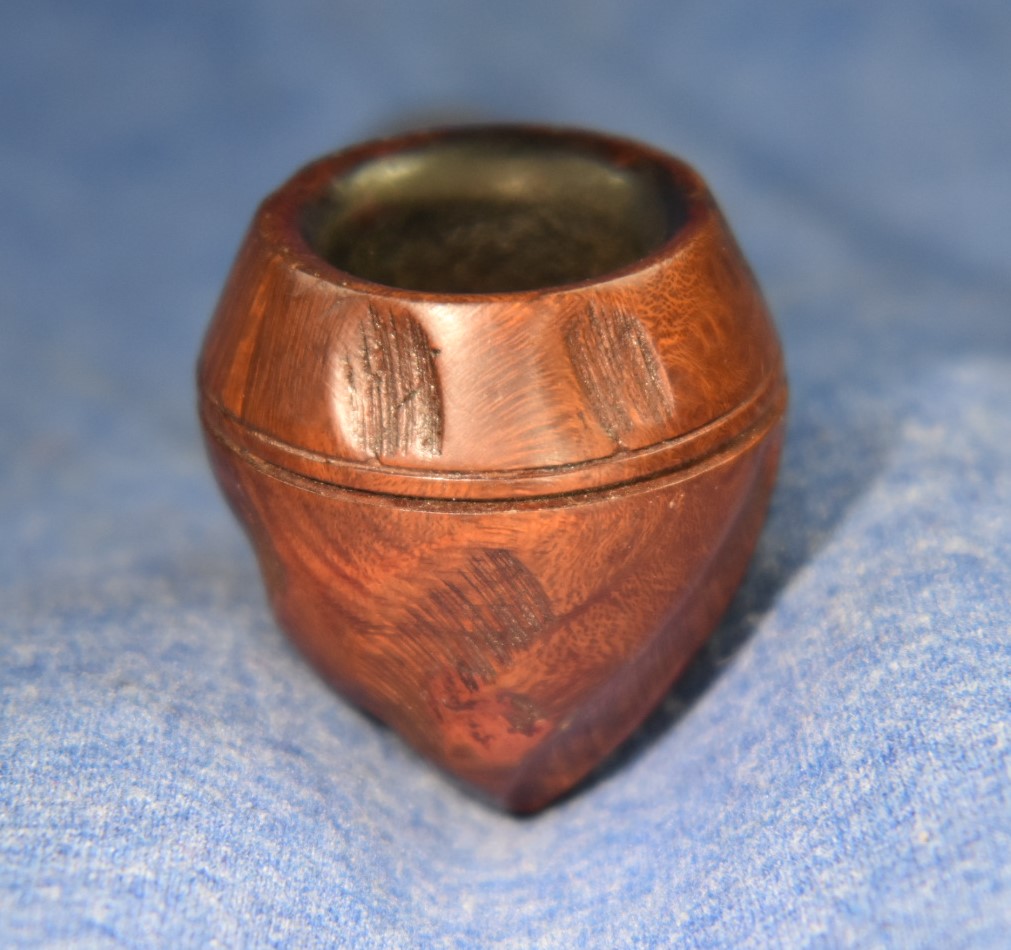
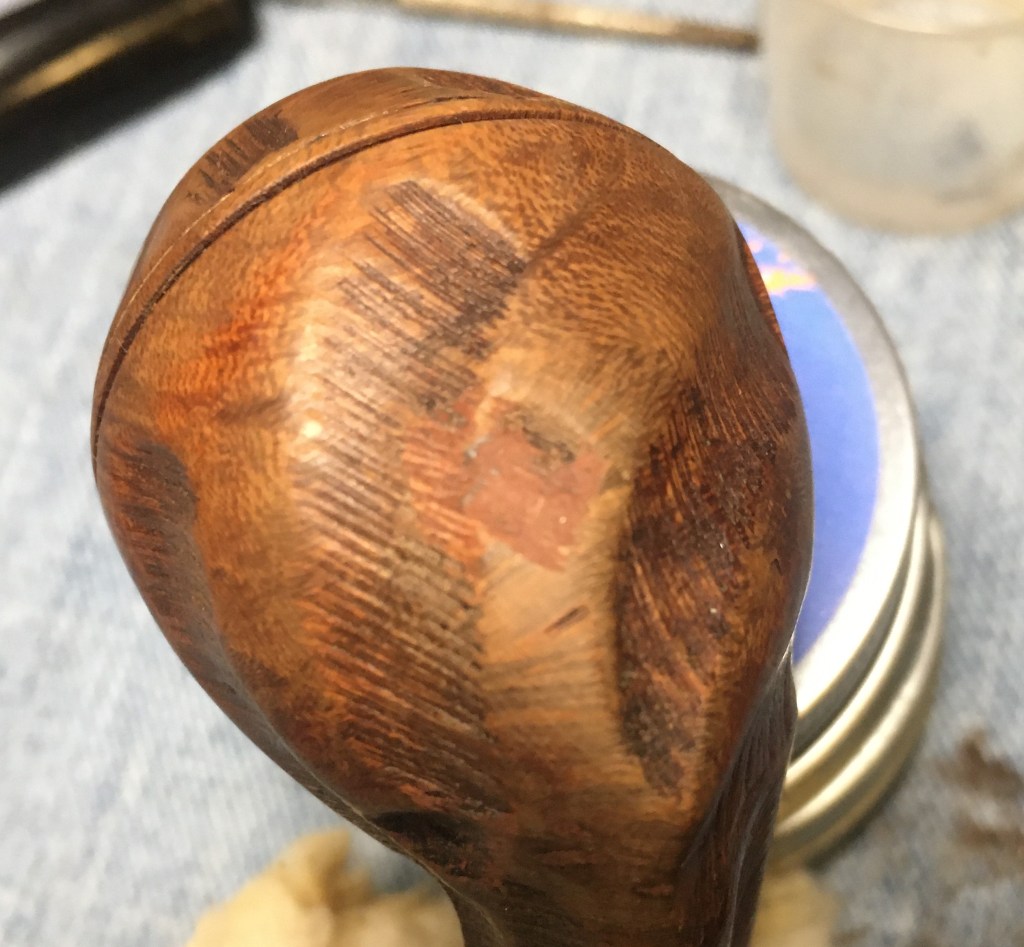
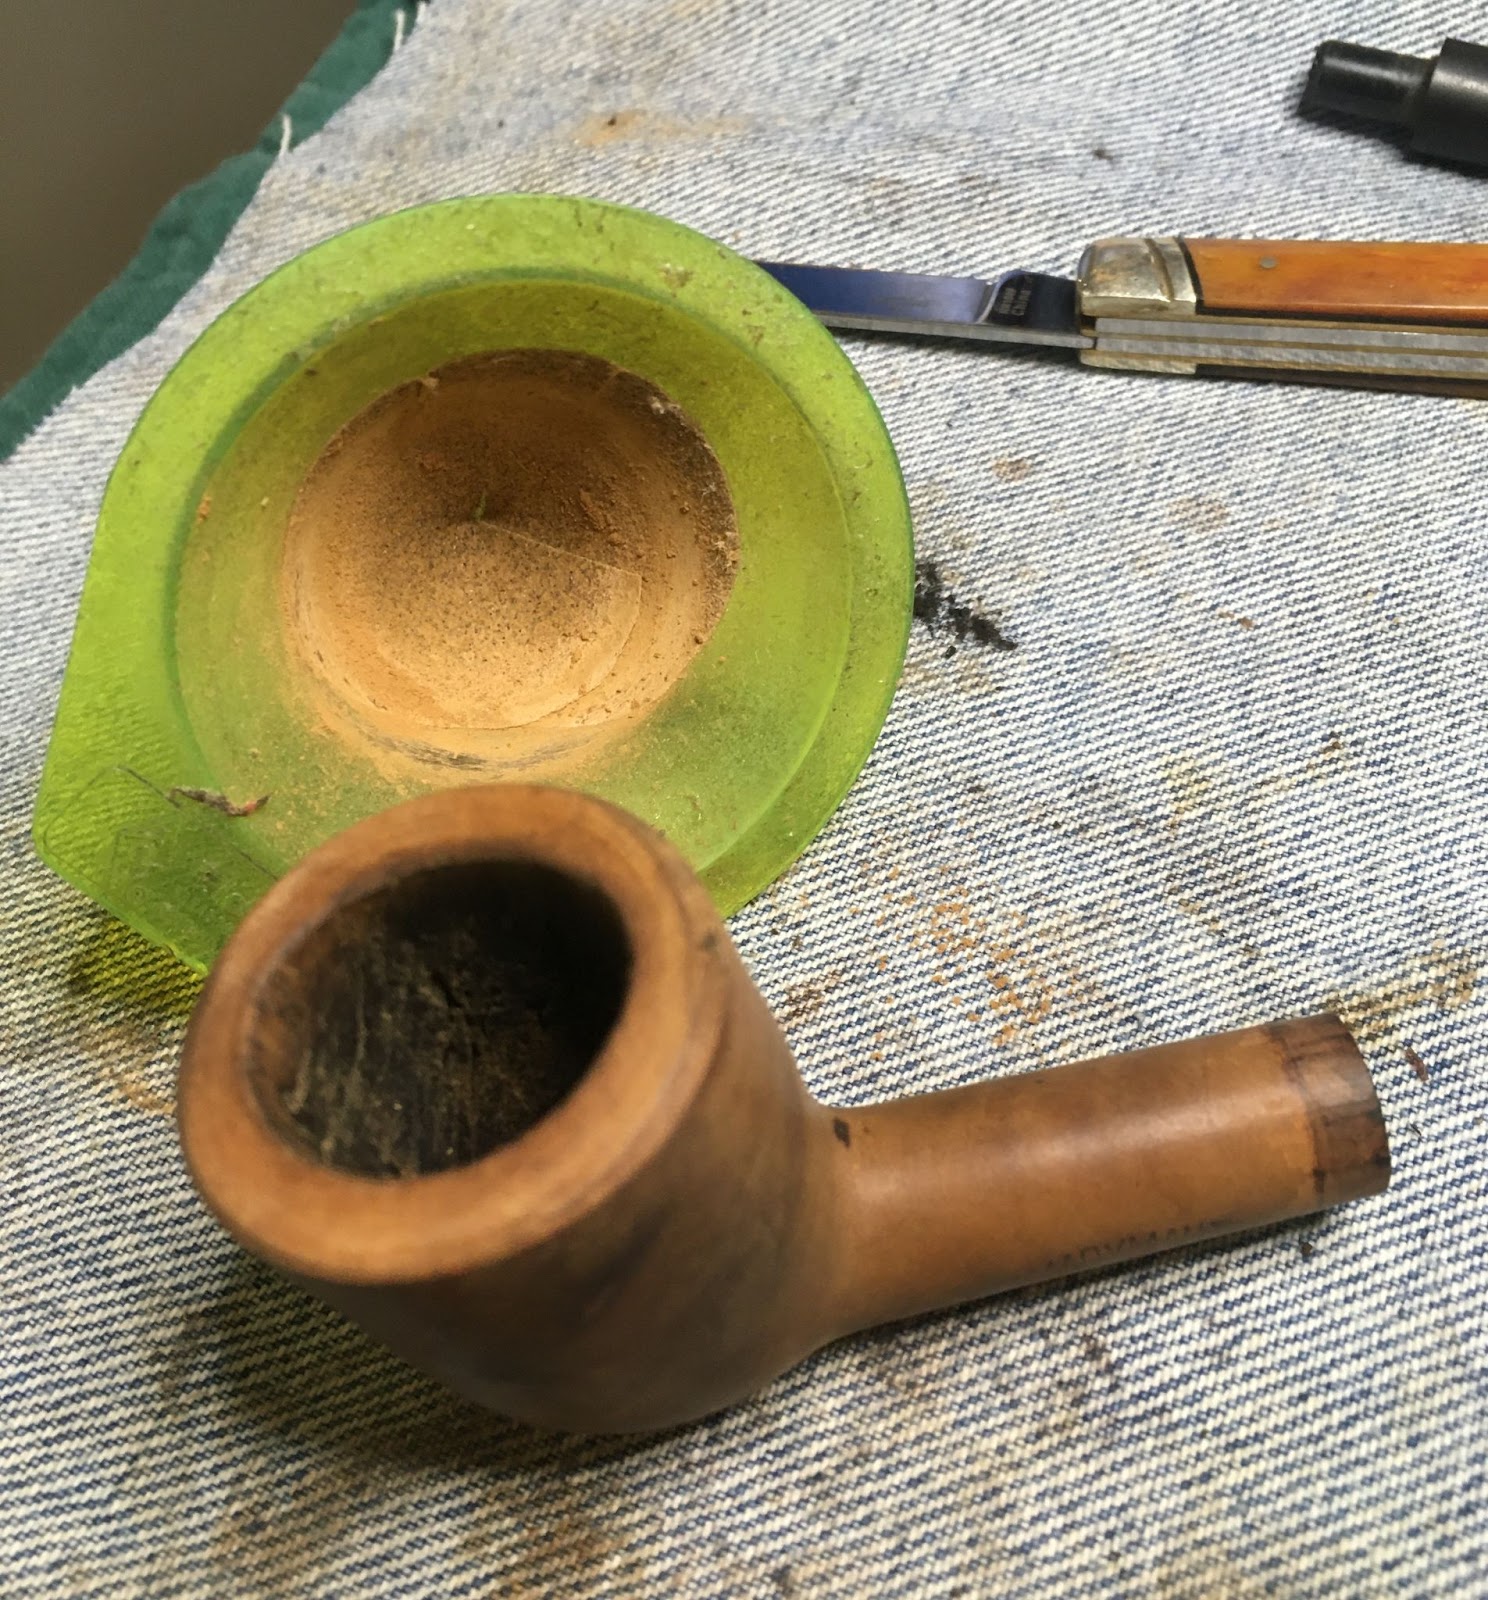
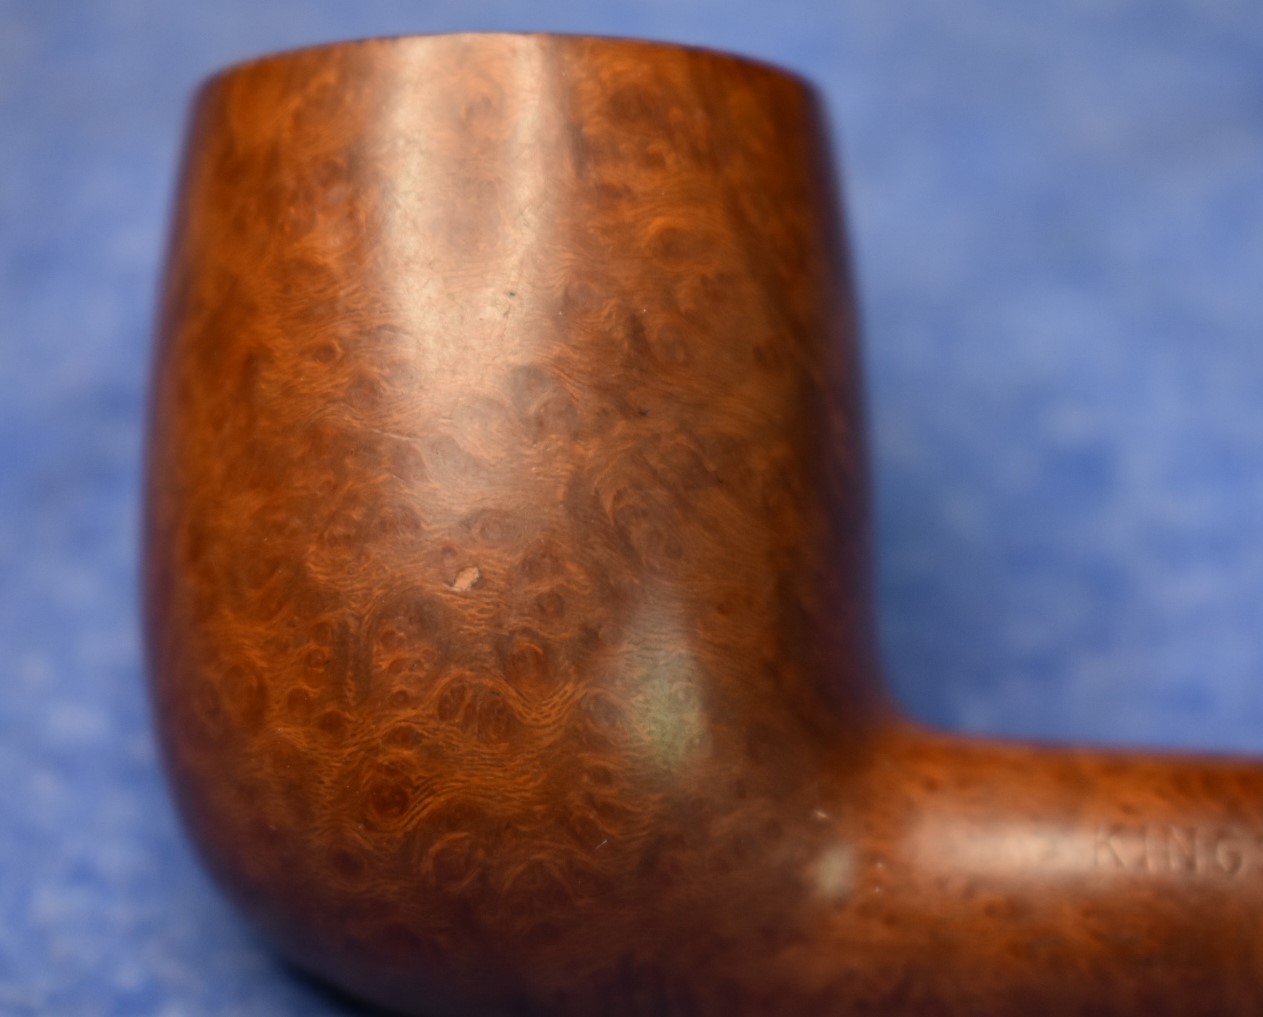
    I was able to see three small pits that I wanted to fill on the left side of the stummel and one on the inside edge of the  rim.

    For these fill I sanded the area around the pit and for briar dust into the sanding sponge.  I then placed a small dab of cyanoacrylate (CA, super glue) onto the pit.  I dabbed away most of the CA except that immediately on the pit.  I then sanded the area with the sanding sponge.  This allowed the briar dust to combine with the CA and fill the pit with CA and briar dust.  Together they set up almost instantly and filled the small pits.  This technique works well for tiny and small pits.  It can be used for larger fills but it will take more than one application of CA.  For the depression on the rim, I applied the CA and pushed a pinch of briar dust into the CA.  This was then sanded smooth.   

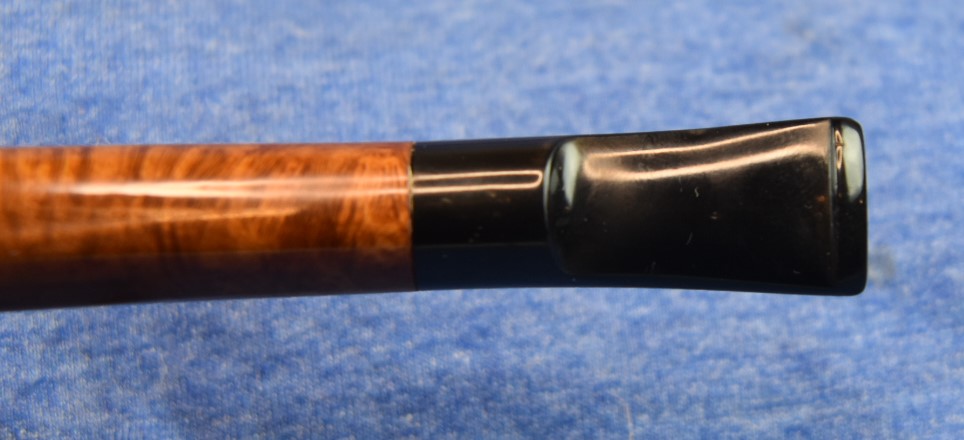
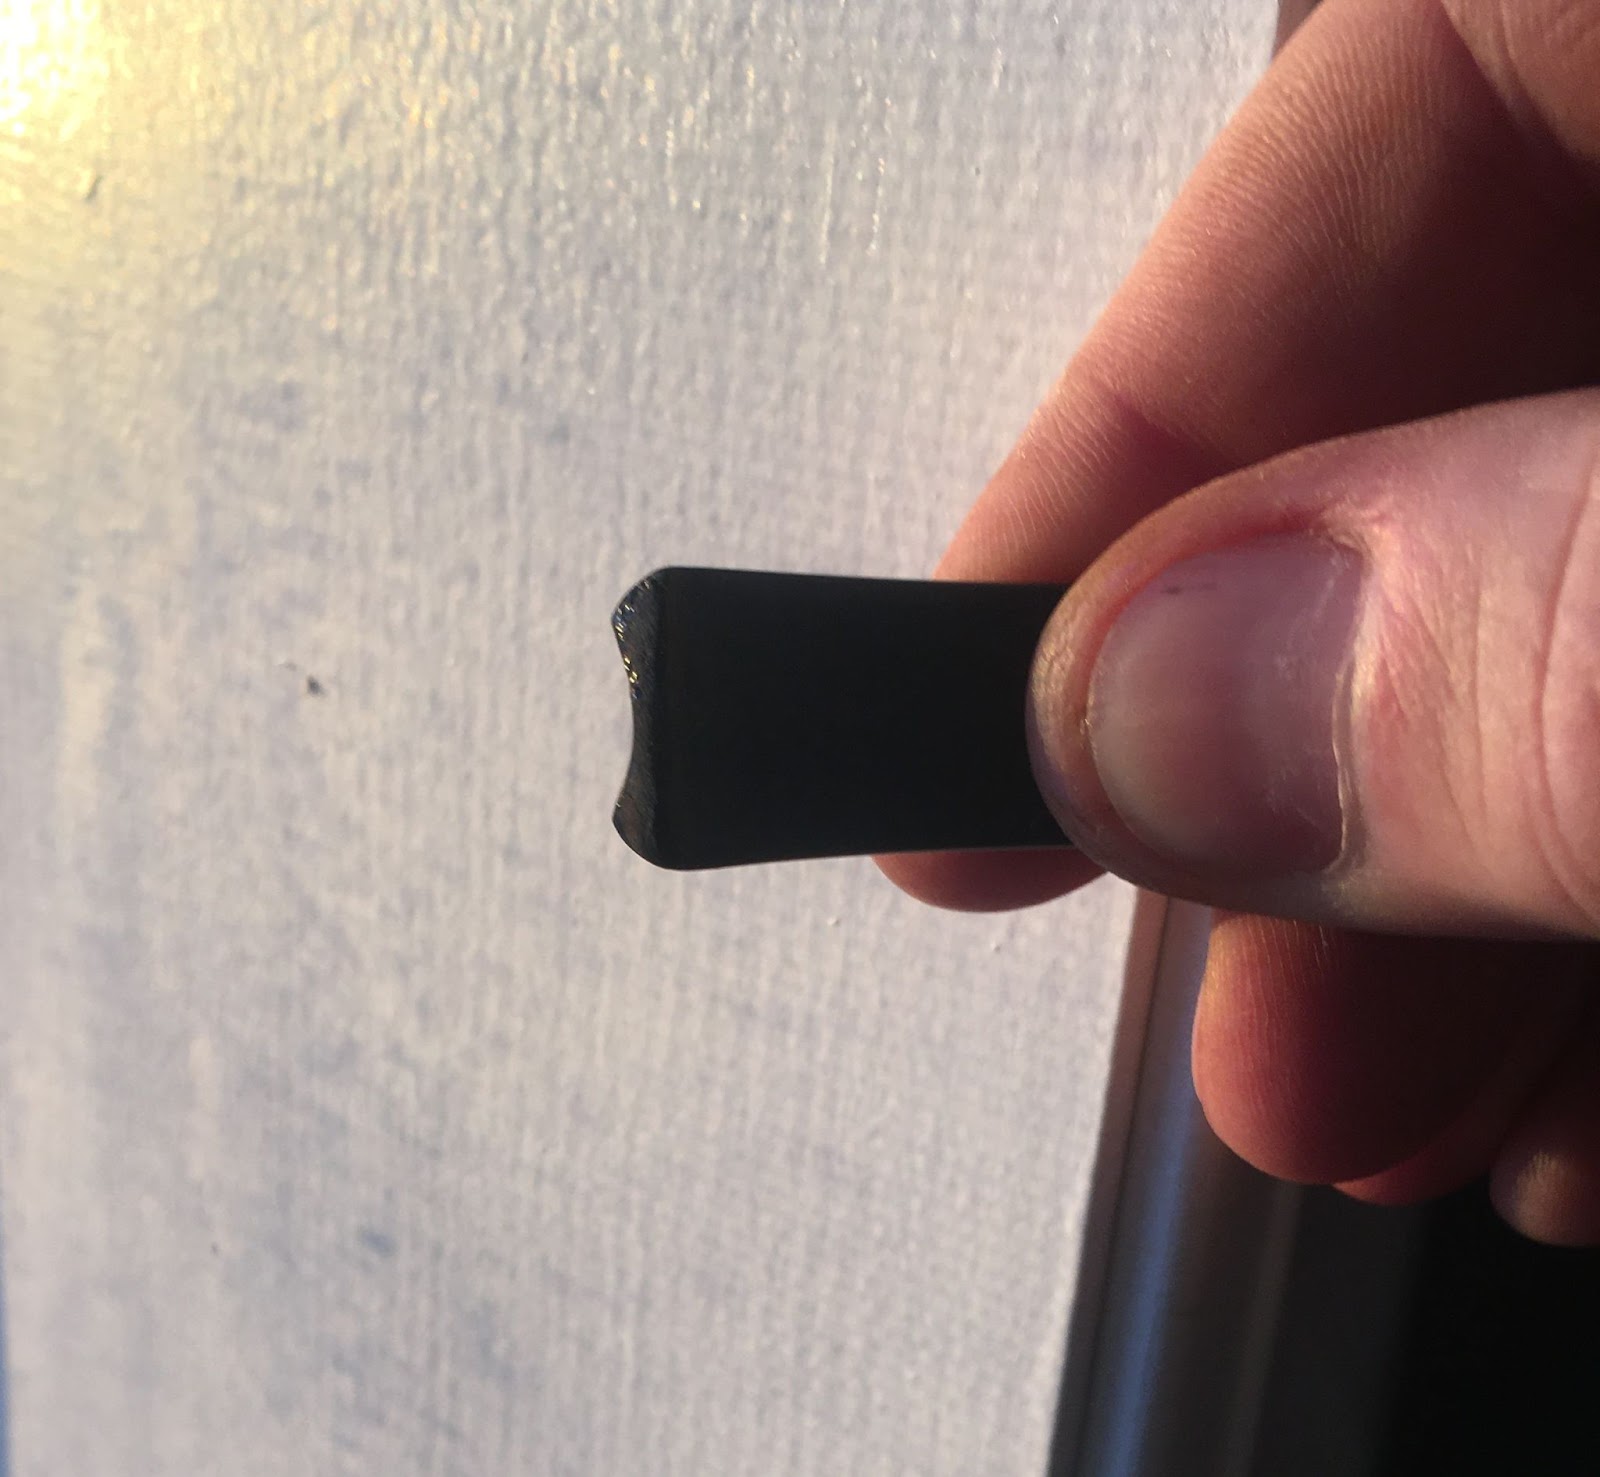
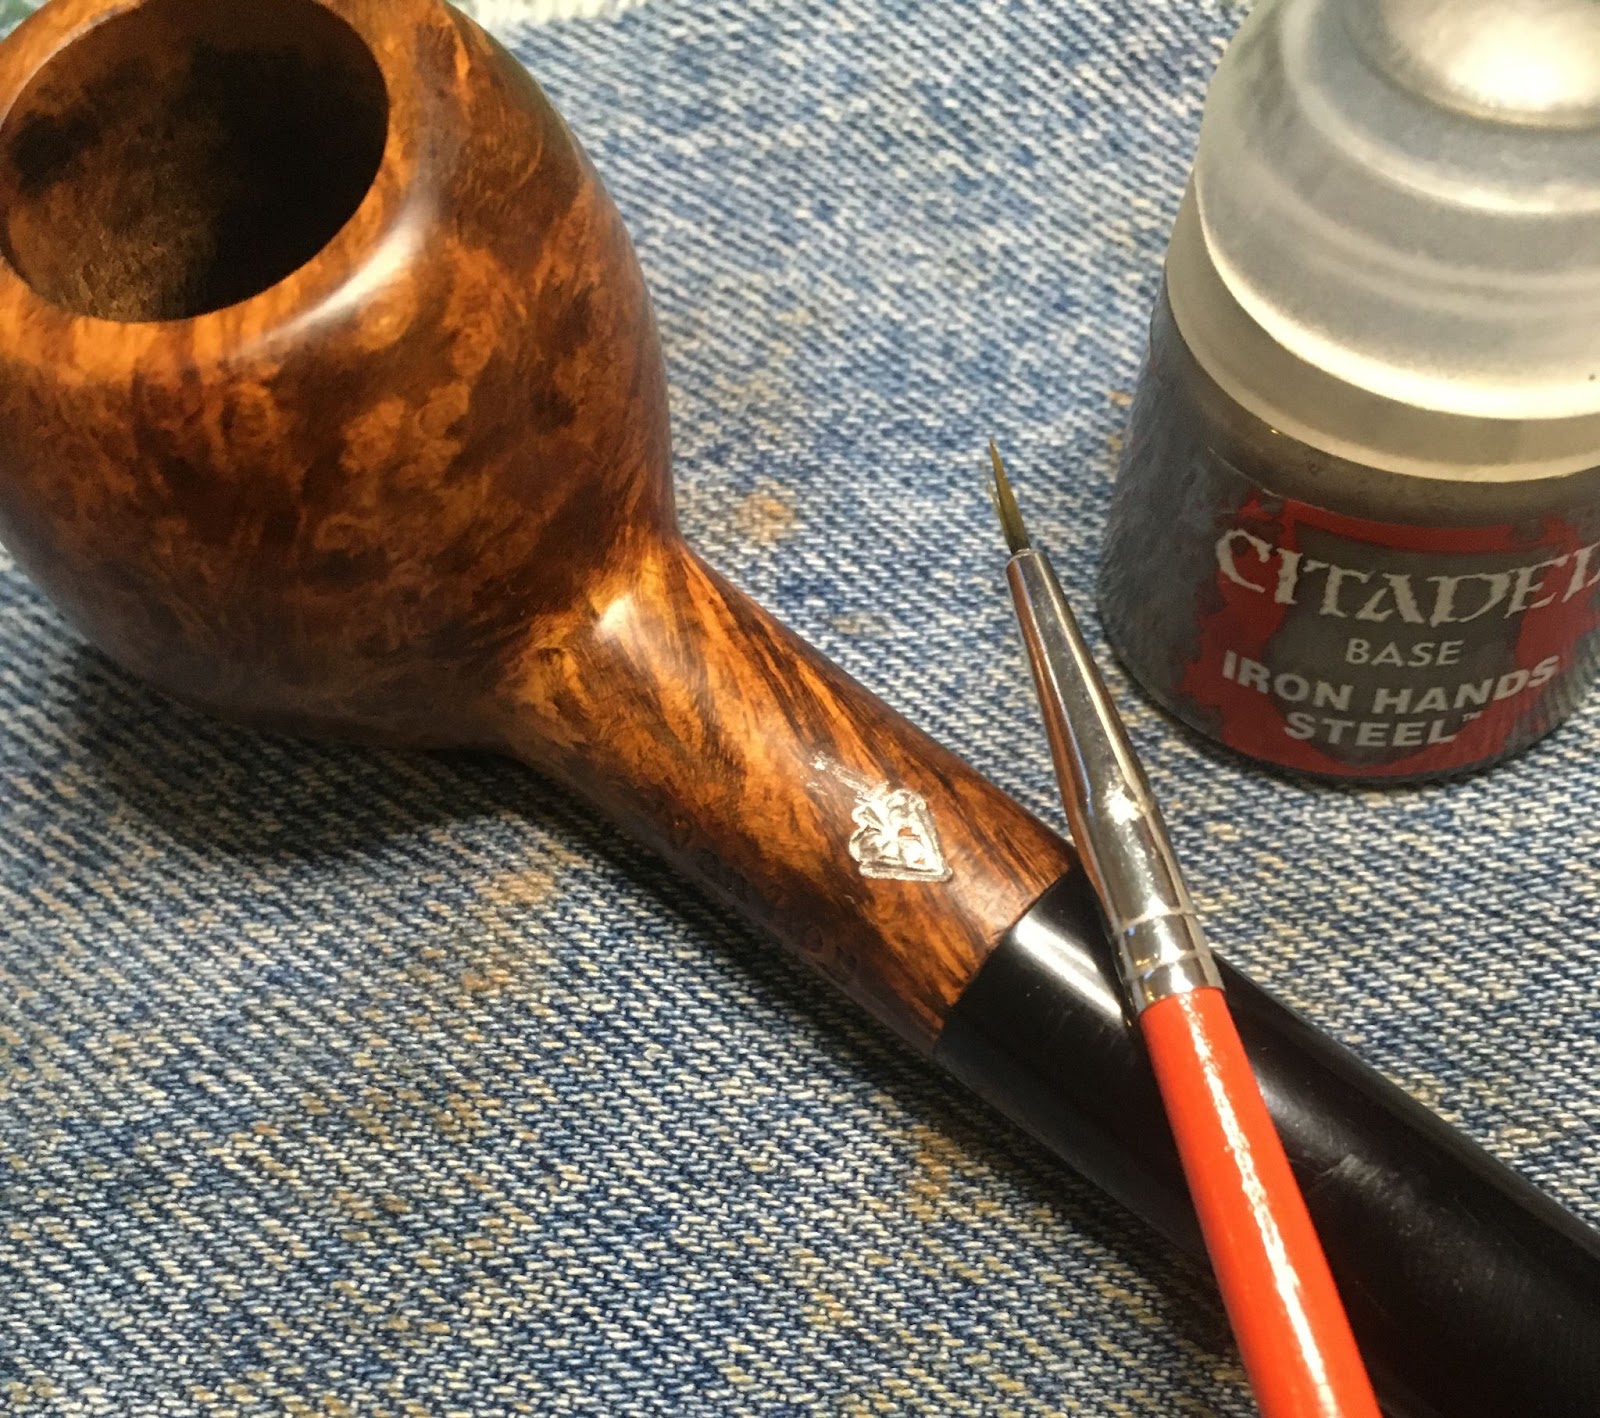
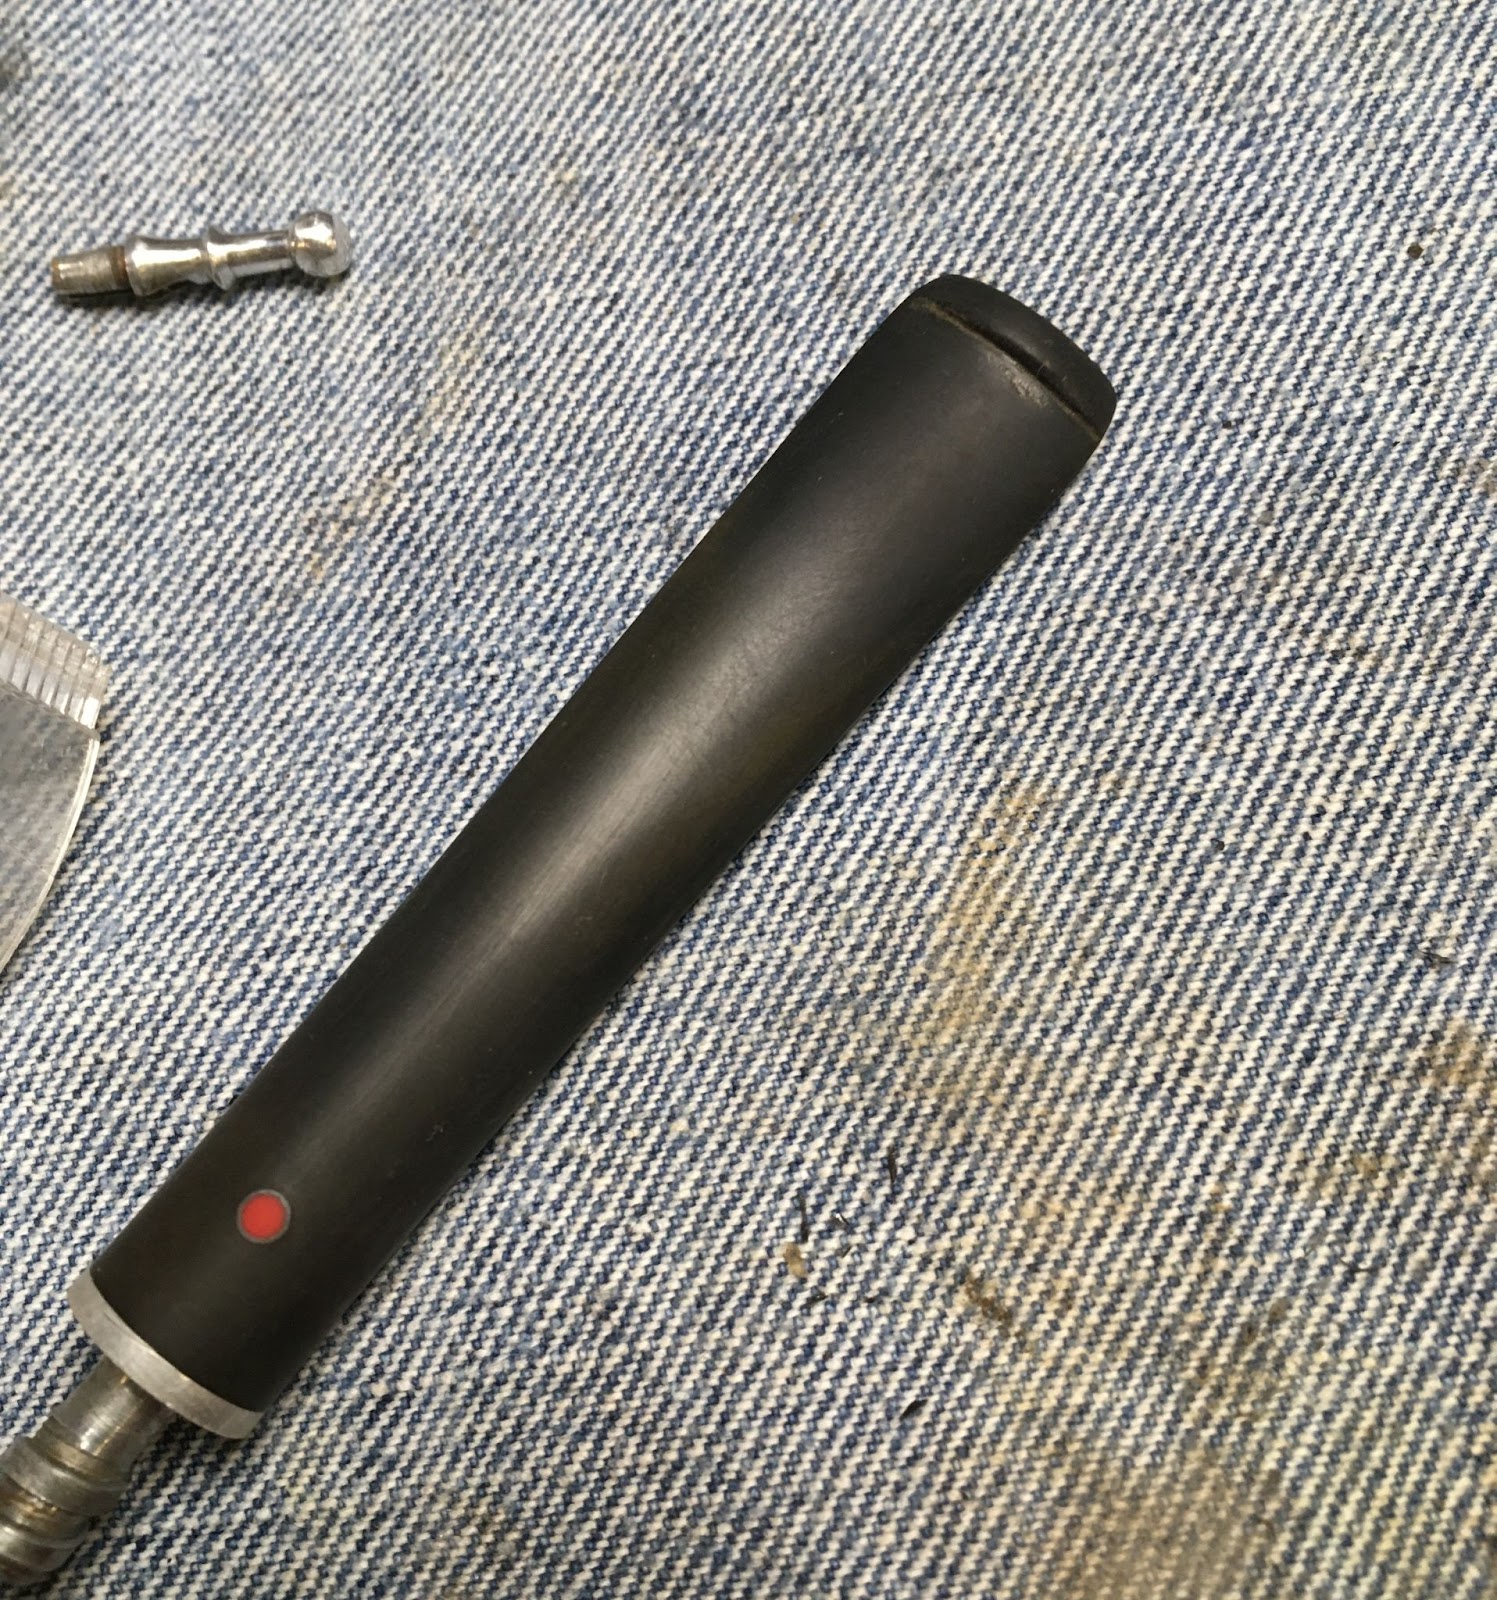
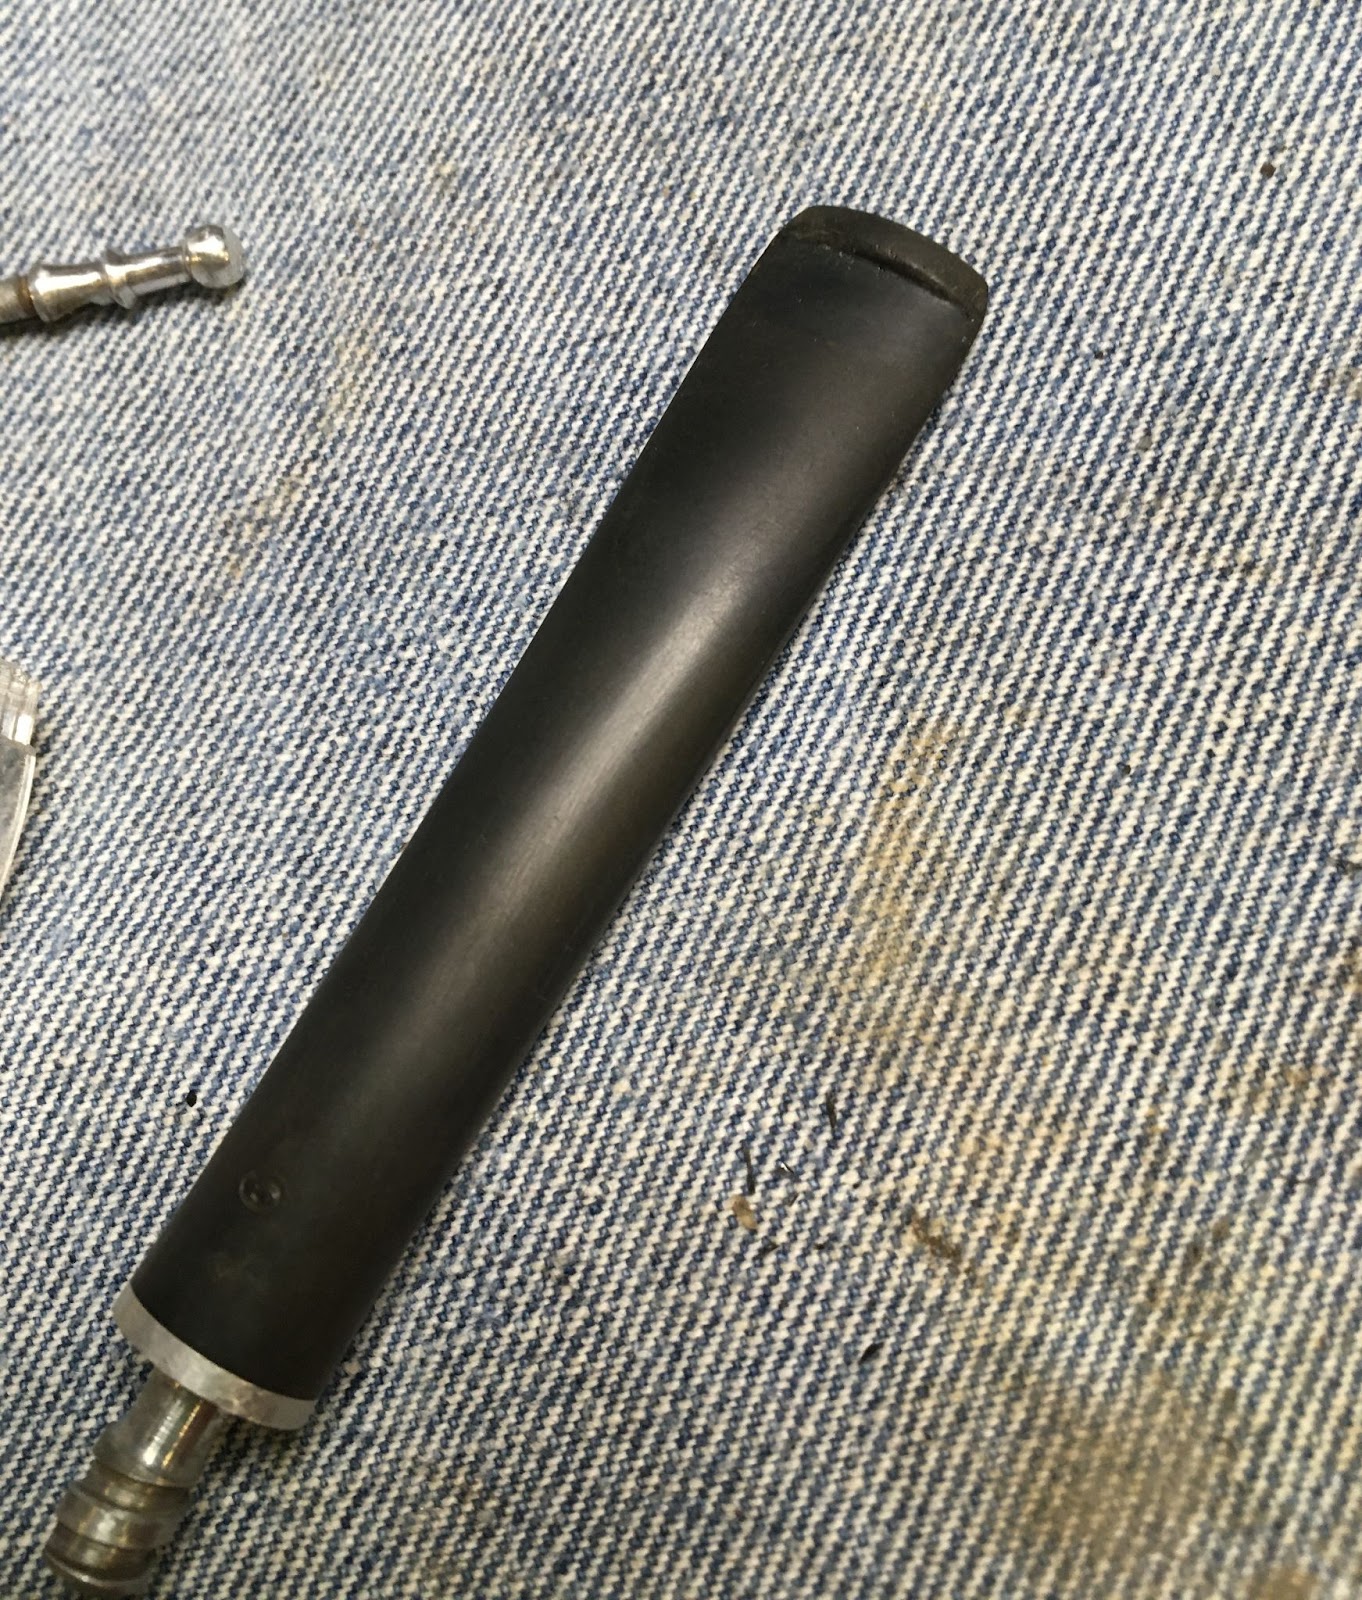
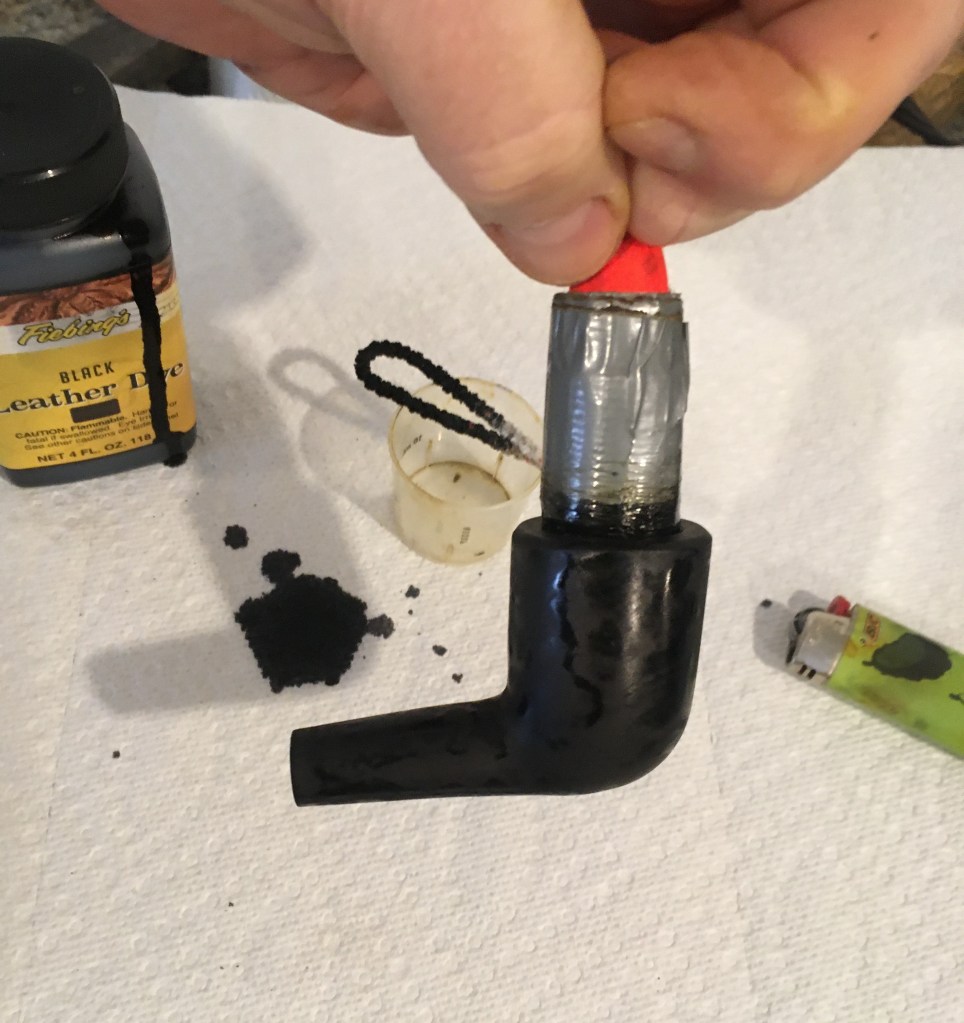
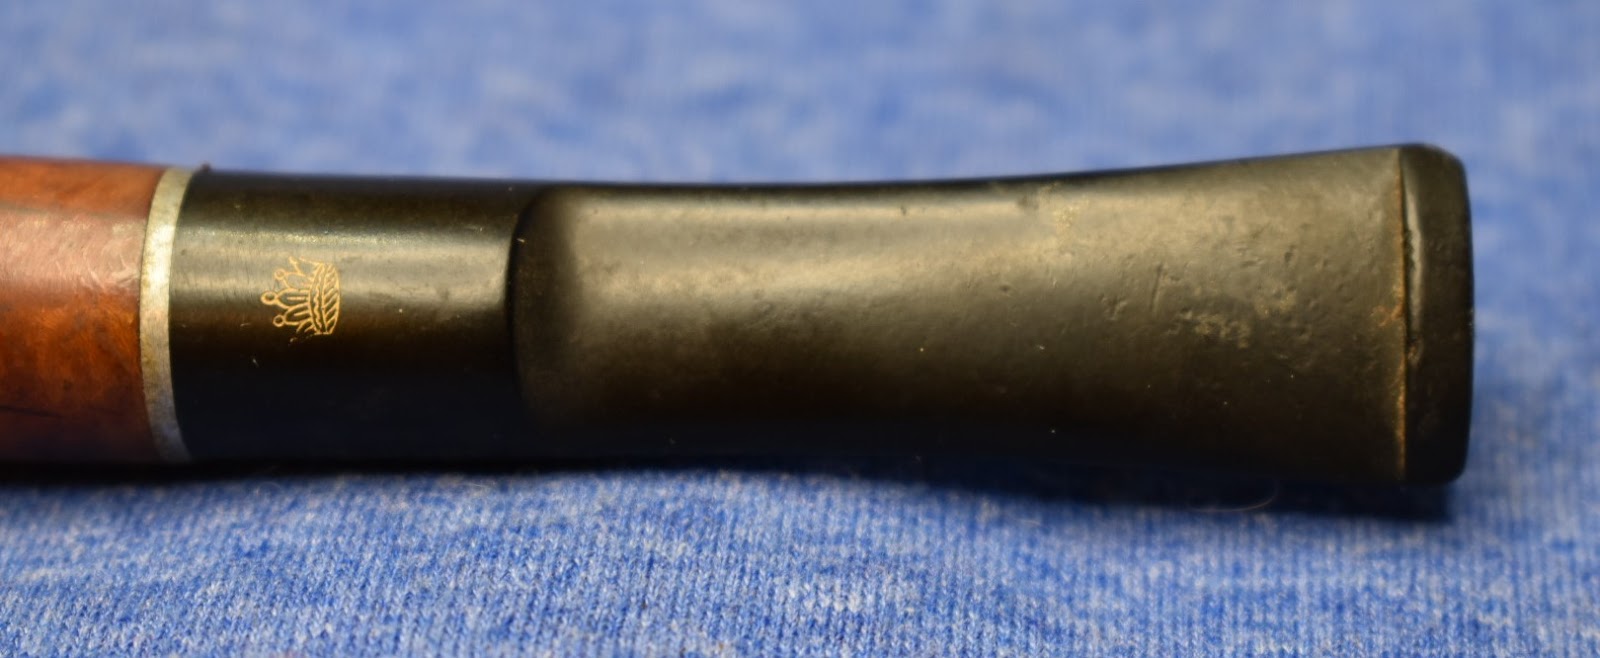
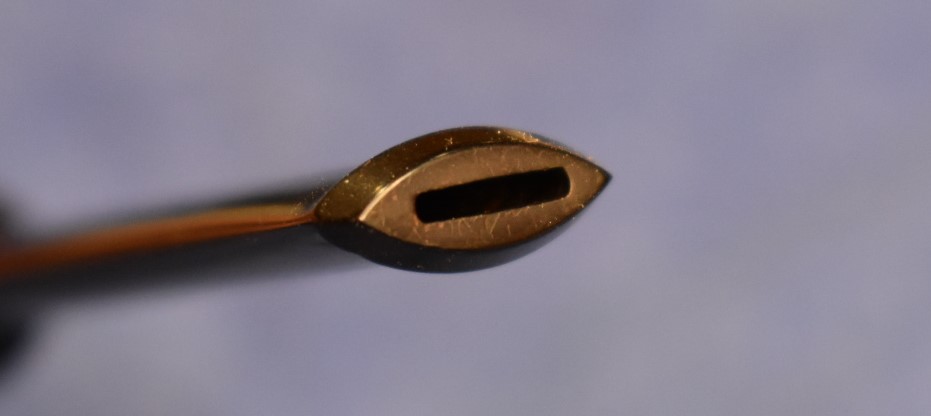
    With the fill addressed I taped over the stamps with painters tape.  I then reinserted the stem thus allowing a better grip on the stem for filing the teeth dents.  I first tried to paint them with the flame of a lighter.  This is done by moving a flame back and forth over the stem.  Obviously, not heating the stem to melting or burning, just a rapid heating and cooling to allow the rubber to “rebound” to more of its original shape.  This helped but the stem still required some file work to smooth the dents.  I also used the file to smooth the button.  

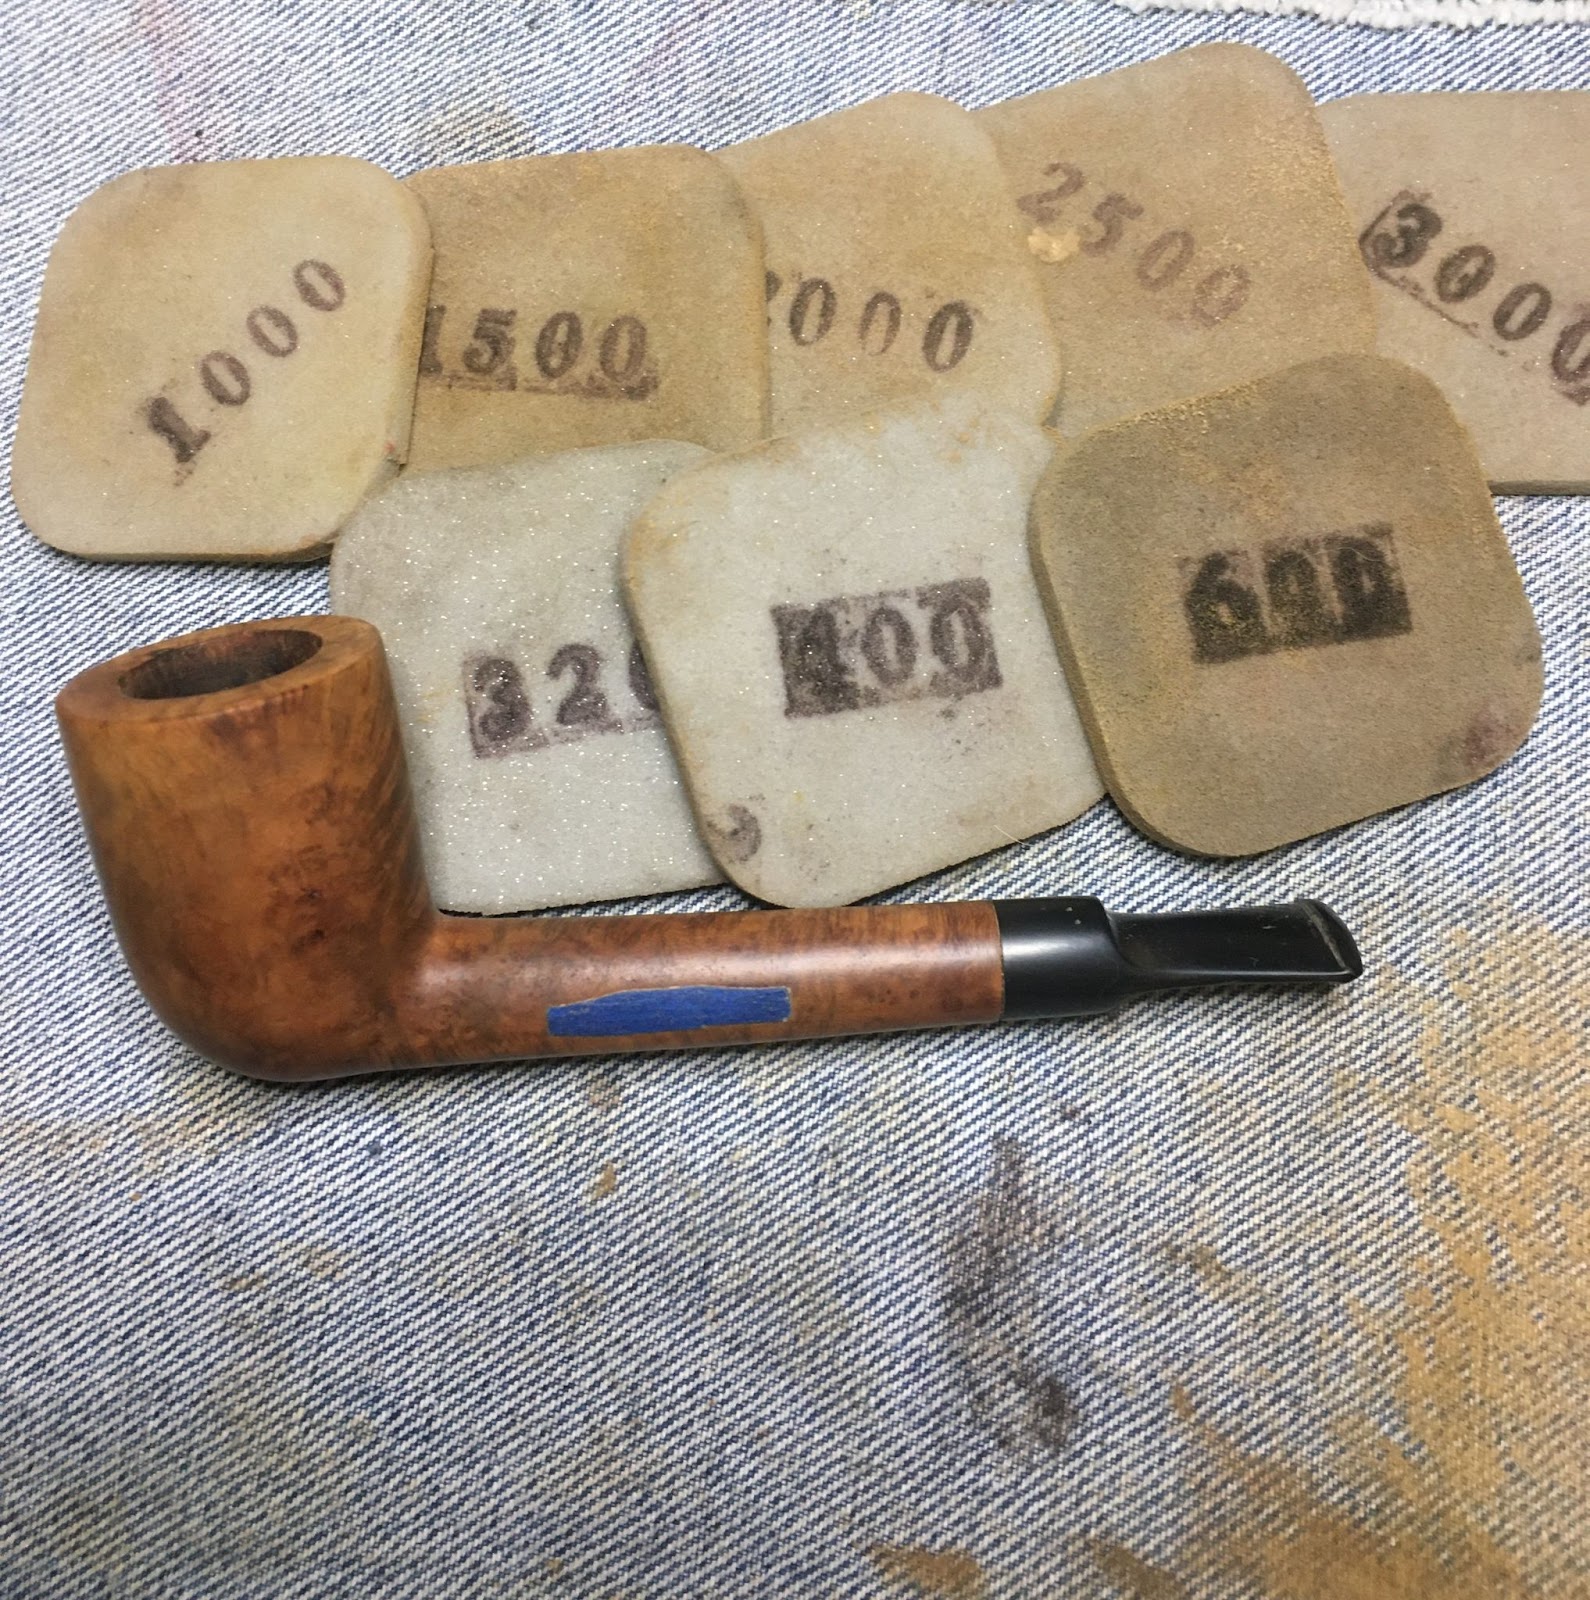
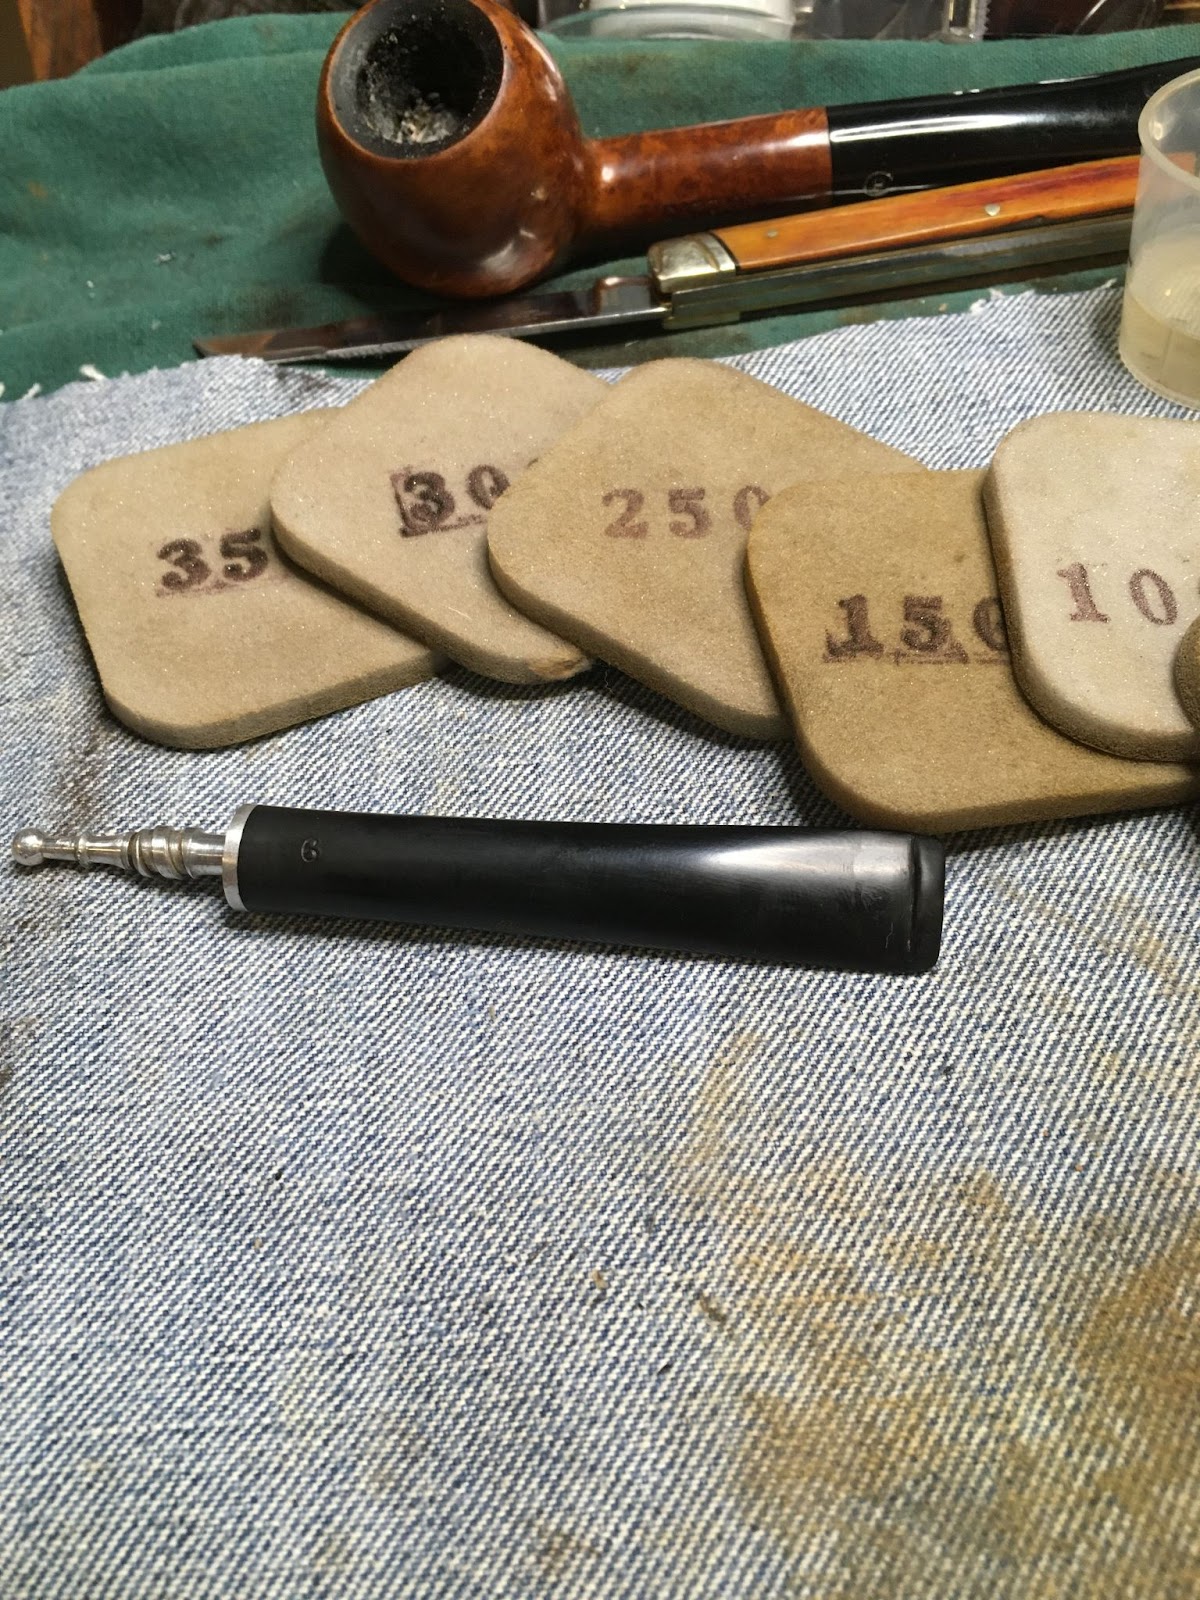
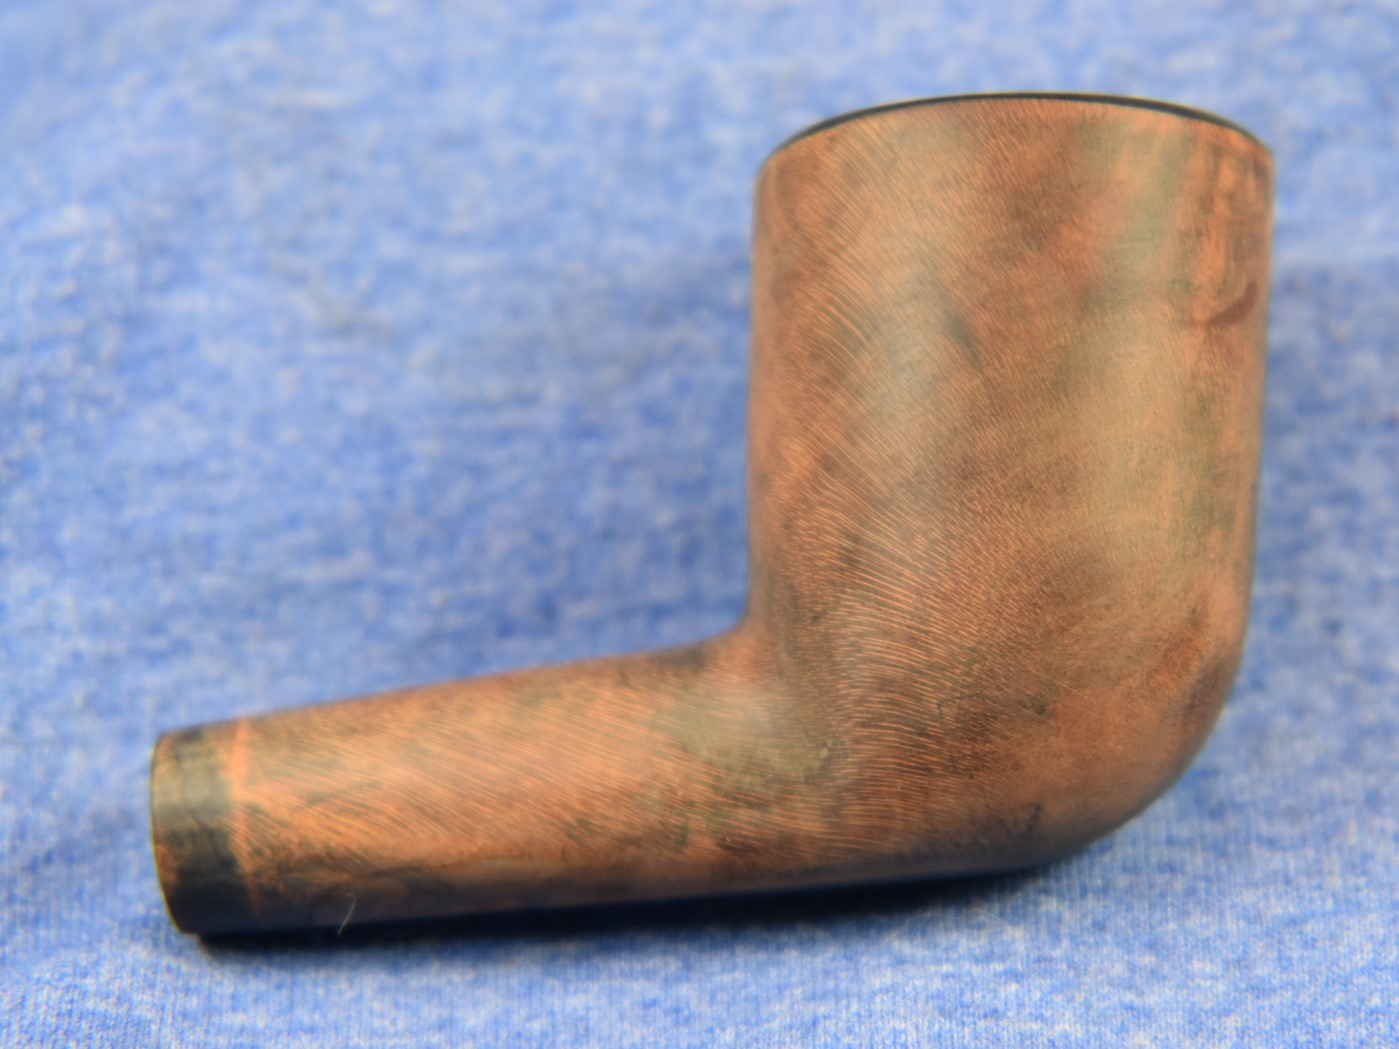
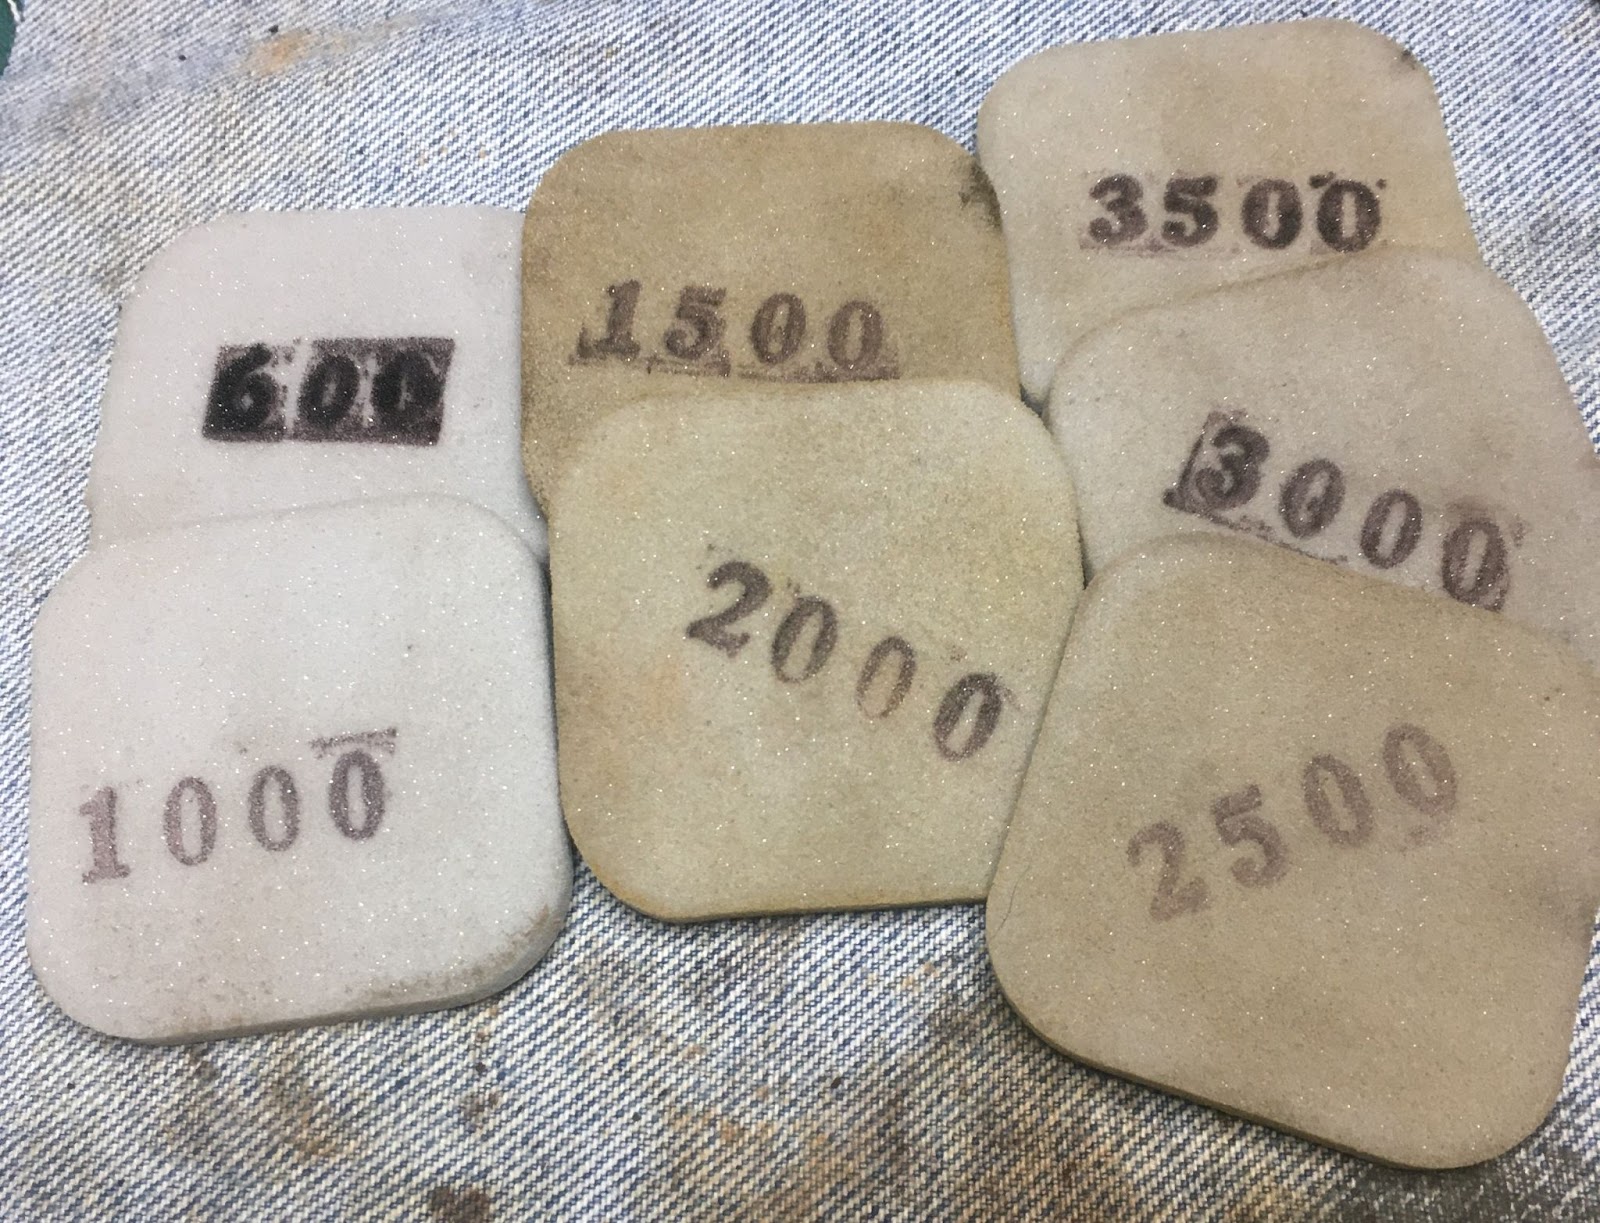
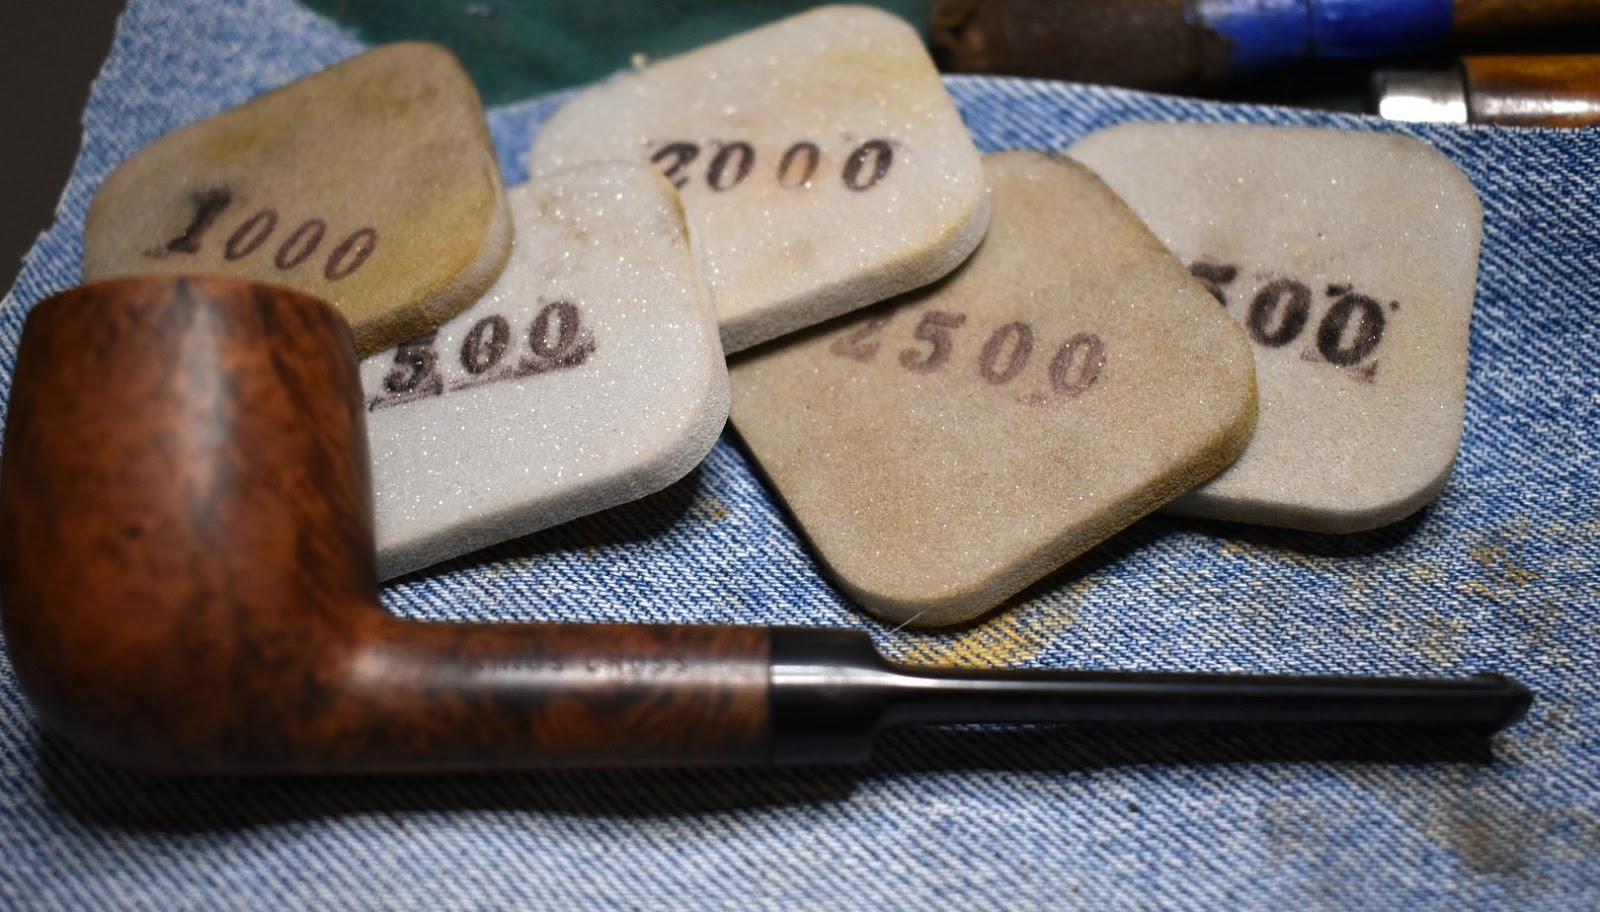
    The sanding of the stem and stummel was done using sanding sponges.  I worked on the stem with the 320-3500 sanding sponges to smooth the scratches from the filing.  The stummel was sanded from the 600-3500.  Between each sponge the stummel was wiped with a make-up pad moistened with 99% isopropyl alcohol.  The stem was rubbed with a drop of mineral oil from my finger and wiped with a paper towel.  Once finished with the sanding sponges I removed the painters tape and wiped away residual adhesive from the tape with the make-up pad and alcohol.

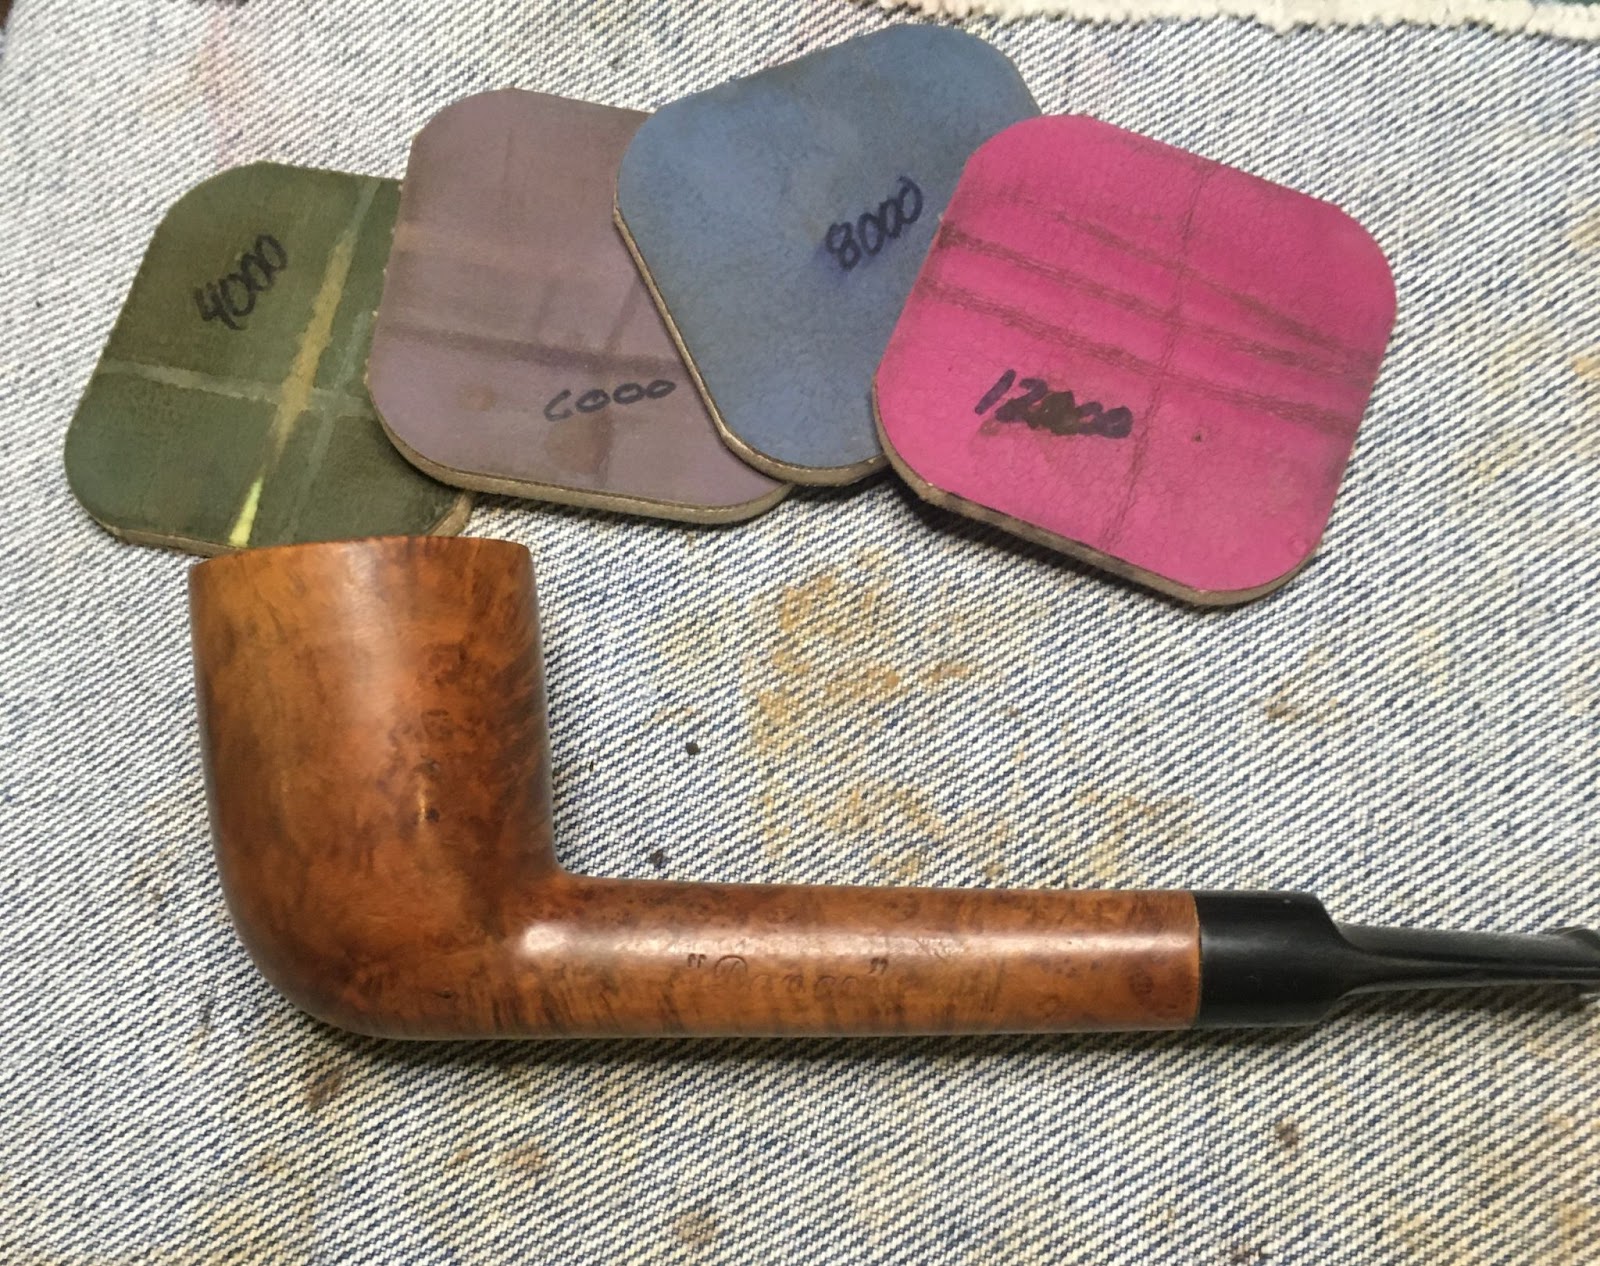
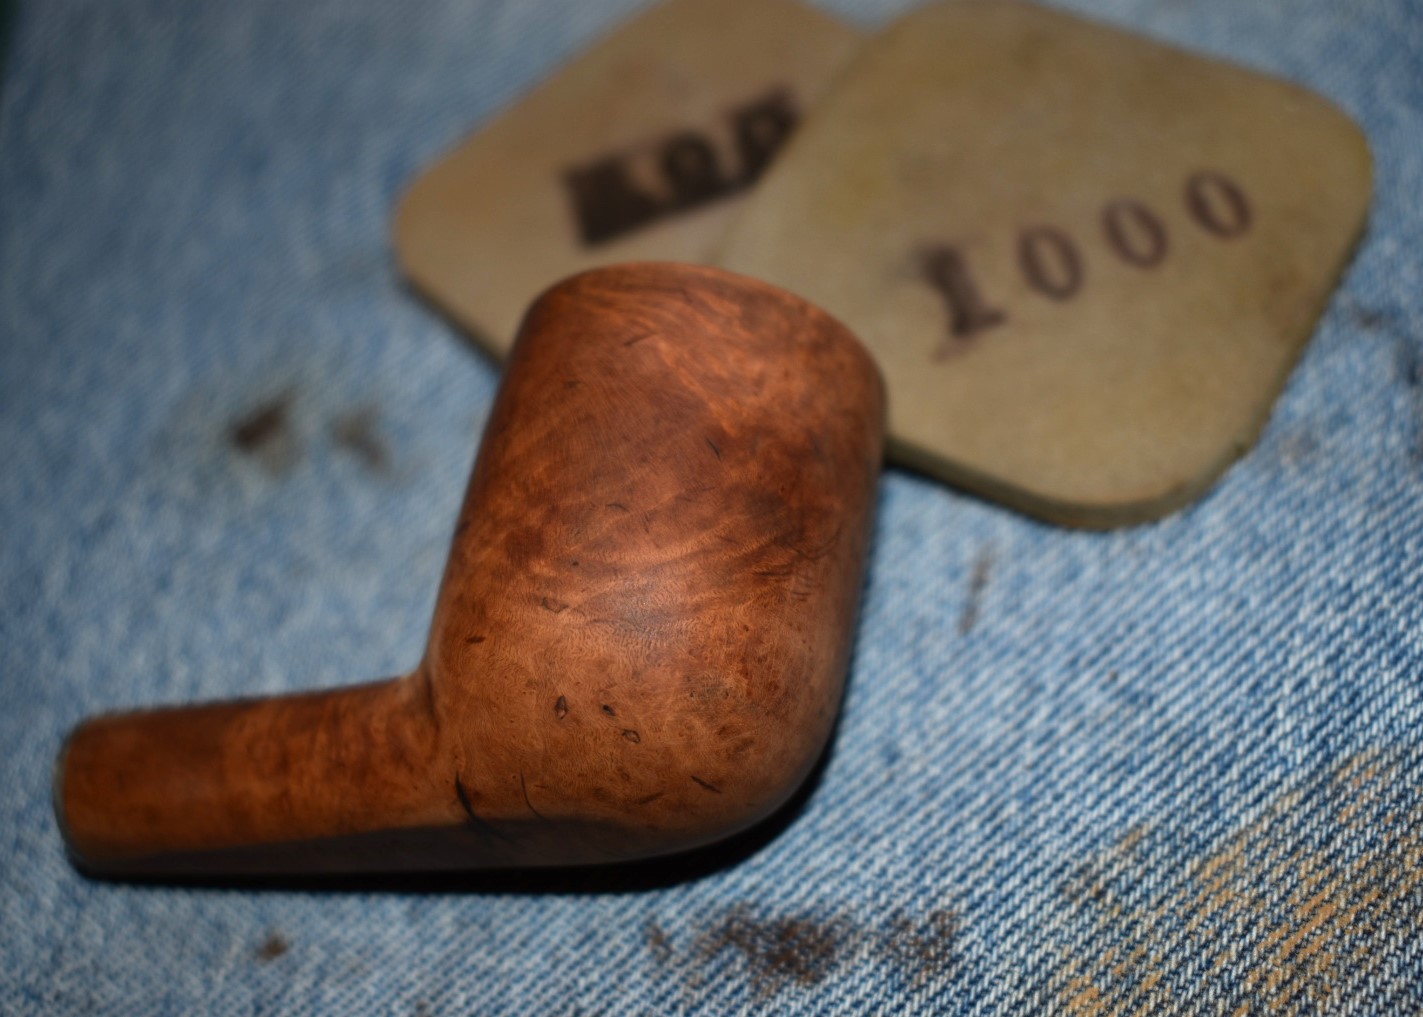
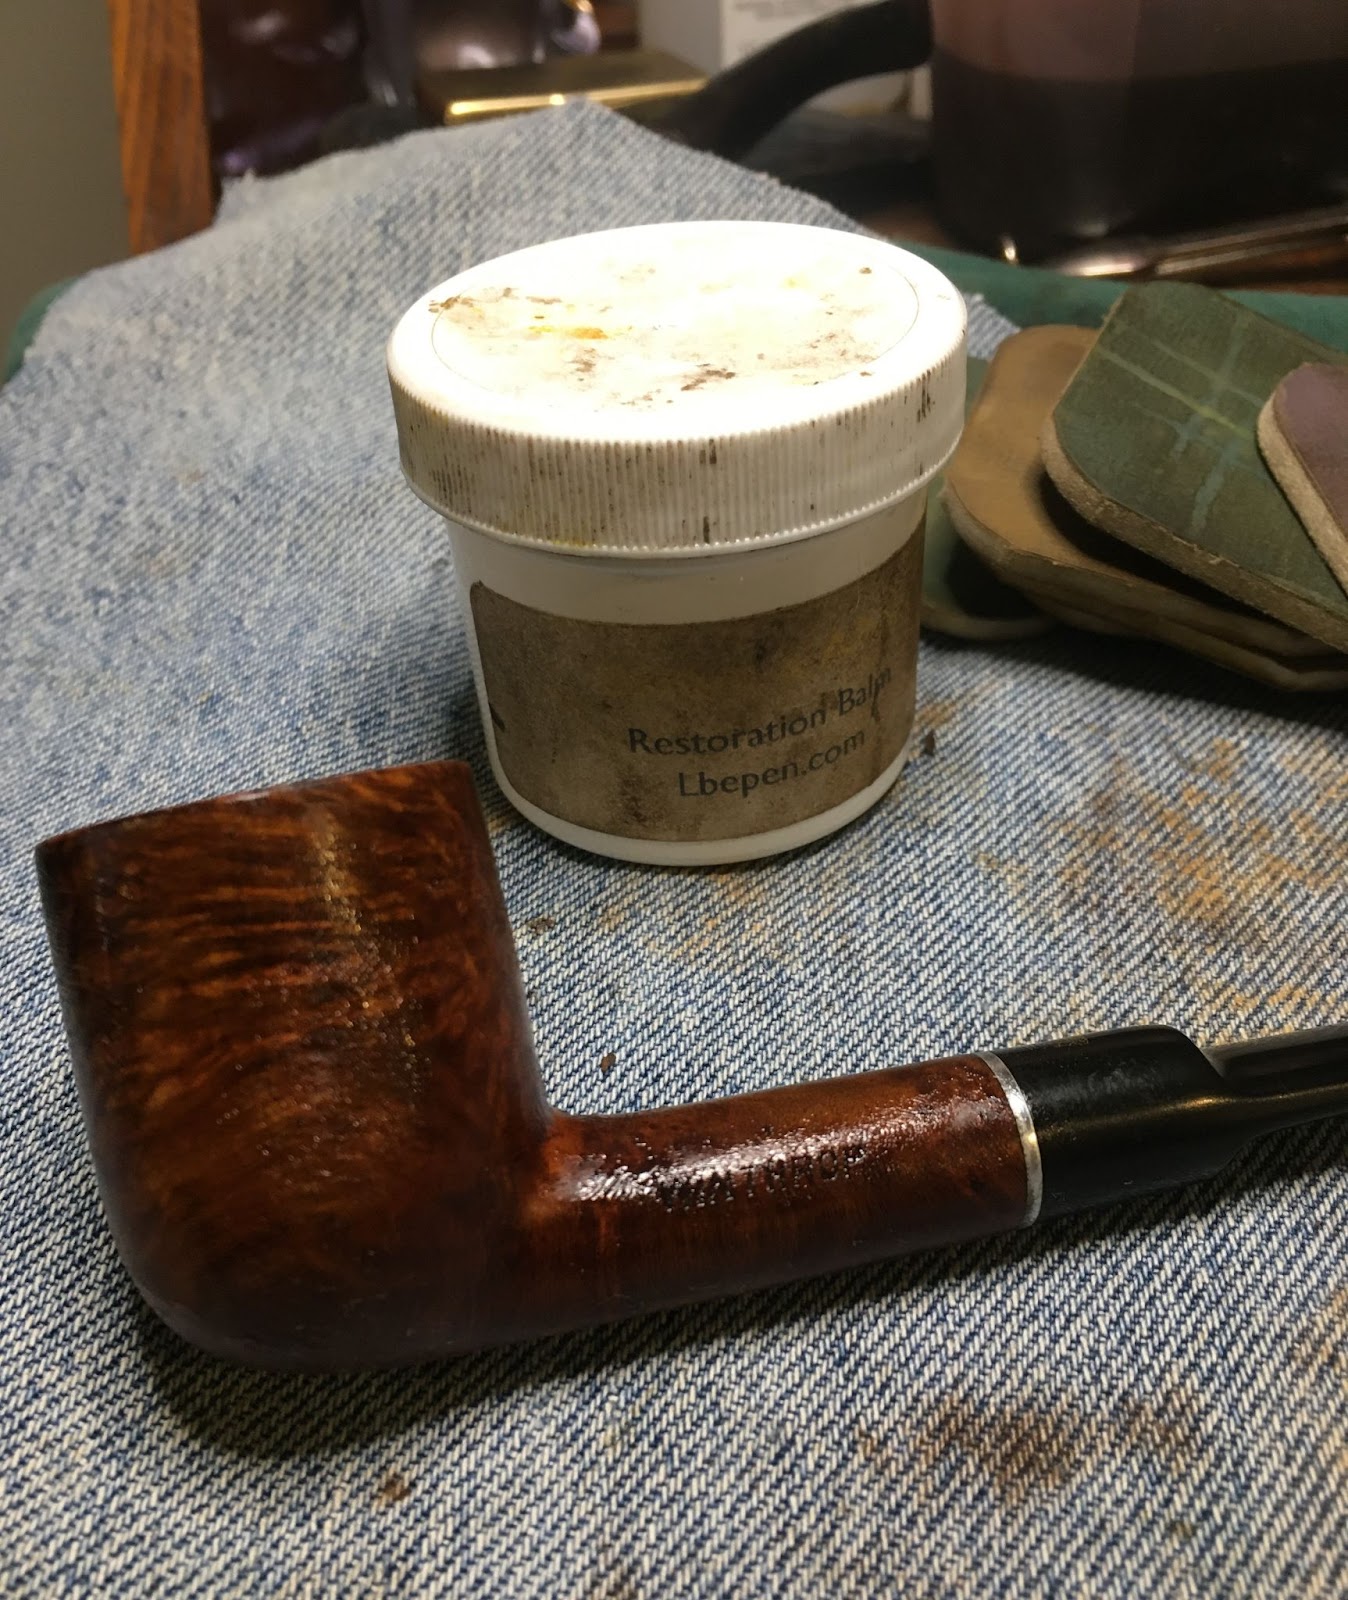
    The pipe was ready for micro-meshing.  The micro-meshing was done with 2 inch square micro-mesh pads 4000-12000.  Between each pad I wiped the stummel with a make-up pad wetted with alcohol.  The stem received a drop of Obsidian Oil rubbed in by finger and wiped with a paper towel between pads. 

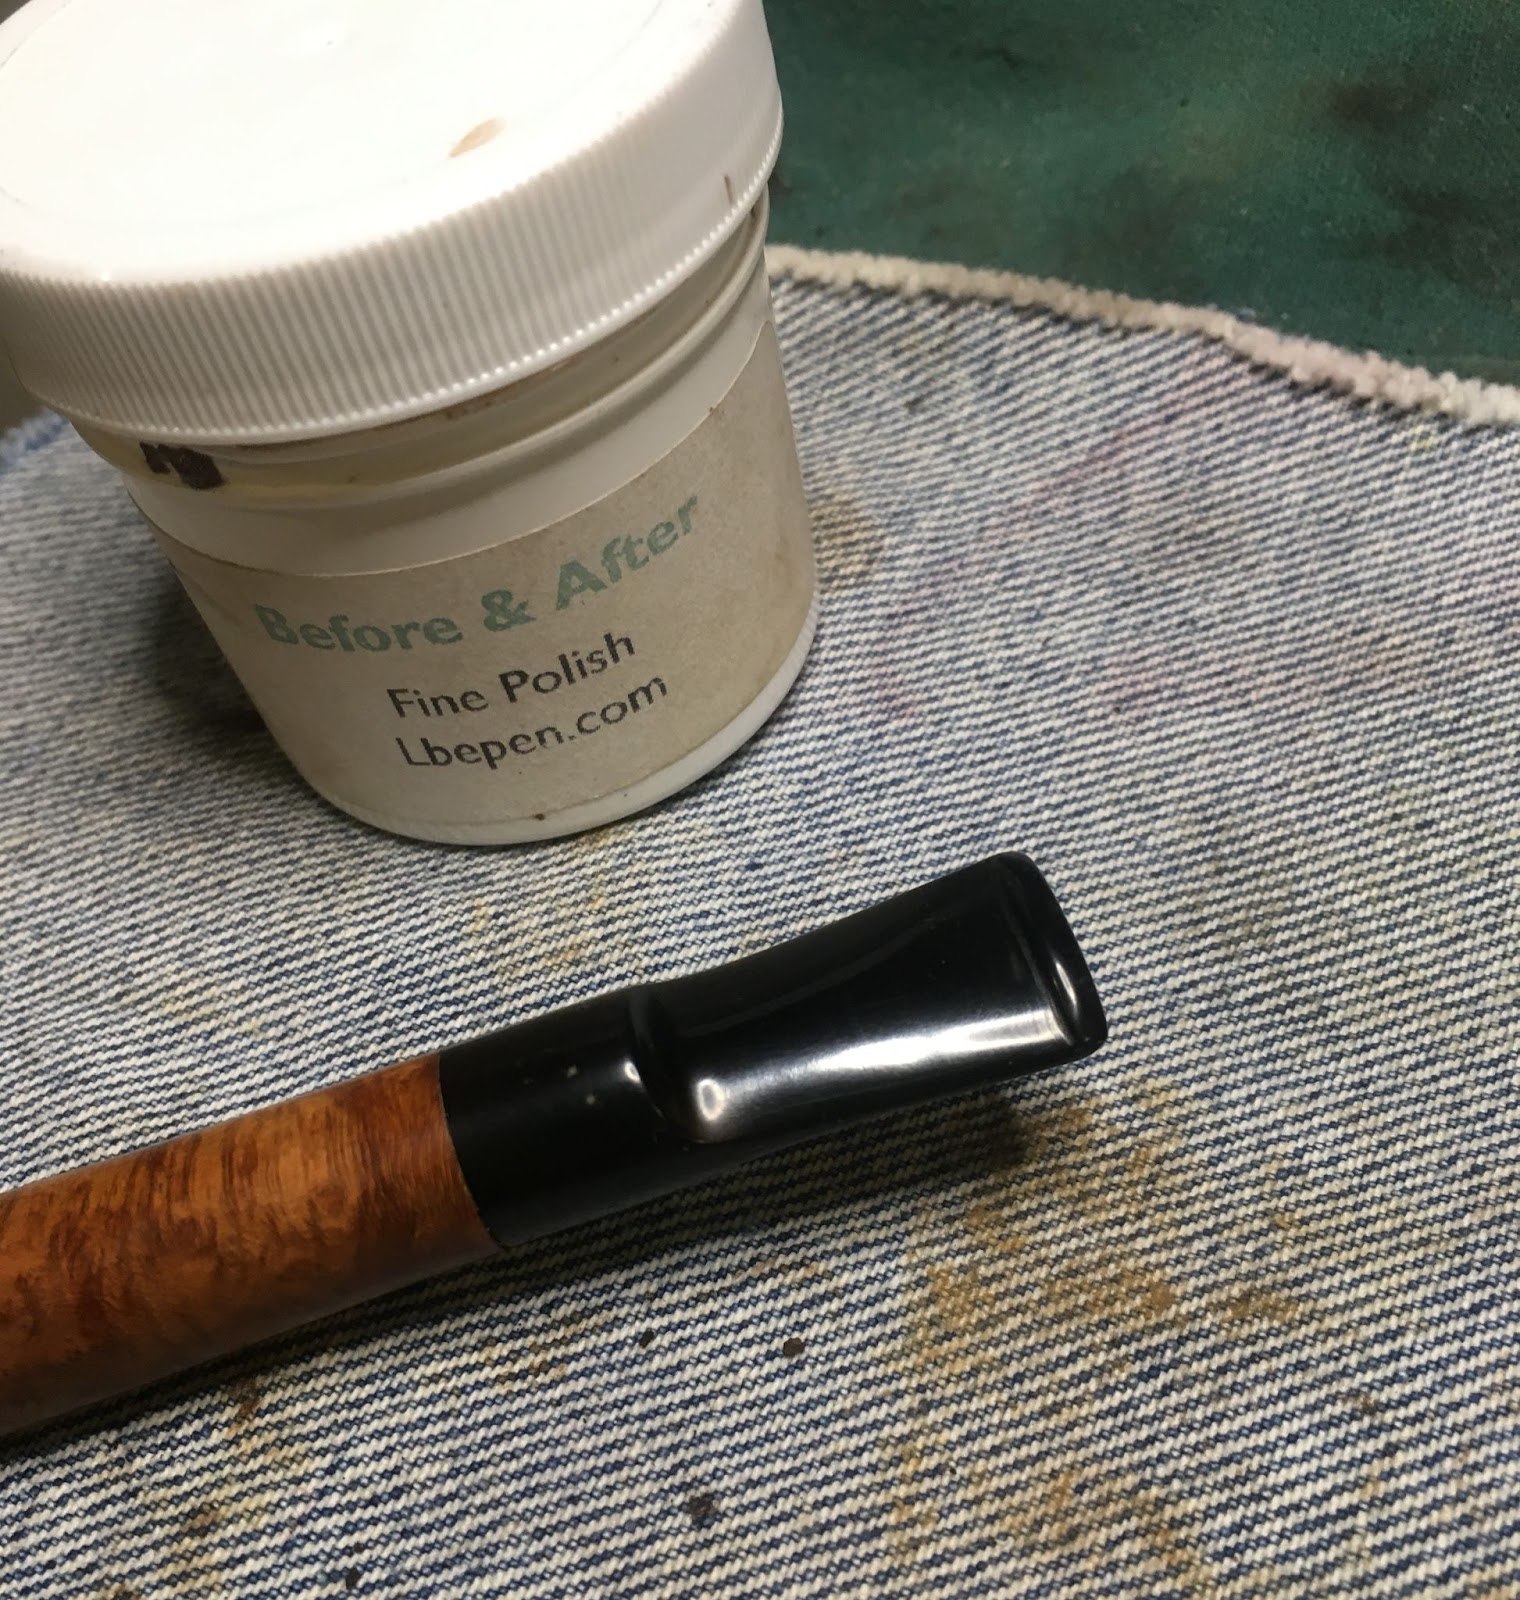
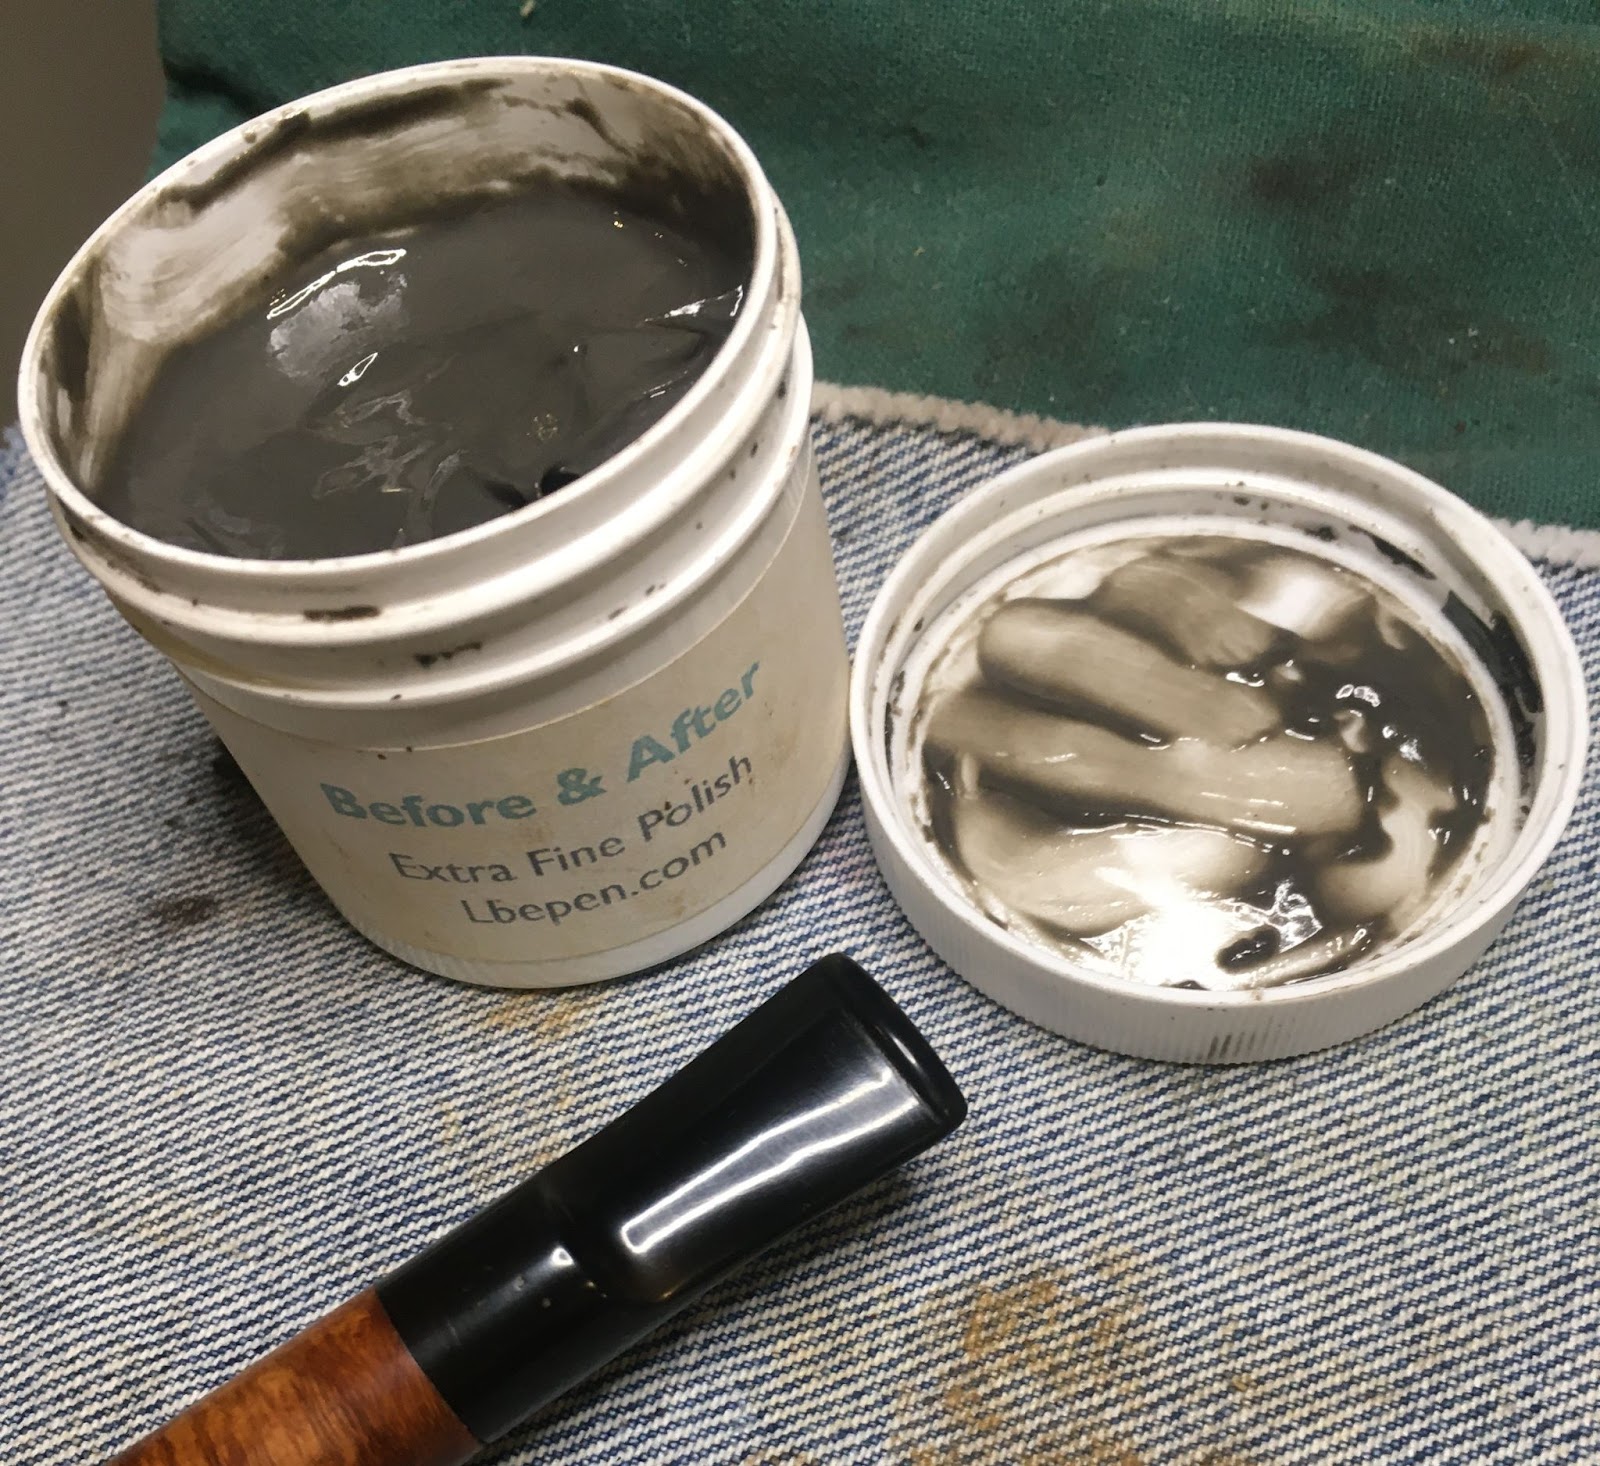
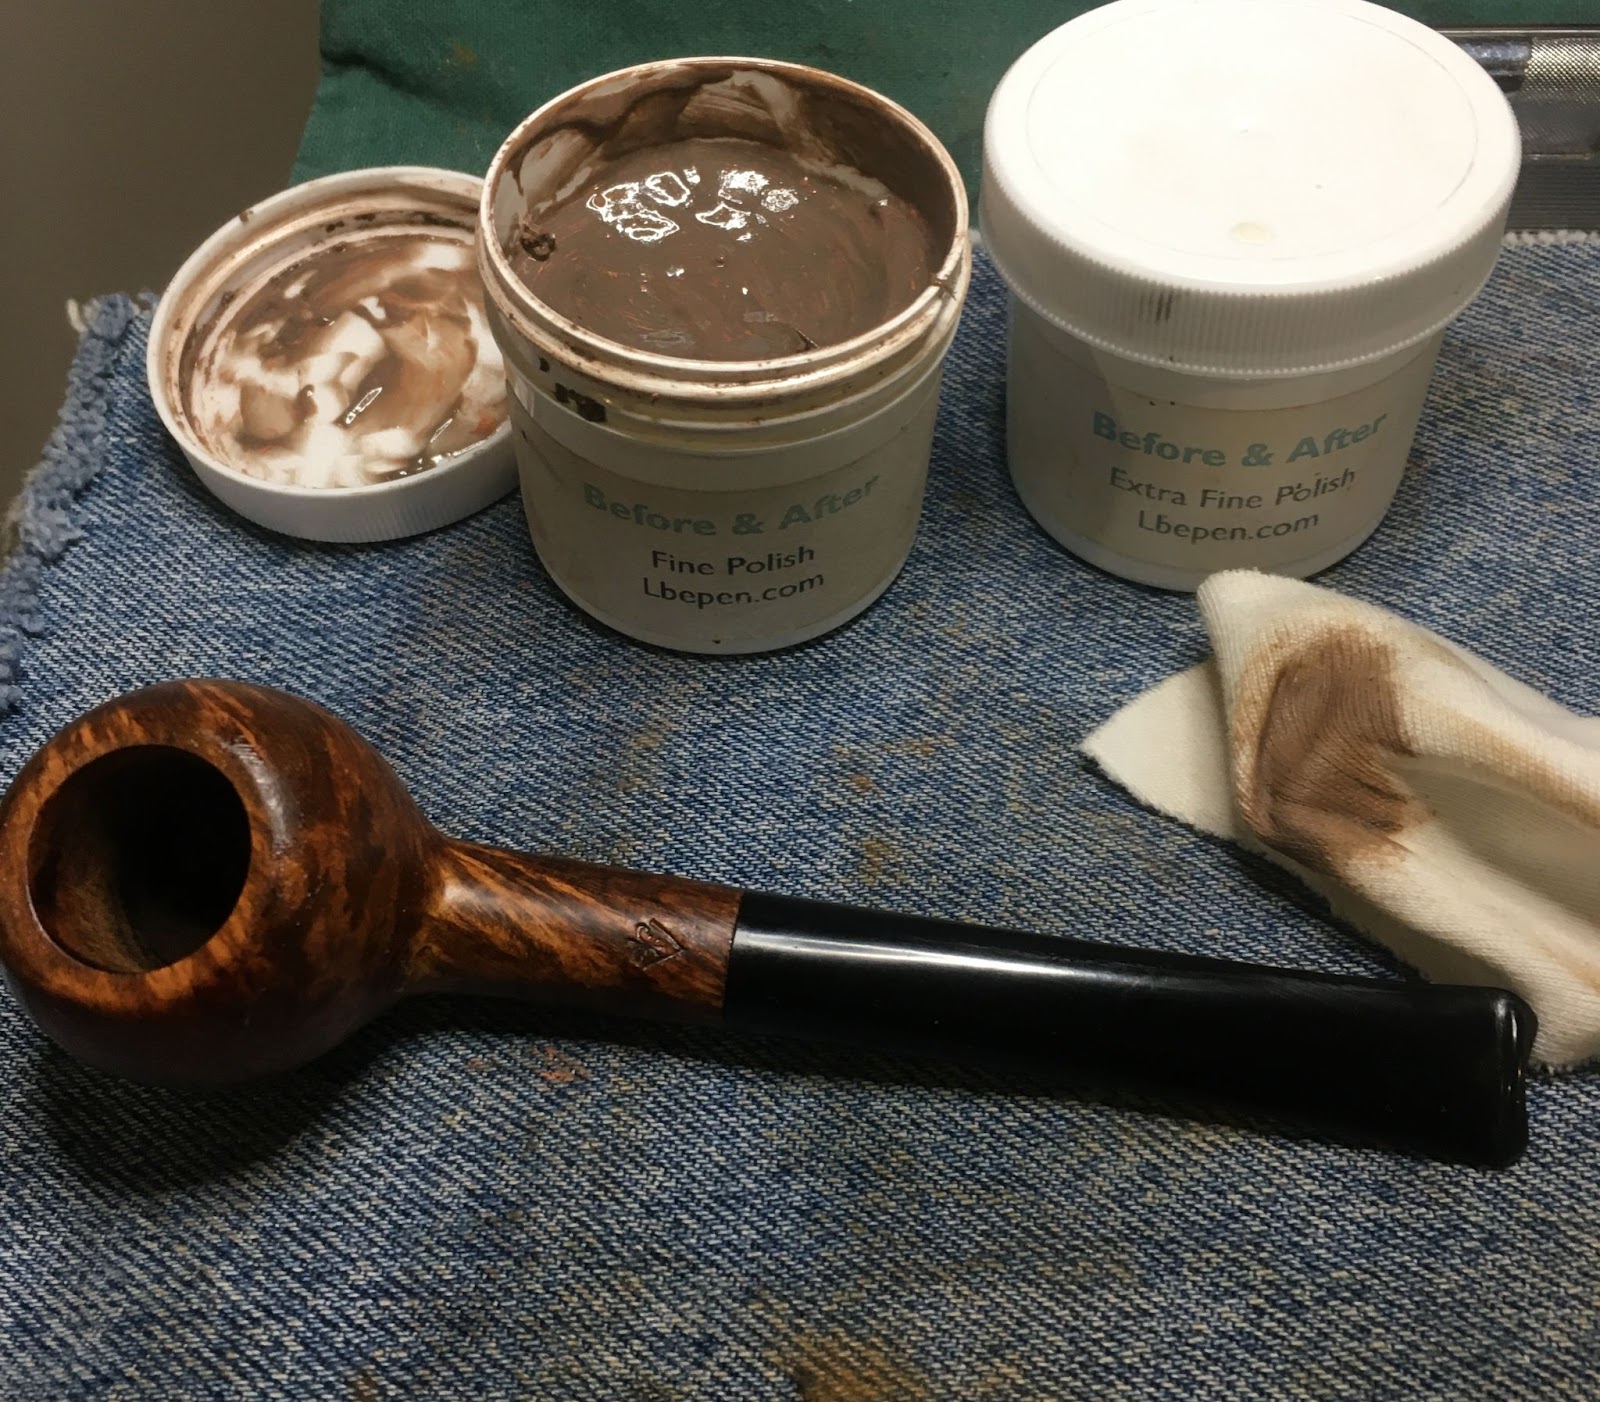
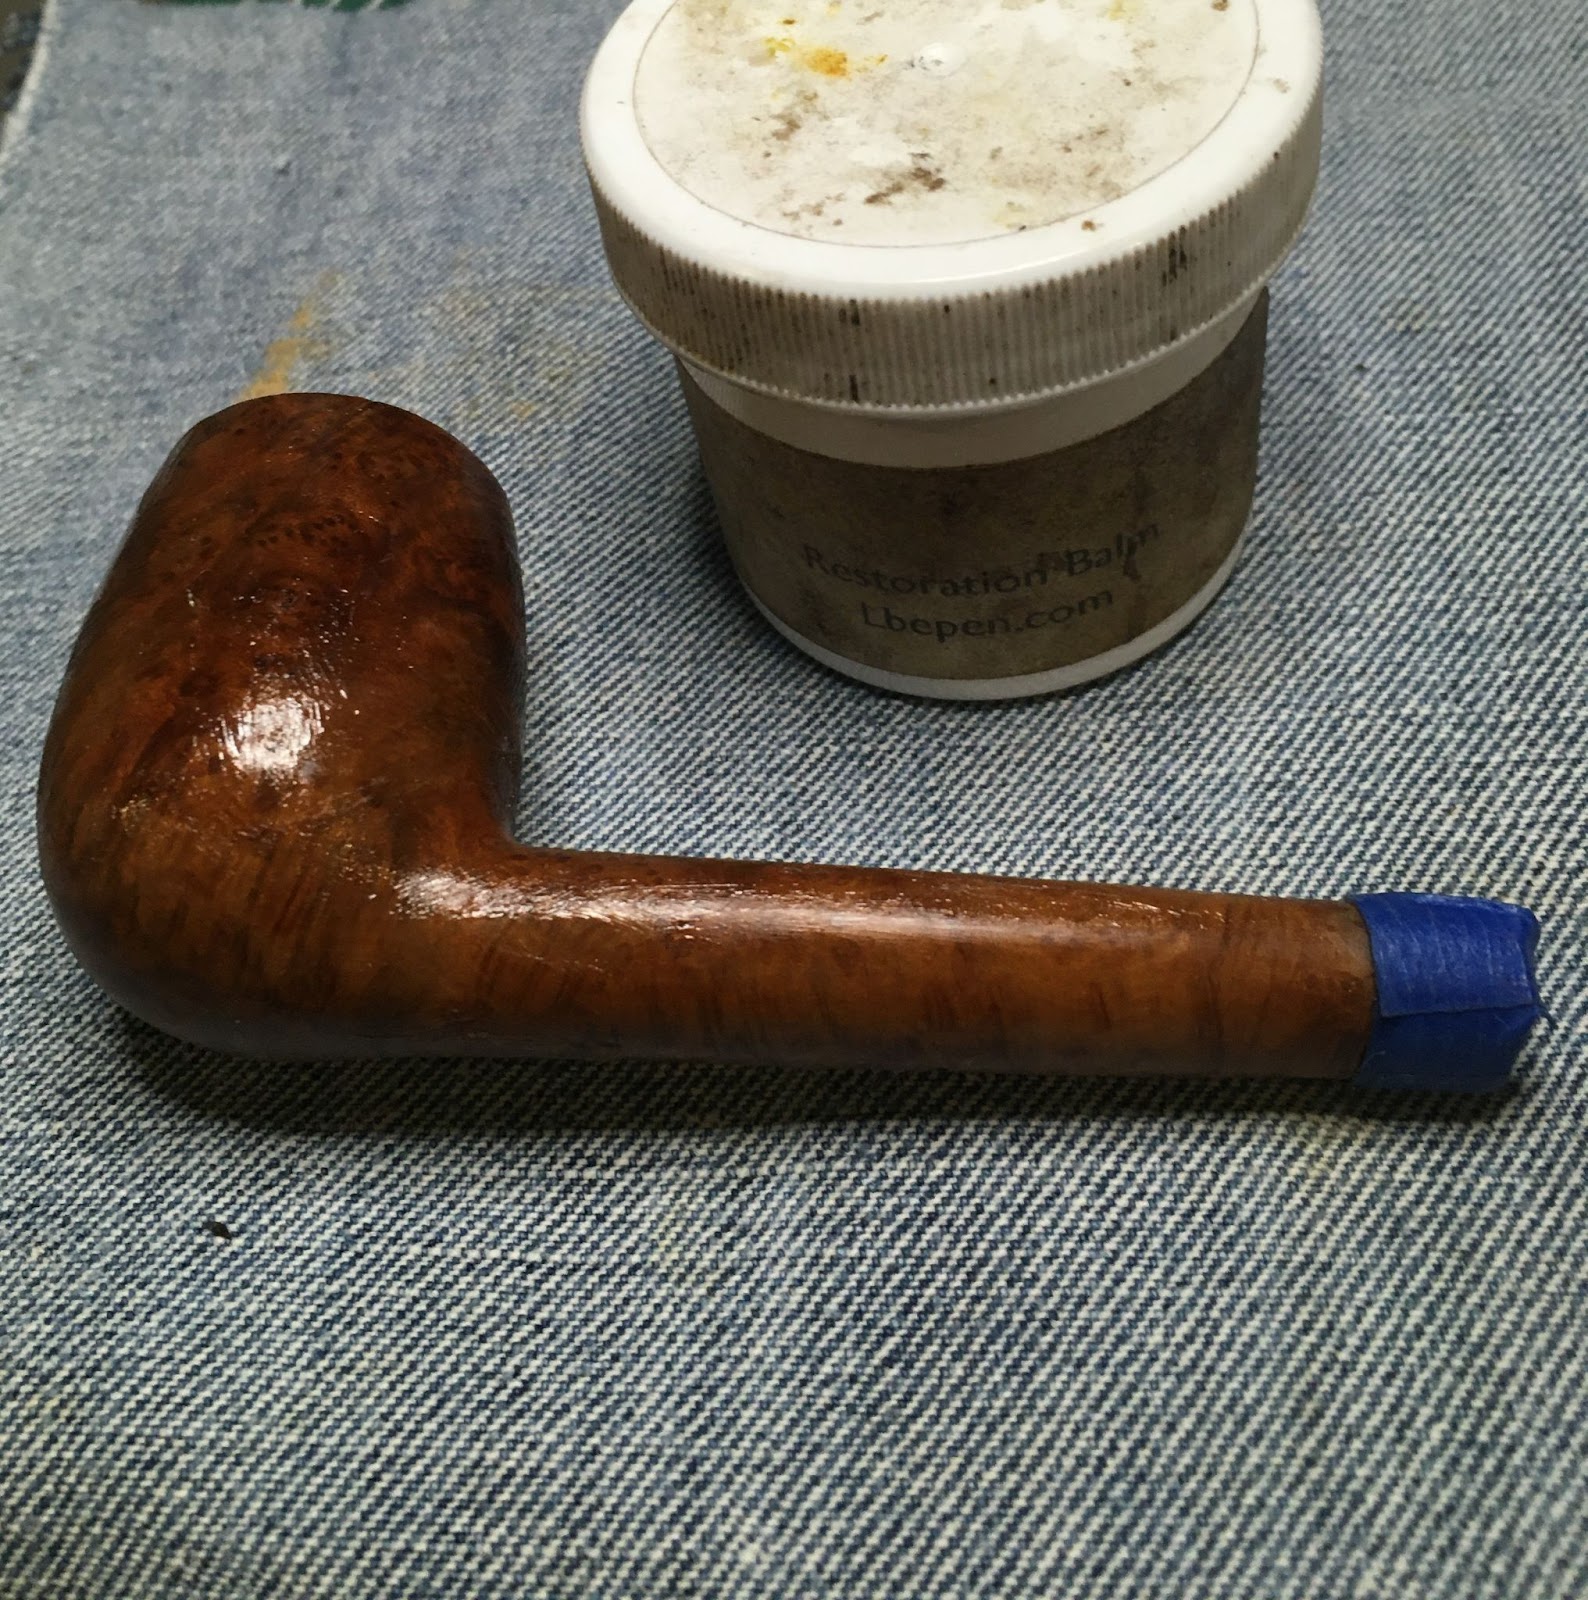
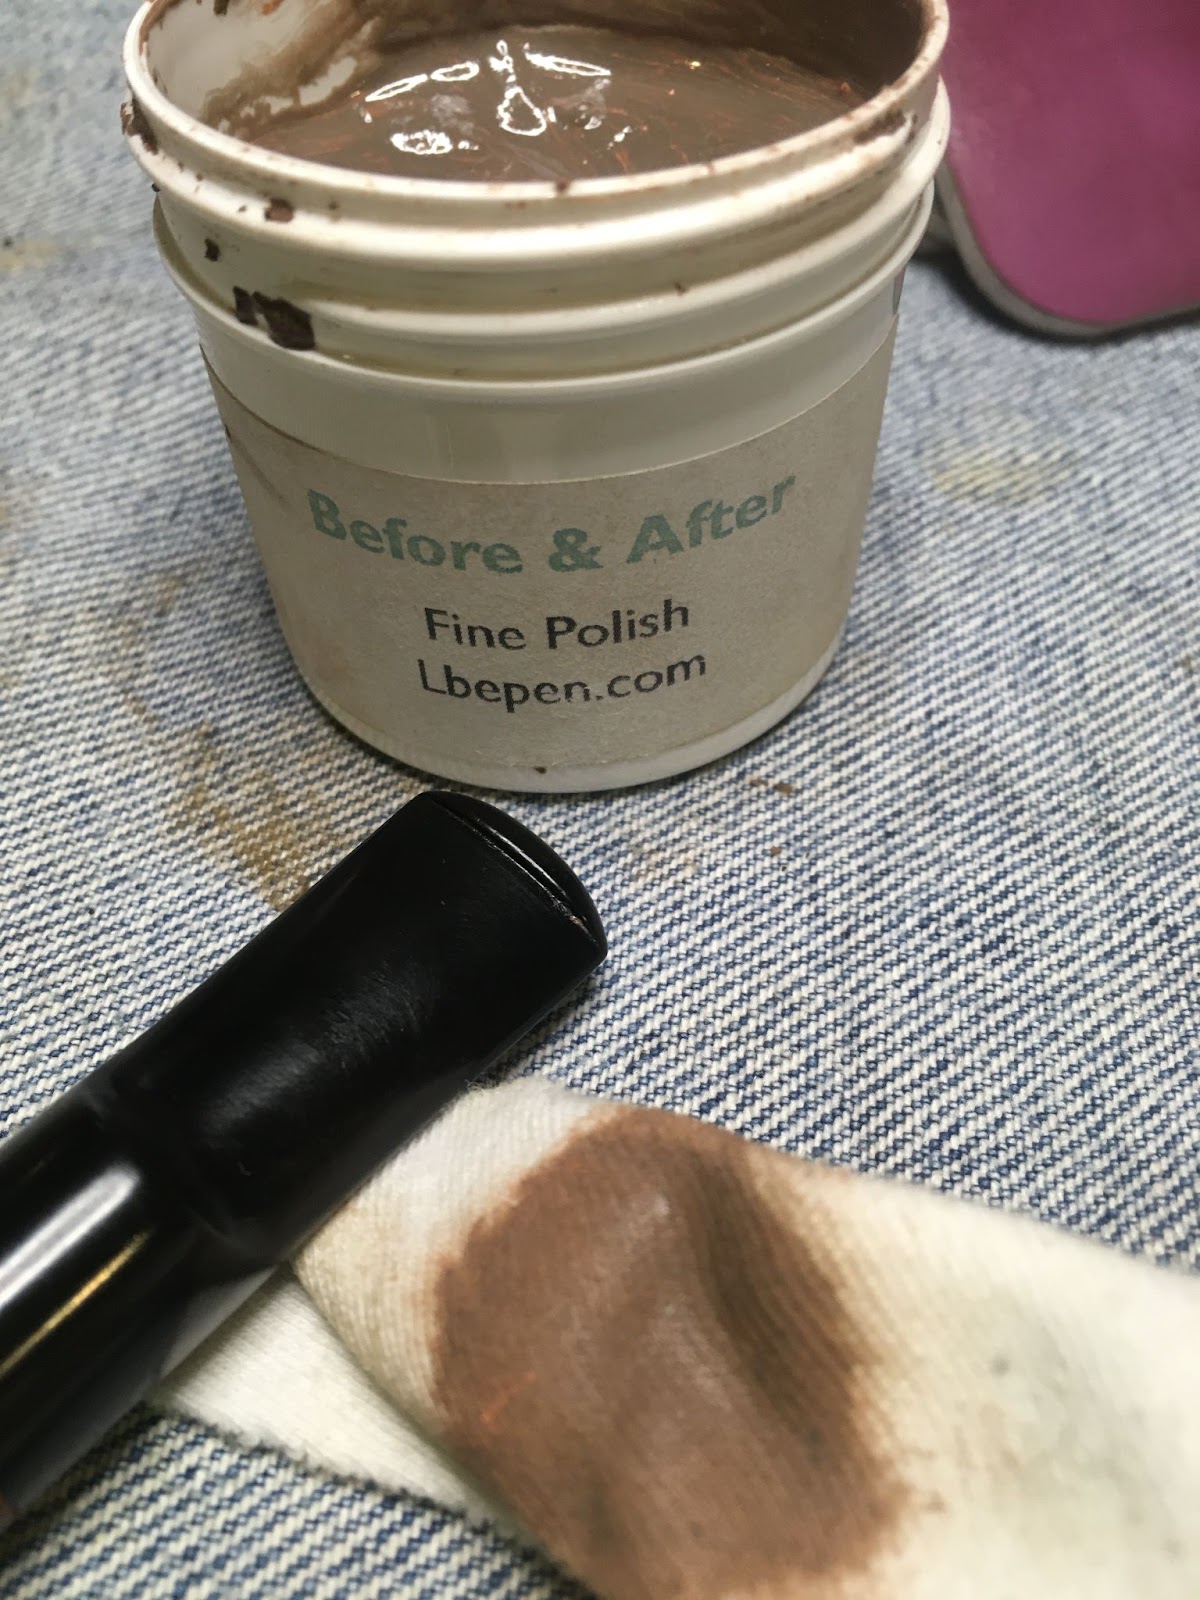
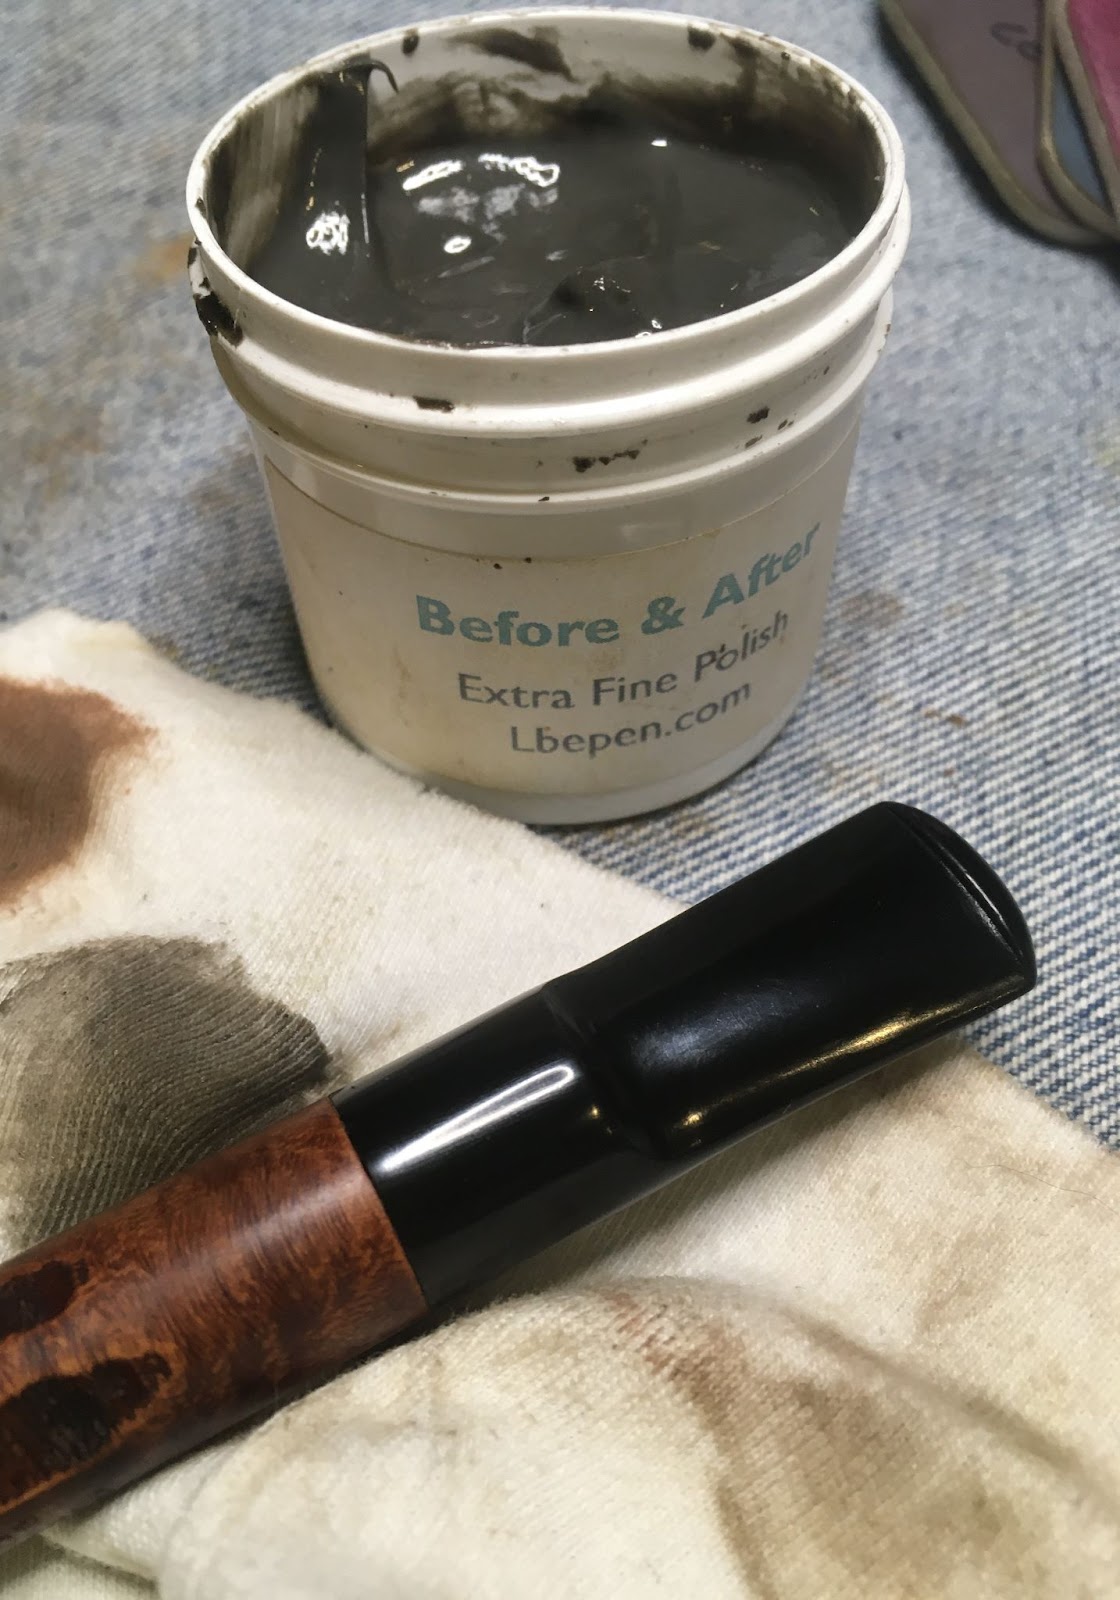
    The little Danco was really looking good.  Only a few things remained.  The first of which was to polish the stem with Before and After Fin and the Extra Fine Polish.  This was done by applying the polish with a finger and vigorous rubbing with a soft cotton cloth.  I repeated the same process with the Extra Fine Polish.  With the polishing finished I gave the stummel a coat of Before and After Restoration Balm and allowed it to do the magic that it does for 20 minutes.  After 20 minutes, I wiped the remaining balm off with the inside of an athletic sock.

    The pipe now needed a couple of coats of carnauba wax applied with the buffer.

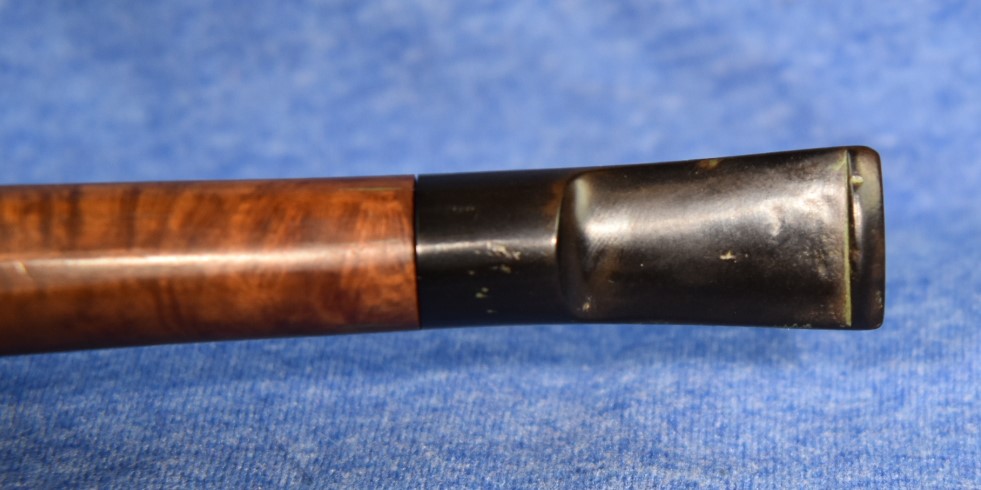
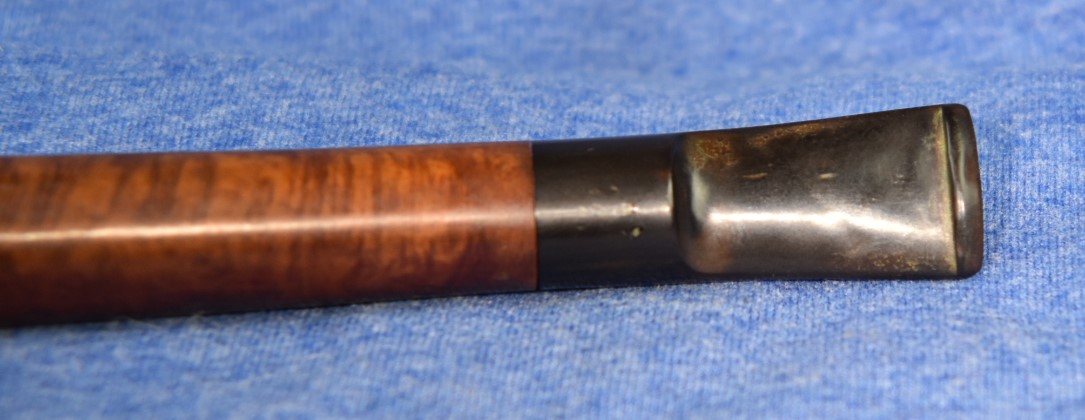
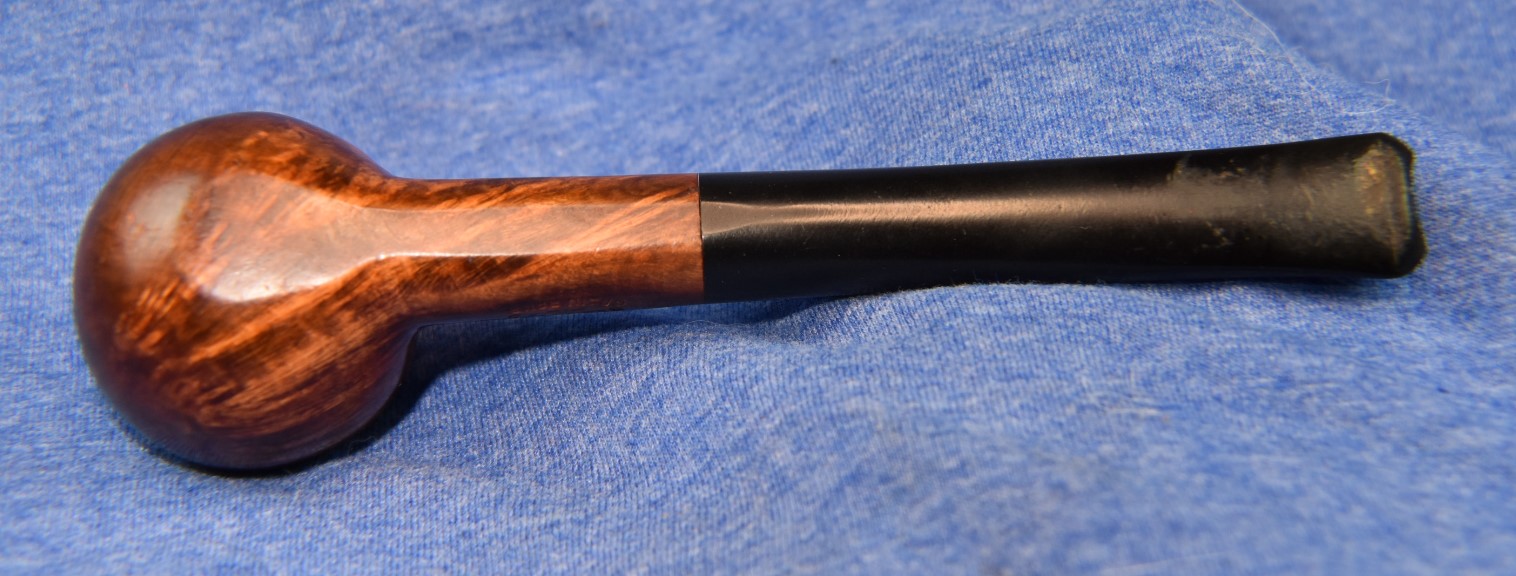
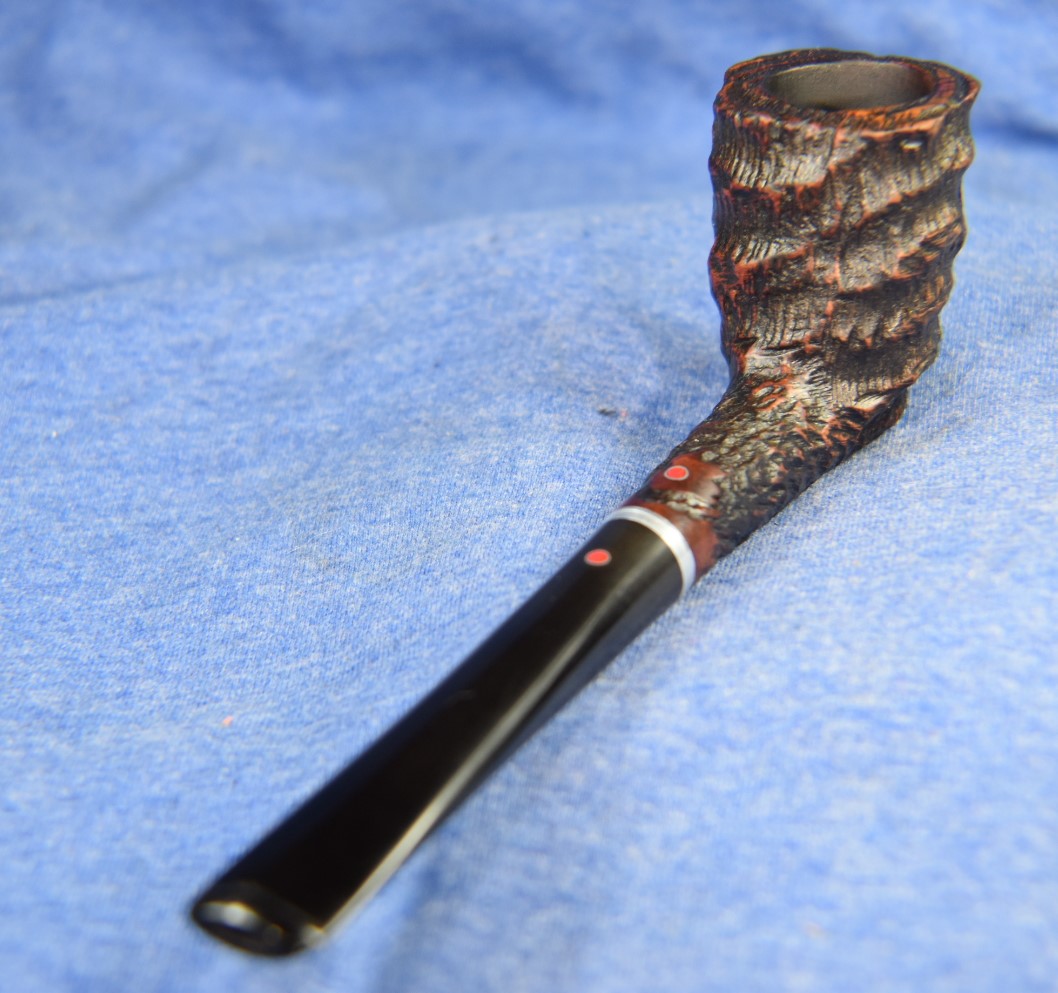
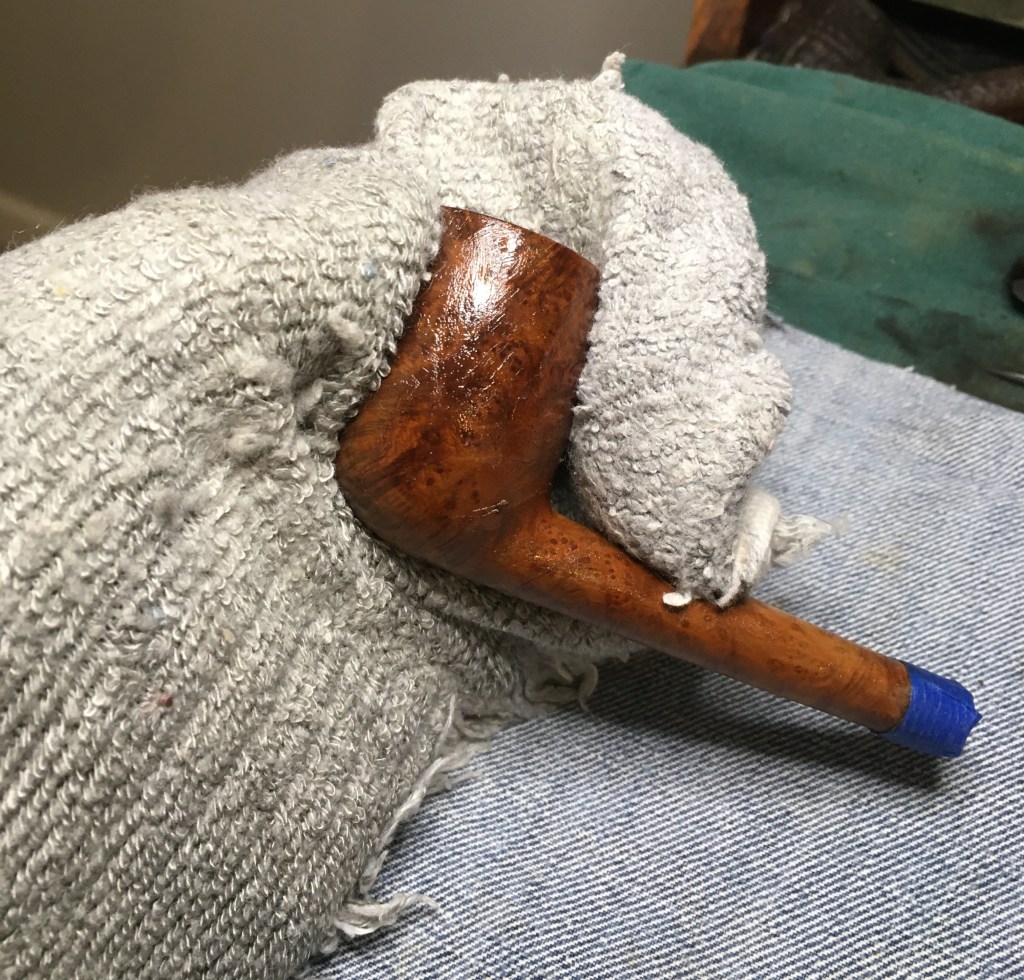
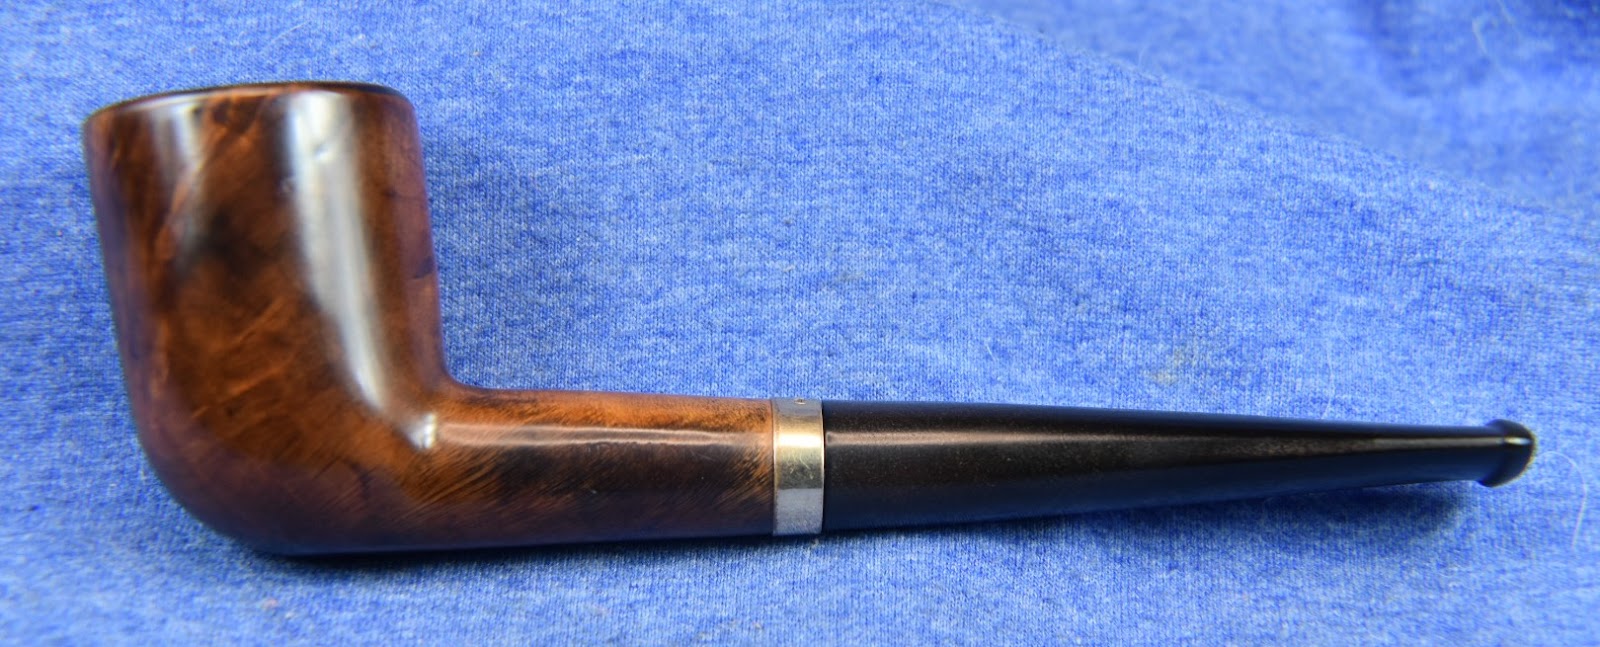
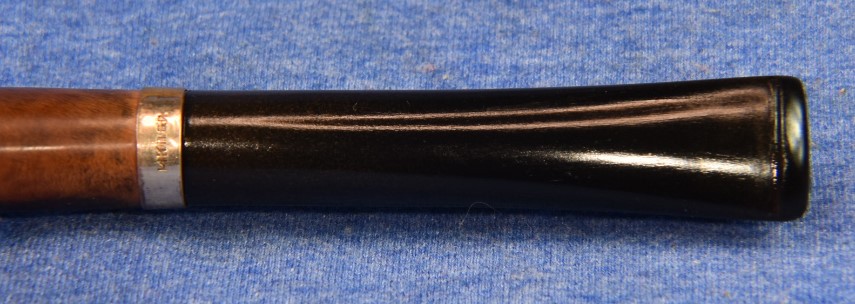
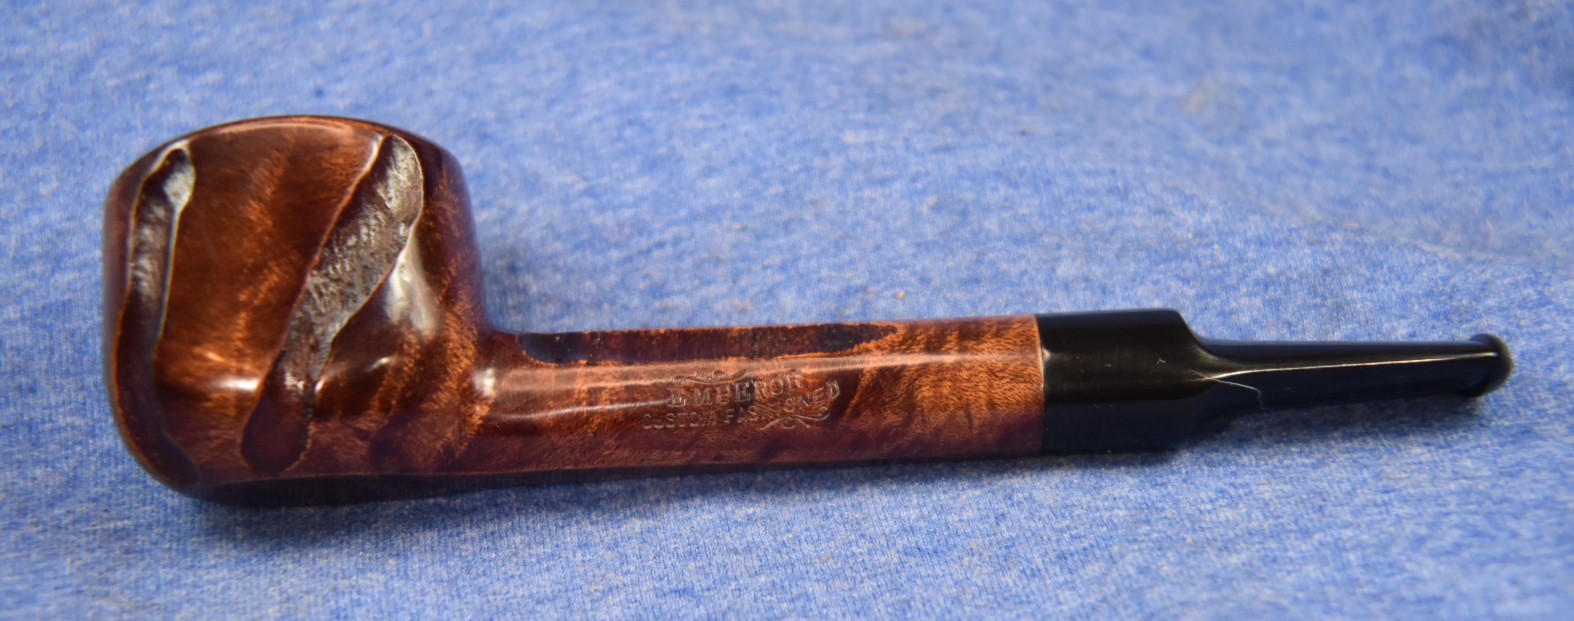
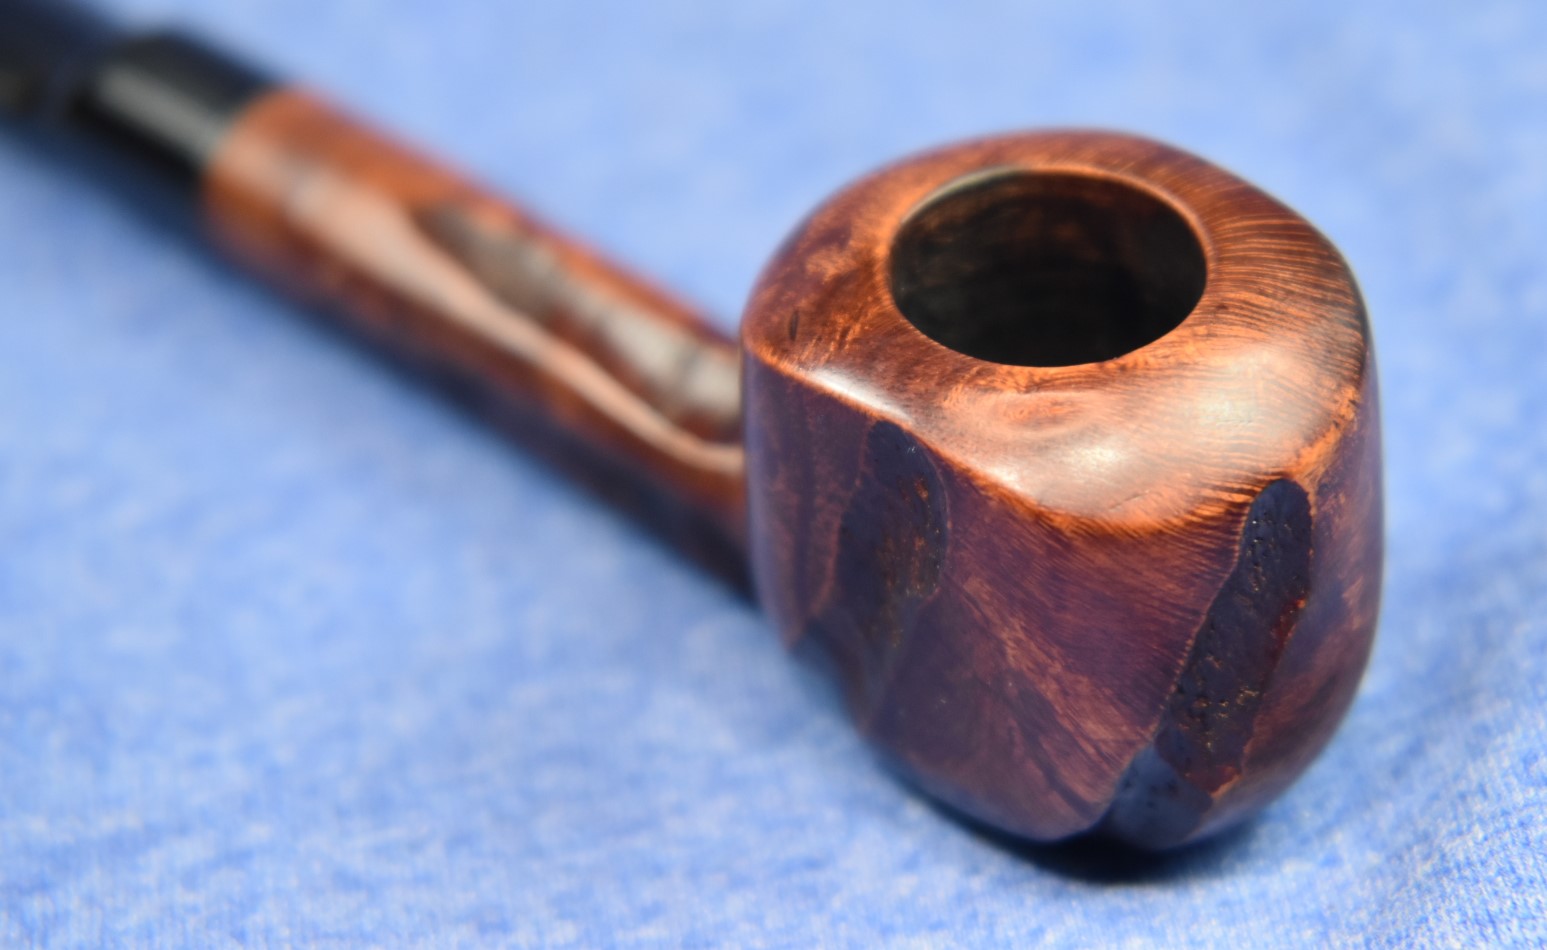
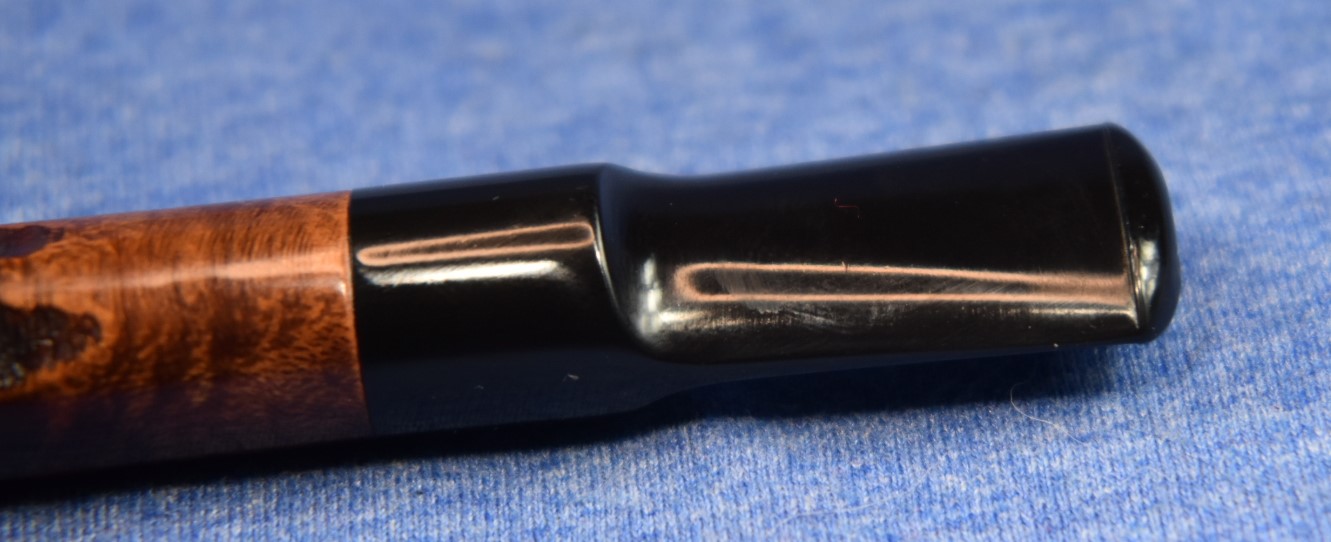
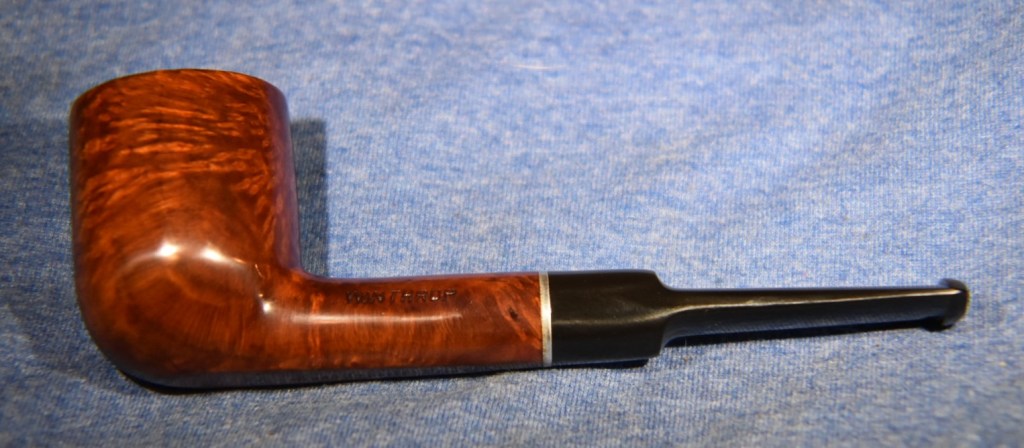
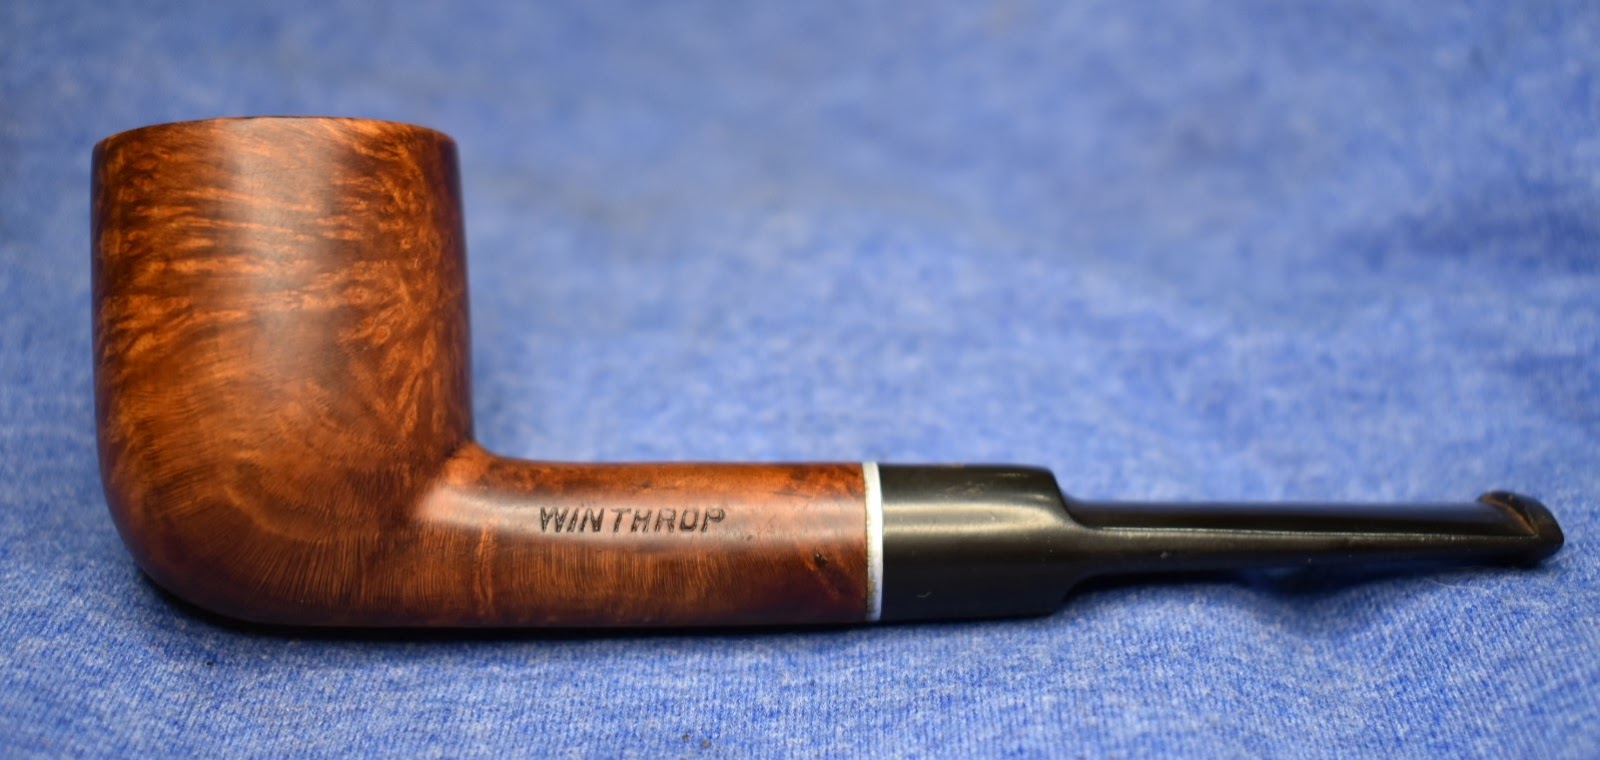
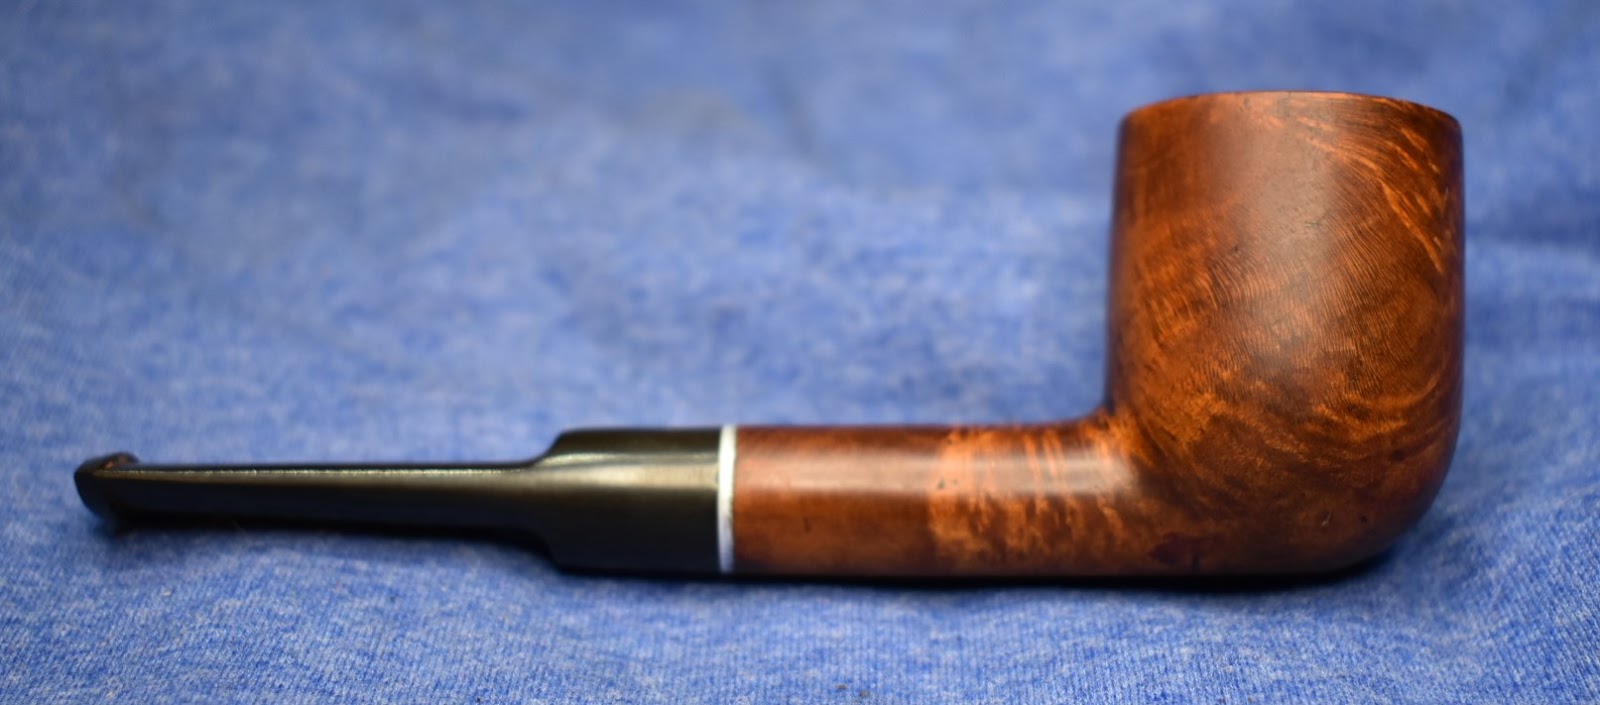
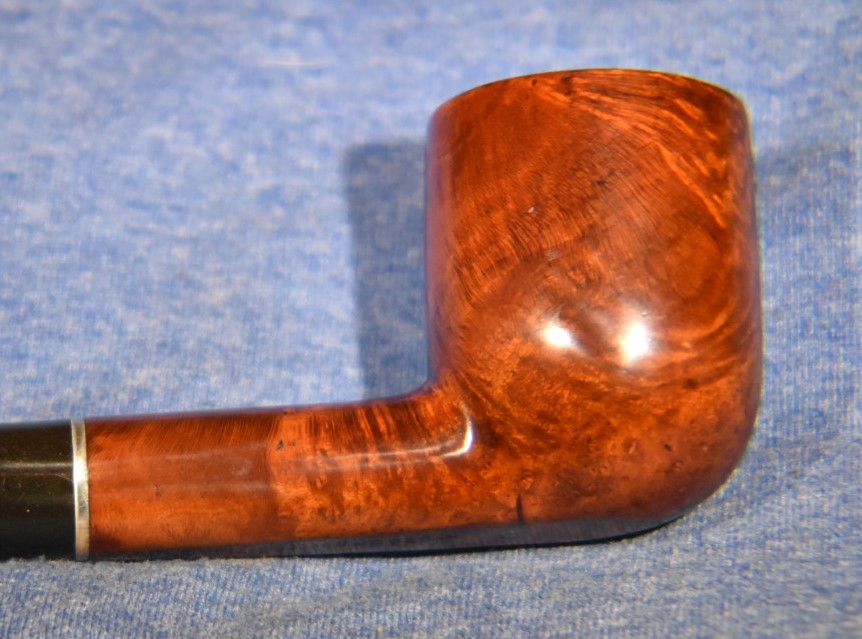
    I think this little Danco Lovat turned out very nicely.  The only complaint I have about it is that the stem only fits perfectly one way rather than either way.  That is hardly something worth complaining about.  Okay, two complaints.  The other is that stuck stinger.  The pipe doesn’t have a bad draw to it but, I think it would be better without the constriction of the stinger.  The grain of the briar looks very nice with the carnauba wax.  The proportions of the pipe are very classic and classy. I would like to know more about the Danco brand if anyone knows more please feel free to reach out with comments.  I do hope that something here has been useful to you with restorations of your own or that you were entertained.  If you like this sort of thing please click the like and subscribe.  Thank you very much for reading the ramblings of an old pipe lover.

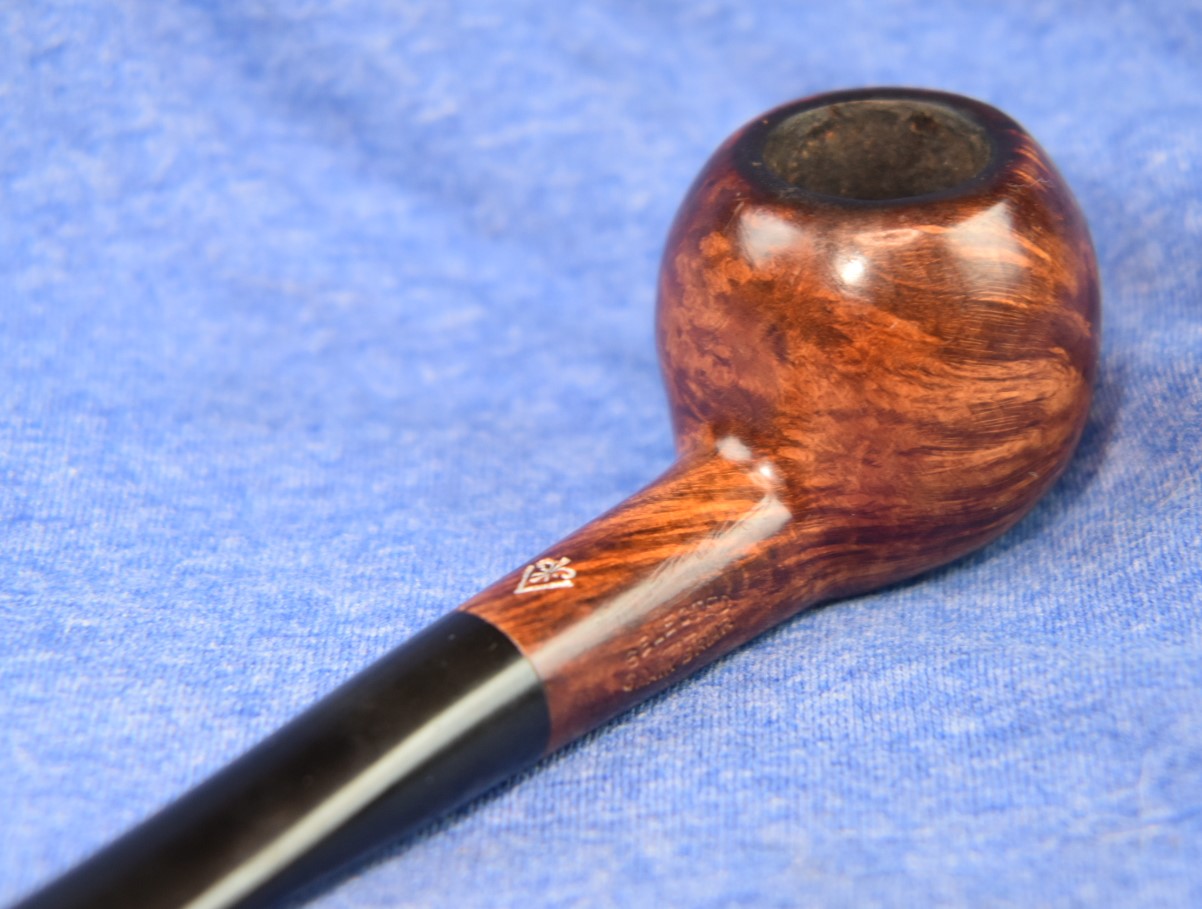
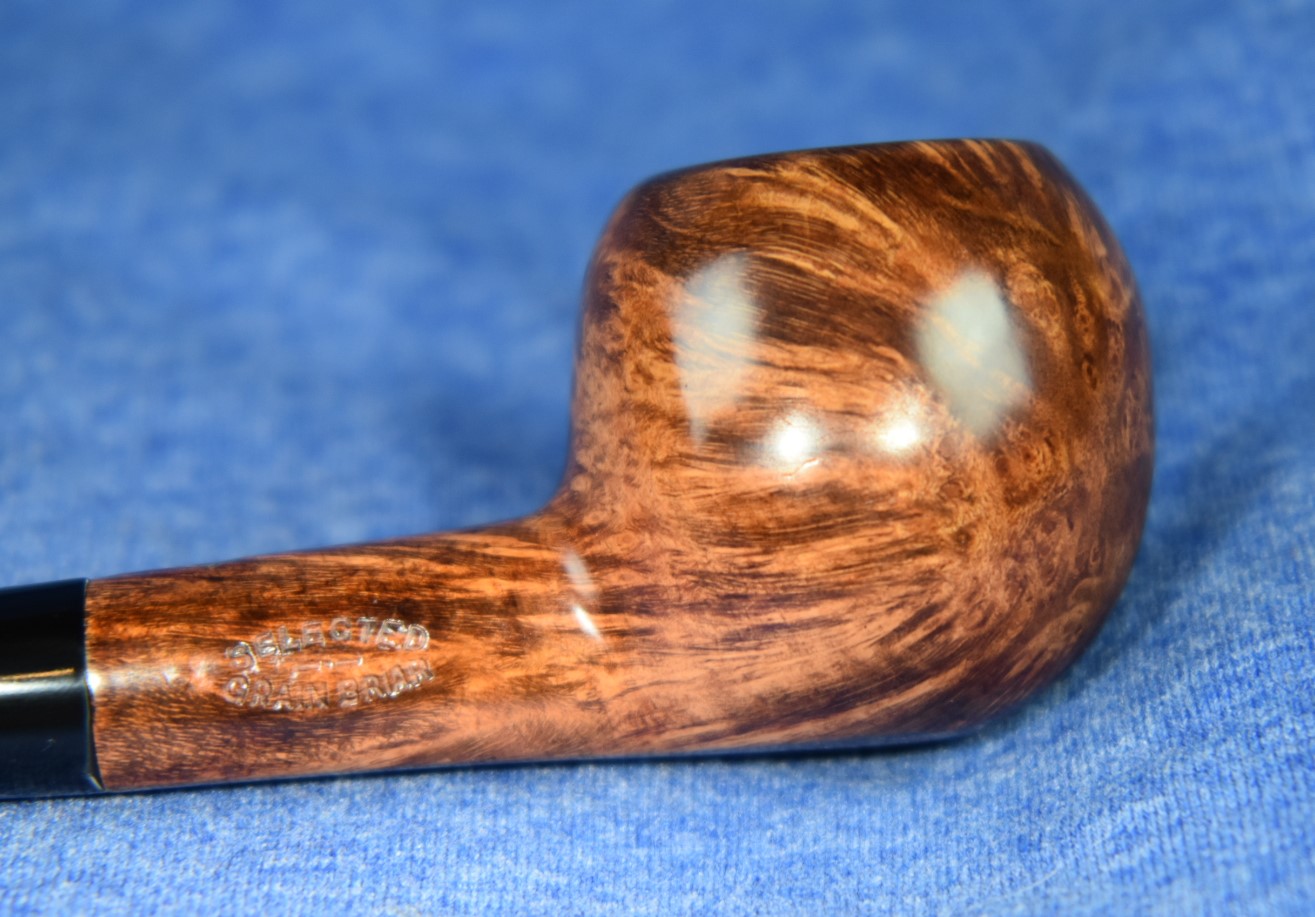
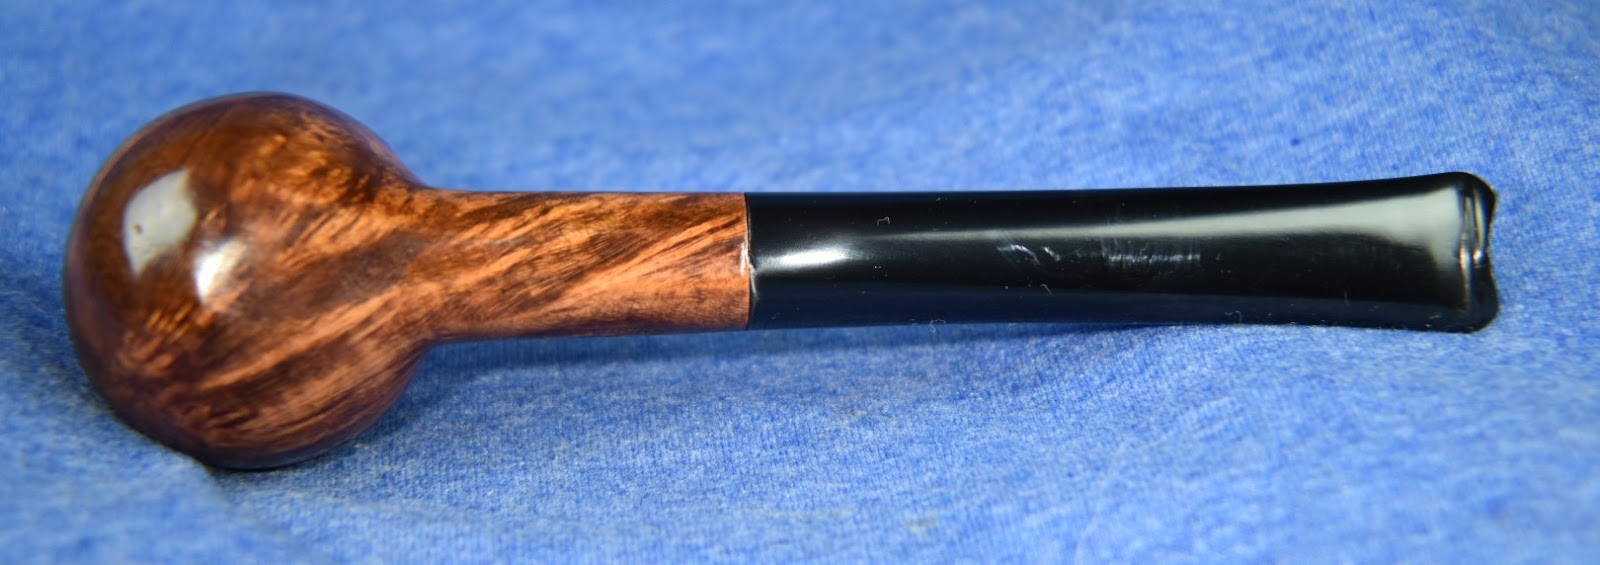
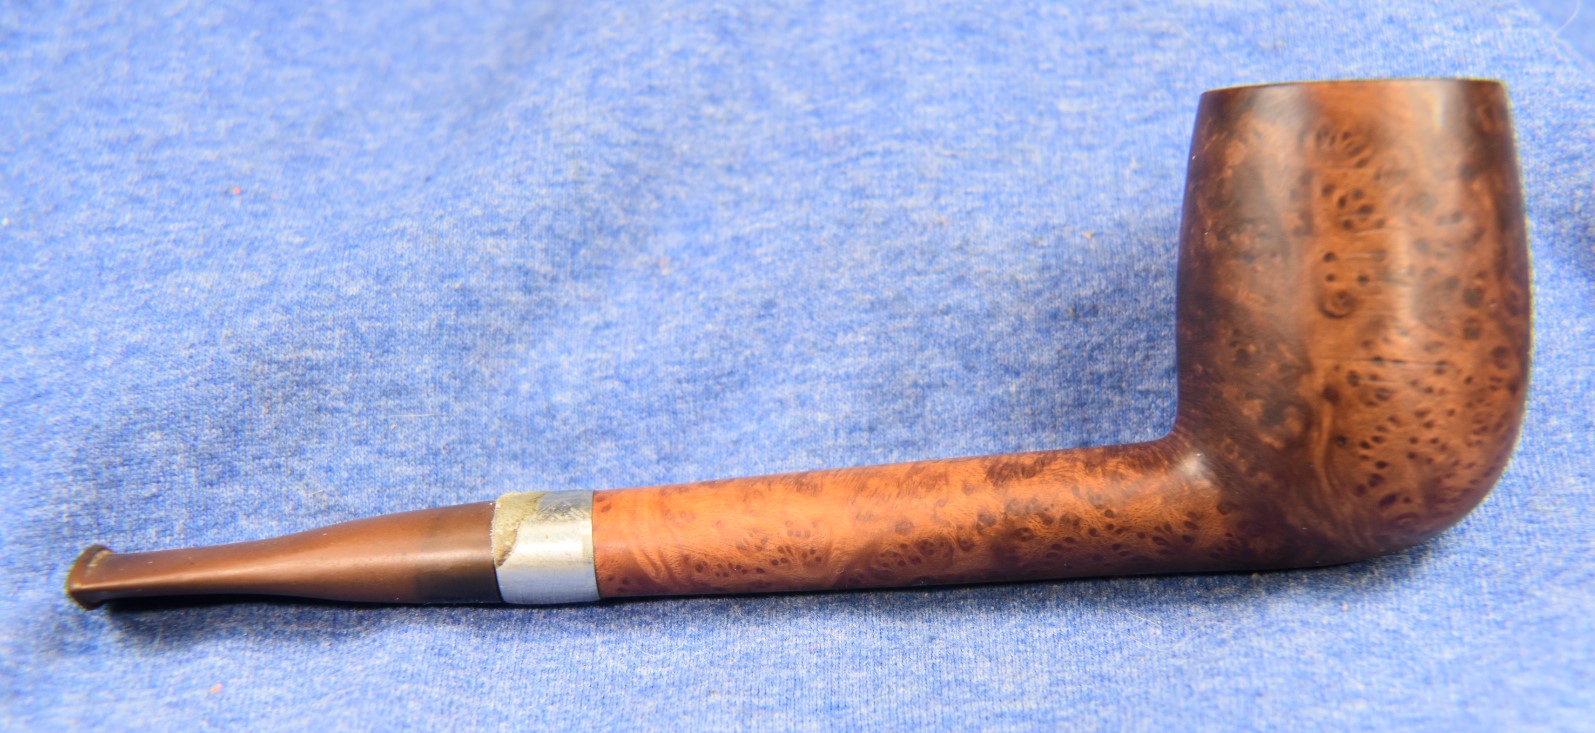
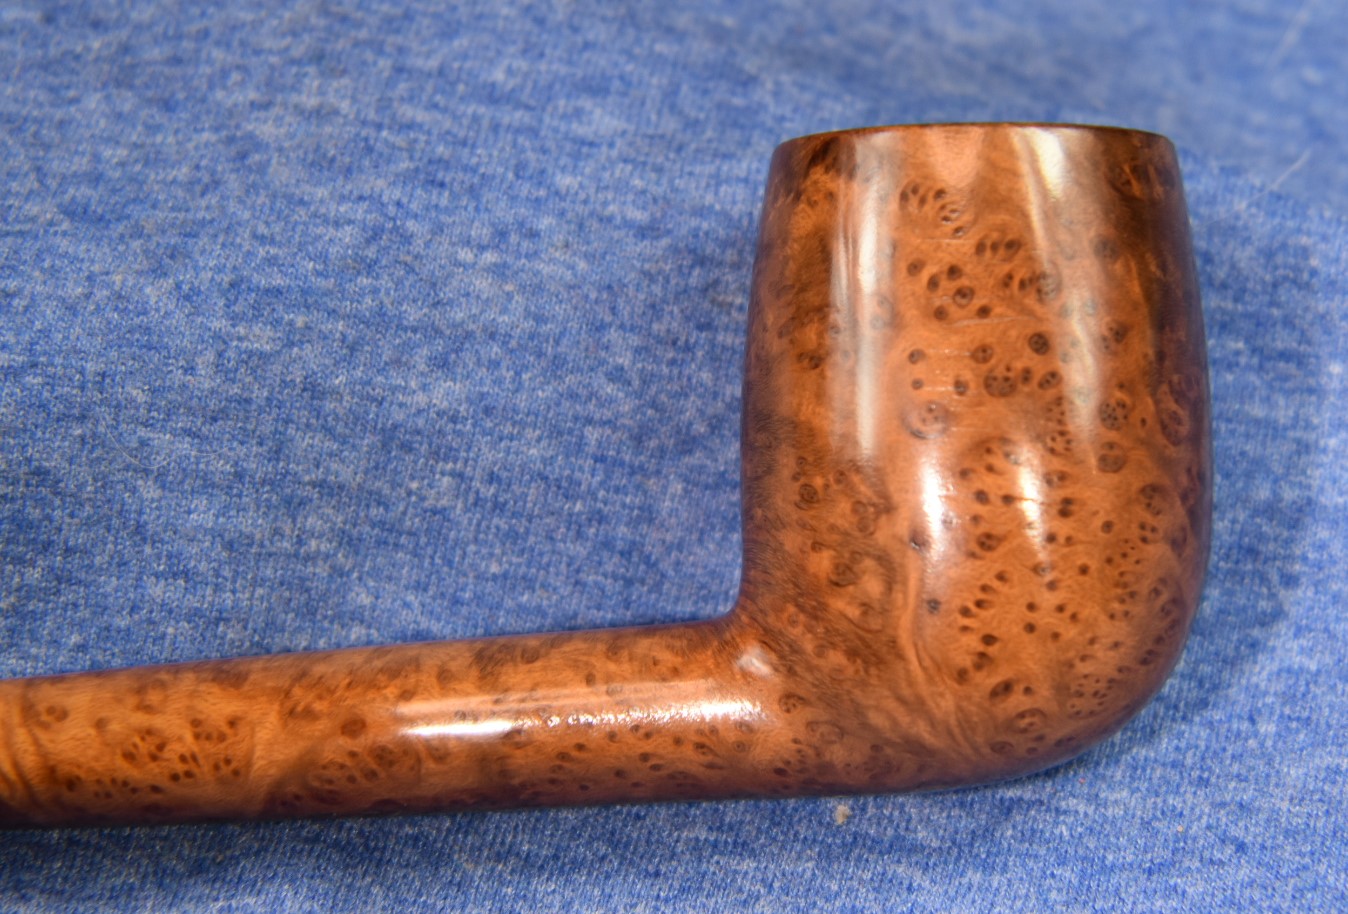
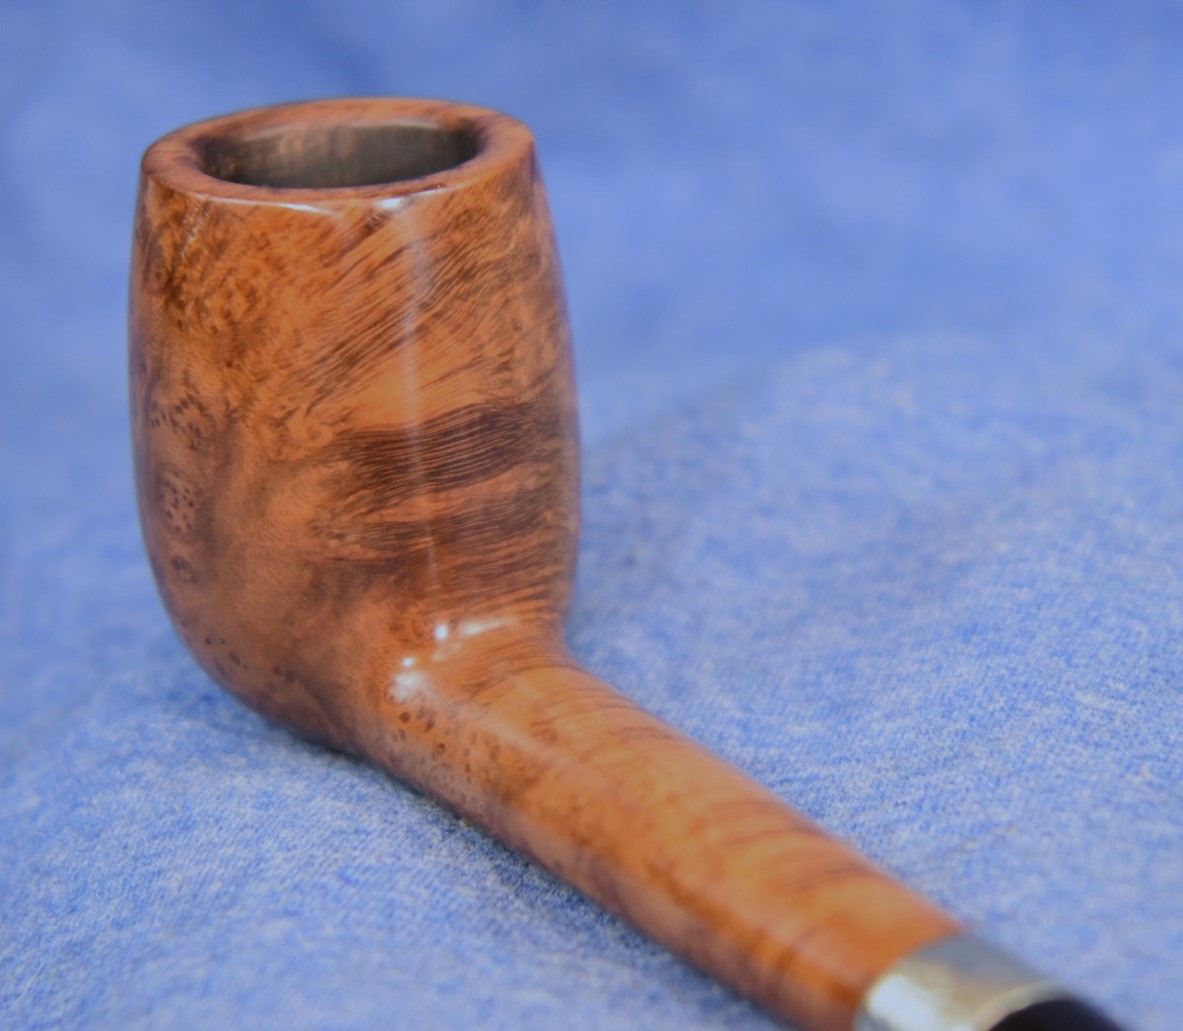
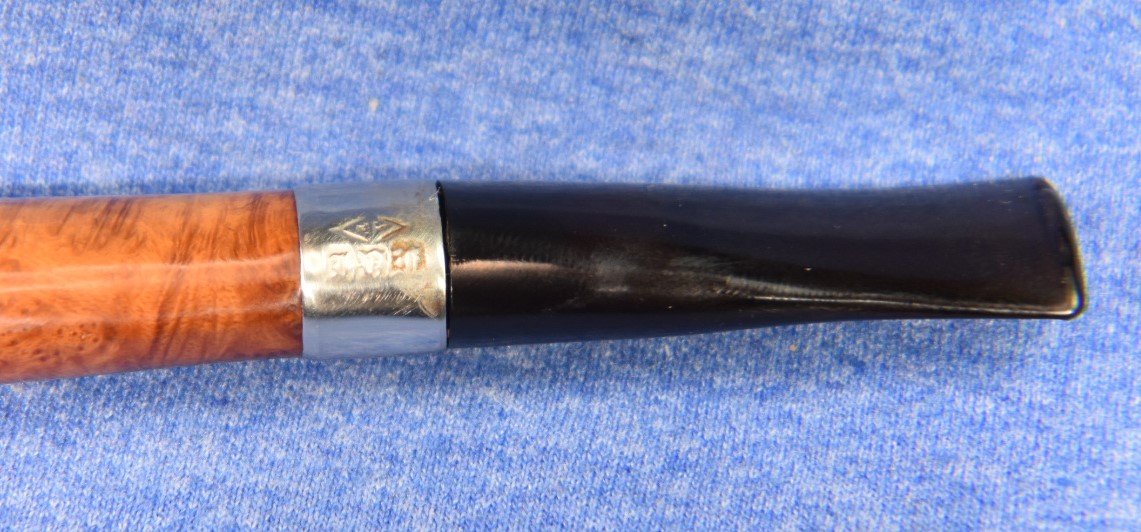
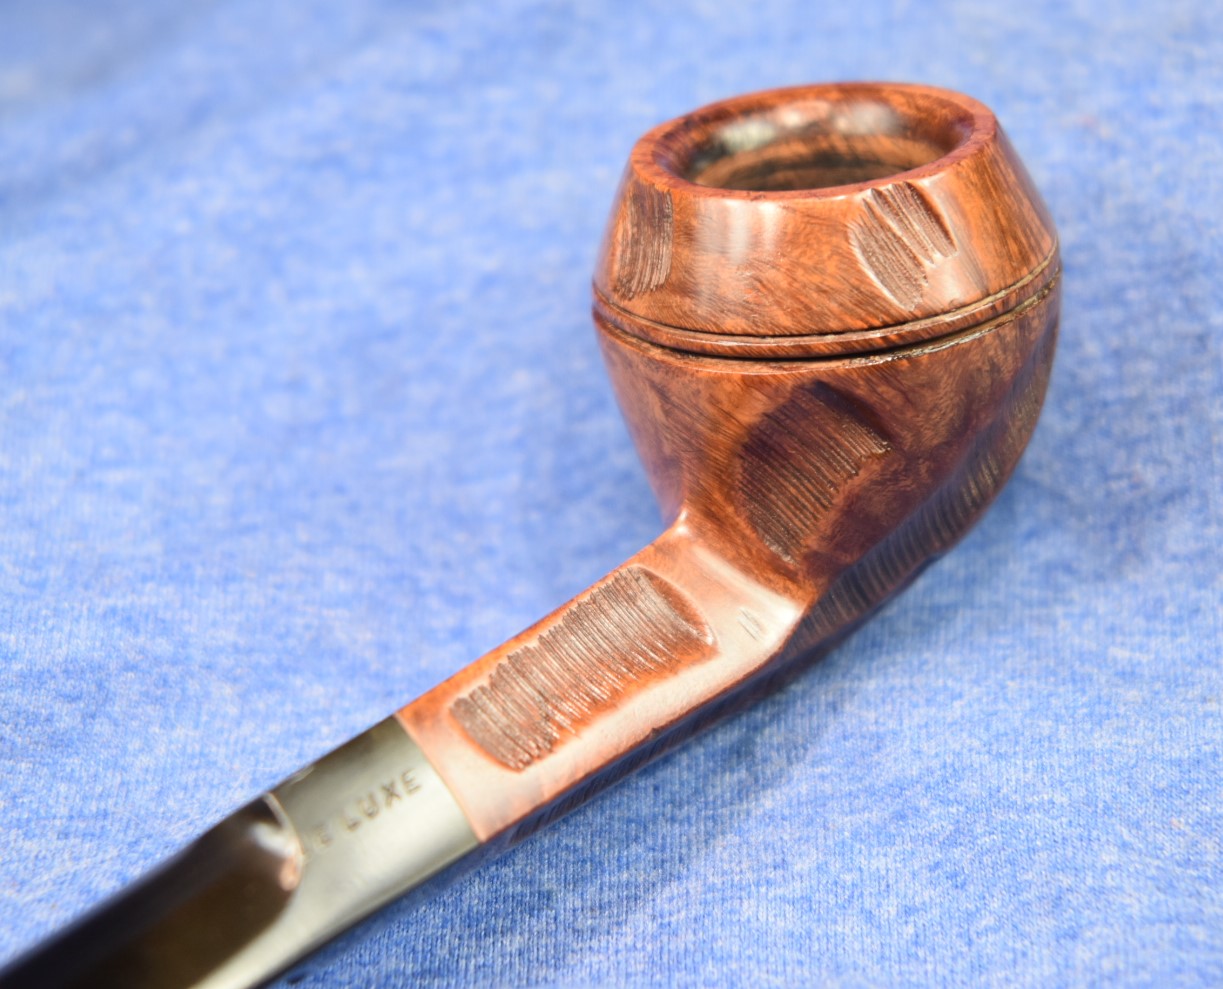
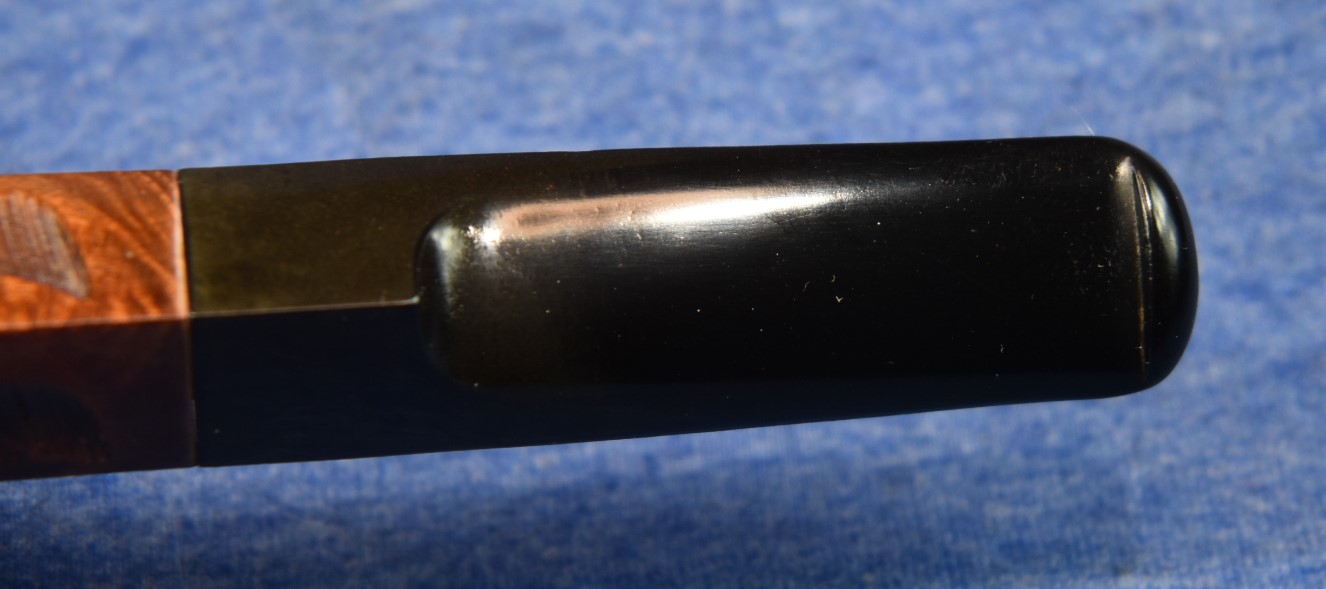
    Below are some photos of the finished Danco Lovat.

  • A Van Roy Bard Selected Grain Restoration 

    January 17th, 2024

    Written and photographed by 

    John M. Young

    The 1940s pipe restoration marathon continues.  This time with another lesser known maker that found to be interesting.  Though the name of the line was continued long after the original company was bought up by the Big Boys.  Once again Pipe Lovers Magazine led me to this little cutie.

    (Pipe Lovers Magazine 1947 all numbers : Free Download, Borrow, and Streaming : Internet Archive p. 186) 

    Now this is historically interesting for a few reasons: One, briar pipe manufacture is returning to normal after WWII, two, mention of the Van Roy  Ajustomatic stem (more on that later) and three, the stem repair done by pipe repair shops nationally.  I really need to research the pipe repair business of the 1940-present.  Today there are a handful of pipe repair shops, I wonder how many there were in the Golden Era of pipe smoking?

    Back to reasons one and two, This article is from June, 1947.  It makes sense that briar availability is returning to the world.  Harvesting, drying and curing took a year or more and the transportation, without worry of German U-boats, was also normalized.  Two mentions the Ajustomatic stem.  This is a Van Roy invention.  

    Turning to pipedia.org for clarification:

    “The VanRoy Pipe Company, originally located in the Empire State Building in New York City, began as its own pipe company, and the originator of the Ajustomatic feature better known from its later use in Dr. Grabow pipes. No evidence can be found of their existence prior to October, 1944. When Henry Leonard & Thomas Inc. moved to Sparta, North Carolina in 1953, in addition to purchasing the rights to the Dr. Grabow line, they also purchased other New York pipe firms, including the VanRoy company. After moving to Sparta, HL&T at some point revived the VanRoy name for a cheaper line of pipes, but the later pipes did not have the ajustomatic feature, and instead a push tenon.

    The stem logo for VanRoy was a fleur de lis, originally filled, and the pipes were marked as patent pending for the early ajustomatics. In 1949 the pipes began to carry a patented stamp, with the 2461905 patent number representing the 1949 patenting of the ajustomatic feature, as well as a stamp stating “Magic Cake”, but no fleur de lis was on the stems. After 1953, pipes have been seen with a fleur de lis again on the stem, but an open design, not a filled one.

    According to the 1944 ad there were 4 models offered, as follows:

    • ARISTA… 3.50
    • BARD… 5.00
    • COURIER… 7.50
    • DUMONT… 10.00”

    (VanRoy – Pipedia)

    Here is a great myth-busting gem, the Ajustomatic was not a Dr. Grabow thing.  It was a Van Roy invention.  I also find it strange that there is no mention of Van Roy prior to 1944.  One does not simply open a shop in the Empire State Building, undoubtedly one of the most expensive locations in the world, to start a business.  Also, look at this advertisement from 1944:

    (VanRoy – Pipedia)

    That ad does not have the look of a small start-up company.  It shows polish, flair and quality.  This ad does mention the Ajustomatic stem nor do the pipes appear to have any metal screw-in tenon. 

    The next ad, from 1945, again does not mention the Adjustomatic stem.  

    (VanRoy – Pipedia)

    The final advertisement, from 1949, makes full mention of the Ajustomatic stem and is illustrated with the aluminum screw-in tenon.

    (VanRoy – Pipedia)

    I am assuming that the Van Roy Bard sitting here next to me is an early, pre-Ajustomatic pipe.  Further evidence of this is the logo stamped on the pipe shank.  None of the illustrations nor descriptions show/discuss shank stamps.  They all refer to stamps of the stem.  Several other makers stamped logos on the shanks of their early pipes. KB&B within their clover and Linkman can both dated by their early use of logos stamped on the shank. These were later dropped.

    There is a photo of a stem stamped with the fleur-de-lis on pipehil.eu.  Notice the logo is lacking the chevron below the fleur-de-lis.  The below image is also associated with Dr. Grabow Ajustomatic on pipehil.eu, indicating a post-HTL buy-out(1953).  On all of the ads above and on the Van Roy Bard sitting next to me there is a chevron below the Fleur-de-lis.

    (Ae-Ak — Pipes : Logos & Markings (pipephil.eu))

    By the above reckoning, I am going with the idea that this is a 1944?-1949 Van Roy Bard.

    On to the restoration.  Upon arrival this little cutie looked like this:

    The Bard looked to be in very good condition, minus the chewed through button.  Once again, I was worried that a pipe that had been so much used, that the stem was bitten through, would probably have filthy internals.  

    In celebration of the laundry machines only eating one dryer ball while cleaning the shop rags, I rewarded the worktop with a new clean denim piece.  I began with the reaming of the tobacco chamber.  The usual tools were used to make short work of the cake deposits:  PipNet with #2 blade, Smokingpipes Low Country knife and the General triangular scraper.

    After the reaming, the chamber was sanded with 220 sandpaper wrapped around a Sharpie marker.

    Next was the shank cleaning and rim scraping.  I was pleasantly surprised by how clean the air war of the Bard was. It only required a few cotton swabs dipped in 99% isopropyl alcohol to clean.  The rim was scraped with a sharp pocket knife.  I softened the lava on the rim with saliva prior to the scraping.  Yeah, kind of gross but it works.

    The next task was to scrub the externals of the stummel.  I took it to the sink and used a medium stiff toothbrush and undiluted Murphy’s Oil Soap to scrub the stummel.  I rinsed with warm water and dried it with a cotton dish towel.

    Returning to the workbench I wanted to remove the finish from the stummel.  I first tried 99% isopropyl alcohol on a make-up removal pad.  It worked.  This indicated shellac as the clear coat.  Yay, easy to remove, especially with 95% ethyl alcohol.  I supposed that I could have saved myself labor by dunking into the ethyl alcohol (EtOH) jar and letting it sit for 30 minutes but easy wasn’t on the menu.  I used several EtOH wetted pads and removed the shellac from the stummel

    Next was the taping of the stamps on the stummel and a light sanding to look for spots to fill.  I used the 1000 sanding sponge followed by the 1500 and the 2000 sponges.  I am not sure why, the “selected grain briar” from the stamp really meant selected, I guess.  The stummel required no fills.

    Maybe I was just putting off the stem repair with that extra sanding.  It was time to address that bite-through.  I began with using a flat needle file to smooth the stem of any large bumps created by the chewing of the stem.  It sounds weird but the “smoothing” also roughens the surface allowing a better surface for the cyanoacrylate (CA, super glue) to adhere to.  I then started making a new dam to keep the black CA from entering the airway.  I used a piece of flat plastic from a snus can although any 1-2 mm thick plastic would work.  

    The plastic was trimmed to fit this particular airway.  On the previous restoration, I used a folded pipe cleaner wrapped in scotch tape.  For this restoration I wanted a very flat surface for the CA to sit on so I chose this plastic lid method.  I did have to wrap a couple of layers of scotch tape onto the dam to get the thickness I wanted.

    The CA needs to be applied in thin coats to allow the CA accelerator to cure all of the CA.  It is very important to be holding the stem upside down when the accelerator is spritzed onto the CA.  Gravity is your friend and will pull down, thus keeping the CA from flowing into the airway.  I would show this with photos but having only two hands makes it too difficult.

    After that first drop was cured I filed the area behind the button flat again.  This flat area and the “hole” received another layer of black CA.  I again inverted the stem and spritzed with the accelerator.

     In the photo above, I had two coats of CA cured.  I filed the CA flat up to the button then sanded it with the 400 sanding sponge.  This smooth surface was taped over with scotch tape right up against the rise of the button.  THe next coat of black CA was then placed, building up the button and flowing a bit onto the tape.

    It takes a few seconds for the accelerator to cure the CA.  In this time I quickly use an Exato knife to cut down through the, still soft, CA.  This reduces the filing and sanding of the button.  It is not necessary if you miss the “soft” window or like to shape a button.  The tape is removed along with the CA that was on top of the tape.  Notice the dam is still in place.  I did not remove this until I had built up both sides of the button.  After the bite-through was filled with new CA, I flipped the stem over and built up CA on the slightly deformed button of the opposite side.  

    Once both sides had been cured I filed the stem to shape.  The next two photos show the top and bottom.  Noting the end of the button remains rough.  This stem had a semi circular button end.  To retain that feature with the restore I used the round sanding drum of the Dremel tool.  

    I clamped my Dremel into a portable vise above the quite messy fly tying bench.  Yeah, my fly tying bench is by the window so I can tie with natural light.  I’m not sure if the fish care but I prefer it.

    With the Dremel clamped down I had access to two, partially functional hands.  I used the sanding drum to shape the button end.

    Returning to the workbench, I used the flat needle file and sandpaper to shape the button then to smooth it.

    Lots of little scratches but, that’s what sanding sponges are for.

    Wow, that was a great segue, to the sanding of the whole pipe.  The painters tape still remained on the stummel so I interested the stem into the stummel and sanded them together.  I used the sanding sponges 1000-3500 in sequence.  Between each sponge I wiped the stummel with an alcohol wetted make-up pad.  The stem was rubbed with mineral oil applied from my finger then wiped with a paper towel.  The below photo shows the 400 and 600 sponges because I used them on the stem. Remember those scratches?  I’m not sure when the 3500 sponge didn’t make the photo.  Perhaps they thought they were too fine for this dirty workbench (sorry, Dad jokes are sneaky).

    After the sanding sponges and the removal of the painters tape the Van Roy Bard was micro-meshed with the 4000-12000 pads. Between each pad I wiped the stummel with an alcohol wetted make-up pad.  The stem was rubbed with Obsidian oil applied from my finger then wiped with a paper towel.  All the alcohol wipes took a toll on the silver paint of the shank logo.  The stamp was cleaned of remaining paint with a cotton swab dipped in 

    alcohol.  I then used an acrylic silverish paint (Iron Hands Steel) applied with a fine brush.  The paint was allowed to dry for a few minutes and the excess was removed with a fine emery board.  The stummel was then coated with Before and After Restoration Balm and allowed to sit for 30 minutes.  

    During this time I used the Before and After Fine followed by the  Extra Fine polish on the stem.

    The remaining balm was wiped from the stem using the inside on a just cleaned athletic sock.  All that remained was a couple of coats of carnauba wax from the buffer.

    This little Van Roy Bard with the “Select Grain Briar” is a beautiful pipe.  The contrast stain of the original briar was preserved during the restoration and brought back to vivid life with the removal of the old finish.  The repaired stem is almost undetectable with the polished black setting off the briar grain very nicely.  Overall I am very pleased with this restoration, another 1940s pipe returning to us nearly 80 after it was made to help with the enjoyment of pipe tobacco from one century to the next.  I hope that you have found something here useful to your own restorations or were entertained.  If you enjoy this sort of thing please click the like and subscribe.  Thank you for reading the ramblings of an old pipe lover.

    Here are some photos of the finished Van Roy Select Grain Bard.

  • A Ludwig and Hugo Stern (LHS) Sculptured Purex Dublin

    January 15th, 2024

    Written and photographed by

    John M. Young

    Well my interest in late 1940s pipes has yet to subside.  Although there are a couple of samples that are just beyond this retired teacher’s means.  I came across an advertisement for a very interesting pipe called a Roto Bowl.  Here is the ad from 1947 vol. 4 Pipe Lovers Magazine 

    (Pipe Lovers Magazine 1947 all numbers : Free Download, Borrow, and Streaming : Internet Archive p. 99)  How does it work?  I just want one to take apart and see what the parts are like and what they are meant to do.  Okay, I want to restore it too.  Then, I’ll probably lose interest and not call her back.  Oh wait, we are talking pipes.  Well due to the wonders of the Internet I found one.  Yes, on eBay. And, it only has a starting buy-out price of (dramatic pause) US $812.50 or Best Offer.  No, seriously.  Here is the link – Francis Ellsworth Roto Bowl Pipe 1946 Briarwood Tobacco Pipe RARE UNSMOKED! | eBay.  Although if you are reading this in the future, the link may be gone.  Here’s the screenshot too. 

    What does this have to do with our gnarly little darling, the LHS Purex?  Umm, I don’t know, I was just trying to write an introduction and I guess I got carried away.  Oh yeah, now I remember, I was talking about my current crush on late 1940s pipes.  And how Sterncrest (LHS) has like ¼ page ads in every volume of Pipe Lovers Magazine.  Remember the LHS London Royal restoration?  Okay, it was over a month ago but, here’s the link. 

    If you are like me and have forgotten about LHS (Ludwig and Hugo Stern) and their pipe making, I’ll try to give a quick review.

    “Ludwig Stern, a successful pipe manufacturer since 1893 and closing around 1960, reorganized his company along with his brother Hugo Stern, opening a factory in 1911. They named the company L&H Stern Smoking Pipes & Holders. The newly formed company was moved into a six story building on the corner of Pearl and Waters street Brooklyn, NY.

    Thoroughly organized in all departments, and housed in a well-lighted and ventilated modern office and manufacturing building, the firm of L&H Stern Inc. is located near the first arch of the Manhattan bridge, near the river and convenient to the Brooklyn bridge, which makes it accessible from all the hotels in the metropolis for visiting buyers. The structure is six stories with a seventeen-foot basement, with light on three sides through prismatic glass windows, the first floor being seven feet above the sidewalk. Light enters the upper floors from all four sides.

    L&H Stern is known to every important wholesaler and jobber in the country. LHS manufactures a complete line of briar pipes. Ginmetto wood pipes are also made, as well as Redmanol goods, the man-made amber. The first substitute for amber. Everything, even down to the sterling silver and other metal trimmings are made under one roof.”  (LHS – Pipedia)

    So, here we have an old company that made a lot of different pipes.  Here is the list of brands or lines from 1944.

    (Document: LHS Grading — Pipes : Logos & Markings – (pipephil.eu))

    There is our little darling at the bottom of this list.  She is kind of a cheap little pipe but I refuse to let that stand in the way of a good relationship.  Although I remember talking to a buddy about a girl he met at a bar.  He said, “She’s fun and I like her, but I wouldn’t bring her home to meet mom” (personal conversation). Although my mother probably would have found this little darling cute.

    Let’s see if we can narrow down the manufacture date a bit more.  

    “Some models were made before, during, and after WWII. LHS was one of the main pipe supplier for US soldiers during WWII.

    Pre-war pipes were stamped Real Briar Root, or Briar Root. Some war time pipes were made from domestic briar, or “American” briar and were void of any briar stampings. Many American pipe makers lost their over seas supply of Mediterranean briar shortly before and during the war. Post war pipes were stamped Imported Briar to assure customers that they were buying premium briar once again.”  (LHS – Pipedia)

    So there we have it.  This cute LHS Sculpted Purex does indeed have a stamp “IMPORTED BRIAR” on the bottom of the shank.  No, not a little trashttoo (tattoo on the small of her back).

    That little beauty places this pipe as a post WWII-1960 manufactured pipe. and matches the piphil.eu data file for stamps.

    (LHS — Pipes : Logos & Markings (pipephil.eu))

    This LHS Sculpted Purex was one of a 3 pipe lot won from eBay.  The other 2 are also late 1940s that will make future blog posts.  Upon arrival she looked great except for one massive flaw.  I’ll let you see if you can find it from the “before” photos.

    You are getting warmer.

    Still warmer.

    Getting warmer.

    I know, you are feeling like a kid in the back seat going on vacation; “are we there yet?”

    Aaaughhh! That’s awful.  Don’t look, children, you’ll have nightmares.

    Don’t worry, I’ll show you how I fix those.  Seriously though, she was in good shape save for that hole in the stem.  I used to fear working on those, now I like to.  The biggest potential problem that I saw, other than the hole, was the fact that this pipe had been used a lot.  For a hole like that to be chewed through the mouthpiece, it had to be in someone’s mouth a great deal.  That indicated that the airway cleaning might be difficult.  And, did you see the matching aluminum edged red circles on both the shank and the stem?  That was a very nice touch for a “cheap” pipe.

    The first step with this restoration is to have a clean piece of denim placed on the workbench and disassemble this Purex.  The aluminum stinger is a two piece, one of which went into the 99% isopropyl alcohol for a soak.

    Step two, reaming the tobacco chamber.  The chamber is too narrow for the remaining blades of my PipNet so, the Scottie Reaming tool, Smokingpipes Low Country knife and the General triangular scraper were put to use  The chamber was then sanded with 220 sandpaper wrapped around a wood dowel.  This was another case of soft Algerian briar that literally sloughed off the cake.  I do love a good old Algerian briar.  The  cake had completely protected the chamber interior.

    Next came the shank cleaning.  Surprise, it was pre-cleaned for my convenience.  Either that or the previous keeper was a good and proper pipe cleaner.  Thank you.  The cotton swabs did come back a bit discolored as their isopropyl alcohol dissolved the tars within the airway.  However, they soon were coming back clean.

    The stummel was then taken to the sink for the Murphy’s Oil Soap scrubbing.  The Murphy’s was used undiluted and scrubbed once with a medium bristle toothbrush then rinsed with warm water and dried with a cotton dish towel.  The stummel was then scrubbed a second time with undiluted Murphy’s and a brass wire bore brush.  Since the rustication was so deep and rugged I used the wire brush as well.  This too was rinsed with warm water and dried again with the now slightly damp cotton dish towel.  The stummel was then returned to the workbench where alcohol was poured into the bowl and allowed to slosh around and poured out through the airway.  You can see a very slight coloring of the alcohol in the medicine cup.  The stummel was also wiped with an alcohol wetted make-up pad. This too slightly discolored the pad.

    I then wetted another make-up pad with acetone and vigorously wiped the stummel.  I removed more finish from the stummel.

    Next the stem was going to be cleaned using bristle pipe cleaners dipped in 99% isopropyl alcohol.  It was quickly discovered that the stem was softened and began to dissolve with the alcohol.  As the alcohol evaporated the stem lost the sticky feel.  I decided that it should be cleaned with soap and water.  I used Dawn dish soap and hot water with bristle pipe cleaner to clean the airway.  Both parts of the stinger were also cleaned using alcohol and pipe cleaners along with a cotton rag and cotton swabs.  THe aluminum was then polished with a 4000 micro-mesh pad.

    It was time to address that scary hole in the bottom of the stem.  It kind of looks like it goes through the top and bottom in these photos.  That is an illusion, it was only in the bottom.  I first filed the area from the button shank-ward for about 1 cm.  This would allow the black cyanoacrylate (CA, super glue) a nice rough surface to adhere to.

    I frequently will cut a piece from a plastic lid material into a custom fit insert and press this insert into the airway.   The insert acts as a dam for the CA and keeps it from out.  I used a slightly different method enlisting a pipe cleaner and scotch tape.   I folded a soft pipe cleaner in half and wrapped the folded end with scotch tape.  There seem to be two main types of scotch tape – the good stuff (3-M brand flat/matte) and the cheap stuff (no-name clear).  They each have their uses.  I like the good stuff for wrapping the pipe cleaner as the CA does not adhere to it at all.   

    The good stuff wrapped pipe cleaner needs to be a tight fit into the airway.  You want as little CA as possible to enter the airway on the scotch tape.  The hole then gets a drop of black CA applied to it.  This CA is quickly sprayed with a cyanoacrylate drying accelerator. 

    The key to using the accelerator is numerous thin coats or small drops of CA.  The accelerator comes into contact with the liquid CA and starts the curing process as it quickly evaporates.  If the drop is too thick the accelerator cannot reach the bottom and it remains liquid. I used 2 applications to fill the hole.  Another warning is not to remove the inserted dam too soon.  Since the CA is very thin at this point removing it can cause it to break through and reopen the hole.  After the initial hole was filled I started expanding the CA covered area.  This makes blending the black CA to the existing stem less noticeable.

    After the coat of CA was applied, I again spritzed with the accelerator and allowed the accelerator to evaporate.  Another warning:  Some stem materials are affected by the accelerator and it causes it to soften.  This usually will return to normal after the accelerator dries.  Until it does the stem can be soft and if touched you can leave fingerprints in the stem surface causing you extra sanding and micro-meshing to mitigate.  Also, notice the Exacto knife blade in the photo.  For a few seconds after the accelerator is applied the CA will be soft.  This time can be used to cut the back side of the button straight.  This reduces the amount of time spent filing and sanding the button edge.  

    In the above photo, you can see two slivers of CA that were cut from the back side of the button while the CA was still soft.  After the CA cured or dried (I’m not sure of the correct term) I filed the surface flat using a flat needle file.  Additional CA was applied to fill low spots and was again spritzed with the accelerator.

    Once cured/dried I again filed.  This time there are no low spots and I was able to file the high spots flat.  Apologies for the photo focus.  These were taken with the phone, not the NIkon.

    Once filed flat the CA was fine filed with an emery board.  A flat sander works better that a finger as it allows for even sanding rather than curving like my finger would.

    I removed the dam (good stuff wrapped pipe cleaner) and inspected for CA overflow in the airway.  I could see none.  Now the fine sanding using the sanding sponges could proceed.  I used the 1000-3500 sanding sponges with a paper towel wetted with mineral oil to wipe between each sponge.  Yeah, the Captain Pete made a couple of photo-bomb appearances here.  I left the below two photos uncropped a bit to show where I had been wiping the sanding dust from the sponges on the denim work surface.  Keeping the sponges clean helps the sanding process.

    Now for a slightly interactive blog session.  Remember the hole was on the bottom of the stem.  Which photo is of the repaired hole, top or bottom?  Don’t worry this is not being graded.

    There you have it, how I repair and rebuild stems.  The CA can be purchased in many different colors.  Although, I was internet shopping the other day and I was shocked at the inflationary price increases for CA. 

    The micro-meshing of the stem proceeded from micro-mesh pad 4000-12000.  Between each pad I applied a small drop of Obsidian Oil, rubbed it in with my finger and wiped it with a paper towel.  After the micro-meshing I used both the Before and After Fine and Extra Fine polishes.  These were applied with a finger and hand rubbed using a soft cotton rag. 

    With the stem completed I was ready for the arduous task of sanding the stummel.  Oh year, I was completely out of arduous.  Good thing none was needed.  The rustication or “sculptured” texture of the stummel required nearly no work.  I lightly sanded it with a 3200 micro-mesh pad to give it a bit more of a contrast look by removing stained briar from the high points of the rustication.  I liked the lighter browns peeking through as highlights.  The stummel was then treated with Before and After Restoration Balm.  I used a baby toothbrush to work the balm into all the nooks and crannies.  This was allowed to sit for about 30 minutes.

    After 30 minutes, I wiped away the remaining Restoration Balm with the inside of an athletic sock, using the thick terry cloth to get into the above-mentioned nooks and crannies.

    The above crummy photo is meant to show the cleaning of the baby toothbrush by dipping it into isopropyl alcohol and rubbing it on the denim work surface a few times.  I wanted to use the brush for the waxing and did not want Restoration Balm in my wax.

    I again used the baby toothbrush as the applicator, this time for Decatur Pipe Shield No-Buff Wax.  I’ve had good results with this wax on heavily rusticated pipes.  The wax was allowed to dry for 20 minutes and was then bushed using a shoe shine brush followed by hand buffing with a soft cotton cloth.

    Overall this was a fun restoration.  I did not have to spend a great deal of time working on tar removal.  The pipe is relatively dainty with a shank diameter of only ½ inch (12.7 mm), a bowl outside diameter of 1 ⅜ inches (35 mm), bowl height of 1 ¾ inches (44.5 mm) and a respectable length of 5 ¾ inches (146 mm).  See, Americans can do the metric system.  I think the size is why the pipe is at the bottom of the LHS quality scale.  I was quite pleased with how well the old LHS Purex turned out.  I have not been using a shape name with this pipe since I am unable to place it on any shape chart from LHS.  The bowl has a slightly paneled look from above but that may just be due to the rustication.  It does have a forward cant and a slight flaring from the shank to the rim.  I guess I’ll call it a Dublin.  I do hope that you have found something here useful in your own restorations or were at least slightly entertained.  If you enjoy this sort of thing, please click the like and subscribe.  I thank you very much for taking time to read the ramblings of an old pipe lover.

    Below are some photos of the finished LHS Sculpted Purex Dublin.

  • An Edward’s Canadian Restoration

    January 14th, 2024

    Written and photographed by

    John M. Young

    Talk about seeing the writing on the wall.  The Edward’s folks must have been big fans of the Old Testament.  Okay, for those who are not as familiar with American idioms – (handwriting on the wall).  The Edward’s pipes story is one of well timed business choices as well as great briar, talented craftsmen and good advertising.

    (https://www.edwardspipeandtobacco.com/)
    (https://pipedia.org/images/thumb/9/96/Edwards-001.jpg/600px-Edwards-001.jpg)

    According to pipedia.org:

    “Edward’s pipes were originally produced in Saint-Claude, France when Francais actually was a world-class pipe maker with longstanding business & political connections to Colonial Algeria that allowed them to obtain the finest briar.

    During the tumultuous 1960’s, Edward’s created a business model to offer the finest briar available in both Classic and Freehand shapes – all at a fair price. They bought the company & equipment and cornered the market on the finest, choice Algerian Briar just before the supply vanished in political turmoil of Algeria’s independence. Edward’s packed up both machinery and briar-treasure to America, safely caching the essentials to create a new pipe-making dynasty. This was a coup, for the 70’s and 80’s were grim years for pipe smokers as quality briar all but disappeared.

    Edward’s Design Philosophy is hard to pin down, think of their style as the “American Charatan” with unique & clever twists all their own. Today, they fashion pipes in several locations across the USA. All of Edward’s pipes are Algerian Briar – a fact very few pipe companies can claim, and all are oil-cured utilizing natural finishes – no strange concoctions are used to interfere in your tastebud’s dance with the briar. Algerian, Calabrian, Sardinian, Corsican – take your pick, but Algerian Briar is generally considered the finest smoking briar ever used. When combined with oil-curing, Algerian takes on a magical quality that even Alfred Dunhill recognized as far back as 1918 as the choice for both his Bruyere and Shell.

    www.otcpipes.com has a nice collection of vintage Edward’s pipes along with scans of Edward’s catalogs.”

    (Edward’s – Pipedia)  Note:  The above “www.otcpipes.com” gave me a “server IP address could not be found.” message. 

    The “tumultuous 1960’s”, is a very gently stated reference to the Algerian War of Independence from France followed by years of civil war within Algeria.  The “tumultuous 1960’s”, had a human death toll of around 1 million people.  If you are interested in the Algerian War, I linked it here.  Needless to say, all that tumult affected the briar harvesting and exportation.  

    This Edward’s Canadian has what I think is a nickel band as it has no “sterling” nor 925 stamping.  There are what look like hallmark stamps from an assay office but I assume those are decorative.  The Edward’s stamp on the top of the shank is very light with only the “Ed” discernable.  On the bottom of the shank there are stamps; ALGERIAN BRIAR (very light and barely visible), 2 (probably a briar quality stamp) and 271 (probably a shape number)  The below photos show the Edward’s Canadian  as it looked upon arrival.

    The pipe definitely had some issues.  The stem was badly oxidized.  The band appeared to have some crystalline oxidation crust as well.  The briar looked good with some cake and lava on the rim which hopefully was not hiding charring.  It looked like a straightforward restoration of a used pipe that was 60 years old.

    The first order of business was to get that stem into the stem into the Before and After Extra Strength Deoxidizer solution. I removed the stem and took it to the sink area.  I laid down a paper towel to absorb the “It’s gonna happen” spills and ran a used pipe cleaner through the airway.  If you don’t happen to have a used pipe cleaner laying on your counter, then I suppose you could use a clean one.  As Ben Franklin is said to have said, “waste not want not”.  I figured this old stem would require a couple of hours of deox (pipe restoration term for time in the deoxidation solution).  The used pipe cleaner was bent over the jar edge and the lid loosely screwed on.

    With the stem in deox, I began the tobacco chamber reaming.  I used the Pipnet reaming tool with blade #2, a Smokingpipes Low Country knife and the General triangular scraper.  The tools made the remaining easy or maybe it was the Algerian briar.  I have had some Algerian briar that literally sloughs off deposited cake and this was one.

    The reaming was followed by a sanding of the chamber with 220 sandpaper wrapped around a wood dowel.  The interior of the chamber looked nice with no evidence of any damage.

    Next the stummel was taken to the sink for a scrub with Murphy’s Oil Soap.  I used a medium bristle toothbrush and undiluted Murphy’s to scrub away 60 years worth of accumulated dirt.  The stummel was then rinsed with warm water and dried with a cotton dish towel.  Upon returning to the workbench I wiped the stummel with a make-up pad wetted with 99% isopropyl alcohol.  The pad removed some material and was slightly discolored.  

    Below are some photos of the stummel after the alcohol wipe

    The rim needed to be lightly topped and given a bevel on the inside edge.  I did this with a piece of 220 sandpaper laid flat on  a countertop.  The stummel was moved in a circular pattern and rotated in hand every could of circles to achieve an even sanding of the rim.  This was repeated with 400 sandpaper.  To bevel the inside edge I used a small piece of 220 sandpaper wrapped around a wooden ball.

    After about 2 hours I retrieved the stem from the deox tank.  That sounds so much cooler than the peanut-butter jar.  I let the stem drip off much of the excess solution back into the tank. I then place the stem on a coarse shop rag.  I rubbed the surface of the stem vigorously to wipe off the oxidized rubber.

    It looked much better, black rather than sickly brown.  I wanted to make sure the brown didn’t return anytime soon so I rubbed the stem with Soft Scrub with Oxy on a make-up pad removing even more of the oxidation from the surface.

    I repeated that with a couple more make-up pads.  I then gave the stem a coating of mineral oil with my fingers and set it aside.

    While the stem was soaking up the mineral oil, I taped the stampings with painters tape.  I wasn’t sure why since the stamps were so light I could barely read them anyway.  Well the top “Edward’s” stamp and the bottom ALGERIAN BRIAR were light.  The #2 and the 721 are nice and clear on the bottom of the shank.

    I sanded the stummel with the sponges from the 1000-3500.  Between each sponge I wiped the stummel with a make-up pad wetted with 99% isopropyl alcohol.  I didn’t need to use the more coarse sponges since this pipe was in such great condition and this Algerian briar is very soft and the coarser grits would have been too aggressive.  With the sanding sponges done, I removed the tape and started micro-meshing with the 4000 micro-mesh pad.  I attached the stem and also used the pads on the stem.  Between pads the stummel was wiped with a make-up pad wetted with 99% isopropyl alcohol.  The stem was rubbed with a drop of Obsidian oil and wiped off with a paper towel between pads.

    Once finished with the micro-meshing the stem was given a final rub with Obsidian Oil and the stummel had Before and After Restoration Balm applied and allowed to sit for 20 minutes.

    After 20 minutes the balm was wiped from the stummel using the inside of an athletic sock. 

    The tape was removed from the band.  I used the 6000-12000 micro-mesh pads to polish the band.  At this stage the Edward’s Canadian was really looking great.   

    I got out the Before and After Fine and Extra Fine Polishes and used them on the stem and the band.  The polish was applied with my finger and hand buffed using a cotton make-up pad.

    The final step was to take the Canadian to the buffer and apply several coats of carnauba wax to the stem and stummel.

    I am very pleased at how this Edward’s Canadian turned out.  The only disappointment is the strength of the stampings.  The grain is a beautiful mix of cross grain and bird’s eyes.  Now that it is finished I kind of wonder how it would have looked with a contrast dye.  Oh well, that would have completely obliterated the barely readable stampings but, I bet it would have made the grain really look cool.  This shape is as traditional of a Canadian as possible, wonderfully proportioned oval shank with that elegant tapered stem.  It is just a darn pretty little pipe.  A credit to the craftsmen who made it and a blessing to it’s next pipe companion.  I do hope that you have found something here useful to restorations of your own or at least found it entertaining.  If you enjoy this sort of thing please, click the like and subscribe.  Thank you very much for reading the ramblings of an old pipe lover.

    Here are some photos of the finished Edward’s Canadian.

  • An Emperor De Luxe Saddle Bit Bulldog Restoration

    January 13th, 2024

    Written and photographed by 

    John M. Young

    A couple of blogs ago I wrote about an Emperor Supreme Golfer (I thought it to be a lovat at first).  This pipe will probably be called something other than a bulldog but that is what I am going with right now.  I do hope that you will not feel cheated that I am going to use much of the history from the previous Emperor Supreme Golfer, the pipe formerly known as lovat. (I do love a good Prince reference). 

    I recently became inthralled with Pipe Lovers Magazine from 1946 and 47.  I imagine the multitudes of service men and women returning home to a simpler and safer life than what they had experienced during the war.  I am immediately reminded of J.R.R. Tolkein’s Hobbits.  They too enjoyed a simpler and safer life.  Judging from the Magazine, the number of pipe smokers during that era also was at record levels.  And just like the Hobbits of Middle Earth all those pipe smokers would need pipes, tobacco and a magazine telling them of the 5 Ws – “Who, what, where, when and why” of pipe smoking.  Okay, the Hobbits didn’t have a magazine but they were fond of their pipes and their “pipe weed”.

    Searching through eBay for estate lots which contained one or more of the makers proved to be fun as well.  One listing that I came across was this one:

    The description by the seller read as:  

    “This vintage Emperor Wally Frank smoking pipe lot includes a box of Empire pipes made in Brooklyn, NY. Crafted from high-quality BRIAR, this lot is perfect for collectors of estate tobacco items. The pipe features a unique body shape and is made by a renowned brand. The country/region of manufacture is the United States. This lot is a must-have for any serious collector of tobacciana and will make a great addition to any collection. All four pipes look in nice shape all are nice wood. Interesting box with instruction pamphlet ! Do not know a year I know nothing about these. My father had them. So please ask questions and look at all pictures took a lot not sure how many are Wally frank. All say imported BRIAR thank you.”

    When the lot arrived I sent the seller a message saying that the pipes arrived and that everything looked good.  I also usually ask the seller if they would be interested in seeing photos of the pipes after they’ve been restored.  I received a message from this seller that read as follows:

    “”Thank you very much they were my dads! yes would love to see them!!”

    I did send them some photos of the finished Emperor Supreme Golfer and a link to the restoration of that pipe.  I had previously asked if they would be willing to share any other information about their father and his pipes.  The reply arrived and was short and to the point:  

    “Hi My dads name was ED he probably bought those new as he lived in Brooklyn NY he passed about 10 years ago very glad you won them thanks larry” (personal message).

    The third pipe of that lot, is what traditionally is called a bulldog.  The finish was mostly smooth with carved grooves in the way that Custombilt or Marxmam rusticated some of their pipes.  There was a stamp on the left side – EMPEROR over Imported Briar.  The stem also had stamps on two sides.  Left – CRAFT FINISHED and right – DE LUXE.  I started researching Emperor with the usual starting sources pipehil.eu for logos and pipedia.org for information.

    First I went to pipedia.org for information about the Emperor.  According to  the site;

    “Empire Briar Pipe Company Inc. of New York produced Emperor pipes. Known as “The Pipe that knows no Peer” as their 1945 advertising promotes. That ad reads “The pipe that knows no Peer. For every Emperor pipe is a notable work of art, a masterpiece created in the custom tradition.” They are a subsidiary of the Continental Briar Pipe Co. Inc. 80 York Street, Brooklyn, New York.

    They had Three grades: Standard, De Luxe and Supreme.”

    (Emperor – Pipedia) 

    Pipedia also had an example of an Emperor store display and advertisements  from the late 1940s courtesy of Doug Valitchka.  Thank you, Mr. Valitchka.  

    I could not find a pipe with the same shape as this bulldog shown in any of the company photos and continue to refer to it as a bulldog.

    (Emperor – Pipedia)

    This pipe was missing the keystone cleaner which was a bit disappointing.  I am including a photo of the Keystone cleaner from the Golfer:

    The next stop was pipehil.eu we can see the logos stamped on representative pipes in their collection of images:

    (Em-Eq — Pipes : Logos & Markings (pipephil.eu))

    The DE LUXE bulldog on the desk beside me shares EMPEROR over IMPORTED BRIAR as with the photos of both pipes from pipehil.eu.

    The final bit of research was done perusing the 1946 and 1947 Pipe Lovers magazines.  There I found a couple of references to Emperor.  Item one is for an essay contest as the first prize.

    (Pipe Lovers Magazine February 1947 p. 60)

    And the second is a “What’s new” article also 1947, from the July issue.  

    (Pipe Lovers Magazine July 1947  pp. 219-220)

    Ah hah, finally a reference to the name of this pipe – “saddle bit bulldog”.  I just changed the title of this restoration blog entry.  I dub thee Emperor De luxe Saddle Bit Bulldog.

    There we have it, a late 1940s Emperor with a bit of personal information from the son of the previous and only owner.  And here is how it looked upon arrival.

    This Emperor is in very good condition and is showing that the majority of this restoration looks to be confined to the stem.  Lovely, just lovely, compared to the restoration of the previous pipe, also known as the Marxman from hell.  I plan on reaming the tobacco chamber, cleaning out the airway, sanding and micro-meshing the stummel and stem, a light topping of the rim,  filling any noticeable pits on the smooth surfaces of the stummel and finishing with a few coats of carnauba wax.  This looks like it will be a relaxing restore.

    The first step was the reaming.  Typing that sentence was about as difficult as the reaming.  I used the Pipenet with blade 2, the Smokingpipes knife and the General triangular scraper.  I also sanded in with 220 sandpaper wrapped around a dowel rod.

    Next up, cleaning out the shank airway.  The boring here was a bit different.  A single pipe cleaner went through with too little contact while a cotton swab was too big to fit past the mortise.  I folded pipe cleaners in half and gave them a hard pinch.  Just right.  The folded pipe cleaners were of the bristle variety and were dipped in 99% isopropyl alcohol.  The first four removed most of the yuck with the final two removing the last of it.

    Have I mentioned how nice it is not to use 81 cotton swabs to clean a shank?  Yeah, I’m talking about you, Marxman Dublin.

    Next up was the ever popular Murphy’s Oil Soap bath.  It is Friday night so, baths are in order.  I used the Murphy’s undiluted with a medium bristle toothbrush.  As clean as this pipe looked the Murphy’s still did what it does and removed the accumulated dirt and grime of 75 years.  The soap was rinsed with warm water and dried with a cotton dish towel.

    While I’m over here I may as well give the rim a light topping.  I used a light touch on a piece of 220 sandpaper laid flat on the counter top.  Then repeated it on a piece of 400 sandpaper.  Returning to the workbench, I needed to blend the the newly sanded rim to the existing stain.

    I used a maple furniture touch-up stain marker.  I thought the maple looked a bit too red and light so, I used the mahogany marker as well, then used a

    make-up pad dipped in isopropyl to lightly wipe/blend the stains to the stummel. The stummel was then wiped with a make-up removal pad dipped in 99% isopropyl alcohol.  It removed a little bit of color from the briar.  Not enough to notice a difference.   

    I also poured 3 ml of the alcohol into the tobacco chamber and let it flow into the shank.  The alcohol was poured back into it’s medicine cup and I was very happy to see that it remained clear and un-browned.  Yeah Marxman Dublin, you better hide like a dog who knows they’ve been up to no good. 

    Once the alcohol had evaporated, I did notice a few spots where there was still some shine remaining.  This was probably just wax that wasn’t removed with the scrub and the isopropyl.  I wetted another make-up pad with 95% ethyl alcohol.  Those smaller 2 carbon ethyl molecules might be less forgiving than their 3 carbon isopropyl comrades.  The ethyl did a better job and

    completely removed any trace of shine.  Hmm, I wonder how methyl with only one carbon would work?  Although as much as I use, it would probably soak through my skin causing blindness and death, both of which are permanent.  Yeah, I could wear gloves but we both know I’d forget.  That little bit of red you see on the photo above is from the fresh stain from the topping touch-up.  I knew I thought it looked too red. 

    The stem needed to be rid of that tooth chatter that it had picked up.  Since it wasn’t very bad I figured a quick painting with a disposable lighter might get rid of some of it.  That helped but the sanding sponges were still required.  I didn’t need a real aggressive grit and started with the 1000

    sanding sponge.  It was slow or maybe I was just going slowly relishing the easy relaxing change of pace from the dreaded Marxman Dublin.  I made a slow deliberate look out of the corner of my eyes while frowning to where the Marxman was sitting.  Like you would, to intimidate a bad dog.  It had no effect on the pipe but it made me feel good. The 1000 sanding sponge was followed by the 1500-3500 sanding sponges.  Between each sponge I would rub in a drop of Obsidian Oil with my finger and wipe it away with a paper towel. I didn’t bother taping the stamps on the stem since there was no oxidation to speak of so I just didn’t sand them until I got to the 3500.  Then they got a light sanding avoiding the stamp as much as possible.

    In looking the stummel over I noticed something for the first time.  There

    was a fill and it was a big ugly one.  How had I missed that?  I guess I was just so enamored by the lack of difficulty, I was blind to it.  I used the sharp tip of a round needle file to cut some grooves into it, trying to match the lines from the carving.  That helped but, ugh, it was now knocked from the pedestal I had placed it on.  I thought maybe with some sanding the fill would become less noticeable.  I started sanding the stummel with the 1500 sanding sponge.  I jumped to the 2500 then the 3500.  “Why?” you ask.  This is a very soft briar reminiscent of the soft algerian briar that the good Marxman and Pipe by Lees used at this same time.  It is so soft that you can easily get carried away with sanding and end up marring the briar.  I have found that a very light touch is all that is required.  Between each sanding sponge I would use an alcohol moisted make-up pad to wipe the stummel.

    On to the micro-meshing.  I started this with the 4000 micro-mesh pad, micro-meshing the stem and stummel together.  I worked up through the series and wiped the stummel with an alcohol moisted make-up pad between micro-mesh pads.  The stem was again rubbed with Obsidian Oil and wiped with a paper towel.  When finished, I cleaned out the beads around the bowl with the sharp tip of a round needle file.  

    I left this photo more un-cropped to show where I had been wiping the sanding sponges and the micro-mesh pads on the denim surface.  It really does help to keep the pads cleaned of removed material.  After the micro-meshing the stummel was given a coating of Before and After Restoration Balm.  This was allowed to do wherever magic it does for about 10 minutes before I wiped it off with the inside of an athletic sock.  The pipe was then given several coats of carnauba wax at the buffer.

    Overall, I am very happy with this bulldog.  It was exactly the pipe I needed to work on after the Marxman Dublin.  Sideways glance and furrowed brows.  I am saddened by the lack of the keystone cleaner and that horrific frontal fill but still it is a beauty.  I am sure that it will make someone very happy by delivering their smoke with grace and style.  I do hope that you have found something here helpful in restorations of your own or that you were at least entertained.  If you like this sort of thing please click the like and subscribe.  I thank you for taking the time to read the ramblings of an old pipe lover.     

    Here are some photos of the finished Emperor De Luxe Saddle Bit Bulldog.

    Yeah, I am probably putting off showing the front…

    Heh, from this angle you barely notice the fill.

  • A Marxman Dublin Gold Band Restoration

    January 11th, 2024

    Written and photographed by

    John M. Young

    I know what you are thinking, “Good Lord, man.  Another Marxman?  Why don’t you expand your repertoire?”  Hah, I say, and stop questioning my motives in French.  Just because the French are almost solely responsible for bringing briar to our beloved past-time, that’s no reason to start throwing French terms around.  Besides, it is probably becoming known that I really like Marxman pipes.  

    My recent fascination with the post-World War Two (WWII, to properly use an acronym). Led me to further appreciation of the Marketing genius of Robert Marx, the founder of Marxman Pipes Inc.  Allow me to illustrate:

    (Pipe Lovers Magazine 1946 all numbers : Free Download, Borrow, and Streaming : Internet Archive)

    Those are the back covers of Pipe Lovers Magazine for each month of 1946.  That represents a substantial investment in building and maintaining one’s brand name.

    Here is a quick review of Marxman pipes from pipedia.org:

    “Marxman (Marxman Pipe Company) was created by Robert (Bob) L. Marx in 1934, when he was 29, and after he had worked for the William Demuth Company. His pipes were not outstanding because of the quality of their wood (probably Algerian), but Bob started making unique sculpted pieces, which brought the brand fame in the World of Hollywood cinema. Actors like Zachery Scott, Dennis Morgan, Jack Carson, Alan Hale, Joel McRae, and Ronald Reagan were some of the faces that appeared on the bowls.

    Bob knew how to innovate and took full advantage of marketing and press advertising in order to sell the brand–one of his slogans being “Relax with a Marxman”.

    (Marxman – Pipedia)

    In a recent forum post on Pipesmagazine.com, contributor jguss posted the following from the February 2, 1935 issue of the United States Tobacco Journal:

    A remarkable article showing the business acumen as well as a photo of the man himself.  Thank you, jguss.

    This is one of my favorite quotes about Rober Marx:

    “Ted also said: Several years before UST bought Mastercraft, M/C had aquired Marxman Pipes. A wonderful kind man, Bob Marx was still working as a salesman in NYC, and I was fortunate to make a few sales calls with him. You all remember Charles Atlas? Bob Marx was about 76 and had just been awarded the (I think) Atlas Award for being the finest speciman of manhood over 70 years old in NYC, or maybe the state.

    M/C had some inventory of Marxman stuff, but not a lot. I know very little about Marxman. Did they make, import, or both?” (Mastercraft – Pipedia)

    The “Ted”, who is being quoted above, was the nickname of Tom Douglas.  Here is an announcement of Mr. Douglas’ passing from Pipesmagazine forum November 26, 2018:  

    “Tom Douglas passed away at 71 years of age, this past Saturday, in Florida. It seems he had an infection in his stomach, but I don’t know much more than that, regarding what actually contributed to his death. He did have a history of heart and other health complications. I just spoke very briefly with his wife Joyce; you can imagine how she’s doing.

    The impact Tom had on the pipe community is huge…beginning with an immense library of pipe knowledge through the pages of the Dr. Grabow Collectors Forum….his 25 years of service at the Grabow / Sparta pipe factory (where he retired in 1991)….his executive leadership over Mastercraft distribution for many years…”

    (Broken Pipe: Tom Douglas, aka “TED” :: General Discussion :: Pipe Smokers Forums of PipesMagazine.com)

    So, at 76 years old Robert Marx was still involved in the business that he must have loved.  This would have been around 1980.

    Onto the pipe at hand.  This Marxman Dublin was in the same estate lot as the Winthrop (previous blog) and the Manhattan (future blog).  The Manhattan (c. 1922) is awaiting parts needed for completion.  The final pipe of the 4 is a promotional pipe stamped with “Tropical Paints” over “Cleveland”.  That one will be a fun research project, I am sure. 

    The Marxman Dublin had seen a great deal of use, some of it well beyond use and into the abuse category.  Here are photos of the poor darling upon arrival.

    Yeah, she needed a lot of attention.  This one may require me to find a new historical drama series to have on in the background while I work.  Okay, probably not a whole series but, a solid 5 episodes.

    The only thing that is in surprisingly good shape is the stem.  The previous owner may not have ever heard of a pipe cleaner but he wasn’t a biter.  Okay, that was kind of sexist – they were not a biter.  

    I started by disassembling the pipe.  You probably noticed that the stem was not fully inserted in the photos.  I removed it when it first arrived.  It was very tight and I didn’t want to force it back into place for the photos.  I also removed the gold band, which surprisingly did not conceal a cracked shank.  Like Forrest Gump said, “that’s good! One less thing.”

    I then began to ream the tobacco chamber.  The cake was very hard and did not want to relinquish its hold on the briar.  Hmm, I’ve had Marxman pipes

    with Algerian briar before that literally slough off their cake with little effort.  It took all the reaming tools to get this task finished.  The Scottie reaming tool, the Pipnet, the Smokingpipes Low Country knife, the General triangular scraper and of course the 220 sandpaper wrapped around a wood dowel.  The inspection of the interior of the tobacco chamber revealed that not only was the previous owner cleaning averse but also a puffing machine.  The chamber showed signs of heat damage and charring on three sides.  The repair of the damaged bowl took some thought while working on other issues.

    After the Tobacco chamber I started in on the shank airway.  This cleaning nearly made me rethink my life choices and hobbies.  I could give you the short version and say something like “81 cotton swabs and a highball glass full of alcohol later, the shank was clean.”  I know you would rather hear the long painful real experience.  First off, let me say that this was perhaps the most filthy shank I have ever cleaned out.  Now it could be that I had wiped worse shanks from my memory but I don’t think so.  This shank was a bear to clean out.  I will let the photos speak for themselves.  The process was as follows:

    1. Pour 3 ml of 99% isopropyl alcohol into the bowl.
    2. Plug the mortise with a finger and tilt stummel to wet the airway with alcohol
    3. Use a .22 caliber brass bore brush to scrub the interior of the shank.
    4. Use 3-4 cotton swabs to scrub the airway absorbing the dissolved tars and remaining alcohol from the shank.
    5. Repeat until clean.

    After a few (AKA bunch) of repetitions.  I tried rolling a 5cmx5cm piece of paper towel around a round needle file.  This was dipped in alcohol and used to scrub the airway.  When it came out I’d unroll it and reverse it and reroll the paper towel to scrub with a clean side.  Thus the paper towel pieces in the photos.  I eventually got tired of my continual failures and decided to pack the tobacco chamber and shank with cotton and let the interior soak in alcohol/cotton overnight.

    The next morning the cotton was stained with the tars that had dissolved from the stummel and got absorbed into the cotton as the alcohol evaporated.  I removed the cotton and started the above scrubbing procedure (steps 1-5) repeatedly.  

    Above was the first cotton swab used after the overnight alcohol/cotton treatment.  Yep, it is still nasty and tar filled.

    A bunch of swabs later I was finally getting lighter colored swabs out of the shank.  Long story-short = 81 cotton swabs were defiled with this one shank.  I was victorious.

    The stem was next on the hit list.  After just finishing the shank from hell, and looking at the button, this is going to be fun.  I used the dental pick in an

    attempt at opening up the airway at the button.  That tar and smoking residue was nearly as hard as the stem.  Eventually, I was able to get a pipe cleaner all the way through the stem.  I thought this would be a good candidate for the churchwarden-pipe-cleaner-in -the-vise routine.  That is where you clamp one end of a bristle pipe cleaner into a vise, thread the pipe cleaner through the airway, using a pipette soak the pipe cleaner with alcohol and move the stem up and down the length of the pipe cleaner. 

    Usually a dirty stem will use two churchwarden pipe cleaners.  This one took 6 plus the 6 to get the stem to accept a pipe cleaner and it was still dirty.  I was getting frustrated.  I returned to the

    workbench and dipped a bristle pipe cleaner in acetone.  It came back even more soiled that the pipe cleaners dipped in alcohol.  I repeated this 3 more times.  Every one came out as filthy as the one before it.  I took the stem to the sink and ran hot water through the stem, thinking that maybe that would loosen the yuck better.  I then used a bore brush with dawn dish soap.  After the Dawn, I repeated with Castile soap all with hot water.  I then tried a pipe cleaner dipped in alcohol.  Surprise, still coming out brown.  I continued with running the hot water through the stem then scrubbing with an alcohol dipped  pipe cleaner for another 6 days.  Ok, that may be an exaggeration.  It might have been 15 minutes.  Eventually the pipe cleaner did emerge without any yuck.

    Cleaning done, time to move on to the sanding.  I used the 400 sanding sponge followed by the 1000 sanding sponge.  This allowed me to get a better look at the areas that needed to be filled.  I saw a couple of spots.  I placed a small drop of clear thin cyanoacrylate (CA, super glue) on the spot and immediately sanded with the briar dust filled sanding sponge over the top of the CA.  This enables the briar dust from the sponge and sanding to stick to the CA and fill the pit.  This technique is good for small shallow pits and is not suitable for larger deeper fills.  

    Next was to top the rim.  I used a piece of 220 sandpaper laid flat  on a countertop as the topping surface.  The stummel is rotated in a circular motion while trying to keep even pressure.  Every three rotations I spin the stummel 90 degrees in an attempt to evenly remove material from the rim.  Once the desired amount of material is removed I sand the rim with a piece of 400 sandpaper laid flat on the countertop.

    This rim was beaten up pretty badly.  Rather than removing an eighth of an inch of stummel I topped the rim to remove most of the damage then beveled the inside and outside of the rim.  I used a wooden ball wrapped in 220 sand paper for the inside bevel and a 220 sandpaper lined funnel for the outside bevel.

    With the fills filled and the rim topped,  I was able to get a good look at the grain of this briar.  It was rather unimpressive.  Now, I know that Algerian briar is not known for outstanding grain, great smoking – yes, great grain, not so much.  This pipe was what I would call, “less than”.  I thought maybe a bit of contrast stain would bring the little grain present to a better light.

    I prepped the dyeing/staining area.  Side note:  I know that I am using a dye

    not a stain.  I just can’t get used to the term dyeing when working with wood.  Staining wood is ground into my being from Wood Shop in middle school.  The required gear is a paper towel covered surface, Fiebing’s Black Leather Dye, a folded pipe cleaner, a disposable lighter and the official duct tape wrapped fishing bobber.  Yeah, I know, most people use a wine bottle cork, those are in short supply due to my tea-totaling life.  

    I purposely spilled dye on the paper towels to stress the importance of this step.  Yeah, that ‘s what happened, purposely.   It is a good idea to wear nitrile gloves when working with leather dye – good thing I forget that.  After the dye had dried I wiped the stummel with a make-up pad wetted with alcohol.  I then sanded the stummel with the 400 sanding sponge to remove the outer layer of black stained briar.  I’d like to say the results were phenomenal.  I’d be a liar.  The results were more like, nominal.  Oh well maybe, it will look good after the restoration balm?

    Taping the gold band and stamps then working through the sanding sponges were the next steps.  The sanding sponges 1000-3500 were used on the stummel and stem.  The stummel was wiped 

    with an alcohol wetted make-up pad between sponges while the stem received a light coat of Obsidian oil from my fingers and was wiped with a paper towel.  Looking down at the workbench I saw that gold band wrapped in blue tape.  Why the heck did I do that?  I never had it on while I was sanding.  

    It was getting to the time when I had to decide what to do about the damage to the inside of the bowl.  Options:

    1. Redrill the tobacco chamber.
    2. Use a pipe mud made from cigar ash and water to fill the cracks.
    3. Use JB Weld epoxy to fill the cracks

    Hmm, number one sounded a bit extreme and would require me to buy some significant equipment.  While not averse to the idea of buying some large tools I am economically unwilling.  Number two sounded reasonable.  This pipe will never be sold due to the extensive repairs and will remain with me or be gifted to a friend who understands what they are receiving.  I am out of cigar ash and really don’t enjoy smoking cigars.  That left option three.  I have JB Weld and I’d used it several times with great success.  It definitely won’t fall out like the pipe mud might.  

    Yeah, that is almost as scary at looking at MRI images of my brain with my neurologist.  First I worked a 20 gauge brass bore brush around to get rid of any loose charred material.  

    Then I mixed the epoxy as stated by product instructions with a little bit of carbon powder.  I remembered to wear nitrile gloves and place a pipe cleaner in the airway.  I bet you didn’t think I’d remember either of those.  Using the epoxy on a nitrile covered finger, I smeared it evenly over the inside of the bowl.  I planned on sanding the interior leaving the epoxy only in the depressions once it had cured in 24 hours.  JB Weld can be wiped from any surface where I didn’t want it with a make-up pad dipped in acetone.  I did this around the inside edge of the rim. 

    This restoration had already taken a full day more than I had anticipated.  Not wanting to waste any more time waiting for the epoxy to cure, I taped over the tobacco chamber to keep dust and debris off of the curing epoxy. Micro-meshing came next, here I used the 4000-12000 micromesh pads in sequence with the same wiping between pads as I did with the sanding sponges.

    Getting nearly finished.  Well, after waiting for the 24 hours of epoxy curing, that is.  I still needed to reattach the gold band.  The stamp on the band says “14K RGP.”  This would indicate a 14 karat rolled gold plate.  I used the fly tying bodkin to lay a bead of brown CA around the outer edge of the shank.  I then carefully slid the band into place.  I set it aside to dry.  During the drying I took the stem to the buffer.  The stem had been micro-meshed when I was doing the stummel but, I needed something to do while the CA set with the band.  I buffed the stem with a red buffing compound and wiped it clean with a cotton cloth.  

    After a few minutes I returned to the stummel and reattached the stem.  It was slightly loose.  It probably would have tightened up by smoking a bowl of tobacco but the epoxy was not cured and not sanded.  I decided to give it a quicker tightening with a bit of Bee’s wax.  I placed 3 kernels of wax on a spoon and warmed it over a burner on the stove.  Once melted I rolled the tenon in the melted wax.  This was allowed to cool then I pushed the tenon ½ into the mortise.  That pushed the extra wax back toward the stem.  I used an Exacto knife to cut away the extra wax and pushed it ¾ into the mortise.  Again I cut away the excess wax.  Then slid the stem all the way into the mortise.  Perfect tightness.

    I then took the pipe to the buffer for a couple of coats of carnauba wax.  Yeah, I know, I didn’t do the Before and After Restoration Balm.  In all honesty, I was getting a bit tired of working on this Marxman Dublin.  The stummel took to the wax very nicely and it looked pretty good.  I will let the epoxy cure for the required time before I try sanding the interior of the tobacco chamber.  I may need to apply a second coat of epoxy to fill some of the deeper grooves.  I’ll know more tomorrow.  For now, I am calling this Marxman finished.  Three days and still not finished is a long time for me to work on a single pipe.  Even my love of Marxman pipes has a limit.  

    Overall I am glad to be done… Um, I mean I am happy with the way this pipe turned out.  For a pipe that was; as filthy as this one was, has rather unattractive grain and has charring in the bowl it turned out well.  I will give it a chance and smoke it in a couple of days.  It may be one of those magical pipes that smokes so well it will replace a favorite.  “May” is not just the month after April, it is also a very big qualifier here.  This pipe obviously was someone’s favorite pipe for a long time.  That may be an indication of it’s potential.  I do hope that you found something here useful for restorations of your own or at least were entertained.  If you like this kind of thing, please click like and subscribe.  Thank you very much for reading the ramblings of an old pipe lover.

    Below are some photos of the finished (nearly) Marxman Dublin with a gold band.

  • A Emperor Supreme Rusticated Medium Golfer Restoration

    January 9th, 2024

    Written and photographed by 

    John M. Young.

    A while back I discovered the cache of Pipe Lovers Magazines from 1946, 1947 and 1948.  The articles were fun to read and the print advertisements provide an amazing source of information for research.  It was during one of these reading sessions that I decided that I wanted to restore some of the pipes from the advertisements from the pages of Pipe Lovers Magazine of the post war 1940s.

    Searching through eBay for estate lots which contained one or more of the makers proved to be fun as well.  One listing that I came across was this one:

    The description by the seller read as:  

    “This vintage Emperor Wally Frank smoking pipe lot includes a box of Empire pipes made in Brooklyn, NY. Crafted from high-quality BRIAR, this lot is perfect for collectors of estate tobacco items. The pipe features a unique body shape and is made by a renowned brand. The country/region of manufacture is the United States. This lot is a must-have for any serious collector of tobacciana and will make a great addition to any collection. All four pipes look in nice shape all are nice wood. Interesting box with instruction pamphlet ! Do not know a year I know nothing about these. My father had them. So please ask questions and look at all pictures took a lot not sure how many are Wally frank. All say imported BRIAR thank you.”

    When the lot arrived I sent the seller a message saying that the pipes arrived and that everything looked good.  I also usually ask the seller if they would be interested in seeing photos of the pipes after they’ve been restored.  I received a message from this seller that read as follows:

    “”Thank you very much they were my dads! yes would love to see them!!”

    I am looking forward to sending them photos of the finished pipes.  I then sent another message asking if they would be willing to share any other information about their father and his pipes.  As of yet, I have not received any additional information.  I realize that this is asking someone to share personal information and that not all people are comfortable doing that with a total stranger but, I was hopeful.

    The first pipe that I decided to work with was a small lovat.  The finish was rusticated in the same way that Custombilt or Marxmam rusticated some of their pipes.  There were stampings on both sides and the bottom.  Left side – EMPEROR over CUSTOM FASHIONED, right side – Supreme and bottom – CUSTOM FINISHED.  I started researching Emperor with the usual starting sources pipehil.eu for logos and pipedia.org for information.

    First I went to pipedia.org for information about the Emperor.  According to  the site;

    “Empire Briar Pipe Company Inc. of New York produced Emperor pipes. Known as “The Pipe that knows no Peer” as their 1945 advertising promotes. That ad reads “The pipe that knows no Peer. For every Emperor pipe is a notable work of art, a masterpiece created in the custom tradition.” They are a subsidiary of the Continental Briar Pipe Co. Inc. 80 York Street, Brooklyn, New York.

    They had Three grades: Standard, De Luxe and Supreme.”

    (Emperor – Pipedia) 

    Pipedia also had an example of an Emperor store display and advertisements  from the late 1940s courtesy Doug Valitchka.  Thank you, Mr. Valitchka.  

    THis next image set me straight as to the name of this shape.  I had been calling it a lovat.  In looking at the names Emperor gave this shape I will henceforth (and in the title) call it a  Medium Golfer.  THough it is not quite an exact match for the shape of this pipe it is the closest match I can find for an Emperor so, That is what I’m calling it.  If you have additional information please feel free to include it in the comments.

    And for the last advertisement an image of the stinger or, rather the “Keystone Cleaner”  For some reason I envisioned Charlie Chaplin and the Keystone Cops with brooms when I read this.

    (Emperor – Pipedia)

    The next stop was pipehil.eu we can see the logos stamped on representative pipes in their collection of images:

    (Em-Eq — Pipes : Logos & Markings (pipephil.eu))

    The Medium Golfer on the desk beside me shares the Supreme stamp and the EMPEROR over IMPORTED BRIAR but does not have any stamps on the stem.  This is probably due to the short saddle stem shape not being conducive to stamping.

    The final bit of research was done perusing the 1946 and 1947 Pipe Lovers magazines.  There I found a couple of references to Emperor.  Item one is for an essay contest as the first prize.

    (Pipe Lovers Magazine February 1947 p. 60)

    And the second is a “What’s new” article also from 1947, from the July issue.  This closely  describes the carving style of this Golfer.

    (Pipe Lovers Magazine July 1947  pp. 219-220)

    Based on the above, I would say that this Emperor Supreme Medium Golfer was made by the Empire Briar Pipe Company Inc. and was carved at 80 York Street, Brooklyn, New York sometime around 1947.  This pipe represents one of their highest grades, the Supreme.

    Now, let’s see what it looked like upon arrival.  Okay, as a disclaimer, this is kind of a set-up.  There was another Emperor pipe in the box upon arrival.  The other pipe was an Emperor but it was not a Supreme it was a De Luxe (their spelling not mine).  Everything else is as-found upon arrival.  THe pipe was in remarkably good condition.

    This really looked more like a clean-up rather than a restoration.  I planned to ream the tobacco chamber, clean out the airway, sand the light scratches on the stummel and stem, micro-mesh the pipe, give it a Restoration Balm coating and buff with carnauba wax.  

    I started with the reaming.  The pipe is small and none of my reaming tools would fit the tobacco chamber.  The diameter measures .67 inches or 43/64 in.  Who the heck has ever heard of that drill bit?  It is in between ⅝ and 11/16 inches although it could be a 17 

    mm.  I used the Smokingpipes Low Country knife and the General triangular scraper to remove the minimal cake.  This was interesting, the cake seemed to just slough off the chamber interior.  It was obviously an old cake but it came off very easily.  I have experienced this before with Algerian briar in Marxman pipes.  They just seem to shed the cake with little effort. After the scraping, I sanded the interior of the chamber with 220 sandpaper wrapped around a wood dowel.

    Next I addressed the shank airway. Cotton swabs dipped in 99% isopropyl alcohol were used for the initial scrub attempt.  Once the tars in the airway started to soften the swabs became darkly stained.  I then poured about 3 ml of alcohol into the tobacco chamber allowing some of it to flow into the shank.  Holding the stummel at an angle to avoid pouring the alcohol on my jeans I used a nylon shank brush to scrub with the alcohol.  I scrubbed and twisted the nylon brush.  The brush was removed and wiped by pulling the bristles through a paper towel.  I then used a couple of cotton swabs to scrub and absorb the remaining alcohol.  THis was repeated until the swab emerged clean. 

    After the shank was cleaned I turned my attention to the stem.  The stinger was definitely unique.  It showed evidence of quality machine work and surprise – it is threaded into the 

    stem.  I soaked the stinger in alcohol while I ran alcohol dipped bristle pipe cleaners through the stem.  The stinger (Oh wait, Keystone Cleaner) was scrubbed using a piece of 0000 steel wool dipped in alcohol. Once cleaned the stem was reassembled.

    The stummel was then taken to the sink for a cleansing with Murphy’s Oil Soap.  There didn’t appear to be much dirt or grime on the stummel but the thing is still 76 years old and a bath is rarely a bad idea.  I used Murphy’s undiluted and scrubbed with a medium bristle toothbrush.  The Murphy’s was rinsed with water and the stummel dried with a cotton dish towel.  Upon returning to the workbench I wiped the stummel off with a make-up removal pad dipped in 99% isopropyl alcohol.  The pad discolored slightly during this rubbing.  It looked like it may have been dissolving some of the dye from the briar.

     I then rubbed the stummel with a make-up pad dipped in acetone to see what that solvent would do.  It appeared to remove a bit more color though neither of the pads affected the overall finish of the pipe.

    I then taped the stampings with painters tape for their protection.  I began sanding with the 1000 grit sanding sponge.  I used the sponge with a light touch and did not try to sand 

    any of the carved grooves on the stummel.  I sanded the stem at this time with the same sponge.  I moved up through the sponges from 1000 to 2000 then 3000.  I wiped the stummel with a make-up pad wetted with alcohol between sponges and the stem got a drop of Obsidian oil rubbed in with my fingers and wiped with a paper towel.  After the 3000 sanding sponge I removed the painters tape and micro-meshed the stummel and stem with pads 4000-12000.  I again wiped between pads the same way that I did between the sponges.

    After the 12000 micro-mesh pad was used on the stem I did a final polishing with Before and After Fine and Extra Fine  polishing compounds.  They were applied with my finger then hand rubbed with a soft cotton rag.

    The Emperor was really starting to look fantastic.  I applied a coating of Before and After Restoration Balm to the stummel and let it set for about 30 minutes.

    After about 30 minutes I wiped off the Restoration Balm using the inside of an athletic sock.  Wow, I thought that it looked good before.

    All that remained was for me to apply a few coats of carnauba wax the pipe and take some photos.

    When I opened the package with the four pipes in this lot the phrase “pleased as Punch” came to my mind.  “What the heck does that mean?”  asks anyone who is not old.  “As pleased as Punch means to feel a great sense of delight.”  Feel free to click the link for the citation.  The other Emperor in the lot will be in a near future blog. I believe the briar to be Algerian similar to the briar used by Pipe by Lee and Markman.  It is very soft and has a quality that I cannot define well but know when I see it.  The pipe is relatively small measuring in at 5.5 inches long (140 mm), 1.4 inches tall (40 mm) and 1.13 inches wide (29 mm) with a weight of 1.1 ounces (31.3 g).  The briar’s grain is difficult to discern with the carvings but I could not find any fills.  It is just a little darling of a pipe.  I hope that you have found something here that you can use in restorations of your own or that you were entertained.  If you like this sort of thing please click the like and subscribe.  Thank you very much for reading the ramblings of an old pipe lover.

    Here are some photos of the finished Emperor Supreme Medium Golfer.

    Yeah, I had to try that one out myself. It was so worth doing. Thanks again, John.

  • A Winthrop Billiard Restoration

    January 7th, 2024

    Written and photographed by 

    John M. Young

    This is not the pipe I set down to restore.  I actually started a different pipe and got to a point where I did not have the materials I needed to finish it.  That one will be a great story to blog about.  Stay tuned.  I wanted something to fill the afternoon and this Winthrop jumped out at me.  I had never heard of Winthrop.  

    I searched the usual information outlets; pipehil.eu for logo leads and pipedia.org for maker information.  Two strikes.  I wasn’t “out” but I was running out of swings.  I then turned to Steve Laug’s rebornpipes.com blog.  He has been writing up restorations for darn near a dozen years.  I will frequently search his site to see if he has restored a pipe and use his blog as a starting point for research.  Steve had nothing on Winthrope.  I’m going to call that a “ball”, not a strike.  I wasn’t ready to return to the bench, yet.  I searched the internet and found this lead:  “RARE OLD VINTAGE ANTIQUE WHITCOMB’S WINTHROP BRAND CIGAR BOX – LABEL – TOBACCO.”  

    (Rare Old Vintage Antique Whitcomb’s Winthrop Brand Cigar Box – label – tobacco | #1844991015 (worthpoint.com))

    Ball 2. I searched a bit for Whitcomb’s Cigars and found this:

    (Antique Smoke the Winthrop Cigar Cutter Joseph Whitcomb & Co Springfield Mass 1800s Tobacciana Collectible Vintagesouthwest DMT – Etsy)

    I’m calling that another “ball”.  That put me at 2 strikes and 3 balls.

    For my last swing I posted the following on pipesmokermagazine.com forum:  “I am sure that there are folks out there who can enlighten me about Winthrop. I got this as part of an estate lot. Relatively thick walls, screw in tenon (similar to a Kaywoodie without the 3 or 4 holes), saddle stem. Photos of pre-restoration.

    No mention of it in pipehi.eu nor pipedia.org. Heck, Steve Laug hasn’t even restored one.”,  

    Once again Briar Lee came to my rescue.  Briar Lee, by the way, is a fine gentleman on the forums who is an absolute wealth of knowledge and a fellow Marxman pipe lover.  Here is his response to my post:

    “That font just screams Wally Frank catalog, 1940s. It was a style he used. [photo]

    It is actually a Briarlee type stinger, it’s removable, and has a full aluminum disc mortise. [photo] There are three Winthrops listed on eBay tonight. [photo x3]

    They look high quality factory pipes of the forties, likely a Wally Frank contract.

    Lee could certainly have made those, but so could other New York City pipe makers.

    That likely was a $2-3 pipe, with lots grain figure, in a catalog where a very good pipe was $1 to $1.50.” (https://pipesmagazine.com/forums/threads/can-anyone-tell-me-about-this-brand-winthrop.102598/#post-36957469)

    Maybe not the exact manufacturer but, that is far better than my imaginative conjectures.  And, sticking with my baseball themed analogy, the umpire says, “Ball 4.  Batter, take your base”.

    Here is the pipe that caught my attention as it appeared emerging from the “do me next” box.

    The Winthrop didn’t look too bad for a 1940s pipe.  Yeah, she had some scars from rough relationships but, don’t we all?  I figured a good reaming, cleaning finish removal, maybe a dye-job, some sanding and she’d look like a brand new pipe.  Well, newish, anyway.

    I started to prepare to ream the tobacco chamber.  I removed the stem and saw a very interesting stinger.  Now, I am not a stinger fan, generally.  This just looked to be a quality piece of work.  Fairly heavy aluminum, well machined, good fit with the mortice.  What’s this, it comes apart?  Cool.  Given, I had to use a pocket knife to get it to come apart the first time and the photo shows the cleaned-up version, I was initially impressed.  I dropped the removable stinger into a medicine cup with some 99% isopropyl alcohol to soak.  I then started running

    alcohol dipped bristle pipe cleaners through the stem.  That was an ADHD moment, there, I was supposed to be reaming the tobacco chamber.

    Okay, back to reaming the tobacco chamber.  I used the Scottie stainless steel reaming tool as the Pipnet tool has a broken #1 blade.  The Smokingpipes Low Country knife and the General triangular scraper were used to further rid the chamber of carbonized  material.  The chamber was then sanded with 220 sandpaper wrapped around a wood dowel.  THe chamber looked google with no evidence of heat damage.

    I started cleaning the airway in the shank with cotton swabs dipped in 99% isopropyl alcohol.  They came back looking dark.  I then poured about 3 ml of the alcohol into the bowl and let it drain into the airway.  I then used a nylon brush to scrub the shank interior while holding the stummel at an angle so the alcohol could dissolve the tars and remain in the stummel rather than staining another 

    pair of jeans by dripping it on my lap.  After the scrub I used cotton swabs to scrub the airway.  These absorb the loosened tar and remaining alcohol.  

    The photo is after the first 3 ml of alcoholI repeated the process with 3 ml of fresh isopropyl.  This was done 3-4 times before the cotton swabs came back clean.

    I then applied an even coat of saliva onto the rim and scraped the rim with a sharp pocket knife.  I held the bladed perpendicular to the rim and lightly scraped away the lava.  

    With the interior and rim cleaned, I took the stummel to the sink for the Murphy’s Oil Soap scrub.  The Murphy’s was used undiluted and scrubbed with a medium stiff bristle toothbrush.  The stummel was rinsed with warm water and dried with a cotton dish towel.  I returned the stummel to the workbench and wiped the bowl off with a make-up pad wetted with 95% ethyl alcohol.  The ethyl alcohol removes an existing finish better than the 99% isopropyl alcohol.  The pad came back with a good bit of color indicating that it was dissolving the old finish.  

    I continued with a fresh pad and continued until I was no longer seeing any color on the make-up pad.  I then tried a make-up pad wetted with acetone – a little more color came off.

    With the finish removed I could see a couple of spots that I needed to fill with cyanoacrylate (CA, super glue) and briar dust.   Gave the stummel a light sanding with a 400 sanding sponge. This revealed a small pit on the end of the shank.  I dug out the old fill with a fly tying bodkin. There were also several cuts in the bottom of the stummel that needed to be filled.

    For the pit on the shank I pressed briar dust into the pit and placed a small drop of Thin CA onto the dust.  Ist absorbed and set up almost instantly.  I smoothed the fill with a 400 sanding sponge.  The gashes on the bottom of the stummel were a little more difficult.  I did not want to damage nor did I want to get any CA into the stamping.  I placed a small drop of Thin CA into the gash and started sanding it immediately.  The hope was that some sanding dust would get into the gash, mix with the CA and form a fill in place.  I had to repeat this process a few times.

    With the fills addressed I covered the stamps with painters tape and sanded the stummel with the 600 and 1000 sanding sponges.  I thought that I might be able to use a dark brown dye then sand the stummel leaving a nice contrast stain and accentuating the briar’s grain.

    I prepped the dyeing area and gathered the needed items.  Fiebing’s Dark Brown Leather Dye, a folded pipe cleaner, disposable lighter and the duct tape wrapped styrofoam fishing bobber.

    I used the folded pipe cleaner as an applicator for the dye.  The fishing bobber was inserted into the bowl to stop dye from entering and give me a handle to hold the stummel.  Most people use a wine bottle cork for the bowl plug/handle.  I applied two coats of dye and flamed the wetted stummel with the lighter.

    After allowing the stummel to dry for a few minutes I used a paper towel to wipe the excess stain from the stummel.

    I returned to the workbench and spayed a make-up pad with 99% isopropyl alcohol.  Holding the stummel in paper towels, I wiped the stummel to remove additional dye.

    After the stummel had been wiped and dried, I began sanding with a 400 sanding sponge.  I wanted to remove the outer layer of dyed briar leaving behind the areas that absorbed more dye.  It didn’t work as planned, I probably should have used a black dye.  Oh well, it’s still a lovely color of brown and is more like the original.  I continued sanding using the sanding sponges 600-3500.  Between each sponge I would wipe the stummel off with an alcohol dampened make-up pad.  The dyed and sanded stummel looked like this when I was done with the sanding sponges:

    The stummel still needed to be micro-meshed.  I figured I would do the stem and the stummel at the same time.  This meant that I needed to work to the stem.

    The stem had quite a bit of teeth chatter or, maybe a previous owner liked to 

    smoke while waking during sandstorms.  Either way it needed a good sanding and micro-meshing.  The stem did not have any browning indicative of oxidized vulcanite yet when sanded the color was a yellow-brown like oxidized vulcanite – weird.  I sanded using the sanding sponges from 600-3500.  Between each sponge I applied a layer of mineral oil with my fingers and wiped it off with a paper towel.  These new sanding sponges are excellent at getting into the corner where the button meets the stem.  I almost forgot to tell you that I covered the stem logo with a piece of painters tape to protect the logo.

    With both the stem and stummel now ready for micro-meshing I reapplied new painters tape of the stamps and logo.  I started with the 2400 micro-mesh pad and moved through the whole series through the 12000.  Between each pad I wiped the stummel is a make-up pad wetted with 99% isopropyl alcohol and the stem with mineral oil on my fingers wiped with a paper towel.  The stummel 

    received a coating of Before and After Restoration Balm and was allowed to sit for about 30 minutes.  For the final polishing of the stem I used Before and After Fine then Extra Fine Polish.

    The polish was applied with my finger and vigorously rubbed with a cotton rag for each polish.

    .  

    The last thing this old pipe needed was the final few coats of carnauba wax applied with the buffer.  After the waxing I gave the stem another drop of obsidian Oil, hand buffed the stummel with a nanofiber polishing cloth and took some photos. 

    This old Winthrop Saddle Stem Billiard may have an unknown providence but it certainly did clean up nicely.  The briar is thick, well drilled and though the grain isn’t great it certainly doesn’t hurt my eyes.  The aluminum work of the mortise and tenon is well done and precisely machined.  The stem material, whatever it is, proved to be hard to finish, never really taking on the ebony glow of high quality vulcanite or ebonite.  Overall this is a very well made factory produced pipe.  It will undoubtedly provide years of enjoyment for its next partner.  I hope that you have found some of the techniques used here helpful in restorations of your own or were at least entertained.  Thank you for reading the ramblings of an old pipe lover.  Almost forgot again, if you like this kind of stuff please hit the like and subscribe buttons.

    Below are some photos of the finished Winthrop Saddle Stem Billiard.

  • Tools of the Trade – Restoration Tools and Materials

    January 5th, 2024

    Written by 

    John M. Young

    Recently a reader, Sascha from Germany, messaged me in a Facebook group and mentioned that he liked my detailed descriptions of the processes used in restorations but he had never heard of some of the products I use.  I thought, “Oh, yeah. Not everyone lives in southeast Nebraska.” That completely explains why the nearest town has a population of 480 people.  If everyone lived here it would probably be more like 8 billion.  Also, WordPress has a function where viewers’ countries are shown.  My ramblings have been viewed by amazing people in 34 different countries.  I find this astounding and I am glad that I don’t have to pay the postage for my blogs to reach each of you. 

    Well, back to Sascha’s concern.  He was unfamiliar with Murphy’s Oil Soap.  I quickly did a search for German equivalents of the Murphy’s and found that: Murphy’s Oil Soap = Schmierseife in German and suggested that he try Denkmit Schmierseife gold as a product.  The logistics of me doing this for every product I use for 34 countries immediately made my head explode.  Fortunately, there isn’t much inside my head so the clean-up of an exploded head was minimal.  

    I did figure that I would list the main products I use and a link to a supplier, typically Amazon.  Now I realize that Amazon may not ship to all points on Earth so I typed in the most remote human habitation of Earth – Tristan Da Cunha.  And then searched to see if Amazon delivers there.  They do:  

    “Important Notice – Updated Information for Amazon Global International Shopping to Saint Helena Ascension and Tristan Da Cunha

    • Amazon has recently expanded Amazon International Shopping, its selection of items from the main US Amazon store that can be shipped to Saint Helena Ascension and Tristan Da Cunha and other countries.
    • It’s a lot like a filtered version of the main Amazon website which simply excludes the items that can’t be shipped to Saint Helena Ascension and Tristan Da Cunha.
    • If you’re looking to get an Amazon item shipped to you in Saint Helena Ascension and Tristan Da Cunha, we strongly recommend you start by visiting Amazon International Shopping. (https://flycrates.com/amazon-shipping-to-saint-helena-ascension-and-tristan-da-cunha)

    Who would have thought that, eh?  Well, now we know.

    Below is the list of products used in darn near every restoration:

    54 Pack Sanding Blocks, 9 Grits from 320 to 3500, Soft Touch Sanding Pads,2″ x 2″ Sanding Sponge

    Starbond 2 oz. Black Medium-Thick CA Glue (Premium Cyanoacrylate Super Glue)

    Starbond 2 oz. Super Fast Thin CA Glue (Premium Cyanoacrylate Super Glue)

    Starbond “Pinocchio” Pump CA Accelerator – Instantly Dries Super Glue (8 ounce)

    2 inch by 2 inch Double Sided Micro-Mesh Soft Touch Sanding Pads

    Isopropyl Alcohol 99% (IPA) – USP-NF Concentrated Rubbing Alcohol

    Roundfire Premium Ethanol Fireplace Fuel

    This one may raise some eyebrows, don’t let the “fuel” fool you.  It is just  95% denatured  ethyl alcohol.

    ForPro Pure & Natural Stitched Cotton Rounds for Face (400-Count), 100% Pure Cotton Makeup Remover Pads

    Before and After Restoration Balm and Deoxidizer.  

    Pipnet Pipe Reamer 5 Piece 168g

    Low Country Reamer

    Dental Tools, Professional Teeth Cleaning Oral Care Hygiene Kit, Stainless Steel Dental Pick Tooth Scraper

    Kleenex Professional Facial Tissue for Business These are used to wipe away the tears when I think of all the pipes I cannot afford to buy.

    YAKAMOZ 10Pcs Mini Diamond Metal Files Set Micro Round Needle File Triangular Square Flat Riffler File Kit Wood Stone Glass Jewelry Fine File Tools for Jewelers Crafts Hobbies

    Fiebing’s Leather Dye – Alcohol Based Permanent Leather Dye – 4 oz This is just the black dye.  There are many colors to choose from.
    Murphy’s Oil Soap, Coconut, 16 Oz You do not have to use the coconut, it’s just half the money of the regular.

    Soft Scrub Multi-Purpose Cleanser with Oxi

    BUCKTOOL 6-Inch 1/3HP Low-Speed Bench Grinder, High Precision Wobble-free Wheel Grinder, TLG-150S

    I picked up a grinder like the above a while back.  I removed the protective guards and replaced the spindles with a convert-your-grinder-to-a-buffer-kit similar to this:  PURUI 11PC Metal Polishing Buffing Kit Use on 6″ Bench Grinder

    For things like cotton balls, cotton swabs, acetone and toothbrushes, I get them at the dollar store.  You can also get the sponge backed emery boards, for filing fingernails, at the dollar store.  I pick those up when I am buying birthday cards.  Yeah, I’m cheap.  Why pay $4.99 for a card when I can get one for $1?  I can save the money for more Kleenex tissues for the tears generated by looking at pipes I can’t afford on eBay.

    That is a list of stuff that took years to accumulate.  I wouldn’t recommend purchasing it all at once or you may incur the wrath of a spousal unit.  Or, you may decide that this restoration nonsense isn’t for you.  The good news of changing your mind is that most of that stuff has uses besides pipe restoration.  Well, maybe not the Pipnet reamer but, a lot of it does.  You can always use the alcohol to burn everything thus getting rid of the evidence of your weird life choices.

    I hope you have found this helpful in your quest of strange life choices.  Thank you for reading the ramblings of an old pipe lover.

  • A Kings Cross Saddle Stem Billiard Restoration

    January 4th, 2024

    Written and photographed by John M. Young

    I know what you are going to say, “Good Lord man, another Kings Cross?”  Well this is actually only the fifth one of a six pipe estate lot.  All six of them, Kings Cross.  I will probably spare you from the last pipe restoration as it is another saddle stem billiard with the same shape number as this pipe.  Anyway, I thank you in advance for reading this.  Maybe, I will be try something new, be especially insightful and humorous this time.  That too is probably not going to happen.  I’m just full of good new year cheer, eh?  

    Well, here we are again.  The history of a Kings Cross pipe.  The best part of this blog for me is that I am writing it while smoking the Pipe by Lee from the last restoration.  Let me rephrase that, from the previous restoration.  I bet you were thinking, “finally this guy’s last restoration.  I figured he would be canceled after the second one.”  Hah, still going strong with at least 5 more pipes in the restore box and another 4 due on Friday.  Okay, I’ve been putting it off long enough.  The history of Kings Cross pipe.  Really, again?  

    These were pipes made by the Chapuis-Comoy company in both their English and French factories.  The “FRANCE” stamped on the stem of this pipe indicates the Chapuis factory in France was the home of this pipe.  Kings Cross pipes stamped  “MADE IN ENGLAND” would be those made in the Comoy’s London factory.  Pipe lovers of the world are indebted to the Comoy family for their contributions of bringing briar to the pipe making world.  If you are interested in the Chapuis-Comoy family history, and it is amazing, take a look at these or these links:  

    • https://pipedia.org/wiki/Comoy%27s
    • https://pipedia.org/wiki/Kings_Cross
    • https://pipedia.org/wiki/Chapuis-Comoy
    • https://pipedia.org/wiki/Comoy%27s_Shape_Number_Chart
    • http://www.pipephil.eu/logos/en/logo-comoy.html
    • http://www.pipephil.eu/logos/en/infos/connect-en.html

    As for this pipe and the “6”  pipe shape.  That coincides with the Comoy shape chart which both factories share.

    (https://pipedia.org/wiki/Comoy%27s_Shape_Number_Chart)

    The below photos show how the Chapuis Saddle Stem Billiard appeared upon arrival.

    The pipe showed signs of regular use, well developed cake in the tobacco chamber, some calcium deposits and numerous tooth chatter marks on the stem.  Overall, the pipe appeared in good condition and only needed fills in two spots.  This looked like a straight forward restoration.

    I began with reaming the tobacco chamber using the PipNet reaming tool with the number 2 blade, Smokingpipes Low Country reaming knife, General triangular scraper and the 220 sandpaper wrapped wood dowel.  The cake was hard and required some knife work prior to the PipNet tool.

    Next I removed the stem and began cleaning the airway within the shank with a dental scraper, nylon shank brush, cotton swabs and a good deal of 99% isopropyl alcohol.

    The initial alcohol dipped cotton swabs came back dark with tar.  The initial scrapings were also hard and dry.  To soften the residues in the shank I poured approximately 3 ml of alcohol into the bowl and slightly rotated it to allow the alcohol to flow into the shank.  While holding the bowl slightly lower than the shank I could keep the alcohol in the bowl and shank.  I scraped the airway with the dental scraper, swished the alcohol into the shank then scrubbed with the shank brush.  I would clean the brush by pinching it in a paper towel. After scrubbing with the brush I scrubbed the shank with the cotton swabs to absorb the loosened/dissolved tar and removing the 3 ml of blackened alcohol.  I repeated these steps numerous times.

    Eventually the shank was cleaned and a folded pipe cleaner dipped in alcohol came back without discoloration.

    The stem was then cleaned with alcohol dipped bristle pipe cleaners,  Again several pipe cleaners were used before the pipe cleaners went through the stem without discoloration.  The stinger was soaked in alcohol to soften the residues on it.  After softening the aluminum stinger was cleaned using a pocket knife blade in the grove and 0000 steel wool dampened with alcohol.

    Wit the internals cleaned I took the stummel to the sink to scrub the externals with Murphy’s Oil Soap.  The Murphy’s was used undiluted and scrubbed with a medium stiff bristle toothbrush.  Once scrubbed the stummel was rinsed with warm water and dried with a cotton dish towel.  I returned the stummel to the work bench and wiped the surface with a cotton make-up removal pad wetted with 99% isopropyl alcohol.  The make-up pad came back with very slight discoloration.

    The lack of color to the pad indicated that either there was little finish remaining on the stummel of that the alcohol did not dissolve the finish.  I repeated the make-up pad wipe with acetone to see if that solvent would remove any additional finish.  It too came back without much discoloration.  

    I placed protective painters tape strips over the stampings on the stummel and the stem.  I wanted to sand/micro-mesh the stem and stummel together to avoid rounding the edges of the mortise/tenon contact.  I sanded the pipe with sanding sponges with 600 grit followed by the 1000 grit sponge.  The stummel and stem were wiped with an alcohol dampened make-up pad between and after the pads.

    At this point I decided to try to give the stummel a contrast stain to liven-up the pipe a bit.  The tape on the stummel was removed.  I then prepped the area for dyeing.  I use an upside down plastic tub as the work surface, paper towel base, black Fiebing’s Leather Dye, a folded pipe cleaner applicator and a disposable lighter.  And, the official duct tape wrapped styrofoam fishing bobber for the tobacco chamber plug/ handle.

    I applied one complete coat and flamed it with the lighter.  I then allowed the dye to dry for about 5 minutes.

    After it was dry I returned the pipe to the workbench and wiped off the excess dye with a couple of make-up pads wetted with 99% isopropyl alcohol.  One really nice thing about a black stained pipe is how well they show off any flaws in the wood.  I decided to fill the two spots now since I would be sanding for the next half hour anyway.  This was done using cyanoacrylate (CA, super glue) and briar dust.  I pressed some dust into the pit and dabbed a small drop of CA onto the briar dust.  I used the 600 grit sanding sponge to smooth the fills and to remove the upper layer of dyed briar.  Care was taken to avoid the stampings.  Some sanding of these areas was necessary but done with a very light touch.  The below photos show the stummel dyed and sanded with the 600 sponge.

    With the dyeing and initial sanding complete it was time to sand and micro-mesh the stummel and stem.  I was really wanting to see how this dye job would look.  I used the sanding sponges 1000-3500 with an alcohol dampened make-up pad wipe between sponges.  The stem was sanded at the same time with the same sponges.  I did use a lighter touch on the stem than on the stummel.  The stem was wiped off with a dry paper towel between sponges and a thin layer of mineral oil was applied to the stem with my finger tips then wiped again with a paper towel.

    Once finished with the final micro-mesh pad I wiped the stummel with the alcohol pad then applied a coating of Before and After Restoration Balm to the entire pipe.  I let this sit overnight as it was bedtime.

    Morning came, as I find they always do.  I wiped away the slightly more rigid Restoration Balm with the inside of an athletic sock and found a quite lovely finish.  All this one needed now are a few coats of carnauba wax from a buffer.  The below three photos are of the pipe after the balm was wiped off.

    I took the pipe to the buffer for this carnauba wax application.  I took my time making sure to apply wax to each side from different directions.  I then used a polishing cloth to hand buff the pipe.  I returned to the buffer for one more application of carnauba.  Maybe, it was just to polish my own ego rather than the pipe.  I was pretty pleased with how the stain looked. The contrast stain looked beautiful and the wax was giving it a glow.  I looked at the finished pipe and thought “I don’t really care that I don’t know your exact providence.  You are lovely.”

    Overall I think this Kings Cross Saddle Stem Billiard turned out very nicely.  I am glad that I did the contrast stain/dye.  I think that it really made the grain show up beautifully.  I often feel torn during a restoration that I should try to keep things as original as possible.  In this case I am pretty sure that the original workmen would have approved.  I was able to retain the stampings and showcase the natural grain in a way that accentuates the natural beauty of the briar.  The polished black of the stem goes even better with the black from the contrast stain.  I hope that there was something here that you can use in your own restorations or that you were entertained.  Thank you very much for reading the ramblings of an old pipe lover.  Oh yeah, I almost forgot the required if you like this sort of thing please click the like and subscribe buttons.

    Below are some photos of the finished Kings Cross Saddle Stem Billiard.

←Previous Page
1 … 20 21 22 23 24 … 26
Next Page→

Blog at WordPress.com.

Privacy & Cookies: This site uses cookies. By continuing to use this website, you agree to their use.
To find out more, including how to control cookies, see here: Cookie Policy

Loading Comments...

    • Subscribe Subscribed
      • NebraskaPeteGeek
      • Join 38 other subscribers
      • Already have a WordPress.com account? Log in now.
      • NebraskaPeteGeek
      • Subscribe Subscribed
      • Sign up
      • Log in
      • Report this content
      • View site in Reader
      • Manage subscriptions
      • Collapse this bar