Skip to content
    • About

NebraskaPeteGeek

  • American Pipe Makers
  • British pipe Makers
  • Danish pipe Makers
  • French Pipe Makers
  • German Pipe Makers
  • Irish Pipe Makers
  • Italian Pipe Makers
  • Others or Unknown Pipe Makers
  • Restorations
  • A Savinelli Porto Cervo 677KS Salvage, I mean Restoration

    March 9th, 2024

    Photographed and written by

    John M. Young

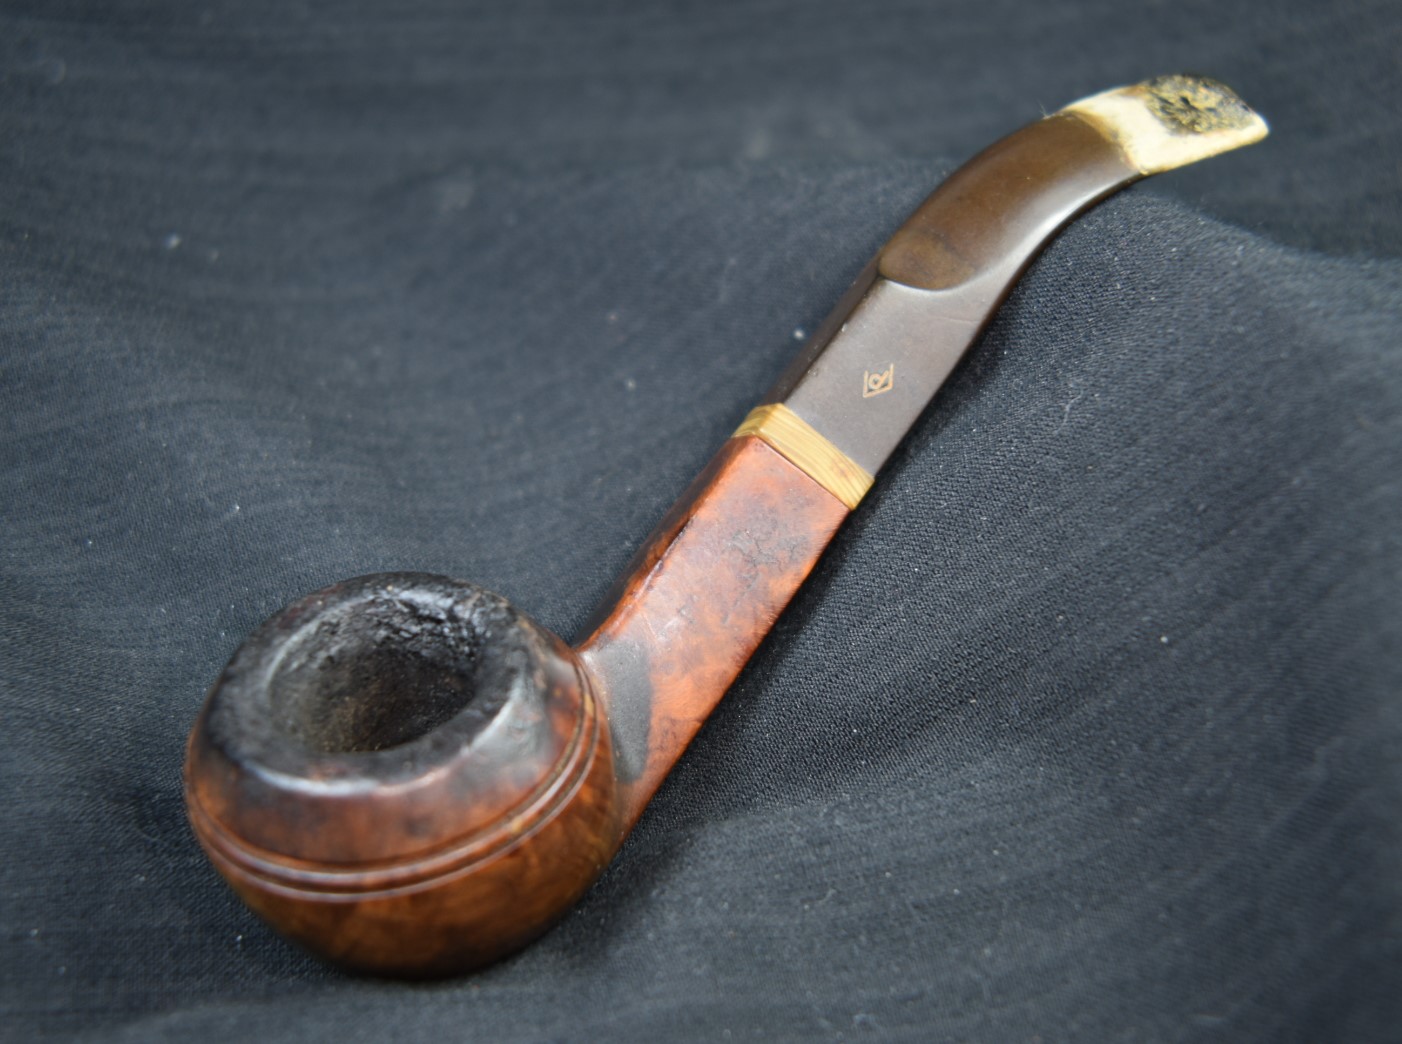
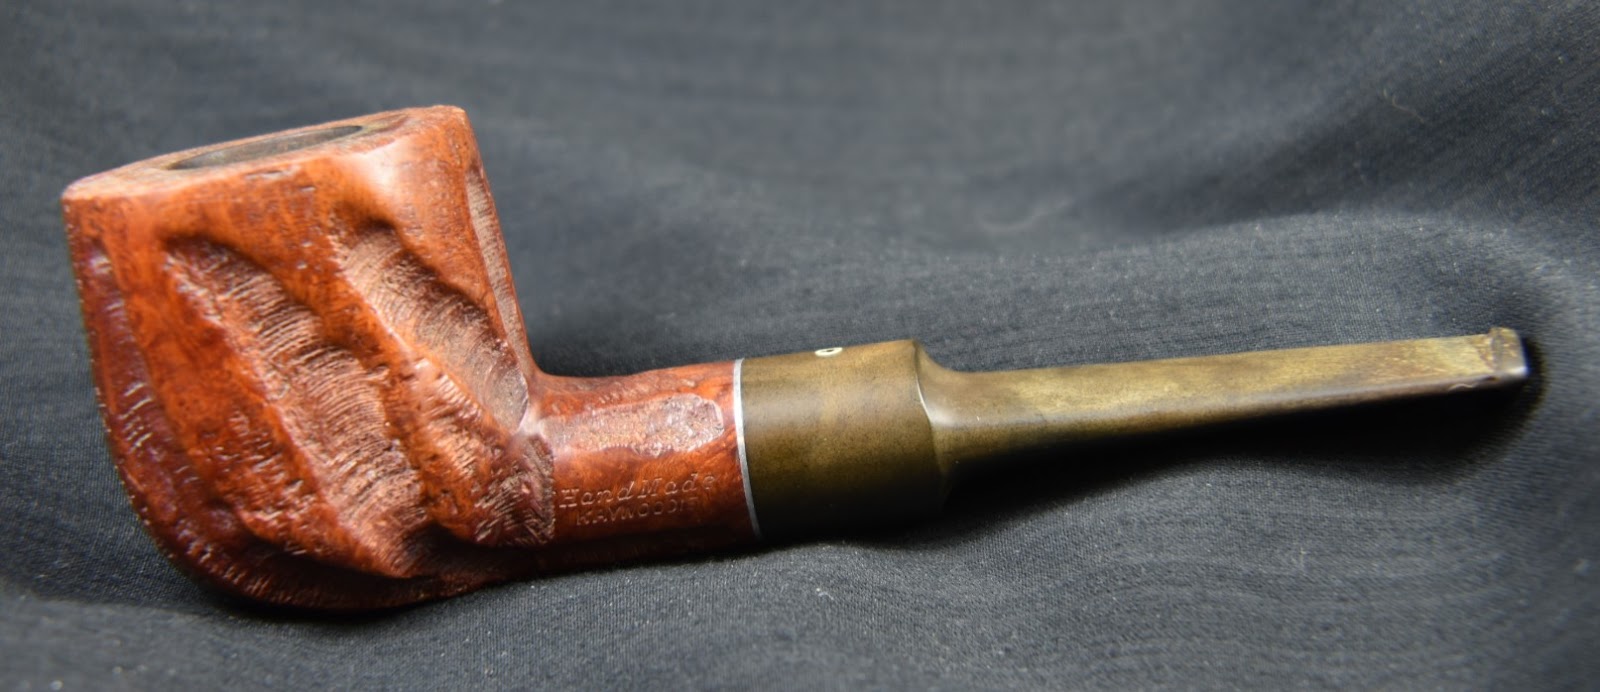
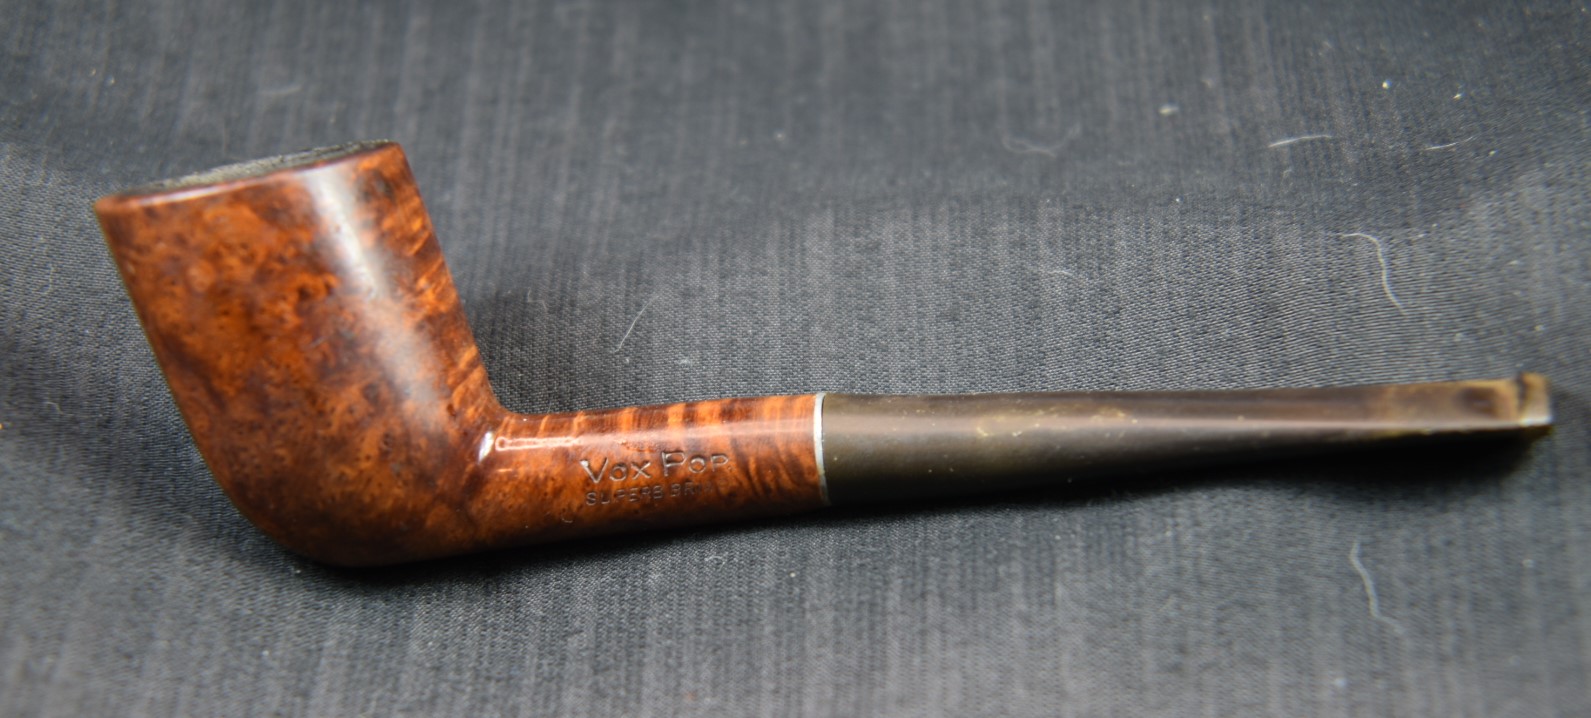
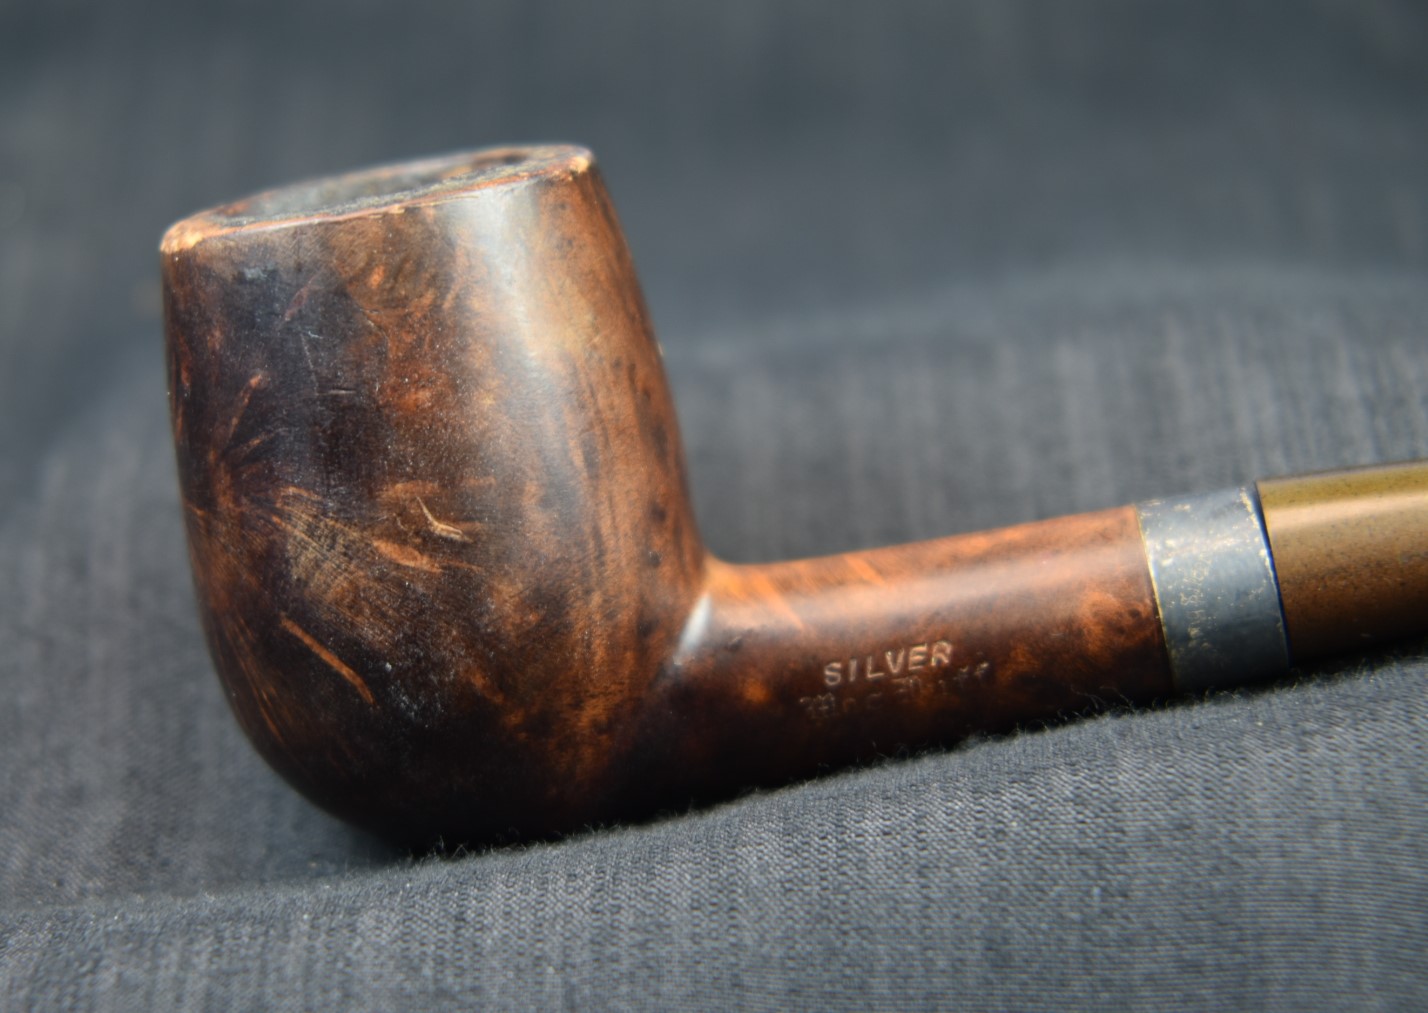
    I have a few Savinelli pipes and they are all fine smokers.  This poor beat-up Porto Cervo must be an absolutely wonderful smoking pipe.  It had been smoked so much that I questioned if it was even salvageable.  I wondered this more than once during this restoration, “Can I return this pipe to service?”  That is why I left the “before” photo up there with the title.  I didn’t know if I could restore it and you, dear reader, are perhaps wondering the same thing. 

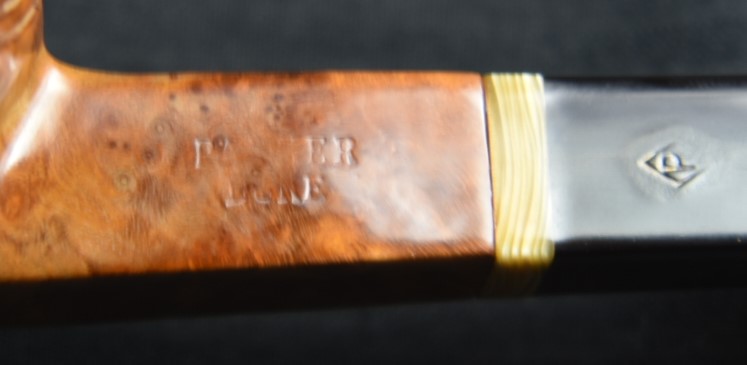
    This pipe came from an estate lot which I won from Greece.  The Parker from the previous blog was also in this lot.  When I first looked I thought that the pipes looked challenging to restore and so far I have not been disappointed.   Here are a couple of screenshots of the lot.  There were some interesting shapes and makers

    Challenging can be fun.  Testing one’s abilities and skills is seldom routine and so far the restorations have tested my abilities and made me think of some unique workarounds to problems.  I will try to keep this write-up short but it was a rather extensive operation.

    First off , let me provide some history of Savinelli.  As usual I employed pipedia.org and pipephil.eu for source information.  The pipedia.org section of Savinelli is well written and very informative.  I know I said I wanted to keep this brief but much of this is worthy of repeating especially the “origins” of the company in 1876 and the post-WWII company as we know it.  

    Early Origins

    “1876 was a year of breakthroughs: Thomas Edison patented the mimeograph, Julius Wolff-Eastport canned sardines for the first time, Alexander Graham Bell made the first telephone call,

    Pyotr Ilyich Tchaikovsky completed Swan Lake, Melville Bissel patented the first carpet sweeper, Mark Twain published Tom Sawyer, and in Milan, Italy, Achille Savinelli opened one of the first shops exclusively focused on tobacco and smoking accessories.

    That last item may seem relatively unimportant in the global scheme of advancements, but for those of us who love pipes, it was a monumental achievement, made even more difficult by the Italian government, which held a monopoly on tobacco. In addition, Achille was convinced that briar pipes represented the future of pipe smoking at a time when the market was dominated by clay and meerschaum. It may not have been obvious in 1876, but Achille Savinelli’s commitment to briar pipes would prove to be visionary.

    He soon began designing his own pipes (different from the styling we associate with Savinelli today) and arranged their manufacture by local pipemakers in the Varese district of north-west Italy. The pipes became so popular that some were exhibited at the 1881 Esposizione Industriale Italiana (Italian Industrial Exposition)—the precursor to today’s Milan Fair, one of the largest trade fairs in the world.” (https://pipedia.org/wiki/Savinelli)

    Post-WWII

    “With his two best friends, Amleto Pomé and Mario Vettoruzzo, he assembled a team of fifteen employees to start a new business in the Varese region—the same area of northwest Italy in which his grandfather, Achille Sr., commissioned his own designs more than 60 years before.

    Savinelli Pipes began production in 1948 and, although the pipes were of a superior quality and unique in their aesthetic, the brand wasn’t an immediate success. Few new brands are. It takes time for the public to catch on. Retailers were skeptical of placing Italian pipes alongside their best sellers from England or France, and customers, in turn, were hesitant to purchase a Savinelli over pipes by already established, foreign brands. Achille Jr. stood by his product, however; he knew it was only a matter of time before the world realized that these pipes were of a far superior quality, capable of competing with even the most well-established pipe manufacturers in the world. As it turns out, he was right. In less than a year, Savinelli pipes gained prestige in markets all across the world—heralded for their delicate balance of innovation and tradition, of form and function. Savinelli pipes were placed alongside the likes of Dunhill and Comoy’s in tobacconists from the United States to Europe, and, in time, this exposure modified Italy’s reputation; it was not only the premier exporter of briar, but now a premium source of fine briar pipes.” (https://pipedia.org/wiki/Savinelli)

    Who doesn’t love a success story where hard work and producing a quality product pays off and builds a dynasty?  A story for the soul.  Anyway, the whole article is worth a read.  

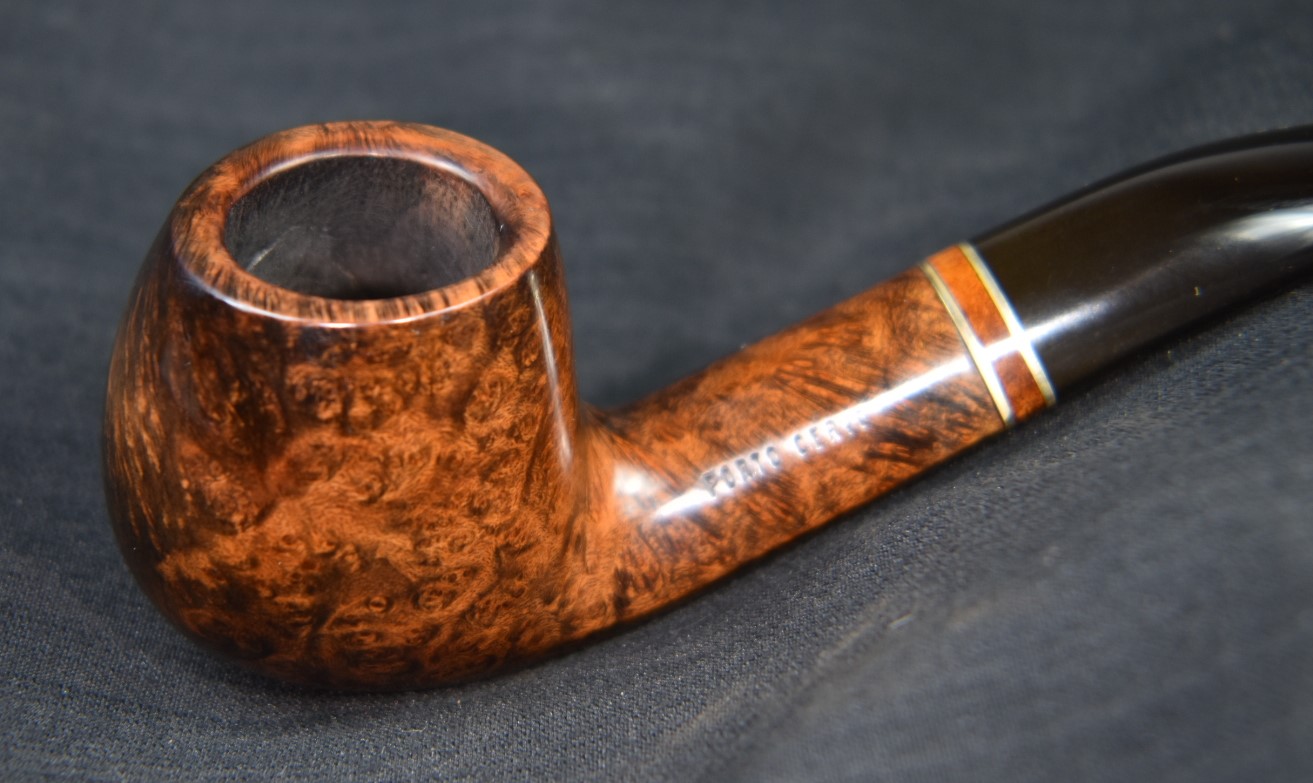
    The line, Porto Cervo, refers to a seaside resort town on the island Sardinia (That’s the big island that looks as if  the boot of Italy is kicking it towards France).   This little port town with a resident population of only 421 is renowned as a hotspot for wealthy resort goers.  As Tripadvisor claims, “Once an exclusive retreat for the crème de la crème of society, Porto Cervo is still one of the world’s most luxurious resorts, but thanks to the 2004 opening of an airport in nearby Olbia, you don’t have to own a megayacht to vacation here. You do, however, need to realize this is definitely not a backpack-and-Eurail Pass destination. Designer boutiques, luxury spas, fine restaurants and exclusive nightspots abound.” (https://www.tripadvisor.com/Tourism-g194856-Porto_Cervo_Arzachena_Province_of_Olbia_Tempio_Sardinia-Vacations.html) 

    In other words a place for Robin Leach and Lifestyles of the Rich and Famous (TV Series 1984–1995).

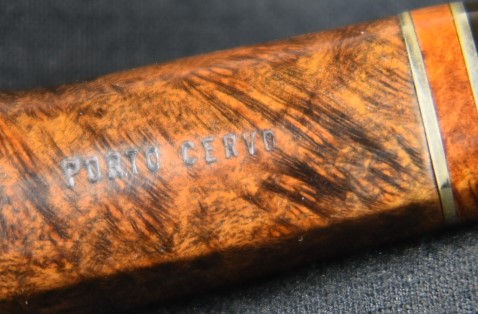
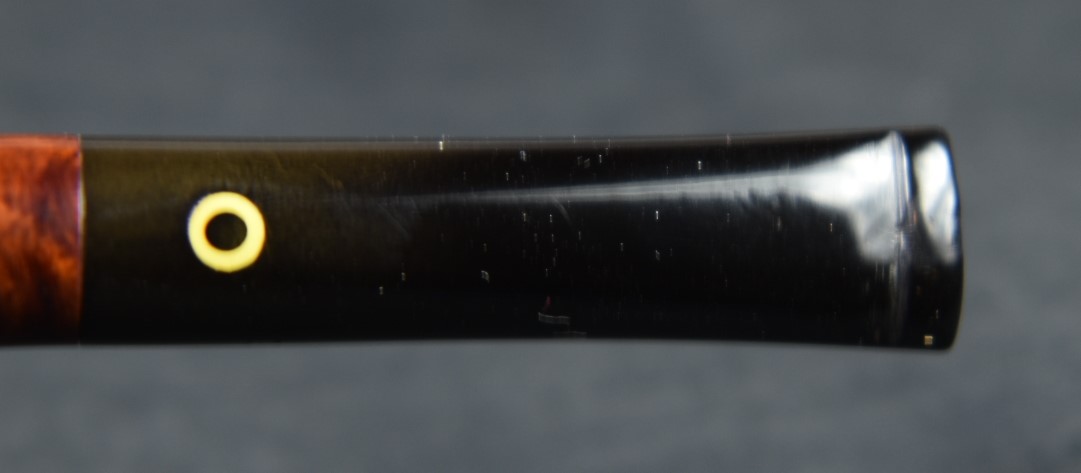
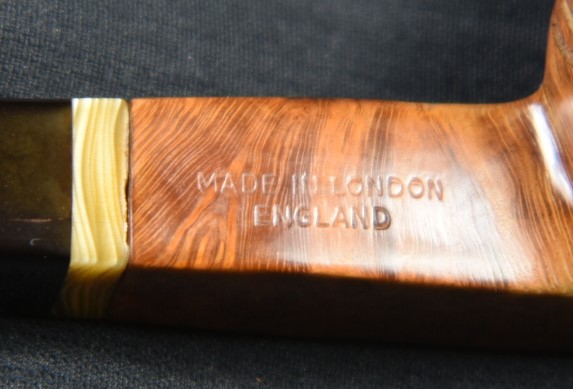
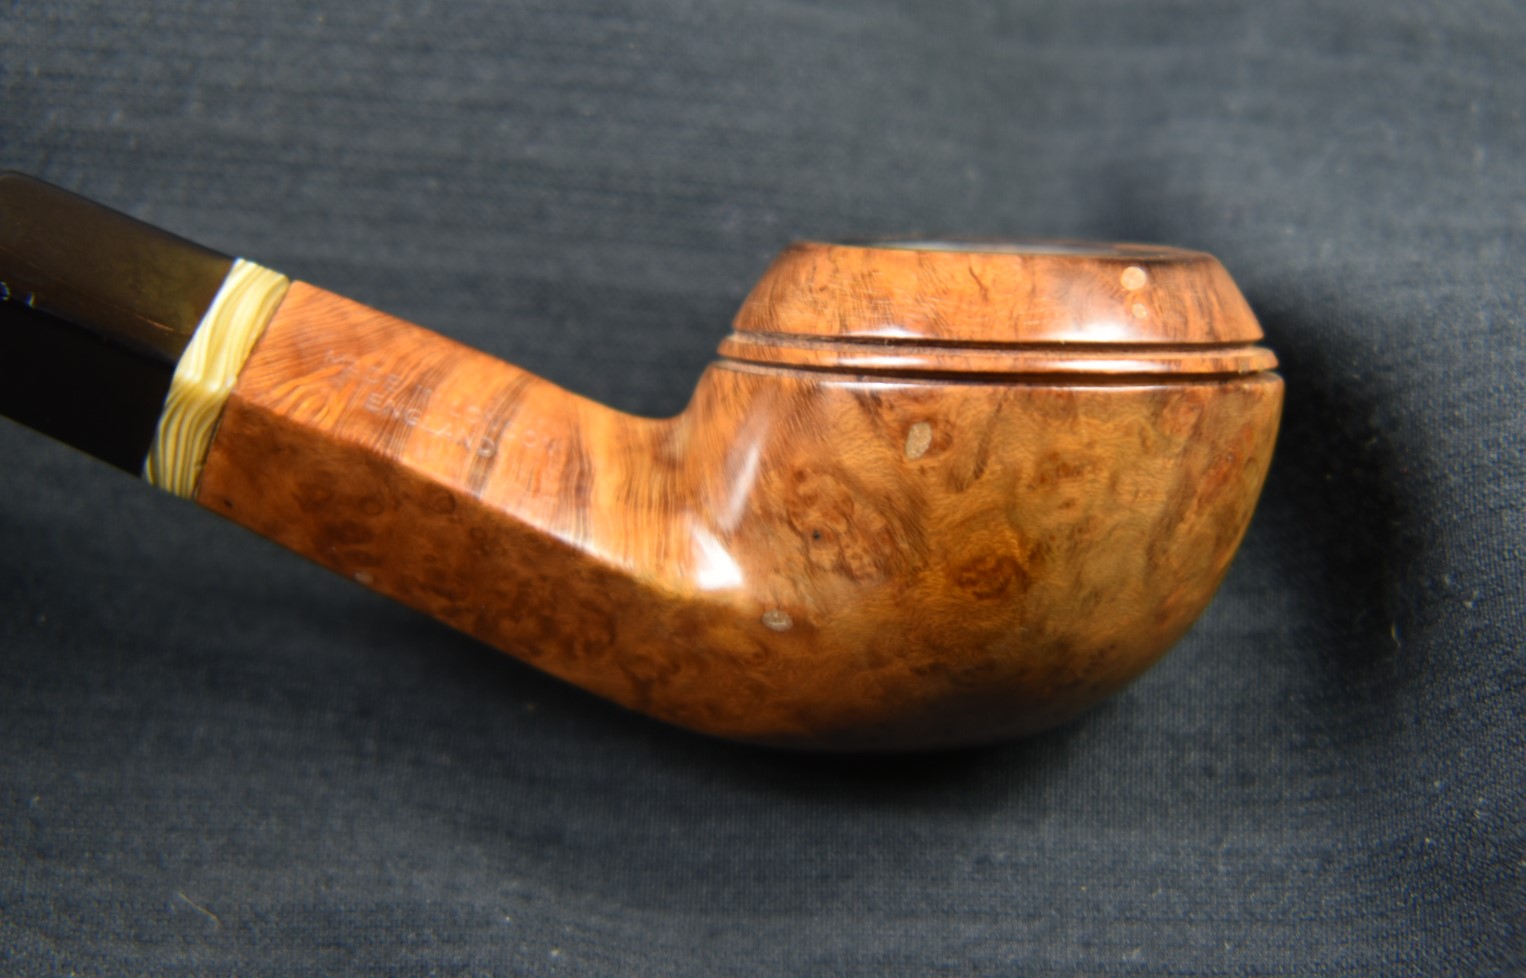
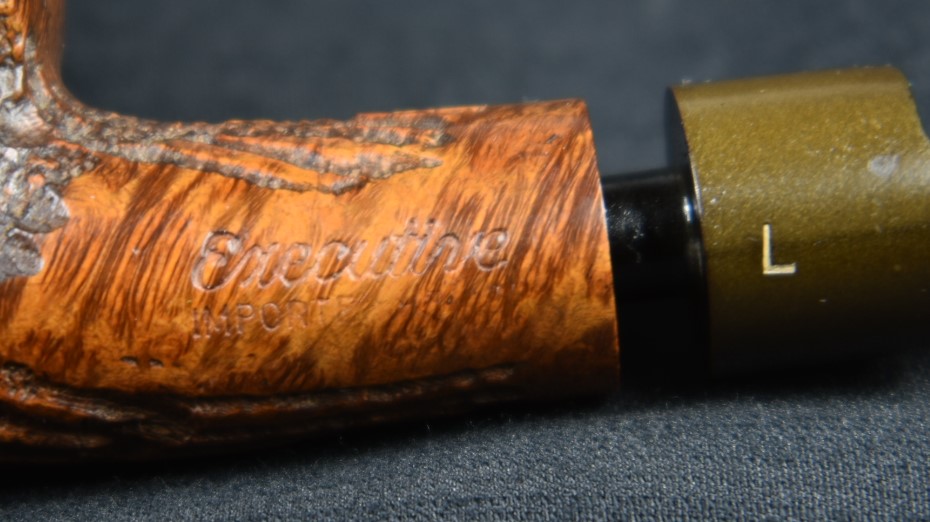
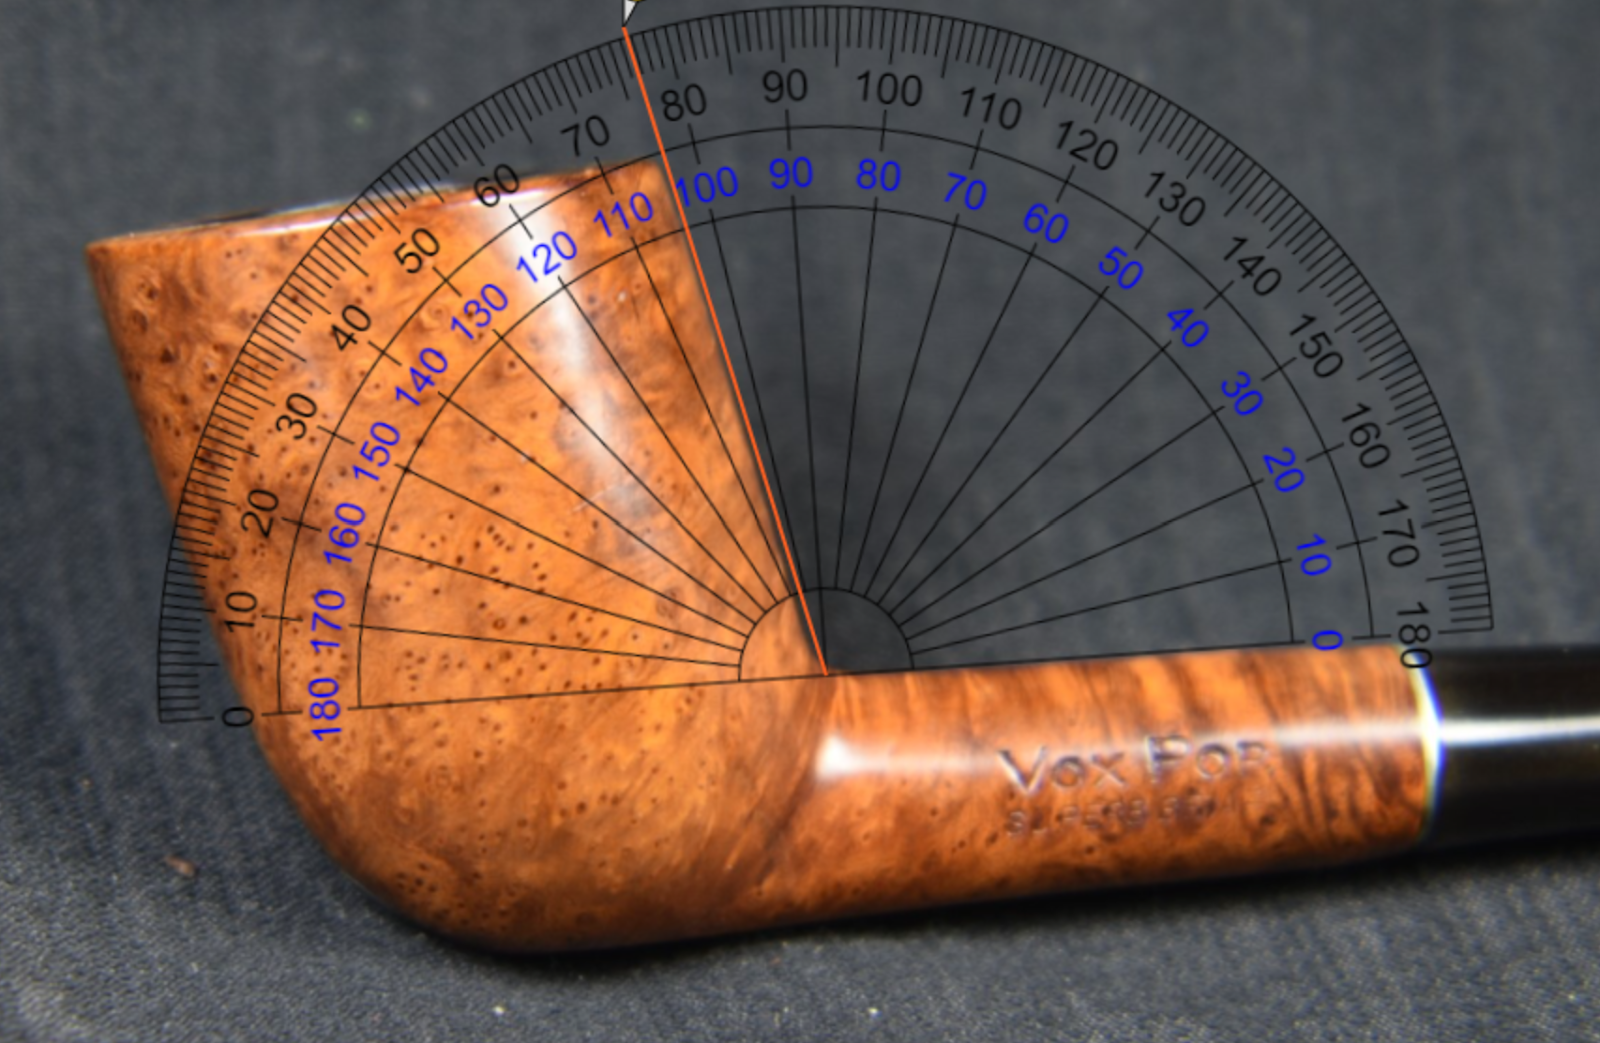
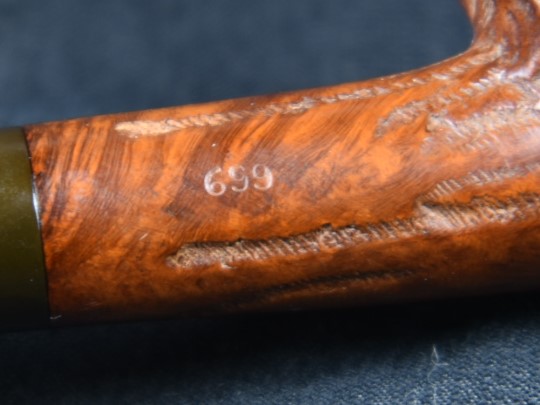
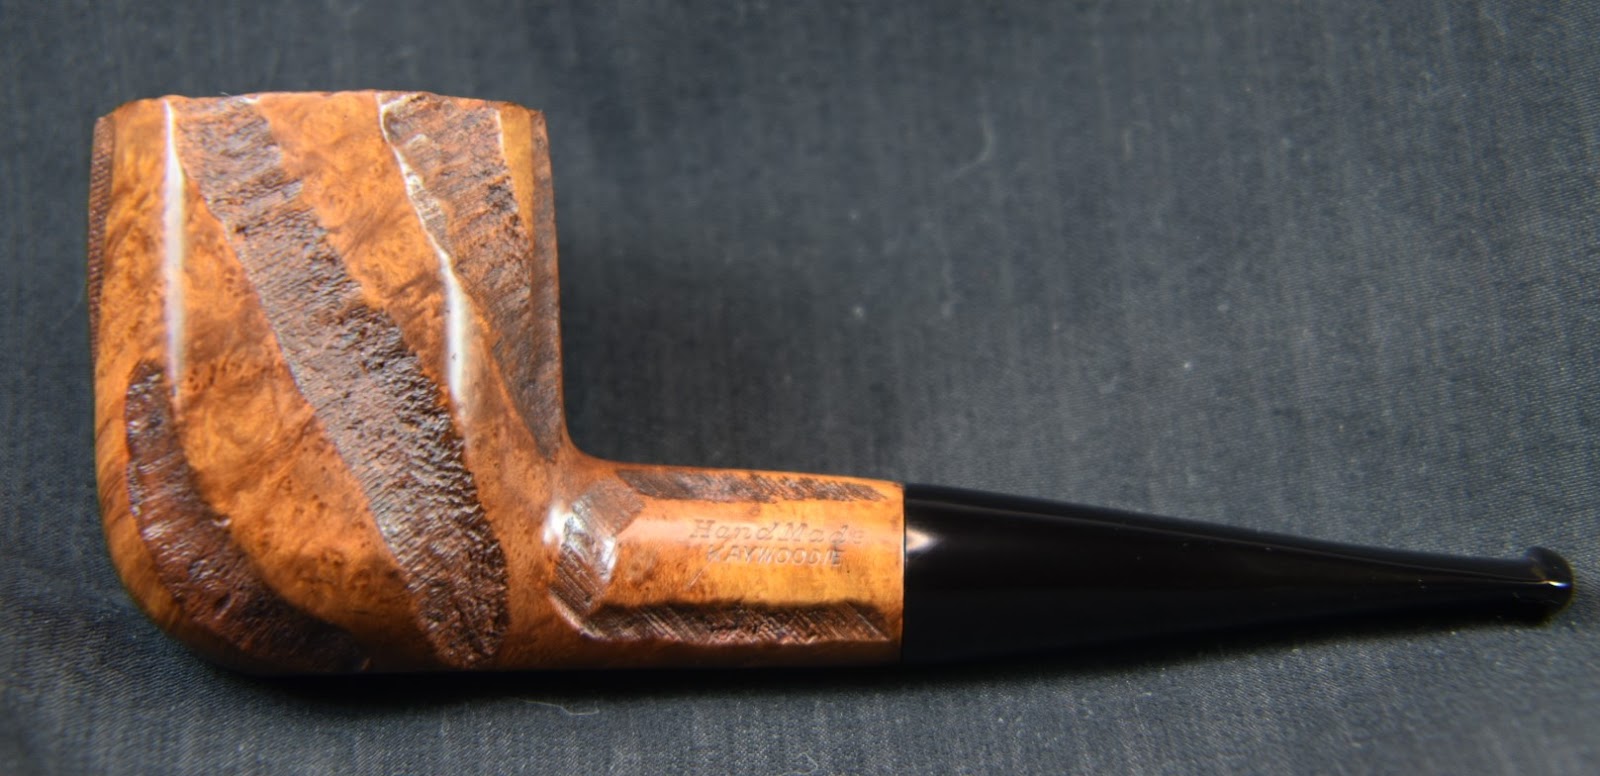
    The 677 KS shape is “A bent Billiard with a supple, Brandy-like taper toward the rim, Savinelli’s “677 KS” is a compact yet full-bodied take on the classic English shape. Per the Italian marque’s shaping conventions, Savinelli has elaborated on the standard design, adding mass to the base and transition with extra height and taper lent to the bowl, all paired to one of their signature triangular shanks.” according to Smokingpipes.com.  That is a mouthful of a description.  Also you will later see that the “extra height” is a bit less extra after the restoration.  The three digit shape code for Savinelli pipes was established in the 1970s according to information from pipephil.eu.  One more detail is the “KS” – this stands for King Size.

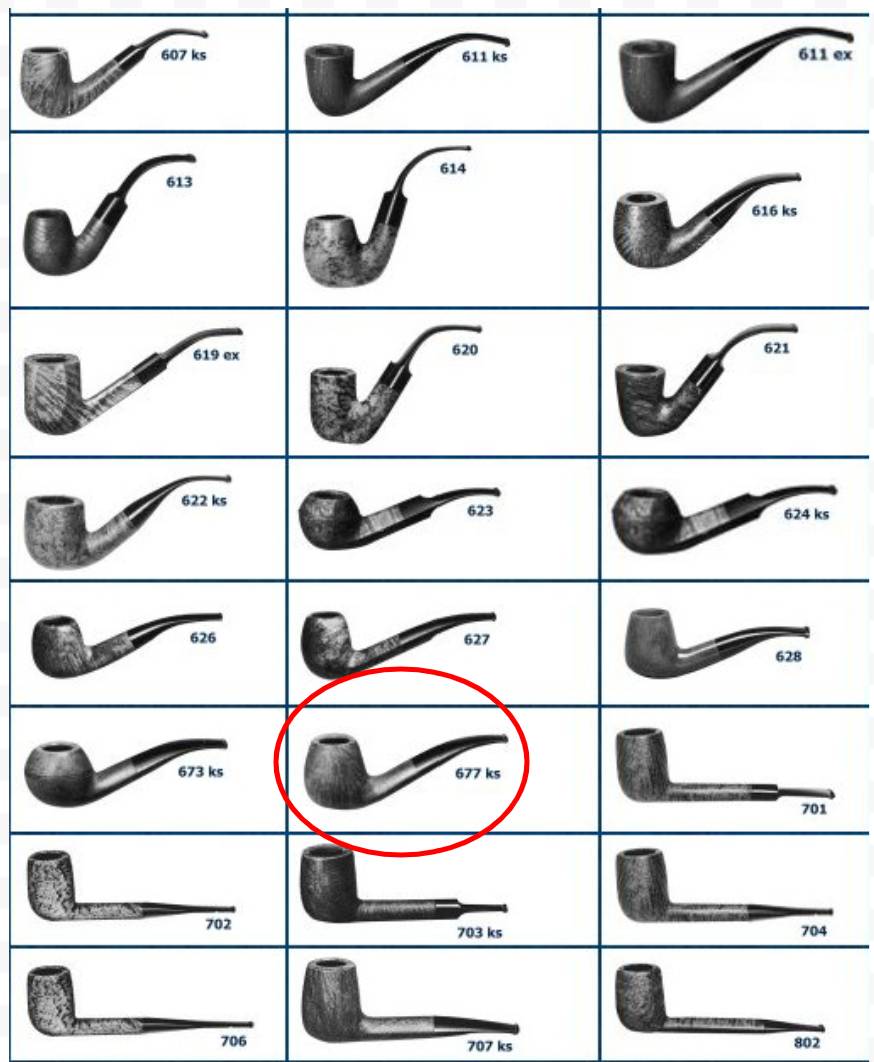
    (Document: Savinelli shape chart — Pipes : Logos & Markings – (pipephil.eu))

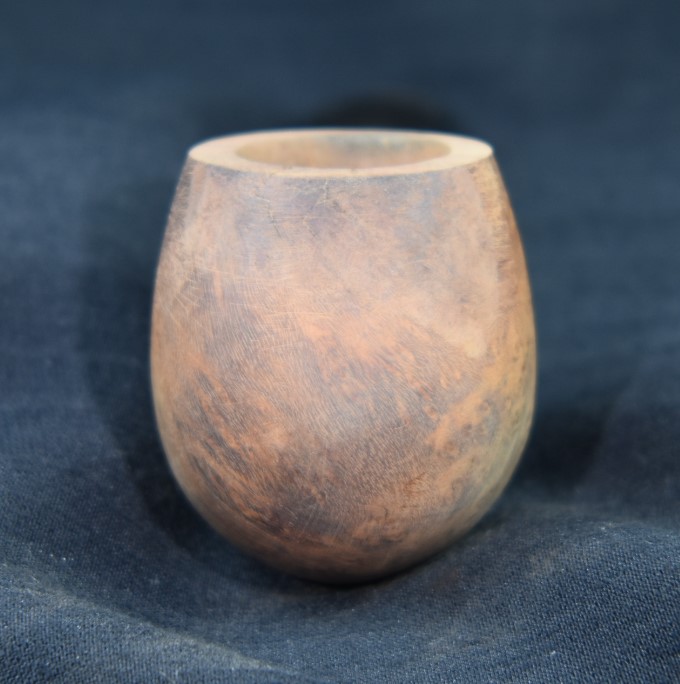
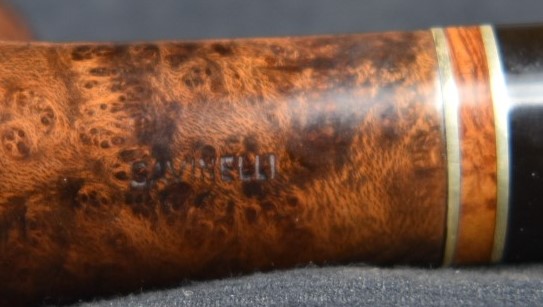
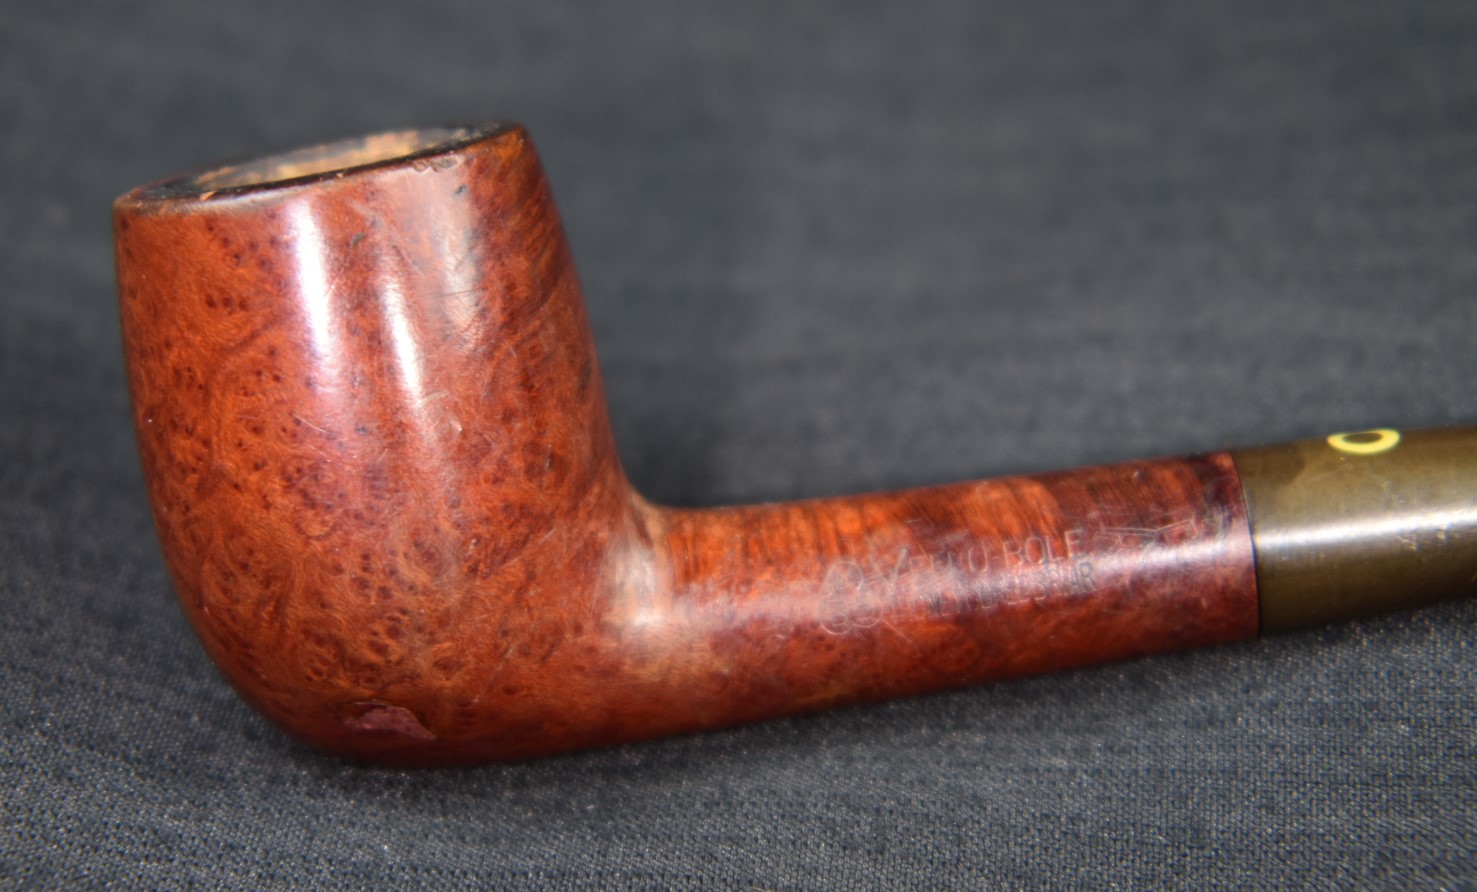
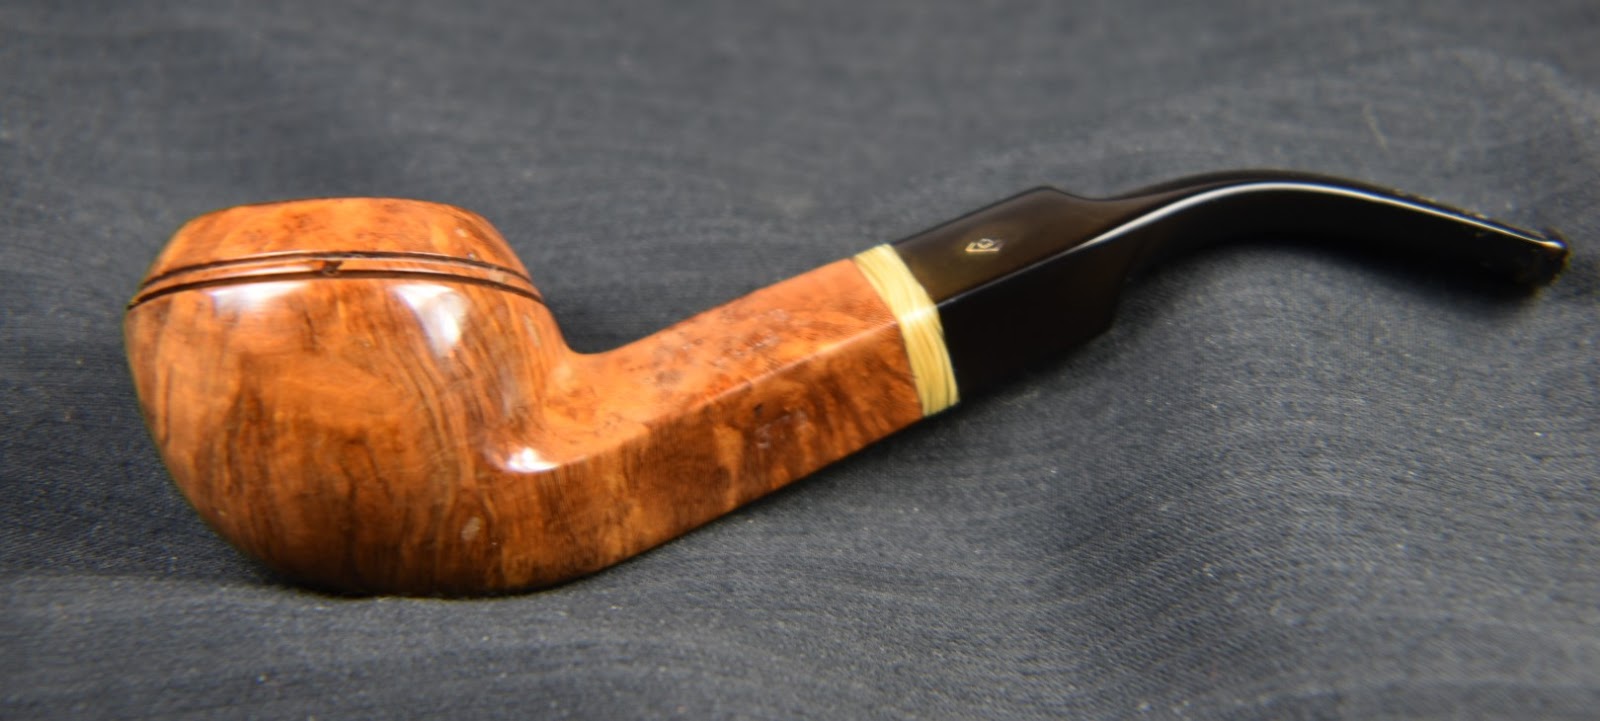
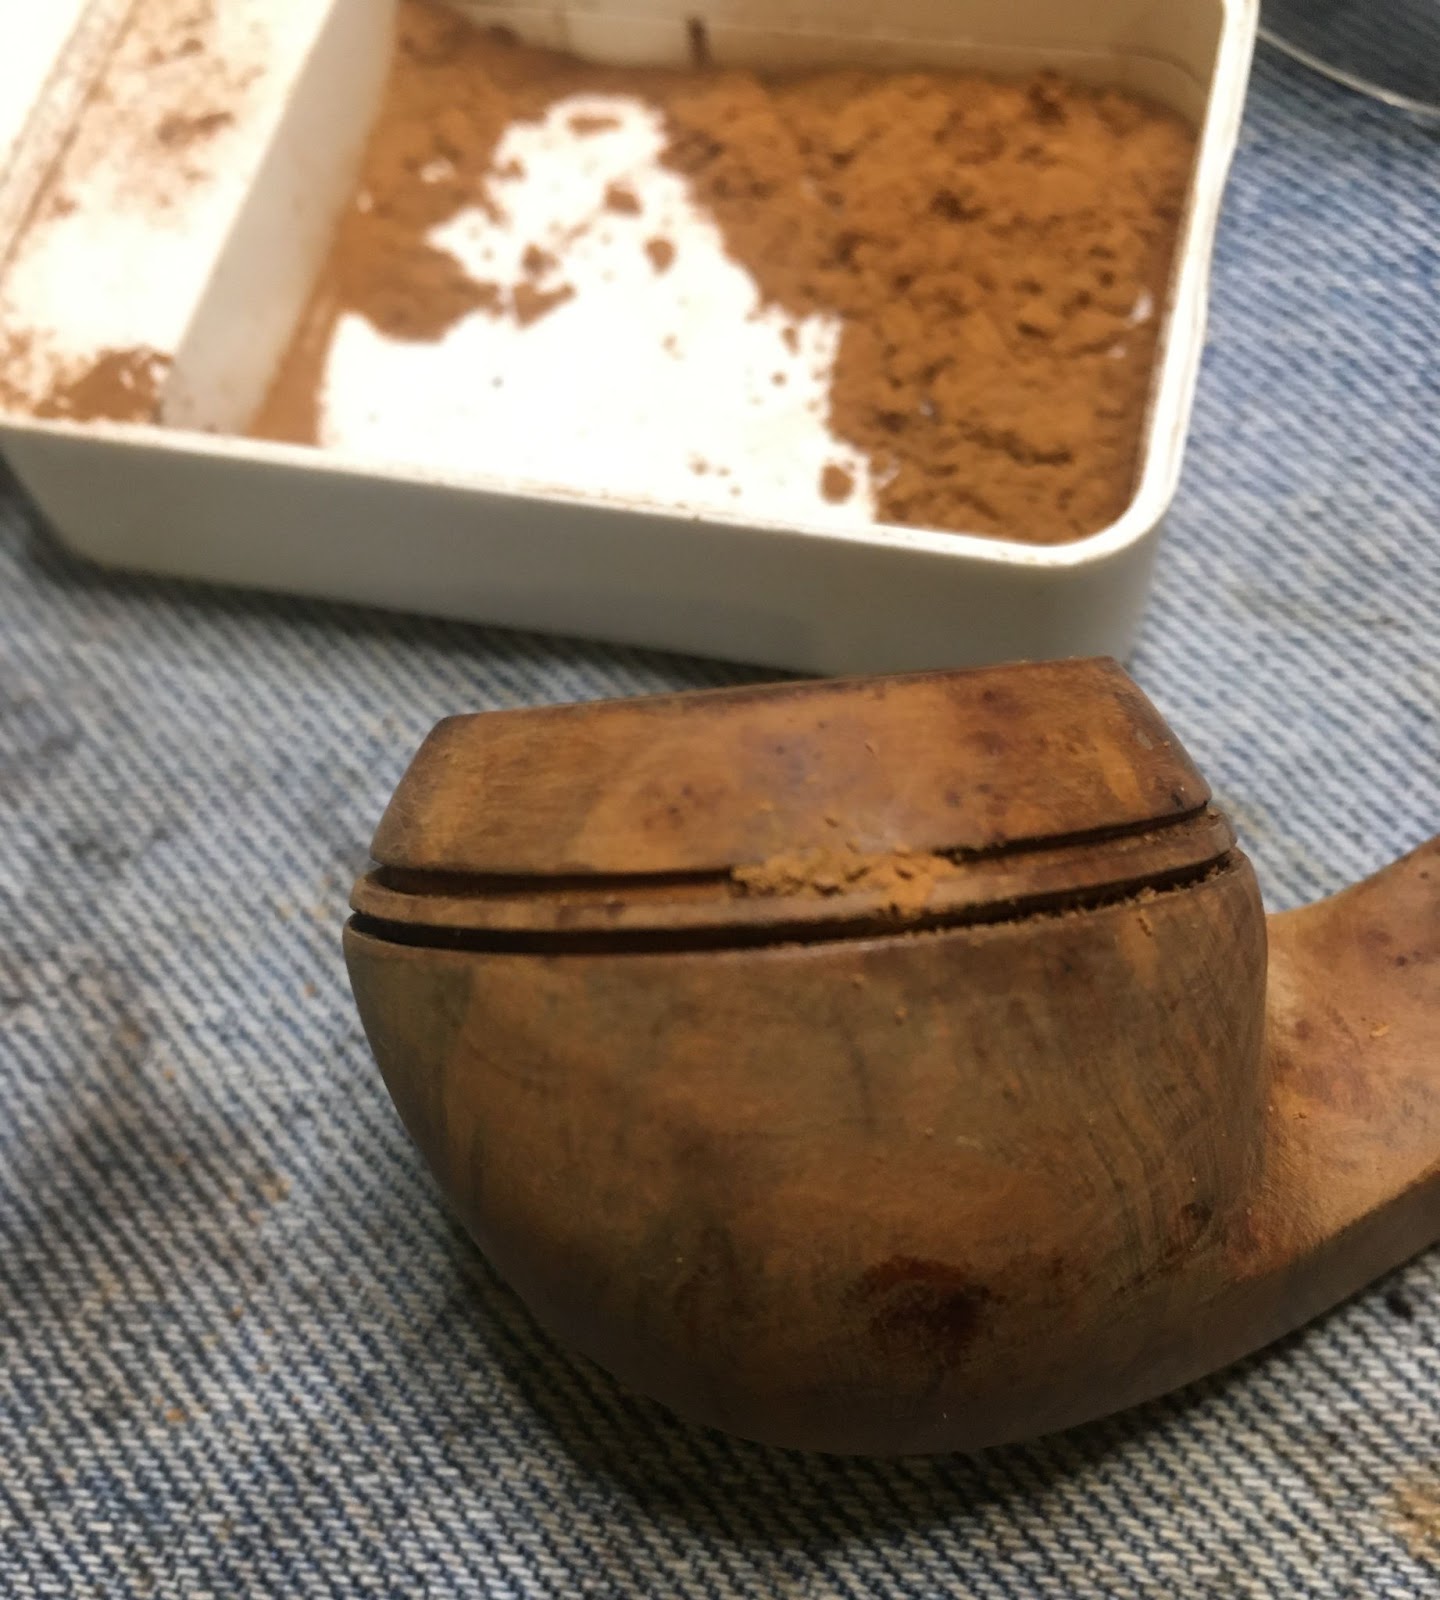
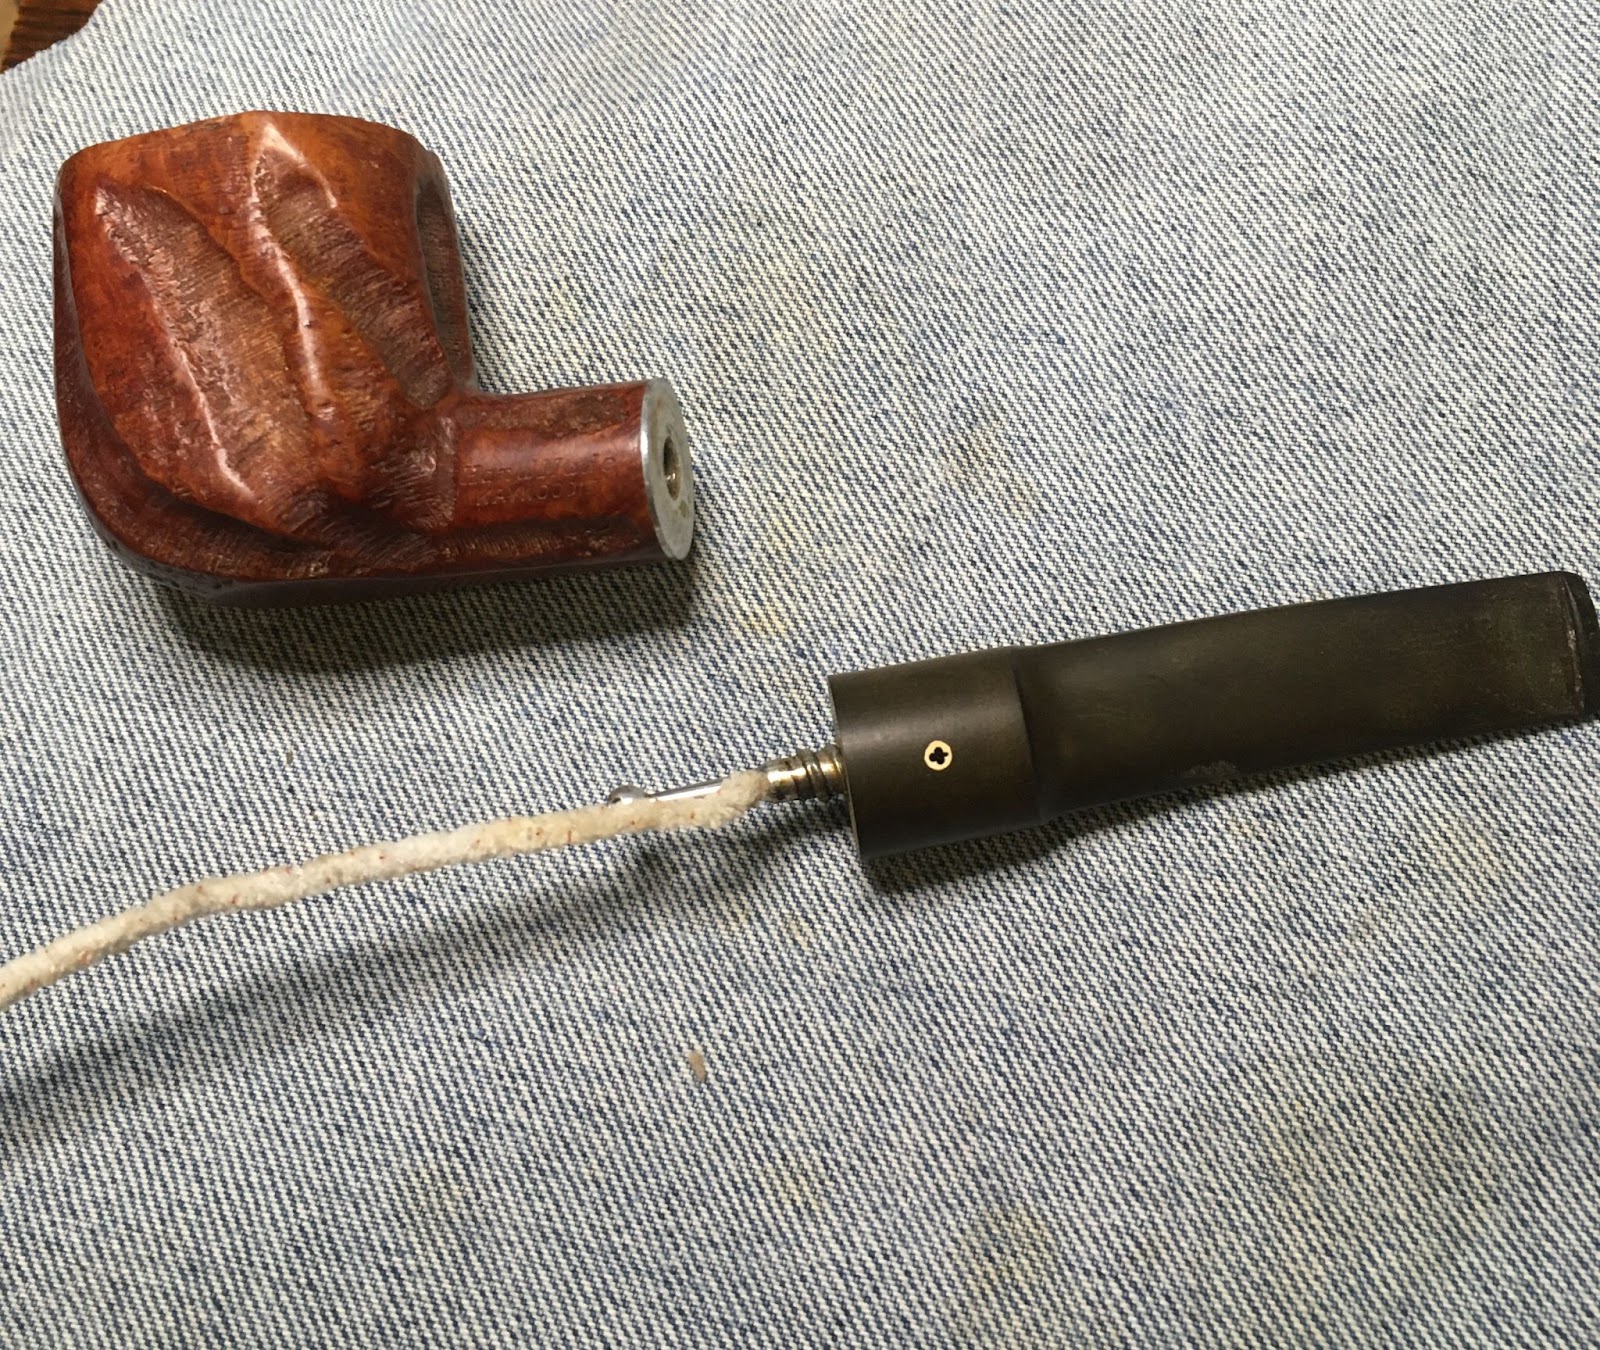
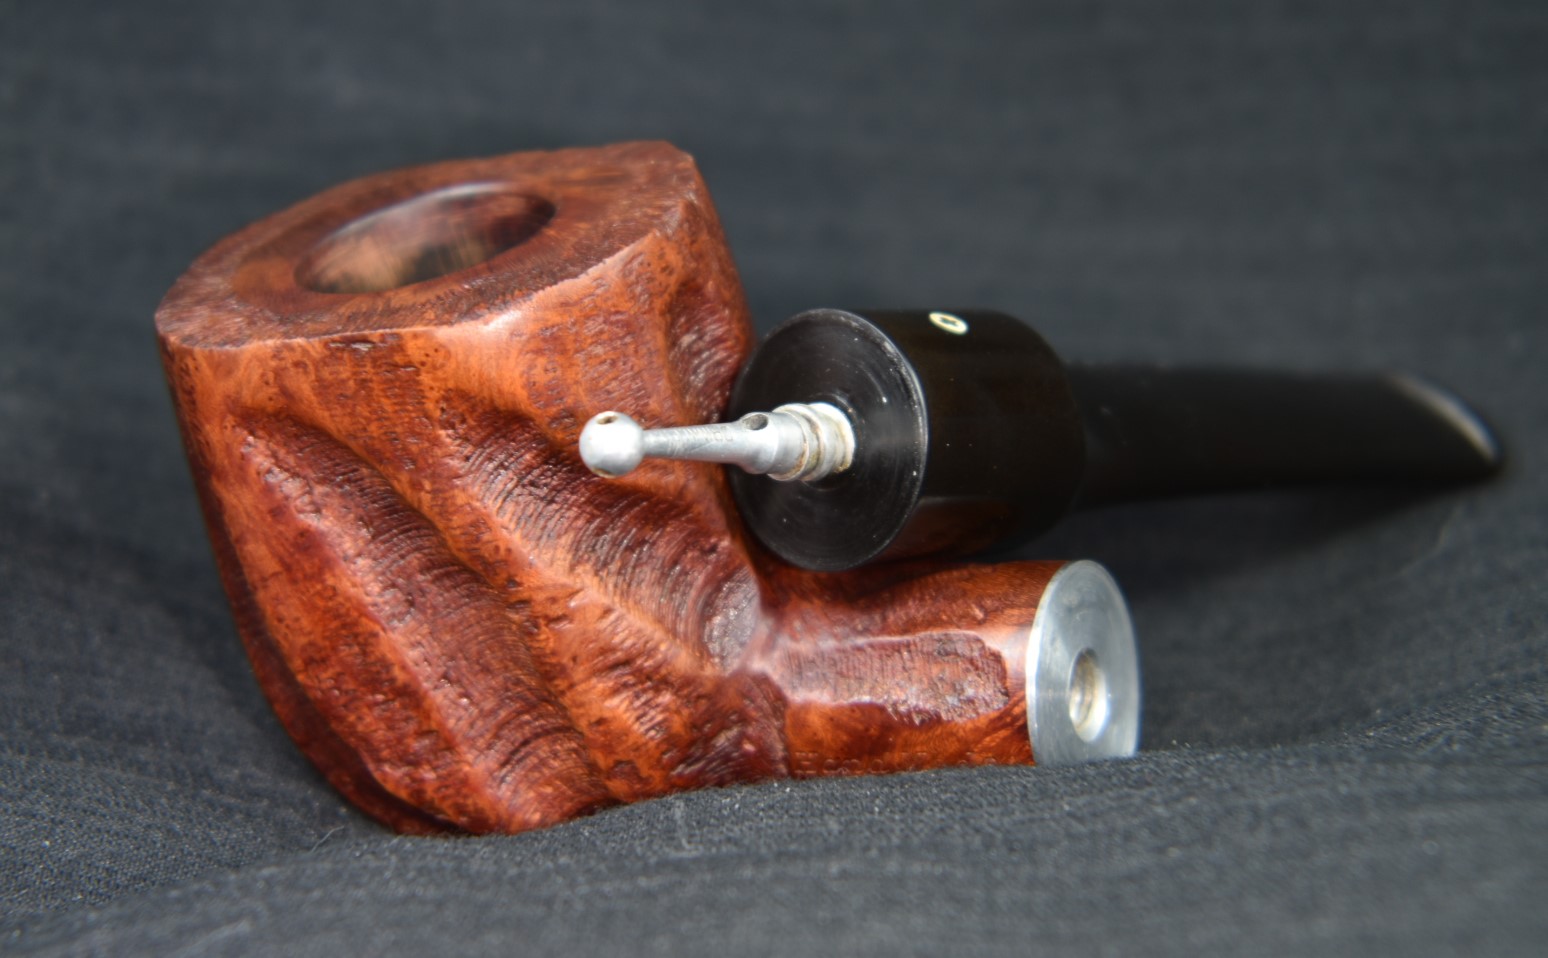
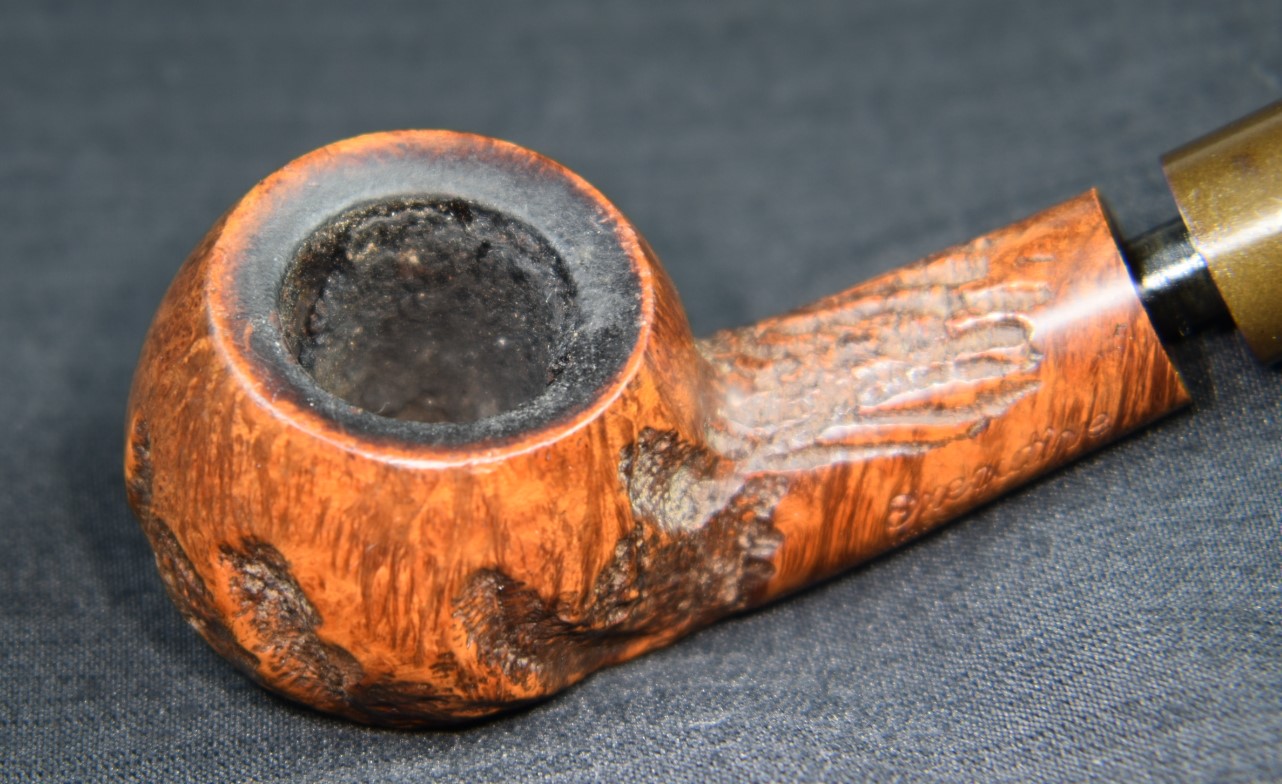
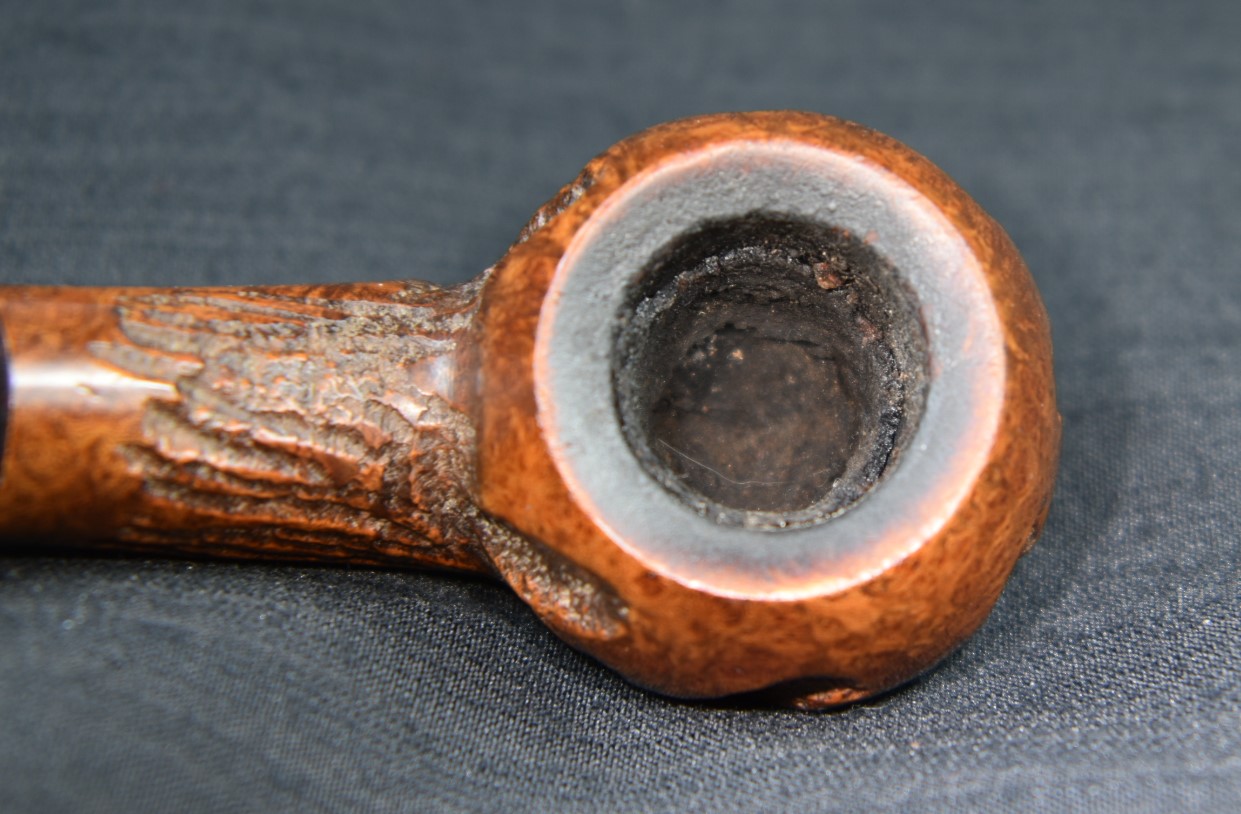
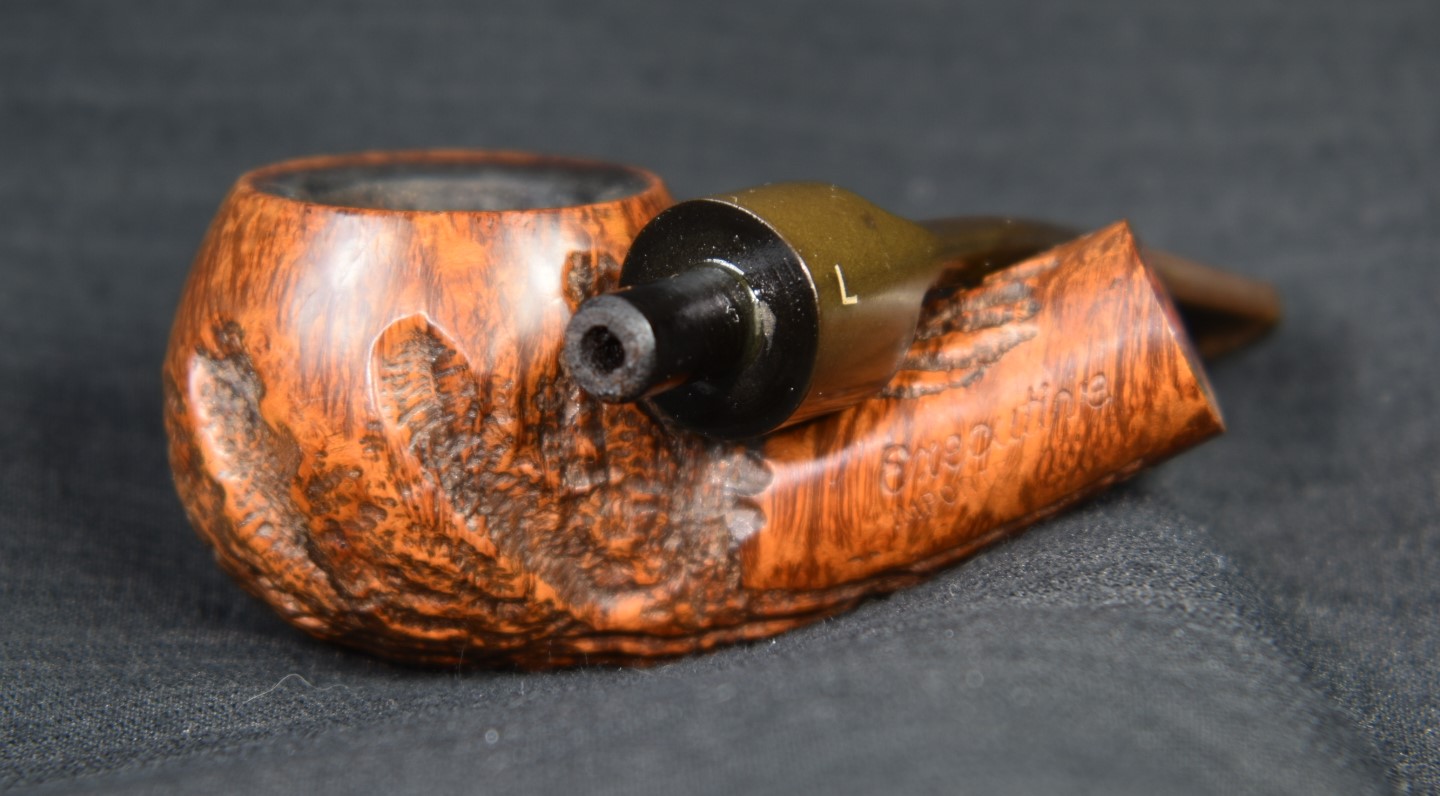
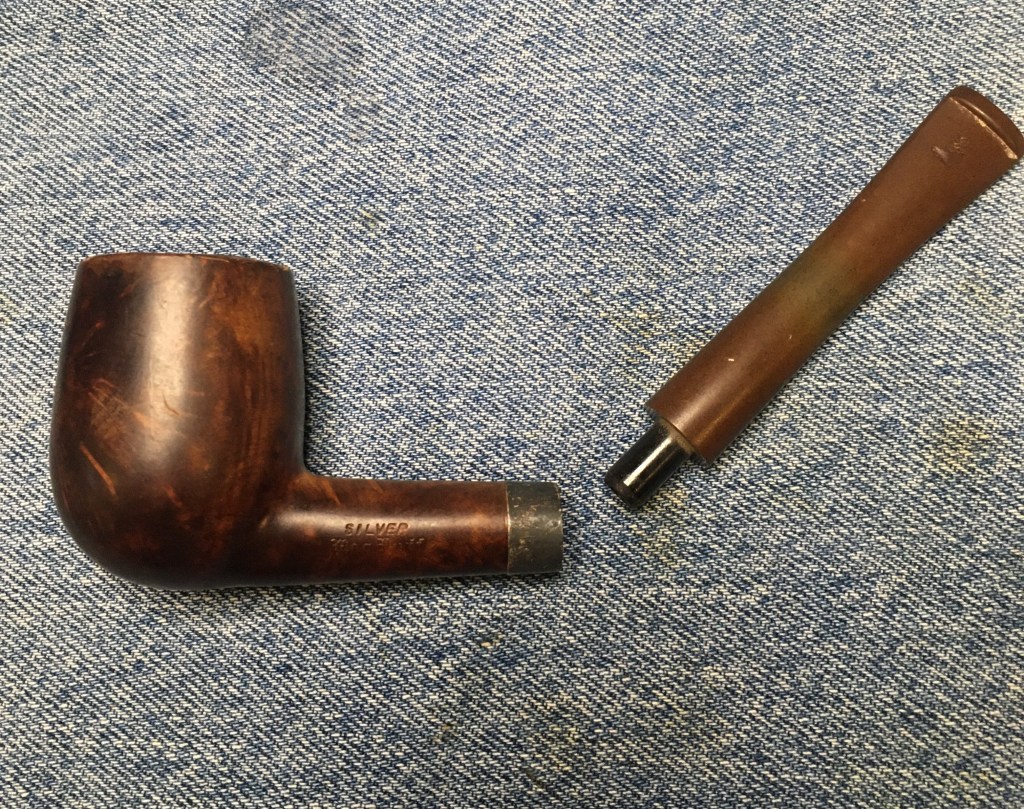
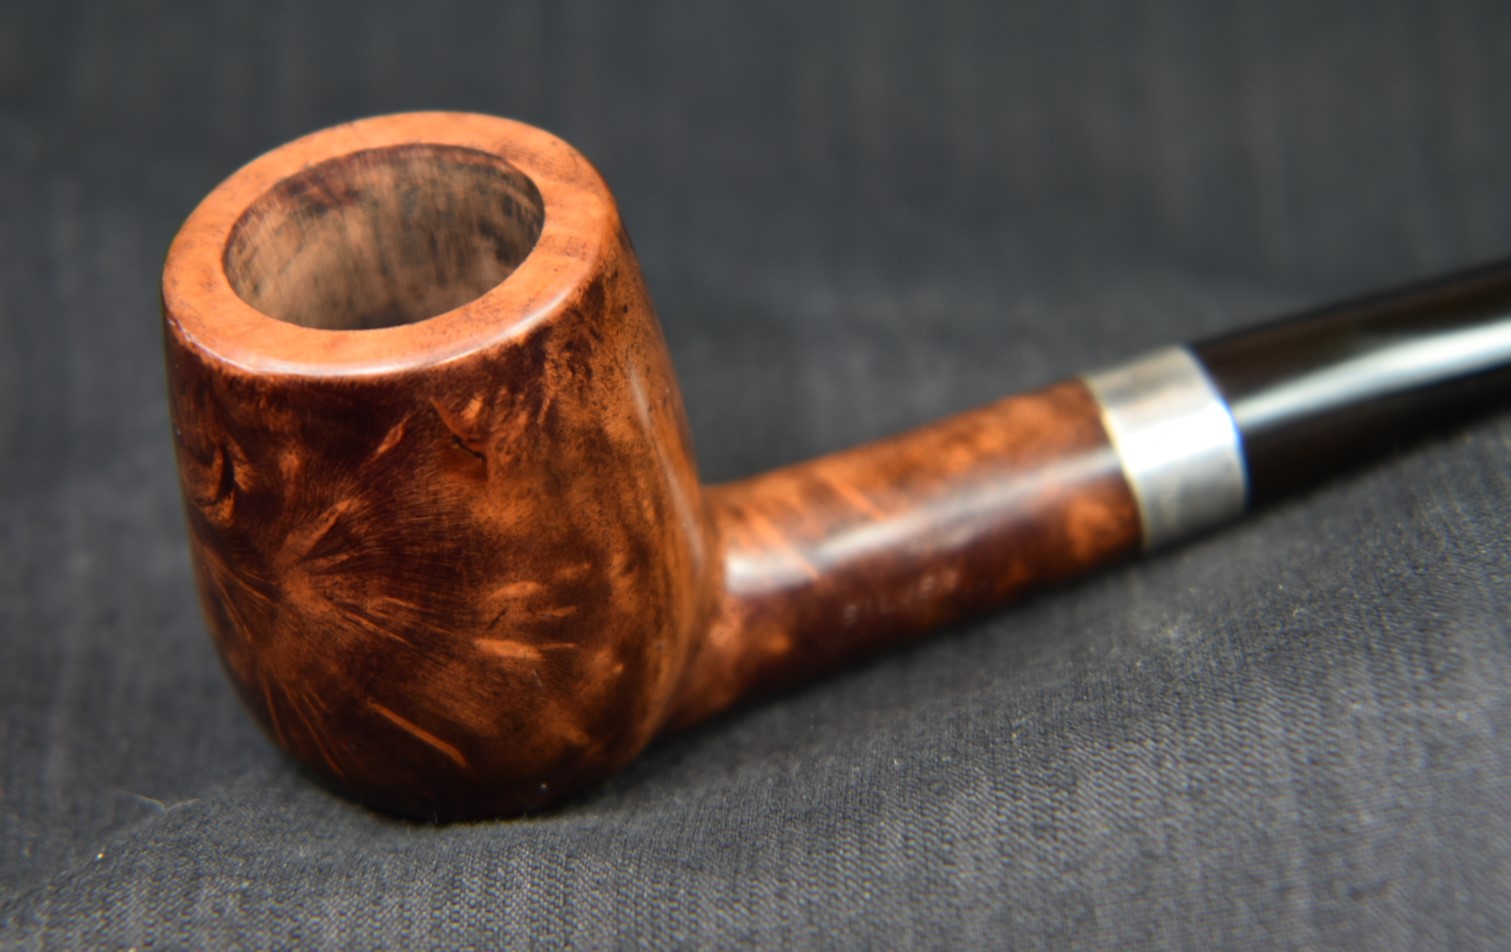
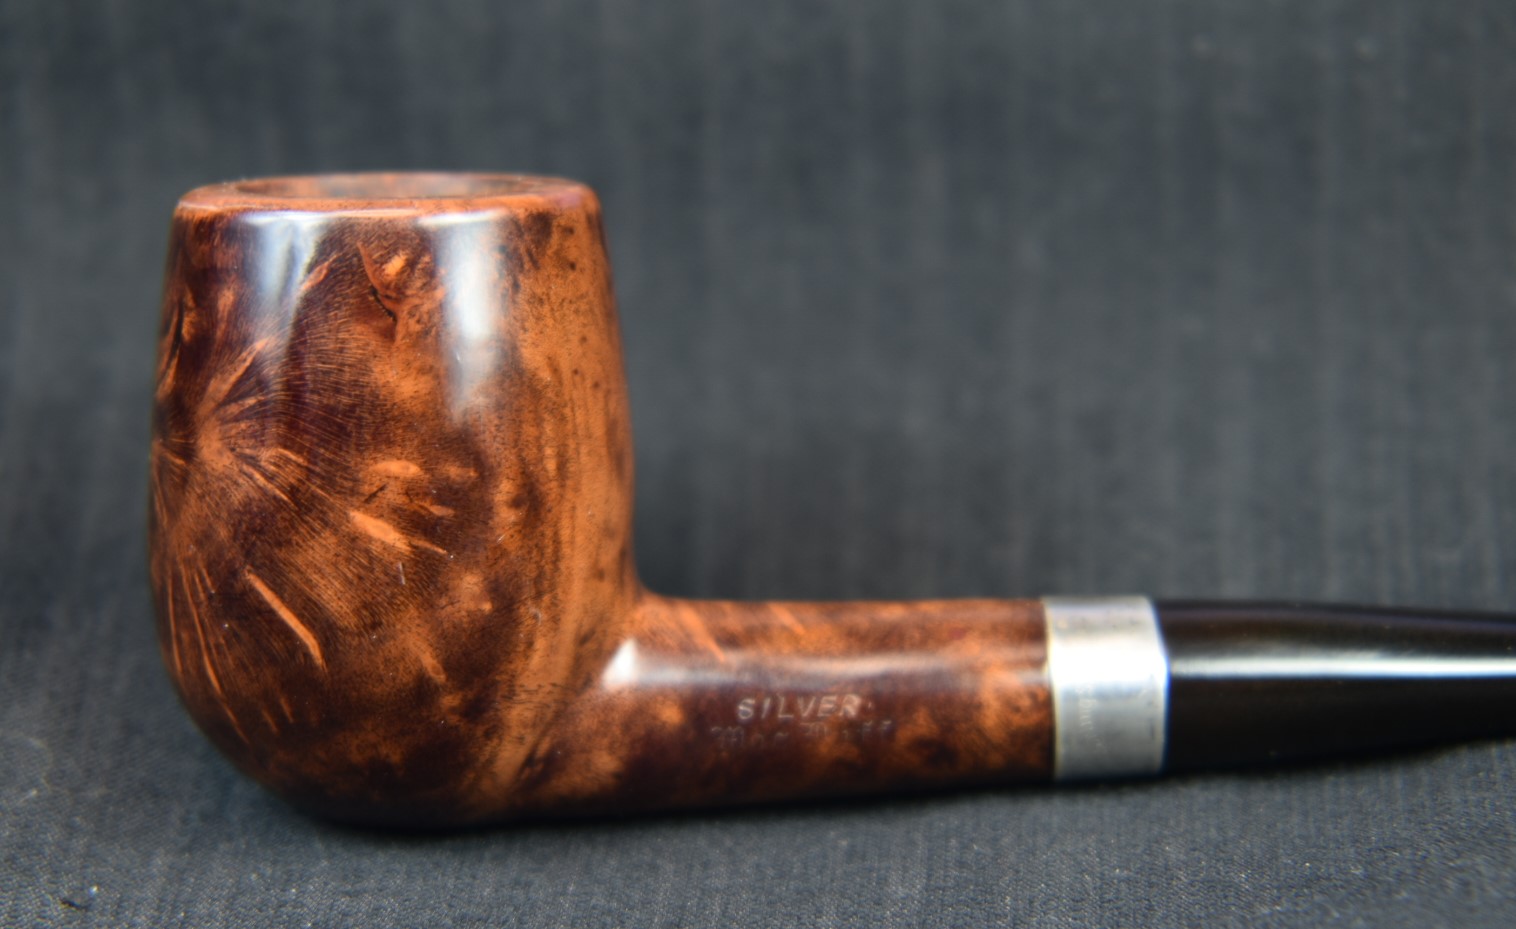
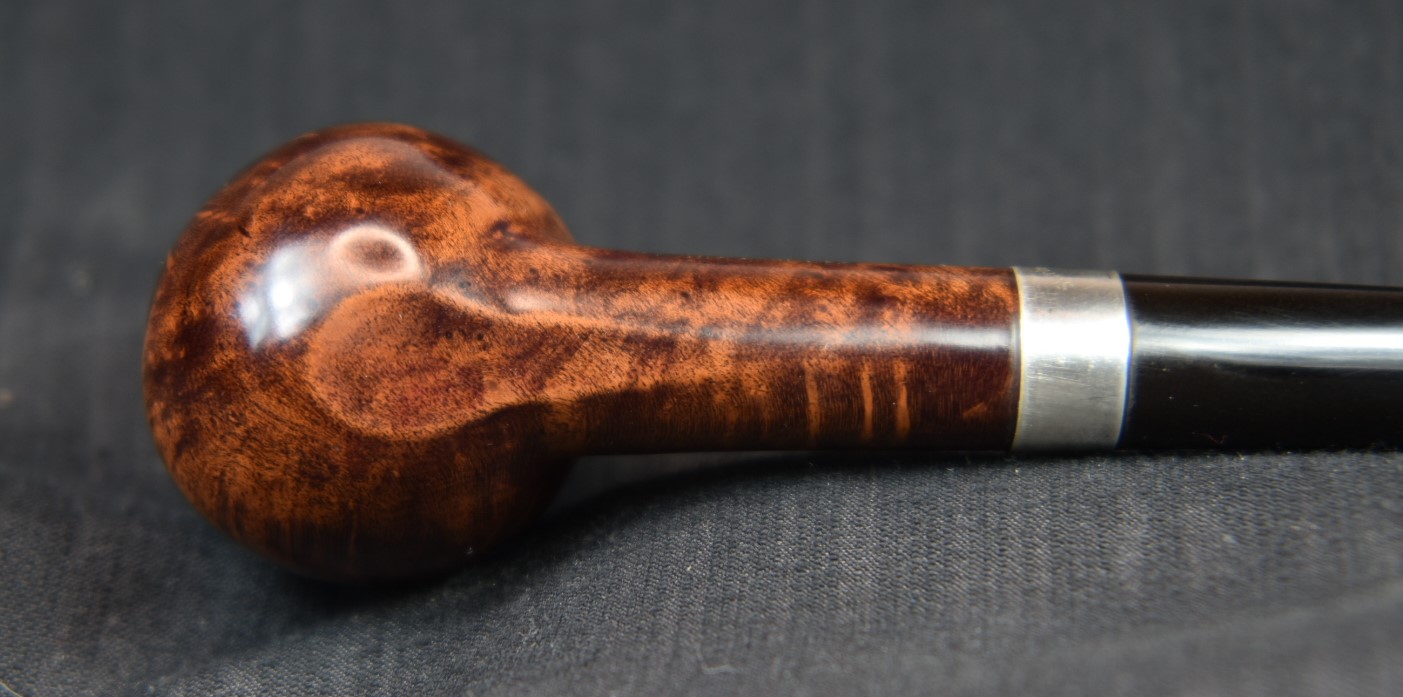
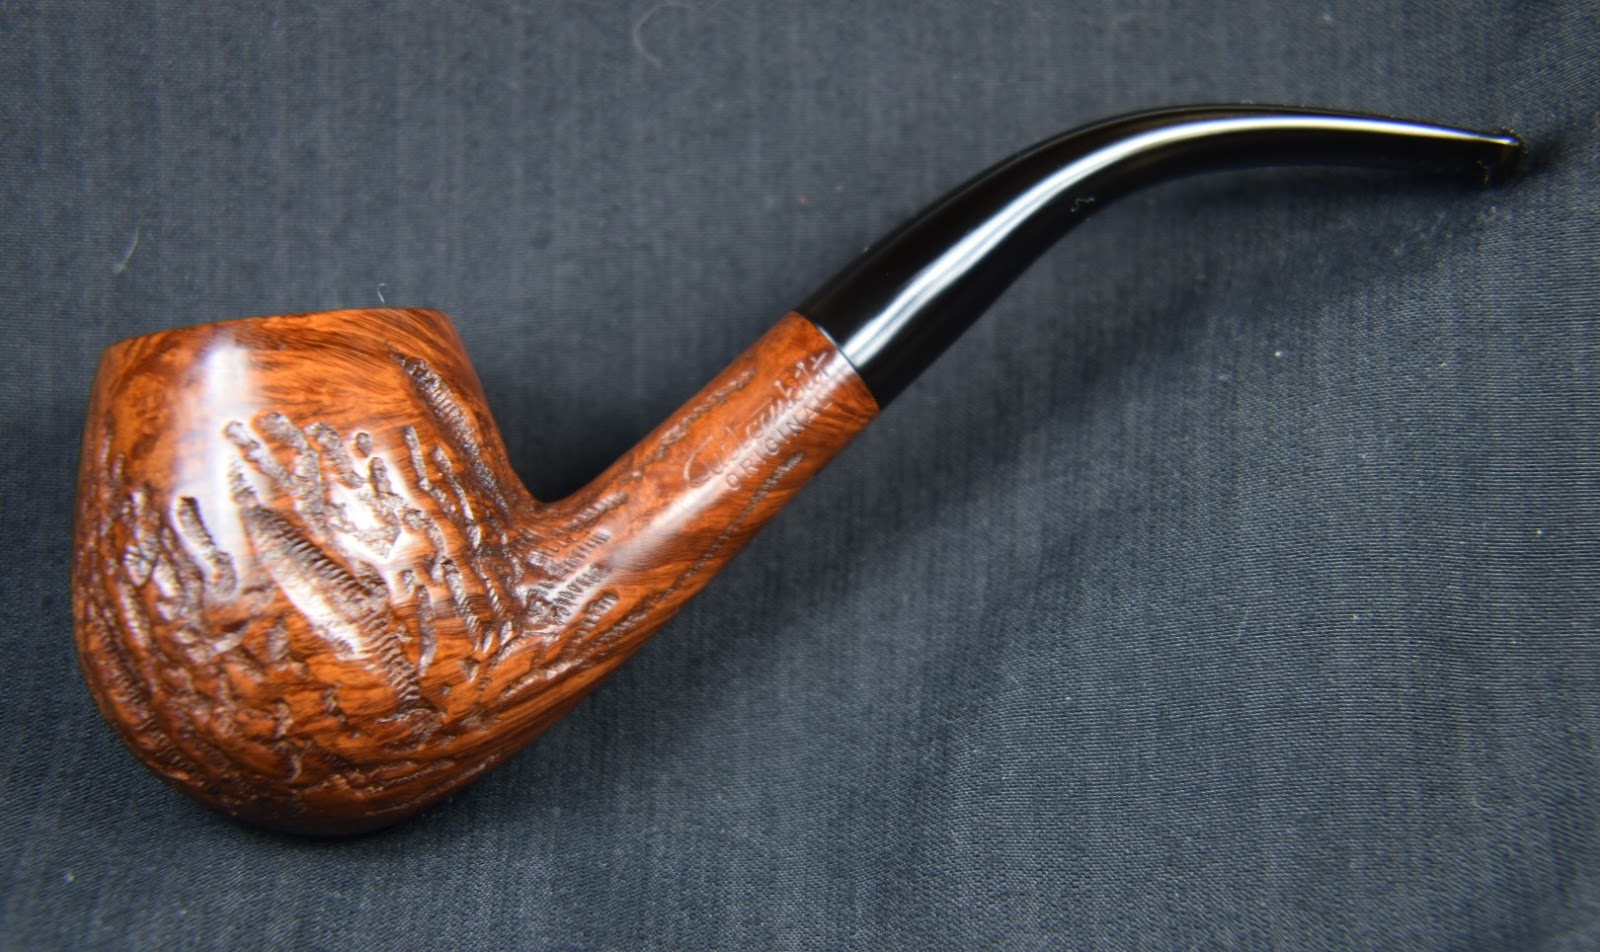
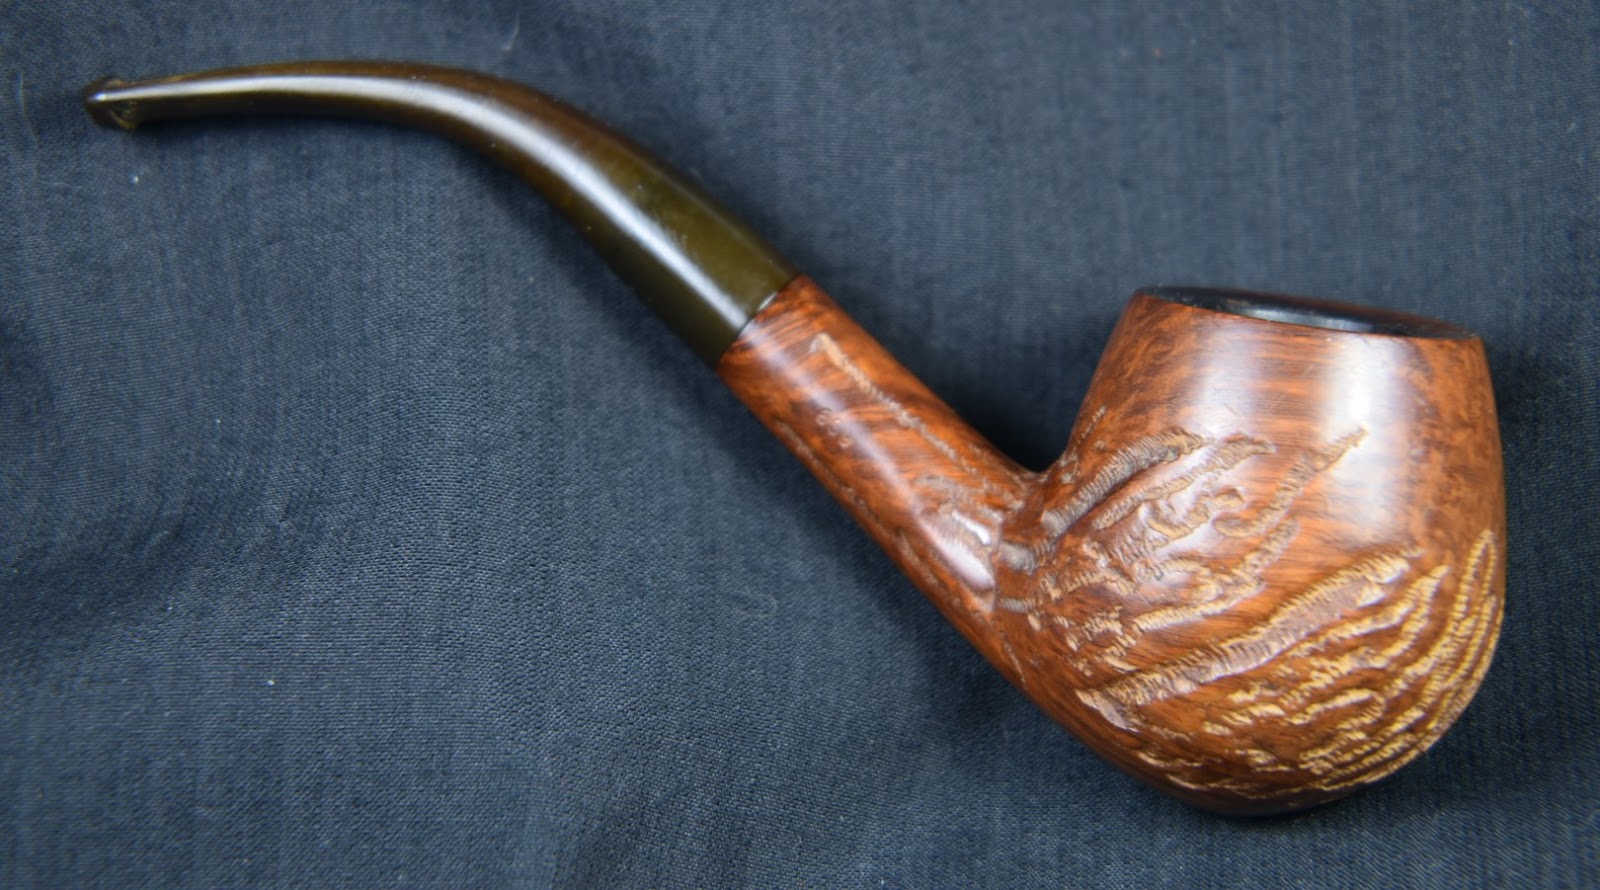
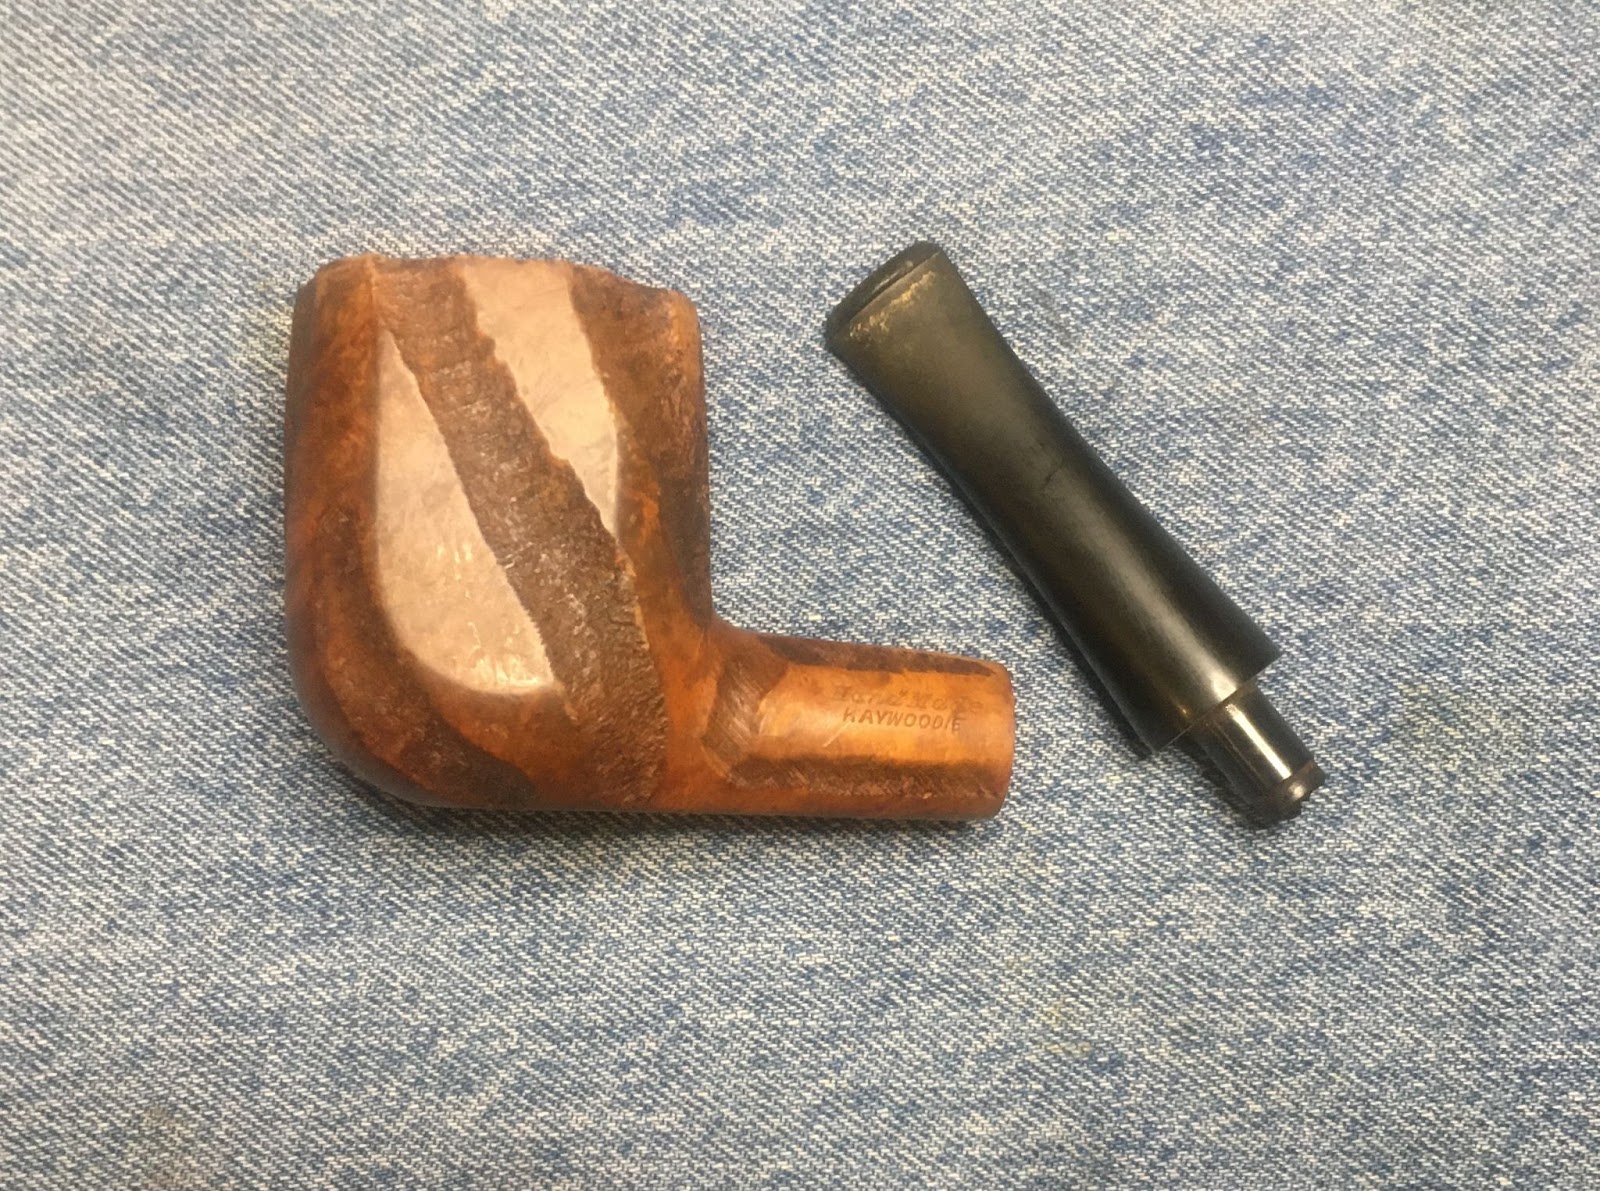
    So let’s take a look at what this Savinelli Porto Cervo 677 KS looked like upon arrival.

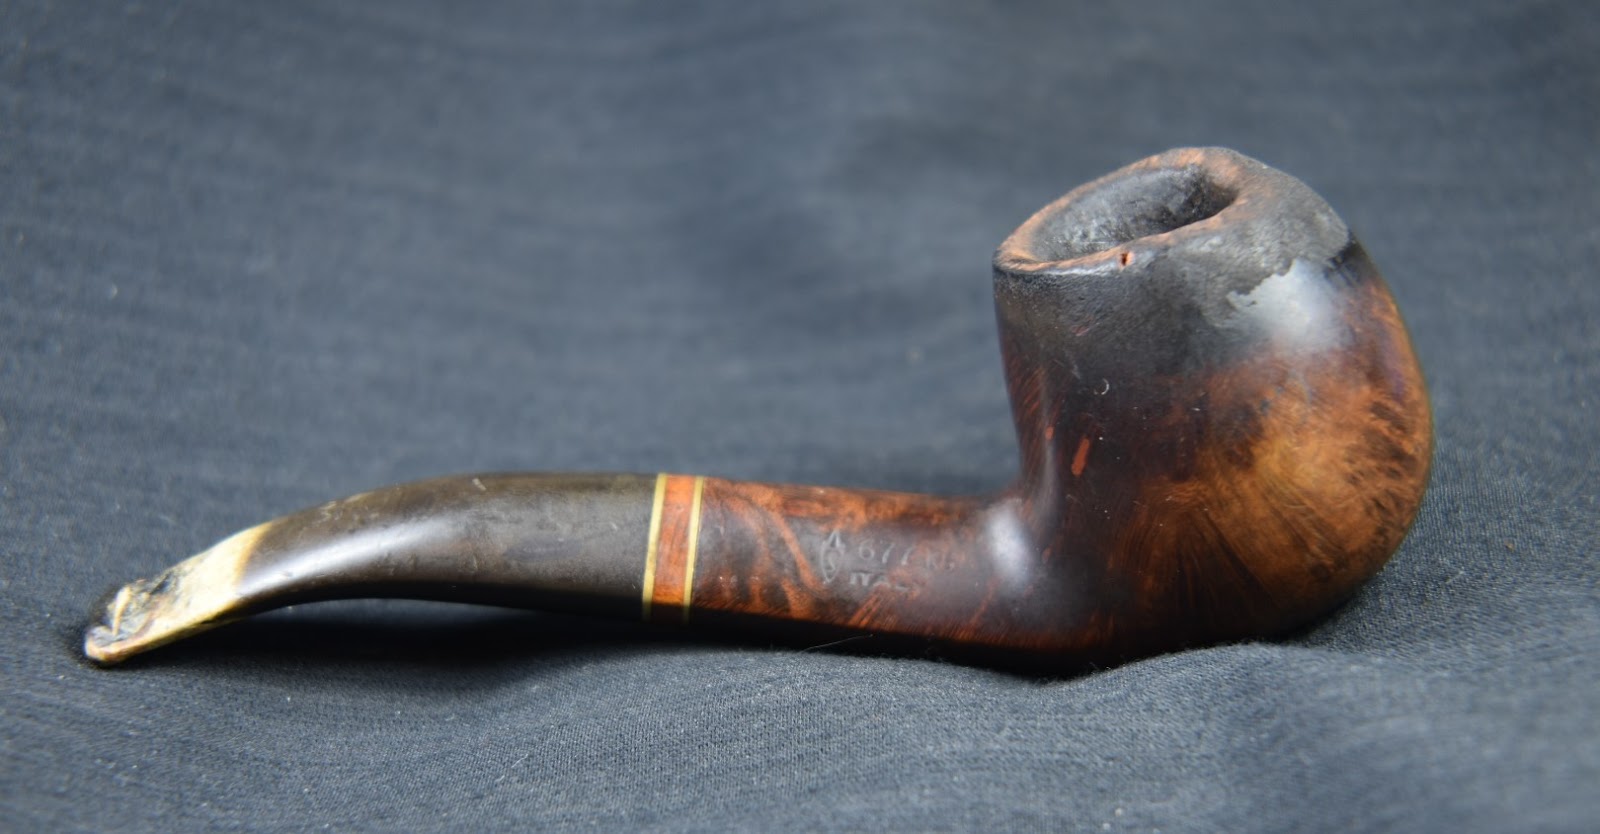
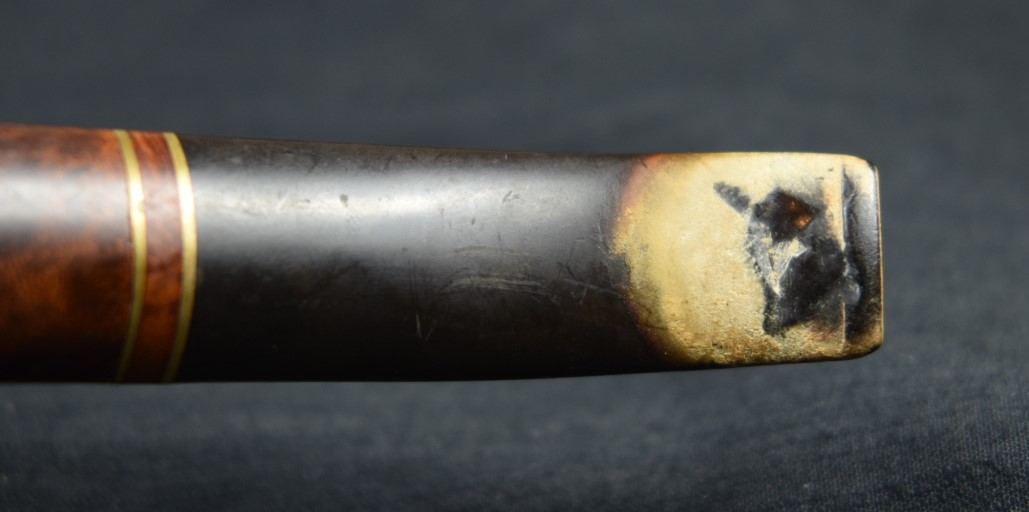
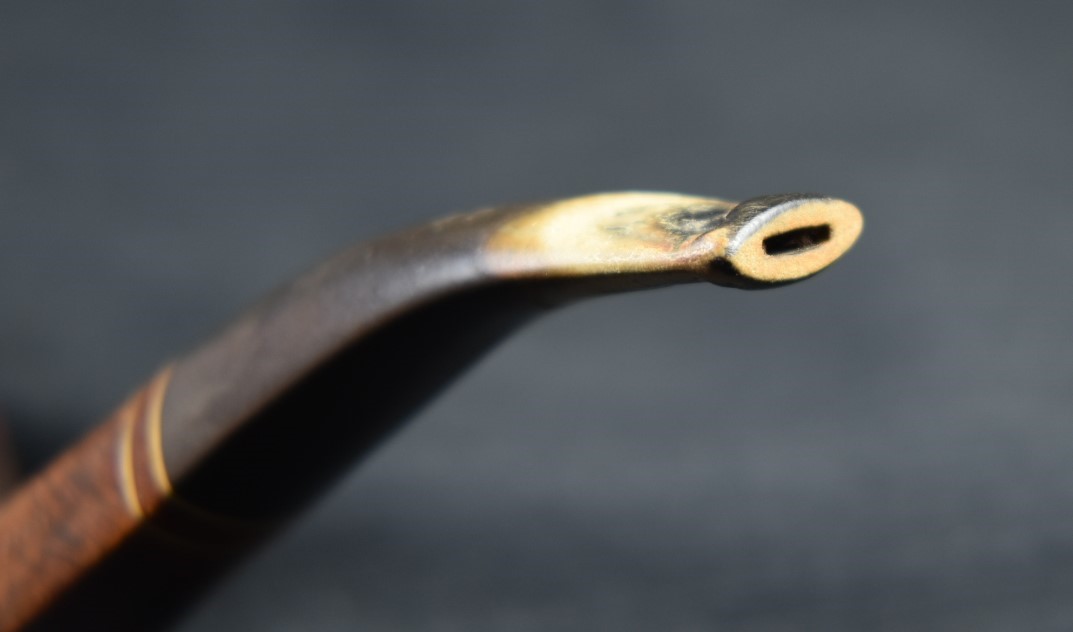
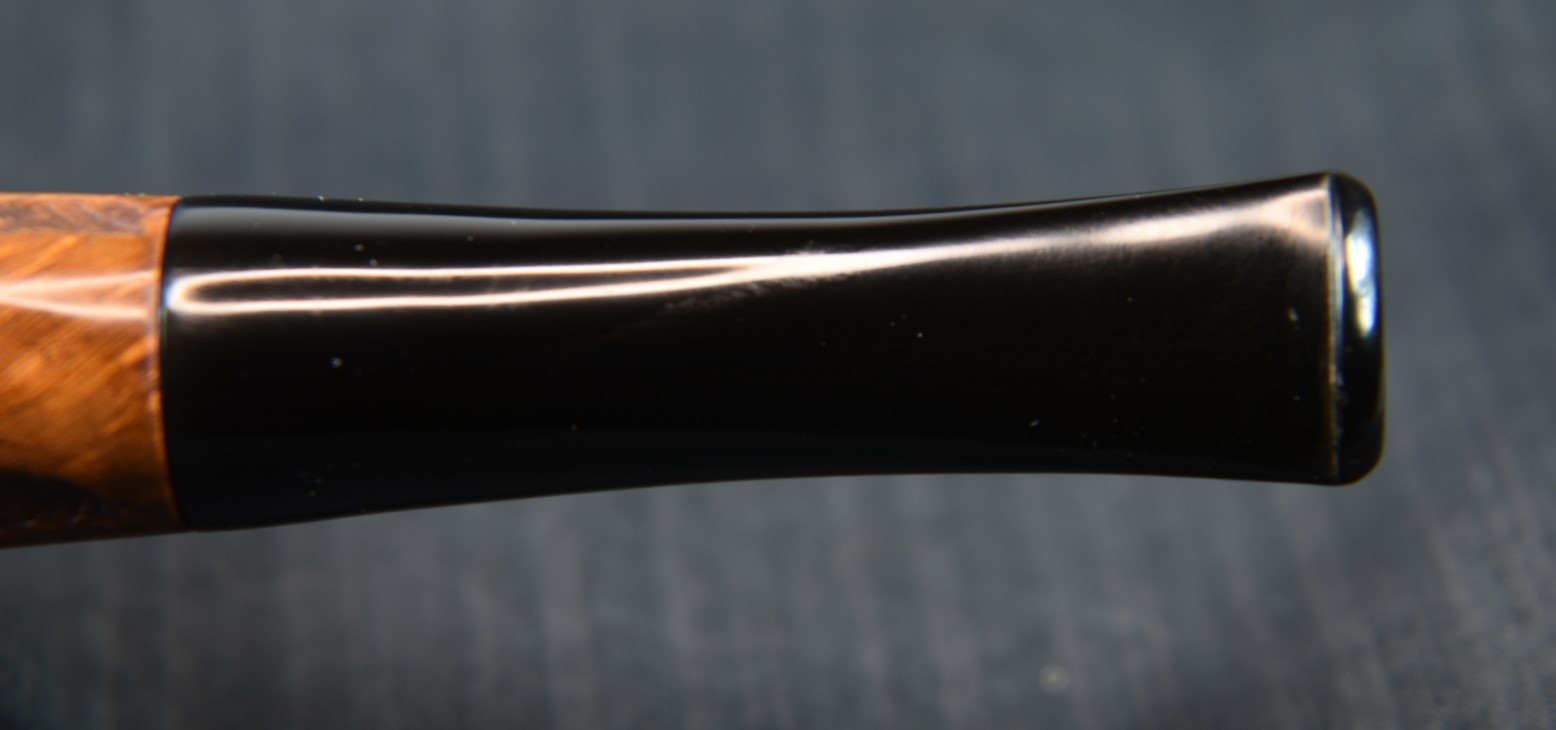
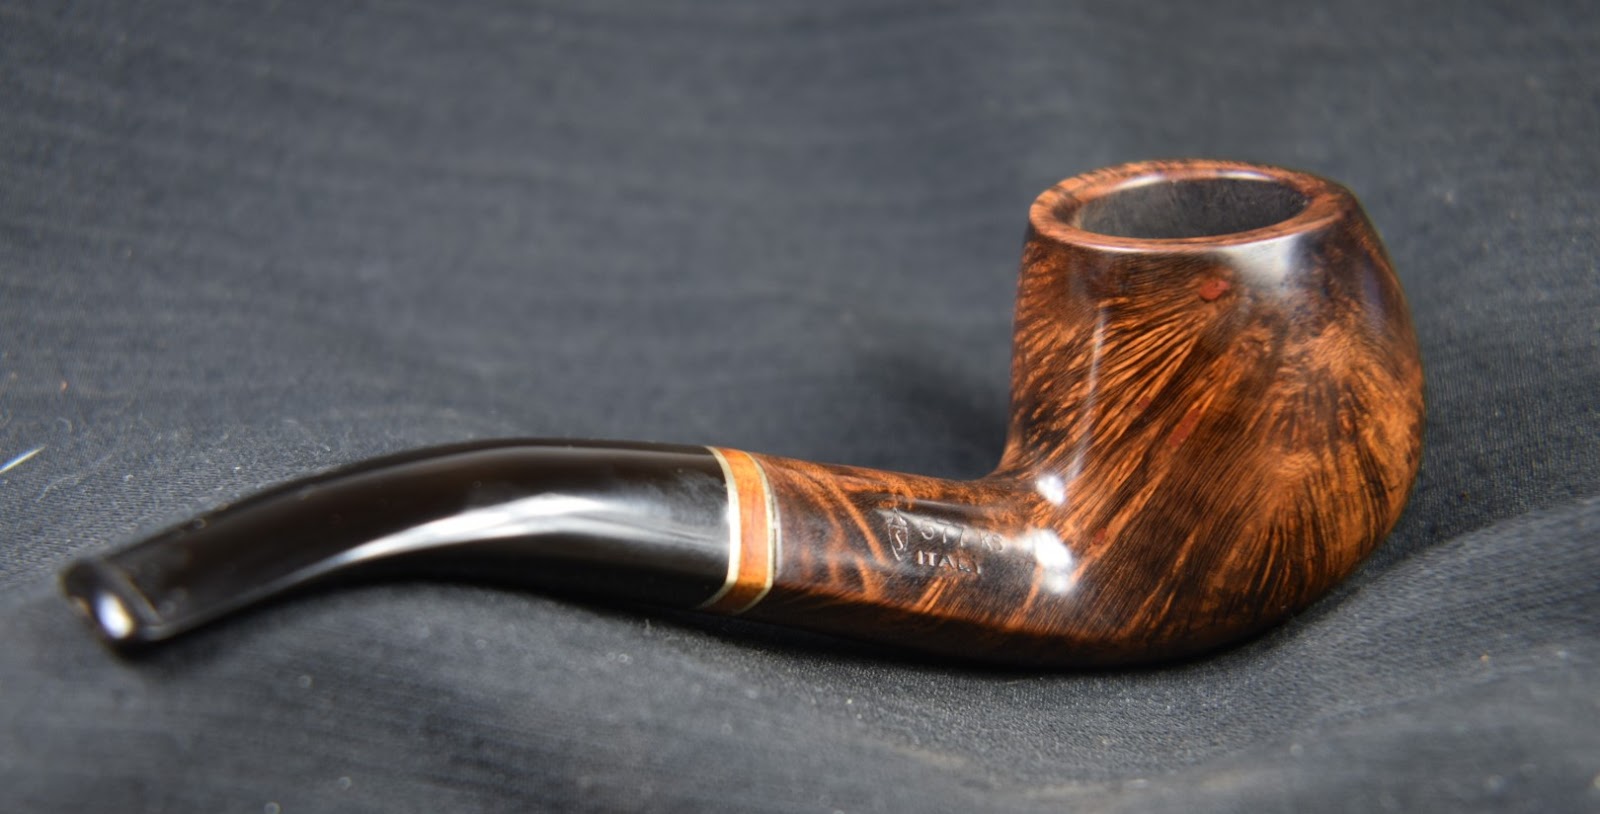
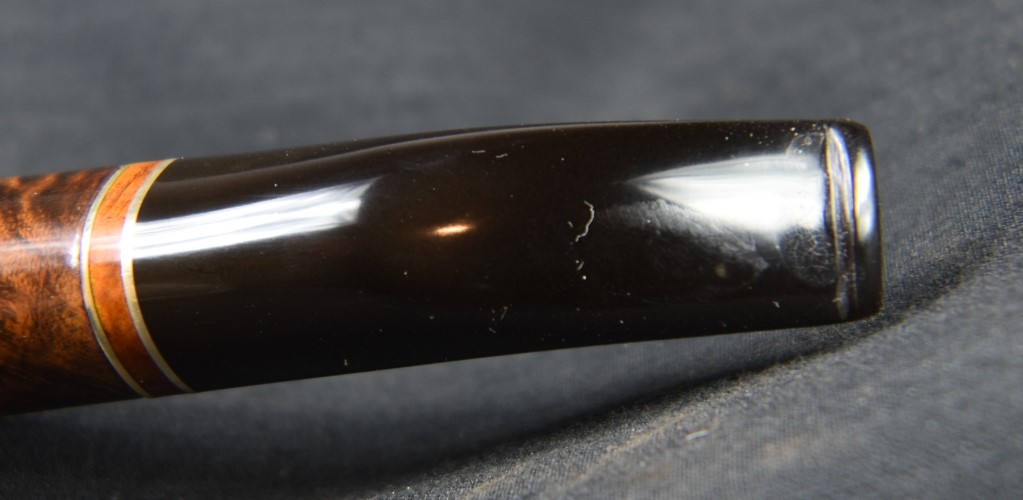
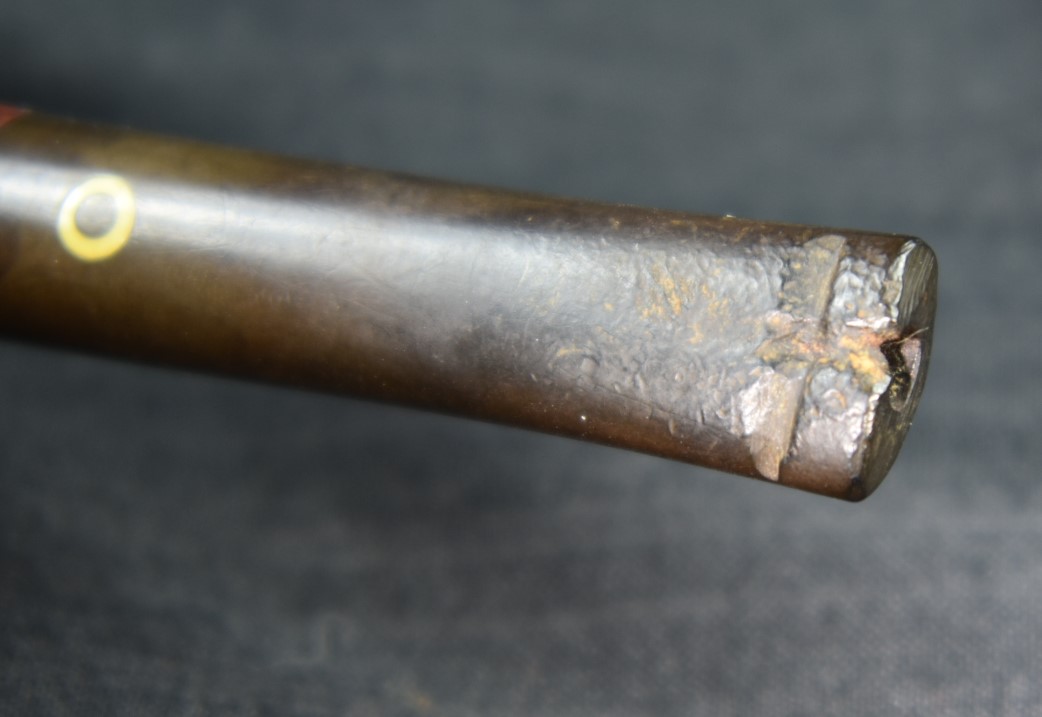
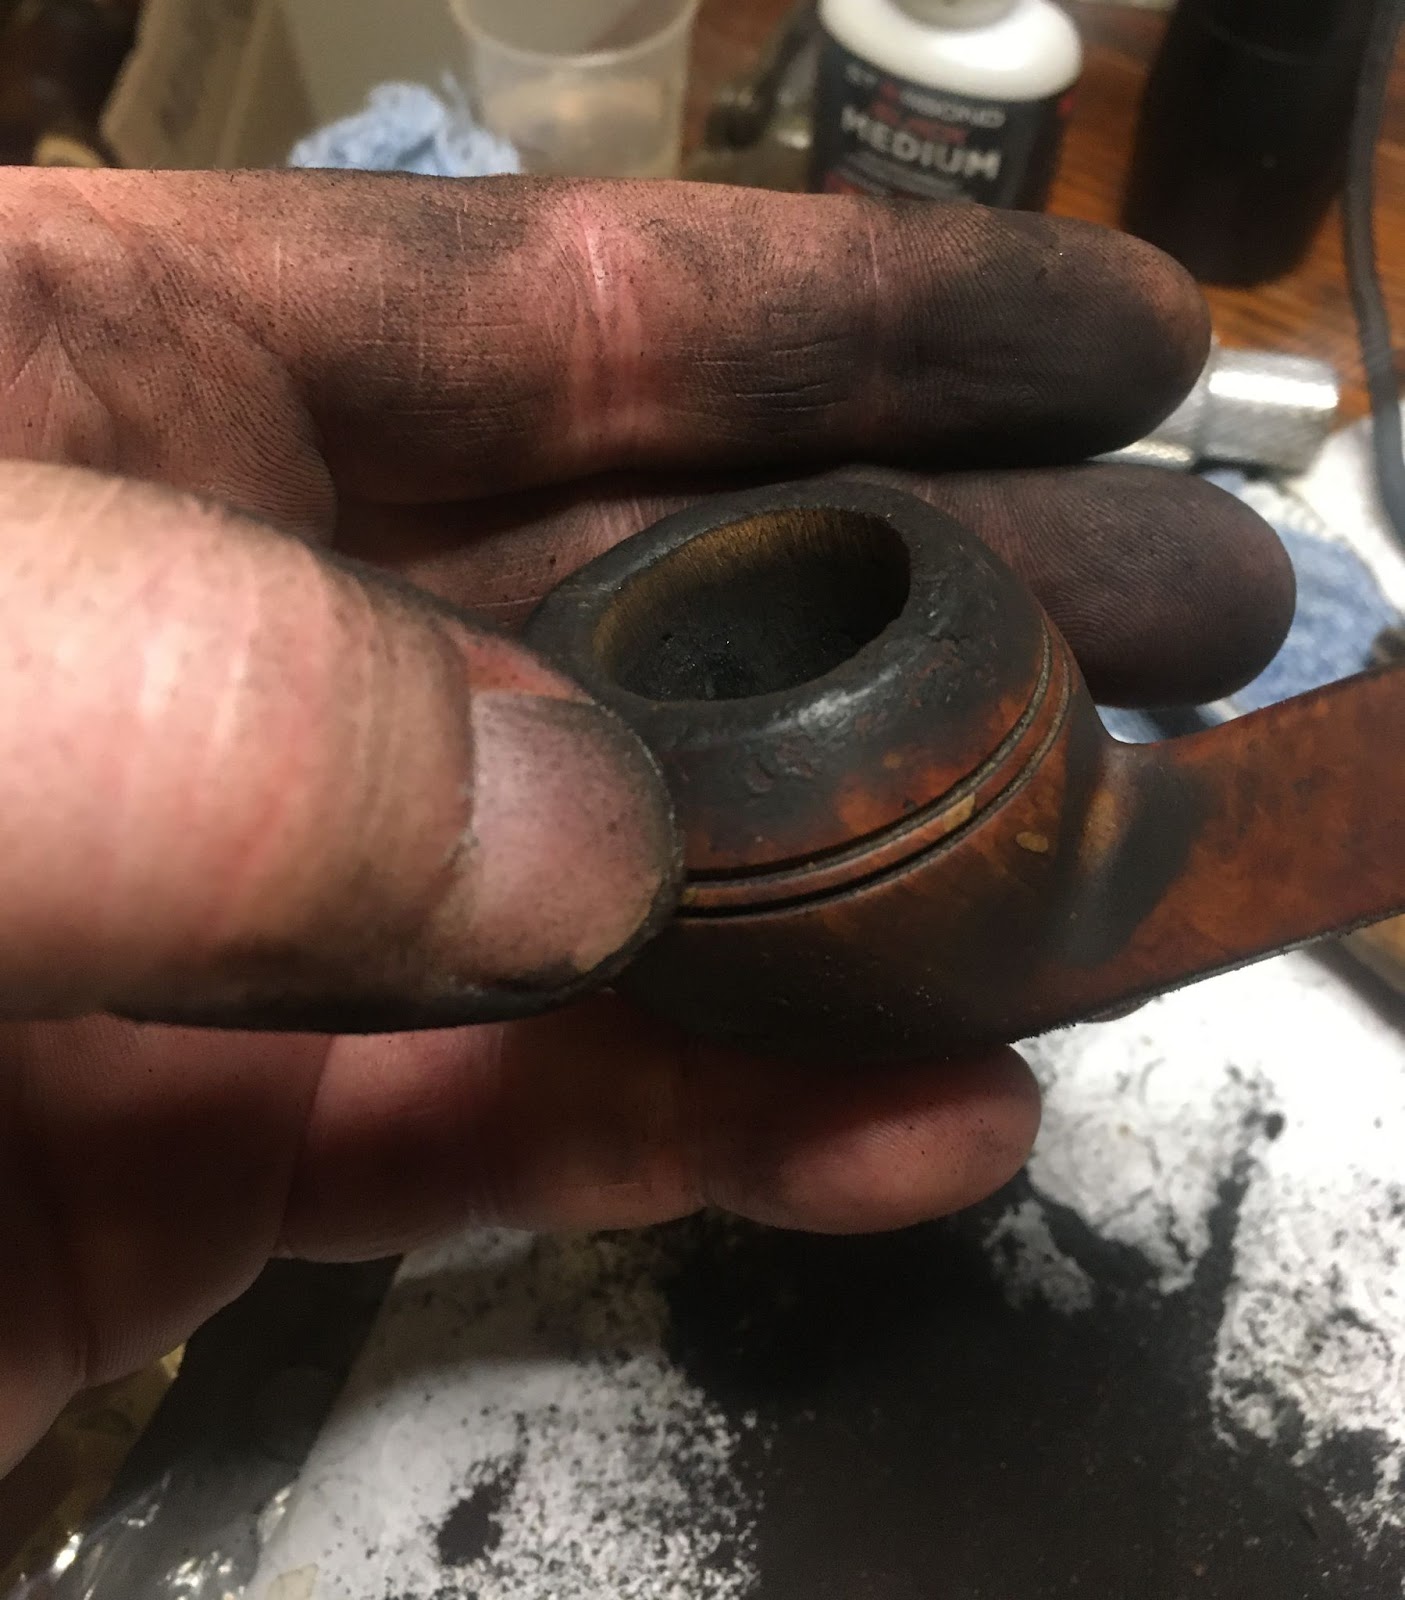
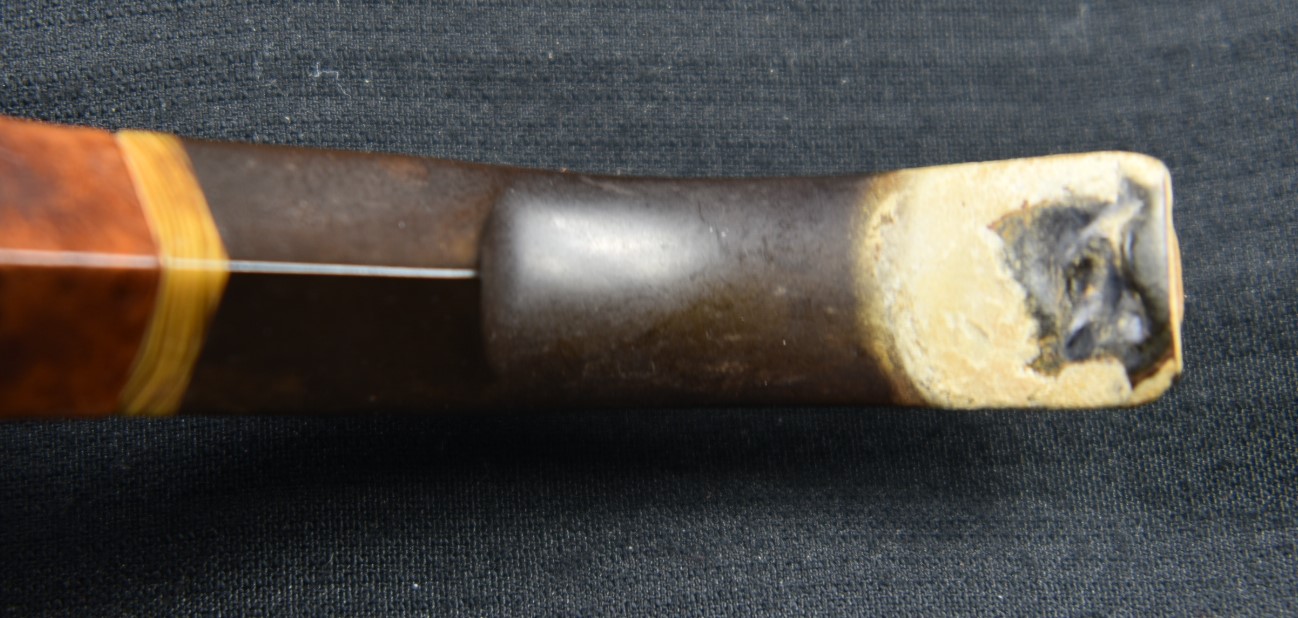
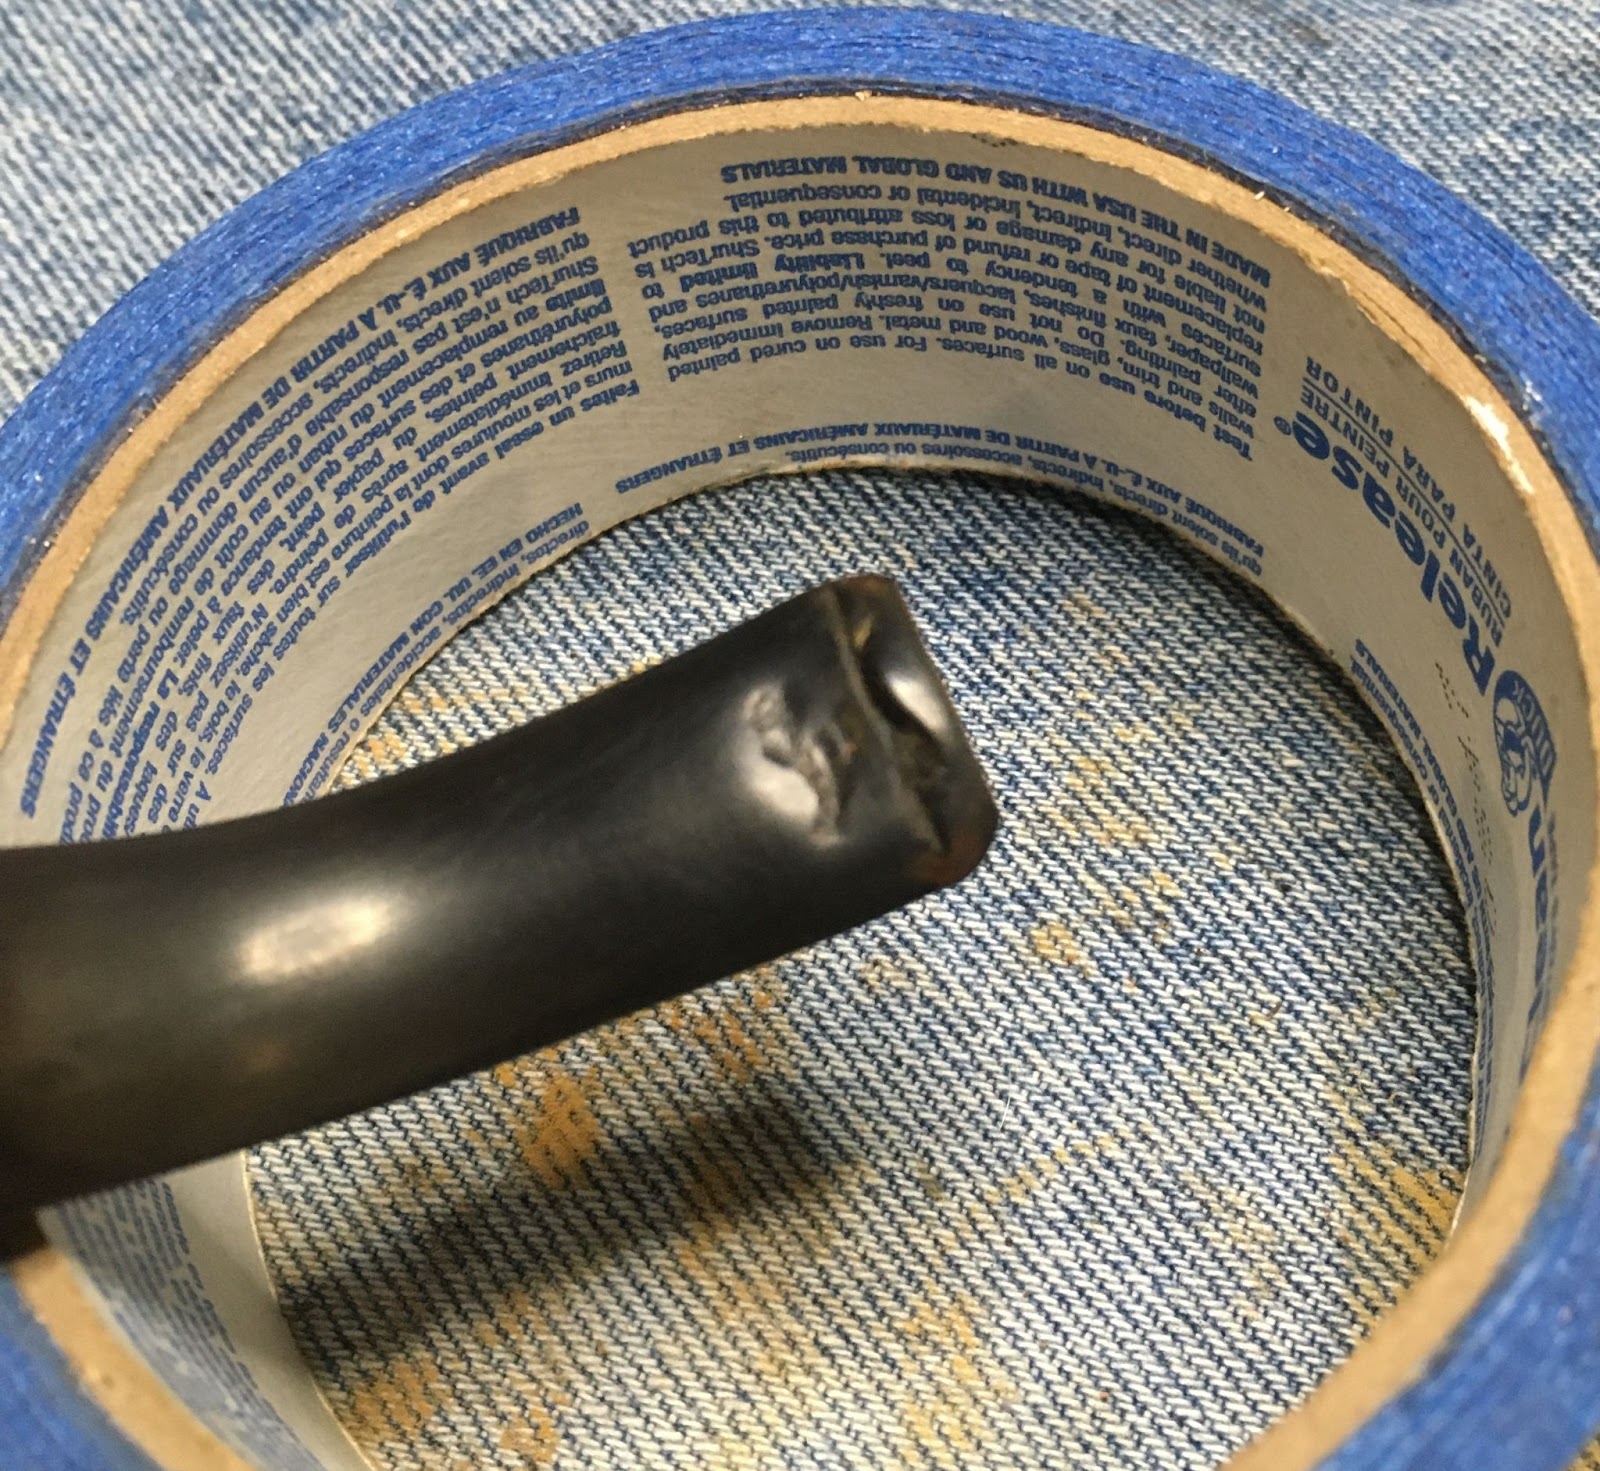
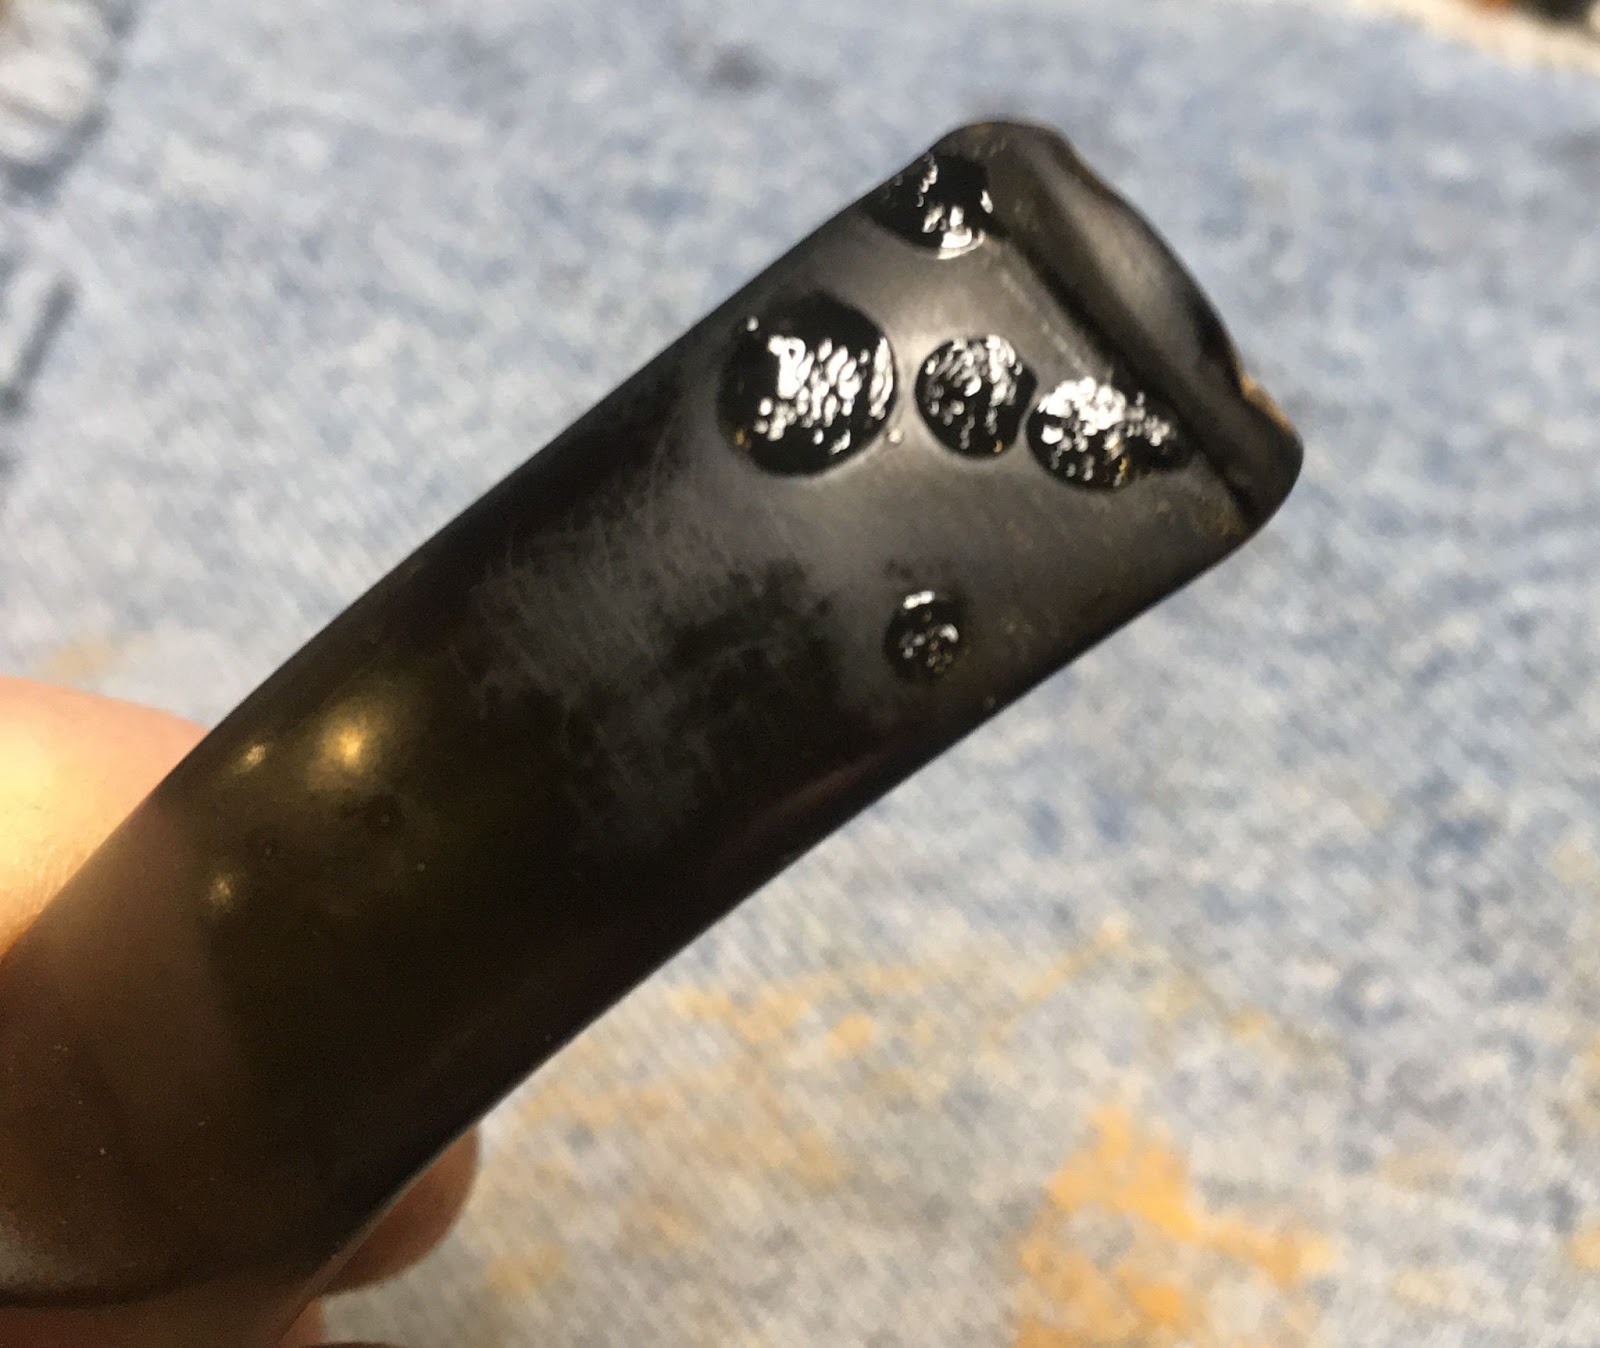
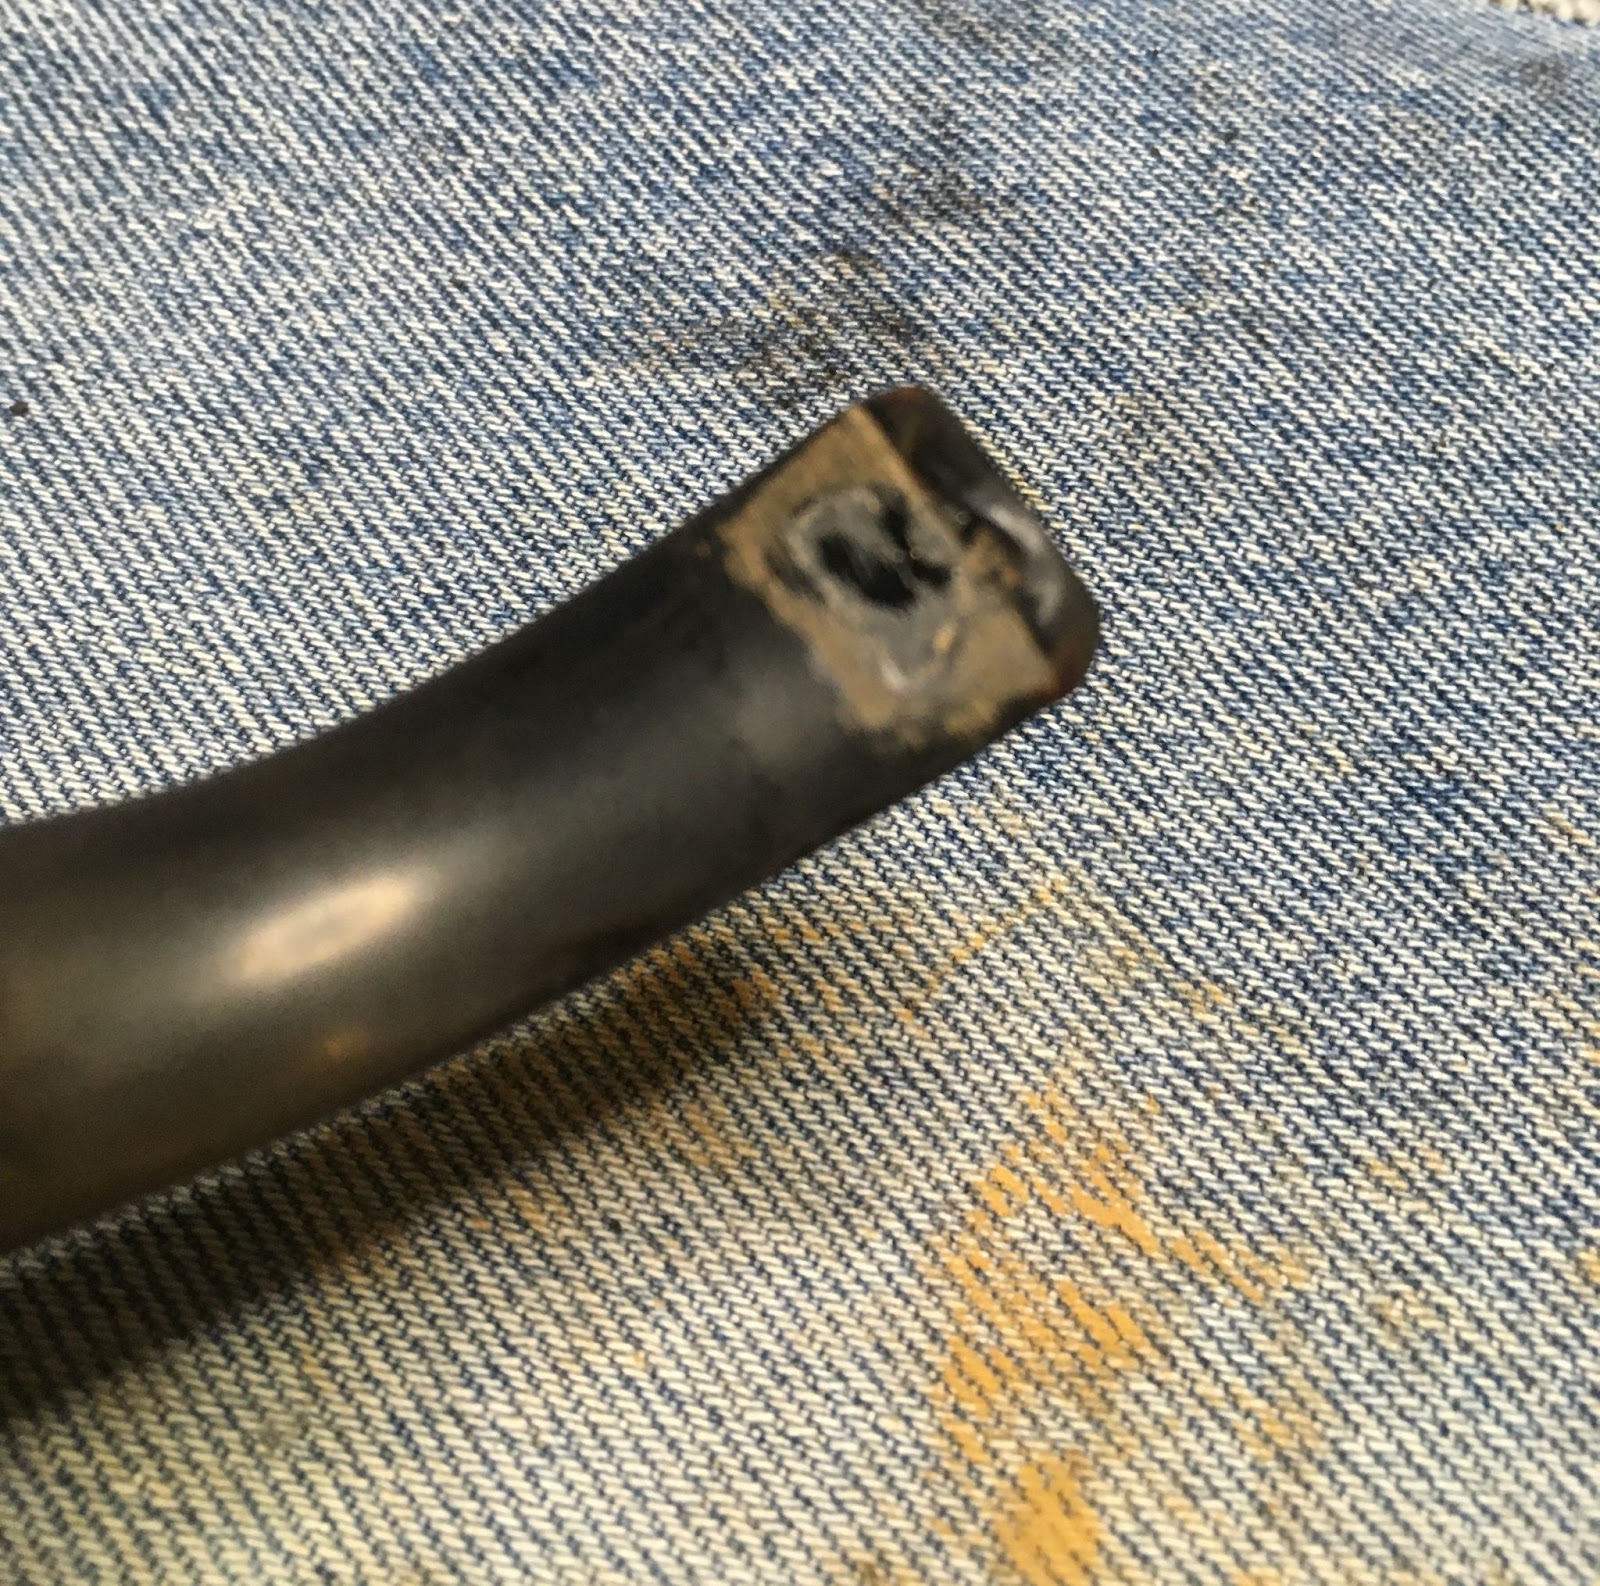
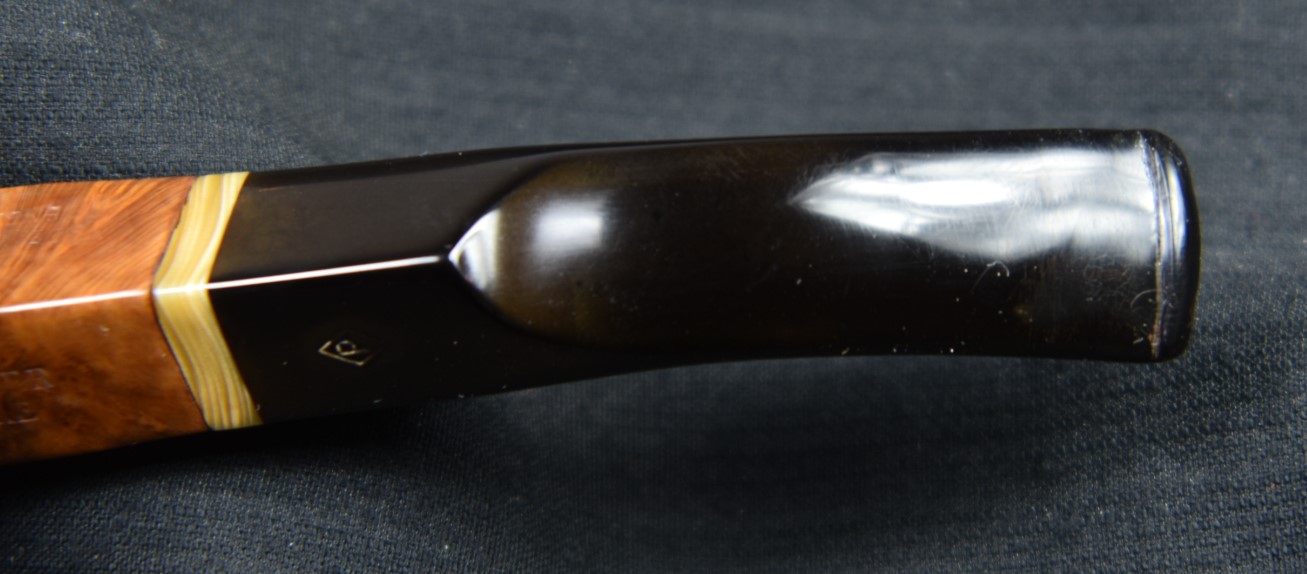
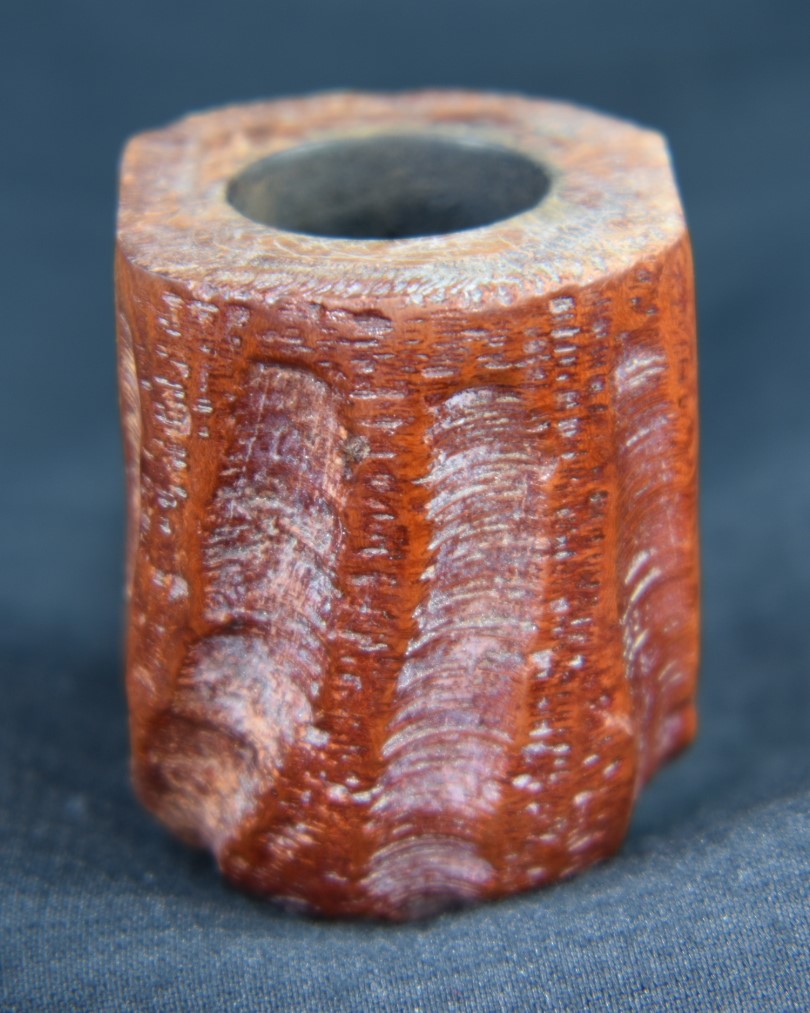
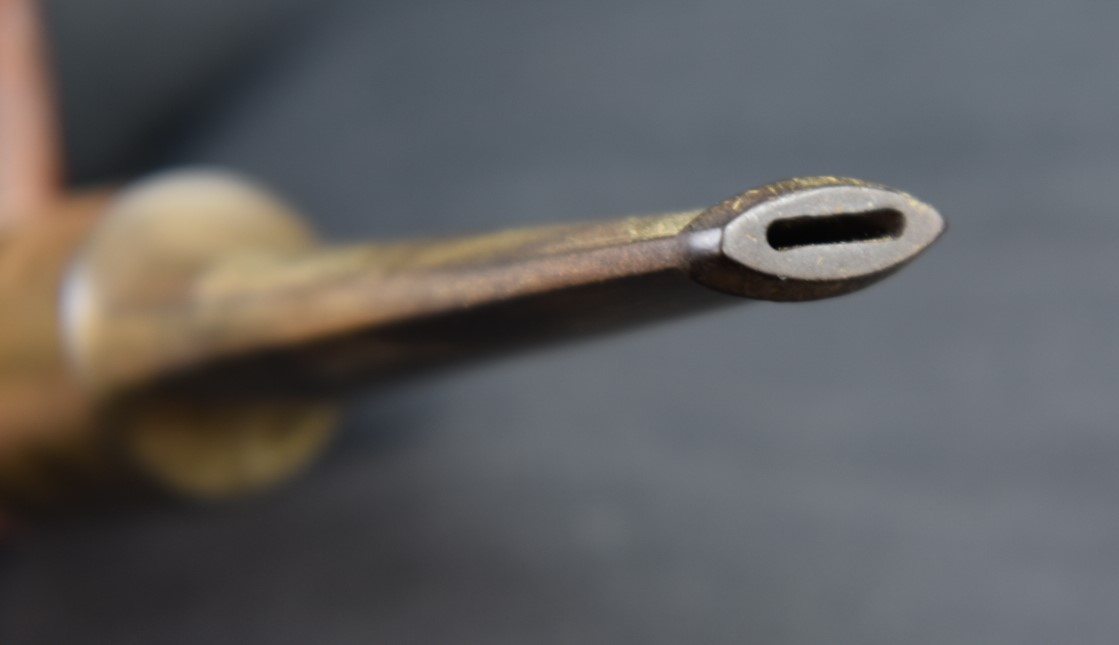
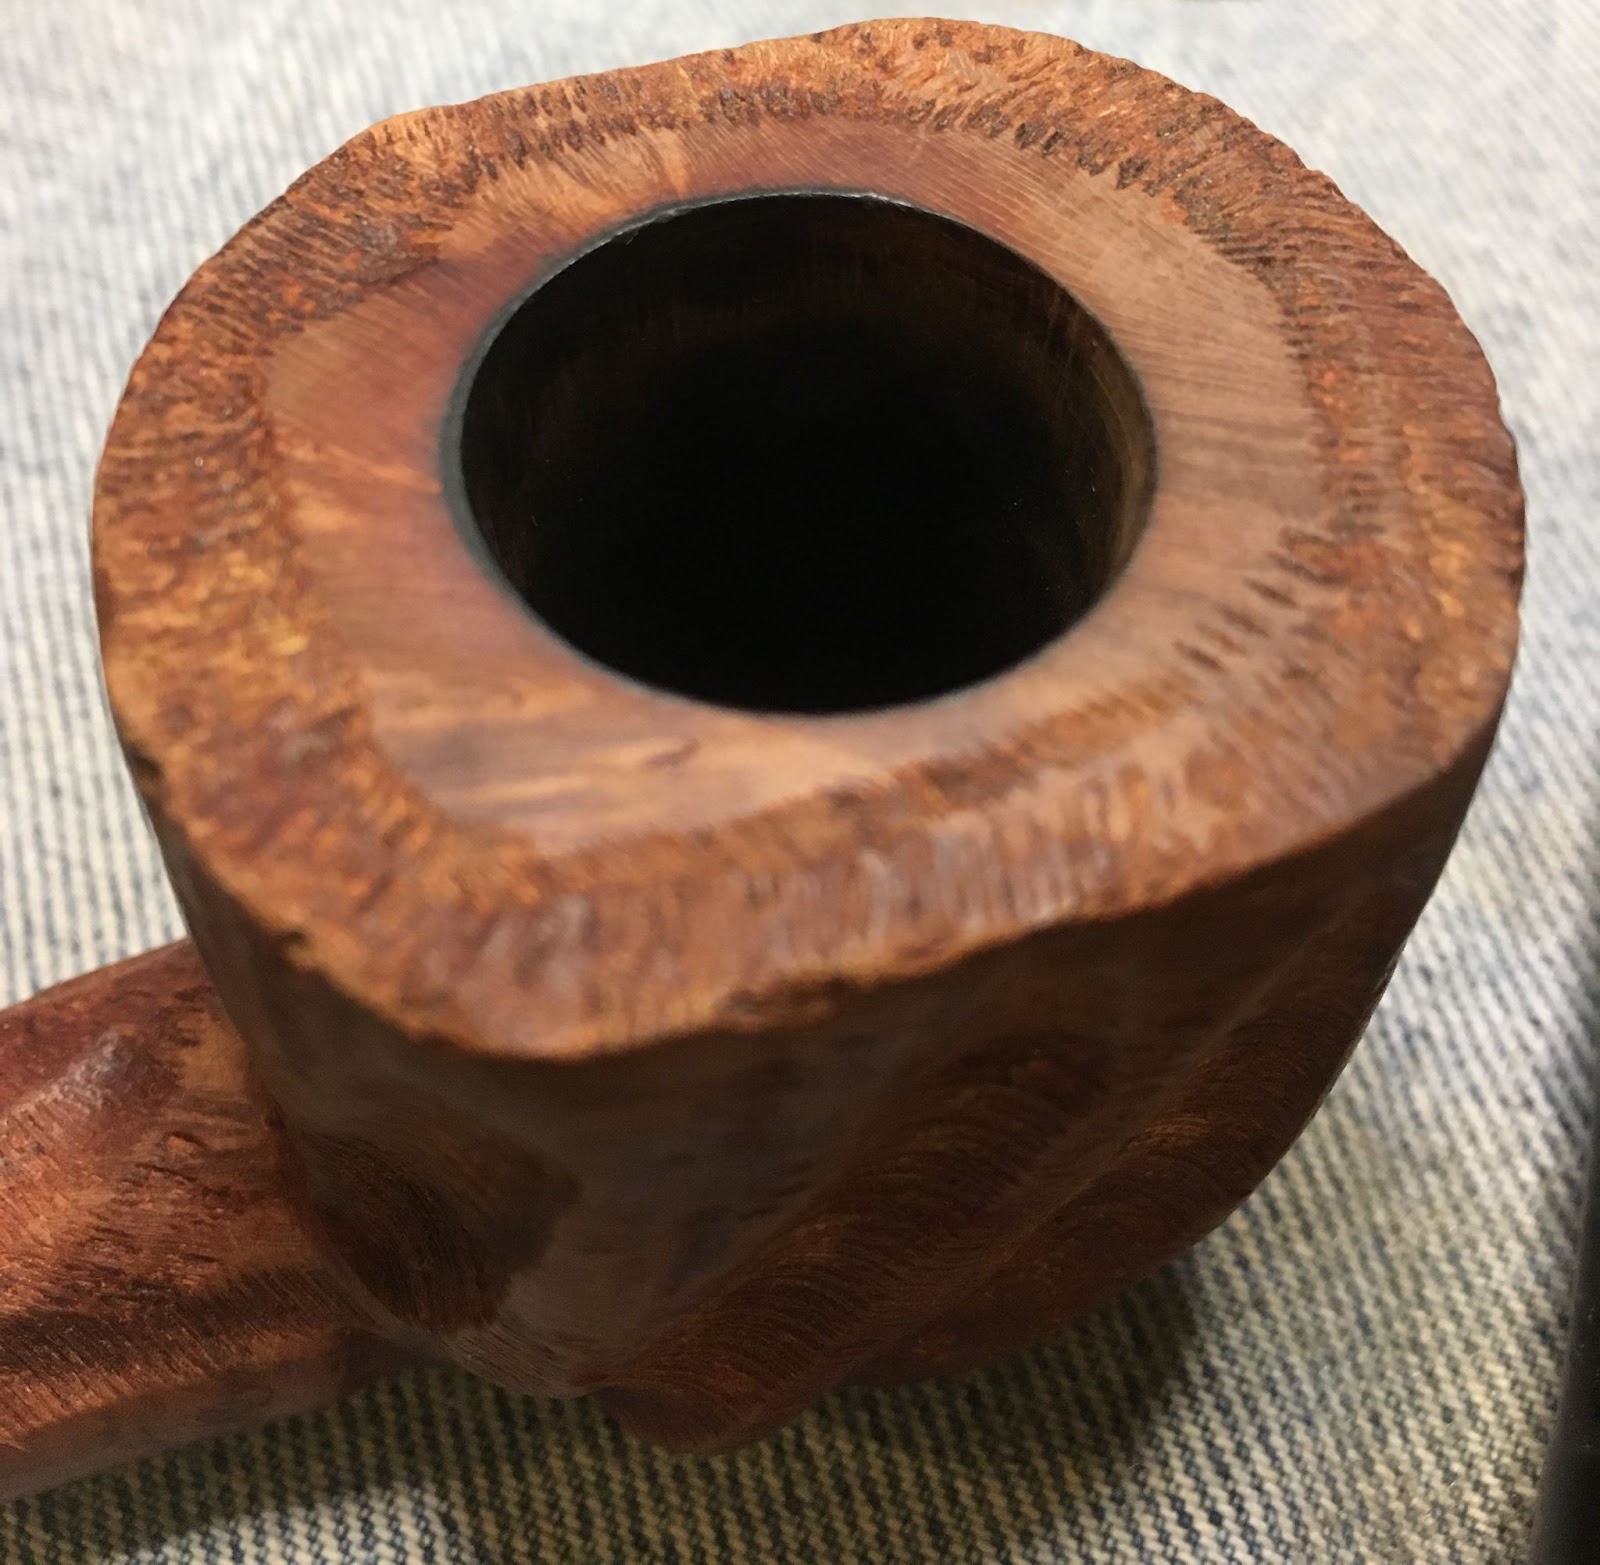
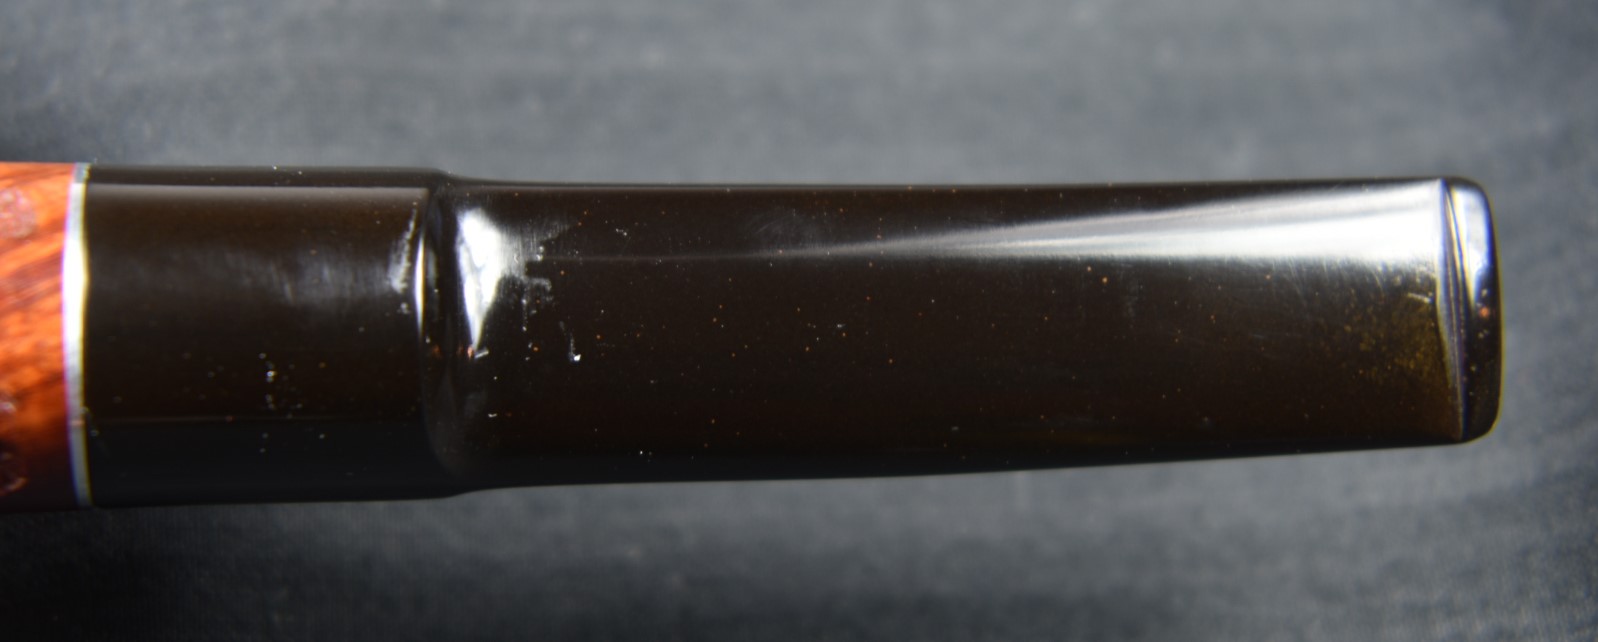
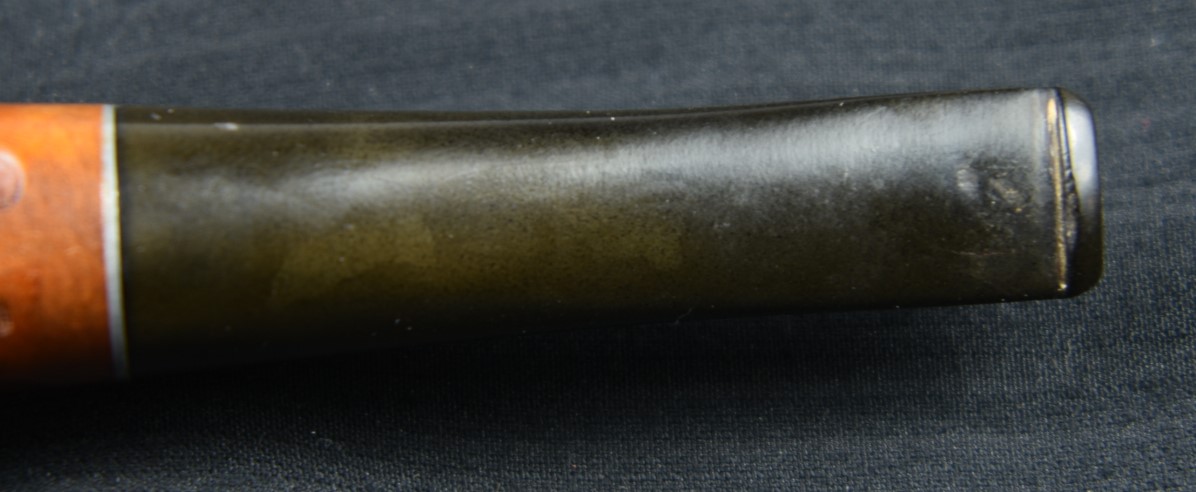
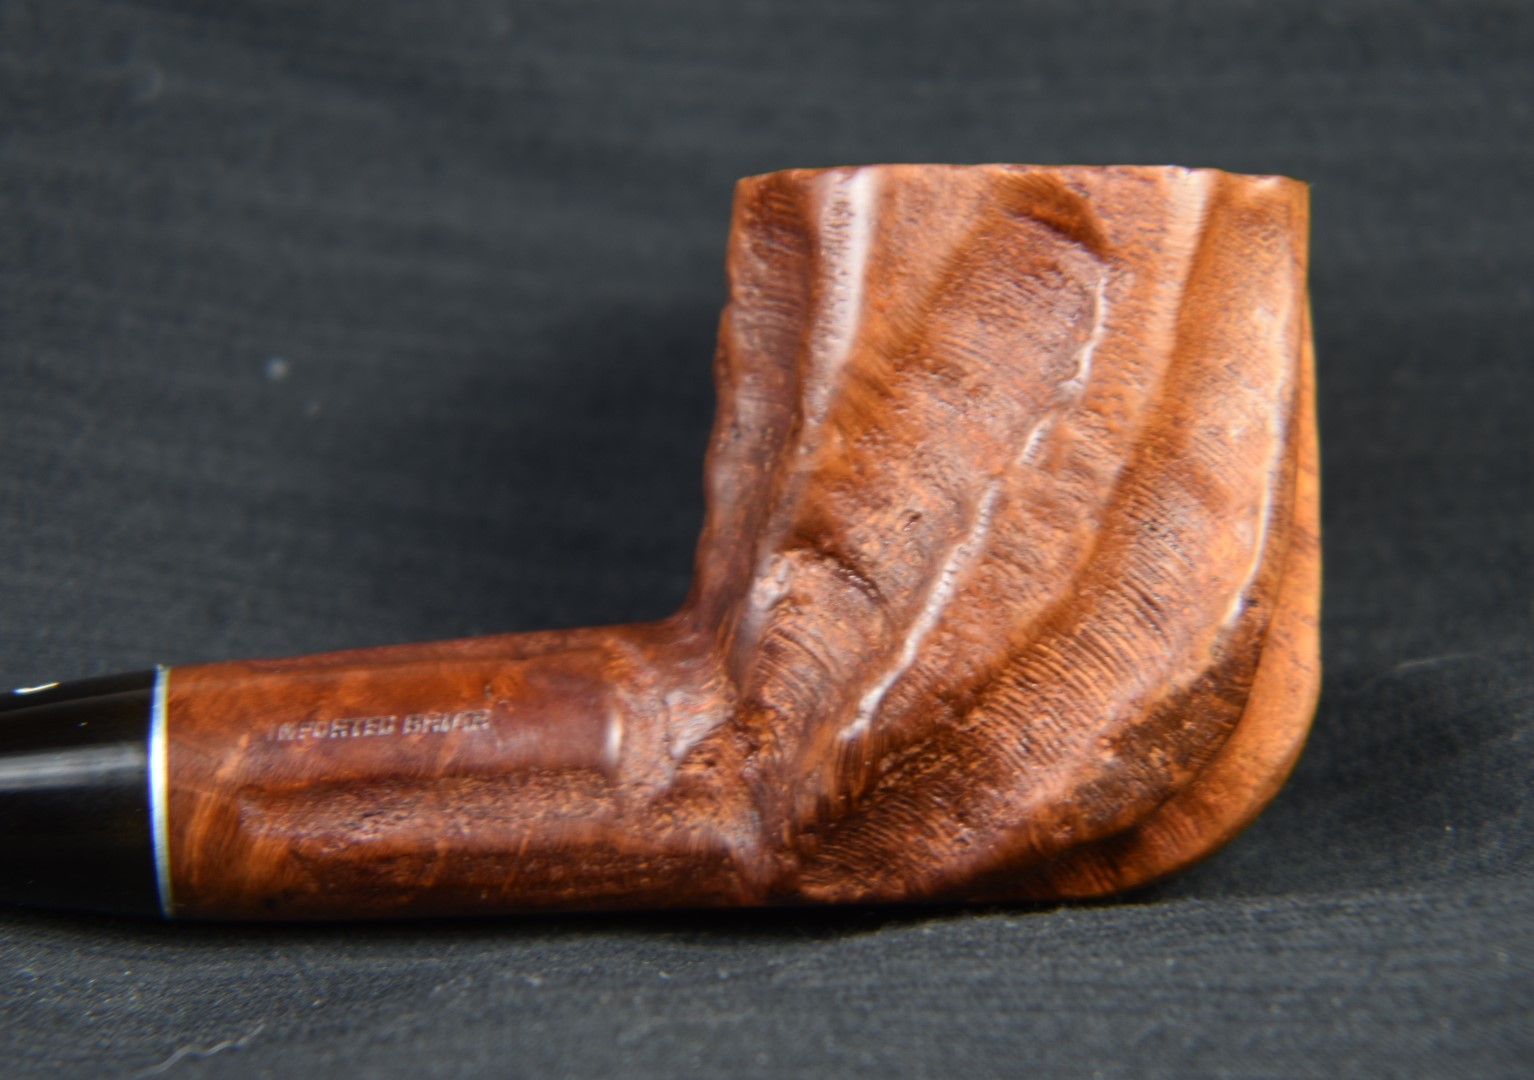
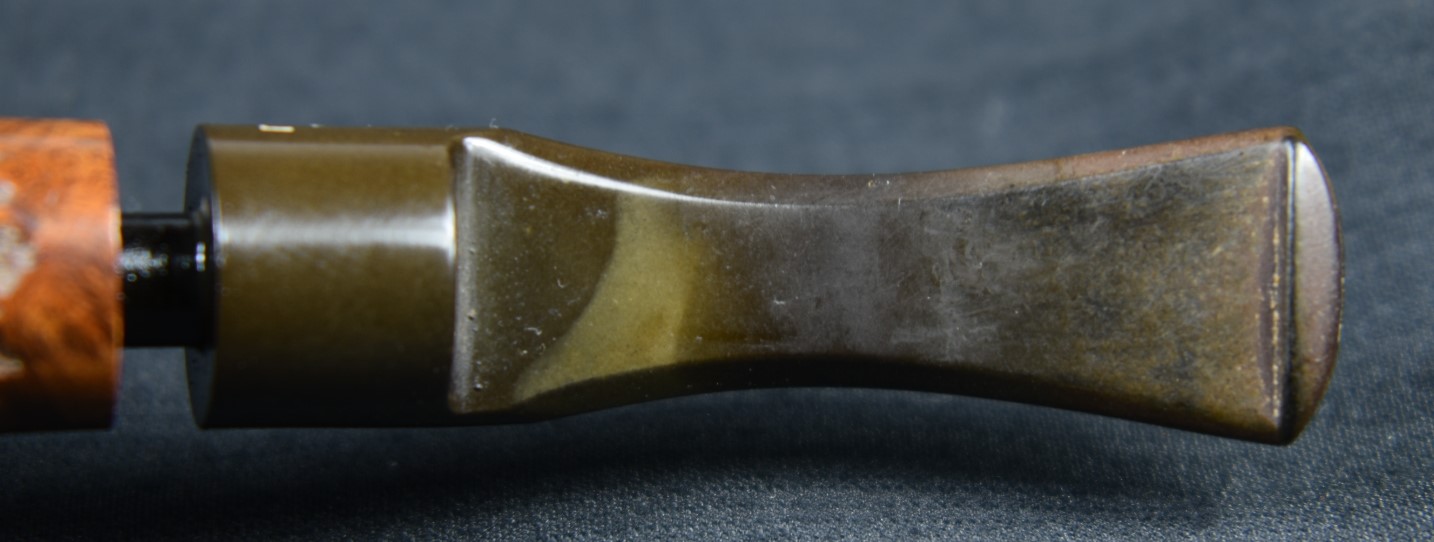
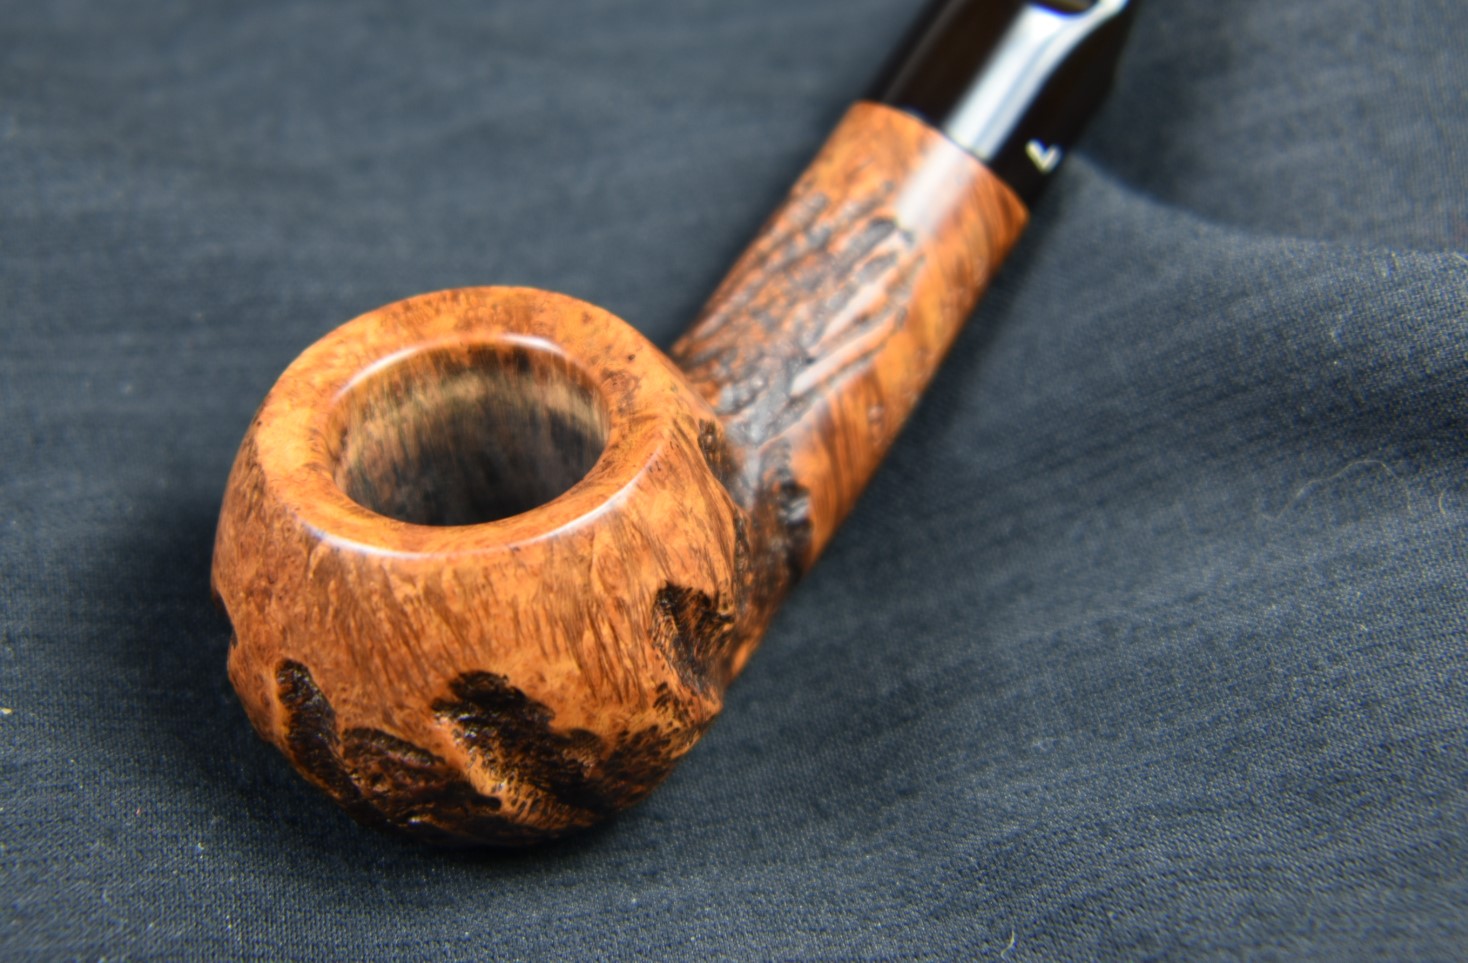
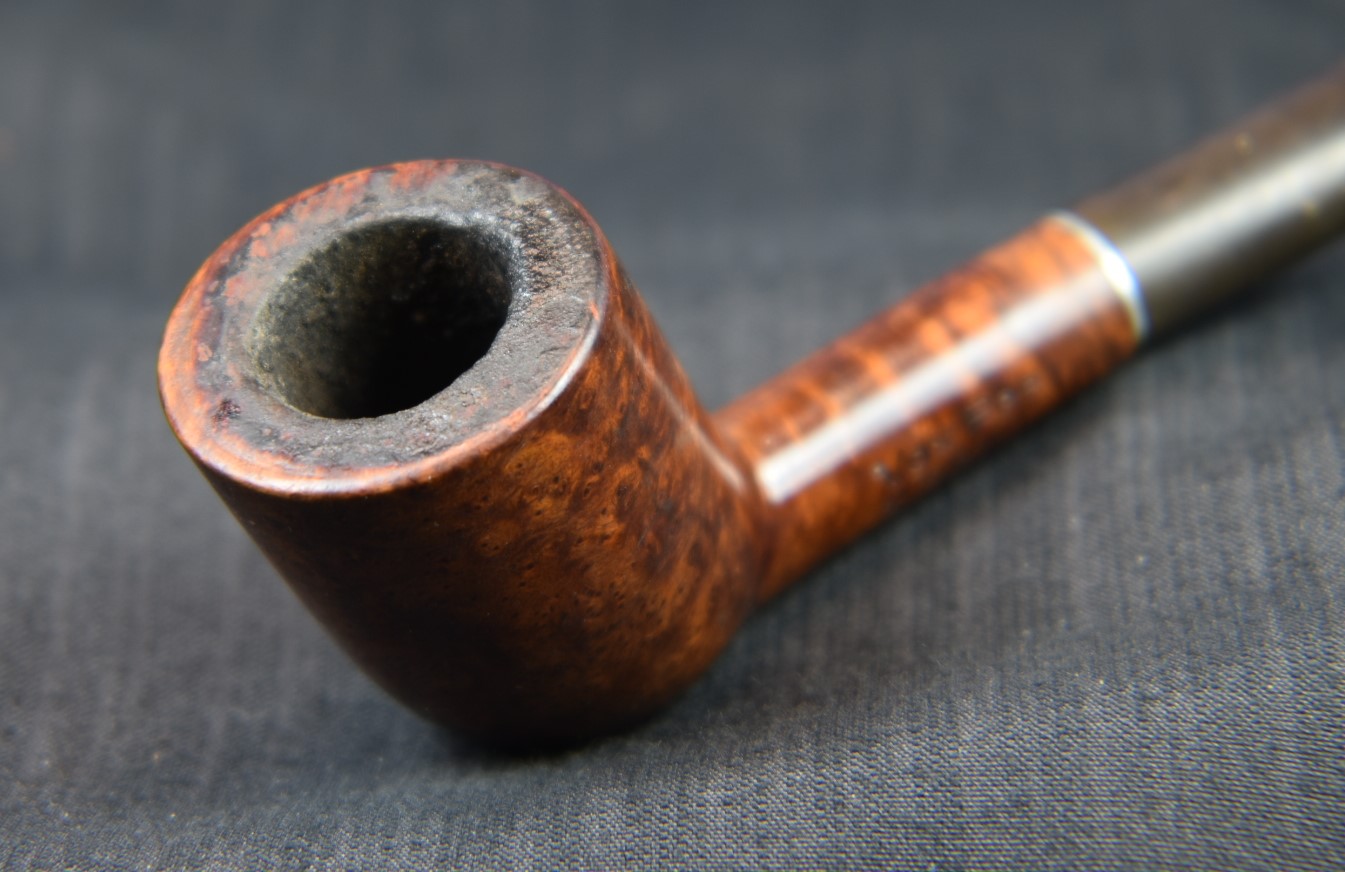
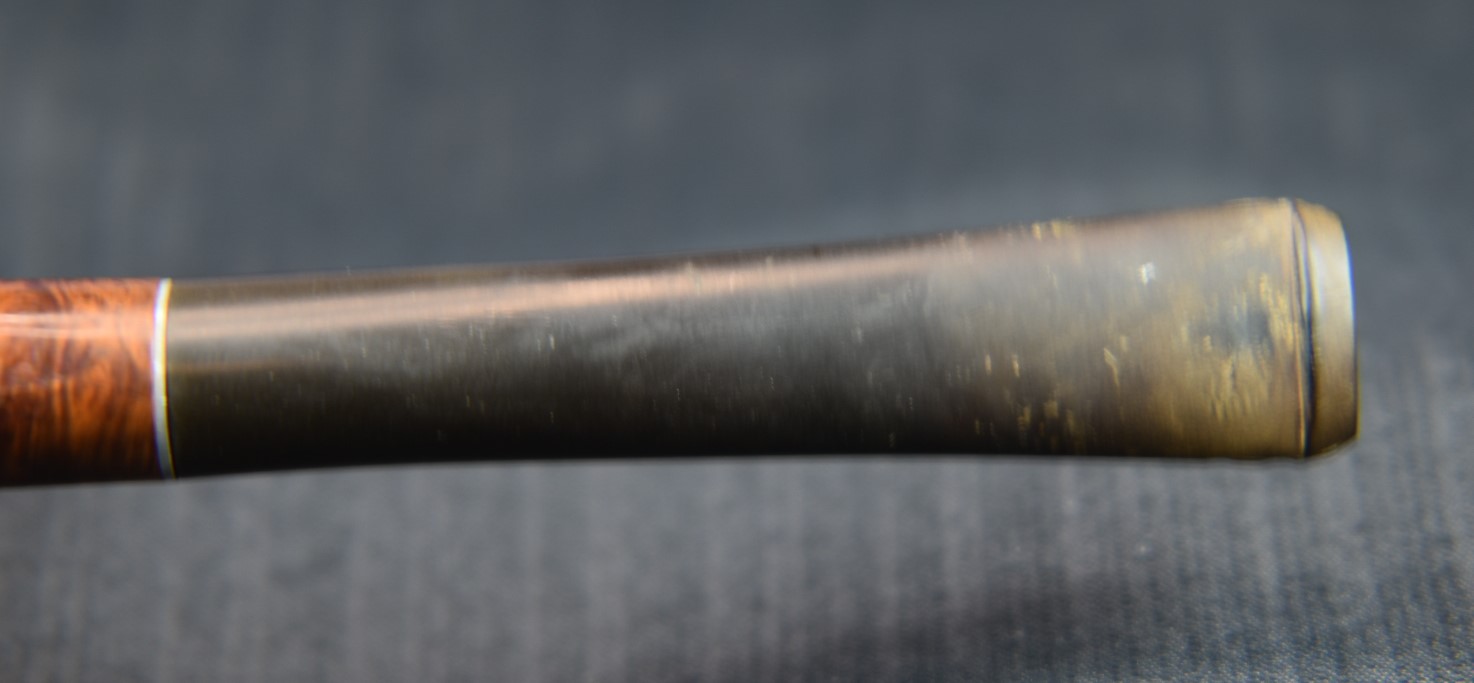
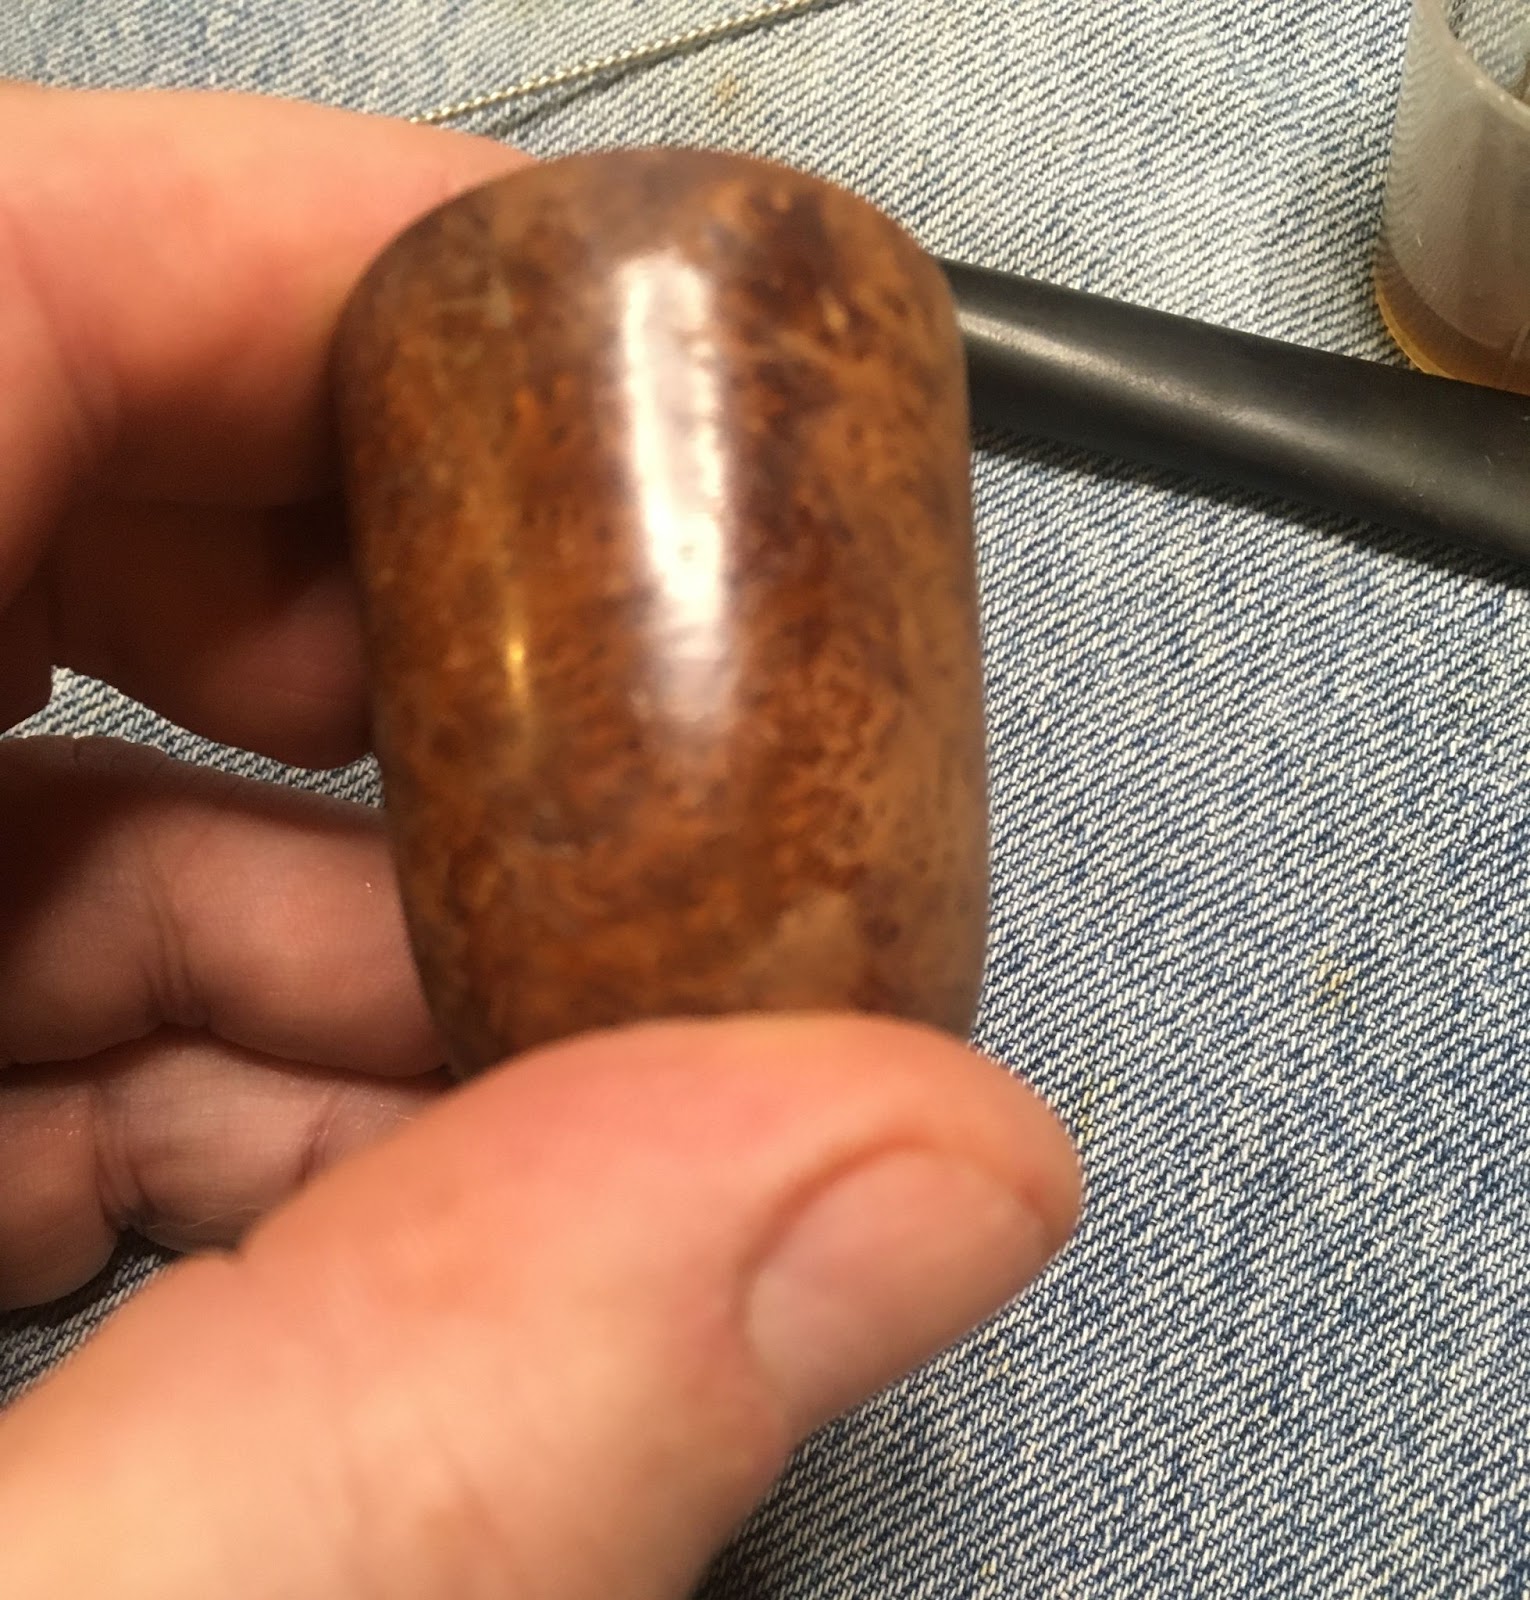
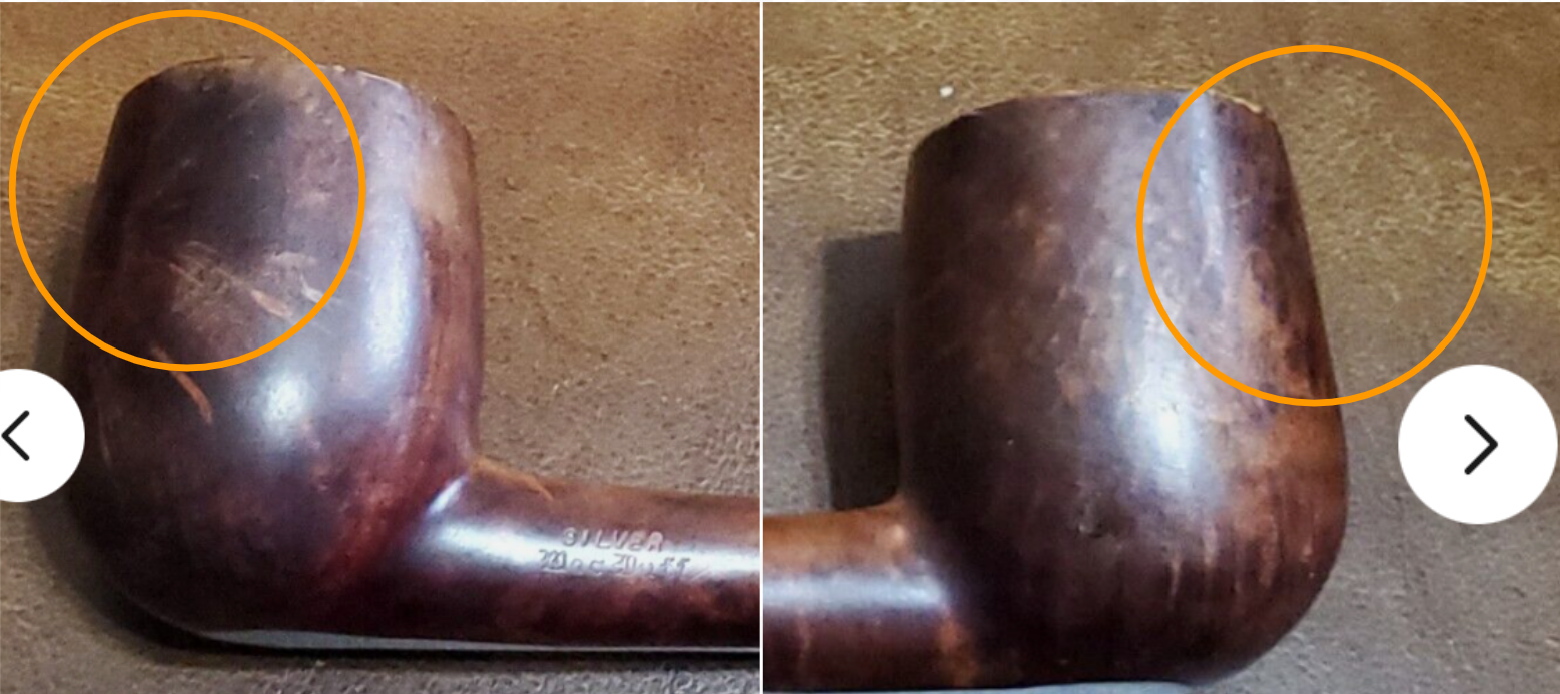
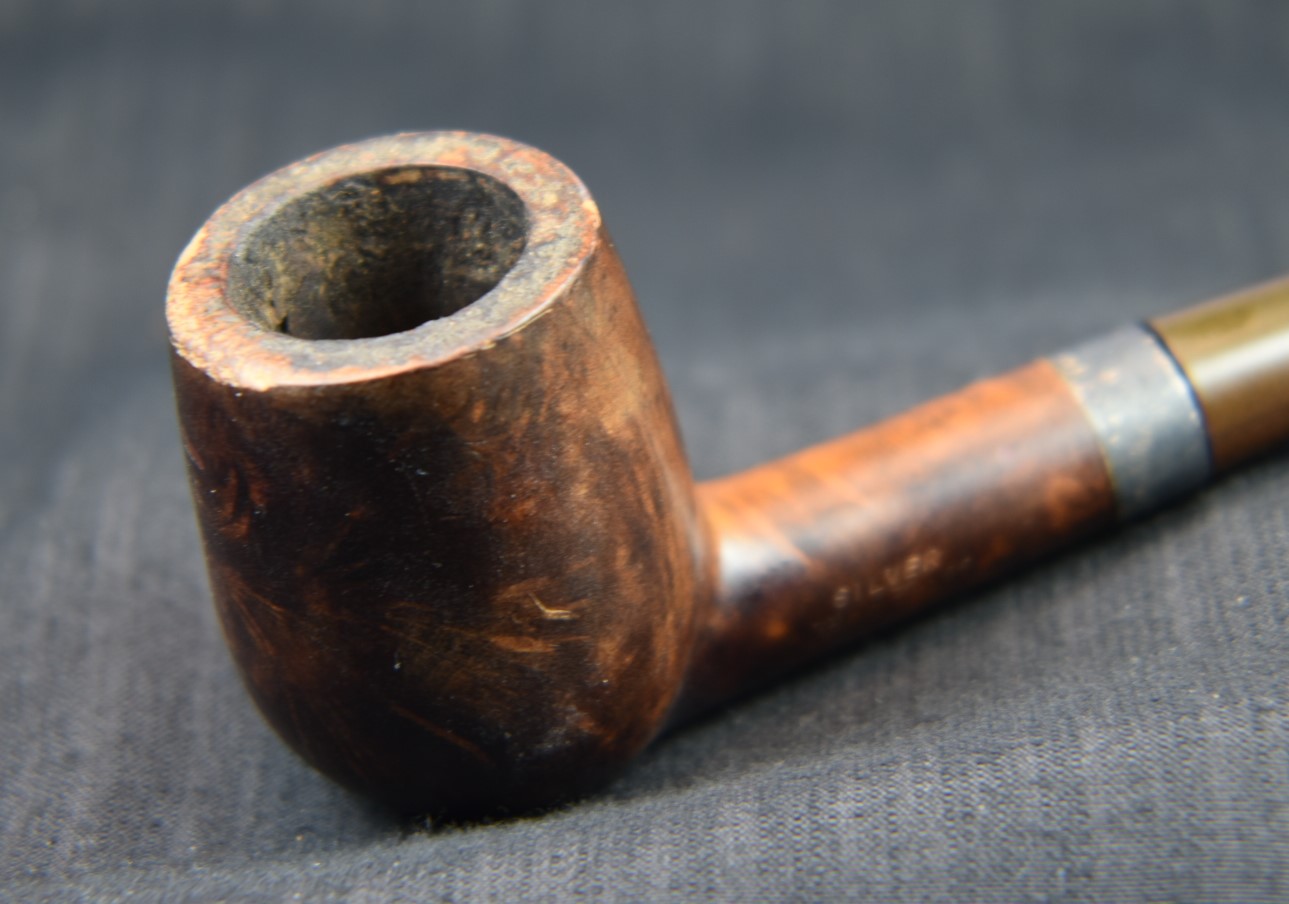
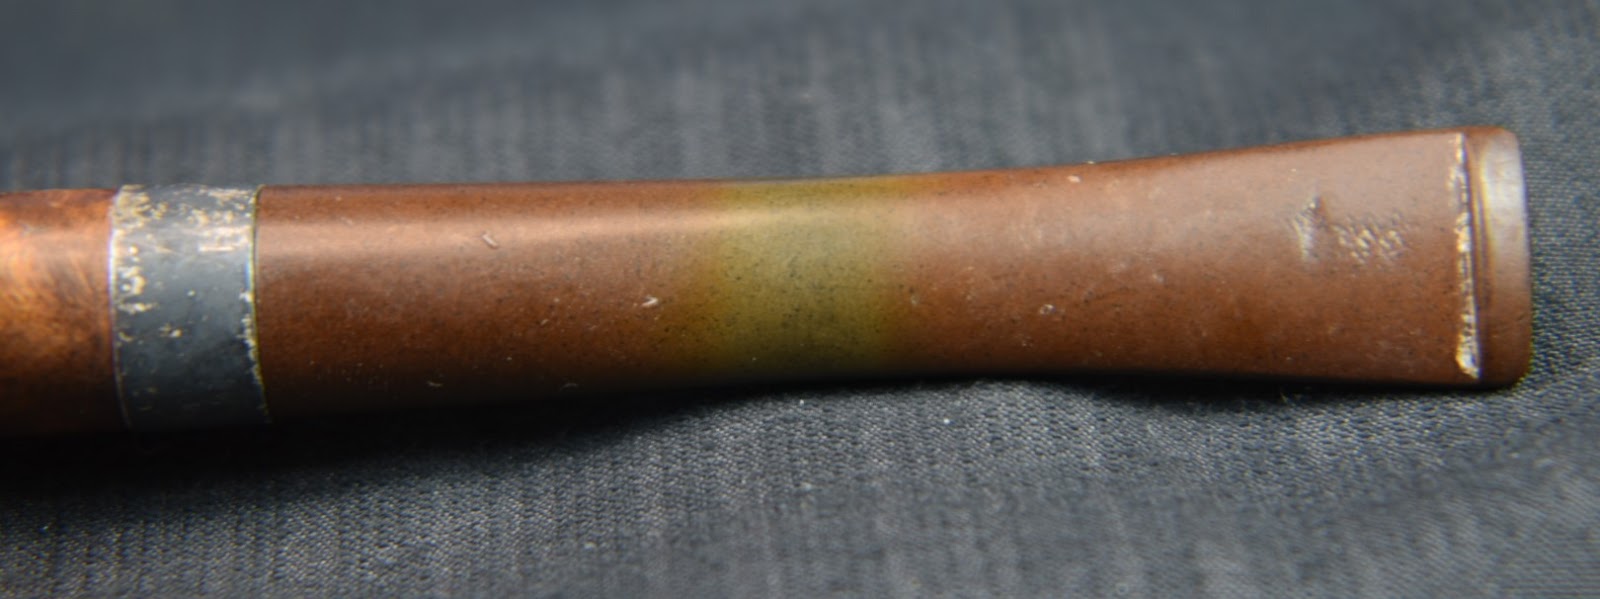
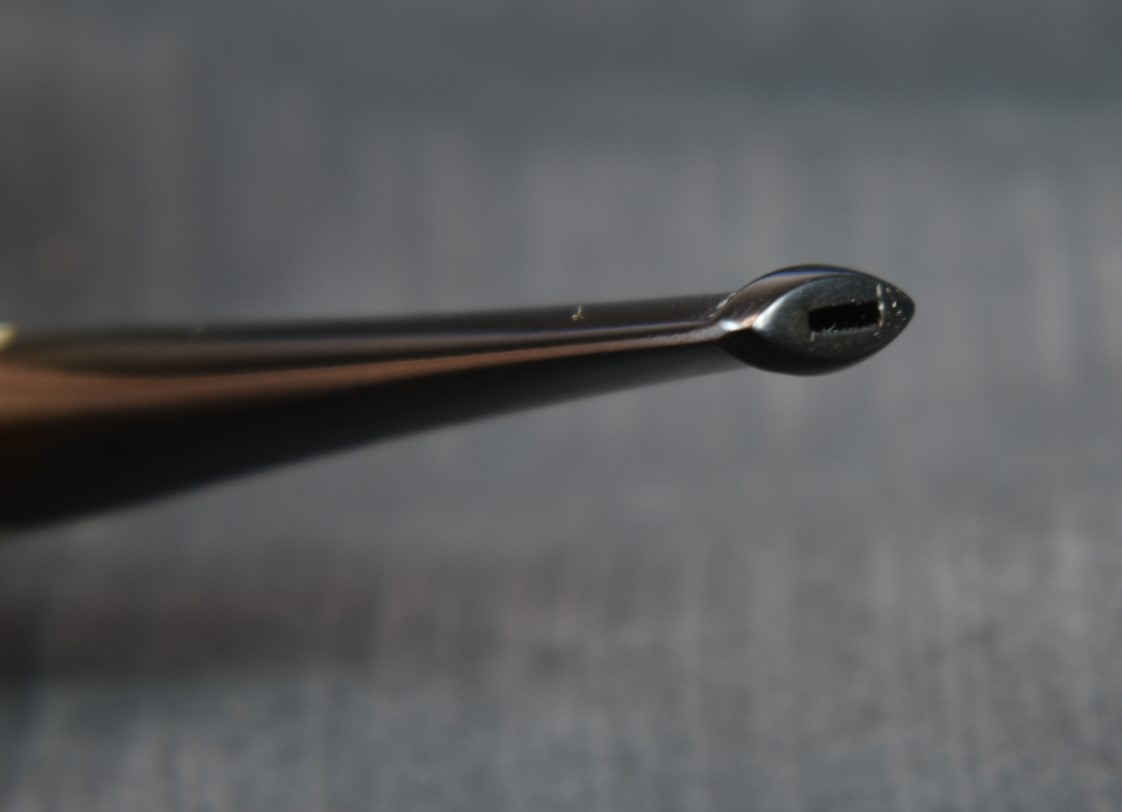
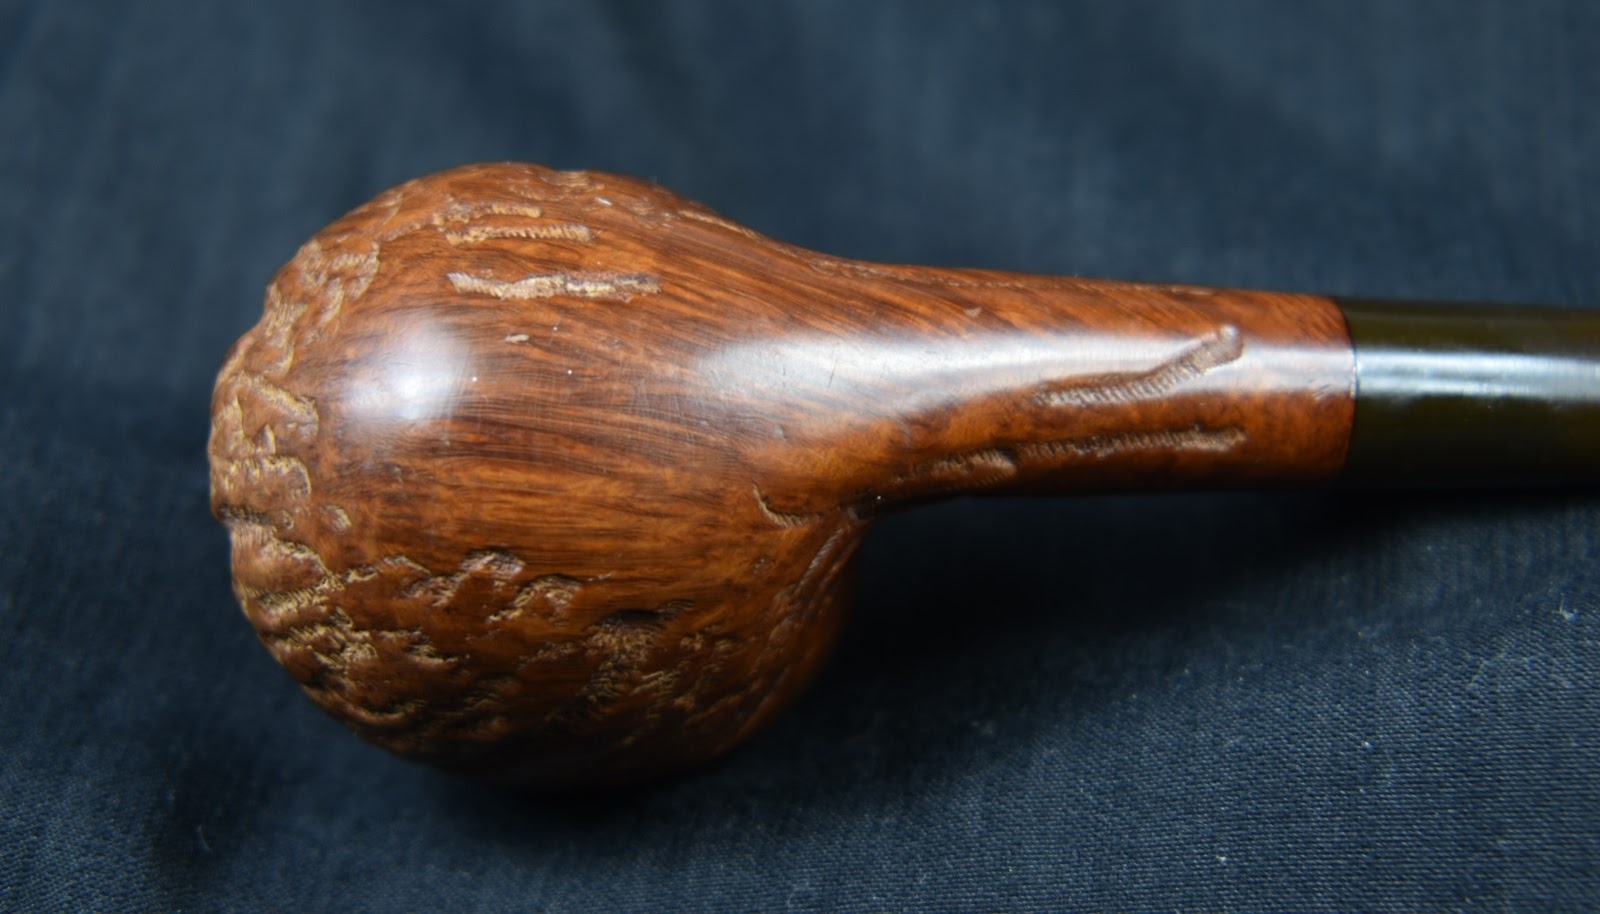
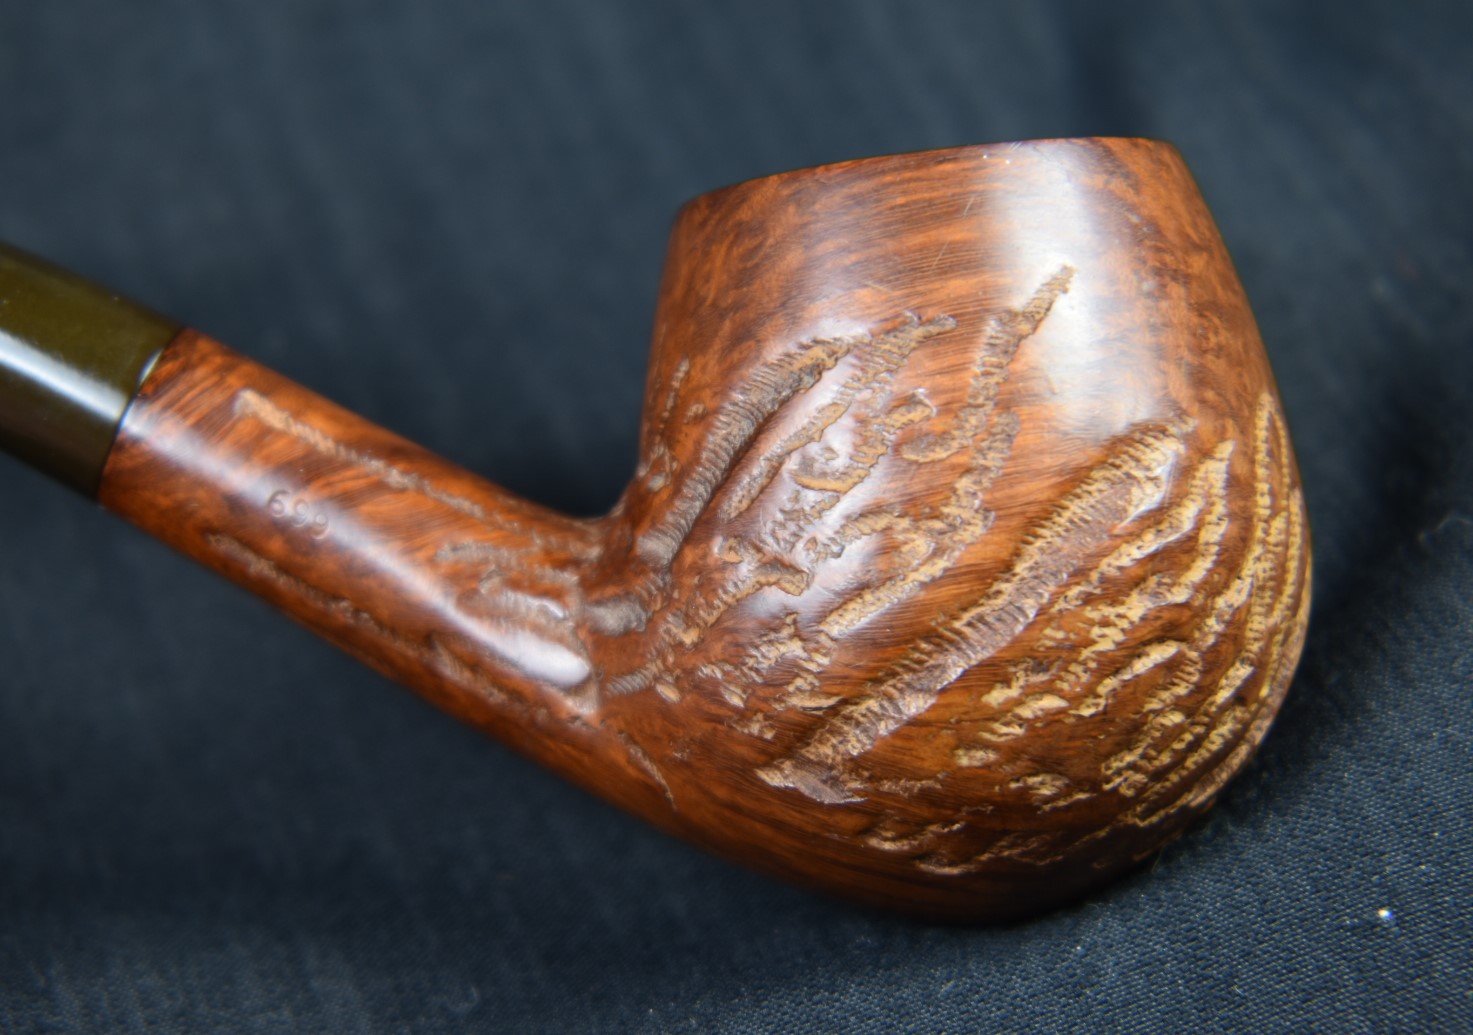
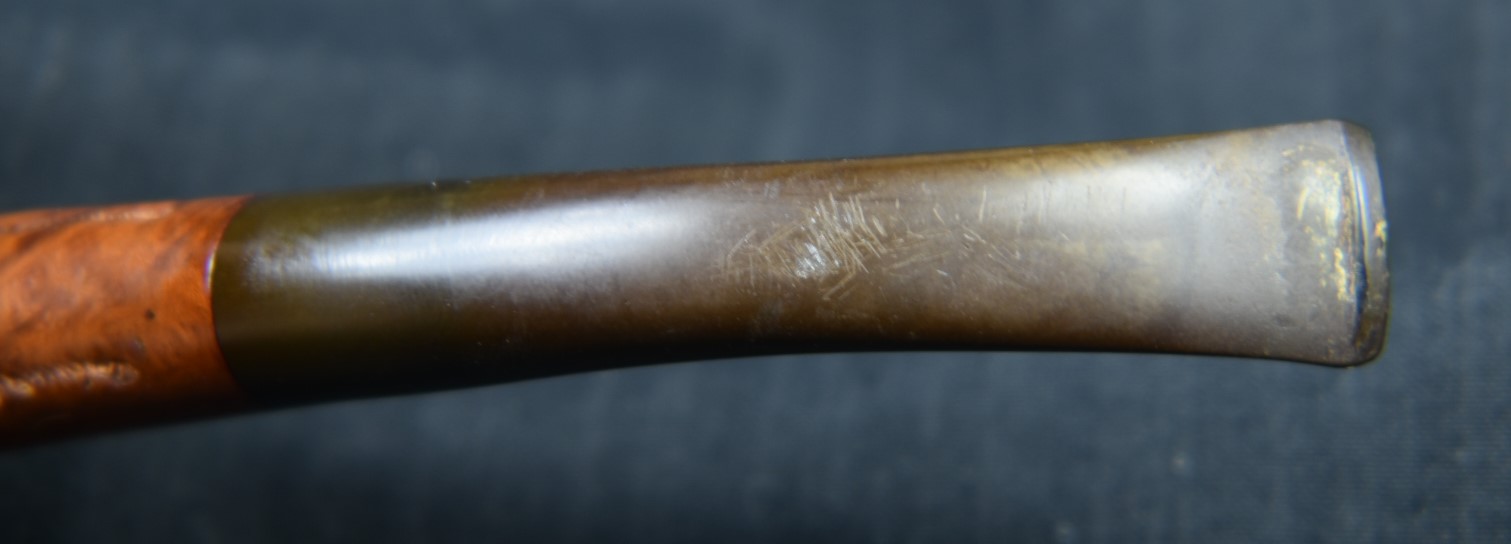
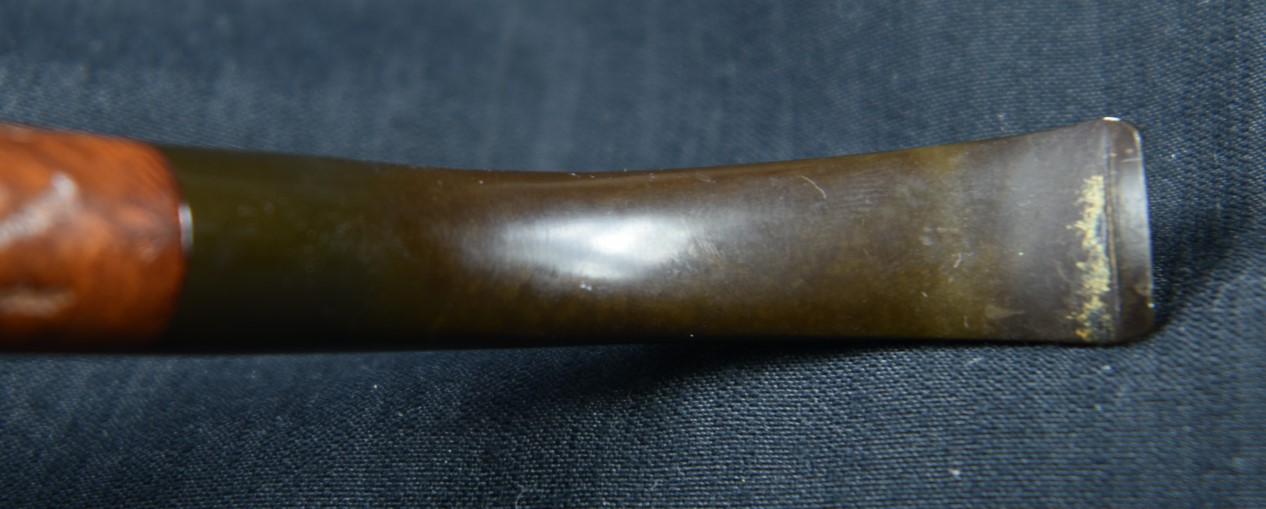
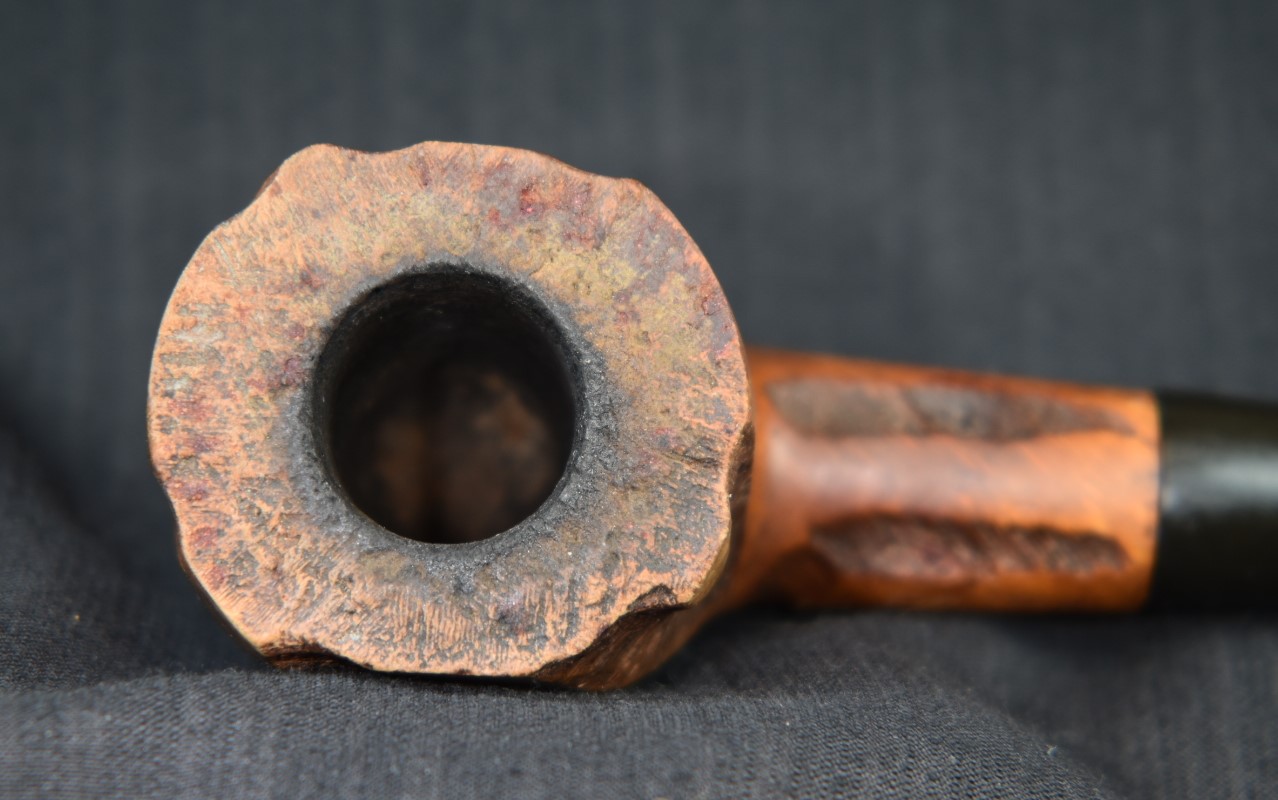
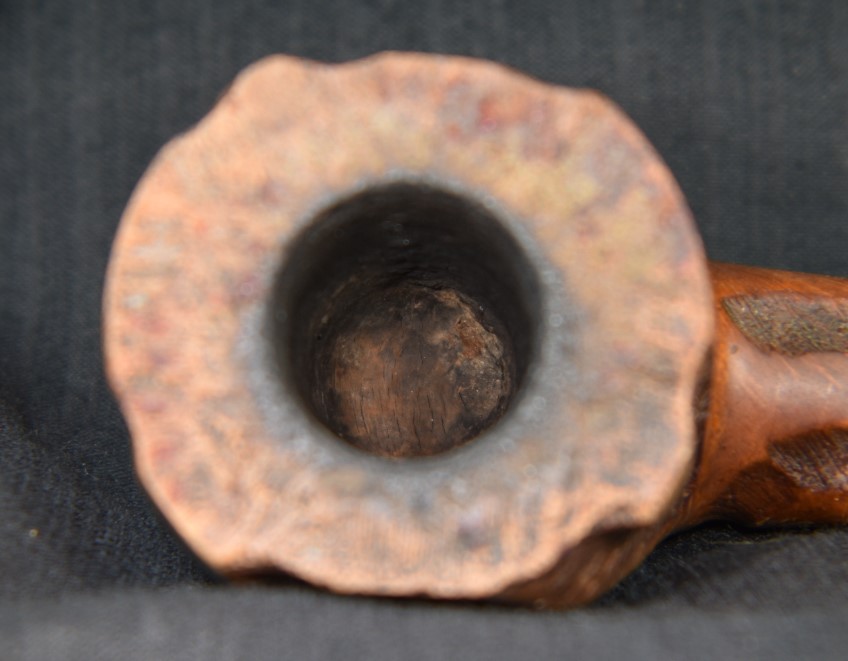
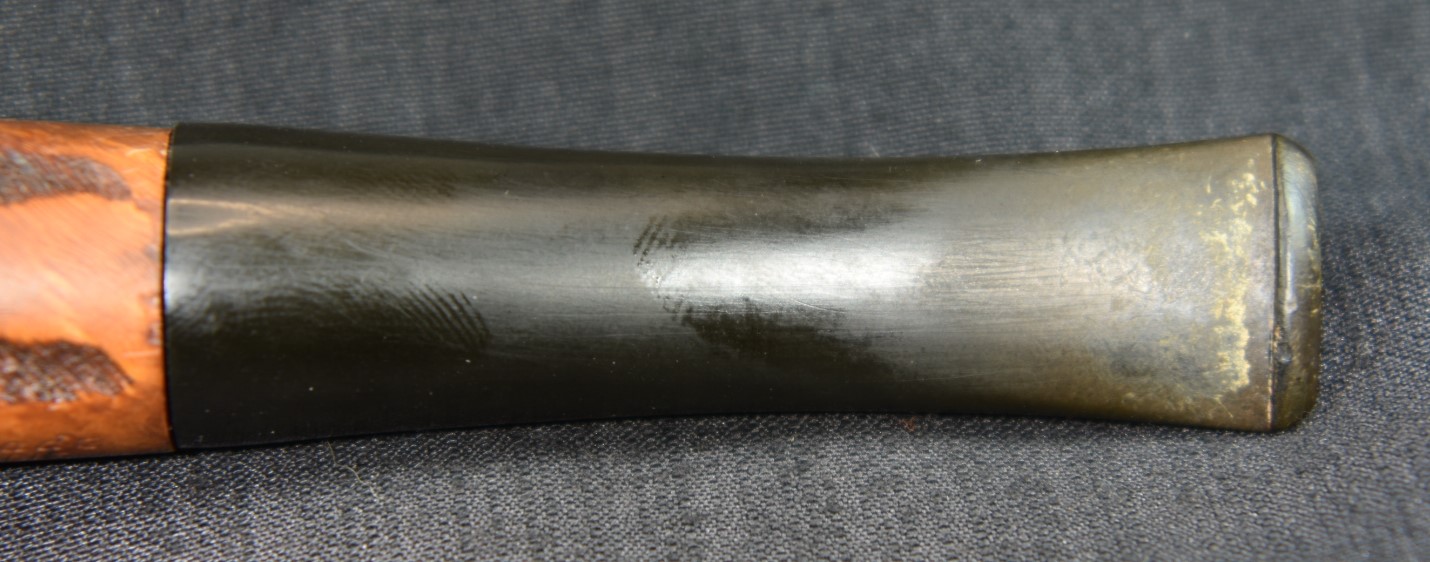
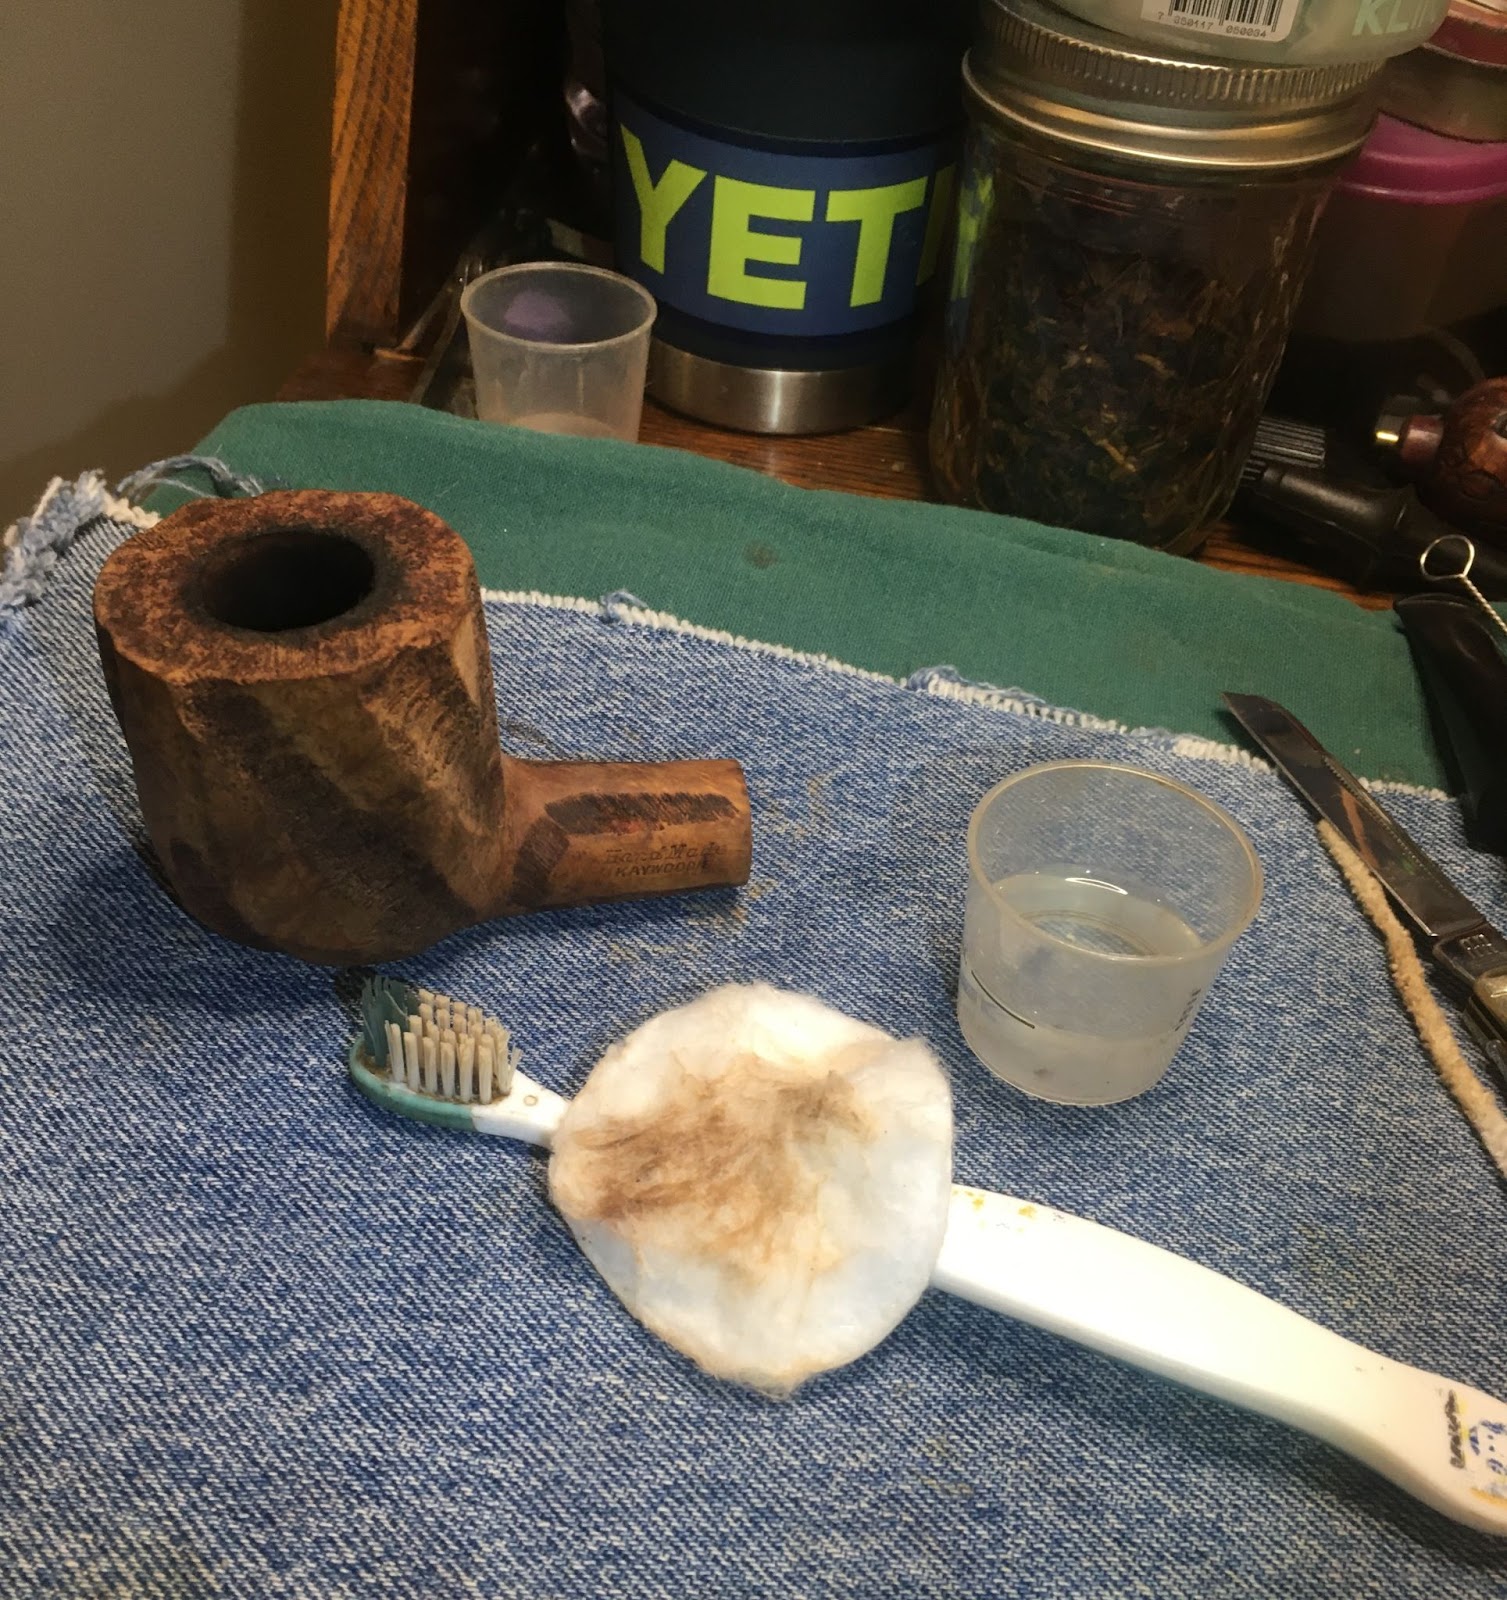
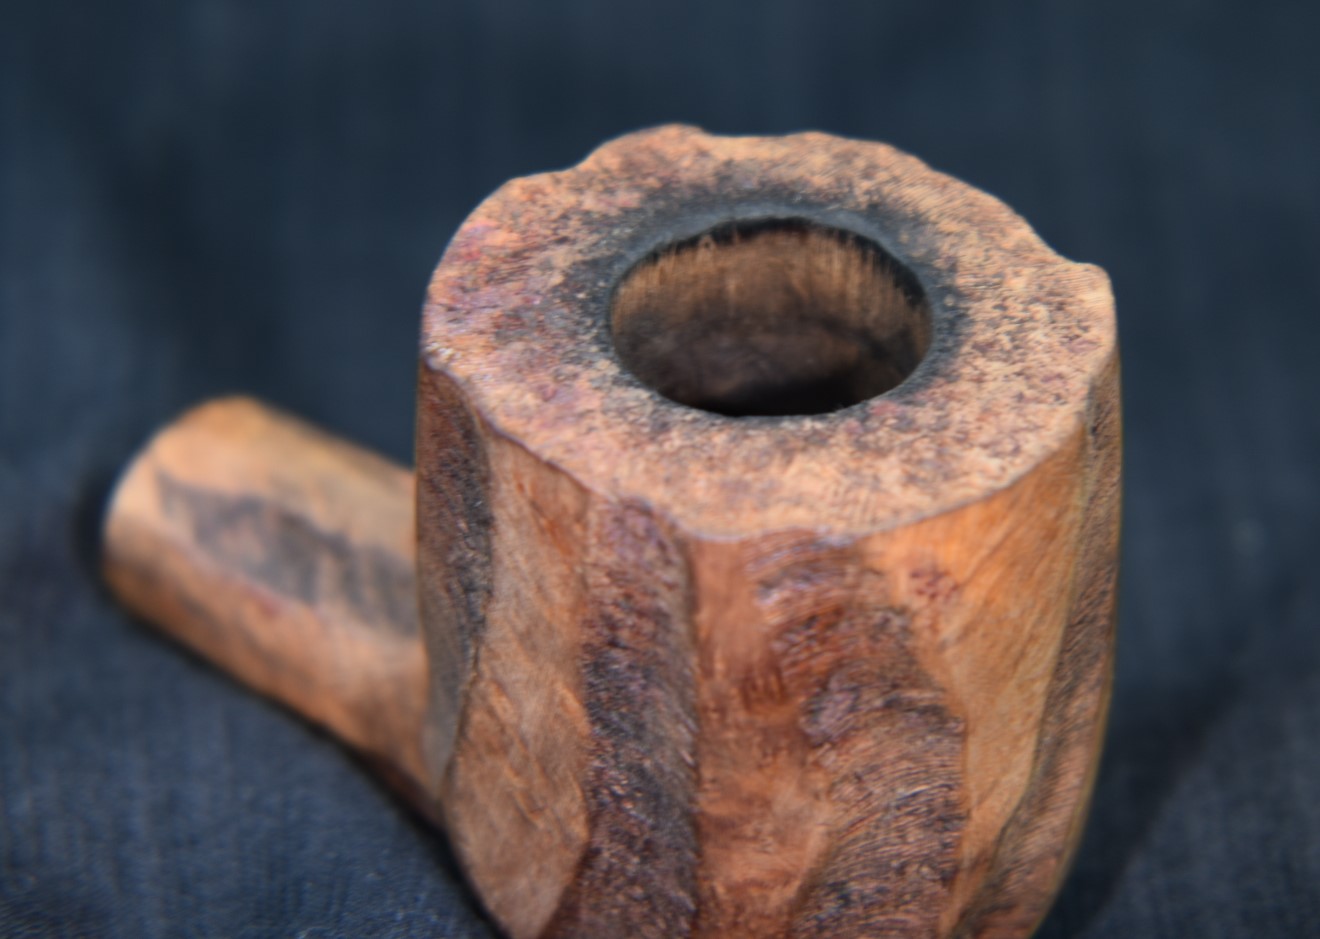
    Now, I think you see why I called it a salvage rather than a restoration.  This old girl had been through some rough treatment.  Upon examination I thought, “can I save this one?”, several times.  I decided that I could but that the shape of the stummel would have to be significantly altered.  A close look at the front of the stummel below the rim showed an area that I initially thought was just very beaten up by dottle knocking, proved to have deep charing fractures.  It looked as if the front of the pipe had been lit aflame then filed off in an attempt to hide the evidence of the crime.  Then there was the condition of the stem – deep bite marks and calcium deposits reminiscent of limestone.  Oh well, it ain’t gonna get done by talking about it.

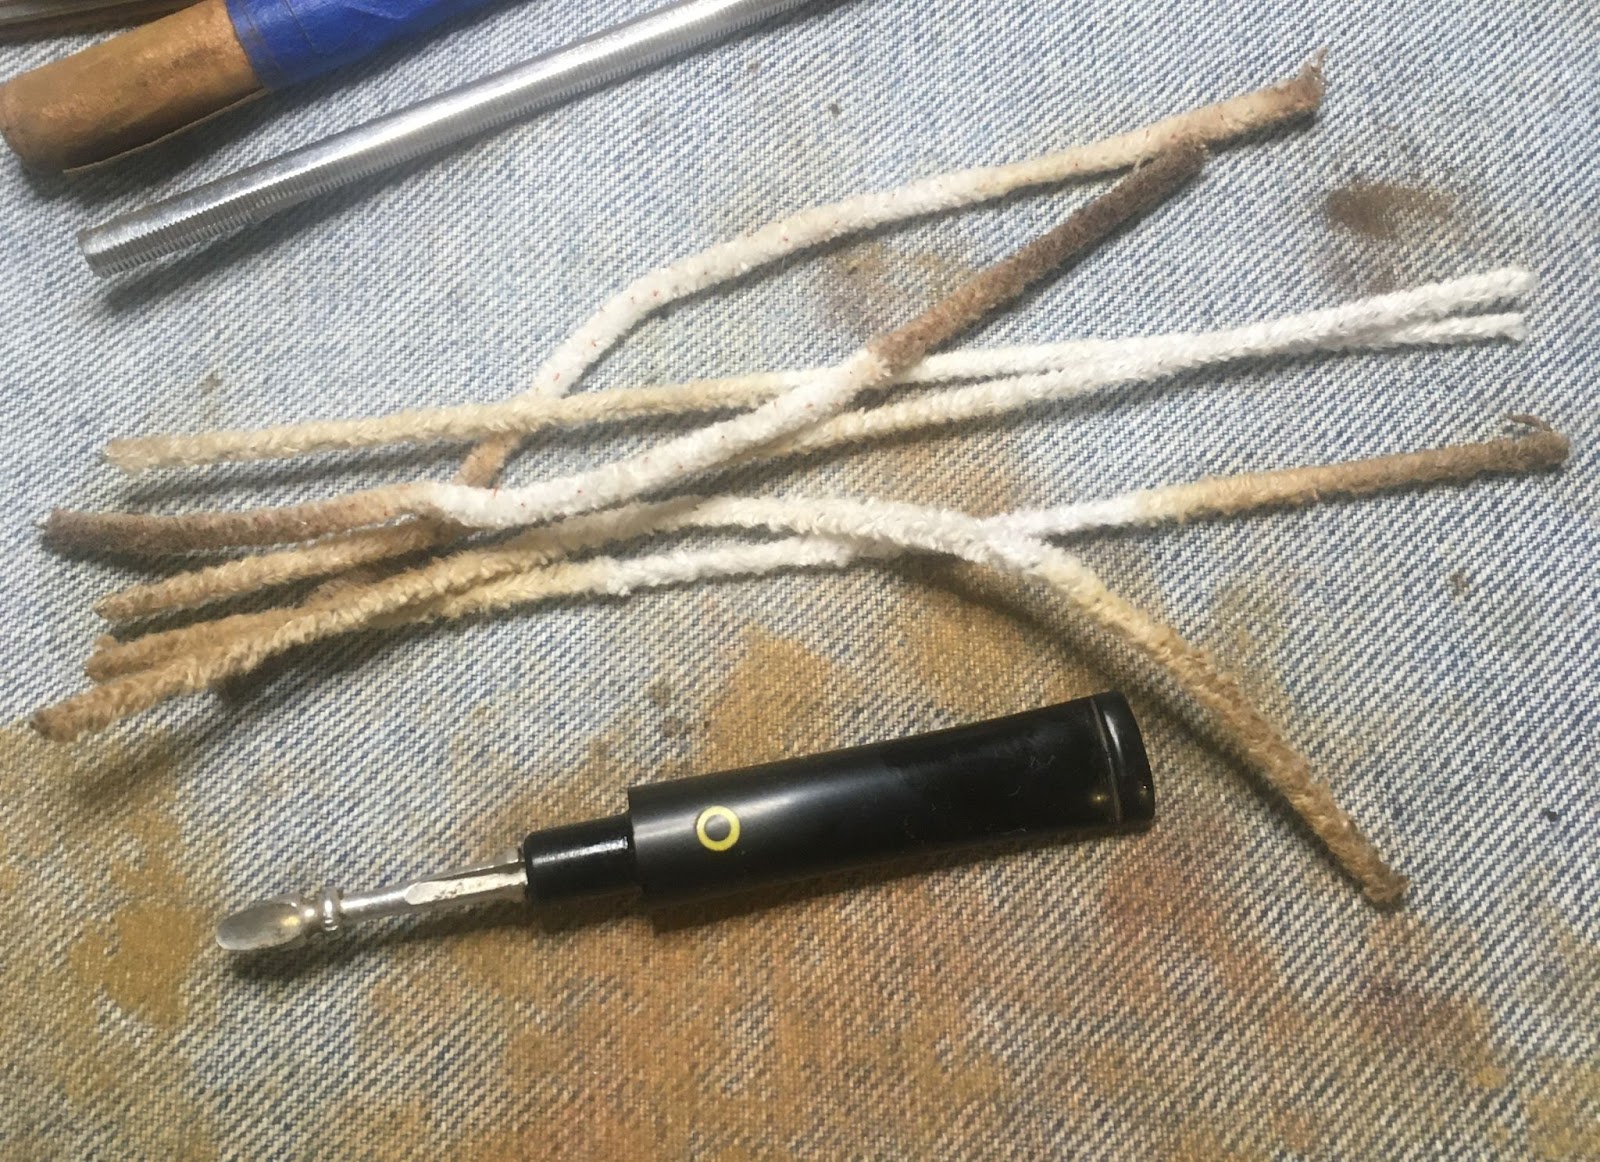
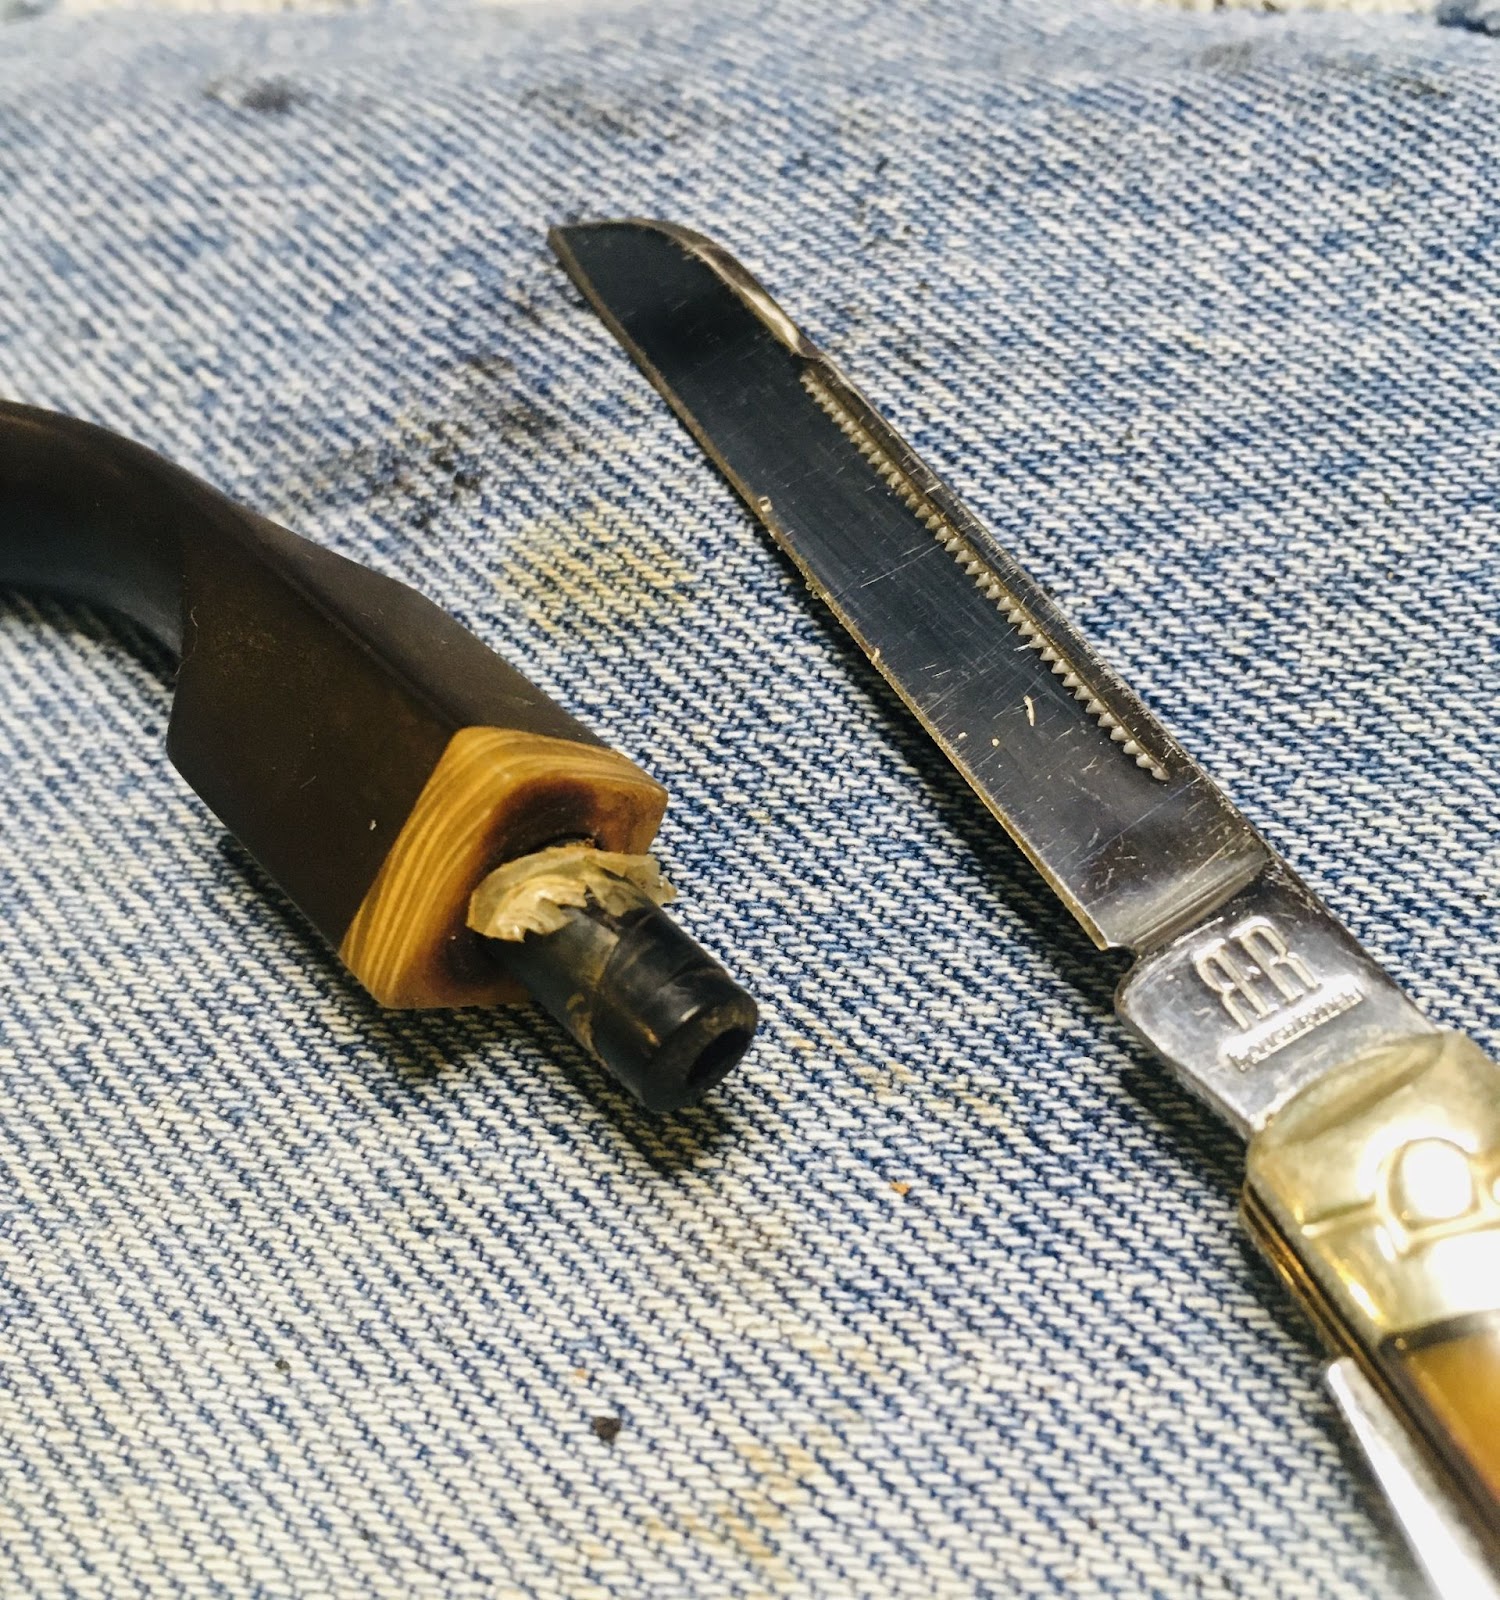
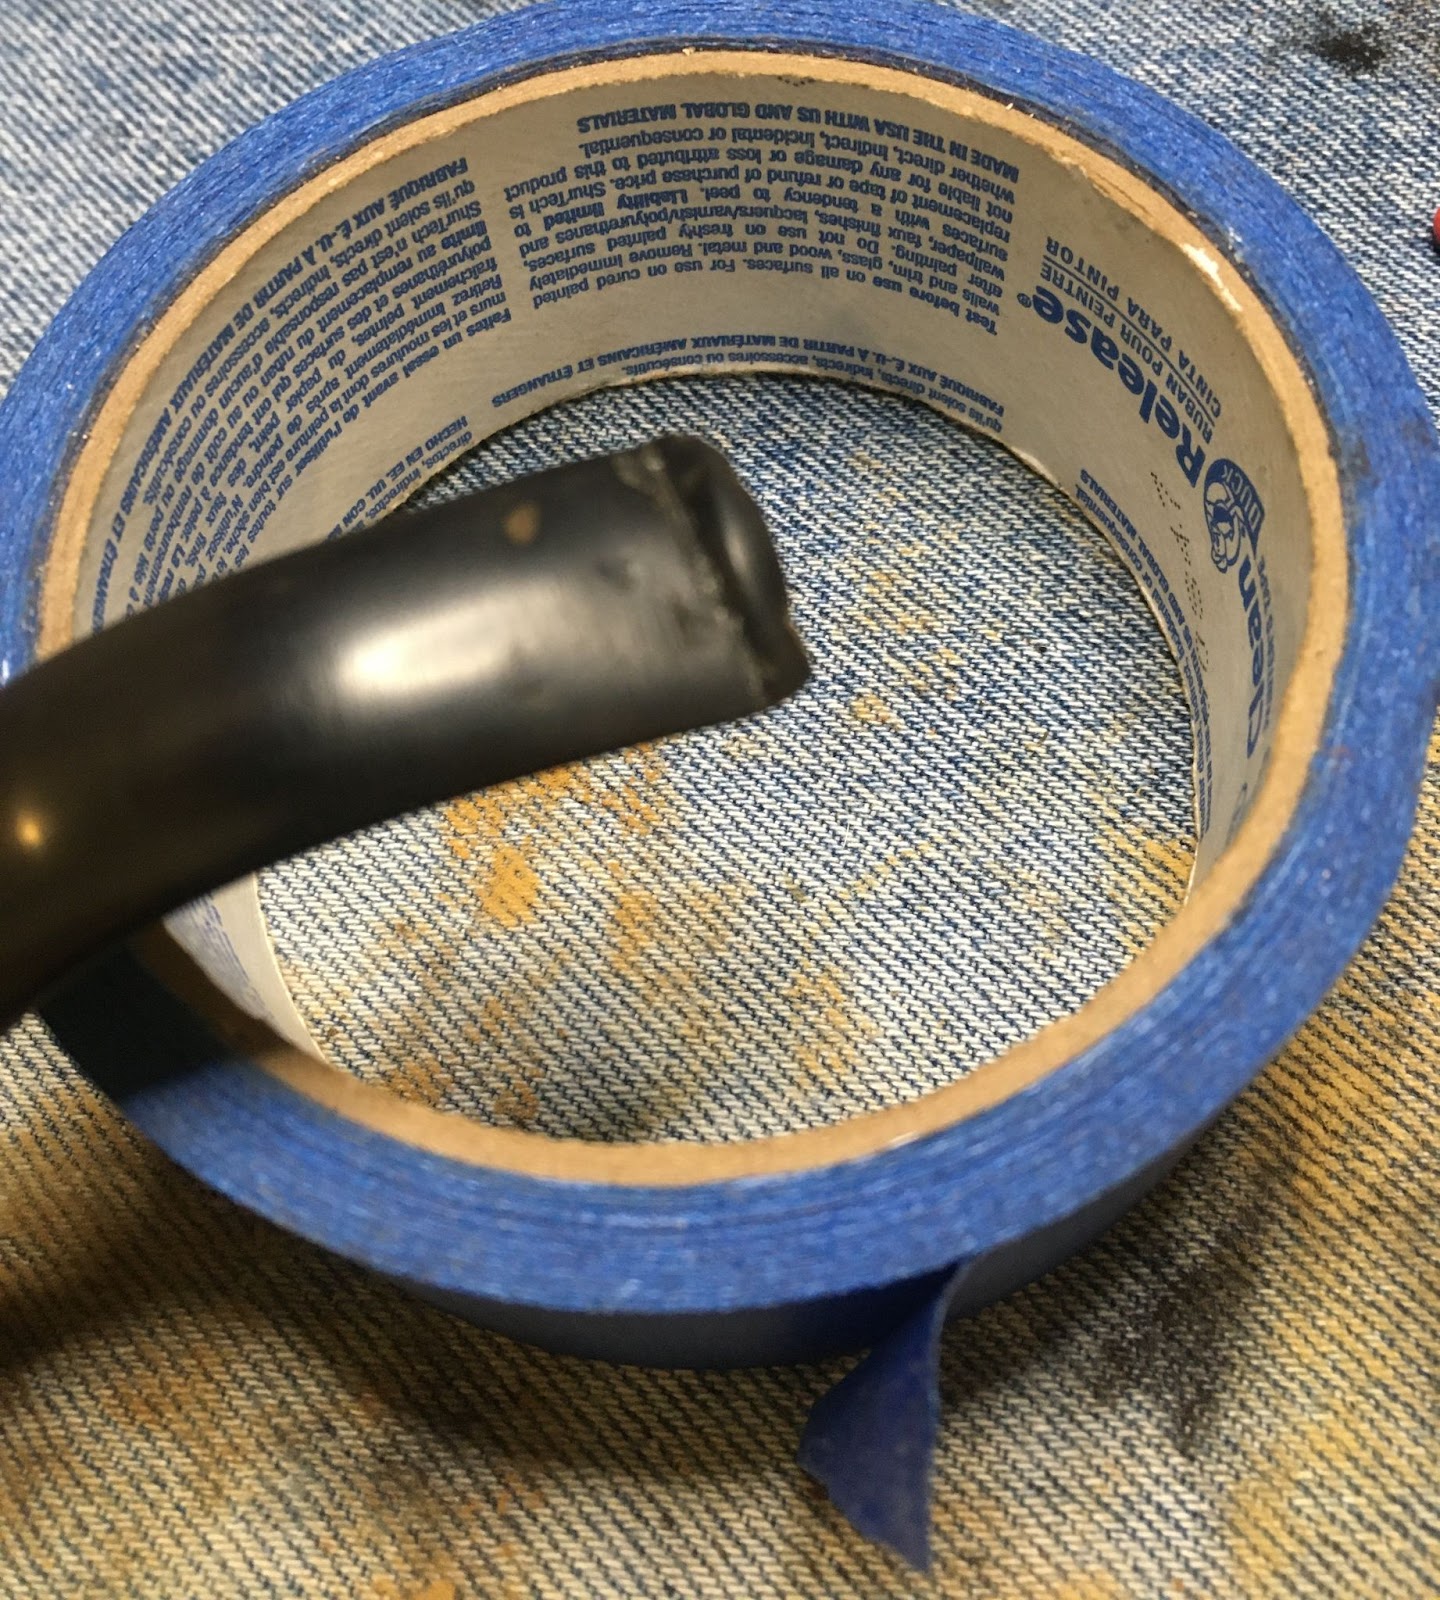
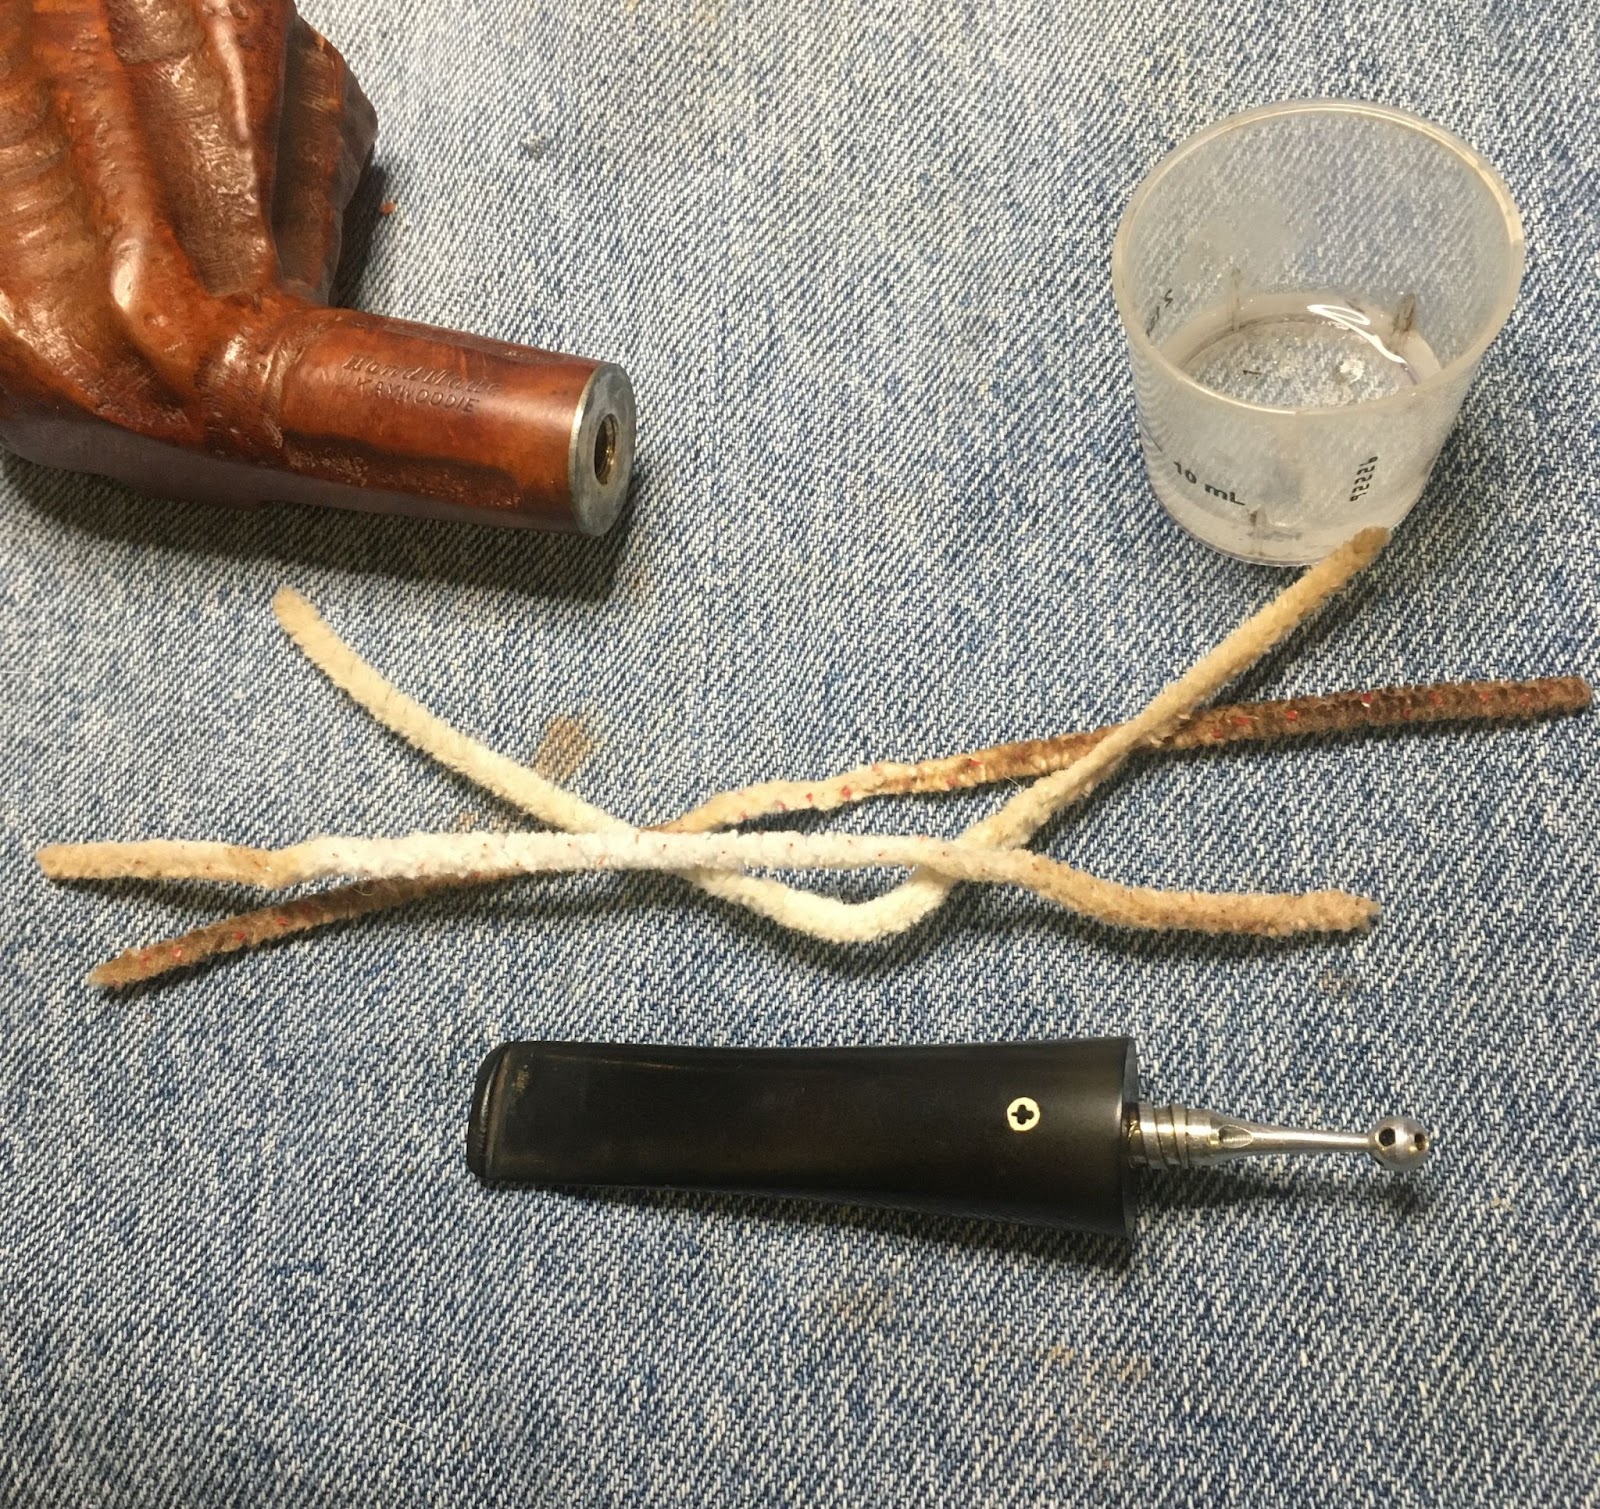
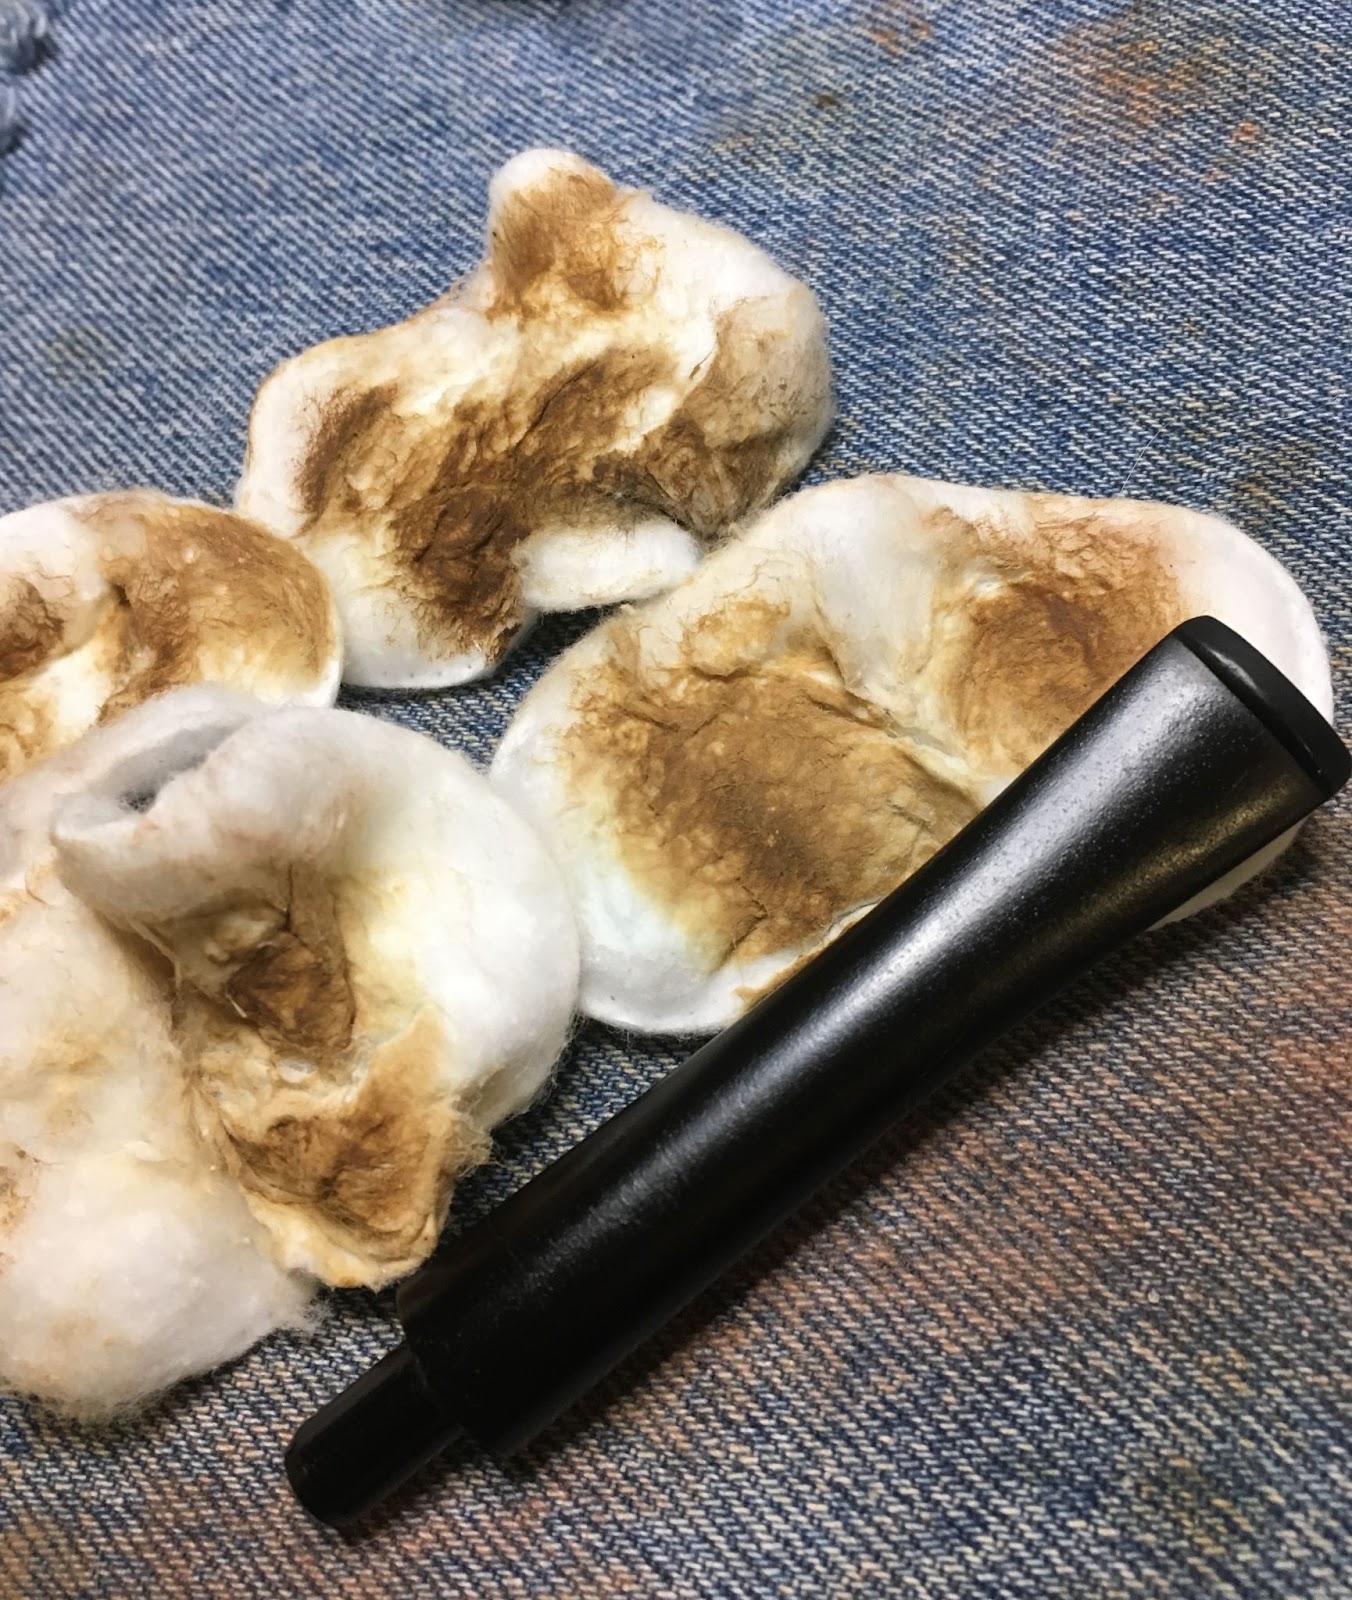
    A clean denim piece was added to the work surface and I was off and running.  What to do first?  I admit that the stummel had intimidated me, so I started with a more familiar task, the stem.  I used a sharp pocket knife to scrape away the calcium deposits on the stem.  There was no good way to get into the bite dents with the knife or with a dental  pick so I used a brass brush dipped in a bit of 99% isopropyl alcohol.  The results looked better.

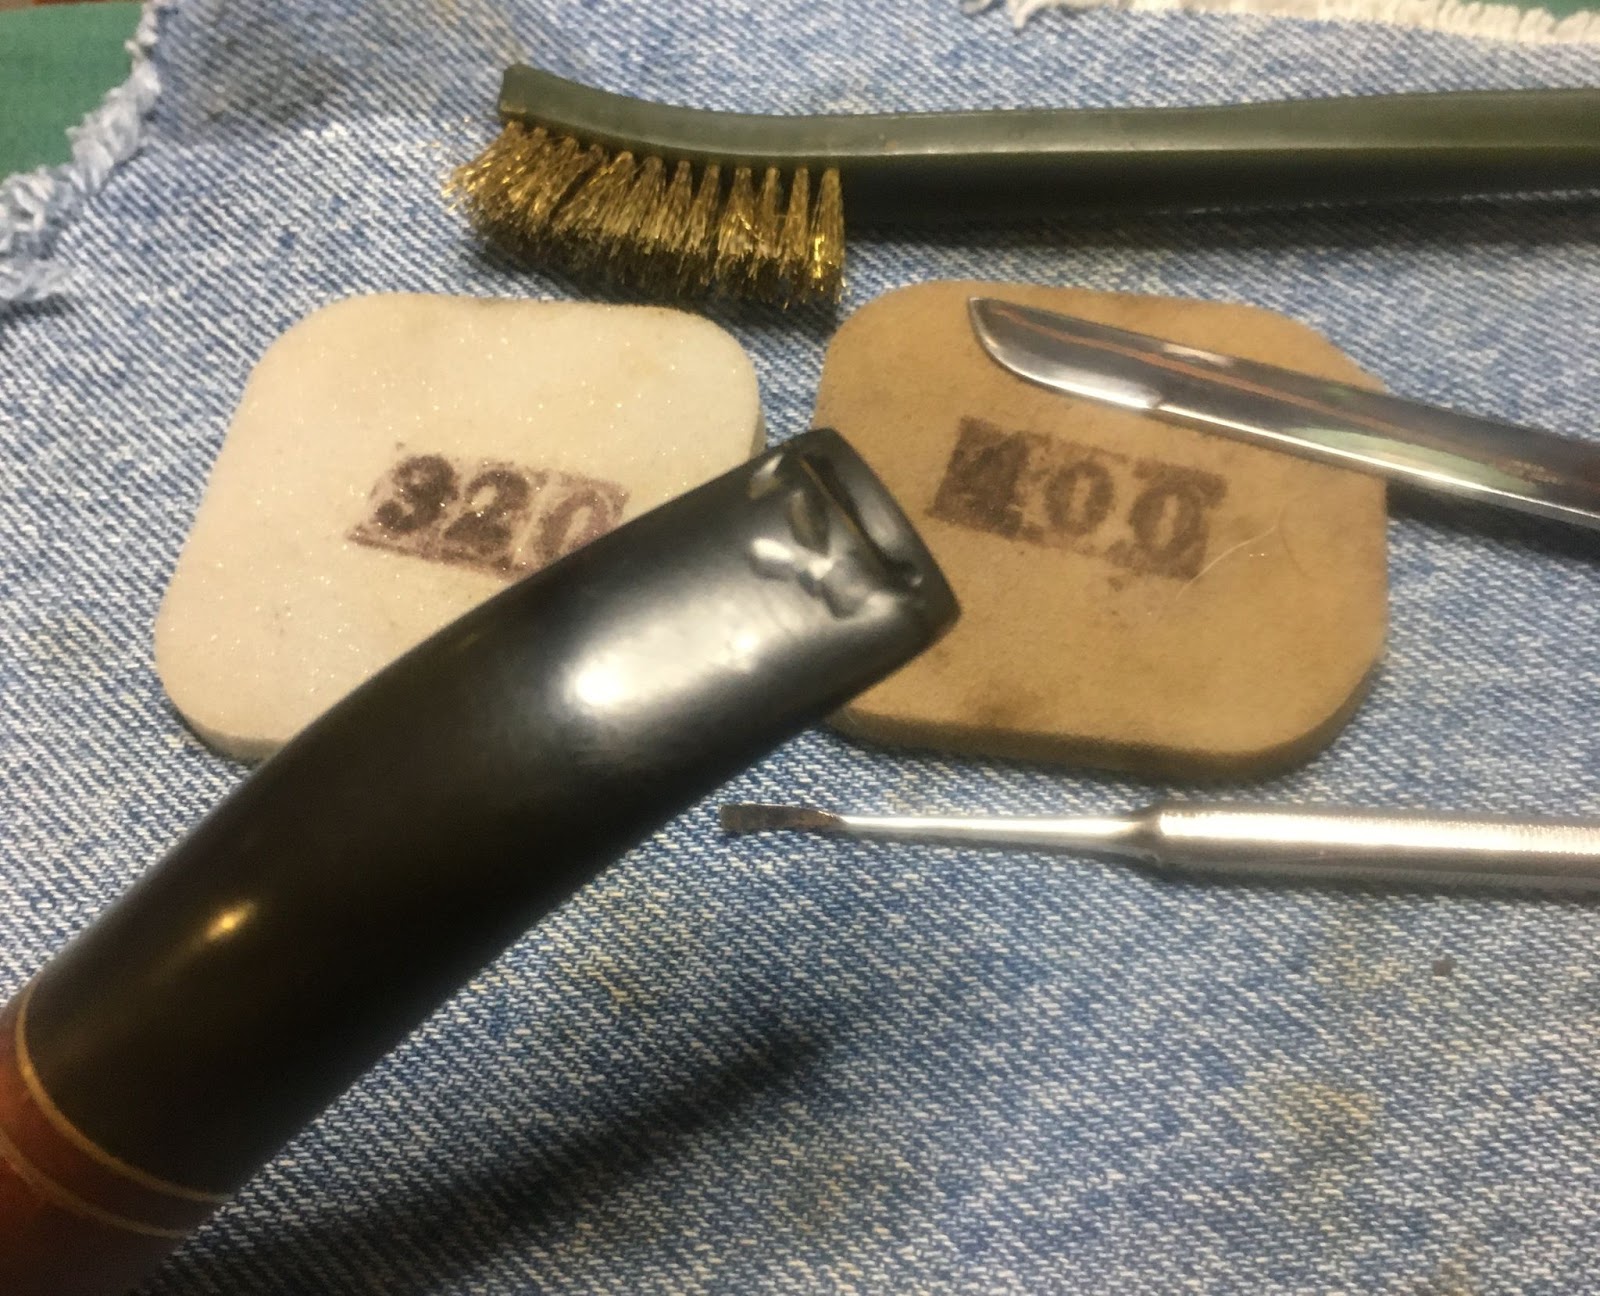
    The stem was then sanded with the 320 and 400 sanding sponges.  I wanted to remove the oxidation and roughen up the surface to allow the black cyanoacrylate (CA, super glue) a better surface to adhere to.  

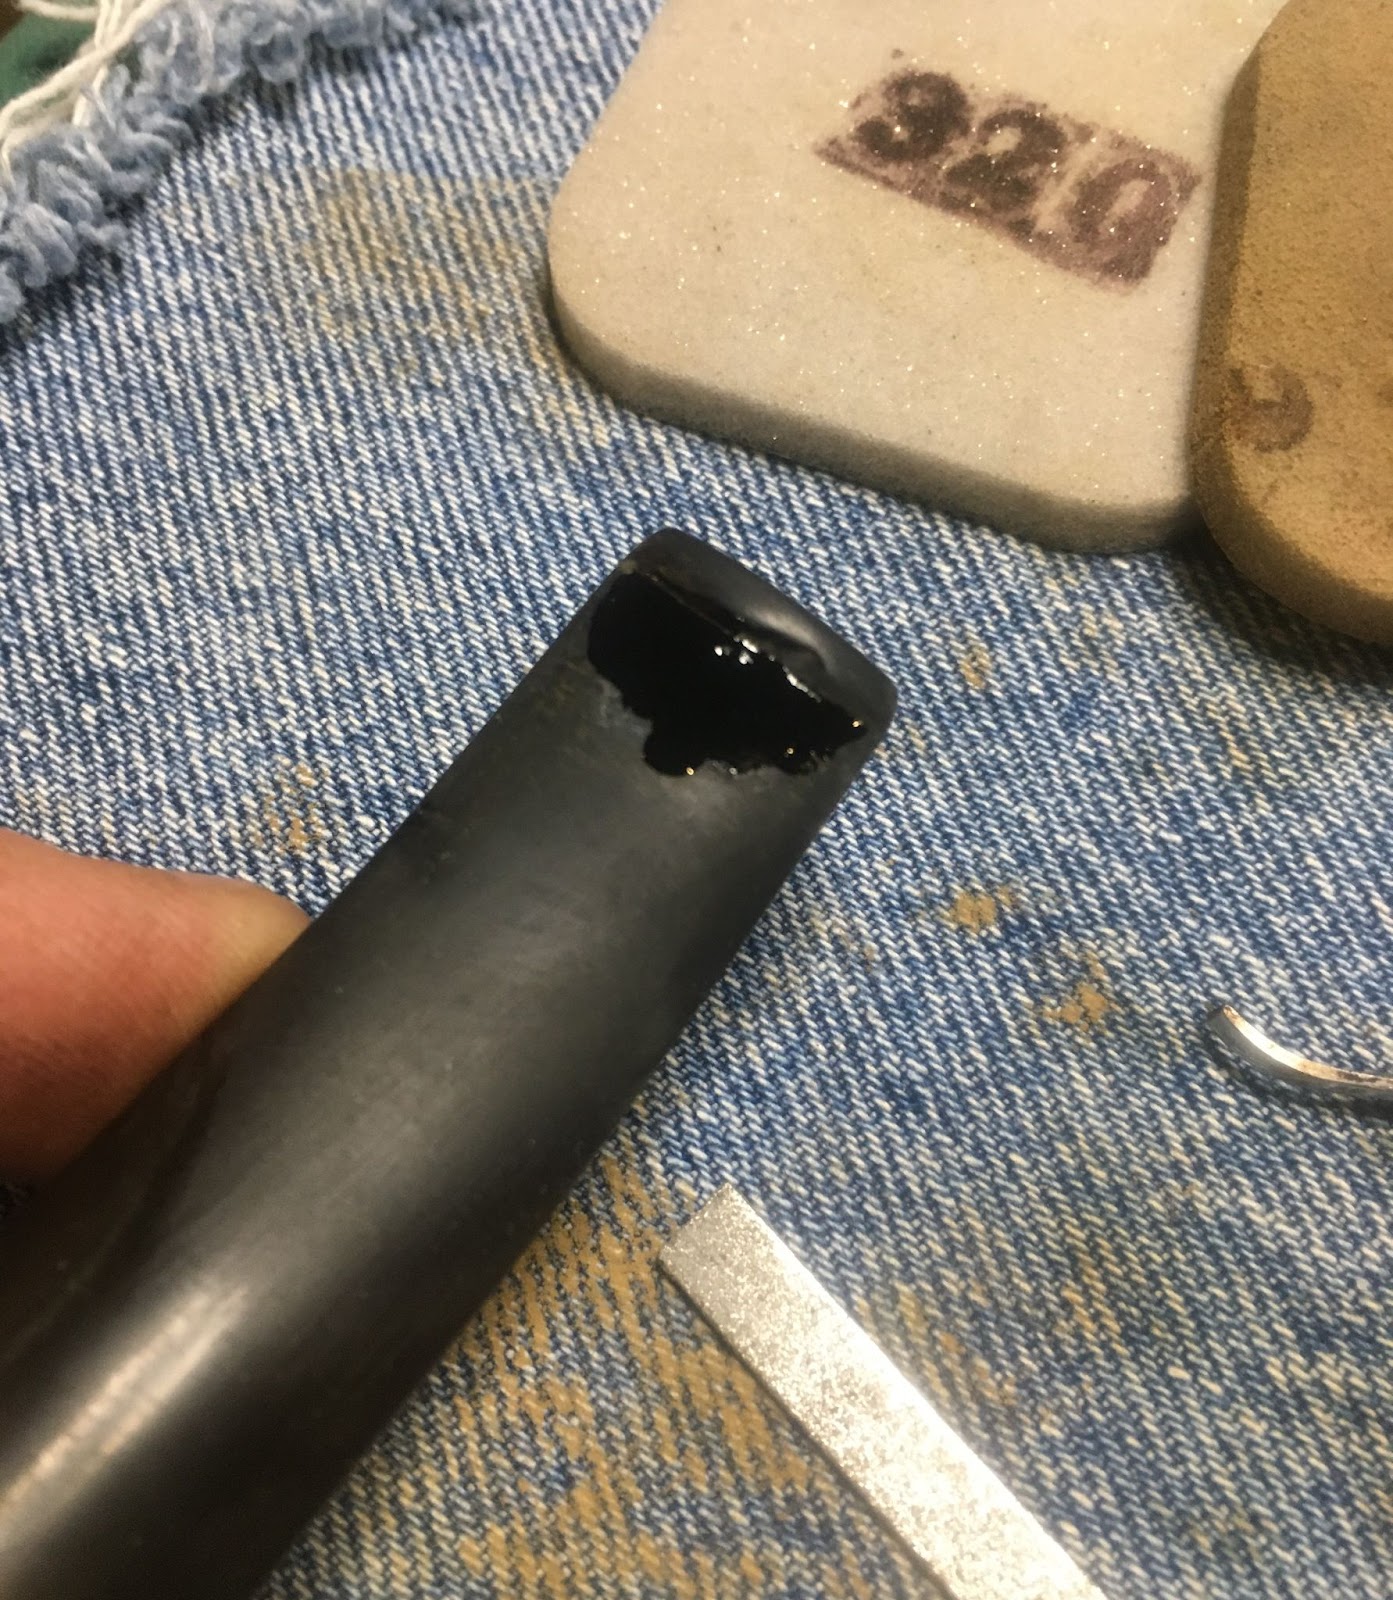
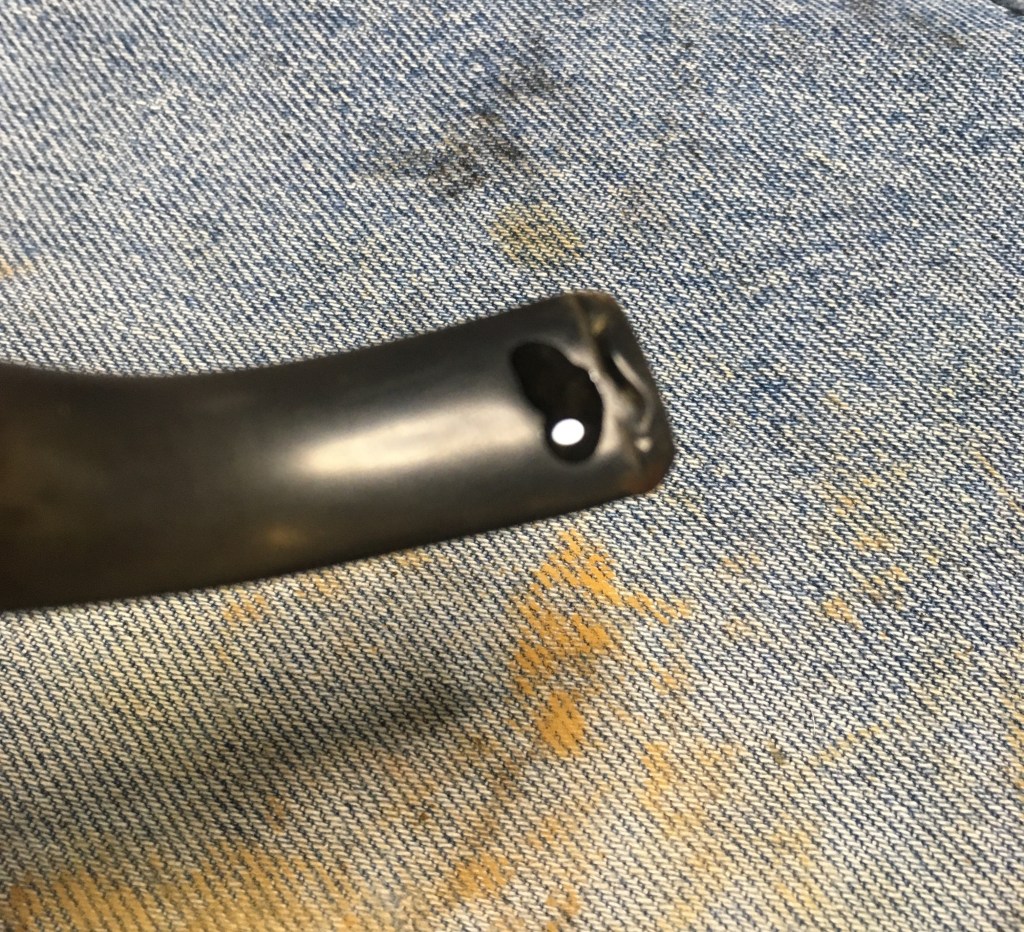
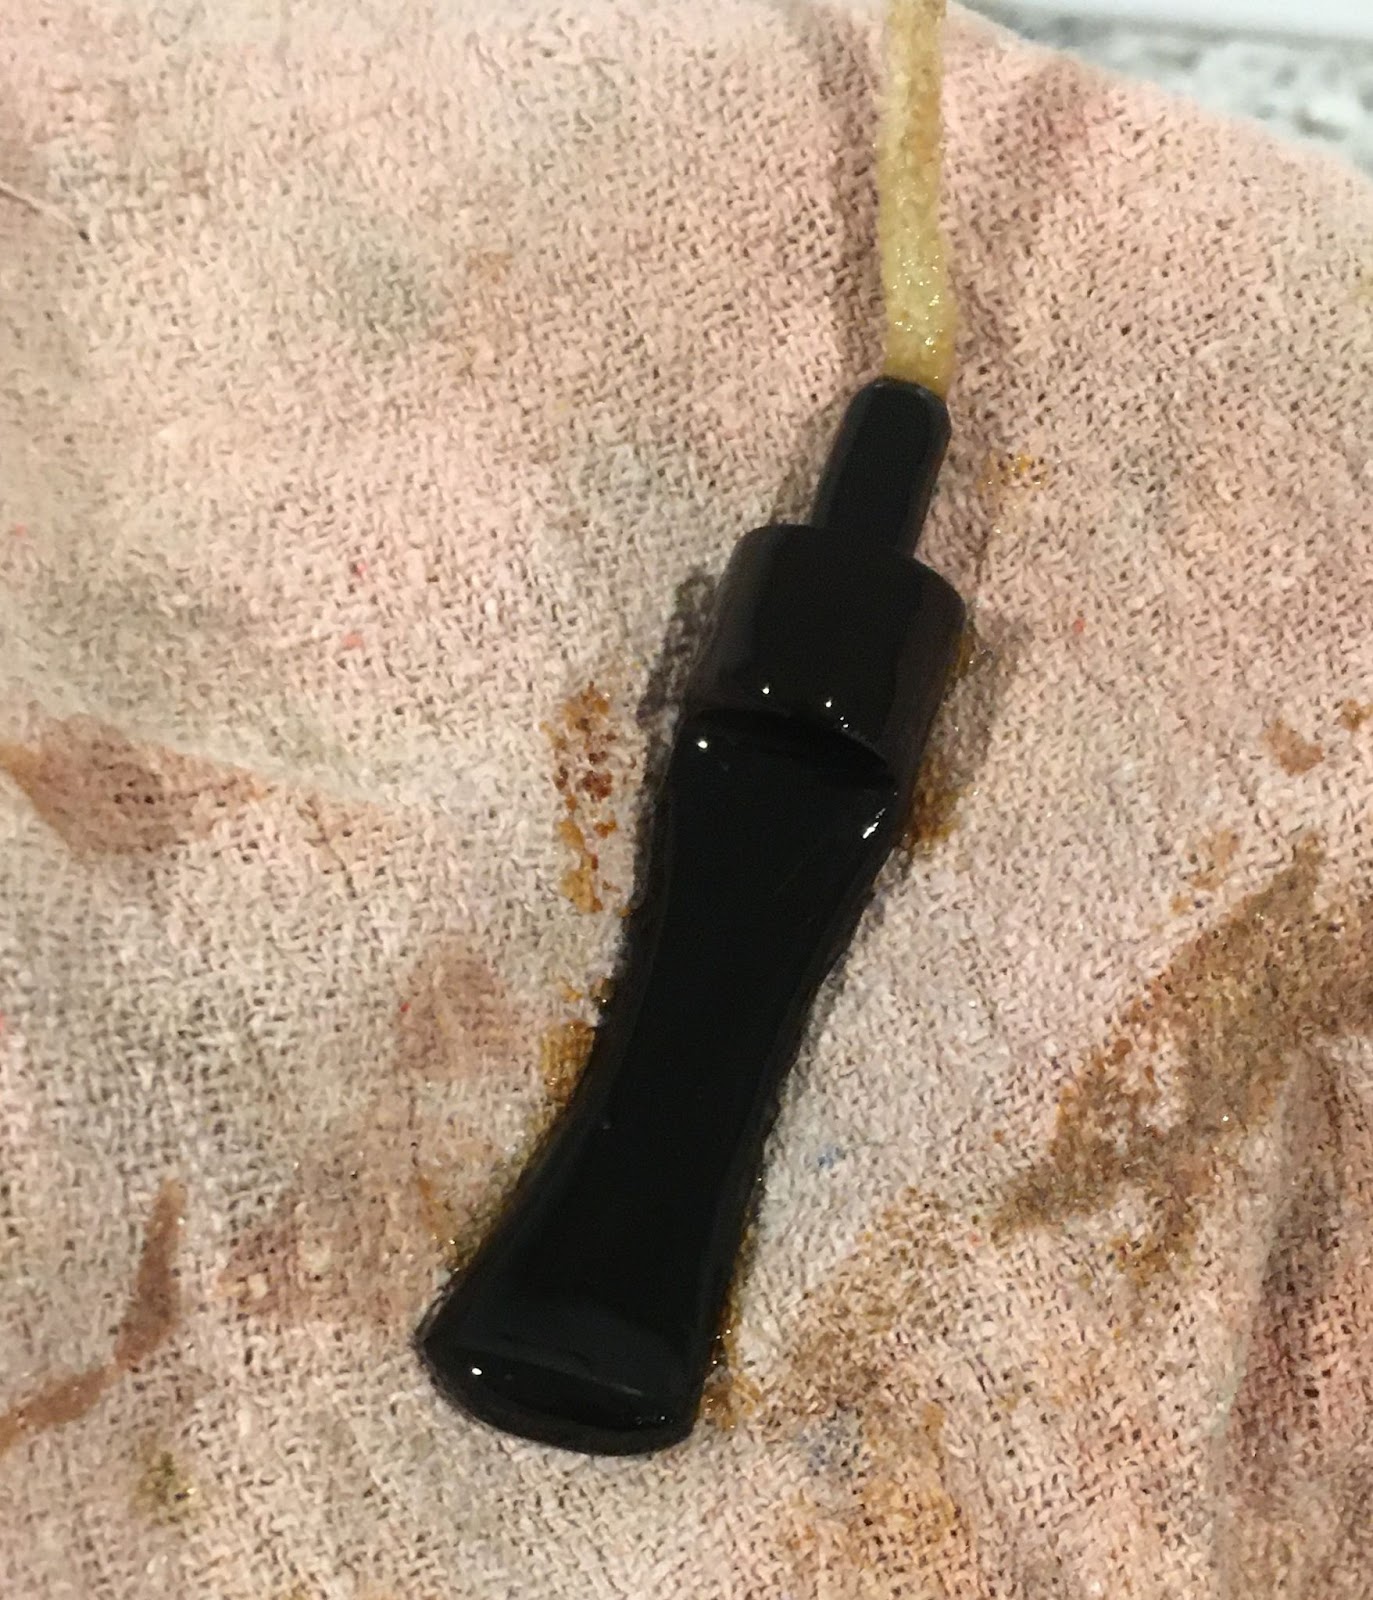
    I placed small drops of the black CA into the dents on the top side of the stem.  I figured this would take several smaller applications with filing and sanding in between applications.  THe drops were spritzed with a CA drying accelerator then filed flat..

    After filing came a little bit of sanding.

    This led to another application of CA to fill depressions over a much larger area.  The larger area allows the blending of fill.  This application also received a spritz of accelerator. 

    More filing and sanding to smooth and blend the repair.

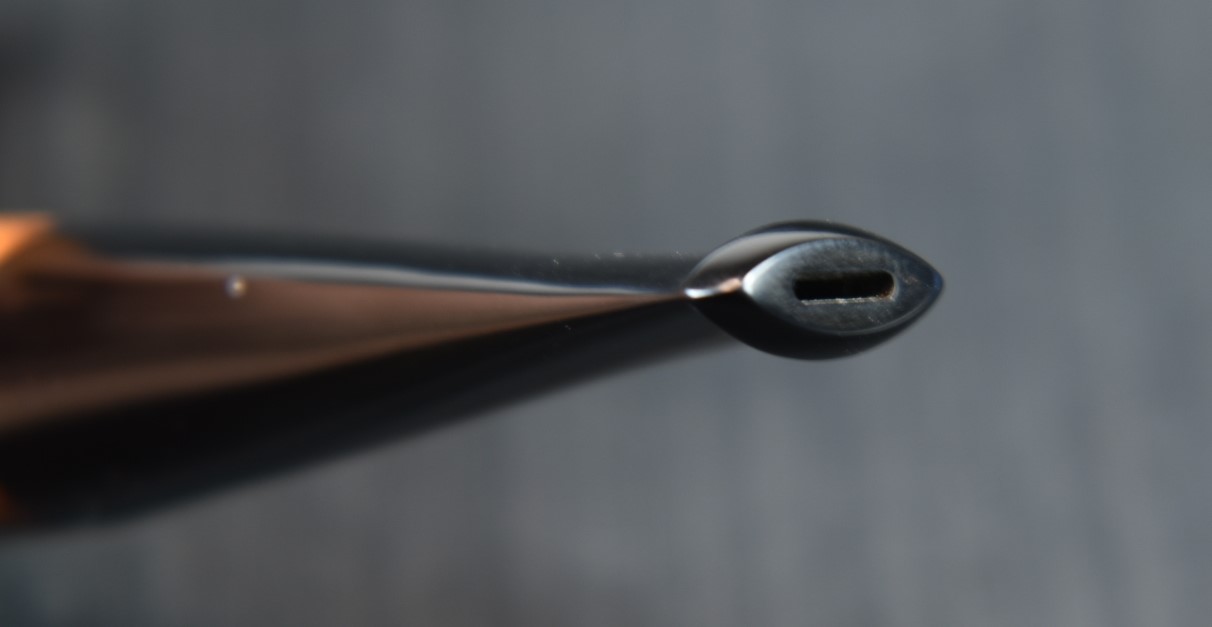
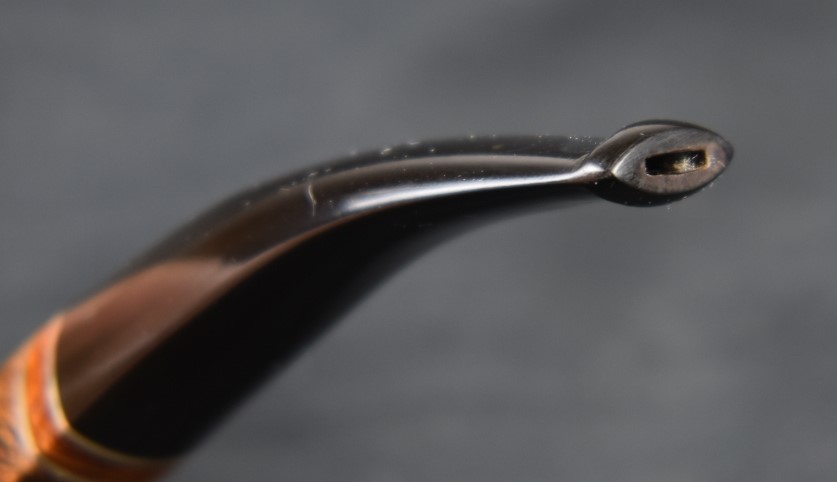
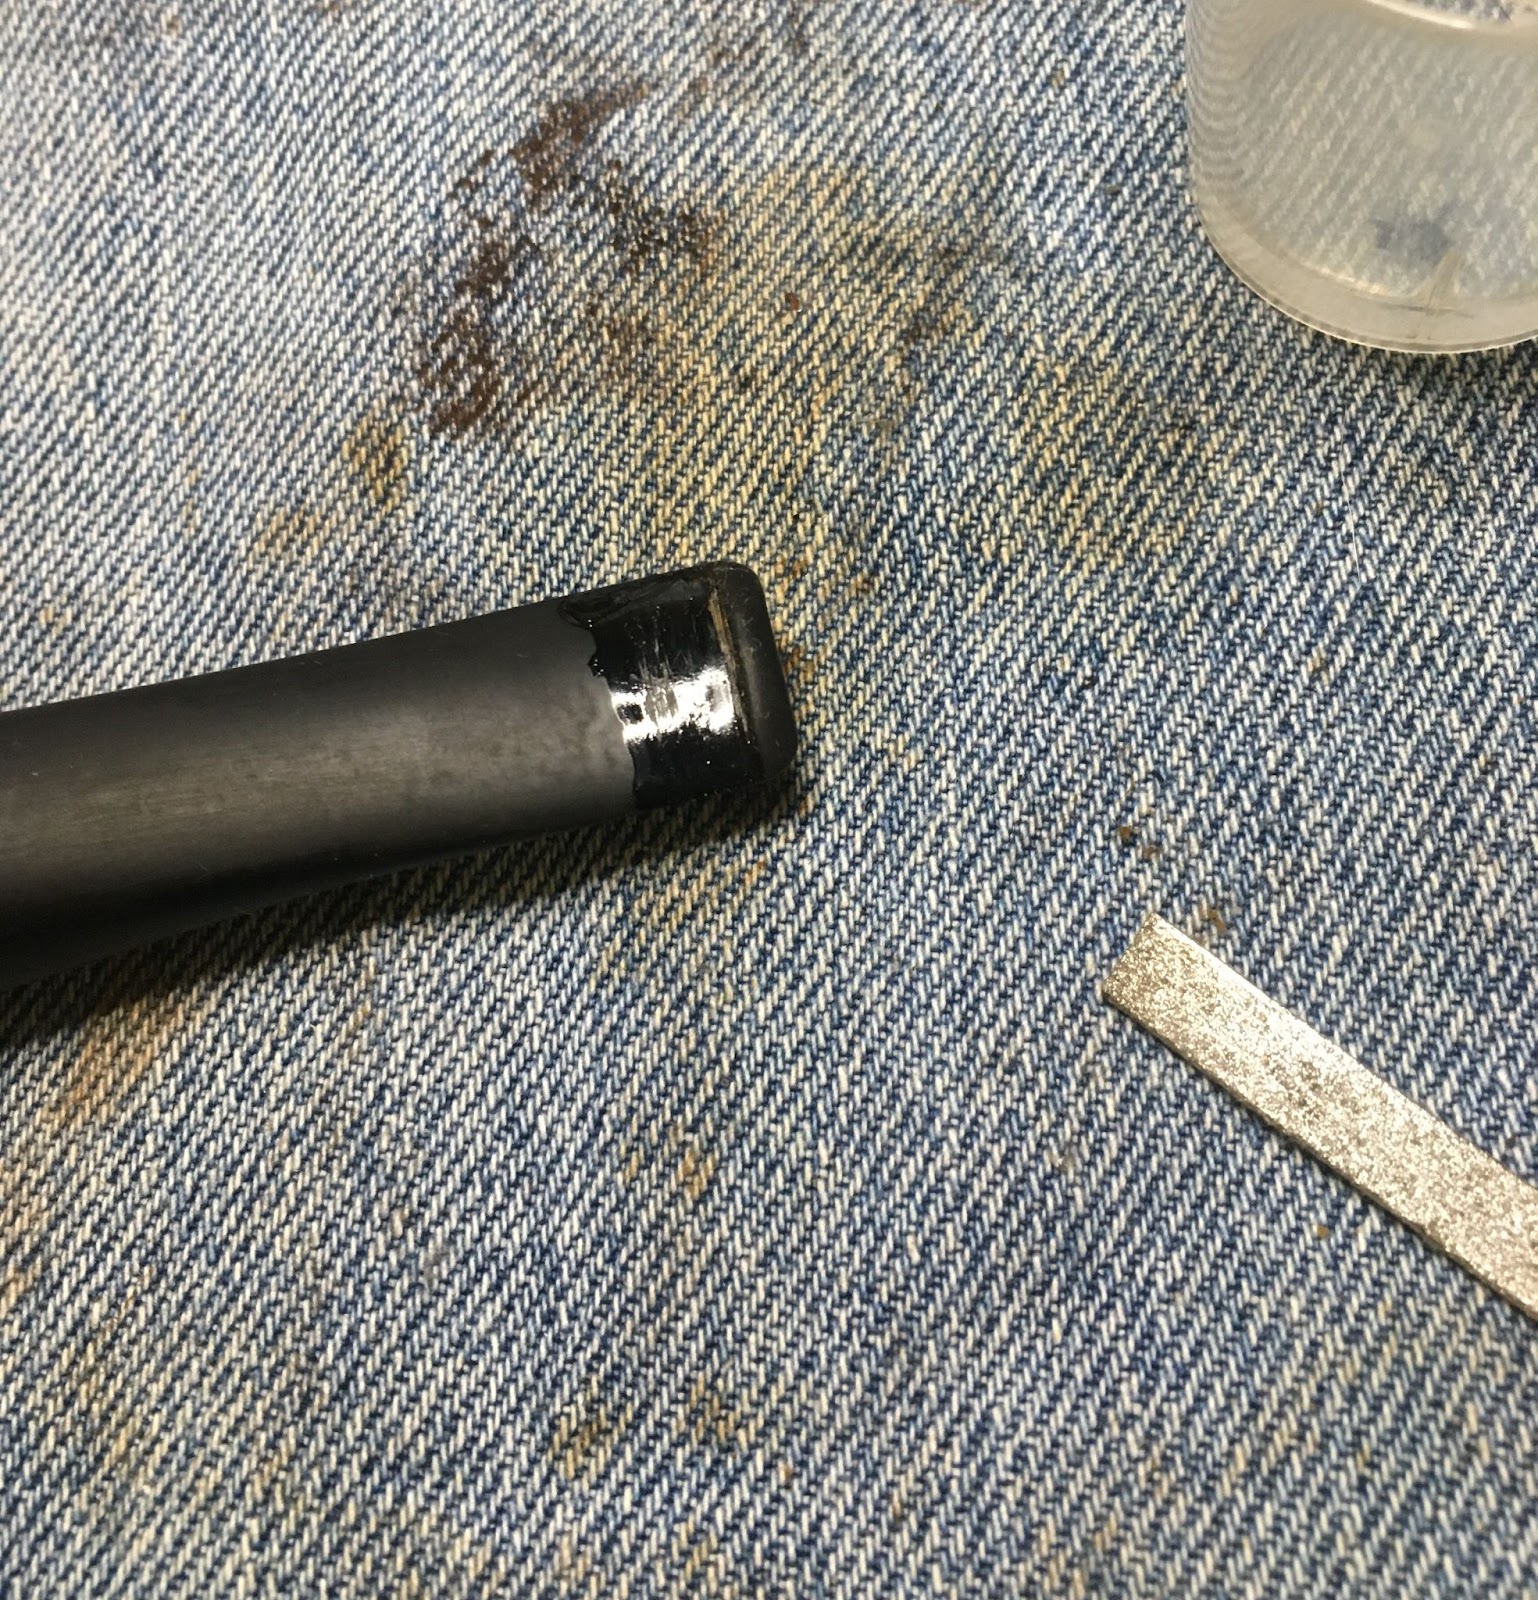
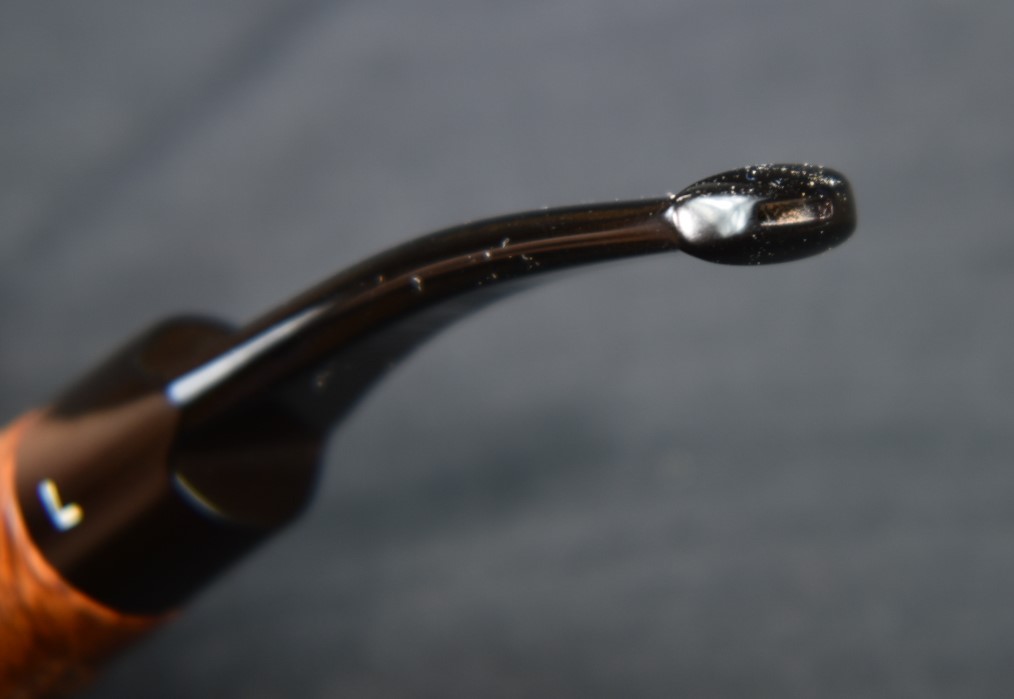
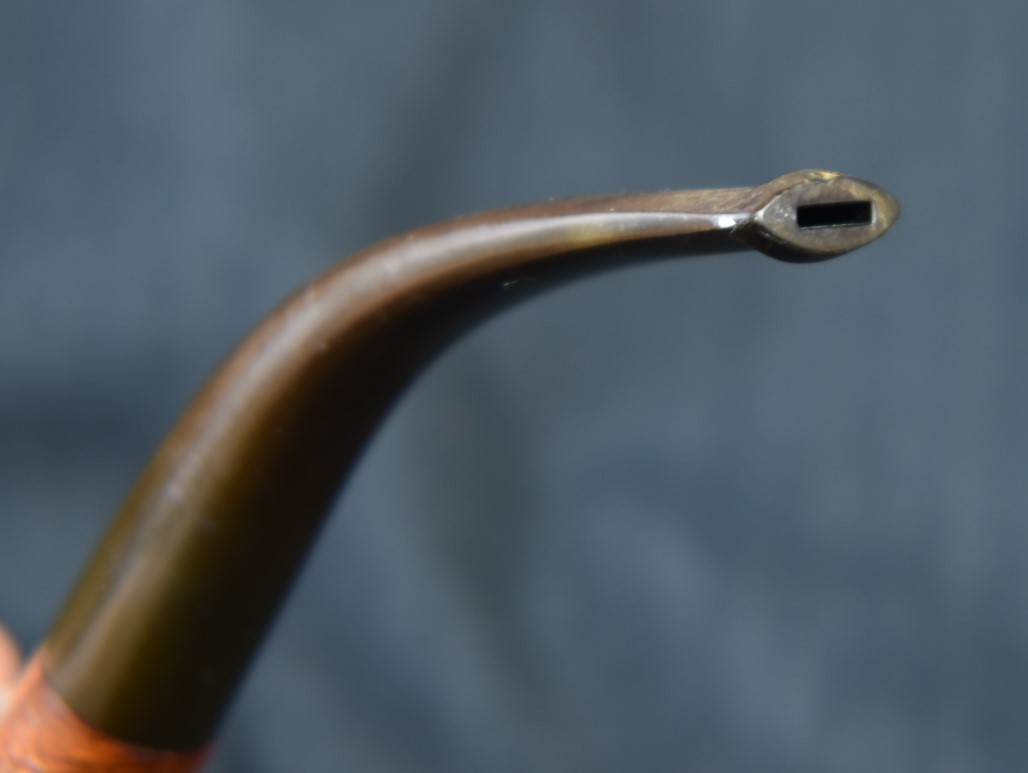
    Notice that I had not addressed the button.  I prefer to get the dents smoothed before I try to rebuild the button.  This process was then repeated on the bottom of the stem.  Initial small drops, accelerator, filing, sanding and repeat.

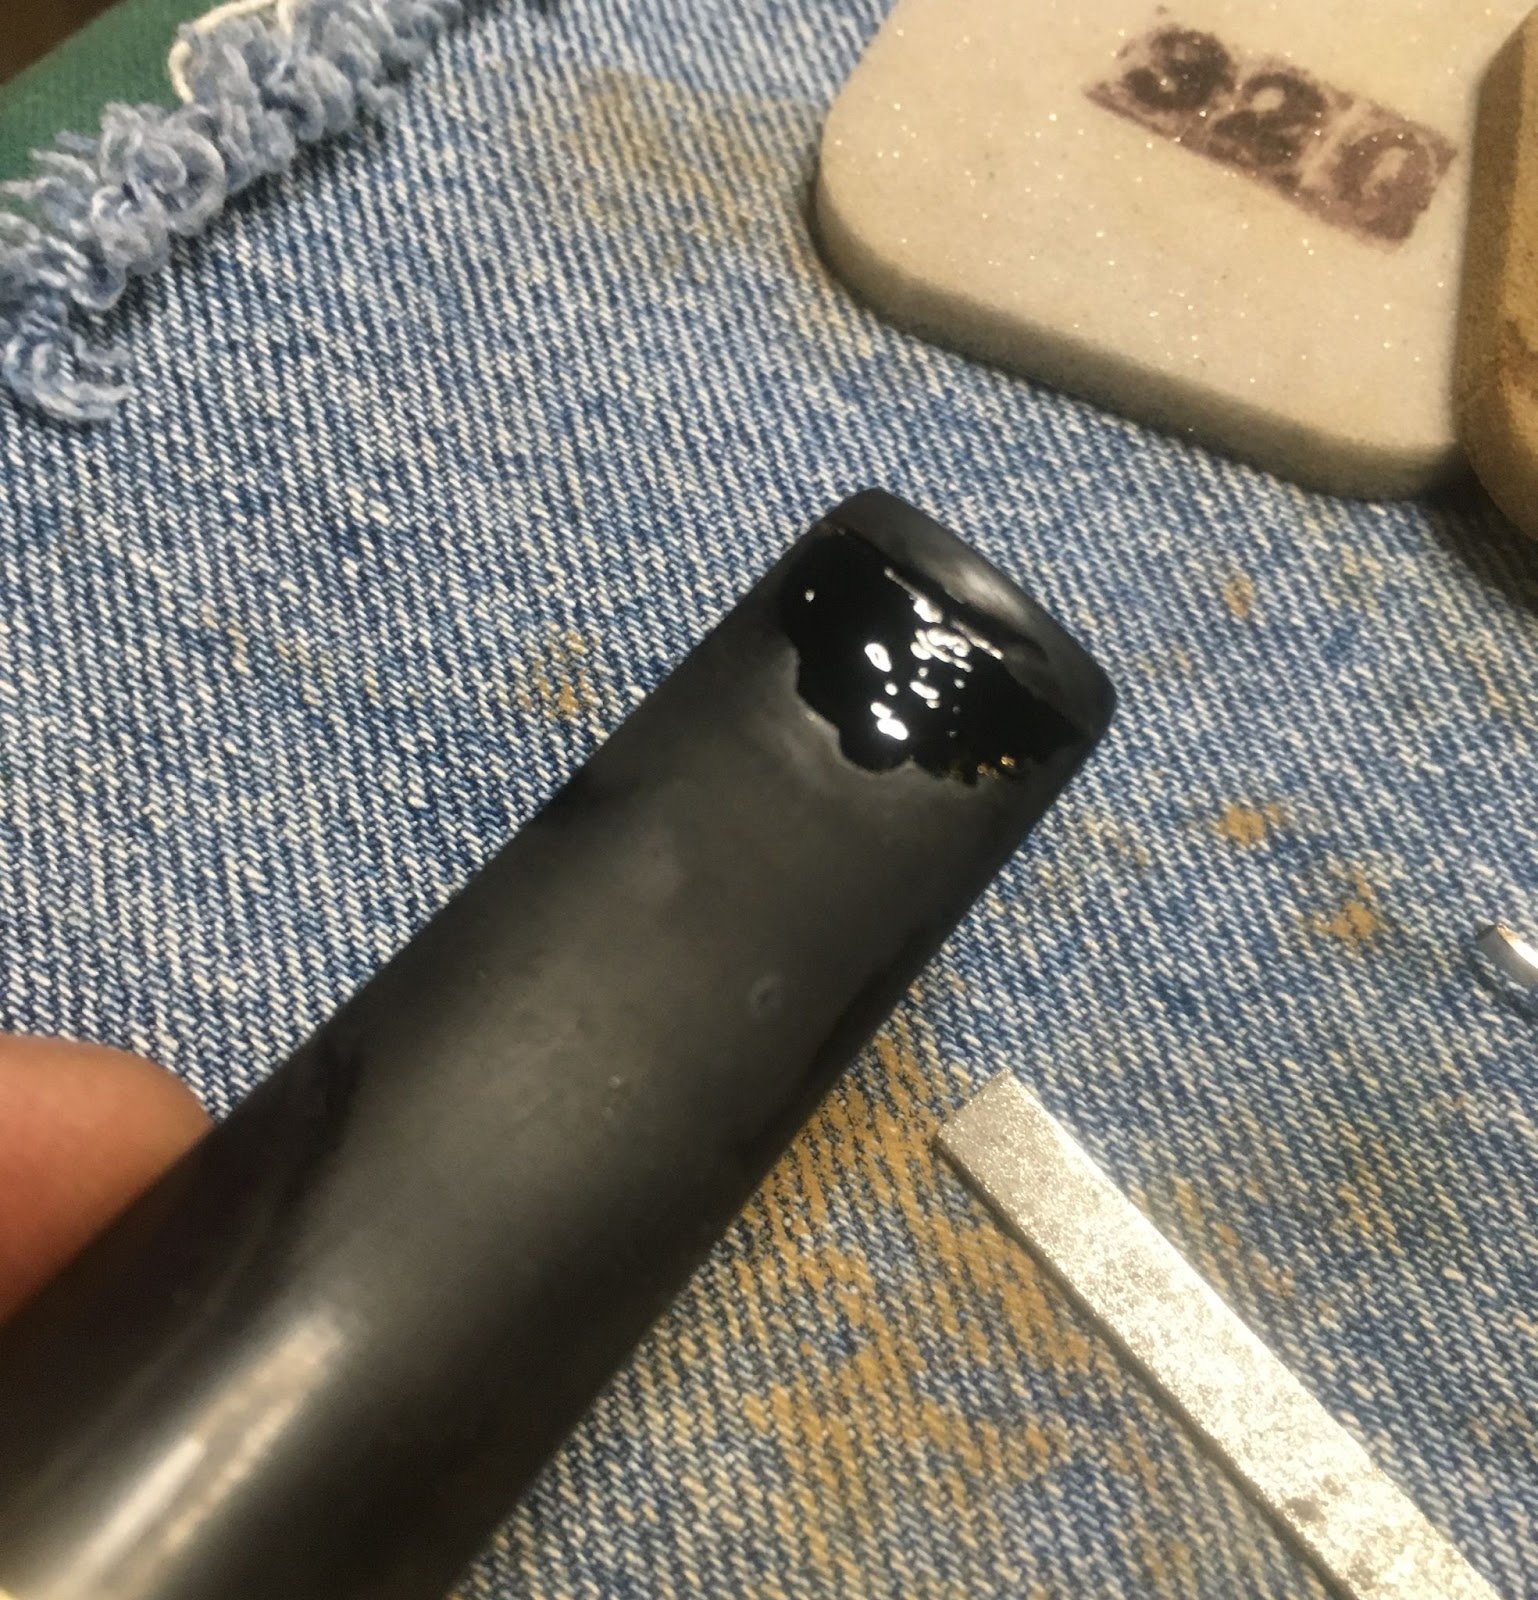
    Below is application 3, now over a larger area.

    I Threw this photo in to show that the CA has a much smoother texture before the accelerator is used.  THe rapid drying makes the surface rough and more bumpy.

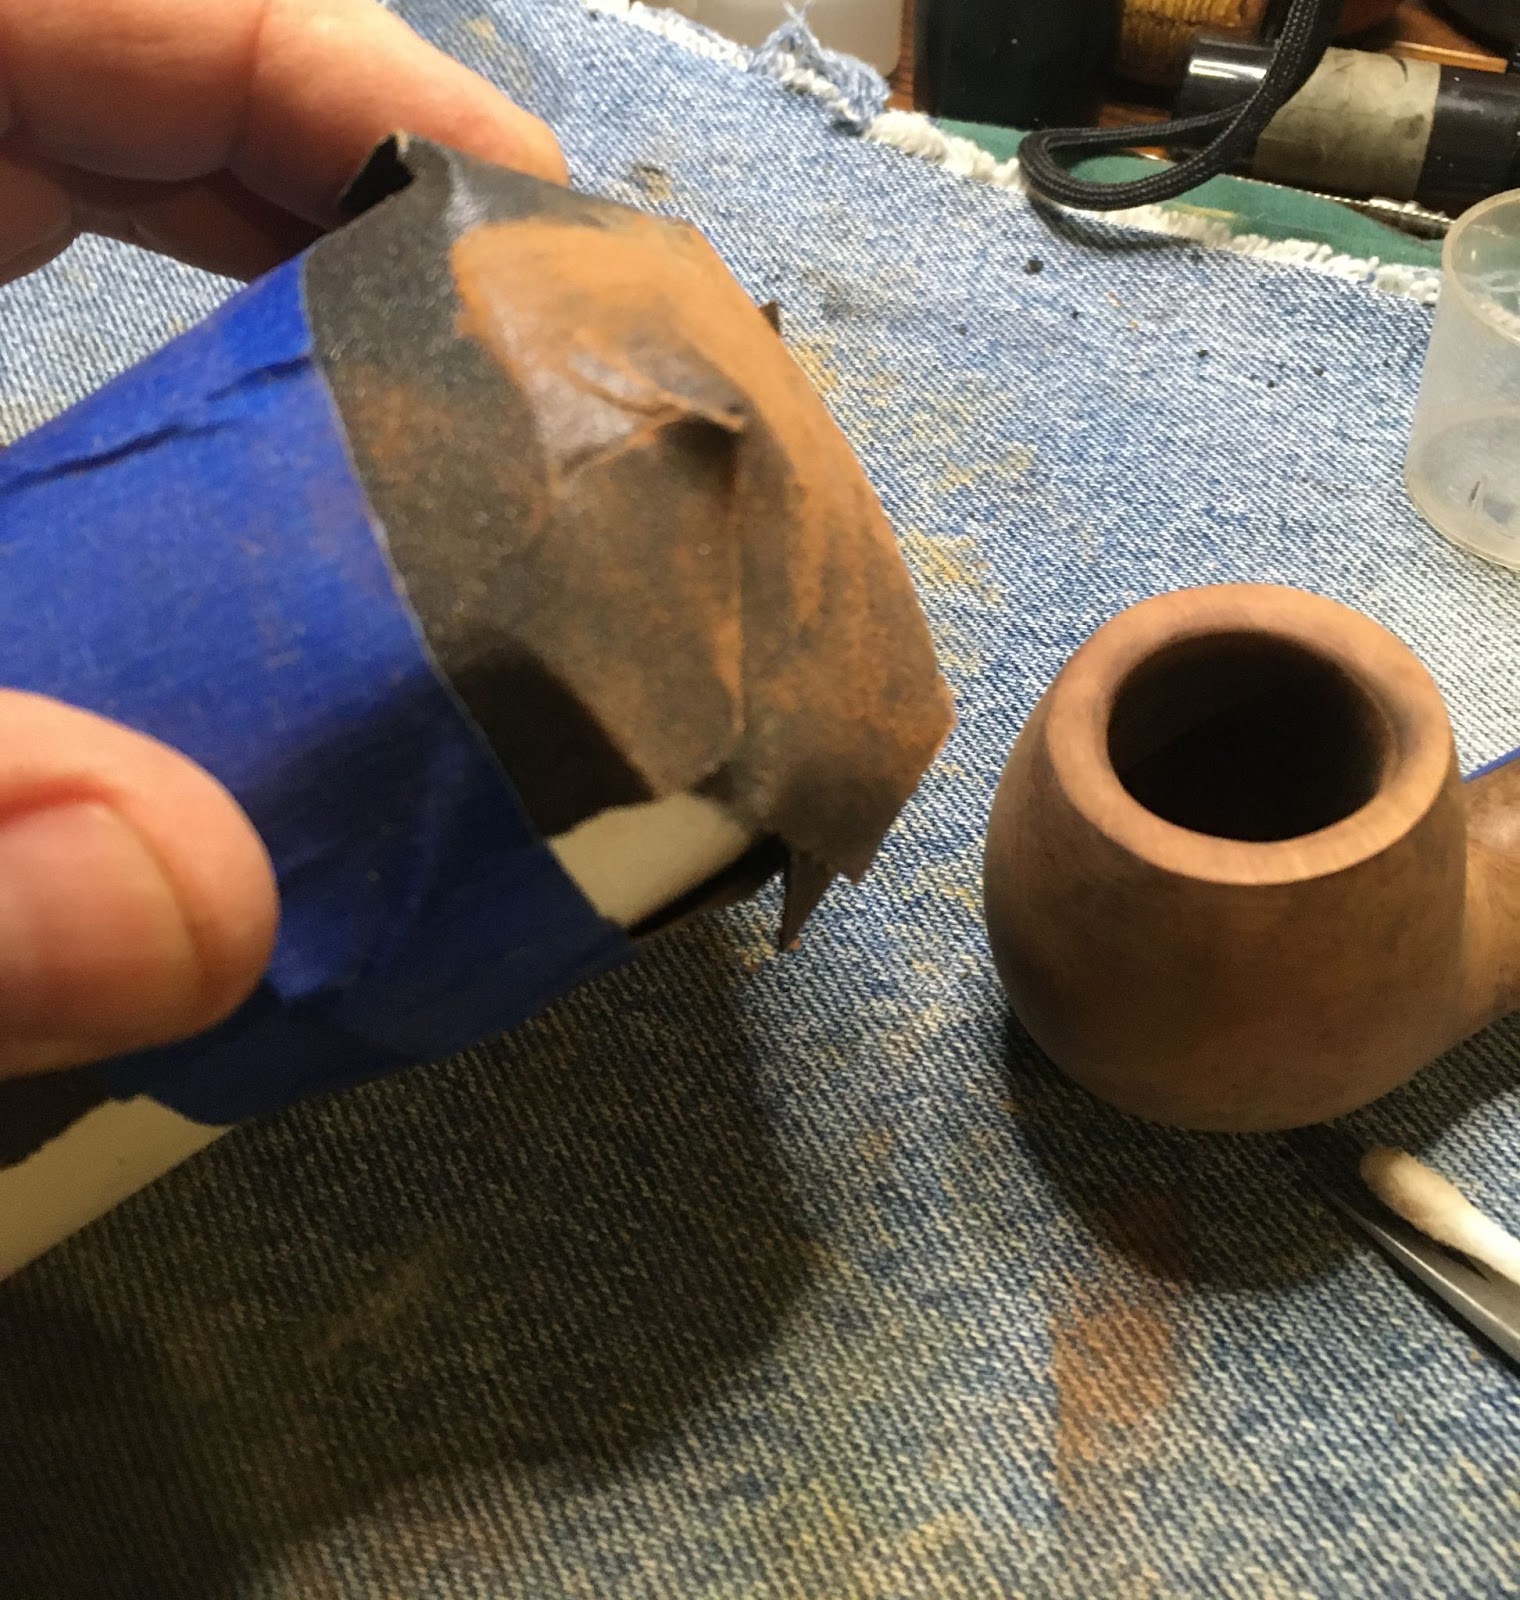
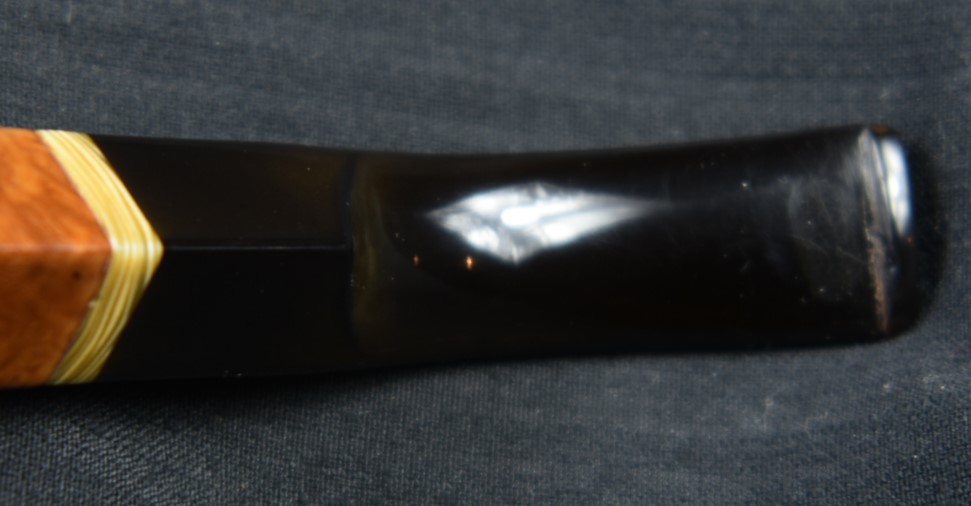
    After filing and smoothing with 320 and 400 sanding sponges I was ready to start rebuilding the button.  This button did not need very much material added.  The previous owner fortunately was not interested in mauling both the button and the stem.  I like the cheap shiny Scotch tape for this next technique.  The more expensive matte finish 3M tape dissolves when exposed to the CA accelerator.  I wrap the newly smoothed stem in a layer of tape right up against the button.  This will keep the next application of CA off the previous applications.  

    I then add CA to the area I want to build-up.  I immediately invert the step so the wet CA hangs down but doesn’t drip (If it drips then I was using too much CA, thin coats are easier to work with).  While holding the stem upside down, I spritzed with the accelerator.  Now for the part that you have to do fast you will have about 5 seconds to work with.  Flip the stem back over and while the CA is still soft use a sharp knife to cut along the edge of the button.  This will give you a nice straight flat edge that you will not have to spend a lot of time filing and sanding.  Once the CA was set-up the tape was removed.  The cut off piece of excess CA was stuck to the tape and removed with it.  The edge was straight.

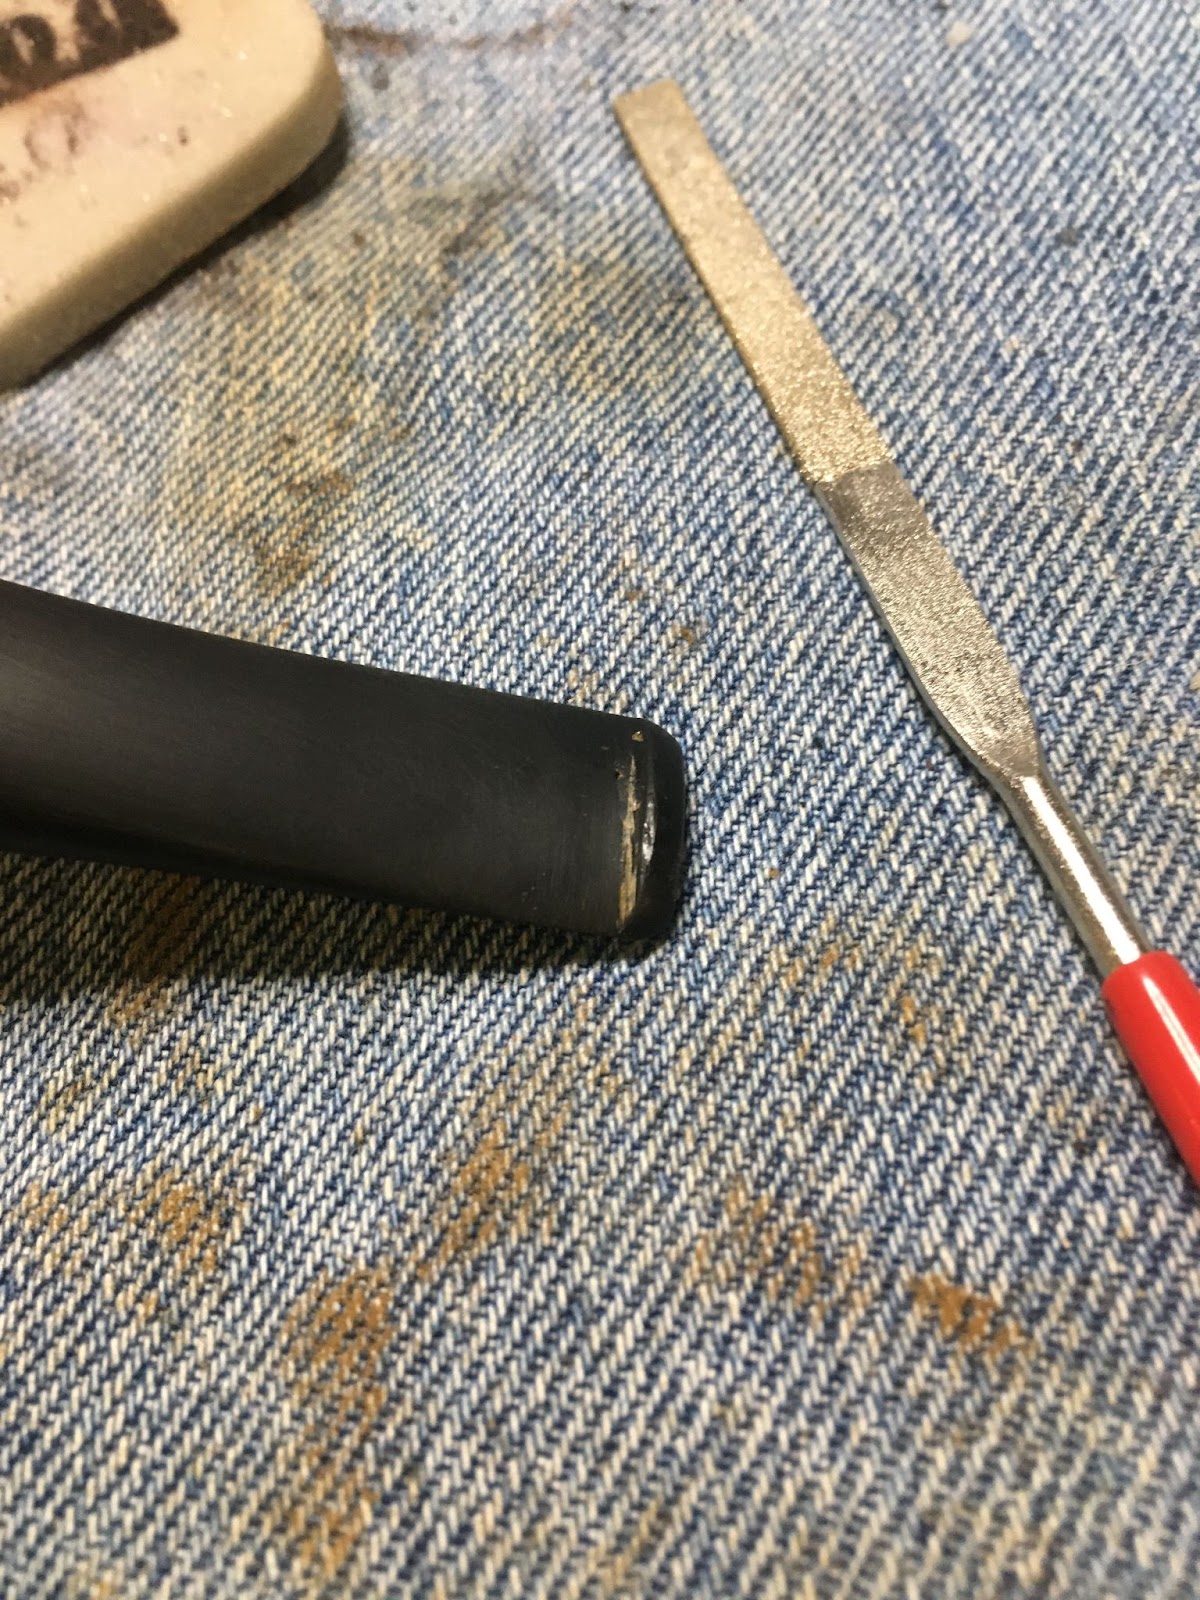
    The button was shaped with a flat needle file and smoothed with sanding sponges.

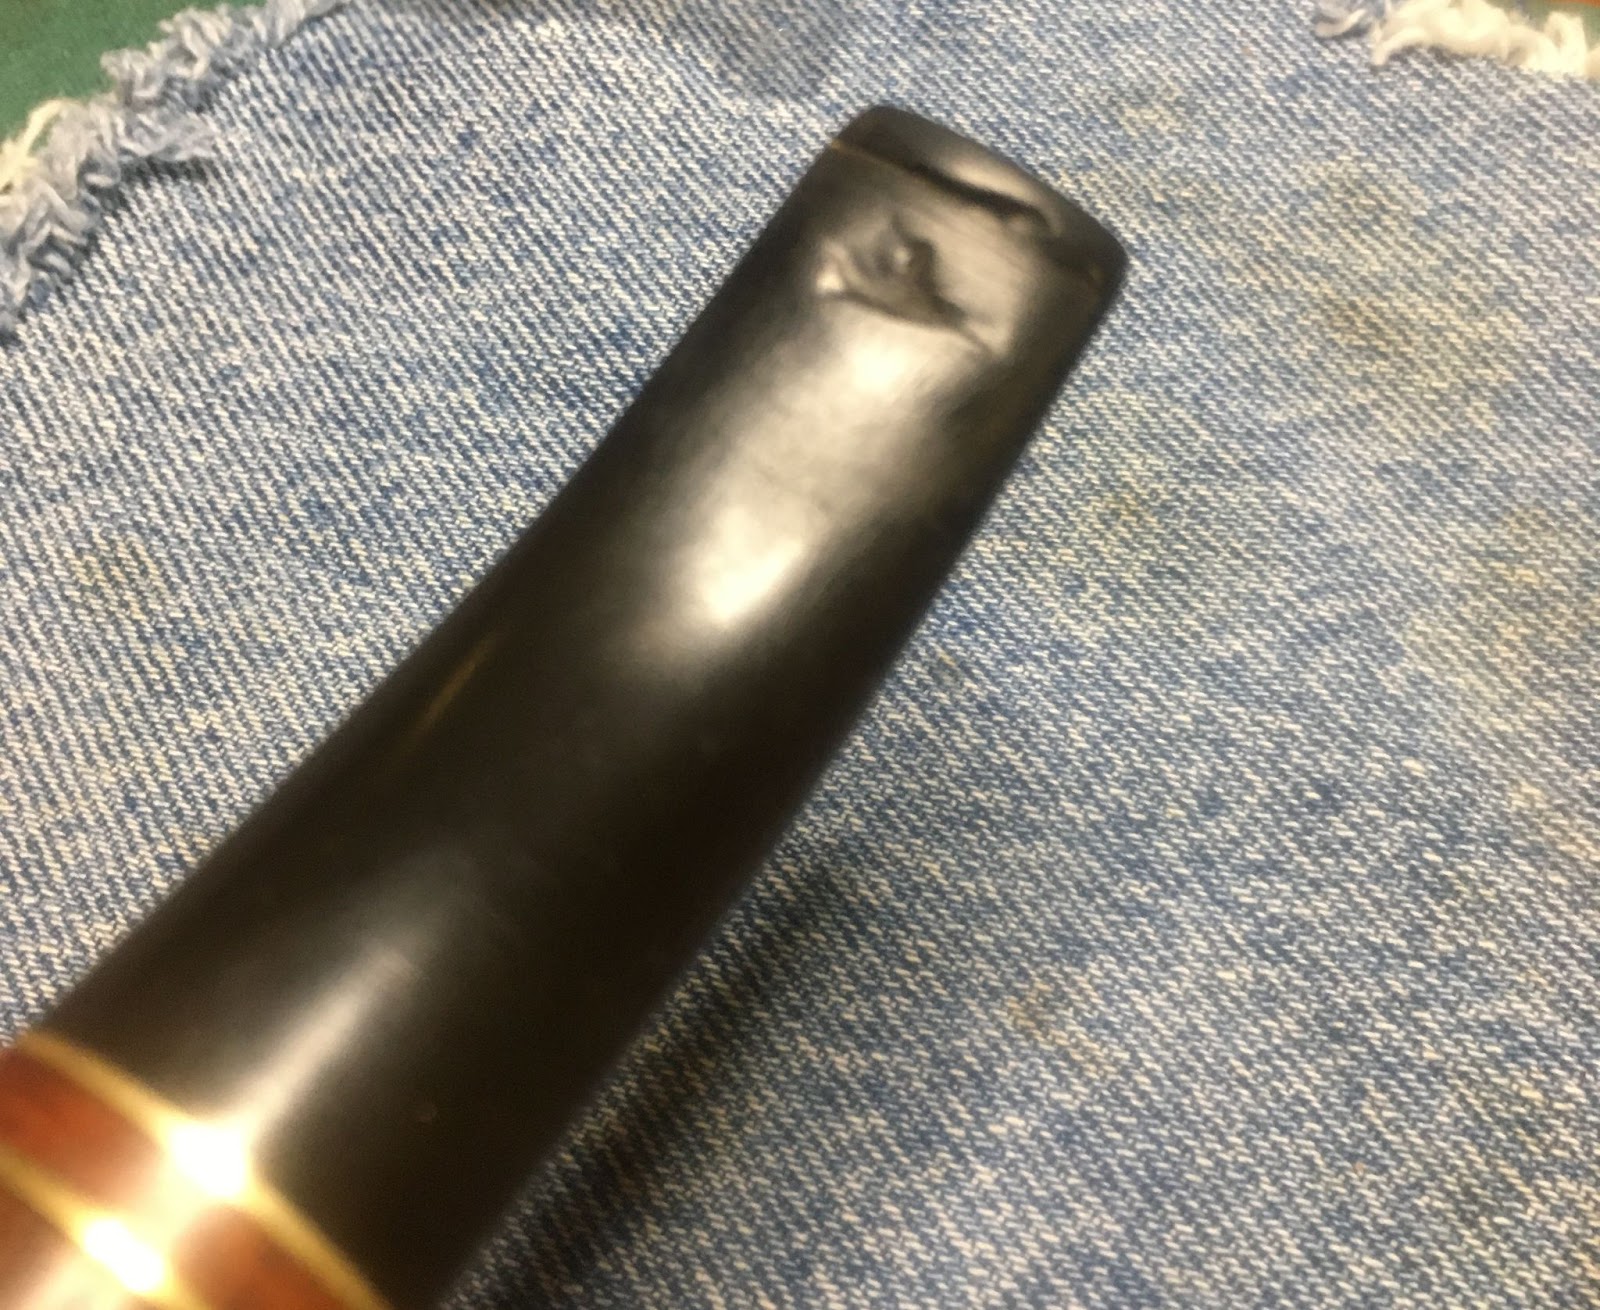
    The above was then done with the top side button.  Once both the top and bottom side were filed and smoothed I applied a thin coating of Thin CA over an even larger area.  I did this to allow the Thin CA to penetrate into any small seams between the CA fils and the vulcanite and to fill and fine depressions which I may have missed.  

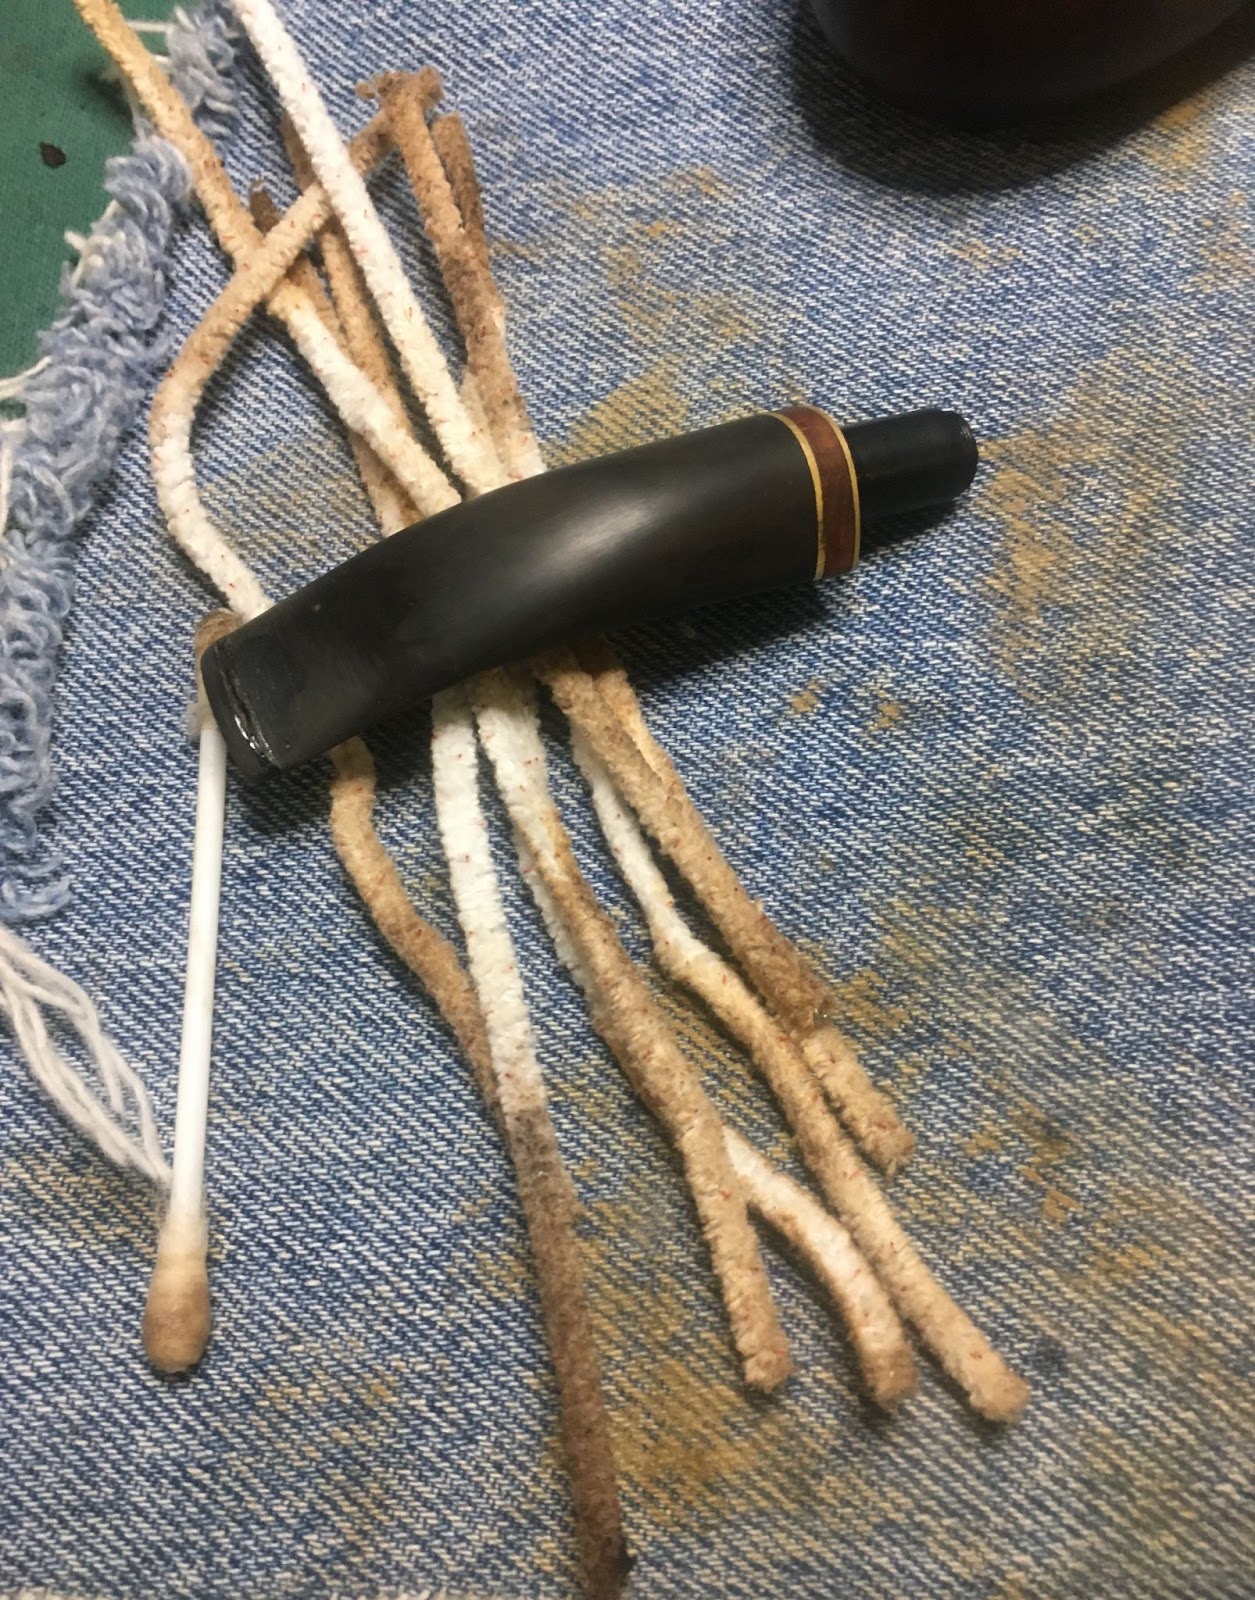
    This was then spritzed with a CA drying accelerator and sanded.  Below is the rebuilt stem prior to finishing sanding and micro-meshing.

    I think that may have been the best step-by-step procedure that I’ve written.  I hope you find it useful.

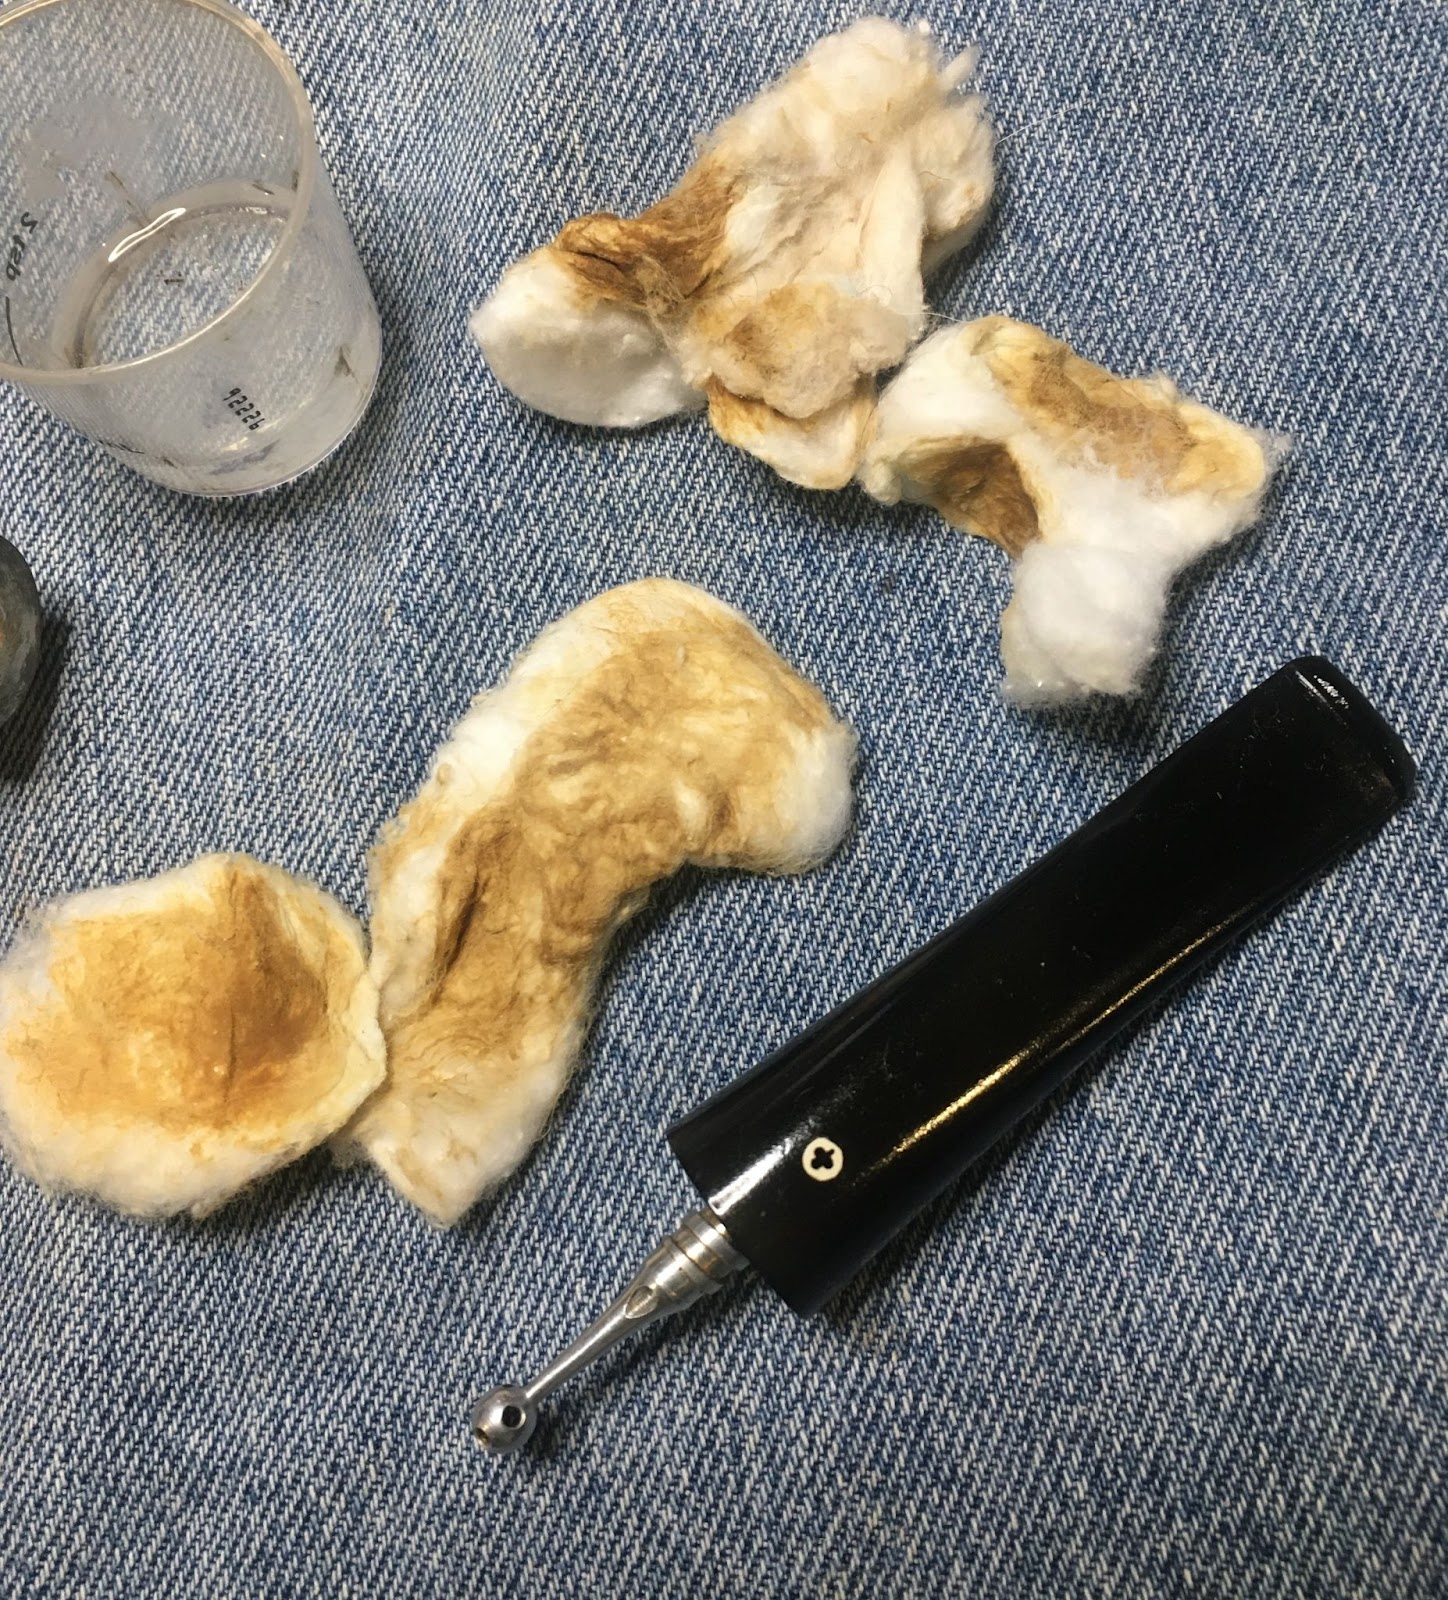
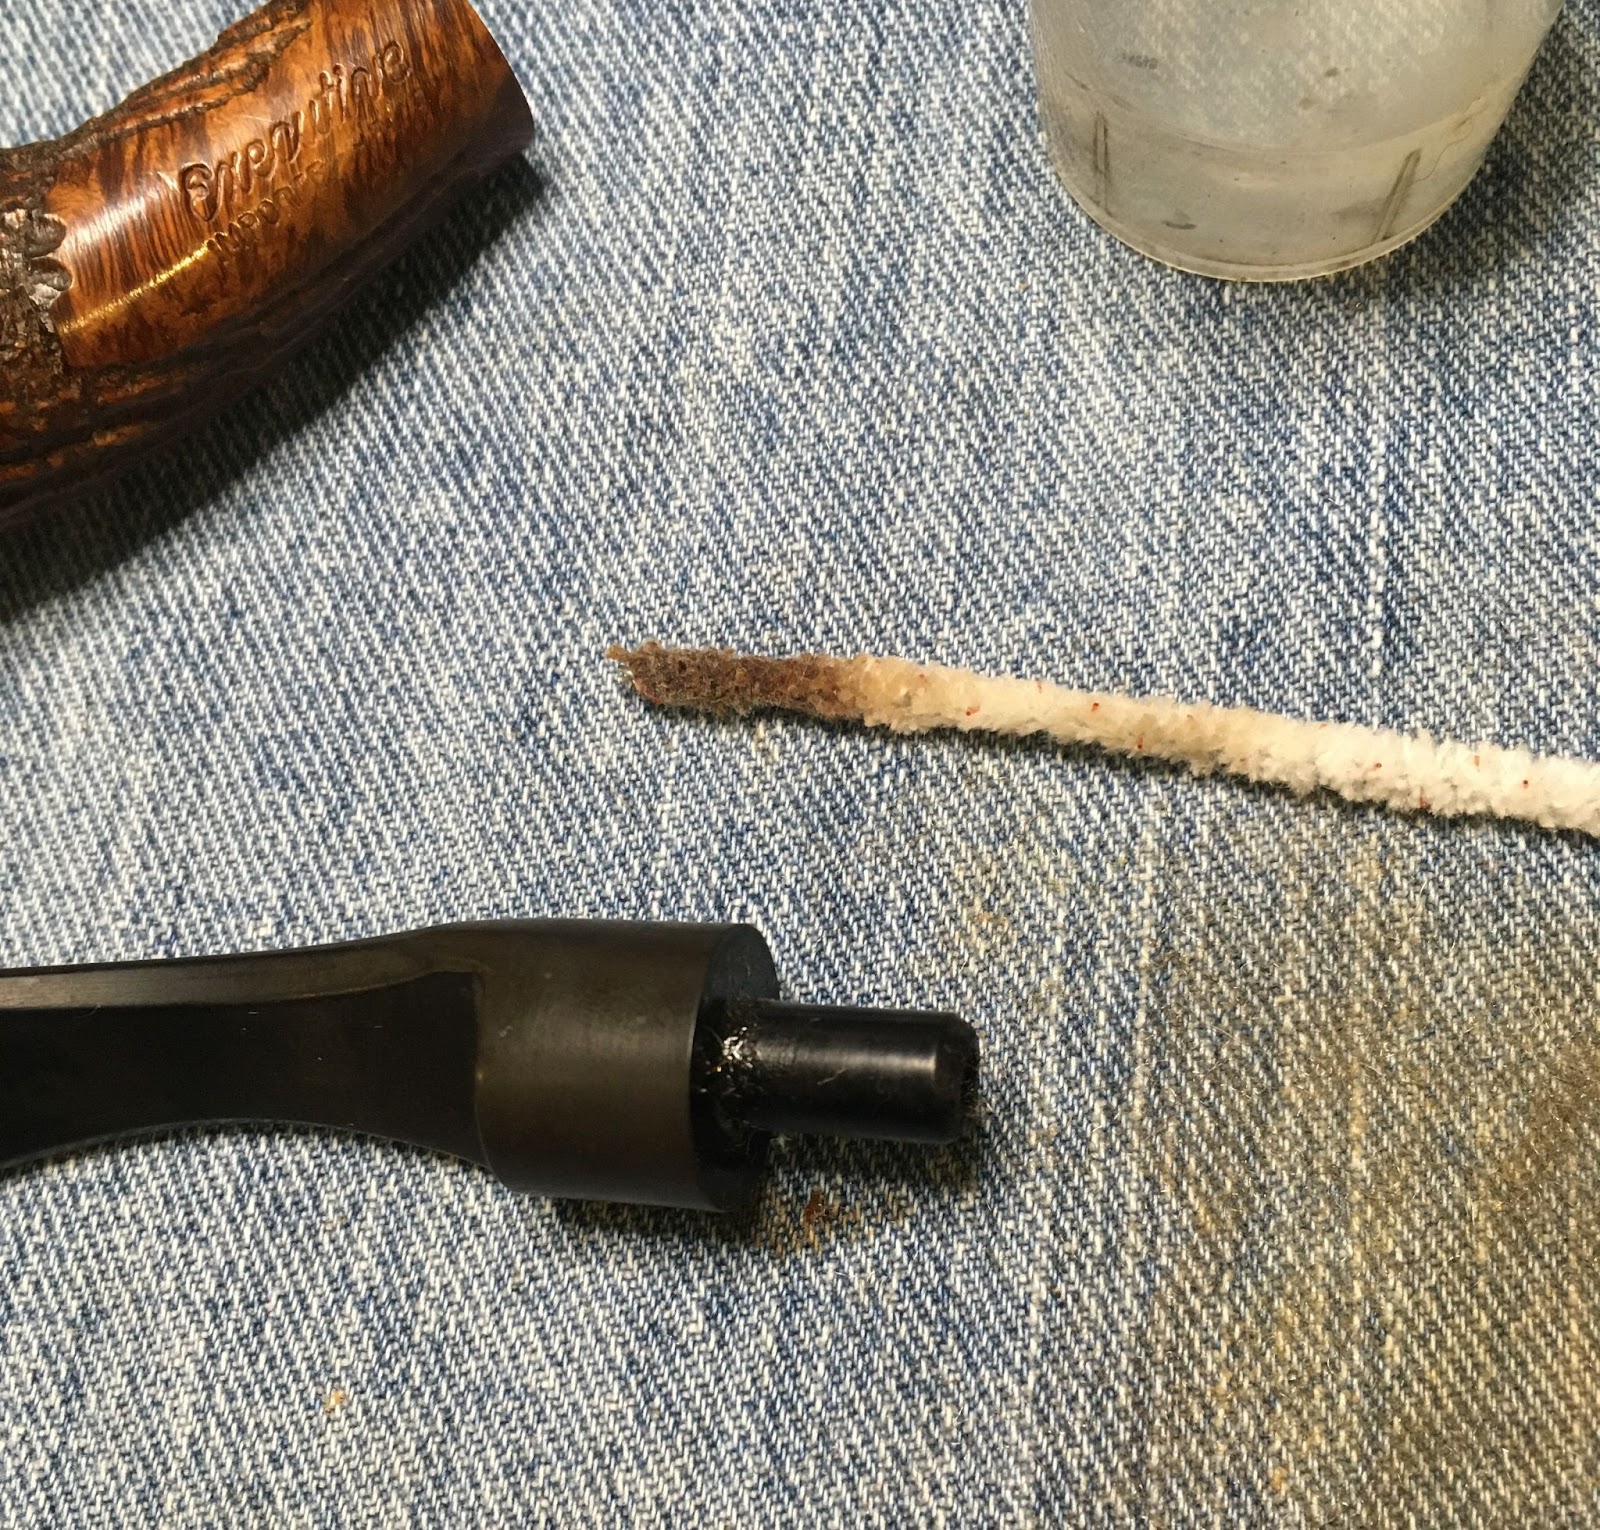
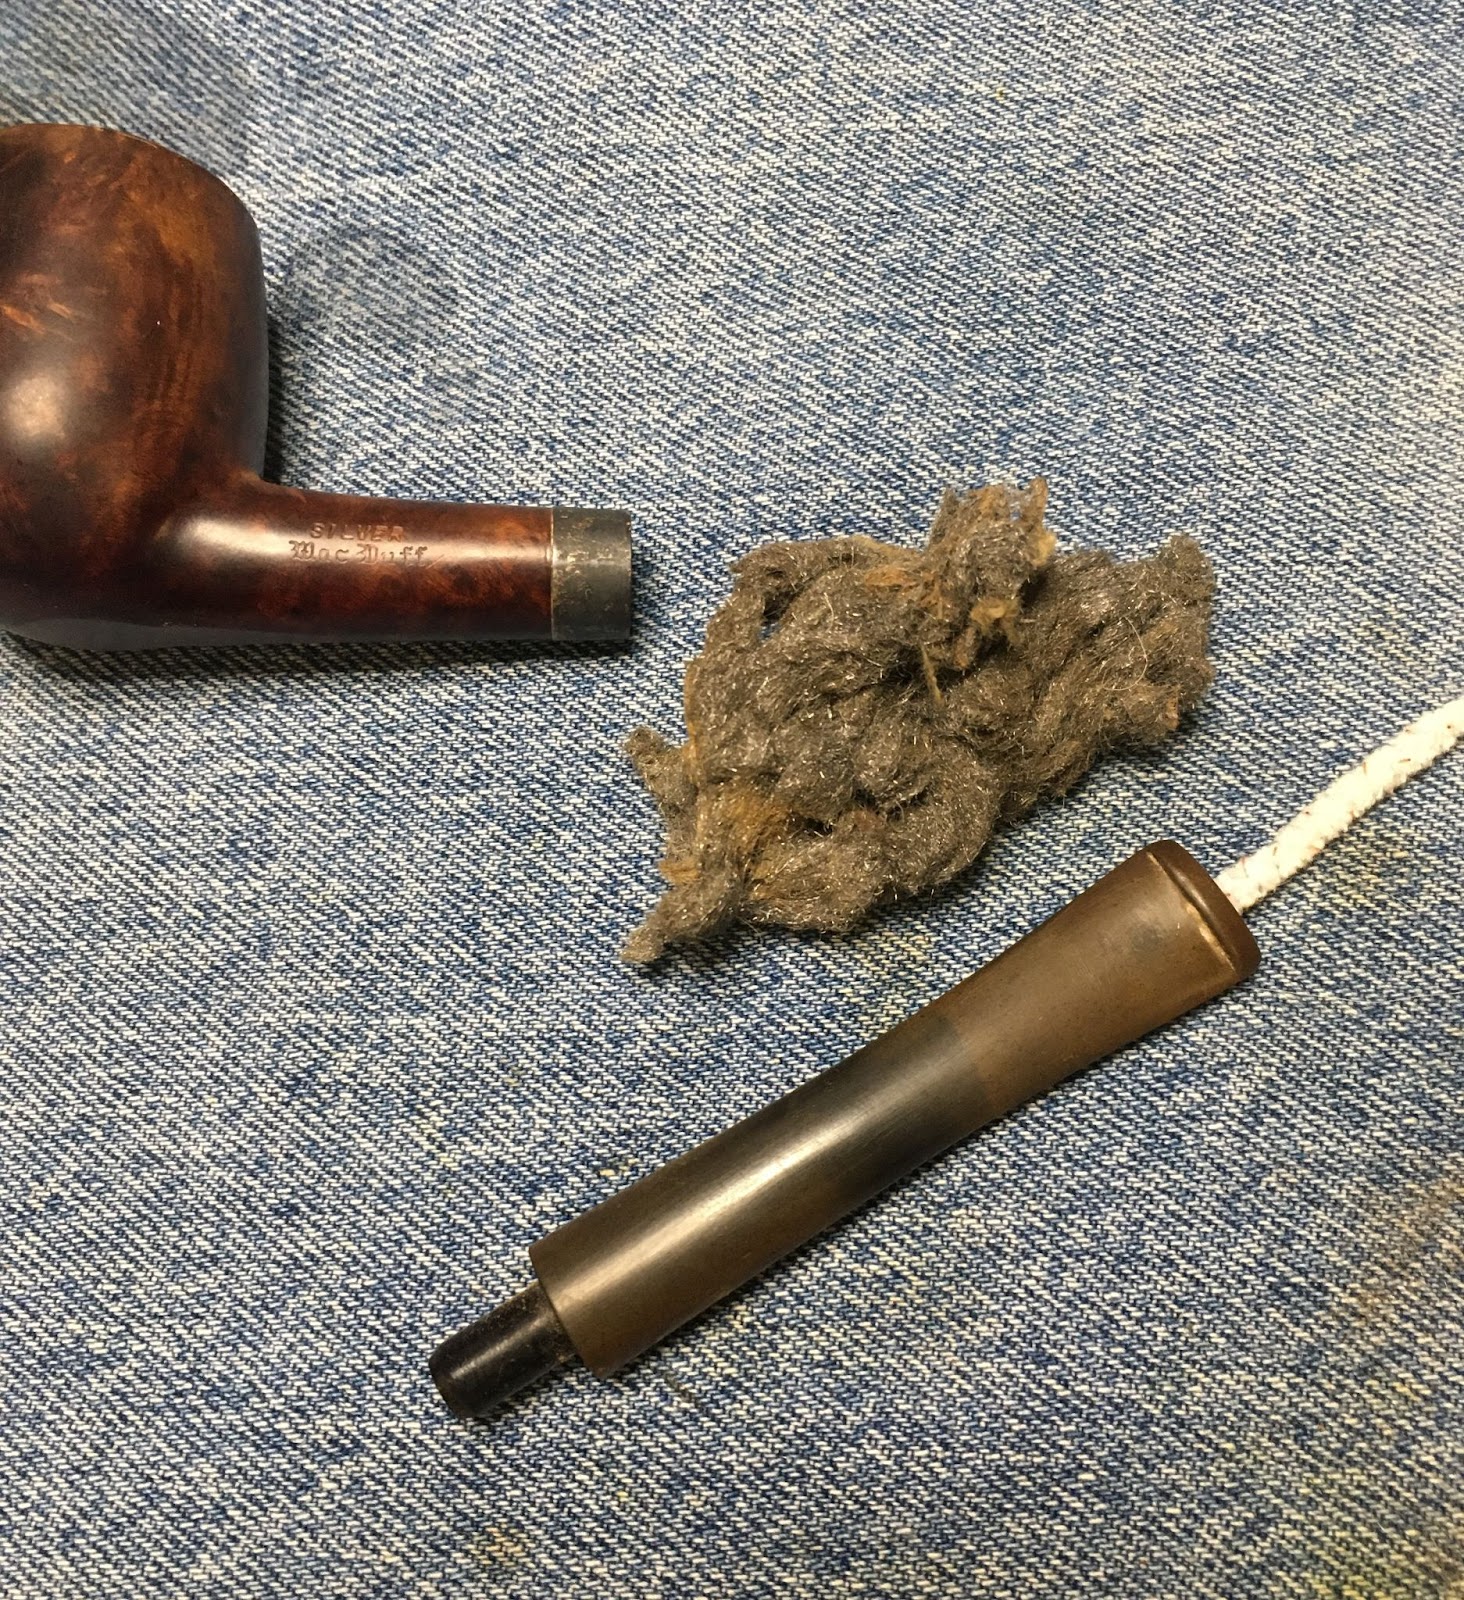
    Next, I cleaned the interior of the stem using bristle pipe cleaners and 99% isopropyl alcohol.

    Now onto the object of intimidation and dread – the stummel.  Normally I will ream the tobacco chamber first.  This time I wanted a more clear idea of what I was working with so I proceeded to scrub the stummel’s exterior.  The scrubbing was done at the sink with undiluted Murphy Oil Soap and a medium bristle toothbrush.

    A typical scrubbing uses one application of soap.  This one used 3 and a stiffer nylon scrub brush in addition to the toothbrush.  The stummel was rinsed with warm water and dried with a cotton dish towel.  Hmm, I was still wondering if this pipe could be saved.

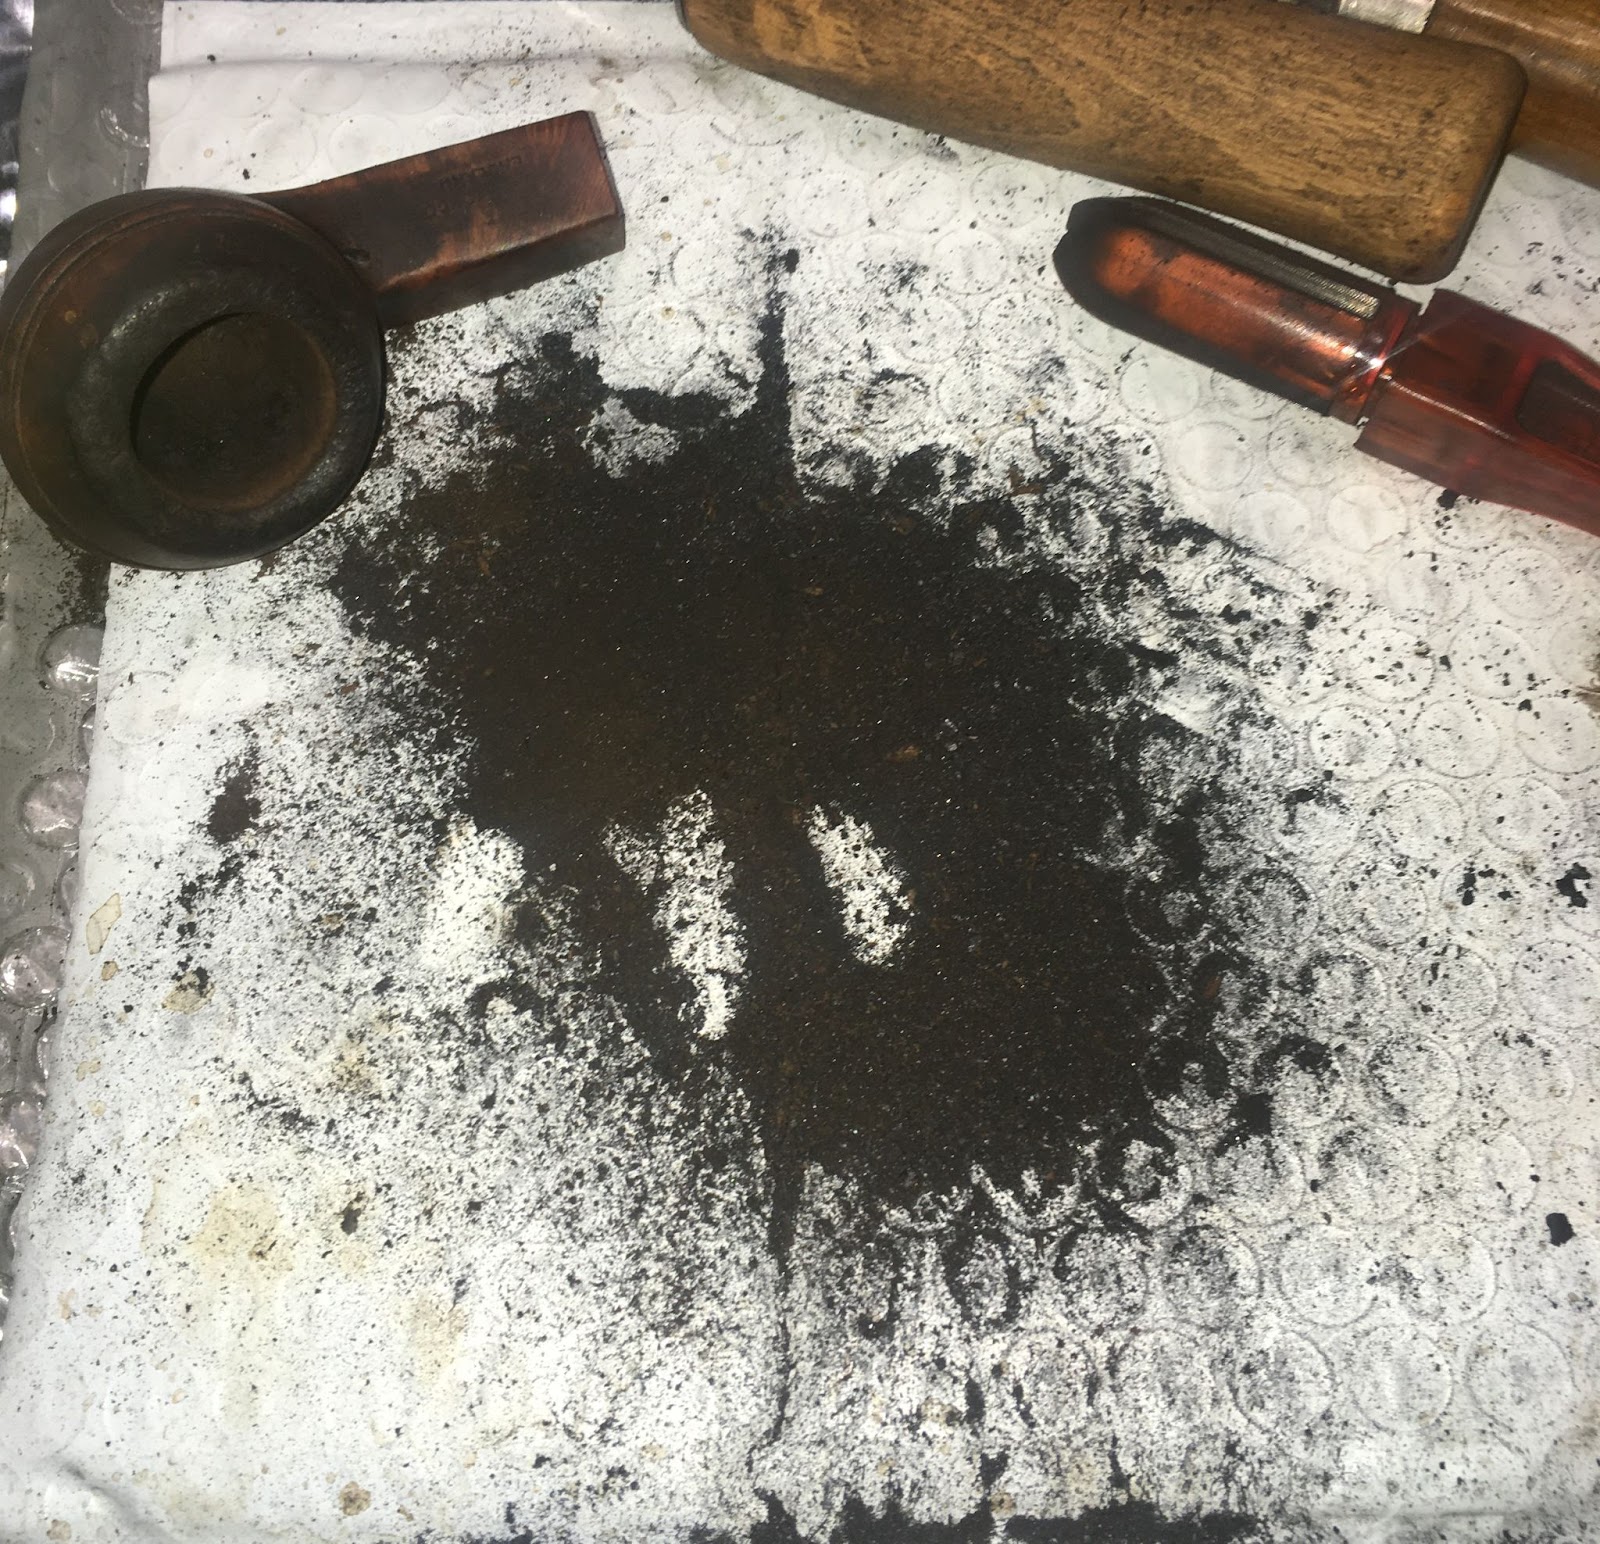
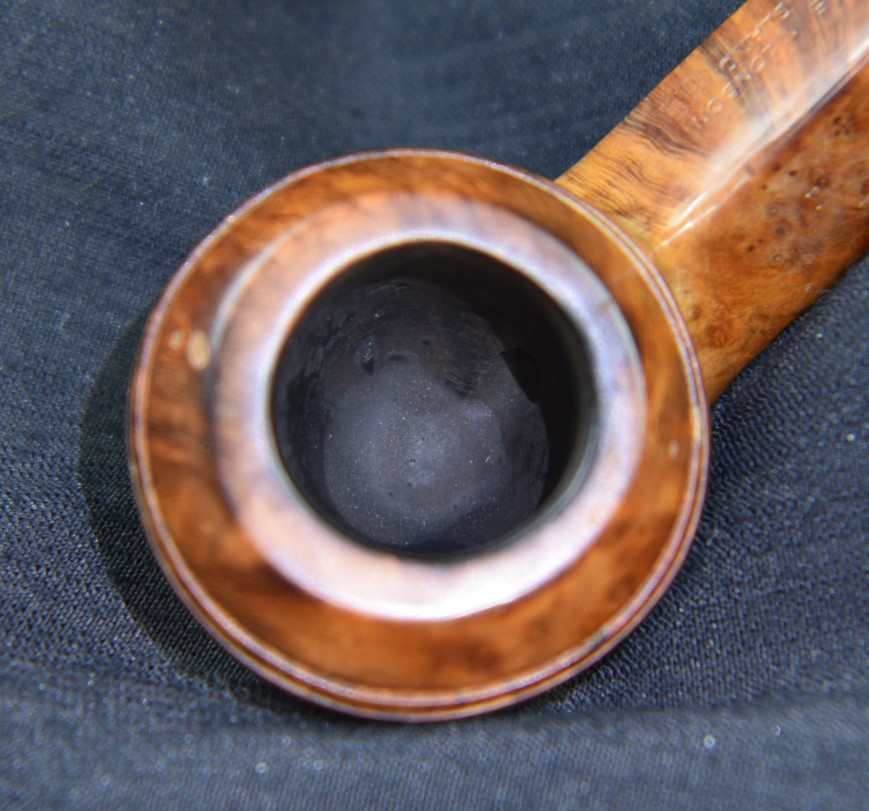
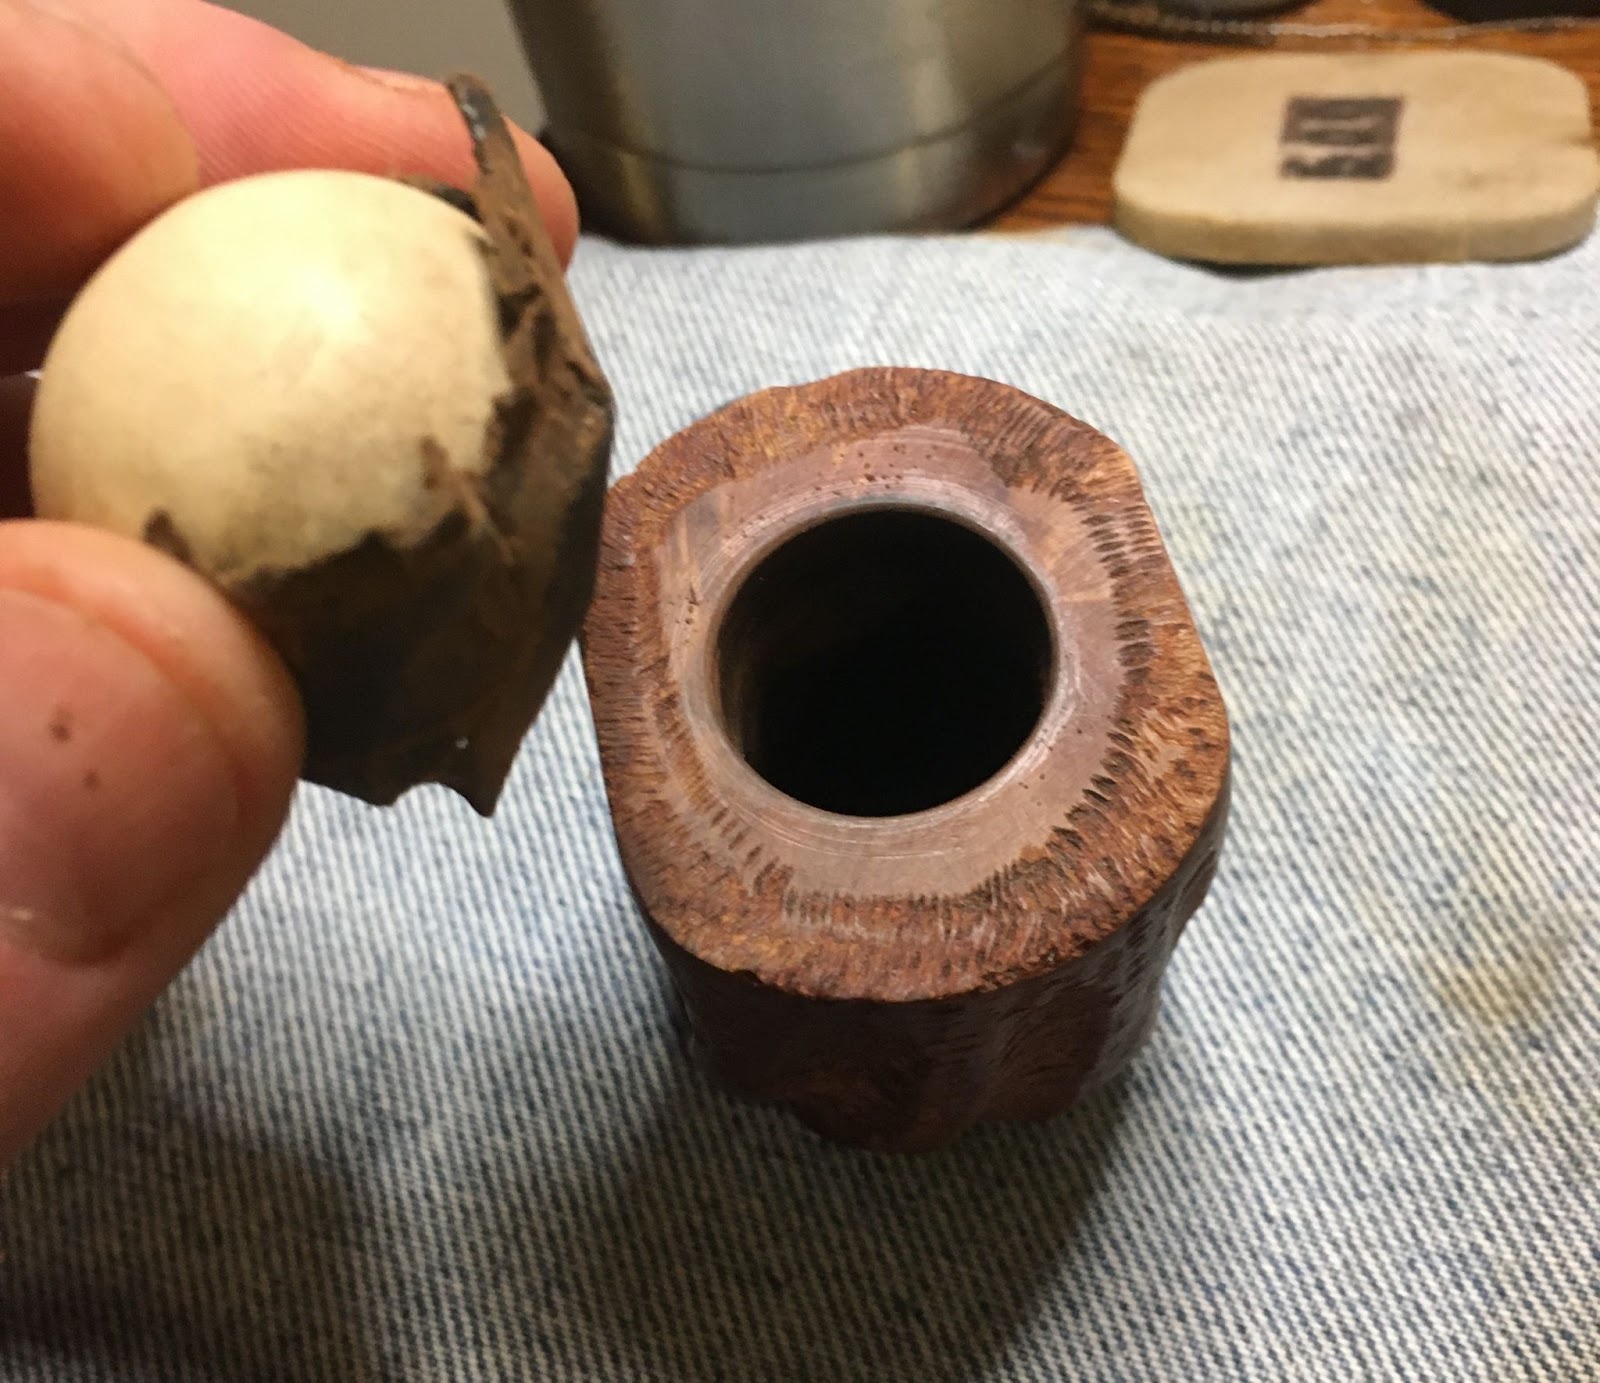
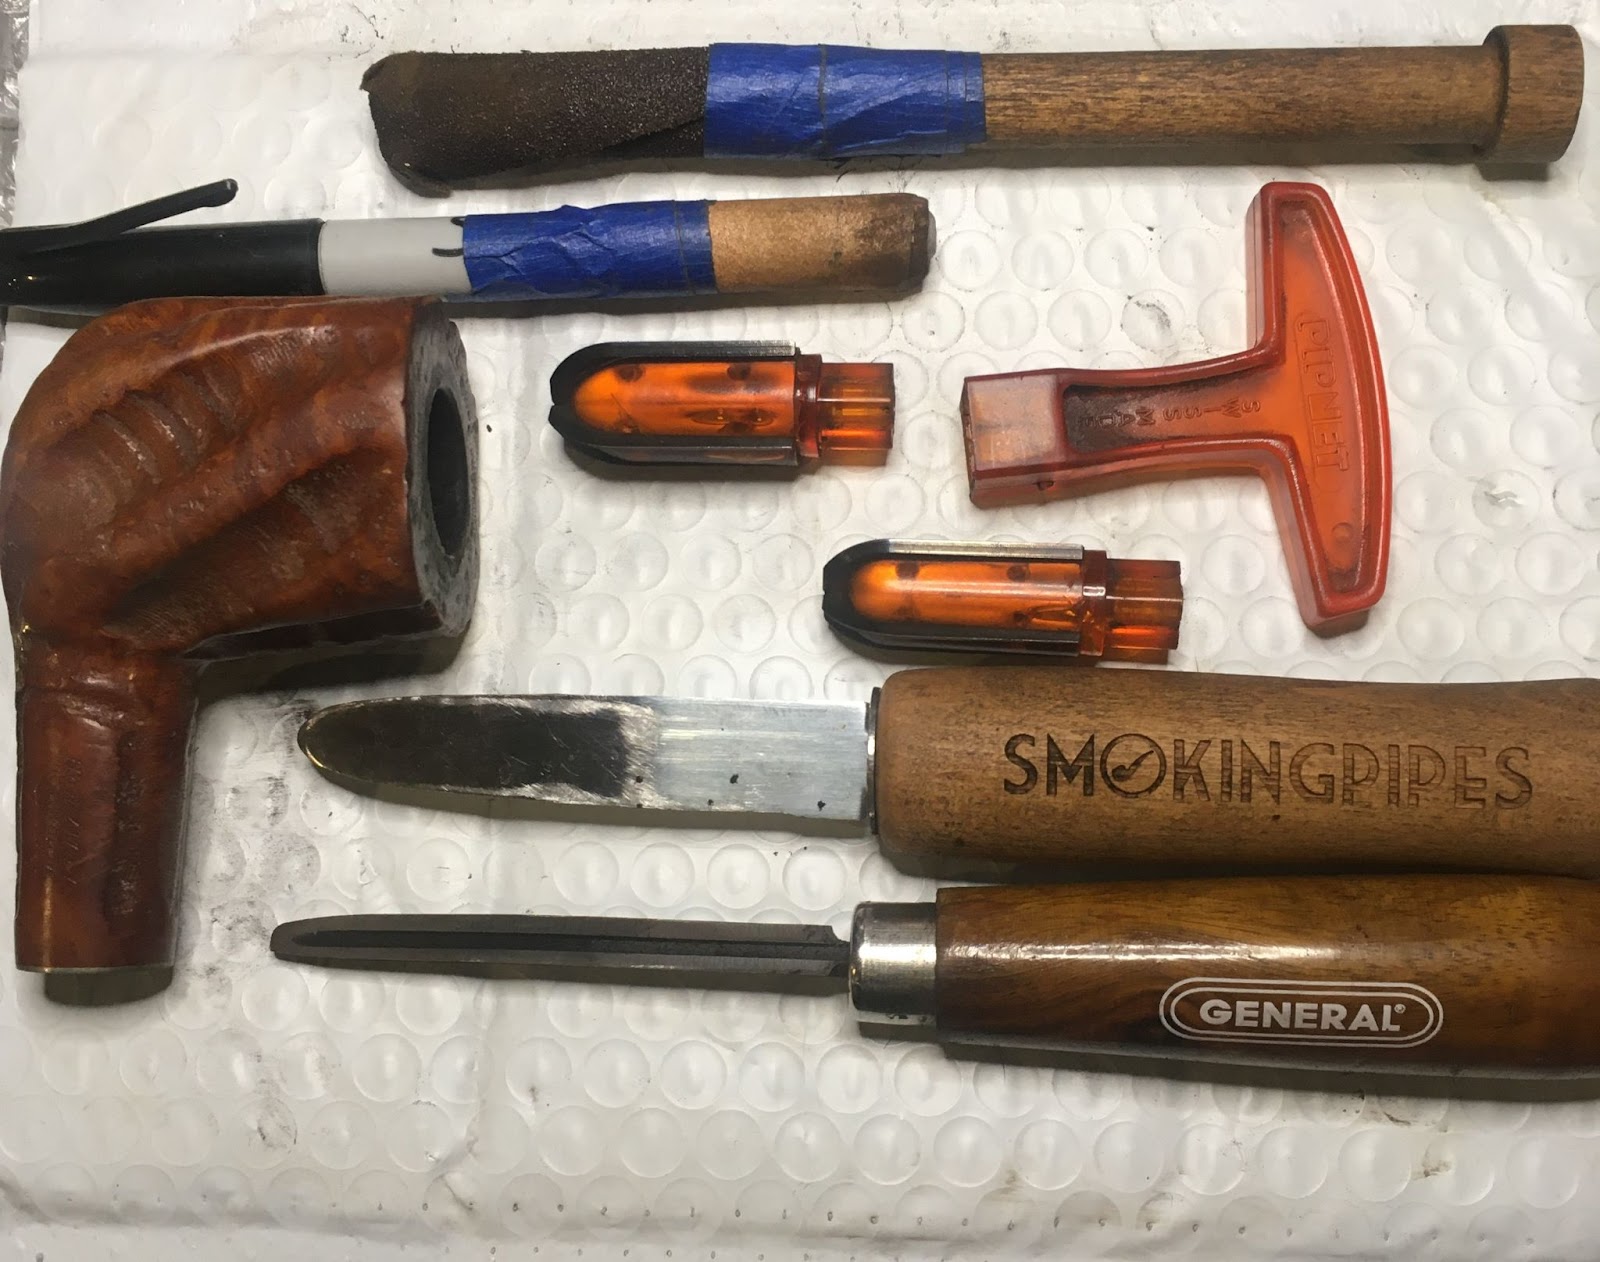
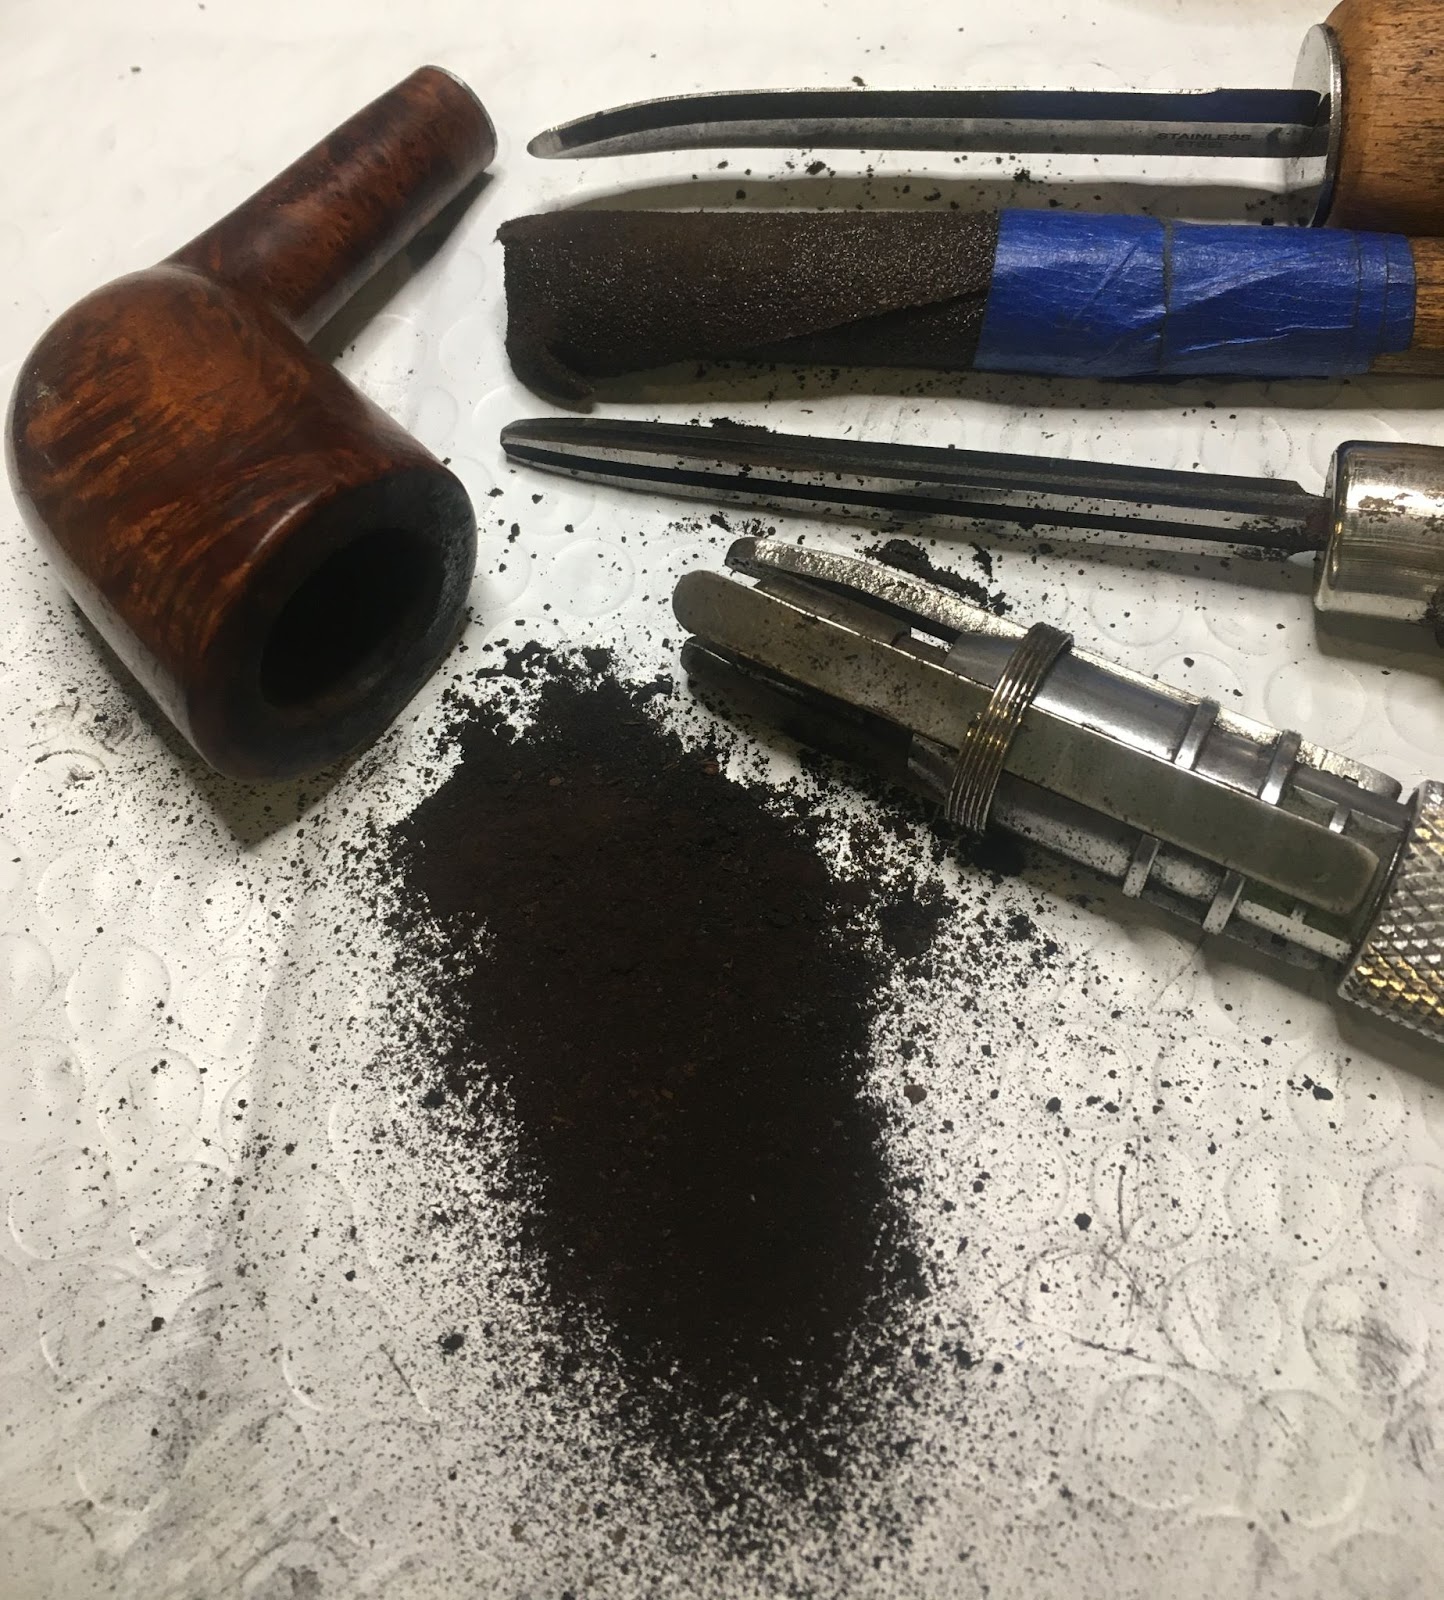
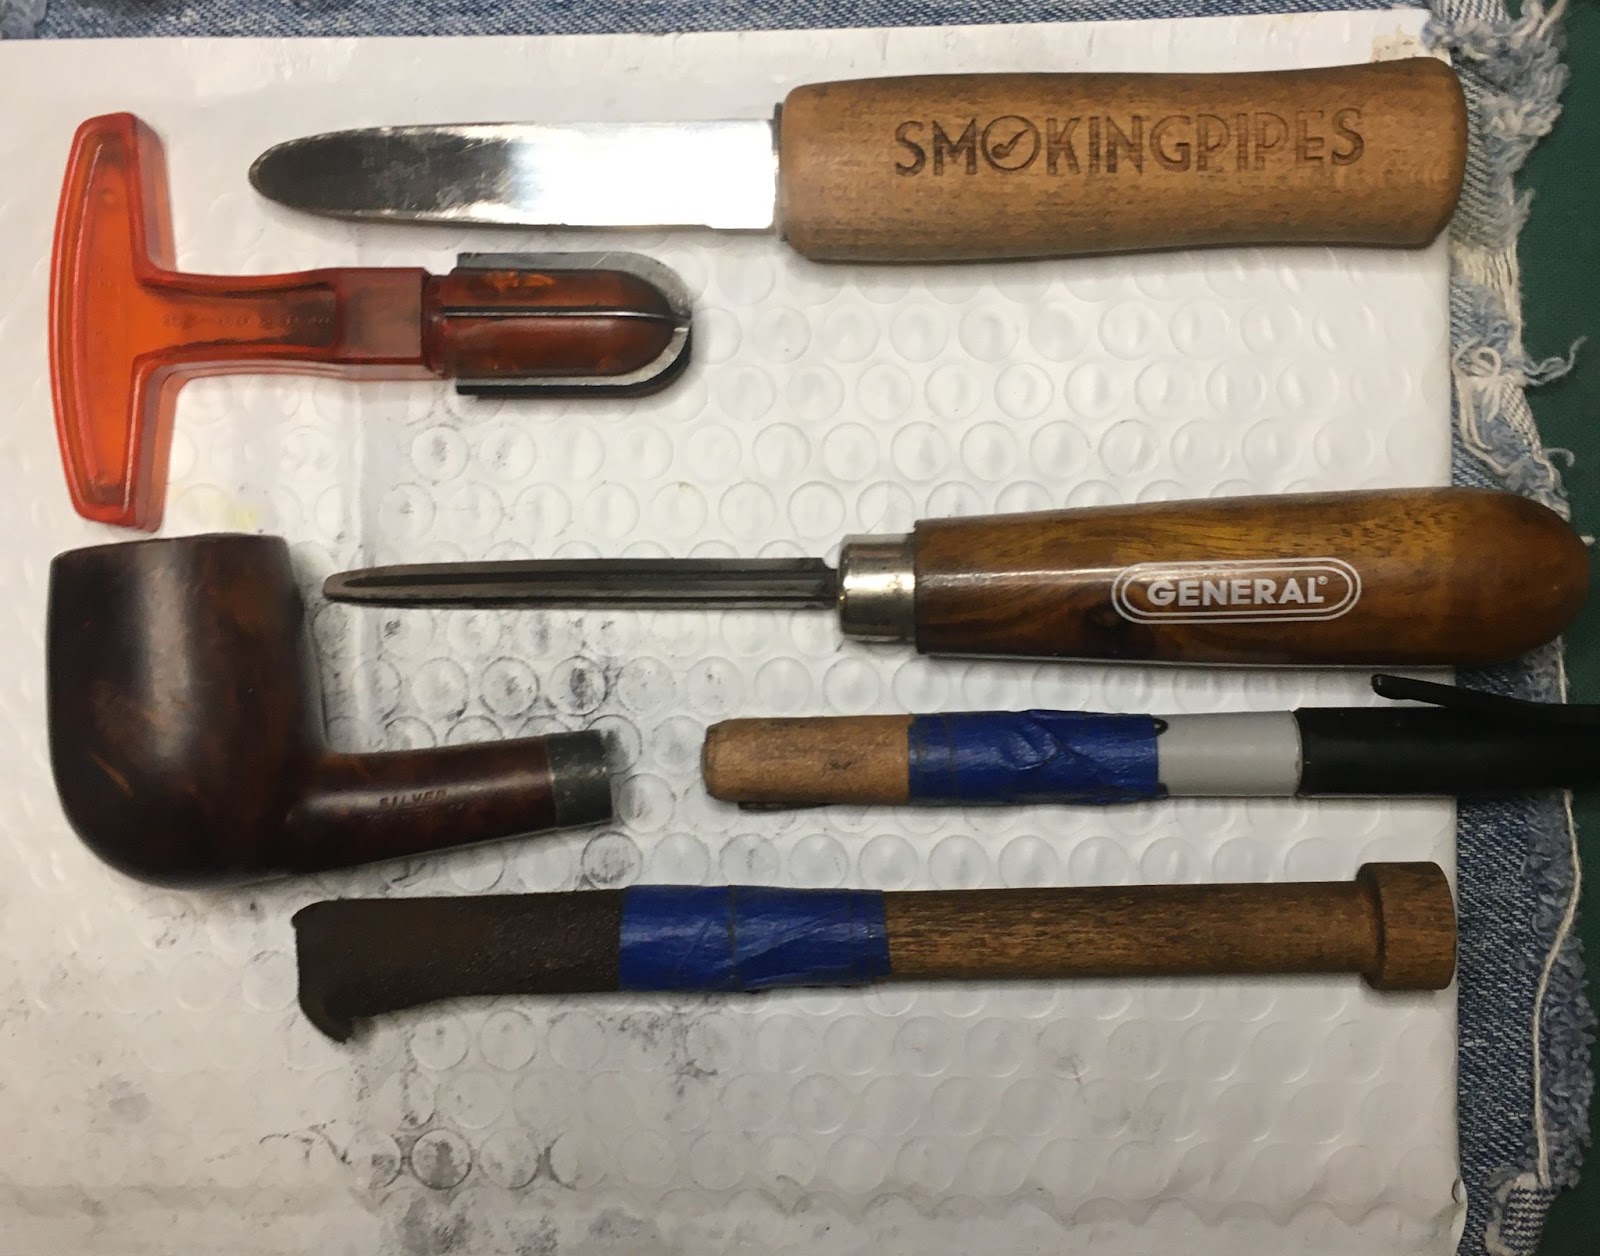
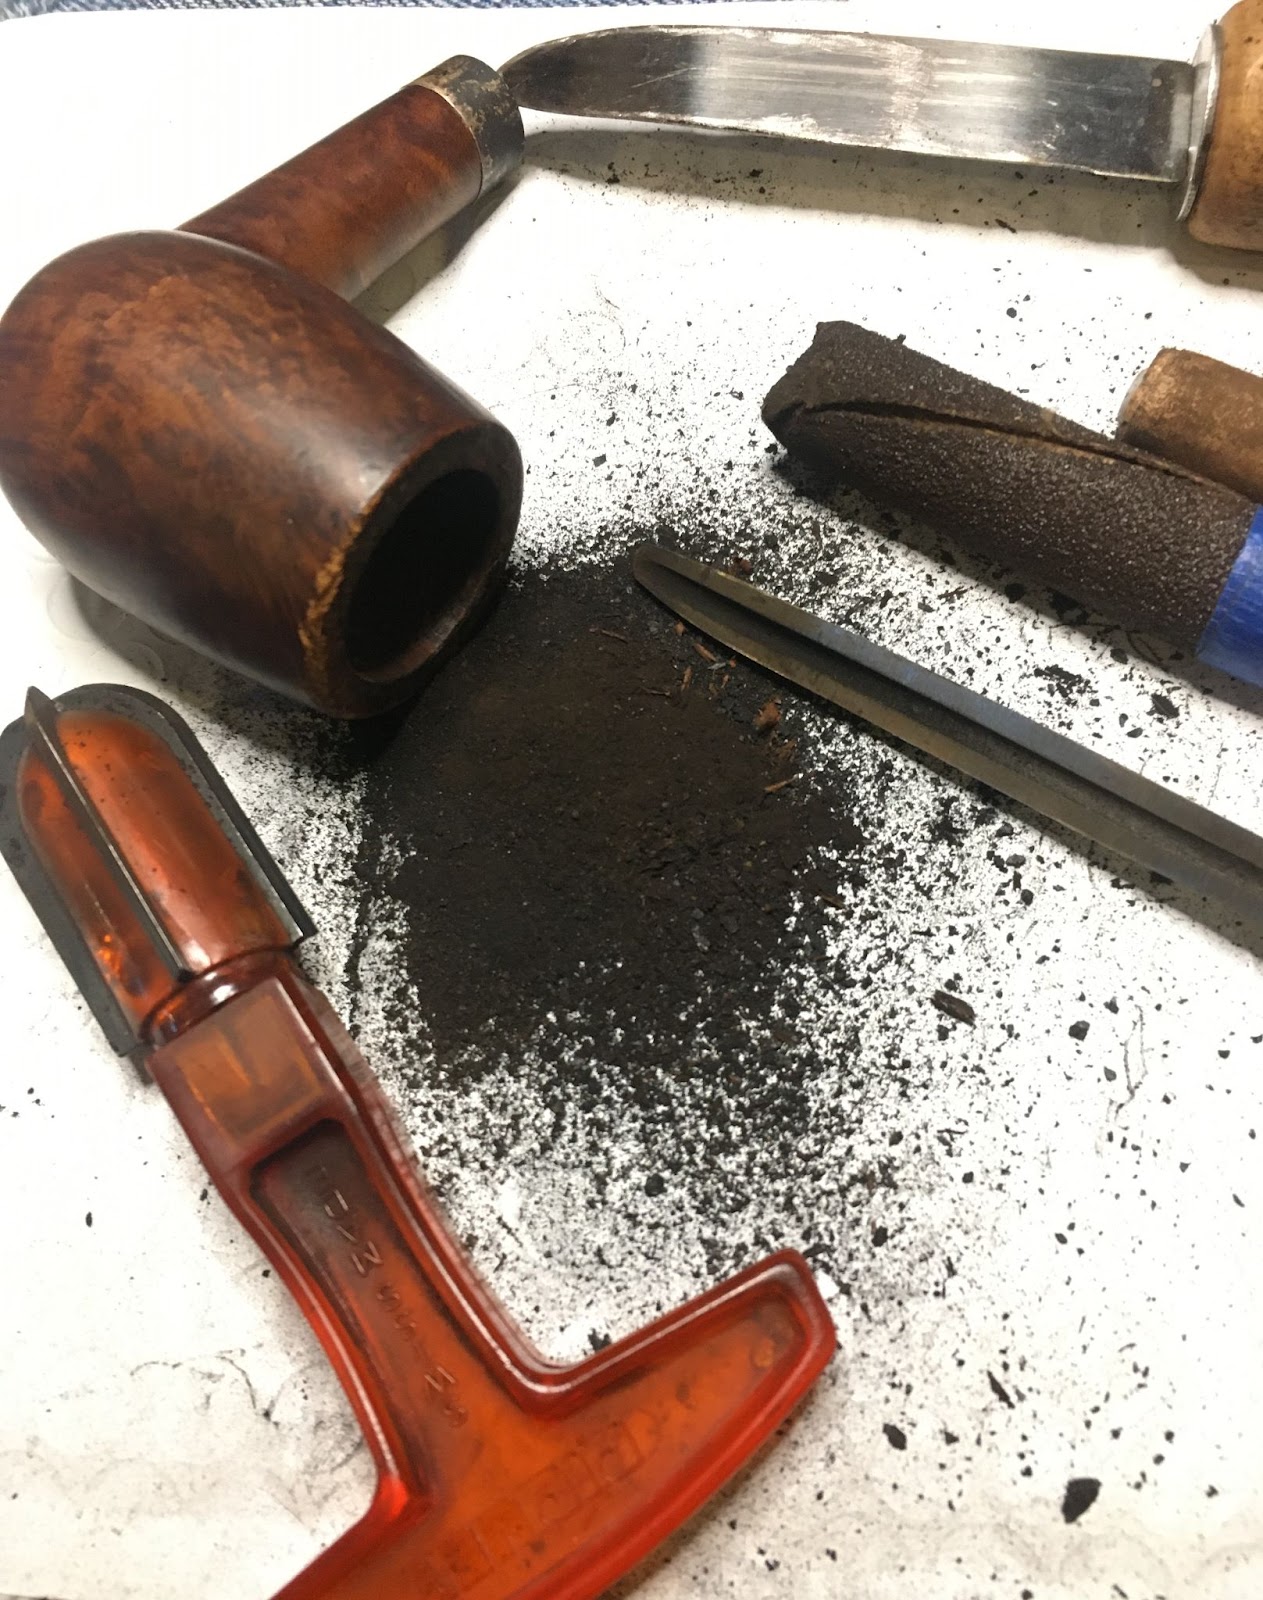
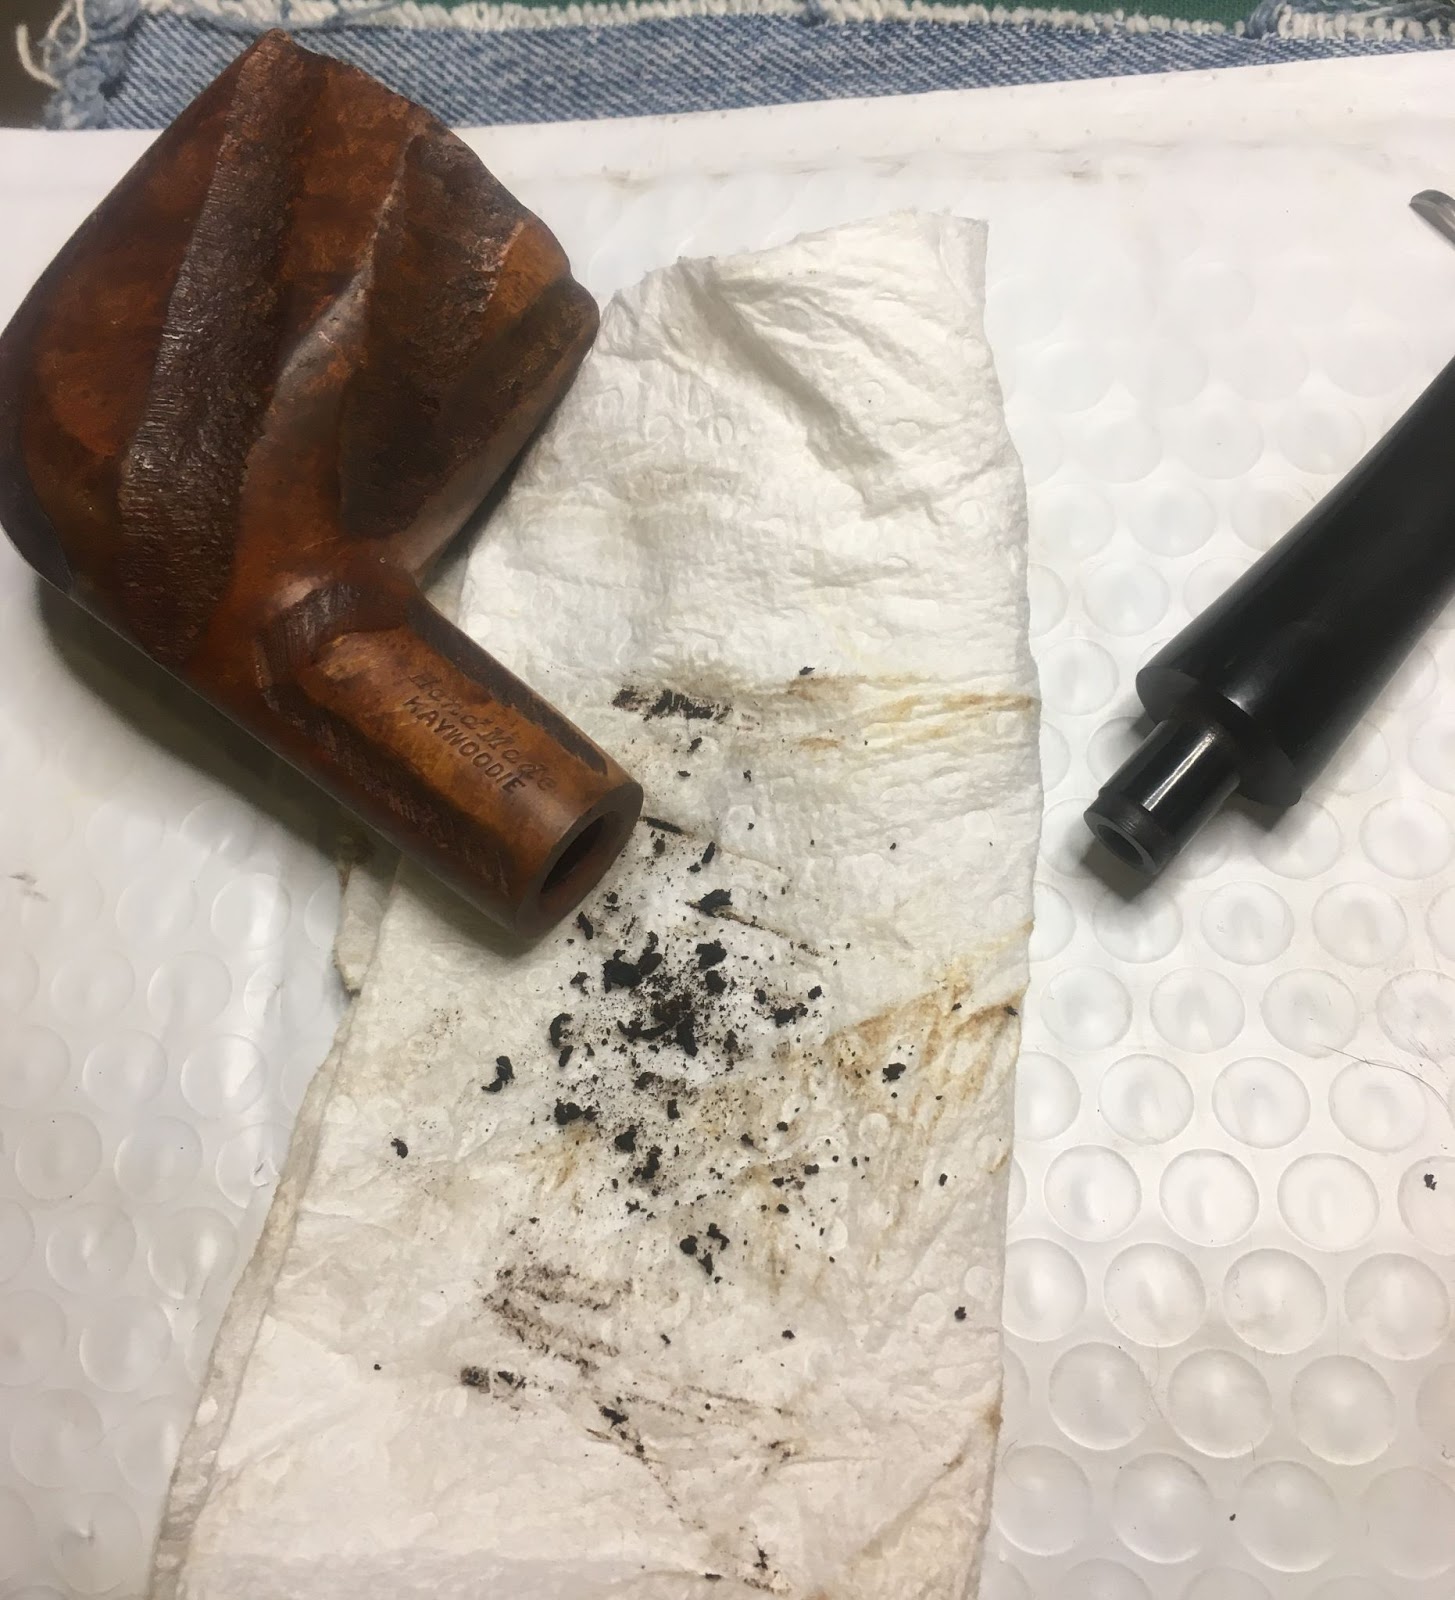
    I returned to the workbench and started the reaming.  I used a plastic envelope to catch the reaming residue and the PipNet with the #2 blades.  The cake in the tobacco chamber was softened by the water but it was still quite hard.  I had to stop several times to scrape

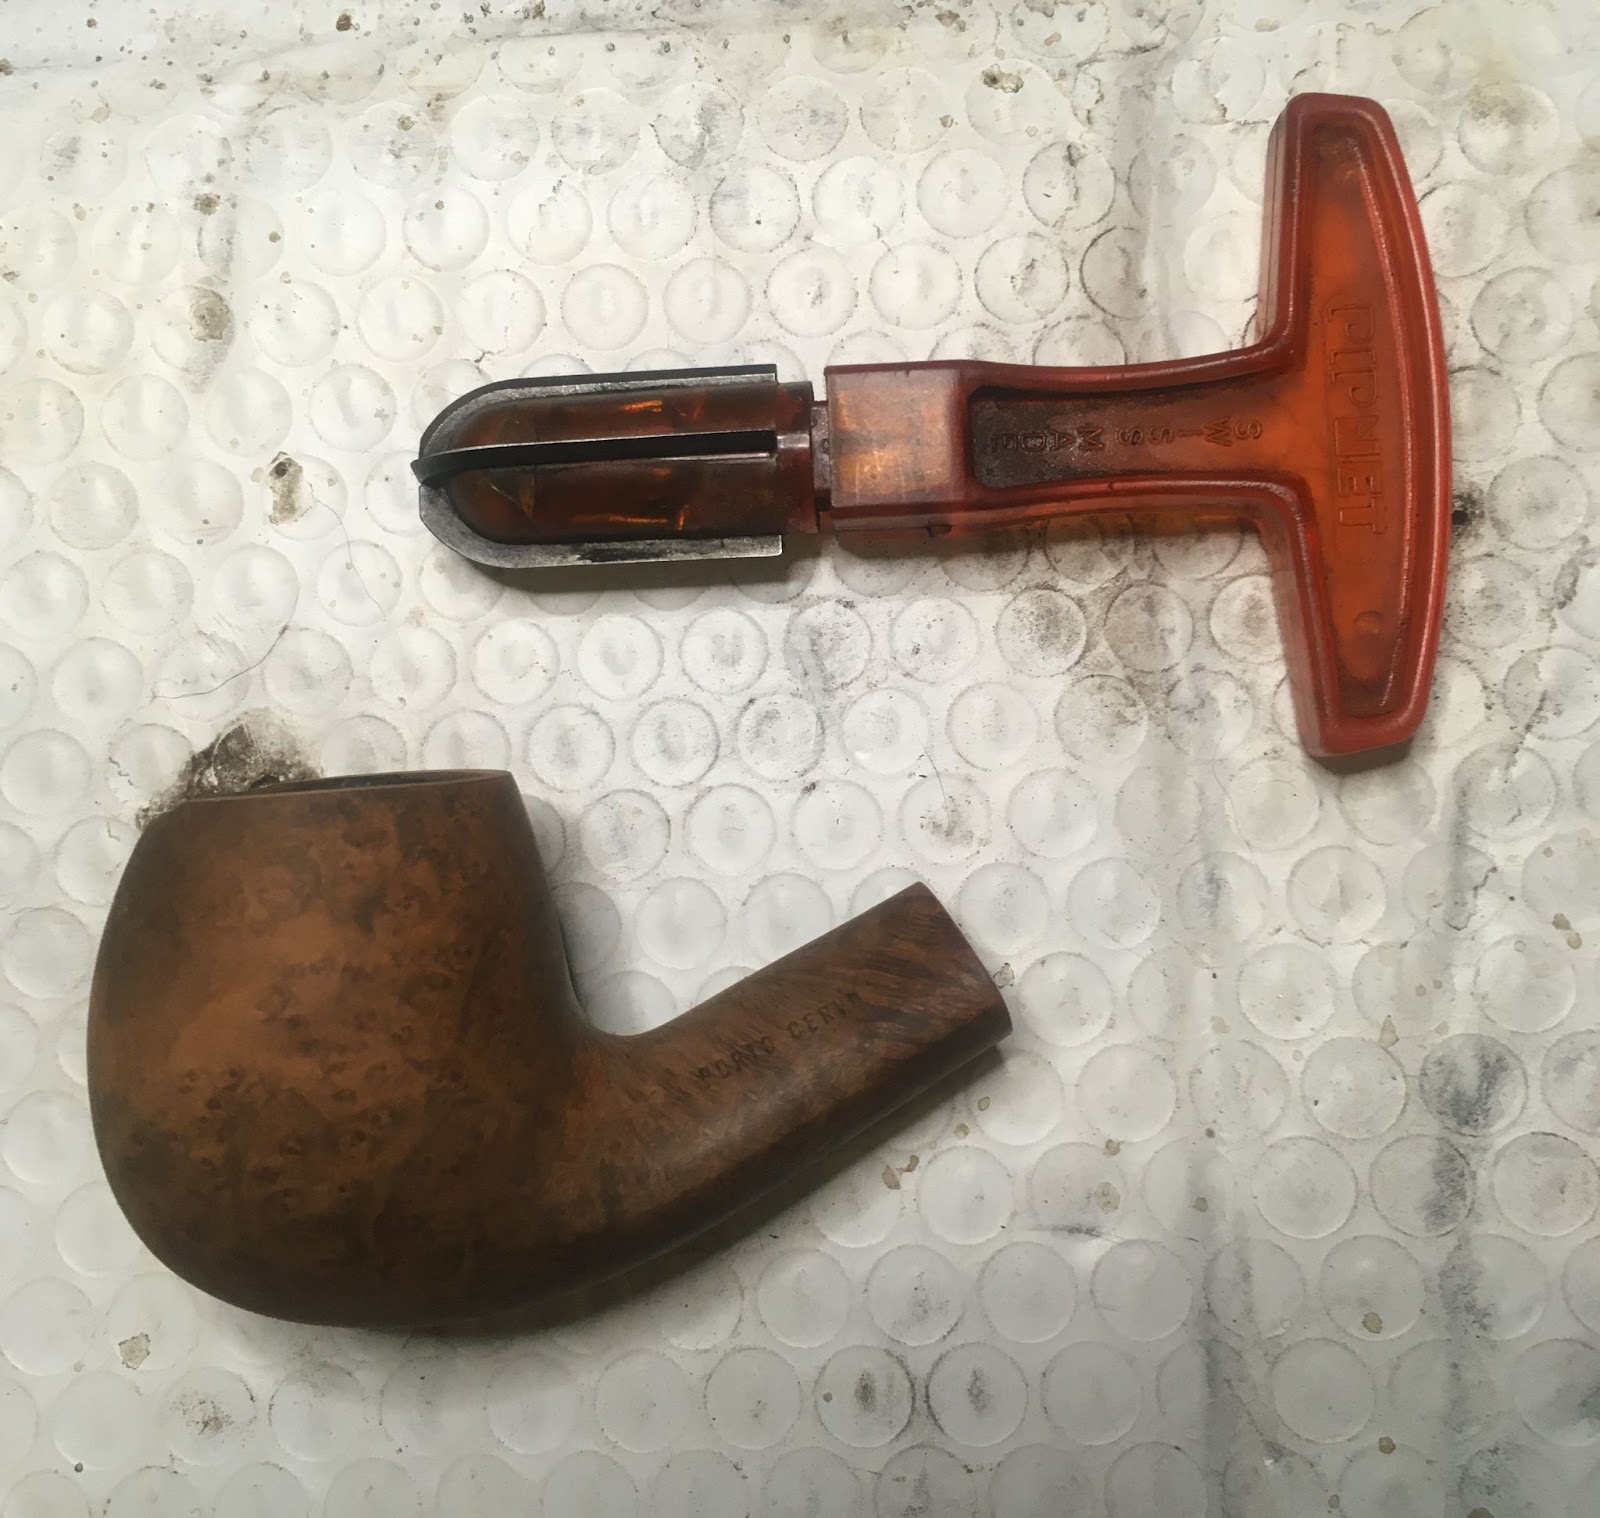
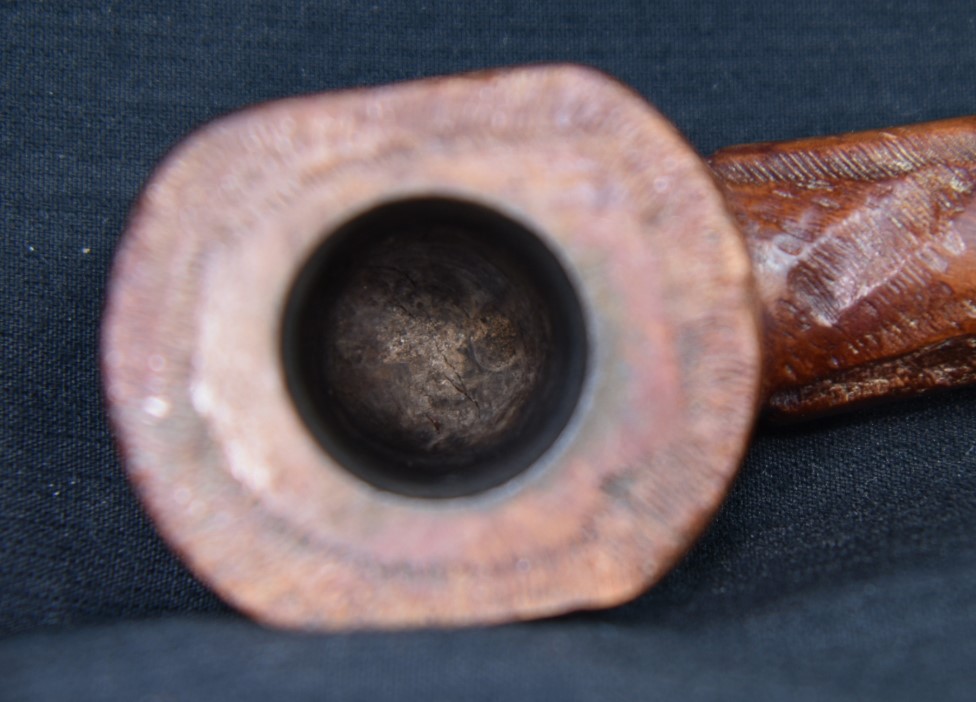
    with the Smokingpipes Low Country knife and the General triangular scraper then proceed with the PipNet.  I replaced the #2 blades with the #3 blades and further cleared the cake from the chamber.  The #3 blades proved to be too small to reach across the chamber as more cake was removed.  This led me to scraping with the knife and the triangular scraper.  Eventually the cake was removed and the chamber was sanded using a wooden dowel wrapped in 220 sandpaper.  I felt certain that the walls of the chamber had to be charred due to the amount of material I was removing but upon inspection with a flashlight I saw no evidence of charring. 

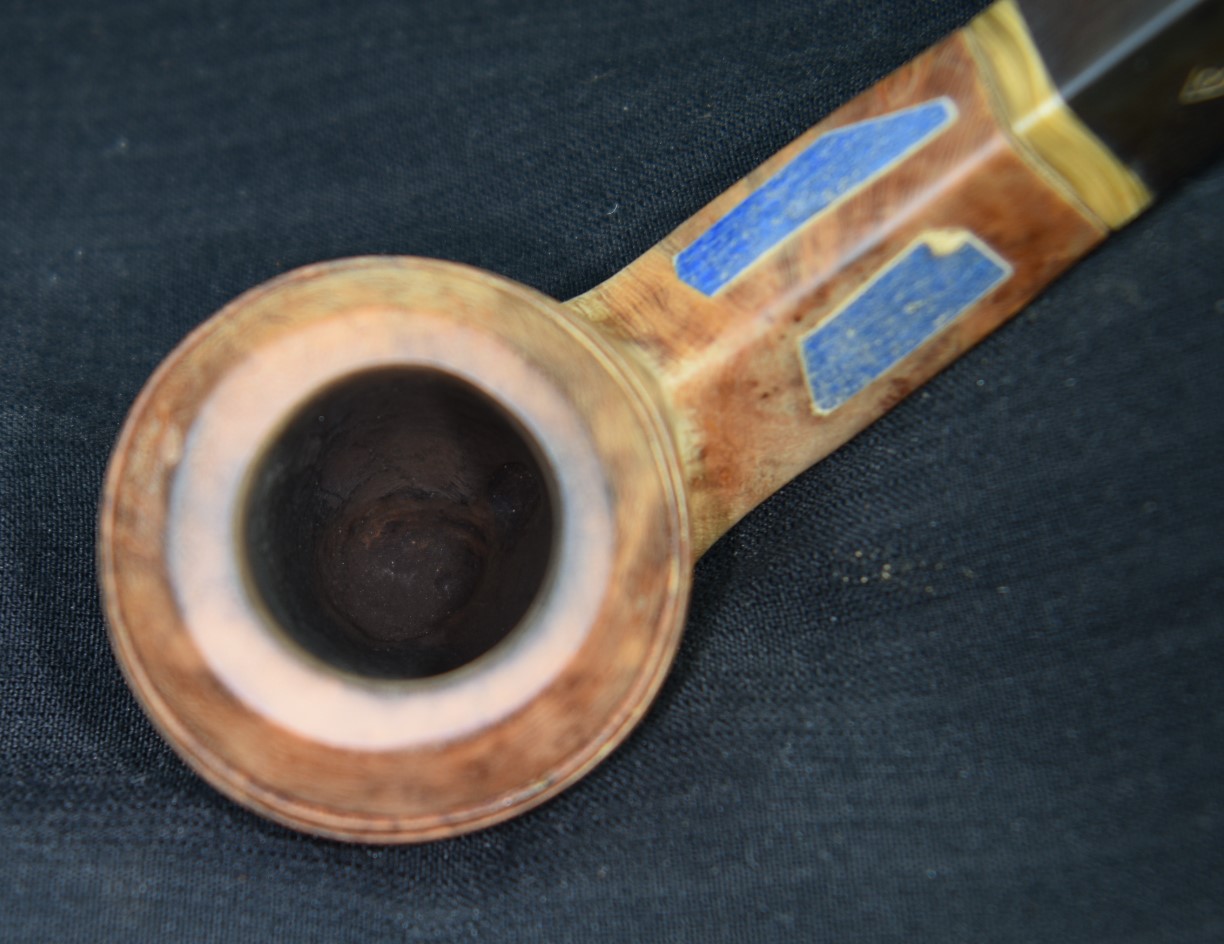
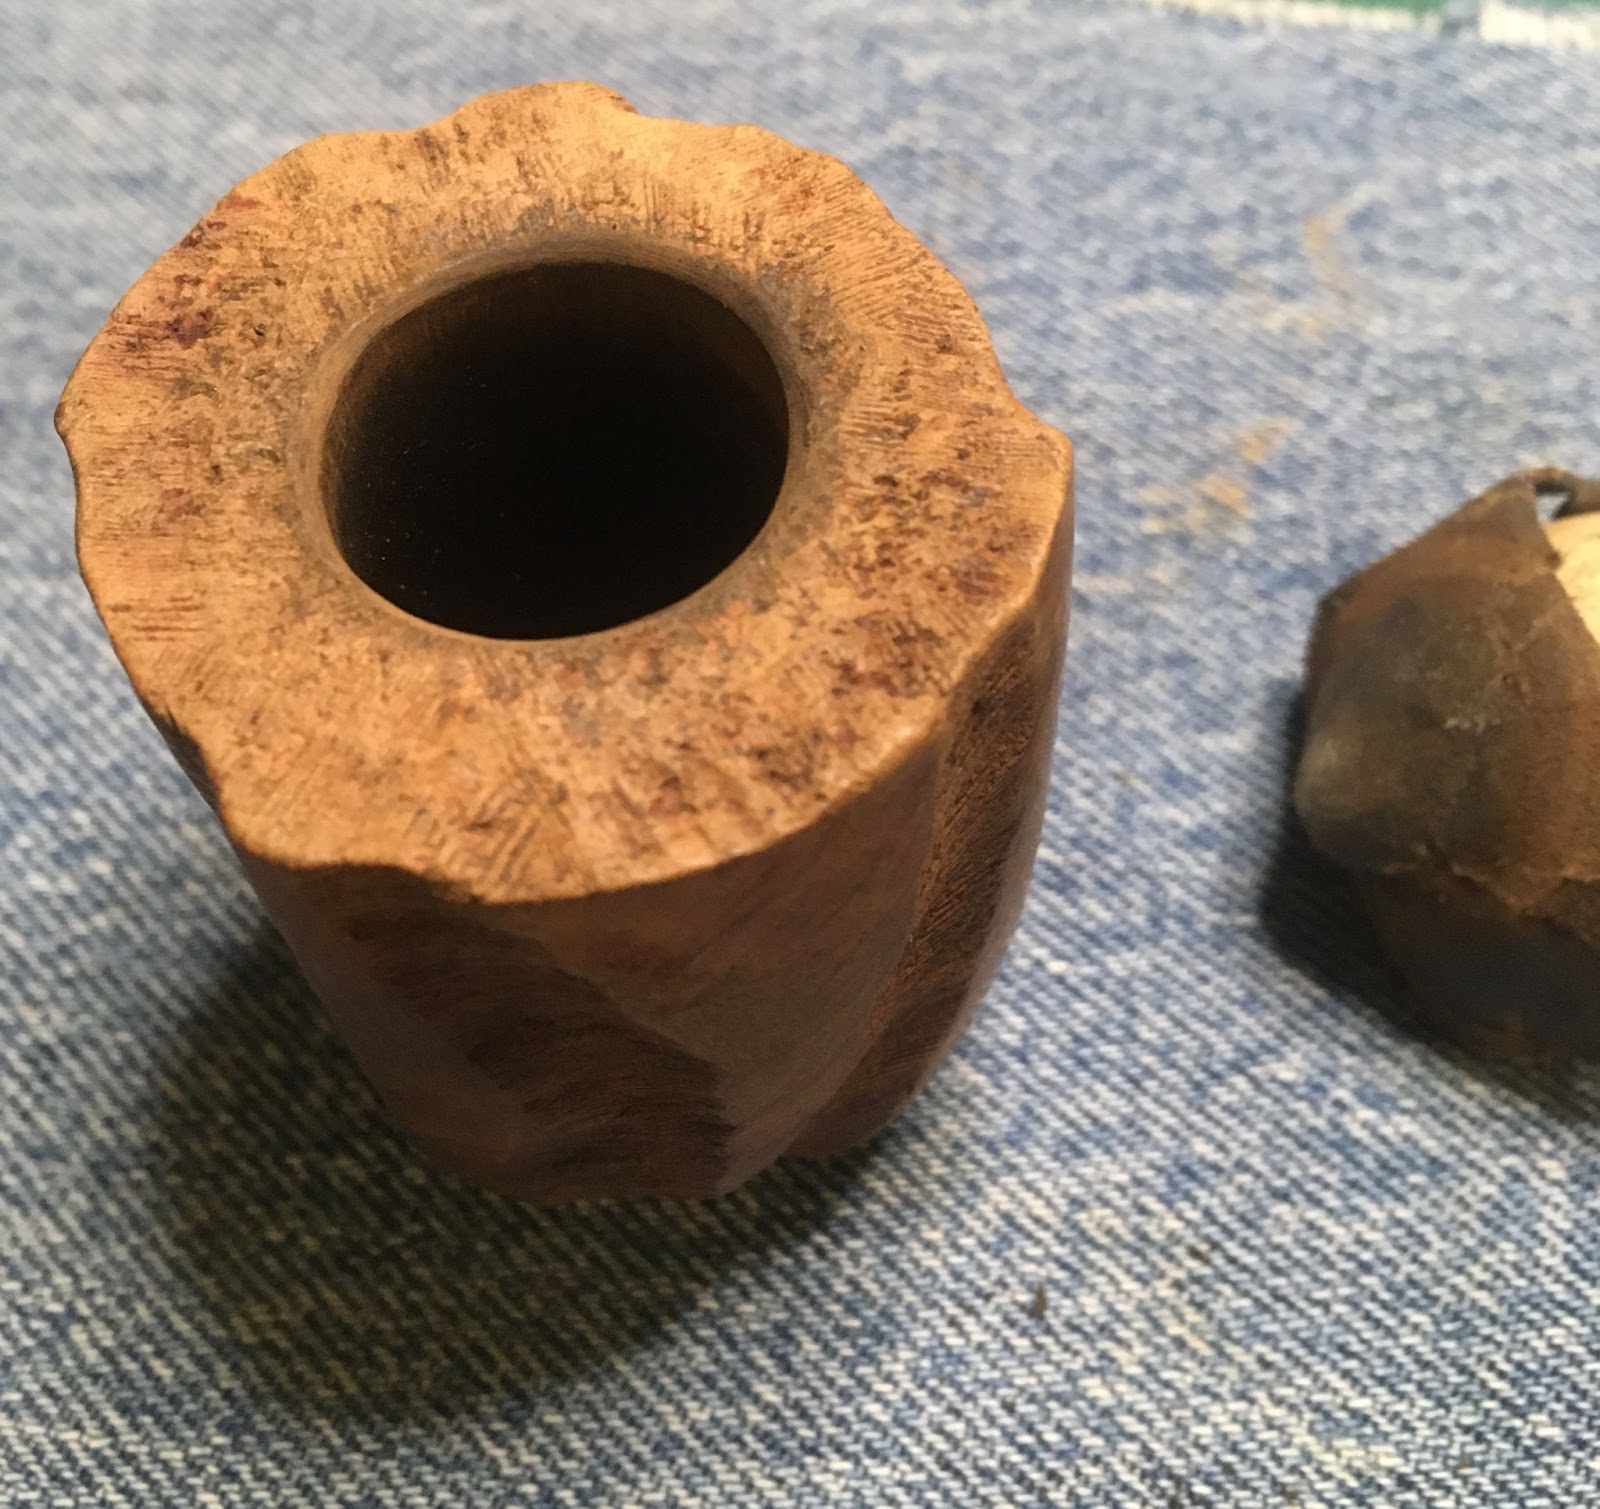
    I did not bother with trying to scrape the rim clean of lava.  In order to reshape the stummel the rim was going to lose about ⅛ of an inch of briar so scraping became a mute point.

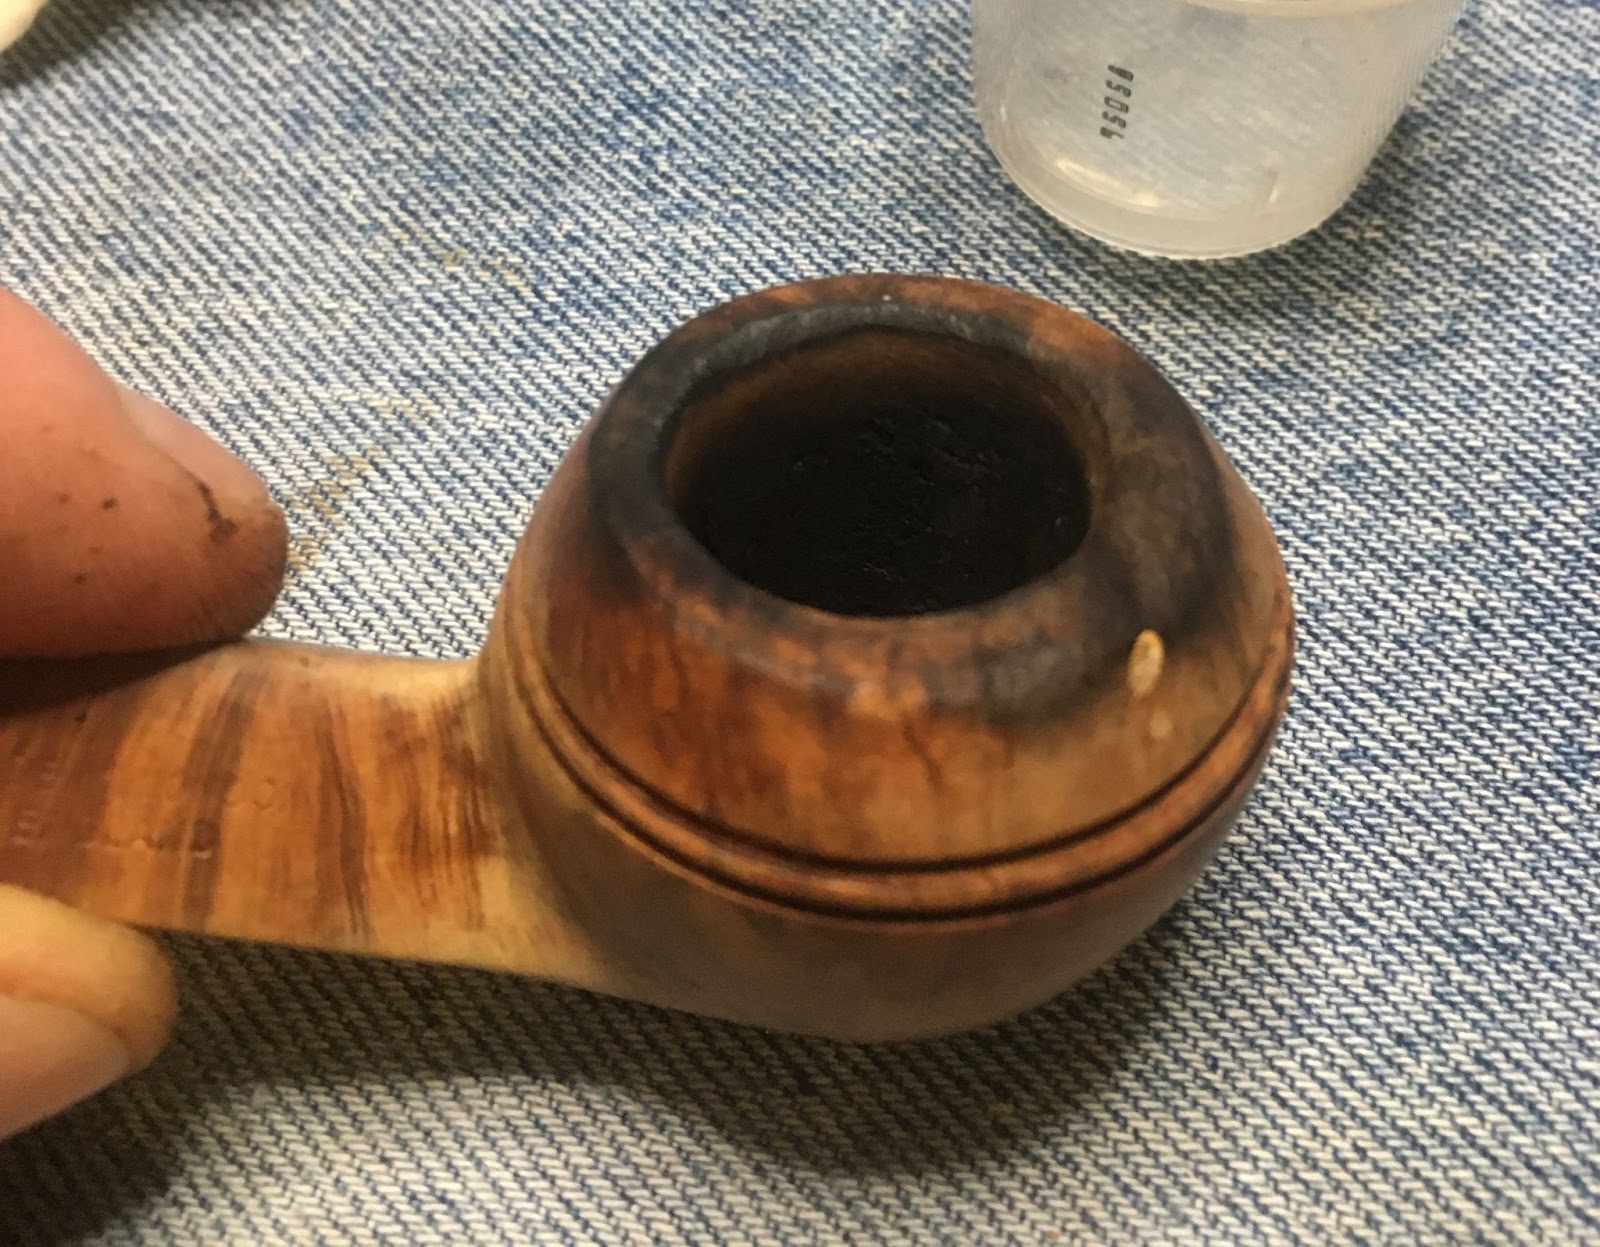
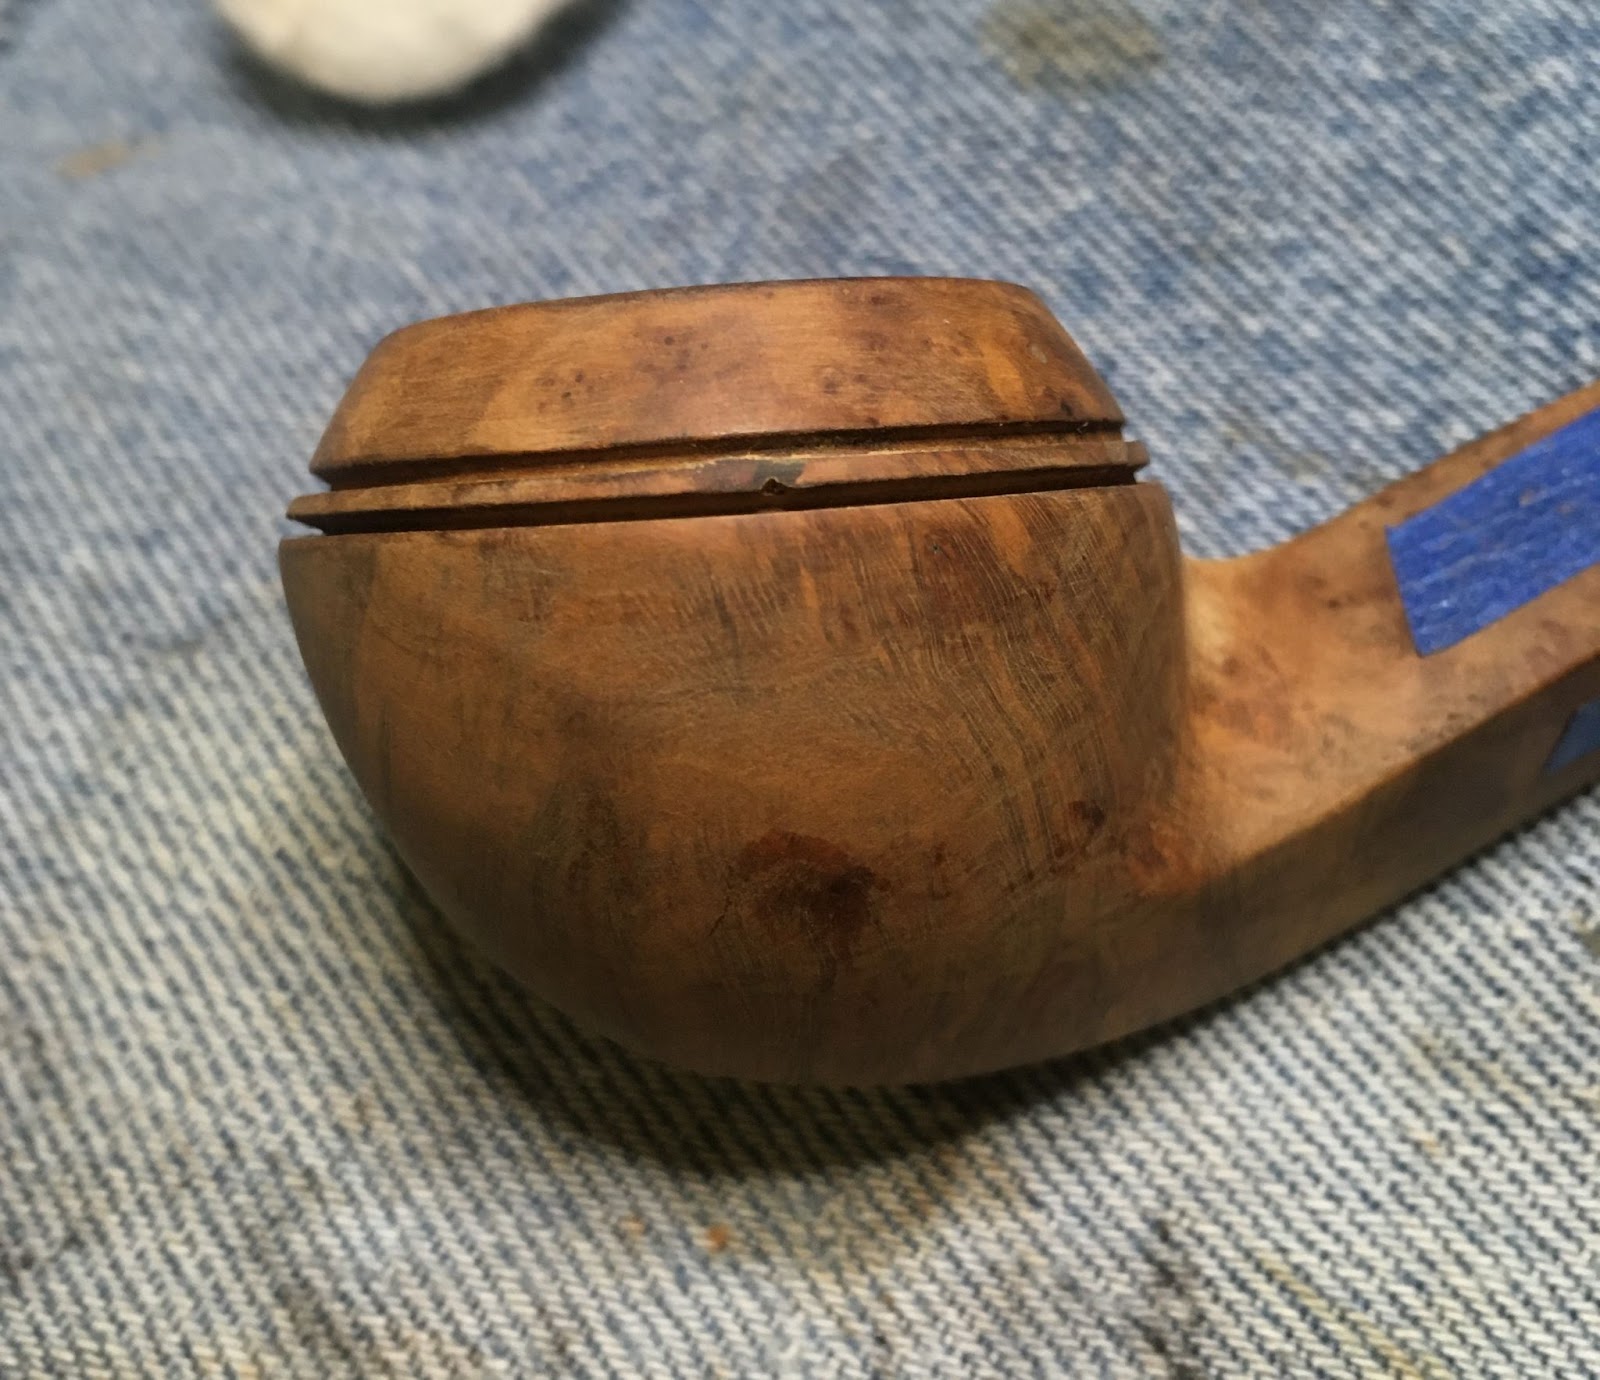
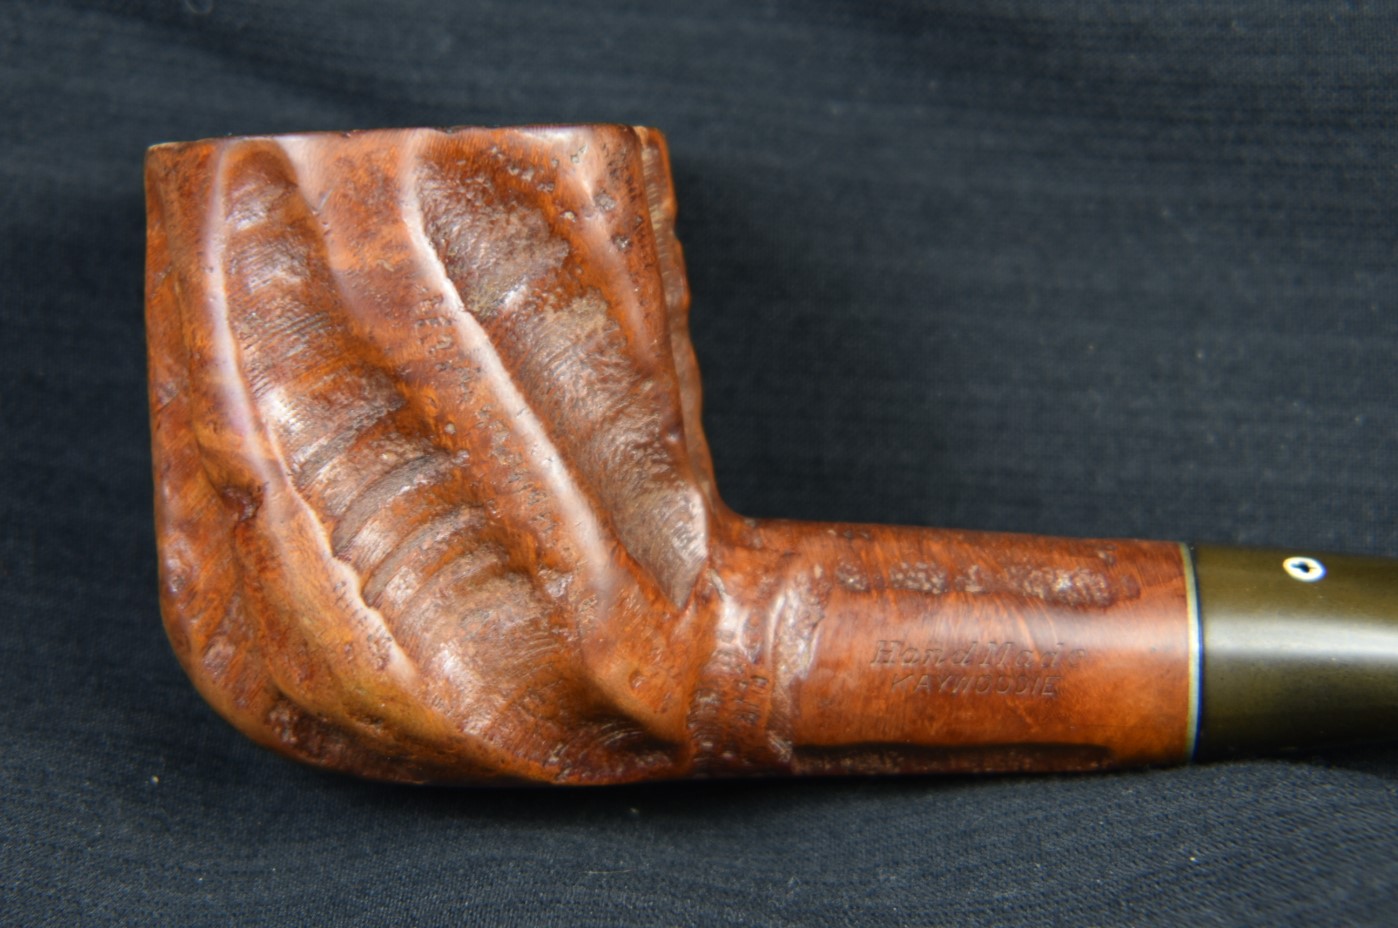
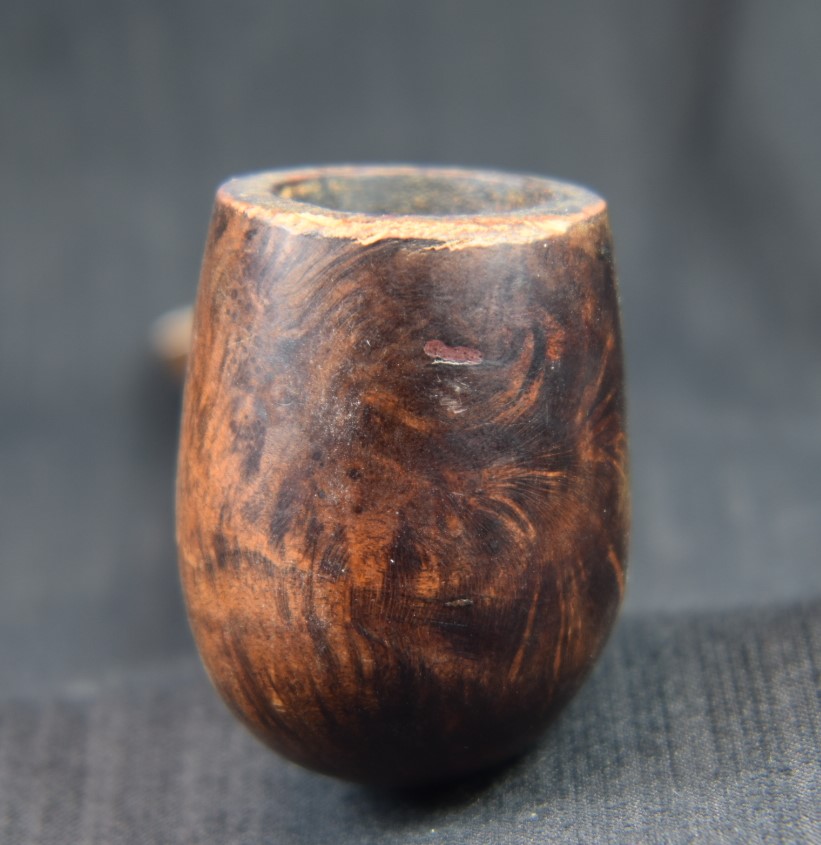
    I took the stummel to the counter where I top pipes.  Here a sheet of 220 sand paper is laid flat on the counter and used to sand during topping.  I started the sanding and quickly wished that I had a belt of disk sander.  I moved the stummel in a circular motion every few circles, I would rotate the stummel 90 degrees.  I was trying to keep an even pressure on the entire rim.  The back of the rim looked good but the front was still showing charred wood.  I decided that the new shape of this stummel would have to have a forward cant.  Additional pressure was put on the front of the stummel during the sanding.  The result looked pretty good.  

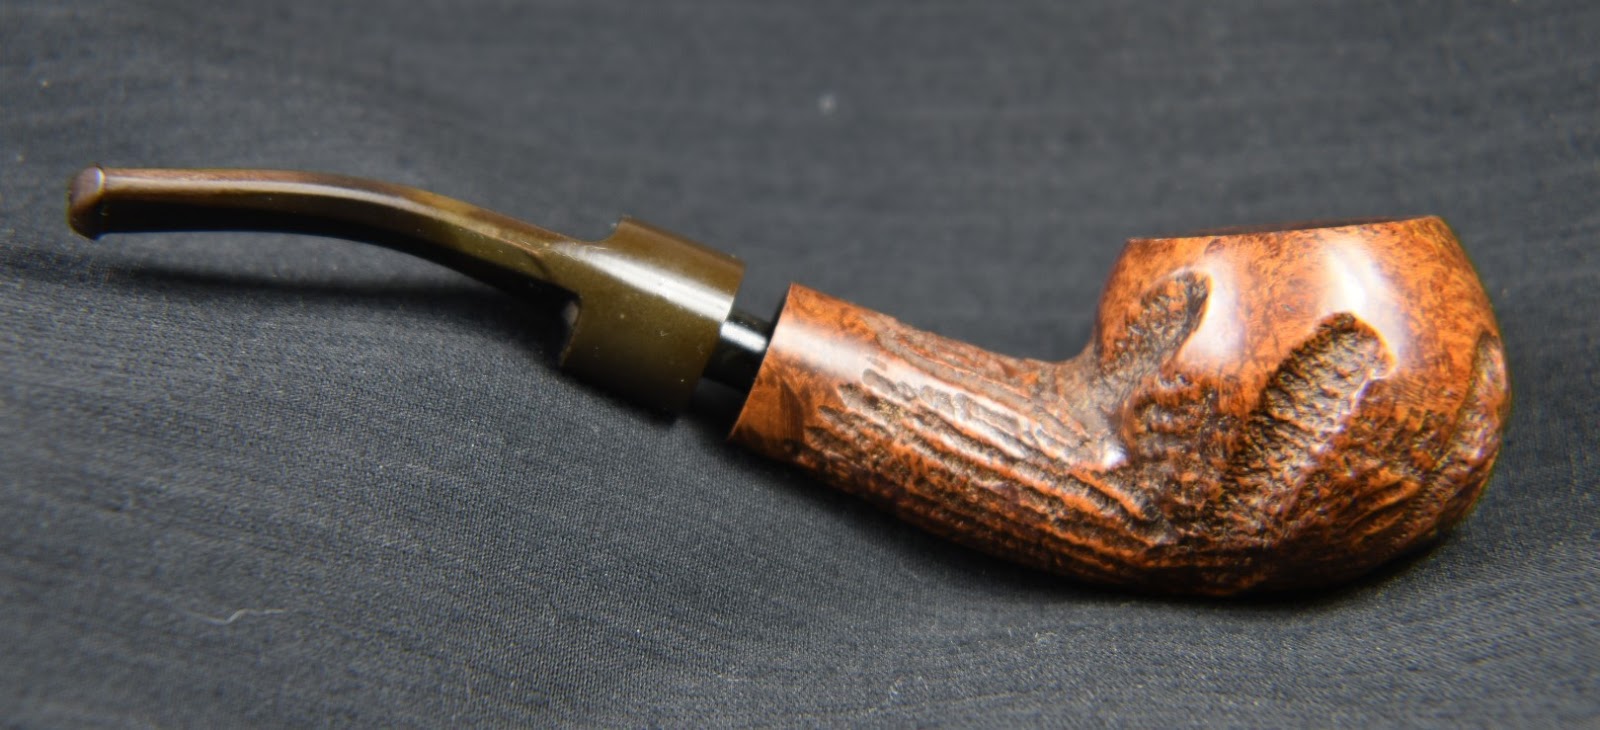
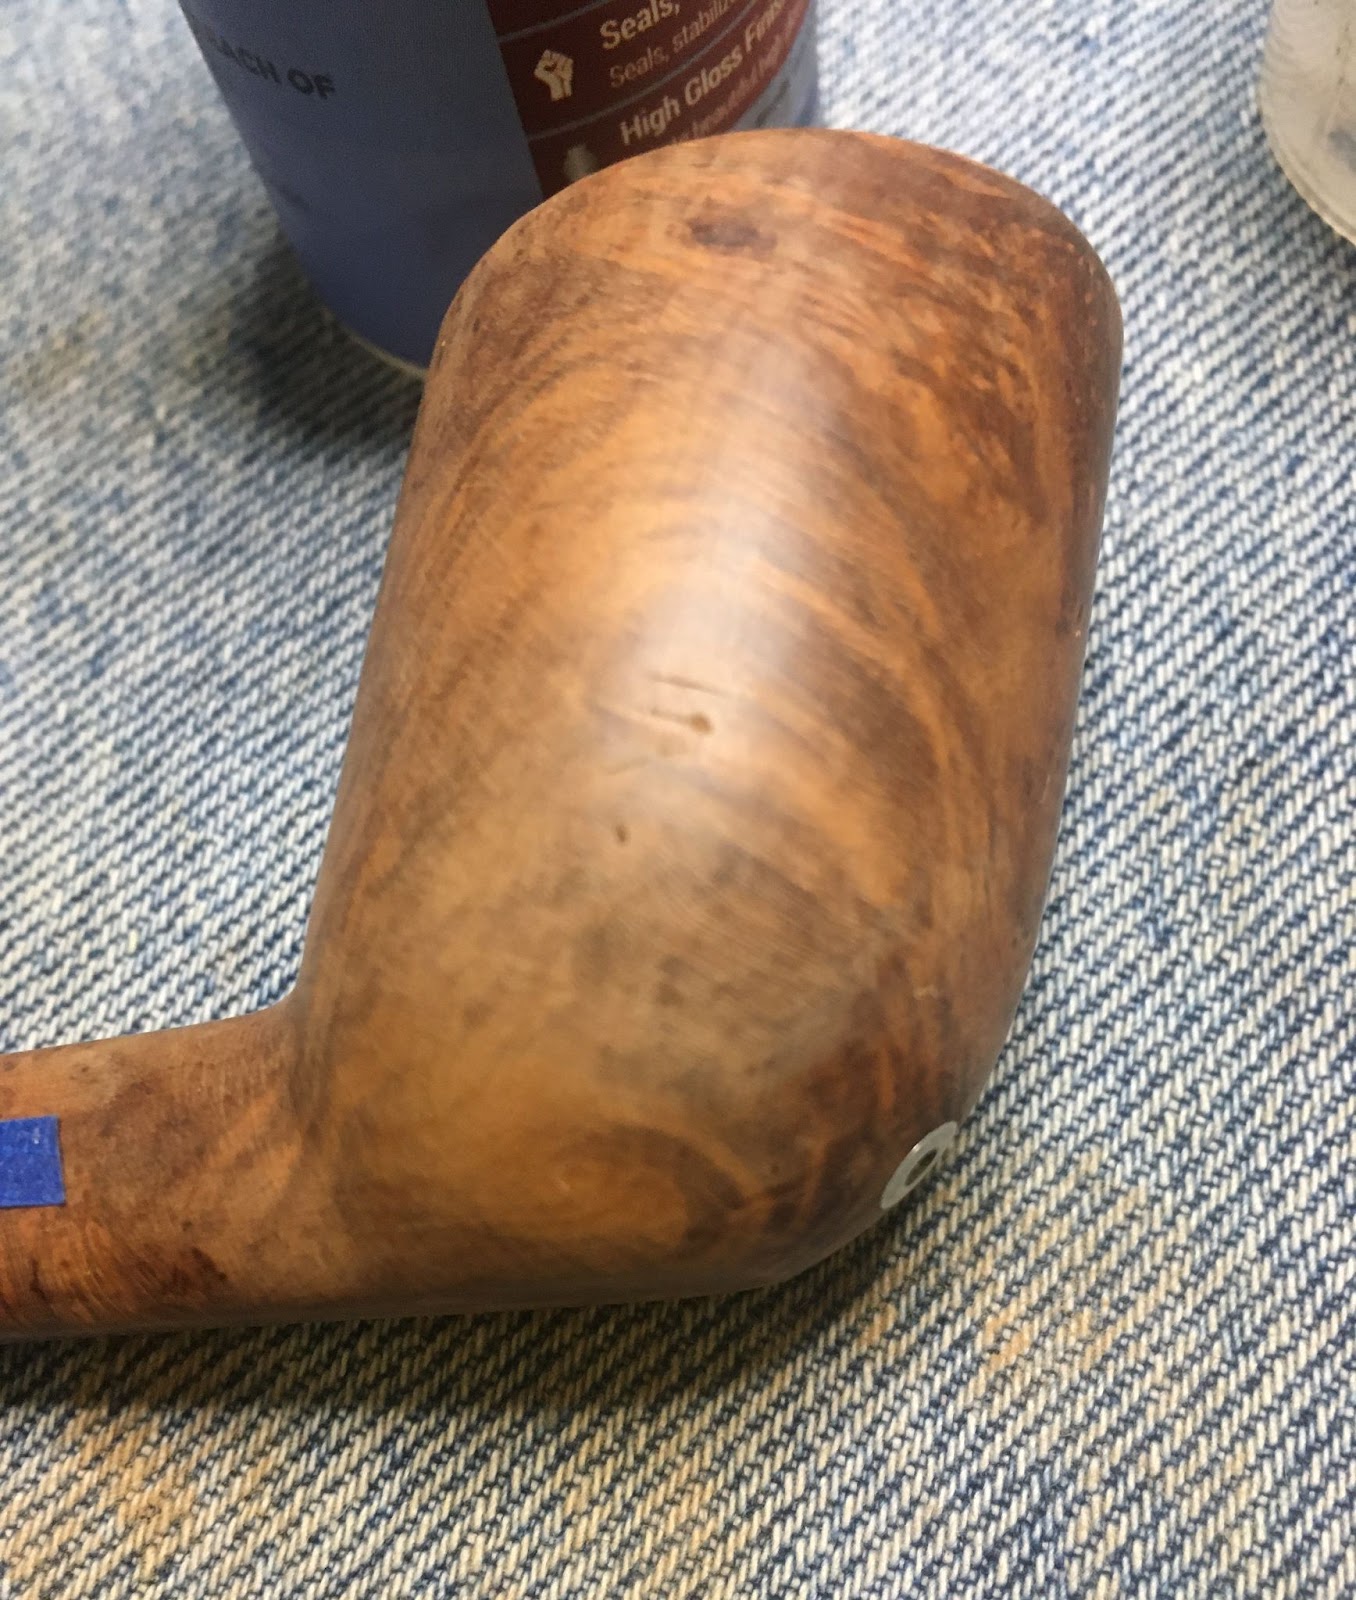
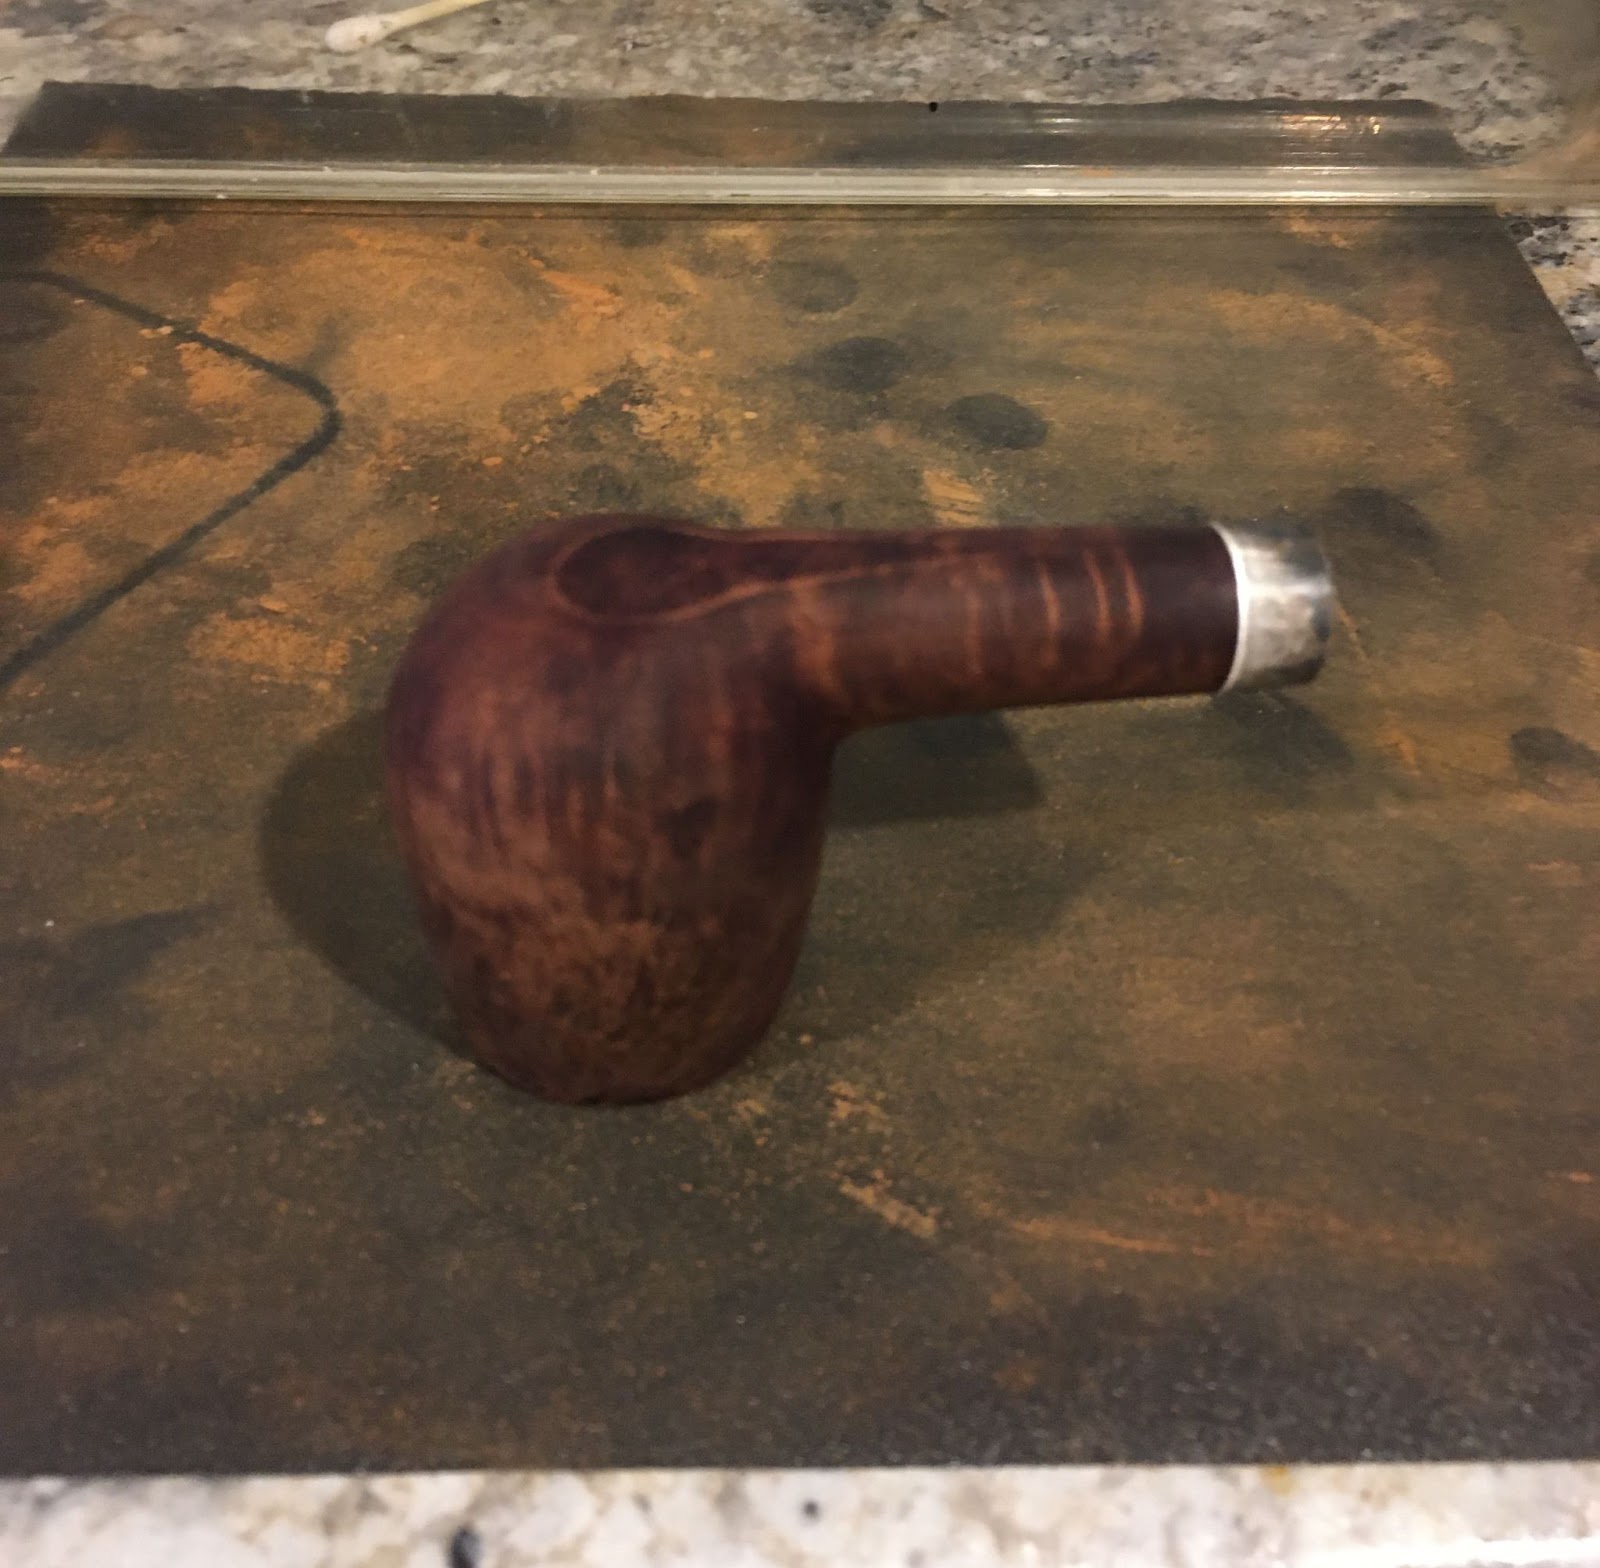
    Now to address the reshaping of the front of the pipe.  I used a piece of 80 grit emery cloth wrapped around a wood block to coarsely remove and reshape the stummel.  The goal was to remove the char while retaining most of the character of the Savinelli shape.  I apologize for not photo-documenting this stage.  Once happy with the progress I used 220 sandpaper to smooth the stummel.  Eventually I was back to using the 320 sanding sponge followed by the 400 sandi sponge.  THe below photos show the pipe at this point.

    I was now certain that the Savinelli Porto Cervo 677 KS could be saved.  The question of: “But, how will it look?” remained.  

    When I would wipe the stummel with alcohol I would get the following dark color below the rim at the front.  I did not like the dark color.  I had read about work workers using oxalic acid to bleach wood.  This was usually done to remove water or iron stains from wood.  I bought some oxalic acid thinking that someday I’d try it.  Hmm, does oxalic acid work on burned spots with briar?  I asked that very question in a pipe restoration group on Facebook.  THe response from several people was yes.  

    Preparing chemical solutions was something that I had years of experience with as a high school chemistry teacher.  I figured that I’d just prepare a saturated oxalic acid solution.  I cleaned out my induction kettle with vinegar and soap then rinsed it with distilled water.  I washed out a glass jar and lid and rinsed them with distilled water also.  I brought 300 ml of distilled water to boiling in the kettle.  I poured 250 ml into the clean jar.  I added 2 

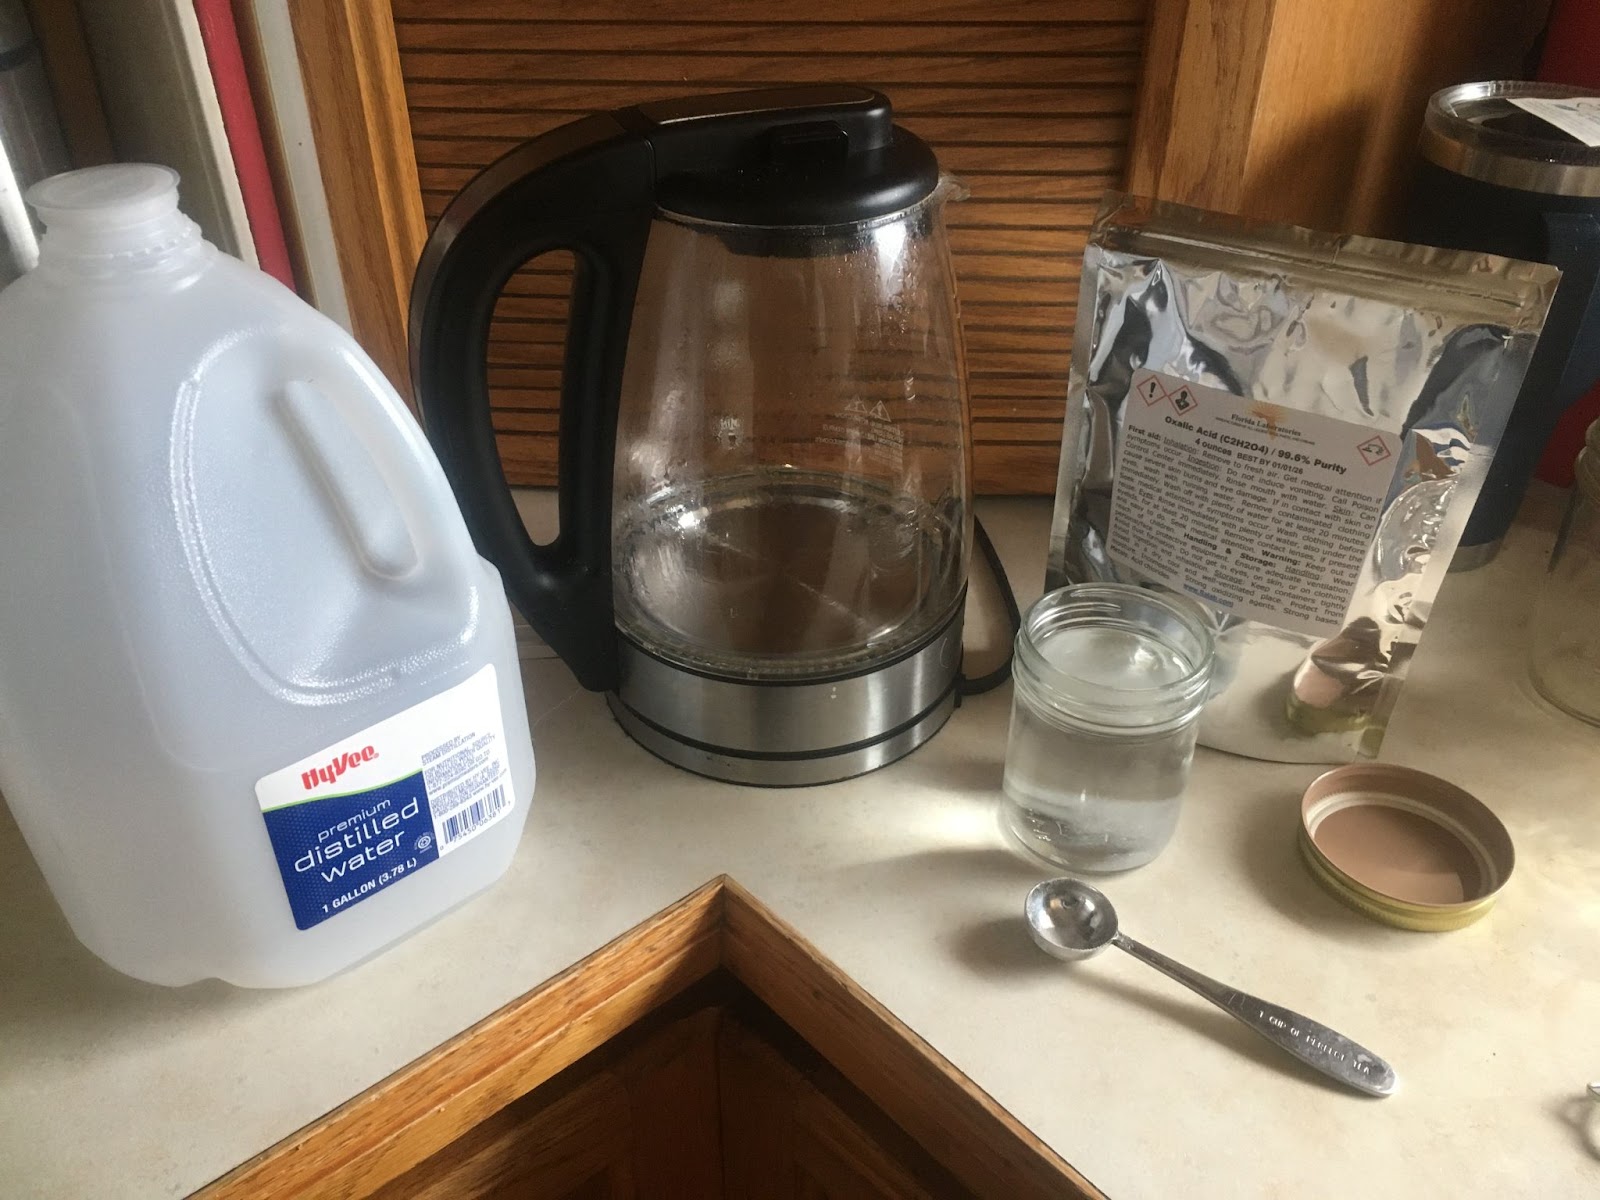
    teaspoons of oxalic acid crystals.  They dissolved immediately.  Hmm, maybe I should have read a recipe?  Na, this is bucket chemistry.  I added another 2 teaspoons.  Again totally dissolved.  One more – didn’t completely dissolve.  Wait a few minutes.  Crystals remained at the bottom of the jar.  We have a saturated solution that will become supersaturated as it cools.

    I allowed the solution to cool to room temperature and took the solution down to the workbench.  I applied a coat to the stummel using a cotton swab.  The oxalic acid solution

    was absorbed quickly by the briar.  I applied a second coat.  I had read to allow the oxalic acid 20-30 minutes to work on the wood.  I waited for about 40 minutes.  In the meantime I prepared a baking soda solution to neutralize the oxalic acid on the briar.  40 minutes later I was ready to rinse away the oxalic acid and scrub the stummel with the baking soda solution.

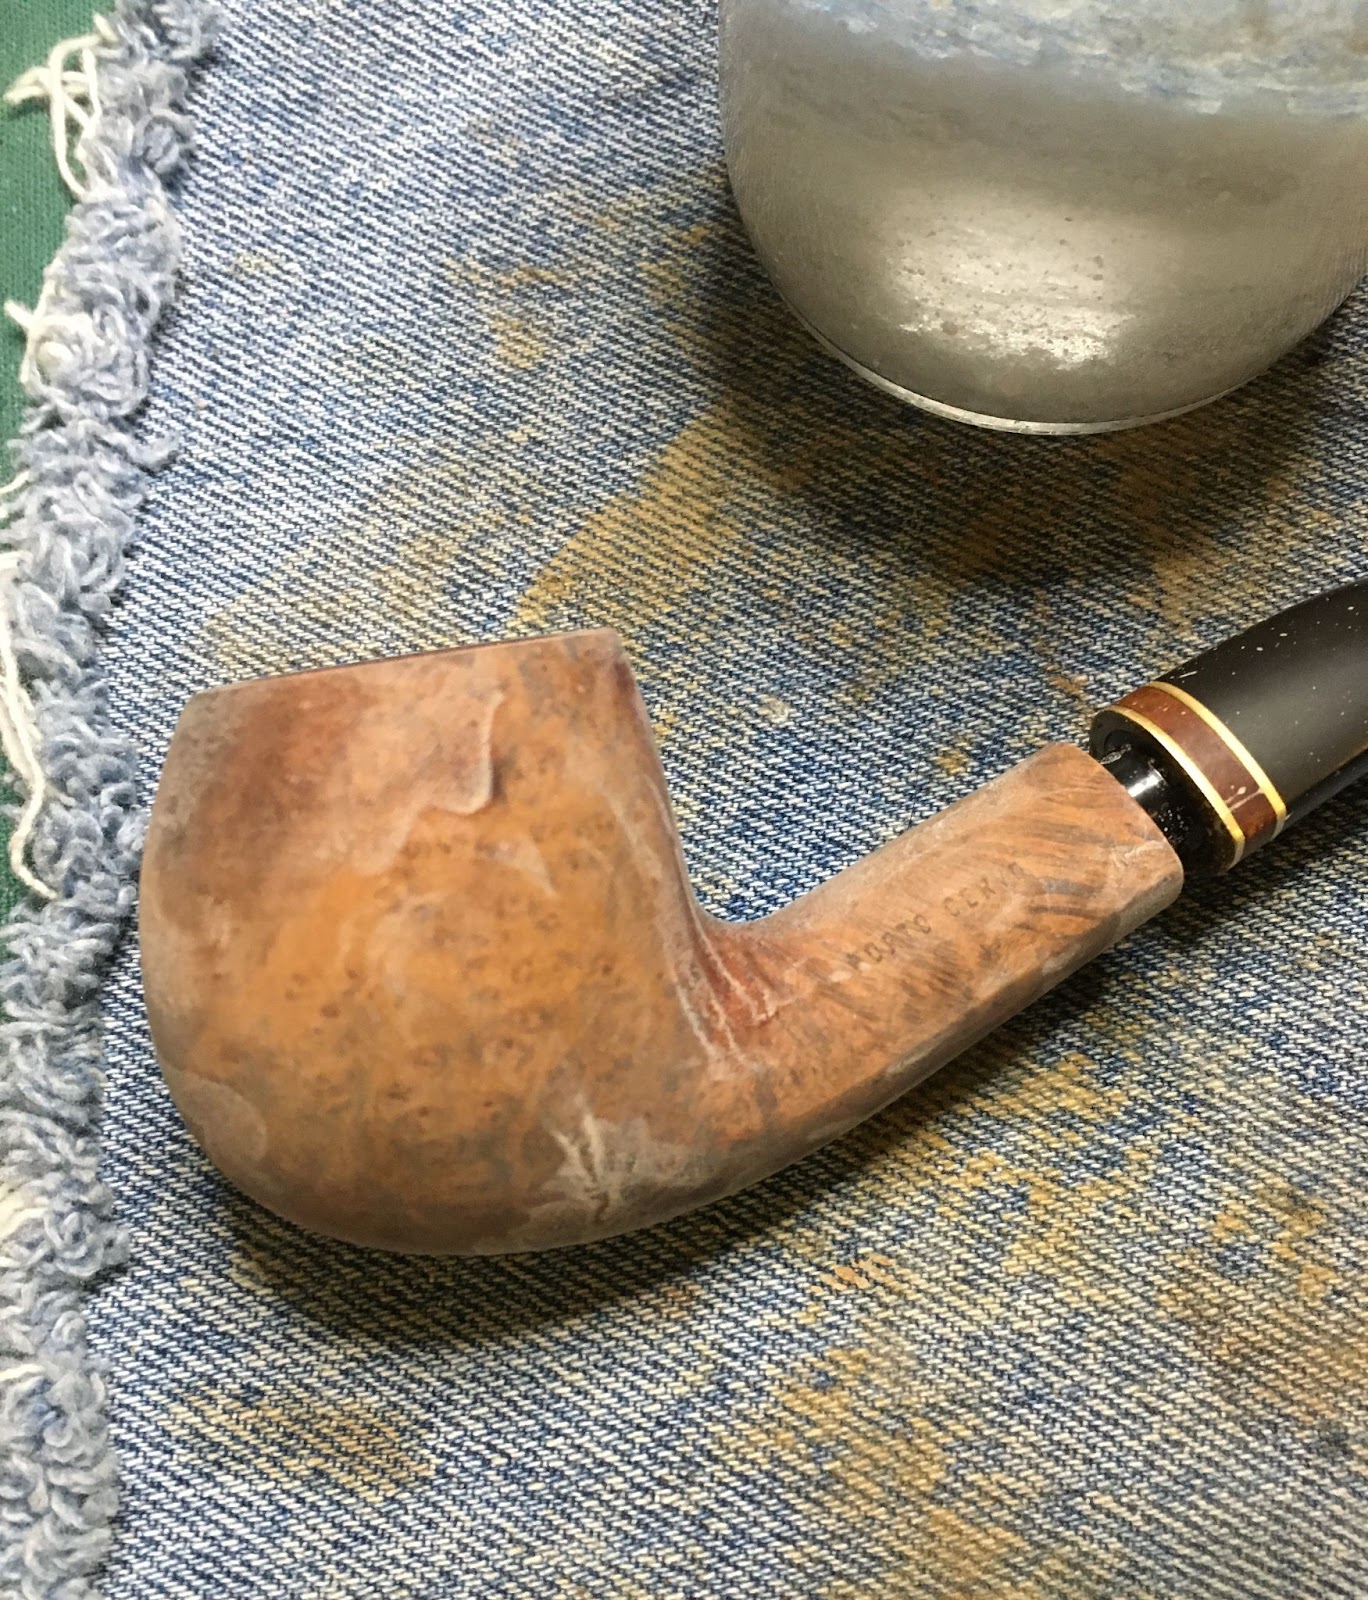
    I don’t know if the oxalic acid lightened the charred area a noticeable amount.  I guess I should have taken before and after photos.

    I returned to the workbench and worked on reestablishing the inner rim bevel that the Porto Cervo had before I so rudely sanding it away.  I used a 2 inch polyvinyl chloride (PVC) pipe with a 2 inch PVC round end cap.  The end cap was wrapped with 220 sandpaper.  This gave me a uniform curved surface to reestablish the curve of the rim bevel.  If you are interested in the real purpose of this tube, ask me in the comments.

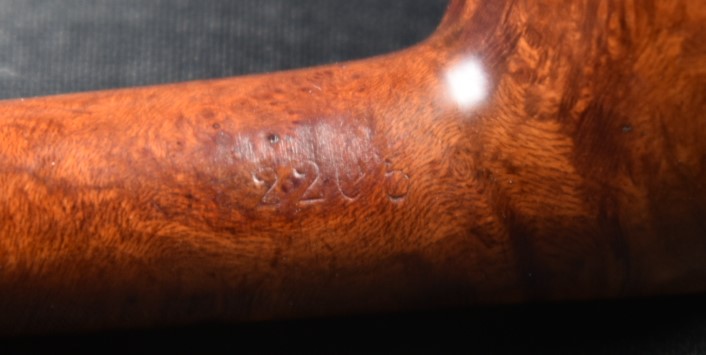
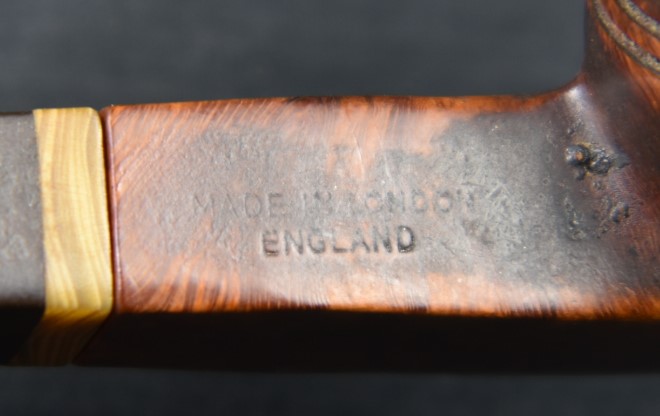
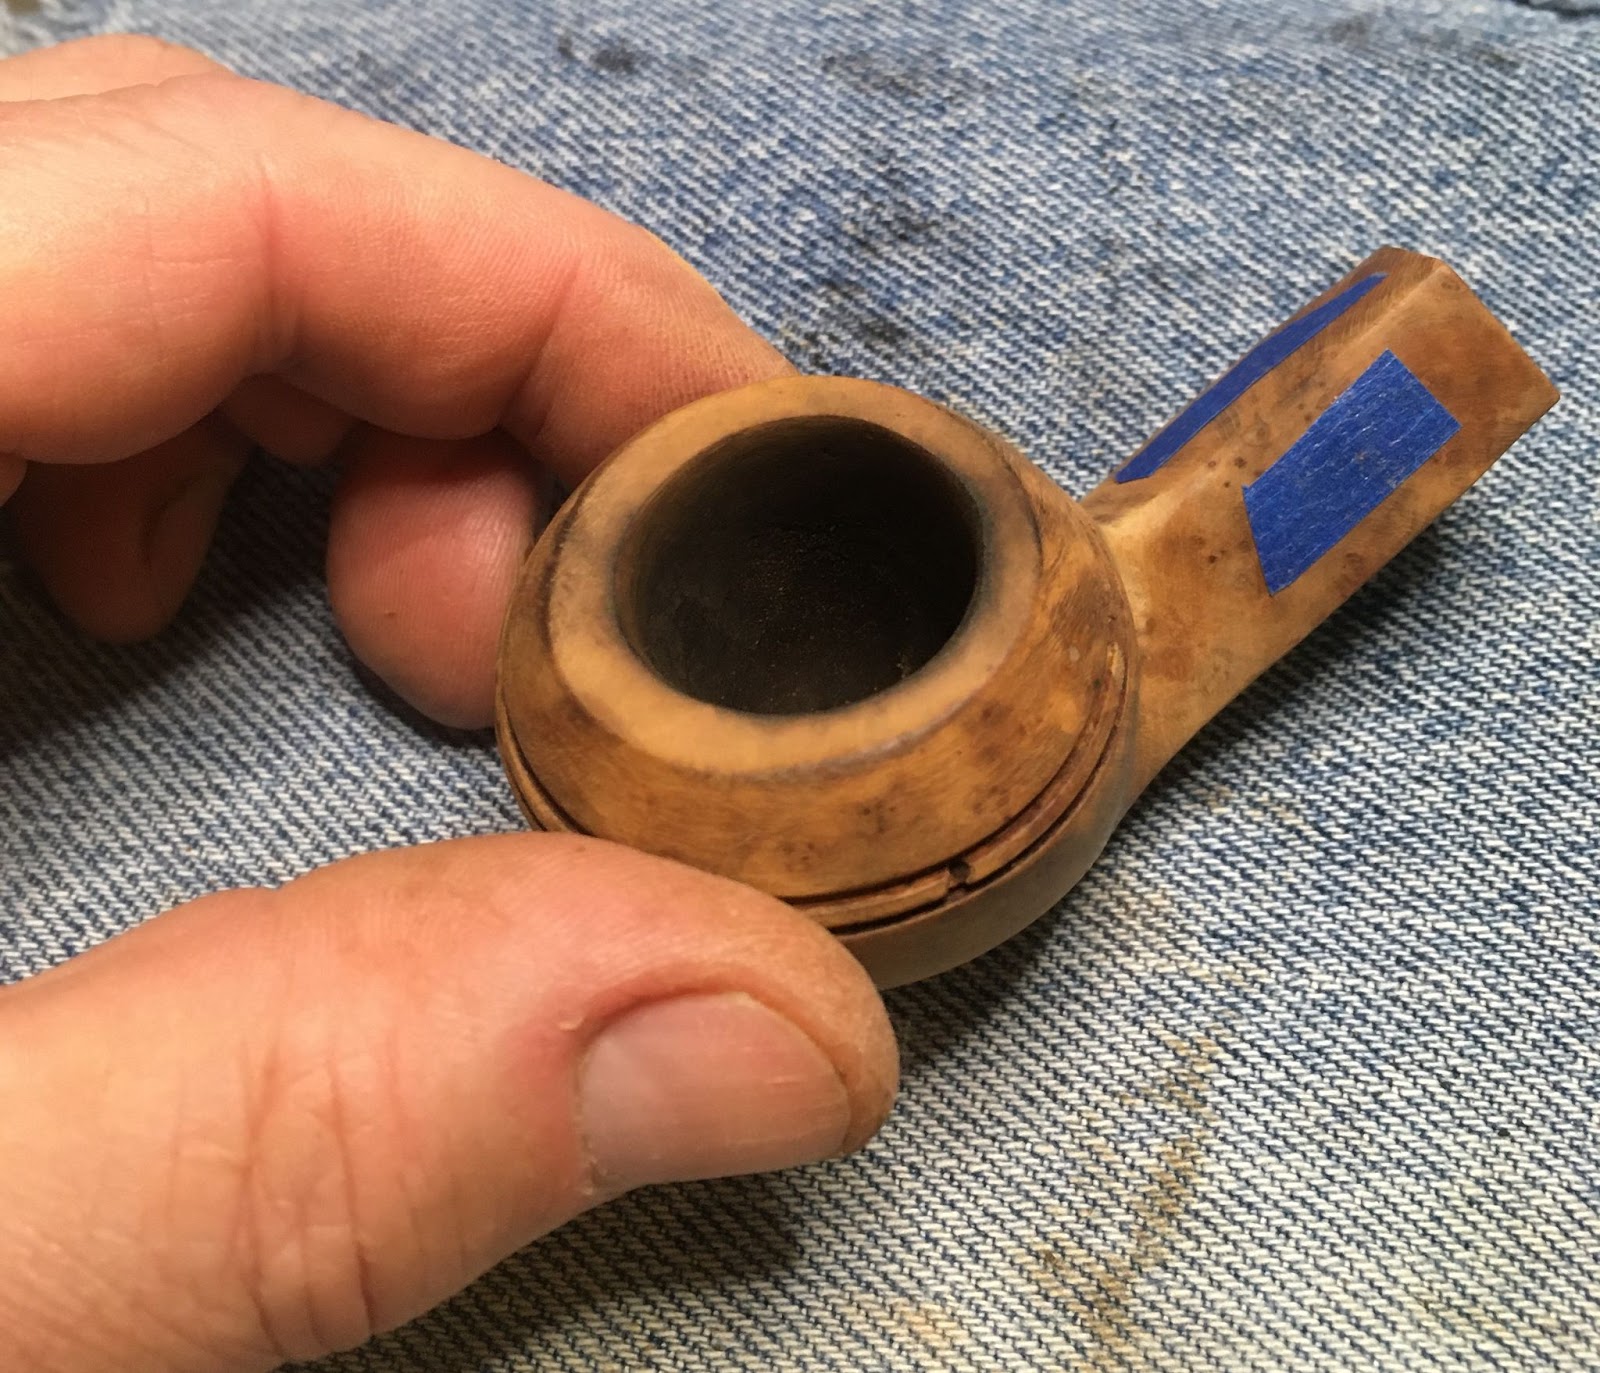
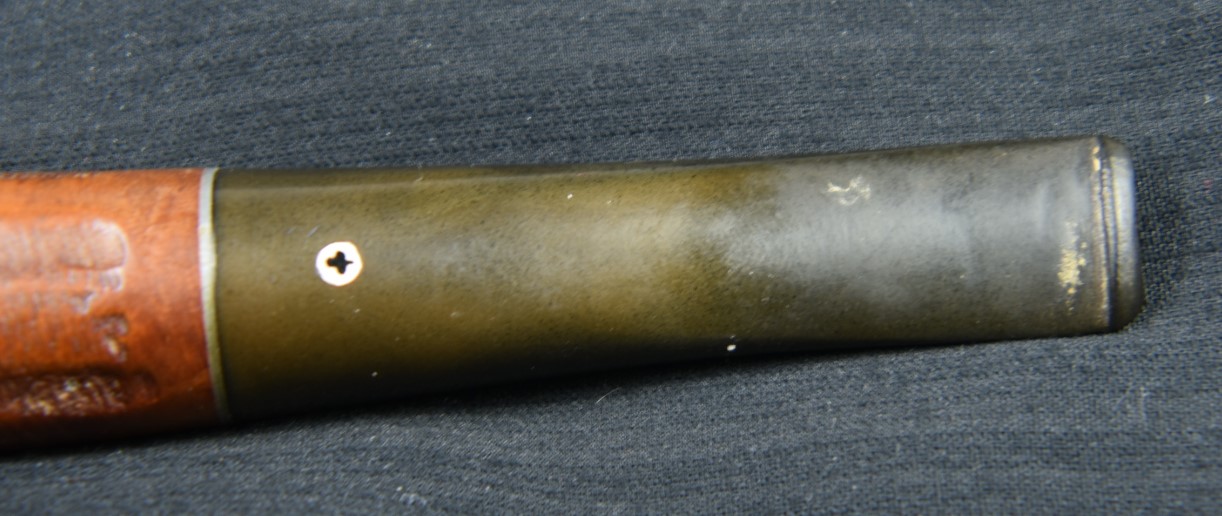
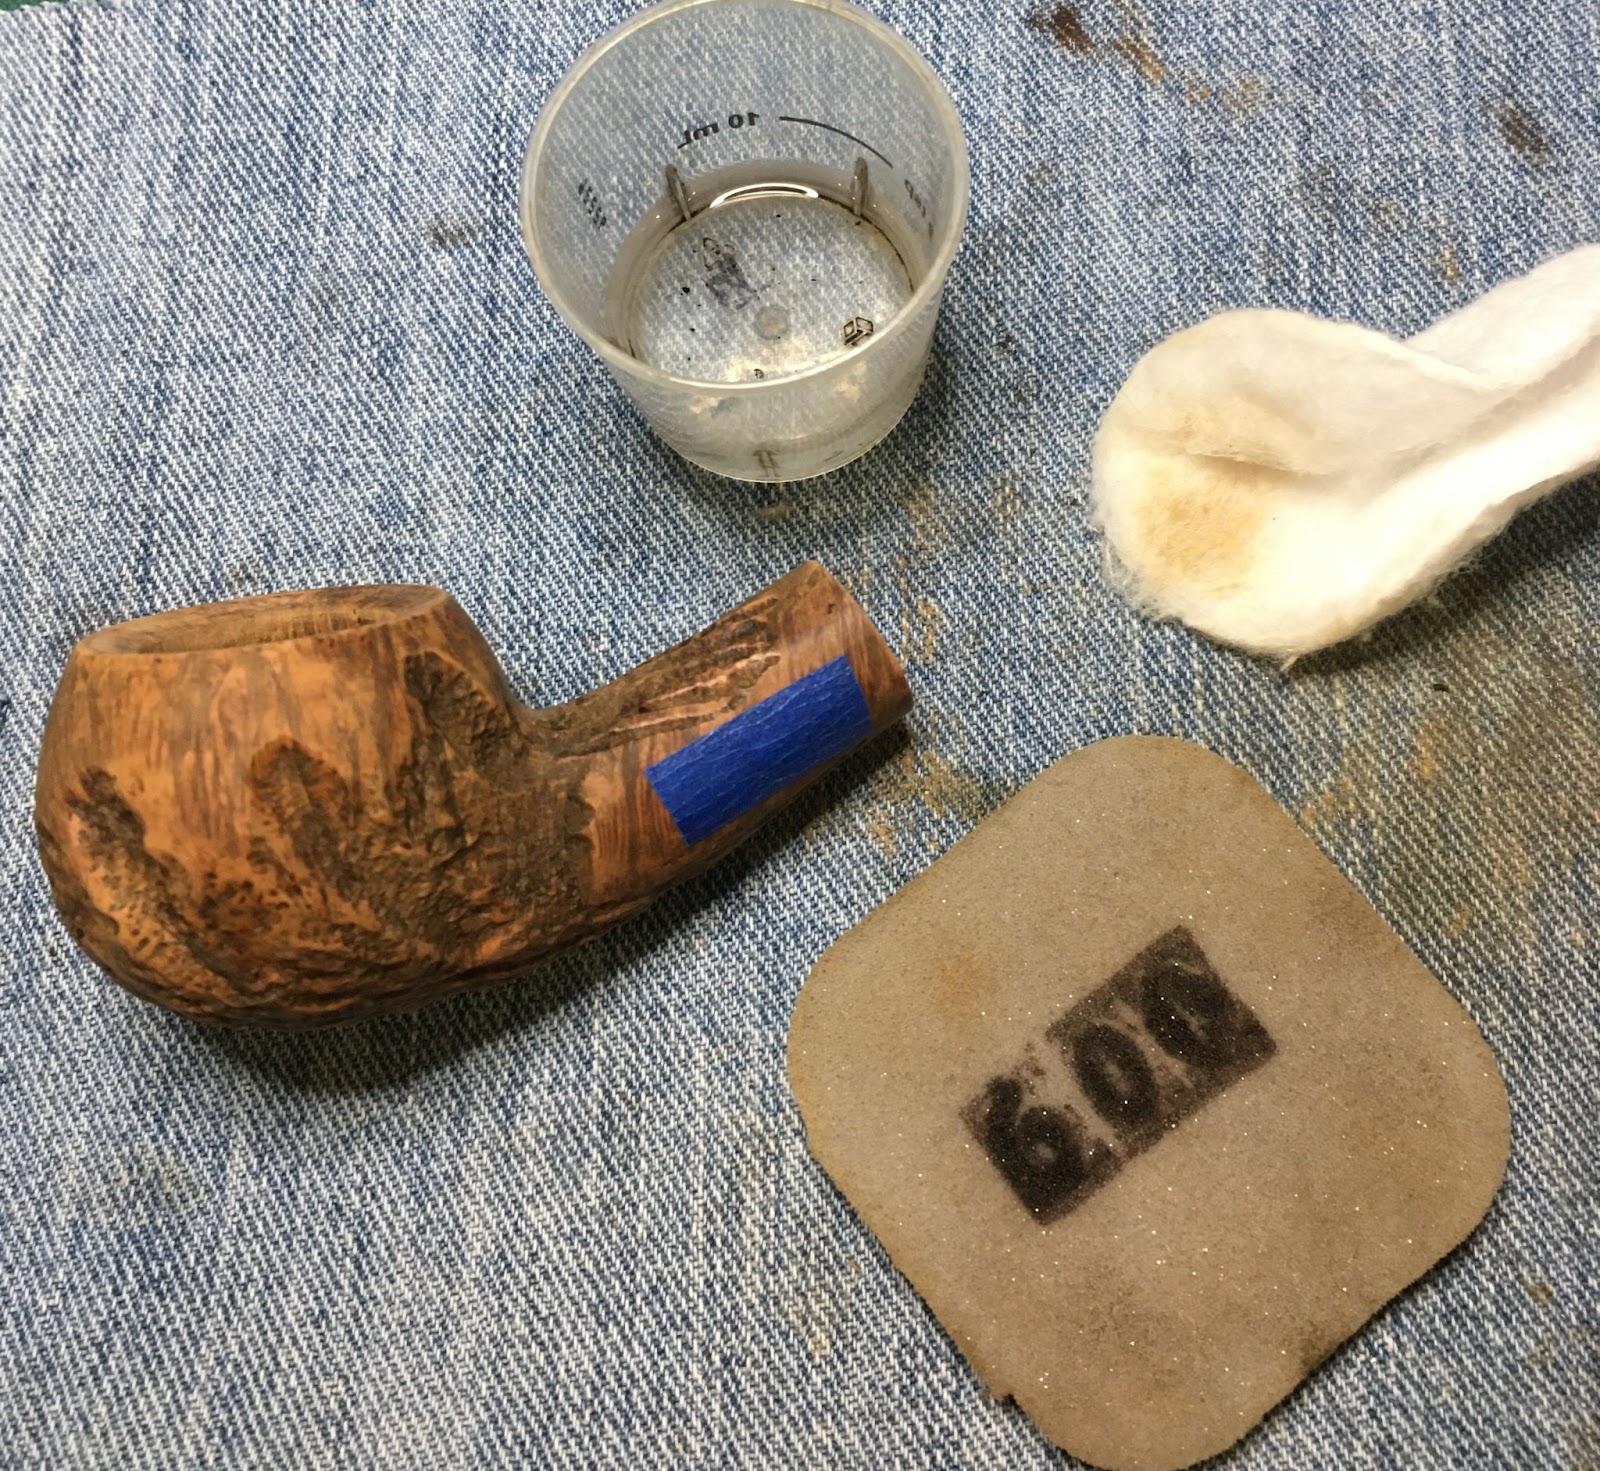
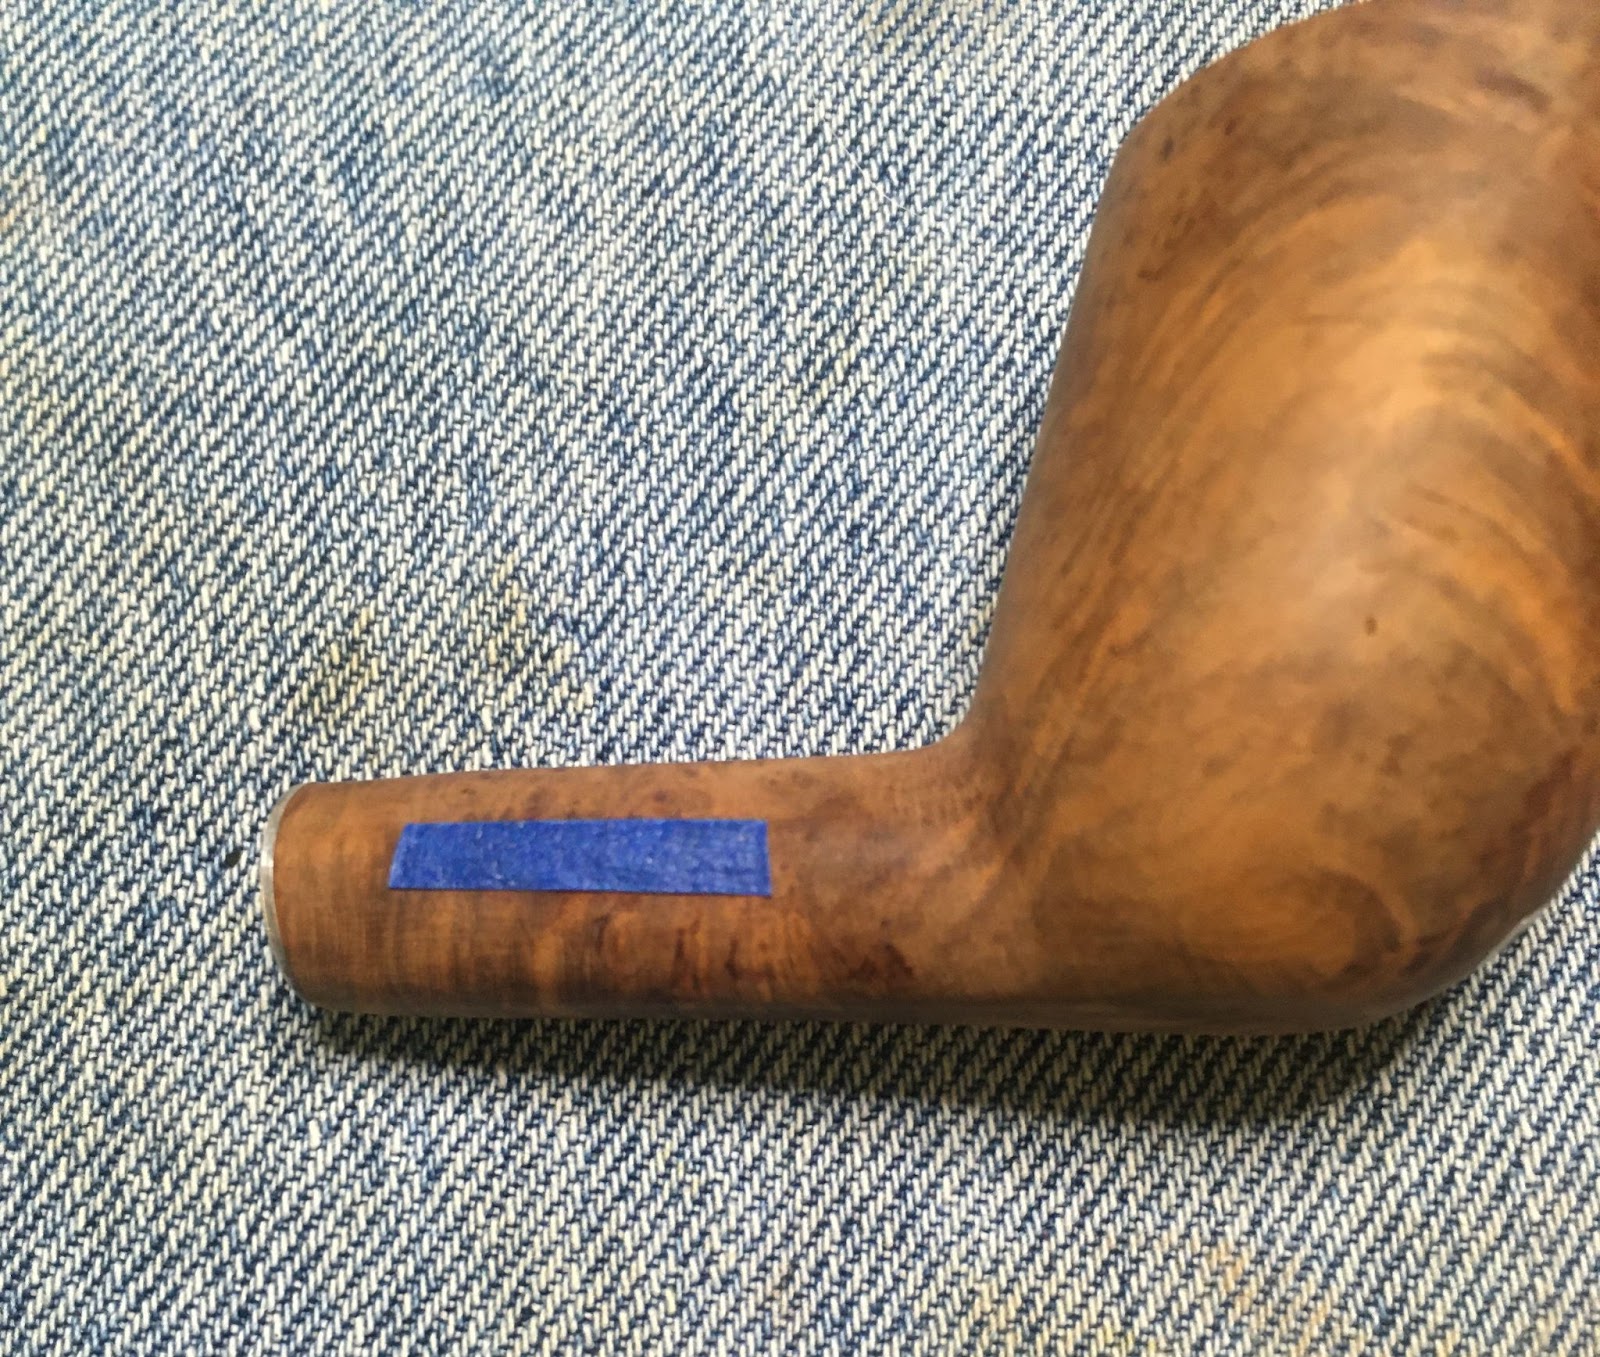
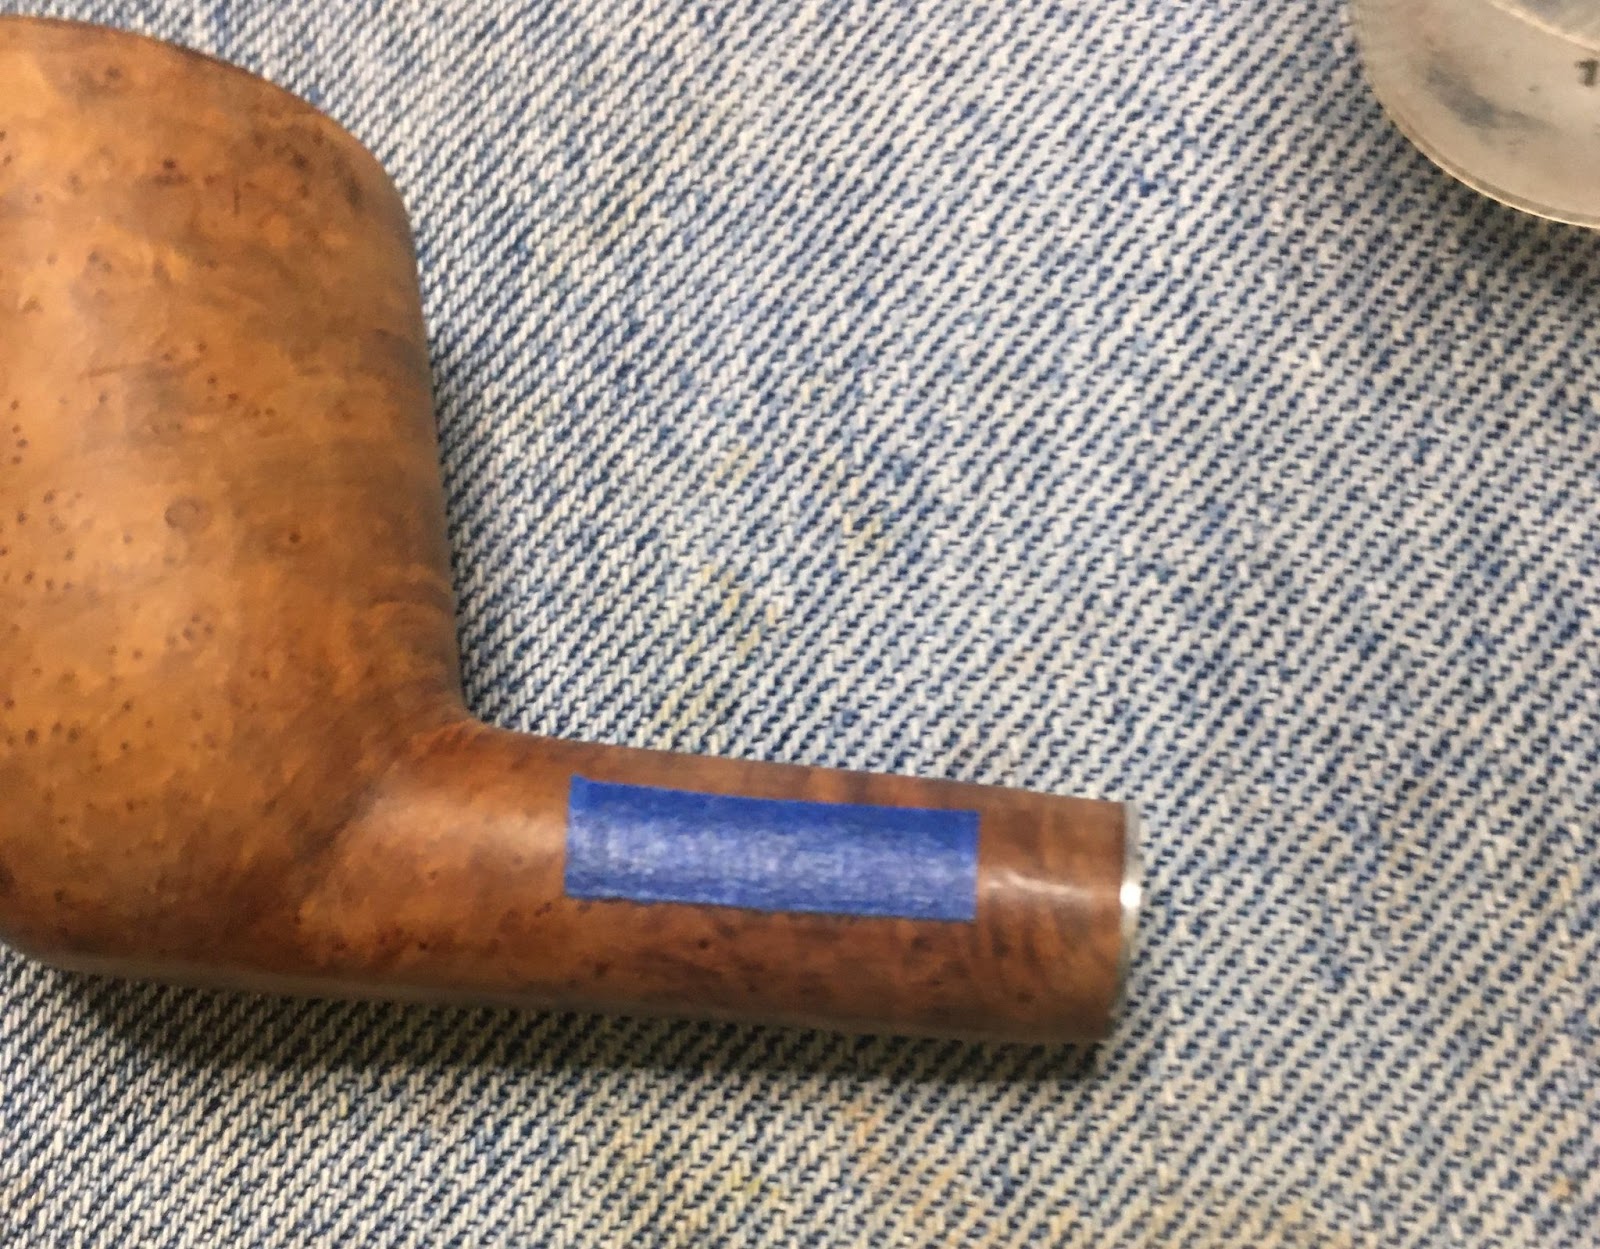
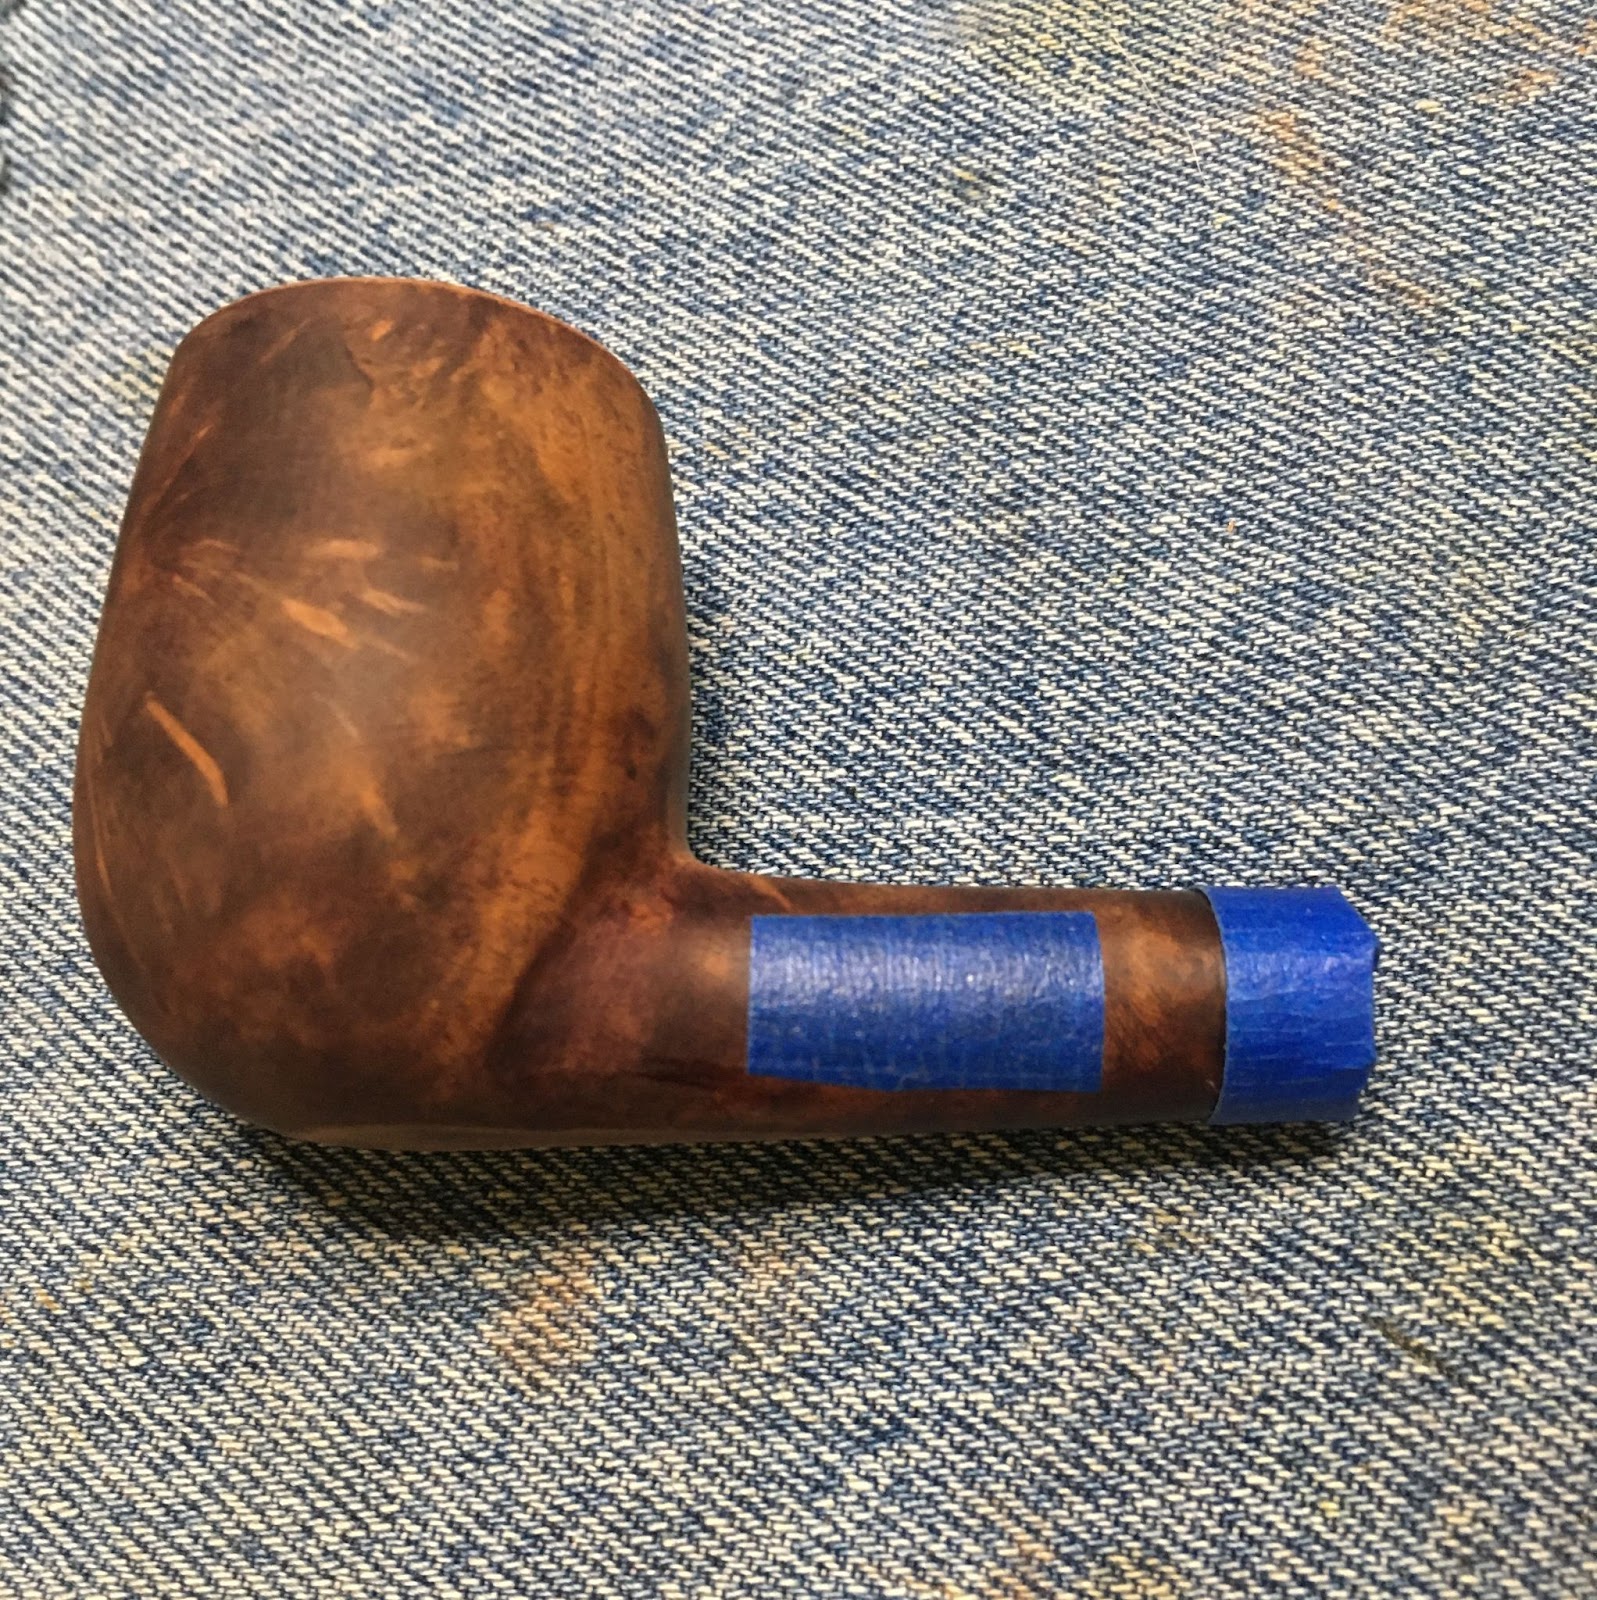
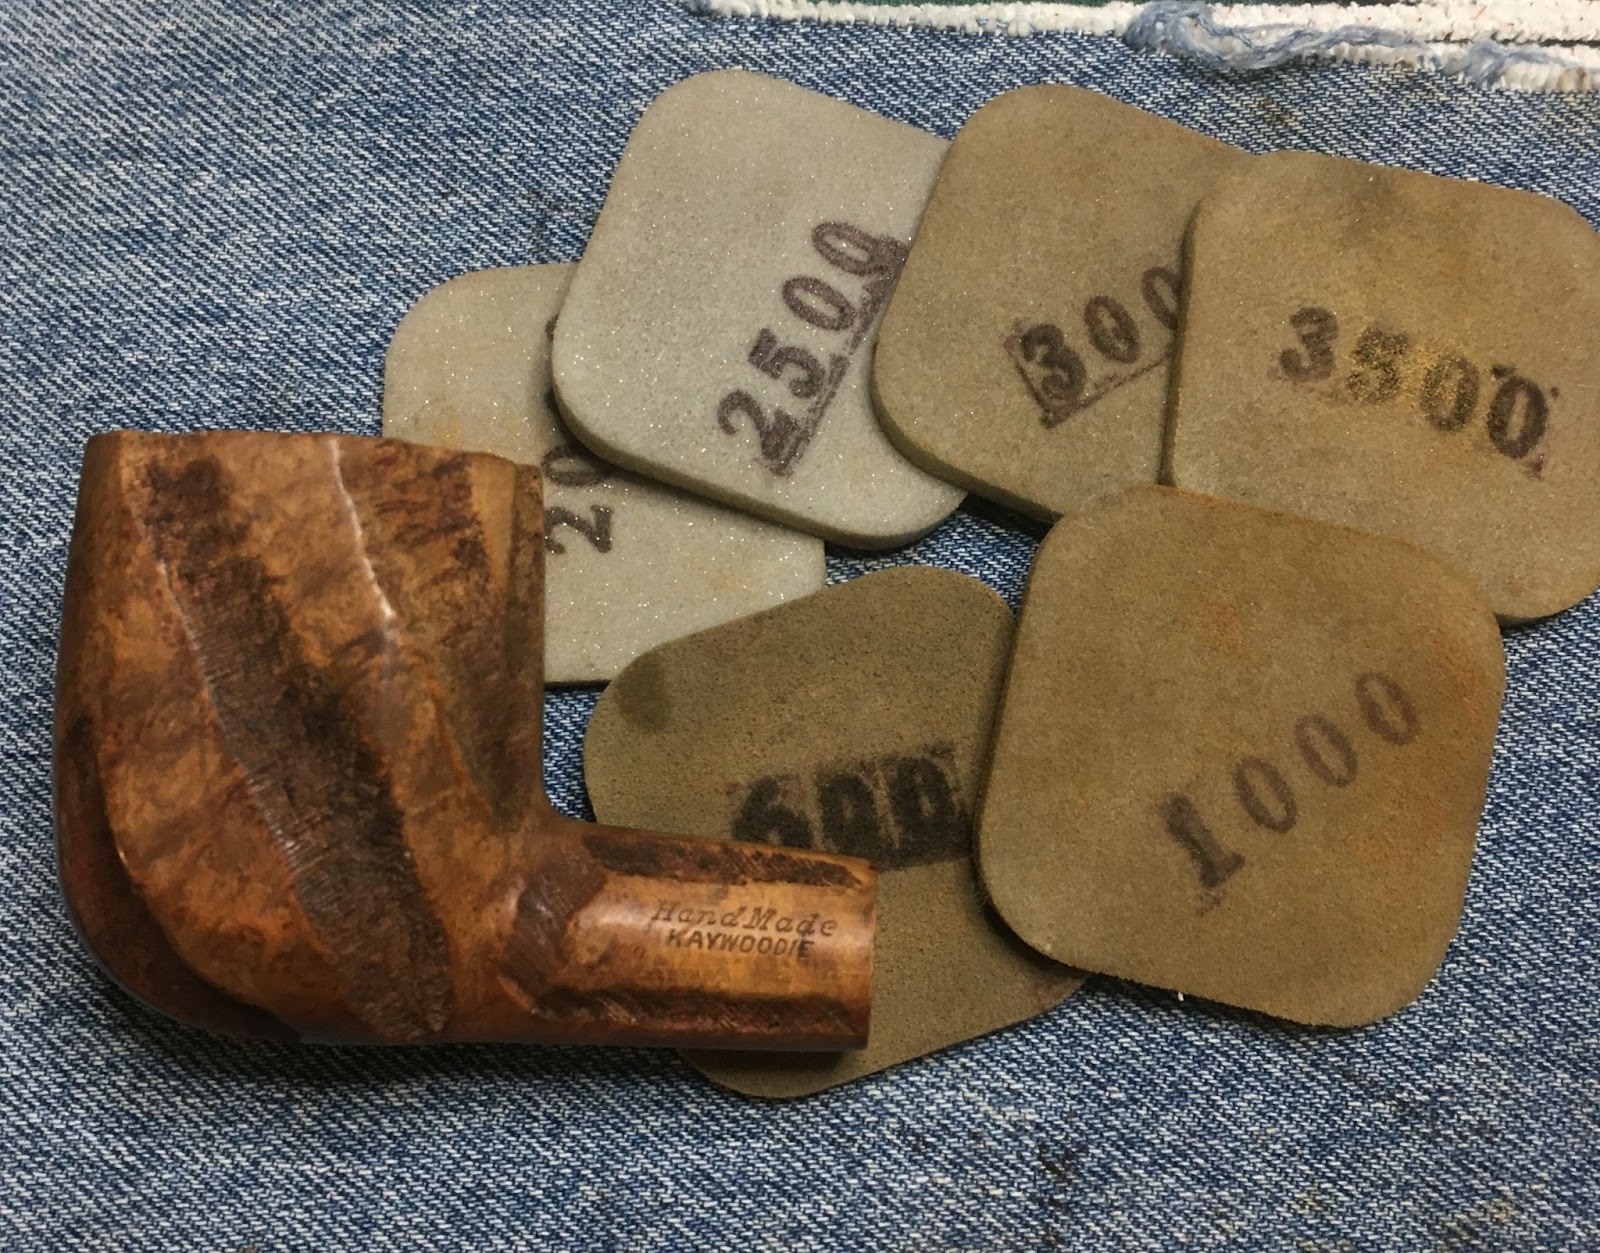
    With the Stummel reshaped and the rim beveled it was time to start sanding.  I used painters tape to cover the stamps.  I wanted to keep the stem and the stummel together for the sanding to avoid rounding any of the edges where joined from being rounded. 

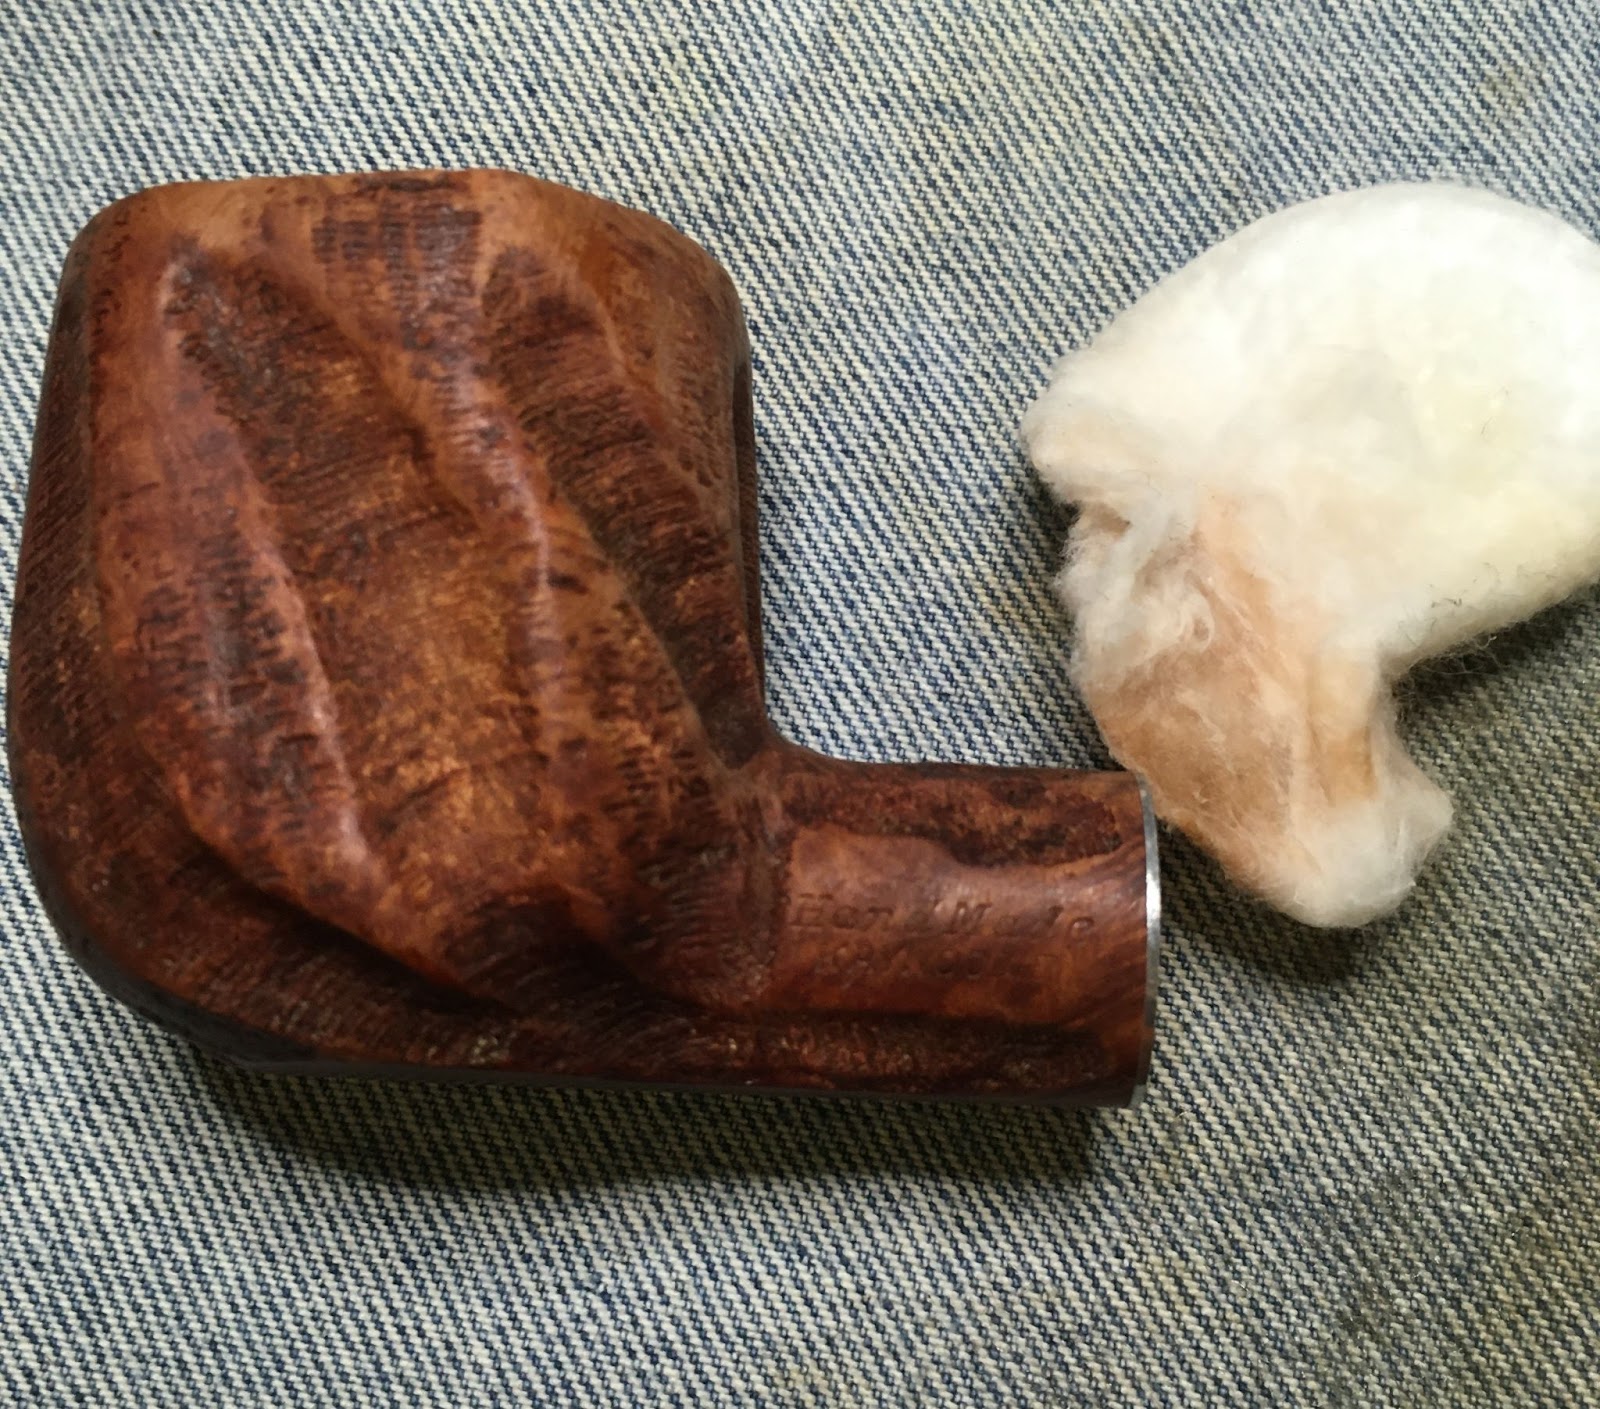
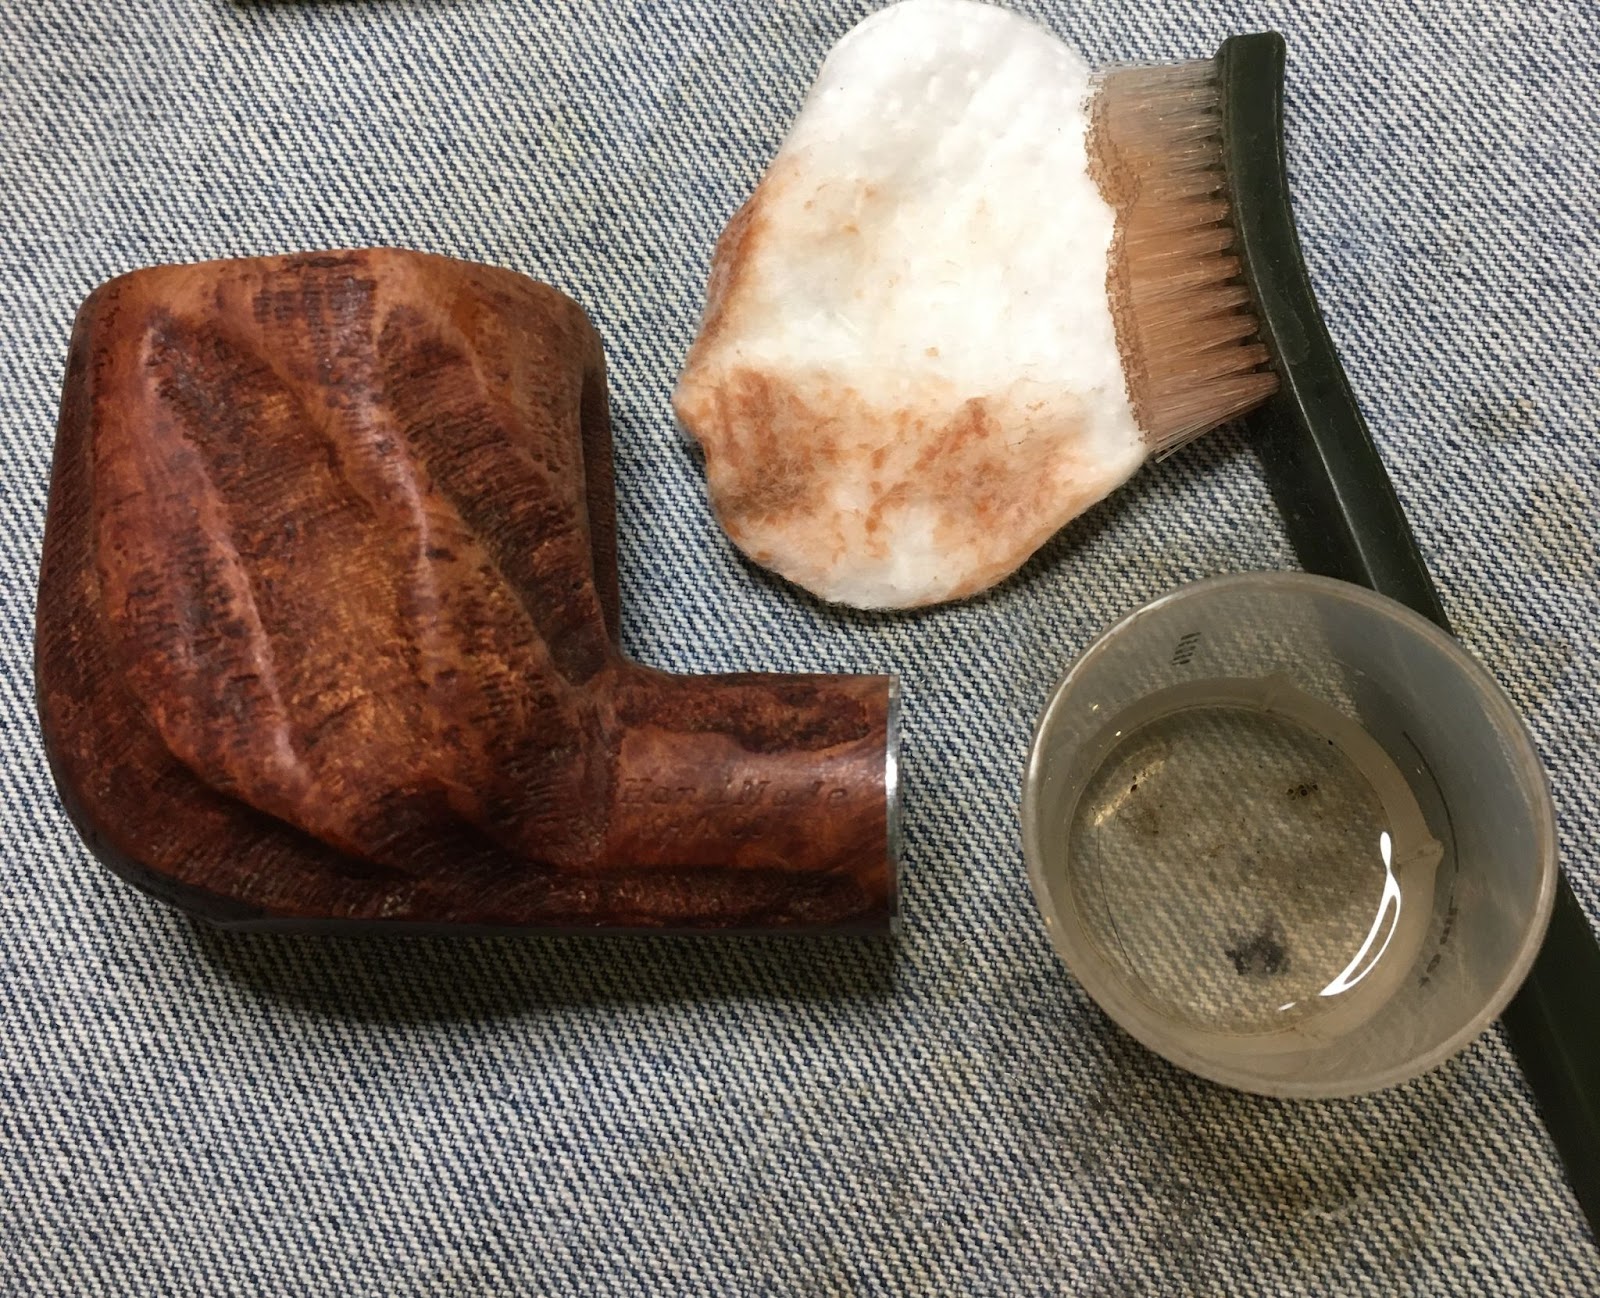
    I used the 320-400 sanding sponges on the stummel only.  The 600-1000 sanding sponges were used on both parts.  In between sponges I wiped the stummel with an alcohol moistened make-up pad to remove the dust .  I applied a drop of mineral oil with my fingertip to the stem and wiped that with a paper towel.  

    While wiping the stummel I couldn’t help focusing on the dark spot at the front of the pipe where the briar had been burnt.  It still seemed too dark for my liking.  I decided to give the stummel a contrast stain.  I thought that maybe a black dye might penetrate into the softer grained areas giving them a darker appearance while I sanded the black dye off of the harder, more resistant grain.  This would darken the pipe overall but would still show off the existing grain patterns.  

    I prepped the counter for dying.  Actually for mitigating a dye spill if one occurred.  I used an inverted plastic container as a work surface.  This was topped with a couple of paper towels.  The black Fiebing’s Leather dye, a disposable lighter, a folded pipe cleaner, a small medicine cup with 5 ml of 95% ethyl alcohol were gathered and the fishing bobber wrapped in duct tape.  The bobber was pushed into the tobacco chamber giving me a handle.  The pipe cleaner was the dye applicator.  The lighter is to flame the dye once applied to the pipe.

    I put on nitrile gloves and applied a single coating of the Fiebing’s Leather dye to the stummel.  I flamed this with the lighter.  This burns off the alcohol base of the dye and sets it into the briar. 

    After the stummel had been flamed I wiped the surface with a dry paper towel to remove any remaining dye.  I was not concerned about the dye drying for a certain time as I was going to remove the majority of the dyed wood in short order.

    I returned the stummel to the work bench and began sanding away the newly dyed briar from the surface of the stummel.  I was very careful to avoid sanding the stamped areas.I wiped the sanding sponge off frequently of the denim work surface to keep the sponge clean.  I used a barely wetted with alcohol make-up pad to wipe away the dyed briar dust and assess where I needed to sand in order to have a uniform color.  Below is how the stummel looked after the black dye was sanded.

    I was fairly pleased with how the black had accentuated the grain while masking the burned area.

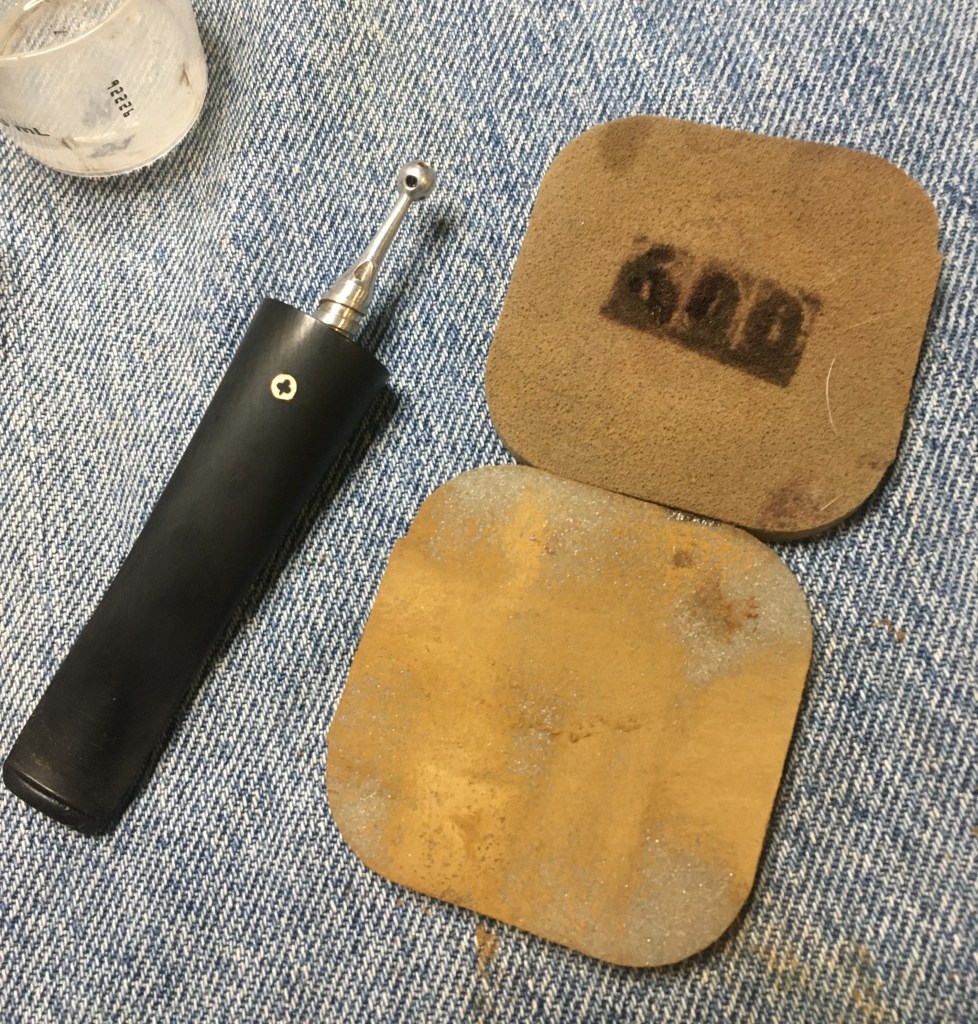
    The sanding continued as before with the 1500-3500 sanding sponges.  I did not tape the stamps but I was careful to avoid them.  I had to get close to avoid having a “CENSORED” box appearance around the stamps.  As before, I wiped the stummel with a make-up pad between sponges.

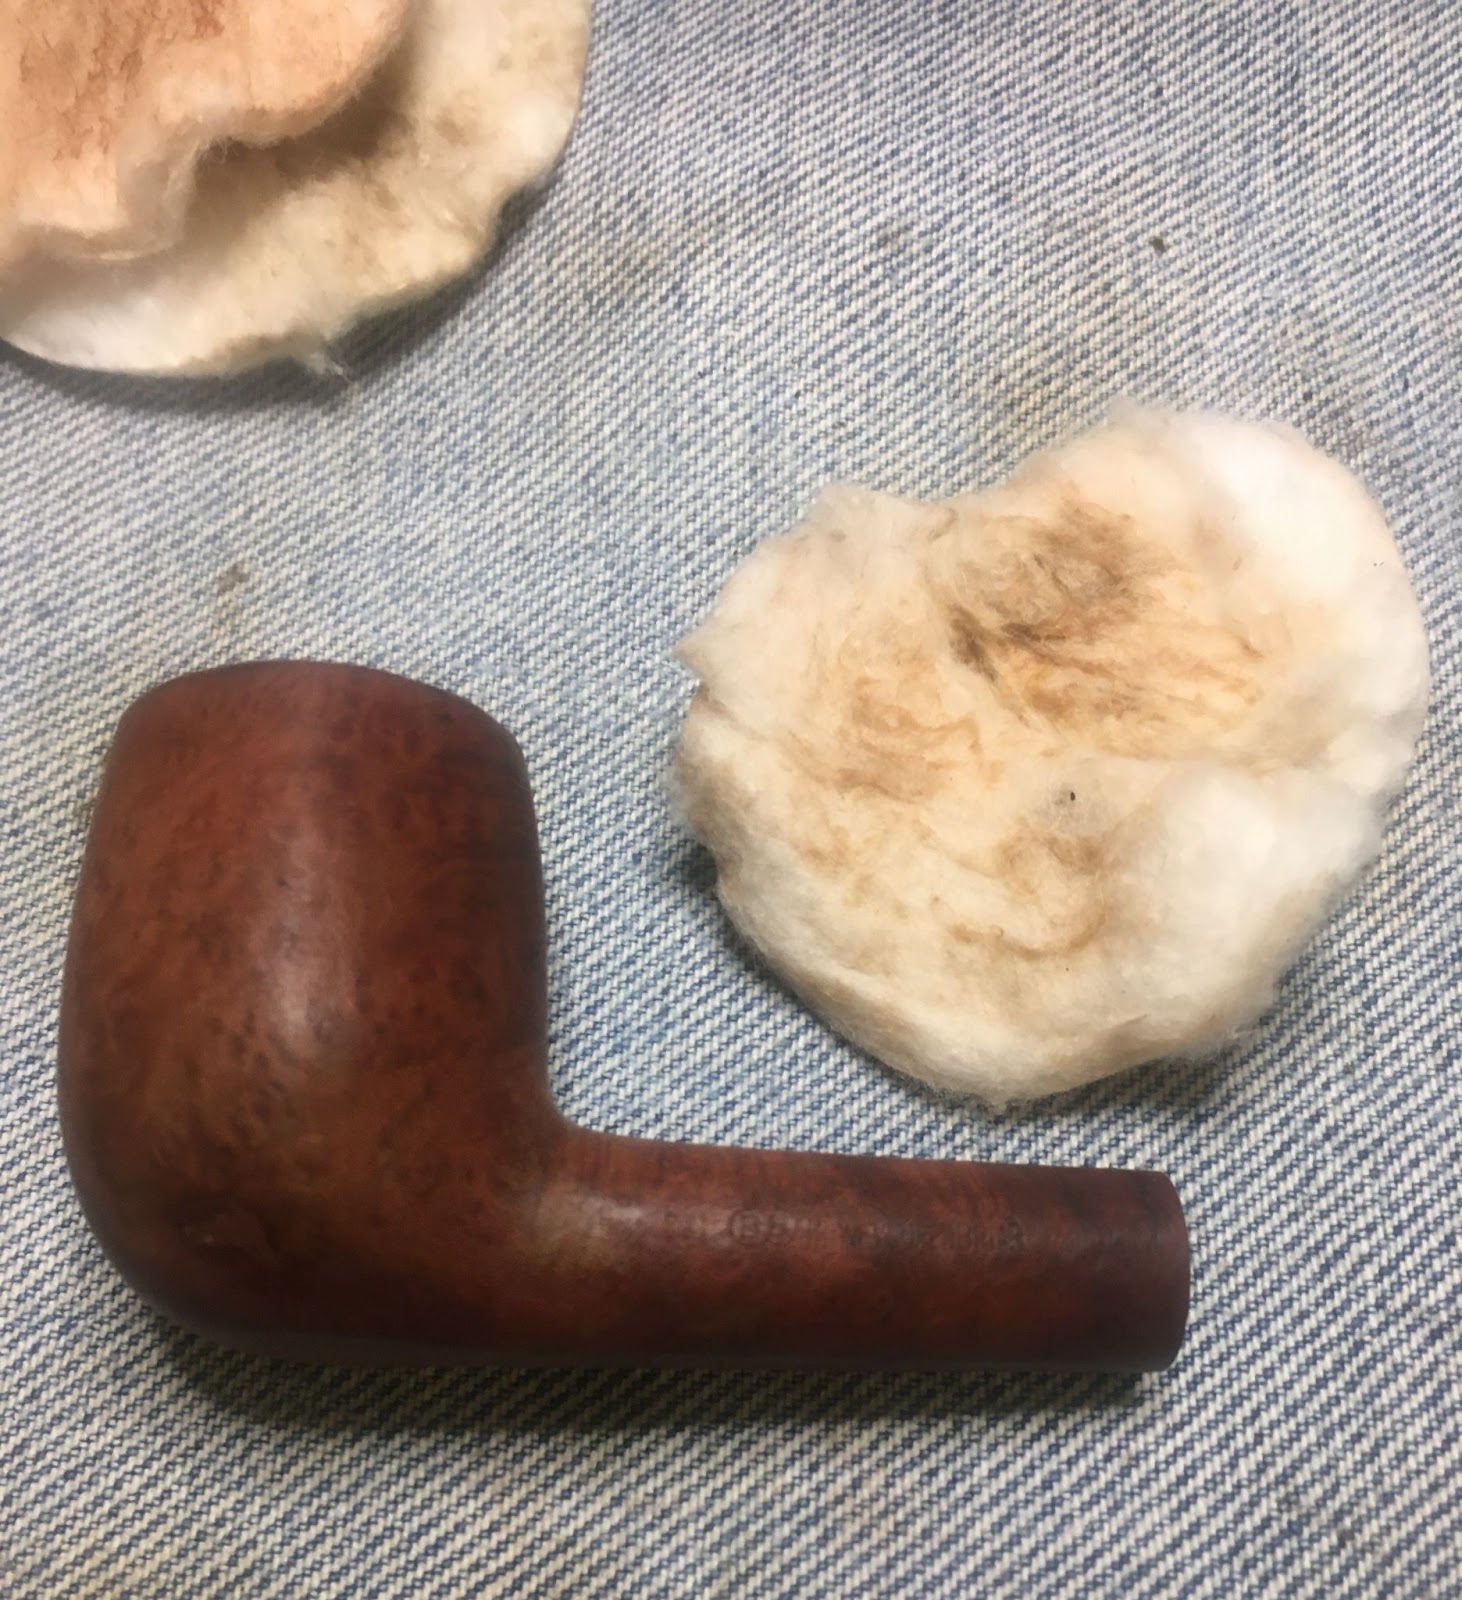
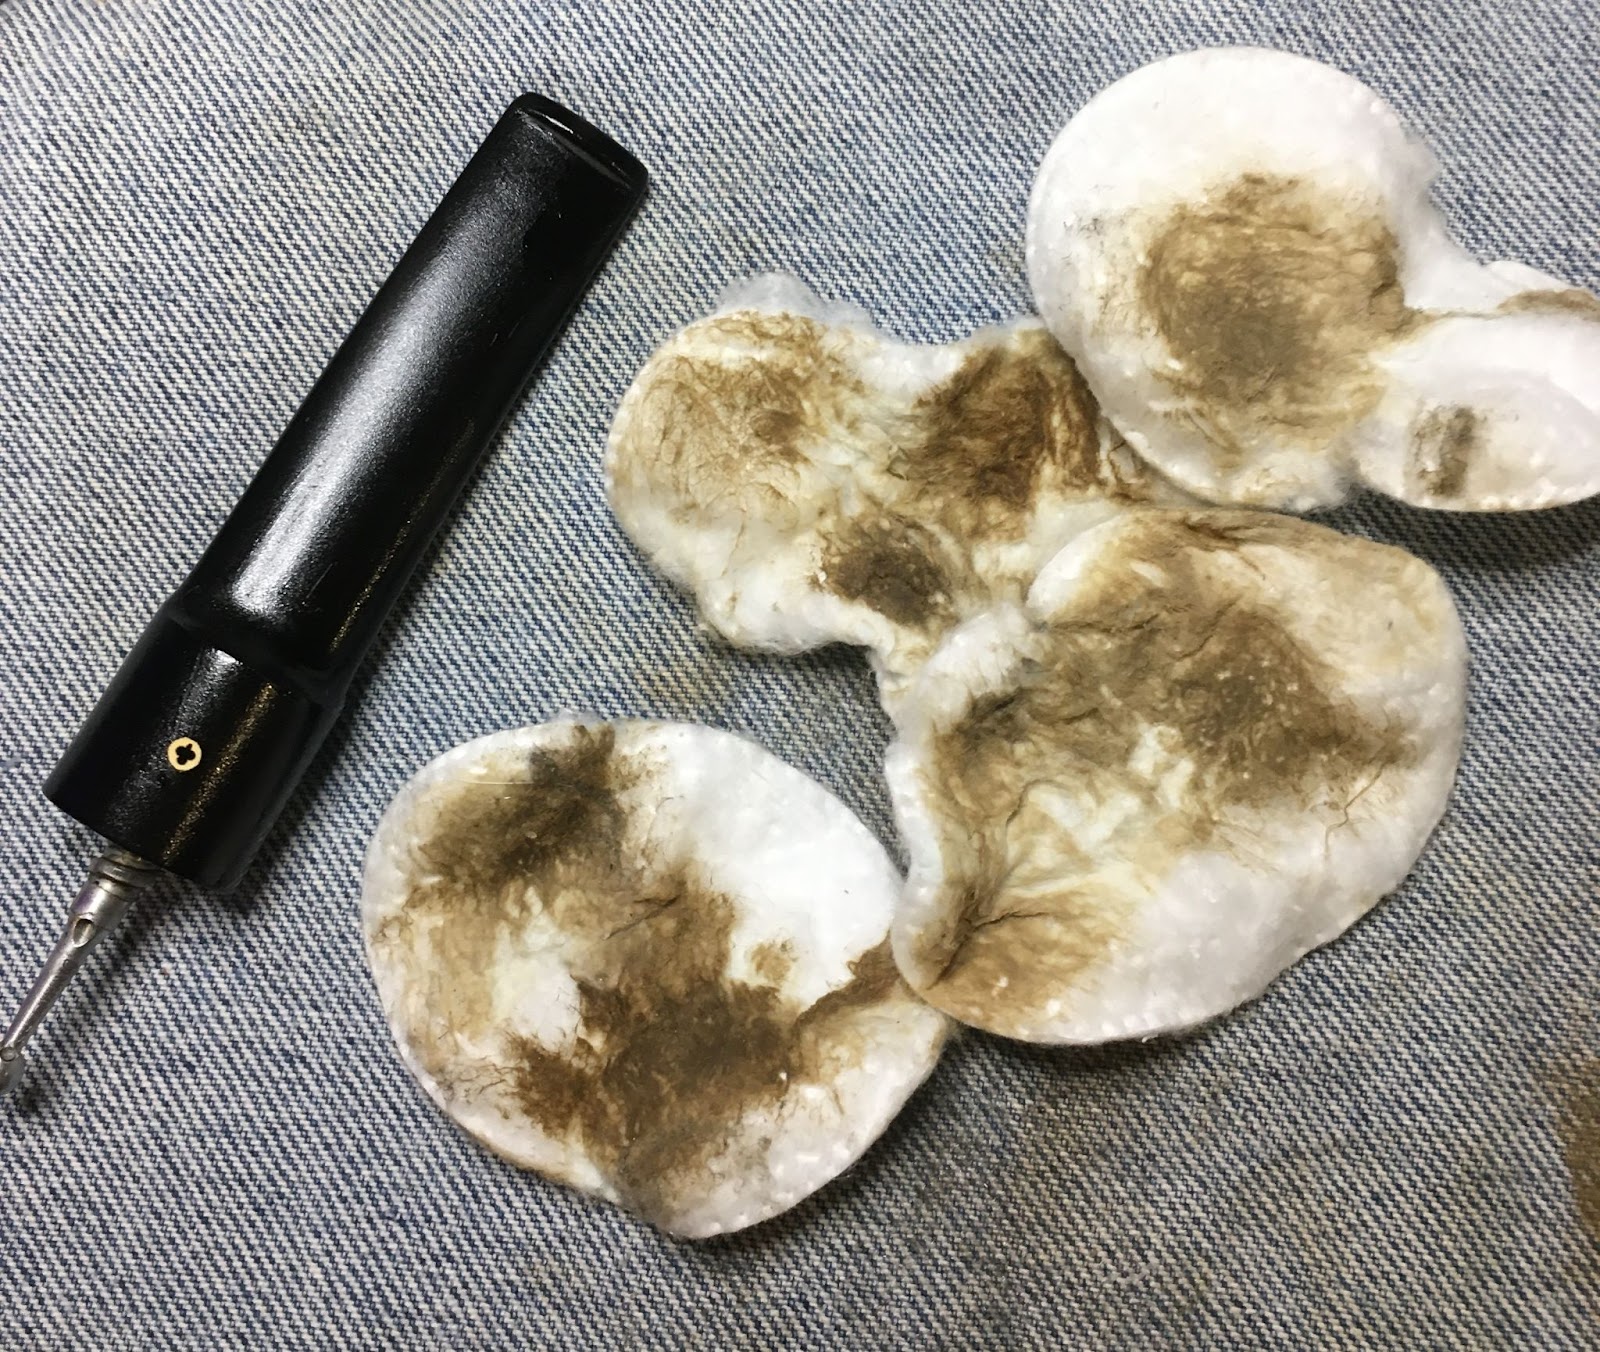
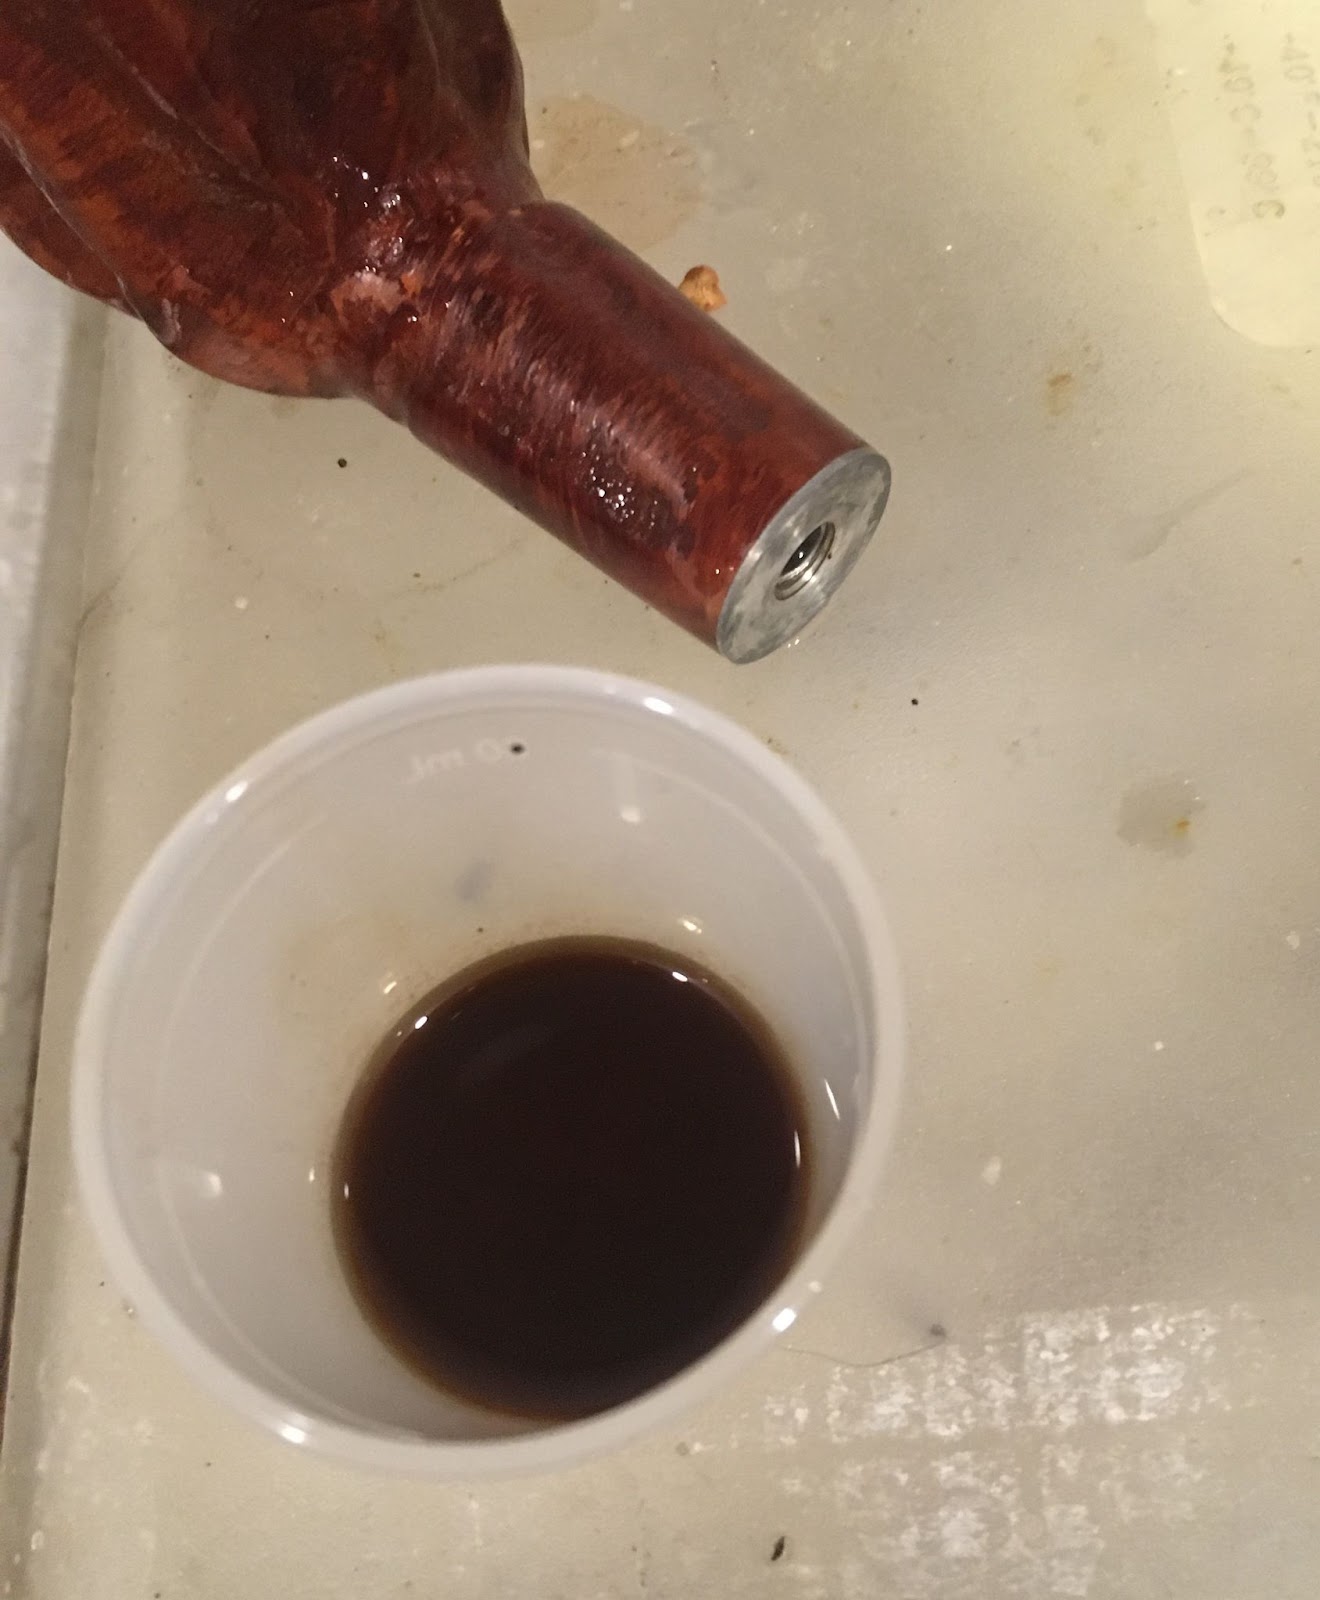
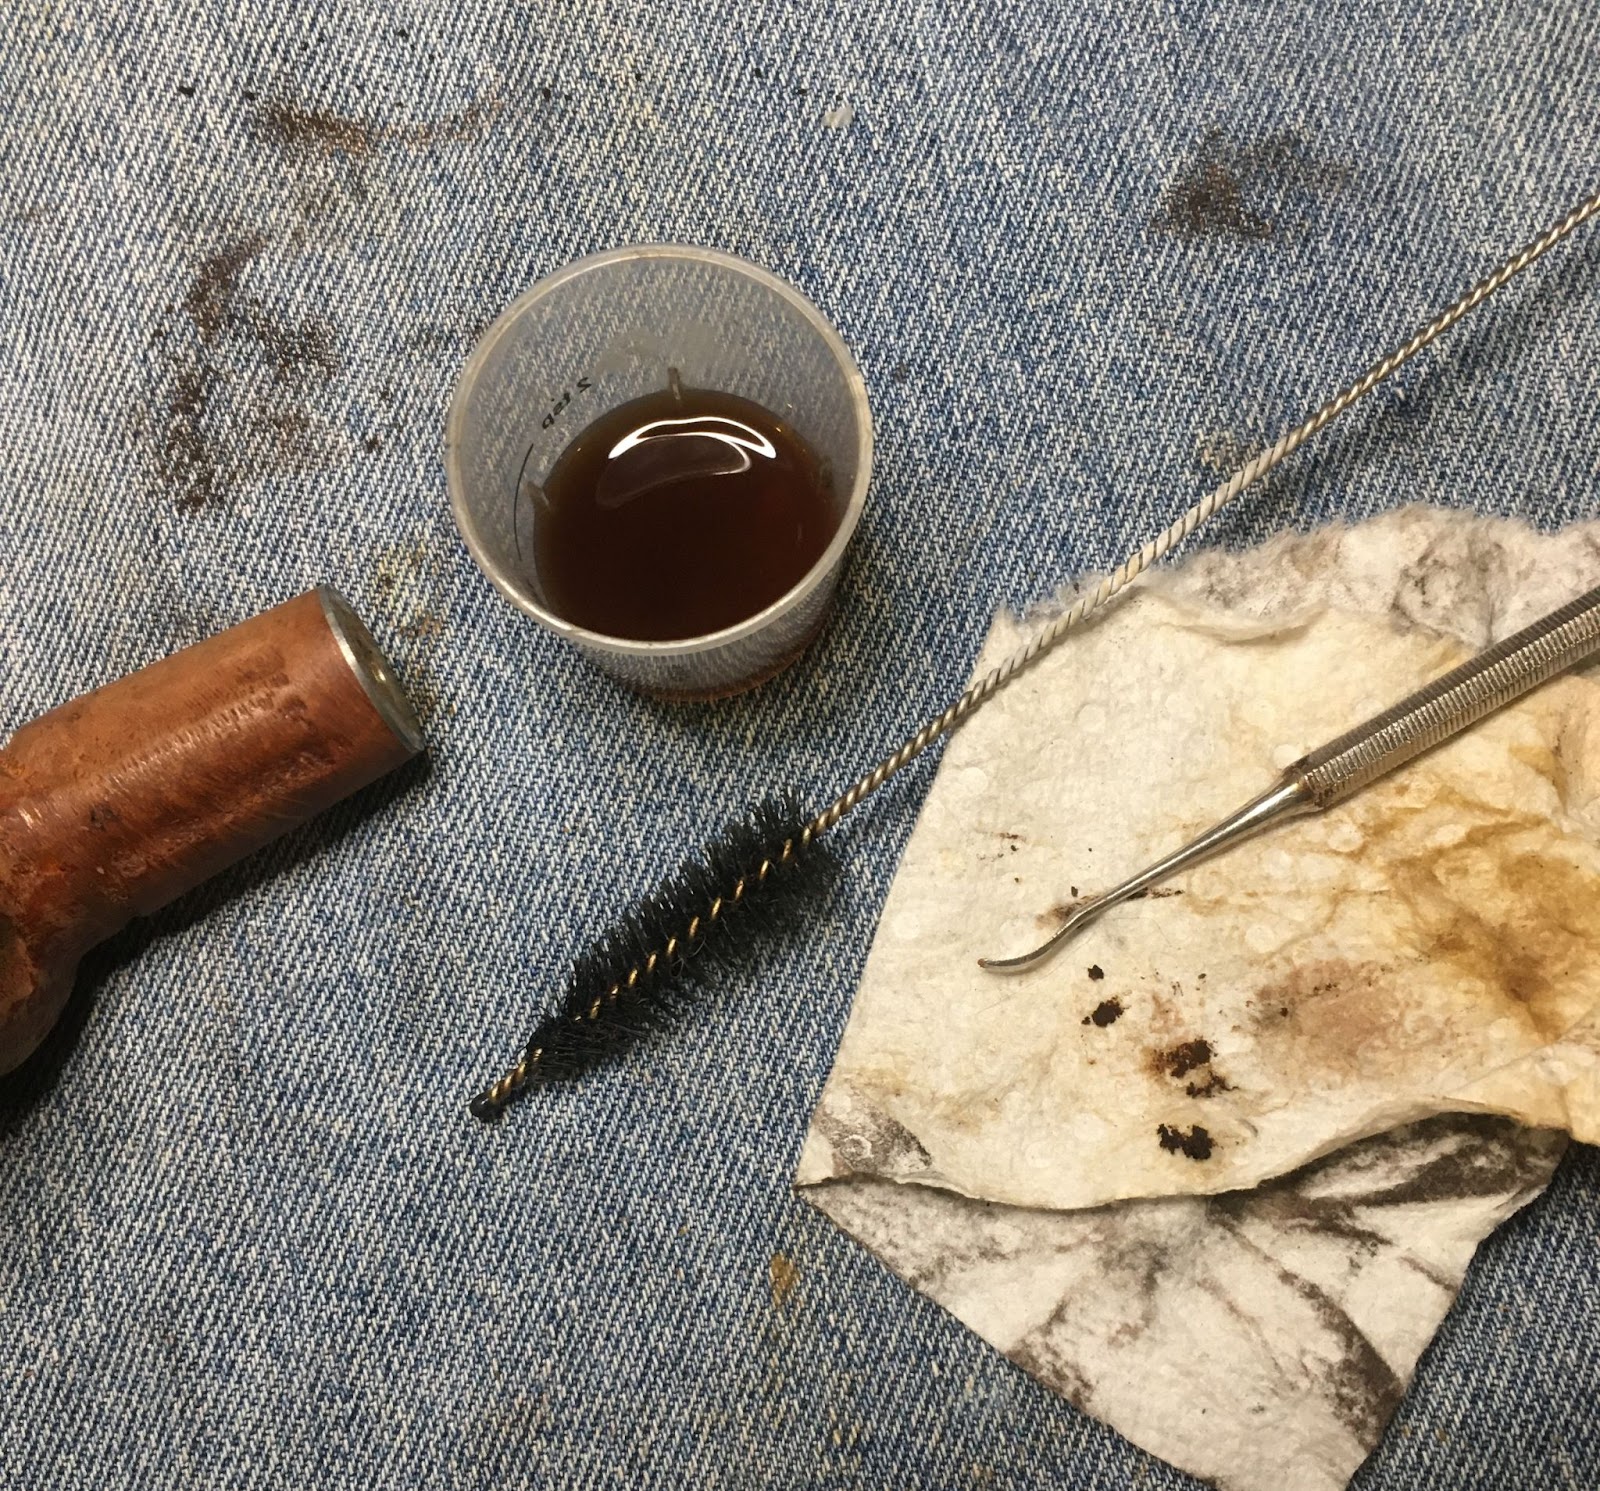
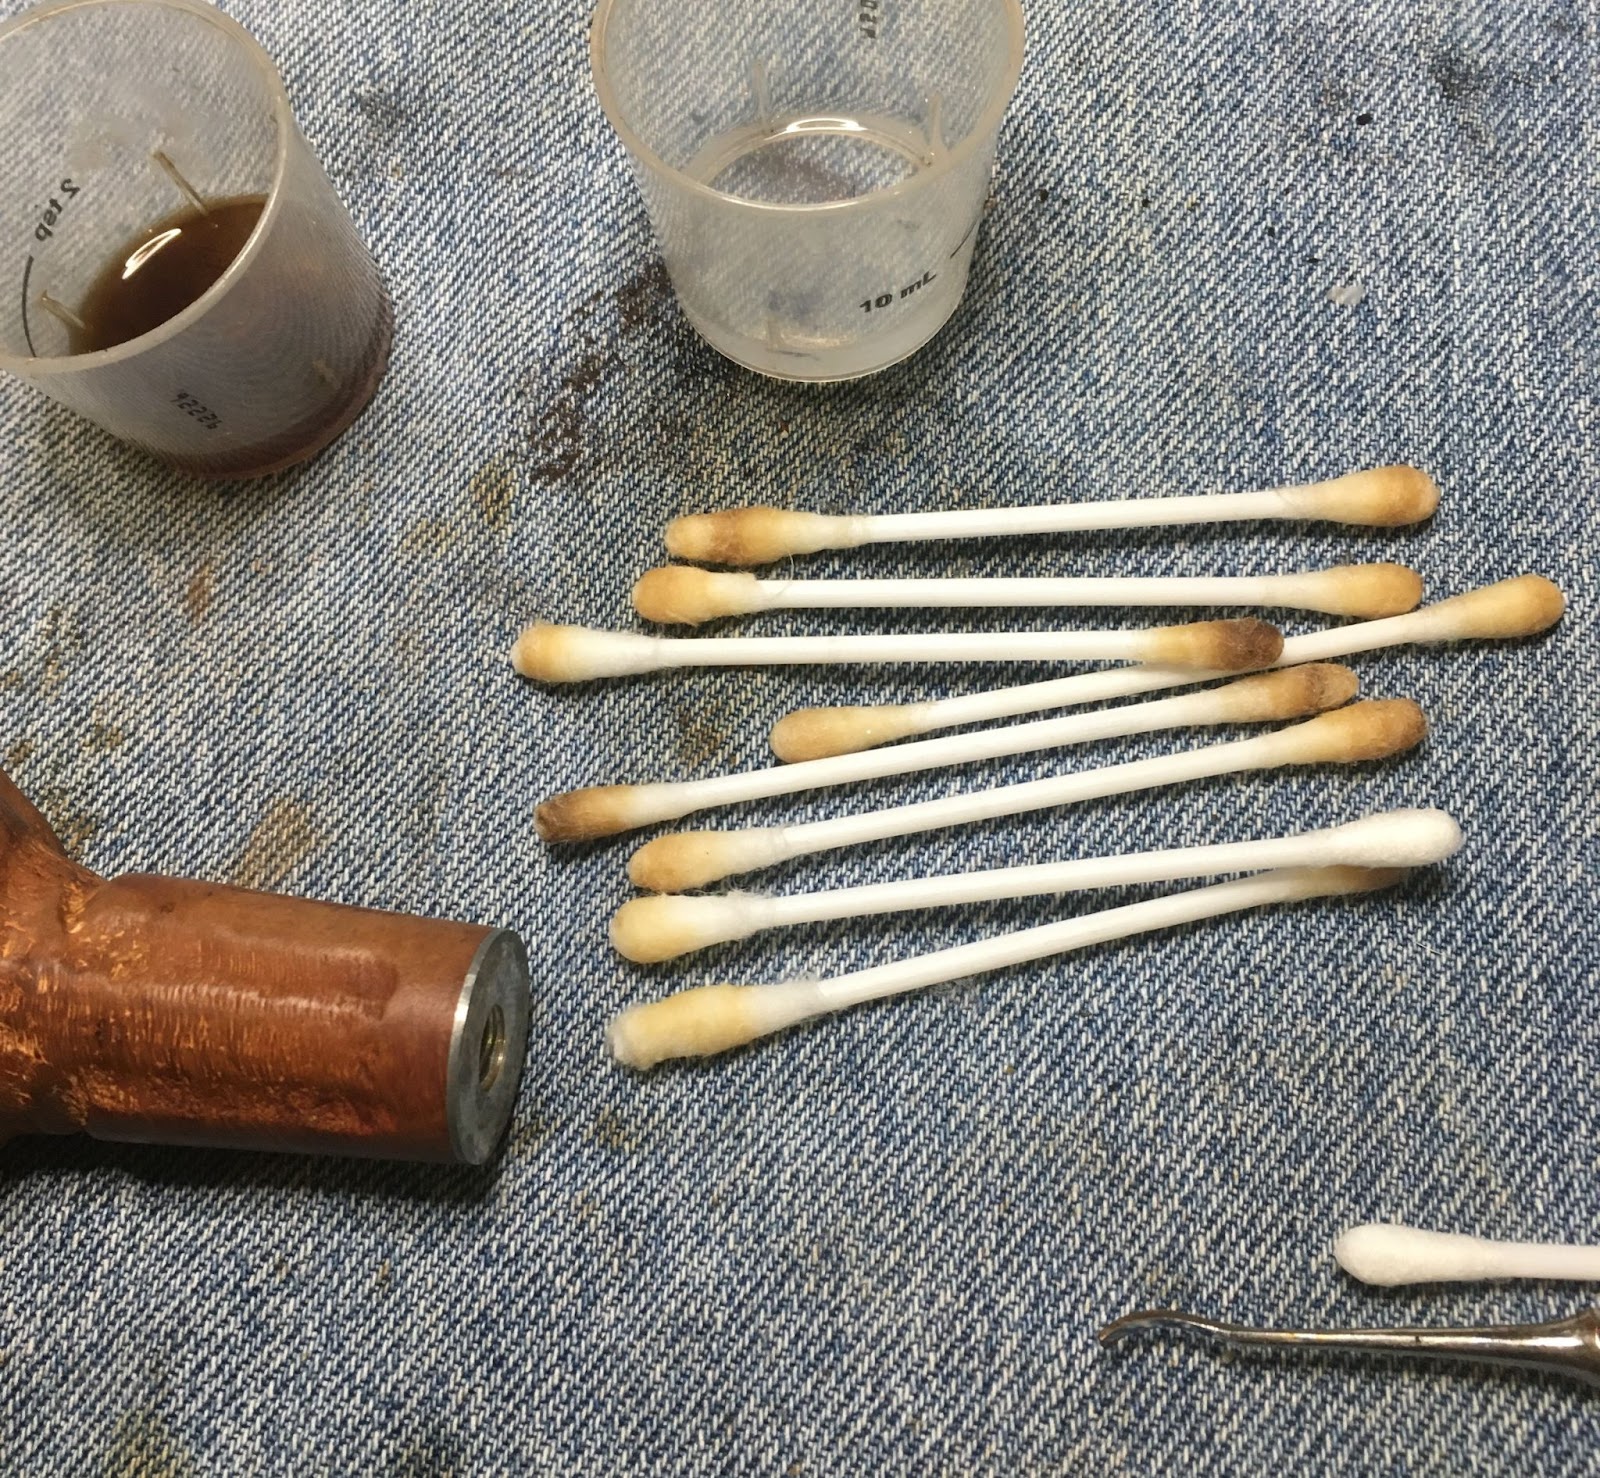
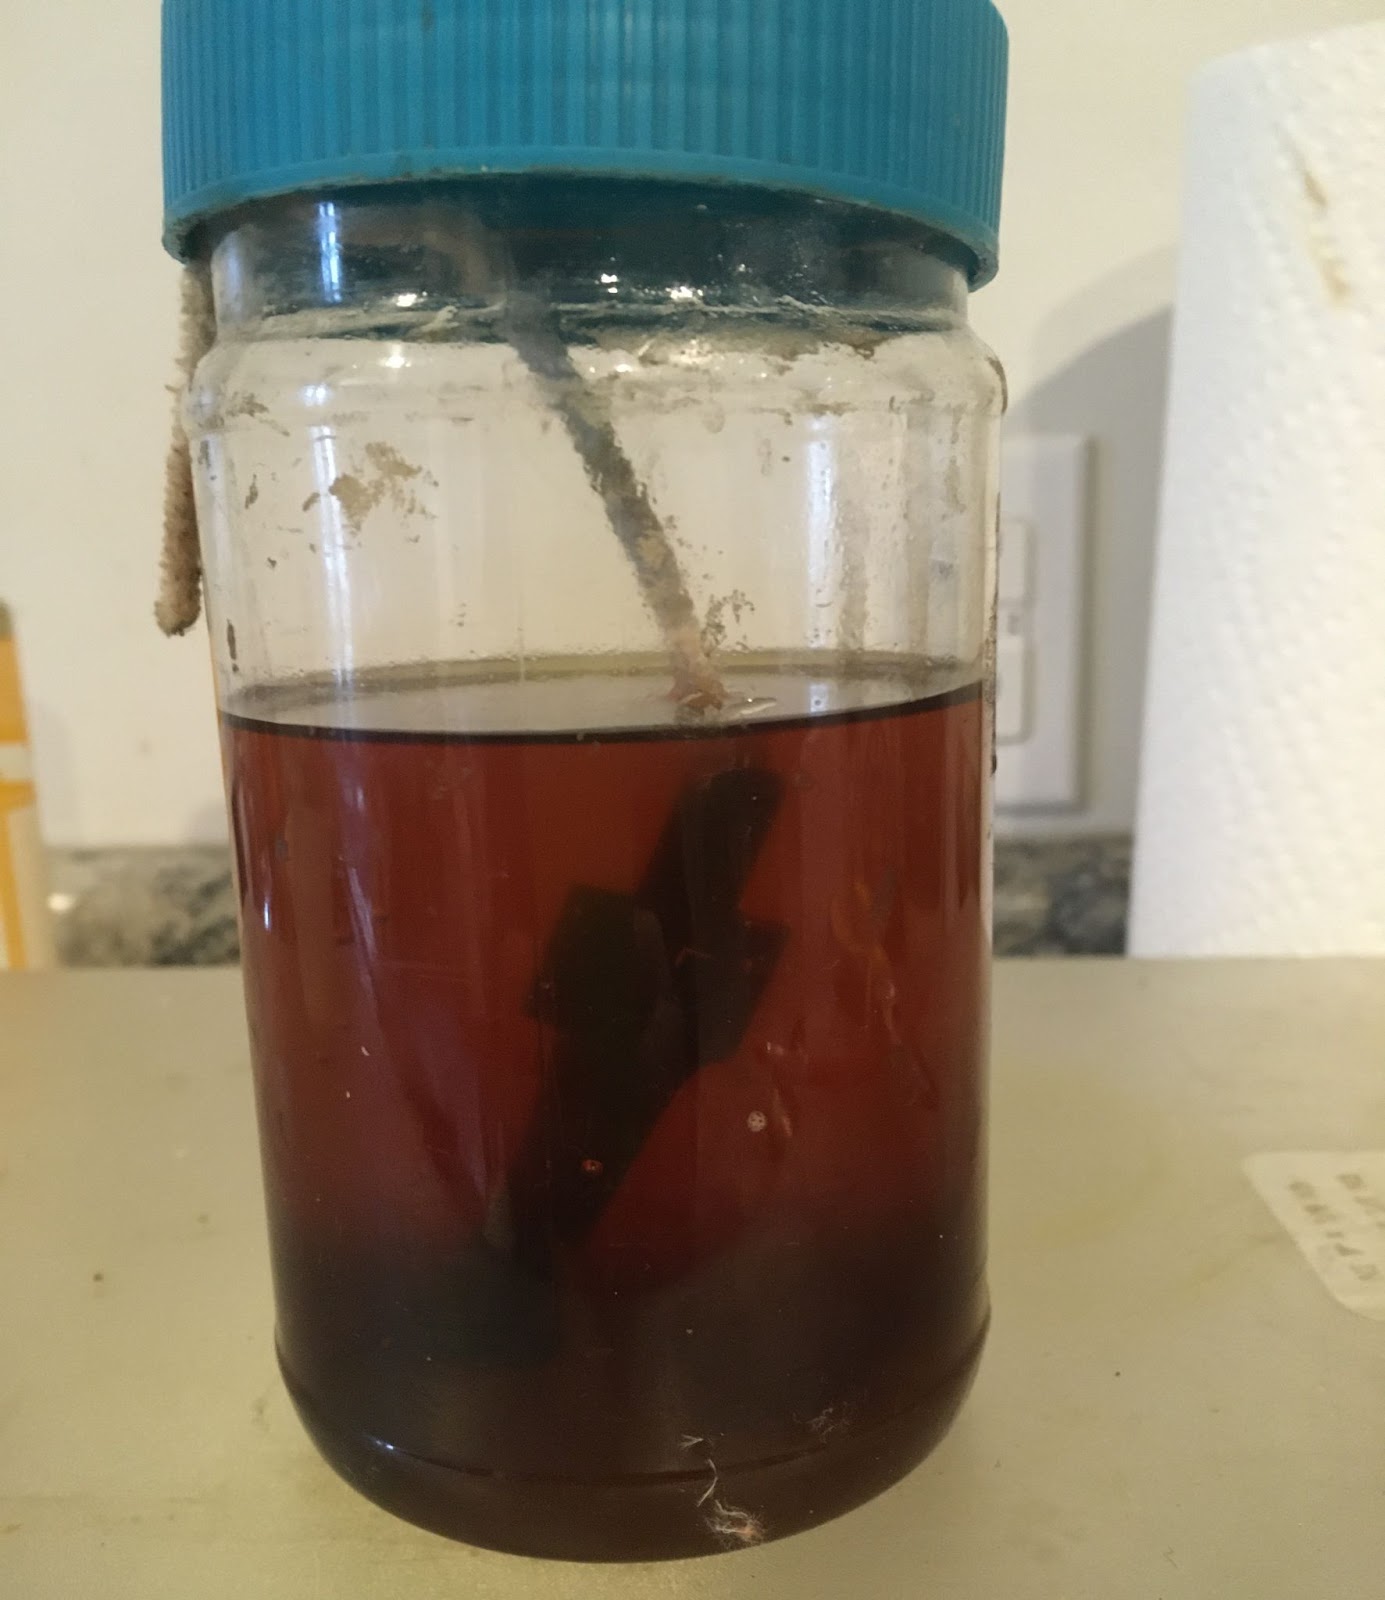
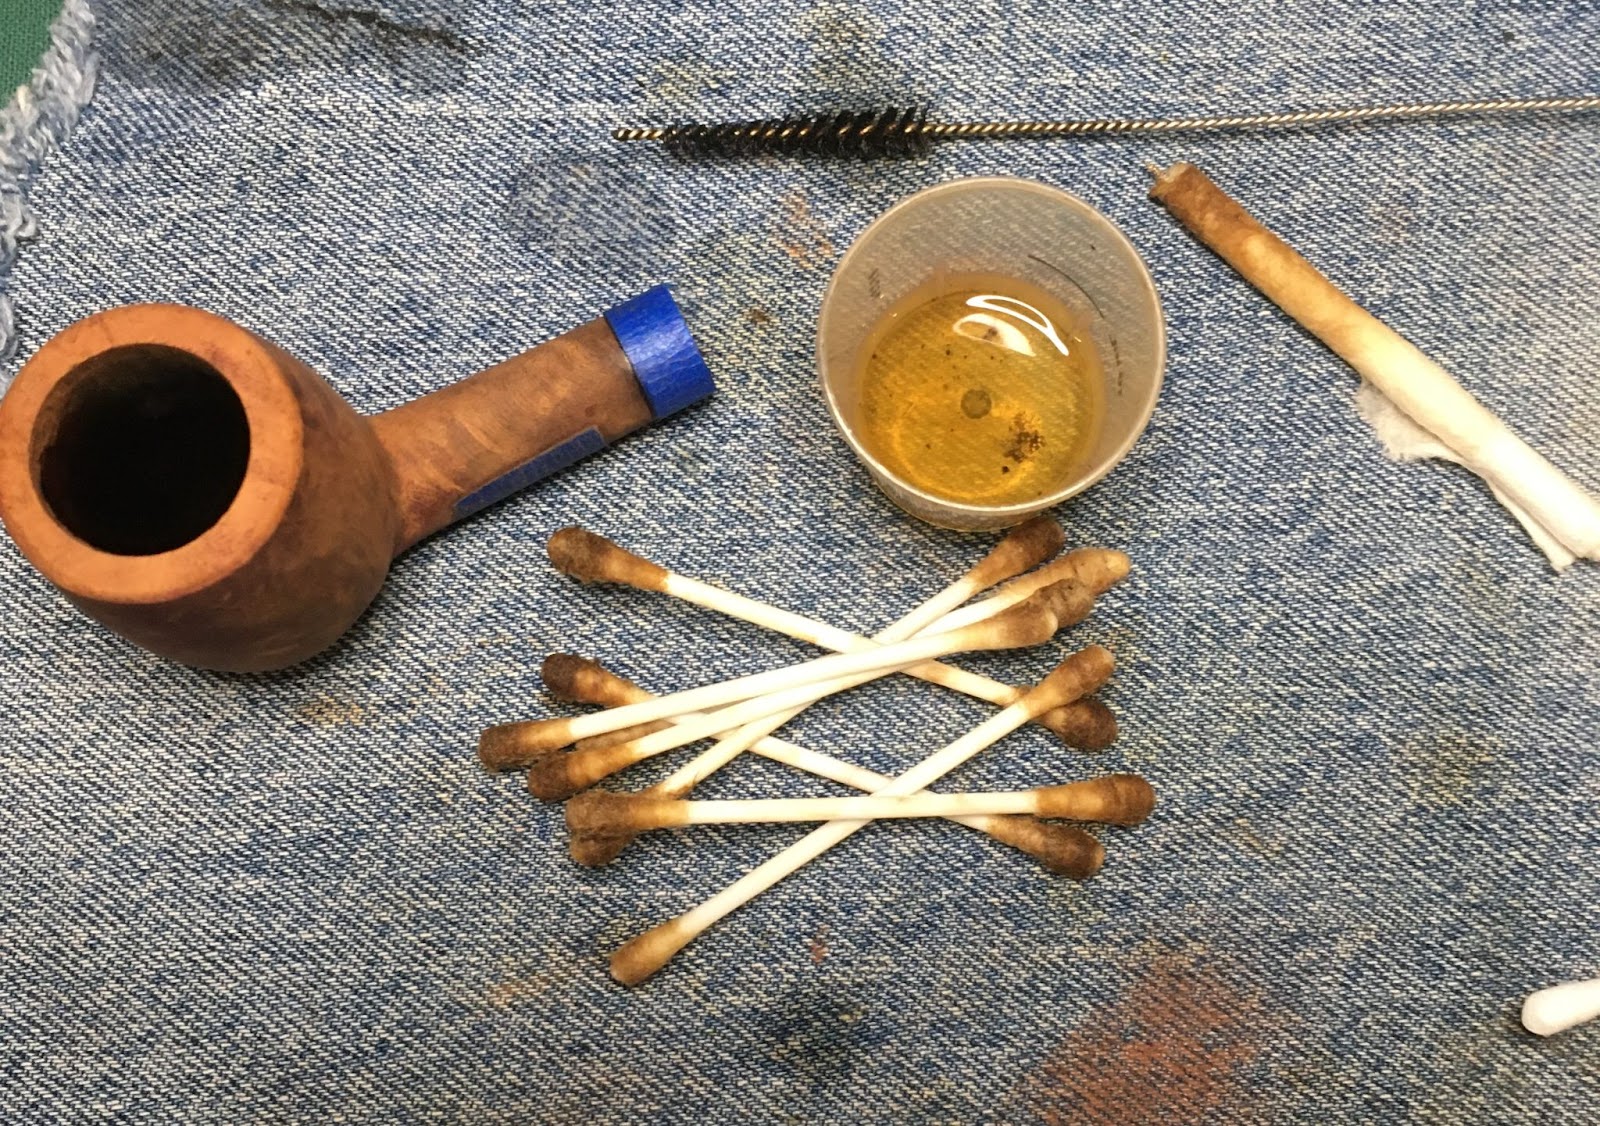
    It was at this point that I realized that I had completely forgotten to clean the shank airway.  If you are a regular reader, you will probably be saying something like:  “Forgot, nothing.  You just didn’t want to do it.”  Yeah, it’s not my favorite job.  I did clean the shank, thank you very much.  I started by pouring 3 ml of 95% ethyl alcohol into the bowl and letting it flow into the shank.  I then used a nylon shank brush to scrub the airway with the alcohol.  After a vigorous scrub, I poured the alcohol into a medicine cup to assess the progress.  This process is repeated ad nauseam.  After a few scrubs I would go back to the workbench and see if I could scrape some yuck out of the airway, scrub with a cotton swab and repeat the 3 ml alcohol scrub routine.

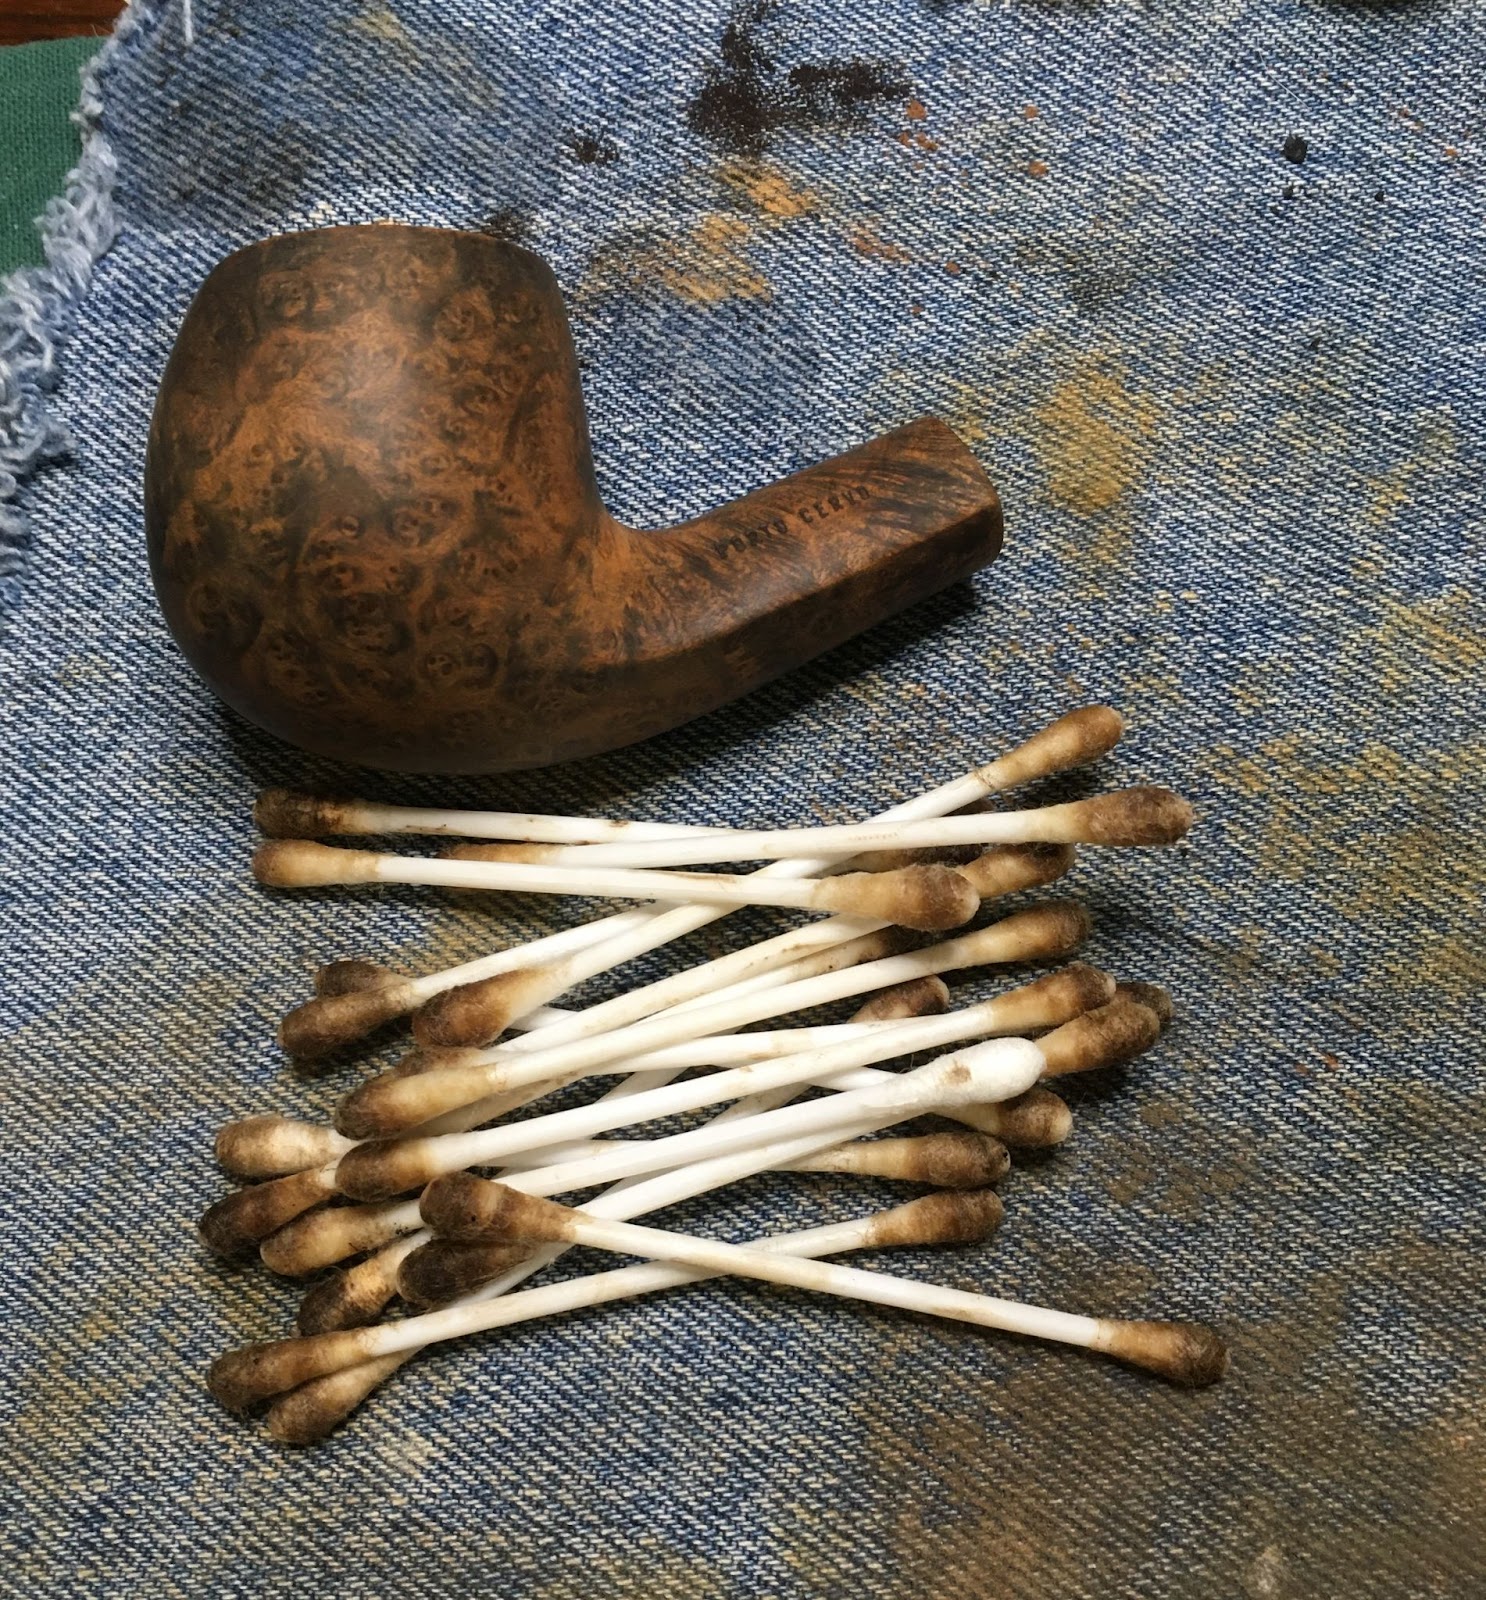
    After what seemed like 4 hours of repeating the process the cotton swabs emerged clean.  I did notice a cherry aromatic smell throughout this process.  I had never had a pipe so heavily infused with cherry aromatic tobacco before.  It wasn’t a bad smelling blend, just very cherry.  

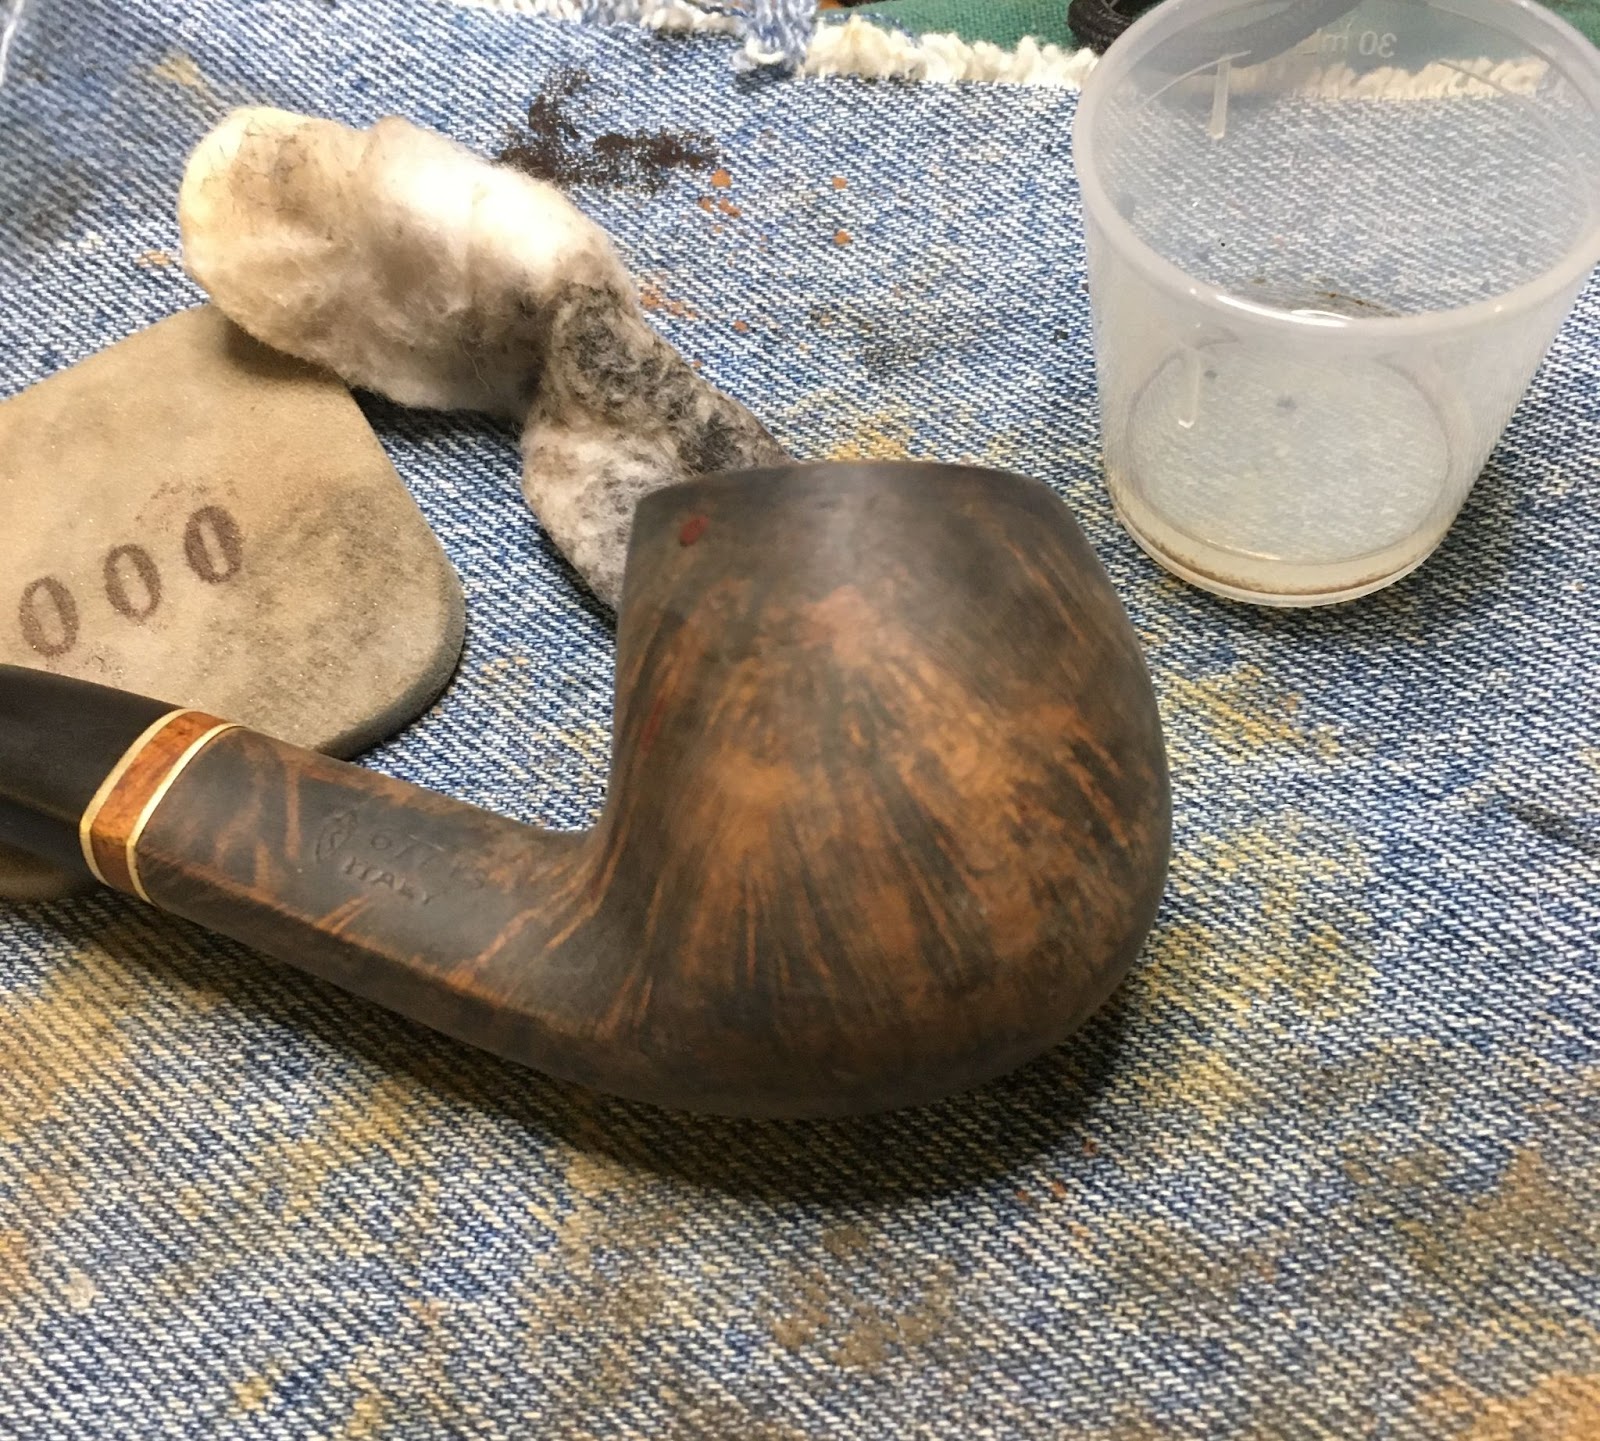
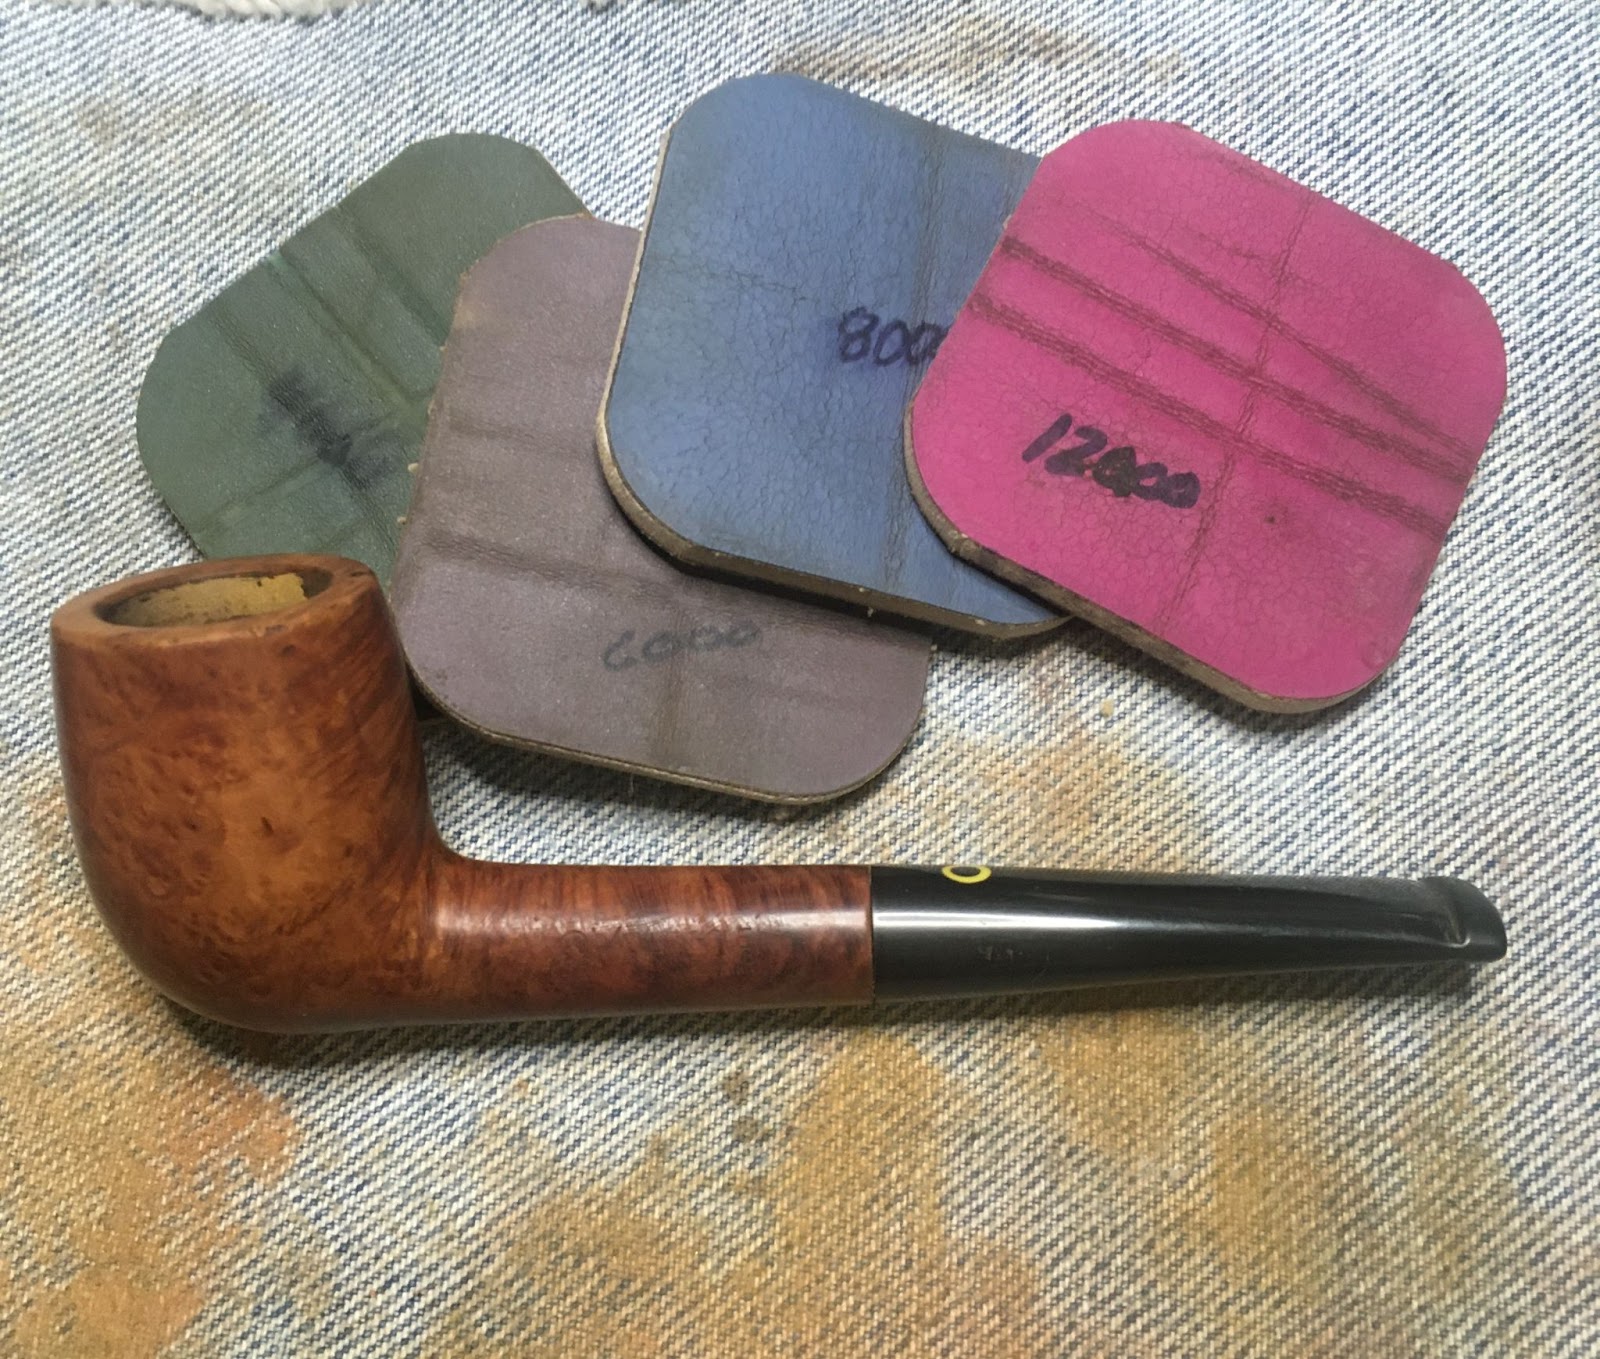
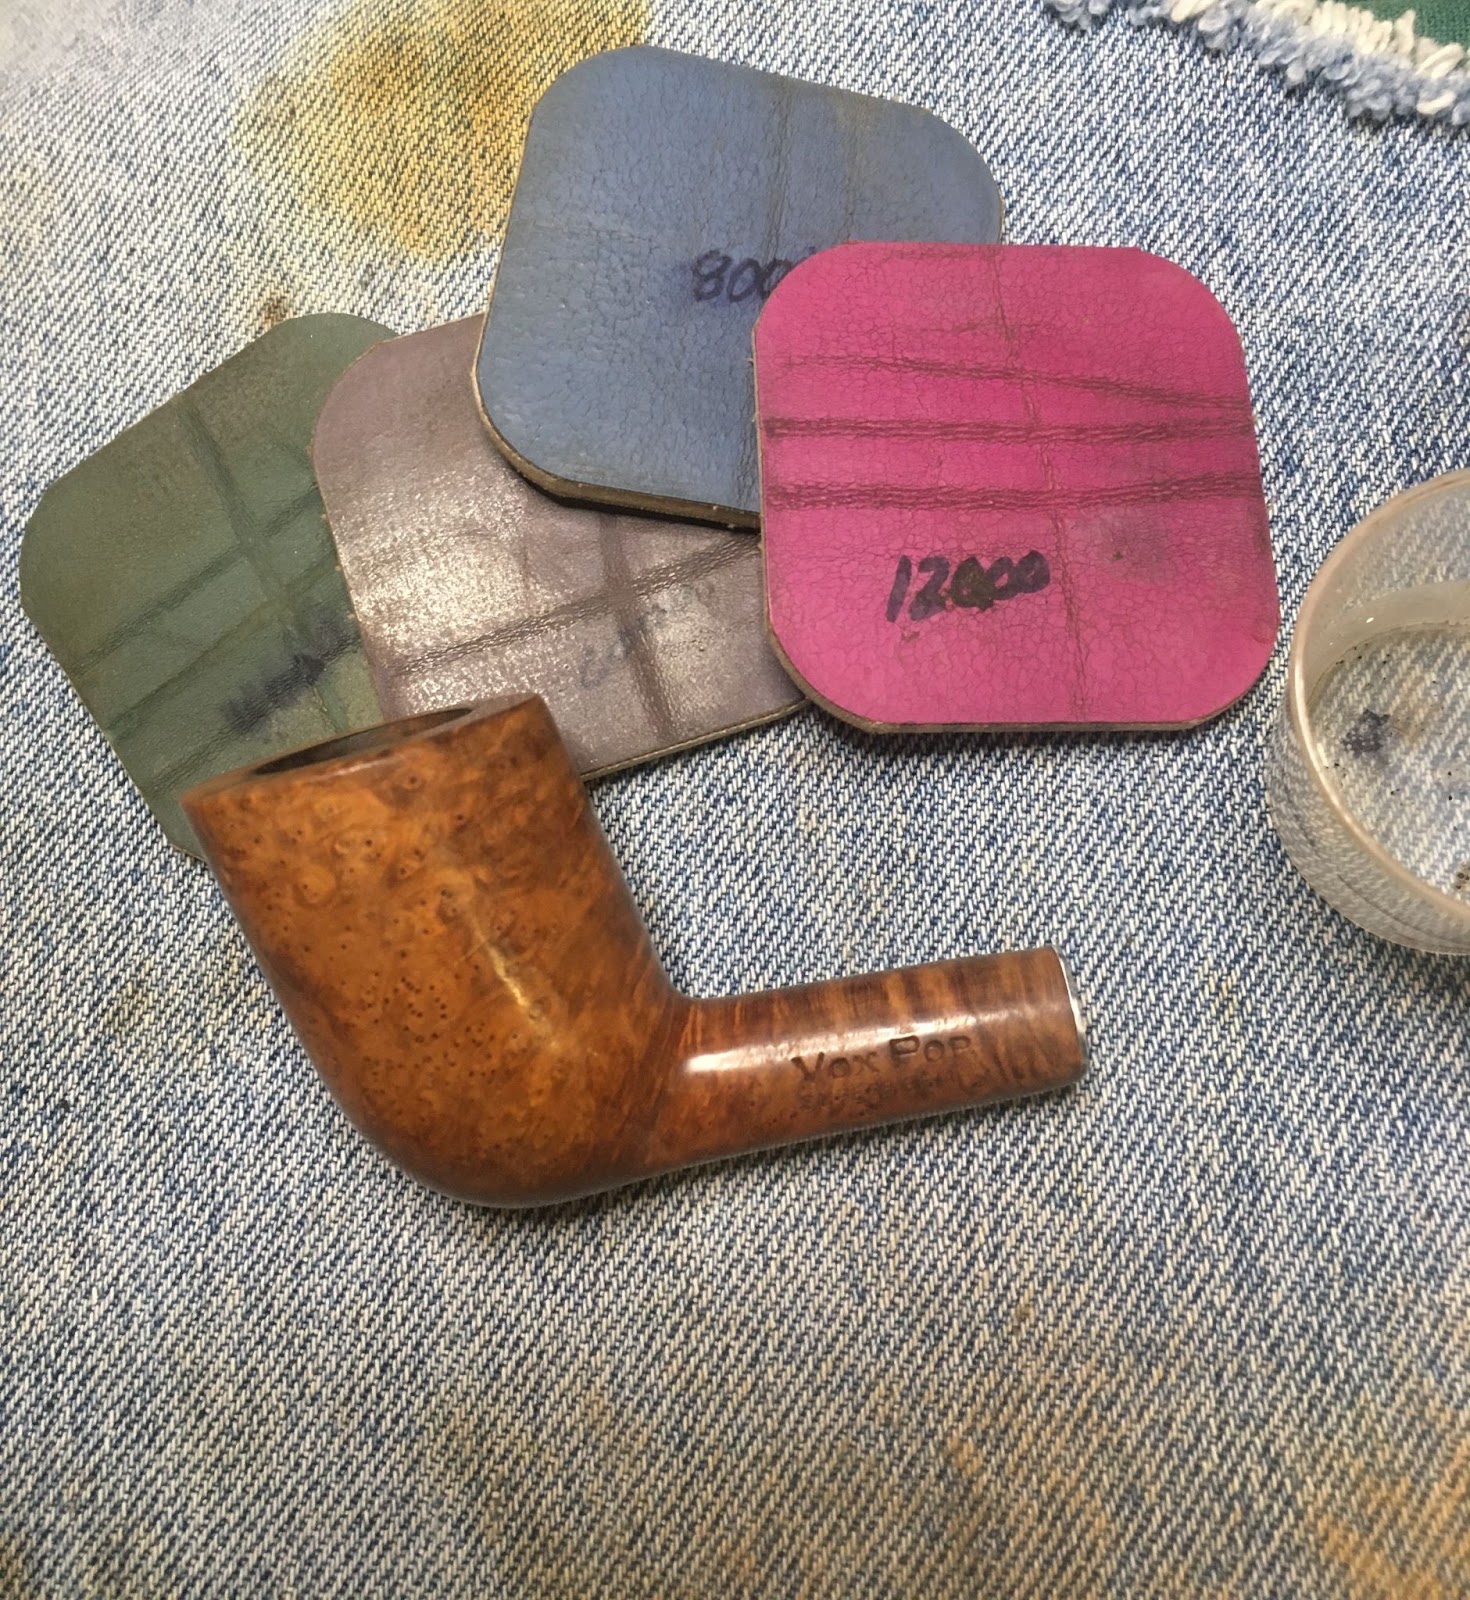
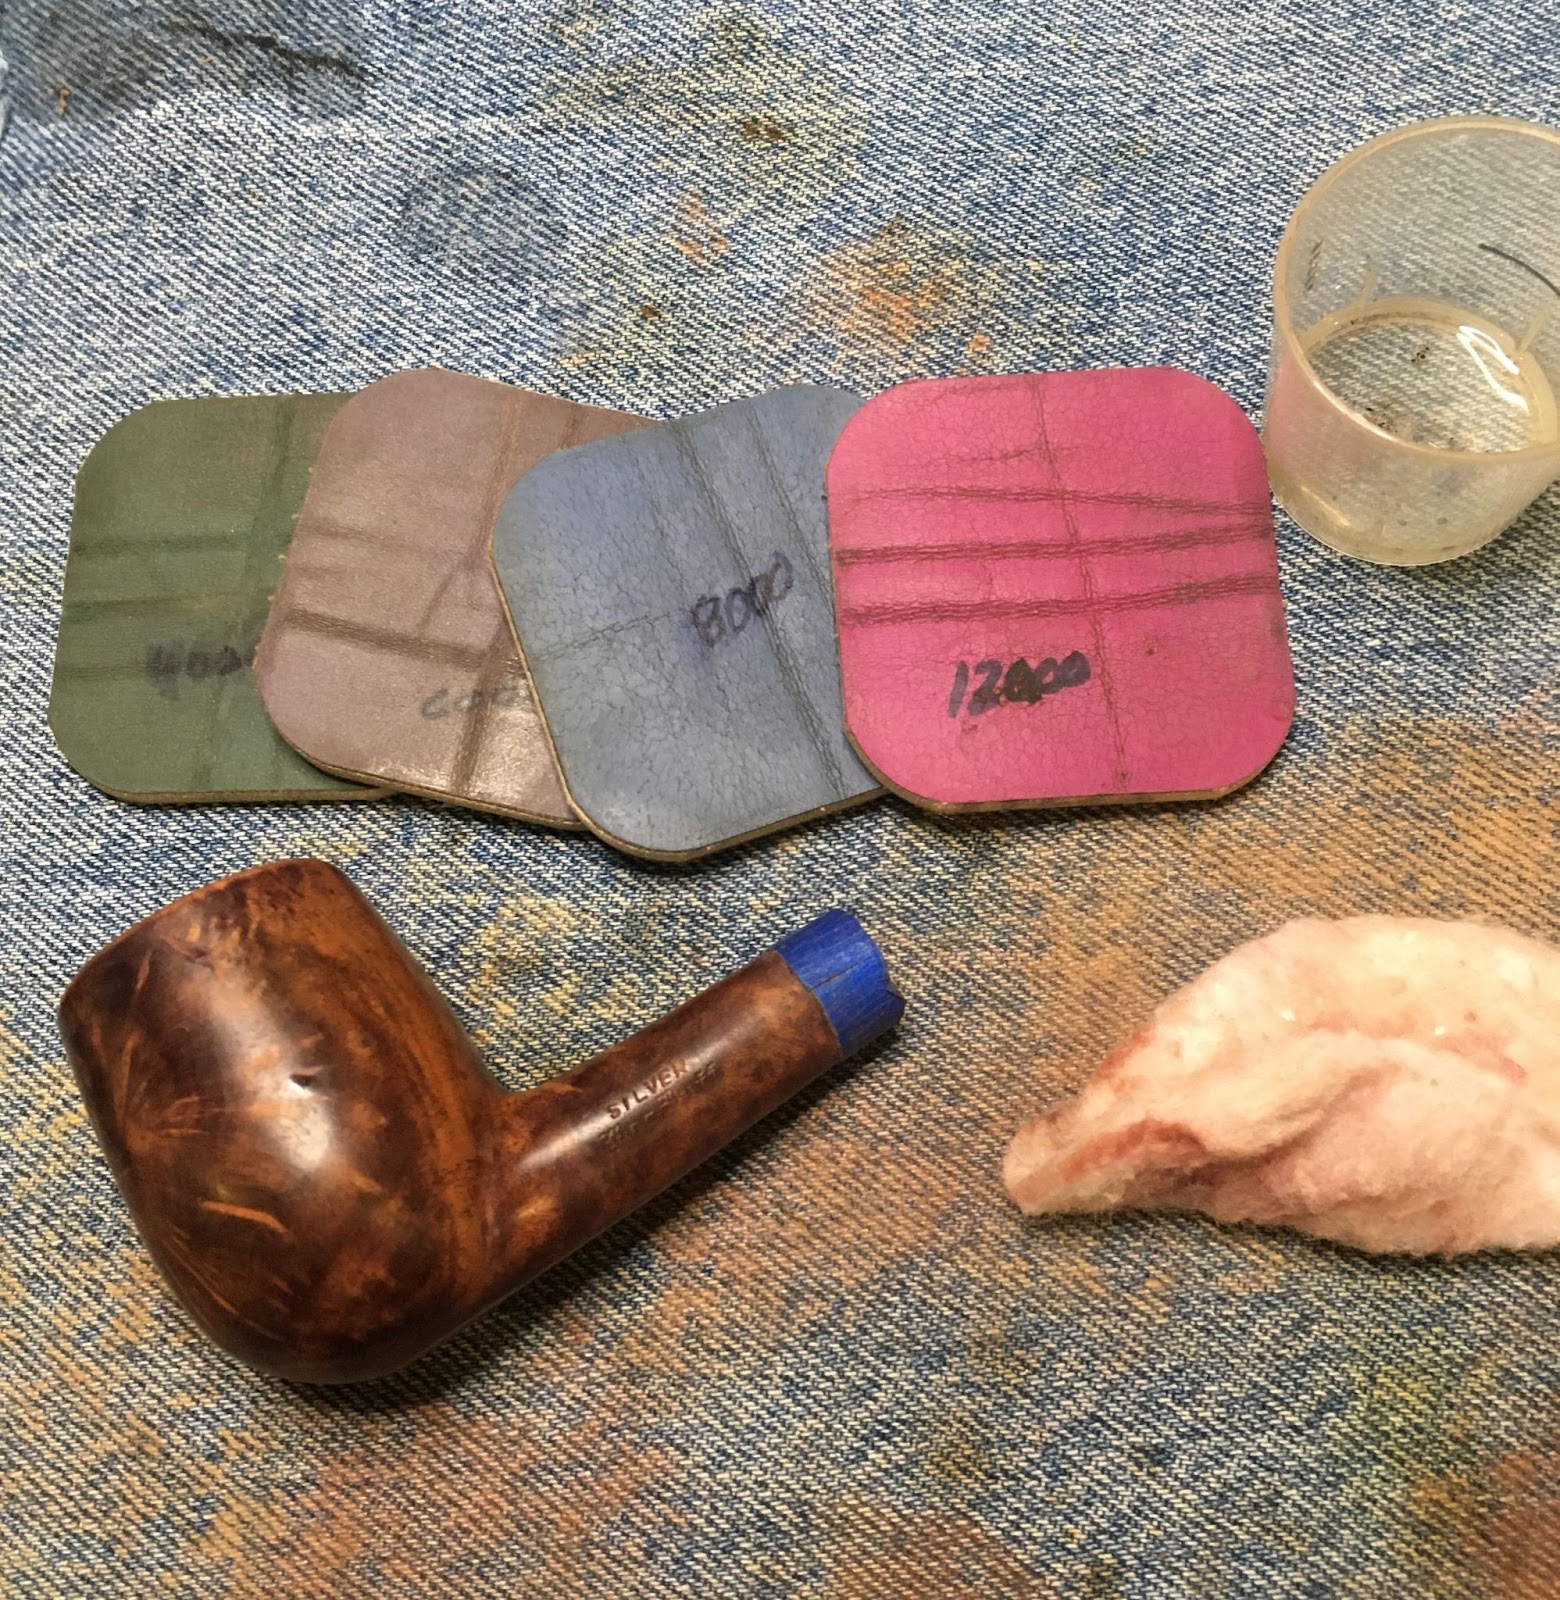
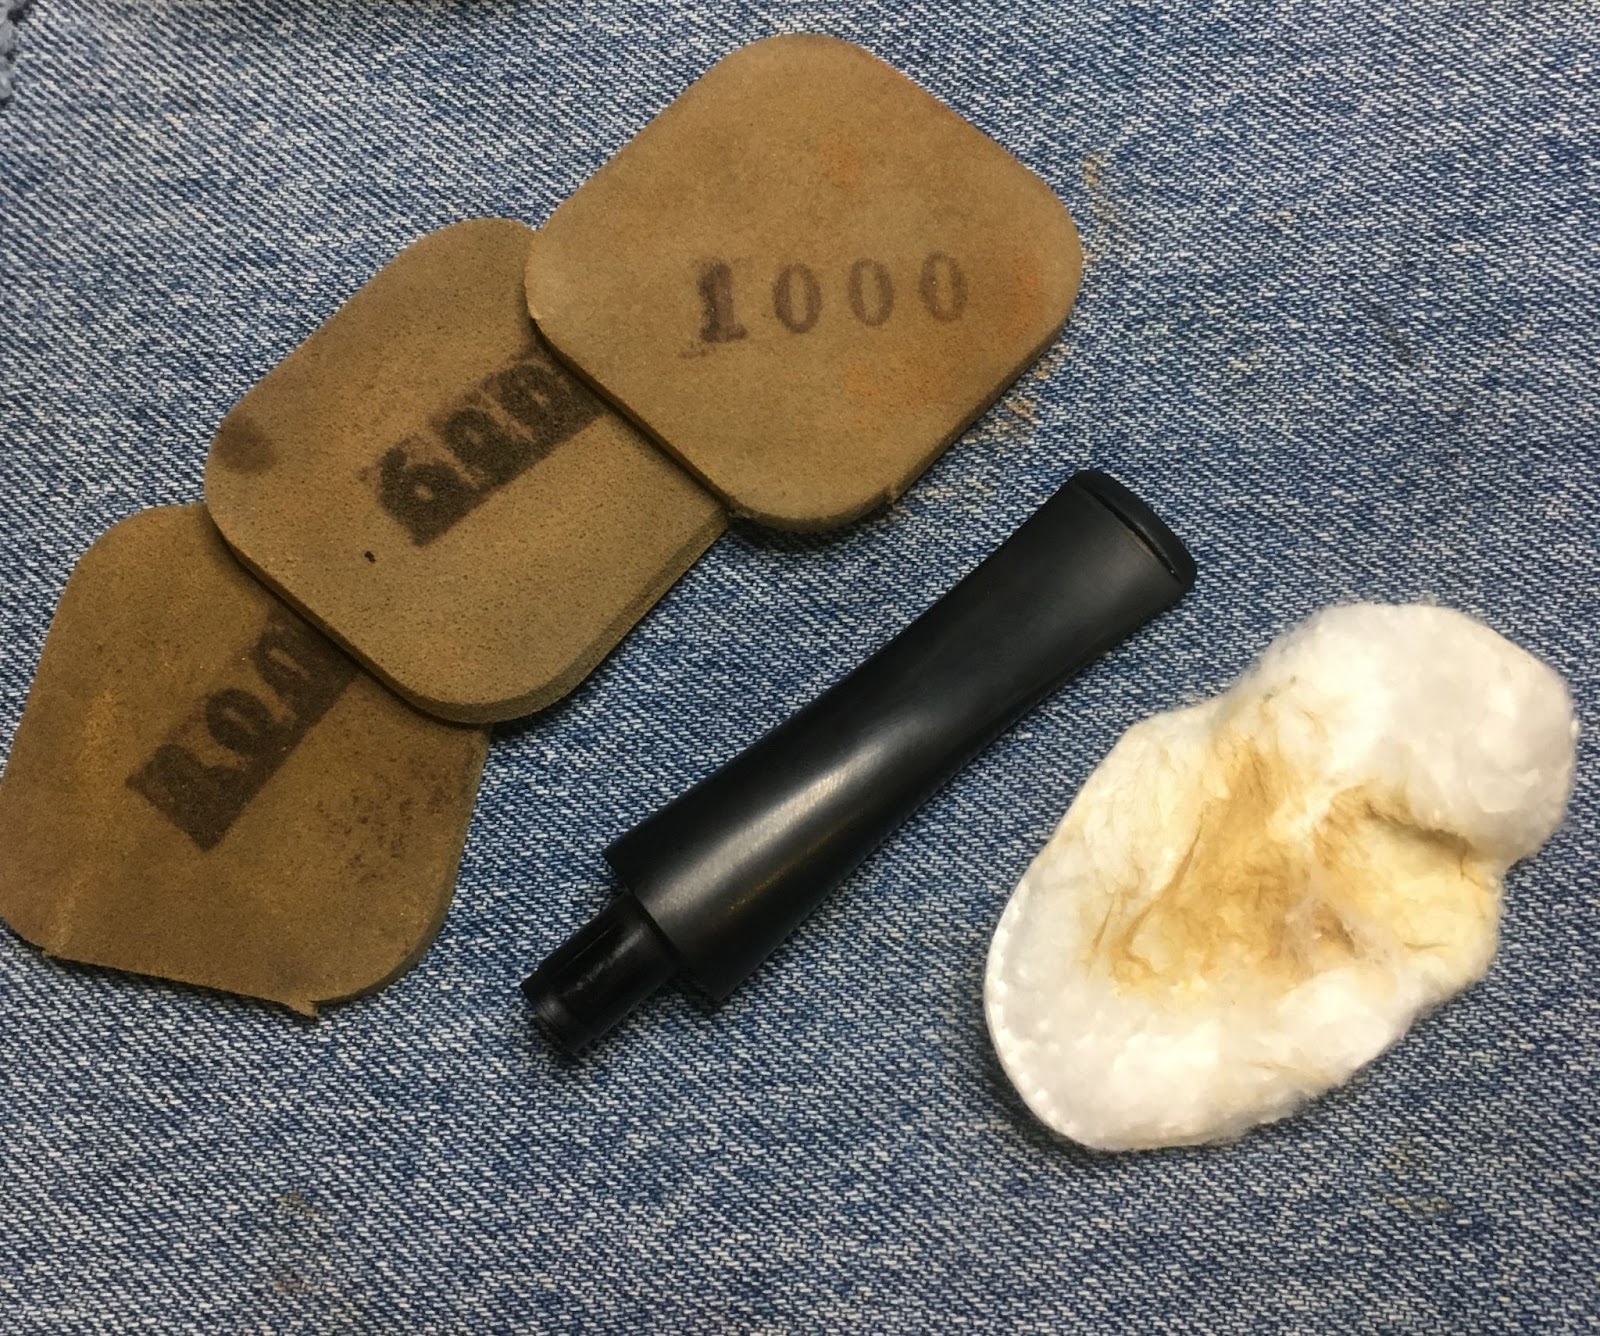
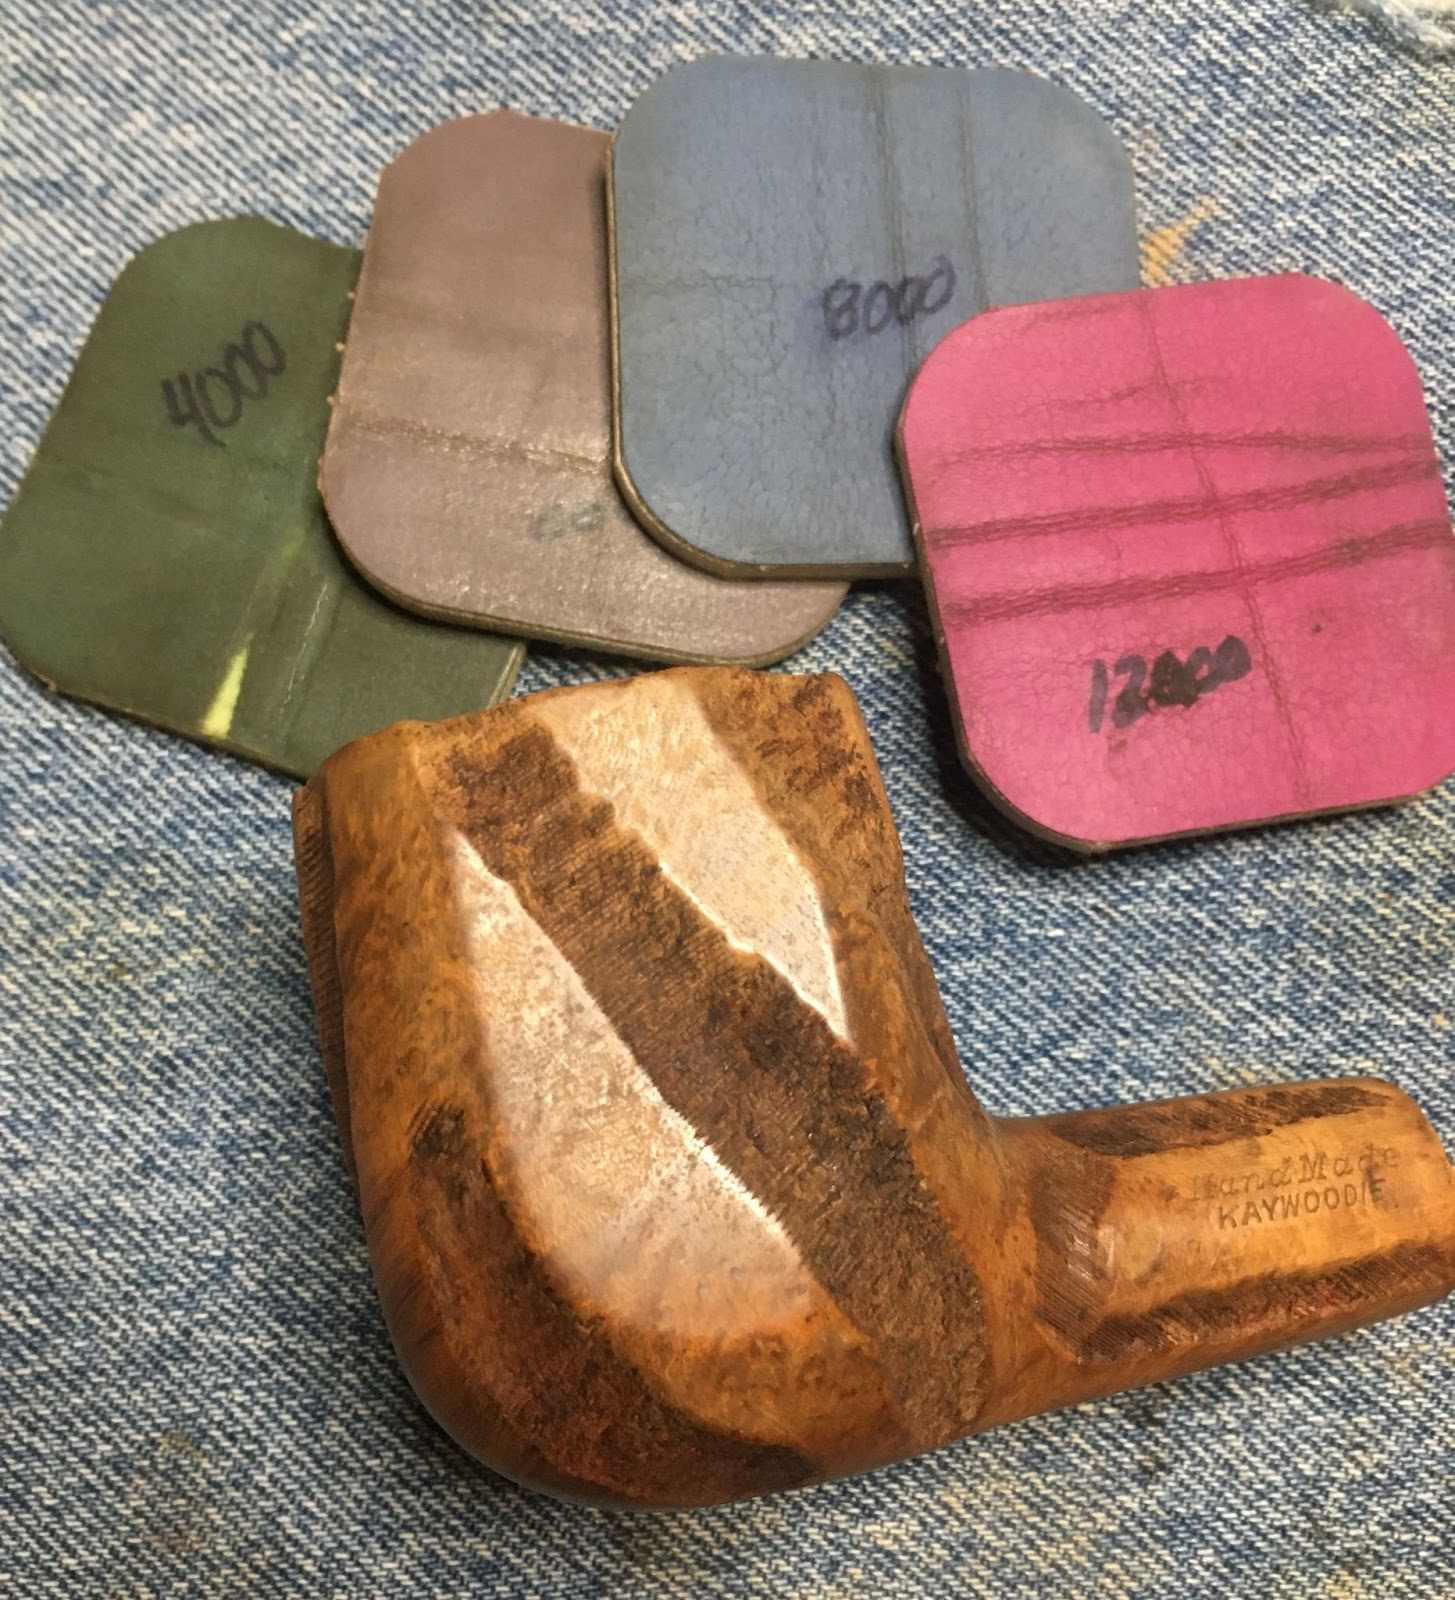
    Next was the micro-meshing.  Here I used the 4000-12000 micro-mesh pads in sequence on both the stem and  stummel.  Between each pad I wiped the stummel with an alcohol dipped make-up pad.  The stem received a drop of Obsidian Oil rubbed in with my finger and wiped with a paper towel between pads.

    I was in the home stretch, the end was in sight.  All that remained was to polish the stem and apply some carnauba wax with the buffer.  So, that’s what I did.

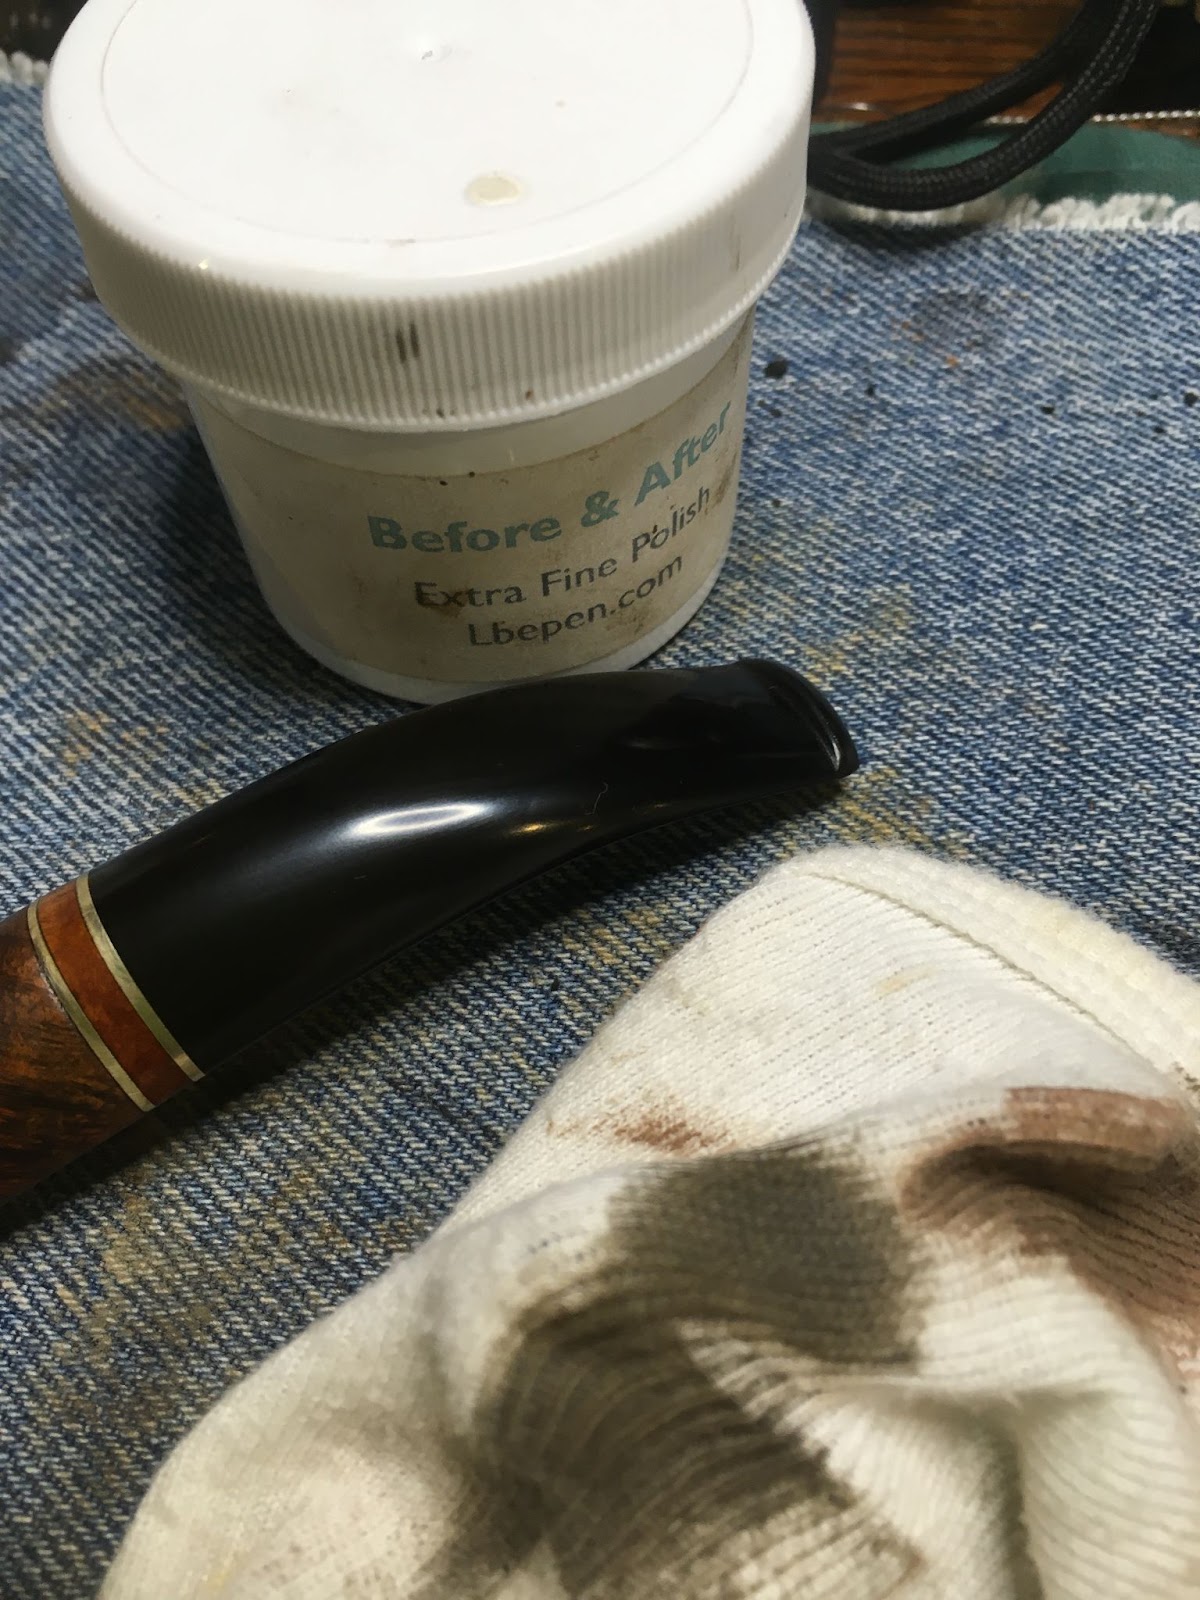
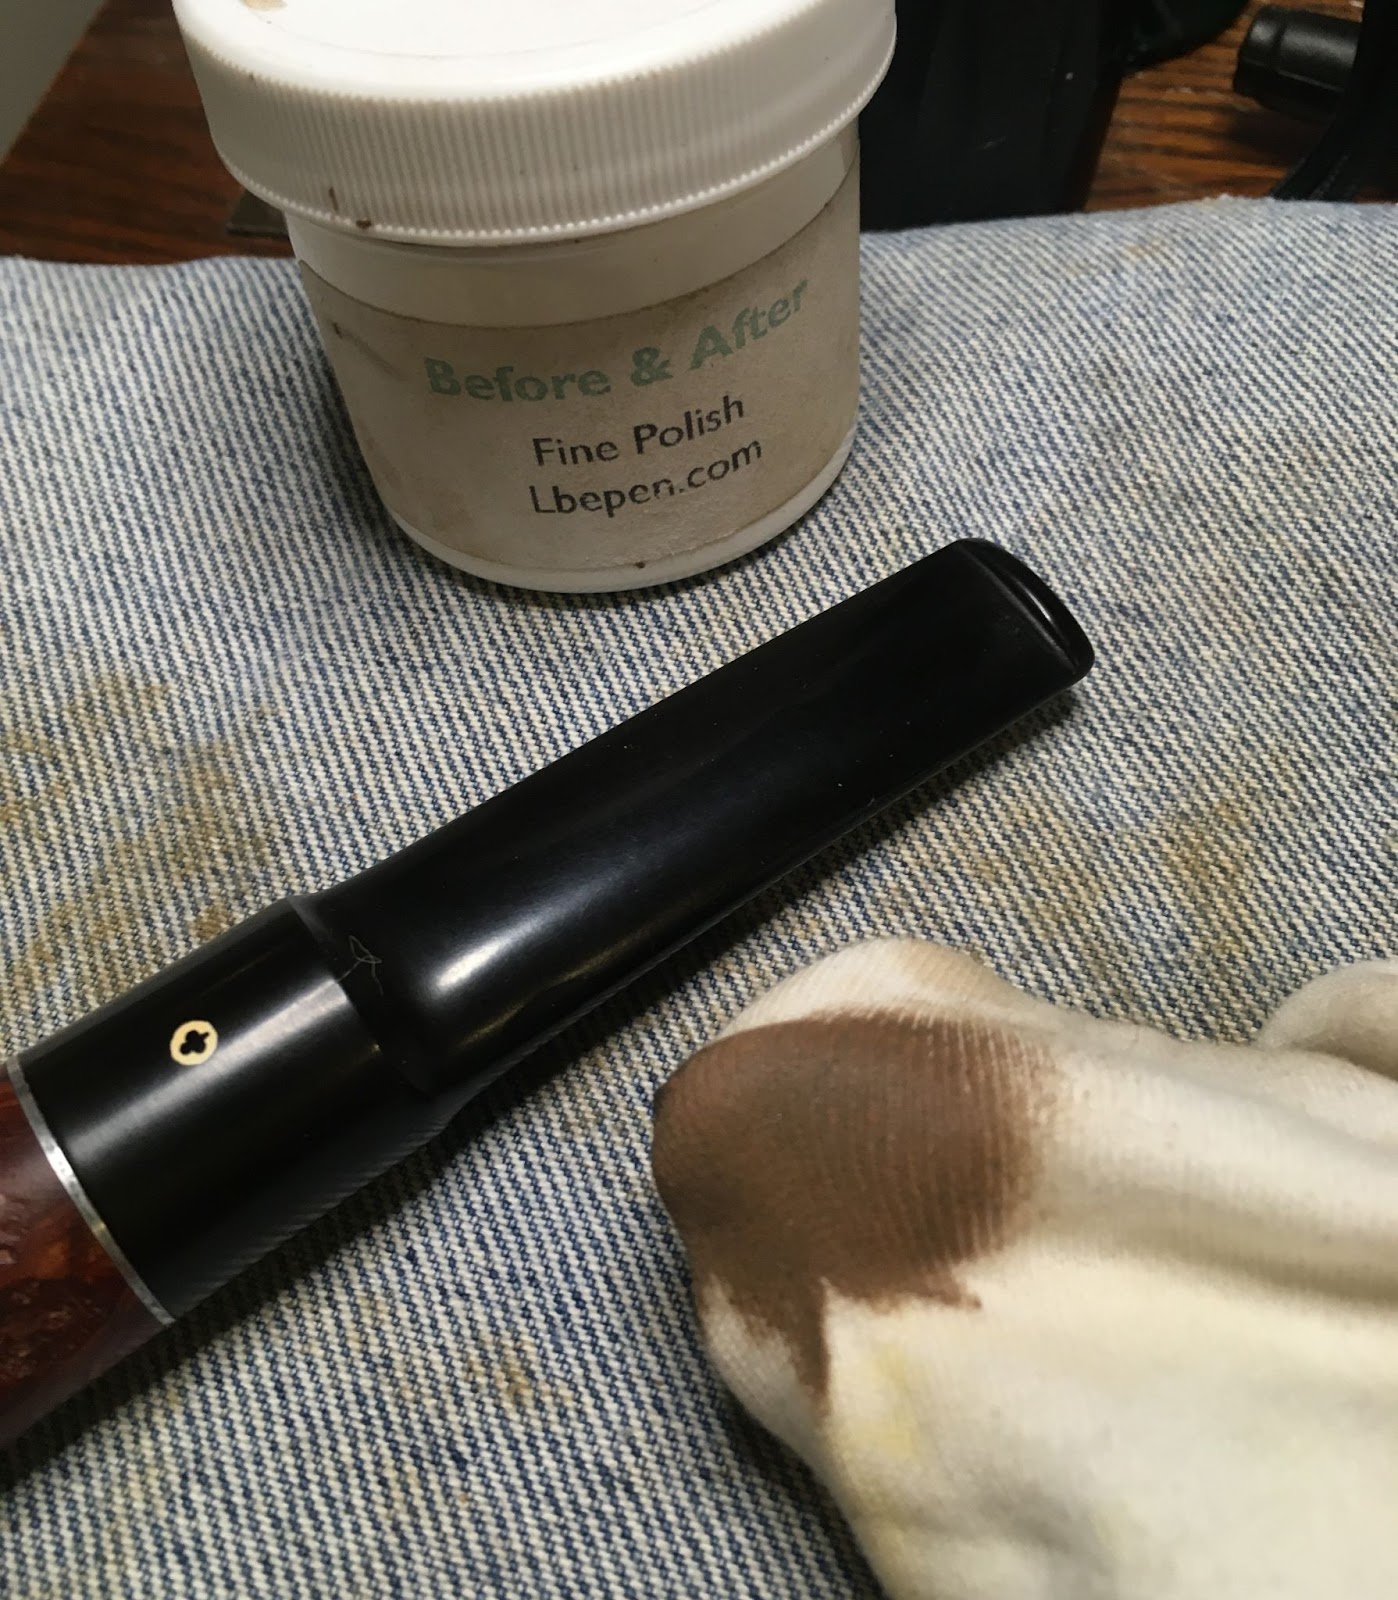
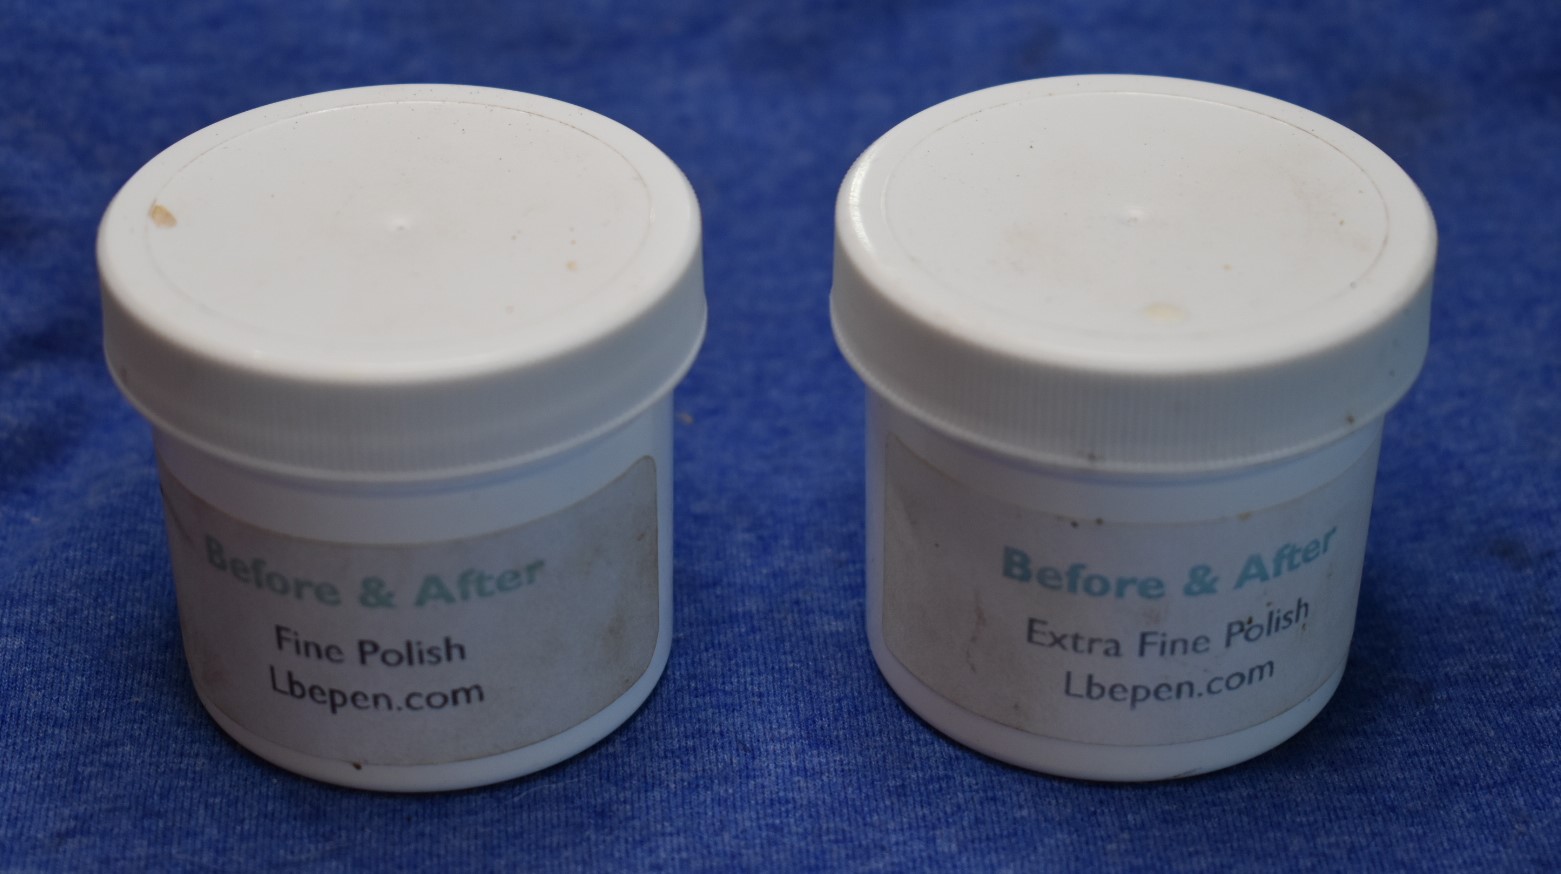
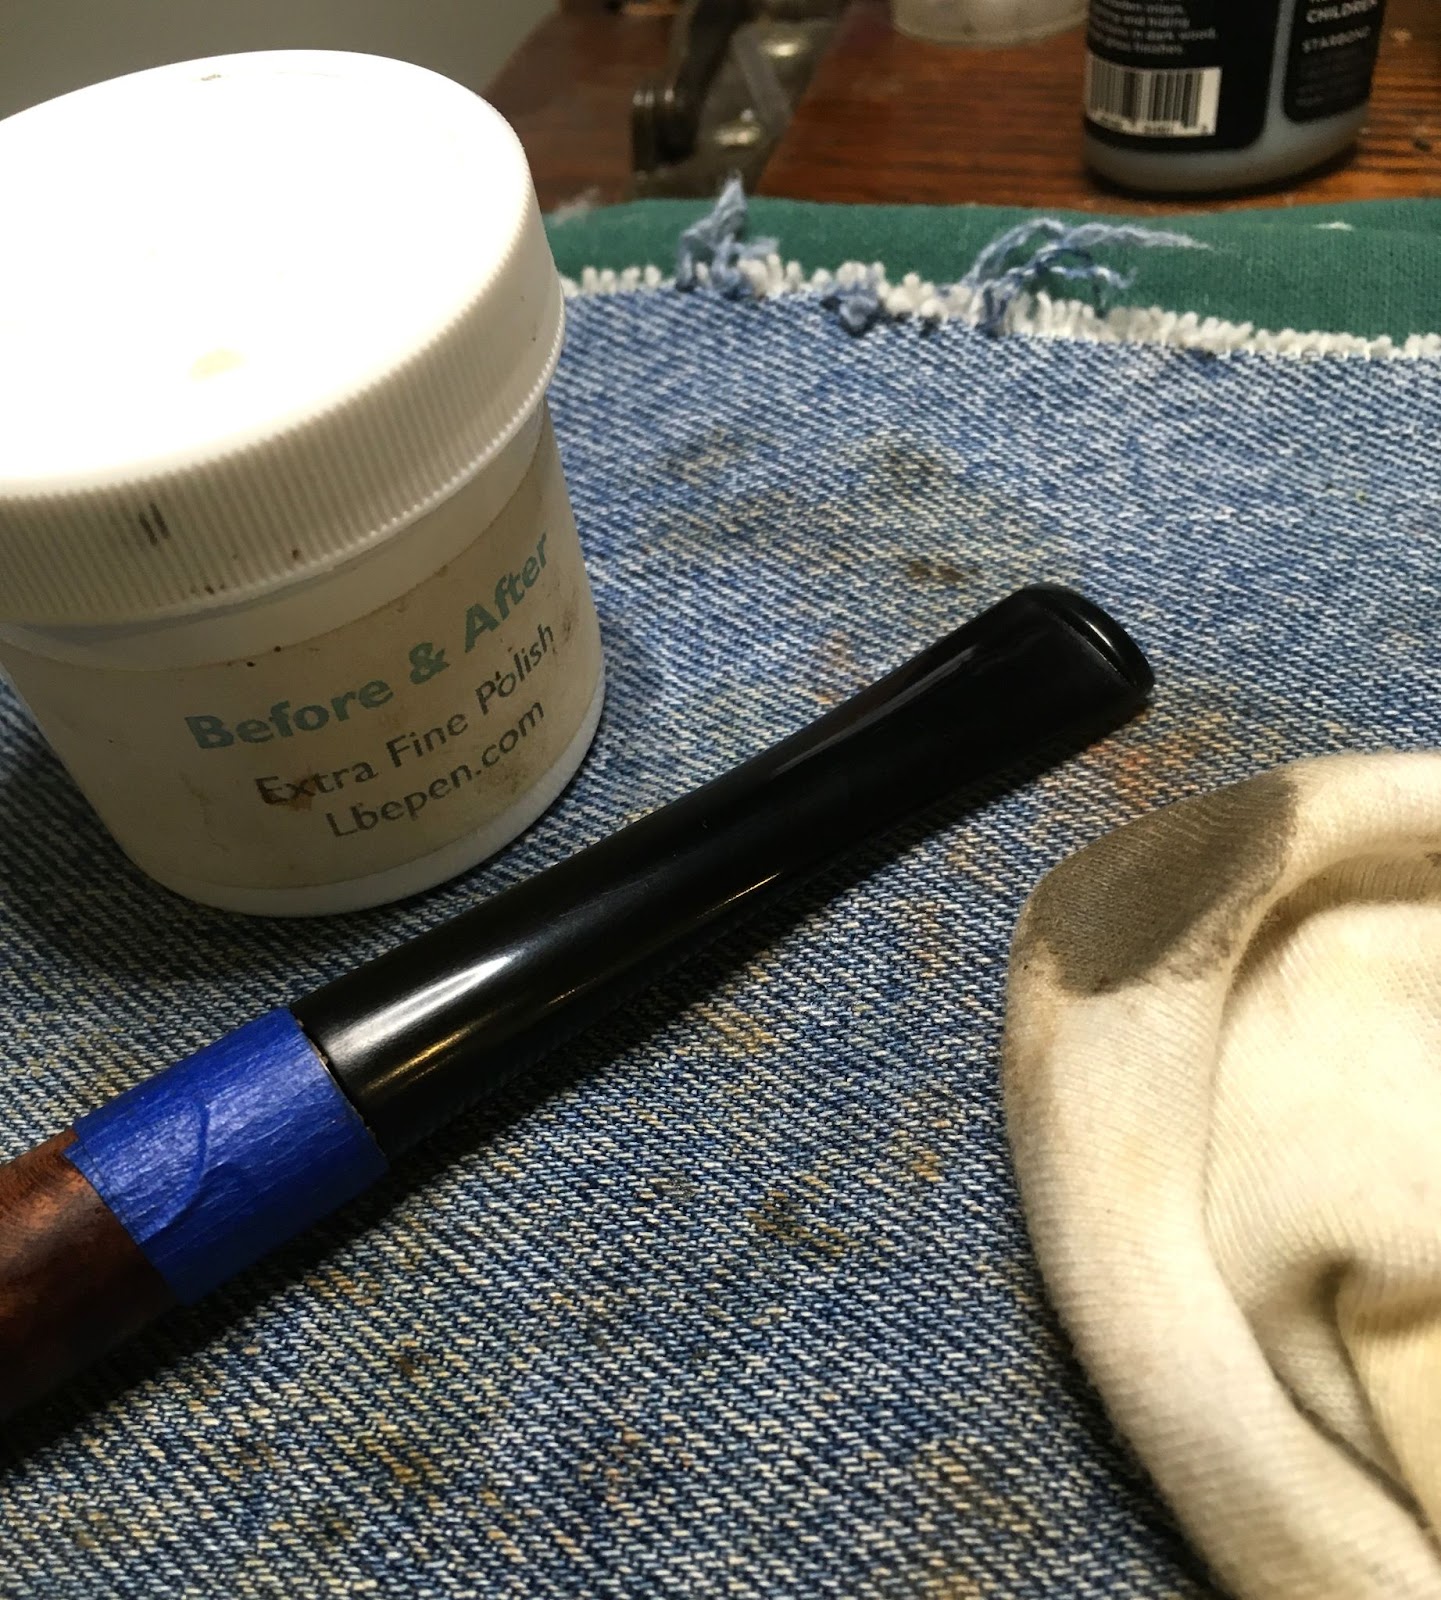
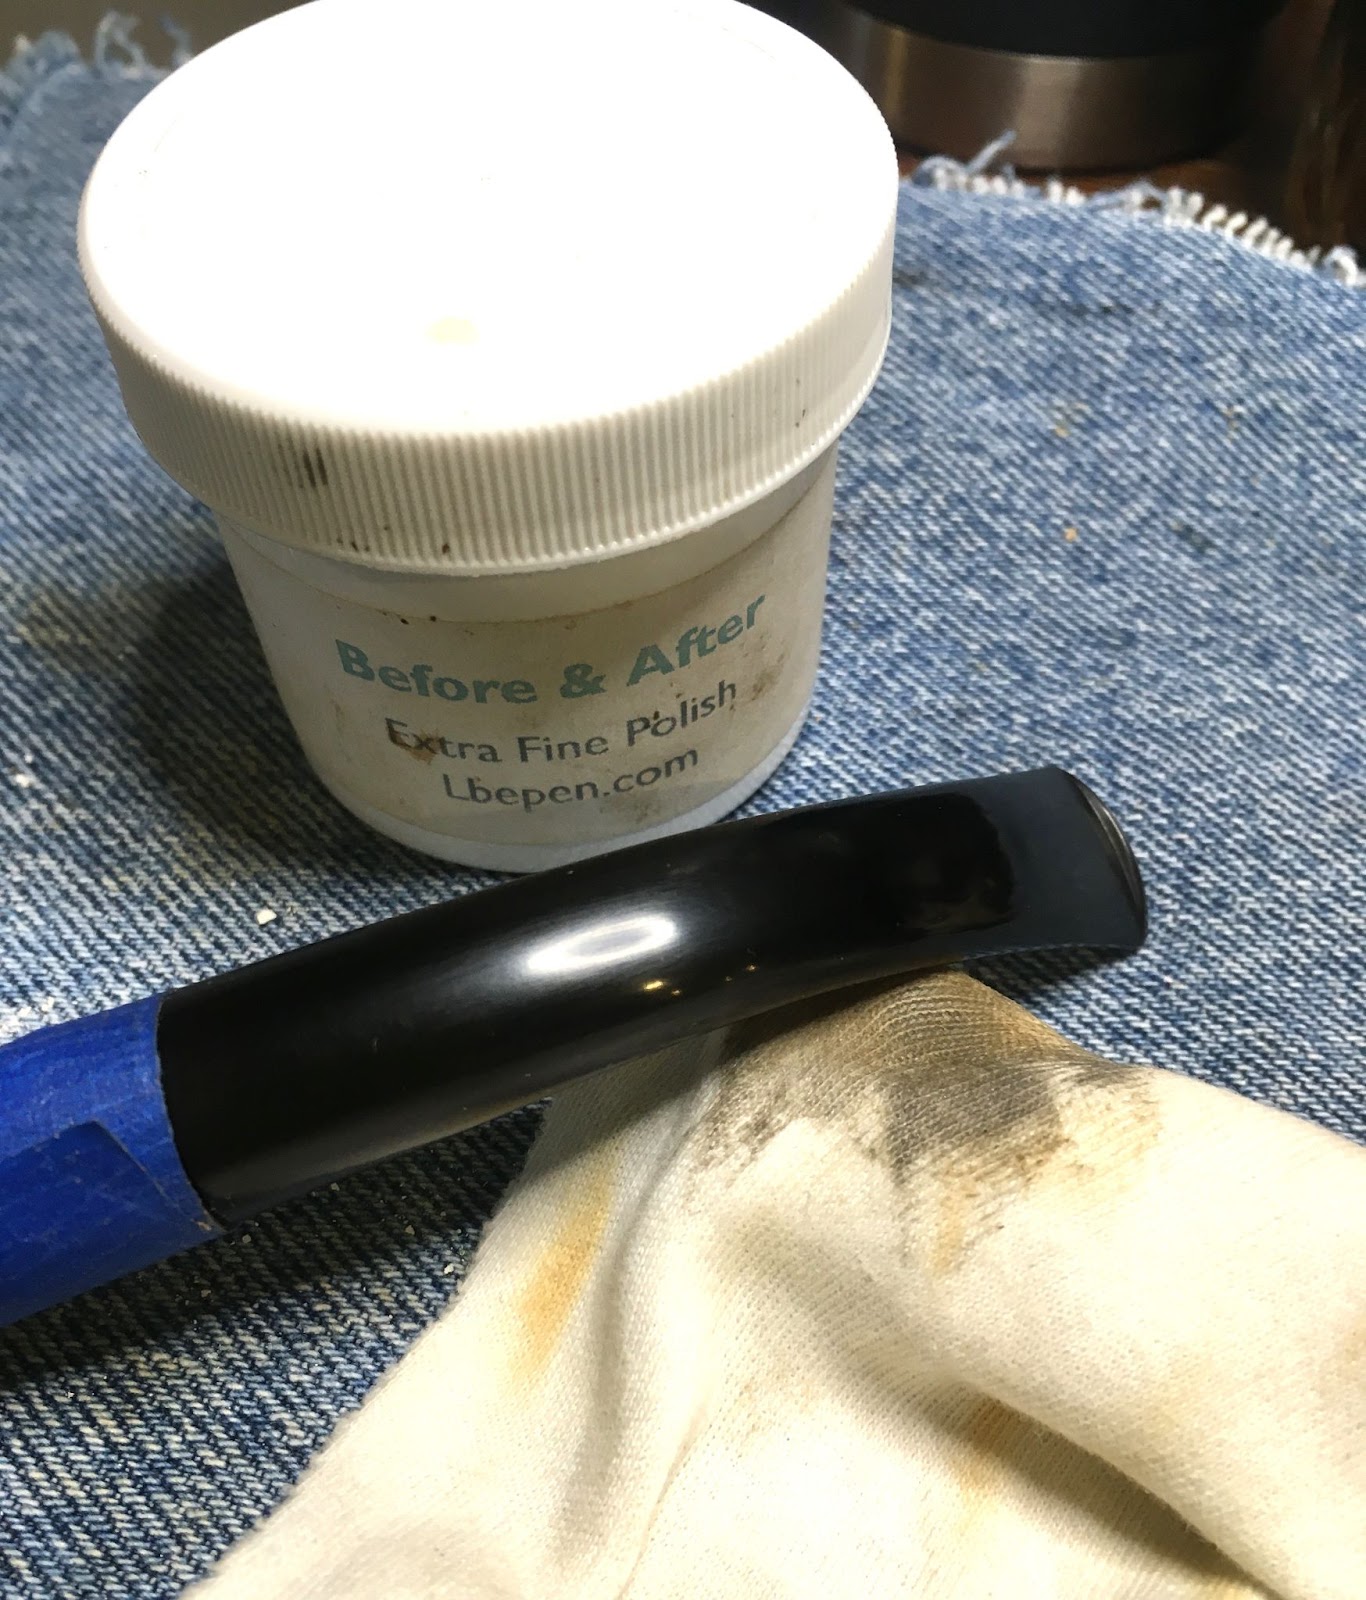
    The polish was Before and After Fine Polish followed by Before and After Extra Fine Polish.  Both were applied by finger and rubbed with a soft cotton cloth.  The waxing was done with my low speed grinder converted to a buffer and carnauba wax.

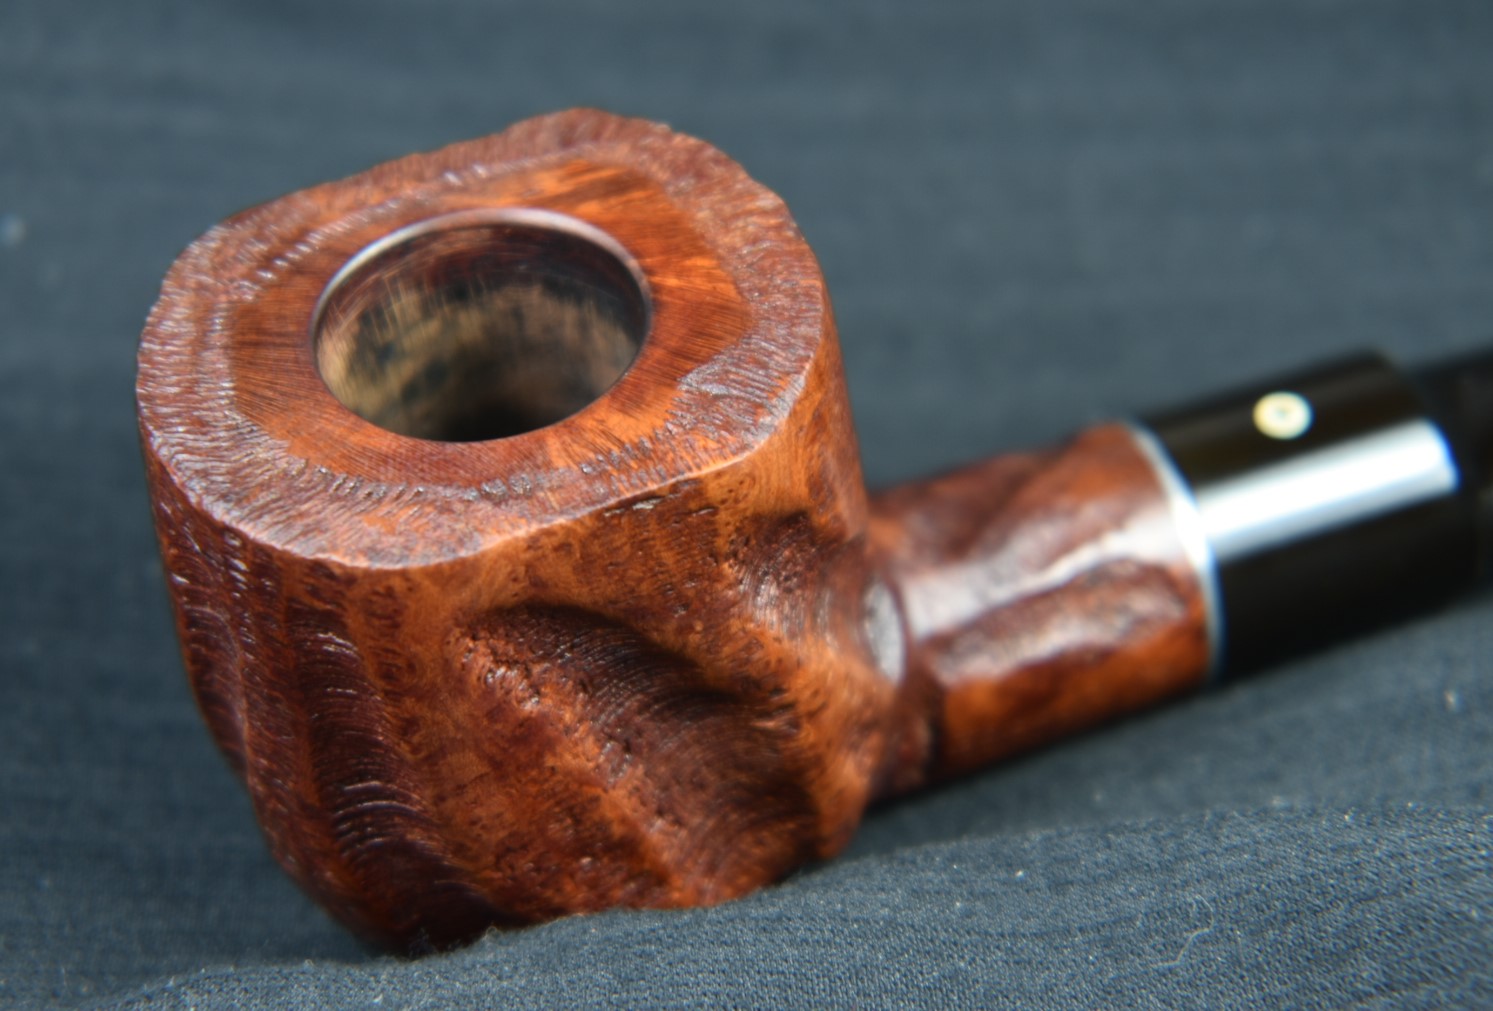
    Well, I wasn’t sure if this pipe would be salvageable, much less restorable.  I am glad to report that I smoked it today and it was lovely.  Remember when I said that it had a definite cherry aroma?  Well I may be giving her a cotton ball alcohol treatment.  I didn’t find it annoying  but it certainly did alter my Lane BCA to a vanilla cherry.  The pipe looks pretty darn good.  I am sure that a Savinelli connoisseur will spot that it is not really a 677 KS any longer.  I bet they would agree that the contrast stain turned out nicely.  I worried about it being too dark for the brass and wood banding on the stem but I think they work well together.  The stem rebuilding also was a success and polished equally as well as the waxed stummel.  I do hope that you found something here useful in restoring or just caring for your own pipes.  If you like this sort of thing, please click the like and subscribe.  I know I said I wanted to keep this brief and I have done anything but that.  Thank you for reading the ramblings of an old pipe lover.

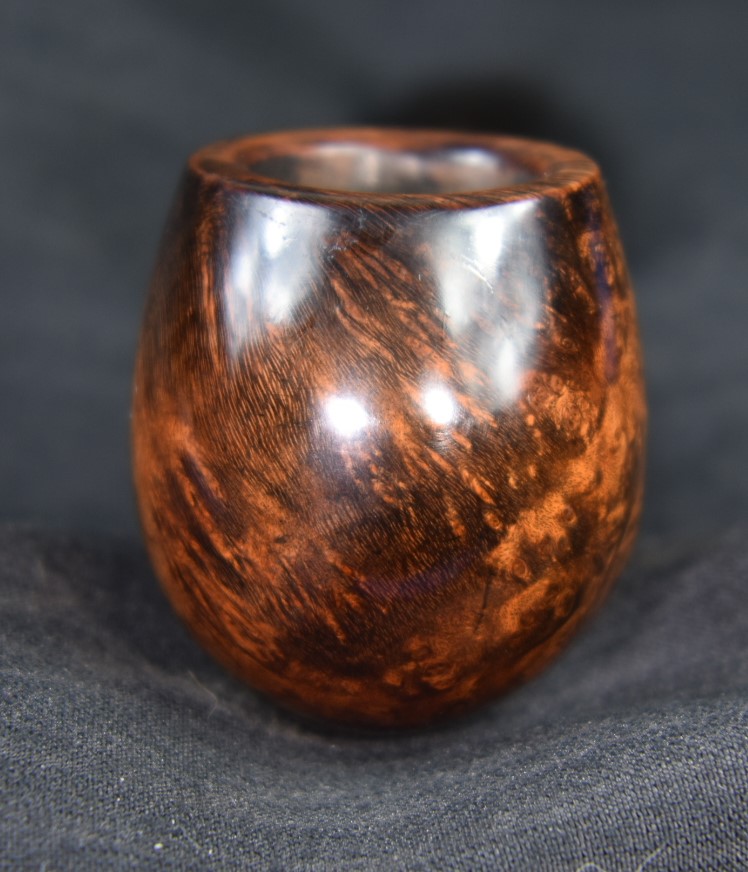
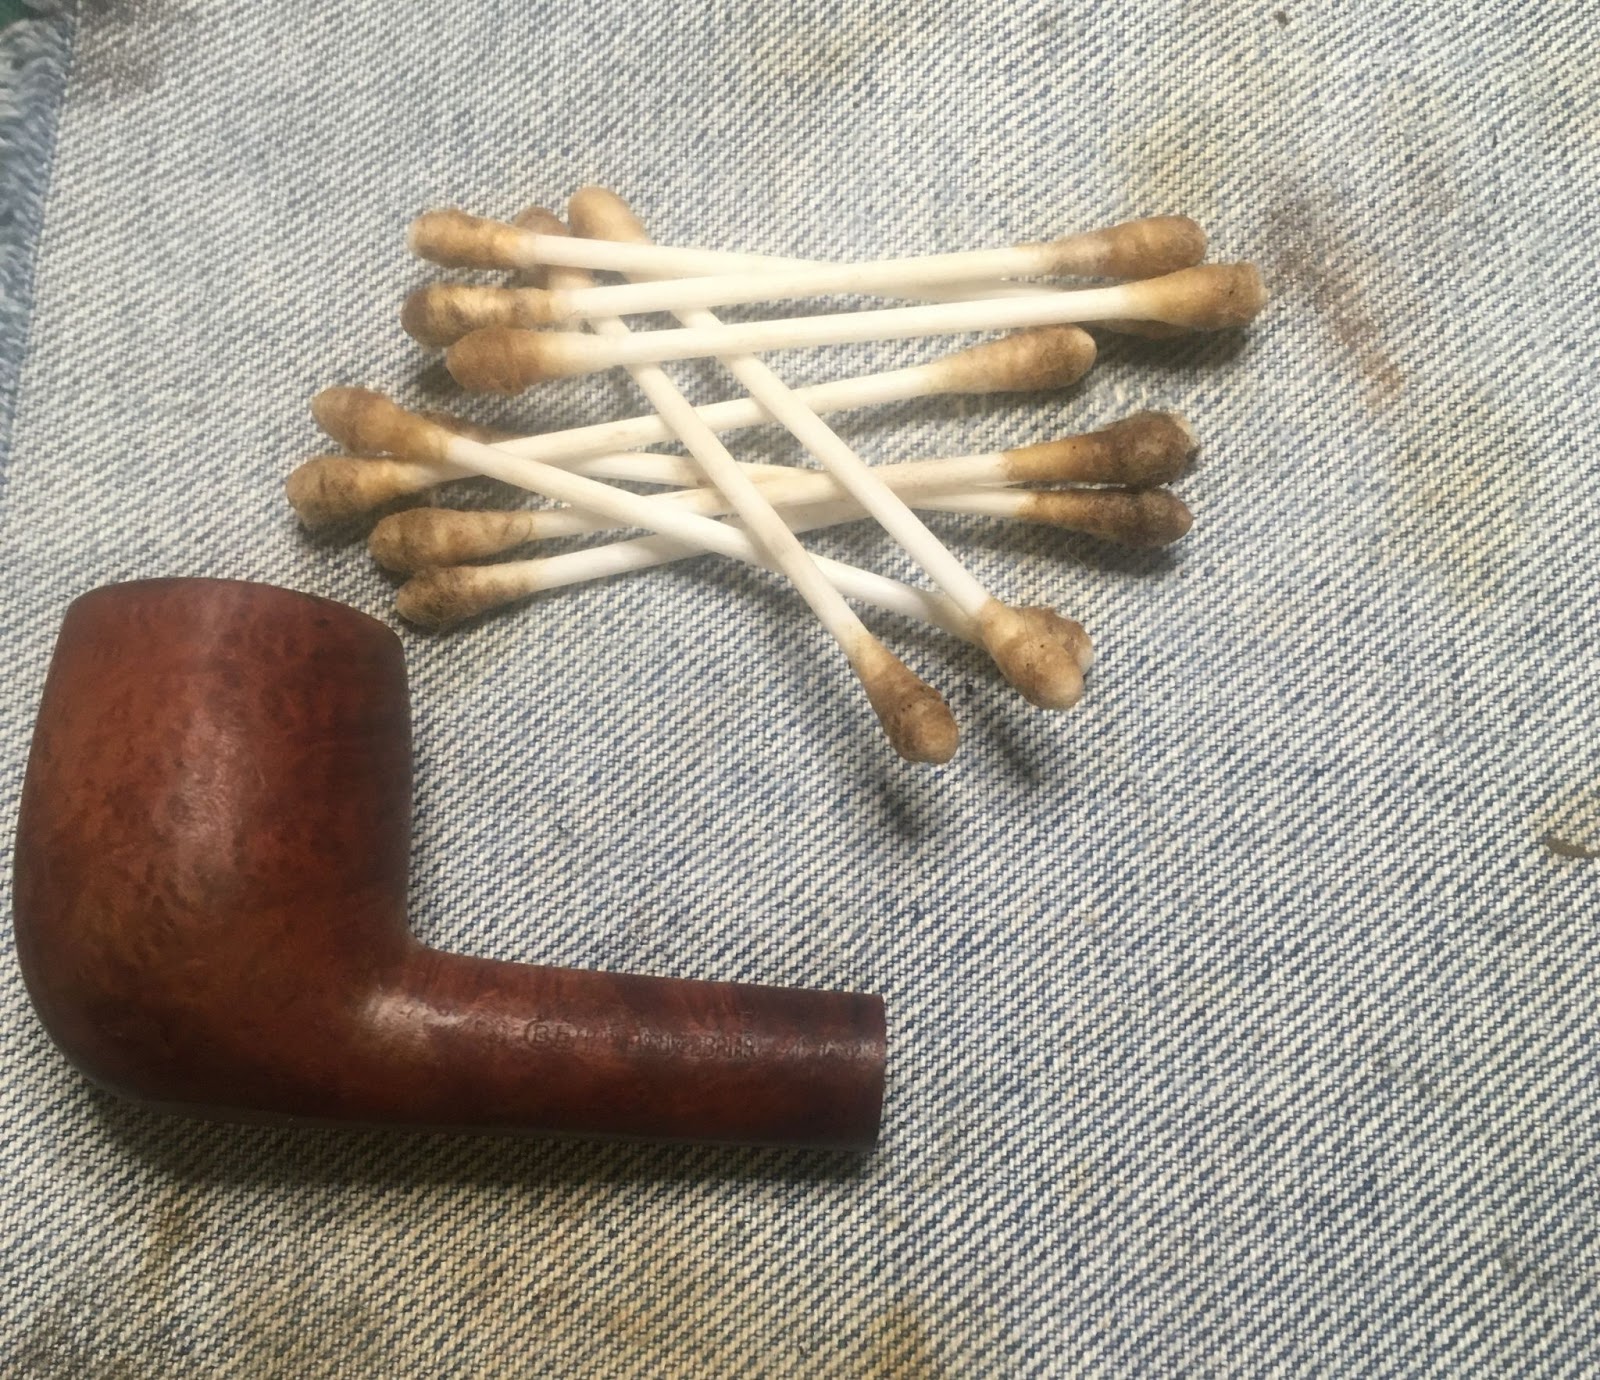
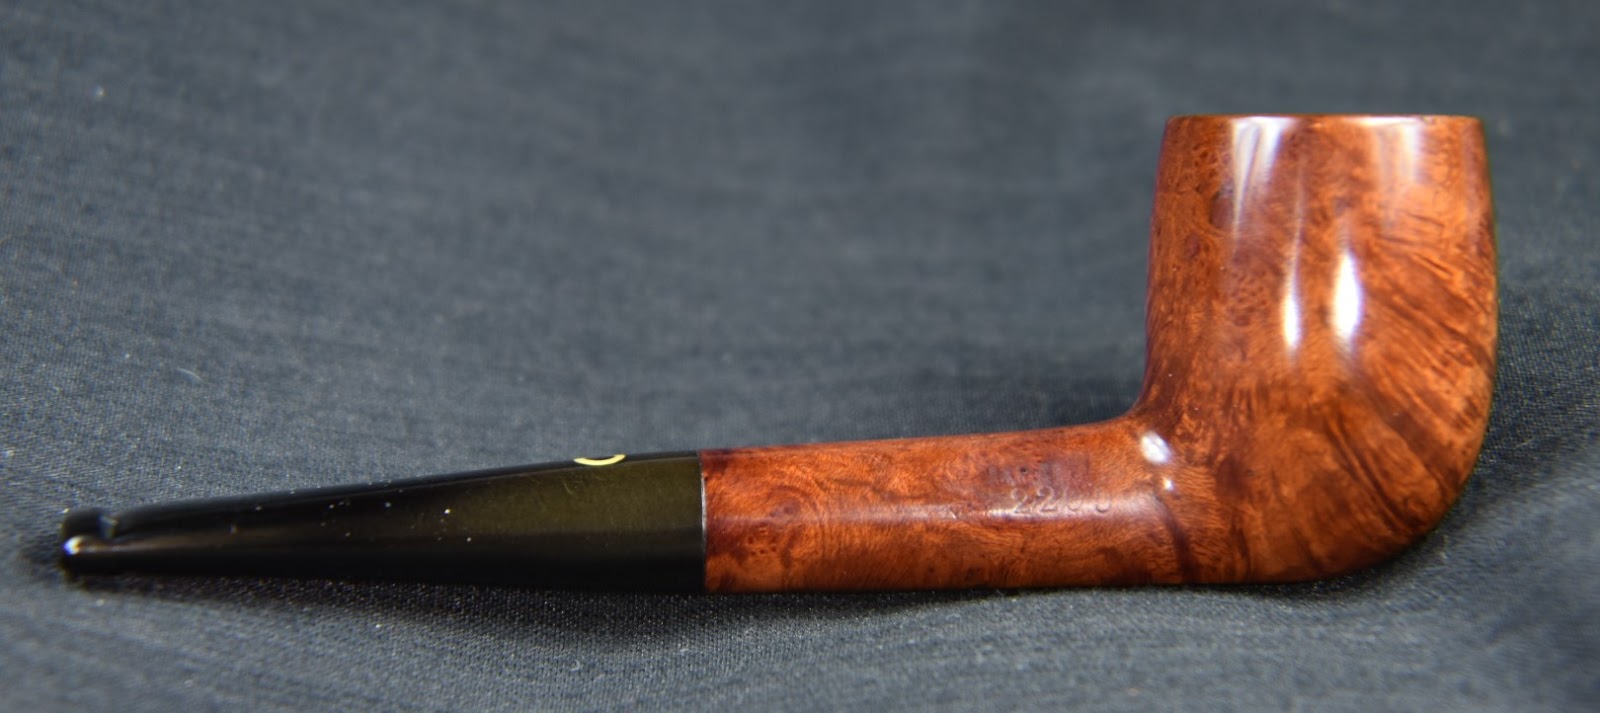
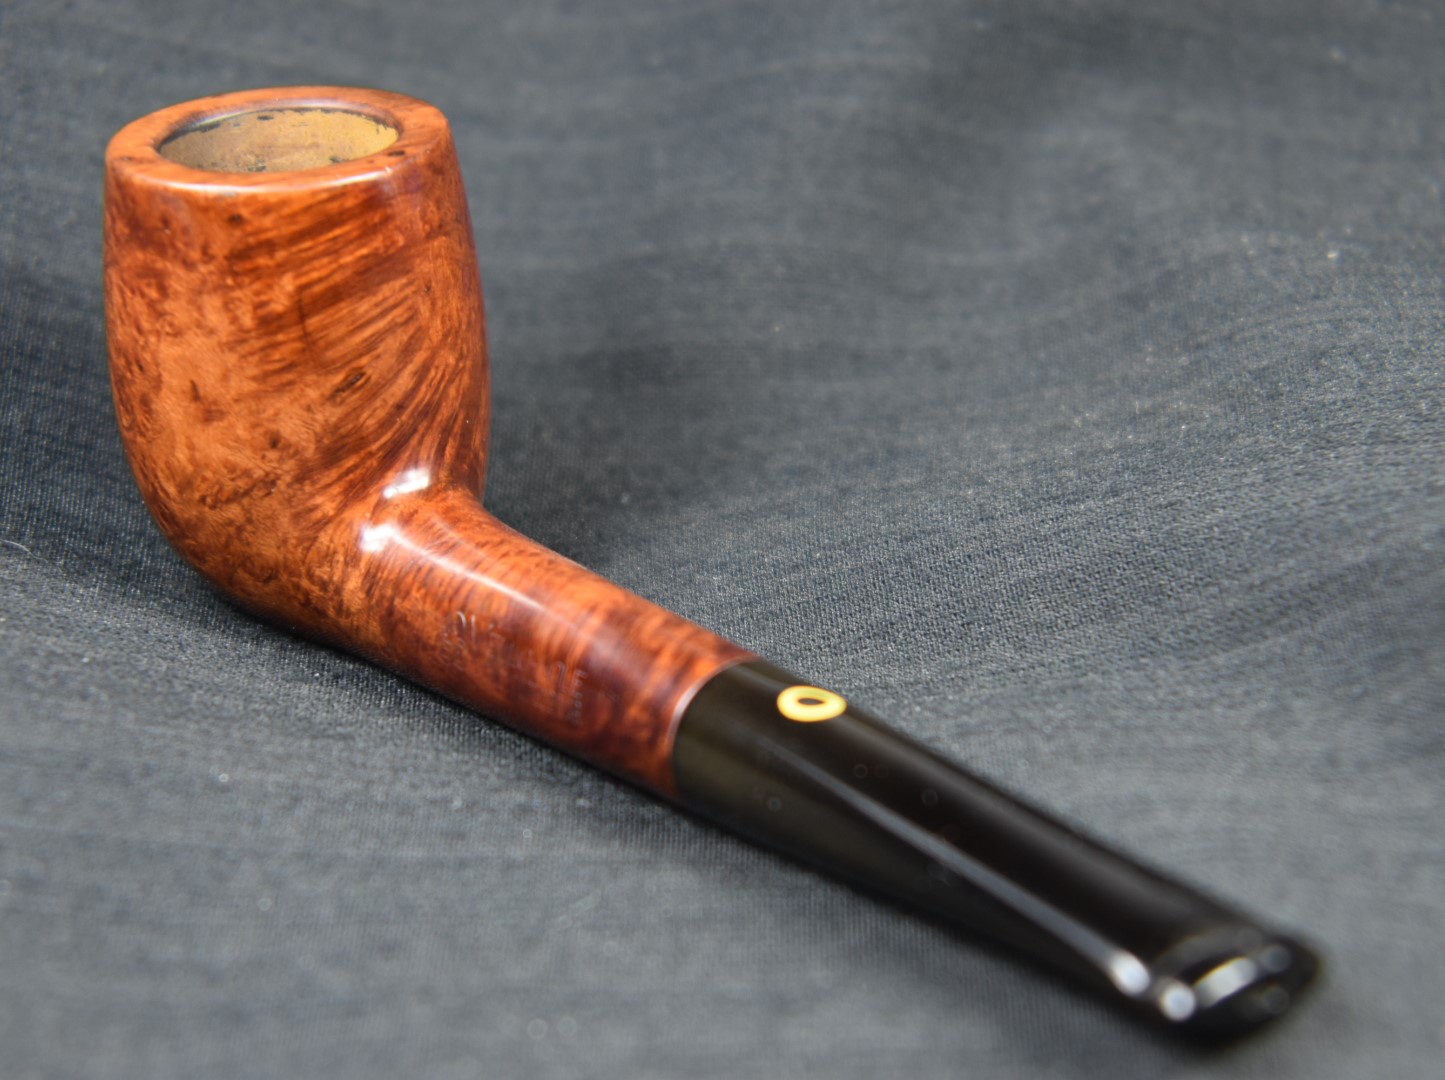
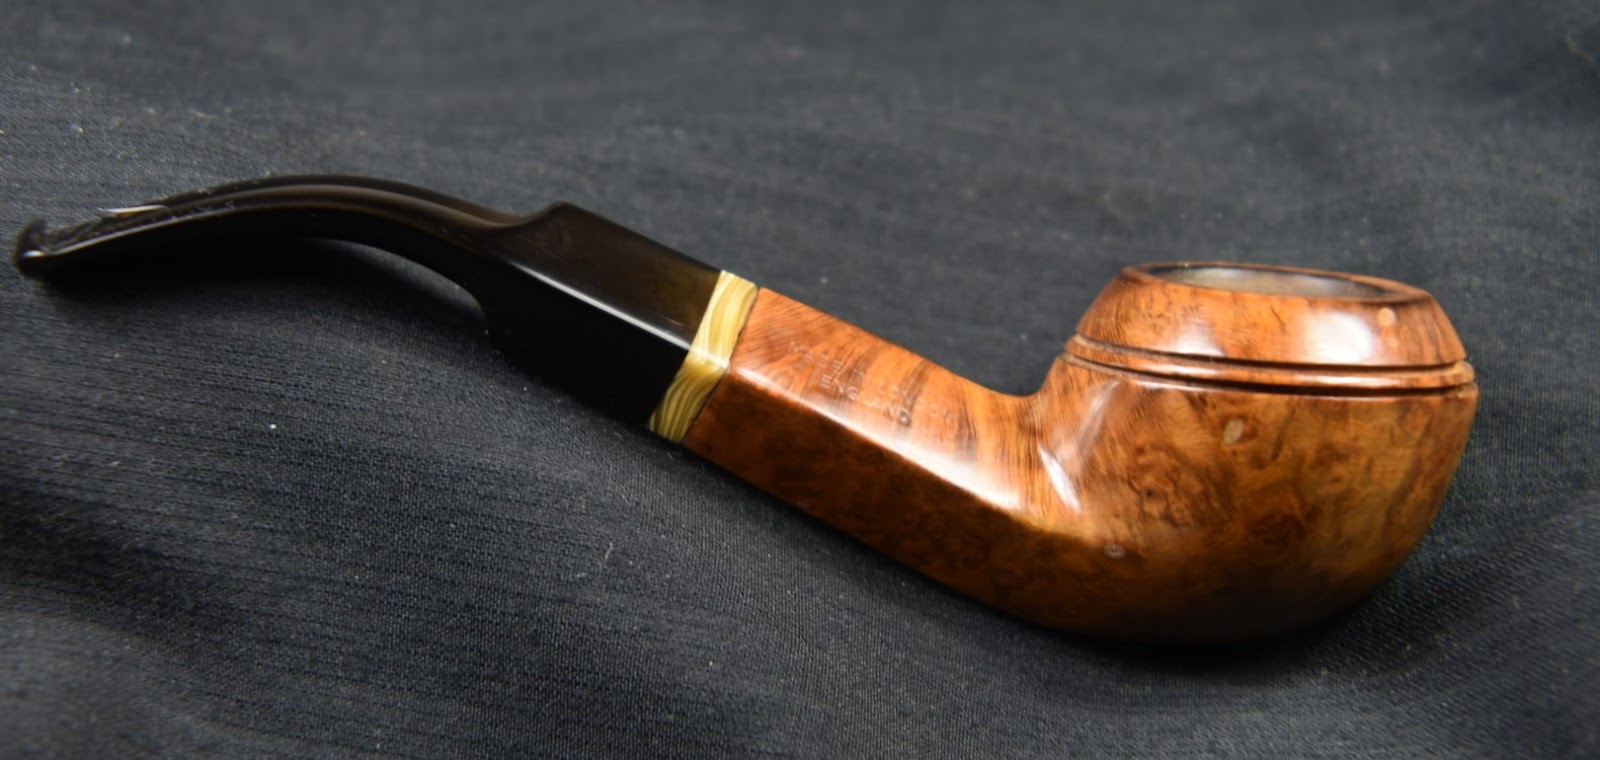
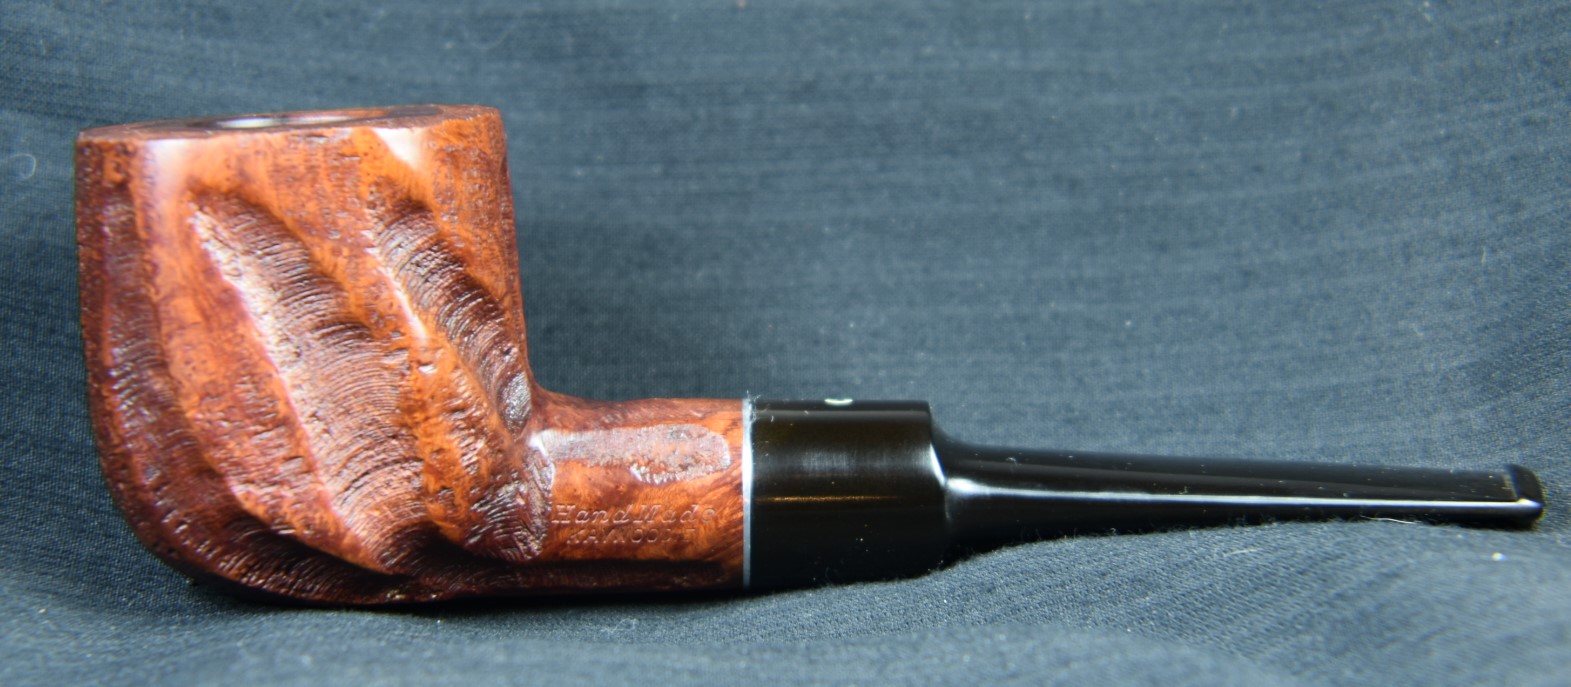
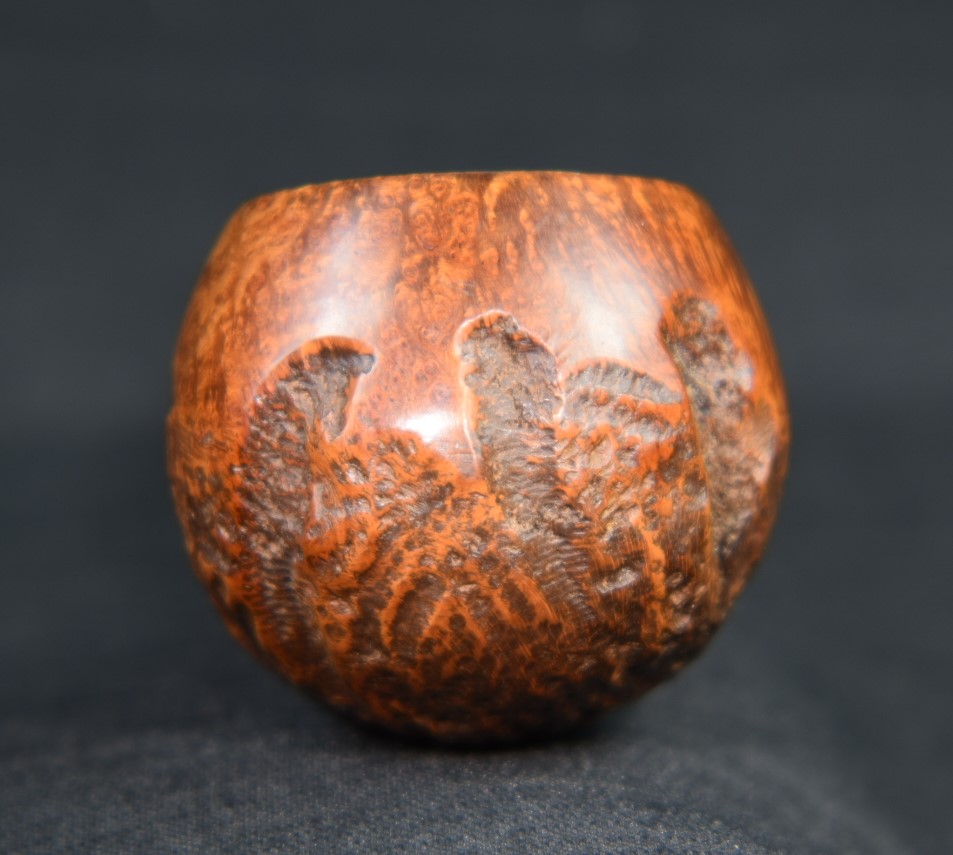
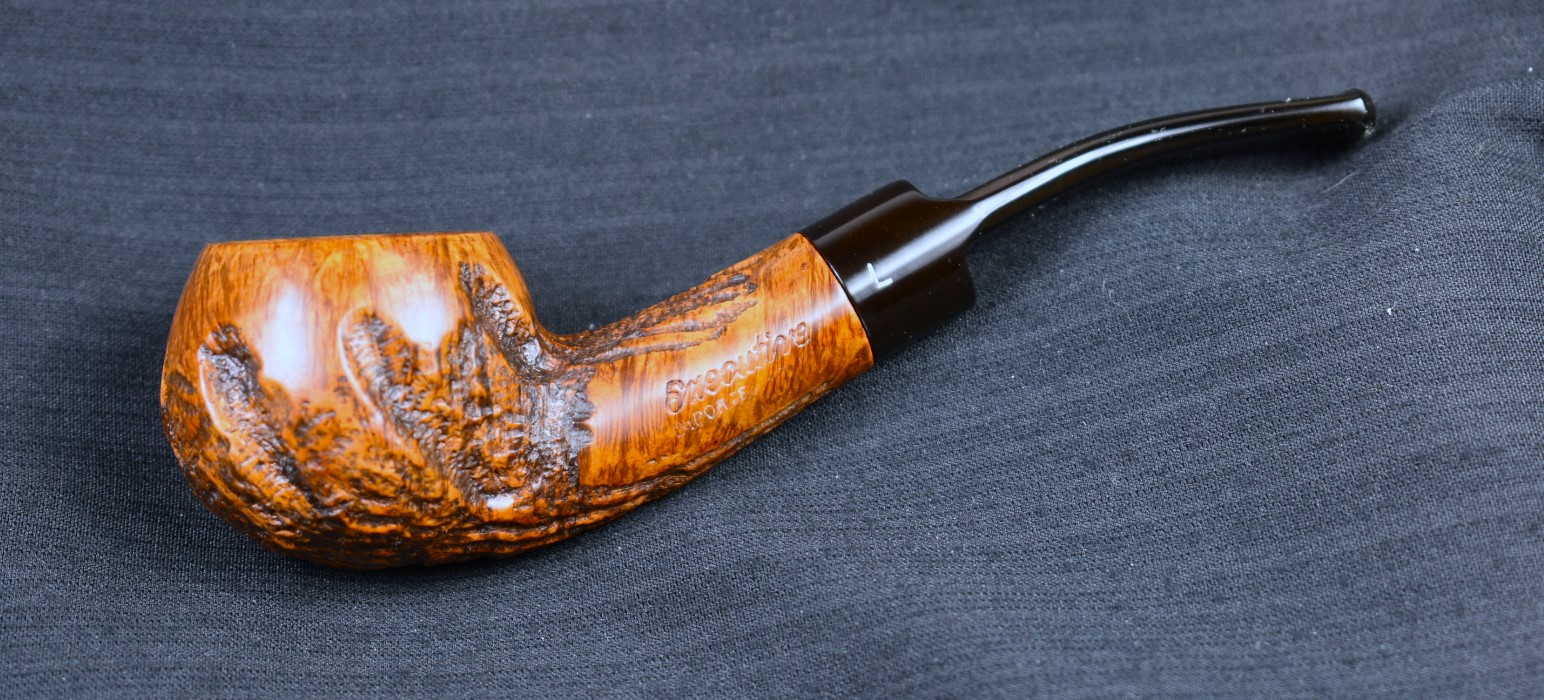
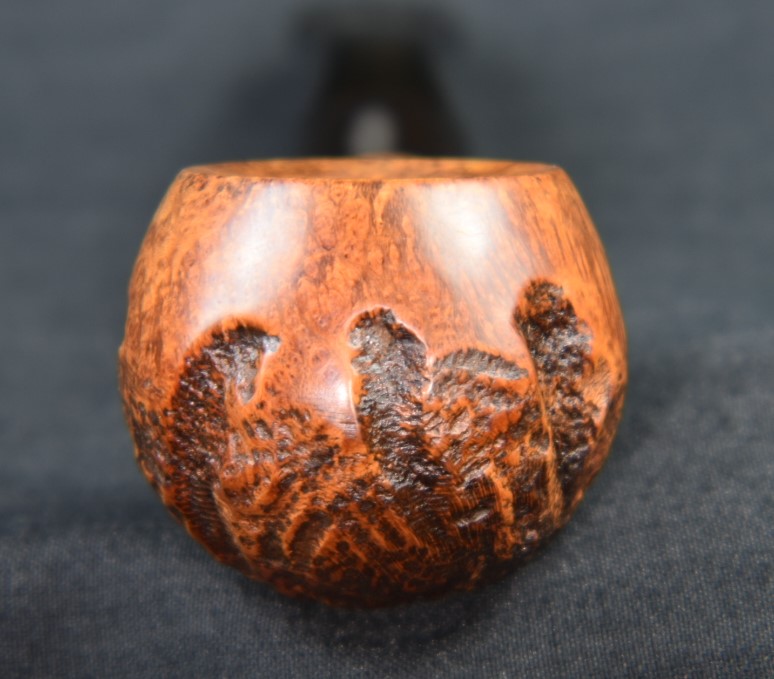
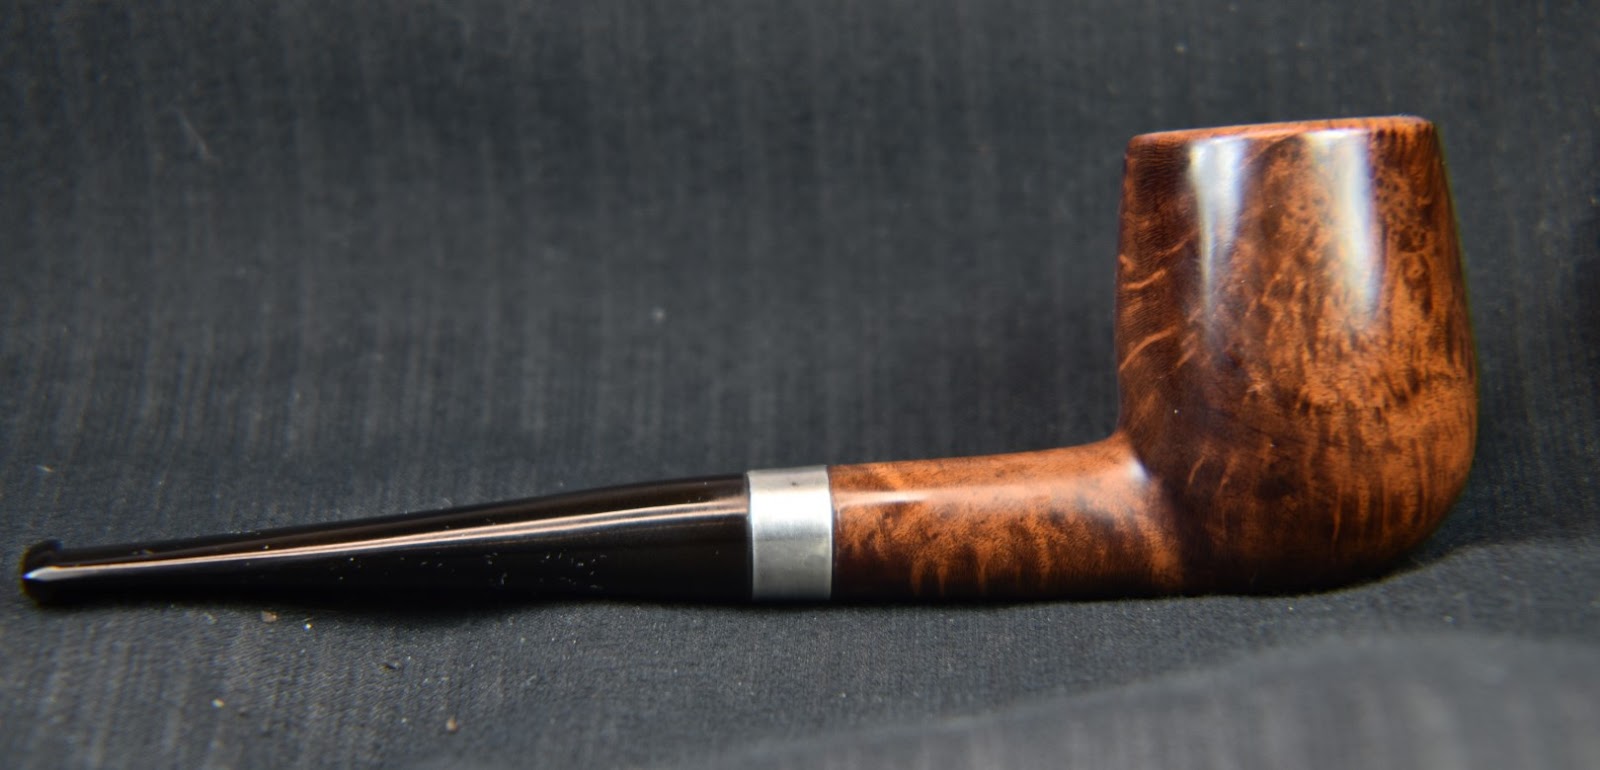
    Now for the moment you have all been waiting for:  Some photos of the finished Savinelli Porto Cervo 677 KS.

  • A Yello-Bole Billiard (1933-36) Restoration

    March 7th, 2024

    Photographed and written by

    John M. Young

    It is kind of an American tradition to love the underdog.  Maybe it goes back to our founding when 13 little colonies took on the greatest empire of the time.  Nothing personal, United Kingdom.  I look at Yello-Bole pipes in a similar light.  They kind of have the reputation of being third string benchwarmers to the “real” players of Kaywoodie.  Sure they were a second, but I am a guy who loves leftovers from the night before meals.  So I kind of have a soft spot in my heart for seconds.

    This little Yello-Bole billiard caught my eye because of the stamp  “Honey Cured Briar”.  This is a bit more of a rarity than the usual “Cured with Real Honey”.  According to pipedia.org, “Pipes from 1933-1936 they were stamped “Honey Cured Briar” (https://pipedia.org/wiki/Yello-Bole).  That provides pretty finite dates for this old pipe.  Let me show you what it looked like upon arrival.

    Yello-Bole was started as a processor of briar that did not meet the quality standards for Kaywoodie pipes.  I’ll allow pipedia.org to tell the story as a more reputable source than my failing memory.

    “In 1932 Kaufmann Bros. & Bondy (KB&B), est. 1851, expanded their programm consisting of KB&B pipes, Reiss-Premier and Kaywoodie as the mainstay brand by introducing the Yello-Bole line. Yello- Bole was designed as an outlet for lower grade briar not used in Kaywoodie production.

    At that time KB&B produced their brands in Union City and in West New York, both New Jersey. Deviating from that, Yello-Boles were manufactured by The New England Briar Pipe Company in Penacook, New Hampshire to use this KB&B subsidiary to capacity.1966 Add

    As briar was hardly had during World War II, the KB&B Company embarked on a project of domestically grown briar wood, called Mission Briar or manzanita early in 1941. The Pacific Briarwood Company, a subsidiary founded for this purpose, began harvesting the burls growing on the slopes of the Santa Cruz Mountains of California. Though this wood is botanically the same as briar form the Mediterranean countries, the smoking characteristics were not quite as good and the project was abandoned after the war.

    Was it for that reason? Advertising from the 1940’s pictures the Yello-Bole “Honey Girl”, who gently urges the pipe smoker to smoke the pipe with “a little honey in every bowl.” In fact, honey was an ingredient of the material used to coat the inside of the bowl. It was said to provide a faster, sweeter break-in of the pipe.

    In 1952, 101 years after the Kaufmann brothers had opened a small pipe shop in the Bowery section of New York City, Kaufmann Bros. & Bondy Company with all subsidiaries was purchased by an unknown company strange to pipe industry. (At least, the new owner was economical because the KB&B managers had to leave their luxurious bureaus on 630 Fifth Avenue, New York – the Rockefeller Center – for new rooms in the factory on 6400 Broadway, West New York.) This interlude ended after only 3 years in March of 1955, when S. M. Frank & Co. bought Kaufmann Bros. & Bondy, The Kaywoodie Company, Reiss-Premier Corp., The New England Briar Pipe Co. and – of course – Yello-Bole.

    From the time of S.M. Frank’s purchase in 1955 until 1972 Yello-Bole was run as a separate company, as division of the parent. Through this period, Yello-Bole, same as Kaywoodie, had it’s own officers, sales force and maintained the production facilities in West New York. These 17 years were probably the most glorious years in Yello-Bole’s history.” (https://pipedia.org/wiki/Yello-Bole).

    “Tips for Dating Yello-Bole Pipes

    • KBB stamped in the clover leaf indicates it was made in 1955 or earlier as they stopped this stamping after being acquired by S.M. Frank.
    • Pipes from 1933-1936 they were stamped “Honey Cured Briar”
    • Post 1936 pipes were stamped “Cured with Real Honey”
    • Pipe stems stamped with the propeller logo were made in the 1930’s or 1940’s – no propellers were used after the 1940’s.
    • Yello Bole used a 4 digit code stamped on the pipe in the 1930’s.
    • Pipes with the Yello-Bole circle stamped on the shank it were made in the 1930’s, this stopped after 1939.
    • Pipes stamped BRUYERE rather than BRIAR it was made in the 1930’s.”  

    (https://pipedia.org/wiki/Yello-Bole).

    Using the above guidelines this pipe represents the 1st, 2nd and 5th bullet points:

    1. KBB stamped in the clover leaf
    2. “Honey Cured Briar”
    3. 4 digit code

    Other than the stampings it also had some of the hallmarks of an older pipe.  The button for example was filed in a “not so modern” fashion and had a narrow rectangular draft hole. Overall the pipe was in good condition for a 90 year old pipe that I paid less than 5 dollars for.  Heck, the shipping cost more than the pipe.  In examining the old girl I could still see some of the yellow bowl coating in the tobacco chamber.  The stem was very tight, actually “scary tight”.  I rubbed the tenon with olive oil when I reassembled it for the before photos.  

    I figured that the restoration would be fairly simple.  It needed a light reaming, airway cleaning, stinger removal and cleaning, oxidation removal from the stem, stummel sanding and fills, button rebuilding with cyanoacrylate (CA, super glue), briar refurbishing, stem polishing and a wax.  That sounded like a relaxing evening.

    I started out with a clean denim piece to protect the work surface.  Even though this pipe looked pretty clean I knew the denim wouldn’t stay clean

    for long.  I wanted to get the stinger out of the stem so I could let it soak in alcohol and soften the tar lacquer (that is my new name for that version of yuck – tar lacquer).  The darn thing was stuck.  I tried wrapping it in fabric and gripping it with pliers.  Tried wiggling, tried sweet talking and swearing but it wouldn’t budge.  When all else fails, alcohol.  I used to use that saying for more things than a stuck stinger.

    With the stem occupied with the alcohol, I turned my attention to the stummel.

    The reaming of the tobacco chamber was easy and uneventful.  I probably even could have skipped it.  After the reaming I sanded the chamber smooth, some of the original yellow bowl coating didn’t want to budge so I left it to remind me that it was a Yello-Bole and because it’s probably a lead based paint.  Just kidding, the environmental control laws of the 1930’s are well known for their extensive product testing.  Yeah, kidding again.

    I didn’t think the shank airway could be too dirty since the pipe did not appear to have smoked very much.  Cotton swabs dipped in 95% ethyl alcohol would clear out any tar lacquer and associated yuck.  I have to admit being a bit surprised by the number of swabs it took to get the airway clean but clean it was.

    I must have been feeling lazy because I did not give this stummel the usual Murphy’s Oil Soap scrubbing.  I figured that I would just clean and remove the finish in one fell swoop.  Using 95% ethyl alcohol on a make-up pad I started wiping the exterior of the stummel.

    Now I remembered why I used Murphy’s.  The first pad just removed the accumulated dirt and grime from 90 years of existence.  The next pad did remove a little finnish but the alcohol was not having the desired effect of removing all of the finish.

     Pad number three was enlisted with acetone.  This one did what I wanted it to do.  The acetone dissolved the finish readily.  

    A couple more for good measure and the stummel was ready for sanding.

    I checked back on the stem.  The stem retained it’s death grip on the stinger.  Again, the pliers, fabric, sweet talk and swearing were employed with no result.  I will be victorious, just not yet.  I gave the stem a little bit of work with the flat needle file and 320 sanding sponge to smooth out the roughness around the button.  How a pipe that appeared relatively little smoked could have a stem chewed up this badly is a mystery to me.  Perhaps it had been smoked frequently and just well cleaned.  That concept broke with my experience with pipes from this era but remained a possibility.

    Once the worst of the oxidation had been removed by sanding, I started the rebuilding of the button.  The dent above the button was filled first using thin applications of black CA, spritzing with CA drying accelerator, filing and sanding.  The resulting area then received a second coat of black CA with the above speed drying and smoothing until it was filled.

    The below photo shows the rebuilt area smoothed inside a yellow square.

    The draft hole of this Yello-Bole was rectangular, nearly square.  I thought about items to use to support the liquid CA prior to it setting-up with a CA accelerator.  The cotton swabs I had been using had a plastic “stick portion.  I thought I could square this off with a bit of force and make it work.  I worked very well.  The CA did not stick to the plastic and the size and shape fit with near perfection.  The plastic was inserted into the airway, while I applied a drop of black CA to the chewed through section of the button.  The wet CA was then inverted and held upside-down while I spritzed it with the CA drying accelerator.  

    Once the CA had set-up I continued adding additional thin layers of black CA followed by spritzing with the accelerator.  Eventually the gap had been spanned with new material.  This new material was shaped with a flat needle file and smoothed with a 400 sanding sponge.

    Final shaping and smoothing were done until I was happy with the results.  My reshaping did take away that “older look” and did make the stem look more modern.  I have conflicting feelings about that.  It is more comfortable and looks more finished but It lost that apparent “old pipe” look.

    After the button was finally shaped I started cleaning the airway in the stem.  This went quite smoothly using bristle pipe cleaners and 99% isopropyl alcohol.  

    For the sanding I wanted the two pieces together so as to not round the edges of the joint where the pieces join.  I taped off the stampings; right, left and bottom.  The sanding was done with a series of sanding sponges from 600-3500 grit.  Between each sponge I wiped the stummel with a make-up pad moistened with 95% ethyl alcohol.  The stem was rubbed with my finger dipped in mineral oil then wiped with a dry paper towel.

    Next, I worked the pipe with the micro-mesh pads 4000-12000.  I wiped the stummel as above but the stem received a drop of Obsidian Oil rubbed in with my finger and wiped with a paper towel.between pads.

    The final stem polishing was done with Before and After Fine and Extra Fine Polish, respectively.  Each polish was applied by fingertip and hand rubbed with a soft cotton cloth.

    The entire pipe was coated with aBefore and After Restoration Balm and allowed to sit for 30 minutes.

    Once 30 minutes were up, I used the inside of an athletic sock to wipe away the excess balm.

    THe stinger was still stuck.  I said that I would be victorious and I had some thought as to how that could come about.  The first plan was to try to soak the stinger in boiling water.  The thought was that the aluminum would heat up the surrounding tar lacquer, softening it so that I could remove the stinger with a little bit of force.  Good idea, no results.

    THe next idea was to apply heat in the form of flame.  The hotter than boiling water temperature would soften the tar lacquer releasing it’s death grip on the stinger and allow me to remove it.  As I was heating the stinger I was steam coming from the point where the stinger was inserted into the stem.  Some water must have seeped into the stem and was being vaporized by the flame heating the aluminum stinger.  I knew that if the water was vaporizing I was at the boiling point of water also the temperature that vulcanite begins to soften.  I wrapped the stinger in a cotton handkerchief and pulled on the wrapped stinger with a pair of pliers.  It came free.  Victory!  I then cleaned the stinger with 99% isopropyl alcohol and a nylon scrub brush.  I ran a couple more alcohol dipped pipe cleaners through the stem, now unimpeded to get it completely cleaned also.

    All that remained was to apply several coats of carnauba wax with the buffer to the whole pipe.

    I love how this 90 year old Yello-Bole turned out.  The wood grain is beautiful.  Sure, it has some fills.  I left the old olds and only fixed a couple of small scratches while I was sanding.  It was a “second” after all.  The stem was cleaned-up and polished nicely.  The logo and stampings all remained intact and are more clearly legible now than they were under the grime and finish.  I did get to smoke this pipe earlier and it smokes very well for being a smaller pipe.  The walls are thick enough that they remained cool throughout the bowl of tobacco.  This pipe was never intended to be a showcase item and I intend to use it as it was designed as a nice pipe to smoke on the way to town for errands when a 15-20 minute smoke is what is needed.  I hope that you have found something here useful to your restorations or were entertained.  If you like this sort of thing, please click the like and subscribe.  Thank you for reading the ramblings of an old pipe lover.

    Below are some photos of the finished Yello-Bole Billiard.

  • A Parker Bent Rhodesian Square Stem Restoration

    March 5th, 2024

    Photographed and written by

    John M. Young

    I decided that I wanted to expand my horizons the other day.  I have only purchased pipes from US and UK sources.  I saw a lot of 6 pipes from Greece and decided to take a gamble at getting something from the other side of a couple of ponds, one Atlantic and the other Mediterranean.  After a 19 day voyage of international shipping the lot arrived and required a signature.  Of course one should be away from home when an unexpected and unplanned package arrives.  The dejected postal worker left a note saying the package could be picked up in town after 8:00 the following morning.  I needed groceries anyway so off to town I went.  

    Dirty old pipes from Greece look remarkably like dirty old pipes from the US.  One of these dirty darlings caught my eye more than the others.  What can I say, when the muse beckons, I can’t help but follow.  The pipe that drew me to it appeared as follows.

    I know what you are probably saying, “Haha, a fool and his money are easily parted.”  Or perhaps, “Yikes!”  You would be correct with both or either statement.  I saw something in this pipe that I can’t easily define, the cool shape and the hint of pretty grained briar under the filth.  Maybe?  Whatever it was, I wanted to restore this one first.  I had never restored a Parker before.  Heck, I barely knew that they were a second of Dunhill.  I needed a Parker history lesson.

    Looking at my go-to source, pipedia.org, I found that, “In 1922 the Parker Pipe Co Limited was formed by Alfred Dunhill to finish and market what Dunhill called its “failings” or what has come to be called by collectors as seconds. Previous to that time, Dunhill marketed its own “failings”, often designated by a large “X” over the typical Dunhill stamping or “Damaged Price” with the reduced price actually stamped on the pipe.” (https://pipedia.org/wiki/Parker).  Hmm, an entire brand based on failings.  That was an interesting concept.  I envisioned a surgeon in a business relationship with his mortician brother.  Or, a teacher sending failing students to their sister at her tutoring company.  Waste not want not.

    The Parker story continued,

    “While the timing and exact nature of the early relationship remains a bit of mystery, Parker was destined to eventually merge with Hardcastle when in 1935 Dunhill opened a new pipe factory next door to Hardcastle, and purchased 49% of the company shares in 1936. In 1946, the remaining shares of Hardcastle were obtained, but it was not until 1967 when Parker-Hardcastle Limited was formed.

    It is evident through the Dunhill factory stamp logs that Parker and Dunhill were closely linked at the factory level through the 1950s, yet it was much more than a few minor flaws that distinguishing the two brands. Most Dunhill “failings” would have been graded out after the bowl turning process exposed unacceptable flaws. This was prior to stoving, curing, carving, bit work and finishing. In other words, very few Parkers would be subjected to the same rigorous processes and care as pipes destined to become Dunhills. Only those that somehow made it to the end finishing process before becoming “failings” enjoy significant Dunhill characteristics, and this likely represents very few Parker pipes.

    After the war, and especially after the mid 1950s the differences between Parker and Dunhill became even more evident, and with the merger of Parker with Hardcastle Pipe Ltd, in 1967 the Parker pipe must be considered as an independent product. There is no record of Parker ever being marketed by Dunhill either in it’s retail catalog or stores.

    Parker was a successful pipe in the US market during the 1930s up through the 1950s, at which point it faded from view in the US, while continuing to be popular in the UK. It was re-introduced into the US market in 1991 and is also sold in Europe.

    John Loring states in “The Dunhill Briar Pipe – ‘the patent years and after’” that while he has seen several pre-war Parkers and some from the 1950s that appear to be Dunhill “failings” during the finishing process, briar was also obtained from sources other than Dunhill. Loring knows of no way to distinguish the briar source when looking at either Hardcastle, Parker, or Parker-Hardcastle pipes. And that aside from a very few Parkers from the 1950s and before, and a few ODA shapes, we should not expect to find any actual Dunhill production in these lines. While one might be there, it is doubtful we will ever be able to determine it.”  (https://pipedia.org/wiki/Parker)

    This Parker has none of the stamping described above.  This indicates that it was made much more recently.  Actually the pipedia.org author asks for assistance from readers regarding pipes made after 1957. 

    “A little help here from anyone with date code information beyond 1957 would be most appreciated.

    After 1957 on pipes Parker ceased to put patent number and the code with definition of date.”   (https://pipedia.org/wiki/Parker)

    Looking to pipehil.eu for any clues regarding the stampings led to similar conclusions.  There was a wealth of information from the earlier pipes and then very little for anything after the late 1950s.  

    (http://www.pipephil.eu/logos/en/logo-parker.html)

    Although the pipe pictured below is very similar in shape to the Parker in hand, there is no shape number listed below.

    (http://www.pipephil.eu/logos/en/logo-parker.html)

    Back to pipedia.org, maybe I can at least find the shape number or name.  There is a 1958 Parker brochure pictured.  Once again, thank you Doug Valitchka.

    (Brochure photos from https://pipedia.org/wiki/Parker)

    Alright, I now have an official name for her.  I guess what I can tell you about this Parker Bent Rhodesian Square Stem is that it was made in London, England after 1957 and whoever owned it before smoked the bejeebers and a lot of tobacco out of it.

    This restoration began like most others with a clean denim piece for the work surface.  This pipe was in need of a lot of work.  I started by assembling the reaming gear.    

    The tools were the PipNet with the #2 blades, Smokingpipes Low Country knife, General triangular scraper (with the tip ground round), 220 sandpaper wrapped around a wood dowel and 320 sandpaper wrapped around a Sharpie marker, all on top of a white plastic mylar envelope.  I have to keep that denim pristine.

    In very short order the word pristine left my vocabulary and was replaced by other less savory terms.  The cake in the tobacco chamber was very hard.  I had to stop using the PipNet for fear of breaking the reamer and scrape with the knife or the scraper then return to the PipNet several times.

    Eventually the chamber was reamed out and then sanded.  The chamber appeared to be out of round.  I couldn’t tell exactly how due to the lava that was encrusting the entire rim.

    With the reaming done I scraped the lava from the rim using a very sharp pocket knife.  This was another dirty job, where is Mike Rowe when you need him? I took the stummel to the sink for a good long scrub.  The scrub was done with Murphy’s Oil Soap used undiluted and a medium bristle toothbrush.  A normal scrub uses one application of soap.  A dirty pipe scrub will require a second application of soap.  This poor stummel received three applications and I retrieved a stiffer nylon brush to get rid of the grime on the top of the shank.  I neglected to photograph the scrubbing as my hands were so fouled with carbon and cake I was afraid for the wellbeing of the phone.  Maybe an exaggeration but not much of one.  

    Returning to the workbench with the freshly scrubbed stummel, I wetted a make-up pad with 95% ethyl alcohol and wiped off the exterior of the stummel – three times.  The stummel was still shedding grime.  After all the scrubbing I thought I had it clean.  Nope. 

    The make-up pads finally stopped discoloring.  The next step was to clean the airway within the shank.  As usual I neglected to photograph this process.  I can describe it though.  I poured about 3 ml of 95% ethyl alcohol into the bowl.  A nylon shank brush was then used to scrub the airway while keeping the stummel held at an angle allowing the alcohol in the chamber to dissolve the tars and keep the brush wet.  I then poured the alcohol into a medicine cup and swabbed out the loosened residue with cotton swabs.  This was repeated until the cotton swab emerged clean.  In this case it was repeated many times.

    That finished, I examined the stummel for the next task to take on.  There were several fills on the pipe.  They appeared lighter and remained solid after all the scrubbing and alcohol.  I figured I would leave them alone, staining them to match later.  The rim was charred under all of that lava.  Charred nearly all the way around.  Apparently the previous abuser was ambidextrous as well and wielded a lighter in both hands. 

    The scrubbing also revealed a piece of beading that was broken.

    I figured that a little bit of sanding might reveal some more issues to deal with so I taped the stampings to protect them from any sanding.

    I sanded the exterior around the rim. The charring was not as deep as I feared and sanding removed most of it.

    The rim would require topping to rid it of the charred briar.

    The rim was topped using 22- sandpaper on a countertop.  A circular motion was used while rotating the stummel in hand every couple of circles.  This was done to keep equal pressure on the stummel and even sanding of the rim.  Below you can see the results of the topping.  I hoped that the charring that remained would be removed during the normal sanding.

    The next task was to fill in the break in the beading.  I figured that this could be done with careful application of briar dust then a bit of cyanoacrylate (CA, super glue).  The goal would be to have the CA bond the briar dust together in the void and provide me a surface that I could then sand smooth with the existing briar.  I pushed the briar dust into the hole.  WIth a fly tying bodkin I carefully removed the bust from the groove. below

    The briar dust removal was repeated with the groove above the “hole”.

    CA was then applied to the briar dust with the fly tying bodkin.  THe CA soaked into the dust and set-up almost immediately.  The result was sanded smooth with the contours of the stummel below.  I then used a folded piece of 220 sandpaper to sand the groove.  There is a better photo of the finished fill in the “finished” section at the end. 

    I did not want to sand the stummel separate from the stem.  The stem had a wood accent at the tenon and I wanted these to be together during the sanding to avoid any rounding of the contact seam.

    This meant that it was time to address the stem.  This stem had several issues to be dealt with.  Here are the before photos of the stem, in case you forgot.  There was a thick calcium deposit and beneath that deep tooth dents on the top and bottom surfaces.  Along with oxidation with a mangled button.  To make matters a bit more precipitous, the logo was already worn and the wood accent made me scared to give this stem a soak in the Before and After Deoxidizing solution.  

    I took off my aluminum foil hat and put on the thinking cap to come up with a plan.  The plan was as follows:

    1. Insert the stem, the stummel would provide a better handhold
    2. Scrape and sand the calcium deposits
    3. Assess the severity of the tooth dents
    4. Sand the worst of the oxidation avoiding the logo
    5. Soft Scrub the oxidation into oblivion
    6. Fill the dents with black CA, file, refill, file
    7. Rebuild the button with black CA
    8. Tape the logo
    9. Sand, micro-mesh and polish the stem and the stummel together 

    That sounded like a good plan.  It’s always the implementation that provides the difficulties though.

    Following my incredible, well throughout, detailed, perfect plan I proceeded to step #1.  Dramatic pause.  The stem was too loose.  I had forgotten that when I was initially assessing this restoration I noticed that the tenon had what appeared to be beeswax, or something like it, spread on the tenon.  I had scraped this off.  I photographed it too and completely forgot about it.

    Well, poop, there goes an incredible, well throughout, detailed, perfect plan.  Wait, I can still salvage the plan.  All I need to do is make the tenon fit as step Pre-1.  Then proceed as planned.

    Okay, tenon tightening using black CA – step pre-1.  I cleaned the tenon with 95% ethyl alcohol.  The tenon was then sanded with the 400 grit sanding sponge to roughen the surface.  I used a short flat “dry brush” paint brush to smoothly and evenly coat the tenon with black CA.  I constantly rotated the stem as I worked.  The tenon was then spritzed with a cyanoacrylate drying accelerator.  The hardened CA was then sanded with the 1500 grit sanding sponge to smooth it and check for fit.  I had to apply a second very light coat of CA and repeat the drying/sanding to get the desired snugness.  Oh, make sure you put your brush into a medicine cup with a couple ml of acetone and let it soak.  They clean up almost like new. 

     Now I was ready to start that incredible, well throughout, detailed, perfect plan.  The newly tightened tenon fit very nicely into the stummel and allowed for a complete step 1.  Next, I scraped and sanded the calcium deposits revealing a frightening looking stem and button.

    The stem was sanded with the 400 and 600 grit sanding sponges to remove a good deal of the oxidation.  I was very careful to avoid the logo.  I then used Soft Scrub on a make-up pad to scrub the stem.  This took many pads.  I apparently also neglected to photograph this.  Again, trust me, there were at least 6 pads all with gross brown spots of oxidized vulcanite.

    That brings me to step 6 – filling the dents and rebuilding the button.  The dents were too deep to fill with a single application of black CA.  Several smaller applications were used.  Filing with a flat needle file and smoothing with a 400 sanding sponge were done between applications.  Pardon the less than stellar photographs.  Some day I’ll use the real camera rather than trying to do this one handed with a phone camera.

    First application of CA on dents.

    After the accelerator spritz.

    CA filed.  I am not concerned with smoothness at this point.

    Covering the “blending area” with CA.

    Now the smoothing becomes important.  There was still one depression, the shiney spot, that needed more CA.

    Bad photo but I hope you get the main idea.

    Then repeat for the bottom of the stem.  Initial CA application.

    Filing of the initial.  Followed by subsequent applications.

    Smoothing of a larger area.

    With the dents filled and fairly smoothed it was time to rebuild the button.  To do this I wrap the newly smoothed area in scotch tape.  I don’t want to have to redo any work that I had just done.  The tape also projects the surface from the file and sanding sponges for the work to be done.

    With the scotch tape applied, I started layering the new black CA.  I must have been getting tired and stopped photographing.  For me, rebuilding a button is almost the same as filling the dents.  Several layers of CA are added with filing and sanding between each layer to assess where additional material is needed.  There is one important addition:  Immediately after the accelerator is spritzed I take a sharp knife and cut through the CA while it is still soft.  I only have a few seconds until is sets-up.  The cut is made along the stem-ward side of the button; the cutoff material will come off when the scotch tape is removed.  This cutting saves you the time and trouble of shaping the button where it meets the stem.  The rebuilding occurred on the top and bottom of the button and was shaped with the flat needle file and sanding sponges.

    That brings us to the last two steps of the incredible, well throughout, detailed, perfect plan.  The taping of the logo and the sanding and micro-meshing of the pipe.  The sanding went smoothly, no pun intended.  The sanding sponges were used in sequence from the 600-3500.  Between spongers I would wipe the stummel with an alcohol wetted make-up pad.  The stem was wiped off with a dry paper towel and every couple of sponges I would apply a coating of mineral oil and wipe that off before going to the next sponge.

    Just when I think the thing is about finished I notice something else that I just can’t ignore.  OK, two things:  The non-round tobacco chamber and the bottom of the chamber had a depression that was far below the draft hole.  It looked like years of scraping had deepened the bowl.  It is hard to see in the photos but you might be able to make it out.

    I could not stand the thought of the gouged bowl bottom.  I mixed some J.B. Weld as per product instructions.  This is a two part epoxy that can be exposed to 550 degrees Fahrenheit, according to product details.  I used a disposable syringe with the tip cut off to draw up and apply the epoxy to the bottom of the bowl.  The photo below shows the epoxy pooling in the gouge in the bowl. 

    After the epoxy had started to set-up, after 30 minutes, I covered the epoxy surface with carbon powder and pressed it into the still tacky surface of the epoxy.  The epoxy sets-up within minutes but I left it to cure overnight.  

    THe next morning, I continued on with the micro-meshing using the 4000-12000 pads.  Between each I would apply a drop of Obsidian Oil to the stem, rub it in with my finger then wipe off the excess with a paper towel.  The stummel was wiped with an alcohol dampened make-up pad.

    The stem was then polished with the Before and After Fine Polish followed by a polish with the Extra Fine Polish.  Both the fine and the Extra fine were applied with my finger then hand rubbed with a soft cotton cloth.

    The final step was to take the pipe to the buff and apply several coats of carnauba wax.

    Overall I am very happy to add this Parker to my personal collection of pipes.  The briar does have several fills but they are only evident with close observation.  I guess the pipe had to live up to its “Dunhill’s failings” reputation.  The grain is lovely and is accentuated by the exotic wood stem accent.  The stem polished up nicely with the black vulcanite contrasting the woods nicely.  The pipe feels great in hand and the bent Rhodesian is a favorite shape of mine.  I do hope that you have found something here useful to your restorations.  If you like this sort of thing, please click the like and subscribe.  I thank you for reading the ramblings of an old pipe lover.

    Below are some photos of the finished Parker Bent Rhodesian Square Stem.  

    Here is a close-up of the repair of the bead.

    And finally the finished bowl fill.

  • A Kaywoodie HandMade Saddle Stem Restoration

    March 1st, 2024

    Photographed and written by 

    John M. Young

    I am starting to feel like I work at a lumber yard.  This is the third Kaywoodie HandMade restored in the past couple of weeks.  Good thing they are fun to work on.  The first one had a push stem and no Kaywoodie logo on the stem.  The second was a tapered stem with a white circle with a black 3 leaf clover logo.  This one is all decked out with a saddle stem and the same white and black logo as the tapered stem.  That logo was discontinued after 1955, according to pipedia.org and the shape first appeared in the 1947 catalog. 

    I’m just going to copy the historical information from the first HandMade restoration..  I am pretty sure that nothing historical has changed in the last few days.“Kaywoodie name first appearing in February of 1919.” (Kaywoodie History – Greywoodie LLC) The history of Kaywoodie pipes is fortunately well documented thus, allowing rather precise dates for a Kaywoodie collector to declare the provenance of their charges.  The above pictured Kaywoodie is stamped HANDMADE over KAYWOODIE (left) and IMPORTED BRIAR (right).  No shape number is present.

    Using this information and referring to the Kaywoodie Collectors’ Guide listed on pipedia.org I found that these pipes were made during the following years:

    “Handmade-Oversize-Carved 1947-1955 on and off” (https://pipedia.org/images/3/3d/Kaywoodie_Pipe_Names.pdf) and that

    “The Oversize Kaywoodies were, as the name implies, “Giants”. Lowndes notes that these pipes were stamped simply, “Hand-Made”. The pipes were all roughly “bulldogish” in appearance and were available in the following styles and grades7 : • Hand-carved “Colossus” ($10) • Walnut finish, banded “Hercules” ($20) • Hand-carved “John Henry” ($10) • Virgin finish, specimen grain “Paul Bunyan” • ($25)Virgin finish, banded specimen grain “Goliath” • ($25)Walnut finish “Atlas” • ($20)Hand-carved, Meerschaum-Inlaid “Samson” ($15)” (Kaywoodie Collector’s Guide – p10.pdf)

    Looking into the stampings, I went to piphil.eu for confirmation.  ThereI was able to find an exact match of this pipe’s stampings.

    (Kaywoodie series from L to Z — Pipes : Logos & Markings (pipephil.eu))

    Well, that was easy.  This large Kaywoodie Hand Made, though not very “bulldogish” was most likely made between 1947 and 1955 at the West New York, New Jersey factory.  If you would like to see the 1947 Kaywoodie catalog here is a link:  Kaywoodie_1947.pdf (pipedia.org).  It is a fascinating read with great old marketing photos and illustrations.  Just out of curiosity I wondered what $10 in 1947 was equivalent to today.  According to a bis.gov inflation calculator it is $131.09 (Using Dec. 1947 and Dec. 2023)(CPI Inflation Calculator (bls.gov)).  I highly recommend reading the above links for further Kaywoodie history.

    This Kaywoodie HandMade saddle stem came from Las Vegas Nevada to southeast Nebraska.  All three Kaywoodie HandMades were from the same seller.  The first one bought on a whim the second two were negotiated for.  I will link the first two restorations for you, if you are interested in reading about them:  Hand Made 1 and HandMade 2.  This third pipe was stamped HANDMADE over KAYWOODIE on the left shank and IMPORTED BRIAR on the right.  No stampings were on the bottom.  Below are photos of how the pipe appeared upon arrival.

    This restoration began like most others with a fresh clean denim piece for the work surface.  I should show the final version of the denim, I’ll probably forget but it’s worth a shot.  

    Since this stem was badly oxidized I decided to give it a several hour long soaking in the Before and After Deoxidizing Solution.  I first sanded the stem with a 400 grit sanding sponge and cleaned out the interior with several alcohol dipped bristle pipe cleaners.  The final pipe cleaner You see in the photo above, inserted into the stinger.

    The stem was too long to hang in the solution.  I ended up using a wood sanding block to tilt the jar of Deoxidizing solution (deox, as I like to call it).

    It wasn’t perfect but I was certain that it would work.  At this point I actually went upstairs to type up the restoration of the second Kaywoodie HandMade.  Oh, this is confusing.  About 4 hours later, I returned to the deox jar to retrieve the stem.  After allowing most of the excess solution to drip off the stem, I like to use a coarse cotton shop rag to vigorously rub off the remaining solution.  

    The stem looked much better.  You can see the black has returned but the surface was rough and pitted.  

    I used Soft Scrub on make-up pads to rub off the remaining oxidized vulcanite.  

    After the Soft Scrub I oiled the stem with a coating of mineral oil and allowed it to soak up the oil while I started work on the stummel.

    Looking back at my photos I apparently neglected to photograph the reaming of this HandMade.  Don’t worry, you are not missing much. This pipe had been smoked very little as you will see when I describe the shank cleaning.  The reaming was very quick and uneventful.  I used the PipNet with the #3 blades to barely mess up my plastic drop surface.  The scraper and knife were not used and the tobacco chamber was sanded with 220 sandpaper on a wood dowel followed by 320 sandpaper wrapped around a Sharpie marker.  The most interesting part was that there was a shallow groove inside the chamber that ran along the left side.  I remembered that the second Kaywoodie HandMade also had a groove in it’s chamber.  Upon looking very closely at both with a bright flashlight I saw what appeared to be a thin crack in both chambers.  It did not go from the top to the bottom; rather it was about ½ to ¾ inches long in the center of the chamber on both pipes.  It almost looked like it was a crack from improper drying or the chamber was bored out while the wood was not completely dried.  I then remembered that both of these pipes had come from Las Vegas Nevada, a place not known for their humidity.  Perhaps years of storage in the desert had not been good for the pipes.  Either way I thought it would be best to mix up some J.B. Weld and fill the crack from within the chamber.  Allow the epoxy to set and sand it smooth with the chamber surface.  I thought that I would come back to do that step with both pipes when I was finished with the restoration.

    I took the stummel to the sink.  There I scrubbed the stummel with undiluted Murphy’s Oil Soap and a medium bristle toothbrush.  The years of dirt and grime were evident in the lather.  The stummel was rinsed in warm water and dried with a cotton dish towel.  

    When finished drying I poured 5 ml of 95% ethyl alcohol into the tobacco chamber and allowed it to flow into the shank.  Without pouring the alcohol out I used a nylon shank brush to scrub the airway within the shank with the alcohol.  This alcohol was poured into a medicine cup.  The color indicated the extent of the tar accumulation in the airway.

    THe very light color of the alcohol led me to believe the shank was relatively clean.  A few alcohol dipped cotton swabs confirmed this.

    With the internals cleaned out I returned to the exterior of the stummel.  There seemed to be some yuck (the technical term for unwanted debris) in the grooves of the carvings.  I wetted a make-up pad with 95% ethyl alcohol and wiped-down the exterior of the stummel.  Very little color came off.

    I then used a stiff nylon bristle brush dipped in the alcohol to scrub the carvings.  Again I wetted a make-up pad and wiped the surface.  This time the grooves looked deyuckified and it showed on the make-up pad.

    The rim looked very clean after the alcohol and nylon brush scrubbing.  Although it did show a bit of charring around the inside edge of the rim.

    Now to deal with that charring.  I used a wood sphere with a piece of 220 sandpaper.  The sphere provided an even angle for a bevel and erased the charred briar.  THe bevel was then sanded smooth with the sanding sponges by using the 400, 1000, 1500 and 2500 sponges in sequence.

    The stummel required no real sanding other than a light buff with the previously mentioned sanding sponges.  I wiped the stummel off with an alcohol dampened make-up pad and let it dry.  The stummel was then coated with Before and After Restoration Balm and allowed to sit overnight.

    In the morning the Restoration Balm was hand buffed from the stummel using the inside of an athletic sock.  The terrycloth of the sock worked excess balm from the rustications of the carvings and left a very pretty shine on the stummel.

    The stummel needed an equally attractive stem, so back to work.  I wiped the excess mineral oil from the stem and began sanding with the series of sponges – 1000-3500.  Between each sponge I would dip my finger in the mineral oil, rub the stem and wipe it dry with a paper towel.  I would also wipe the sponge off on the denim to keep the sponges kind of clean.

    After the sanding I started to micro-mesh the stem.  Here I used the 4000-12000 micro-mesh pads in sequence.  Between each pad I applied a drop of Obsidian Oil.  The oil was rubbed in with my finger and wiped away with a paper towel.

    The final steps in polishing the stem were done with Before and After Fine and Extra Fine Polish.  The polish was applied by finger tip and hand rubbed with a soft cotton rag.  Fine Polish followed by the Extra Fine Polish. 

    The final touch was the application of several coats of carnauba wax with the buffer.  I tried to only apply the wax to the high area but gave up on that.  I used the edges of the buffing wheel to work the wax into the carvings.  When I was finished I replaced the waxing wheel with a clean flannel wheel.  I used this wheel without any wax and used the corner edge of the wheel to get into the carving grooves.  My thought was to melt and absorb as much of the wax from the grooves as possible while still leaving a thin coating to protect the briar.  It looked good.

    Overall I was very pleased at how well this Kaywoodie turned out.  These were fun pipes to work on and their size makes you feel like you have accomplished a real feat.  The briar cleaned up beautifully and the stem again shines like new vulcanite should.  As for the dimensions of this pipe, as I said it is large, the dimensions are as follows:

    Weight:  3.12 ounce/ 88.45 g.

    Length:  6.42 in./ 163.07 mm.

    Bowl Height: 2.18 in./ 55.37 mm.  

    Chamber Depth: 1.85 in./ 46.99 mm.

    Chamber Diameter: 0.84 in./ 21.34 mm.

    Outside Dimension (side-side):  1.60 in./ 40.64 mm.

    Outside Dimension (front-back):  1.91 in./ 48.51 mm.

    These are not pipes that you can clench while raking leaves or shoveling snow.  This pipe demands you attention.  I am sure the reward for such demands is a very nice cool smoke.  I do hope that you have found this to be useful and entertaining.  If you enjoy this sort of thing, please click the like and subscribe.  I thank you for reading the ramblings of an old pipe lover.

    Below are some photos of the Kaywoodie HandMade Saddle Stem.  

    Well, I’ll be darned.  I didn’t forget.

  • A Kaywoodie HandMade tapered stem Restoration, dé·jà vu

    February 28th, 2024

    Photographed and written by

    John M. Young

    I know what you are thinking:  “Dang Young, you must be getting old and didn’t realize that you already posted that restoration.”  And I reply:  “Hah, this is a different one.  This one has a screw-in tenon and a pre-1955 logo.”  You are correct though, I am getting old.  I came across two more of these Kaywoodie Hand Mades the other day and settled on a price with the seller.  This one has a lovely tapered stem while the other one has a saddle stem.  These pipes make me think of the word “lumber” when I handle them.  They are large.  Both over 2.5 ounces (71 g).  Not clenchers but, I am sure they will be cool smokers.

    I am going to use the historical information from the previous Kaywoodie HandMade restoration.  I linked that blog as well, for those who would like to read it.

    “Kaywoodie name first appearing in February of 1919.” (Kaywoodie History – Greywoodie LLC) The history of Kaywoodie pipes is fortunately well documented thus, allowing rather precise dates for a Kaywoodie collector to declare the provenance of their charges.  The above pictured Kaywoodie is stamped HANDMADE over KAYWOODIE (left) and IMPORTED BRIAR (right).  No shape number is present.

    Using this information and referring to the Kaywoodie Collectors’ Guide listed on pipedia.org I found that these pipes were made during the following years:

    “Handmade-Oversize-Carved 1947-1955 on and off” (https://pipedia.org/images/3/3d/Kaywoodie_Pipe_Names.pdf) and that

    “The Oversize Kaywoodies were, as the name implies, “Giants”. Lowndes notes that these pipes were stamped simply, “Hand-Made”. The pipes were all roughly “bulldogish” in appearance and were available in the following styles and grades7 : • Hand-carved “Colossus” ($10) • Walnut finish, banded “Hercules” ($20) • Hand-carved “John Henry” ($10) • Virgin finish, specimen grain “Paul Bunyan” • ($25)Virgin finish, banded specimen grain “Goliath” • ($25)Walnut finish “Atlas” • ($20)Hand-carved, Meerschaum-Inlaid “Samson” ($15)” (Kaywoodie Collector’s Guide – p10.pdf)

    Looking into the stampings, I went to piphil.eu for confirmation.  ThereI was able to find an exact match of this pipe’s stampings.

    (Kaywoodie series from L to Z — Pipes : Logos & Markings (pipephil.eu))

    Well, that was easy.  This large Kaywoodie Hand Made, though not very “bulldogish” was most likely made between 1947 and 1955 at the West New York, New Jersey factory.  If you would like to see the 1947 Kaywoodie catalog here is a link:  Kaywoodie_1947.pdf (pipedia.org).  It is a fascinating read with great old marketing photos and illustrations.  Just out of curiosity I wondered what $10 in 1947 was equivalent to today.  According to a bis.gov inflation calculator it is $131.09 (Using Dec. 1947 and Dec. 2023)(CPI Inflation Calculator (bls.gov)).  I highly recommend reading the above links for further Kaywoodie history.

    With that perfect example of a generation-X lazy re-use of a previous blog history it is time to get to the restoration.  Here is what the Kaywoodie HandMade taper stem (that is what I’m calling it) looked like upon arrival.

    This looked like a normal restoration.  The main tasks to be completed should be:  Reaming the tobacco chamber, cleaning out the airway, cleaning and removing any finish from the stummel, removing the oxidation, and restoration of the stem, wax and polish.  It always sounds easier than it actually turns out to be but I am an optimist.

    I started with a clean denim piece for the work surface and started working on the stem.

    I began with the airway within the stem.  I am not a big fan of stingers especially, stingers that don’t come apart.  At least with those you can slide out the funky shaped end-piece and run a pipe cleaner through a fairly open hole.  Kaywoodies on the other hand, not so much.  I was able to get a bristle pipe cleaner dipped in alcohol from the button end down into the stem.  Fortunately the stem was not too dirty.  Thank you, previous owner.  A couple pipe cleaners later and the stem was clean.

    Nex, I rubbed the surface with 0000 steel wool then dipped the steel wool into 99% isopropyl alcohol and cleaned up the stinger.  After the steel wool I thought that I would not need to give this stem a soak in the Before and After Deoxidizing solution.

    The stinger cleaned up nicely and the oxidation on the stem looked like all it needed was Soft Scrub on a make-up pad.  Well, several applications of Soft Scrub, that is.

    After a mineral oil rub the stem was looking much better. I set it aside to soak-in some oil and started to work on the stummel.

    I gathered the reaming crew:  The pipNet with the #2 and #3 bladed, Smokingpipes Low Country knife, General triangular scraper, 220 sandpaper wrapped wood dowel and the 320 sandpaper wrapped Sharpie marker.  

    With the crew all ready I started with the PipNet with #2 blades attached.  It was far smaller than the tobacco chamber but working in steps is easier that taking a large step.  

    It reminded me of the old saying, “How do you eat an elephant?”.  “One bite at a time.” The #3 blades cleaned up the chamber most of the way and required little scraping with the knife or scraper.

    The chamber was sanded to bare briar with the 220 sandpaper and finished with the 320 sandpaper.  There was a strange groove cut into the chamber from nearly the top to the bottom.  The groove was about 1-2 mm wide and not a mm deep.  I tried to sand it smooth without getting the chamber out of round.

    I normally would have addressed the rim at this time but the rim had fine rustications and a smooth surface immediately out from the chamber.  I did not want to change the rustication so opted to try to remove the lava with the Murphy’s Oil Soap scrubbing.  I did want to get some idea for how fouled the airway of the shank was.  I moistened several cotton swabs with alcohol and tried scrubbing the shank.  They came back very darkly stained with tar and yuck (the technical term for black tar like smoking residue).  That told me that the shank cleaning would be a difficult one.  The Kaywoodie mortise being aluminum meant that it was difficult to do any scraping of the airway with a dental scraper.

    I took the stummel to the sink for scrubbing.  At the sink I used Murphy’s Oil Soap undiluted and scrubbed the stummel with a medium bristle toothbrush.  A surprising amount of old dirt and grime came off in the scrub.

    The rim was scrubbed with the toothbrush initially then I graduated up to a brass brush to remove the lava without damaging the rustication.  The stummel was rinsed with warm water and dried with a cotton dish towel.  I then poured about 5 ml of 95% ethyl alcohol into the bowl.  I let this flow into the shank without pouring it out.  I then scrubbed the airway using a nylon shank brush allowing the alcohol to soften and dissolve the accumulated yuck.  This was then poured into a medicine cup.  The results were very dark and indicated that the shank was full of yuck.

     I returned to the workbench to do what scraping I could with the dental scraper.  Anything I could get out with the scraper was worth several alcohol/shank brush scrubs.

    The scraping alternated with alcohol and nylon brush scrubbing.  An abbreviation that comes to mind is TMTC, meaning too many to count.  TMTC later the cotton swabs were finally yielding less and less yuck.

    With the shank finally cleaned out I returned my attention to the exterior of the stummel.  I wiped the exterior with a make-up pad wetted with 95% ethyl alcohol.  The briar did not appear to have been stained and not finished.  I was hoping that it was just wax and grime that would be removed with the pad.

    The alcohol pad came back with what looked like some sort of finish or wax, mostly from the carved areas.  I decided to use an alcohol dipped brass brush to scrub the carved areas more thoroughly.

    This resulted in removing much more, whatever it was that was, being removed.  The stummel looked much cleaner.  The only sanding that I did to the stummel was a slight beveling of the rim around the tobacco chamber to eliminate some of the charred wood from lighting the pipe.  Since there wasn’t really anything to sand or micro-mesh on the stummel I gave it a coating of Before and After Restoration Balm worked into the rustications with a baby toothbrush and set it aside.

    The stem had soaked up a bit of the mineral oil.  I started with the 400 and 600 sanding sponges.  I wanted to see if the tooth dents were bad enough to fill or if they could just be sanded.

    The dents on top were minimal but the both would require filling with black cyanoacrylate (CA, super glue).  I placed a small drop of the black CA on the dent filling it.  I then spritzed the drop with a CA drying accelerator.  This dries the CA almost immediately.  I then filed the drop smooth.  A second layer of CA was then spread over the entire area from the button back up the stem for about 1/2 inch (1 cm).  

    This was then smoothed with a flat needle file, followed by the 400 and 600 sanding sponges.  The wider area helps blend the filled dents better than just having CA spots on the vulcanite.

    I admit to doing a poor job at photo-documenting the process with step by step photos of both top and bottom.  The results look good though.  Next was sanding the stem with the full series of sanding sponges from 1000-3500.  Between each sponge I applied a finger dipped in mineral oil to the stem then wiped it off with a paper towel.

    After the sanding sponges I used micro-mesh pads 4000-12000 to further polish the stem.  Between each of these pads I applied a drop of Obsidian Oil, rubbed it in with a finger and wiped the stem off with a paper towel. 

    The final polishing was done with Before and After Fine followed by their Extra Fine Polishes.  These were applied with a finger and rubbed with a soft cotton cloth.

    I had allowed the Before and After Restoration Balm to dry overnight on the stummel.  It had formed a slightly tacky textured finish that I hand buffed off with the inside of an athletic sock.  I do love the way the terry-cloth of a sock removes the excess balm.

    The pipe was reassembled and taken to the buff for several coats of carnauba wax.  I tried to apply very light coats of wax to the rusticated carved surfaces using the edges of the buffing wheel to work the wax into the carvings.  It seemed to work well.  After the application of was I replaced the waxing wheel with a clean buffing wheel and went over the carving again hoping to draw out excess wax with the clean buffing flannel.  The waxing wheel was placed back on and I applied a final coating of carnaube to the smooth surfaces carefully avoiding the carvings.

    Overall this Kaywoodie HandMade tapered stem turned out very well.  It feels very good, substantial but good in hand.  My fingers seem to line up nicely with the carvings making it quite comfortable to hold.  This is probably good because clenching this pipe would be difficult with it’s 2.52 ounce weight.  The other dimensions are as follows:

    Length:  6.16 in./

    Bowl Height: 2.20 in./ 156.46 mm  

    Chamber Depth: 1.96 in./ 49.78 mm

    Chamber Diameter: 0.85 in./  21.59 mm

    Outside Dimension (side-side):  1.67 in./  42.42 mm

    Outside Dimension (front-back):  1.89 in./ 48.01 mm

    Yes, she is a big girl, some might even refer to this pipe as lumber.  Were I a betting man, I would wager that she smokes very coolly.  I do hope that you have found this to be useful and entertaining.  If you enjoy this sort of thing, please click the like and subscribe.  I thank you for reading the ramblings of an old pipe lover.

    Below are some of the finished photos of the Kaywoodie HandMade taper stem.

  • An Executive Restoration

    February 27th, 2024

    Photographed and written by

    John M. Young

    I have to admit to being smitten by this little darling when she arrived.  She was not the target of my acquisition, more like an innocent bystander.  The pipes I was after in that estate lot were the Senlars.  If you are new to the blog I did three Senlar pipes in January. I’ll link them for you if you are interested:  Senlar Canadian, another Senlar Canadian and a Senlar billiard.  Anyway, this little bent sweetheart was so cute and had been smoked quite a bit.  That indicates to me that she was a good smoking little pipe.

    The stamping was crisp and clear and read, EXECUTIVE over IMPORTED BRIAR and she had an L stamped and painted on the saddle stem.  My mind was eagerly thinking, “How difficult could it possibly be to research a pipe with that distinctive set of stamps?”  Well mind, you got me into another situation with high hopes only to be dashed by reality.

    Here is all I could find on the information highway. 

    Notice even the little flag symbol in the upper right corner is empty.  My father frequently said, “when all else fails, read the instructions.”  That old quote made me think to check Steve Laug’s rebornpipes.com blogs.  His instructions on restoring pipes are amazing as are the vast number of pipes he has restored over the past dozen years.  I searched his restorations for “Executive”.  Well, heck, if he hasn’t done one then they are indeed a rarity.   Any speculative nonsense that I could come up with would be just that – speculative nonsense.  If you have any information regarding this brand please feel free, no feel obligated to share it in the comments (wink).

    On to the restoration.  The pipe looked to be in quite good condition.  Below are the photos I took prior to doing any work.

    Other than the stem fitting very tightly, there were only normal issues:  The rim was lava encrusted, the bowl was caked and the stem was oxidized.  There were no severe bite marks or tooth chatter on the stem and the cake only seemed to be in the middle section of the bowl with little at the top or bottom.  The previous owner must have come up with a unique way of smoking a pipe and only smoked the tobacco in the middle of the bowl.   Okay, I thought that was funny.

    I started with a clean piece of denim on the work surface.  I figured that I would need to have this stem in the Before and After Extra Strength Deoxidizer solution for a minimum of 4 hours.  So, I started prepping the stem for the deox (that’s my play on detoxification – detox). 

    The preparation included rubbing the stem with 0000 steel wool to clear off the worst of the surface oxidation and the calcium deposits around the button.

    Next I wanted to clean out the air way to keep that tar and yuck (the technical term for smoking residue) from the deoxidizing solution.  I first tried an alcohol dipped bristle pipe cleaner.  I could only get it about ½ inch or 1cm into the tenon end of the stem.  I tried a non-bristle pipe cleaner with about the same result.  

    I retrieved the Falcon Extra Thin pipe cleaners.  I dipped one into the 95% ethyl alcohol and worked it through the airway.  Success! 

    Several Extra Thin cleaners later the stem was ready for deox.

    I inserted a pipe cleaner into the tenon end of the stem to act as a hanger for suspending the stem in the deoxidizing.  I was hopeful that the stamped logo would survive the process.

    Time of entry was 13:00.  I had a funeral visitation at 17:00 and some errands so by my return in the evening it should be ready.

    In the meantime,  I prepped the work surface for the reaming.  I placed the white plastic surface, PipNet with the #2 & #3 blades, General triangular scraper (with the tip ground round), Smokingpipes Low Country knife, 220 sandpaper wrapped wood dowel and the 320 sandpaper wrapped Sharpie marker.

    The PipNet with the #2 blade was a bit too small but it did a fine job at breaking up the cake and removing most of it. 

    The #3 blade was just a bit too large for the chamber so the knife and scraper were used to clean the chamber walls.  

    This was followed by the 220 sandpaper wrapped around the wood dowel and finally the 320 sandpaper.  The photo below is after the 220 and shows there is still some sanding work to be done on the lower and bottom of the tobacco chamber.

    With the tobacco chamber reamed, I turned to the rim.  I moistened the lava with saliva and scraped it with a sharp pocket knife.  This is a slow process that requires care and patience.

    After the scraping I took the stummel to the sink for a scrub with Murphy’s Oil Soap.  The soap was used undiluted and scrubbed with a medium bristle toothbrush.  When finished the stummel was rinsed with warm water and dried with a cotton dish towel.  At this point I poured approximately 3 ml of 95% ethyl alcohol into the bowl and holding my thumb over the rim and finger over the mortise, I let the alcohol flow through the interior of the pipe.  The hydrophilic nature of 95% ethyl alcohol will pull water from the briar putting it in solution with the alcohol as well as soften the yuck in the shank.  I used a nylon shank brush to scrub the airway.  I poured the alcohol into a medicine cup.  By looking at the color of the alcohol I could gauge how dirty the airway was – not too bad. 

    Returning to the workbench I wetted a make-up pad with 95% ethyl alcohol and wiped off the stummel.  The pad came back with some color.  I wasn’t sure if this was from a clear coat or just old wax.  The pipe did appear to have a varnish-like coating originally but the dull/flat briar indicated that it had been mostly removed. 

    I decided to err on the side of certainty and scrubbed the carved areas with a brass brush dipped in the 95% ethyl alcohol.  This removed a bit more color from the briar and cleaned up the rusticated areas better.

    Once again I neglected to photo the cleaning of the shank.  I think this is a subconscious effort by my damaged brain to avoid remembering the tasks which I do not enjoy as much.  I assure you that the shank airway was cleaned and the world now has fewer clean cotton swabs and pipe cleaners.

    With the stummel exterior and interior cleaned, it was now ready for some sanding.  I taped the stamp with painters tape for its protection and began with a light sanding with the 600 sanding sponge followed by an alcohol wipe.  I was looking for pits that would need to be filled.  I did find a couple but in looking at them and thinking about it, I decided to leave them alone.  I thought they actually added to the rustic look of the pipe.

    I sanded the smooth areas of the stummel with the sanding sponges in sequence from the 1000-3500 sponges.  Between each sponge I wiped the stummel with a make-up pad moistened with alcohol.

    Once finished with the sanding sponges, I used the micro-mesh pads 4000-12000 in sequence again, wiping the stummel with an alcohol dipped make-up pad between micro-mesh pads.

    The stummel then received a coating of Before and After Restoration Balm applied by finger then rubbed into the rustications with a baby toothbrush.

    It was time to head into town and allow the Restoration Balm and the Deoxidizing solution to do what they do.  It was 21:00 when I finally returned to the patiently waiting pipe parts.  I removed the stem from the deox solution, letting most of the solution drip off.  I like to use a coarse shop rag for the initial wiping off of the excess deoxidizing solution.  It helps absorb and abrade the oxidized material from the stem.

    Here is the stem freshly wiped off.  Notice the white German Shepherd hair, she photobombs me even when she is upstairs.

    YAY! The logo survived intact.

    I used a couple more Falcon Extra This pipe cleaners to clear out the airway of any remaining deox solution then a third to apply mineral oil to the airway.  I applied a liberal coat of mineral oil to the stem as well.  The oil was allowed to sit and soak in overnight.

    The next morning I returned to the workbench and started to finish the Executive.  I wiped the oil from the stem and scrubbed it with Soft Scrub on make-up pads.  The pads came back with oxidized vulcanite.  Most of the color that you can see on the photo below was from the step-up of the saddle.  The stem itself was pretty oxidation free.  Once finished I reapplied mineral oil.

    I then wiped the remaining Restoration Balm from the stummel.  Normally, I do not let the balm sit overnight.  It had dried to a consistency of refrigerated butter and took a bit more effort to rub off.  I used the inside of an athletic sock for the hand-buffing and wiping of the stummel.  It looked very nice.

    I reinserted the stem and taped the shank stamps and stem logo with painters tape in preparation of the stem sanding.

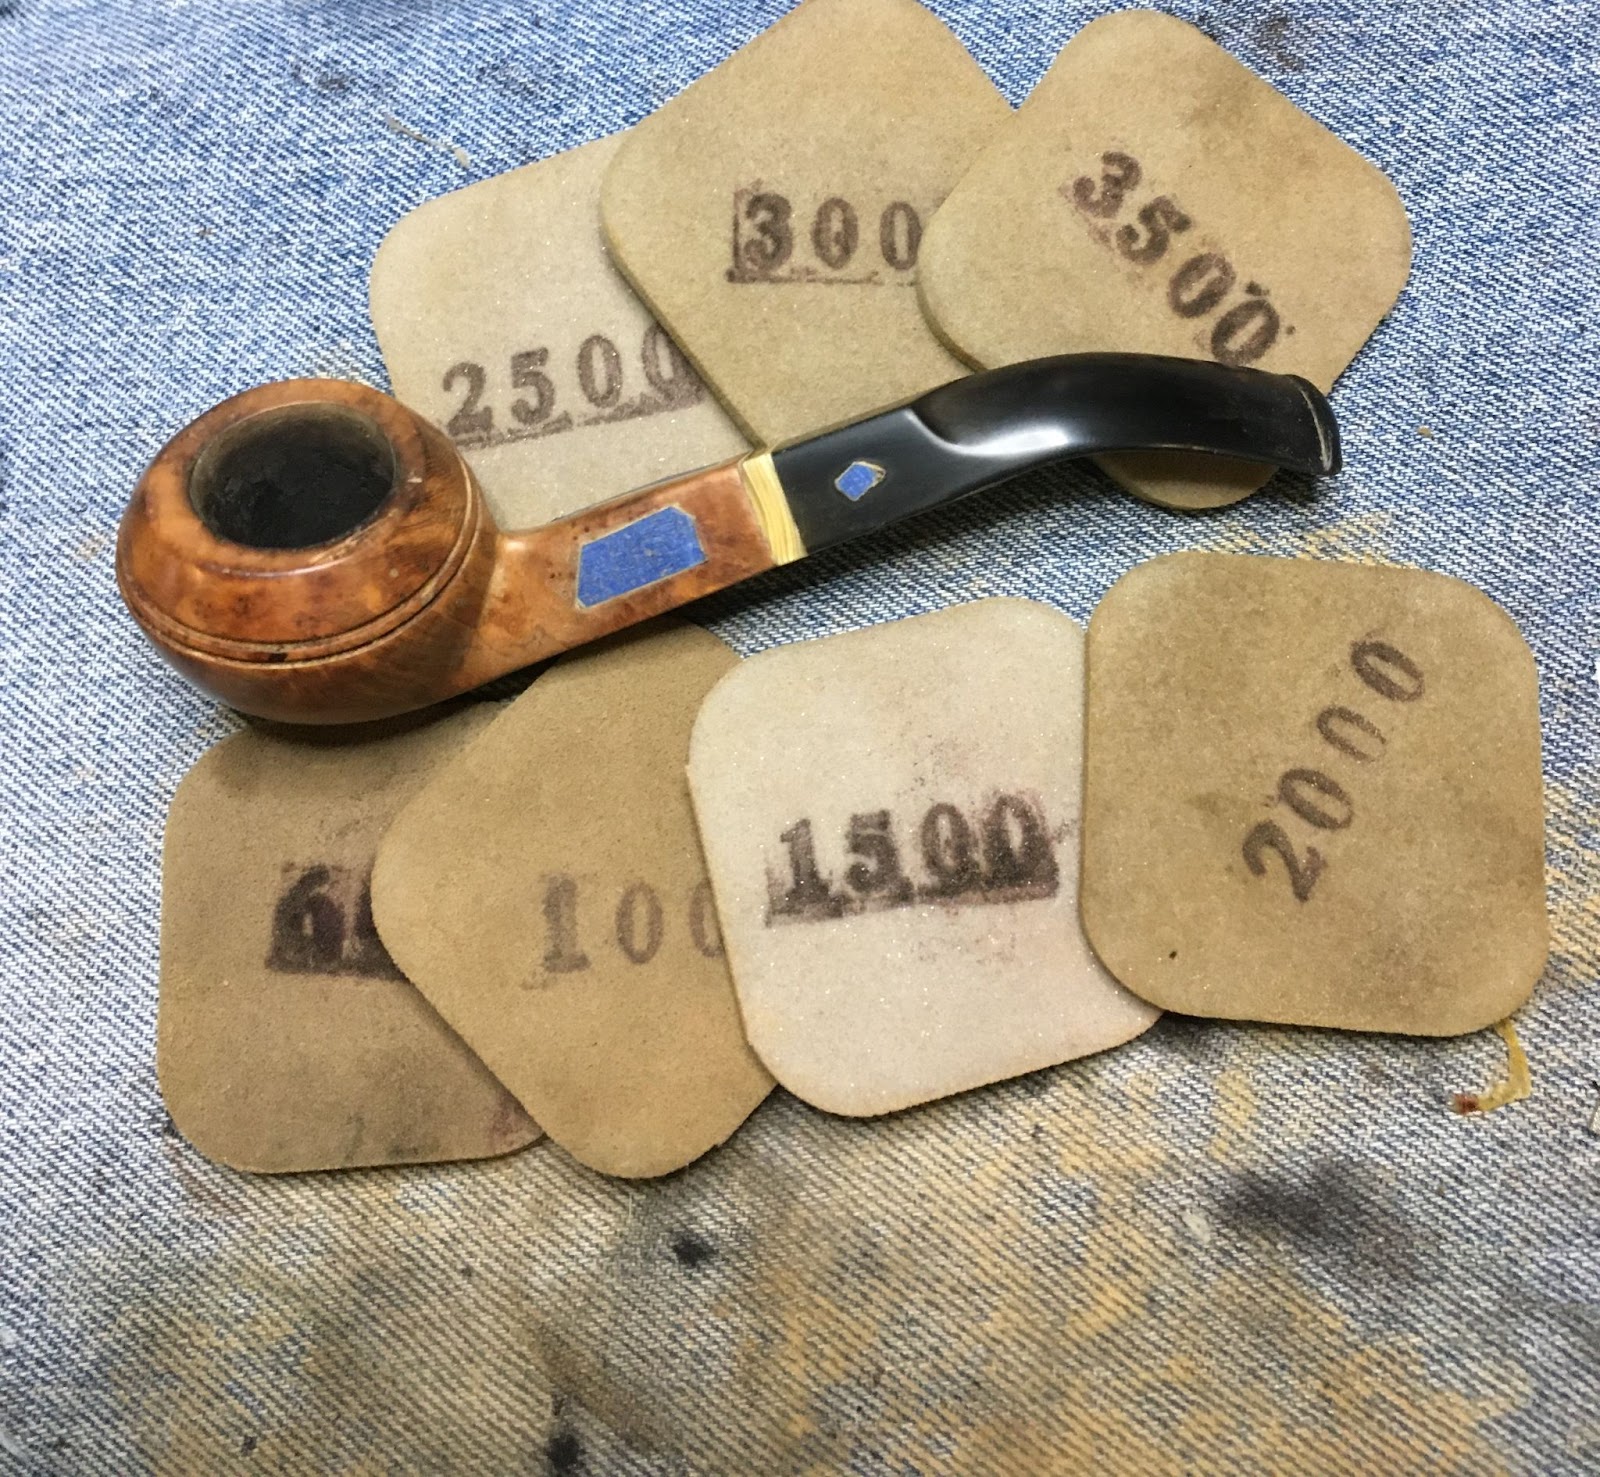
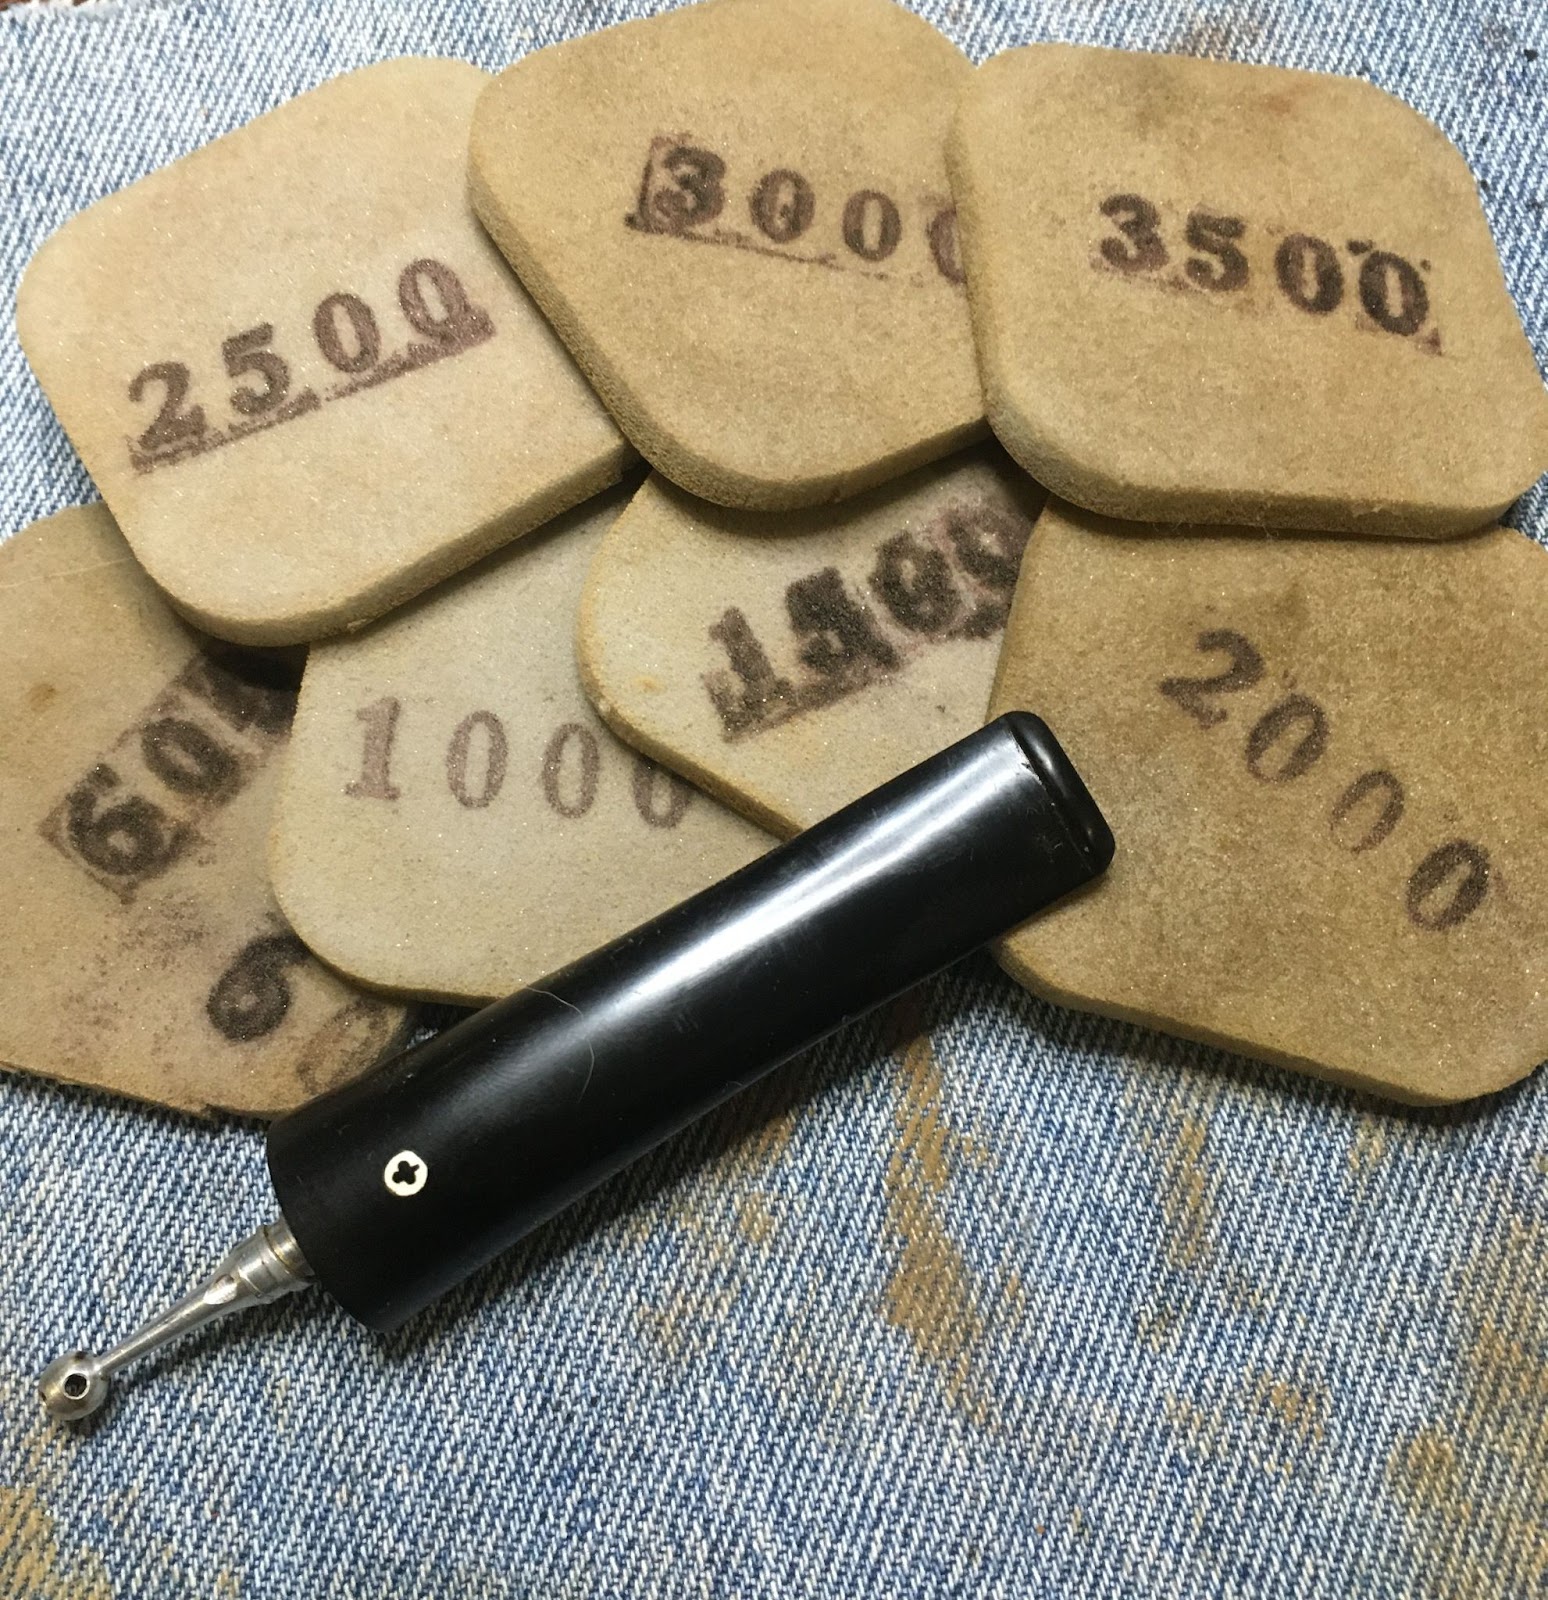
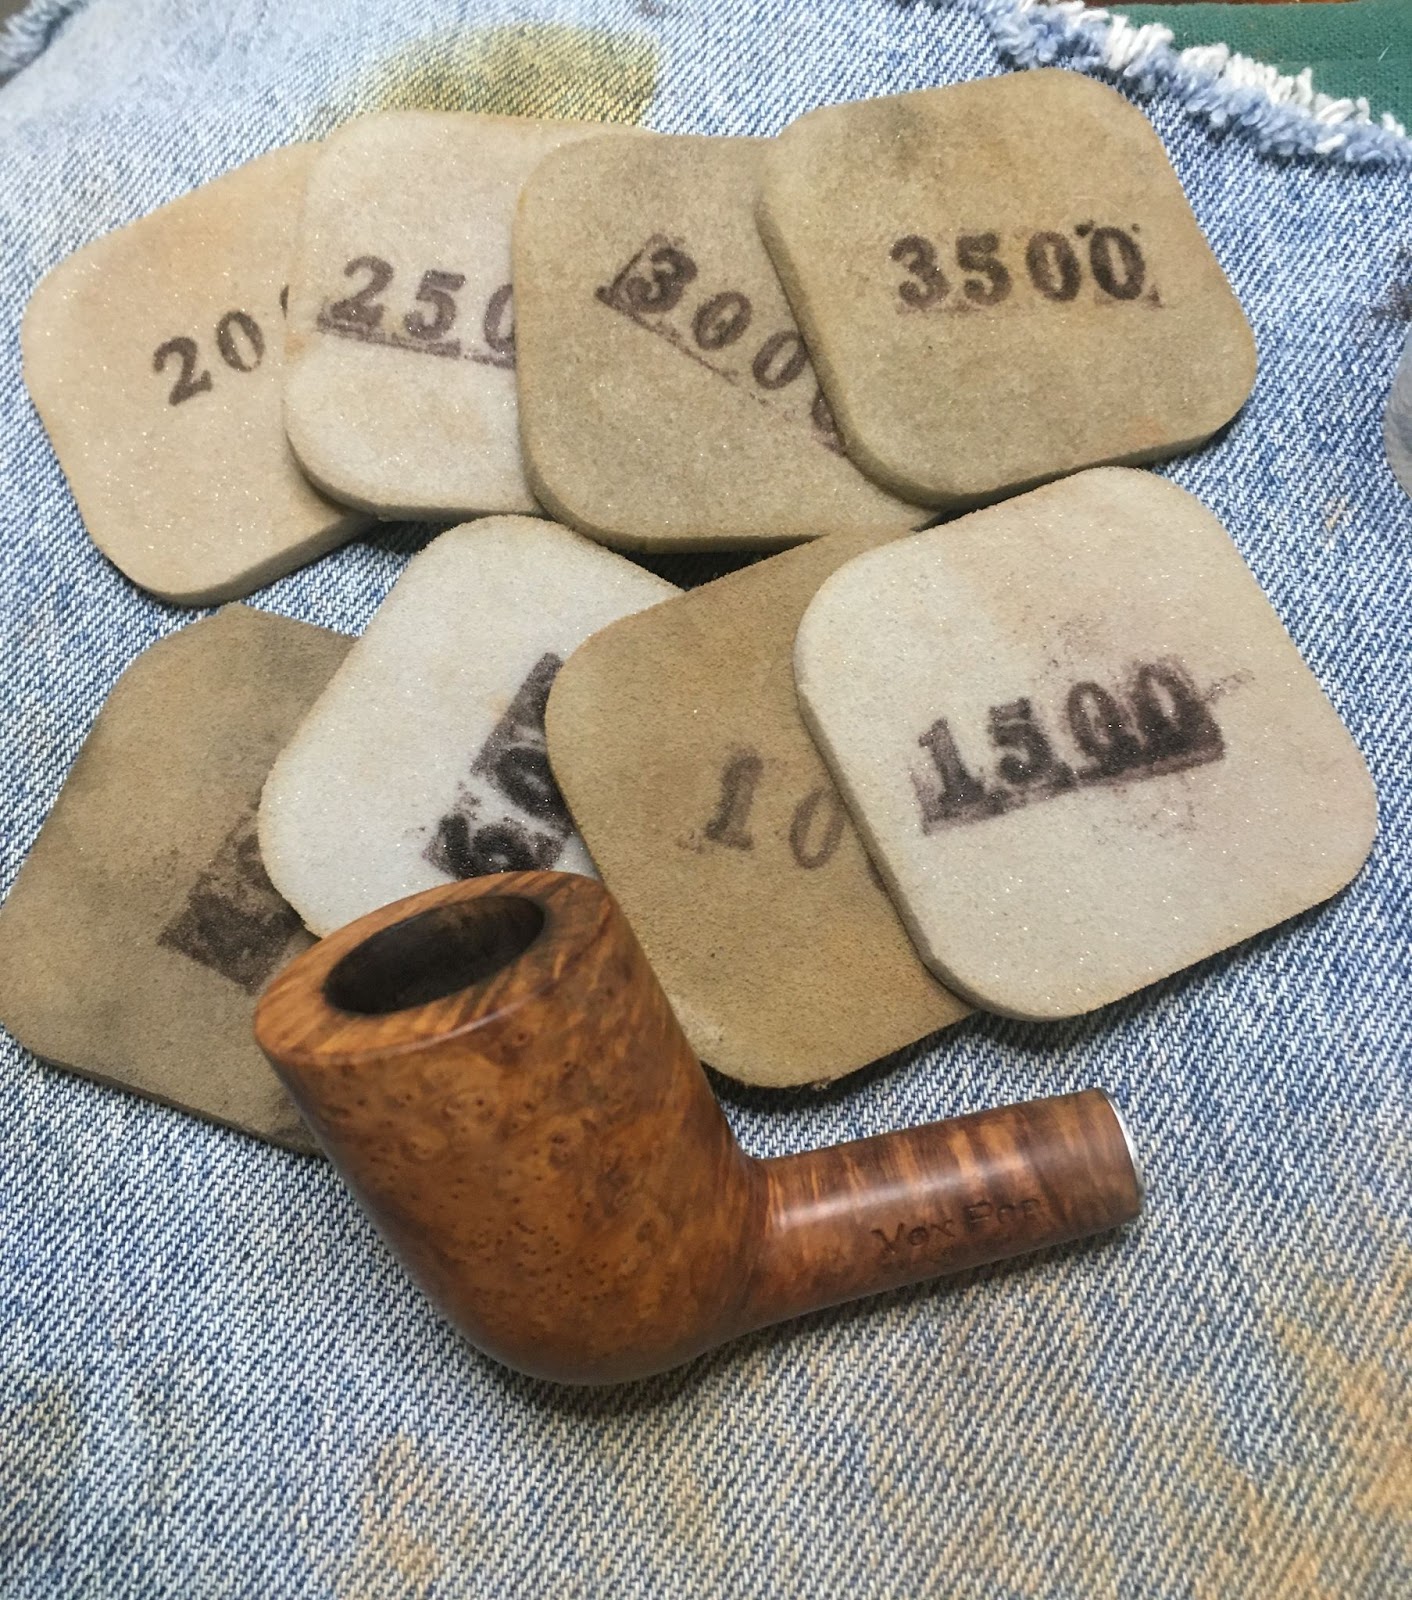
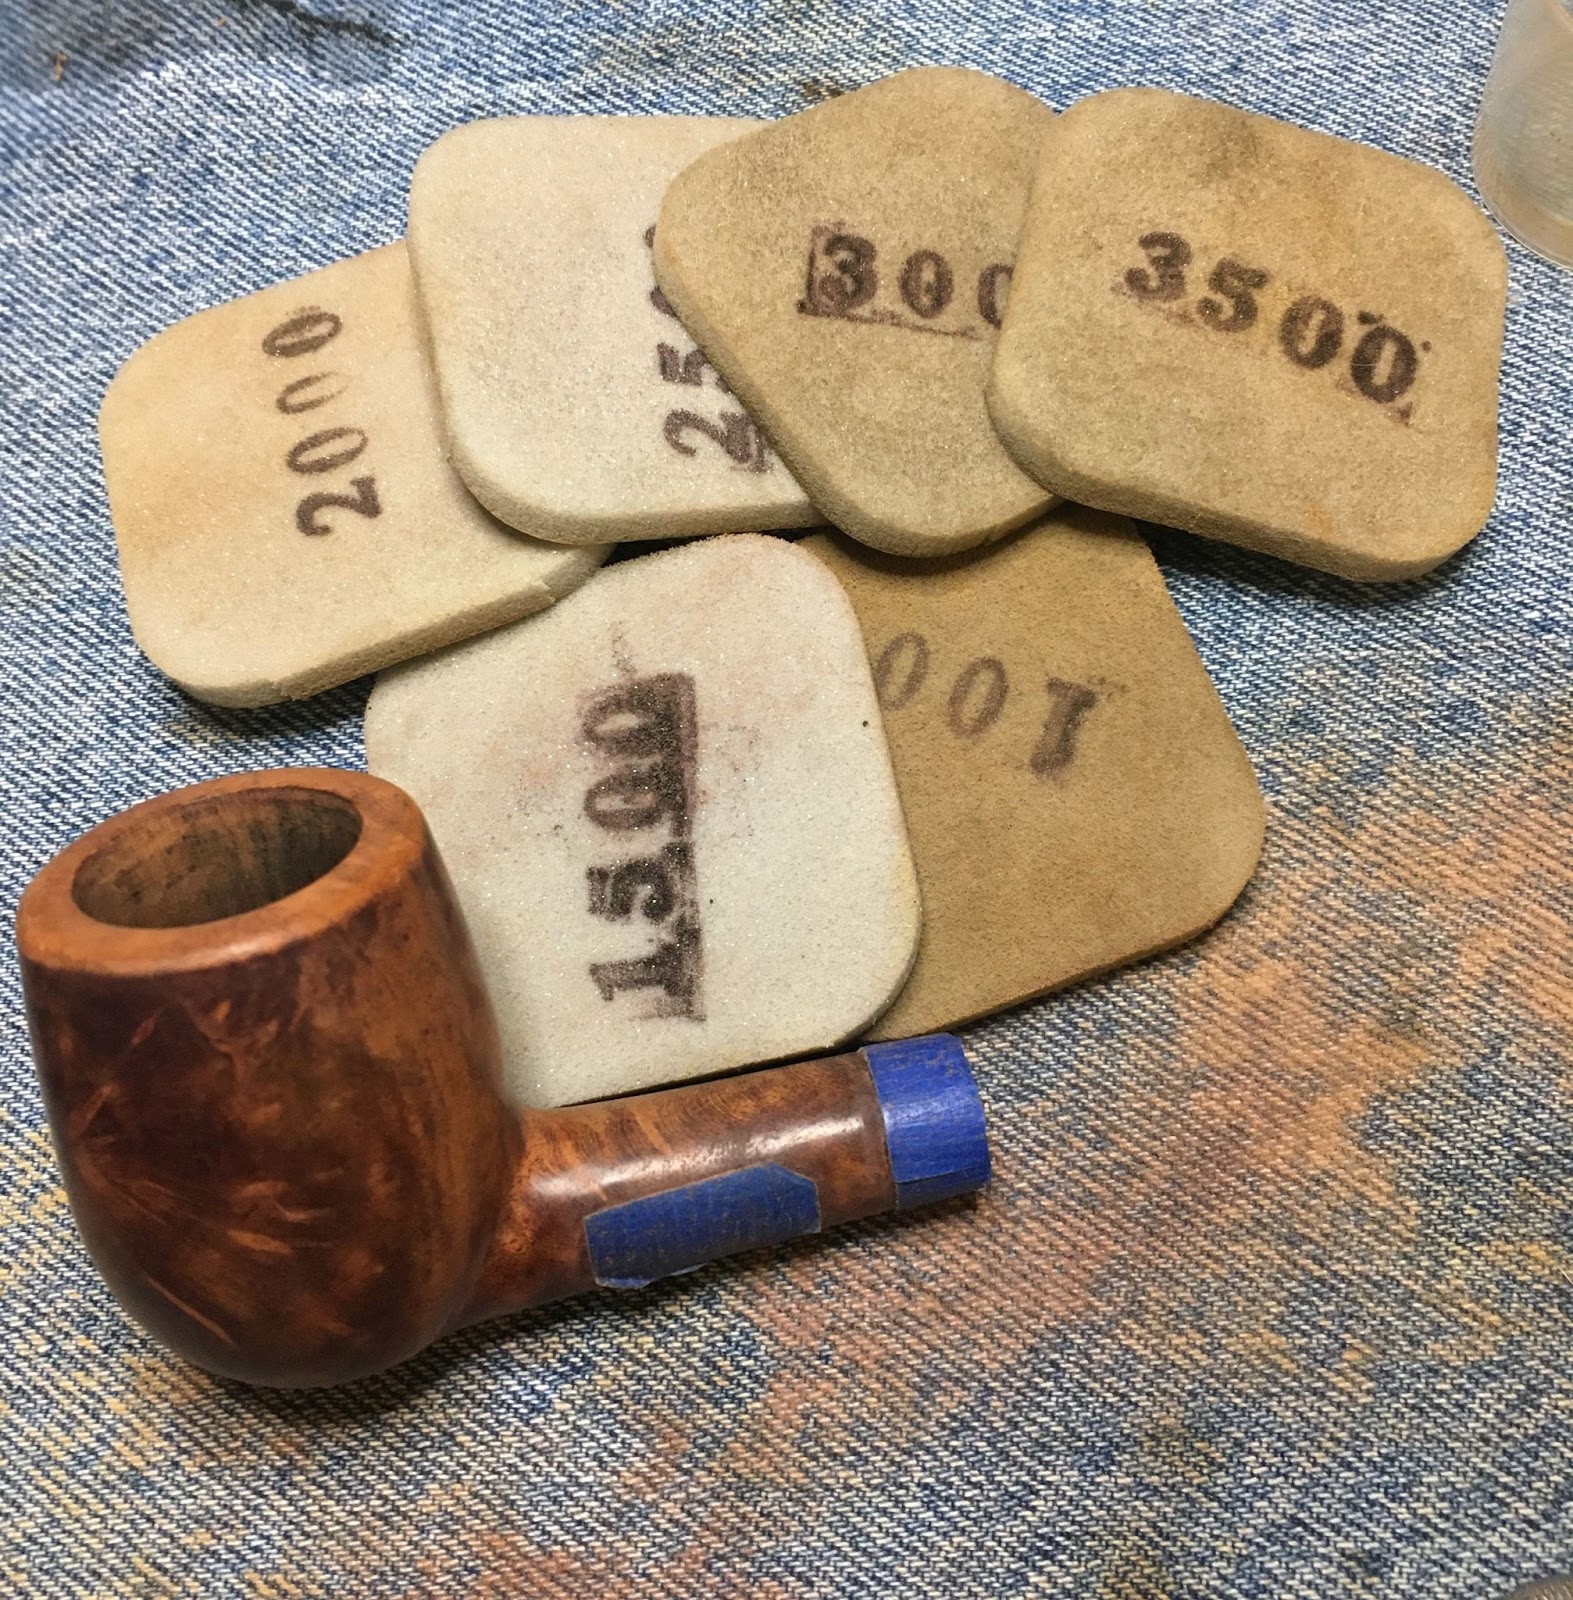
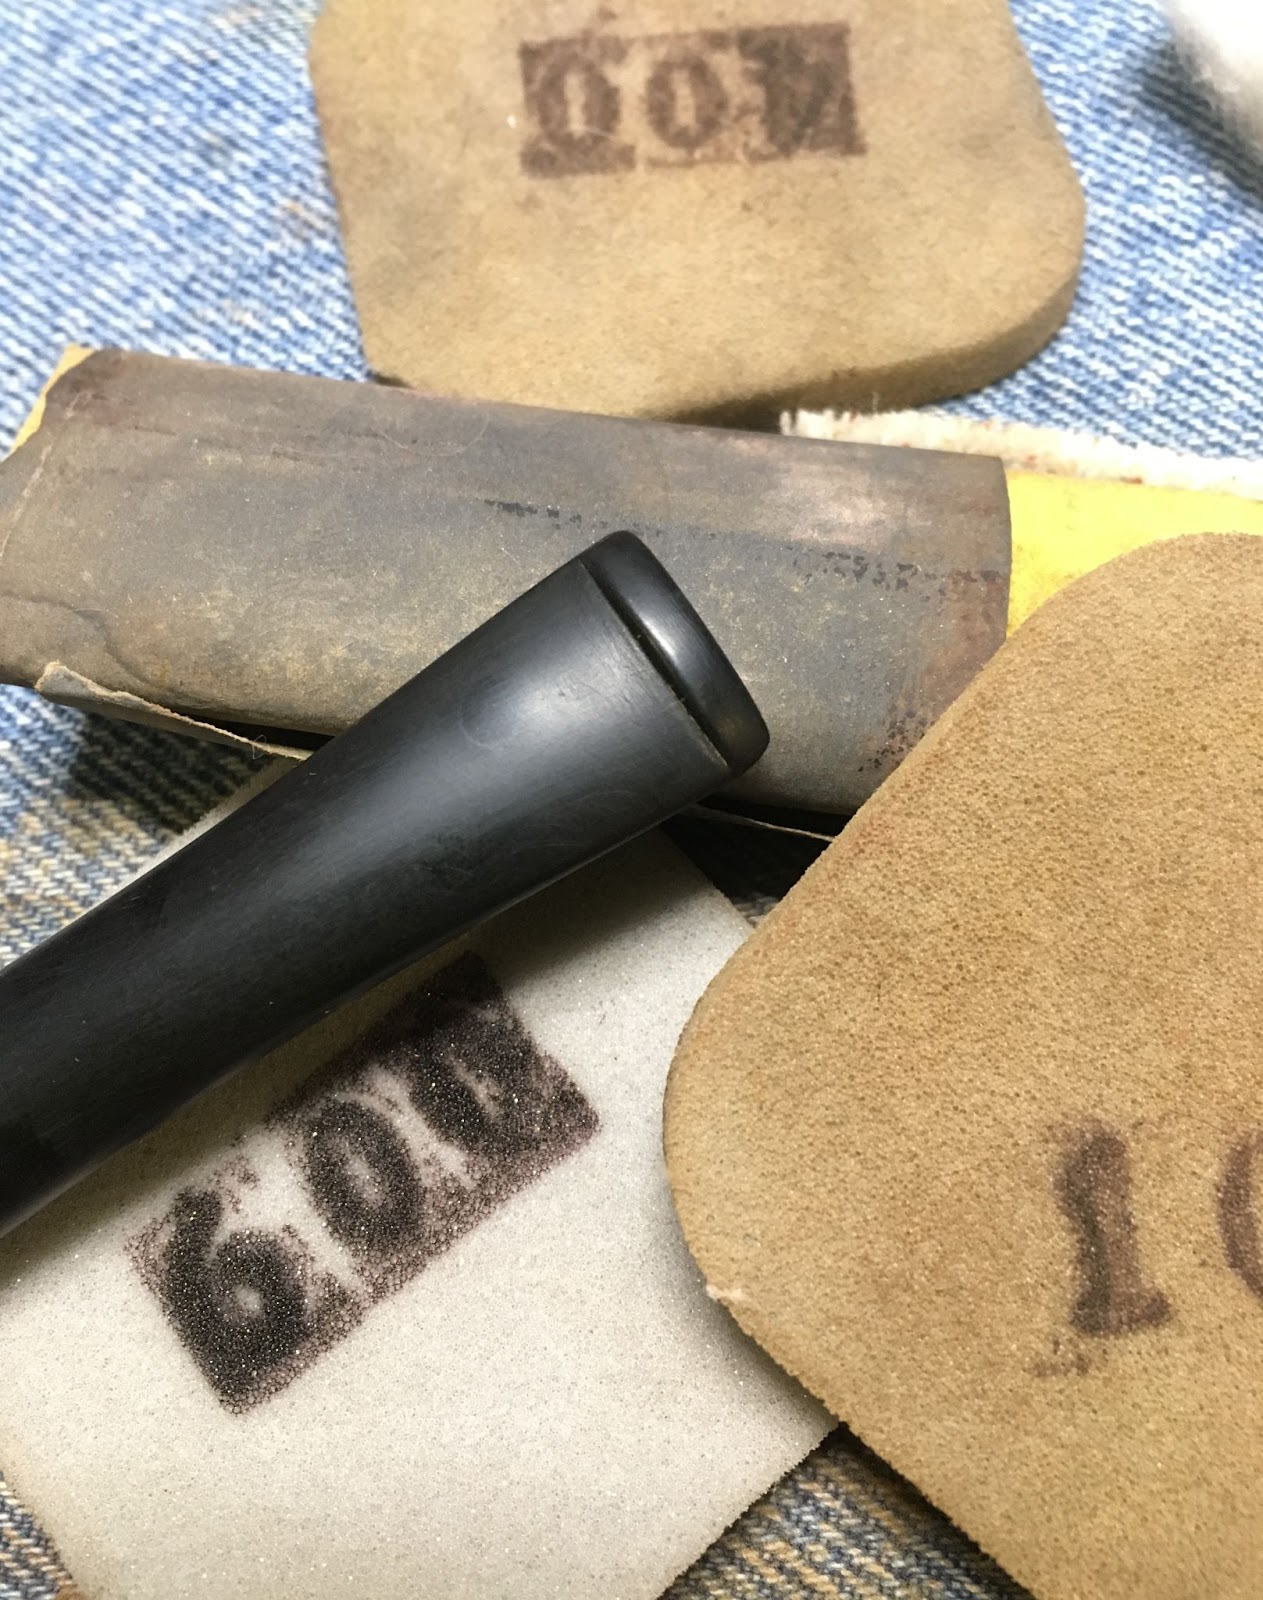
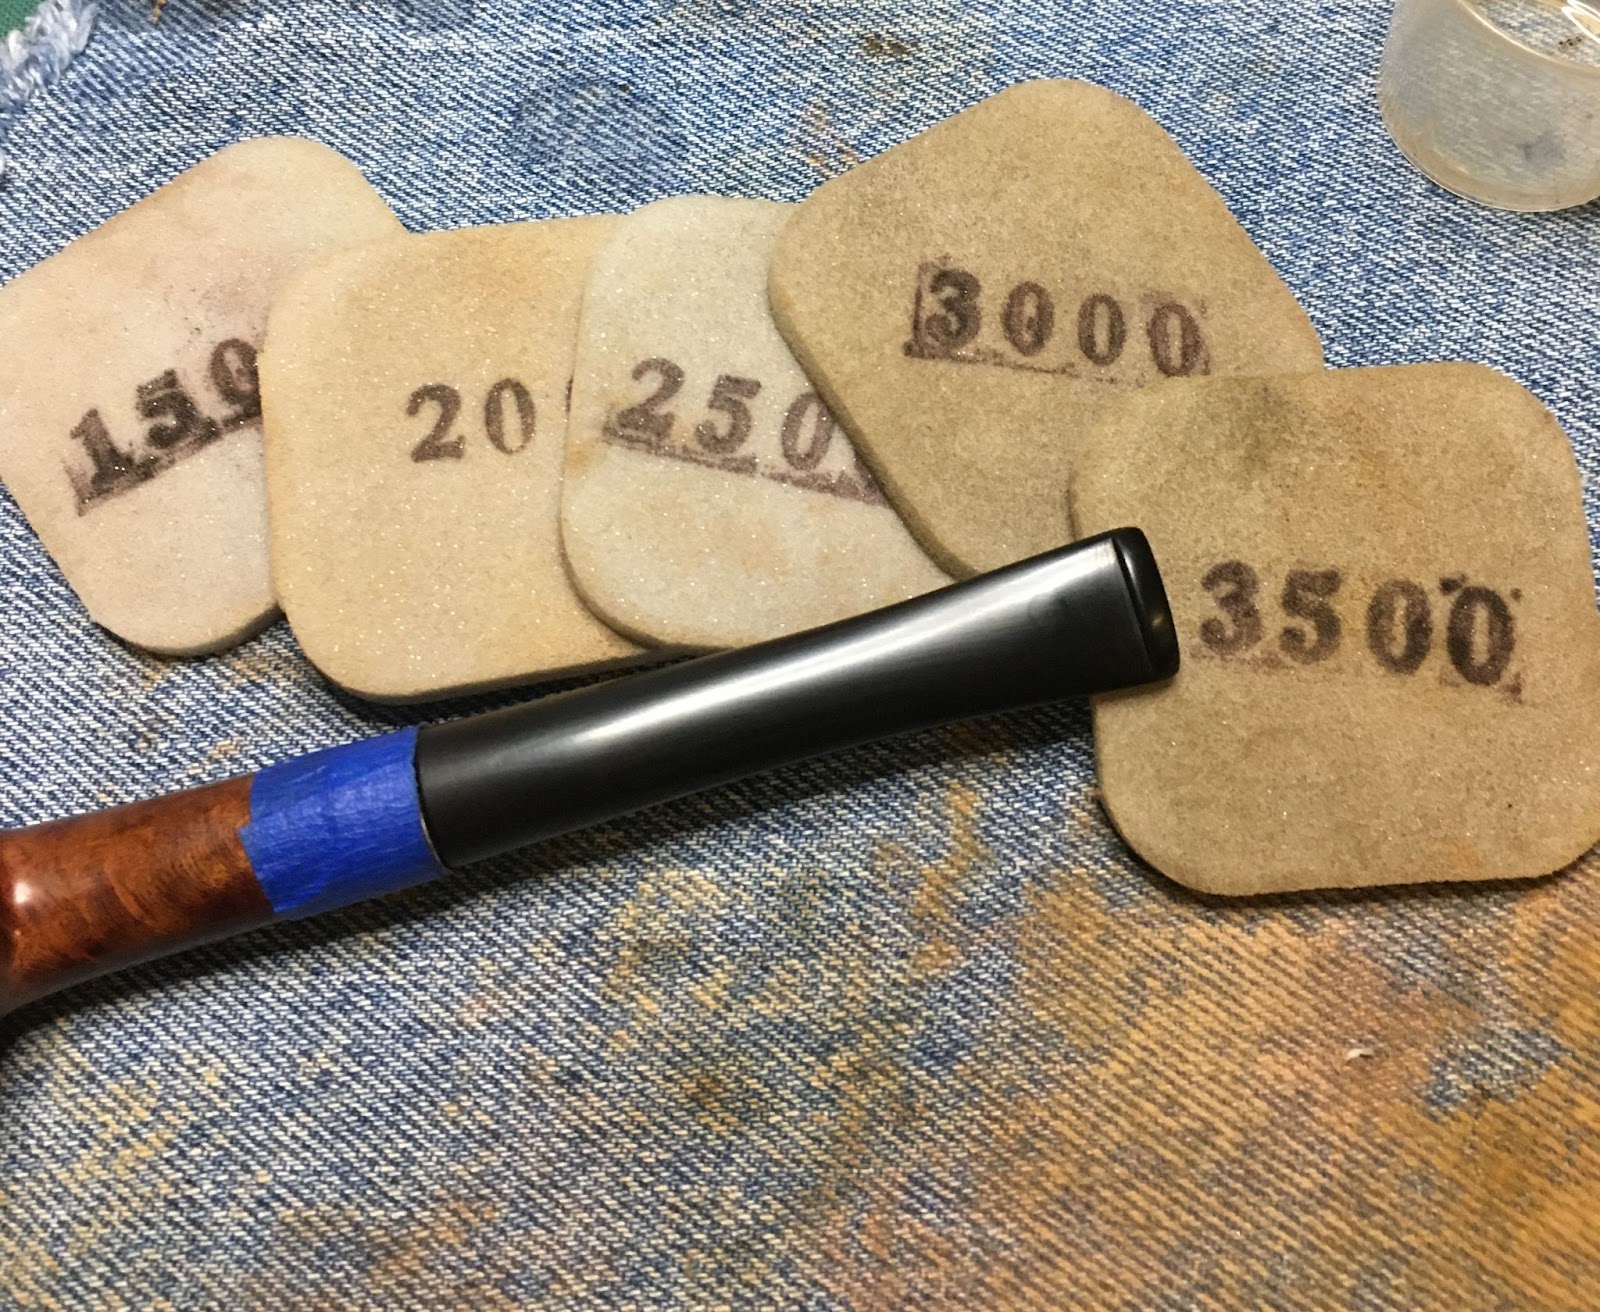
    I worked on the stem with the sanding sponges from 600-3500 in sequence.  Between each sponges I applied mineral oil from my finger and wiped the stem with a paper towel.

    To repaint the stem logo, I removed the tape and used a cotton swab dipped in alcohol to remove any oil.  I used Pure White acrylic model paint on a detail paint brush to apply the paint to the stamped logo.  This paint dries quickly.  Once dried I used the 2600 micro-mesh pad to lightly scrub the white paint from the area above the logo.

    The stem was then micro-meshed with the 4000-12000 micro-mesh pads.  In between each pad I applied a drop of Obsidian Oil with my finger tip and wiped the stem with a paper towel.

    The stem was then polished with Before and After Fine Polish applied by fingertip and hand buffed with a soft cotton cloth.

    This was then followed by polishing the stem with Before and After Extra Fine Polish applied by finger tip and hand buffed with a soft cotton cloth.

    The final steps were to use the buffer to apply several coats of carnauba wax to the pipe.  I tried to avoid the rustications while applying the wax and just focus on the smooth areas.

    Overall this pipe turned out very nicely.  I love the shape.  I think if I had to give it a name, I’d call it a bent pot or maybe a bent squat tomato.  Either way, it feels great in the hand.  I am sure it will be a fine smoking pipe especially for English blends with it’s nice wide bowl.  The greatest disappointment is that the “BRIAR” from the IMPORTED BRIAR stamp, which was very light from the start, has seemed to evaporate.  The briar grain is lovely and set off nicely by the rustications and the black vulcanite.  The surviving stem logo with new paint looks great and will hopefully lead to additional information on the maker of this old darling.  Again, if anyone has any thoughts or ideas of the provenance of this pipe, please leave it in the comments.  I do hope that you have found something here useful.  If you enjoy this sort of thing, please like and subscribe.  I thank you for reading the ramblings of an old pipe lover.

    Below are some photos of the finished Executive (whatever it is).

  • A Vox Pop Superb Briar Air Conditioned Zulu Restoration

    February 22nd, 2024

    Photographed and written by

    John M. Young

    It is time for the final addition to the Penn Tobacco Company coupon pipe collection.  Let’s start with the name of the pipe from the stapings.  This is a VOX POP over SUPERB BRIAR on the left and AIR CONDITIONED on the right.  There is no shape number.  I turned to the internet for the definition of Vox Pop.  According to the Cambridge Dictionary; “the opinions of people recorded talking informally in public places” and, “a broadcast for radio or television in which people going past in a public place are asked their opinion on a particular subject”. (https://dictionary.cambridge.org/us/dictionary/english/vox-pop)

    In other words, the person on the street interview.  When this pipe was made, I’m guessing late 1940s-50s, radio was a much more important media for information.  Don’t tell the Librarian but, I used Wikipedia for this next quote: “Vox Pop was a popular radio program of interviews, quizzes and human-interest features, sometimes titled Sidewalk Interviews (1936) and Voice of the People (the name is from the Latin “Vox Populi”, meaning “Voice of the People”). It was heard from the early 1930s to the late 1940s.” (https://en.wikipedia.org/wiki/Vox_Pop_%28radio%29).  That actually helps confirm the date of this pipe and provides more meaning of the name.  The Air Conditioned stamp refers to the carburetor feature of this pipe.

    I am not certain of the name of this pipe shape.  Henry Leonard and Thomas Inc. actually manufactured this pipe and the three other pipe lines for Penn Tobacco Company’s promotional pipes.  The pipes were available to customers of Penn Pipe tobaccos such as

    one of their largest selling brands, Kentucky Club pipe tobacco.  According to https:  //www.tobaccoreviews.com/:

    “Original Kentucky Club pipe mixture. The label on the tin reads as follows: “White Burley – recognized as a better tobacco since 1867 – makes Kentucky Club the smooth, mild, satisfying pipe smoking brand with the grand aroma. An aromatic that you, and the family too, will enjoy. “Kentucky Club’s White Burley blend never tires your taste. Its delightful flavor, enjoyable taste, satisfying mildness, and grand aroma give you the greatest enjoyment in pipe smoking.”

    Notes: Kentucky Club was introduced in 1934 by Penn Tobacco Company of Wilkes Barre, Pennsylvania. In 1943 The Bloch Bros. Tobacco Co. of Wheeling, West Virginia bought the company. In 1969 it was purchased by general cigar. In the late 80’s it was purchased by John Middleton Inc. of King of Prussia, Pennsylvania, where it was last blended.”  (https://www.tobaccoreviews.com/blend/1171/john-middleton-inc-kentucky-club/?pagenumber=2&orderBy=tr.UpVotes)

    The association of Penn Tobacco Company and Henry Leonard and Thomas Inc. (HLT) was a marketing venture where both companies benefited; pipe smokers needed both tobacco and pipes.  Vox Pop was a brand of pipes only available as a pipe from Penn via the coupons included in packages of pipe tobacco.  Penn produced the tobacco while HTL produced the pipes for Penn.  Pilehil.eu explains this and three other lines of pipes below.

    Brand of the Penn Tobacco Company formed in Wilkes-Barre Pennsylvania in 1901 by Russell Uhl († 1914) and Henry Weigand († 1942). Bruce Peters was a Treasurer of the company.

    There were four pipes in the line offered by the company: the Bruce Peters (top of the line), the Silver Mac Duff, the Vox Pop, and the Broadcaster. The pipes were manufactured for Penn by Henry Leonard & Thomas, manufacturers of Dr. Grabow pre-smoked pipes.

    (http://www.pipephil.eu/logos/en/logo-b8.html#brucepeters)

    Back to the shape of this pipe,  I originally wanted to call it a Dublin but it did not have the flared rim characteristic of a Dublin.  Then I thought to call it a Zulu, which fits the forward cant of the bowl but this stem is straight and the shank is round, not oval.  I then looked at the Dr Grabow shapes from 1960 flyers.  I wanted to find a match and give this pipe shape a name.  Nope, it couldn’t be that easy.  Below are two shape charts from pipedia.org.  The Dublin shapes, from the chart on the right, have a slight forward cant but it is slight.

    That is a cant of less than 10 degrees.  The Dr Grabow 65 Quarter Bent Oval Shank from the left chart has an angle of about 12.5 degrees.  My computer protractor skills are still in development.

    The Vox Pop has angles that match very close to the Dr Grabow 65 shape without the oval shank of the quarter bent stem.  Now, this could be explained as this pipe does not have its original stem but I do not feel that I can refer to it as a Quarter Bent with no bend.   

    Here is the Executive decision:  This is a Vox Pop Superb Briar Air Conditioned Zulu.  Or, if you want to be crazy, you can call it a Zublin.  I won’t tell anyone.

    The blogs of the previously restored Broadcaster, Bruce Peters and Silver Mac Duff also have historical information and commentary.  I added links with the names to their respective restorations.  Feel free to peruse them all.

    This Vox Pop was purchased as a lone pipe from an eBay seller.  Upon arrival I photographed the pipe before doing any work to it.

    The Vox Pop was a wonderfully dirty, well used pipe that appeared to have some very pretty briar hiding beneath 70 years worth of grime.  I interpret a well used pipe as a good smoking pipe. 

    The first step was to prep the work surface with a clean piece of denim.  Next was to call forth the plastic reaming surface and the reaming tools.  

    That included the Scotte stainless steel reamer, Smokingpipes Low Country knife, General triangular scraper, 220 sandpaper wrapped wood dowel and the 320 sandpaper wrapped Sharpie marker.  If you are wondering why there was no PipNet its because my #1 blade broke.  Apparently the translucent plastic PipNets are not nearly as tough as their older opaque versions.

    The reaming liberated the cake from the briar.  Scraping with the knife and scraper got down closer to the briar then the sanding exposed the briar.  There was no sign of any heat damage to the interior of the tobacco chamber.

    There was a thick deposit of lava on the rim from years of use and/or many bowls of tobacco.  I moistened this with saliva.and scraped it with a sharp pocket knife.

    Here you can see the rim ½ scraped with the scrapings wiped on the paper towel.  Ew, gross.

    Below the rim is all scraped.

    After the rim was scraped I took the stummel to the sink.  Here I scrubbed the stummel with undiluted Murphy’s Oil Soap and a medium stiff toothbrush.  After the scrub the stummel was rinsed with warm water and dried with a cotton dish towel. 

    I returned to the workbench and examined the stummel for the finish that survived the scrub.  There were several shiney areas.  You can see the shank-bowl junction was shiney. 

    The front of the bowl had some shine as evident in the next two photos. 

    I rubbed the stummel with a make-up pad moistened with 95% ethyl alcohol to see if that would remove the finish.  It did but there remained some stubborn areas. 

    I then tried acetone on a make-up pad.  That removed the remaining finish revealing the briar grain and a couple spots to fill.

    I do not know what happened during the airway cleaning of the shank and the stem.  I can tell you that I did clean them but I failed to take any photos of the process.  The only thing I can think happened was that I was pretty engrossed with watching the final couple of episodes of the Netflix Medici series.  I know that is no excuse.  One other thing, if you have watched Medici and Yellowstone, do you agree with me that they are really the same show?  I mean, Lorenzo Medici saves the bank & family from nefarious villains in nearly every episode just as John Dutton saves the ranch & family from nefarious villains.  I guess it is just a story telling formula that works.   

    To protect the stamps from the ravashes of sanding I cut strips of painters tape and covered the stampings.

    Next I lightly sanded the area to be filled with the 400 sanding sponge.  I let the sponge retain the dust from the sanding.  The pits received a small drop of brown cyanoacrylate (CA, super glue) applied with a fly tying bodkin.  Before the CA set-up I sanded the area with the dusty sanding sponge.  THe dust on the sponge combined with the CA to fill the pitted areas.  This technique works best for small fills and will require a second application if the pit is larger or deeper.  

    The stummel was then sanded with the series of sanding sponges from 400-3500.  Between each sponge I wiped the stummel with a make-up pad wetted with alcohol to remove any sanding debris.  The tape was removed after the final sanding sponge.

    After the sanding I used the 4000-12000 micro-mesh pads in sequence.  In between each pad I wiped the stummel with a make-up pad moistened with alcohol, as with the sanding sponges. 

    The last treatment for the stummel was to receive a coating of Before and After Restoration Balm.  This was allowed to do the magic that it does for about 20 minutes.

    I turned my attention to the stem.  It was in pretty good shape and appeared to only have surface oxidation and calcium deposits.  I opted to sand the vulcanite with the 600 sanding sponge to see if the oxidation was deeper than it first appeared.

    The stem looked pretty good but I wanted to make sure there was no oxidation present so I applied Soft Scrub to a make-up pad and started scrubbing the stem.  The Soft Scrub removed a good deal of additional oxidation.  After the Soft Scrub scrubbing the stem was given a coating of mineral oil and allowed to soak for 30 minutes. 

    In the meantime I used an inside-out athletic sock to wipe away the remaining Restoration Balm, revealing some very pretty grained briar.

    I then wrapped the shank in painters tape and inserted the stem.  I did not want to round the edges of the stem at the stem-shank joint.

    The stem was sanded with the series of sanding sponges from 1000-3500 grit.  Between each sponge I applied mineral oil to the stem with my fingertip and wiped off the stem with a paper towel.

    After the sanding sponges, I used the micro-mesh pads in sequence from 4000-12000.  In between each pad I applied a drop of Obsidian Oil, rubbed that in with my finger tip and wiped the stem with a paper towel.

    The stem looked good but all of the airway cleaning had a stem loosening effect that I was not happy with.  Yeah, I know – the undocumented airway cleaning.  I said I was sorry. Jeez.  Anyway, it might have been tightened  up by just smoking it but then I would have to clean it all again, probably without documenting it.  If this were a pipe I was planning to keep I would be inclined to apply a little bit of molten beeswax to the tenon and tighten it that way.  Since this pipe will hopefully find a new steward I wanted a more permanent solution.  I used a short bristle paint brush known as a “dry brush” in figurine painting to apply a thin coating of black CA to the tenon.  This is done carefully and allowed to dry without accelerant spritzing.  Once dry the CA is micro-meshed smooth.  The stem is inserted and checked for fit.  If too loose another light coat of black CA can be applied.  If the stem is too tight additional micro-meshing evenly around the tenon will adjust the fit.  In this case a single light coat was all that was required.  By the way, the CA will harden and make you think that you have destroyed your brush.  Don’t worry, a soak in acetone dissolved the CA and returns the brush to near normal.

    With the stem well fit I hand polished the stem with Before and After Fine Polish followed by their Extra Fine Polish.  Both polishes were applied and buffed with a soft cotton cloth.  Again no photos but here are the products in question:

    I have to say that this pipe is probably my favorite of the four-pipe set from HT&L via the Penn Tobacco Company.  The Zulu shape is just one of my all time favorites.  The briar grain is pretty, the vulcanite polished up nicely and the aluminum spacer gives the pipe a little accent that I find endearing.  I am glad that my compulsive personality led me to collecting and restoring each of the Penn pipes but seeing all four together is just a piece of history that can now be passed along to their next steward.  I do hope that you found something here useful in restorations of your own or had some fun reading this.  If you enjoy this sort of thing, please click the like and subscribe buttons.  I thank you for reading the ramblings of an old pipe lover.  

    Below are some photos of the finished Vox Pop Superb Briar Air COnditioned Zulu( that is a mouthful) and photos of the four Penn Tobacco co. crew. 

    If you are interested in acquiring the set of four pipes please, feel free to mention it in the comments or contact me at scimansays1787@gmail.com.

  • A Silver Mac Duff Restoration

    February 20th, 2024

    Photographed and written by 

    John M. Young

    My quest to restore an example of the four pipes from the Penn Tobacco Company coupons or certificates continues.  I took on the quest when researching the history of a Broadcaster pipe (the link will take you to that restoration).  Upon discovering that there were four total pipes named in these offers, I was intrigued.  Intrigued to the point where I wanted to restore an example of each.

    I will refer back to the Broadcaster restoration for a history of the Penn Tobacco Company and their pipe offers and include a shortened version here.  There is an interesting summary on piphil.eu regarding the Bruce Peters line:

    (http://www.pipephil.eu/logos/en/logo-b8.html#brucepeters)

    The Broadcaster had come to me years ago as part of an estate lot.  The second pipe was a Bruce Peters, restored and published last week.  This Silver Mac Duff was discovered on eBay, offered as a lone pipe.  I had been looking for over a month for a Silver Mac Duff and this was the first that I had seen.  The photos on eBay were not bad but indicated what might be a serious problem.  The below photos were taken by the seller as part of the description of the pipe.

    I took screenshots of the photos and circled the area of concern.  A dark spot over an area in briar can indicate a charring of the interior of the tobacco chamber.  This can be caused by the tobacco actually burning the briar.  Typically caused by the smoker smoking the tobacco too fast or by smoking in windy conditions.  I messaged the seller, showed him the screenshots with circles and asked if they could provide additional photos.  They were kind enough to do so.  The newer photos did not completely erase my fears but helped lessen them enough to purchase the Silver Mac Duff.  

    The pipe arrived within short order and appeared in the condition shown in the following photographs.

    I had the first and arguably the most important part of the restoration accomplished – getting the pipe to restore.  Put kindly, the pipe was in rough shape.  It was dirty, dented, dinged, worn and oxidized.  I was happy. 

    Normally, my restorations begin with laying down a clean piece of denim as a surface to work on.  Check.  They also do not usually begin with a stem that is this badly oxidized.

    Sidenote:  I take the before and after photos of the pipes with my Nikon.  The camera sends the photos taken to my phone.  The phone camera is used for the photos during the restoration.  I tell you this because this is how I can recall the order of operations with a restoration.  When writing the restoration I refer back to the phone for the sequence of events.  So, no you know, even if you don’t care.

    I figured that this one would have to soak in the Before and After Extra Strength Deoxidizer for at least 4 hours.

    Before the stem would get its bath, it had to have a little pre-treatment with a rubdown with 0000 steel wool.  A pipe cleaner was inserted into the stem to act as a hanger for suspending the stem in the solution.

    With the stem safely submerged I turned my attention to the reaming of the tobacco chamber.  The reaming tools were assembled:  The PipNet with #3 blades, the Smokingpipes knife, General triangular scraper, 220 sandpaper wrapped dowel and 320 sandpaper wrapped Sharpie.

    The PipNet took center stage and did most of the work.  This pipe had a large chamber with most of the cake deposited on the upper half.

    After the PipNet the scrapers were used to clean off the lower part of the chamber then the interior was sanded to bare briar with the 220 followed by the 320 sandpapers.  There was no sign of any heat damage to the chamber.

    This was a great relief referring back to that dark spot on the front of the bowl.  Below is my photo of the left side of the stummel.  There is a dark area but it was not associated with any charring damage from within the tobacco chamber. 

    Next, the rim was scraped using a sharp pocket knife on the lava.  Yeah, I know it sounds gross but I moistened the lava with saliva before scraping.

    After the scraping the stummel was taken to the sink and scrubbed with Murphy’s Oil Soap.  The Murphy’s was used undiluted and the scrubbing done with a medium stiff toothbrush.  The Murphy’s was rinsed with warm water and dried with a cotton dish towel.  At this point I poured about 4 ml of 95% ethyl alcohol into the bowl and let it flow into the shank.  I used a nylon shank brush to scrub the airway full of alcohol. I then poured the alcohol into a medicine cup.  I can get a pretty good idea of how dirty a shank is by gauging the color of the alcohol in the cup.  This one was dark indicating a lot of scrubbing would be required. 

    The counter, next to the sink, is where I top a rim if topping is required.  This rim definitely needed some topping to remove the damage from dottle knocking.

    I would have had to remove several millimeters or ⅛ inch from the rim to remove the damage.  Instead I opted for a topping and to bevel the outer rim edge. 

    I used a funnel with sandpaper glued to the interior.  The funnel established the angle.  I then used a flat needle file  and further funnel sanding to bevel the rim.

    On to the shank scrubbing.  I started with scraping as much yuck (the highly technical term for smoking residue) from the shank with a dental scraper.  I then poured about 3-4 ml of 95% ethyl alcohol into the tobacco chamber.  This was allowed to flow into the shank but not out.  I then held the stummel at an angle and scrubbed with the nylon shank brush and alcohol.  After a bit of scrubbing I’d pour the alcohol into the medicine cup and either scrape or use a cotton swab to check on the yuck removal.  This was repeated several times, replacing the alcohol when it got fully yuckified (another highly technical term for something which has been exposed to large amounts of smoking residue).

    I must have gotten bored with all the scrubbing and decided to work on the stummel.  According to the order of photos on the phone, I then polished the silver then taped over it.  Perhaps I was curious to see the condition of the briar after the Murphy’s scrub.  

    After taping the stamp and silver, I lightly sanded the stummel with the 400 and 600 grit sanding sponges.  I wiped the stummel with a make-up pad dipped in alcohol to remove the sanding dust/sinish.  I discovered a couple of spots that I filled using cyanoacrylate (CA, super glue).  I placed a small drop of the CA into the pit and used the dusty sanding sponge to provide the briar dust to the fill.  You can see the red stain originally used on this pipe.

    Without any more interruptions, I returned to the airway scrubbing.  This is not my favorite part of restoring a pipe and I have been known to seek a distraction or two.  Eventually the alcohol and the cotton swabs were returning lighter colored.   Oh yeah, I also used a small piece of paper towel rolled around a round needle file dipped in the alcohol to scrub the airway.  That’s what you see in the below photo on the right, below the shank brush.

    Several more rotations of alcohol scrubs followed by cotton swabs later the airway was cleaned.  And in the process the alcohol completely removed my carefully placed tape.  Like I said, seeking distractions.

    More tape and the sanding of the stummel was carried out.  I used the sanding sponges in sequence from 1000-3500.  Between each sponge I wiped the stummel with a make-up pad wetted with alcohol.

    When finished with the sanding sponges I used the micro-mesh pads 4000-12000.  Again between pads I wiped the stummel with a make-up pad wetted with alcohol.  I am not sure what that dark spot is in the center of the stummel below.  There was no pit there and it does not show on any other photo.

    The next step in the restoration of the stummel was to give it a liberal coating of Before and After Restoration Balm.  The balm was allowed to soak into the briar for about an hour.  

    An hour later the Restoration Balm was wiped off using the inside of an athletic sock.  If you do not have an athletic sock covered in white German Shepherd hair, don’t worry.  I am sure that an athletic sock without white German Shepherd hair would work equally as well. 

    Another sidenote:  Thank you to all of you readers who have told me that they prefer the black background for my before and after photos.  I now know exactly who does not have a white German Shepherd living in their homes.

    The stummel was pretty much finished but I still needed to let the stem soak for a couple more hours.  I suppose I should go make some dinner.

    Finally the four hours were up.  I returned to the stem, still soaking in the Before and After Deoxidizer.  I removed the stem and let the solution drip off for a few minutes.  While I cleaned up the workbench and retrieved the rough shop rag I like for wiping the deoxidizer from stems.  This first photo shows the stem still wet with solution. The dark smudge to the left was from this stem when it first hit the rag.  I rubbed the remaining solution off with quite a bit of force.  I was trying to wipe off the solution and abbrade away as much of the oxidized rubber as possible.

    Below you can see the stem after the solution has been rubbed off and a couple of pipe cleaners passed through to remove the solution from the airway.  It is looking much better and black though you can see the dents from teeth and small pits left by the removal of the oxidized  rubber.

    Here is another shot showing the rough surface of the stem after the solution.  I chose to use Soft Scrub of make-up pads to see how much more of the oxidized material was still present.

    The answer, a lot.  The good news was that the oxidized material was quite soft from the deoxidizer solution so this brown matter came off easily.  Afterwards I oiled the stem with mineral oil and allowed it to soak in.

    With fresh vulcanite, I used a cotton swab dipped in 95% ethyl alcohol to remove the oil from the area I needed to fill with black CA.  I placed a small drop onto the dent and spritzed it with a CA drying accelerant.  This makes the CA set-up within seconds.  

    I filed the dried CA smooth and applied a larger spot of black CA to the area.  This time I spread the drop out to about ⅛  inch diameter or 4-5 mm.  I spritzed it again with the accelerant.  This area was again filed smooth then sanded with the 400 sanding sponge followed by the 600 sanding sponge.  Below you can still see the larger CA area sanded.

    From there, I sanded the stem with a series of sanding sponges from 1000-3500.  Between each sponge I wiped the stem with mineral oil on my finger and wiped it with a dry paper towel.  The stem had been reinserted into the stummel to avoid any rounding of the joint edges of the stem or the stummel.  The stummel was also taped to protect the silver.

    I failed to take a picture of the stem with micro-mesh pads.  Let the record show that the stem was indeed micro-meshed with the 4000-12000 micro-mesh pads.  Between each pad I applied a drop of Obsidian Oil, rubbed that in with my finger and wiped the stem with a paper towel.  The final steps of polishing the stem were with the Before and After Fine and Extra Fine Polish.  These polishes were applied and hand buffed with a soft cotton rag.

    All that remained was to apply several coats of carnauba wax to the pipe with the buffer.

    This restoration brought me one pipe closer to the goal of having a restored example of each Penn Tobacco Company coupon pipe.  The Broadcaster, Bruce Peters and now Silver Mac Duff could be checked off of the list.  The final pipe arrived during the restoration of the Silver Mac Duff and will be the subject of the next restoration blog.  Overall I am very pleased at how well this pipe turned out.  It was rather rough looking at first.  The grain is lovely with almost contrast stained features.  The vulcanite polished very nicely and has that black luster that really makes the briar grain stand out beautifully.  The accenting of the whole pipe with the broad silver band is like the icing on the cake.  I do hope that you found something here useful.  If you enjoy this sort of thing, please click the like and subscribe.  I thank you for reading the ramblings of an old pipe lover.

    Below are some photos of the finished Silver Mac Duff, a name that continues to make me smile every time I type it.

  • A Custombilt Original 699

    February 16th, 2024

    Photographed and written by 

    John M. Young

    It has been said that ignorance is bliss.  With that in mind let me say that in regards to Custombilt pipes, I am a blissful ignoramus.  I can look at a pipe and say, “that is a Custombilt style pipe.”  I also know that the company was started prior to World War II by Tracy Mincer.  Oh, and this Custombilt in the photo above doesn’t look like a typical Custonbilt.  That is about all I really know about Custombilt.  You ask, “Then why did you go out of your way and buy that pipe?”  I reply: “Good question.  Because it looks cool and I wanted to restore a Custombilt.  Preferably one that I could afford.”  

    Returning to ignorance for a moment.  As a high school teacher, I frequently needed to intercede in social conflicts usually between young males.  Inevitably, one of the two verbal combatants was “stupid” according to the other.  This often provided a learning experience for both youngsters.  I would say something like, “Roberto,  Stupid means that someone is unable to learn.  Now, we both know Kyle has learned some things, like how to annoy you.  Stupid is not the term you need.  I think you want to say ignorant.  This means that Kyle does not know something.  Maybe you can teach him what he doesn’t  know.”  Eyes would roll, sometimes even loud enough to hear, and I’d usually have to clarify with something easier to remember:  “if stupid and ignorant were diseases then you can cure ignorant but, you are going to die with stupid.”  That would usually get a smile or chuckle. My day was made if I could get one eyeroll that was loud enough to hear.

    One thing I do give myself credit for is my ability to talk to just about anyone and my ability to learn new things.  Given, these new learnings may be quickly forgotten but relearning comes far easier than initial learning.  I love reading about history.  Pipe history, Natural History, Archeology, Geologic History, they all interest me.  When I get to learn something new for a reason other than my own selfish interests it makes it even more enjoyable.  So, thank you reader, for giving me an excuse to go down the Custombilt rabbit hole and cure my own ignorance.  Even if it is only temporarily.

    The amount of information available on Custombilt pipe is pretty amazing.  Rather than giving you a history of the company, I have chosen to provide several links which I think will provide some of the history of the company and their pipes.

    Typically, my first starting point for information about a brand is pipedia.org.  

    1. (Custom-Bilt – Pipedia).  
    2. There is a book written on their history: THE CUSTOM-BILT PIPE STORY, by William E. Unger, Jr., Ph.D. (circa 2001).  The book appears to be self published by the author and a search of the book will lead you to a review written by Rich Esserman (http://naspc.org/Archives/esserman.htm).  The review is good and has several quotes from Unger’s original.  If one goes to pipedia.org and searches “Custombilt”, the search will yield the above review and a second review:  
    3. “THE CUSTOM-BILT STORY: A Review By Tony Soderman” (Custom-Bilt – Pipedia).  At the end of the pipedia.org Custombilt  entry there is a link for ordering the book.  Unfortunately the link takes you here:

    An eBay search for the original Unger signed book and a Custombilt pipe was recently available:  

    (RARE “As Individual As a Thumbprint” Unger Signed Copy & Custombilt Bulldog Pipe | eBay). Yikes! is all I have to say about that.

    1. The next link is a wordpress.com site that does a very nice job showing many examples of photographs of Custombilt stampings and pipes organized by “eras” of the company. (https://pipesrevival.com/).  
    2. The final link is to a blog post by Paresh Deshpande.  This post: “Restoring a Wally Frank Era Custombilt Sitter #633”, appeared on Steve Laug’s rebornpipes.com site and shows a restoration of a pipe with very similar carvings to the subject of this Custombilt Original 699 restoration.  (https://rebornpipes.com/2018/07/20/restoring-a-wally-frank-era-custombilt-sitter-633/)

    The Custombilt Original 699, subject of this restoration, just arrived last week.  I saw it while searching for 1940’s and 50’s brands of pipes.  The photos indicated a large pipe as to be expected from a Custombilt.  Oh wait, I guess I did know something else about Custombilts, they’re big.  When I opened the box and unwrapped the 699, I was a bit taken aback.  It was really big.  The next observation was at how nice the briar grain looked.  That’s not supposed to happen.  I mean, the whole reason for the Custombilt carving is to mask the unsightly appearance of Algerian Briar.  Wow, there’s another thing I knew about Custombilts, they were made from Algerian briar.  I guess I knew more than I thought I did.  The stampings said I had a Custombilt over ORIGINAL on the left shank and 699 on the right.  Here is what the pipe looked like prior to any work being done

    Notice that I didn’t show any photos of the tenon.  That is because it was stuck.  I could twist it about 90 degrees and move it off the mortise a few millimeters then it was really stuck.  I sprayed some olive oil cooking spray into the gap and on the tenon.  Allowed it to soak for about 30 seconds and resumed my twist-pull.  That is all it needed.  It was still cold from being outside but the oil was the secret sauce to free up the stem.

    After the photos I took the 699 to the workbench.  The pipe was worthy of a clean denim piece to protect both it and the work surface.

    The reaming tools were gathered: The PipNet with #3 blade, Smokingpipes knife, General triangular scraper, 220 sandpaper wrapped around a wood dowel and 320 sandpaper wrapped around a Sharpie.  The small amount of cake was mostly removed with the knife and scraper.  THe PipeNet #3 blade was a bit too small and the #4 too large.  This pipe had either been smoked rarely or reamed recently.  The cleaning of the shank would certainly solve that question.  

    I apparently did not feel the need to photograph the minimal amounts of cake removed by the reaming.  Trust me, it was quite uneventful and minimal.  The next task was cleaning the rim.  The lava was mainly on the sides and back surface.  I moistened the rim with saliva and started carefully scraping with a sharp pocket knife.  After the scraping I remoistened and rubbed the rim with a Scotch-brite pad.   

    Below you can see the lava wipings from the knife and the corner of the Scotch-brite pad.

    After the Scotch-brite pad the rim was wiped with a make-up pad wetted with 99% isopropyl alcohol.

    Next I decided to clean out the airway in the shank.  This was quite clean and answered the previous question about the pipe being rarely smoked or recently cleaned.  I think this pipe had only been smoked a handful of times.

    The internals were cleaned now it was time for the exterior.  I took the stummel to the sink.  I used Murphy’s Oil Soap undiluted and a medium bristle toothbrush to scrub the outside of the stummel.  This was rinsed with warm water and then the stummel was dried with a cotton dish towel.  Upon returning to the workbench I vigorously rubbed the surface with a make-up pad wetted with 95% ethyl alcohol.  The pad showed that it removed something from the briar.

    I repeated the rubbing with a fresh make-up pad wetted with acetone.  There appeared to be some sort of clear finish on the rim. 

    Subsequent rubbing with the solvents did not produce the removal of more finish.

    The stem showed signs of oxidation.  I feared that this would be the most difficult part of this restoration.  The cleaning of the airway of the stem was done with bristle pipe cleaners dipped in 95% ethyl alcohol and was uneventful.  

    I lightly sanded the entire stem with the 400 and 600 sanding sponges.  I then placed it into a container with a solution of Oxy-clean and water.  I let the stem soak for 2 hours.  

    During the 2 hours, I started sanding the stummel with the 400 and 600 sanding sponges.  I wiped the stummel off with a make-up pad wetted with alcohol.  I could only see two small pits that I thought required filling.  They were both on the rim.  With a rim this large and smooth I did not want anything to detract from the smooth surface.  I used a fly tying bodkin to apply small drops of brown cyanoacrylate (CA, super glue) to the pits.  I then dipped my finger into my container of briar dust, getting a little dust stuck to my finger tip, and pressed it onto the CA filled pit.  This was repeated for the second pit.  The CA set-up quickly and was sanded smooth using the sanding sponges.

    The sanding continued with the 1000-3500 sanding sponges in sequence.  Between each sponge I wiped the stummel with a make-up pad dipped in alcohol.  I was very careful to avoid the stamps and the edge of the mortise.

    The stummel then was micro-meshed with the 4000-12000 pads.  Between each pad the stummel was again wiped down with a make-up pad moistened with alcohol. 

    The stem was then slathered with Before and After Restoration Balm by finger tip and baby toothbrush.

    After about 30 minutes I wiped the remaining balm from the stummel using the inside of an athletic sock.  It was really looking good. 

    Before working on the stem, I wrapped the shank in a bit of painters tape to protect it from the Soft Scrub and the sanding of the stem.  I wanted it attached as it gave me more to hold on to.  I retrieved the stem from the Oxy-clean bath, dried it off with paper towels and started scrubbing with Soft Scrub on a make-up pad.    The oxidation just kept coming off the stem.  Several make-up pads later it was looking much better.  The area immediately ahead of the tenon still had some light brown rather than black.  I upped my efforts with the remaining scraps of a Magic Eraser and Soft Scrub.  That seemed to do the trick.  Below you can see some of the make-up pads and a mineral oiled stem.

    The tape didn’t stick too well to the freshly balmed shank so another strip of painter tape was applied before I sanded the stem.  The sanding was done with the 1000-3500 sanding sponges.  Between each sponge I rubbed in a drop of mineral oil with my fingers and wiped it off with a paper towel.  After the sanding came the micro-meshing.  Micro-mesh pads 4000-12000

    were used in sequence.  Between each pad rubbed in a drop of Obsidian Oil with my fingers and wiped it off with a paper towel.  

    The last few tasks remained and the finish line was quickly approaching.  I polished the stem with Before and After Fine Polish with a soft cotton cloth and repeated that polishing with the Extra Fine Polish. 

    All that remained was the carnauba waxing with the buffer.

    I would describe this Custombilt Original 669 as a large bent apple shape.  It has been strange for me writing the latter half of this blog as I smoke the pipe.  I don’t often smoke a restoration while typing up the restoration.  By the way, it smokes very well, cool, dry and for the first few puffs the flavor of spice that I have only gotten before from a newly reamed Marxman pipe.  I am very pleased with how this Custombilt turned out.  I have a new appreciation for the brand.  Given this pipe is not as1934-1940s original Tracy Mincer Custom-bilt (if you read the history you will get the hyphen, there) but it is a lovely old pipe.  I do hope that you have found something useful here.  If you like this sort of thing, please click the like and subscribe.  I thank you for reading the ramblings of an old pipe lover.

    Below are some photos of the finished Custombilt Original 699.

  • A Kaywoodie HandMade Restoration

    February 14th, 2024

    Photographed and written by

    John M. Young

    If I were a betting man, I believe it would be a fairly safe bet to say that many pipe smokers had either a Dr Graybow or a Kaywoodie as one of their first pipes.  Kaywoodie has a long and colorful history dating back to their origins, “Kaywoodie name first appearing in February of 1919.” (Kaywoodie History – Greywoodie LLC) The history of Kaywoodie pipes is fortunately well documented thus, allowing rather precise dates for a Kaywoodie collector to declare the provenance of their charges.  The above pictured Kaywoodie is stamped HANDMADE over KAYWOODIE (left) and IMPORTED BRIAR (right).  No shape number is present.

    Using this information and referring to the Kaywoodie Collectors’ Guide listed on pipedia.org I found that these pipes were made during the following years:

    “Handmade-Oversize-Carved 1947-1955 on and off” (https://pipedia.org/images/3/3d/Kaywoodie_Pipe_Names.pdf) and that

    “The Oversize Kaywoodies were, as the name implies, “Giants”. Lowndes notes that these pipes were stamped simply, “Hand-Made”. The pipes were all roughly “bulldogish” in appearance and were available in the following styles and grades7 : • Hand-carved “Colossus” ($10) • Walnut finish, banded “Hercules” ($20) • Hand-carved “John Henry” ($10) • Virgin finish, specimen grain “Paul Bunyan” • ($25)Virgin finish, banded specimen grain “Goliath” • ($25)Walnut finish “Atlas” • ($20)Hand-carved, Meerschaum-Inlaid “Samson” ($15)” (Kaywoodie Collector’s Guide – p10.pdf)

    Looking into the stampings, I went to piphil.eu for confirmation.  ThereI was able to find an exact match of this pipe’s stampings.

    (Kaywoodie series from L to Z — Pipes : Logos & Markings (pipephil.eu))

    Well, that was easy.  This large Kaywoodie Hand Made, though not very “bulldogish” was most likely made between 1947 and 1955 at the West New York, New Jersey factory.  If you would like to see the 1947 Kaywoodie catalog here is a link:  Kaywoodie_1947.pdf (pipedia.org).  It is a fascinating read with great old marketing photos and illustrations.  Just out of curiosity I wondered what $10 in 1947 was equivalent to today.  According to a bis.gov inflation calculator it is $131.09 (Using Dec. 1947 and Dec. 2023)(CPI Inflation Calculator (bls.gov)).  I highly recommend reading the above links for further Kaywoodie history.

    Before we get to the restoration let’s take a look at how the pipe appeared before I did any work to it and compare it to a more normal size Kaywoodie.

    Just kidding.  That is actually a mini pipe.  Here is a real comparison using a Kaywoodie author.  And yes, the Hand Made in those last two photos is the finished version.

    Now we can do the restoration part.  Normally I begin with a clean denim piece to work on then get out the white plastic reaming surface and do the reaming.  This time I did start with the denim but started scraping the shank and the tenon on the white plastic rather than reaming.  

    As you can see, quite a bit of tar/smoking residue was removed.  After this I addressed the tobacco chamber.  The tools were the PipNet with #3 blades, Smokingpipes knife, General triangular scraper, 220 sandpaper wrapped around a wood dowel and 320 sandpaper wrapped around a Sharpie marker.  

    The PipNet did the majority of the work. Although the chamber did not look heavily caked the bowl was so large that the cake that was there left a large pile.  After the PipNet the knife and scraper were used followed by the sanding with 220 then 320 to get to bare briar.  The tobacco chamber looked good and free of any heat damage. 

    The next task was to clean the exterior of the stummel.  I took it to the sink and scrubbed the stummel with undiluted Murphy’s Oil Soap and a medium bristle toothbrush.  This was repeated two times.  I spent extra time scrubbing the rim and the rusticated surfaces couldn’t be scraped to

    free them from lava.  I was not happy with the way the lava was being removed with the toothbrush so I used a brass brush to further scrub the rim.  The Murphy’s was rinsed off with warm water and the stummel dried with a cotton dish towel.  I then poured about 5 ml of 95% ethyl alcohol into the bowl.  I allowed the alcohol to flow into the shank but not pour out.  I then used a nylon shank brush to scrub the airway of the shank.  After the scrubbing I poured the alcohol into a medicine cup.  The alcohol was dark brown.  I applied a drop of Dawn dish soap to the shank brush and scrubbed the airway again with soap and water.  The soap lather was dark gray.  The soap was rinsed and scrubbed while rinsing. to rid the airway of all the soap.  Fresh alcohol was poured into the bowl and I again scrubbed the airway with the shank brush and alcohol.  This time the alcohol was much lighter when poured into the medicine cup.  

    I returned to the workbench.  I wetted a make-up pad with 95% ethyl alcohol and wiped the exterior of the stummel.    The carved groves still looked like they had some of the years of accumulated dirt and grime ground into them.  I then dipped a baby toothbrush into the alcohol and scrubbed the stummel with that.  The carvings had ridges that ran perpendicular to the grooves.  I matched the scrubbing of the toothbrush to the ridges and

    scrubbed them with alcohol.  After the scrub I again wiped the surface with an alcohol wetting make-up pad. The stummel exterior was cleaned.

    The exterior of the stummel was looking good.  Now to deal with the airway.  I was hoping that the scraping, alcohol scrub and the soap scrub would make cleaning the airway a bit easier.  I was right, it did.  Now, that is not to say that I didn’t have to do a couple more alcohol nylon brush scrubs.  I did and many cotton swabs as well but all the scraping and previous scrubbing had made my life a bit easier.  Eventually the airway was clean.

    I was pleased at how stummel had cleaned-up with the accumulated dirt gone.  The rim still did not look good.  Below are photos of the scrubbed stummel and rim.

    I was not pleased with the charring of the rim.  I would normally rub Vaseline on the rim  and scrape this with a sharp knife to remove the charred briar.  The rustication prevented this.  New plan, soak the rim in Murphy’s oil soap for an hour then try scrubbing it again.  I had no idea if it would work but I thought I remembered reading about a German Facebook buddy doing it with a pipe.  I found a wider medicine cup and poured in a few millimeters of  Murphy’s Oil Soap. 

    While waiting for the Murphy’s to do or not do something, I started the initial sanding of the stem.  I used the 400, 600 and 1000 sanding sponges to remove the tooth chatter, scratches and oxidation from the stem.  I then used Soft Scrub on a make-up pad to vigorously rub the stem.  This worked brilliantly.  The Soft Scrub removed all signs of oxidation and left a beautifully black stem behind.  The stem was then coated with mineral oil and let to sit and absorb oil.

    Although it had only been about 15 minutes, I couldn’t wait to see if the Murphy’s was doing anything to the charred briar.  I lifted it up and used the baby toothbrush to scrub the rim.  The soap darkened with charred wood.  Wow, this is actually doing something! Sascha Mertens, the Facebook pipe restoration buddy from Germany, comes through again. Thank you Sascha!

    I placed the stummel back into the soap and waited another 15 minutes.  Fortunately Netflix and Lorenzo Medici kept me from tampering with the stummel.  15 minutes and another baby toothbrush scrub and more of the char seemed to be gone.  Well let’s see what evil plots Lorenzo can nullify in a half hour.  30 minutes later and saving the Medici Bank from usurpers, miscreants and maybe some alien vampires at least 10 times, Lorenzo and I were victorious.  He, at saving the bank and Medici family and me at removing most of the char from the Kaywoodie.

     Okay, it wasn’t all gone but a little sanding with a wooden ball and 220 to give the rim a bevel and… 

    Who knows what kind of magic will happen?  

    I could live with that.

    The sanding of the stummel went fairly quickly as I only had to work on the smooth sections.  I used the 400 and 600 sanding sponges lightly and wiped with an alcohol wetted make-up pad.  I was looking for sand pits that might require filling.  I found a few all in one smooth section.  Unfortunately I did not photograph this step but, you can see the fills as dark spots on these before and after shots of the right side.  The pits were filled using

    Cyanoacrylate (CA, super glue) dabbed into the pit.  I then placed a pinch of briar dust on top of the CA and pressed hard with my fingertip.  The CA and briar dust set-up almost immediately.  I then used a small flat needle file to smooth the fill and finished it with the 400 and 600 sanding sponge.  I continued with the series of 1000-3500 sanding sponges.  Between each sponge I wiped the stummel with an alcohol wetted make-up pad.

    Once the stummel was sanded I moved on to micro-mesh the stummel.  The 4000-12000 micro-mesh pads were used.  Again, as with the sanding sponges, I wiped the stummel with an alcohol wetted make-up pad between pads.

    At this point I applied a coating of Before and After Restoration Balm to the briar.  I world the balm into the rustications with a baby toothbrush.  The balm was allowed to sit for an hour. 

    After an hour, I applied additional Restoration Balm to areas of the stummel that appeared to have soaked-up the Restoration Balm and now looked dry.  This was mainly on the rim.  An additional 20 minutes was given to the stummel.

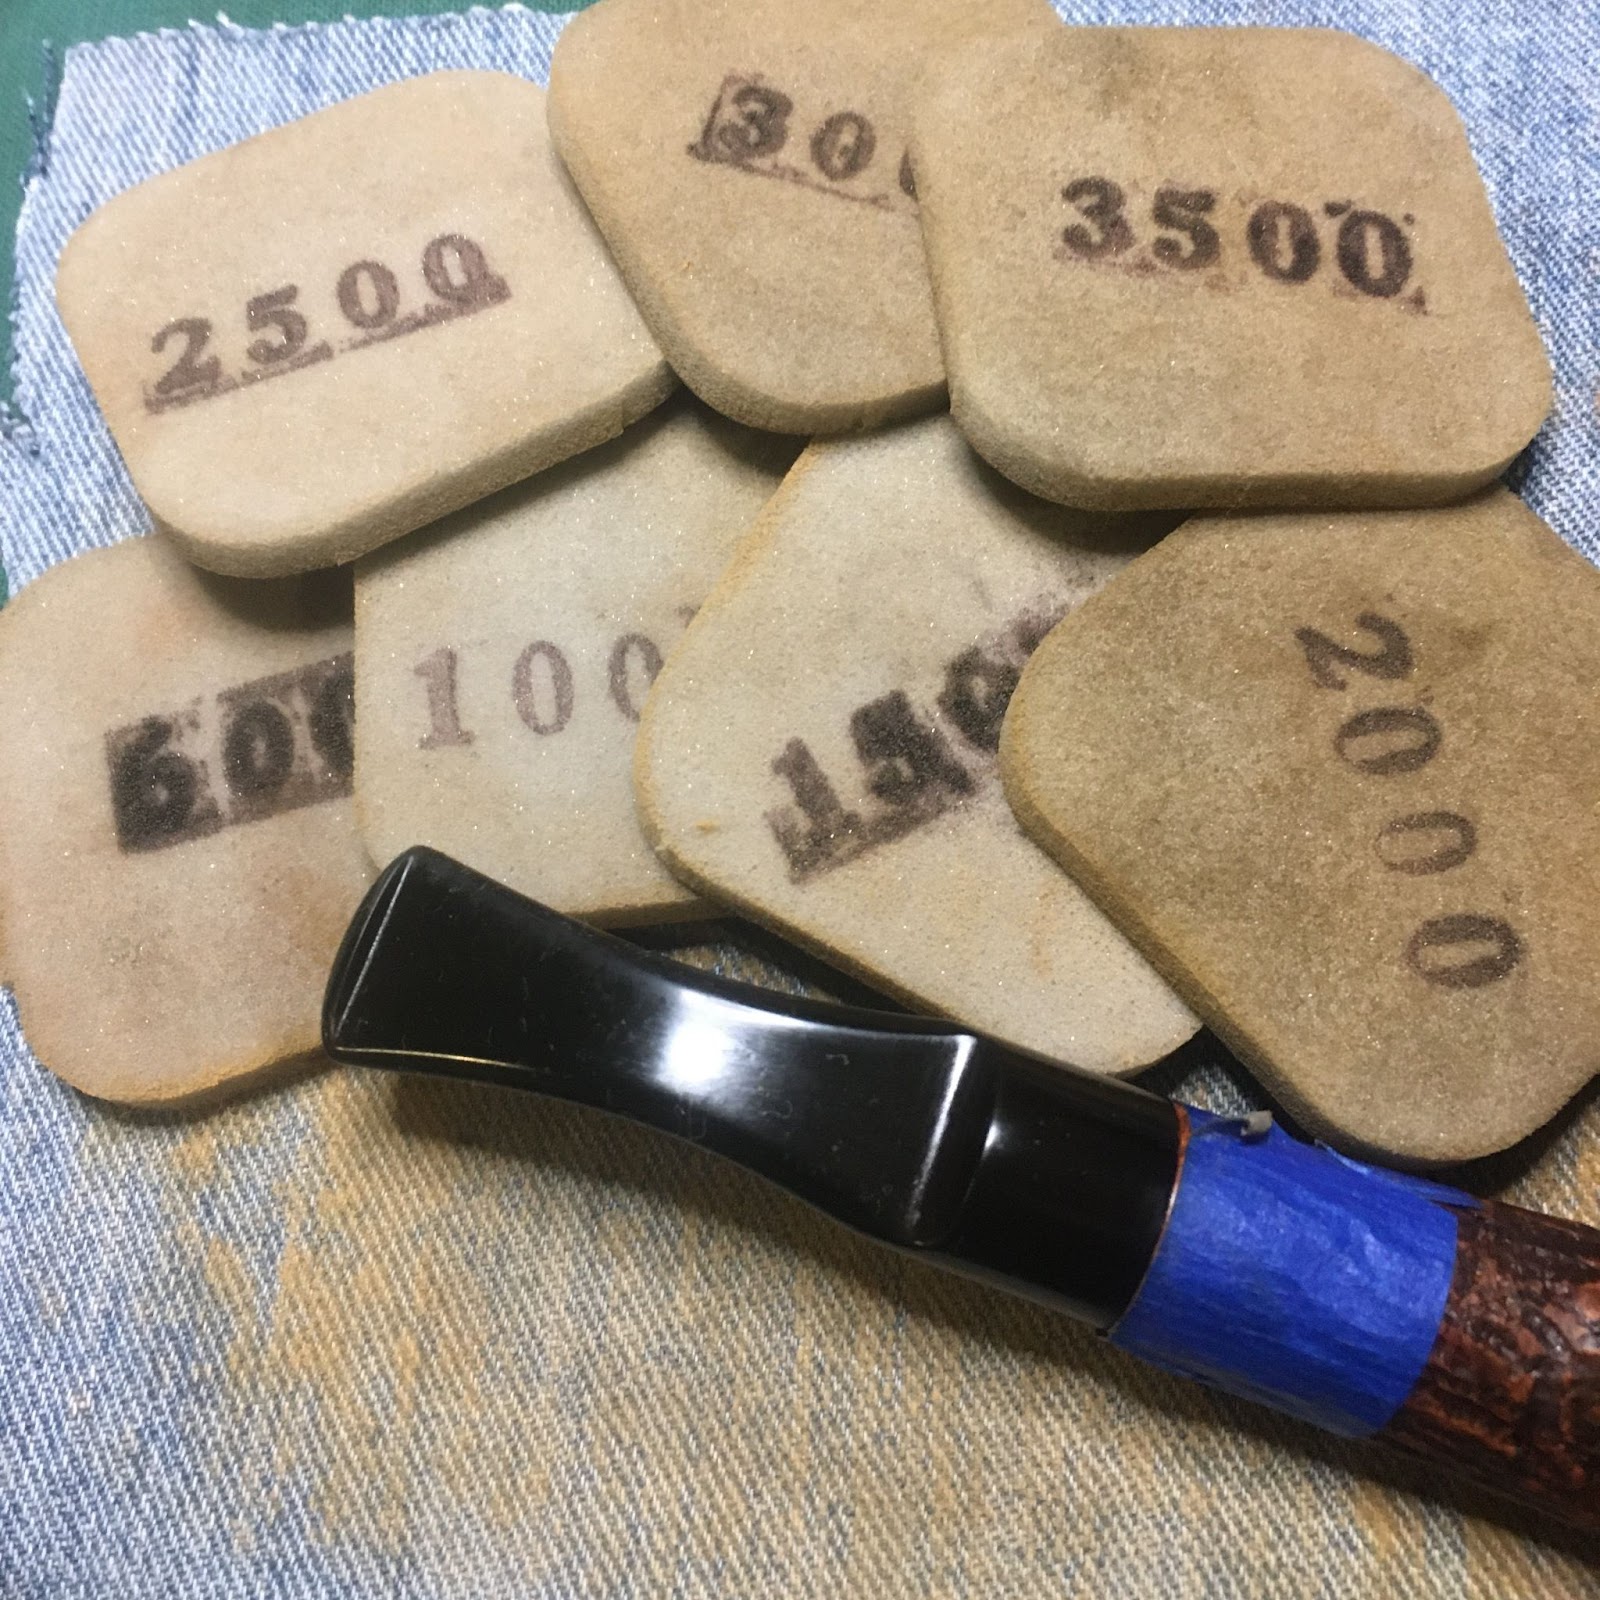
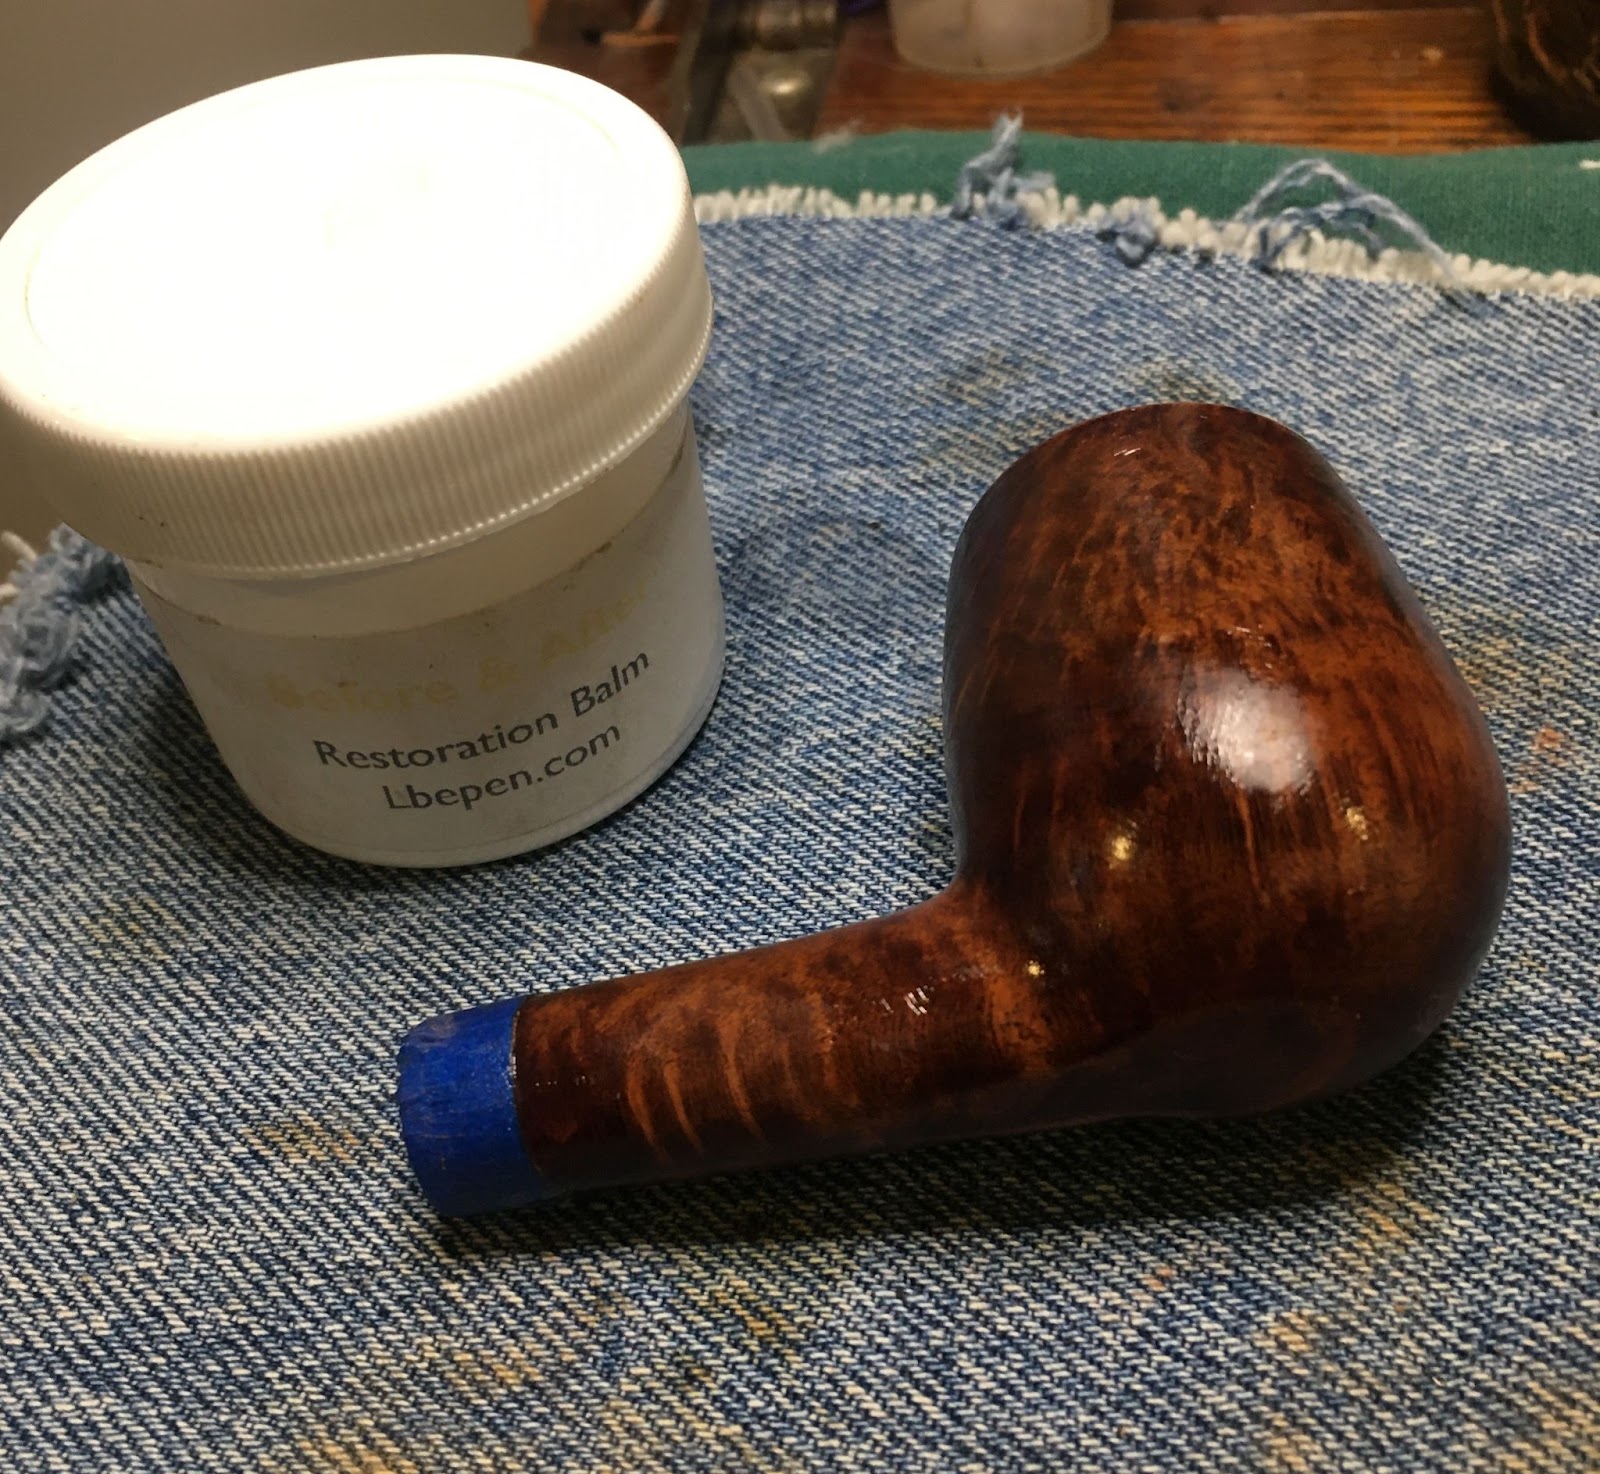
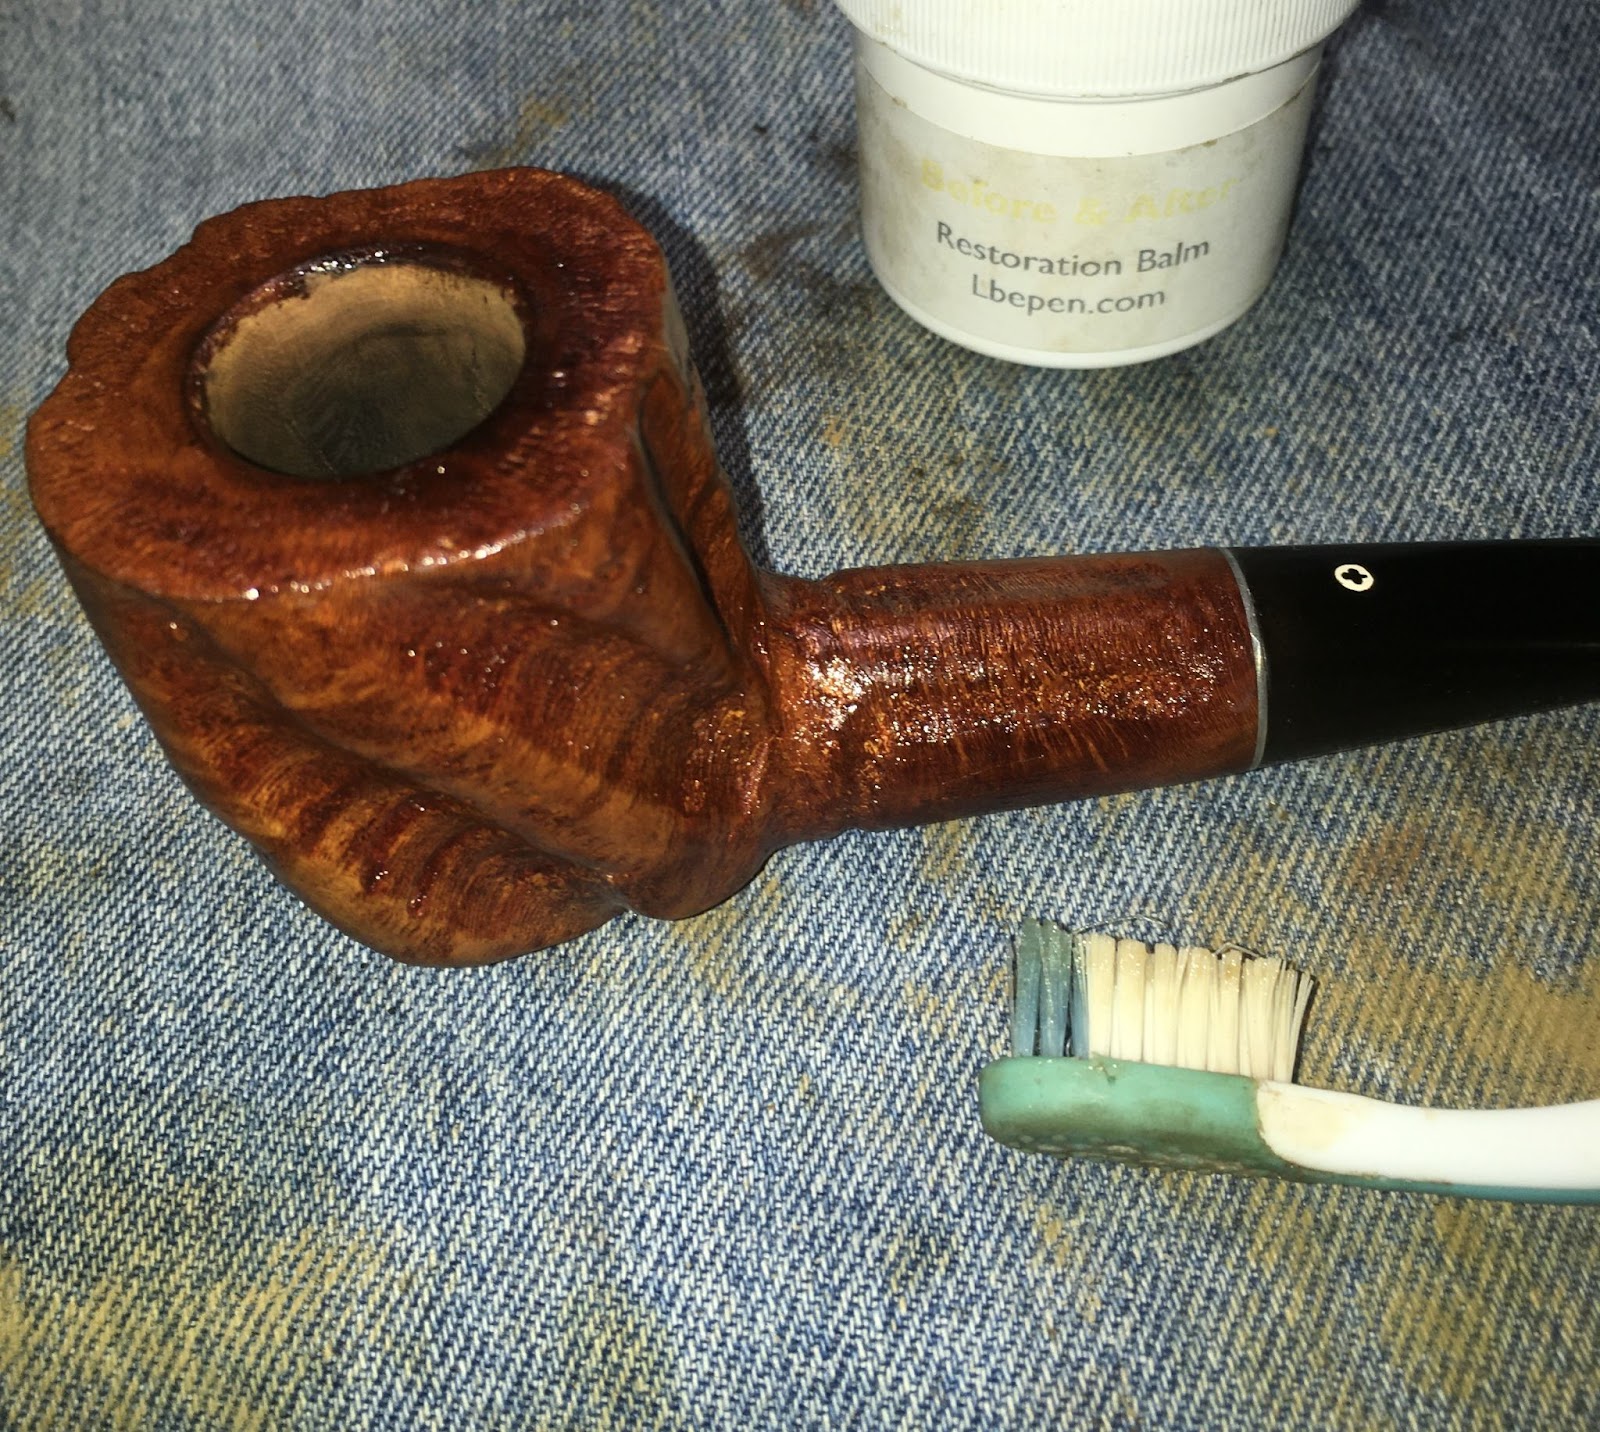
    After 20 minutes, the remaining Restoration Balm was wiped away with the inside of an athletic sock.  The terry cloth material was great at getting into the rough surfaces and wiping away the excess balm.

    Back to the stem.  I wanted the stem/shank joint to be nice and tight with no rounding of the edges.  To manage this I wanted to sand the stem in place with the shank.  I had avoided sanding the edge of the shank while sanding the stummel but that cannot be done with a stem and still look finished.  I needed to protect the shank so wrapping it with painters tape was in order.    

    I worked the stem with the 1000-3500 sanding sponges in sequence.  Between each sponge I rubbed  the stem with mineral oil on my finger and wiped it with a paper towel.  When finished with the sanding sponges I used the 4000-12000 micro-mesh pads in sequence.  Between each pad I rubbed in a drop of Obsidian Oil with my finger and wiped it with a paper towel.  The final stem polishing was done with Before and After Fine Polish.  This was applied with my finger and rubbed with a soft cotton rag.  The Fine Polish was followed by Before and After Extra Fine Polish applied and rubbed the same way.

    The last step to this restoration was to apply a couple of coats of carnauba wax using the buffer.  I tried to only apply the carnauba to the flat surfaces.  This meant that I could not apply the normal amount of pressure with the pipe to the buffing wheel.  I did not want to get carnauba wax embedded into all of the grooves of the carvings.  This made me go much slower and more carefully.  It worked and looked great.  I still felt like the grooves needed some kind of wood sealer or protector.  I opted to use Renaissance Micro-crystalline Wax Polish.  This is a wax that can leave white spots if it is allowed to

    dry too thickly.  I applied it with my finger tip, working it into the coarse grooves.  While it was drying I buffed it with a shoe shine brush. The hairs of the brush smoothed and evened out the wax as it was drying.  Like it says on the label “Apply sparingly with a soft cloth and buff gently.  Dries hard instantly.  Resists liquids spillage. Does not show finger marks”.  I wanted the “dried hard” and “resists liquids” features.  I also love the solvent based smell of it.  When completely dry the smell is gone.  I hand buffed the completely dried pipe with a microfiber polishing cloth.

    I am very pleased at how well this Kaywoodie Hand Made pipe turned out.  It feels good in hand with the grooves being smooth and comfortable.  The smooth surfaces, separated by the carved grooves, come together nicely towards the shank.  The briar grain, though not distinctive, is attractive.  I am impressed with how well the stem polished-up  it’s glossy black contrasts the medium browns of the stummel beautifully.  This is a very large pipe weighing 2.7 ounces (76,5 g).  It’s length is 6 in. (15.2mm), bowl height:  2.38 in. (60mm), chamber depth: 2 in. (50.8 mm), chamber diameter:.875 in. (22.2 mm), outside diameter (side-side): 1.63 in (41.4 mm), outside diameter (front-back): 1.75 in. (44.5mm).

    I do hope that you have found something here useful.  If you like this sort of thing, please click the like and subscribe buttons.  I thank you for reading the ramblings of an old pipe lover.

    Below are some photos of the finished Kaywoodie Hand Made.

←Previous Page
1 … 18 19 20 21 22 … 26
Next Page→

Blog at WordPress.com.

Privacy & Cookies: This site uses cookies. By continuing to use this website, you agree to their use.
To find out more, including how to control cookies, see here: Cookie Policy

Loading Comments...

    • Subscribe Subscribed
      • NebraskaPeteGeek
      • Join 40 other subscribers
      • Already have a WordPress.com account? Log in now.
      • NebraskaPeteGeek
      • Subscribe Subscribed
      • Sign up
      • Log in
      • Report this content
      • View site in Reader
      • Manage subscriptions
      • Collapse this bar