Skip to content
    • About

NebraskaPeteGeek

  • American Pipe Makers
  • British pipe Makers
  • Danish pipe Makers
  • French Pipe Makers
  • German Pipe Makers
  • Irish Pipe Makers
  • Italian Pipe Makers
  • Others or Unknown Pipe Makers
  • Restorations
  • A Denicotea Deluxe Hockey Restoration

    November 5th, 2024

    Photographed and written by 

    John M. Young

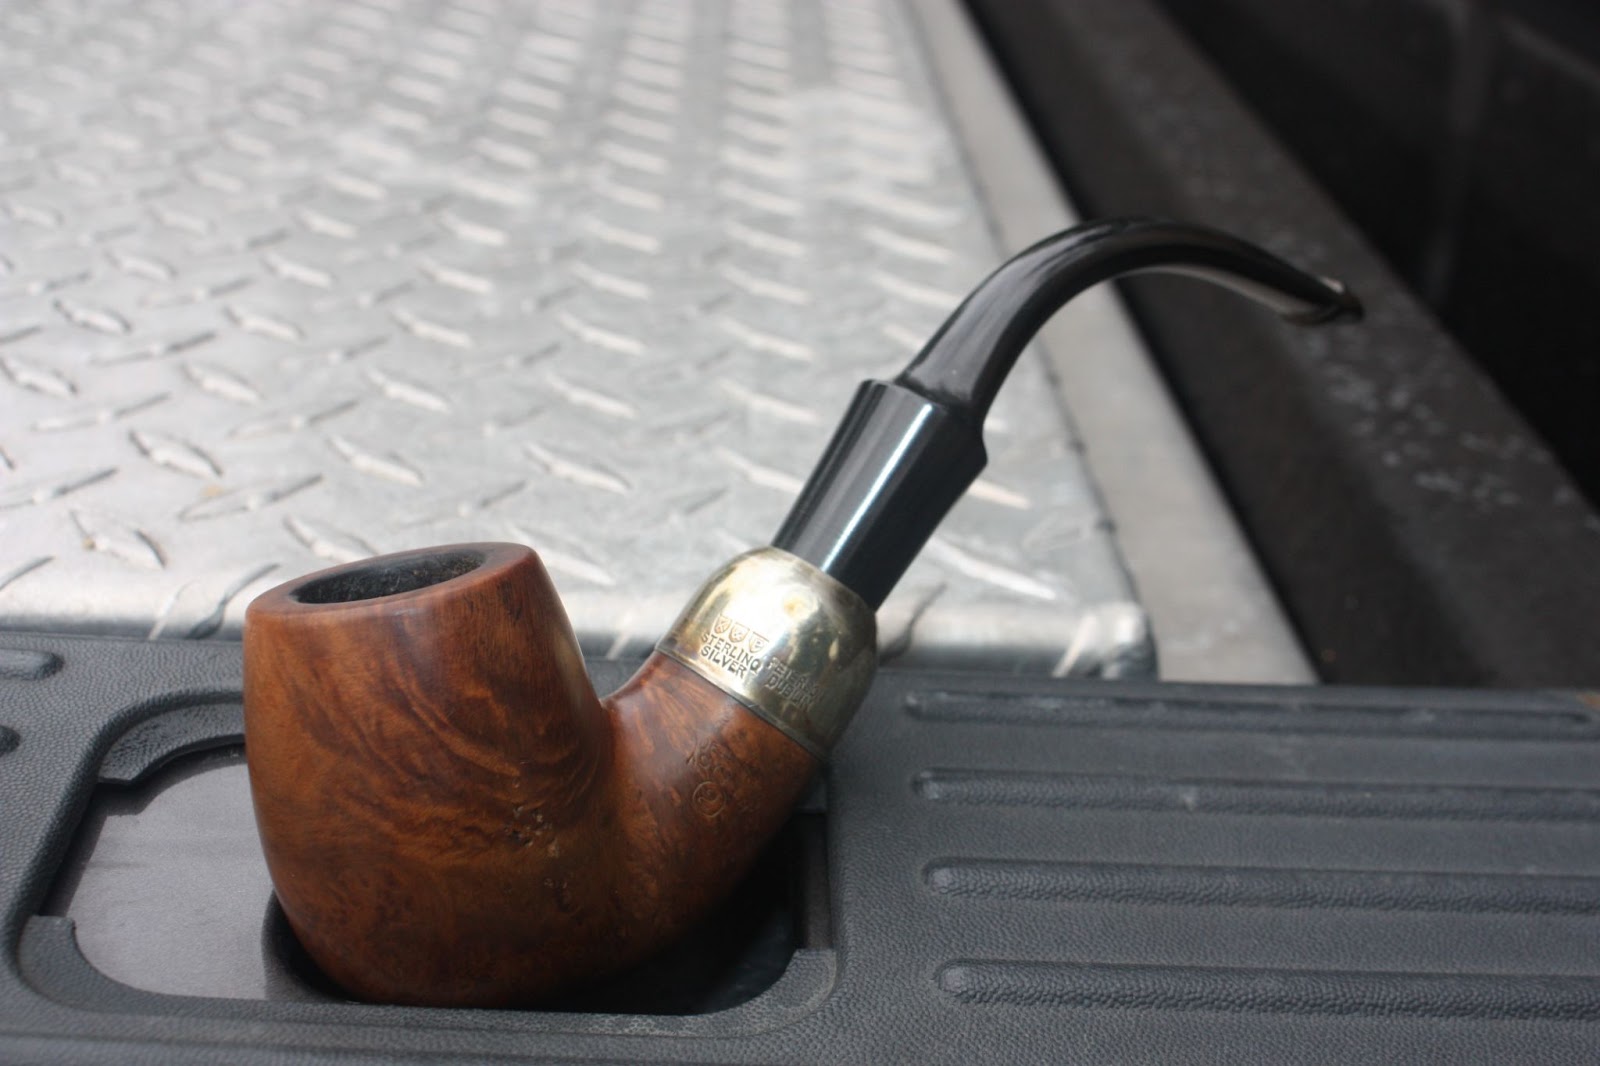
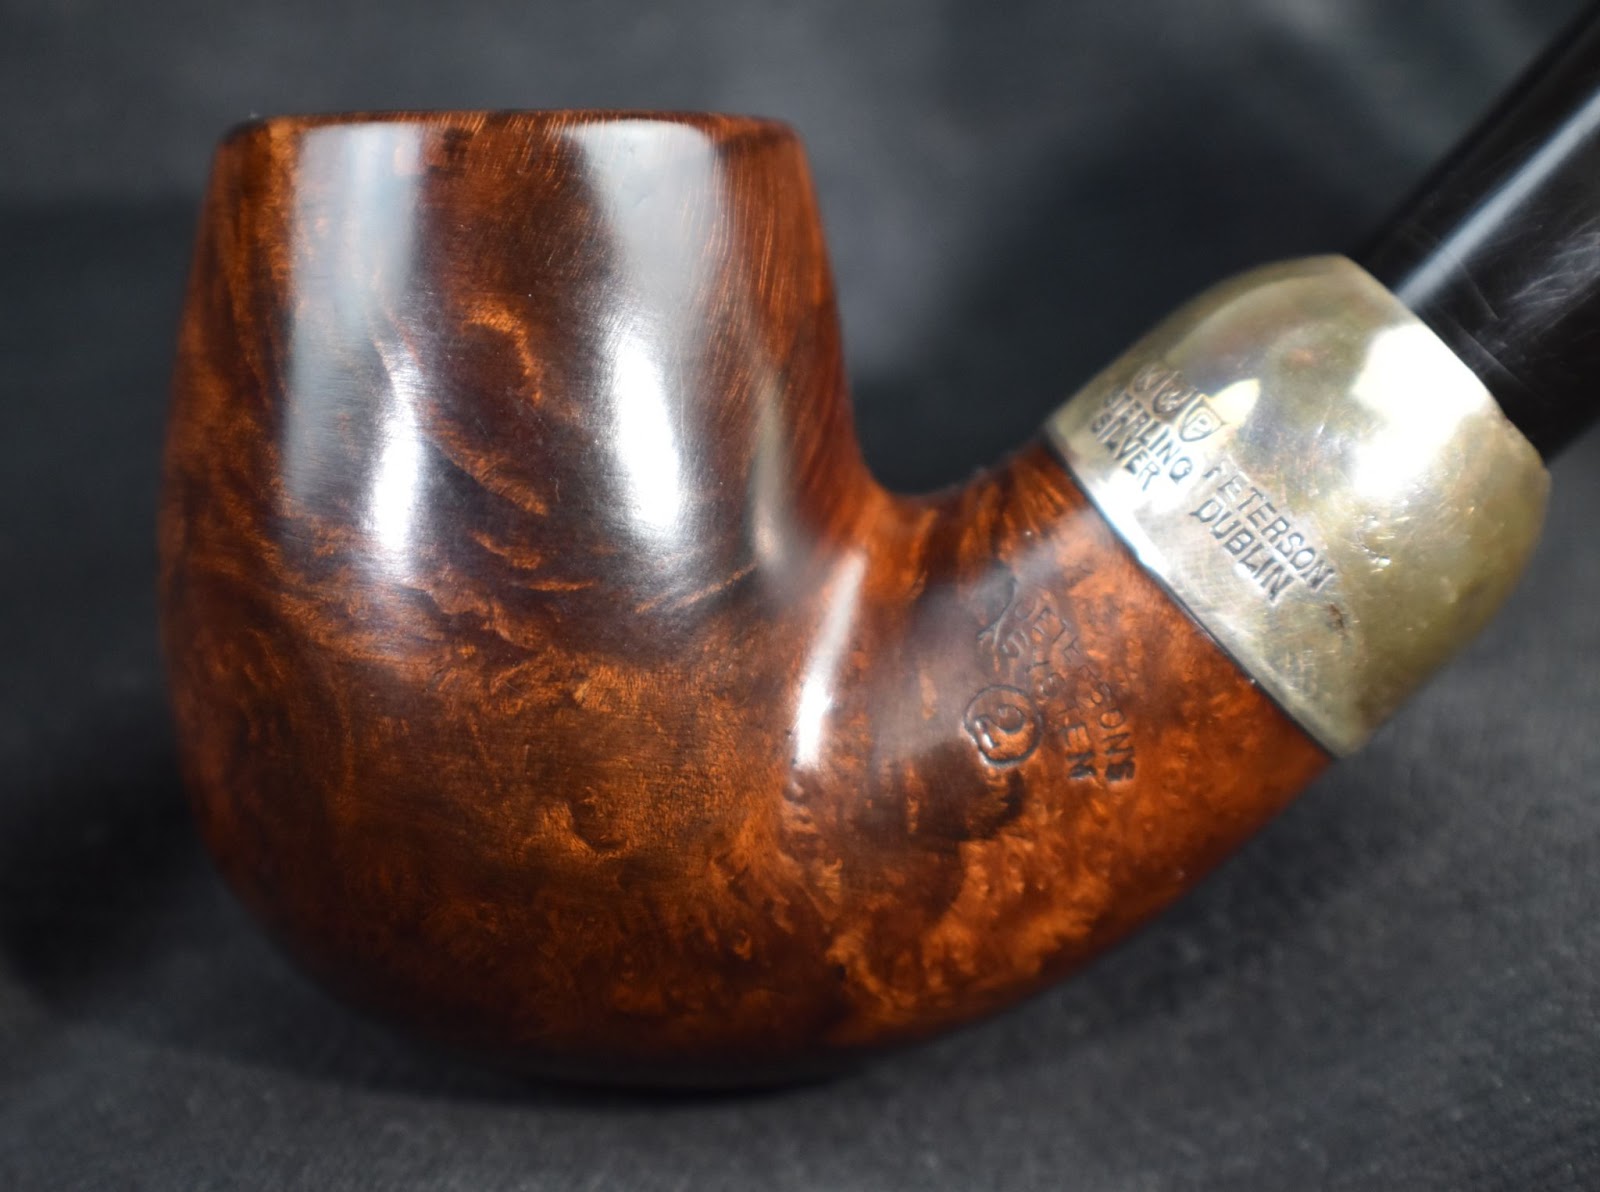
    DENICOTEA arched over DELUXE on the left shank with HOCKEY over BRUYERE EXTRA on the right.  741L on the underside of the shank next to  the stem.

    Background

    In a previous blog I wrote about the history about what little I found about Denicotea, I will link that post here, and  include the information below:

    “Pipedia.org has a short article on Denicotea.  I will include it here in its entirety:

    “Willy Heineberg founded the company Denicotea in 1932 and began manufacturing and selling smoking accessories such as filters, filter inserts, cigarette holders and pipes.[1] The company headquarters was initially in Cologne, but was relocated to Bergisch Gladbach after the Second World War.[2]

    Denicotea is actually the name of a silica gel filter, cigarette holders and care products for pipes and cigarette holders.

    I still find it a bit confusing as Denicotea seems to be a company[3] and a brand as well which is operated by COMPOSING-STUDIO GmbH[4].

    Brands

    Adsorba

    Adsorba is a fantasy series of pipes produced by Luigi Crugnola for the German market.

    Aldo Morelli

    Aldo Morelli is a fictional name. The brand Aldo Morelli has been registered for Denicotea on February 26th, 1992.[5]

    Depending on the different lines the pipes are made by Cesare Barontini, Gigi or Molina Pipe for Denicotea GmbH.

    Stefan Petzuch points out this brand appears to have similarities to the Mauro Cateni pipe brand, in particular they are both fictional Italian brands by German companies, and both have the “HAND CUT” imprint on the stem as seen bellow. This may connect the Aldo Morelli brand to Gebr. Heinemann KG in Hamburg, who had registered the Mauro Cateni brand. Or perhaps there is a connection between Denicotea and Gebr. Heinemann KG, or perhaps these pipe brands simply used “Hand Cut” stems from the same source.” (Denicotea – Pipedia)

    Interesting and weird are the two qualifiers that come to mind in reading that.  The four makers mentioned in the article; Luigi Crgnola, Cesare Barontini, Gig and Molina are all Italian pipe manufacturers.  Where does the MADE IN ENGLAND stamp on the example on pipephil.eu or the stamp on the pipe I purchased come in, I cannot say.  I can say that I am not the first person to have little success researching the origins of Denicotea pipes.  Dal Stanton, who is far more diligent in his background research than I, had a French made Denicotea.  He traced its origins to the St. Claude area but not to a specific maker.  Dal’s blog was posted on Steve Laug’s rebornpipes.com site.  Here is the link to Dal Stanton’s blog post:  https://rebornpipes.com/2016/09/29/nice-find-in-plovdiv-bulgaria-denicotea-deluxe-curling-bruyere-extra/”

    This Denicotea has neither the Country of Manufacture (COM) stamps of England nor France.  It does have a shape number 147L which I could find no corresponding match  with brands associated with Denicotea.  This pipe’s heritage appears to remain a mystery.

    The Restoration

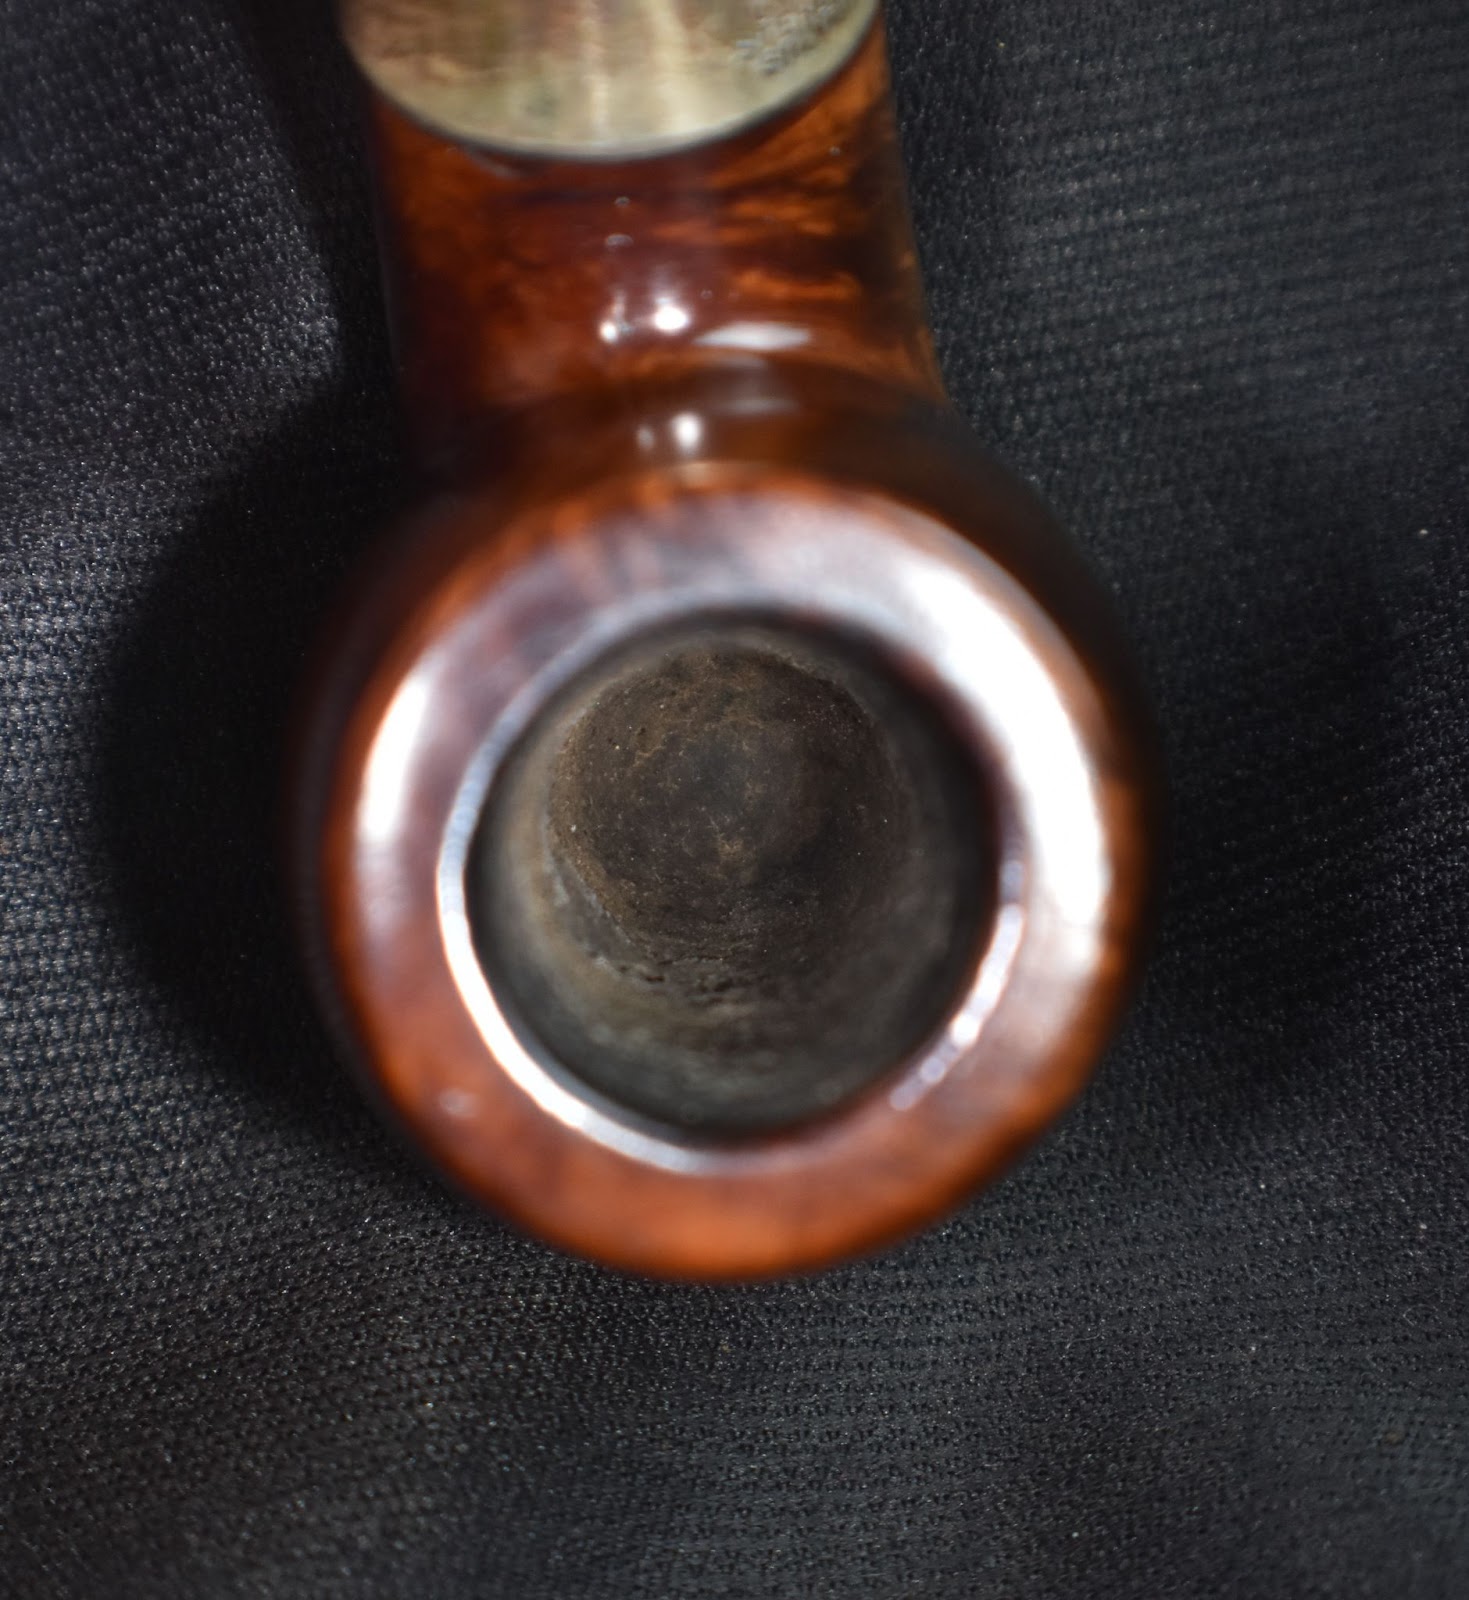
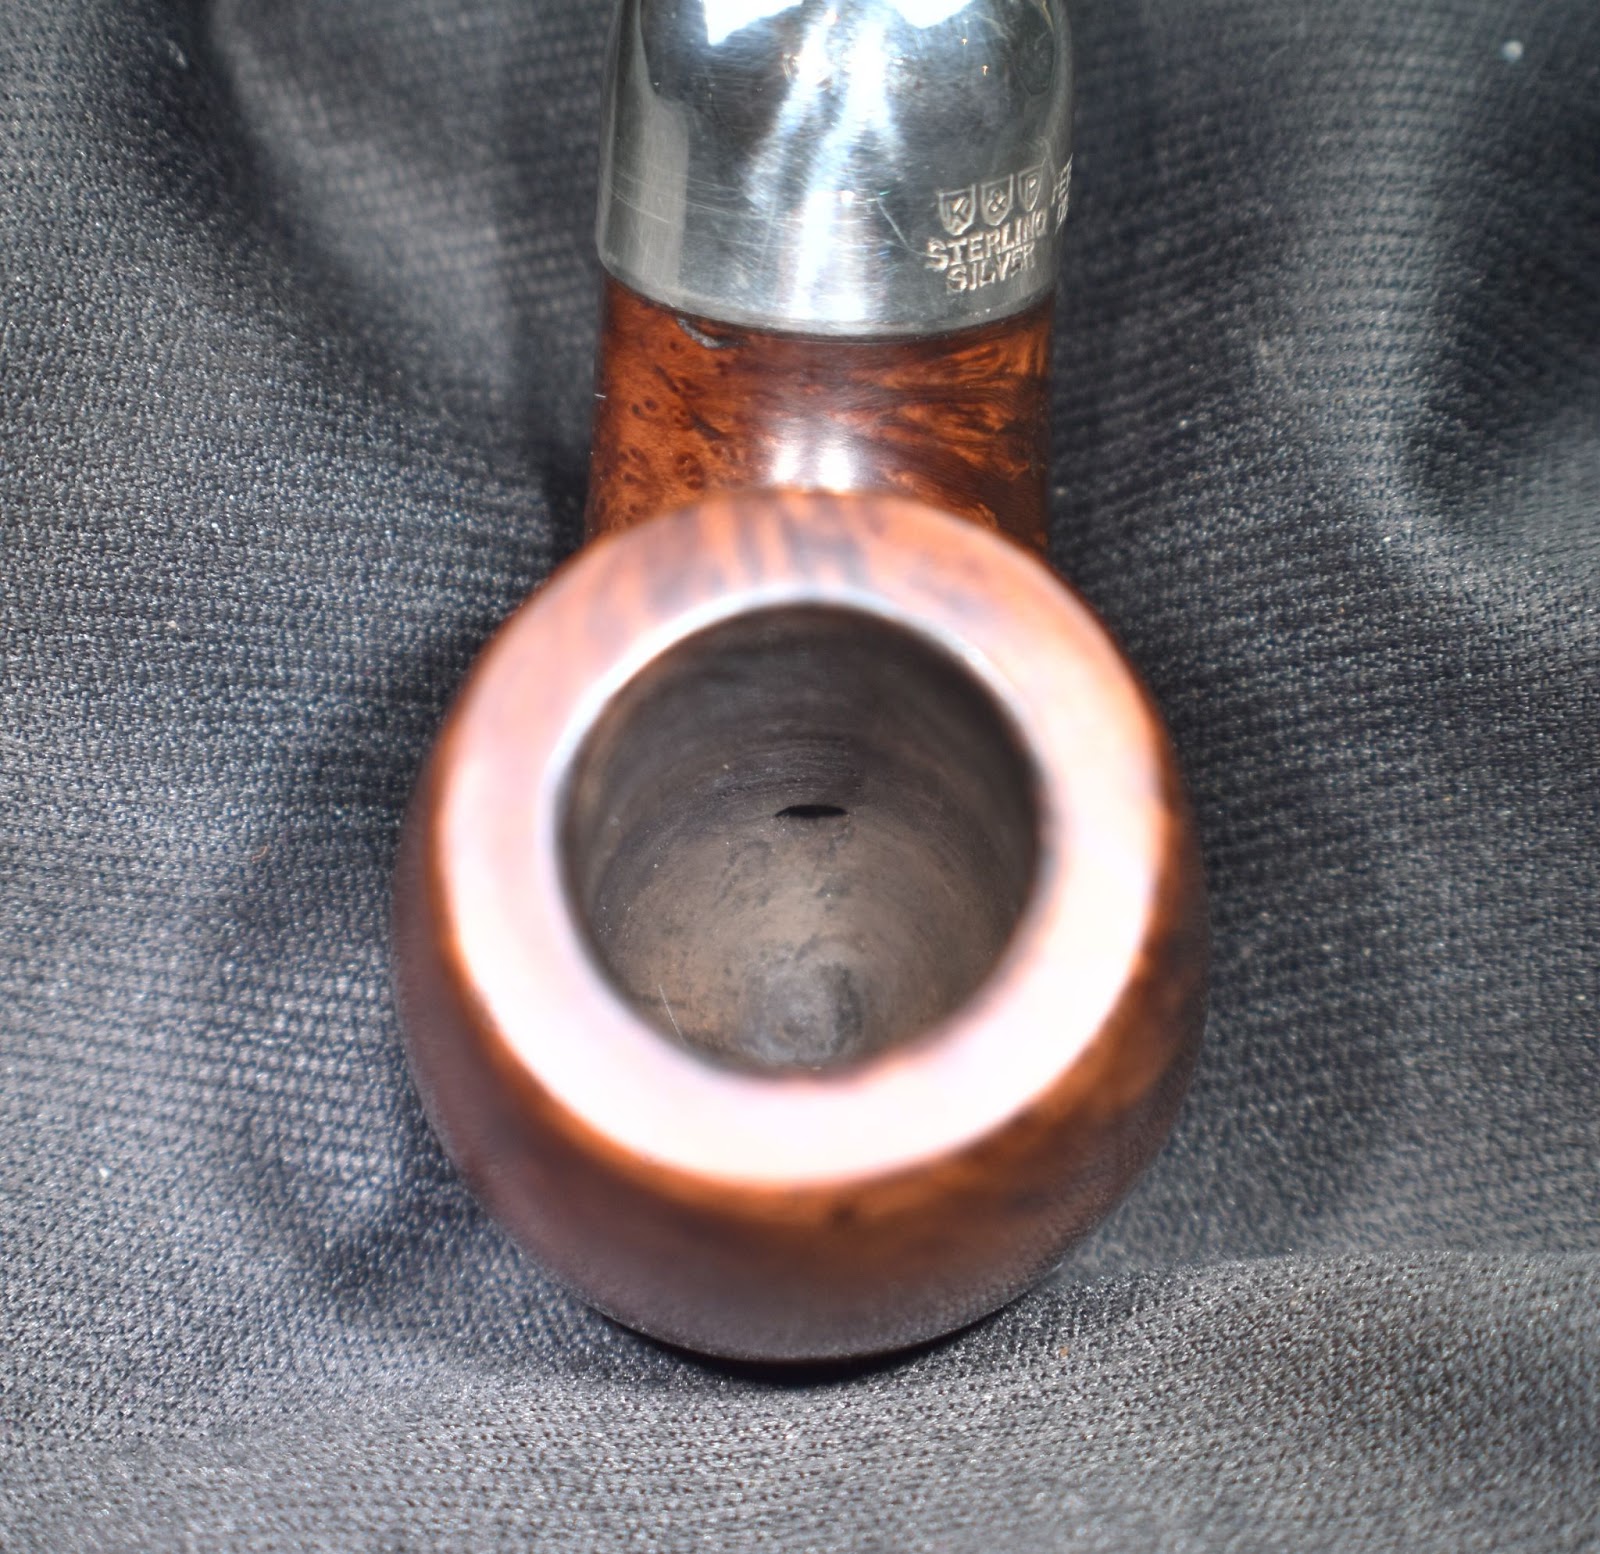
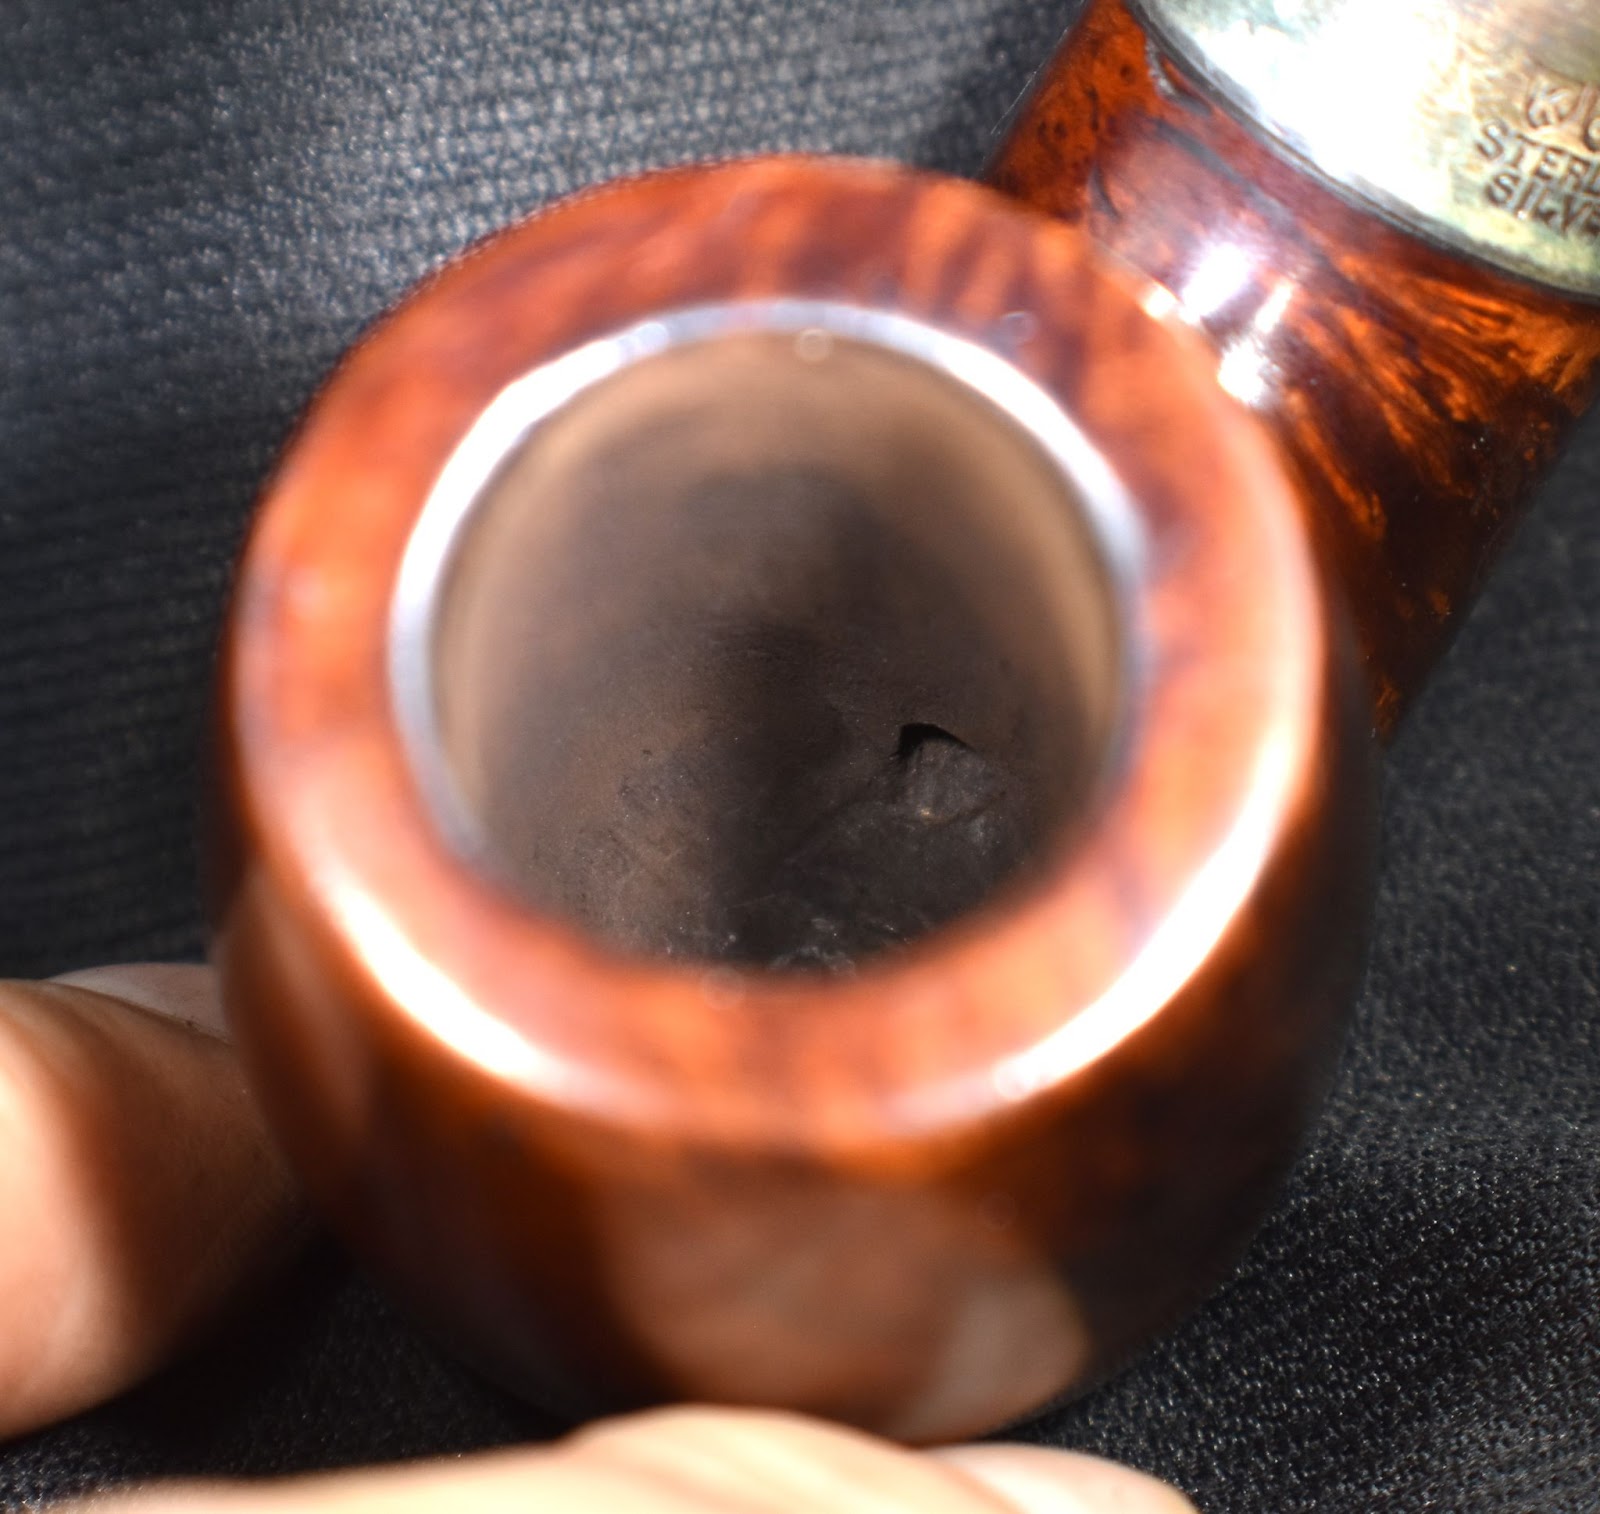
    The restoration began with the reaming of the tobacco chamber.  There was little cake to remove indicating that the pipe had not been used heavily.  This premise was later shattered.  The chamber was rather narrow making me use the Kleen-Reem, General triangular scraper and the smokingpipes Low Country reaming knife to clear the cake.  

    The below photo illustrates the very small amount of cake present.  The bowl was sanded with 220 sandpaper wrapped around a wood dowel and no evidence of heat damage was observed on the bare briar.

    The rim had no lava deposits again indicating that the pipe had not been smoked too heavily.

    The stummel was taken to the sink and scrubbed with undiluted Murphy Oil Soap and a nylon scrub brush.

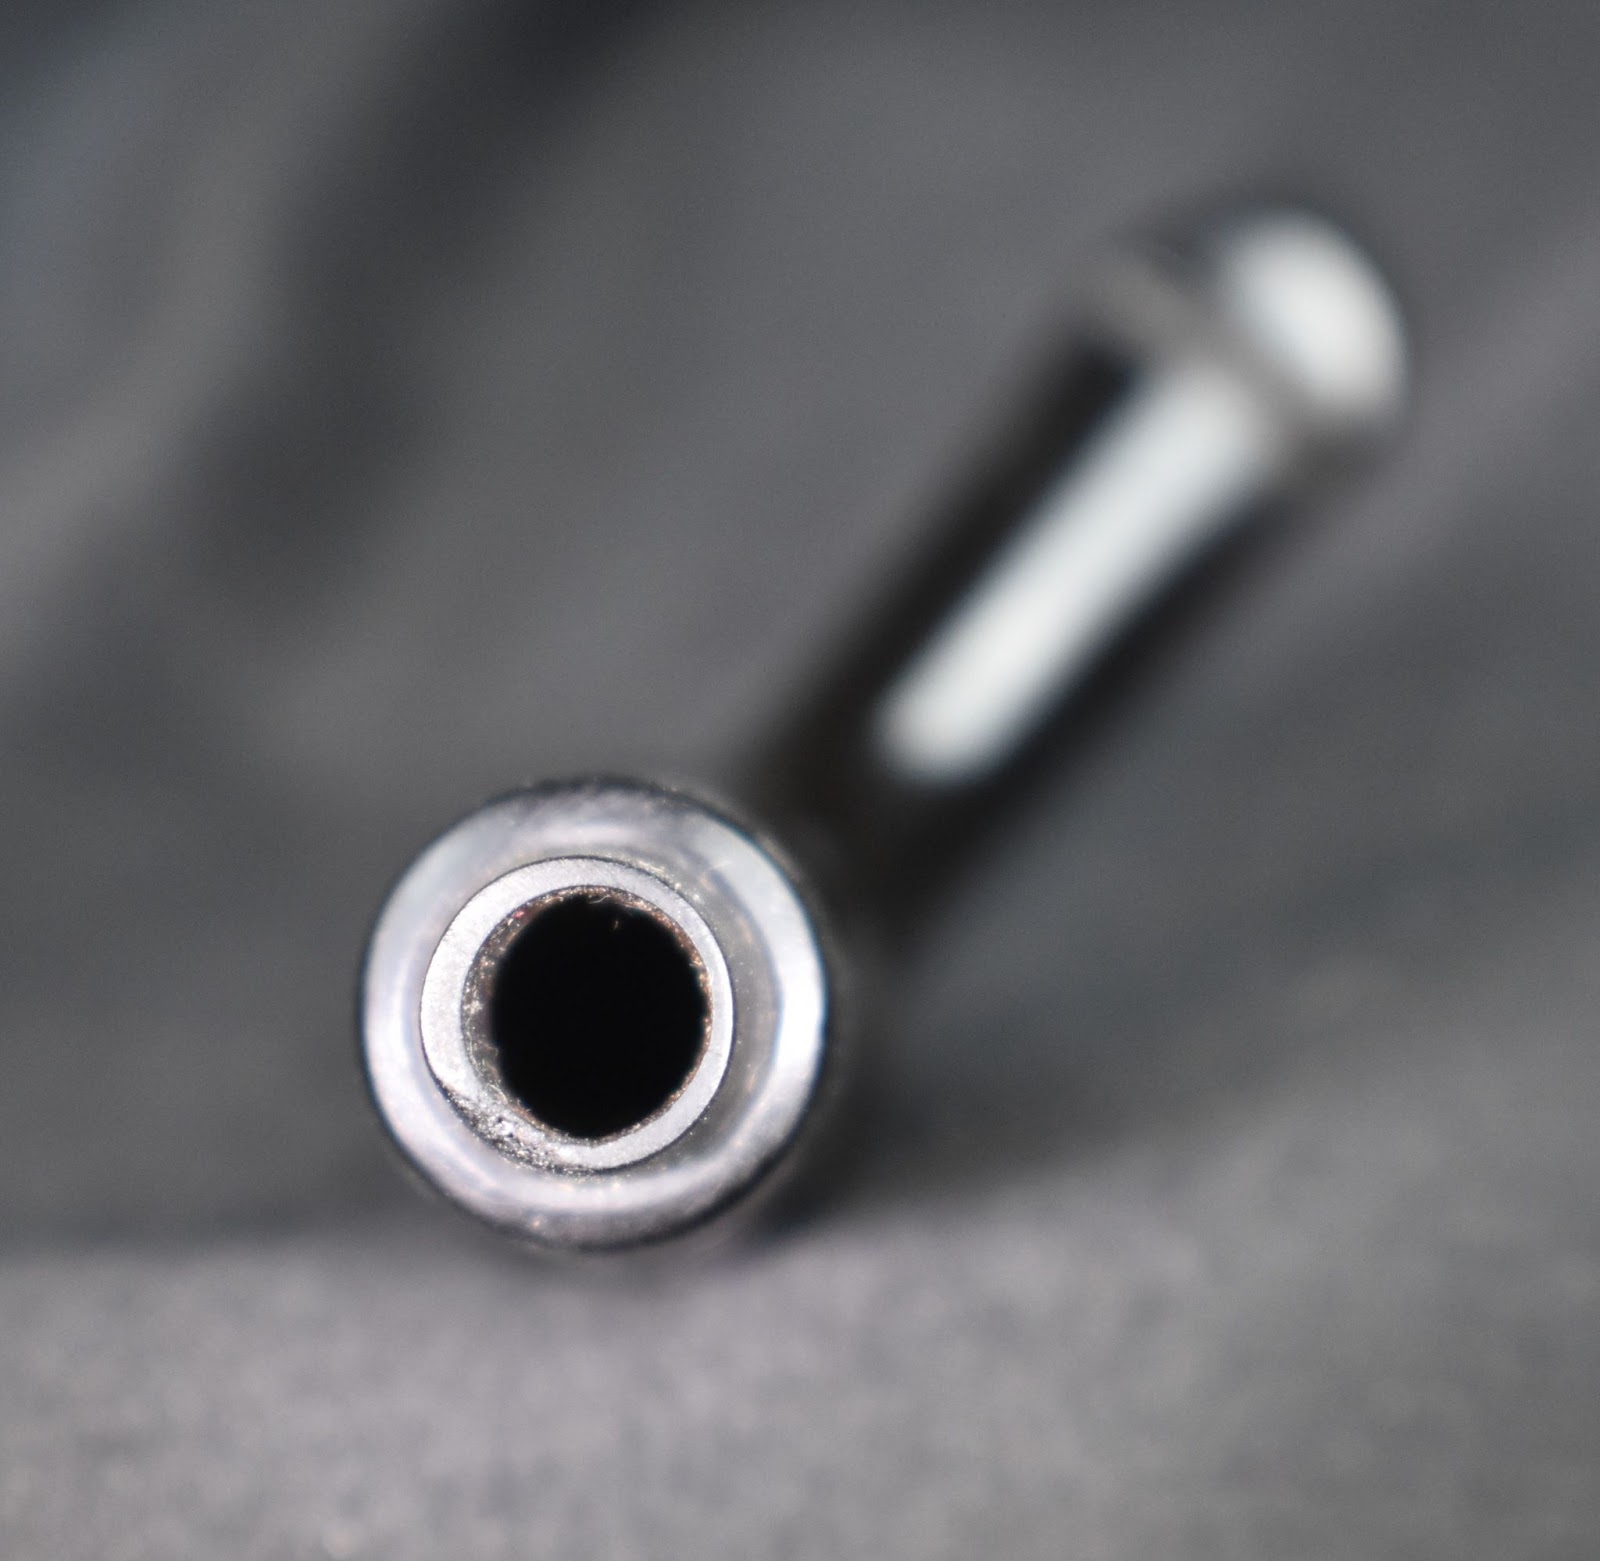
    Next came the cleaning of the shank.  This is where I realized that this pipe had indeed been smoked a good deal.  For all the maintenance that the bowl had received the shank had been severely neglected.  It was very full of tar and smoking residue, also known as yuck.  Now, to cut the previous owner some slack, the shank was not easy to clean as the airway appeared to be bored at 9.5 mm.  The plastic tenon was inserted into this bore and left with a step.  There was another step at the bowl end of the airway where the drilling draft hole went from a normal small hole to the 9.5 mm.  These two steps had accumulated a great deal of yuck and could not be reached with dental scrapers to help clear the yuck.  Numerous cotton swabs dipped in 95% ethyl alcohol were used along with a nylon shank brush.  I seemed to make little progress as the cotton swabs continued to emerge heavily stained with yuck.  I then decided to try stuffing the tobacco chamber and the shank with cotton, filling them with 95% ethyl alcohol and allowing them to sit overnight.

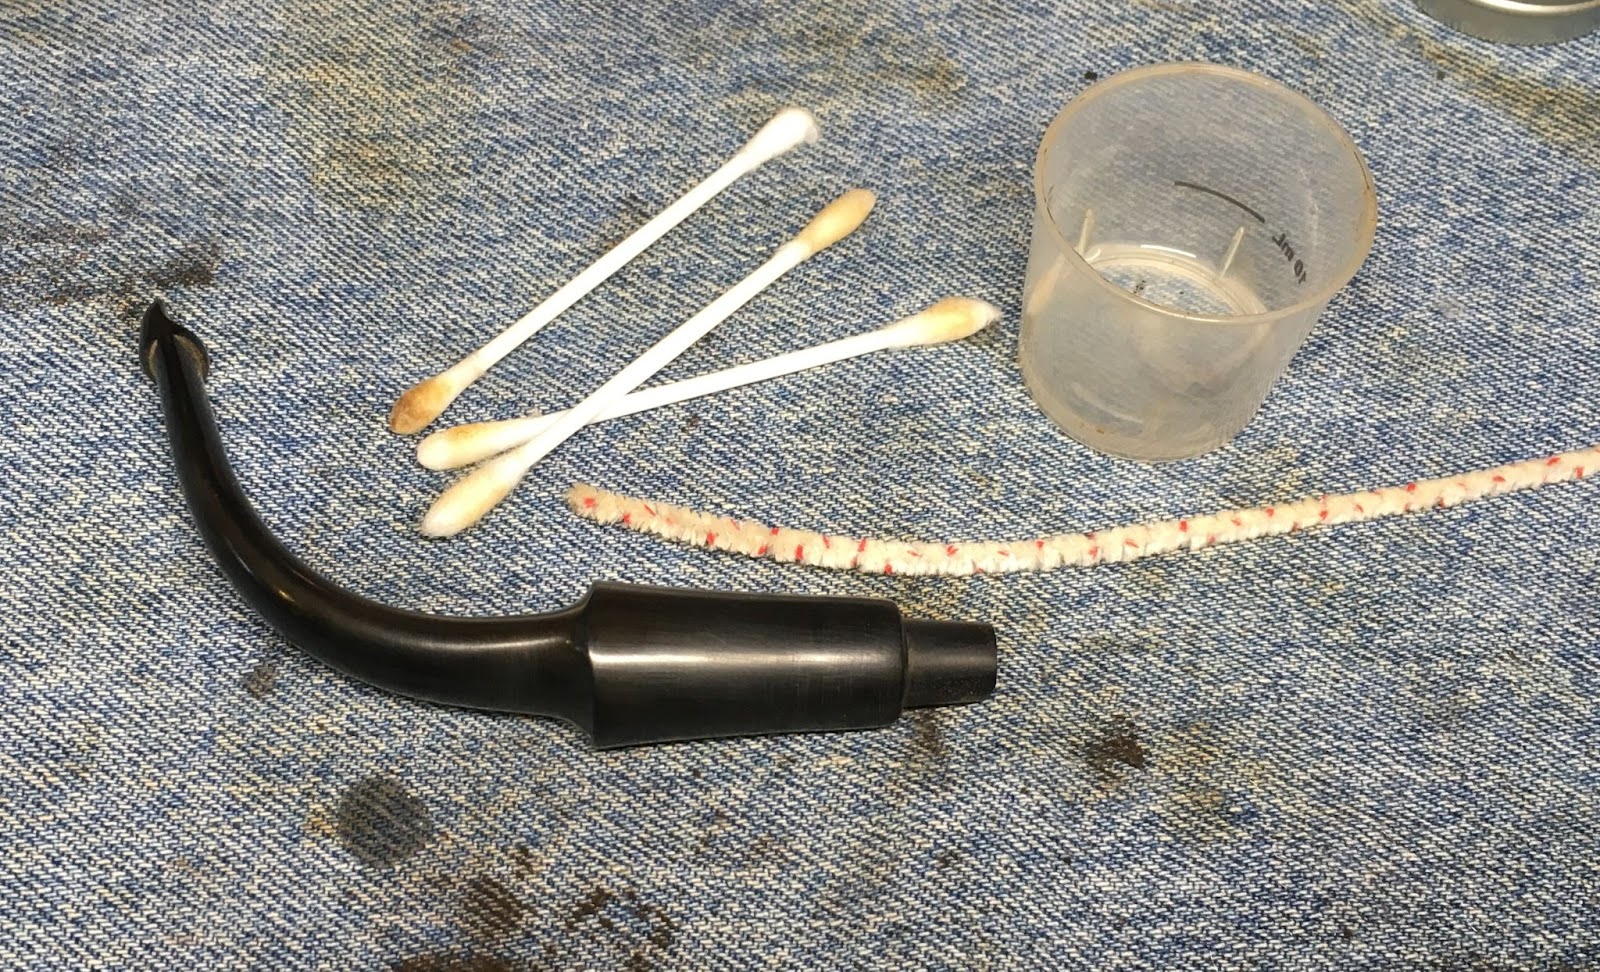
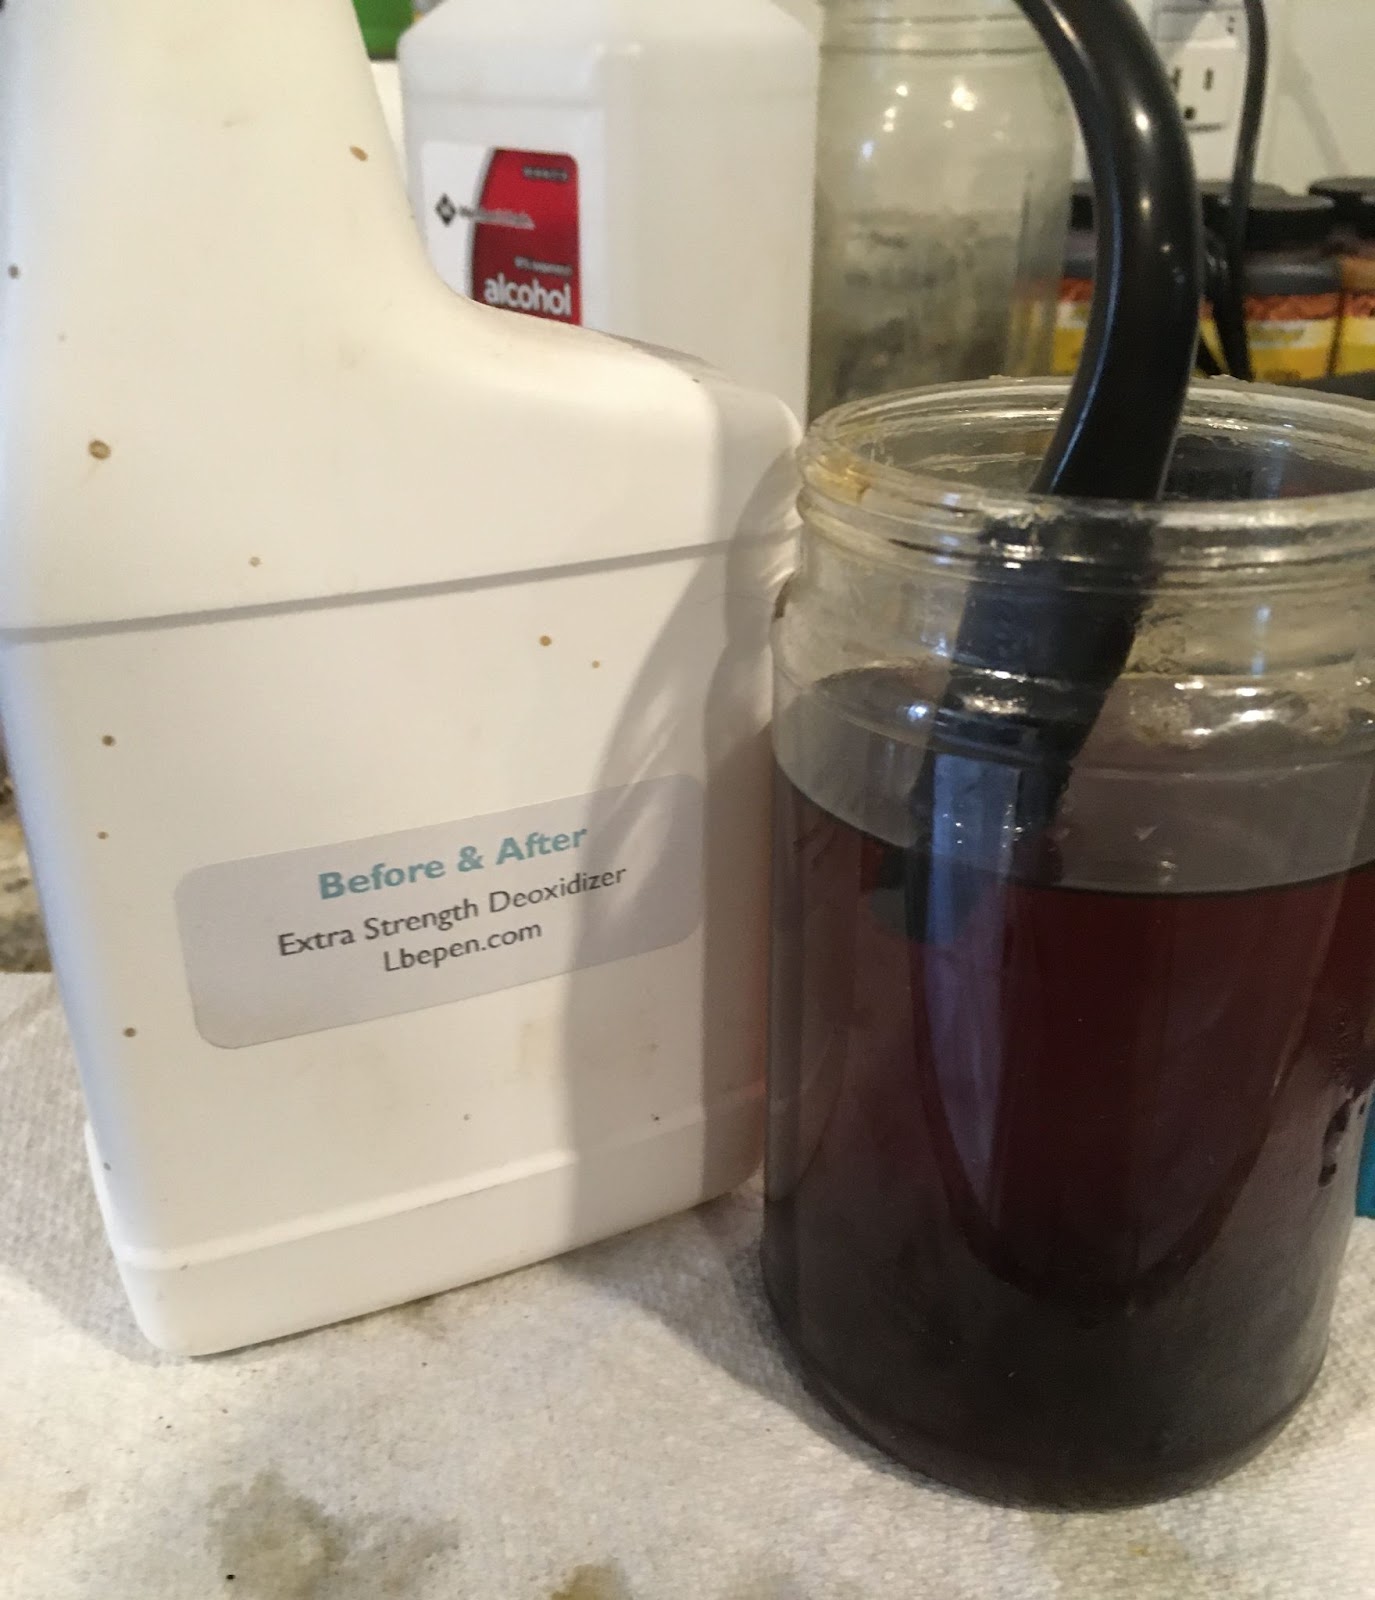
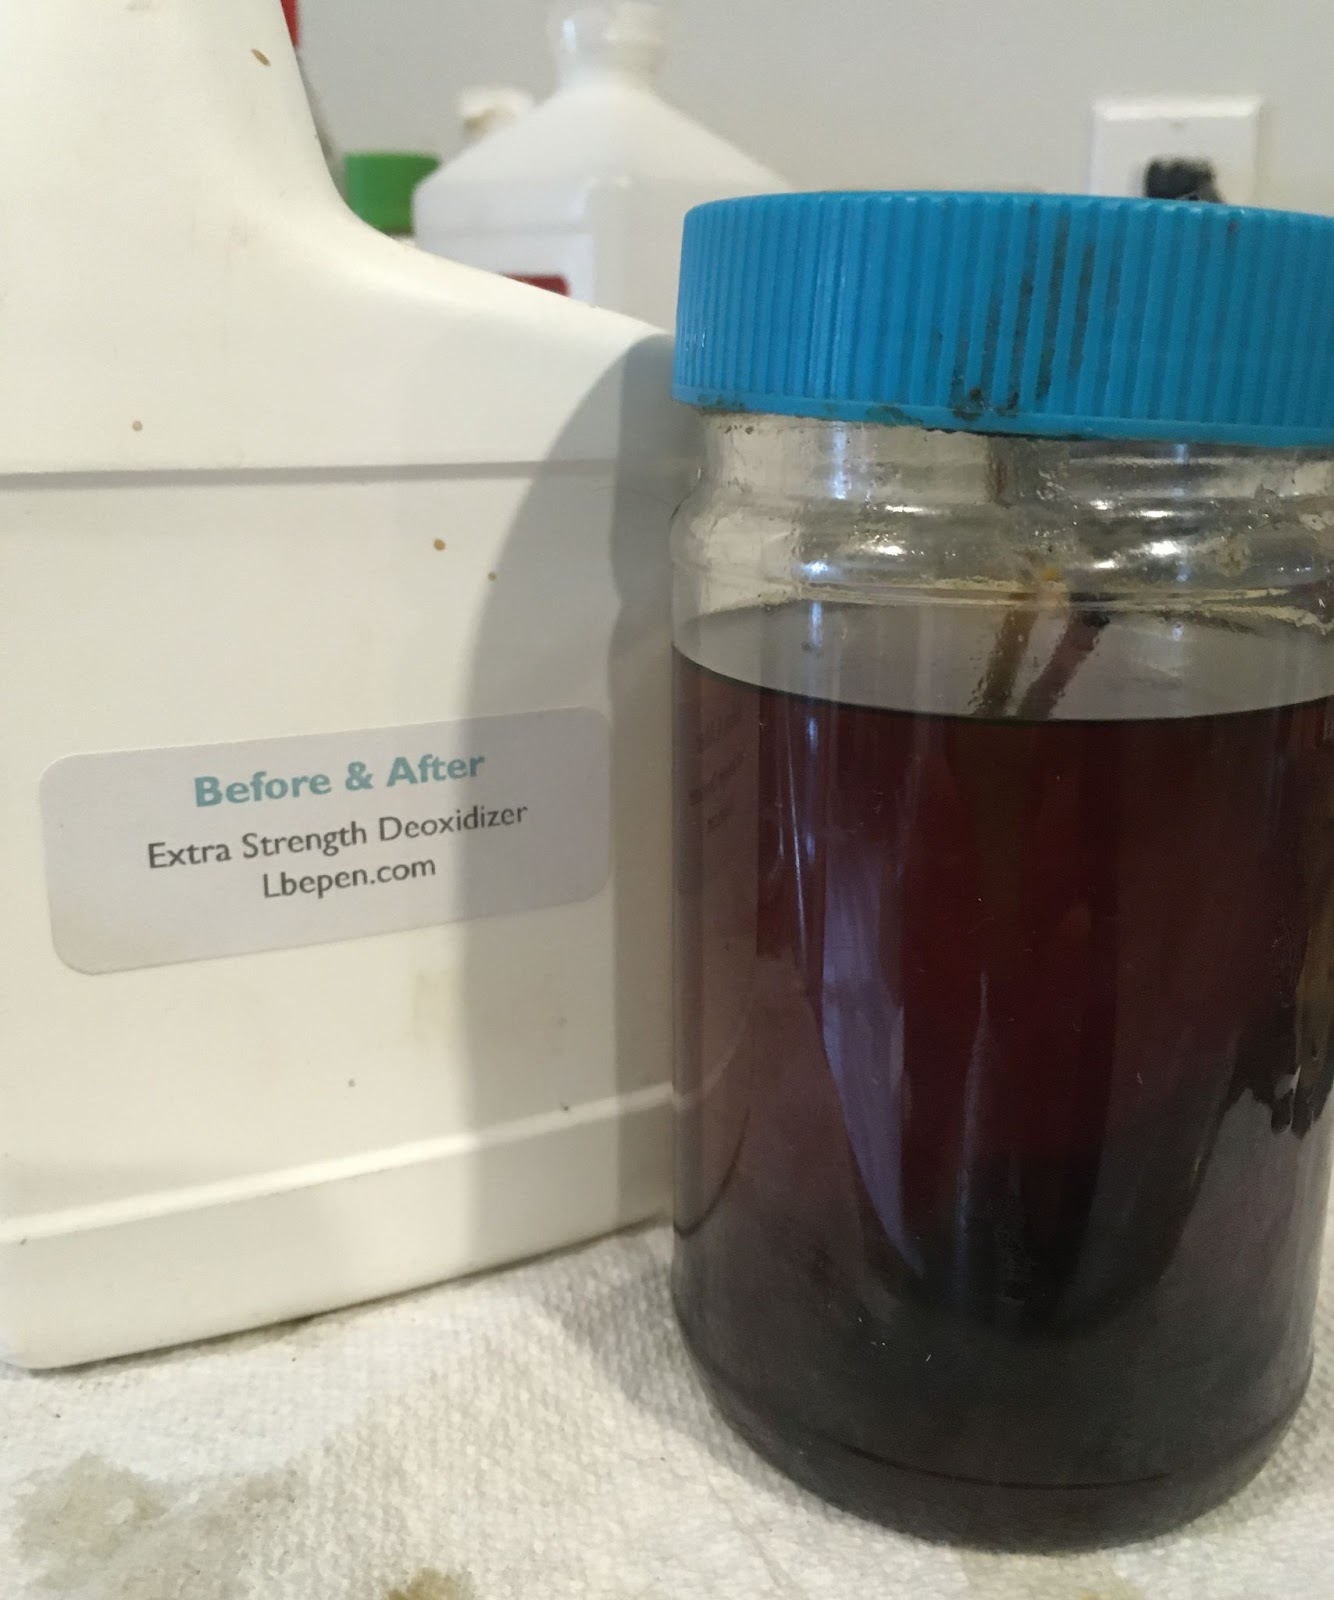
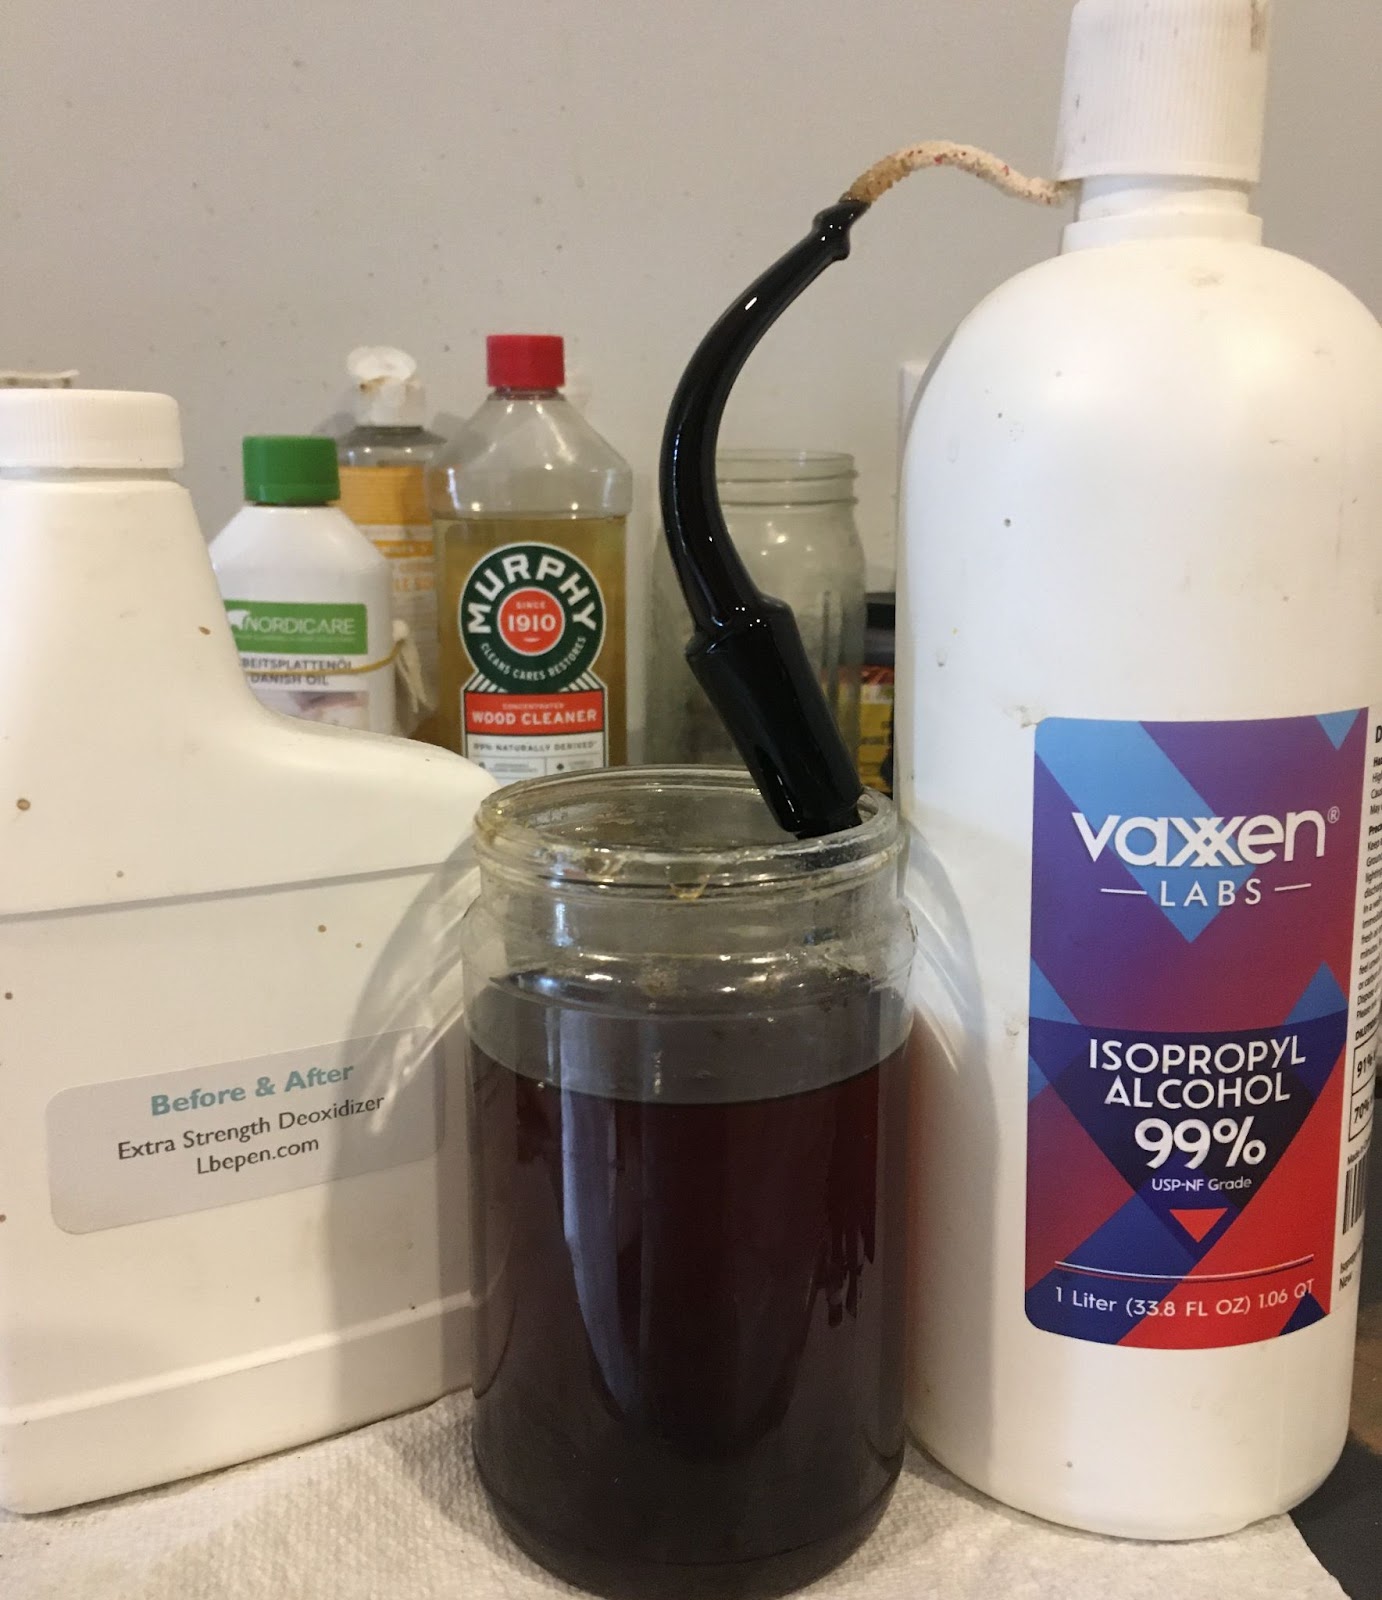
    The stem was not much better than the shank.  I plugged the button end with my finger and poured some ethyl alcohol into the airway.  Here I scrubbed with a nylon shank brush.

    The alcohol was allowed to drain into the sink.  It was full of yuck.

    The stem was designed for use with 9 mm filters and judging by the accumulated yuck, they had not been used as I don’t think a filter could have been inserted with all of the residue in the stem.

    I alternated between using Castile soap and 95% ethyl alcohol hoping that one of the two would help reduce the yuck.

    It was about here that I noticed the fine scratched immediately above the button.  

    The scratches were present on both the top and bottom sides of the stem.

    The stem was returned to the workbench where I continued cleaning the stem with more traditional methods.  Bristle pipe cleaners and cotton swabs  dipped in alcohol were used.  I also wrapped small 5 cm square pieces of paper towel around a rat tail file and scrubbed the airway with these dipped in alcohol.   Eventually I was victorious and the stem cleaned.

    To address the scratches I sanded the button end of the stem with 400, 600 and 1000 grit sanding sponges.  I used a small circular pattern while sanding.  This eliminated the scratches.

    While the stummel was still soaking with the cotton and alcohol I picked the old fill from the briar.  There were two big fills on the left.

    One large fill and one smaller fill on the right.

    And two larger fills on the rim which were picked free of old fill material.

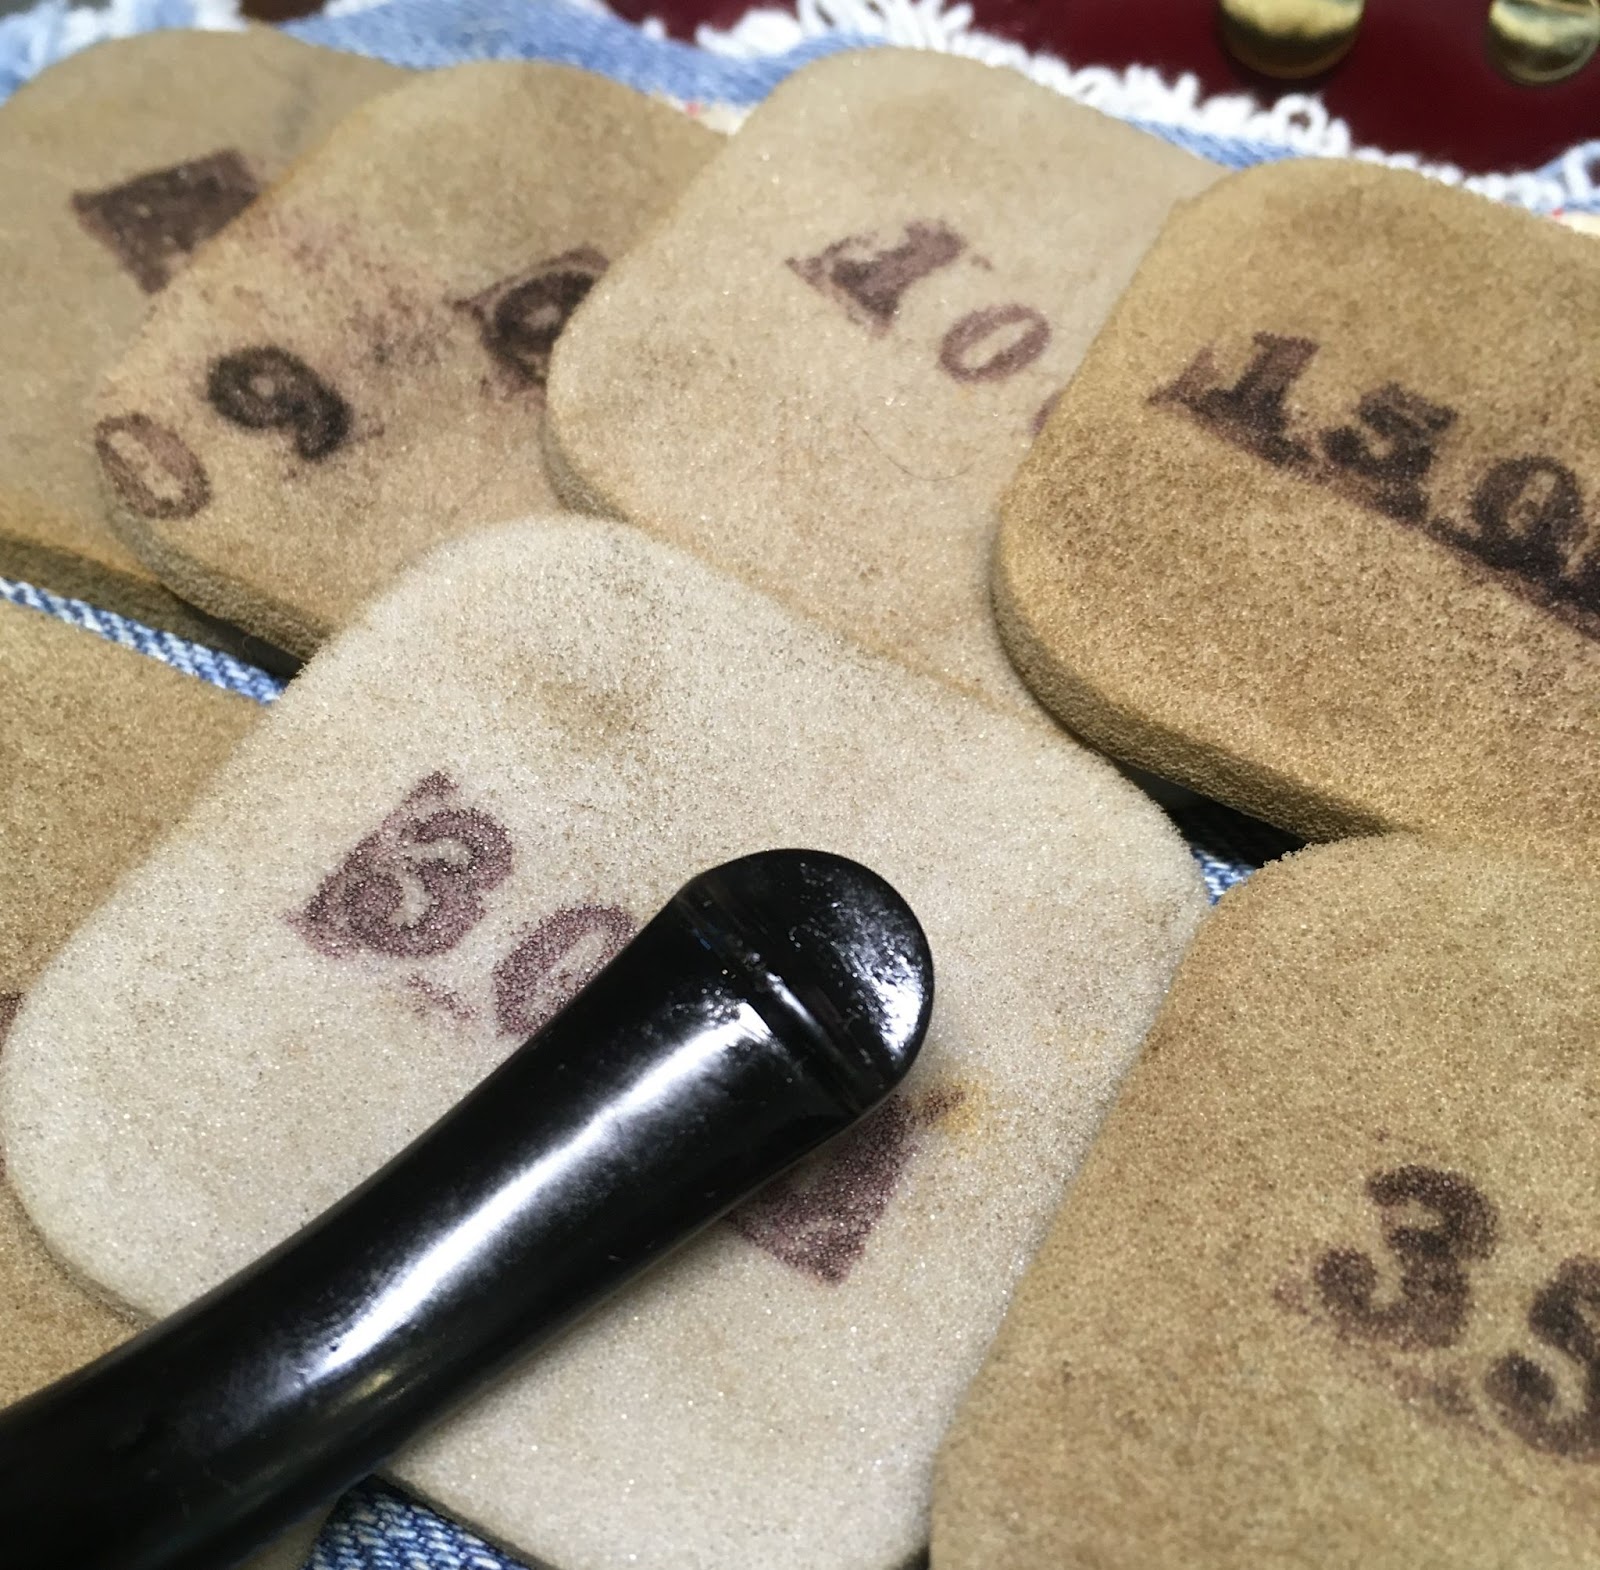
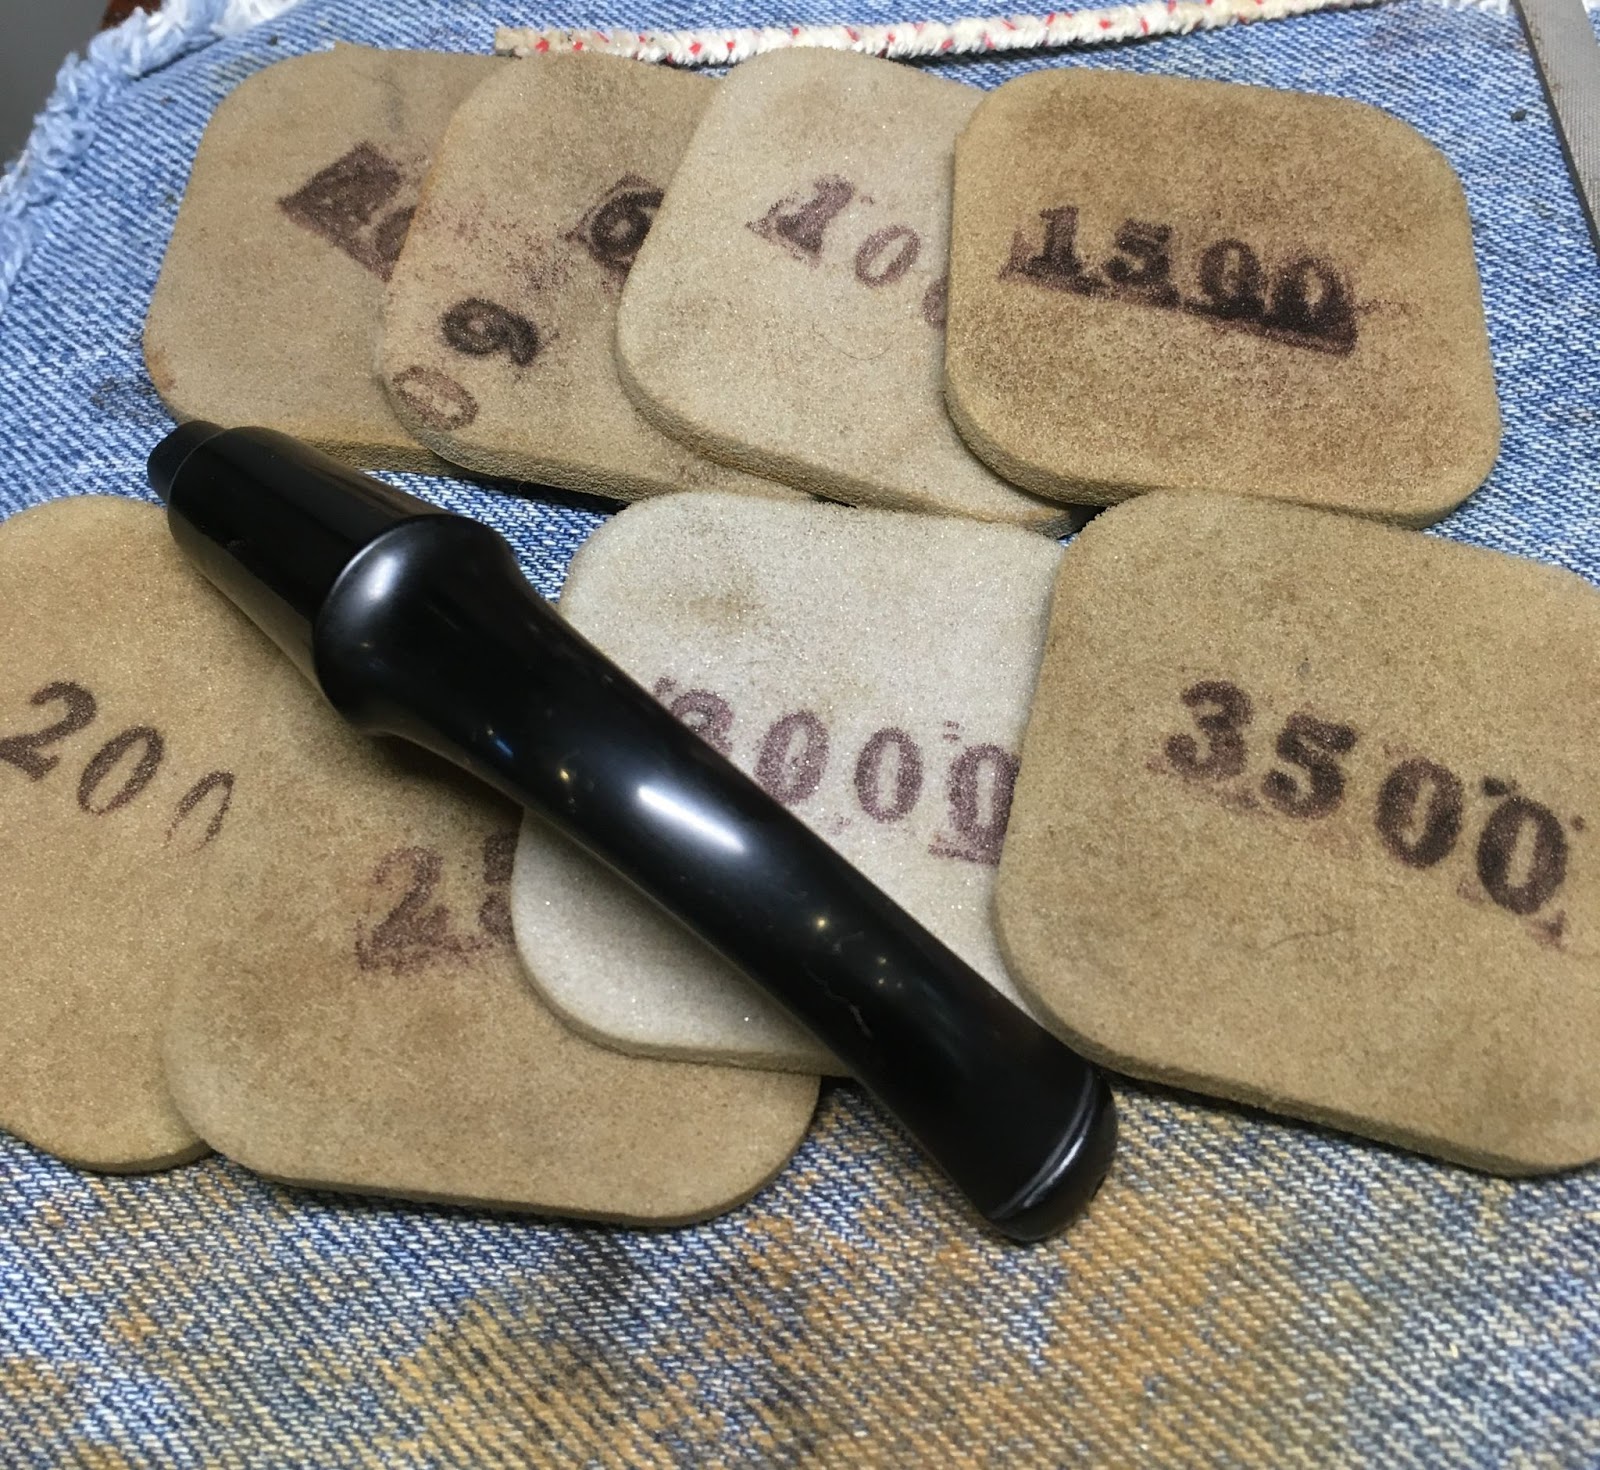
    The whole stem was sanded with a series of sanding sponges from 400-3500 grits.  Between each sponge I rubbed the stem with mineral oil and wiped it with a paper towel.

    This is where day one ended.  The pipe was to sit overnight  allowing the alcohol to soften and dissolve the yuck in the airway.

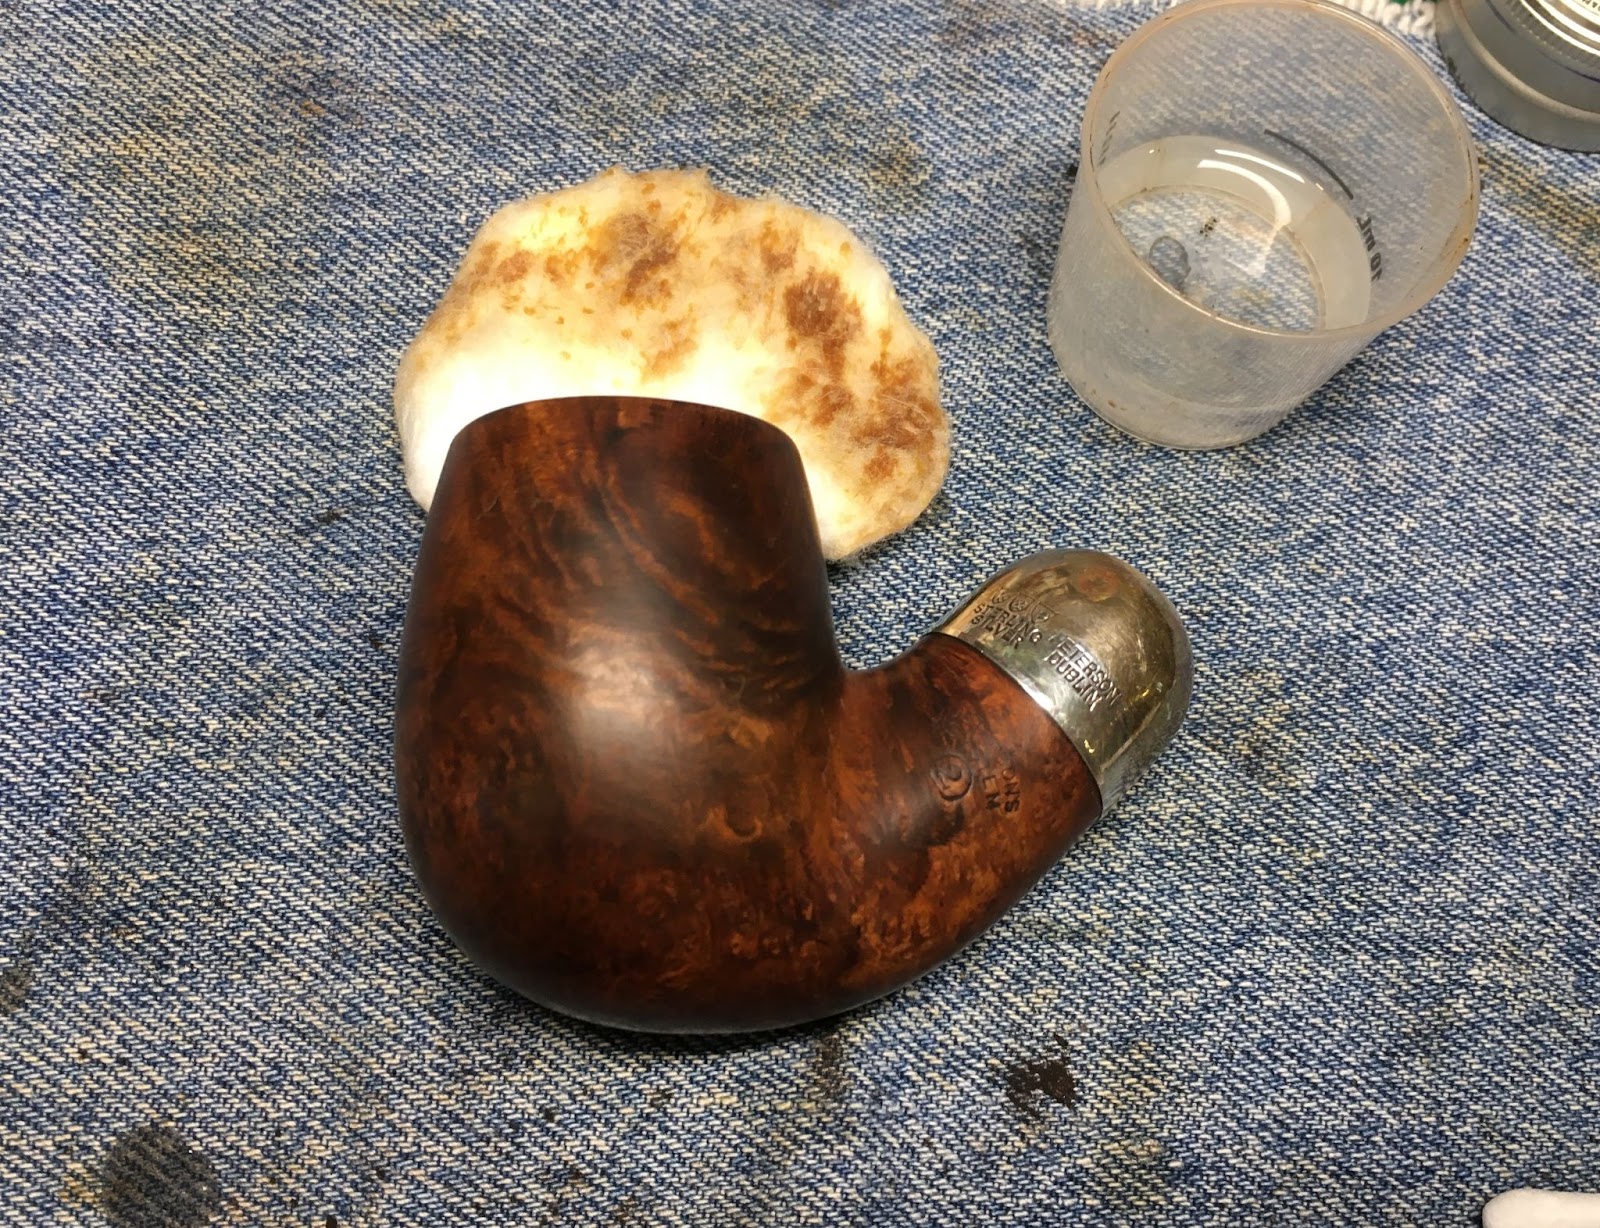
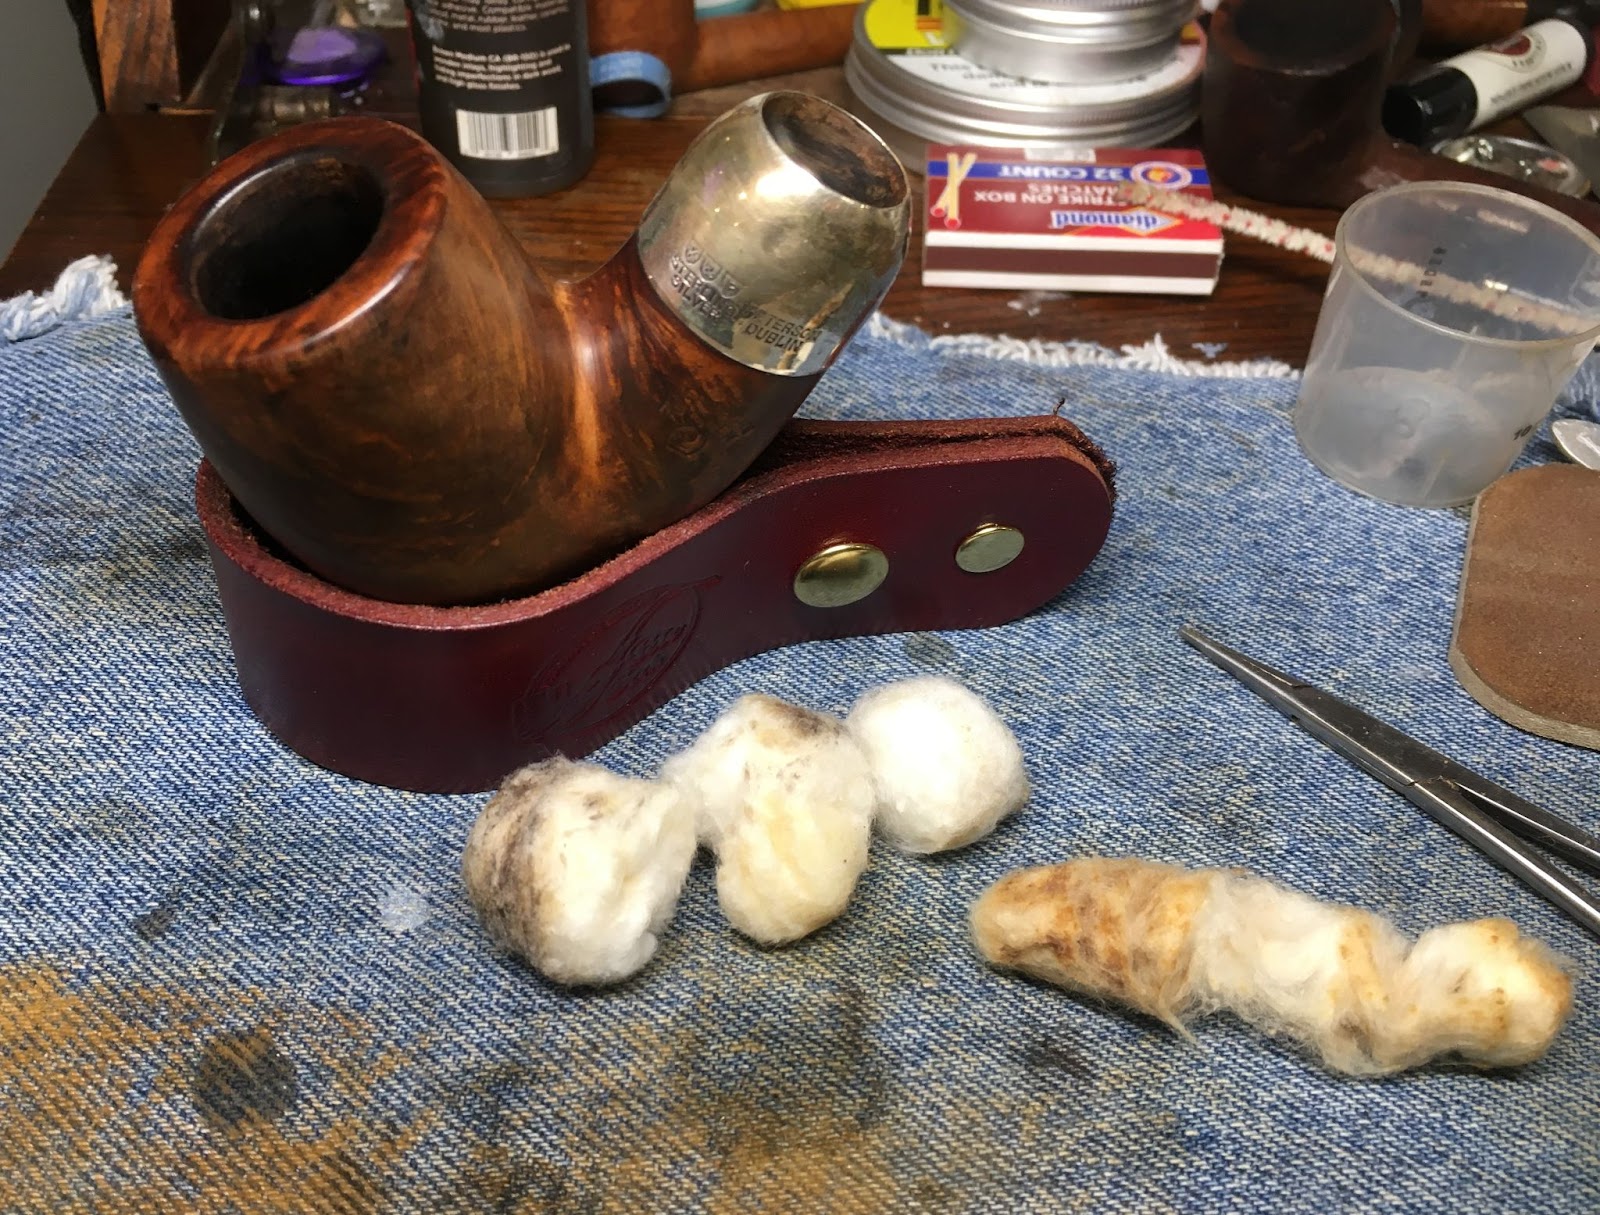
    The next day I returned to find the cotton, as expected, quite stained with removed yuck.

    The cotton was removed and I tried cleaning the airway with cotton swabs and the 5 mm paper towel pieces wrapped around the rattail file.  

    The cotton alcohol had worked but not to the extent I had hoped for.  Many more cotton swabs and scrubbings with alcohol yielded nothing but more stained swabs.

    This prompted me to repack the bowl and shank with cotton and repeat the overnight soaking.

    Since the cotton helb the alcohol in contact with the walls of the airway and was not dripping alcohol I went ahead with the filling of the pits.  For this I used brown cyanoacrylate (CA, super glue) and briar dust.  I applied the CA into the pit and then pressed some briar dust into the wet CA.  These cured almost immediately.  The subsequent fill was filed with a small flat file and smoothed with a 400 grit sanding sponge.  The three photos below show the first application of CA/briar dust.

    The filling process was repeated for each of the fills.

    Where needed the brown CA was added a third time without briar dust and allowed to cure.  The pipe was again allowed to sit overnight enabling the alcohol to further dissolve and remove the yuck.

    The next day, I revisited the pipe.

    The cotton was again stained with removed yuck.  I removed the cotton.

    The staining was far less than the previous attempt.  I started cleaning with alcohol dipped cotton swabs.  At first I thought that no progress had been made then suddenly the swabs began to come out with less staining.  I had finally removed the yuck.

    The stamps were covered with painters tape to protect them during the sanding.  The stummel and stem junction was sanded with sanding sponges 400-3500.  Between each sponge the stummel was wiped with a make-up pad moistened with 95% ethyl alcohol.

    The pipe was then worked with micro-mesh pads from 4000-12000.  The stummel was again wiped with a make-up pad dipped in alcohol.  The stem was rubbed with Obsidian Oil and wiped with a paper towel between micro-mesh pads.

    The pipe was taken to the buffer where I buffed the entire pipe with Blue DIamond on a clean wheel.  After the buffing compound was thoroughly wiped off the pipe received several coats of carnauba wax.  The final step was a hand buffing with a microfiber polishing cloth.

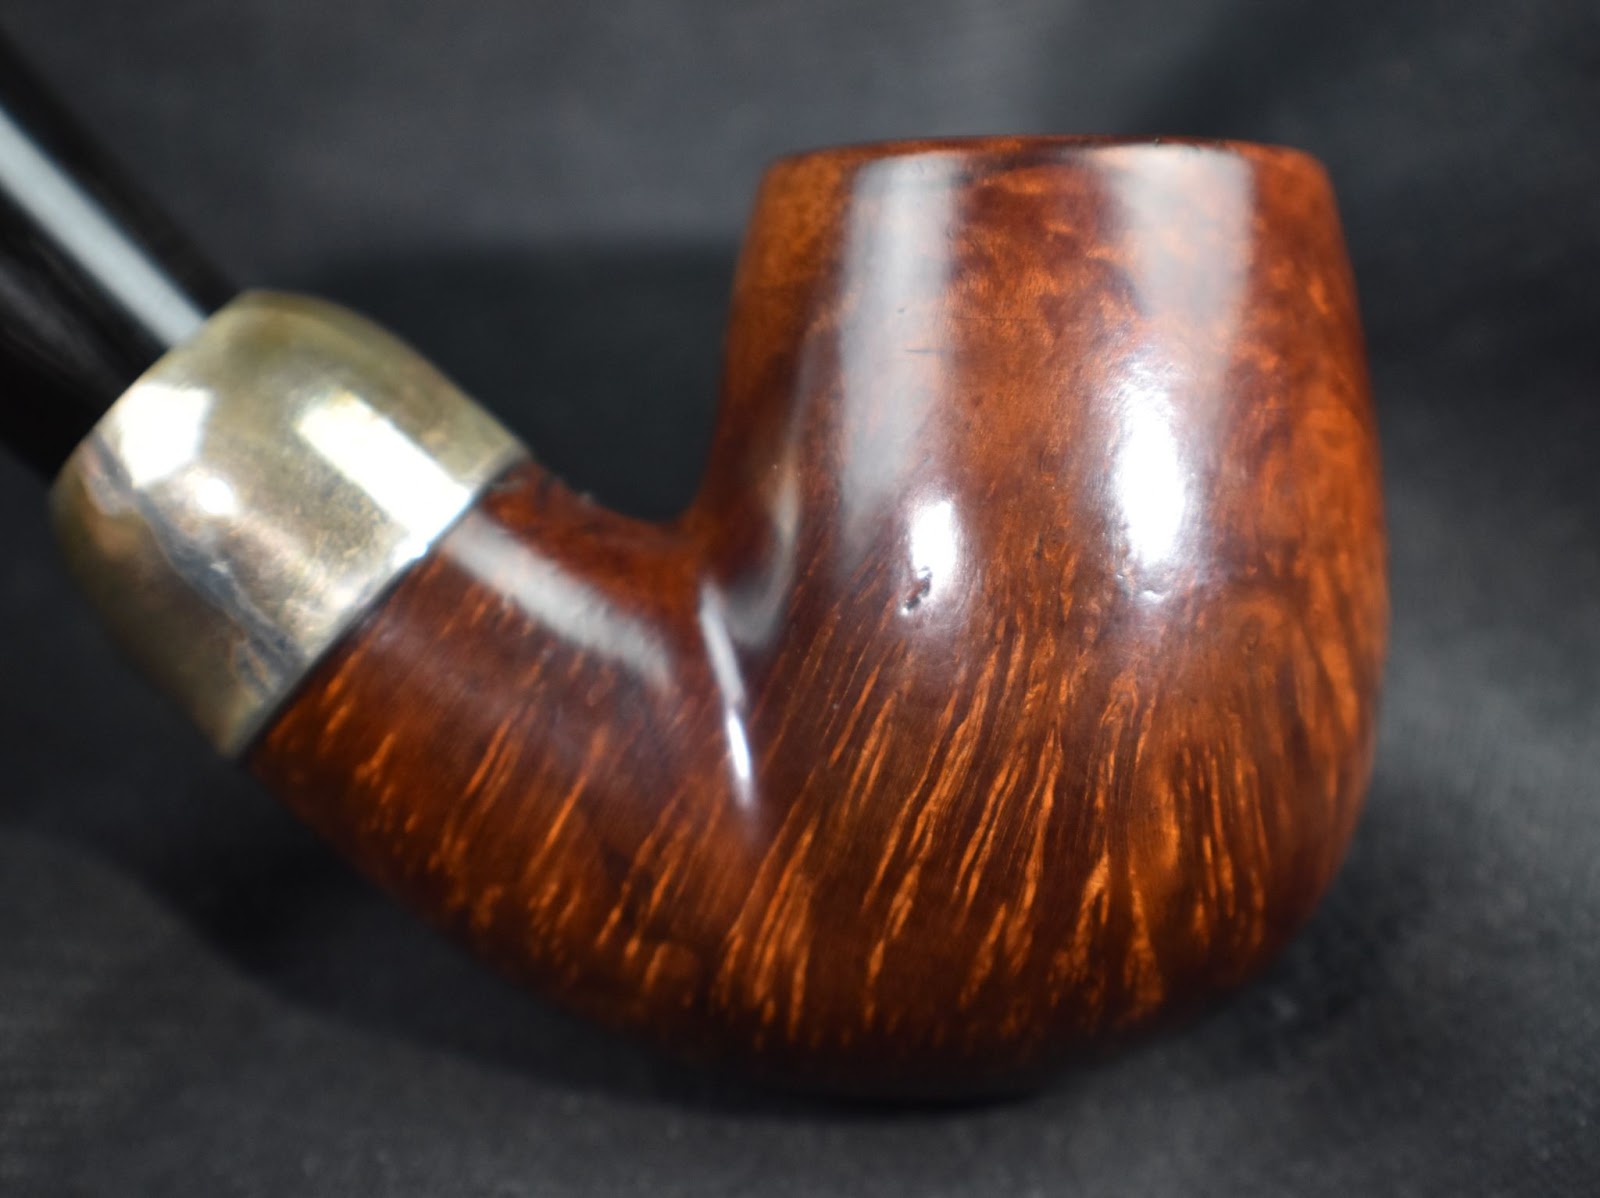
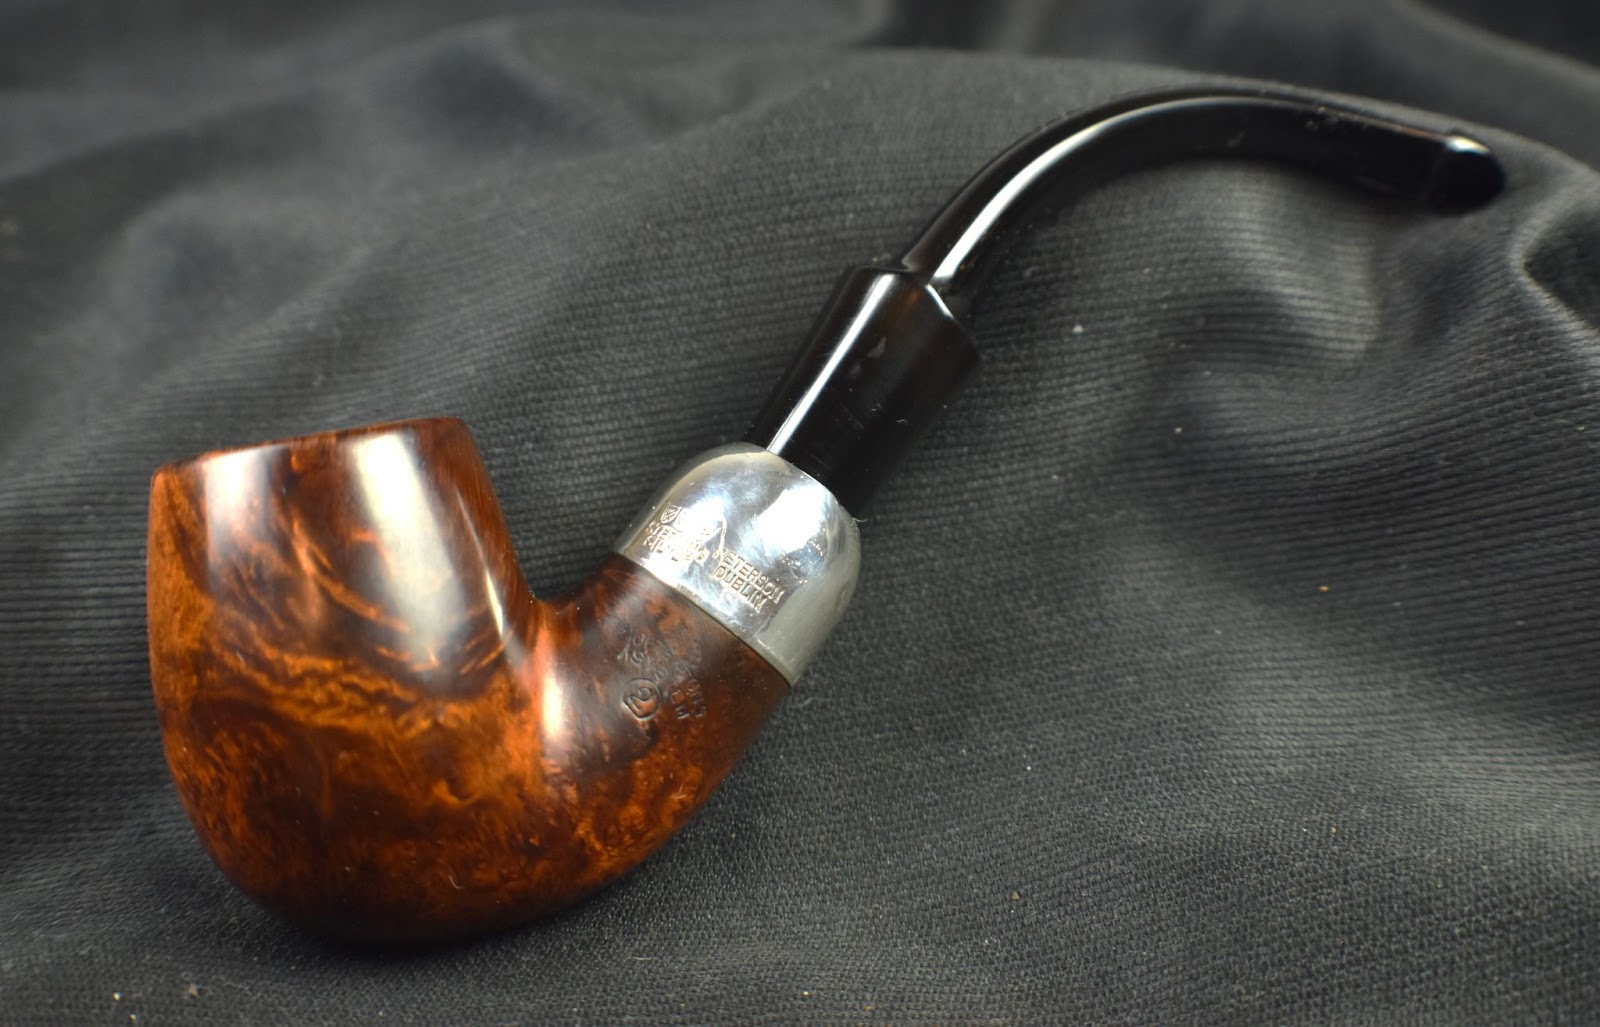
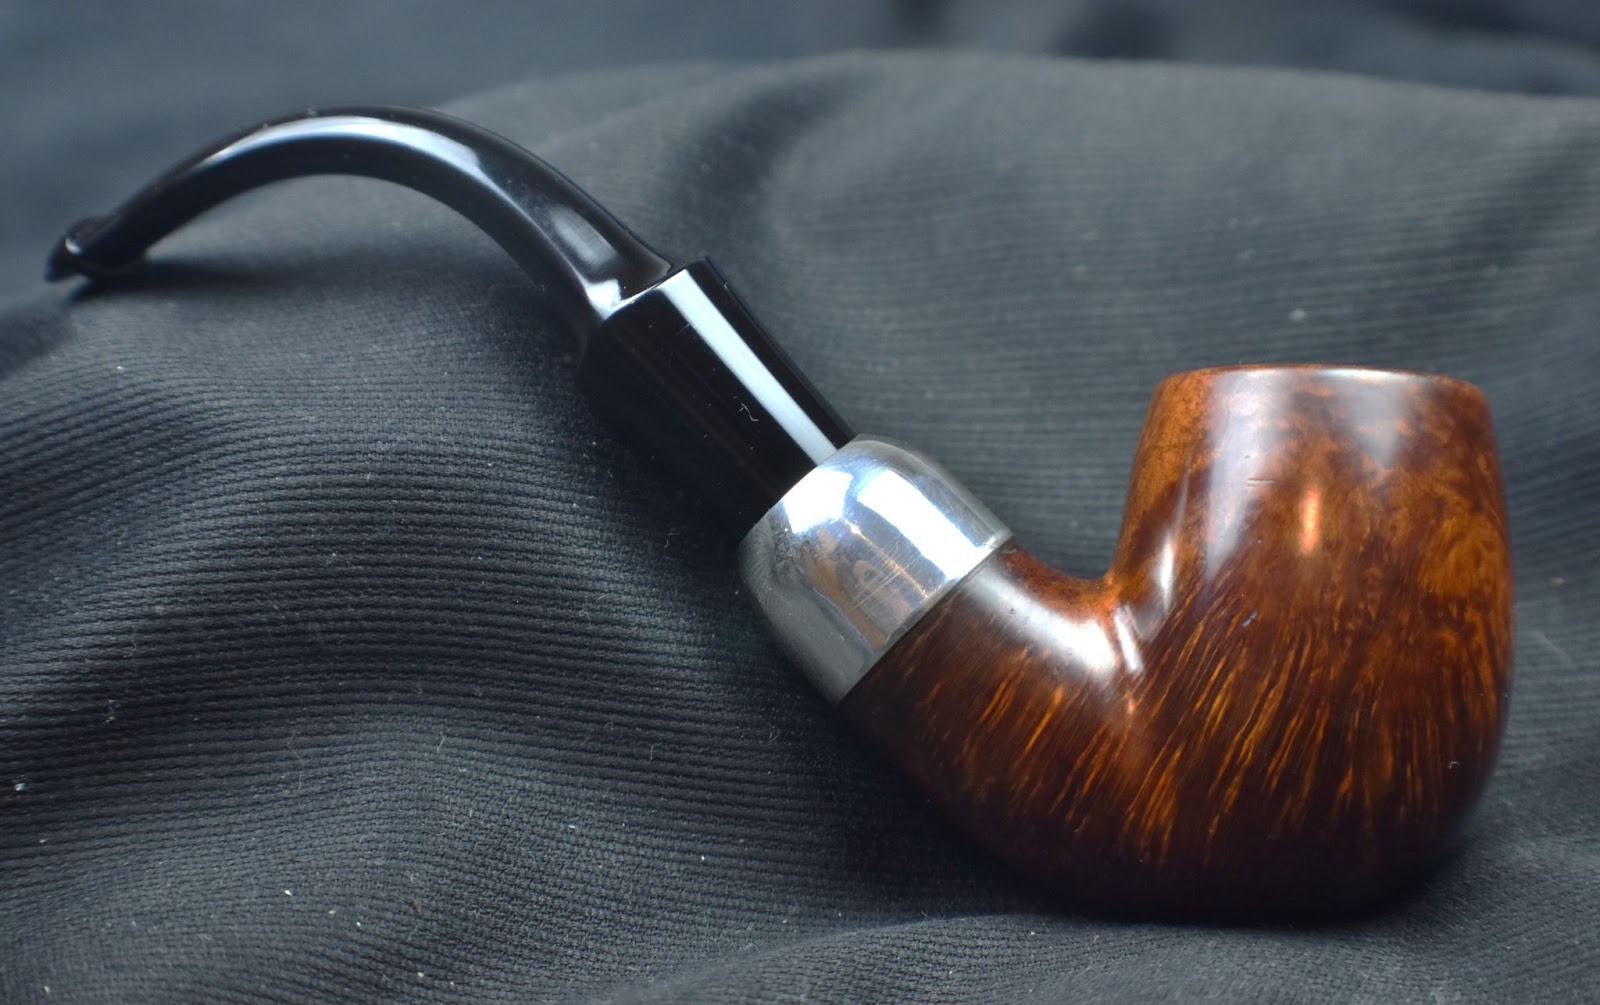
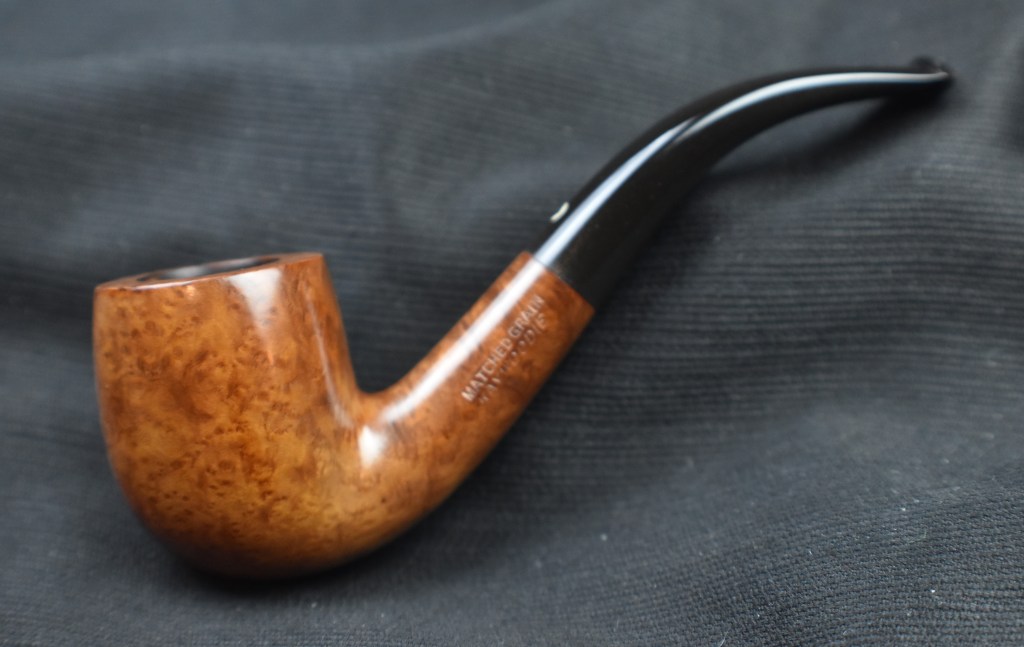
    This pipe is a perfect example of how my prejudice led me to inaccurate conclusions.  Yeah, the tobacco chamber looked clean and there was no lava on the rim, both indicating a little used pipe, only to discover a heavily tarred mess of an airway.  Overall I am pleased with the finished restoration.  The briar grain is nice, the new fills are a bit too noticeable.  In hindsight, I am thinking that a contrast dye of black would have concealed them and accentuated the briar grain.  That might be another project for this winter when I am hunkered down avoiding the cold and snow.  The stem polished up very nicely.  The long sleek glossy black vulcanite is a great contrast with the briar.  I do really like this shape, though it doesn’t quite fit a cutty nor a zulu.  I guess that’s why it is called a Hockey.  The dimensions of the Denicotea Deluxe Hockey are: 

    • Length:  6.66 in./ 169.16 mm.
    • Weight:  1.18 oz./ 33.70 g.
    • Bowl Height:  1.77 in./  44.96 mm.
    • Chamber Depth:  1.42 in./ 36.07 mm.
    • Chamber Diameter:  0.67 in./ 17.02 mm.
    • Outside Diameter:  1.30 in./ 33.02 mm.

    I do hope that you have found something here useful to your own pipe care, maintenance or restorations.  If you like this sort of thing, please click the like and subscribe buttons.  Thank you for reading the ramblings of an old pipe lover.

    Loading…

    Below are some photos of the finished Denicotea Deluxe Hockey.

  • A Peterson Irish Seconds Restoration

    October 31st, 2024

    Photographed and written by

    John M. Young

    It seems fitting to post this pipe today, October 31, 2024, for a few reasons.  The first of which is the name, Nebraska Pete Geek.  Secondly an Irish Seconds sounds like the pipe is being given a second chance which is exactly what restoring does for these old darlings.  Third, today is the one year anniversary of this blog.  I really didn’t think that I’d be able to successfully do this for an entire year.  As of this writing, 3133 visitors have viewed my blogs 5138 times.  I taught secondary school science for 32 years and a rough calculation had me at 3600 students over those years.  I have achieved nearly that many viewers in a single year.  All I can say is thank you all.  Your support, comments, and encouragement have been wonderful.  I know, “shut up and get on with the restoration.”

    This pipe came to me as part of an estate lot back in early July.  This pipe wears the stamp IRISH SECONDS on the left and MADE IN THE over REPUBLIC  over OF IRELAND on the right.  There is no shape number but the shape corresponds to the Peterson Classic Shape XL90 which is the same shape as the 307 Extra Large Billiard.  Below are some photographs of the pipe as it appeared prior to any work.

    The Irish Seconds looked like a very straightforward restoration.  Reaming, cleaning some scratch mitigation and deoxidizing the stem.  The rather blocky button would have to be made more comfortable, I know this is not restoring it to factory new condition but whoever gets this pipe will be quite grateful.

    Background

    I’ve said it before and here it is again:  “If you have been following this blog for a length of time you know I have done a few Peterson restorations in the past.  If you are new here, welcome and I’ve done a few Peterson restorations in the past.  I’m not going to go on and on about the history of the oldest continually operating pipe manufacturer in the world and arguably the best.  I will however lead you to The Peterson Pipe book.  Mark Irwin and Gary Marlburg’s book is a must read for a Pete Geek.

    (Available at https://www.smokingpipes.com/accessories/books/moreinfo.cfm?product_id=471478)  I am also including a couple of free sites as the book is a bit pricey,

    The first site is pipedia.org’s History of Peterson by Jim Lilley (Peterson – Pipedia)

    The second is the pipephil.eu site for all things logo:  Peterson: historical pipes — Pipes: Logos & Markings (pipephil.eu)  They also have a few other links to things like the Peterson timeline and P-lip information.”

    According to smokingpipes.eu Irish Seconds, 

    “If you’ve ever been to any kind of “outlet” store, you’re already more or less familiar with what seconds are. Products that — due to some minor cosmetic flaw — just don’t pass a manufacturer’s quality control process. When these cosmetic flaws don’t affect the function or durability, they generally get sold at a deep discount. Not ideal for the manufacturer, but it’s great news for you, the customer.

    And that’s exactly what we have here — pipes produced right here in Ireland, fully functional, eminently smokeable, and heavily discounted due to some superficial blemish. Irish Seconds are graded from 1 to 3, with 1 being the highest quality, and 3 being the deepest discount. If you’re in the market for a shop pipe, just getting into pipes, or are generally more budget minded, these are hard to go past.

    (https://www.smokingpipes.eu/pipes/new/irish-seconds/)  I have to admit that I am happy  not to be geographically closer to Dublin.  The reasons for my happiness are that I would most likely be considered furniture at the Nassua Street shop and would convert the entirety of my daughter’s inheritance to Petersons and Irish Seconds.  Though neither of these things are terrible, both would become annoying by those involved.

    In listening to my own advice I quote from Irwin’s big Peterson Pipe book:  “See Seconds” (p. 304).  Just kidding, it really does say that though.  The real information is as follows:

    “Seconds Peterson seconds are pipes of all shapes with briar flaws deemed unacceptable for ordinary models and sold at reduced prices, sometimes unstained, fit with fishtail or round button mouthpieces.  Since the early 1990s they have only been available in Ireland.  Occasionally they are described in Peterson catalogs under different names, and documented specimens have various stampings.  In roughly chronological order these include:

    Stamped arched KAPP & over straight PETERSON”S over arched DUMMIES An early specimen preserved at the Peterson museum with this stamp has a round-button mouthpiece.

    IRISH FREE STATE stamp (1922-37) COM stamp with no brand or model name.  Documented with or without nickel bands.

     System Reject (1968-)  Noted first in the Price List for January 1968 as being available in all six system shapes.  Also found in the ‘80 Peterson-Glass Price List.

    Erica System Reject (1987-98)Noted in two US distributor catalogs.  Fishtail mouthpiece, unstamped nickel band, with COM of MADE IN THE over REP. IRELAND or with no COM.

    Irish Seconds (1982-98)  Classic Range shapes stamped with no brand name , fishtail mouthpiece, in unstained, black rustic or dark brown finishes, no band.  (Irwin, Mark and Malmberg, Gary (2018). The Peterson Pipe The Story of Kapp & Peterson, First edition, second printing 2021. Briar Books Press, Canada. p312).

    The last line of the Irwin quote above describes this pipe nicely.  It is indeed not stamped with a brand, unstained, it is of the Classic Range and matches the dimensions of an XL90 (used from 1980-) and has no band.  With this information I can safely say that this pipe is a Peterson product produced between 1982-98 and though deemed unworthy of the Peterson name, it remains a fine briar pipe.

    The Restoration

    The chubby darling got a clean denim piece to sit on.

    The stem was heavily oxidized.  I lightly sanded it with a 320 sanding sponge in preparation of the Before and After Extra Strength Deoxidizer (deox) bath.

    I inserted a pipe cleaner into the button to act as a hanger, suspending the stem in the deox.

    I figured at least 4 hours in deox would be required.

    I gathered the reaming gear:  The PipNet with #2 blades, the General triangular scraper, Smokingpipes Low Country reaming knife and wood dowel wrapped with 220 sandpaper.

    The reaming went smoothly as the cake was not terribly thick.  The top of the bowl had some scratches that appeared to be from a previous owner scraping the bowl with a pocket knife.  Also the lave on the rim was not bad and did not appear to be hiding any charring of the rim.

    The interior of the bowl did not have any heat damage.

    The shank was cleaned by scraping with a dental scraper and with cotton swabs dipped in 95% ethyl alcohol.

    Folded bristle pipe cleaners, also dipped in alcohol, were also used to clean the airway.

    After 4 hours the stem was removed from the deox and allowed to drip excess solution back into the jar.

    The stem was vigorously rubbed with a coarse shop rag to remove the remaining deox solution and abbrade additional oxidized vulcanite.

    Below you can see the oxidized rubber removed by the rubbing.

    The stem was then scrubbed with several make-up pads drizzled with Soft Scrub cleanser.

    The button was reshaped to make it far more comfortable for a smoker.  A couple of flat files were used for the reshaping.

    The worst of the stummel dents were at the bottom front of the stummel.  It looked like it had been dropped on concrete.  

    The other dents and dings were less severe but were on both sides.

    I decided to try raising the dents with steam.  I set an iron to high and moistened a washcloth with tap water.  Below you can see the set up and the protective tape on the stamps in anticipation of the sanding that would follow.

    The steam did raise the dents but they would still require filling with cyanoacrylate (CA, super glue).

    Below is a close up of the dents after a couple of steaming episodes.

    The area was covered with brown CA applied with a fly tying bodkin and allowed to cure/dry without the use of a CA drying accelerator.

    Once dry, the area was filed smooth and sanded with a 400 grit sanding sponge.

    The pipe was sanded with a series of sanding sponges from 400-3500 grit.  The pipe was sanded intact to avoid the rounding of the shank/stem joint.  Between each sponge the stummel was wiped with a make-up pad moistened with ethyl alcohol.  The stem was rubbed with mineral oil and wiped with a paper towel between sponges.

    The pipe was then worked with micro-mesh pads 4000-12000.  The wiping after each pad was as above except that the mineral oil was replaced with Obsidian Oil for the stem.

    The pipe was given a coating of Before and After Restoration Balm and allowed to sit for 20 minutes.

    20 minutes later the balm had done it’s magic and the excess balm was wiped from the pie using an inside out athletic sock.

    The pipe was taken to the buffer where it received several coats of carnauba wax applied by the buffer.  The final step was a hand buffing with a microfiber polishing cloth to raise the shine.

    I think this Peterson Irish Seconds turned out very nicely.  The reservoir is drilled out in typical Peterson System fashion and though the stem lacks a tenon extension and the P-lip, I am sure that this will be a fine smoking pipe.  The briar grain is pretty with the cross-grain at the front and rear.  The bird’s eyes are small and very numerous.  I can’t help but wonder how the pipe would look with a contrast dye accentuating the briar grain.  That would violate the description of the Irish Second though.  The stem polished up very nicely revealing the glossy black vulcanite under all that oxidation.  The dimensions of the Peterson Irish Seconds are: 

    • Length:  5.18 in./ 131.57 mm.
    • Weight:  1.96 oz./ 54.88 g.
    • Bowl Height:  1.91 in./  48.51 mm.
    • Chamber Depth:  1.46 in./ 37.08 mm.
    • Chamber Diameter:  0.79 in./ 20.07 mm.
    • Outside Diameter:  1.57 in./ 39.88 mm.

    I do hope that you have found something here useful to your own pipe care, maintenance or restorations.  If you like this sort of thing, please click the like and subscribe buttons.  Thank you for reading the ramblings of an old pipe lover.

    Loading…

    Below are some photos of the finished Peterson Irish Seconds.

  • A Dr Grabow CDL Restoration

    October 29th, 2024

    Photographed and written by 

    John M. Young

    I cannot explain why but I find metal pipes fascinating.  I don’t find them particularly beautiful but more utilitarian, like a good tool.  I remember first seeing a Dr Grabow CDL online and found them to be rather disjointed in appearance.  The stems and shanks looked segmented.  Still, they intrigued me.  The advertisements spoke highly of their cool and dry smoking characteristics but then nearly all advertisements make similar claims.  I decided that I needed to find and restore one to see this for myself.  The search for a subject was not fast and easy.  For many months the auction listings were far more expensive than what I was willing to pay.  I remember thinking, “Who in their right mind would pay over $100 for a Dr. Grabow?”  The listings seemed to be of two categories; one around $30 and the other +$100.  I personally thought that both were too high, at least for a pipe to satisfy my curiosity.  Eventually, I found a likely subject for under $20.  The pipe was an eBay purchase and arrived from Reno, Nevada.  On the bottom of the stummel was stamped DR. GRABOW IMPORTED BRIAR in a circle around CDL. Below are some photos of the Dr Grabow CDL before any work was done.

    The pipe appeared to be unsmoked and there was a clean filter within the stem.  How the nylon bit became so heavily dented with what looked like tooth chatter, I couldn’t figure out.  There were a few marks on the stummel that looked like the finish had been worn away.  I wondered if the pipe had been jostled in a drawer of a vehicle glovebox, purchased but never used.  For whatever reason this pipe had gone neglected for the past 50 years and would soon be back in the game.

    Background

    Dr Grabow is perhaps one of America’s best known pipe brands.  This renown has brought with it a following of two main camps:  Those who love their Dr Grabows and those who do not.  In an attempt to remain objective, I can say that I love a couple of the Dr Grabow lines; the old 1930s Linkman pipes and the more recent Westbrooks are in my “favorites” category while many of the other lines are considered “less than” pipes.  By that I mean less than preferred.  Whatever your impression of Dr Grabow, they have a long and significant history in our hobby.  I will include a link to the history of the brand from pipedia.org for those who would like access to a more complete history here.

    As for the CDL pipes, I first turned to pipephil.eu for information.  According to this site the CDLs were manufactured for about a decade starting in 1975 and never made it past test marketing.

    (Dr Grabow — Pipes : Logos & Markings (pipephil.eu))

    Next, I found a nice restoration of a CDL by Charles Lemon of dadspipes.com.  In his blog he included an image of an ad from pipephil.eu.  I found this interesting but could not find the ad on the pipephil.eu site.  I do not know what the “Magni” implies in the ad but it certainly must be important as it is found in three of the components of the pipe.  Perhaps “magni’ficent?  The prefix comes from Latin meaning, large or great, if memory serves.

    (https://dadspipes.com/2020/10/09/a-quick-refresh-for-a-grabow-cdl/)

    Whenever I research any pipe consisting of metal parts, I turn to smokingmetal.co.uk.  This is a wonderful resource for pipes made from, you guessed it, metal.  The entry is included in its entirety. 

    “Not totally sure where this pipe fits in. Metal stem it certainly has, but unsure if bowl is meant to be detachable 6.2 inches long and the facility to take an in line filter in the stem. The stem continues right through the bowl and enables air to be drawn through from front of bowl as well as smoke from bowl

    This example thanks to John Phillips of Arkansas.

    Ed James tells me that CDL is for Cooler,Dryer,Lighter. He has a display card with this on, the pipe retailed at $4.95 at that time.

    “A couple of other things I remember about the CDL pipe. It was produced from 1975 to 1983 in limited qualities and test marketed in several U.S. cities but apparently never mass marketed” from Dave Whitney” (http://www.smokingmetal.co.uk/pipe.php?page=391)

    Another interesting link is the Dr Grabow timeline produced by Tiki Vegas.  I find this useful for dating various Dr Grabow lines.  According to Vegas, the CDLs were made starting in 1974 not 1975 as previously recorded.

    (https://www.timetoast.com/timelines/dr-grabow)

    Turning to a forum post, I found a quote from a user named theloniousmonkfish who stated:

    “Made from 75-83 and test marketed in cities across the US, never took off.

    From the former COO of Grabow, Tom Douglas

    “The predecessor of the CDL was bought in 1967 in LaGuardia airport by Paul Fish. It sat on Pauls desk until his death in 1972. It was a simple bowl and a simple metal stem with attatched bit. I’ve always speculated that it was sold by Mastercraft.

    Jack Martin became President of Sparta Pipes in 1972. The CDL sat on his (and Paul’s) desk for years.

    In about 1974 we decided to design and try the concept. Tooling for the “shank”, and the mould for the bit were EXPENSIVE, but we tried.

    Best I recall… we made 300 and sent them FREE to RJR customers who had ordered Westbrook etc. along with a survey. Knew we had pipe smokers.

    Comments were.. Coolest smoke I ever had.

    Dryest smoke I ever had.

    Lightest pipe I ever owned.

    But Invariably.. Ugliest pipe I’ve ever seen.

    Guess we should have called it CULD.

    I’m really curious about what those who have never tried a CDL will think about it. It is a wonderful smoke…. not to be seen outside with…… Td”“

    (https://pipesmagazine.com/forums/threads/need-info-on-dr-grabow-cdl.93500/)  This is interesting as it is purportedly a quote from the former COO of Dr Grabow, Tom Douglas.

    In summary, it appears that the CDLs were produced by Dr Grabow as a test to see if the product would be accepted by pipe smokers.  The pipes were manufactured in 1974 or 1975-1983.  For whatever reason the line never caught on with pipe smokers and was discontinued.  

    The Restoration

    The Dr Grabow CDL received a clean denim piece for the restoration.  Well, actually it would be more of a refreshening than a restoration.

    The first step was to clean the accumulated years worth of dirt and dust from the patient.  This was done with undiluted Murphy Oil Soap and a nylon scrub brush.  The soap was rinsed with warm water and the stummel dried with a cotton face towel.

    The pipe was already looking better.  I was not sure why there were areas within the rusticated surface which looked like scratches in the finish.

    Alos confusing was the high number of what looked like tooth chatter.

    The interior of the stem was cleaned with a cotton swab dipped in 95% ethyl alcohol.  This came back clean reaffirming my impression that the pipe had never been smoked.

    To address the damage to the stem, I filed the dented surface with a small fine file.  The nylon bit proved to be difficult to file not because it was too hard but more due to its plasticity.  The shank was wrapped in painters tape for its protection.  I then worked the stem with a series of sanding sponges from 320-3500 grit.  Occasionally I would rub the stem with mineral oil and wipe it with a paper towel.  This helped me see where I needed additional sanding.  The stem was then taken to the  buffer where I buffed it with a Red Tripoli wheel followed by a White Diamond wheel.  The finish of the stem was far better but also far from perfect.  This was, though, as good as I was going to get it.

    The worn spots on the stummel were stained using a walnut Furniture Touch-up Marker.  Below are a few before and after photos..

    I used Renaissance Micro-Crystalline Wax Polish to help preserve the rusticated briar.  This was applied with a baby toothbrush.

    The instructions said that the product “Dries hard instantly”.  I found that their definition of instantly differed from mine.  

    After the wax was applied I let it sit for 5 minutes then hand buffed it with an inside out athletic sock.

    The pipe was returned to the buffer where I applied a couple coats of carnauba wax to the stem, shank and base of the stummel.  The pipe was then hand buffed with a microfiber polishing cloth.

    I am actually smoking this pipe as I type this conclusion,  I am quite pleased at how much better the pipe looks after the restoration.  The worn surfaces are refreshed and the stem much better and  nearly chatter free.  The pipe does smoke very nicely.  I give credit to the Dr Grabow designers full credit for that.  The walls of the stummel are 0.35 inches (8.89 mm) wide.  This, the “Magni-vent” and the “Magni-chamber” do combine to make a nice cool smoking experience.  I am smoking it without a filter and will compare that to filtered smoke in the future.  The dimensions of the Dr Grabow CDL are: 

    • Length:  6.19 in./ 157.23 mm.
    • Weight:  0.99 oz./ 28.04 g.
    • Bowl Height:  1.46 in./  37.08 mm.
    • Chamber Depth:  1.24 in./ 30.73 mm.
    • Chamber Diameter:  0.78 in./ 19.81 mm.
    • Outside Diameter:  1.48 in./ 37.59 mm.

    I do hope that you have found something here useful to your own pipe care, maintenance or restorations.  If you like this sort of thing, please click the like and subscribe buttons.  Thank you for reading the ramblings of an old pipe lover.

    Loading…

    Below are some photos of the finished Dr Grabow CDL.

  • A BBB Own Make Virgin 165 Large Apple Restoration

    October 24th, 2024

    Photographed and written by 

    John M. Young

    I’m pretty sure that the saying, “An apple a day, keeps the doctor away” was in reference to the apple shape of pipes.  Although, the only lines that my doctor seems to say are; “You should lose 30 pounds” and “exercise more”.  I think I’ll take a walk with this BBB 165 once it is restored.  This lovely pipe, well soon to be a lovely pipe, came to me via an eBay auction.  How could I say no to this listing:

    Besides, I was the only bidder for the “Chubby” darling.  The pipe was obviously well made with great grain, minimal fills, and a very tight fit between the stem and shank.  The stamps read; BBB in a diamond, OWN MAKE (with the KE very faint) over VIRGIN on the left side.  On the right shank was stamped MADE IN LONDON over ENGLAND and 165.  I assumed this to be the shape number associated with this model.  The stem had an inlaid metal logo consisting of a diamond with B over BB within the diamond.  Below are some photos of the BBB upon arrival here in southeast Nebraska.

    This looked like a straightforward restoration with no hidden weirdisms.  I like straightforward without weirdisms.

    Background

    I think this was the first BBB pipe that I had worked on certainly, the first I blogged about.  I first turned to pipephil.eu for a search of BB logos.  Here I found the following:

    There are several examples of BBB lines but nothing on the OWN MAKE VIRGIN.  The good news was that this was definitely not a cheap Chinese BBB reproduction or copy.  Side note:  Is that even a thing?  I have heard of Dunhill imitations but that had nothing to do with the Chinese.   

    Next, I turned to pipedia.org.  Here I found a plethora of information on the brand.  There was a link to a history of BBB which the pipedia entry is taken from, Genesis and history of Adolph Frankau & Co Ltd written by Benoit de Liège.

    (Pipe Smokers – BBB, by Benoit de Lège (fumeursdepipe.net)).  This piece is a fascinating look at the history of the company and the 18 year old Luis Blumfeld who was given charge of the firm and is the origin of the first “B” in BBB.  I will include an excerpt and recommend the article for those interested.  I used the translation function in Google to translate the French to English and it did a fine job.

    In 1847, Adolph Frankau arrived in London and quickly understood the opportunities presented by the rapidly expanding tobacco market. He founded the company “Adolph Frankau & Co” and became an importer of meerschaum pipes and tobacco-related supplies. He took under his wing a 14-year-old boy, Louis Blumfeld. The business prospered quickly until the death of Adolph Frankau in 1856. His widow is preparing to sell the company.

    Enter Thomas Carlyle (1795-1881), author of “Heroes and Hero Worship”. The latter advised Mrs. Frankau not to sell, but to entrust the future of the company to the young Louis Blumfeld, then 18 years old. Carlyle must have had a very high opinion of the young Louis, and this confidence was justified by his handling of the case, his enthusiasm, and his inexhaustible energy. Louis quickly realised, like others, the great potential of La Bruyère, whose interest had just been recognised.

    Louis Blumfeld developed important international trade relations from the very beginning, with particular success in Canada, Australia, New Zealand, India and the far east of Europe, Switzerland and, with a special mention, Denmark. Although the USA has never been an extraordinary market, a branch is still open in New York. In fact, the commercial strategy focused mainly on the countries of the British Empire. Shortly before 1914, A Frankau & Co was also the exclusive dealer for Ropp’s Cherry Wood pipes to cover the United Kingdom and its colonies.”

    (Pipe Smokers – BBB, by Benoit de Lège (fumeursdepipe.net)).

    The below quote discusses the quality of various BBB ranges.  This includes the metal inlays as seen with this BBB 165 Large Apple.

    “In the Thirties, the top-of-the-range one becomes “BBB Best Make” with alternatives like “Super Stopping” and “Ultonia Thule”. The BBB Carlton, sold with the detail with 8/6 in 1938, is equipped with a system complicated out of metal, system which equipped the BBB London Dry too. Blue Peter was not estampillées BBB but BBB Ultonia, and the BBB Two Star (* *) become the bottom-of-the-range one. The calabash leave the catalogues, but some pipes with case and some scums are still produced. The forms also are typical of this time: half are billiards, some princes and bullcaps, a limited number of bulldogs and curved. It is as at that time as the top-of-the-range series receive an incrustation of initials BBB out of metal, whereas the bottom-of-the-range series have only the engraved pipe.

    Middle of the years 1950 with that of the Sixties, the lines are relatively stable. At the top, Own Make “Rare Grain”, then the line virgin with hearth in scum, Own Make “Virgin”, Own Make “Walnut” and finally Own Make “Thorneycroft”.” (BBB – Pipedia)

    Based on the information above the metal “incrustation of initial BBB” represents a “top-of-the-range” quality of this BBB.

    The identical stamping of a pipe can also be found on pipedia.org and is shown below.

    BBB Virgin and nomenclature, courtesy Doug Valitchka

    BBBVirgin01.jpg
    BBBVirgin07.jpg

     (BBB – Pipedia)

    The 1960 BBB catalog had images of the VIRGIN line as well as the 165 large Apple shape.

    (BBB_1960.pdf (pipedia.org))

    (BBB_1960.pdf (pipedia.org))

    Taken in its entirety, the above information indicates that the BBB Own Make Virgen 165 is a high quality pipe fashioned between the mid-1950s-1960s.

    The Restoration

    As usual the restoration began with a fresh piece of denim on the workbench.

    The ream team was gathered and included the PipNet reaming tool with #2 blades, Smokingpipes Low Country reaming knife, General triangular scraper (with the tip ground round) and a wood dowel wrapped in 220 sandpaper.

    There was a surprisingly large amount of cake in the bowl.  The previous owner was a “whole bowl” smoker with the cake running all the way to the bottom of the tobacco chamber.

    The PipNet tool was a near perfect fit of this bowl and only slight scraping with the other tools was needed.

    After sanding the interior of the chamber to bare briar I could see very slight spider webbing.  I thought that a bowl coating of maple syrup and carbon powder would be more than sufficient to protect the briar from further damage.

    The below two photos are out of sync with the restoration.  The first shows the spider webbing of heat damage.  I coated the bowl with maple syrup and dusted it with carbon powder at the end of the restoration.  The second photo shows the bowl coating.

    The rim had a bit of lava on the surface.  I hoped that there was no damage to the rim beneath the lava.  I moistened the deposits with saliva and gently scraped it with a sharp pocket knife.

    The scraped rim showed little damage – Yay!

    The stummel was taken to the sink where it was scrubbed with undiluted Murphy Oil Soap and a nylon scrub brush.  The soap was rinsed with warm water and the stummel dried with a cotton face towel.

    Back at the workbench I could see that the stummel had not received a clear coat.  Perhaps this was what BBB referred to as “virgin”.  The briar looked as though it had been stained with a medium brown stain.  The grain was quite pretty and I decided to do as little as possible to the stummel.

    I began cleaning the shank with 95% ethyl alcohol on cotton swabs.  Once the yuck (technical pipe restorer term for smoking residue) was softened, I proceeded to scrape the airway with a dental scraper.  I then poured 3-4 ml of ethyl alcohol into the bowl and allowed it to flow into the shank.  Using a nylon shank brush I scrubbed the airway and poured the alcohol into a medicine cup.  The scraping, scrubbing and swabbing continued.

    Several cycles of the above finally yielded a clean stairway within the shank.

    The stem was lightly sanded to assess the level of oxidation.  Prior to the sanding I covered the logo with a piece of painters tape to protect it.  The stem material was discolored like vulcanite but softened with the 95% ethyl alcohol like phenolic plastic (Bakelite) does.  I proceeded to clean the airway with several bristle pipe cleaners dipped in the alcohol.

    There were a couple of tooth dents on the button that received small drops of black cyanoacrylate (CA, super glue).  The CA was allowed to cure on its own without the use of a CA drying accelerator.

    While the CA was curing, I examined the stummel for pits which needed to be filled.  I only found one.  I placed a small drop of brown CA on the pit and allowed it to cure.

    The cured CA was filed and sanded smooth.

    The stem was also filed and sanded smooth

    I taped over the stamps on the shank with painters tape and proceeded to sand the pipe with a series of sanding sponges from grits 400-3500.  Between each sponge I wiped the stummel with a make-up pad wetted with alcohol.  The stem was rubbed with mineral oil and wiped with a paper towel between sanding sponges.

    The pipe was then micro-meshed with pads 4000-12000.  Again the stummel was wiped with alcohol between pads while the stem was rubbed with Obsidian Oil and wiped with a paper towel.

    I applied a coating of Before and After Restoration Balm to the entire pipe and set the timer for 15 minutes.

    After 15 minutes I wiped the excess balm from the pipe with an inside out athletic sock.

    The pipe was then taken to the buffer for several coats of carnauba wax.  The final step was a hand buffing with a microfiber polishing cloth.

    This BBB was restored beautifully.  I am not sure about the definition that BBB used for their version of “Virgin”.  In my mind that would be an unstained briar finished only with love and wax.  This pipe appears to have been stained with a medium brown previously.  I am not being critical, it is a lovely shade of brown and the stain shows off the grain very nicely.  The stem cleaned and polished well.  The material of the stem reacted with 95% ethyl alcohol like Bakelite rather than vulcanized rubber.  Either way the high gloss finish of the stem provides a beautiful contrast to the briar.  The apple shape is a favorite of mine so, I may be a little bit jaded by calling this pipe beautiful.  I am sure that it will once again provide it’s new steward with hours of great smoke and contemplation.  The dimensions of the BBB Own Make Virgin 165 Large Apple are: 

    • Length:  5.43 in./ 137.92 mm.
    • Weight:  1.43 oz./ 40.04 g.
    • Bowl Height:  1.74 in./  44.20 mm.
    • Chamber Depth:  1.21 in./ 30.73 mm.
    • Chamber Diameter:  0.74 in./ 18.80 mm.
    • Outside Diameter:  1.45 in./ 36.83 mm.

    I do hope that you have found something here useful to your own pipe care, maintenance or restorations.  If you like this sort of thing, please click the like and subscribe buttons.  Thank you for reading the ramblings of an old pipe lover.

    Loading…

    Below are some photos of the finished BBB Own Make Virgin 165 Large Apple.

  • A Marxman Figural Camel Restoration

    October 22nd, 2024

    Photographed and written by 

    John M. Young

    But 

    I remember an old advertisement for Camel cigarettes where the main actor walks a mile for a Camel cigarette.  That commercial was made about thirty years after this pipe while the advertisement campaign by Camel was actually started in 1920.  (https://tobacco-img.stanford.edu/wp-content/uploads/2020/03/06212512/camel_creativehistory.pdf) I still associate camels with tobacco.  If you have followed my blog for any time you have seen me restore several Marxman pipes.  I admit to being a Marxman fanboy.  Having read about and seen images of Robert Marx’s figural pipes I knew I wanted to have one in hand.  That is where this camel enters the story.  I saw the photo from the eBay listing:

    Background

    As I said earlier, I have restored several Marxman pipes this year.  I will link a couple which I think did a fair job at documenting the company history:  Marxman Jumbo and Marxman Mel~O for those who are interested in reading about this amazing company.

    Back to the pipe in hand,  The eBay listing photo was not a great photo and the others  were no better.

    I could tell, kind of, that this was a similar camel from the 1950 Marxman catalog.

    Image above is from pipedia.org circa 1950s catalog.  Now, I know that the above image is not stellar quality but I think the camel in hand looks to be of better quality than the quality of the carved pipe in the catalog image.  There seems to be a great difference in the carving quality of some of the Marxman carved figural pipes which I have seen photos of.  I can’t help but wonder if the figurals from the early 1940s were of a higher quality than those of the 1950s.  Allow me to show a couple of screen captures from Etsy and eBay of recent auctions to make this point.

    The first two images below appear to be rather good quality carvings and I realize that image quality plays a major role in assessing the apparent quality of a piece.

    While the next two images show carvings of a lower quality or lesser detail:

    All of the pipes are listed as “Marxman” but stampings of the shank can only be verified on the Ubangy Male and the parrot pipes.

    MasterCraft purchased Marxman in 1953 and started importing pipes from France and Italy.  These foreign made Marxman pipes do not have the “magic” of the Marxmans made in New York.  I cannot quantify the magic and I do have a French made Marxman spigot that is a truly wonderful smoking pipe but there is just something missing from the Marxmans after the sale to Mastercraft.

    The Restoration

    The Camel got itself a nice soft piece of denim to rest upon.

    The first stem was the reaming of the tobacco chamber.

    The very deep tobacco chamber.  The Kleen-Reem was used for this due to its reach.  The chamber was also scraped with the Smokingpipes Low Country reaming knife and sanded with 220 sandpaper wrapped around a wood dowel.

    The stummel was then taken to the sink for a scrub with undiluted Murphy Oil Soap and a nylon scrub brush.  The soap was rinsed with warm water and the stummel dried with a cotton hand towel.

    Back at the workbench the briar was looking better without the years of accumulated dirt and grime.  Fortunately it did not smell like a wet camel.

    There was still some lava present in the carvings on the rim.  I cleaned this with 95% ethyl alcohol and a brass brush.

    I failed to photograph the cleaning of the shank.  I guess I was so excited to be working on a Marxman figural that I lost myself in the task.

    I did regain my composure while cleaning the stem.  This was done with 95% ethyl alcohol and bristle pipe cleaners.  You can see from the pipe cleaners, in the photo below, that the stem was in need of a cleaning.  I assure you that the shank was also quite dirty and required many scrubbings with a nylon shank brush, alcohol dipped cotton swabs and folded pipe cleaners.

    The stem exterior was in far better shape than the interior.  It had slight tooth chatter but no deep dents.

    I filed the tooth chatter with a small flat file on both the top and bottom of the stem.

    I wrapped the shank in painters tape to protect it during the sanding.  Oh, below  you can see how the lava cleaned up from the rim too.  Sorry for not photographing that cleaning.

    The stem was sanded with a series of sanding sponges from 400-3500 grit.  Between each sponge I rubbed the stem with mineral oil and wiped it with a paper towel.

    The stem was then worked with micro-mesh pads from 4000-12000.  Between each pad the stem was rubbed with Obsidian Oil and wiped with a paper towel.

    The stummel had a coating of Before and After Restoration Balm rubbed into the carvings by a baby toothbrush.

    The Restoration Balm was allowed to work it’s magic for 20 minutes.  It was then vigorously hand buffed with an inside out athletic sock to remove the excess balm.

    I cleaned the baby toothbrush by dipping it into 95% ethyl alcohol and rubbing the brush on the denim piece.  This was repeated several times to remove all of the Restoration Balm on the brush bristles.  I then used the baby toothbrush to apply Renaissance Micro-Crystalline Wax to the stummel.  I buffed the stummel with a shoeshine brush then with a fluffy microfiber polishing cloth.  

    The pipe was taken to the buffer where I applied several coats of carnauba wax to the stem and to the smooth heel where the briar was stamped.  I did not apply carnauba to the carved surfaces of the stummel.  The stem was hand buffed with the microfiber polishing cloth to further raise the level of shine.

    There you have it, the 1940s Marxman Camel restoration.  Although I am sure my oldest granddaughter will declare this is a llama not a camel.  She has a thing for llamas and rearranging the pipes in my pipe racks.  I am very pleased with how this restoration turned out.   I’d always wanted to lay hands on a Marxman figural and this one was a beauty.  The briar looks great, cleaned and conditioned.  The stem polished-up wonderfully and together they are quite stunning.  Filling the entire cavernous bowl would provide lengthy smoke.  I am thinking at least a couple of hours.  Certainly enough time to walk a mile.  

    The dimensions of this Marxman Jumbo C are:

    • Length:  6.08 in./ 154.65 mm.
    • Weight:  2.67 oz./ 75.60g.
    • Bowl Height:  3.5 in./  80.00 mm.
    • Chamber Depth:  2.24 in./ 57.00 mm.
    • Chamber Diameter:  0.79 in./ 20.07 mm.
    • Outside Diameter:  1.57 in./ 39.88 mm.

    I do hope that you have found something here useful to your own pipe care, maintenance or restorations.  If you like this sort of thing, please click the like and subscribe buttons.  Thank you for reading the ramblings of an old pipe lover.

    Loading…

    Below are some photos of the finished Marxman Camel.

  • A Smokes Stogies Snuff & Stuff Panel Billiard

    October 17th, 2024

    Photographed and written by

    John M. Young

    Geometry, design and art are not things that I have ever been trained in.  Sure, I took an art history class in college and loved it but that could have been just for the nude women.  I was 19 years old after all and in 1985 the internet was not a source of said nudies.  Back to the aesthetics of pipes; panel shapes with their flats and curves draw me to them.  I cannot explain why, perhaps it is like they are providing some order to the chaos of fire and smoke or, maybe they just look cool.  Whatever the case may be, this panel caught my eye and the stamped name on the shank made me laugh.  SMOKES STOGIES SNUFF AND STUFF.  I made several assumptions here; the stamp referred to a tobacconist shop, the “SMOKES” referred to cigarettes, the “STOGIES” to cigars, “SNUFF” the nasal variety not the films and “STUFF” the catchall category.  I definitely wanted to visit that shop as I am a snuff taker/pipe smoker who has not seen snuff in a brick and mortar establishment in more years than I can remember.  I am not sure where this pipe came from.  It was most likely part of an estate lot.  My record keeping is poor at best and the secretary continues to not come to work.  This is probably due to the fact that I’ve never hired one.  The below photos are of the Smokes Stogies Snuff and Stuff pipe prior to working on it. 

    So many issues.  The glaring ones are; the cloudy clear coat, oxidized stem, hole in stem and the tobacco still in the bowl.  Well one of those will be easy to fix.

    Whew, that’s a relief.  

    Background

    I think it is safe to say that Smokes Stogies Snuff and Stuff is not the original maker of this pipe.  A quick internet search did not produce the tobacco shop that I had imagined.  I envisioned a castle-like structure with old world charm nestled in the historic section of an old New England town.  Then I found this matchbook.  Anchorage Alaska!  That completely edited imagined scene.  Now I envisioned rustic sea-side tobacconist along a wharf with a fleet of fishing boats moored.  Instead of a wooden cigar-store Indian statue there was a haggard sea captain with a pipe, wooden leg and a harpoon in hand.  Oh, the vivid mental images were running wild.

    Alas  there matey, little could be found of this tobacco shop.  Fortunately there were the names of the proprietors on the mathbook – Mike Plipton and Wades Osborne.  There was also the address.  Hmm, Penney’s Mall didn’t sound like it fit my wharf scene and a search 412 W. 6th Avenue, Penney’s Mall Anchorage Alaska 99501 completely ruined my imagined scene.  The below photo is of the Anchorage JCPenney.   Not a fishing boat to be seen.

    (https://www.google.com/url?sa=i&url=https%3A%2F%2Fen.wikipedia.org%2Fwiki%2FJ._C._Penney_Store_%2528Anchorage%2C_Alaska%2529&psig=AOvVaw3QYrR-aXjqHAL4GFNYJT12&ust=1727882791568000&source=images&cd=vfe&opi=89978449&ved=0CBQQjRxqFwoTCJjl5JS_7YgDFQAAAAAdAAAAABAE)

    The search continued.  Next I tried the proprietor’s names.  Mike Plimpton’s name led me to the following obituary:

    (Michael Charles Plimpton (1945-2003) – Find a Grave Memorial)

    I could find nothing on Wade Osborne.  

    I then searched out Anchorage tobacco shops currently in business, hoping to find someone who knew of or about Smokes Stogies Snuff & Stuff or the proprietors.  One of the shops that I contacted, via their website, was G&P Fine Tobaccos Limited (https://gptobacco.com/).  I received the following email reply:

    “Our shop started in the late 60’s and we know of this shop.

    It was a small shop in the JC Penney’s mall in the mid 80’s and was very short lived according to our shop oracle (who starting working our group of shops in the early 80’s). 

    They were in business for about 2 years and abruptly closed

    Ill let you know if he remembers more. Ill be meeting with him again soon

    Best regards,” (personal communication, email)

    A second avenue of research led me to the Alaska Pipe Club Facebook page.  I posted an inquiry and a few photos of this pipe and asked if any group members had additional information.  I received a few replies from kind and knowledgeable Alaskans.

    One of the most helpful replies was:

    “DS Hogan

    From G&P / Tobacco Cache this morning: Our retired guys chimed in this morning with some history. It was a shop that formed in the mid 80’s in the penny’s mall. They recall it being in business for a couple years aprox 2- years then it abruptly closed. Hurriedly for some reason that no one recalls. No records exist on it aside from advertisements such as the match covers. Nice find. Always cool to discover shop stamped pipes. We have collected a few from the earliest Tobacco Cache and Pipe and Pouch FAIRBANKS, but haven’t seen much other. Happy collecting.” (Facebook, Alaska Pipe Club group chat)

    Well, the approximate date of the pipe seemed quite certain now who made it was inquisition.  Unfortunately, there was no shape number stamped on the pipe.  I had restored a Telford’s Canadian pipe earlier this year.  Telford’s is a tobacco shop outside of San Francisco, California.  In talking to the Owner, he told me that the pipe I was restoring was made by Comoy’s and stamped by them for sale in his shop.  I started looking at Comoy’s shapes for a panel billiard with a square stem.  According to pipedia.org Comoy’s did produce such a pipe but there was no photograph or image to confirm the exact shape or the number of panels.  

    (Comoy’s Shape Number Chart – Pipedia)

    Next I searched GBD.  The GBD 9486 was a nearly exact match to the Smokes Stogies Snuff & Stuff pipe.  

    (GBD Shapes/Numbers – Pipedia)

    I posted my proposed manufacturer in the Alaska Pipe Club group and received the comment that Kaywoodie also made a very similar panel shape.  The reply is below:

    DS Hogan

    John M. Young it certainly looks like a GBD. I collect GBD’s and love them. Panels are super rare to fine. Also note that Kaywoodie made panels like that (identical shape) as well as GBD

    I searched the Kaywoodie shapes and found a match from their 1968-69 catalog.  Kaywoodie No. 44 Octagon Apple did appear to have the correct shape but it lacked the saddle stem and did not list the square shank.

    Based on my limited searching I think it is a fairly safe assumption that the Smokes Stogies Snuff & Stuff pipe was produced by GBD in the mid 1980s.

    The Restoration

    As usual the pipe received a clean denim piece as a work surface.

    I cleaned out the stem which surprisingly, was quite clean.  95% ethyl alcohol and bristle pipe cleaners were used and the stem was lightly sanded to remove the surface oxidation.

    Next, a pipe cleaner was inserted into the tenon to act as a hanger for the stem as it was submerged into Before and After Extra Strength Deoxidizer.

    The stem in the solution for 3 hours.

    I hoped that the clear coat on the stummel was a shellac which would be easily removed with 95% ethyl alcohol.  I tested this with alcohol on a make-up pad.  It was not.  This was not surprising since the pipe was of a more recent make.  Though being lazy, I had hoped.

    The reaming tools were assembled:  Kleen-Reem, Smokingpipes Low Country reaming knife, General triangular scraper and a wood dowel wrapped with 220 sandpaper.

    The Kleen-Reem did the majority of the work in removing the cake from the tobacco chamber.  Minimal scraping was needed.  I then sanded the interior to bare briar and saw no sign of any damage from heat to the chamber.

    The stummel was scrubbed with undiluted Murphy Oil Soap and a medium stiff toothbrush.  The soap was rinsed with warm water and the stummel dried with a cotton dish towel.

    Since the clear coat was not soluble with alcohol I opted to soak the whole stummel in acetone to remove the finish.

    The stummel wanted to float higher in the acetone than I like so an empty brass pistol cartridge (brass band doner) was used to weigh it down.

    30 minutes later the stummel was removed and wiped with a make-up pad wetted with acetone.  The finish had been removed but so had a good deal of the Smokes Stogies Snuff & Stuff stamp.  I have found that some manufacturers will stamp on top of the clear coat rather than stamping the briar then applying the clear coat.  This is more often done on lesser quality pipes.  In these cases removal of the finish will also remove the stamping.

    While the yuck, also known as smoking residue, was still soft from the acetone bath, I worked on removing it from the shank.  This was done with a nylon shank brush, cotton swabs, bristle pipe cleaners and 95% ethyl alcohol.

    The stem was removed from the Deoxidizer (deox) and allowed to drip the excess solution back into the jar.  The not yet patented Deoxidizer Drip-O-Matic consists of the pipe cleaner hanger wedged into the lid of a taller bottle.

    After dripping, the stem was vigorously rubbed with a coarse shop rage to absorb the remaining solution and to abbrade some of the loosened oxidation.

    Below you can see the oxidation that was removed with the shop rag.

    The stem was looking much better though slightly pitted by losing the oxidized rubber.

    I then used several make-up pads with Soft Scrub cleanser to further rid the stem of oxidized rubber.

    The stem was reattached to the stummel to preserve the joint where the two pieces meet.  I then lightly sanded with a 400 and 600 grit sanding sponge.  This prepared the stem for the rebuilding of material lost to tooth/biting damage.

    I roughened the area that was to be rebuilt with 80 grit sandpaper.

    A piece of a plastic lid was cut to act as a dam to stop the black cyanoacrylate (CA, super glue) from building up in the airway.  The plastic dam was wrapped in several coats of cheap Scotch tape to add to its thickness.  The good 3M tape does not work as well as the cheap stuff at resisting the CA and the CA drying accelerator used to speed the curing  of the CA.

    With the dam inserted into the mouthpiece, black CA was layered onto the button area.  This CA was then spritzed with a drying accelerator.  Several thin coats are preferred over one thick coating as the accelerator does not penetrate into a thick layer.

    Below, you can see how the deeper dents were filled before the area was covered.

    The new CA patch was then filed, smoothing the surface.  Sanding sponges further smooth and remove the lines from filing.

    The shiny spots on the photo below indicate places where additional CA needed to be applied and material built up.

    This process was repeated until the damage was no longer obvious.

    I wanted to give the stummel a little bit of a contrast stain to bring out the briar grain. 

    The stummel was pre-heated with a heat gun to open the pores of the briar.  A duct-tape wrapped fishing bobber was inserted into the tobacco chamber to keep dye from entering.  Most folks use a wine bottle cork for this but I’ve found that not drinking severely limits the availability of wine bottle corks.

    The black Fiebing’s Leather Dye was applied with a folded pipe cleaner and flamed with a lighter.

    The stummel was then wiped with a paper towel to remove excess dye.

    I then took the stummel to the buffer where the new black dye was buffed from the surface of the pipe with rouge compound.  Below you can see one panel buffed.  The dye penetrates the softer grained briar more than the harder grains.  When buffed off this contrast accentuates the grain.

    The stem and stummel were then sanded with a series of sanding sponges from 400-3500.  Between each sponge the stummel was wiped with a make-up pad dipped in alcohol.  The Stem was rubbed with mineral oil and wiped with a paper towel.

    The pipe was then worked with micro-mesh pads 4000-12000.  Between pads the stummel was wiped with a make-up pad dipped in alcohol.  The Stem was rubbed with Obsidian Oil and wiped with a paper towel.

    The stummel was given a coating of Before and After Restoration Balm and allowed to sit for 20 minutes.

    The Restoration Balm was wiped from the stummel using an inside out athletic sock.

    The pipe was then taken to the buffer where it was given several coats of carnauba wax.  The final step was hand buffin the pipe with a microfiber polishing cloth to further raise the level of shine.

    I would like to thank the folks at G&P Fine Tobacco Limited (https://gptobacco.com/) and the Alaska Pipe Club for assisting with the research for this restoration.  If you are ever in Anchorage please pay  G&P Fine Tobacco Limited a visit.  I think this piece of tobacciana known as, Smokes Stogies Snuff & Stuff paneled, square shank, saddle stem billiard turned out quite well.  I was sad to see the stamp not make it through the finish removal completely intact.  It is still legible but not with ease.  The stem reconstruction turned out well and the contrast dye looks very nice and accentuates the briar grain.  The dimensions of this Smokes Stogies Snuff & Stuff paneled, square shank, saddle stem billiard are: 

    • Length:  5.53 in./ 140,46 mm.
    • Weight:  1.53 oz./ 43.70g.
    • Bowl Height:  2.09 in./  53.09 mm.
    • Chamber Depth:  1.60 in./ 40.64 mm.
    • Chamber Diameter:  0.73 in./ 18.54 mm.
    • Outside Diameter:  1.41 in./ 35.81 mm.

    I do hope that you have found something here useful to your own pipe care, maintenance or restorations.  If you like this sort of thing, please click the like and subscribe buttons.  Thank you for reading the ramblings of an old pipe lover.

    Loading…

    Below are some photos of the finished Smokes Stogies Snuff & Stuff paneled, square shank, saddle stem billiard.

  • Kiko Caveman Restoration

    October 15th, 2024

    Photographed and written by 

    John M. Young

    It must be my four years of physical geography/geology undergraduate training that drew me to this pipe.  It looks like a rock sample on a stick but I fell in love with it at first sight, scars and all.  I remember seeing various examples with various natural rock-like shapes online but this one called to me.  The funny part of this story is that I had just seen Steve Laug post in a Facebook group about a great antique store that he came across.  I commented something about how the local antique stores in town really needed to “up their game” regarding old tobacco pipes and whined about how the local shops might have a Willard that looks as if it was last cleaned by placing it in a garbage disposal.  Yeah, I was a bit jealous.  The next day I made my way into town to pay taxes on the house and truck.  While there I swung into one of the antique shops and asked if they had any old pipes.  Out came the box.  Low and behold, there was this Kiko.  I was amazed, there were also two Willards that had last been cleaned not with a garbage disposal but with a technique involving chains and a gravel road – not sure how that one works.  I don’t think the proprietor of the shop had any idea about the value of the Kiko.  His mother was working the counter that day and we had a very nice conversation about meerschaum and how it really was a rock.  I left her enlightened and with some cash as I returned home with a Kiko and new stickers on my license plates.  When I got home I was able to examine the pipe more thoroughly and in a less excited state.  There were no carvings or stamps on the stummel.  The stem had the Kiko Elephant near the shank on the left and along the bottom was stamped TANGANYIKA.  Below are some photos of the Kiko as it appeared prior to any work.

    I’m not sure what the scars on the lower end of both sides were from.  I can’t figure why you’d need to squeeze a meerschaum stummel with a channel lock pliers but that is what it looks like happened.  The stem was oxidized suggesting that it was indeed vulcanite and had accompanied a previous owner on many a clenching expedition.  This was going to be an interesting restoration.  The first question:  Do I re-carve the damaged spots and make the re-carvings blend with the original or, Do I patch the holes?  Either pursuit was a novel idea for me.  Research was required.

    Background

    The first step that I took in researching this pipe was to look up the logo at pipephil.eu.  There I found the following:

    (Ki-Km — Pipes : Logos & Markings (pipephil.eu))

    Turning to pipedi.org for some history of Kiko led to the following entry:

    “Kiko, meaning “pipe” in Swahili-Kiswahili to English translation, is probably the best known of the various brands listed below. In East Africa Meerschaum is found in Tanganyika, once known as German East Africa, and since 1964 part of the United Republic of Tanzania. The main deposit comes from the Amboseli basin surrounding the Lake Amboseli. Tanganyika Meerschaum is normally stained in shades of brown, black and yellow, and is considered to be inferior to Meerschaum from Turkey. Eventhough, the raw material is mined by the Tanganyika Meerschaum Corporation and to a large extent used for pipemaking. Uncounted pipemakers throughout the world were supplied with Amboseli Meerschaum, preferentially used for Meerschaum lined briars or leather-clad pipes. In Tanganyika the Kilimanjaro Pipe Company Ltd.” (Kiko – Pipedia) 

    And, more specifically the Caveman line of Kiko pipes.

    • “Caveman Fashioned from a piece of natural meerschaum.Every pipe is unique and – is in fact a geological specimen over a million years old.Attractively boxed.” (Kiko – Pipedia)

    A second entry at pipedia.org discusses the Tanganyika Meerschaum Corporation in greater detail. 

    “From Pipes, Artisans and Trademarks, by José Manuel Lopes

    Tanganyika Meerschaum Corporation is a company that formed in 1955 by Kenyan businessmen from Nairobi after the discovery of a meerschaum mine relatively close to the surface on Kilimanjaro. The meerschaum is tougher, less porous, and cheaper than the Turkish variety. Another mine was soon discovered in Sinya, in the famous Amboseli Game Park.

    The company, previously based in Arusha (Tanzania), became an associate of a Belgium firm, but closed some years after. It produced the Caveman, Countryman, Kiko, Killimanjaro, Sportsman, Townsman, and Wiga brands. It maintained a link with GBD for the making of the GBD Block Meerschaum series, and after its closure, the English firms, London Meerschaum and Manx Pipes (Manx Meerschaum) continued producing with African meerschaum.” (Tanganyika Meerschaum Corporation – Pipedia)

    To give more depth to the meerschaum story here is a quick lesson in geography.  

    Lake Amboseli is a rainy season body of water along the shared border of Kenya and Tanzania, northwest of Mount Kilimanjaro.  The straight white line on the image below is that border.  Sinya refers to the Sinya Mine (https://www.mindat.org/loc-266724.html).

    (https://www.google.com/maps/@-2.7763709,37.2580582,99656m/data=!3m1!1e3!5m1!1e4?entry=ttu&g_ep=EgoyMDI0MDkyMy4wIKXMDSoASAFQAw%3D%3D)

    Zooming in on the south western shore of the temporary Lake Amboseli you can actually make out the excavations of the old mining activities.  On the below image from google maps; pits, tailing piles, roads etc… can be discerned.

    (https://www.google.com/maps/@-2.7763709,37.2580582,99656m/data=!3m1!1e3!5m1!1e4?entry=ttu&g_ep=EgoyMDI0MDkyMy4wIKXMDSoASAFQAw%3D%3D)

    It appears that little to no mining is done at the site today.  Several sources say that the meerschaum deposit were close to the surface, not very large and were played out 

    Super fast history lesson:

    Before World War I, Tanganyika formed part of the German colony of German East Africa. It was gradually occupied by forces from the British Empire and Belgian Congo during the East Africa Campaign, although German resistance continued until 1918. After this, the League of Nations formalised control of the area by the UK, who renamed it “Tanganyika”. The UK held Tanganyika as a League of Nations mandate until the end of World War II after which it was held as a United Nations trust territory. In 1961, Tanganyika gained its independence from the UK as Tanganyika, joining the Commonwealth. It became a republic a year later. Tanganyika now forms part of the modern-day sovereign state of Tanzania. (https://en.wikipedia.org/wiki/Tanganyika_Territory)

    With all of that information in mind and assuming that the TANGANYIKA stamp on the stem is referring to the country of manufacture (COM) this pipe was made not after 1962.  

    The Restoration

    As I said earlier, I had some research to do regarding how to patch meerschaum.  Oh yeah, I decided to patch the damaged area rather than try my hand at carving the meerschaum.  The first site I visited was that of Troy W. of Baccypipes (https://baccypipes.wordpress.com/author/troynov1965/).  He had a unique “Old Time Meer Lining Repair Method On a Kaywoodie Shellcraft #5651” post describing the use of finely ground chalk and egg white.  This patch was described for repairing a meerschaum bowl lining but I figured that it could be used for meerschaum in general.  Here is the link to that blog post.  A second blog post that I read was by Dal Stanton, published at rebornpipes.com, describing another meerschaum lining repair.  That post can be found here.  I frequently message Dal about various pipe related issues or the weather in Colorado.  I asked him how the repair on the pipe he had done was holding up with use.  His restoration was done as a commission for Paresh Deshpande.  Paresh has also done restorations at rebornpipes.com (Here is an example by Paresh).  Dal messaged Paresh and in very short order replied to me, 

    “I have heard of no failures!  The concoction is pretty sturdy and a great way to salvage Meers.

    Dal

    Dal Stanton

    I’ll ask Paresh for a report.

    Dal

    Dal Stanton

    From Paresh:

    Hey Dal,

    The repairs have held up perfectly well and the pipe is still providing me hours of great smoke. Do say Hi to John for me.” (Dal Santon, personal communication)

    That provided the confidence boost that I needed.  Egg whites and powdered chalk, who would have thought that would be the solution (pun intended – though it is actually more of a mixture than a solution) to this restoration?

    On the next trip into town I stopped by a local dollar store and purchased chalk.  The trip was actually for groceries so eggs were already on the list.  Returning home I set to work following Troy W.’s procedure.  Troy used the handle of a screw driver, apparently he didn’t own a mortar and pestle either.  I started with a breaker bar rather than a screwdriver. 

    The breaker bar worked well but the end was rather small in diameter.  I looked in the garage for a larger caliber tool.

    A small sledge hammer head with a broken handle seemed like the perfect choice.  I don’t recommend that you break off the handle of your small sledge in order to reproduce this procedure.  I’m sure the handle would not provide a significant source of error.

    The hammer was washed and dried and put to work.

    A point of reinforcement here, Troy mentions to finely grind the chalk and when you have it ground then grind it some more.  I concur and can state that I did not follow this advice as well as I should have.  You really want the chalk to be powdered.  Not mostly powdered with some small pieces, like mine was.  I am sure that a mortar and pestle is the proper tool for this endeavor and were I still an active science teacher I would have borrowed one from the lab.  Drats, foiled again by life choices.

    The chalk was mixed with egg white.  I added chalk until I had a mixture that was like “soft peaks” when whipping cream.  The damaged spots appeared to have plenty of rough surface to enable the mixture to adhere to.  I did wipe the surrounding smooth surface with alcohol to remove any surface wax that might not allow the mixture to stick.

    The mixture was applied and allowed to dry for 4 hours.  I also wanted to test a spot of the mixture to see how I could stain it in order to blend the patch with the existing meerschaum.  I placed a small blob on a scrap of cardboard and set it aside to dry. I put the unused mixture in an airtight container and refrigerated it.

    Once dry the patch felt “chalky”.  I don’t know what I was expecting, perhaps more “dried eggy”.   The numerous air bubbles had also left pours that I was not happy with.  You can see the bubble very distinctly on the dried test blob.

    Hmm, I think I needed more chalk in my mixture to make it less liquid and more like putty.  I added more chalk.  I lightly sanded the dried patch in preparation for a second application. 

    This 2nd application was applied to both sides simultaneously.  The mix was thick enough that It would not drip, had no air bubbles and I could work it more like a putty.  “Living and learning” might become my new life motto.  

    I let this application dry for about 30 minutes then tried to add some texture to it in an attempt to match the existing texture.

    Time to test this blob.  I thought that I would cover ½ the blob with beeswax to see how the wax colored the patch then try painting the other half with a green tea I was drinking to see how that changed the color.

    The first part of the plan worked as planned.  ½ the blob was painted with hot beeswax.

    The plan went bad when I used the heat gun to melt the beeswax and allow the excess to drip off.  It did drip down but the force of the hot air also pushed the remelted wax up onto the unwaxed portion of the ½.  Oh well, my plans frequently have difficulties with reality.

    There was a slight yellowing of the patch with the application of the beeswax.  This was good but not quite the color change I wanted.  The texture also changed significantly.  The blob was no longer chalky, it was much more like the meerschaum.  I think the term in meerschaumy.

    I smoothed the mostly dried patch with 400 wet/dry sandpaper and tried the green tea stain.  The tea immediately resoftened the patch.  Hmm, – note to self, dry time seems important.  The tea did seem to color the patch successfully.  I set the stummel aside to completely dry and harden, overnight, in this case.

    The next day, I began melting the beeswax.  I have decided that I really need one of those electric candle maker wax heating pots.  Until I do get one I will continue with this system I devised:  An aluminum pan with water, a small canning jar with beeswax and a stove top.  I like the hot water bath because I can’t overheat the wax getting it to its flashpoint and once the wax is melted I can turn off the flame and the hot water will keep the wax liquid for several minutes.

    I heated the stummel with the heat gun preparing it for the wax that I would be painting it with.  I painted the entire stummel with melted beeswax.  I was amazed at how much wax the meerschaum absorbed.  Nearly none of the was applied dripped into the catch tin.

    I started working on the stem.  The tooth chatter was filed and the stem sanded to remove the hardened oxidized surface.

    The stem was then placed into Before and After Extra Strength Deoxidizer (deox).  Due to the long stem the jar had to be sealed and placed at an angle to allow the stem to be fully submerged.

    Several hours later the stem was removed and allowed to drip excess solution back into the jar.

    I used a coarse shop rag to wipe and hand buff the remaining solution from the stem.

    The coarse material of the rag both absorbs the solution and acts as an abrasive to remove the newly softened oxidation.  The dark residue can be readily seen in the photo below.

    The stem was then scrubbed with Soft Scrub cleanser on make-up pads.

    At this point I used painters tape to mask the logo and stamp then sanded the stem with sanding sponges in grits of 400-3500.  Between sponges I rubbed the stem with mineral oil and wiped it with a clean dry paper towel.  I failed to photograph this so I guess you will just have to believe me.

    Before moving on to micro-meshing the stem I wanted to repaint the logo and try to paint the TANGANYIKA stamp. 

    The letters were faint and proved to to take well to the painting.  I didn’t see any evidence that they ever had been painted so this was not a great loss.  The elephant had been slightly degraded with the removal of the oxidation but remained accepting of the paint.  The stem was then polished with micro-mesh pads 4000-12000.  Between each pad the stem was rubbed with Obsidian Oil and wiped with a paper towel.

    The stem was taken to the buffer for a final buff with Blue Diamond compound.  The stem then received several coats of carnauba wax.  The stummel was not waxed with carnauba since it had just received fresh beeswax.

    This was a fun restoration.  It did not turn out as well as I had hoped.  The patched spots on the damaged meerschaum are actually quite an eyesore but I learned many things about working with meerschaum.  This pipe is not one that will be offered for sale unless someone really wants it.The meerschaum remains a rugged thing of beauty to me even with the blemishes.  The stem cleaned and polished nicely and provides a strangely satisfying contrast to the stummel.  I was glad that the logo and stamps were preserved.  I am also looking forward to another Kiko restoration, hopefully one without the deep scars that this pipe had.  The dimensions of this Kiko Caveman are: 

    • Length:  6.83 in./ 173.50 mm.
    • Weight:  1.34 oz./ 37.40 g.
    • Bowl Height:  2.33 in./  59.18 mm.
    • Chamber Depth:  1.61 in./ 40.89 mm.
    • Chamber Diameter:  0.72 in./ 18.29 mm.
    • Outside Diameter:  2.00 in./ 50.68 mm.in line with shank

    1.64 in. / 40.18 mm. Perpendicular to shank

    I do hope that you have found something here useful to your own pipe care, maintenance or restorations.  If you like this sort of thing, please click the like and subscribe buttons.  Thank you for reading the ramblings of an old pipe lover.

    Loading…

    Below are some photos of the finished Kiko Caveman.

    Troy W.’s

    Chalk and egg white meerschaum bowl lining repair.

    Old Time Meer Lining Repair Method On a Kaywoodie Shellcraft #5651

    Dal Stanton’s meerschaum bowl lining repair.

    A Meer-lining and Crack Repair to Rescue a Doomed Gargantuan Kilimanjaro Made in Tanganyika Bent Billiard
  • A Commissioned Peterson System 2 Restoration

    October 10th, 2024

    Photographed and written by

    John M. Young

    Being asked to restore a family heirloom is a flattering and frightening request.  Flattered because the owner of the piece thinks highly of your ability to restore the item yet frightening because ethos is a one of a kind item that carries significant personal meaning.  In this case personal and historical family meaning as well.

    Background

    Earlier this month I was contacted via email by a gentleman who had seen a link to my blog on Mark Irwin’s Peterson Pipe Notes.  Below is an excerpt from an early email:

    “I’m wondering if you do restoration work for others as well as for yourself?  

    I have an old Peterson System pipe that had belonged to my father’s Uncle, Richard McNamara.  He would have bought the pipe while stationed in Northern Ireland as a technician with Lockheed Aircraft.  He died unexpectedly in 1943 while still in Northern Ireland.  

    I intend to pass the pipe along to my nephew.  I had sent it to Peterson’s for their assessment to date it and to clean it up a bit.  I received a nice note from Glen Whelan, who set the pipe in the 1930’s/1940’s.

    So, if you do restorations of this sort, I be happy to have you restore this pipe.”

    I asked if it was possible to see some photos of the pipe in question to assess what I would recommend for the restoration.  The following five photos were sent by the owner.

    The pipe looked to be in very good condition.  I replied, 

    “That is a beauty.  I am assuming the Peterson boys told you that the pipe was probably from 1937-1945ish.  That would be my guess anyway.  Here is what I see that you may want to have restored: 

    The stem – Looks great.  There are some very small scratches around the ferrule.  Micro-meshing and a white diamond buff should make it like new.

    The Cap – I saw a couple of small dents.  The cap can be removed and the dents pressed/tapped out.  Then polished and reglued into the original position.

    The Stummel – The dings from contact with a rough surface can be 1)  filled with cyanoacrylate and briar dust.  This will smooth them but will also make for dark spots where each dent is. Or, 2)  The dents can be steamed to see if the briar can rebound back.  This may lessen the dent but probably not remove it.

    The Internals – a general cleaning and yuck removal.  “Yuck” is a highly technical restoration term referring to smoking residue.  When in abundance, it can be called “yucky”.”

    The owner replied,

    “Thanks, it is a nice pipe with a special heritage.

    All I got from Peterson’s was that it was from the 1930/40’s.  But from further investigation I have learned that the 1937-1945 span is correct.  Now, I’m assuming that my Uncle bought the pipe new as he was in Northern Ireland from about 1939 to 1943.  I have photos of his travels to Dublin, so I’ll further my assumption that he bought it from Peterson’s.

    Anyway, i agree with your suggestions about the stem and cap.  I saw some crud around the button and the dents on the cap.  As for the Stummel, I think I’d just as soon leave the dents as they are.  After all, as far as I am aware, only my uncle Richard and I have used the pipe in it’s 80ish years, so, in my mind, it adds a touch of being authentic with continuity.  The internals will need a cleaning.  I don’t have the pipe in front of me now, it’s packed away in my pipe bin in our RV basement.  I’ll pull it out in a day or two and check the bowl etc., but I don’t think it’s too bad.”

    We agreed on the work to be done and arranged for shipping.  A few days later the pipe arrived and was photographed prior to any work.

    Though there was no sign of a shape number stamp, I think this is a 307 shape.  

    “The 307 is an original Patent bent billiard-shape, shown in the 1896 catalog as shape 9. It has retained its original shape number in the De Luxe version, but was issued in the 1937 catalog as the 307 (2nd quality) / 357 (3rd quality). Since then, it has also appeared as the 9S and 9B (De Luxe), Dunmore System 78 (1978-1983), and the Classic Range 9BC (1940s-1950s) / XL90 (1980s-Present). The 9B dating from the 1940s-1960s (the De Luxe System with a tapered rather than saddle bit) is rarely seen on the estate market. There have been changes in the shape since the 1960s, all toward less “cheeking,” making earlier versions, when available, preferable to those wishing to get back to the first, classic iteration of the shape.” (https://petersonpipenotes.org/146-a-guide-to-system-shapes-1896-2019-part-1-the-300-shape-group/).  The 1937 issue of the SYSTEM 2 coincides precisely with the provenance of the pipe.

    When I first received the pipe I thought that something had gone wrong like the wrong pipe was shipped.  There were no dents on the left side of the stummel.  Adding further to my confusion, which is pretty easy to do by the way, was the stem.  A Peterson System 2 should have a bone tenon extension or “chimney”, as the Peterson factory folks call them.  This tenon was smooth, without threads, and looked to be about 9mm.  A closer examination of the pipe and comparison to the photos indicated that it was the same pipe pipe from the initial photos based on briar grain patterns.  I could make out well done fills where the dents were supposed to be and there were slight bumps in a newly acquired finish.  The finish looked like a lacquer and stain combo which had been sprayed on or maybe a lacquer sprayed onto a still damp stain.  It also looked like the stem had received some of the lacquer then had been buffed with carnauba wax.

    I emailed the owner with my questions.  While awaiting a response I began working on the pipe.

    The Restoration

    As usual the pipe was taken to the workbench where it was placed on a relatively clean denim piece.

    Next the tobacco chamber was reamed using the PipNet and #2 blades.  The General triangular scraper and Smokingpipes Low Country Reamers also saw limited action.  The chamber was then sanded with 220 sandpaper wrapped around a wood dowel.  The sanding resulted in seeing the condition of the briar within the chamber which showed no signs of any damage from excessive heating or charring.

    The stummel was then taken to the sink for a scrubbing with Murphy Oil Soap with a nylon scrub brush.  The soap was rinsed with warm water and the stummel dried with a cotton hand towel.

    Back at the workbench the stummel was wiped with a make-up pad dipped in 95% ethyl alcohol.  This removed a good deal of color.  Apparently the pipe had received a clear coat of some kind and a recent dye or stain.  I could not believe that this was the original stain from the 1930’s or early 1940.

    The stem was cleaned out with bristle pipe cleaners and ethyl alcohol and showed that the pipe was being well cared for and cleaned after use.

    Oxidation, however, does not care how well a pipe is cared for and attacks at every chance it gets.  This stem showed signs of oxidation though not very severe.  I decided to remove the oxidation with Before and After Extra Strength Deoxidizer.  The stem had a pipe cleaner inserted into the mouthpiece to act as a hanger and entered the deoxidizer solution.

    During the reaming, I noticed an off smell from the removed cake.  It was not a foul smell, just a slightly sour hint. I decided to give the stummel an alcohol treatment to remove any traces of old smoking and tobacco residue.  I packed the tobacco chamber and shank with cotton and filled the respective volumes with 95% ethyl alcohol.  The stummel was propped up to allow the alcohol levels to remain level while filled.

    The below photo is after two hours of the alcohol treatment.  The shank was discoloring far more than the tobacco chamber.

    During this waiting time I was able to check emails.  Yeah I know, a phone can be used to check emails but I’m old and stubborn.  Phones are for calling, texting and photos.  Typing is done on a computer.  Anyway, the owner had gotten back to me regarding my questions about the condition of the pipe.  He had said that he had sent the pipe to Peterson in Dublin.    

    “Perhaps the boys at Peterson’s did more than I realized.  Good on them.” 

    “I just checked the box in which the pipe was returned from Peterson’s and the extra stem they sent does not match the curvature of the stem in my pictures.  So, the stem you have is likely the original.  

    As for the 9mm part, perhaps that allowed for a bone extension rather a filter, but it’s just a guess.”

    The timeline was making sense to my old brain now:  

    1) Original photos were taken.

    2) The pipe was sent to Peterson’s in Dublin.  While there the stummel fills were done and a new finish was applied.

    3)The pipe was sent to me.

    The tenon still was giving me confusion.  There were no threads for a bone extension.  I knew that Peterson did have a line of Filter pipes which were described in the 1947 catalog but this pipe pre-dated that by several years.  I emailed the owner that I’d like to reachout to Mark Irwin for his thoughts.  The owner agreed.

    Below is the correspondence between me and Mark Irwin:

    Subject:  Hate to bother you

    Hi Mark,

    You know those four words in the subject line are going to be followed by “but…” right?

    I got a commission to restore an old Pete for a gentleman whose granduncle picked it up while stationed in northern Ireland around 1940, just prior to his unexpected passing in 1943.  I figured the pipe was from 1937-1945.  My question is why in the world does it have what appears to be a 9mm (though it is smaller than 9mm) filter type stem?  There are no threads for a bone tenon.  Any idea or just rack it up to “it’s probably a replacement stem”.

    “Hey John,

    My best guess is that this pipe was drilled for a “Good Health” K&P 6mm filter.  You can see a photo of the filter box in the identification guide at the back of the big Pete book, as these still sometimes appear on eBay.  Try measuring it with your micrometer and seeing if you think a 6mm would fit!” (Mark Irwin, personal email)

    Another potential piece of the puzzle – The stem appeared to have been drilled for one of the early GOOD HEALTH stems.  Since it was already a Peterson System 2, today’s equivalent of a “Deluxe”, it was also not stamped as a GOOD HEALTH though it did receive a GOOD HEALTH stem.  I notified the owner and he was pleased with the new information. 

    Time to get back to work. After 3 hours the stem was removed from deox.  That is my term for the Before and After Extra Strength Deoxidizing solution.  Kind of a play on the idea of detoxification or detox used for drug and alcohol abuse patients in rehab.  The stem was hung by its pipe cleaner on a tall bottle and allowed to drip excess solution back into the jar.

    After dripping, I hand buffed the stem with a coarse shop rag.  The coarse material both absorbs the excess solution and helps abbrade some of the oxidized rubber from the stem.

    The next step was to scrub the stem with Soft Scrub applied to make-up pads.  This mild abrasive cleanser further removes oxidized surface material from the stem.

    After the Soft Scrub scrub, that’s just fun to say, the stem was worked with a series of sanding sponges from 400-3500 grits.  Between each sponge I rubbed the stem with mineral oils and wiped it with a clean dry paper towel.

    The sanding was followed by micro-meshing with pads 4000-12000.  Between each of the pads the stem was rubbed with Obsidian Oil and wiped with a paper towel.

    At this point the stummel was still having the yuck removed the the ethyl alcohol as it slowly evaporated pulling the yuck from the briar and depositing it in the cotton.  That continued overnight.  In the morning I removed the cotton.  It had done a fine job at removing any trace of smell from the tobacco chamber, reservoir and shank.

    The stummel was then worked with micro-mesh pads from 2400-12000.  The 2400 pad removed the finish which can be seen wiped onto the denim and on the two alcohol dampened make-up pads in the photo below.  Between each pad the stummel was wiped with a make-up pad for removing debris from the micro-meshing.

    After the micro-meshing the stummel received a coat of Before and After Restoration Balm and was allowed to sit for 20 minutes.

    After 20 minutes the balm was wiped from the stummel using an inside out athletic sock.

    The briar of the shank was covered with painters tape to protect the wood and the silver ferrule was lightly polished with the micro-mesh pads.  After the peds I polished the silver with Before and After Fine and Extra Fine Polish.  I failed to photograph the earlier steps of this process but did capture the final step.

    The stem and stummel were taken to the buffer where they were buffed with Blue Diamond Polishing compound on a flannel wheel.  Reunited with the stummel, both then received several coats of carnauba wax.  The pipe was finally hand buffed with a microfiber polishing cloth to further raise the shine.

    I can’t say what my favorite part of this restoration was.  The pipe was a beautiful example of Irish craftsmanship by Peterson.  The family history and the story of the great uncle were the things that I always wish I could know about these old pipes.  The mysterious details of the pipe stem and the path that the pipe took, both geographically and through time, to get to me were a fun exploration.  The happiness and gratitude of the owner upon receiving the restored piped was also fulfilling.  Being honored and trusted to work on a family heirloom is daunting but exciting.  All of these were part of this restoration and all of them were unique and unforgettable.  The pipe turned out beautifully.  I don’t mean to speak disparagingly about the clean-up that the Peterson crew did.  Their fills were impressive but a custom hand polishing and finish is something that a manufacturing shop cannot take the time to do.  I failed to mention in the above blog that I could not remove the silver ferrule.  I tried seeping both ethyl alcohol and acetone into the glue to loosen it. I tried heating with a heat gun and even speaking softly and gently but I could not get the silver to budge.  In the end I emailed the owner and admitted failure.  He was understanding and we both agreed that the dents added to the history of the pipe.

    I do hope that you have found something here useful to your own pipe care, maintenance or restorations.  If you like this sort of thing, please click the like and subscribe buttons.  Thank you for reading the ramblings of an old pipe lover.

    Below are some photos of the finished Peterson System 2.

  • A Kaywoodie Matched Grain 10 Bent Billiard Restoration

    October 8th, 2024

    Photographed and written by

    John M. Young

    Oh to have both of the pipes in this matched pair.  I don’t mean to complain as this was part of an estate lot where I was targeting a single pipe.  The target was a Peterson meerschaum Dublin 120.  This pipe was just an innocent bystander caught up in the crazed Peterson Pipe Acquisition Disorder (PPAD) that wreaks havoc on my life occasionally.  If you are curious regarding the meerschaum pipe here is the link to that restoration.  Below is a screenshot from the original eBay listing back on August 4 of 2024.  There was a second Kaywoodie but a White Briar is no Matched Grain.

    The lot came from Rockmart, Georgia and did have several interesting pipes.  Below are some photos of the Matched Grain prior to working on it.

    “Free tobacco with the purchase of one chomped on Kaywoodie.”  I don’t think that advertising campaign will catch on.

    The stummel needed almost nothing except the general lava cleaning, reaming and cleaning, the stem on the other hand…  You may have noticed that the stem immediately behind the button had been filed.  I did that before I took the above photos.  I was thinking about how to reinforce the button for its reconstruction. So in full transparency, there was a little bit of work done to the pipe prior to the above photos.

    Background

    I am using pipedia.org’s Collector’s Guide to Kaywoodie Pipes to tell the history of the company and the Matched Grain lines as they are far better at it than this lazy writer.  “According to Hacker (1), the firm of Kaufmann Bros. & Bondy (KB&B) began producing the Kaywoodie (2) Pipe in 1915. Hacker notes that:

    “The company was originally started in 1851 in New York by two brothers named Kaufmann, who sold meerschaums and clays that a third :brother sent them from Vienna. Business thrived and in 1854 the Kaufmanns took in a partner named Bondy. … The three partners retired :in 1898, but their relatives continued on with the firm, which had begun to manufacture their own briar pipes under the KB&B trademark. :In 1915 the Kaywoodie brand was created as a marketing umbrella for a new briar pipe which the KB&B company introduced. …”‘

    The “marketing umbrella” mentioned by Hacker included lower grade Kaywoodies that were later marketed under the “Yello-Bole” name. (According to a 1948 Yello-Bole catalog, “Yello-Boles have been on the market since 1933. About 25 millions of these pipes have been sold”). Hacker concludes his history of Kaywoodie Pipes by noting that:

    “The KB&B briar pipe brand existed from 1900 until just after World War I (with some overlapping with the Kaywoodie from 1915 — 1917), :and collectors refer to the KB&B as a Kaywoodie transition pipe. During the early years of the 20th century a number of filter systems :were designed by the KB&B firm and incorporated into their Kaywoodie Pipes under the names of Synchro-Stem and Kaywoodie Drinkless3 :filters. During the late 1920’s and throughout the 30’s the Kaywoodie became a highly respected pipe in spite of its filter system (which :was popular among many smokers of the era) primarily due to the fine quality of the straight grain and the flame grain models. :Unfortunately, the hard-to-get-briar years of World War II marked the decline of the Kaywoodie Pipe, a plummet from which it has never :recovered as far as collectors are concerned….”

    The pre-Kaywoodie KB&B pipes were marked on the shank with a cloverleaf around KB&B. Some early Kaywoodies had this same marking on the shank, but the practice was dropped some time prior to 1936. Yello-Boles also had KBB in the leaf on the shanks, but did not have the ampersand found on Kaywoodies.

    Early (pre-1936) Kaywoodies had an “elongated” white cloverleaf on the bit, a large fitment, and four-digit shape numbers. The 1936 catalog shows a larger, “fuller” leaf, but lists two-digit shape numbers. Sometime between 1936 and 1947, the better pipes were marked on the bits with a black cloverleaf in a white circle. The white cloverleaf continued on the lesser pipes. However, this was not a consistent convention, as pipes of the same grade could have either type of leaf.

    The S.M. Frank Co. now owns the Kaywoodie name, but no longer makes pipes. However, Italian made “drugstore” grade Kaywoodies are still being marketed in this country. These Italian-made Kaywoodies have a “white­outline” cloverleaf logo.

    Pipedia Editor’s Note: Thankfully, Kaywoodies are again being made in the U.S. ”

    (https://pipedia.org/wiki/Collector%27s_Guide_to_Kaywoodie_Pipes#A_Partial_Chronology_of_Kaywoodie_Grades,_Shapes_and_Prices_(1936_-_1969))

    The following discusses the logos seen on this Matched Grain Kaywoodie:

    “Some of the pre-1936 Kaywoodies were stamped (on the shank) with a cloverleaf around KBB. Sometime between 1936 and 1947, the better pipes were marked with a black cloverleaf inside a white dot. However, because many of the pipes in the 1968-69 catalog still show this type of logo, the black-in-white logo merely indicates a “post 1936” vintage.” (https://pipedia.org/wiki/Collector%27s_Guide_to_Kaywoodie_Pipes#A_Partial_Chronology_of_Kaywoodie_Grades,_Shapes_and_Prices_(1936_-_1969))

    The Kaywoodie shape 10 has remained very consistent in catalogs since if first appeared in the 1936 catalog as appears from the Collector’s Guide yo Kaywoodie Pipes:

    “1936 Kaywoodie Shape Numbers and Descriptions

    Shape Number and Description

    • 10 — Curved Medium Billiard” 

    “1947 Kaywoodie Shape Numbers and Descriptions

    • 10 — Medium Billiard, Full Bent”

    “1955 Kaywoodie Shape Numbers and Descriptions

    • 10 — Medium Billiard, Full Bent”

    “1968-69 Kaywoodie Shape Numbers and Descriptions

    • 10 — Small Full Bent Billiard”

    (https://pipedia.org/wiki/Collector%27s_Guide_to_Kaywoodie_Pipes#A_Partial_Chronology_of_Kaywoodie_Grades,_Shapes_and_Prices_(1936_-_1969))

    The below Kaywoodie Lines and their dates are clipped from the Guide and are a compilation: 

    “THE 1947 KAYWOODIE LINE OF PIPES

    The Matched Grain first appears in the 1947 catalog.  According to the Collector’s Guide or Kaywoodie Pipes:  “In addition to these individual pipes, the 1947 catalog shows two- and seven-pipe matched grain sets(5). 

    • Two-Pipe Matched Grain Setb: $25.00
    • Seven-Pipe Matched Grain Setc: $125.00”

    “THE 1955 KAYWOODIE LINE OF PIPES

    The line-up of pipes in the 1955 catalog (Table 3) was more extensive than in previous years. The catalog presented an expanded line of meerschaum pipes and introduced a 4-pipe set of Matched Grain Pipes, as well as several pipes with “special features”.”

    • Matched Grain Set (4-Pipes): $50.00
    • Matched Grain Set (7-Pipes): $125.00”

    “THE 1968-69 KAYWOODIE LINE OF PIPES

    In addition to the two-, five-, and seven-pipe Matched Grain pipe sets listed in Table 4, the 1968-69 catalog introduced the Presentation Pipe. The catalog states that in “Every 8 or 10 thousand briar blocks, we come across a single piece that is as near to perfection as briar can get. This rare find is set aside and turned over to a master pipe craftsman. He lovingly sees this precious briar through each step, until it takes shape as one of the rarest pipes in the century.” The Presentation Pipe was packaged in a walnut grain, velvet lined, leather case. (See Section 3.5 for description of other Kaywoodie Presentation Pipes).”

    • Matched Grain Sets:
      • 2 Pipesa: $75.00
      • 5 Pipes: $175.00
      • 7 Pipesa: $250.00”

    “Presentation Collection. “The most illustrious collection of pipes ever assembled – the Kaywoodie Presentation Collection. It presents a set of 28 Kaywoodie Matched Grain Pipes . . . pipes as perfectly, flawlessly, magnificently matched as a string of rare Oriental pearls. Over 500,000 blocks of pristine briar must be sorted to find just one such matched collection; hence no more than 12 sets can be produced in any one year. Hand fashioned from tapered bit to burnished bowl, every pipe in this Collection becomes a prized possession. A Carved Headbriar [see note concerning “carved heads” in the discussion of Heirloom pipes, Section 3.4], a Calabash and a Meerschaum complete this Collection of 31 pipes. This precious ensemble is housed in a custom-designed walnut cabinet of distinguished elegance. It contains a tobacco humidor and a handy compartment for pipe smoking utensils. A brass plate, engraved with the recipient’s name, personalizes the presentation” (Price: $2500). The Presentation Collection did not appear in the 1955 catalog, but was apparently introduced shortly thereafter. A “brief” article in the September 17, 1956 issue of Newsweek supports this contention. The article, entitled “Pipe Dream”, contains a photo of the Presentation Collection, which is described as the “costliest pipe set ever marketed in the U.S.” (Lowndes notes that a small (undated) WWII era catalog showed the Presentation Collection in a smaller cabinet with legs that sold for $1000.)”

    (https://pipedia.org/wiki/Collector%27s_Guide_to_Kaywoodie_Pipes#A_Partial_Chronology_of_Kaywoodie_Grades,_Shapes_and_Prices_(1936_-_1969))

    From all of the above we can be assured that this pipe was indeed part of a set.  Most likely it was one of a pair of pipes made between 1947 and 1969.  Its companion piece or pieces are lost to time thus reducing the value and importance but not the beauty of the selected briar and the craftsmanship that went into this pipe.  

    The Restoration

    In the beginning there was clean denim.  Kind of a Genesis vibe to the resurrection of this lovely pipe.

    I started with the stem.  It was lightly sanded with a 600 grit sanding sponge to remove the hardened oxidation and surface grime.

    Next, the stem had a pipe cleaner inserted into the tenon to act as a hanger and it was submerged into the jar of Before and After Extra Strength Deoxidizer.  Here it sat for 4 hours.

    The stummel was exorcized of the remnant tobacco.   

    The ream team was gathered and included the PiNet, Smokingpipes Low Country reaming knife, General triangular scraper and wood dowel wrapped in 220 sandpaper.

    The reaming was quickly completed and the bowl sanded to bare briar.  This revealed no damage to the interior of the tobacco chamber.

    The rim was moistened with saliva and gently scraped with a sharp pocket knife.

    The scraped rim looked mostly free of any charring.

    I tried a scrub with 95% ethyl alcohol on a make-up pad to assess the finish on the briar.  The pad turned a yellow brown indicating that the finish was susceptible to ethyl alcohol.

    I took the stummel to the sink for a scrub with undiluted Murphy Oil Soap and a nylon scrub brush.  The soap lather turned a yellow brown color with scrubbing.  This was rinsed with warm water and the stummel dried with a cotton dish towel. 

    Back at the workbench the stummel was wiped with a make-up pad with 95% ethyl alcohol and more of the finish was removed.  The result was a finish-free stummel with lovely grain.

    Next came the shank cleaning.  This was done with folded bristle pipe cleaners and cotton swabs both dipped in the ethyl alcohol.

    I lightly topped the rim to remove the dottle knocking scars and the light charring on the rim.  220 and 400 grit sandpaper were used.

    Below you can see the rim after the topping.

    I was anxious to see the briar grain and applied a coat of Before and After Restoration Balm before I sanded or micro-meshed the briar.  I know patience is a virtue but I couldn’t wait.

    The stem was removed from the Deoxidizer solution after four hours.  It was allowed to drip a good deal of the excess solution back into the jar.

    My normal coarse shop rags were both in the laundry so an old bathroom face towel was used to buff away the remaining Deoxidizer solution.  I’ll see if the oxidized vulcanite is effective at staining white cotton face towels.  The stem on the other hand was looking much better.

    The stem was cleaned with bristle pipe cleaners and 95% ethyl alcohol.

    Make-up pads with Soft Scrub cleanser were used to further remove any remaining surface oxidation.

    The below photo shows a clean black stem with quite a bit of pitting from the deoxidizing of the vulcanite.  The stem had been oiled with mineral oil to prevent further oxidation.

    For the moment you’ve all been waiting for:  “How the heck is that stem going to be salvaged?”  My imagined plan was to file immediately behind the button and glue two brass pins across the gap.  These pins would provide a scaffold for the building up of cyanoacrylate (CA, super glue) and black JB Weld Epoxy.  The pins would be completely encased in CA and Epoxy and not be seen while providing rigidity for any future chomping.  The thickened rebuilt zone would be the “new button”  The old button end would be filed off, shortening the stem by a couple of millimeters.  This plan worked brilliantly in my damaged brain but how would it fare in reality?  I wasn’t sure but I knew that I’d have a heck of a hard time finding a perfect replacement stem so, this seemed like  the best remedy.

    Two brass pins were measured and cut to span the gap.  The first pin was glued into place using black CA.  I allowed the CA to cure on its own and did not use a CA drying accelerator.

    I wanted to work on the stem, one side at a time and be able to access the airway to sand and smooth the airway if needed.  I made a dam from a piece of plastic lid and thickened the plastic with several layers of Scotch tape.  This would be inserted into the airway to prevent the CA and Epoxy from entering where I did not want it.

    With the dam inserted I was ready to start layering reinforcements of black CA.

    The black CA was applied using a fly tying bodkin.  Unfortunately the black CA was slightly transparent.  This is why I thought that I would also have to use the JB Weld epoxy.  Imagine the brass pin inside the new button and the old button, that you see below, as being filed off.

    Below the CA was allowed to cure and the dam removed.  Everything was going according to the plan.

    After the CA had cured I cut an emery board nail file to fit into the airway.  I used this to smooth the interior of the airway.  Below is an early photo of the smoothing.  You can see that the brass pin is completely encased in CA.

    The process was then repeated for the opposite side with the placement of the second pin.

    Black CA was used to fill around and encapsulate the brass pin.

    To build up material around the new button I used black JB Weld with the addition of very finely ground carbon powder.  I wanted to make sure that the epoxy was not even slightly transparent.  I emptied a capsule of carbon into the mortar and used the pestle to grind it into a very fine powder.

    The two part epoxy was mixed and a small amount of ground carbon powder was added.  To keep the epoxy from fouling the airway another plastic dam was used.  This time I coated the surface of the dam with Vaseline petroleum jelly to keep the epoxy from adhering to the dam.

    The JB Weld label says the product sets up in 15 minutes.  I think they meant to say 15 hours.  It does set up to the point that it stops flowing in 15 minutes but I usually give the epoxy at least 24 hours before I try to file or sand it.

    The next day, I mixed a second batch of epoxy as with the first batch.  This was applied to the bottom side of the stem.  I propped up the pipe as shown in the photo below.  

    The below photo shows how the first application of the epoxy looked after 24 hours.

    Here is the second application cured for 24 hours.

    This photo shows the two applications in profile.

    The button was filed to reshape it.  Below is the top view of the reshaping.

    The bottom view of the reshaping.

    Profile of the reshaping.

    I taped the shank off to protect it, with masking tape, then sanded the stem with a series of sanding sponges in grits 320-3500.  Between each sponge I rubbed the stem with mineral oil and wiped it with a paper towel.

    The stem was then micro-meshed with 4000-12000 pads.  Between each pad I rubbed the stem with Obsidian Oil and wiped it with a paper towel. 

    The stummel was worked with micro-mesh pads 3200-12000.  Between each pad I wiped the stummel with a make=up pad dipped in 95% ethyl alcohol.

    The pipe was taken to the buffer for several coats of carnauba wax.  The final step was to hand buff the Matched Grain with a microfiber polishing cloth.

    This beautiful Matched Grain Kaywoodie will unfortunately and most likely never again see it’s mate.  It’s beauty will have to be appreciated on it’s merits alone.  I think the pipe turned out very nicely.  The briar is exceptional with outstanding grain and free of any pits or flaws.  The stem reconstruction actually went as I imagined it would.  That comes as a welcome shock to me.  More times than not my imagined plans are dealt a rude awakening by reality.  The dimensions of this Matched Grain 10 Bent Billiard are: 

    • Length:  4.90 in./ 124.46 mm.
    • Weight:  1.28 oz./ 36.30g.
    • Bowl Height:  1.72 in./  43.69 mm.
    • Chamber Depth:  1.47 in./ 37.39 mm.
    • Chamber Diameter:  0.72 in./ 18.03 mm.
    • Outside Diameter:  1.39 in./ 35.31 mm.

    I do hope that you have found something here useful to your own pipe care, maintenance or restorations.  If you like this sort of thing, please click the like and subscribe buttons.  Thank you for reading the ramblings of an old pipe lover.

    Loading…

    Below are some photos of the finished Matched Grain 10 Bent Billiard.

  • A Sea Dog Calabash Restoration

    October 8th, 2024

    Photographed and written by

    John M. Young

    The stereotypic pipe that most people think of when envisioning Sherlock Holmes would most likely be a calabash.  The above bent beauty would likely fit that image, with its flowing curves and old fashioned mouthpiece.  Once again reality interferes with our perception, according to https://www.visitportsmouth.co.uk/conan-doyle/sherlock-holmes, who states “Our aim is to publicise the Conan Doyle Collection locally and internationally. To do this, we attend and create local events and work with other partners on projects to promote access and to the Collection.”, “It’s common to see Sherlock Holmes with a Calabash Pipe (similar to the one at the bottom), but that was a choice made for the stage. In the books Sherlock Holmes smoked briar, clay and cherrywood pipes but none were specifically explained so it is unclear exactly what he smoked.” (https://www.visitportsmouth.co.uk/conan-doyle/you-dont-know-sherlock-holmes-yet/cabinet-of-curiosities/three-pipes#:~:text=In%20the%20books%20Sherlock%20Holmes,unclear%20exactly%20what%20he%20smoked..).  Nevertheless, in the minds of the public Holmes smoked a calabash.

    This lovely Holmes stereotype was purchased from a seller in Racine, Wisconsin who was kind enough to accept my offered payment.  The pipe bears the following stamps, all on the left shank:  SEA-DOG in a flowing arched script over REGD over MADE IN FRANCE.  The Sea-Dog sports an unmarked stem with an orific button.  Below are some photos of the pipe as it appeared prior to having any work done.

    For its age, the pipe was in great condition.  The bowl had moderate cake and the rim had considerable lava deposits.  The condition of the rim remained concealed underneath the lava.  There were a few fills, dents and dings.  The stem looked remarkably free from oxidation.  This indicated that the pipe had been stored away from any light.  I was expecting a nice break from a rather difficult previous restoration.

    Background

    I will differ from the description of a Calabash shape to the experts at St. Claude, 

    “The Calabash pipe shape is one of the most sophisticated and refined shape that exists. Most of the time associated with the image of the detective Sherlock Holmes, the Calabash pipe distinguishes itself by its really pronounced bent silhouette and its imposing bowl. At the beginning, the real “gourd calabash” pipe (also called “Calebasse”), was made from an African squash, with a removable bowl made out of meerschaum (positioned against a cork joint) and an amber stem. Smokers greatly appreciate this kind of conception because the tasting experience is, according to some people, unbeatable. Indeed, the smoke arrives in mouth cooled down and dry thanks to the large settling chamber on the inside of the bowl of the pipe. This empty space allows the smoke to cool down (and therefore to get smoother) before being aspirated by the smoker. Nowadays, pipe makers create Calebass pipes from more traditional materials (like briar for the main part and acrylic for the stem). Therefore, we can find pipes essentially made with briar that copy the iconic calabash silhouette (it is the case for a lot of brands like Peterson, Ser Jacopo, Stanwell, Butz-Choquin…). More rarely, it is possible to find pipes called “reverse Calabash”. On the same principle, a huge cooling chamber will disrupt the smoke on the inside of the pipe to return it to you smooth and cooled!” (https://www.pipeshop-saintclaude.com/calabash-262)

    The term “sea-dog” obviously hails from maritime regions far from my local landlocked home of Nebraska.

    “sea-dog (n.)

    1590s, “harbor seal,” from sea + dog (n.). Also “pirate” (1650s). Meaning “old seaman, sailor who has been long afloat” is attested by 1823. In Middle English sea-hound was used of the walrus and the beaver.” (https://www.etymonline.com/word/sea-dog#:~:text=1590s%2C%20%22harbor%20seal%2C%22,the%20walrus%20and%20the%20beaver.)  Beavers on the other hand are a very familiar critter in these parts.  Now pertaining to this pipe pipe I am pretty sure that the sea-dog anime refers to the “old seaman or sailor” though I have seen rustications that reminded me of the gnawing habits of beavers. 

    This particular pipe is very likely from the following, “Sea Dog was one of many brands owned by the Oppenheimer Pipe group, apparently made in France, likely by Marechal Ruchon & Cie. as evidenced on page 34 of the Circa 1950s Oppenheimer Pipes Catalog”. (Sea-Dog – Pipedia).  The date 1950 struck me as far too recent of a date for a mouthpiece like that of the Sea-Dof in hand.  I am not familiar with orific buttons occurring after about 1920.  Further searching of pipedia.org led e to the next entry concerning Marechal Ruchon & Cie., 

    “Marechal Ruchon & Cie. was a company owned by Auguste Marechal and Ferdinand Ruchon (“& Cie” is the french equivalent of “& Co”) which owned the GBD brand from the end of the 19th century until 1902 when they sold Marechal, Ruchon & Cie. to Oppenheimer Pipe, which in turn changed the name of the company to Marechal, Ruchon & Co., Ltd.. Upon the creation of Cadogan, however, the brand was no more, remembered only in the name of the GBD Marcee pipes made until just after the Second World War.” (Marechal Ruchon & Cie. – Pipedia)

    So to cloud the history a bit further we have GBD owned by Marechal Ruchon & Cie. who then sold it to Oppenheimer in 1903.  Pipephil has a truly brain bending flowchart of the mergers and acquisitions of the Oppenheimer group throughout the early 1900s.  There appears to be a great deal of motion and changes in ownership of companies at this time.

    (http://www.pipephil.eu/logos/en/infos/connect-en.html)

    Again I return to pipedia for a synapses of some of these events,

    “Cadogan Investments Limited is a subsidiary of A. Oppenheimer & Co. Limited. It was formed by Oppenheimer Pipe in 1920 as a holding company for its many recent acquisitions, including BBB, Loewe & Co., two pipe factories in Saint-Claude and others. It continued to acquire pipe brands and makers for decades, adding GBD and others to their marquee.

    Both companies are currently located at 20 Vanguard Way, Shoeburyness, Essex, SS3 9RA. A storefront operates out of the same location selling pipes and smokers accessories under the name Cadogan Gifts, and also sells a wide variety of other items. Cadogan currently holds, among others, the trademarks for Dr. Plumb’s, Irwin’s, Comoy’s, BBB, GBD, Loewe & Co., Medico, Orlik, and Ropp.” (Cadogan – Pipedia)

    That puts this pipe as made in France prior to the demise of Marechal, Ruchon & Co., Ltd. in 1920.  This is supported by the button type, orific.  I am not familiar with buttons of this type in pipes made after the early 1920s.

    The Restoration

    I was hoping that the restoration would be far less confusing than the above company lineage.

    For some reason I began cleaning out the stem of the Sea-Dog.  This was done with 95% ethyl alcohol and bristle pipe cleaners.  The stem was remarkably clean inside, a nice surprise.

    The reaming gear was gathered.

    The PipNet was once again the workhorse of the process.  The scrapers were used for the finishing touches then the chamber was sanded with 320 sandpaper wrapped around a wood dowel.  No scorching nor heat damage was observed.

    The rim was a mess with lave deposits.  This was softened with saliva then scraped using a sharp pocket knife.  I realize sharp can be a subjective term so, let me explain.  My high school dropout father worked his way through college, after a stint in the Army, a GED (general education diploma) and the G.I. Bill, at a packing plant in Waterloo, Iowa.  There, he was a ham cutter.  Needless to say, every knife in our house was very sharp.  I was taught at an early age how to sharpen and maintain a sharp knife and have not been without one in my pocket since I was 5 years old.  By the way, dad ended up with a PhD and not in knife sharpening.

    How the rim looked after the scraping.

    Next was a scrub with undiluted Murphy Oil Soap and a nylon scrub brush.  The decades of grime and soap were rinsed away with warm water and stummel dried with a cotton hand towel. 

    The shank cleaning was carried out next in hopes that water from the rinse would have slightly softened the yuck (the technical term for smoking residue in an airway) within.  Apparently a little Peterson Premiere 51 needed to photobomb this shot or it was used to prop up the Sea-Dog and its crazy bendy shape.  The shank of this bent beauty proved to be not too dirty, slightly worse than the stem but still surprisingly clean.  The curves made the junction with the tobacco chamber a little challenging with very short scrub strokes with pipe cleaners.

    The stummel was wiped off with 95% ethyl alcohol on a make-up pad and the fills, of which there were many, were picked clean of their old fill material.

    In the photo below you can see a large flake of the old fill material which was picked from the fill on the shank.  .

    The photo attempts to show the inner rim damage from doddle knocking or cage fighting medieval armored combatants.

    Taking a break from the sitting and picking led me to submerge the stem in a bath of Before and After Extra Strength Deoxidizer.    The pipe cleaner inserted into the tenon acted as a hanger.

    Returning to the workbench the process of filling all of those recently excavated fills resumed using brown cyanoacrylate (CA, super glue) and in most cases CA and briar dust.  The fill on the shank proceeded without any briar dust.  When the briar dust combines with the CA it makes for a quality fill that can take years of abuse, it also cures very rapidly and allows one to keep working without the need of excessive drying or curing time.  Unfortunately, the subsequent fill is very dark and can be conspicuous.  I thought that the fill on the shank of the Sea-Dog was too large and would look awkward.  Instead, I filled the depression with brown CA and let it cure on its own.  I applied two additional coats of brown CA to fill in the voids.  Each of these took approximately 20 minutes of curing time when I was not able to do anything with the pipe.

    I thought I made the right call.  You could still see the briar grain through the CA and it appeared far more natural than a dark scab of a fill.

    The rim was kind of a mess.  There was one deep gouge, seen at the 2:00 position below, dents and dings around the inside rim and outside rim.  To keep the classic Dublin shape with nice sharp edges and a flat top, I had to do a good deal of reconstruction with CA and briar dust.  I laid down a bead of CA with the fly tying bodkin and pressed the still wet CA into the tray of briar dust.  The dust would quickly cure the CA and for a hard fill.  I would then brush the excess dust back into the tray with a brass brush.  The new fill was then topped.  The whole process was repeated until the surface was filled and smooth.

    For the fills on the sides of the stummel a similar procedure was used.  Except rather than pressing the wet CA into briar dust the dust was applied and pressed into the wet CA.

    Now comes the issue with CA and briar dust fills – they are dark in color.  On the sides they can blend in with the briar grain but on the rim they can appear as scorched charred spots and look less than appealing.

    To address this I planned to give the stummel a contrast dye using black Fiebing’s Leather Dye.  The black dye would be absorbed more into the soft grained briar and less in the harder grains.  When the surface is abraded off, either by buffing with rouge compound or sanding, the softer grains retain more black dye making the grain stand out and concealing the CA fills.  To avoid sanding the stamps and losing their detail I covered the stamp with an irregular piece of painters tape.  This is not meant to protect the stamp from sanding but to keep it from becoming dyed and then requiring buffing or sanding to remove the dye.

    Okay, maybe I felt a little bit apprehensive about dying and wanted to think about it moreso, I stalled and retrieved the stem from the deox.  Using the high tech patented Drip-Dry-O-Matic the stem was allowed to drip excess solution back into the jar.

    After dripping, the stem was hand buffed with a coarse shop rag to absorb the excess solution and to abbrade some of the loosened oxidation.

    Below you can see the oxidized rubber which came off with the rubbing.

    The tooth chatter was filed with a small flat file.

    Filing on both top and bottom was followed with sanding the 320 and 400 grit sanding sponges.  The stem was then coated with mineral oil and allied to sit while I dyed the stummel.

    My composure and confidence regained, I gathered the dye kit:  The black Fiebing’s Leather Dye, a folded pipe cleaner (applicator), a dust tape wrapped fishing bobber (Plug for keeping dye from the tobacco chamber) and a lighter.

    The stummel was dyed with the black Fiebing’s and flamed to set the dye and evaporate the alcohol solvent.  The stummel rinsed with 99% isopropyl alcohol over the sink and wiped with a paper towel then returned to the workbench.  Below, you can see how the tape kept the black dye from the stamp which kept me from having to sand the stamp area, thus preserving the stamp.

    The stummel was wiped with a make-up pad dipped in 95% ethyl alcohol to remove any remaining dye.  The stummel was then taken to the buffer and buffed with rouge compound and a flannel wheel to remove the outer layer of dyed briar.  Below you can see how the softer grained briar absorbed more black dye while the harder briar did not.

    I wanted the stummel to have a lighter shade of brown while keeping some of the darker grain so I sanded with a 400 grit sanding sponge.    That was the color I was after.

    Below you can see how the rim looked after the dye and some of the black removed.

    The stem and stummel were reunited with sanding of both pieces done together.  The sanding was done with a sequence of sanding sponges from 400-3500 grit.  Between sponges the stummel was wiped with a make-up pad moistened with ethyl alcohol while the stem was rubbed with mineral oil and wiped with a paper towel.

    The pipe was worked with micro-mesh pads in grits 4000-12000.  Again between each pad the stem and stummel were wiped as above except Obsidian Oil was used in place of mineral oil.

    The stem was coated with Before and After Restoration Balm and allowed to sit for 20 minutes.

    After 20 minutes the balm was wiped and hand buffed using an inside out athletic sock.

    I’m not sure why I did this next step, maybe because I bought the stuff and have rarely used it.  I used a gun cleaning patch to apply a very light layer of Danish Oil to the stummel.The gun cleaning patch was used because it is a lint free material.  I followed the label instructions and allowed the oil to “harden” for 9-12 hours. 

    It may not have served much purpose but it sure was pretty.

    The next morning I returned to the Sea-Dog.  I took it to the buffer and applied several coats of carnauba wax with  a flannel wheel.  The pipe was hand buffed with a microfiber polishing cloth and the final photos can speak for themselves.

    It is official, I really like the calabash shape.  There is just something about it that says, “I am how pipes should look.”  Yeah, I know they don’t talk but you know what I mean.  This Sea-Dog is a grand old testament to pipe makers’ generations lost.  The sweeping curves and graceful flow beckon me to fill the bowl, slow down, relax and enjoy a moment of contemplation.  This is called, “sitting on  your butt doing nothing” by some people.  The best part of their attitude is that there remains far more tobacco for us to enjoy.  I think this Sea-Dog restored very nicely.  The numerous fills are not too noticeable with the contrast dye.  The stem polished up beautifully and provides an excellent contrast while complimenting the briar grain.  The old fashioned orific button can interestingly be directed into one’s mouth with subtle changes to the alignment with the shank.  A slight twist can send the smoke into a new direction.  

    The dimensions of this Sea-Dog Calabash are kind of strange to measure but here they are: 

    • Length:  5.53 in./ 140,46 mm.
    • Weight:  1.53 oz./ 43.70g.
    • Bowl Height:  2.09 in./  53.09 mm.
    • Chamber Depth:  1.60 in./ 40.64 mm.
    • Chamber Diameter:  0.73 in./ 18.54 mm.
    • Outside Diameter:  1.41 in./ 35.81 mm.

    I do hope that you have found something here useful to your own pipe care, maintenance or restorations.  If you like this sort of thing, please click the like and subscribe buttons.  Thank you for reading the ramblings of an old pipe lover.

    Loading…

    Below are some photos of the finished Sea-Dog Calabash.

←Previous Page
1 … 10 11 12 13 14 … 25
Next Page→

Blog at WordPress.com.

Privacy & Cookies: This site uses cookies. By continuing to use this website, you agree to their use.
To find out more, including how to control cookies, see here: Cookie Policy
 

Loading Comments...
 

    • Subscribe Subscribed
      • NebraskaPeteGeek
      • Join 37 other subscribers
      • Already have a WordPress.com account? Log in now.
      • NebraskaPeteGeek
      • Subscribe Subscribed
      • Sign up
      • Log in
      • Report this content
      • View site in Reader
      • Manage subscriptions
      • Collapse this bar
    %d