Skip to content
    • About

NebraskaPeteGeek

  • American Pipe Makers
  • British pipe Makers
  • Danish pipe Makers
  • French Pipe Makers
  • German Pipe Makers
  • Irish Pipe Makers
  • Italian Pipe Makers
  • Others or Unknown Pipe Makers
  • Restorations
  • A Silver Mac Duff Restoration

    February 20th, 2024

    Photographed and written by 

    John M. Young

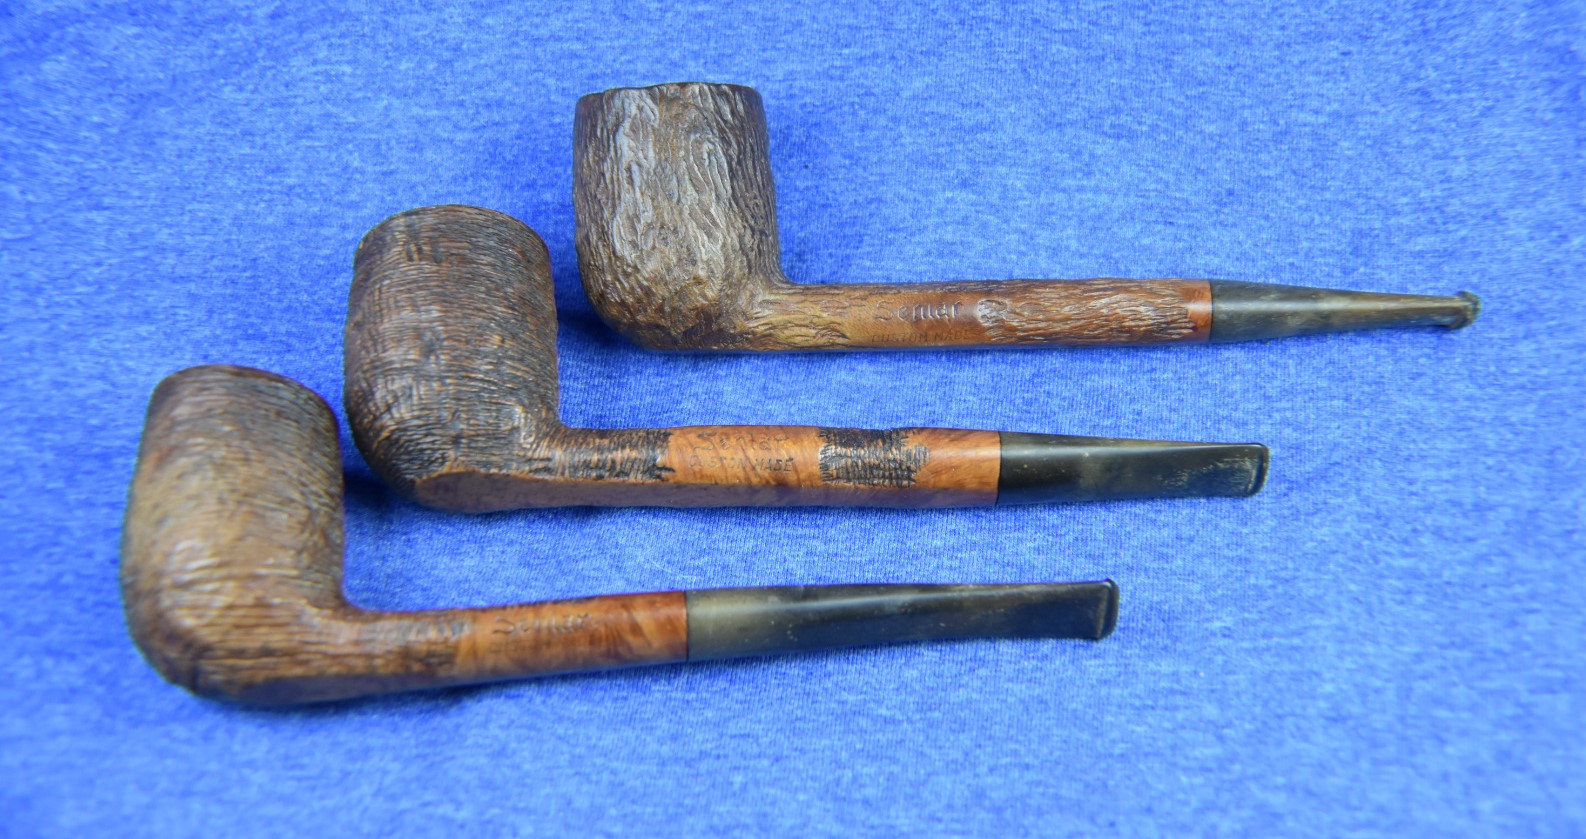
    My quest to restore an example of the four pipes from the Penn Tobacco Company coupons or certificates continues.  I took on the quest when researching the history of a Broadcaster pipe (the link will take you to that restoration).  Upon discovering that there were four total pipes named in these offers, I was intrigued.  Intrigued to the point where I wanted to restore an example of each.

    I will refer back to the Broadcaster restoration for a history of the Penn Tobacco Company and their pipe offers and include a shortened version here.  There is an interesting summary on piphil.eu regarding the Bruce Peters line:

    (http://www.pipephil.eu/logos/en/logo-b8.html#brucepeters)

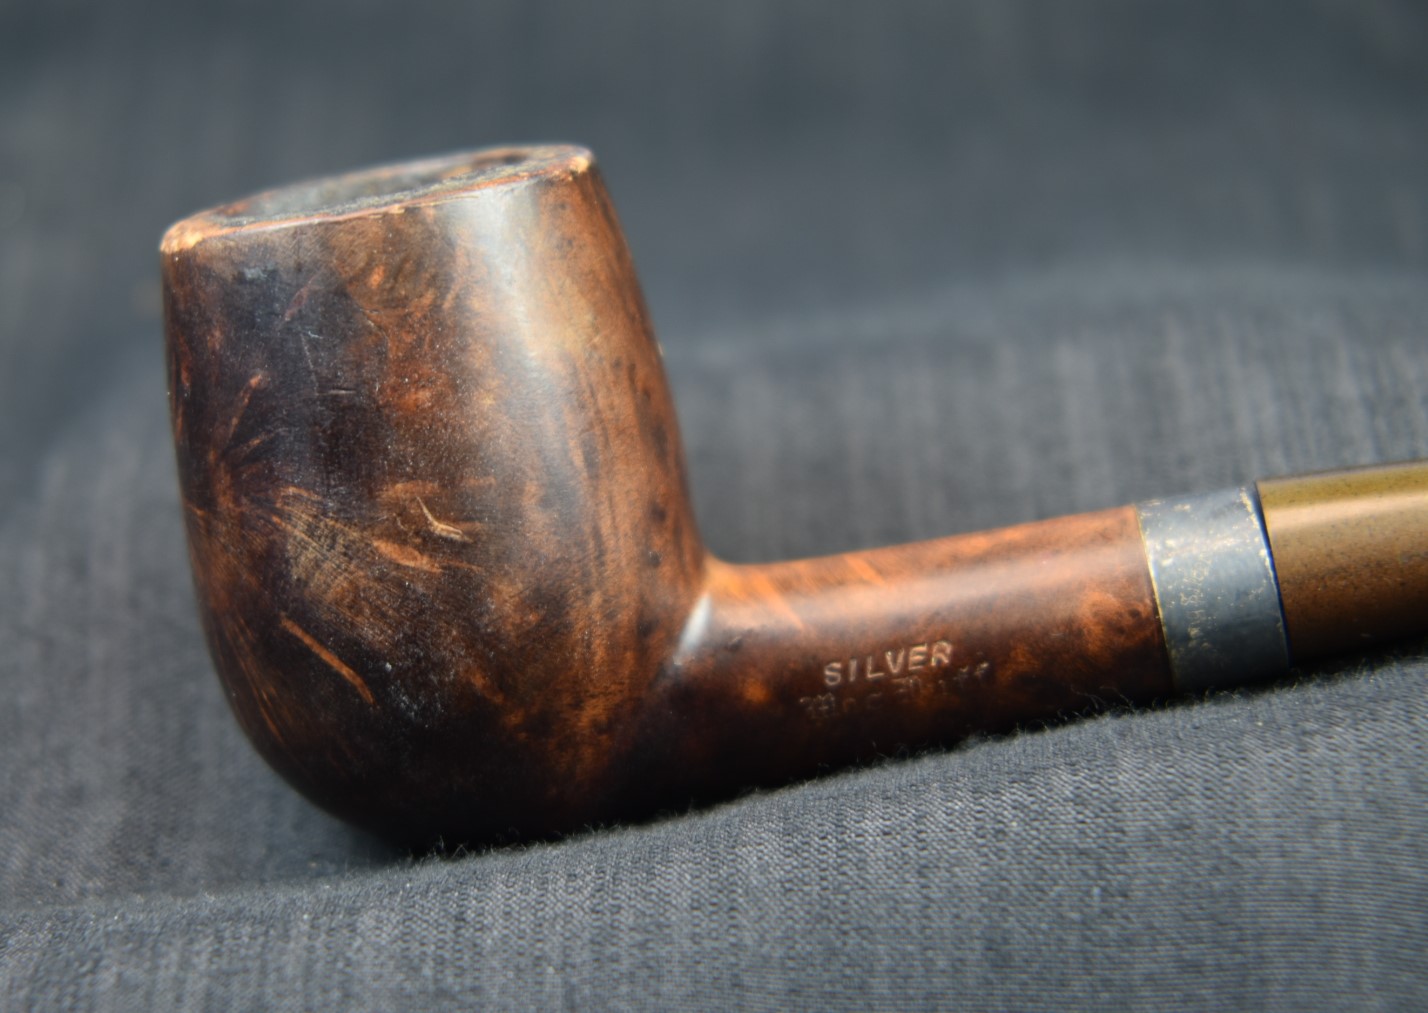
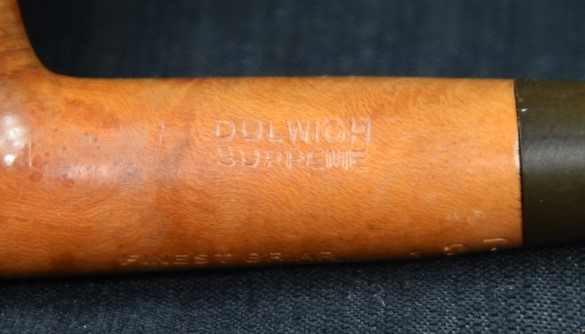
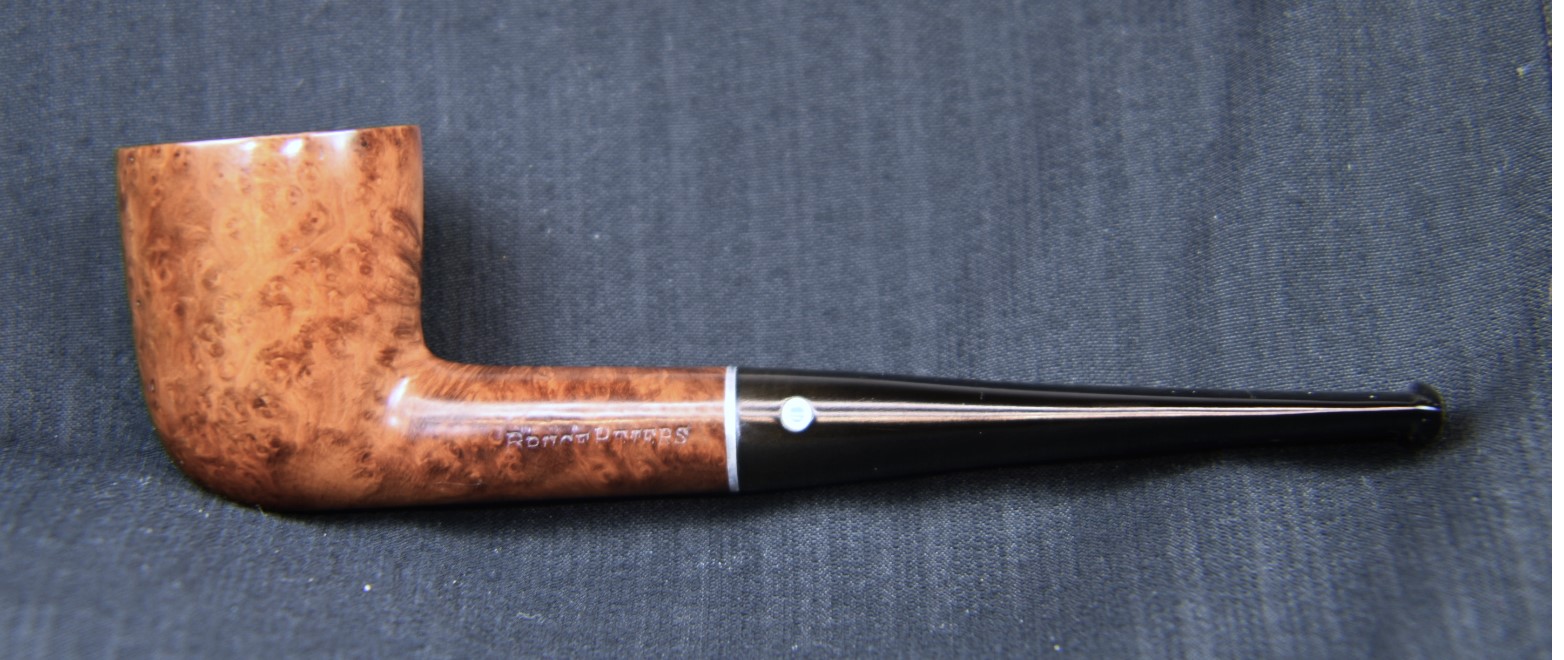
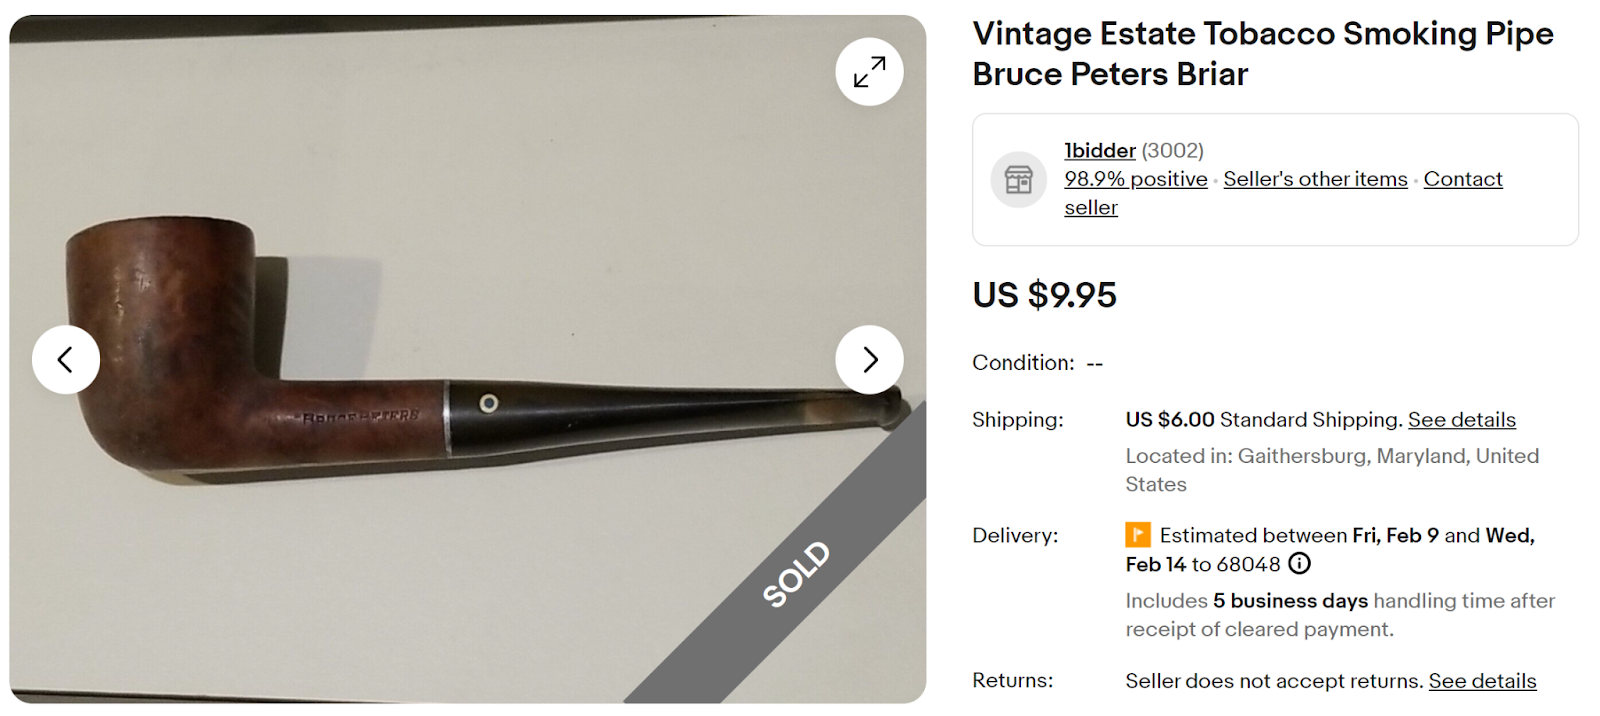
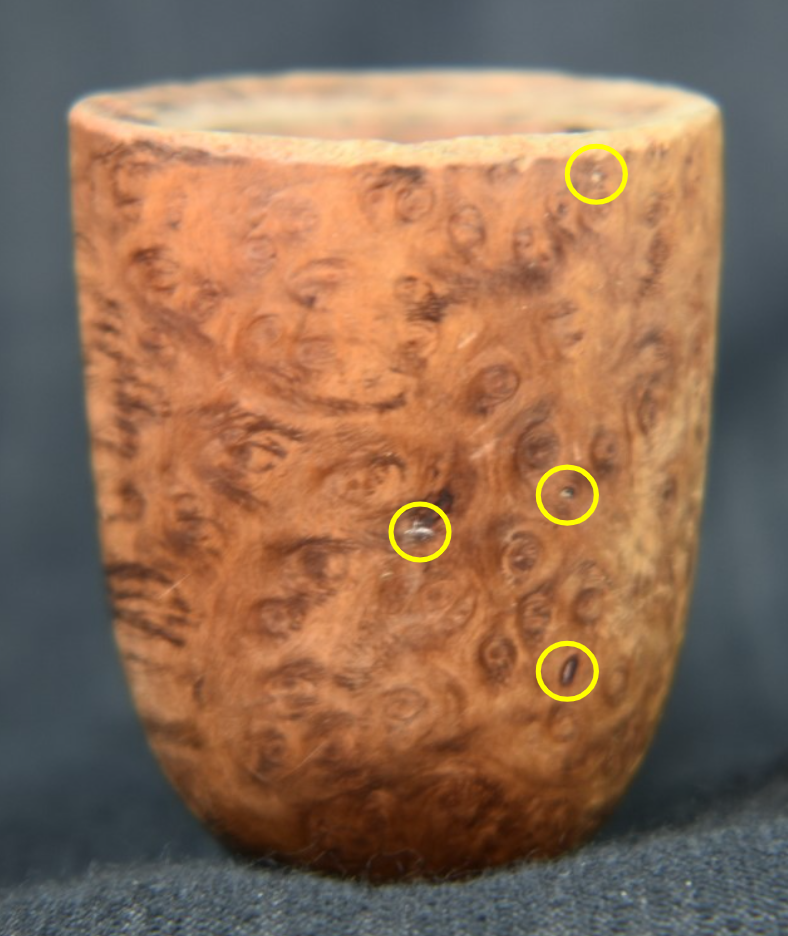
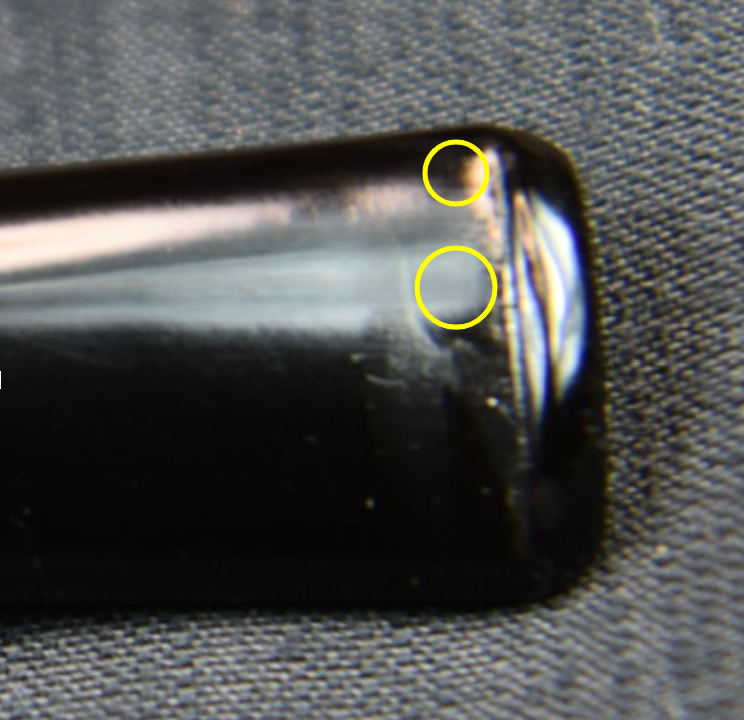
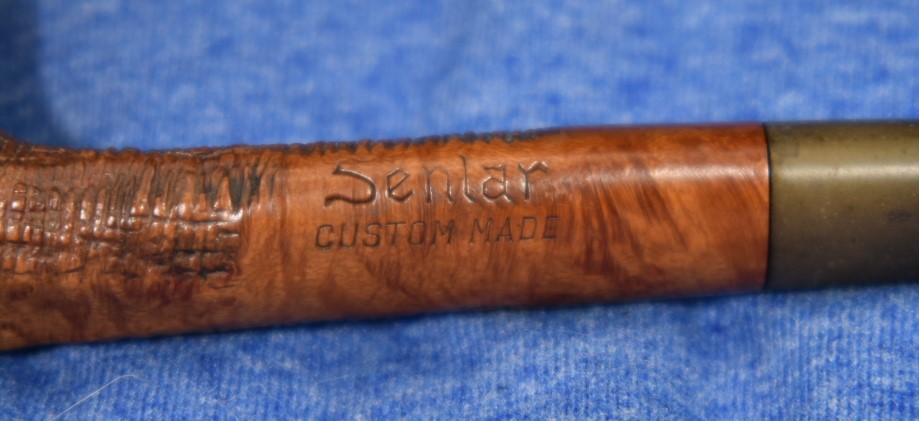
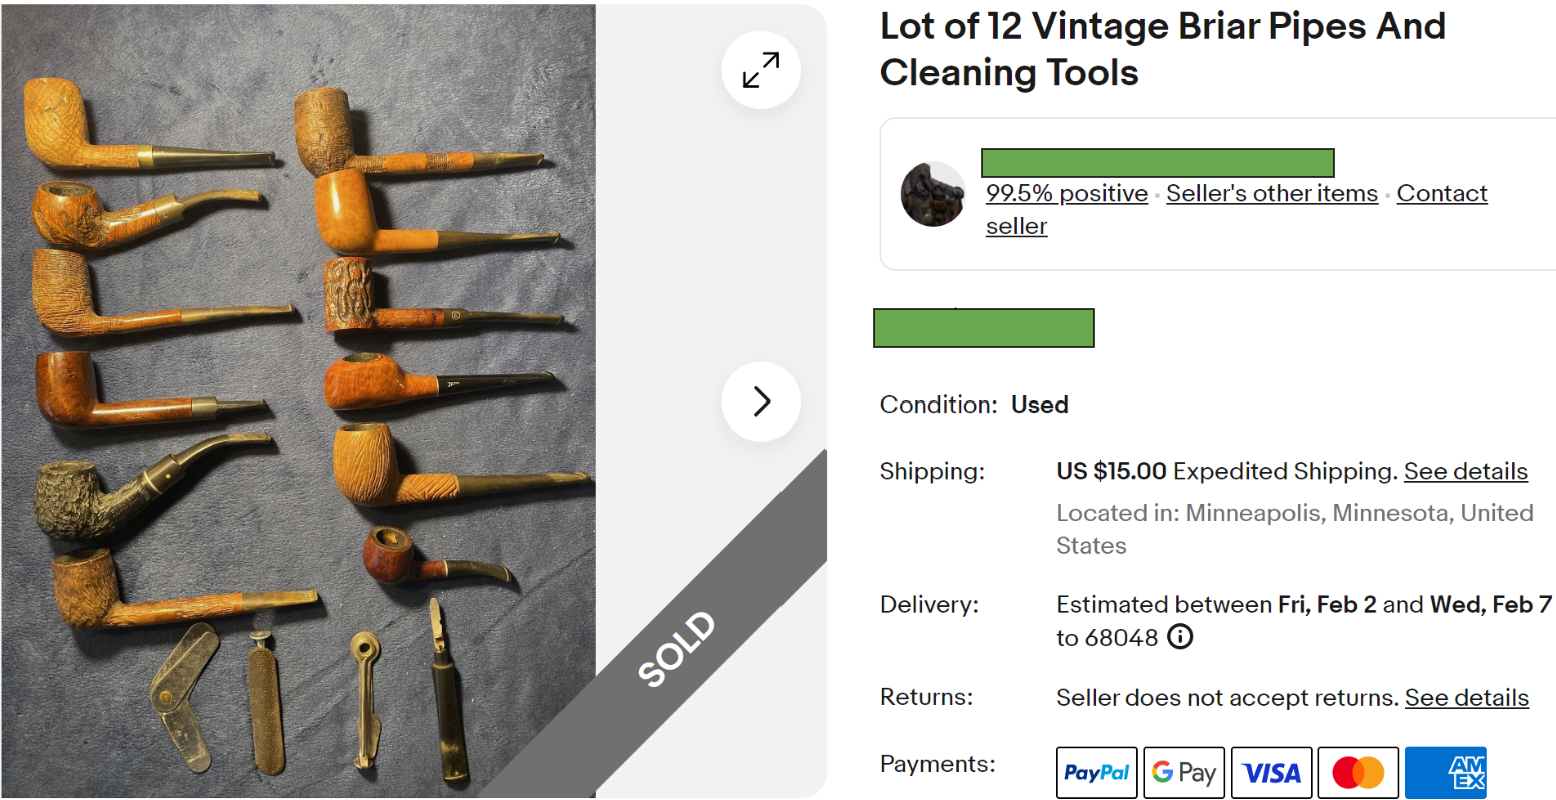
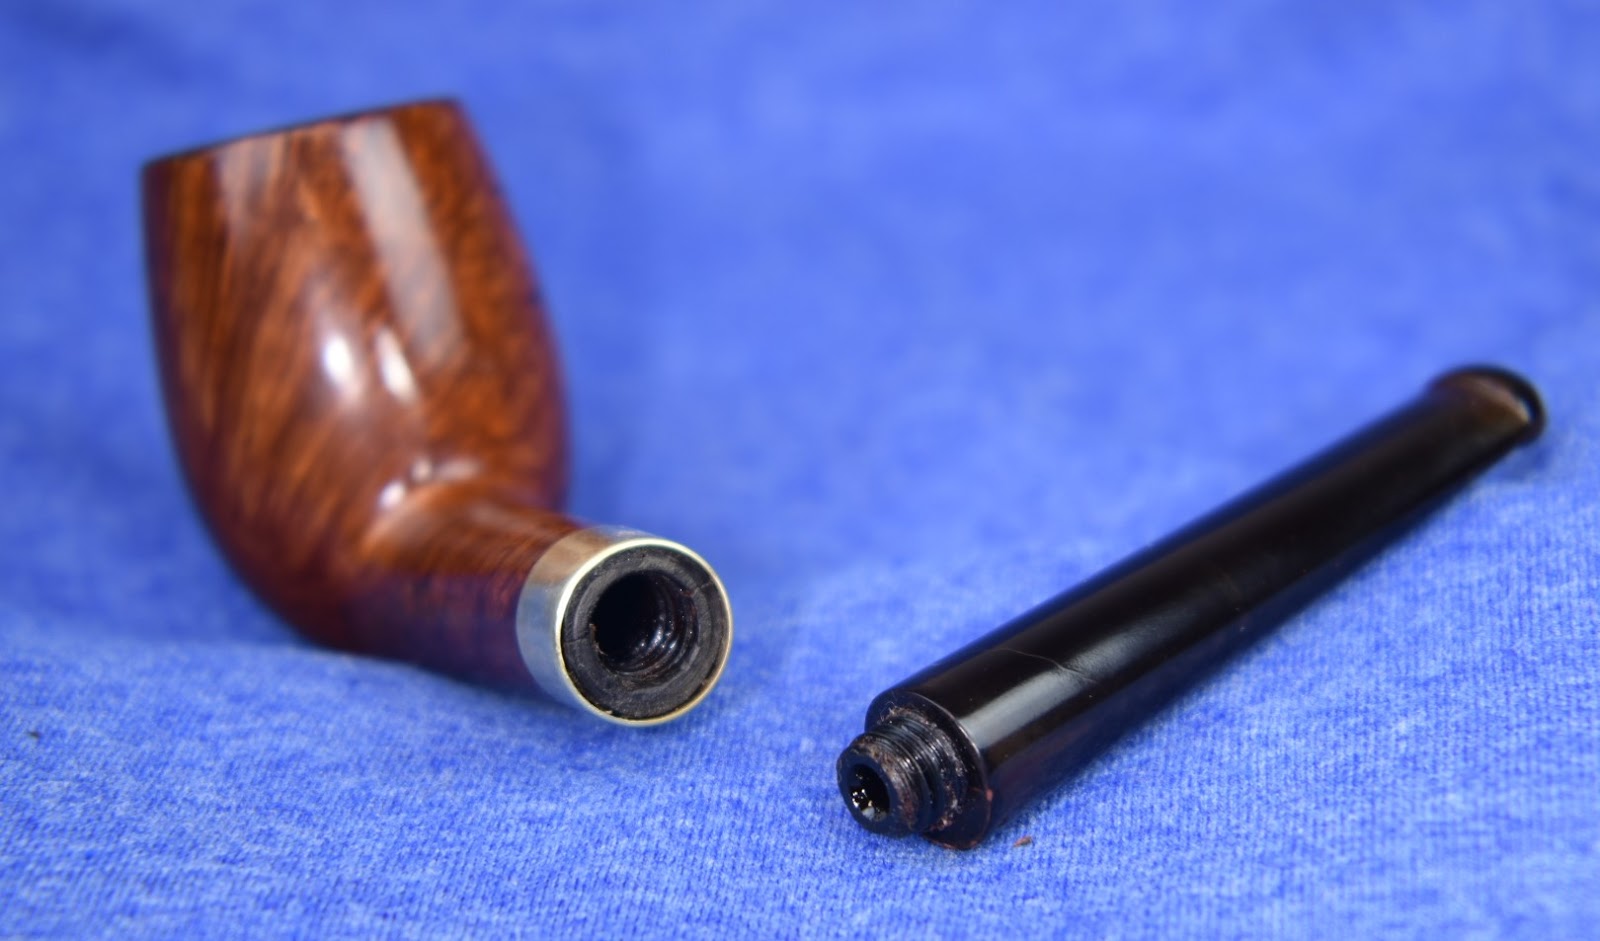
    The Broadcaster had come to me years ago as part of an estate lot.  The second pipe was a Bruce Peters, restored and published last week.  This Silver Mac Duff was discovered on eBay, offered as a lone pipe.  I had been looking for over a month for a Silver Mac Duff and this was the first that I had seen.  The photos on eBay were not bad but indicated what might be a serious problem.  The below photos were taken by the seller as part of the description of the pipe.

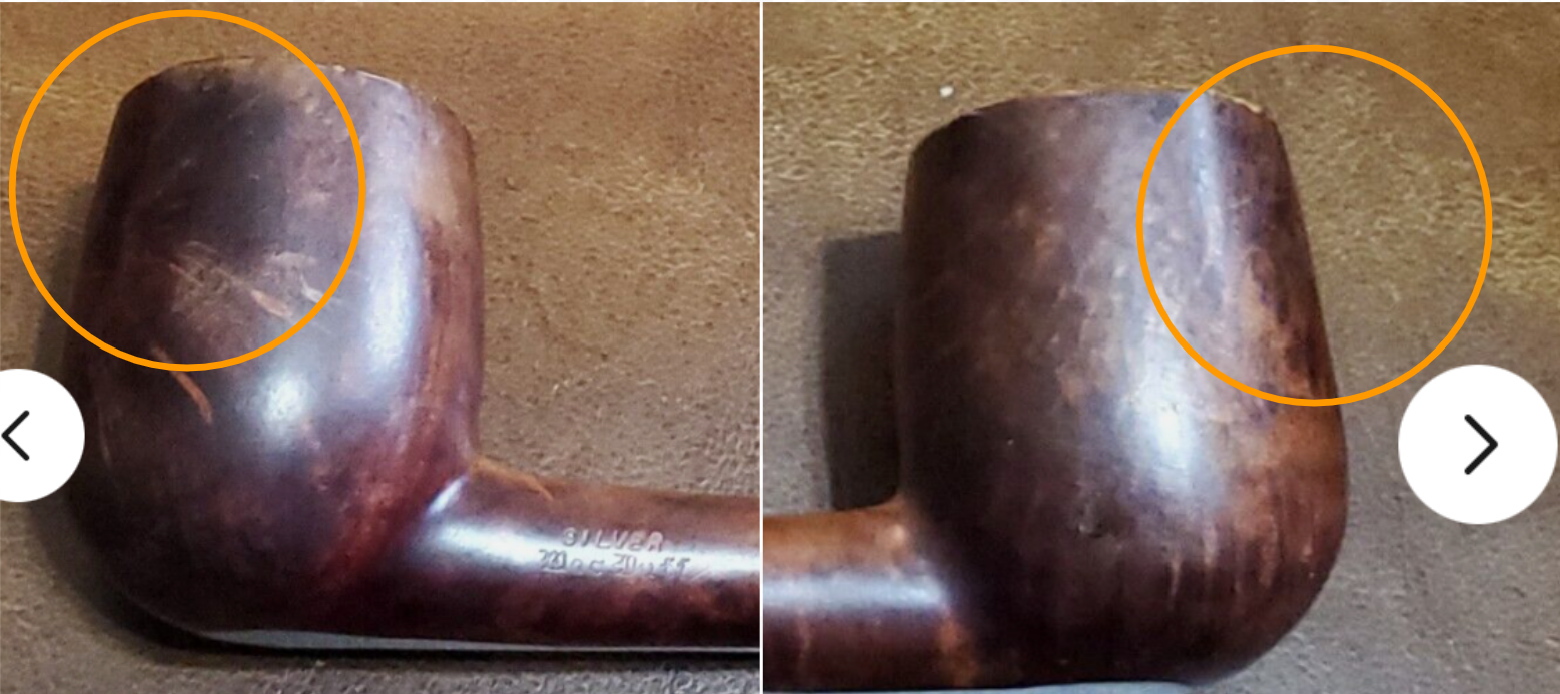
    I took screenshots of the photos and circled the area of concern.  A dark spot over an area in briar can indicate a charring of the interior of the tobacco chamber.  This can be caused by the tobacco actually burning the briar.  Typically caused by the smoker smoking the tobacco too fast or by smoking in windy conditions.  I messaged the seller, showed him the screenshots with circles and asked if they could provide additional photos.  They were kind enough to do so.  The newer photos did not completely erase my fears but helped lessen them enough to purchase the Silver Mac Duff.  

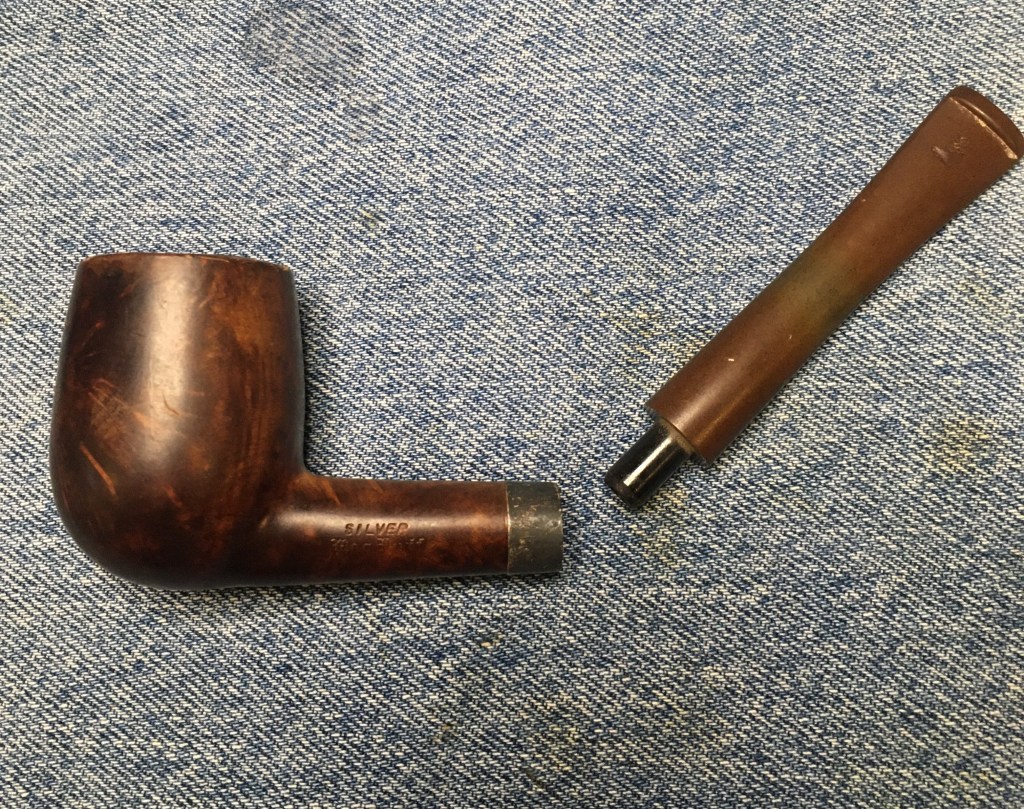
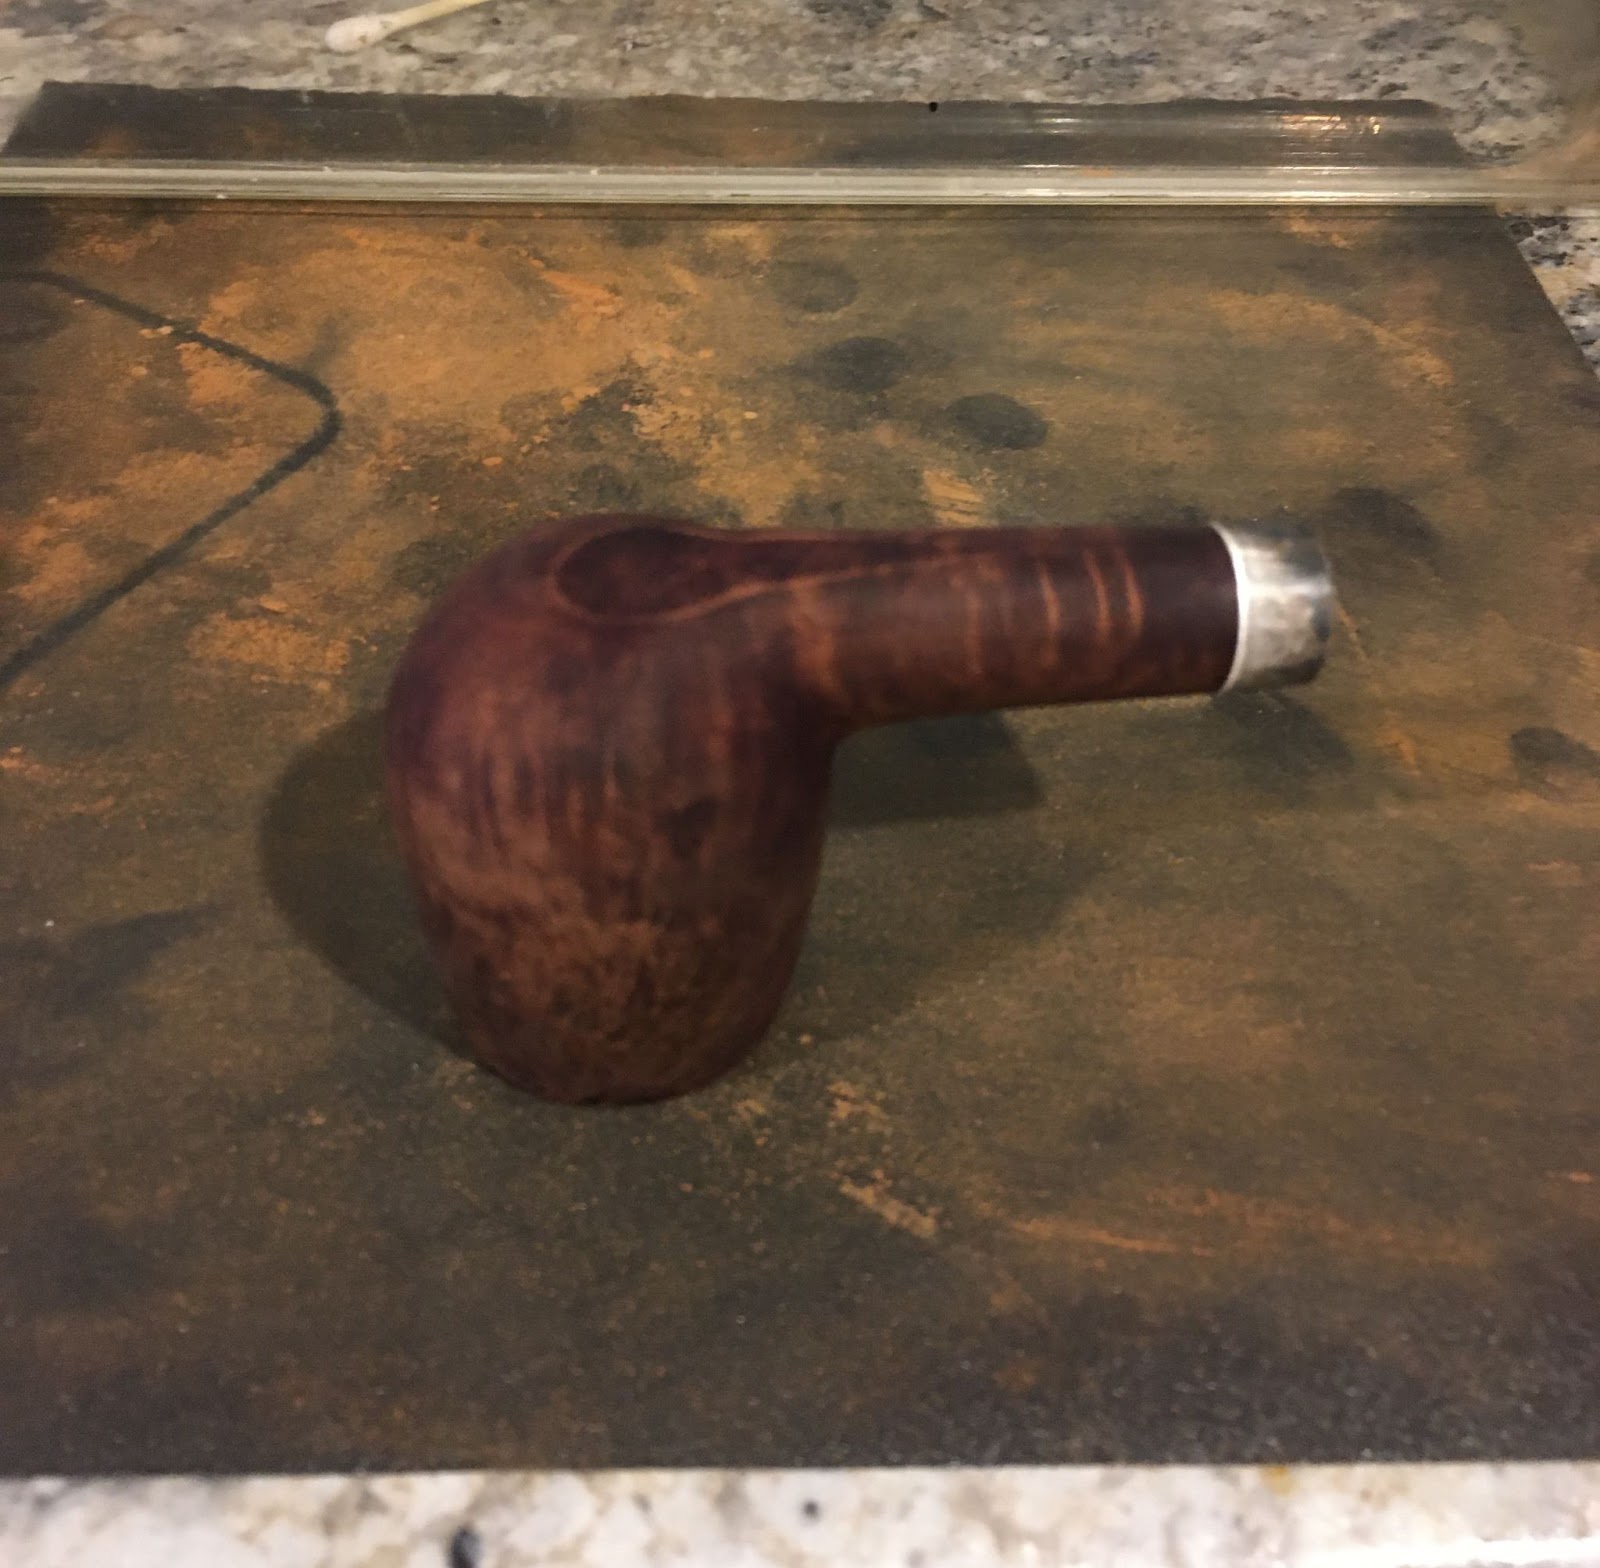
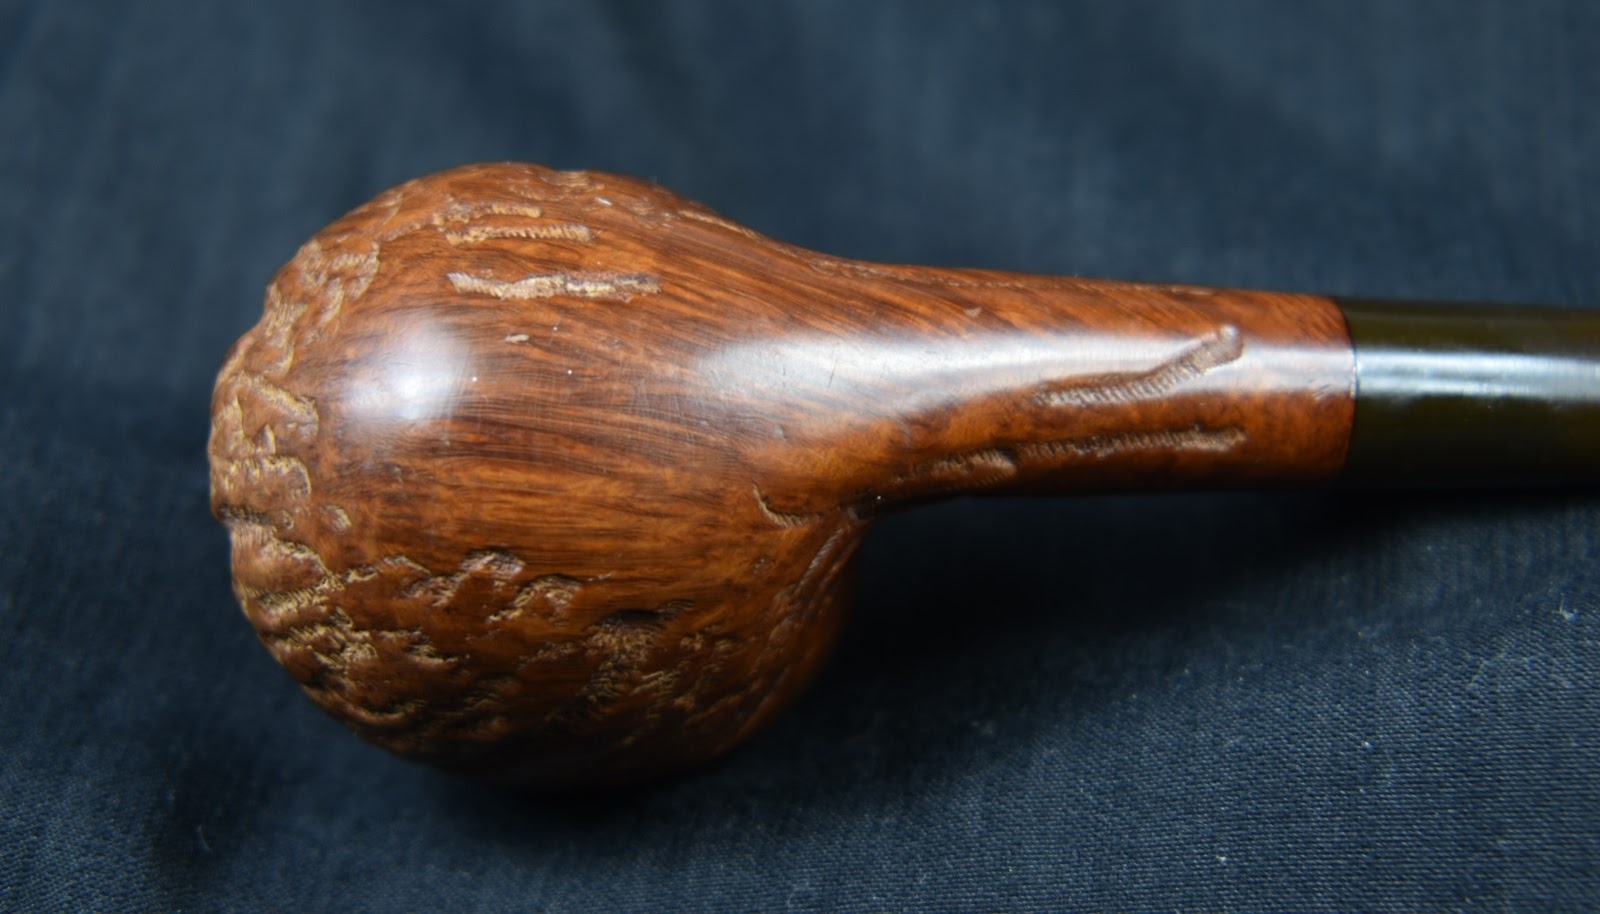
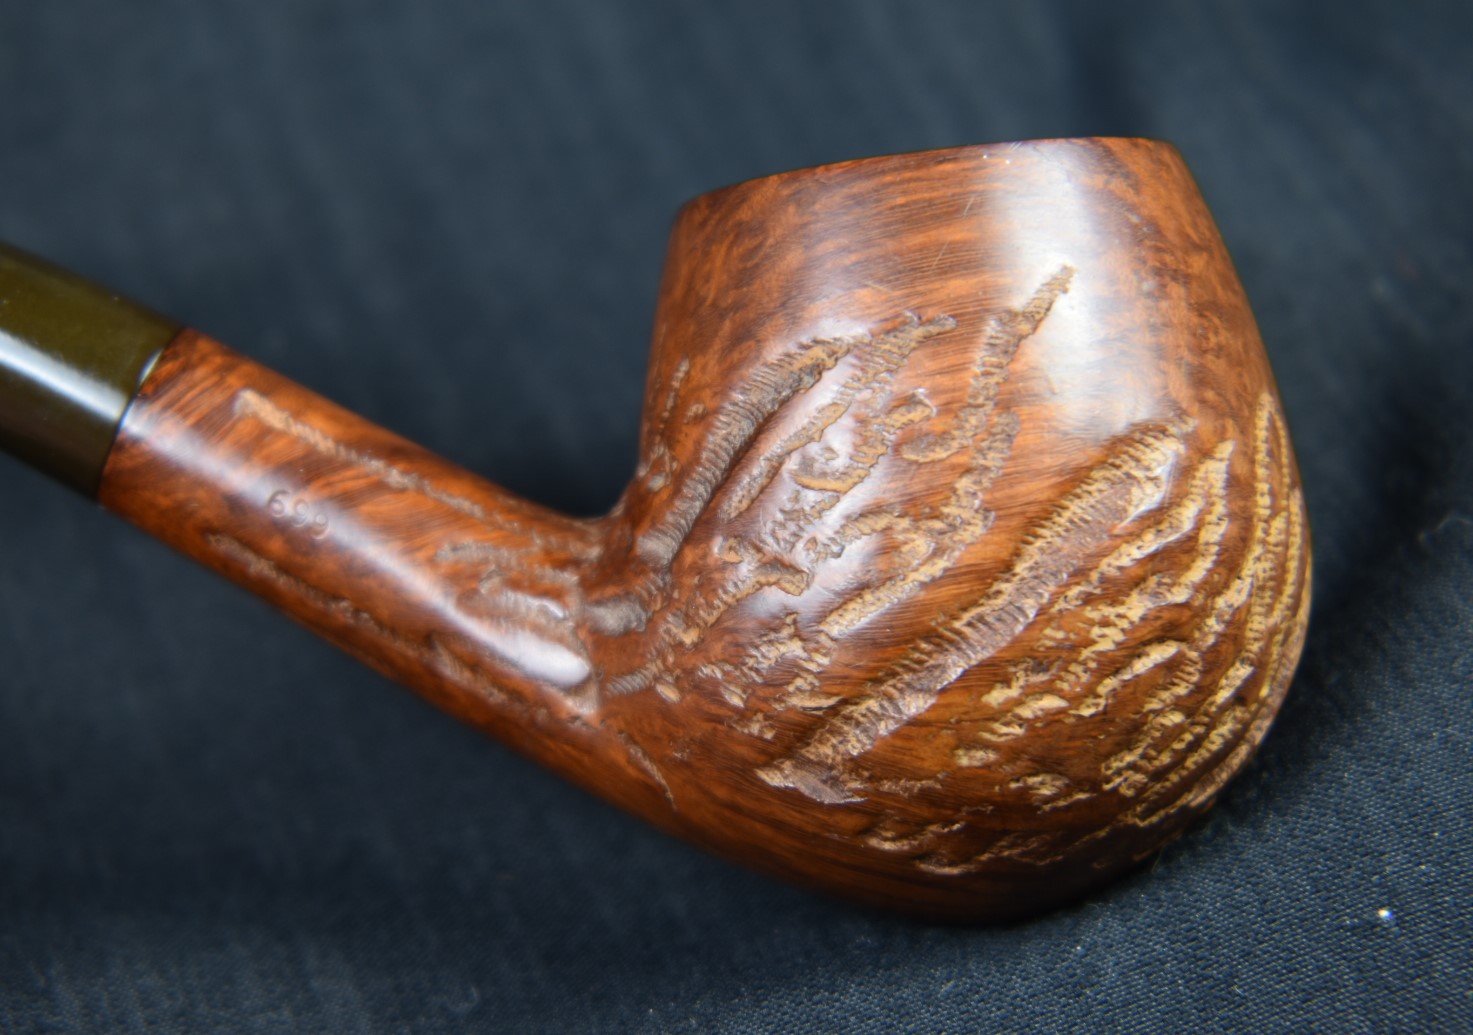
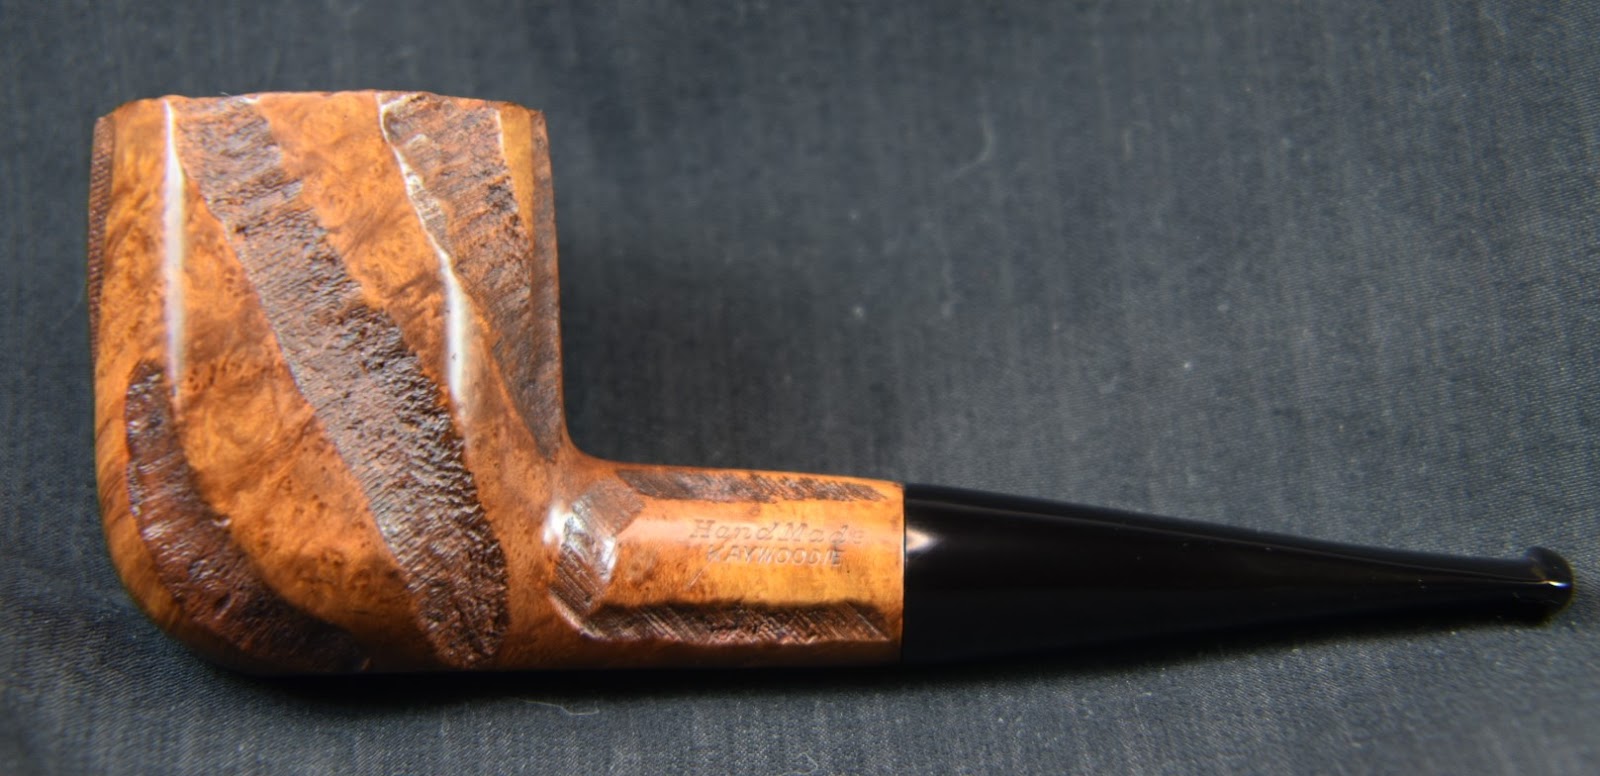
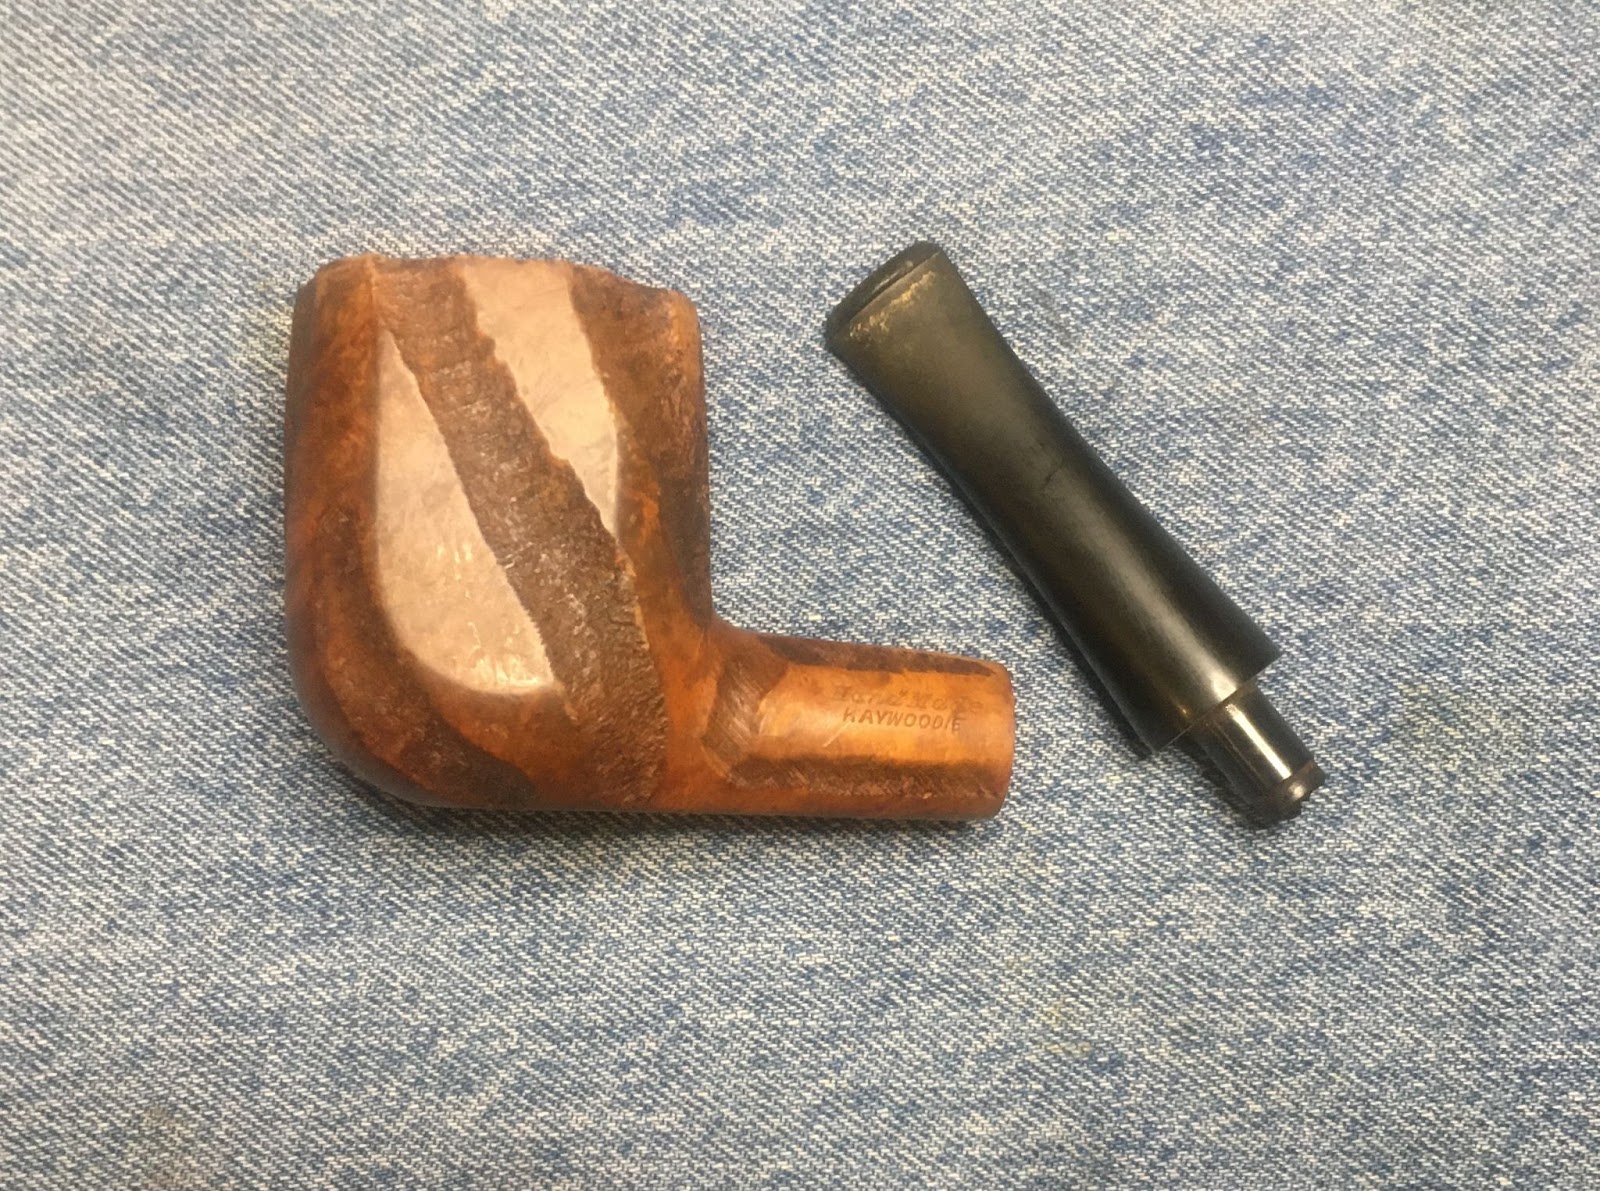
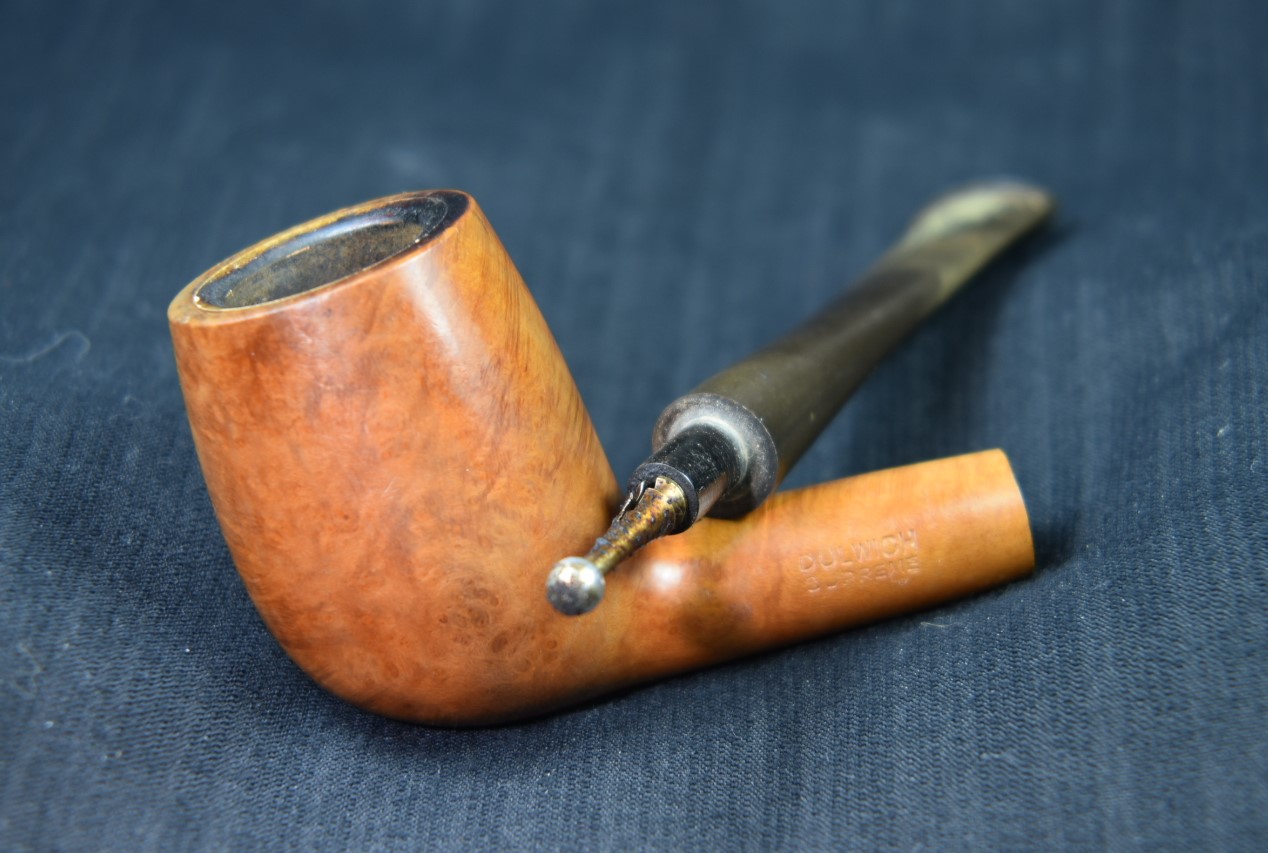
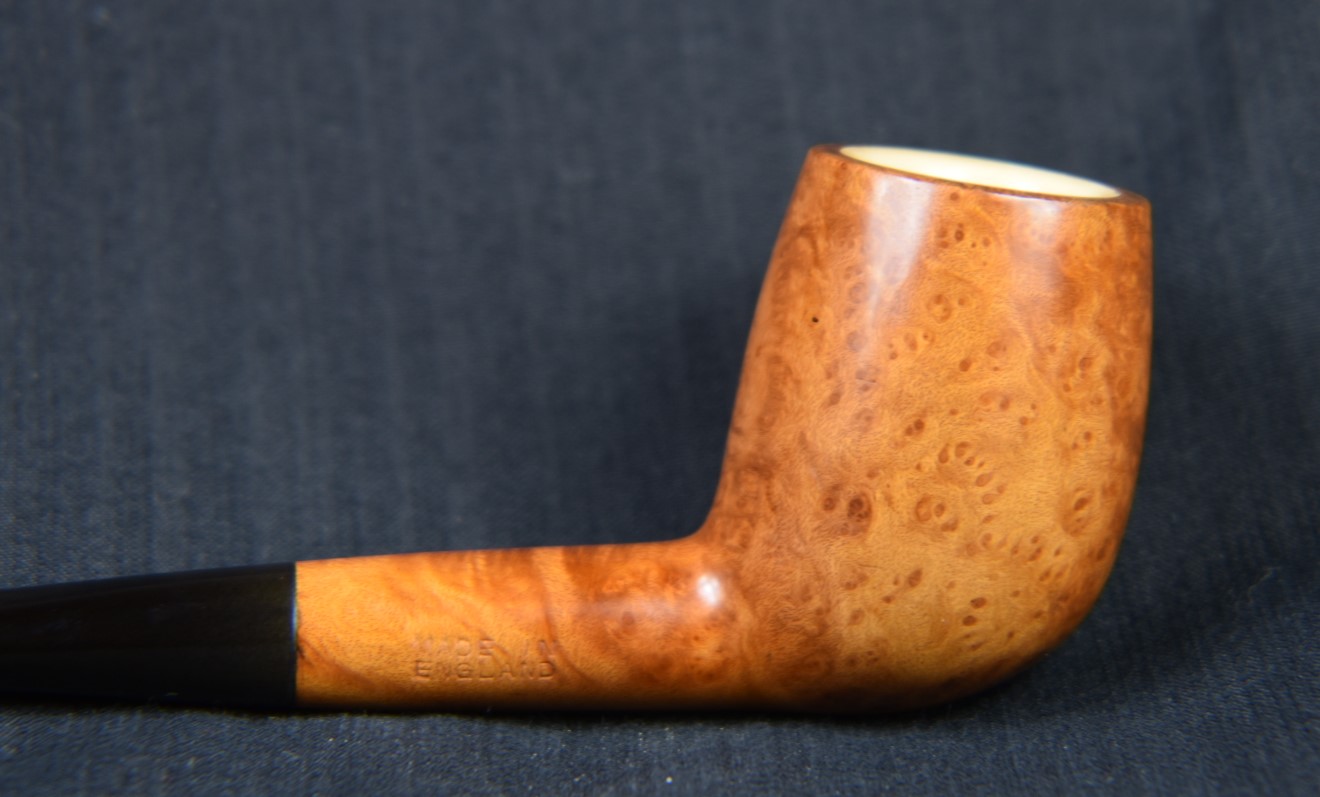
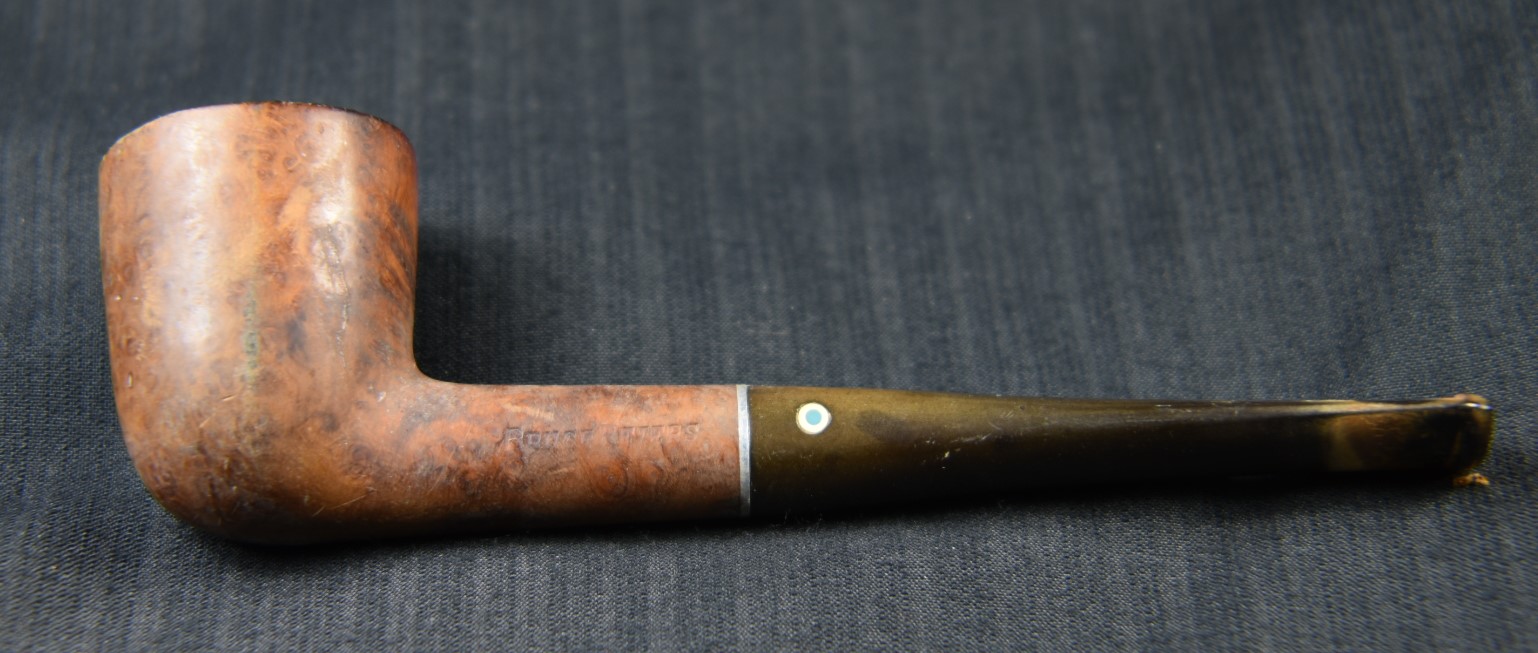
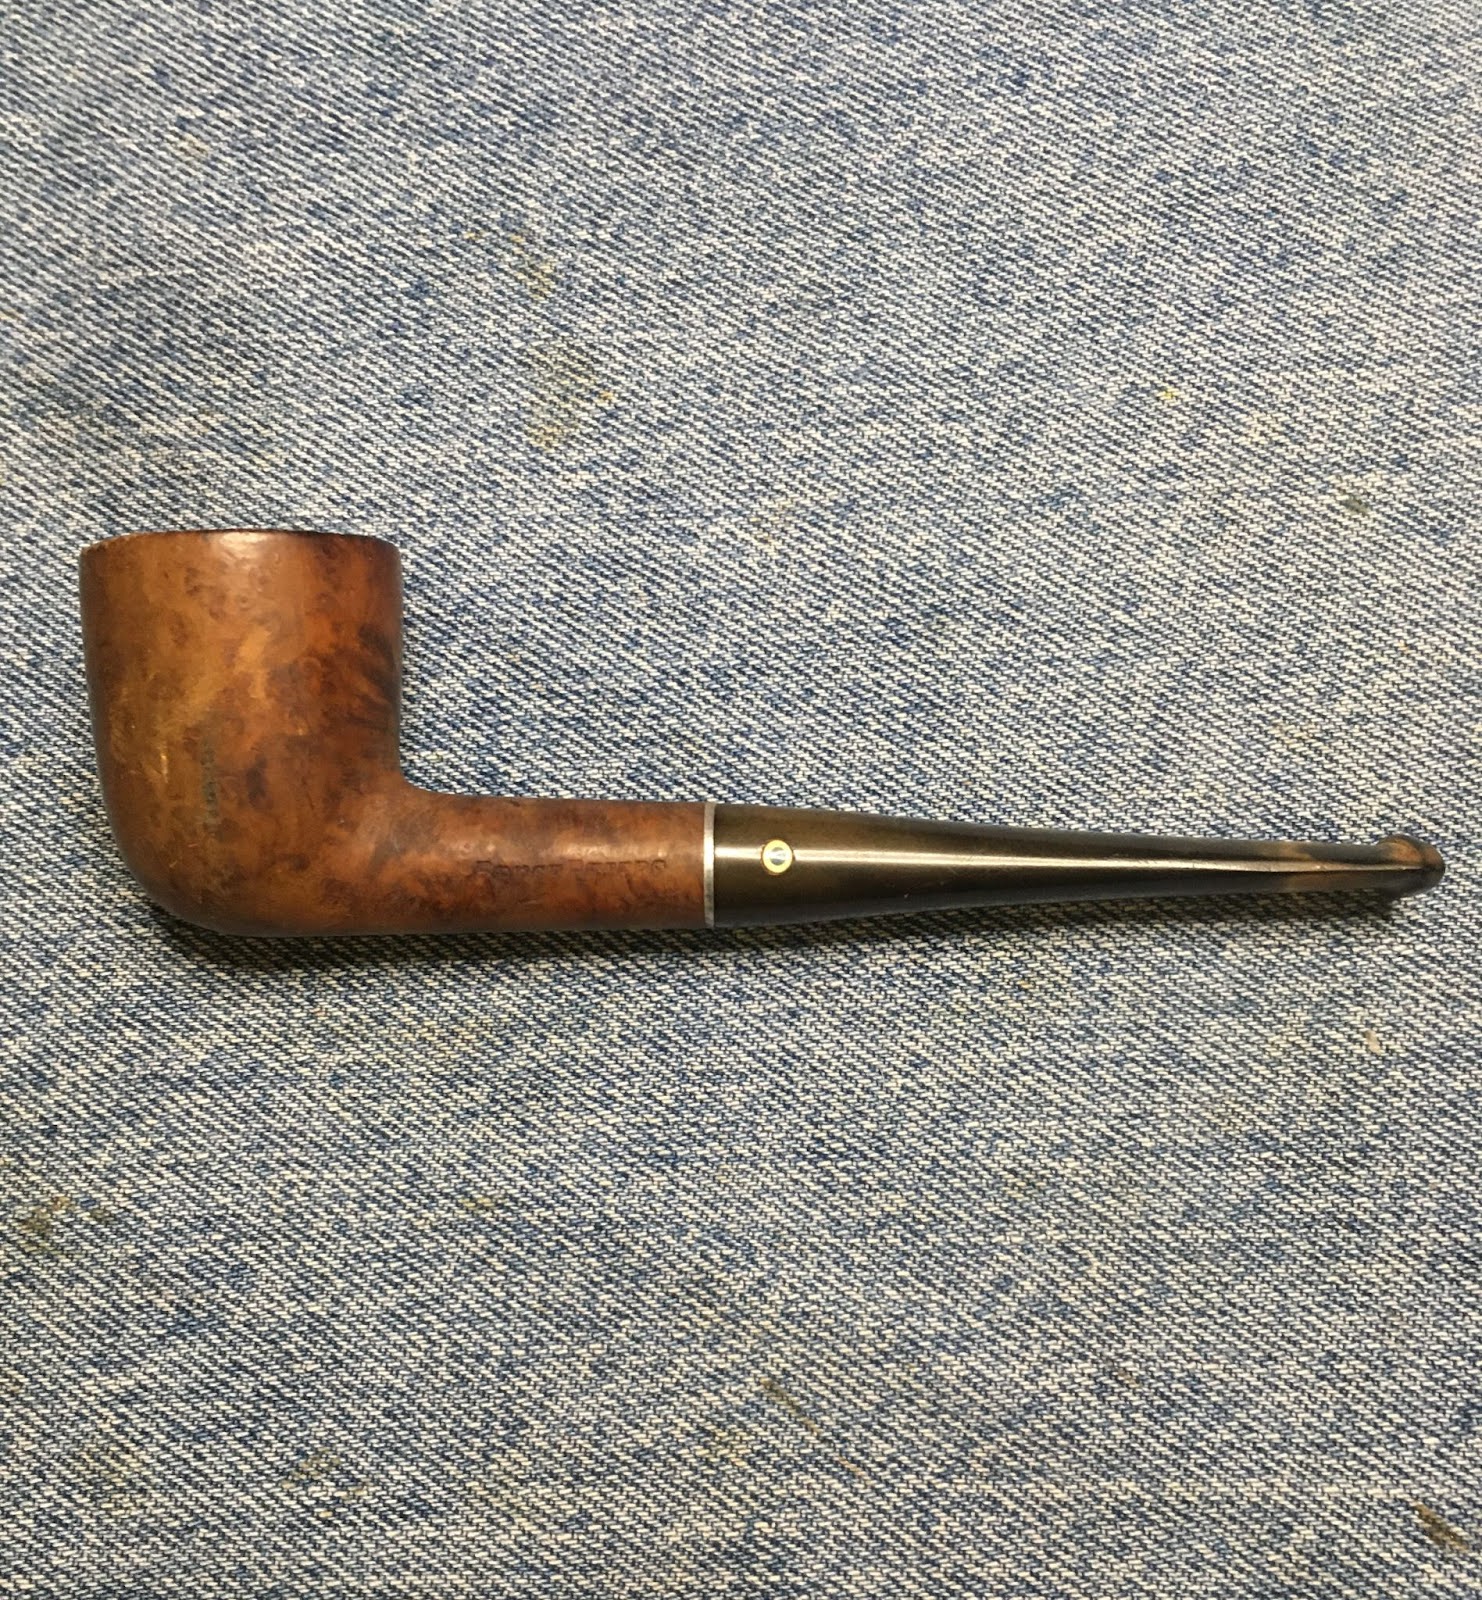
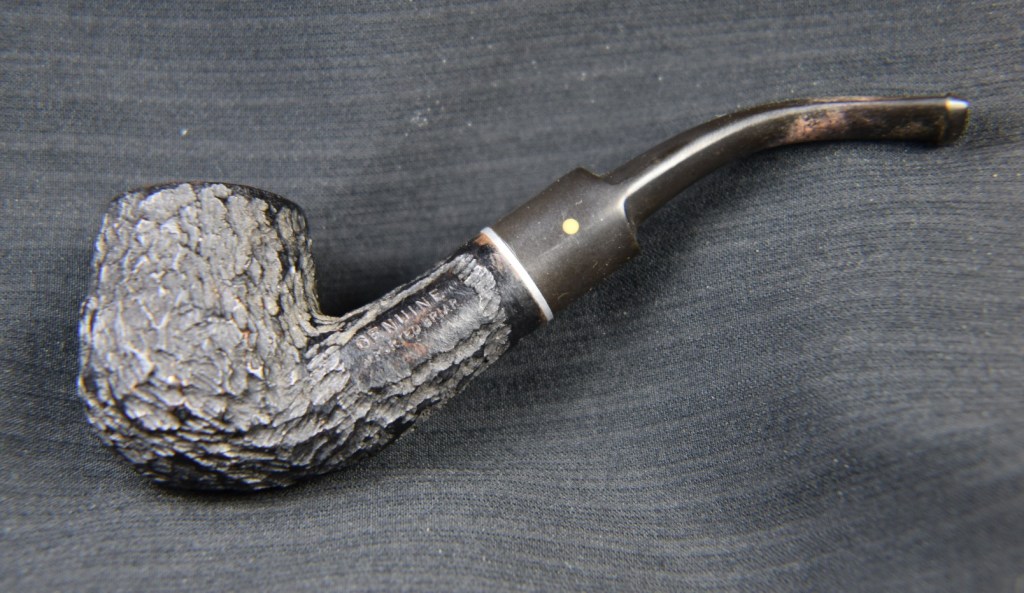
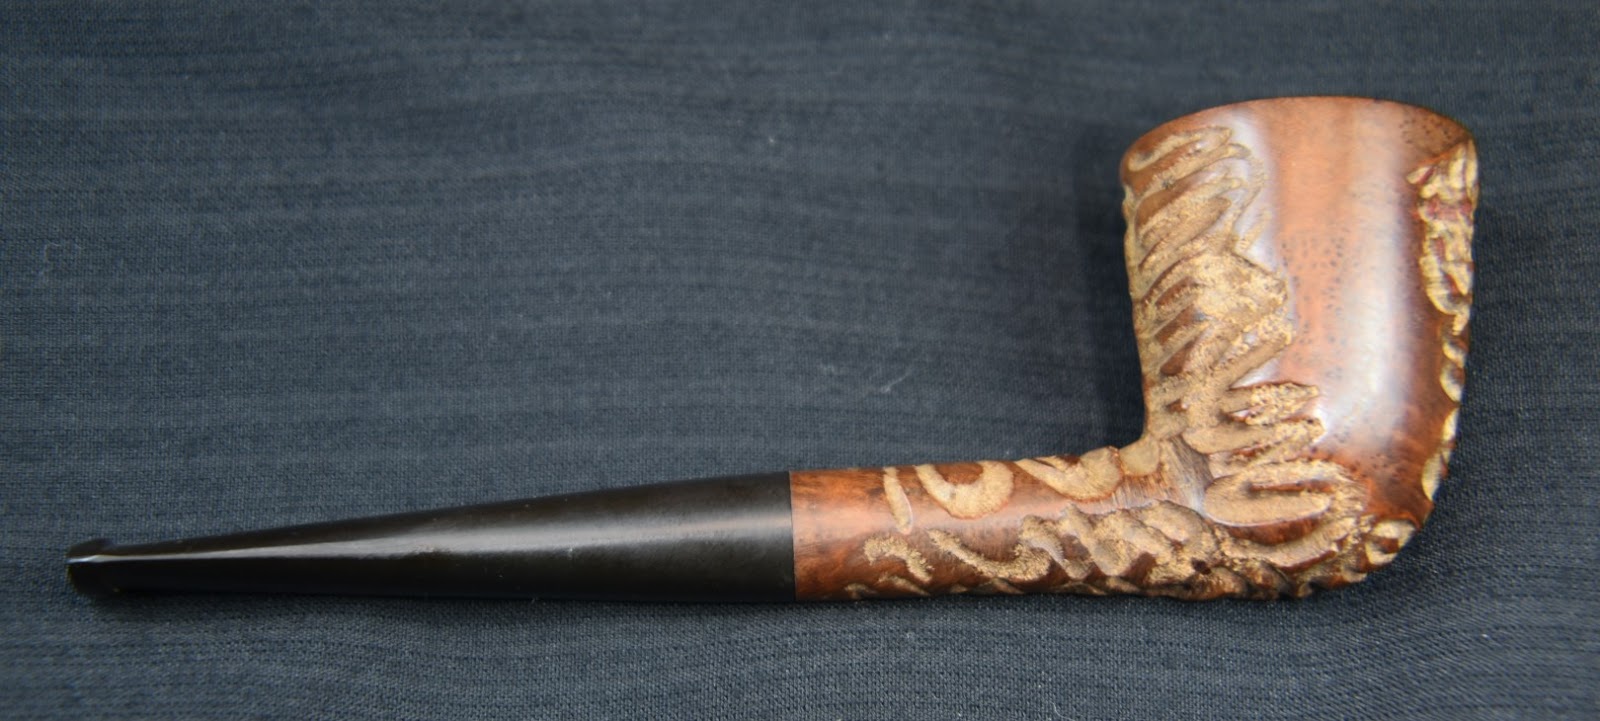
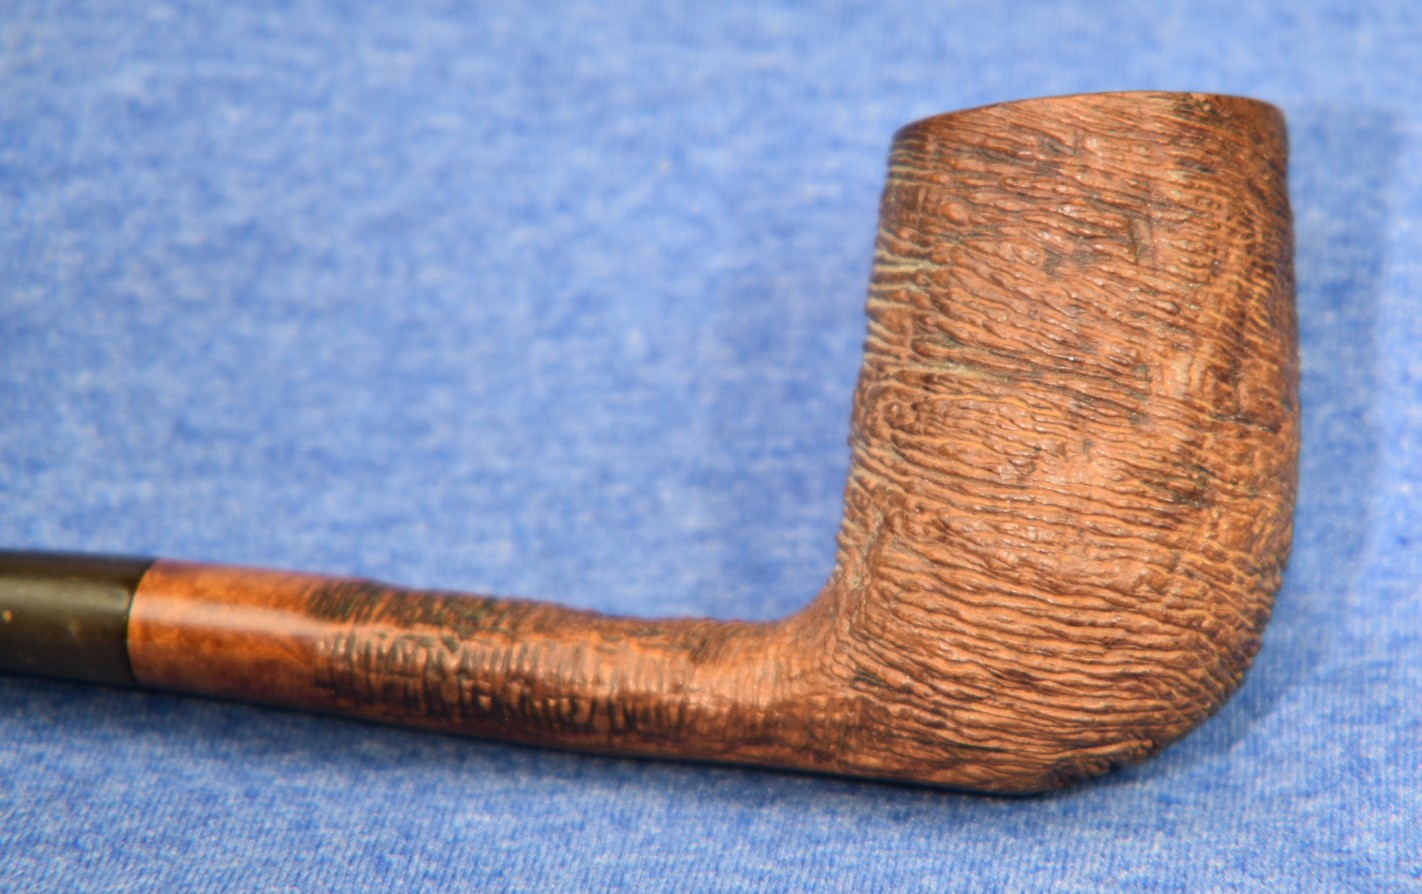
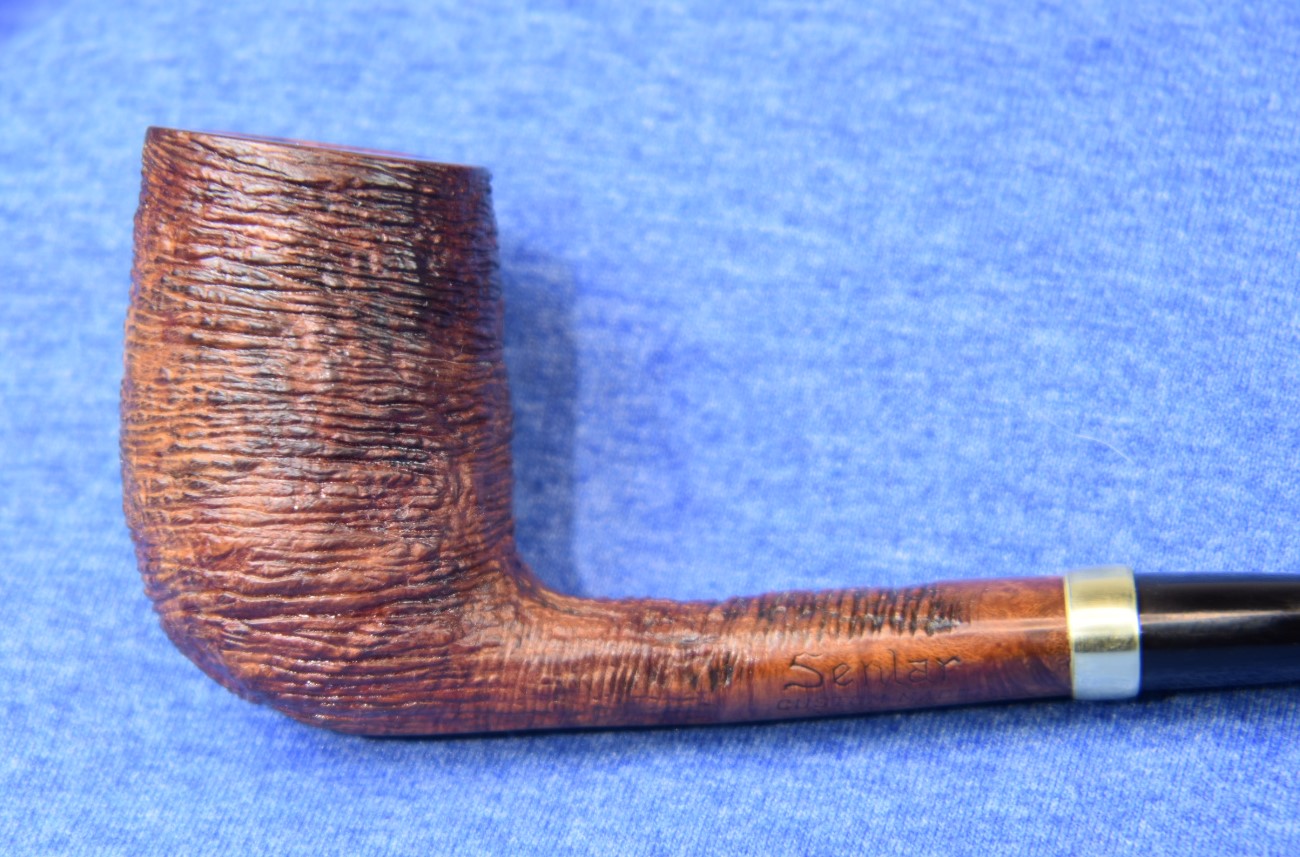
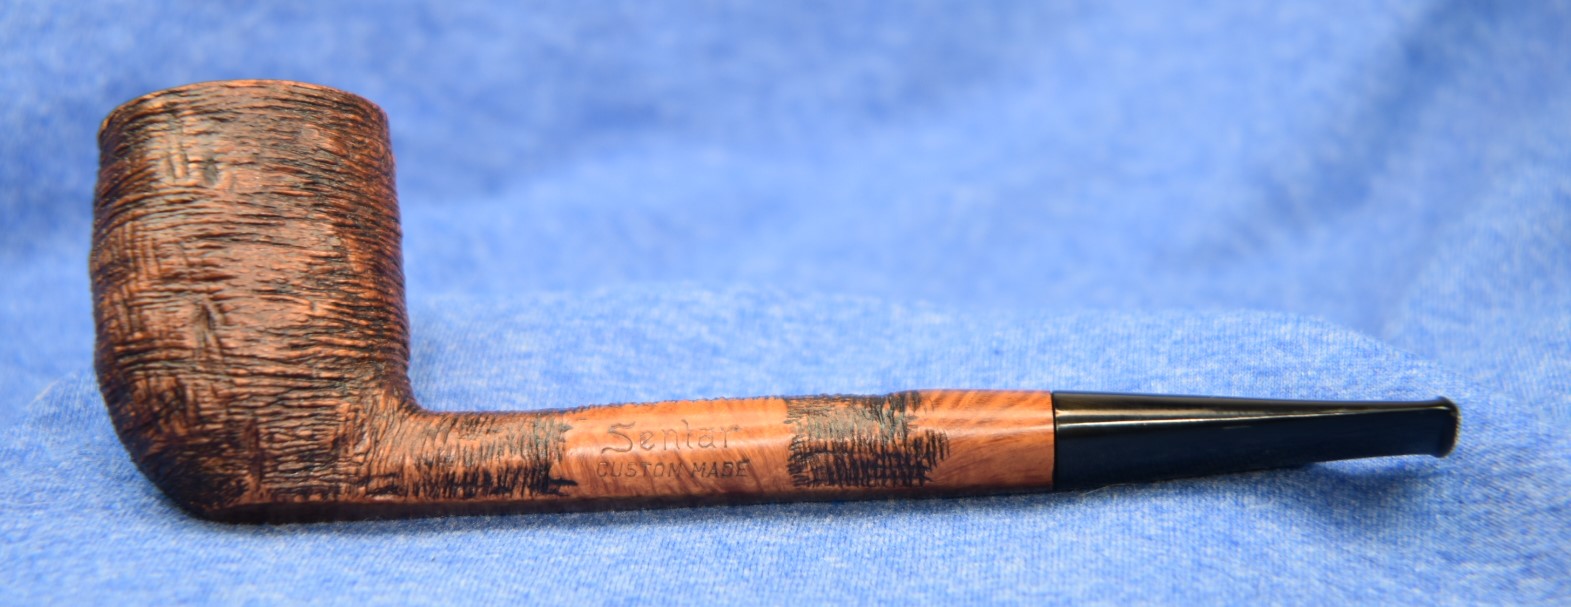
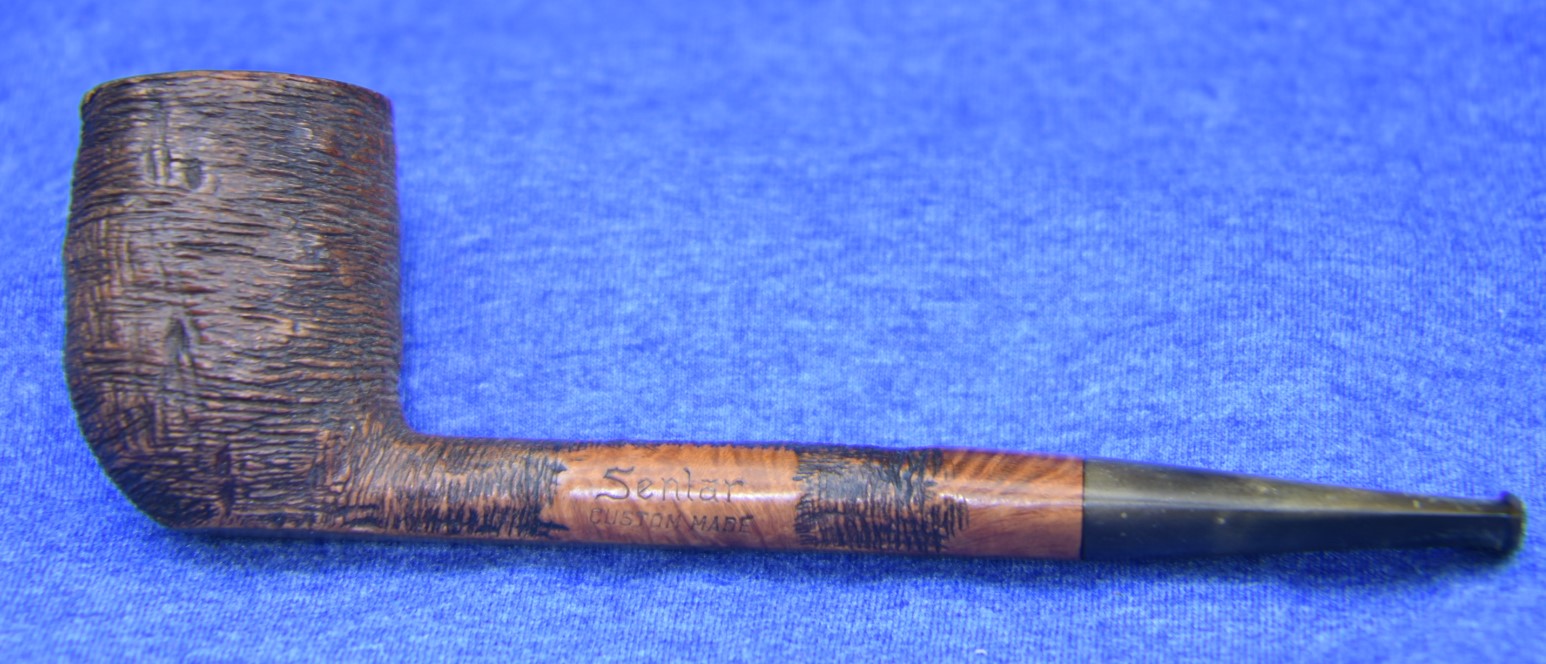
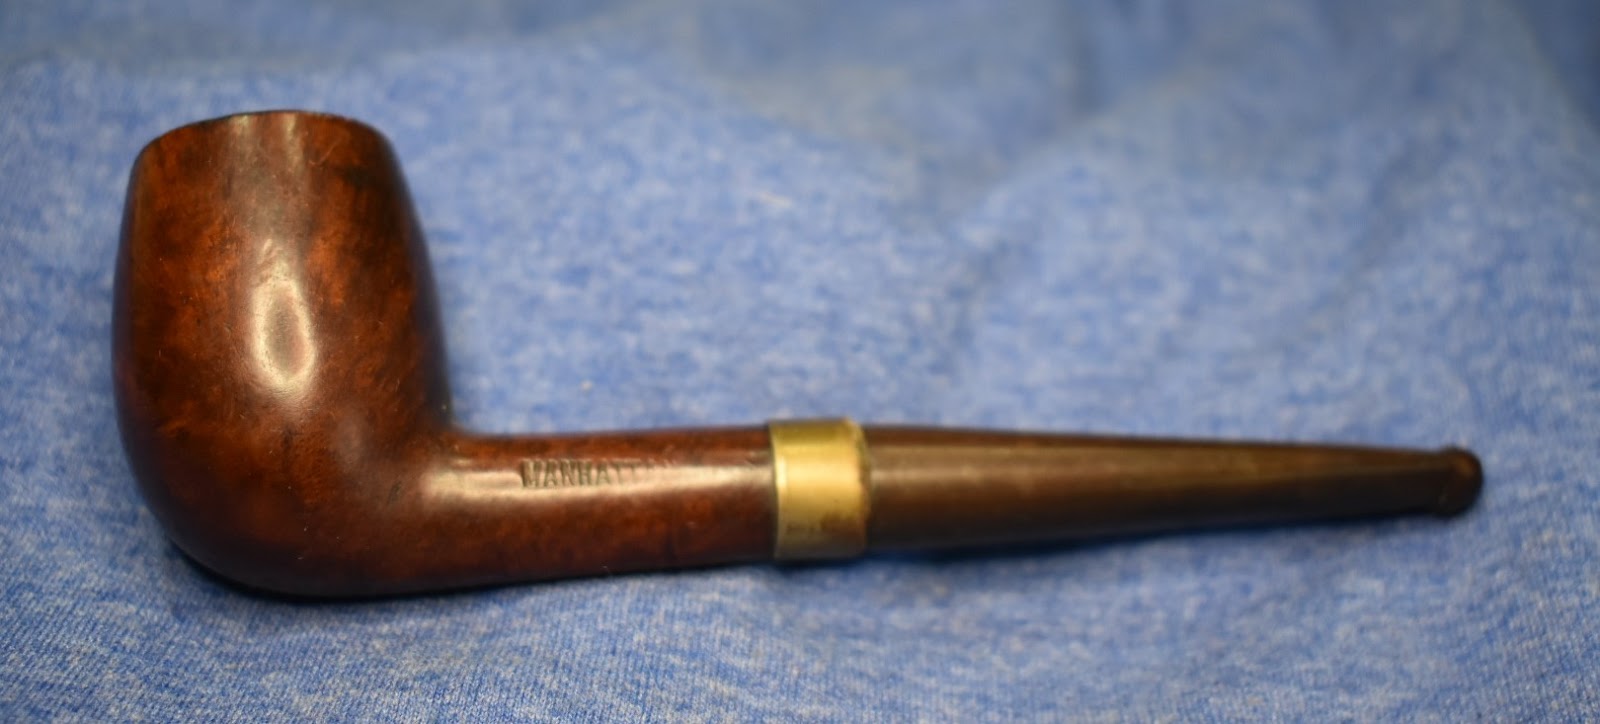
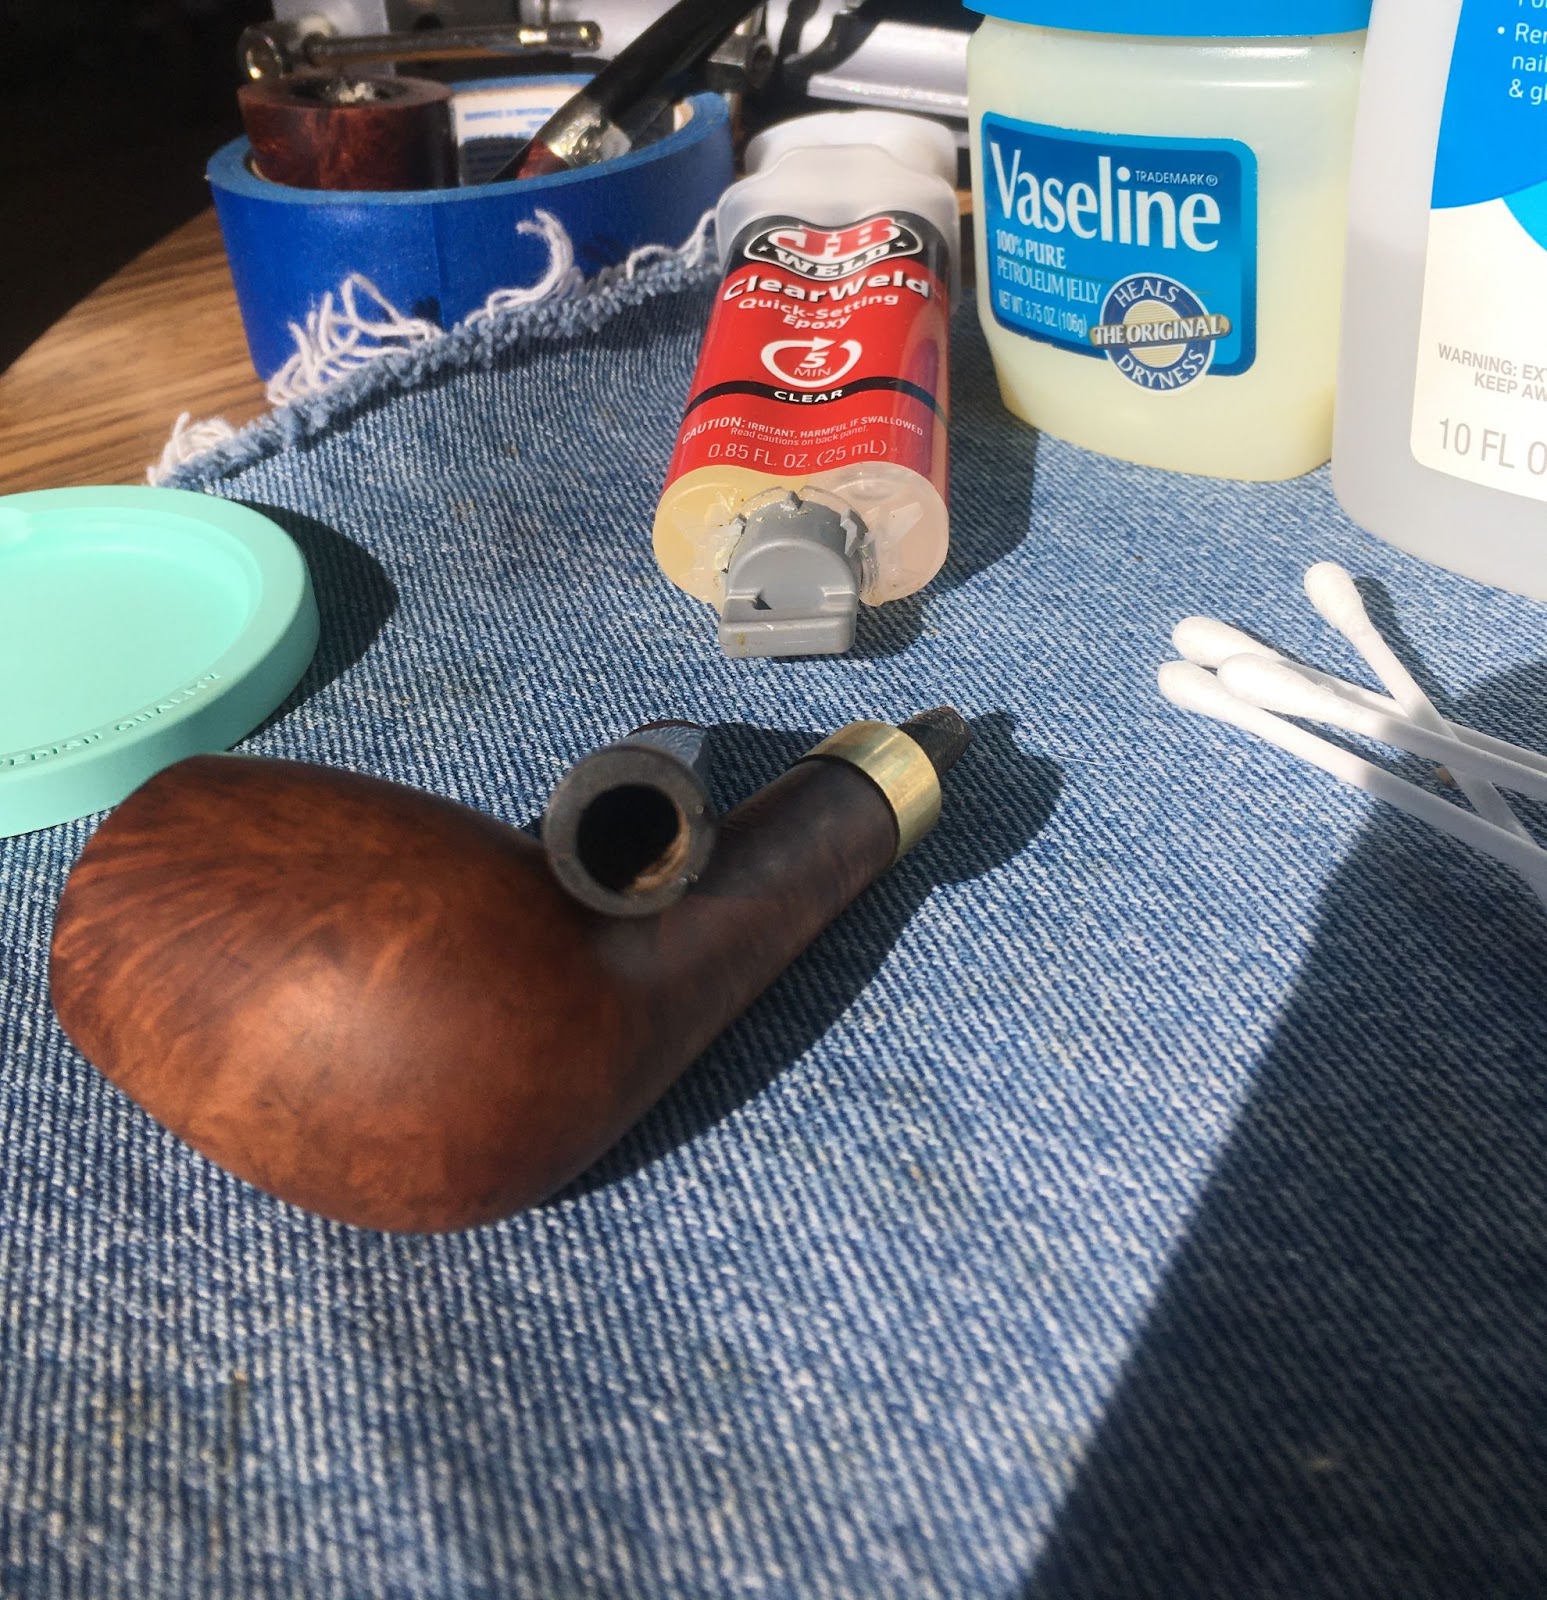
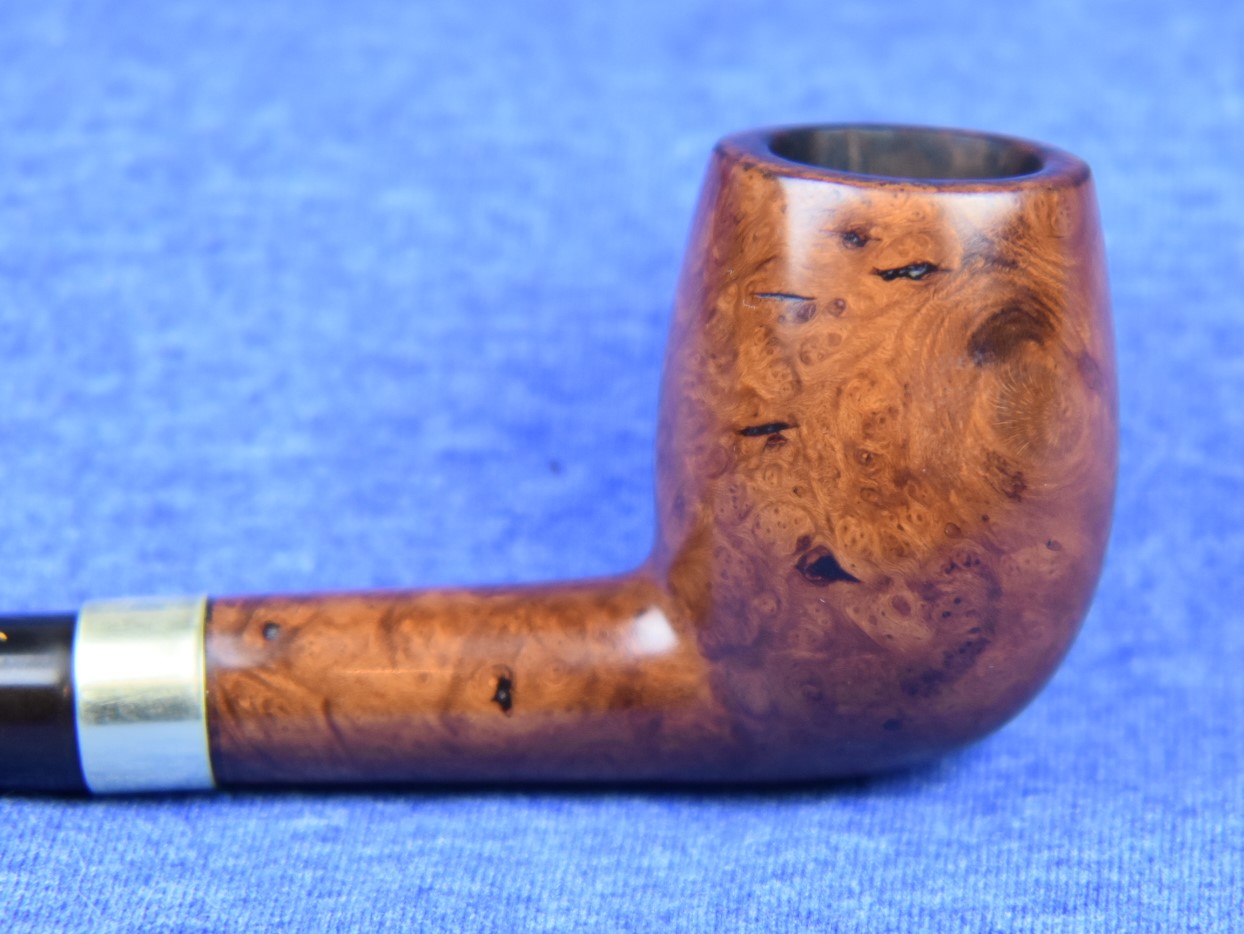
    The pipe arrived within short order and appeared in the condition shown in the following photographs.

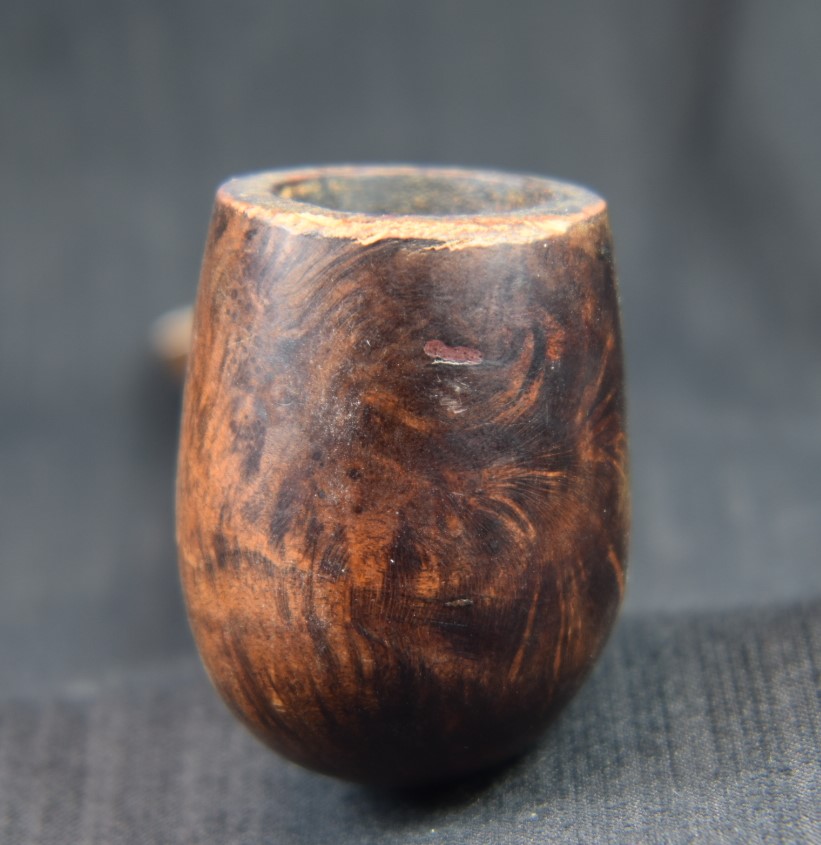
    I had the first and arguably the most important part of the restoration accomplished – getting the pipe to restore.  Put kindly, the pipe was in rough shape.  It was dirty, dented, dinged, worn and oxidized.  I was happy. 

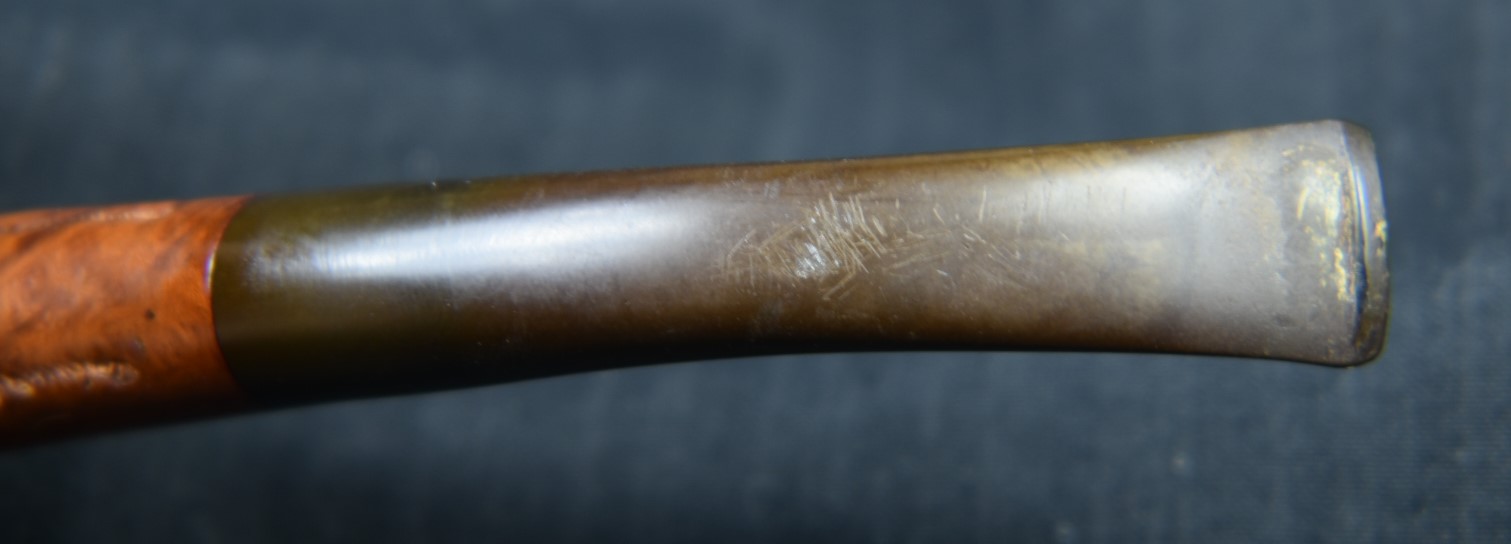
    Normally, my restorations begin with laying down a clean piece of denim as a surface to work on.  Check.  They also do not usually begin with a stem that is this badly oxidized.

    Sidenote:  I take the before and after photos of the pipes with my Nikon.  The camera sends the photos taken to my phone.  The phone camera is used for the photos during the restoration.  I tell you this because this is how I can recall the order of operations with a restoration.  When writing the restoration I refer back to the phone for the sequence of events.  So, no you know, even if you don’t care.

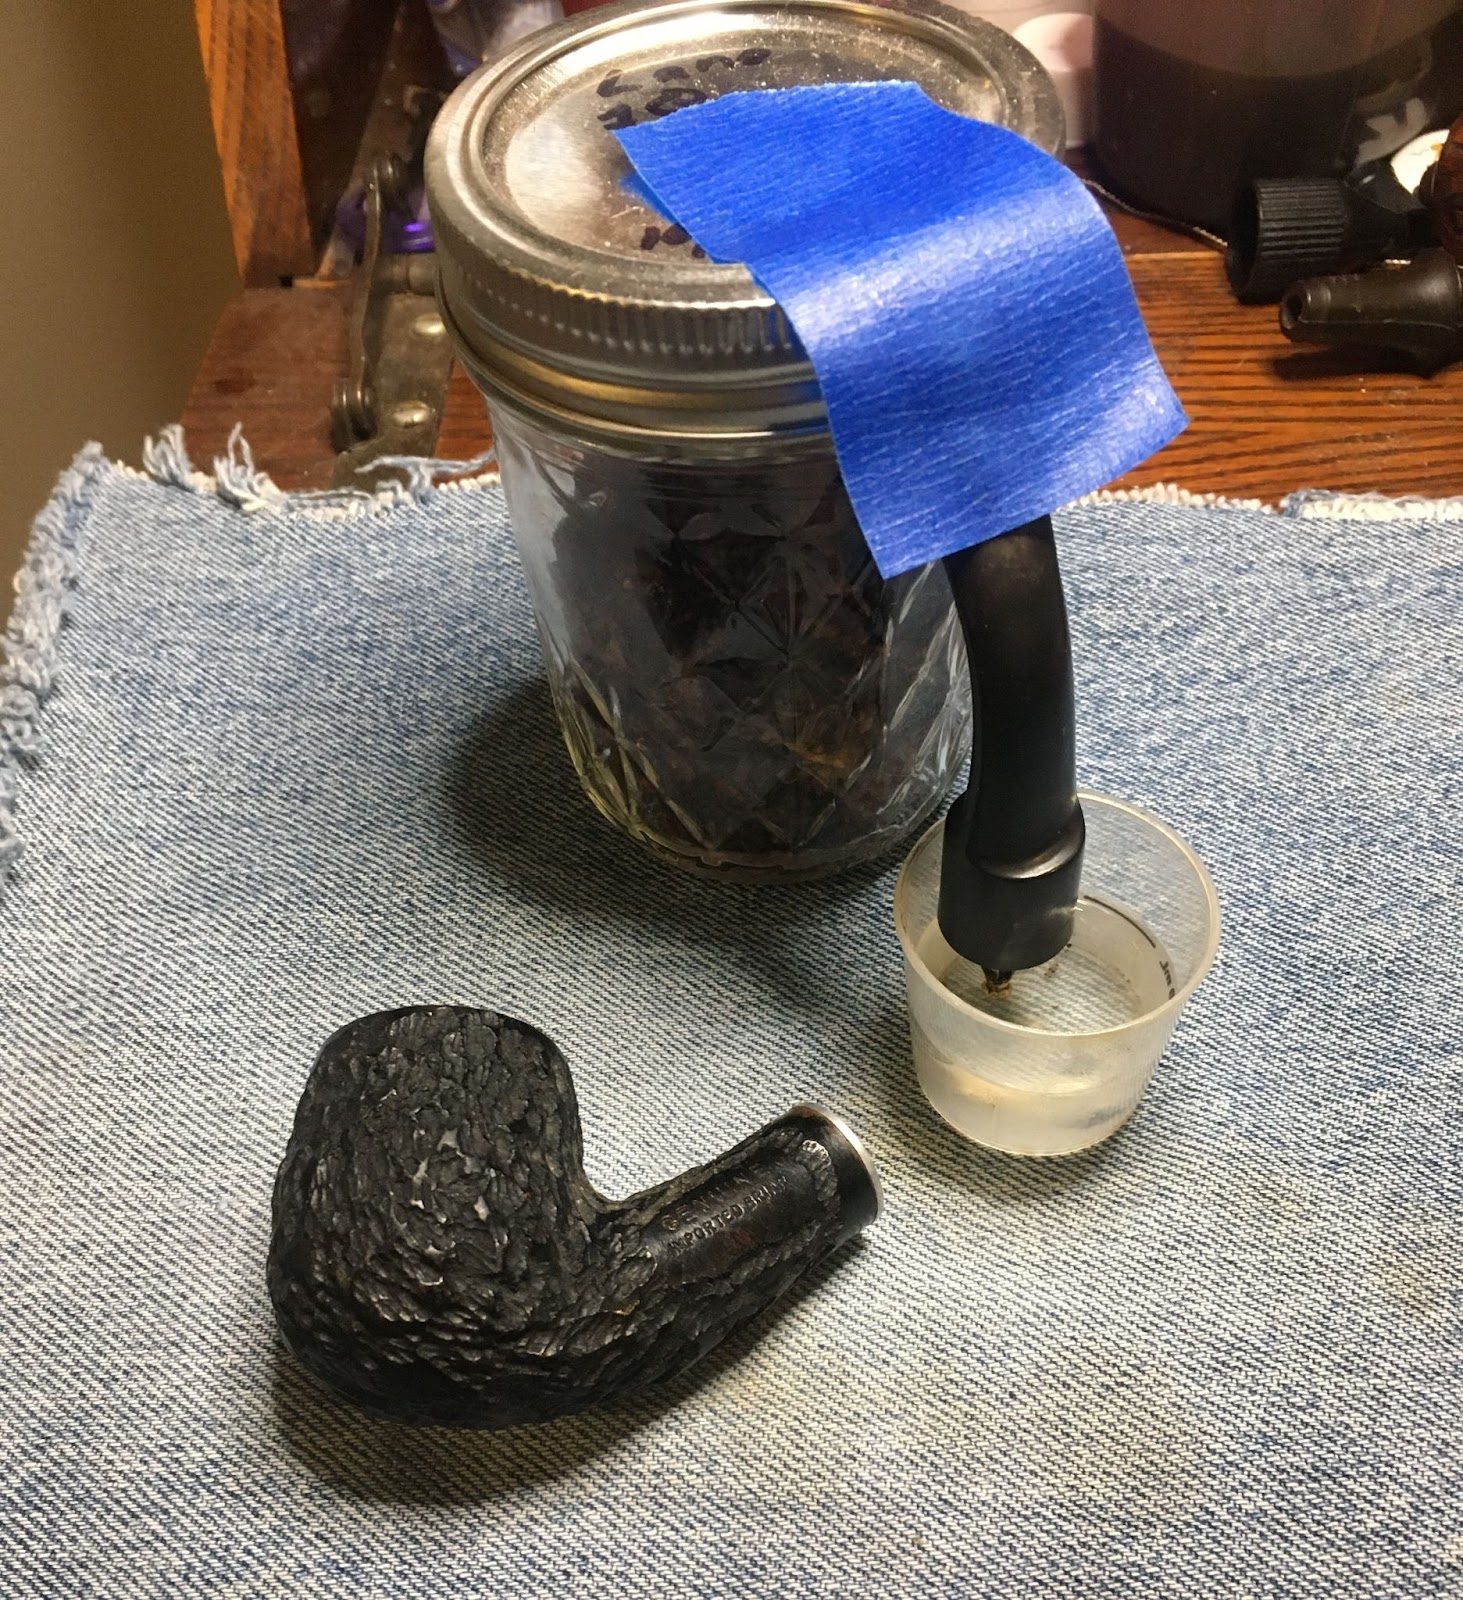
    I figured that this one would have to soak in the Before and After Extra Strength Deoxidizer for at least 4 hours.

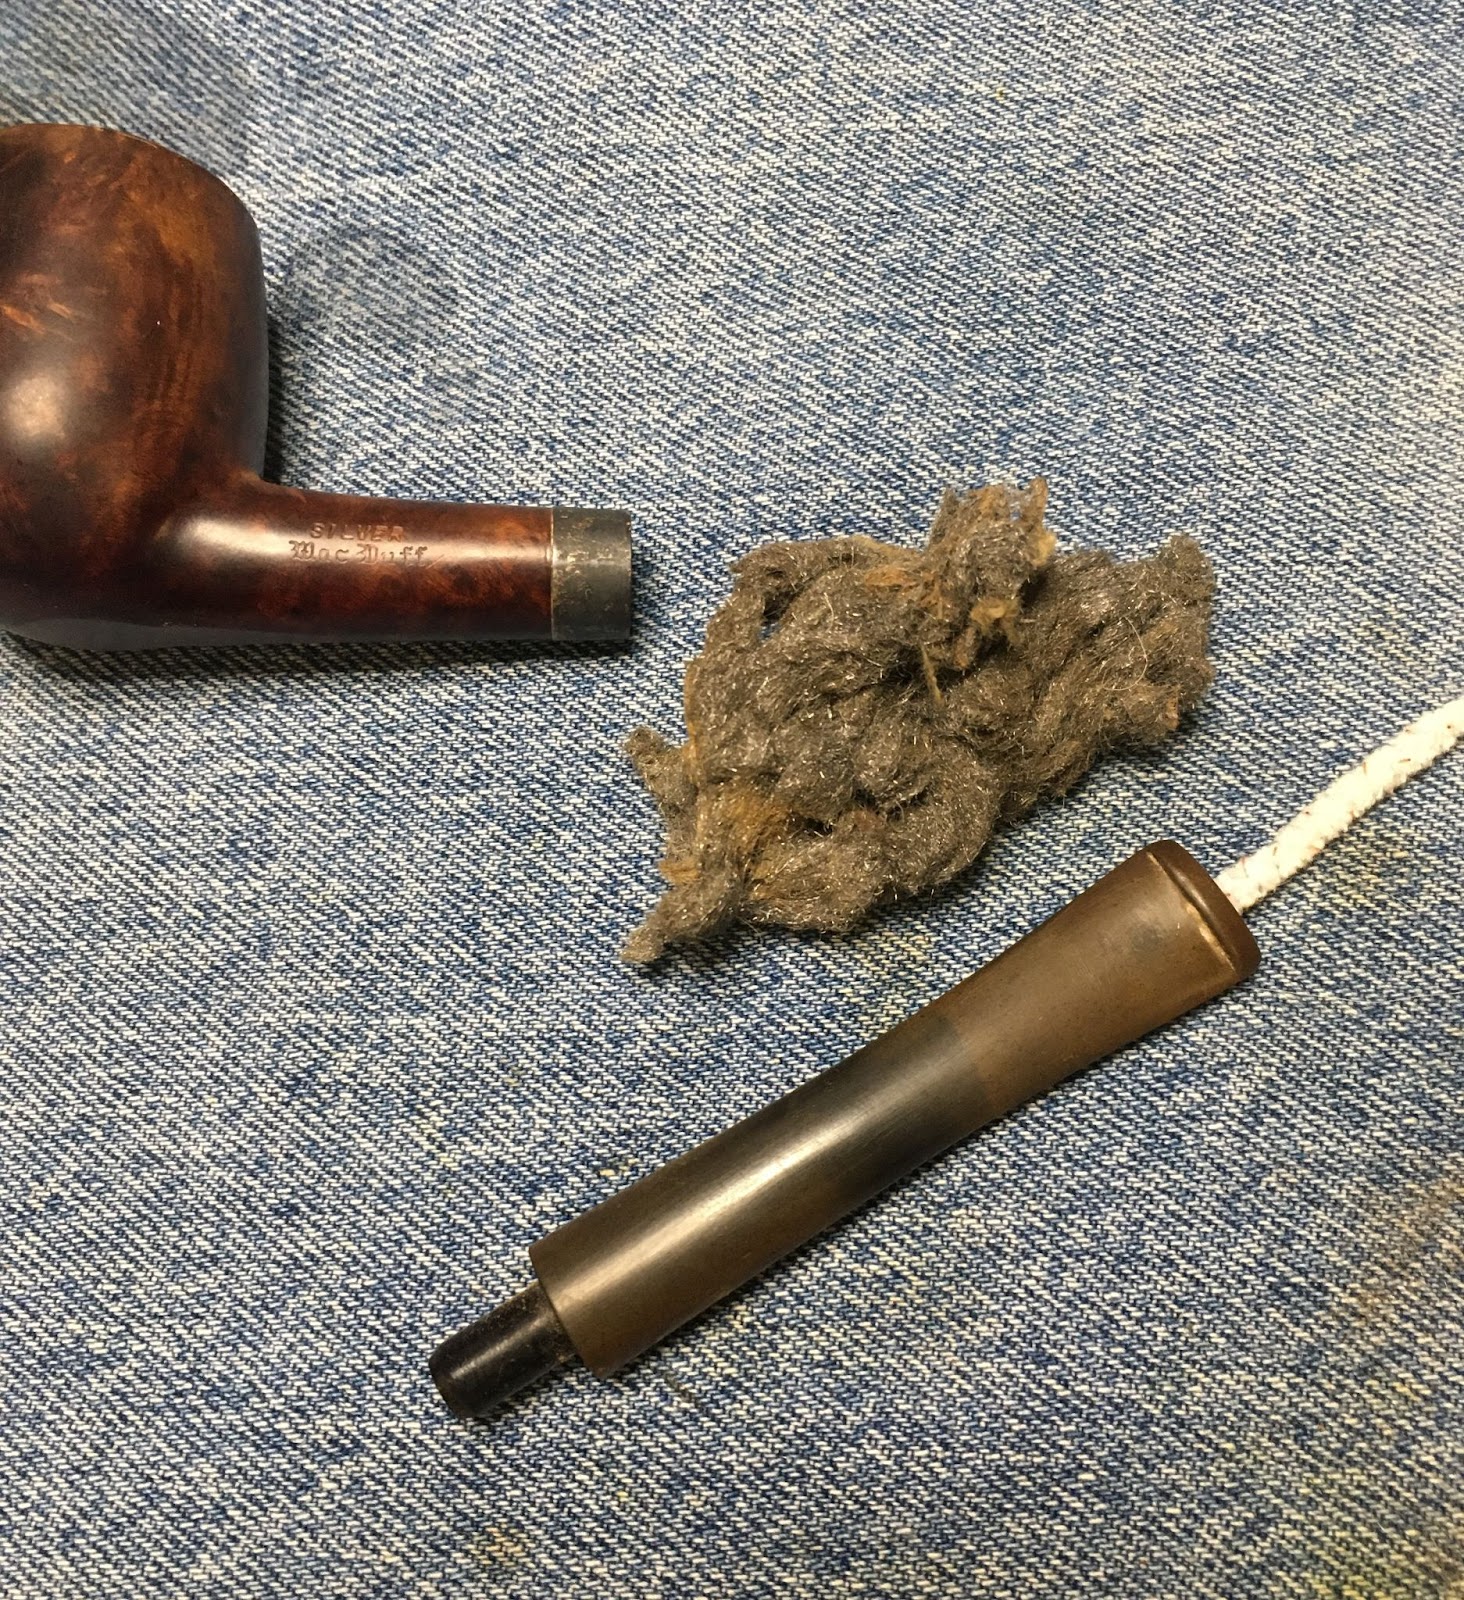
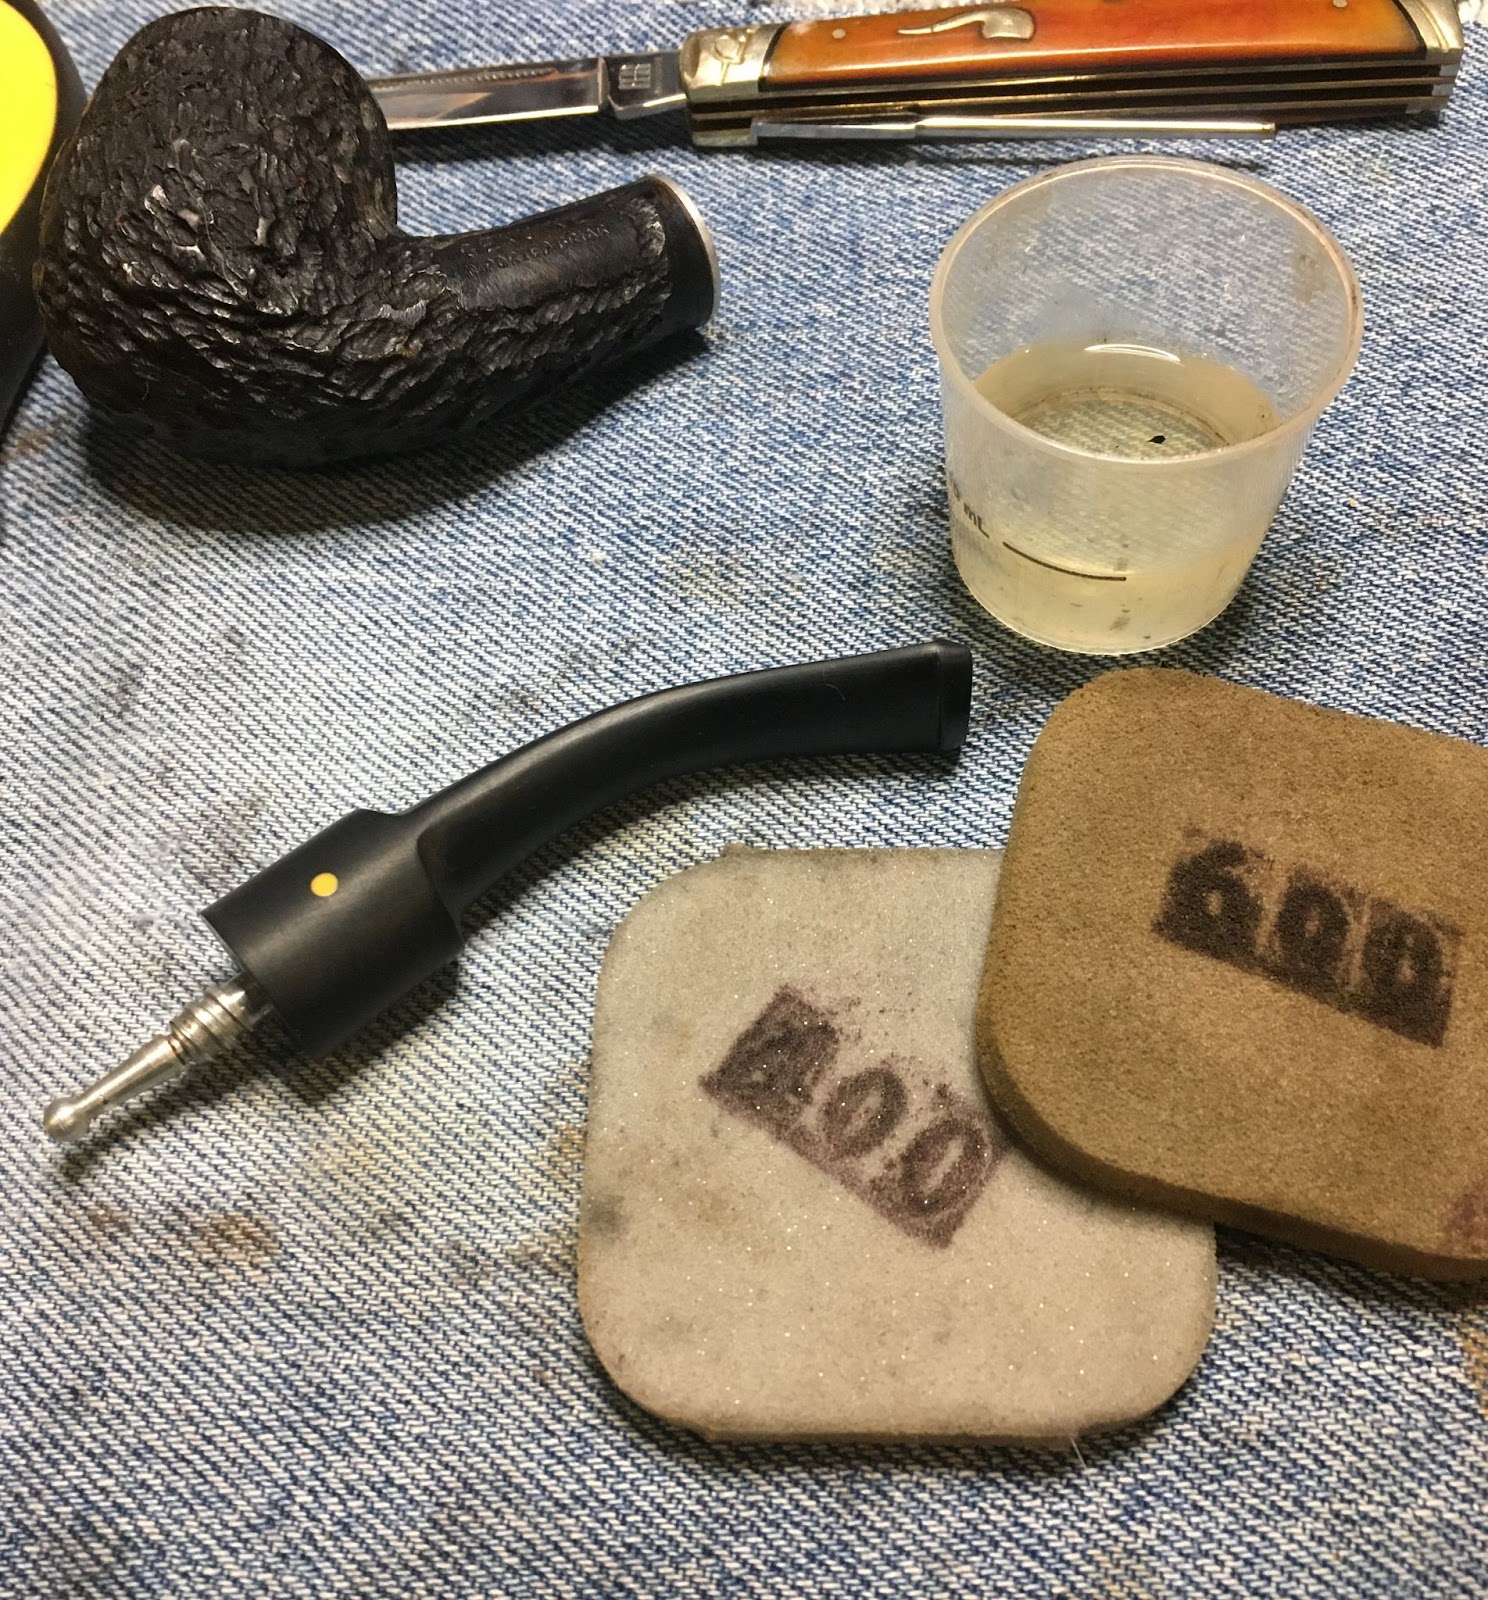
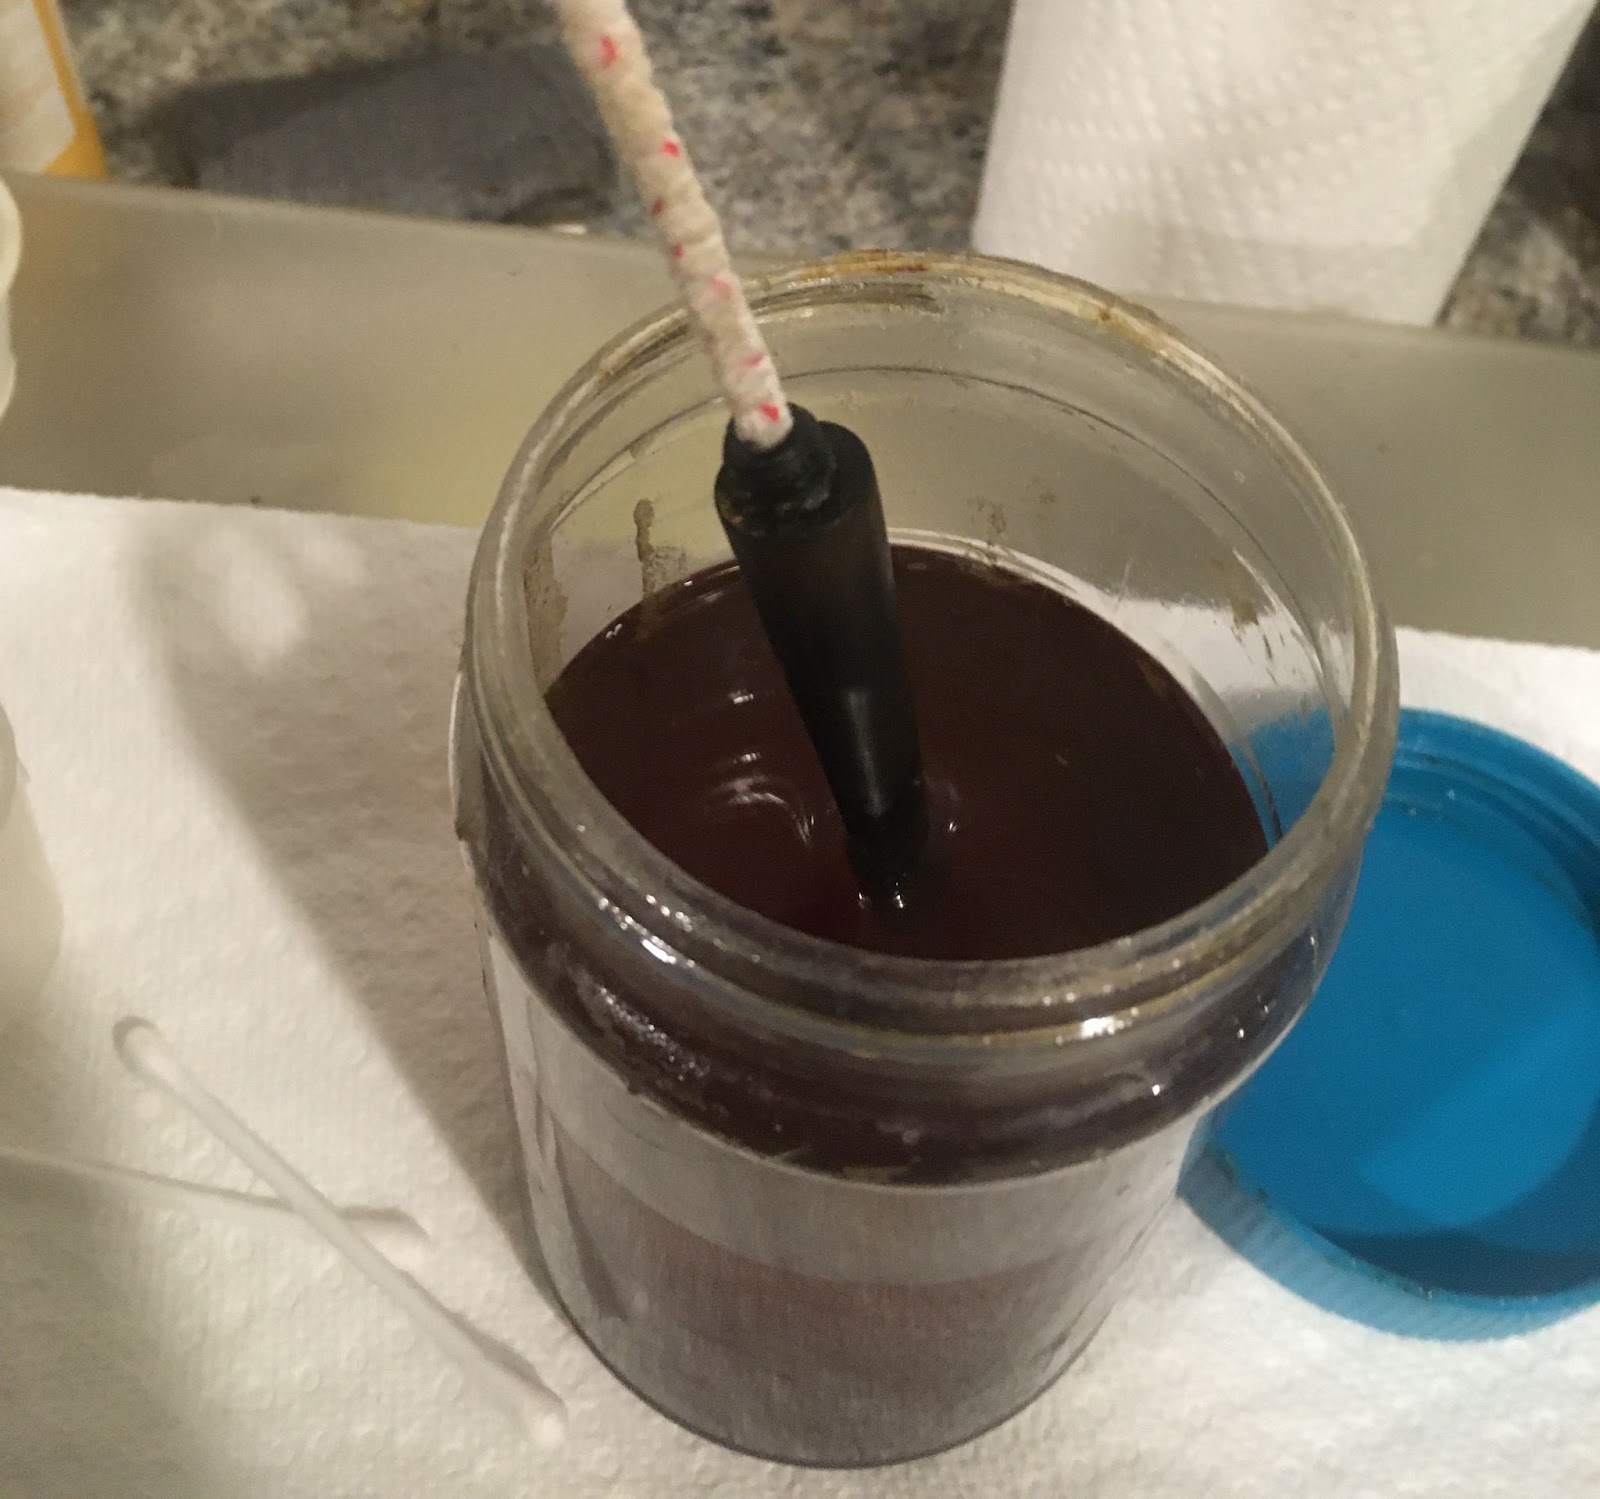
    Before the stem would get its bath, it had to have a little pre-treatment with a rubdown with 0000 steel wool.  A pipe cleaner was inserted into the stem to act as a hanger for suspending the stem in the solution.

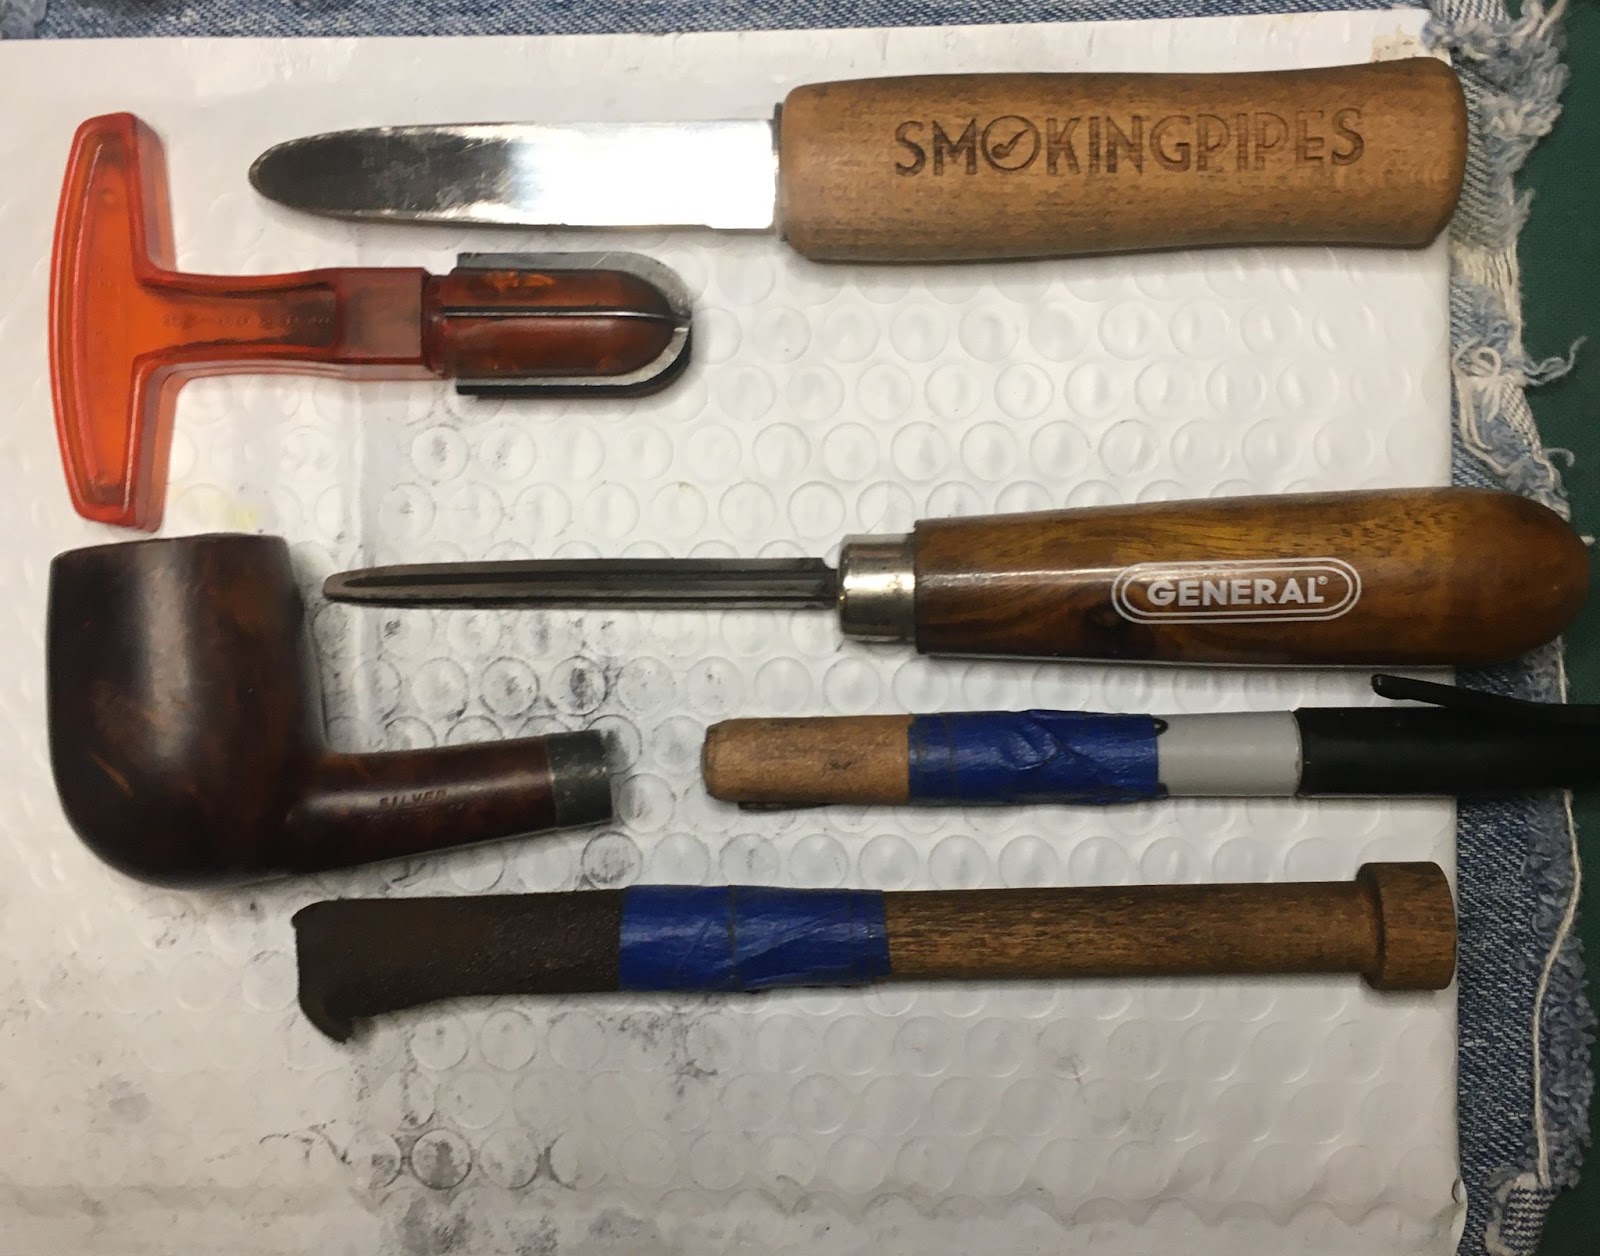
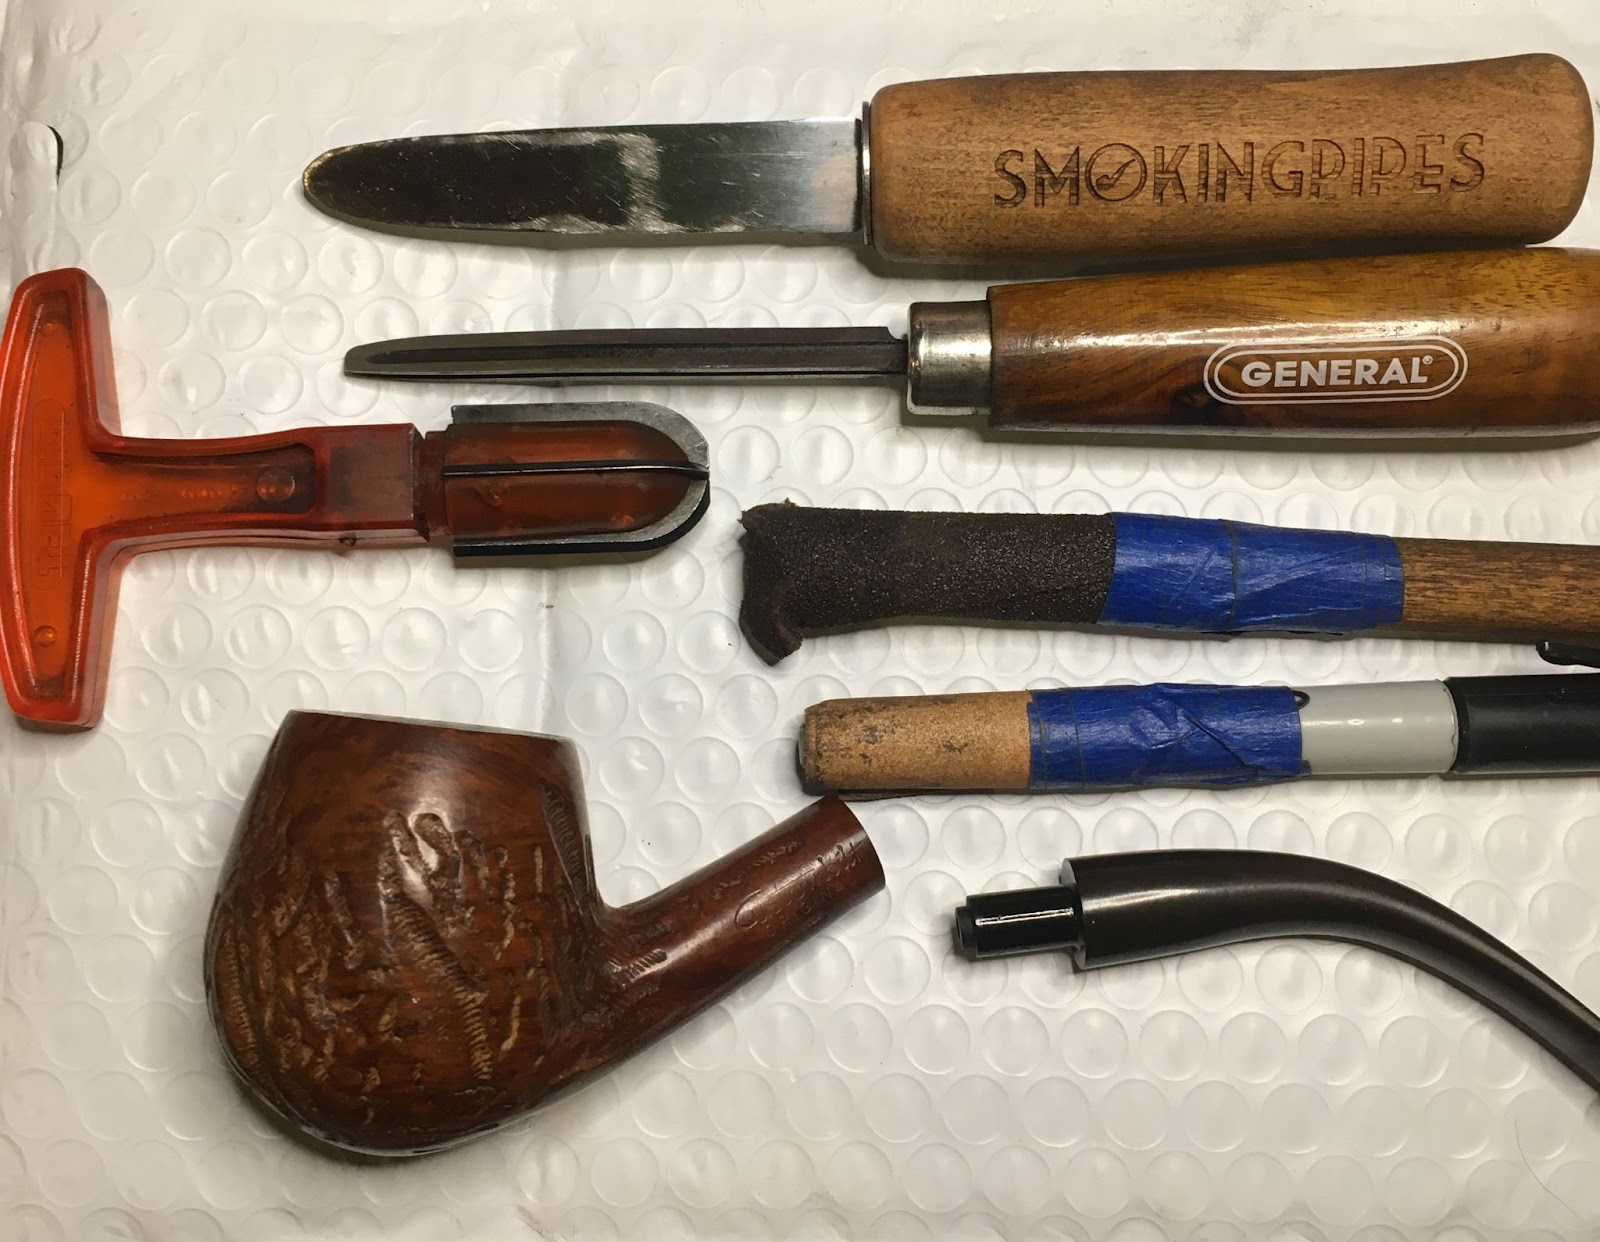
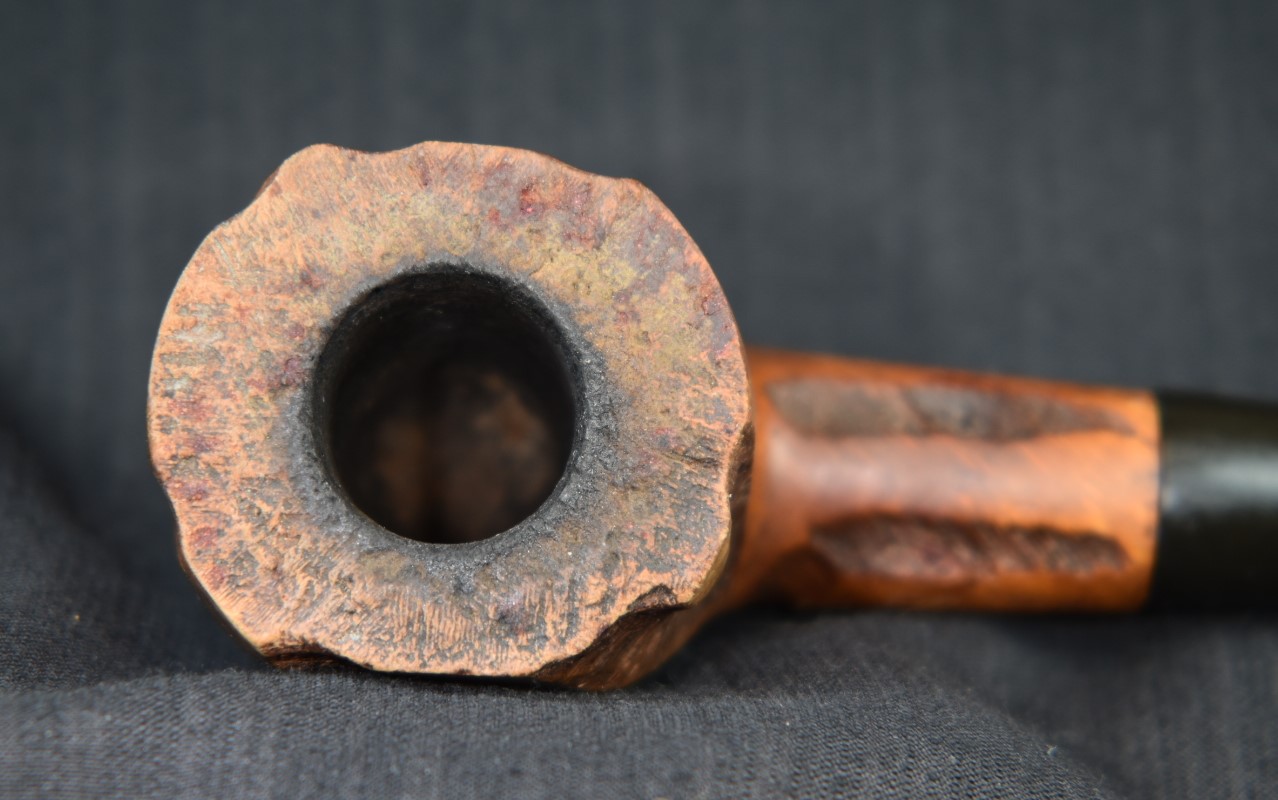
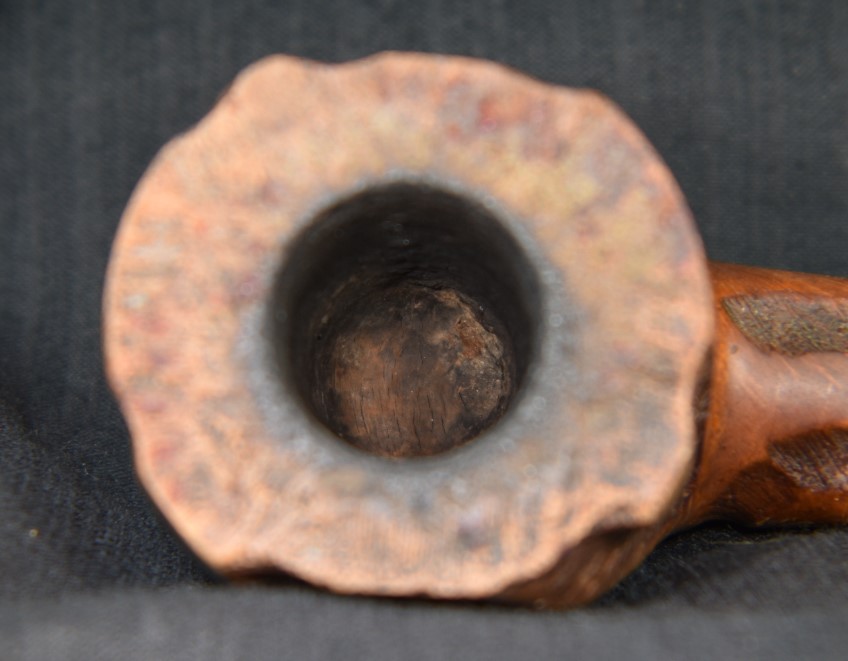
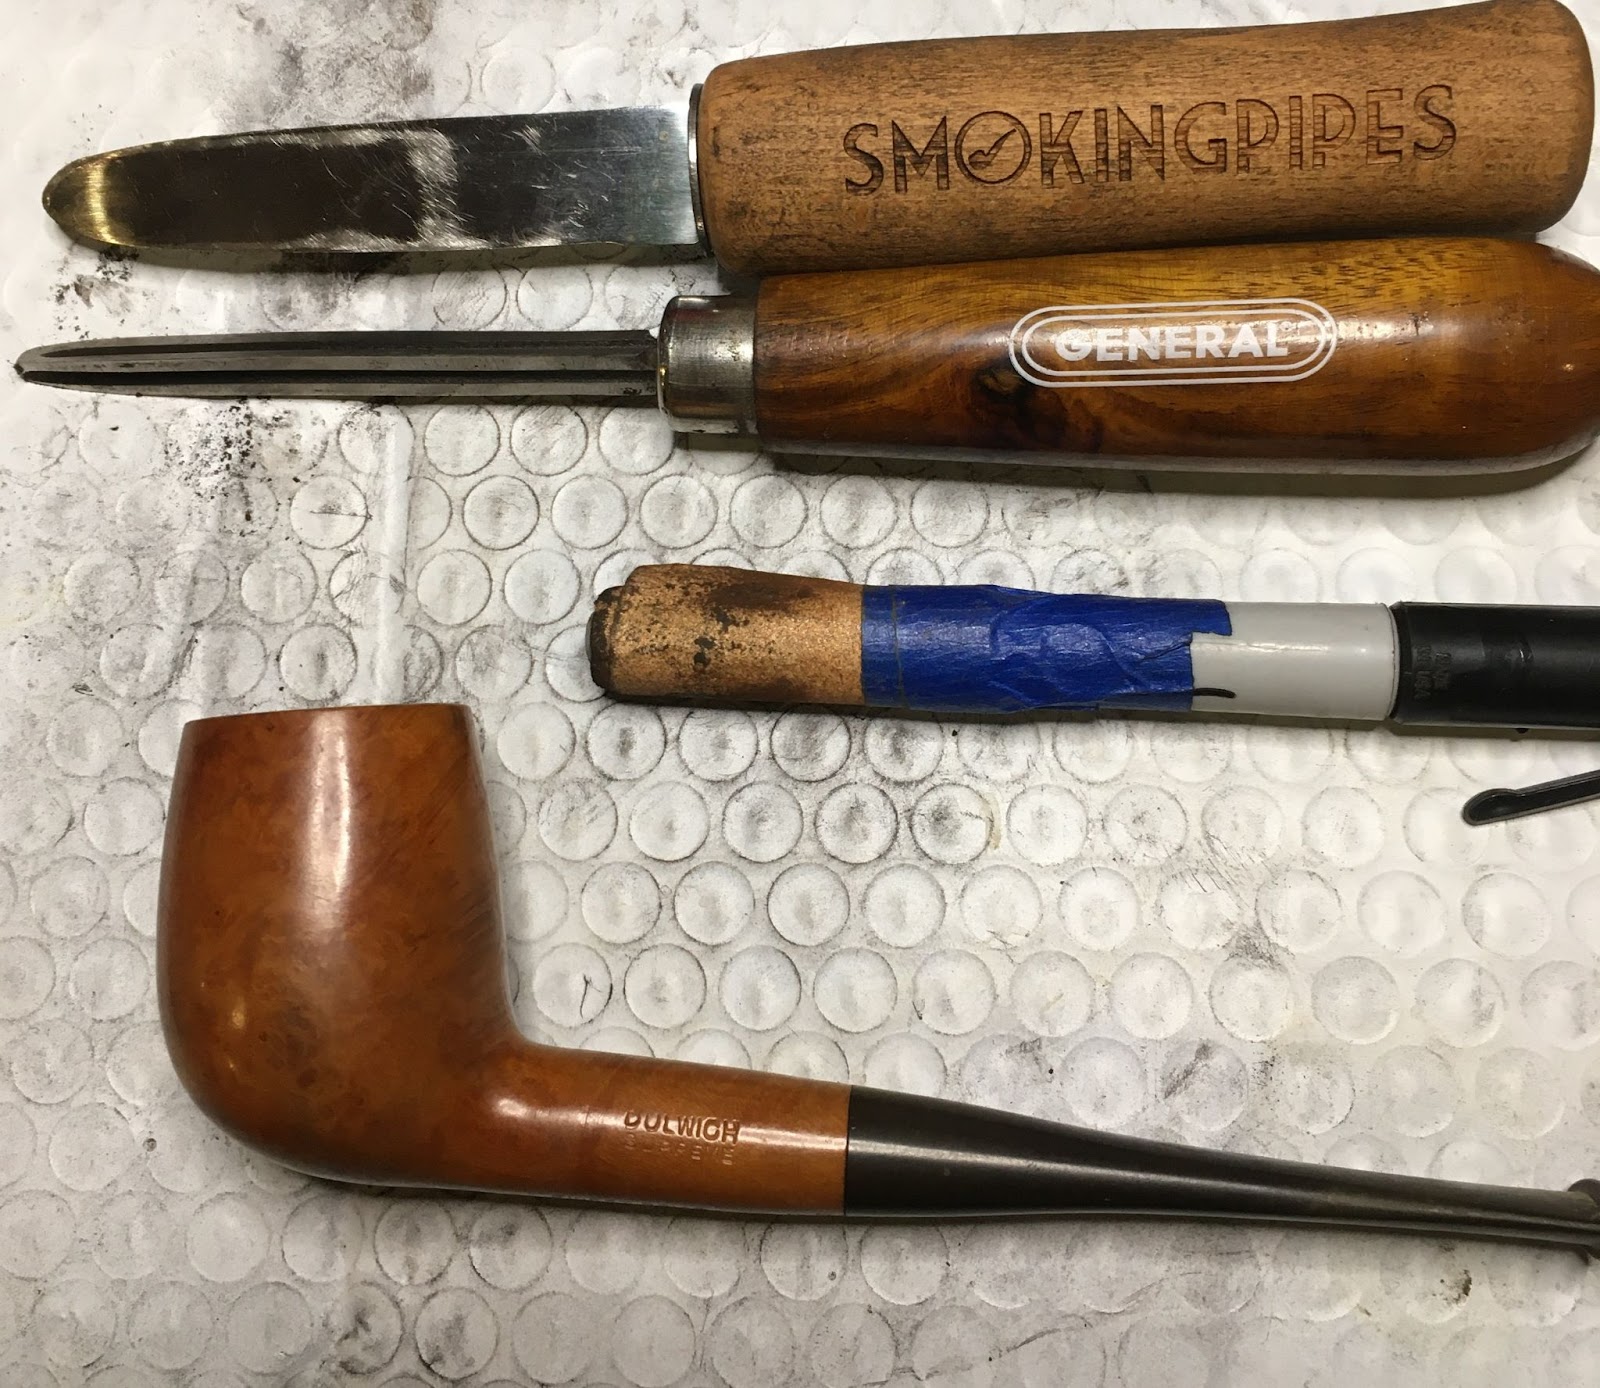
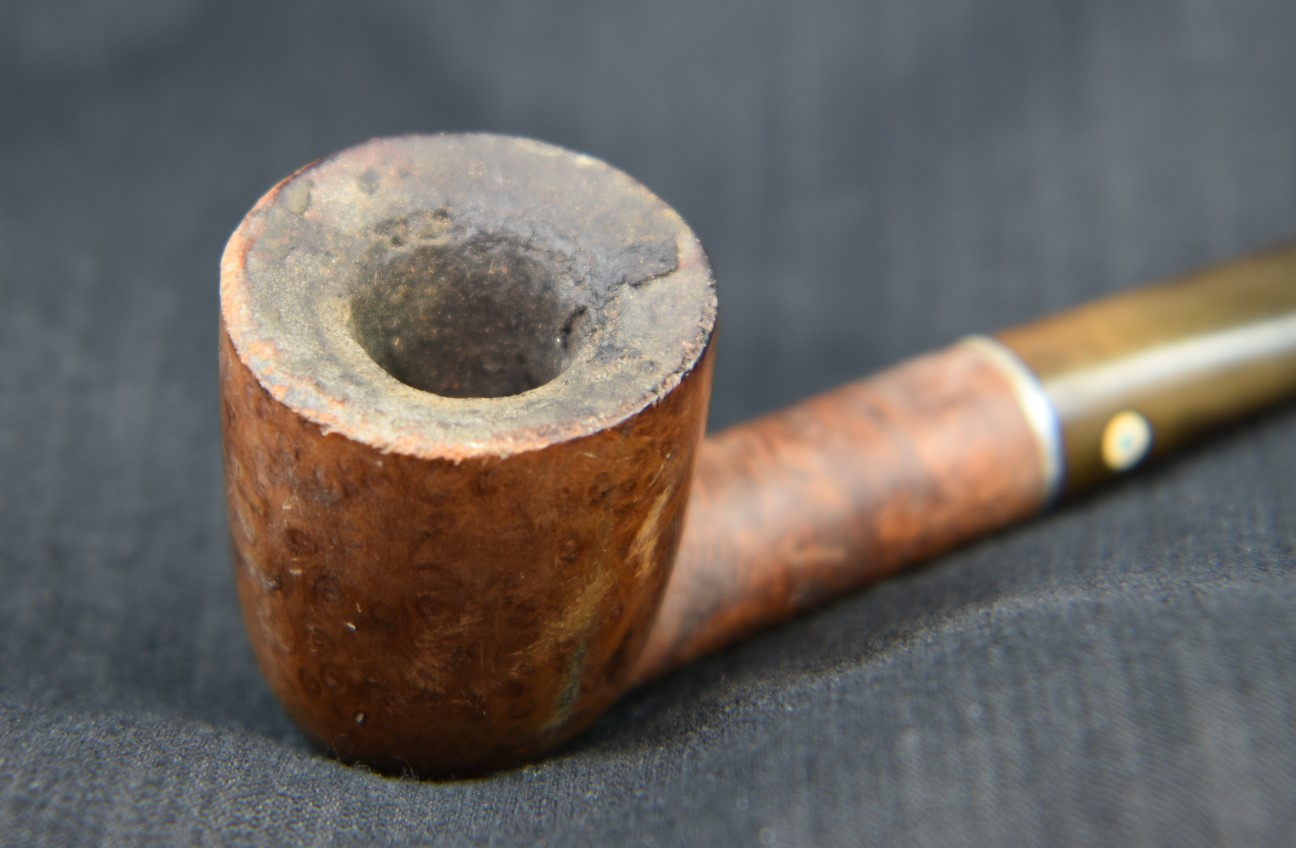
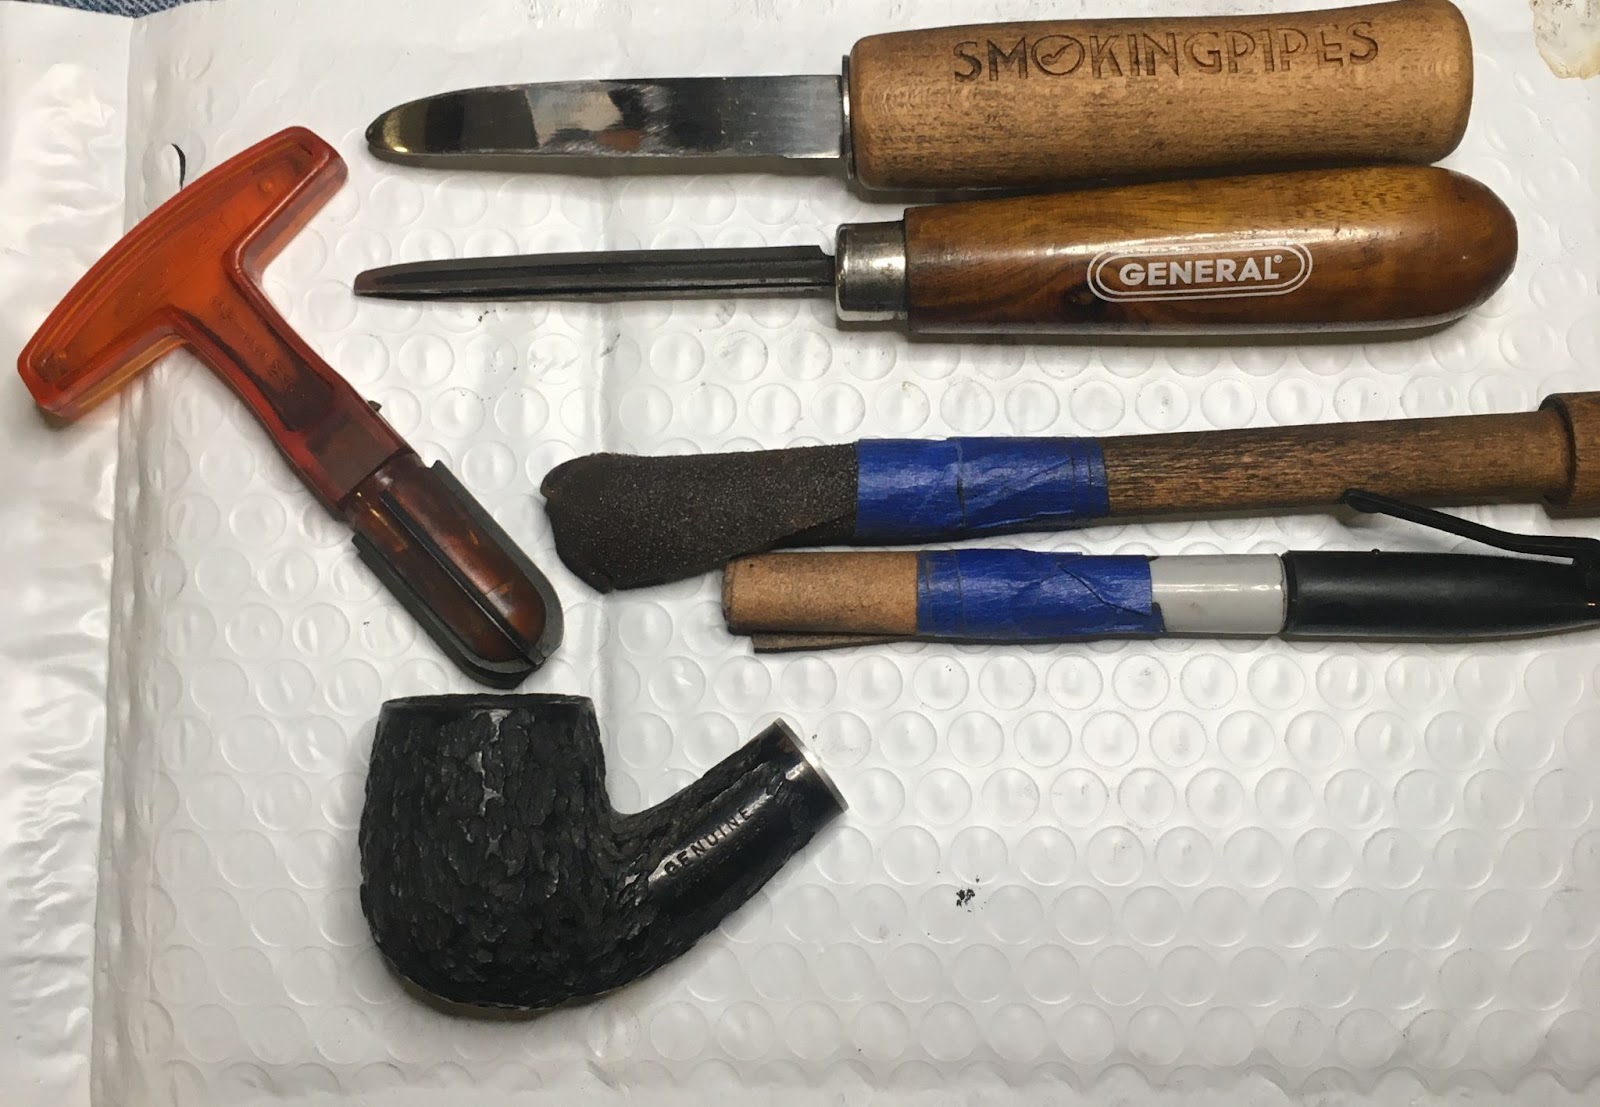
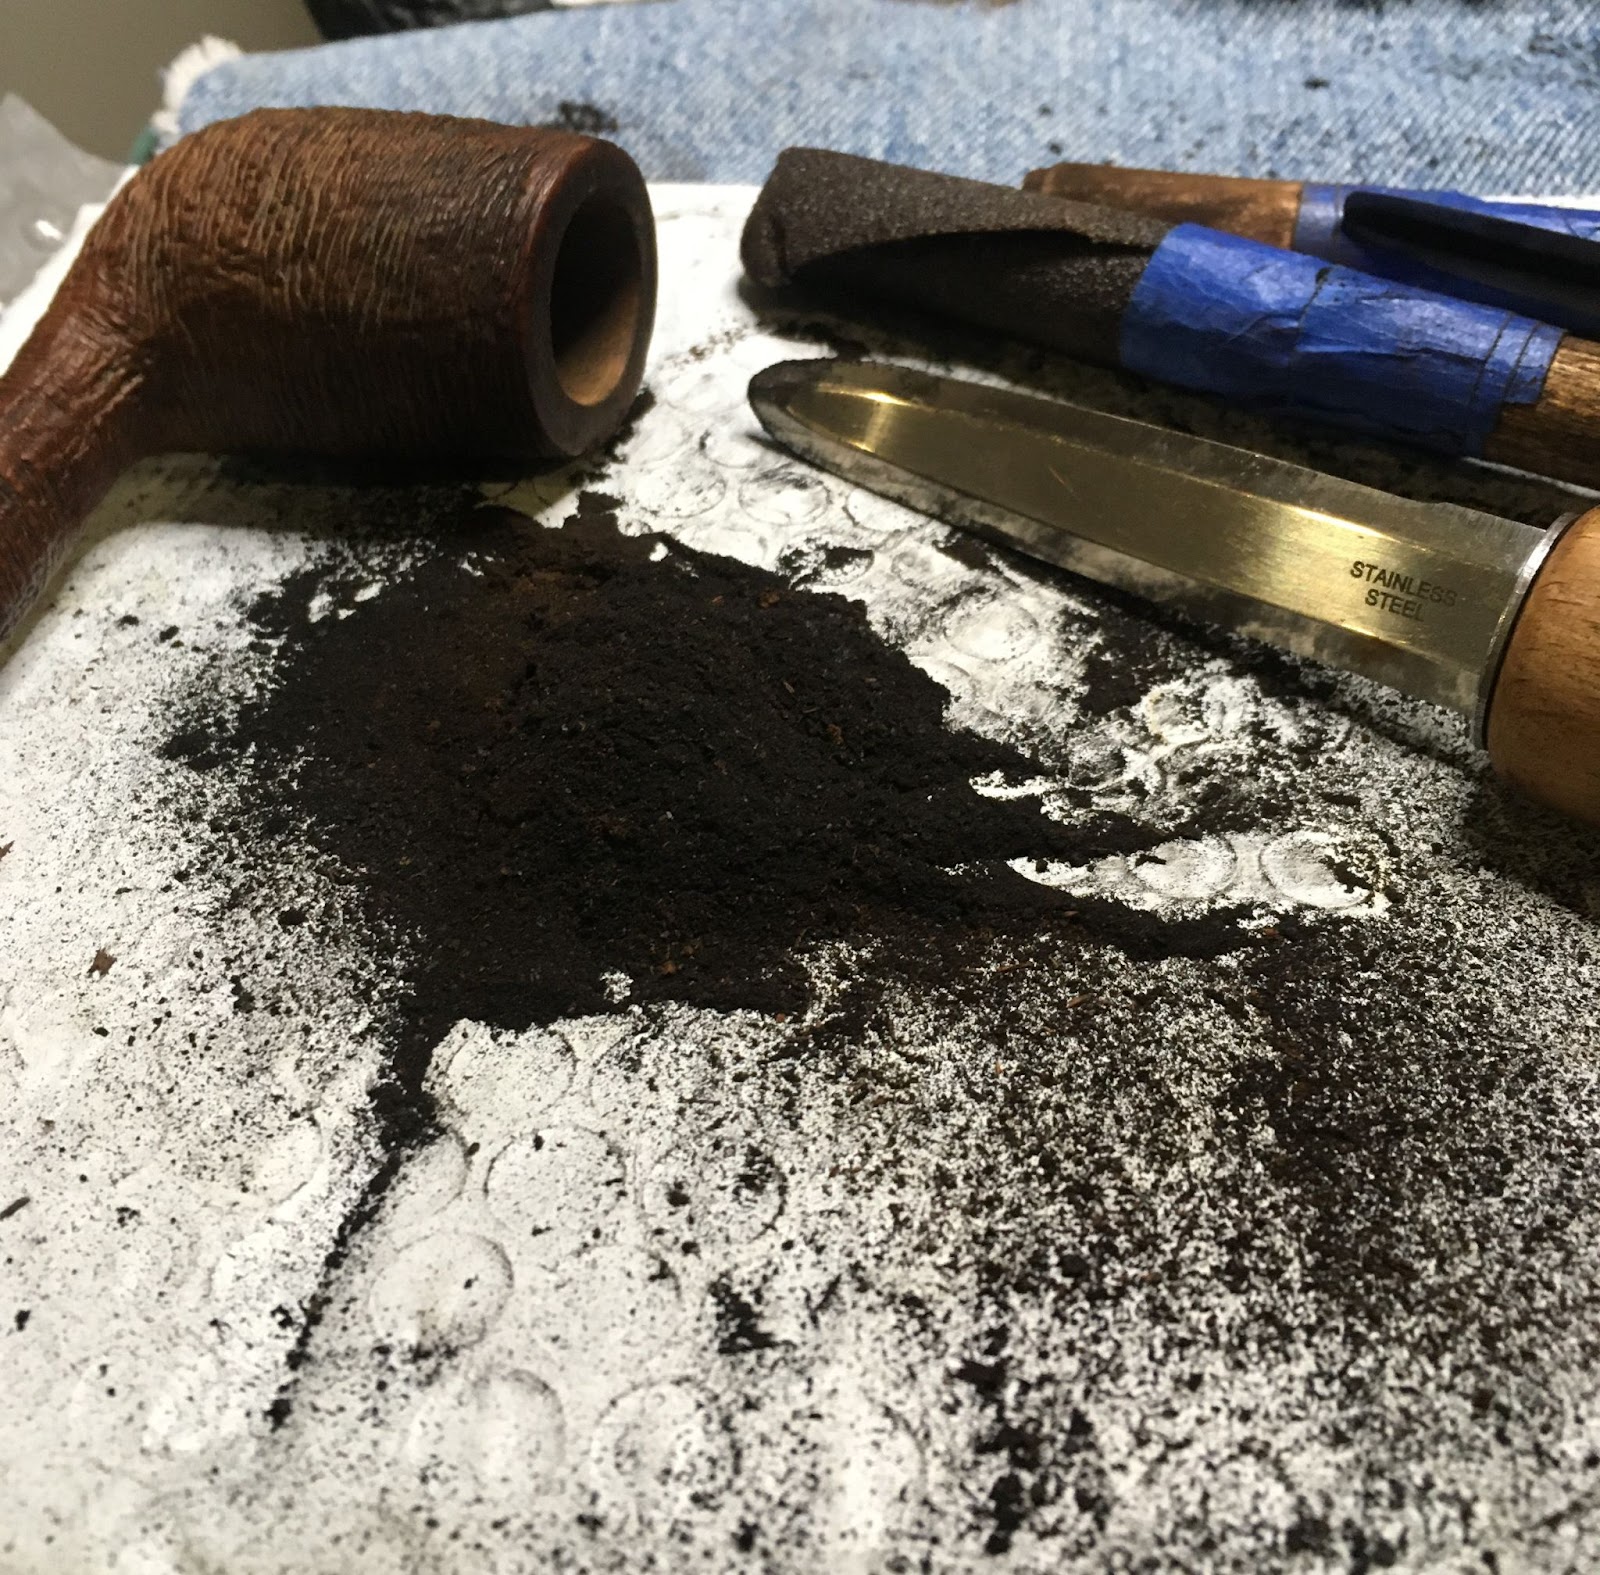
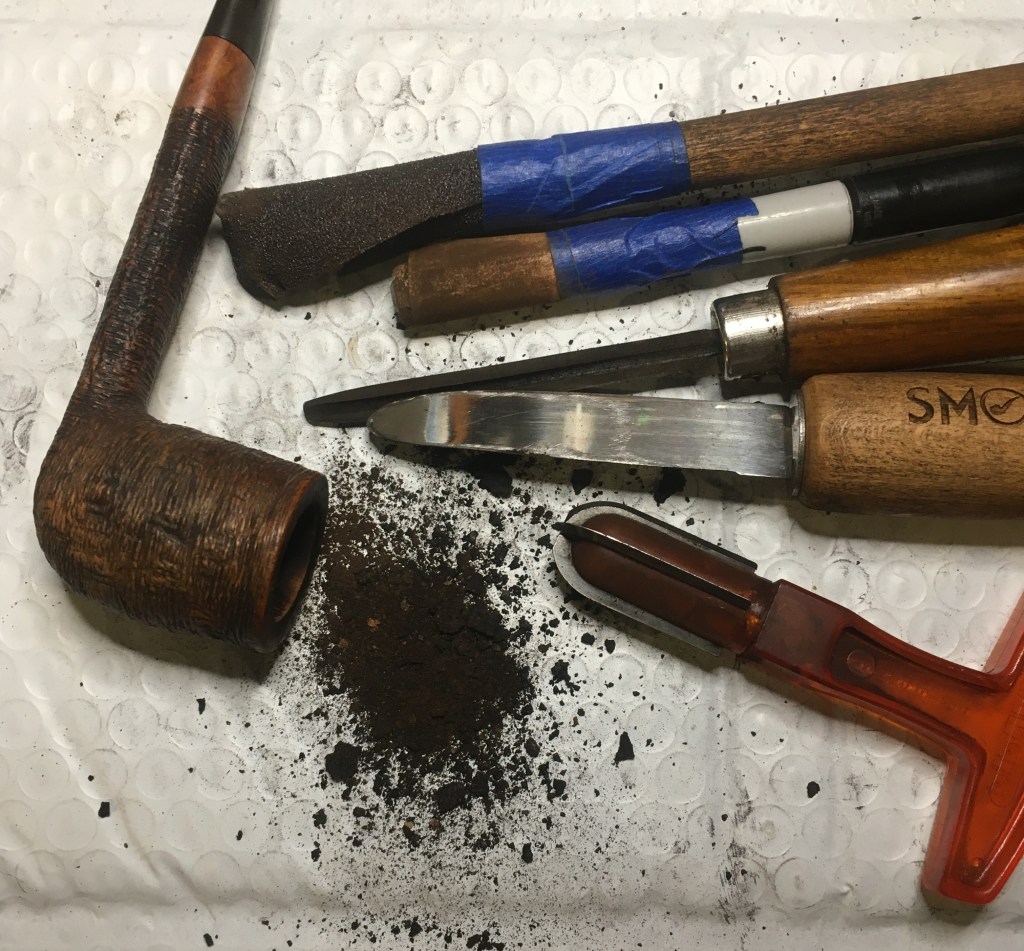
    With the stem safely submerged I turned my attention to the reaming of the tobacco chamber.  The reaming tools were assembled:  The PipNet with #3 blades, the Smokingpipes knife, General triangular scraper, 220 sandpaper wrapped dowel and 320 sandpaper wrapped Sharpie.

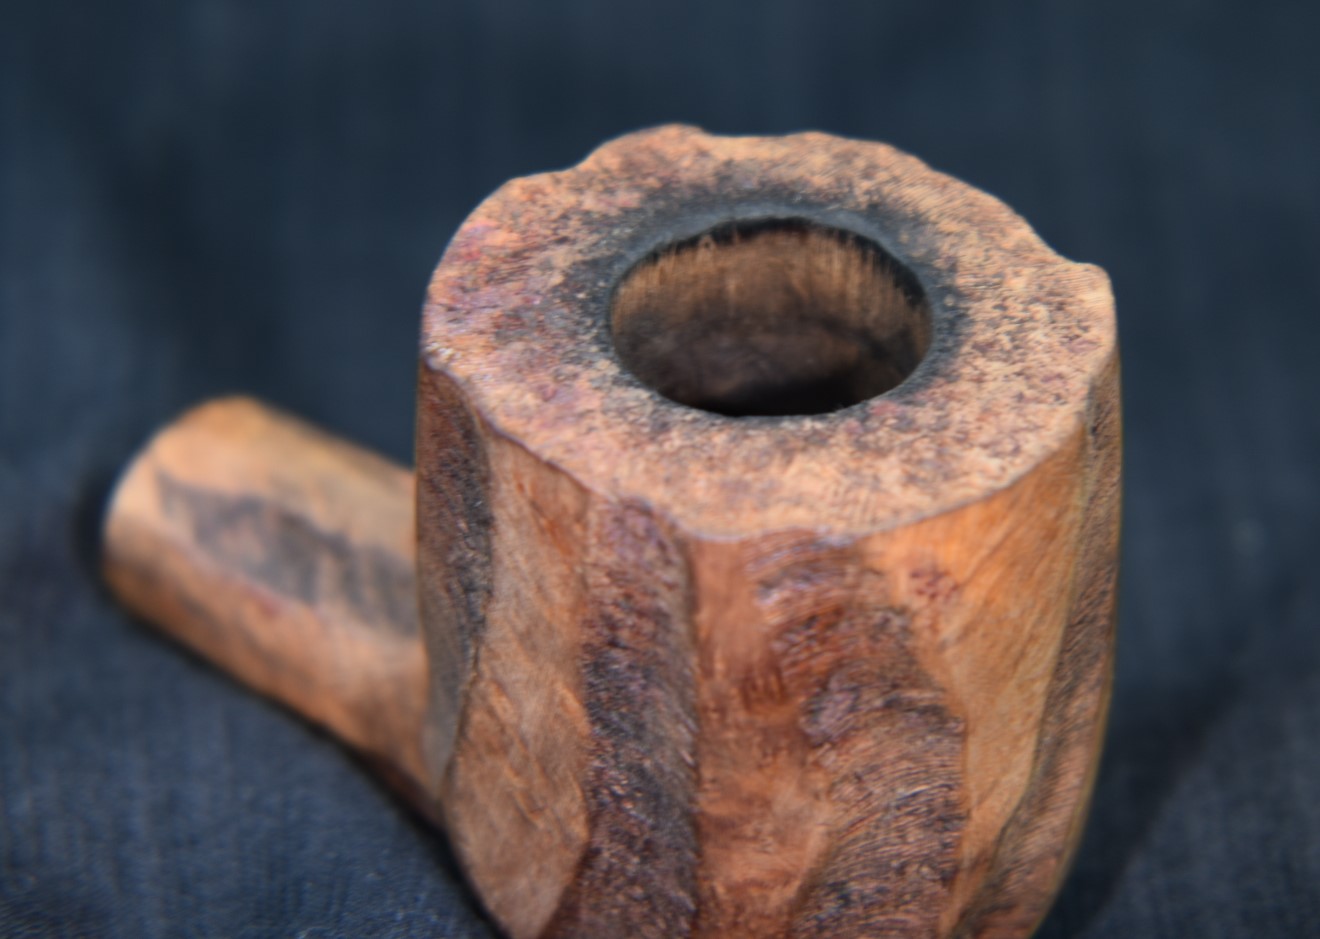
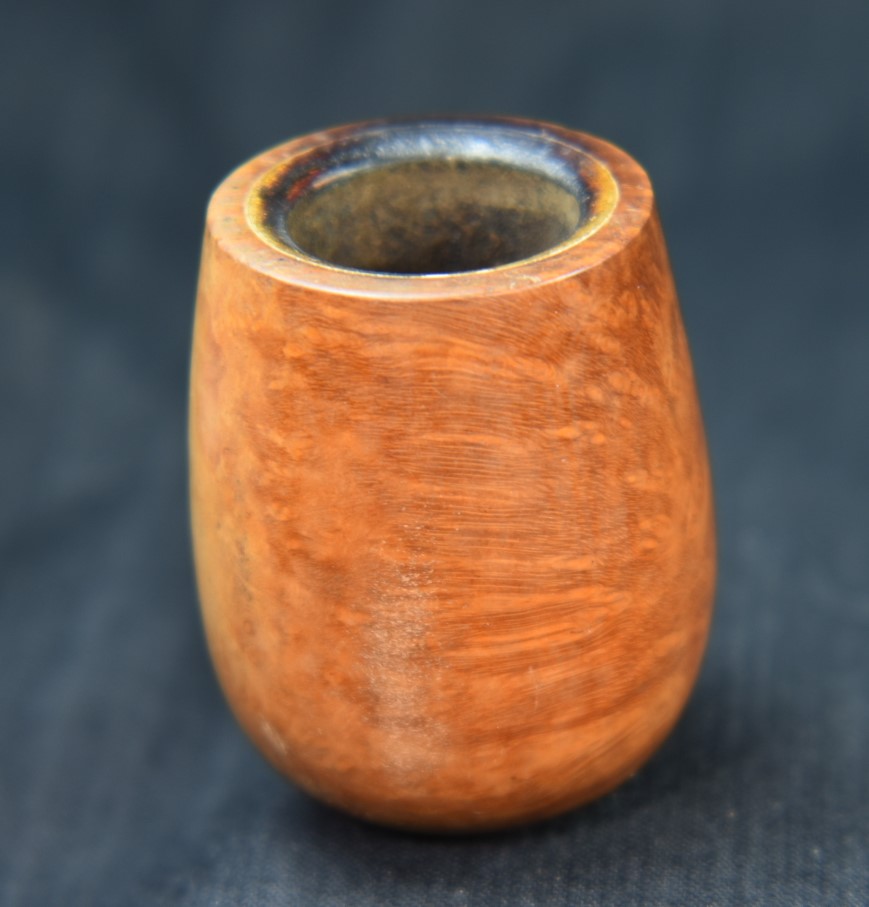
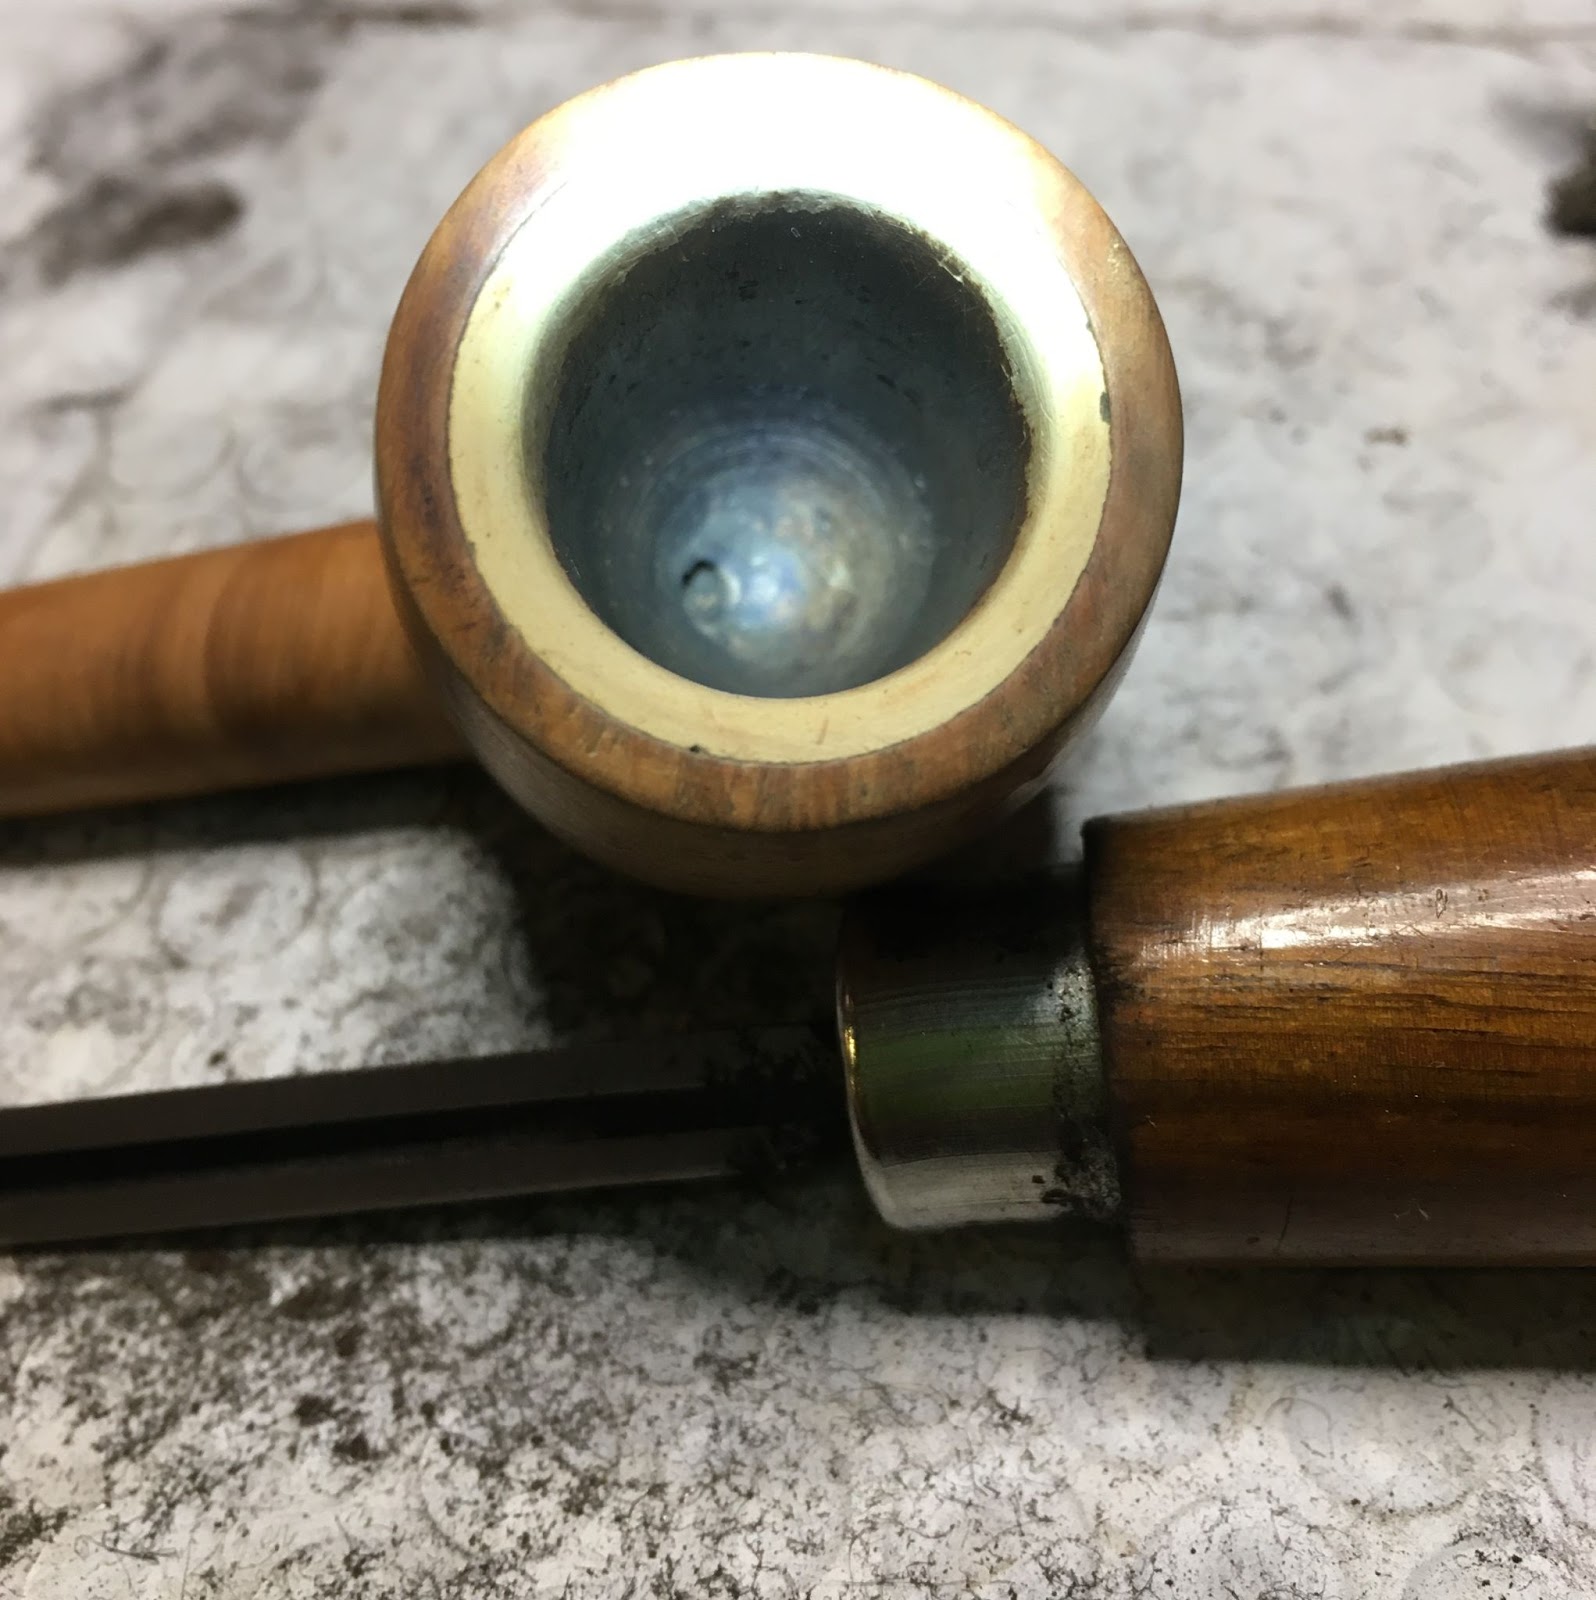
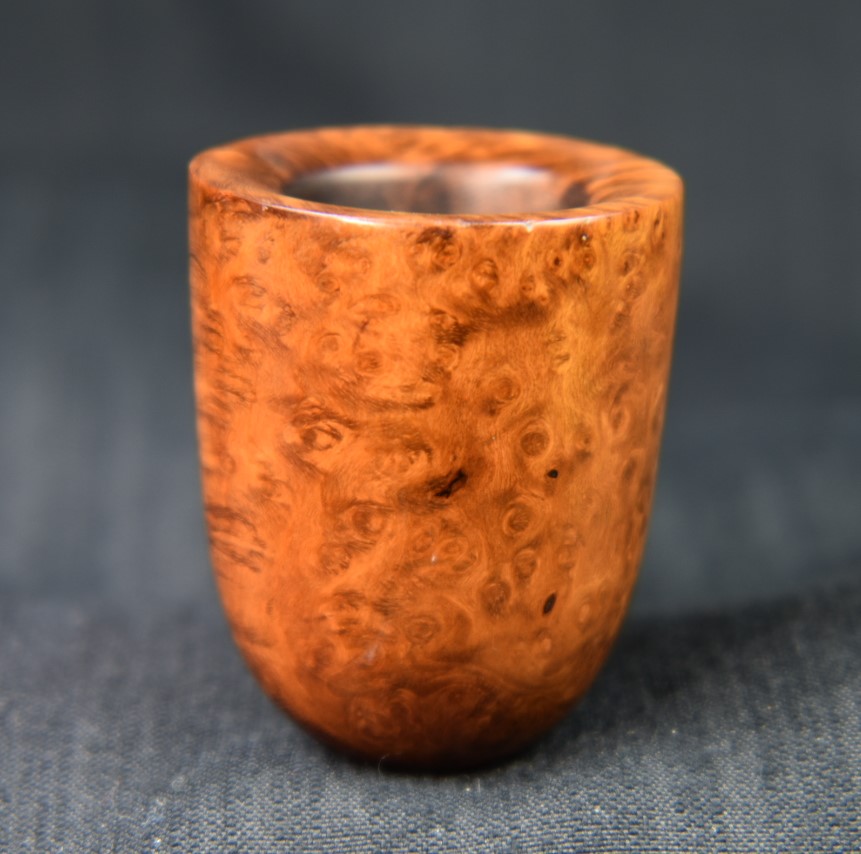
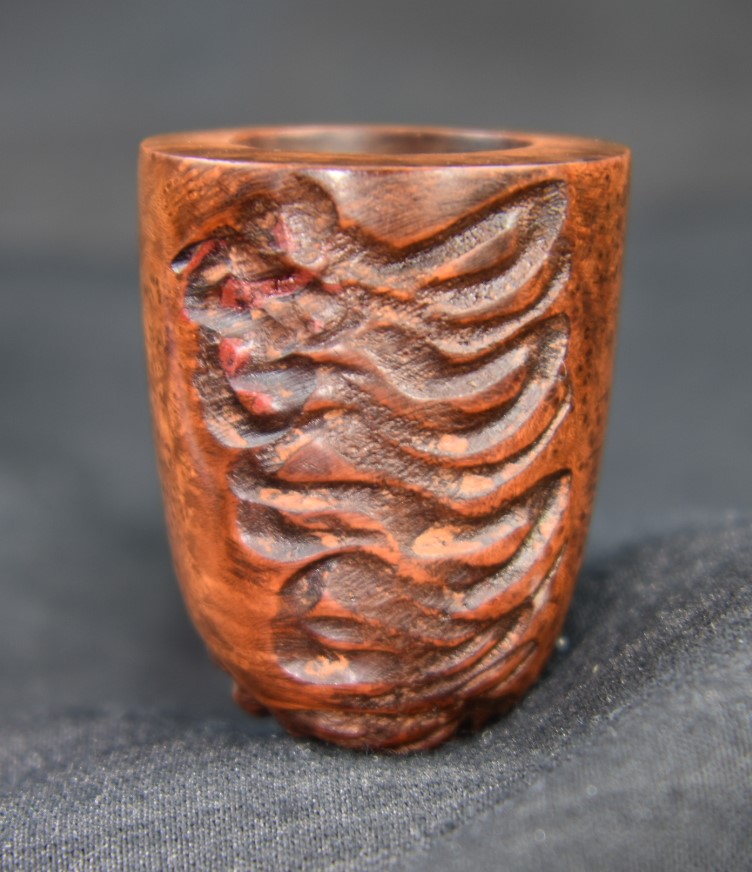
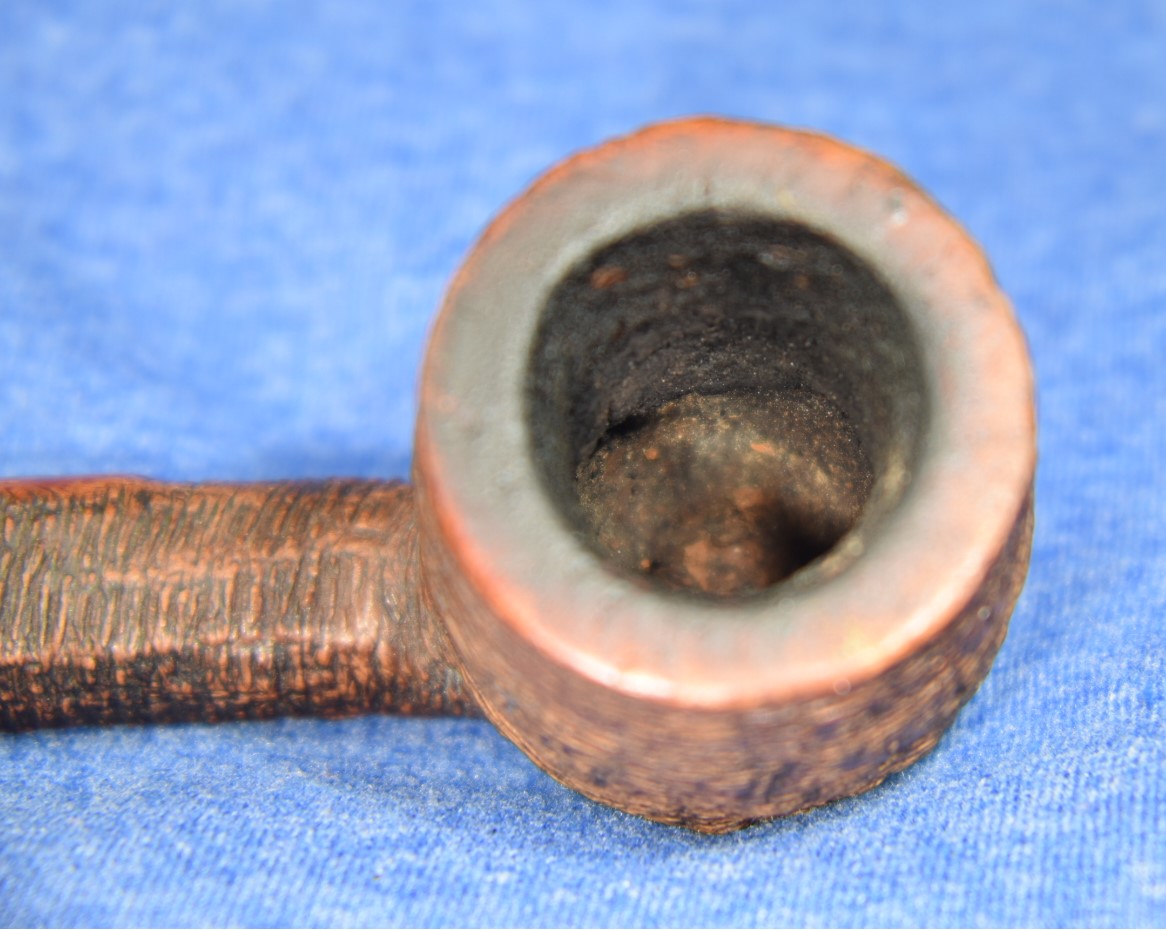
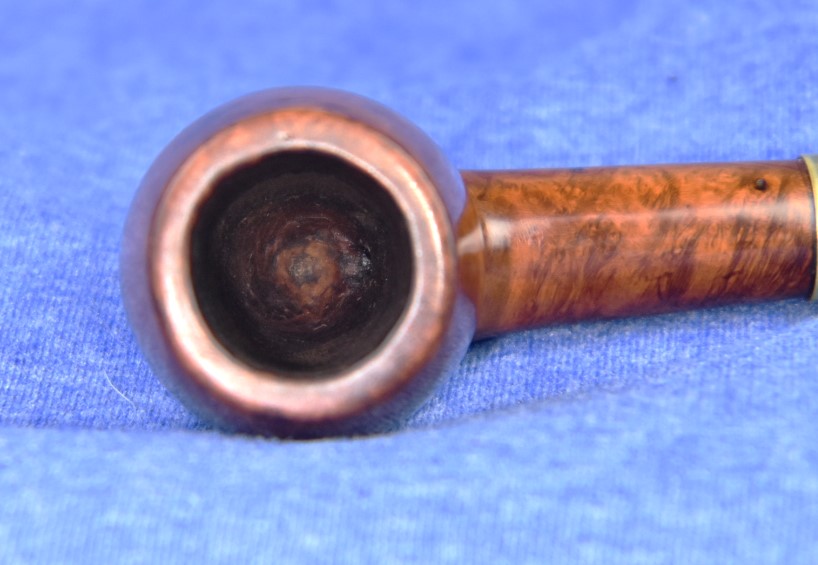
    The PipNet took center stage and did most of the work.  This pipe had a large chamber with most of the cake deposited on the upper half.

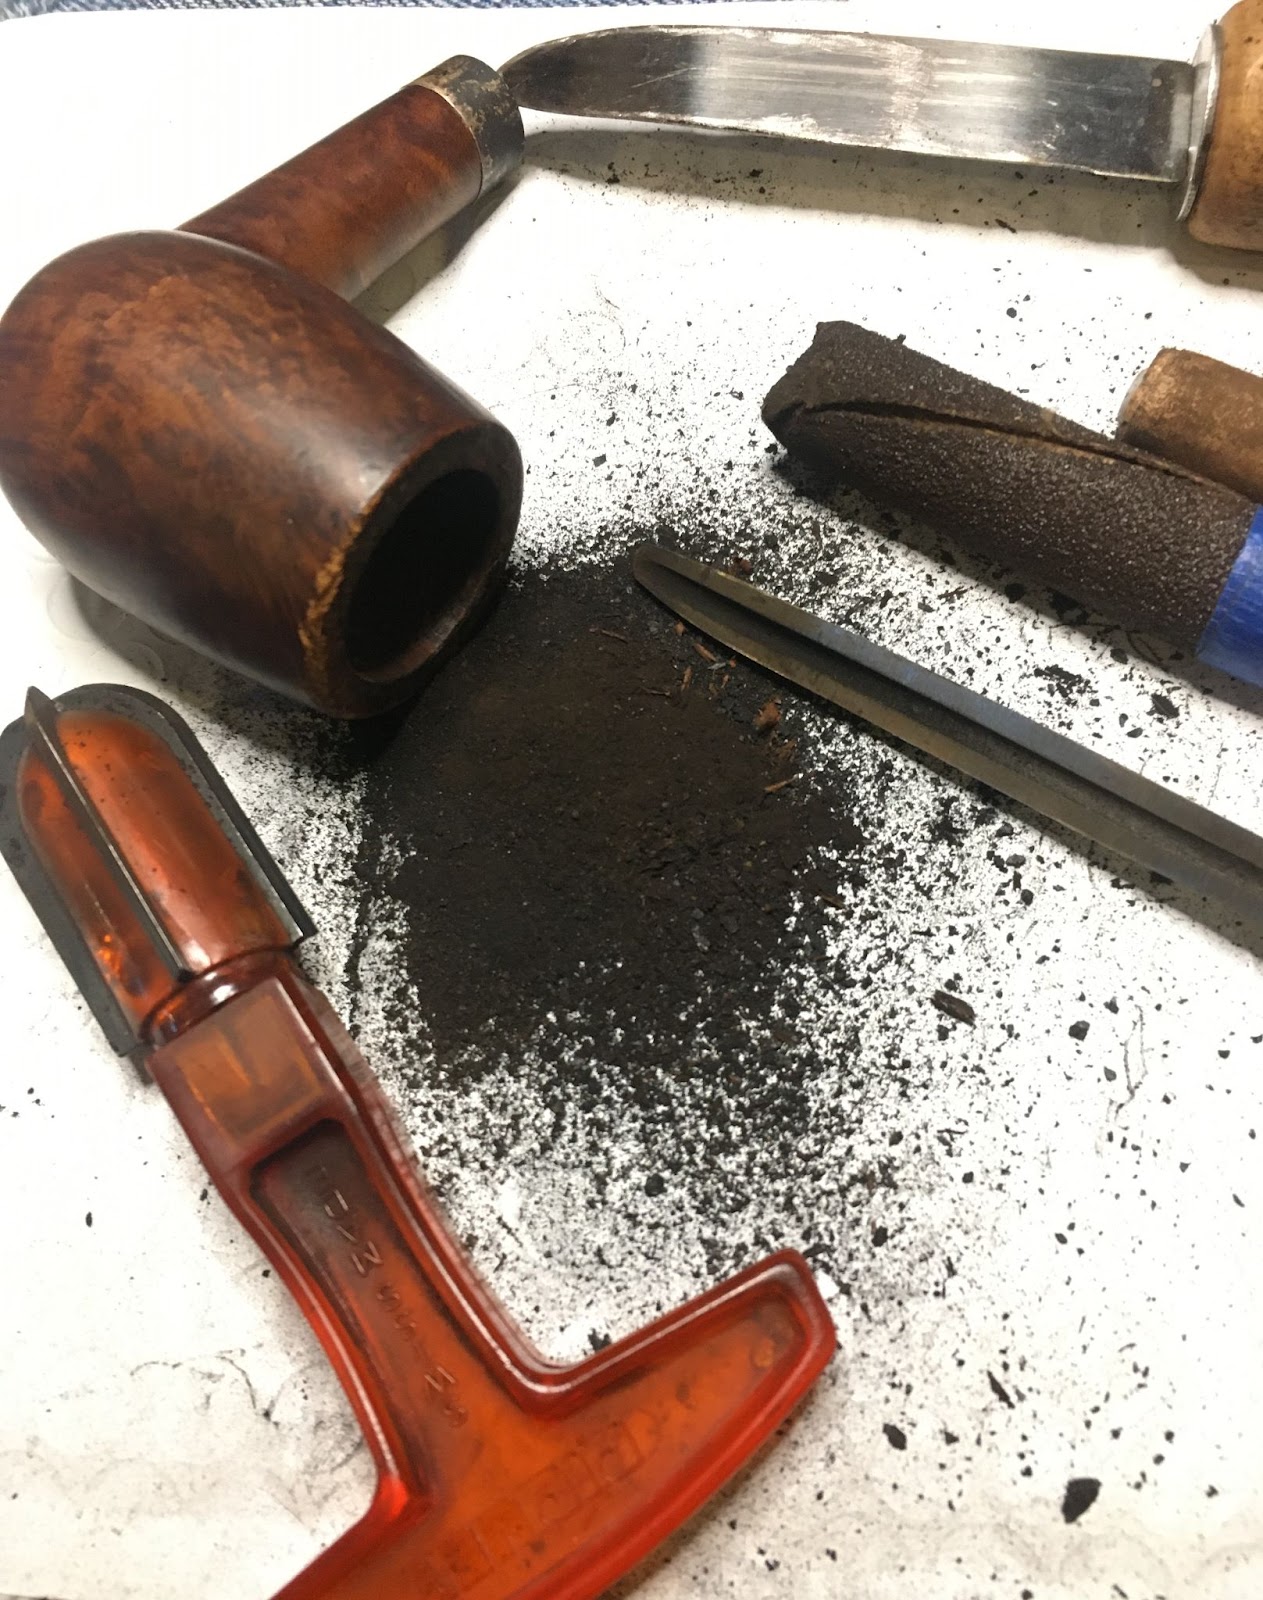
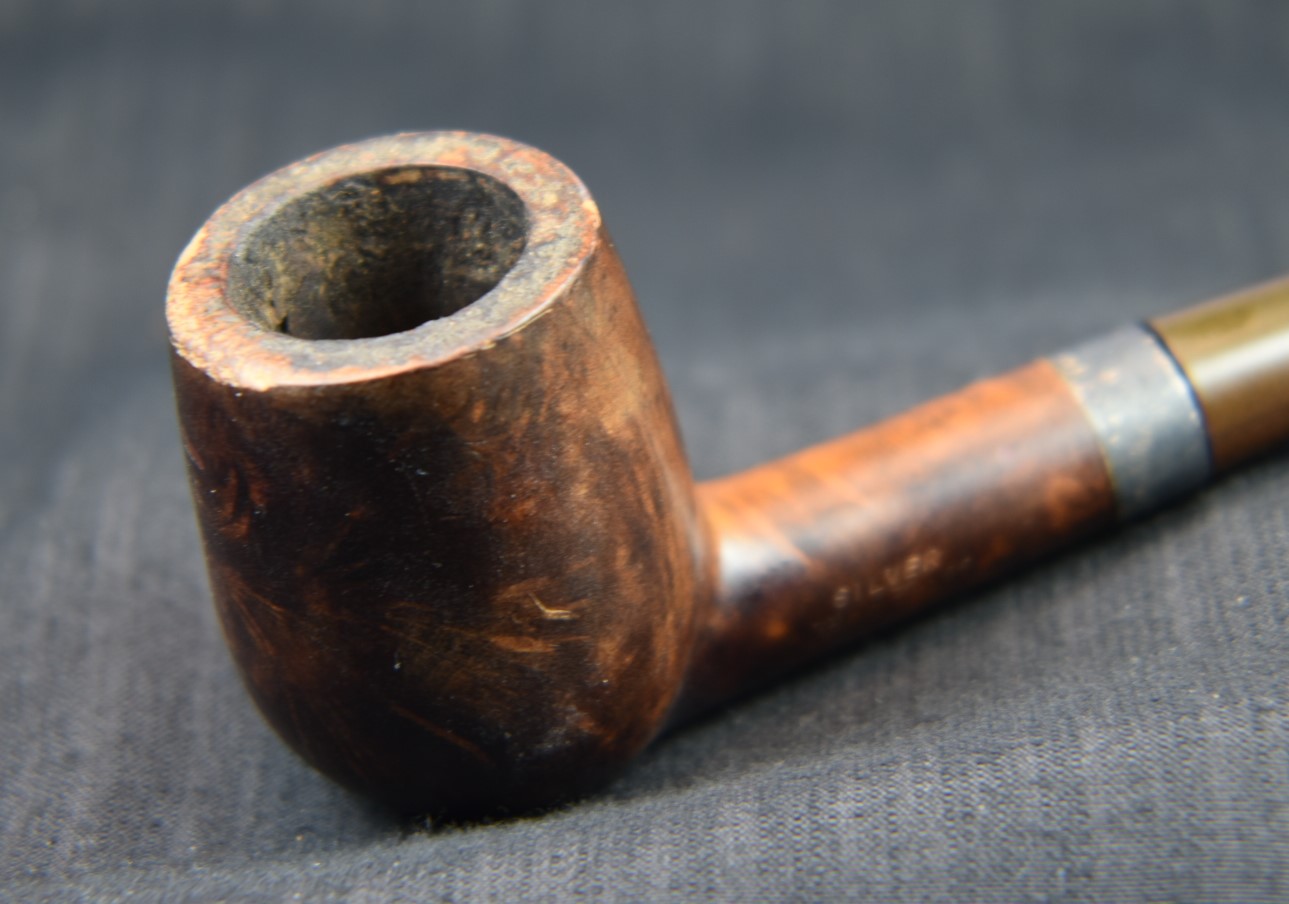
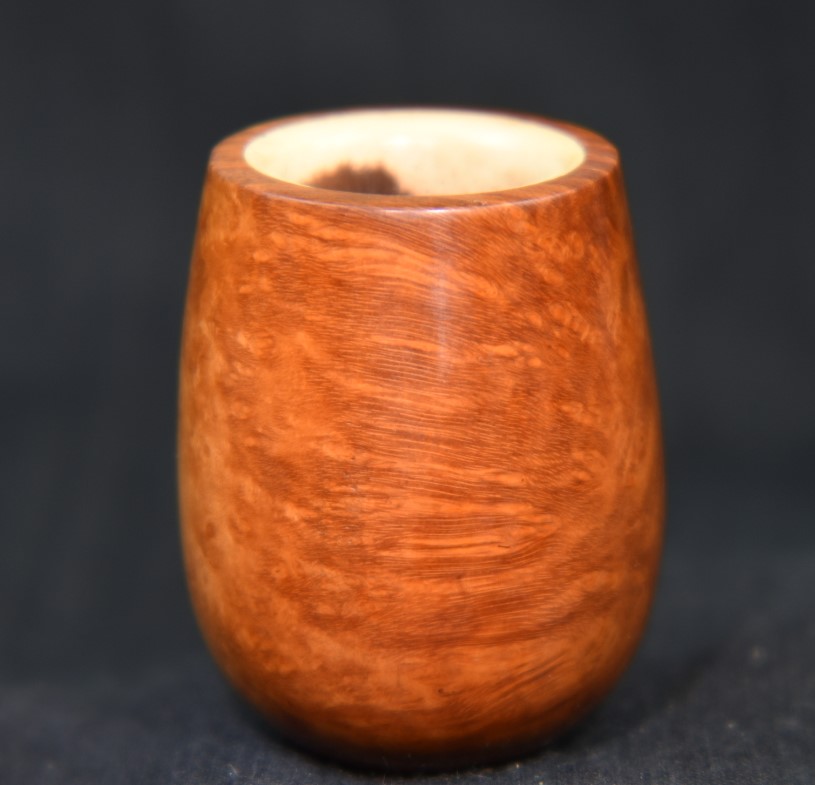
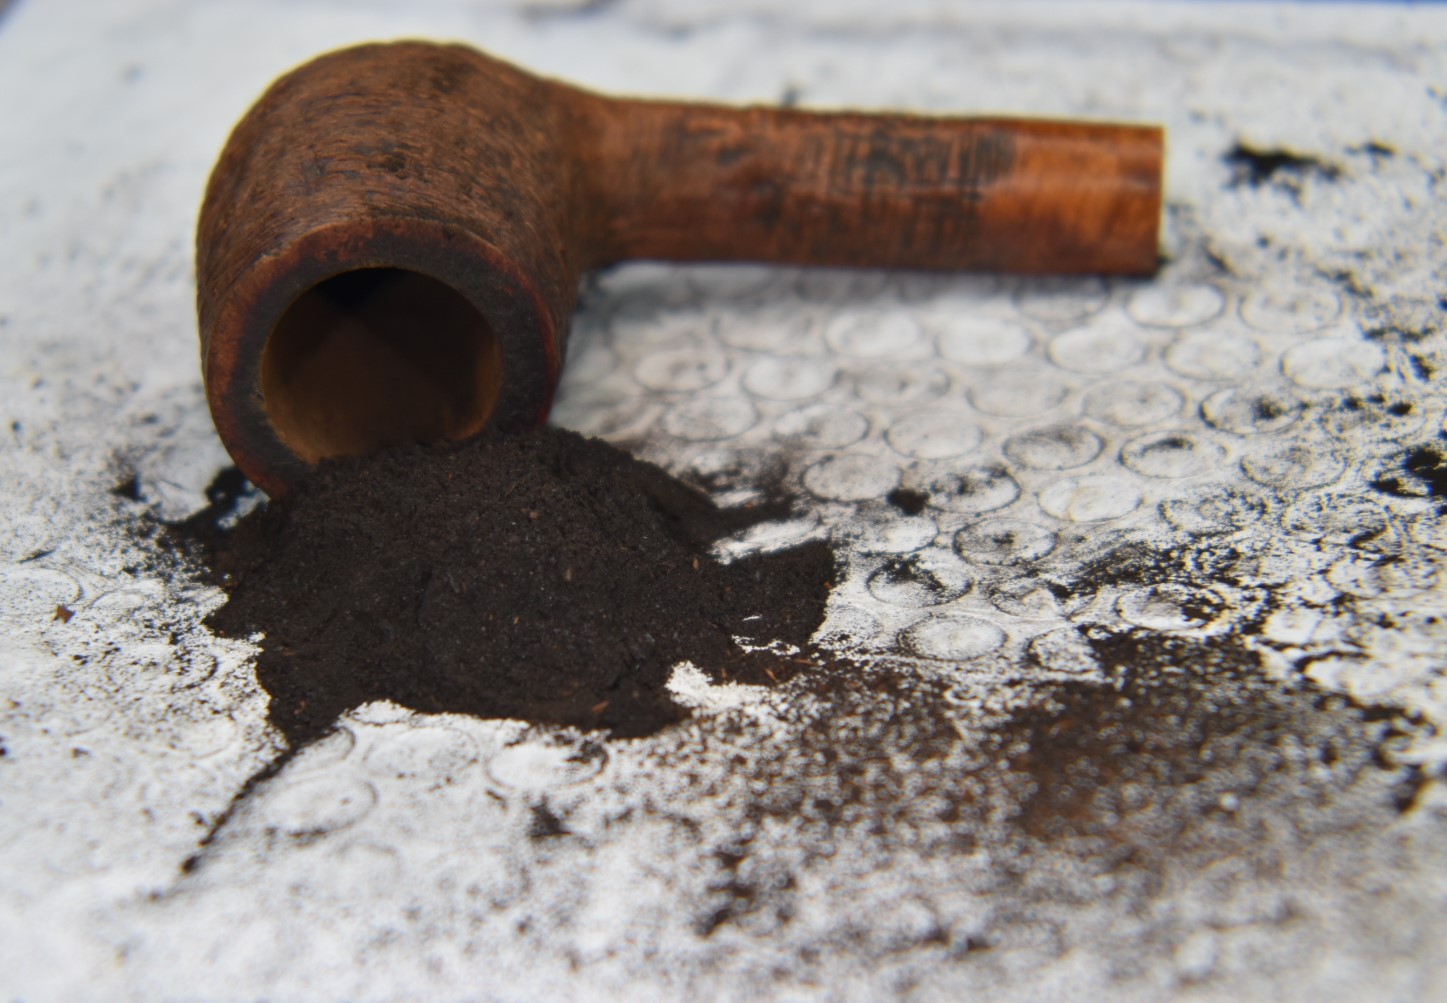
    After the PipNet the scrapers were used to clean off the lower part of the chamber then the interior was sanded to bare briar with the 220 followed by the 320 sandpapers.  There was no sign of any heat damage to the chamber.

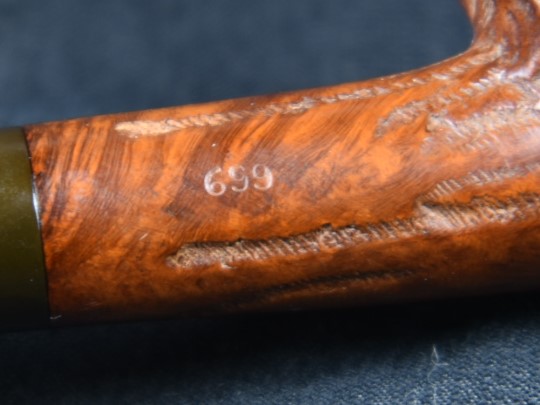
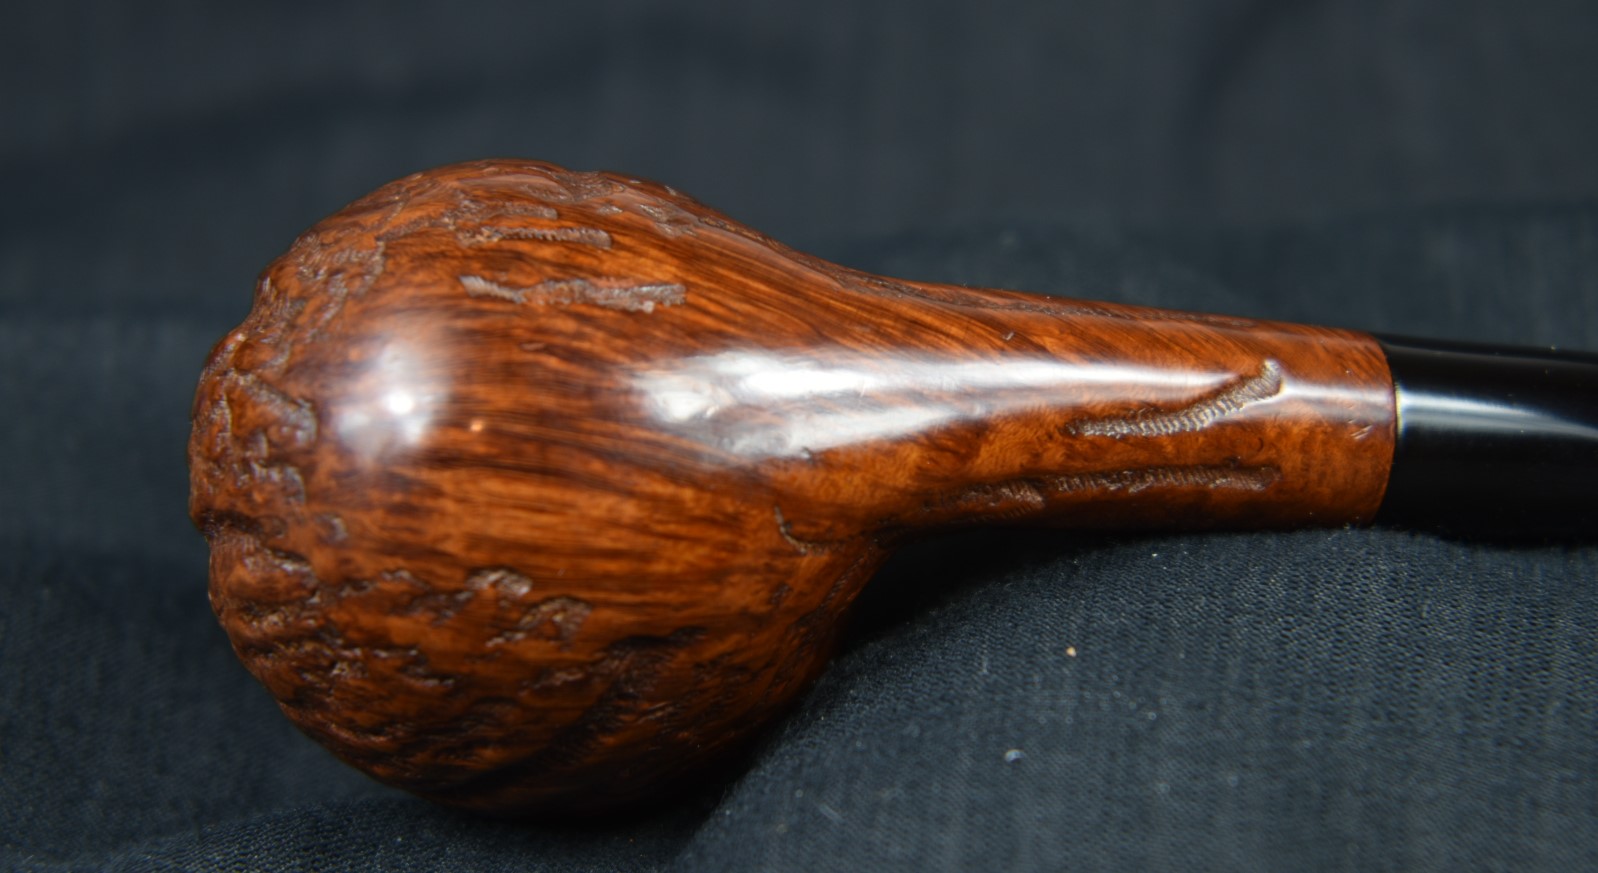
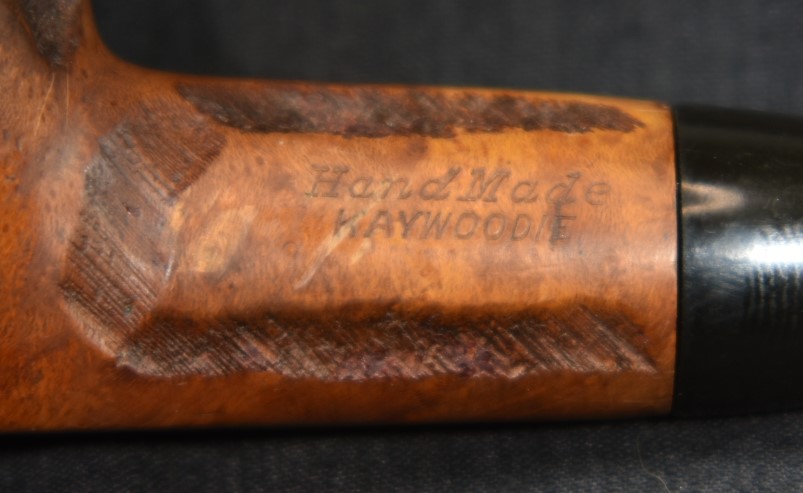
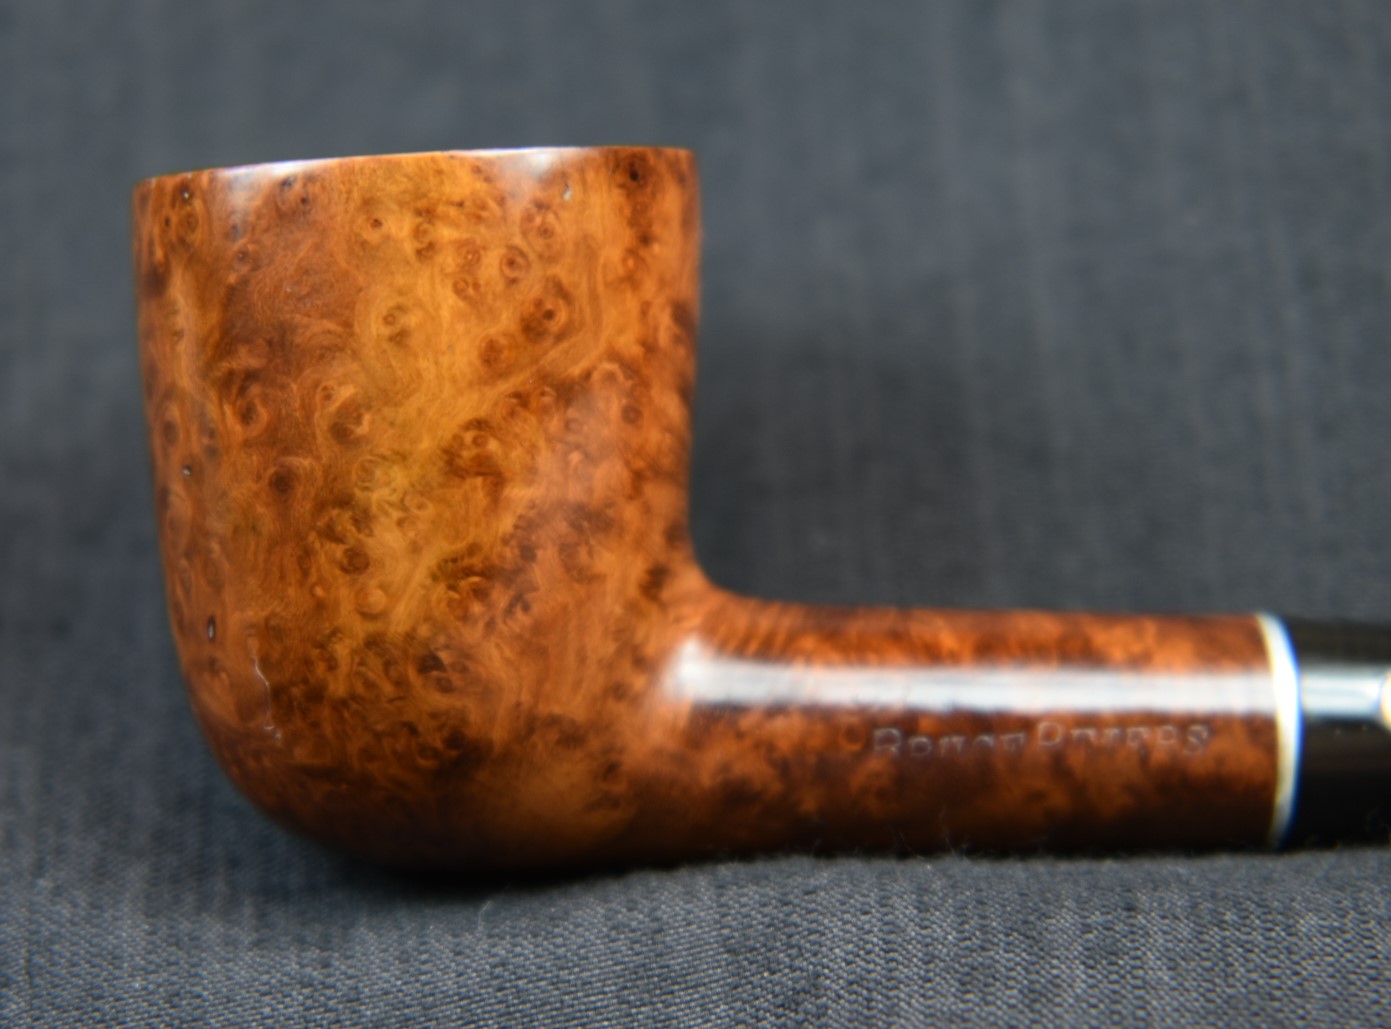
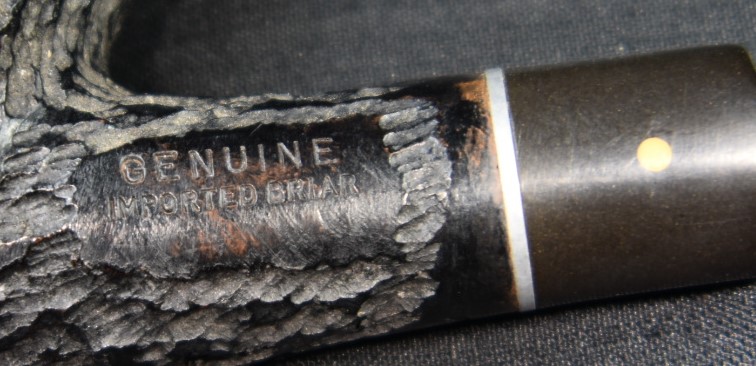
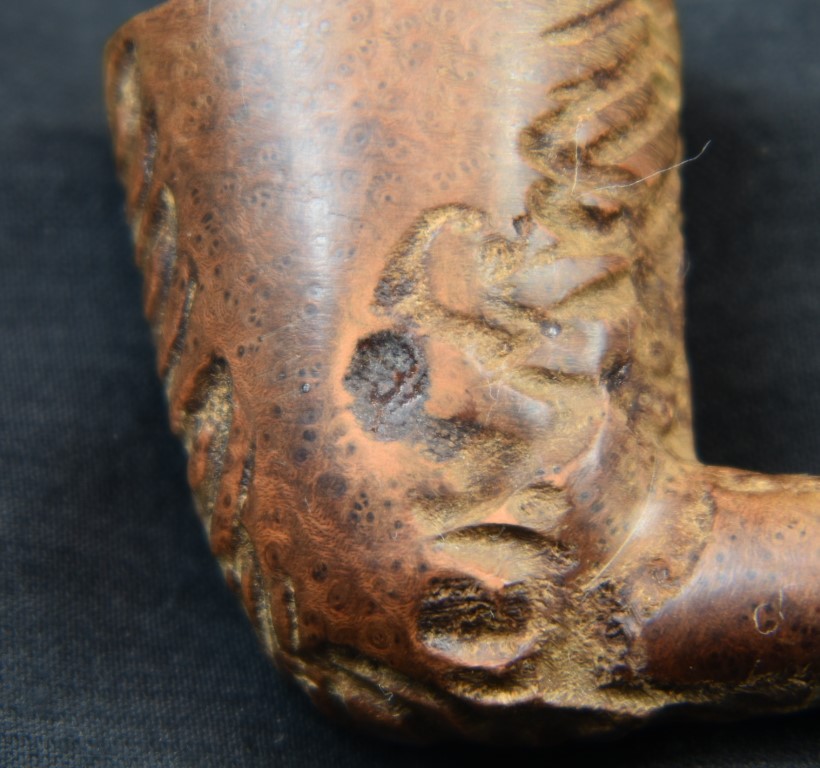
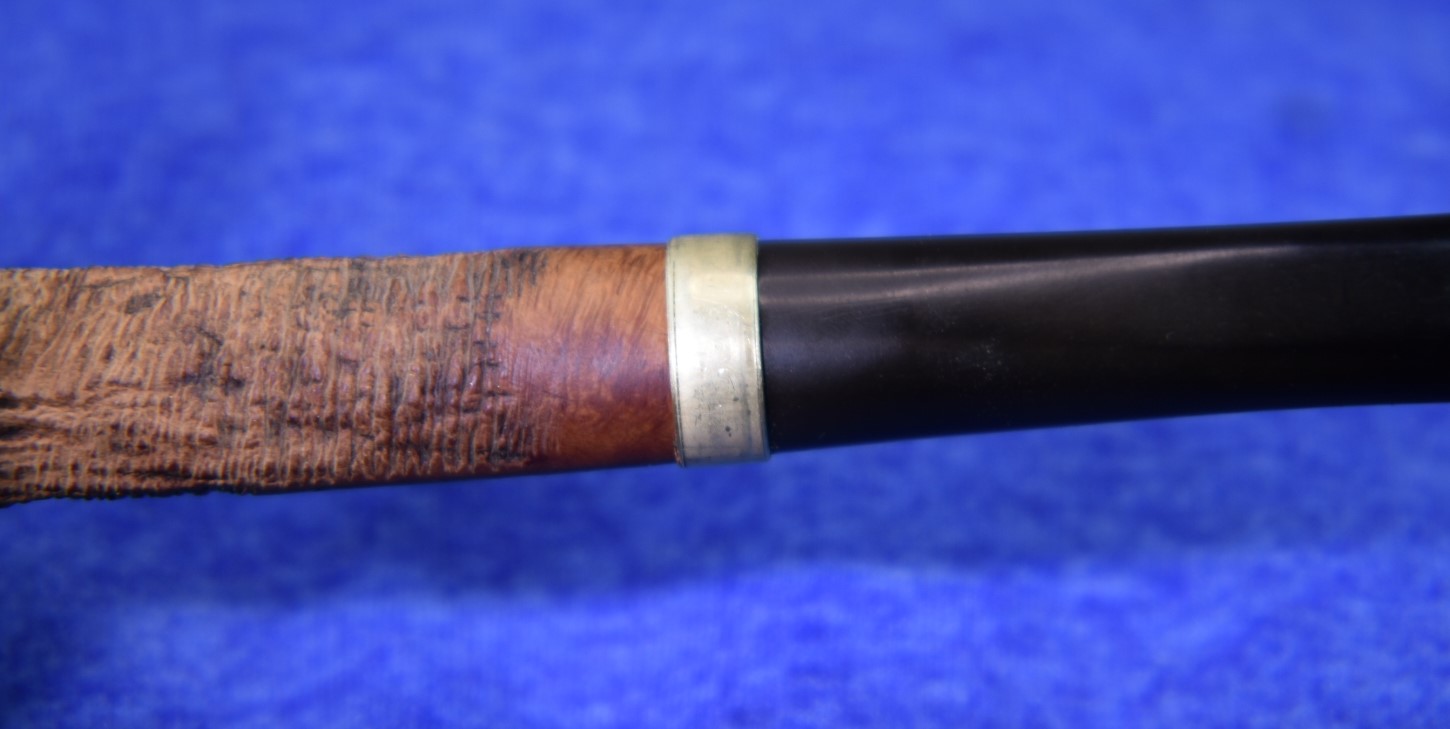
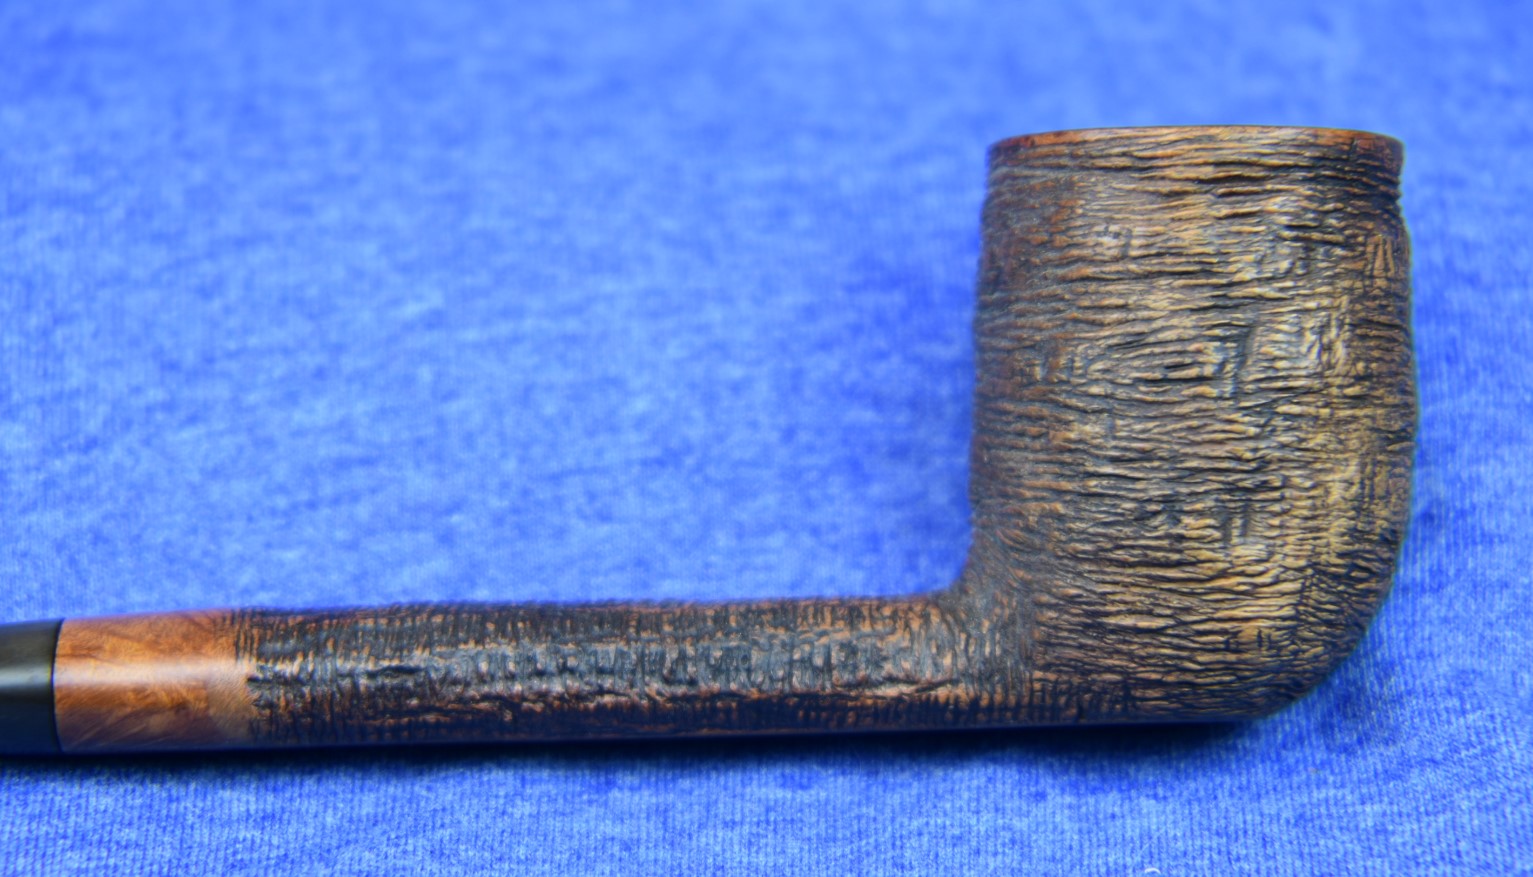
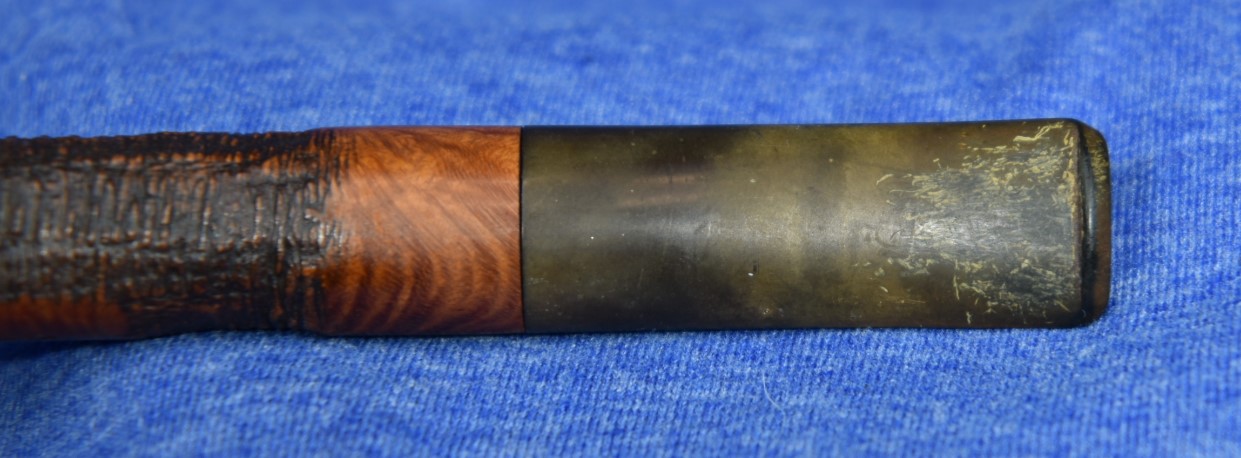
    This was a great relief referring back to that dark spot on the front of the bowl.  Below is my photo of the left side of the stummel.  There is a dark area but it was not associated with any charring damage from within the tobacco chamber. 

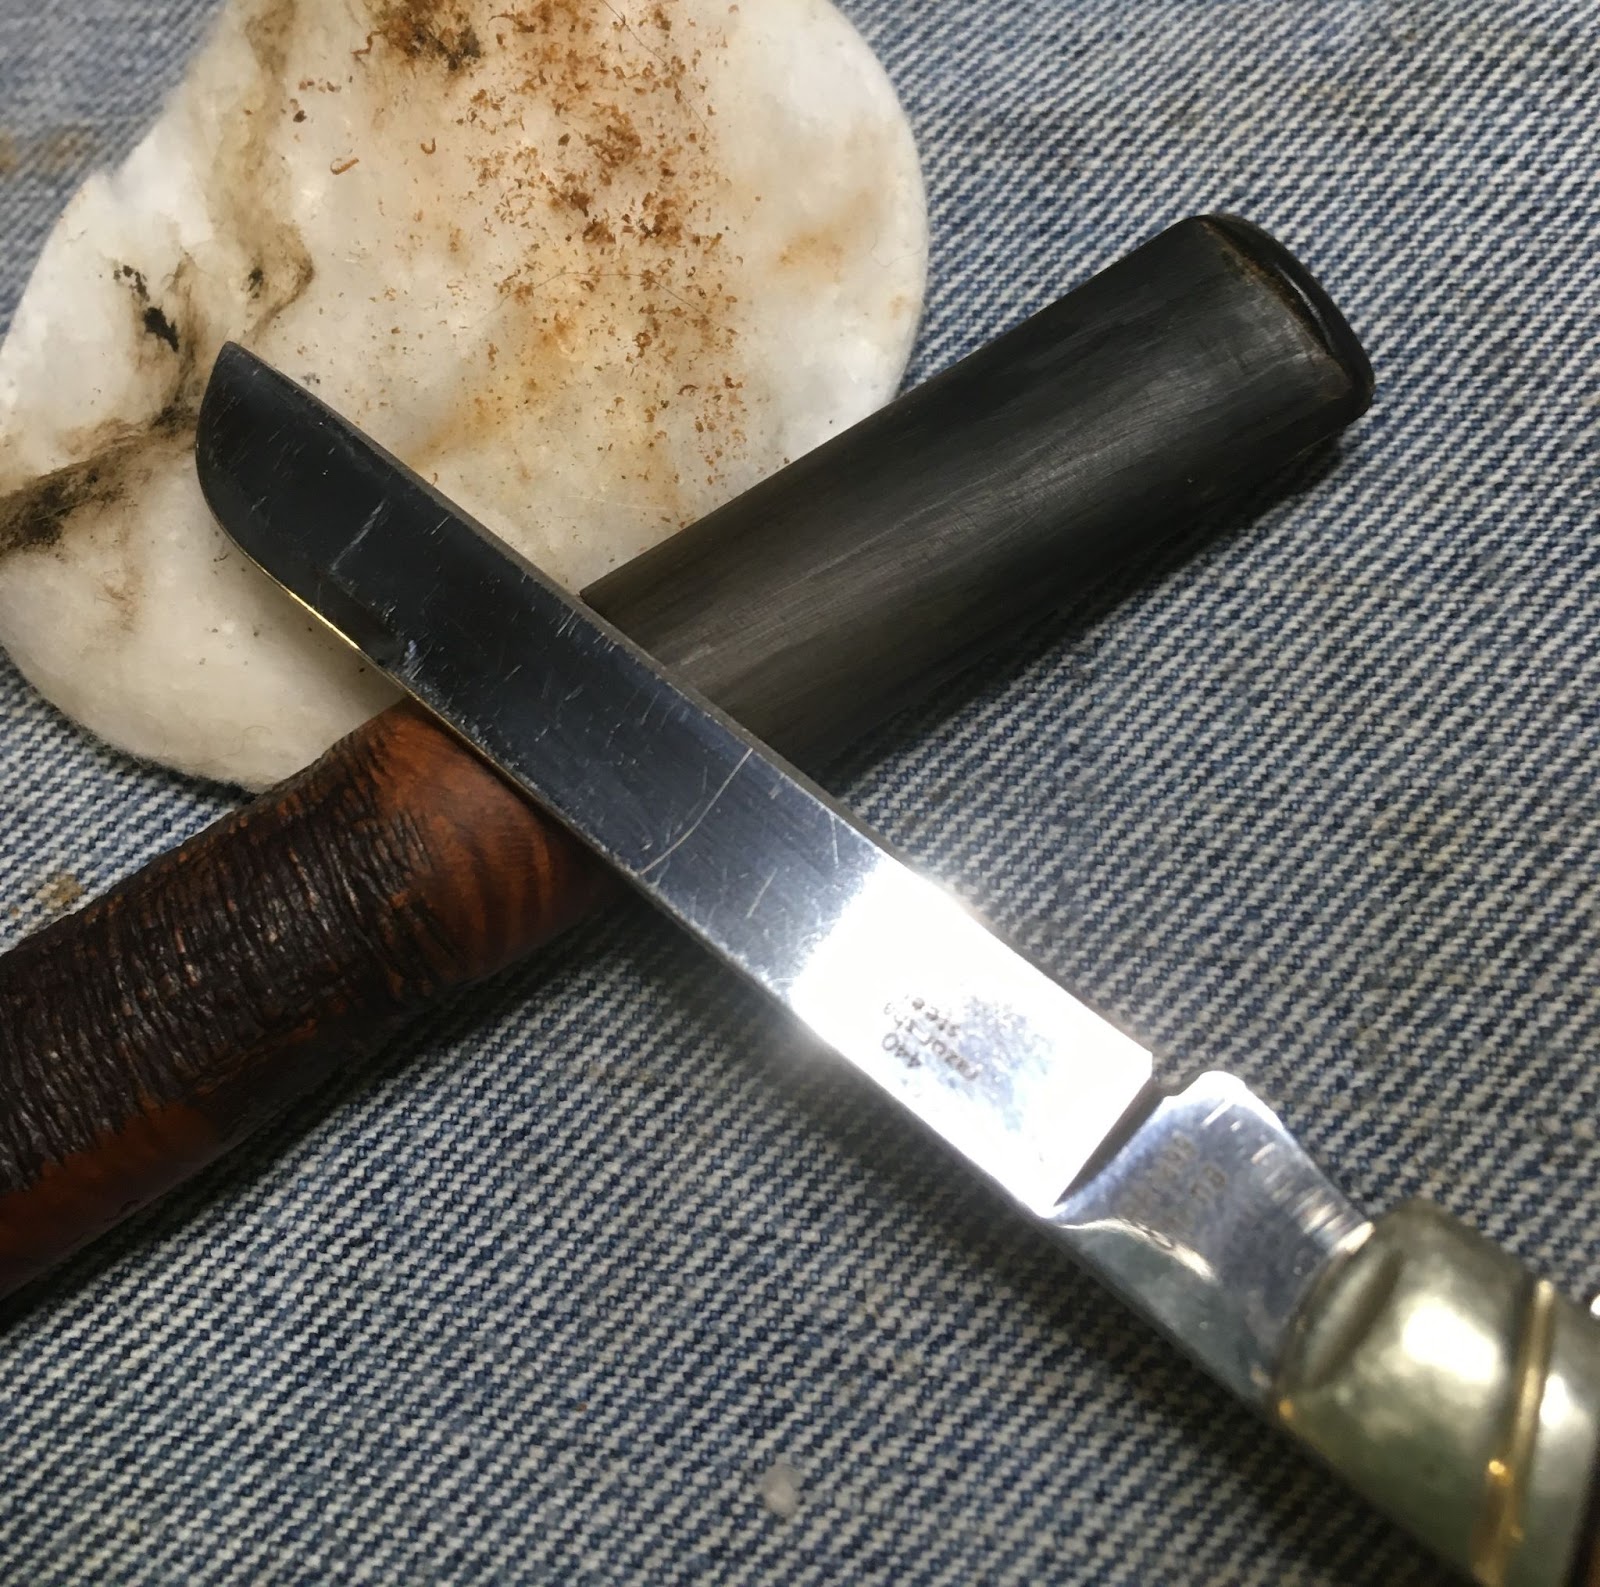
    Next, the rim was scraped using a sharp pocket knife on the lava.  Yeah, I know it sounds gross but I moistened the lava with saliva before scraping.

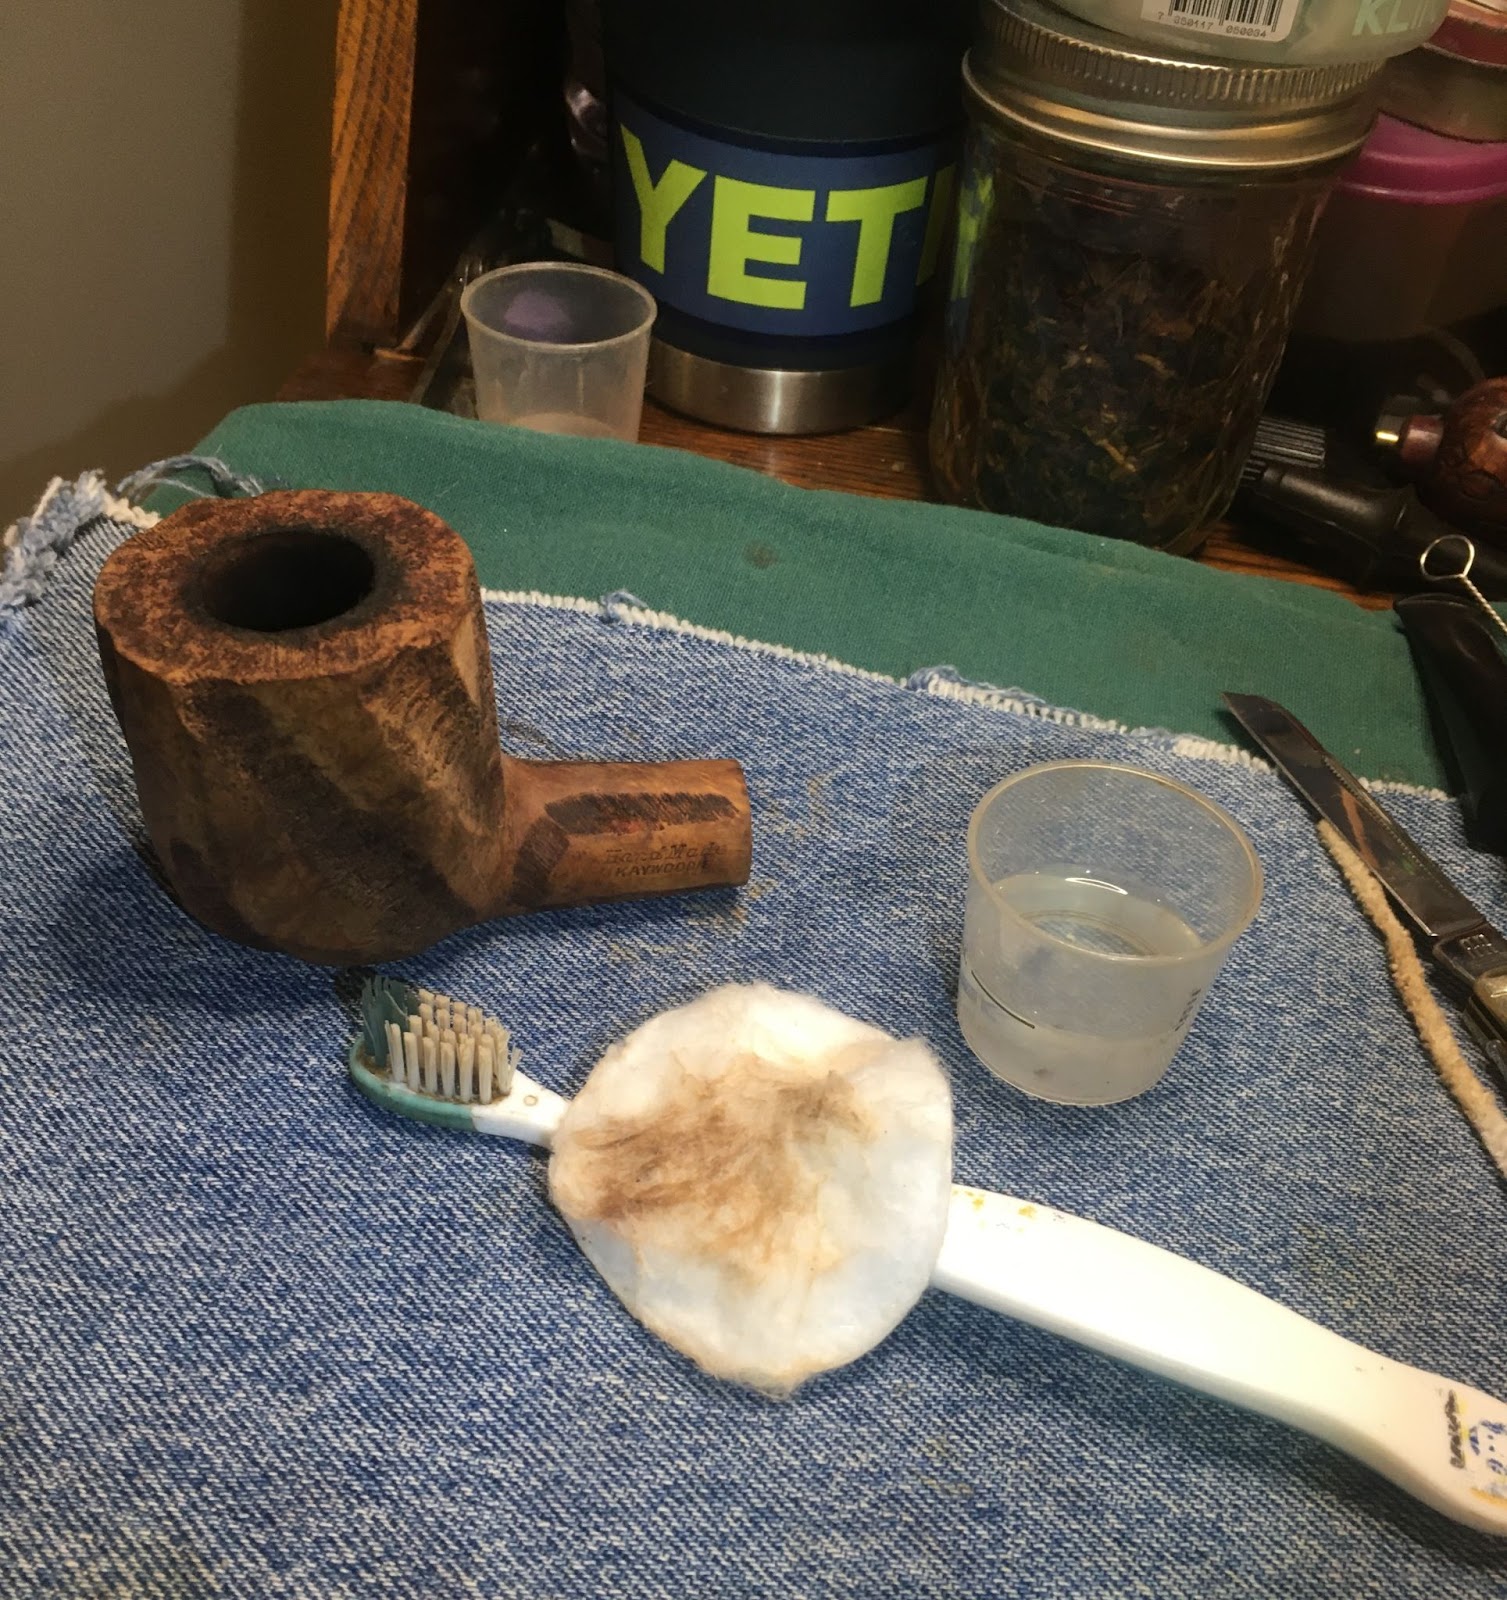
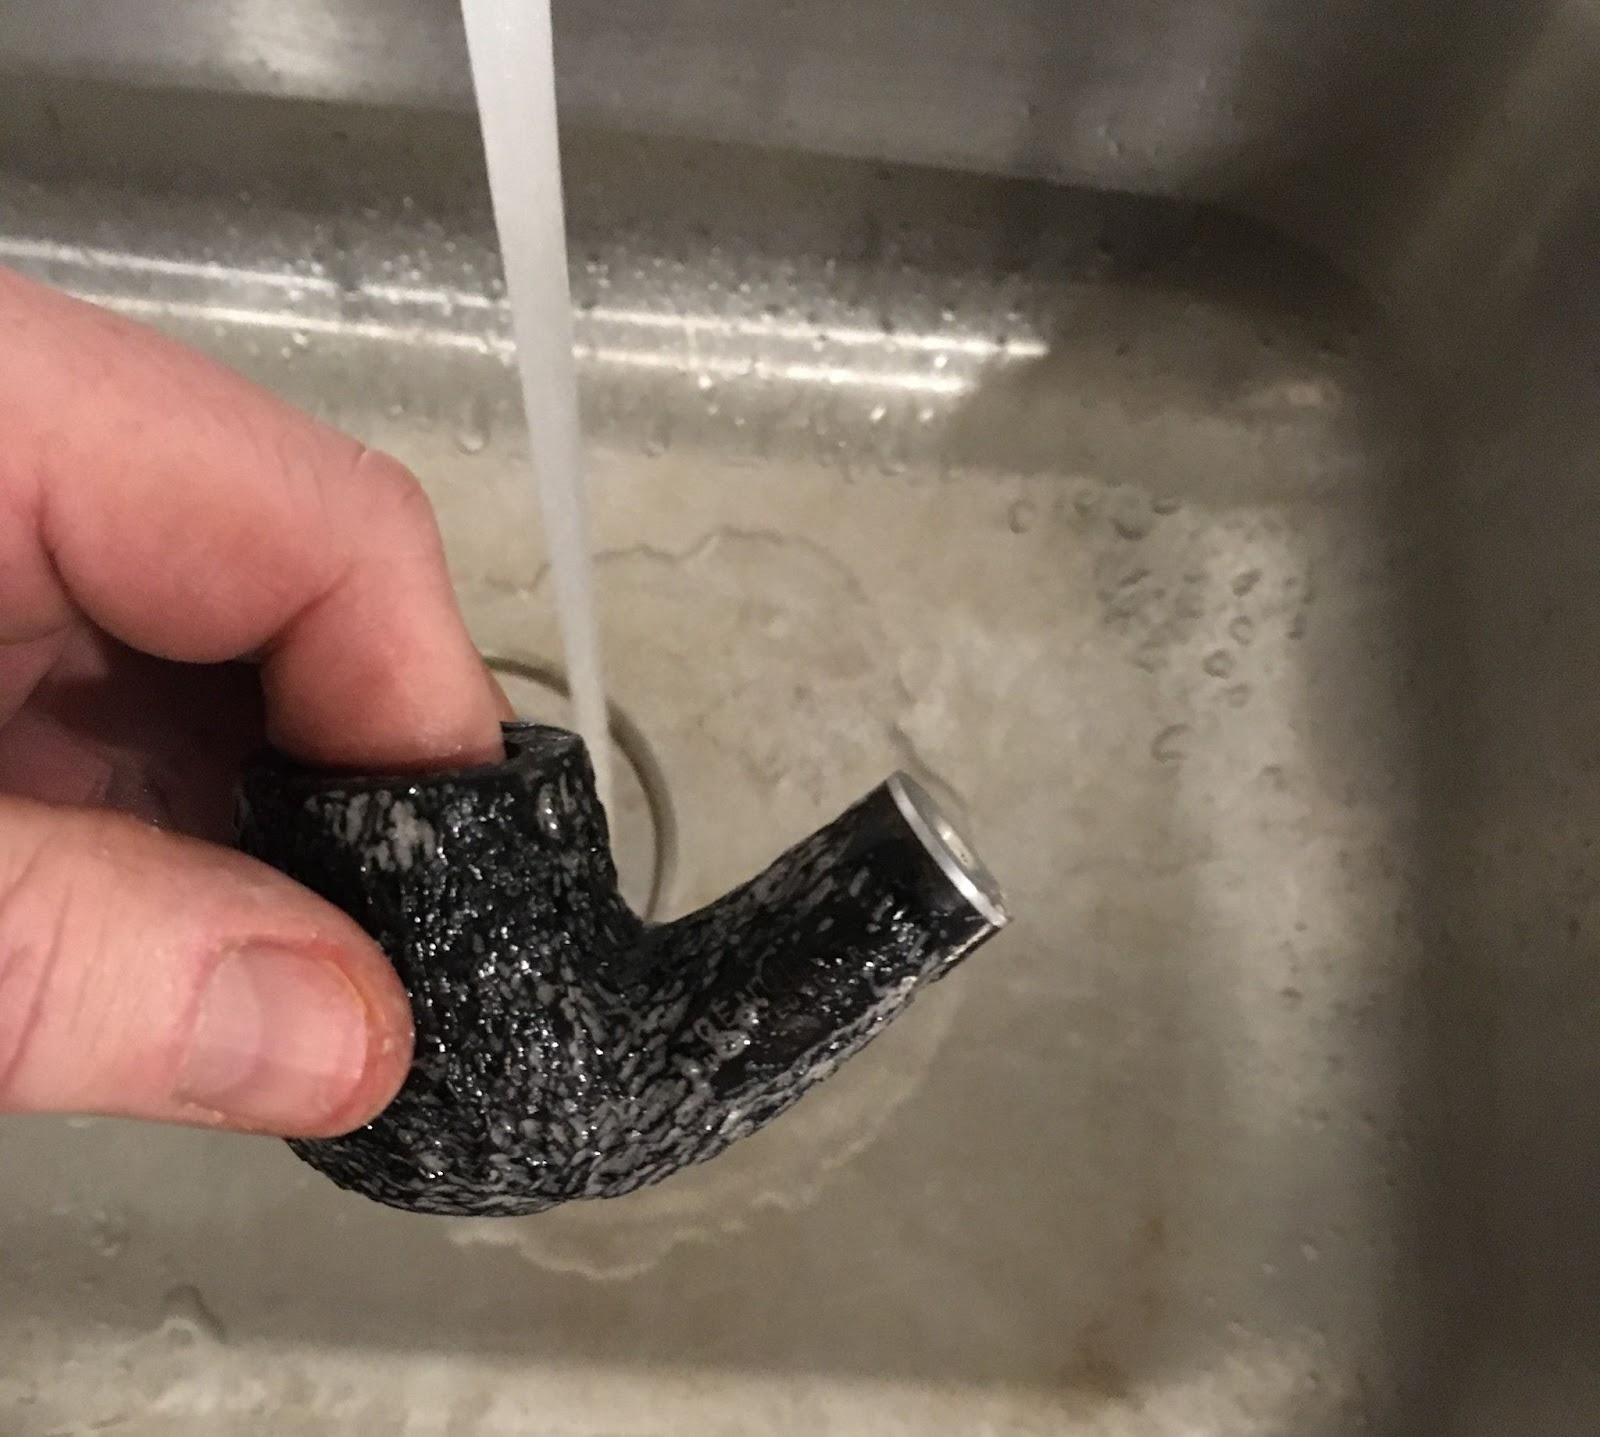
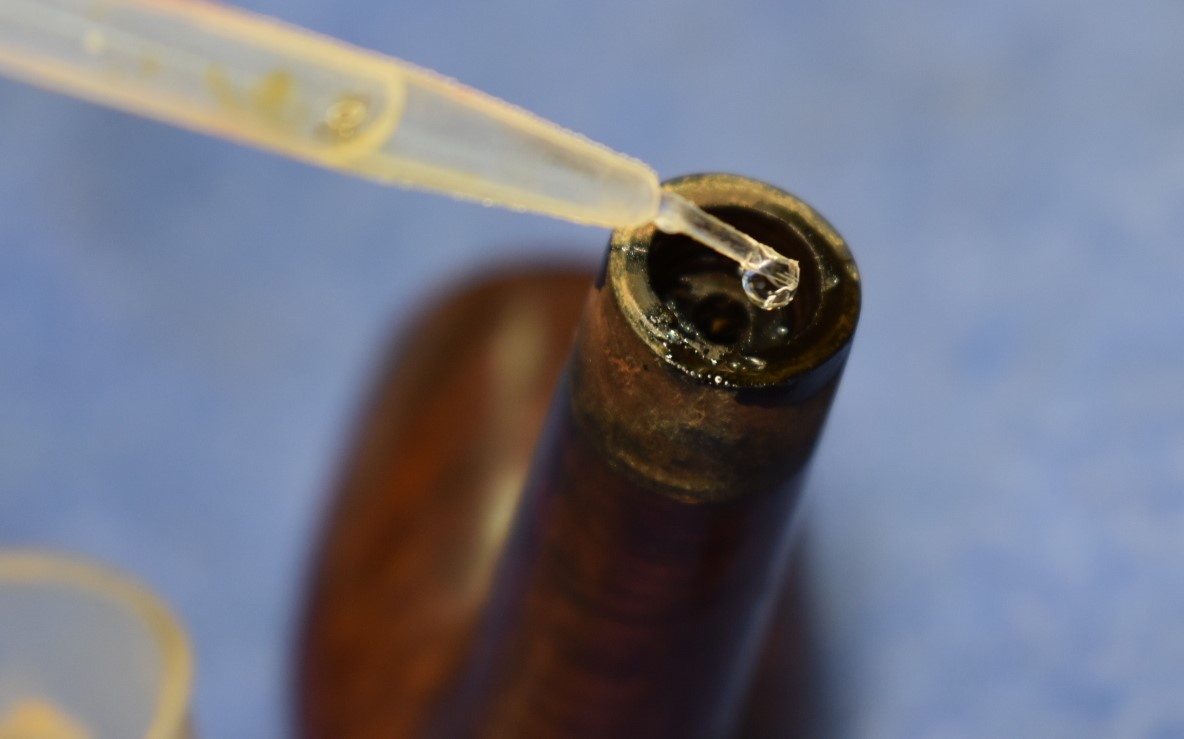
    After the scraping the stummel was taken to the sink and scrubbed with Murphy’s Oil Soap.  The Murphy’s was used undiluted and the scrubbing done with a medium stiff toothbrush.  The Murphy’s was rinsed with warm water and dried with a cotton dish towel.  At this point I poured about 4 ml of 95% ethyl alcohol into the bowl and let it flow into the shank.  I used a nylon shank brush to scrub the airway full of alcohol. I then poured the alcohol into a medicine cup.  I can get a pretty good idea of how dirty a shank is by gauging the color of the alcohol in the cup.  This one was dark indicating a lot of scrubbing would be required. 

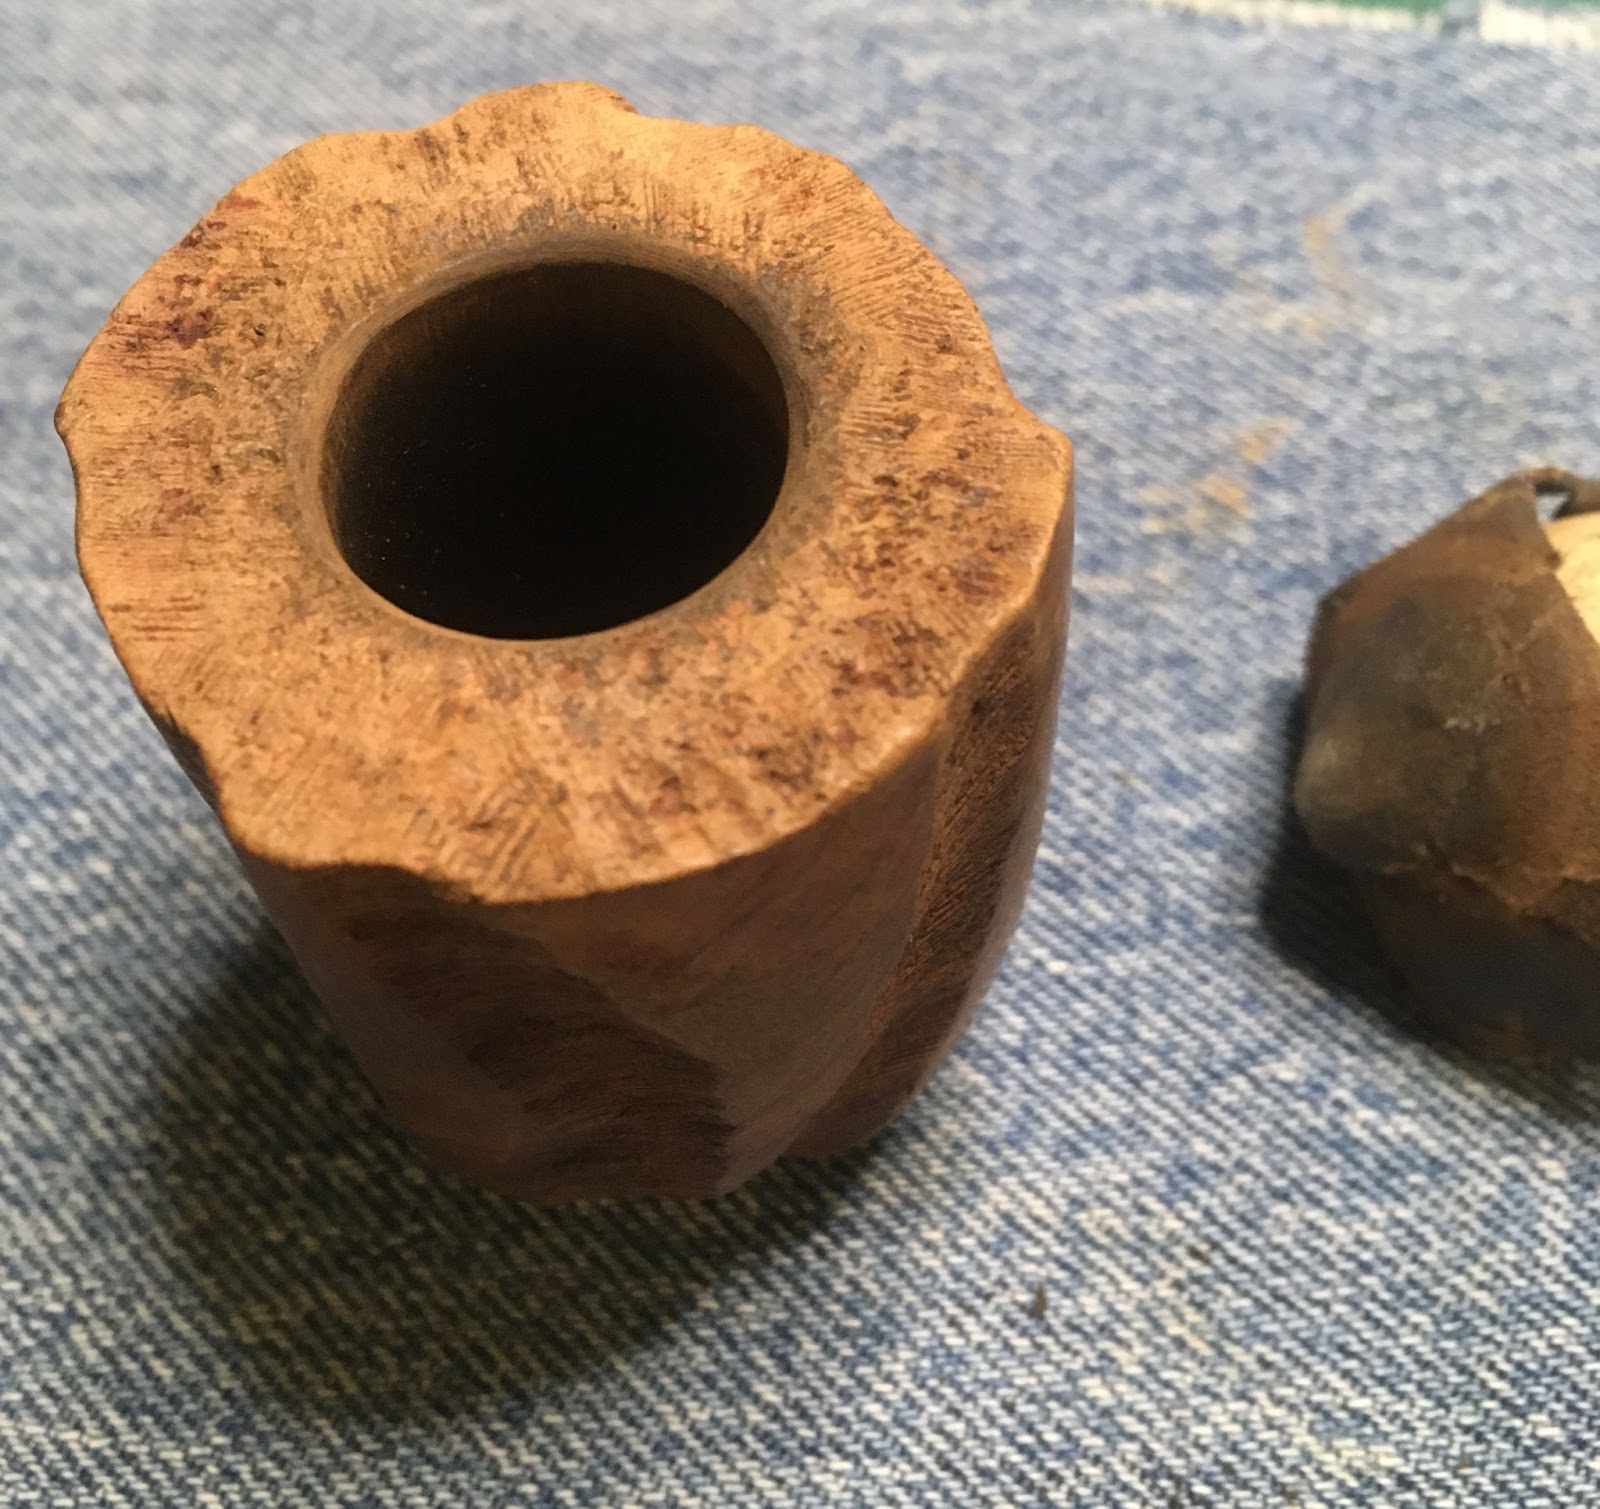
    The counter, next to the sink, is where I top a rim if topping is required.  This rim definitely needed some topping to remove the damage from dottle knocking.

    I would have had to remove several millimeters or ⅛ inch from the rim to remove the damage.  Instead I opted for a topping and to bevel the outer rim edge. 

    I used a funnel with sandpaper glued to the interior.  The funnel established the angle.  I then used a flat needle file  and further funnel sanding to bevel the rim.

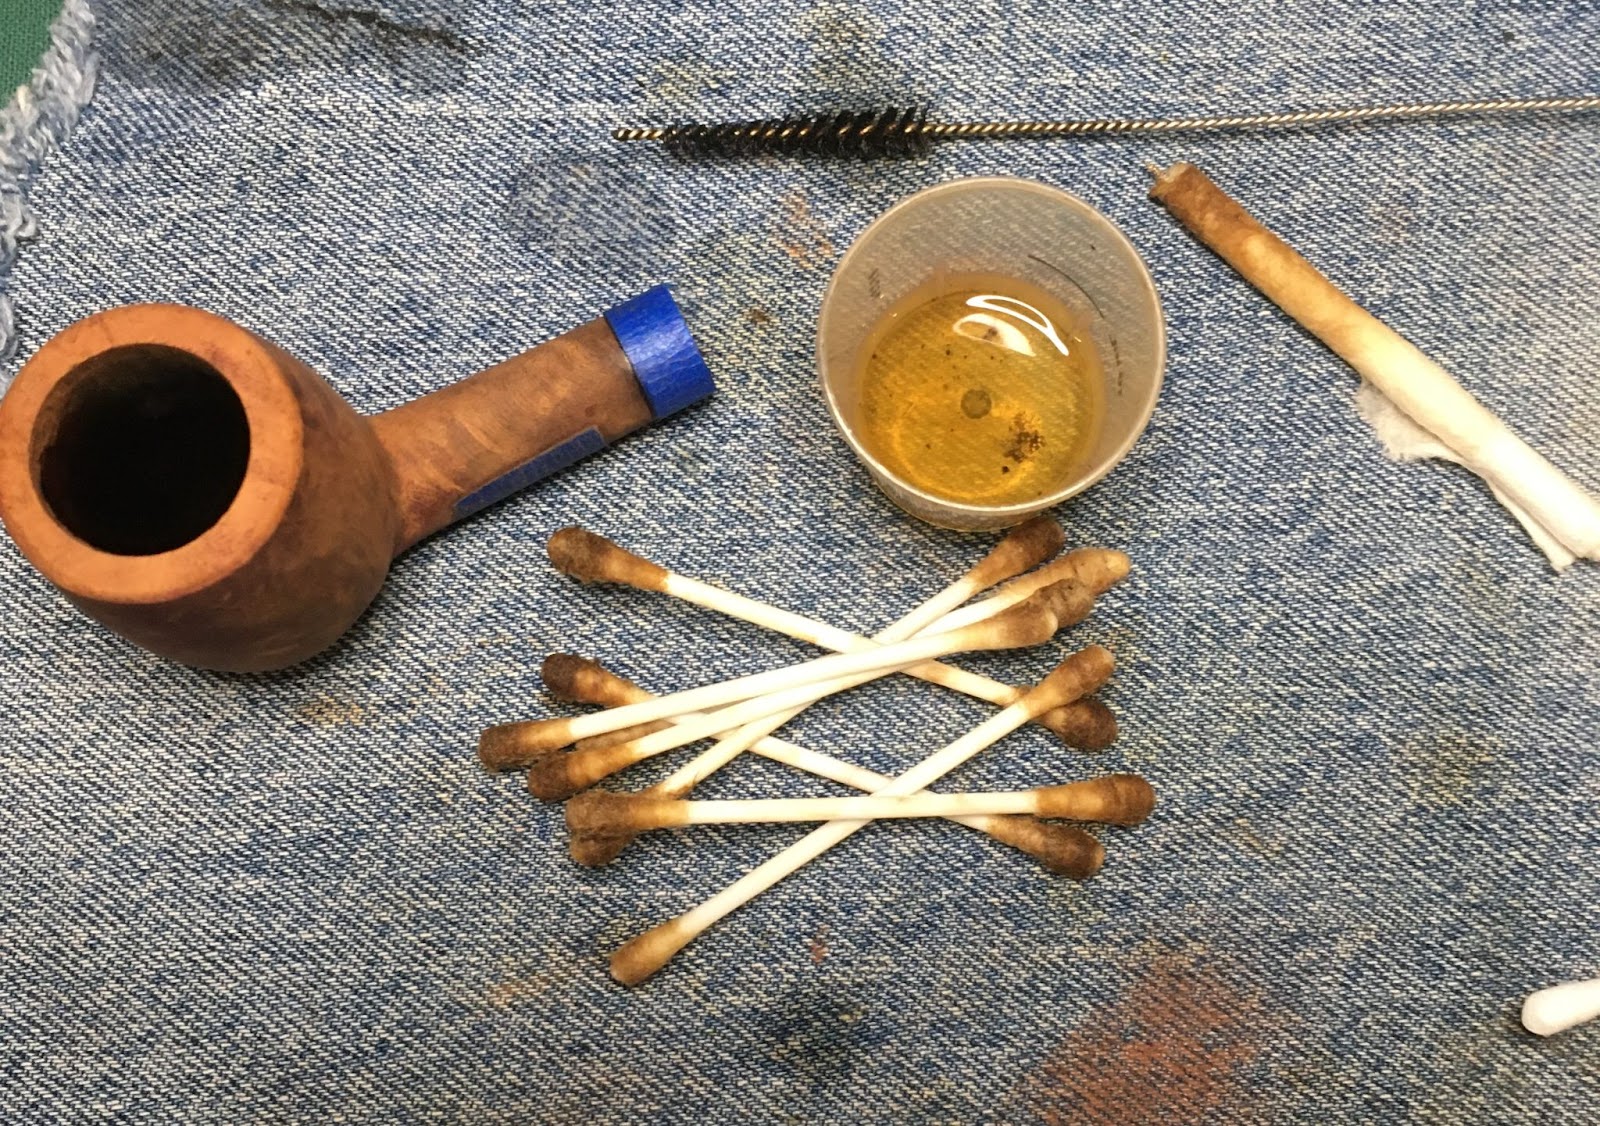
    On to the shank scrubbing.  I started with scraping as much yuck (the highly technical term for smoking residue) from the shank with a dental scraper.  I then poured about 3-4 ml of 95% ethyl alcohol into the tobacco chamber.  This was allowed to flow into the shank but not out.  I then held the stummel at an angle and scrubbed with the nylon shank brush and alcohol.  After a bit of scrubbing I’d pour the alcohol into the medicine cup and either scrape or use a cotton swab to check on the yuck removal.  This was repeated several times, replacing the alcohol when it got fully yuckified (another highly technical term for something which has been exposed to large amounts of smoking residue).

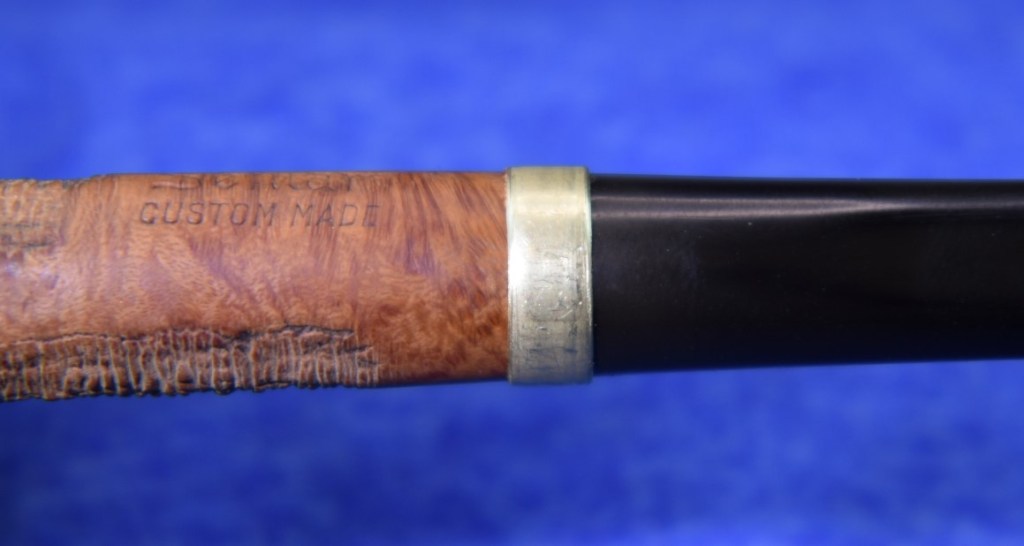
    I must have gotten bored with all the scrubbing and decided to work on the stummel.  According to the order of photos on the phone, I then polished the silver then taped over it.  Perhaps I was curious to see the condition of the briar after the Murphy’s scrub.  

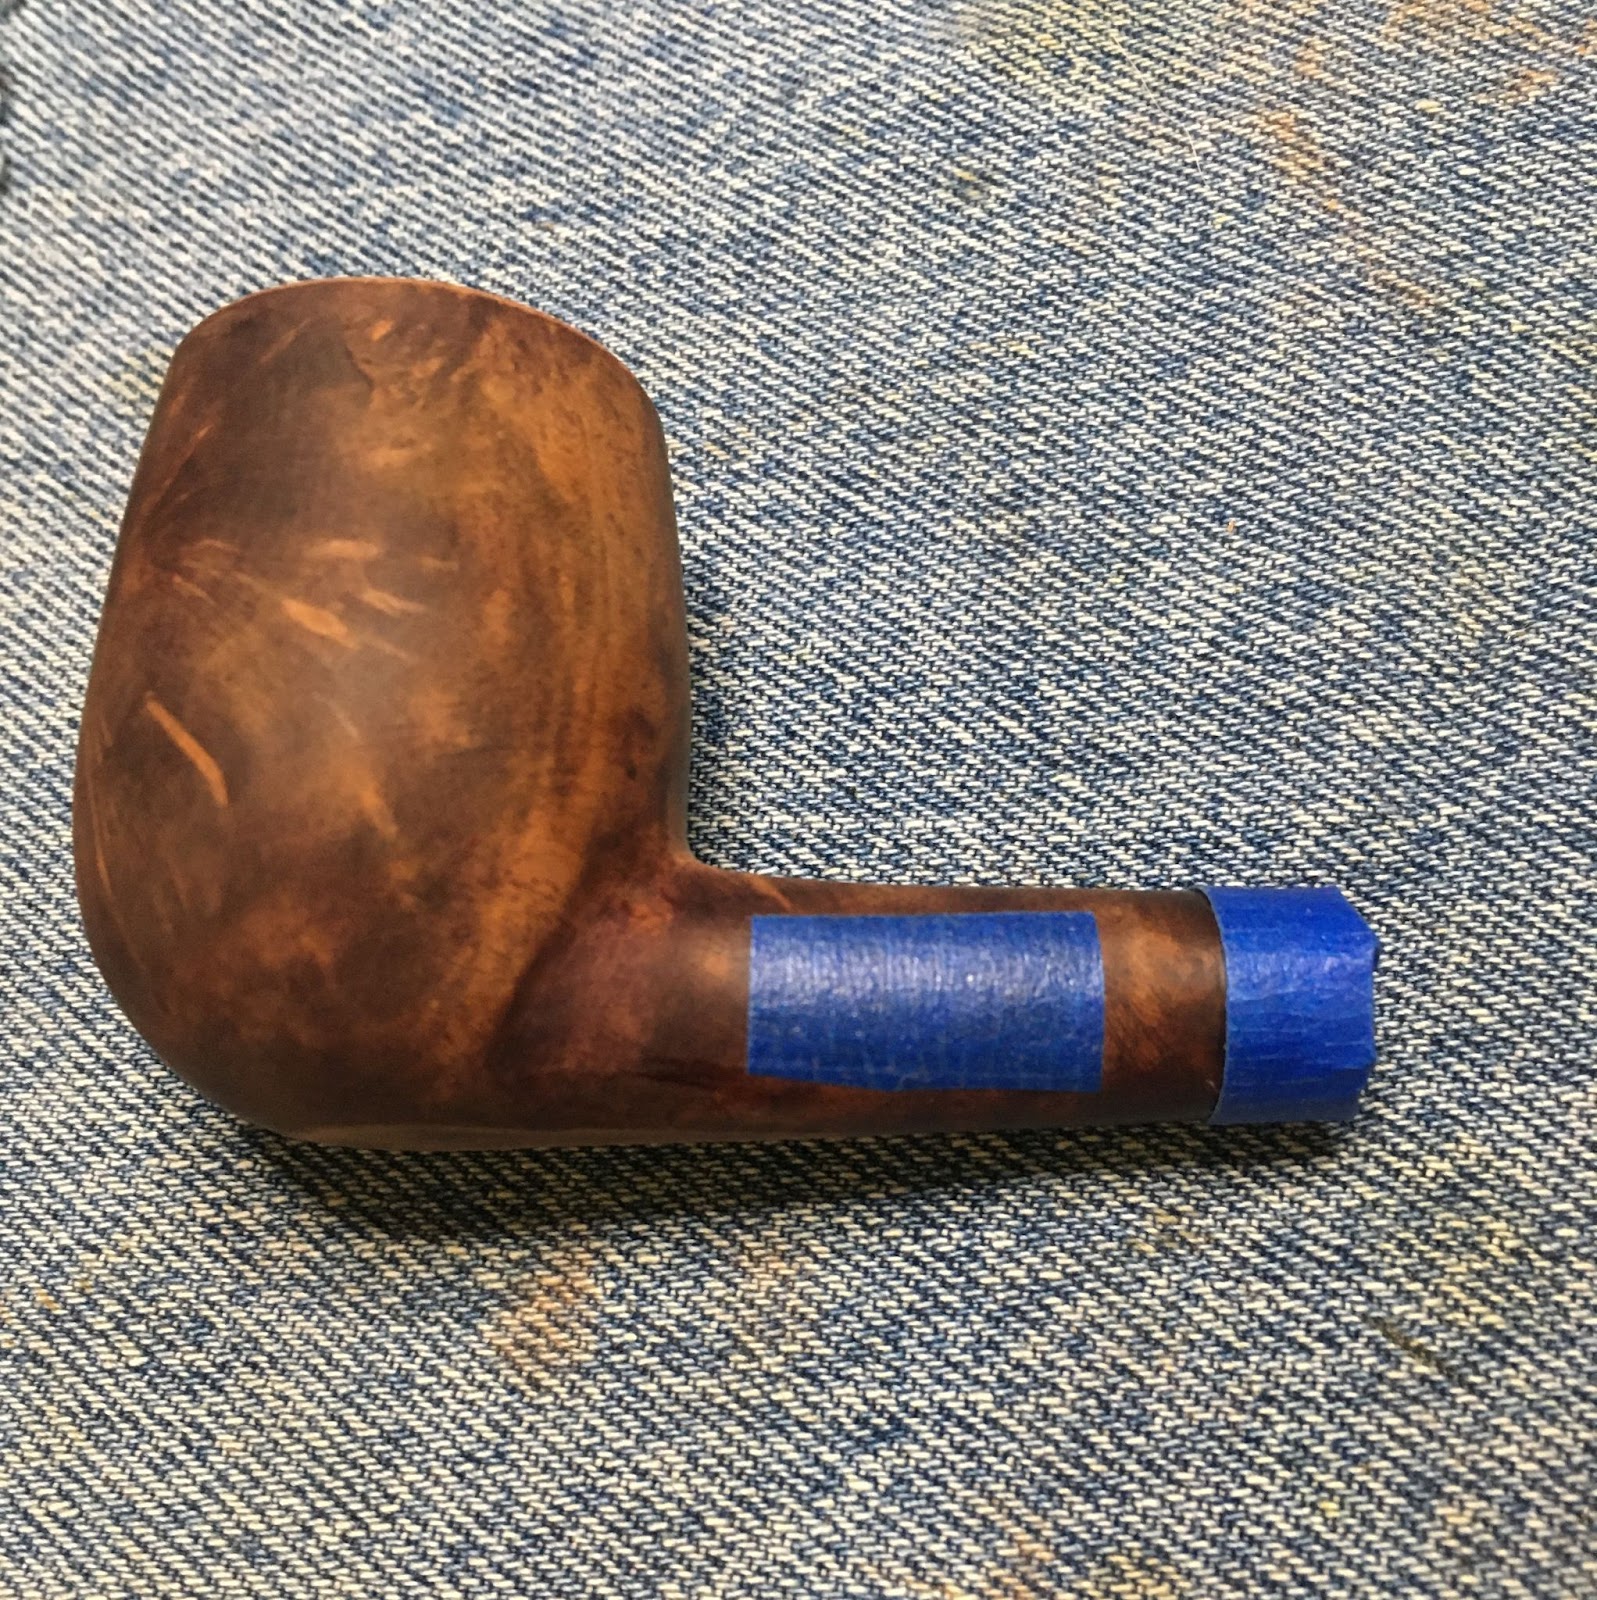
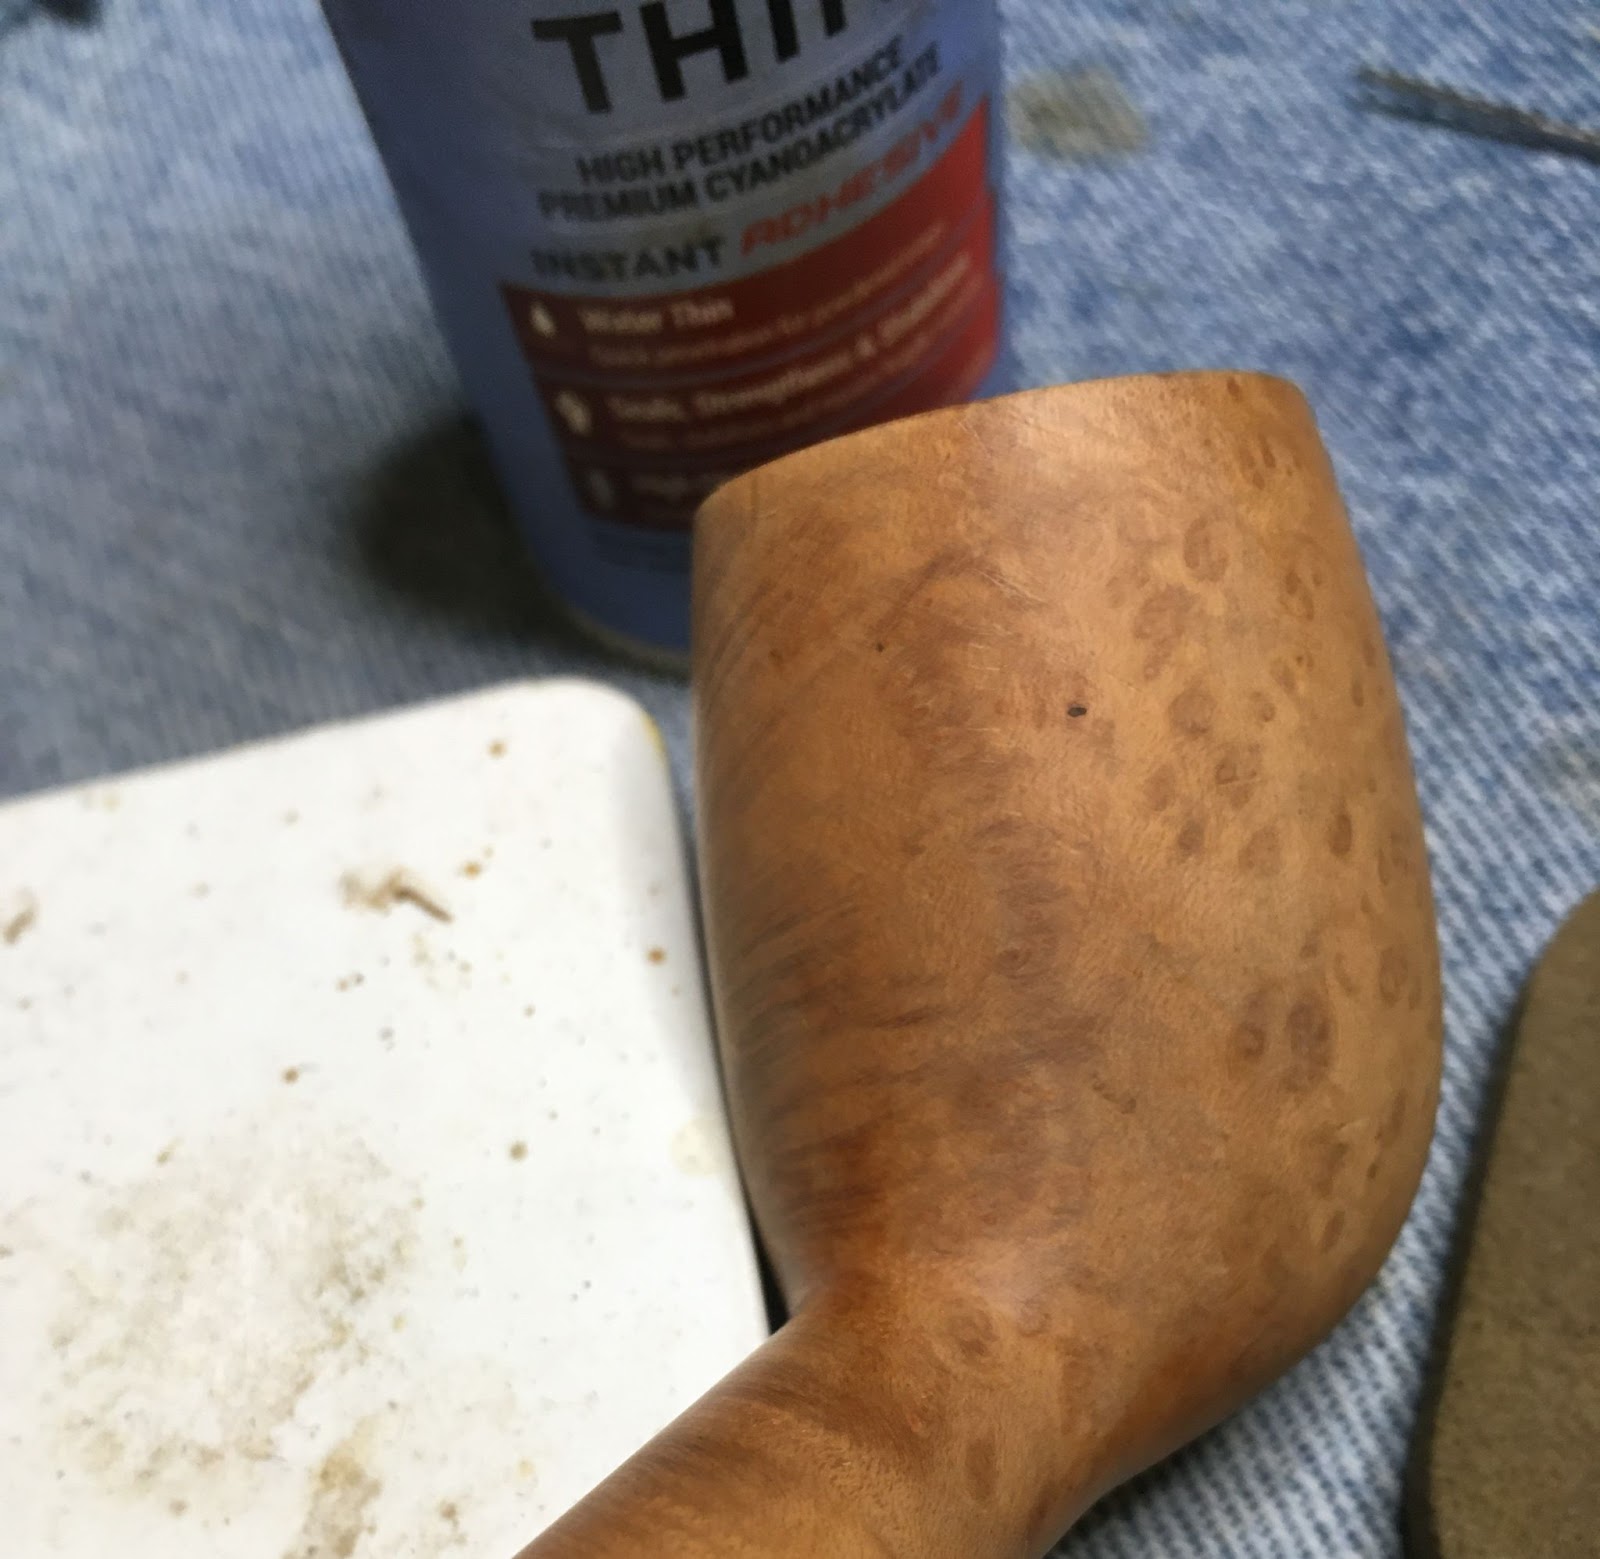
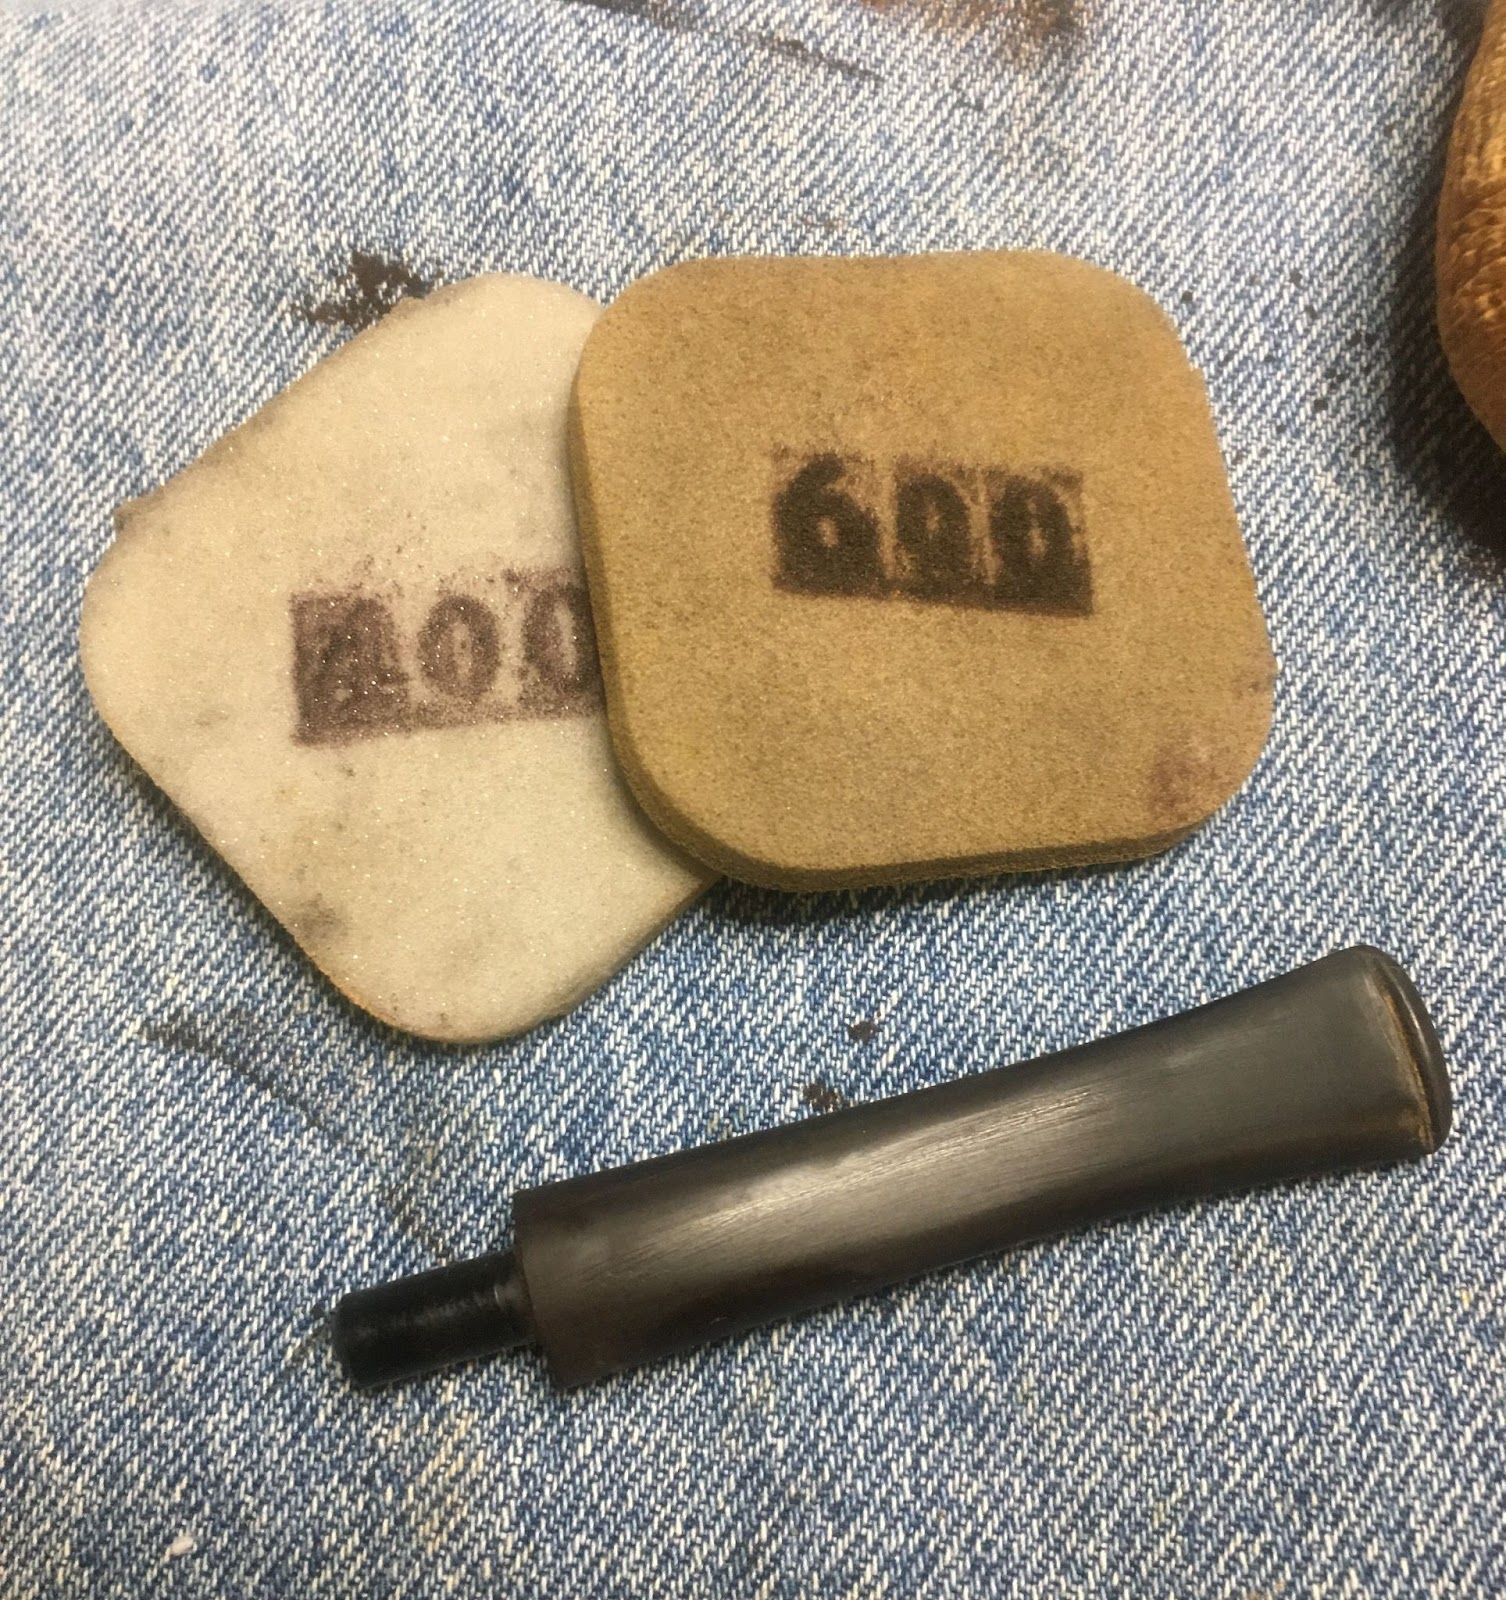
    After taping the stamp and silver, I lightly sanded the stummel with the 400 and 600 grit sanding sponges.  I wiped the stummel with a make-up pad dipped in alcohol to remove the sanding dust/sinish.  I discovered a couple of spots that I filled using cyanoacrylate (CA, super glue).  I placed a small drop of the CA into the pit and used the dusty sanding sponge to provide the briar dust to the fill.  You can see the red stain originally used on this pipe.

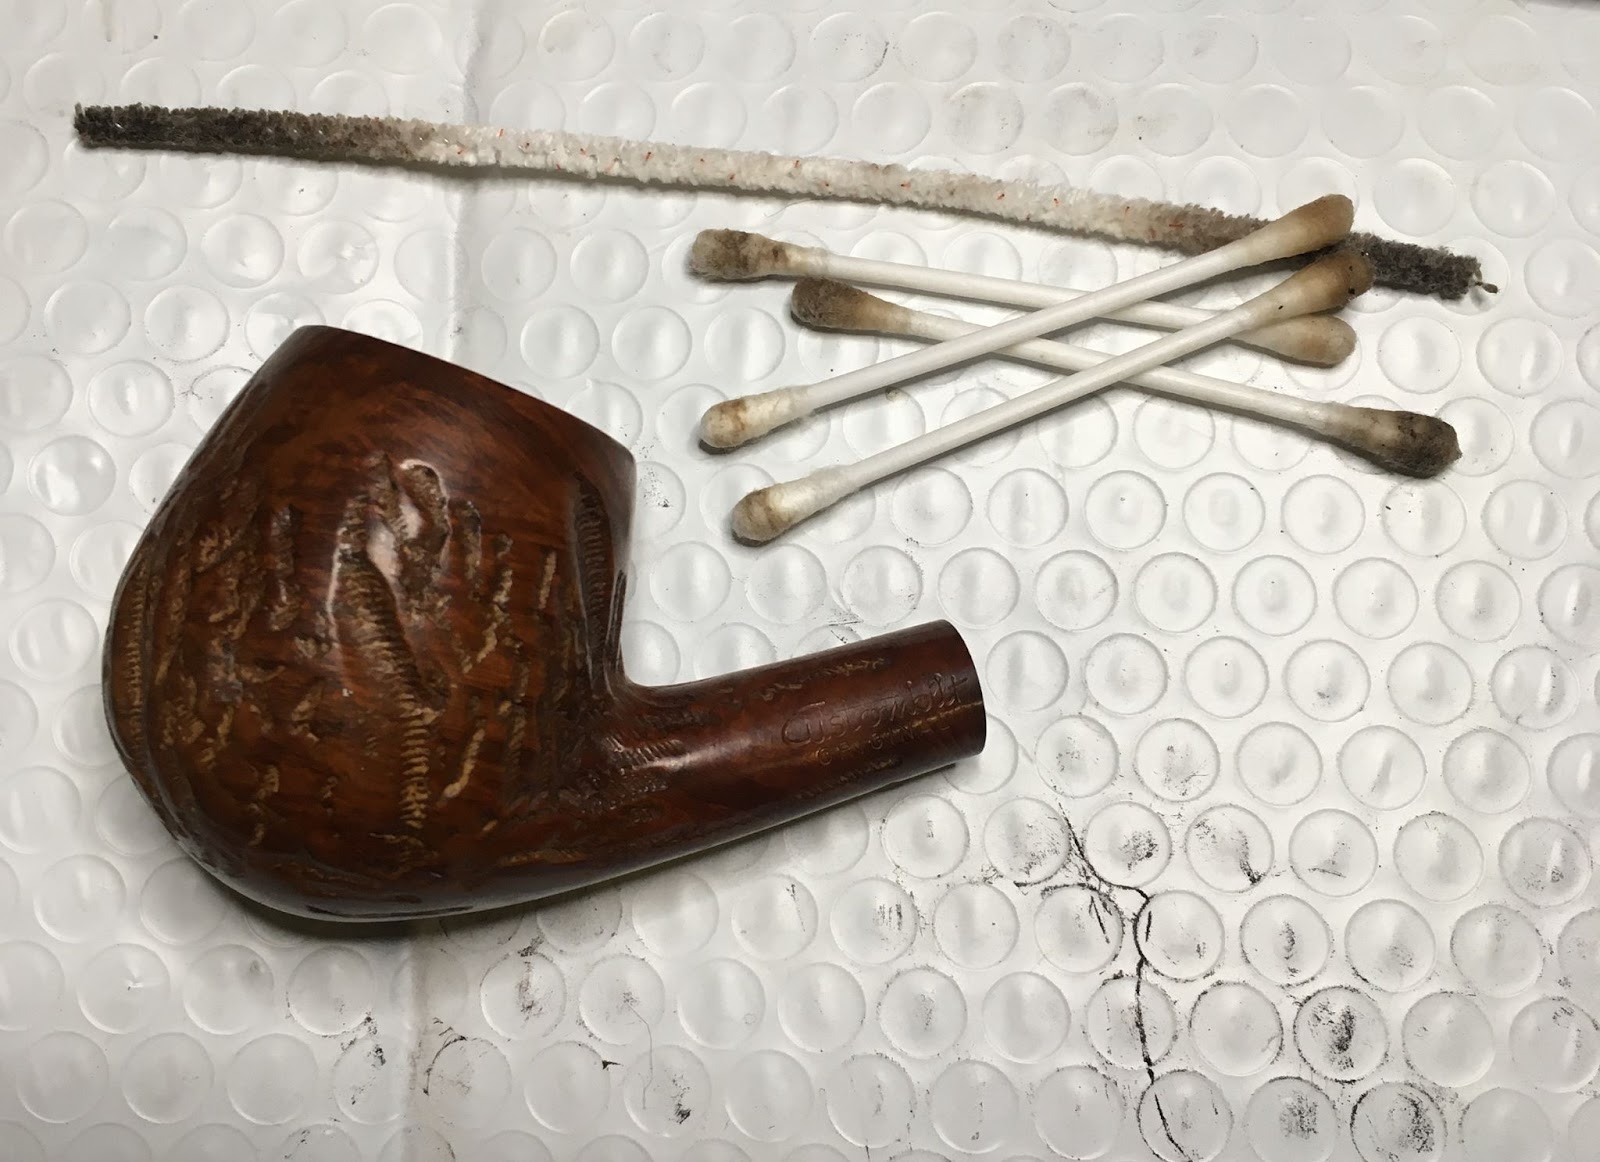
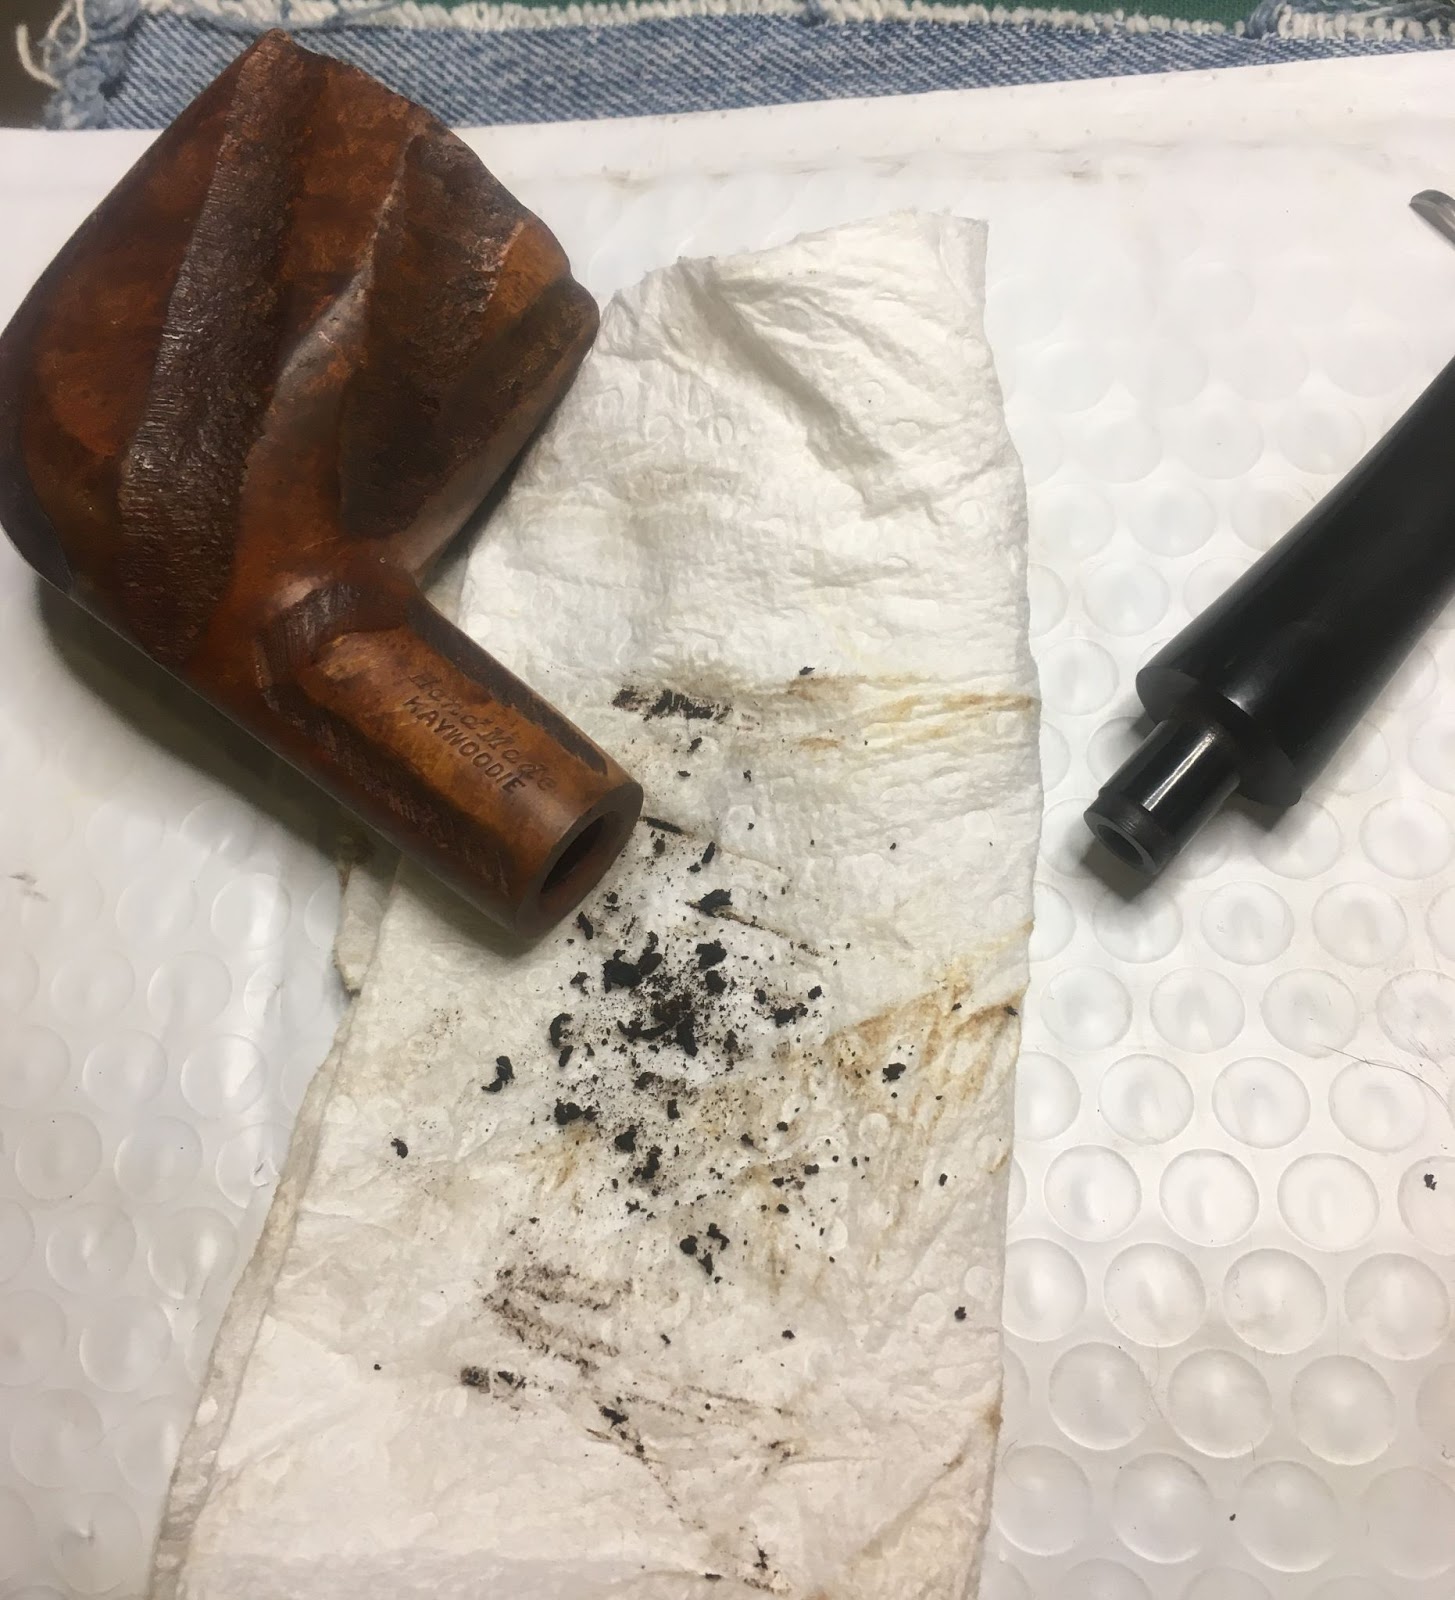
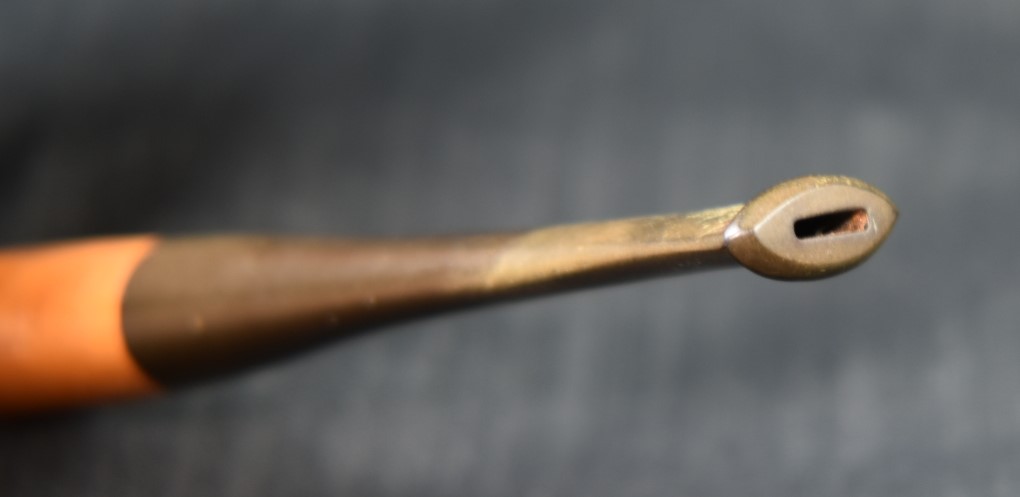
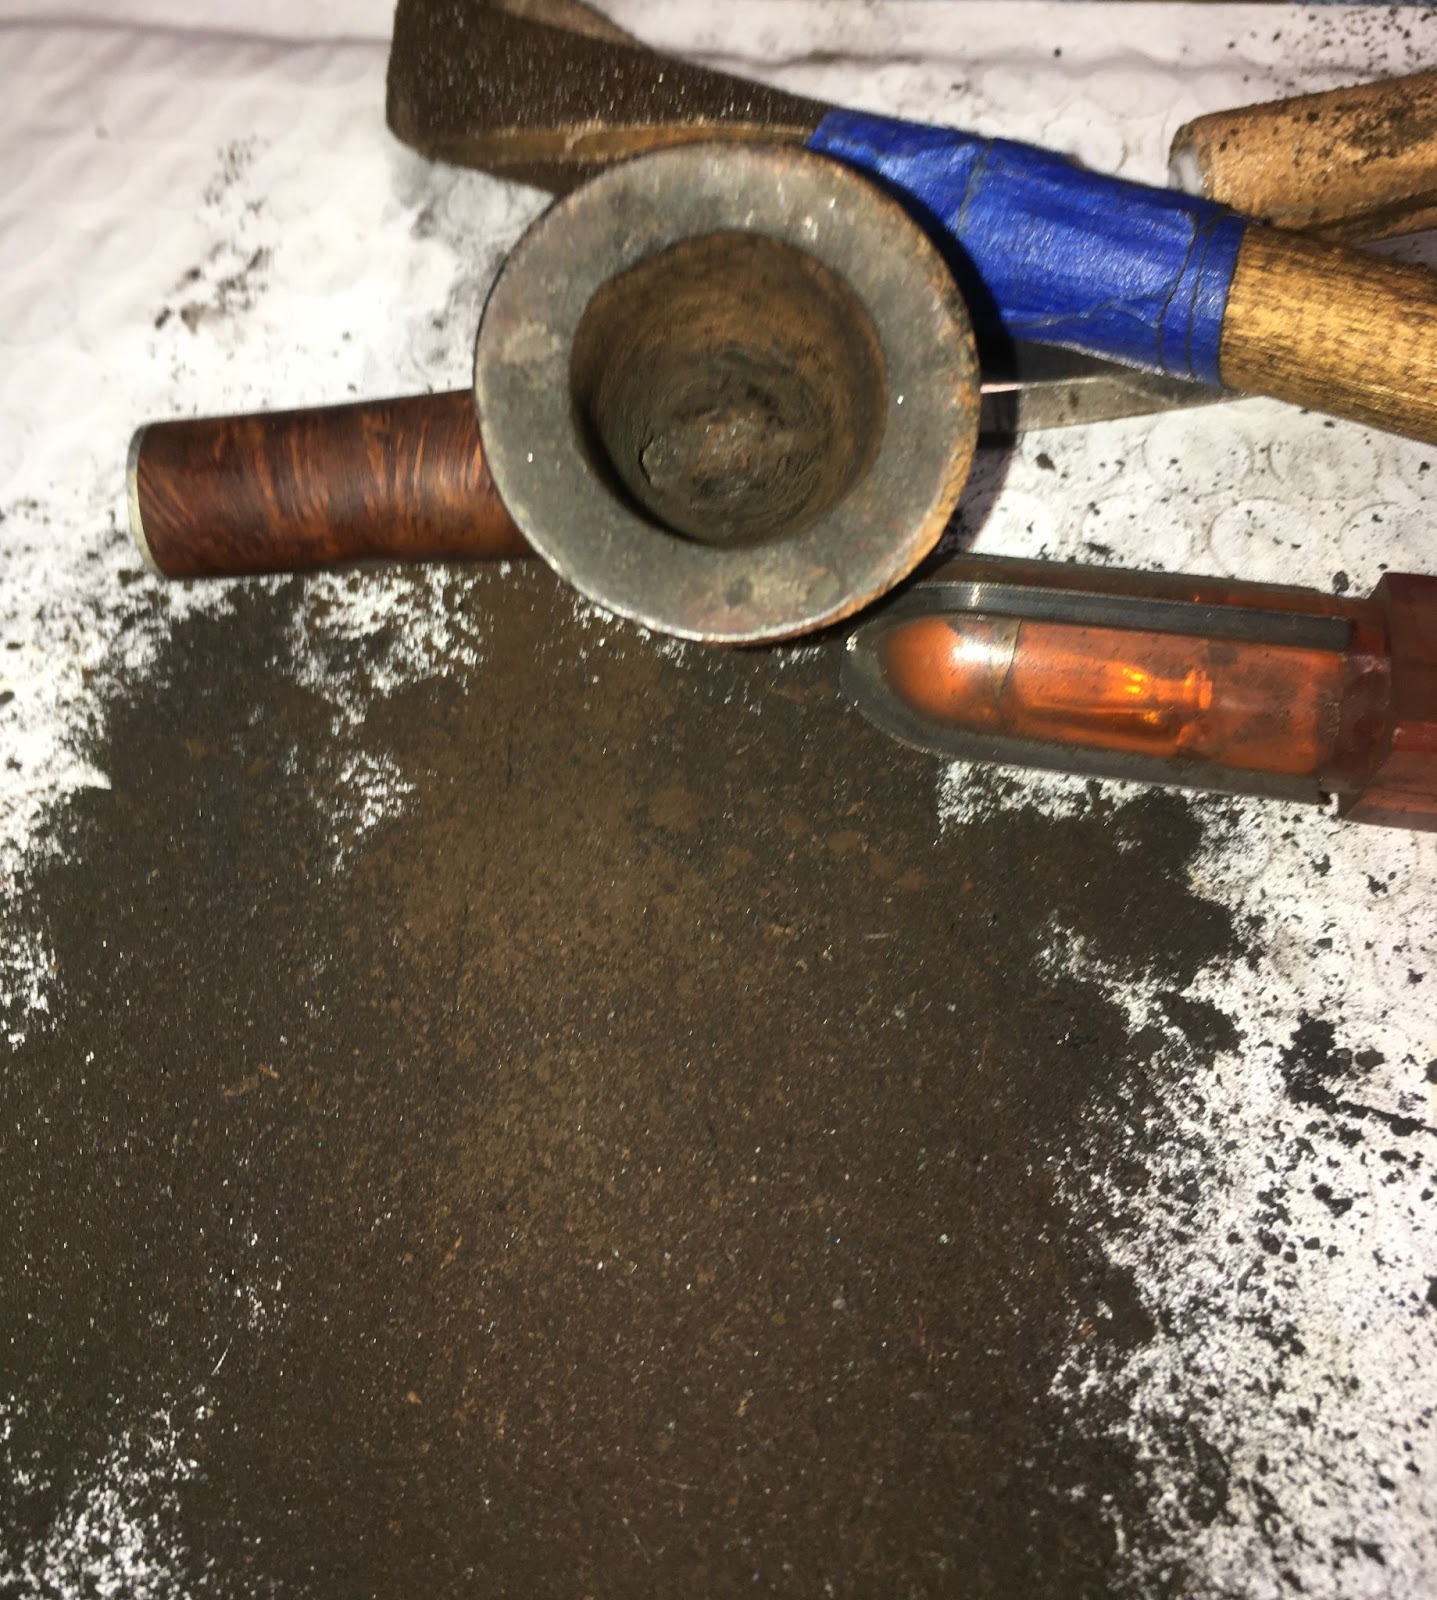
    Without any more interruptions, I returned to the airway scrubbing.  This is not my favorite part of restoring a pipe and I have been known to seek a distraction or two.  Eventually the alcohol and the cotton swabs were returning lighter colored.   Oh yeah, I also used a small piece of paper towel rolled around a round needle file dipped in the alcohol to scrub the airway.  That’s what you see in the below photo on the right, below the shank brush.

    Several more rotations of alcohol scrubs followed by cotton swabs later the airway was cleaned.  And in the process the alcohol completely removed my carefully placed tape.  Like I said, seeking distractions.

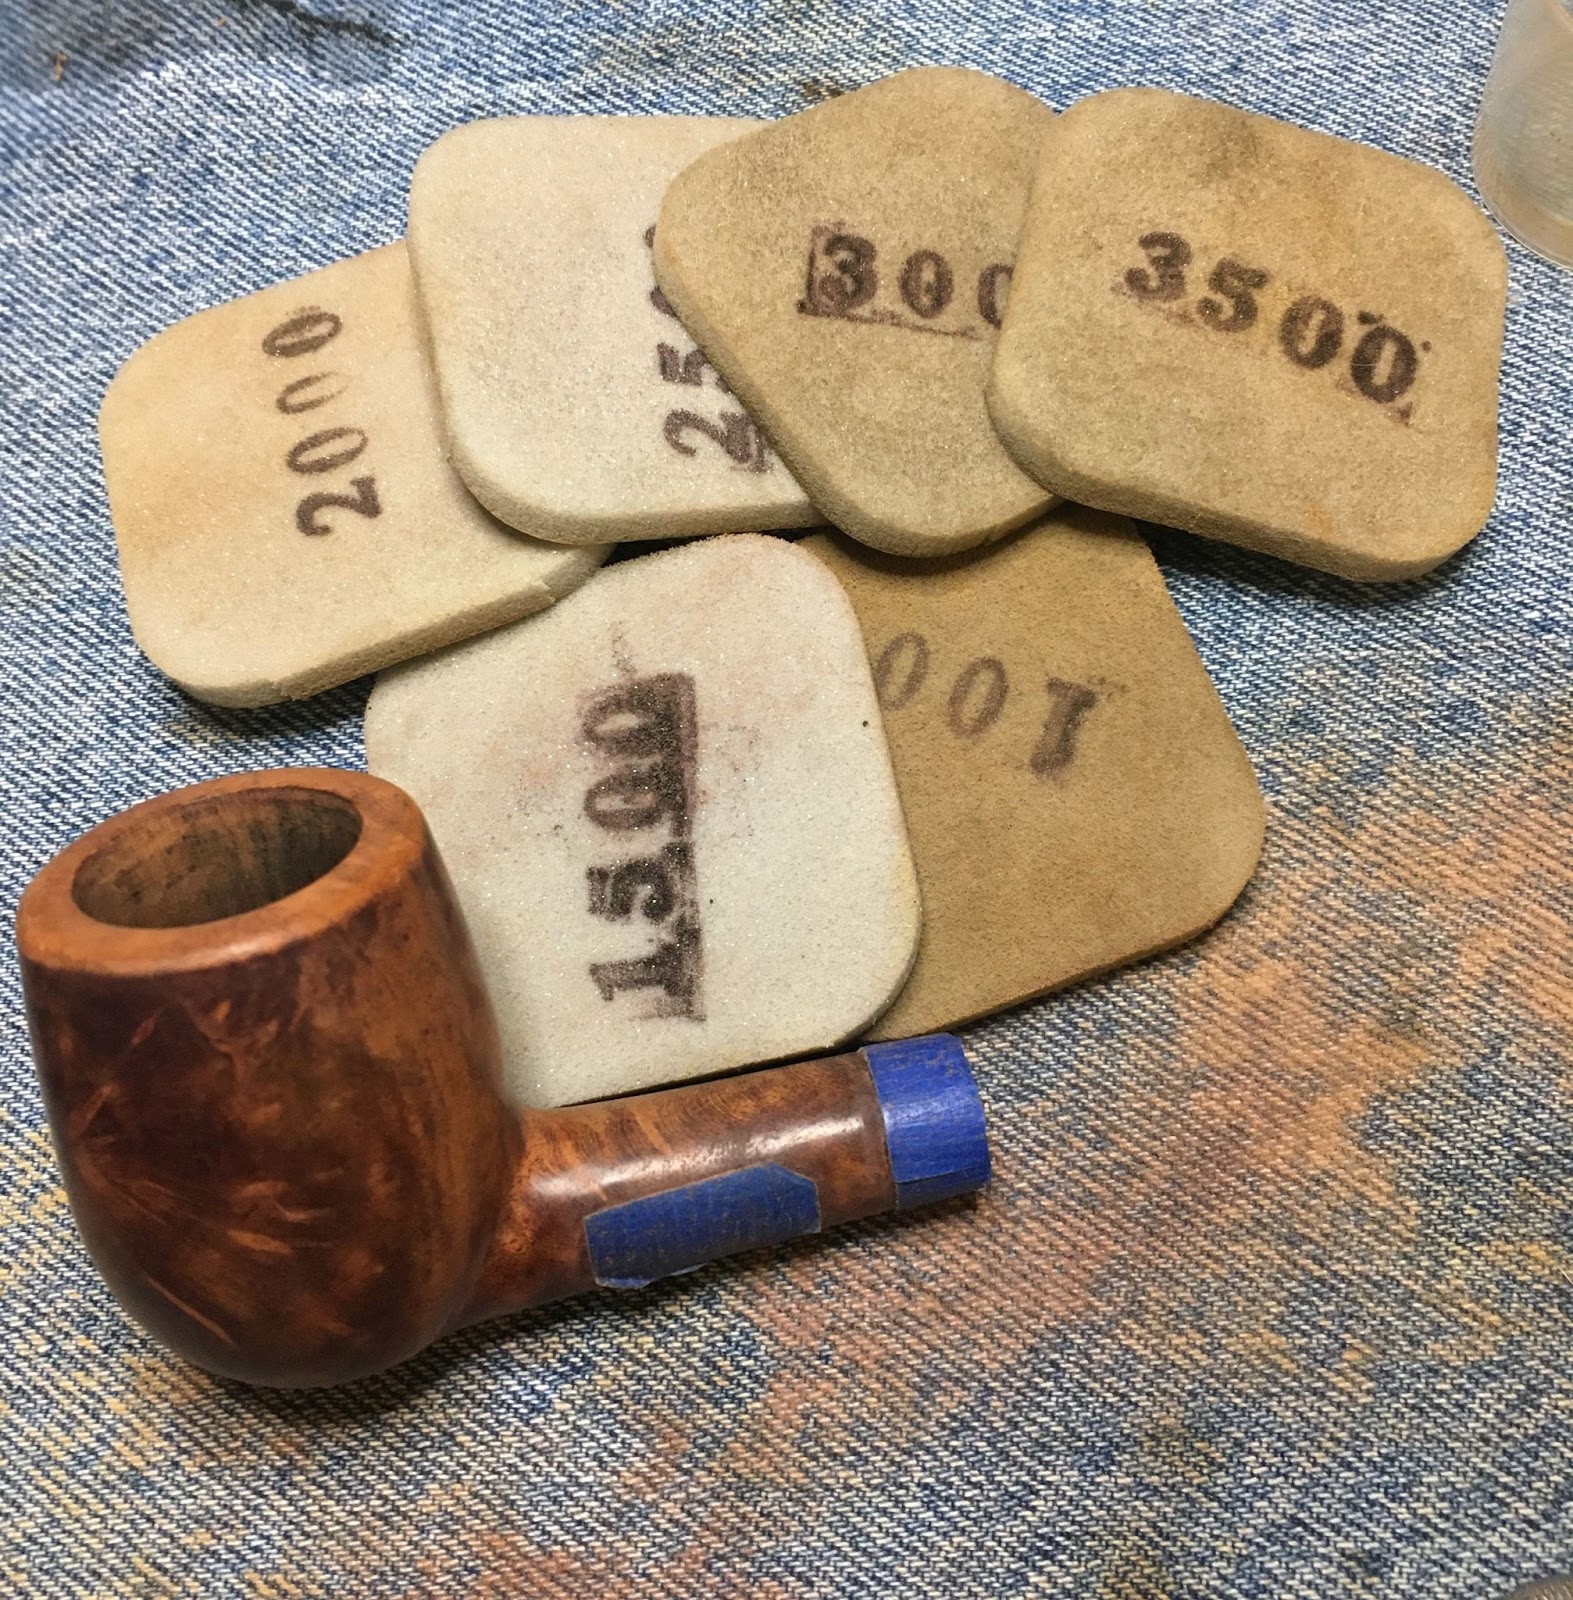
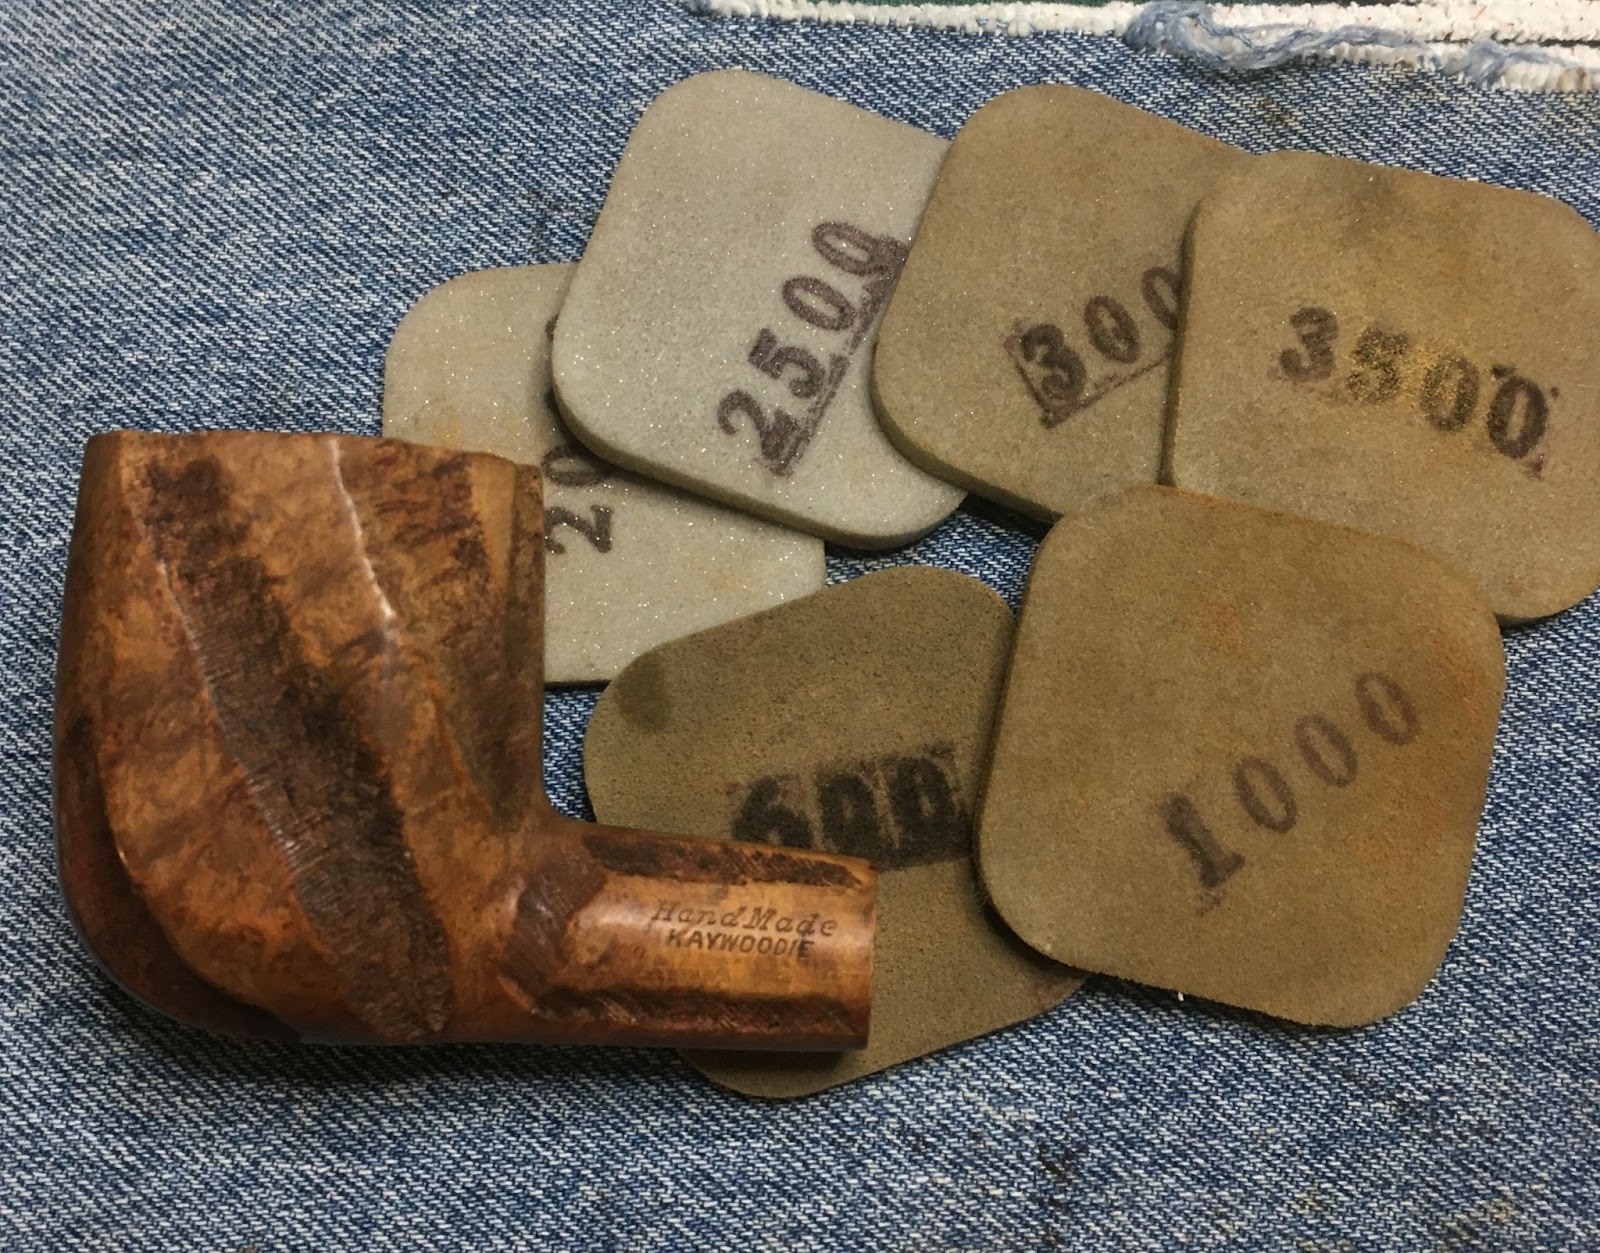
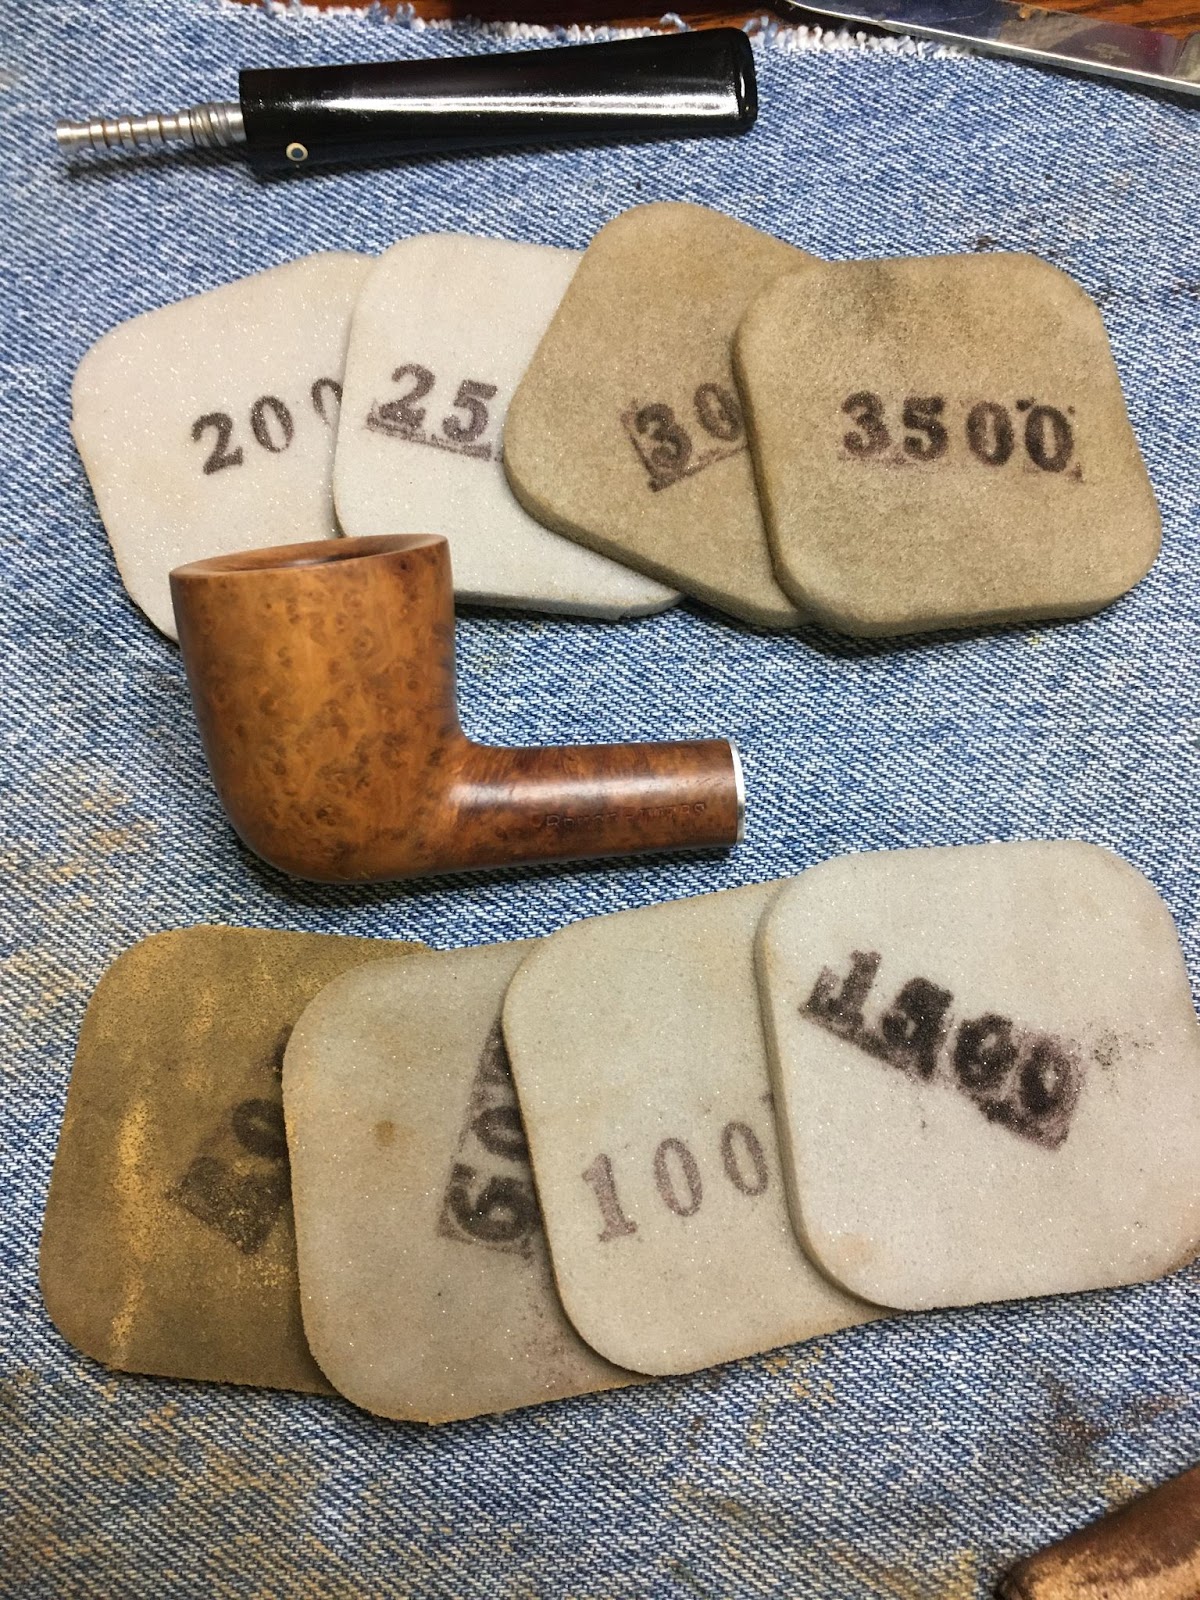
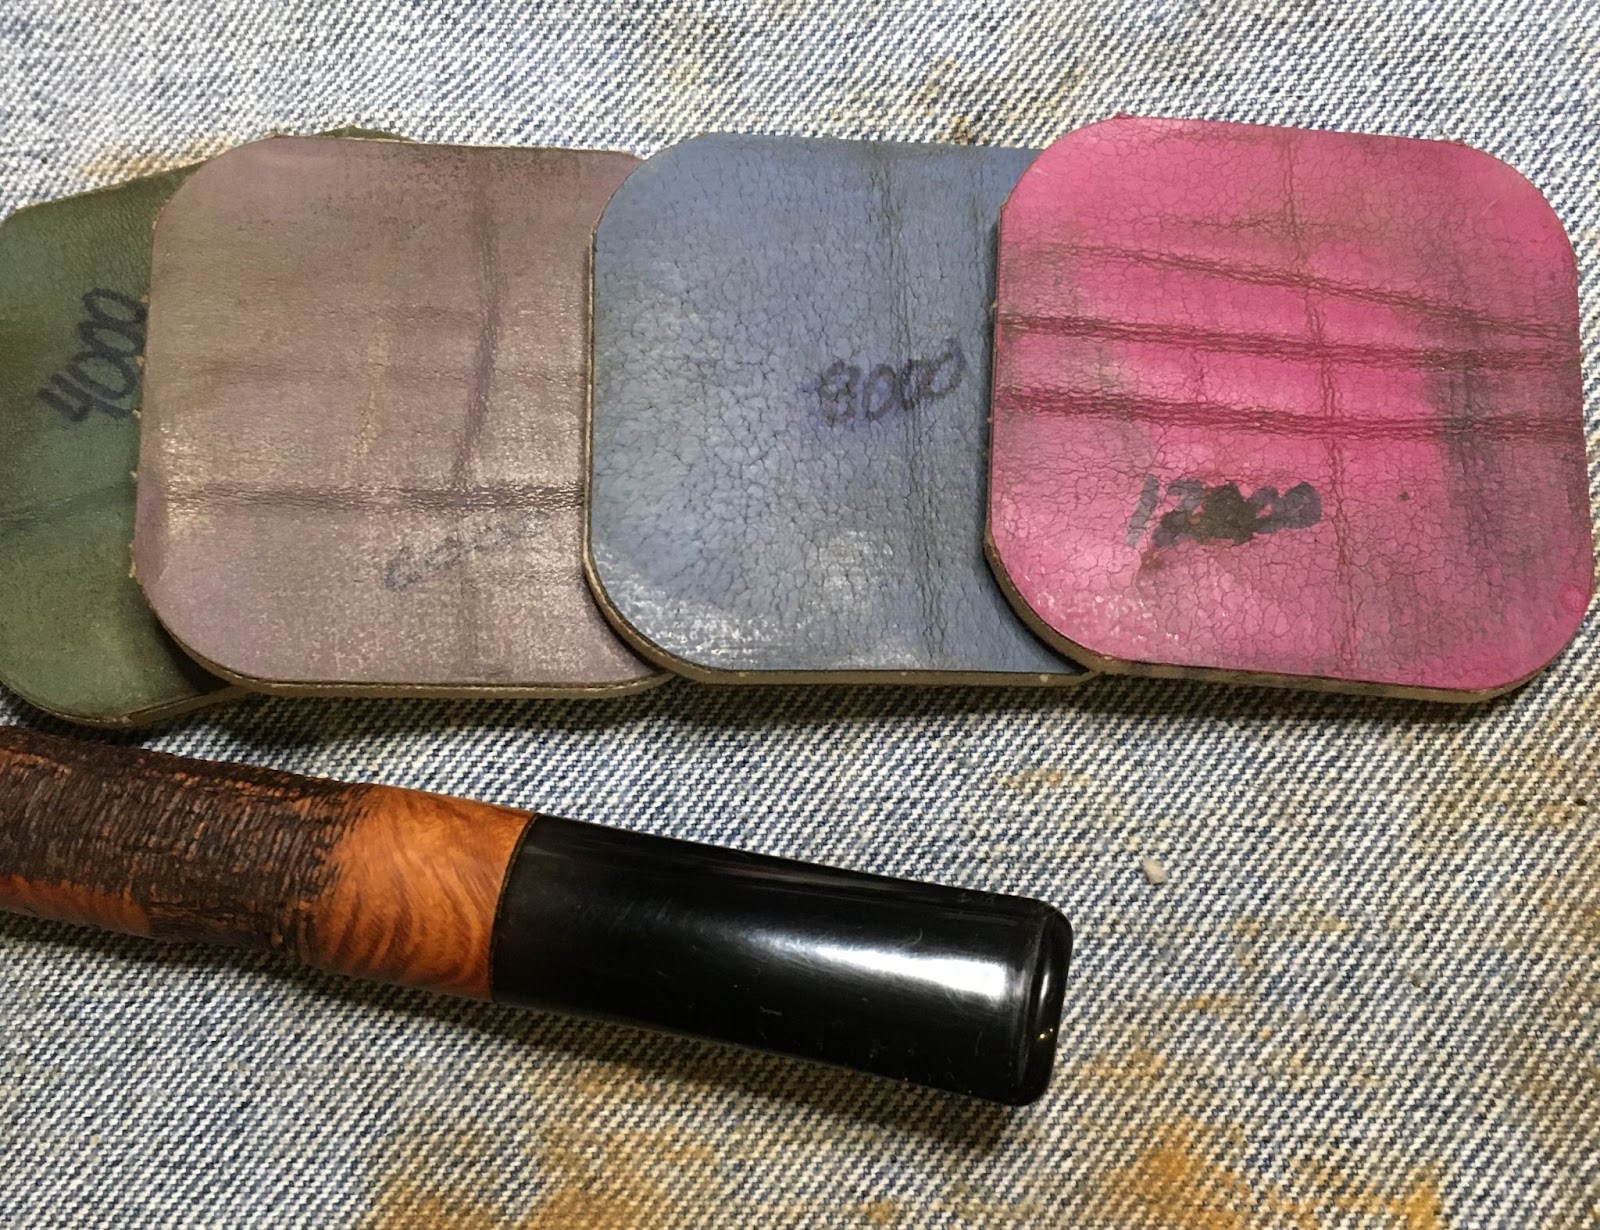
    More tape and the sanding of the stummel was carried out.  I used the sanding sponges in sequence from 1000-3500.  Between each sponge I wiped the stummel with a make-up pad wetted with alcohol.

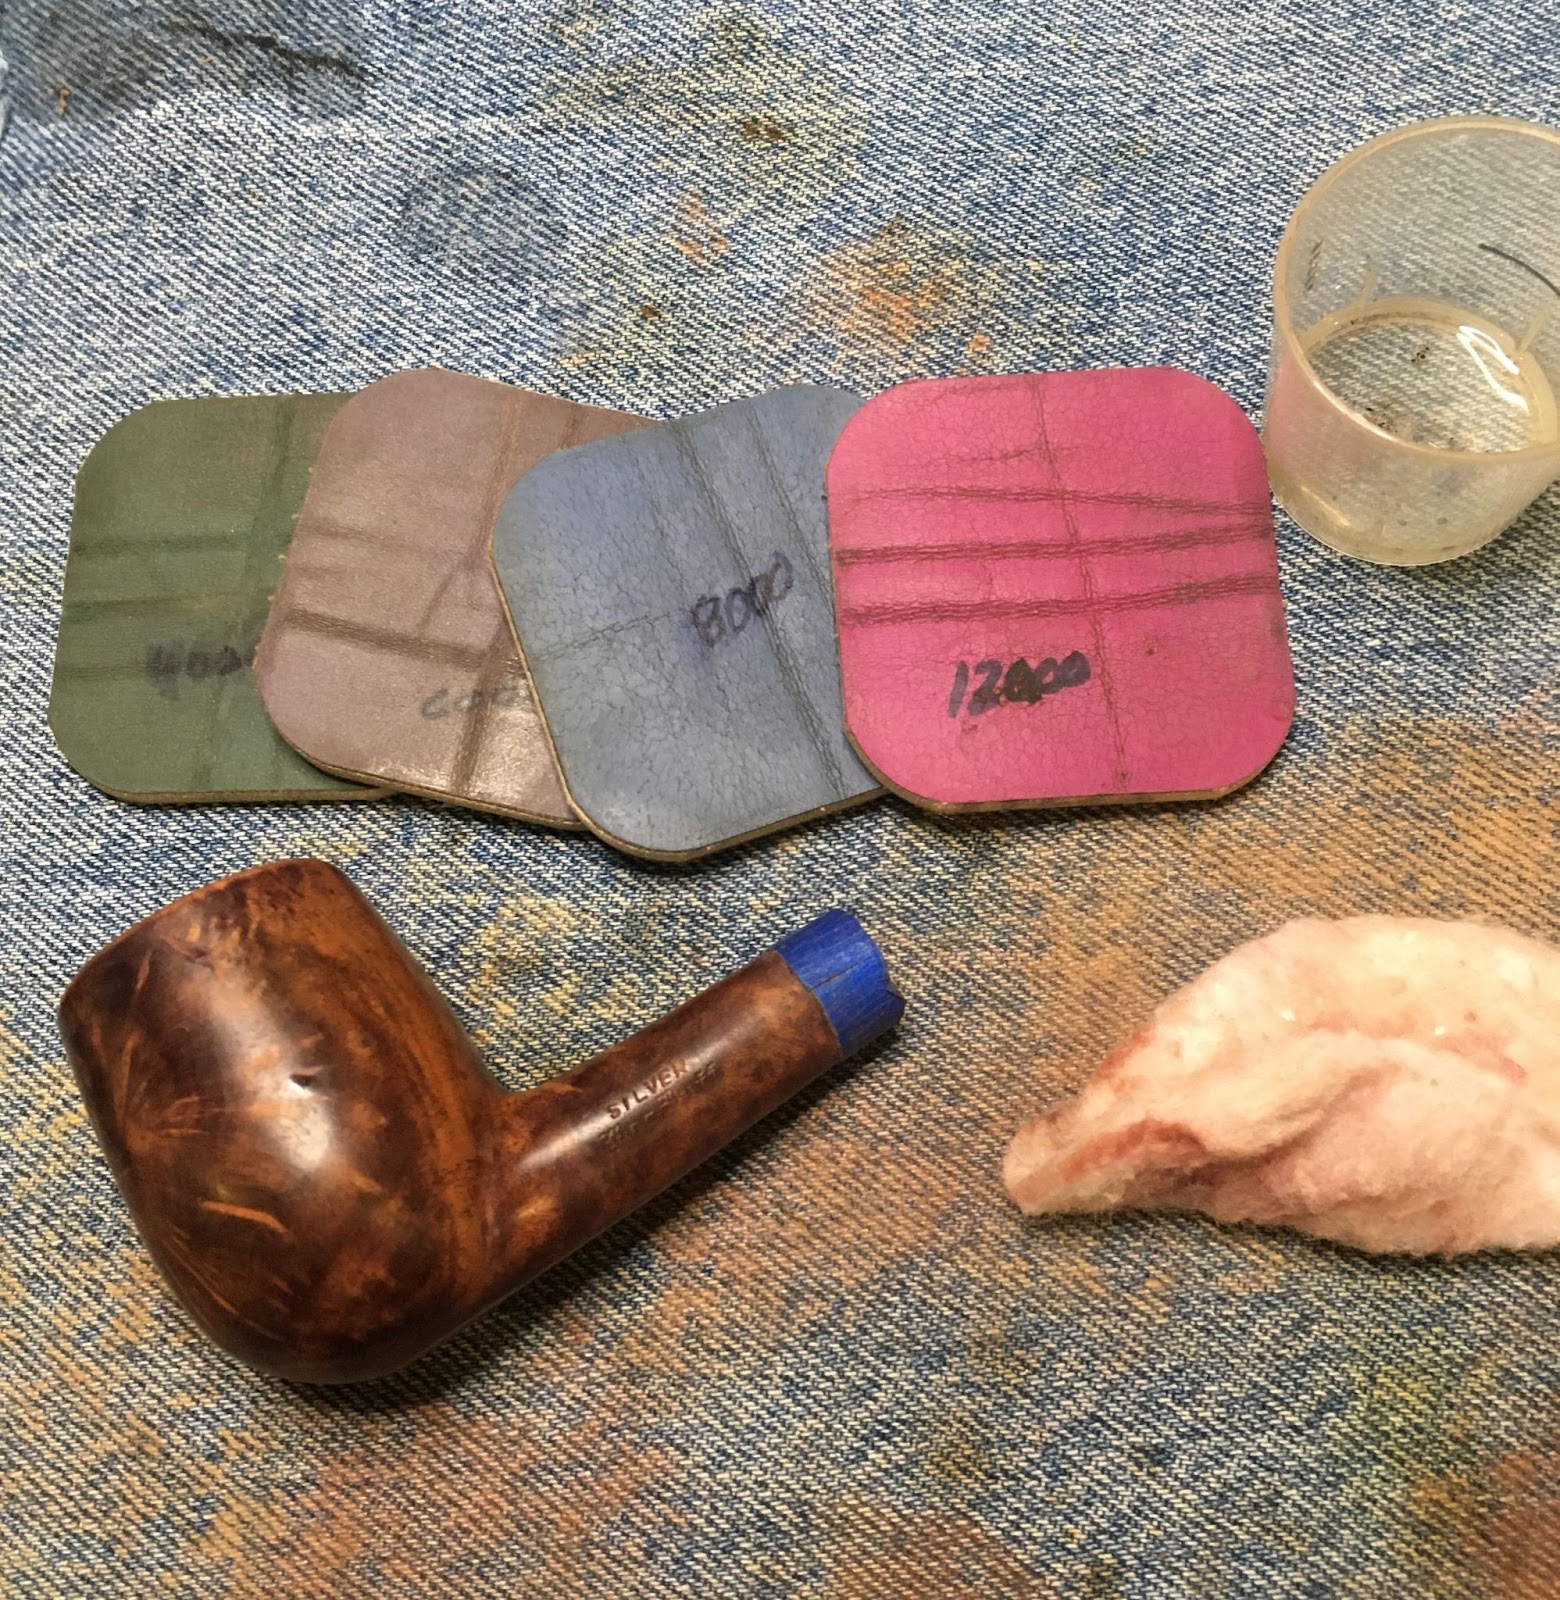
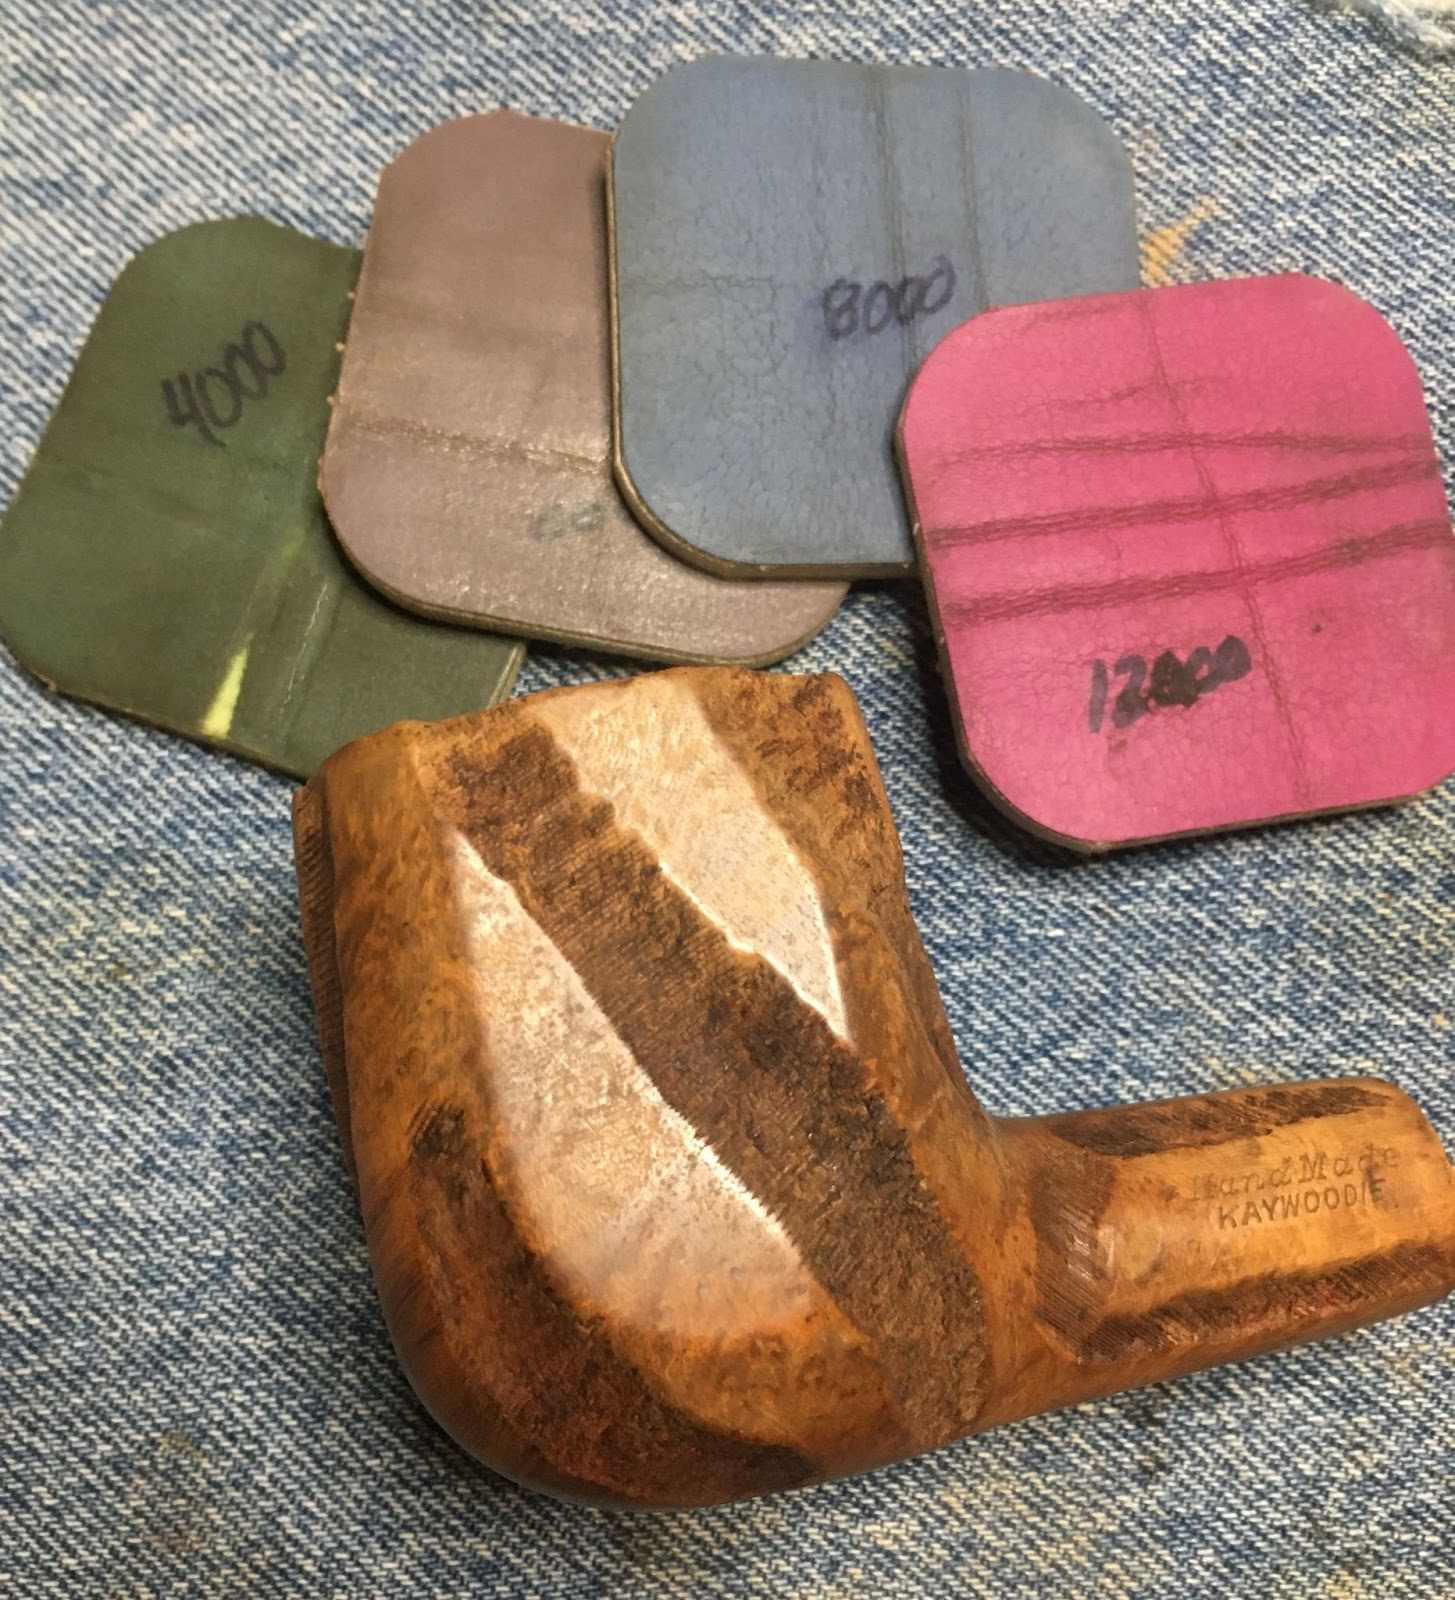
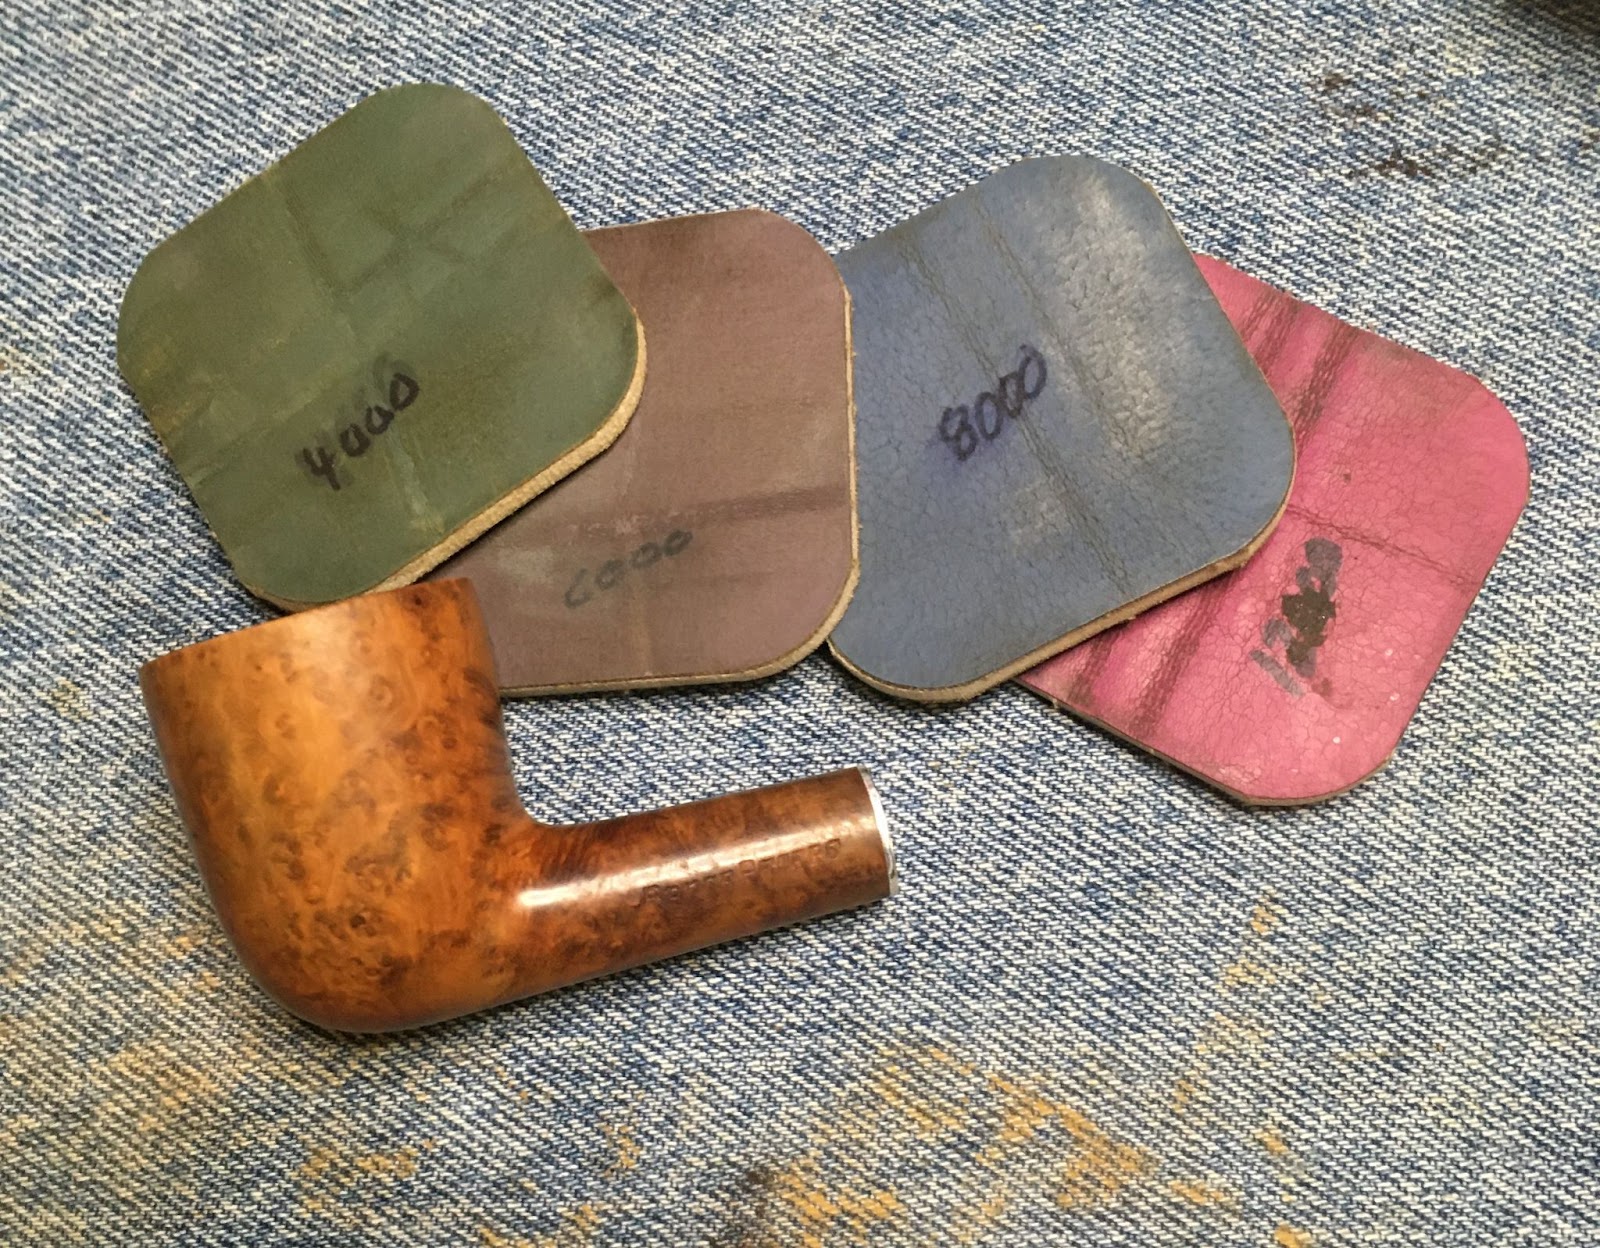
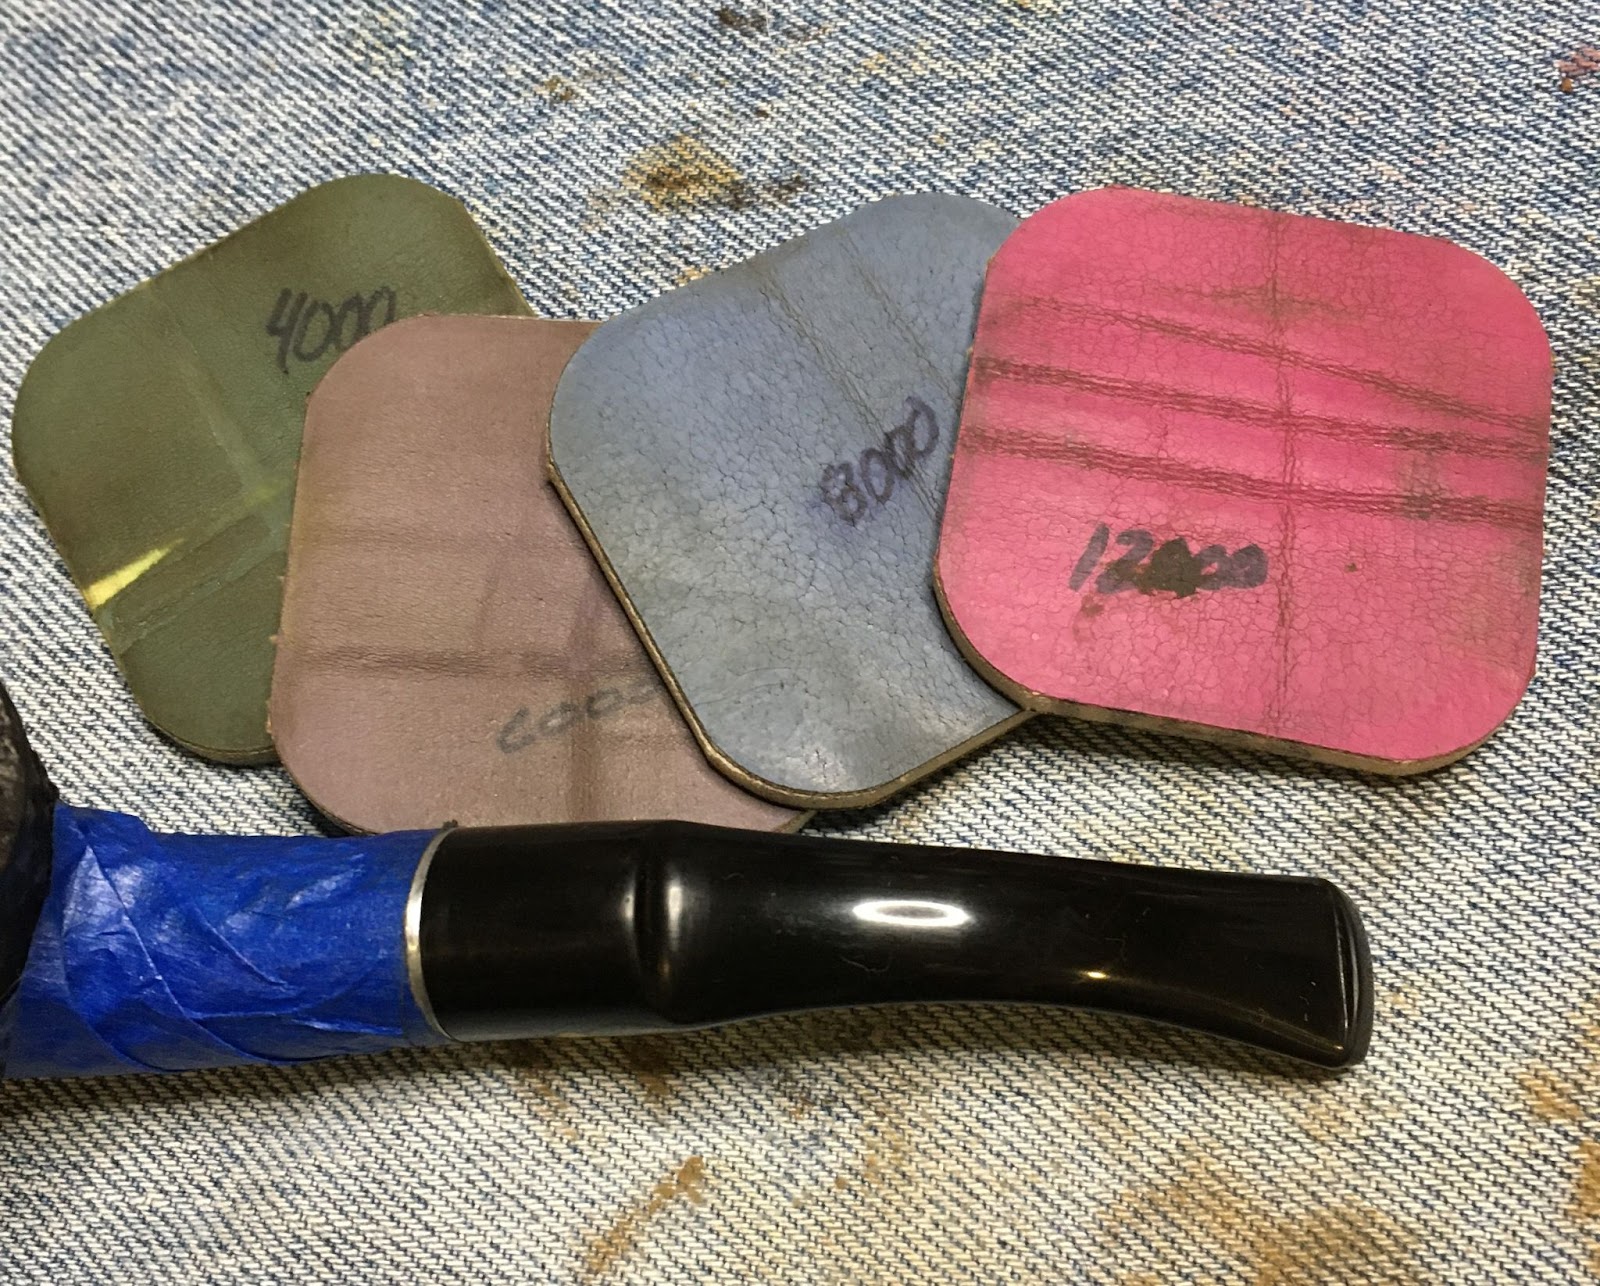
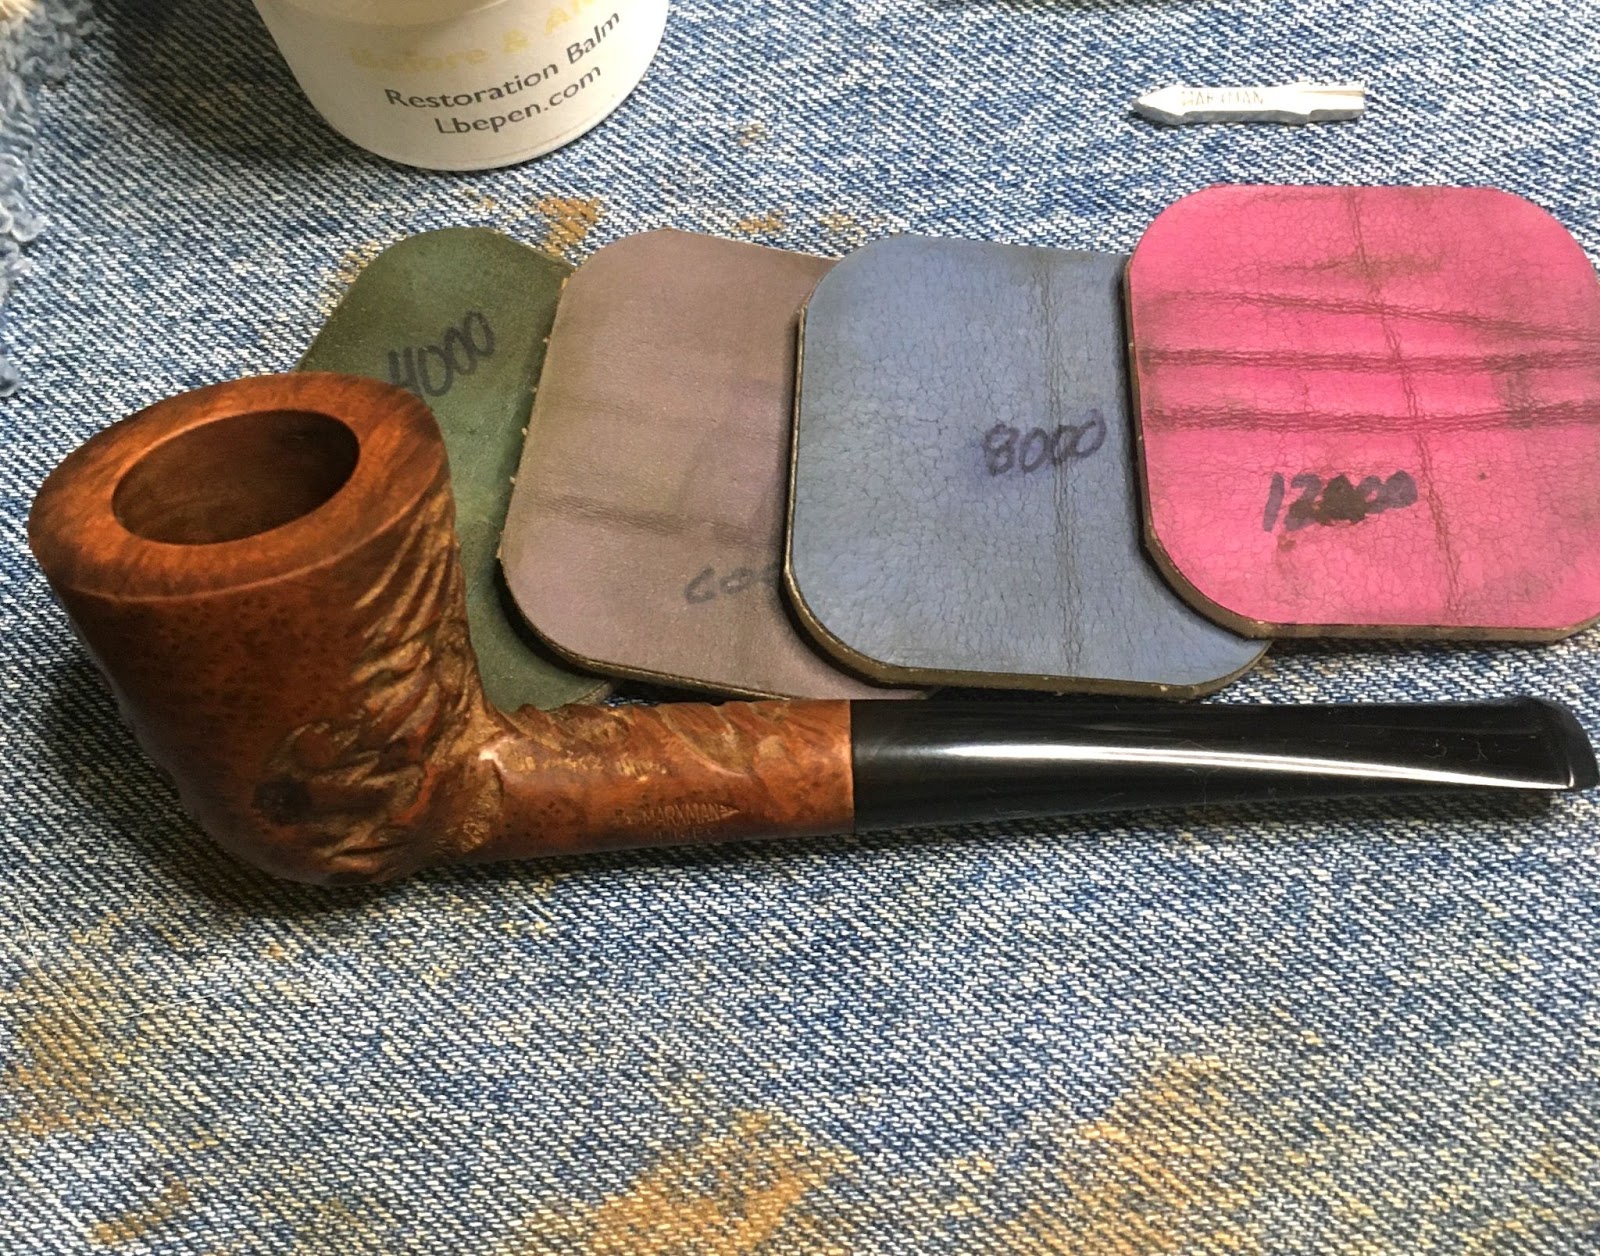
    When finished with the sanding sponges I used the micro-mesh pads 4000-12000.  Again between pads I wiped the stummel with a make-up pad wetted with alcohol.  I am not sure what that dark spot is in the center of the stummel below.  There was no pit there and it does not show on any other photo.

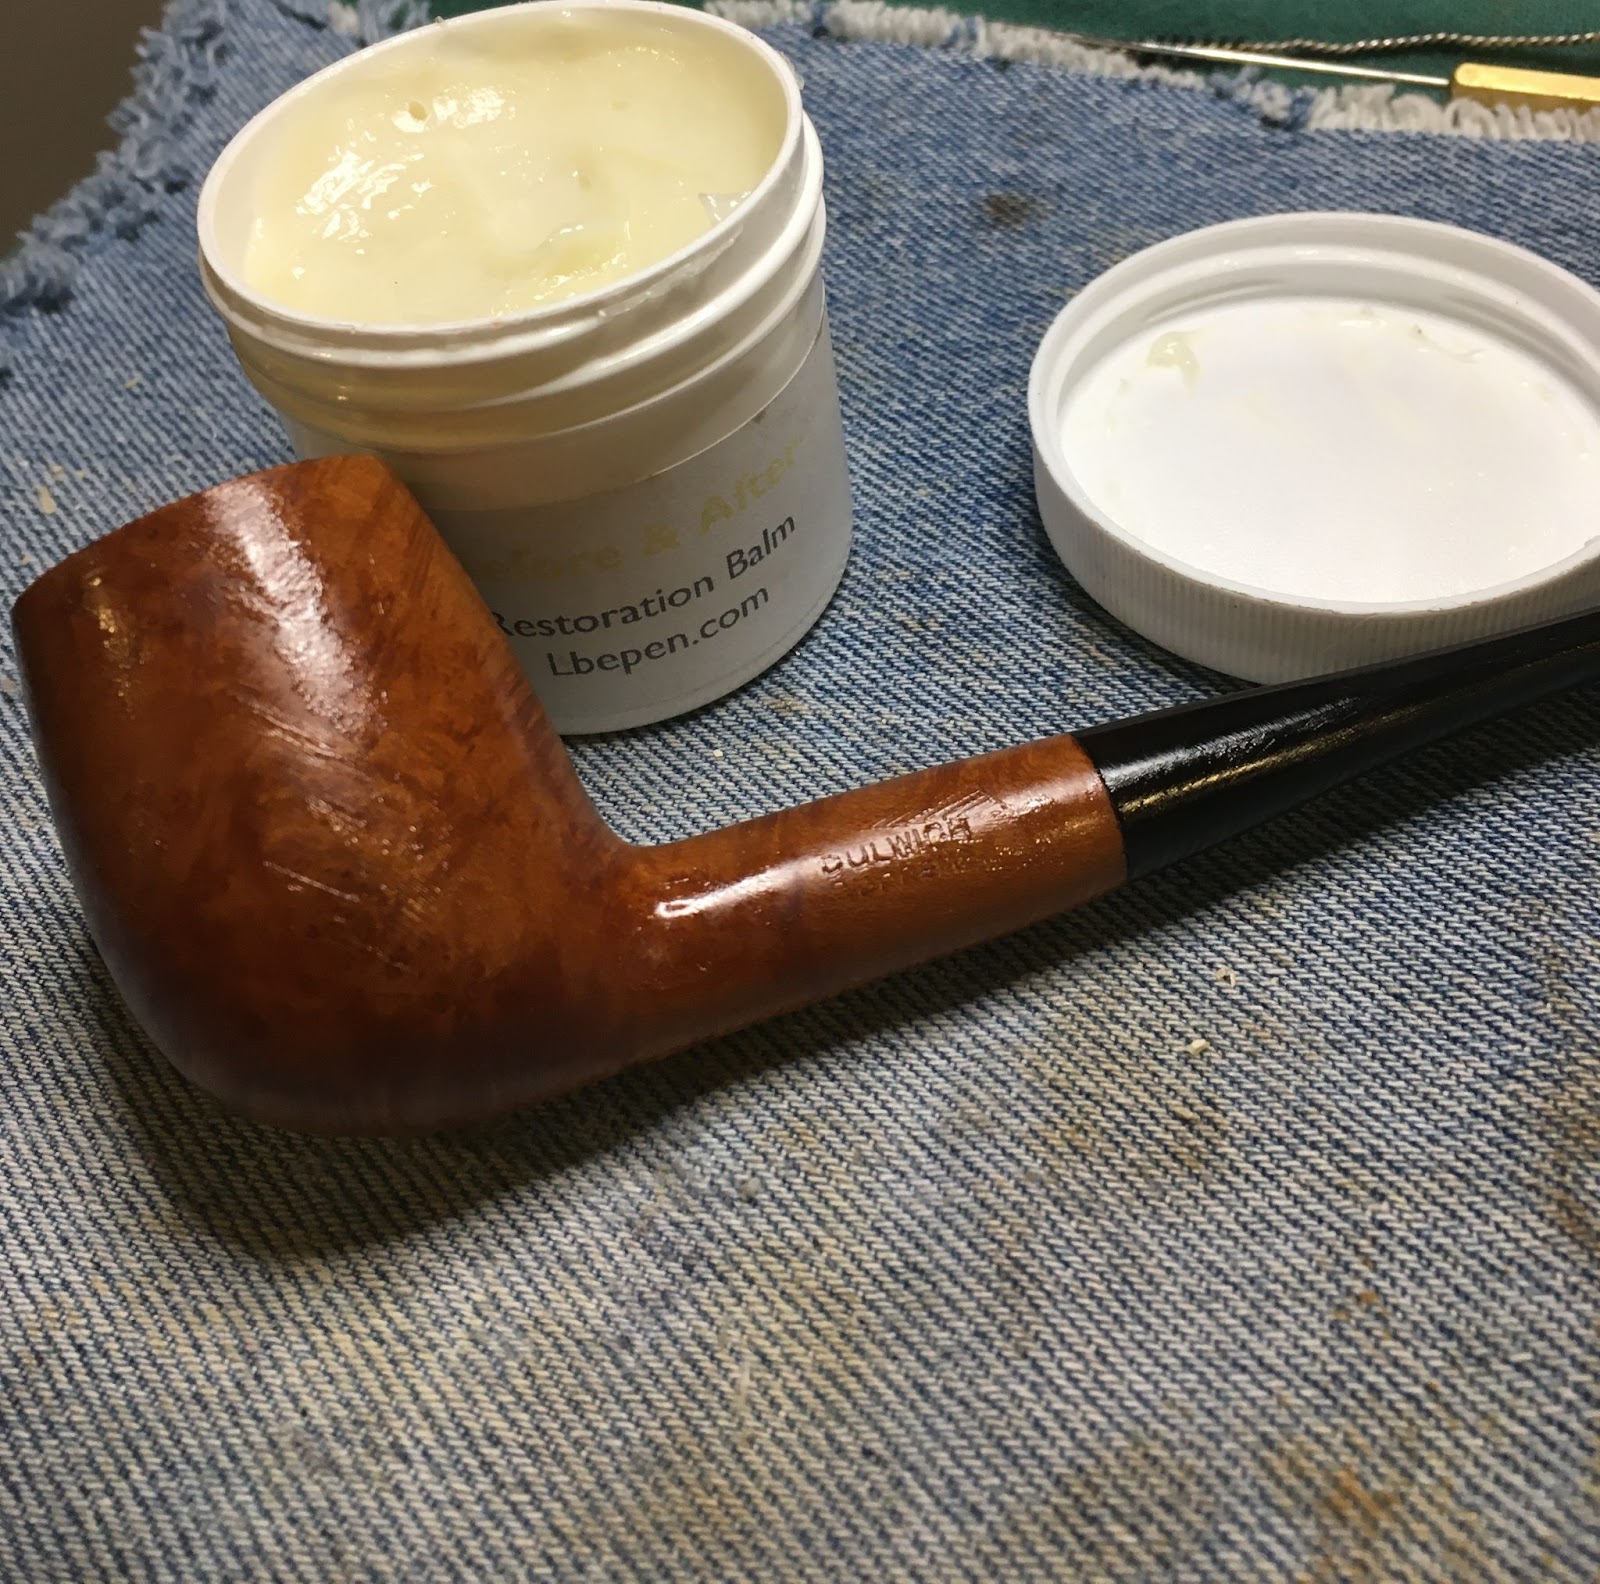
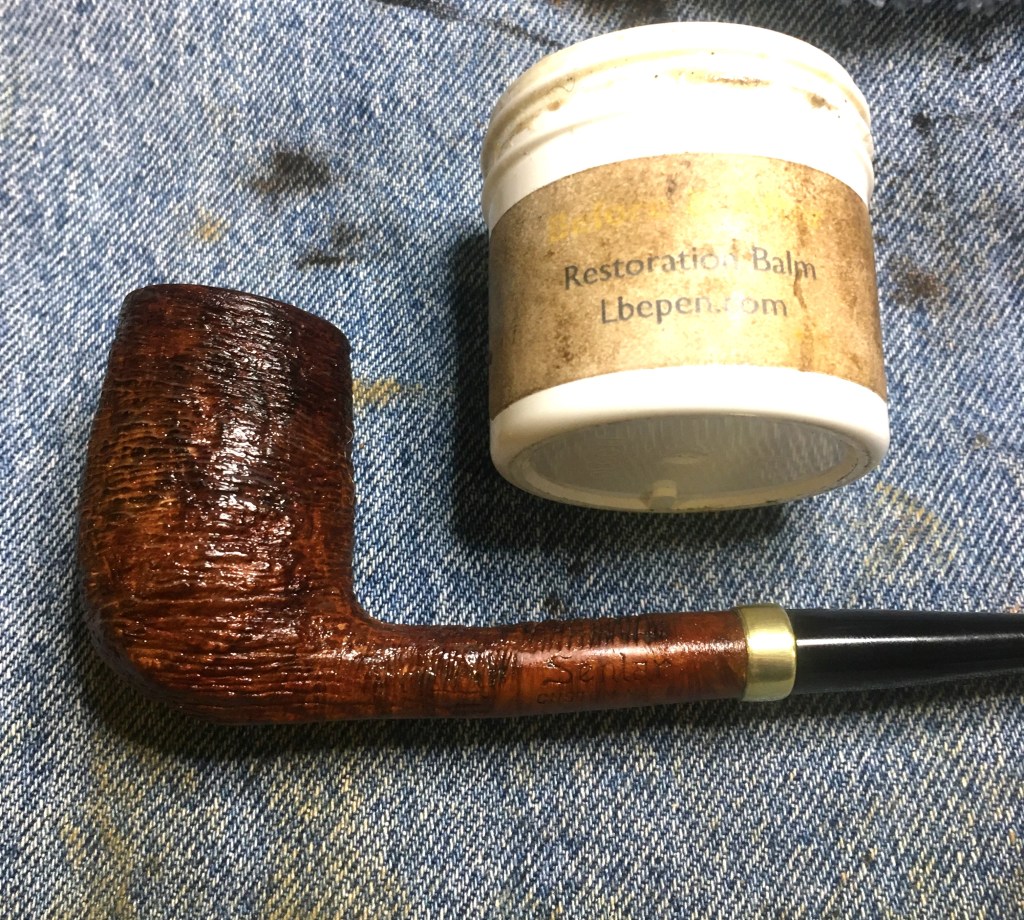
    The next step in the restoration of the stummel was to give it a liberal coating of Before and After Restoration Balm.  The balm was allowed to soak into the briar for about an hour.  

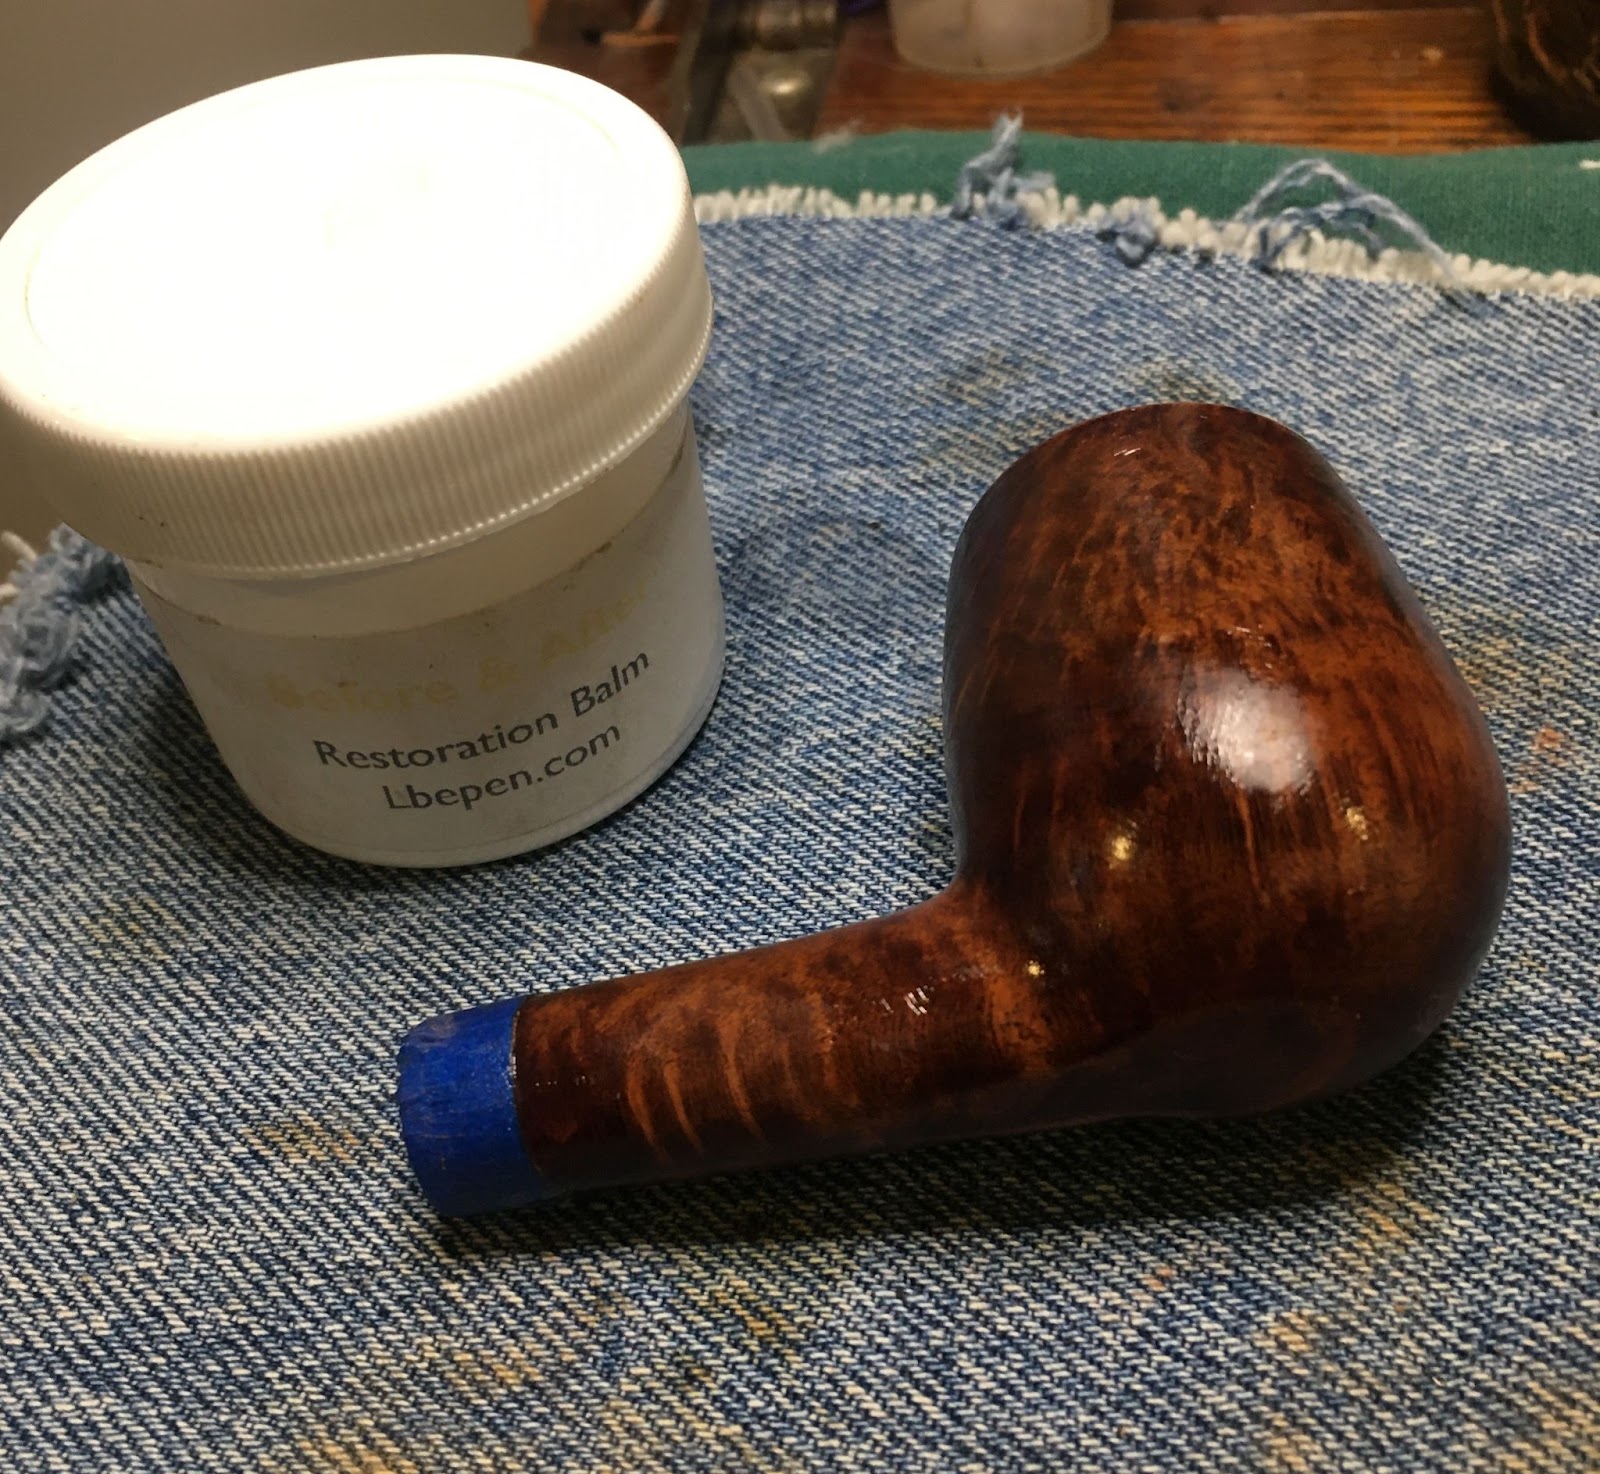
    An hour later the Restoration Balm was wiped off using the inside of an athletic sock.  If you do not have an athletic sock covered in white German Shepherd hair, don’t worry.  I am sure that an athletic sock without white German Shepherd hair would work equally as well. 

    Another sidenote:  Thank you to all of you readers who have told me that they prefer the black background for my before and after photos.  I now know exactly who does not have a white German Shepherd living in their homes.

    The stummel was pretty much finished but I still needed to let the stem soak for a couple more hours.  I suppose I should go make some dinner.

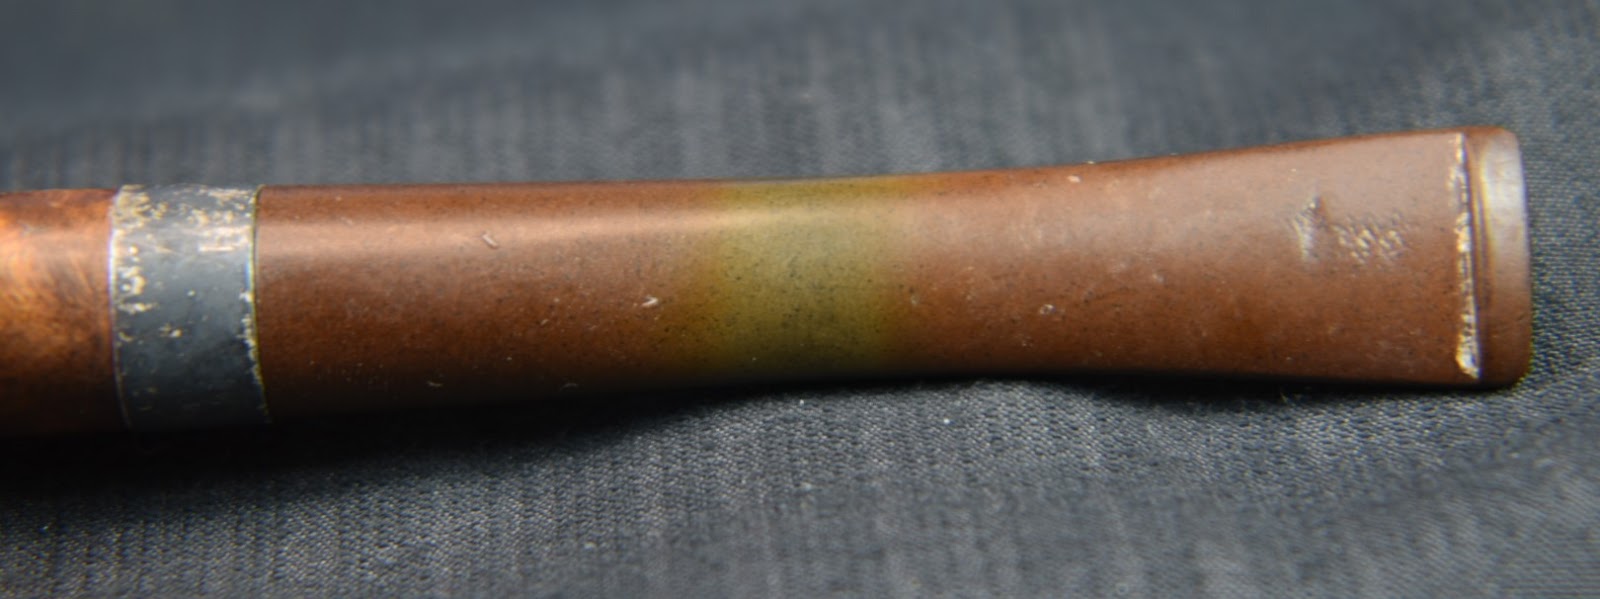
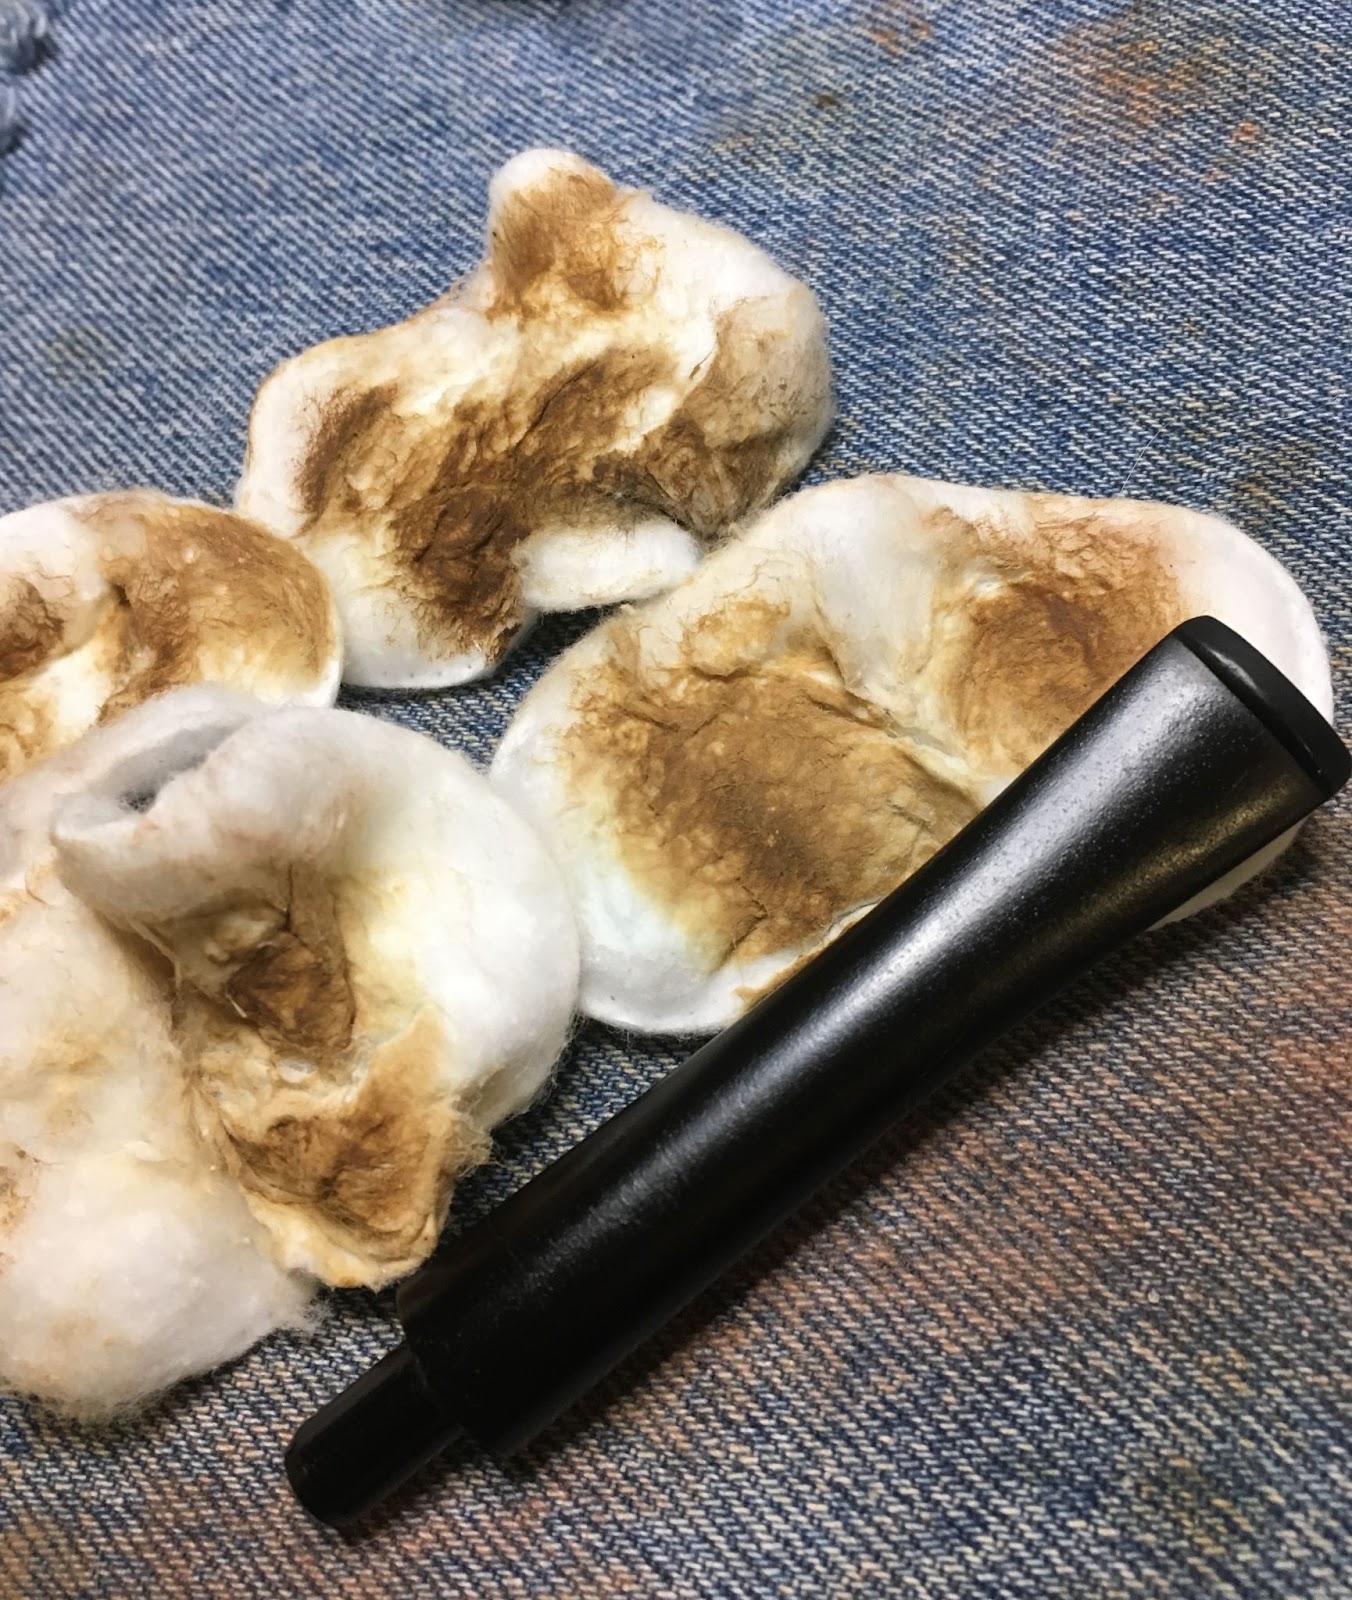
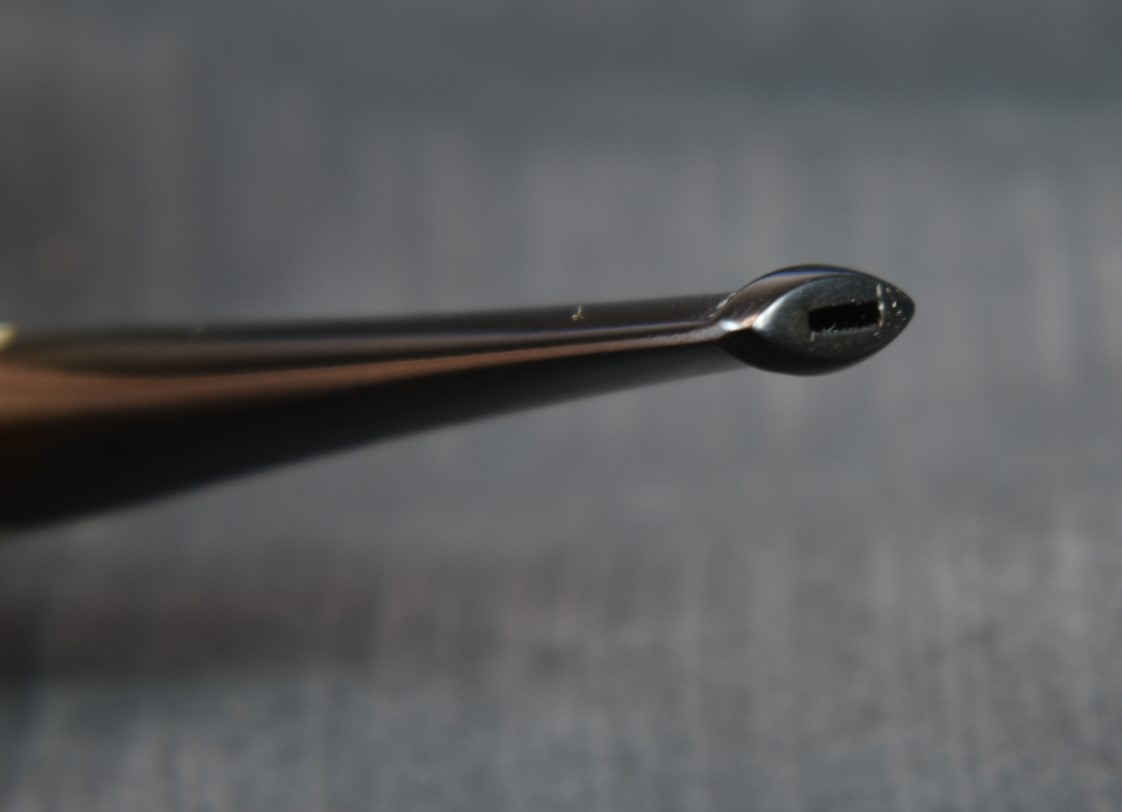
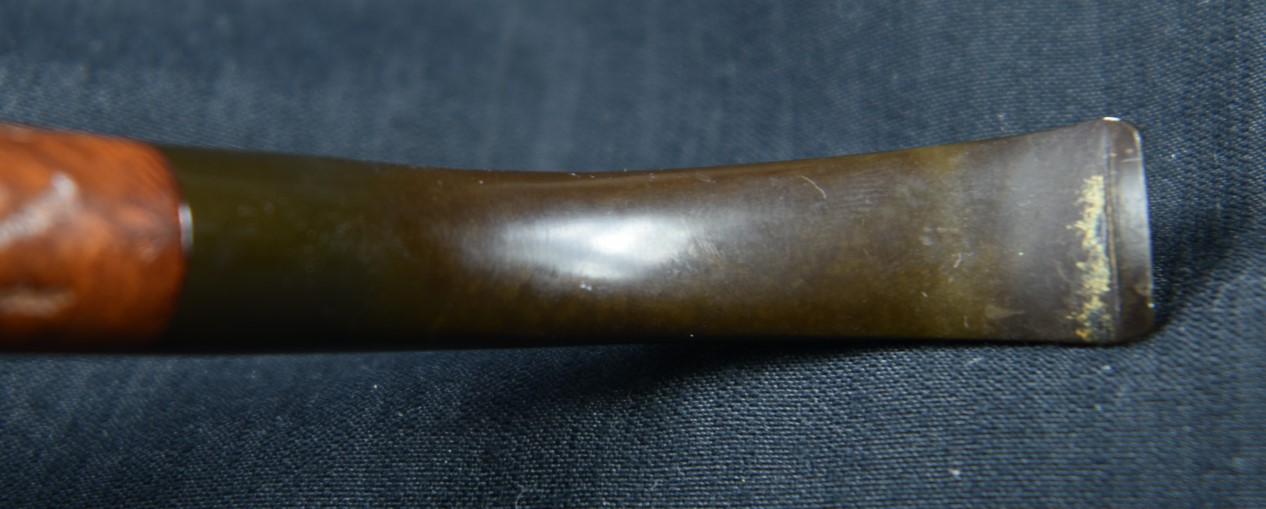
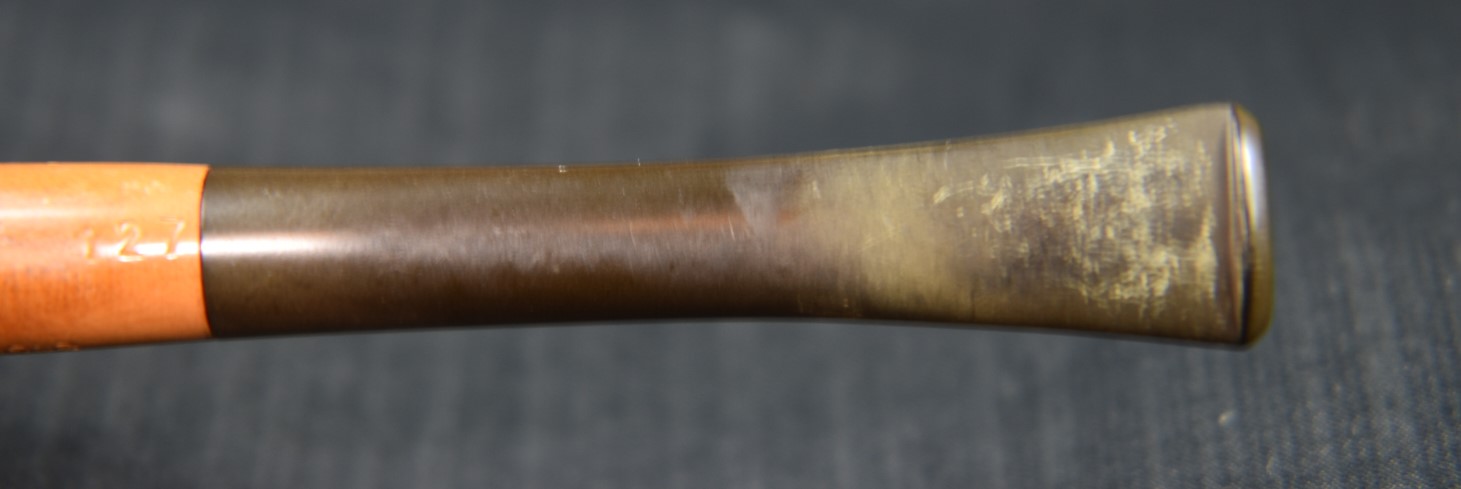
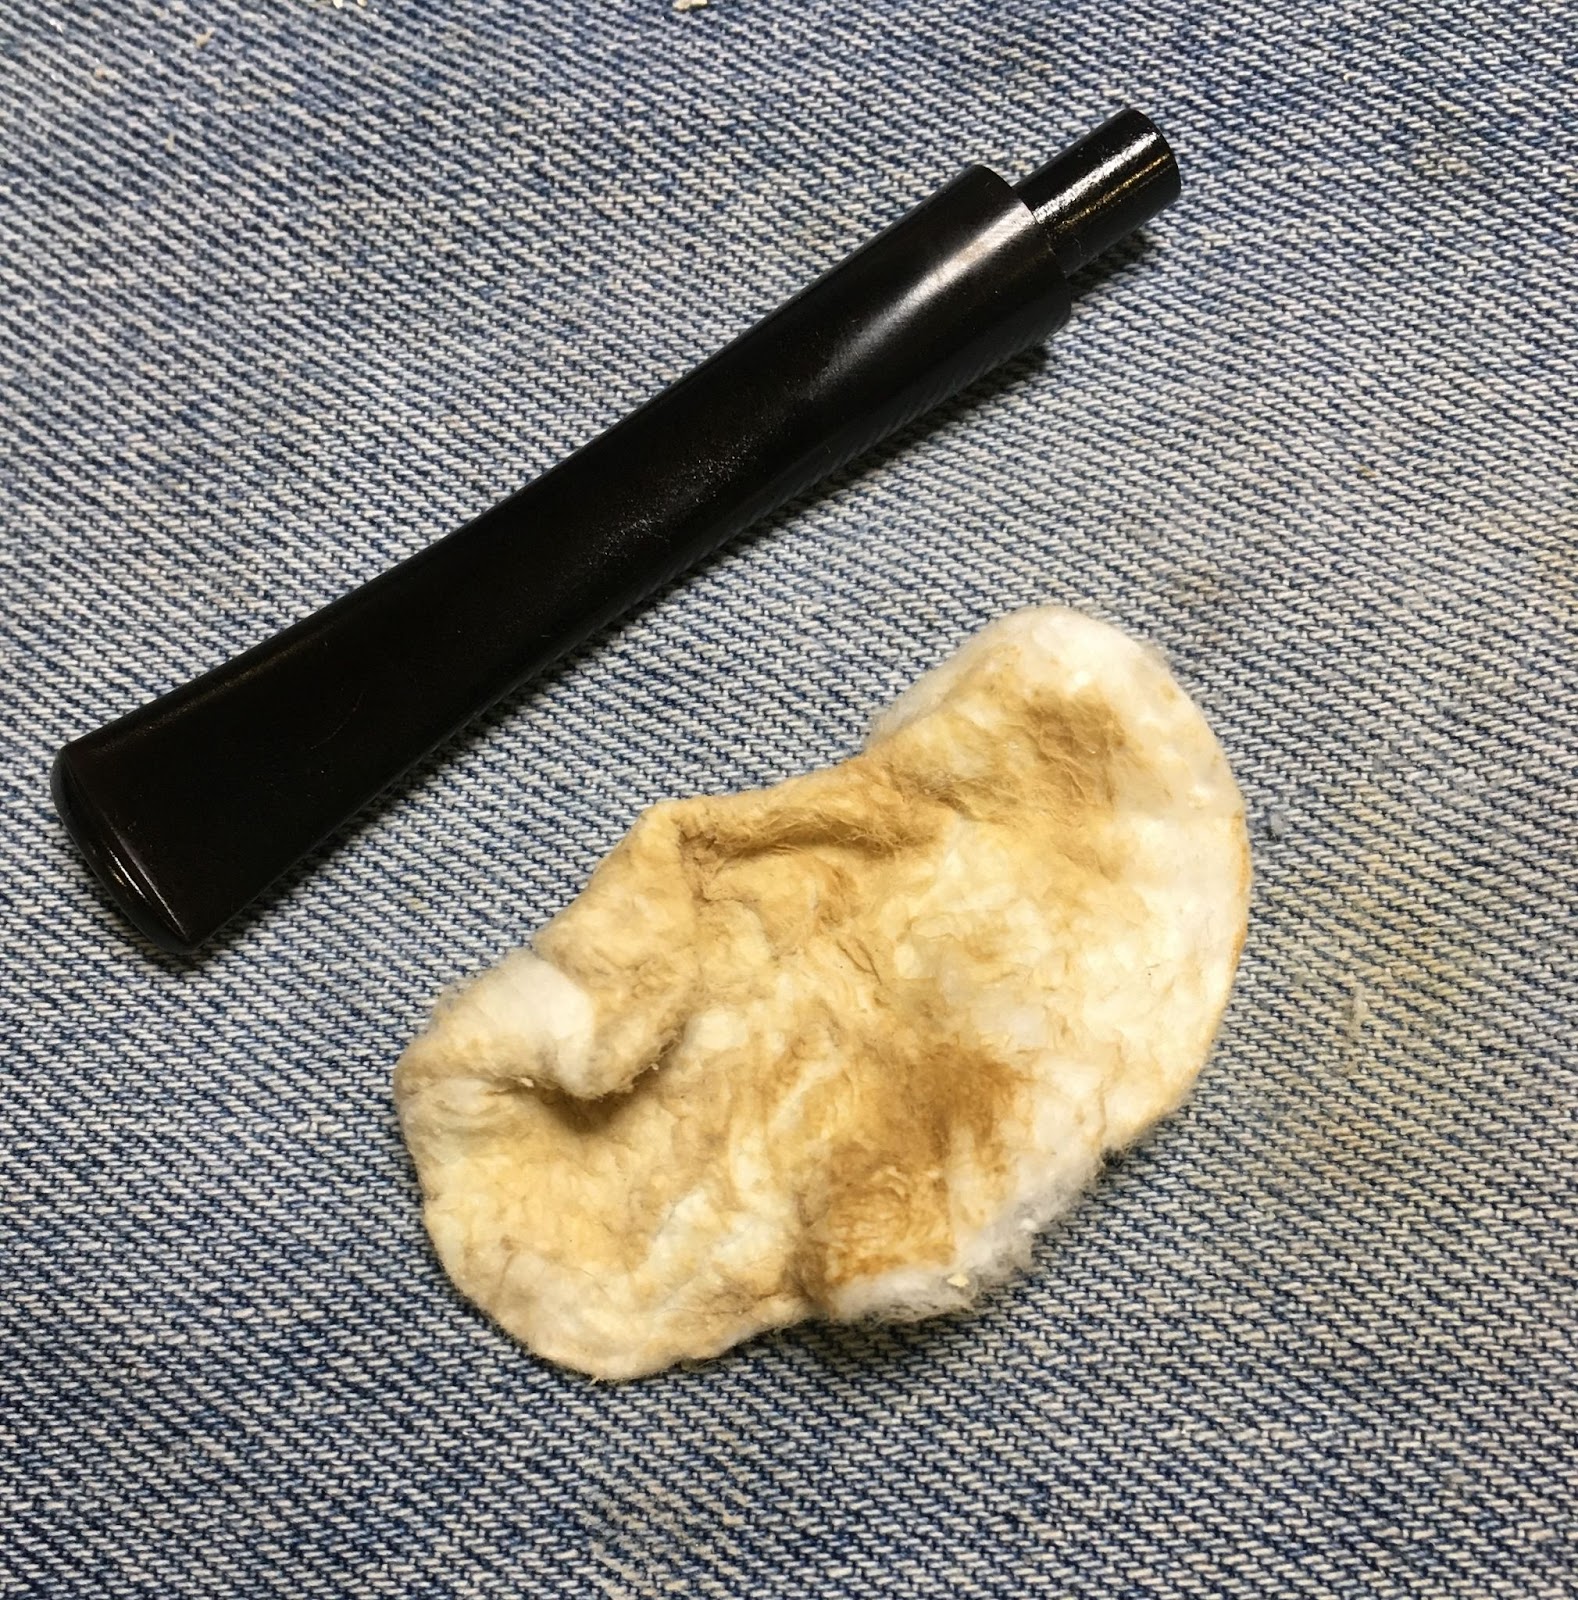
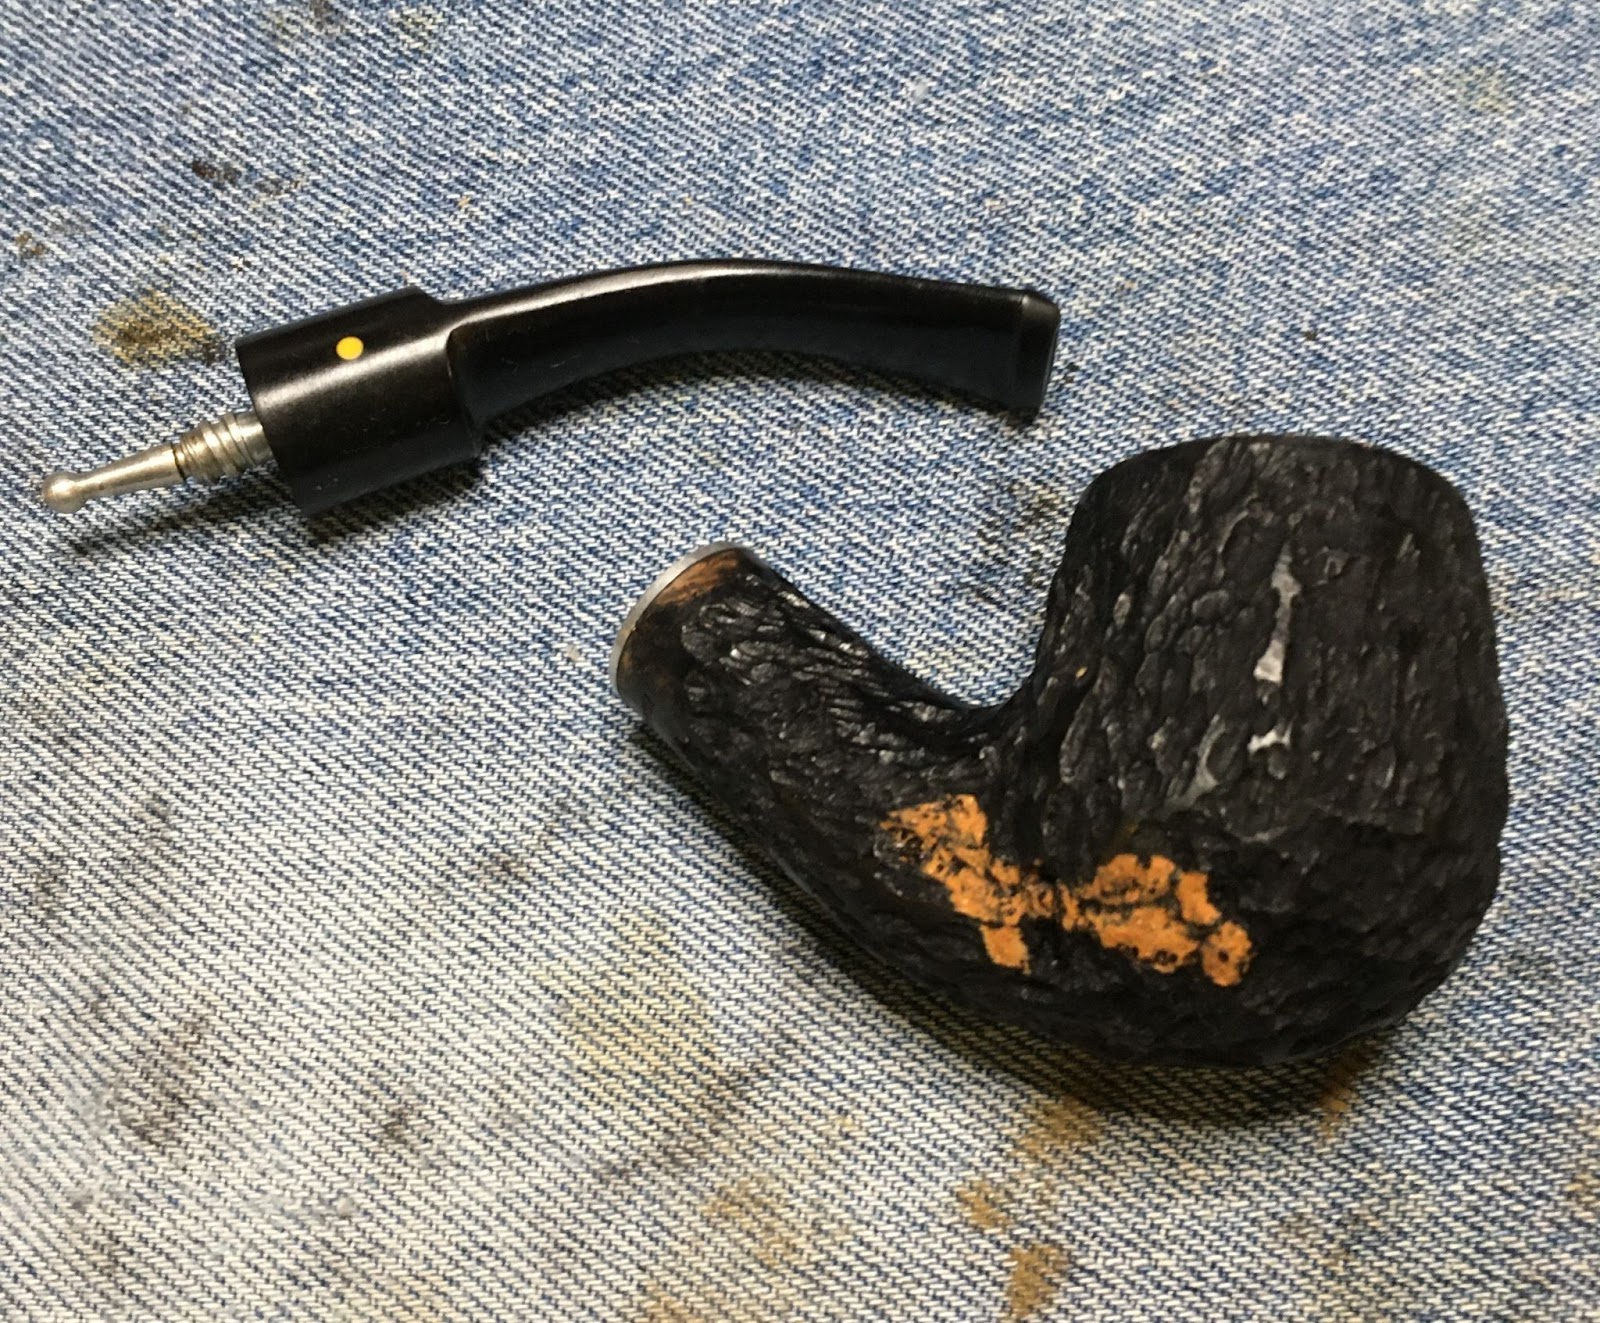
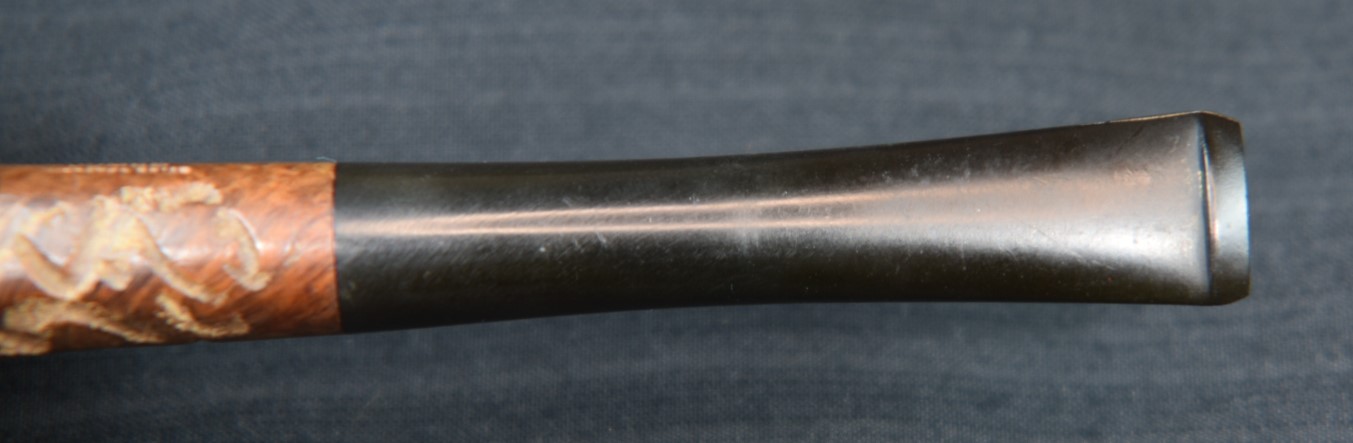
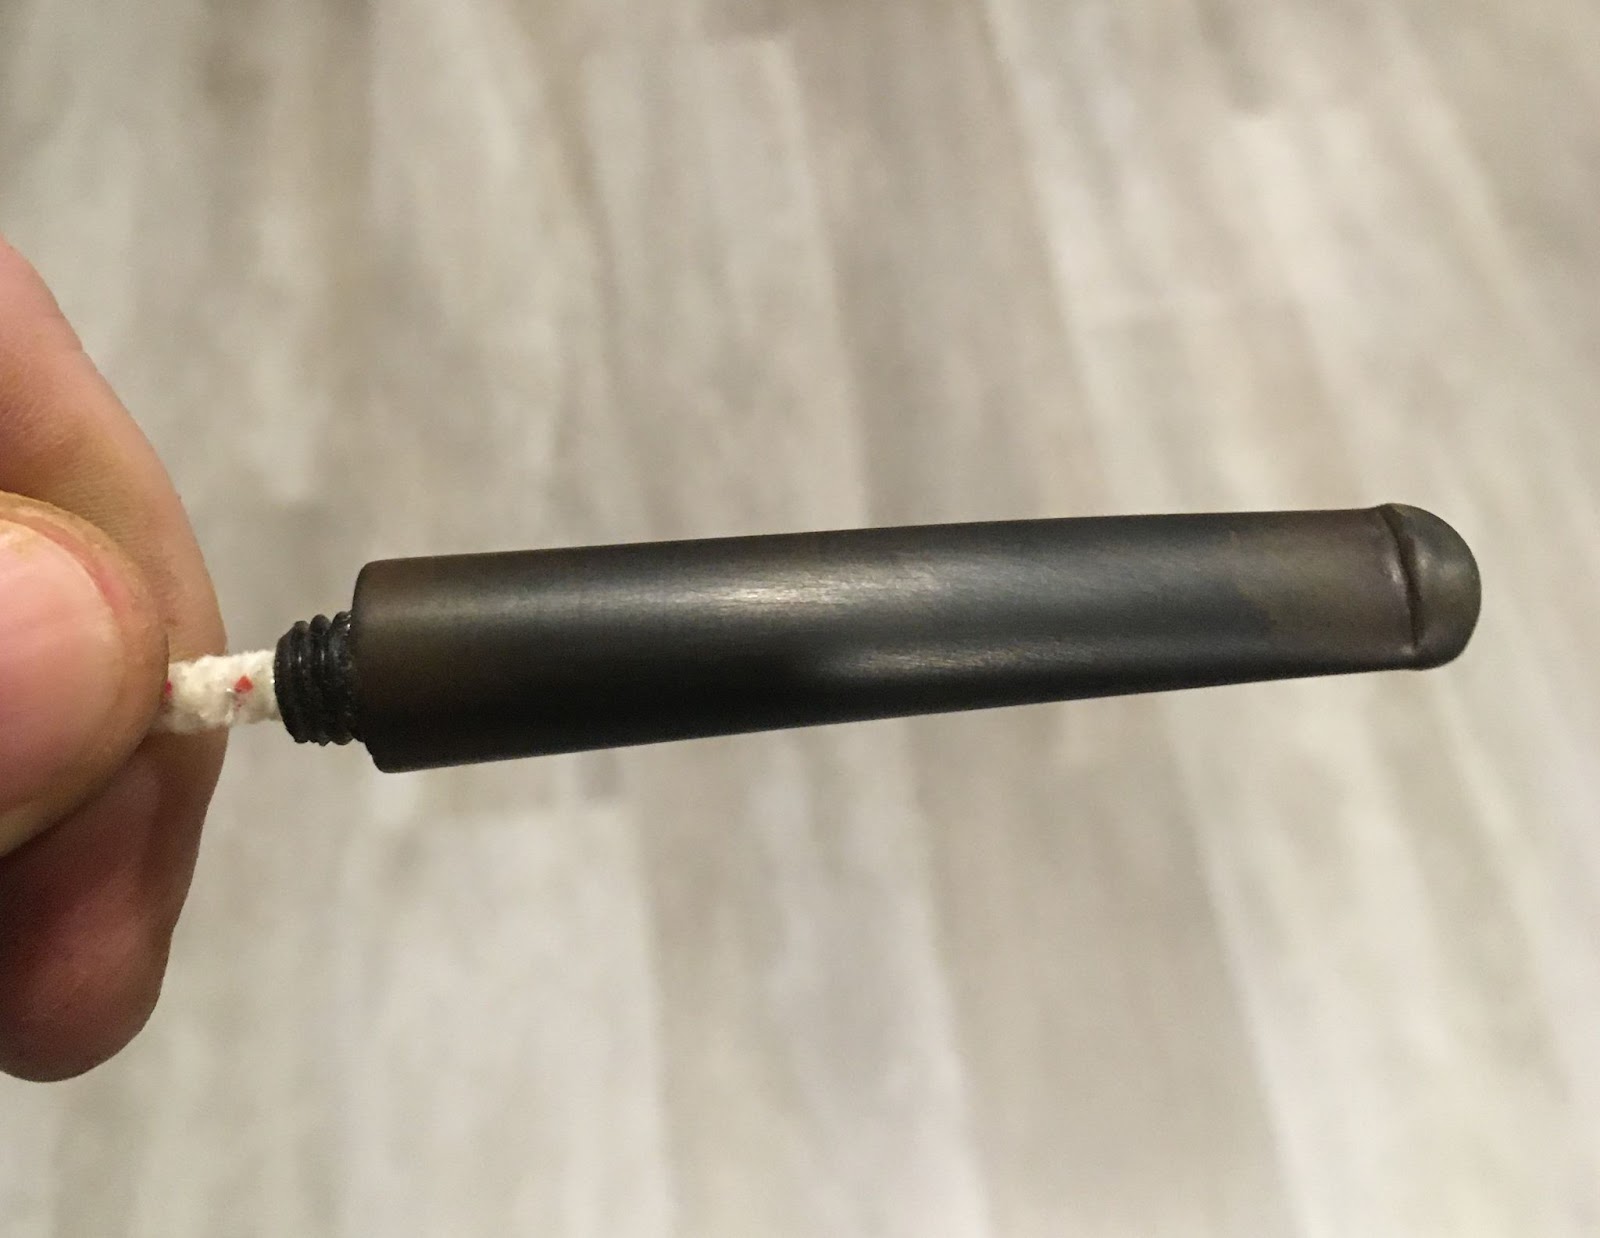
    Finally the four hours were up.  I returned to the stem, still soaking in the Before and After Deoxidizer.  I removed the stem and let the solution drip off for a few minutes.  While I cleaned up the workbench and retrieved the rough shop rag I like for wiping the deoxidizer from stems.  This first photo shows the stem still wet with solution. The dark smudge to the left was from this stem when it first hit the rag.  I rubbed the remaining solution off with quite a bit of force.  I was trying to wipe off the solution and abbrade away as much of the oxidized rubber as possible.

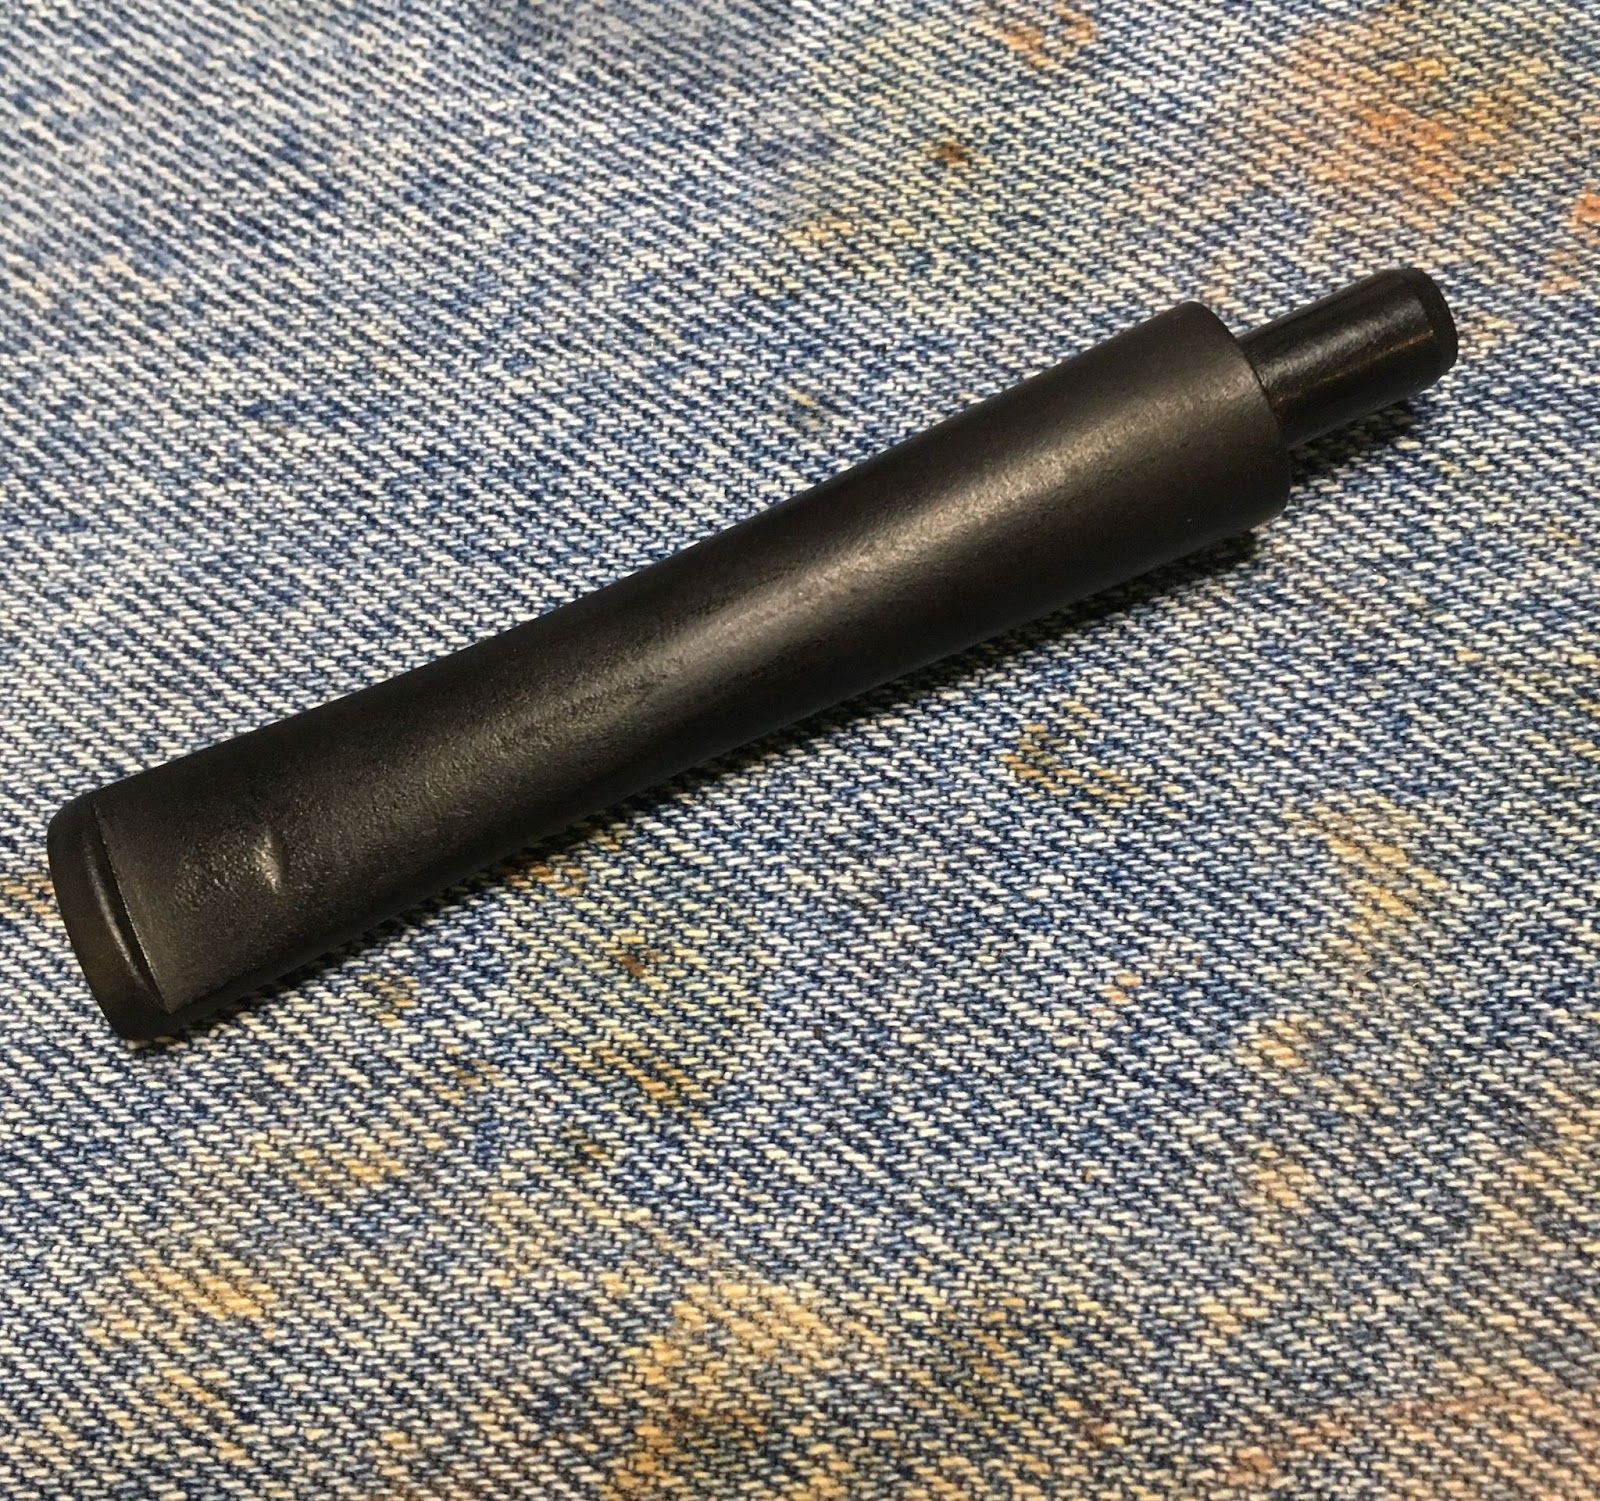
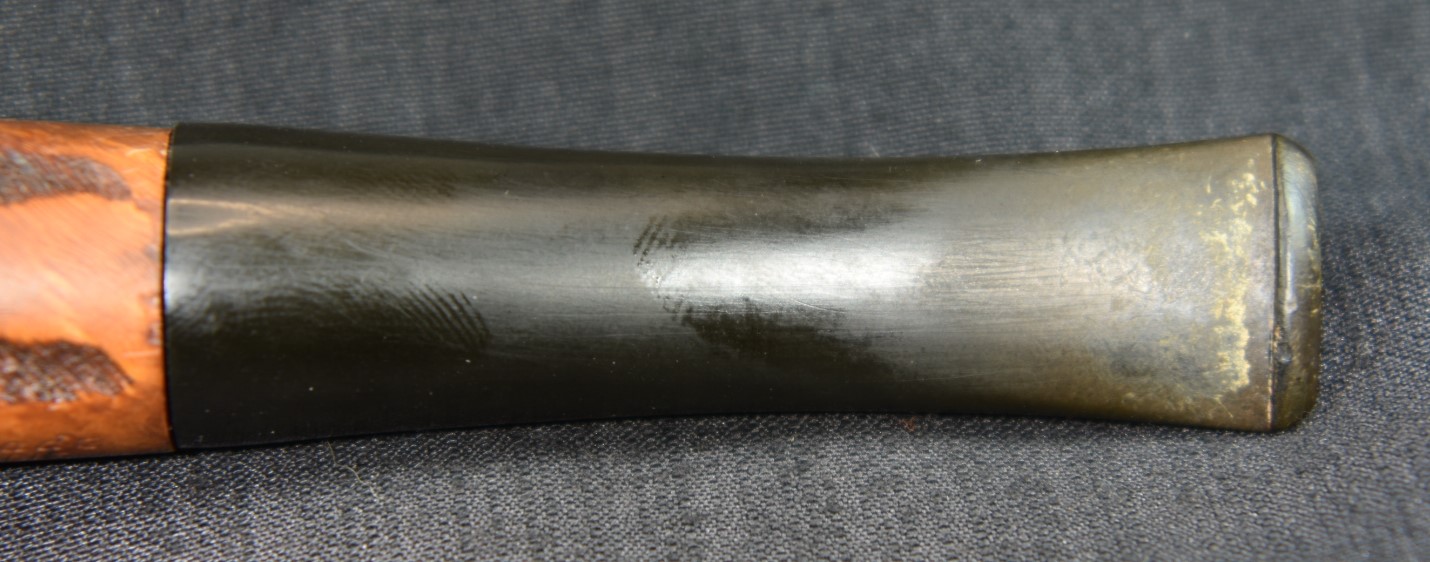
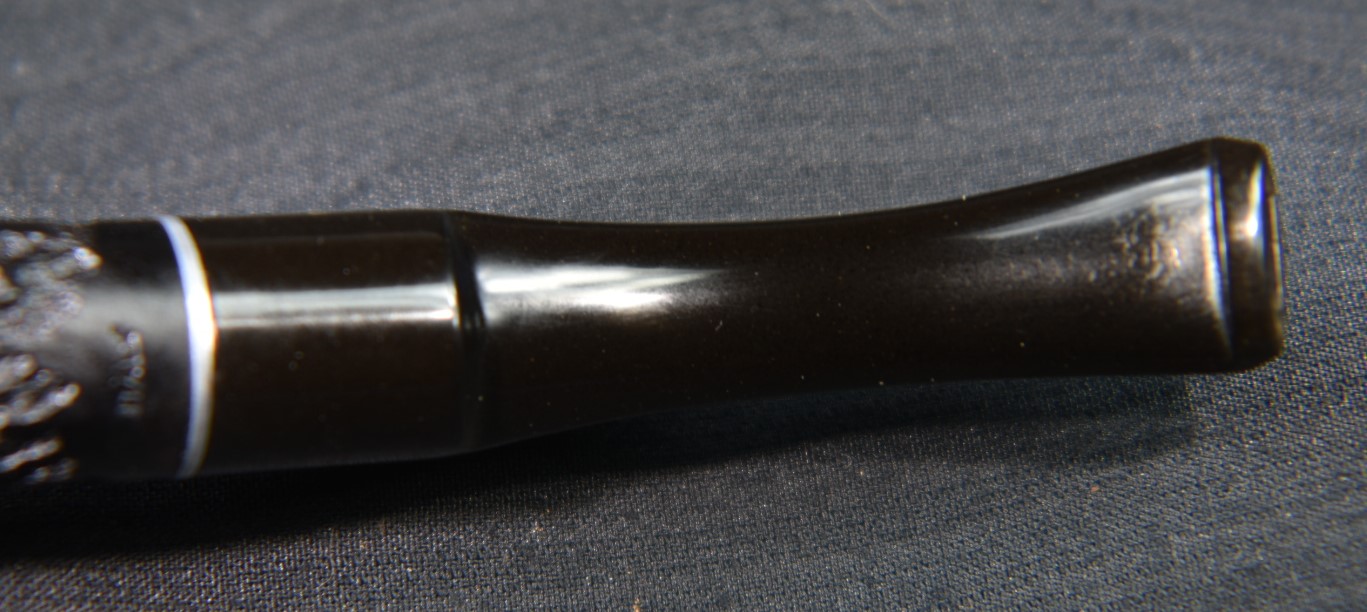
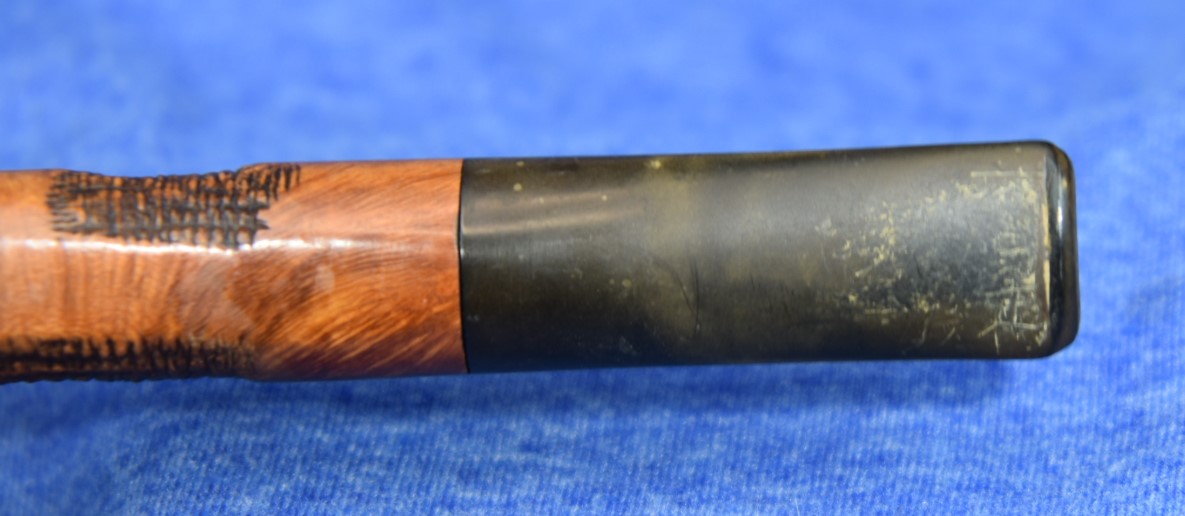
    Below you can see the stem after the solution has been rubbed off and a couple of pipe cleaners passed through to remove the solution from the airway.  It is looking much better and black though you can see the dents from teeth and small pits left by the removal of the oxidized  rubber.

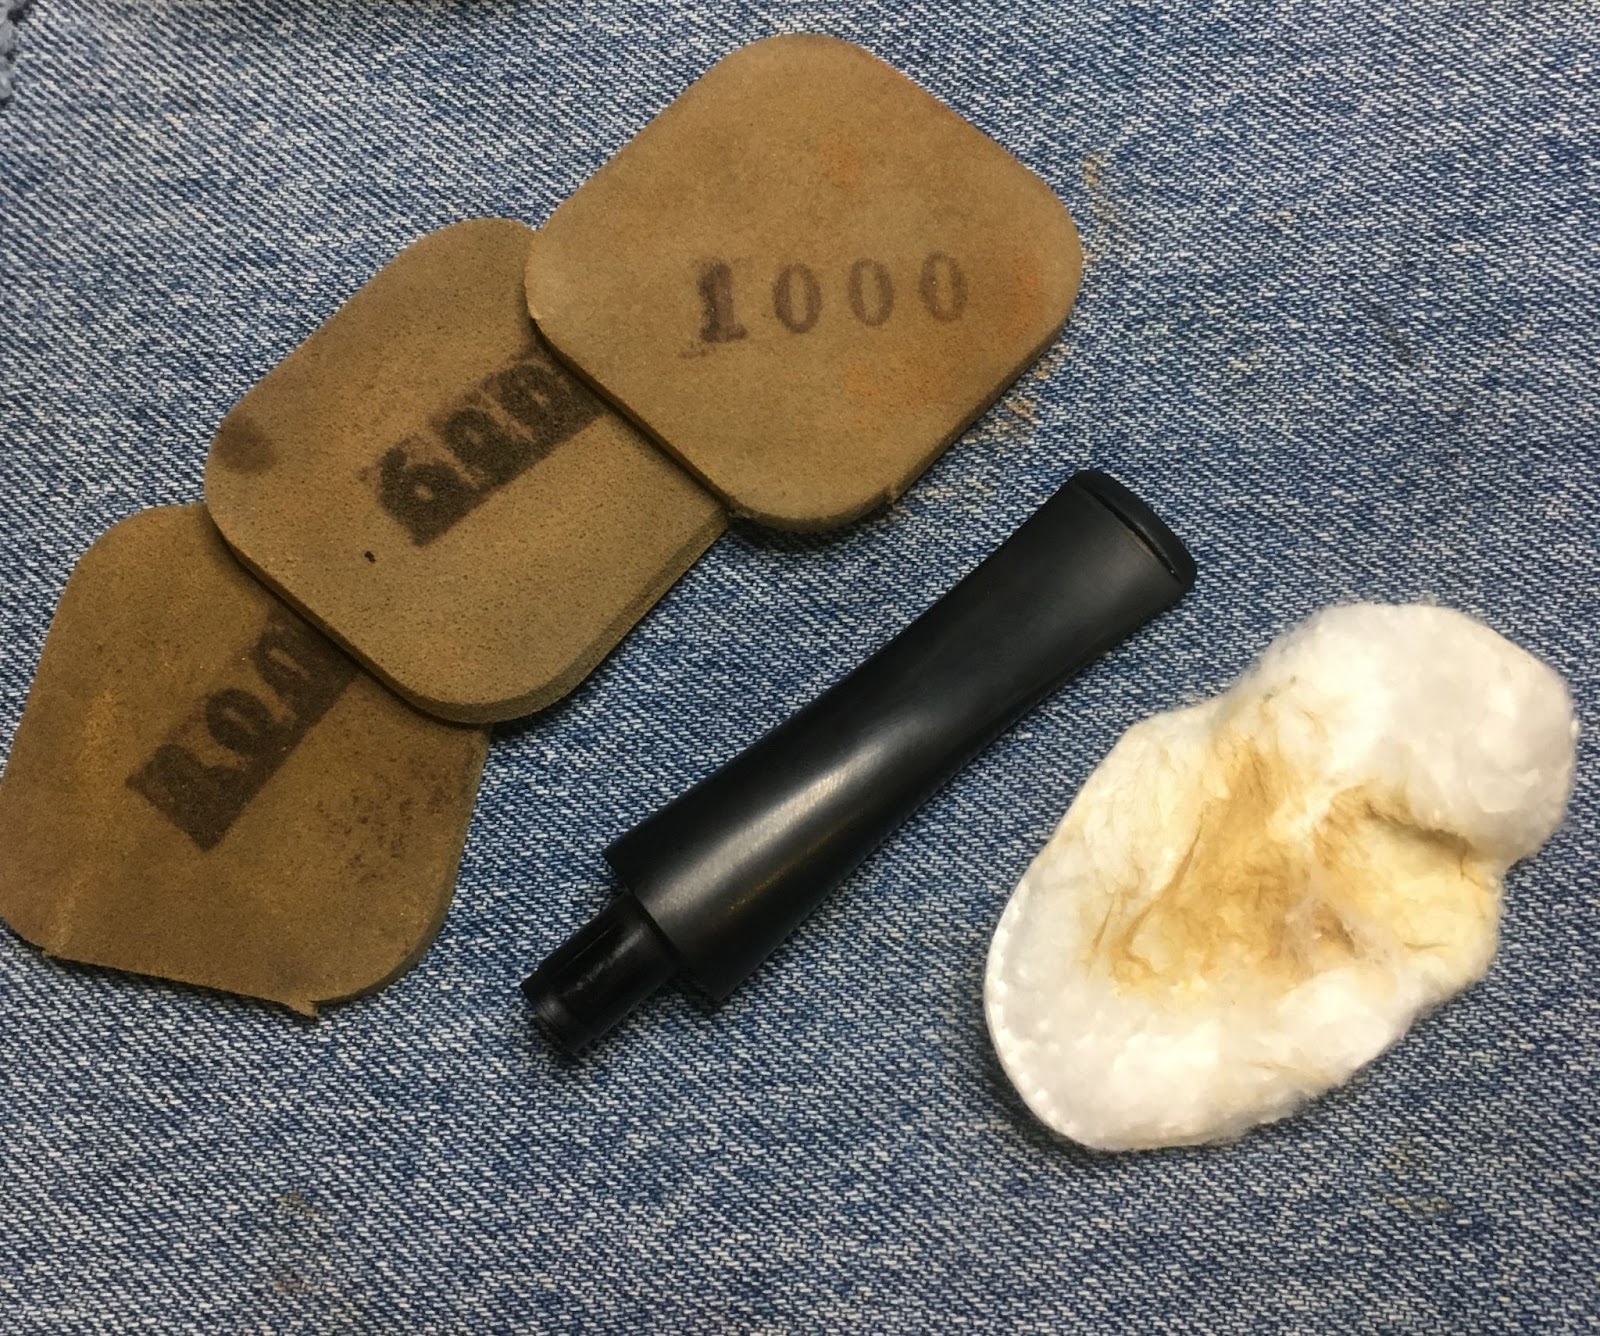
    Here is another shot showing the rough surface of the stem after the solution.  I chose to use Soft Scrub of make-up pads to see how much more of the oxidized material was still present.

    The answer, a lot.  The good news was that the oxidized material was quite soft from the deoxidizer solution so this brown matter came off easily.  Afterwards I oiled the stem with mineral oil and allowed it to soak in.

    With fresh vulcanite, I used a cotton swab dipped in 95% ethyl alcohol to remove the oil from the area I needed to fill with black CA.  I placed a small drop onto the dent and spritzed it with a CA drying accelerant.  This makes the CA set-up within seconds.  

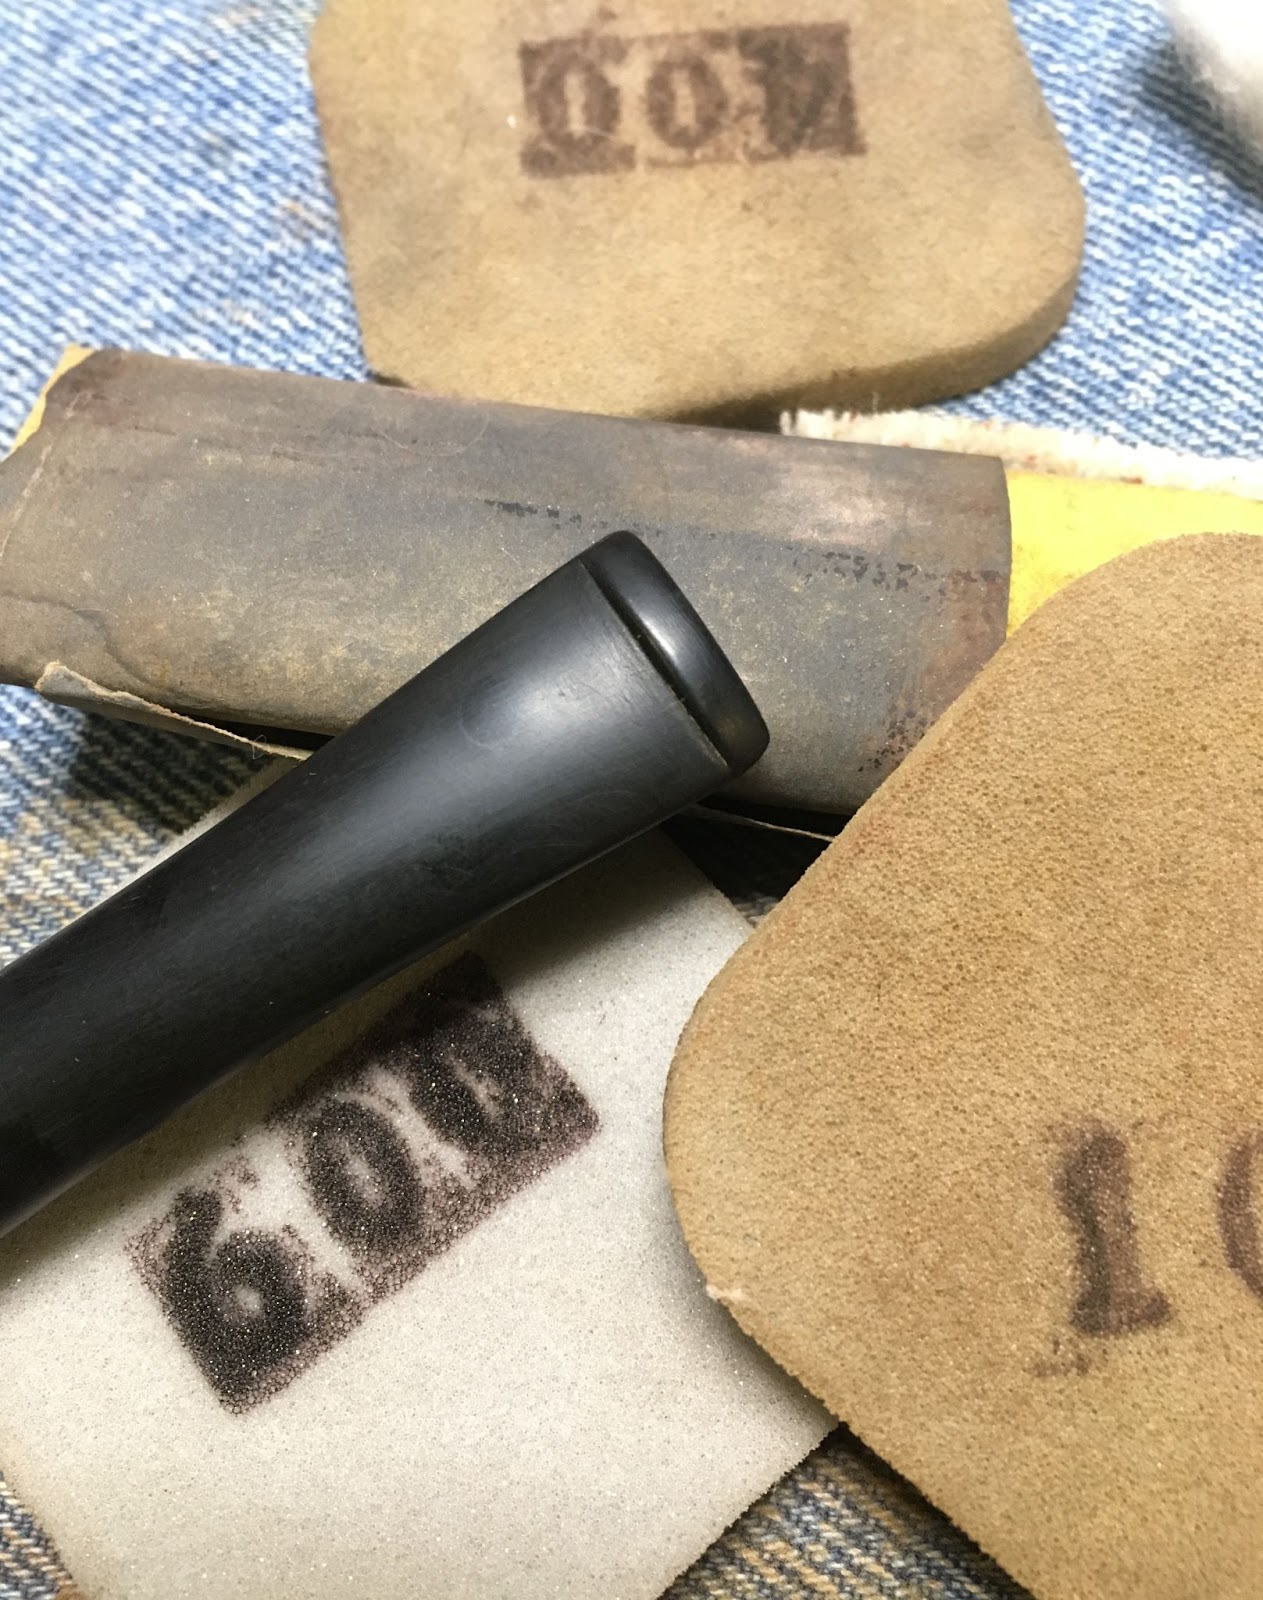
    I filed the dried CA smooth and applied a larger spot of black CA to the area.  This time I spread the drop out to about ⅛  inch diameter or 4-5 mm.  I spritzed it again with the accelerant.  This area was again filed smooth then sanded with the 400 sanding sponge followed by the 600 sanding sponge.  Below you can still see the larger CA area sanded.

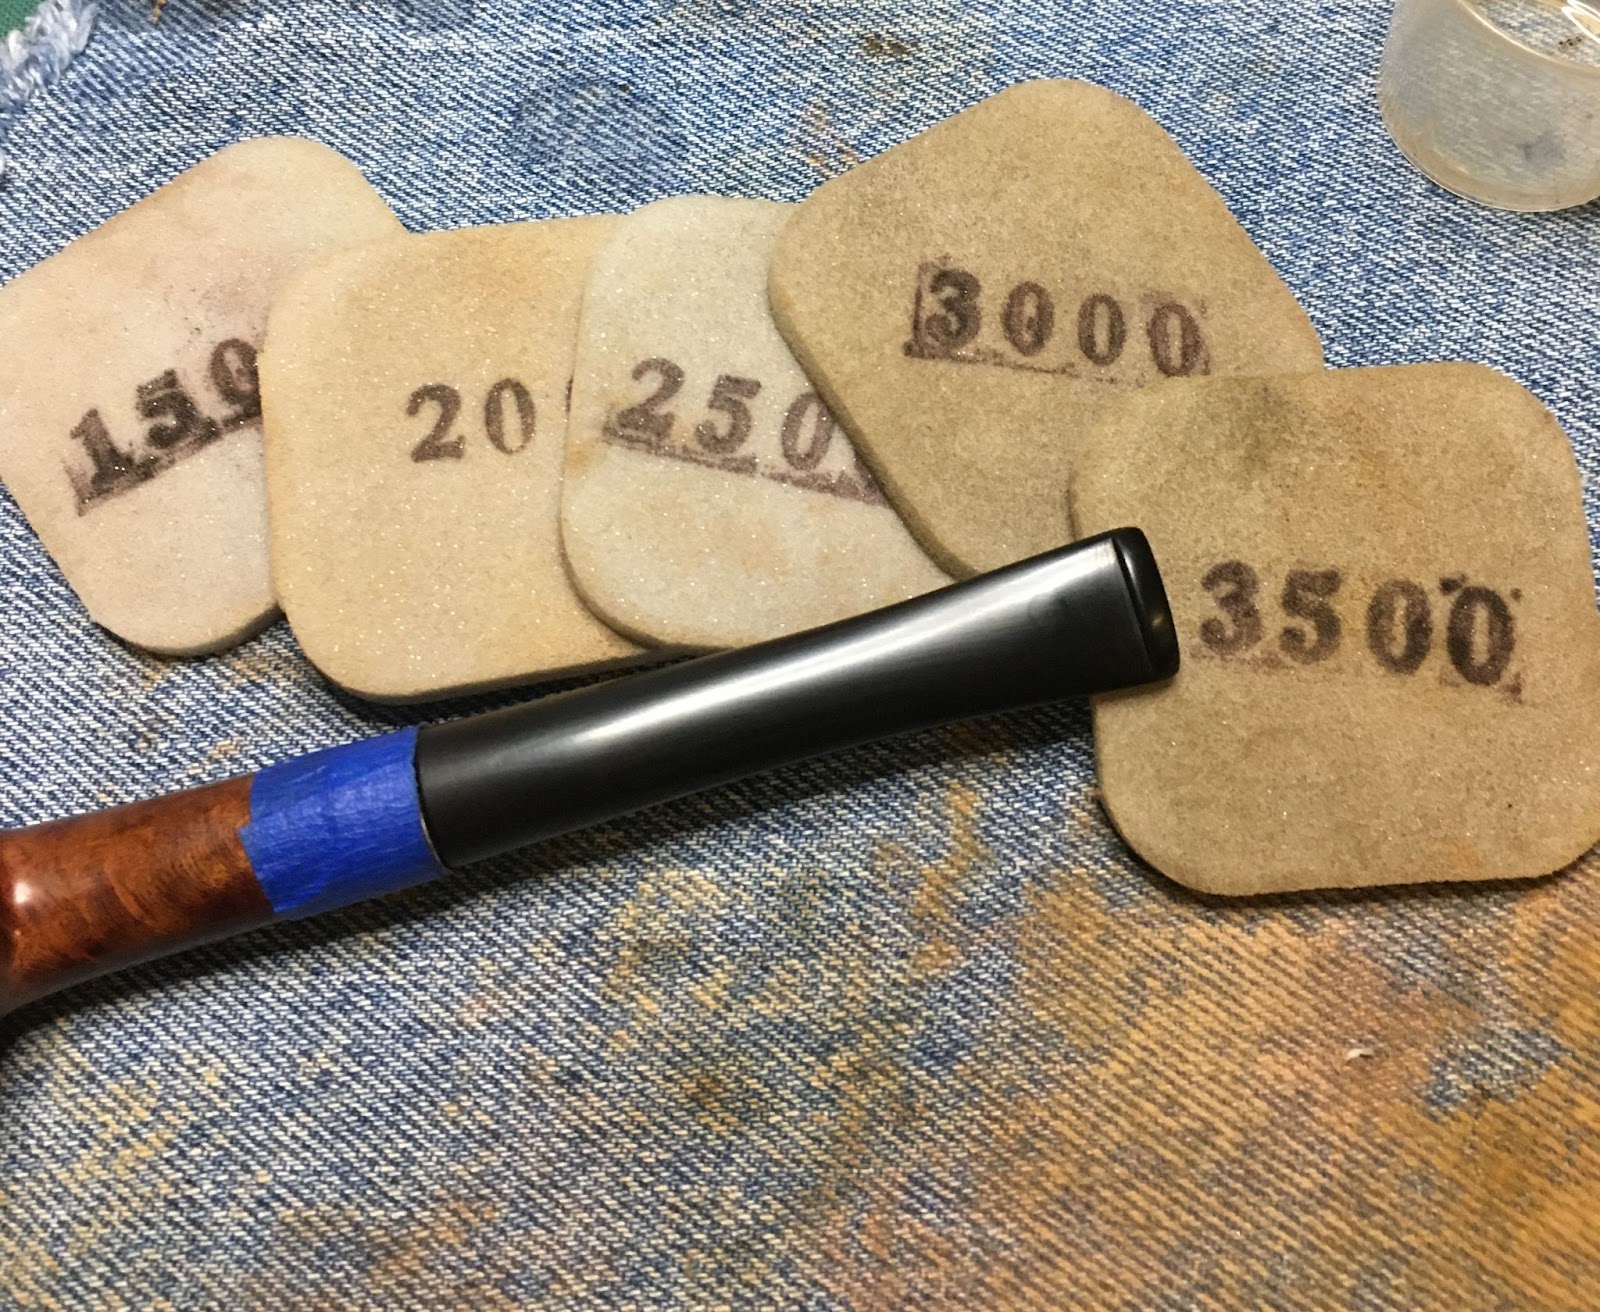
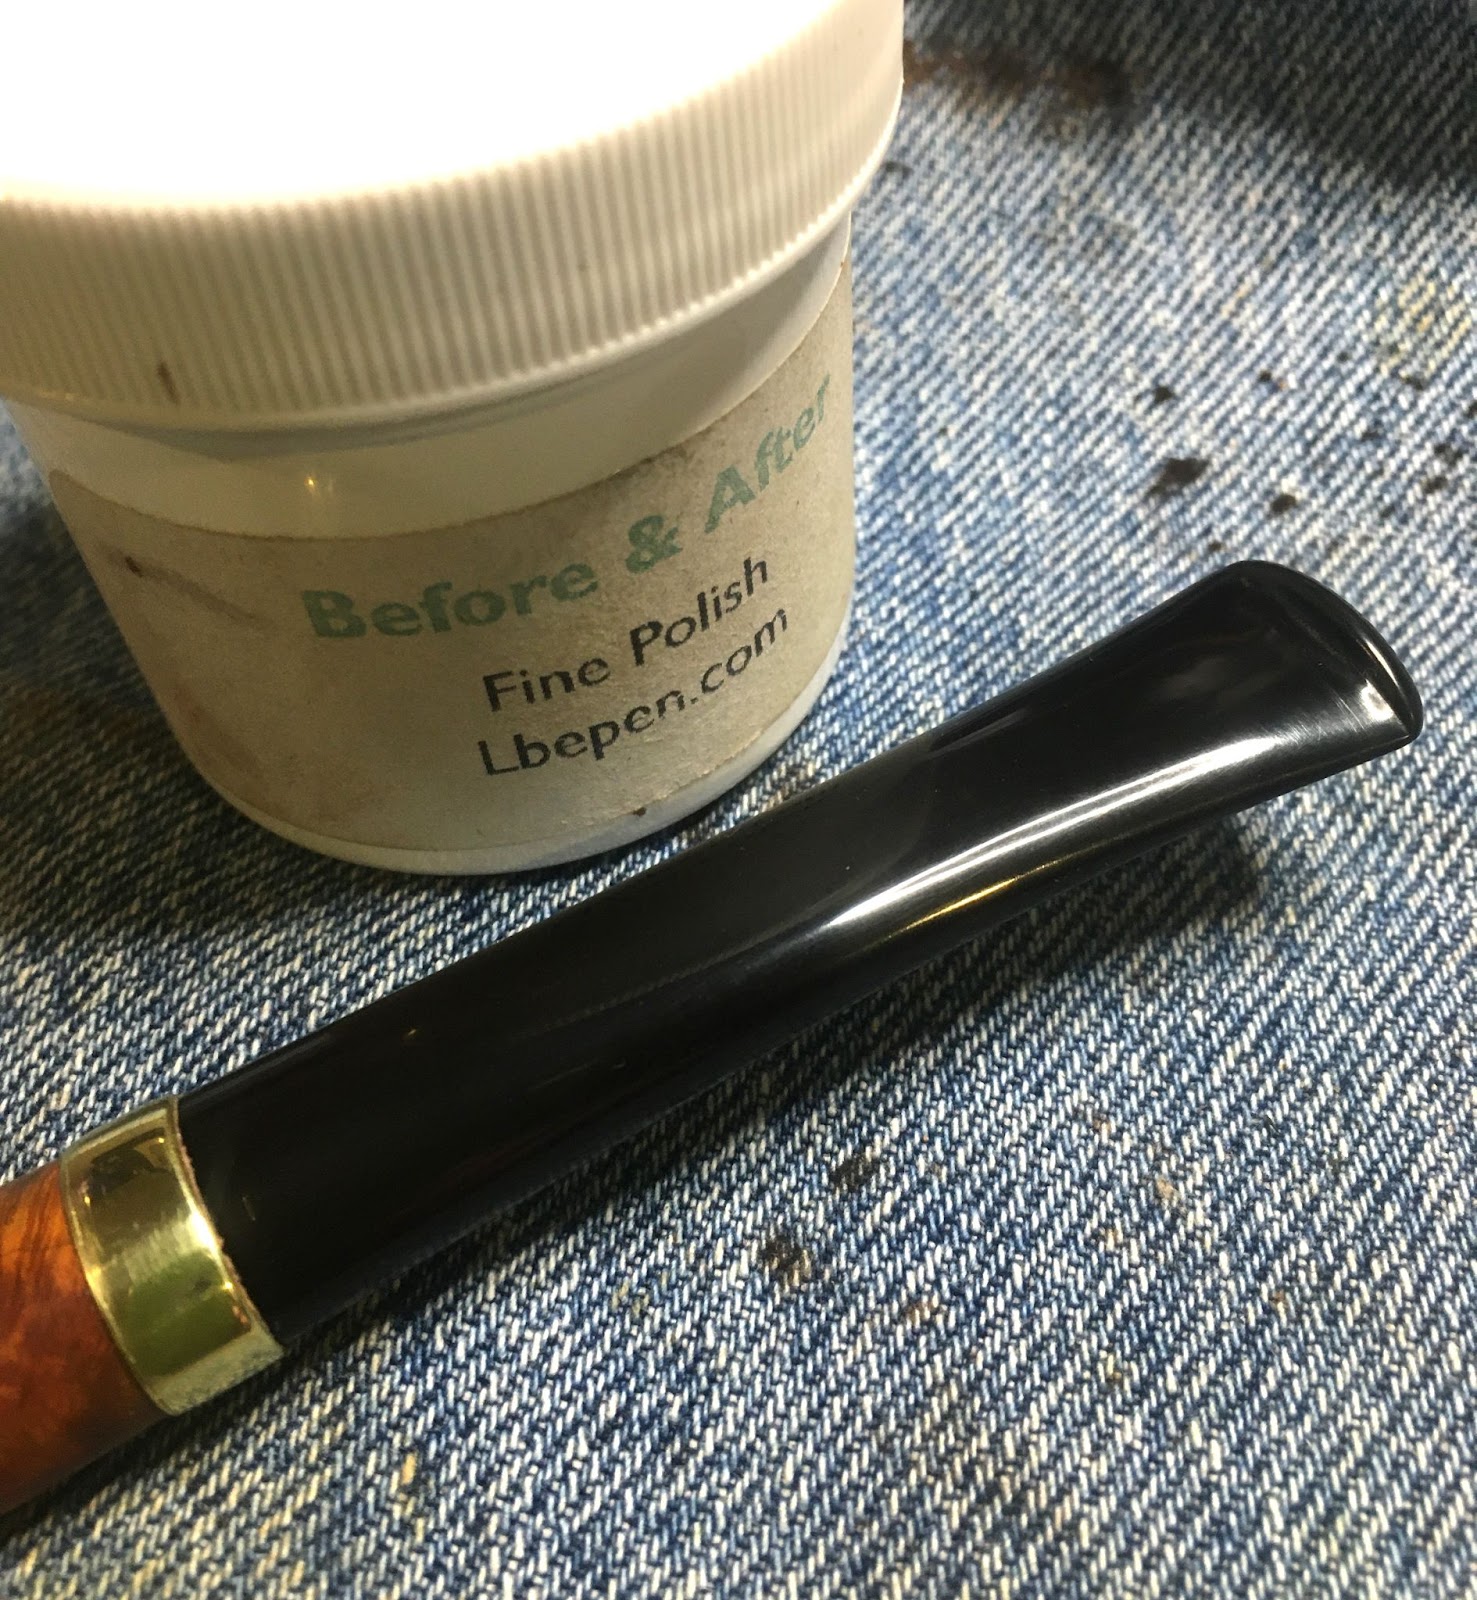
    From there, I sanded the stem with a series of sanding sponges from 1000-3500.  Between each sponge I wiped the stem with mineral oil on my finger and wiped it with a dry paper towel.  The stem had been reinserted into the stummel to avoid any rounding of the joint edges of the stem or the stummel.  The stummel was also taped to protect the silver.

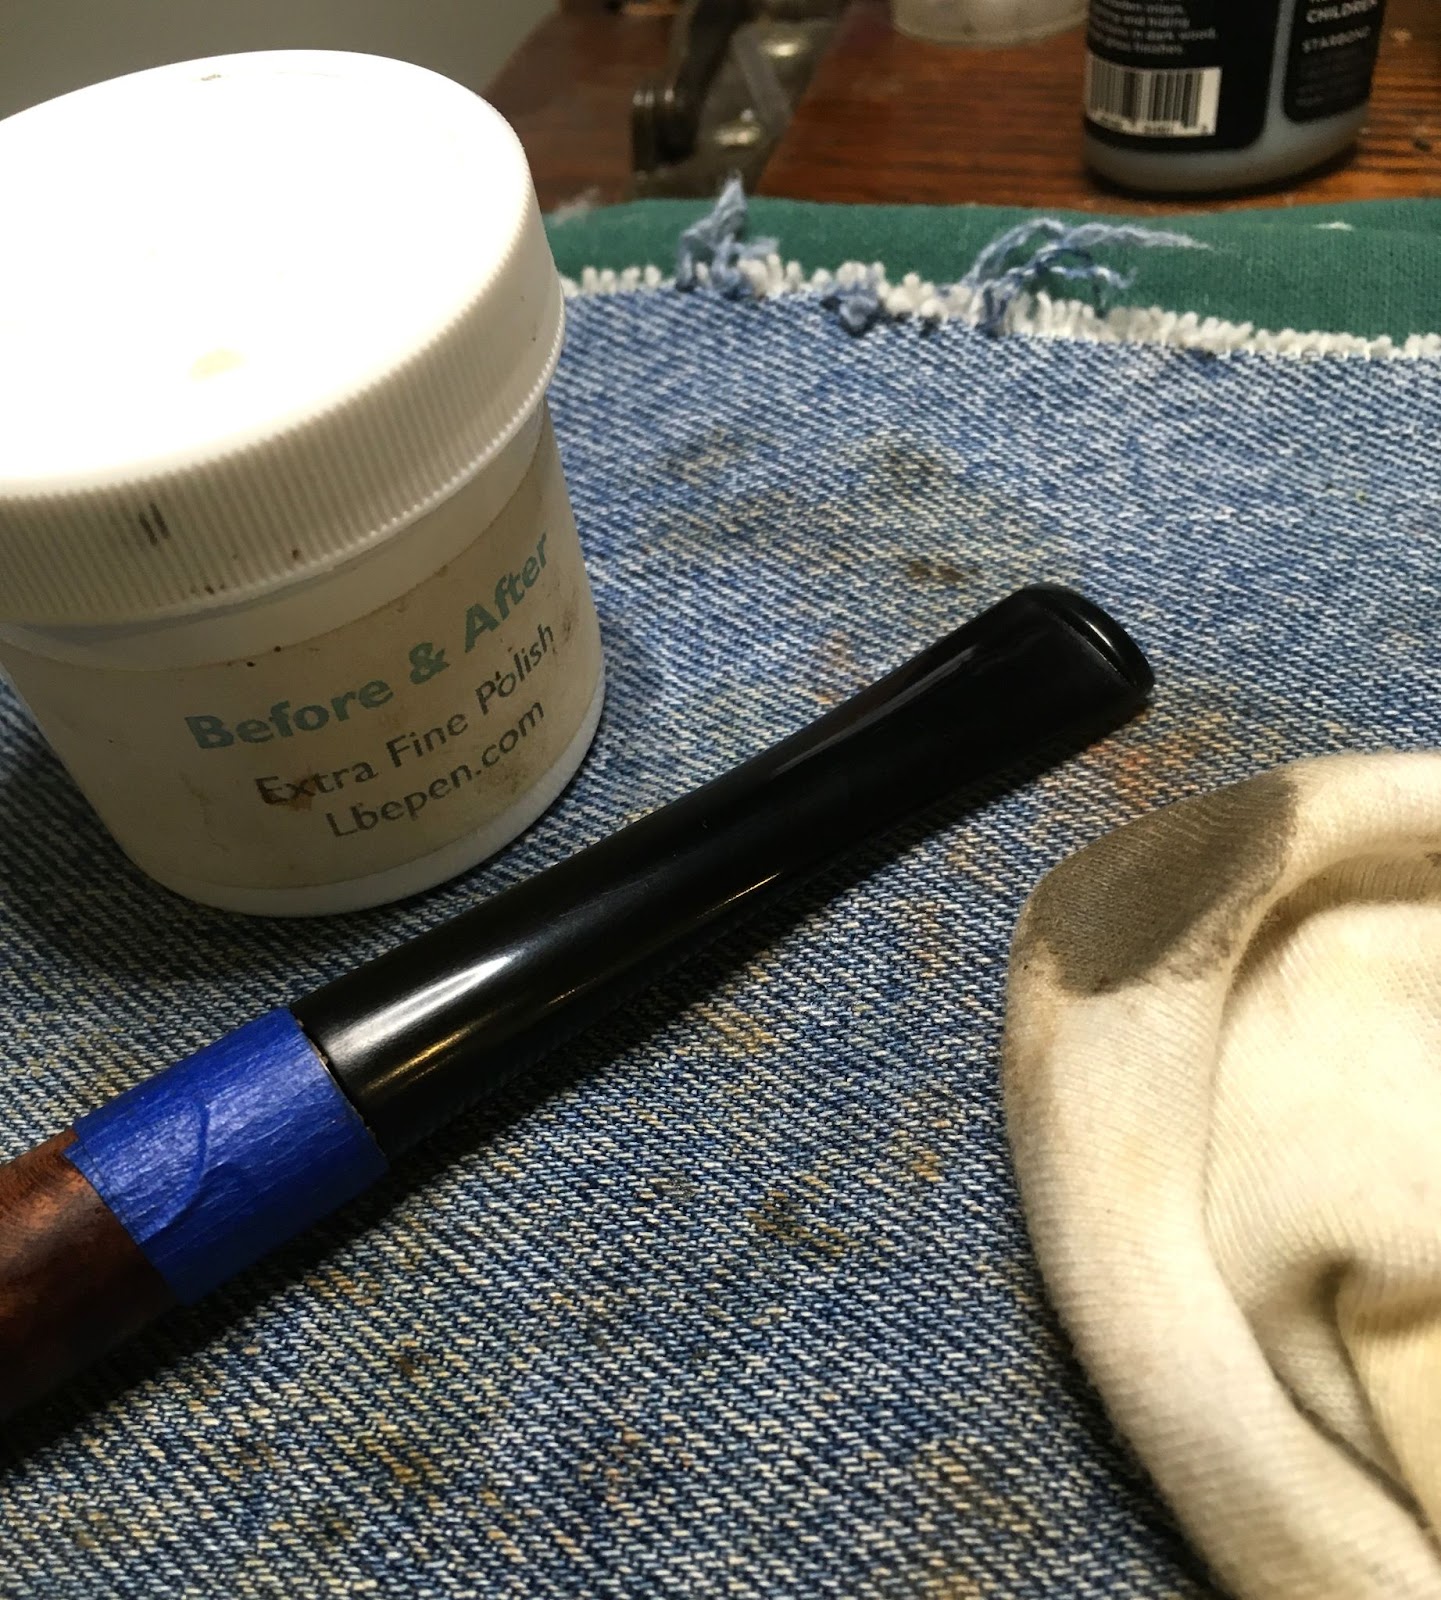
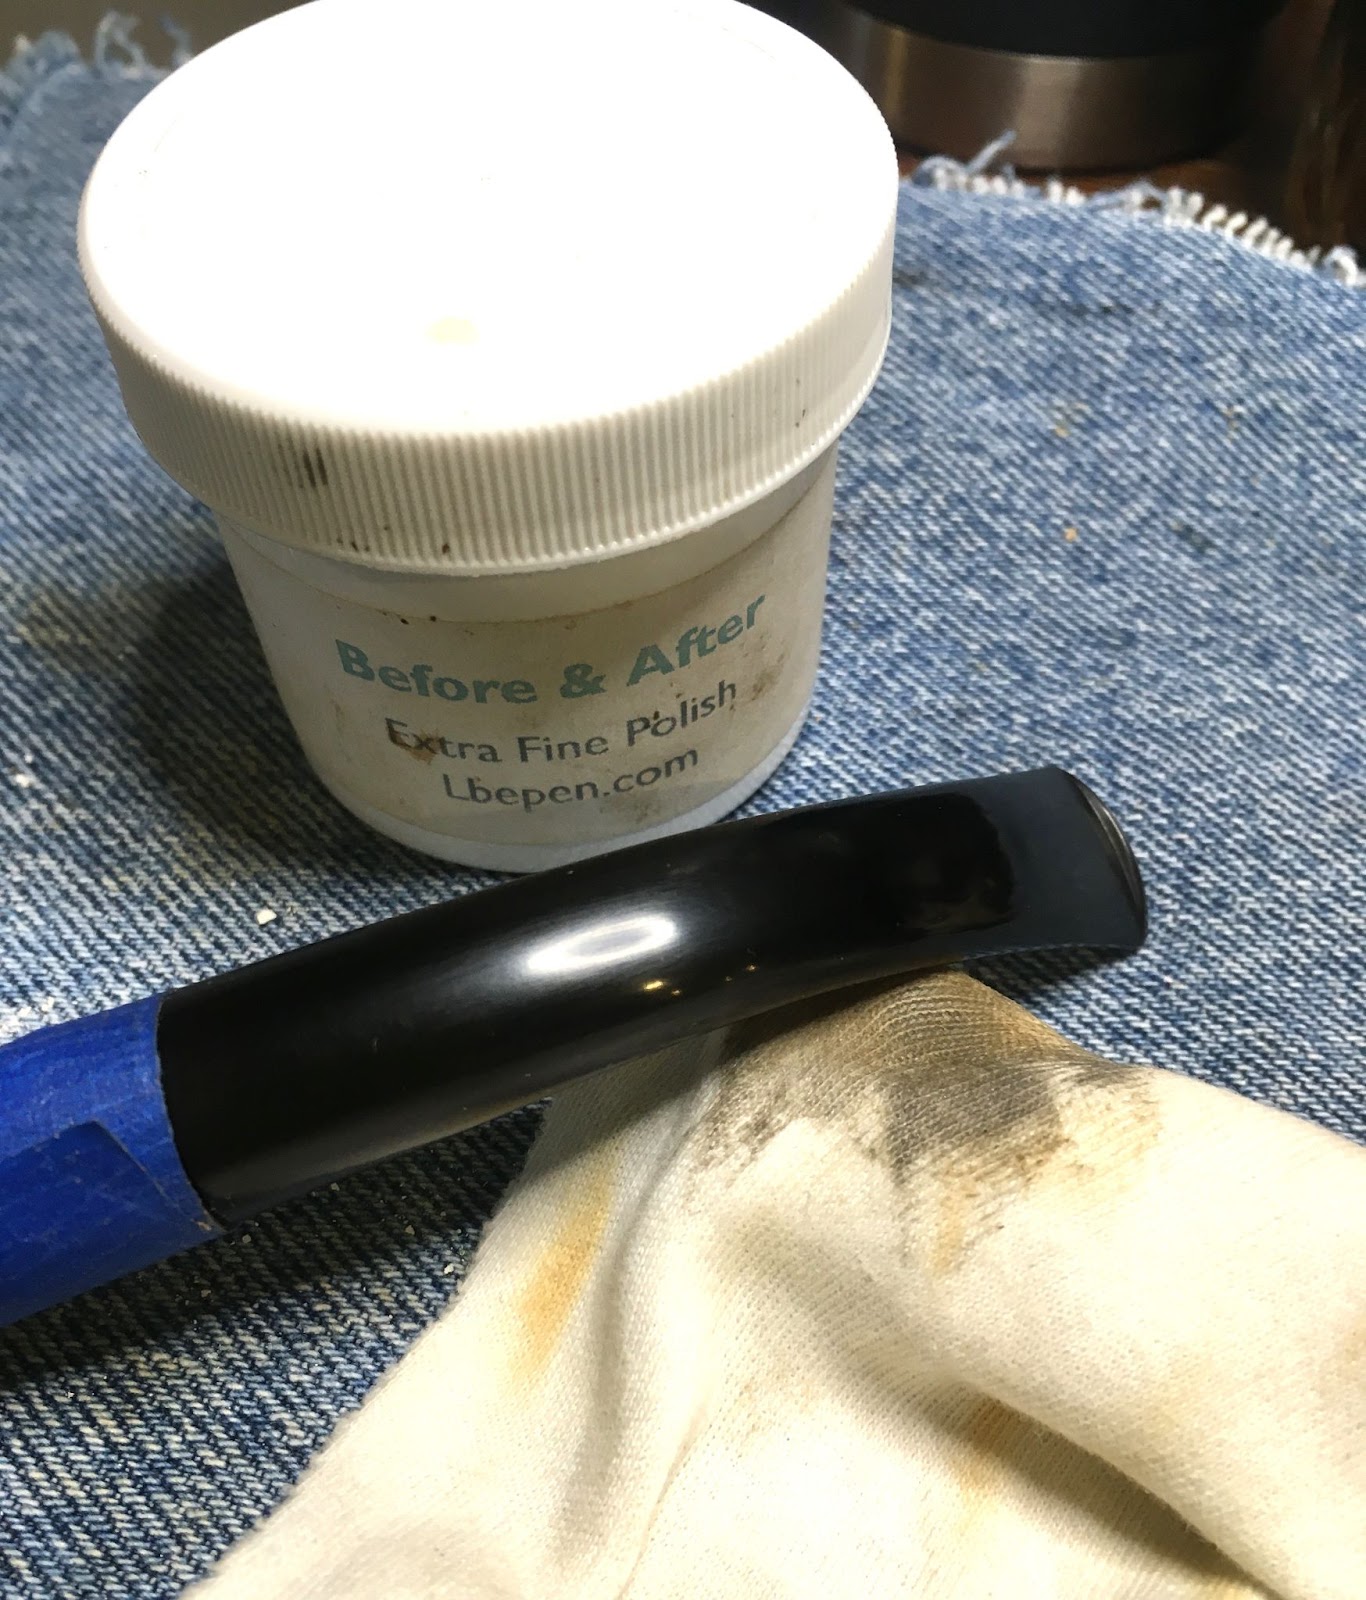
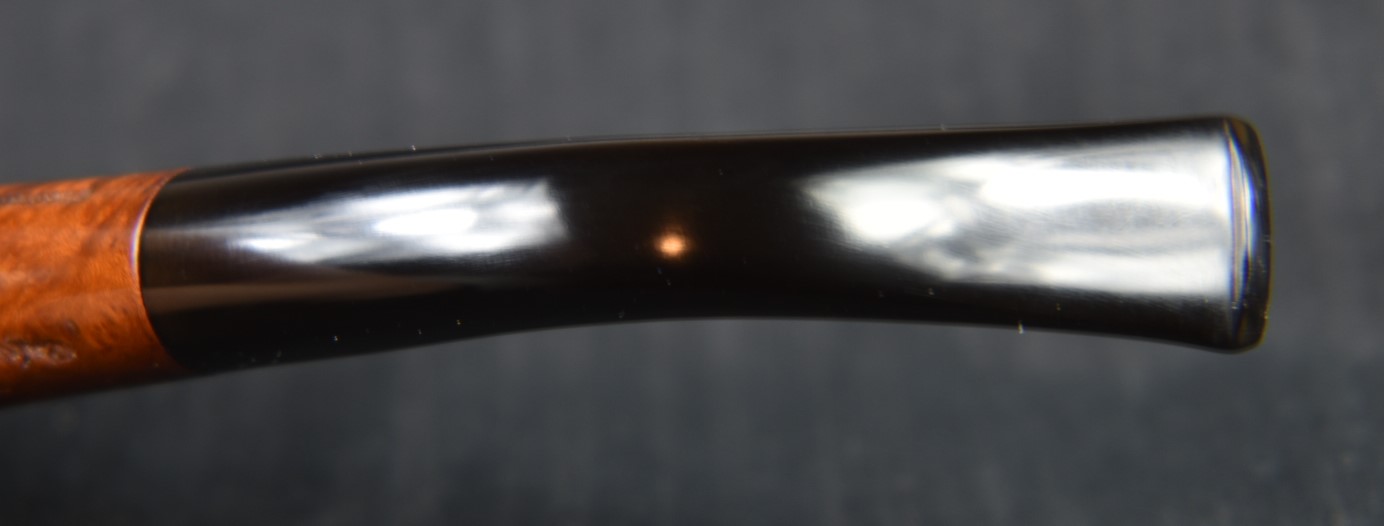
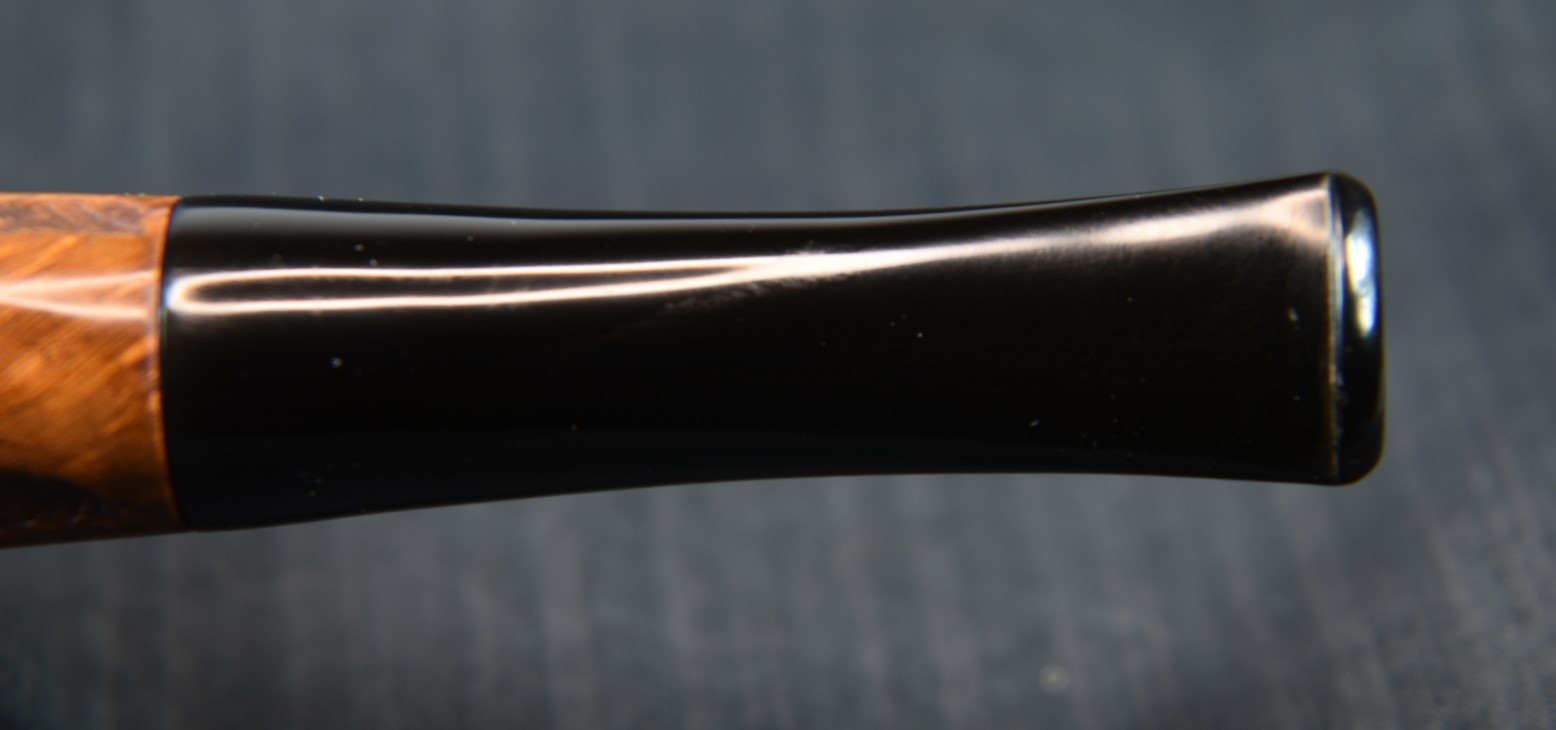
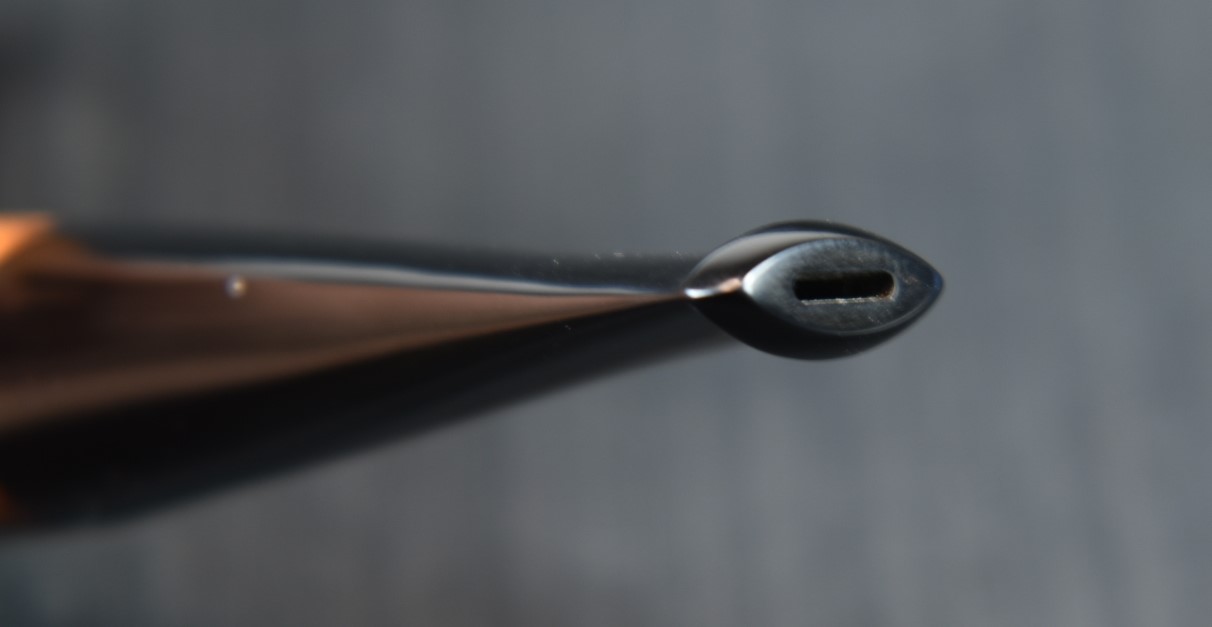
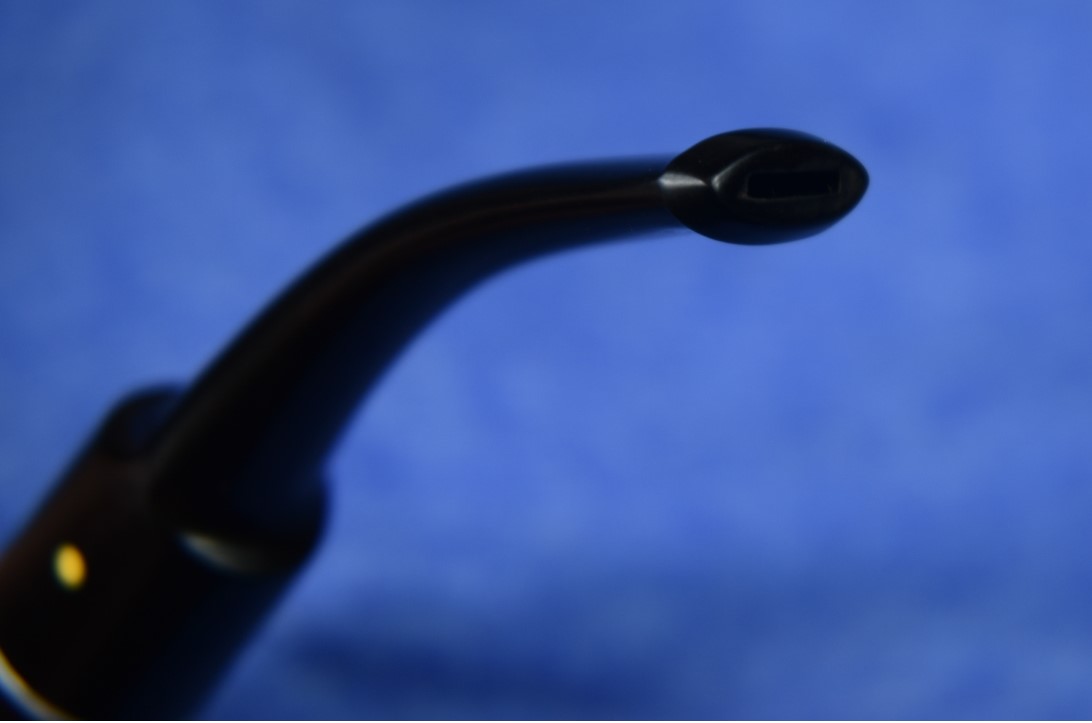
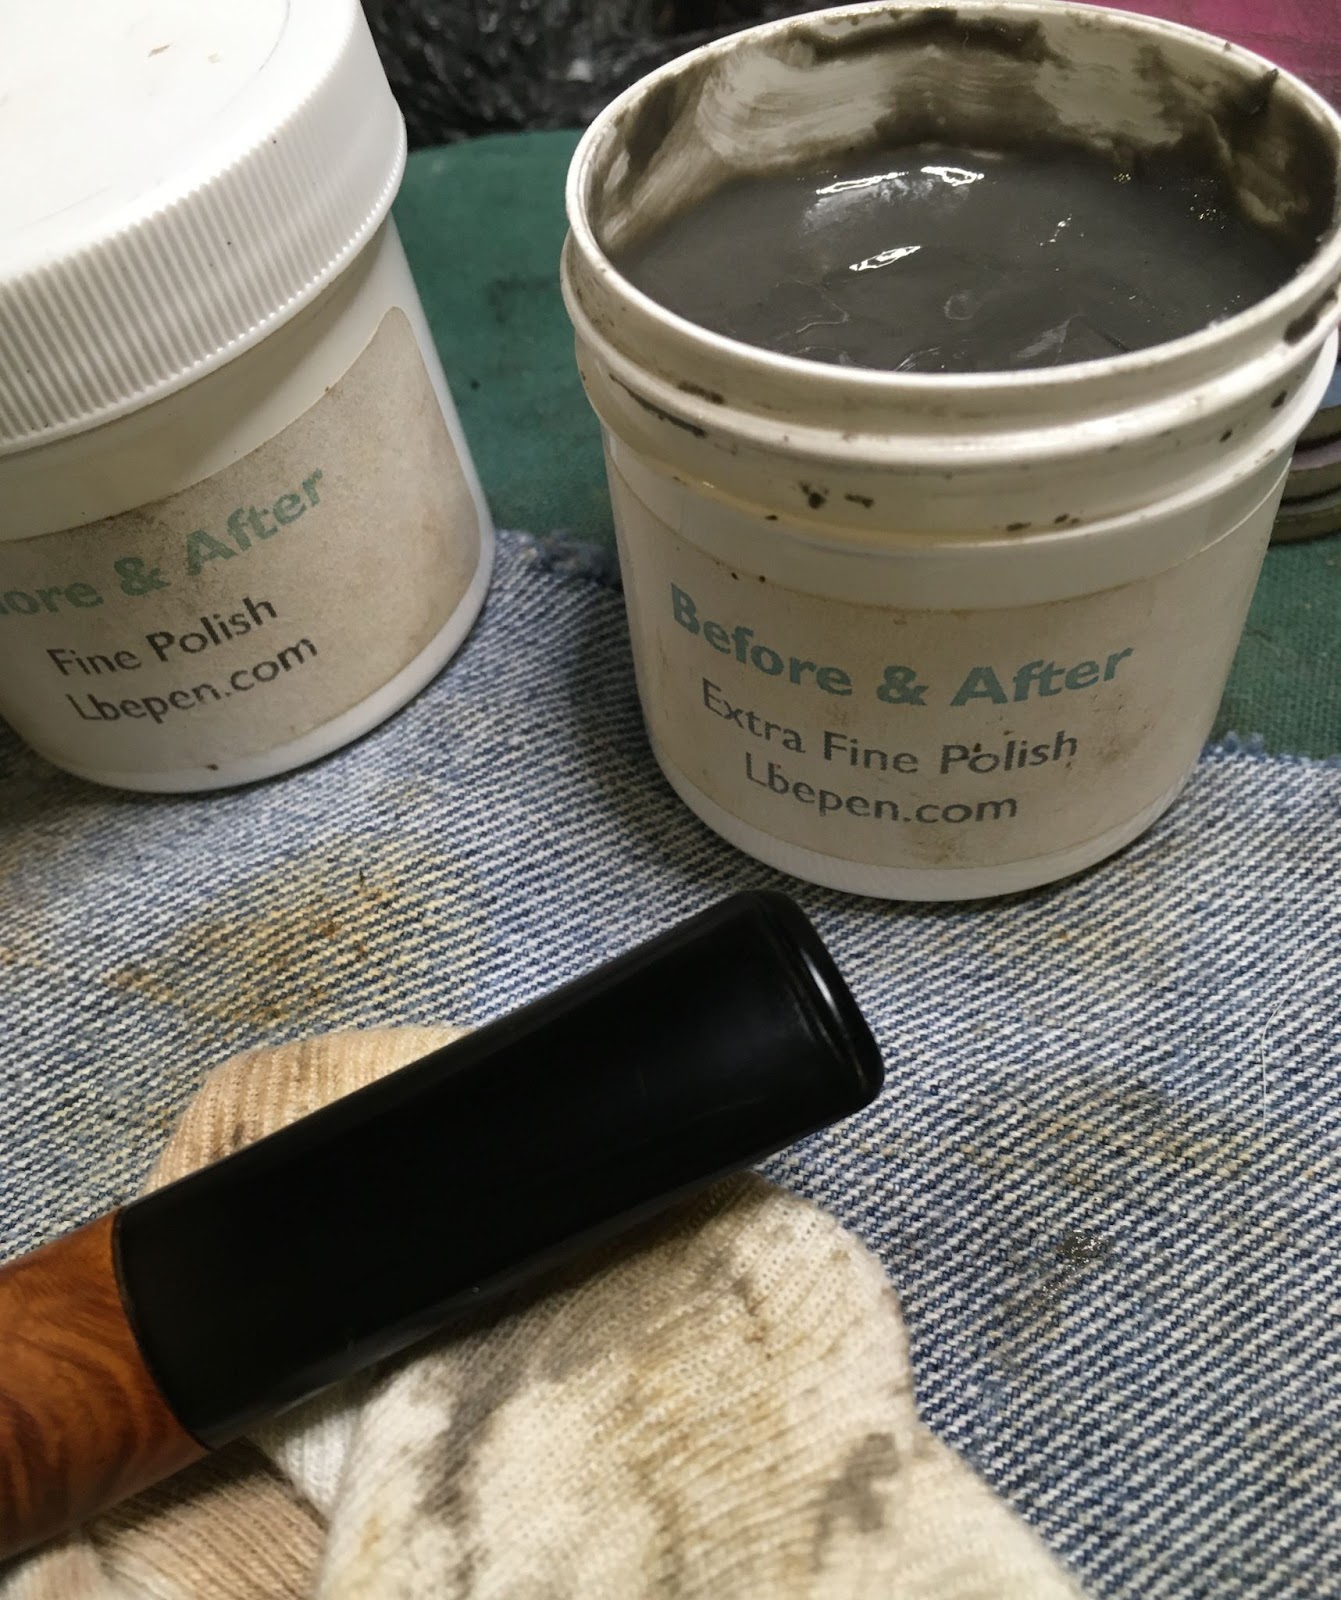
    I failed to take a picture of the stem with micro-mesh pads.  Let the record show that the stem was indeed micro-meshed with the 4000-12000 micro-mesh pads.  Between each pad I applied a drop of Obsidian Oil, rubbed that in with my finger and wiped the stem with a paper towel.  The final steps of polishing the stem were with the Before and After Fine and Extra Fine Polish.  These polishes were applied and hand buffed with a soft cotton rag.

    All that remained was to apply several coats of carnauba wax to the pipe with the buffer.

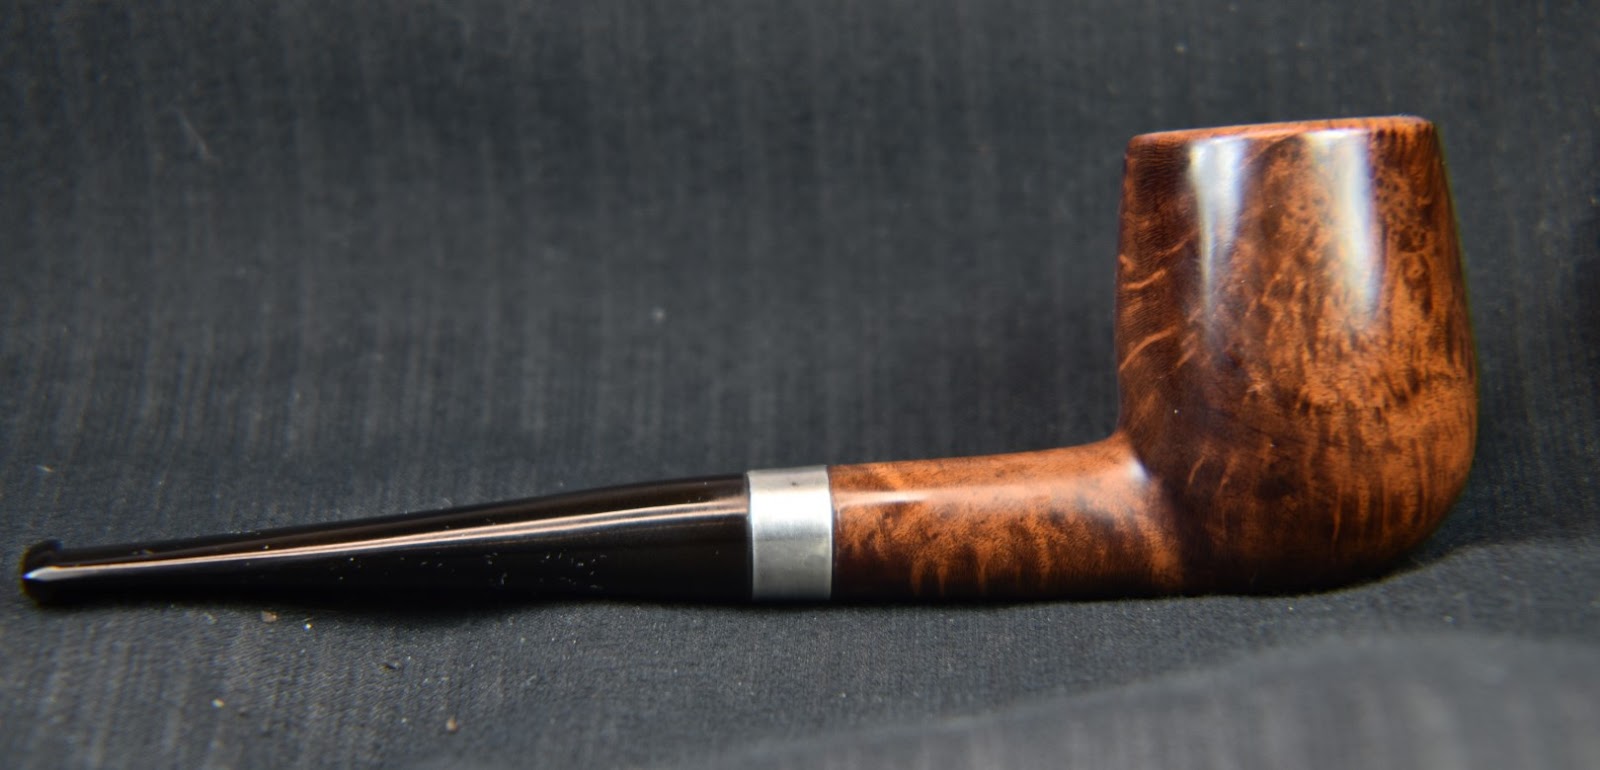
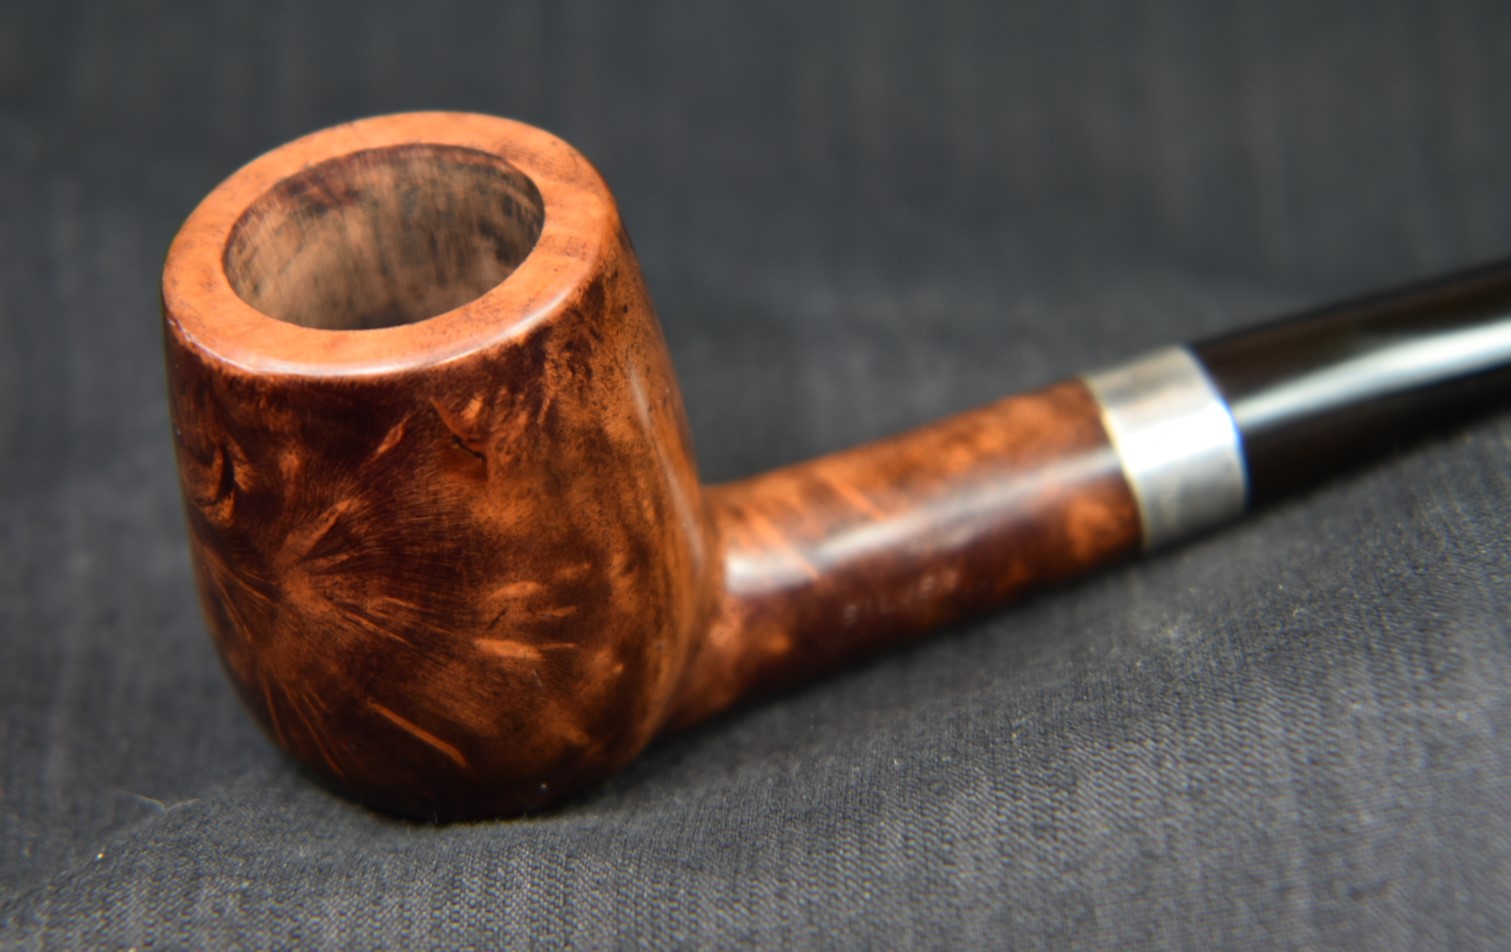
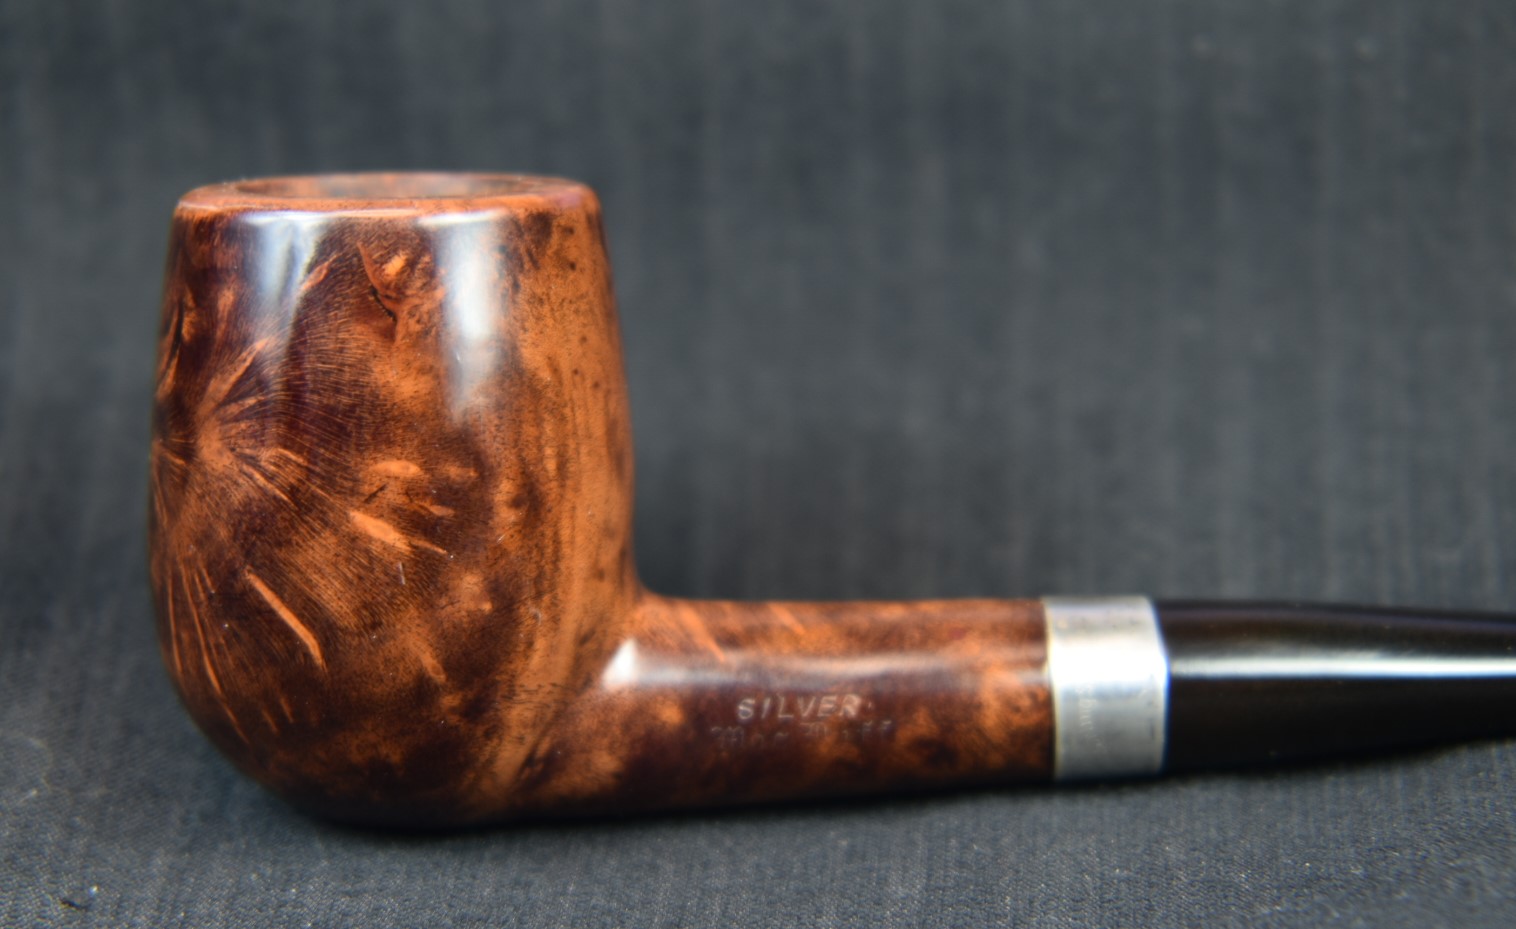
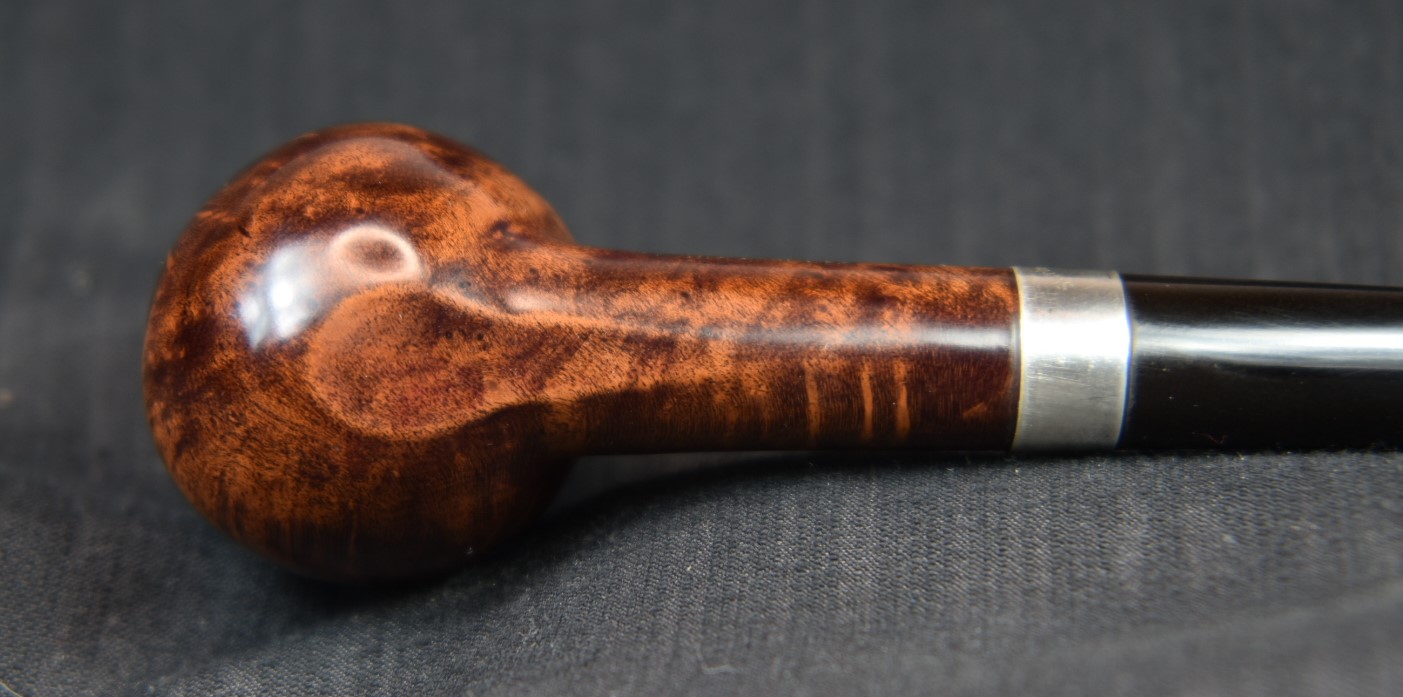
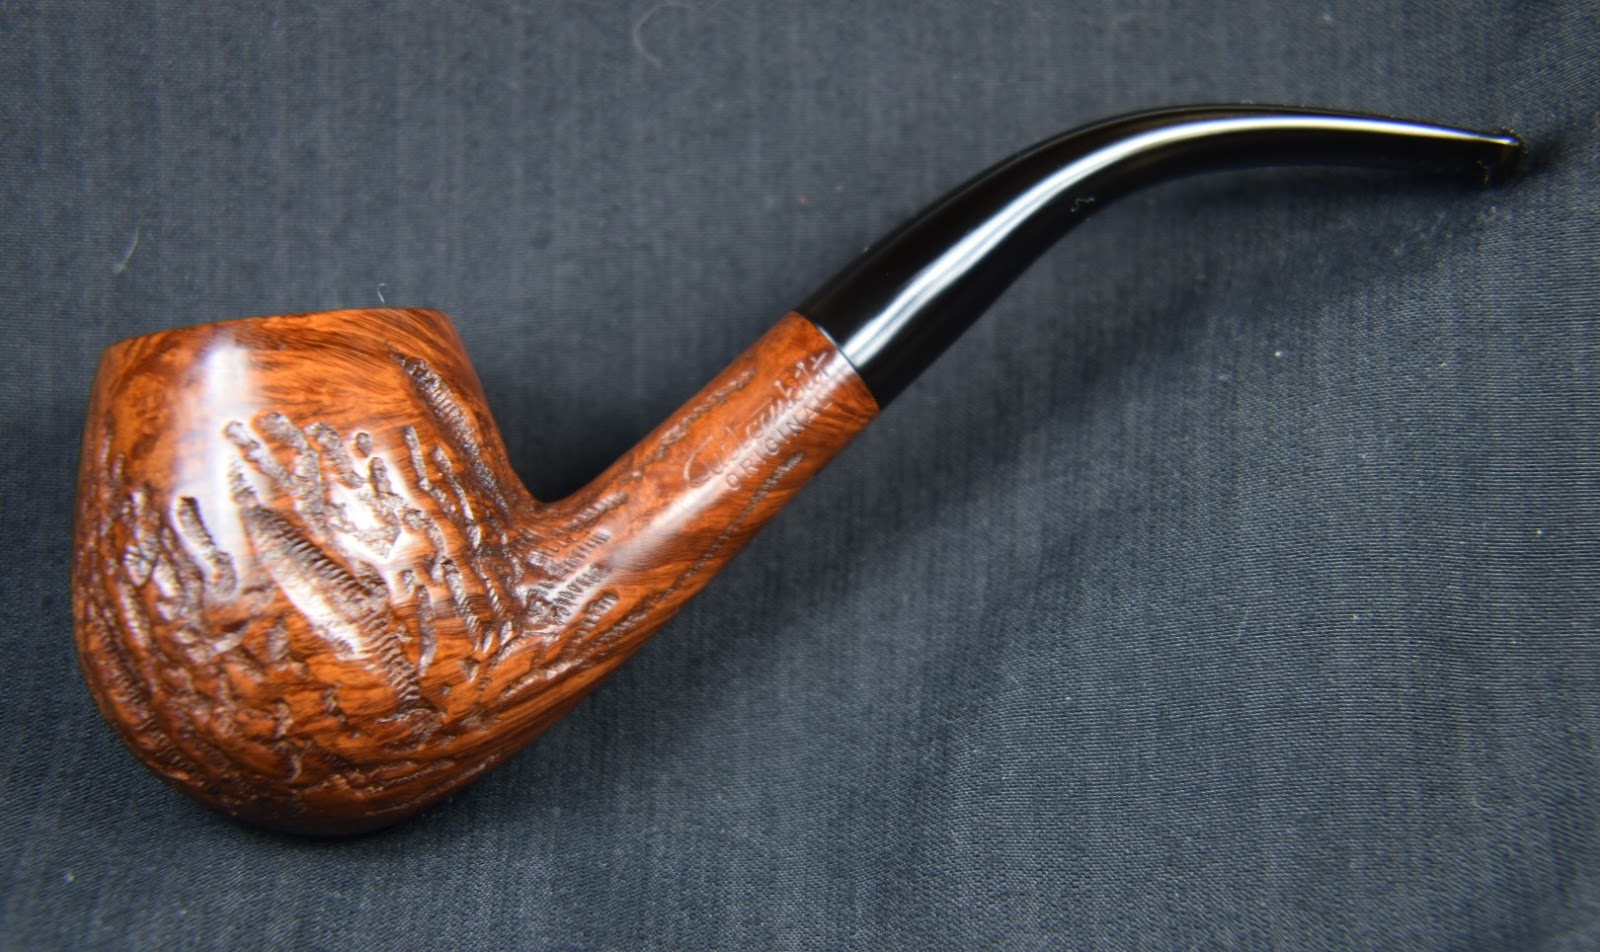
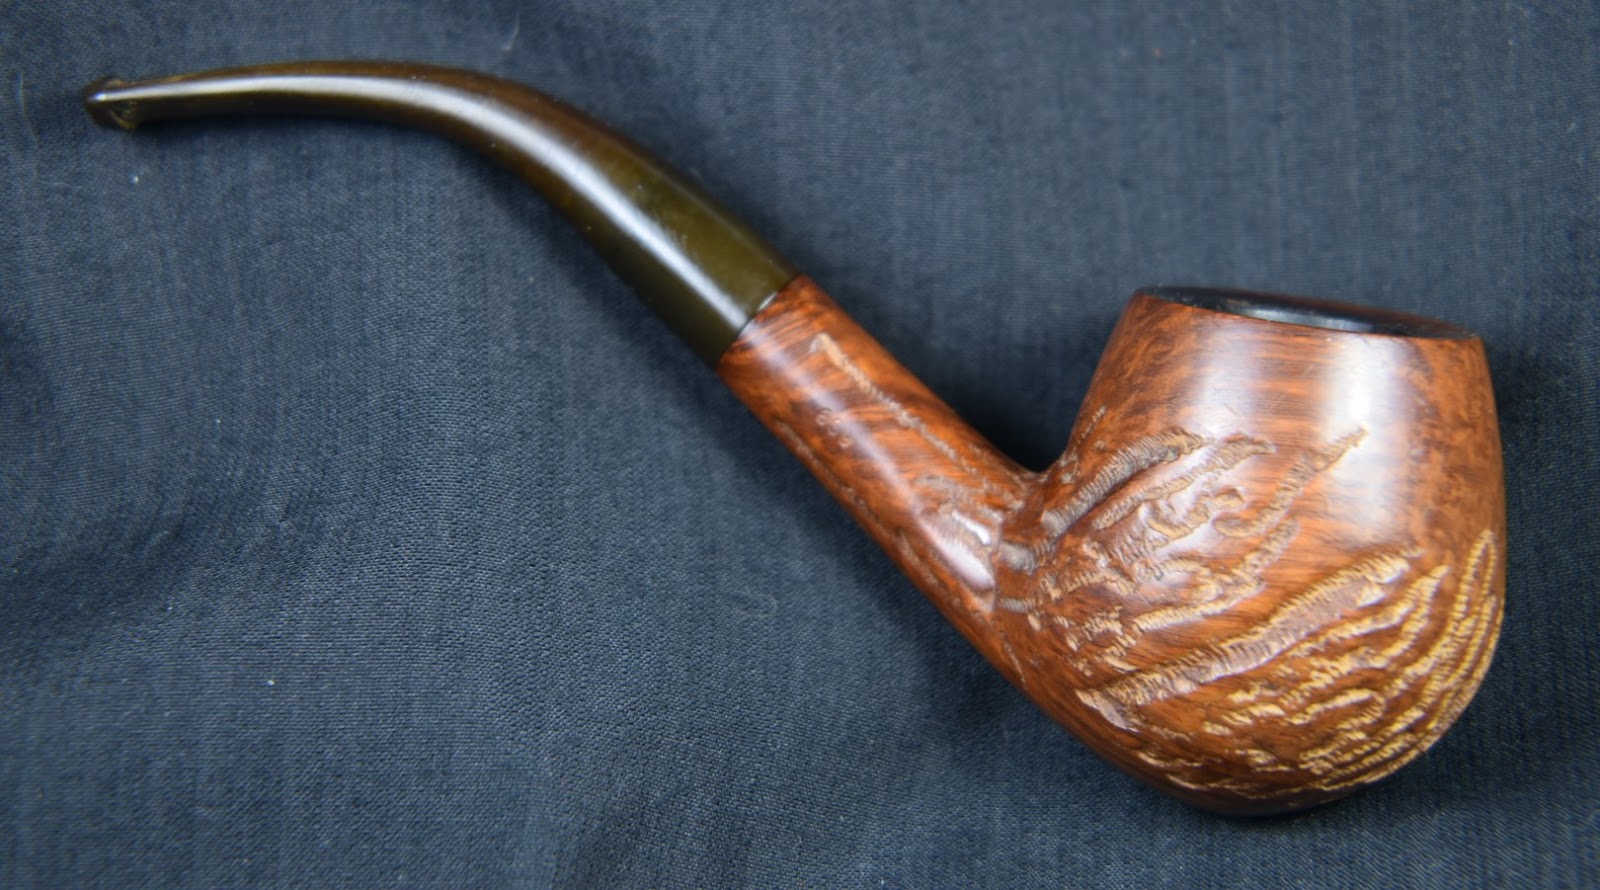
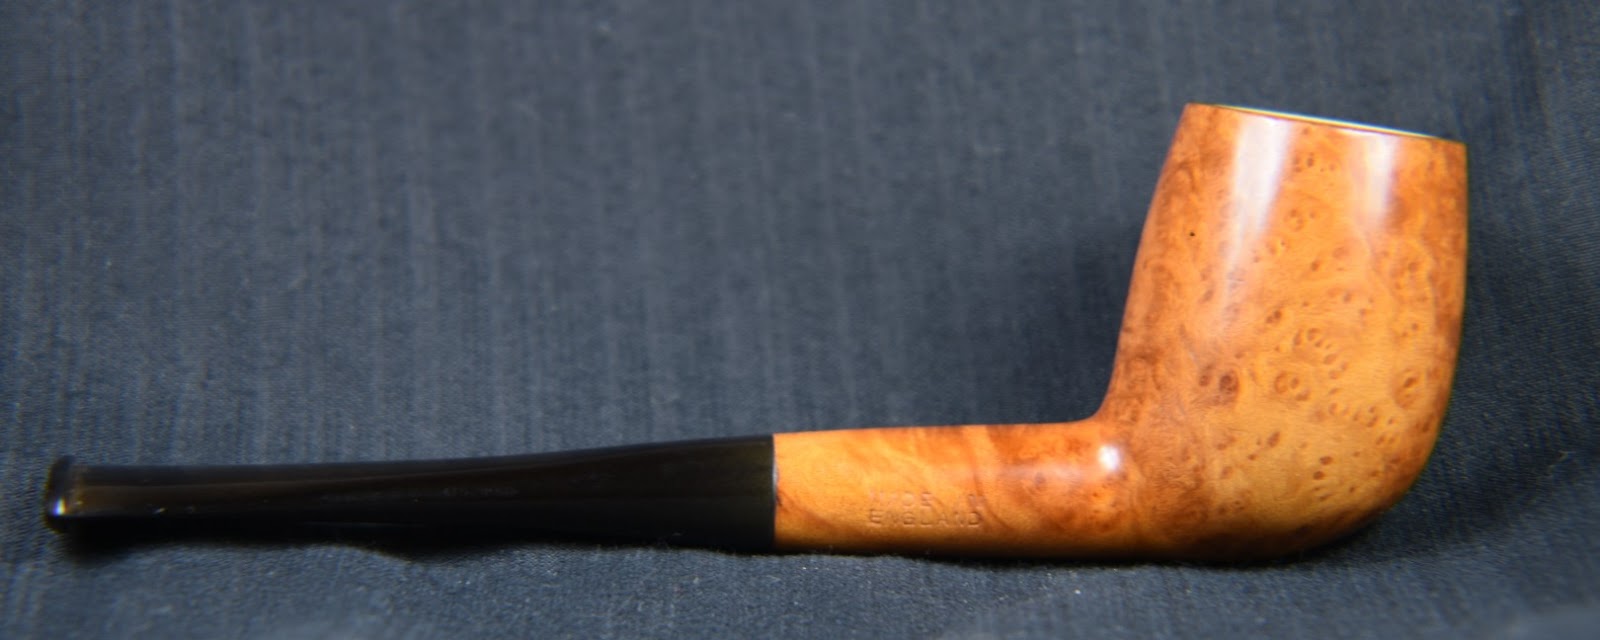
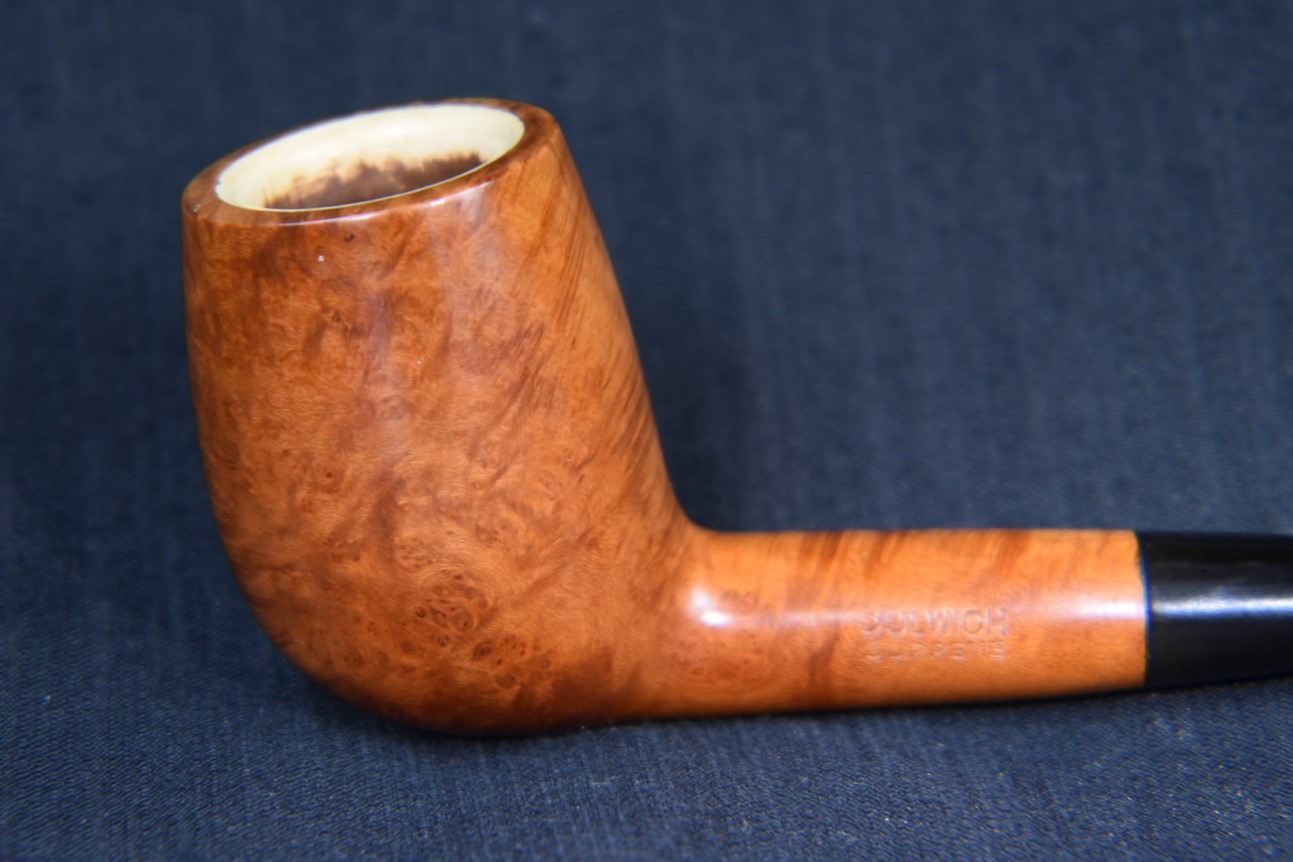
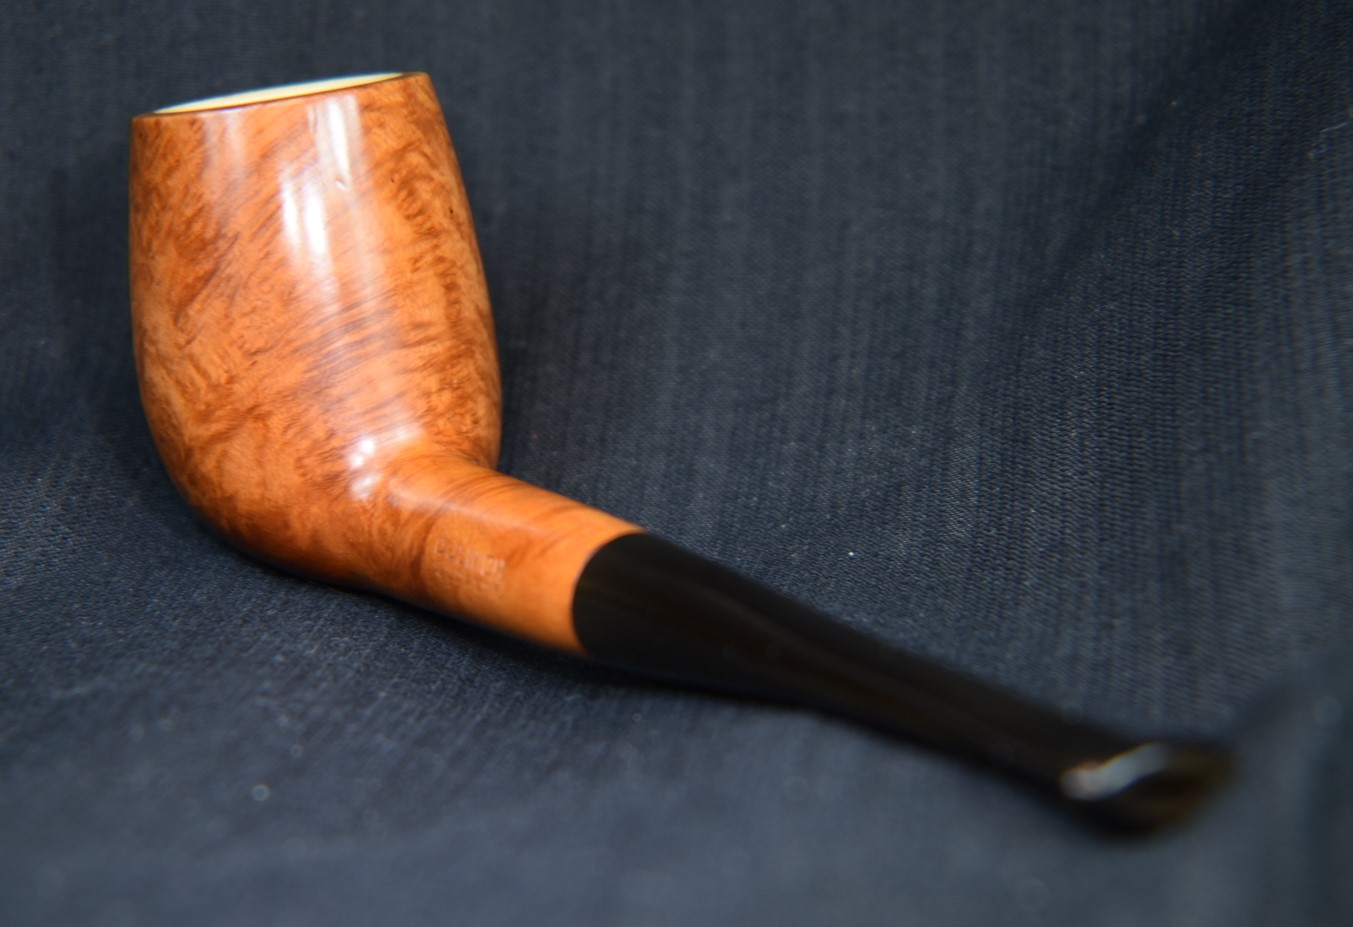
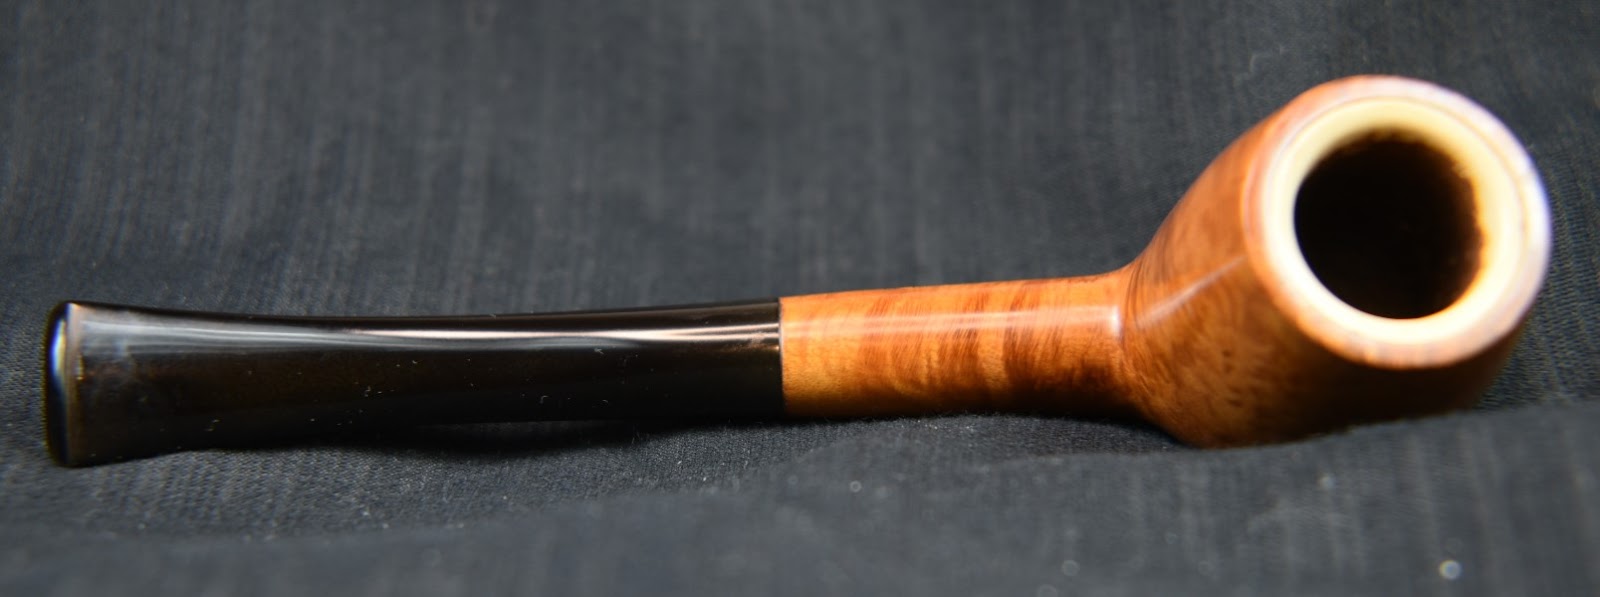
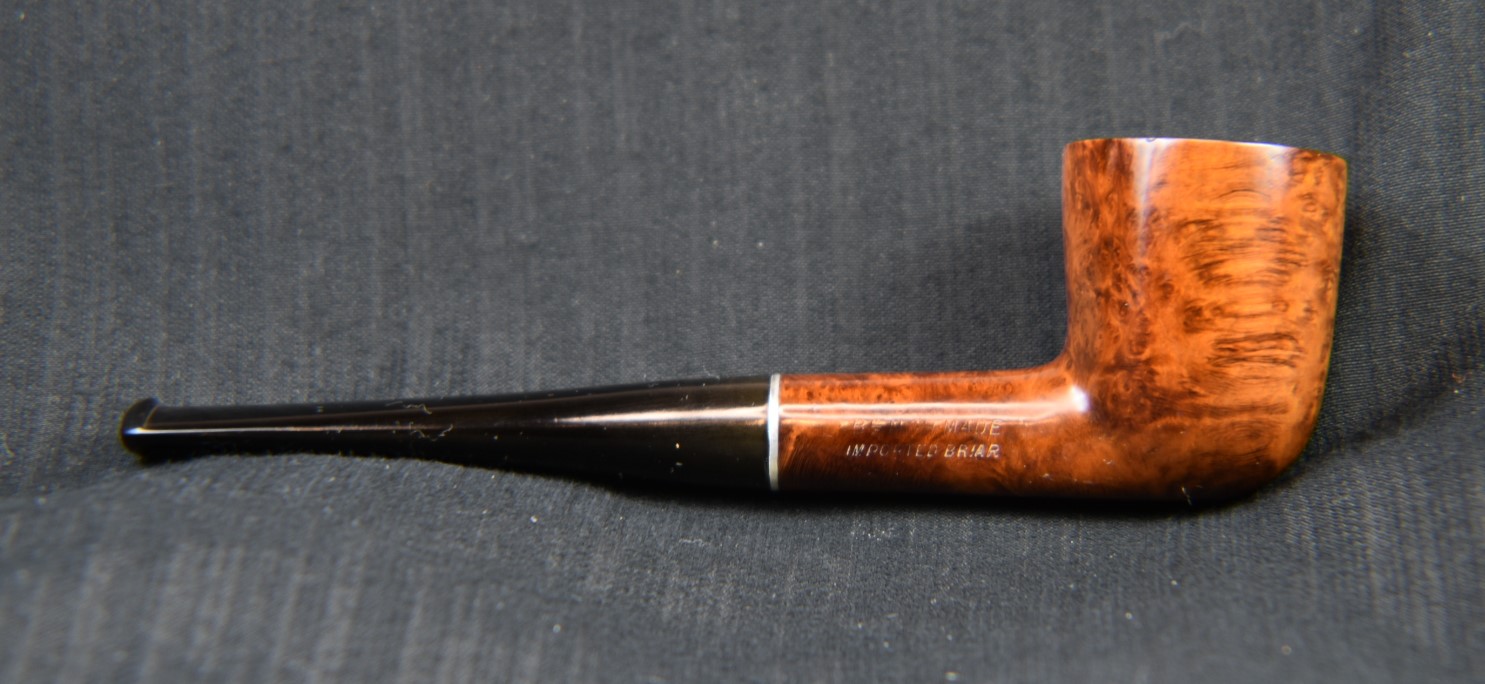
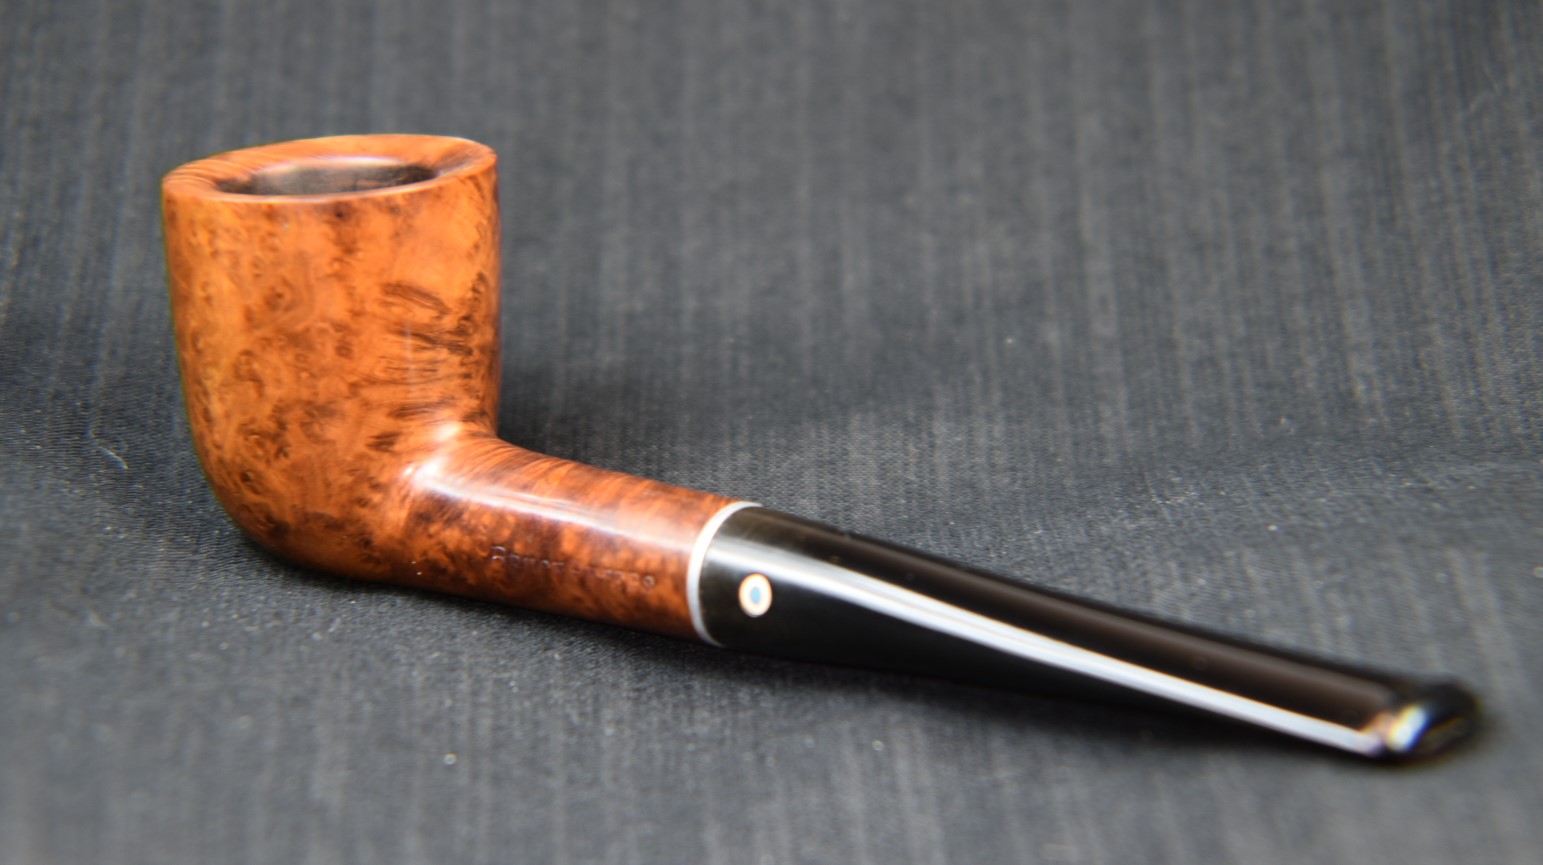
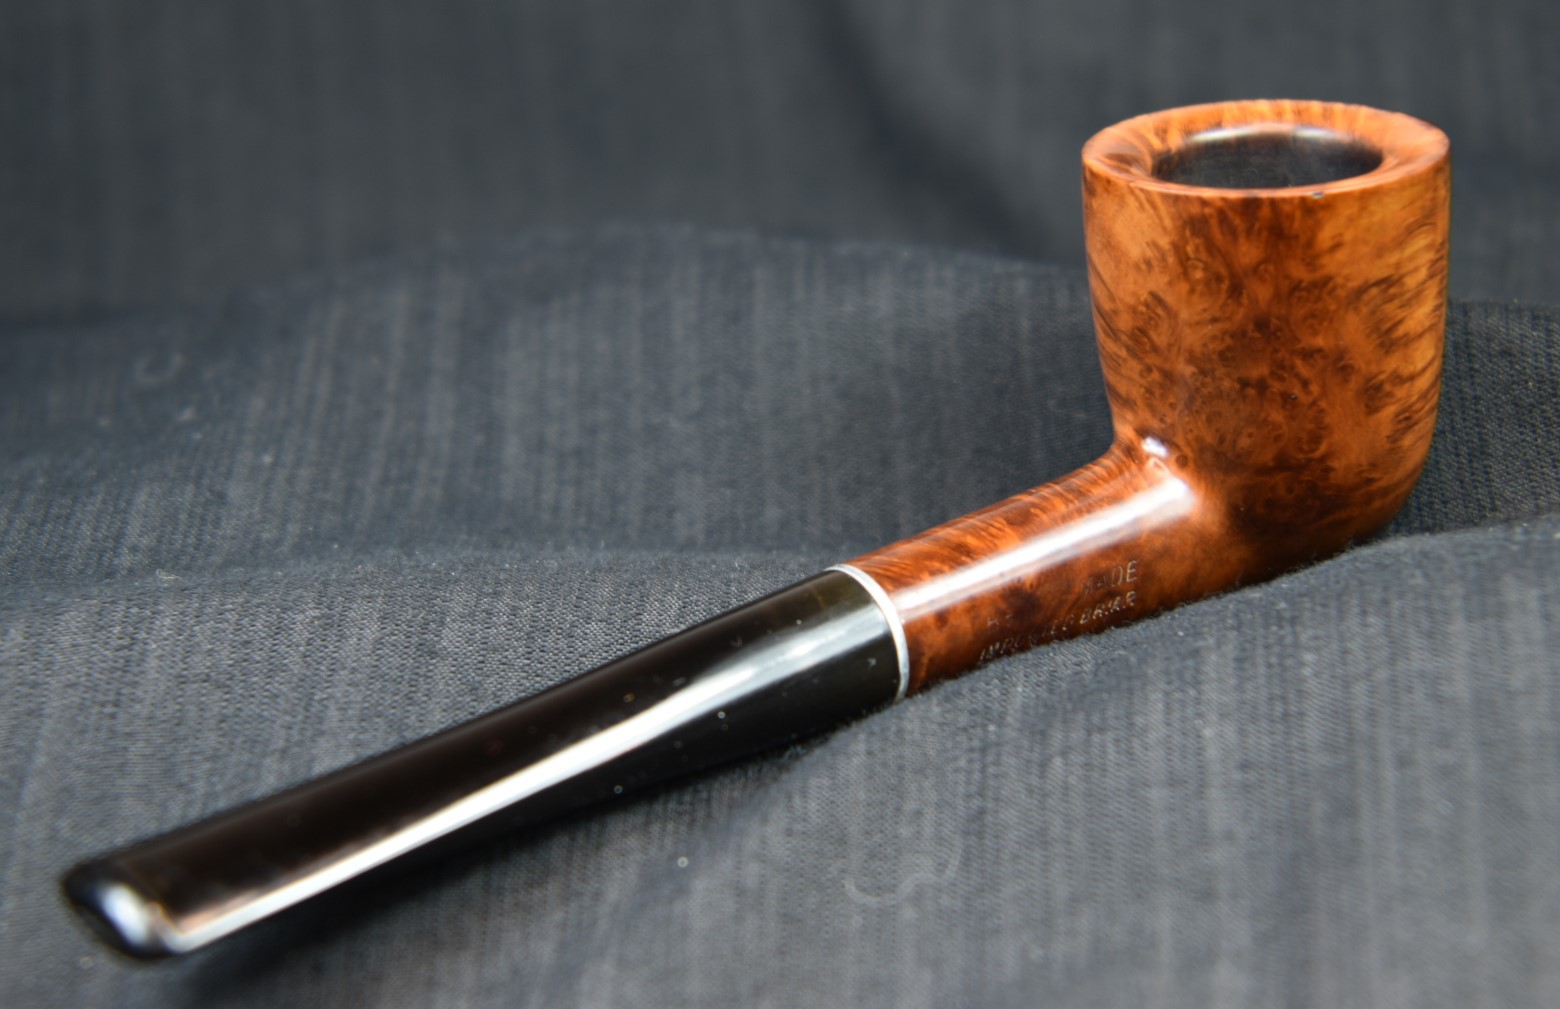
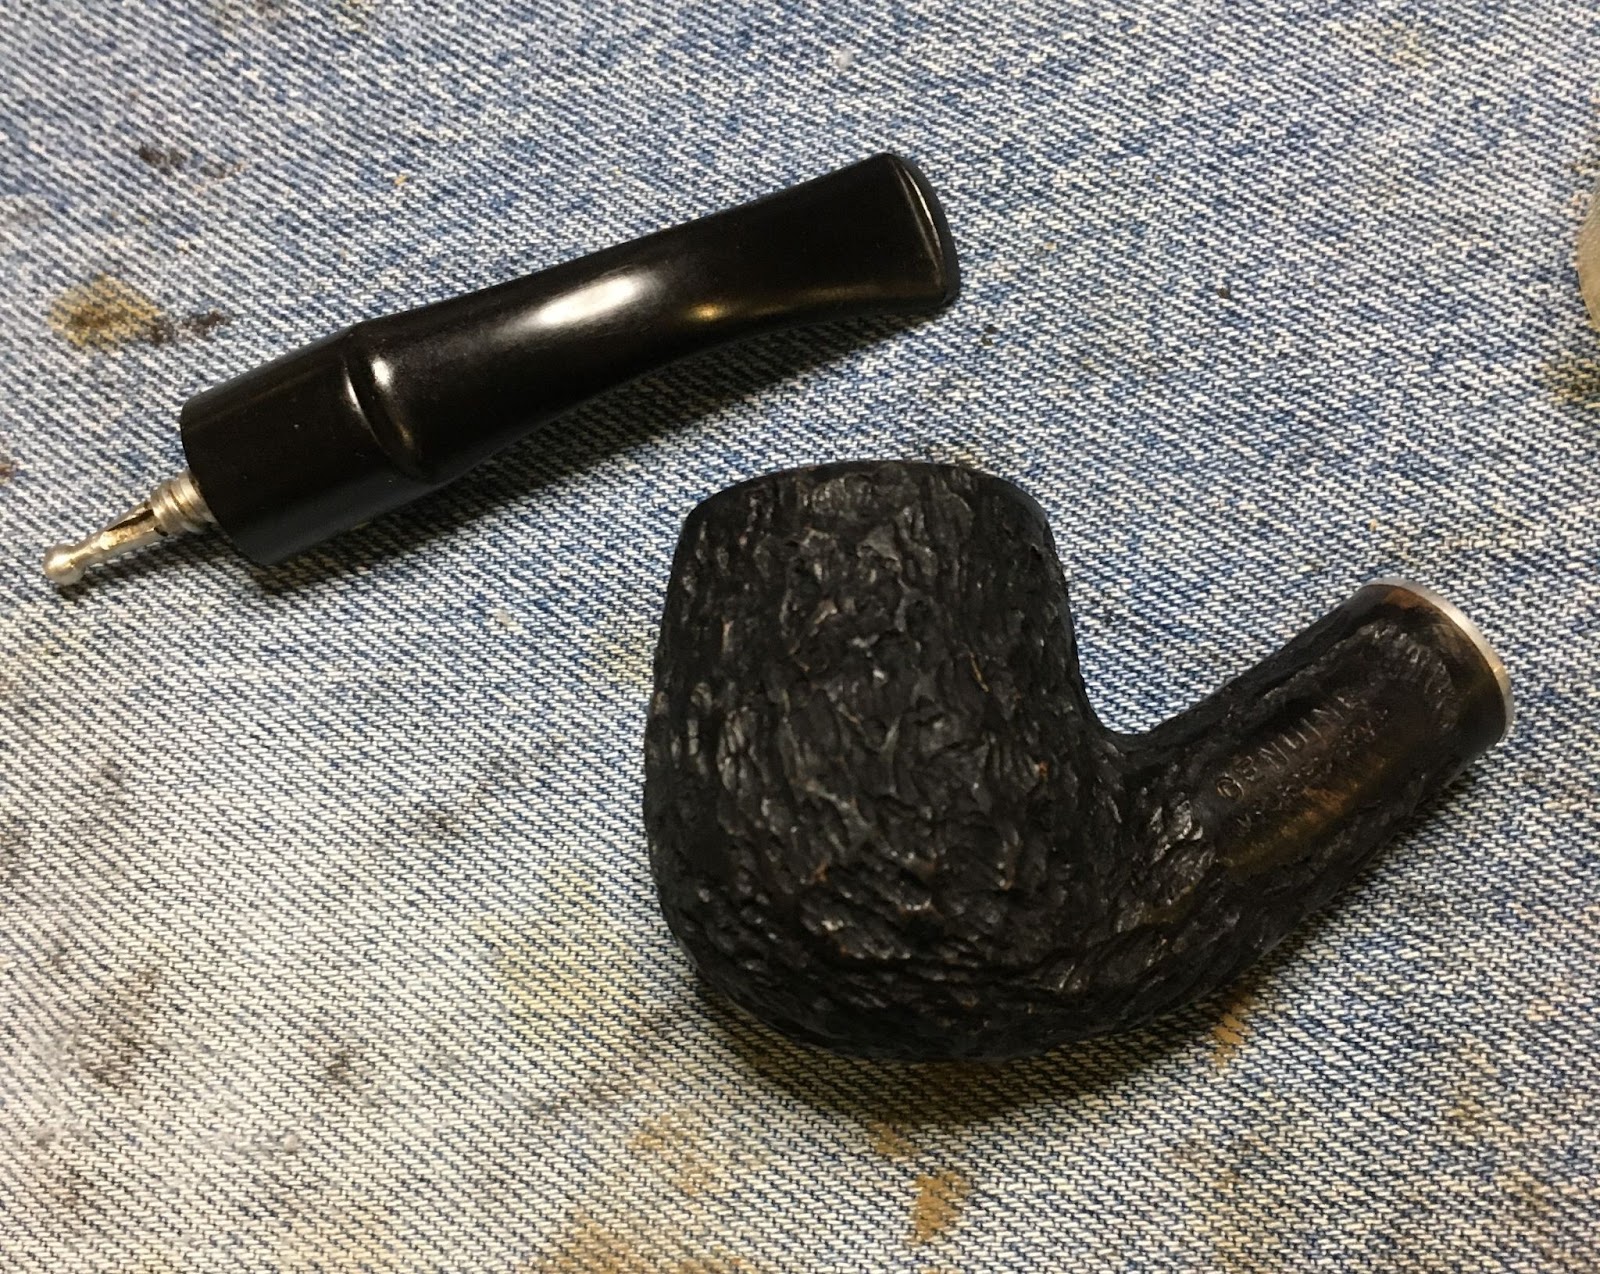
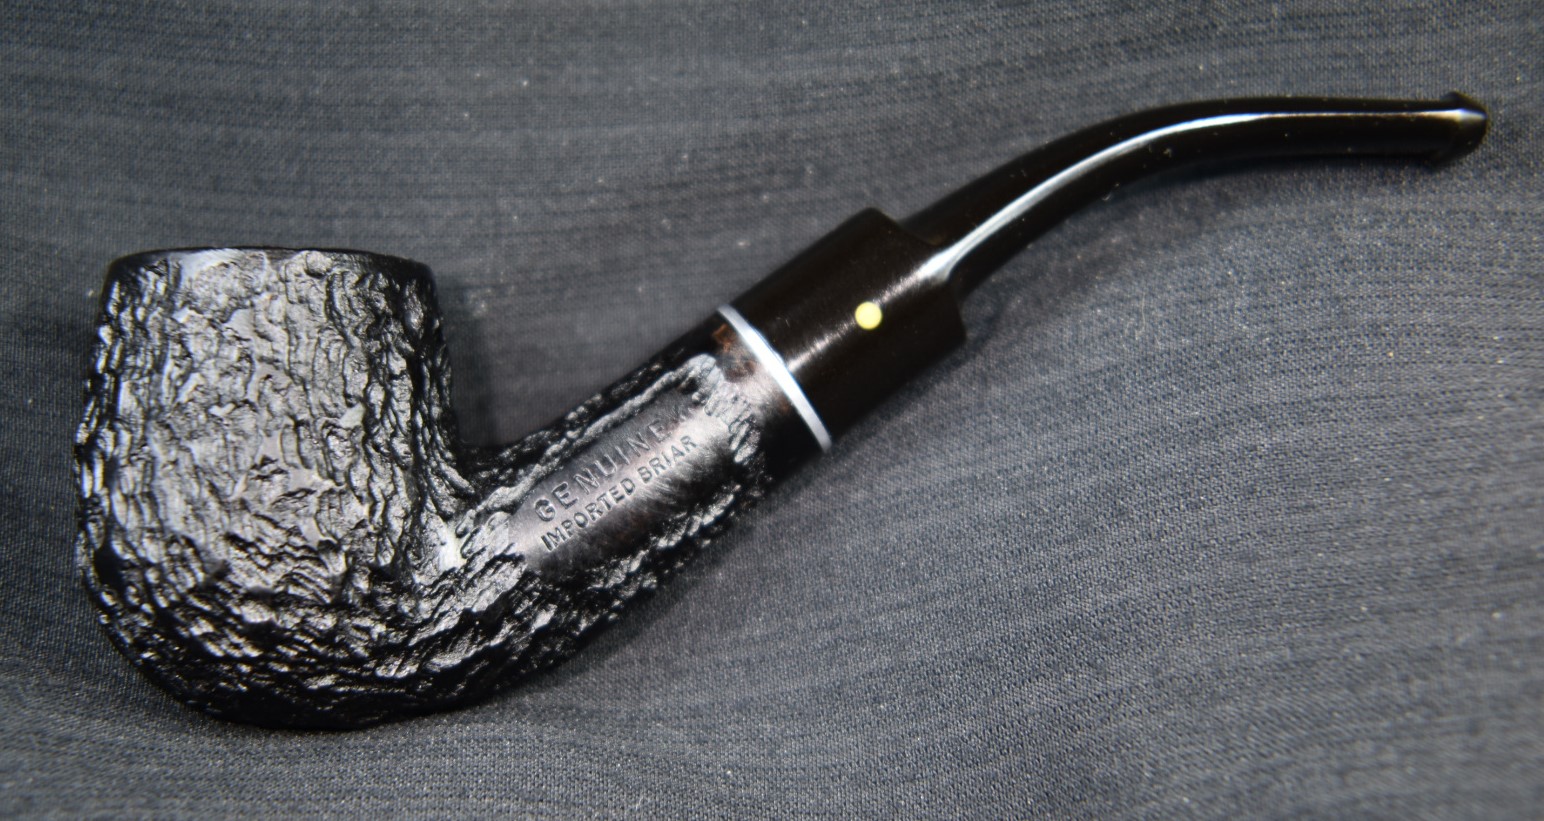
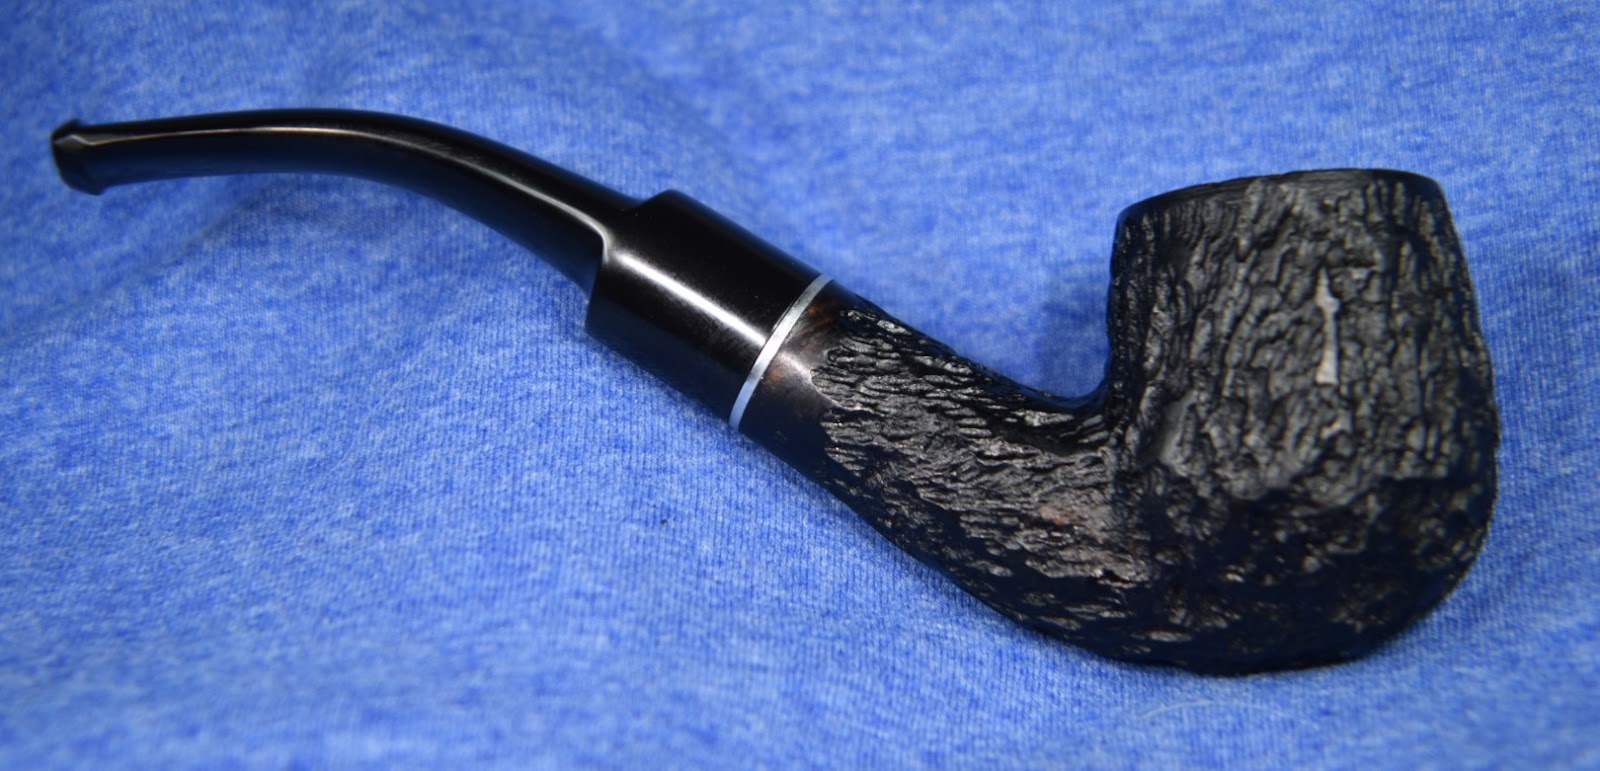
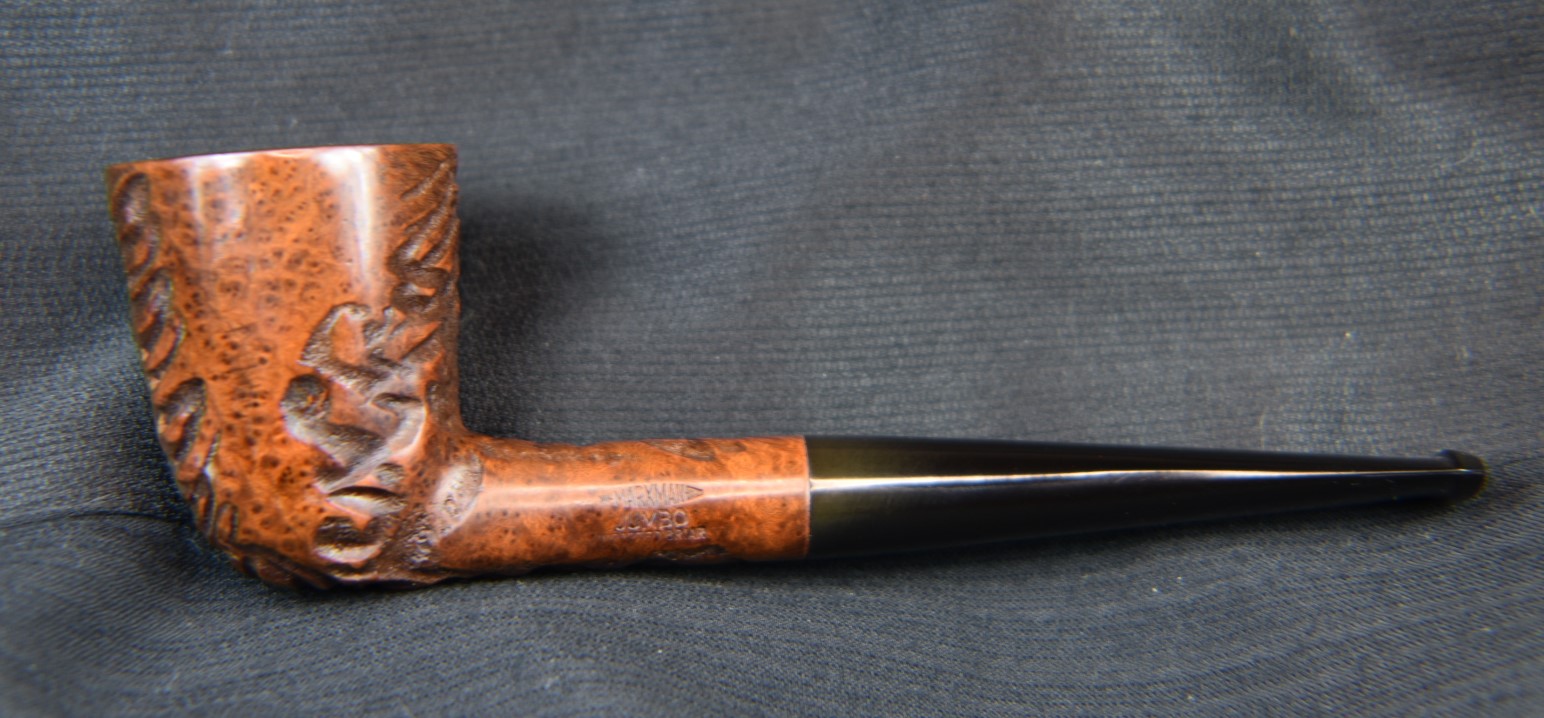
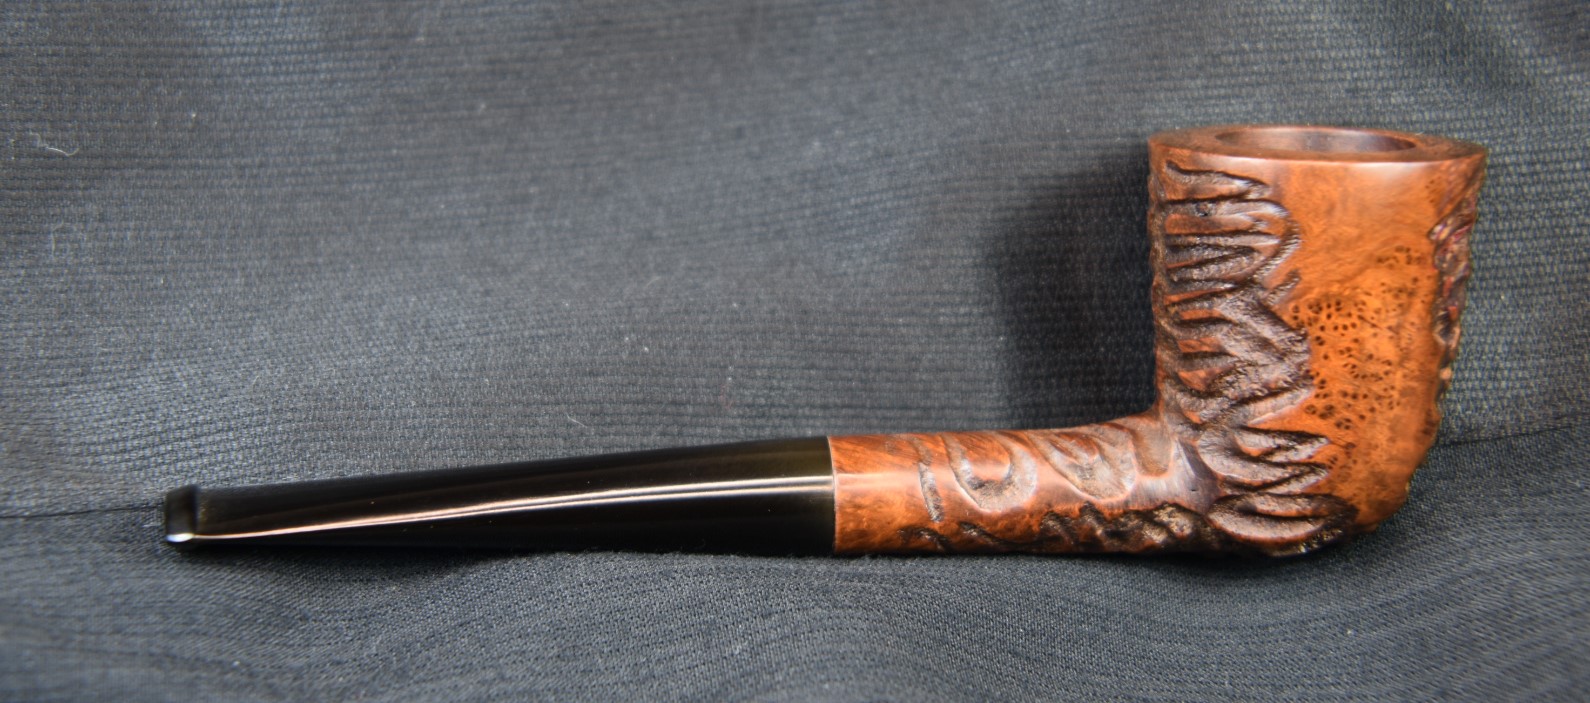
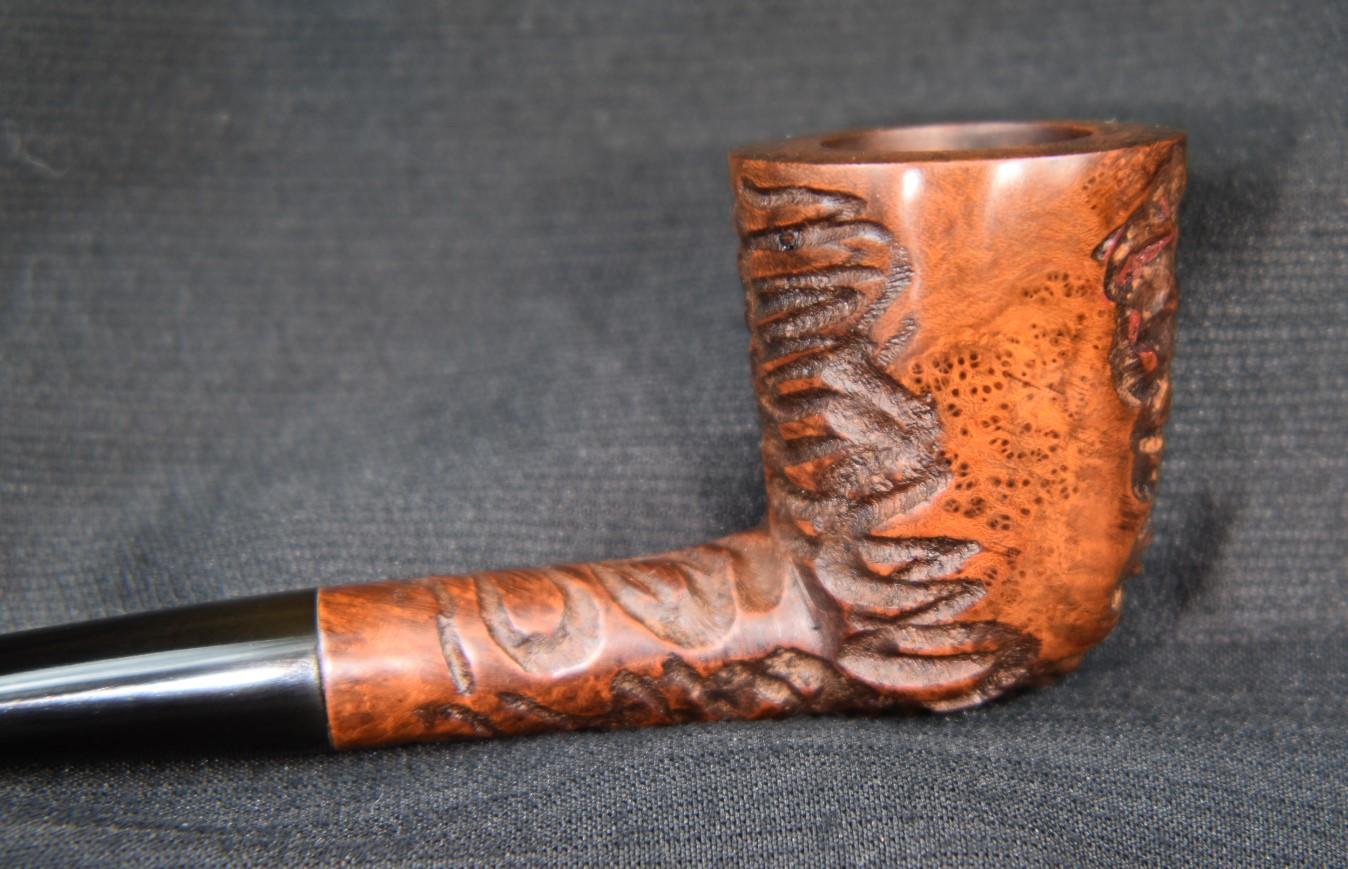
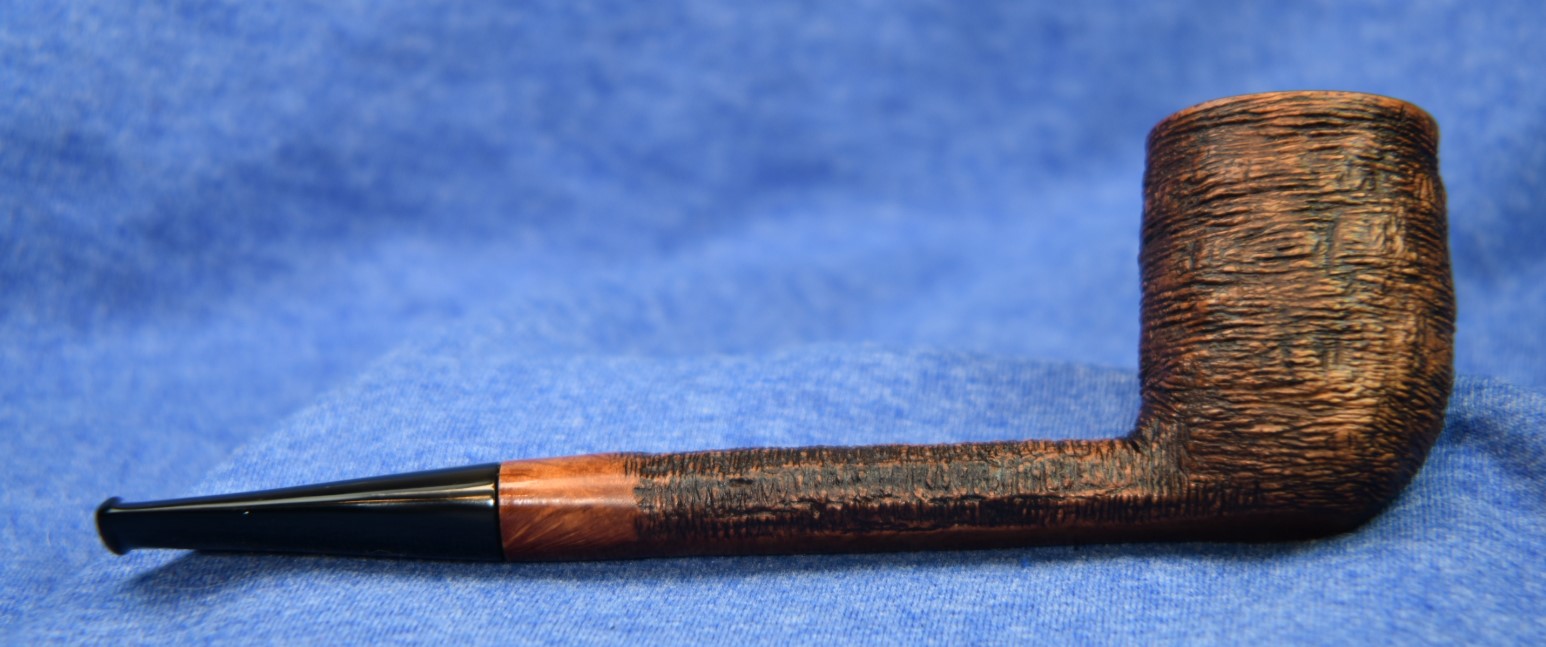
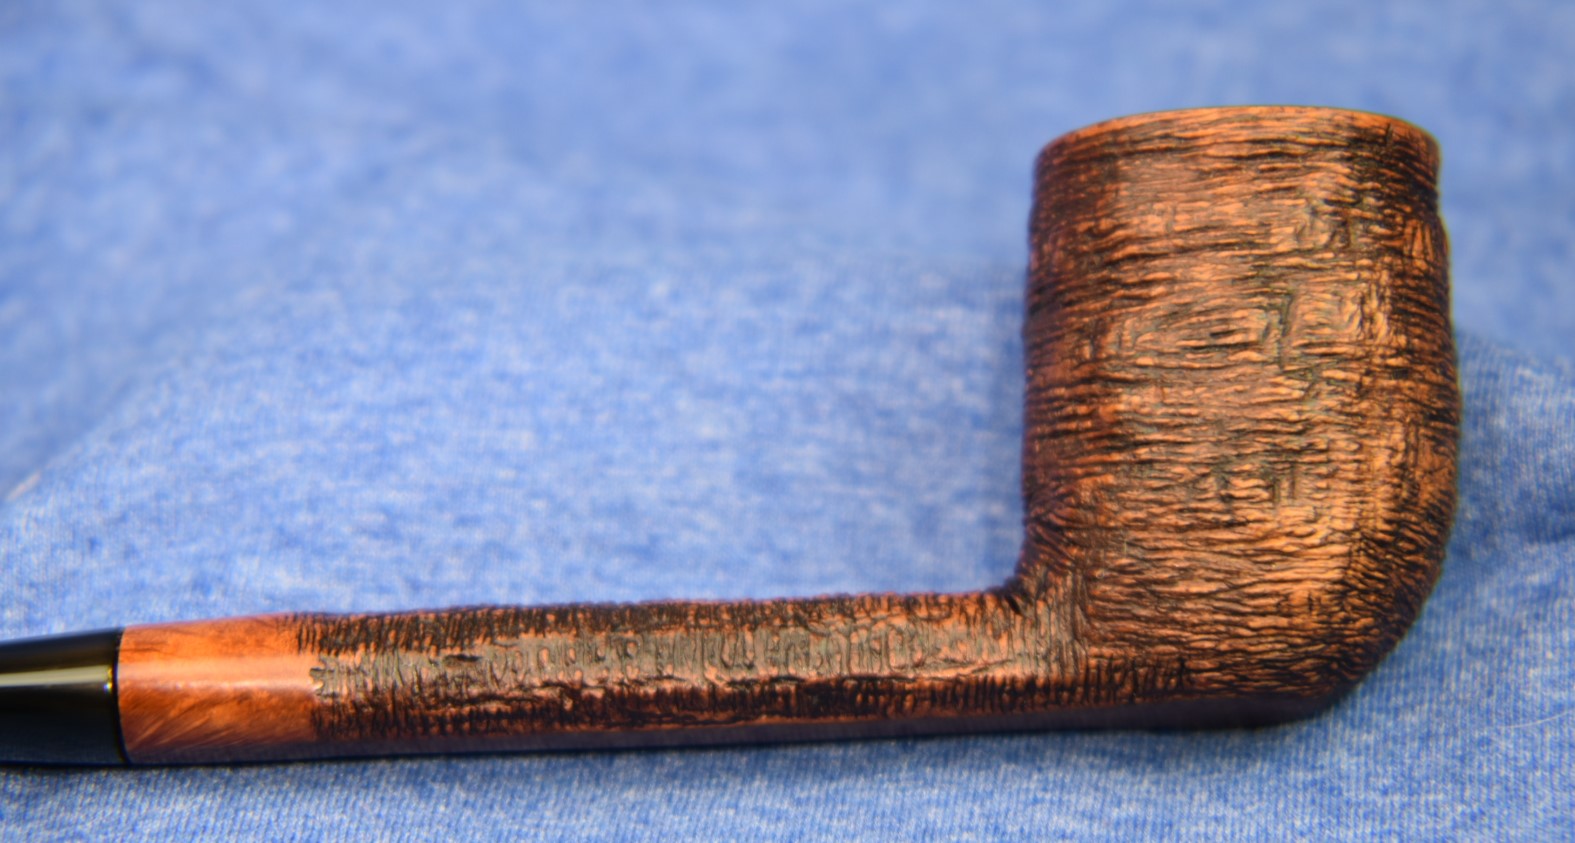
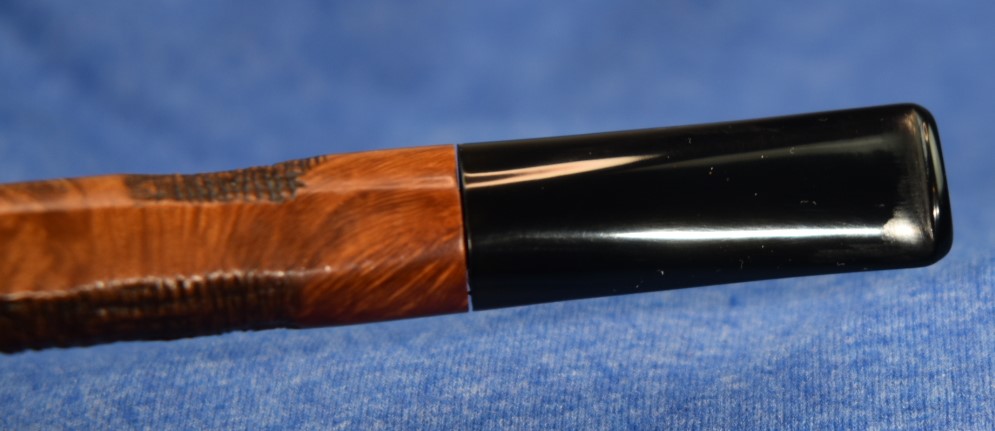
    This restoration brought me one pipe closer to the goal of having a restored example of each Penn Tobacco Company coupon pipe.  The Broadcaster, Bruce Peters and now Silver Mac Duff could be checked off of the list.  The final pipe arrived during the restoration of the Silver Mac Duff and will be the subject of the next restoration blog.  Overall I am very pleased at how well this pipe turned out.  It was rather rough looking at first.  The grain is lovely with almost contrast stained features.  The vulcanite polished very nicely and has that black luster that really makes the briar grain stand out beautifully.  The accenting of the whole pipe with the broad silver band is like the icing on the cake.  I do hope that you found something here useful.  If you enjoy this sort of thing, please click the like and subscribe.  I thank you for reading the ramblings of an old pipe lover.

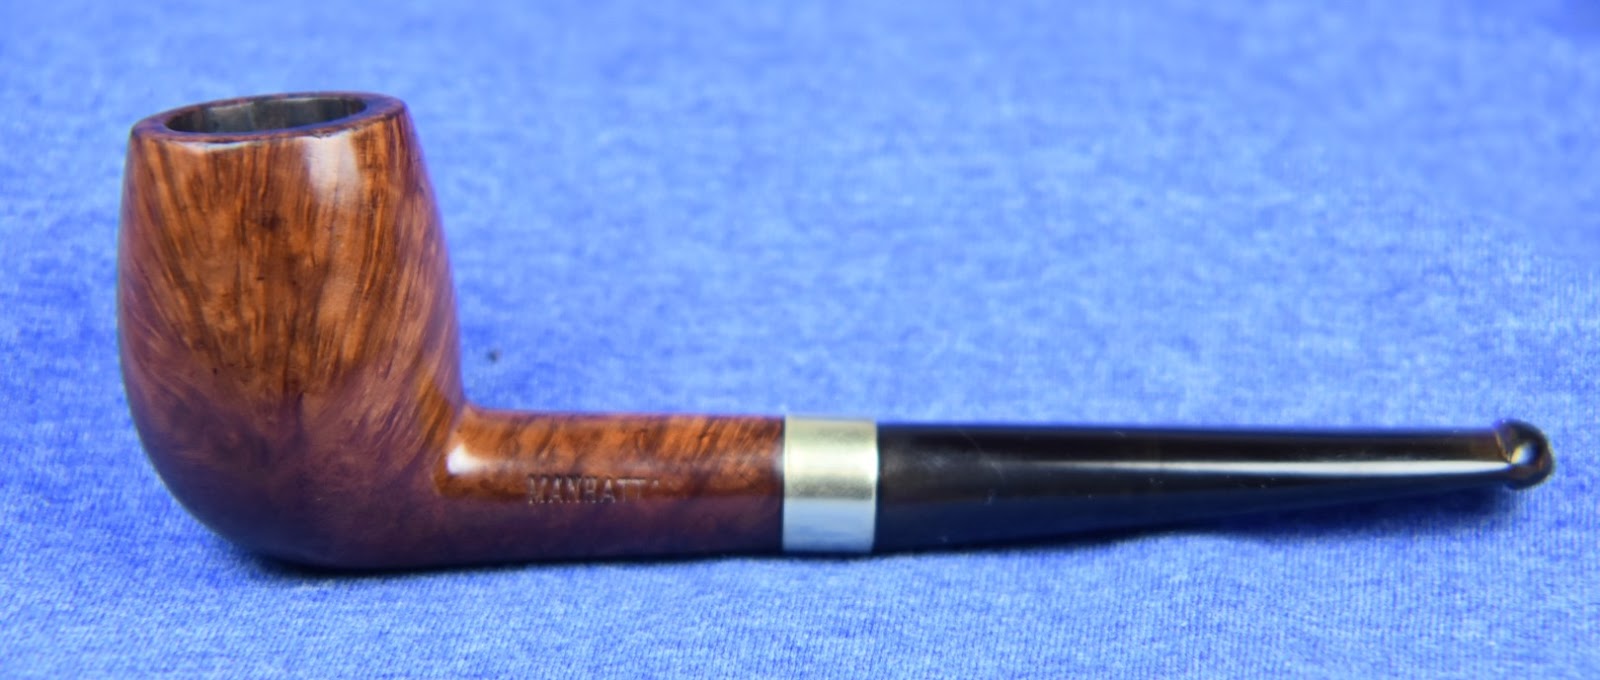
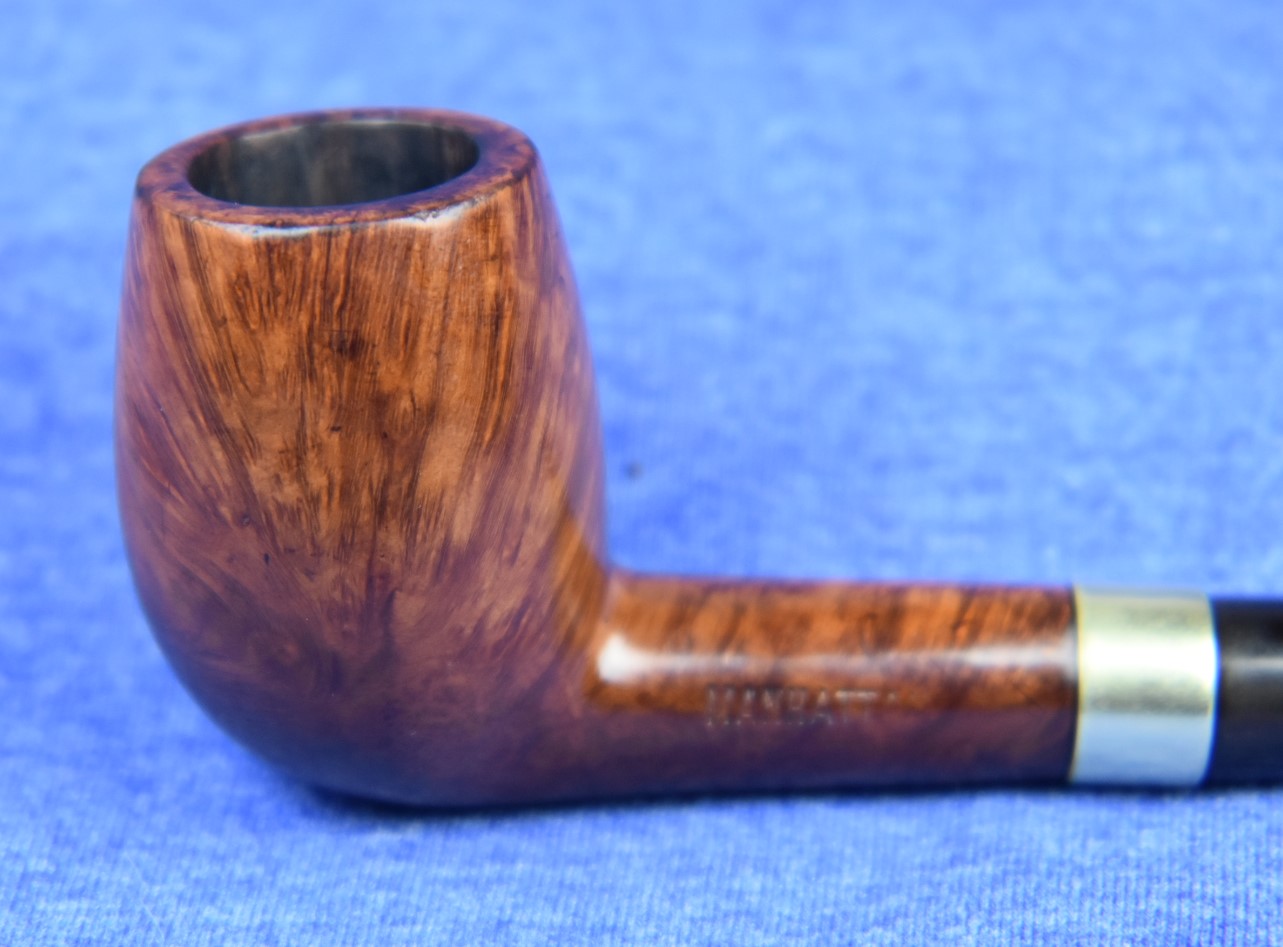
    Below are some photos of the finished Silver Mac Duff, a name that continues to make me smile every time I type it.

  • A Custombilt Original 699

    February 16th, 2024

    Photographed and written by 

    John M. Young

    It has been said that ignorance is bliss.  With that in mind let me say that in regards to Custombilt pipes, I am a blissful ignoramus.  I can look at a pipe and say, “that is a Custombilt style pipe.”  I also know that the company was started prior to World War II by Tracy Mincer.  Oh, and this Custombilt in the photo above doesn’t look like a typical Custonbilt.  That is about all I really know about Custombilt.  You ask, “Then why did you go out of your way and buy that pipe?”  I reply: “Good question.  Because it looks cool and I wanted to restore a Custombilt.  Preferably one that I could afford.”  

    Returning to ignorance for a moment.  As a high school teacher, I frequently needed to intercede in social conflicts usually between young males.  Inevitably, one of the two verbal combatants was “stupid” according to the other.  This often provided a learning experience for both youngsters.  I would say something like, “Roberto,  Stupid means that someone is unable to learn.  Now, we both know Kyle has learned some things, like how to annoy you.  Stupid is not the term you need.  I think you want to say ignorant.  This means that Kyle does not know something.  Maybe you can teach him what he doesn’t  know.”  Eyes would roll, sometimes even loud enough to hear, and I’d usually have to clarify with something easier to remember:  “if stupid and ignorant were diseases then you can cure ignorant but, you are going to die with stupid.”  That would usually get a smile or chuckle. My day was made if I could get one eyeroll that was loud enough to hear.

    One thing I do give myself credit for is my ability to talk to just about anyone and my ability to learn new things.  Given, these new learnings may be quickly forgotten but relearning comes far easier than initial learning.  I love reading about history.  Pipe history, Natural History, Archeology, Geologic History, they all interest me.  When I get to learn something new for a reason other than my own selfish interests it makes it even more enjoyable.  So, thank you reader, for giving me an excuse to go down the Custombilt rabbit hole and cure my own ignorance.  Even if it is only temporarily.

    The amount of information available on Custombilt pipe is pretty amazing.  Rather than giving you a history of the company, I have chosen to provide several links which I think will provide some of the history of the company and their pipes.

    Typically, my first starting point for information about a brand is pipedia.org.  

    1. (Custom-Bilt – Pipedia).  
    2. There is a book written on their history: THE CUSTOM-BILT PIPE STORY, by William E. Unger, Jr., Ph.D. (circa 2001).  The book appears to be self published by the author and a search of the book will lead you to a review written by Rich Esserman (http://naspc.org/Archives/esserman.htm).  The review is good and has several quotes from Unger’s original.  If one goes to pipedia.org and searches “Custombilt”, the search will yield the above review and a second review:  
    3. “THE CUSTOM-BILT STORY: A Review By Tony Soderman” (Custom-Bilt – Pipedia).  At the end of the pipedia.org Custombilt  entry there is a link for ordering the book.  Unfortunately the link takes you here:

    An eBay search for the original Unger signed book and a Custombilt pipe was recently available:  

    (RARE “As Individual As a Thumbprint” Unger Signed Copy & Custombilt Bulldog Pipe | eBay). Yikes! is all I have to say about that.

    1. The next link is a wordpress.com site that does a very nice job showing many examples of photographs of Custombilt stampings and pipes organized by “eras” of the company. (https://pipesrevival.com/).  
    2. The final link is to a blog post by Paresh Deshpande.  This post: “Restoring a Wally Frank Era Custombilt Sitter #633”, appeared on Steve Laug’s rebornpipes.com site and shows a restoration of a pipe with very similar carvings to the subject of this Custombilt Original 699 restoration.  (https://rebornpipes.com/2018/07/20/restoring-a-wally-frank-era-custombilt-sitter-633/)

    The Custombilt Original 699, subject of this restoration, just arrived last week.  I saw it while searching for 1940’s and 50’s brands of pipes.  The photos indicated a large pipe as to be expected from a Custombilt.  Oh wait, I guess I did know something else about Custombilts, they’re big.  When I opened the box and unwrapped the 699, I was a bit taken aback.  It was really big.  The next observation was at how nice the briar grain looked.  That’s not supposed to happen.  I mean, the whole reason for the Custombilt carving is to mask the unsightly appearance of Algerian Briar.  Wow, there’s another thing I knew about Custombilts, they were made from Algerian briar.  I guess I knew more than I thought I did.  The stampings said I had a Custombilt over ORIGINAL on the left shank and 699 on the right.  Here is what the pipe looked like prior to any work being done

    Notice that I didn’t show any photos of the tenon.  That is because it was stuck.  I could twist it about 90 degrees and move it off the mortise a few millimeters then it was really stuck.  I sprayed some olive oil cooking spray into the gap and on the tenon.  Allowed it to soak for about 30 seconds and resumed my twist-pull.  That is all it needed.  It was still cold from being outside but the oil was the secret sauce to free up the stem.

    After the photos I took the 699 to the workbench.  The pipe was worthy of a clean denim piece to protect both it and the work surface.

    The reaming tools were gathered: The PipNet with #3 blade, Smokingpipes knife, General triangular scraper, 220 sandpaper wrapped around a wood dowel and 320 sandpaper wrapped around a Sharpie.  The small amount of cake was mostly removed with the knife and scraper.  THe PipeNet #3 blade was a bit too small and the #4 too large.  This pipe had either been smoked rarely or reamed recently.  The cleaning of the shank would certainly solve that question.  

    I apparently did not feel the need to photograph the minimal amounts of cake removed by the reaming.  Trust me, it was quite uneventful and minimal.  The next task was cleaning the rim.  The lava was mainly on the sides and back surface.  I moistened the rim with saliva and started carefully scraping with a sharp pocket knife.  After the scraping I remoistened and rubbed the rim with a Scotch-brite pad.   

    Below you can see the lava wipings from the knife and the corner of the Scotch-brite pad.

    After the Scotch-brite pad the rim was wiped with a make-up pad wetted with 99% isopropyl alcohol.

    Next I decided to clean out the airway in the shank.  This was quite clean and answered the previous question about the pipe being rarely smoked or recently cleaned.  I think this pipe had only been smoked a handful of times.

    The internals were cleaned now it was time for the exterior.  I took the stummel to the sink.  I used Murphy’s Oil Soap undiluted and a medium bristle toothbrush to scrub the outside of the stummel.  This was rinsed with warm water and then the stummel was dried with a cotton dish towel.  Upon returning to the workbench I vigorously rubbed the surface with a make-up pad wetted with 95% ethyl alcohol.  The pad showed that it removed something from the briar.

    I repeated the rubbing with a fresh make-up pad wetted with acetone.  There appeared to be some sort of clear finish on the rim. 

    Subsequent rubbing with the solvents did not produce the removal of more finish.

    The stem showed signs of oxidation.  I feared that this would be the most difficult part of this restoration.  The cleaning of the airway of the stem was done with bristle pipe cleaners dipped in 95% ethyl alcohol and was uneventful.  

    I lightly sanded the entire stem with the 400 and 600 sanding sponges.  I then placed it into a container with a solution of Oxy-clean and water.  I let the stem soak for 2 hours.  

    During the 2 hours, I started sanding the stummel with the 400 and 600 sanding sponges.  I wiped the stummel off with a make-up pad wetted with alcohol.  I could only see two small pits that I thought required filling.  They were both on the rim.  With a rim this large and smooth I did not want anything to detract from the smooth surface.  I used a fly tying bodkin to apply small drops of brown cyanoacrylate (CA, super glue) to the pits.  I then dipped my finger into my container of briar dust, getting a little dust stuck to my finger tip, and pressed it onto the CA filled pit.  This was repeated for the second pit.  The CA set-up quickly and was sanded smooth using the sanding sponges.

    The sanding continued with the 1000-3500 sanding sponges in sequence.  Between each sponge I wiped the stummel with a make-up pad dipped in alcohol.  I was very careful to avoid the stamps and the edge of the mortise.

    The stummel then was micro-meshed with the 4000-12000 pads.  Between each pad the stummel was again wiped down with a make-up pad moistened with alcohol. 

    The stem was then slathered with Before and After Restoration Balm by finger tip and baby toothbrush.

    After about 30 minutes I wiped the remaining balm from the stummel using the inside of an athletic sock.  It was really looking good. 

    Before working on the stem, I wrapped the shank in a bit of painters tape to protect it from the Soft Scrub and the sanding of the stem.  I wanted it attached as it gave me more to hold on to.  I retrieved the stem from the Oxy-clean bath, dried it off with paper towels and started scrubbing with Soft Scrub on a make-up pad.    The oxidation just kept coming off the stem.  Several make-up pads later it was looking much better.  The area immediately ahead of the tenon still had some light brown rather than black.  I upped my efforts with the remaining scraps of a Magic Eraser and Soft Scrub.  That seemed to do the trick.  Below you can see some of the make-up pads and a mineral oiled stem.

    The tape didn’t stick too well to the freshly balmed shank so another strip of painter tape was applied before I sanded the stem.  The sanding was done with the 1000-3500 sanding sponges.  Between each sponge I rubbed in a drop of mineral oil with my fingers and wiped it off with a paper towel.  After the sanding came the micro-meshing.  Micro-mesh pads 4000-12000

    were used in sequence.  Between each pad rubbed in a drop of Obsidian Oil with my fingers and wiped it off with a paper towel.  

    The last few tasks remained and the finish line was quickly approaching.  I polished the stem with Before and After Fine Polish with a soft cotton cloth and repeated that polishing with the Extra Fine Polish. 

    All that remained was the carnauba waxing with the buffer.

    I would describe this Custombilt Original 669 as a large bent apple shape.  It has been strange for me writing the latter half of this blog as I smoke the pipe.  I don’t often smoke a restoration while typing up the restoration.  By the way, it smokes very well, cool, dry and for the first few puffs the flavor of spice that I have only gotten before from a newly reamed Marxman pipe.  I am very pleased with how this Custombilt turned out.  I have a new appreciation for the brand.  Given this pipe is not as1934-1940s original Tracy Mincer Custom-bilt (if you read the history you will get the hyphen, there) but it is a lovely old pipe.  I do hope that you have found something useful here.  If you like this sort of thing, please click the like and subscribe.  I thank you for reading the ramblings of an old pipe lover.

    Below are some photos of the finished Custombilt Original 699.

  • A Kaywoodie HandMade Restoration

    February 14th, 2024

    Photographed and written by

    John M. Young

    If I were a betting man, I believe it would be a fairly safe bet to say that many pipe smokers had either a Dr Graybow or a Kaywoodie as one of their first pipes.  Kaywoodie has a long and colorful history dating back to their origins, “Kaywoodie name first appearing in February of 1919.” (Kaywoodie History – Greywoodie LLC) The history of Kaywoodie pipes is fortunately well documented thus, allowing rather precise dates for a Kaywoodie collector to declare the provenance of their charges.  The above pictured Kaywoodie is stamped HANDMADE over KAYWOODIE (left) and IMPORTED BRIAR (right).  No shape number is present.

    Using this information and referring to the Kaywoodie Collectors’ Guide listed on pipedia.org I found that these pipes were made during the following years:

    “Handmade-Oversize-Carved 1947-1955 on and off” (https://pipedia.org/images/3/3d/Kaywoodie_Pipe_Names.pdf) and that

    “The Oversize Kaywoodies were, as the name implies, “Giants”. Lowndes notes that these pipes were stamped simply, “Hand-Made”. The pipes were all roughly “bulldogish” in appearance and were available in the following styles and grades7 : • Hand-carved “Colossus” ($10) • Walnut finish, banded “Hercules” ($20) • Hand-carved “John Henry” ($10) • Virgin finish, specimen grain “Paul Bunyan” • ($25)Virgin finish, banded specimen grain “Goliath” • ($25)Walnut finish “Atlas” • ($20)Hand-carved, Meerschaum-Inlaid “Samson” ($15)” (Kaywoodie Collector’s Guide – p10.pdf)

    Looking into the stampings, I went to piphil.eu for confirmation.  ThereI was able to find an exact match of this pipe’s stampings.

    (Kaywoodie series from L to Z — Pipes : Logos & Markings (pipephil.eu))

    Well, that was easy.  This large Kaywoodie Hand Made, though not very “bulldogish” was most likely made between 1947 and 1955 at the West New York, New Jersey factory.  If you would like to see the 1947 Kaywoodie catalog here is a link:  Kaywoodie_1947.pdf (pipedia.org).  It is a fascinating read with great old marketing photos and illustrations.  Just out of curiosity I wondered what $10 in 1947 was equivalent to today.  According to a bis.gov inflation calculator it is $131.09 (Using Dec. 1947 and Dec. 2023)(CPI Inflation Calculator (bls.gov)).  I highly recommend reading the above links for further Kaywoodie history.

    Before we get to the restoration let’s take a look at how the pipe appeared before I did any work to it and compare it to a more normal size Kaywoodie.

    Just kidding.  That is actually a mini pipe.  Here is a real comparison using a Kaywoodie author.  And yes, the Hand Made in those last two photos is the finished version.

    Now we can do the restoration part.  Normally I begin with a clean denim piece to work on then get out the white plastic reaming surface and do the reaming.  This time I did start with the denim but started scraping the shank and the tenon on the white plastic rather than reaming.  

    As you can see, quite a bit of tar/smoking residue was removed.  After this I addressed the tobacco chamber.  The tools were the PipNet with #3 blades, Smokingpipes knife, General triangular scraper, 220 sandpaper wrapped around a wood dowel and 320 sandpaper wrapped around a Sharpie marker.  

    The PipNet did the majority of the work. Although the chamber did not look heavily caked the bowl was so large that the cake that was there left a large pile.  After the PipNet the knife and scraper were used followed by the sanding with 220 then 320 to get to bare briar.  The tobacco chamber looked good and free of any heat damage. 

    The next task was to clean the exterior of the stummel.  I took it to the sink and scrubbed the stummel with undiluted Murphy’s Oil Soap and a medium bristle toothbrush.  This was repeated two times.  I spent extra time scrubbing the rim and the rusticated surfaces couldn’t be scraped to

    free them from lava.  I was not happy with the way the lava was being removed with the toothbrush so I used a brass brush to further scrub the rim.  The Murphy’s was rinsed off with warm water and the stummel dried with a cotton dish towel.  I then poured about 5 ml of 95% ethyl alcohol into the bowl.  I allowed the alcohol to flow into the shank but not pour out.  I then used a nylon shank brush to scrub the airway of the shank.  After the scrubbing I poured the alcohol into a medicine cup.  The alcohol was dark brown.  I applied a drop of Dawn dish soap to the shank brush and scrubbed the airway again with soap and water.  The soap lather was dark gray.  The soap was rinsed and scrubbed while rinsing. to rid the airway of all the soap.  Fresh alcohol was poured into the bowl and I again scrubbed the airway with the shank brush and alcohol.  This time the alcohol was much lighter when poured into the medicine cup.  

    I returned to the workbench.  I wetted a make-up pad with 95% ethyl alcohol and wiped the exterior of the stummel.    The carved groves still looked like they had some of the years of accumulated dirt and grime ground into them.  I then dipped a baby toothbrush into the alcohol and scrubbed the stummel with that.  The carvings had ridges that ran perpendicular to the grooves.  I matched the scrubbing of the toothbrush to the ridges and

    scrubbed them with alcohol.  After the scrub I again wiped the surface with an alcohol wetting make-up pad. The stummel exterior was cleaned.

    The exterior of the stummel was looking good.  Now to deal with the airway.  I was hoping that the scraping, alcohol scrub and the soap scrub would make cleaning the airway a bit easier.  I was right, it did.  Now, that is not to say that I didn’t have to do a couple more alcohol nylon brush scrubs.  I did and many cotton swabs as well but all the scraping and previous scrubbing had made my life a bit easier.  Eventually the airway was clean.

    I was pleased at how stummel had cleaned-up with the accumulated dirt gone.  The rim still did not look good.  Below are photos of the scrubbed stummel and rim.

    I was not pleased with the charring of the rim.  I would normally rub Vaseline on the rim  and scrape this with a sharp knife to remove the charred briar.  The rustication prevented this.  New plan, soak the rim in Murphy’s oil soap for an hour then try scrubbing it again.  I had no idea if it would work but I thought I remembered reading about a German Facebook buddy doing it with a pipe.  I found a wider medicine cup and poured in a few millimeters of  Murphy’s Oil Soap. 

    While waiting for the Murphy’s to do or not do something, I started the initial sanding of the stem.  I used the 400, 600 and 1000 sanding sponges to remove the tooth chatter, scratches and oxidation from the stem.  I then used Soft Scrub on a make-up pad to vigorously rub the stem.  This worked brilliantly.  The Soft Scrub removed all signs of oxidation and left a beautifully black stem behind.  The stem was then coated with mineral oil and let to sit and absorb oil.

    Although it had only been about 15 minutes, I couldn’t wait to see if the Murphy’s was doing anything to the charred briar.  I lifted it up and used the baby toothbrush to scrub the rim.  The soap darkened with charred wood.  Wow, this is actually doing something! Sascha Mertens, the Facebook pipe restoration buddy from Germany, comes through again. Thank you Sascha!

    I placed the stummel back into the soap and waited another 15 minutes.  Fortunately Netflix and Lorenzo Medici kept me from tampering with the stummel.  15 minutes and another baby toothbrush scrub and more of the char seemed to be gone.  Well let’s see what evil plots Lorenzo can nullify in a half hour.  30 minutes later and saving the Medici Bank from usurpers, miscreants and maybe some alien vampires at least 10 times, Lorenzo and I were victorious.  He, at saving the bank and Medici family and me at removing most of the char from the Kaywoodie.

     Okay, it wasn’t all gone but a little sanding with a wooden ball and 220 to give the rim a bevel and… 

    Who knows what kind of magic will happen?  

    I could live with that.

    The sanding of the stummel went fairly quickly as I only had to work on the smooth sections.  I used the 400 and 600 sanding sponges lightly and wiped with an alcohol wetted make-up pad.  I was looking for sand pits that might require filling.  I found a few all in one smooth section.  Unfortunately I did not photograph this step but, you can see the fills as dark spots on these before and after shots of the right side.  The pits were filled using

    Cyanoacrylate (CA, super glue) dabbed into the pit.  I then placed a pinch of briar dust on top of the CA and pressed hard with my fingertip.  The CA and briar dust set-up almost immediately.  I then used a small flat needle file to smooth the fill and finished it with the 400 and 600 sanding sponge.  I continued with the series of 1000-3500 sanding sponges.  Between each sponge I wiped the stummel with an alcohol wetted make-up pad.

    Once the stummel was sanded I moved on to micro-mesh the stummel.  The 4000-12000 micro-mesh pads were used.  Again, as with the sanding sponges, I wiped the stummel with an alcohol wetted make-up pad between pads.

    At this point I applied a coating of Before and After Restoration Balm to the briar.  I world the balm into the rustications with a baby toothbrush.  The balm was allowed to sit for an hour. 

    After an hour, I applied additional Restoration Balm to areas of the stummel that appeared to have soaked-up the Restoration Balm and now looked dry.  This was mainly on the rim.  An additional 20 minutes was given to the stummel.

    After 20 minutes, the remaining Restoration Balm was wiped away with the inside of an athletic sock.  The terry cloth material was great at getting into the rough surfaces and wiping away the excess balm.

    Back to the stem.  I wanted the stem/shank joint to be nice and tight with no rounding of the edges.  To manage this I wanted to sand the stem in place with the shank.  I had avoided sanding the edge of the shank while sanding the stummel but that cannot be done with a stem and still look finished.  I needed to protect the shank so wrapping it with painters tape was in order.    

    I worked the stem with the 1000-3500 sanding sponges in sequence.  Between each sponge I rubbed  the stem with mineral oil on my finger and wiped it with a paper towel.  When finished with the sanding sponges I used the 4000-12000 micro-mesh pads in sequence.  Between each pad I rubbed in a drop of Obsidian Oil with my finger and wiped it with a paper towel.  The final stem polishing was done with Before and After Fine Polish.  This was applied with my finger and rubbed with a soft cotton rag.  The Fine Polish was followed by Before and After Extra Fine Polish applied and rubbed the same way.

    The last step to this restoration was to apply a couple of coats of carnauba wax using the buffer.  I tried to only apply the carnauba to the flat surfaces.  This meant that I could not apply the normal amount of pressure with the pipe to the buffing wheel.  I did not want to get carnauba wax embedded into all of the grooves of the carvings.  This made me go much slower and more carefully.  It worked and looked great.  I still felt like the grooves needed some kind of wood sealer or protector.  I opted to use Renaissance Micro-crystalline Wax Polish.  This is a wax that can leave white spots if it is allowed to

    dry too thickly.  I applied it with my finger tip, working it into the coarse grooves.  While it was drying I buffed it with a shoe shine brush. The hairs of the brush smoothed and evened out the wax as it was drying.  Like it says on the label “Apply sparingly with a soft cloth and buff gently.  Dries hard instantly.  Resists liquids spillage. Does not show finger marks”.  I wanted the “dried hard” and “resists liquids” features.  I also love the solvent based smell of it.  When completely dry the smell is gone.  I hand buffed the completely dried pipe with a microfiber polishing cloth.

    I am very pleased at how well this Kaywoodie Hand Made pipe turned out.  It feels good in hand with the grooves being smooth and comfortable.  The smooth surfaces, separated by the carved grooves, come together nicely towards the shank.  The briar grain, though not distinctive, is attractive.  I am impressed with how well the stem polished-up  it’s glossy black contrasts the medium browns of the stummel beautifully.  This is a very large pipe weighing 2.7 ounces (76,5 g).  It’s length is 6 in. (15.2mm), bowl height:  2.38 in. (60mm), chamber depth: 2 in. (50.8 mm), chamber diameter:.875 in. (22.2 mm), outside diameter (side-side): 1.63 in (41.4 mm), outside diameter (front-back): 1.75 in. (44.5mm).

    I do hope that you have found something here useful.  If you like this sort of thing, please click the like and subscribe buttons.  I thank you for reading the ramblings of an old pipe lover.

    Below are some photos of the finished Kaywoodie Hand Made.

  • A Dulwich Supreme Billiard Restoration

    February 12th, 2024

    Photographed and written by

    John M. Young

    The Dunwich Horror is one of H. P. Lovecraft’s best known works from 1928.  The name of this pipe has little to nothing in common with that story other than sharing most of the letters in Dunwich. The Dulwich Supreme was far from an eldritch abomination of cosmic proportion and it most likely is more recent than 1928.  Rather it appears to be a fine piece of briar with an intact meerschaum bowl and good quality vulcanite for a stem.

    This pipe was part of an estate lot that contained the 3 Senlar pipes from earlier restorations (Senlar Canadian, A Second Senlar Canadian and Senlar Billiard).  This pipe caught my eye with its light colored briar and forward

    canted bowl, both features I find attractive.  And, of course, the Lovecraft-esque name.  I had restored several meerschaum lined pipes though not a favorite. I had kept a couple of them for use on windy days when I was working on an outdoor project.  I considered the small bowl size as a detractor from frequent use.  Although the cleaning with soap and water was always a feature that I liked.

    Here is what I was looking at.   

    I failed to photograph the third stamp, along the bottom of the shank.  They read, DULWICH over SUPREME (left), MADE IN over ENGLAND (right) and FINEST BRIAR over EXTRA and a shape number 127 (bottom).  I could find very little information on Dulwich pipes.  The information from pipedia.org is a single line, “|”'[[Dulwich]]”’||brand that often has Meerschaum lined bowls” (Search results for “Dulwich” – Pipedia).  Pipehil.eu had nothing.  I turned to Steve Laug’s rebornpipes blog and his extensive list of pipes that he had restored and found that he had restored 3 Dulwich pipes on two separate blog posts:  Refurbishing a Dulwich Quaint Oom Paul 64 and A Rare Find – A Pair of Fieldcraft Dulwich Quaints. In both of Steve’s posts he too could find little information on the Dulwich brand.  Also of note is that none of the three Dulwhich pipes that Steve restored had the meerschaum liner.  With little information to go on and no idea of a date for this all I can do is make a guess – made in England in the 1970s.

    After the initial photos were taken the Dulwich received a clean piece of denim at the workbench.  I did not want to use the PipNet for reaming for fear of the torque that my massive forearms would deliver to the fragile meerschaum liner.  Okay, that was an exaggeration although, I am pretty sure that my forearms do have some mass.  In my previous restorations of meerschaum lined pipes I have found that the meerschaum is usually chipped, has breaks and/or missing pieces.  This Dulwich was dirty but intact.  I opted to only use scraping tools and sandpaper to ream the tobacco chamber.

    The scraping went well and was followed by sanding with 320 sandpaper.  The interior of the tobacco chamber felt smooth yet remained discolored.  I feared being too aggressive with it and stopped sanding when the walls were smooth and cake free.

    I cleaned the rim by gently scrubbing with Castille soap and a Scotch-brite type dish cleaning sponge.  The lava on the rim came free with minimal scrubbing.  The exterior of the Dunwich was scrubbed using Murphy’s Oil Soap undiluted and a medium bristle toothbrush.  The soap was rinsed with warm water and dried with a cotton dish towel.  After the scrubbing I wiped the surface of the briar with a make-up pad moistened with 95% ethyl alcohol.  The pad showed some color as it removed some of the remaining finish from the stummel.  I do not think that this briar was stained so the pad removed a bit of shellac or wax.

    Next, I removed the stinger from the stem and placed it in a medicine cup with 99% isopropyl alcohol to soften the lacquer-like tar.  As the stinger soaked I started sanding the stummel.  There were numerous scratches, dents and dings on the surface of the stummel.  I thought that most of these were minor and would sand out easily.  I began with the 400 sanding sponge followed by a wipe from an alcohol wetted make-up pad.  I was examining the stummel for pits that might need filling.  I only found one.  This was indeed “supreme” briar.  The one small pit was treated by placing a small drop of thin

    cyanoacrylate (CA, super glue) in the pit and sanding over it with the 400 sanding sponge.  The briar dust from the sponge combined with the CA in the pit to make a barely noticeable fill.  I continued sanding the stummel with the sequence of 1000-3500 sanding sponges.  I did not tape over the stampings, rather was very careful to avoid them and the edge of the mortise.

    With the stummel sanded I turned my attention to the stem.  The tooth chatter looked far worse than it actually was.  None of the bite marks were deep enough to require filling with black CA.  the surface was scratched and there was oxidation on the surface.  I sanded the stem with the 400 and 600 grit sanding sponges.  I then placed the stem into a bath of Oxy-Clean and let it soak for an hour.  After the soak I ran several pipe cleaners through the stem to clean it out.  I then used Soft Scrub on a make-up pad to scrub the stem.  The pad quickly became discolored with the oxidized  vulcanite that the stem was shedding.  The cleaning left the stem a nice black with no signs of brown.  It was then coated with mineral oil and allowed to sit for another 30 minutes.

    I used a piece of alcohol wetted 0000 steel wool to remove the tar from the stinger and inserted it back into the stem.  I then taped the shank with painters tape and reinserted the stem into the stummel and sanded the stem with the 1000-3500 sanding sponges.  Between each sponge I applied a drop of mineral oil with my fingertips and wiped with a paper towel.

    The whole pipe was micro-meshed intact.  I worked with the 4000-12000 micro-mesh pads in series.  Between each pad the stummel received a wipe with an alcohol dampened make-up pad while the stem received a drop of Obsidian Oil rubbed in by finger and wiped with a paper towel.  After the micro-meshing the stem was further polished with Before and After Fine Polish followed by the Extra Fine Polish.

    After the stem was polished the stummel was given a coating of Before and After Restoration Balm.  I planned to allow it to sit for 30 minutes then wipe it off.  When I checked on it after 15 minutes the briar had absorbed much of the balm and appeared dry in places.  I then applied a second coating of the Restoration Balm and allowed it to sit an additional 30 minutes.

    After the final 30 minutes, I wiped the remaining Restoration Balm from the stummel with the inside of an athletic sock. 

    All that remained was to apply a few coats of carnauba wax to the pipe with the buffer.  

    This was by far the best looking meerschaum lined pipe that I had ever worked on.  It quite literally puts the others that I have to shame.  The quality of the briar is very fine and after being waxed the briar looked fantastic.  The vulcanite stem cleaned-up well and has a brilliant glossy black which accentuates the briar even more.  This Dulwich is a fine looking pipe and I am sure it will be a great smoking pipe as well.  I really like the forward cant of the bowl and how the white of the meerschaum peeks out at an observer from the front.  This pipe is larger than any of my other meerschaum lined pipes which allows it to have a larger bowl capacity. I am very pleased by how this pipe turned out. I do hope that you have found something here useful. If you like this sort of thing please click the like and subscribe buttons. I thank for reading the ramblings of an old pipe lover.

    Below are some photos of the finished Dulwich Supreme Billiard.

  • A Bruce Peters Dublin Restoration

    February 9th, 2024

    Photographed and written by

    John M. Young

    Back on January 20, 2024 I posted a blog about a Broadcaster Billiard.  While researching the history of that little darling I discovered that it was what some call a coupon or certificate pipe.  The term comes from an advertising method where a coupon or certificate for a new pipe was placed into the packaging of pipe tobacco.  The buyer could fill out the coupon, include a check and order the pipe or in some cases accumulate enough coupons and turn them in for a new pipe.  A wonderful marketing idea, especially for folks who considered a pipe as a consumable product like shoes.  When they got too worn and dirty they just replaced it with a new one.

    It turns out that one such tobacco company that pursued this technique was Penn Tobacco Company, Penn as in Pennsylvania.  In the Broadcast er blog I wrote the following: 

    “The history of Broadcaster is actually the history of the Penn Tobacco Company and Henry Leonard and Thomas Inc. (HLT).  Broadcaster was a brand of pipes only available as coupon pipe from Penn via the coupons included in packages of pipe tobacco.  Penn produced the tobacco while HTL produced the pipes for Penn.  Pilehil.eu explains this and three other lines of pipes below.

    Brand of the Penn Tobacco Company formed in Wilkes-Barre Pennsylvania in 1901 by Russell Uhl († 1914) and Henry Weigand († 1942). Bruce Peters was a Treasurer of the company.

    There were four pipes in the line offered by the company: the Bruce Peters (top of the line), the Silver Mac Duff, the Vox Pop, and the Broadcaster. The pipes were manufactured for Penn by Henry Leonard & Thomas, manufacturers of Dr. Grabow pre-smoked pipes.

    (http://www.pipephil.eu/logos/en/logo-b8.html#brucepeters)”

    If you are interested more in the history of the Penn Tobacco Company and my research into the history of the Broadcaster and subsequently this pipe, please take a look at the Broadcaster Restoration.

    It turns out that Penn’s advertising genius caught another customer, me, far after their own company faded into history.  I wanted to restore examples of those pipes.  Through the wonders of the Internet and eBay, we can find these poor abused darlings and have them delivered to our door.  Below is the listing of the Bruce Peters that I purchased from eBay.

    Wait, not that one.  Dang eBay searches, just when you think, “how can I go wrong with a name like “Bruce Peters”…

    Yeah, that’s much better and more appropriate.  A mere 9 days after purchasing the Bruce, as I called him, it arrived.  Ole Bruce looked a bit rough. Here are the before photos.

    I felt like a game show host.  Read this next line in your best game show host voice.  “Welcome to another episode of “What’s Under That Filth?  America’s favorite game show where contestants wager a guess to see if there is beauty under the filthy grime of old pipes.”  Hmm, I don’t think it will give The Price is Right any competition.  Anyway, I thought that the Bruce might have some pretty grain under there.  It was hard to tell, the stamps were barely visible, BRUCE PETERS on the left and BENCH MADE over IMPORTED BRIAR on the right.  There was a thick lava deposit over the rim.  I could also see rim damage from knocking the rim on various unforgiving surfaces.  The stem looked like some prayers offered to the patron saint of desperate situations and lost causes, Saint Jude Thaddeus would be required.  I’m not even Catholic, but any help removing the calcium deposits and oxidation is appreciated.

    I took old Bruce to the workbench and against my better judgment, gave him a clean denim piece.  You know he is just going to get it all dirty.

    I usually start with the reaming.  I assembled the reaming tools:  PipNet withthe #2 blades (I would have used the #1 but it broke), The Scotte reaming tool, Smokingpipes knife, General triangular scraper, 220 sandpaper wrapped around a wood dowel and the 320 sandpaper wrapped Sharpie. 

    I started to ream the tobacco chamber with the PipNet but the cake was hard, dry and the opening was too constricted with cake.  Scraping with the General opened the chamber enough to get the Scotte in.  This was followed by the PipNet and more scraping.  Eventually the sanding revealed briar in very good shape.  No heat damage was seen.  

    I carefully scraped the rim with a sharp pocket knife.  As expected there was damage to the front of the rim from repeatedly knocking the dottle from the pipe on various hard rough surfaces.  

    Next it was time to give Bruse a scrub.  I used Murphy’s Oil Soap undiluted and a medium bristle toothbrush to scrub Bruce.  This was rinsed with warm water and dried with a cotton dish towel.  I then poured about 3-4 ml of 95% ethyl alcohol into the bowl, allowed it to flow into the shank and scrubbed the airway with a nylon shank brush.  The alcohol was then poured into a medicine cup to judge how dirty the airway was.  Dark brown = very dirty, light brown = not so bad and clear = a new pipe.  This one was very dirty.

    After the stummel dried I was impressed with the grain and decided that it was worthy of a set of post-scrub photos.

    These last two show the dents and dings on the front of the rim.  That is going to take some topping and sanding to reestablish the bevel of the rim.

    I now believed the quote from above:

    “the Bruce Peters (top of the line) … by Henry Leonard & Thomas, manufacturers of Dr. Grabow pre-smoked pipes.”

    (http://www.pipephil.eu/logos/en/logo-b8.html#brucepeters).

    The “top of the line” grain of this Bruce Peters was quite lovely.

    Back to the cleaning.  The shank was quite dirty, as should be expected after seeing that tobacco chamber.  I did a series of 3-4 ml of alcohol into the bowl followed by scrubbing with the nylon shank brush, dump the alcohol in a medicine cup and check for color routines.  After many of these the color of the scrub alcohol became lighter.  The two photos below show a lightening of the alcohol in the medicine cup.  Eventually the cotton swabs emerged clean.

    I removed the stinger from the screw-in tenon and  dropped it into the alcohol for a soak.  While it was soaking I gave the stem an initial sanding with  the 320, 400 and 600 sanding sponges to remove the calcium deposits and the worst of the oxidation.  I oiled the stem with mineral oil and let it soak while I cleaned the internals.  It too was dirty but cleaned out well with alcohol dipped bristle pipe cleaners.  The alcohol soaked stinger was scrubbed with a 0000 steel wool dipped in the alcohol and gave up its tar varnish.

    With the airways cleaned out it was time to start sanding the stummel.  I began with the 600 sanding sponge followed by an alcohol dipped make-up pad wipe.  I was trying to see any spots that would require filling.  There were four small spots on the front of the stummel.  I placed a small spot of thin cyanoacrylate (CA, super glue) on each spot and sanded over it with the 600 sanding sponge.  The briar dust from the sponge and the sanding combined with the CA and filled the small pits.  The area was then sanded smooth.

    The next area that needed restoration was the rim.  The photo above also shows the damage that needed to be dealt with.  For this I took the stummel to the counter where I had a sheet of 220 sandpaper laid flat.  I sanded the rim in a circular pattern while turning it in my grip every 3 revolutions.  I tried to sand the rim evenly without changing the shape of Bruce.  Once I had sanded enough material to erase the damaged areas I had to reestablish the bevel of the rim.  I did this with a 1 ½ inch rounded polyvinyl chloride (PVC) pipe end-cap wrapped with 220 sandpaper.  The below photo shows two of them, one with sandpaper and one without.  The rounded end was ideal for the rim bevel.  

    I proceeded on to the 1000-3500 sanding sponges wiping the stummel with the alcohol wetted make-up pad between sponges.  I was careful to avoid the areas immediately around the stampings.

    Next I turned my attention to the stem.  I’d already sanded it through the 1000 sanding sponge but there were a couple of dents on the underside that needed to be filled with black CA.  I failed to photograph the process.  I will describe it briefly.  I used alcohol on a cotton swab to remove the oil from the dented area.  I placed small drops of black CA onto the depressions then spritzed the area with CA drying accelerant.  After the accelerant had evaporated the CA had hardened.  I used a small needle file to smooth the drop and sanded with the 400 and 600 sanding sponges.  I then applied additional black CA over the entire area in a smooth uniform coat.  I again spritzed with the accelerant.  This larger area was then filed smoothly.  The larger area blends the black CA to the vulcanite better merging the two better than blending two individual spots. 

    The stem was then sanded with the 1000-3500 sanding sponges.  Between each sponge I applied mineral oil to the stem then wiped the excess off with a paper towel.

    I micromeshed the stummel separate from the stem.   The micro-mesh pads were used in sequence from 4000-12000.  I wiped the stummel with an alcohol dampened make-up pad between each pad.

    The stem was returned to the pipe and I micromeshed the stem attached to the stummel for ease of holding.  I allowed myself to micromesh the first few millimeters of the shank while doing the stem.  Between each micro-mesh pad the stem received a coat of Obsidian Oil rubbed in and wiped with a paper towel.

    This little beauty, wait, that sounds wrong for a pipe named Bruce.  This handsome pipe was looking nearly ready.  Bruce got a nice coating of Before and After Restoration Balm for the stummel and a coat of Obsidian Oil for the stem.  They were allowed to soak or whatever they did for 30 minutes.  After that they were wiped off with the inside of an athletic sock and by the power of terry-cloth they looked very good.  The final step was to give the pipe several coats of carnauba wax with the buffer.

    This brings the total to two of four Penn Tobacco Company coupon pipes restored.  I don’t want to get your hopes up too much but, there is a Vox Pop pipe in route to southeast Nebraska as I type this.  I think this Bruce Peters Dublin turned out very nicely.  My curiosity of the coupon pipes had lessened but was far from cured.  The grain of the Bruce Peters is a beautiful mix of bird’s eyes on the front, back and left side with more horizontal stripes on the right.  The stem polished up very nicely with the glossy black accentuating the briar grain even more.  I am not a big fan of metal screw-in tenons and their stingers but this aluminum ring doesn’t detract from the pipe’s looks.  This pipe was a textbook example of a well used pipe just needing some restoration to change it back into the beauty that it was in 1950.  The best part about a pipe that has been smoked as much as this one indicates that it is probably a very good smoking pipe.  I do hope that you have found something here that fits your needs.  If you like this sort of thing, please click the like and subscribe.  I thank you very much for reading the ramblings of an old pipe lover.

    Below are some photos of the finished Bruce Peters Dublin. 

    And finally here are the Broadcaster and Bruce Peters patiently waiting for their Vox Pop sister to join the party.

  • A Genuine Imported Briar Restoration 

    February 7th, 2024

    Photographed and written by 

    John M. Young

    This pipe stamped GENUINE over IMPORTED BRIAR with ITALY also stamped on the shank is another entrant in “why do I try to research the history” category of pipe restorations.  It is obviously made in Italy but it has a screw in tenon and aluminum mortise. There is also a singular yellow dot inlay into the stem.  The aluminum features indicate to me that the pipe was a product of an American manufacturer of the mid-1900s.  Of course there is no mention of a company called “Genuine” in pipedia.org nor pipehih.eu, which are the “go to” sources for initial searches for a pipe’s provenance.

    Here is what it looked like prior to me doing anything to it.

    So, who made this pipe?  I do not know.  When?  Probably 1950-1980.  Where?  Italy.  Why? To make some money.  Sorry if you were looking for some great detective work tracing the history and thrilling story behind this pipe.  If you have additional information about this pipe, please feel free to include it in the comments.

    As for the restoration, it was a nice relaxing restore.  I began with trying to get the stinger free of the tenon.  The dried smoking residues had sealed the stinger into the threaded part of the tenon.  I used a piece of painters tape to hold the stemupright in a medicine cup filled with 95% ethyl alcohol.  While this was softening the tars I turned to reaming the tobacco chamber. 

    The usual tools joined the crusade against cake.

    The pipNet with the #2 blades, the Smokingpipes knife, the General triangular scraper, the 220 sandpaper wrapped wood dowel and the 320 sandpaper wrapped Sharpie expected to see some action.  The reaming went quickly as it was not very thick.  The interior of the chamber was sanded to bare briar and revealed no sign of heat damage.

    I returned to the stem.  The alcohol had done it’s dissolving tar magic.  I used several layers of paper towel to protect the stinger from the jaws of a needle-nose pliers and wiggled the stinger free.  It was dropped back in the alcohol while I cleaned out the stem with bristle pipe cleaners dipped in the alcohol.  The stinger was then cleaned with the alcohol, paper towels and a pipe cleaner.

    To assess the amount of work needing to be done to the stem I wanted to sand it with the 400 and 600 sanding sponges.  These were used to remove the calcium deposits and tooth chatter as well as the outermost oxidation.  

    I then used Soft Scrub on a make-up pad to vigorously rub the stem to remove the remaining oxidation.

    After this the stem was rubbed with mineral oil and allowed to absorb the oil.

    I then cleaned out the airway within the shank using cotton swabs dipped in the alcohol.

    I took the stummel to the sink to scrub it with Murphy’s Oil Soap.  The soap was used undiluted and scrubbed with a medium bristle toothbrush.  Once scrubbed it was rinsed with warm water and dried with a cotton dish towel.

    The scrubbed stummel showed off the areas where the black stain had been scratched off.  This would have to be restrained.  Below you can see photos of the left and right sides of the stummel after it was scrubbed.

    Initially I thought that I could just stain the worn areas with black Fiebing’s Leather Dye.  As I examined the stummel in better light, I decided to redye the entire stummel.  I applied the Fiebing’s with a folded pipe cleaner.  I flamed the dye to better set the stain to the briar.  This was repeated two times.

    I was actually quick enough with the camera to catch a little bit of blue flame from the burning alcohol based dye.  There’s a first time for everything, I guess.  The stummel was allowed to dry.  After 30 minutes, I rubbed the surface with a cotton rage to remove and dye that remained on the stummel.  The shank was then wrapped in a protective layer of painters tape.

    I used the sanding sponges and progressed from the 1000-3500 grits.  Between each sponge I would apply a dab of mineral oil with my finger and wipe it away with a paper towel.

    Next the stem was micro-meshed using the 4000-12000 pads in sequence.  Between each pad I would apply a drop of Obsidian Oil, rub this in and wipe away the excess with a paper towel. 

    The last thing to do was to wax the Genuine.  I used the Renaissance Micro-crystalline Wax Polish applied by finger and brushed in with a baby toothbrush.  The wax was allowed to dry for 30 minutes then buffed with a shoe shine brush.  

    The stem and smooth area where the stamps had carnauba wax applied with the buffer.

    Overall I think this Genuine Imported Briar pipe turned out very nicely.  It is a good looking pipe made from briar with good clean centered drillings and a rustication that provides a solid grip.  This would make for a great outdoor use pipe for lunting, fishing or a Saturday work on the car, yard or garden.  The rusticated black finish would hide most of the dirt and grime of outdoor activities and still look presentable in public.  Although smoking in public will still probably get you an “evil-eye look’ until they smell the delightful smoke.  I hope you found this useful in restorations of your own or you had a relaxing read.  If you like this sort of thing please click the like and subscribe.  Thank you for reading the ramblings of an old pipe lover.

    Below are some photos of the finished Genuine Imported Briar.

    I am still debating the background color.  Tell me what you think in the comments.  Thanks.

  • A Marxman Jumbo Dublin Restoration

    February 5th, 2024

    Written and Photographed by

    John M. Young

    Okay, I know what you are thinking: 

    1)  “John, didn’t you suffer enough with that last Marxman Dublin?” And, 

    2)  “Hey, you changed the color of your photo background.”

    Well, first of all, I’m glad we are on a first name basis now.  Secondly, yes I was remembering the Marxman Dublin from Hades restoration the other day while smoking it.  That is a great smoking pipe.  I now know why it had been so heavily used – because it is awesome.  I didn’t have to deal with miniature La Brea Tar Pits within this one, it was unfired.  Yeah, you read that correctly.  A 1947’ish unfired Marxman Jumbo.  And further, yes, I am trying a black background.  I am not sure if I prefer it over the blue but that blue would change shades between photos occasionally.

    Oh, so now you are thinking,  “This guy is a hack!  Claiming to restore a pipe that hasn’t even been used. What a kind of deceitful shenanigans is he up to? Next he’ll be running for office.”  Dang, calm down there, buddy.  I did stuff to it.  Restorer stuff, even.  I guess you are just going to have to read about my creative process or, flip through the photos and get to the good stuff at the end.  Wink.

    If you have read a few of my blogs you know that I am a Marxman lover.  If you are a newer reader, thank you for stopping by and by the way, I am a Marxman pipe lover.  Since I started blogging at the end of October 2022, I have done 4 Marxman pipes.  Crazy as that sounds, I actually have many more Petersons than Marxmans.  Why the preponderance of Marxmans?  I can afford them.  Have you seen the prices they are asking for Peterson pipes these days?  Thanks alot, Mark Irwin for writing an incredible book,  The Peterson Pipe – The Story of Kapp & Peterson (Irwin, Mark and Malmberg, Gary. 2018.  Canada, Briar Books Press.) and making people want to collect Peterson pipes (feel free to read this with a sarcastic tone)  By the way, Mark knows that little of what I say is serious and I will be giving him a heads-up before I publish this.

    I suppose some history of Marman is in order.  Feel free to read my prior Marxman blogs (Marxman; Regular Apple, Super Briar, Quarter Bent Big Boy Rhodesian and Marxman Dublin) as they contain histories and commentary as well.  Here is a quick review of Marxman pipes from pipedia.org:

    “Marxman (Marxman Pipe Company) was created by Robert (Bob) L. Marx in 1934, when he was 29, and after he had worked for the William Demuth Company. His pipes were not outstanding because of the quality of their wood (probably Algerian), but Bob started making unique sculpted pieces, which brought the brand fame in the World of Hollywood cinema. Actors like Zachery Scott, Dennis Morgan, Jack Carson, Alan Hale, Joel McRae, and Ronald Reagan were some of the faces that appeared on the bowls.

    Bob knew how to innovate and took full advantage of marketing and press advertising in order to sell the brand–one of his slogans being “Relax with a Marxman”.

    (Marxman – Pipedia)

    The Marxman Jumbo that is the subject of this blog is an example of a Jumbo.  Here is a 1946 advertisement discussing the qualities of a Jumbo.

    (https://pipedia.org/wiki/File:MarxmanBM15.jpg)

    This pipe does not have a size stamp though, judging from other Marxmans in my collection it is a smaller pipe.  It also is stamped IMPORTED BRIAR indicating that it was not made in France but rather at the New York factory using Algerian briar.  I would judge this pipe was made prior to the Mastercraft purchase of Marxman in 1953 as it does not have a foreign maker.  Again referring to pipedia.org, 

    “Bob also produced other brands, such as the “Bench Made”. The company lasted until 1953, the year in which it merged with Mastercraft, then the USA’s biggest pipe importer. Marxman Pipes Inc., was located at 27 West 24th St. New York 10, NY.” (Marxman – Pipedia)

    Below are photos of the Marxman Jumbo prior to me doing any work to it.

    On to the restoration, and yes, I do consider it a restoration as the pipe is being restored to a condition more similar to how it looked as it left the New York factory (probably a great deal better, in all honesty).  Due to the pipe never having been smoked my task of cleaning it was very easy.  There was no need to ream the tobacco chamber.  Actually there were still chuck marks visible within the chamber.  I did clean the airway within the shank using cotton swabs dipped in 95% ethyl alcohol.

    I am not sure what the dark colored stuff on the cotton swab was, perhaps a stain or just sanding dust residue?  THe stem was even less eventful.  I used bristle pipe cleaners dipped in the alcohol.  I should say I used one bristle and one non-bristle as I could not get a bristle pipe cleaner through the button.

    Next, I took the stummel to the sink for a scrub with Murphy’s Oil Soap.  It still had dirt and dust from 70+ years accumulation on it.

    See, I did do something to it.  The stummel was scrubbed with Murphy’s, undiluted, and a medium stiff toothbrush.  After scrubbing the stummel was rinsed with warm water and dried with a cotton dish towel.  I returned to the workbench and wiped the exterior of the stummel with a make-up pad dipped in 95% ethyl alcohol.  This pad did show some color after the wiping indicating that the pad and alcohol removed something from the stummel.

    I am still not sure if the material removed was a light coating of shellac or some residual stain.

    I did notice a large sand pit or as I called it when labeling photos a “Weird hole” on the side of the stummel.  Although it looked imposing it was only about 1 mm deep and did not appear to be anything more than a surface flaw.  A surface flaw that I was not content to leave alone.

     The treatment that I chose for this weird hole was to fill it with briar dust then apply a drop of thin cyanoacrylate (CA, super glue) to the briar dust.  I thought that the CA would penetrate into the dust and fuse it all together and to the surrounding briar.  Good plan, eh?

    I assembled the tools I thought I’d need for this hole filling.  A cotton swab, fly tying bodkin, small snuff spoon, briar dust and thin CA.

    I used a small snuff spoon to place a scoop of briar dust on top of the hole.  I then pressed the briar dust into the hole using the back side of the spoon.  I also used a fly tying bodkin to force the dust into the hole making sure it had penetrated and filled the opening.I then used a cotton swab to dust the area around the briar dust filled hole.

    I thought that a pipette would be the best way to apply the CA to the briar dust.

    I placed a small drop on the dust and it soaked in with a little extra pooling on top of the fill.  I used the cotton swab to quickly absorb the pooled CA.  I was fast enough that the CA did not bond the cotton to the briar.  Better lucky than good, any day.  Below is the photo of the CA once dry.

    I didn’t like where I slightly overfilled the hole so I used the 400 grit sanding sponge to roughen up the carved area.  I did not worry about the high spots around the carving as I knew I’d be sanding and micro-meshing the stummel.  Below you can see a better photo of the roughened-up fill.  The hole was gone.

    Next I sanded the stummel with the 600-3500 sanding sponges.  Between each sponge I wiped the sponge off on the denim work surface and wiped the stummel with a make-up pad moistened with 95% ethyl alcohol.when finished with the series of sponges the stummel looked like this.  I was careful to sand around the stamp.  I did not tape over the stamp to protect them.

    The shank was then taped with painters tape to protect the stampings.  

    I sanded the stem with the 600 and 1000 sanding sponges.  I wanted to make sure there was no deeper oxidation so, I scrubbed the stem with Soft Scrub on a make-up removal pad.  This pad became discolored with oxidized rubberAfter a thorough scrubbing, I did not see any further browning of oxidation.  I continued through the sanding sponge series 1000-3500.  Between each sponge I would dip my finger tip into mineral oil and rub that onto the stem then wipe the excess away with a paper towel.

    Following the sanding sponges I removed the painters tape and proceeded to micro-mesh both the stem and the stummel together.  The stummel was wiped with an alcohol wetted make-up pad between pads while the stummel received a drop of Obsidian Oil, rubbed in and a paper towel wipe.

    All that remained was to use the buffer to apply a couple of coats of carnauba wax to the smooth surfaces of the stummel and the stem.

    This Marxman was a breeze to restore compared to the previous gold band Dublin.  Never having been smoked certainly does make a restorer’s job easier.  I think the high gloss black stem sets off the briar grain of the smooth areas while retaining the traditional carved appearance of a Marxman pipe.  Algerian briar is not renowned for having great grain.  This pipe does show a number of small birds eyes on either smooth side.  I think the most remarkable aspect of this pipe is the fact that it is 70 plus years old and had never been used for the purpose that it was made.  I admit to being torn between wanting to give it some tobacco or leaving it unsmoked for its next companion.  I hope that something here was found useful or entertaining.  If you like this sort of thing, please click the like and subscribe buttons.  Thank you very much for reading the ramblings of an old pipe lover.

    Below you will find some photos of the Marxman Jumbo Dublin.  Let me know in the comments if you like or dislike the black background.

  • A Senlar Billiard restoration

    February 3rd, 2024

    Written and Photographed by

    John M. Young

    Over the past week I have restored two of the three Senlar pipes that I came into my possession.  The first two were both Canadian style shapes with lovely tree bark like rustications.  This last Senlar is more of a billiard shape with a slight bend.  I can’t really call it an ⅛ bent since when I “eyeball” the stummel with a protractor I see about a 5 degree angle.  I have to give Wally Larsen credit for making this pipe geometry lesson for me.  I am getting ahead of myself again, if you haven’t read the first or second Senlar Canadian restorations Wally Larsen references make no sense.  I will let pipedia.org summarize:

    “”Senlar” – Pipes were made in Minnesota by pipe maker Wally Larsen who inverted his last name LAR SEN to come up with SEN LAR. The Saint Paul Pioneer Press nicknamed Larsen “The Great Dane Of The Pipe World” in 1973. Larsen’s pipes were made in the basement of his Minnetonka home, with pipes selling in 1973 for as much as $75. Larsen learned the pipe making craft in the 1940’s when an established pipe maker moved into the home next door. After observing this craftsman work for three years Larsen decided to make a pipe for himself. That first pipe got him some attention from fellow smokers and he sold his next nine before being able to keep another for himself.

    Senlar pipes were apparently primarally sold in only three shops, St. Marie’s and the Tobak Shop in St. Paul, and Tobaccoland in Rosedale. Larsen expressed difficulty keeping up with the demand of just these three outlets.

    Larsen sought to make Senlar pipes “Look like a tree.” Which he accomplished by using a whirling drill to carve a distinctive bark like finish on the pipe. It is a finish seen on most Senlars and Larsen regarded it as a sort of trademark.

    He died in approximately 1988.”  (https://pipedia.org/wiki/Senlar)

    I had picked up 3 Senlar pipes in an estate lot purchased from eBay last month.  

    Clicking the above photos should take you to their respective restorations.

    Back to the geometry lesson.  I was reading about the characteristics of the traditional billiard shape.  This pipe is just full of contradictions to that shape.  Here is what Tobaccopipes.com says about billiards:  “The Billiard shape is without a doubt the most popular tobacco pipe shape in the world.  Billiards feature a perfectly cylindrical chamber and can be found with either a bent or a straight stem. The key to a classic Billiard is a cylindrical shank equal in length to the height of the bowl.” (https://www.tobaccopipes.com/blog/glossary-of-tobacco-pipe-and-pipe-tobacco-terms/)

    Okay, the shank length and bowl height do match if you use the average for the front height and the back height.  This pipe has a canted rim in relation to the shank.  This angle is approximately 20 degrees.  

    Now to make matters more confusing the bowl meets the shank at a 90 degree angle at the rear of the bowl.

    However the bowl is not cylindrical, it is flared at the bottom with the front of the bowl at a right angle to the rim.

    So, what does all of this mean?  I don’t know but it sure is cool and it makes for a very interesting looking pipe.  It is like an optical illusion.  The pipe looks like it is a slightly bent billiard, yet, when you measure it one way it is at a perfect 90 degree angle.  However, when you look at it you see it as bent. 

    It is all about the angle from the front of the bowl to the shank.  It gives the illusion of being a cylindrical bowl due to the curve at the heel yet the bowl is flaring outwards and you move down the bowl.  Then there is a very slight bend to the stem which is comfortable to clench and allows easy viewing of the top of the tobacco chamber when lighting the pipe.  Genius.

    All this and I haven’t even started restoring it.  I will get on with it.  The pipe, though geometrically amazing, did need some attention.  The tobacco chamber had a moderate layer of cake.  The exterior was dirty with a lava crusted rim.  The stem had minimal tooth chatter but had calcium deposits and oxidation issues.  The most alarming part, to me, was the constriction or congestion of the draw.  When the stem was disconnected it had a fine draw but when inserted into the pipe the draw was very restricted.  I took this to mean the airway of the shank was going to be a tough one to clean.  The stem also seemed to be slightly loose fitting. 

    Here is what I was looking at:

    I started with a clean denim piece on the workbench surface then assembled the reaming tools.  The PipNet with the #2 blade, the Smokingpipes knife, the General triangular scraper and the two sanding rods.  220 sandpaper wrapped around the wood dowel and 320 sandpaper on the sharpie.   The cake was very hard and thicker than it appeared.  As I was working the PipNet I had to stop frequently and scrape with the knife to allow the PipNet easier action.  The bowl was also deeper than it appears – more of that optical illusion.   Eventually the PipNet reached the bottom of the chamber.  I was very surprised by the pile of carbonized cake remains on the plastic reaming pad.

    The chamber was then sanded with the 220 and 320 sandpaper rods to bare briar.  The interior looked very good with no signs of any heat damage to the chamber.  At this point I tried to blow air through the airway but it was completely sealed.  I used the Scotte Pipe Reaming tool’s drill needle to try to clear the airway.  The needle drill worked through the airway with difficulty but eventually reached the tobacco chamber.  This greatly opened up the airway and returned it to normal.

    Next came the scraping of the lava from the rim.  I moistened the lava with saliva and used a sharp pocket knife to carefully scrape the rim.  The first photo shows the rim  ½ finished.

    With the rim scraped it was time to scrub the exterior of the stummel.  I took it to the sink and applied a liberal blob of Murphy’s Oil Soap.  The soap was used undiluted and was scrubbed with a medium bristle toothbrush.  When finished scrubbing I rinsed the stummel with warm water and dried the stummel with a cotton dish towel.  I then poured about 3 ml of 95% ethyl alcohol into the tobacco chamber, sloshed it around and allowed it to flow into the shank but not pouring it out.  I then used a nylon shank brush to scrub the airway.  I poured the scrubbing alcohol into a medicine cup to assess the color.  The color indicated that there was still a good deal of work to be done cleaning the airway.  I returned to the workbench and started work on the stem and allowed the stummel to dry out.  

    The briar surface  looked very dry and prompted me to photograph it.

    I started sanding the stem with  400 and 600 grit sanding sponges.  These quickly removed the calcium deposits and smoothed the chatter.  There did not appear to be any deep tooth marks that would require filling with black cyanoacrylate (CA, super glue).  After the sanding I oiled the stem with mineral oil to prevent further oxidation.

    When inserting the stem into the stummel I heard a “click” that did not sound normal.  I immediately examined the shank around the stem.  There I saw a hairline crack. 

    I remembered that the stem had felt slightly loose earlier and wondered, “did I just crack that shank or did the cleaning remove the grime that had concealed it?”  I went back through the photos that I had taken previously to see if I missed it.

    There was a dark spot on the left photo of the mortise, at about 11:30.  On the right photo, immediately above the glare, there may have been a crack.  Neither of these photos were definitive.  I suppose it didn’t really matter if I did it or if it was there.  The crack would have to be addressed.

    I had never fashioned a band on a pipe that had anything other than a round shank.  Perhaps this whole experience was there to expand my horizons.  I checked the size on my existing brass tubing.  The 17/32 outside diameter tubing looked like it would work. 

    I measured the length that would be needed to cover the crack and reinforce the mortise.  I then used a pipe cutter to cut a band from the end of the tube.

    The band was cut now to see if making it into an oval would be as easy a process as I hoped it would be.

    Using needle nose pliers the round band was bent onto an oval.

    The oval was pressed onto the shank and tapped into place.

    The band diameter was slightly greater than the diameter of the shank so I smoothed the edges of the band with sandpaper giving it a bevel on both sides. 

    I thought that it looked good and would look even better once it gets glued in place and is sanded with the stem for a more custom fit.  I assembled the gluing gear. 

    I used the fly tying bodkin to apply the thin CA to the crack.  The CA penetrated  and bonded the broken parts together.  After it had dried I sanded it with the 400 sanding sponge.  I dipped a cotton swab into acetone and wiped the inside edge of the mortise to remove any CA from that surface.  I then mixed the J.B. Weld per instructions.  Again using the bodkin, I applied a bead of the epoxy to the first 2-3 mm of the shank.  I applied a thin layer of the epoxy to the inside of the band.  Trying  to keep my left hand free of any epoxy, I worked the band into place with my right hand.  I used the needle nose pliers to tap the band firmly into position.  I then used acetone on a soft cotton rag to clean off both my fingers and the shank/band of epoxy.  The mortise was wiped with a cotton swab dipped in acetone.  Everything looked good.  I coated the contact areas of the tenon and stem with Vaseline and inserted the stem.  I was confident I had wiped all of the epoxy off but, I know my luck when it comes to these things… The pipe was set aside to allow the epoxy to cure.

    When I returned to the workbench I examined the band and determined that the epoxy had set beautifully.  The stem slid free smoothly and had the correct snugness of fit.  All that remained for this pipe was to; 1) sand and polish the stem and new band, 2) apply restoration balm to the stummel and 3) wax.  I was looking forward to the finished product.

    I had sanded the stem with the 400 and 600 sanding sponges before I used the Soft Scrub, so I proceeded on with the 1000-3500 sanding sponges.  After each sponge I would wipe the dust from the stem and apply a finger-tip-dip of mineral oil to the stem.  I would then wipe it again with a paper towel. 

    As I was sanding I let the sponge glide up over the edge of the new brass band.  This sanding of the band smoothed it and took some of the edge off the band.  

    Micro-meshing pads were up next.  I used the 4000-12000 pads.  Between each of these I applied a drop of Obsidian Oil, rubbed it in with my finger and wiped with a paper towel.

    After the micro-mesh pads the stem and band were polished further with Before and After Fine Polish followed by the Extra Fine Polish.  These were both applied by finger then rubbed with a soft cotton cloth.

    The end is nigh,  That reminds me of the graphic novel Watchmen everytime I say it.

    (Moore, Alan & Gibbons, Dave.  Watchmen.  New York, New York, DC Comics, 1987)

    I applied a coating of Before and After Restoration Balm to the stummel and worked it into the rustication with a baby toothbrush.

    I allowed it to sit for about an hour then wiped the excess off with an inside-out athletic sock.  I love the thick terry cloth for doing this.  Oh, may we please have a moment of silence for this was the final pipe served by this jar of Restoration Balm.  Dramatic pause.

    I took the pipe to the buffer for a couple of coats of carnauba wax.  I would not normally apply carnauba wax to a rusticated pipe like this but all of the rustications were running in the same direction so, I thought it would work out.

    There you have it, the final pipe of the three Senlar collection.  Of the three, this billiard is my favorite.  I think the band added a little pizzazz that the two Canadians were lacking.  Given, they didn’t suffer a shank crack and require a band but, still.  The angles are the other part of the design of this pipe that I just love.  The more I look at them the more appreciation I have for Wally Larsen.  I can’t say that I can identify the tree bark that he was after with this pattern. I think the rustication looks interesting and accentuates the bizarre cant of the rim.  The stem polished up very nicely to glossy black.  This bordered with the polished brass then the rusticated briar is just a joy to the senses.  As is the feel of this pipe in the hand, very comfortable with great balance.  I hope that you have found something here useful or at least entertaining.  If you do like this sort of thing, please click the like and subscribe buttons.  I thank you for reading the ramblings of an old pipe lover.

    Below are some photos of the finished Senlar Billiard.

  • A second Senlar Canadian restoration

    February 1st, 2024

    Written and Photographed by

    John M. Young

    Here we are again with a second Senlar Canadian pipe.  After the last restoration, The Manhattan Billiard, I am looking forward to a less stressful and more straightforward restore.  This is a lovely Canadian with rustication running the opposite direction compared to the first Senlar Canadian.  The first Senlar Canadian resembled the bark from an Ash tree, this one reminds me more of a Birch.  I am getting ahead of myself a little bit.  Let me review the Senlar history and then the tree bark references will make more sense.

    Senlar is a very interesting though not terribly common pipe.  They hail from St. Paul Minnesota, twin city to Minneapolis Minnesota.  Thus the colloquial name, the Twin Cities.  I will let the pipedia.org entry summarize further:

    “”Senlar” – Pipes were made in Minnesota by pipe maker Wally Larsen who inverted his last name LAR SEN to come up with SEN LAR. The Saint Paul Pioneer Press nicknamed Larsen “The Great Dane Of The Pipe World” in 1973. Larsen’s pipes were made in the basement of his Minnetonka home, with pipes selling in 1973 for as much as $75. Larsen learned the pipe making craft in the 1940’s when an established pipe maker moved into the home next door. After observing this craftsman work for three years Larsen decided to make a pipe for himself. That first pipe got him some attention from fellow smokers and he sold his next nine before being able to keep another for himself.

    Senlar pipes were apparently primarally sold in only three shops, St. Marie’s and the Tobak Shop in St. Paul, and Tobaccoland in Rosedale. Larsen expressed difficulty keeping up with the demand of just these three outlets.

    Larsen sought to make Senlar pipes “Look like a tree.” Which he accomplished by using a whirling drill to carve a distinctive bark like finish on the pipe. It is a finish seen on most Senlars and Larsen regarded it as a sort of trademark.

    He died in approximately 1988.”  (https://pipedia.org/wiki/Senlar)

    I find it interesting that there are several references to starting a pipe crafting business in the 1946 of Pipe Lovers Magazine.  A few Examples from  1946 issues:

    Disabled Veterans Learn Art of Pipe Making (Pipe Lovers Magazine 1946 vol. 1, pp. 13)

    HIS HOBBY BECOMES HIS PROFESSION (Pipe Lovers Magazine 1946 vol. 4, pp. 128-129)

    PIPE MAKING AT HOME (Pipe Lovers Magazine 1946 vol. 6, pp. 193-195 and 212)

    PIPE MAKERS Electrical Employees Learn Art From Parents; Now Have Their Own Business (Pipe Lovers Magazine 1946 vol. 6, p. 211)

    (Each of the volumes for 1946 can be found here: https://archive.org/details/pipe-lovers-magazine-1946-7/Pipe%20Lovers%20Magazine%201946-1/)

    Taking the a piece of information from the pipedia.org entry, “selling in 1973 for as much as $75.” (https://pipedia.org/wiki/Senlar) and using an inflation calculator to convert to 2023 dollars, that would equate to approximately $515, today.  Mr. Larsen wouldn’t have to make but 10-15 pipes per month to have a middle-class income.  Well, at least an income on par with a public school teacher.

    Back to the Senlar pipe at hand.  I received 3 Senlars in an estate lot I purchased on eBay.  The 3 Senlars were the objects of desire from that lot

    while there were a few others which will probably be restoration blog subjects in the future.  The three Senlars appear below as they looked upon arrival.  I wrote a blog about the top Canadian pipe earlier this month. Of the three I think I like the rustication of the middle pipe, the subject of this blog, the best.  Although the bottom pipe has a shape that I am more partial to.

    I called the photographs of this Canadian “Canadian 2”  as I was saving and organizing them on the computer.  I will be referring to it as the Canadian or the Senlar Canadian from here out.  I hope this doesn’t cause confusion with the previously restored Senlar Canadian.  Below are the photos I took of the Canadian before I started to do any work on it.

    This Canadian looked to be in good shape.  It would need a tobacco chamber reaming, rim scraping/scrubbing, exterior scrubbing, airway cleaning and some deoxidizing and sanding/polishing of the stem.  Overall, this should be a nice relaxing restoration.  

    I started by placing a clean piece of denim on the workbench surface then assembled the reaming gear.  I use a white plastic envelope on top of the denim for reaming.  This allows me to just dump the carbonized yuck into the trash can without fouling my clean denim.  Below you can see the PipNet reaming tool with the #2 blade, Smokingpipes Low Country knife, General triangular scraper and the two sanding devices.  There is 220 sandpaper on the wood dowel (actually a shotgun magazine plug) and 320 sandpaper on the Sharpie marker. 

    The PipeNet did the job of removing the cake very well.  The cake came out in surprisingly large pieces and came free of the chamber easily.  This required minimal scraping with the knife and scarper.  Sanding the chamber to the briar, revealed no heat damage to the interior.

    At this point, I moistened the lava on the rim with saliva and scraped the rim with a sharp pocket knife.  The remaining lava would hopefully come off when the stummel was scrubbed.

    Next, I scraped the stem with the edge of a sharp pocket knife, held at a 90 degree angle to the stem and sanded the stem with the 400 grit sanding

    sponge to assess what would be needed for its restoration.  The tooth chatter and oxidation came off easily.  There did remain a slight brown color of oxidized rubber.

    I took the stummel to the sink for its introduction to the wonders of Murphy’s Oil Soap.  The Murphy’s was used undiluted and was scrubbed with a medium bristle toothbrush.

    Liberal use of Murphy’s was applied.  The rim did lose the remaining lava during this scrub.  The soap was rinsed with warm water and the stummel dried with a cotton dish towel.  While I was at the sink, I poured about 3 ml of 95% ethyl alcohol into the tobacco chamber and allowed the alcohol to flow into the shank but not pour out.  I used a nylon shank brush to scrub the airway with the alcohol.  The alcohol was then poured into a medicine cup.  I looked at the color of the scrubbing alcohol, it was a light brown.  I used a couple of cotton swabs to further scrub the inside of the shank.  They also came back brown but not dark brown.  This indicated that the airway was not terribly fouled with tar.

    I poured the alcohol back into the chamber and scrubbed with the nylon brush again, thus reusing the alcohol.  It did appear darker than the first time but not as dark as I would have predicted.

    I returned to the workbench and started cleaning the airway with bristle pipe cleaners and cotton swabs dipped in 99% isopropyl alcohol.  THe cleaning went quite quickly and was returning clean pipe cleaners.

    I returned my attention to the stem.  I thought that a little work with Soft Scrub on a make-up pad would eliminate the remaining oxidation.  I was rewarded with a stained make-up pad and shiny black stem in short order.

    The stem cleaned up inside and outside nicely.  It was now time to put them back together and sand them.  This Canadian has a smooth area next to the stem so I was able to carefully sand the pieces together without a protective tape covering.  I sanded with the sponges from the 600-3500 sponges.  Between each sponge I wiped the dust off with a paper towel, oiled the stem with mineral oil and wiped off again with the paper towel.

    With the sanding done Micro-meshing with the 4000-12000 micro-mesh pads came next.  Again I Oiled the stem, now with Obsidian Oil and wiped with a paper towel, between each pad.

    The final steps to finishing the stem was to polish it with Before and After Fine then the Extra Fine Polish.  This was applied by finger and hand rubbed with a soft cotton rag.

    The stummel received a coating of Before and After Restoration Balm applied with finger and rubbed in with a baby toothbrush.  This was allowed to sit for 30 minutes to give the balm time to work it’s magic on the rusticated briar.

    After 30 minutes, I wiped away the remaining balm with the inside of an athletic sock then further hand buffed it with a soft cotton rag.

    With the rustication running all the same direction, I thought that I could successfully use the buffer to apply carnauba wax to the pipe.  I normally do not use carnauba with a rusticated finish but thought that it might work with this one.  The briar seemed to take to the wax well.  After I used the soft flannel wheel, I swapped it out for a new clean wheel and buffed it again with the clean wheel.

    This Senlar Canadian turned out better than the previous Senlar Canadian.  I think it is because either, I like the rustication better or that the contrast stain of this pipe lends itself to a more attractive finished look.  Whatever the reason. This pipe is a knockout.  The little bit of grain visible on the shank is pretty, and is contrasted beautifully with the black of the stem and the rustication.  I can’t imagine that this pipe looked any better the day that Mr. Larsen finished it in his basement shop.  I hope that there was something here that you found useful or were entertained.  If you like this sort of thing please, click the like and subscribe buttons.  Thank you very much for reading the ramblings of an old pipe lover.

    Below are some photos of the finished Senlar Canadian, the second.

  • A Manhattan Billiard Restoration

    January 31st, 2024

    Written and photographed by

    John M. Young

    Yeah, not the photograph that you were expecting on one of my blogs, eh?  Well this sets the stage for a fun restoration.   Before I begin with the restoration let me tell you a bit about Manhattan pipes.  Manhattan pipes are hardly a world renowned brand. I could find only a couple of references to the brand but they are good ones:

    “The Manhattan Briar Pipe Co. was organized in October, 1902 by the American Tobacco Company, under an agreement with the owners of the Brunswick Briar Pipe Company, as a New York corporation. Its initial address was 111 5th Avenue, New York City, and the value of its stock in 1902 was $350,000.00. American Tobacco Company had itself been founded in 1890 by J. B. Duke through a merger between a number of U.S. tobacco companies, and was one of the original twelve members of the Dow Jones Industrial Average in 1896. It was commonly called the “Tobacco Trust”.

    The majority of the stock in Manhattan Briar Pipe Company was immediately acquired by the American Tobacco Company after the company was organized, but the prior owners retained a controlling minority interest for some years. In October, 1906, however, the American Tobacco Company acquired the remaining shares of stock, and from that point on Manhattan Briar was the pipe making branch of American Tobacco. By 1911, however, American Tobacco had been dissolved in anti-trust litigation, and Manhattan Briar Pipe Co. became a separate concern.

    Manhattan Briar Pipe Co. had started operations in 1905 in Jersey City, New Jersey, having taken on a lease for a ten year period in 1905, and maintained a factory at Marion, New Jersey, where the pipes were made. By 1913, former American Tobacco pipe department chair John Glossinger was the president of Manhattan Briar Pipe Company, and began a significant advertising push for high grade pipes, using the slogan “Don’t spoil good tobacco by using a poor pipe”. It appears from cases having appeared on the estate market that Manhattan also sold meerschaum pipes, most likely rebranded articles originally made by European craftsmen.

    After the expiration of the Jersey City lease the Manhattan Briar Pipe Company maintained offices and a factory at 415-425 Greenpoint Avenue, Brooklyn, New York beginning in 1915, evidently under the direction of W. C. Bastian, who had been granted a patent for a chambered pipe stem[1] otherwise seemingly identical to a Peterson P-Lip in 1910. An employee of the company, one J. Gianninoto, was granted a patent for a device meant to permit the emptying of a cuspidor[2] without the mess in early 1918, and the company continues to be listed in local directories through 1921. In 1922 Manhattan Briar was purchased by S.M. Frank and merged into that company[3].” (Manhattan Briar Pipe Co. – Pipedia)

    “In the year 1900 Sam Frank Sr. started his own business, selling pipes and other tobacco items. His original office was located at 20 W. 17th Street, NYC. He was also closely associated with the sales staff of Wm. DeMuth & Co., selling their line of pipes. It was at this time that Mr. Frank first met Ferdinand Feuerbach and formed what would be a lifelong friendship. Mr. Feuerbach started working for the DeMuth company in 1897 and by 1903 had become the production manager. In 1919, when Mr. Frank needed an experienced pipe man to run his pipe factory, located at 168 Southern Blvd., in the Bronx, he persuaded his old friend Ferdinand to join him. Mr. Feuerbach is credited with developing DeMuth’s popular Royal DeMuth and Hesson Guard Milano pipelines. In 1922, when S. M. Frank purchased the Manhattan Briar Pipe Co. the company incorporated. In 1933, the paper Medico filter was introduced along with the Medico brand line of pipes. The Medico filter is the “original” and most absorbent paper filter on the market that is recognized by pipe smokers world-wide. Filtered pipe smoking, a debatable issue among pipe smokers, reduces tars and nicotine in the smoke stream to make a “safer” smoke.” (S. M. Frank & Co. – Pipedia)

    The date looks correct for the characteristics of this pipe.  The button definitely looks like a much older era and the cut threads of the mortise and tenon strike me as significantly pre-WWII.  The date that the company was taken in by S.M. Frank, was1922.  That puts this pipe at least one hundred years old.  No pressure with that little piece of information.

    Now for the restoration.  The pipe was purchased as part of an estate lot and included this Manhattan, a Marxman, Tropical Paints Cleveland and a Winthrope.  The only name I recognized was Marxman. The Marxman

    originally looked most interesting.  It turns out that all four were interesting.  The Winthrope, Marxman and Tropical Paints Cleveland were each done previous blogs.   Here is what I saw upon the arrival of the Manhattan.

    I am sure you saw the photo with the cracked band.  You were probably thinking the same as I was, “Yeah, bands crack all the time and never have a cracked shank, right?” Hmm, have you heard of a big river in Egypt?  Speaking of denial, the seller of this auction either didn’t know the stem was broken, didn’t declare the stem was broken or was a very bad packager of pipes leading to the stem becoming broken in shipping.  I messaged them about the broken stem and said that I would not complete the “feedback” for the purchase until they had responded to my informing them of the broken stem.  They never did respond.  This forced me to give a relatively unfavorable “feedback”.

    Hmm, how to fix this?  My pondering led me to solution #1 first.  Pretty original, solution #1 first, eh?  Okay, here it is:

    1. Carefully drip alcohol onto the threads to loosen the dried yuck holding the broken tenon piece in place.
    2. While the piece and threads are soaking, drill out the airway to 4 mm.   “Why 4 mm”, you ask.  Because I have some 4 mm outside diameter, stainless steel tubing.  
    3. Press the stainless steel tube into the newly drilled 4 mm hole and try to work the piece free.
    4. Drill the stem out to 4 mm also to a depth of about 7mm..
    5. Cut the stainless tubing to length, approximately 10 cm so it can be a connecting piece holding the two tenon pieces together.  Like a sleeve except on the inside.  
    6. Thus preserving the original stem and its threaded tenon.

    Great plan.

    I soaked the threads and made sure not to let any alcohol go through the airway. 

    After several drops, I saw alcohol seeping into the tobacco chamber.  This was good, it meant the alcohol had penetrated the threads and that they were not sealed to the tenon piece 

    like a Tupperware lid.  I carefully drilled out the piece of tenon while it was still stuck in the mortise.  I figured that this would be the best situation for drilling such a small piece of rubber and it may act to loosen the tenon.  It didn’t.  I applied a little more alcohol.  Earlier in my life I thought that alcohol improved everything and that if a little was good more would be better.  It didn’t and it wasn’t.  This time the alcohol didn’t help either.

    Hmm, I tried scraping any gunk out of the threads and the backside of the tenon with a curved dental pick.  The threads cleaned nicely as the gunk there had been softened by the alcohol.  When I scraped the inside of the tenon I realized that the piece was only about 3mm thick.  I tried inserting the 4mm tubing.  It went in with a little bit of twisting and pressure.  It was good to know the hole worked.  I could not get the piece to budge.  I then noticed the cracks in the shank.  Yes, I said cracks, plural, more than one.  They were tiny and only extended for a 2-4 mm but they were there.  This led me to think that the piece was wedged hard enough into the mortise to 1- break the stem and 2- crack the shank.  Oh, this just keeps getting better and better. 

    I removed the tubing and thought that maybe if I inserted a thin bladed knife into the airway it would act like a regular screw head and I could just unscrew the piece through the cleaned-out threads.  Another grand idea.  I found a perfect knife and inserted it until I felt “enough” resistance and turned it counter-clockwise, lefty loosey.  I felt like it should be working but it wasn’t.  More pressure.  Still nothing.  More pressure, “tick”.  That must have been the sound of the piece breaking free of the shackles of the mortise.  Nope, that was the sound of the piece breaking.  Using the dental pick I removed the shattered pieces of the tenon.

    Here you can see the shank cracks at about 3:00 and 9:30.

    Okay, that first plan, #1, didn’t completely pan out.  I removed my tinfoil hat and donned my thinking cap.  The second plan emerged.  I’ll call it #2.  Oh, the originality-train is stuck in the station.  I thought:

    1. Measure the threads at their widest point.
    2. Buy some Delrin tenons of that diameter.  
    3. Cut off the broken tenon flush with the stem.
    4. Drill out the stem to accept the Delrin tenon.
    5. Cut new threads into the Delrin tenon.
    6. Screw the Delrin tenon into the mortise.
    7. Apply epoxy glue to the non-threaded end of the Delrin tenon.
    8. Slip the glued Delrin tenon into the newly drilled-out hole in the stem.
    9. Align stem to the correct position before glue sets.
    10. Perfection!

    Wow, this will probably work as well as plan #1. I measured and 5/16 was close to perfect.  I looked at https://jhlowe.com/catalog/#delrin-plastic-tenons-smooth and they existed.  

    I sent them an email requesting a dozen of the tenons.

    At this point I actually started the restoration of the Winthrop saddle stem billiard  (https://wordpress.com/post/scimansays1787.wordpress.com/1939).  I had never dealt with J. H Lowe before.  A great gentleman and Facebook buddy, Donald Cole, recommended them and had dealt with them in the past.  I had no idea how long it would take for the J.H. Lowe folks to respond to the email.  Of course I sent it on a late afternoon Friday.  After waiting for a few days, I used the official J. L. Howe “order” button.  This worked as well as my previous email, which is, it also met with no reply.  

      Several days later I called the phone number on the website.  Tim West promptly answered, a wonderfully helpful gentleman, he took my order and said he would send it out with an invoice.  Wow, an item mailed to me prior to me paying for it?  What an amazingly trusting person.  

    During the wait time to receive the Delrin tenons I decided to make a new band for this old girl.  I looked through the brass tube stock that I had on hand.  The 17/32 inch outside diameter (O.D.) tube was a near perfect fit.  I measured the length of the old band and used that to cut a new band from the 17/32 stock.  The new band was slightly larger which would not be a problem when glued in place.  The mortise side of the band needed a slight bend to soften the edge.  To do this I slid the new band over the ½ inch O.D. tube and tapped the edge with a small hammer as I rotated the band.  This is a slow process and is best done while watching something on TV.  Eventually the band got a nice even bevel.

    Seven days after ordering them, the 12 Delrin smooth plastic tenons arrived (SBT-6, https://jhlowe.com/catalog/).  Looking at them and the existing Manhattan stem I thought, “this might not work”  The 5/16 inch Delrin just looked too thick in diameter.  The original stem would most likely crack during the drilling.  Maybe with a precision vice and a drill press it would work but no way with hand tools.  I thought back to the Plan #2 steps.  I skipped ahead to steps 5 & 6 – cutting thread in the new tenon.  The tap and die set rarely gets used so I was looking forward to that.  I used the thread gauge on the existing threads of the tenon.  Size 18 and a diameter of  5/16.  I clamped the Delrin in the vice and started cutting the threads.  The portable vice that I have has plastic covers on the clamping surfaces.  These would not grip the slick Delrin.  I had to unclamp the tenon and hold it in a pliers and I finished cutting the threads.

    They threaded into the mortise of the stummel very nicely.  I was glad to save the original wooden threads in the shank of the old Manhattan.  Now for the task I think I had been putting off, step 4 the stem drilling.

    I retrieved my round-thing-holding-jig for clamping round pieces in a vice.  It would work to hold the stem while I used a hand drill.  I might be able to get up to ¼ inch by stepping up through increasing sized bits.  I wrapped the stem in a triple layer of scotch tape hoping that that might allow an extra layer of protection from cracking.  Then clamped the stem into the

    round-thing-holding-jig in the portable vice.  The 3 mm bit went through without removing much material.  Next, came the 7/64 inch.  I marked the ½ inch depth, to drill, with painters tape on the drill bit and started drilling – no problem.  I repeated the taping and drilling with a ⅛ in bit.  Again, no problem.  The threaded tenon was getting very thin but I wanted to keep it as long as possible to aid in keeping the drill bits running straight.  The 4 mm bit was taped and I started drilling – the threaded tenon cracked and parts broke away.  Not a problem, I thought.  I used the Dremel tool with a cut-off bit to remove the remaining threaded tenon as flush as possible.  The remaining material would be sanded away.  The next bit was a 3/16 inch.  Again, I taped it for depth and proceeded – no problem. 

    To save time, for you reading this, I continued stepping up the drill bit size to ¼ inch.  The hole in the stem was now noticeably off center.  I don’t know if this was due to my drilling or if the original airway was not centered.  Either way, the 5/16 inch hole was going to be a problem.  I thought maybe if I started the 5/16 bit with the drill then switched to a bit in a screwdriver I would be able to drill it by hand.  This worked but I soon saw a crack develop in the stem.  The crack was filled by applying clear Thin Cyanoacrylate (CA, super glue) which penetrated into the crack.  This was sanded smooth using an emery board.  I figured once the epoxy was inside the drilling and adhered to the Delrin tenon there would be enough adhesion to keep the crack from being an issue in the future.  A new plan was needed, perhaps it should be called “#3”. 

    Plan #3

    If the hole can’t get larger then the tenon must get smaller.  That sounds far too easy.

    1. Use the drum sanding bit with the Dremel tool to sand down the diameter of the Delrin tenon.
    2. Cut the Delrin tenon to appropriate length.
    3. Screw in the Delrin tenon until tight.
    4. Check the stem fit over the Delrin tenon.  Sand tenon to fit.
    5. Apply Vaseline to surfaces where no epoxy is wanted.
    6. Use epoxy to glue tenon into the stem.
    7. Run an acetone dipped pipe cleaner through the stem to make sure no epoxy interferes with the airway.
    8. Tah-dah.

    That was the plan and that is what I did.  The Delrin sanding with the Dremel was not photographed due to it taking both of my hands.  The next two photos show steps 1-3.

    I did not include a step for getting all the gluing gear together but, here is a photo.

    Step 5 “Apply Vaseline to surfaces where no epoxy is wanted“, is shown by the next two photos.  The Vaseline did not photograph well on the stem but it was there. 

    Step 6)  Sorry that the focus is so bad.  Trust me the tenon is wet with epoxy as was the drilled out stem.  

    Below is the tenon inserted into the stem as the epoxy is drying.  I did run a couple acetone dipped tapered pipe cleaners through the stem and spun them with my fingers to make sure that no epoxy was fouling the airway.  The blue and white pipe cleaner in the photo below was one of them.

    I set the time for 15 minutes hoping that that would be long enough for the epoxy to hold tight to the tenon and allow me to unscrew it.  It was.  The Vaseline did its job beautifully.  Excess epoxy was scraped with an Exacto knife while it was still soft.  

    It worked, it actually worked.  Well, it eventually worked, you know, 3 plans later.  Let’s finish this restoration.  The pipe left the bright sunny upstairs and headed back to the workbench.  The stem was very oxidized, again indicating that this was an old pipe.  I used the 600 sanding sponge to smooth the entire surface and remove the outermost layer of oxidized rubber.  I decided to give the stem a couple of hours in the Before and After Deoxidation solution or, deox as I like to call it.  A pipe cleaner was inserted into the stem to act as a hanger to suspend it in the solution.

    During this time, I worked on sanding and micro-meshing the stummel.  Okay, this was weird.  I had already sanded and filled the dents and dings on this stummel.  I don’t remember when I did it and I took no photos.  This is another reason not to work on pipes in starts and stops.  I had been so focused on the stem that I didn’t even notice that the stummel had been sanded and filled.  There were 6 spots that received fills all on the right side of the stummel.  I do now remember doing them.  I used a dental pick to

    remove the old fill material. None of them were large but they were all too deep to be just sanded away.  I used cyanoacrylate (CA, super glue) in the depression then sanded over them with a sanding sponge.  This allowed the

    briar dust from the sponge to combine with the CA and fill the hole.  The area was then sanded smooth. If the depression remained a second application of the CAA and further sanding was done. 

    With the sanding done, I moved on to the micro-mesh pads.  I used the 4000-12000 pads.  Between each pad I wiped the stummel with a make-up pad dipped in 99% isopropyl alcohol.  After the final alcohol wipe I allowed the stummel to dry and applied a layer of Before and After Restoration Balm.  The balm was allowed to sit and do the magic that it does for about an hour.  

    I returned an hour later and wiped the remaining Restoration Balm from the stummel with the inside of an athletic sock.  The stem had been in the deox for a couple of hours so, I retrieved it from the solution.  I allowed the excess to drip off the stem.  The stem was then vigorously rubbed with a coarse cotton shop rag.  THe rag absorbed the remaining solutions and rubbed away the oxidized rubber.  The inside of the stem was cleared of solution with a couple of pipe cleaners.  The stem was returned to the workbench and rubbed with mineral oil.  I ran a mineral oil dipped pipe cleaner through the stem as well.

    There were still areas of brown oxidation visible on the tenon end and right below the button.  I was getting frustrated with this stem.  I thought, “try buffing it with the buffer and some red compound.”  I did,  It helped but the oxidation remained.  I returned to the workbench and scrubbed the stem with Soft Scrub on a make-up pad.  This barely turned the pad tan.  The oxidation seemed to be deep into the rubber of the stem.  I ran through the micro-mesh pad series 4000-12000 and the stem did take on a good polish but under bright light the brown was still visible.  I gave up.  The final task for me was to apply several coats of carnauba wax to Manhattan.

    As frustrating as this restoration was, it was still fun and provided a great learning experience for me.  I had never cut threads in Delrin before and I had never drilled out a stem for a new tenon.  The new band turned out very nicely and will keep those two pesky shank cracks in their place.  The finish of the briar was restored to what I assume it looked like 100 years ago.  Do I think this pipe will be around in another 100 years?  I see no reason that it couldn’t.  I can foresee a  scenario where the Manhattan’s next companion decides that it does need a new stem, one without oxidation.  A good pipe repairman could do that with a lathe and some ebonite.  Other than that, this old pipe is ready for some tobacco.  I hope that you have found something here interesting or useful.  If you like this sort of thing, please click the like and subscribe.  I thank you for reading the ramblings of an old pipe lover.  

    Below are some photos of the finished Manhattan Billiard.

←Previous Page
1 … 18 19 20 21 22 … 25
Next Page→

Blog at WordPress.com.

Privacy & Cookies: This site uses cookies. By continuing to use this website, you agree to their use.
To find out more, including how to control cookies, see here: Cookie Policy
 

Loading Comments...
 

    • Subscribe Subscribed
      • NebraskaPeteGeek
      • Join 37 other subscribers
      • Already have a WordPress.com account? Log in now.
      • NebraskaPeteGeek
      • Subscribe Subscribed
      • Sign up
      • Log in
      • Report this content
      • View site in Reader
      • Manage subscriptions
      • Collapse this bar