
Photographed and written by
John M Young


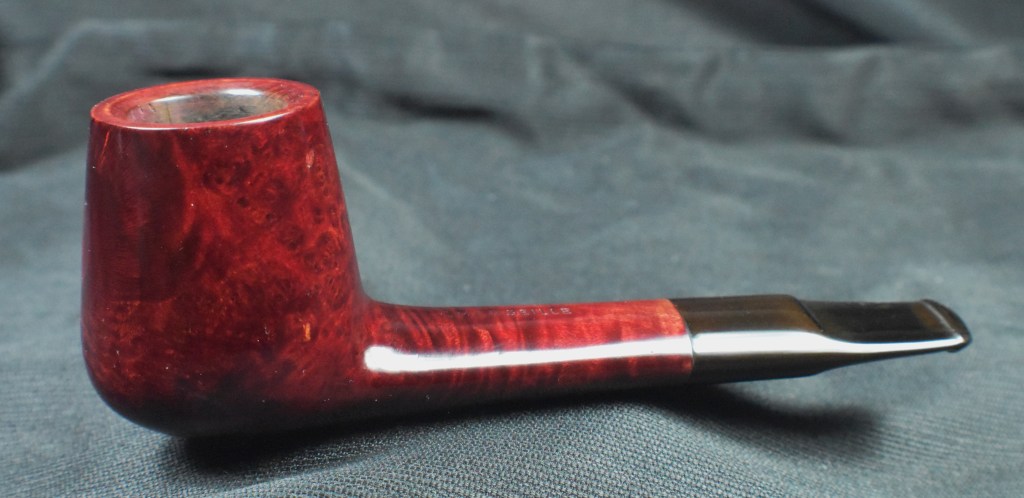
I don’t understand how the red in pipes is so difficult to capture in photographs. The oxidation is easy to capture and this stem had plenty of that. The rim was coated in a layer of lava indicating a fair amount of use but the tobacco chamber was pretty clean. Perhaps the previous owner liked to keep the cake to a minimum but was not concerned about rim maintenance. I did not like the look of the clear coat on the pipe and hoped that would be easily removed. Overall this looked like a straightforward restoration.
Background
I can barely say anything about this pipe. Pipedia.org has nothing on Marseille. Pipephil.eu has the following:

Smokingpipes.com has two old estate pipe listings. One by Butz-Choquin

(https://www.smokingpipes.com/pipes/estate/france/moreinfo.cfm?product_id=200428) and the other by Chacom.

(https://www.smokingpipes.com/pipes/estate/france/moreinfo.cfm?product_id=558385)
Both Butz-Choquin and Chacom are French pipe makers although the lack of any maker’s stamps or COM on the Marseille at hand opens any conclusion I make to pure speculation.
The Restoration
This is the second pipe of the double restoration. The first was the E. Wilke Squashed Apple. If you missed that restoration there is the link. I said in that one that I do not normally like to work on more than one pipe at a time. Anyway, here is the Masrielle situated on a clean denim piece.

I lightly sanded the stem with a 400 grit sanding sponge. I was careful to avoid the stem logo.

Next the tooth marks were filed smooth with a small flat file.

The stemairway was cleaned with 95%ethyl alcohol and pipe cleaners. The button was a little bit constricted so I used a Vermont Freehand Slot Funneling Tool to clean up the slightly off-center drilling. I also used a piece of emery board (fingernail file) to sand the airway at the button.

The stems of both project pipes were suspended in Before and After Extra Strength Deoxidizer (deox). The stems were left in the solution for four hours.

I returned to the stummel and cleaned out the airway within the shank. 95% ethyl alcohol with cotton swabs and a nylon shank brush were the tools of choice here.

Next came the ream team: The PipNet with #2 blades, the Smokingpipes Low Country Reamer and the General triangular scraper with the tip ground off, round were called up for duty.

They all served valiantly with the PipNet doing the lion’s share of the work.

Once sanded Chuck marks within the tobacco chamber could be observed. This told me that the pipe, though used, had not experienced a lot of use.

The stummel made her way to the sink for a scrubbing with undiluted Murphy Oil Soap and a nylon brush. The soap was rinsed with warm water and the stummel dried with a cotton hand towel.

The scrubbing did not remove the lava from the rim as well as I had hoped. Back at the workbench a wipe with ethyl alcohol on a make-up pad barely touched the clear coat and the lava.

The rim required a bit of scraping with a sharp knife. Saliva was applied to soften the deposits on the rim prior to and during the scraping.

It was looking better.

The problem with a good scraping was what it uncovered. The absence of the lava highlighted some dings on the rim. Topping would be my solution to this.

I wondered if wiping the stummel with acetone on a make-up pad would be sufficient to dissolve away the clear coat.

The acetone was working but oh, so slowly.

Light sanding helped etch the coating but it was still a slow process.

I decided to give the stummel a 30 minute bath in acetone.

After 30 minutes the stummel was removed and wiped with another make-up pad.

The shininess of the clear coat was gone and with it most of the red stain.

The four hour deox bath ended and both stems were set up to drip excess deon solution back into the jar.

The Marseille stem was vigorously rubbed with a coarse shop rag to remove both the remaining deox solution and some of the oxidized vulcanite.

The stem was scrubbed with Soft Scrub cleanser on a few make-up pads to remove more of the stubborn oxidized vulcanite.

Both stems were oiled with mineral oil and set aside overnight.

I returned my attention to the stummel. I wanted to try to return it to the reddish brown. I assembled the materials needed to dye the stummel; Dark Red Fiebing’s Leather Dye, a lighter , a wine bottle cork and a pipe cleaner. The cork was to be both a plug, keeping dye out of the tobacco chamber and a handle. The lighter, for flaming the wet dye, allowing the alcohol solvent to burn off and set the dye to the briar and the pipe cleaner as an applicator.

Below is the freshly dyed stummel in red.

The stummel was allowed to air dry another 30 minutes at the workbench.

A second dying was done with mahogany Fiebing’s Leather dye and the same process as with the red dye.

Below is the freshly dyed stummel with mahogany over the red dye.

This too was allowed to dry for 30 minutes before lightly wiping the stummel with a make-up pad wetted with 95% ethyl alcohol.

The stamps were taped with painters tape to protect them during the sanding to come.

The stem and stummel were reconnected and sanded together. A series of sanding sponges in grits of 600-3500 were used. Between each sponge the stummel was wiped with an alcohol dampened make-up pad to remove sanding debris. The stem was rubbed with a light coating of mineral oil and wiped with a paper towel between sanding sponges. You can see in the photo below where I wiped the sponges off on the denim. It not only protects the workbench surface but is a great place to wipe sanding sponges.

The stummel was then worked with micro-mesh pads 4000-12000. The wiping of the stummel with a make-up pad was repeated as was the oiling and wiping of the stem.

The pipe was taken to the buffer for several coats of carnauba wax. The final step was a hand buffing with a microfiber polishing cloth.
I said it before and I say it again, I am developing an appreciation for the oval shank. It is a feature that provides a more robust feel in the hand while retaining a more elegant contour in profile. I am sure the extra briar also provides additional strength for those who are a bit more hard on pipes. The oval shanked volcano of this Marseille restored beautifully. The dye turned out lovely and the factory staining was fairly well mimicked. The stem oxidation was problematic with the loss of the logo disappointing. I admit that I am not finished with this restoration. I am waiting for another brand of stem deoxidizer which a supplier has sent me to try. I want to try it on this stem and report the findings when I have used the product. Stay tuned for updates. Overall I am very pleased at how well this pipe turned out. The dimensions of the Marseille Oval Shank Volcano are:
Length: 5.05 in./ 128.27 mm.
Weight: 1.47 oz./ 41.67 g.
Bowl Height: 1.84 in./ 46.74 mm.
Chamber Depth: 1.47 in./ 37.34 mm.
Chamber Diameter: 0.76 in./ 19.30 mm.
Outside Diameter: 1.56 in./ 39.62 mm.
I do hope that you have found something here useful to your own pipe care, maintenance or restorations. If you like this sort of thing, please click the like and subscribe buttons. Thank you for reading the ramblings of an old pipe lover.
Below are some photos of the finished Marseille Oval Shank Volcano.


One response to “A Marseille Oval Shank Volcano Restoration”
[…] I looked back through this year’s restorations and there it was – the Marseille Volcano (A Marseille Oval Shank Volcano Restoration – NebraskaPeteGeek). Below is a photo I took while working on the […]
LikeLike