Photographed and written by
John M. Young
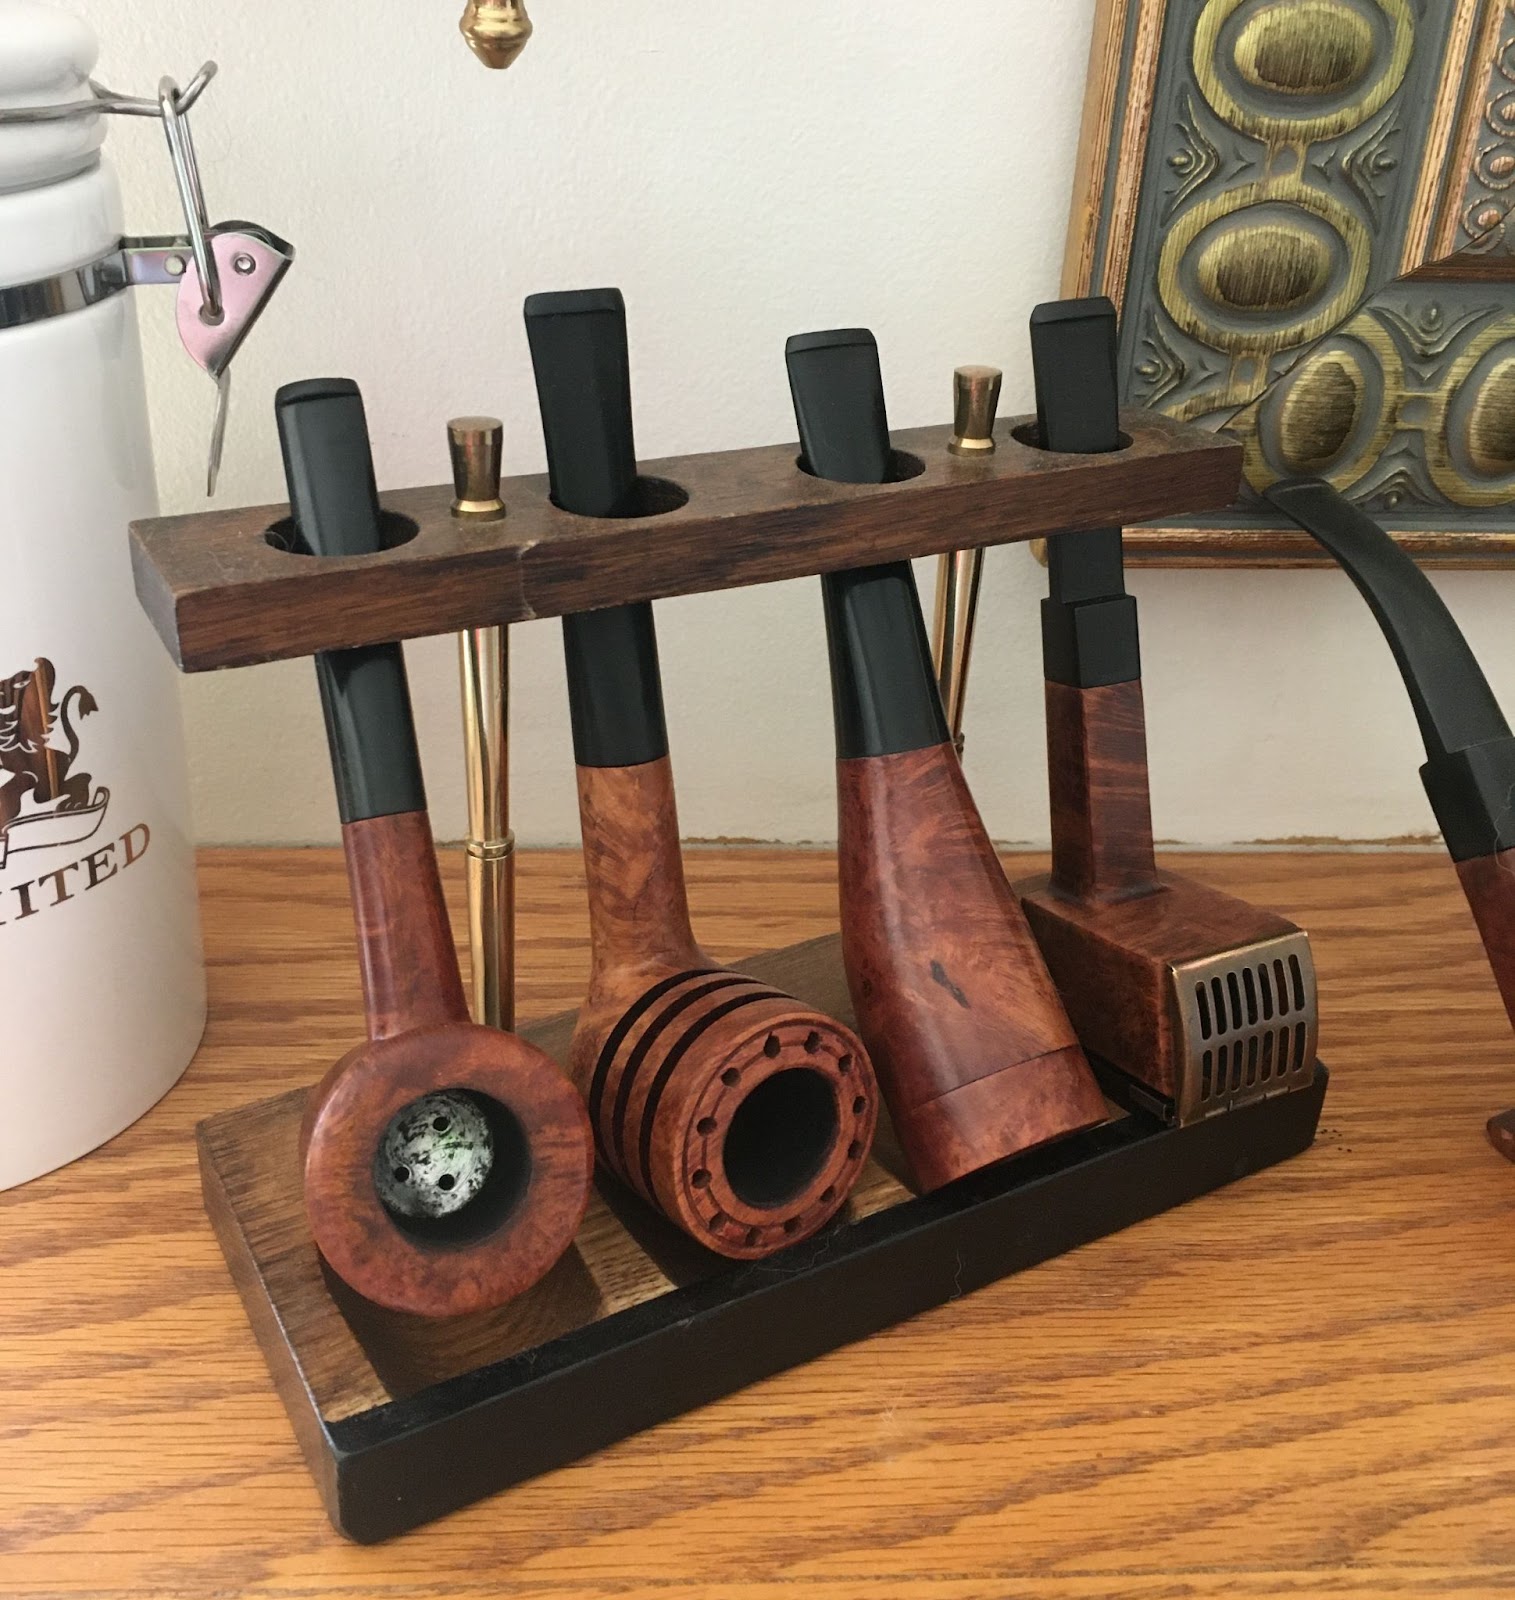
I love the oddities and curiosities, as I call them, regarding the designs of pipes. I have a 4 pipe rack on my mantle that holds pipes which rotate out occasionally as I find a new oddity. Currently they are; a c.1924 MLC Hell Maria, a Wally Frank Windcapped Horn, a Tracy Mincer Doodler and Weber Windpruf. These have all been featured in previous blogs and I linked their respective blogs to their name.
Medico’s Jet Stream fits in the category of oddities and curiosities with its uniquely streamlined shape and place in history. As a kid growing up in the late 1960s and 1970’s I remember advertisements for products using terms like “futuristic”, ”rocket age”, “space age polymers”, etc… Heck, George Jetson even sported a pipe back then,
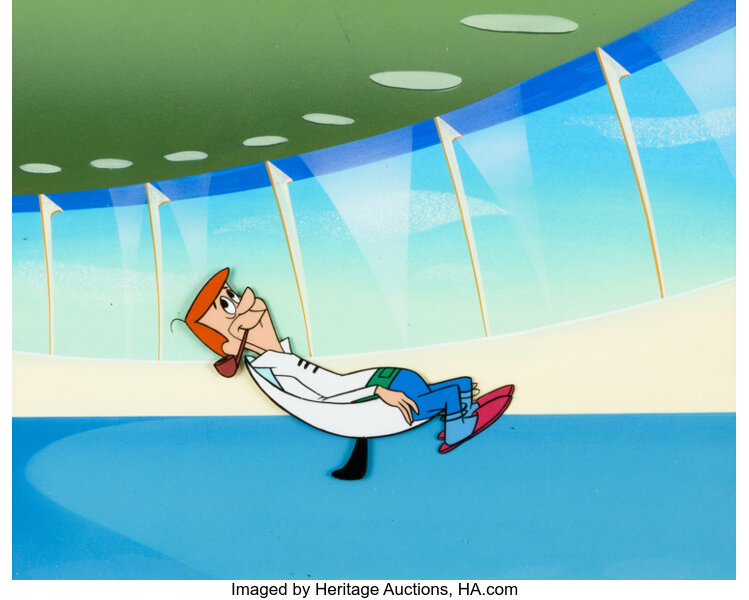
I would never accuse Mr. Jetson of contributing to my obsession with tobacco pipes or addiction to nicotine , rather that was the world some of us grew up in. This Medico Jet Stream epitomizes that world for me.
Background on Medico and the Jet Stream
Medico, as a company, has roots back far further than that. According to TobaccoPipes.com,
“When you trace the Medico tobacco pipes history, you have to trace it back to the origins of the company that created it. The company that originated the Medico brand is the S.M Frank & Co. This company dates back to the year 1900. In that year, a man named Sam Frank began selling pipes and related tobacco products. Eventually, the company began making its own line of pipes. With the help of an experienced pipe manufacturer, Ferdinand Feuerbach, the company produced the popular Royal DeMuth and Hesson Guard Milano tobacco pipes. The company continued to grow well into the early part of the 1930s.

So, where did Medico pipes come into the picture?
By the early 1930s, there were some concerns about the tars and nicotine found in tobacco smoke. In order to mellow out the flavor of hot tobacco smoke as well as to capture the tars and nicotine, the S.M. Frank & Co. introduced the Medico pipe filter. This is an absorbent paper filter that many people still use to this day. In order to accommodate the new filter, the company developed an accompanying brand of pipes known as Medico. That line of pipes continues in production today.
The company ended up buying some of their main competition in 1955. That year the Kaywoodie brands came under the S.M. Frank Company. The Medico brand continued production through this transition without many changes. The next big change for the brand came in the late 1960s. In 1966, the company developed a synthetic material that combined the traditional briar wood with resins. It is known as Brylon. At that time, all Medico pipes were made from imported briar wood. In order to keep production costs down, the company began offering some lines with Brylon. Today, that is still true.
Today, the Medico brand of pipes is still a top selling one for the S.M Frank & Co. This line of pipes comes in thirteen different finishes with five made of briar wood and the rest from Brylon. All come with the push bit with a filter inside. The filter is easily changed out when the smoker desires. In the briar wood finishes, this line includes the Silver Crest, Premier, Bold Rebel, Kensington, and Windsor. In the Brylon, the line includes the Lancer, Apollo, Standard, Varsity, Conqueror, Medalist, Cavalier, and V.E.Q. As far as price, the briar wood pipes tend to be higher in cost that the Brylon ones.” (Medico Pipes History | TobaccoPipes.com)
There was no mention of the Jet Stream in the above article. Further research into the Jet Stream led me to a post by Anthony Cook, on Steve Laug’s rebornpipes.com, from January 2015. Anthony was restoring a Jet Stream and wrote:
“This time, it was a Medico Jet Stream. These were produced by Medico from sometime around 1965 until 1971.” (Turbulence: Rusticating a Medico Jet Stream | rebornpipes)
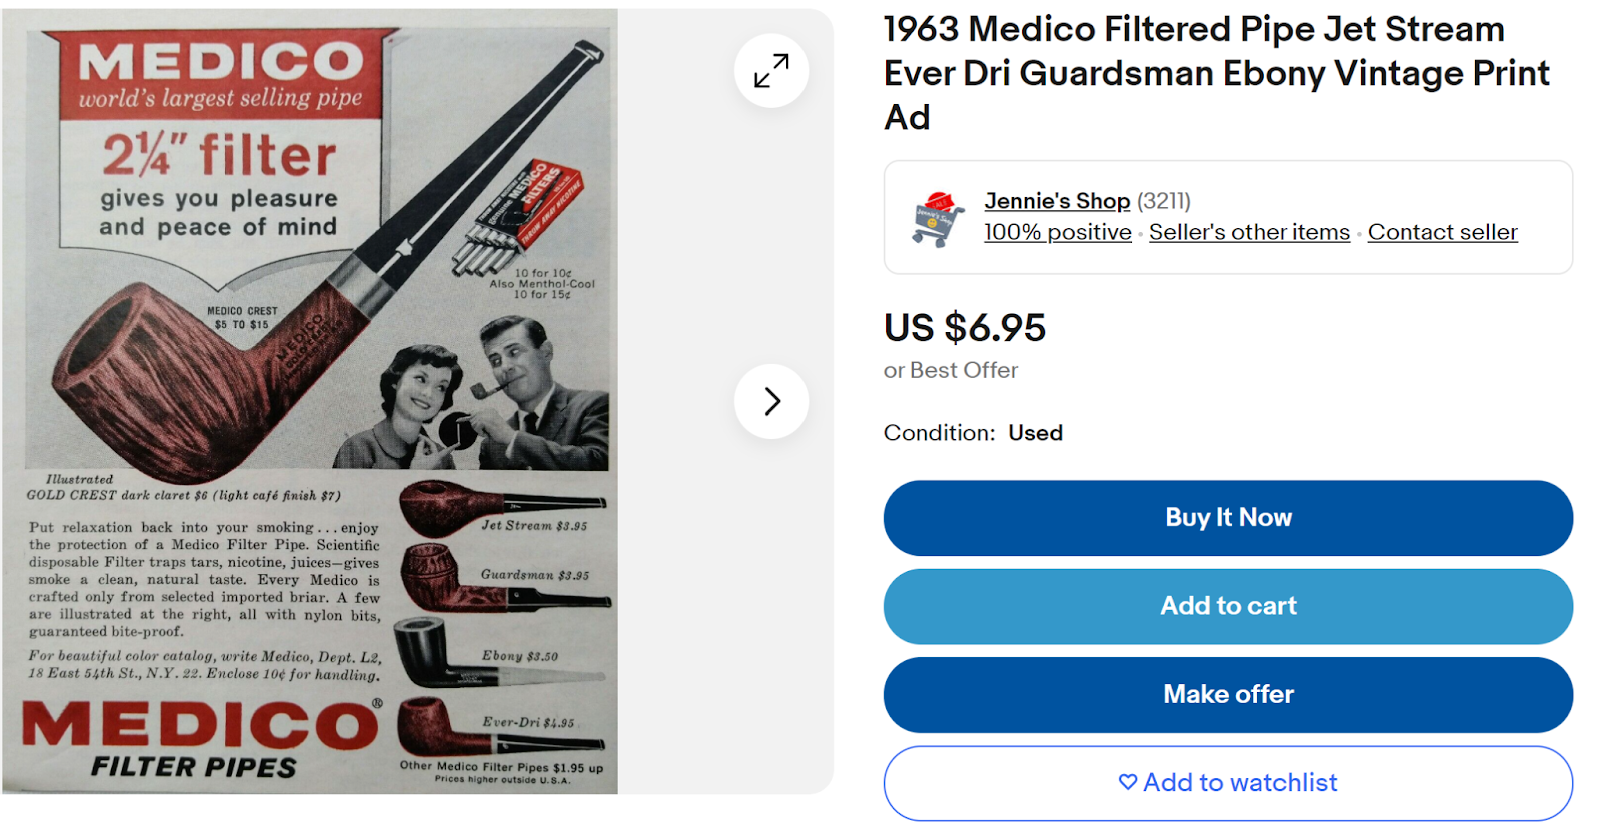
Further print advertisement evidence of the dating of Medico’s Jet Stream came from the listing of a print ad for sale on eBay:
The final place I looked was on the pipephil.eu site for the logo of a Jet Stream. This matched the stampings on the Jet Stream in hand.

(Medico — Pipes: Logos & Markings (pipephil.eu))
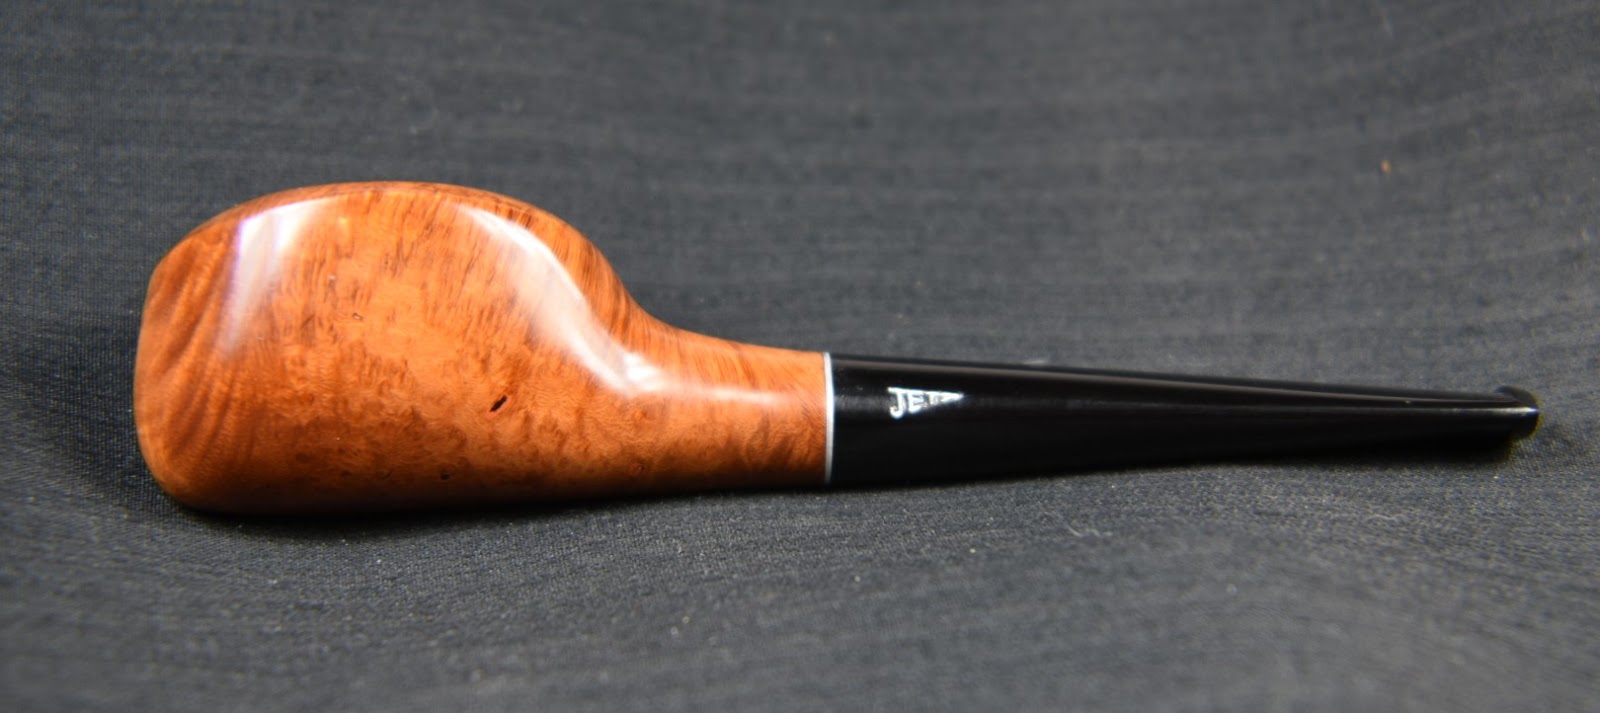
The below photo is of my Medico Jet Stream.

From all of the above I can pretty assuredly state that this Medico Jet Stream was produced sometime between 1963-1971.
The pipe upon arrival
This pipe came to me as one of 12 pipes in a lot from Minneapolis Minnesota. The Jet Stream was not the target of this acquisition. It was a bonus. Below are some photos of the condition of the pipe prior to any work being done.

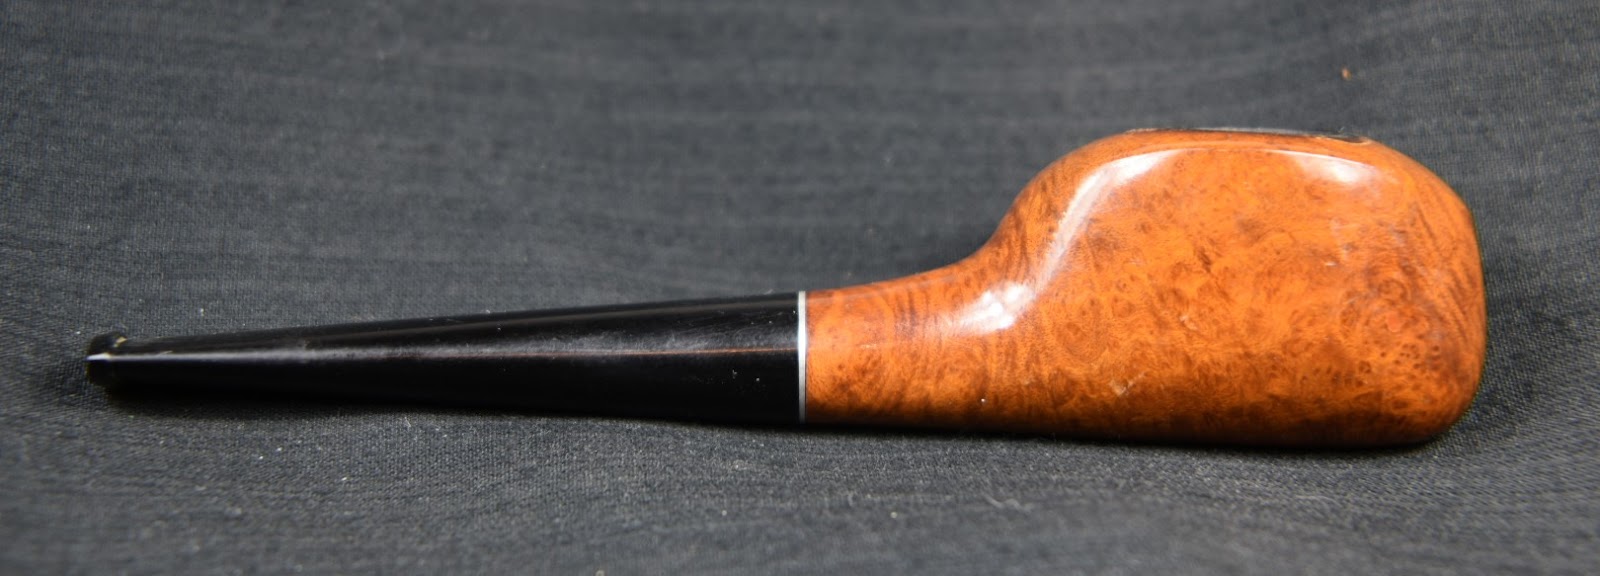


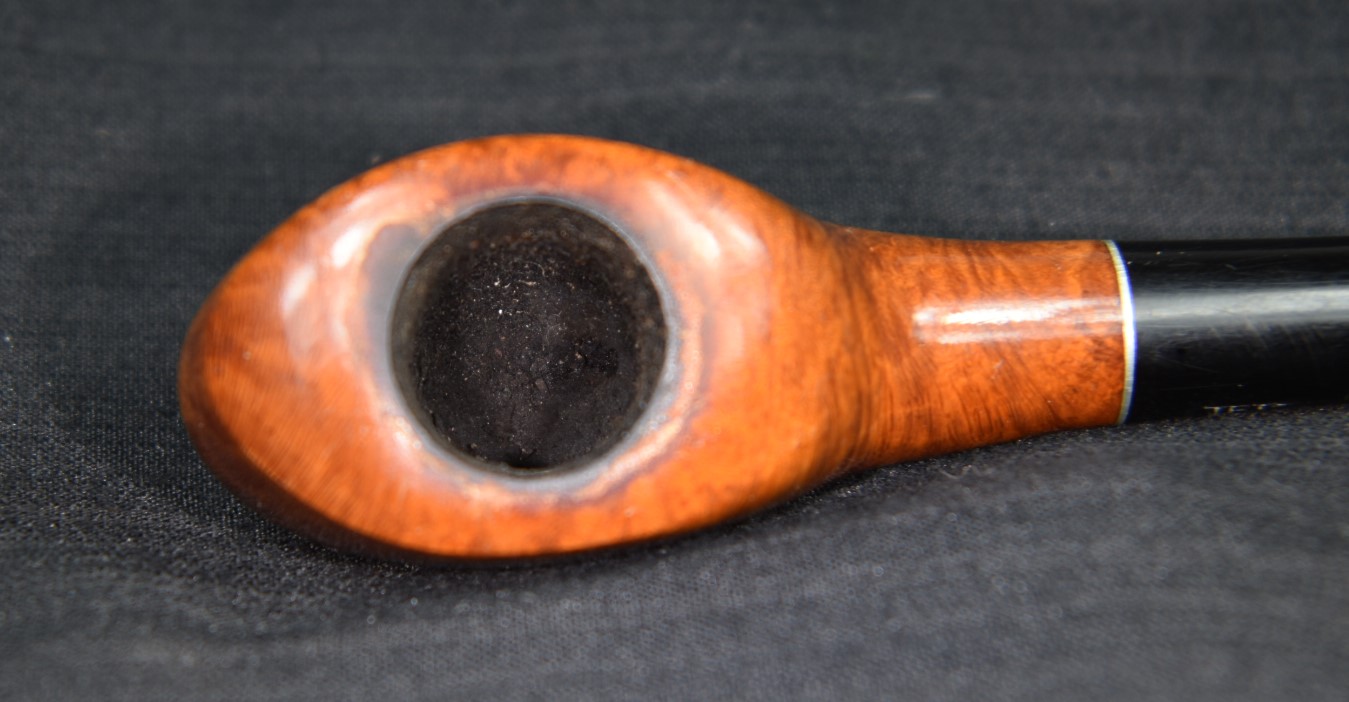


The little pipe was in very good condition. It had been smoked though not very heavily. There were some lava deposits on the rim and there was a light cake in the tobacco chamber. The filter within the stem showed obvious signs of use as did the tooth chatter on the stem. The finish on the pipe was a heavy clear coat which I hoped was not some “space age polymer”. This looked like it would be a relaxing evening restoration of a pipe that may share my birthday.
The Restoration
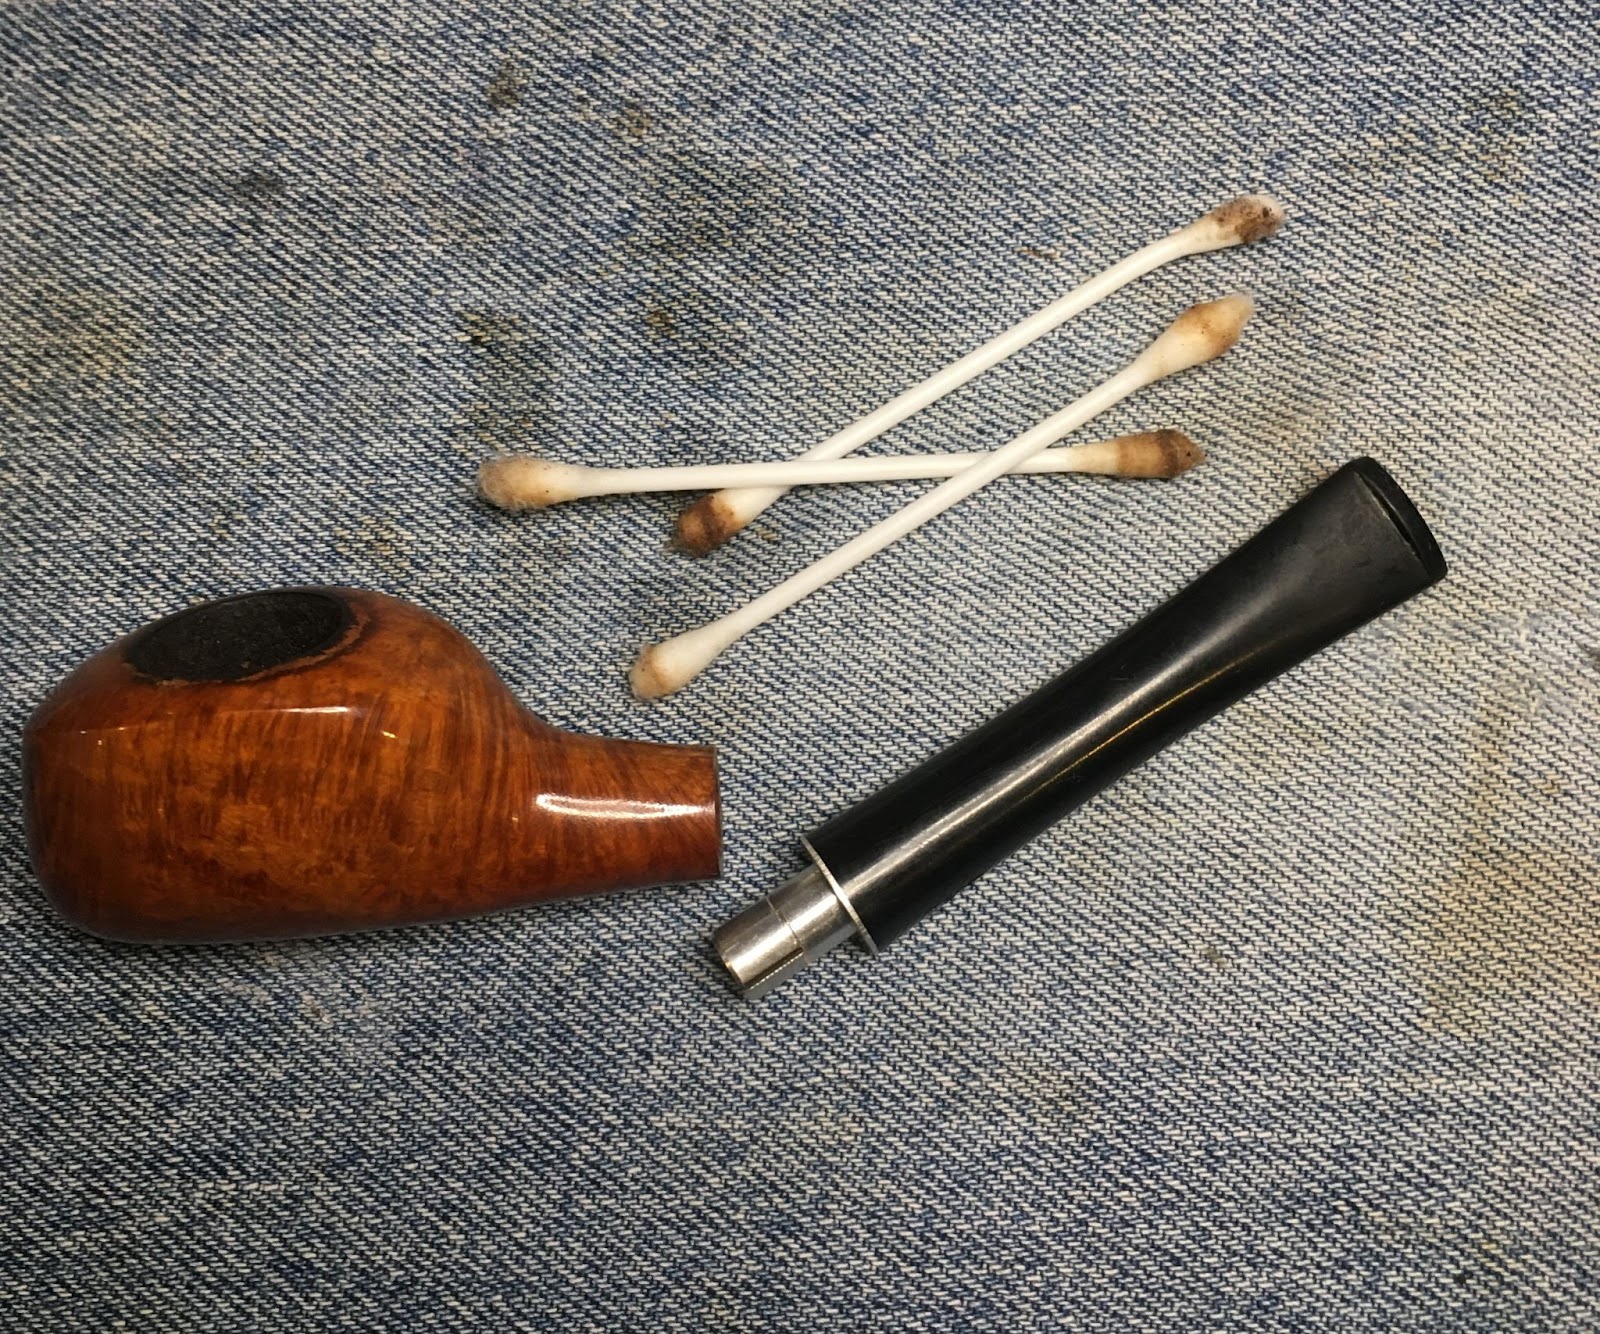
This restoration, like most, started with a clean denim piece as a work surface.

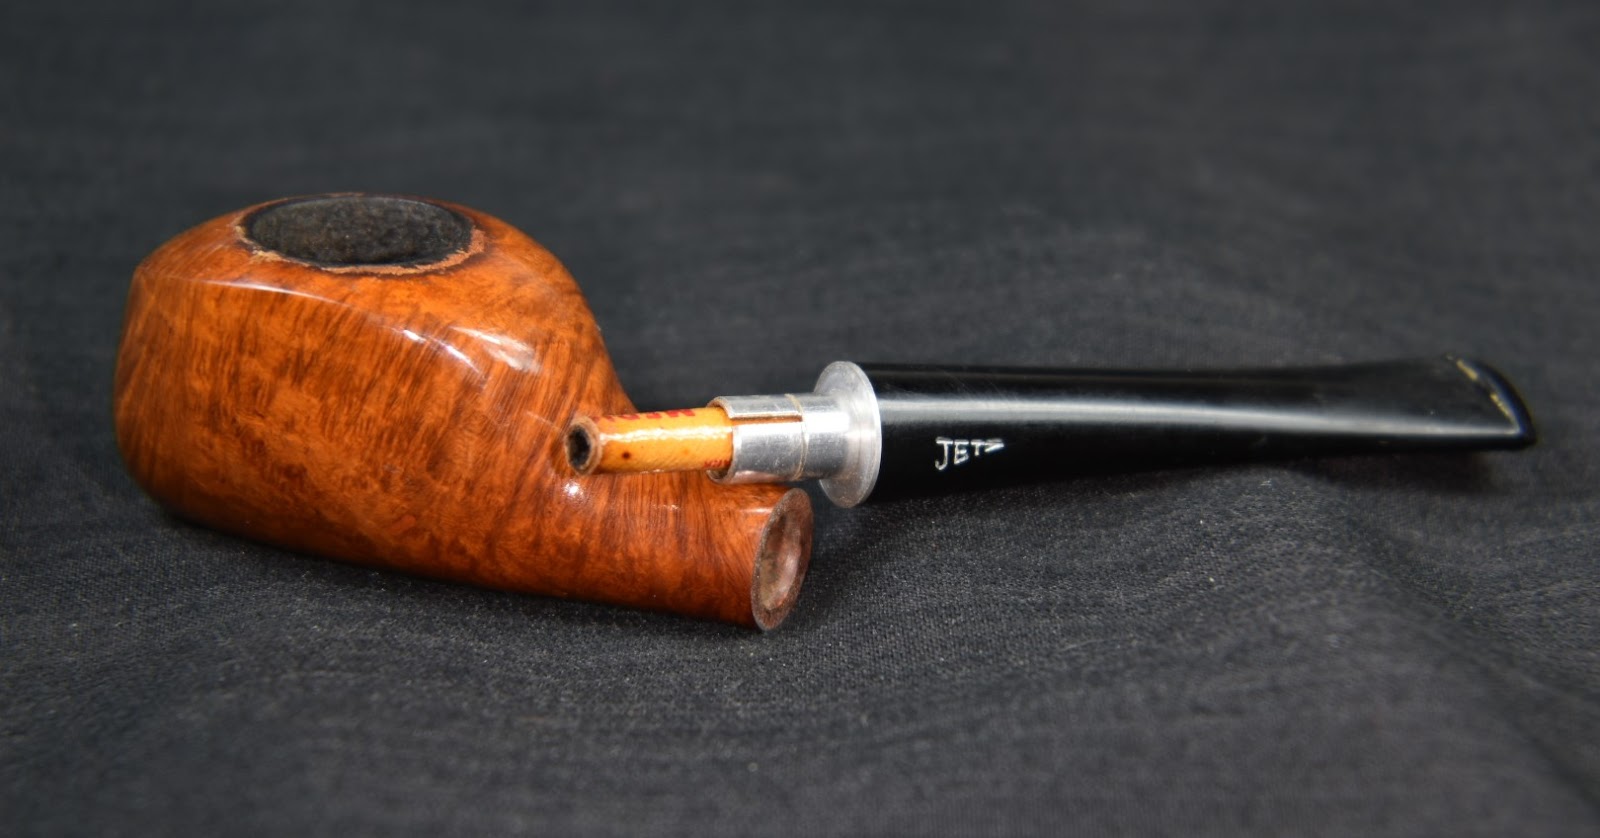
I started working with the stem. The aluminum tenon cleaned up quickly with cotton swabs and 99% isopropyl alcohol. Deeper in the stem whe airway changed to the plastic or nylon of the stem. Here the cleaning became a bit more difficult. The draft hole was 6 mm for a good deal of the length of the stem, the aluminum inner tube. This is to fit the 2 ¼ inch Medico filter length. Apologies for changing measuring units, there. There was a slight change in diameter where the draft hole changed from aluminum to plastic. This “step” seemed to have trapped and deposited smoking residues. The diameter was too large to be cleaned with a single pipe cleaner but a doubled over cleaner worked well.

The shank cleaned up very quickly. This indicated that the previous owner had not only smoked the pipe little but also used a filter regularly. The draft hole from the bowl to the shank was the typical diameter and was cleaned out with bristle pipe cleaners dipped in 99% isopropyl alcohol. I failed to photograph this.
Next I addressed the lava around the rim. The heat from smoking or from previous cleanings appeared to have removed some of the finish from the immediate rim. There also appeared to be some charring of the briar at the front rim area. I wetted the rim with saliva and scraped it with a sharp pocket knife.


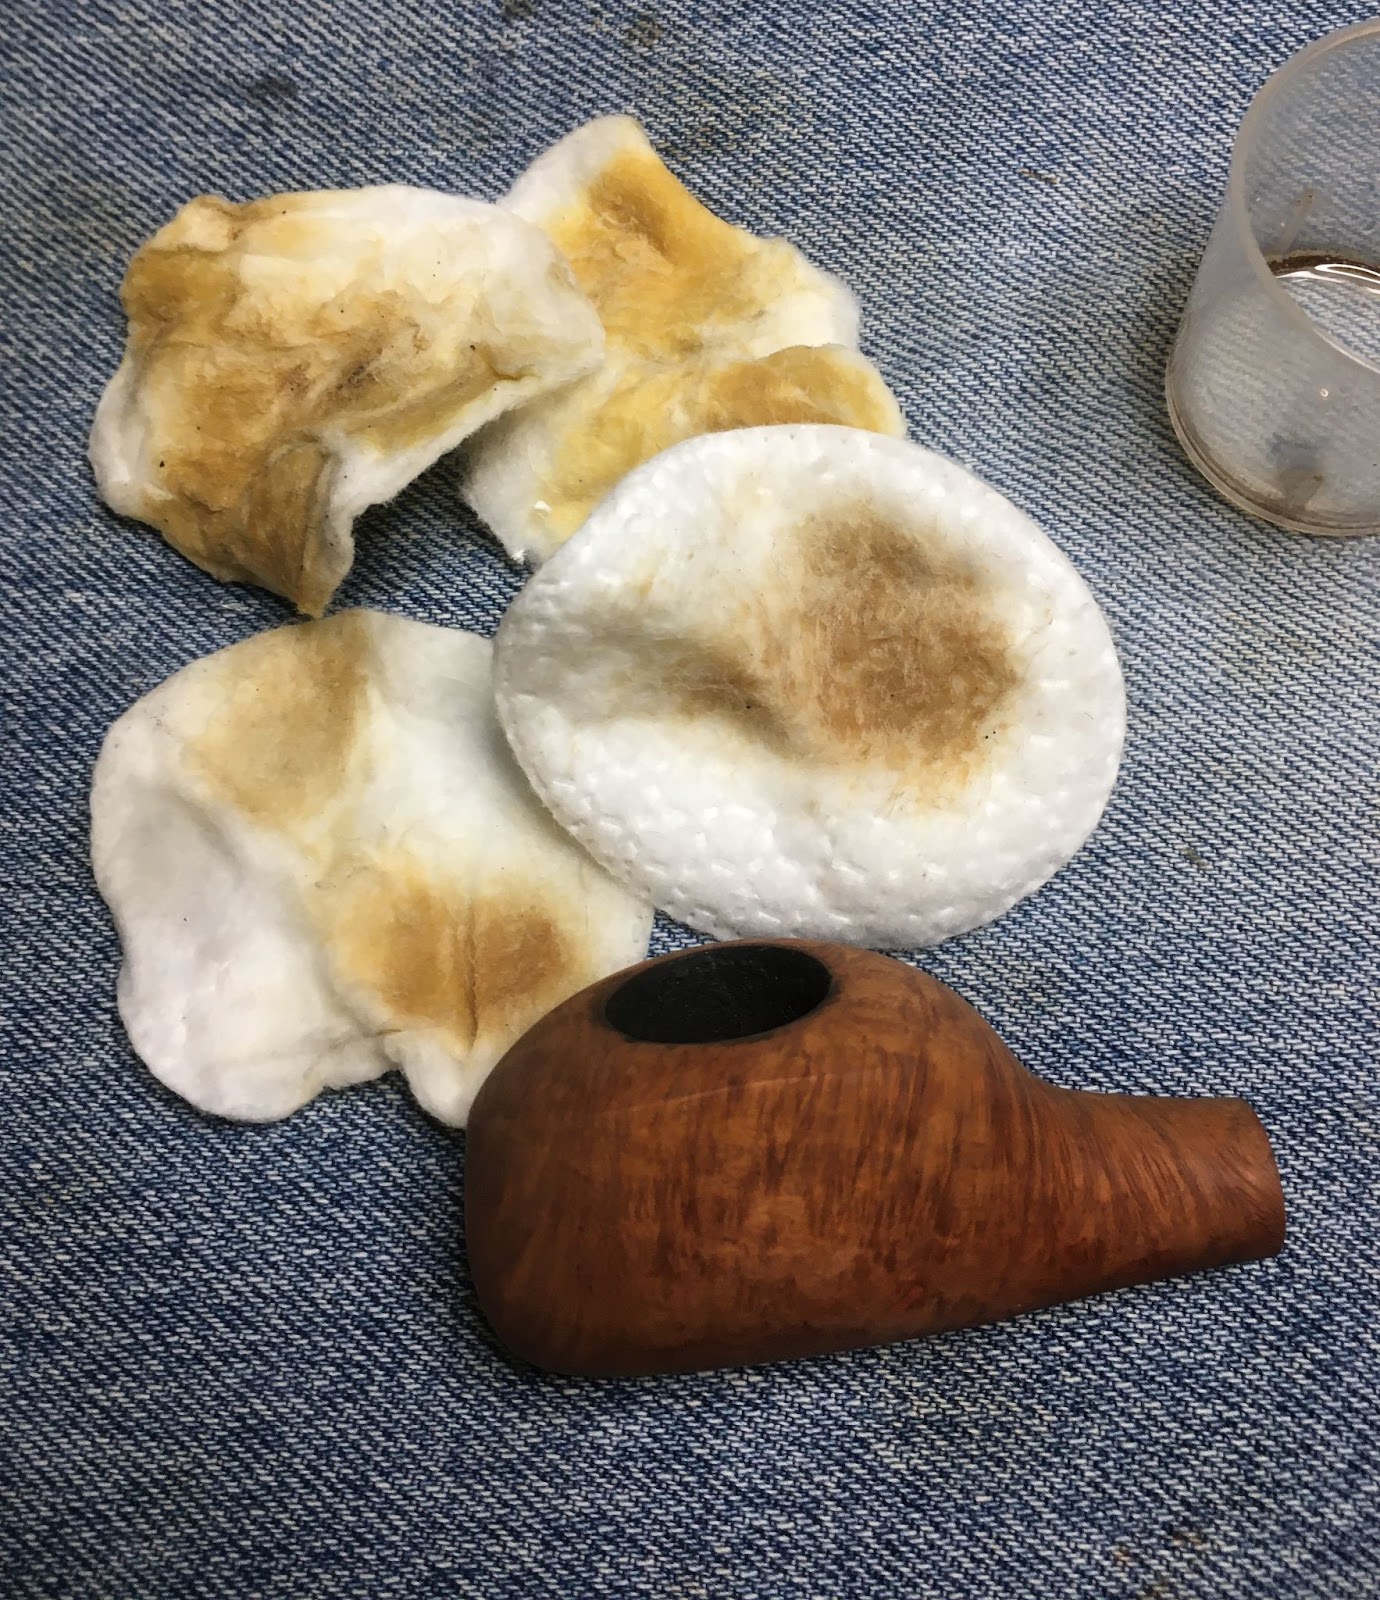
Next I tried removing the old finish with 95% ethyl alcohol. The finish laughed at me and remained untouched. Hmm. The next assault was with acetone on a make-up pad. This met with success.

Several acetone soaked make-up pads and cold fingers later, the finish was removed. I will admit to using a little bit of 0000 steel wool dipped in acetone as well for a couple of spots where the finish coating had pooled.
Next came the reaming. This bowl is small in size and due to the PipNet having a broken #1 blade, I was forced to use the Scottie Stainless Steel Reaming Tool.

The Scottie performed well and cleared out the cake. I only had to scrape a minimal amount and sanded the chamber with 220 sandpaper wrapped around a wood dowel and finish sanded with 320 sandpaper wrapped around a Sharpie marker. The chamber was taken down to bare briar and showed no signs of any damage.

Next I addressed a few of the fills that the pipe had received during manufacture. They were the pink wood fill that was used by many makers. These were hard and difficult to pick out.

In preparation for the sanding that comes with new fills I taped the stampings to protect them.
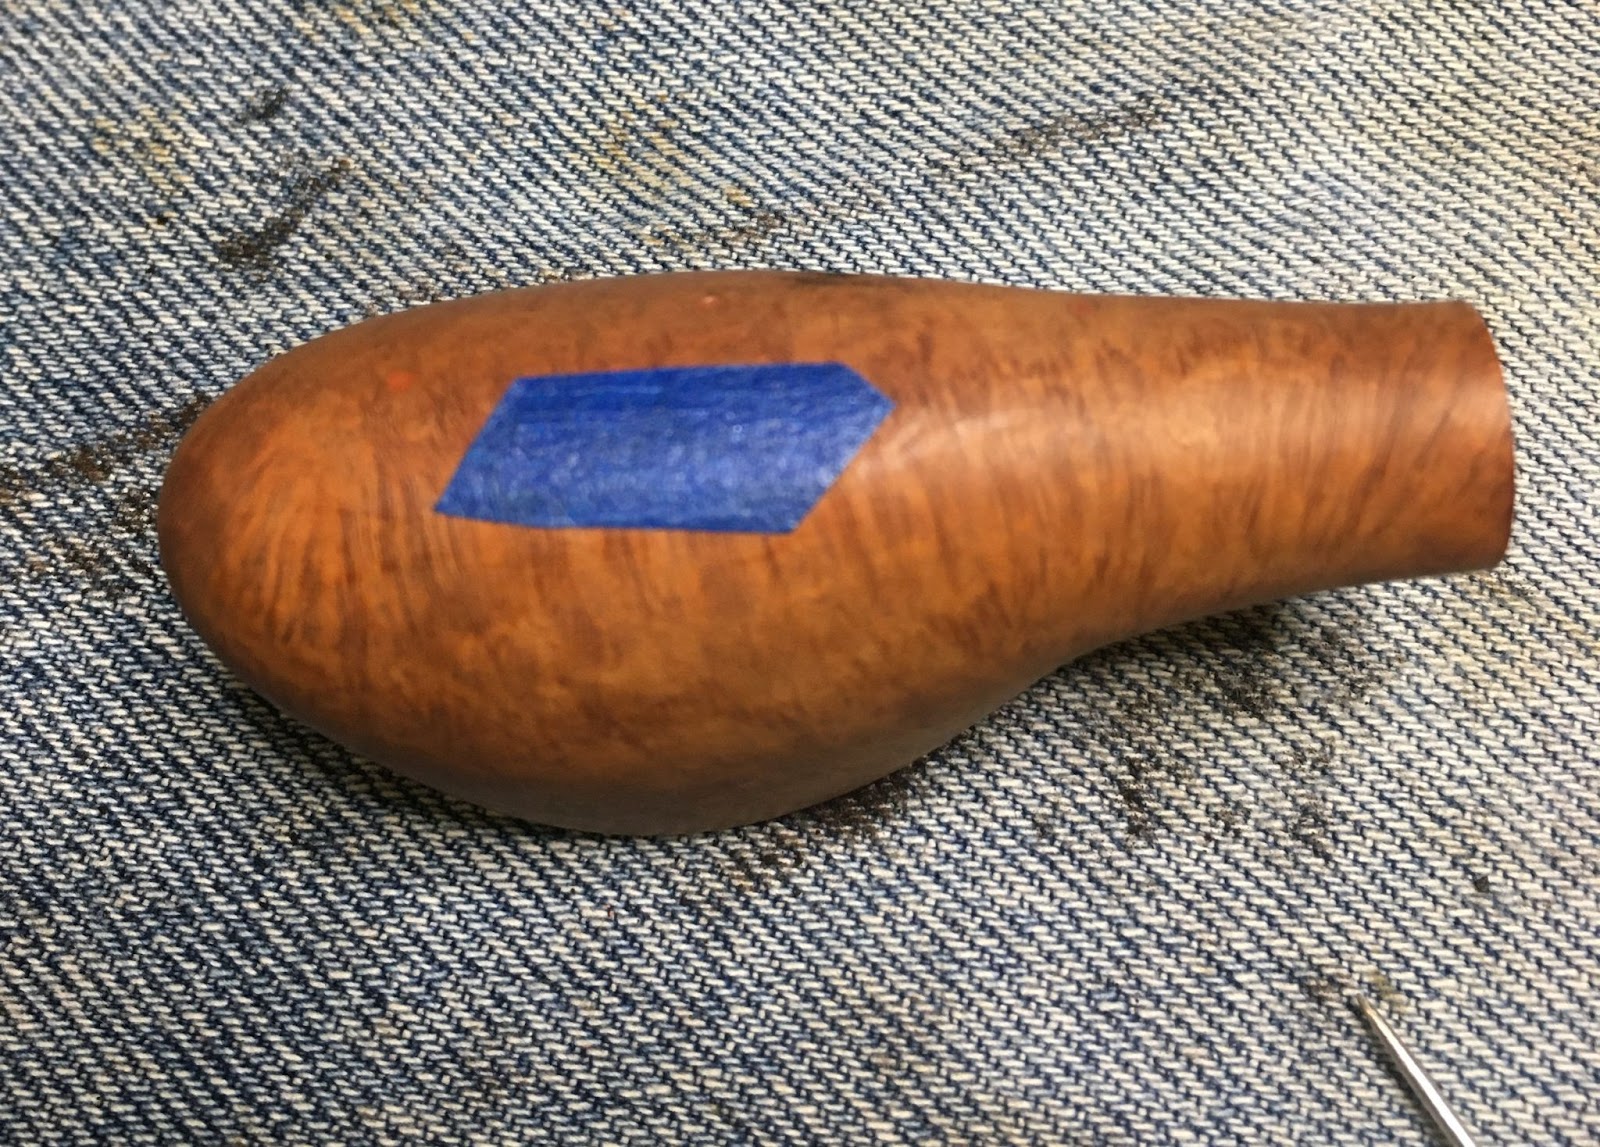
None of the replacement fills were very deep. I used brown cyanoacrylate (CA, super glue) and briar dust to fill the pits. The fills were then sanded with a 400 sanding sponge.

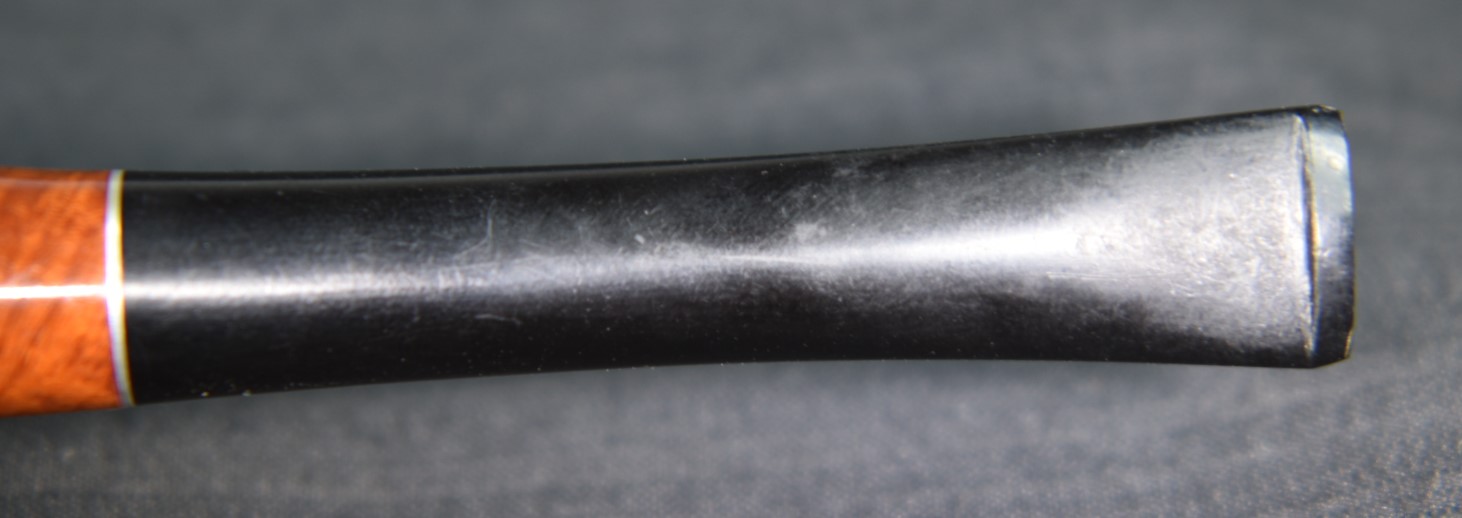
With The new fills finished I taped over the “Jet” logo to keep it safe from my sanding. None of the tooth chatter was deep enough to require filling with black CA.

I wanted the pipe to remain intact for the sanding to preserve the tight contact joints on the stummel from being rounded by sanding. I sanded both the stem and stummel with the sequence of sanding sponges from 400-1500. The stummel and stem were wiped with a make-up pad dipped in alcohol between each sponge. Since this pipe had a nylon stem, I did not worry about it discoloring like vulcanite would have with alcohol wipes.

The sanding progressed through the 200-3500 sponges followed by alcohol wipes as above. The protective tape was removed with the completion of the 3000 sponge.

The final smoothing and polish came from using the micro-mesh pads in sequence from 4000-12000. Again wiping between pads with the alcohol moistened make-up pad.

I applied a coating of Before and After Restoration Balm to the stummel and allowed it to sit for 30 minutes.
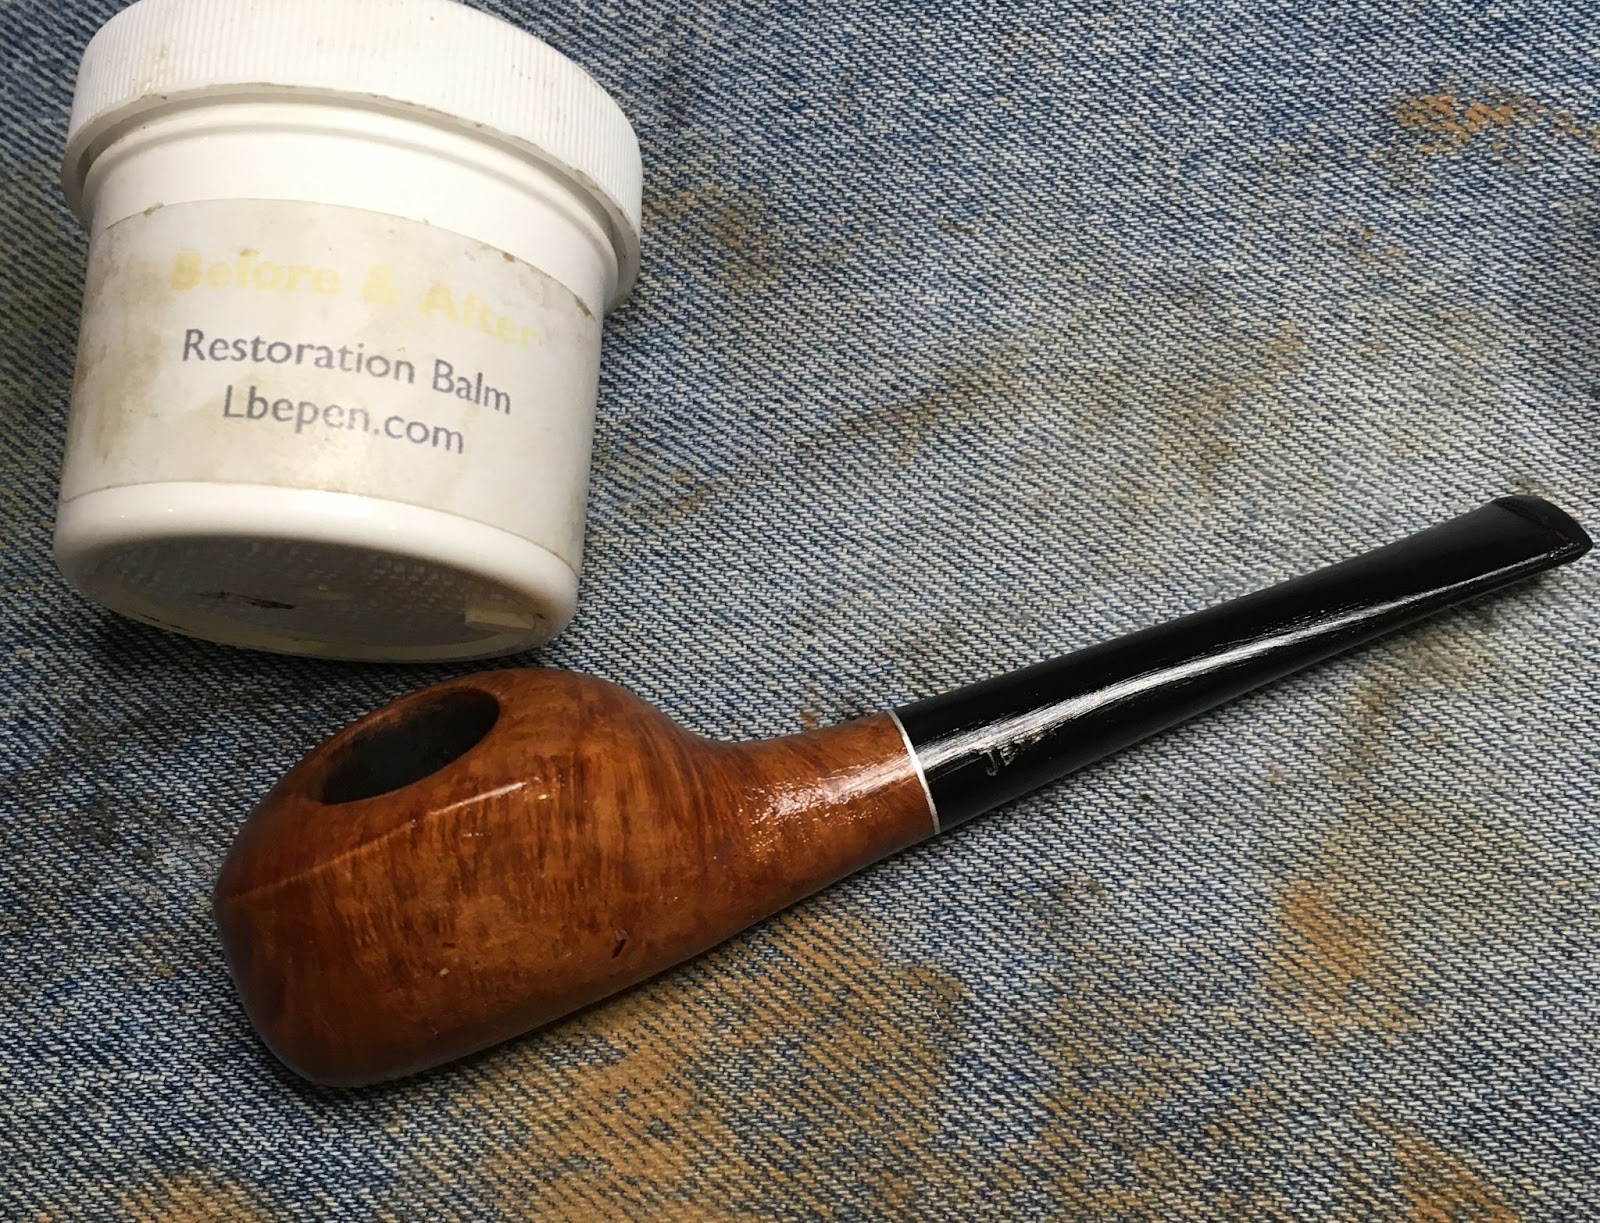
After 30 minutes the balm was wiped away using the inside of an athletic sock.

The “Jet” logo had gotten noticeably lighter with all the micro-meshing. I decided to paint it with a white acrylic model paint.
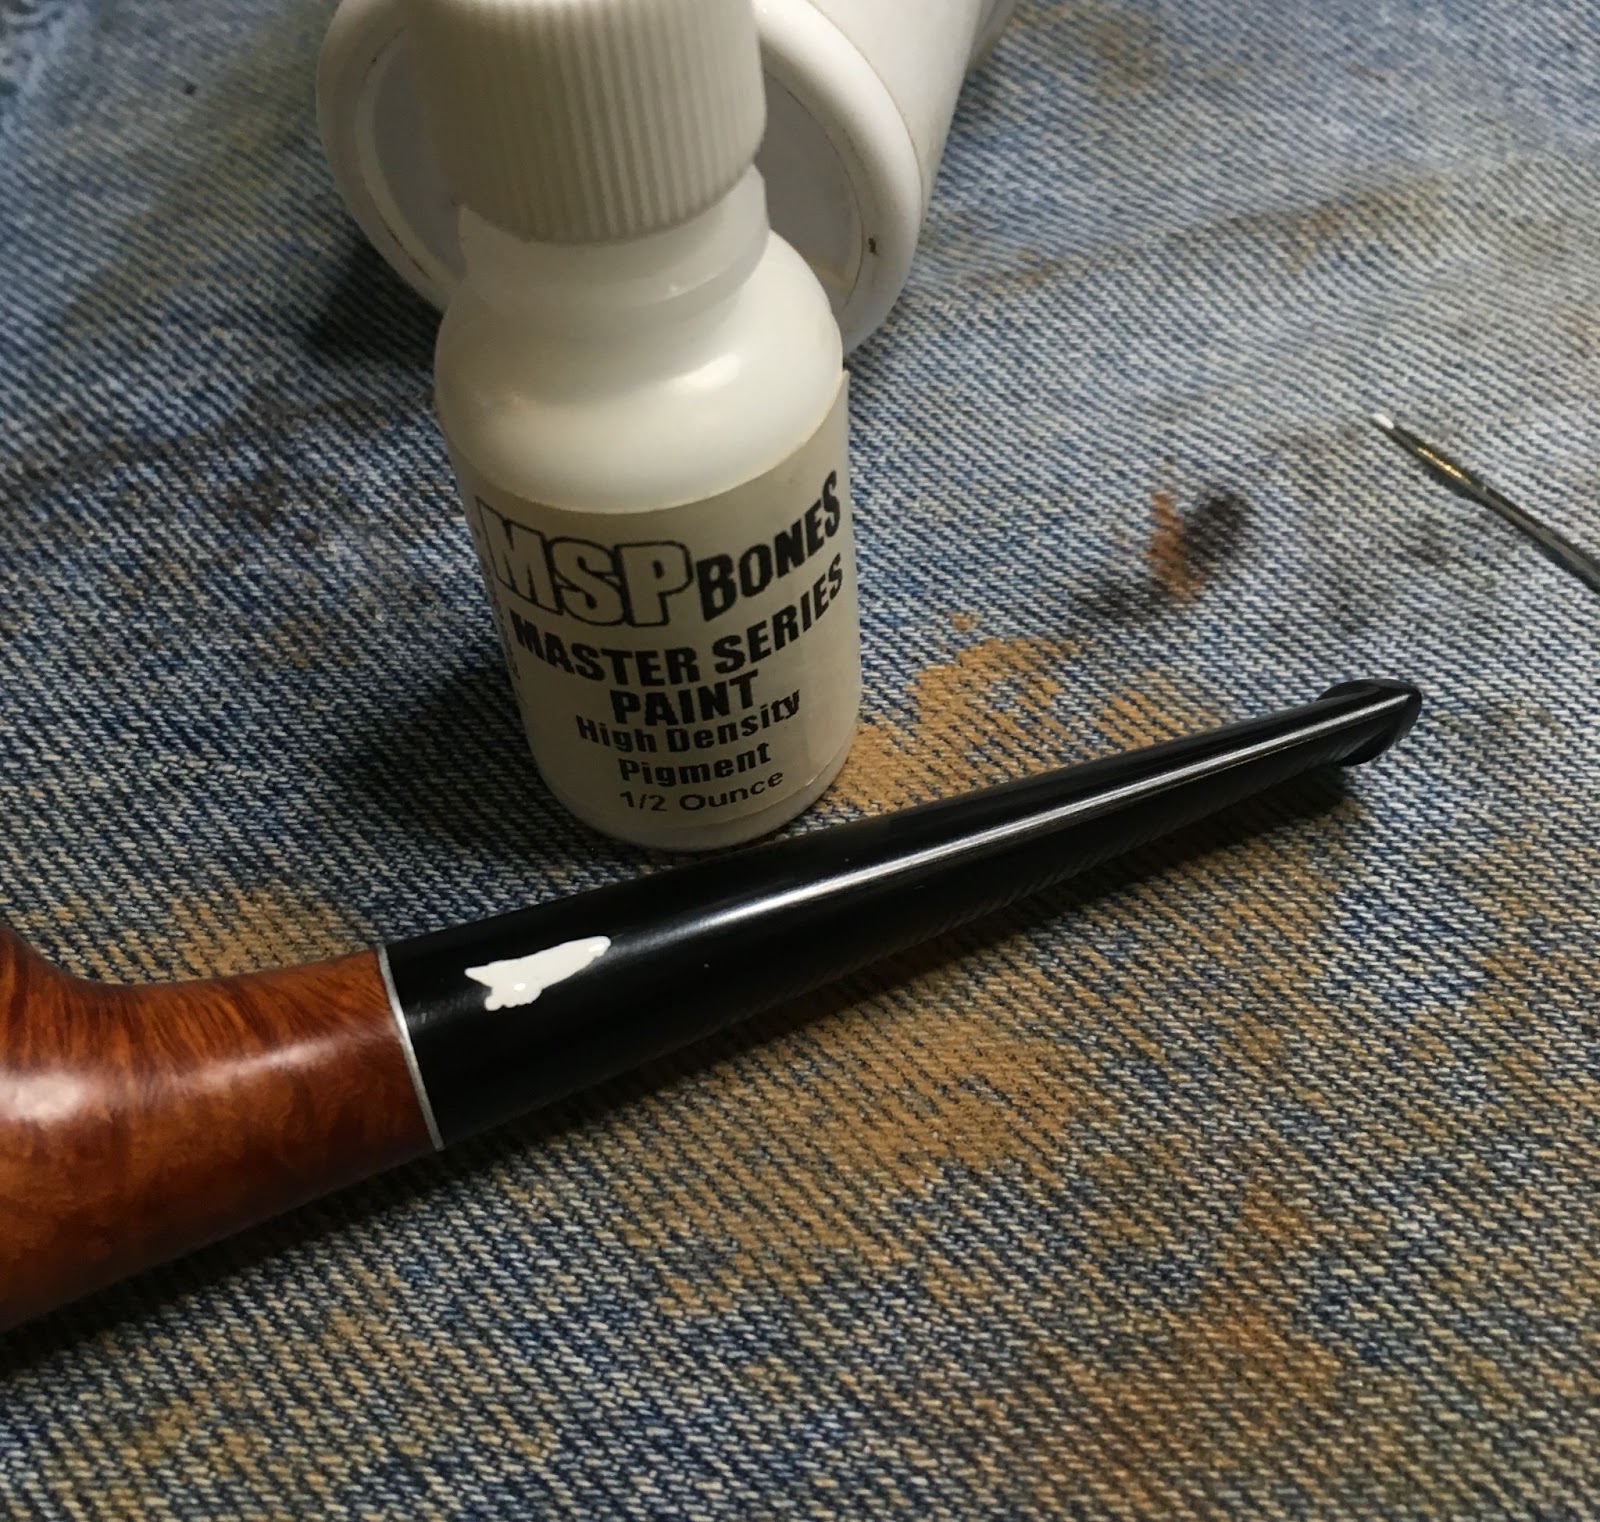
Once the paint was dry I lightly buffed the surface with the 4000 micro-mesh pad. In a couple of places I used the fly tying bodkin to scrape unwanted white paint from places between the letters.

The final steps of this restoration were to apply several coats of carnauba wax with the buffer.
Overall I am very pleased with how well this little Jet Stream turned out. I am not a fan of the clear coat finish and was quite glad to see it gone. The briar grain, though not spectacular, is nice. In hindsight, I think a contrast stain might have been interesting. The nylon stem sanded and polished better than I had thought it would. The light weight of this pipe would make for a very comfortable clencher but the small bowl is not something I would prefer. The dimensions of this pipe are as follows:
- Length: 5.37 in./ 136.40 mm.
- Weight: 0.88 oz./ 25.00 g.
- Bowl Height: 1.22 in./ 30.99 mm.
- Chamber Depth: 1.04 in./ 26.42 mm.
- Chamber Diameter: 0.75 in./ 19.05 mm.
- Outside Diameter: 1.30 in./ 33.02 mm.
I do hope that you have found something here useful to your own pipe care or restorations. If you like this sort of thing, please click the like and subscribe buttons. Thank you for reading the ramblings of an old pipe lover.
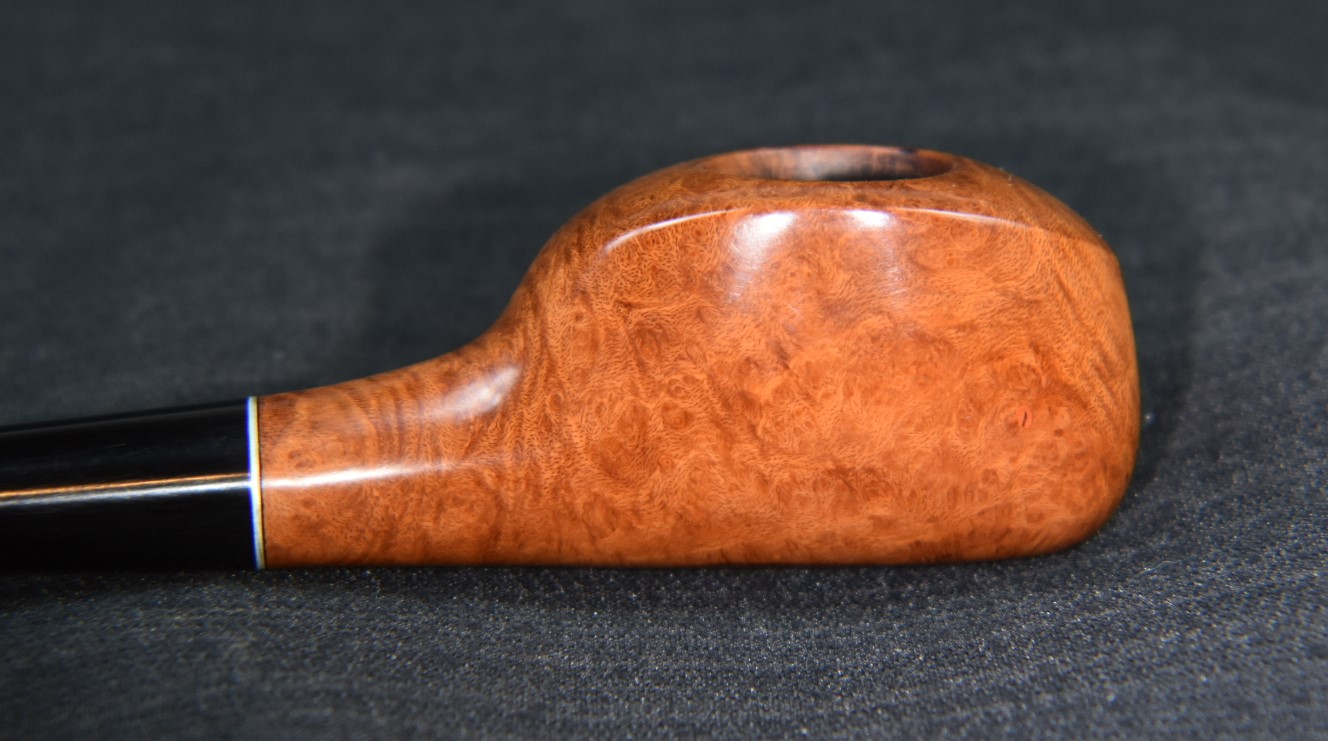
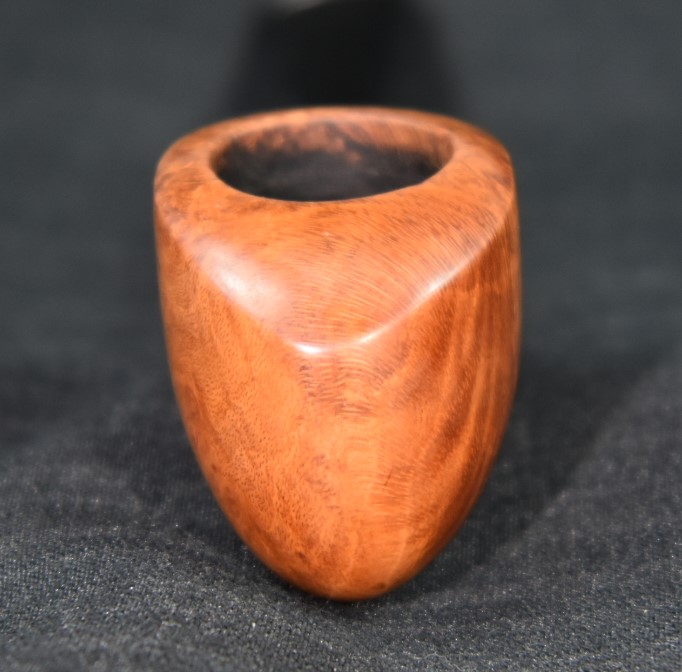
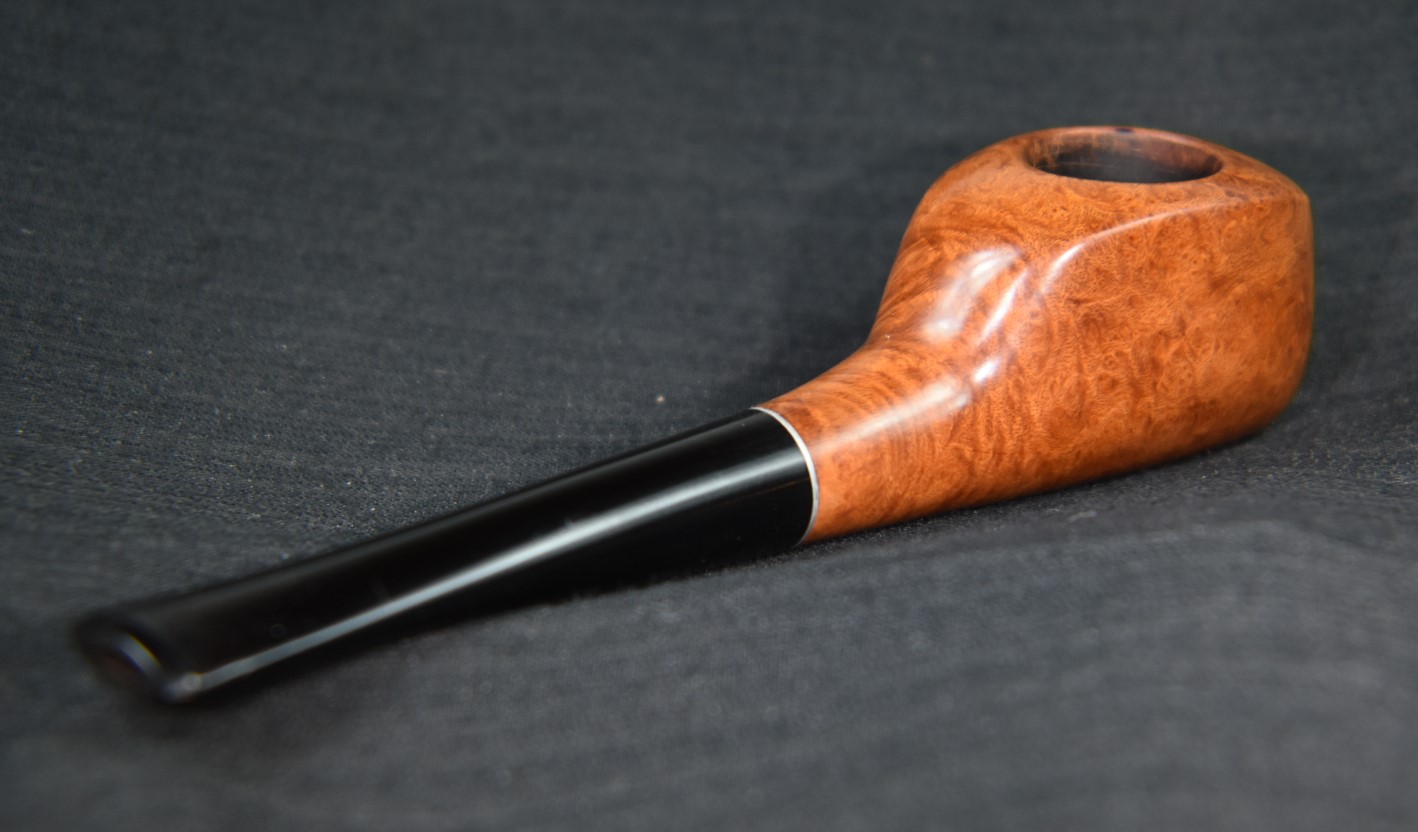
Below are some photos of the finished Medico Jet Stream.


3 responses to “A Medico Jet Stream Restoration”
[…] A Medico Jet Stream Restoration […]
LikeLike
Such a weird pipe! Great job.
LikeLike
Thank you. Heh, I think I prefer the term cute.
LikeLike