
Photographed and written by
John M. Young
I cannot say how many times I had picked up this London Briar apple and appreciated its dimensions and contours. Yet, time and again I set it aside to work on another pipe. The apple shape is a favorite of mine and this pipe has nearly perfect “apple” archetypal lines. Perhaps it fell to the wayside because of its more generic heritage and my snobbish attitude. Then I think back to my list of favorite brands and lines: Peterson, Marxman, Dr Grabow, Yello-Bole. Hmm, that pretty much rules out the snobbery, eh?
This pipe came as part of an estate lot. One of those purchases where it was along for the ride and not the object of my desire of the lot. Below are some photographs I took of the pipe before work was started.


Overall, the pipe was in very good condition. The acrylic stem was pretty much impervious to oxidation, saving me a good deal of work. Another positive was that the stem had not been the victim of chewing. It did have a dark streak from smoking residue though. The stummel had been given a clear coat finish which I do not like and will typically remove. There did not appear to be any significant fill which would require attention. The tobacco chamber was also quite clean and the rim looked nearly pristine. This had all the earmarks of a nice relaxing restoration.
Background
I cannot say that there is a lot of information out there on this pipe. Searches on both pipephil.eu and pipedia.org came up with nothing. Fortunately there is the great Steve Laug who has restored a very similar pipe and chronicled it very well. Here is the link to Steve’s restoration blog:
Didn’t Break a Sweat Cleaning this London Briar Brandy | rebornpipes
Unfortunately the link from Steve’s blog to the shop where these pipes were sold lists the link as:

(Page not found | Gauntleys Cigars)
I will quote from Steve Laug’s post,
“I had not seen the stamping London Briars before so I did some hunting on the web for the brand and found that the brand was made by/for Gauntleys of Nottingham. They sold new for £31.95 Here is the link to their site: https://cigars.gauntleys.com/uk/offer/gauntleys-london-briar-pipes
I quote directly from the site:
Gauntleys London Briar Pipes – Our London Briar pipes have become very popular since we introduced them just a few months ago. Each is made from selected second briar blocks from one of the country’s largest and most respected pipe makers.
If the briar was flawless these pipes would sell for over £250. These are from briar with small flaws in the grain or needing small amounts of filler so are great value. The briar is some of the finest in the world and can be up to 80 years old.
Each pipe is hand made in a range of classic English shapes and comes in a number of finishes from Smooth Brown to Black (Shell Briar) Sandblasted.
If you are looking for a first pipe or something to use around the house or garden the Gauntleys London Briars are very affordable and smoke like an entry level premium briar. Each pipe comes boxed with a silk bag.” (Didn’t Break a Sweat Cleaning this London Briar Brandy | rebornpipes).
The Restoration
The restoration of this great apple shaped piece began with a cleanish denim piece on the workbench.

The pipe’s tobacco chamber looked pretty clean but I kept getting whiffs that it may have been used for the smoking of non-tobacco. I have had experiences with marijauna smoking residue and it is never easy nor pleasant to deal with. This pipe had a slight aroma of the wacky weed yet there were tobacco fragments in the chamber. If it had been used for non-tobacco it was infrequent. I gathered the “ream team”, which included the PipNet, Smokingpipes Low Country reamer and General triangular scraper.

The number 2 blades of the PipNet made short work of the tobacco chamber with the Low Country reamer used for the bottom part of the chamber.

Below is a photo of the reamed chamber.

The draft hole was constricted so I used the Kleen-Reem draft hole drill to clear it.

Below is a photo of the drill in the airway.

The airway was cleaned with several bristle pipe cleaners, cotton swabs, both dipped in 95% ethyl alcohol, and some scraping with a dental scraper.

This stummel had a clear coat finish that I wanted to remove. I tried ethyl alcohol on a make-up pad and that didn’t touch the finish. I then tried acetone on a make-up pad. This too had little effect. I decided that a bath in acetone for 30 minutes would loosen or dissolve the finish.

While waiting for the acetone to do what it does, I started cleaning the stem. This was done with bristle pipe cleaners and 95% ethyl alcohol. The before photos show a distinctive dark stained airway. Once cleaned out the stem showed no signs of the dark streak.

After 30 minutes in the acetone I wiped the stummel with a make-up pad and some color and finish did come off but not enough for my liking, so I went back into the acetone for another 30 minutes.

After another 30 minutes the clear coat was relinquishing its hold on the briar. A light sanding while the finish was still soft removed it from the bowl. The finish remained on the shank.

The below photos indicate that further sanding and acetone wipes were needed.


Eventually the clear coat was removed. Below, you can see that the stem was reattached to preserve the joint where the stem meets the shank as well as the painters tape protecting the stamps.

WIth the finish removed I sanded the stem and stummel with a series of sanding sponges in grits from 320-3500. Between each sponge I wiped the pipe with a make-up pad wetted with ethyl alcohol.

After the sanding sponges I worked the pipe with micro-mesh pads 4000-12000, again wiping the pipe as above.

I gave the stummel a coating of Before and After Restoration Balm and allowed it to sit for 20 minutes.

The Restoration Balm was wiped from the stummel using an inside out athletic sock.

The pipe was then taken to the buffer where the stem was buffed with white buffing compound before the entire pipe was given several coats of carnauba wax. The final step was a hand buffing of the pipe with a microfiber polishing cloth raising the shine to the levels which can be seen below in the “finished” pipe photos.
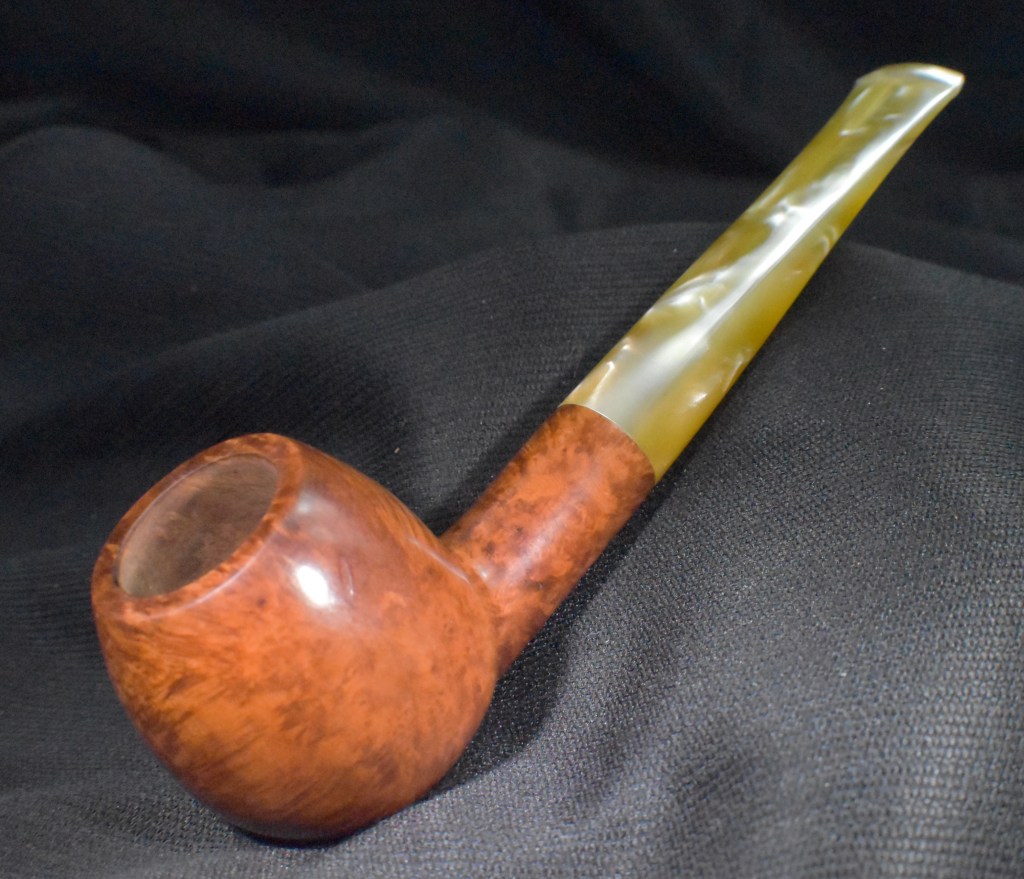
There is something about the apple shape that just fits for me. Perhaps it is because I share a well rounded shape. This apple caught my eye as a wonderful example of the shape and turned out beautifully. The acrylic stem cleaned up nicely and demanded attention with its bright pearlescent yellow. The briar grain, though not unattractive, is rather muted. I wonder if I should have tried to accent the grain more with a contrast dye. Still the cross grains at the front and rear of the bowl are pretty. The best part of the pipe is the hand feel, this apple just fits in the hand with the perfect plumpness. The dimensions of the London Briar Apple are:
Length: 5.74 in./ 145.80 mm.
Weight: 1.52 oz./ 43.09 g.
Bowl Height: 1.66 in./ 42.16 mm.
Chamber Depth: 1.49 in./ 37.85 mm.
Chamber Diameter: 0.74 in./ 18.80 mm.
Outside Diameter: 1.55 in./ 39.37 mm.
I do hope that you have found something here useful to your own pipe care, maintenance or restorations. If you like this sort of thing, please click the like and subscribe buttons. Thank you for reading the ramblings of an old pipe lover.
Below are some photos of the finished London Briar Apple.


