

Photographed and written by
John M. Young
I recently received a lot which included a couple of Danish pipes. They were all gloriously dingy and well used. I know, not everyones’ cup of tea but for me, heaven. The first of the pipes that I selected was a Stanwell. I had restored a Stanwell POY 1997 for my son-in-law as a birthday present but I only one other Stanwell had ever crossed my workbench.


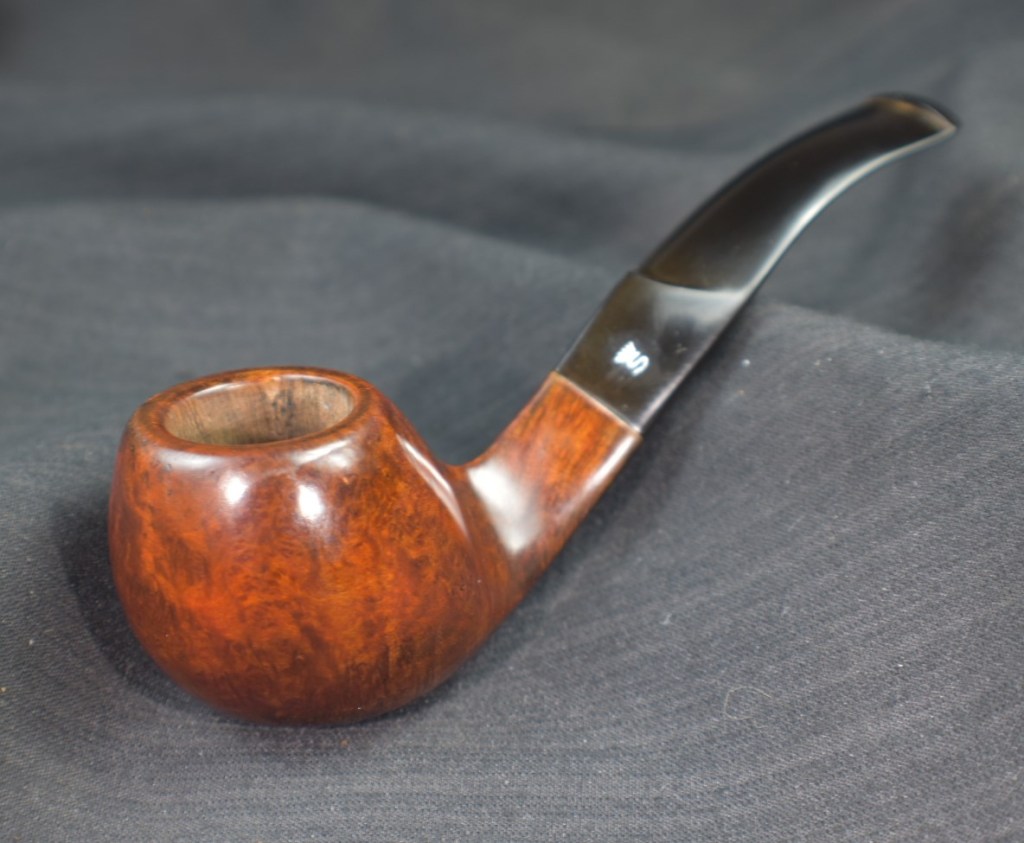
This pipe was stamped 07 over STANWELL over HAND MADE over DENMARK. The lot came from Sacramento, California via an eBay auction and a safe road trip provided by the United States Postal Service to the wilds of southeast Nebraska. Below are some photos of the Stanwell 07 upon arrival.


The previous owner apparently liked to keep the tobacco chamber clean as there was no buildup of cake present. The pipe had obviously been smoked more than the bowl indicated. The stem had calcium deposits and tooth dents indicative of long term but not hard clenching. The finish was degraded and worn as would be expected of a well smoked and less well cared for companion pipe.
Background
The following is taken from pipedia.org and is an article from smokingpipes.com, included here in its entirety, italics were added by me save for the final sentence.
“When pipe smokers talk about pipes that are consistently great smokers, exhibit the creative and beautiful designs that exemplify Danish pipemaking and offer the best value in factory produced pipes, they are talking about Stanwell. We hear time and time again, from customers and top pipe makers from around the world, that Stanwell is the best factory produced pipe in the world. Stanwell maintains the most modern pipe making facility in the world and for many years has enjoyed some unique relationships with many legendary Danish pipe makers. In fact, Stanwell occupies a pivotal place in the history of the world-wide popularity of Danish-made pipes. During WWII, Danish pipe smokers could no longer buy the English made briar pipes they preferred to smoke. In 1942, because of the unavailability of English pipes and raw briar, Poul Nielsen began making pipes from beech wood for Danish customers. At the time, Poul was managing a company called Kyringe, which made various wood products.
At the end of the war, briar became available again, so Nielsen began importing his own briar and started making briar pipes to compete with the English manufacturers. It must be remembered that in 1948, England was the single great center for pipe making. Therefore, Nielsen changed the name of his pipes to “Stanwell”, which sounded much more like a proper English name than “Nielsen”. He also created the horse drawn carriage logo for its English connotations. He later changed his own last name from Nielsen to Stanwell, a testament to his devotion to the pipes he made. Stanwell’s relationships with Danish pipe makers goes back to Sixten Ivarsson, who is considered the originator of modern Danish pipe making. Ivarsson was commissioned to design Stanwell shapes. In 1969, the factory was moved a town called Borup, just outside of Copenhagen to be closer to Ivarsson.
Stanwell revolutionized the pipe world with his new factory; until its debut, very few pipes were exported from Denmark. It was the Stanwell factory that first began mass exportation of Danish pipes and first whetted the appetites of Americans and Germans for the Danish pipe. Today Stanwell produces around 300,000 pipes annually. Stanwell relies on designs from the great Danish pipe makers, from Sixten Ivarsson to Jess Chonowitsch from which they create their hundreds of shapes. Since most sandblasting for Danish pipemakers is done at the Stanwell factory (Stanwell has a reputation for excellence in sandblasting that is used by many, many Danish carvers from Poul Winslow to Jess Chonowitsch), many of the pipes that they sandblast are then observed and used as starting points for Stanwell shapes with the consent of the original carvers. This interesting and unusual symbiotic relationship gives Stanwell the opportunity to offer hundreds of unusual and interesting shapes at an affordable price.
Once a new shape is established and hand carved, it is then reproduced using a lathe. Following the initial carving of the pipe which is done by machine, all other processes are done by hand, from the final sanding and staining to the application of the wax finish. There are approximately 120 manual steps to Stanwell’s pipe making process. The Stanwell factory is arguably the most efficient pipe operation in the world. It is this efficiency that has made Stanwell so remarkably price competitive and able to offer pieces of superior quality to those created by other large factories.
Essentially the goal of Stanwell is, and always has been, to produce high quality pipes at a price that is truly within the reach of the common man. In this they have succeeded admirably, offering perhaps more pipe for the money than any other pipe manufacturer in their price range. Stanwell pipe offers exceptional quality at a remarkably affordable price. Today it often seems that there are few options in between low cost, very low quality pipes and the handmade pipes that fetch hundreds of dollars. Stanwell manages to fill this void commendably by offering pipes close to the quality of the handmade with prices that are only slightly higher than drug store pipes.
Stanwell pipes are a must for any pipe collection. The Stanwell name is a cornerstone of Danish pipe making. In owning a Stanwell, you will not only enjoy beautifully styled, great smoking pipe at a great price, you will own a piece of pipe making history.
This is the end of smokingpipes.com material” (Stanwell – Pipedia)
- 07. Two versions of this shape number:
a) Slightly bent Zulu-Canadian hybrid with an oval shank and a short tapered stem, by Sixten Ivarsson.
b) Bent apple with a triangular shank and saddle stem.
(Stanwell Shape Numbers and Designers – Pipedia)
There is a section in the pipedia.org article concerning the HAND MADE designation: “Pricing Information in 1970s

1979 Tinder Box Catalog page featuring Stanwell pipes, courtesy Doug Valitchka
- Hand Made, (smooth walnut, brown and black sandblasted) $13.60 USD” (Stanwell – Pipedia)
If I had to proclaim a date of manufacture for this pipe I would venture to say this is a HAND MADE Stanwell 07 from the 1970s.
The Restoration
As usual I began by placing a laundered denim piece on the worksurface.

This restoration started with the stem. I figured that it would need to soak in a solution of OxyClean to loosen the oxidation from the surface of the vulcanite. To speed the process alon I lightly sanded the stem with a 320 grit sanding sponge before the Oxy bath.

I do not recall the concentration of the OxyClean and water and admit that this solution has been used numerous times since its original formulation. As it still works, i’ve no mind for remixing it.

During the Oxy bath, I turned my attention to the stummel. The reaming tools were assembled though mostly unneeded.

The PipNet saw very little action but did it’s job gloriously. The scrapers also were not really required.

I did sand the chamber with 220 sandpaper wrapped around a wood dowel and could see no sign of any damage to the chamber from excessive heat. The below photo was taken prior to the sanding.

The stummel was taken to the sink for a scrubbing. Undiluted Murphy Oil Soap and a medium bristle toothbrush were used for the scrubbing.

I also scrubbed the airway with a nylon shank brush and a small amount of Dawn dish soap. The soap was rinsed with copious amounts of warm water and the stummel dried with a cotton dish towel.

Upon returning to the work bench the stummel was wiped with a make-up pad dipped in 95% ethyl alcohol. Very little color was removed from the surface of the stummel.

I repeated the wiping with a make-up pad wetted with acetone. Again, surprisingly little color came off the stummel. The stummel did appear much darker than it had prior to the scrubbing.

I sanded the stummel with a 320 sanding sponge to see if I could lighten the now dark stummel and re-wiped with both alcohol and acetone, respectively. Dark briar dust came off but no real lightening of the briar.

I allowed the stummel to dry for several minutes and sanded again with a 600 grit sanding sponge. The dark surface remained. Perhaps this was the “walnut” stain referenced in the HAND MADE description from the pipedia.org article?

I continued to sand and reshape the rim and rim bevels while thinking about how I wanted this pipe to look when finished. I used a 2 inch polyvinyl Chloride (PVC) pipe cap wrapped in 220 sandpaper to reestablish the inner rim bevel. I did not think the dark color accentuated the briar grain and did not really like the color.

At the counter I lightly topped the rim with 220 sandpaper laid flat, followed by 400 sandpaper. I sanded in a circular motion rotating the stummel in my hand 90 degrees after a few circles. This was repeated 3 more times to keep even pressure on the rim while sanding.

I wondered how a saturated oxalic acid solution would affect the color of the briar. In the past I have had mixed results in trying to “bleach” briar using oxalic acid. I have a jar containing a saturated solution and painted some of the solution onto the stummel with a cotton swab.

The effect was very fast and quite dramatic. The solution lightened the briar in front of my eyes. I allowed the solution to work its magic for 10 minutes. After 10 minutes I rinsed and lightly scrubbed the stummel with warm water.

Upon drying I was happy to see briar of the color which I was more accustomed to.


I could also see a single spot which I needed to fill with cyanoacrylate (CA, super glue) and briar dust.

With the briar/stummel situation dealt with, I returned to the stem. I removed the stem from the Oxy bath and dried it with paper towels. I started scrubbing the oxidation from the stem with Soft Scrub on make-up pads. The first several pads were heavily stained with oxidized rubber.

Eventually the oxidized material was removed and the stem coated with mineral oil.

The airway of the stem was cleaned with bristle pipe cleaners and 95% ethyl alcohol.

The stem cleaning had given me time to think about how I wanted the stummel to look. I decided that I wanted a darker base with a touch of reddish orange. To do this I first needed to dye the stummel black. I know you are probably thinking, “What? You just spent all that time lightening the stummel.” Yeah, I did. But this black was going to be something that I was in control of, not the weird unknown dark that was removed.

Black Fiebing’s Leather Dye was applied to the stummel with a folded pipe cleaner and flamed with a lighter.

This black dye was then sanded from the surface of the stummel leaving the black to penetrate deeper into the soft grained briar and not penetrate as much into the harder grained briar.

When wetted with alcohol the light grained briar had a nice brown color contrasting well with the black. It was lacking the reddish orange that I wanted though. I mixed a wash of 50% Feibing’s Orange Leather Dye with 50% ethyl alcohol. The alcohol was 95% ethyl. This wash was applied with a cotton swab and flamed with the lighter.

The stummel was then taken to the buffer where I buffed the freshly orange dyed briar with a flannel buffing wheel and rouge buffing compound.


I am not sure why but the sanding of the stummel and stem of this pipe were very poorly photographed. I am having trouble thinking of any reason for the oversight other than forgetf,,, What was I talking about, again? Anyway, I know I did sand both with the series of sanding sponges and micro-mesh pads. I also bet that in between each sponge and pad I wiped the surface with either alcohol, for the briar, or mineral oil, for the vulcanite. I do remember that I failed to repaint the stem logo prior to polishing the stem and had to go back and repair the white.
I cleaned the logo thoroughly with a cotton swab dipped in alcohol.

I then used a white acrylic modeling paint to the logo. Before the paint was completely dry I used a piece of thin plastic to scrape over the top of the logo. This scraped the paint from the high spots leaving the stamped depressions. A few minutes later the paint was completely dry and the logo was hand buffed with a cotton rag.

The pipe then was taken to the buffer where it was given several coats of carnauba wax. I then hand buffed the pipe with a nanofiber polishing cloth and took the finished photos.
I think this Stanwell 07 is ready to return to a smoking lifestyle. The contrast dye may not be a perfect match to the original walnut but I like it. I looked through many photos of Stanwell pipes and the number of reddish tinted versions are darn near 50%. The stem polish up very nicely and is a great combination of angels on top with a nice curve below. It seems like such a small detail but the triangular stem with a curved bottom adds tremendously to this pipe. I do believe that this pipe will be a Christmas present for my son-in-law. His name is Sebastian and the Stanwell logo is very fitting. Don’t tell him. The dimensions of the Stanwell 07 Bent Apple with a Triangular Saddle Stem are:
Length: 5.07 in./ 128.78 mm.
Weight: 1.59 oz./ 45.1 g.
Bowl Height: 1.65 in./ 41.91 mm.
Chamber Depth: 1.35 in./ 34.29 mm.
Chamber Diameter: 0.79 in./ 20.07 mm.
Outside Diameter: 1.67 in./ 42.42 mm.
I do hope that you have found something here useful to your own pipe care, maintenance or restorations. If you like this sort of thing, please click the like and subscribe buttons. Thank you for reading the ramblings of an old pipe lover.
Below are some photos of the finished Stanwell 07 Bent Apple with a Triangular Saddle Stem.


5 responses to “A Stanwell 07 Bent Apple with a Triangular Saddle Stem Restoration”
nice post
LikeLike
Thank you.
LikeLiked by 1 person
Beautiful work on the Stanwell. You choice of finish was a good call. I used to smoke Stanwells almost exclusively. A great looking pipe at a fair price. Since Stanwell moved their production out of Denmark, it looks like the quality has gone down whle the price remains the same. Shame.
LikeLike
Thank you for the kind words. The encouragement is appreciated. I wasn’t sure what color to go with there. I looked at a number of photographs of Stanwells. Their walnut looked too dark for the grain of that pipe.
LikeLike
[…] pipes. The last one I had worked on and blogged about was back in June of 2024. Here is that link if you’d care to read it. The funny part was that the restored Stanwell from […]
LikeLike