Photographed and written by
John M. Young
Well, my Peterson Pipe Acquisition Disorder (PPAD) has once again come out of remission. I didn’t think that self medicating and meditation via fishing would keep it at bay for very long and I was correct. Go me! How could I say no to this little darling when it appeared with a buy now price less than ½ that of a new spigot. As soon as I got the notification I looked and clicked the “hello PPAD button”.
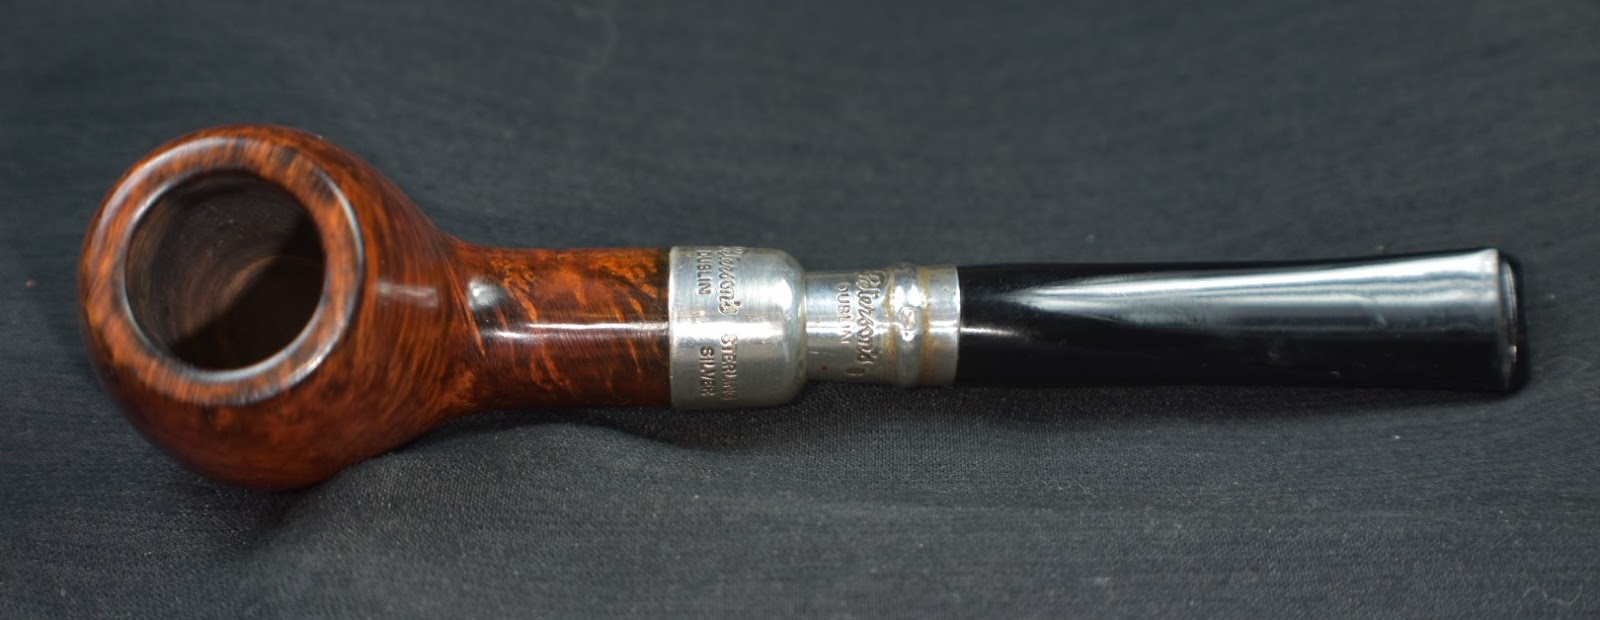
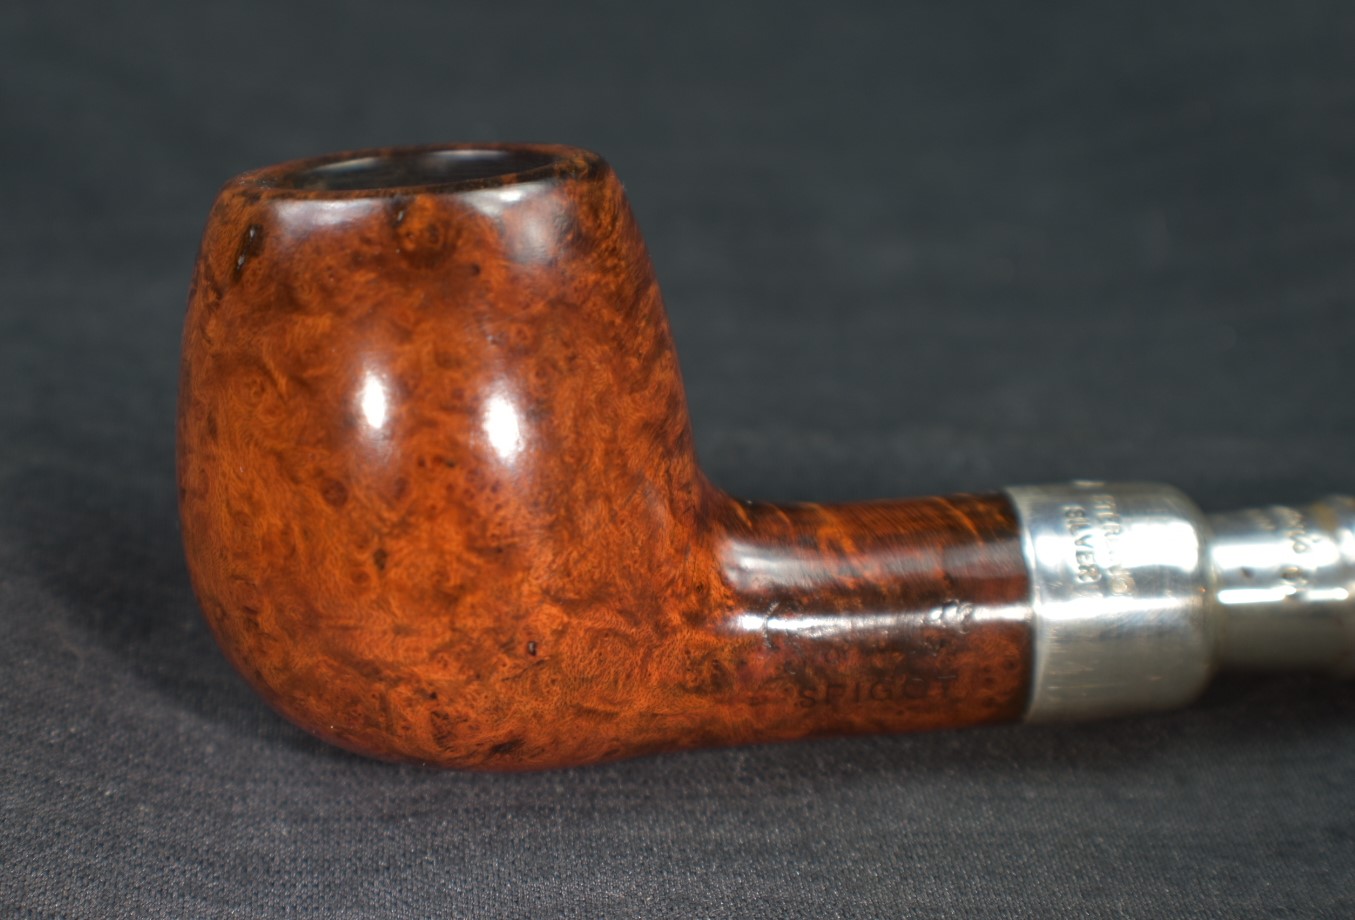
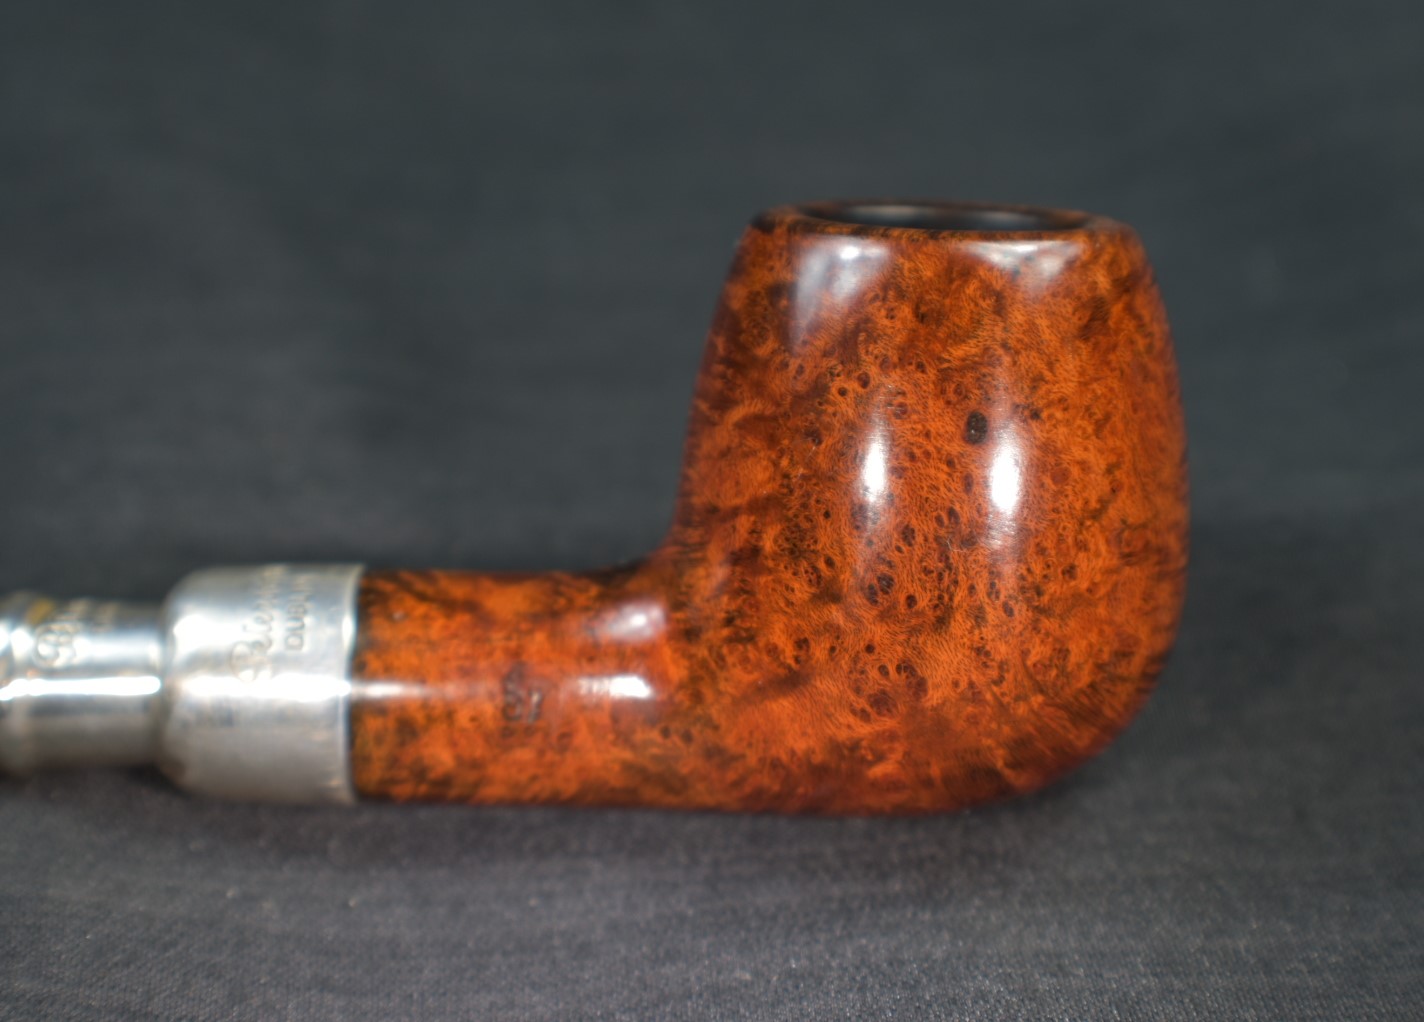
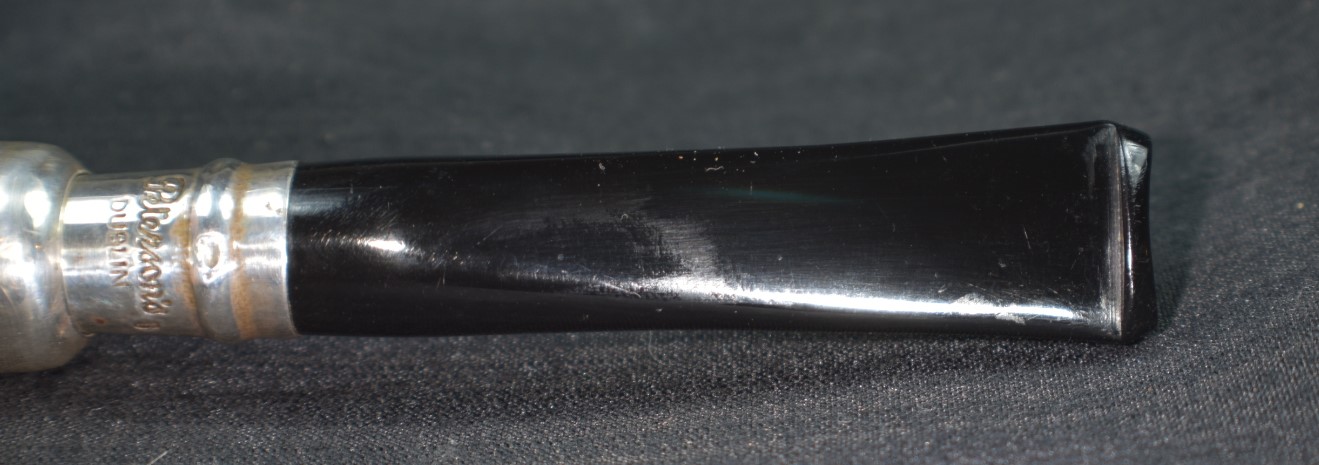
The pipe shipped quickly after an excruciating 3 day long posting time by the seller. I know, they were building anticipation, right? Don’t they realize the importance of immediate gratification to a poor soul suffering a terrible PPAD episode? Within a week the Peterson Spigot made it from North Hollywood, California to the wilds of southeast Nebraska. Below are some photos of the pipe as it appeared prior to any work.


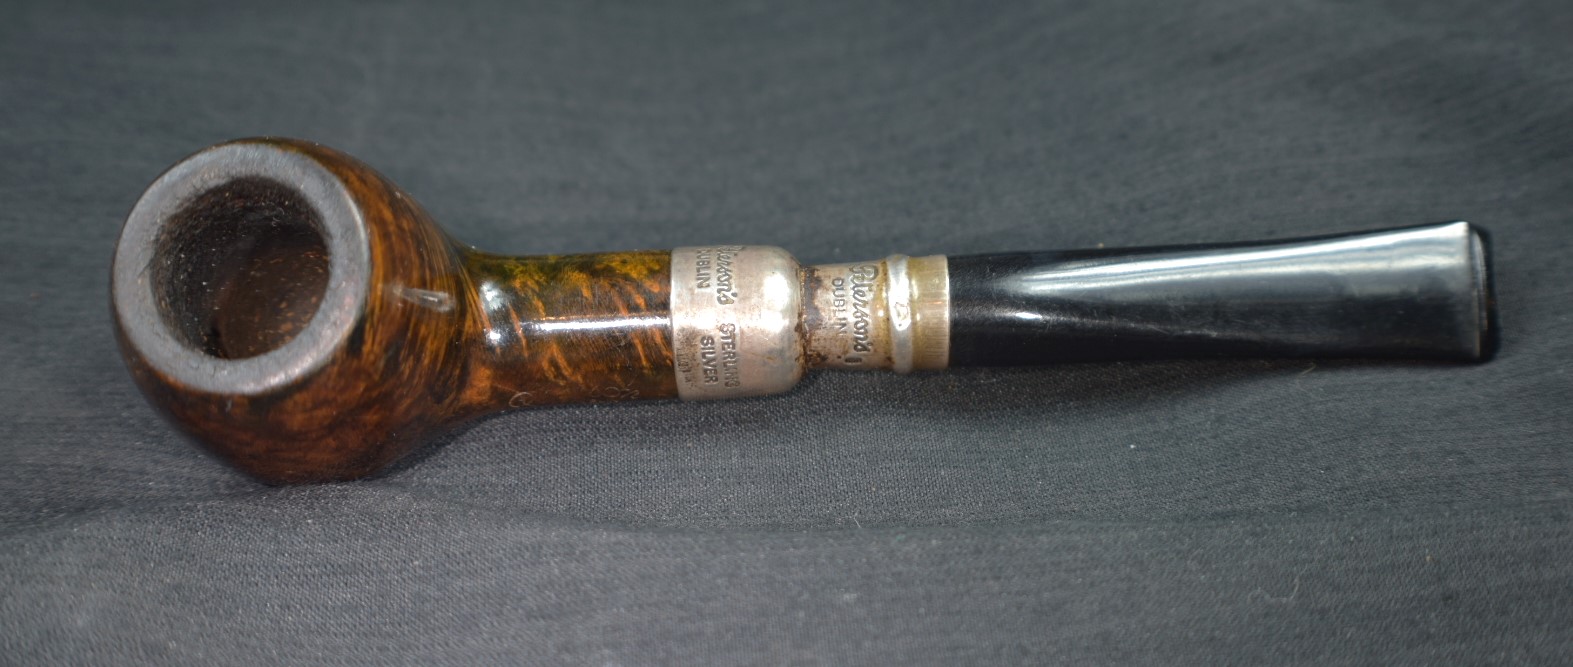


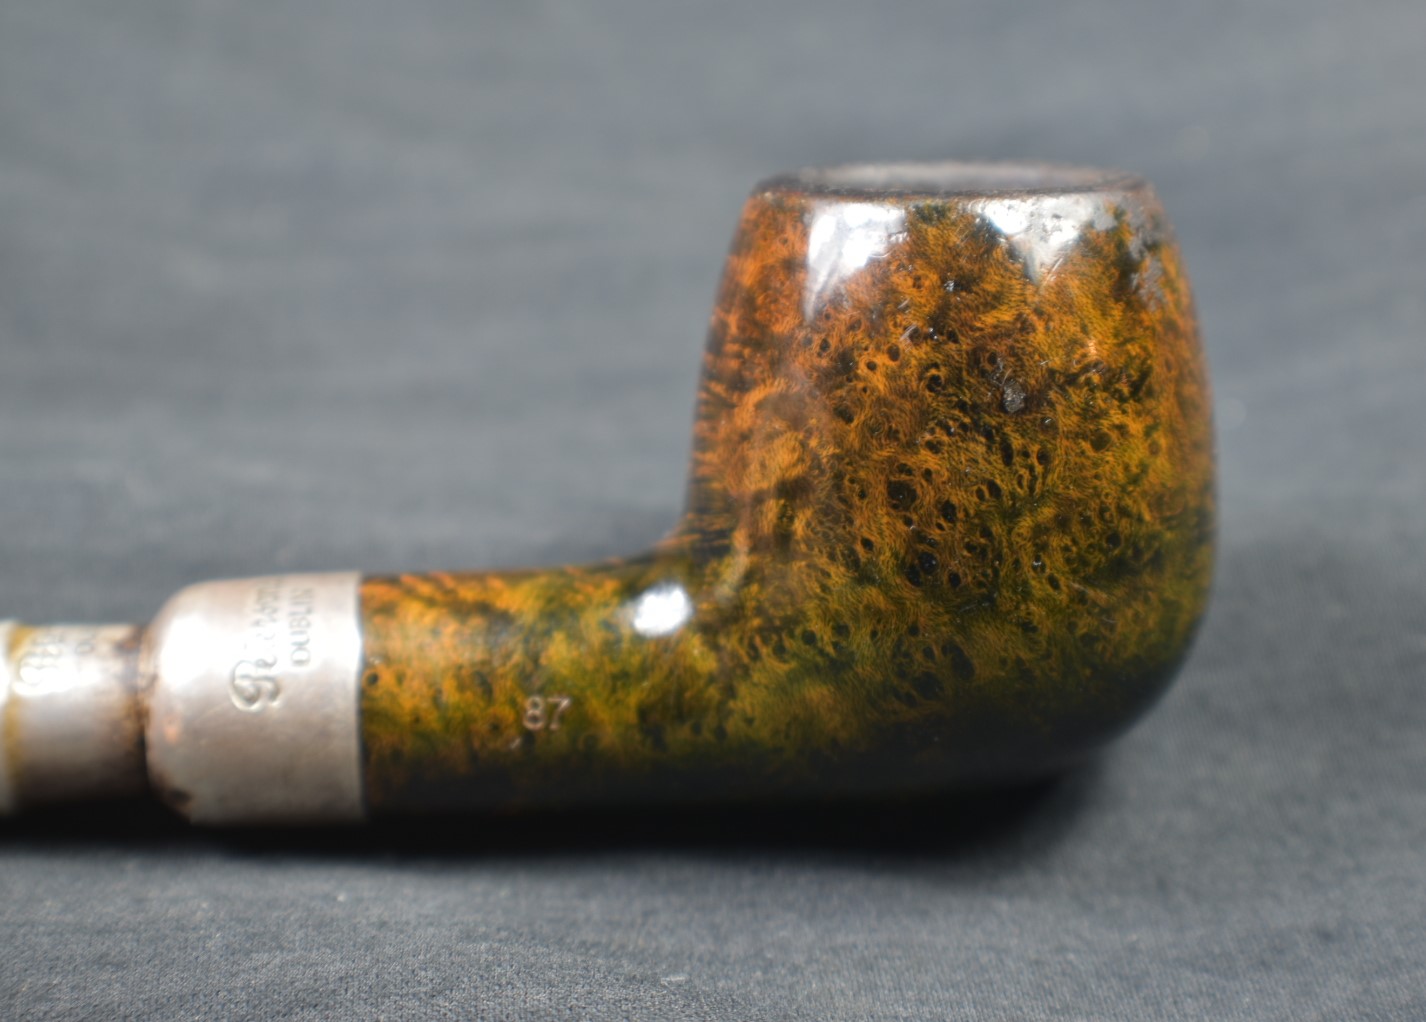

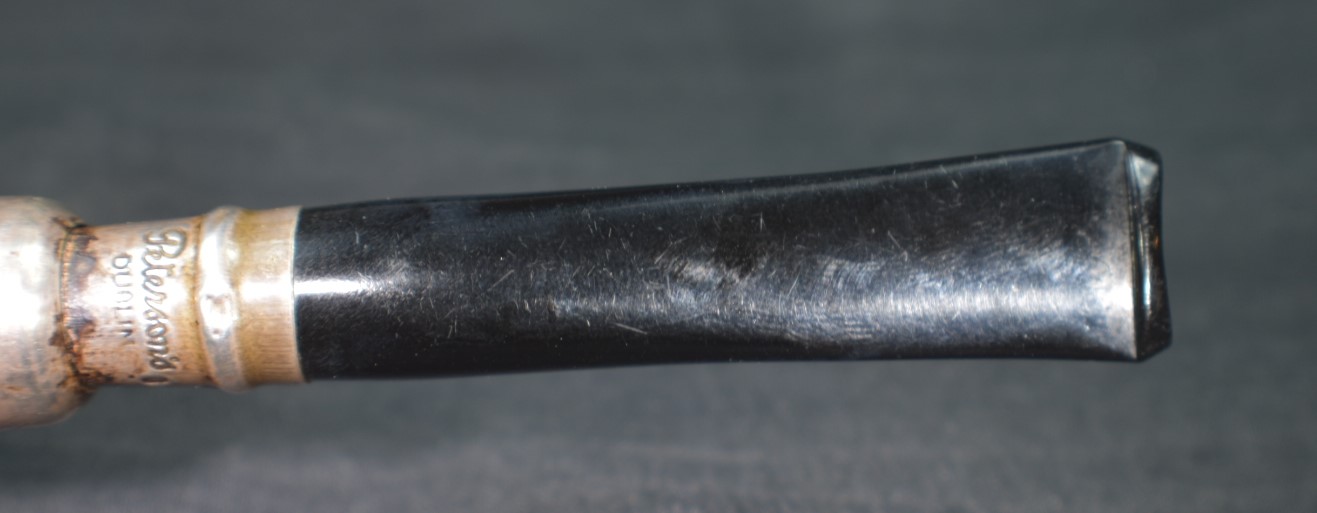

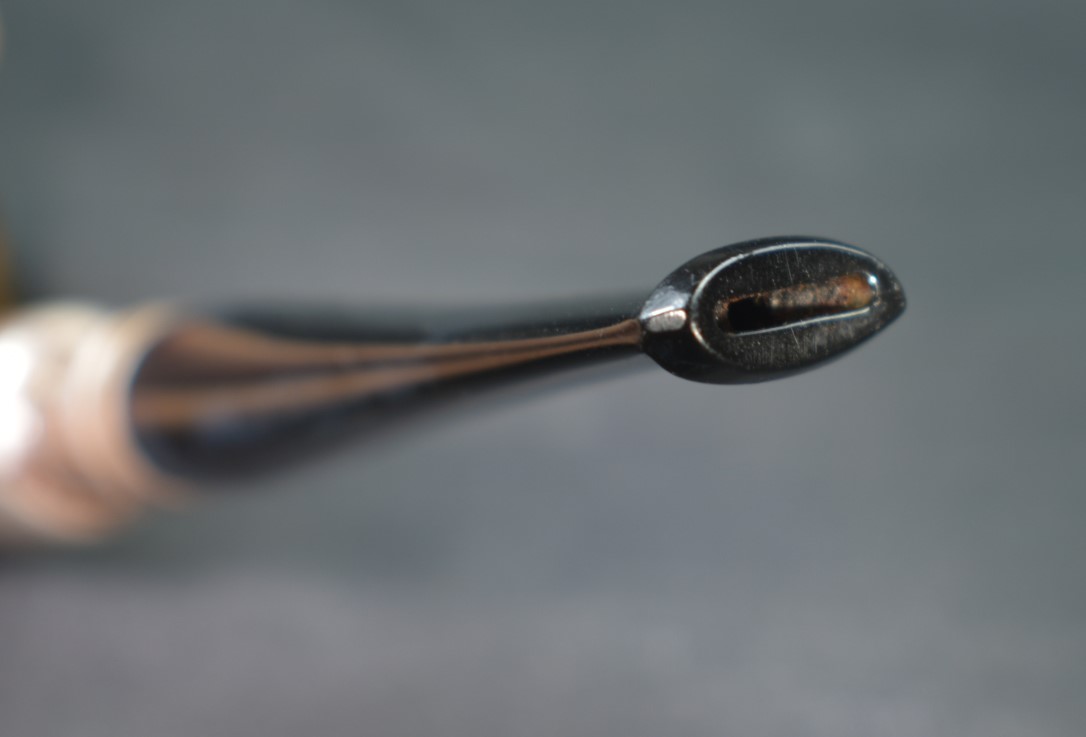

Yeah, it has the potential to be a real looker and another yeah, it has a green tint towards the bottom. I’ve never experienced a Peterson with a clear coat quite like this. It will have to go. There is a lava outcrop on the rim flowing over the edges. The tobacco chamber needs a good reaming and inspection. The shank and stem look disgusting, um, I mean well used. But that grain is gorgeous.
Peterson Background
For a complete history of the Peterson Pipe I cannot even begin to do justice to the subject. Mark Irwin and the late Gary Malmberg have done a wonderful job with this in their book, image and purchase link below.

(https://www.smokingpipes.com/accessories/books/moreinfo.cfm?product_id=471478)
For a shorter and less costly history I will include a few good links for those who are interested:
- Peterson Pipes History (Peterson Pipes History (#1 Best Source) – TobaccoPipes.com)
- A Primer on Peterson Pipes (A Primer on Peterson Pipes | PipesMagazine.com)
- System Day 2019: 100 Years Of Peterson System Advertisements (100 Years of System Advertisements – Peterson Pipes | Smokingpipes.com)
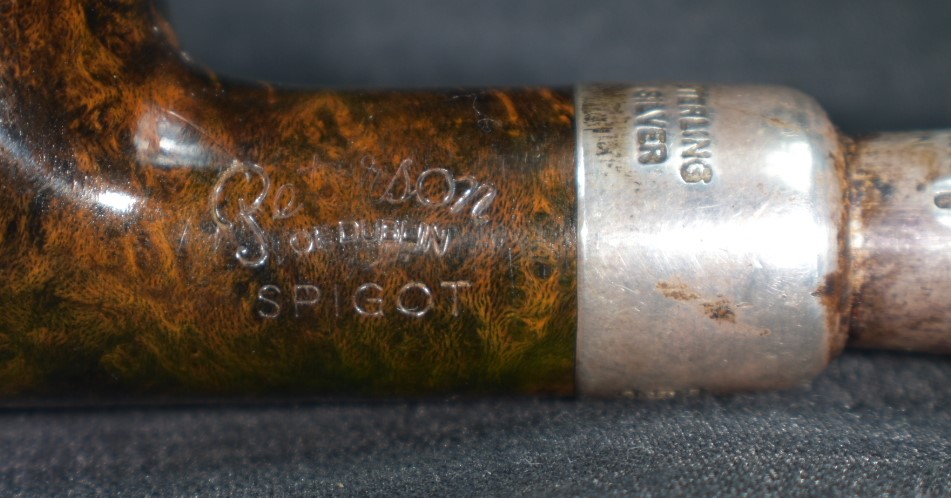
For the history of this pipe I will start here with a quote from smokingpipes.com describing the 86 Spigot pipe:
“Peterson: Green Spigot (87) Fishtail Tobacco Pipe
Product Number: 002-029-114391
Peterson’s “87” is a straight Apple in classic Peterson style, with a bit of extra heft to its shank relative to the bowl and a tapered stem that keeps things balanced throughout. It’s still a robust, hearty smoker, that has no problem upholding the marque’s characteristically bold style and features a bowl that is capacious enough to thoroughly enjoy your favorite tobacco, yet small enough so that it doesn’t require a major time commitment.
Along with their signature shaping style, Peterson of Dublin is renowned for their silverwork. The journey of becoming a Peterson silversmith requires years of training and personal mentorship from the factory’s senior craftsmen, and the superlative results testify to such a demanding, lengthy process — each worker having engineered his own mandrel to the extent that every metal accoutrement made is imprinted with the subtle, personal style of the one who machined it. Peterson’s Spigot line was created in 1977, after discovering an old Peterson catalog from 1906 that pictured pipes with spigot mounts, and the series is among the best at showcasing the Irish marque’s signature silver treatment, fitting sterling silver around both the shank end and stem base in a spigot-mount arrangement. The construction provides further reinforcement and durability and highlights even more sterling silver than would be used for a standard military mount. Presented here in the Green finish, the flashy, regal metal is paired to Peterson’s signature emerald stain for a unique, distinctly Irish take on the dress pipe aesthetic.
-Truett Smith” (https://www.smokingpipes.com/pipes/new/peterson/moreinfo.cfm?product_id=607279) Written as a true advertising genius, well said Mr. Smith.
Pipedia.org discussed the spigots in general. “Gold & Silver Spigots: The Peterson Spigot is characterised by a gold or sterling silver covering on the tapered end of the mouthpiece which complements the sterling silver band of the pipe. The Spigot style evolved from the practice of soldiers in earlier centuries who repaired broken pipes by sliding a used cartridge case over the shank and reinserting the mouthpiece. In this unique spigot finished pipe, Peterson craftsmanship perfect the union of finest quality briar and precious metals. The silver or gold is spun to shape and then fitted to the pipe.
These are amongst the most attractive and collectable pipes in the Peterson range of pipe issues. They just ooze quality. Prices start at around $200 and rise to $800 for the Gold versions.” (https://pipedia.org/wiki/Peterson)
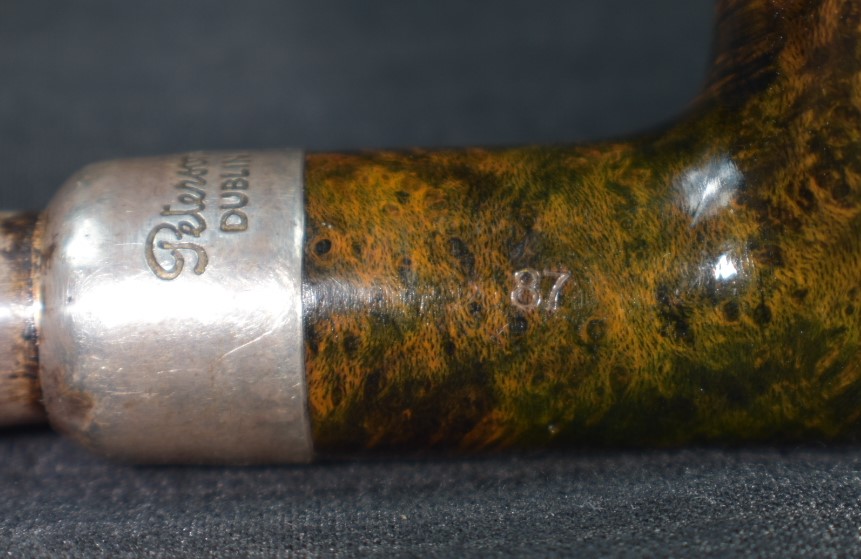
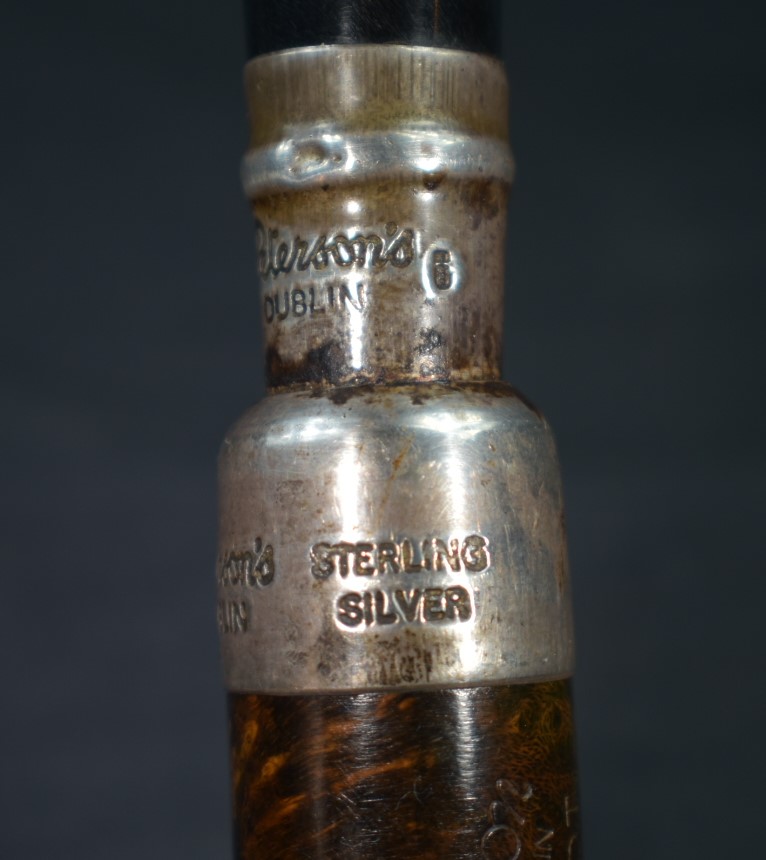
The final point to discuss here is the year that this pipe was produced. Peterson’s hallmarking is a great way to precisely date a Peterson pipe. Here are links to Peterson’s hallmarks (Hallmarks – Peterson Pipe Notes) and (PPN-Hallmark-Chart.pdf (petersonpipenotes.org))


This dates the 87 Spigot in the Year of Our Lord 2012.
The Restoration
As usual the work surface received a cleanish denim piece.

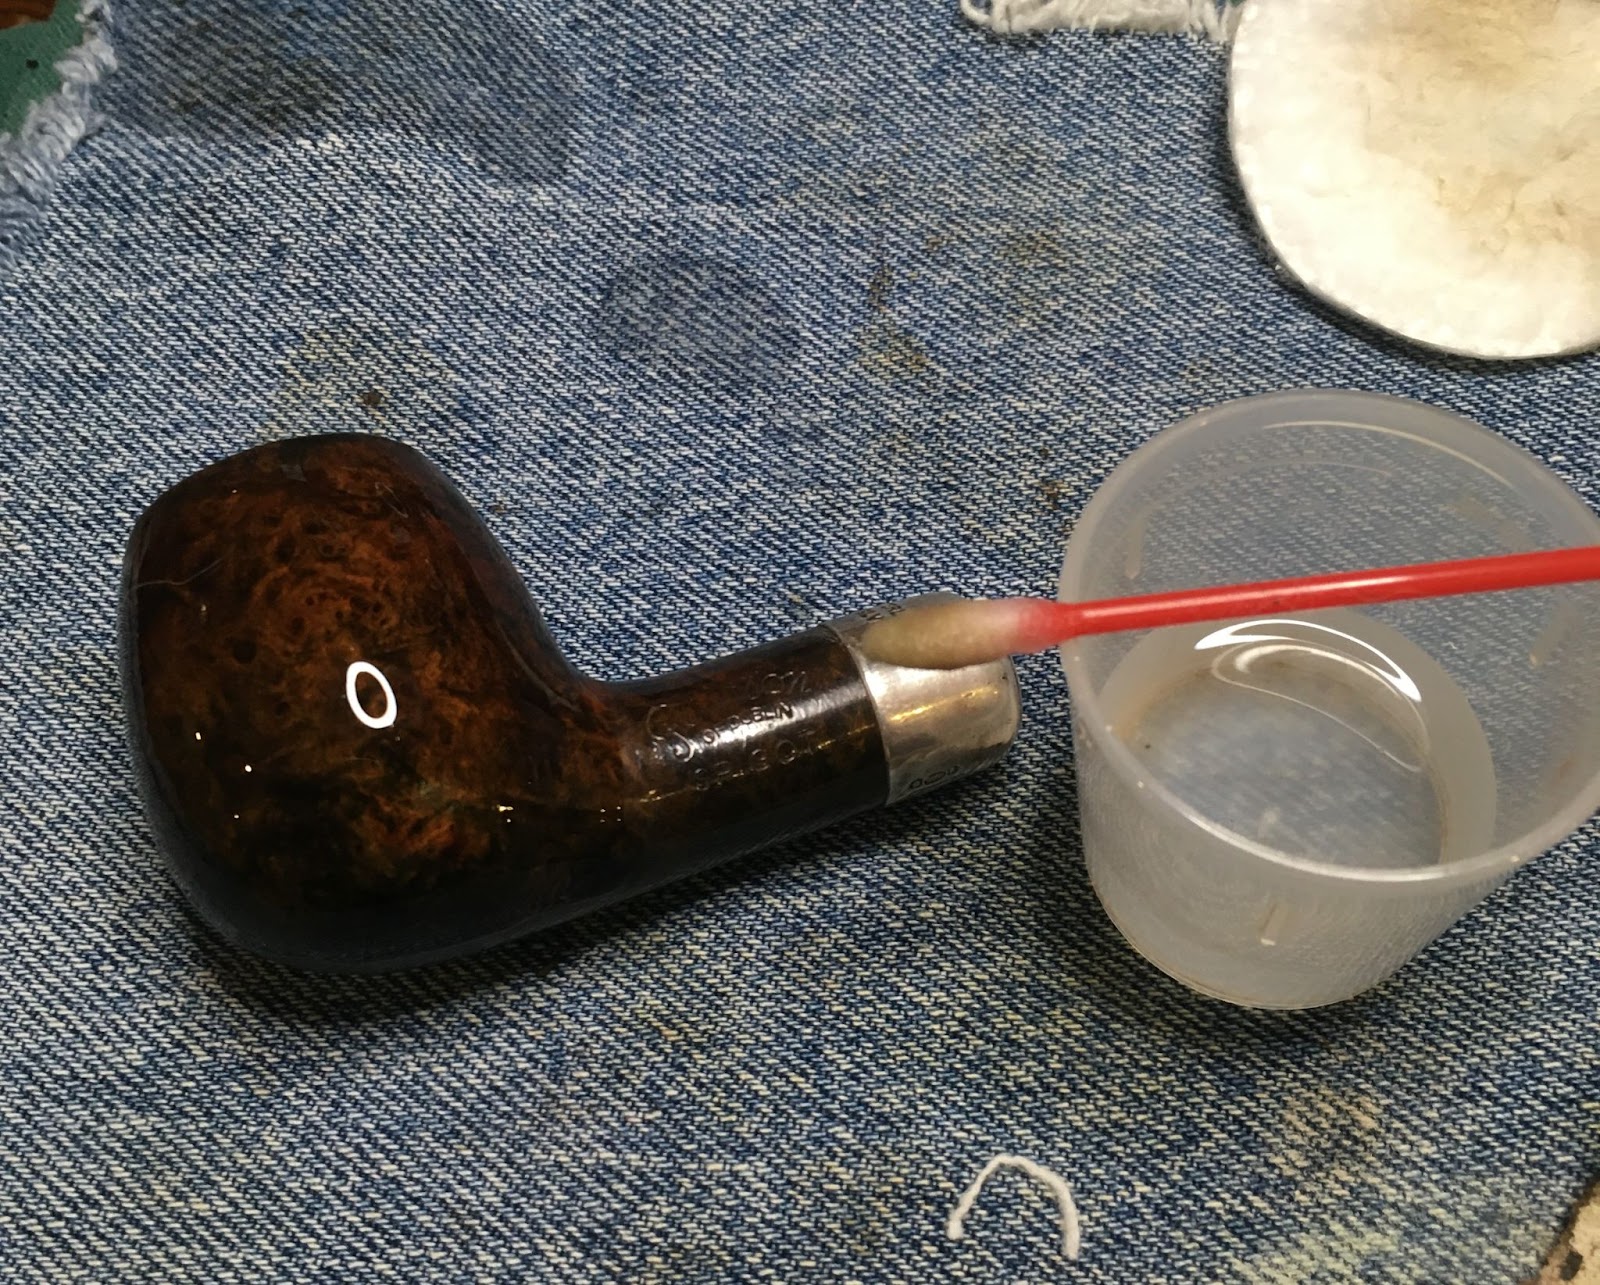
I started with a make-up pad dipped in acetone to see if the finish was susceptible to acetone. I hoped so. I was not. The acetone did remove the lava from the rime nicely as can be seen on the pad below.

As I was considering options for removing the clear coat I began working on reaming the tobacco chamber. The tools were assembled; PipNet with #2 blades, General triangular scraper, 320 sandpaper wrapped wood dowel and the 320 sandpaper wrapped Sharpie marker.

The reaming and sanding of the chamber went well and revealed a tobacco chamber with no damage.

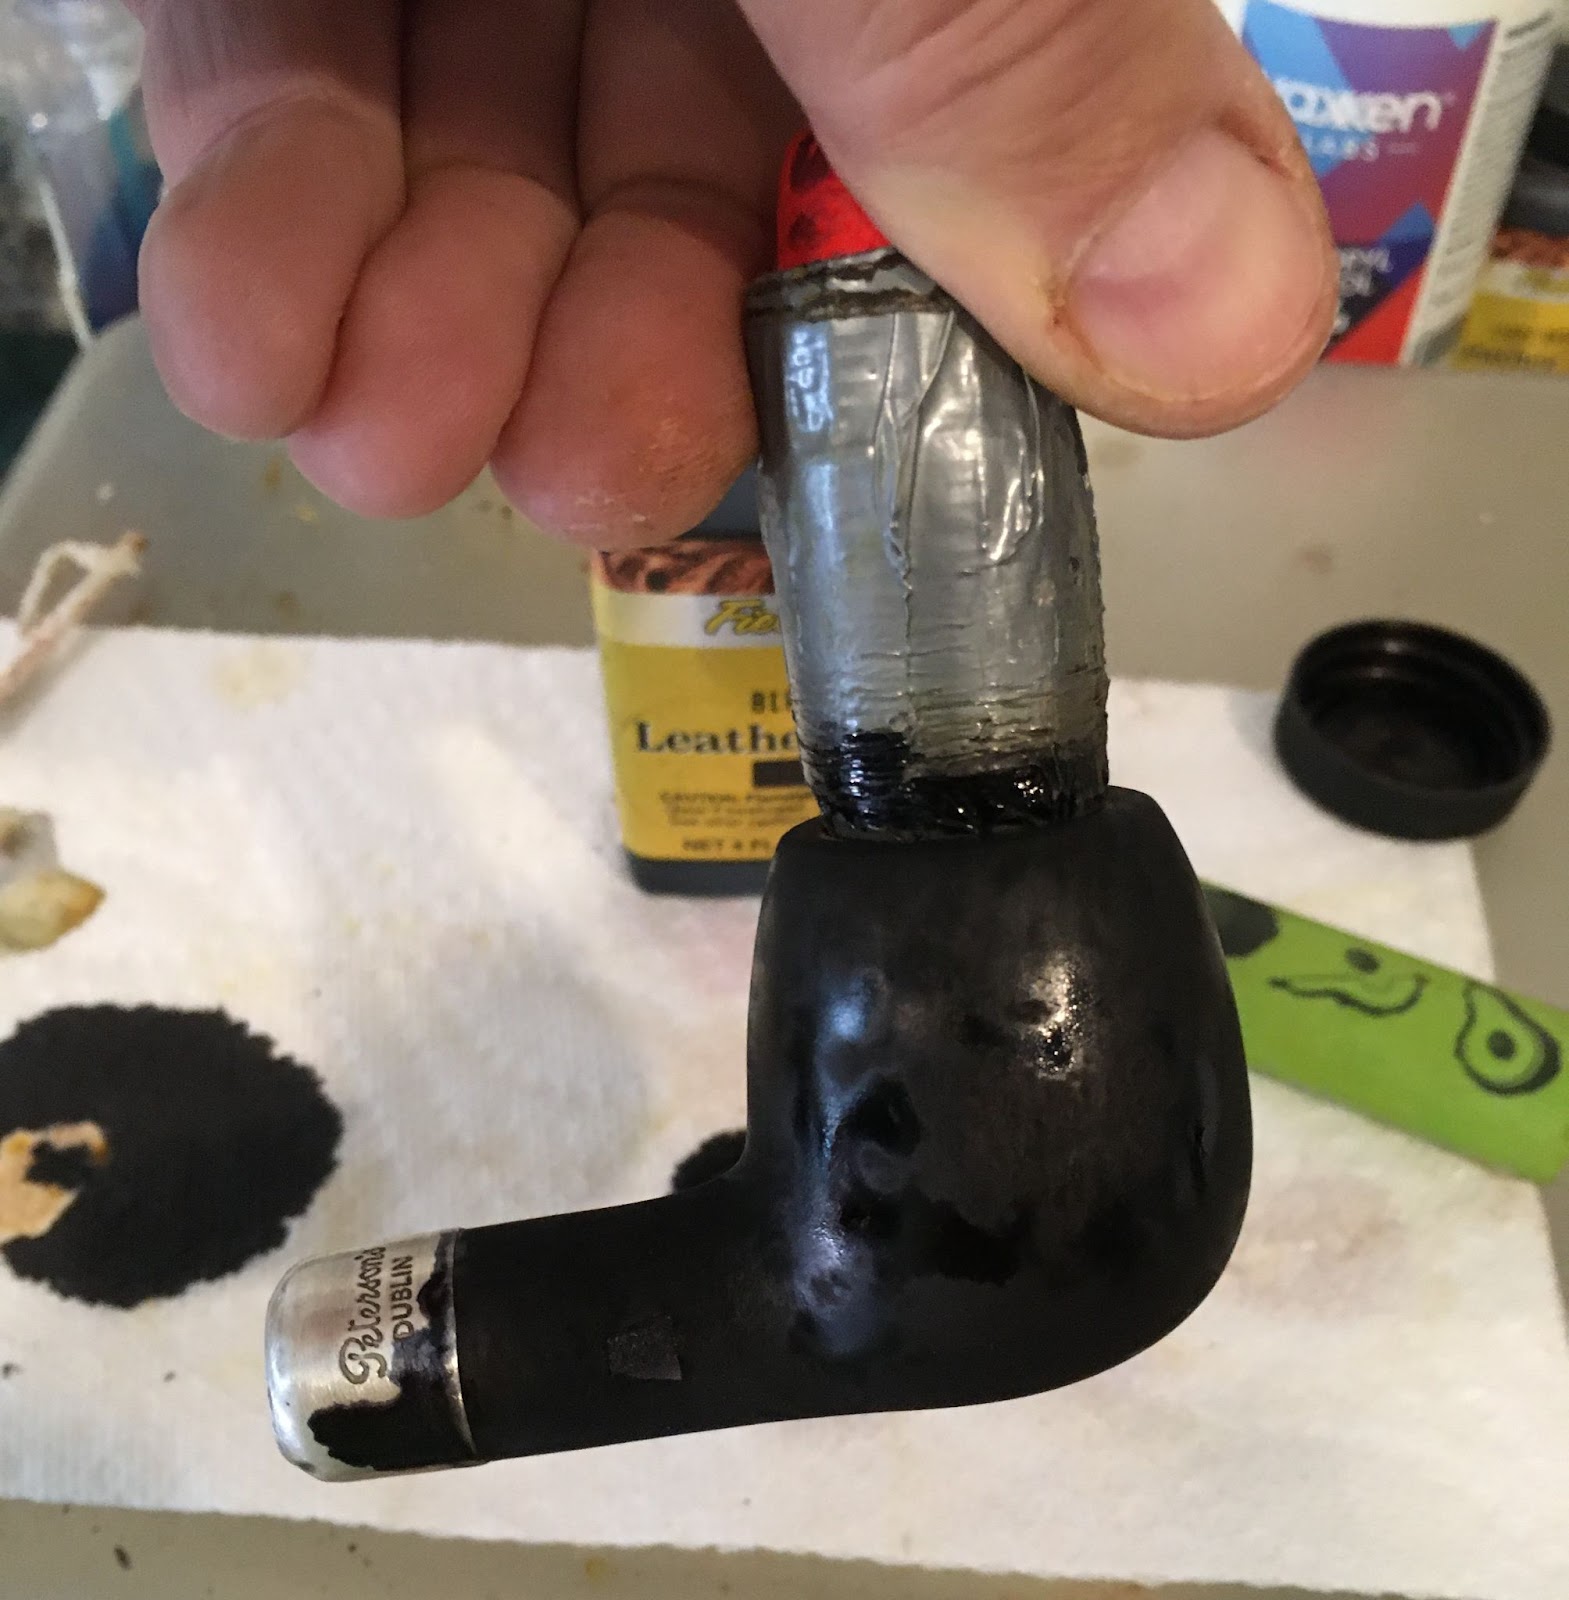
Still pondering the finish removal, I started cleaning the airway of the shank. Scraping with a dental scraper, numerous cotton swabs, bristle pipe cleaners and a good amount of 95% ethyl alcohol later the airway was clean.

Still thinking about finish removal, I started cleaning the stem. Again the ethyl alcohol and bristle pipe cleaners came to use.

The acrylic stem needed minimal exterior work. I sanded it with 1000-3500 sanding sponges then polished it with micro-mesh pads 4000-12000.
During the above cleaning I decided to try physical removal of the finish over chemical removal. Great care would have to be taken around the stamps but how hard could this finish really be, right? I started sanding the finish on one side of the stummel. Good Lord the stuff was hard. Impervious, adamantine, diamond coated, were terms that came to mind. I changed my mind after about 20 minutes of sanding and barely making a dent in the finish. This was a job for modern chemistry.
A couple of years ago I purchased a very cool used pipe rack for my son-in-law. It needed to be stripped and refinished. During my college days I spent one summer stripping and refinishing school gym floors. We used methylene chlorine and it would eat its way through polyurethane finish in minutes. It was also highly toxic and probably an environmental menace. I wondered what products had been developed more recently for stripping finishes. I settled on a non-toxic product called Max Strip Paint and Varnish Stripper.
 (
(It worked quite well on the pipe rack and seemed to live up to the non-toxic reputation. The pipe rack also turned out amazingly well and was a great Christmas present. I reread the toxicity information and decided that it should be okay for use with pipes.
Application of stripper 1. It seemed much thinner than I remembered it. Hmm, perhaps reading the directions is a good idea.
Oh yeah, shake the container well. That made it much thicker, like I remembered. The stummel was coated with a thick coating of the stripper and set bowl down in a disposable plastic dish.

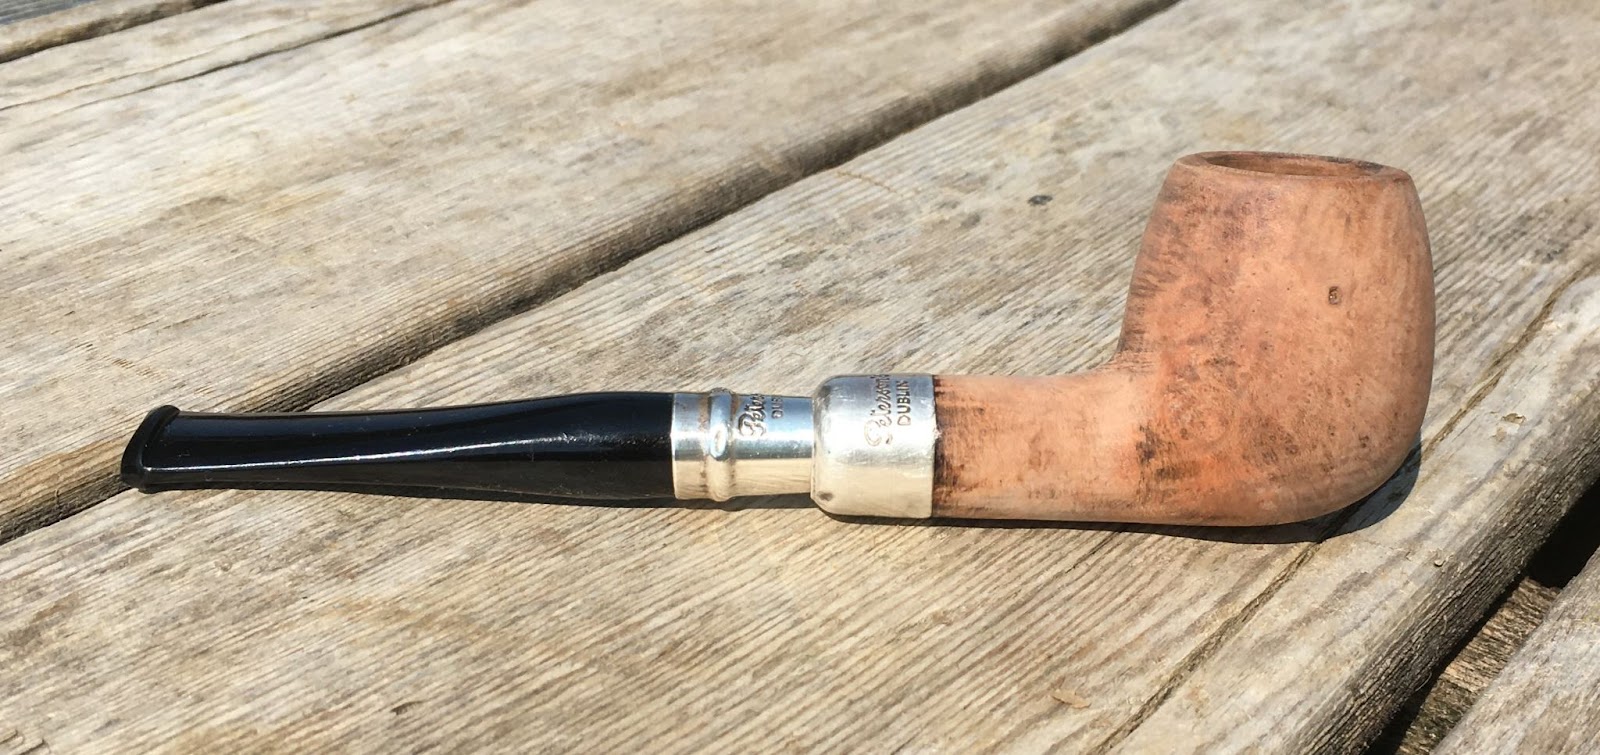
After 12 hours I wiped the stripper from the stummel using paper towels and rinsed it under a stream of water while scrubbing with a Scotch Brite pad. The side where I had sanded the finish looked better than the rest of the stummel but none of it looked stripped. I took it out into the sunlight for a better look and photos. The scratches that can be seen were from the Scotch Brite pad.

The shiny areas of remaining finish were evident.


The stripper did manage to eat it’s way through the disposable plastic dish.

Read those instructions again. OK, it says to “scrape” the stripper and old finish from the surface. I also used glass this time as a tray to catch the excess stripper.
Application 2.

After 2 hours I scraped the stripper with a sharp kitchen paring knife. This worked much better.


You can see the stripes where my scraping wasn’t well aligned. I tried sanding with a 320 sanding sponge. The stummel still had a layer of the clear coat that the sandpaper would barely touch. The dust came off as a white powder or as a pastel green powder indicative of finish, not the reddish brown of briar.

After the scraping the stummel was again rinsed with copious running water and further Scotch Brite scrubbing.
Application 3. Freshly sharpened knife and dental scraper at the ready. I allowed the stripper to do it’s thing for an hour then scraped the stripper from the stummel. Again I rinsed with water and scrubbed with the Scotch Brite pad.

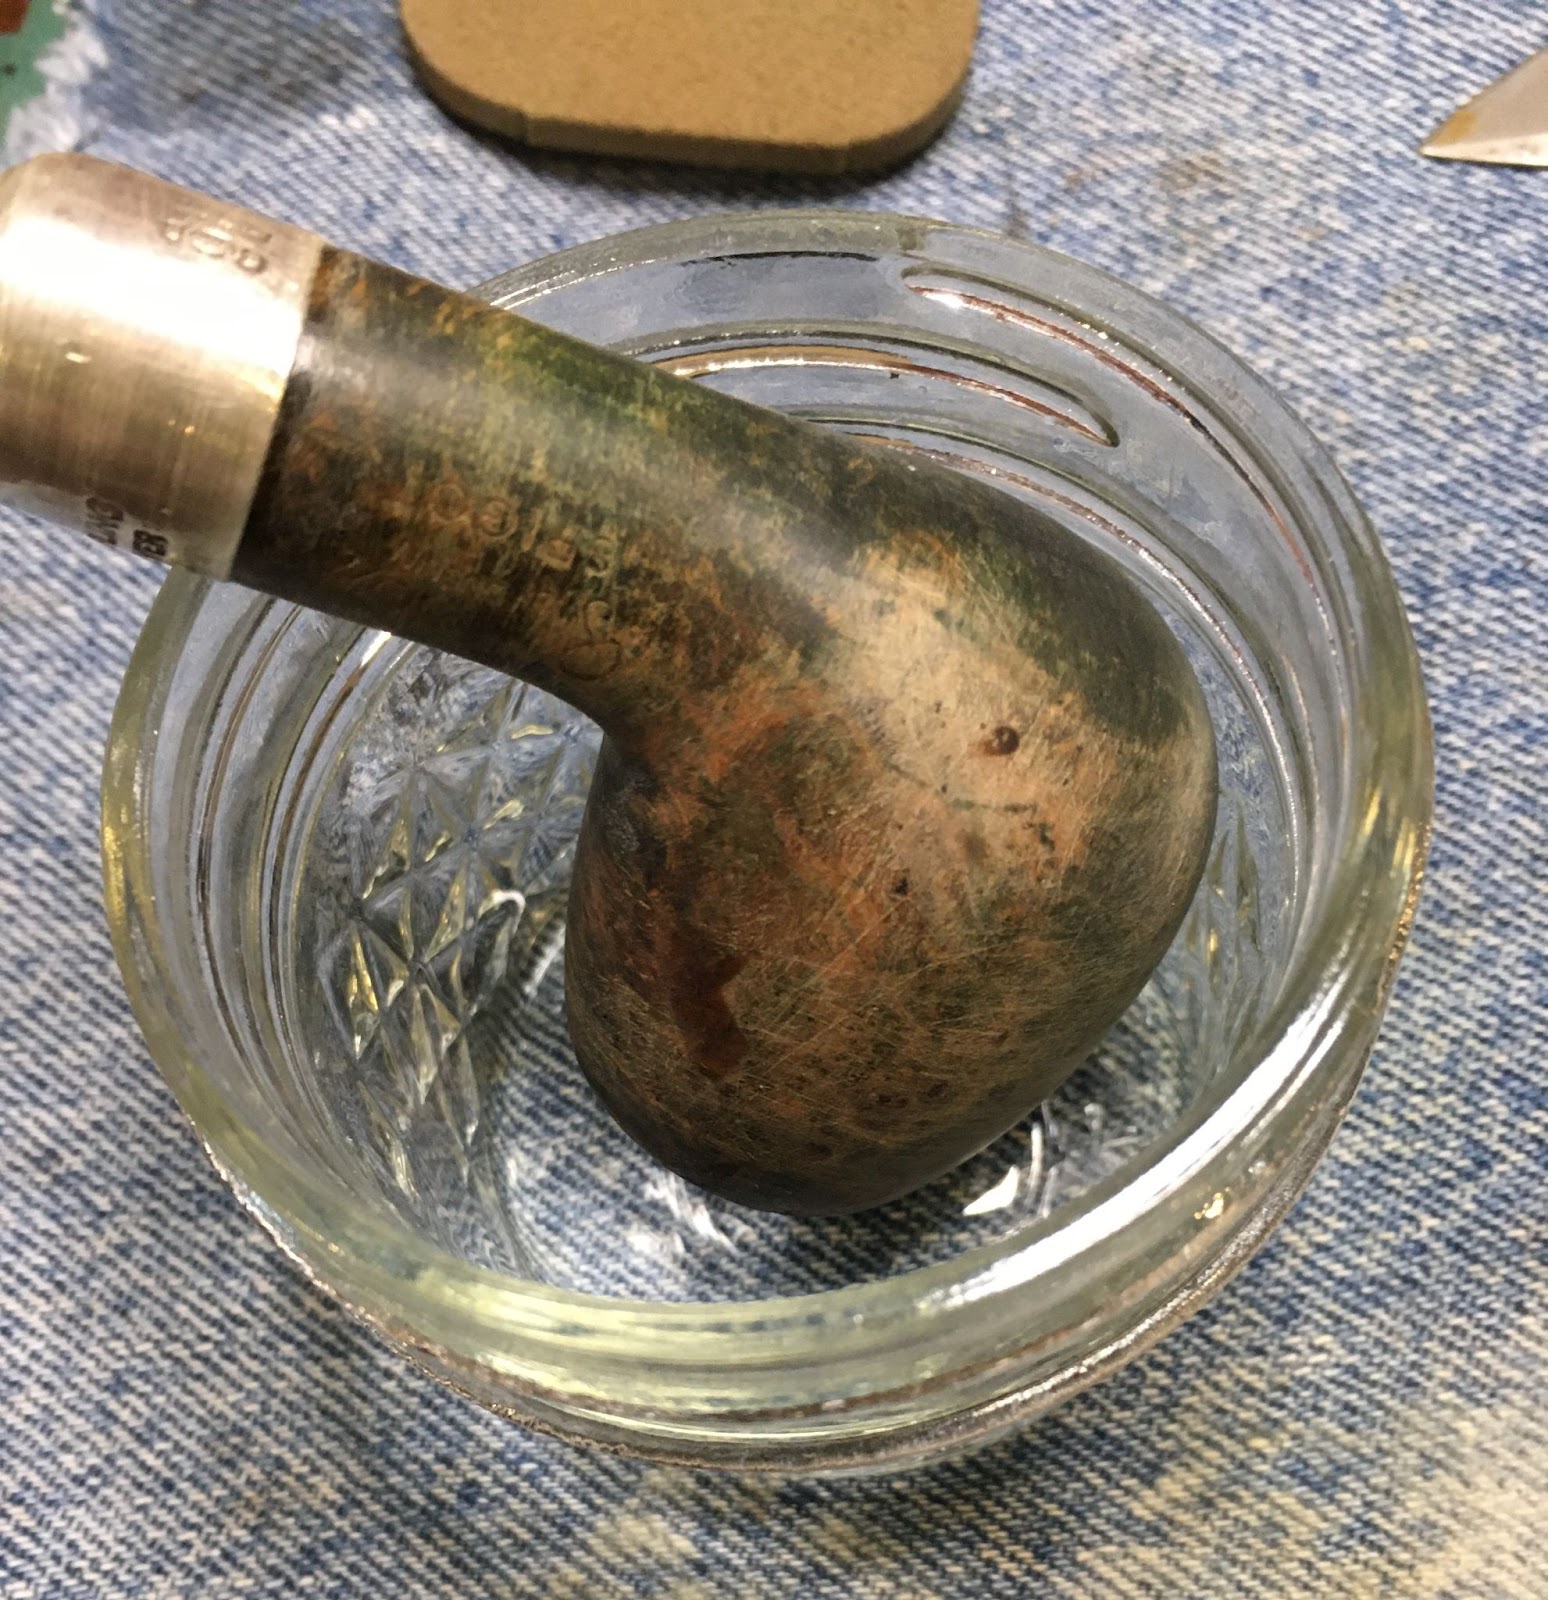
The stummel looked better but still not free of the clear coat of stain. I decided to try an acetone wipe to see what would happen. To my surprise the make-up pad wetted with acetone came away with a good deal of green. It was as if the stripper had softened the finish and it was now susceptible to acetone. Yay!

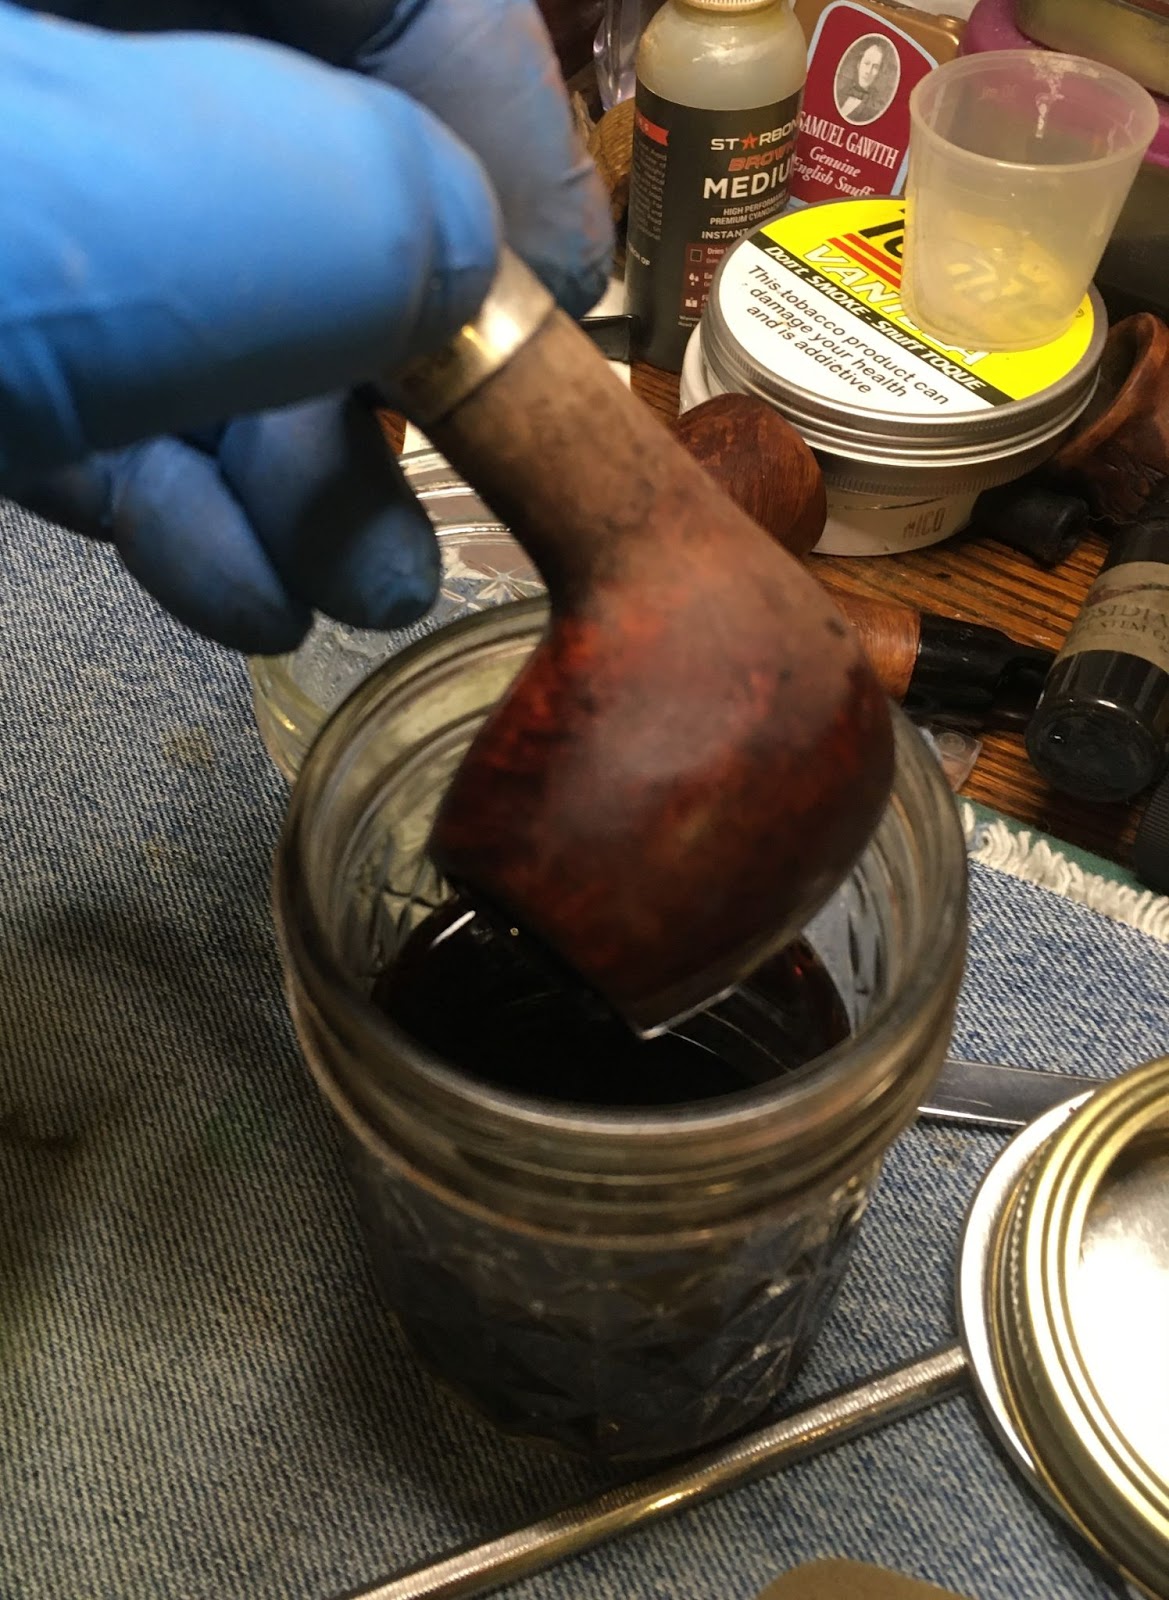
I got out the acetone jar and submerged the stummel into the solvent.

The stummel was allowed to soak in the acetone for one hour. I then removed it with nitrile gloved hands. The green was gone along with the finish. I won!
Another make-up pad wetted with clean acetone and very little color came off the stummel.
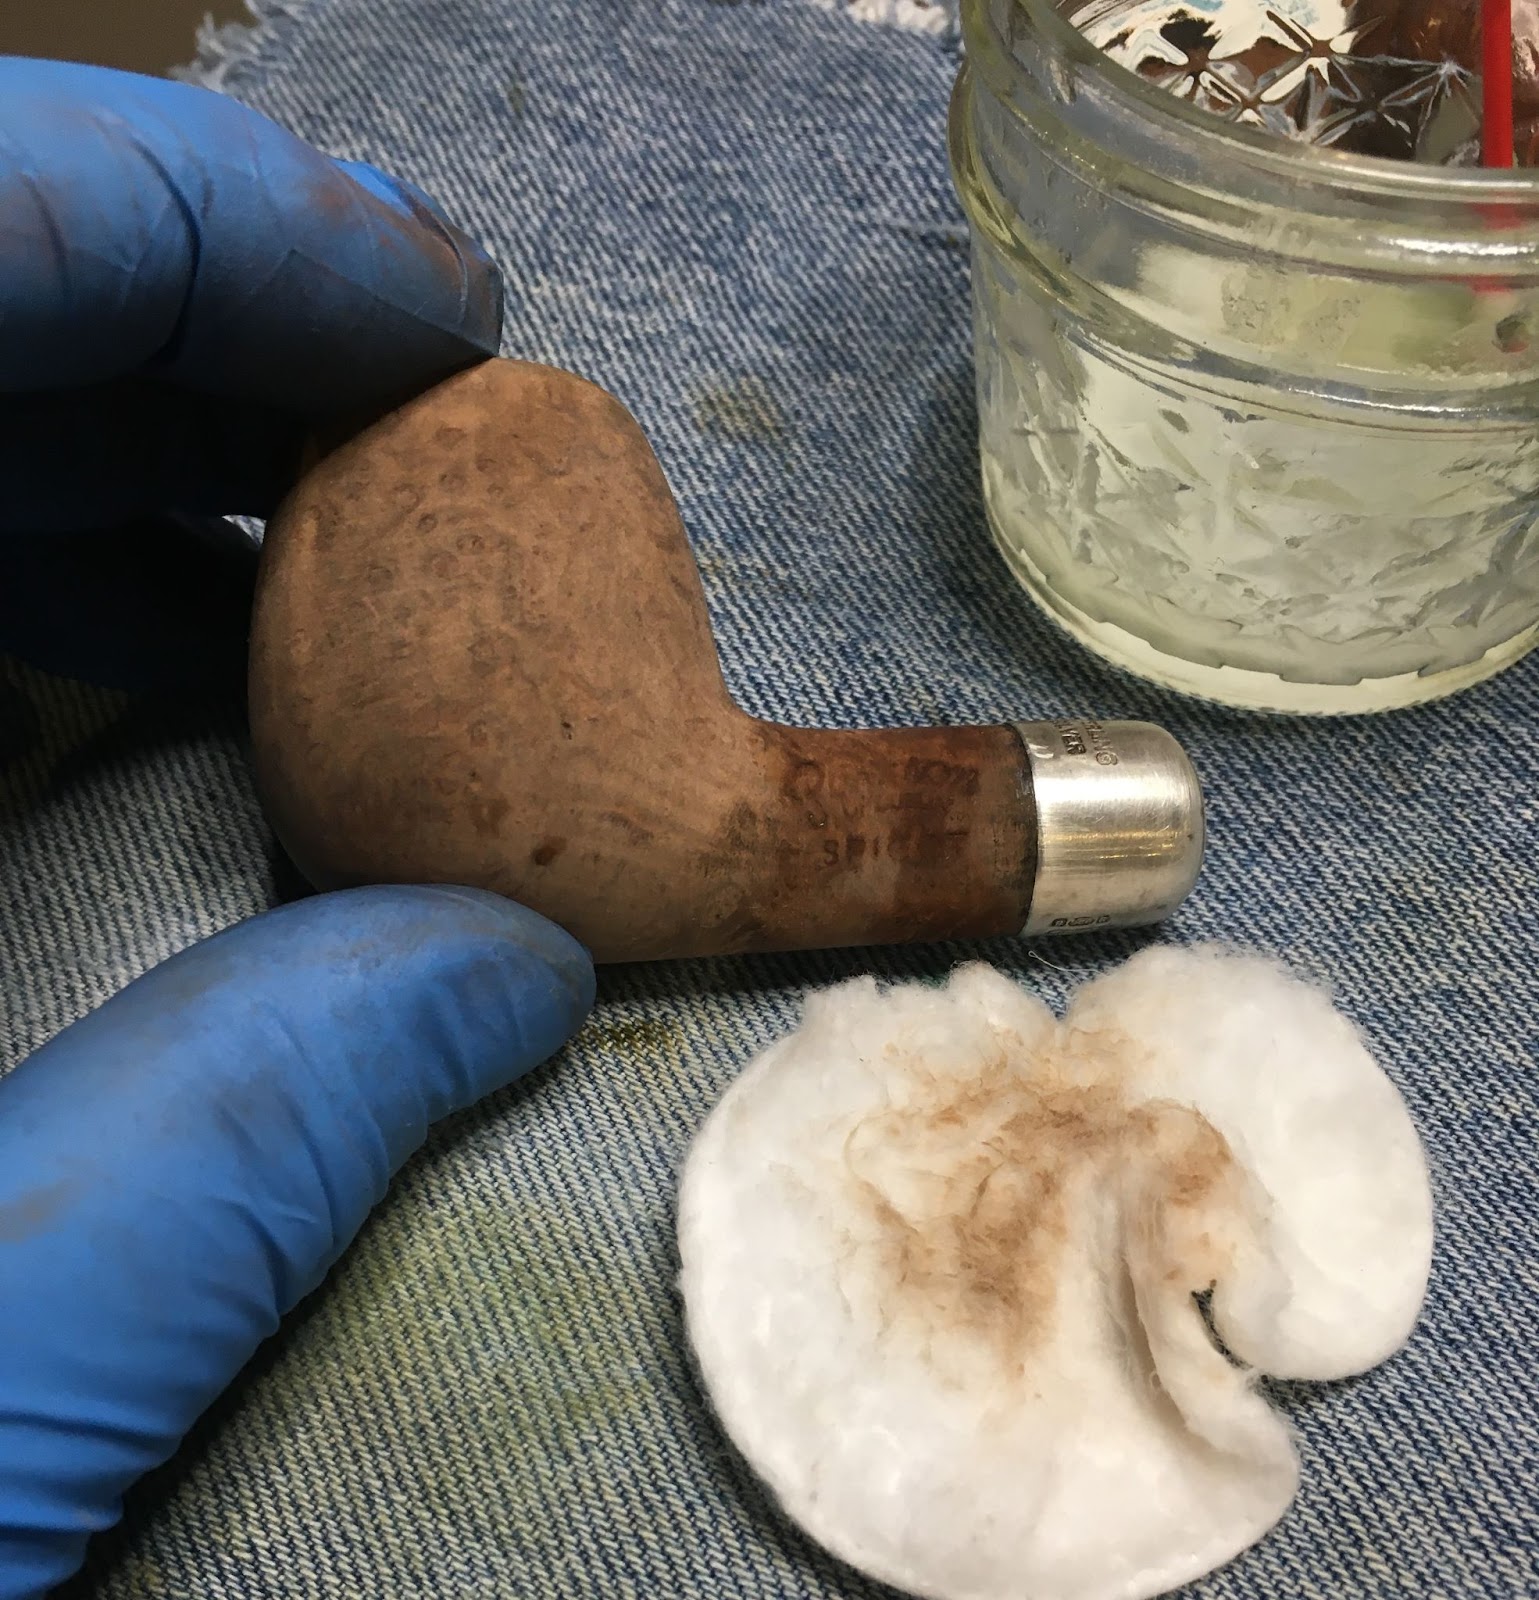
I lightly sanded the stummel with the 320 sanding sponge. There were still some areas where the sandpaper would not “cut” as with briar but these quickly sanded away. The below two photos are again outside in sunlight.

The beautiful brain was still there but all of the previous dye/stain had been removed. This required a rebuilding of dye to emphasize the grain I’d seen before. I made a difficult decision to not use green. I knew this would violate the “restore” part of restoration but this was going to be a personal use pipe rather than a resale so keeping it original was not as high on the list of priorities. I also feared the fading of the new green requiring another refinishing.
The lack of finish also made several pits very noticeable. These were filled with brown cyanoacrylate (CA, super glue) and briar dust. The old fill material was picked from the stummel using a fly tying bodkin. A small drop of brown CA was then applied to the pits and briar dust was pressed into the wet CA. The new fills were filed with a flat needle file and smoothed with a 320 sandpaper sponge. Where needed a second application of CA was used and sanded allowing the sanding to provide the briar dust.


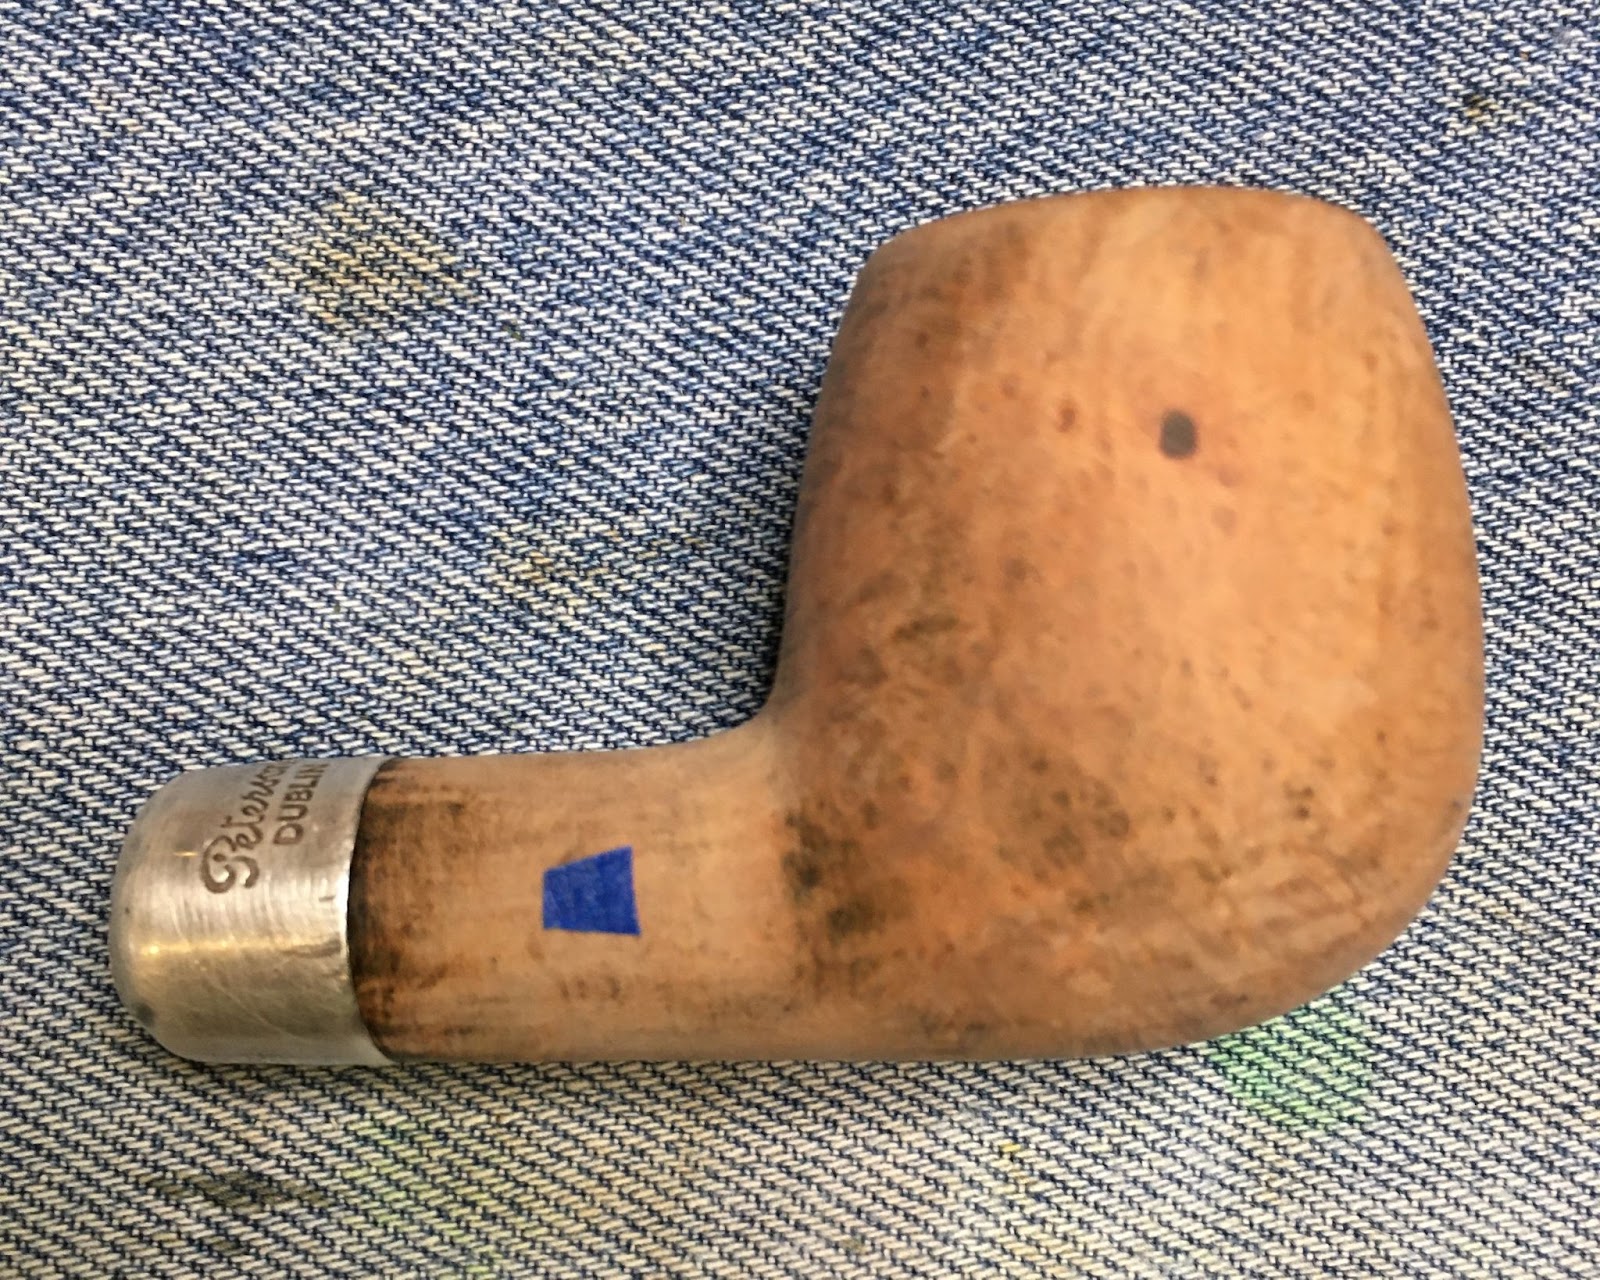
Additional sanding of the stummel required that the stamps be protected with a layer of painters tape.

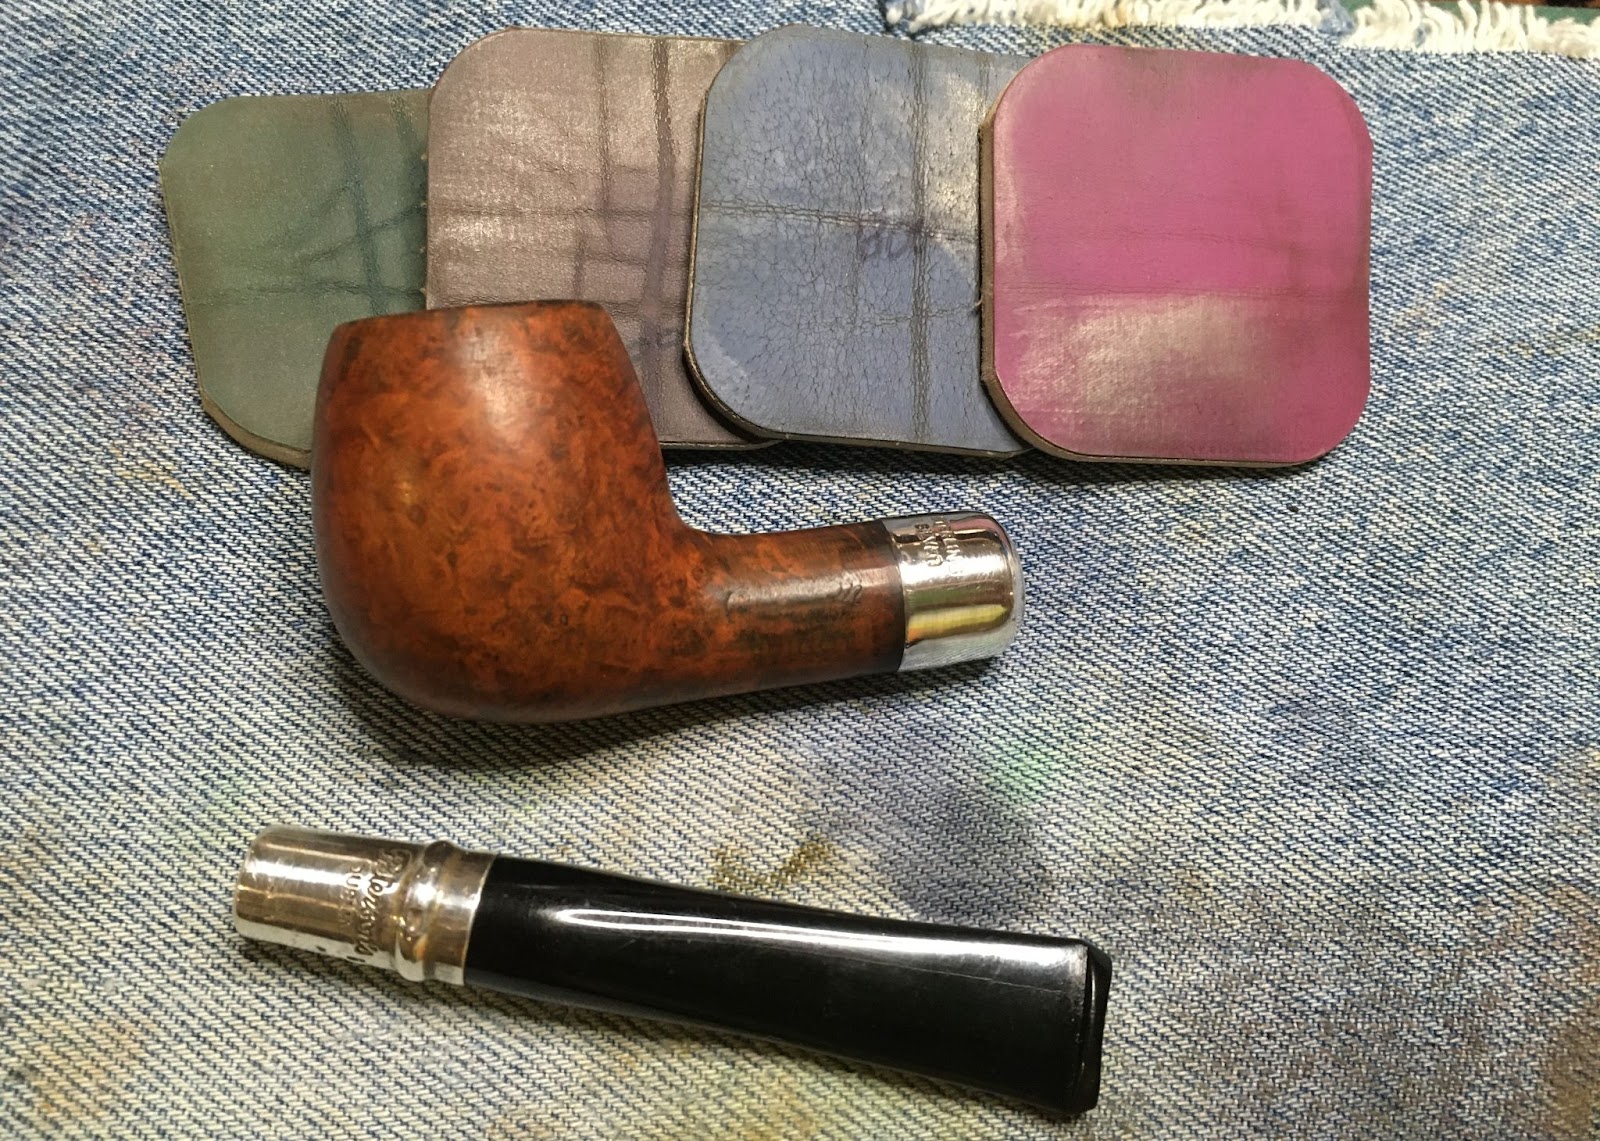
The stummel was then sanded with the 400 sanding sponge. The stummel was nor ready to have the briar grain reemphasized. I used a black Fiebing’s Leather dye as a base for contrast dying.

The black dye was applied with a folded pipe cleaner and flamed with a disposable lighter to burn off the alcohol and set the dye to the briar.
I then rinsed the stummel with 70% isopropyl alcohol over the sink to remove some excess dye.

Back at the workbench the stummel was wiped with several make-up pads wetted with 95% ethyl alcohol to remove the black dye from the surface.

Next came the sanding of the stummel to remove the outer layer of dyed briar. The sanding continued from the 400-3500 sanding sponges. Between each sponge the stummel was wiped with a make-up pad wetted with ethyl alcohol.

To restore a bit of the original color to the stummel I used a “wash” of 95% ethyl alcohol with orange Fiebing’s Leather dye mixed at about 3:1 (3 parts alcohol to one part orange).
The stummel was then micro-meshed using the 4000-12000 pads. Between each pad the stummel was wiped with a make-up pad lightly wetted with ethyl alcohol.
The stummel was then coated with Before and After Restoration Balm and allowed to sit for 30 minutes.
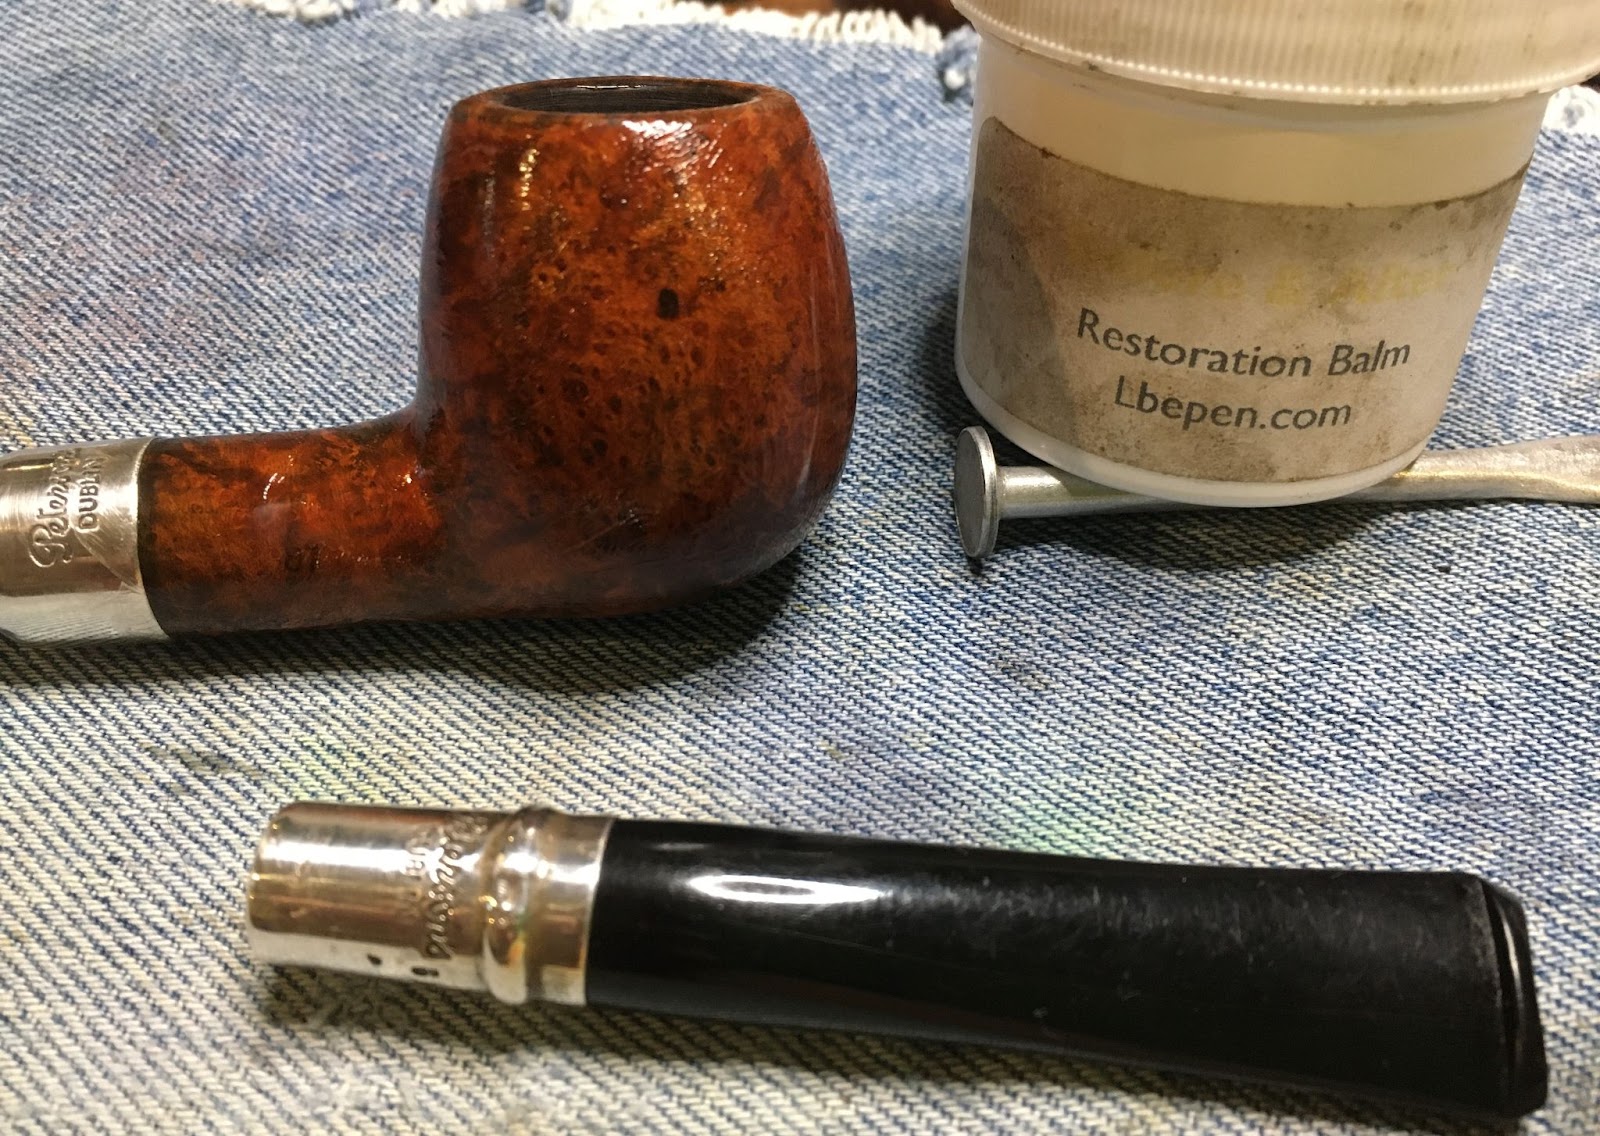
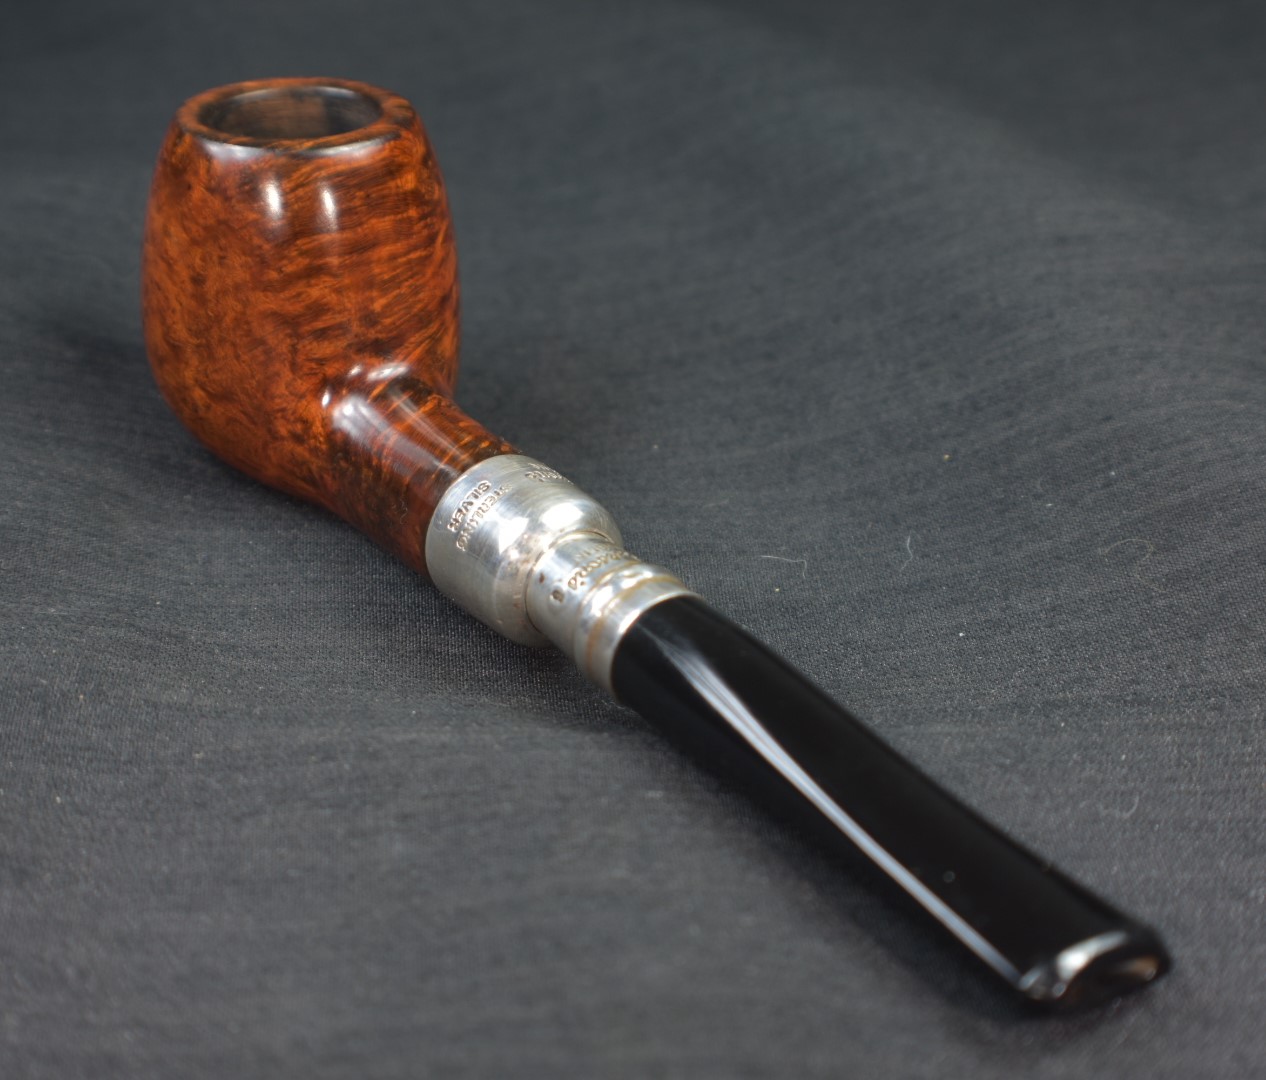
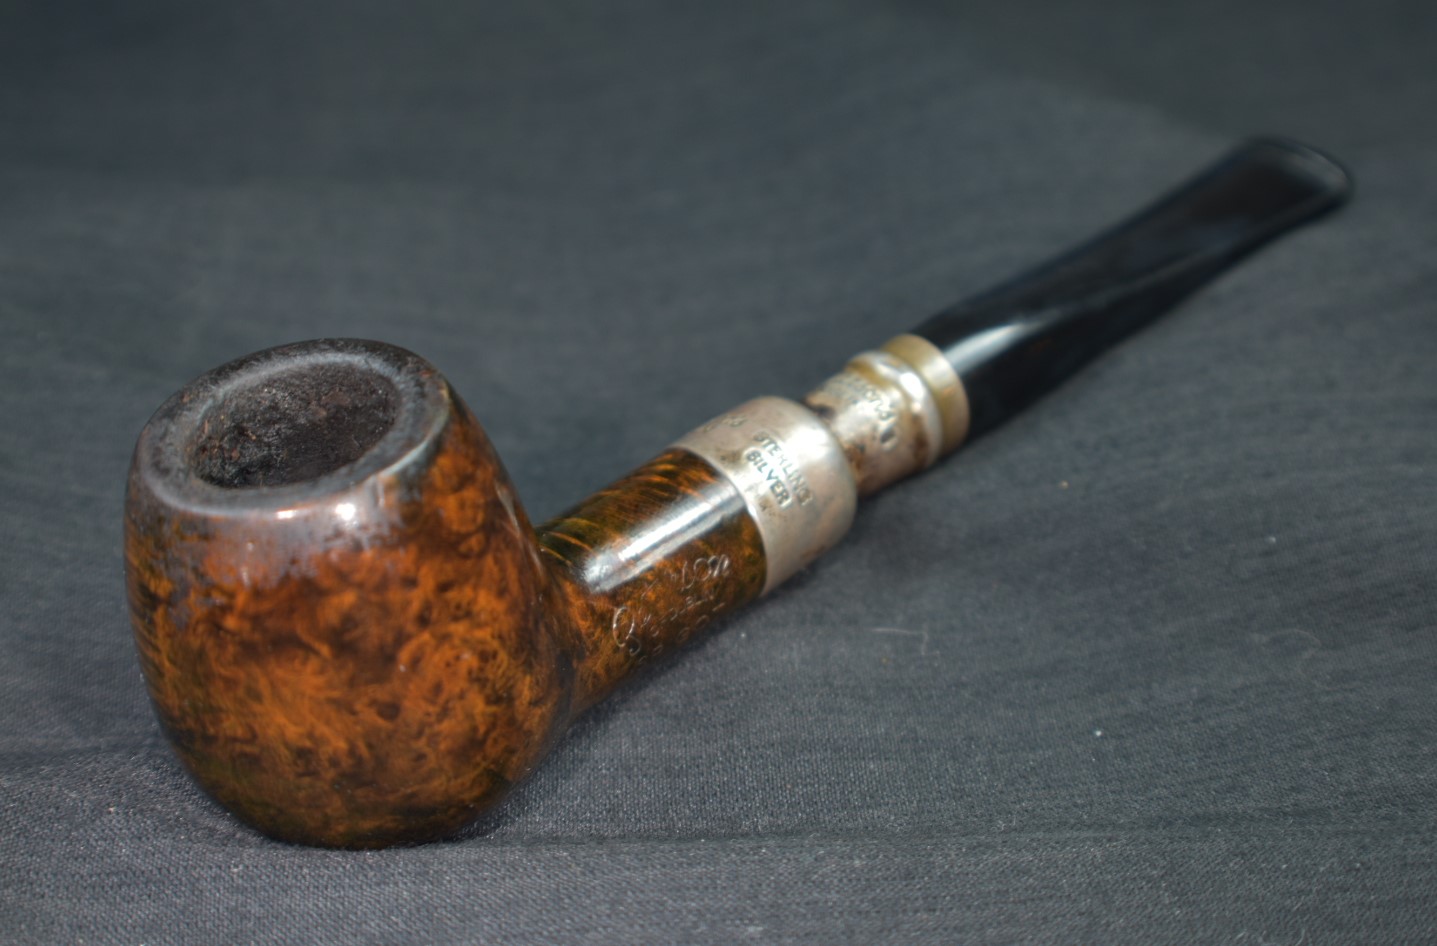
30 minutes later the excess Restoration Balm was wiped away using an inside out athletic sock. There’s that grain I had been waiting to see.

The pipe was then taken to the puffer to receive several coats of carnauba wax applied with the buffer.
I am pretty happy with the restoration of this Peterson 87 Spigot. It is a shape that I love and I only have one other spigot. The spigot system is very handy as well as classy looking. This one was certainly challenging to remove the dreaded clear coat. I lament the loss in clarity of the stamps but that is the price paid to be rid of the clear coat. The contrast dying came out well as did the color of the finished Spigot. The minor dents in the silverwork were not repairable by me but it does save me the trouble of having to dent them myself, I guess. I am becoming more and more a fan of acrylic stems. Their ease of maintenance is nice and I really don’t find their hardness to be an issue. The dimensions of this 87 Spigot are:
Length: 6.09 in./ 154.69 mm.
Weight: 1.47 oz./ 41.8 g.
Bowl Height: 1.77 in./ 44.96 mm.
Chamber Depth: 1.42 in./ 36.07 mm.
Chamber Diameter: 0.73 in./ 18.54 mm.
Outside Diameter: 1.47 in./ 37.34 mm.
I do hope that you have found something here useful to your own pipe care, maintenance or restorations. If you like this sort of thing, please click the like and subscribe buttons. Thank you for reading the ramblings of an old pipe lover.
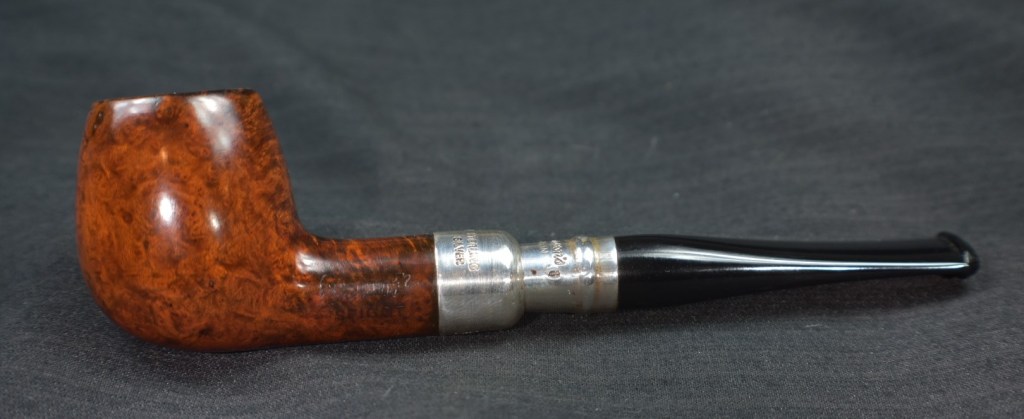
Below are some photos of the finished Peterson 87 Spigot


Yeah, the stampings did take a beating from all the stripper, dying and sanding.