
Photographed and written by
John M. Young
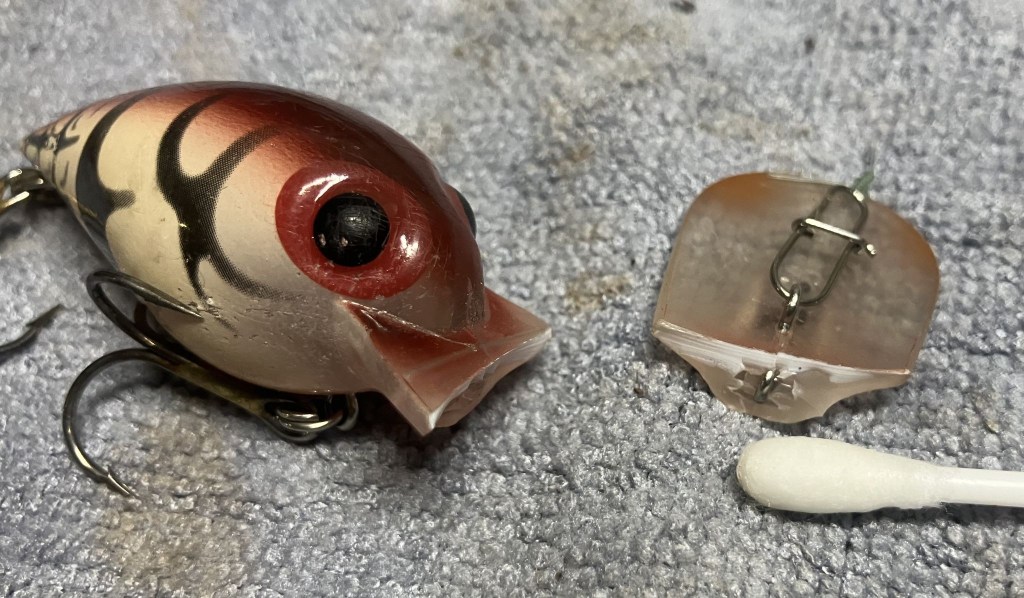
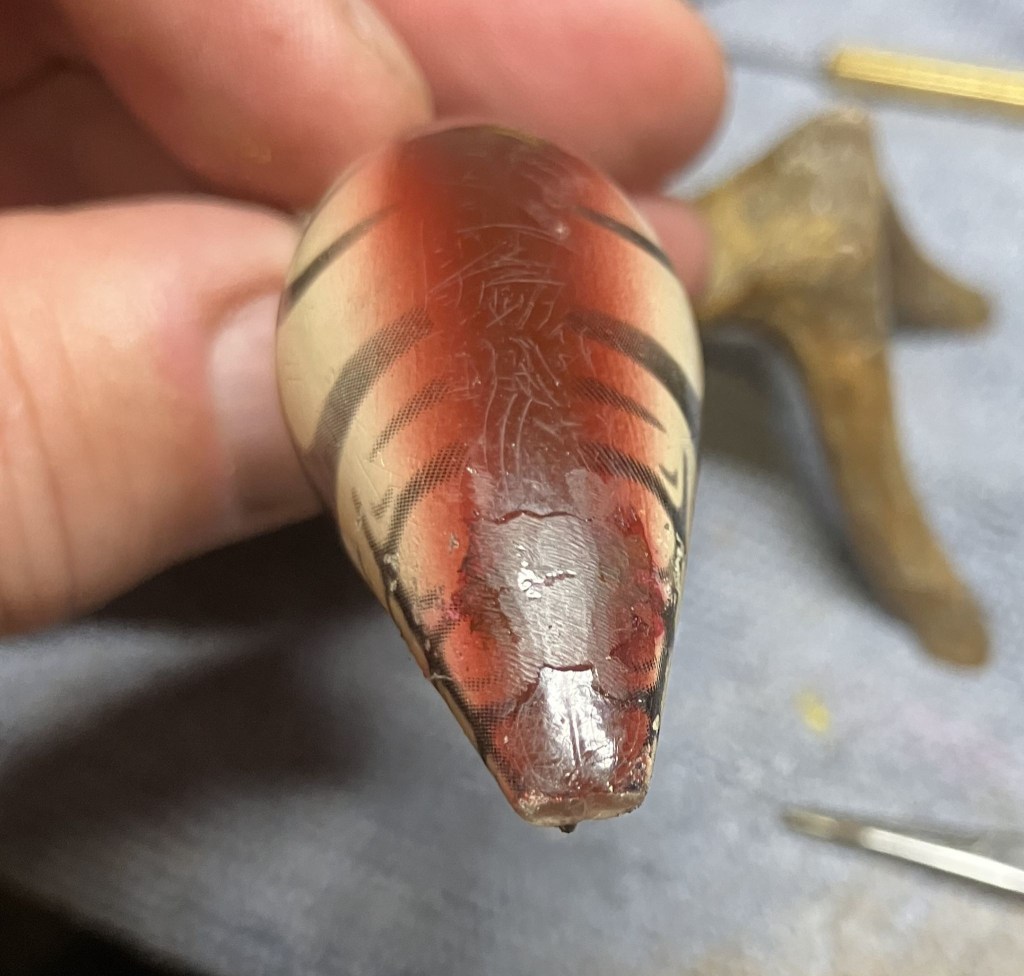
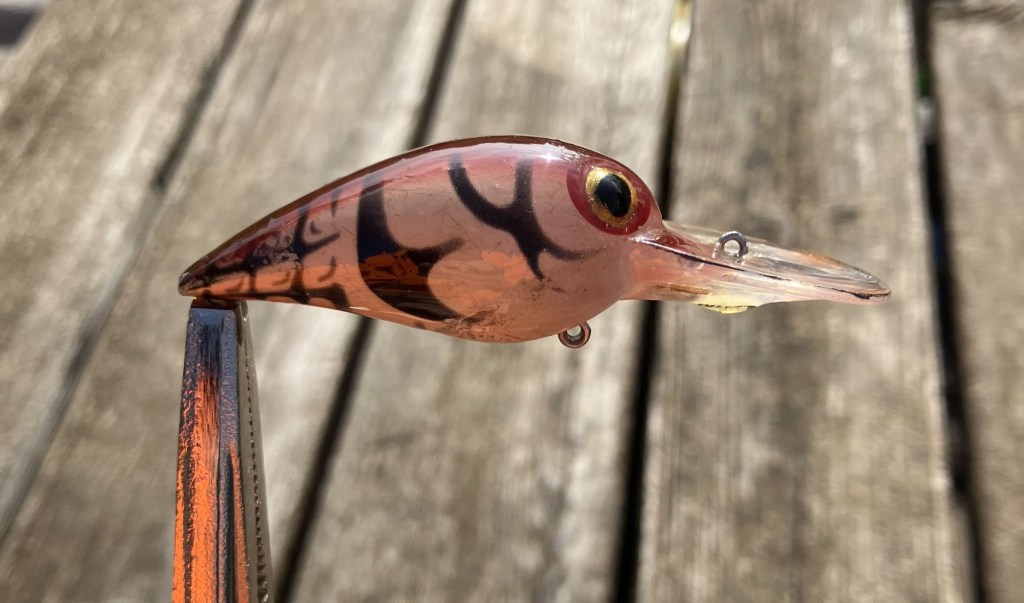
Not a pipe indeed. If you have read my blogs for a while you may have picked up on one of my other vices, fishing. A buddy of mine, let’s call him Matt, had (still has but I’m trying for grammatical correctness) a beloved Storm crank bait. As you may have noticed from the above photo it suffered a catastrophic break. When I saw the pieces on the deck of Matt’s bass boat I immediately felt his pain. You know that little devil that pops up whispering nerdowell things in your ear? Mine was saying, “Hah, he’ll never catch more fish than you with that lure again!” Darn little devil. After a morning of fishing Matt had once again caught more fish than me even without the use of his beloved bait. I looked at the pieces and thought, “I can fix this”. Matt said to give it a try, it was getting any better laying on the deck of his boat but at the same time, I couldn’t help but notice that it had not gotten picked up and thrown away. Perhaps some things are just too painful to disregard. That brings us to the blog for this week. How can a pipe restorer repair a broken plastic lip of a crank bait?
The Restoration
The bait made it to the workbench. It is weird typing that without the word “pipe” in there.
My first thought was to tack the lip back together with some cyanoacrylate (CA, super glue). Not as a permanent repair but to get the lip back into its original position and alignment. I also thought about completely removing the line tie and redrilling a new hole through the old line tie and into the molded resin body of the lure, then fashioning a new line tie and glueing it into position. I judged that might significantly weaken the lip and would likely affect the movement of the lure through the water, so opted against that.
The surfaces to be glued were cleaned using 99% ethyl alcohol on a cotton swab.

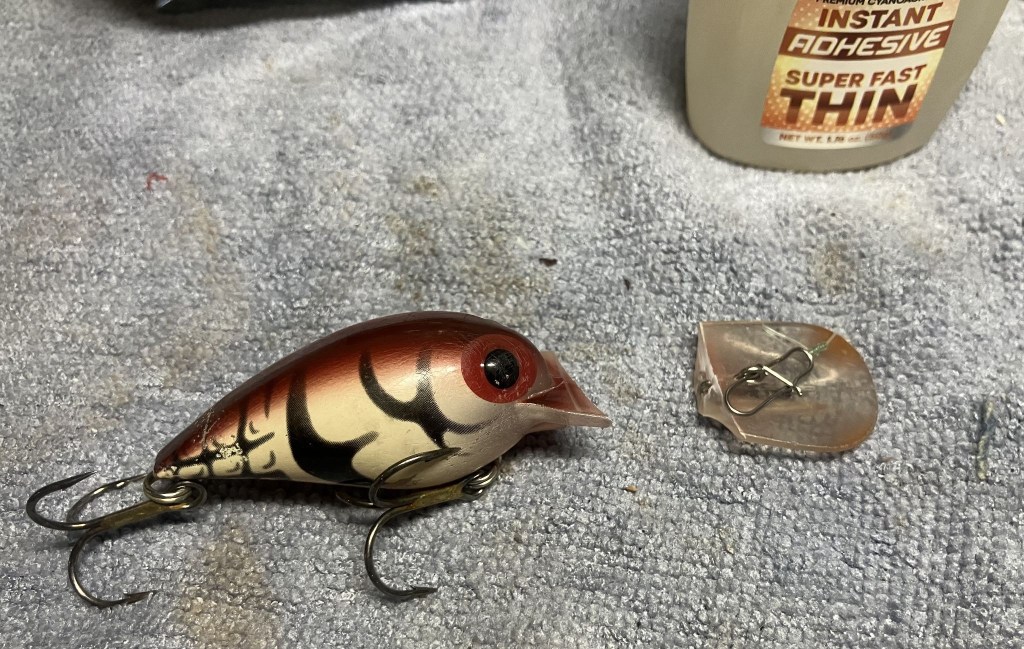
Next a drop of CA was applied to the surface and the lip was reattached. Additional CA was allowed to fill the cracked surface of the seam. The Thin CA is very thin, imagine that, and penetrates well into any slight crack.
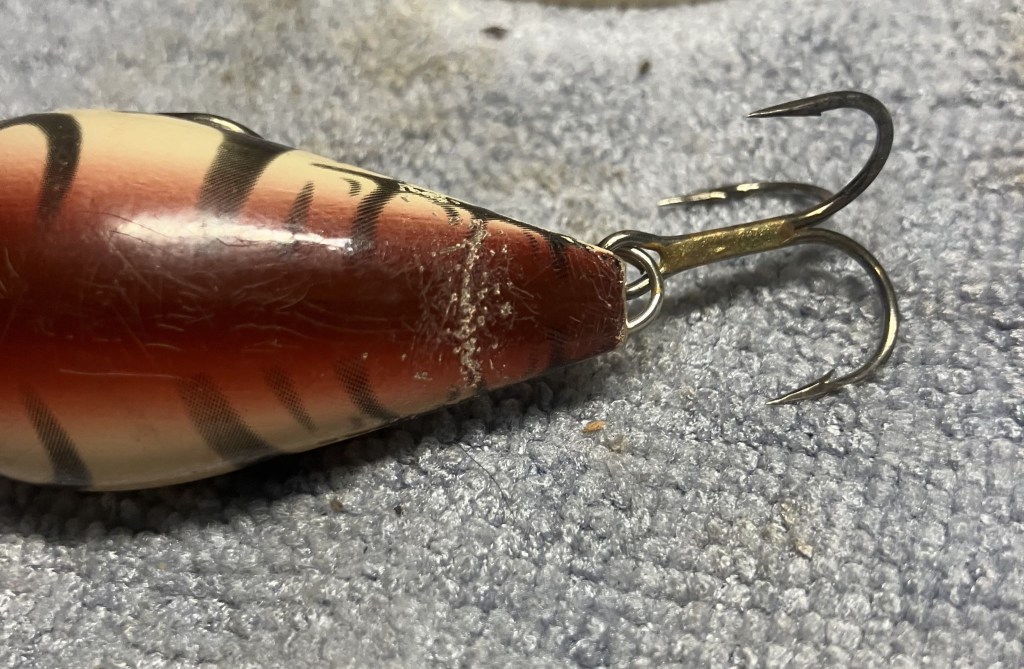
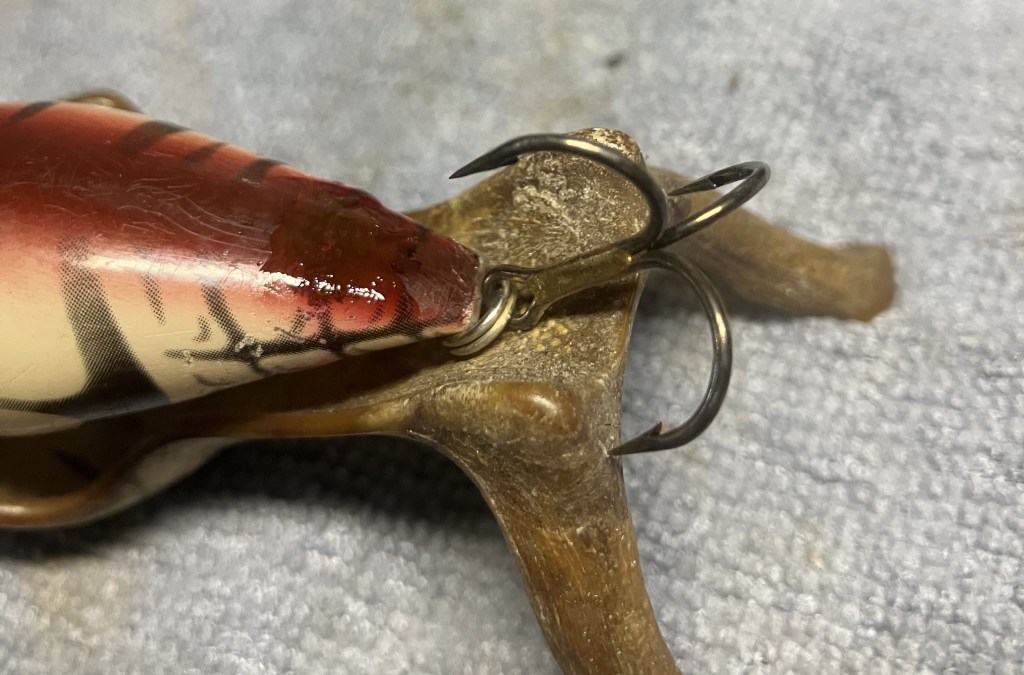
While allowing the glue to cure, I thought I should attempt to repair the “hook rash” or wear on the finish of the bait caused by frequent run-ins with the hooks. That brown looked very similar to a mahogany wood stain.
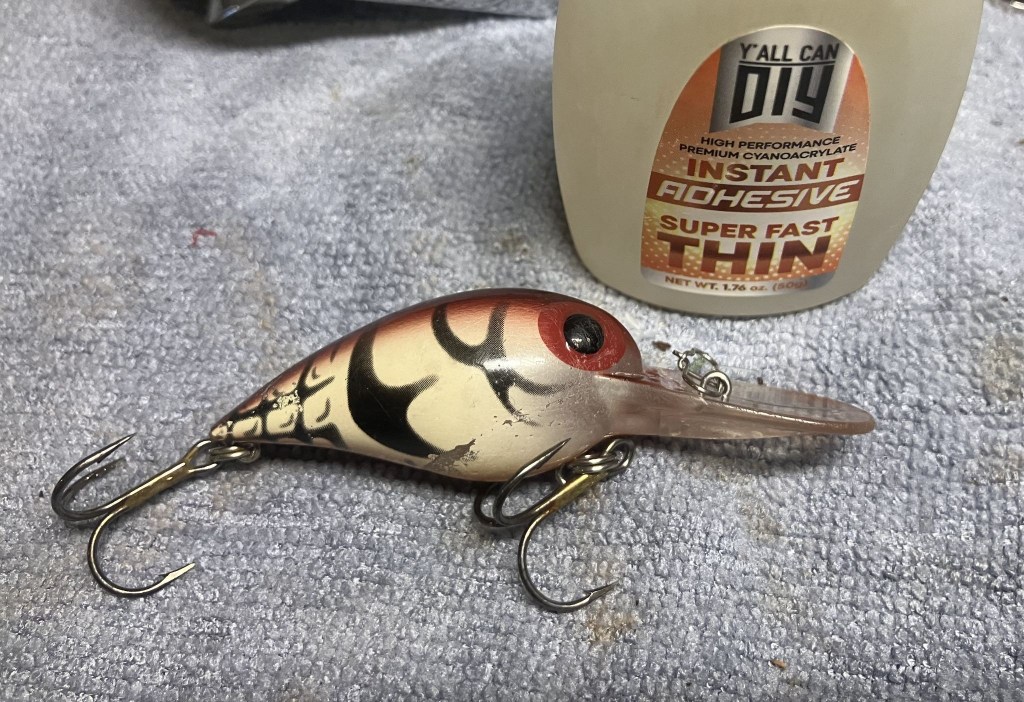
Sure enough, mahogany matched quite well. A little bit of Thin CA locked that stain in place. Now both ends of the bait were untouchable until the CA cured, unless I felt the need to attach the bait to my fingers.
After the CA had completely cure, I used a Dremel rotary tool with a cut-off bit to make two grooves into the lip intersecting the previous break. My grand plan was to use two 2 mm brass rods to reinforce the lip. These would be glued in place with CA then encased in 24 hour epoxy resin which would later be carved to a semblance of the original lip but be slightly thicker. The brass rods, CA and Epoxy all come together to repair and strengthen the break. In my imagination, this worked gloriously.
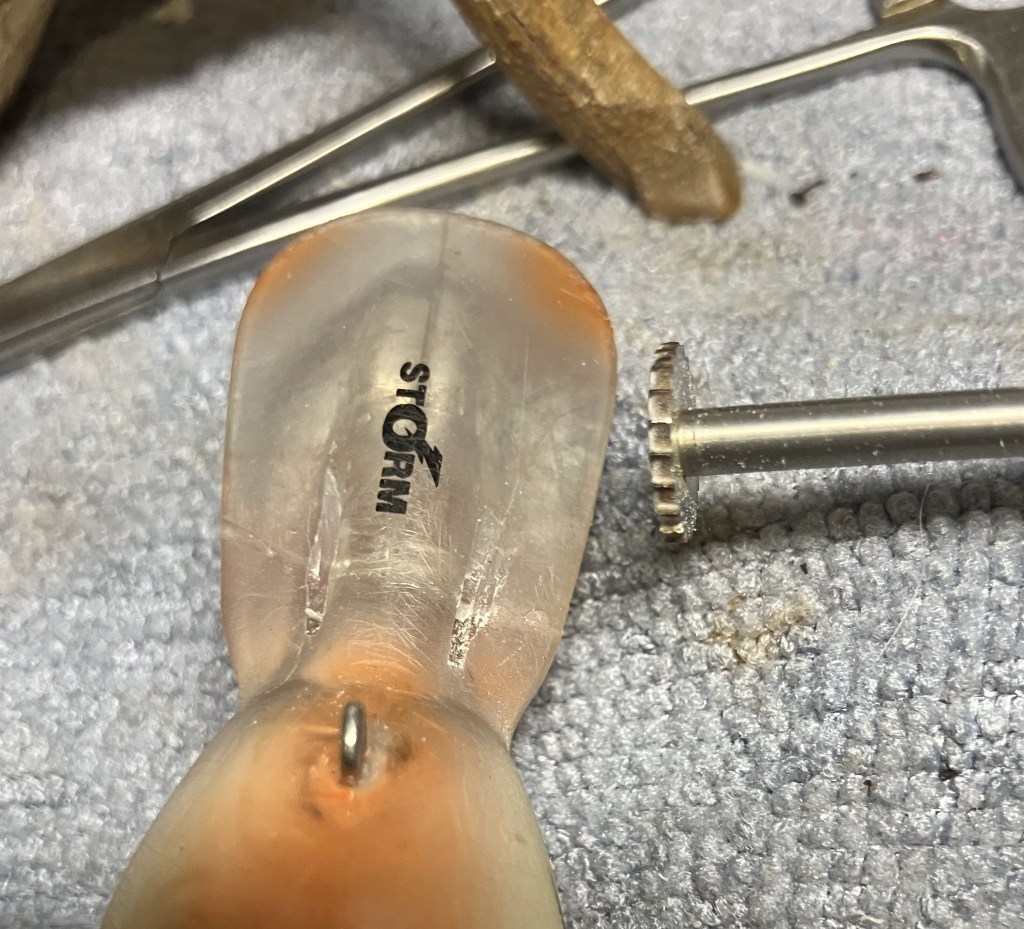
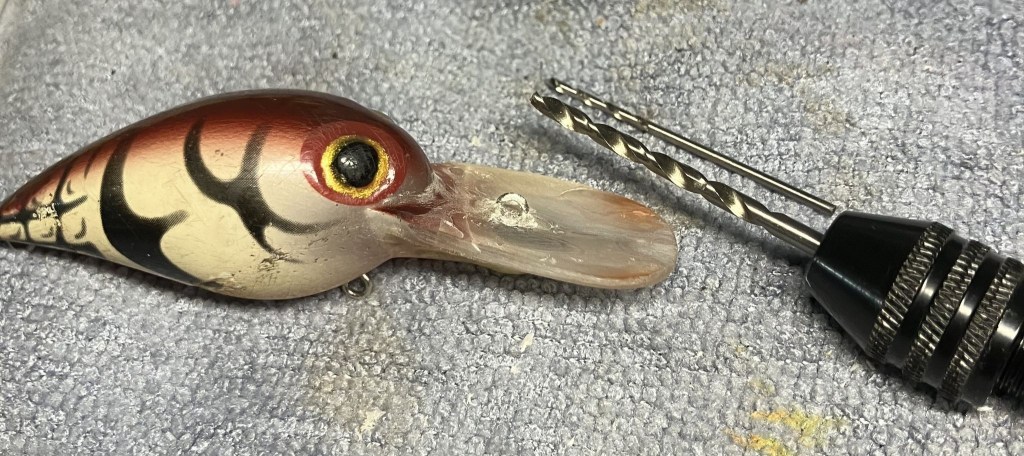
To further anchor the 2 mm brass rods I drilled a 2 mm hole into the resin body of the bait.
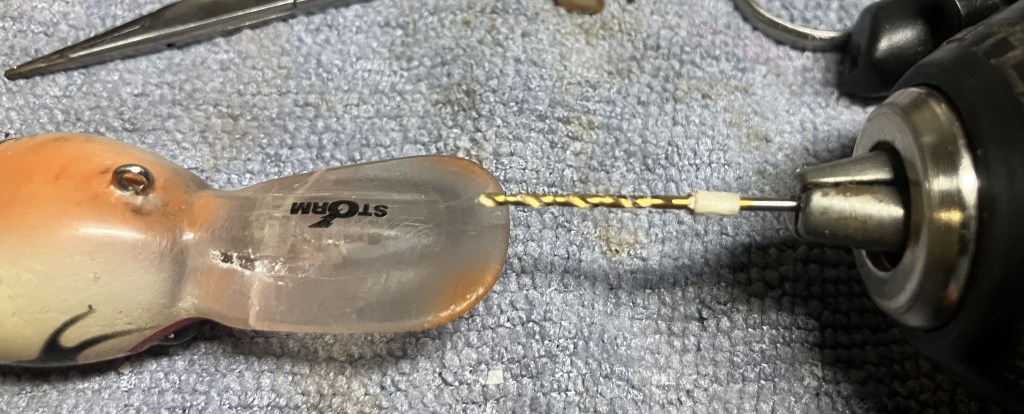
The brass rods were measured and cut. They were then pressed into the holes and fit nicely into the grooves cut with the Dremel. These received a drop of Thin CA to tack them into place while the epoxy cured.
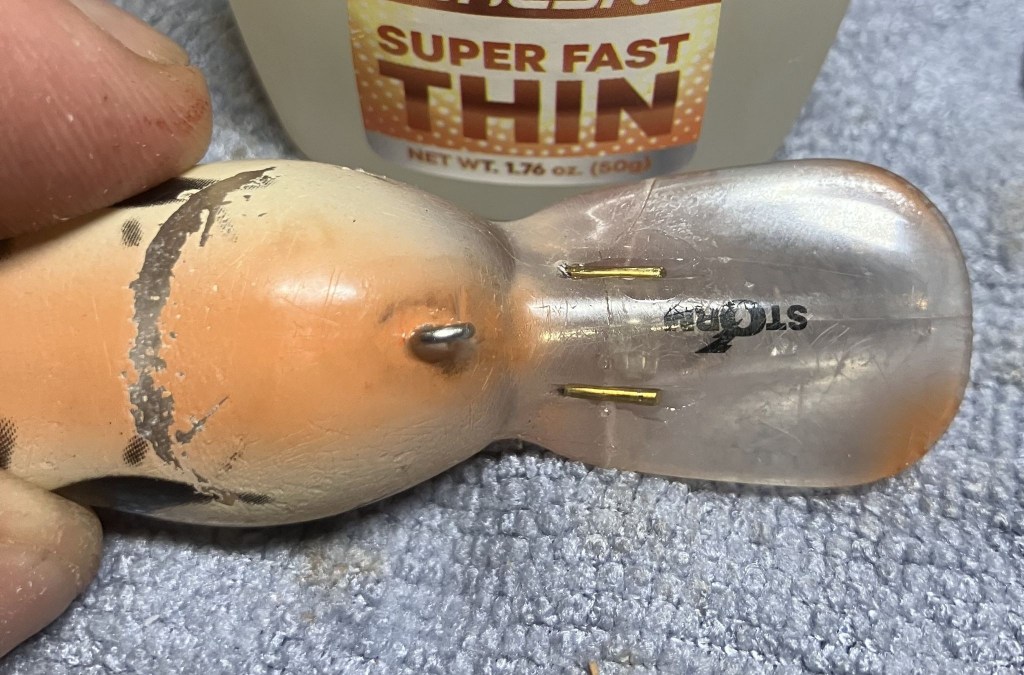
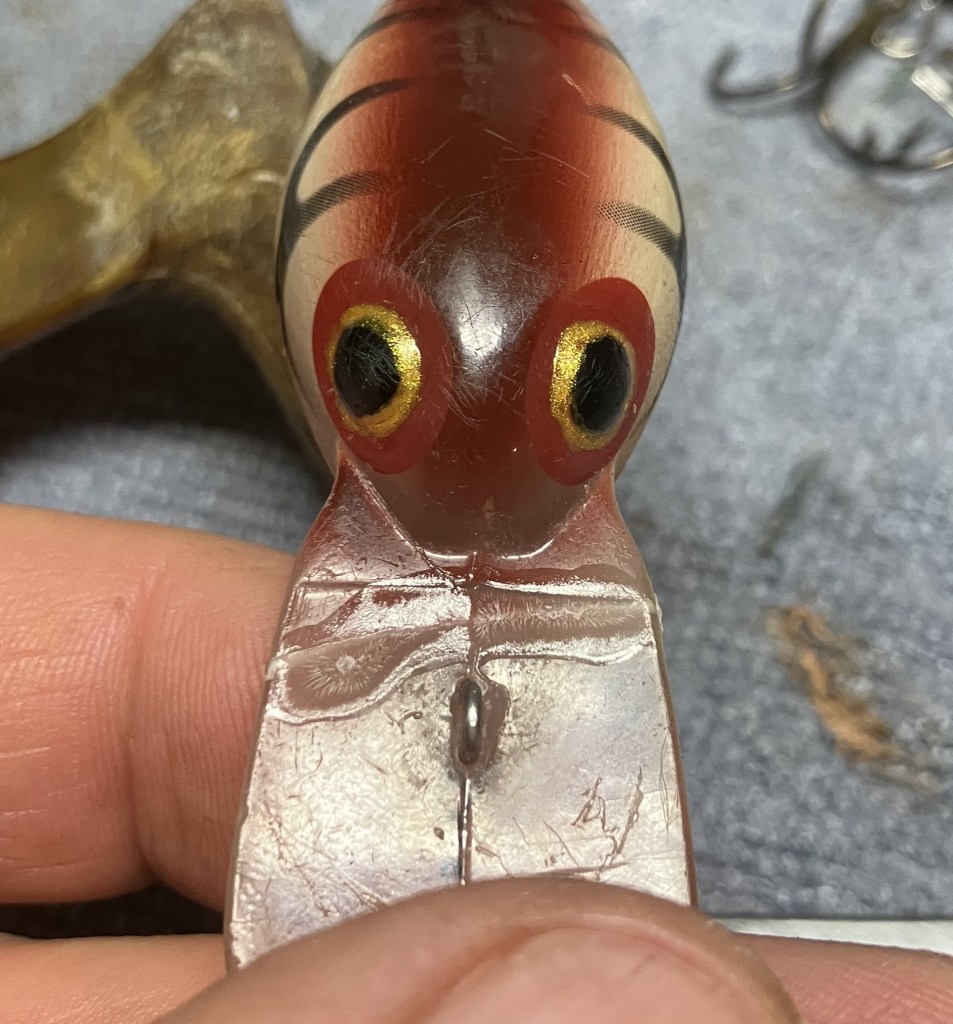
I thought the eyes needed a bit more flair, so I painted a gold iris around the black eye. OK, I was really just keeping busy while the CA fully cured but it still looks cooler, eh?
I also blended some acrylic model paint to cover the hook rash on the belly of the bait. Had I been thinking I would have given this a light coat of thin CA to seal the paint as well. Too bad I wasn’t thinking.
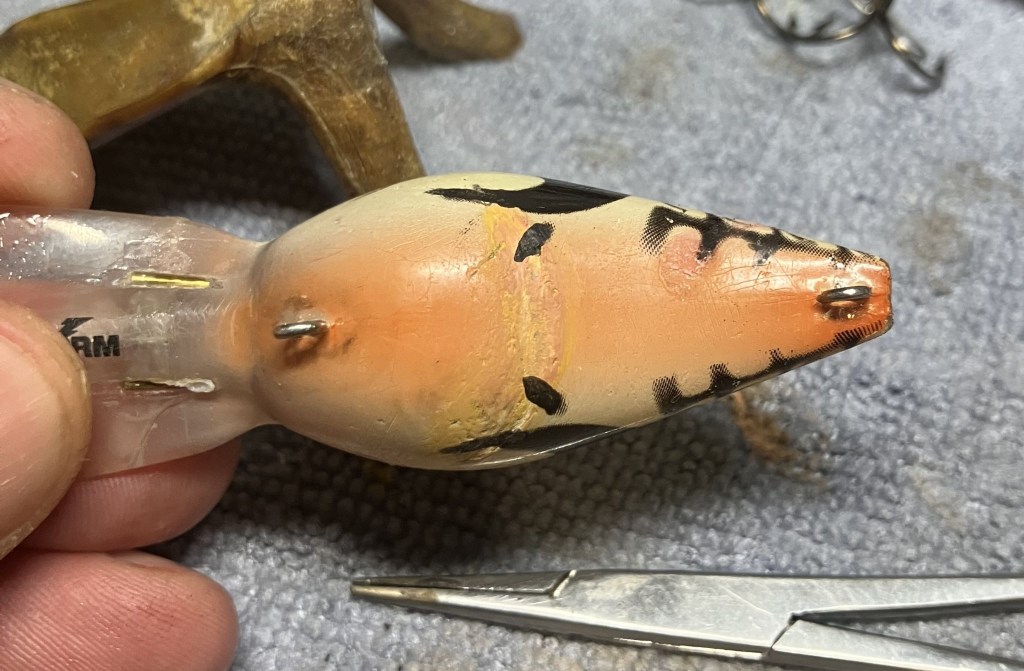
The black was touched up as well and also not protected with CA.
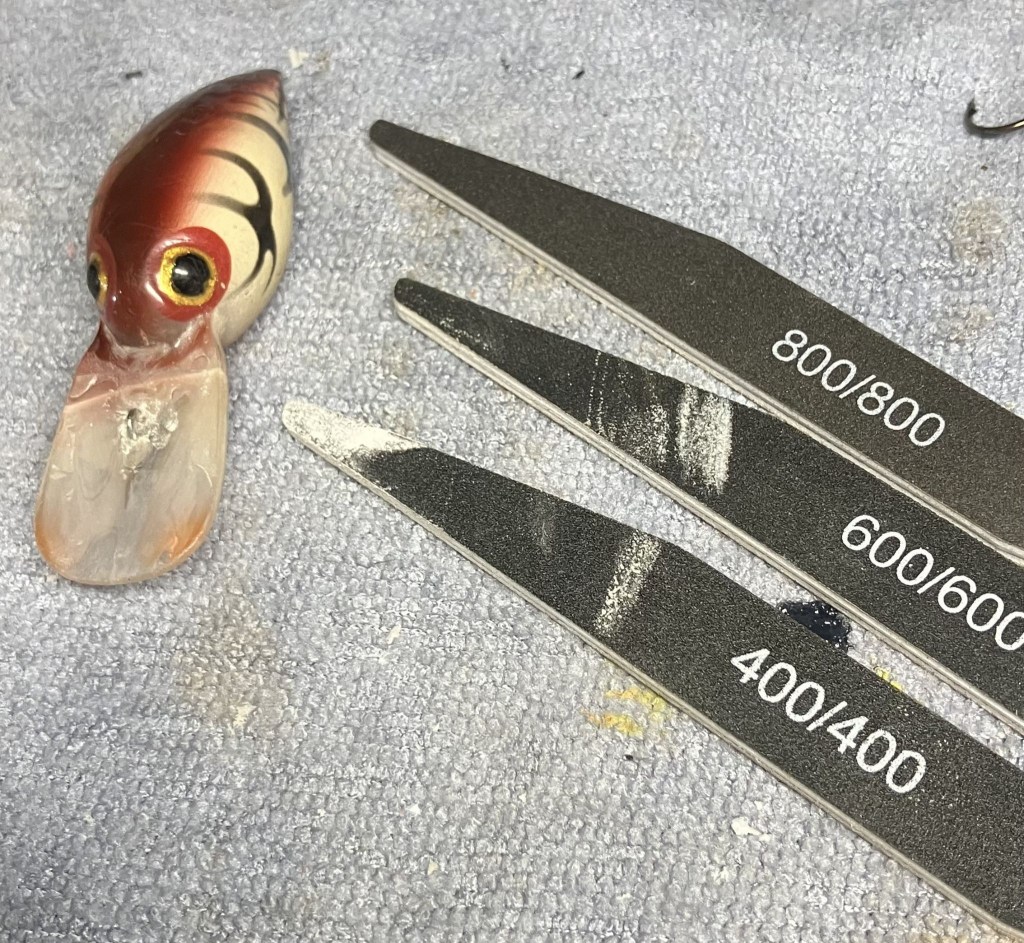
The Protected mahogany spot was filed smooth, not quite finished in the photo below.
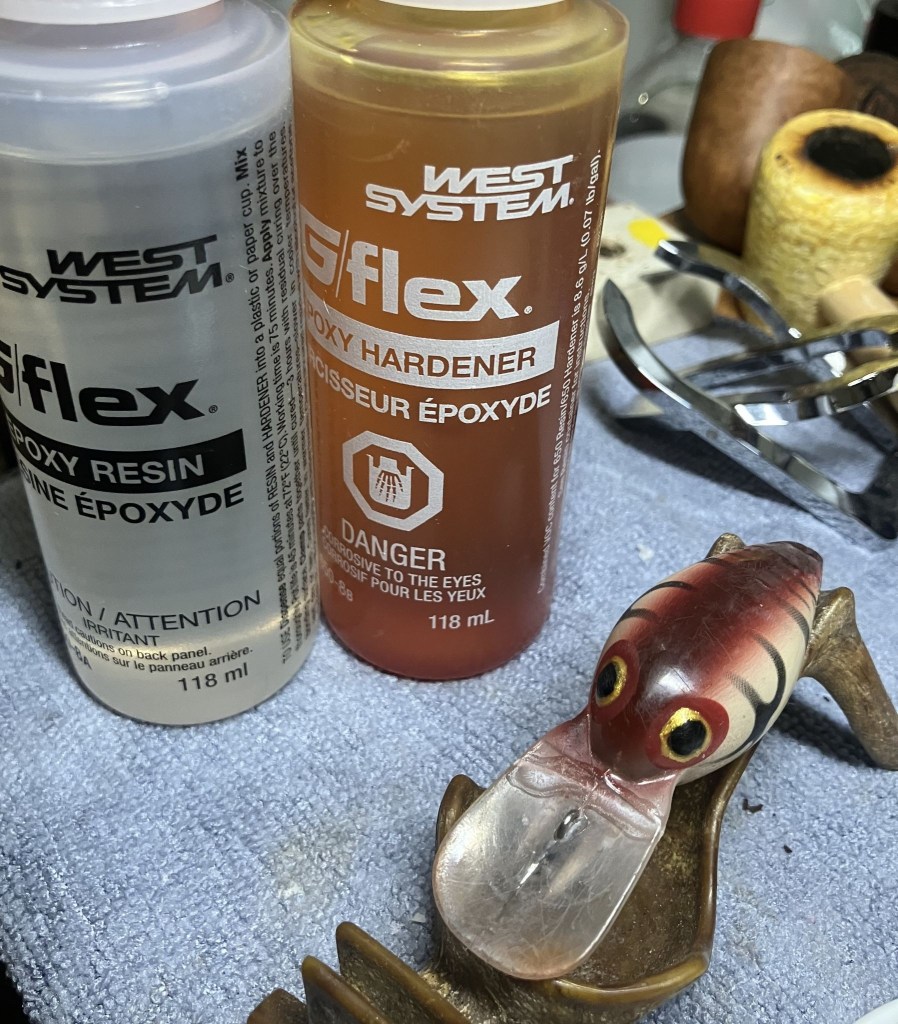
I chose West System G/flex epoxy for this repair. For no other reason that these were new bottles and the tips were not gunked up like my other epoxies were.
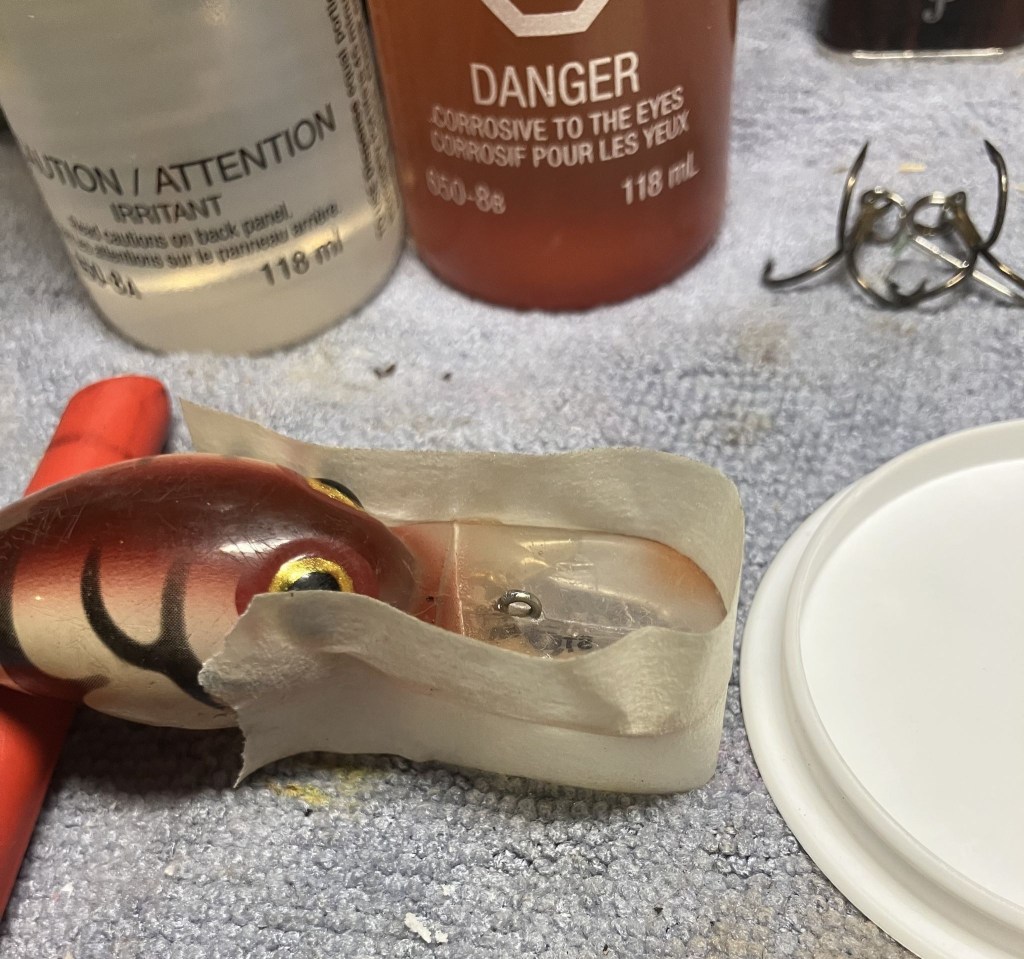
Using masking tape, I made a dam around the lip to contain the epoxy and keep it from flowing over the edges. The epoxy was mixed as per label instructions and applied to the lip both on top and bottom. The bait was set up level and allowed to cure for 24 hours.
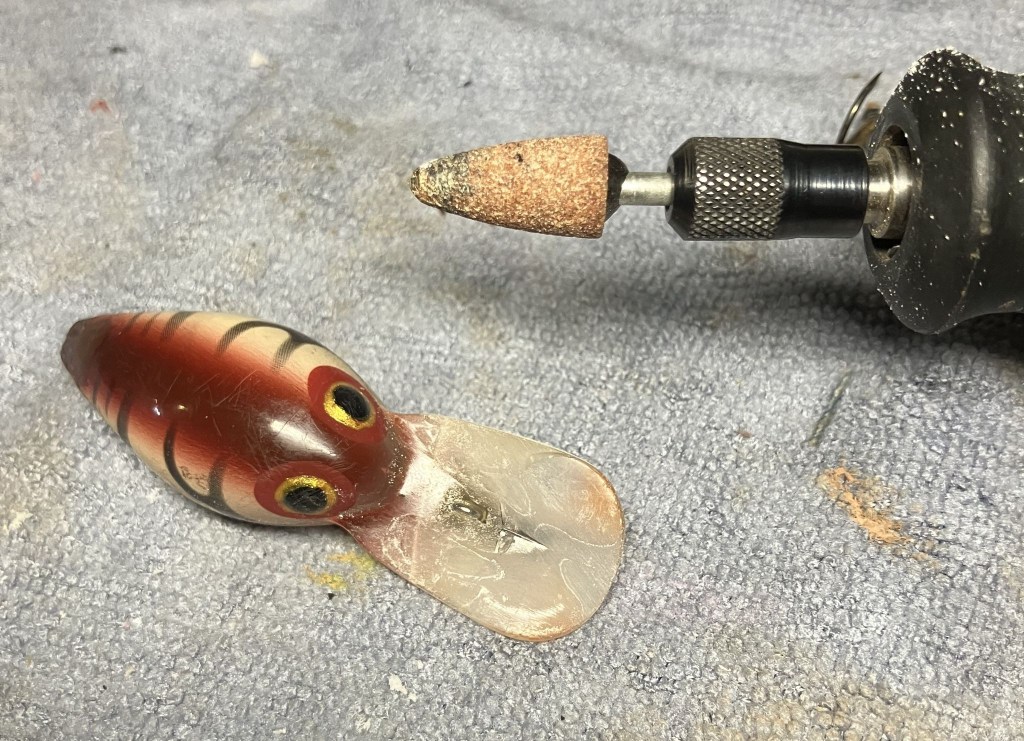
The next day the line tie was completely encased in hardened epoxy. Don’t worry, this was part of the intended thickening of the lip. A grinding bit was used in the Dremel to carve and reshape the hardened epoxy.
I used a hand drill with a couple of bits to drill out the epoxy from the line tie eye.
The epoxy was finish sanded and slightly shaped using sanding boards in 400-800 grit.
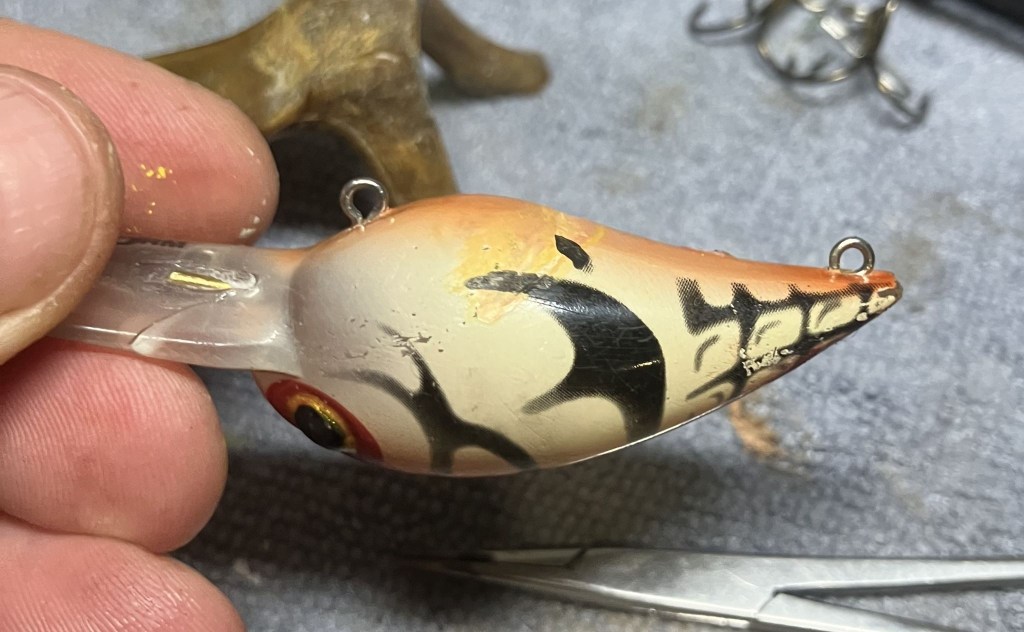
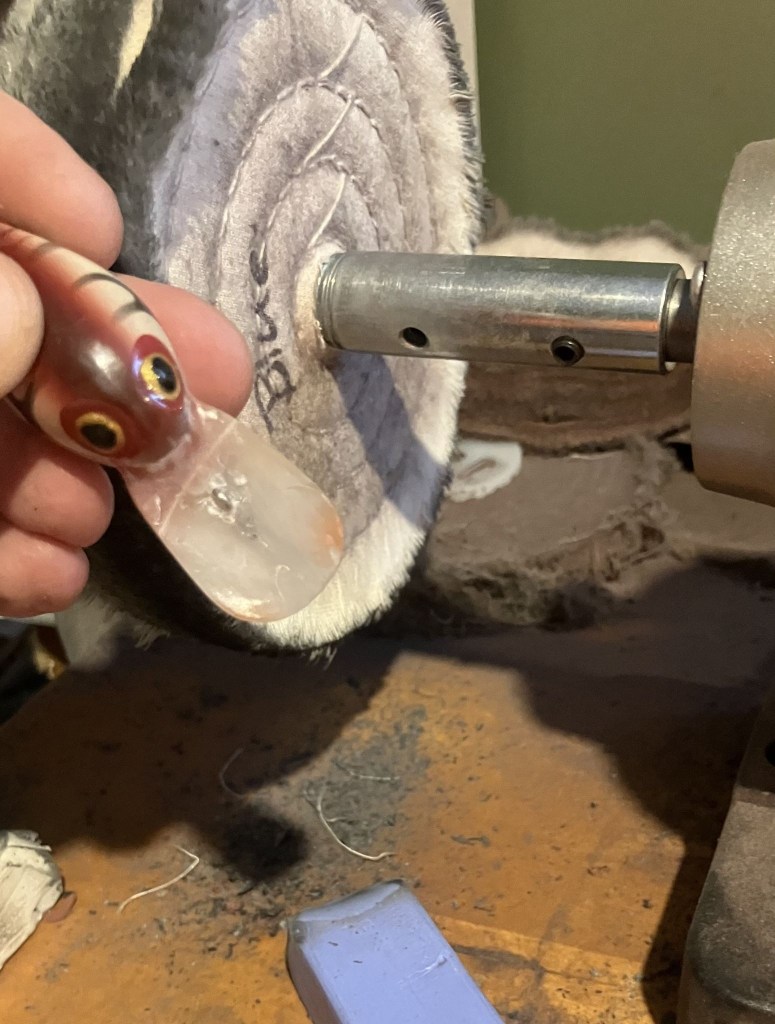
Once the epoxy was shaped to my satisfaction I buffed the bait with Blue Diamond compound on the buffing wheel. This is where protecting the new paint would have really been a good idea. The buffing kind of removed most of my beautiful color matching. DOH!
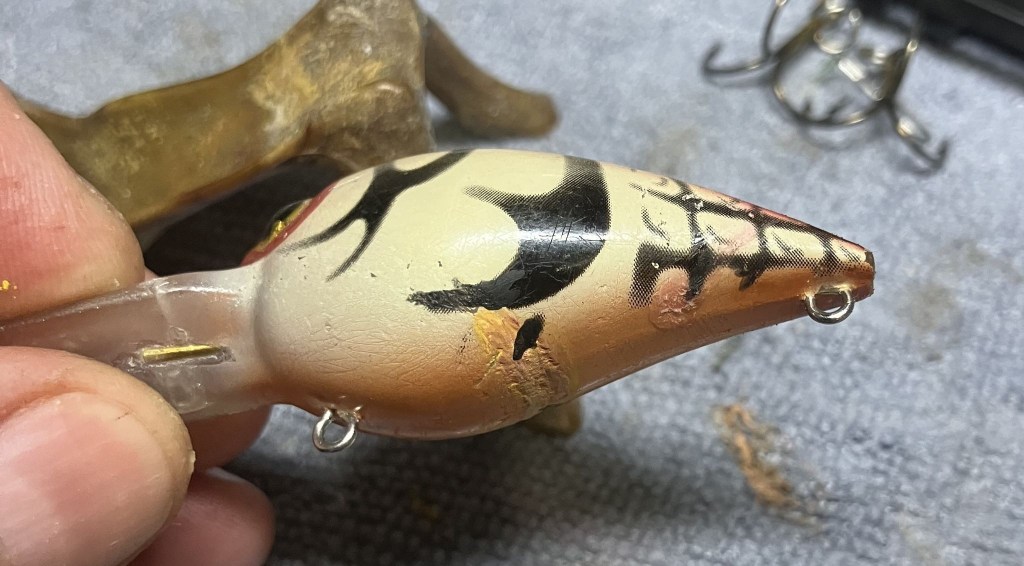
Chinese UV resin was applied to the bait and allowed to cure in sunlight for 20 minutes. After the first coat a second coat was added and allowed to cure for another 30 minutes.
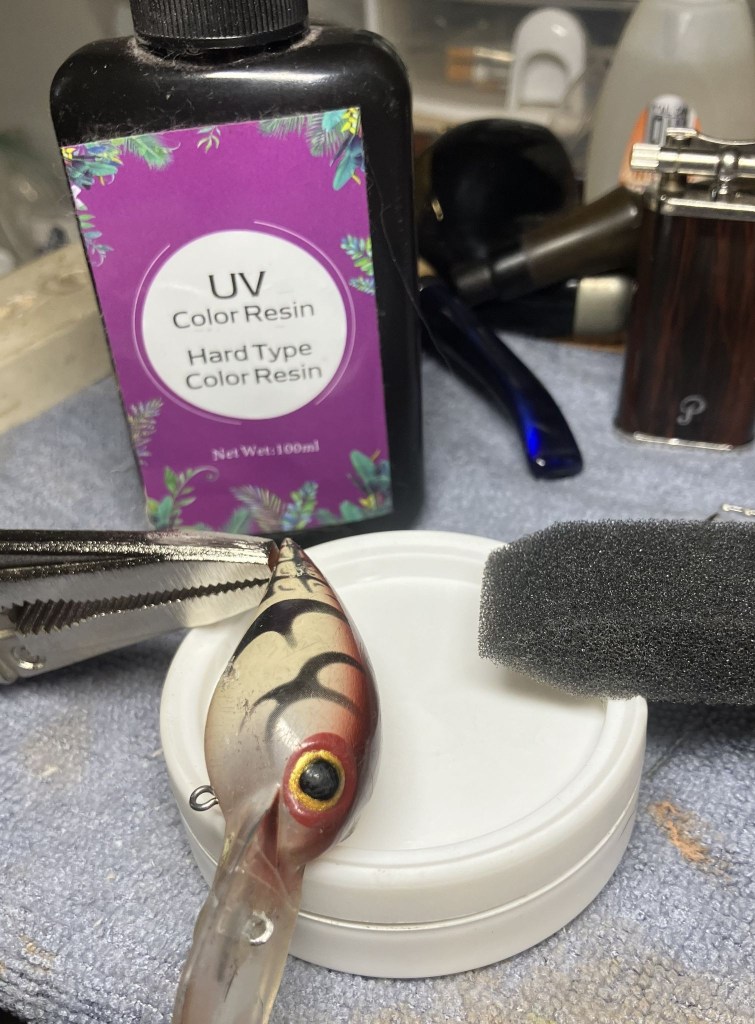
Below is the bait as it was being set in the sun for Chinese UV resin curing.

The hardware was reattached and the bait returned to Matt. Here is the point where you ask, “Didn’t you sharpen all the hooks for him?” Heck no, he is always catching more fish than me anyway.
I do hope that you have found something useful or at least entertaining in this “not-a-pipe” restoration. Feel free to like, comment and/or subscribe. The next blogs will most likely be a return to pipe restorations but you never know.
