
Photographed and written by
John M. Young
I love it when an attractive pipe comes across the bench that is stamped with a rather obscure maker. In this case S. Johnson and SFJ on the stem as well. Pride in workmanship and putting one’s name on a pipe is something that I find interesting. I’d never heard of S. Johnson and I have to say that this pipe was not the focus of purchasing the estate lot which it was featured in. The entire lot looked interesting and I couldn’t believe that I was the only bidder. Below is the original eBay listing photo.

The lot came to me from Ipswich, Massecheutets (dang, I can’t believe I spelled that right the first time) in mid-January of 2025. I guess not everyone gets excited about oxidized broken pipes with one missing a stem. The S. Johnson pipe had a broken acrylic stem and a reverse tenon. The stampings on the pipe were: S. JOHNSON over XXQ offset 8 on the left shank, HANDMADE over U S A on the right shank and SFJ stamped on the stem with a gold paint filling the impressed stamping. Below are some photos of the S. Johnson pipe prior to work. I was trying a white background for the initial photography of this restoration. I am unsure but generally not liking the white. Please feel free to comment.


The issues with this pipe seemed to increase upon close examination. The obvious ones were the chipped mortise and tooth marks on the stem. The plug on the bowl would require some serious investigation regarding the condition of the tobacco chamber but it looked as if it were professionally done. The reason why it was done is the thing which worried me. The exterior of the stummel looked great. I guess I need to focus on the positives and be glad I don’t have to worry about oxidized vulcanite.
Background
I was glad to see that there was information on S. Johnson on both of my “go to” pipe researching sites. I first found him mentioned on pipephil.eu. There I discovered the S. stood for Steve. Below is the pipephil.eu information.

(Ste-Stz — Pipes: Logos & Markings)
Research stop number two was pipedia.org. Here I found a short entry and have included it in its entirety:
“Steven Johnson made his first pipe at the age of 9, as a friend had accidently dropped his pipe in a stream while fishing. This is according to an article in the Boca Raton News on May 16, 1982. It says further that by the age of 20 he had become a master pipe maker. He worked as the manager of the E. Wilke pipe shop, since 1977 was located in a large department store called John Wanamakers in Philadelphia. For his own pipes he’s reported to have produced 3 pipes a day, 6 days a week. His pipes are rare to find and are marked S. JOHNSON.
Richard Esserman, in an article entitled “Pipe Travels”, wrote of meeting Steve Johnson in 1978 at Wanamaker’s. At the time Johnson made pipes for Wilke’s in a small room right in the middle of the department store. The two became friends, and Esserman comments on one pipe going to the Wilke shop in New York City with an asking price of $500.00, a substantial sum in those days for any pipe.
In “Trial By Fire”, an article in Pipes and Tobaccos magazine by William Serad and Tad Gage, Mr. Serad speaks of Steve Johnson working as the manager of the satellite store in Philadelphia in the early 1970’s, and again offers great compliments to Mr. Johnson’s work.
Mr. Johnson is believed to have moved on from the Philadelphia Wilke’s shop to working for Zino Davidoff.
Markings: No. 1 BROAD STREET, (J.W), MADE IN ENGLAND (round stamping) made in the 1930’s-40’s timeframe reportedly by Comoy’s for the tobacco shop in the John Wanamaker department store in Philadelphia, located at No. 1 BROAD STREET. It’s stamped with the (J.W) logo and the early 1930’s-40’s circular MADE IN ENGLAND country of manufacture stamping. Here’s some info on the stamping from Trademark history: J.W. On Tuesday, April 18, 1933, a U.S. federal trademark registration was filed for NO. 1 BROAD STREET by JOHN WANAMAKER PHILADELPHIA, PHILADELPHIA. The USPTO has given the NO. 1 BROAD STREET trademark serial number of 71336921. Made for them by Comoy’s. The NO. 1 BROAD STREET trademark is filed in the category of Rubber Products . The description provided to the USPTO for NO. 1 BROAD STREET is SMOKING TOBACCO.” (Steven Johnson – Pipedia)
The last paragraph there was pretty much discussing the building that the pipe shops were in. I did not include the images as this blog is already a long one. So, Steven Johnson must have been a pipe making progeny and he got to live the dream of making pipes and working in pipe shops throughout the 1970s. If any of you would like to make this S. Johnson yours for $500, PLEASE say something in the comments. In all seriousness I’ll sell it for far less than $500.
The Restoration
The first step was to poorly focus on the S Johnson while it sat on a cleaned denim piece.

Next came the evaluation of stem banding material. I checked available spent cartridges for the correct size, thinking that one might look cool and the more traditional brass tubing. The diameter needed was .50 inches which coincided nicely with a 300 Winchester Short Magnum that I picked up somewhere.

The rifle case was tarnished but would polish up nicely. The question was, how to bore out the interior to fit the stem. Hmm, good thing I don’t have a lathe (said with extra sarcasm). I do know a great machinist though. I will call him Christian, because that is his name. I have employed the use of Christian’s unique skill set on other restorations here and here, if you are interested. More on Christian in a bit.
The stem had a large chip removed due to a previous break. My thought was to add a “band” to the stem, thus concealing the chipped portion and also filling it with epoxy within the band.

While considering the stem repairs I proceeded on to reaming the tobacco chamber. The tools needed were the PipNet, Smokingpipes Low Country Reamer and the General triangular scraper.

The pipNet with the #2 and #3 blades worked well for the deep chamber but (dramatic pause)

there was a good deal of extra scraping that required the General.

Eventually the chamber looked pretty well reamed. There was charring damage observed within the tobacco chamber. It was not severe but it was an issue which would require attention.

Next, the lava on the rim was addressed.

This was softened with saliva and scraped with a sharp pocket knife.

The stummel was taken to the sink for a scrubbing with undiluted Murphy Oil Soap and a nylon brush. The soap was rinsed with warm water and the stummel dried with a cotton hand towel.

Back at the workbench the stummel was wiped with 95% ethyl alcohol on a make-up pad.

The shank was cleaned out using numerous bristle pipe cleaners dipped in the ethyl alcohol and a nylon shank brush.

I had reached out to Christian to ask when he would be available to assist with this project. The date was February 4. The project was put on hold until February 25 when I could make it to Christian’s new machine shop. Once there I showed him what my thoughts were regarding the band. He immediately thought that the cartridge would make a cooler looking band than the brass tubing or, maybe he relished the greater challenge of the cartridge.

The cartridge was measured and cut using a lathe. The edge was then slightly beveled.

I neglected to photograph the next steps, I know, loser move. I will try to explain them. A boring bar was used on the lathe to bore out the interior of the cartridge giving it an equal inside diameter with a flat bottom. This bottom would be the resting place for the end of the acrylic stem. The outside diameter of the tenon was measured and an appropriate drill bit was selected. The primer pocket was enlarged to .25 inch. The brass was then polished on Christian’s buffer.
Back at home I assembled the stem and fit it to the stemmel. Everything looked like it was coming together nicely.

Below are a couple of photos of the parts at this juncture.


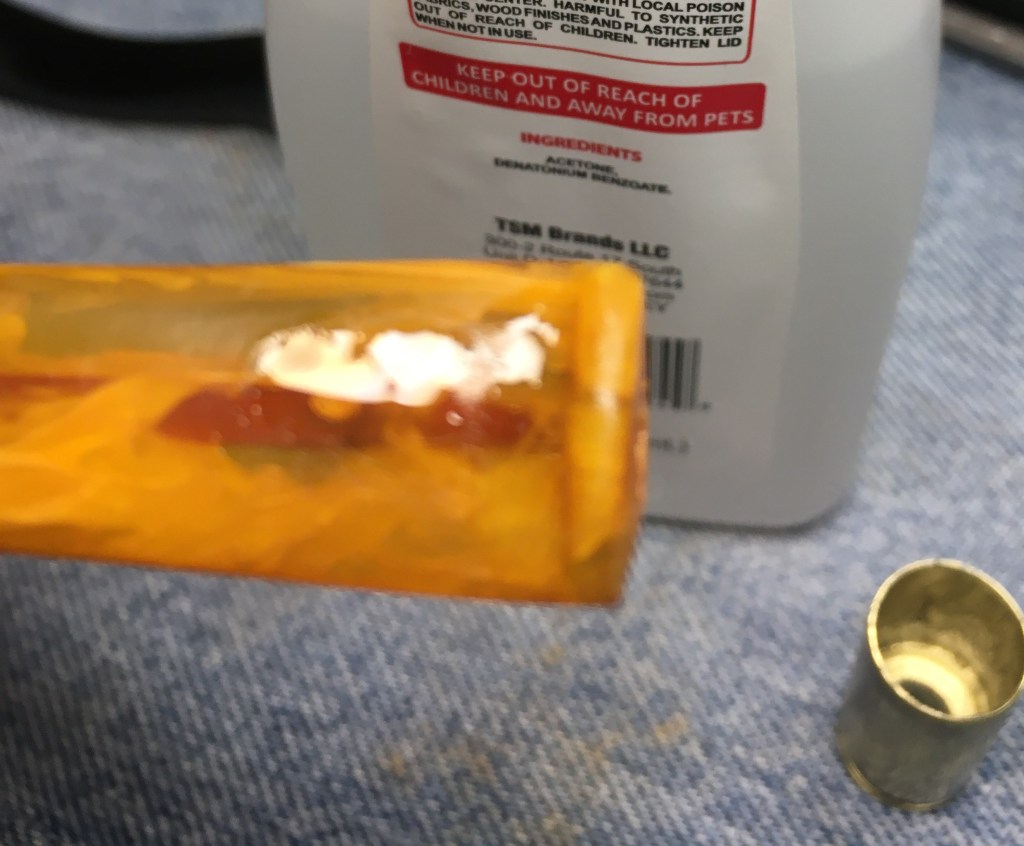
I needed to build up epoxy to replace the chip on the stem. I found a surrogate stem which fit the mortise of the real stem nicely. This was greased with petroleum jelly to avoid the epoxy from sticking.

The surrogate was inserted into the stem. This would prevent the epoxy from getting in the hole meant for the tenon insert. The two part epoxy was mixed and added to the chipped area. I had to continuously rotate the stem for about 15 minutes while the epoxy was setting up.

Once the epoxy had set I removed the surrogate.

It would take the epoxy a full 24 hours to completely harden but the chip had been filled. While the epoxy was still soft I used an exacto knife to trim the edge flush with the original edge.

I could work on the tooth chatter while the epoxy was curing. I cleaned the top and bottom of the bite zone with acetone.


Once cleaned, I used Thin clean cyanoacrylate (CA, super glue) to build up the tooth dents.
This was repeated on the opposite side of the stem.

The CA was allowed to cure then was filed with a small flat file and smoothed with a 400 grit sanding sponge.

Additional applications of This CA were used until the depressions were completely filled.

The airway of the stem was then cleaned using pipe cleaners dipped in 95% ethyl alcohol.

With the epoxy on the stem needing time to completely harden, I returned to working on the stummel. The rim had some charring that I wanted to remove. This was done by lightly topping the pipe.

A piece of 220 sandpaper was laid flat on the counter and the rim sanded using a figure 8 motion. I rotated the stummel in my hand and repeated the sanding a few times.

The topped rim looked much improved.

The next day I couldn’t help but think I was mistaken about the reverse tenon of this stem. I gripped the tenon insert with a jaw-taped pliers and gave it a twist. The tenon insert came out. I felt kind of dumb for not realizing that the tenon of this pipe was completely normal and that the tenon insert was not reverse but that the broken stem had merely released the gluck holding the tenon insert in the stem. DOH!

I used the two drill bits in the above photo to clear and clean the hole in the stem. The brass was roughened up with a piece of 80 grit emery cloth to allow epoxy to better adhere.

The tenon insert was test fitted to the stem. The airway looked very nice and clear.

The tenon insert was roughened up with the emery cloth again to allow better contact with epoxy.

The brass was thoroughly cleaned with acetone. The epoxy was mixed and applied to the tenon insert and to the brass.

The tenon insert was seated into place.

A pipe cleaner was run through the airway from the button out through the tenon insert to clear any epoxy which may have intruded.

The excess epoxy was removed using a cotton swab then was wiped clean with a soft cotton cloth wetted with acetone.

Next came the sanding of the briar. The stamps were both masked with painters tape for their protection.

The tape was cut in slightly irregular shapes to better conceal the lack of sanding immediately around the stamps.

The inner rim was beveled by sanding it with a small wood ball wrapped in 220 sandpaper to mask the slight rim charing.

The exterior of the stummel was sanded with a series of sanding sponges from grits 400-3500. Between each sponge the stummel was wiped with a make-up pad moistened with ethyl alcohol.

The stummel was then worked with micro-mesh pads from 4000-12000 grit. Between each pad the stummel was wiped with an alcohol wetted make-up pad.

The stummel received a coating of Before and After Restoration Balm and was set aside for 15 minutes to allow the balm to work its magic.

The excess balm was wiped away with an inside out athletic sock.

The brass and stem were buffed using white compound on the buffer.

I wanted to revitalize the gold which the stem logo had. I used Run’nBuff Gold Leaf for this. The metallic wax was applied with a fly tying bodkin and buffed with a soft cloth.

The surrounding area was then cleaned of any gold using a cotton swab dipped in acetone.

The pipe then received several coats of carnauba wax with the buffer.

To address the charring of the tobacco chamber, I decided to give the pipe a bowl coating. I applied a light coating of 100% pure maple syrup to the interior with my finger tip. I ran a pipe cleaner up to the inner edge of the chamber via the mortise. This would act as a plug to keep the charcoal dust out of the airway.

A capsule of activated charcoal powder was then dumped into the chamber and placed a piece of painters tape over the rim.

The stummel was shaken for over a minute. The shaking was interrupted by me tapping the stummel on the denim covered workbench from several different sides. The goal was to evenly disperse the carbon powder. The tape was removed and the excess charcoal was dumped in the trash. I then blew air through the shank and avoided the black cloud of dust.

The final step was to hand buff the pipe with a microfiber polishing cloth.
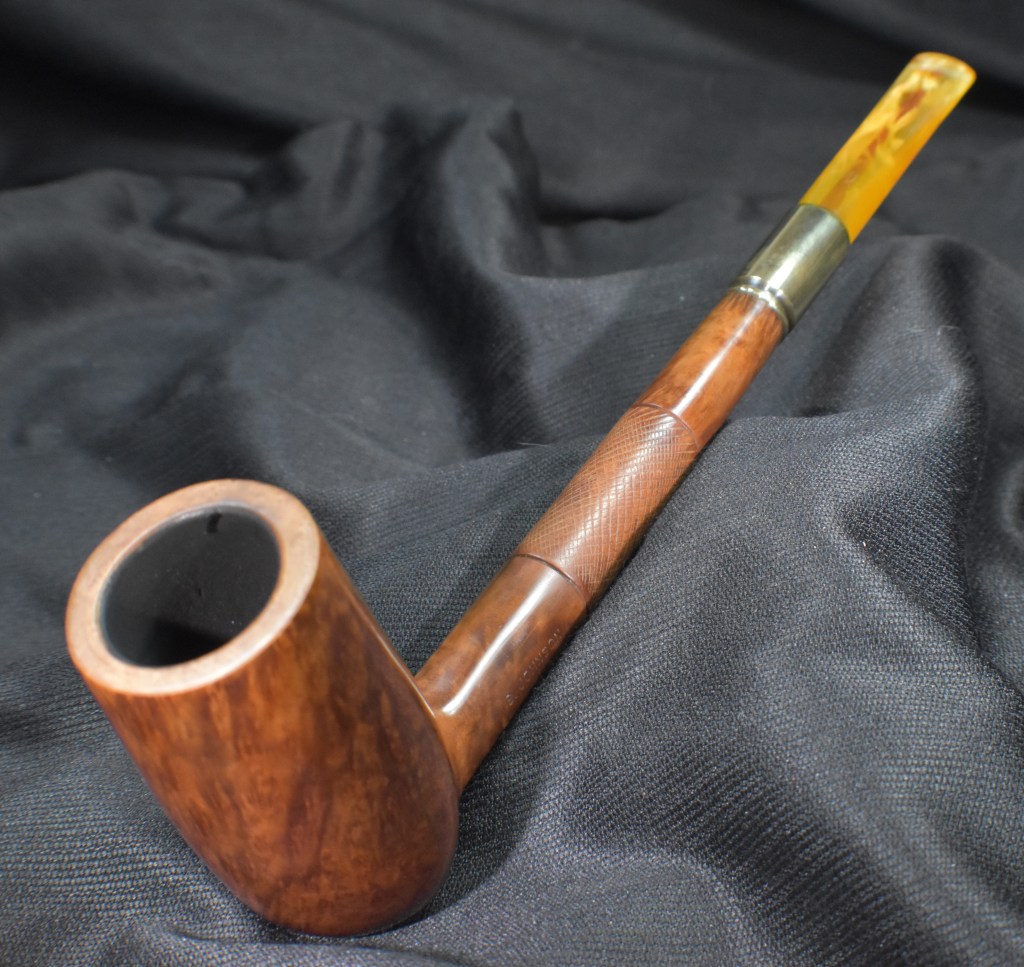
This was a long restoration with several interesting twists. The whole misidentification of the reverse tenon made me feel foolish. I am not sure why the bowl was plugged. The interior of the tobacco chamber showed some light charing but did not show signs of excessive scraping. The plug looks very professionally done with a minimal footprint. The finish on the pipe with the checkering is interesting and something I think of with rifle stocks and not pipes. It does make the 300 Winchester Short Magnum brass more appropriate though.The color of the acrylic stem blends in well with the brass. Overall it turned out as a very large beautiful billiard which will hopefully give someone many more years of enjoyment. The dimensions of the S. Johnson 8 are follows:
Length: 8.76 in./ 222.50 mm.
Weight: 2.27 oz./ 64.36 g.
Bowl Height: 2.74 in./ 69.60 mm. (bowl only) 1.70 in. / 43.18mm (with tube)
Chamber Depth: 2.58 in./ 65.53 mm.
Chamber Diameter: 0.84 in./ 21.34 mm.
Outside Diameter: 1.47 in./ 37.39 mm.
I do hope that you have found something here useful to your own pipe care, maintenance or restorations. If you like this sort of thing, please click the like and subscribe buttons. Thank you for reading the ramblings of an old pipe lover. Oh, I almost forgot. I do not like the white background. Perhaps it’s my lighting but, I find the black better for me and my photography.
Below are some photos of the finished S. Johnson 8.


One response to “An S. Johnson Restoration”
[…] This will be the second pipe of the lot that I’ve worked on. The first was the S. Johnson (the long shanked chimney, above) which was a very fun project. I had done a few Danish pipes […]
LikeLike