
Photographed and written by
John M. Young
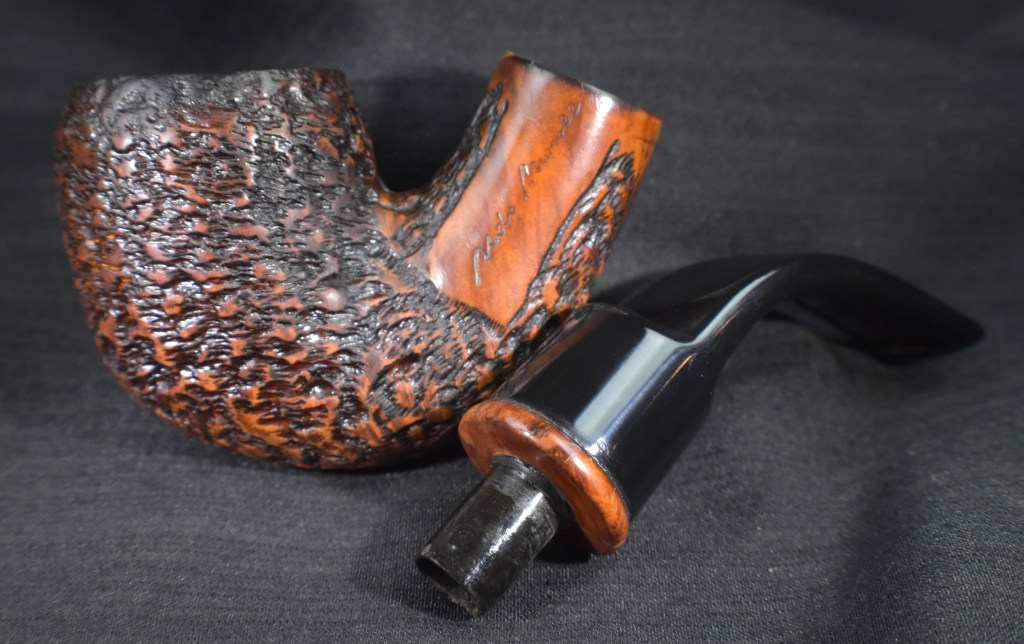
This slightly brutalized bent beauty was part of an estate lot of 13 pipes from Germany. I was interested in getting some pipes less common in the United States. The first from this lot that drew my attention was this rusticated bent pipe with a unique briar ring adorning the stem. The pipe was marked with what appeared to be a signature though I had trouble making out the name. The only other markings on the pipe were a 5 digit number around the bottom of the shank. Below are some photos of the pipe prior to being worked on.


Based on previous experience a heavily smoked pipe is frequently a very good smoking pipe. Then again it could just be a heavily smoked pipe by a slob. The rim was heavily layered in lava, the tobacco chamber well caked and the shank to stem joint looked like it had issues retaining a tight seal. When I pulled the stem from the stummel I saw a replaceable filter which someone must have thought to be irreplaceable. The briar ring on the stem appeared to have been a two piece ring glued together and since separated slightly. The most redeeming quantity was that the stem did not appear to be chewed on. My vivid mental image of the previous owner was a German tweed jacket wearing man with a bottomless tobacco pouch and no teeth. Well, this was going to be an interesting restoration.
Background
For researching this pipe, the first place I visited was pipephil.eu. Not sure how to proceed without a logo, name or country of manufacturer (COM), I started with a hunch, Germany. I had no evidence that this pipe had a German provenance but I had to start somewhere and the pipe did come to me from Germany. I clicked the German flag in the section that read “Search by country”.

(Germany — Pipes : Logos & Markings)
And there, third from the left was Aldo Morelli. Hmm, that kind of looks like the first name of the signature.

(Al-Ale — Pipes : Logos & Markings)
Denicotea? Barontini? Molina? I have the song Synchronicity by the Police blaring in my head after I read those three names. I had just recently restored a Barontini pipe, and last Saturday I received a brand new Molina pipe and the next pipe in the restoration queue is a Denicotea. Good thing I like the Police, the genius of Sting, the amazing guitar work by Andy Summers and the incredible drumming by Stuart Copeland – what’s not to love.
Back to the pipe, I continued to pipedia and searched Aldo Morelli. Here I found the following:
“Aldo Morelli is a fictional name. The brand Aldo Morelli has been registered for Denicotea on February 26th, 1992.[5]
Depending on the different lines the pipes are made by Cesare Barontini, Gigi or Molina Pipe for Denicotea GmbH.
Stefan Petzuch points out this brand appears to have similarities to the Mauro Cateni pipe brand, in particular they are both fictional Italian brands by German companies, and both have the “HAND CUT” imprint on the stem as seen below. This may connect the Aldo Morelli brand to Gebr. Heinemann KG in Hamburg, who had registered the Mauro Cateni brand. Or perhaps there is a connection between Denicotea and Gebr. Heinemann KG, or perhaps these pipe brands simply used “Hand Cut” stems from the same source.” (Denicotea – Pipedia)
Like I said earlier, “this was going to be an interesting restoration”. I now had an imaginary signature on an imaginary brand for an Italian made German pipe. All I could think was, “What the heck?” Continuing down this rabbit hole, I typed in “Denicotea” into pipedia.org and was rewarded with,
“Willy Heineberg founded the company Denicotea in 1932 and began manufacturing and selling smoking accessories such as filters, filter inserts, cigarette holders and pipes.[1] The company headquarters was initially in Cologne, but was relocated to Bergisch Gladbach after the Second World War.[2]
Denicotea is actually the name of a silica gel filter, cigarette holders and care products for pipes and cigarette holders.
I still find it a bit confusing as Denicotea seems to be a company[3] and a brand as well which is operated by COMPOSING-STUDIO GmbH[4].” (Denicotea – Pipedia)
This brought me back to the whole musical synchronicity idea, a composing studio, really? Just when you think that reality can’t match fiction something like this smacks you in the head. Anyway, this pipe is likely to have been made in the 1990s in Italy by Cesare Barontini, Gigi or Molina Pipe for Denicotea Gebr. Heinemann KG in Hamburg. Confused? I was.
The Restoration
The pipe was taken to the workbench where a cleaned denim piece was laid to protect the work surface.

The poorly fitting stem made me think that was where I should begin. The tenon and stem face were heavily fouled with smoking residue. Thinking back to the disgusting filter from the “before” images, I thought that a saturated filter would allow moisture and dissolved yuck to seep around the tenon. This also made me wonder about the condition of the airway.

The tenon was far more dirty than one would expect.

And, the separating briar band would have allied more seepage of smoking residues.

I started cleaning the stem with 95% ethyl alcohol,cotton swabs and bristle pipe cleaners. The tenon was as dirty inside as outside.

I tried to lightly sand the stem face but this seemed like a bad idea since I was sure that I could not keep from sanding one side more than the other and affecting the overall fit of the stem to the shank.

My home-grown solution was to drill a 10 mm hole in a hardwood block of wood. This would fit the tenon snugly. And keep the stem perpendicular to the stem face.

The fit was good.

I then placed a piece of sandpaper over the block and used a cork hole borer to cut a hole in the sandpaper.

The problem of sanding unevenly was solved.

I carefully topped the shank face with a piece of sand paper laid flat on a countertop.

The subsequent fit of the mortise and tenon was restored and the fit was good.

The stem cleaning continued with a lot of 95% ethyl alcohol, cotton swabs and bristle pipe cleaners.

The fit and briar ring itself needed a bit of polyvinyl acrylate (CA, super glue) to help make them look finished. I used brown CA to fill in the gaps in the briar ring and black CA to fill the area between the acrylic stem and the briar ring. I first applied a layer of transparent tape to the stem. Then cleaned out the gap with alcohol and a cotton swab. Using a fly tying bodkin I applied brown CA to the briar ring on both gaps. This was then spritzed with a CA drying accelerator.

The gap between the stem and the briar ring was then filled with black CA again using the fly tying bodkin. This too was spitzed with a CA drying accelerator.

While the CA was still soft, I removed the tape. The black CA that lay outside of the gap on the tape peeled off with the tape, limiting the sanding I would have to do to the stem.

With the stem now looking much better, I turned my attention to the stummel. The reaming kit was gathered.

The PipNet did most of the work here.

The Smokingpipes Low Country Reamer and the General triangular scraper finished the scraping of the tobacco chamber. The chamber was then sanded with 220 sandpaper wrapped around a wood dowel. The below photo shows a strange step at the bottom of the tobacco chamber.

Looking at the opposite side, there is no step but a patch of slight charring was evident.

The rim also appeared charred.

The stummel was taken to the sink for a scrubbing with a nylon brush and undiluted Murphy Oil Soap. The color of the nylon brush indicates how dirty the stummel was. The sap was rinsed with warm water and the stummel dried with a cotton hand towel.

A second scrubbing of the stummel was done using the same process. The nylon brush was less colored this time indicating progress.

Back at the workbench the stummel looked much better but the rim damage could also be clearly seen.

The rim was charred. This changed my vivid mental image again, now the previous owner was a German tweed jacket wearing man with a bottomless tobacco pouch and no teeth and clutched a torch lighter.

I lightly topped the rim on a piece of 220 sandpaper laid flat then started the shank cleaning. Both removed a lot of black material from the stummel. The airway of the shank was very encrusted with tar and required significant scraping with the dental scraper.

The topping of the rim with sandpaper was insufficient to redeem it. I used a couple of files to remove the charred briar. The bevel of the inside rim was gained using a 2 inch PVC pipe cap wrapped in sandpaper.

In an attempt to lighten or bleach the darkened briar I applied a saturated solution of oxalic acid by cotton swab.

I wetted the rim with several applications of the oxalic acid solution and let it sit for 45 minutes. The solution was then scrubbed and rinsed with copious amounts of tap water.

There remained a darkening which I did not like. I thought back to several conversations with Sascha Mertens about removing charred wood. Sascha is a German pipe restorer and all around great guy. Although he may start charging me consultant fees as he is becoming more well known here in the States and Canada and has helped big name restorers like Steve Laug recently. Anyway, He frequently uses a technique where petroleum jelly is applied to the charred area and allowed to sit. The charred area is then carefully scraped with a sharp knife to remove the char.

I did all of the above and as can be seen below it did indeed remove more of the darkened briar.

I finally gave up on trying to make the rim look pristine. The darkened briar would have to be worn as a mark of honor signifying the scars of previous battles. Next I wanted to further clean out any remaining residues from the bowl and shank so I packed both with cotton and saturated the cotton with 95% ethyl alcohol. While this was sitting, I also coated the briar of the stummel and stem ring with a layer of Before and After Restoration Balm. These were allowed to sit overnight.

The following day the cotton showed signs that additional tars had been liberated from the briar and deposited in the cotton.

The cotton was removed and the bowl and shank were cleaned again with alcohol dipped cotton swabs and pipe cleaners.

The remaining Restoration Balm was hand buffed from the stummel using an inside out athletic sock.

The stem pipe was taken to the buffer where I buffed the stem with white jewelers rouge. The pip then received several coats of carnauba wax applied with the buffer. The final step was a hand buffing of the pipe with a microfiber polishing cloth.
This pipe turned out pretty well overall. I am still thinking about what to do about the interior of the tobacco chamber. That step in the drilling bothers me perhaps, a sanding or maybe filling the step with JB Weld? If someone wants to adopt this pipe, I will let them decide. The small spot of charred briar would be taken care of with a bowl coating of a light layer of maple syrup and carbon powder. No sense in applying a bowl coating though before the step is addressed. The pipe feels wonderful in hand. The heavy shank fit for a 9mm pipe filter gives the piece a substantial heft. The rusticated finish is very pretty and is well accentuated by the smooth panel with the Aldo Morelli signature, the briar ring and the glossy black acrylic stem. The dimensions of the Aldo Morelli Bent pipe are:
Length: 5.53 in./ 140.46 mm.
- Weight: 2.36 oz./ 66.91 g.
- Bowl Height: 1.99 in./ 50.55 mm.
- Chamber Depth: 1.68 in./ 41.91 mm.
- Chamber Diameter: 0.80 in./ 20.32 mm. (Conically bored diameter is at the top)
- Outside Diameter: 1.57 in./ 39.88 mm.
I do hope that you have found something here useful to your own pipe care, or restorations. If you like this sort of thing, please click the like and subscribe buttons. Thank you for reading the ramblings of an old pipe lover.
Below are some photos of the completed Aldo Morelli Bent pipe.


