

Photographed and written by
John M. Young
The Pipe Den, the name harkens back to a day of local pipe and tobacco shops which our world appears to have mostly left in the past. Many pipe smokers love our local brick and mortar shops and it warms our hearts to hear the success stories of the local shop that is surviving in the world of big internet retailers. I live within an hour drive of one such shop and I admit to visiting it about once a year to stock up on a local blend assembled there. The place has a cigar lounge and will infuse your clothing with cigar aroma at no cost. I have been the only pipe smoker present on my last two visits. The world I live in enables me to have pipe tobacco from all over the world available with the convenience of no 60 minute drive in city traffic and the thrill of opening the aromatic box, freeing the imprisoned contents and allowing them to join their tobacco blend brethren in glass jars upon a shelf.
I warmly remember the smell of David’s Briar Shop in a local mall Westroads in the 1970’s and 80’s. That smell is firmly locked into the vault and I have to admit to wishing to experience it again. It is a nostalgic smell that when reminiscing with others about the mall, has never met with someone saying “I hate that smell”. To the contrary, it seems to only incite fond memories. These are the memories that stir when I work on a pipe stamped with the name of a pipe shop.
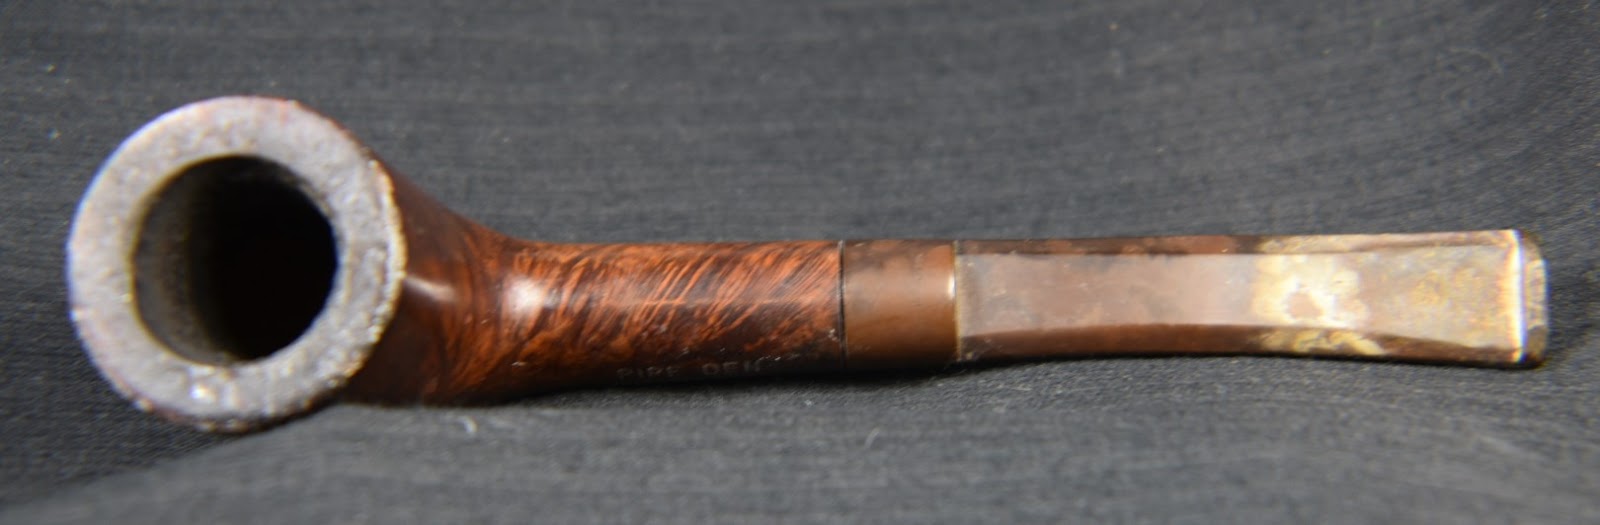
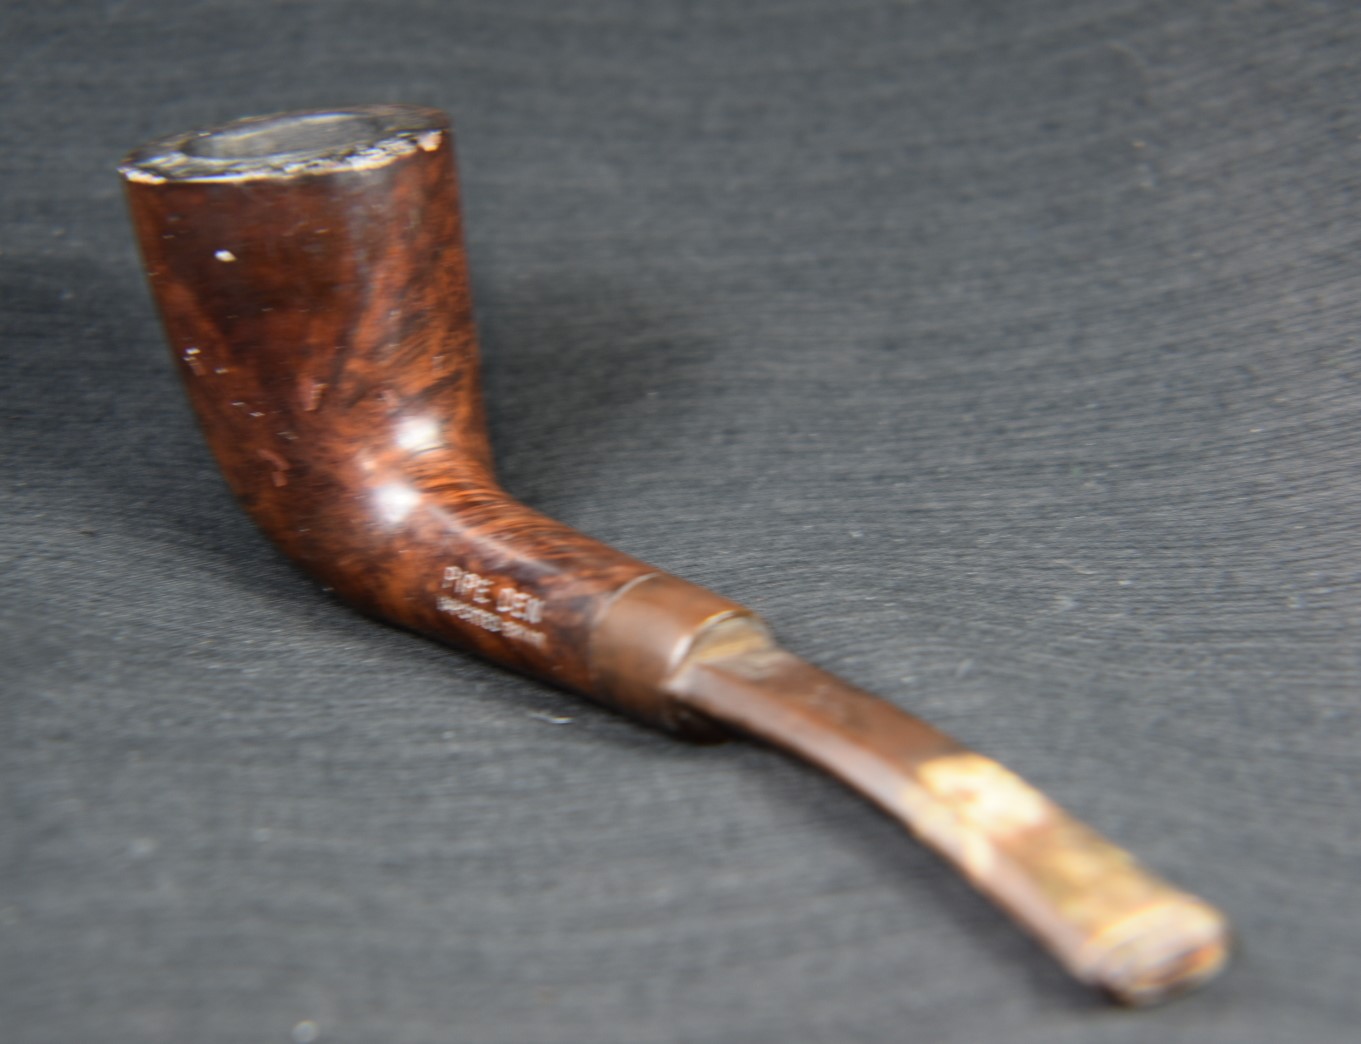
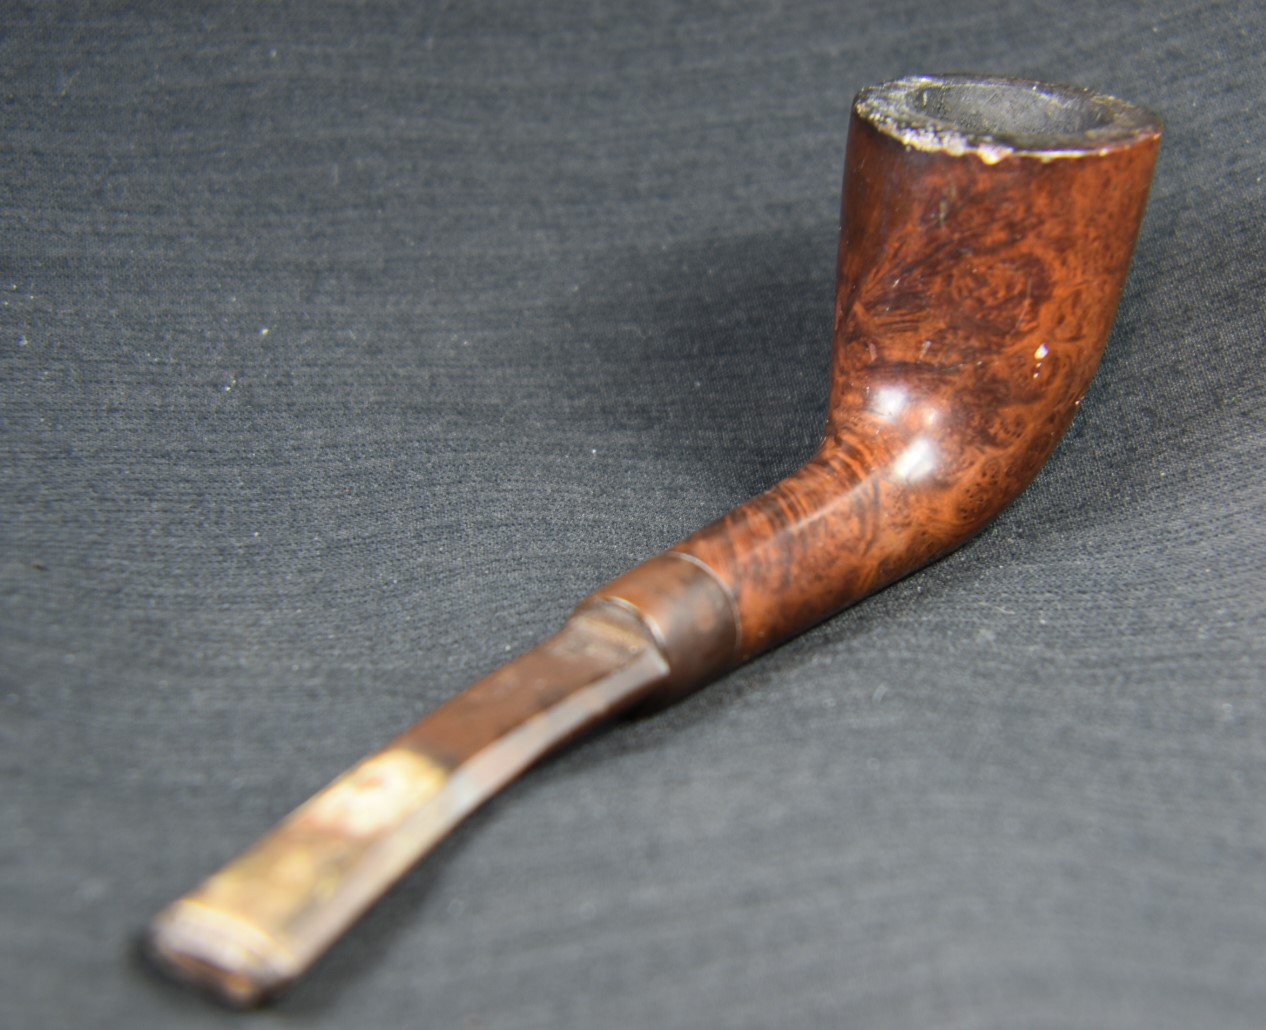
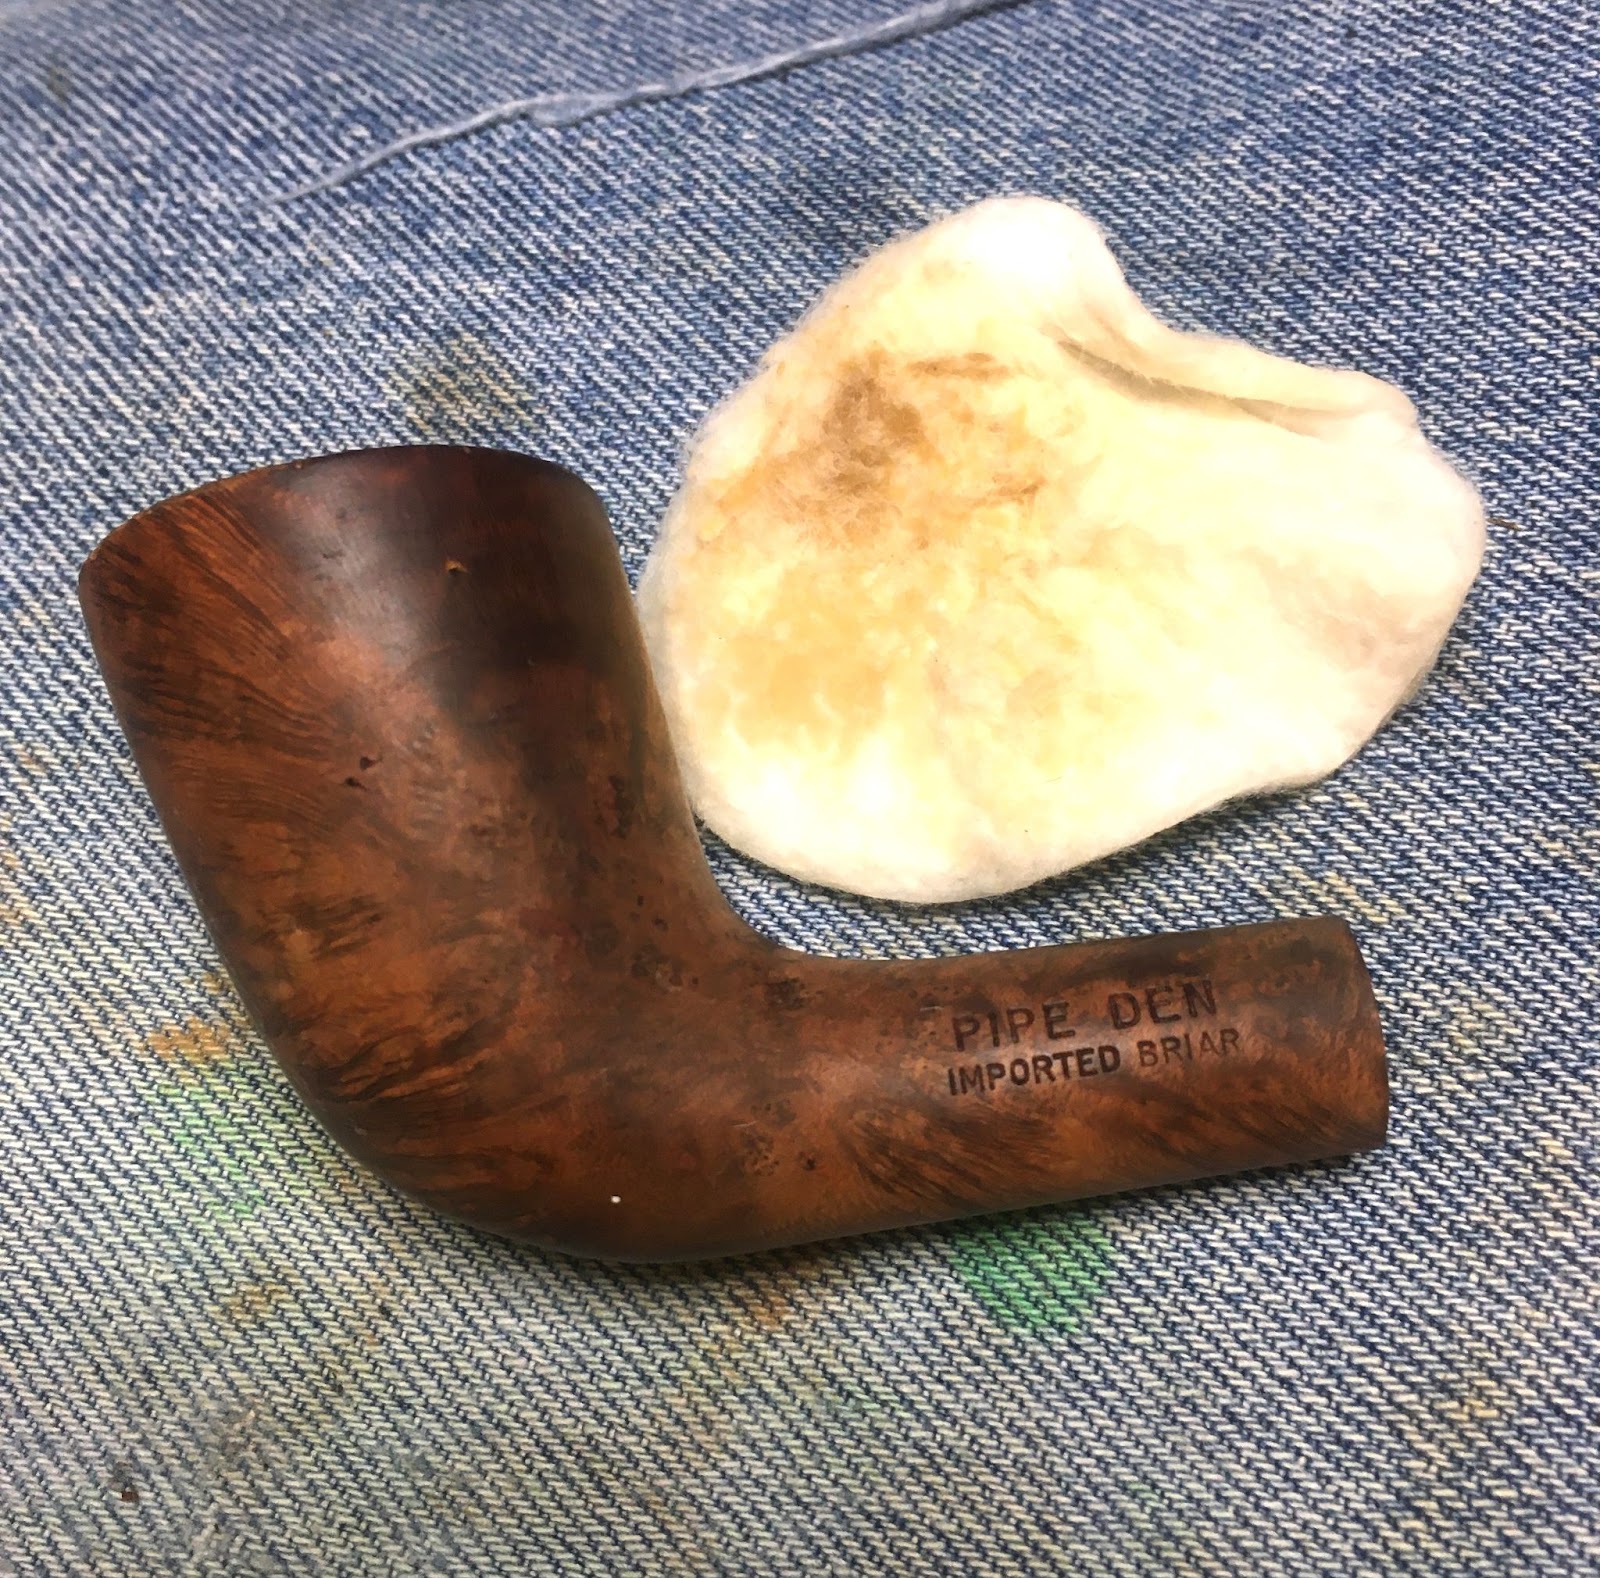
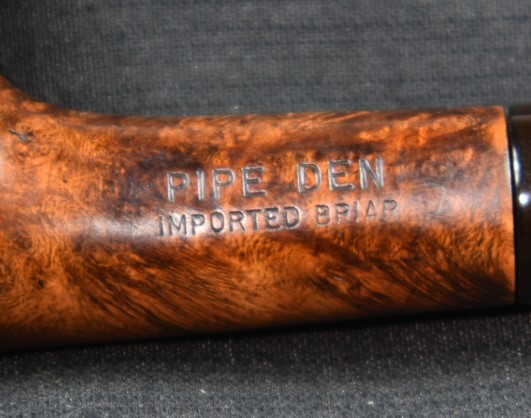
This Zulu came to me as part of an estate lot. Let me show you what I was looking at with this Pipe Den Zulu.


Background on the Pipe Den
The Pipe Den is a shop from Vero Beach Florida. According to the internet, source of only honest, truthful and accurate information, the Pipe Den still operates today. According to their website, Bob Marshbanks has been, “Serving pipe and cigar enthusiasts since 1977. We are your premier cigar, pipe and tobacco shop” (https://pipedenvero.com/). The website does not offer any online shopping yet invites patrons to the actual store to see what they have to offer. There is no mention of specific pipes but they do state the following:
“We offer a large selection of top quality pipes made by the world’s best pipe makers. I personally guarantee all my pipes, even “starter” pipes. Many “production” made pipes are manufactured of “Green” briar, heavily stained, varnished to cover poor grain and imperfections and smoke “hot”. To order a pipe, select your shape preference and let me know the price range you have in mind. Choose natural, dark or sandblast finishes. This will allow me flexibility in my efforts to ensure that you will get the very finest pipe available from my selection.
Even easier, just call, we can discuss your preferences and we can be more sure of the selection. I also have a selection of one-of-a-kind and freehand, hand carved Meershaum and Estate pipes.
The relaxed atmosphere at The Pipe Den is there for everyone. You are welcome anytime to come by, sit and enjoy a good cigar, fill your pipe bowl and get away from the hassles. I specialize in friendly old fashioned service.” (https://pipedenvero.com/pipes-%E2%80%A2-hints-%26-tips)
Here is a very nice review of the Pie Den with some photos taken by the author: The Pipe Den in Vero Beach My New Happy Spot in Florida (classyvice.com)
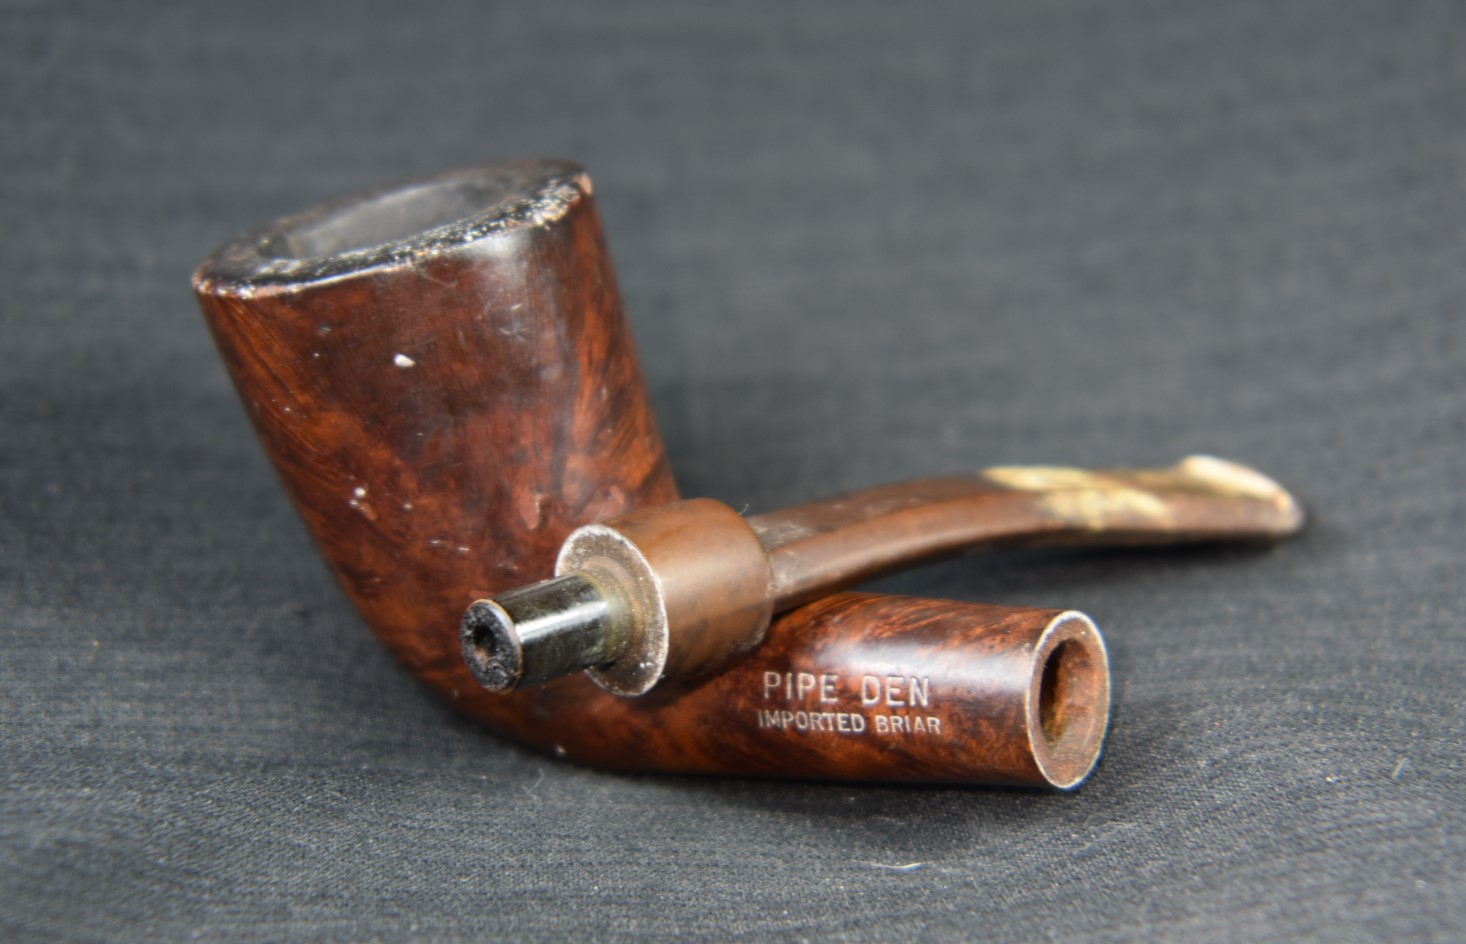
The question of who made this pipe for Pipe Den remains. In looking at the stem I see similarities to a couple of other pipes that I own. I have two Jobey pipes that appear to have very similar identical stems. They are saddle stems with a near 90 degree shoulder.

The Restoration
In the beginning… No, that sounds too biblical. How about, this restoration began with a clean piece of denim laid out on the workbench? Much better.

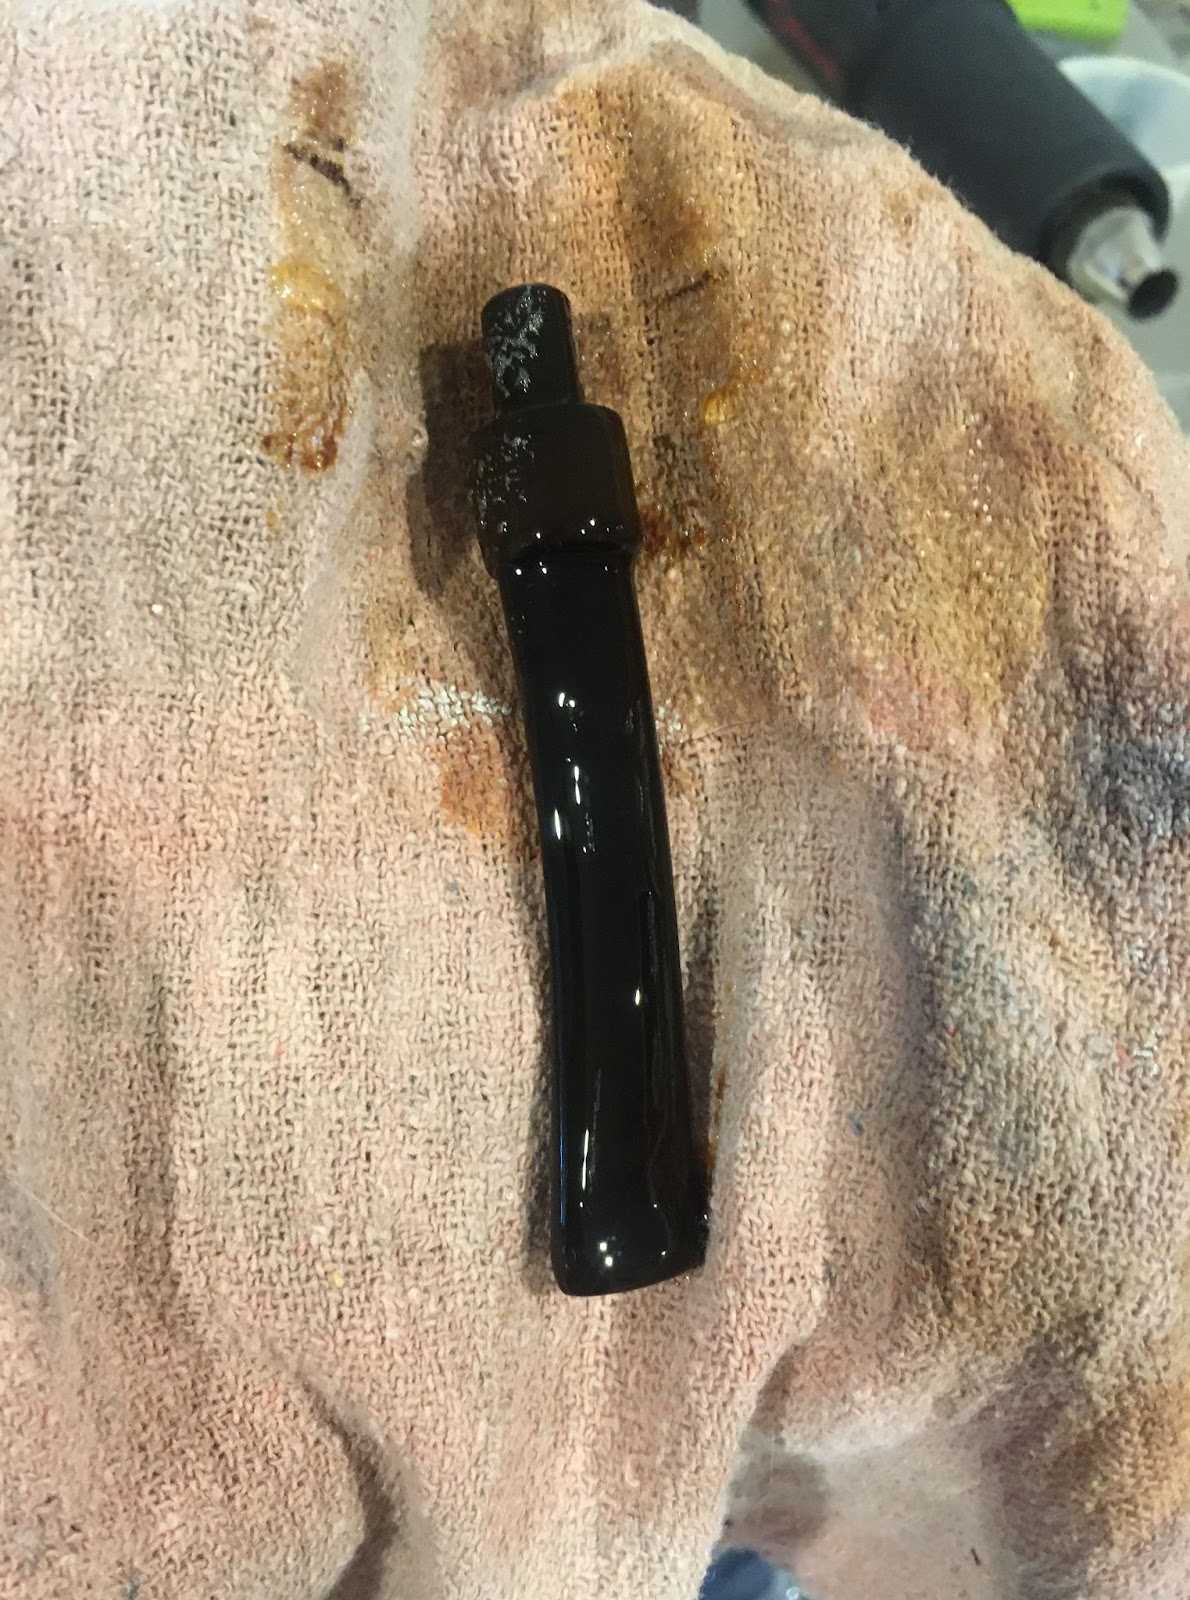
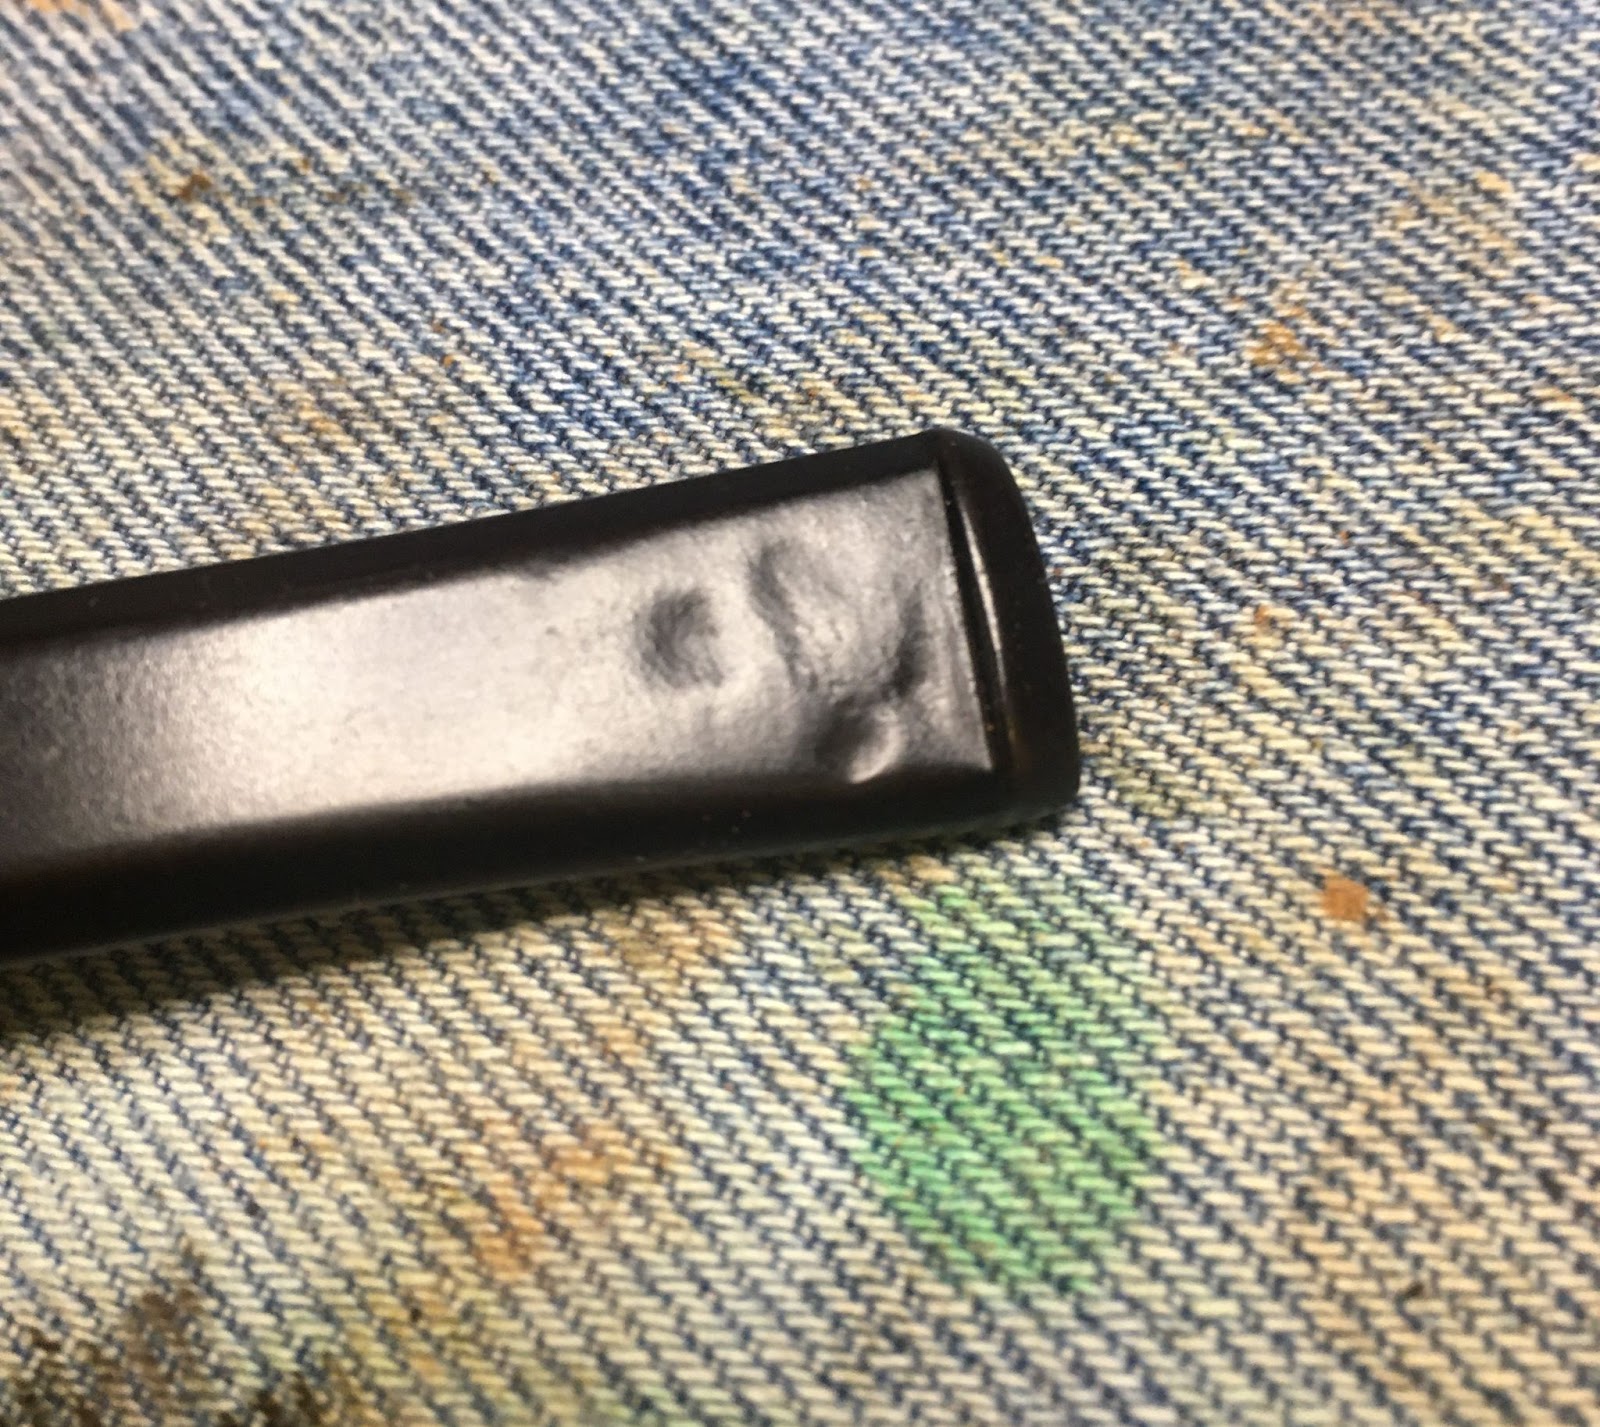
The fit of the stem was too tight and was left partially inserted to avoid dressing the mortise. The stem was also in dire need of oxidized vulcanite removal. That is where I began.

I sanded the stem with a 600 grit sanding sponge to remove the calcium deposits, surface oxidation and light tooth chatter. You can see that I used the denim to clean the sponge.

Next the interior of the stem was cleaned using bristle pipe cleaners and a nylon brush dipped in 95% ethyl alcohol.

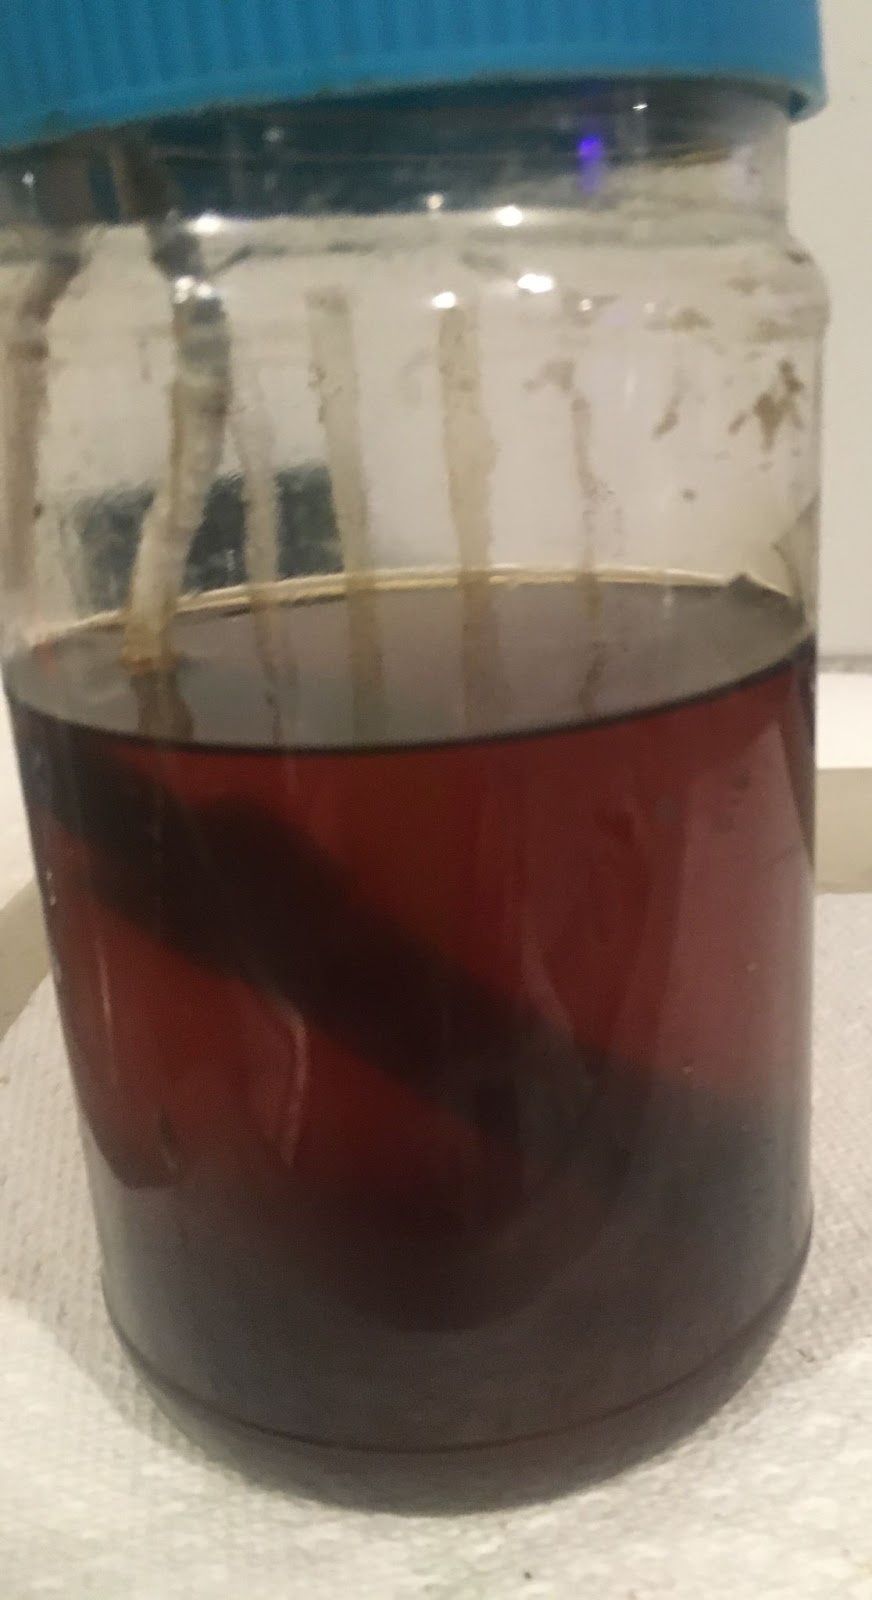
With the stem cleaned inside and out, It was time to go into the Before and After Deoxidizing solution. A pipe cleaner was used as a hanger to suspend the stem in the solution.

I refer to this as the deox tank or deox, as a play on words with detoxification or detox for alcoholics and drug addicts.
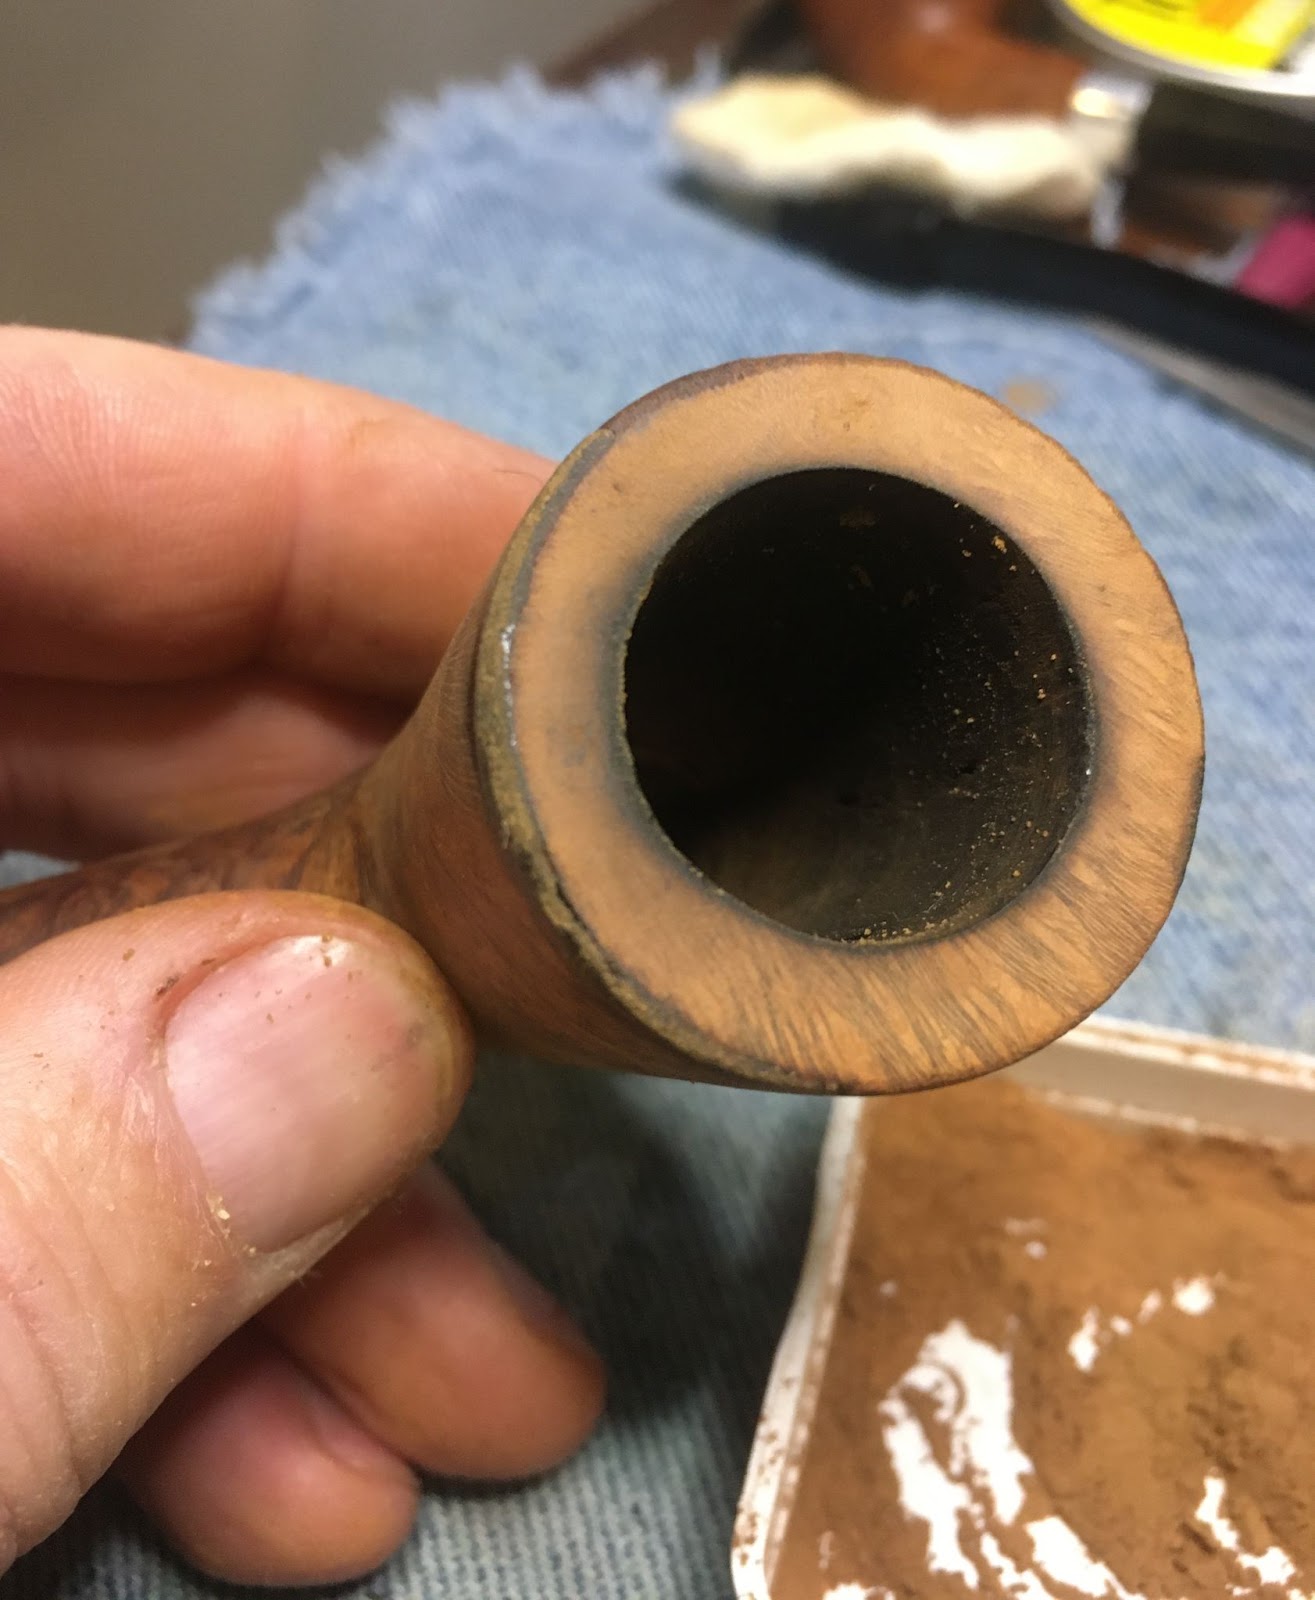
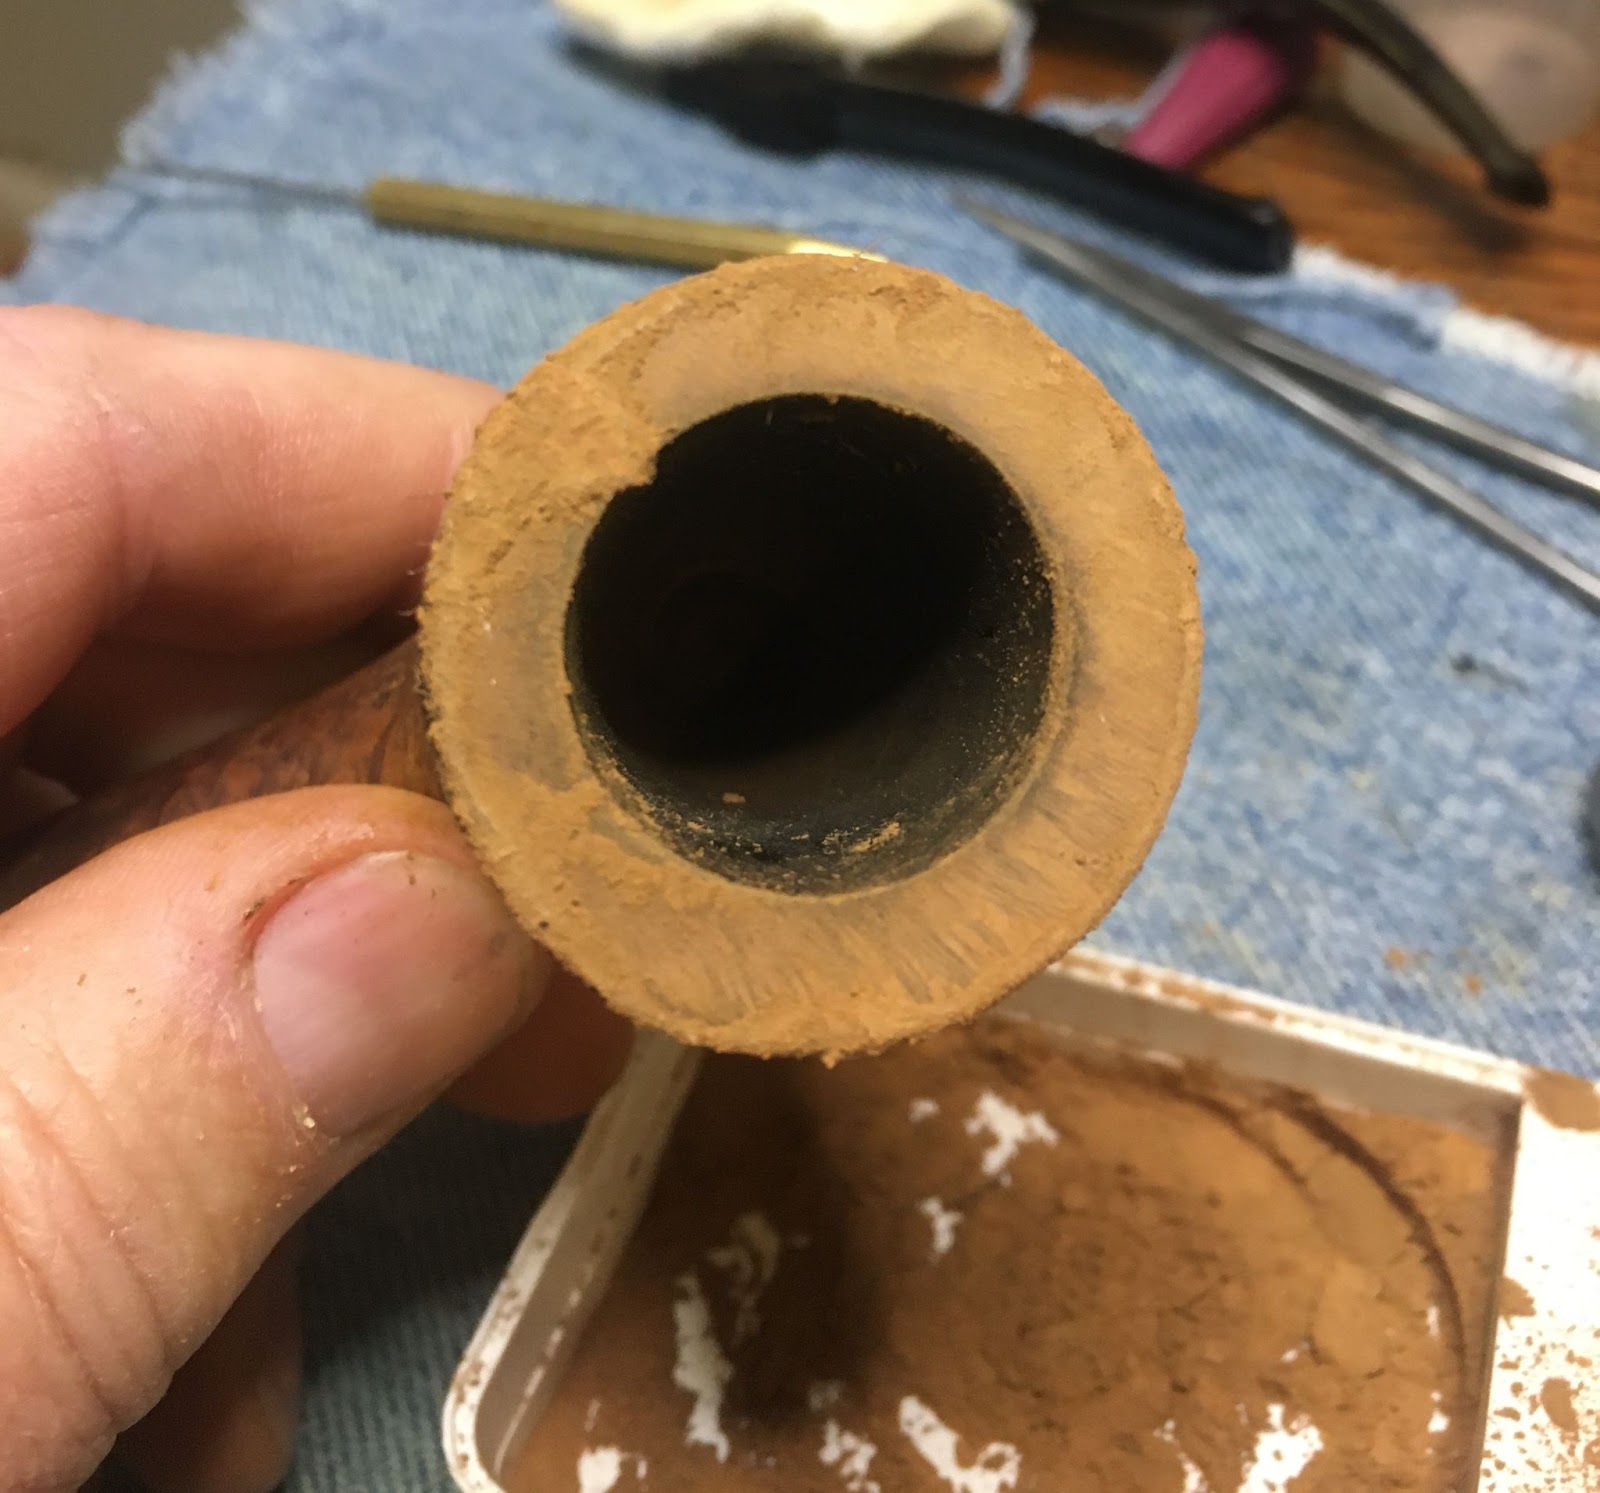
With the stem in deox, I turned my attention to the reaming of the tobacco chamber. The below tools were assembled.
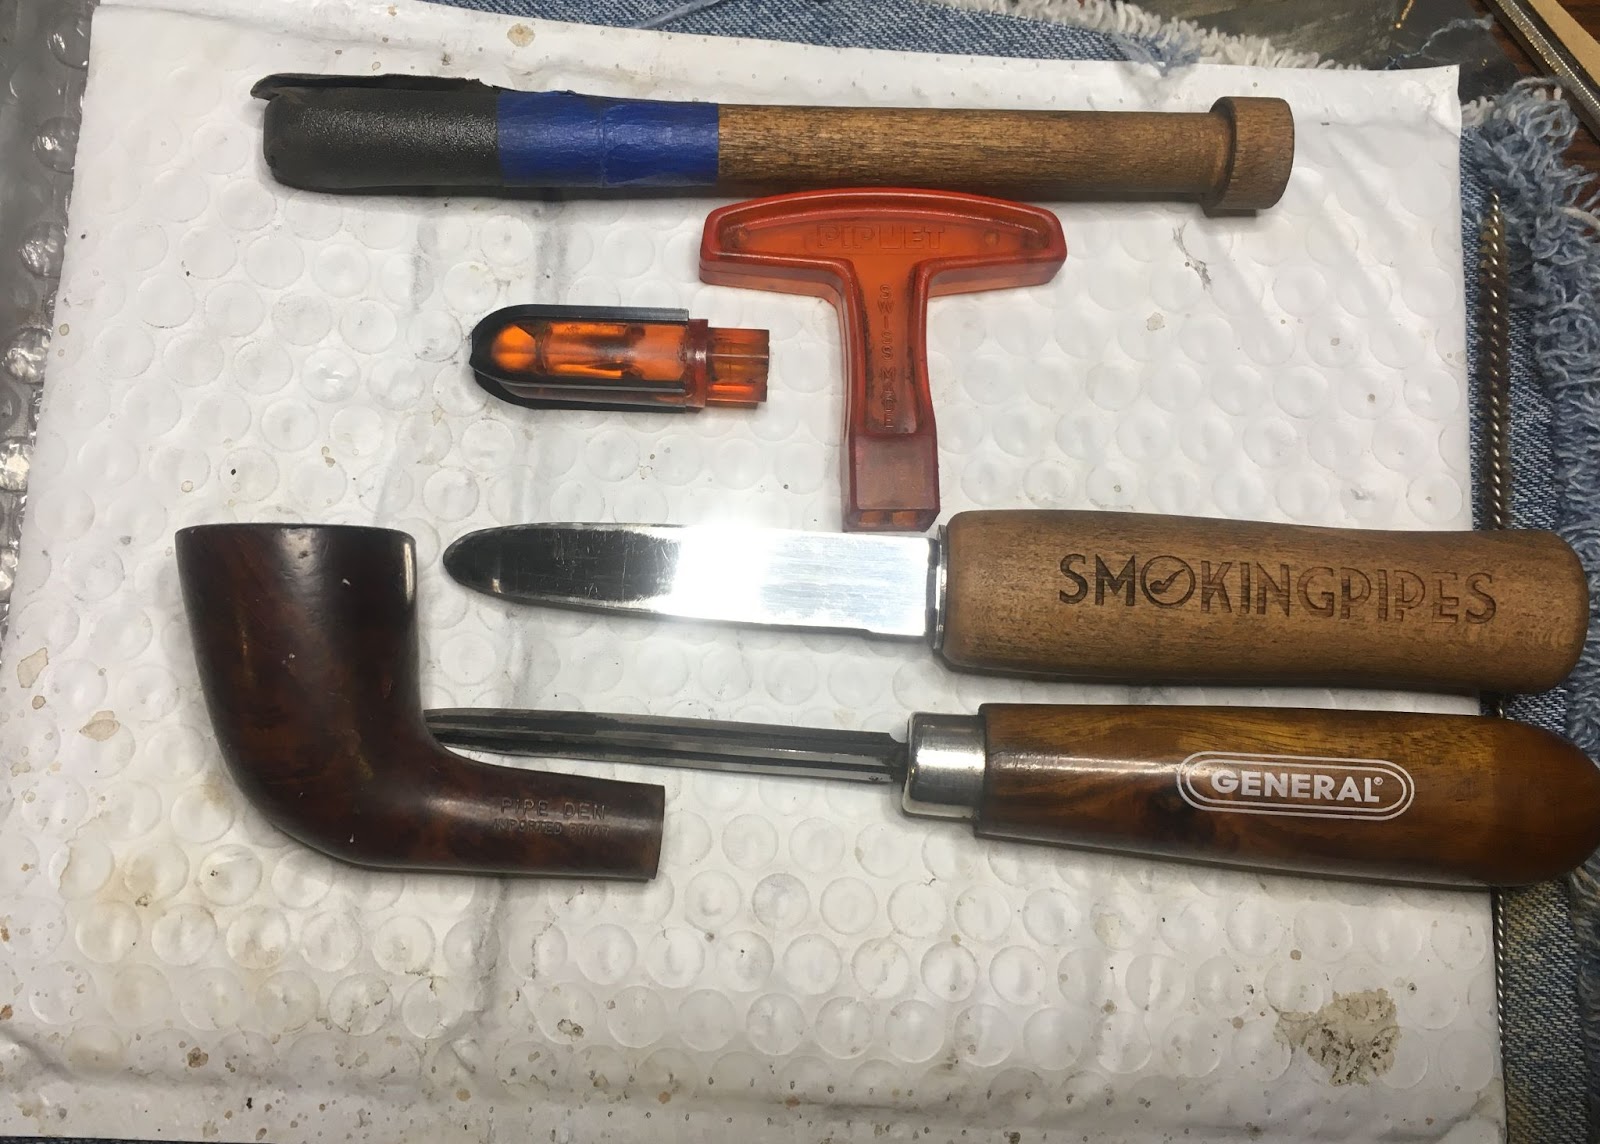
The chamber was bored with a very conical bit and did not fit the PipNet reamer at the bottom. This required more scraping with the Smokingpipes Low Country Reamer and the General triangular scraper.

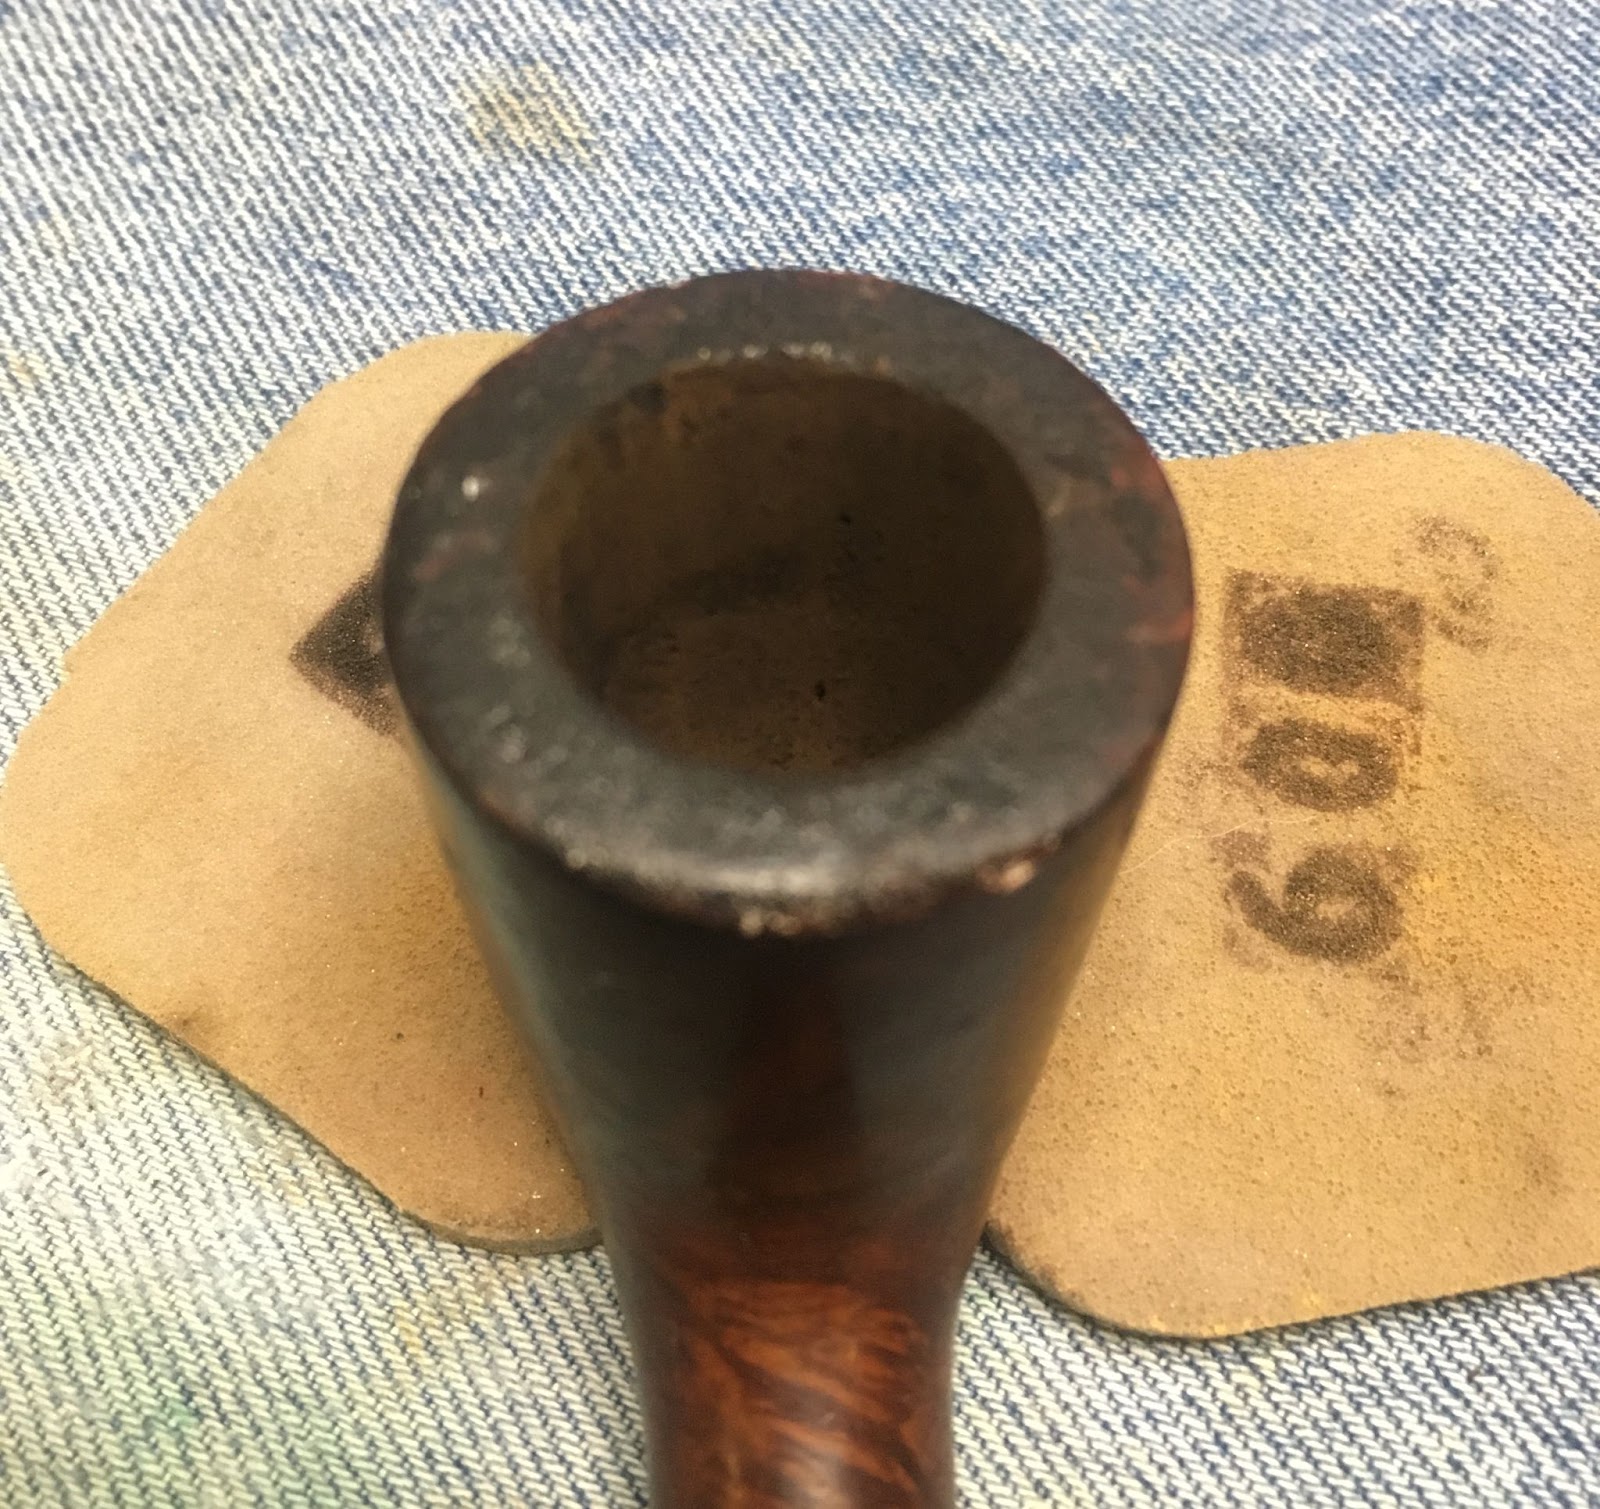
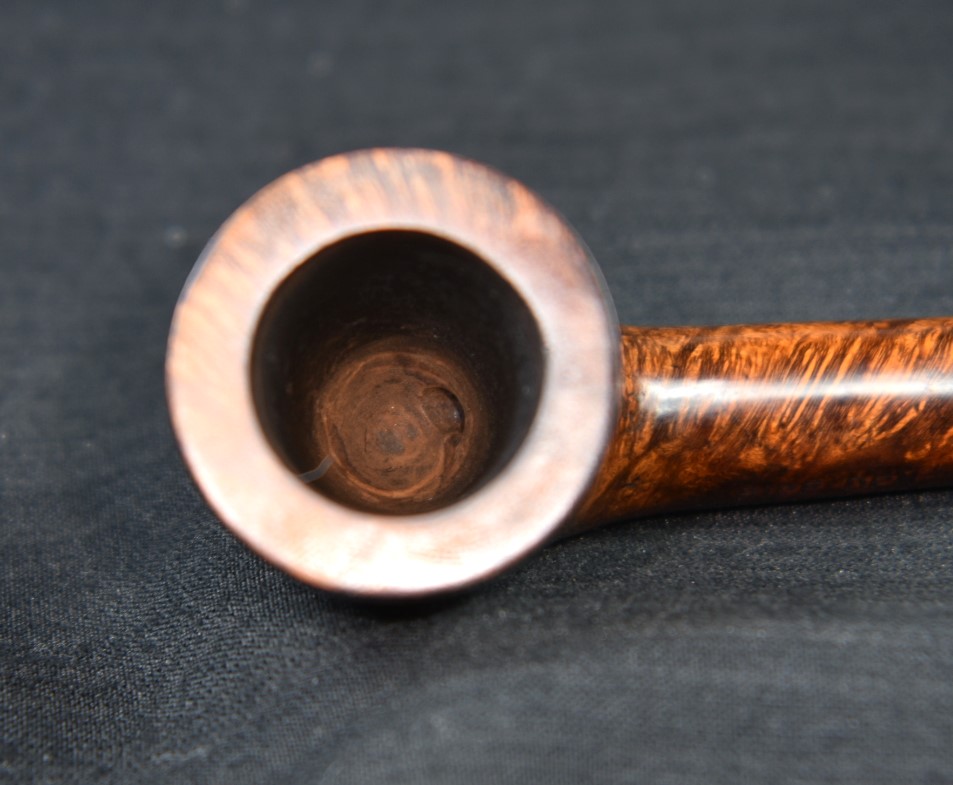
The interior of the chamber was sanded to bare briar and no evidence of heat damage could be observed. The rim was the next target of restoration. I could see damage around the outer edge from tapping out dottle on surfaces not meant for tapping. There was also a thick coating of lava.
The lava was scraped with care and a sharp pocket knife after being moistened with saliva.

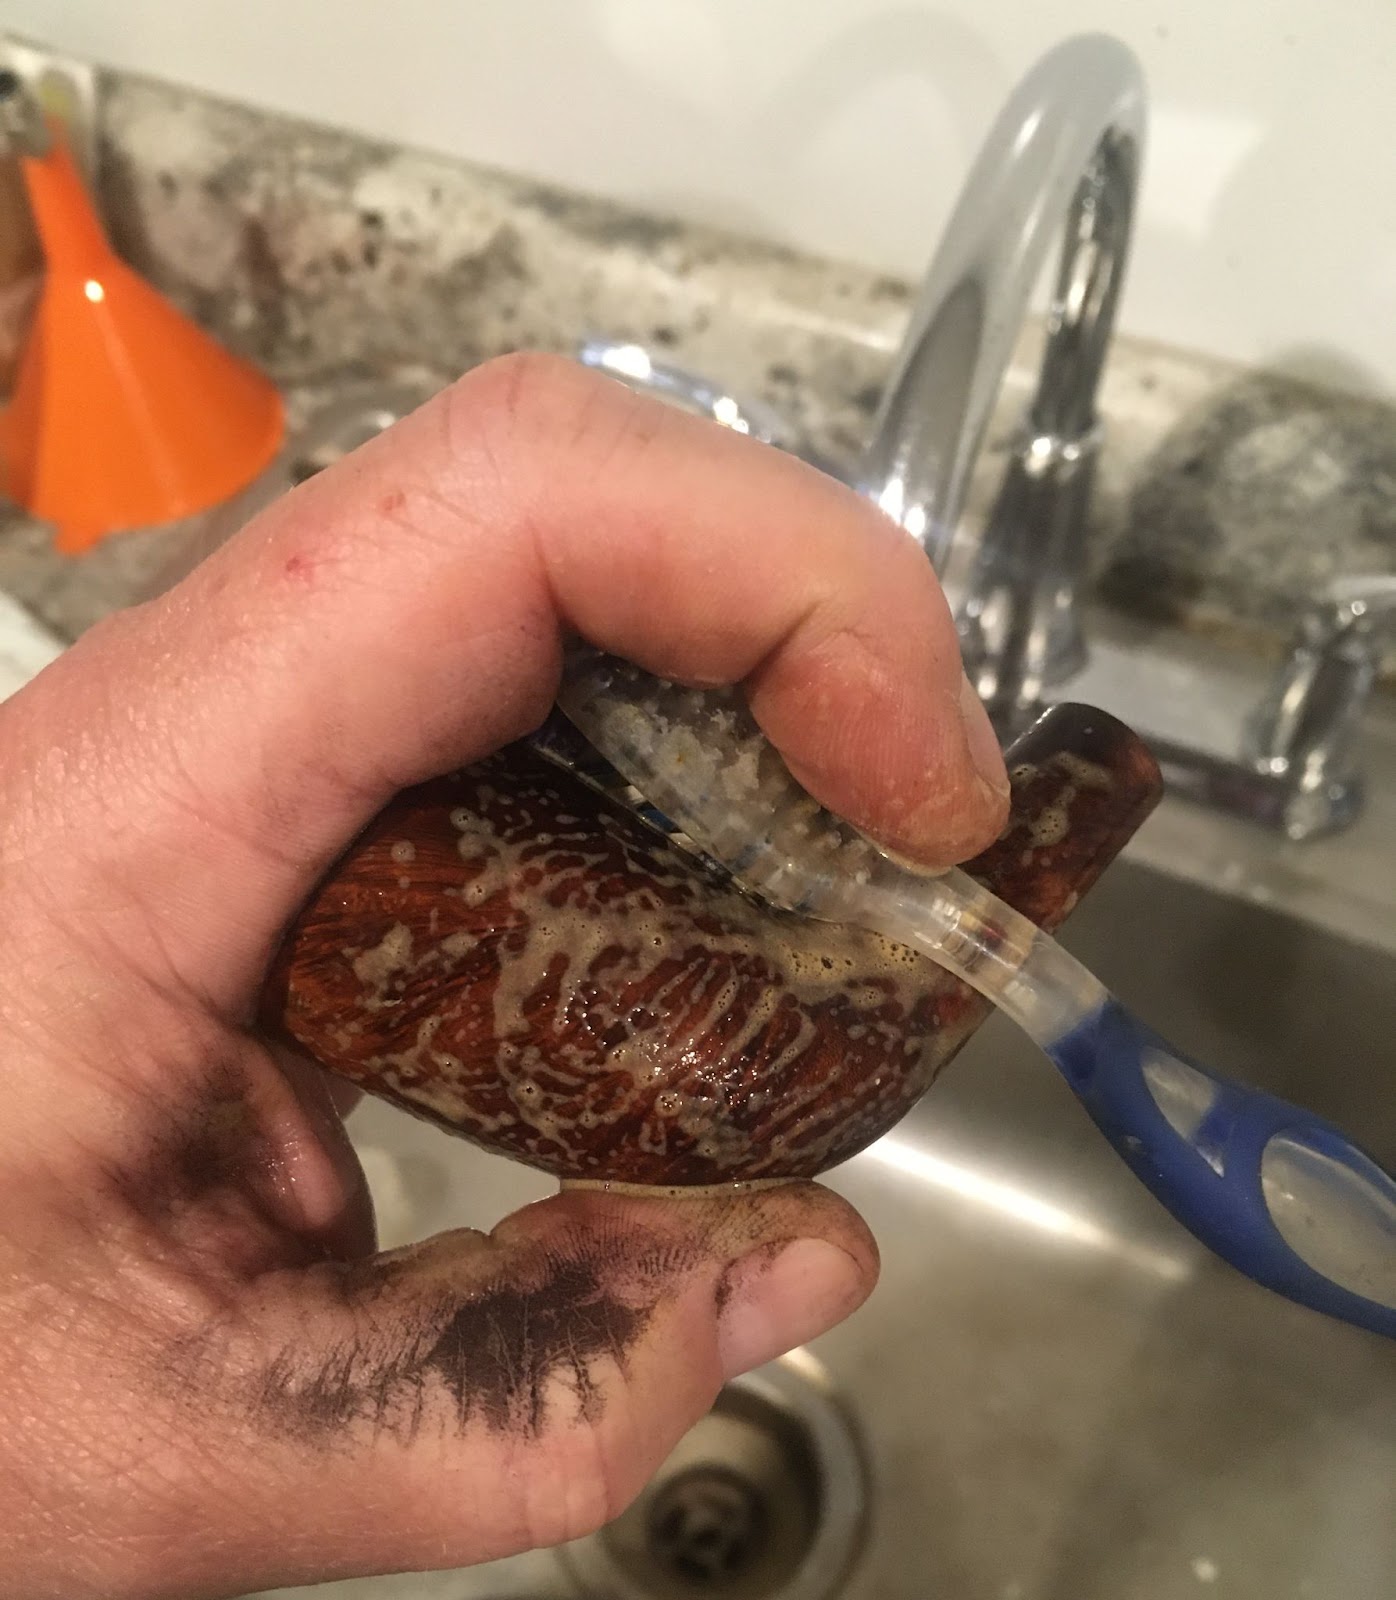
The stummel was then taken to the sink. Here it was scrubbed using a medium stiff toothbrush and undiluted Murphy Oil Soap. The soap was rinsed with warm water. At this point I decided to scrub the airway of the shank with a nylon shank brush and a bit of Dawn dish soap. The airwar was rinsed with warm water and the stummel was dried with a cotton washcloth.
Back at the workbench the stummel was wiped with a make-up pad dipped in 95% ethyl alcohol to remove any remaining wax or finish. The pad came back with reddish brown, indicating that I was removing some of the original stain. No finish could be observed.
The cleaning of the shank was next on the list. I poured about 4 ml of 95% ethyl alcohol into the bowl and allowed it to flow into but not out of the shank. I used a nylon shank brush to scrub the airway with the alcohol present. I then poured this alcohol into a medicine cup to be used until it was too blackened from dissolved tar. After the alcohol scrub I returned to the sink and scrubbed the airway with undiluted Castile soap. Then abc to the workbench for an alcohol scrub. This rotation continued until my nylon brush was no longer turning black with tar.

Between scrubbing rotations I would scrape the airway with a dental scraper and scrub with cotton swabs. Eventually the airway was cleaned.


14 hours later, I retrieved the stem from the Before and After Deoxidizing solution. I allowed it to drip off excess solution for a few minutes.

Below the stem is on my preferred coarse cotton shop rag. I like this rag for buffing a stem after the solution as it absorbs the remaining solution and abbrades some of the loosened oxidized vulcanite.
Below is the stem after the buffing with the rag.

After the hand buffing I used several make-up pads with Soft Scrub to further remove oxidized material from the stem. I could have sworn that I photographed the pads but failed to find the photos. Further proof than getting old is not for the… What was I saying?
The stem was then coated with mineral oil both inside and out.

There were a few small pits which needed to be filled prior to taking on the damaged rim. The small fills were repaired by placing a small drop of cyanoacrylate (CA, super glue) into the pit then sanding immediately over the pit. The dust from the sanding and sanding sponge combined with the CA to fill the pit. Two applications were sometimes needed for slightly larger pits. Now to deal with that damaged rim I did not want to top the rim and remove an ⅛+ inch or 3-4 mm of briar thus changing the shape of the stummel. I lightly topped the pipe to restore sharp edges on the undamaged rim. My plan was to apply a bead of brown CA to the damaged outside edge of the rim then press it into a container of briar dust. The briar dust would then be combined with the CA to make a hard briar incorporated fill which could be sanded smooth.

Below is the bead of CA around the damaged areas
Below is after the first dip of the wet CA into the briar dust. The excess dust was scraped off with a pocket knife.

Below is a photo of the new edge. It would require a couple more beads of CA and dust dips but it was working.
Below is dust dip number two.
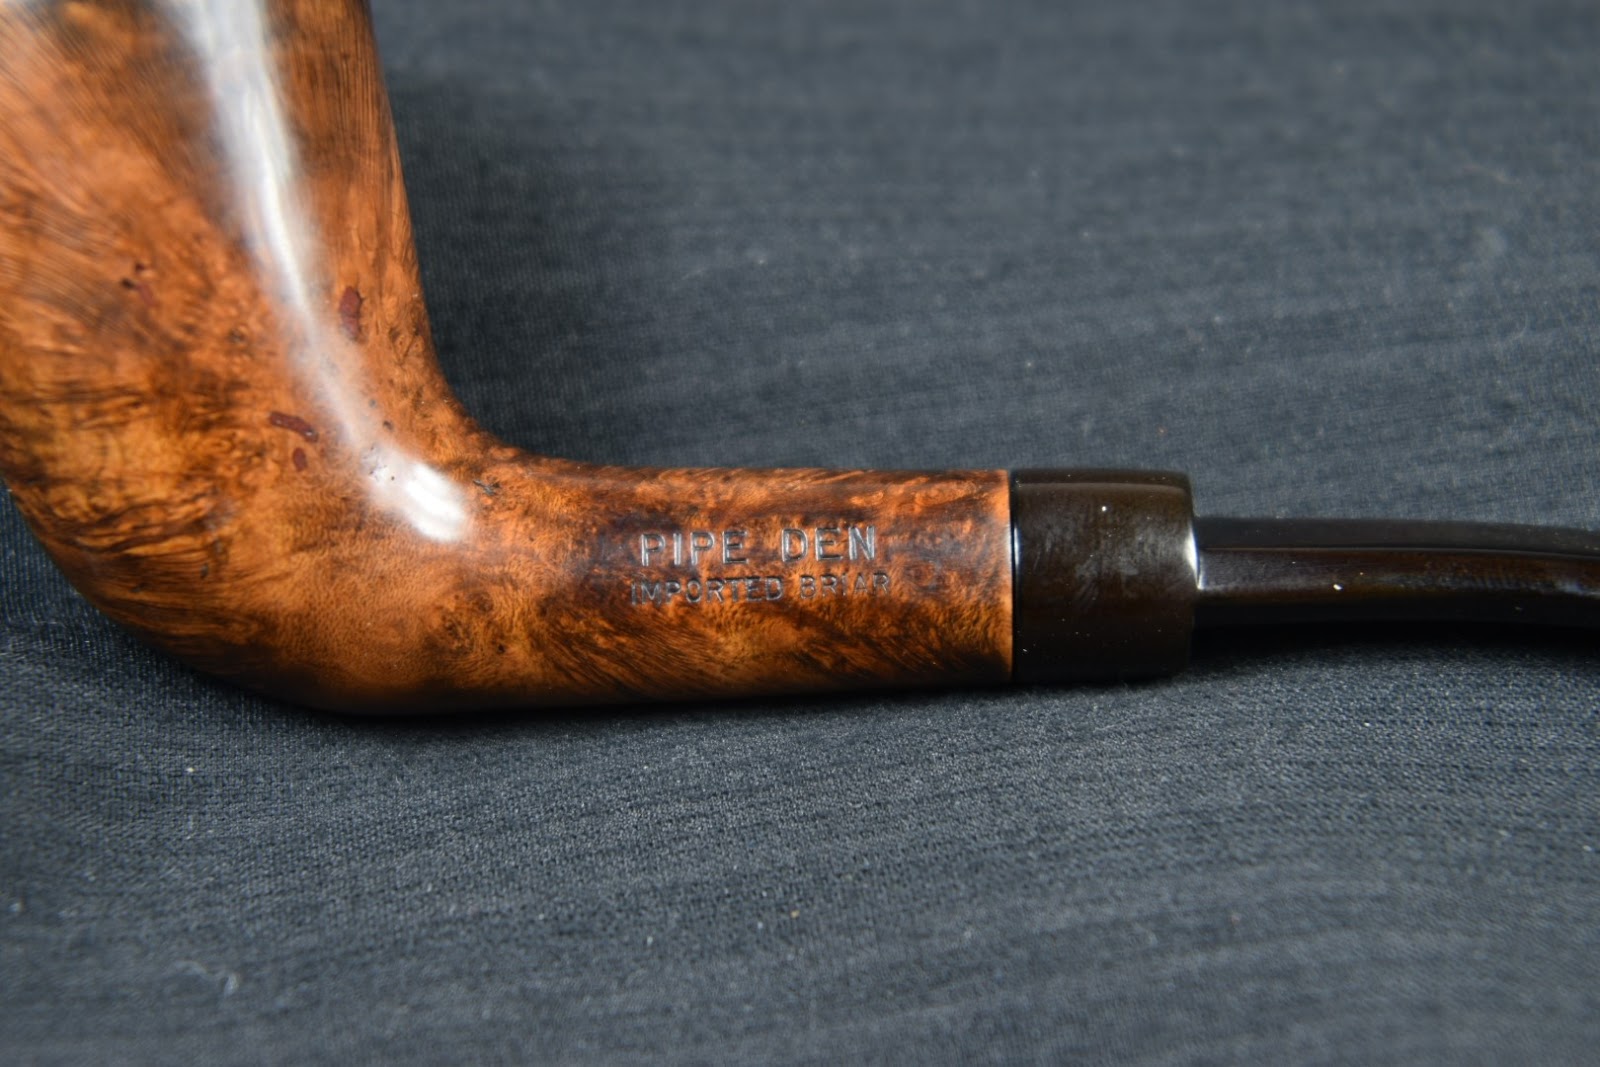
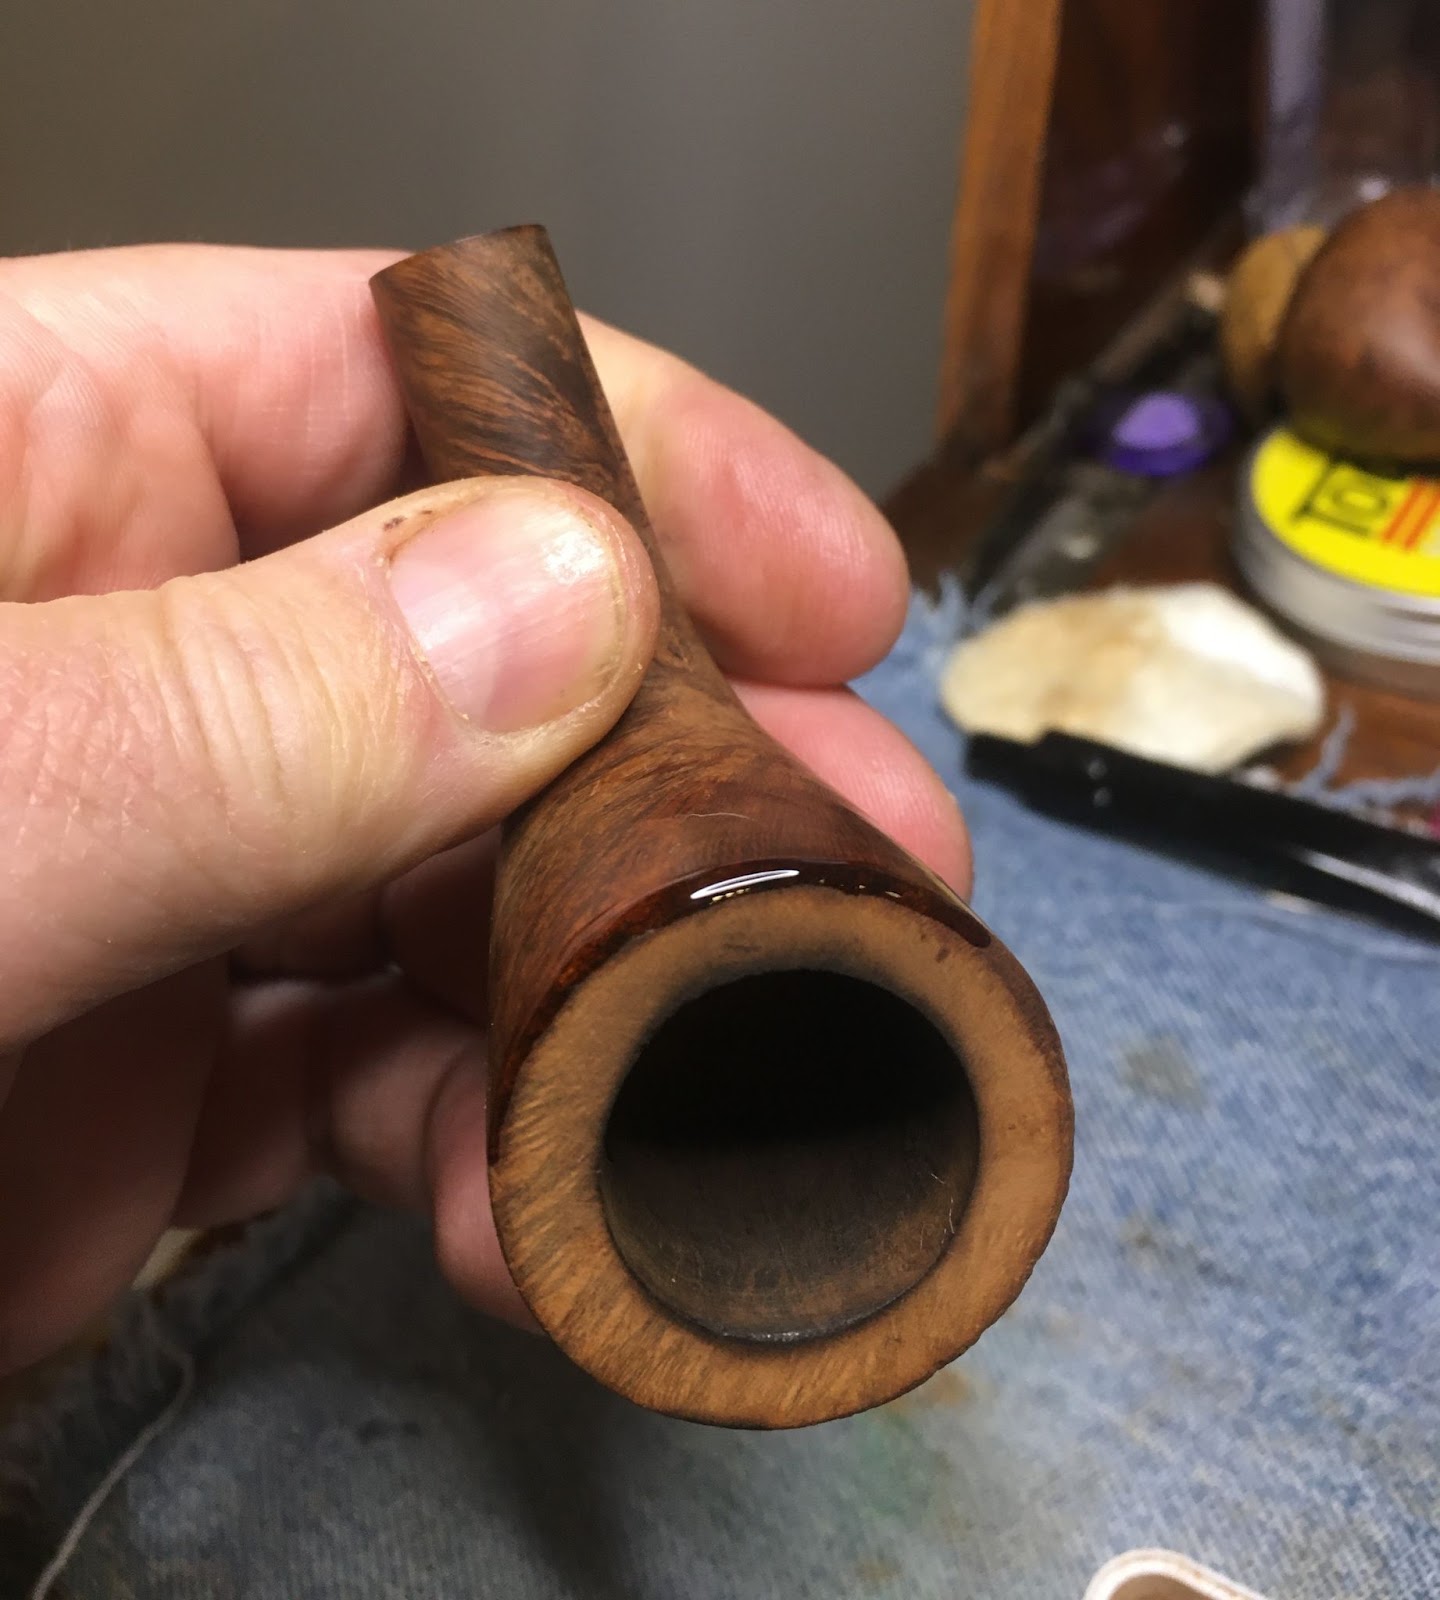
After filing and sanding the edge was restored. The fill did appear darker than the supporting briar but that would be addressed with a contrast dye (more on that later).


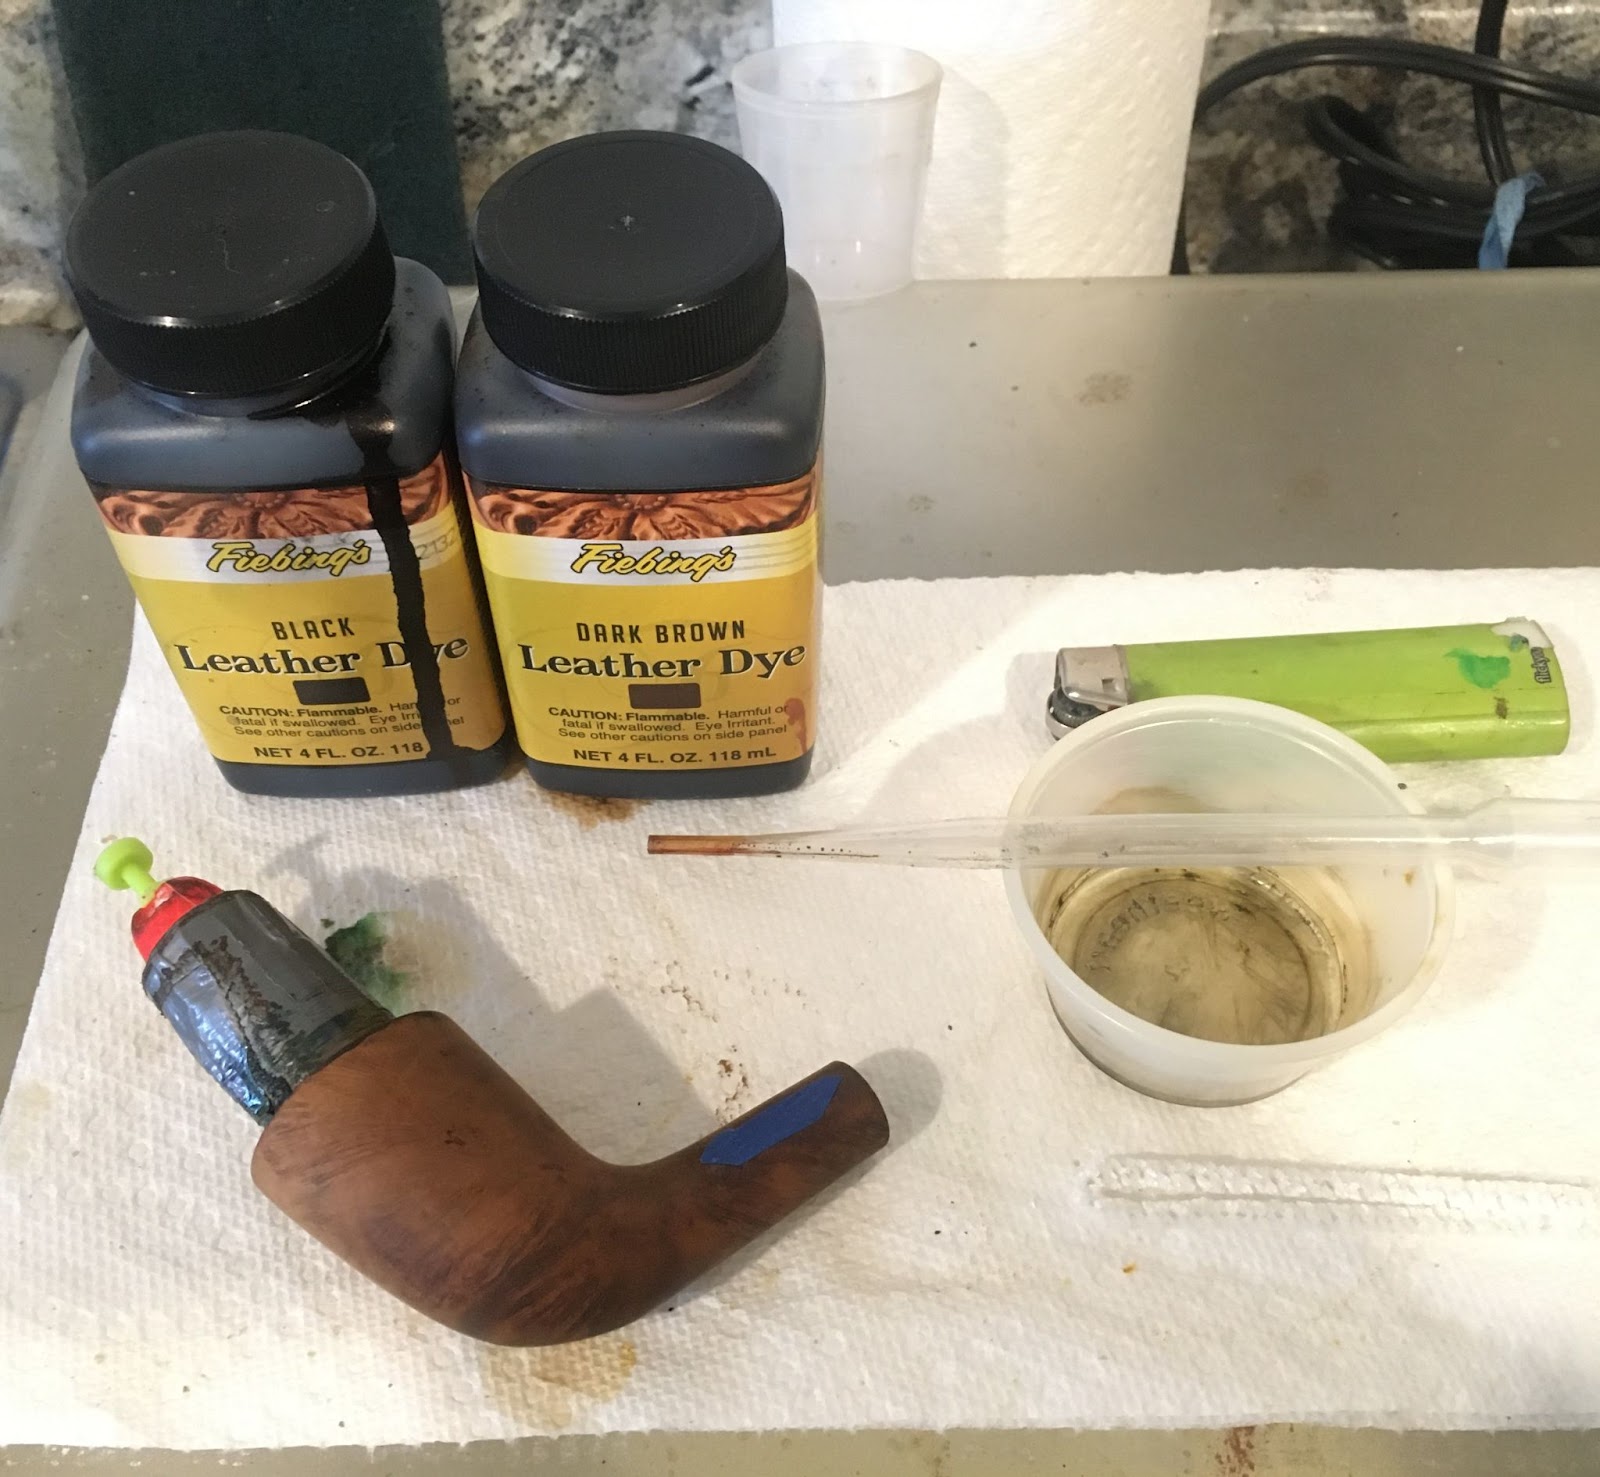
Now, to conceal the darker edge, I figured a darker stain or dye with the surface sanded away would provide a nice contrast showing off the grain of the briar and concealing the repairs. In preparation for this dye job, I wanted to keep the dye from the stamp if possible. I covered the stamp with a slightly irregularly cut piece of painters tape. I wanted it irregular to avoid the “CENSORED” block look.

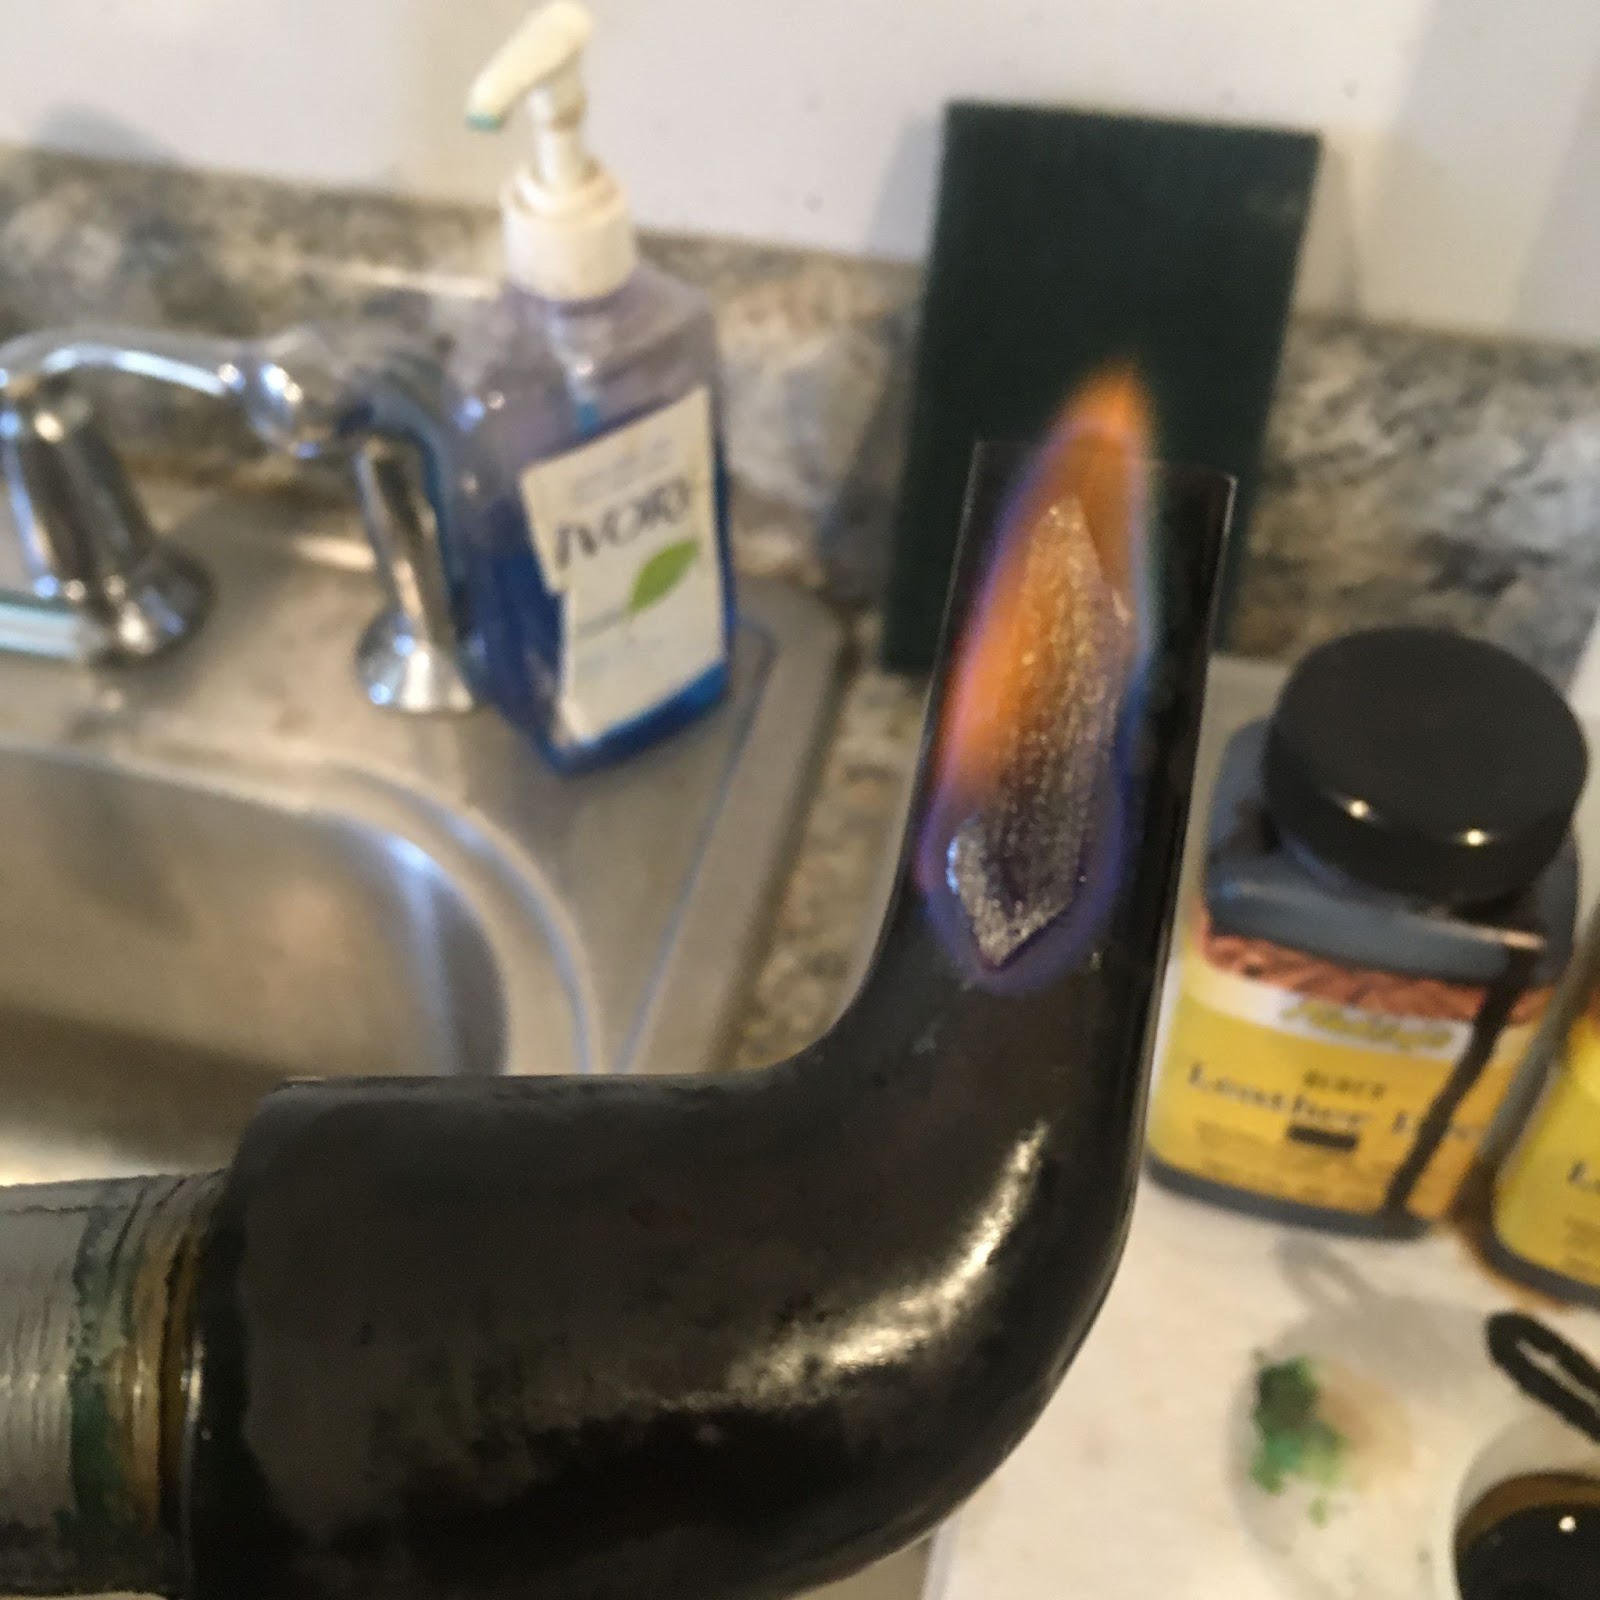
I mixed equal volumes of both black and dark brown Fiebing’s Leather dye and added a couple of ml of 95% ethyl alcohol to allow them to mix thoroughly. The dye was applied with a folded pipe cleaner and flamed with a disposable lighter to burn off excess alcohol in the dye and set the dye to the briar.
Below you can see the tape had ignited during the flaming. Oops.
Back at the workbench, the stem appeared black.

I wiped the excess dye from the stummel. Several alcohol dipped make-up pads later the stummel can be seen to have a very dark brown color. Oh yeah, I actually remembered the nitrile gloves this time. I bet you didn’t see that coming?
The stummel was then sanded with a 400 grit sanding sponge to remove the outer layer of dark dyed briar.

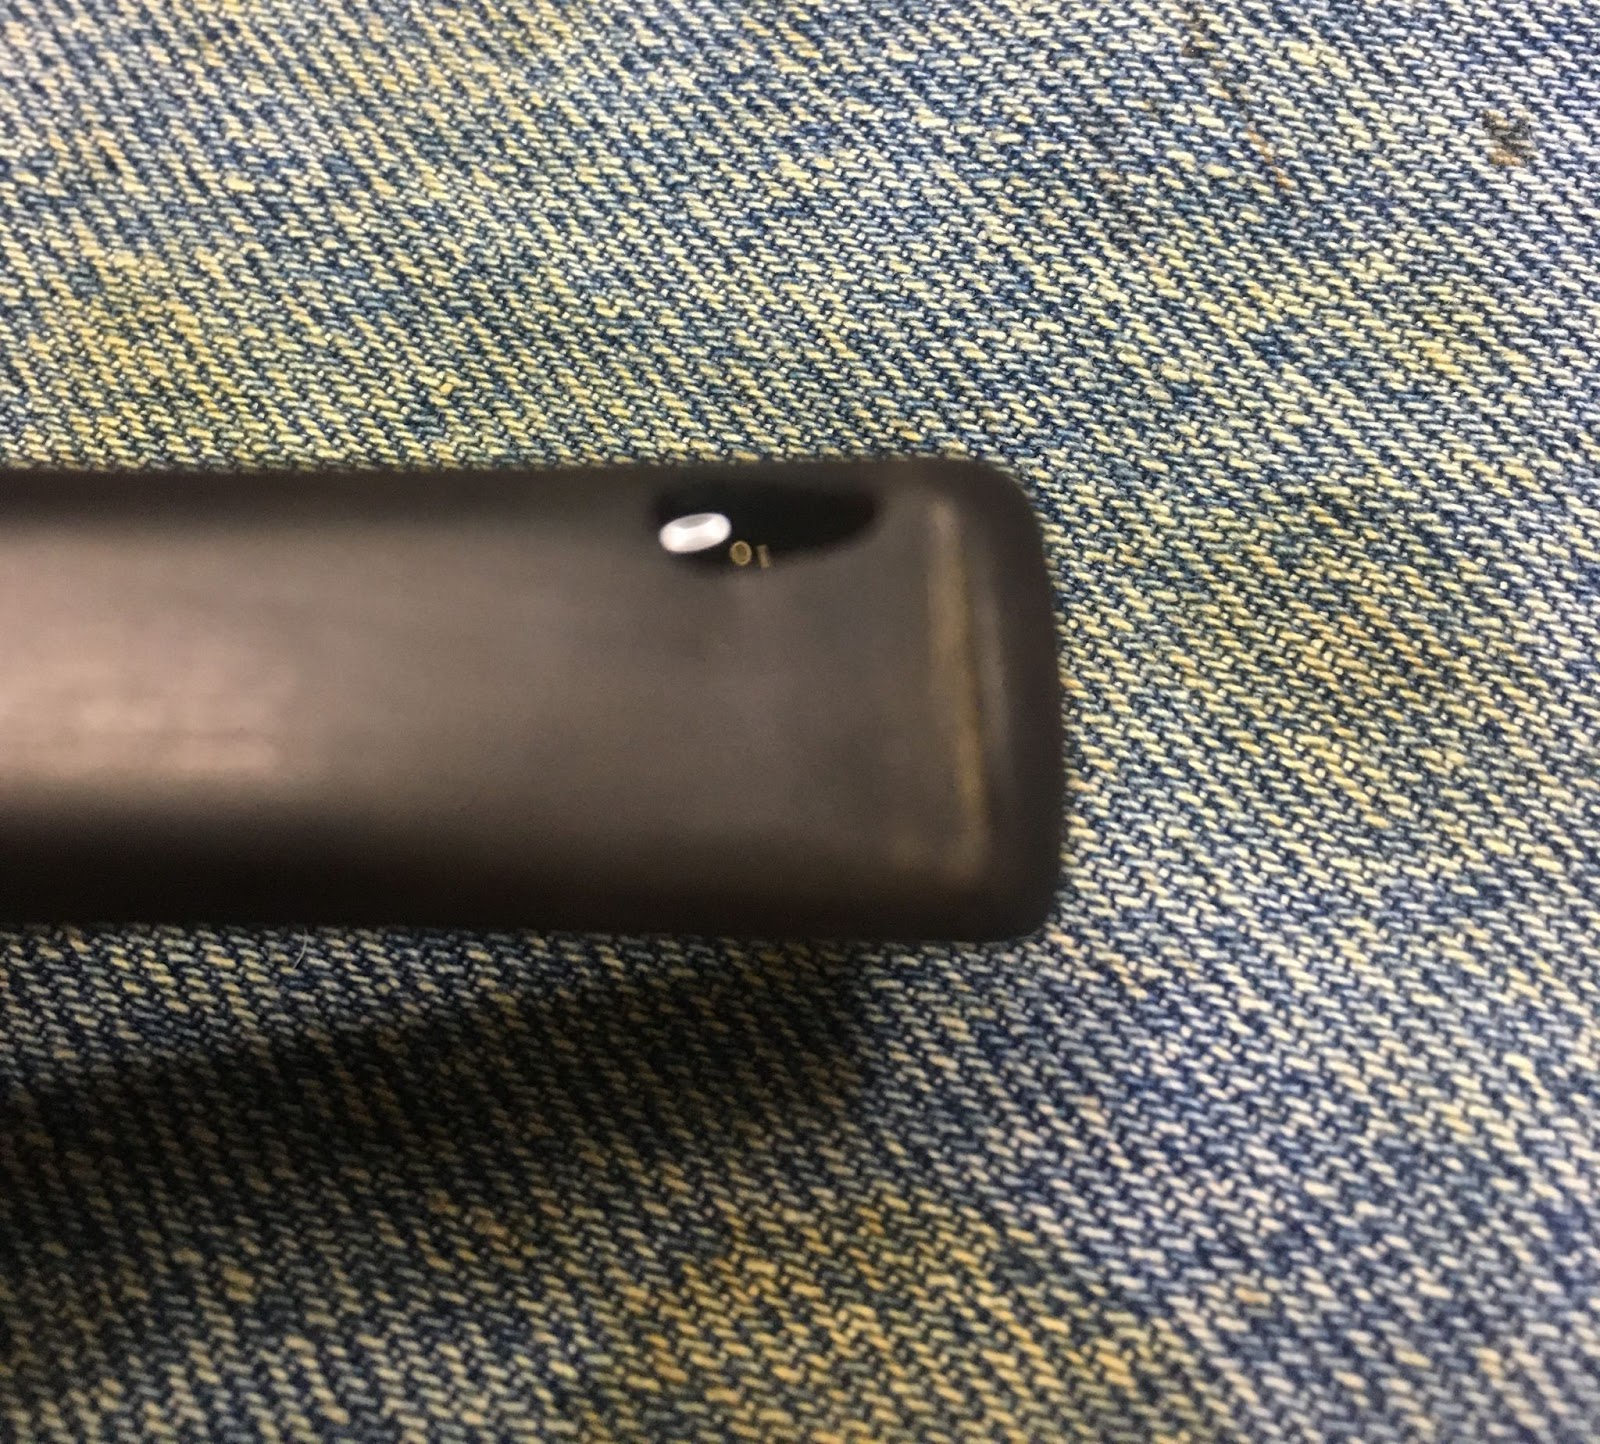
Next the damaged stem needed to be repaired. Below are the top and bottom surfaces of the stem.

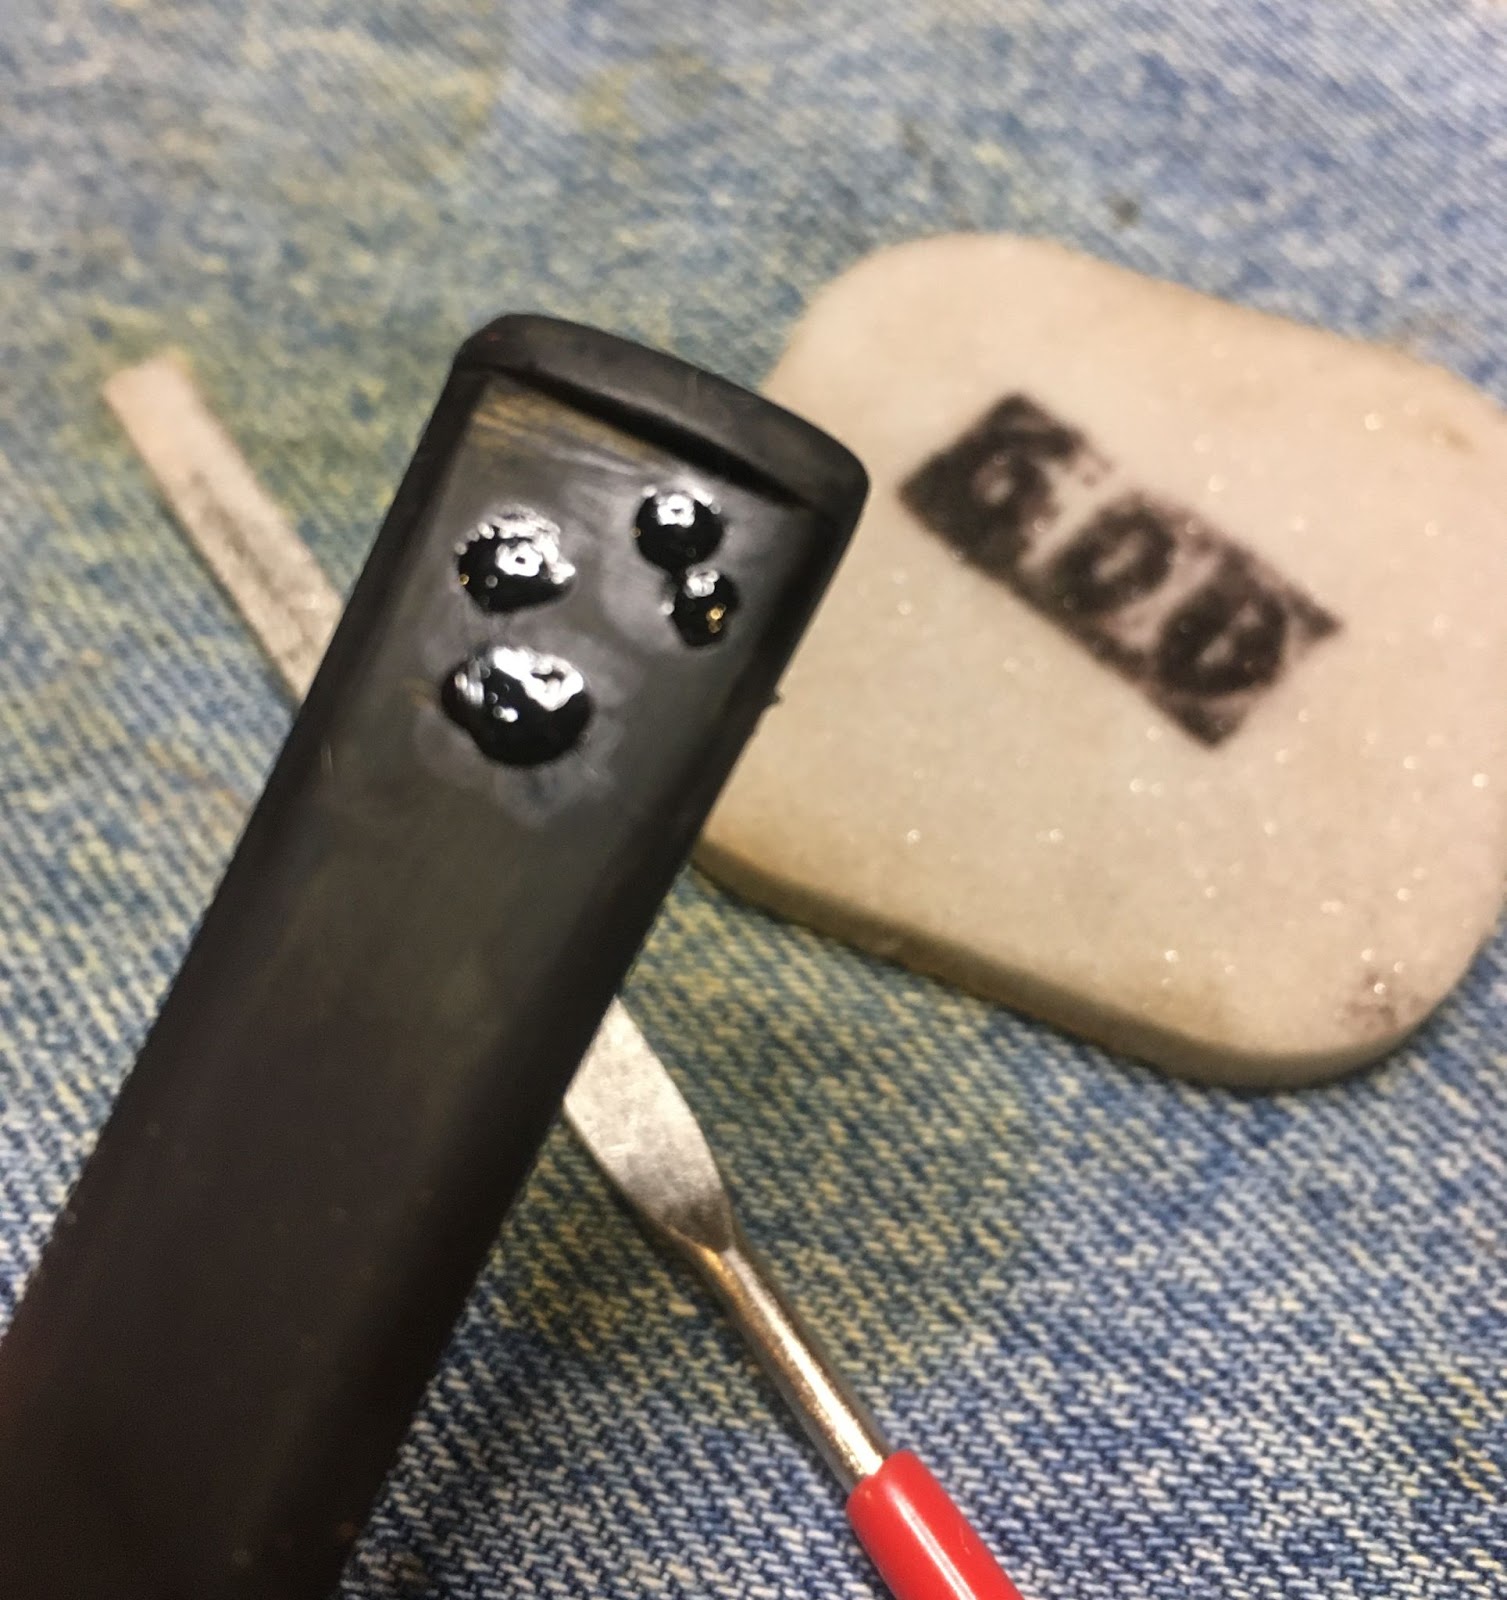
Black CA was applied to the depressions on both the top and bottom of the stem. The CA was then spritzed with a CA drying accelerator.

These were then filed with a flat needle file until flush with the surrounding stem. Both top and bottom required a second application of CA. I prefer to use several light coats compared to a single large coat of the CA.
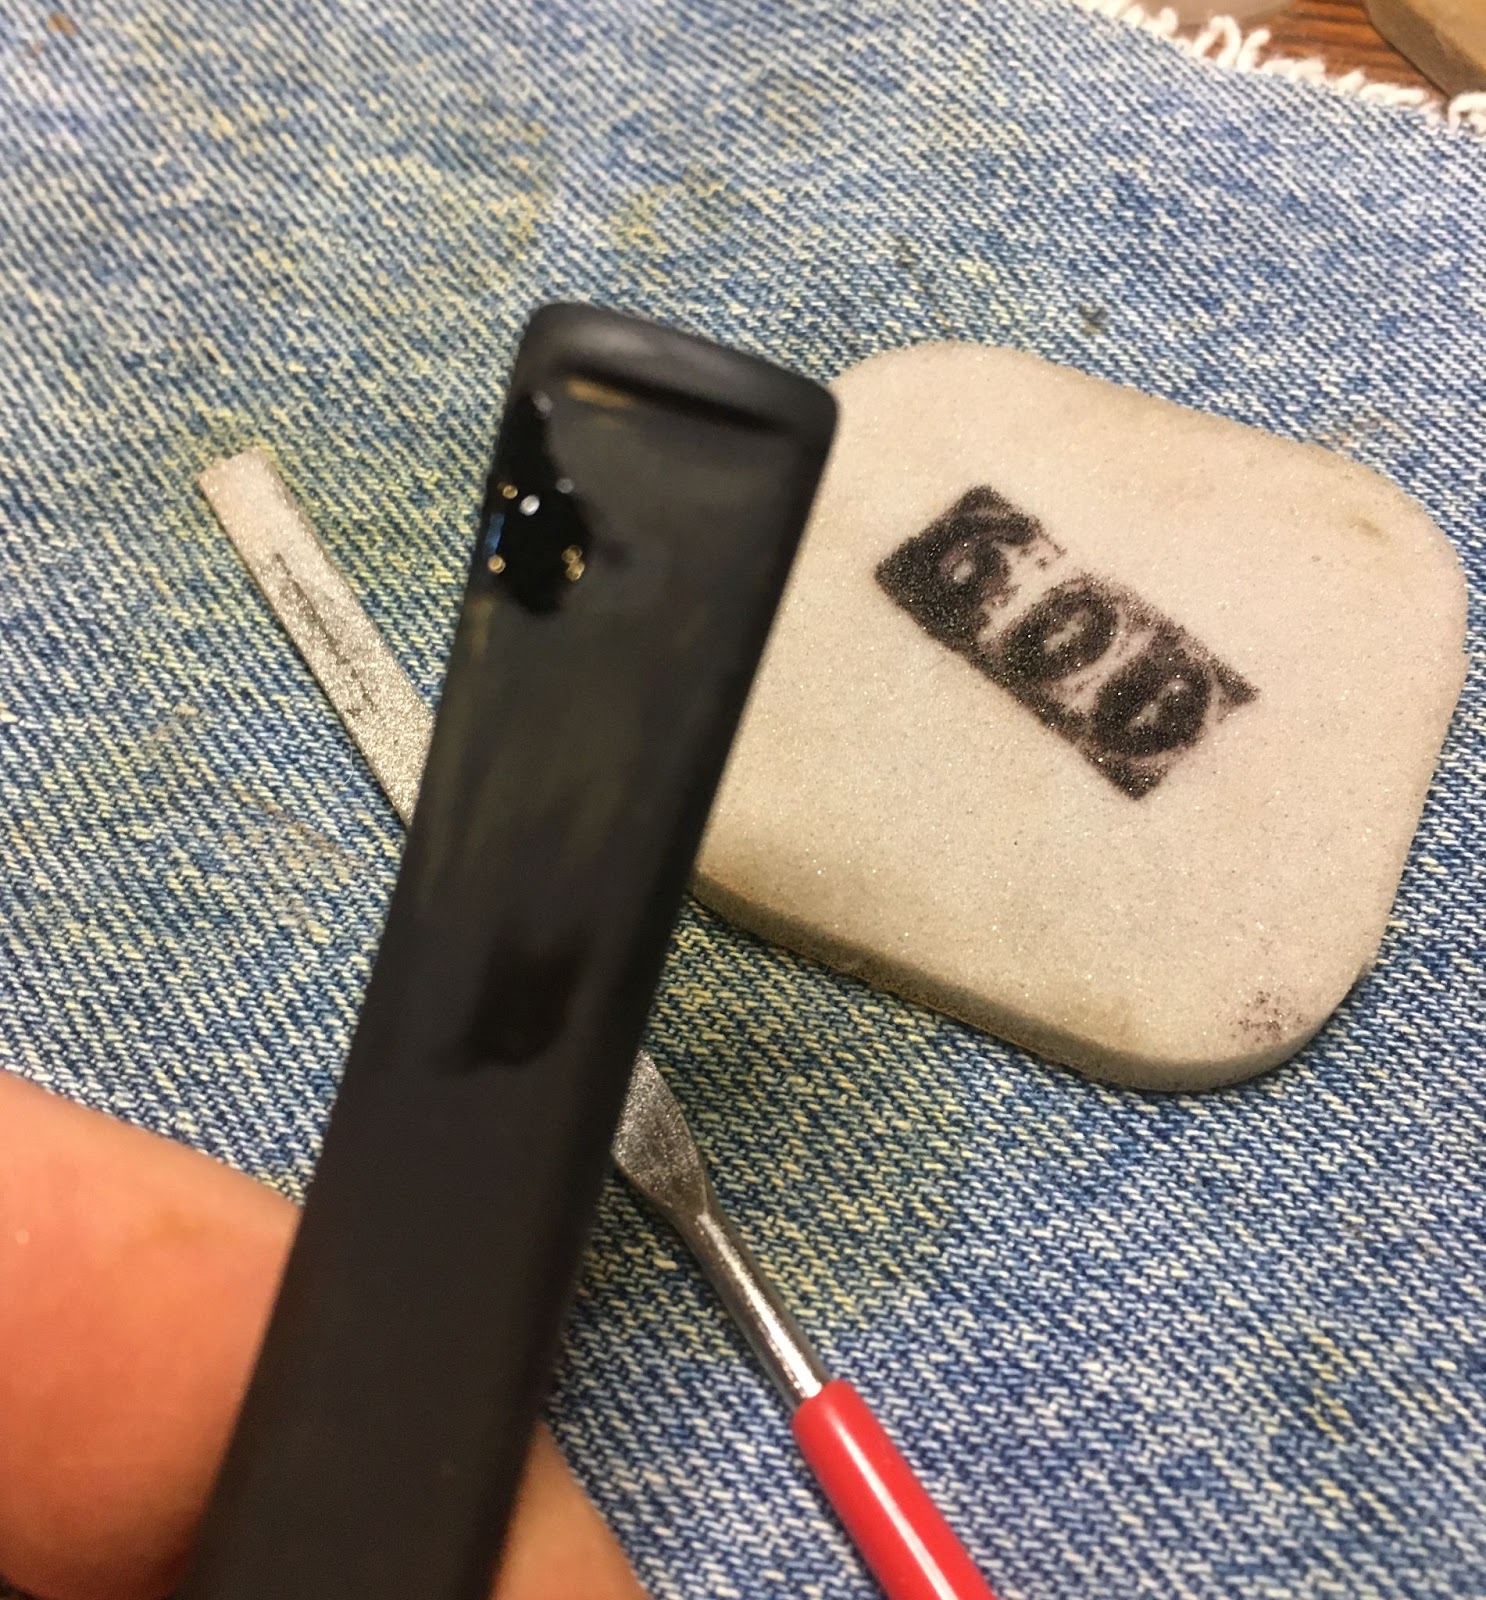
Additional filing and sanding eventually led to the below photos of the top and bottom of the stem.
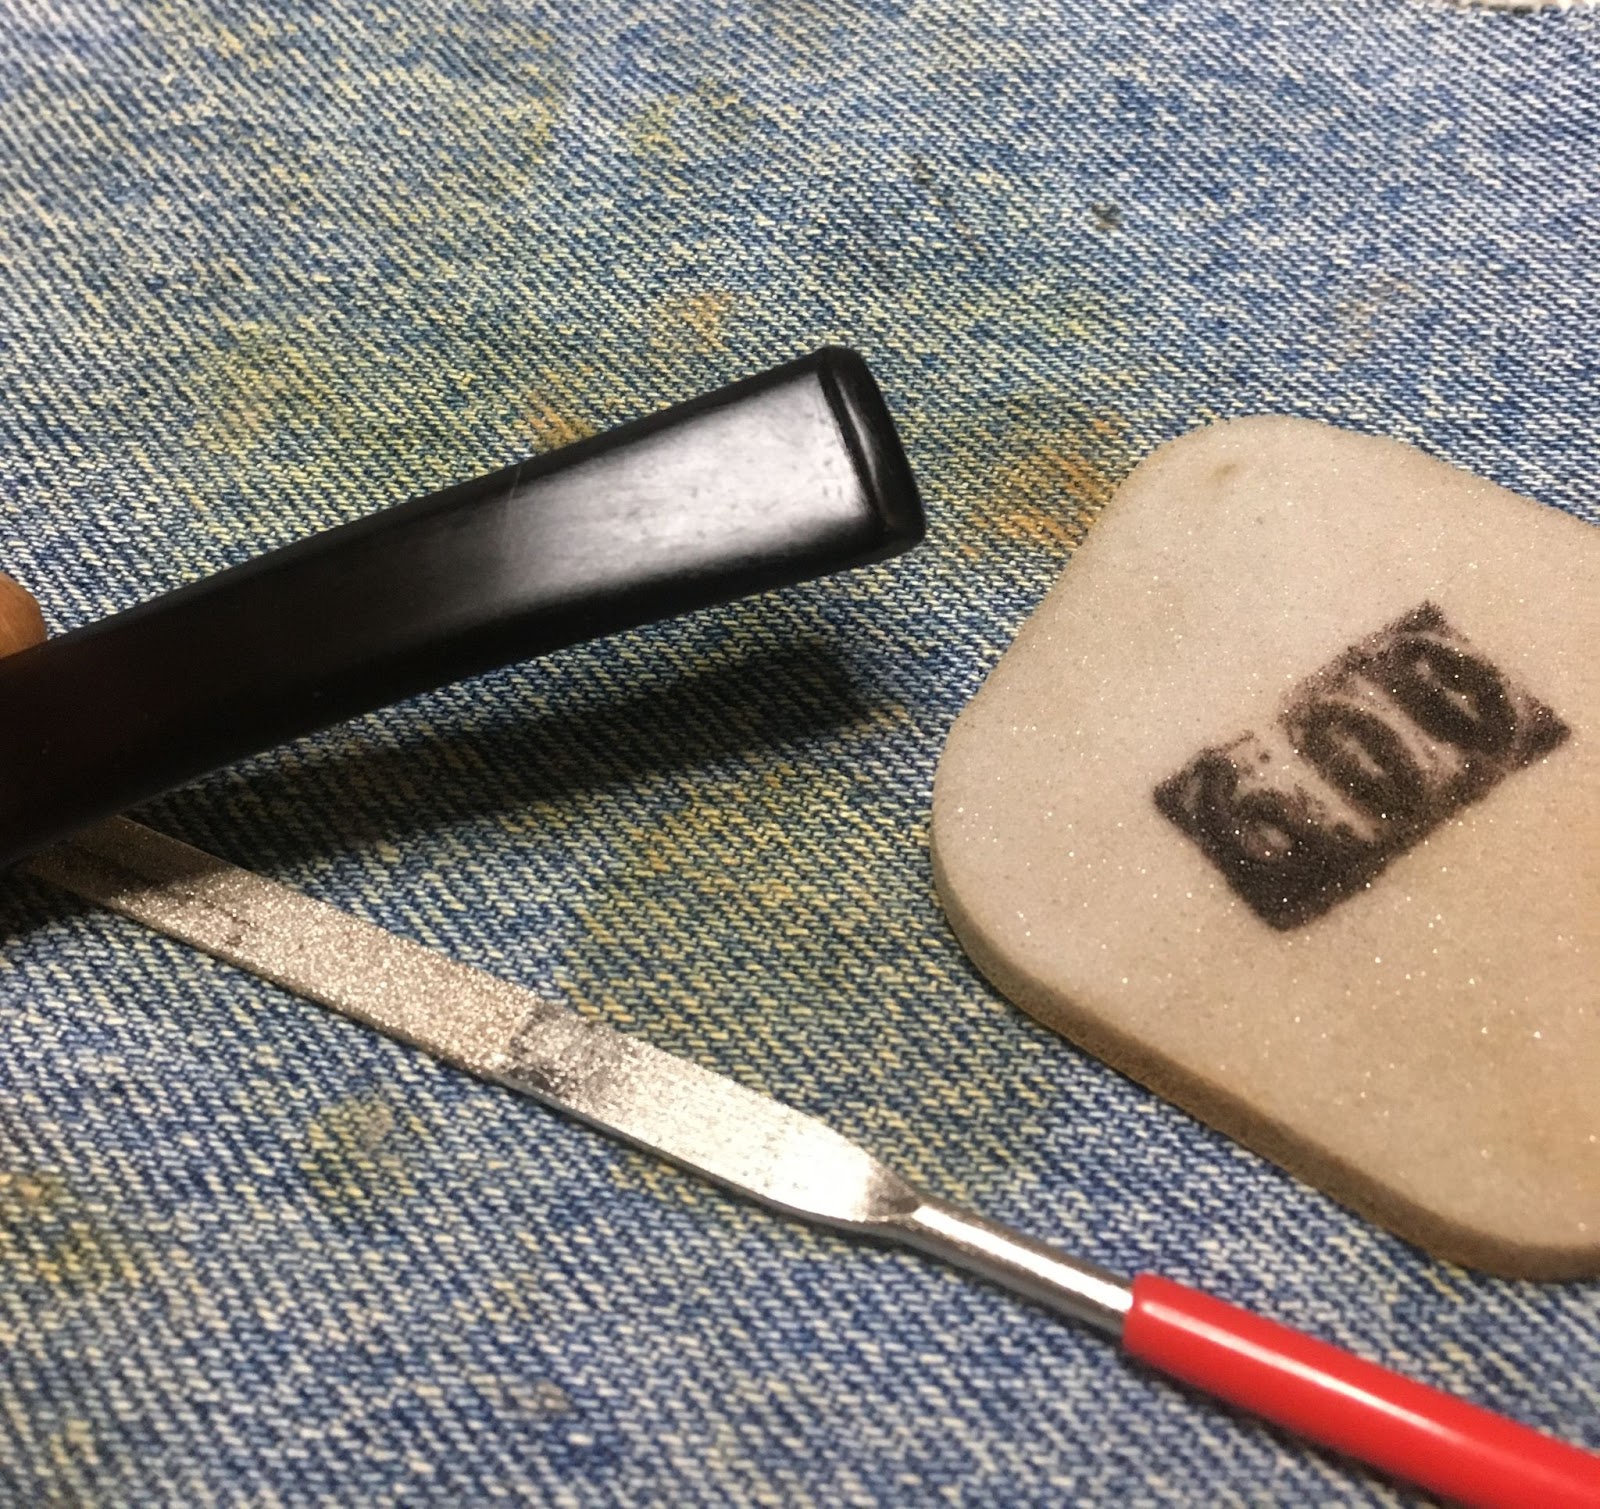

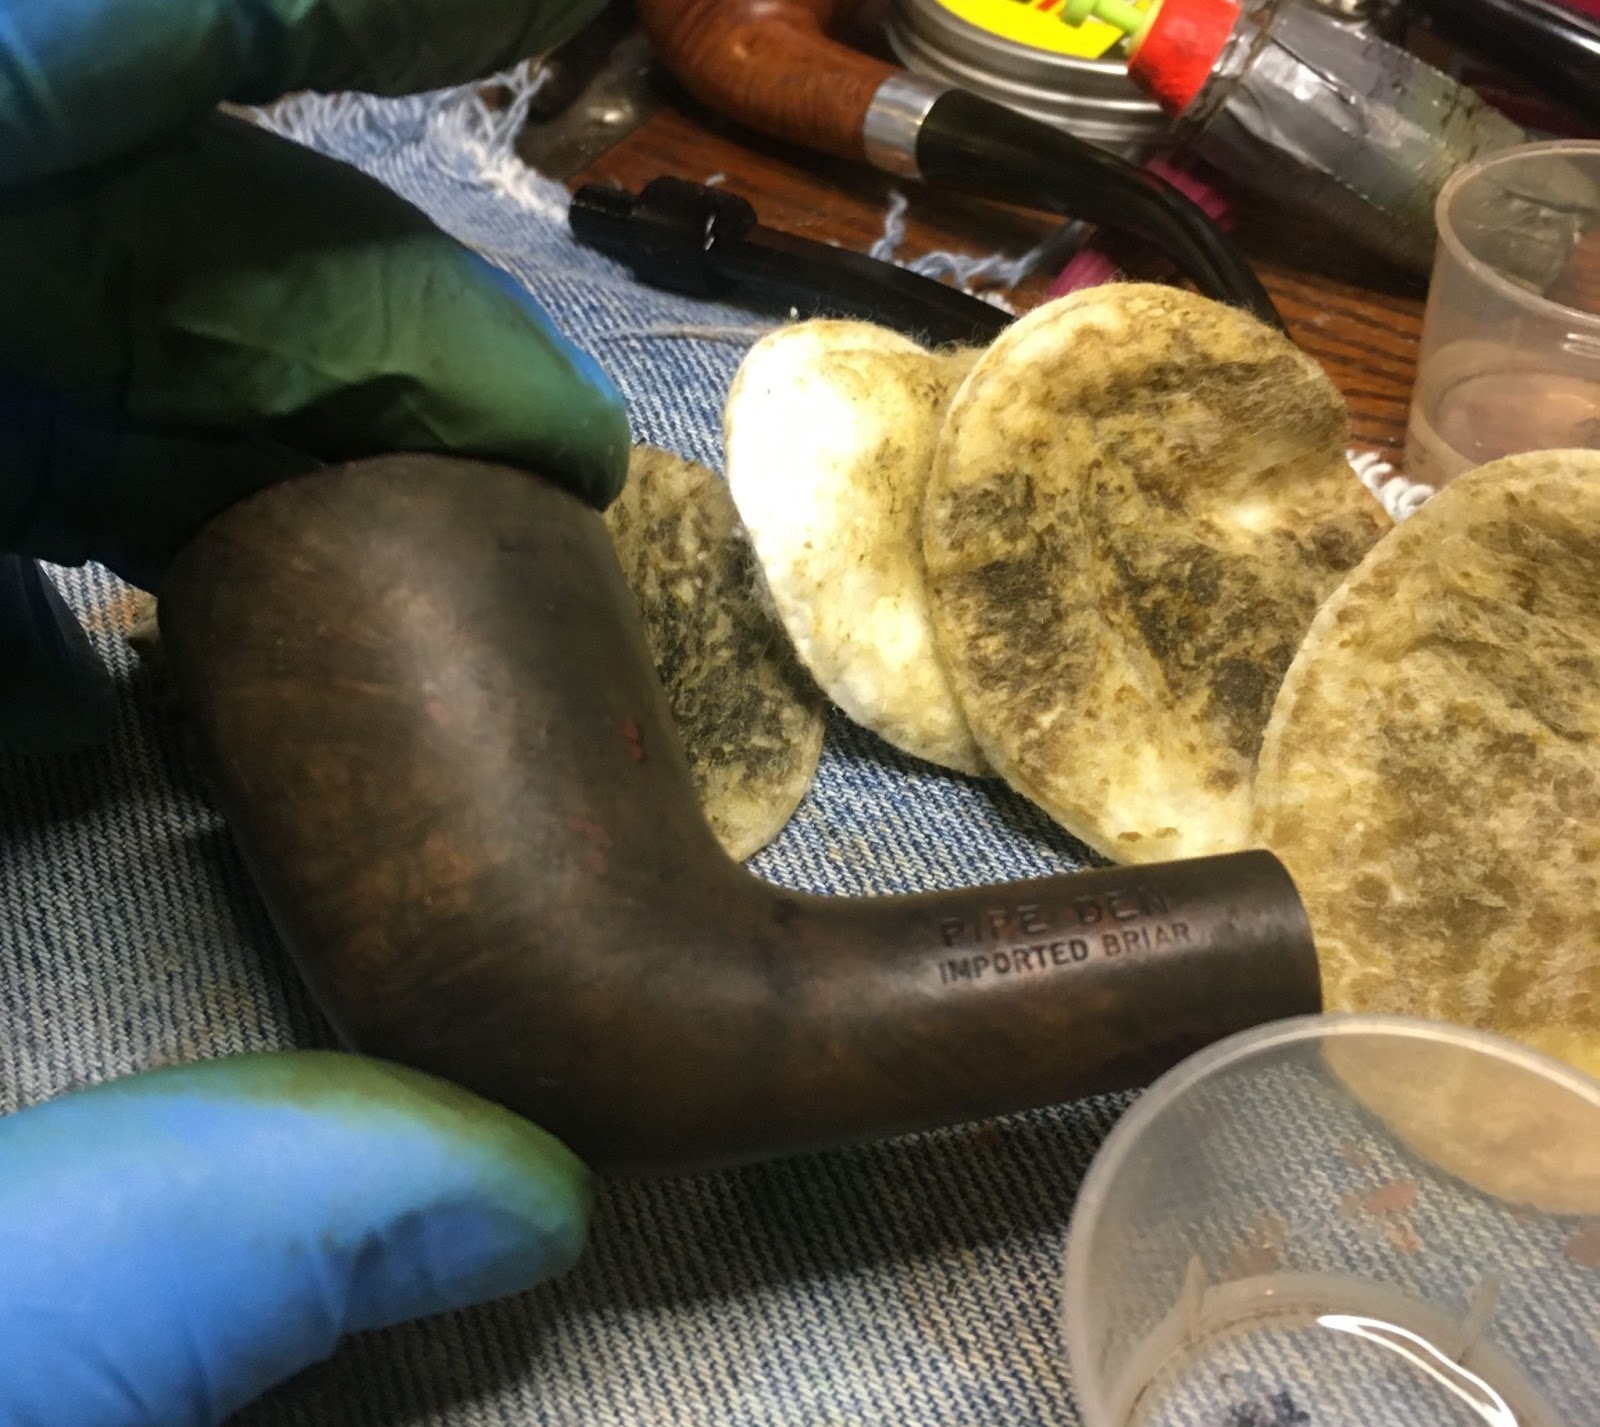
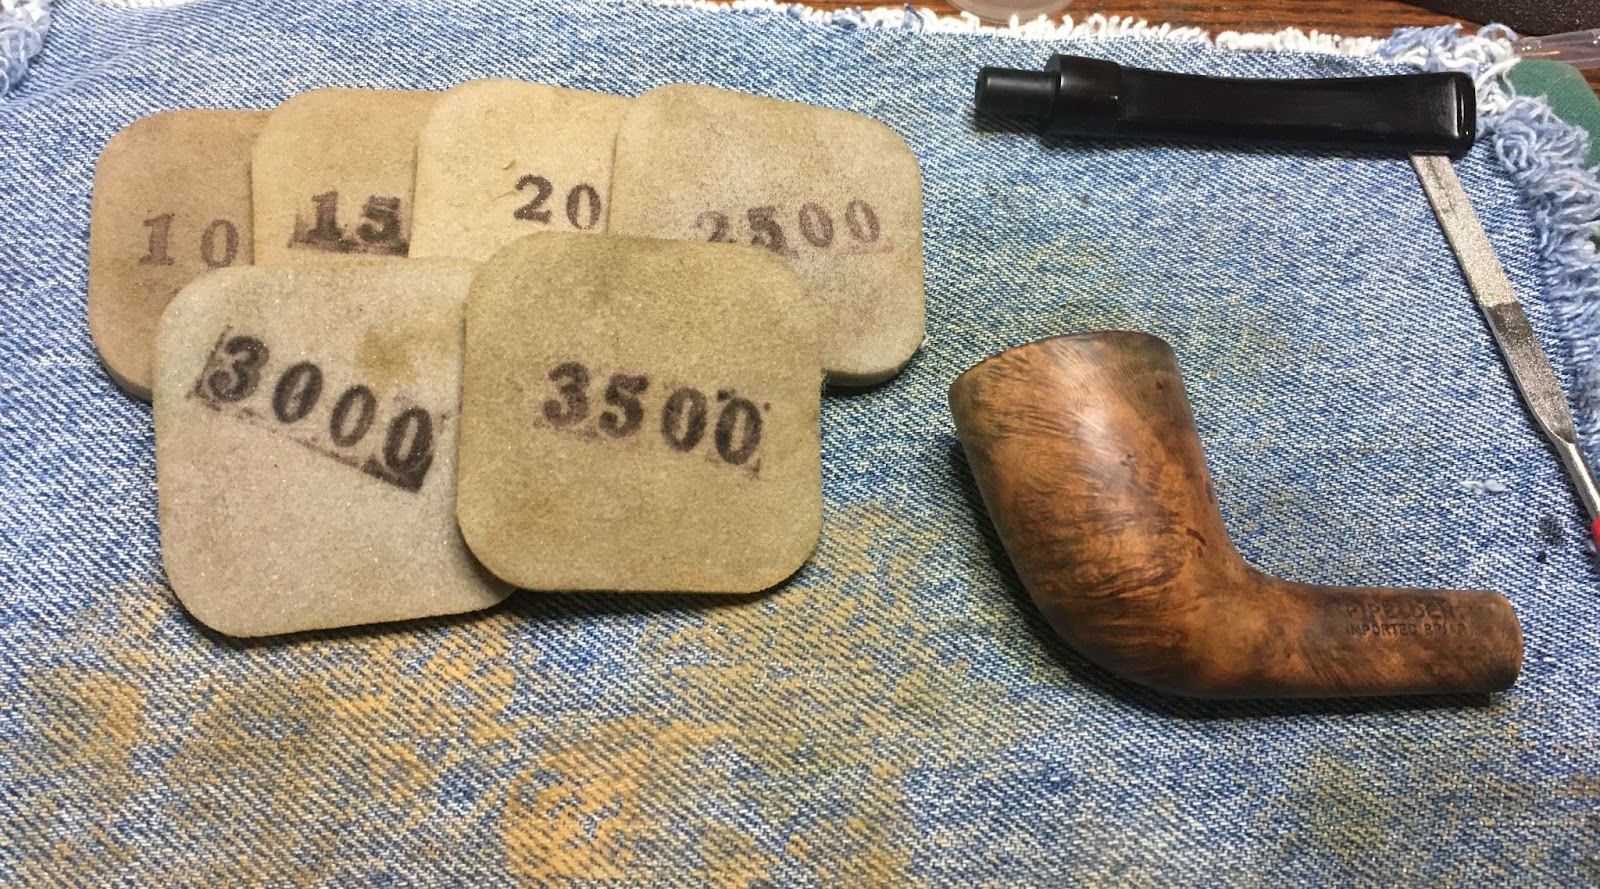
The stem was then sanded using a sequence of sanding sponges in grits 1000-3500. Between each sponge I applied a bit of mineral oil then wiped with a paper towel.

After the sanding sponges I used a sequence of 4000-12000 micro-mesh pads. Between each pad I rubbed in a small drop of Obsidian Oil and wiped the stem with a paper towel.

On to sanding the stummel. It was sanded with the sanding sponges 1000-3500. Between each sponge the stummel was wiped with an alcohol dampened make-up pad.
The stummel was then worked with a sequence of 4000-12000 micro-mesh pads. Between each pad the stummel was wiped as with the sanding sponges.

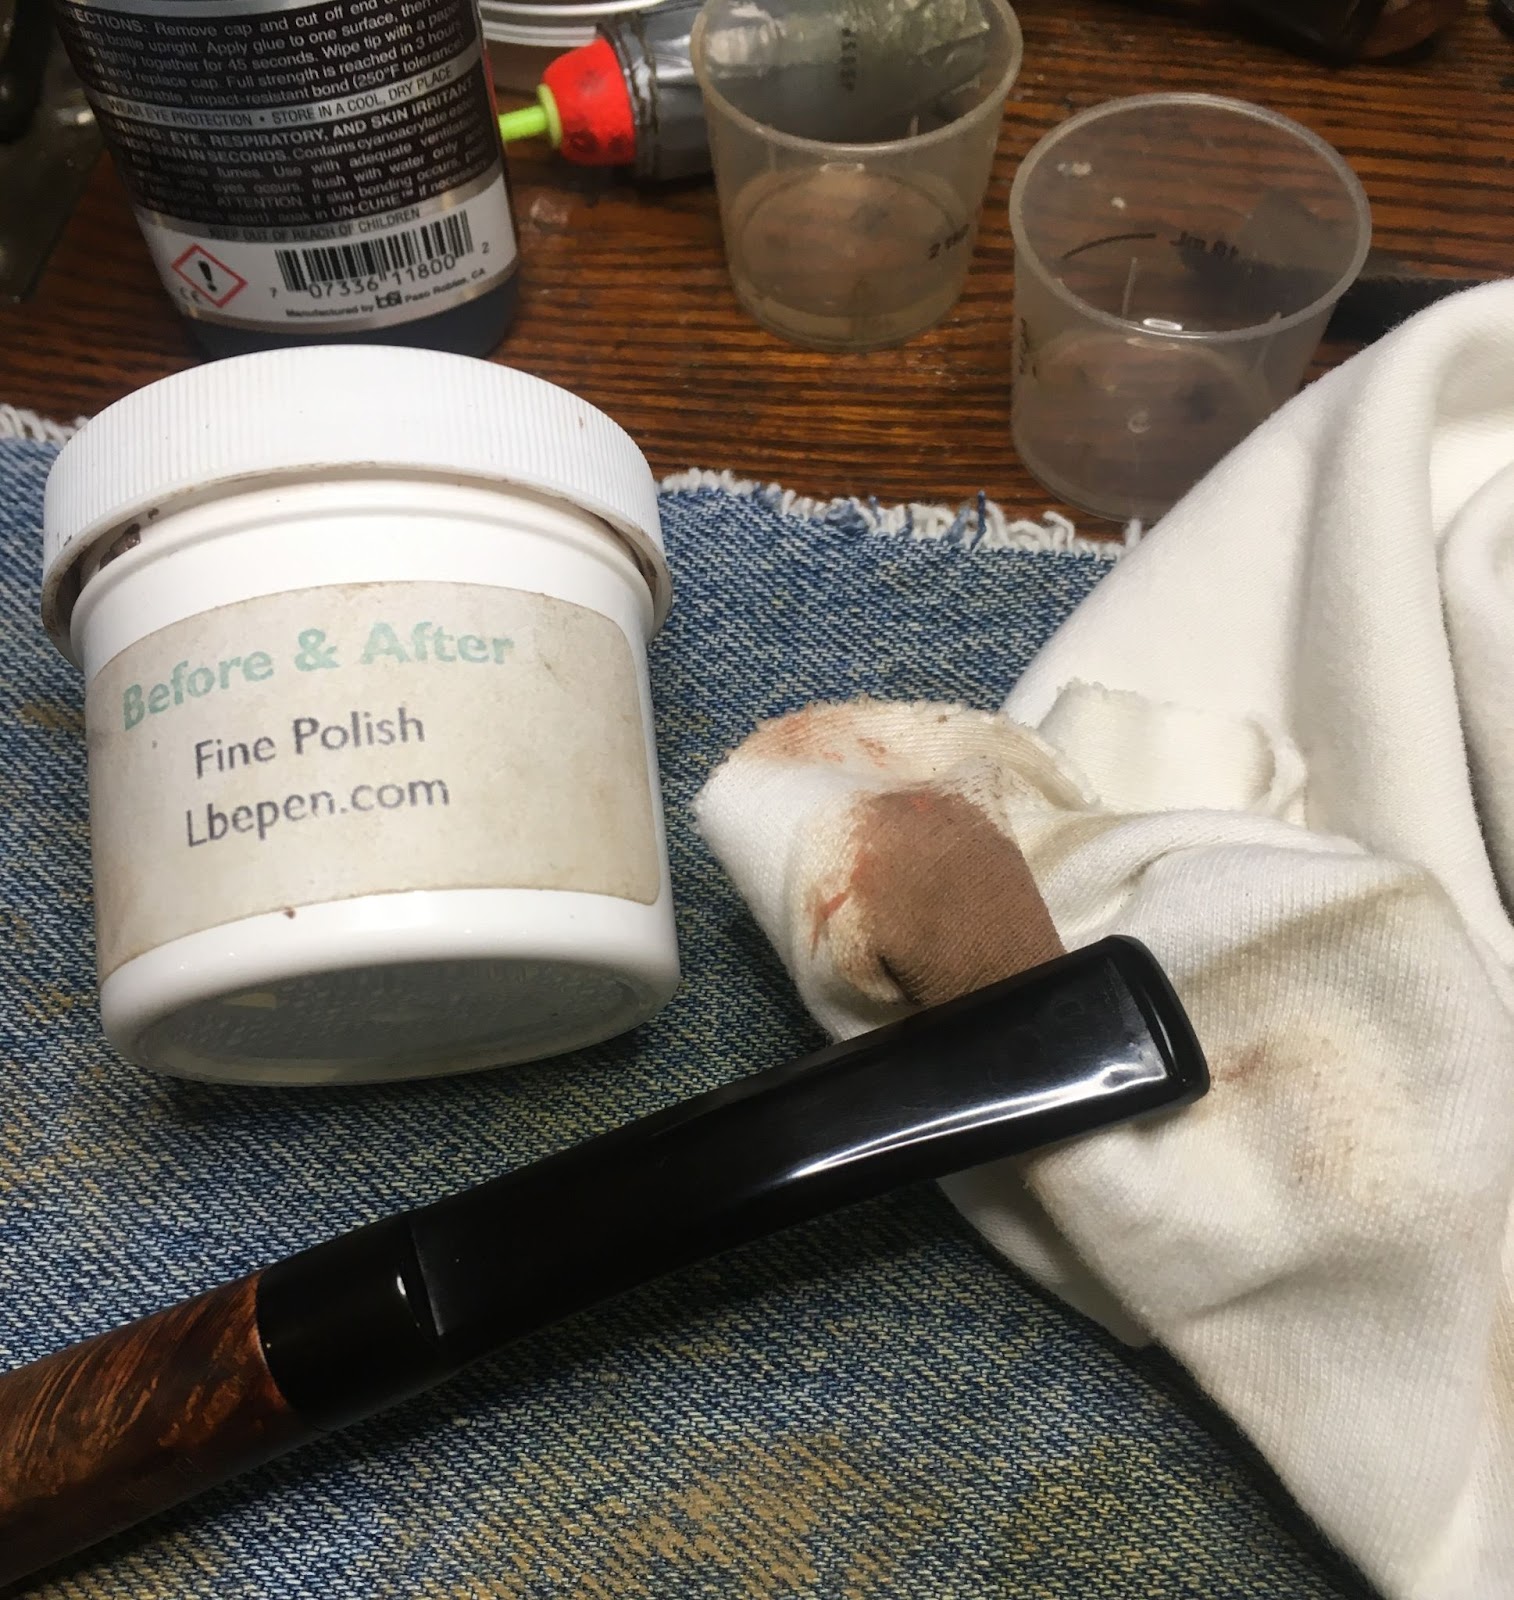
The stem then received polishing with Before and After fine then Extra Fine polish. Both were applied by finger and hand buffed using a soft cotton cloth.

The stummel then was given a coating of Before and After Restoration Balm and allowed to sit for 20 minutes.

The excess Restoration Balm was removed with an inside out cotton athletic sock to reveal a lovely grained briar.

The pipe then received several coats of carnauba wax from the buffer.

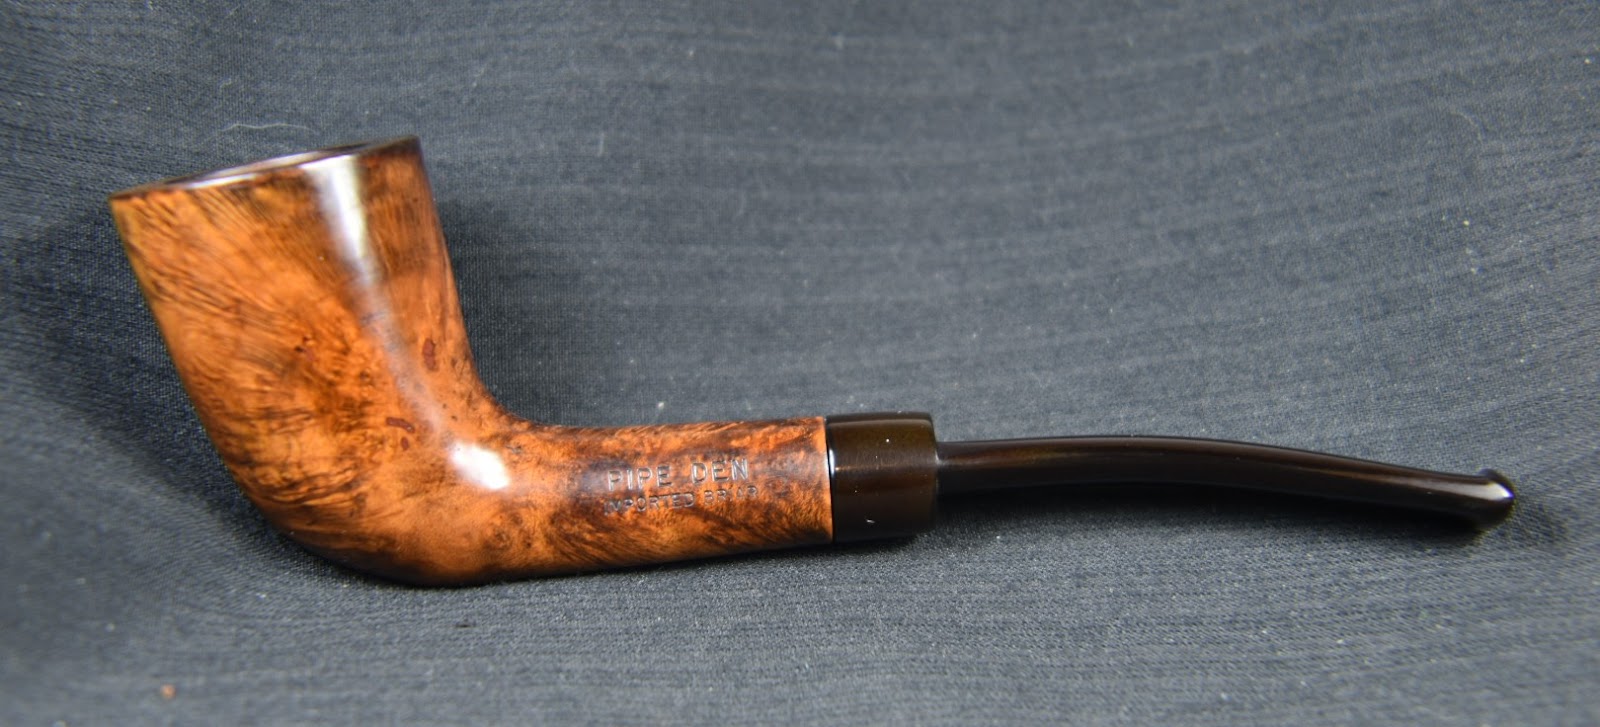
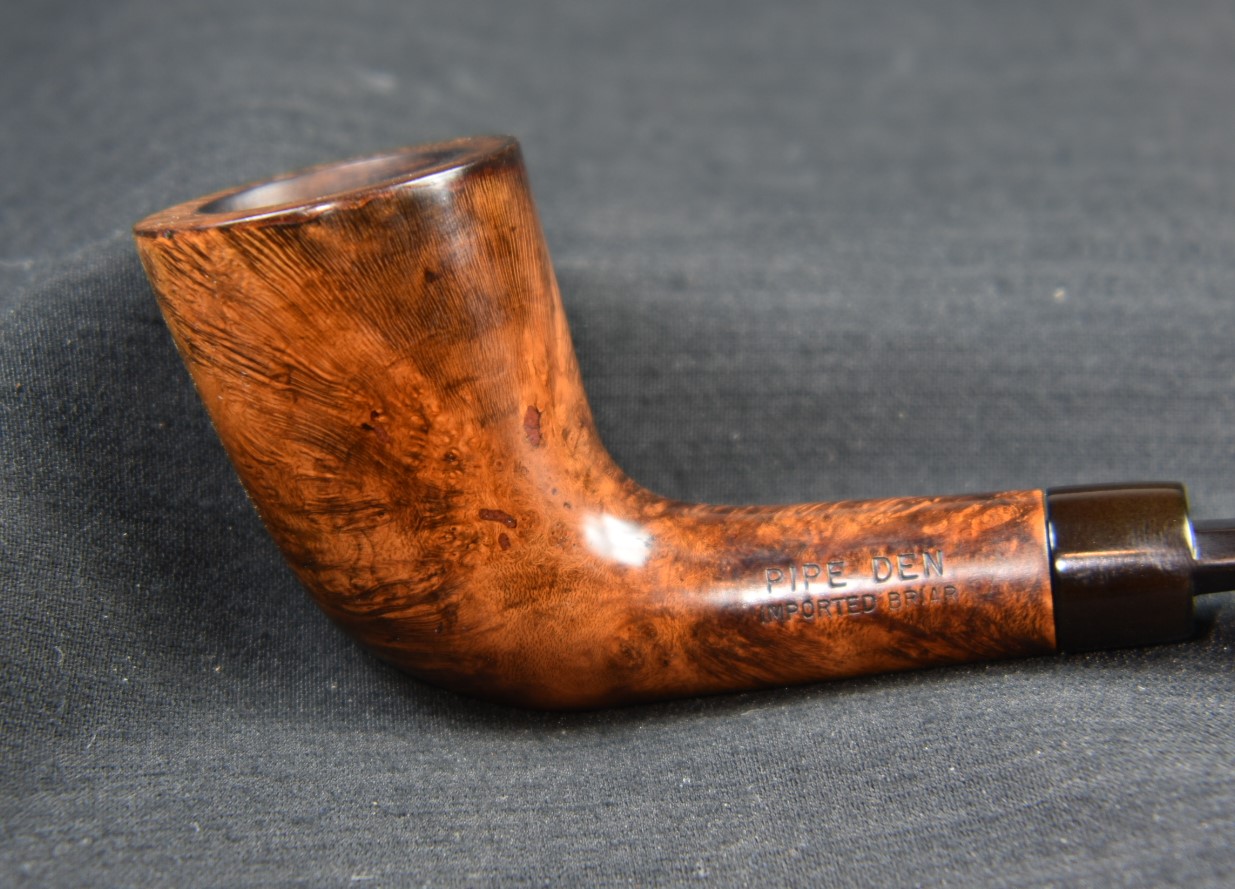
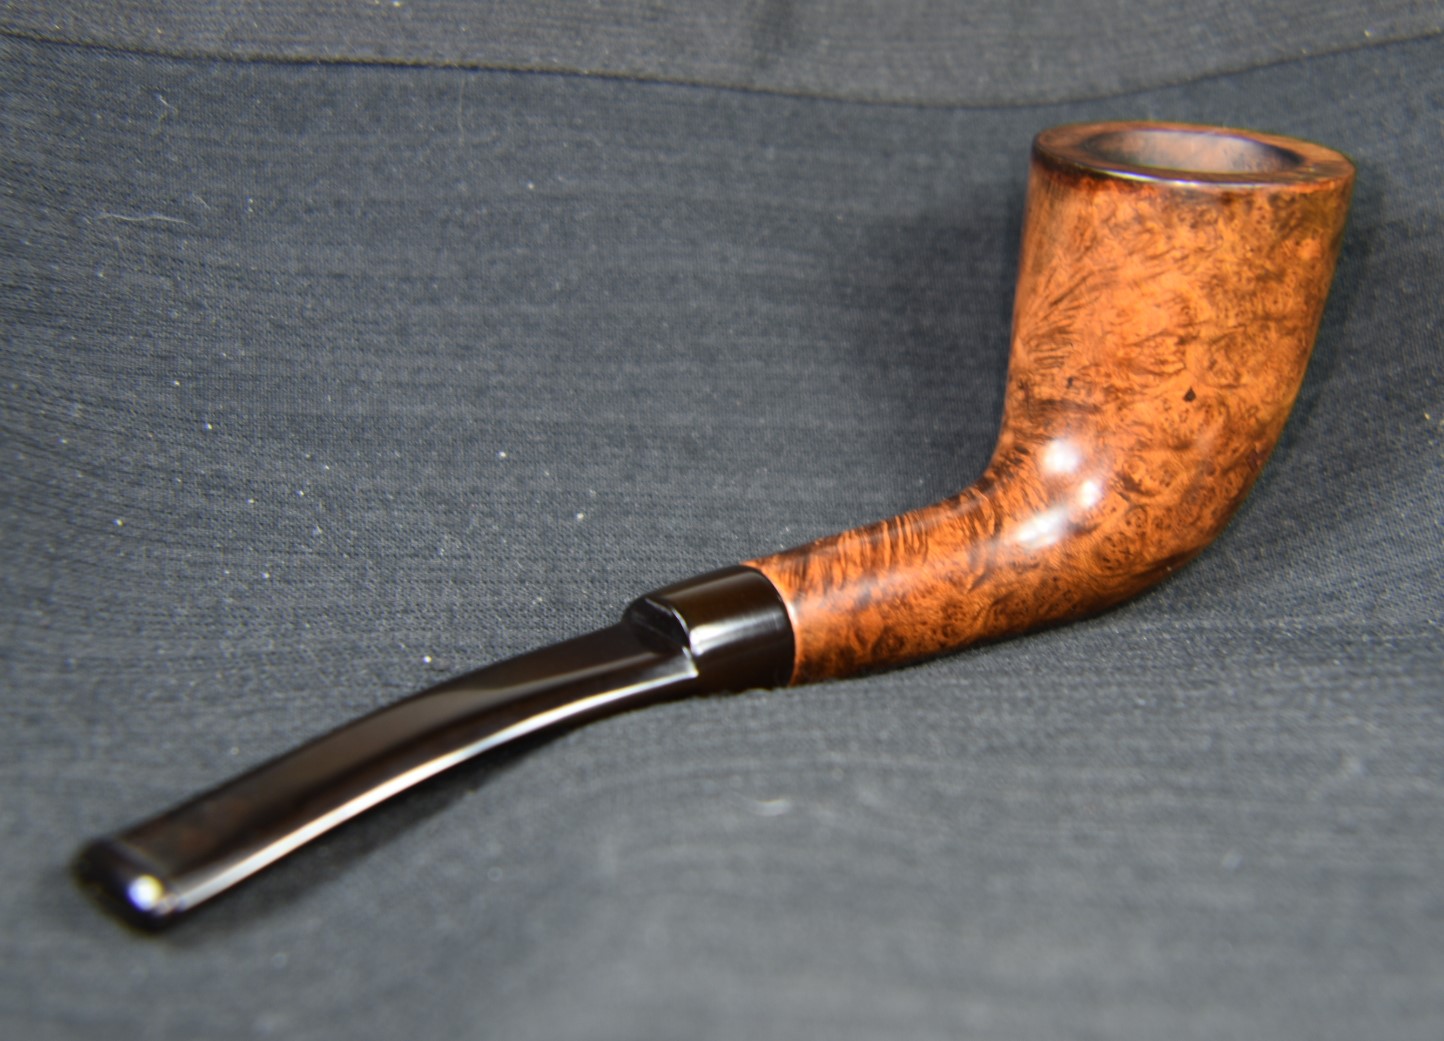
Overall I am pleased with how well this Pipe Den Zulu turned out. I love the shape though I would appreciate a slightly larger size. The repairs of the rim and stem came out better than anticipated. The briar grain was accentuated by the contrast dye and shows itself far better now than when it was buried by years of grime. Though the make of this very nice little pipe may never be known I am sure that it can find a new stewart who will get years of enjoyment from it.
The dimensions of this little beauty are:
- Length: 6.06 in./ 153.92 mm.
- Weight: 1.05 oz./ 29.7 g.
- Bowl Height: 1.94 in./ 49.27 mm.
- Chamber Depth: 1.59 in./ 40.39 mm.
- Chamber Diameter: 0.77 in./ 19.56 mm.
- Outside Diameter: 1.31 in./ 30.28 mm.
I do hope that you have found something here useful to your own pipe care, maintenance or restorations. If you like this sort of thing, please click the like and subscribe buttons. Thank you for reading the ramblings of an old pipe lover.
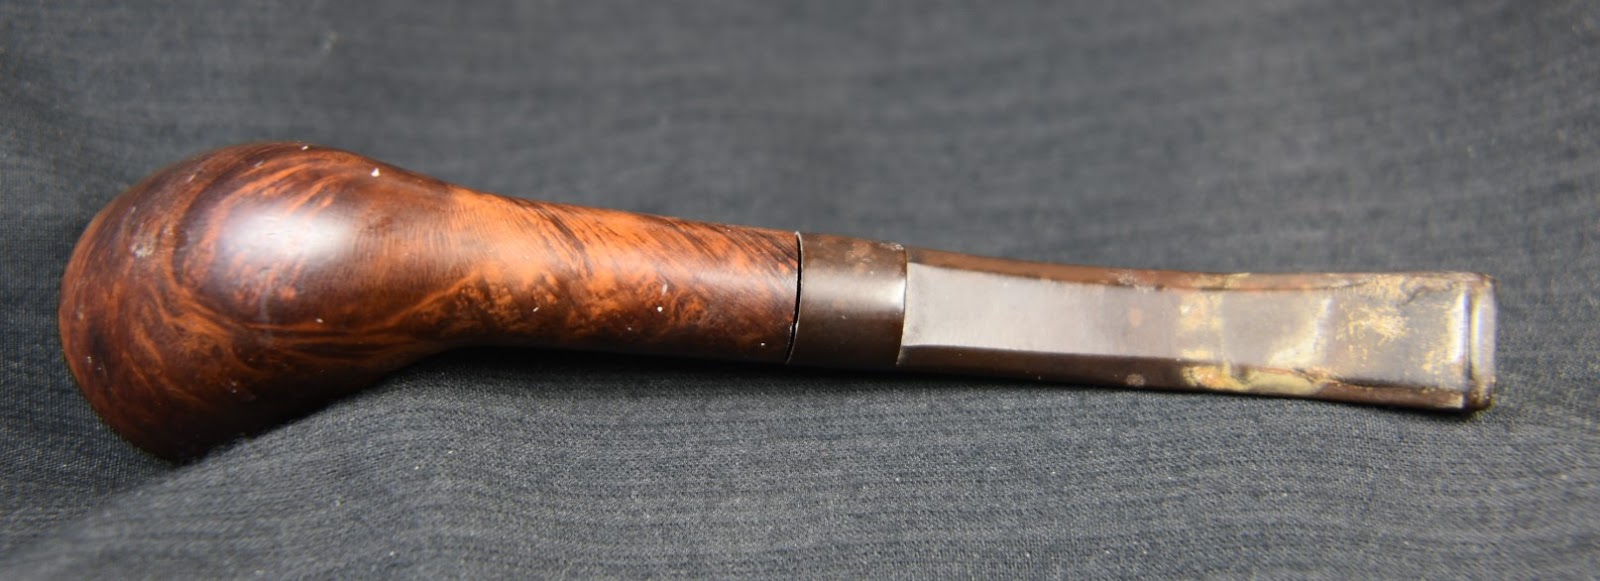
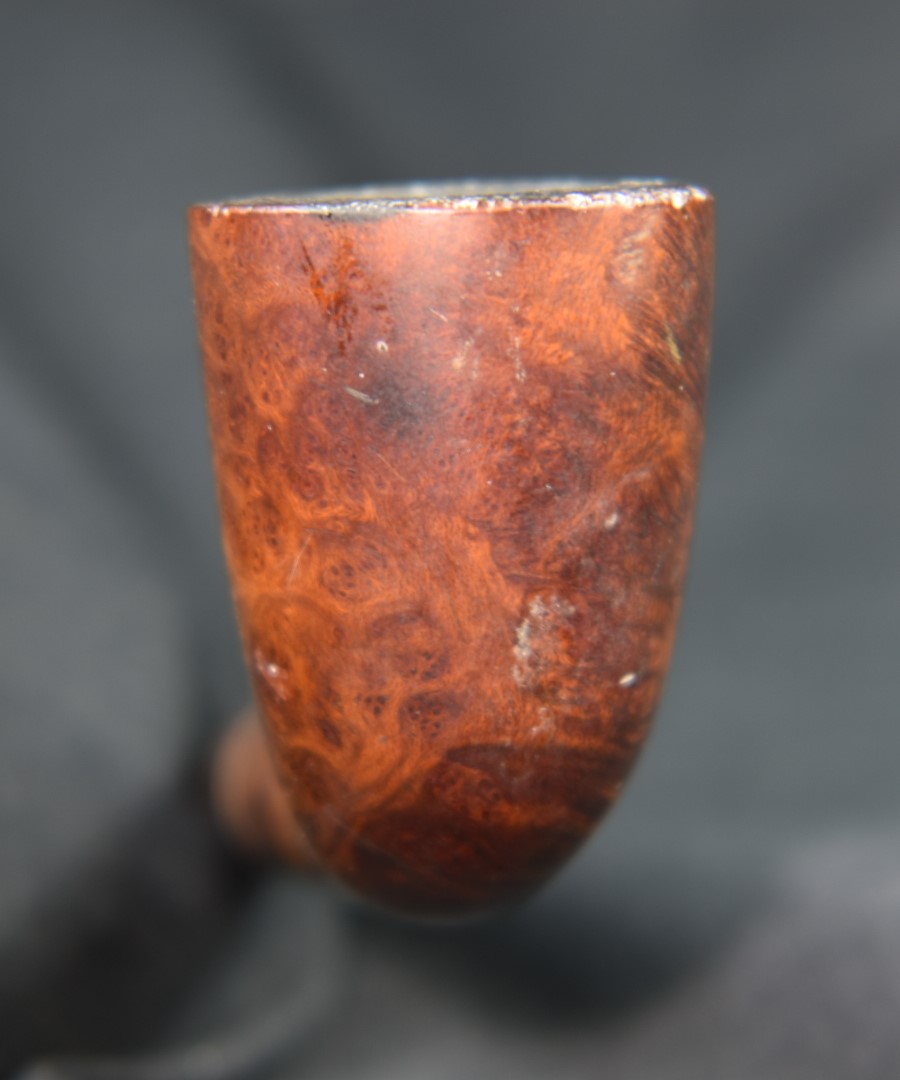
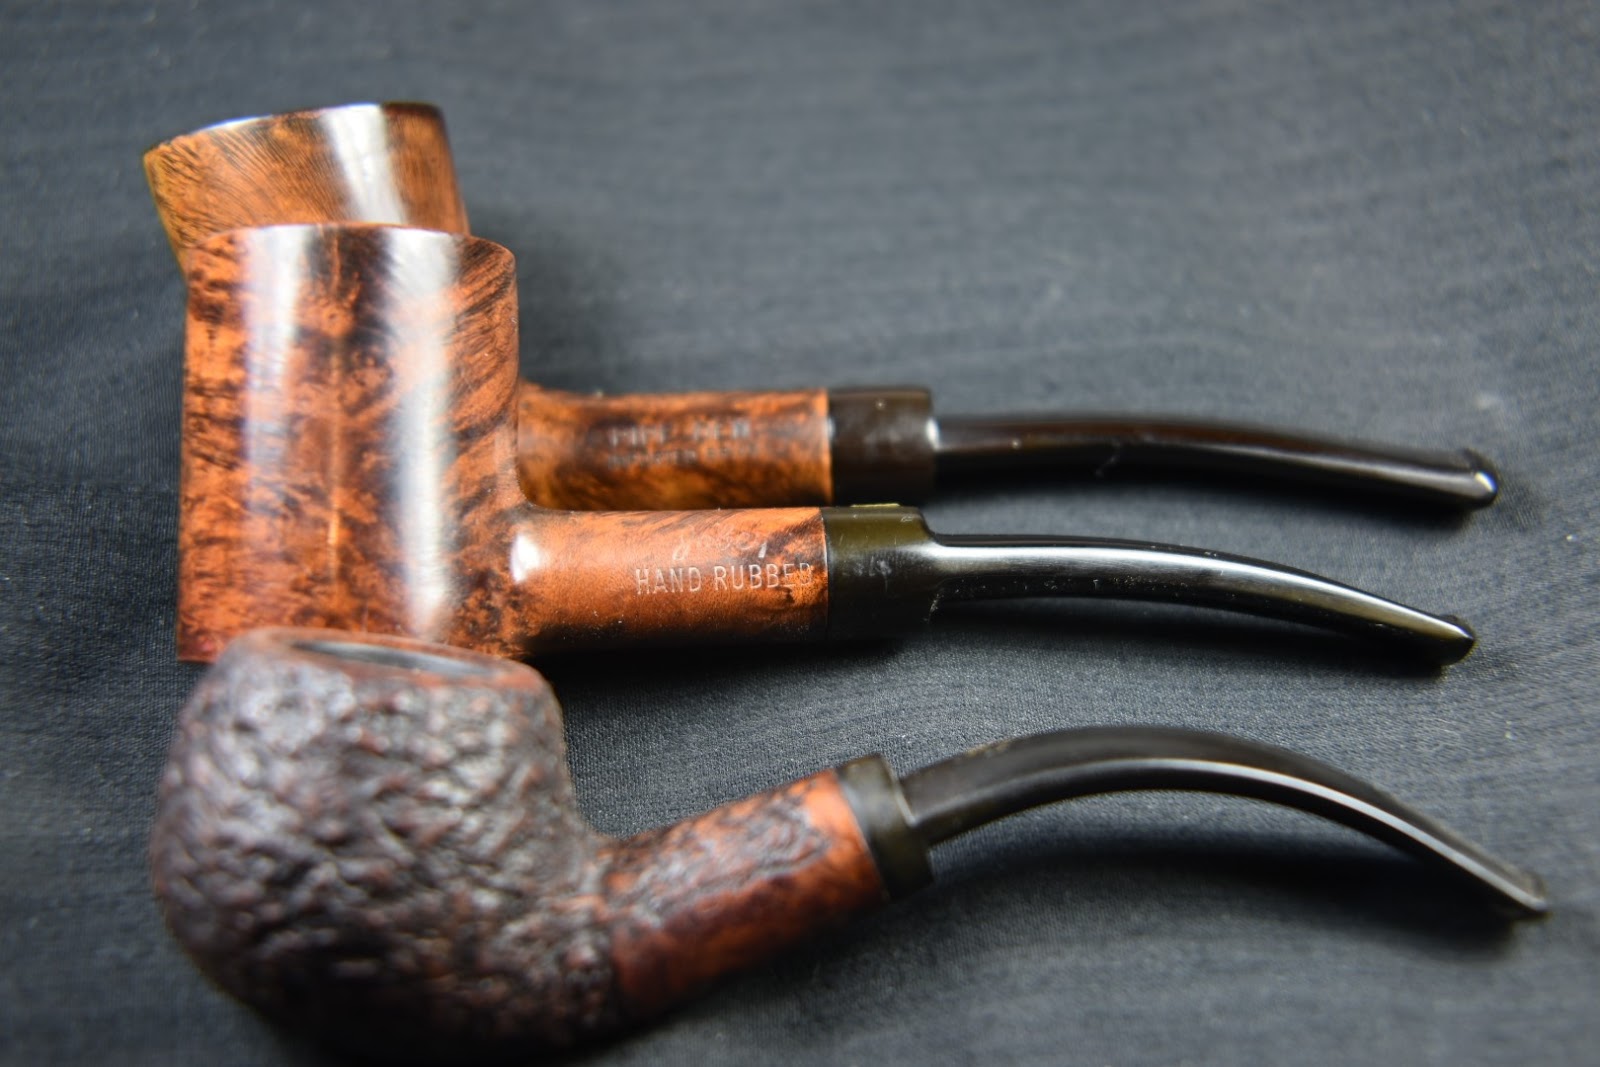
Below are some photos of the finished Pipe Den Zulu.


One response to “A Pipe Den Zulu Restoration”
[…] A Pipe Den Zulu Restoration […]
LikeLike