Photographed and written by
John M. Young
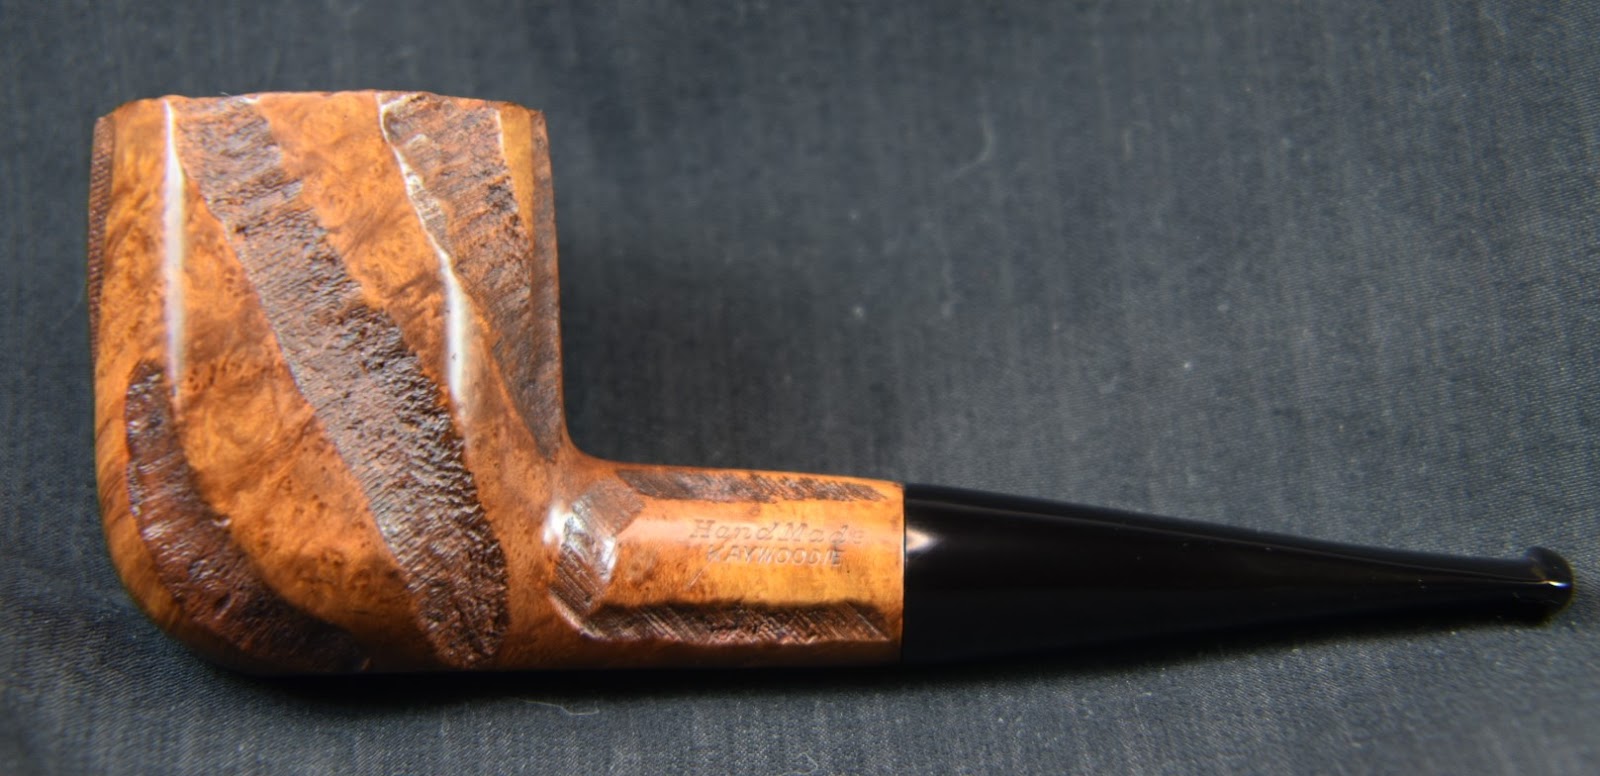
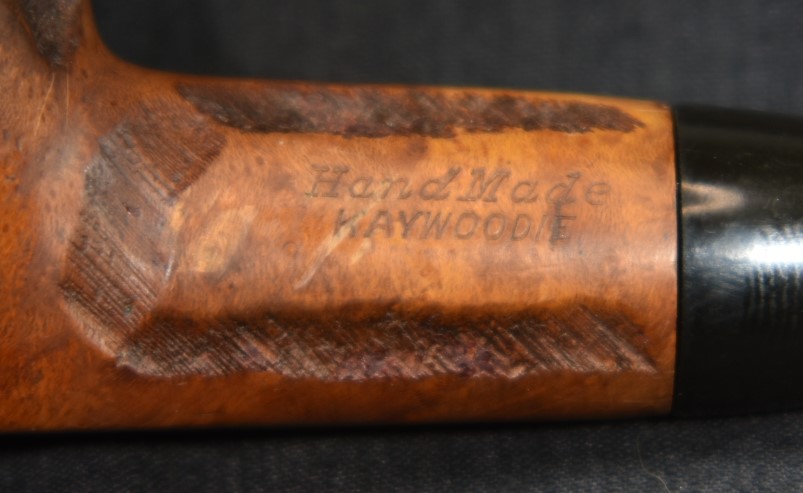
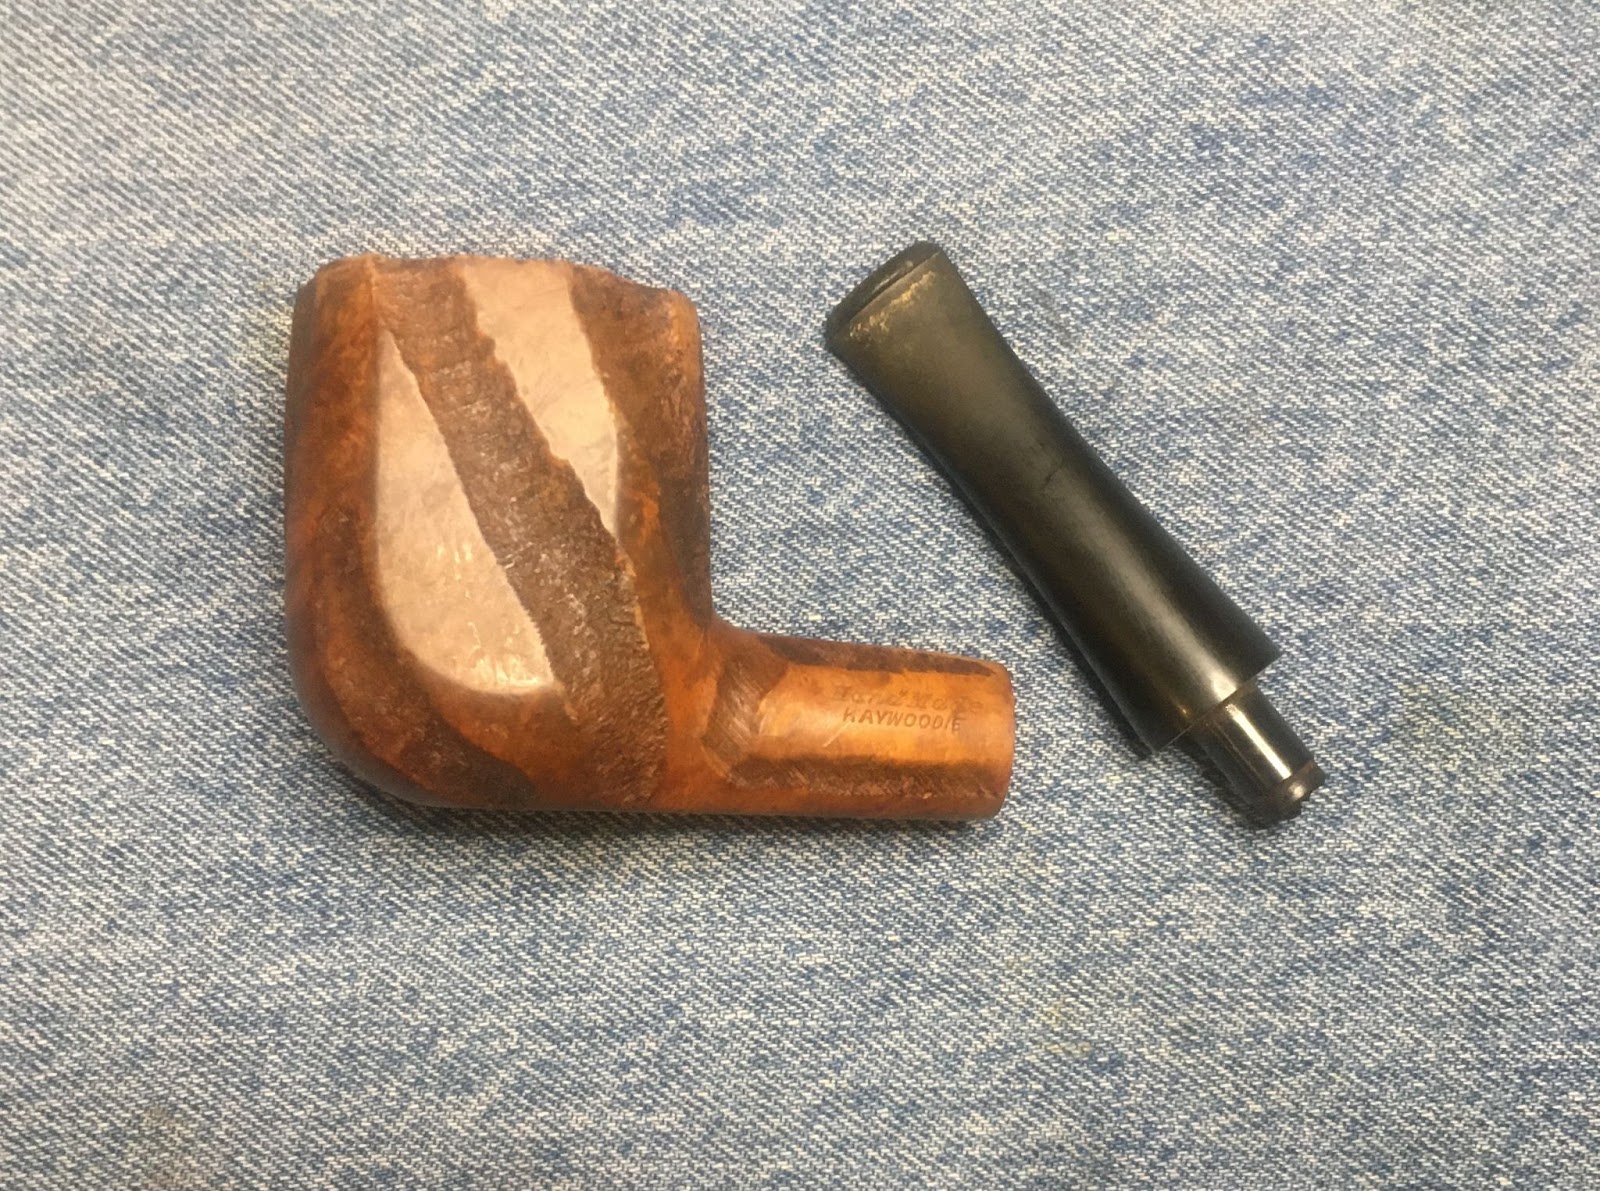
If I were a betting man, I believe it would be a fairly safe bet to say that many pipe smokers had either a Dr Graybow or a Kaywoodie as one of their first pipes. Kaywoodie has a long and colorful history dating back to their origins, “Kaywoodie name first appearing in February of 1919.” (Kaywoodie History – Greywoodie LLC) The history of Kaywoodie pipes is fortunately well documented thus, allowing rather precise dates for a Kaywoodie collector to declare the provenance of their charges. The above pictured Kaywoodie is stamped HANDMADE over KAYWOODIE (left) and IMPORTED BRIAR (right). No shape number is present.
Using this information and referring to the Kaywoodie Collectors’ Guide listed on pipedia.org I found that these pipes were made during the following years:
“Handmade-Oversize-Carved 1947-1955 on and off” (https://pipedia.org/images/3/3d/Kaywoodie_Pipe_Names.pdf) and that
“The Oversize Kaywoodies were, as the name implies, “Giants”. Lowndes notes that these pipes were stamped simply, “Hand-Made”. The pipes were all roughly “bulldogish” in appearance and were available in the following styles and grades7 : • Hand-carved “Colossus” ($10) • Walnut finish, banded “Hercules” ($20) • Hand-carved “John Henry” ($10) • Virgin finish, specimen grain “Paul Bunyan” • ($25)Virgin finish, banded specimen grain “Goliath” • ($25)Walnut finish “Atlas” • ($20)Hand-carved, Meerschaum-Inlaid “Samson” ($15)” (Kaywoodie Collector’s Guide – p10.pdf)
Looking into the stampings, I went to piphil.eu for confirmation. ThereI was able to find an exact match of this pipe’s stampings.
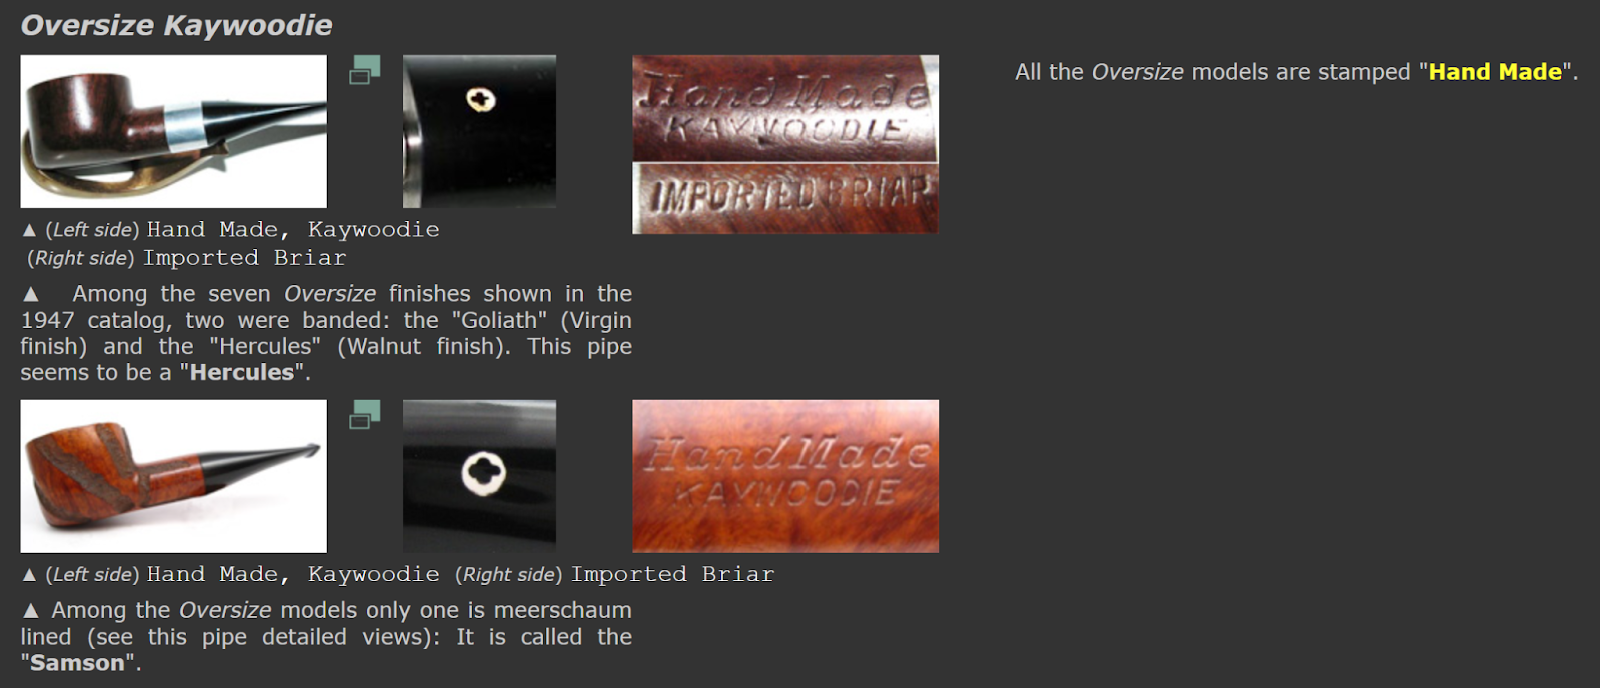
(Kaywoodie series from L to Z — Pipes : Logos & Markings (pipephil.eu))
Well, that was easy. This large Kaywoodie Hand Made, though not very “bulldogish” was most likely made between 1947 and 1955 at the West New York, New Jersey factory. If you would like to see the 1947 Kaywoodie catalog here is a link: Kaywoodie_1947.pdf (pipedia.org). It is a fascinating read with great old marketing photos and illustrations. Just out of curiosity I wondered what $10 in 1947 was equivalent to today. According to a bis.gov inflation calculator it is $131.09 (Using Dec. 1947 and Dec. 2023)(CPI Inflation Calculator (bls.gov)). I highly recommend reading the above links for further Kaywoodie history.
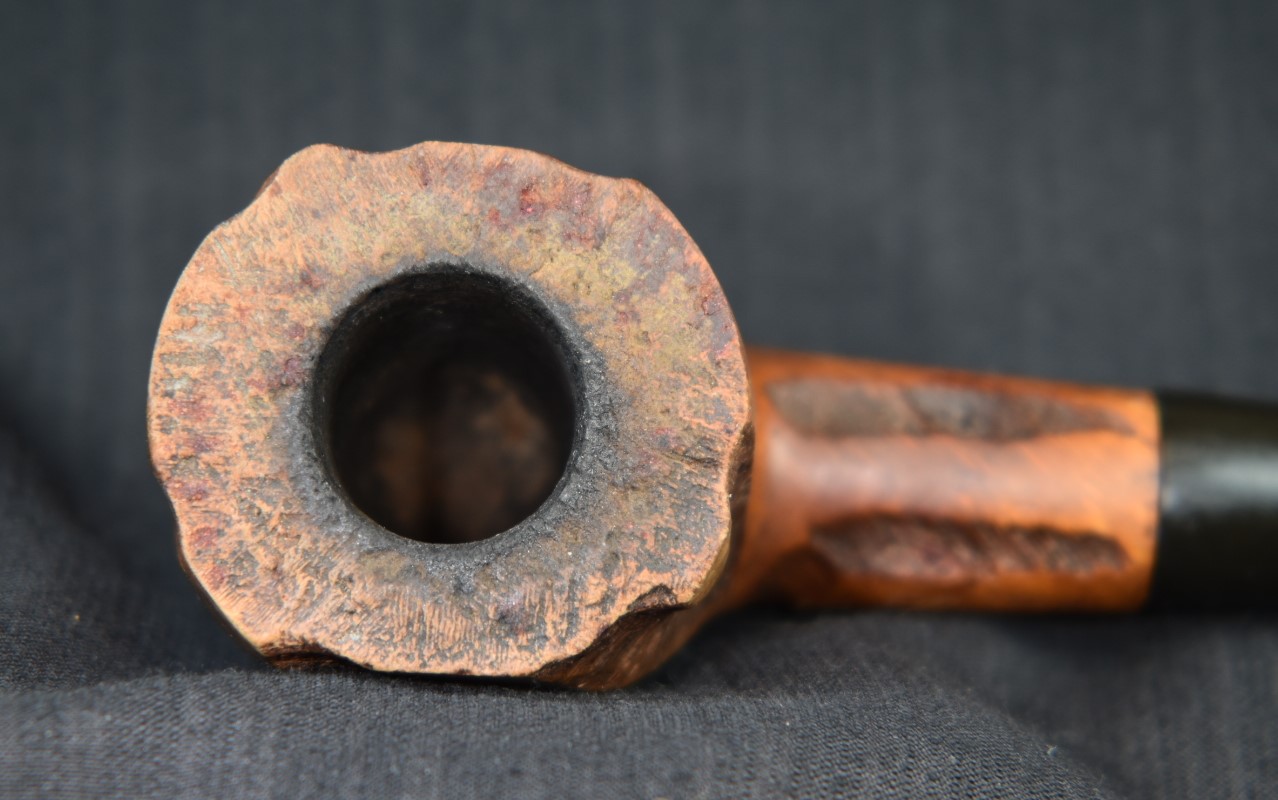
Before we get to the restoration let’s take a look at how the pipe appeared before I did any work to it and compare it to a more normal size Kaywoodie.


Just kidding. That is actually a mini pipe. Here is a real comparison using a Kaywoodie author. And yes, the Hand Made in those last two photos is the finished version.

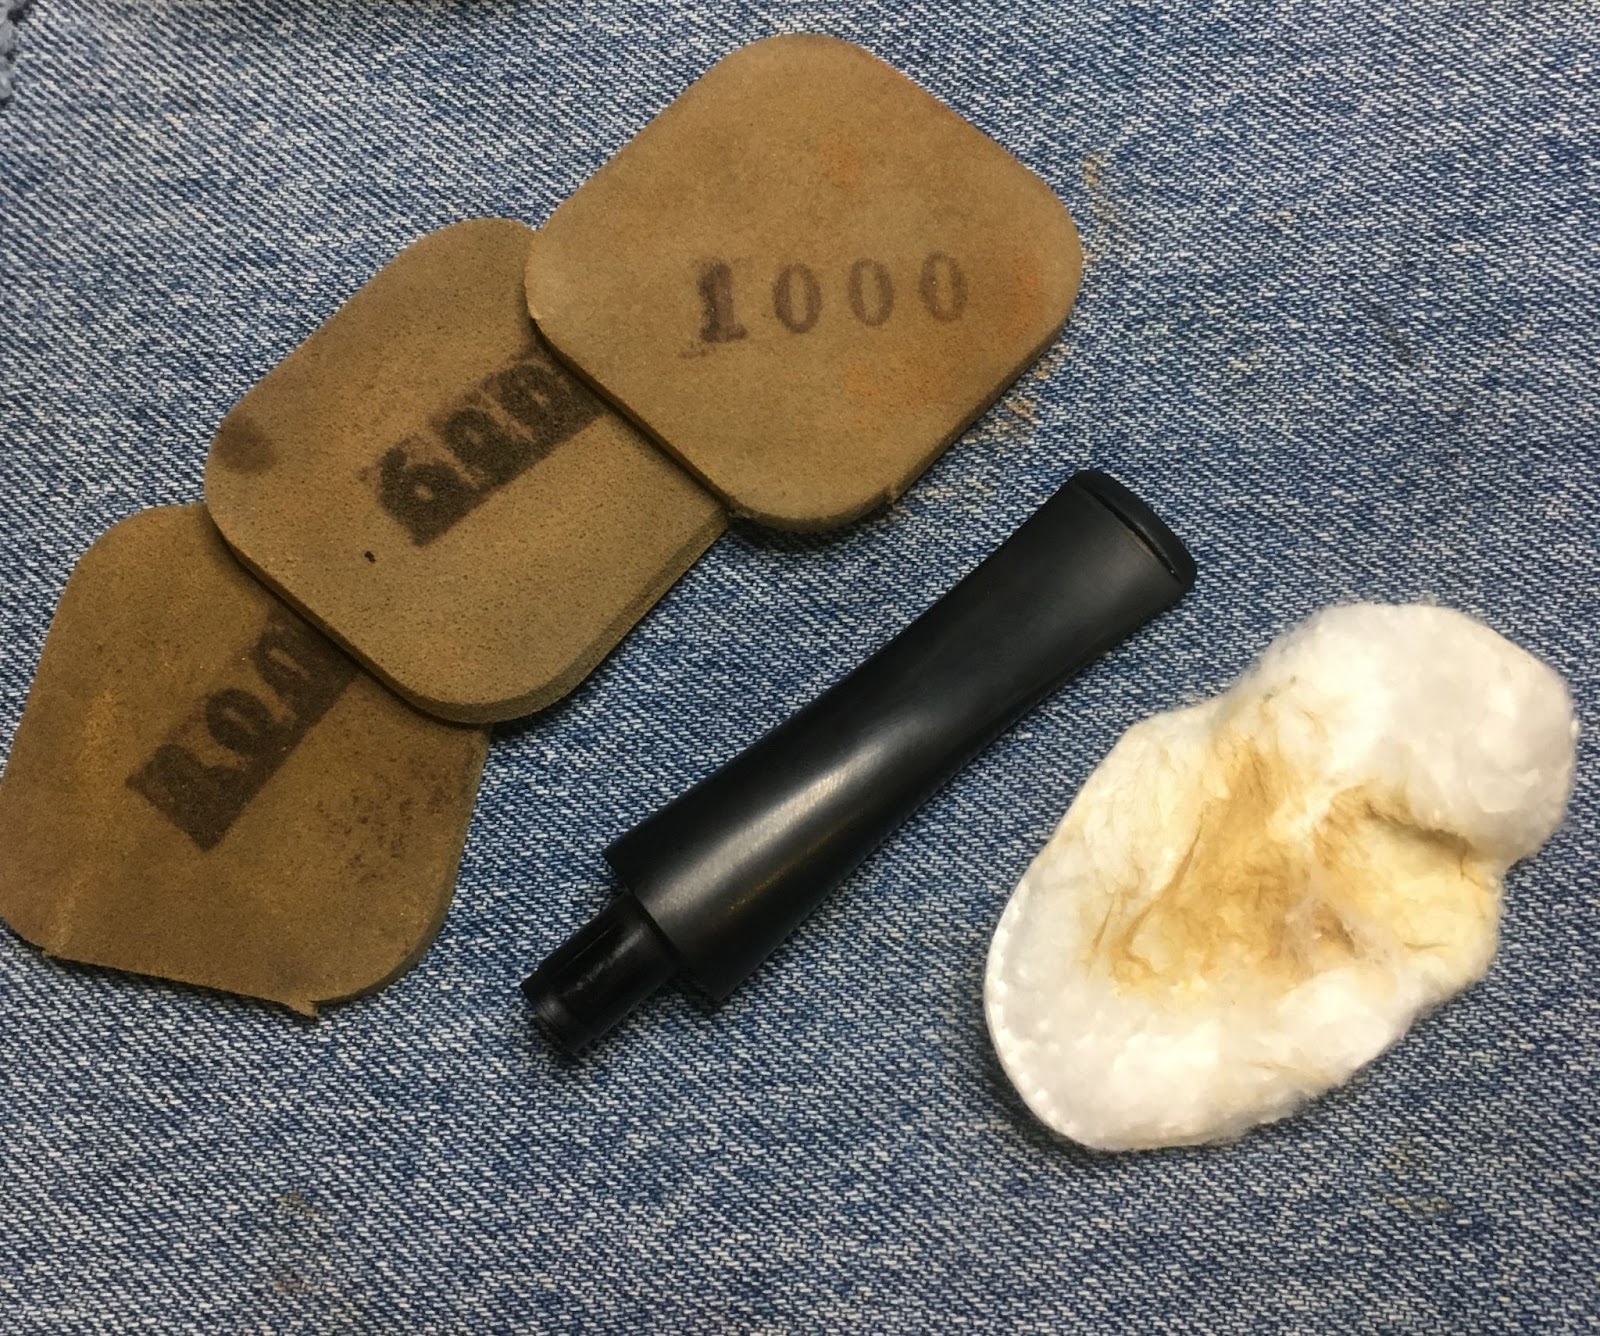
Now we can do the restoration part. Normally I begin with a clean denim piece to work on then get out the white plastic reaming surface and do the reaming. This time I did start with the denim but started scraping the shank and the tenon on the white plastic rather than reaming.
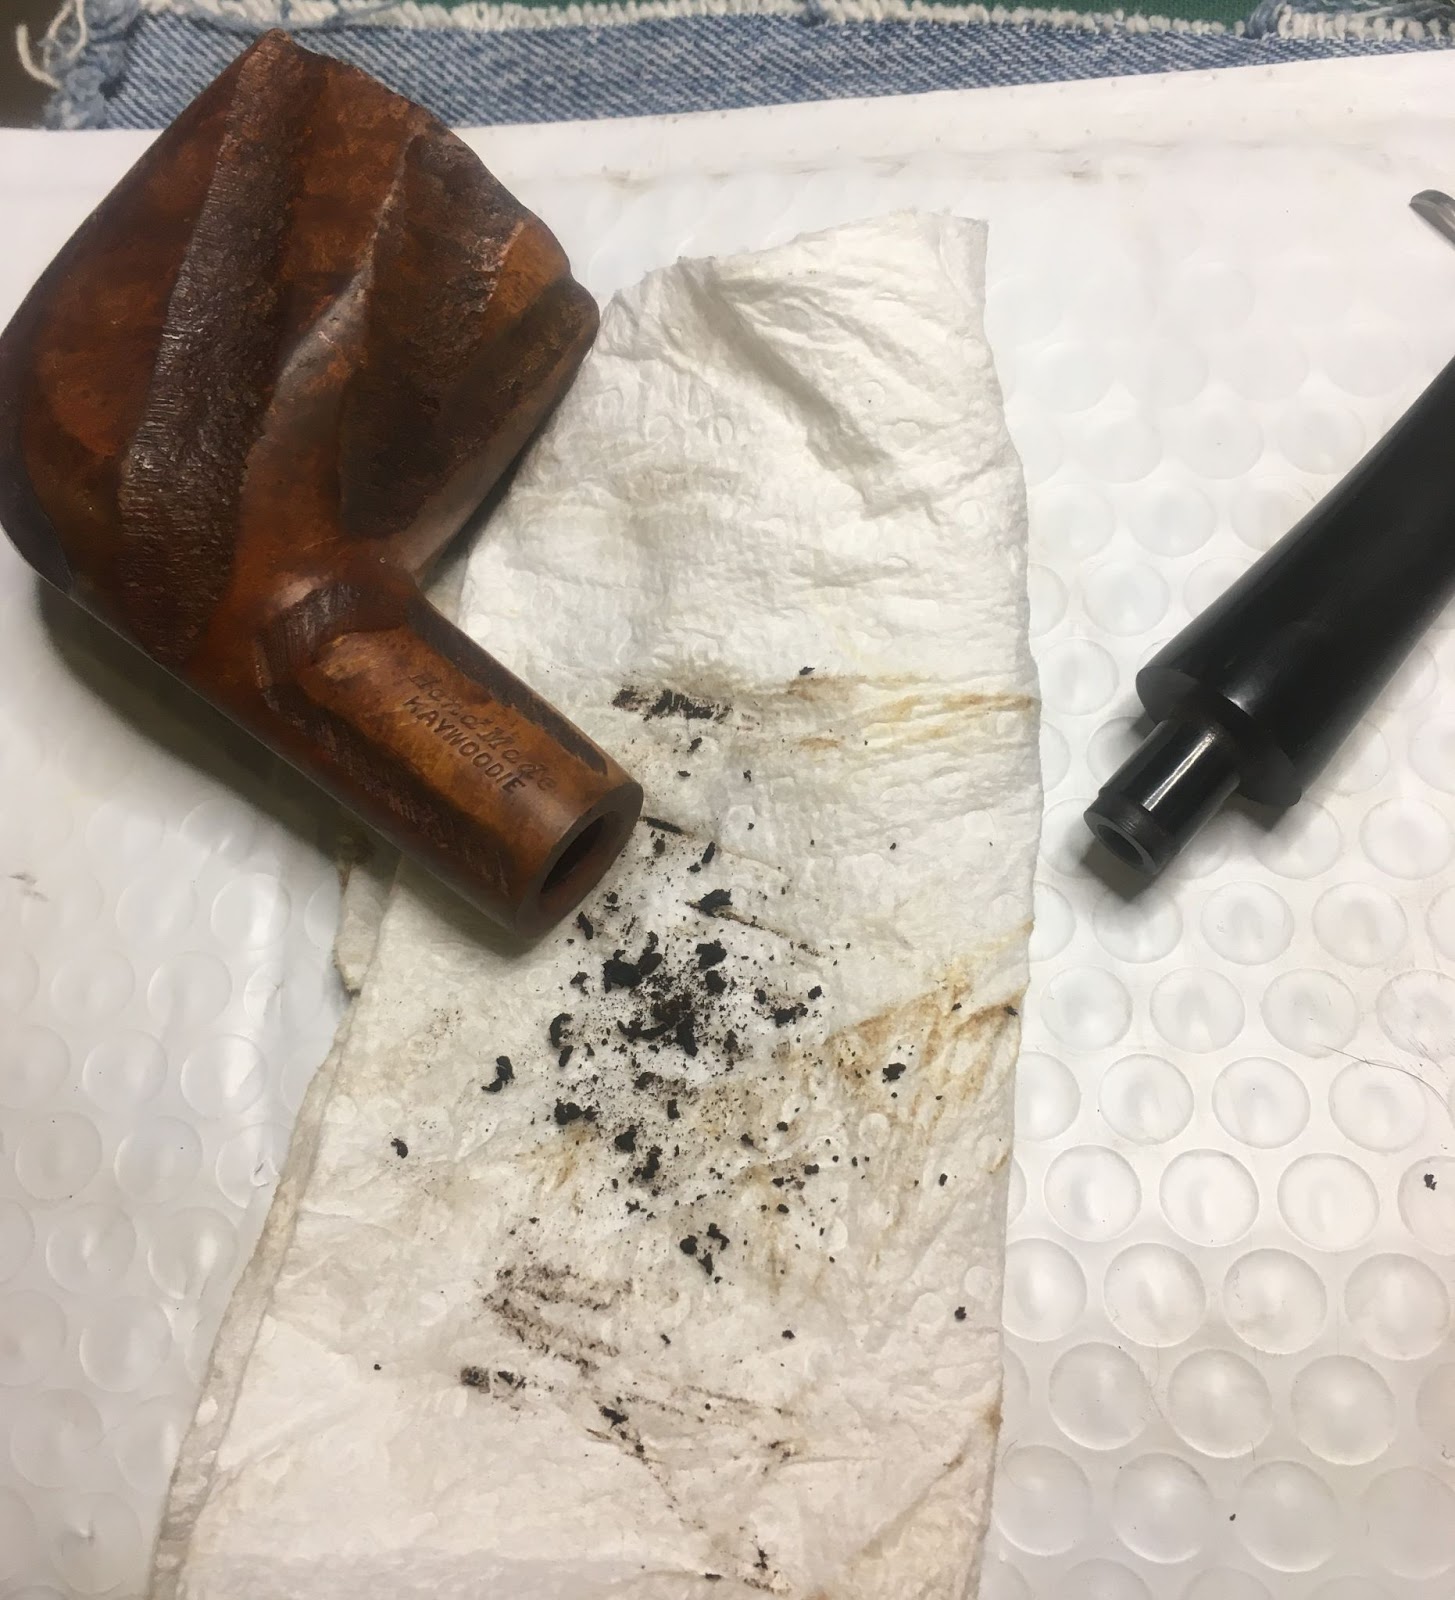
As you can see, quite a bit of tar/smoking residue was removed. After this I addressed the tobacco chamber. The tools were the PipNet with #3 blades, Smokingpipes knife, General triangular scraper, 220 sandpaper wrapped around a wood dowel and 320 sandpaper wrapped around a Sharpie marker.

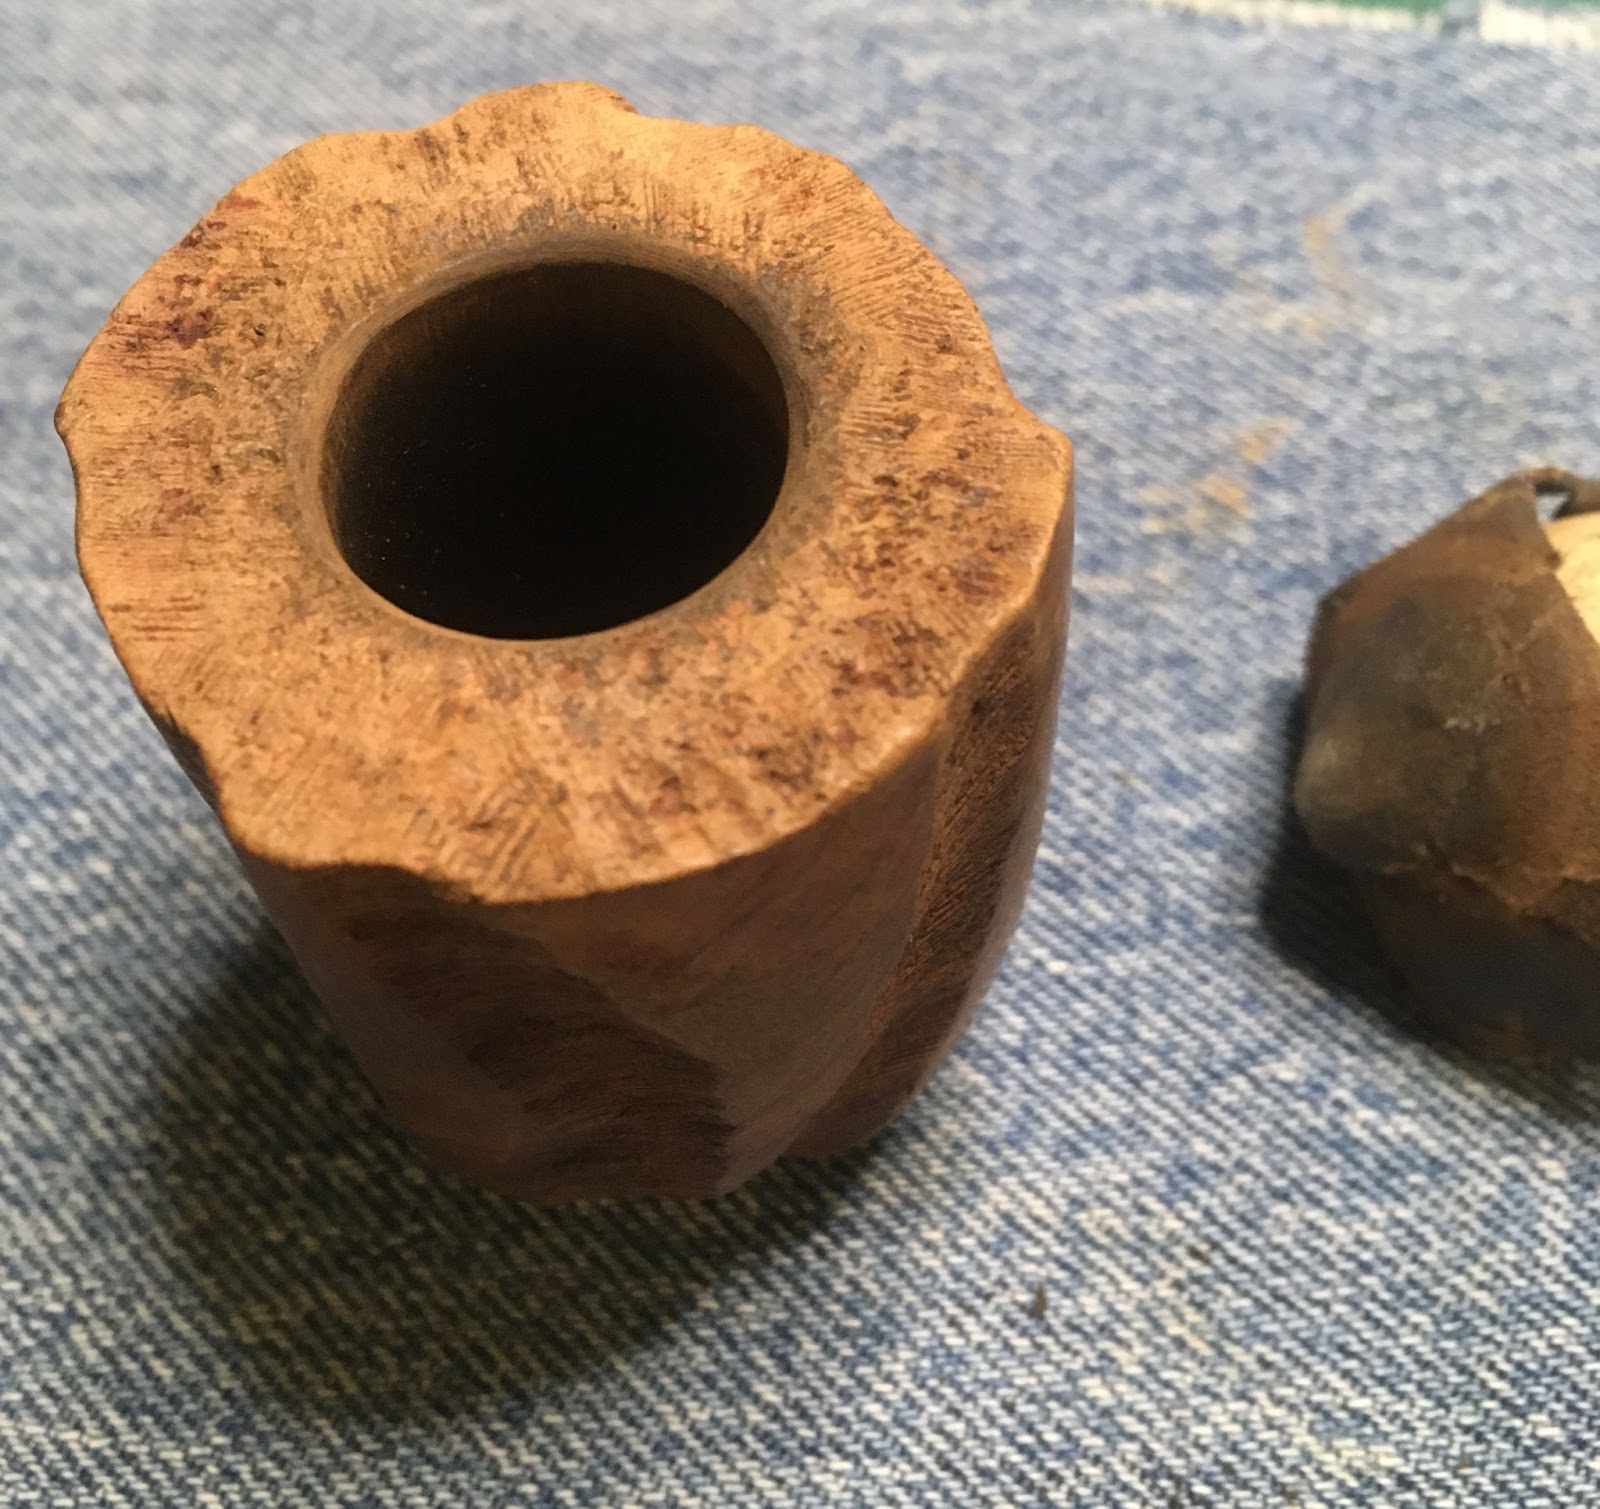
The PipNet did the majority of the work. Although the chamber did not look heavily caked the bowl was so large that the cake that was there left a large pile. After the PipNet the knife and scraper were used followed by the sanding with 220 then 320 to get to bare briar. The tobacco chamber looked good and free of any heat damage.

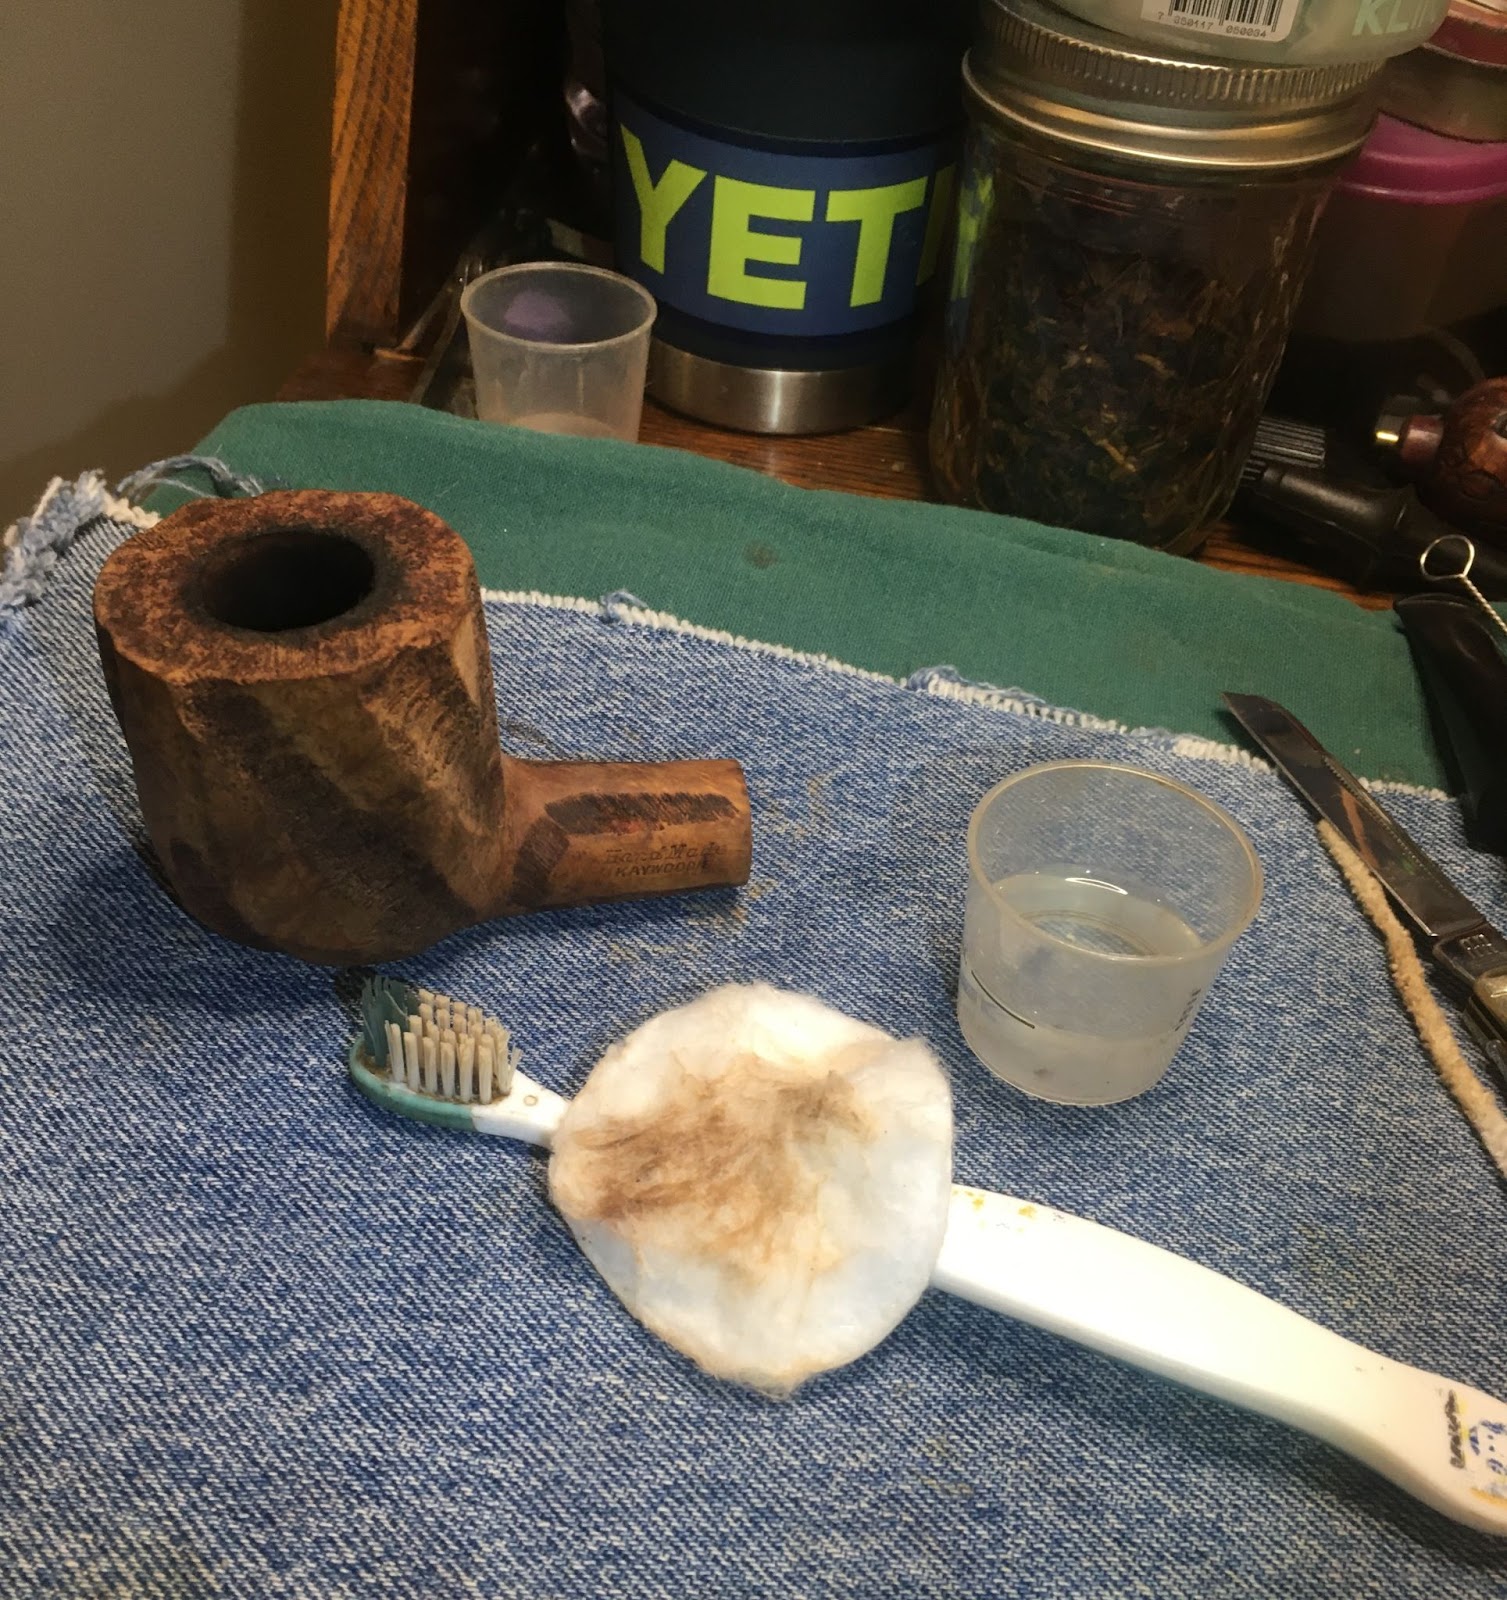
The next task was to clean the exterior of the stummel. I took it to the sink and scrubbed the stummel with undiluted Murphy’s Oil Soap and a medium bristle toothbrush. This was repeated two times. I spent extra time scrubbing the rim and the rusticated surfaces couldn’t be scraped to

free them from lava. I was not happy with the way the lava was being removed with the toothbrush so I used a brass brush to further scrub the rim. The Murphy’s was rinsed off with warm water and the stummel dried with a cotton dish towel. I then poured about 5 ml of 95% ethyl alcohol into the bowl. I allowed the alcohol to flow into the shank but not pour out. I then used a nylon shank brush to scrub the airway of the shank. After the scrubbing I poured the alcohol into a medicine cup. The alcohol was dark brown. I applied a drop of Dawn dish soap to the shank brush and scrubbed the airway again with soap and water. The soap lather was dark gray. The soap was rinsed and scrubbed while rinsing. to rid the airway of all the soap. Fresh alcohol was poured into the bowl and I again scrubbed the airway with the shank brush and alcohol. This time the alcohol was much lighter when poured into the medicine cup.
I returned to the workbench. I wetted a make-up pad with 95% ethyl alcohol and wiped the exterior of the stummel. The carved groves still looked like they had some of the years of accumulated dirt and grime ground into them. I then dipped a baby toothbrush into the alcohol and scrubbed the stummel with that. The carvings had ridges that ran perpendicular to the grooves. I matched the scrubbing of the toothbrush to the ridges and
scrubbed them with alcohol. After the scrub I again wiped the surface with an alcohol wetting make-up pad. The stummel exterior was cleaned.
The exterior of the stummel was looking good. Now to deal with the airway. I was hoping that the scraping, alcohol scrub and the soap scrub would make cleaning the airway a bit easier. I was right, it did. Now, that is not to say that I didn’t have to do a couple more alcohol nylon brush scrubs. I did and many cotton swabs as well but all the scraping and previous scrubbing had made my life a bit easier. Eventually the airway was clean.

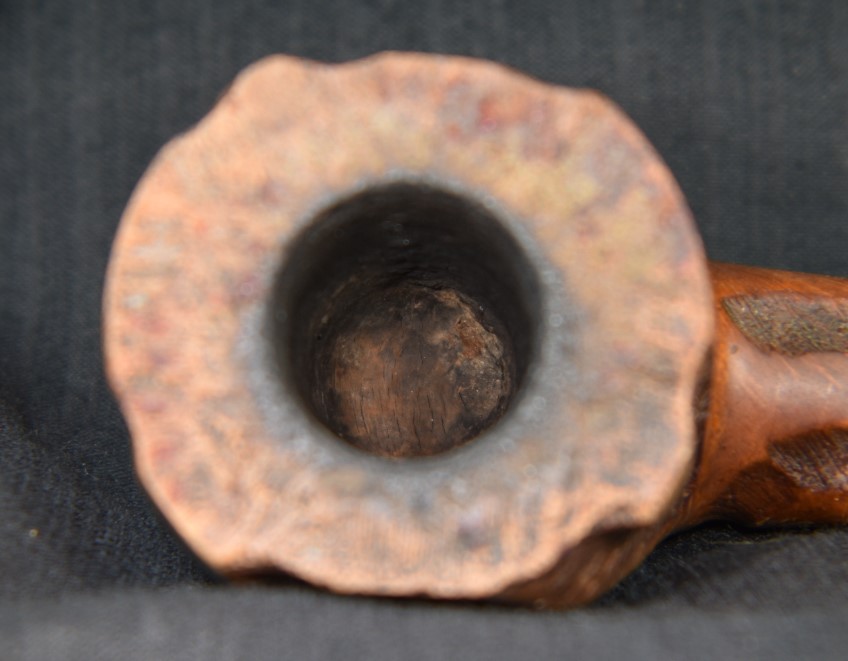
I was pleased at how stummel had cleaned-up with the accumulated dirt gone. The rim still did not look good. Below are photos of the scrubbed stummel and rim.


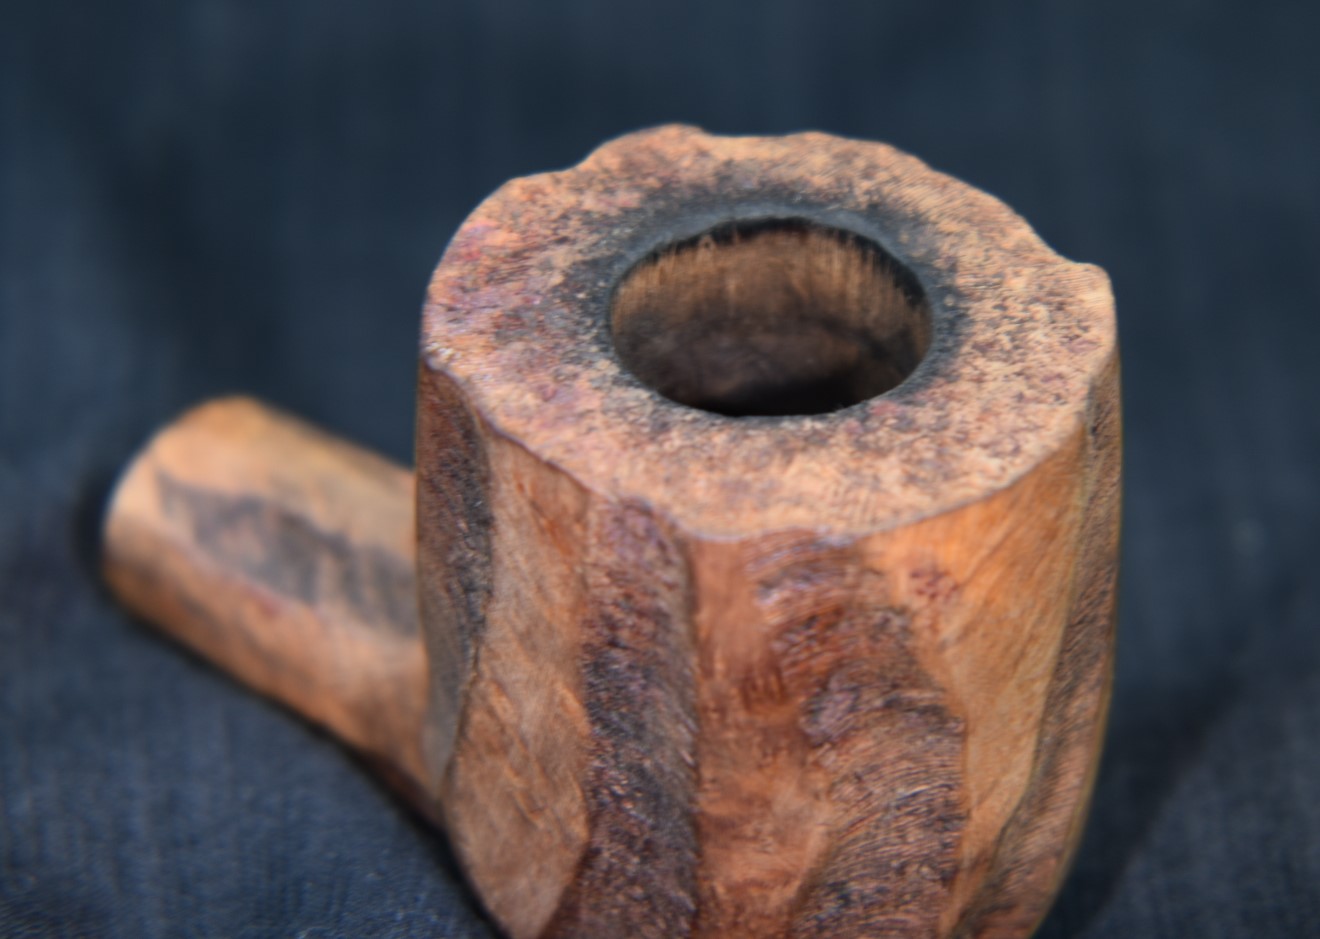
I was not pleased with the charring of the rim. I would normally rub Vaseline on the rim and scrape this with a sharp knife to remove the charred briar. The rustication prevented this. New plan, soak the rim in Murphy’s oil soap for an hour then try scrubbing it again. I had no idea if it would work but I thought I remembered reading about a German Facebook buddy doing it with a pipe. I found a wider medicine cup and poured in a few millimeters of Murphy’s Oil Soap.


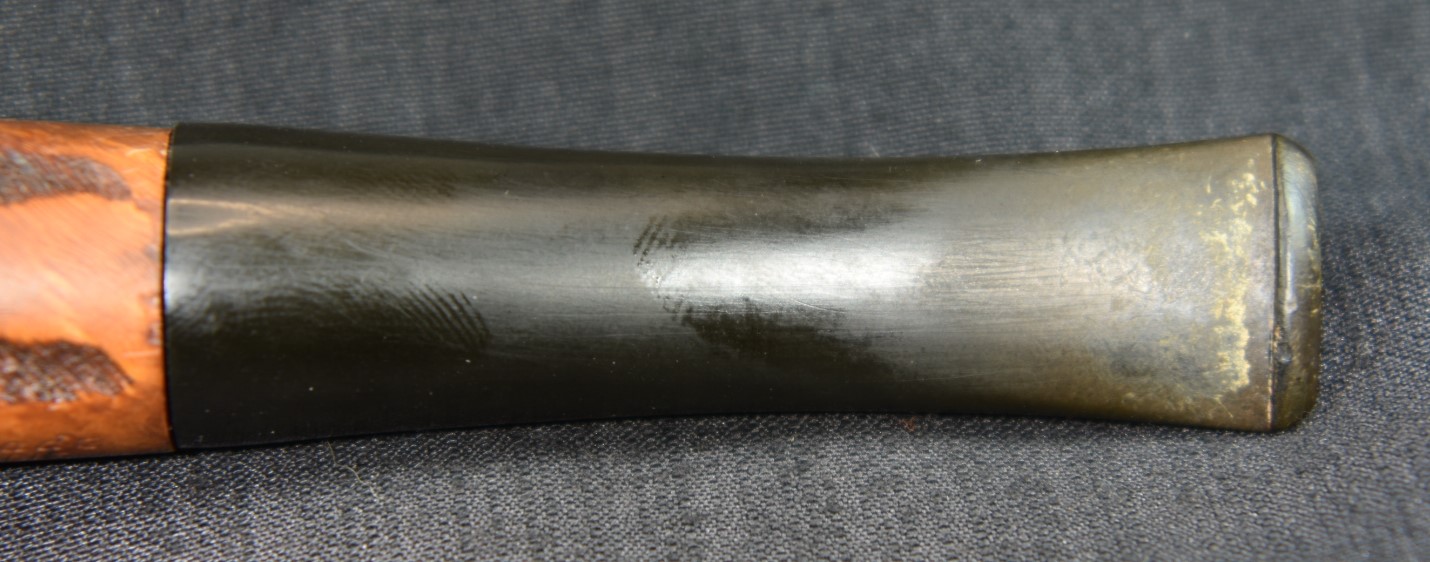
While waiting for the Murphy’s to do or not do something, I started the initial sanding of the stem. I used the 400, 600 and 1000 sanding sponges to remove the tooth chatter, scratches and oxidation from the stem. I then used Soft Scrub on a make-up pad to vigorously rub the stem. This worked brilliantly. The Soft Scrub removed all signs of oxidation and left a beautifully black stem behind. The stem was then coated with mineral oil and let to sit and absorb oil.
Although it had only been about 15 minutes, I couldn’t wait to see if the Murphy’s was doing anything to the charred briar. I lifted it up and used the baby toothbrush to scrub the rim. The soap darkened with charred wood. Wow, this is actually doing something! Sascha Mertens, the Facebook pipe restoration buddy from Germany, comes through again. Thank you Sascha!
I placed the stummel back into the soap and waited another 15 minutes. Fortunately Netflix and Lorenzo Medici kept me from tampering with the stummel. 15 minutes and another baby toothbrush scrub and more of the char seemed to be gone. Well let’s see what evil plots Lorenzo can nullify in a half hour. 30 minutes later and saving the Medici Bank from usurpers, miscreants and maybe some alien vampires at least 10 times, Lorenzo and I were victorious. He, at saving the bank and Medici family and me at removing most of the char from the Kaywoodie.

Okay, it wasn’t all gone but a little sanding with a wooden ball and 220 to give the rim a bevel and…

Who knows what kind of magic will happen?
I could live with that.
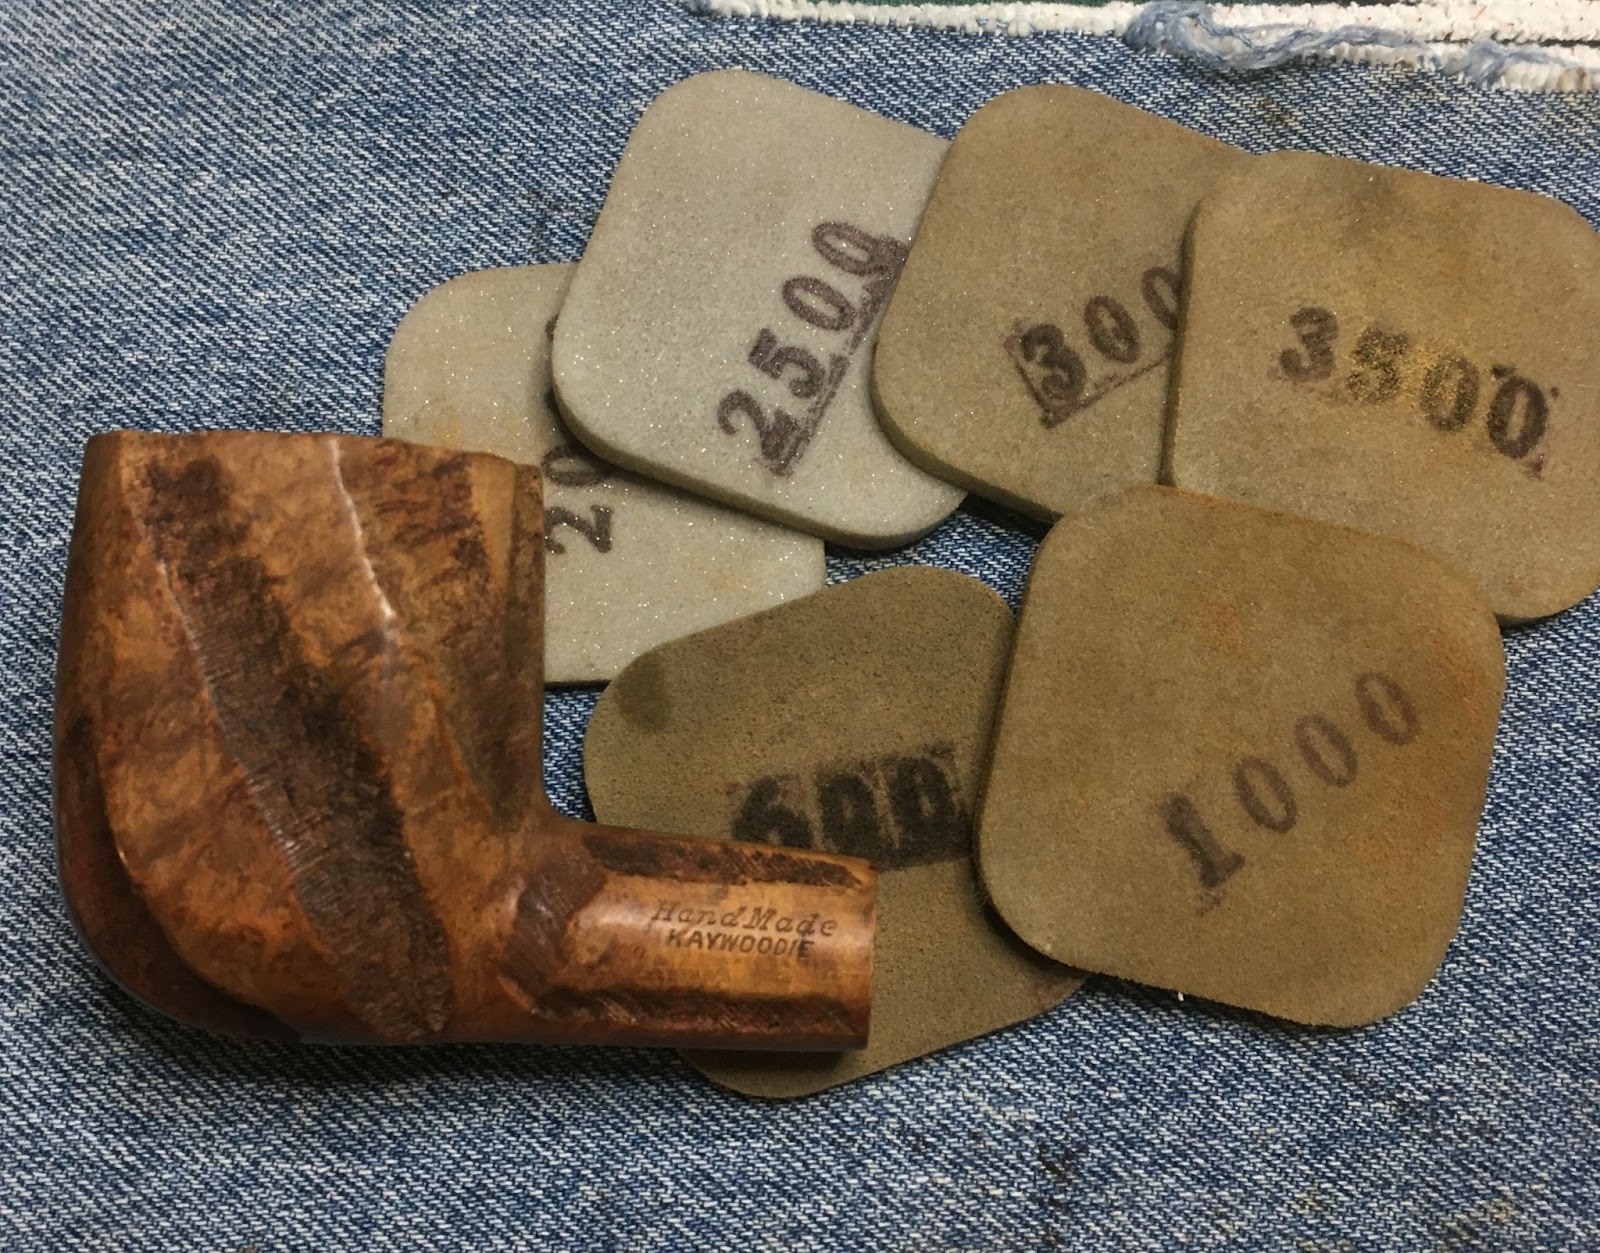
The sanding of the stummel went fairly quickly as I only had to work on the smooth sections. I used the 400 and 600 sanding sponges lightly and wiped with an alcohol wetted make-up pad. I was looking for sand pits that might require filling. I found a few all in one smooth section. Unfortunately I did not photograph this step but, you can see the fills as dark spots on these before and after shots of the right side. The pits were filled using


Cyanoacrylate (CA, super glue) dabbed into the pit. I then placed a pinch of briar dust on top of the CA and pressed hard with my fingertip. The CA and briar dust set-up almost immediately. I then used a small flat needle file to smooth the fill and finished it with the 400 and 600 sanding sponge. I continued with the series of 1000-3500 sanding sponges. Between each sponge I wiped the stummel with an alcohol wetted make-up pad.
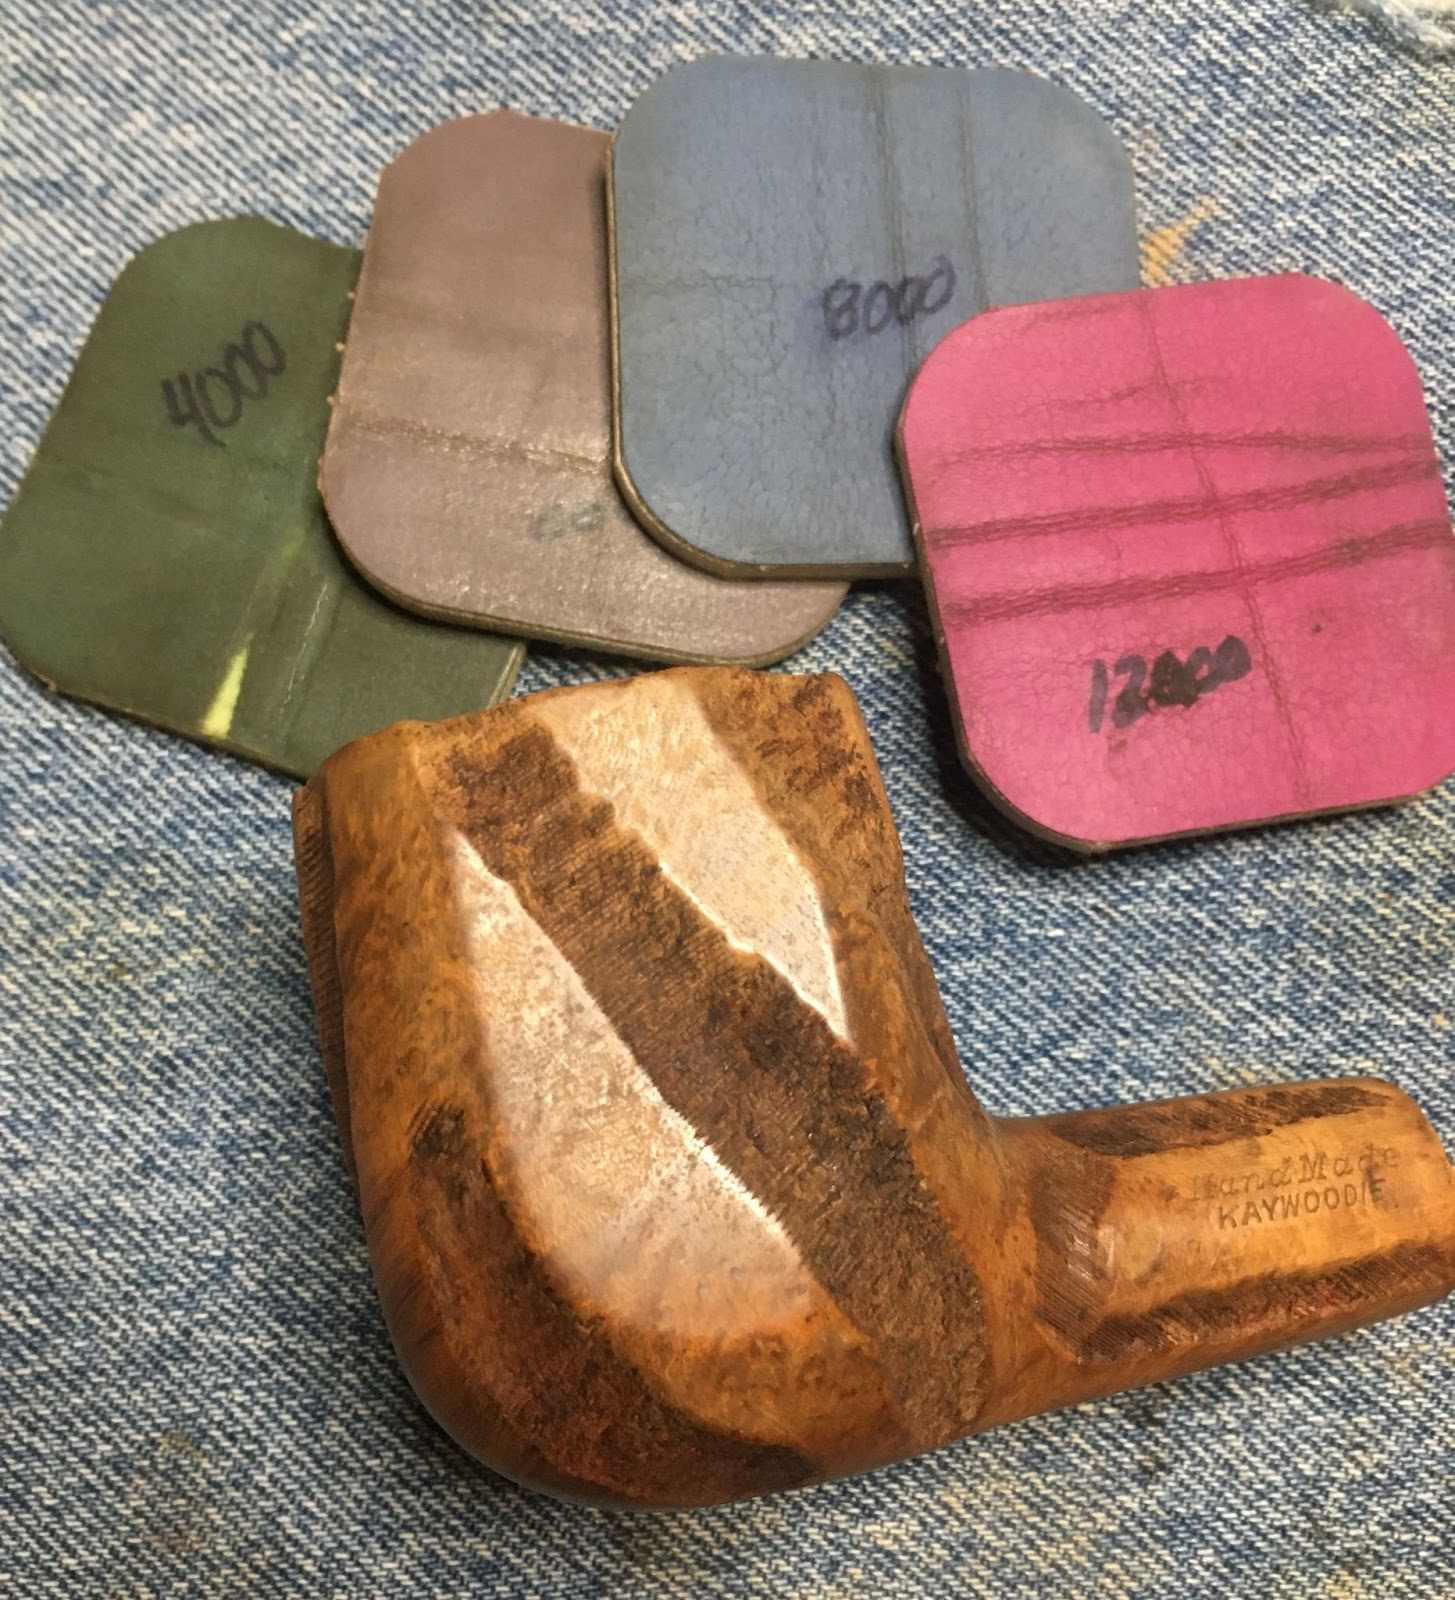
Once the stummel was sanded I moved on to micro-mesh the stummel. The 4000-12000 micro-mesh pads were used. Again, as with the sanding sponges, I wiped the stummel with an alcohol wetted make-up pad between pads.
At this point I applied a coating of Before and After Restoration Balm to the briar. I world the balm into the rustications with a baby toothbrush. The balm was allowed to sit for an hour.

After an hour, I applied additional Restoration Balm to areas of the stummel that appeared to have soaked-up the Restoration Balm and now looked dry. This was mainly on the rim. An additional 20 minutes was given to the stummel.

Back to the stem. I wanted the stem/shank joint to be nice and tight with no rounding of the edges. To manage this I wanted to sand the stem in place with the shank. I had avoided sanding the edge of the shank while sanding the stummel but that cannot be done with a stem and still look finished. I needed to protect the shank so wrapping it with painters tape was in order.

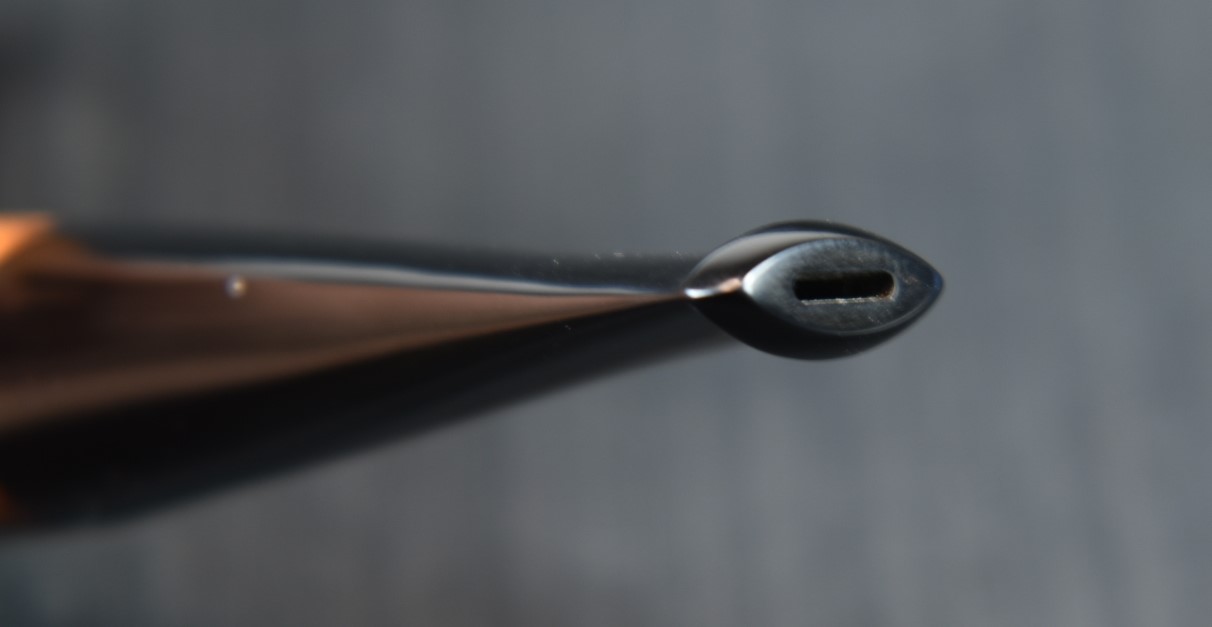
I worked the stem with the 1000-3500 sanding sponges in sequence. Between each sponge I rubbed the stem with mineral oil on my finger and wiped it with a paper towel. When finished with the sanding sponges I used the 4000-12000 micro-mesh pads in sequence. Between each pad I rubbed in a drop of Obsidian Oil with my finger and wiped it with a paper towel. The final stem polishing was done with Before and After Fine Polish. This was applied with my finger and rubbed with a soft cotton rag. The Fine Polish was followed by Before and After Extra Fine Polish applied and rubbed the same way.

The last step to this restoration was to apply a couple of coats of carnauba wax using the buffer. I tried to only apply the carnauba to the flat surfaces. This meant that I could not apply the normal amount of pressure with the pipe to the buffing wheel. I did not want to get carnauba wax embedded into all of the grooves of the carvings. This made me go much slower and more carefully. It worked and looked great. I still felt like the grooves needed some kind of wood sealer or protector. I opted to use Renaissance Micro-crystalline Wax Polish. This is a wax that can leave white spots if it is allowed to

dry too thickly. I applied it with my finger tip, working it into the coarse grooves. While it was drying I buffed it with a shoe shine brush. The hairs of the brush smoothed and evened out the wax as it was drying. Like it says on the label “Apply sparingly with a soft cloth and buff gently. Dries hard instantly. Resists liquids spillage. Does not show finger marks”. I wanted the “dried hard” and “resists liquids” features. I also love the solvent based smell of it. When completely dry the smell is gone. I hand buffed the completely dried pipe with a microfiber polishing cloth.
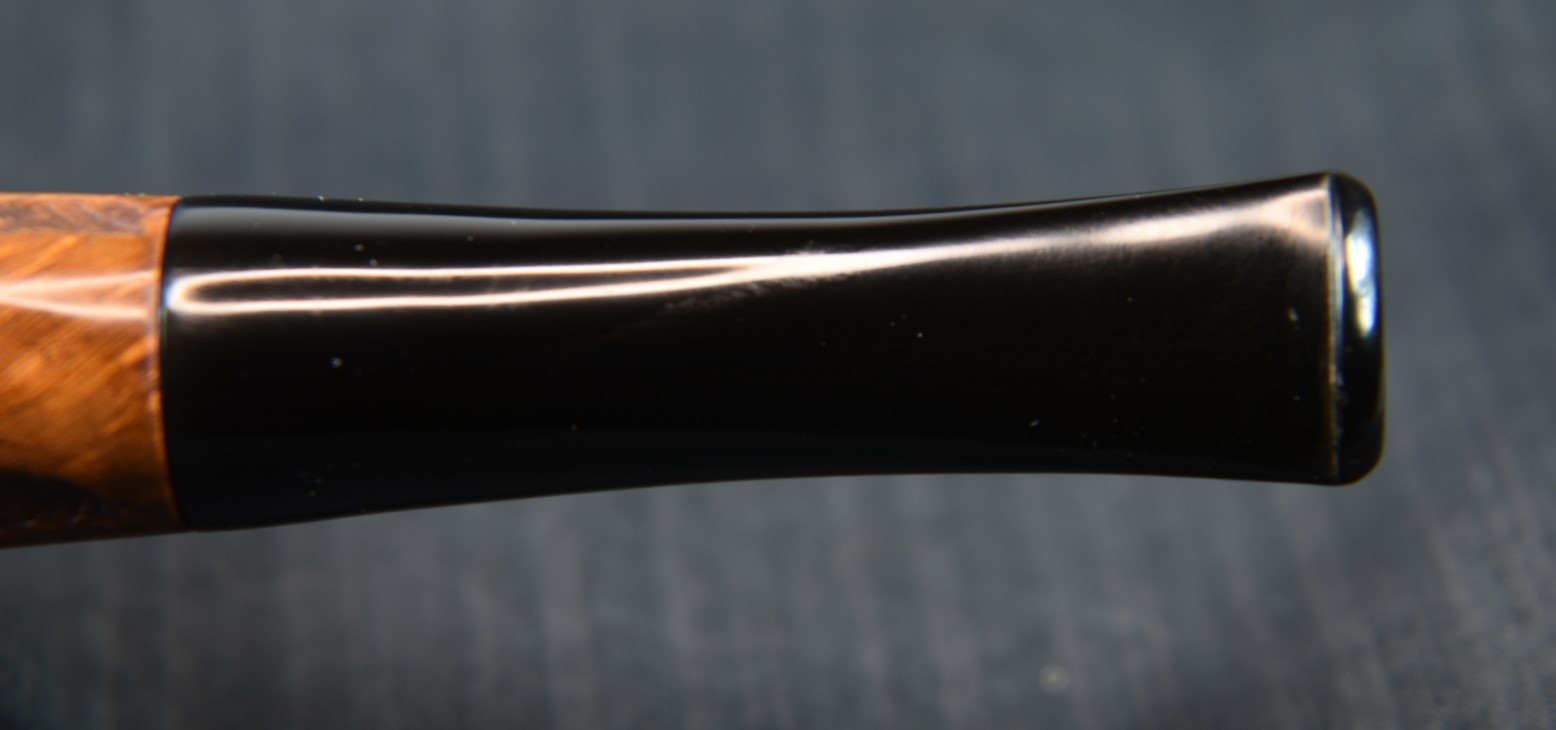
I am very pleased at how well this Kaywoodie Hand Made pipe turned out. It feels good in hand with the grooves being smooth and comfortable. The smooth surfaces, separated by the carved grooves, come together nicely towards the shank. The briar grain, though not distinctive, is attractive. I am impressed with how well the stem polished-up it’s glossy black contrasts the medium browns of the stummel beautifully. This is a very large pipe weighing 2.7 ounces (76,5 g). It’s length is 6 in. (15.2mm), bowl height: 2.38 in. (60mm), chamber depth: 2 in. (50.8 mm), chamber diameter:.875 in. (22.2 mm), outside diameter (side-side): 1.63 in (41.4 mm), outside diameter (front-back): 1.75 in. (44.5mm).
I do hope that you have found something here useful. If you like this sort of thing, please click the like and subscribe buttons. I thank you for reading the ramblings of an old pipe lover.
Below are some photos of the finished Kaywoodie Hand Made.