Written and photographed by
John M. Young
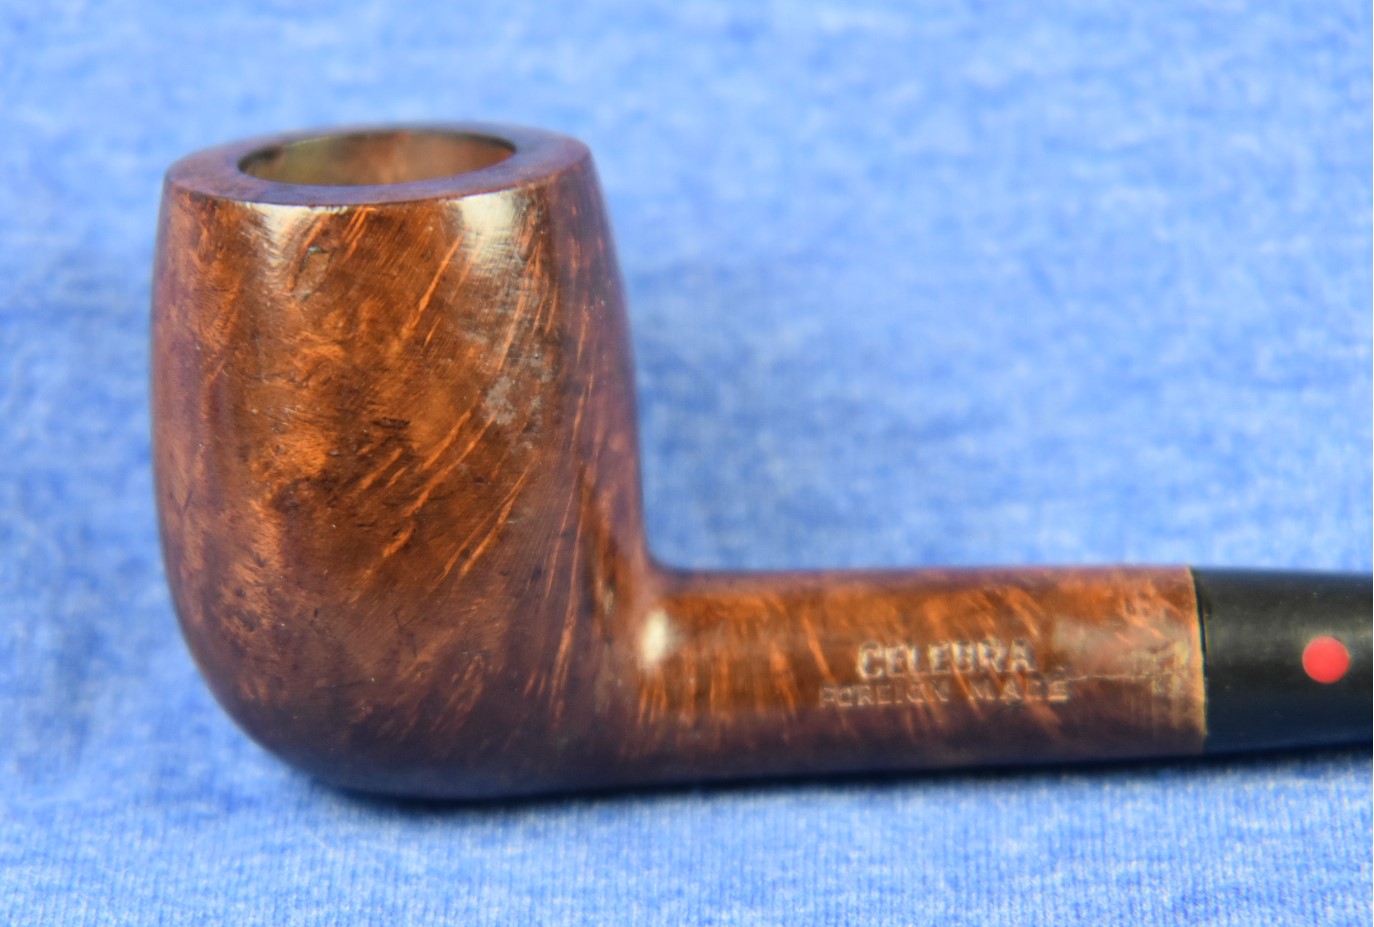
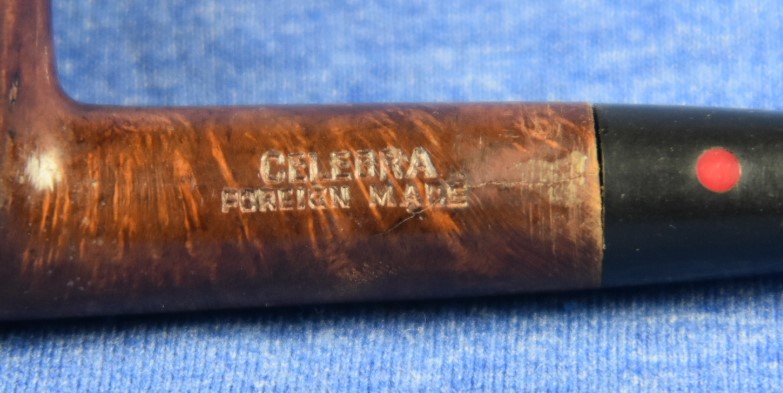
Here we go again, trying to find the maker of an obscure brand of pipe. In this case a CELEBRA FOREIGN MADE. The name results in no information with a Google search nor with pipedia.org. My guess is that the stamped name CELEBRA is from the Italian “celebra” = celebration in English. To make matters more confusing I am not even sure where this pipe came from or when it arrived. I am sure that it was part of an estate lot probably from early 2022 or before.
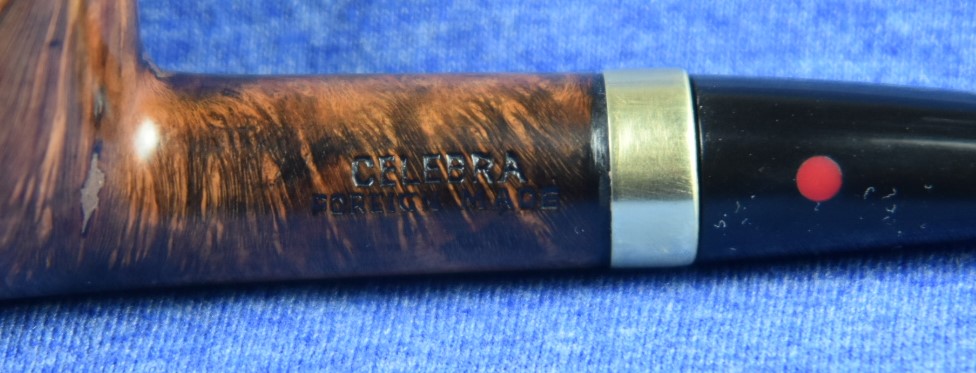
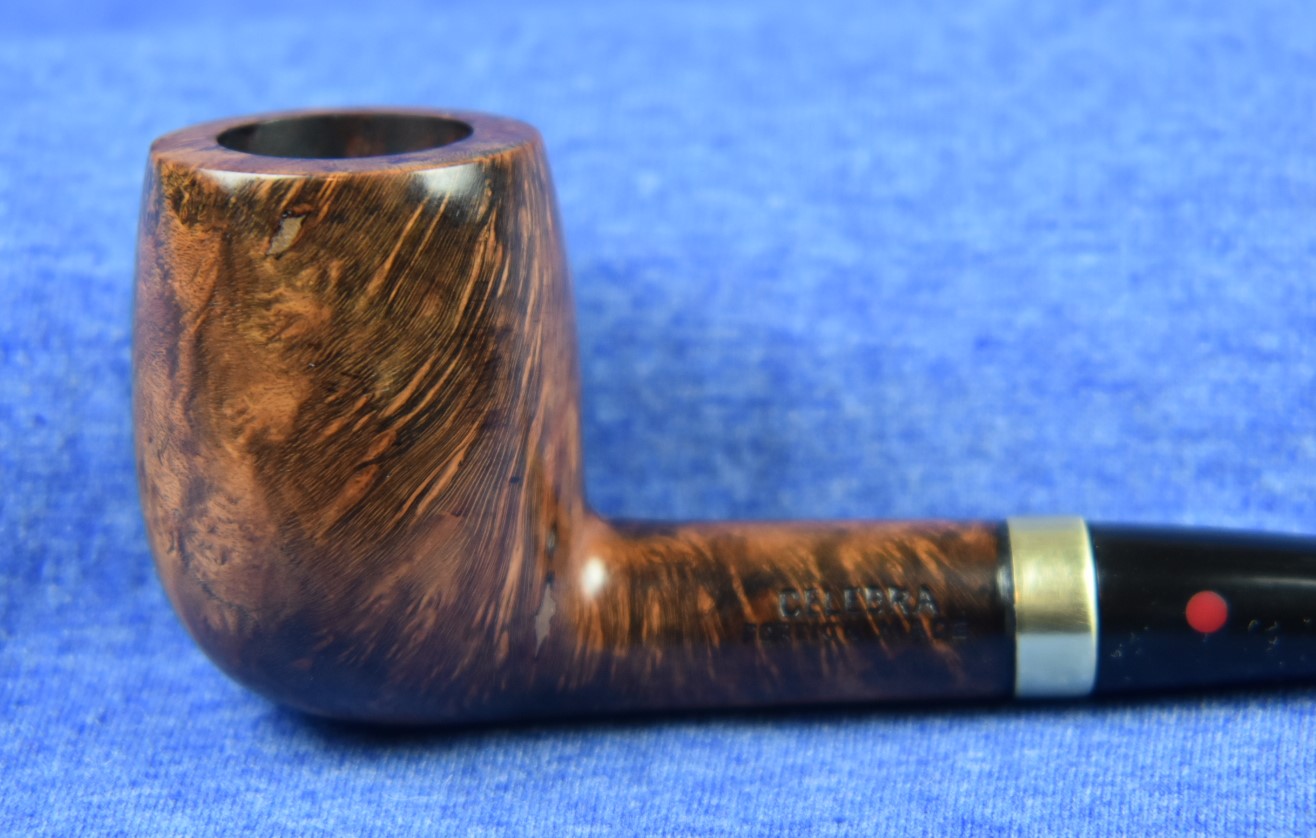
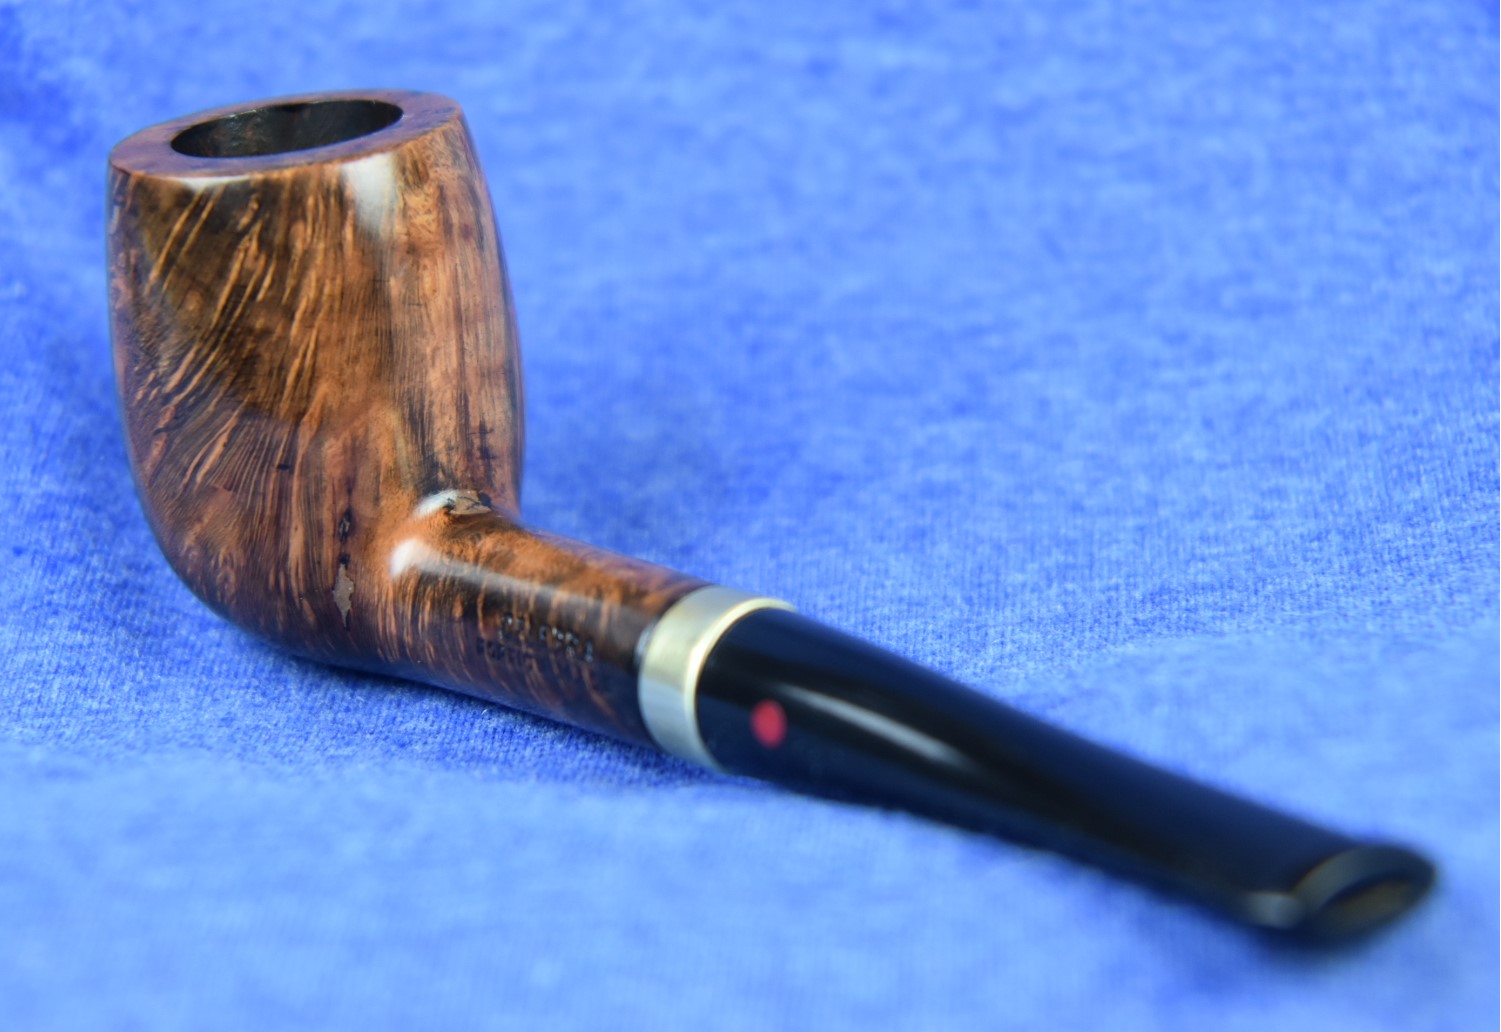
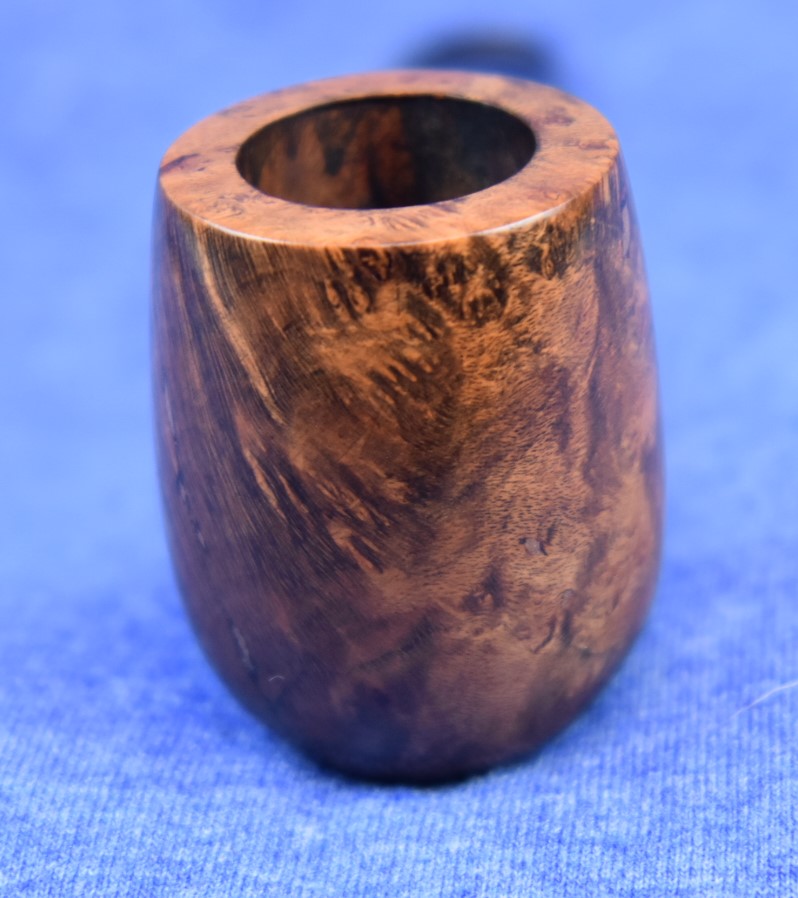
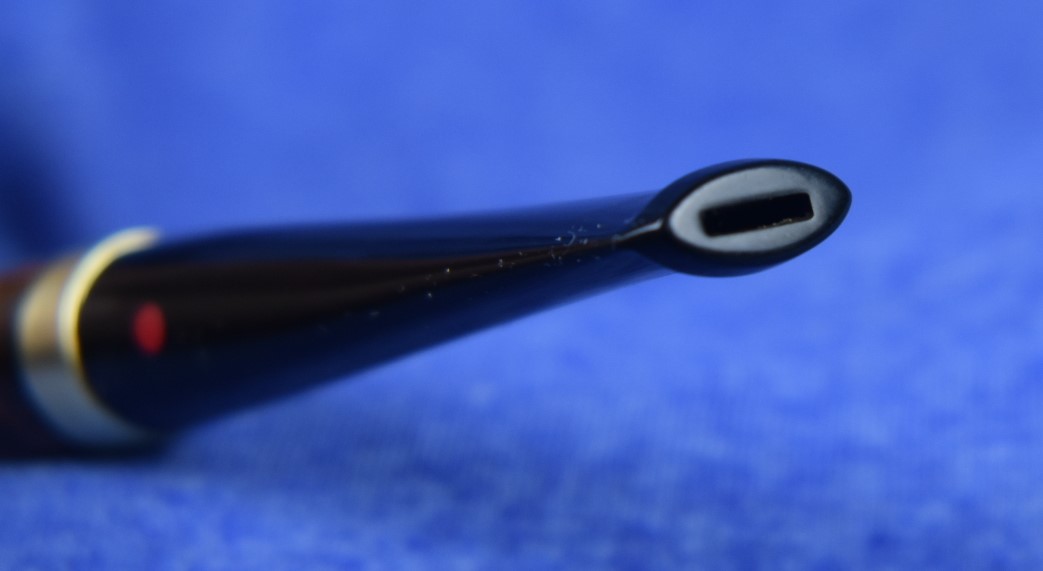
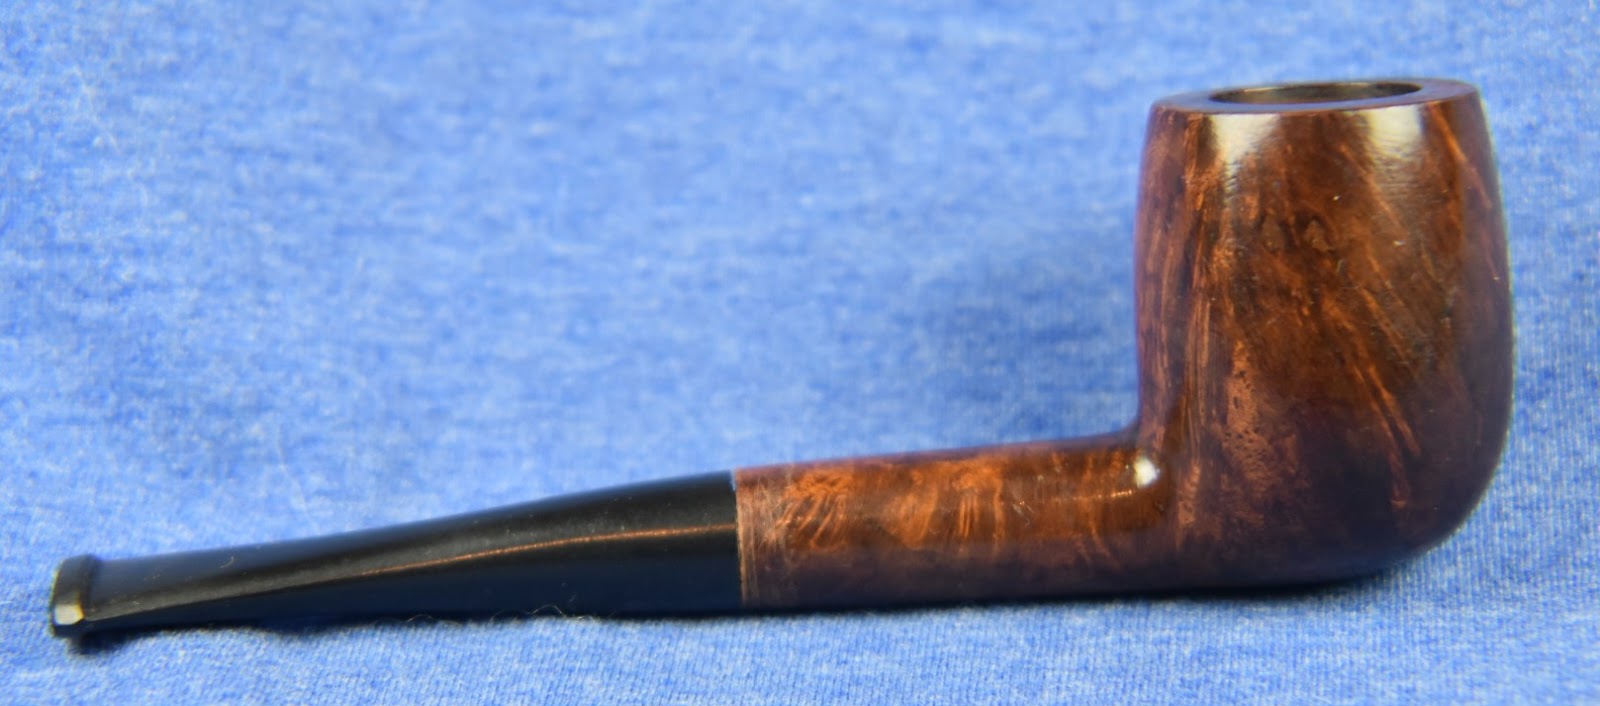
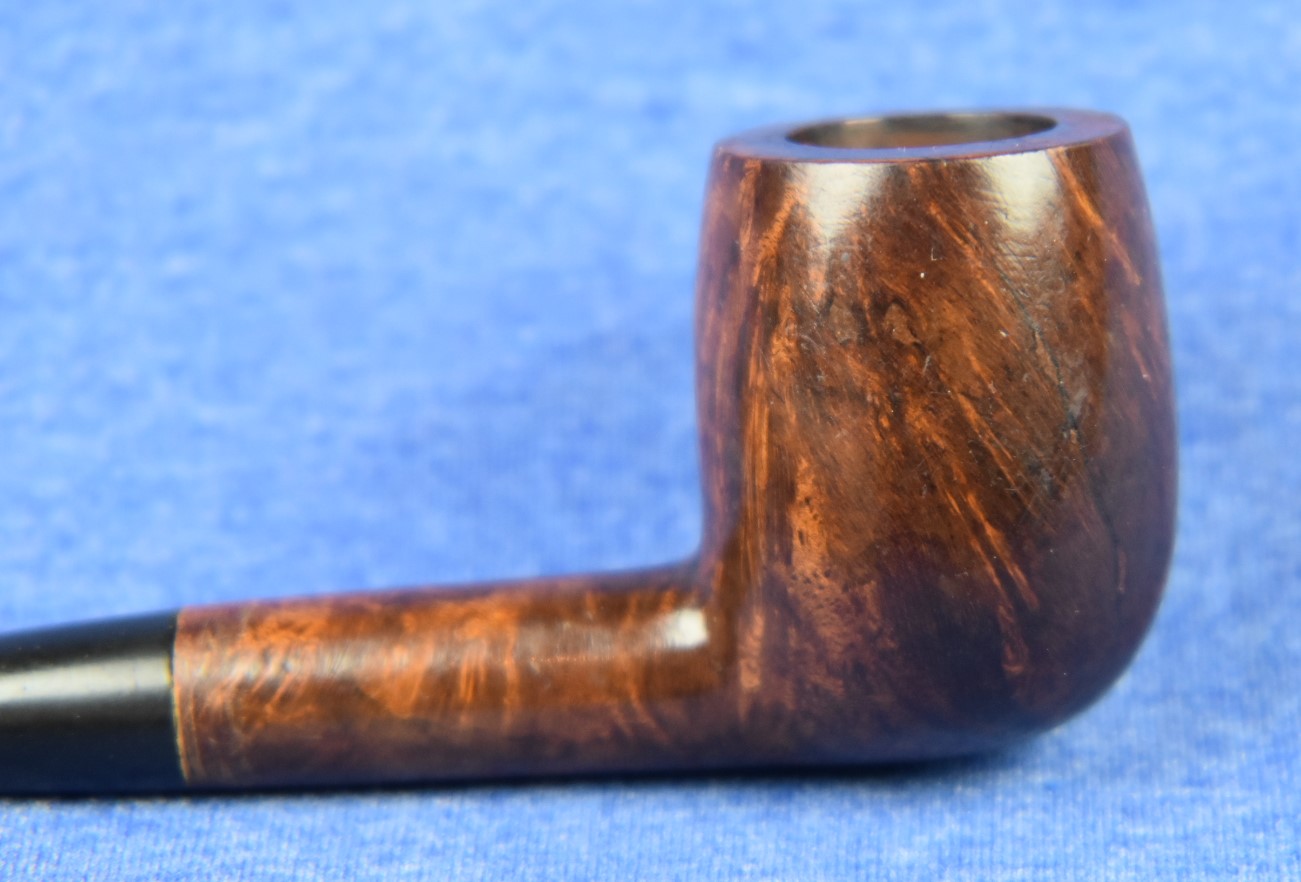
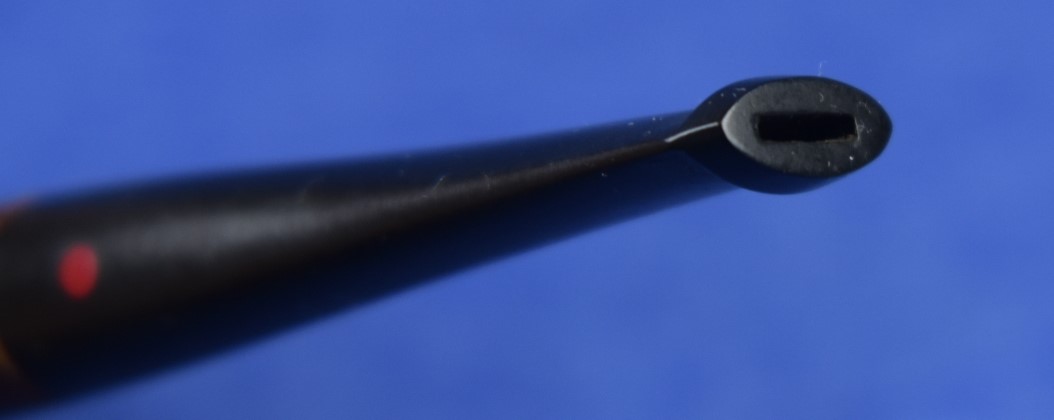
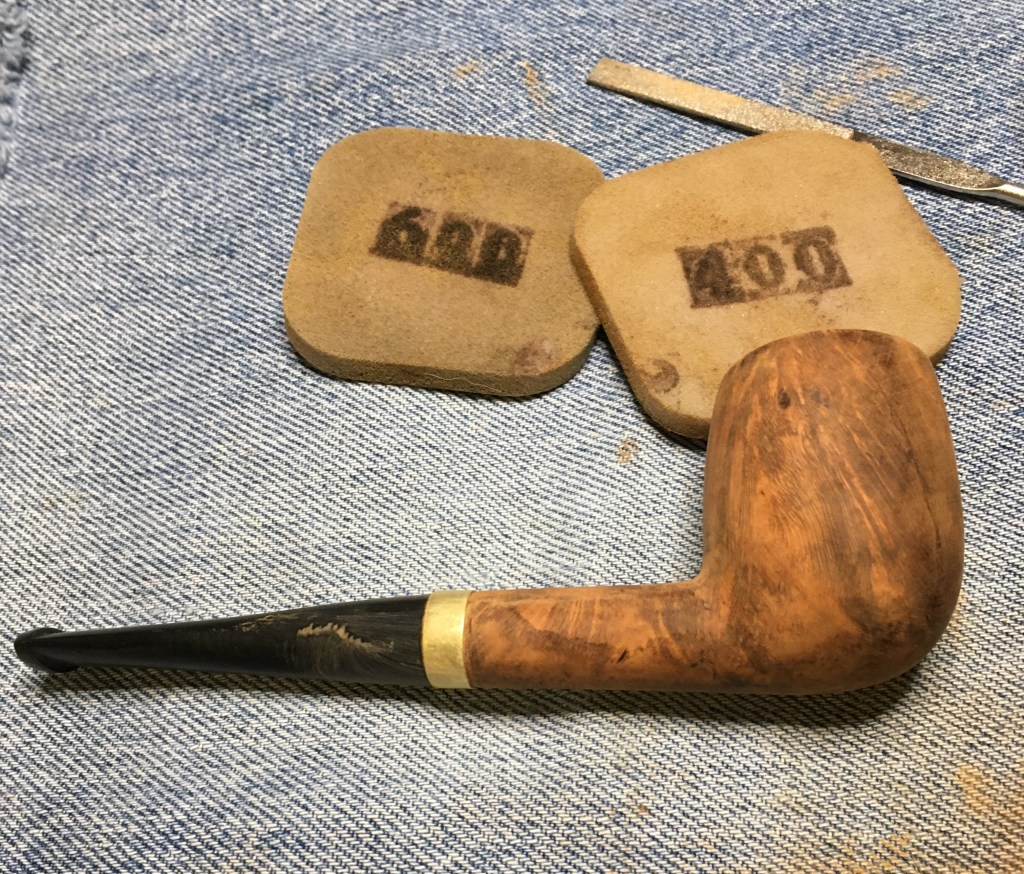
The pipe in question is a new old stock (NOS) unsmoked billiard. It is medium sized and sports a red plastic dot inlay into the left side of the stem. There is no country of origin stamp other than the FOREIGN MADE below CELEBRA. The pipe is stained a medium brown and had a clear coat of some kind. There were a few small fills that appear to by filled with the clear coat. The stummel and stem were not sanded to a very high level of polish as can be seen in the before photos. The most striking issue with the pipe is that has a shank crack, unusual for an unused pipe. Below are photos of the Celebra upon emerging from the storage box.

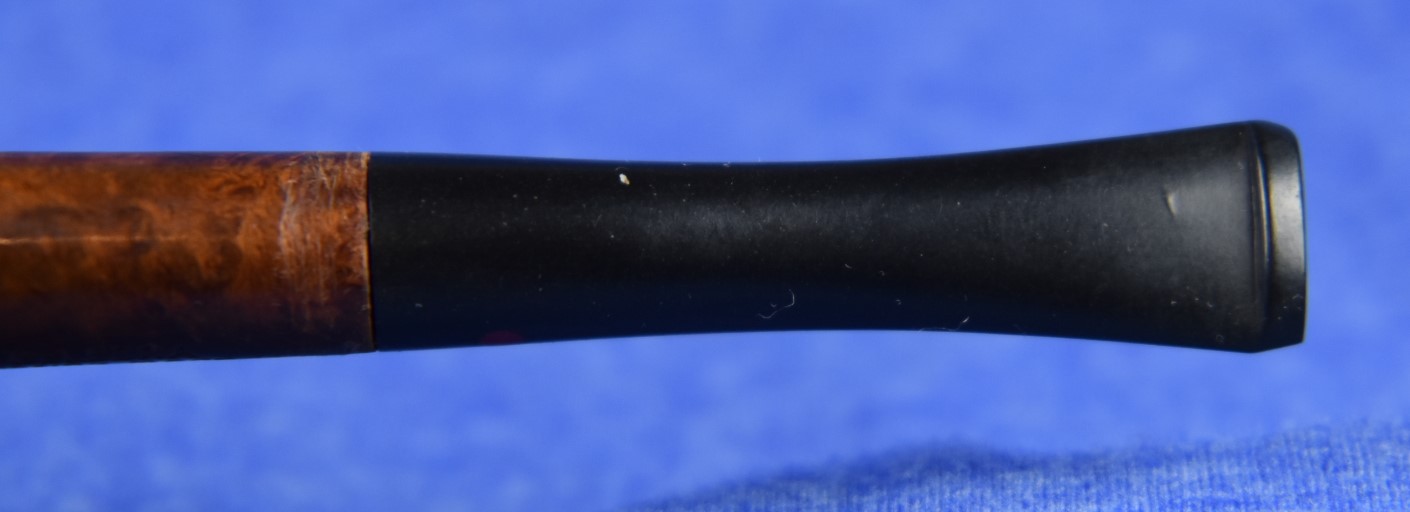


The above photo shows the crack. I had attempted to sand the end of the shank to better show the crack.
As stated earlier searches for “Celebra” returned no results. There was another Celebra listed on eBay which I will include here:


The photos on eBay were not great. You can see the same stamp with the “JUNIOR” added next to CELEBRA and a dot, of indeterminate color, on the stem. So, there were apparently at least two of these pipes made. Also the seller is offering free international shipping from Portugal, that has to be worth at least $15, making this a $12 pipe on the estate market.
The question remains, who made this pipe? I went to pipehil.eu to look for similar dots on stems. Here I saw a few potential leads. I have listed them below with a “Verdict” from my limited knowledge/conjecture.
Suspect #1

(One red dot — Pipes: Logos & Markings (pipephil.eu))
“This is the production Brand of Hans Jonny “Former” Nielsen. When the U. S. pipe demand for quality handmade “freehand” pipes diminished, W.Ø. Larsen in Copenhagen sent their several workshop pipemakers home to work out of their house. Former who was the Larsen foreman at the time, eventually went to Germany and started the Bentley line of production pipes made on frasing machines, several at a time. Some years ago he returned to Denmark with this type of equipment and continues to make these production pipes in his current workshop in between making his famous handmade pipes.
Bentley could also be a name of a line of Kaywoodie seconds.
4/17/2014
- Former went to Kleinlutzel, Switzerland (just over the border from Germany) and took over a pipe fabrication in the employ of Herman Lane, making the Bentley pipes (circa 1986).”
Verdict: Unlikely. Although the Kaywoodie association is interesting, I could find no other information supporting the Kaywoodie connection.
Suspect #2

(One red dot — Pipes: Logos & Markings (pipephil.eu))

“Portland Pipe Company was an English pipe maker, and appears to have started in the 1930’s, and went out of business in 1962. It’s though they had ties to Barling pipes from the 1930’s. They might have been a sub-brand or “second” which was separate from, but fully owned by Barling’s all along. It also thought that after Portland closed down, and during Barling’s corporate era (BB&S), Barling picked up some of the Portland brand (Londoner, Cragmoor and Portland) and made them for a while.
WILCZAK & COLWELL in their book “Who Made That Pipe?” acknowledge the brand as from England, though some have been made in Italy as well (see Pipephil.eu).
The Brand John Peel is a pipe which has the stamping: JOHN PEEL, A PORTLAND PIPE, MADE WHOLLY IN ENGLAND
I have a model with is also stamped SPECIAL, it’s a stack design with shape number 801.
This pipe might have been made either by Portland or Barling. “
Verdict: Potential source. I especially like the “some have been made in Italy as well” line. Does not support the CELEBRA stamp but is the only maker using the term FOREIGN.
Suspect #3

(One red dot — Pipes: Logos & Markings (pipephil.eu))
“Ludwig Stern, a successful pipe manufacturer since 1893 and closing around 1960, reorganized his company along with his brother Hugo Stern, opening a factory in 1911. They named the company L&H Stern Smoking Pipes & Holders. The newly formed company was moved into a six story building on the corner of Pearl and Waters street Brooklyn, NY.”
Verdict: Potential, though unlikely. LHS is typically good about including their logo on pipes that they make.
Suspect #4

(One red dot — Pipes: Logos & Markings (pipephil.eu))
“The Reiss-Premier Corporation was founded on June 22, 1940 in New York as the successor to the Reiss-Premier Pipe Company of Chicago. That company was in turn founded in Chicago, Illinois in 1922 by Jacob D. Burger, again as a successor company to two former pipemaking concerns, Reiss Brothers of Chicago and Premier Briar Pipe Company. The company was located in the south half of the fifth floor at 32 to 40 South Clinton Street in Chicago. Four years later, in 1926 Reiss-Premier Pipe Co. was issued a trademark for the term “Drinkless”, made famous on so many Kaywoodie pipes, and for which they used the slogan “You can’t get a drink from a drinkless pipe”.
In August of 1926, Reiss-Premier Pipe Co. purchased Kaufmann Bros. & Bondy and a year later the Kaywoodie pipes began to sport the Drinkless stinger. By 1928 Reiss-Premier had moved their production to Union City, New Jersey, and in December of that year were granted a patent for a cigarette and cigar holder. The following month the company moved again, purchasing the factory building of Paul G. Mehlin & Sons, piano manufacturers and taking over a part of that four story building.
After Reiss-Premier Pipe Co. became Reiss-Premier Corporation they continued to innovate, and in 1947 trademarked the “Synchro Stem” system used on decades of Kaywoodie pipes.
The Reiss-Premier Corporation was purchased in March of 1955 by S.M. Frank but remains an active corporation in the state of New York.”
Verdict: Potential. These guys made kajillions of pipes under many names.
Suspect #5
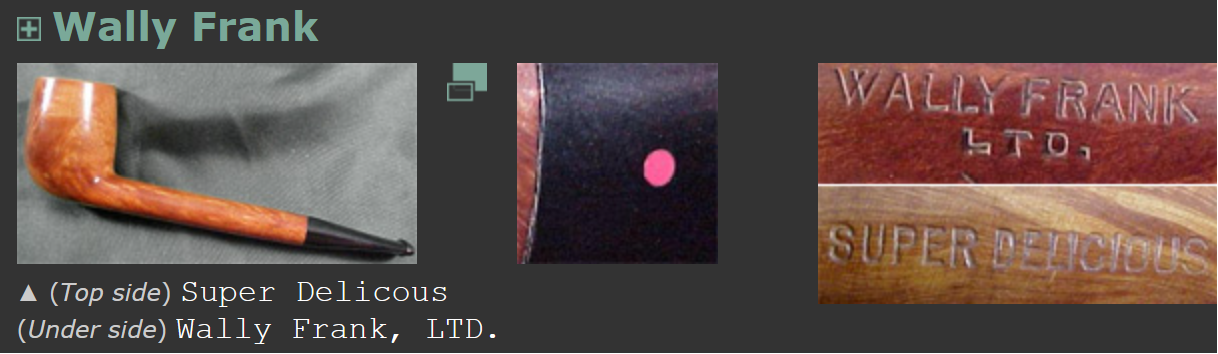
(One red dot — Pipes: Logos & Markings (pipephil.eu))
“Wally Frank, Ltd. was one of America’s oldest and most respected names in pipes and tobaccos, beginning in the early 1930’s. Wally Frank operated a chain of tobacco stores in New York City (the flagship store was in Lexington Avenue) and had a vast catalog business for pipes and pipe tobaccos. Their numerous private-label pipes were made by many makers, including Charatan, Sasieni, Weber, and many others. Wally Frank, Ltd. also owned the Pioneer brand of meerschaum pipes, made from both Turkish and African meerschaum. In addition to importing pipes, he had many pipes made in his own name and also employed pipemakers like Peter Stokkebye, Svend Bang, and Ed Burak (who later became the owner of Connoisseur). As a result, each Wally Frank pipe must be individually evaluated on its own merit.
In 1952, Wally Frank was on a buying trip in Italy and “discovered” pipe maker Carlo Scotti. Frank liked Scotti’s pipes, but there was the small problem of Scotti’s pipes bearing the same trademark or logo as one of Wally Frank’s pipe lines, the White Bar. The two men decided on creating a new logo for pipes sold in the U.S.: a hole drilled in the stem and with a piece of silver foil inserted in the hole and covered with clear Lucite.
Wally Frank (the person) wrote the forward to Georges Herment’s 1954 book “The Pipe.””
Verdict: Potential. Most likely not made by but imported by Wally Frank. Wally Frank was also fairly diligent about stamping their name on pipes imported to the U.S.
Jury, have you come to a verdict?
Yes, your Honor. We, the jury, find this to be a pipe.
Thank you Jury Foreman, Captain Obvious.
As with the imaginary jury above, I cannot say who the maker of this pipe is. If I had to guess, I would say the Portland Pipe Company. This would only be due to their use of the word foreign. I could not find any other occurrences of that term stamped on pipes.
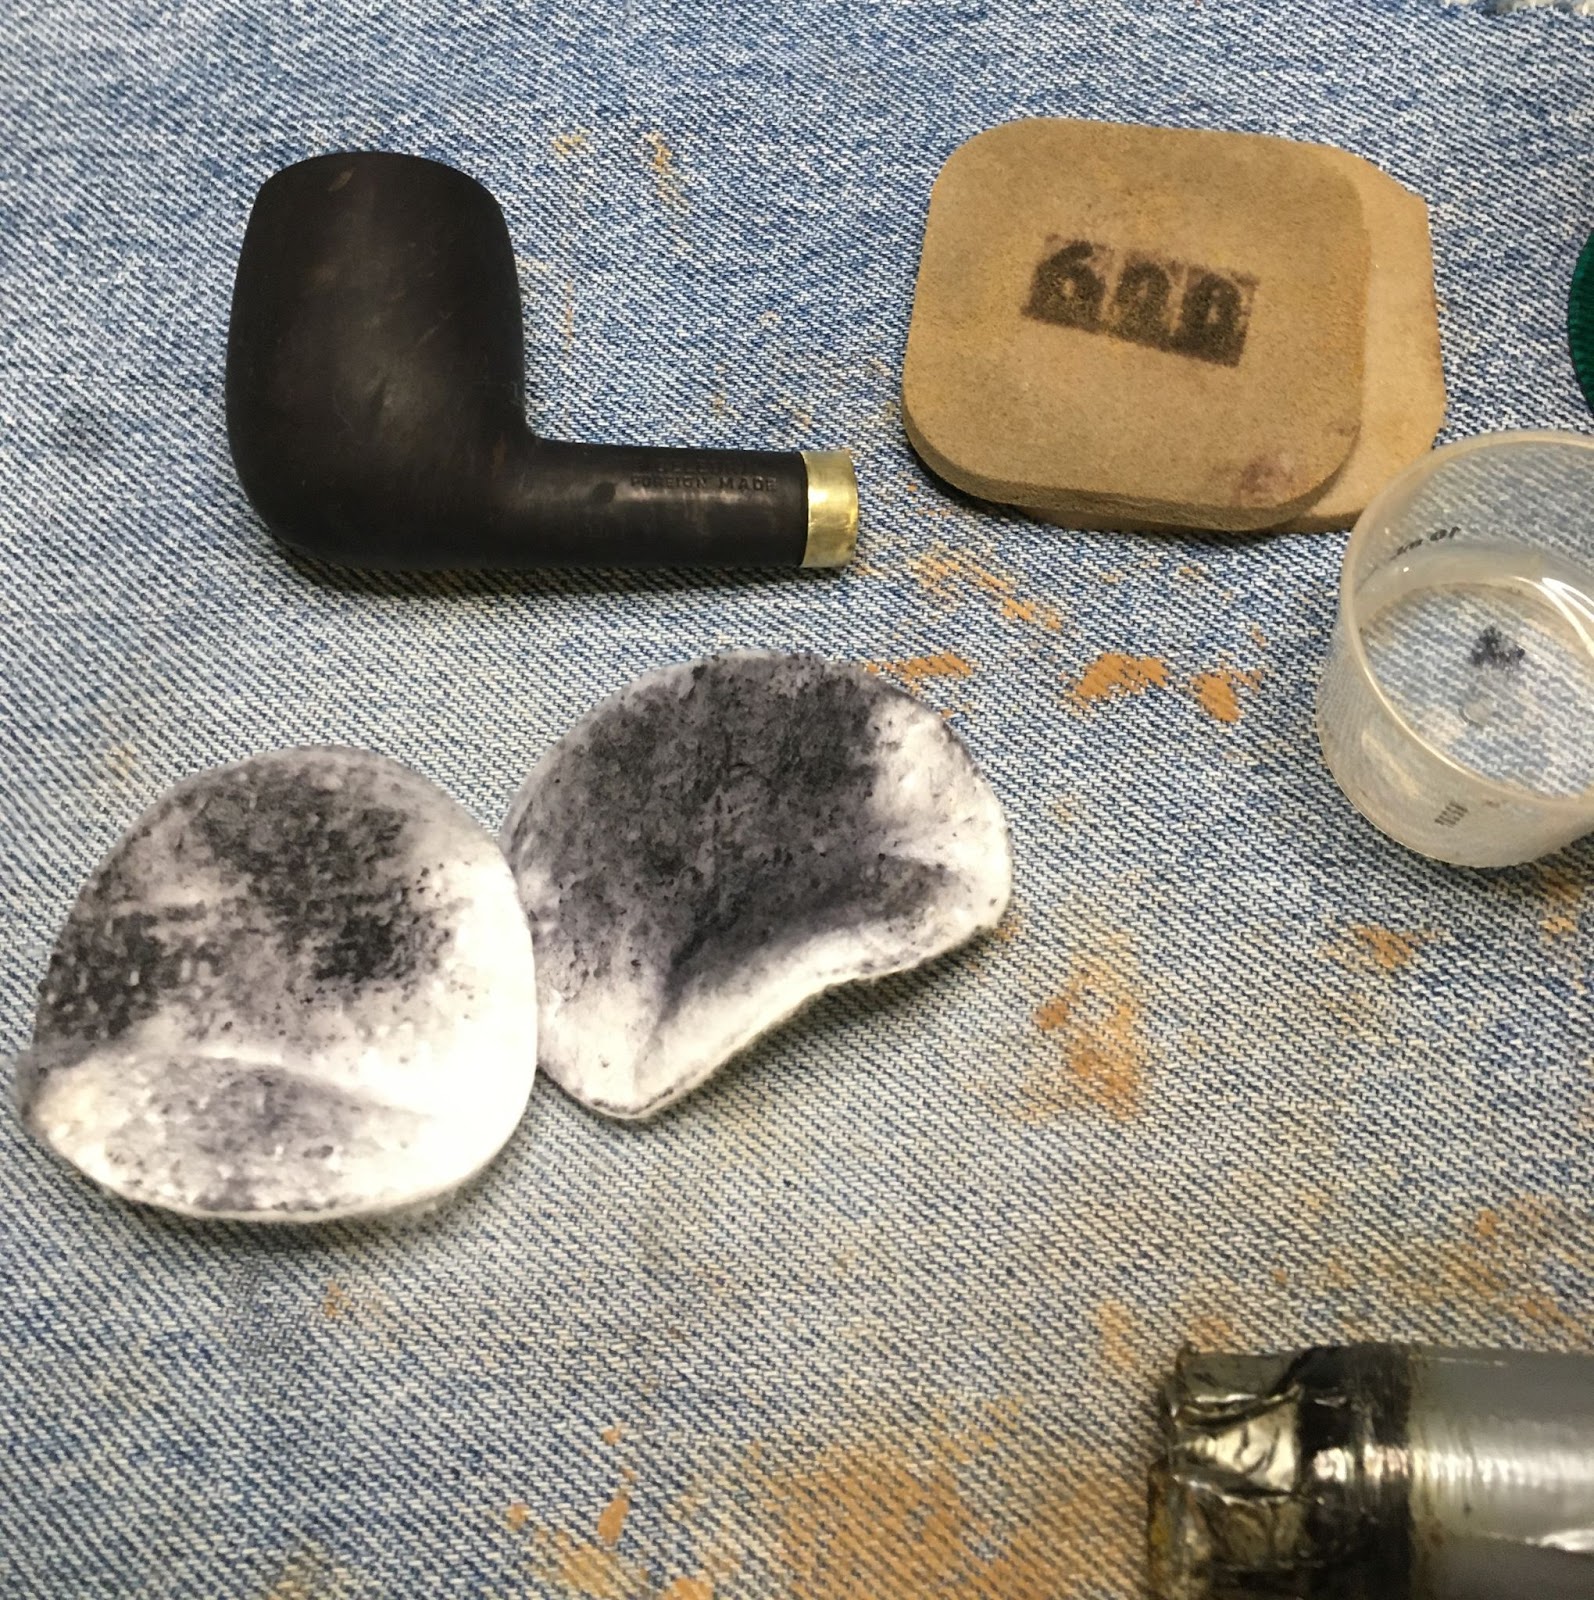
What the heck, let’s just restore it anyway. I started this project by seeing if I had any suitable brass tubing of the correct size for a band. I did, the ½ inch (12.7mm) outside diameter tube would work nicely. I measured the length of brass tubing that would cover the crack and not interfere with the stamp on the shank. A pipe cutter was used to cut the brass to the size I wanted.


Next I had to file and sand the shank for the band to fit the shank. This was done with a flat needle file and 320 sanding sponge.

Once the shank had been defiled and sanded a thin bead of cyanoacrylate (CA, super glue) was applied to the shank and the brass band was pressed into position.
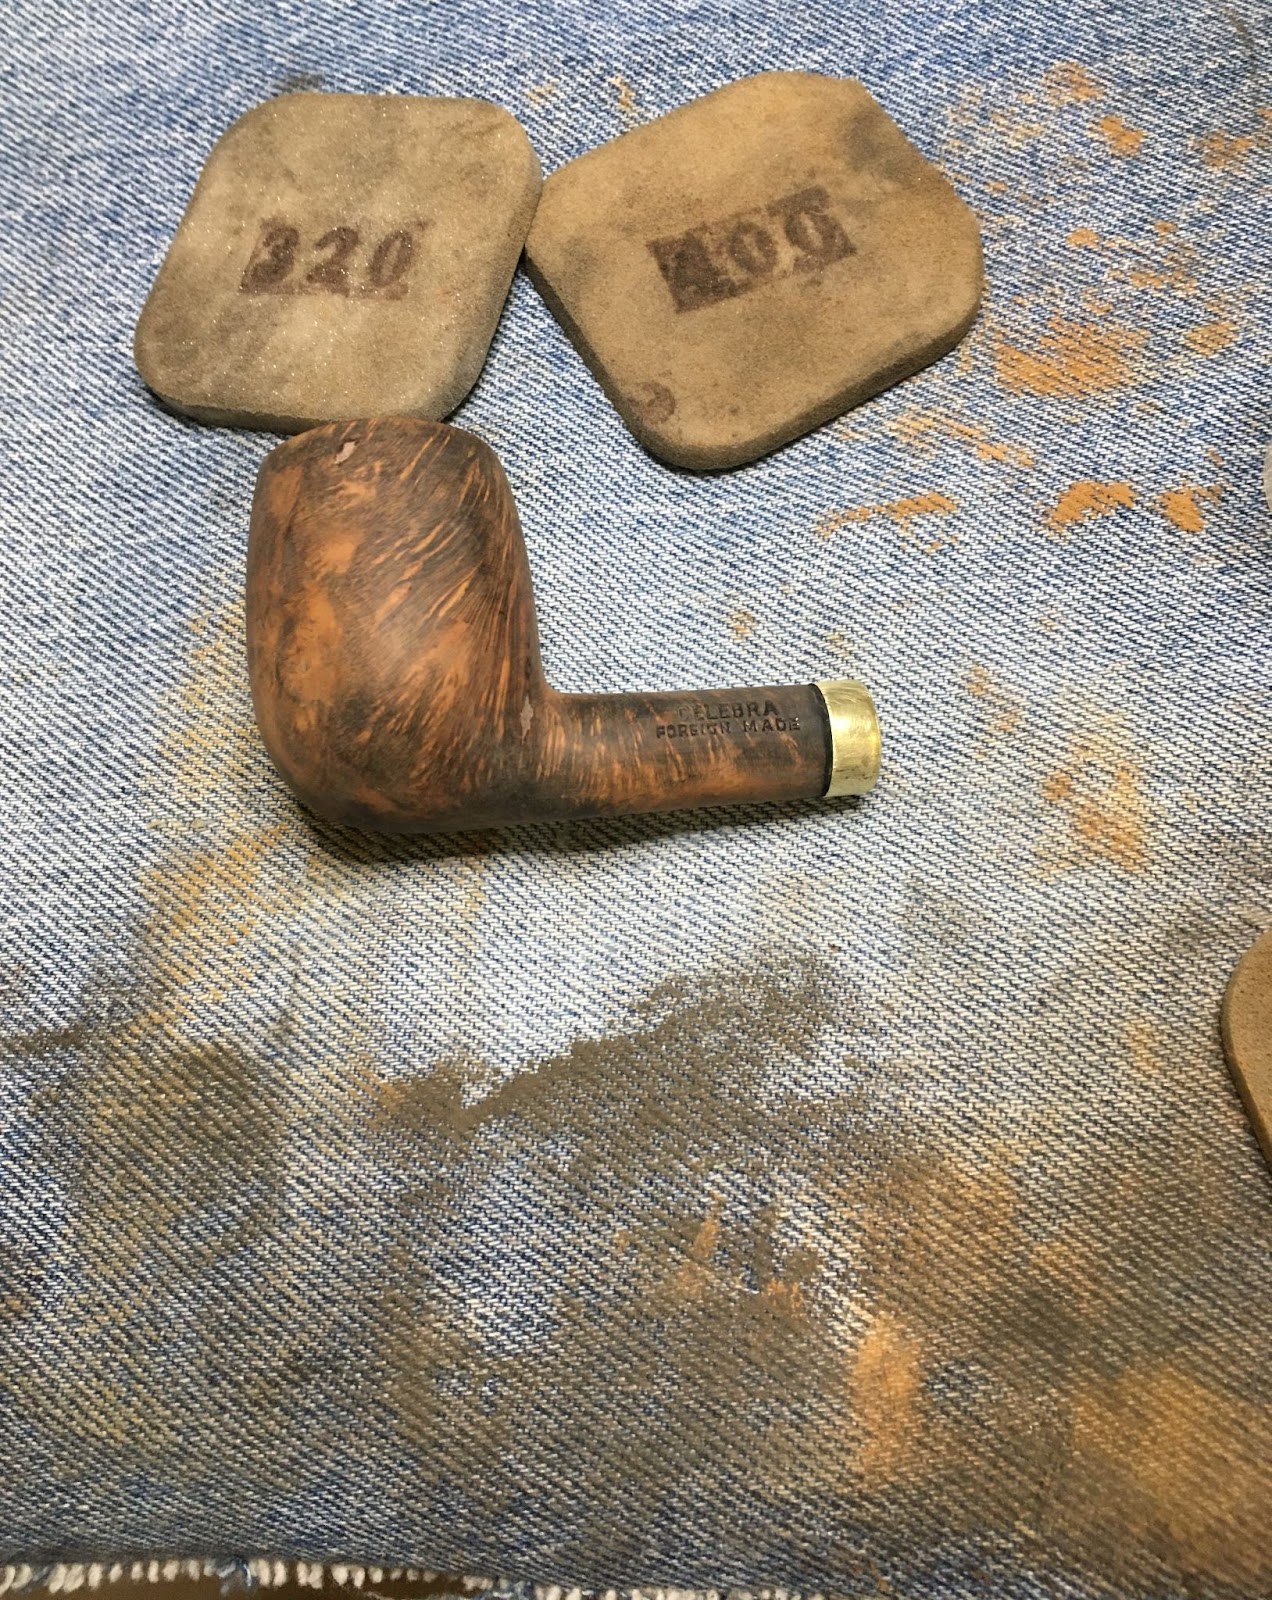
I could see several fills under the clear coat finish. I thought that I would try to sand the finish off rather than use a solvent. I started sanding with the 400 and 600 sanding sponges. You can see the fill as dark spots in several places on the stummel. The finish was applied very thickly and I think acted to fill the flaws in the briar. I sanded with the band in place to further smooth the band with the shank. This allowed a very even and smooth fit for the brass. I planned to do the same for the stem when I sanded and micro-meshed it for the same smooth transition.

I continued sanding with the 1000 and 1500 sanding sponges. After sanding I wiped the stummel with a make-up pad wetted with 99% isopropyl alcohol. The grain looked better when wet with the alcohol however I thought that a contrast stain done with a black base coat would bring out the grain better.
I prepped the dyeing are using an inverted plastic tub as a base. On this I place a couple of paper towels to absorb spill, the Feibing’s Black Leather dye, a pipe cleaner (used as an applicator), the official duct tape wrapped fishing bobber and a disposable lighter. Yeah, most people use a wine bottle cork rather than a duct tape wrapped bobber. What can I say, I’m a real rebel…

I applied a single coat of the black dye to the stummel and flamed it with the lighter. This burns off the alcohol solvent of the dye while heating the briar to allow better penetration of the dye. SInce I was going to be sanding the dyed surface of the briar off immediately I was not concerned about allowing complete drying time.

I took the stummel back to the workbench and put a nitrile glove on my left hand. With the right hand I dipped a cotton make-up pad into the alcohol and began rubbing away extra dye from the stummel. I repeated this one additional time.
The alcohol dried very quickly and I started sanding the black off of the stummel. I know what you are thinking. “Why sand off the dye that you just applied?” I wanted the dye to penetrate into the softer grain of the briar deeper than the harder grain. By sanding off the surface, the grain that absorbed the black dye deeper retains the dye while the grain that allowed less penetration retains its original color. This accentuates the grain of the briar. Well, that is what I hoped would happen. TO remove the outer surface of the stummel I used the 320 sanding sponge until I got the colors I was after. I did more “finish” sanding with the 400 sponge. You Can see from the photos below that I was frequently wiping the sponges off onto the denim cloth on the workbench. I used care around the stamp. I did sand the stamp lightly with the 400 sponge. Since the stamp was deep and very clear I was too worried about destroying it and I didn’t want the blocky “censored” box look around the stamp.
There were a couple of spots where pits could be seen. I used a fly tying bodkin to apply small dabs of thin CA to the pits. A briar dust filled sanding sponge was then used to sand over the wet CA. The briar dust was pressed into the wet CA during the sanding and filled the pit. This fill set-up and cured almost immediately. This technique works well for very small areas to be filled. Several applications are required for large pits. Fortunately these were all very small.
I continued sanding with the sponges from the 600-3500. Between each sponge I wiped the stummel with a make-up pad wetted with alcohol.

I then micro-meshed the stummel with the 4000-12000 micro-mesh pads. Between each pad I wiped the stummel with isopropyl alcohol. Once finished the stummel received a coat of Before and After Restoration Balm.
I allowed the balm to do the magic that it does for about 20 minutes while I transferred and labeled photos. Once the 20 minutes were up I rubbed the remaining balm from the stummel using the inside of a cotton athletic sock.
The next phase was to sand the stem, I inserted it into the stummel for ease of sanding and to allow the sanding of the stem-side of the band as well. Since the stem had no tooth chatter, only mild oxidation, I started with the 15500 sanding sponge and worked up from there. Between sponges I applied a drop of mineral oil rubbed in with fingers and wiped with a paper towel.

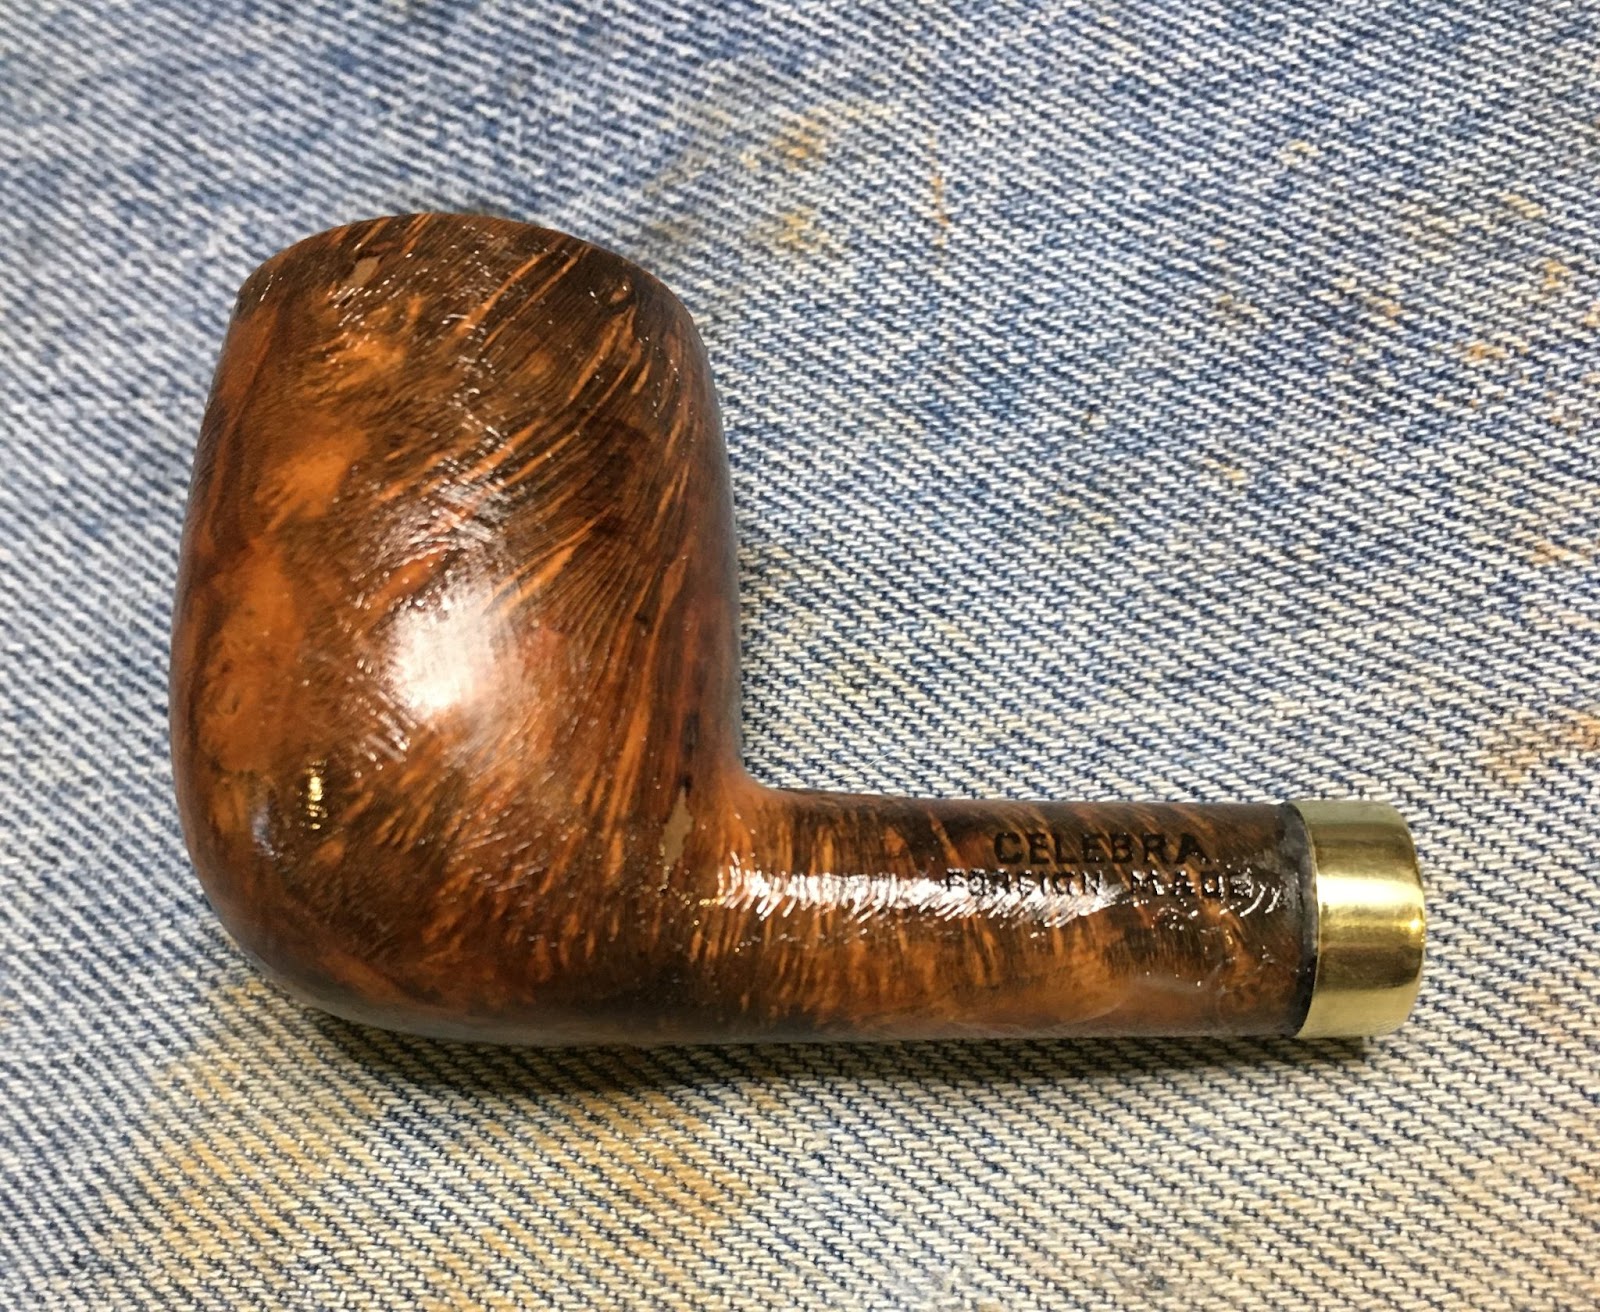
With the sanding finished I moved on to the micro-mesh pads. I used the 4000-12000 pads in sequence. Between each pad I applied a drop of Obsidian Oil rubbed in with my fingers and wiped away the excess with a paper towel. When finished with the stem I carefully used the micro-mesh 4000-12000 pads to polish the brass band and to even out any marks made white micromeshing the stummel or stem. THe final task was to apply several coats of carnauba wax with the buffer.
Overall I think this old Celebra turned out rather nicely. How a never before smoked pipe came to need a band for a cracked stem is anyone’s guess. It must be that guesses are what this pipe is all about. Guessing who made it seems to be the only way to determine the provenance as well. Wherever it hails from, it certainly looks nicer that it did originally. The contrast stain improved the appearance of the grain, the fine sanding and polish with the carnauba wax improved the finish and the band is just a touch of class to an otherwise plain looking old pipe. I do hope that you found something here useful or were entertained. If you enjoy this sort of thing please, click the like and subscribe. Thank you for reading the ramblings of an old pipe lover.
Below are some photos of the Celebra Foreign Made (by unknown maker) Billiard with a new brass band.