Written and photographed by John M. Young

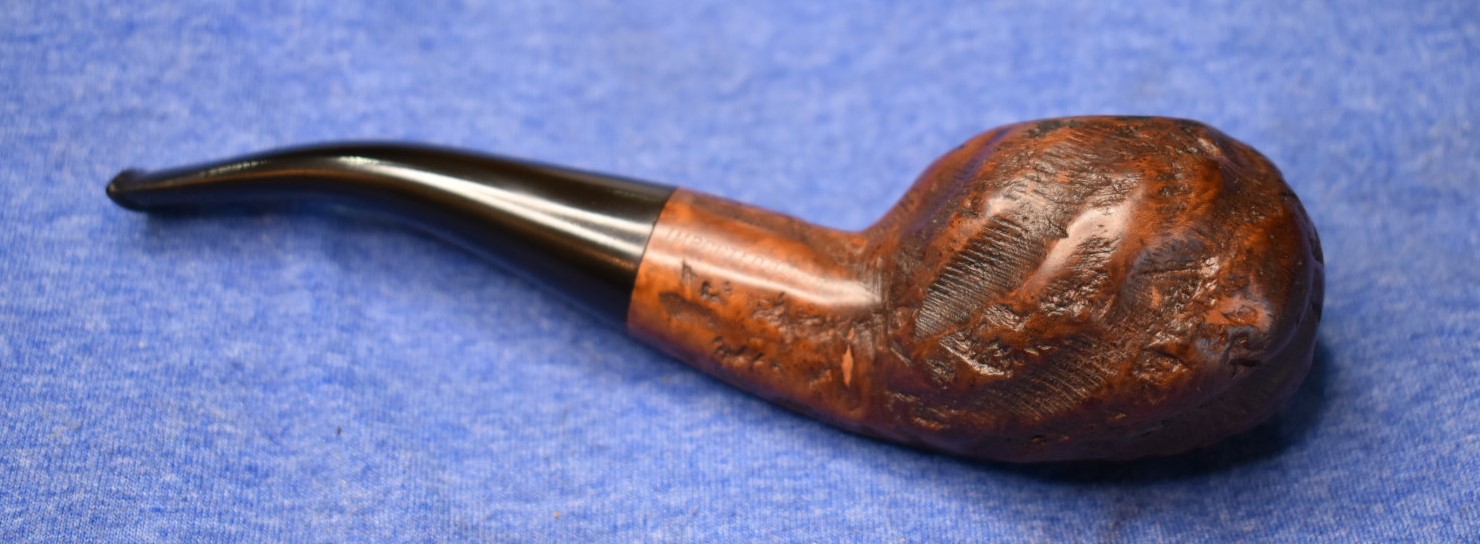
I know what you are thinking: “Wow! That pipe is gorgeous. I’m going to sell all my Savinellis and get a truckload of Greenwichs.” What, no one is thinking that? Oh yea of little faith, give it time. It may turn out pretty well.
I didn’t start out looking for a Greenwich pipe. Heck, I don’t think I’d ever even heard much about them. I was searching out a pipe with a trashed mouthpiece. Yes, I said that. The truth is that rather than practicing a new material/technique on an extra stem, I wanted to try it under fire with a real world example. Sure I could just take a crosscut saw to an extra stem but then I’d miss out on searching Ebay for a reprehensible miscreant pipe, bidding against the throng of others wanting the same hidden gem and waiting for 18 months for the arrival of said pipe from the far reaches of Bhutan. There I go again with my exaggerations, I never was “under fire”. “What is this new material?”, you ask. You are just going to have to wait for the big reveal.
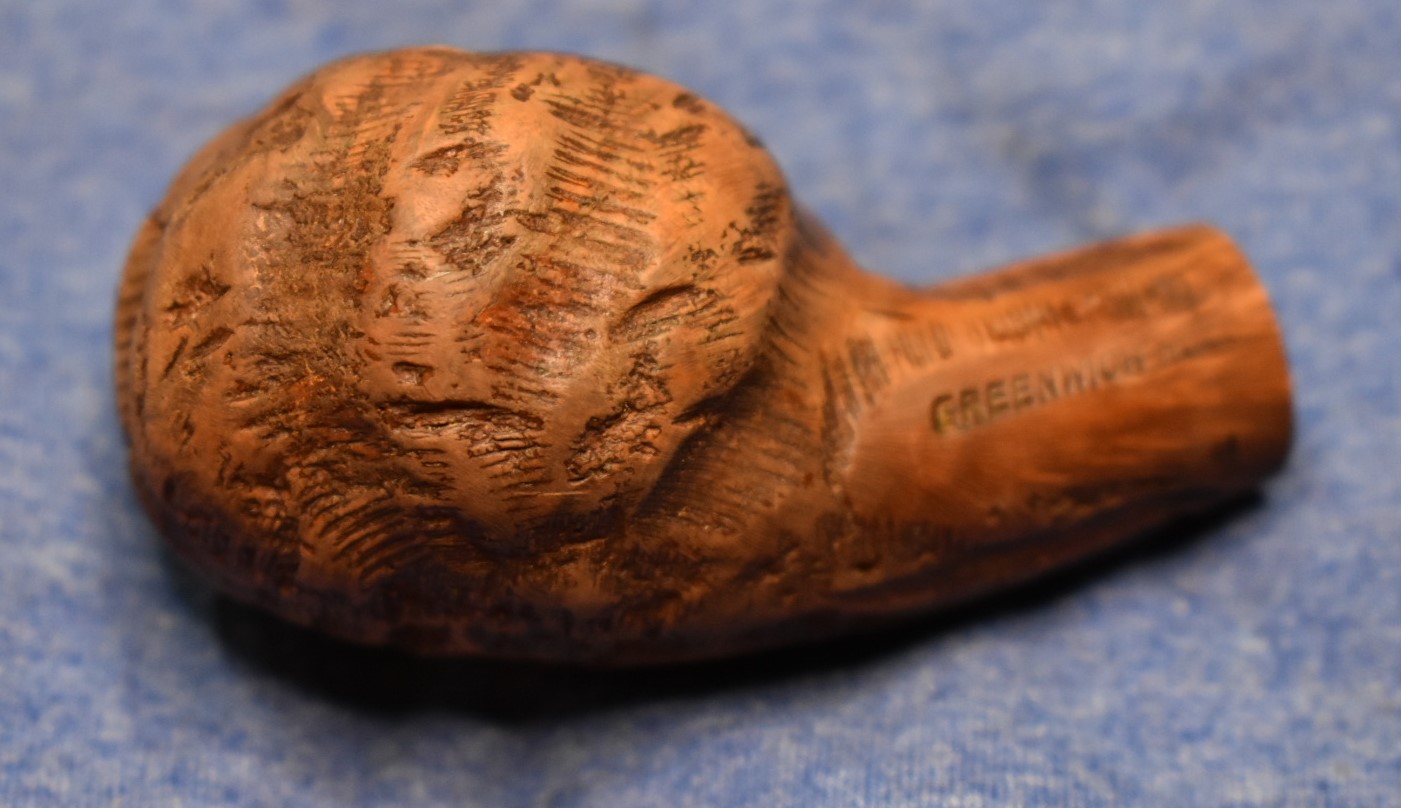
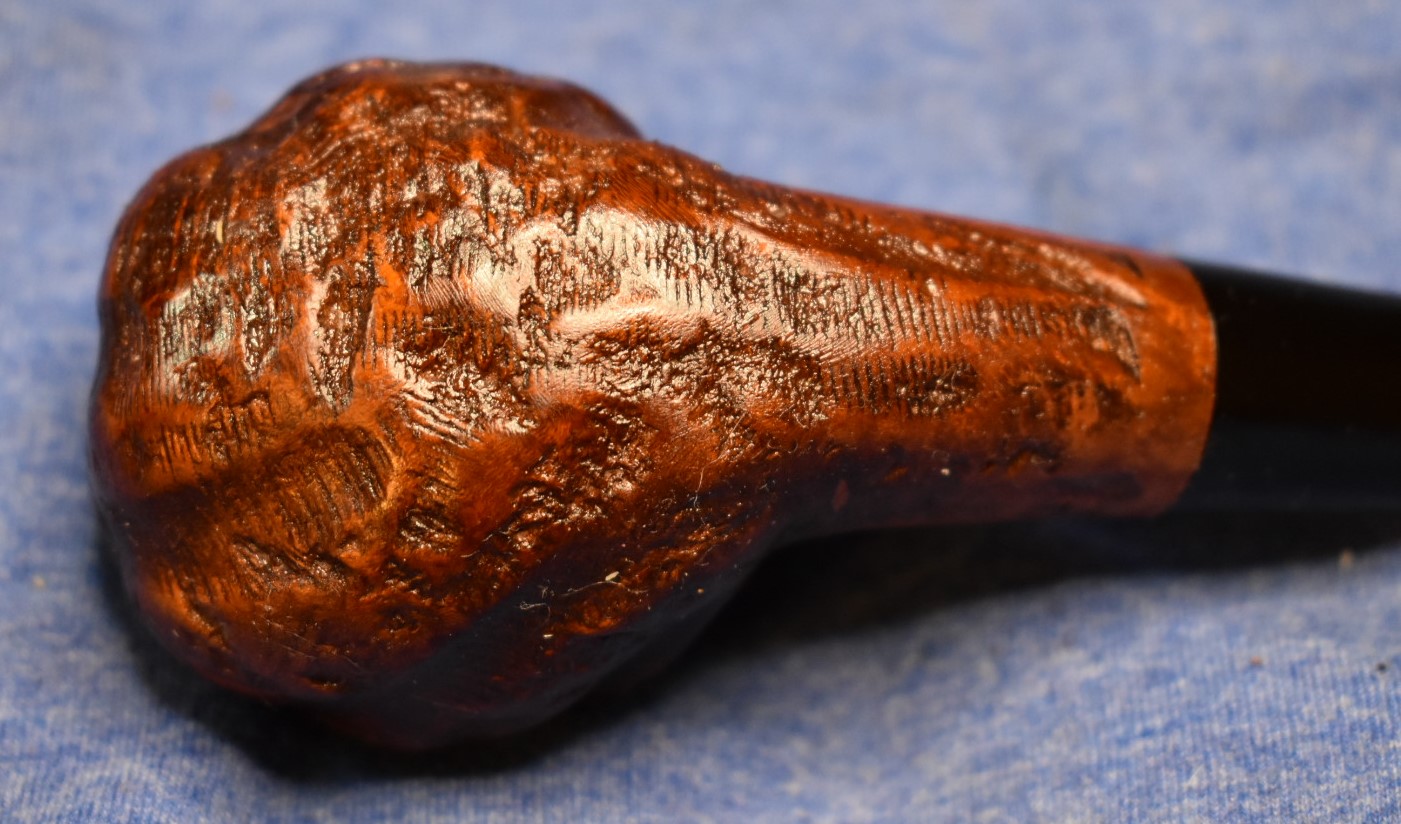
The above Greenwich House pipe was indeed from an Ebay auction. I really did search out a pipe with a damaged stem. Here is the original listing of the darling:
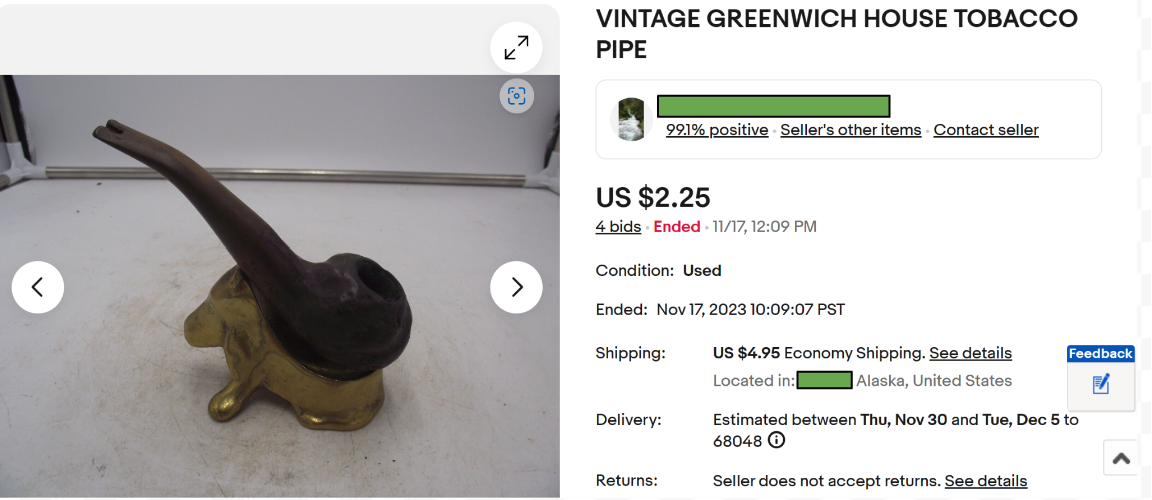
Yes, I am quite the “Big Spender”, I did have to wait for the pipe to arrive from Alaska and there really were three other people who bid on the Greenwich. So, you see my exaggerations were not that great. When she did arrive her condition was what I had expected and hoped for. I’ll let the photos speak for themselves.


Okay, so now you have it, what are you going to do with it?
I am going to make her beautiful and return her to smoking glory.
What do you even know about her history? She could be some vagrant who will prison shank you while you sleep.
Highly unlikely. As a matter of fact, Steve Laug did a restoration of a Greenwich House pipe back in 2019. Here is a link to that restoration: This Greenwich House Antique Imported Briar Crowned Pot Turned into a Nightmare | rebornpipes. Now given, Steve’s blog had the word “Nightmare” in the title but, I’m sure nothing like that will befall me.
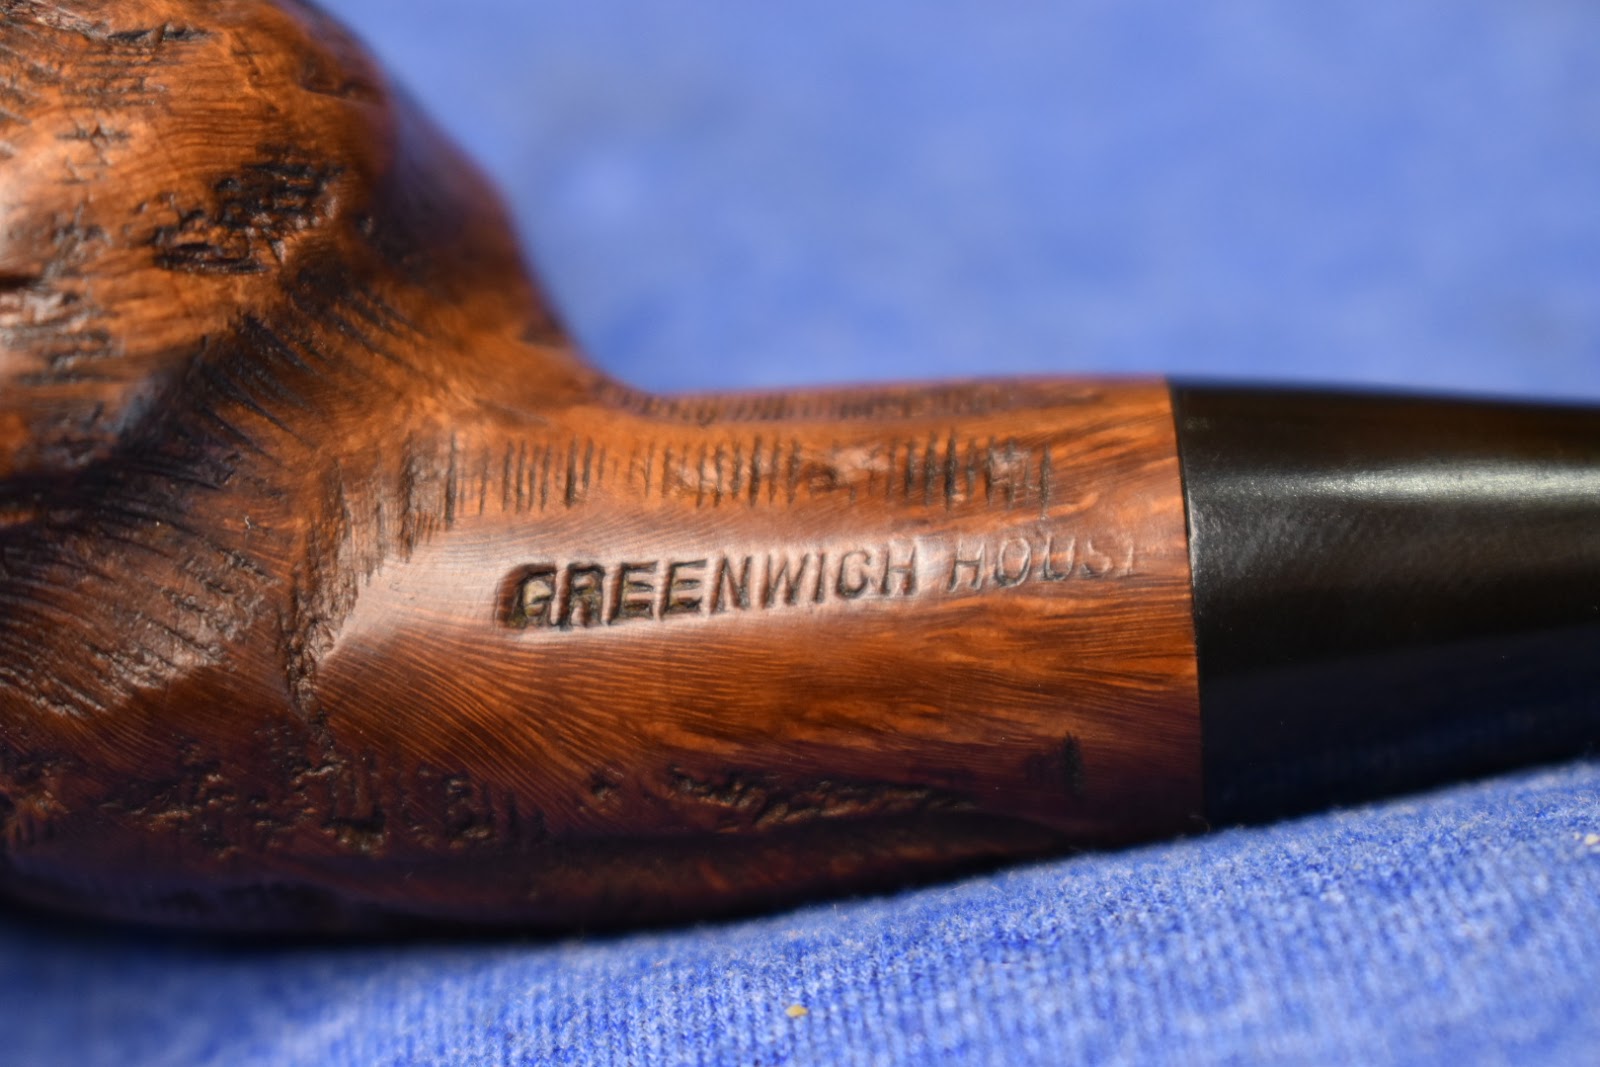
When researching this Greenwich House pipe I had very little to work with. There were only two words visible: “GREENWICH HOUSE”. That is where I started. The site, https://pipes.collectionhero.com/gallery.php?search=greenwich produced images of “Greenwich” pipes that had come up recently. The Thoor-Kleen brand seemed to have the greatest frequency of photos. The other Greenwich pipes appeared more random and diverse in their shapes. Nothing matched the pipe I had in hand.

Since Thoro-Kleens are metal pipes I went to http://www.smokingmetal.co.uk/. In the past I have found that the smokingmetal.co.uk website has very good information about all things pertaining to metal tobacco pipes. I thought they would certainly have more information about Greenwich. I was incorrect. There was more information about the Thor-Kleen pipe but nothing about the parent company. Here is th text on the page in its entirety:
GREENWICH HOUSE THORO KLEEN
Department : METAL OUTER BOWL
This family of pipes have been seen as Knowles Air Lite (believed to be Canadian version), Roybrooke, Comet, Original Gridiron. Seemingly sold in sets that comprised a normal briar bowl as well as the metal outer with a briar insert. The body of the pipe can be hexagonal, square ( Thoro Kleen only seen this shape) or circular in cross section. Regardless of variant all parts are interchangeable. The unmarked version tends to be regarded as the COMET, all the others being stamped with a name. See others on this site under their name
(http://www.smokingmetal.co.uk/pipe.php?page=99)
I returned to the restoringpipes.com website. Steve Laug was able to find more information on his pipe because he had much more information via stamps to work with. This old girl only had a stamp that read “GREENWICH HOUSE”. Now if we assume that it is indeed the same company that either produced or imported both Mr. Laug’s pipe and the Greenwich House I had, then we could say that “The pipes were sold by the Greenwich House Corporation, located in 1947 at 939-M 8th Avenue, N.Y. 19, N.Y…” (https://pipedia.org/wiki/Thoro-Kleen)
Also interesting from Mr. Laug’s research was that his pipe had stamping of the model – “ANTIQUE” as well as “Imported BRIAR”. He found that the Antiques were made from Algerian briar. (Laug, rebornpipes.com). I say interesting because my pipe looks very much like both the Marxman and Custom-bilt (or CustomBilt) pipes made at approximately the same time, 1947-1957. Both the Marxman and the CustomBilts were made from Algerian Briar. This briar is known to be relatively soft with less desirable grain, thus the heavily carved pipe shapes and textures. I think it is pretty safe to assume that since the Antique line of Greenwich was Algerian briar and this pipe has very similar characteristics to the Antique as well as the two other makes of pipes which were known to be Algerian briar we can say that this pipe is very likely to be made from Algerian briar in the decade after World War II.
That information satisfied my curiosity and made me want to get to the restoration. As usual I started with reaming the tobacco chamber. It was heavily caked. The PipNet reamer is the go-to tool for this job followed up with the SmokingPipes Low Country Reamer. I started with the Pipnet’s second size blade. It Made short work of the cake that it could reach. I switched out the 2nd for the 3rd as this was a wide bowl. The 3rd blade worked very well and scraped to the bottom of the bowl. The bowl was now wider than the 2nd and 3rd but the 4th was too large. This meant the Low Country would get some action. I reamed the interior edges of the bowl further with the Low Country Reamer and finished with 220 sandpaper wrapped around a wooden dowel along with sandpaper on my finger. The inside of the tobacco chamber looked very good. I guess that is what the layer of cake is for – to protect the briar.


Next was the old Murphy Wood Cleaner and a toothbrush routine. For this I took the stummel to the sink.
I use a medium stiff toothbrush with undiluted Murphy’s to scrub the exterior of the stummel. This stummel was great. The diameter was enough so that I could push my thumb into the bowl and keep the Murphy’s out while scrubbing. The photo show the lather change to a brown color as it
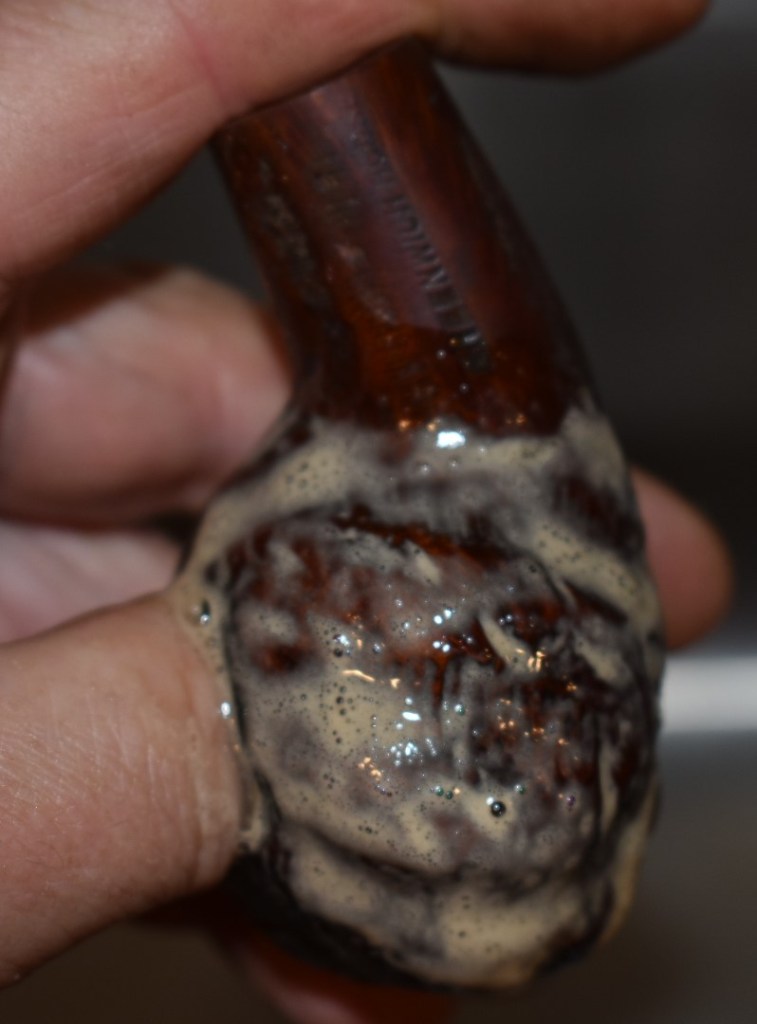
removes the years of accumulated dirt and whatever else it can. I rinsed the Murphy’s from the stummel with warm water. Since this stummel had so many carving grooves and smaller lines I applied the Murphy’s a second time and it sudsed up discolored again. Not as dark as the first time but colored just the same after a second rinse I dried the stummel with a cotton dish towel.
I returned to the workbench with the fresh scrubbed stummel and saw that my scrubbing had cleaned the grime away but this revealed a layer of finish that I did not want on the briar. The following photos show what I had.


To see what kind of finish I had to deal with I thought about finishes of the late 1940s. I hoped it was shellac, mainly because I am lazy.
Shellac: A solution of melted lac, a resinous excretion of the Lac insect (Coccus or Carteria lacca) dissolved in alcohol used as a sealant, adhesive, or insulating varnish. (sciencedirect.com)
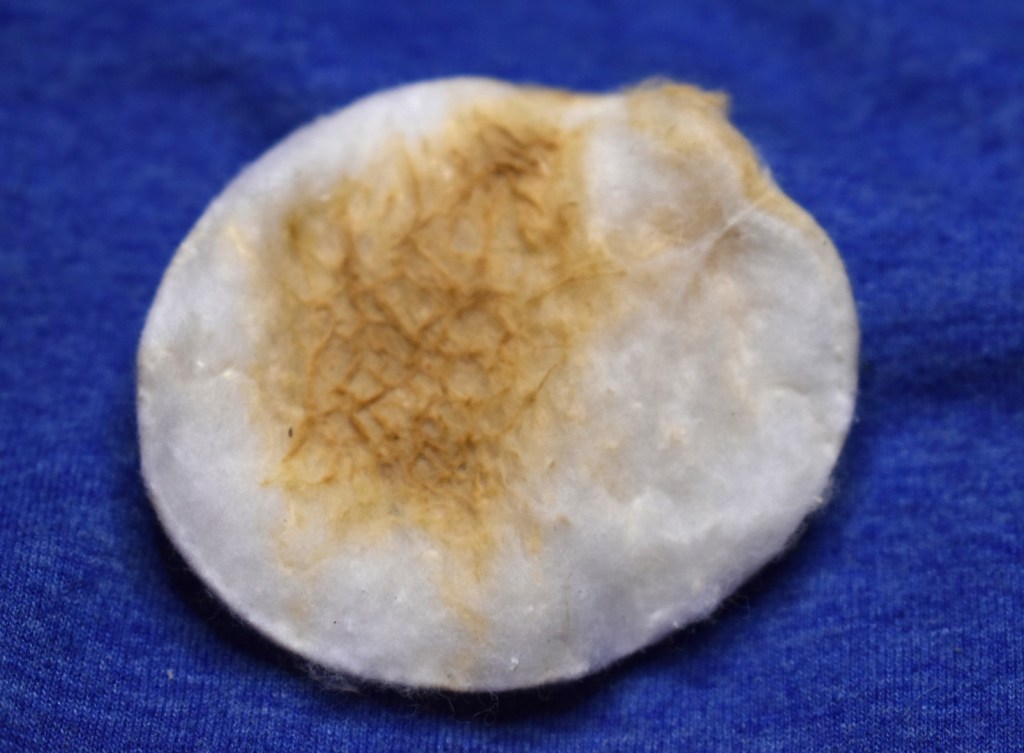
Since shellac is dissolved in alcohol, that means it dissolves in alcohol. I don’t mind working with alcohol. I moistened a make-up removal pad in 95% ethyl alcohol and started rubbing the stummel. Yay! The pad started to turn a yellowish brown. That means that the finish was most likely shellac and it would be easy to remove. Shellac also will dissolve in acetone. I did that too for the photos below (left is ethyl alcohol, right is acetone).

I continued to rub the surface and found that the grooves and depressions held more finish than I was able to remove with the pad. That meant that I 
Sidenote: The acetone bath looks cloudy because the last restoration I did had a very large area that was filled with some filler that only seemed susceptible to acetone. Check out the Waldorf Restoration if you want to see that mess.
Shellac does not take very long to dissolve, especially when it has already been softened by the wet pads. I figured that I wouldn’t need to leave it there for more than 30 minutes. That was plenty of time to get started on the stem.
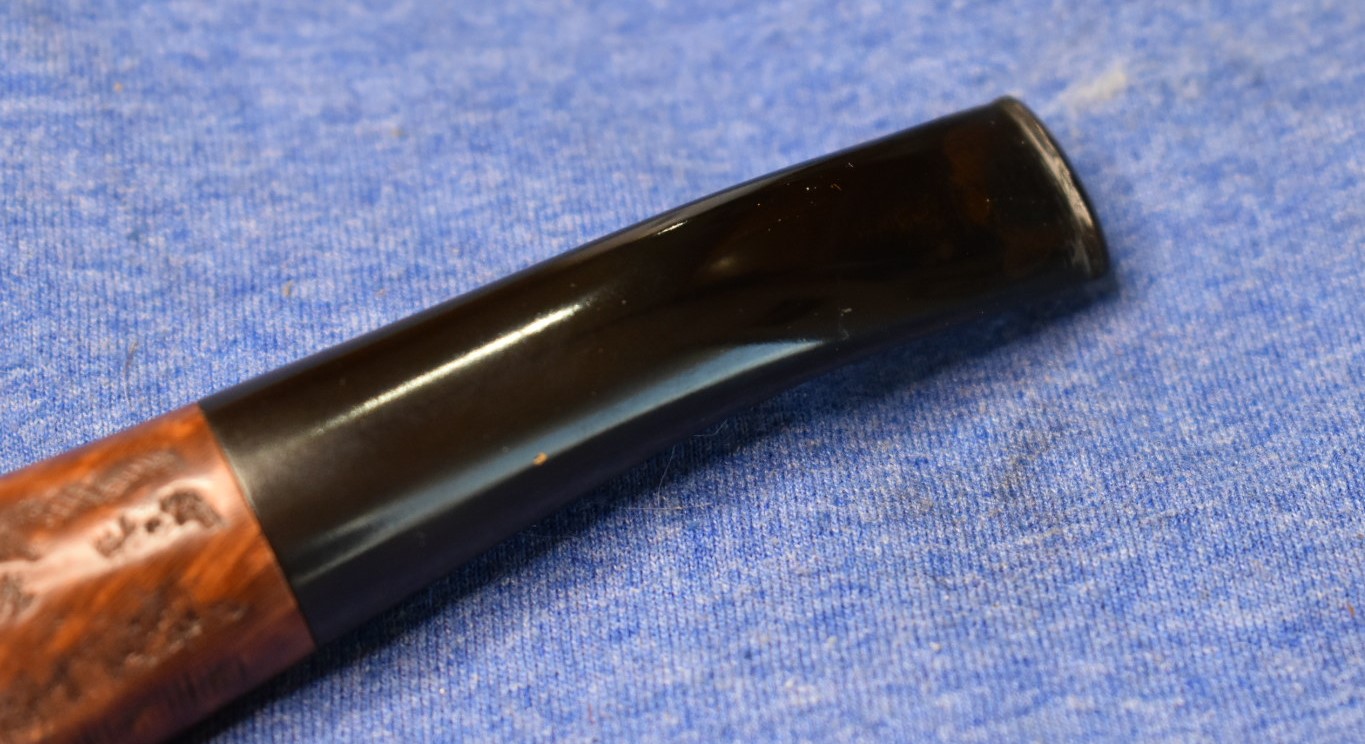
I looked at the stem. I remember reading Steve Laug’s “Nightmare” blog about his Greenwich House Antique pipe. His


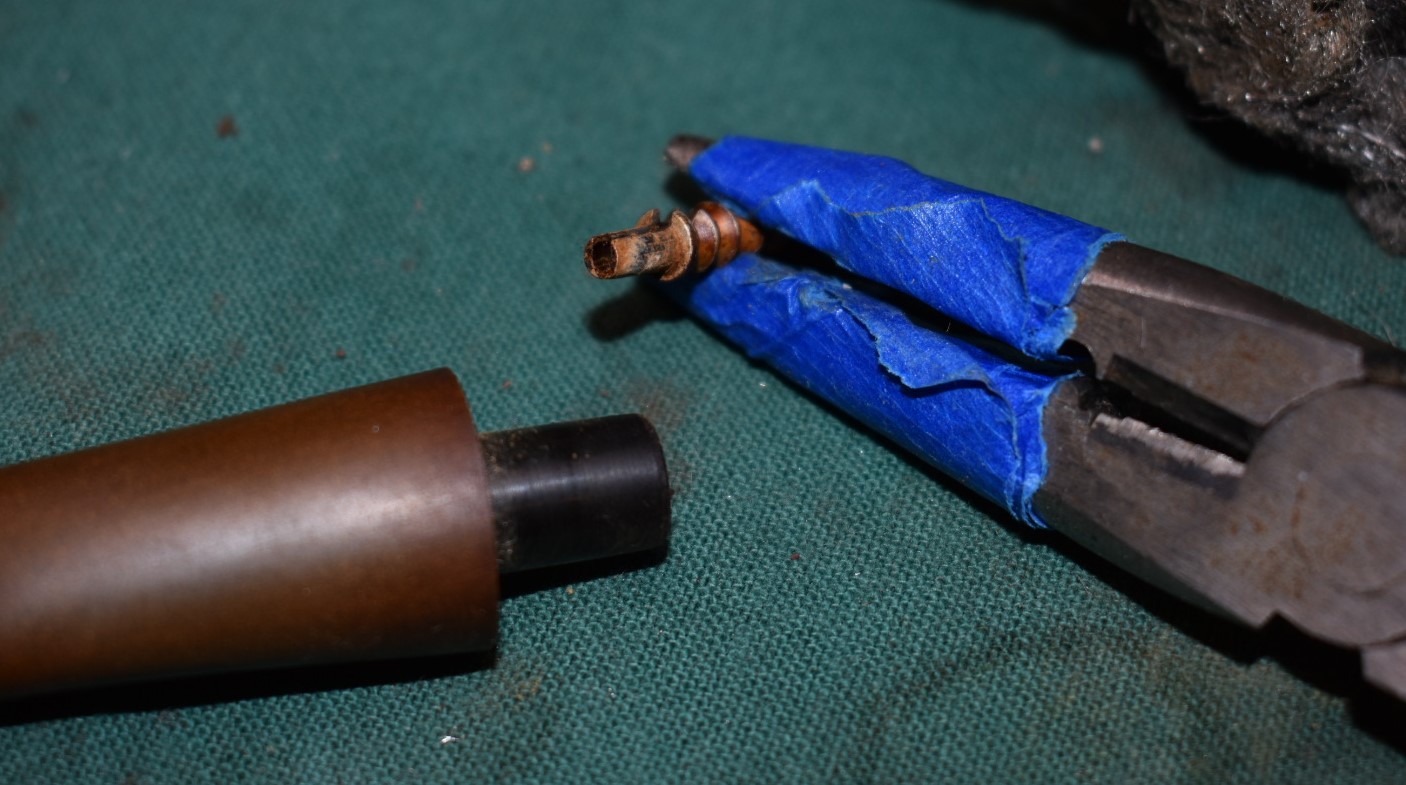
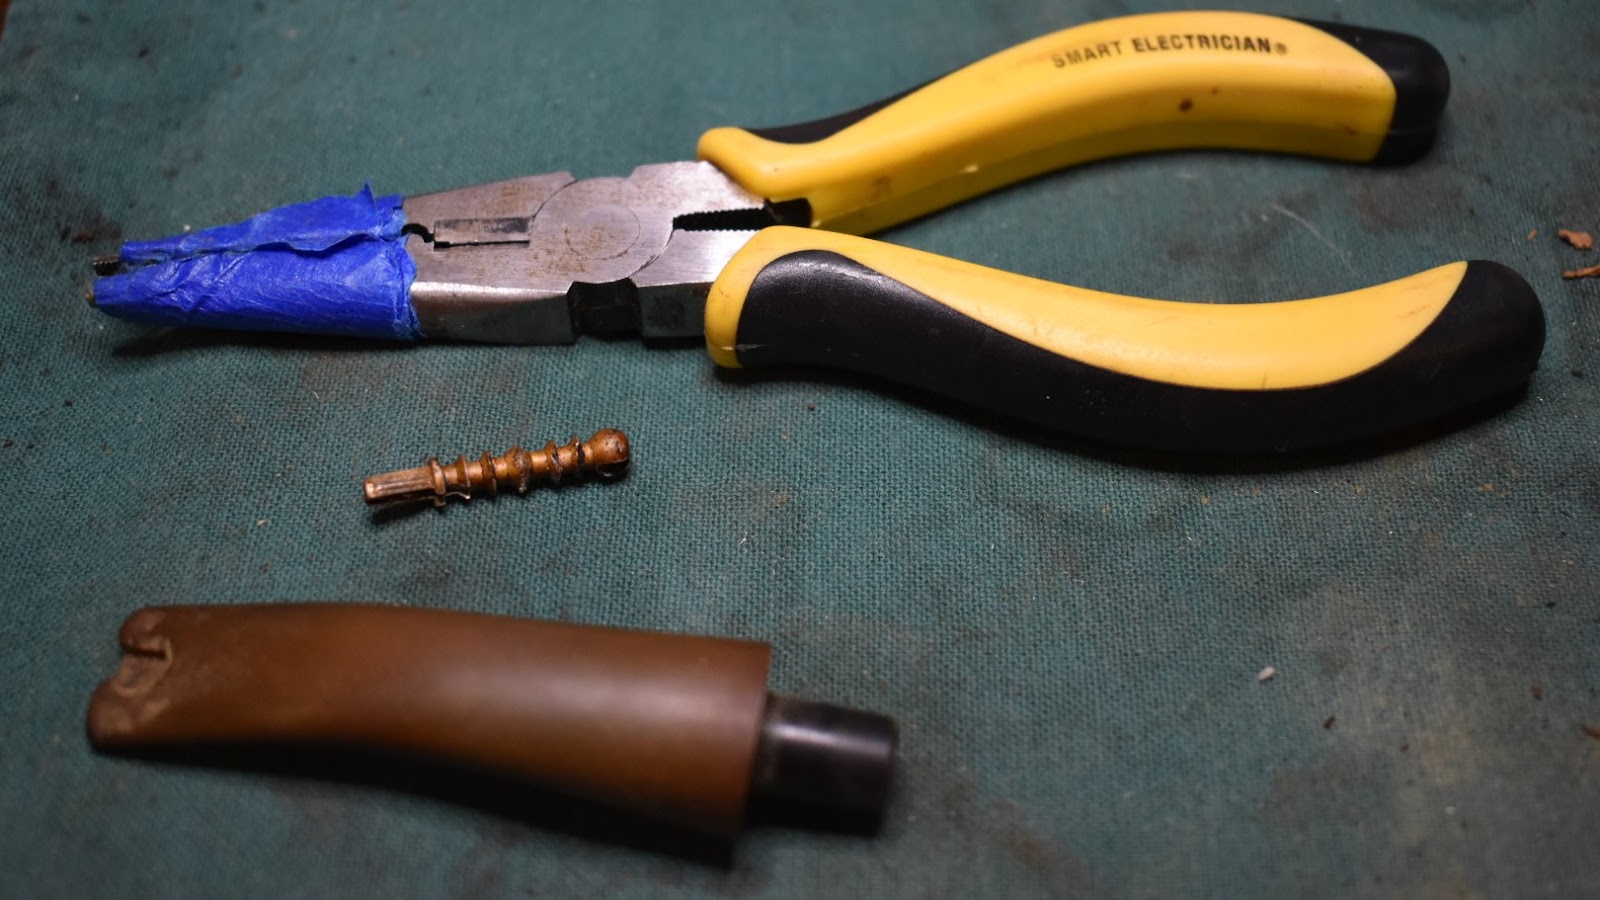
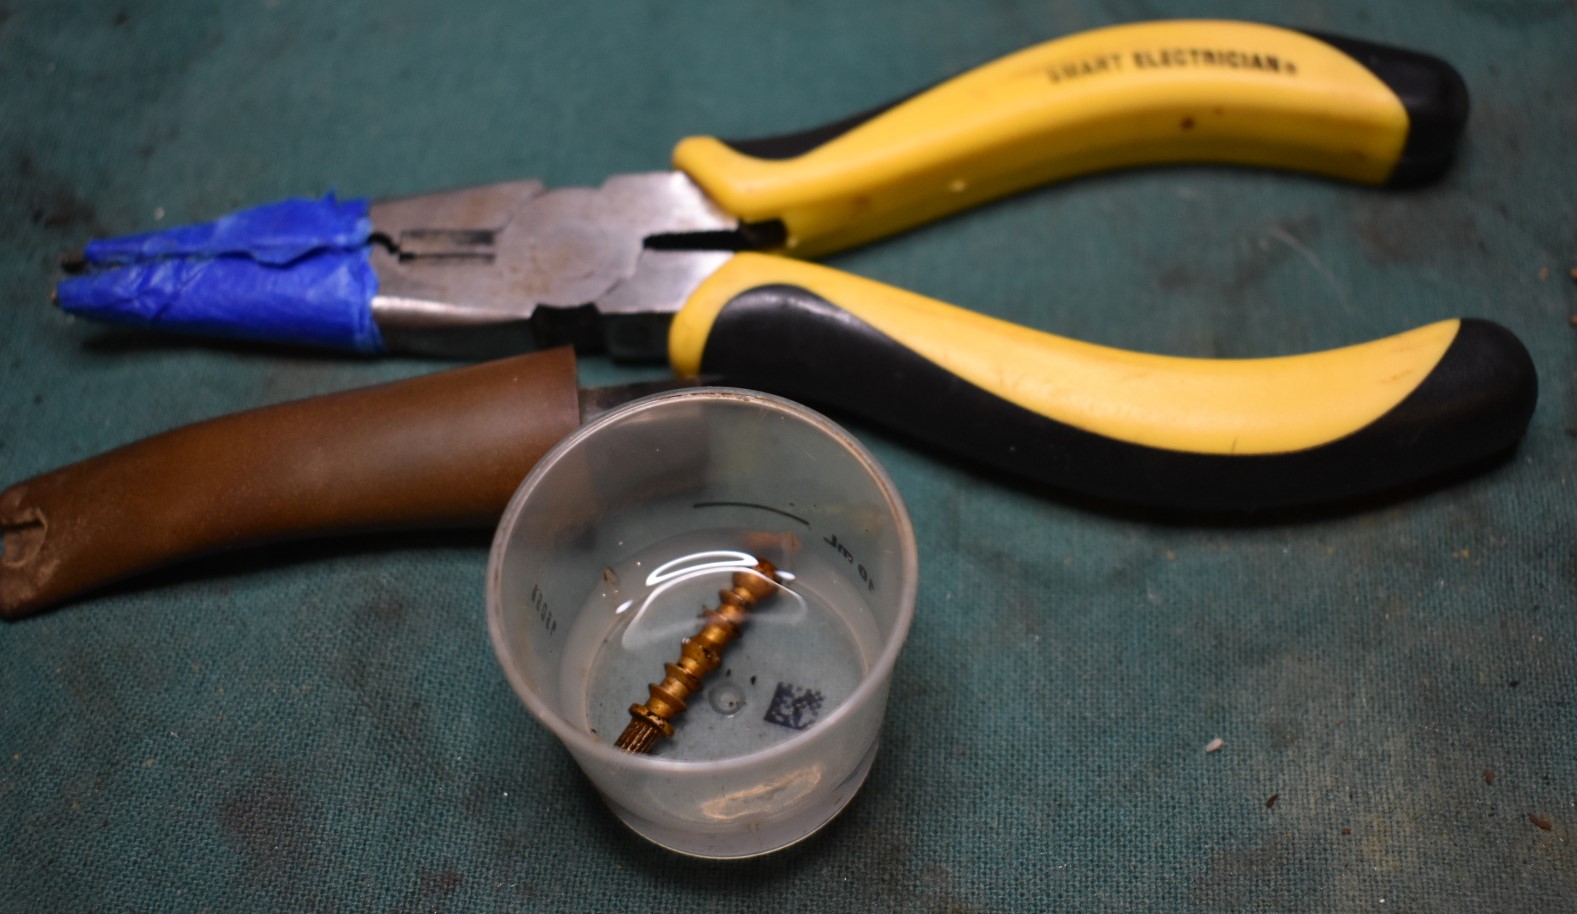
“Nightmare” began with the removing the stinger from his pipe. I tentatively prepared for the worst. I retrieved my stinger extracting tool, and did the “please don’t break dance”. A firm grip, little twist right, little twist left, wiggle, wiggle. Oh that was the motion I was using with the tape wrapped pliers, NOT the dance. I guess I should have made that more clear. The stinger in this pipe was wonderfully well behaved. Filthy and coated with yuck but well behaved. I placed it into a medicine cup with more ethanol to loosen up the yuck..
Next I used 0000 steel wool on the stem. I vigorously rubbed, trying to get the worst of the oxidation off the stem or at least get it mad so that it would come out and fight the deoxidizing solution.


I placed a pipe cleaner into the button of the stem to suspend the stem in the Deoxidizing Solution. This sem was heavily oxidized so, I figured it would have to be in the solution for two hours or overnight. I would check on it in an hour. A motto that I am rather fond of is: “Expect the worst, that way you are never disappointed.” The stem went into the deox bath.

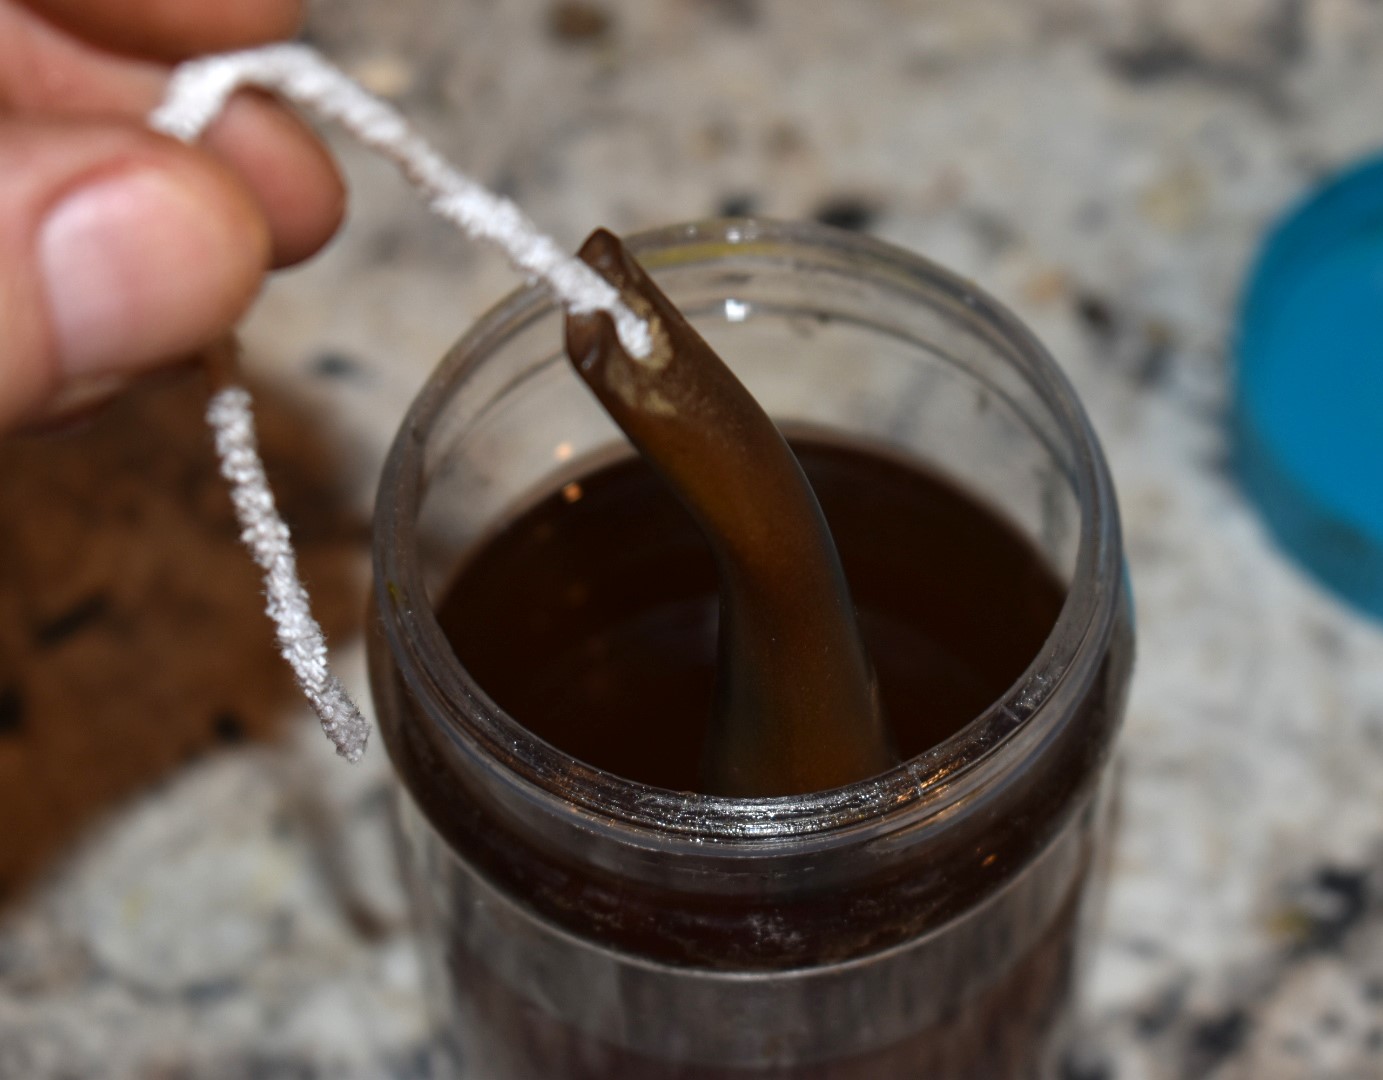
Let’s go see how the stummel is doing. I returned to the EtOH jar and removed the lid. The alcohol is pretty dark from all the finishes that it has removed. I suppose it is about time for it to start a fire in the burn pit but it

was still working. After the EtOH bath I again rubbed the surface of the stummel with a moistened make-up pad and very little color came off – victory.
Now normally I would have to sand and then micro-mesh the stummel at this point. I didn’t want to do either of those things with this briar. It didn’t need that. The rugged look is what this old girl is all about. Well rugged except for those dings on the rim. Those have
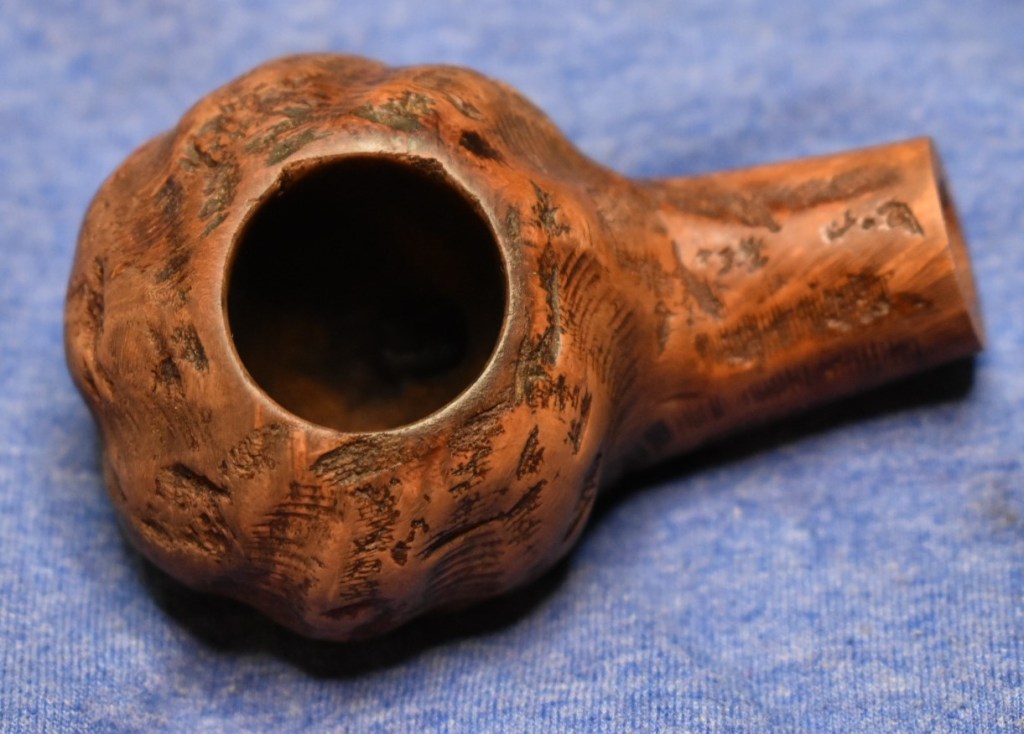

got to go. I used two small wooden spheres wrapped in a small piece of 220 wet/dry sandpaper. The spheres only remove briar from the contact with the inside of the rim. This gives a nice even beveled appearance to the rim. I used two to make sure I got all of the deep dings with the smaller sphere and smoothed out the bevel with the larger sphere. I was mostly pleased with the ding removal.


At this point I slathered the stummel with Before and After Restoration Balm with my finger and thumb. Then I used a soft bristle baby toothbrush to work the balm into all of the nooks and crannies of the briar. I set the stummel aside and went to find something to do for a half hour. Oh yeah, I have laundry to attend to.
I returned after some chores and found that I’d left the stem soaking in the deox bath for about an hour and a half. If it looks like it needs more time, we’ll give it more time. I removed the stem and allowed most of the solution to drip off. I then placed it on a coarse shop rag and started to rub the solution from the pipe. The solution is viscous stuff that will absorb into the rag. The surface of the vulcanite seemed sticky. The vigorous rubbing removes the sticky surface and buffs it to a nice clean vulcanite. I ran two pipe cleaners through the airway to rid the internals of the solution. When I was finished I was surprised to see that most of the oxidation had been removed. I went to the workbench and applied a layer of mineral oil to the stem. I also dipped a pipe cleaner into the mineral oil and ran the oiled cleaner through the airway. This coating of oil should keep the vulcanite from further oxidizing.
I put the stem back on the stummel and took one photo with the still slathered balm and oiled stem.

I then wiped off the excess balm and took some photos to show the progress.


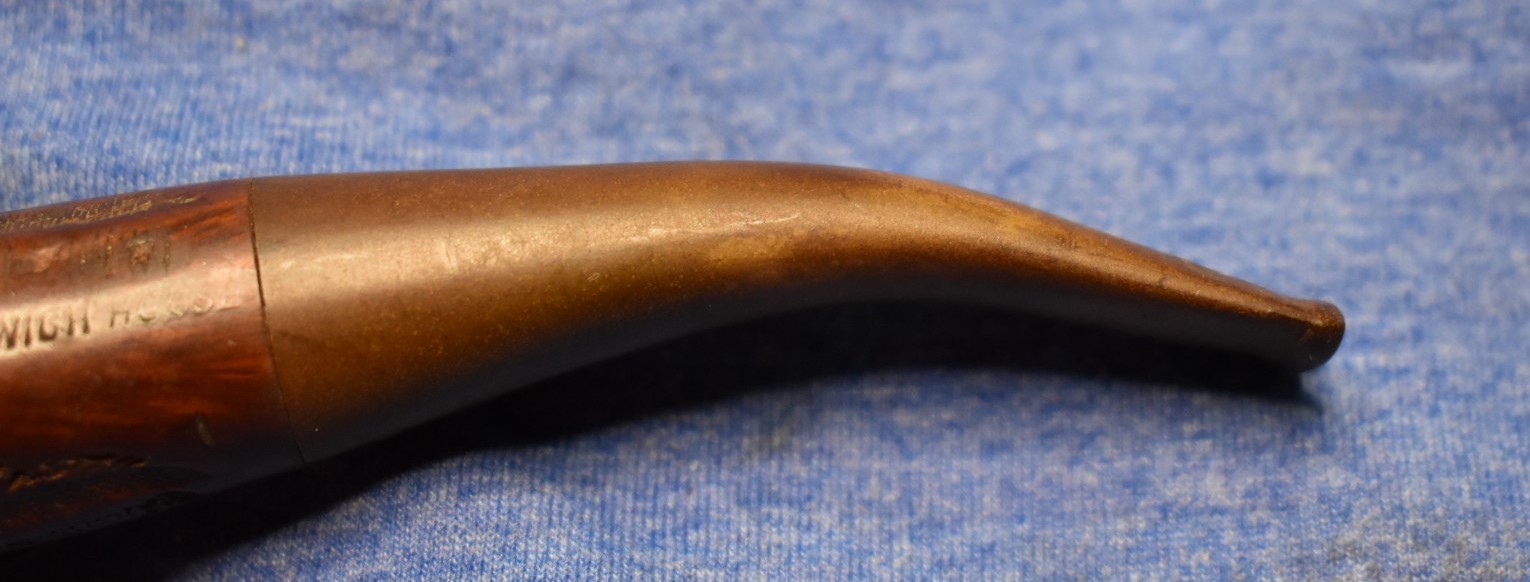
What is that? When did those become visible? I’ll be darned. There is another stamp, saying “IMPORTED BRIAR” just like on Steve Laug’s Greenwich. That is what his pipe said as well, although a slightly different stamp. Further evidence that this pipe is from the same location and time as his Greenwich.
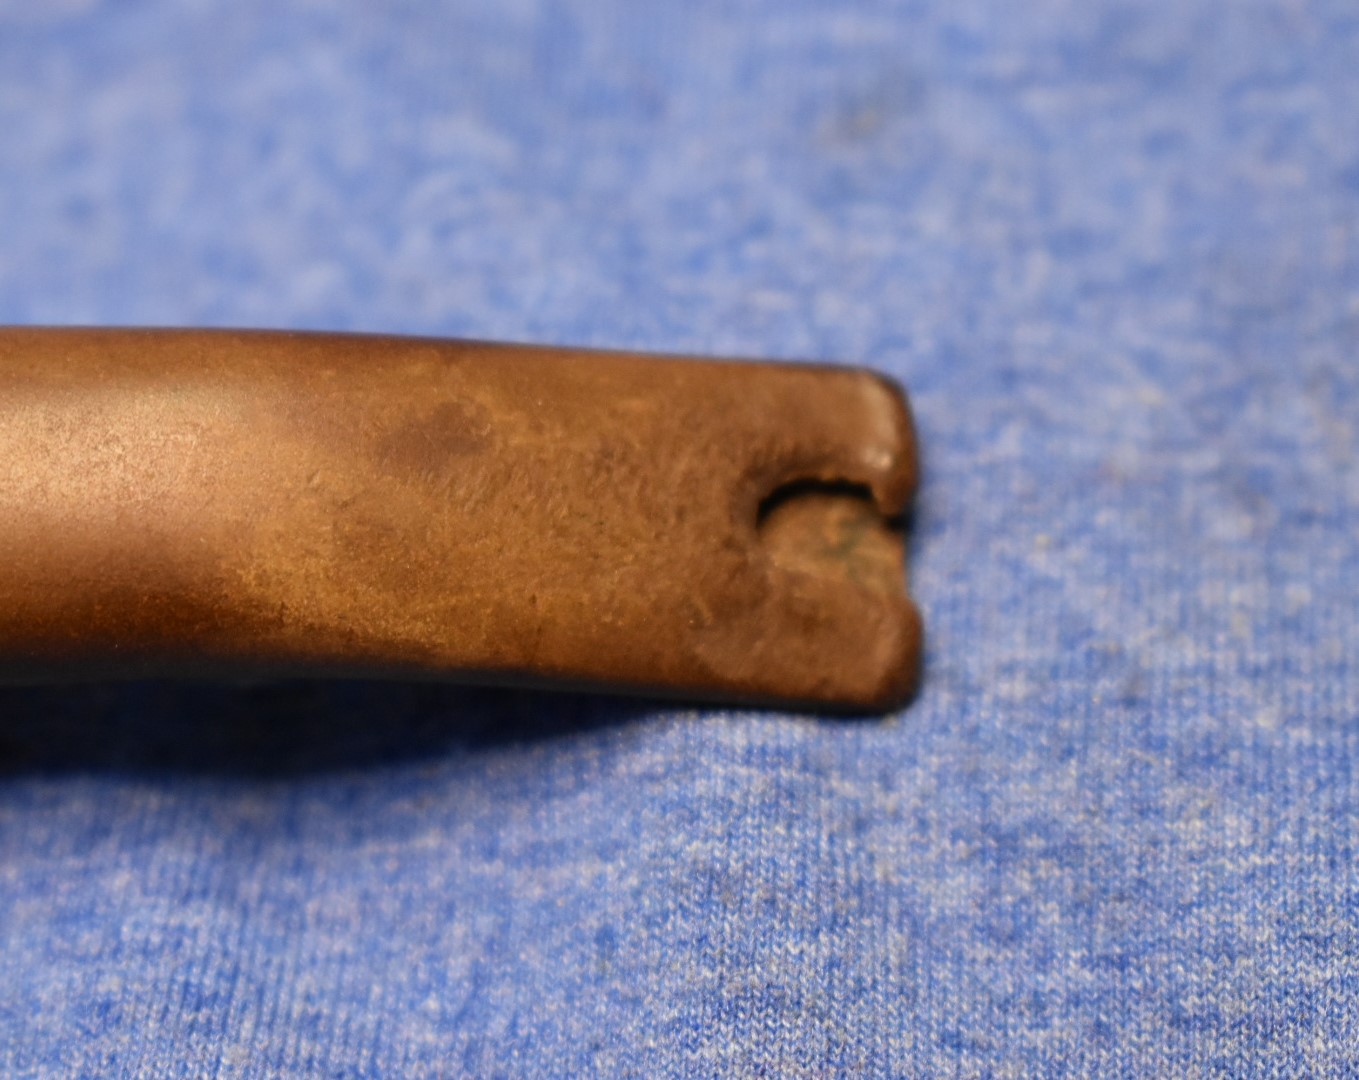
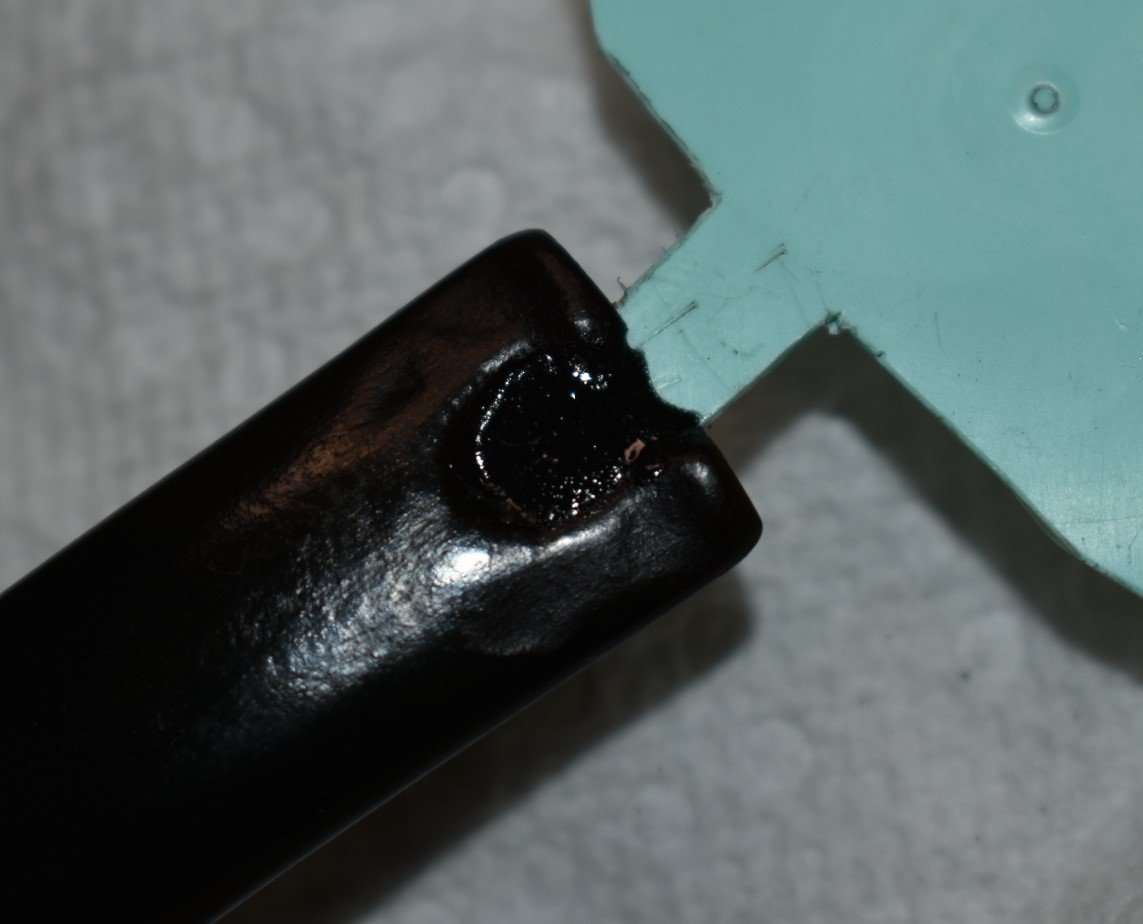
At this point the stem had not received any sanding or micro-meshing. It also needs to have the stem and button rebuilt. That is the real reason I wanted this pipe. I saw the Ebay photos of a pipe with a chewed through mouthpiece. I wanted to try using black ultra violet (UV) resin to rebuild a mouthpiece (Big Reveal – as mentioned in paragraph 2). Thus the bidding, winning and restoring of this pipe.
You are insane. Why didn’t you just take a crosscut saw to an extra stem? You have bags of them. Then you could try your UV resin fixing that.
Yes, I could have. If I did it that way I would never have had the opportunity to meet this lovely old girl. Besides this gave me a reason to use the UV resin.
You’re an idiot.
An idiot with a purpose! I say.
If their arguing bothers any of you readers, let me know in the comments and I will try to shut them both up.
The real problem with the black UV resin is having to wait for it to arrive. I ordered the resin back on November 12. It is now November 27. I have this restoration write-up and the conclusion to the Pipe by Lee 3 star that I also want to use the resin on. I do hope that the readers are more patient than I am.
While waiting for the resin to arrive I decided to get as much done to the stem as I possibly could. The stem still had areas of brown peeking through. Stubborn patches that I tried treating with Soft Scrub on a make-up removal pad. The pad turned golden brown with rubbing. I continued with several pads and reapplications of Soft Scrub. I thought I was making progress until I returned the stem to the bright light of the workbench and could see that stubborn brown in places. I began thinking that perhaps another dunk in the Deoxidizing Solution would be the best course of action. I needed a break from trying to remove the oxidation from the stem.
I needed to develop a plan for the rebuilding of the button. Previously when rebuilding a stem I have used black cyanoacrylate (CA or super glue). I would fashion a dam out of a piece of thin plastic like a lid. I would then apply a thin coating of petroleum jelly to the plastic and insert the plastic into the stem. Sometimes I would have to shim the plastic dam with another piece of thin plastic. Once in place I would place a drop or two of the CA onto the dam, allow it to spread out and contact the vulcanite then I would spritz the wet CA with an accelerant to make it harden in seconds. I would repeat this until the CA was thick enough to begin shaping using files and sandpaper. My idea was to use the same process with the black UV resin. My hope is that the resin will be a little bit softer than the CA. The CA is much harder than the surrounding vulcanite and it does not have a pleasant feel to the teeth. I also do not like the seam where the CA meets the vulcanite. This seam, in my experience, will allow the buildup of oxidized vulcanite and will start to appear brown after a couple of years.
I have high hopes for the black UV resin even though I have not read anything about it being used for stem repair. I have used the clear UV resin in fly tying to make the heads of minnow imitation streamers. It works


wonderfully. It is tough and durable. In reading about the the product is also considered nontoxic and used frequently in jewelry making and for children’s toys. Here are a few streamers I have tied using clear UV resin. I also tried a stem repair on an old Peterson 312 where years of pipe cleaners had worn through the vulcanite from the inside in a stem. The clear UV resin sealed the hole but left a “window” through which you could see a pipe cleaner.
The below photos show the dam I made from a plastic lid for the Greenwich


House pipe. I used an Exacto knife and kitchen shears to fashion the plastic lid. As you can see in the photos each dam needs to be cut to fit the stem that you are working on. I have made generic dams but they usually cause me to do more filing and sanding than for a custom made dam for each specific pipe. I then tested the lid to see if the clear UV resin would adhere to the surface of the lid by applying a drop to the lid, curing it with the UV flashlight then applying pressure to the side to see if it moved.

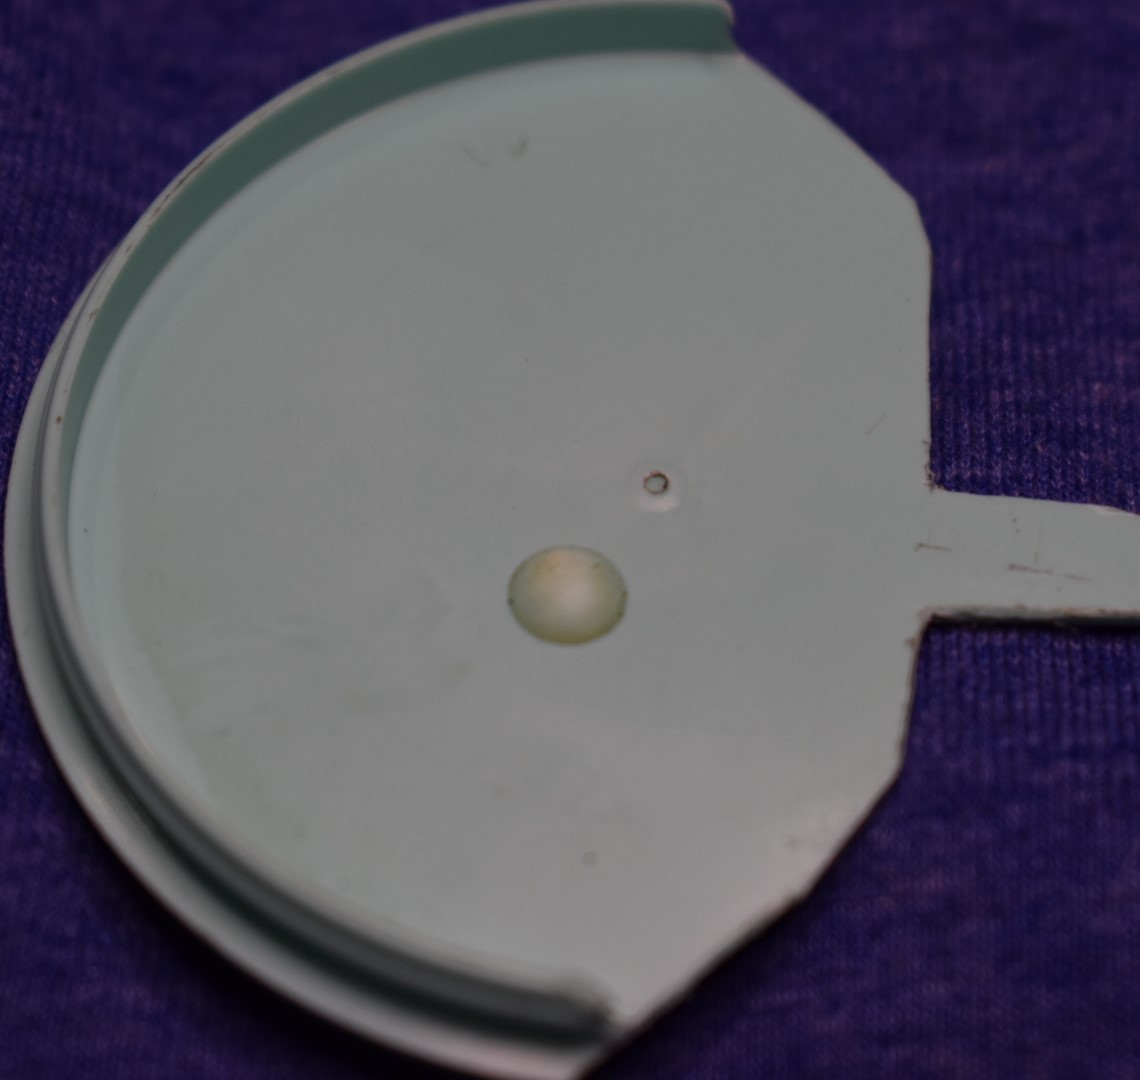


I was very happy to find that the resin did not stick to the plastic lid. You can see from the photos that the cured drop moved on the surface of the lid freely and then moved to the pipe nail. This would eliminate the step of applying petroleum jelly to the plastic. I was feeling even more excited about using the black UV resin if only it would get here.
The stem was returned to the workbench and introduced to the sandpaper. I started with 400 wet/dry sandpaper to smooth the rough patches and to remove any remaining oxidation. Every time I thought I had gotten rid of the oxidation, I would apply a drop of Obsidian Oil and wipe – there would still be a touch of brown. Augh – the joys of old vulcanite. My thought was to get it as good as possible then when the black UV resin arrived I could paint a light coat over the button-ward third of the stem thus sealing the vulcanite and stopping oxygen from getting to the vulcanite. This would then be blended by sanding and micro-meshing to form a continuous flowing finish. Well, that was the imagined outcome, anyway.
The Black UV resin finally arrived (November 28). I tested it and found it wanting in regards to what I need it to do. If you would like to see what I did to test the Black UV resin please see the A Restoration of a Pipe by Lee Restoration. I was disappointed but I was not beaten. I had my old clear UV resin (and a new idea) and if that failed I had the fall back tried and true black CA.
The old clear UV resin has the problem of being clear. Before I discovered black CA glue, I used to mix carbon powder into the clear CA and build up layers of CA to fill dents or rebuild a button. I thought I might be able to do the same thing with the UV resin. I needed to test the carbon powder and clear UV resin. To do this I took an extra vulcanite stem and drilled a hole in it right behind the button.

Next I mixed carbon powder into the Thick Clear UV resin. I put the plastic dam cut earlier into the airway and applied a thin layer of the mixed UV resin into the hole. I then cured it with the UV flashlight.


It seemed to be working. The airway remained clear and the hole had been sealed eliminating the need for the dam in further applications. I continued with another this layer of the UV and carbon mixture. I curing this second layer as with the first.

After curing the second application I filed the high spots (light areas on the above photo). I then repeated the process with a third layer.

From the photo above, you can see that I filed the surface of the third layer. I repeated the process with a fourth layer.

The above layer had been filed smooth then sanded with 220 sandpaper. I was now sure that the UV resin mixed with carbon powder would work to fill the chewed-through area of the Greenwich stem. Test successful!
I inserted the dam and proceeded with the first layer on the Greenwich stem.

Apologies for the lighting. The workbench is not set up to be a very good photo studio. The UV resin and carbon were working. I had to use thin layers as the carbon powder absorbs the UV light from the flashlight and does not allow the light to pass as deeply into the resin as when it is clear. Slow and steady. Another layer.
This layering of the resin continued for several additional layers.


The best part about the UV resin is that it is much easier to work then the black CA. I could file and sand it in less than ¼ of the time it would have taken me to do the same thing with CA. Now, how well the UV resin will hold up to extend clinching and cleanings is another question altogether. I have high hopes for this method of repair.
I worked through the sanding and micro-meshing of the stem. These shorter thick stems are easier to polish than the long bent stems of say a Peterson. The 200 and 400 sandpapers were used first (wetted) followed by the 1500 (wet) and 1800(wet) micro-mesh pads. In between each pad I would apply a light coat of Obsidian Oil and wipe it with a paper towel. I then worked through the set of micro-mesh pads (dry) from 2400-12000 with the Obsidian Oil between each pad. Once finished with those I used white diamond buffing compound on the buffing wheel to polish the entire stem. After the white diamond buffing, I rubbed any remaining compound off with a shop cloth and gave the stem a couple of coats of carnauba wax on the buffer.
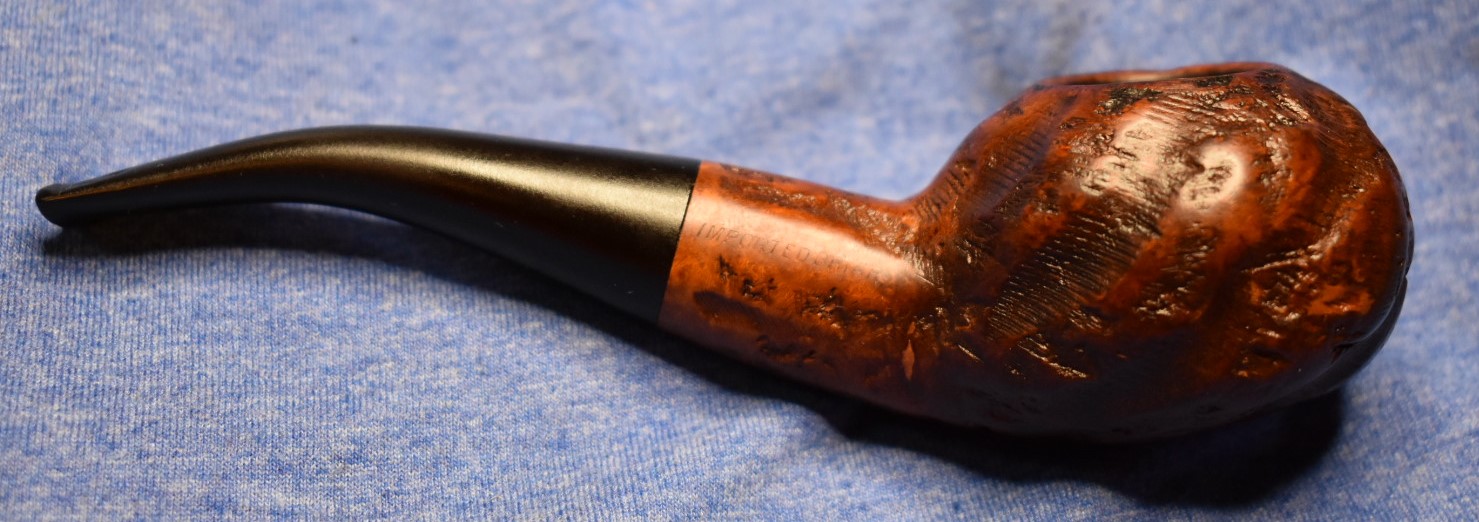
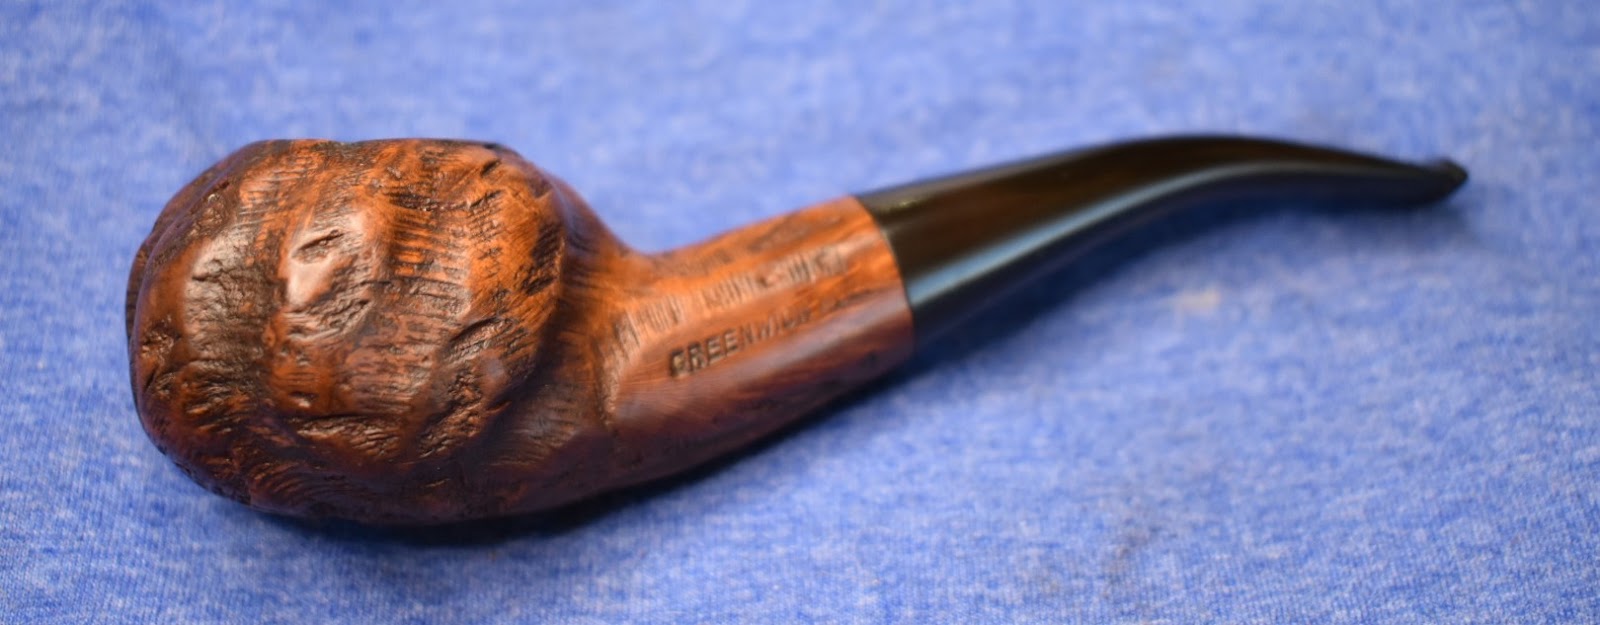
The stem was then reunited with the stummel. Seeing them together nearly finished warmed my old heart. I returned them both to the buffer for their final coat of carnauba wax. After the wax I rubbed the whole pipe with a microfiber polishing cloth. It helped deepen the shine of the vulcanite but did little for the briar. The old girl then posed for some photos.
Overall, I am very pleased with this restoration. The disappointment of the black UV resin has mostly passed. I am now wondering about how the repair, using the UV resin and carbon powder will hold up to use. Another question I have been pondering is about the quality of the UV resin. The fly tying resin used in this restoration has proven to be insusceptible to alcohol while the new black UV resin was not. Perhaps I need to do some more product searching and testing. If you have had experience using UV resins or would like to know how this repair holds up please feel free to use the comments section. Thank you for reading the ramblings of an old pipe lover.
The finished photos of the Greenwich House pipe:


7 responses to “A Greenwich House Restoration”
[…] A Greenwich House Restoration […]
LikeLike
John, enjoyed reading your post and the experimentation with the resin. Keep us up to date on it!
LikeLike
Thank you for the support. I think the resins are a tool that we can use. Finding the right one is where the difficulty will come in. They have resins that they put on kids teeth the protect them from cavities. Talk about a hostile environment. Those also are cured with UV and are HARD. I think that is the stuff I want to find and test.
LikeLiked by 1 person
Sounds interesting. That’s a material I haven’t thought of using.
LikeLike
I was wrong about the dental resin using UV. They use an intense visual light.
LikeLiked by 1 person
[…] I had done a restoration of a Greenwich pipe back in November of 2023 that restoration can be seen HERE. Little information was available other than Greenwich House Corporation of New York City […]
LikeLike
[…] I had done a restoration of a Greenwich pipe back in November of 2023 that restoration can be seen HERE. Little information was available other than Greenwich House Corporation of New York City […]
LikeLike