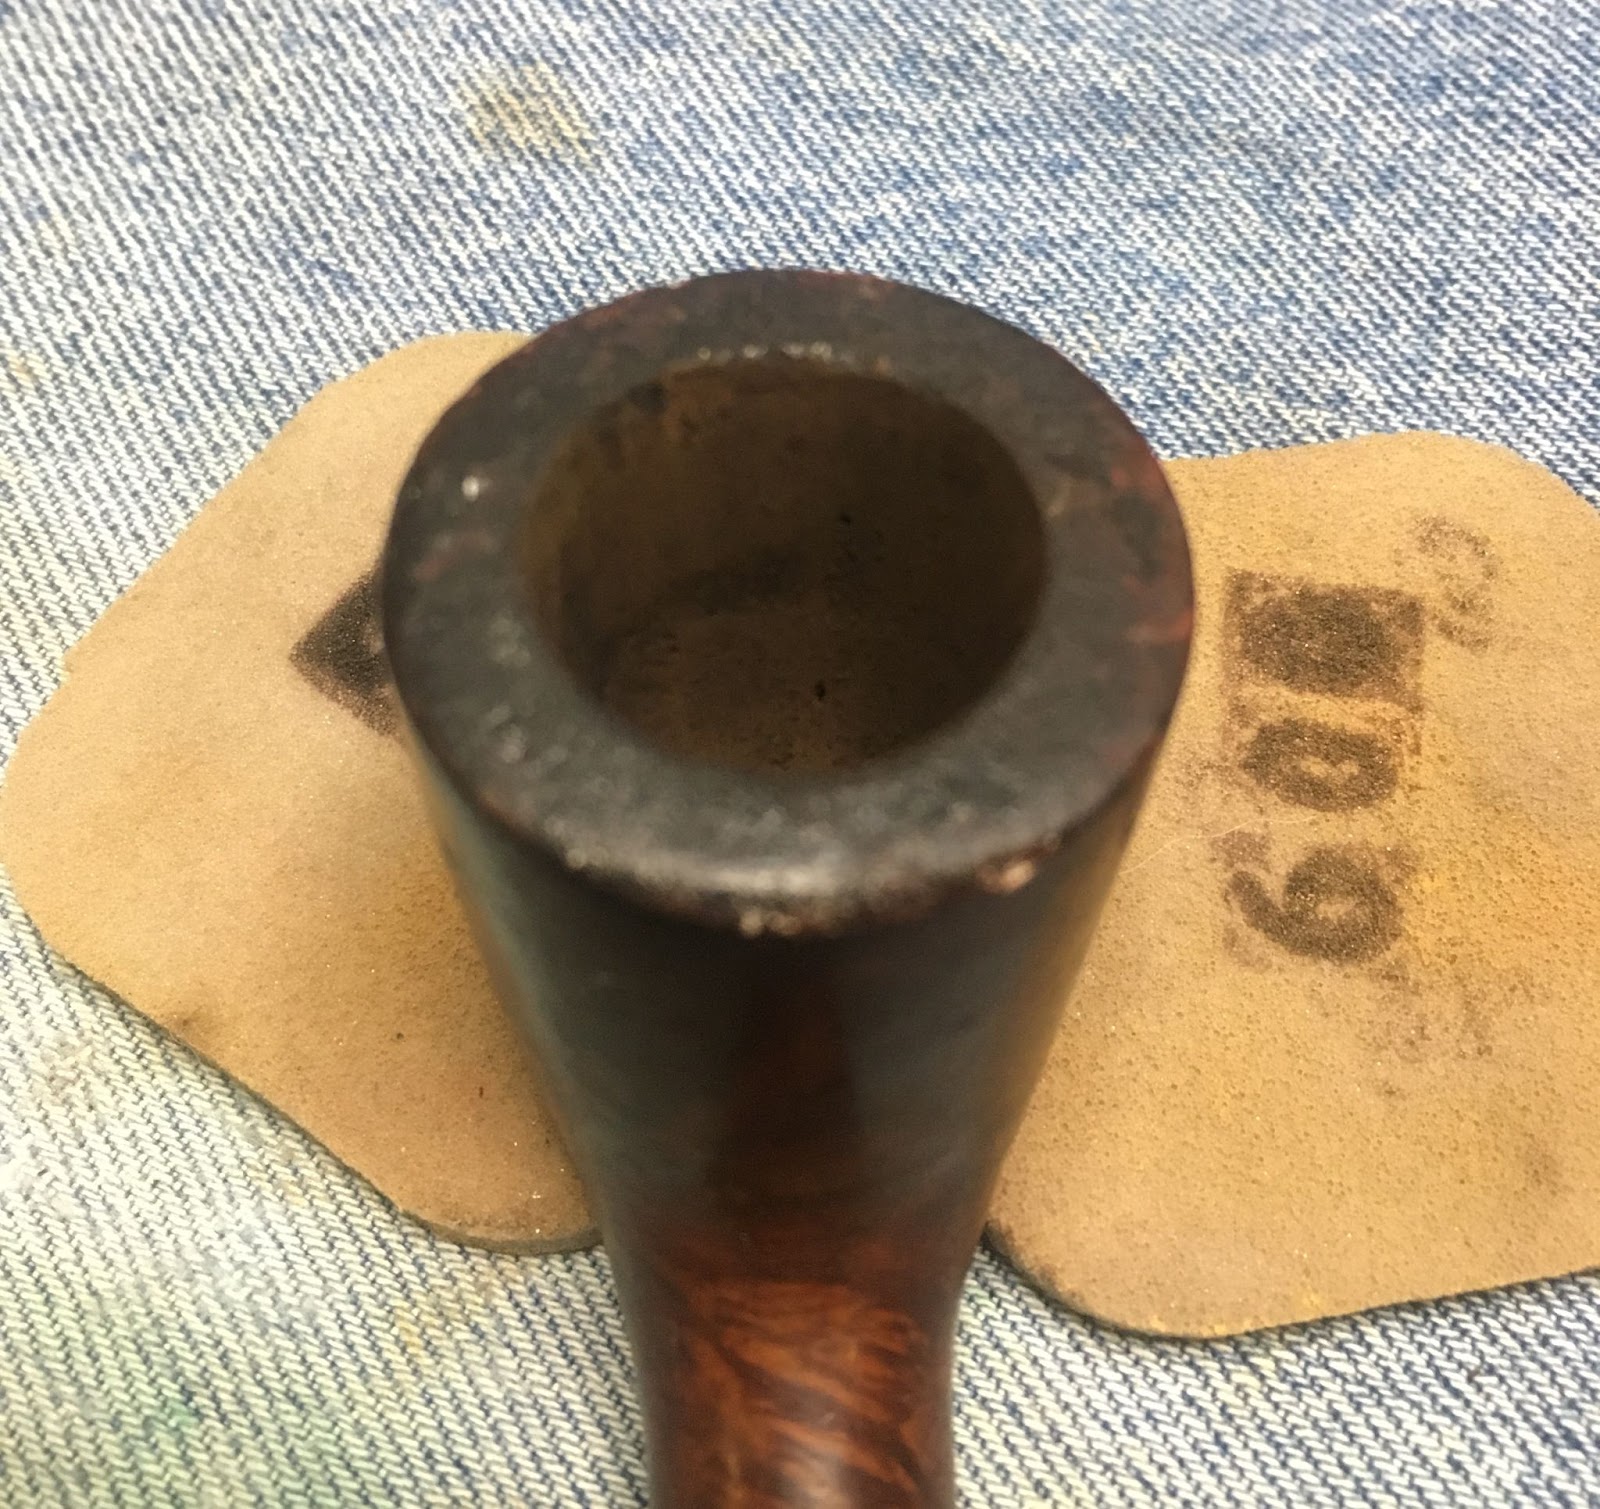
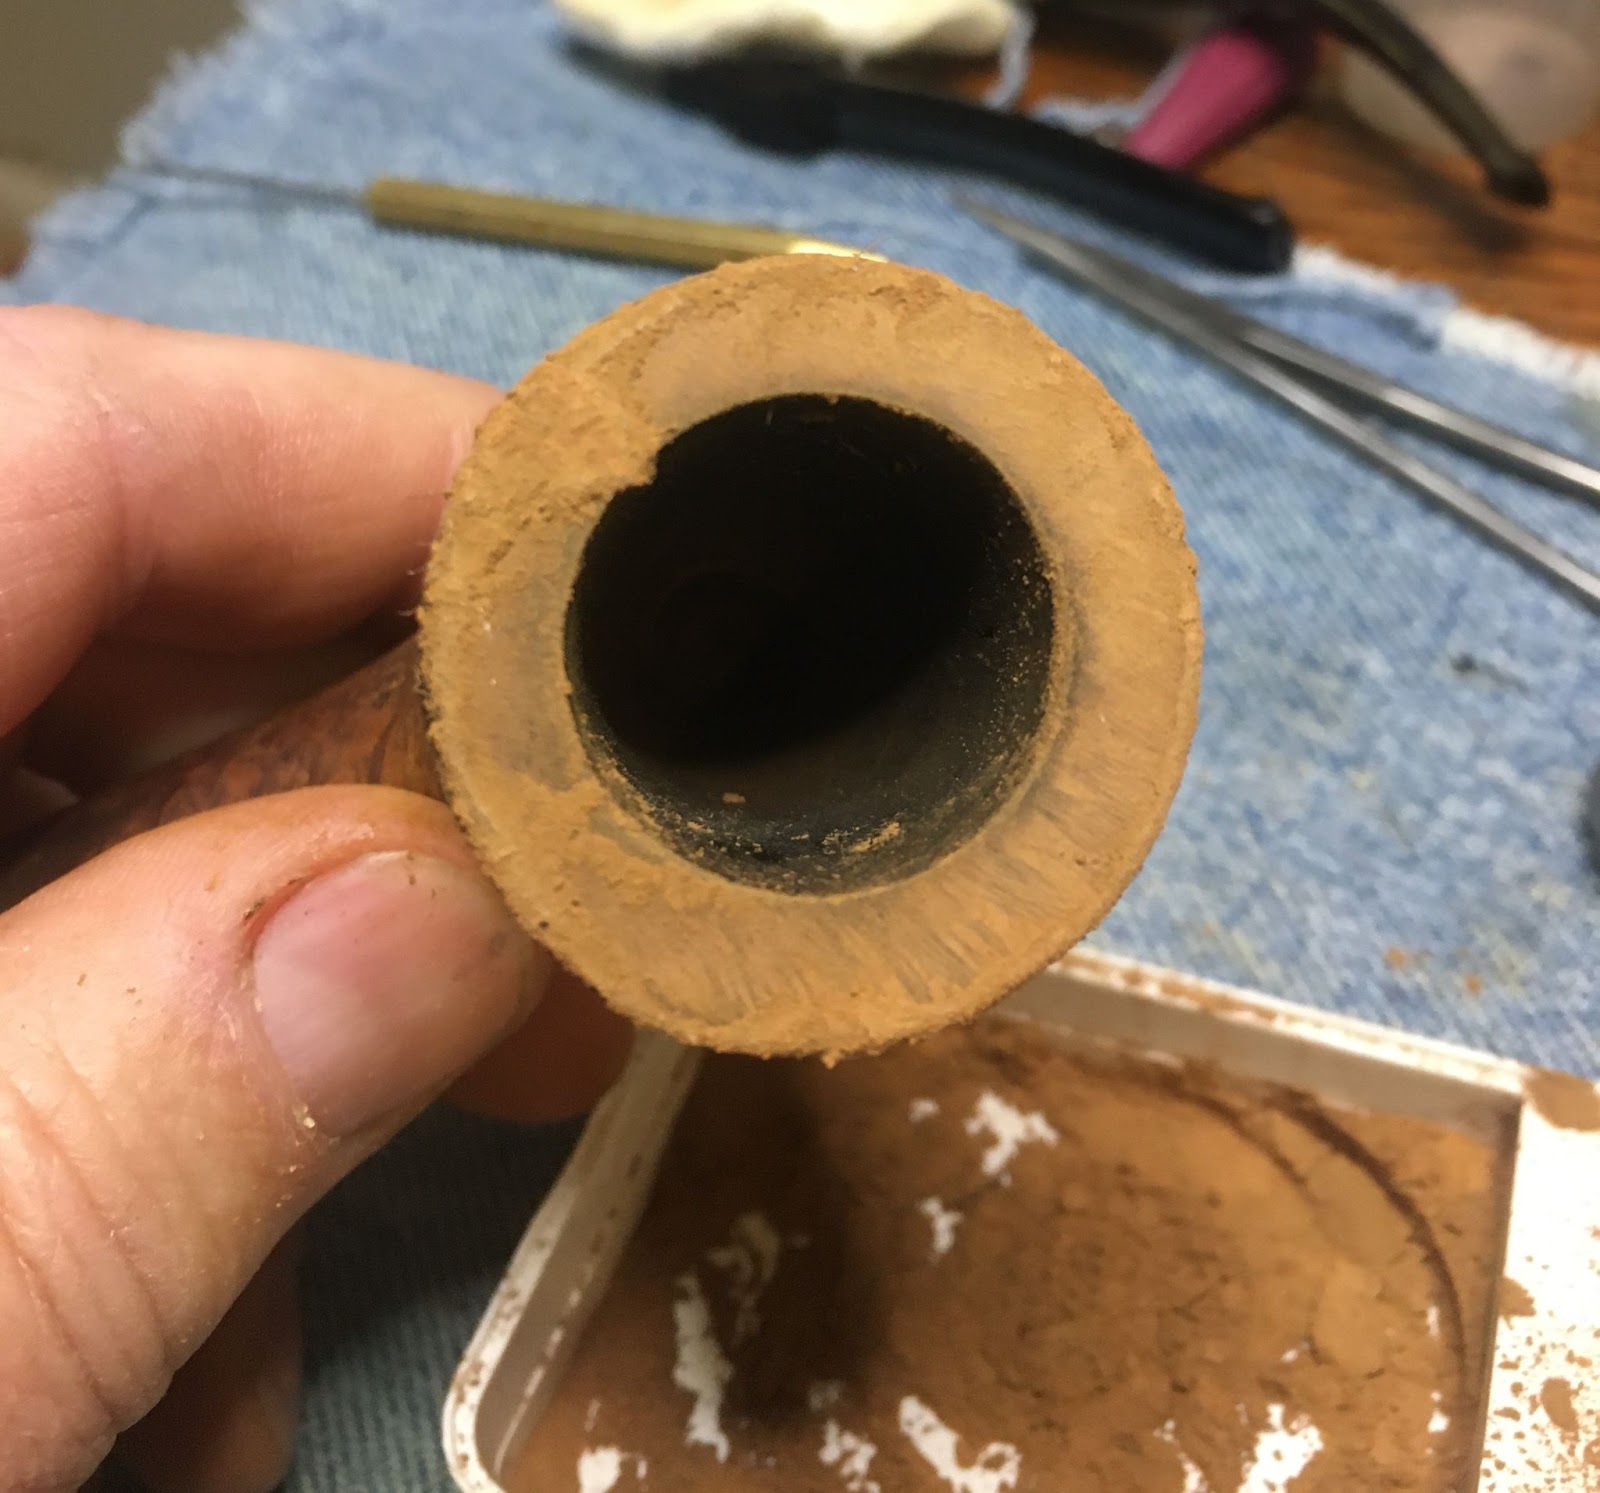
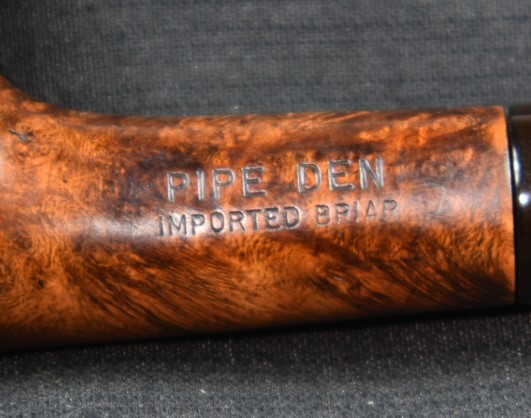
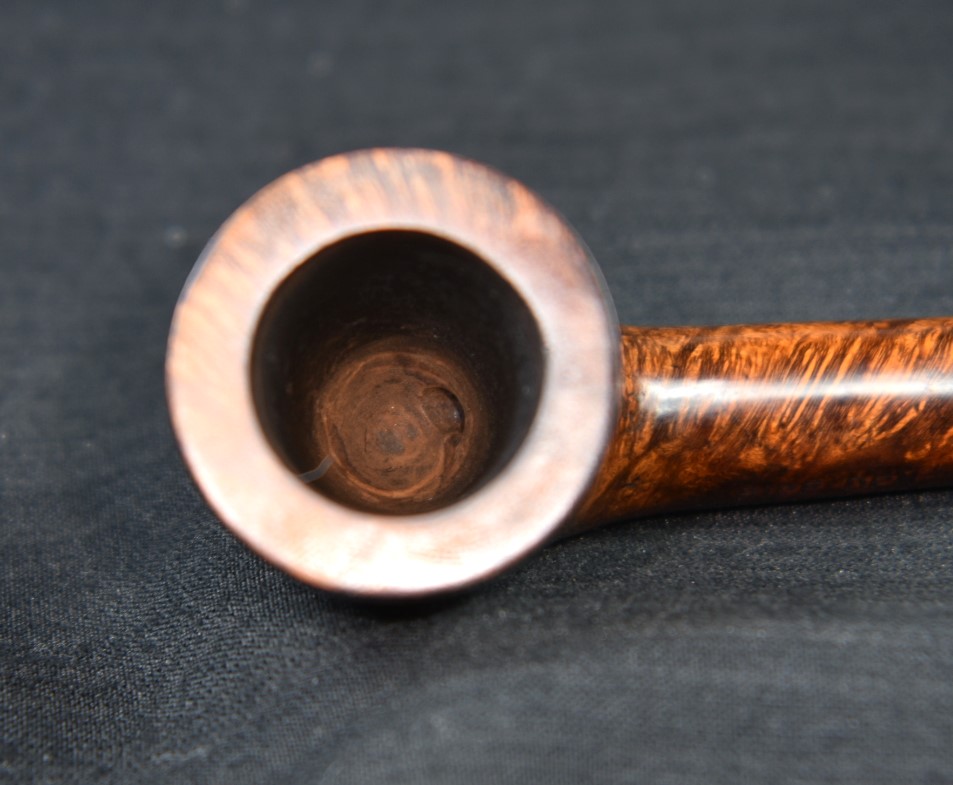
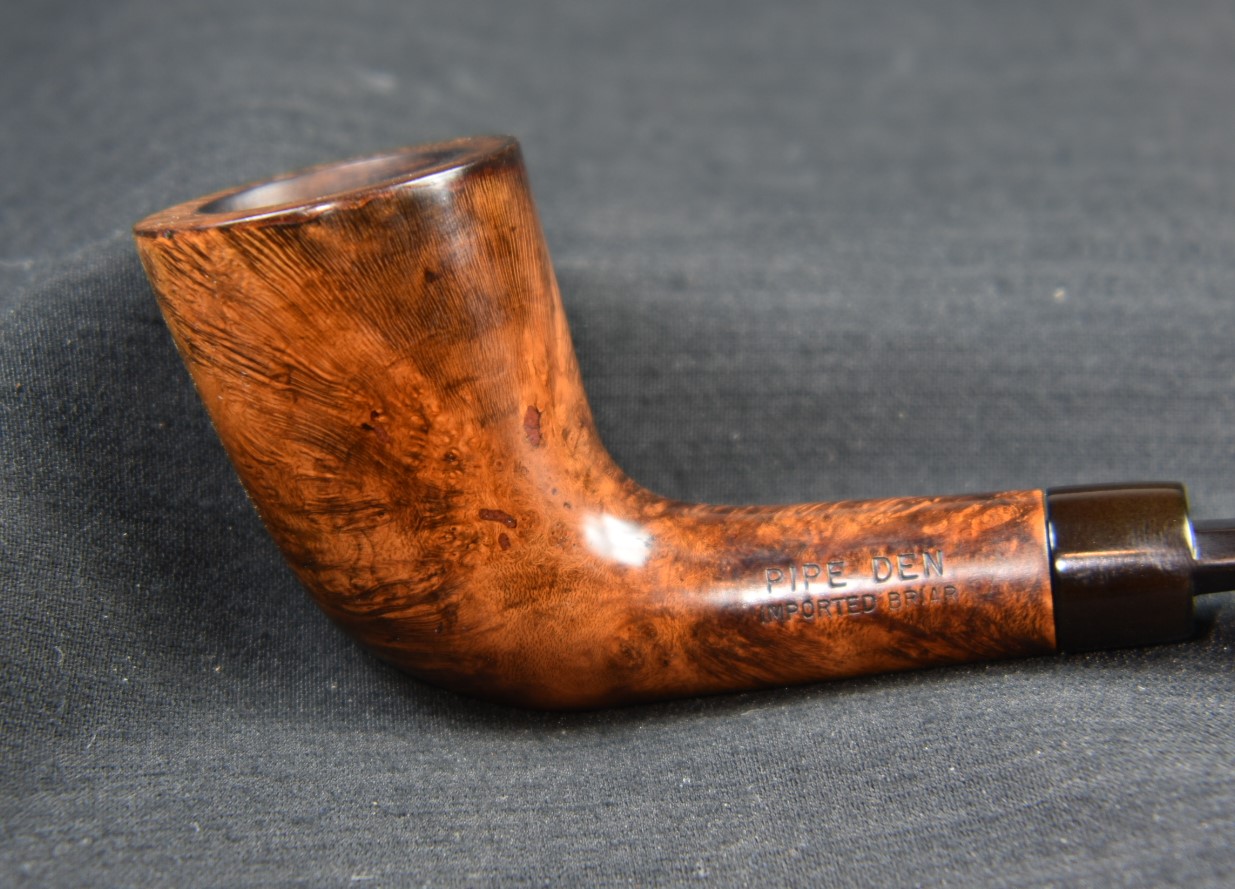
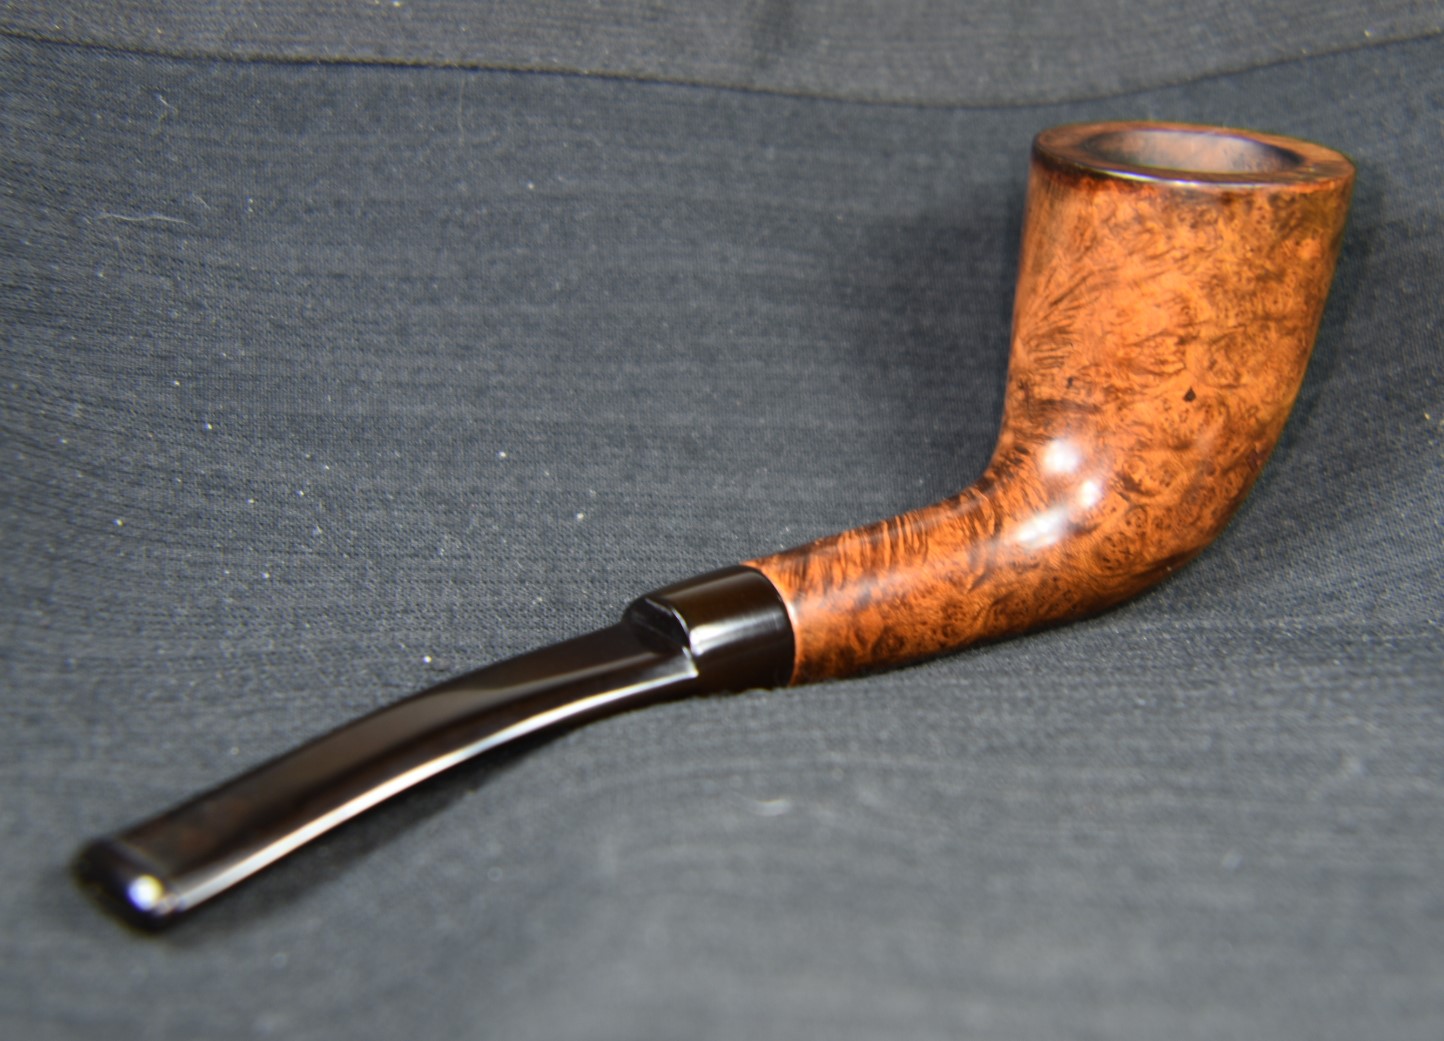
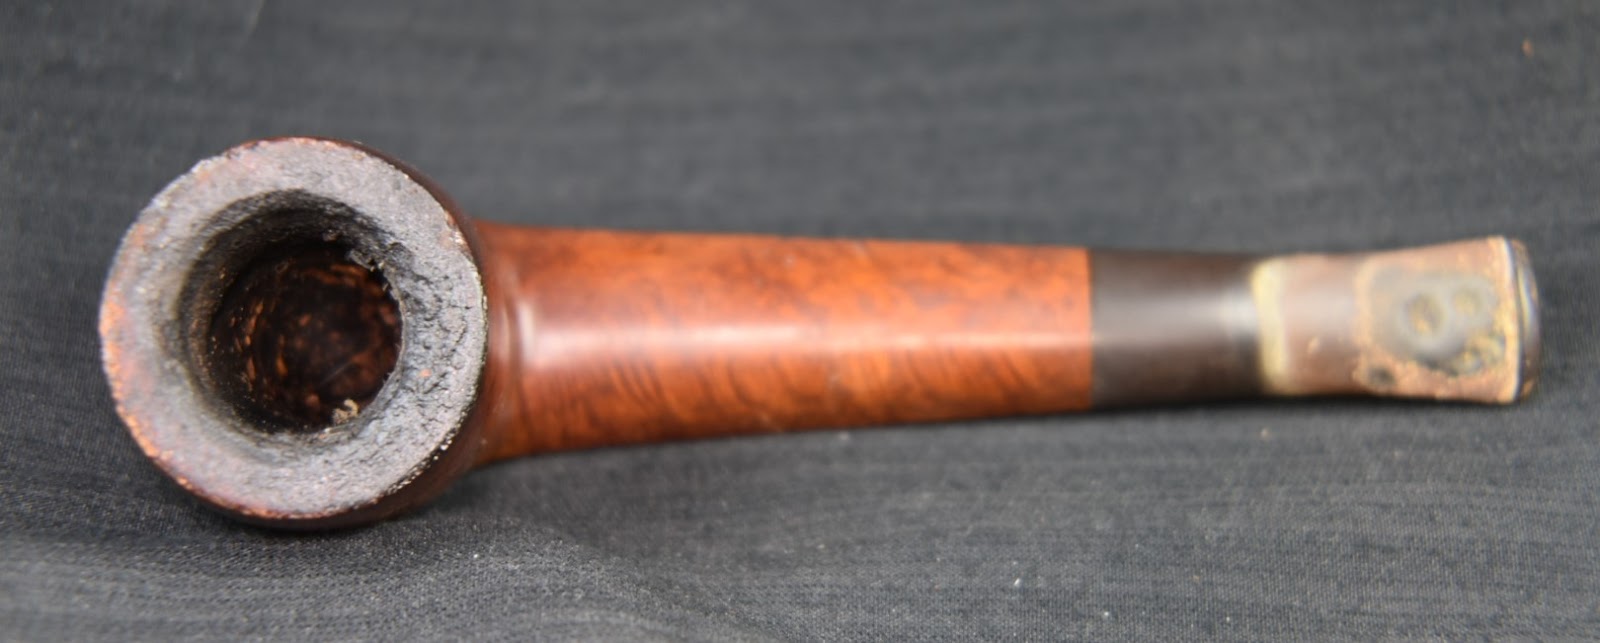
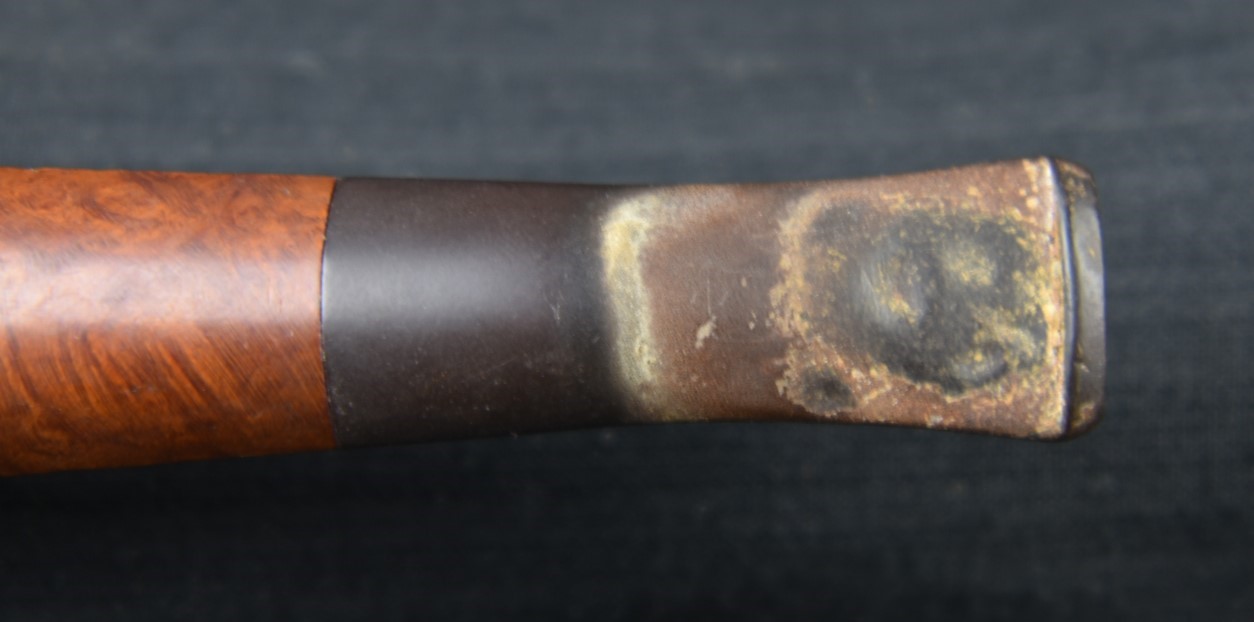
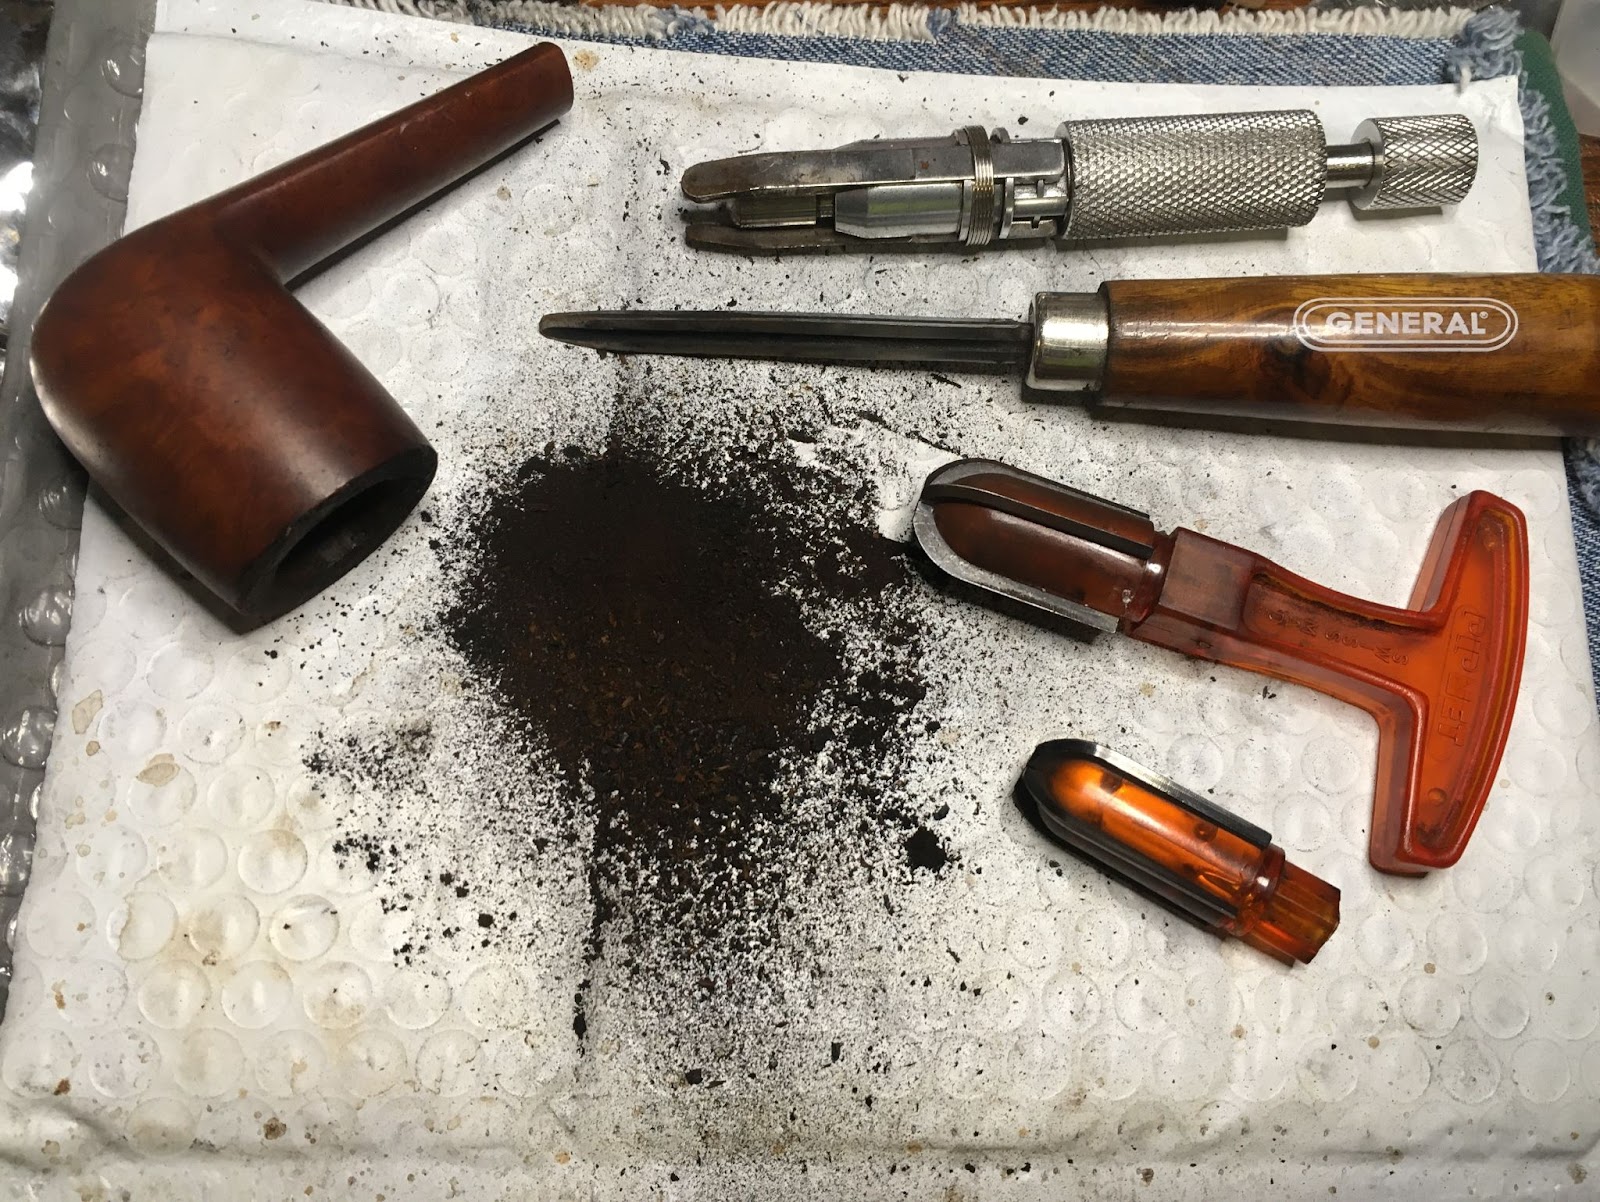
I don’t understand how the red in pipes is so difficult to capture in photographs. The oxidation is easy to capture and this stem had plenty of that. The rim was coated in a layer of lava indicating a fair amount of use but the tobacco chamber was pretty clean. Perhaps the previous owner liked to keep the cake to a minimum but was not concerned about rim maintenance. I did not like the look of the clear coat on the pipe and hoped that would be easily removed. Overall this looked like a straightforward restoration.
Background
I can barely say anything about this pipe. Pipedia.org has nothing on Marseille. Pipephil.eu has the following:
Which, in all honesty, is the same as nothing. The pipe has no country of manufacture (COM) stamp but, if I were a betting man, I’d bet on France. Marseille makes me think of Marsielle Marso but I kind of dislike bringing that up due to the dislike of mimes in general by AMericans. At least in my experience mimes are not appreciated.
Smokingpipes.com has two old estate pipe listings. One by Butz-Choquin
Both Butz-Choquin and Chacom are French pipe makers although the lack of any maker’s stamps or COM on the Marseille at hand opens any conclusion I make to pure speculation.
The Restoration
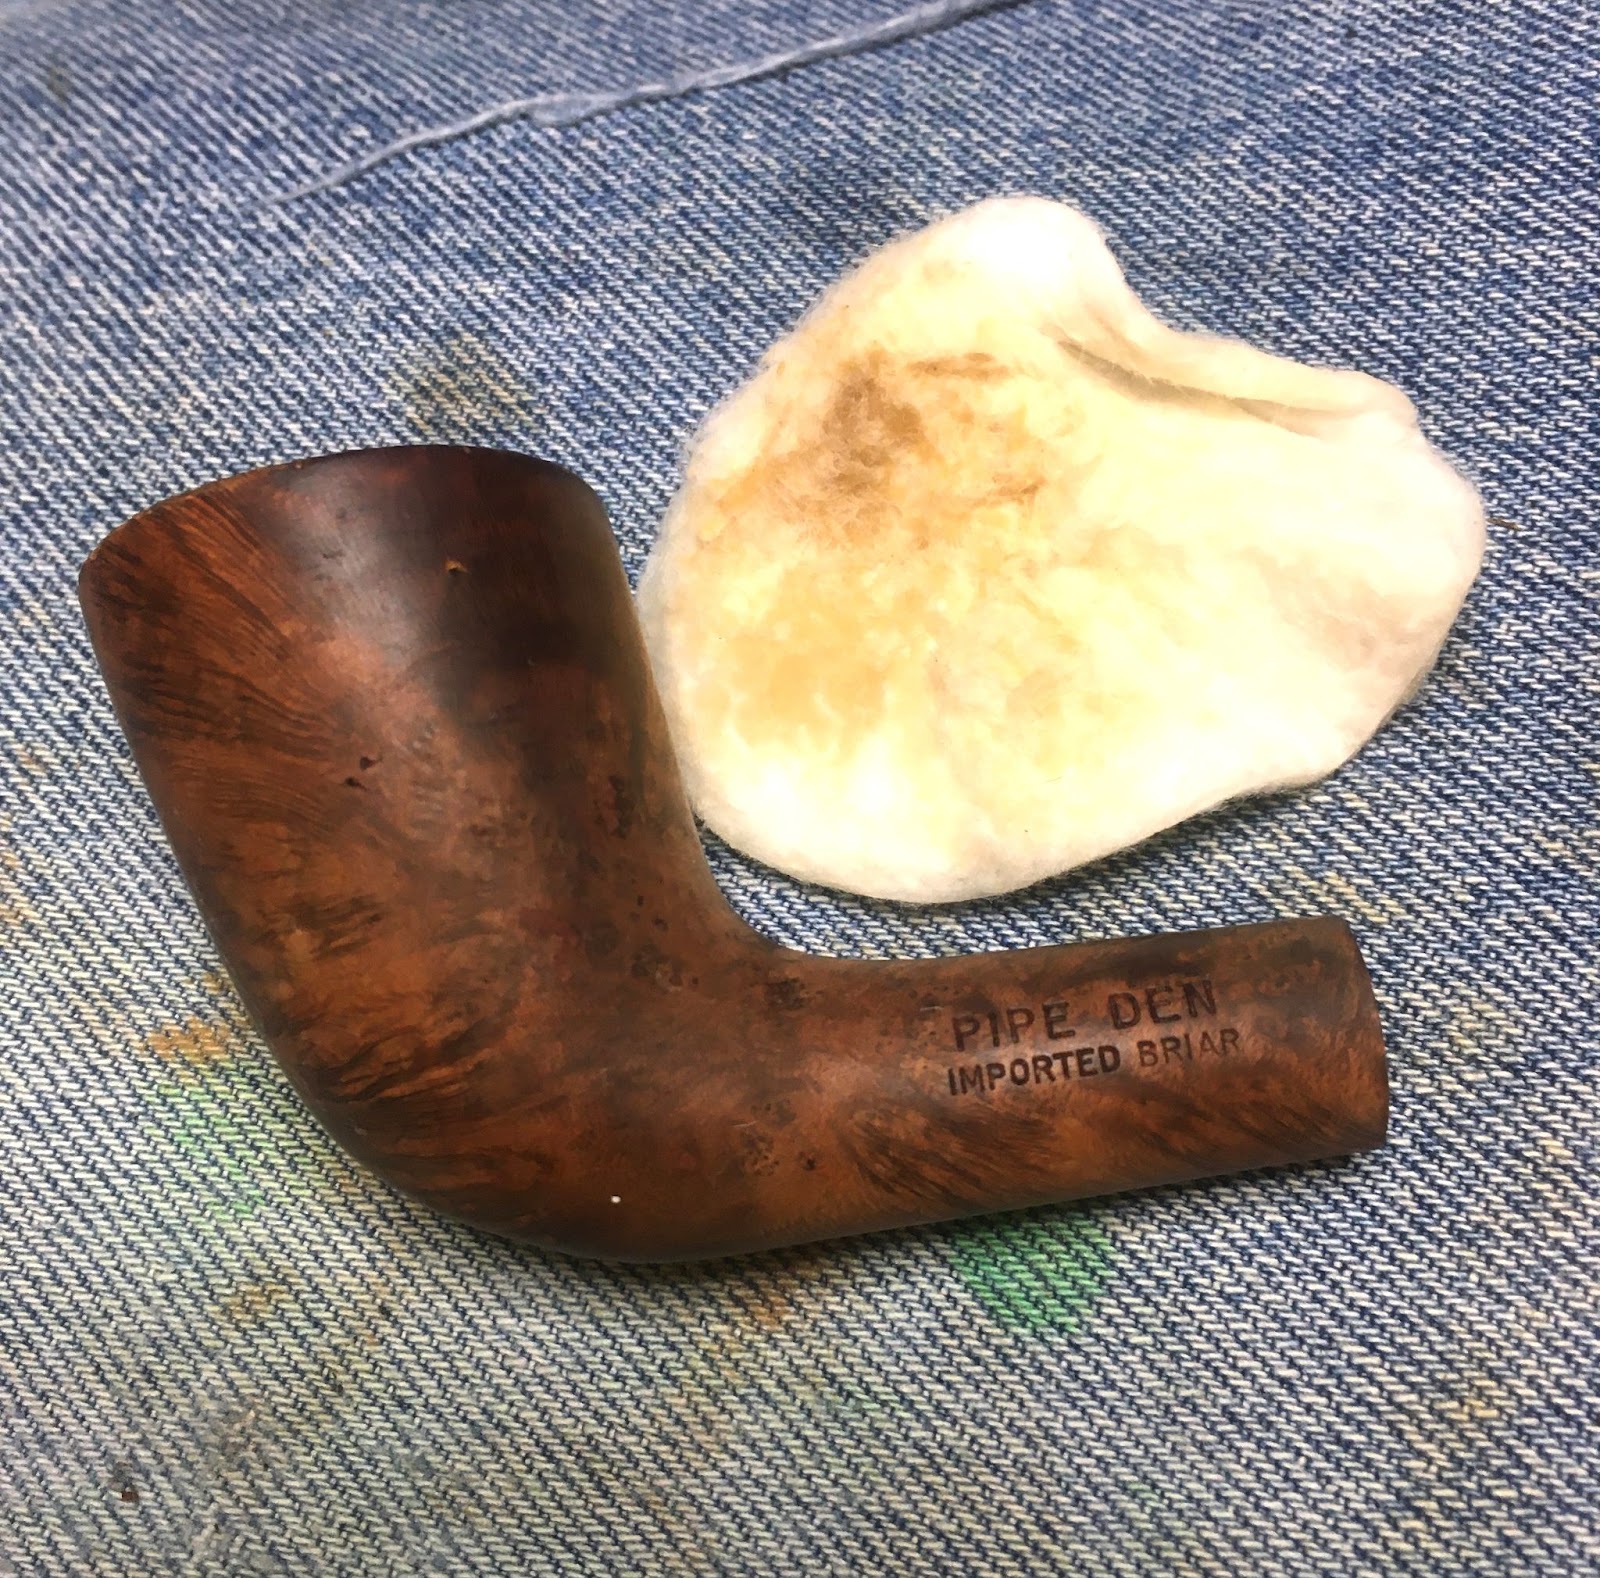
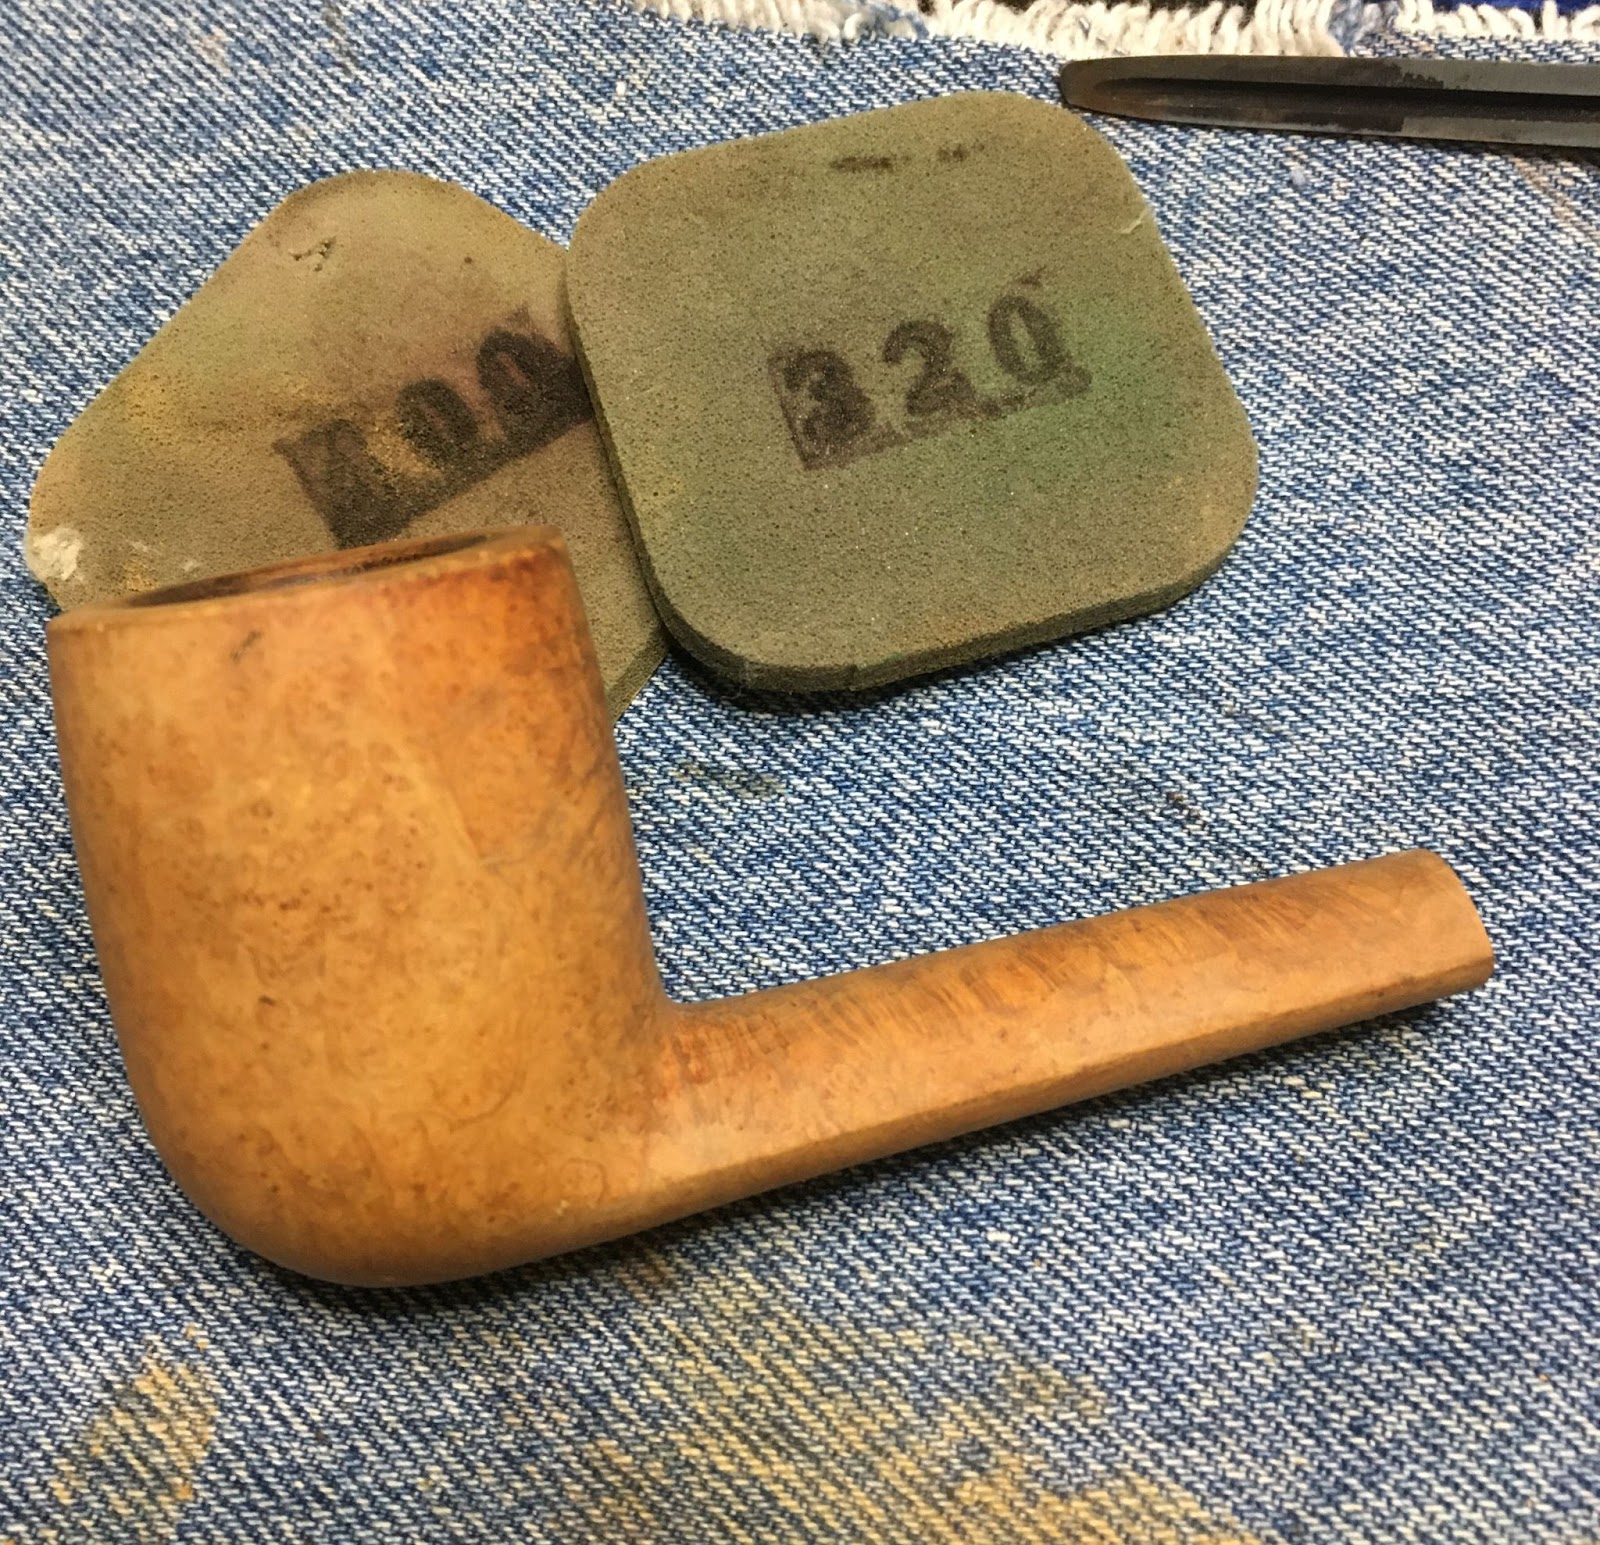
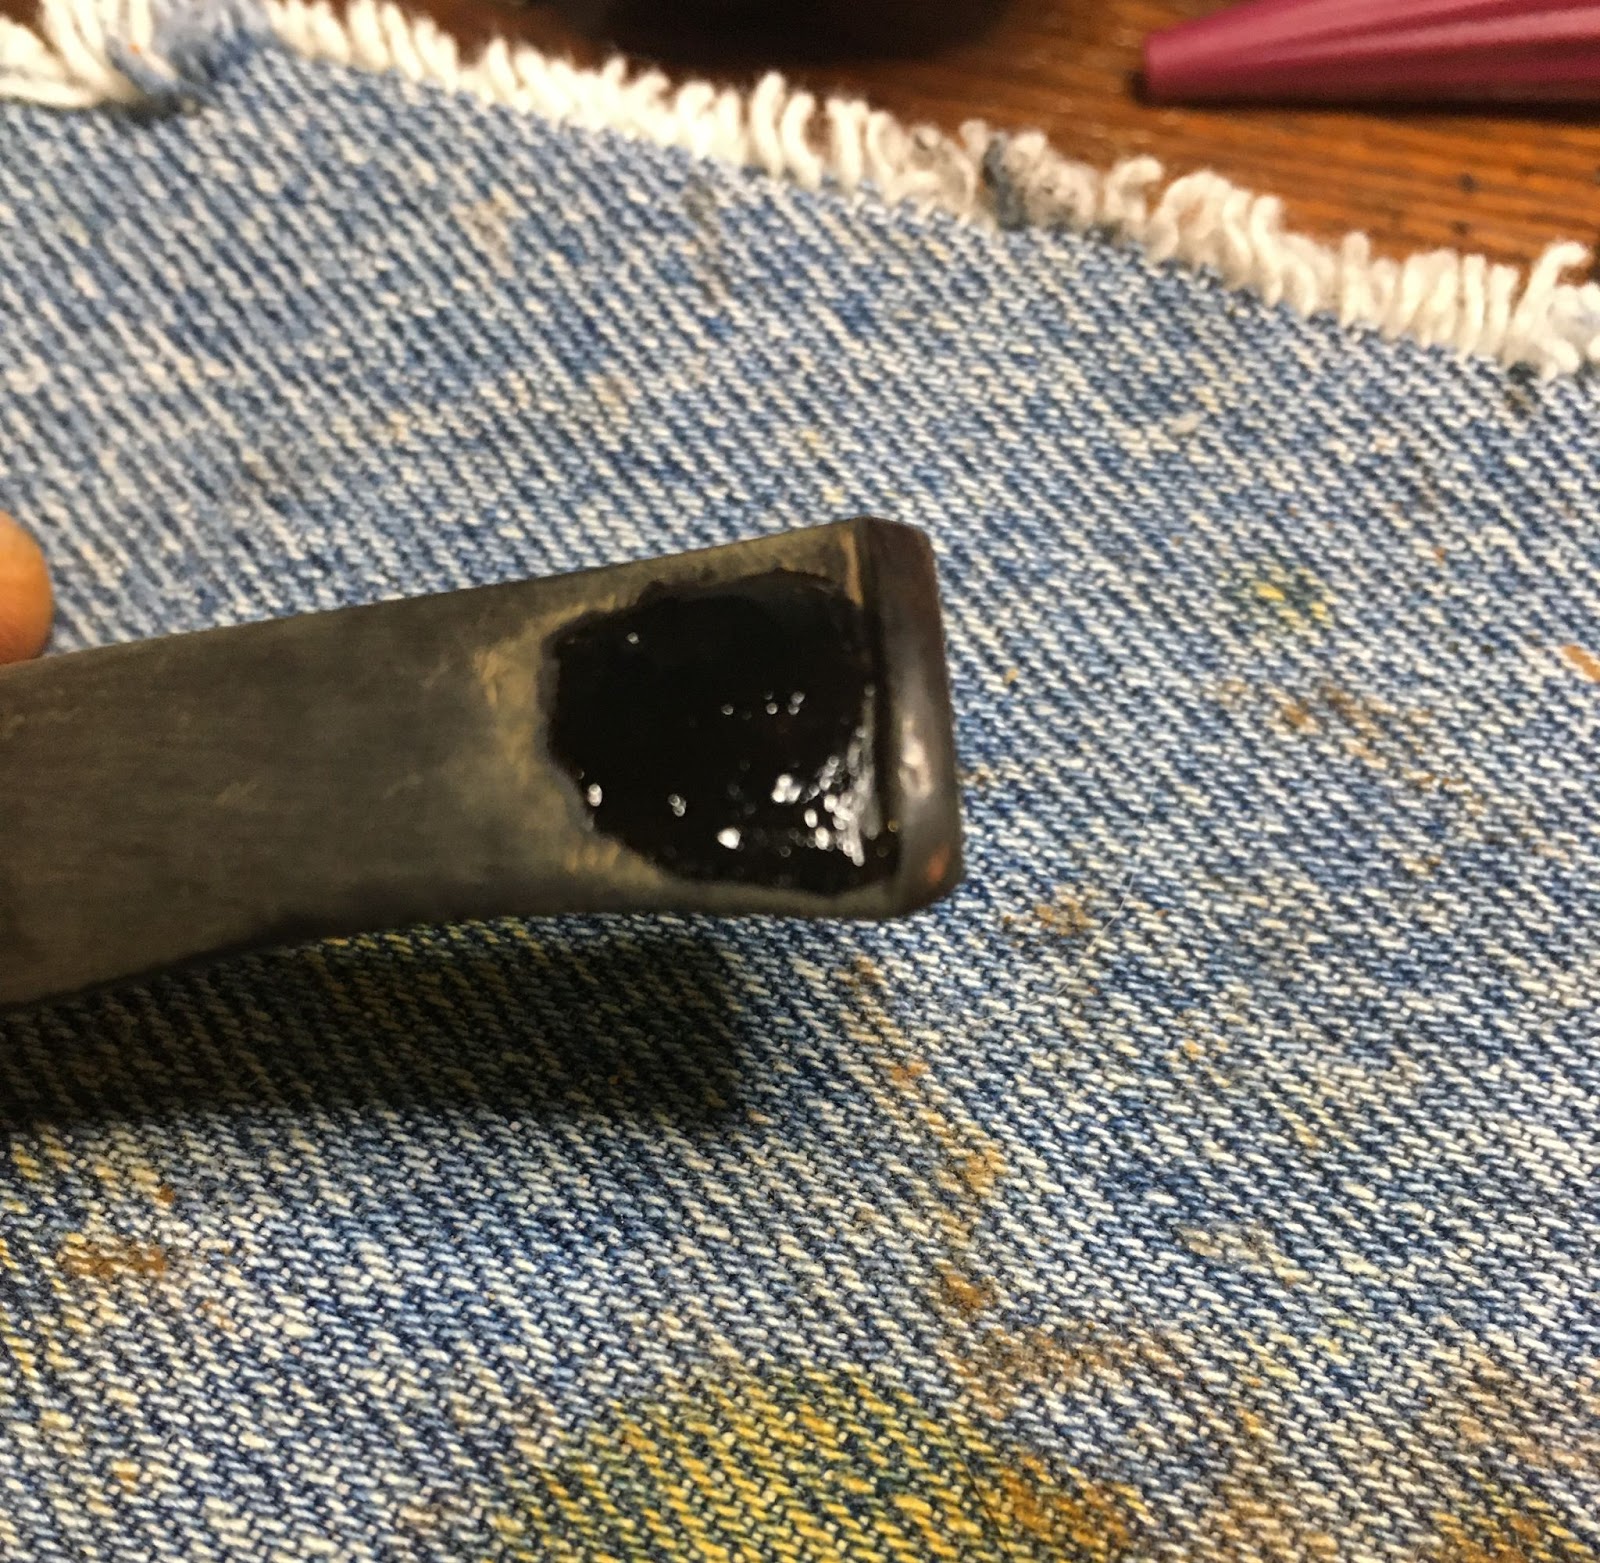
This is the second pipe of the double restoration. The first was the E. Wilke Squashed Apple. If you missed that restoration there is the link. I said in that one that I do not normally like to work on more than one pipe at a time. Anyway, here is the Masrielle situated on a clean denim piece.
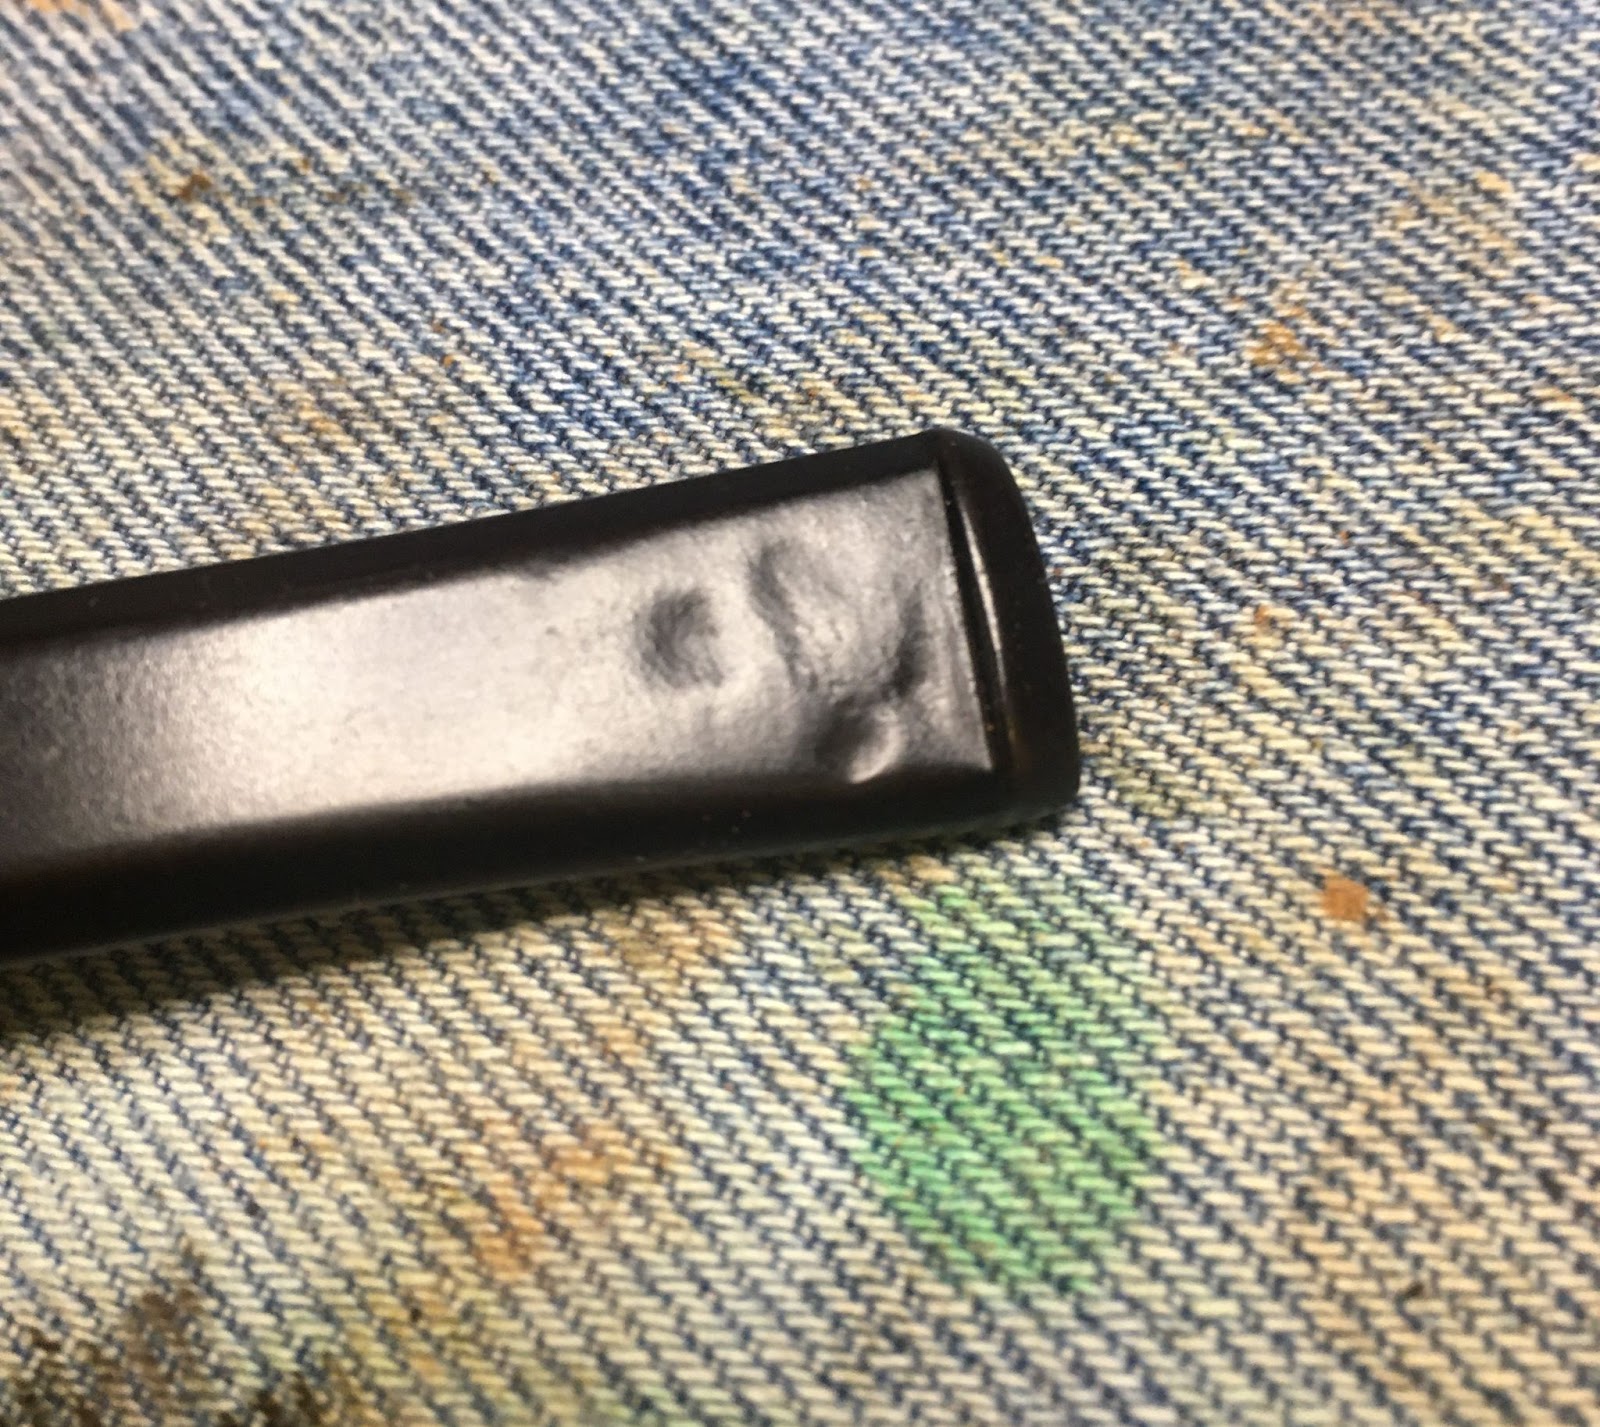
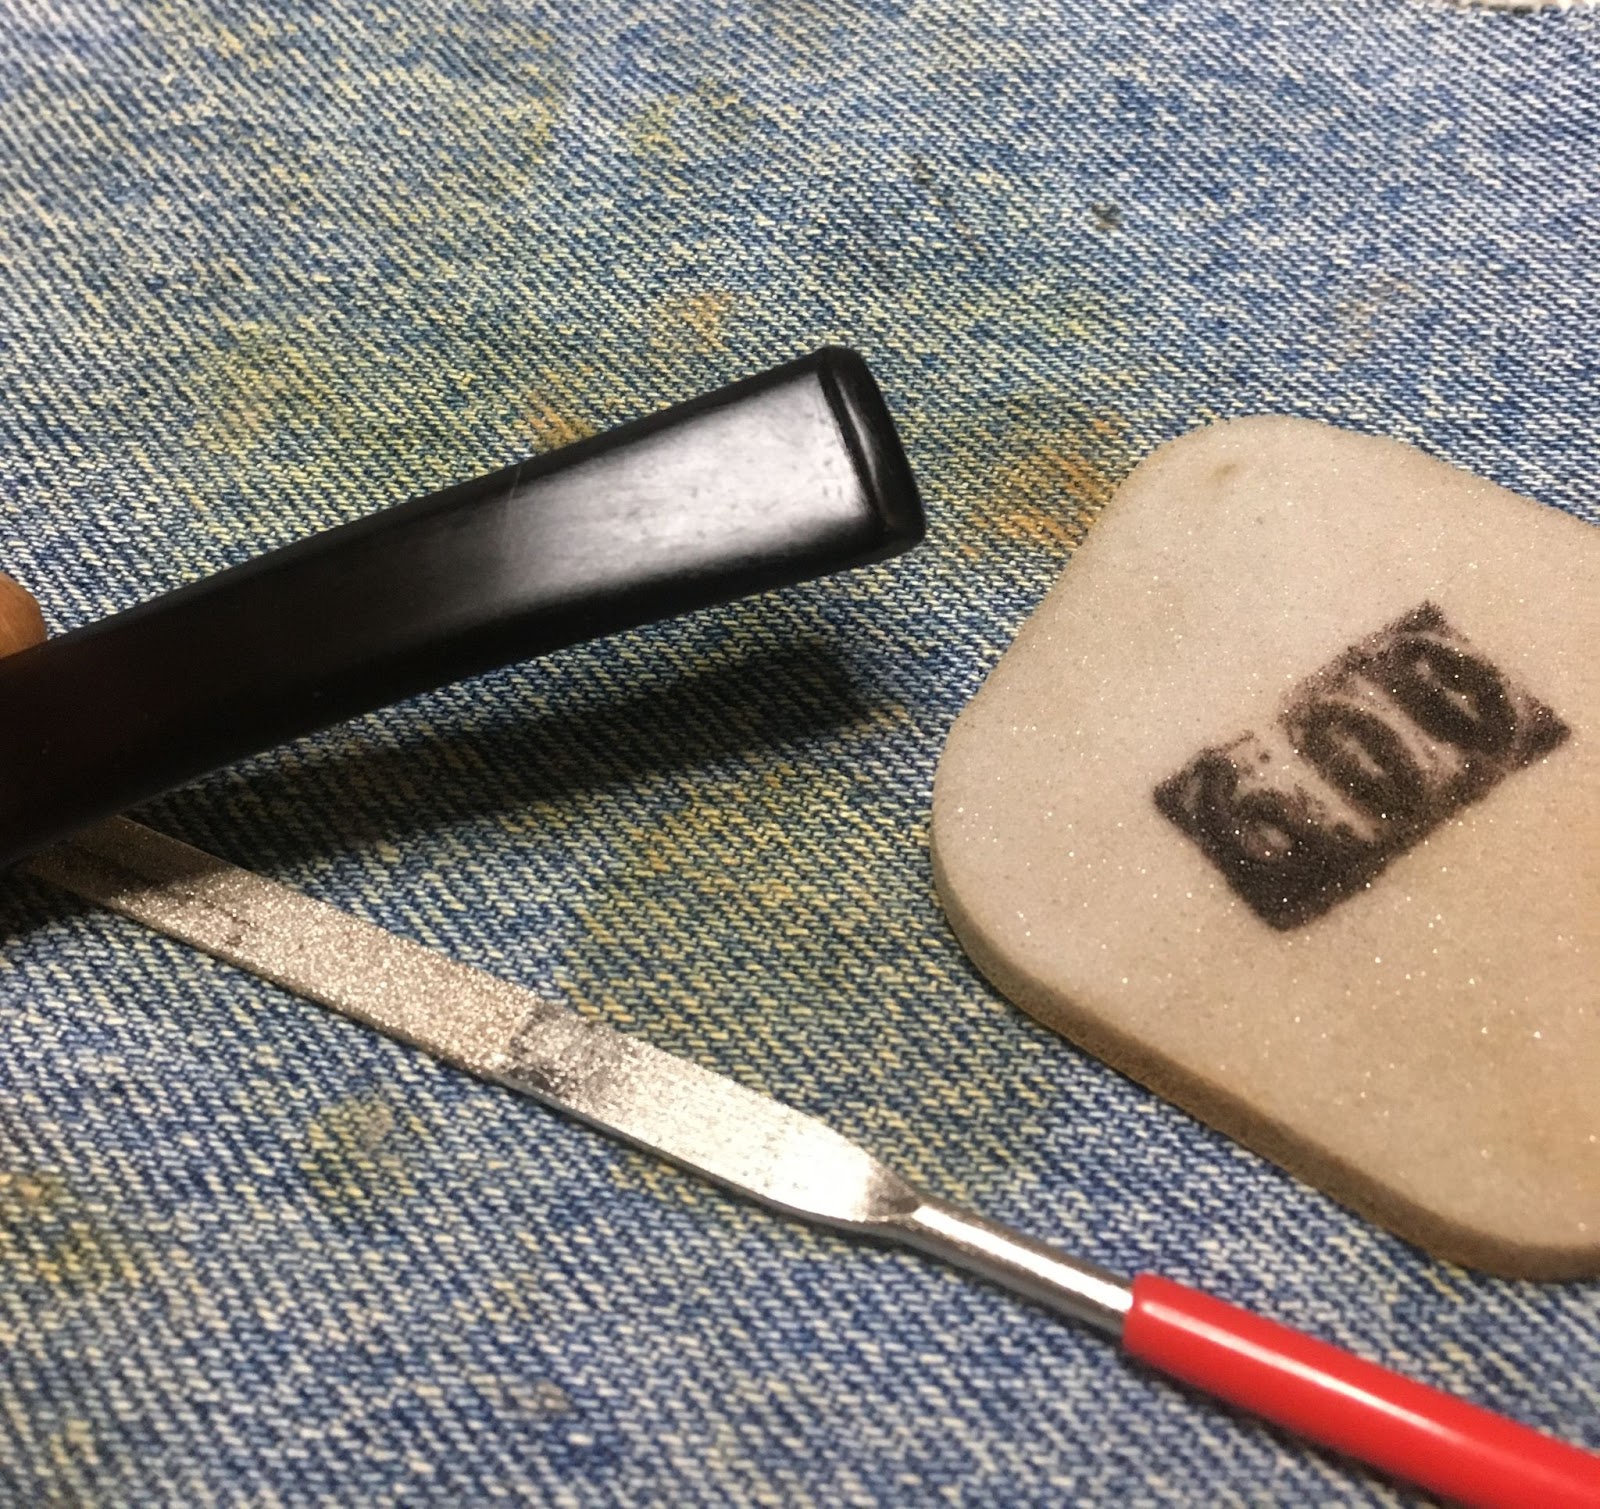
I lightly sanded the stem with a 400 grit sanding sponge. I was careful to avoid the stem logo.
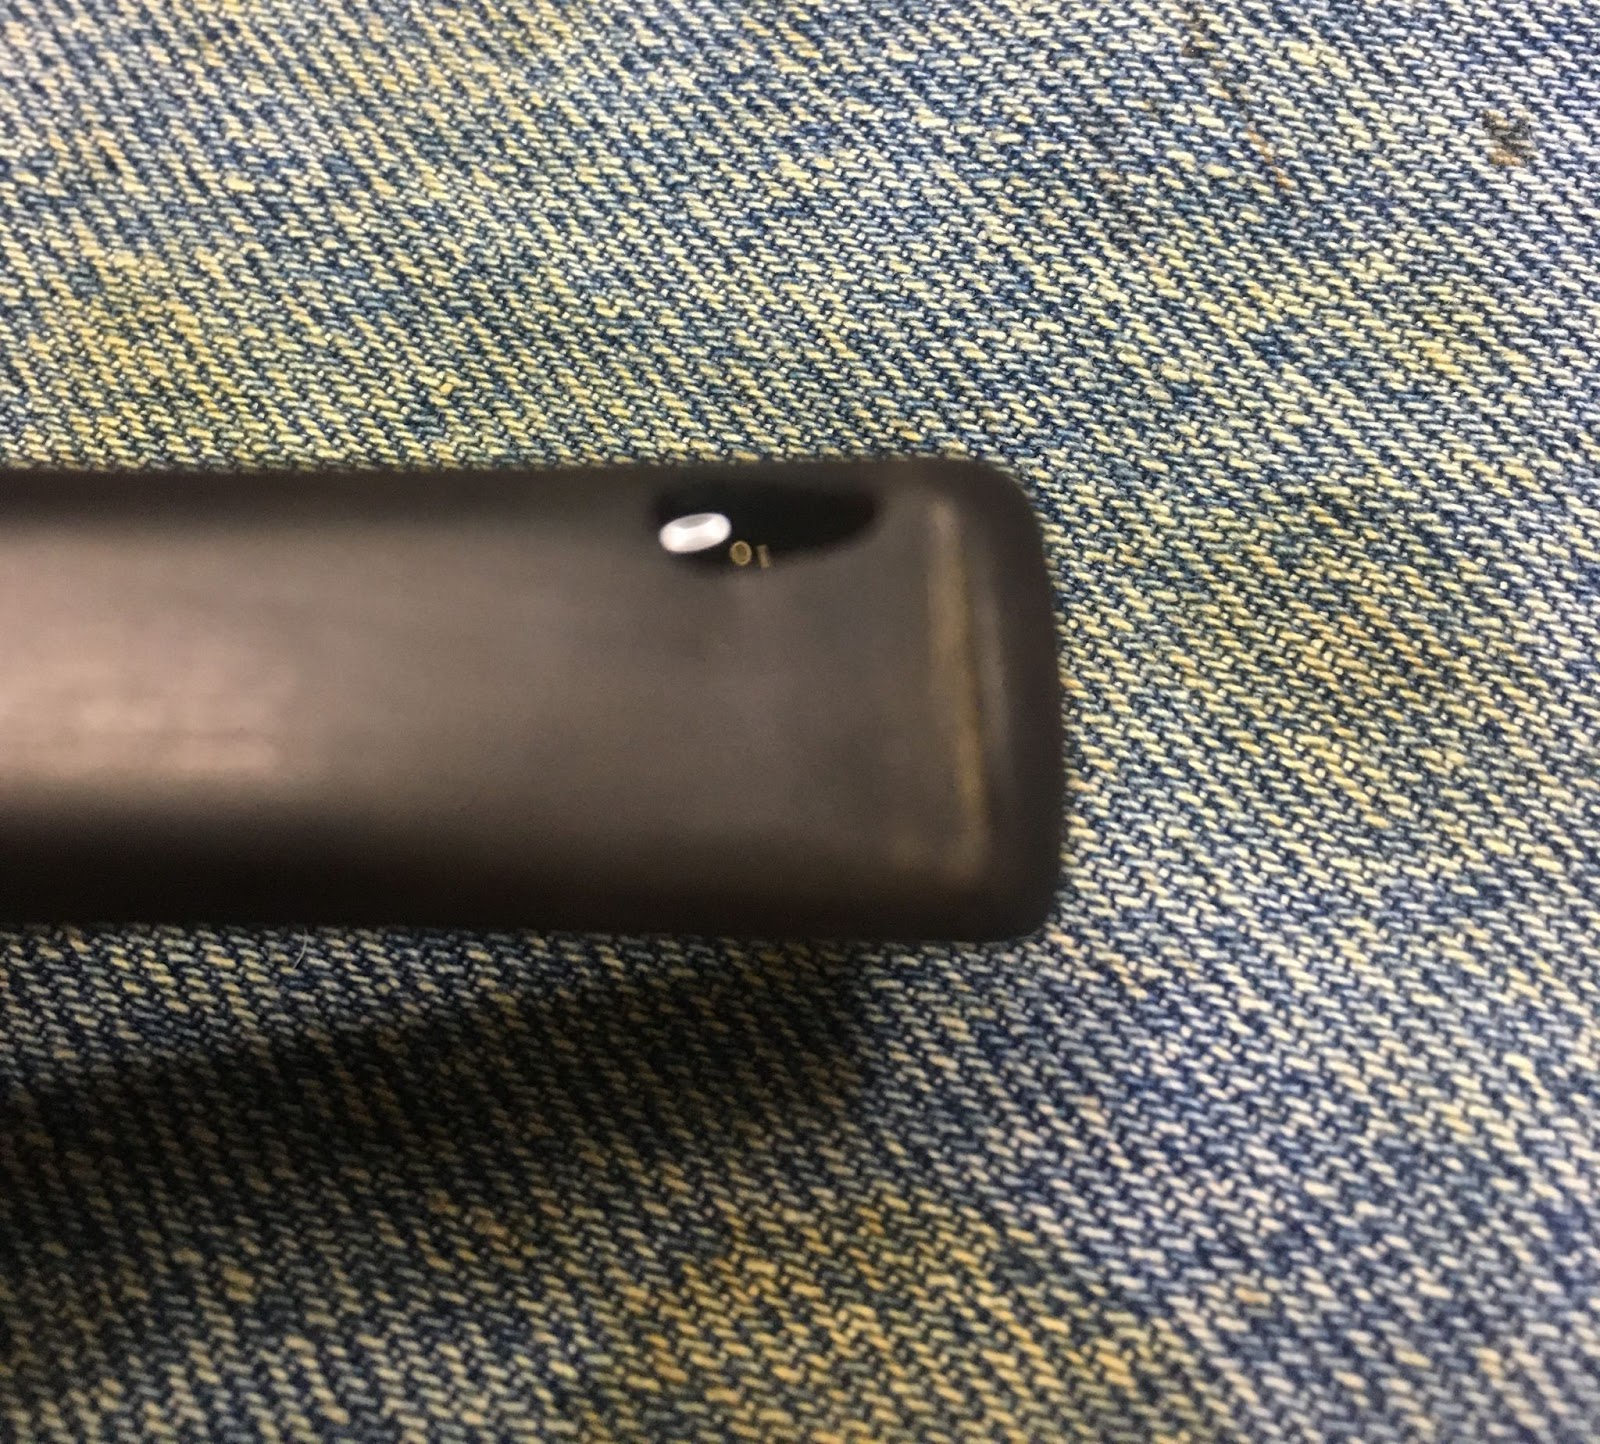
Next the tooth marks were filed smooth with a small flat file.
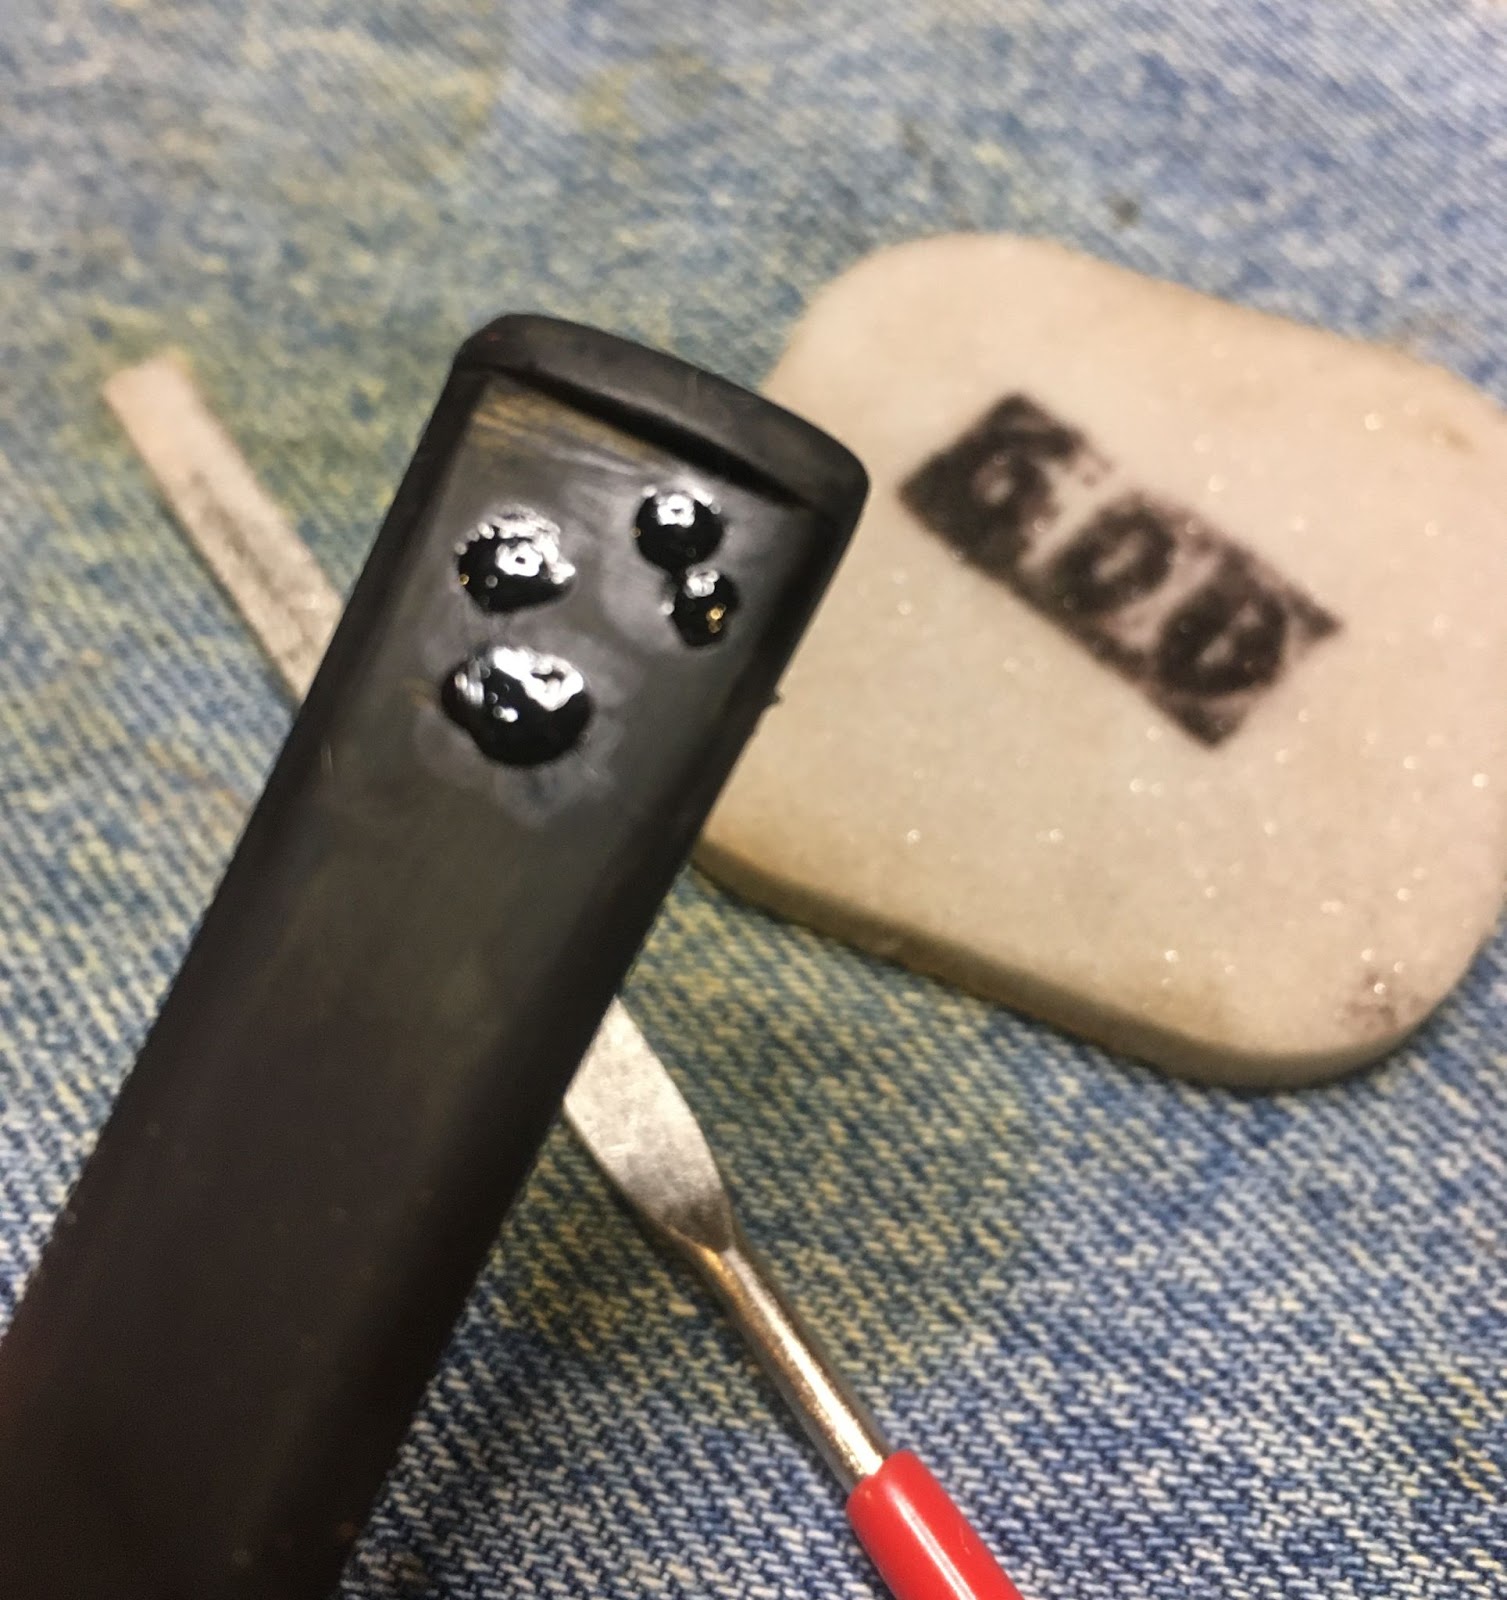
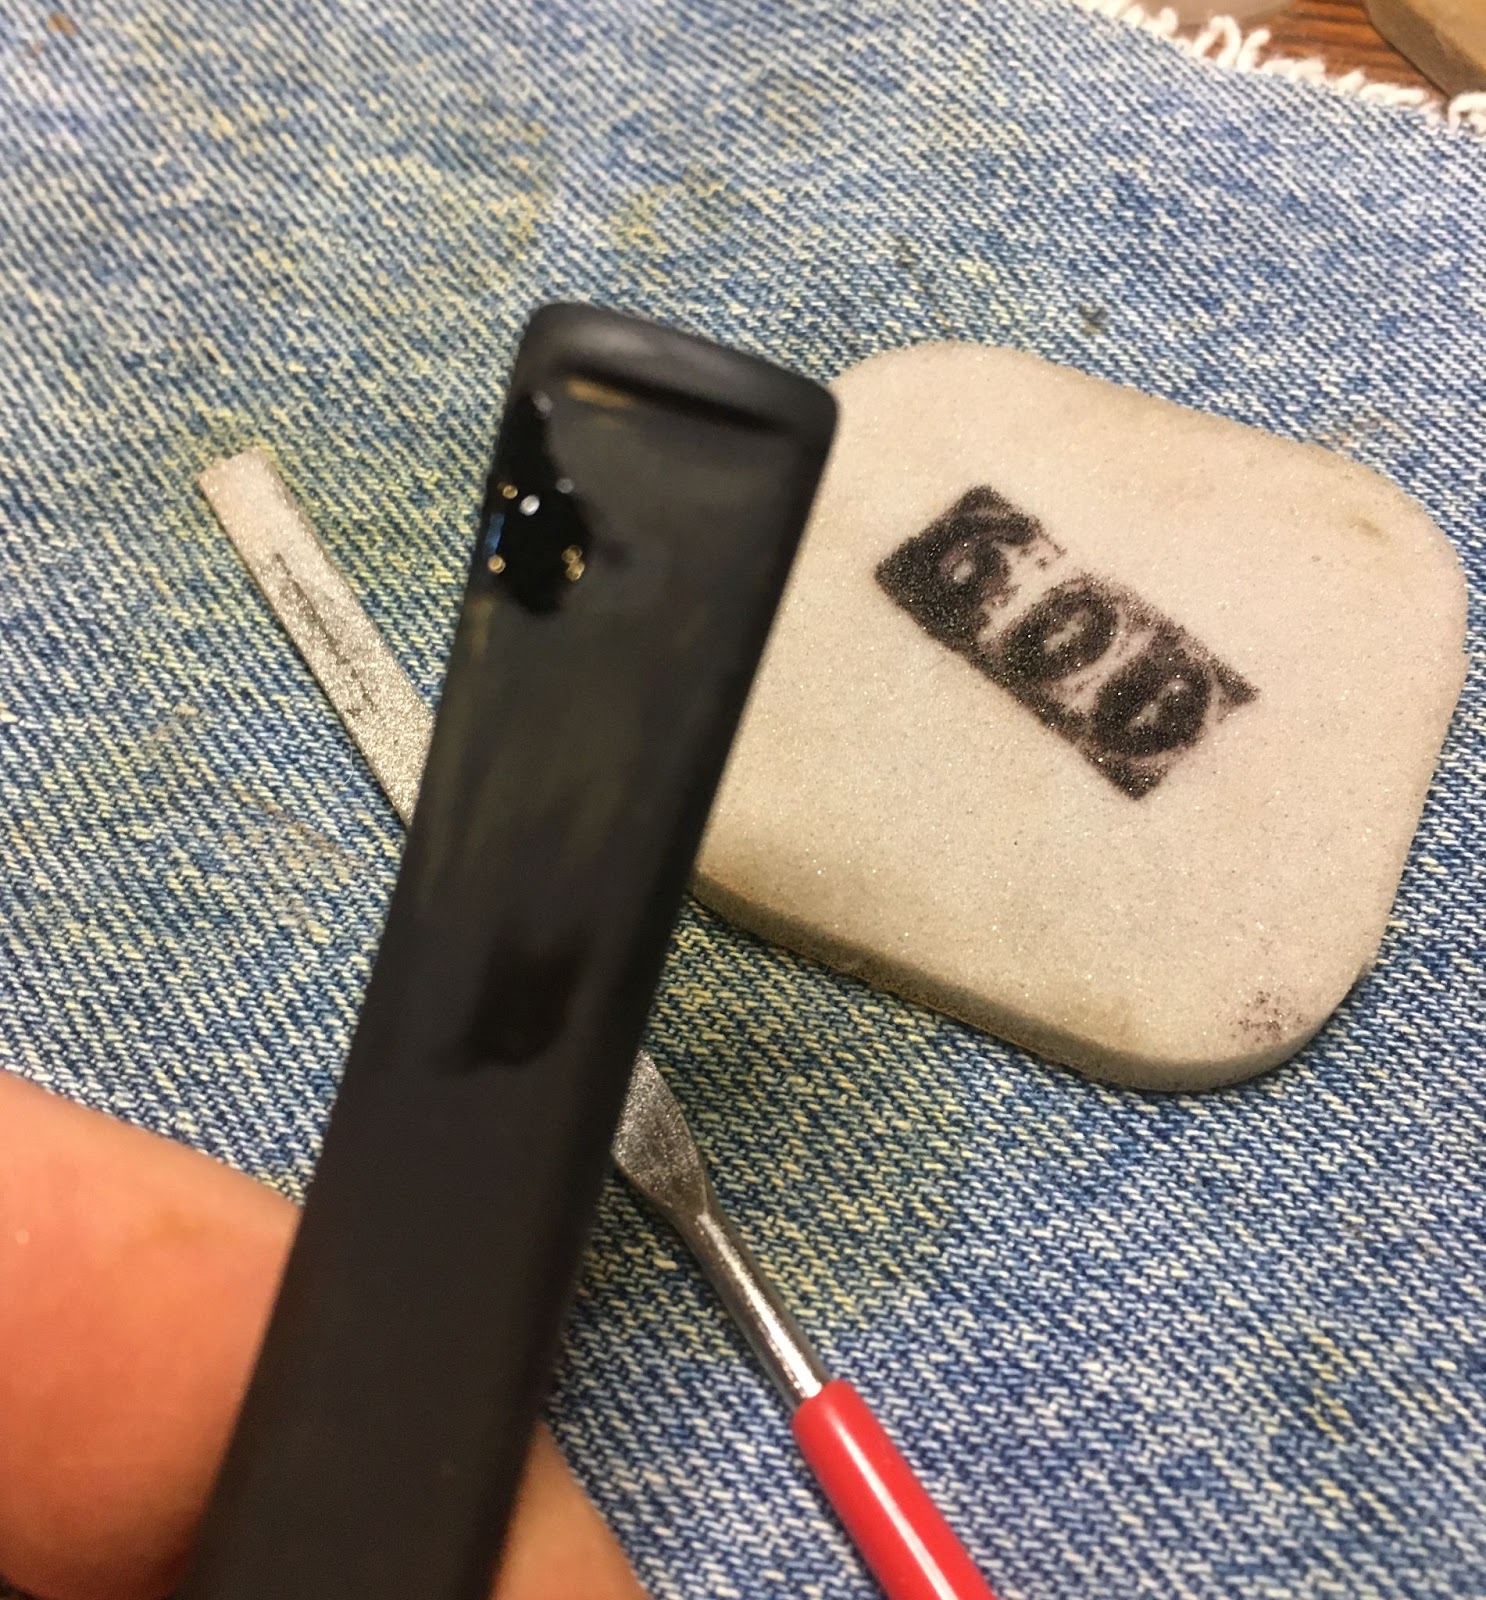
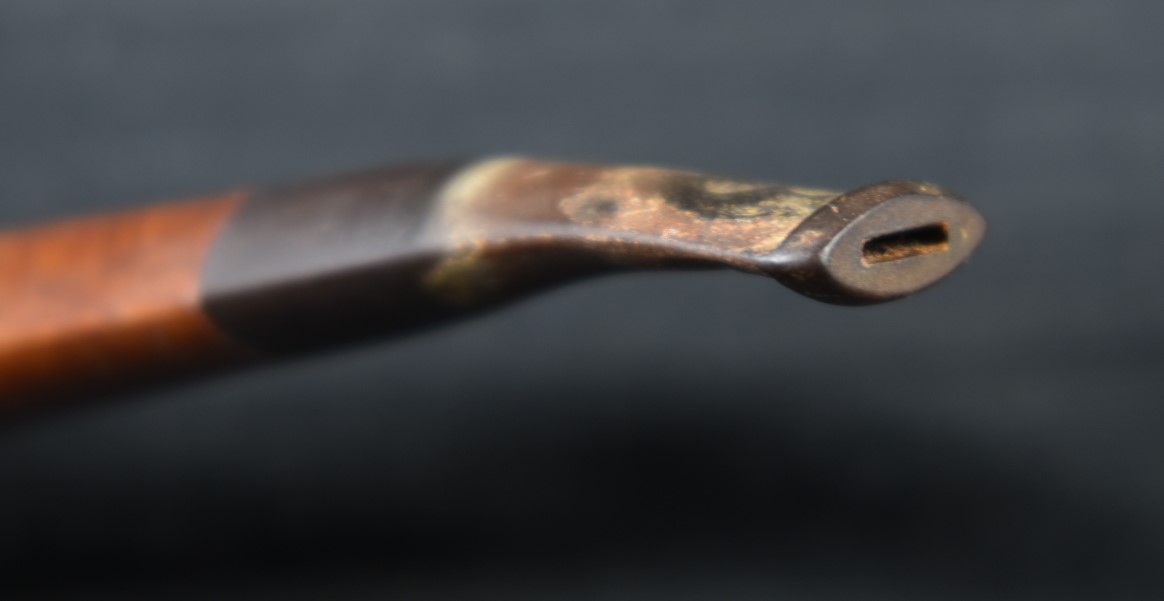
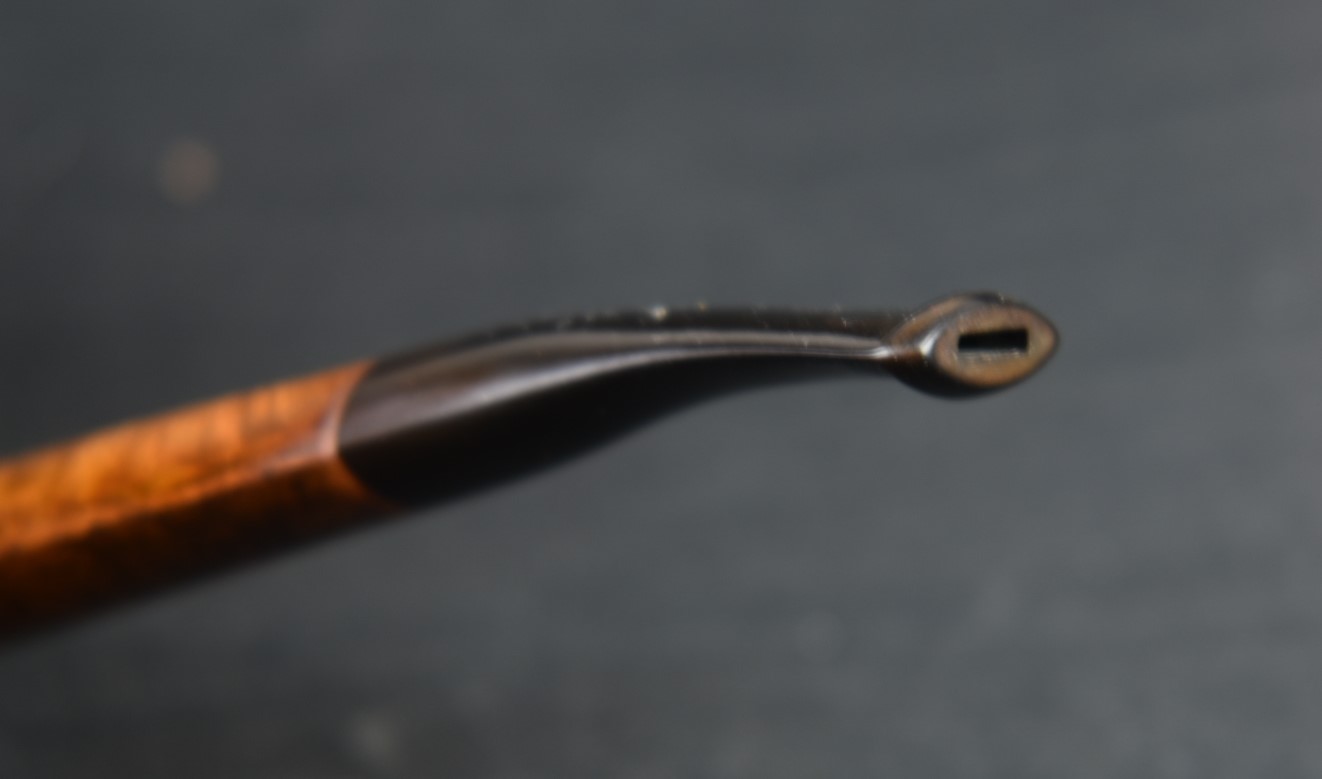
The stemairway was cleaned with 95%ethyl alcohol and pipe cleaners. The button was a little bit constricted so I used a Vermont Freehand Slot Funneling Tool to clean up the slightly off-center drilling. I also used a piece of emery board (fingernail file) to sand the airway at the button.
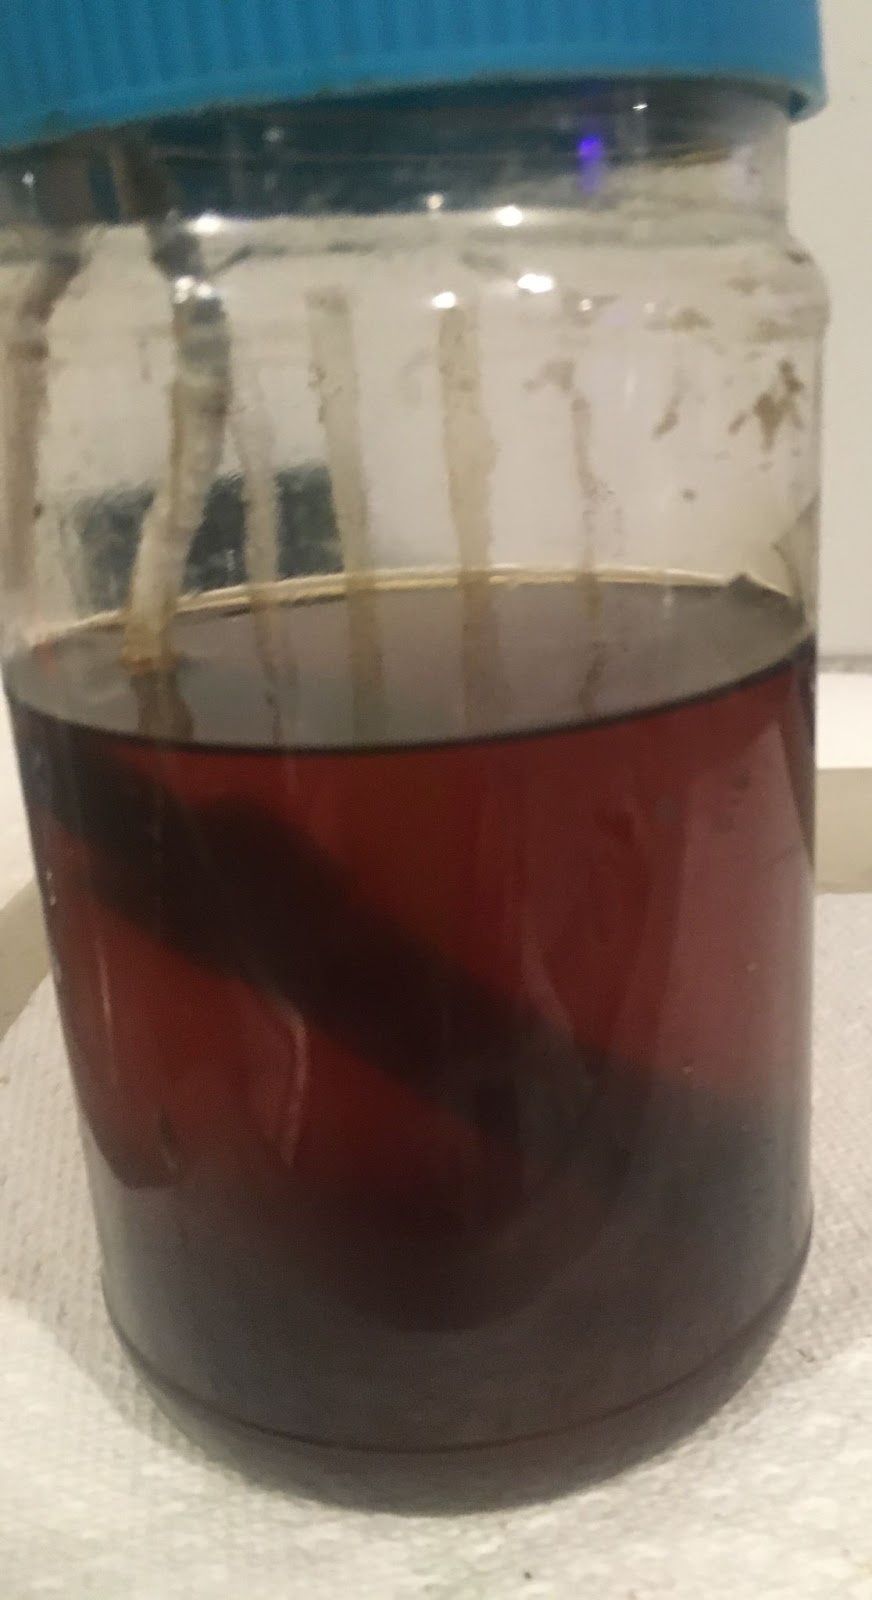
The stems of both project pipes were suspended in Before and After Extra Strength Deoxidizer (deox). The stems were left in the solution for four hours.
I returned to the stummel and cleaned out the airway within the shank. 95% ethyl alcohol with cotton swabs and a nylon shank brush were the tools of choice here.
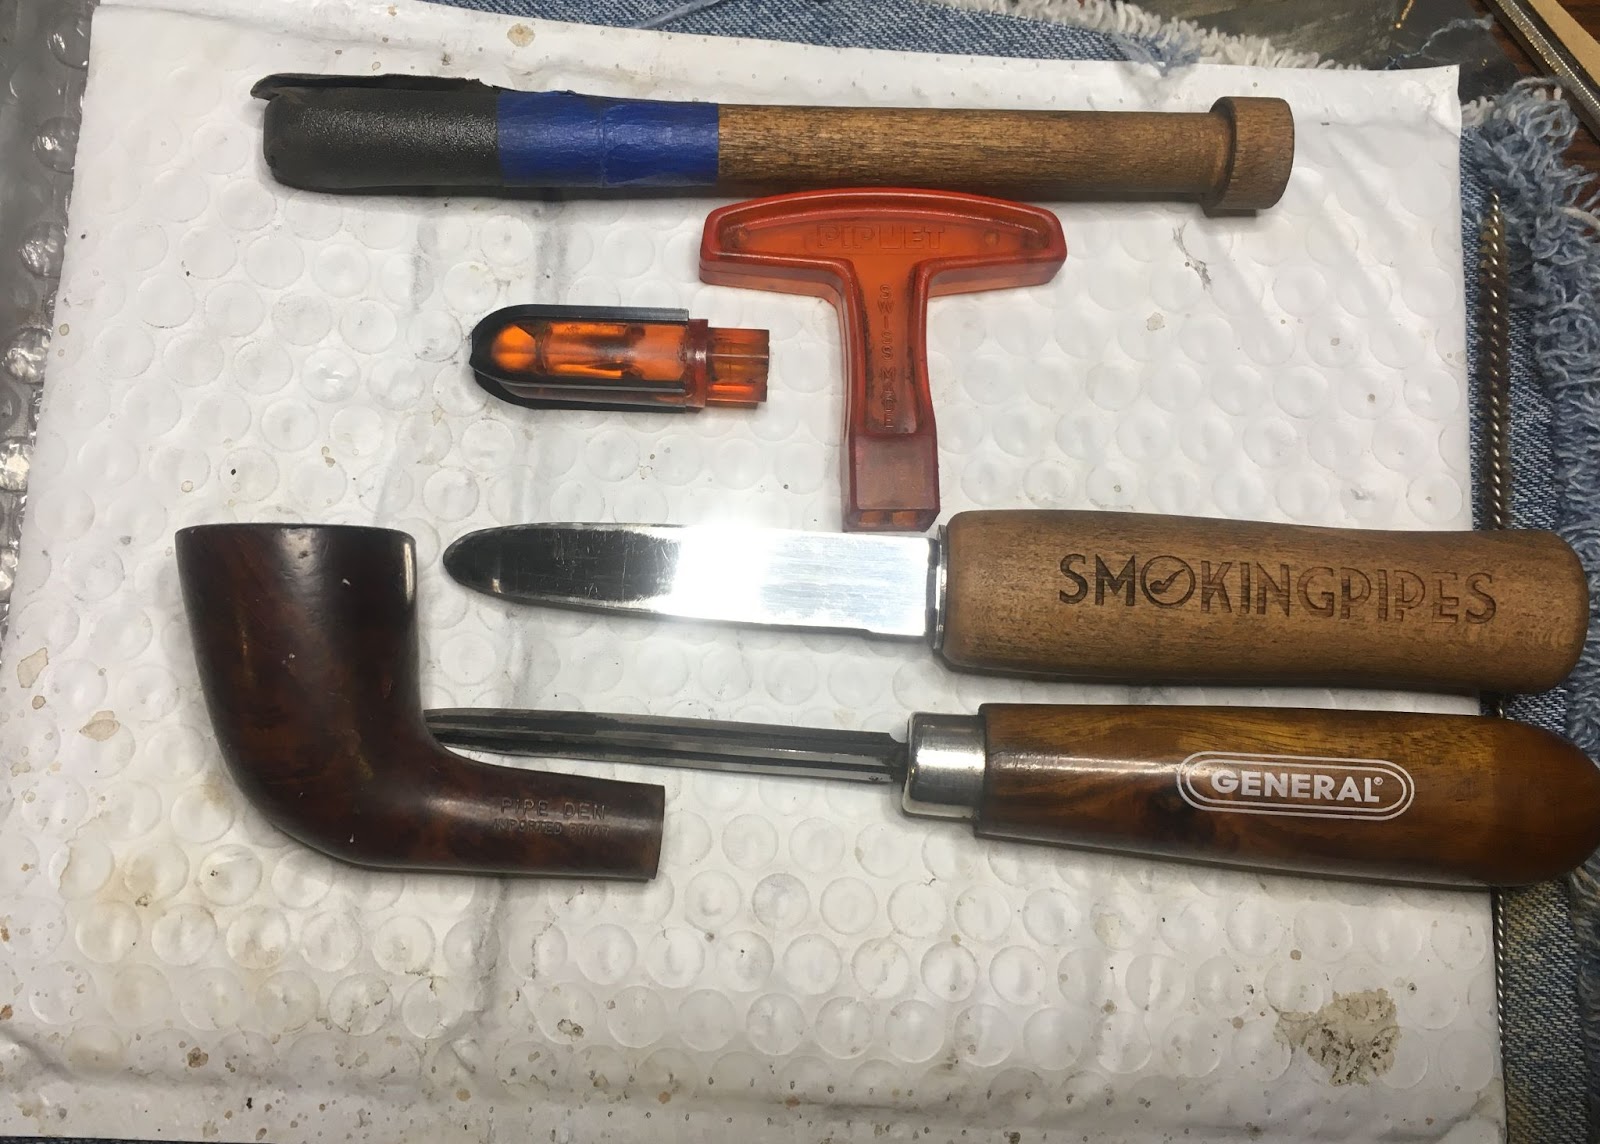
Next came the ream team: The PipNet with #2 blades, the Smokingpipes Low Country Reamer and the General triangular scraper with the tip ground off, round were called up for duty.
They all served valiantly with the PipNet doing the lion’s share of the work.
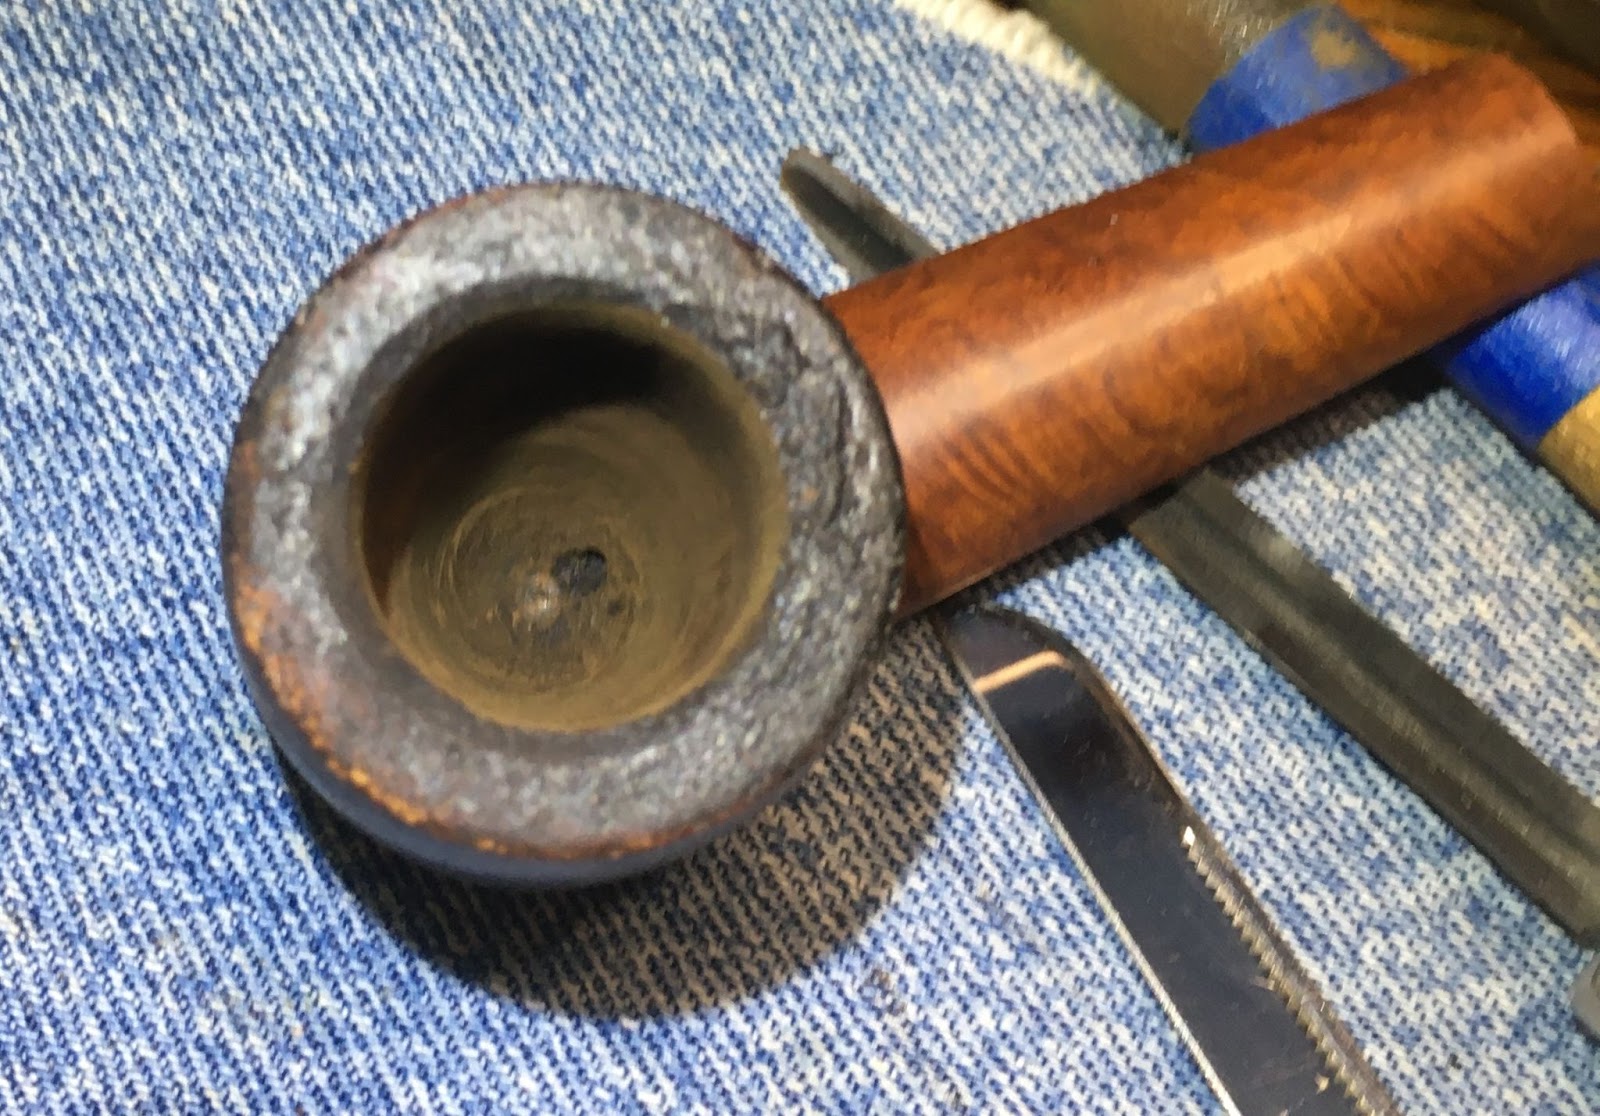
Once sanded Chuck marks within the tobacco chamber could be observed. This told me that the pipe, though used, had not experienced a lot of use.
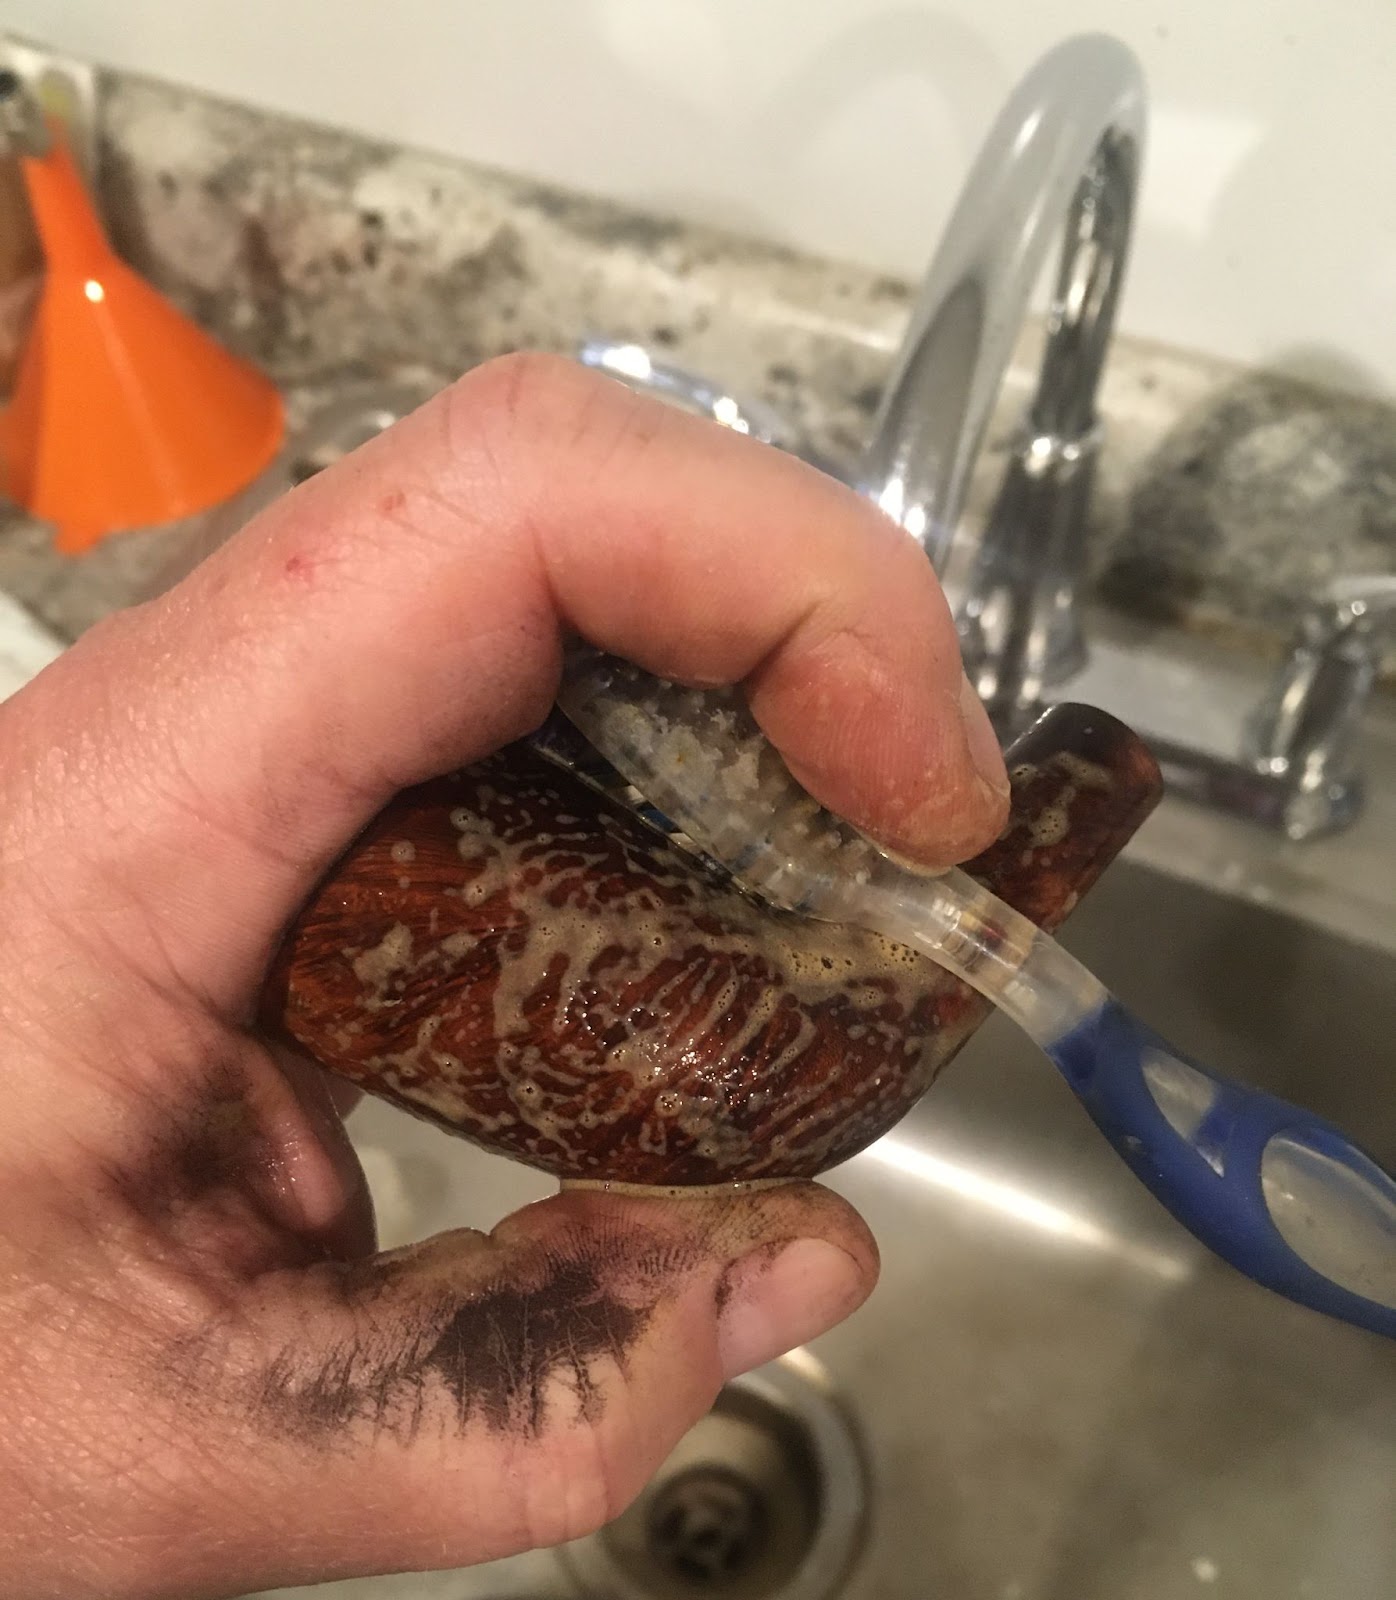
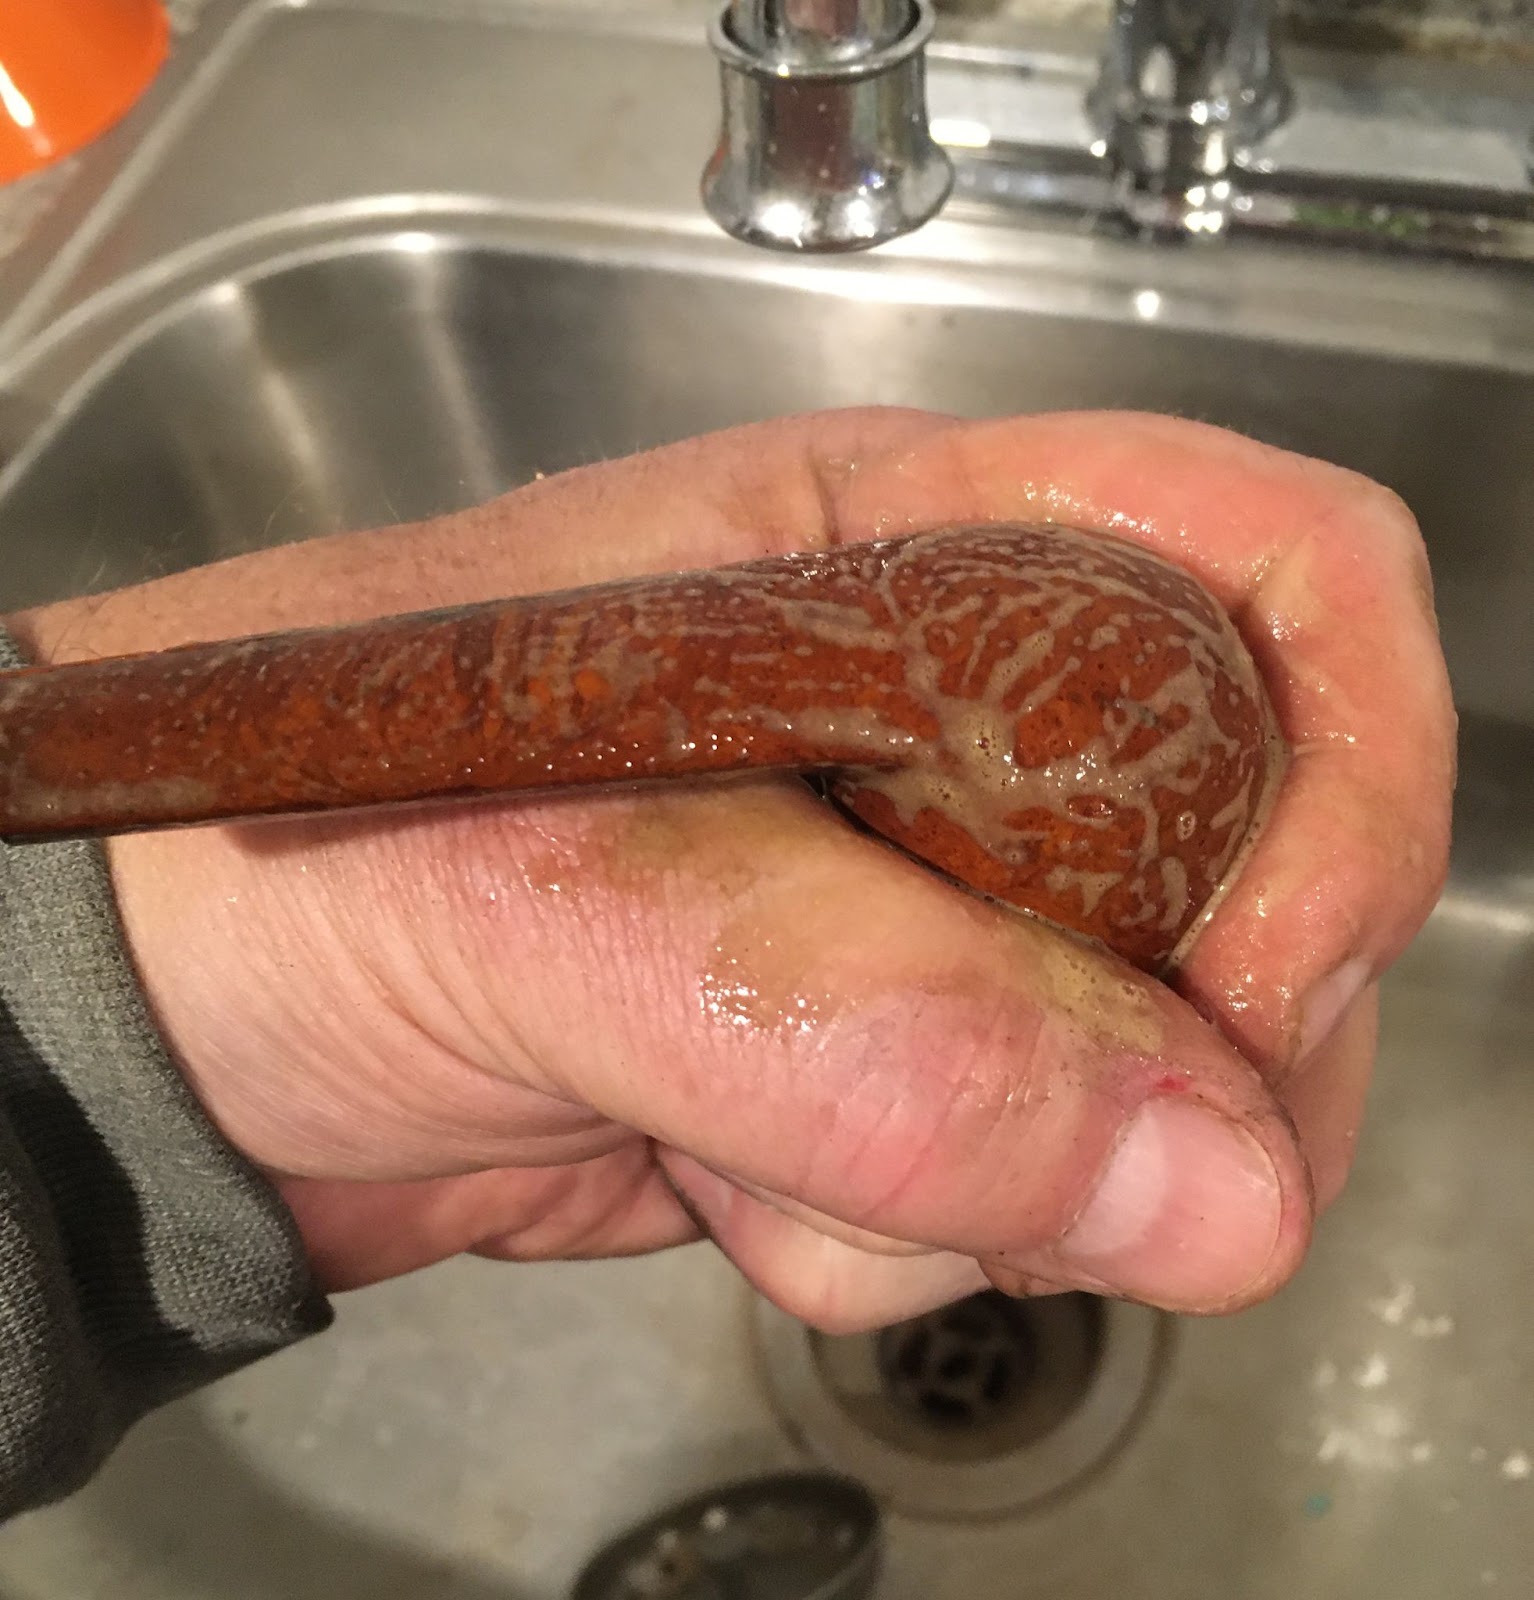
The stummel made her way to the sink for a scrubbing with undiluted Murphy Oil Soap and a nylon brush. The soap was rinsed with warm water and the stummel dried with a cotton hand towel.
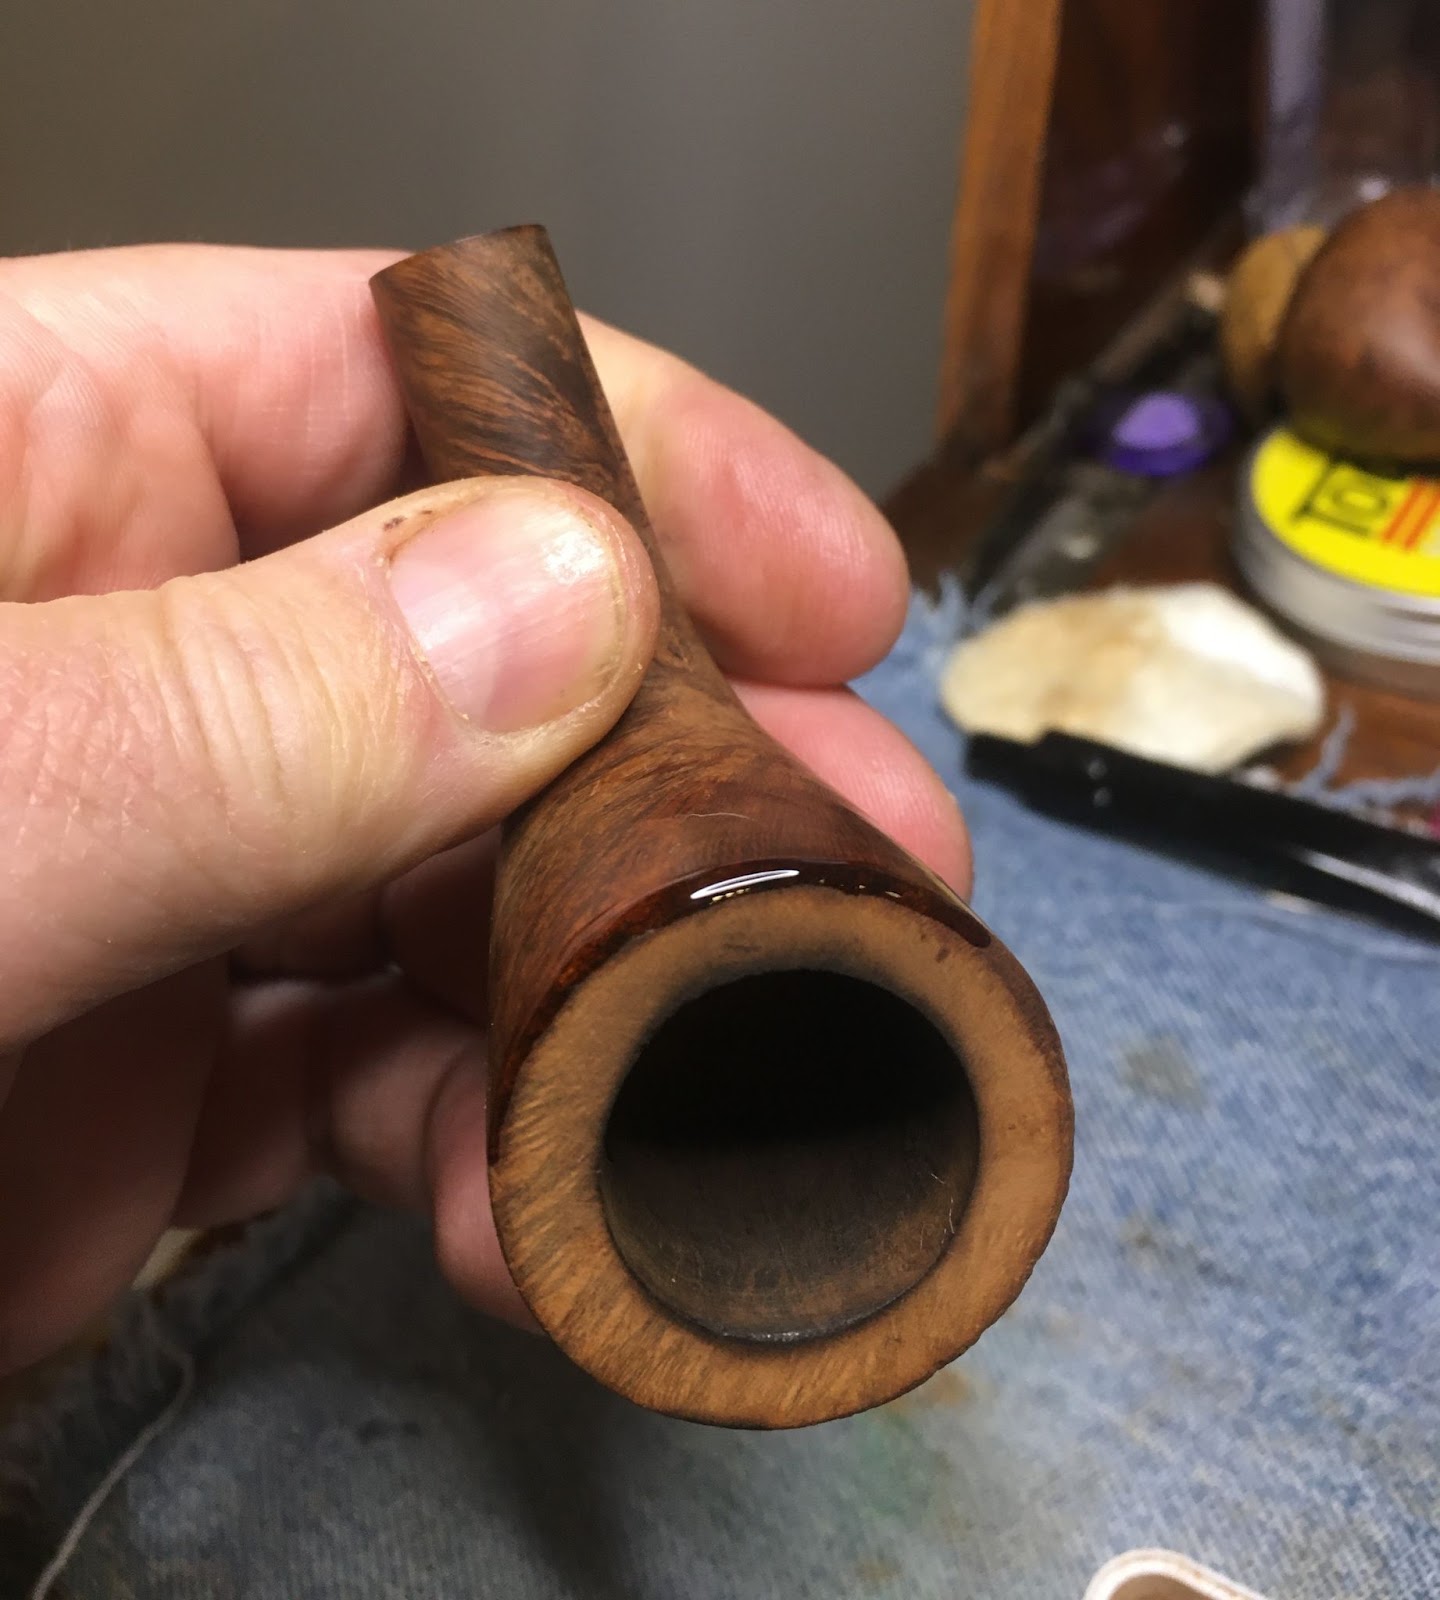
The scrubbing did not remove the lava from the rim as well as I had hoped. Back at the workbench a wipe with ethyl alcohol on a make-up pad barely touched the clear coat and the lava.
The rim required a bit of scraping with a sharp knife. Saliva was applied to soften the deposits on the rim prior to and during the scraping.
It was looking better.
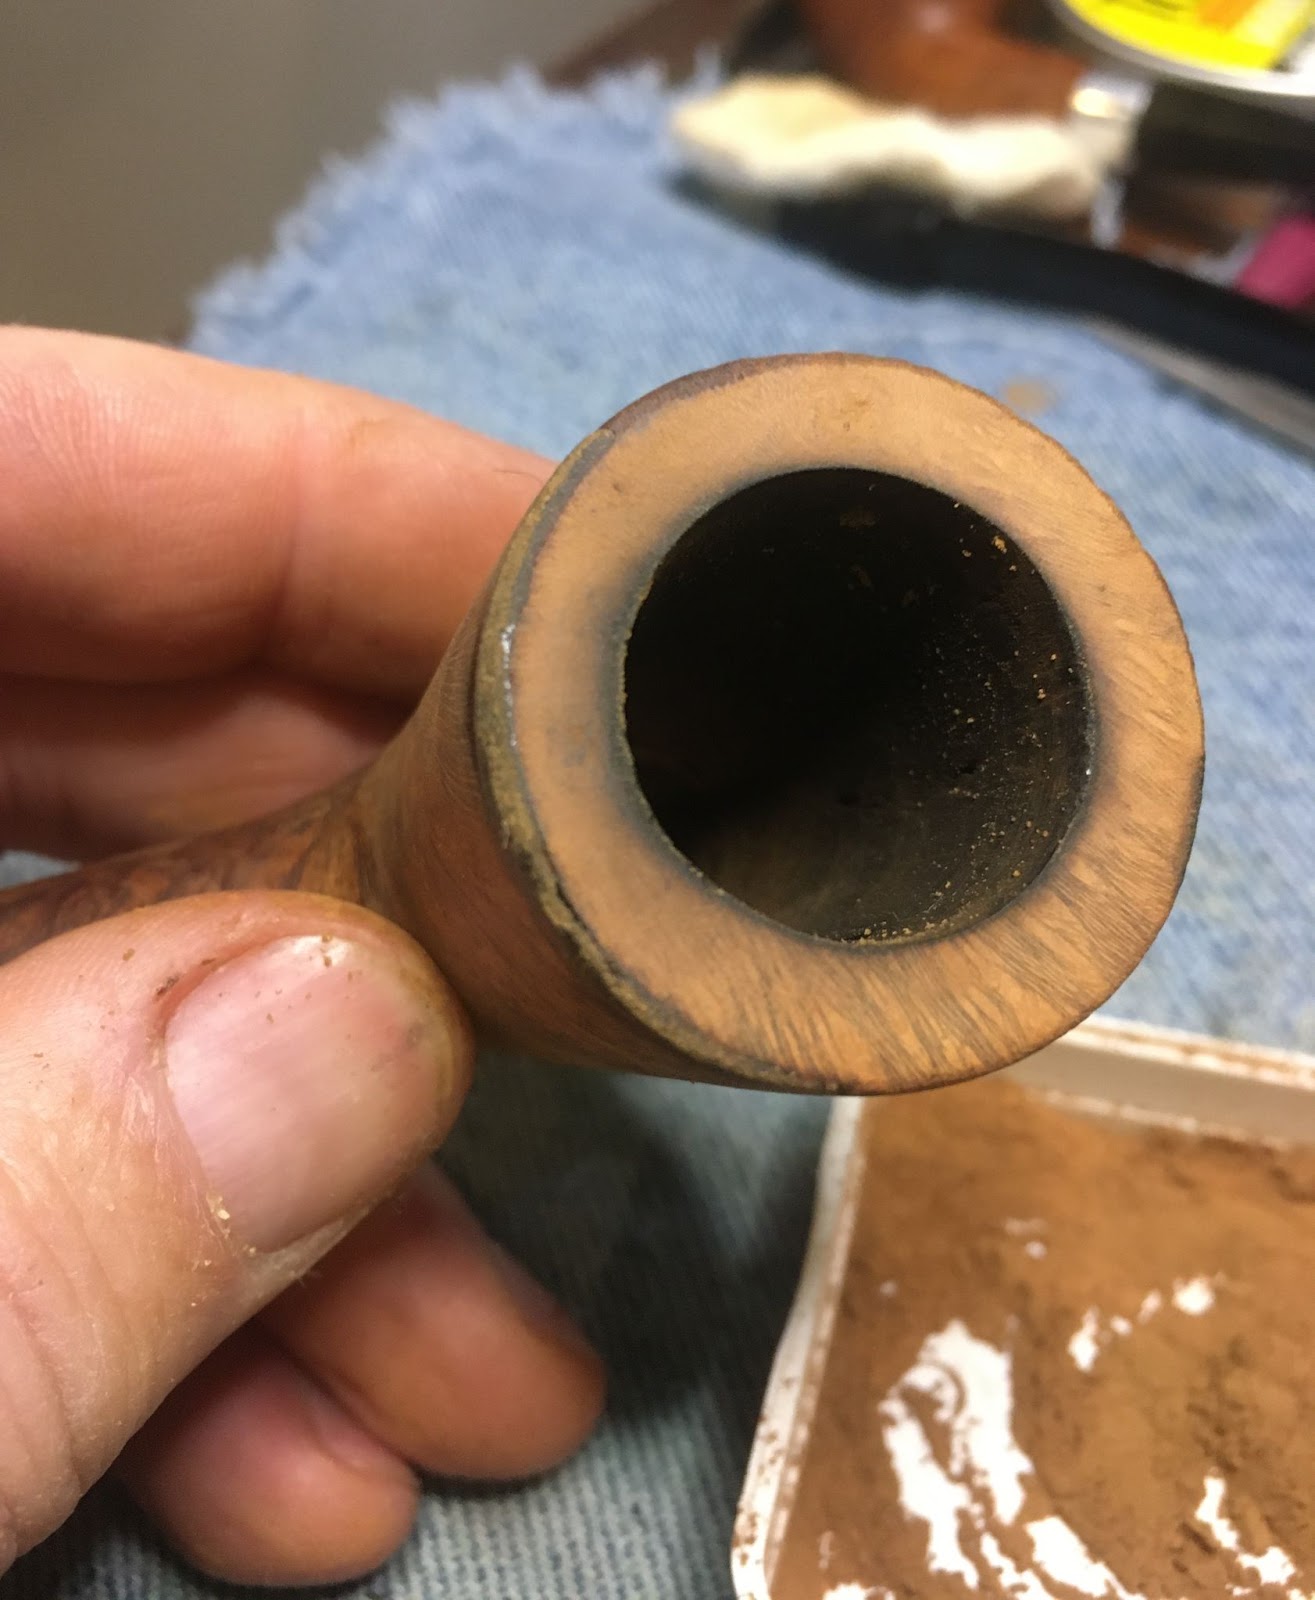
The problem with a good scraping was what it uncovered. The absence of the lava highlighted some dings on the rim. Topping would be my solution to this.
I wondered if wiping the stummel with acetone on a make-up pad would be sufficient to dissolve away the clear coat.
The acetone was working but oh, so slowly.
Light sanding helped etch the coating but it was still a slow process.
I decided to give the stummel a 30 minute bath in acetone.
After 30 minutes the stummel was removed and wiped with another make-up pad.
The shininess of the clear coat was gone and with it most of the red stain.
The four hour deox bath ended and both stems were set up to drip excess deon solution back into the jar.
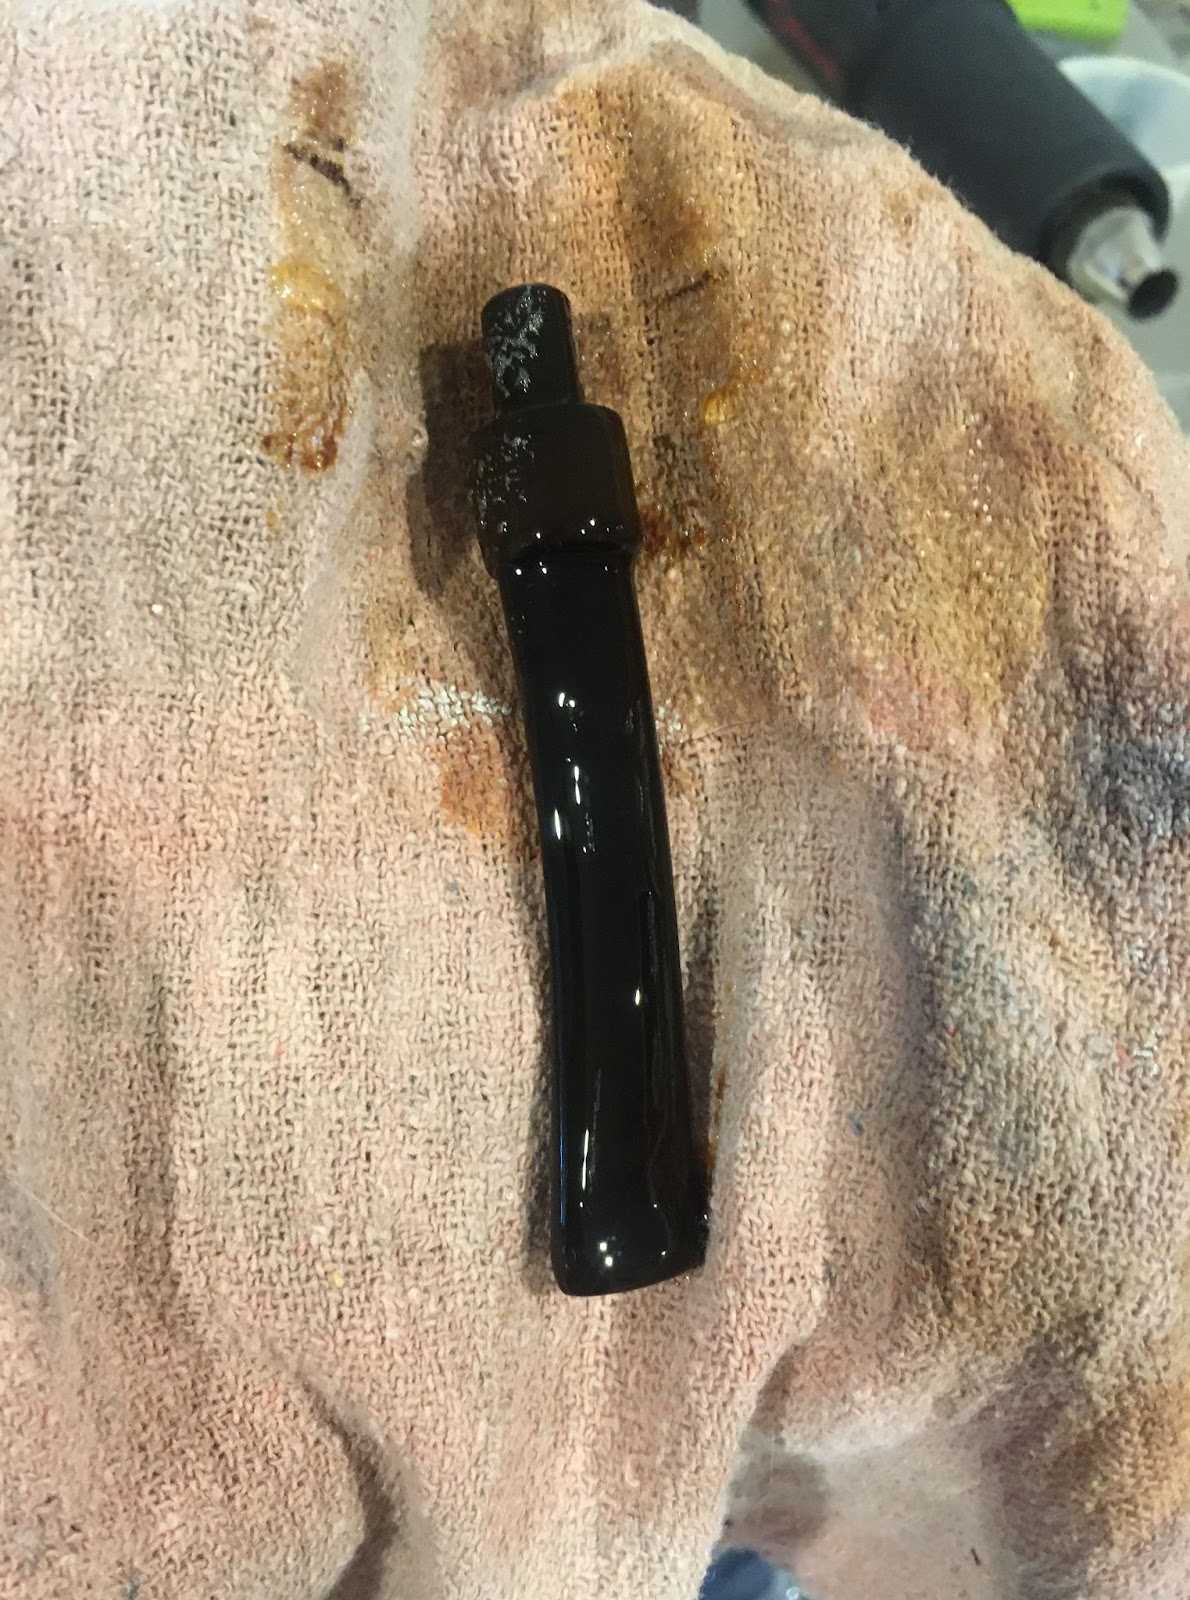
The Marseille stem was vigorously rubbed with a coarse shop rag to remove both the remaining deox solution and some of the oxidized vulcanite.
The stem was scrubbed with Soft Scrub cleanser on a few make-up pads to remove more of the stubborn oxidized vulcanite.
Both stems were oiled with mineral oil and set aside overnight.
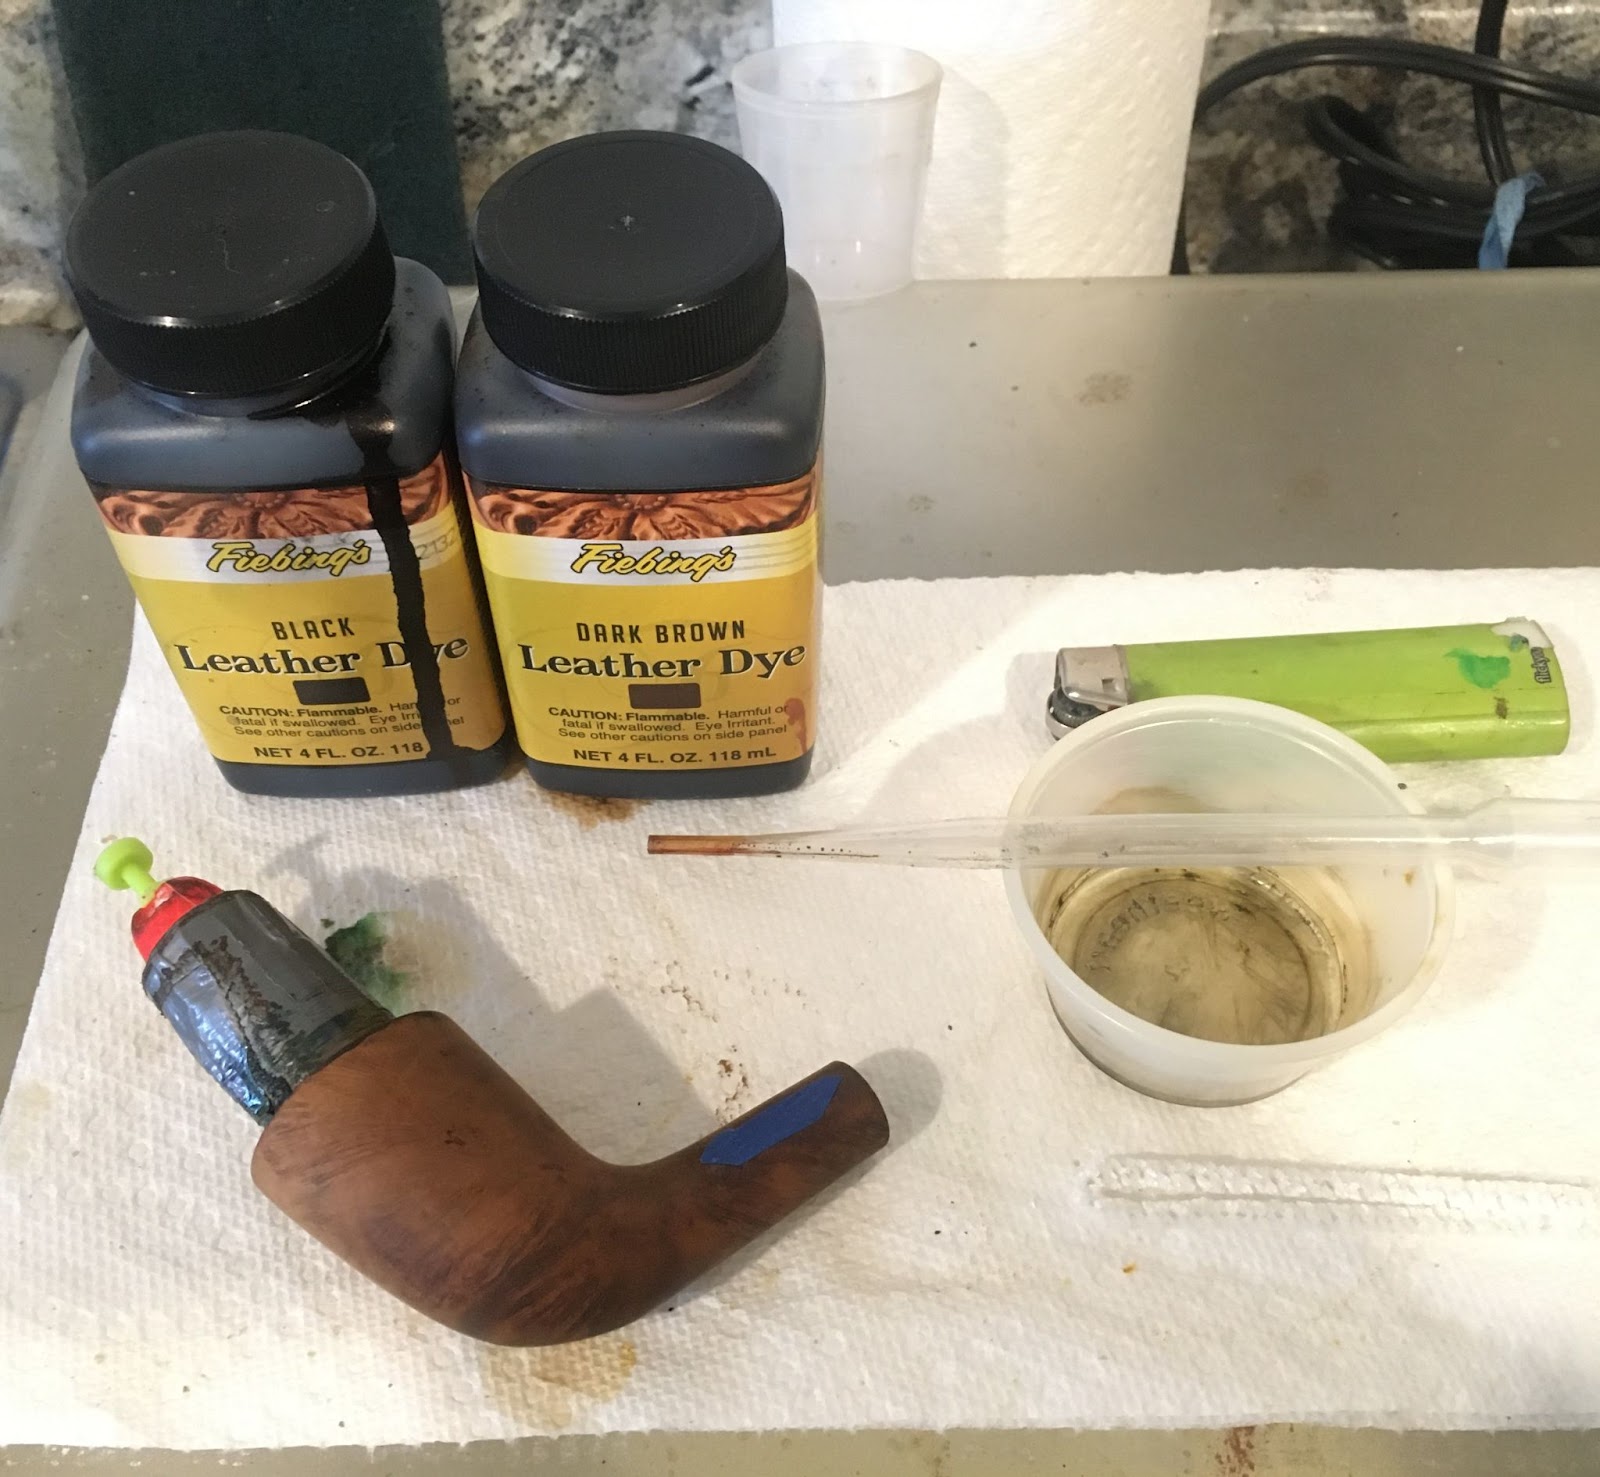
I returned my attention to the stummel. I wanted to try to return it to the reddish brown. I assembled the materials needed to dye the stummel; Dark Red Fiebing’s Leather Dye, a lighter , a wine bottle cork and a pipe cleaner. The cork was to be both a plug, keeping dye out of the tobacco chamber and a handle. The lighter, for flaming the wet dye, allowing the alcohol solvent to burn off and set the dye to the briar and the pipe cleaner as an applicator.
Below is the freshly dyed stummel in red.
The stummel was allowed to air dry another 30 minutes at the workbench.
A second dying was done with mahogany Fiebing’s Leather dye and the same process as with the red dye.
Below is the freshly dyed stummel with mahogany over the red dye.
This too was allowed to dry for 30 minutes before lightly wiping the stummel with a make-up pad wetted with 95% ethyl alcohol.
The stamps were taped with painters tape to protect them during the sanding to come.
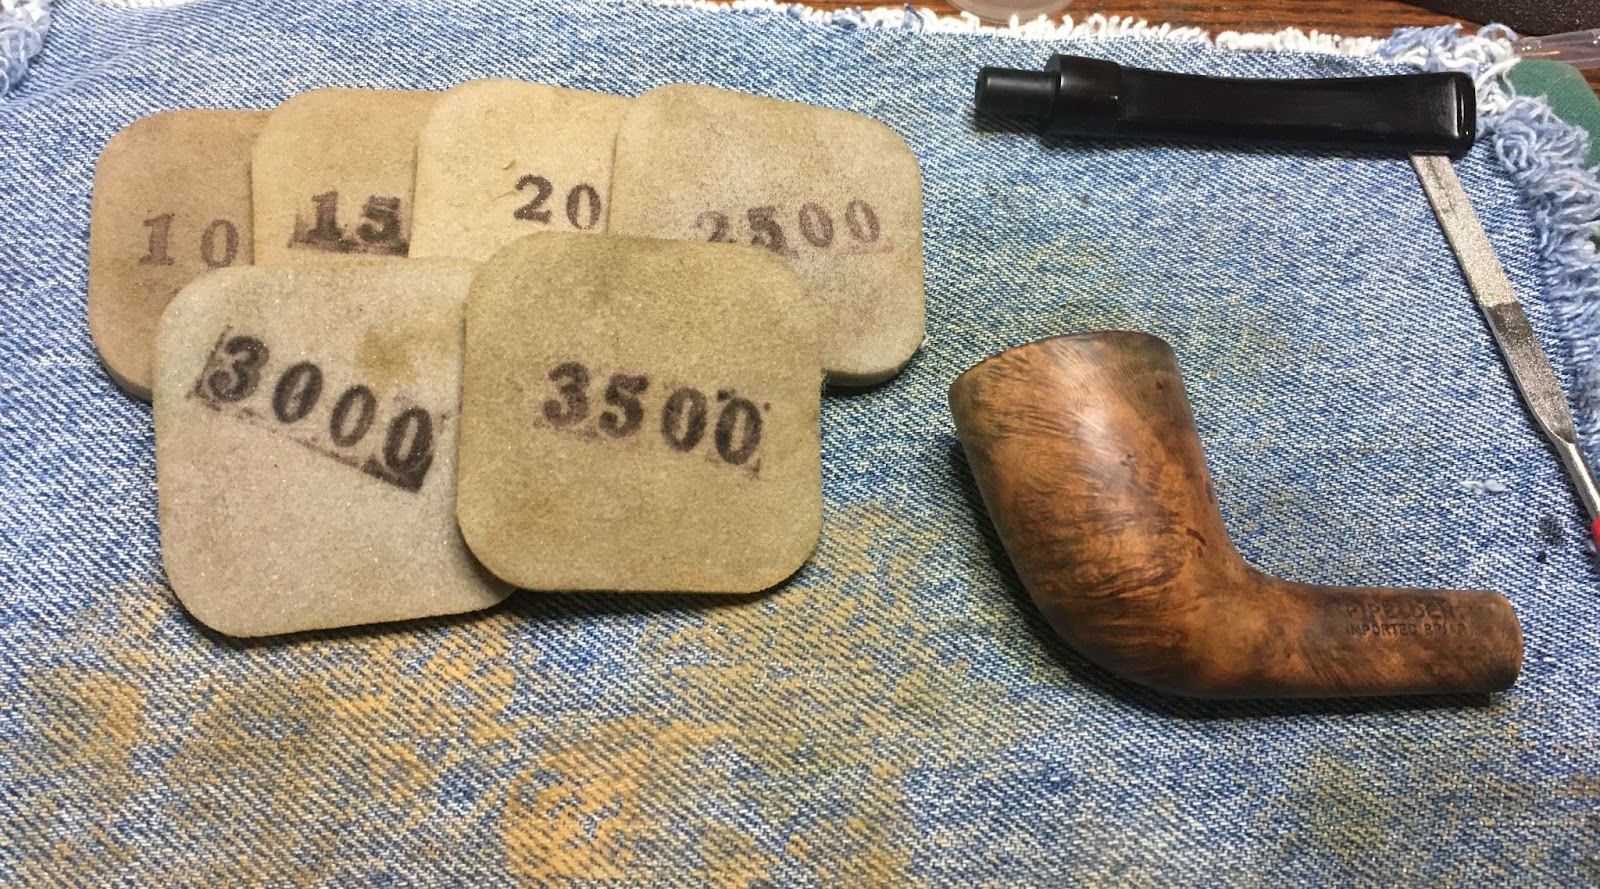
The stem and stummel were reconnected and sanded together. A series of sanding sponges in grits of 600-3500 were used. Between each sponge the stummel was wiped with an alcohol dampened make-up pad to remove sanding debris. The stem was rubbed with a light coating of mineral oil and wiped with a paper towel between sanding sponges. You can see in the photo below where I wiped the sponges off on the denim. It not only protects the workbench surface but is a great place to wipe sanding sponges.
The stummel was then worked with micro-mesh pads 4000-12000. The wiping of the stummel with a make-up pad was repeated as was the oiling and wiping of the stem.
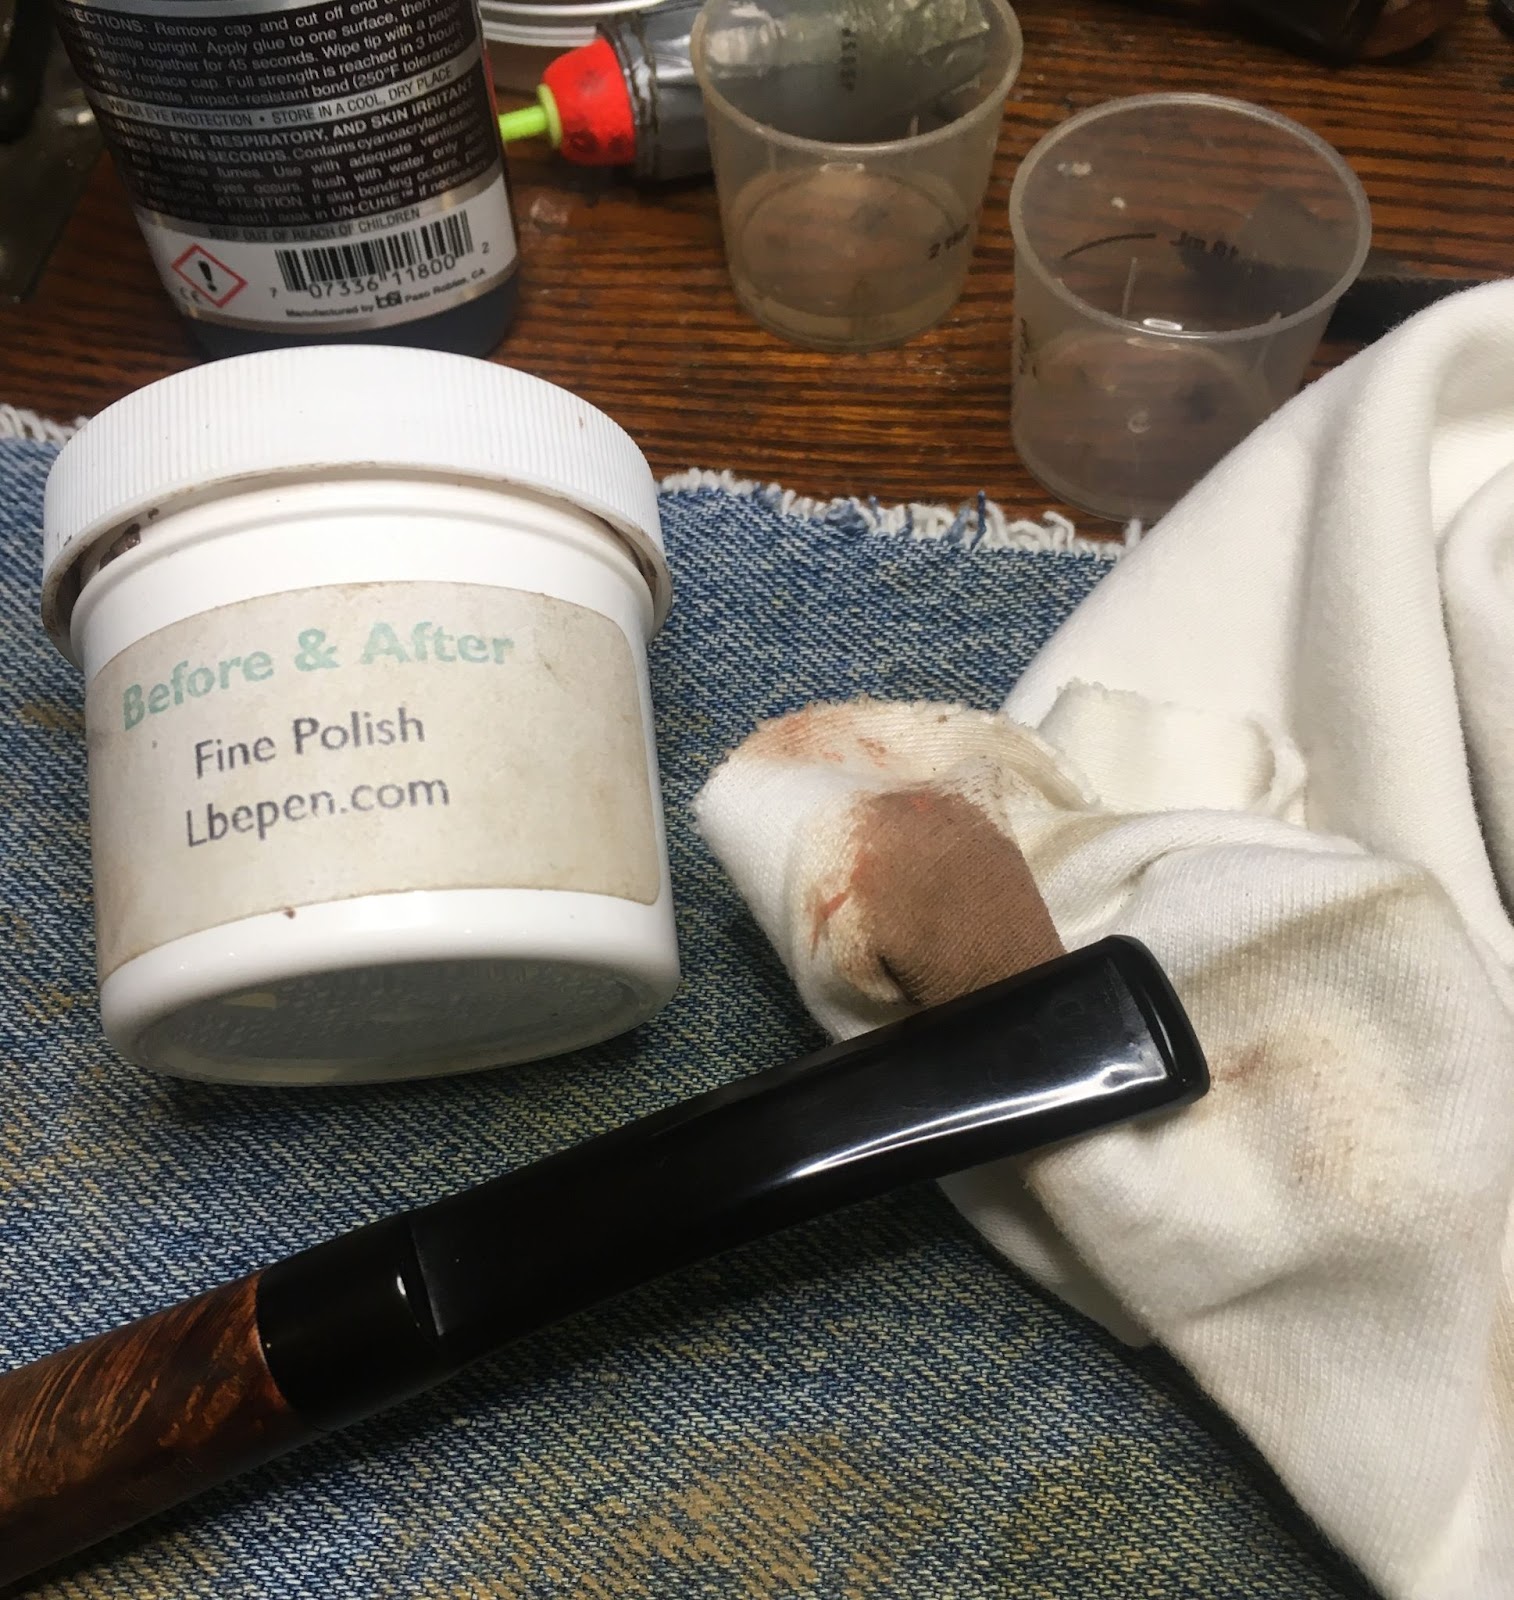
The pipe was taken to the buffer for several coats of carnauba wax. The final step was a hand buffing with a microfiber polishing cloth.
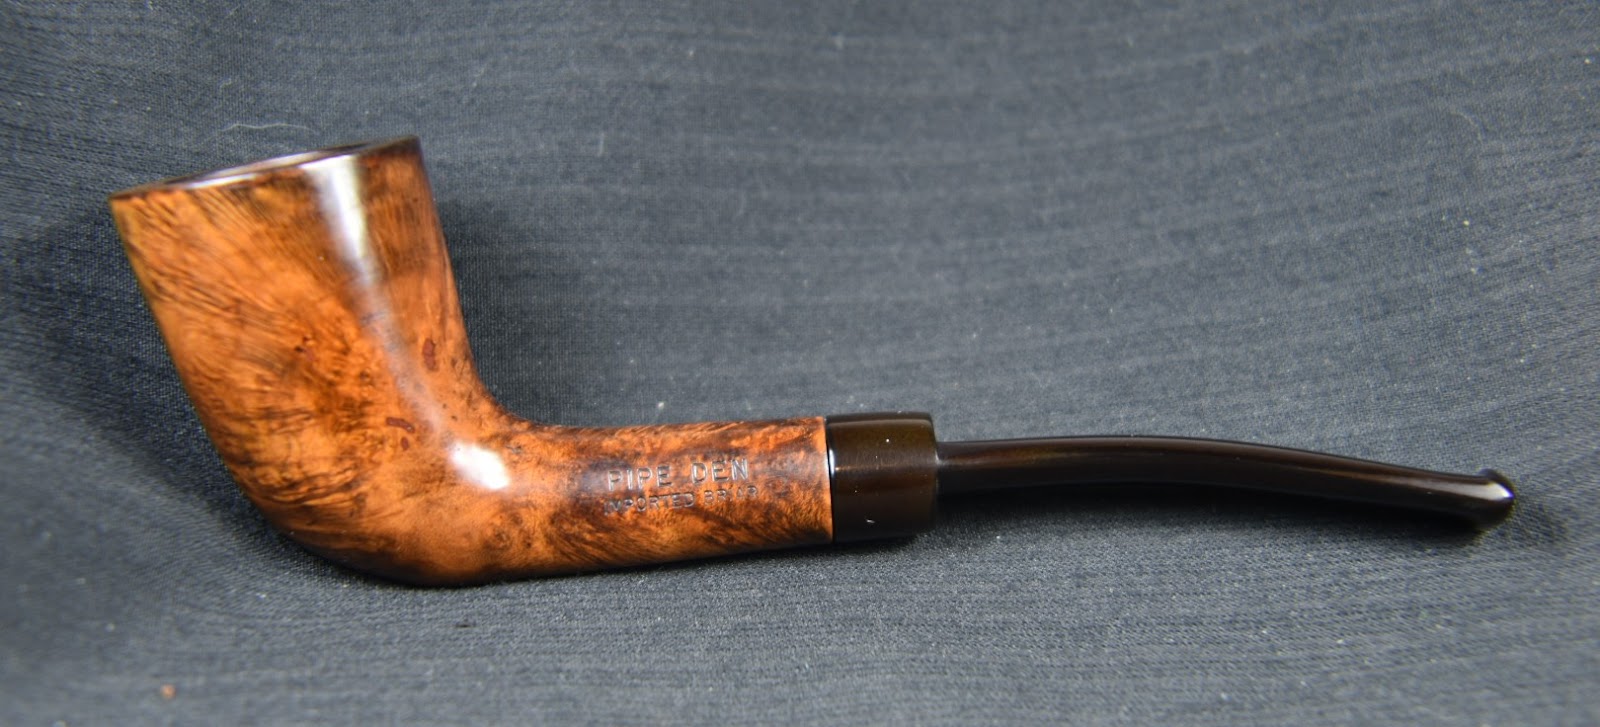
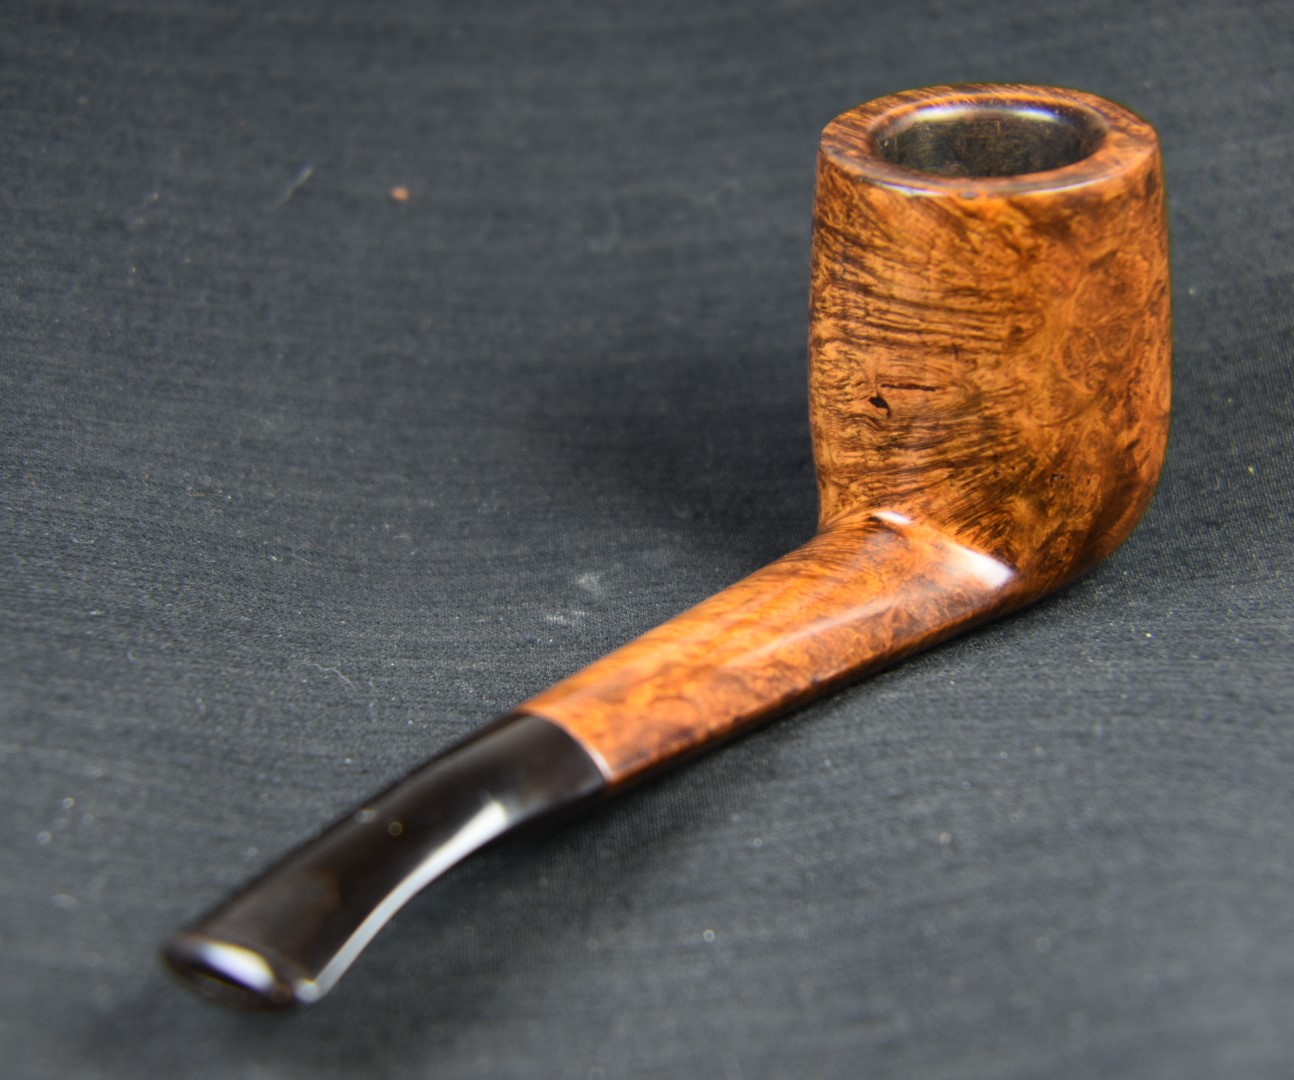
I said it before and I say it again, I am developing an appreciation for the oval shank. It is a feature that provides a more robust feel in the hand while retaining a more elegant contour in profile. I am sure the extra briar also provides additional strength for those who are a bit more hard on pipes. The oval shanked volcano of this Marseille restored beautifully. The dye turned out lovely and the factory staining was fairly well mimicked. The stem oxidation was problematic with the loss of the logo disappointing. I admit that I am not finished with this restoration. I am waiting for another brand of stem deoxidizer which a supplier has sent me to try. I want to try it on this stem and report the findings when I have used the product. Stay tuned for updates. Overall I am very pleased at how well this pipe turned out. The dimensions of the Marseille Oval Shank Volcano are:
Length: 5.05 in./ 128.27 mm.
Weight: 1.47 oz./ 41.67 g.
Bowl Height: 1.84 in./ 46.74 mm.
Chamber Depth: 1.47 in./ 37.34 mm.
Chamber Diameter: 0.76 in./ 19.30 mm.
Outside Diameter: 1.56 in./ 39.62 mm.
I do hope that you have found something here useful to your own pipe care, maintenance or restorations. If you like this sort of thing, please click the like and subscribe buttons. Thank you for reading the ramblings of an old pipe lover.
Loading…
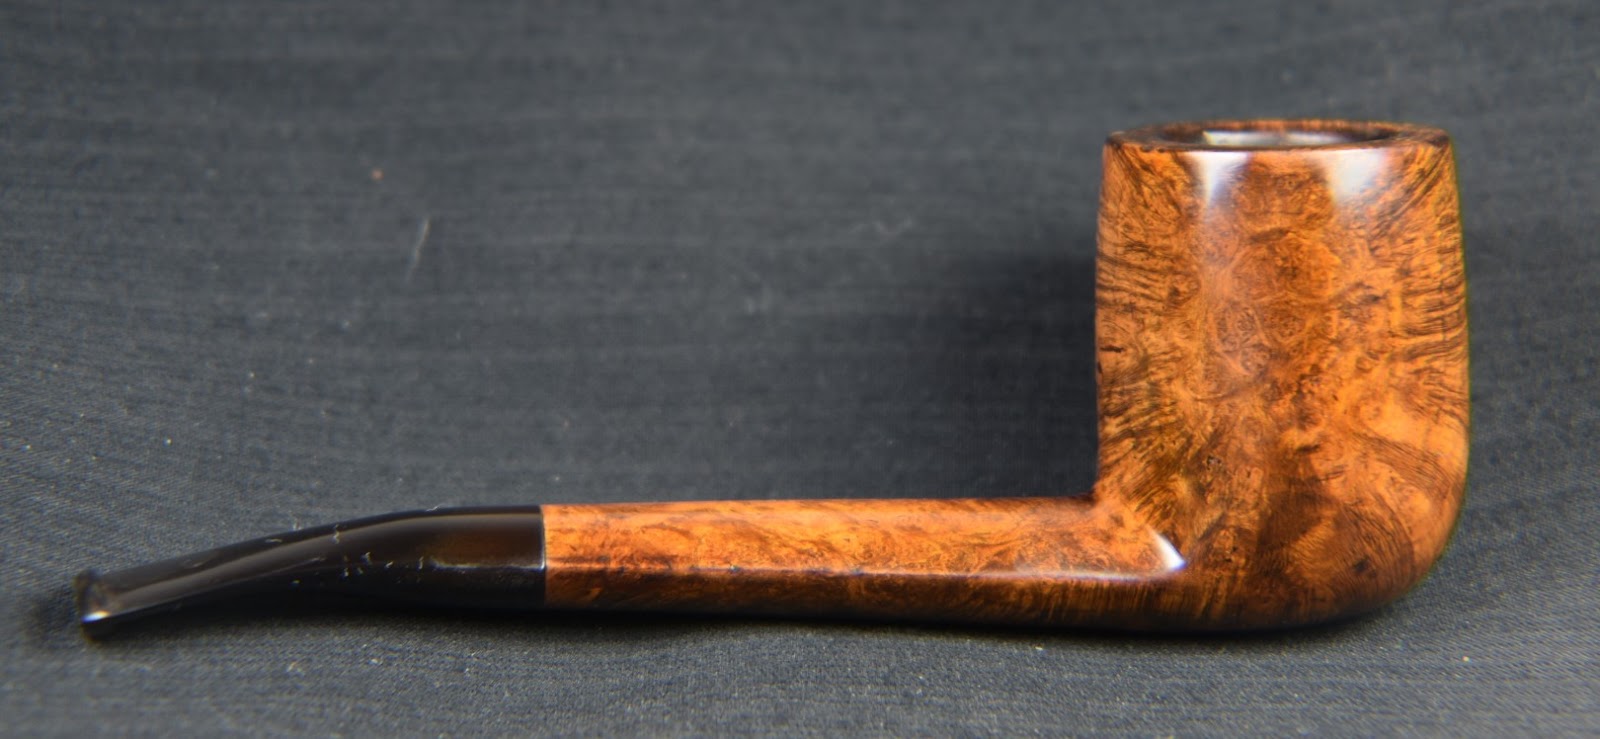
Below are some photos of the finished Marseille Oval Shank Volcano.
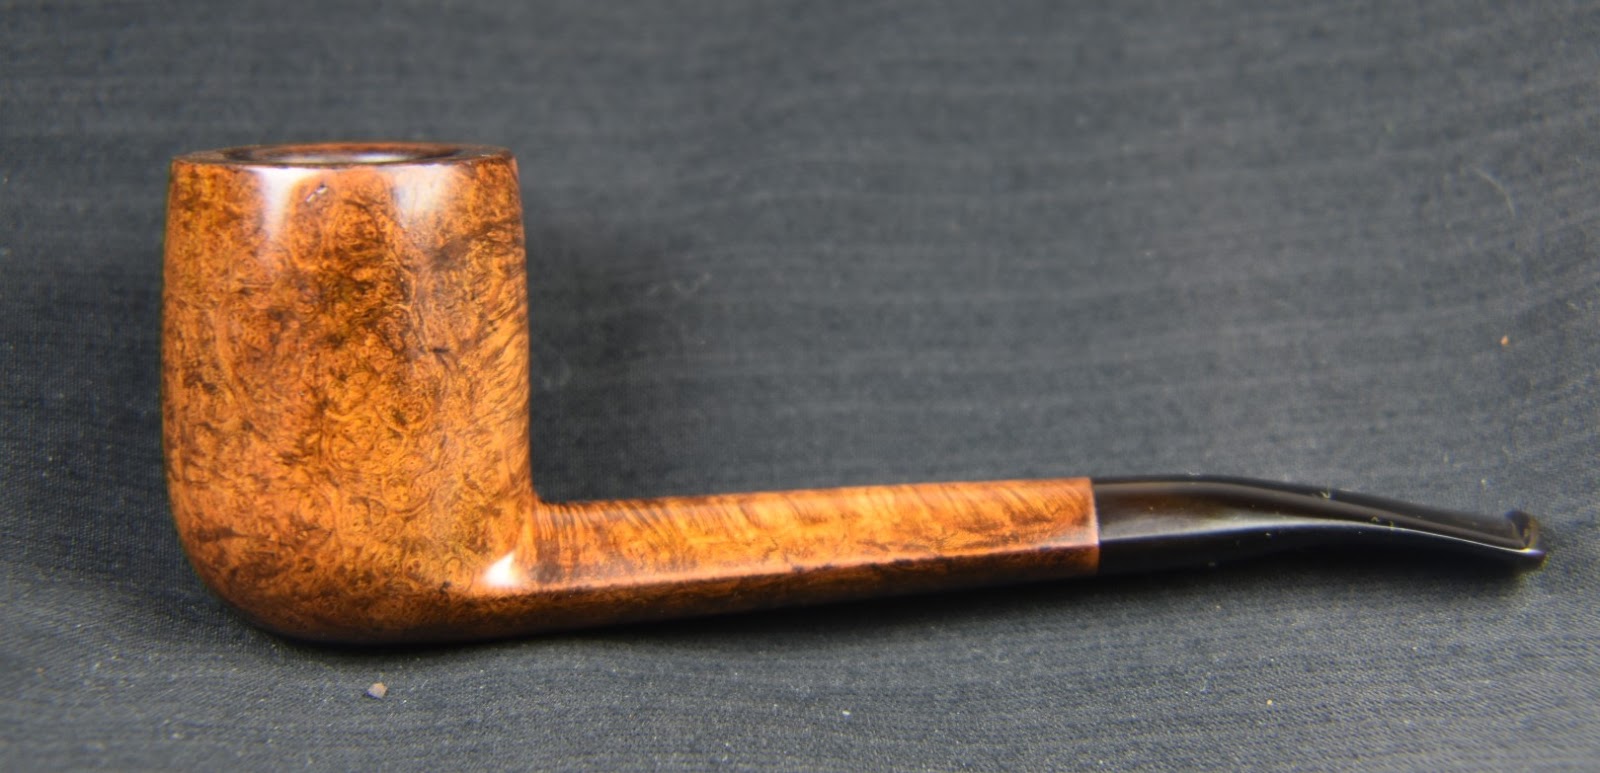
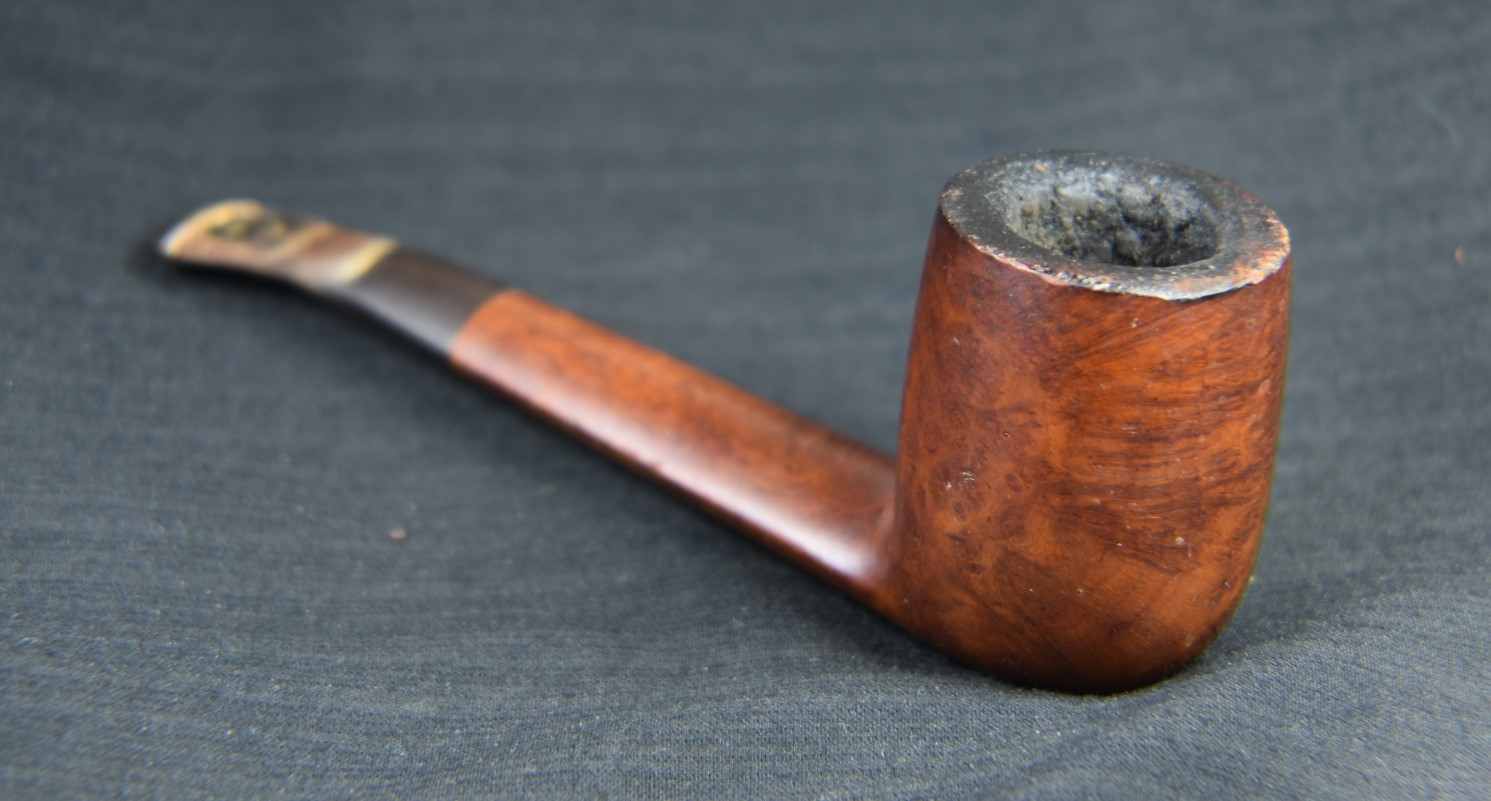
I will probably catch grief for calling this a squat apple and be corrected by some saying it is a tomato or an author but to my eye, it looks like an apple and to be specific an Cortland Apple sans the anthocyanins and their red. Sorry, my previous life as a chemistry teacher emerged and demanded recognition. This plump little darling caught my eye along with its long shanked Marxman coconspirator. The eBay listing only had two photos, the below is a screenshot of one of them:
Those adorable chubby cheeks demanded that I buy the pair. There was a little bit of drama but I’ll leave that to the blog about the Marxman but after a few days wait, the E. Wilke and Marxman both arrived.
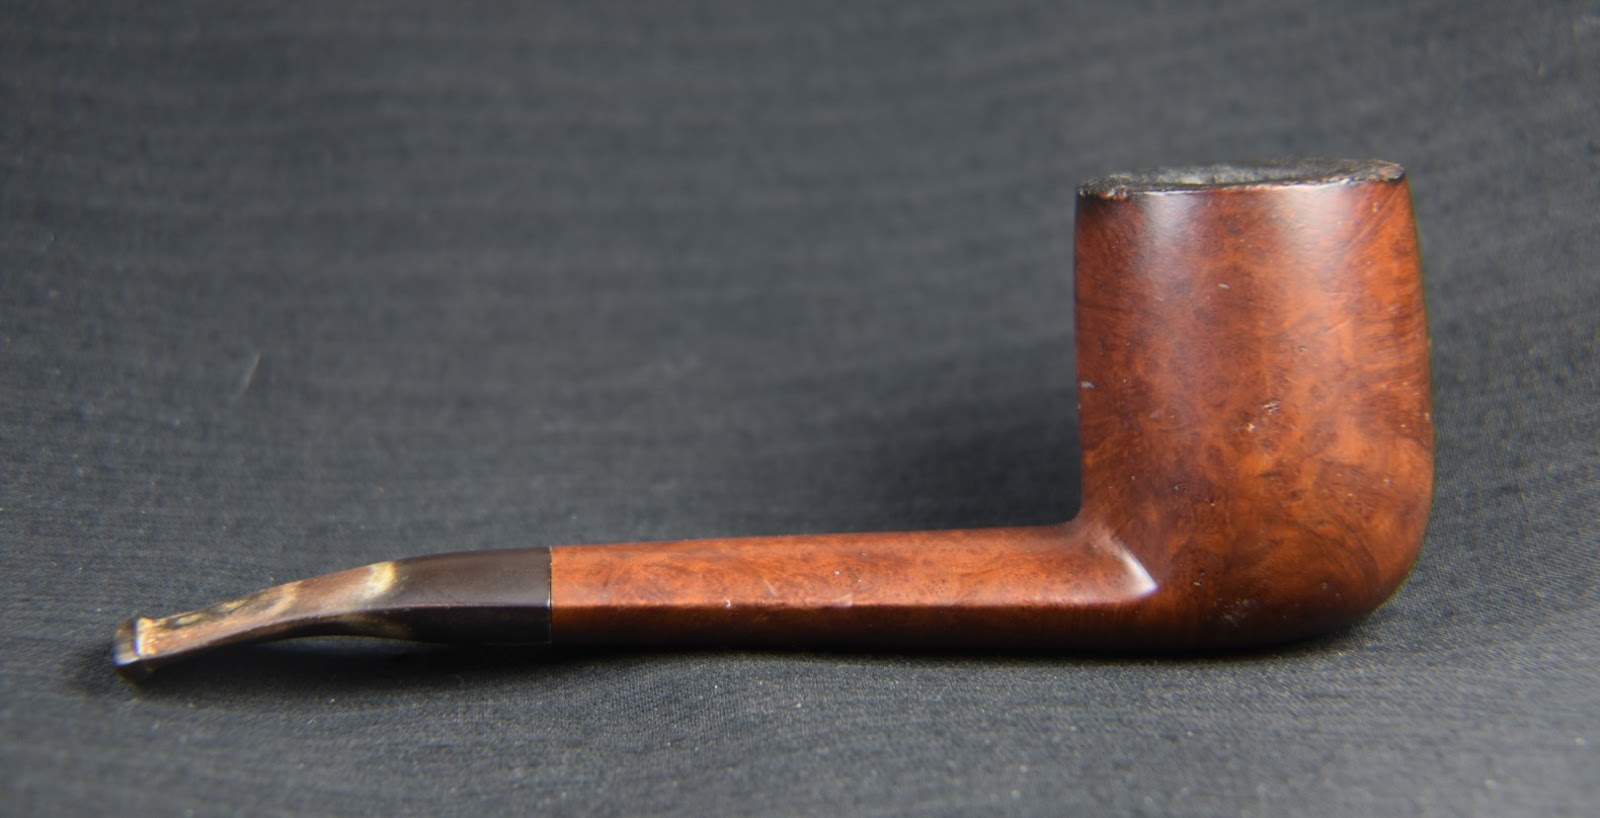
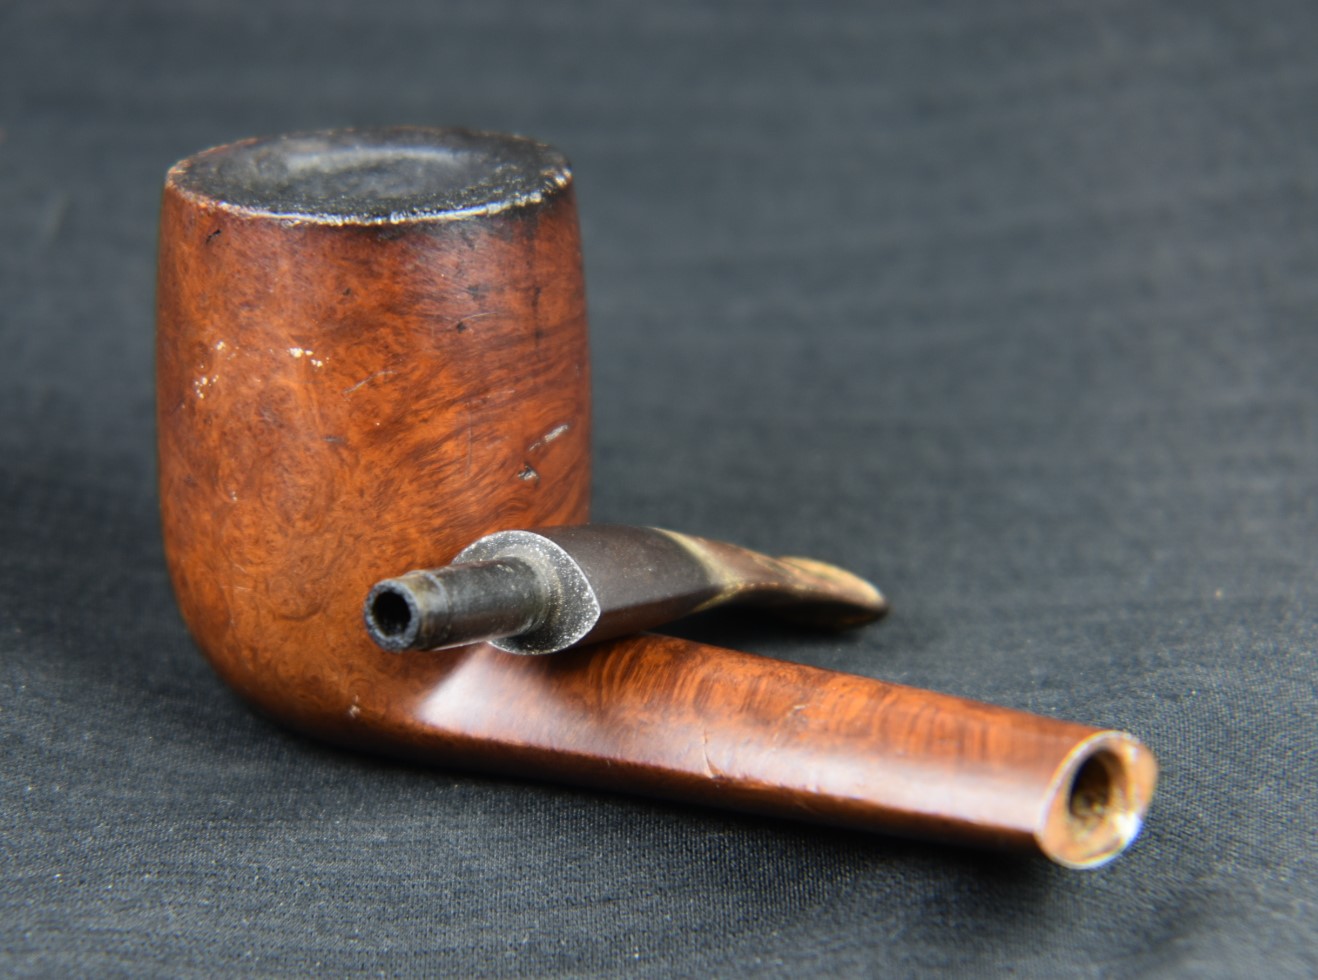
Below are some photos of the pipe prior to working on it.
Yeah, it had some issues but that shape, that amazingly round bowled shape. I was smitten. The stem looked like a Weber that had been left out in the sun. The pipe had obviously been smoked and showed the signs of moderate use, as shown by the charring and lava on the rim. There was also that strange dark streak of the right shank and that truly dreadful fissure on the bottom of the shank but those chubby cheeks could not be denied. I would reclaim this dilapidated doll and make her mine.
Background
E. Wilke stamped on the shank of this pipe refers to Edwin Wilke. According to pipedia.org,
“Edwin Wilke founded Wilke Tobacco in 1872. As the story goes, according to a 1937 New York World-Telegram article, he had no sons, and so he taught his two daughters, Anna and Louisa Wilke, how to make pipes and blend tobacco, and by his death in 1930 they were well versed in both trades, and adamant about only using quality briar. In 1950, when they were the focus of an article in the Sarasota Herald-Tribune, they were the only women pipe makers in the United States, and had sold pipes to Herbert Hoover, Lord Halifax, John Steinbeck and others. The sisters also blended pipe tobacco and repaired pipes. They did not, however, smoke pipes.
Wilke prided itself on “unpainted pipes”, and promised that only Macedonian briar was used, without paint, varnish, plug, or putty of any kind. As of 1950, some of their pipes were selling for up to $100.00, or just under $1,000.00 dollars today. By the release of a 1970 New York Magazine highlight of the shop, that claim had risen to $500.00, or over $3,000.00 today.
The Wilke Pipe Shop was located for decades at 400 Madison Avenue and 48th, in New York City, and in the 1970s opened a satellite store in the famed Wanamaker’s department store in Philadelphia, selling Wilke pipes made by Steven Johnson. In 1983, the brand was purchased by pipe maker Elliott Nachwalter and his wife, Carole Burns. They continued to operate the Madison Avenue store until the early 1990’s, at which point the couple moved to Vermont and Pipeworks & Wilke was born as a mail-order business.
Carole Burns[1] continued blending tobacco in Montpelier, Vermont till July 2017. Now John Brandt looks to continue blending Wilke’s traditional blends and bringing back some of the older blends from the early days to keep the 145 year old brand alive and growing.[2]“ (Wilke – Pipedia)
Now, this pipe did seem to fit a couple of the characteristics from the pipes.org article; it was unvarnished and it did not seem to have any putty filling imperfections in the briar. I cannot speak to the “Macedonian briar” as there is no stamp indicating the origin of the briar. I still think that the stem of this pipe reminds me of Weber made pipes from the same era. In researching further I found an old Google Groups discussion of E. Wile pipes from 2002. Here the user “” started a thread with the following,
“Can anyone give me a brief history about this manufacturer or brand? I
am curious about… if this was a NY company that made pipes, still in
The interesting part came from another user named “LDaneman”. LDaneman, states the following”
“As a former employee and pipemaker for Edwin Wilke Company, I can give you a
little history. The little shop on Madison Avenue was purchased by a Stanley Becker, a jewish NY lawyer. Some pipes were left over from Wilke’s hey-day, . . . I forget the name of the Italian pipemaker who did extra-large art deco shapes.
Through the 80’s the old (80+) tobacconist still blended up on the 4th Floor and I have fond memories of ‘time-traveling’ with him. The 524 blend was better than Dunhill, and the 400 was pretty good as well. The key was an unflavored golden Cavendish and a dark fine cut Cavendish in the 524.
I started a new pipemaking workshop in Philadelphia for Wilke’s concession shop in John Wanamaker’s department store. Our pipes made national news and we shipped tobaccos to European customers. My pipes sold from $65 to $1000 but our main pipemaker was Stephen Johnson. Last I heard Steve worked for Zino Davidoff.
Steve made some sweet smoking pipes and I smoke a few of my own make with the Wilke stamp, but still own a couple by Steve as well.
I was fired under dubious circumstances. The management of Wanamakers hated me since I successfully marketed Eltron razors when they failed, pens, and really hit the roof when I began blending a men’s fragrance.
Wilke in Philly folded less than a year after my departure into the perfume business and the New York shop was sold soon after that. I heard Wilke finally vanished after the buyer was hit with unpaid employee taxes and was bankrupted, but that is just a rumor to me, . . . I don’t know if that is true or not.
Most the Wilke pipes are not especially good, mass-manufactured by a factory whose name escapes me. Unless made by the old Italian fellow (an indented tenon is usually an indication of his make) or by Steve Johnson, . . . well just forget it.
Now, I have no reason to doubt anything that LDanman writes. The pipeda.org information indicates that the location of the Wanamaker’s in Philadelphia occurred in the 1970s and that LDaneman “Set up a new pipe making shop” on Wanamakers mezzanine. This too would likely be during the 1970s. His knowledge of the company is interesting but his jumping around in time, frustrating. The part about the Weber made pipes was particularly interesting as I thought the stem of this pipe looked like a Weber made stem.
The Weber connection is further supported by information again from pipedia.org,
“The firm grew to be one of the giants of the American pipe industry focusing itself in the middle price and quality zone. Trademark: “Weber” in an oval. Beside that Weber – especially in the years after 1950 – was a most important supplier for private label pipes that went to an immense number of pipe shops. Alone in New York, exactly the same pipes were found at Wilke’s, Barclay Rex, Trinity East, Joe Strano’s Northampton Tobacconist in Ridgewood, Queens, Don-Lou in Bensonhurst, Brooklyn… Nearly all pipes for Wilke were unstained and many models, for example the “Wilke Danish Bent”, could hardly deny originating of Weber.” (Weber Pipe Co. – Pipedia)
So, the question remains, “who made this pipe and when?” I honestly do not know. I feel pretty sure of my original thought that this was a Weber made pipe, likely from the 1970 or later. Produced for the E. Wilke company.
The Restoration
As usual the pipe made its way to the workbench and a clean denim piece. I actually undertook the restoration of two pipes during this project. That is not something I really like to do but my schedule has been filled with essential time sucking activities. Okay, I’ve been doing a bit of fishing and have not been at the workbench as much as I should.
The stem required some work before I could put it into the Before and After Extra Strength Deoxidizer solution (deox). This will be called pre-deox and involved; some scraping of calcium/oxidation, filing tooth dents and light sanding with a 400 grit sanding sponge.
The stem was also cleaning out internally with bristle pipe cleaners dipped in 95% ethyl alcohol.
The stem had trouble passing a pipe cleaner through the button so I did work on opening the airway a little bit. I used a tapered piece of an emery board to sand the interior of the airway.
The resulting airway was much better.
The stems of the two project pipes, the E. Wilke and another oval stemmed piece were suspended in deox with pipe cleaners as hangers. They each spent about four hours in the solution.
During this time I continued work on the E. Wilke stummel. The shank was cleaned out using a dental scraper, nylon shank brush, cotton swabs and pipe cleaners with 95% ethyl alcohol.
Once the shank was clean I turned to the tobacco chamber. The PiNet #1 and #2 blades along with the General triangular scraper and the Smokingpipes Low Country Reamer were used.
The below photo shows the results of each tool.
After reaming the chamber was sanded with 220 sandpaper wrapped around a wood dowel. The tobacco chamber showed no signs of charring or heat damage.
Next, the stummel went to the sink where it was scrubbed with undiluted Murphy Oil Soap and a nylon scrub brush. The soap was rinsed with warm water and the stummel dried with a cotton hand towel.
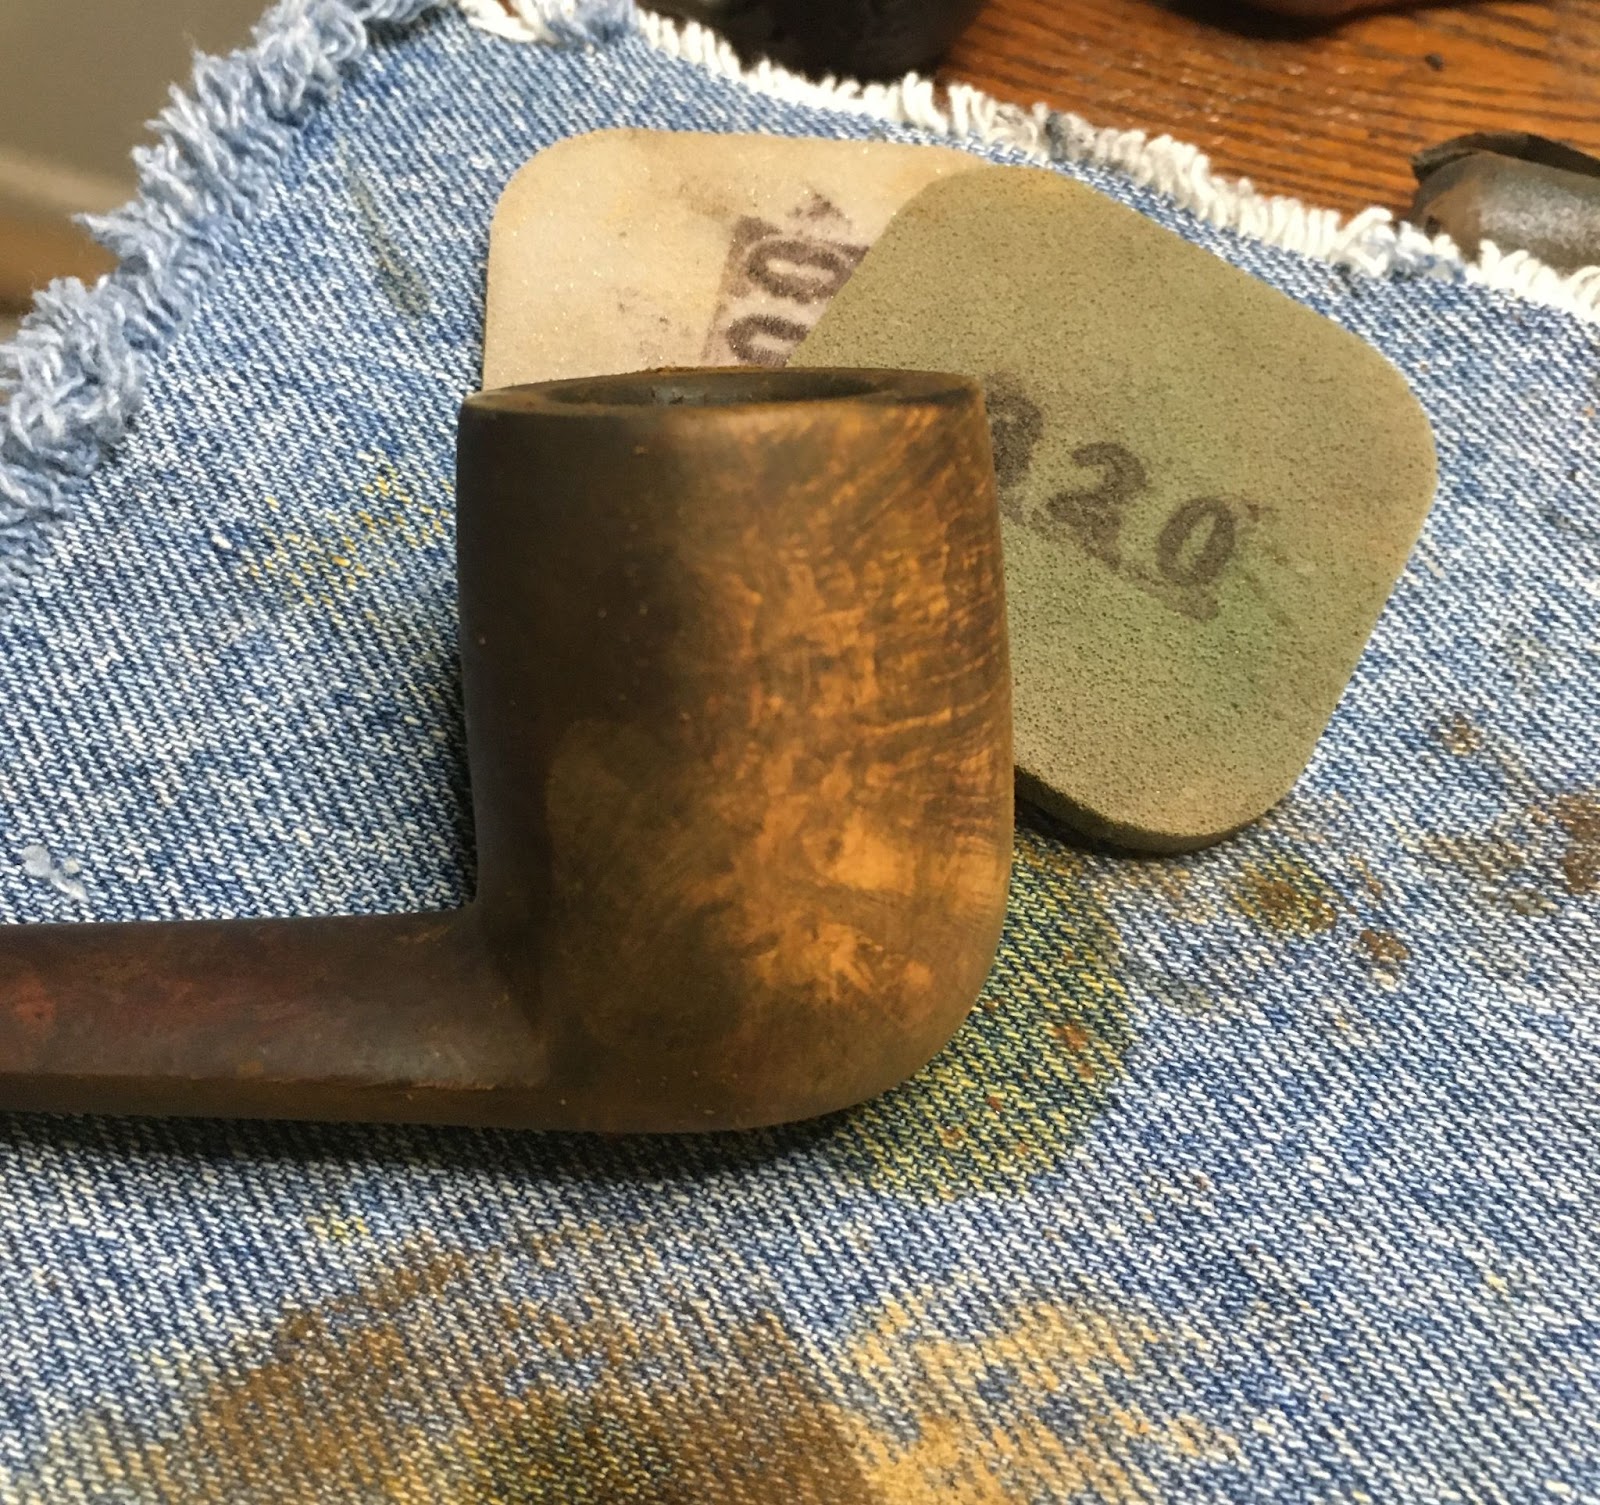
The scrubbing revealed an unsightly charred rim and a dark stain I thought was accumulated grime.
A second scrubbing of the stummel was done with no effect on the supposed grime.
Back at the workbench I got a good look at the two areas of concern. The charred rim would require topping and then some.
The rest of the stummel looked pretty good.
An alcohol wipe confirmed that there was no finish on the stummel.
I took the stummel to the counter where I laid a piece of 320 sandpaper flat on the counter.
Using a figure 8 motion I topped the rim removing the charred wood.
The results of the topping are shown in the photo below.
The charred area below the rim was lightly filed and I attempted to blend the filing to minimize the noticeability of the filing.
The dark streak on the lower right shank was some strange stain on the briar.
I have had good results using a saturated oxalic acid solution to bleach stains from wood and thought it might be useful for both the rim and the shank.
The oxalic acid was applied to the darkened areas with a cotton swab and allowed to sit for 20 minutes.
After the initial 20 minutes I applied more oxalic acid to the entire stummel. This was allowed to sit for another 30 minutes.
After the stummel was scrubbed a third time using Murphy Oil Soap and a copious amount of rinsing the stummel was dried using the cotton hand towel. Once dry the results of the oxalic acid were observed. The stummel looked better but not as good as I had hoped.
The darkened areas had been lightened but they remained darker than the surrounding briar.
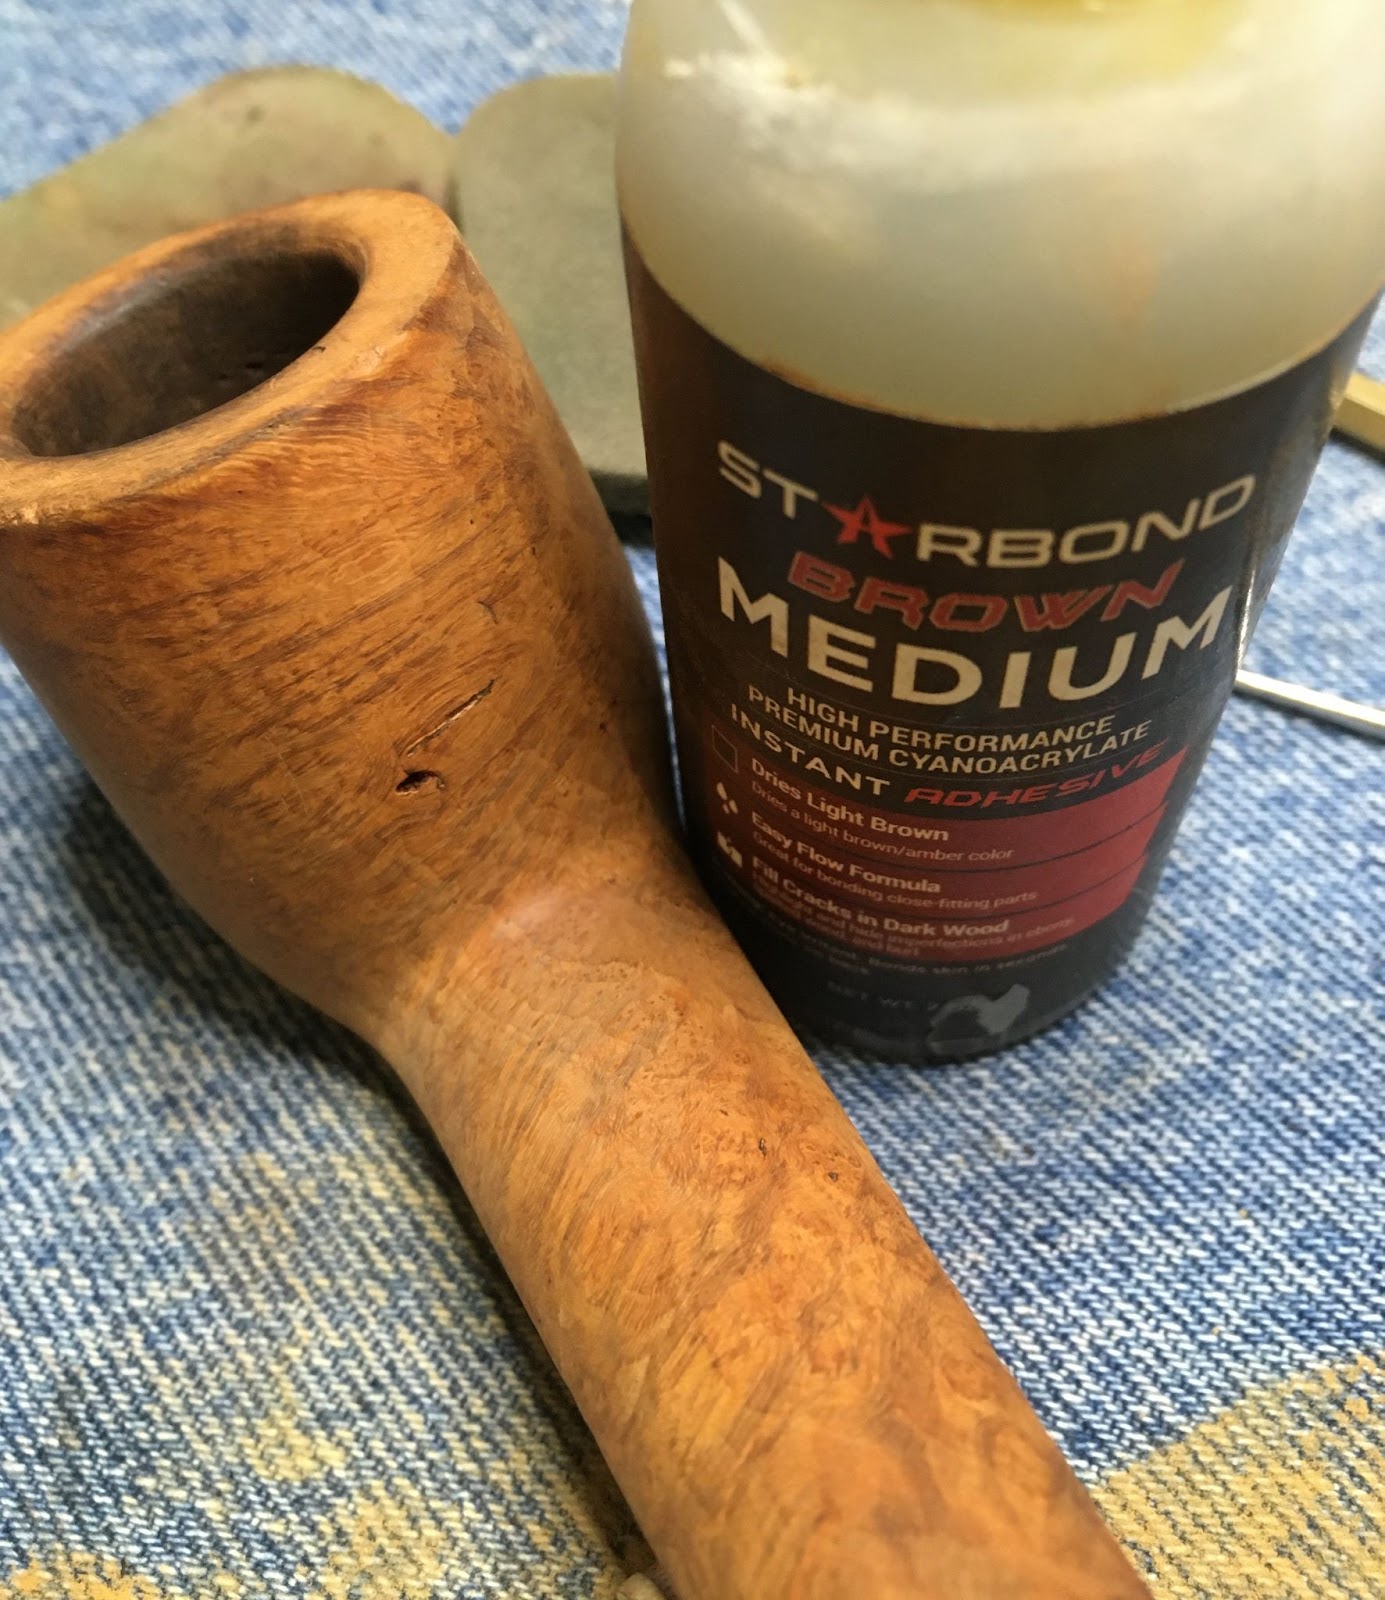
I started repairing the blemish on the bottom of the shank. I know E. Wilke was proud of their “no putty” but that pit was unacceptable to me.
I applied brown cyanoacrylate (CA, super glue) to the pit with a fly tying bodkin.
A dental scraper was used as a spoon to scoop a small amount of briar dust and place it on the wet CA.
The back of the dental scraper was used to press the briar dust into the wet CA in the pit.
Additional brown CA was applied to the pit after the dust had been brushed off.
A second application of brown CA was applied once the first had cured.
After the second application had cured and set up, I filed the fill using a small flat file to remove the new fill material and smooth the surface.
The new fill was then sanded with a 400 grit sanding sponge.
I sanded the entire stummel with a 400 sanding sponge followed by a sanding with a 600 sponge. I was looking for additional spots which might require CA filling. I found none.
I figured the best way to conceal the darker areas caused by the charring or staining was to give the stummel a contrast dye. I thought a black undercoat of dye might be the perfect camouflage. I covered the stamp with painters tape hoping this would prevent the dye from dying the stamp area. It didn’t.
The stems were removed from deox and allowed to drip excess solution back into the jar.
The E. Wilke stem was vigorously rubbed with a coarse shop rag to remove both remaining solution and oxidized vulcanite.
The stem was then scrubbed with Soft Scrub cleanser applied to make-up pads. This removed more oxidized vulcanite.
Below you can see the E. Wilke and the other restoration victim. Both stems had been oiled with mineral oil after their Soft Scrub ordeals.
The dye kit was gathered. It consisted of Fiebing’s Black Leather Dye, a cork to keep dye from the tobacco chamber, a lighter and a pipe cleaner as an applicator.
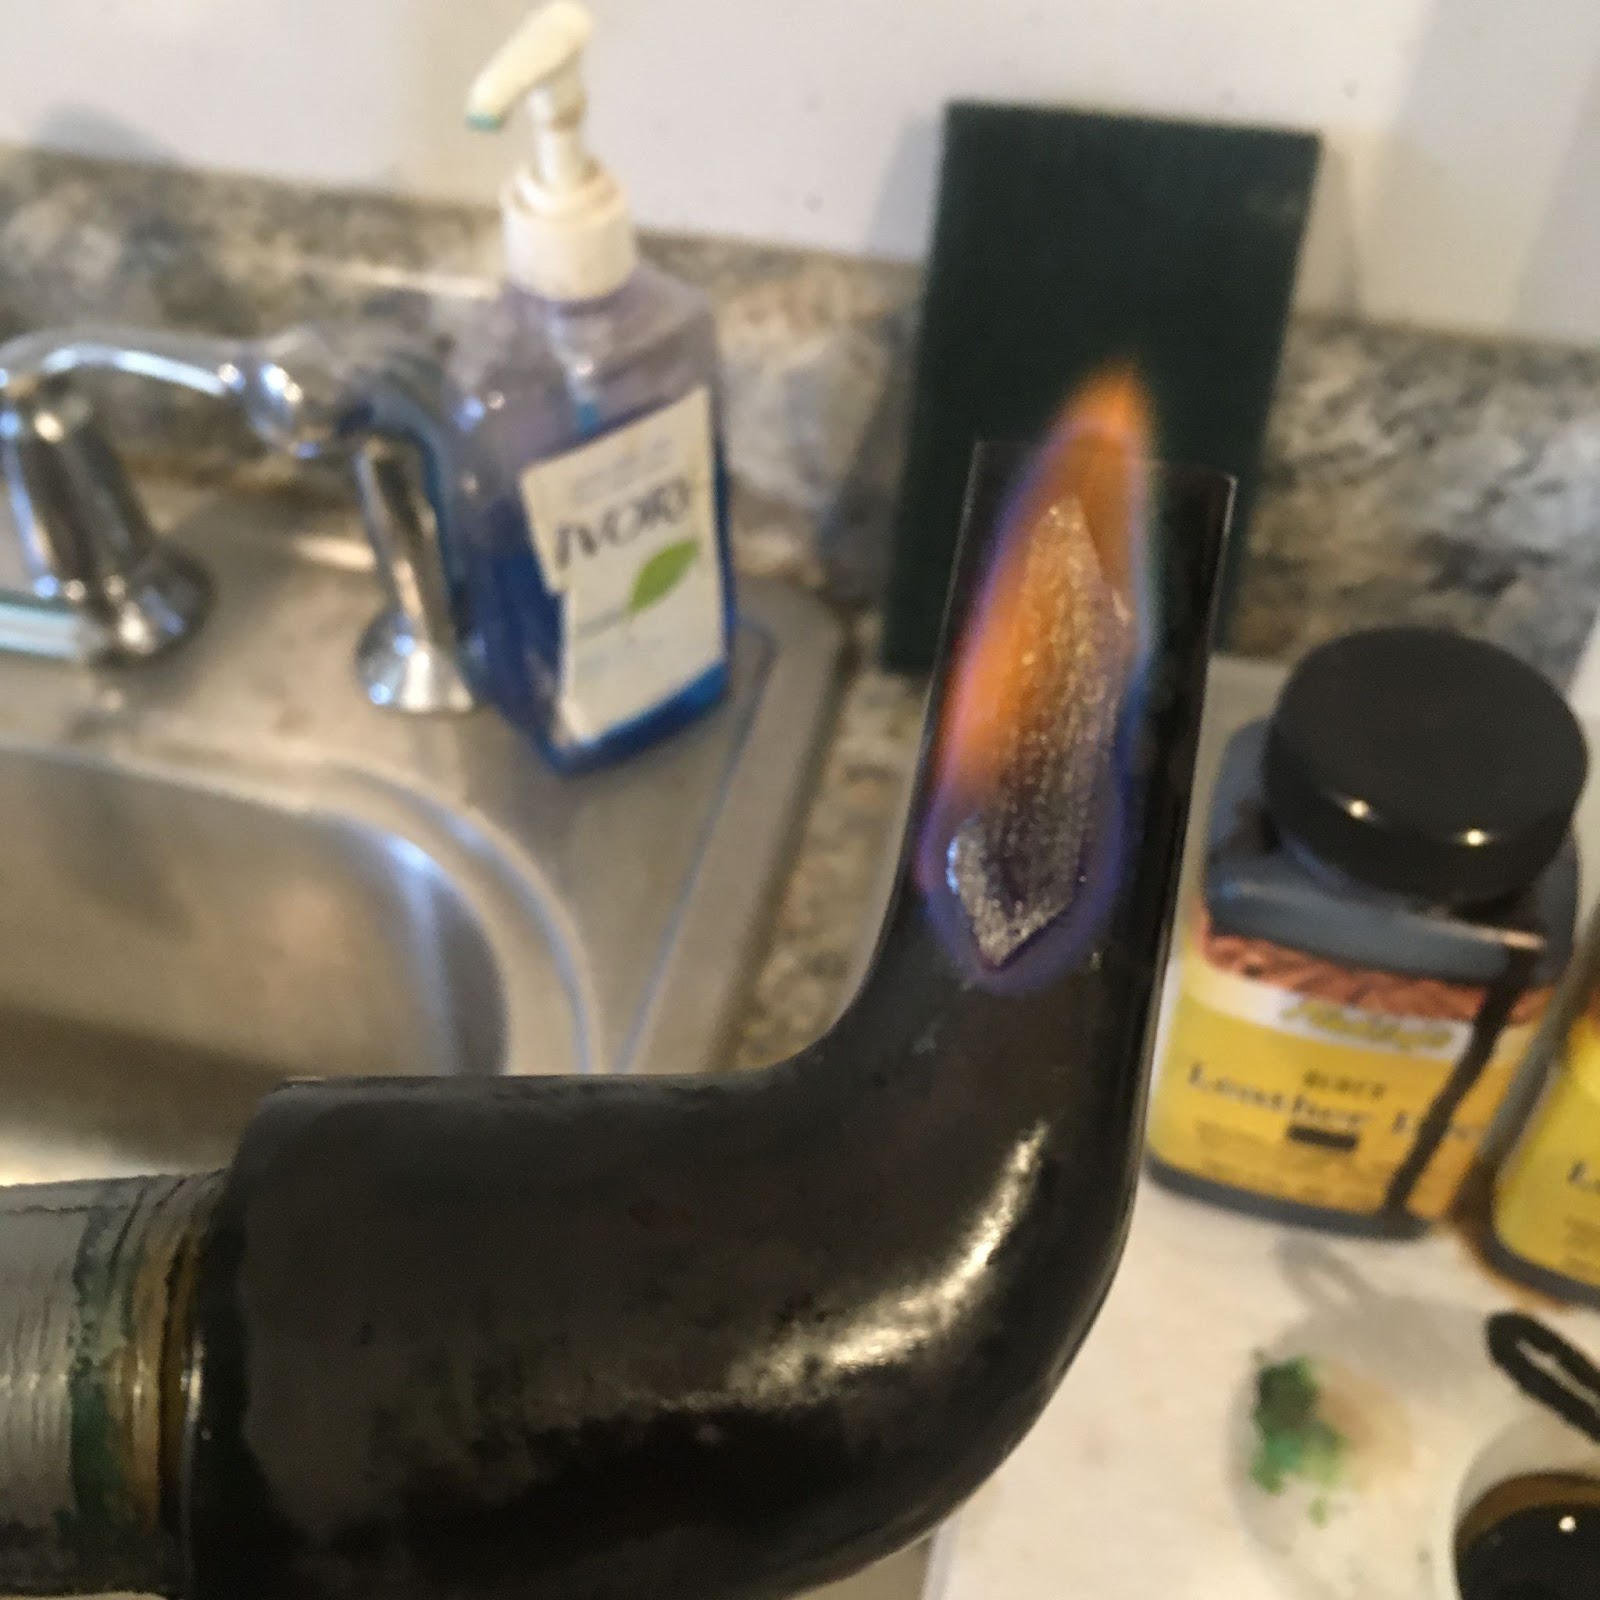
The Fiebing’s Dye was applied and flamed, burning away the alcohol solvent of the dye and fixing it to the briar.
The stummel was then rinsed with 99% isopropyl alcohol and wiped with a paper towel.
Back at the workbench the results of the black dye can be seen. The dye penetrated the softer grained briar more than the harder grain. A light sanding removed the outermost layer of briar revealing lighter and darker areas due to penetration depth.
Below is a photo of the sanded stummel.
The stem and stummel were then sanded with a series of sanding sponges from 400-3500 grit. The stummel was wiped with an alcohol dampened make-up pad between each sponge while the stem was rubbed with mineral oil and wiped with a paper towel between sanding sponges.
The stem and stummel were then worked with micro-mesh pads from 4000-12000. Again stummel wiping with an alcohol make-up pad between micro-mesh pads was done. Between pads the stem was runned with Obsidian Oil and wiped with a paper towel.
The pipe was then taken to the buffer where it received several coats of carnauba wax.
The final step was a hand buffing with a microfiber polishing cloth.
Overall, I am very pleased at how well this E. Wilke pipe turned out. Though it is likely not an example of the highest quality E. Wilke pipe of the company’s heyday, still is a lovely little piece. The contrast stain did a good job of concealing the blemishes that the pipe accumulated over the years of use. The stem polished up nicely and the glossy black accentuated the light and dark grain from the contrast dye. The thick walls and the cheekiness that they provide are even more pronounced with the finished pipe than they were when it arrived and I think it is far more attractive now. The dimensions of the Carlyle Oval Shank Dublin are:
Length: 5.00 in./ 127.00 mm.
Weight: 1.08 oz./ 30.62 g.
Bowl Height: 1.42 in./ 36.07 mm.
Chamber Depth: 1.06 in./ 26.92 mm.
Chamber Diameter: 0.72 in./ 18.29 mm.
Outside Diameter: 1.58 in./ 40.13 mm.
I do hope that you have found something here useful to your own pipe care, maintenance or restorations. If you like this sort of thing, please click the like and subscribe buttons. Thank you for reading the ramblings of an old pipe lover.
Loading…
Below are some photos of the finished E Wilke Squat Apple.
As a child of the 1970s I grew up with the series The Six Million Dollar Man. For those who never heard of this, it was a TV series where an astronaut crashes his ship and is badly damaged. He is rebuilt using “bionic” parts allowing him superhuman abilities. During the title sequence a narrator explains, “”We can rebuild him. We have the technology. We can make him better than he was. Better . . . stronger . . . faster.” For some reason this line kept going through my head during this restoration. Given the “faster” doesn’t work but the other two, most definitely. The pipe was one of 13 pipes won in an eBay auction from Germany. I was hoping to acquire some lesser known makers or lines of pipes to the US market.
The shape of this pipe is a tough one for me, it is a dainty pipe with a curved bowl. Is it a bent tulip, a chimney, a billiard? Heck, I don’t know, I’ll just use the 8497 stamped on the shank to identify the shape. As for the other stamps there was “Spitfire” in a flowing cursive script and GENUINE over BRIAR as a circle on the underside of the shank. Below is a screenshot of this pipe from the original eBay listing. It shows a repaired stem from a break, a chipped shank end and a good deal of excess glue, perhaps a failed clenching experience while mowing the lawn.
Below are some photos of the Spitfire before work had begun. Well, that is not entirely true. The break was held together by the glue until I tried to remove the stem. The stem was quite stuck. Unaware of my incredible strength, the glue broke while I tried to free the stem. Umm, there may have been a slight exaggeration there about my strength. The stem remained stuck within the shank piece as seen in the photos below.
Ok, you can see there are some issues here that will have to be addressed; the stem stuck in the broken shank and the broken shank being the greatest. The lesser issues include general dirtiness, stem oxidation, excess glue removal, tobacco chamber reaming and other typical restoration stuff. This is going to be a fun project.
Background
The first place that I searched was pipephil.eu for the name “Spitfire”. There I found the following:
(Sn-Ss — Pipes: Logos & Markings). Here you can see the same script style in the “Spitfire” stamping. The GENUINE BRIAR stamp is not represented but the four digit shape number is present. There is also a slight difference in the logo coloration of the bottom image from pipephil.eu. The bullseye shown is more indicative of the colors used by the British Spitfire fighter aircraft in World War Two.
I assume that the blue coloration of the logo in this Spitfire had merely faded over the years.
The next search site was pipedia.org. There “Spitfire” resulted in:
(Italian Pipe Brands & Makers R – S – Pipedia). The Lorenzo link took me to a nice bit on the history of the predecessors of and the formation of Lorenzo Pipes in 1969. Also, there was the following quote specific to the Spitfire line:
“A somewhat more bargain series was given its own brand name: Spitfire. Spitfires displayed 1:1 transferred Lorenzo models (mainly for 9mm filter) as well as smaller, more classically shaped pipes. These were also extremely popular.” (Lorenzo – Pipedia). The store takes a more tragic turn in 1983,
“In 1983 Lorenzo Tagliabue came to bitter grief: his little daughter, the only child, died of cancer. He lost all interest in the business and retired still in 1983, leaving no heirs who wished to continue the business. Lorenzo Pipes was licensed for and continued for a shorter period by Comoy’s of London (Cadogan / Oppenheimer Group). Then Lorenzo Pipes almost disappeared and Lorenzo Tagliabue passed away in 1987.
But this wasn’t the end. In 1988 Riccardo Aliverti and his wife Gabriella purchased all rights to the Lorenzo trademark from the Tagliabue family and production of the renown Lorenzo Pipes resumed.
The Aliverti family is involved in pipemaking since Romolo Aliverti, the father of the current owners, joined the Lana Brothers in 1920. He later reached the rank of technical director. No wonder that his son Riccardo showed an interest in pipe making. Riccardo began learning the pipemaking trade in 1954 at the age of fourteen under his father’s watchful eyes and succeeded him as technical director upon his father’s retirement in 1973.
Today the third generation of the Aliverti family is working for the company. Massimo Aliverti, Riccardo’s son, has been with the company as sales director since 1991. He works closely with his father and knows all phases of production. Massimo has established a broad customer base for Lorenzo around the world.
As far as the informations are reliable, Lorenzo’s better lines (One Star, Two Star, Three Star, Moscato, Spumante and the Grand Canadian) are made in Italy while the cheaper ones (New Era – Riesling, New Era – Poggio, Angera, Angera Satinato, Cadry, Churchwarden, Filtro, Arena, Cadore, Sport PS and Garden) are made in Albania by Tomori to benefit from the rich deposit of briar in Albania.
The website of Lorenzo’s American distributor SMS Pipes gives a good impression of today’s Lorenzo Pipes. SMS also offers a wide range of Meers.” (Lorenzo – Pipedia).
I think that it is safe to say that this pipe was made in Italy by Lorenzo most likely between the early 1970s-1983.
The Restoration
Breaking a pipe is seldom fun and breaking one while removing a stem is less fun than that. I suppose I could take some consolation in the fact that it had already been broken and the attempted repair was what had actually broken. Regardless, the pipe made it to the workbench. I immediately dropped the shank piece and tenon end into a small medicine cup with 95% ethyl alcohol. Apologies for not photographing that step. The alcohol worked quickly in freeing the stem from the broken piece of shank. The below photo has the broken piece of shank pressed in place though not glued, for the photograph.
I began with reaming the tobacco chamber. I thought the PipNet and the #1 blade would be narrow enough for this petit chamber. It was for the first 1- 1.5 cm then the chamber tapered.
I used a Tsuge reaming tool for this narrow chamber. This was followed up with the General triangular scraper.
I remember picking up the Tsuge tool after my first PipNet set lost the #1 blade to breakage. The chamber was then sanded with 220 and 320 sandpaper wrapped around a wood dowel and a Sharpie marker, respectively. There was no damage from heat or charring in the chamber but there were a couple of places where the chamber had experienced small dings, likely from previous clumsy reaming/scraping.
The shank was cleaned with cotton swabs and bristle pipe cleaners dipped in 95% ethyl alcohol.
The stummel was then taken to the sink for a scrubbing with undiluted Murphy Oil Soap and both a nylon brush and a brass wire brush. The soap was rinsed with warm water and the stummel dried with a cotton hand towel.
Back at the workbench the stummel was wiped with 95% ethyl alcohol on a make-up pad. This removed some stain from the briar.
The plan to repair the shank was this:
Glue a ¼ inch or 6.5 mm brass tube into the mortise well past the break.
Glue the broken shank end into place.
Fill the seams with cyanoacrylate (CA, super glue) and briar dust.
Recarve the rustication and redye the shank.
The mortise of the Spitfire was drilled at ¼ inch or 6.5 mm. I needed to deepen the mortise to implement my fix. I used a Brad Point Drill Bits 1/4-Inch Hex Shank Stubby Drill Bit in a screwdriver handle to extend the mortise approximately 1.4 inch (6.5 mm) past the furthest edge of the break.
The brass tube was slid into position to test the fit. So far, so good.
The pieces of briar refused to align precisely. Bah! Hmm, there was a layer of glue from the previous fix on the briar which kept the broken pieces from aligning correctly.
I began soaking the broken edges with acetone to soften the old glue.
While the glue was soft I worked it with a nylon brush. This helped peel the edges of the glue from the briar. The acetone would evaporate quickly so I had to soften and scrub quickly. Eventually the glue was removed.
The brass tubing was cut to length using a tubing or pipe cutter.
The brass tube was scratched up with 80 grit emery paper to increase the surface area for the glue to adhere to. The tube was pressed into place without the broken shank piece and Thin CA was allowed to seep into the joint. The broken shank piece was slid over the brass tube and situated correctly. Additional Thin CA was applied to these seams. The two pieces of briar were then clamped and allowed to cure.
As the CA was curing I began cutting the tenon to fit into the brass tube. This required the use of the VermontFreehand Adjustable Tenon Turning Tool. I made several cutts adjusting the cutter very slightly (approximately 1/8th turn of the adjustment screw). I feared taking too much material off and shattering the thin tenon. Once the tenon was close to the right size I began filing the new tenon and smoothing it with 400 grit sandpaper.
When the CA that set, I used a countersink bit to hand bevel the inner edge of the mortise.
The stem was pressed into place and the fit was not too bad. I had to file the top of the stem to fit the shank. This was done by wrapping the shank with a layer of masking tape and filing the stem with a small flat file. The lower edge of the joint would have to wait until I had the chip filled before I could fit it to the stem.
Since the seam where the two shank pieces joined was adjacent to the stamps care had to be taken to keep from damaging the stamp. I applied brown CA with the tip of a fly tying bodkin to the seam. Briar dust was then pressed into the wet CA. The briar dust caused the CA to cure almost immediately. The excess dust was brushed off with a brass brush. This was repeated to fill the seam in very small increments.
The same process was used on the carved surface seams.
To fill the chipped shank end, I applied a bead of brown CA to the area that I wanted filled. This wet CA was then pressed into the box of briar dust. The excess dust was brushed off with a nylon brush and another thin layer of CA was applied. This wet CA was again pressed into the briar dust. Once the chip in the shank end was filled with CA and briar dust the end was filed with a small flat file. The final fill was topped with a coating of Thin CA to seal the layers of brown CA and briar dust.
At this point I was getting impatient to get a look at the finished pipe. I opted to try buffing the stem’s oxidation into submission. In hindsight, this was a mistake. I describe it here so that you can avoid being as dumb as me.
I wrapped the shank with masking tape to protect it from the buffing.
Using a rouge compound I buffed the stem until I thought I’d removed the oxidation.
The problem was, the stem looked shiny but shiny brown. I wanted shiny black. I wetted a few make-up pads with Soft Scrub cleanser and scrubbed the stem. They removed a great deal of oxidation.
“Okay, I’ll quit being in a hurry and do it right,” I said to myself. I suspended the stem into the Before and After Extra Strength Deoxidizer (I refer to this as deox). It was allowed to soak overnight.
The next day I removed the stem and allowed it to drip excess solution back into the jar.
I like to scrub the remaining deox from the stem with vigorous use of a coarse shop rag.
The coarse texture of the rag absorbs the solution and removes more of the oxidized rubber as can be seen below.
The stem was certainly looking more black this time. There remained brown areas especially on the top side of the stem. I sanded the stem with a series of sanding sponges from 400-1000 grit. The zone immediately (1 cm) below the button was filed using the small flat file and further sanded. Once sanded I returned to the buffer and buffed the stem with white compound.
Pleased with the stem, I turned my attention to recarving the rustications on top of the fills. I used the Dremel rotary tool and a sharp carving bit.
I tried to keep the lines pretty much the same but to carve through the fill material. I very much wanted to eliminate any shiny CA spots.
The newly carved textures looked good but their color was off when compared to the rest of the shank.
I used a Mahogany Furniture Touch-up Marker to re-stain the briar to match the existing color.
Not bad.
Not bad, at all.
The stummel was given a coat of Before and After Restoration Balm, applied with a baby toothbrush and allowed to sit for 20 minutes.
20 Minutes later the Restoration Balm was hand buffed from the stummel using an inside out athletic sock.
The baby toothbrush was cleaned using 95% ethyl alcohol. Renaissance Micro-Crystalline Wax was applied to the stummel using the baby toothbrush. I applied two coats of wax allowing 10 minutes between coats.
The stummel was taken to the buffer where it was buffed using a clean flannel wheel. While there I applied several coats of carnauba wax to the stem and the stampings on the underside of the shank.
To address those two rough spots from previous reaming/scraping inside the tobacco chamber, I opted to use a maple syrup and charcoal bowl coating. I applied a very thin coating of syrup to the chamber using a cotton swab.
I then used a capsule of Activated Charcoal dumped into the chamber. Oh, note the pipe cleaner in the shank. This keeps the charcoal from getting into the airway. I covered the rim with a piece of masking tape and vigorously shook the stummel for several seconds to distribute the charcoal powder evenly onto the wet syrup.
After removing the tape, dumping the excess charcoal and giving the stem a good blow, don’t draw in, you’ll get a mouthful of charcoal. The final step was a hand buffing done with a microfiber polishing cloth.
This was a long and troublesome restoration. Little things like; not having the ¼ inch brass tubing and waiting for it to arrive, the old glue removal, fitting the brass reinforcement tube, cutting the tenon, and being dumb and skipping steps, made the whole process last for many days. In the end, I think the pipe turned out well. Yeah, like the pipedia.org article says, “A somewhat more bargain series”, it is a cheaper pipe. I enjoy the challenge of returning a pipe like this to working condition. The re-carvings turned out very nicely as did the re-staining. I think you would be hard pressed to notice the break repair if you could not see the seam on the smooth stamp surface. The stem also did polish up fairly well. The brass reinforcement will certainly add strength to the pipe and should keep it from having another break. It is still a dainty little pipe which would probably be a great addition to someone who loves Virginia flake tobacco in a tall narrow bowl. The dimensions of the Lorenzo Spitfire Bent Billiard 849 are as follows:
Length: 5.37 in./ 136.40 mm.
Weight: 0.87 oz./ 24.66 g.
Bowl Height: 2.02 in./ 51.31 mm.
Chamber Depth: 1.75 in./ 44.45 mm.
Chamber Diameter: 0.61 in./ 15.49 mm.
Outside Diameter: 1.24 in./ 31.50 mm.
I do hope that you have found something here useful to your own pipe care, maintenance or restorations. If you like this sort of thing, please click the like and subscribe buttons. Thank you for reading the ramblings of an old pipe lover.
Loading…
Below are some photos of the finished Lorenzo Spitfire Bent Billiard 8497.
The thing that drew me to this pipe for purchase and restoration was the thick briar wall of the Dublin shape. Recently I have become smitten by thick walled pipes. I know that I live by the phrase, “change is evil and must be destroyed” but this is different. I mean, thick walls are just cool, right? Both literally and figuratively. Well, I saw this multinational beauty, an Italian from Dublin, and had to have it. The auction was won and the pipe made the journey from Cedar Park, Texas all the way to the Northern Time Zone of southeast Nebraska. The stamps on this pipe read: Barontini, in a stylized script over SULTANA on the shank to and KUTTEL over SELECTION with a slightly offset B6 on the shank’s bottom. Below are some photos of the pipe as it appeared before any work was done.
The pipe looked to be in good condition with no obvious damage or evidence of mistreatment. There was of course the expected cake within the bowl, some tooth chatter near the button and oxidation of the stem. Other issues that appeared upon closer examination were the numerous fills and the dreaded clear coat.
Background
In researching the Barontini name, I first visited pipephil.eu for an affirmation of what I expected to be of Italian origin. There was what I had expected, an Italian flag.
(Baro-Bd — Pipes : Logos & Markings). There was no exact match to the stampings but this was obviously the same maker. The stylized signature script was an exact match and the fourth photo from the top had a shape number of B8 and was a very close match to this pipe and the B6 that it wears. The fifth photo from the top middle column, alludes to a briar band and an apparent black acrylic band at the stem shank joint. This also matched the pipe in hand. The stem of my pipe was lacking any of the cool logos of the included Barontinis which saddened me. None of the associated links lead to further information or similarities except for the “L’artigiana” link. Here there was a photo of a pipe which had a similar briar band on the stem.
Next, I turned to pipedia.org for a bit more history on the Barontini company. Not much information was there to be had. I include it here in its entirety:
“In 1890 Turildo Barontini opened a factory for the production of briar. In 1925 his son Bruno began to produce the first pipes. Cesare Barontini, son of Bruno, started direction of the factory in 1955, and still runs it together with his daughters Barbara and Silvia.
“”Cesare” is a second brand produced by Cesare Barontini of Livorno / Italy. Cesare Barontini headed the company from 1955 on.
Another Barontini 2nd is named “Aldo Velani“. The name is fiction. Cesare Barontini Pipes are still relatively unknown and under appreciated here in the United States. They do however offer a value rarely matched by some of their more recognized Italian counterparts. Barontini makes very fine pipes, particularly his premium lines. They offer a fine smoking experience at quite a bargain. There are a few brands of Italian pipes on the U.S. market that are hardly known in Italy, as they are made in factories dedicated to the export trade. Aldo Velani is a line imported from Italy by Lane Limited, Dunhill’s distributor. Made mostly in Livorno by Cesare Barontini, one of the best known private-label manufacturers, Aldo Velani pipes are classic shapes with an Italian ‘twist,’ according to Frank Blews, a spokesman for Lane. “Billiards with more ‘ball,’ bulldogs with more ‘jaw,”‘ is the way he characterizes the line. A medium to large pipe specifically developed for American tastes, the finishes use the names of Italian wines – Soave, Novello, Barolo, Refosco – to suggest their colors, and there is a lot of ornamental work.” (Cesare – Pipedia). The phrase “Aldo Velani pipes are classic shapes with an Italian ‘twist,’” strikes me as an apt description of this pipe. I referred to it earlier as a “multinational beauty, an Italian from Dublin”. This sounds like exactly what Barontini is making with their Aldo Velani line – a traditional shape with a signature, Italian, twist.
I could not find any information as to Barontini employing P-lip (Peterson style) buttons on their pipes nor were any shape charts discovered. Perhaps some things are better off left as mysteries. This mysterious Dublin from Italy seems to be an excellent illustration of that idea.
The Restoration
I broke from tradition with this one and opted to not use a stained denim piece over the stained green flannel which underlies the denim. I thought you might like a change. Or, I was too darn lazy to get up and get a piece of denim from 6 feet (2 m) away.
The new-to-me PipNet got to go to work with this one along with the rest of the ream team.
PipNet #3 blades started the process of reaming.
The #4 blades continued and were followed up by the Smokingpipes Low Country reamer and the General triangular scraper. All of them were followed by the 220 sandpaper wrapped around the wood dowel.
The sanded tobacco chamber was taken to bare briar and appeared free of any heat damage. A condition the interior rim was not so lucky to avoid as there was some charing around the edge.
Another view of the interior of the tobacco chamber and the unsightly fill of the rim. Oh, you know that has to go.
And go it did. The old putty was picked out using a fly tying bodkin and a dental scraper. The old putty was surprisingly hard.
So hard, in fact, that I could not get all of it out. I’ll get more of it in a few minutes.
I used saliva and light scraping with a sharp pocket knife to scrape away some of the charred briar around the rim. That helped but the dark ring persisted.
Moving on to cleaning out the airway of the shank was the next task. I used a dental scraper to remove some of the tar and smoking residue then scrubbed the airway with cotton swabs and bristle pipe cleaners dipped in 95% ethyl alcohol.
My acetone in the acetone jar was getting pretty depleted due to use and evaporation. I unfortunately did not have more on hand. I tried to use a make-up pad dipped in the acetone to remove the finish on the stummel.
The finish was old, hard and thick. A trifecta of resistance to removal. I lightly sanded the stummel avoiding the stampings and placed the stummel into the jar to soak.
I had to repeat this twice, once for each end of the stummel since I could not completely submerge it into the remaining acetone.
After two soakings in the acetone the finish began to relent and was mostly removed with some rubbing with a make-up pad dipped in acetone. The stampings remained finish covered due to my unwillingness to sand. I needed fresh acetone but didn’t want to drive into town for a $1.25 bottle of the finish removing elixir. Fortunately A buddy and his son were coming down to go fishing and I asked them to pick up a bottle for me.
The shiny spots all indicated places with finish remaining.
The below photo is of the stamp on the bottom of the shank.
My delivery arrived and a quick fishing trip gave the remaining finish a short reprieve. Later that evening armed with a fresh bottle of acetone the finish was removed. Another benefit of the acetone was that it softened up the fills allowing me to pick the material out far more easily.
And there were quite a few fills to remove.
To refill the pits I used brown cyanoacrylate (CA, super glue) by itself or with briar dust. I wanted to see if I could use layers of CA only on the rim hoping to achieve slightly transparent fills. While on the stummel I applied the CA to the pit and pressed briar dust into the wet CA. In both cases the CA was allowed to cure or dry then it was filed using a small flat file and smoothed with a 400 grit sanding sponge. If needed additional applications were done. The photo below shows application #1 to the rim.
The rim was propped to allow the CA to level and cure on its own.
While the CA was curing I turned my attention to the stem. I neglected to photograph the cleaning of the stem’s airway. This was done with several bristle pipe cleaners dipped in 95% ethyl alcohol. Those tooth marks had to go. I used the small flat file to filed away material and blend the surface. This stem was rather thick feeling between my teeth and I did not feel the need to fill the dents with black CA. After the filing the stem was sanded with a 320 sanding sponge followed by a 400 sponge.
The CA on the rim contracted as it cured and required a 2nd application to the deepest pit. The two smaller fills can be seen in the photo below at 2:00 and 9:00 positions.
The big rim pit needed a third application.
Below you can see the other fills receiving their final sanding.
Once the fills were done, I taped the stamps and began sanding the entire pipe with a series of sanding sponges from 400-3500. Between each sponge I wiped the stummel with a make-up pad moistened with alcohol to remove sanding debris. The stem was rubbed with mineral oil and wiped with a paper towel.
After the final sanding wipe I removed the painters tape and wiped the shank with alcohol to remove any remaining adhesive from the tape. The pipe was then worked with a series of micro-mesh pads in grits 3600-12000. Between each pad I wiped the stummel with a make-up pad moistened with alcohol to remove debris. The stem was rubbed with Obsidian Oil and wiped with a paper towel.
The pipe was then given a coating of Before and After Restoration Balm and allowed to sit for 30 minutes.
The Restoration Balm was removed with an inside out athletic sock. Sorry, I neglected to photo-document this step. The stem was then hand polished using Before and After Fine Polish followed by the Extra Fine Polish. Both compounds were applied by my fingertip and rubbed with a soft cotton cloth.
Overall this Barnotini Sultana Kuttel Selection B6 turned out very nicely. I love the shape and the thick walls. The pipe retained some of the contrast stain, enough that I did not think additional dying was needed. It did lose some of the deeper reddish hues which it had originally. I think the red and the thick clear coat were only used to hide the numerous fills and their absence added to the attractiveness of the briar. Okay, that is pure conjecture but I still think it looks better with a more natural briar than all the red. The vulcanite of the stem polished up nicely. If you are wondering why I did not use any deoxidation products on the stem it is because the filing and sanding were adequate to remove the oxidation without them. The dimensions of the Barnotini Sultana Kuttel Selection B6 are:
Length: 6.04 in./ 153.42 mm.
Weight: 1.81 oz./ 51.31 g.
Bowl Height: 2.07 in./ 52.58 mm.
Chamber Depth: 1.83 in./ 46.48 mm.
Chamber Diameter: 0.88 in./ 22.35 mm.
Outside Diameter: 1.72 in./ 43.69 mm.
I do hope that you have found something here useful to your own pipe care, maintenance or restorations. If you like this sort of thing, please click the like and subscribe buttons. Thank you for reading the ramblings of an old pipe lover.
Loading…
Below are some photos of the finished Barnotini Sultana Kuttel Selection B6.
Just when I think I have moved on from my fascination with World War Two pipes I get drawn back in. Though this old pipe is more of a reminiscence of my youth and the semi annual visits to Sears for new school clothes. The candy counter was within the first 20 yards of the entrance and I could usually count on a white paper sack with a dollar’s worth of Swedish fish to help tide me through the horrendous task of trying on new clothes. I do not recall seeing pipes under the glass counter. I do recall that this was the only way I had ever seen Swedish fish though. Why the mention of Sears in this introduction? Well, I guess you will just have to read the “Background” for the answer to that question.
This lovely old Yorkshire Natural appears to live up to it’s name – natural. There seems to be little stain and no finish coating. The stamps on the left shank read; Yorkshire (script style lettering) arched (concave up) over NATURAL over ALGERIAN BRIAR arched (concave down).
This was looking like a straightforward restoration. Yes there were a lot of fills that I wanted to redo but other than that the pipe was in great condition. The stem was not badly oxidized and the bowl was not heavily caked.
Background
OK, you have waited long enough. Here is the reason for my back to school clothes /Swedish fish stroll down memory lane. According to pipedia.org, “Yorkshire Pipes was a brand sold exclusively through Sears Roebuck Catalogs, as seen in this 1941-42 catalog page. They were made in France of Algerian Briar, and some of the model names were: Bond Street, Royal, Aristocrat, Natural and Straight Grain. They were not stained nor finished with laquer, and had a natural honey color.”
For a second source confirmation of the heritage of the Yorkshire Natural in hand, I turned to pipephil.eu. Here I found the below images. Again it is confirmed that Sears & Roebuck sold the Yorkshire brand of pipes but here they mention that the pipes were made by Gasparini.
This creates a bit of confusion in my old damaged brain. The pipedia.org entry states a French manufacturer and the pipephil.eu entry states Gasparini. Last time I checked, Gasparini was and is an Italian maker. In examining the stamps the Yorkshire Natural that I have has stamps identical to the image from pipedia.org on the far right. So, I’ll say that this old girl is a French made apple from the 1940’s-1950’s. I know, not very specific with either part of the provenance. That might be the reason this blog is free – lazy Gen-X slacker of an author…
This next part is a little thought that I had and found entertaining. The location of the Sears of my youth was Omaha (yeah, that’s where I grew up). Sears was at a mall called Crossroads Mall. It was opened in 1960. The below photo shows the Sears entrance in 1961 with a crowd of people waiting to get in. I actually remember sitting there like that once.
The second photo below, is an image of Sears from 2019 taken from the same side of the building.
(https://omaha.com/photos-crossroads-mall-through-the-years/collection_086b8140-a744-5e25-a662-8e2aaba4858b.html#40). The entire mall lasted a mere 59 years, three generations of people. Now I find the fact that the entire mall was built, utilized and destroyed in about ½ the time that this single little pipe from the same company has been around, amazing. Businesses and buildings come and go but the pursuit of a relaxing smoke and the contemplation that it brings is a human pursuit which has survived for centuries. Enough of me blathering on let’s get to the restoration.
The Restoration
Here is our star taking up position on a clean piece of denim on the workbench.
The reaming crew was gathered; PipNet with #2 and #3 blades, Smokingpipes Low Country reaming knife, General triangular scraper (with the tip ground off) and 220 sandpaper wrapped around a wood dowel all atop a plastic coated shipping envelope.
The PipNet with the #2 blades did the lion’s share of the work, again. The #3 blades were too tight of a fit so the Kleen Reem pipe tool was used. It actually was a touch too small when fully extended but I pressed sideways with it around the bowl. The scrapers were used to finish the scraping.
The reamed bowl showed no signs of any damage from excessive heat. The chamber was sanded with 220 sandpaper on the wood dowel and 320 sandpaper with my finger.
The shank was far dirtier than I figured it would be. The initial wetting of the airway with 95% ethyl alcohol on cotton swabs produced a heavily blackened cotton. I then poured 3-4 ml of the alcohol into the bowl and scrubbed with a nylon shank brush. I then poured the alcohol into a medicine cup. This airwar would require a lot of scraping with the dental pick to clear as much of the accumulated tar as possible before further scrubbing.
Several scrapings later, the scrubbing with the nylon shank brush and the cotton swabs started to work their way through the accumulated smoking residue and eventually the airway was cleaned.
The stem proved much easier to clean than the shank. Apparently the previous steward was not averse to using a pipe cleaner on occasion. The airway was cleaned with bristle pipe cleaners dipped in 95% ethyl alcohol.
I then took the stummel to the sink for a scrubbing with undiluted Murphy Oil Soap and a nylon scrub brush. The soap was rinsed with warm water and dried with a cotton hand towel.
Back at the workbench the stummel was wiped with a make-up pad dipped in 95% ethyl alcohol. Very little color came off the briar indicating that surface was bare wood. Most of the color on the pad below was from the rim.
I began picking the old fill from the pits on the surface of the stummel. I counted 14 as I went along. The fills were generally solid and required a bit of force with the fly tying bodkin to get them out. ?Why take them out, then?”, you ask. Because I didn’t like the color.
To refill all 14 of the newly excavated pits, I used brown cyanoacrylate (CA, super glue) and briar dust. I dipped the fly tying bodkin into the CA then applied a small amount to the pit and worked it into the hole. I then used the dental scraper to scoop up a tiny scoop of briar dust and piled that onto the wet CA. The dust was then pressed into the pit with the heel of the scraper. Excess dust was brushed off with a brass brush. I only did about 2-4 holes at a time to avoid the CA curing before I had pressed the briar dust into the pit.
With all 14 pits refilled, I used a small flat file to file the CA/briar dust bump off. Then sanded the area with a 400 grit sanding sponge. After all of the pits had received one application and were sanded, I reapplied CA and additional briar dust. The process was repeated until the pits were smooth and flush with the surrounding briar. The stummel was then sanded with a 600 grit sanding sponge and wiped with a make-up pad dipped in ethyl alcohol.
I lightly topped the rim using 320 and 400 sandpaper laid flat on the countertop.
The stummel was stamped NATURAL. I wanted to keep this color finish true to the stamping. My first reaction to a stummel with this number of pits would normally be to give it a contrast dye of black. That would certainly conceal many of the fills but would also violate my sensibilities of maintaining the natural color of the stummel. To lighten the aged briar I decided to treat the wood with an application of oxalic acid. This “bleaches” the surface of the briar and can significantly lighten stained briar. If you are interested in a more heavily stained project see the W.O. Larsen restoration. The oxalic acid was applied with a cotton swab. I wetted the entire exterior 2-3 times and let it sit for 30 minutes before rinsing with copious amounts of was while scrubbing with a toothbrush.
Once dried the stummel looked a bit lighter and more vibrant than it did prior to the oxalic acid.
The stummel then had painters tape placed over the stamp and was sanded with a series of sanding sponges 1000-3500. Between each sponge I wiped the stummel with an alcohol dampened make-up pad.
The stummel was then micro-meshed with 4000-12000 pads. Between the pads I wiped the stummel with make-up pads wetted with ethyl alcohol.
The stummel was then given a coating of Before and After Restoration Balm and allowed to sit for 30 minutes.
After 30 minutes the Restoration Balm was wiped from the stummel using an inside out cotton athletic sock. The grain looked wonderful.
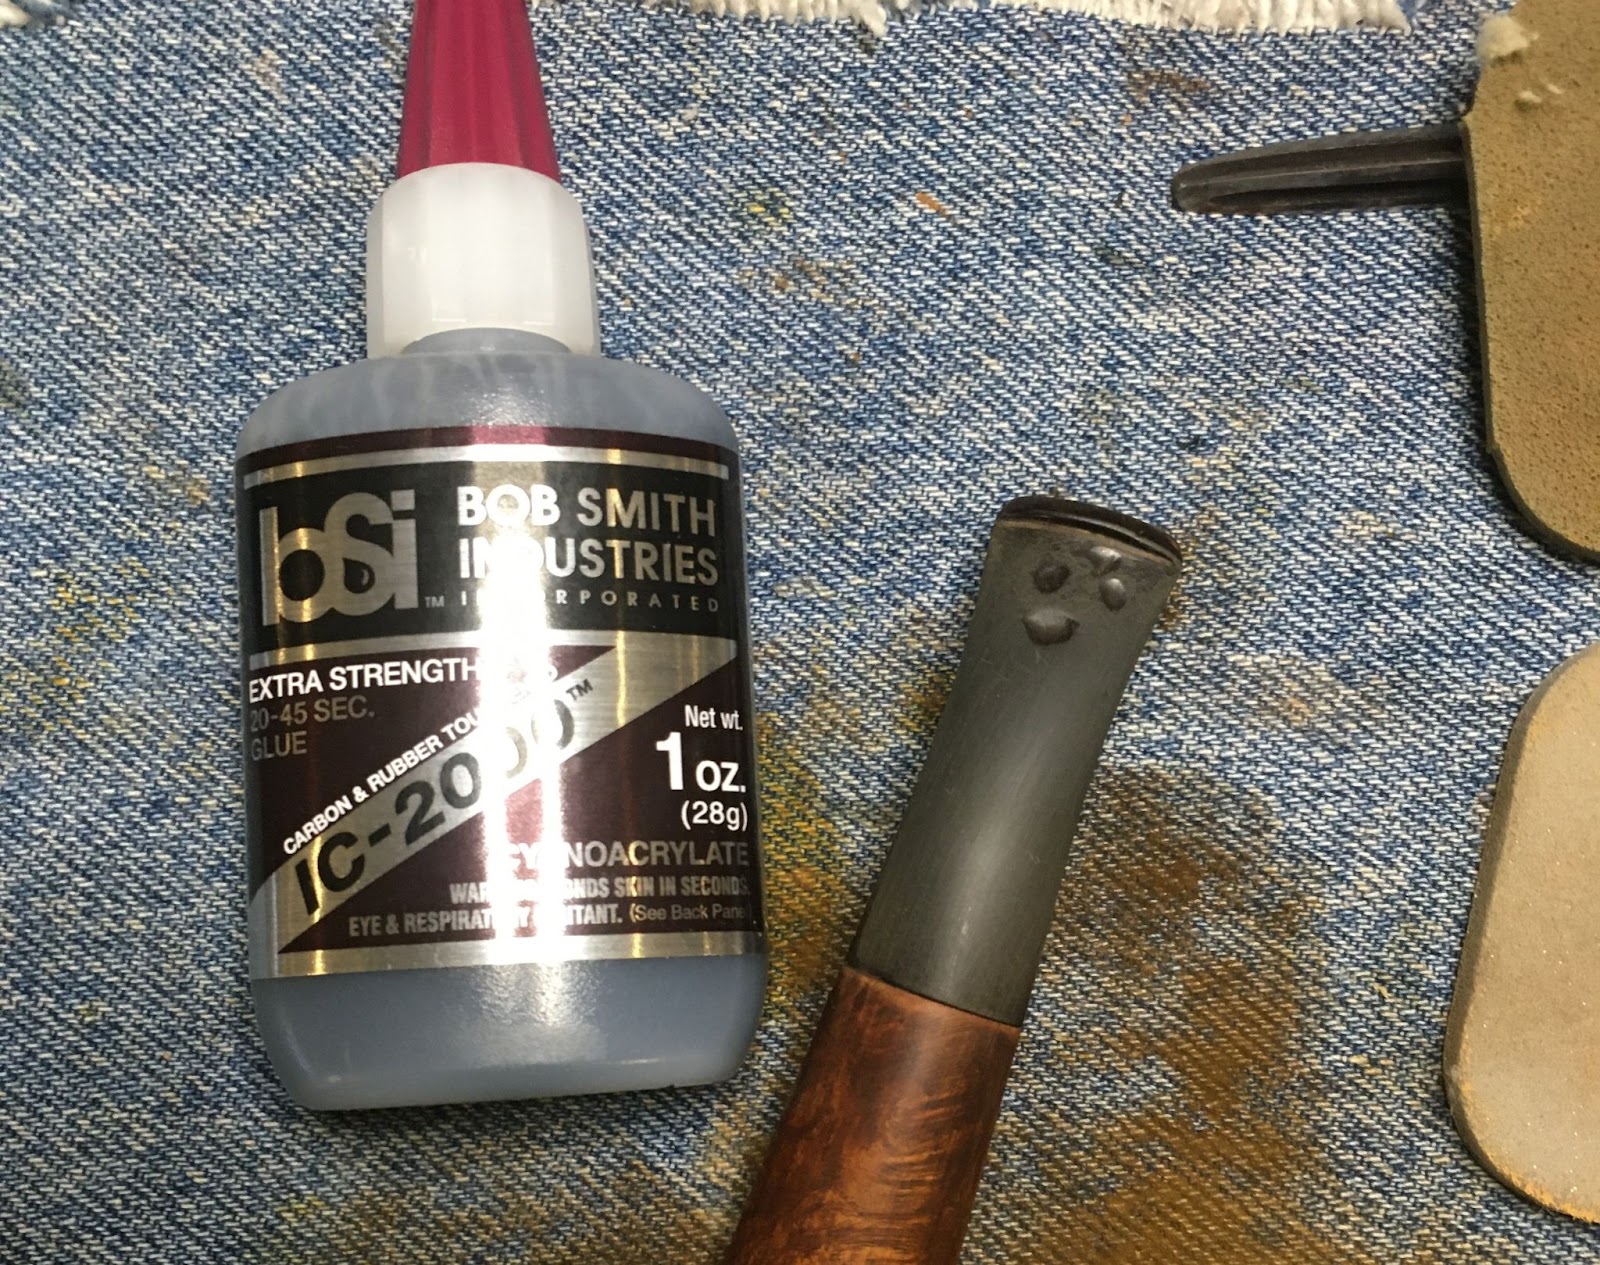
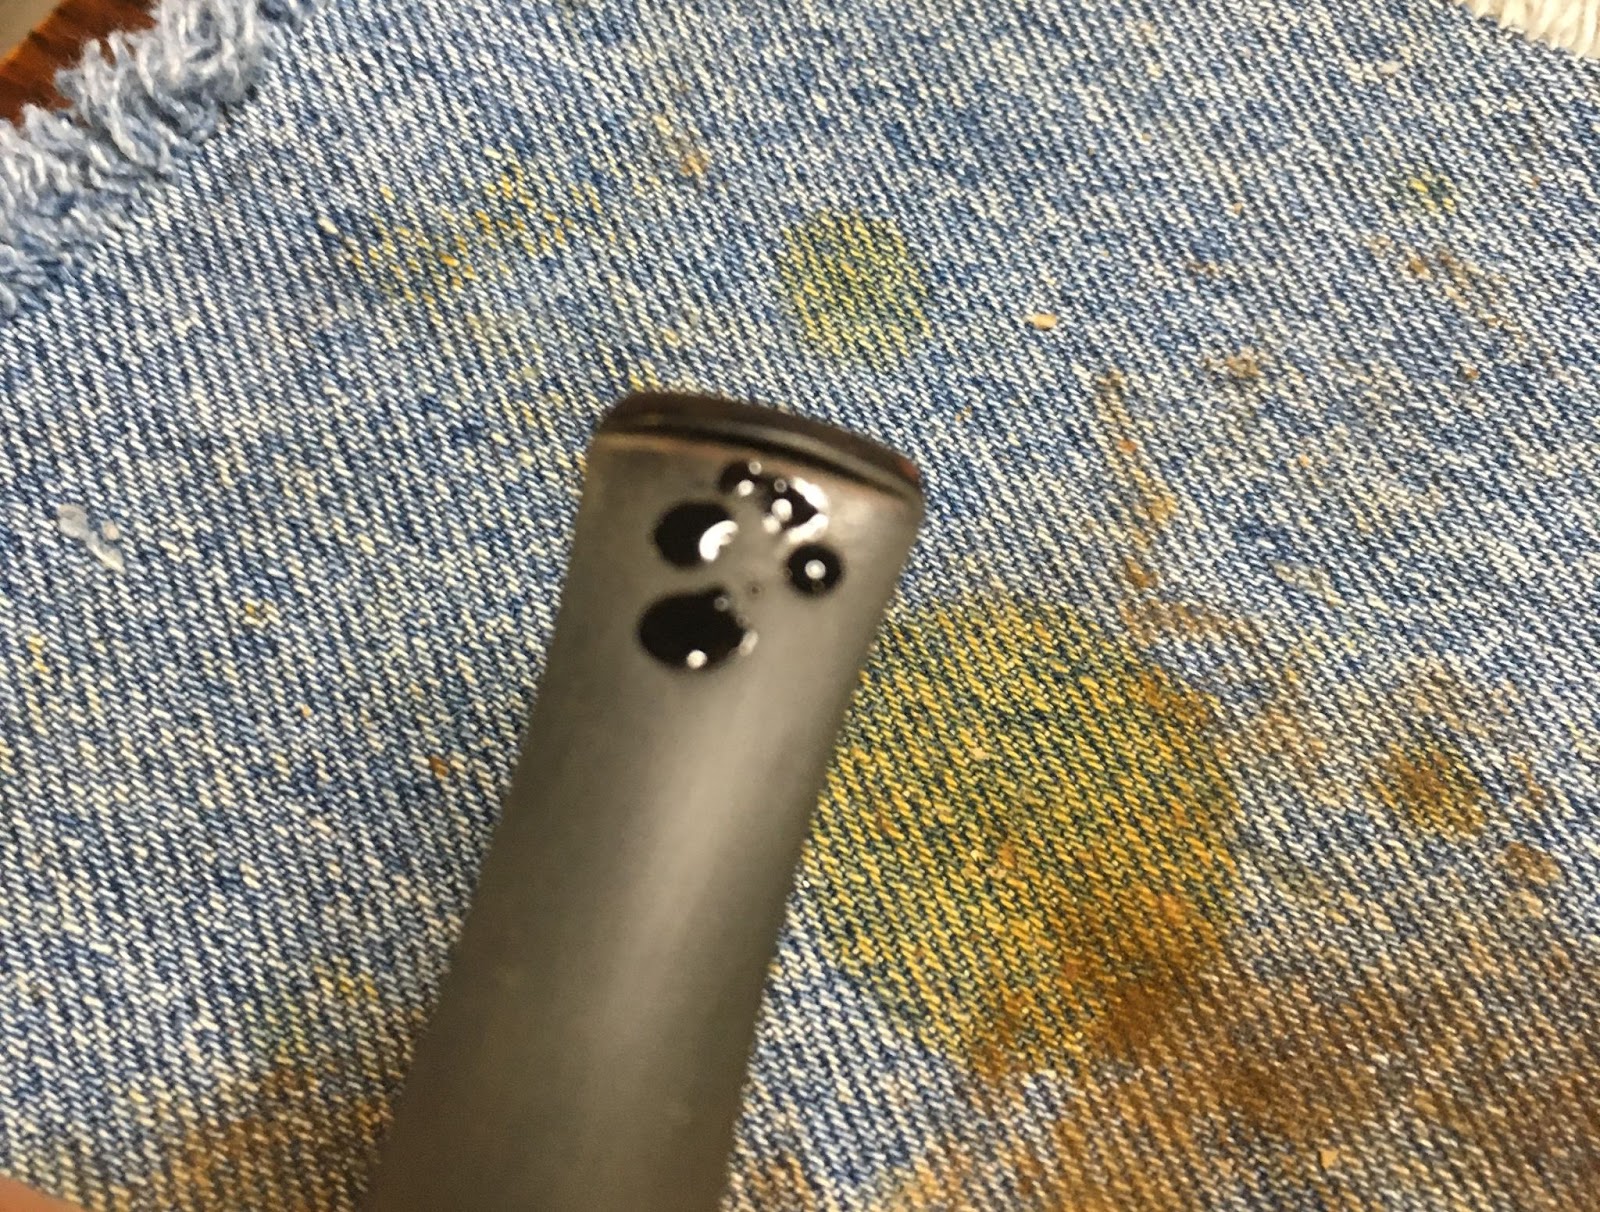
Unfortunately the stem did not look as wonderful. I used a small flat file to smooth the bite zone of the stem. The tooth dents were too deep to file them away without significantly thinning the stem. Filling the depressions with black CA was the chosen repair. I applied a coating of black CA from the button back 1 cm on the top and bottom of the stem. Both sides were then spritzed with a CA drying accelerator. I then shaped the button and smoothed the stem with the flat file. I then started smoothing and blending the patch with 320-600 grit sanding sponges. Between the sanding I rubbed mineral oil onto the stem with my fingertip and wiped away the excess with a dry paper towel.
The shank was taped with painters tape to protect it from the stem sanding. I needed them together to keep from rounding the joint where the stem meets the shank and to provide a handle for the stem.
The stem was sanded with a series of sanding sponges from 600-3500. Between sponges I rubbed the stem with mineral oil and wiped the excess with a dry paper towel.
I then polished the stem with micro-mesh pads 4000-12000. Between each pad I rubbed the stem with Obsidian Oil and wiped the excess with a paper towel.
At this stage I looked at the stem under the bright lights at the photography station. There was still a faint brown visible. I reapplied the painters tape to the shank and took the stem to the buffer. There I buffed the stem with white diamond buffing compound. After wiping the stem with a make-up pad moistened with ethyl alcohol I returned to the bright lights and the brown was gone. I returned to the bench and used Before and After Fine Polish of a soft cotton cloth.
The Before and After Extra Fine Polished was used after the Fine Polish with the same cotton cloth.
The pipe was returned to the buffer where I applied several coats of carnauba wax to both the stem and stummel. The final step was hand buffing the pipe with a microfiber polishing cloth to raise the shine before the final photography session.
I am very pleased with how this Yorkshire Natural Apple turned out. The grain of the briar is beautiful. Yes all the fill detract from the finish but it was an everyman’s mail order pipe from Sears and Roebuck. The stem polished up well and provides a sharp contrast with the light natural briar. Both stem and stummel sport a high gloss finish that complements the other. The shape of the robust apple bowl feels great which is good because the length and mass of the pipe are a bit much for a comfortable clencher. Perhaps one of those rubber cushions would help.. The dimensions of this Yorkshire Natural Apple are:
Length: 5.61 in./ 142.94 mm.
Weight: 1.48 oz./ 42.10 g.
Bowl Height: 1.78 in./ 45.21 mm.
Chamber Depth: 1.32 in./ 33.53 mm.
Chamber Diameter: 0.80 in./ 20.32 mm.
Outside Diameter: 1.59 in./ 40.39 mm.
I do hope that you have found something here useful to your own pipe care, maintenance or restorations. If you like this sort of thing, please click the like and subscribe buttons. Thank you for reading the ramblings of an old pipe lover.
Loading…
Below are some photos of the finished Yorkshire Natural Apple.
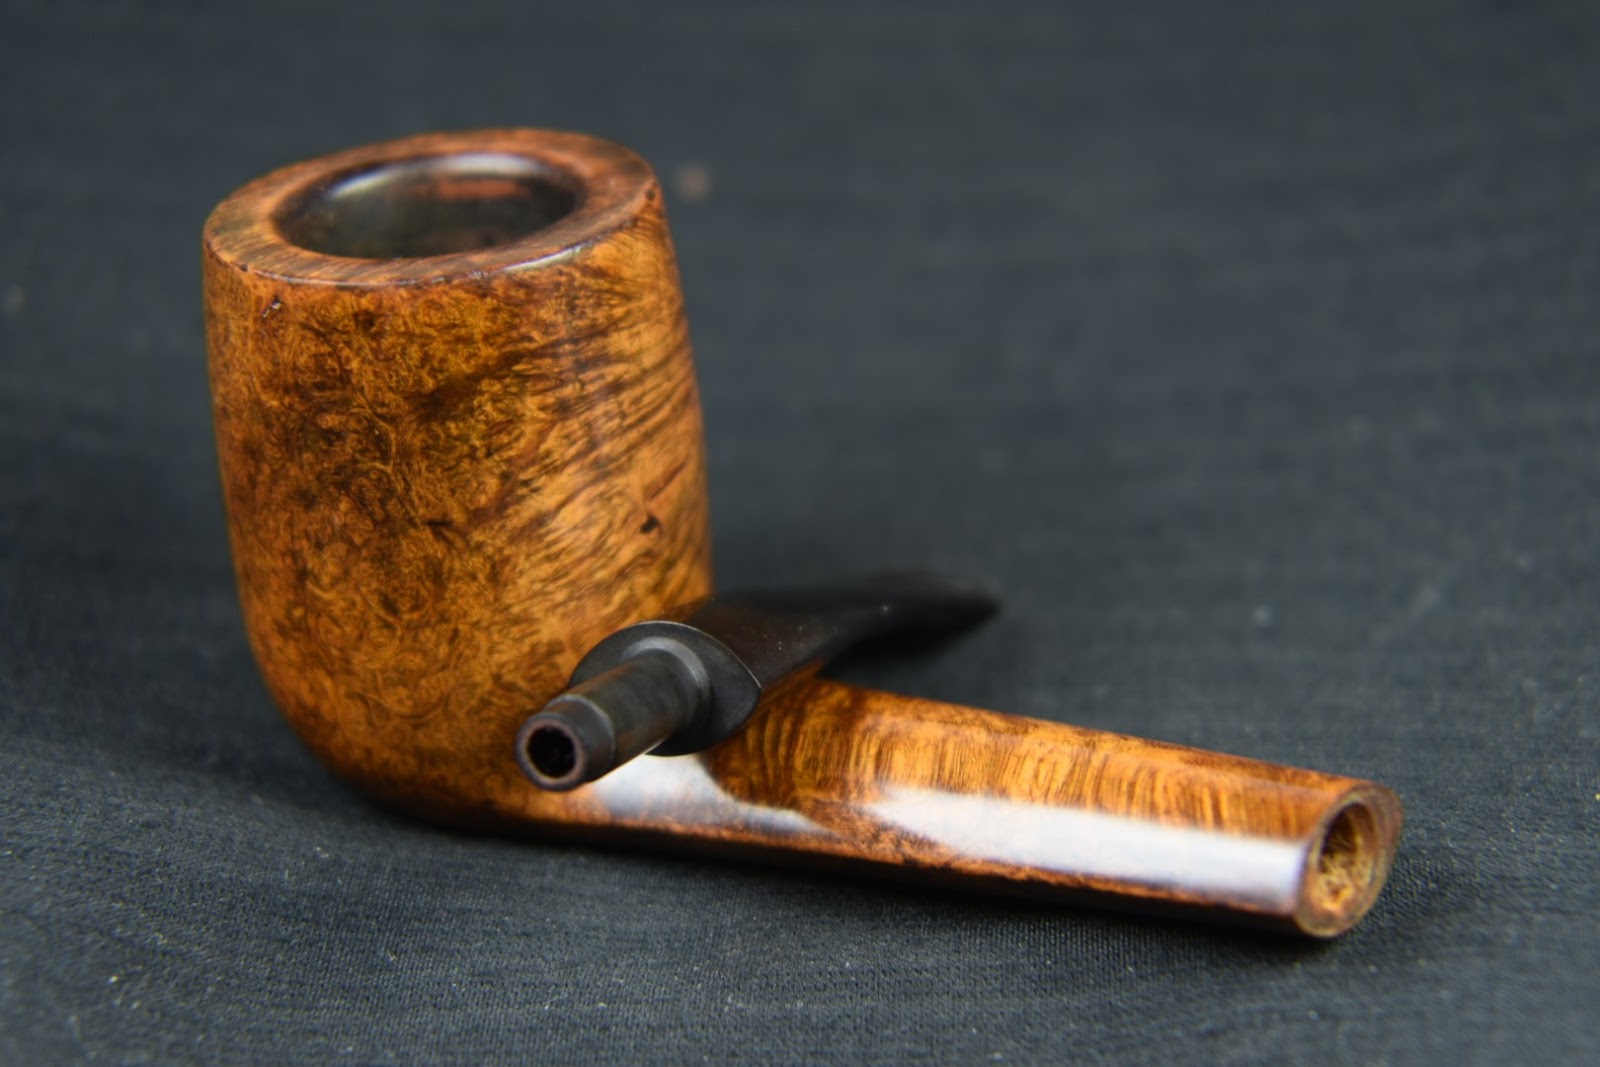
Why do I keep doing this to myself? Here we have another wonderfully shaped pipe made with; quality briar, decent grain pattern that is well constructed and has a very pretty and unique stem. “So, what is the problem?”, you ask. I can find next to nothing on the maker of this delightful darling.
Let me show you some photos taken of the Gold Medal Lovat before any work was done to it.
The first places searched were pipedia.org and pipephil.eu. Neither of these sites had anything on the Gold Medal. Next was a Google search, it turned-up a reference to a very similar pipe. The stampings appear to be very similar to the pipe I have in hand, though the stem is quite different. I realize that the stem on the Gold Medal that I have could be a replacement but, I would prefer to think it original.
I can safely say that whoever made the Gold Medal Lovat, made more than one of them. I remembered seeing a Peterson pipe stamped with Gold Block. In researching that memory, I came across Mark Irwin’s Peterson Pipe Notes blog post about the Gold Block Petersons. I will link the blog here, https://petersonpipenotes.org/tag/gold-block/, for those who are interested. In a nutshell, Gold Block was a pipe tobacco. “To qualify for the 1987 offer, one had to send them £9.95 and proof of purchase for three tins of their Gold Block tobacco.” (https://petersonpipenotes.org/tag/gold-block/). The same thing that American tobacco companies were doing with the coupon pipes like; Broadcaster, Van Roy, Silver MacDuff, Bruce Peters, Dr Grabow Westbrook, etc… At the end of this blog, if it ever does end, I will add links to other coupon pipes which I have restored.
Perhaps this Gold Medal Lovat was a promotional pipe affiliated with a tobacco brand. I started searching Gold Medal as a pipe tobacco rather than a pipe. Again a paltry amount of information but a couple of images did come up.
“By 1870 the tobacco-manufacturing companies owned by Alexander Cameron, William Cameron, and their younger brother, George Cameron, were among the largest in Richmond and Petersburg, and by continuing to expand their business throughout the remainder of the century, they made it one of the largest such enterprises operated by Americans at that time. They sold tobacco around much of the world through agents in Australia, China, India, Japan, South Africa, Europe, and North America. Although each company operated independently, they all worked together buying, manufacturing, and selling all forms of tobacco products, including cigarettes, cigars, plug tobacco, and smoking tobacco. In 1886 William Cameron retired, leaving the management of the far-flung business in the hands of Alexander Cameron and George Cameron, who purchased another Richmond firm within two years to create A. and G. Cameron and Sizer, later known as Cameron and Cameron.
By early in the 1890s the Camerons’ factories in Richmond and Petersburg alone employed hundreds of workers and could produce as much as four million pounds of tobacco each year. Alexander Cameron and his partners began to face increasing competition from the American Tobacco Company, created in 1890, which continually undercut the prices of independent manufacturers. Cameron attempted to compete but ultimately decided to retire from the business, and by 1904 he had sold the Cameron factories to the new British-American Tobacco Company.” (https://www.lva.virginia.gov/public/dvb/bio.asp?b=Cameron_Alexander)
British-American Tobacco (BAT) is one of the world’s largest tobacco companies today. Their business is mainly selling cigarettes all over the world to people who want them and being sued all over the world by countries who want to share in the profits of BAT by doing none of the work. The sale of the Cameron tobacco business to BAT was done far earlier than this pipe. To me, it has the look of a much more recent vintage than a turn of the century specimen.
Well jumping down that rabbit hole, though entertaining and educational, delivered little information on the Gold Medal Lovat. How about turning to the stem and see where that may lead. The stem is some strange rubber that is soluble in 95% ethyl alcohol. More on that later. It has no stamps but does have a single brass dot on the upper surface. I searched through pipephil.eu for similar stems. I looked back at the stampings. SYNCHRO was an obvious clue. The Synchro-Stem was a Kaywoodie patent from 1932.
The aluminum mortise and tenon are similar to a Kaywoodie synchro-Stem but the Gold Medal has twice as long a set of threads as a Kaywoodie. Another difference is the draft hole in the aluminum tenon extension. Kaywoodie draft holes are at an angle which makes cleaning with a pipe cleaner easier. The Gold Medal stem has a draft hole which is drilled perpendicular to the airway. I am sure this is easier to manufacture but makes cleaning more difficult. More on this later.
On the opposite side of the shank from the SYNCHRO stamp is a country of manufacture (COM) ITALY. The only Italian made Kaywoodies were very recent pipes, “The S.M. Frank Co. now owns the Kaywoodie name, but no longer makes pipes. However, Italian made “drugstore” grade Kaywoodies are still being marketed in this country. These Italian-made Kaywoodies have a “whiteoutline” cloverleaf logo.” (Collector’s Guide to Kaywoodie Pipes – Pipedia). Bah, another dead end.
Let’s see what can be found from the CENTURY OLD stamp. A search of CENTURY OLD leads to the following: “It’s possible this pipe was made by Lorenzo, who marked some of their pipes as Century Old Briar, although the script here is different. This pipe has a similar rustication to the Lloyds Canadian example seen below” (Century Old – Pipedia).
Comparing the above from pipedia.org to the Gold Medal the font is more italic above and block lettered below.
According to pipedia.org Lorenzo has a line of pipes called Lloyds. “Lloyd’s was strictly a Lorenzo second.”(Lorenzo – Pipedia)
Lloyds Examples and details, courtesy Doug Valitchka
As you can see the stamping here reads CENTURY OLD over BRIAR ITALY. Again far different than the Gold Medal but the Italy connection is present and if you are familiar with Lorenzo pipes there was a good deal of orange stained briar produced by Lorenzo. Orange is the color of the Gold Medal stem. Yeah, I am reaching for a link…
How about that nifty brass dot? Single brass dots are a bit more rare and may provide some insight. Savinelli’s Punto Oro line uses a single brass dot but let’s be honest,
Savinelli would never stoop so low as to have an aluminum mortise and tenon. I could not find any other Italian makers who had used a single brass dot as a stem logo. The last thing I thought about was the four pointed star on the stem of the worthpoint.com Gold Medal. Guess what, there is one maker who uses a four point star – Five Stars.
Again, not helpful as Five Stars is a French pipe maker. A whole lot of nothing when it comes to the provenance of this Gold Medal Lovat. I am really wanting to go back to restoring Yello-Boles and their well documented histories.
The Restoration
As usual I began with a clean denim work surface.
This restoration began with the stem. It is an amazing stem. It has the tooth feel of vulcanite but it softens with 95% ethyl alcohol like some plastics. The stem with alcohol on my finger felt slick initially then became sticky. Upon the alcohol evaporating the stem returned to its normal feel. I took this to mean that cleaning it with alcohol was not the best option. I ran a few pipe cleaners dipped in alcohol through the stem before making this discovery. Afterwards, I used Castile Soap and hot water to scrub the airway of the stem.
The next step was the reaming of the tobacco chamber. The cake built up in the chamber was very hard and resisted the PipNet with the #2 blades. I used the General scraper to scrape the majority of the cake and finished with the PipNet. The chamber was then sanded with 220 sandpaper wrapped around a wooden dowel. This was followed by sanding with 320 sandpaper wrapped around a Sharpie marker.
Below is a photo of the chamber after sanding and wiped with an alcohol wetted make-up pad. No evidence of heat damage was observed in the chamber.
The rim had lava deposits as seen in the below photo.
These were removed by wetting the rim with saliva and scraping the rim using a sharp pocket knife.
Next came the cleaning of the airway inside the shank. I poured 4-5 ml of 95% ethyl alcohol into the tobacco chamber and allowed the alcohol to flow into the shank. I then used a nylon shank brush to scrub the airway with the alcohol. The alcohol was then poured from the airway into a medicine cup. I also used cotton swab and folded bristle pipe cleaners in the scrubbing. The aluminum mortise did not allow for effective scraping of the airway with a dental scraper thus making the scrubbing process longer and more difficult. I repeated the alcohol/nylon brush scrub followed by the pipe cleaners/cotton swabs numerous times.
Eventually I was tired of the airway scrubbing and needed to give my cramping hands a break. I took the stummel to the sink for a scrub of the exterior. This was done with a medium stiff toothbrush and undiluted Murphy Oil Soap. The soap was rinsed with warm water and then dried with a cotton hand towel. While I was at the sink I scrubbed the airway with a nylon brush and some Dawn dish soap. This did remove some tar from the airway , based on the color of the lather.
Back at the workbench I continued with the airway scrubbing. The color of the alcohol was getting lighter and the cotton swabs less discolored from the tar residue. You can also see from the below photo that a good deal of the pipe’s finish was removed by the Murphy’s Oil Soap scrub.
Eventually the stummel was rid of the tar in the airway. A light sanding and wipings with 95% ethyl alcohol removed the remaining finish and revealed the spots that required either old fill removal or spots to fill. Old fill material was picked out using a fly tying bodkin. The depressions received a small drop of brown cyanoacrylate (CA, super glue) applied with the bodkin then a pinch of briar dust was pressed into the wet CA. The below photos show the CA/briar dust fills.
The excess briar dust was brushed away and then topped with another small dab of brown CA. They were then filed using a flat needle file and smoothed with a 400 grit sanding sponge. Below you can see photos of the dark appearing sanded fills.
The stamps were taped with painters tape to protect them from the sanding that was to come. The pipe was sanded with a sequence of sanding sponges from 600-3500 grits. Between each sponge the stummel was wiped with an alcohol wetted make-up pad. Due to the small size and close quarters of this stem, I chose to use the buffer with red buffing compound rather than sanding.
After the sanding the stem and stummel were worked with the 4000-12000 micro-mesh pads. Between each pad the stummel was wiped with an alcohol moistened make-up pad. The stem received a small drop of Obsidian Oil rubbed in by fingertip and wiped with a paper towel.
The pipe was then liberally coated with Before and After Restoration Balm and allowed to sit for 30 minutes. After 30 minutes the excess Restoration Balm was wiped away using an inside out athletic sock.
A quick trip to the buffer for several coats of carnauba wax finished this Lovat up quite nicely.
Overall I think this Gold Medal First Prize Lovat restored very well. In hindsight, I think it would have looked very interesting with a contrast stain of black and maybe a top coat of orange to match with the stem colors. The existing stain looks good with the stem but I just wonder how a contrast stained stummel would look. The dimensions of the lovat are as follows::
Length: 5.33 in./ 135.38 mm.
Weight: 1.11 oz./ 31.50 g.
Bowl Height: 1.72 in./ 43.69 mm.
Chamber Depth: 1.49 in./ 37.85 mm.
Chamber Diameter: 0.76 in./ 19.30 mm.
Outside Diameter: 1.34 in./ 34.04 mm.
I do hope that you have found something here useful to your own pipe care, maintenance or restorations. If you like this sort of thing, please click the like and subscribe buttons. Thank you for reading the ramblings of an old pipe lover.
Below are some photos of the finished Gold Medal First Prize Lovat
As promised some coupon pipe restorations (yeah, I may have a problem):
The next pipe in que for the workbench is this cute little Bentley Lovat. Once again I have chosen a pipe to restore that appears old, beat up, dirty and has little information concerning its origin story. Yay ( feel free to read with extra sarcasm). The pipe itself is good looking, well good looking if you use your “imagination”. Structurally it was sound with well centered drillings and nice proportions. The stamps are BENTLEY on the left shank and ALGERIAN BRIAR over FRANCE on the right.
Below are some photos taken of the Bently prior to working on it.
Trust me, there is a pretty little pipe there. In planning the restoration in my mind, I saw the usual cleaning and stem oxidation removal. I also say the filling of pits and blemishes and a contrast staining to bring out the naturally occurring grain. I will be sad to see the stem logo disappear but it was only painted on, not stamped and will not make it through a deoxidation process.
Background on Bently pipes
I turned first to pipedia.org for a search of Bentley. There is a short article on Bentley, “This is the production Brand of Hans Jonny “Former” Nielsen. When the U. S. pipe demand for quality handmade “freehand” pipes diminished, W.Ø. Larsen in Copenhagen sent their several workshop pipemakers home to work out of their house. Former who was the Larsen foreman at the time, eventually went to Germany and started the Bentley line of production pipes made on frasing machines, several at a time. Some years ago he returned to Denmark with this type of equipment and continues to make these production pipes in his current workshop in between making his famous handmade pipes.
The last sentence of the quote is most applicable to the Bentley that I have in hand. The aforementioned Bentleys sound like much higher quality pipes than this little lovat. Next I turned to a search of Kaywoodie, again in pipedia.org. I could find no mention of Bentley in a search of any Kaywoodie pages. Things that make you say “Hmmm.”
I then went to pipephile.eu to look for logos. This pipe had a circle logo containing a “B”. of the several circle B logos none of them matched. Search for Bently did meet with several suspects.
Very unlikely.
2. This one has potential. The BENTLEY stamping looks very similar to the stamp on the lovat but the stem logo is completely different.
3. Very unlikely.
4. Stamping here is lower case except for the “B”and the stem logo is missing the circle.
5. Unlikely. Country of manufacture (COM) is England. The Bentley lovat is france.
6. OK, so maybe it is a Kaywoodie second but, does Kaywoodie have any ties to French made pipes? According to the below, yes. They are both stamped Kaywoodie. This might not be the case if a pipe were a true second as “KAYWOODIE” would not necessarily be present on a second.
Conclusions: This Bently lovat is stamped BENTLEY, ALGERIAN BRIAR over FRANCE and it is a pipe. Thank you Captain Obvious. Seriously that is all I can say with certainty. It is a pipe, made in France from Algerian briar.
The Restoration
This restoration started with a clean denim piece then reaming of the tobacco chamber.
The reaming went well except that the chamber is drilled with a size that is just a smidge too tight for the PipNet #2 blade. The General triangular scraper was used then followed by the sanding with 220 sandpaper wrapped around a wood dowel.
The tobacco chamber was in great condition with no sign of any heat damage or careless scraping with sharp pointy knives. The rim on the other hand needed some attention from a sharp knife. I moistened it with saliva and scraped it with a sharp pocket knife.
After the scraping it looked much better and only showed a bit of rim darkening.
The stummel was taken to the sink for a scrubbing with undiluted Murphy’s Oil Soap and a medium stiff toothbrush. The soap was rinsed with warm water and the stummel dried with a cotton hand towel. Back at the workbench, I started picking the old fill material out of the pits.
Before repairing the pits I started cleaning the shank airway. The draft hole from the tobacco chamber was normal size then it widened considerably in the shank. My nylon shank brush was too thin to be very effective. I had to use two doubled over bristle pipe cleaners bent together to fashion a scrubbing tool. I poured 3-4 ml of ethyl alcohol into the chamber and allowed it to flow into the shank. I then used the two doubled over pipe cleaners to scrub the airway with the alcohol. Cotton swabs were then used to remove the remaining alcohol. This was repeated several times until the cotton swabs returned clean.
After the shank was cleaned I turned my attention to the stem. For such a short piece of rubber it certainly was dirty. Bristle pipe cleaners dipped in 95% ethyl alcohol were used to clean the airway of the stem.
The exterior of the stem was lightly sanded with a 400 grit sanding sponge then it was submerged into the Before and After Deoxidizing solution. I planned on leaving it in the solution for 2-4 hours.
This allowed plenty of time to fill the newly excavated pits. I used a fly tying bodkin to apply a small drop of brown cyanoacrylate (CA, super glue) to the pit. I then took a pinch of briar dust and pressed it into the CA filled pit. The briar dust combined with the CA and cured almost instantly. The new fill was then filed with a flat needle file flush with the surface of the stummel. A second small drop of CA was applied with the bodkin. While the CA was wet I sanded the area with a 400 grit sanding sponge. The briar dust from the sanding and the dust on the sponge combined with the CA to fill any remaining rough spots or slight depressions. The new fills appeared dark brown.
Oh yeah, I forgot to say that I covered the stamps with painters tape to protect the stamps from sanding.
The stummel was ready to have its grain accentuated. Due to budget cuts the same paper towels have remained on the dying station for a few restorations. Okay, maybe I’m just too lazy to lay down fresh clean ones. The plan was to use Fiebing’s Leather Dye to dye the stummel black. Sand away the dyed surface leaving the black dye on the softer grain where it had penetrated deeper. Then apply a light brown dye over the black adding a more yellow color to the non-blackened briar. The taped stamps would hopefully keep the black from giving the stamps an “Censored” bar appearance.
The black was wiped with cotton balls soaked in 99% isopropyl alcohol to remove the black dye from the surface.
The stummel was then taken to the workbench and sanded with a 320 sanding sponge to remove the outer layer of black dyed briar. After the sanding the stummel was again dyed but this time with light brown Fiebing’s Leather Dye.
After the light brown had dried I lightly sanded with a 400 sanding sponge. Below you can see the effect that I was hoping to achieve compared to the original surface.
The stummel was then sanded using the sequence of sanding sponges 600-3500. Between each sponge the stummel was wiped with a make-up pad wetted with alcohol. Oh yeah, I forgot to say that I reapplied the painters tape to protect the stamps.
Then the stummel was polished with micro-mesh pads from 4000-12000. Again between pads the stummel was wiped with a make-up pad wetted with alcohol.
The stummel then was coated in Before and After Restoration Balm and allowed to sit for 30 minutes.
I retrieved the stem from the deox, that is my term for the Before and After Deoxidizing solution. The excess solution was allowed to drip back into the jar. The stem was then rubbed vigorously with a coarse shop rab to remove remaining solution and help abrade oxidized vulcanite. A pipe cleaner was used to clear any deox solution from the airway. I then scrubbed the stem with Soft Scrub applied to make-up pads. Energetic scrubbing with the Soft Scrub removed the oxidized material.
Since this stem is so short there was very little room to work with the sanding sponges or the micro-mesh pads. I took the stem to the buffer and tried to polish it with a flannel wheel and red buffing compound. This worked but did not have the finish that the sponges and pads would have achieved.
30 minutes later the Restoration Balm was wiped from the stummel using an inside out cotton athletic sock.
All that remained was to give the pipe several coats of carnauba wax with the buffer.
This little Bentley lovat of unknown origins is nevertheless an adorable pipe. The briar took the dye as I hoped it would and now sports a lovely contrast dye that accentuates the grain. The stem, though short, cleaned up well and works well with the dark contrast of the briar. The draw is smooth and promises to be a delight to smoke.
The dimensions of this Bentley Lovat are:
Length: 4.95 in./ 125.73 mm.
Weight: 0.94 oz./ 27.00 g.
Bowl Height: 1.71 in./ 43.43 mm.
Chamber Depth: 1.50 in./ 38.10 mm.
Chamber Diameter: 0.79 in./ 20.01mm.
Outside Diameter: 1.17 in./ 29.72 mm.
I do hope that you have found something here useful to your own pipe care, maintenance or restorations. If you like this sort of thing, please click the like and subscribe buttons. Thank you for reading the ramblings of an old pipe lover.
Below are some photos of the finished Bentley Lovat.
Why is it that some pipes can’t qualify for the maker stamping their name on the pipe? Not to sound like President Biden but, “Come on, man.” IMPORTED BRIAR is not enough of a name to mean anything except that your briar is imported (Duh, isn’t it all imported?) and that the pipe was likely made in the US after World War 2 (WWII).
Fortunately our government is there protecting us from the diabolical domestic terrorist native briar cartels. As can be seen by,
“Section 304 of the Tariff Act of 1930, as amended (19 U.S.C. 1304)
provides that, unless excepted, every article of foreign origin
imported into the U.S. shall be marked in a conspicuous place as
legibly, indelibly, and permanently as the nature of the article (or
container) will permit, in such a manner as to indicate to the ultimate
purchaser in the U.S. the English name of the country of origin of the
article. Congressional intent in enacting 19 U.S.C. 1304 was that the
ultimate purchaser should be able to know by an inspection of the
marking on the imported goods the country of which the goods is the
product.
Part 134, Customs Regulations (19 CFR Part 134), implements the
country of origin marking requirements and exceptions of 19 U.S.C.
1304. As provided in section 134.41, Customs Regulations (19 CFR
134.41), the country of origin marking is considered to be conspicuous
if the ultimate purchaser in the U.S. is able to find the marking
Use your best Yoda impression to read the following, “The sarcasm is strong in this one.”
Okay, what are we looking at with this restoration?
The Restoration
Perhaps it is for the best that little information can be gleaned from the stamping to the heritage of this pipe. All that background and history research would just keep me from addressing the things that need fixing with this pipe. First off there is a clear coat to eliminate. Then there is the standard reaming and cleaning, followed by repairing the damaged rim and stem. I think the briar would benefit from a contrast stain allowing for a highlight red to be accented by black. Stay tuned to see what happens.
Of course I will begin with a clean denim piece protecting the work surface. Someday I will get around to stripping the finish from this old roll top desk that I use as a workbench. It has a shellac finish that does not agree with spilled alcohol or acetone. A polyurethane would make more sense but it was my grandfather’s desk and I don’t want to alter it too much.
I worked on reaming the tobacco chamber first. The PipNet with a #2 blades after I had scraped the hard dry cake a bit with the General triangular scraper. The problem was that the chamber had a diameter that was a touch too large for the #2 blades and too small for the #3 blades. This meant more scraping.
The chamber was sanded with 220 sandpaper to get to clean briar then finish sanded with 320 sandpaper. There was no heat damage observed in the chamber.
That brings us to the rim. The lava deposits made inspection of the rim difficult. Though there did appear to be charring at the 8 o’clock position of the photo below and around the inside edge of the rim from 3-8 o’clock.
The rim was moistened with saliva then scraped with a shape pocket knife.
A further scraping revealed that the rim damage was all around the rim. The charing was also around most of the inside edge. Topping this stummel and removing the dents and dings would be required. I was hoping to only remove about 1/16 of an inch, 1-2 mm of briar from the rim. Beveling of both the inside and outside edges would remove the edge damage and keep me from removing even more briar.
After the reaming of the tobacco chamber, I poured 2-3 ml of 99% isopropyl alcohol into the chamber and allowed the alcohol to flow into the shank. I then used a nylon shank brush to scrub the airway. I poured this alcohol into a clean medicine cup. I was surprised that the alcohol did not have the dark color that I had expected. The long shank would make scraping the airway very difficult.
The stummel was taken to the sink. Here I used undiluted Murphy Oil Soap and a medium stiff toothbrush to scrub the exterior of the stummel. The stummel was rinsed with warm water and dried with a cotton washcloth. I then decided to check the shank airway by using the shank brush with a bit of Dawn dish soap. I was still having trouble believing that the airway was as clean as the alcohol led me to believe. The Dawn shank brush scrub did not result in dark lather. Maybe the previous owner did keep the airway clean. The evidence was mounting in his favor but the question lingered, “If the rim was that fouled with lava, why did he keep the airway clean?”
I returned to the workbench for another go at cleaning the airway. About 5 ml of 99% isopropyl alcohol was used this time and scrubbed with the shank brush. When this alcohol was poured out I saw the dark color I had expected. The airway was dirty; it had just taken a bit of scrubbing to soften the yuck (yuck is a highly technical term to describe the smoking residue). It was present, not easily scraped and needed to be removed. This was going to be a long one. I just realized the unintended pun, there – long shank, long cleaning job.
Before I started the shank airway cleaning I wanted to top the stummel and remove the clear coat as it got sticky with the alcohol.
The topping was done by moving the stummel in a circular motion on a clean sheet of 220 sandpaper laid flat on a countertop. Every 3-4 circles I would rotate the stummel in my hand to keep an even pressure of all sides of the stummel. I wanted to remove about 1/16 inch or 2 mm of briar from the rim. This would not be enough to eliminate the rim edge damage but I figured I could remedy that by beveling the outside edge of the rim.
Next, I first tried removing it with 95% ethyl alcohol. That worked albeit slowly.
I then tried wiping it with acetone. This worked better and faster.
With the finish mostly removedI set to cleaning the stem. The airway was cleaned with bristle pipe cleaners dipped in 99% isopropyl alcohol. The outside was lightly sanded with a 320 grit sanding sponge then with Soft Scrub applied to make-up pads.
Next came the shank cleaning. The long shank did not allow for effective scraping with a dental scraper. The cleaning did utilize a nylon shank brush with numerous scrubbings of the airway with 5 ml of 95% alcohol poured into the bowl and allowed to flow into the shank. While in the airway the alcohol was scrubbed with the brush. Below you can see the medicine cup use to collect the alcohol after the scrubbing.
There were a couple of dents in the lower left section of the stummel. I used a hot iron and a damp rag to raise these.
Below is a photo of the stummel partially wrapped in the wetted cotton rag and pressed against the hot clothes iron.
The steam from the iron heated water raised the dents very nicely.
After the shank was cleaned the pits on the stummel were filled using a small drop of cyanoacrylate (CA, super glue) and briar dust. A small drop of CA was applied to the pit then sanded with a 400 sanding sponge. The dust from the sponge combines with the wet CA to fill the pit. Additional applications were used for deeper pits.
I wanted a contrast dye that had a base of black with a secondary dye of red. I hoped that this would give the pipe an accented grain in black with reddish hued highlights. To achieve this I first dyed the stummel black with Fiebing’s Leather dye. The dye was applied with a folded pipe cleaner and flamed with a disposable lighter.
A duct tape wrapped fishing bobber was used to keep dye from the tobacco chamber and to act as a handle.
The black dye was then wiped from the stummel using several make-up pads dipped in 95% ethyl alcohol.
The stummel was then sanded with a 320 sanding sponge to remove the outermost black dyed briar leaving the underlying black dyed briar in place, accentuating the grain.
A second dying of the stummel was then done with Fiebing’s Dark Red Leather Dye.
This was then wiped from the stummel using alcohol dipped make-up pads.
The sanding of the stummel with a 400 grit sanding sponge then wiped with a clean alcohol dipped make-up pad resulted in the stummel looking quite red, below. Notice the strange surface crack just above center – this was filled using thin CA then sanded, with the sanding dust filling the crack.
Below is the contrast dyed stummel before any sanding with finer sanding sponges.
I felt like this pipe was living up to the unofficial Nebraska motto – Go Big Red.
Next on the list was the stem repair. I admit to getting into the “stem repair” mode and losing track of documenting the process. I start by de-oiling the areas to be repaired with an alcohol dipped cotton swab. Then small drops of black CA are placed into the depressions on the stem. The wet CA is spritzed with a CA drying accelerator. Once dry or cured the CA is filed with a flat needle file. If the depression is deep it may take several small drops of CA and subsequent spritzes with an accelerator to fill the depression. That was the case here. When I started photographing, I was already filing the second application.
A third application was applied and spread around to thin over a larger area using the tip of the applicator on the bottle. This was then spritzed, filed and sanded with a 400 grit sanding sponge. The next two photos show the depressions filled and sanded with the 4000 sponge.
The stem was slightly “over-clocked”. This led to the stem not aligning correctly with the stummel, as it had been over tightened. There are two ways to address this:
1) to heat the aluminum screw-in tenon until the stem is slightly melted, then rotate the aluminum to the correct position and allow it to cool.
2) Add a light layer of black CA to the edge of the stem and allow it to cure.
Both methods work but come with downsides of being time consuming and tedious. I chose to use the adding of black CA to the stem. Since the alignment was very sligh, only a few degrees I only needed to “paint” or apply a single coat of black CA to the stem.
The pipe was sanded intact. I wanted to smooth out the mortise tenon joint as the original fit was less than smooth feeling. I used a series of sanding sponges with grits from 1000-3500, in sequence. Between each sponge the stummel was wiped with a make-up pad wetted with alcohol while the stemI received a bit of mineral oil rubbed in by fingertip then wiped with a paper towel.
After the sanding sponges I used a sequence of micro-mesh pads from 4000-12000. The stummel was wiped between each pad as above. The stem received a drop of Obsidian Oil between pads, rubbed in by fingertip and wiped with a paper towel.
The pipe then was coated with Before and After Restoration Balm. The balm was allowed to sit for 15 minutes.
The excess balm was wiped with an inside-out cotton athletic sock to reveal a beautiful rejuvenated contrast dyed briar.
The stem was further polished using Before and After Fine Polish. The polish was applied by fingertip and hand buffed with a soft cotton cloth.
The polishing was finished using the Before and After Extra Fine Polish using the above procedures.
The final step was to apply several coats of carnauba wax using the buffer.
I am quite pleased with how well this Italian Canadian of unknown make turned out. It is a large pipe yet is surprisingly light in hand. The contrast staining yielded the color that I had in my mind as I was imagining how it would look finished. The screw-in tenon fits and aligns well. Though not the most beautiful grain the contrast stain definitely improved the look of the briar and is accentuated by the high gloss black stem. I am certain that this will be a nice smoking pipe even without a maker’s stamp.
The dimensions of this large Canadian are:
Length: 6.67 in./ 169.42 mm.
Weight: 1.40 oz./ 39.8 g.
Bowl Height: 1.88 in./ 47.75 mm.
Chamber Depth: 1.65 in./ 41.91 mm.
Chamber Diameter: 0.78 in./ 19.81 mm.
Outside Diameter: 1.46 in./ 37.08 mm.
I do hope that you have found something here useful to your own pipe care, maintenance or restorations. If you like this sort of thing, please click the like and subscribe buttons. Thank you for reading the ramblings of an old pipe lover.
Below are some photos of the finished no name Italian Canadian.
I think I might have to start selling these post restoration denim pieces as wall art.
The Pipe Den, the name harkens back to a day of local pipe and tobacco shops which our world appears to have mostly left in the past. Many pipe smokers love our local brick and mortar shops and it warms our hearts to hear the success stories of the local shop that is surviving in the world of big internet retailers. I live within an hour drive of one such shop and I admit to visiting it about once a year to stock up on a local blend assembled there. The place has a cigar lounge and will infuse your clothing with cigar aroma at no cost. I have been the only pipe smoker present on my last two visits. The world I live in enables me to have pipe tobacco from all over the world available with the convenience of no 60 minute drive in city traffic and the thrill of opening the aromatic box, freeing the imprisoned contents and allowing them to join their tobacco blend brethren in glass jars upon a shelf.
I warmly remember the smell of David’s Briar Shop in a local mall Westroads in the 1970’s and 80’s. That smell is firmly locked into the vault and I have to admit to wishing to experience it again. It is a nostalgic smell that when reminiscing with others about the mall, has never met with someone saying “I hate that smell”. To the contrary, it seems to only incite fond memories. These are the memories that stir when I work on a pipe stamped with the name of a pipe shop.
This Zulu came to me as part of an estate lot. Let me show you what I was looking at with this Pipe Den Zulu.
Background on the Pipe Den
The Pipe Den is a shop from Vero Beach Florida. According to the internet, source of only honest, truthful and accurate information, the Pipe Den still operates today. According to their website, Bob Marshbanks has been, “Serving pipe and cigar enthusiasts since 1977. We are your premier cigar, pipe and tobacco shop” (https://pipedenvero.com/). The website does not offer any online shopping yet invites patrons to the actual store to see what they have to offer. There is no mention of specific pipes but they do state the following:
“We offer a large selection of top quality pipes made by the world’s best pipe makers. I personally guarantee all my pipes, even “starter” pipes. Many “production” made pipes are manufactured of “Green” briar, heavily stained, varnished to cover poor grain and imperfections and smoke “hot”. To order a pipe, select your shape preference and let me know the price range you have in mind. Choose natural, dark or sandblast finishes. This will allow me flexibility in my efforts to ensure that you will get the very finest pipe available from my selection.
Even easier, just call, we can discuss your preferences and we can be more sure of the selection. I also have a selection of one-of-a-kind and freehand, hand carved Meershaum and Estate pipes.
The relaxed atmosphere at The Pipe Den is there for everyone. You are welcome anytime to come by, sit and enjoy a good cigar, fill your pipe bowl and get away from the hassles. I specialize in friendly old fashioned service.” (https://pipedenvero.com/pipes-%E2%80%A2-hints-%26-tips)
The question of who made this pipe for Pipe Den remains. In looking at the stem I see similarities to a couple of other pipes that I own. I have two Jobey pipes that appear to have very similar identical stems. They are saddle stems with a near 90 degree shoulder.
The quality of briar and the original stain color also match quite well. Given those last two qualities are hardly good indicators of a shared heritage but they do look similar. When looking up Jobey on pipedi.org, the first sentence of the entry says, “English – American – Danish – French… Sadly, solid information about Jobey is scamt…”(Jobey – Pipedia) Even misspelling scant. This should tell me something, what, I am not sure. The pipedia.org article goes on to discuss possible origins of the Jobey company. The most likely hypothesis, to me, is that Jobey was an American company and a subsidiary of the Norwalk Pipe Corporation (Norwalk Pipe Co. – Pipedia) and later sold to Weber. There is also another discussion mentioning that, “Weber Pipe Co. owned and manufactured Jobey pipes – when mainly sold in the USA by the Tinder Box from 1970’s – 80’s. In addition Jobey / Weber bought Danish freehands from Karl Erik (Ottendahl). These pipes were offered as Jobey Dansk. Ottendahl discontinued exports to the United States in 1987 and in the very same year – obviously only as a ghost brand – Jobey was transferred to Saint-Claude, France to be manufactured by Butz-Choquin.”(Weber Pipe Co. – Pipedia). This I believe is the most likely suspect. The Pipe Den Zulu has a Jobey/Weber feel to it. I can’t explain that other than the word “feel”. The age would fit for the Pipe Den history, according to their website the Pipe Den opened in 1977. I am of the opinion that this Pipe Den Zule was a Weber made pipe likely from the late 1970’s – 1980’s.
The Restoration
In the beginning… No, that sounds too biblical. How about, this restoration began with a clean piece of denim laid out on the workbench? Much better.
The fit of the stem was too tight and was left partially inserted to avoid dressing the mortise. The stem was also in dire need of oxidized vulcanite removal. That is where I began.
I sanded the stem with a 600 grit sanding sponge to remove the calcium deposits, surface oxidation and light tooth chatter. You can see that I used the denim to clean the sponge.
Next the interior of the stem was cleaned using bristle pipe cleaners and a nylon brush dipped in 95% ethyl alcohol.
With the stem cleaned inside and out, It was time to go into the Before and After Deoxidizing solution. A pipe cleaner was used as a hanger to suspend the stem in the solution.
I refer to this as the deox tank or deox, as a play on words with detoxification or detox for alcoholics and drug addicts.
With the stem in deox, I turned my attention to the reaming of the tobacco chamber. The below tools were assembled.
The chamber was bored with a very conical bit and did not fit the PipNet reamer at the bottom. This required more scraping with the Smokingpipes Low Country Reamer and the General triangular scraper.
The interior of the chamber was sanded to bare briar and no evidence of heat damage could be observed. The rim was the next target of restoration. I could see damage around the outer edge from tapping out dottle on surfaces not meant for tapping. There was also a thick coating of lava.
The lava was scraped with care and a sharp pocket knife after being moistened with saliva.
The stummel was then taken to the sink. Here it was scrubbed using a medium stiff toothbrush and undiluted Murphy Oil Soap. The soap was rinsed with warm water. At this point I decided to scrub the airway of the shank with a nylon shank brush and a bit of Dawn dish soap. The airwar was rinsed with warm water and the stummel was dried with a cotton washcloth.
Back at the workbench the stummel was wiped with a make-up pad dipped in 95% ethyl alcohol to remove any remaining wax or finish. The pad came back with reddish brown, indicating that I was removing some of the original stain. No finish could be observed.
The cleaning of the shank was next on the list. I poured about 4 ml of 95% ethyl alcohol into the bowl and allowed it to flow into but not out of the shank. I used a nylon shank brush to scrub the airway with the alcohol present. I then poured this alcohol into a medicine cup to be used until it was too blackened from dissolved tar. After the alcohol scrub I returned to the sink and scrubbed the airway with undiluted Castile soap. Then abc to the workbench for an alcohol scrub. This rotation continued until my nylon brush was no longer turning black with tar.
Between scrubbing rotations I would scrape the airway with a dental scraper and scrub with cotton swabs. Eventually the airway was cleaned.
14 hours later, I retrieved the stem from the Before and After Deoxidizing solution. I allowed it to drip off excess solution for a few minutes.
Below the stem is on my preferred coarse cotton shop rag. I like this rag for buffing a stem after the solution as it absorbs the remaining solution and abbrades some of the loosened oxidized vulcanite.
Below is the stem after the buffing with the rag.
After the hand buffing I used several make-up pads with Soft Scrub to further remove oxidized material from the stem. I could have sworn that I photographed the pads but failed to find the photos. Further proof than getting old is not for the… What was I saying?
The stem was then coated with mineral oil both inside and out.
There were a few small pits which needed to be filled prior to taking on the damaged rim. The small fills were repaired by placing a small drop of cyanoacrylate (CA, super glue) into the pit then sanding immediately over the pit. The dust from the sanding and sanding sponge combined with the CA to fill the pit. Two applications were sometimes needed for slightly larger pits. Now to deal with that damaged rim I did not want to top the rim and remove an ⅛+ inch or 3-4 mm of briar thus changing the shape of the stummel. I lightly topped the pipe to restore sharp edges on the undamaged rim. My plan was to apply a bead of brown CA to the damaged outside edge of the rim then press it into a container of briar dust. The briar dust would then be combined with the CA to make a hard briar incorporated fill which could be sanded smooth.
Below is the bead of CA around the damaged areas
Below is after the first dip of the wet CA into the briar dust. The excess dust was scraped off with a pocket knife.
Below is a photo of the new edge. It would require a couple more beads of CA and dust dips but it was working.
Below is dust dip number two.
After filing and sanding the edge was restored. The fill did appear darker than the supporting briar but that would be addressed with a contrast dye (more on that later).
Now, to conceal the darker edge, I figured a darker stain or dye with the surface sanded away would provide a nice contrast showing off the grain of the briar and concealing the repairs. In preparation for this dye job, I wanted to keep the dye from the stamp if possible. I covered the stamp with a slightly irregularly cut piece of painters tape. I wanted it irregular to avoid the “CENSORED” block look.
I mixed equal volumes of both black and dark brown Fiebing’s Leather dye and added a couple of ml of 95% ethyl alcohol to allow them to mix thoroughly. The dye was applied with a folded pipe cleaner and flamed with a disposable lighter to burn off excess alcohol in the dye and set the dye to the briar.
Below you can see the tape had ignited during the flaming. Oops.
Back at the workbench, the stem appeared black.
I wiped the excess dye from the stummel. Several alcohol dipped make-up pads later the stummel can be seen to have a very dark brown color. Oh yeah, I actually remembered the nitrile gloves this time. I bet you didn’t see that coming?
The stummel was then sanded with a 400 grit sanding sponge to remove the outer layer of dark dyed briar.
Next the damaged stem needed to be repaired. Below are the top and bottom surfaces of the stem.
Black CA was applied to the depressions on both the top and bottom of the stem. The CA was then spritzed with a CA drying accelerator.
These were then filed with a flat needle file until flush with the surrounding stem. Both top and bottom required a second application of CA. I prefer to use several light coats compared to a single large coat of the CA.
Additional filing and sanding eventually led to the below photos of the top and bottom of the stem.
The stem was then sanded using a sequence of sanding sponges in grits 1000-3500. Between each sponge I applied a bit of mineral oil then wiped with a paper towel.
After the sanding sponges I used a sequence of 4000-12000 micro-mesh pads. Between each pad I rubbed in a small drop of Obsidian Oil and wiped the stem with a paper towel.
On to sanding the stummel. It was sanded with the sanding sponges 1000-3500. Between each sponge the stummel was wiped with an alcohol dampened make-up pad.
The stummel was then worked with a sequence of 4000-12000 micro-mesh pads. Between each pad the stummel was wiped as with the sanding sponges.
The stem then received polishing with Before and After fine then Extra Fine polish. Both were applied by finger and hand buffed using a soft cotton cloth.
The stummel then was given a coating of Before and After Restoration Balm and allowed to sit for 20 minutes.
The excess Restoration Balm was removed with an inside out cotton athletic sock to reveal a lovely grained briar.
The pipe then received several coats of carnauba wax from the buffer.
Overall I am pleased with how well this Pipe Den Zulu turned out. I love the shape though I would appreciate a slightly larger size. The repairs of the rim and stem came out better than anticipated. The briar grain was accentuated by the contrast dye and shows itself far better now than when it was buried by years of grime. Though the make of this very nice little pipe may never be known I am sure that it can find a new stewart who will get years of enjoyment from it.
The dimensions of this little beauty are:
Length: 6.06 in./ 153.92 mm.
Weight: 1.05 oz./ 29.7 g.
Bowl Height: 1.94 in./ 49.27 mm.
Chamber Depth: 1.59 in./ 40.39 mm.
Chamber Diameter: 0.77 in./ 19.56 mm.
Outside Diameter: 1.31 in./ 30.28 mm.
I do hope that you have found something here useful to your own pipe care, maintenance or restorations. If you like this sort of thing, please click the like and subscribe buttons. Thank you for reading the ramblings of an old pipe lover.
Below are some photos of the finished Pipe Den Zulu.
Well, I have good news and bad news. Or maybe, it’s good news and good news. I have an Italian oval shank billiard, here. The bad news is that I can’t do much about the history of a pipe when the only stamp on it is “ITALY”. Now, if you find my histories or background sections annoying this is good news. The other good news is how well this pipe turned out. She is a very attractive no name.
The pipe came to me as part of an estate lot purchased in March of 2024. It was not the target of the lot. After looking over the pipes I found the shank shape very interesting. It was kind of an oval but with points on the ends and it was tapered from wide at the bowl to narrower at the stem. I thought that it was more like a Canadian shape but Canadian shanks are not tapered. The grain of the briar looked pretty uninteresting, at first glance, and there were no identifying markings so, it went back into the box of future projects. Several weeks later I was looking through the box again and the stem drew me back to the pipe. Here is what I was seeing:
Just another old pipe, right? But that shank was cool. I thought, “wait, there is some interesting grain under the grime and crappy stain. This old girl will clean up nice.” Well, spoiler alert – A contrast stain would really show off the grain. Yeah, the stem was a mess, she was dirty, there were pits to fill, and who knows what lies under that lava covered rim?
The Restoration
As usual a clean denim piece was added to the workbench. I knew this piece of denim was not going to look clean for very long.
I began with the stem. I figured that it was going to be in the Before and After Deoxidizing solution for several hours so, best to get it in there first. I sanded the worst of the oxidation and calcium from the stem with a 320 grit sanding sponge.
Yep, so much for the clean denim.
Next I cleaned out the inside of the stem with bristle pipe cleaners dipped in 95% ethyl alcohol. Ignore the aluminum stinger soaking in the alcohol, that’s part of another project. After the cleaning the stem went into deox (my term for the Before and After Deoxidizing solution).
With the stem in deox, I turned to reaming the stummel. The pipe had a large diameter bowl and was drilled with a tapered tobacco chamber. This required using the PipNet with the #2, #3 and the Scotte reaming tools.
The reaming was finished with the General triangular scraper and sanded with 220 sandpaper wrapped around a wood dowel. The tobacco chamber showed no signs of any heat damage. The rim on the other hand was still doing it’s impression of a Hawian island with it’s lava flows.
The lava was softened with saliva and scraped from the rim using a sharp pocket knife.
After the reaming and rim scraping the stummel was taken to the sink. Here it was scrubbed with undiluted Murphy’s Oil Soap and a medium stiff toothbrush. The soap was rinsed with warm water and the stummel dried with a cotton dish towel.
After the scrub, I sanded the stummelwith 320 and 400 grit sanding sponges searching for pits, dents and dings to fill.
Several were found a couple had to have the old fill or dirt picked from them. ALl were filled using brown cyanoacrylate (CA, super glue) and briar dust.
The next day, I returned to the deox tank. The stem had been soaking for 12-14 hours. I removed the stem and let the excess solution drip back into the jar.
The stem was then hand buffed with a coarse shop rag.
Returning to the workbench I started scrubbing the stem with Soft Scrub on make-up pads.
I progressed to using the Soft Scrub with the remnants of my Magic Eraser.
Once the pads started to provide a significantly less color change the step was coated with mineral oil and allowed to sit.
I thought that a contrast stain would allow the grain of the briar to be more apparent. I chose Dark Brown mixed with Black Fiebing’s Leather Dye. I mixed the brown to black at a 2:1 ratio. Prior to applying the dye I heated the stummel with the heat gun, shown below. The dye was applied with a folded pipe cleaner and flamed with the lighter. Two coats were applied and flamed.
Returning to the workbench, I dipped make-up pads into 95% ethyl alcohol and wiped the stummel. I wanted to get as much of the dye off of the stummel as possible.
Once the dye had been wiped from the stummel I started sanding the surface with a 320 sanding sponge. The sponge needed to be wiped off on the denim frequently to free it from the accumulated briar dust. Below shows the stummel ½ sanded illustrating the accentuation of the grain.
When finished with the 320 sanding sponge I sanded with a 400 sponge. Between the sandings I wiped the stummel with a make-up pad dipped in alcohol.
I wanted to sand the stem and the stummel together to avoid rounding the edges of each piece. This meant that I needed to finish the stem. I wiped the mineral oil from the stem and used a cotton swab dipped in alcohol to clean the oil from the area I would be working on. I used black CA to fill the tooth dents.
I applied the black CA into the dents and spritzed the stem with a CA drying accelerator.
The cured CA was then filed smooth with a flat needle file.
Additional coats of CA were added to further smooth and blend the repaired areas.
I prefer to work with several light coats rather than a single heavy coat of CA. Below the dark spots are areas where another application is needed to fill a depression.
Below is after filing and sanding to 400 grit.
The same process was done for the bottom side of the stem.
Once the stem had been sanded with the 600 grit sanding sponge the two pieces were reattached and the pipe was sanded together. The 1000-3500 sanding sponges were used in series with care not to sand the ITALY stamp. Between each sponge the stummel was wiped off with an alcohol moistened make-up pad. The stem had a bit of mineral oil rubbed inby fingertip and then wiped with a paper towel.
The pipe was then polished with a series of micro-mesh pads from 4000-12000. Between each pad the stummel was wiped off with an alcohol moistened make-up pad. The stem had a small drop of Obsidian Oil rubbed in by fingertip and then wiped with a paper towel.
The stummel received a coating of Before and After Restoration Balm and was allowed to sit for 20 minutes.
20 minutes later the Restoration Balm was wiped from the stummel using an inside-out athletic sock.
The final step of the restoration was to apply several coats of carnauba wax to the pipe using a buffer.
This lovely Italian oval shank billiard may not have a stamp indicating a maker and will thus be considered a “less than” pipe but looking at the before and after photo below, I dare you to call her “less than”. She is more than average in quality of briar, workmanship and quality of finish. I am quite pleased at how well this billiard turned out. The stem had me a bit
worried but after the repair it polished up nicely. The Contrast stain did indeed make the briar grain shine. This old girl will be a grand smoker and will hopefully bring someone many years of enjoyment.
The dimensions of this little beauty are:
Length: 5.50 in./ 139.7 mm.
Weight: 1.34 oz./ 37.80 g.
Bowl Height: 1.97 in./ 50.04 mm.
Chamber Depth: 1.72 in./ 43.69 mm.
Chamber Diameter: .82 in./ 20.83 mm.
Outside Diameter: 1.47 in./ 37.39 mm.
I do hope that you have found something here useful to your own pipe care, maintenance or restorations. If you like this sort of thing, please click the like and subscribe buttons. Thank you for reading the ramblings of an old pipe lover.
Below are some photos of the finished Italian No Name Oval Shank Billiard.
Wow, I have to work on that button. The bright light makes it look oxidized.
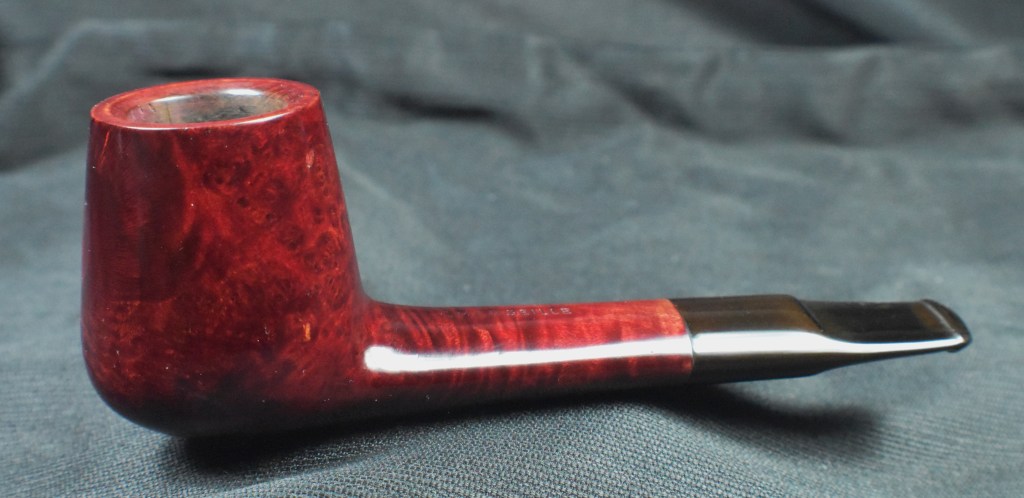


 .
.


 (
(


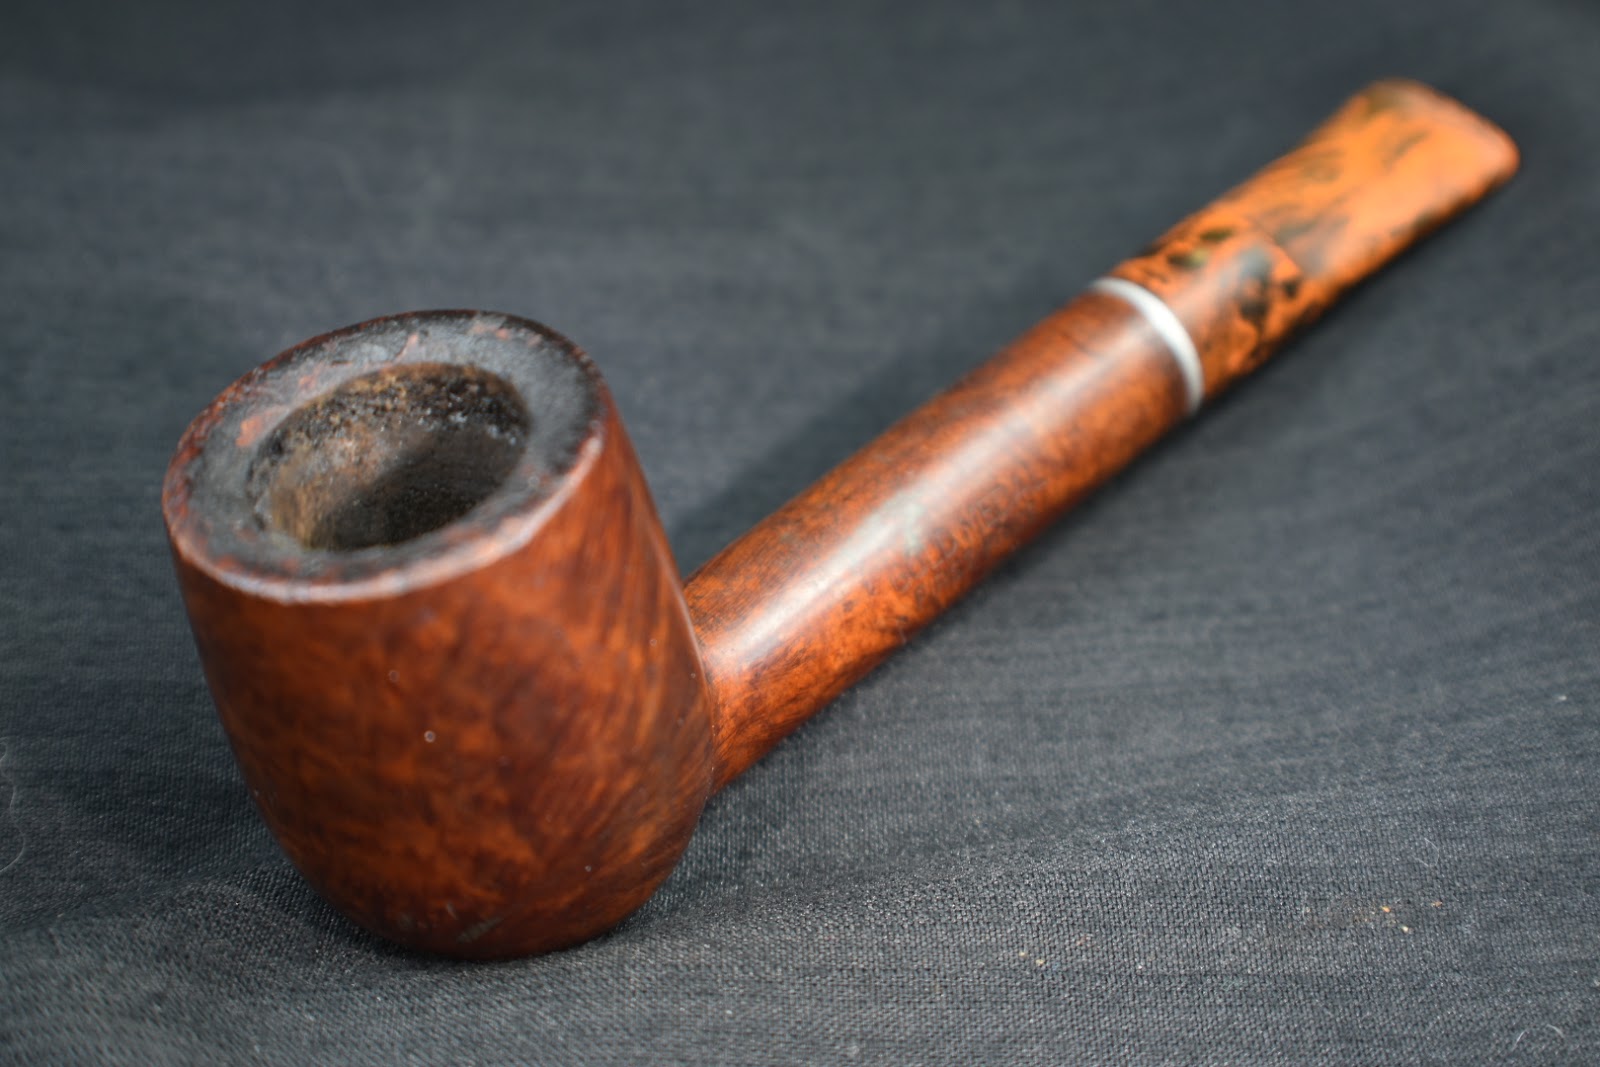

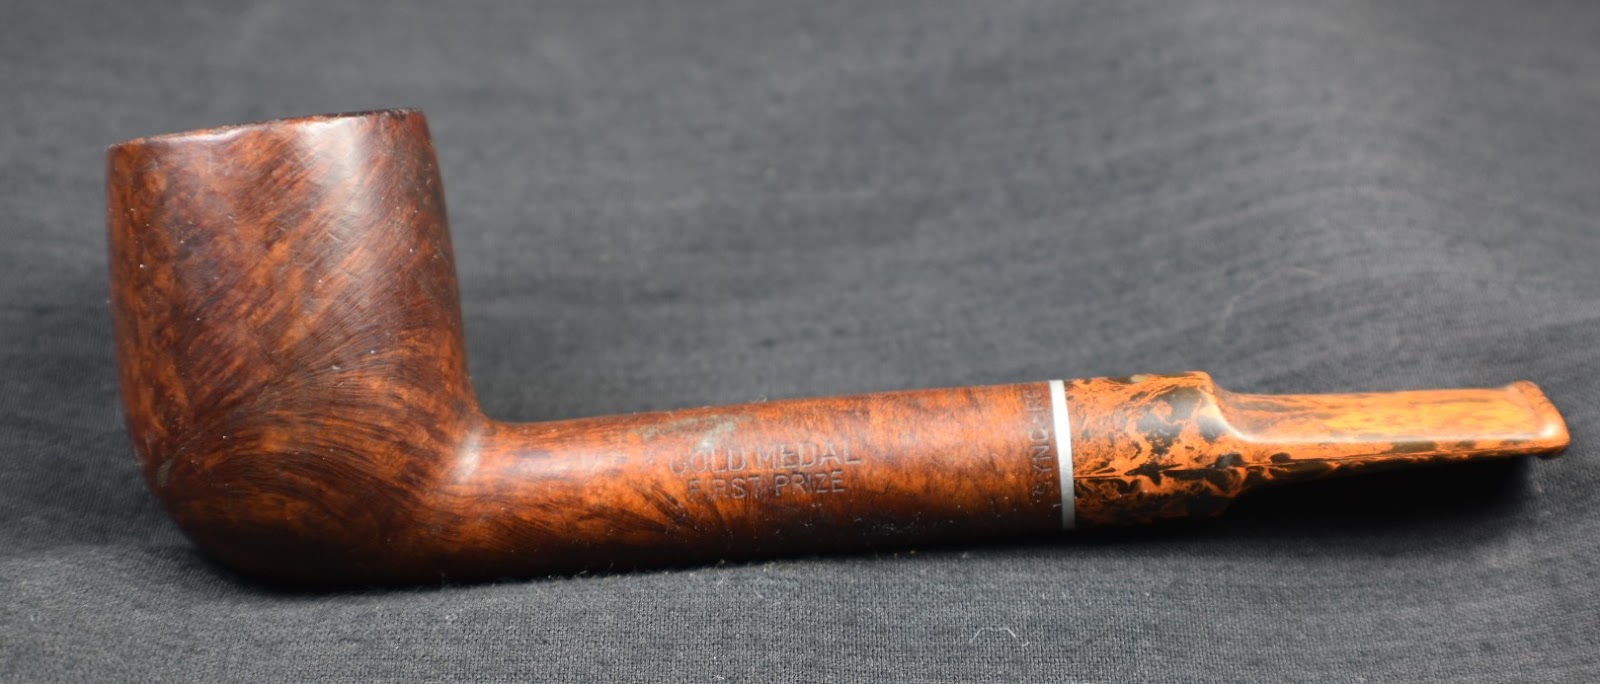


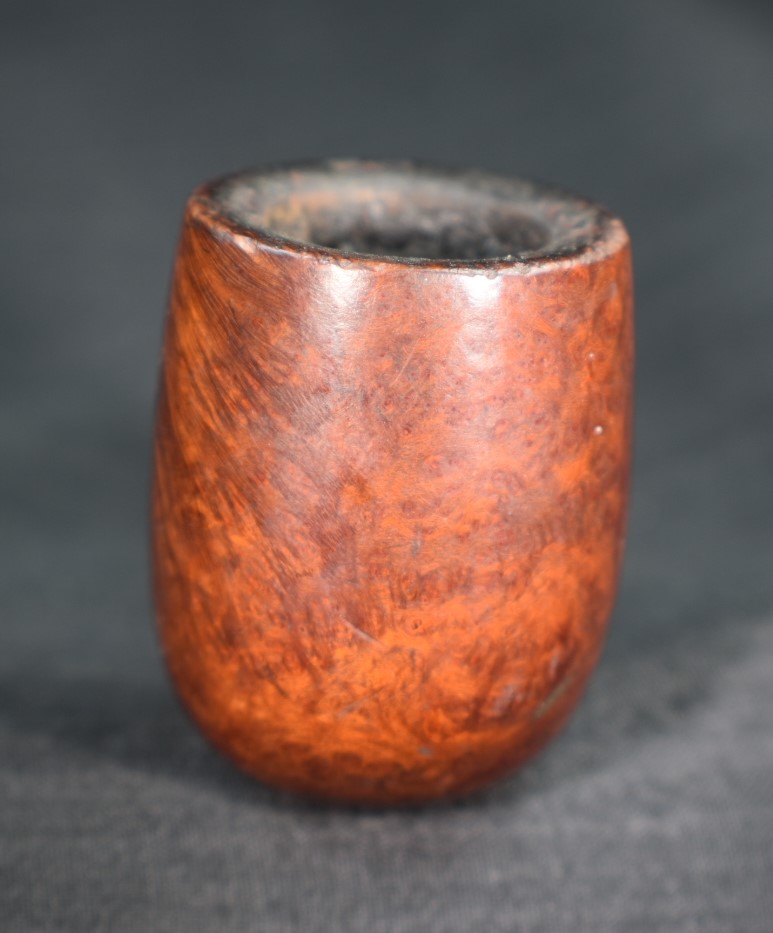

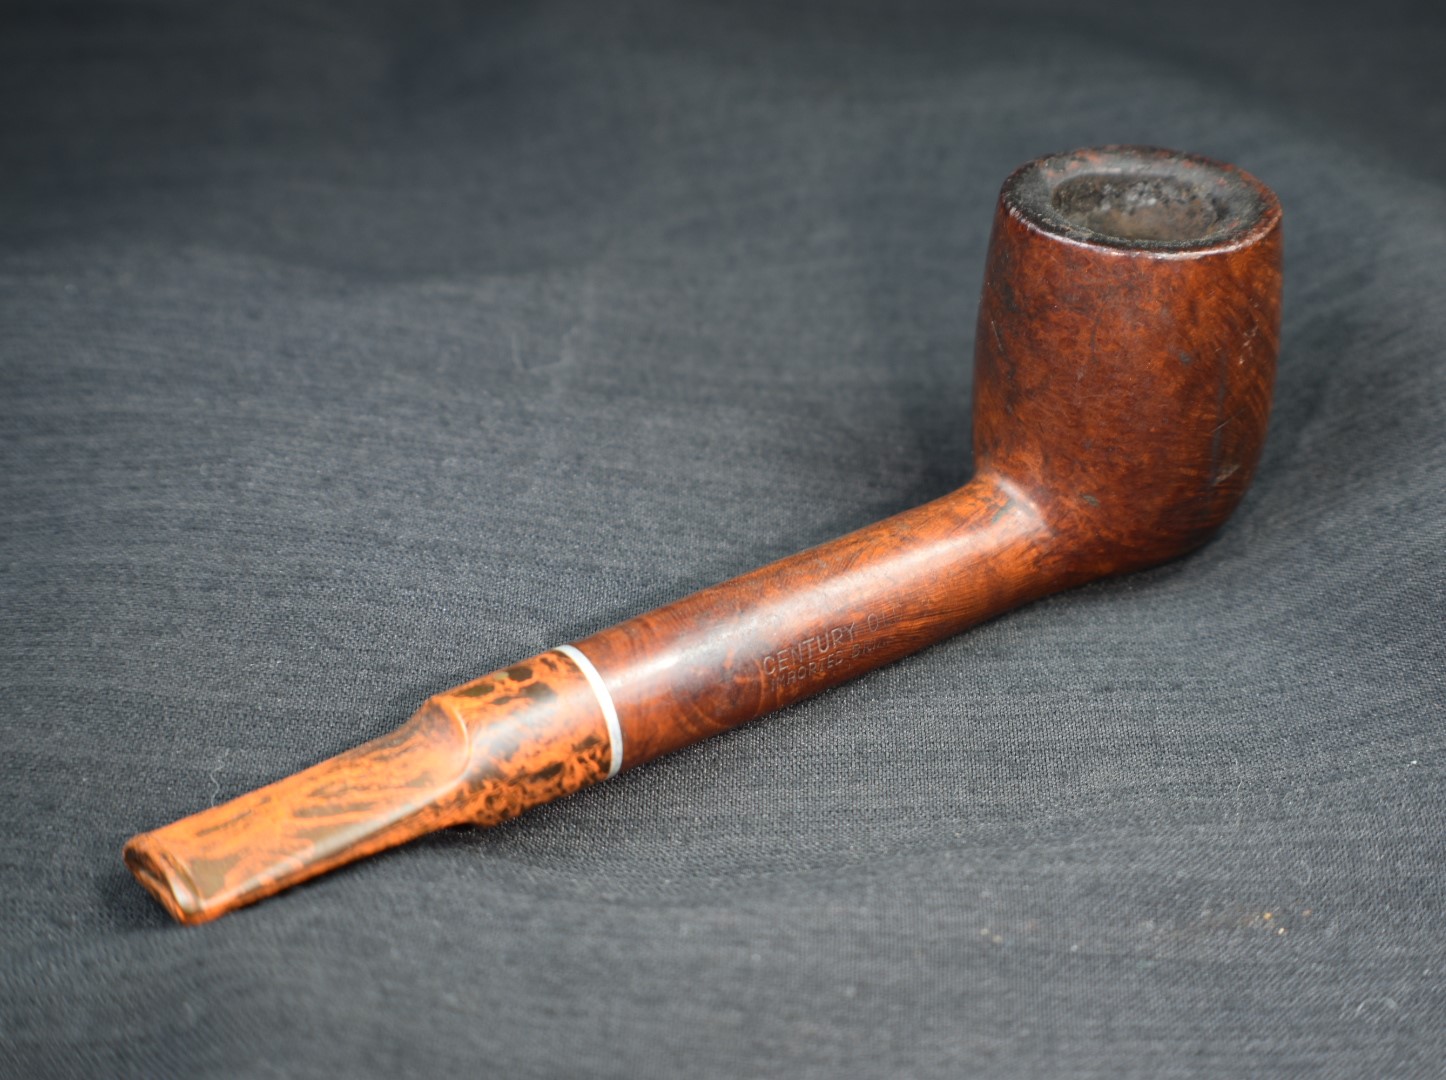

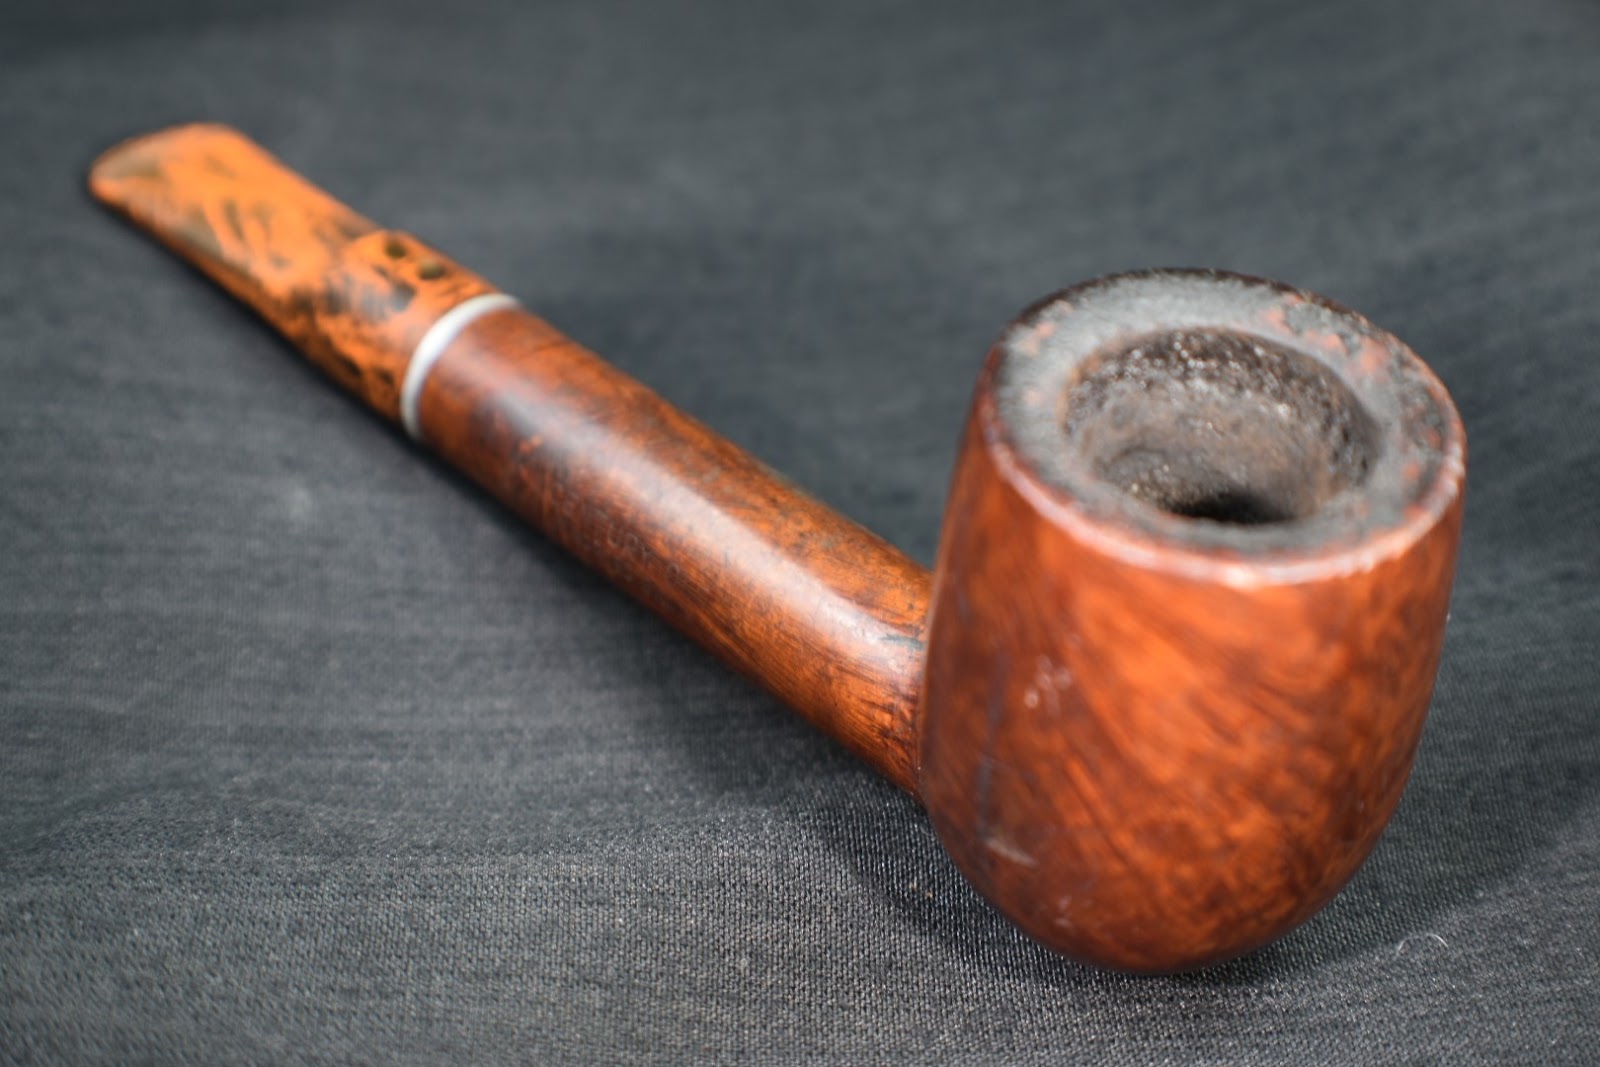


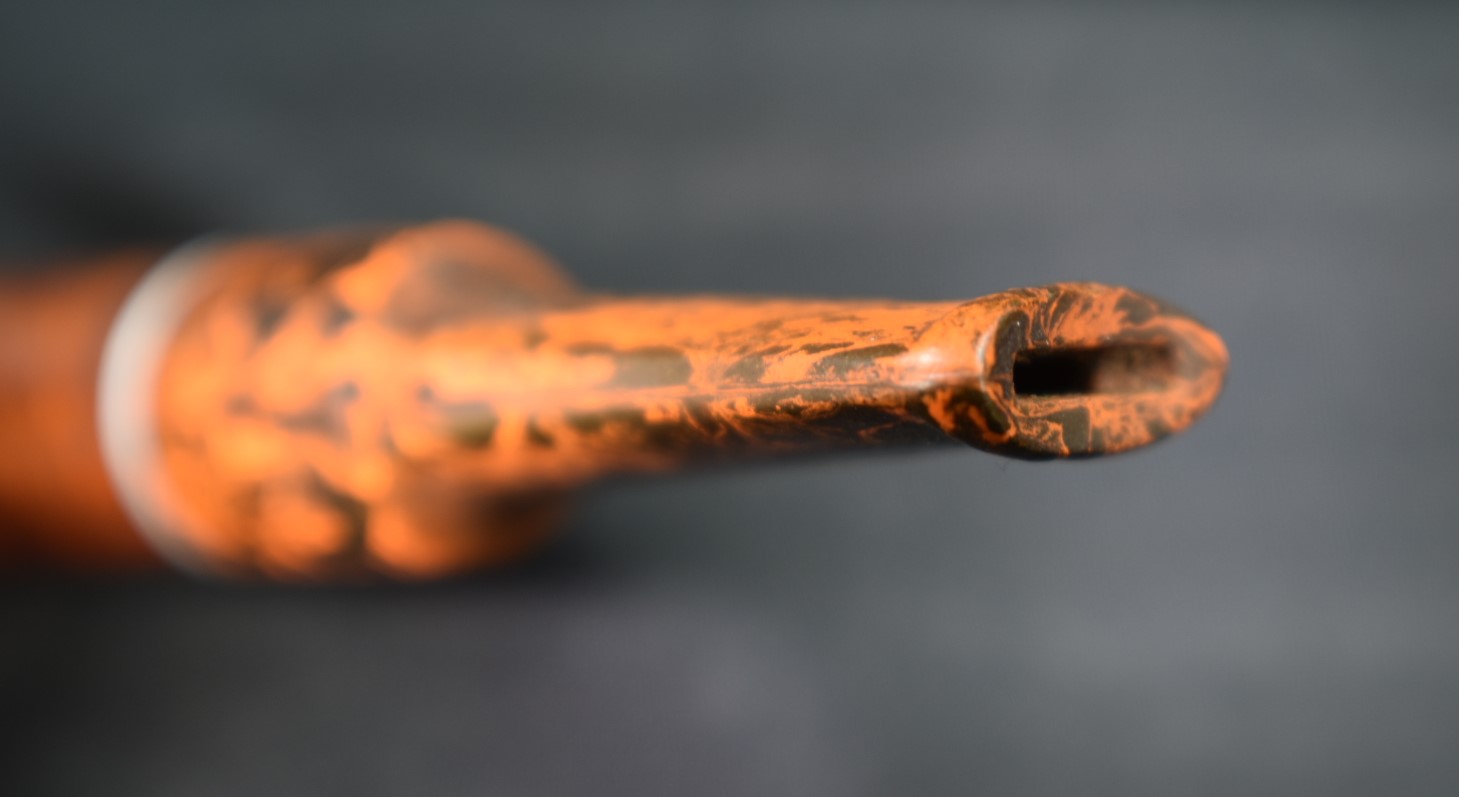
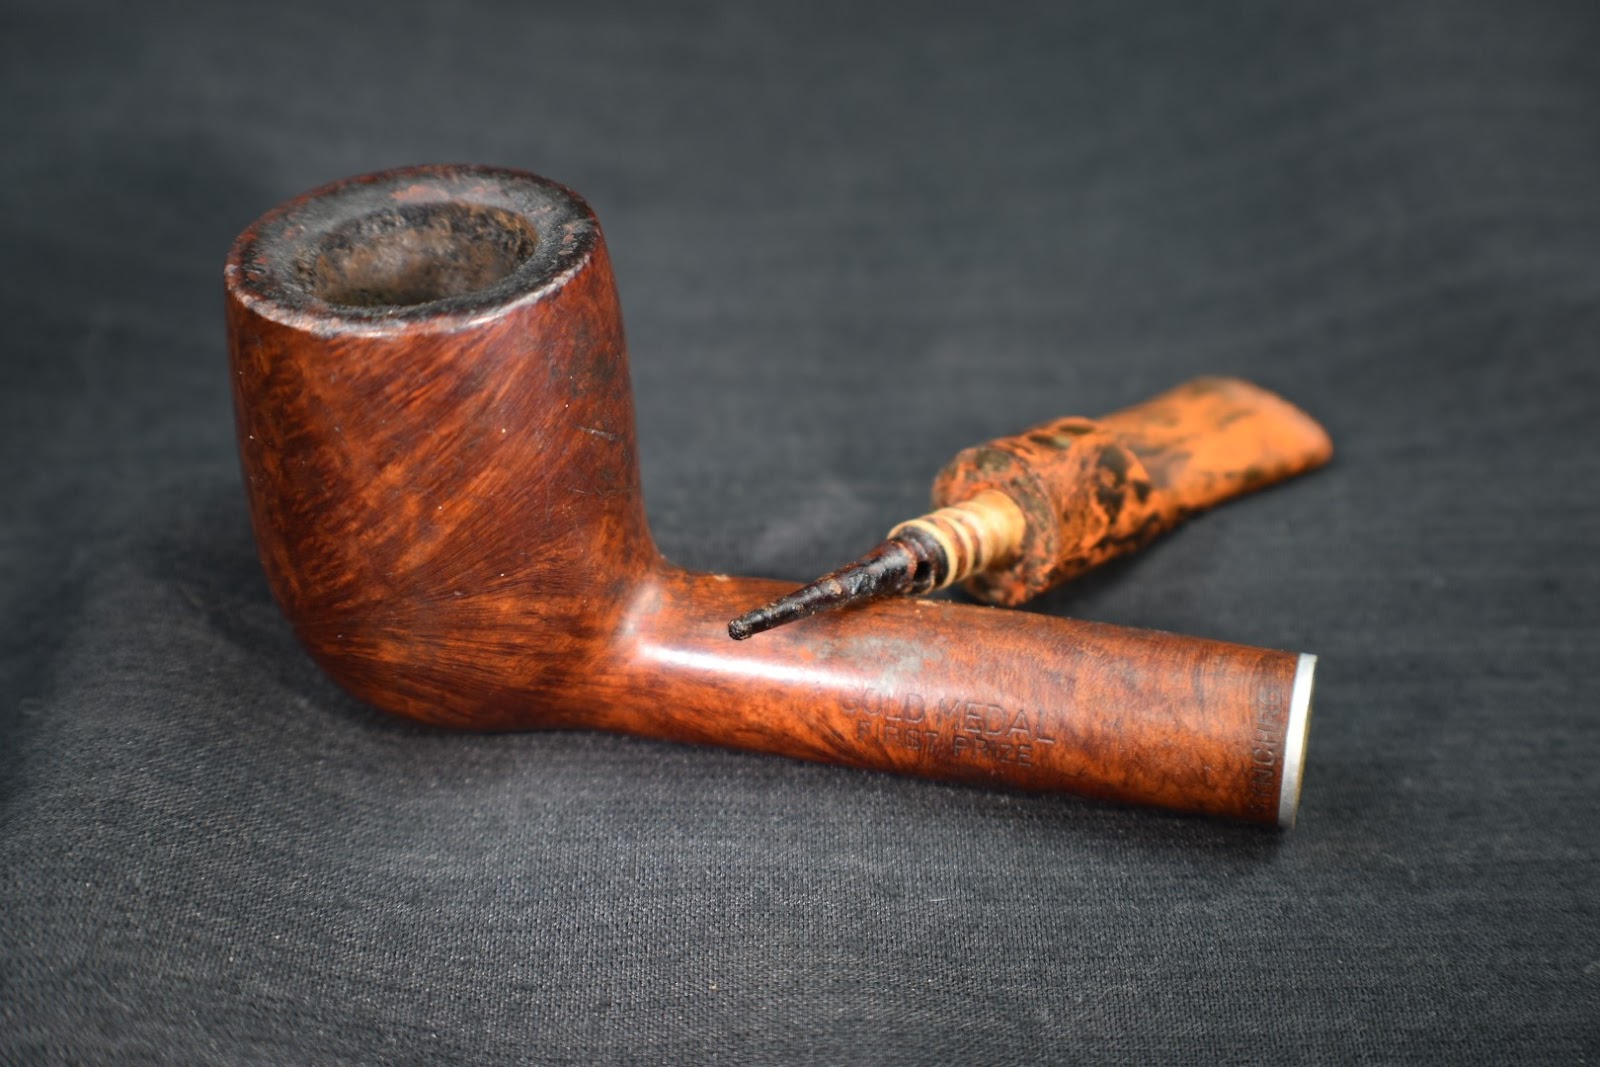


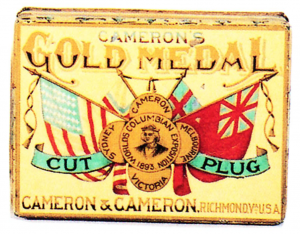
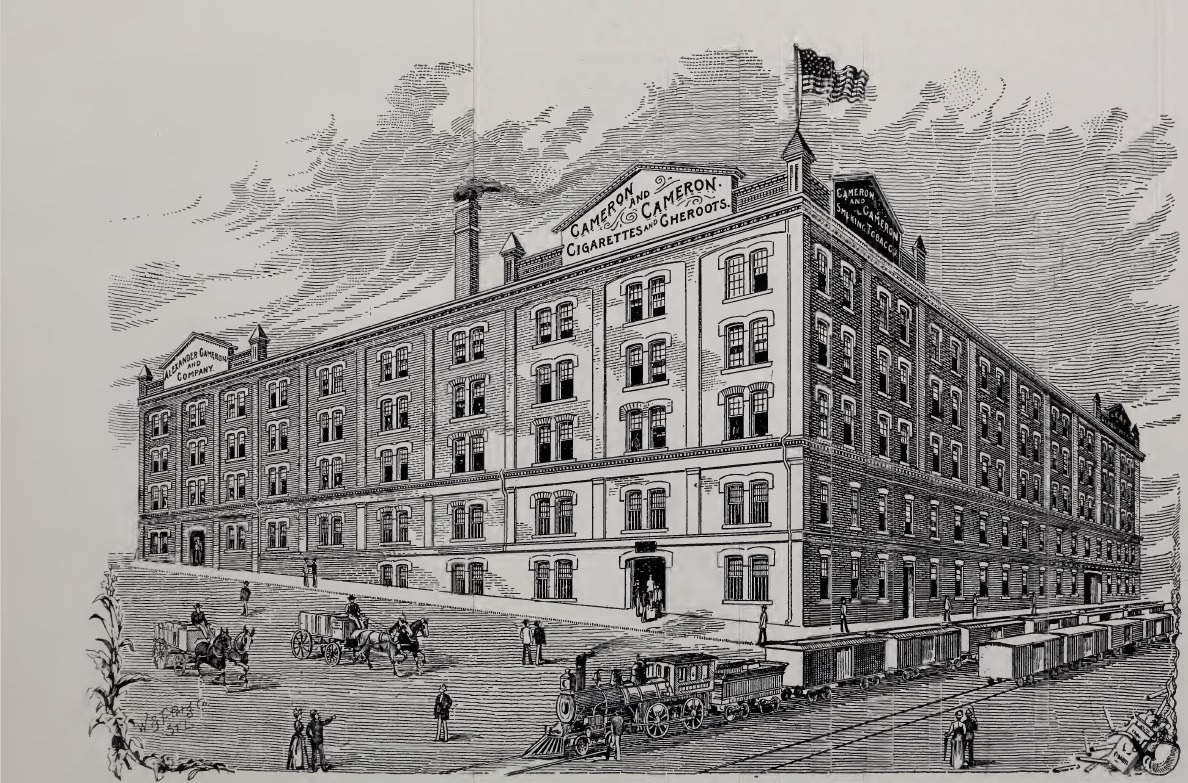
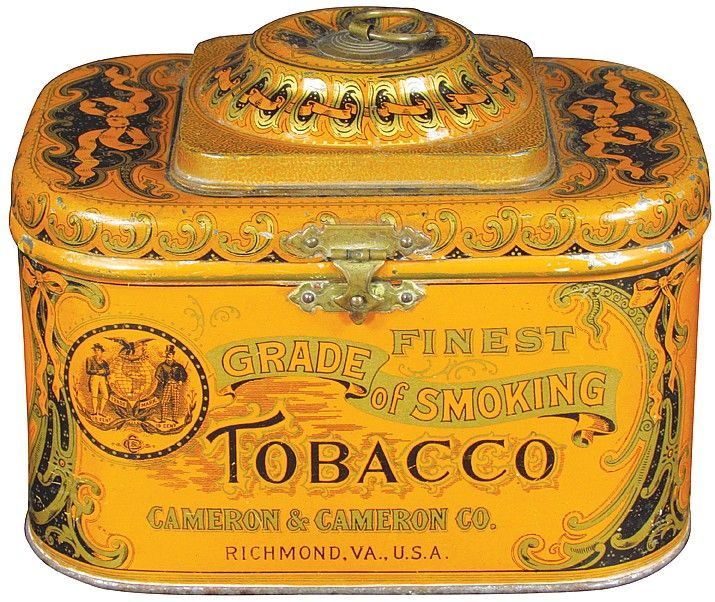

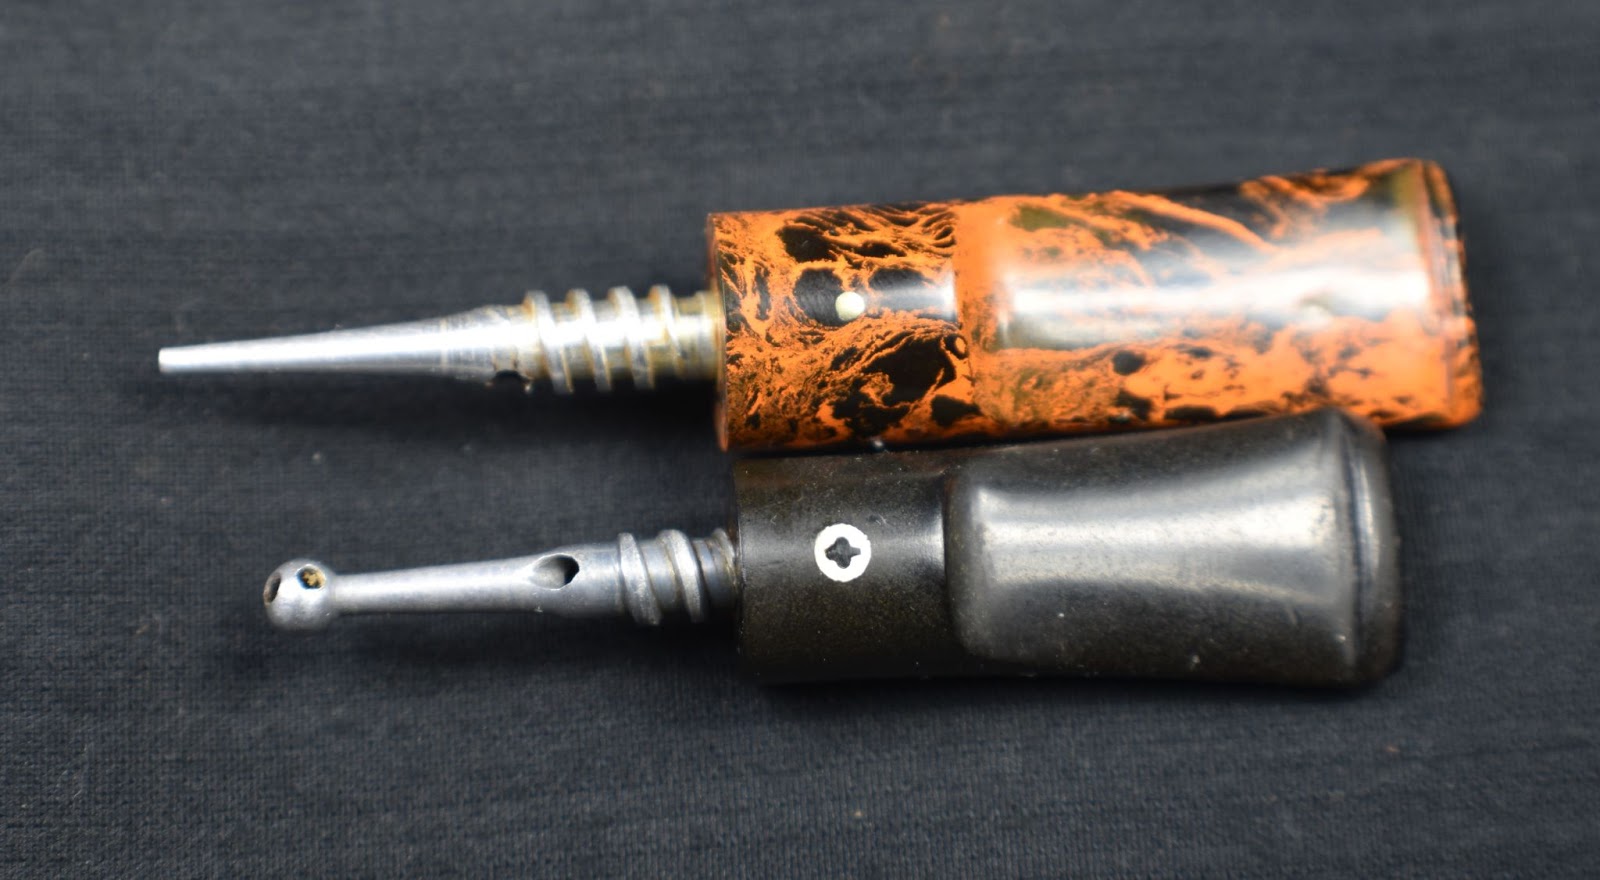
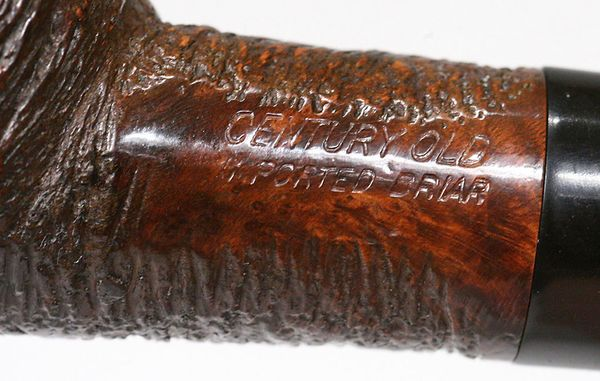
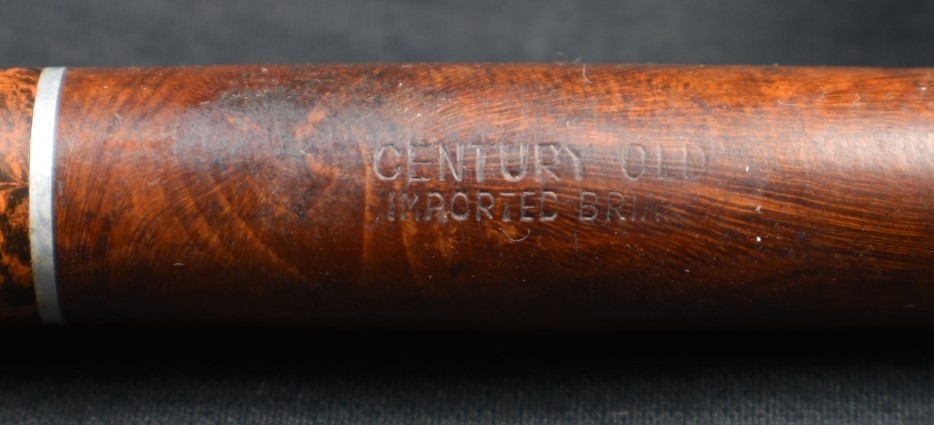
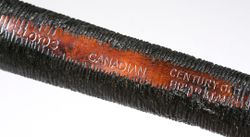 ”
”


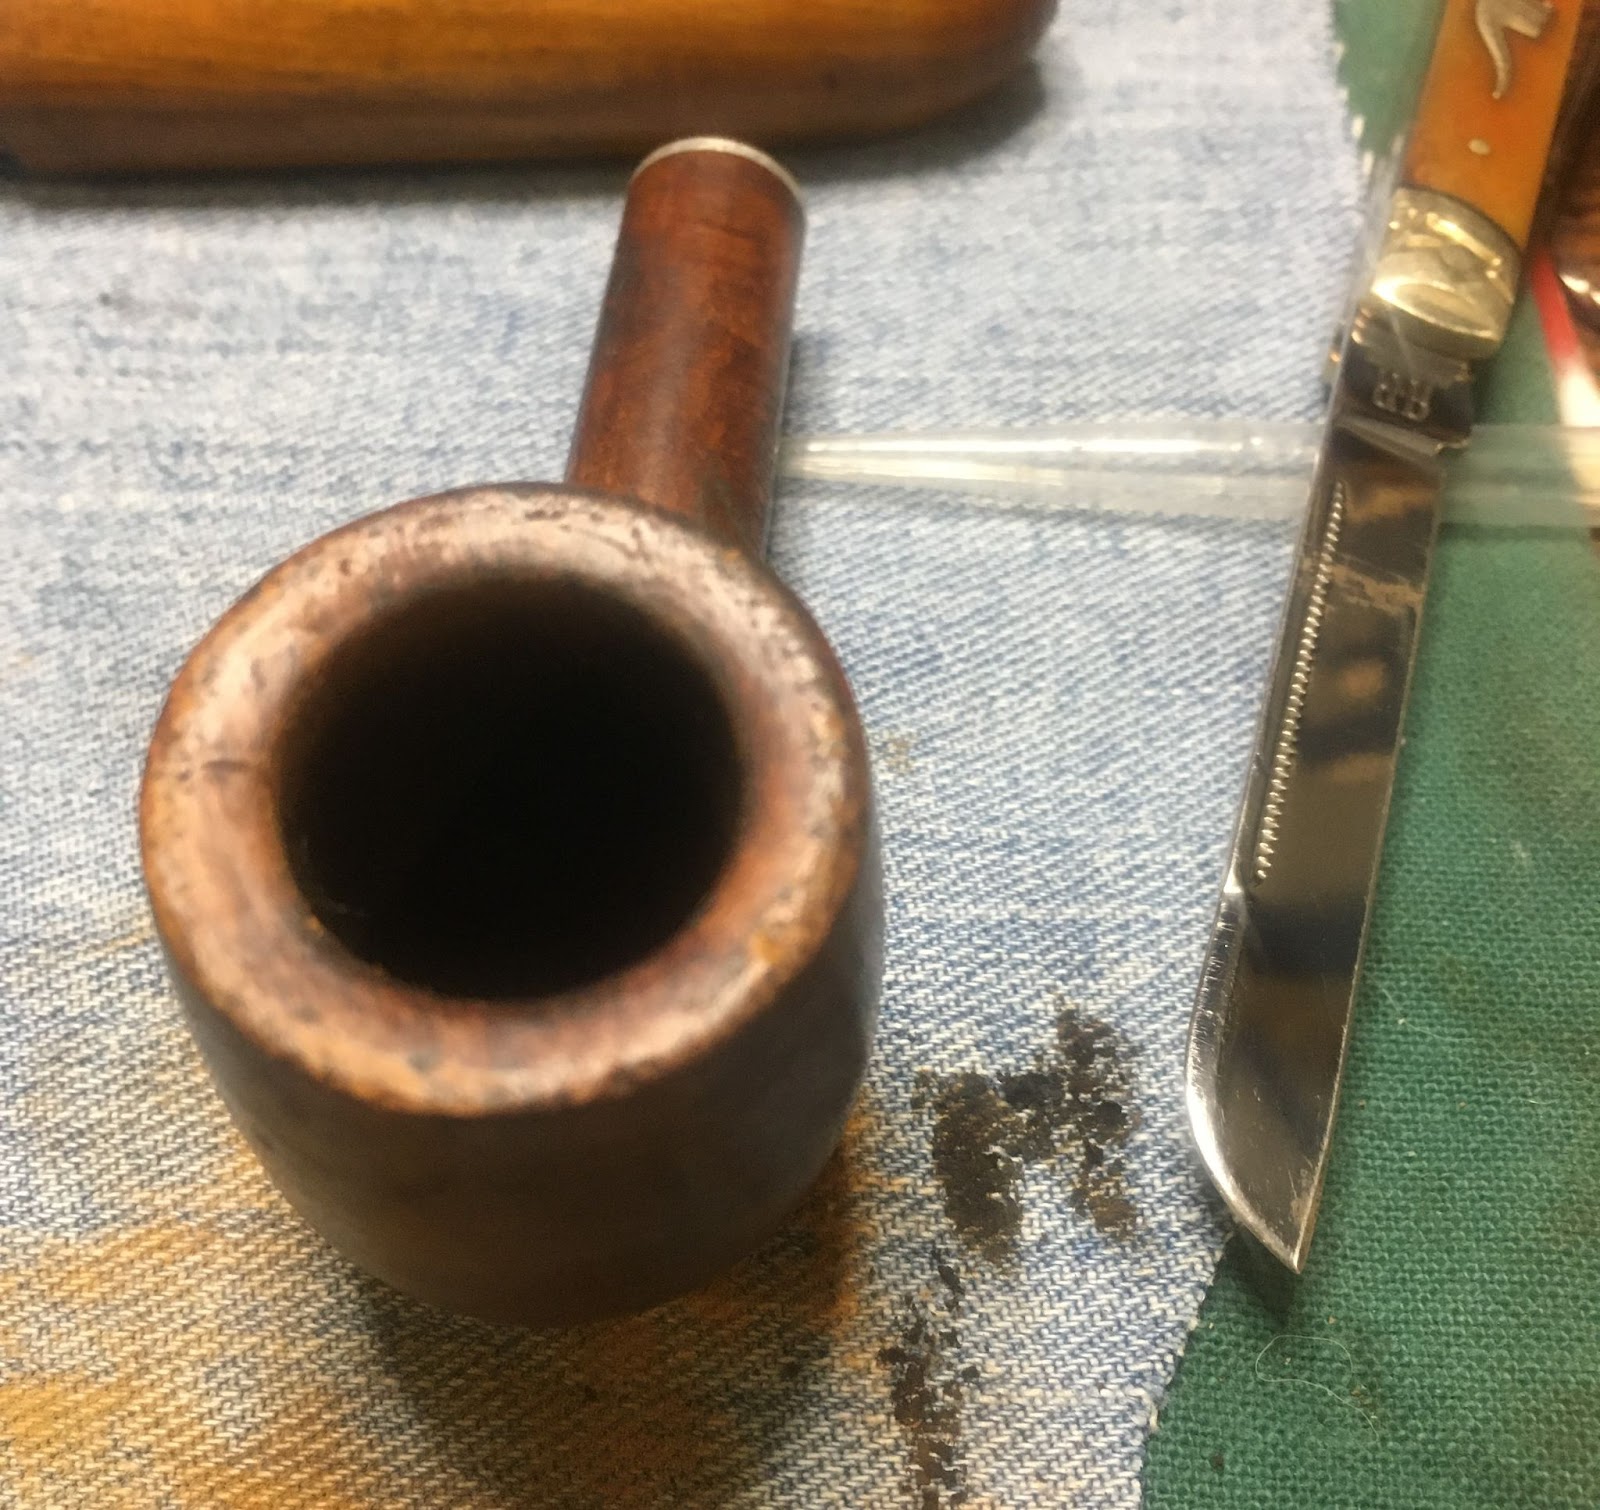


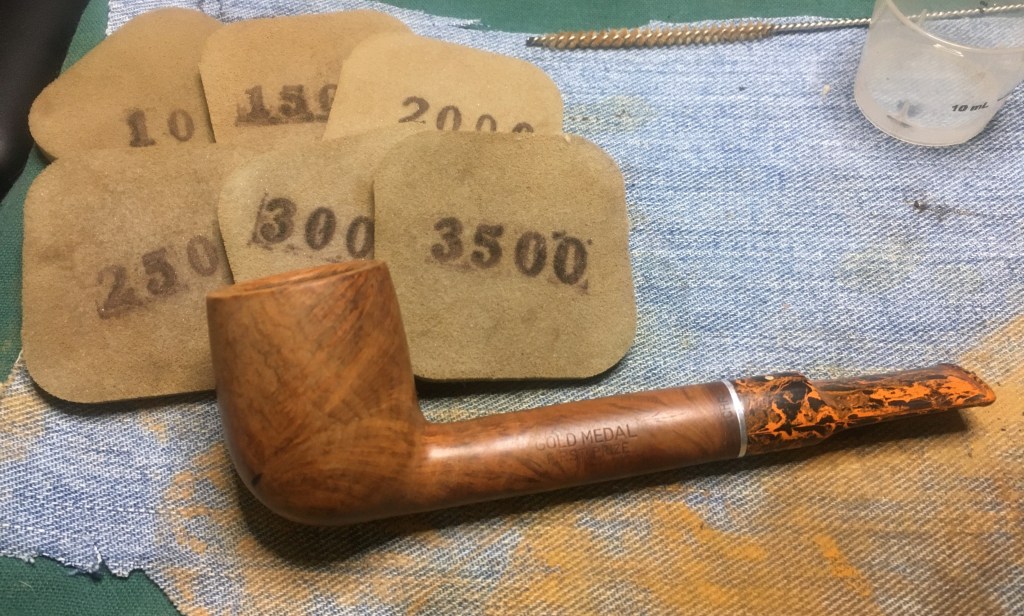
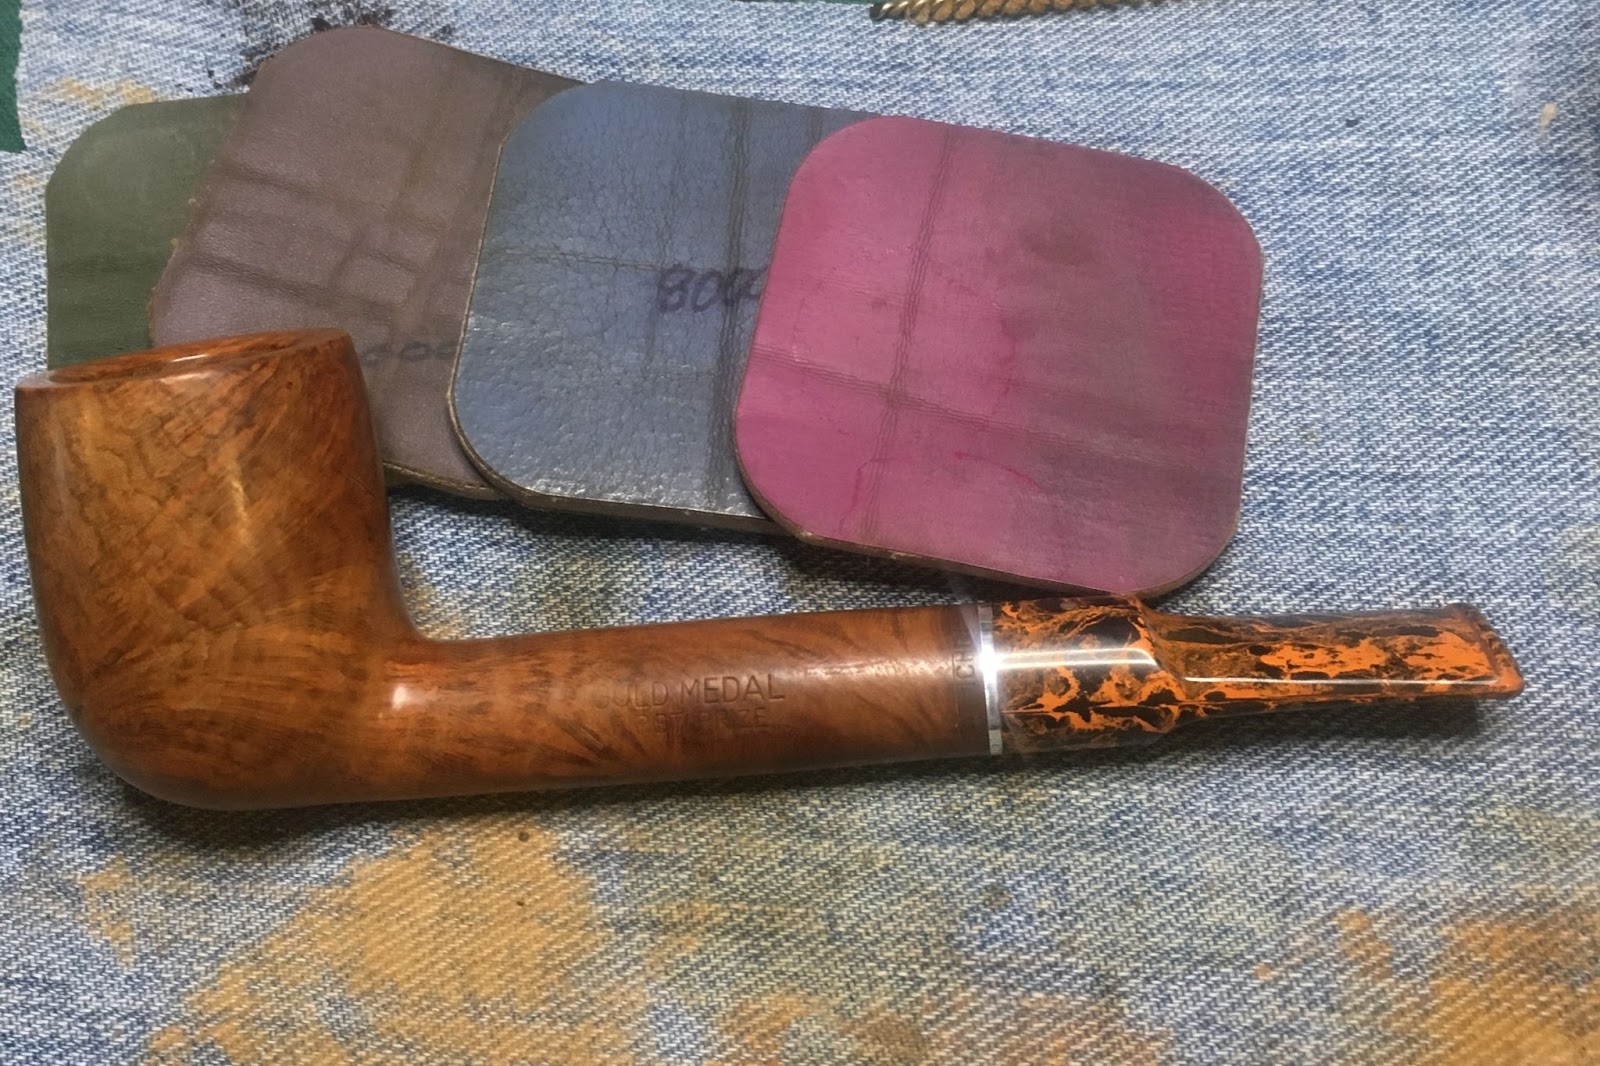


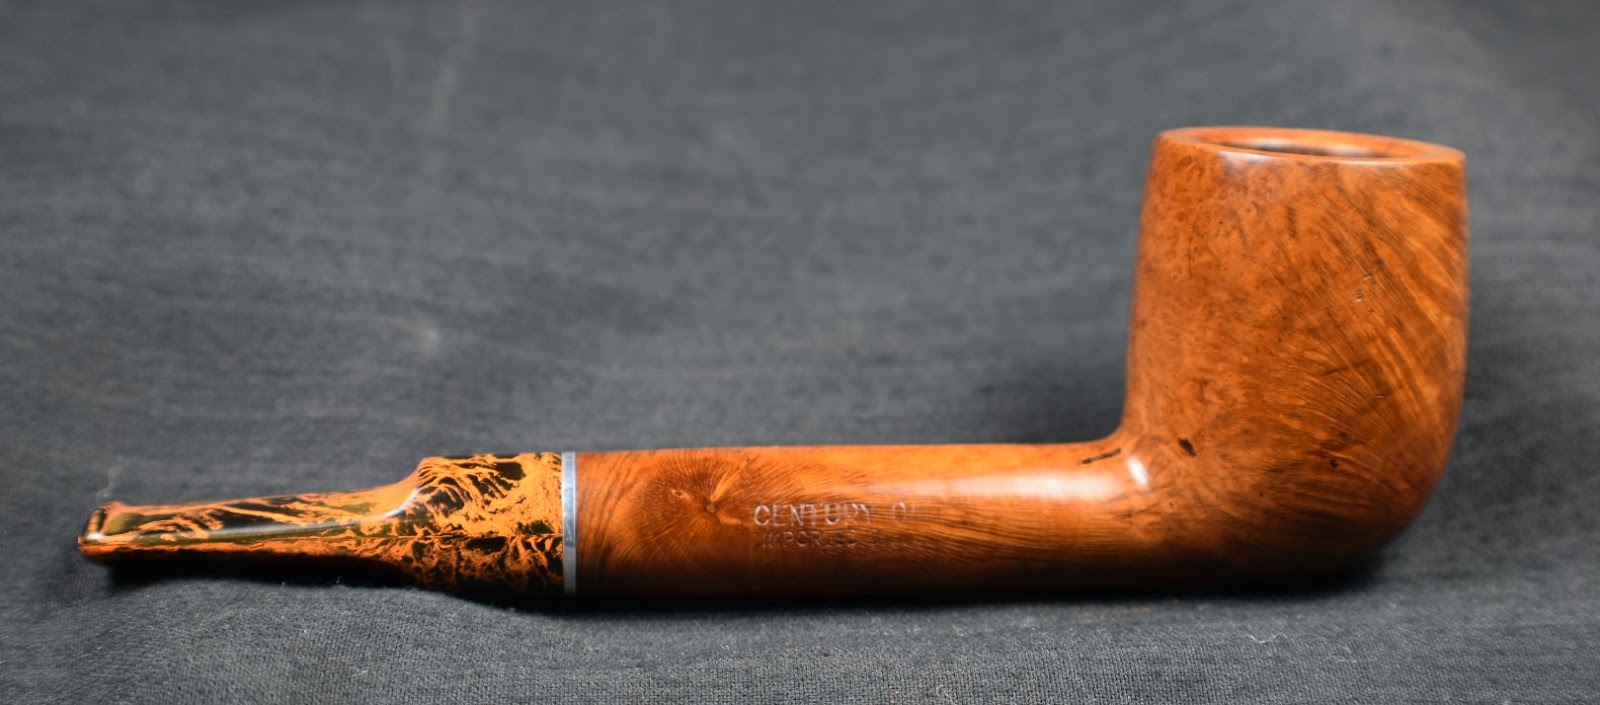

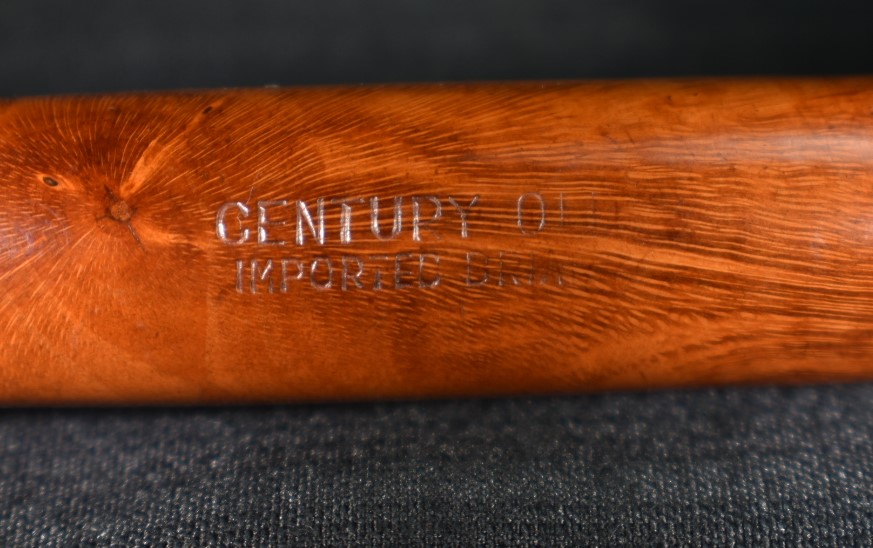


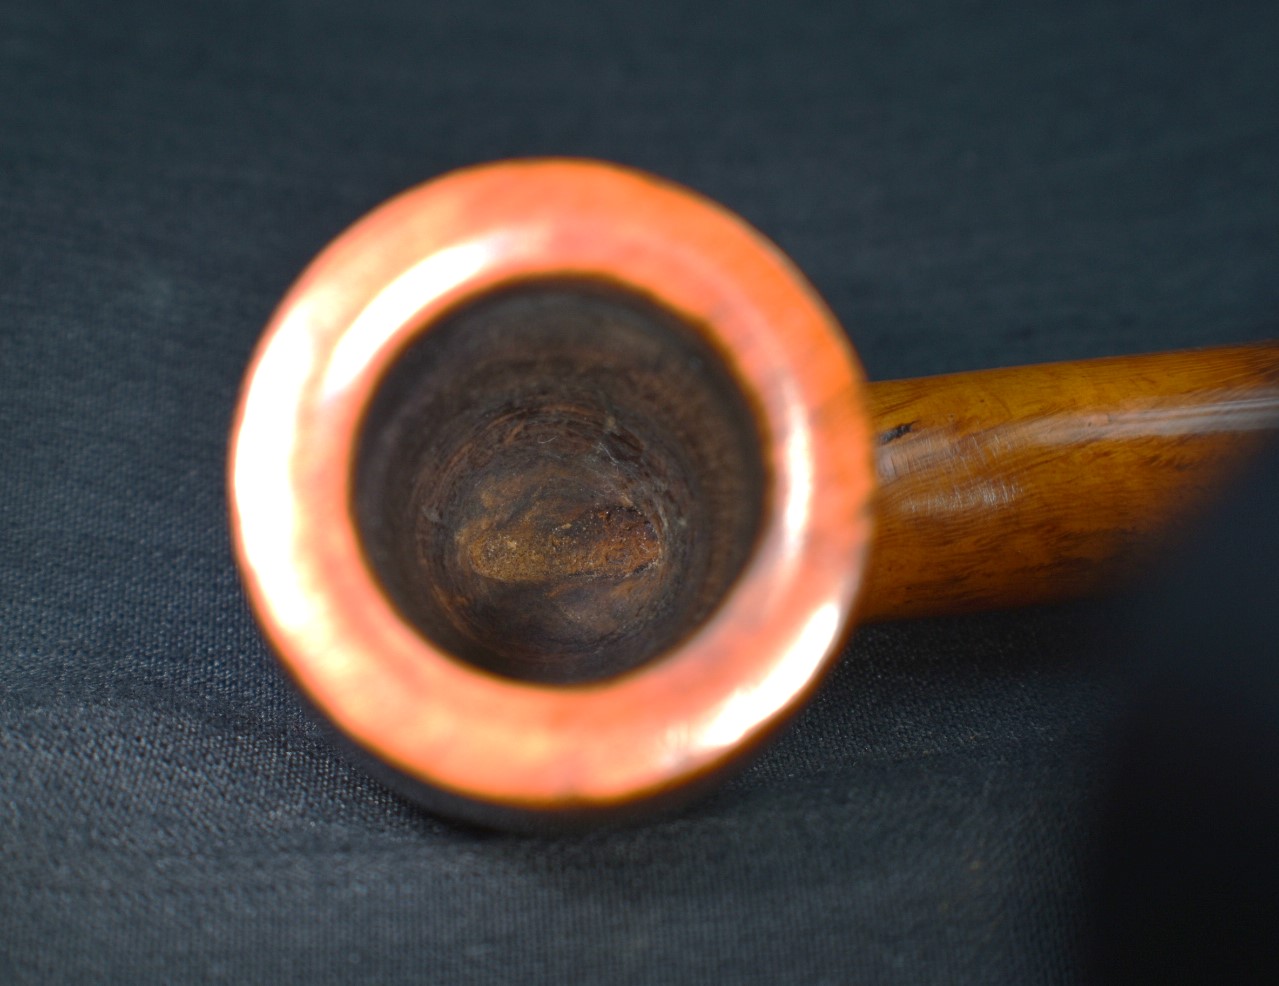
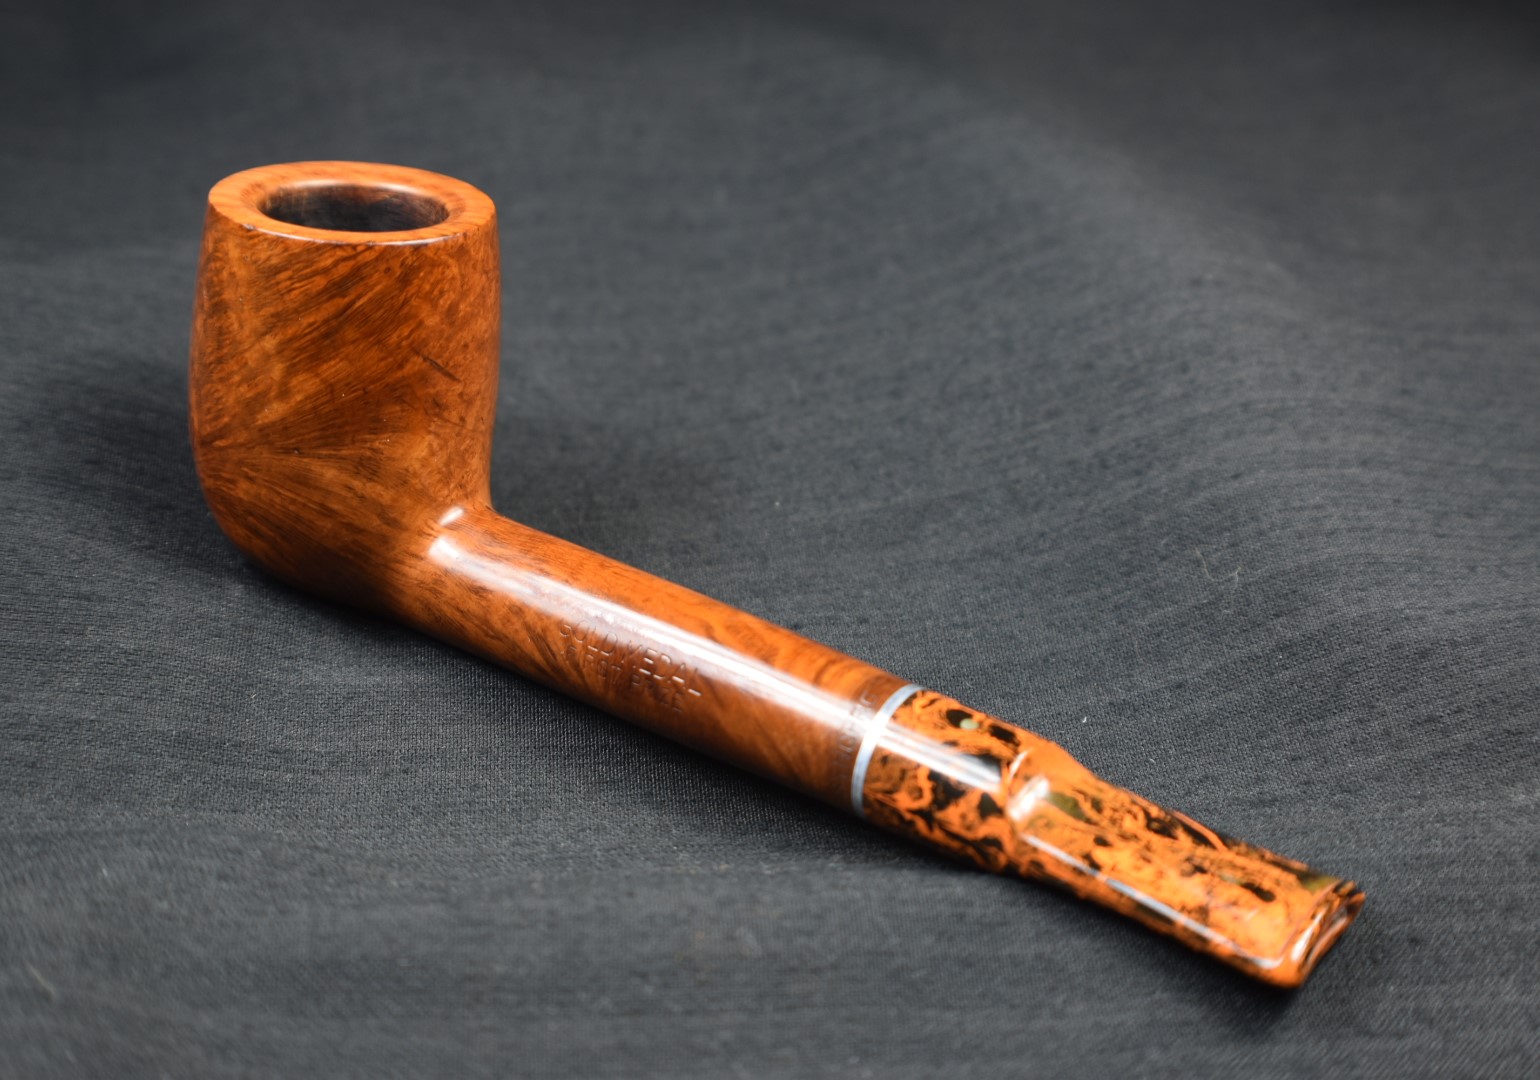

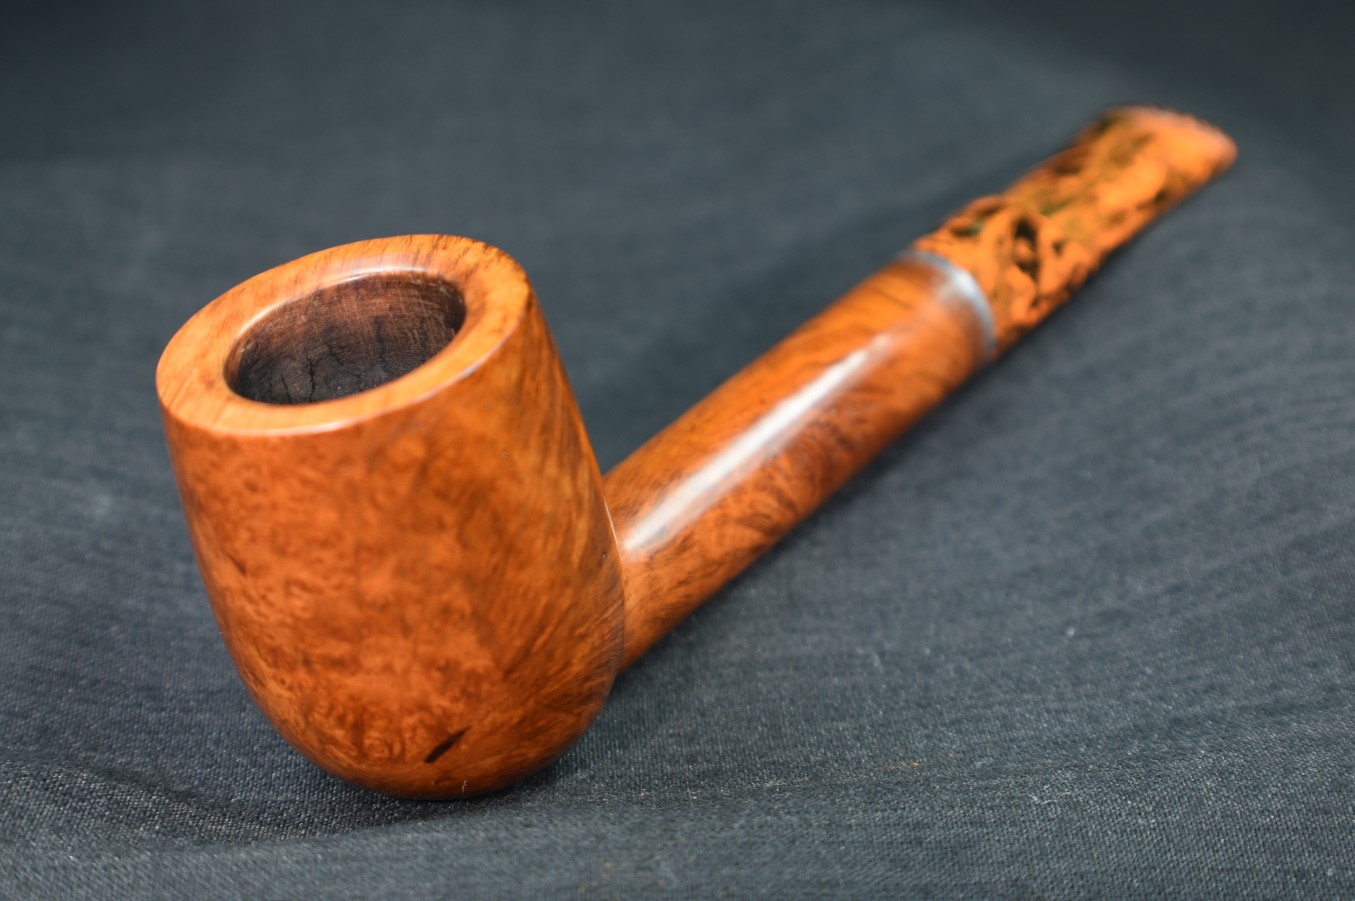

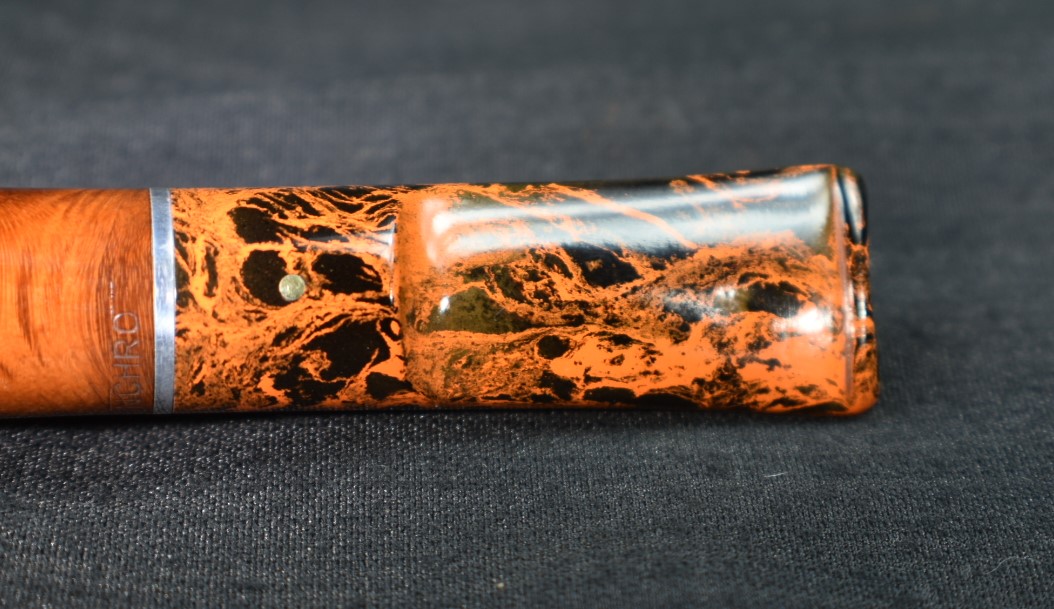


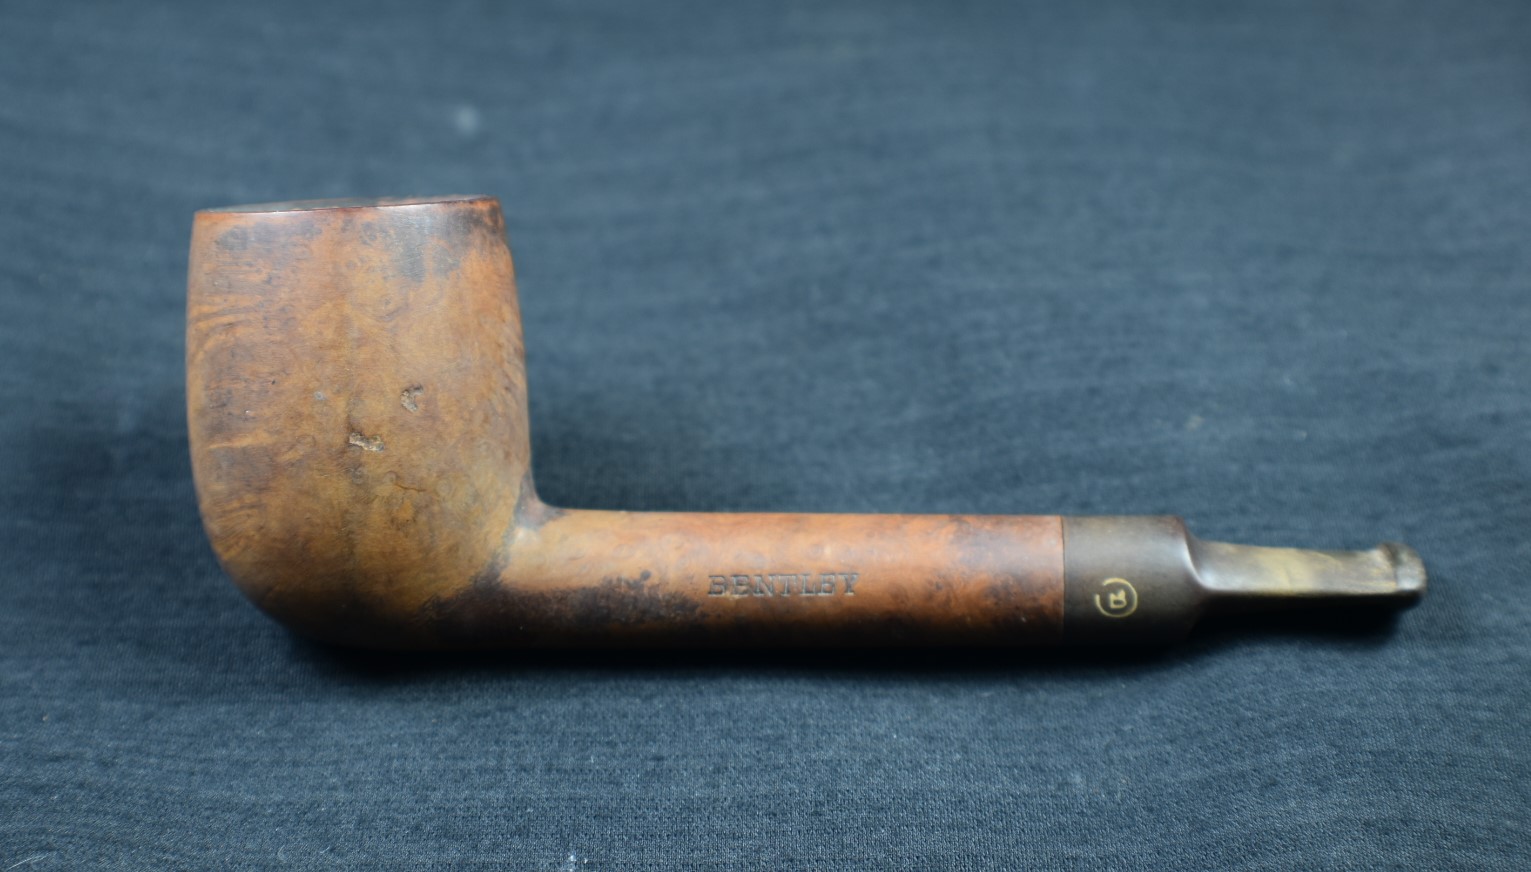

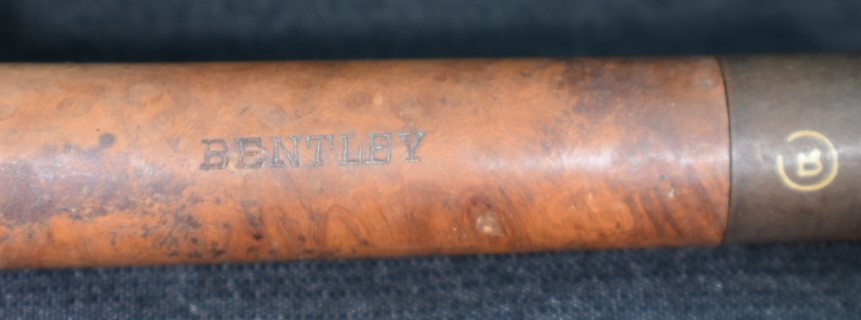


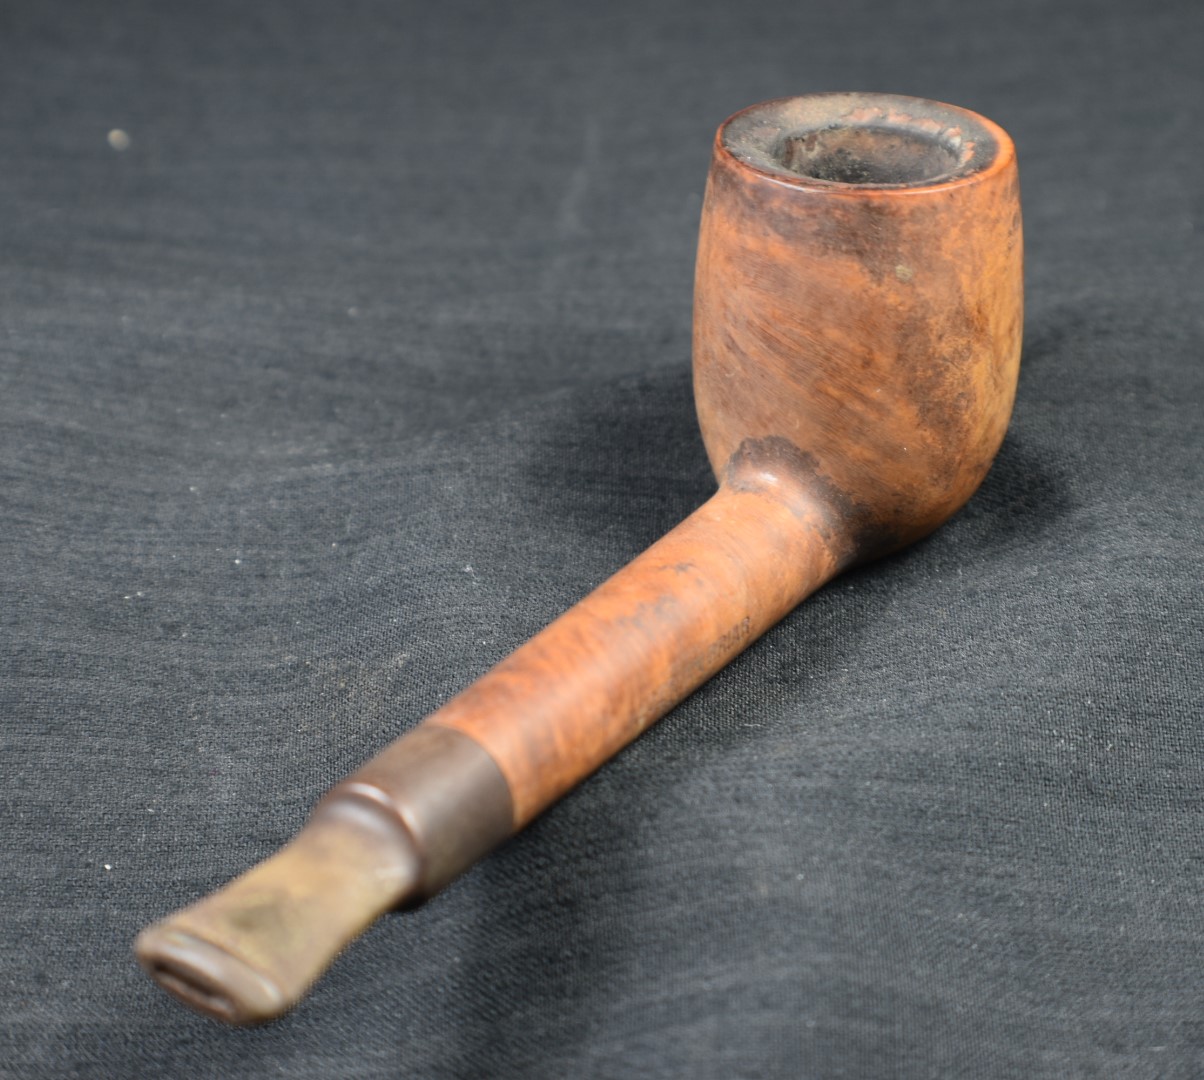
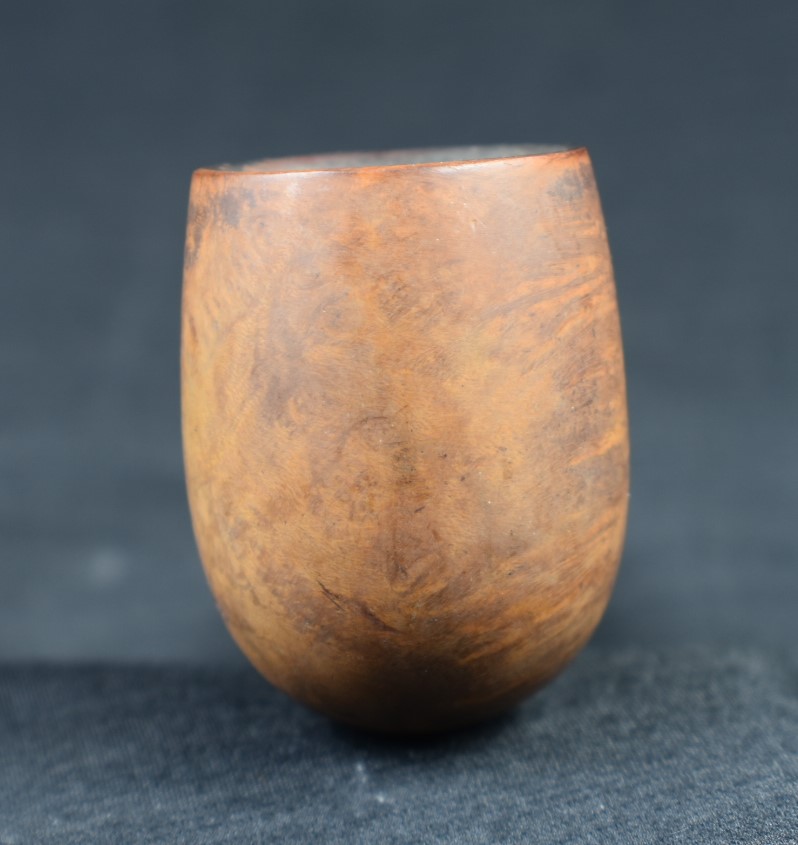


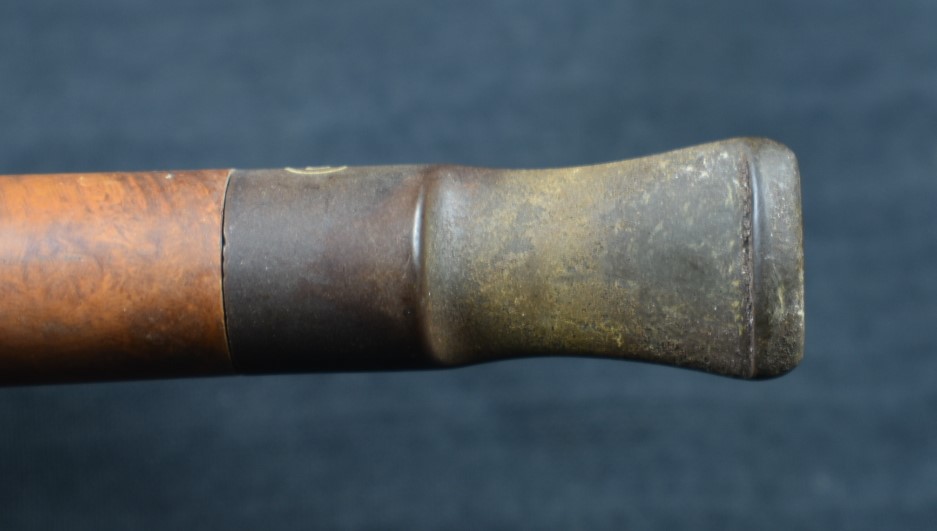


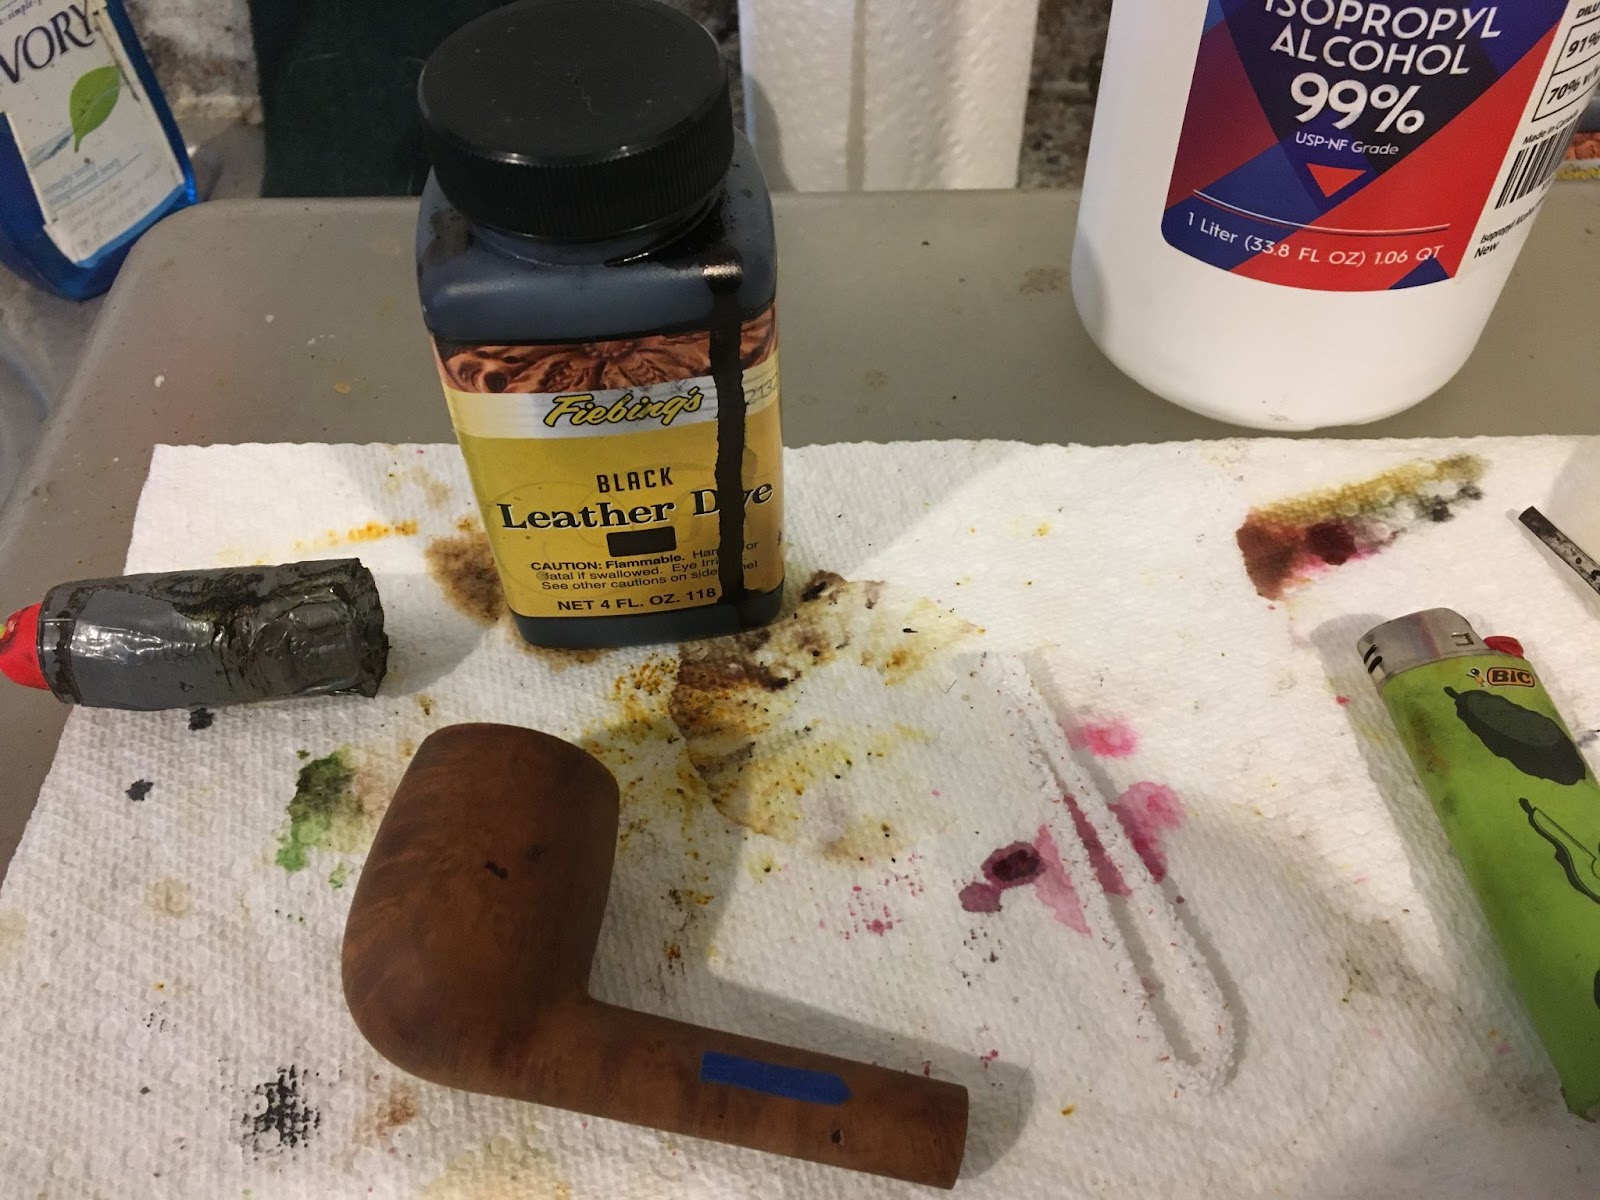
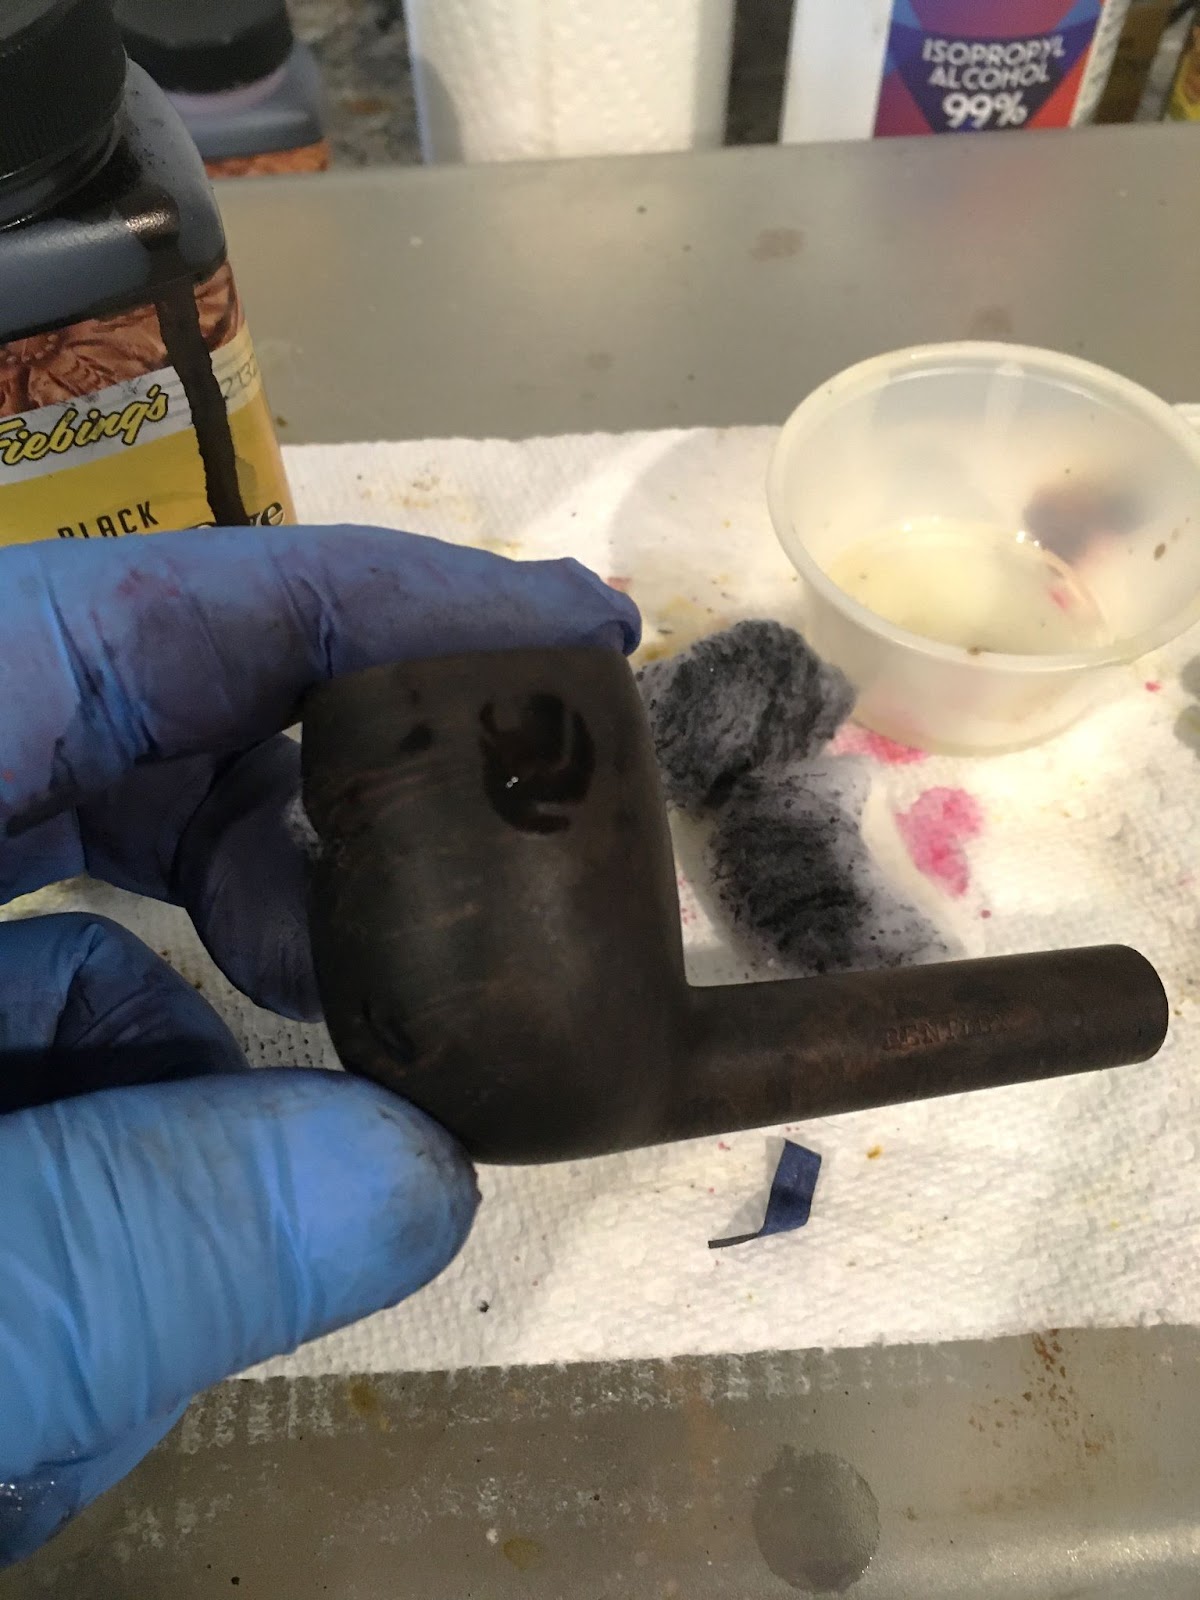
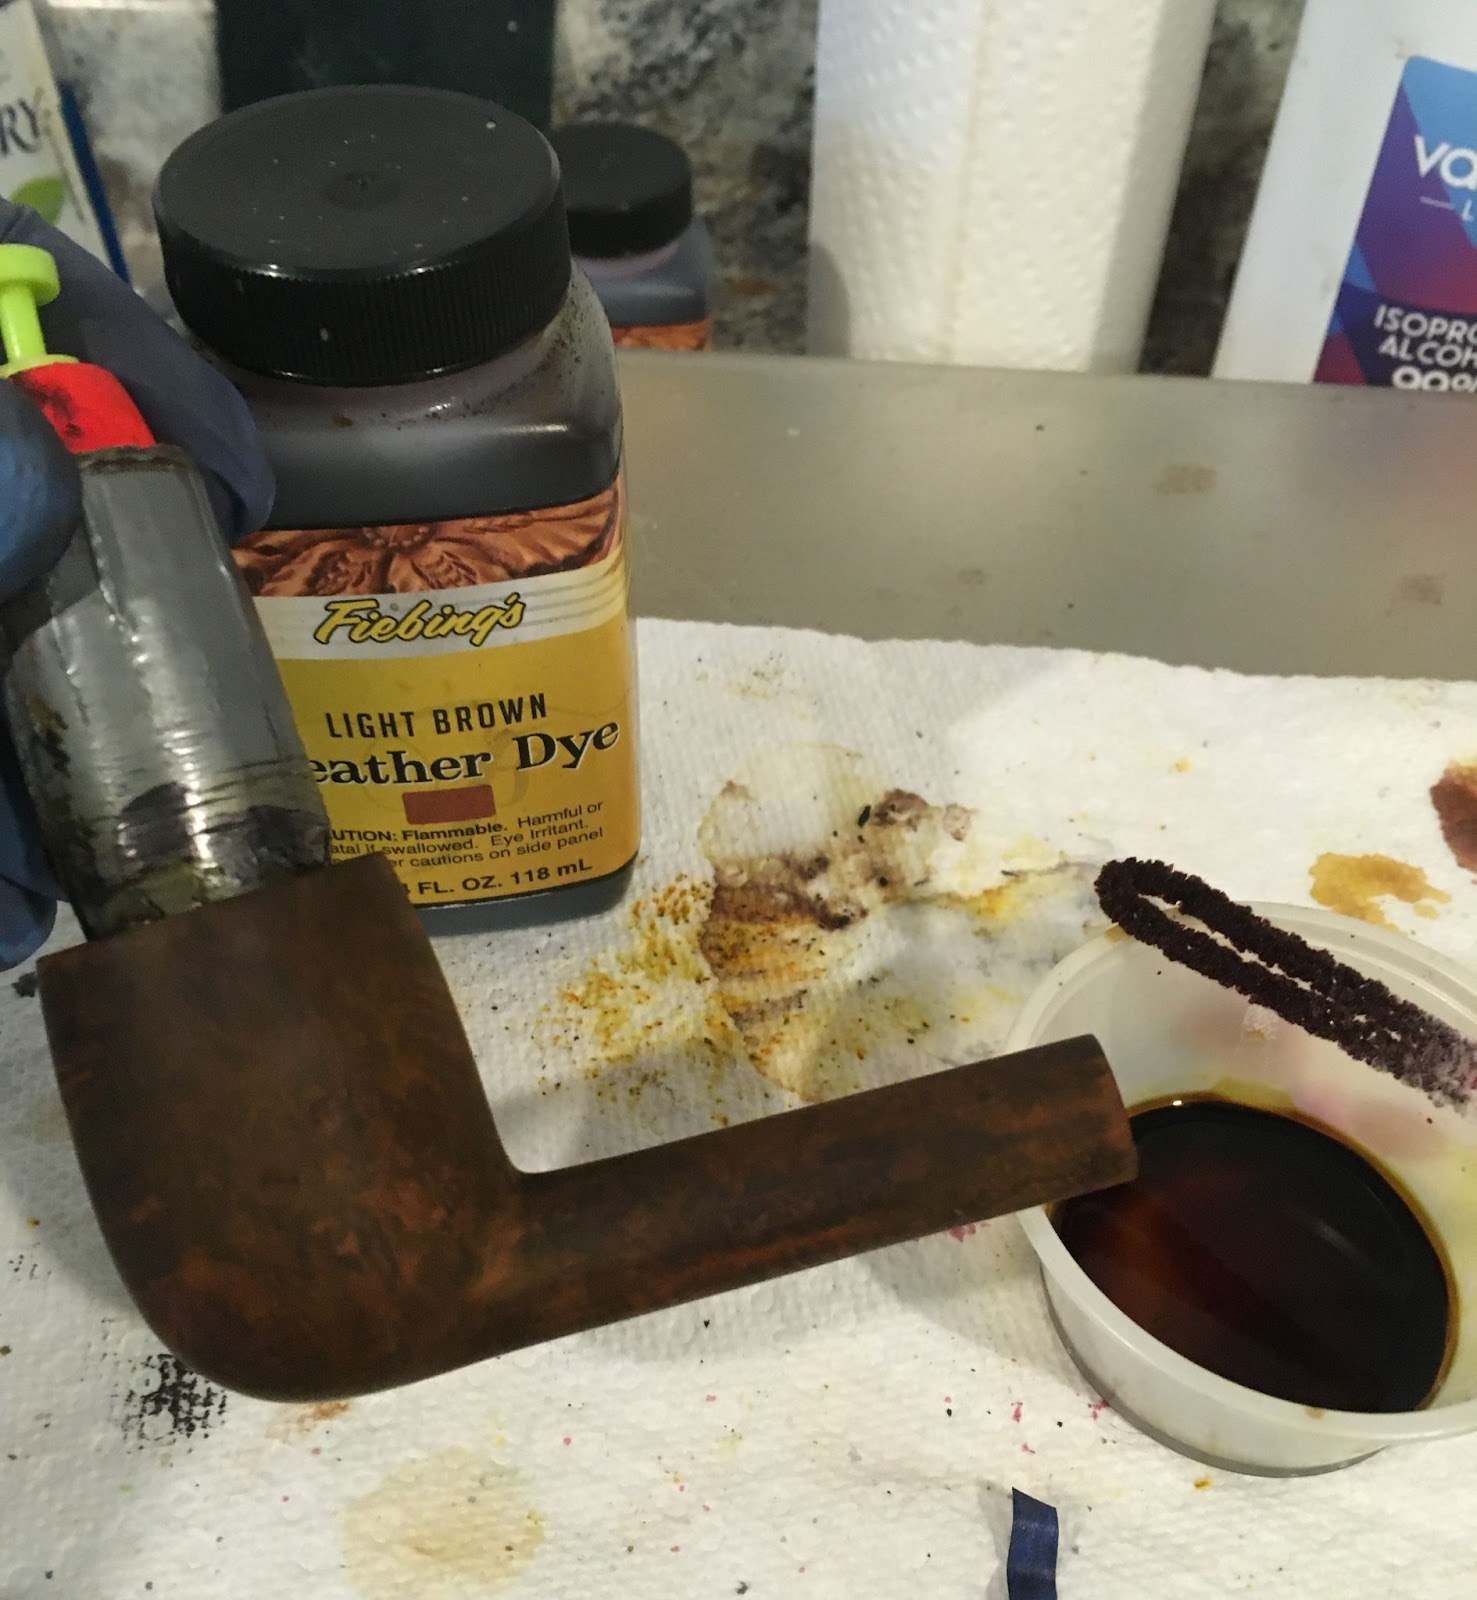


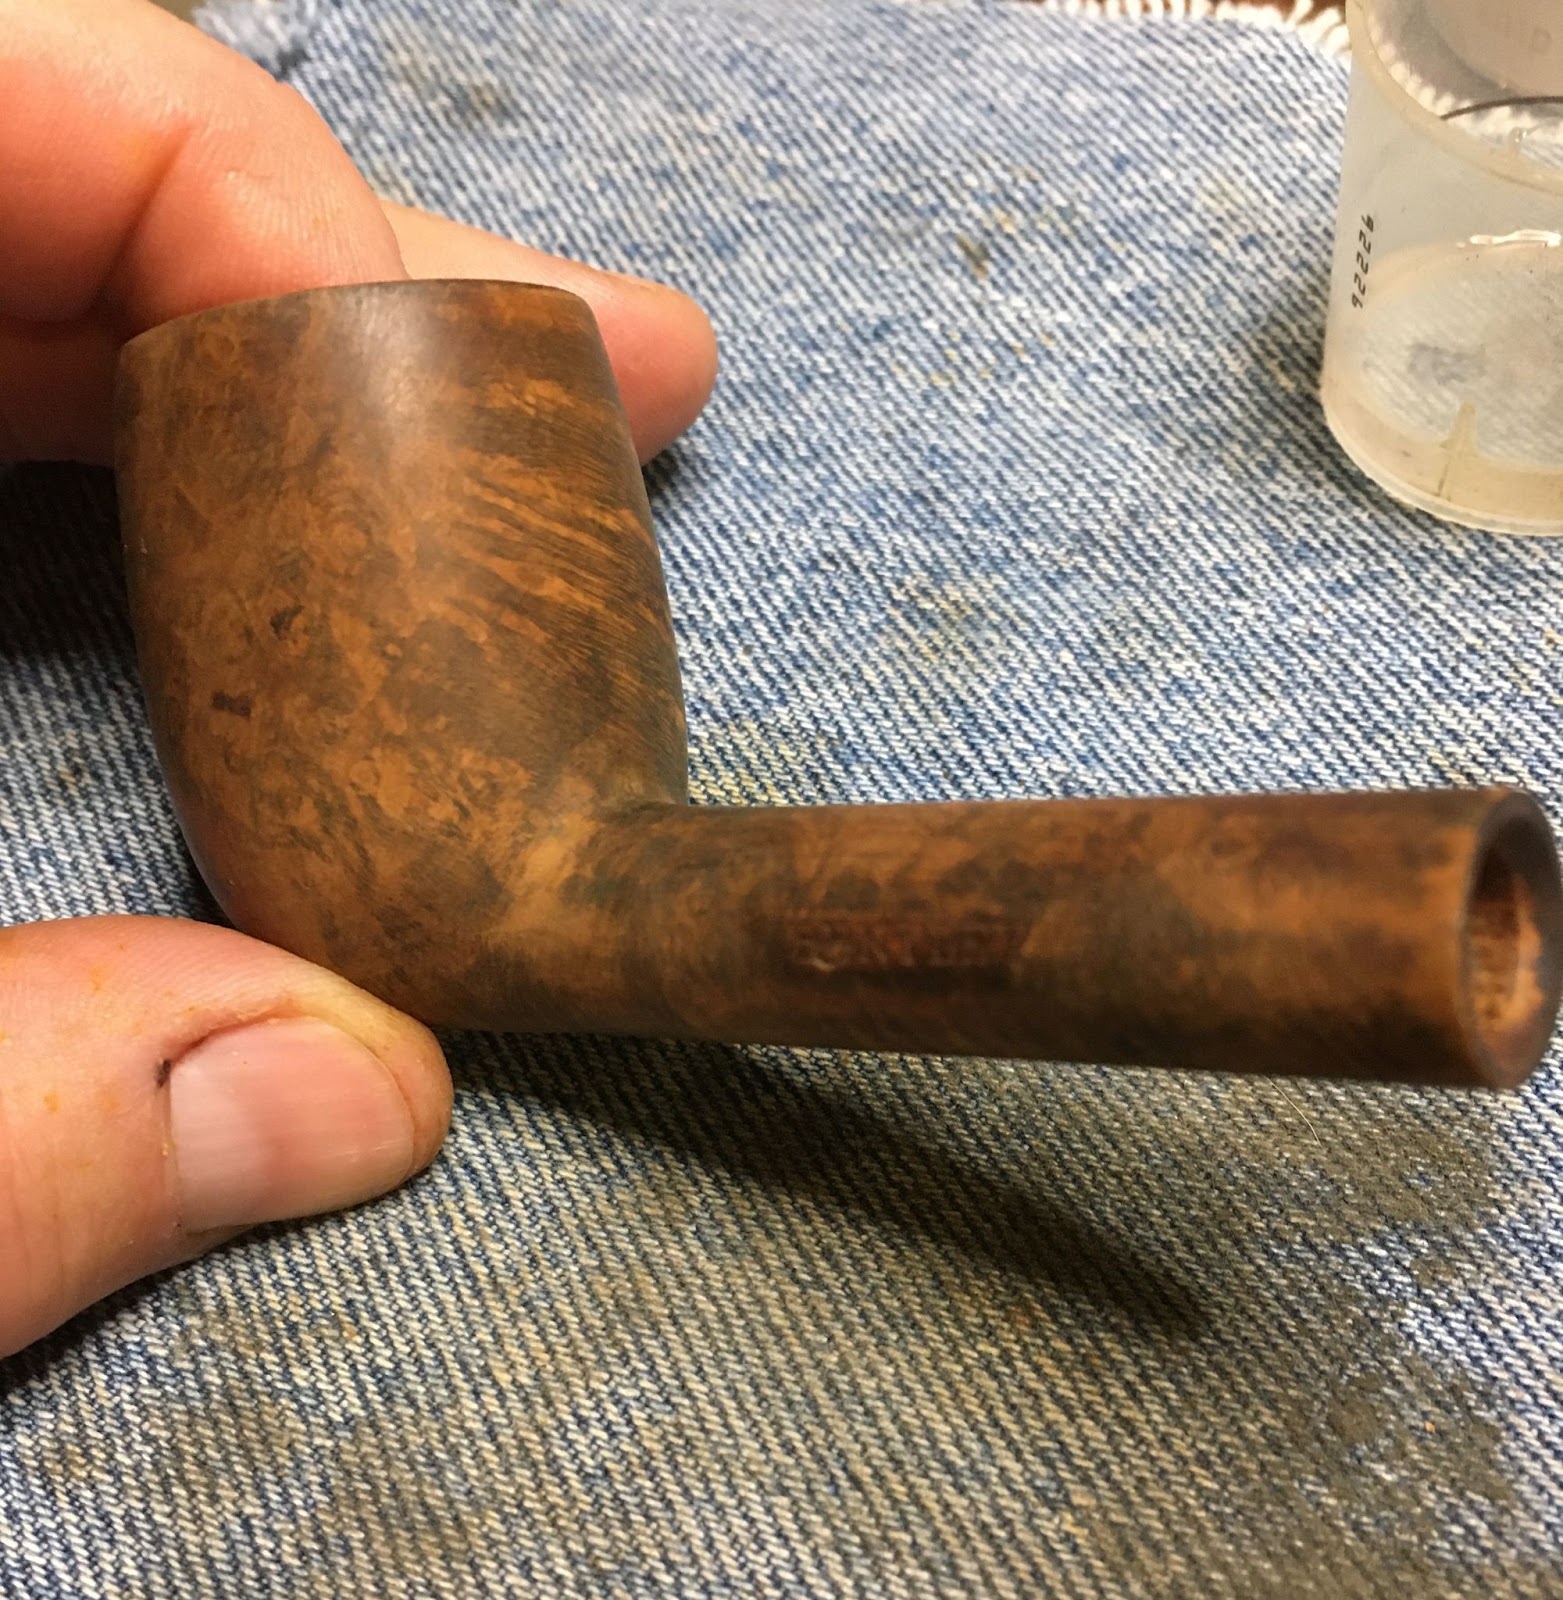
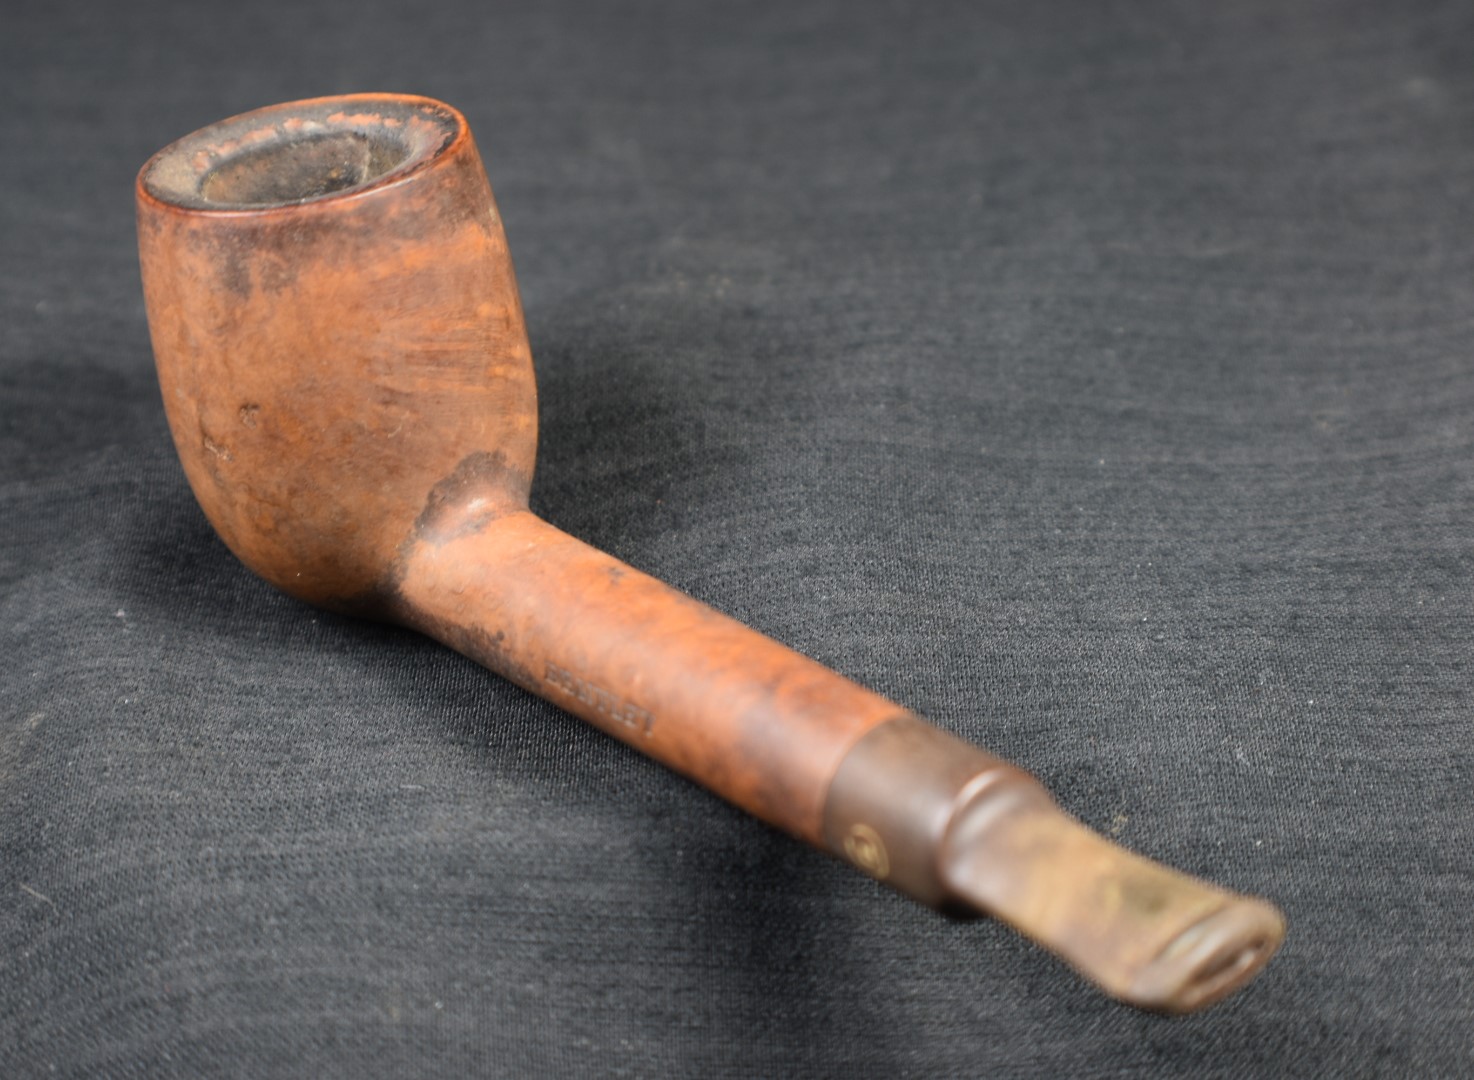
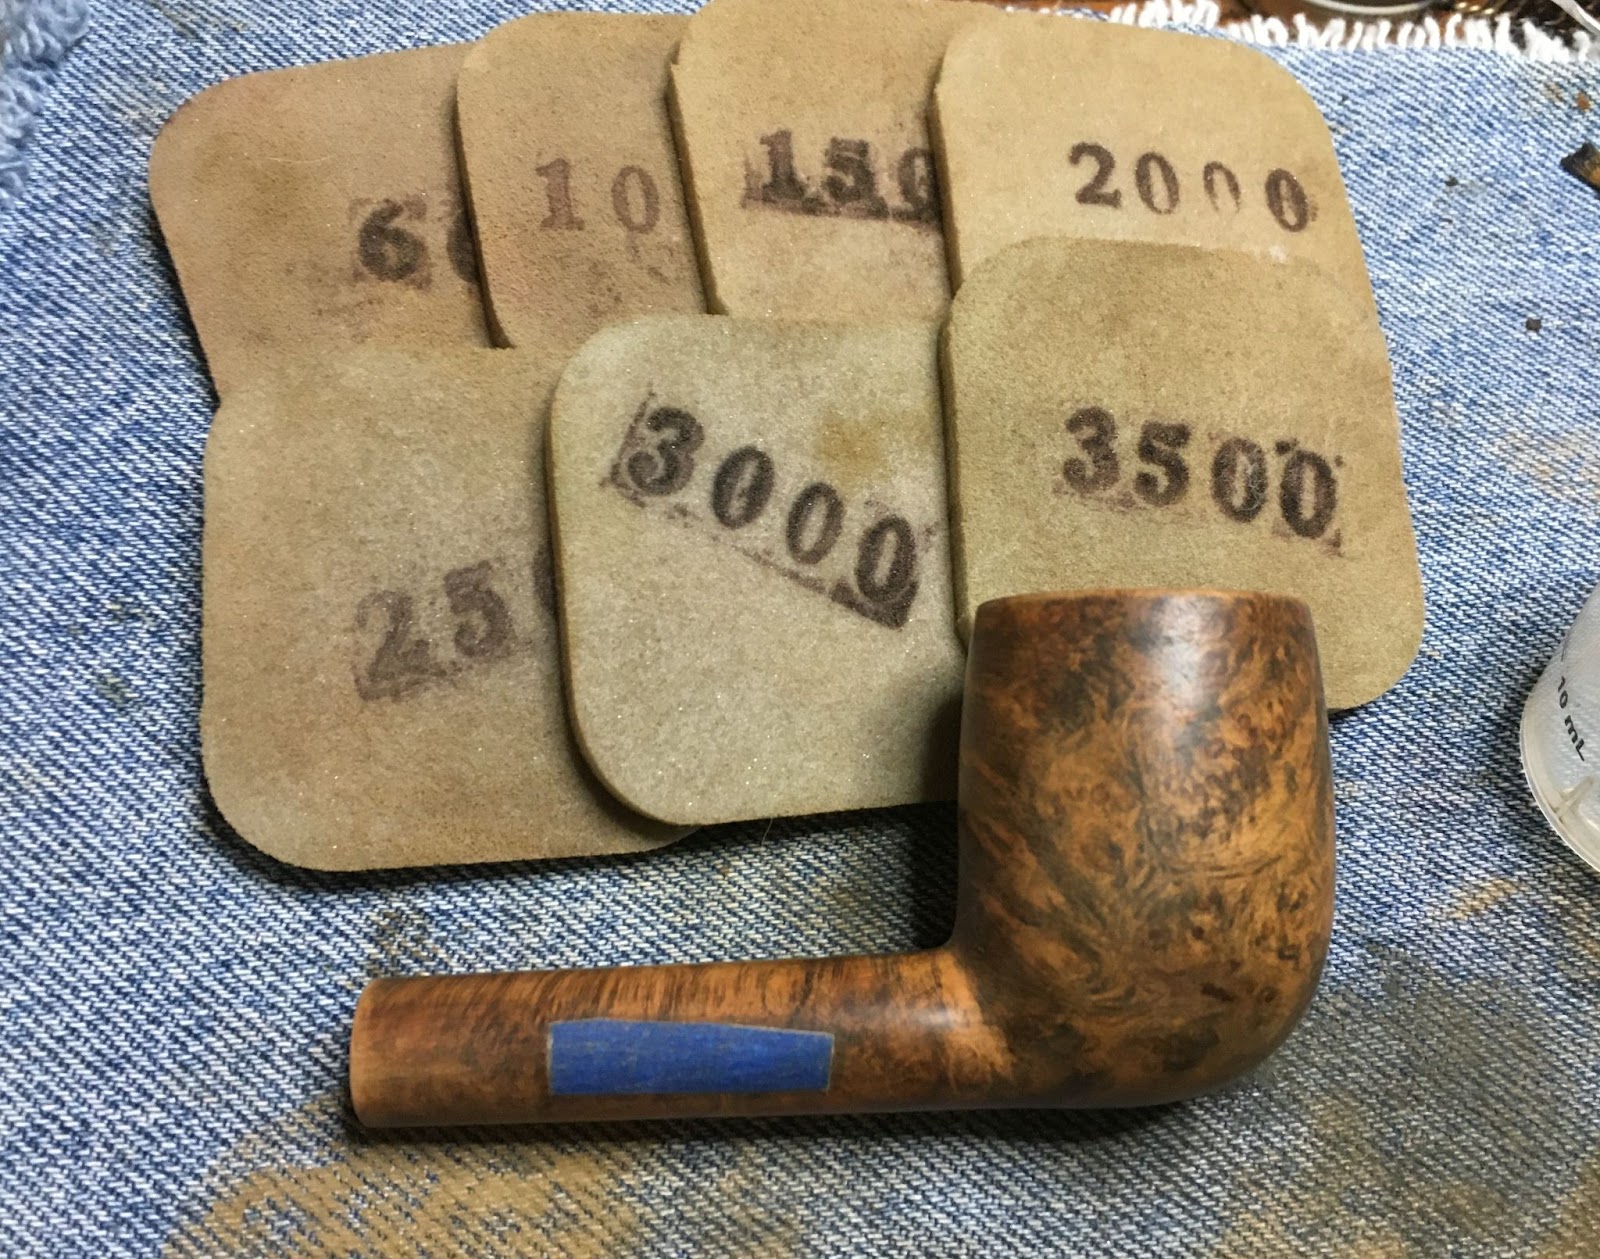
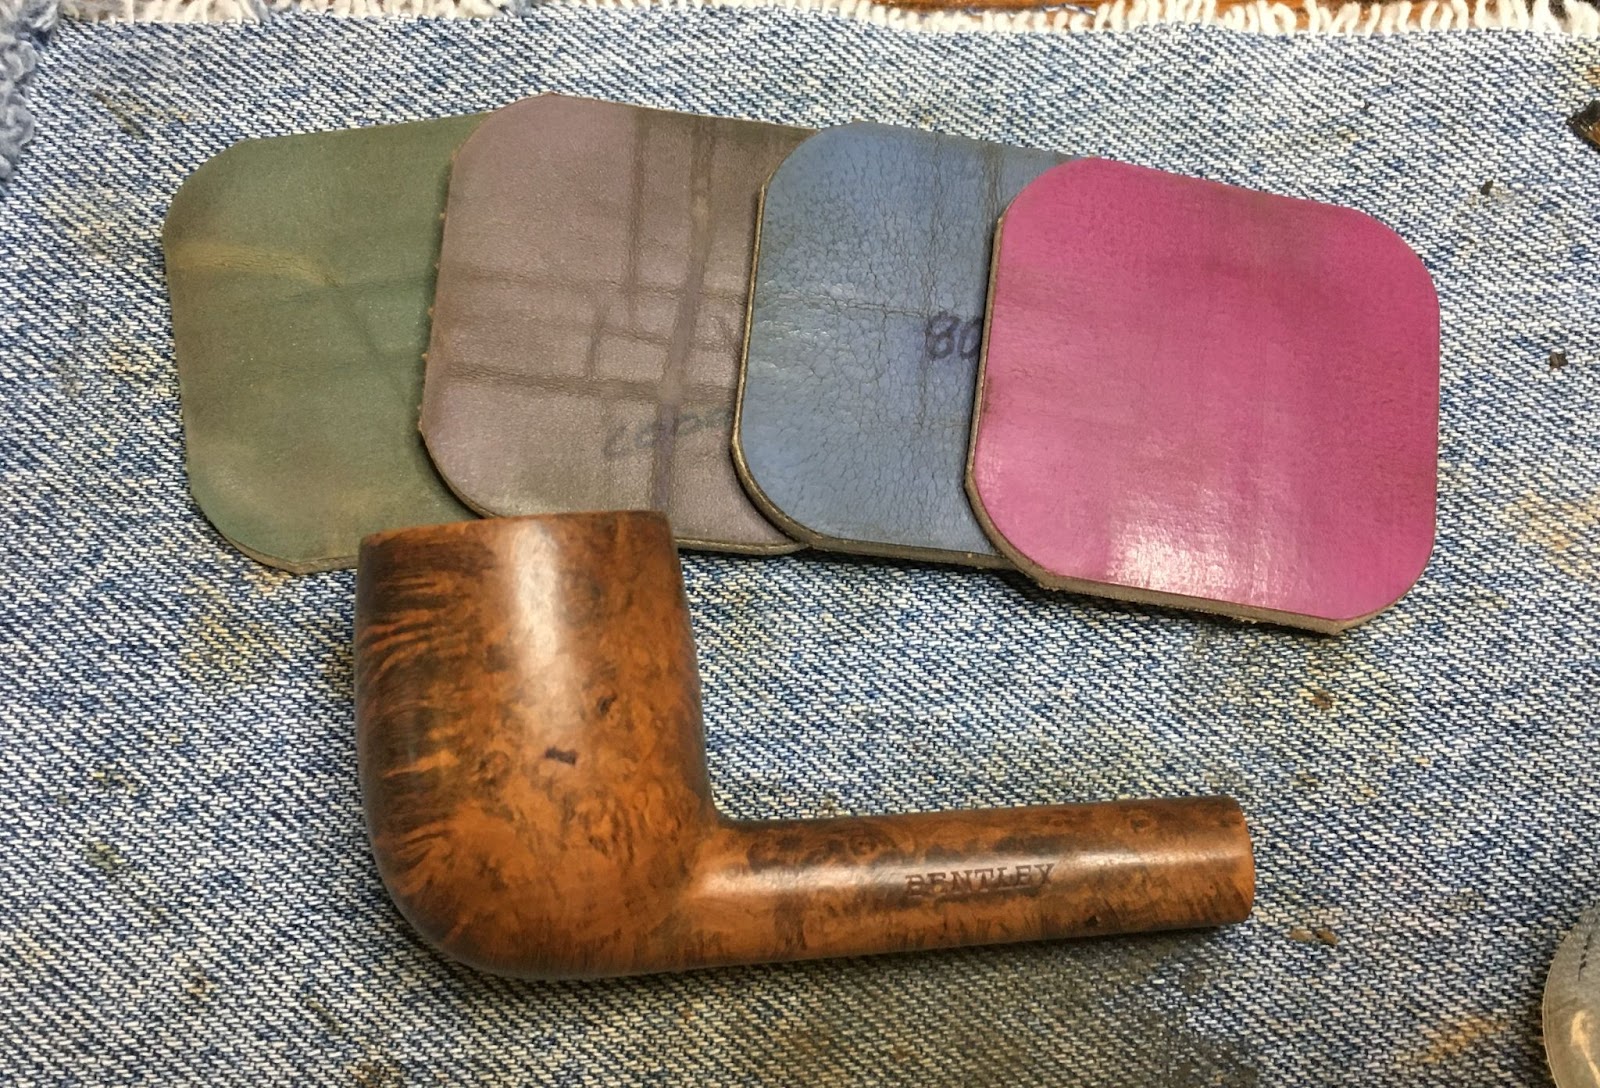
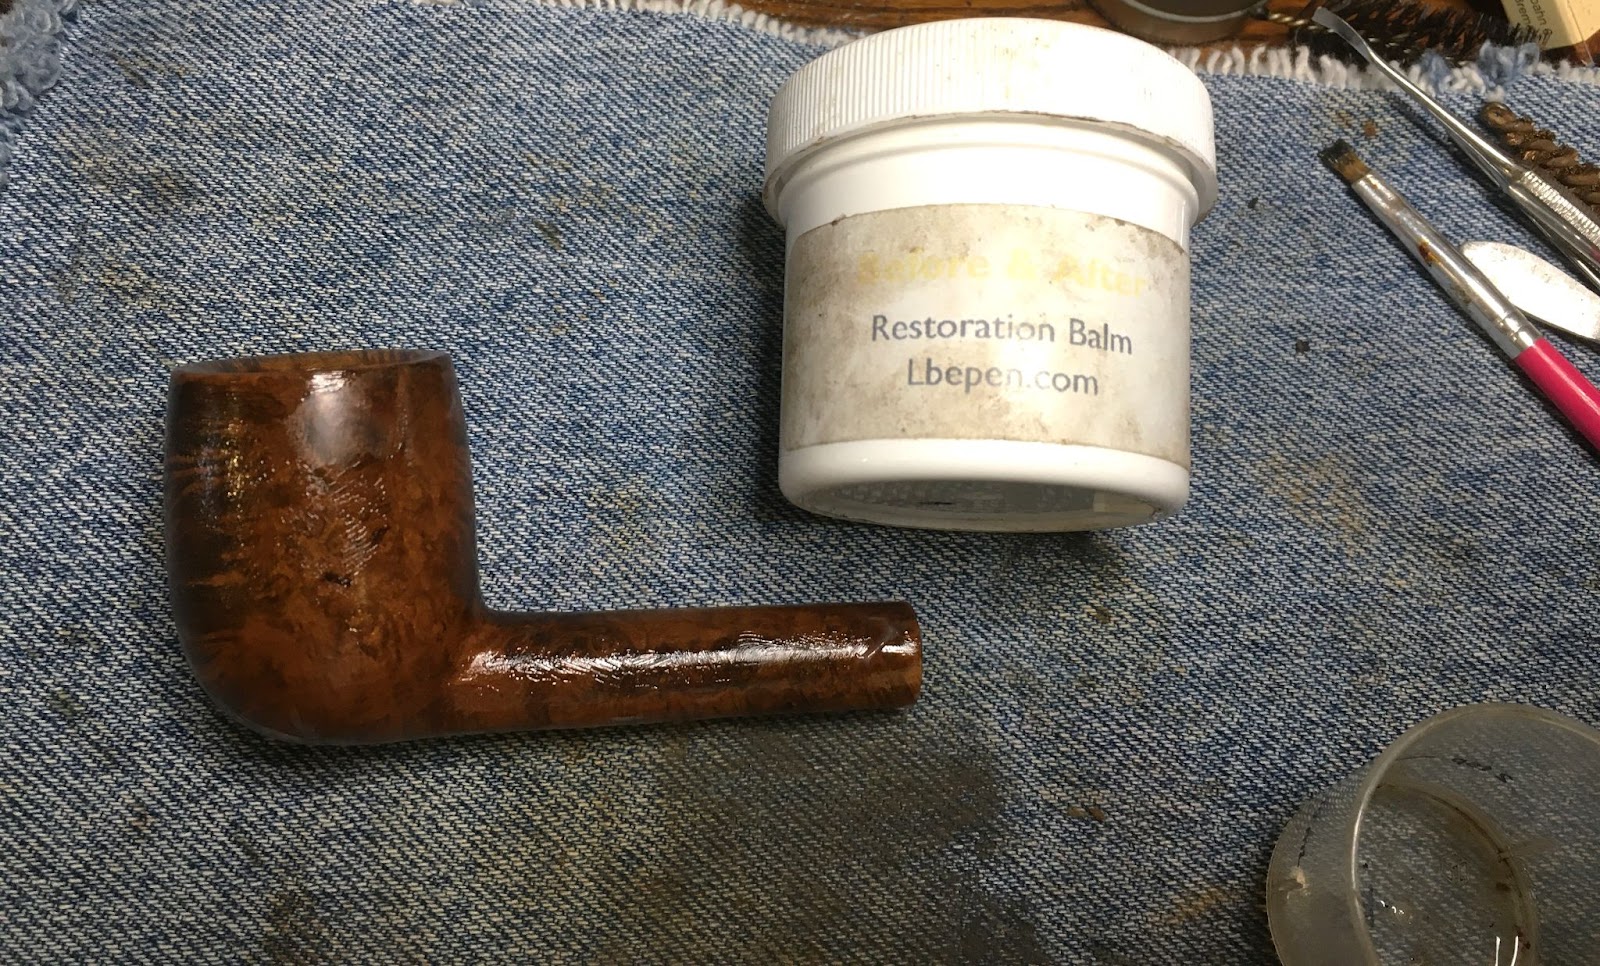
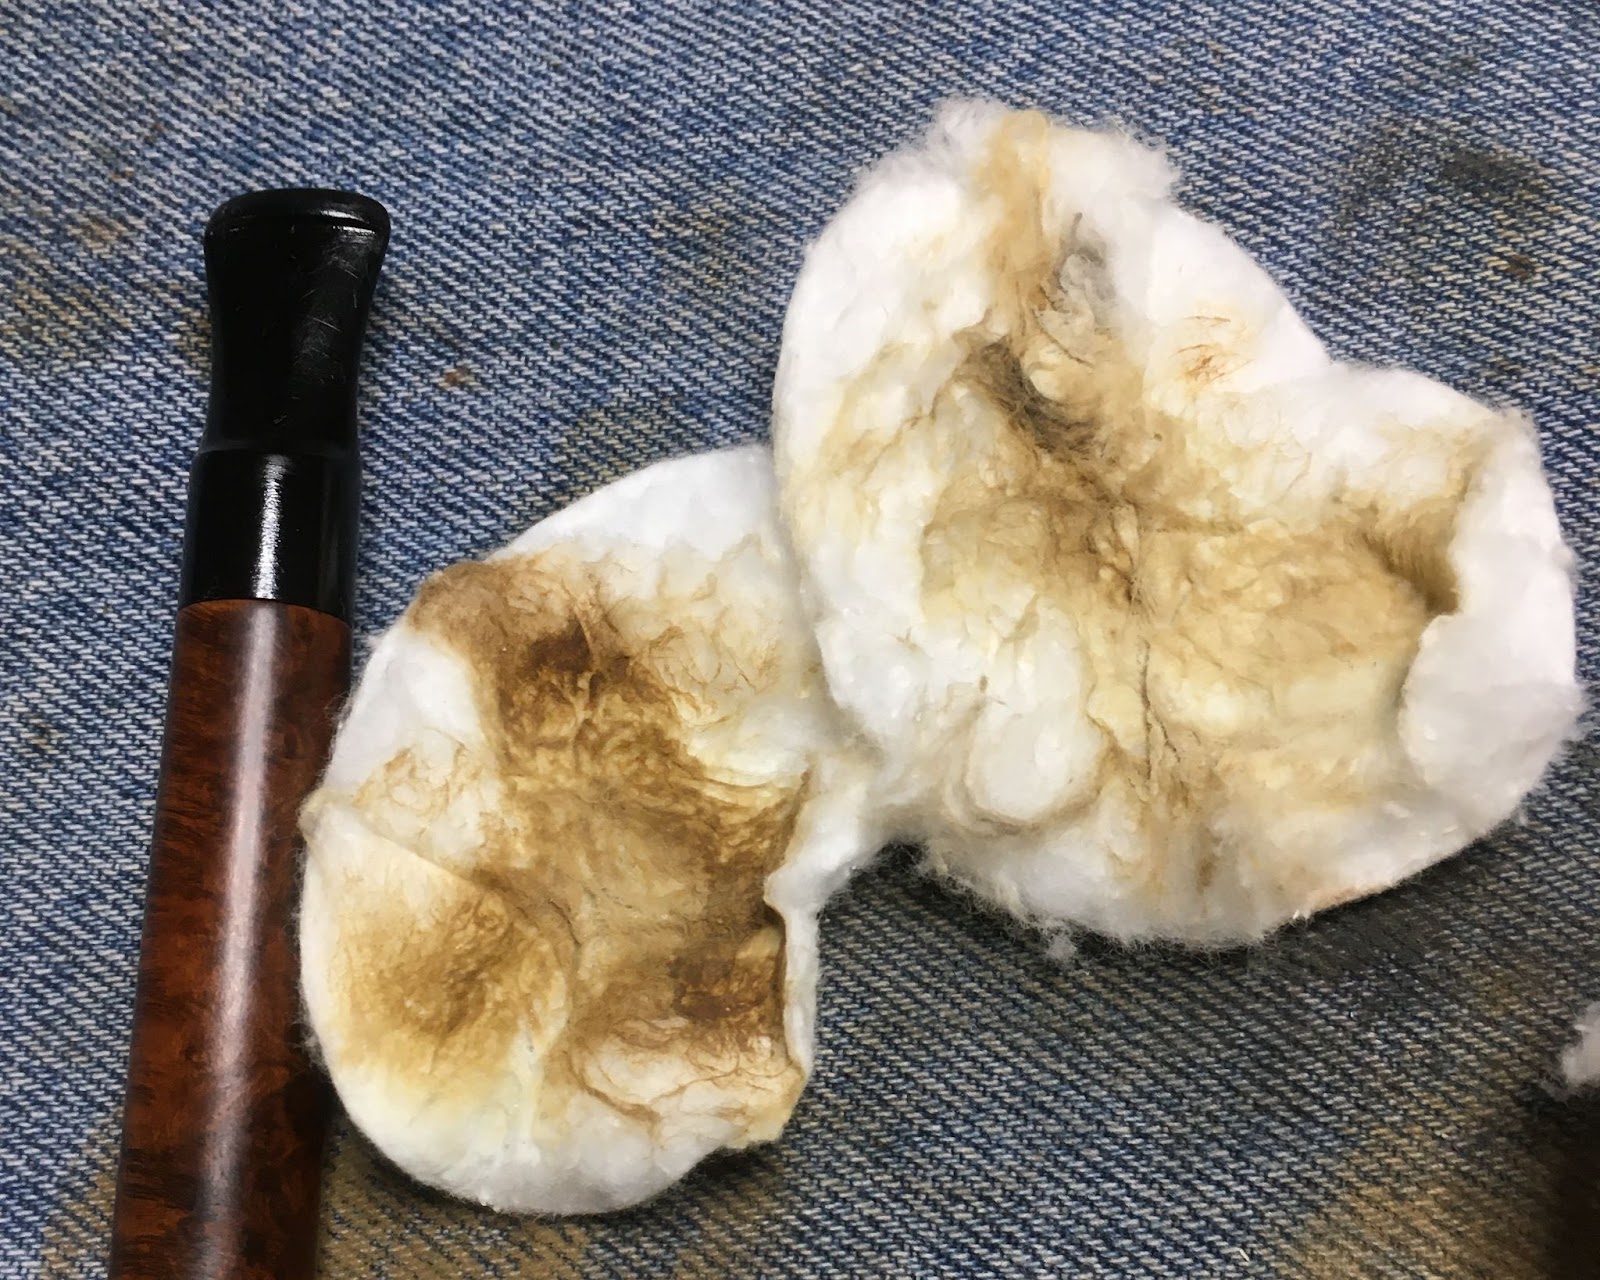


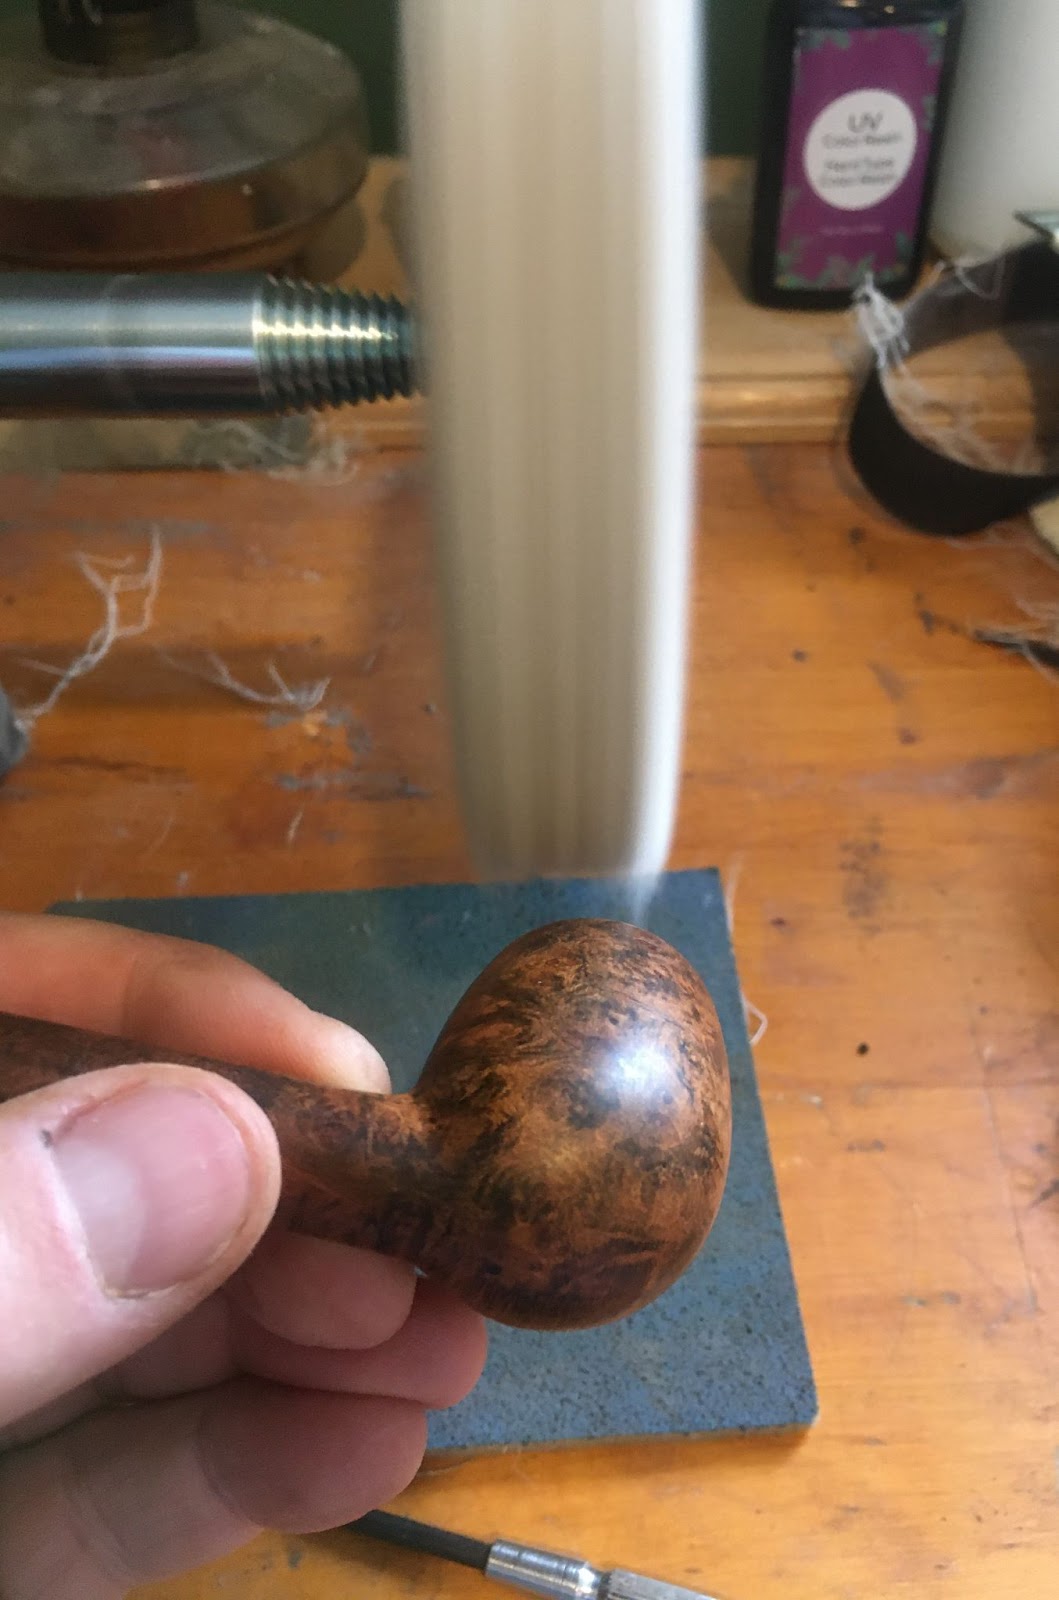


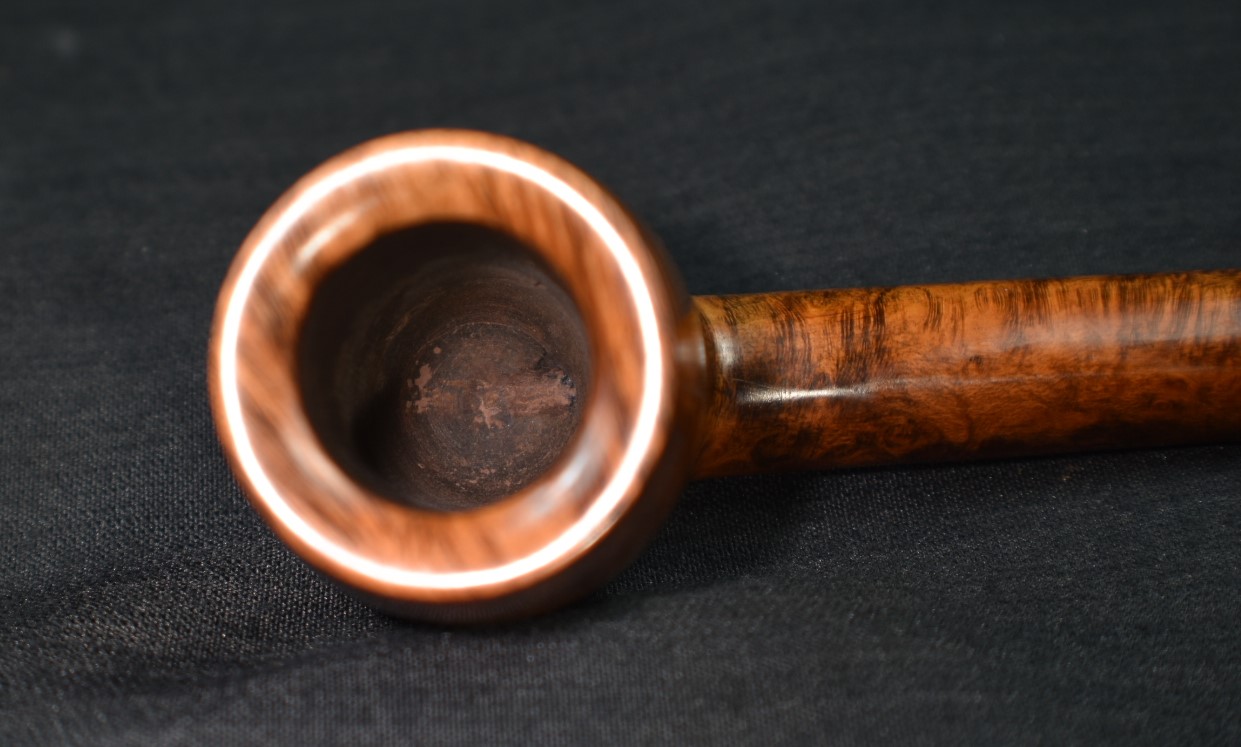


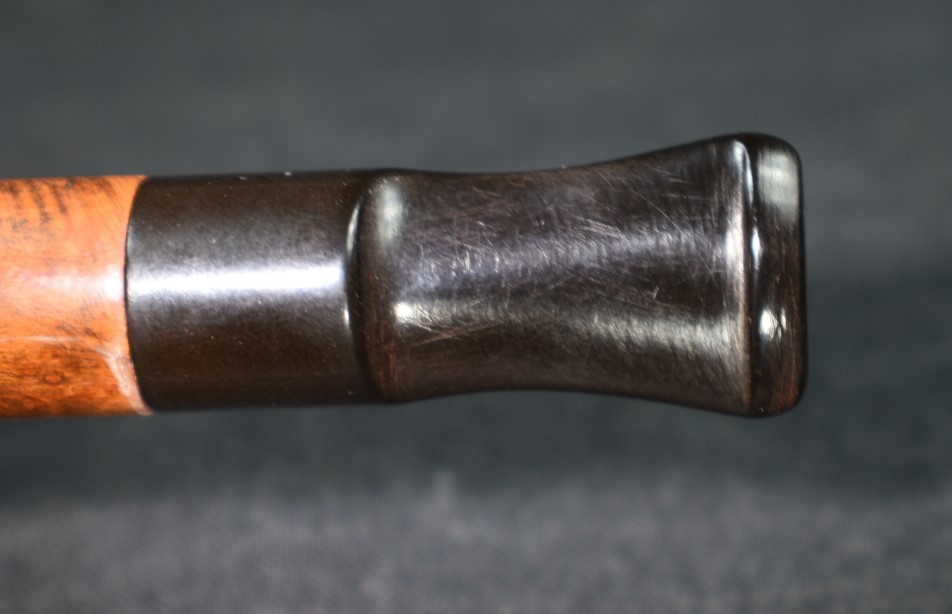
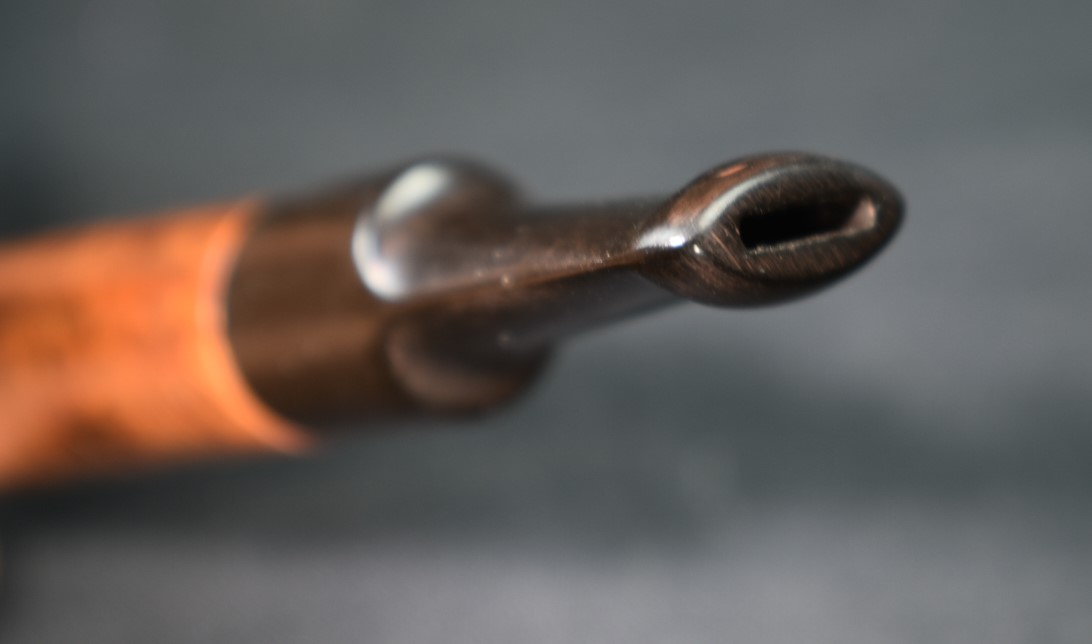

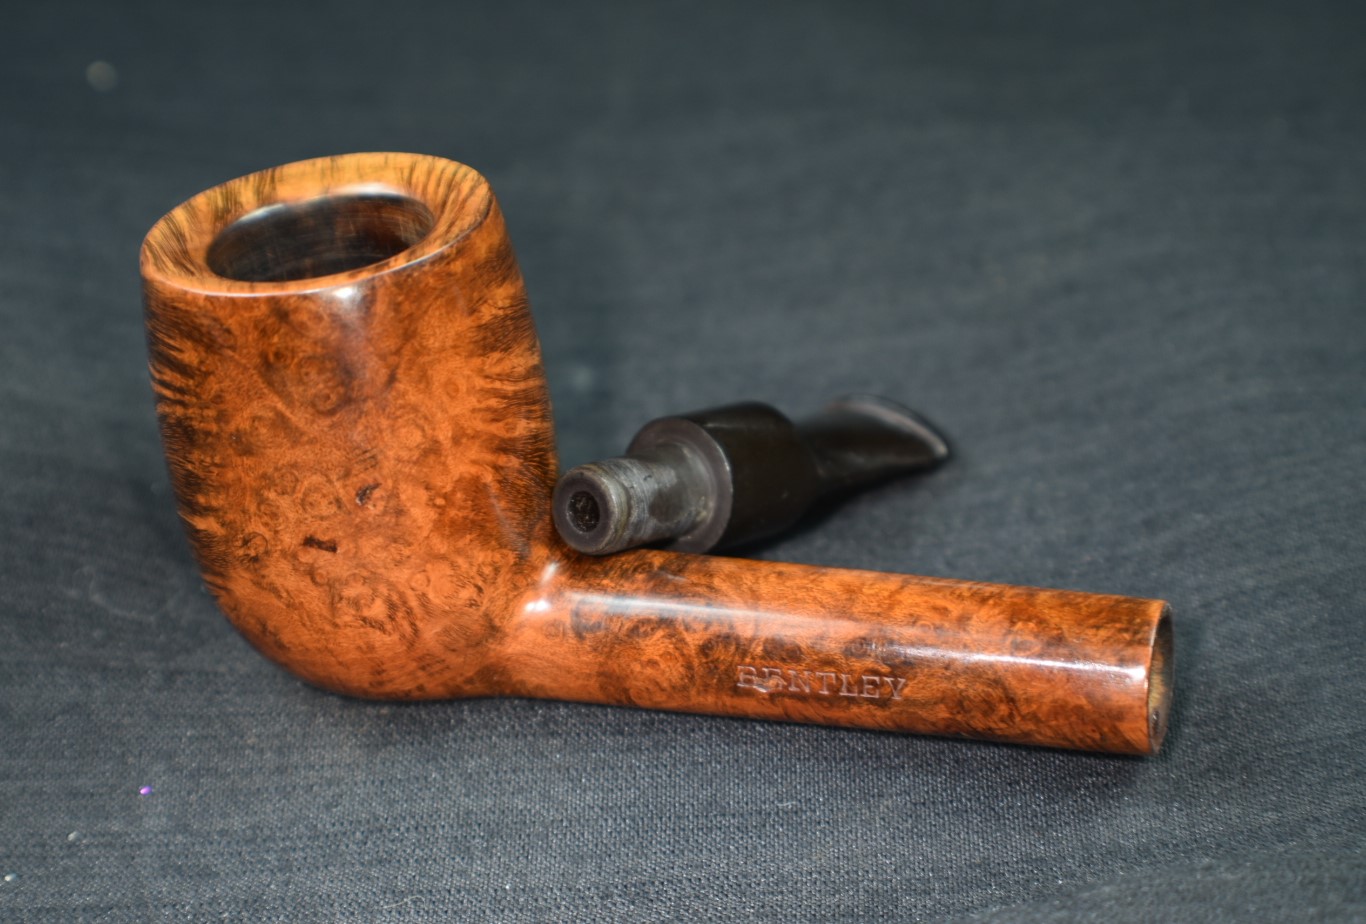

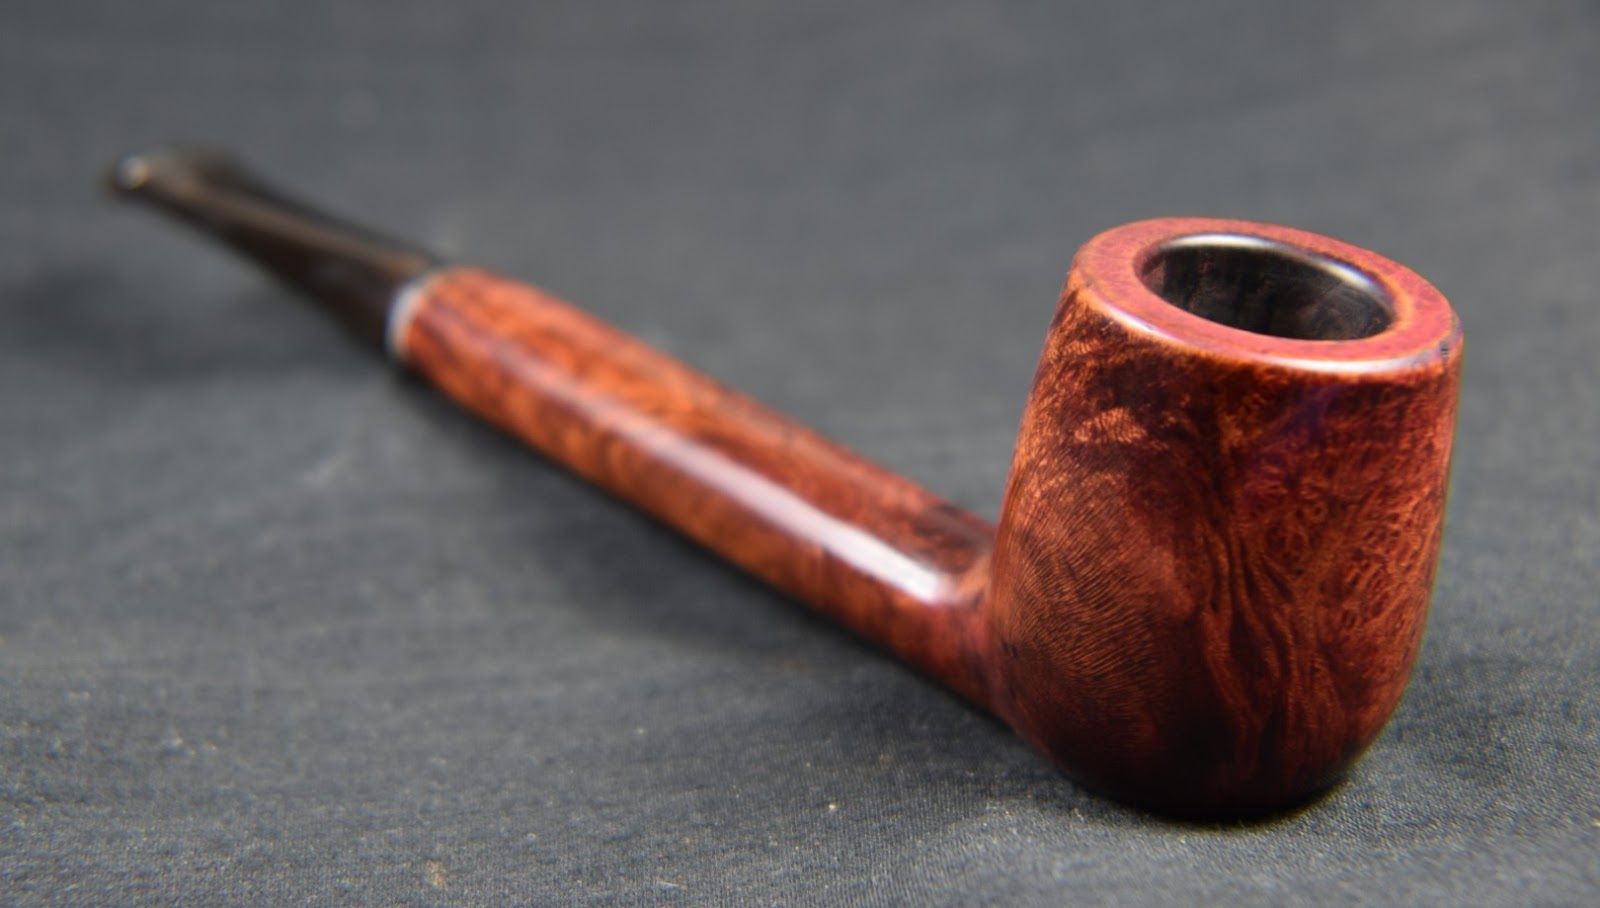
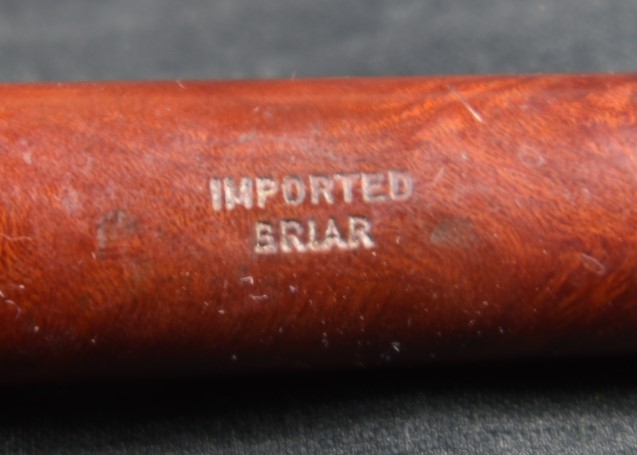


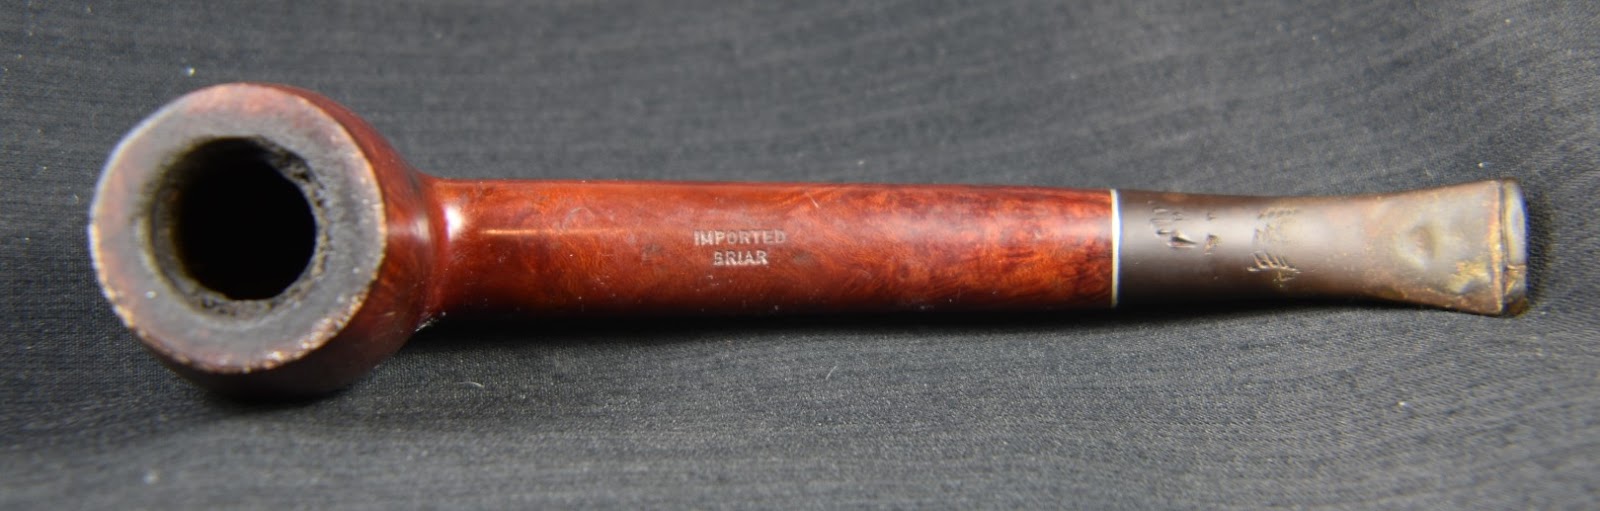


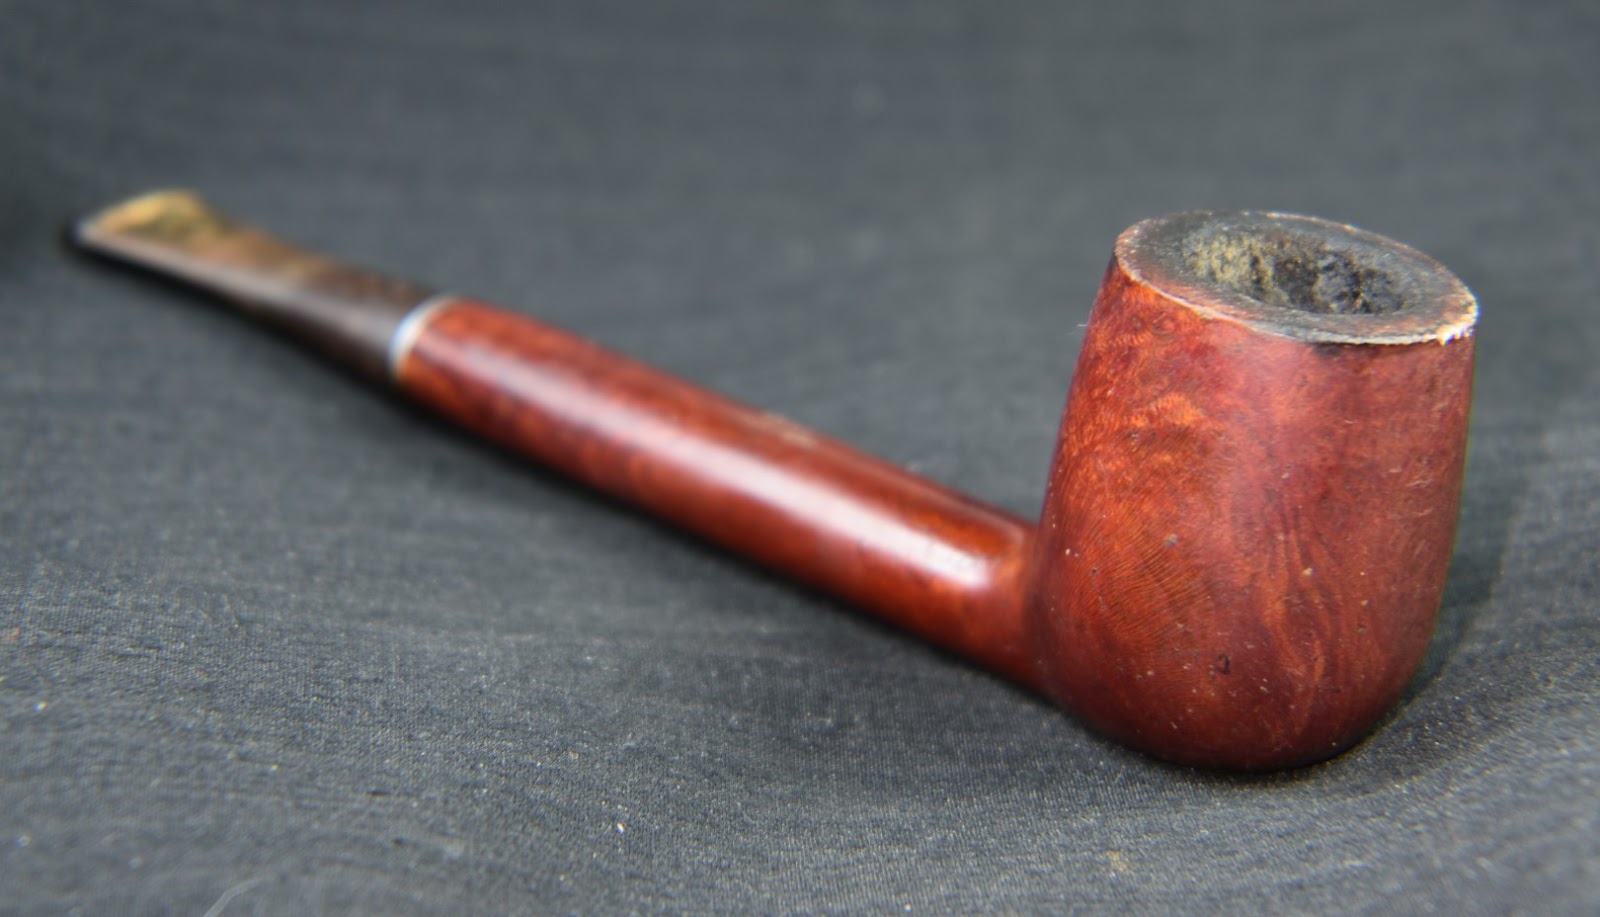

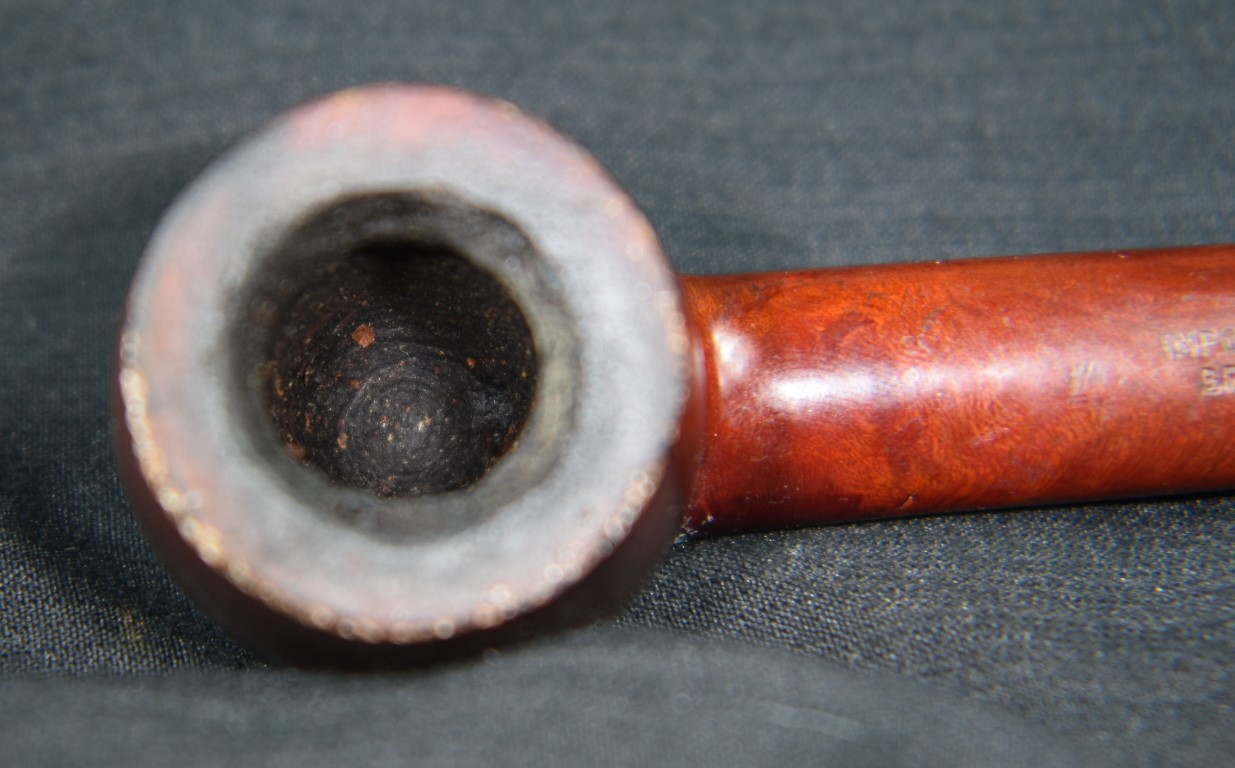
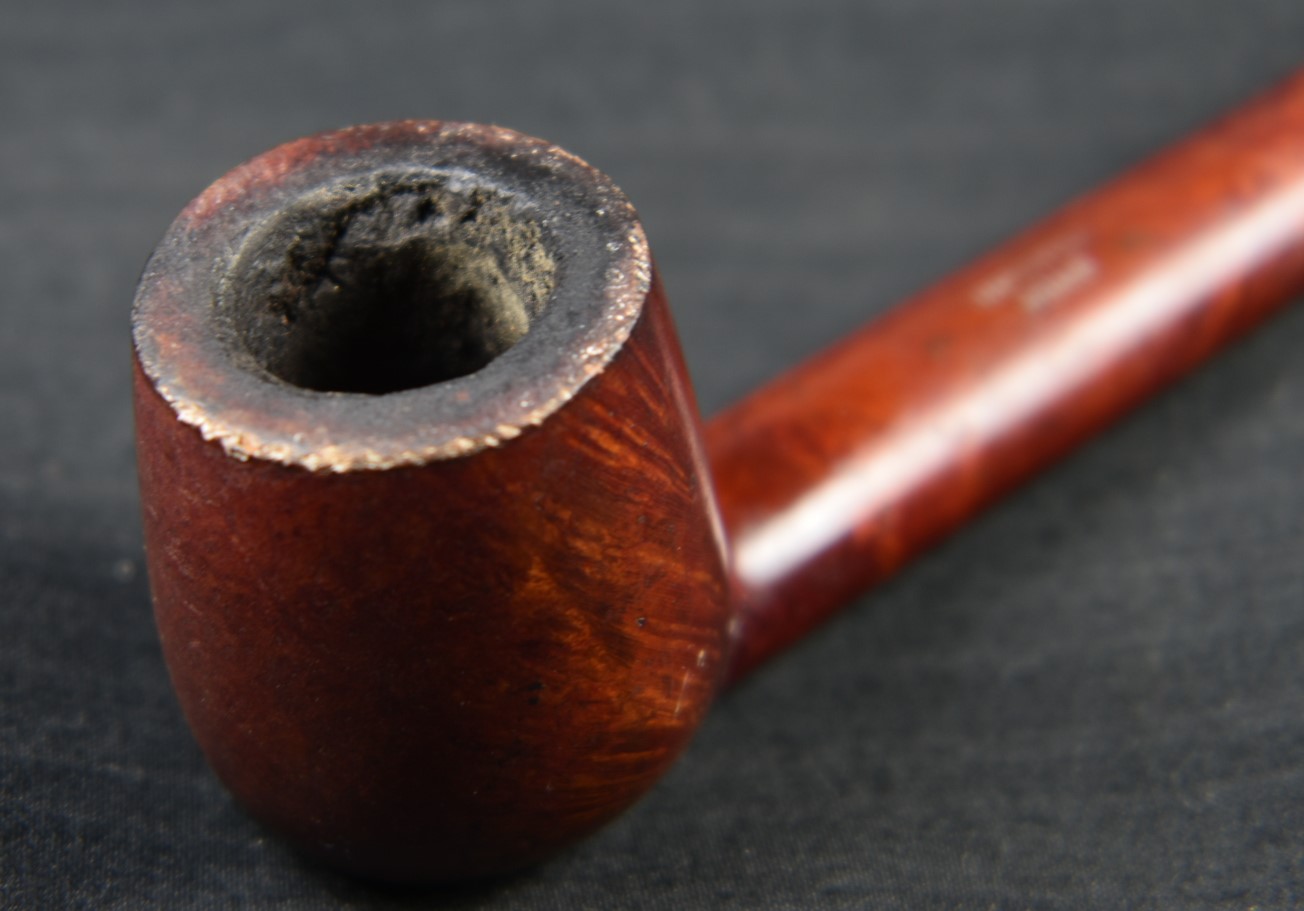
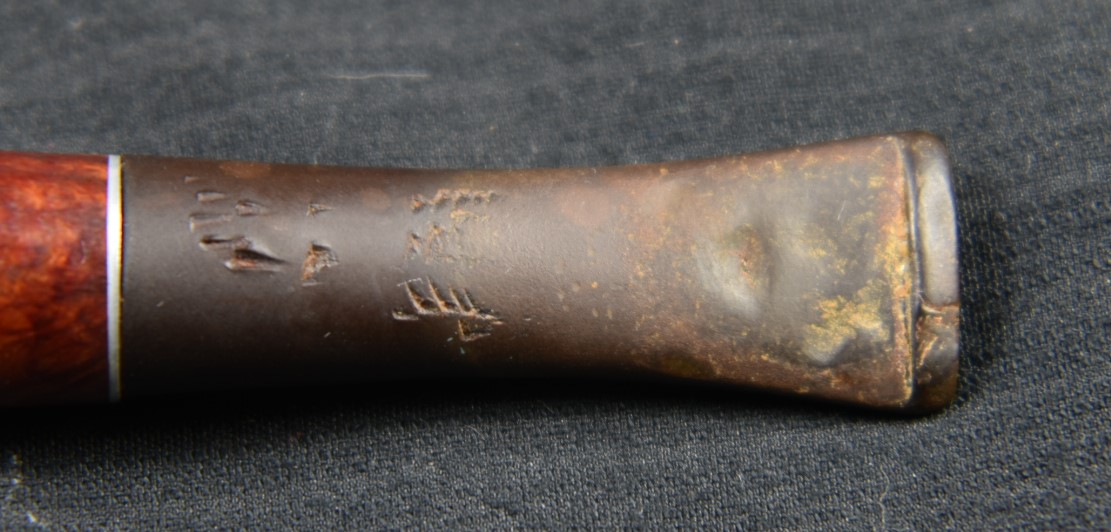

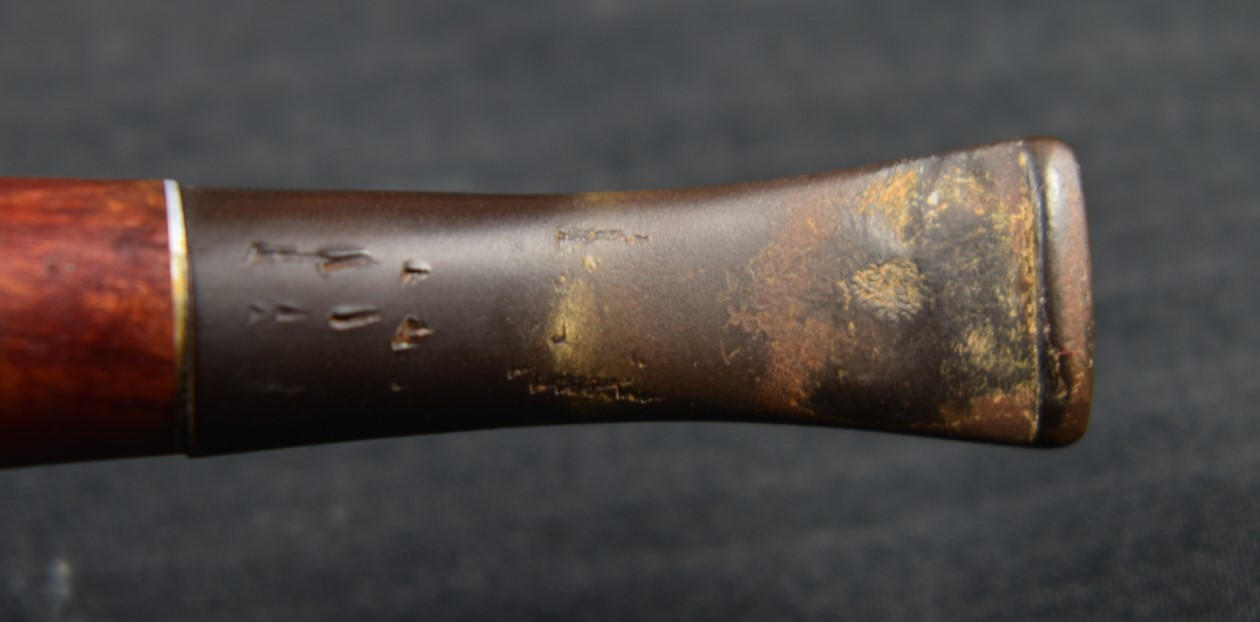

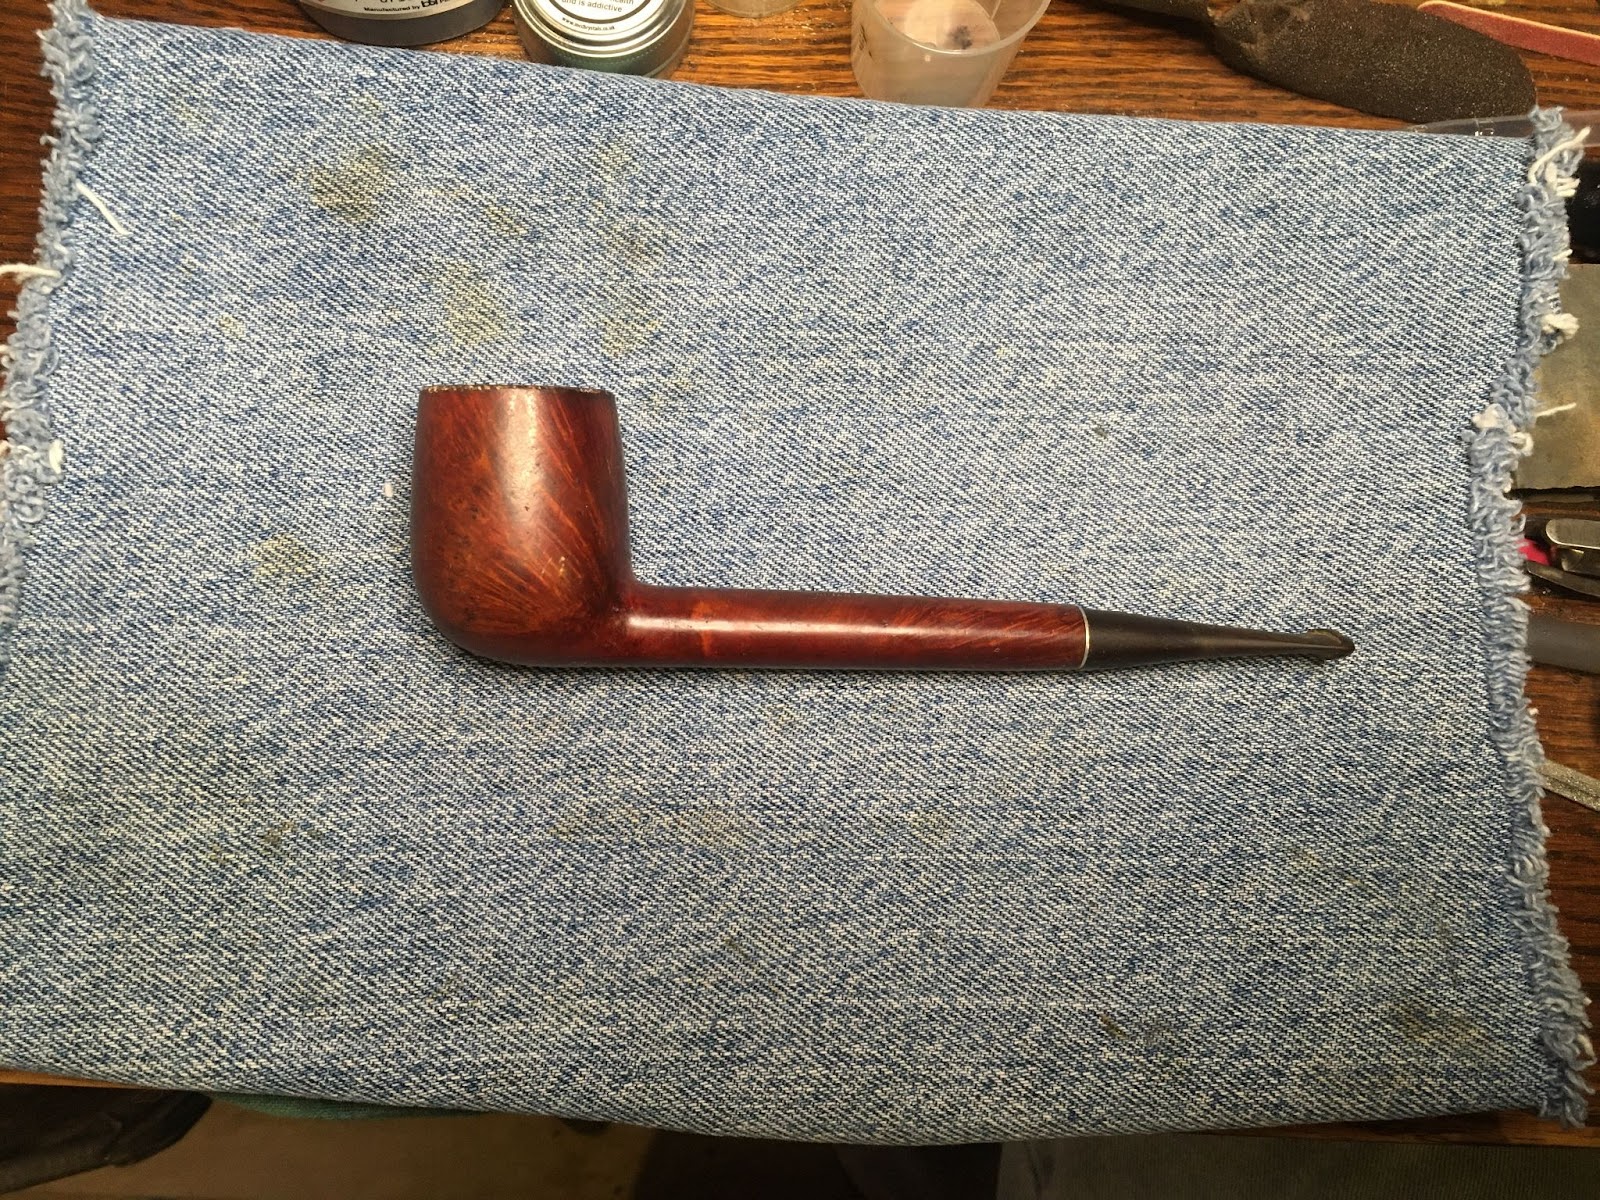


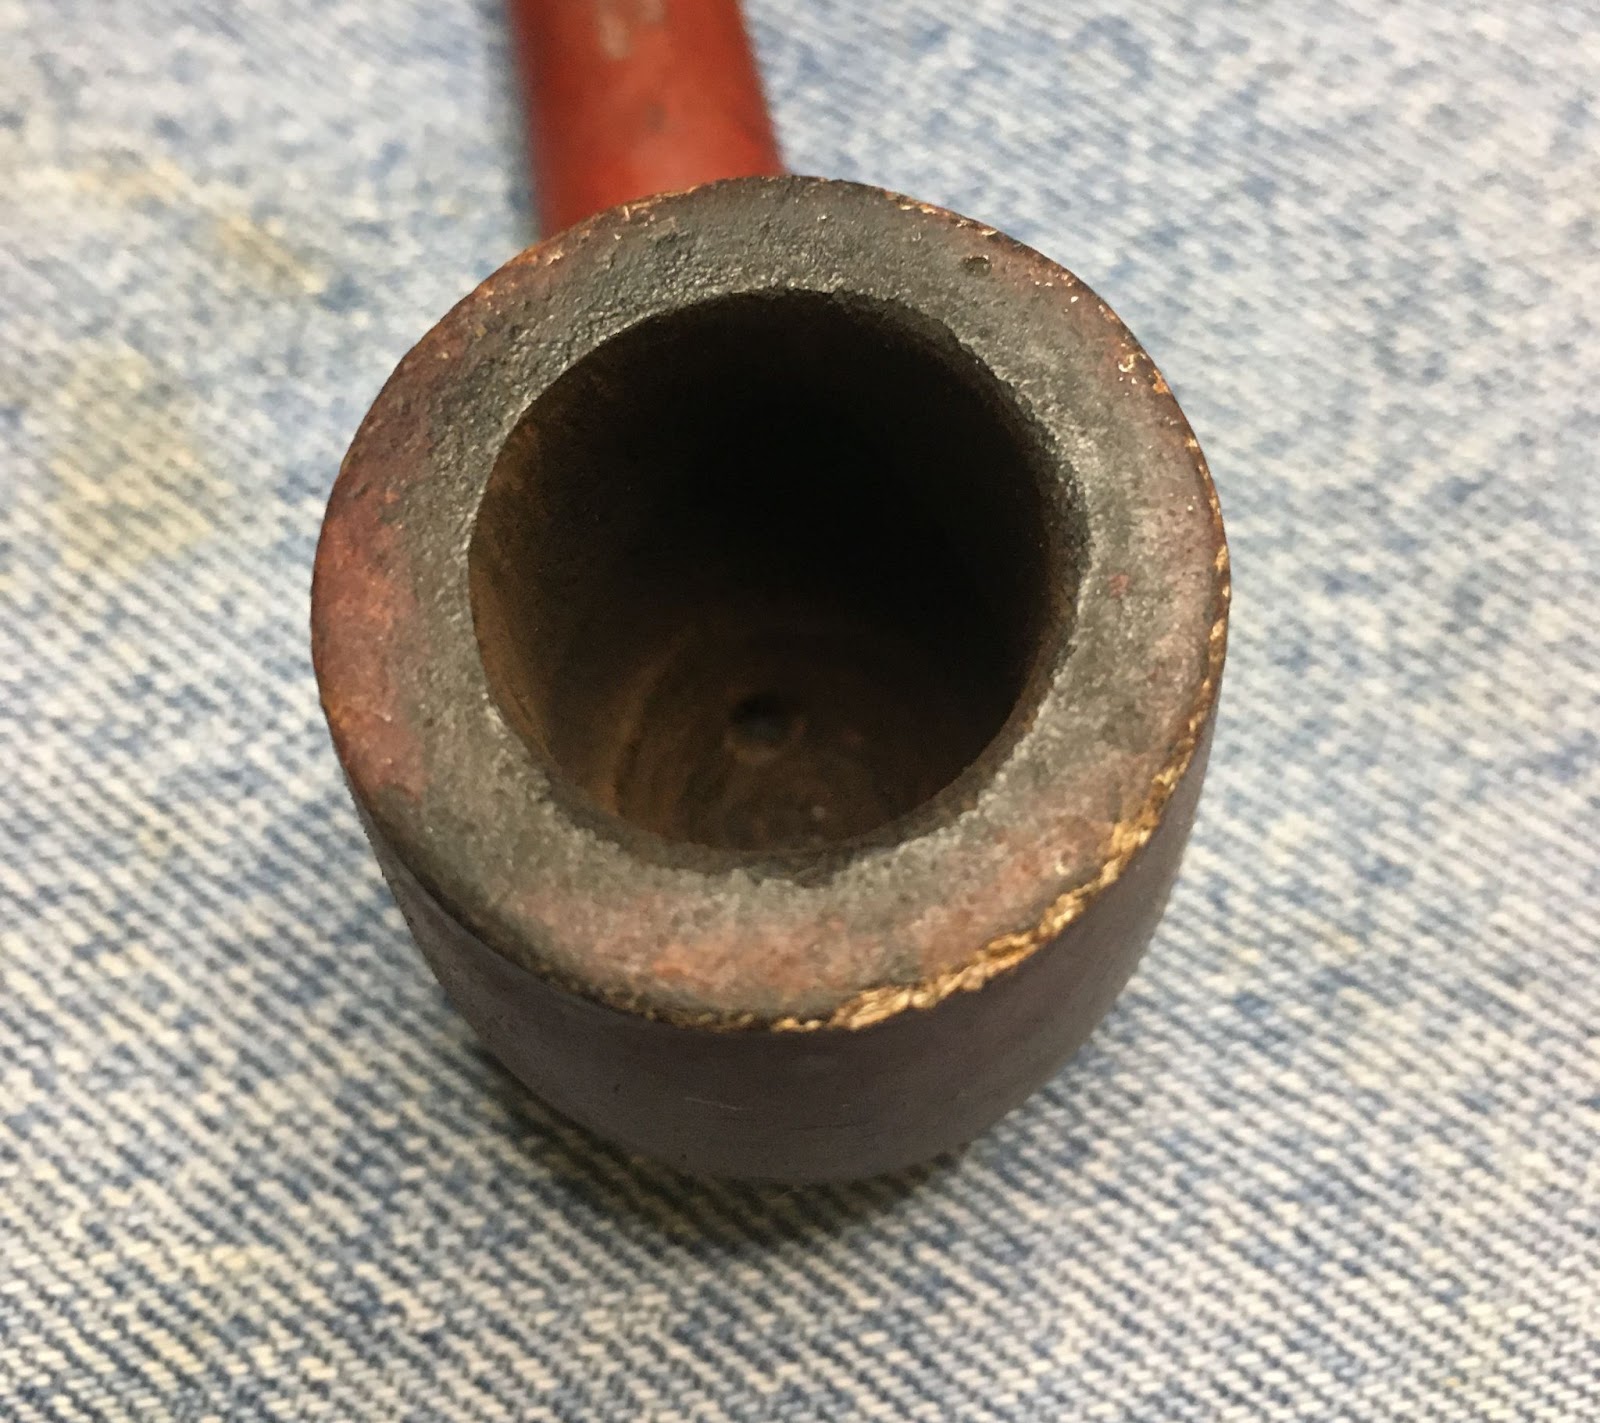

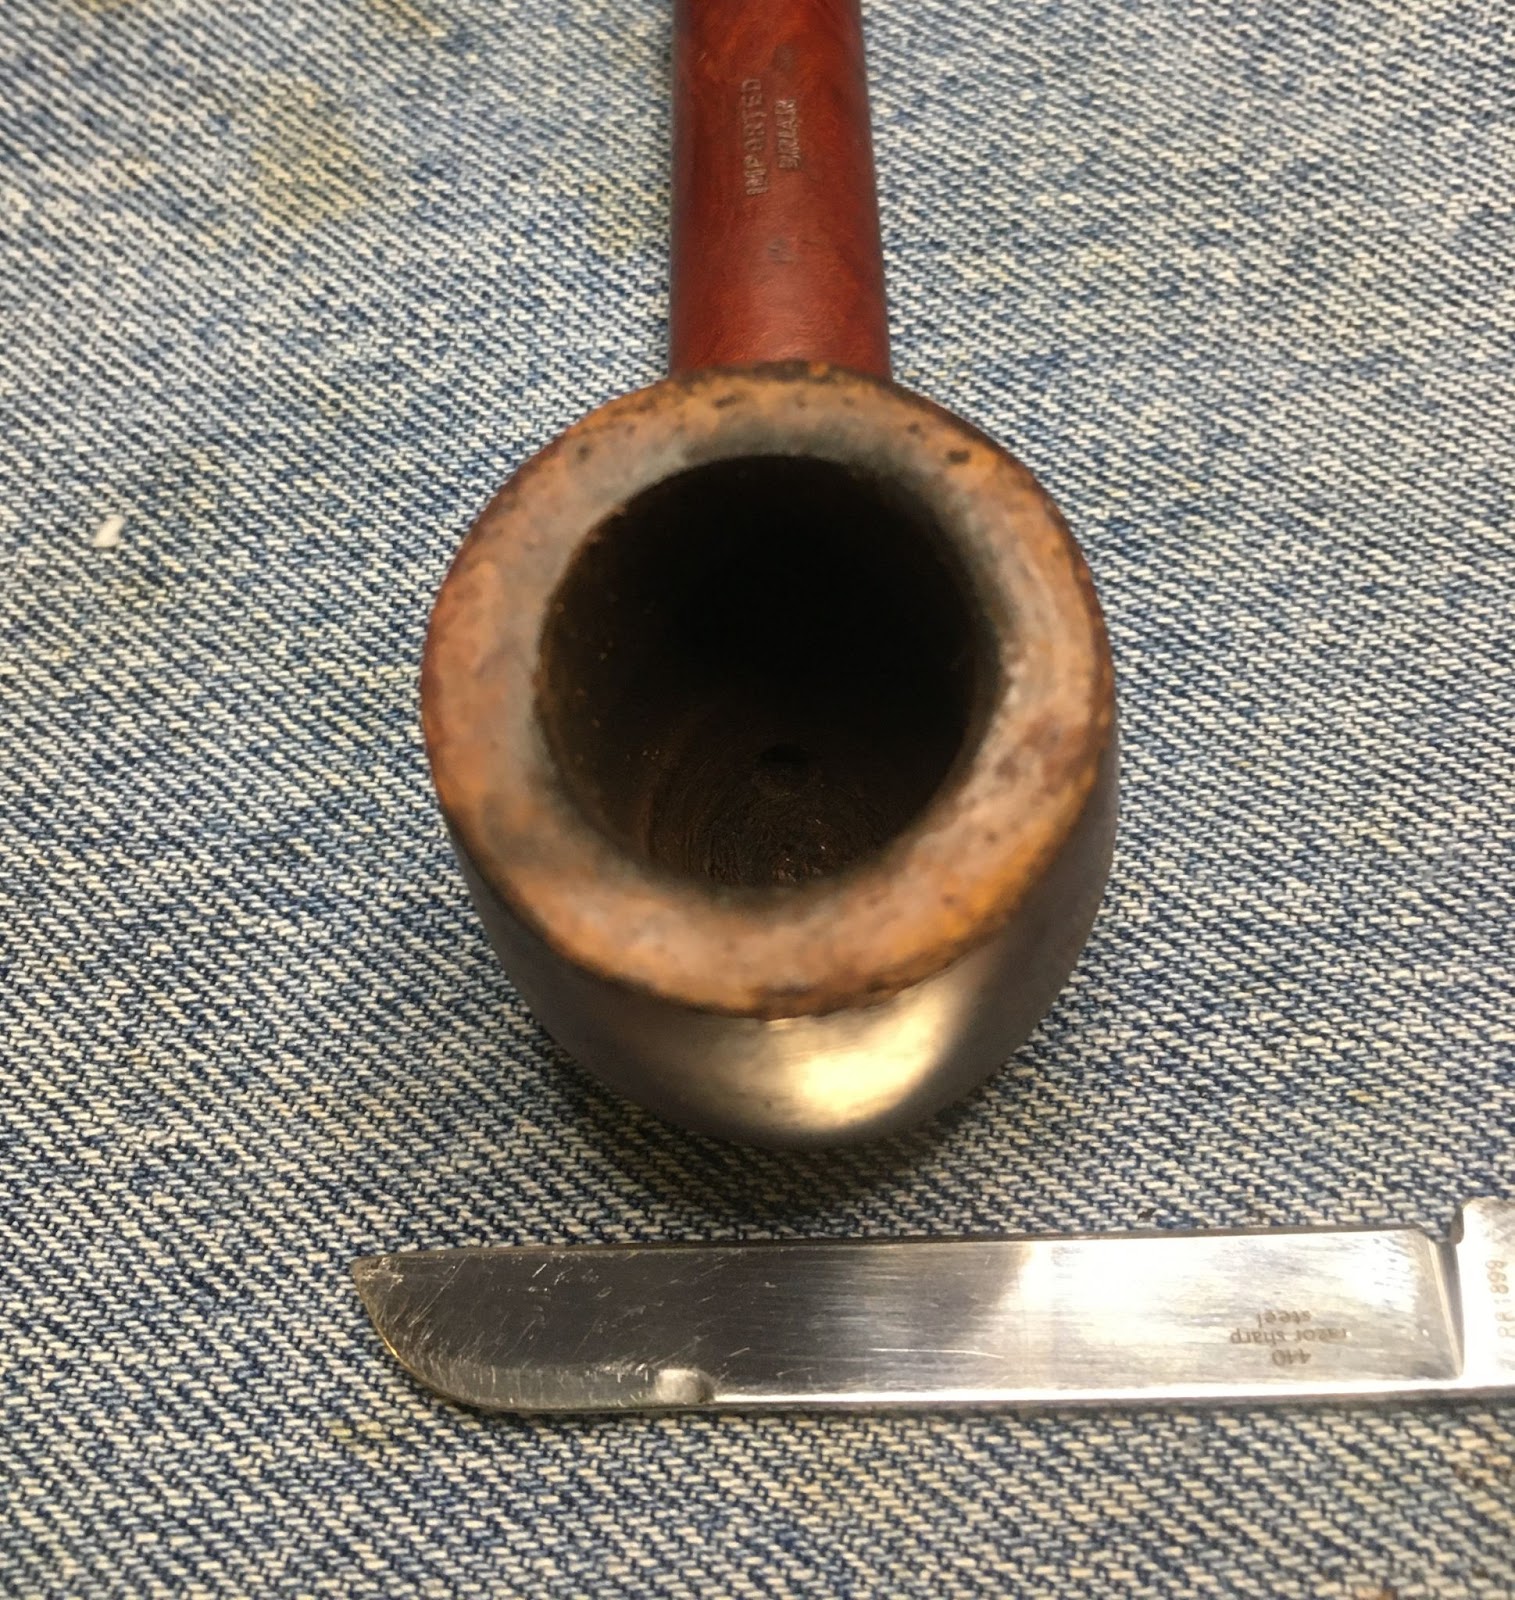


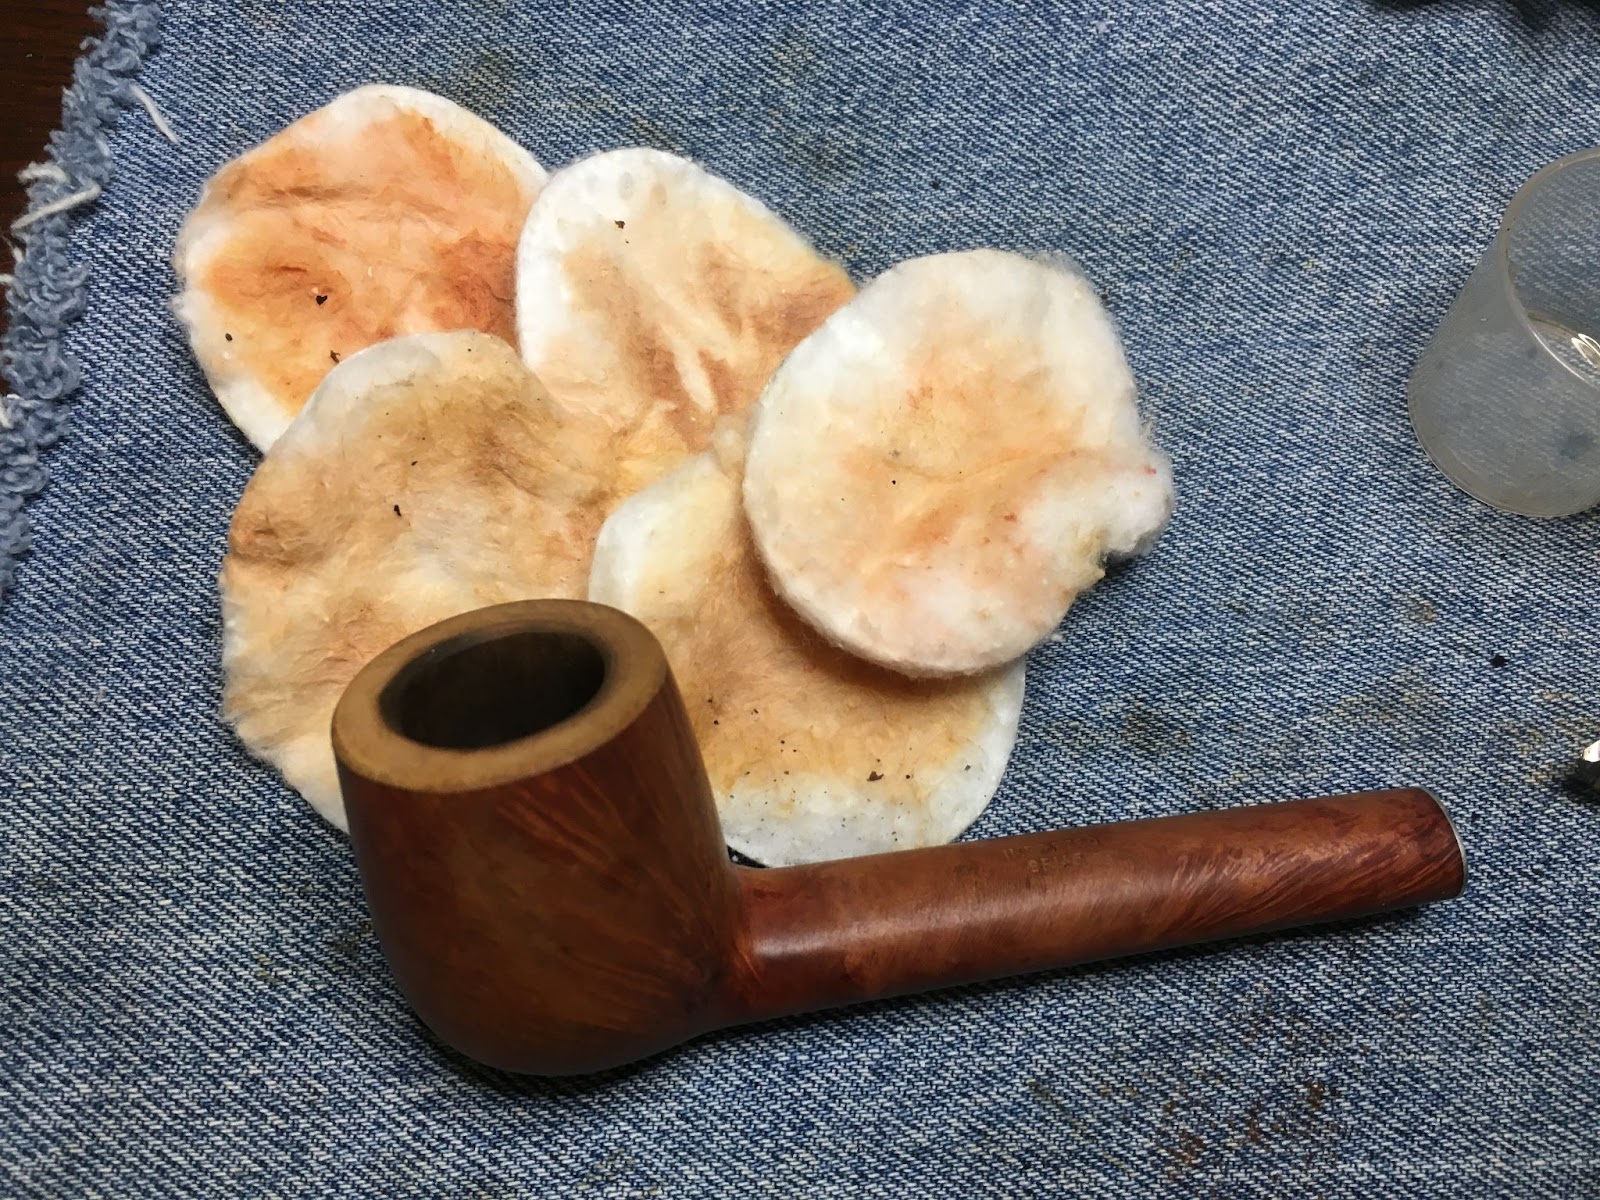


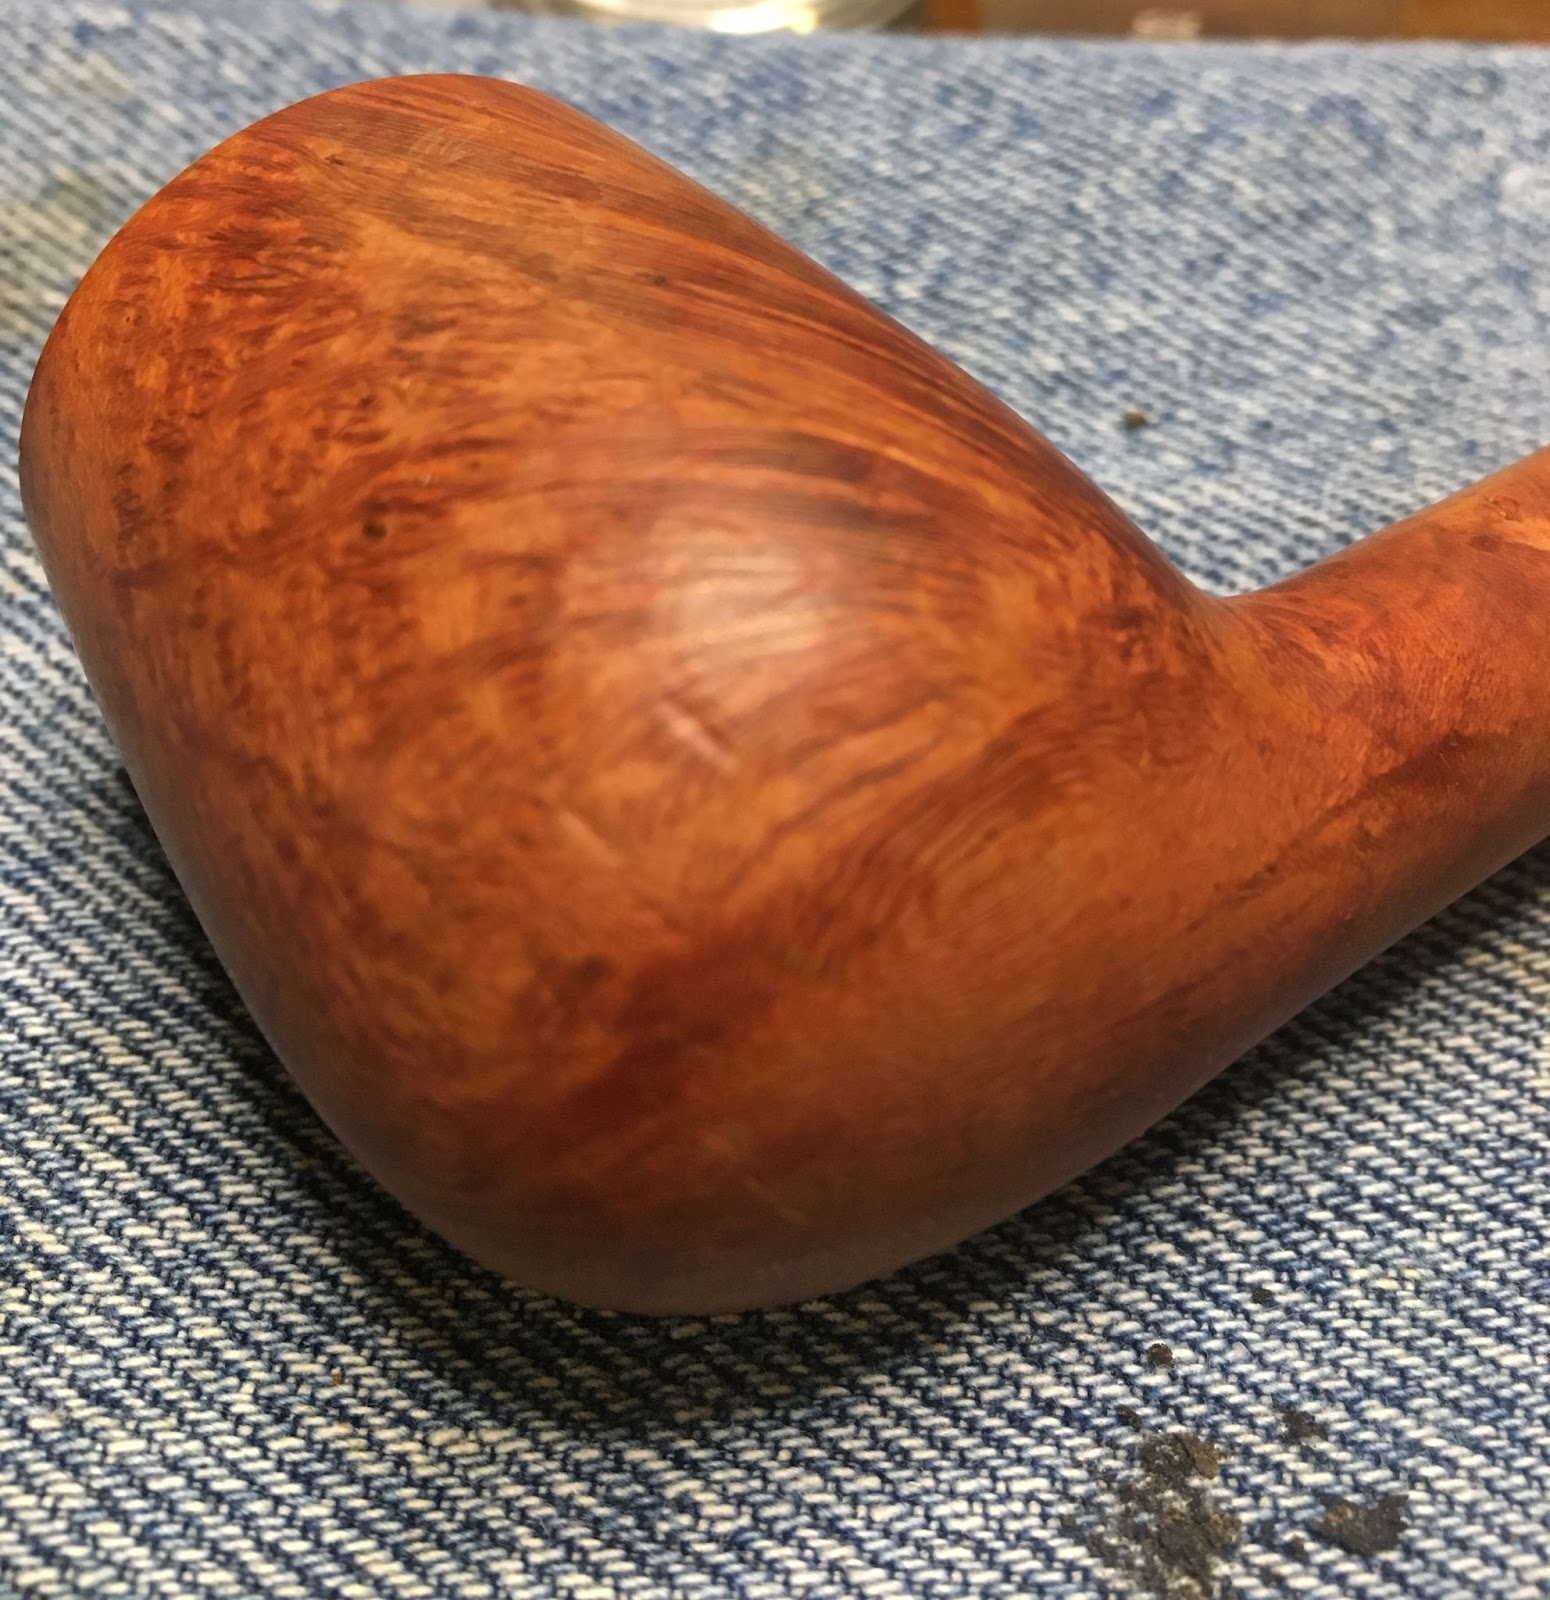
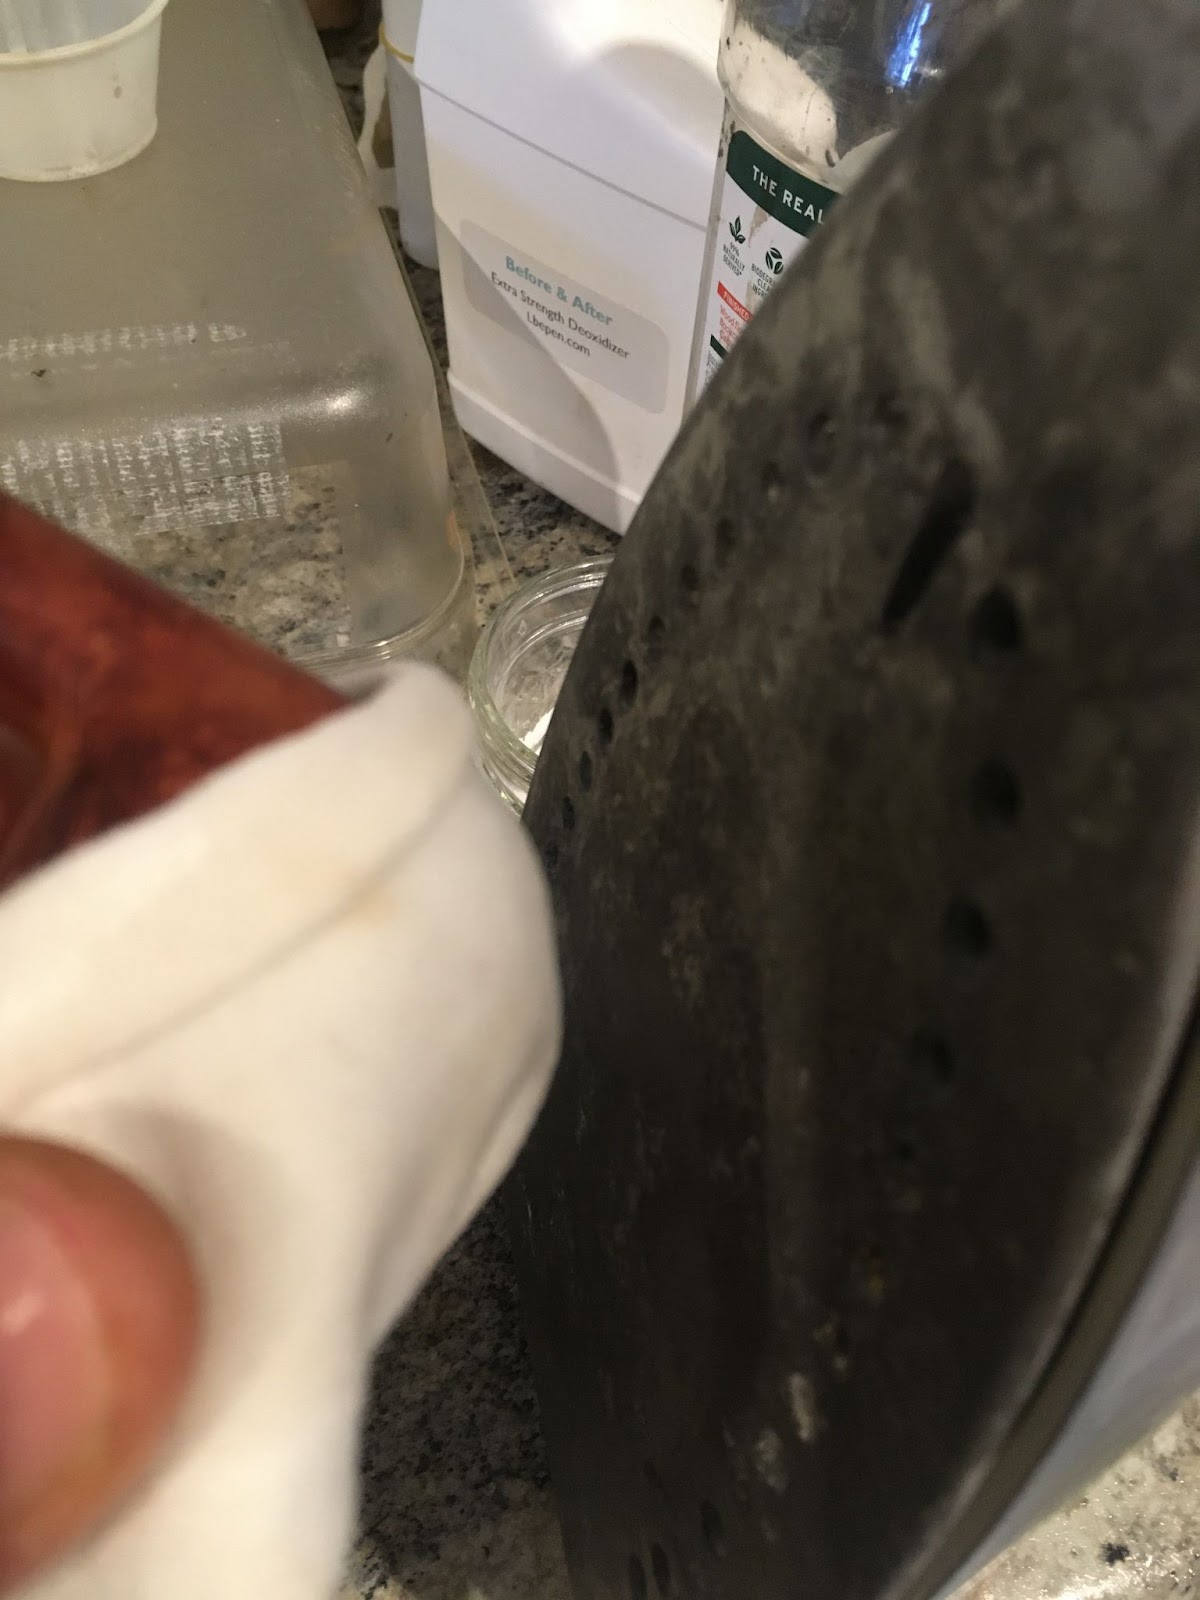
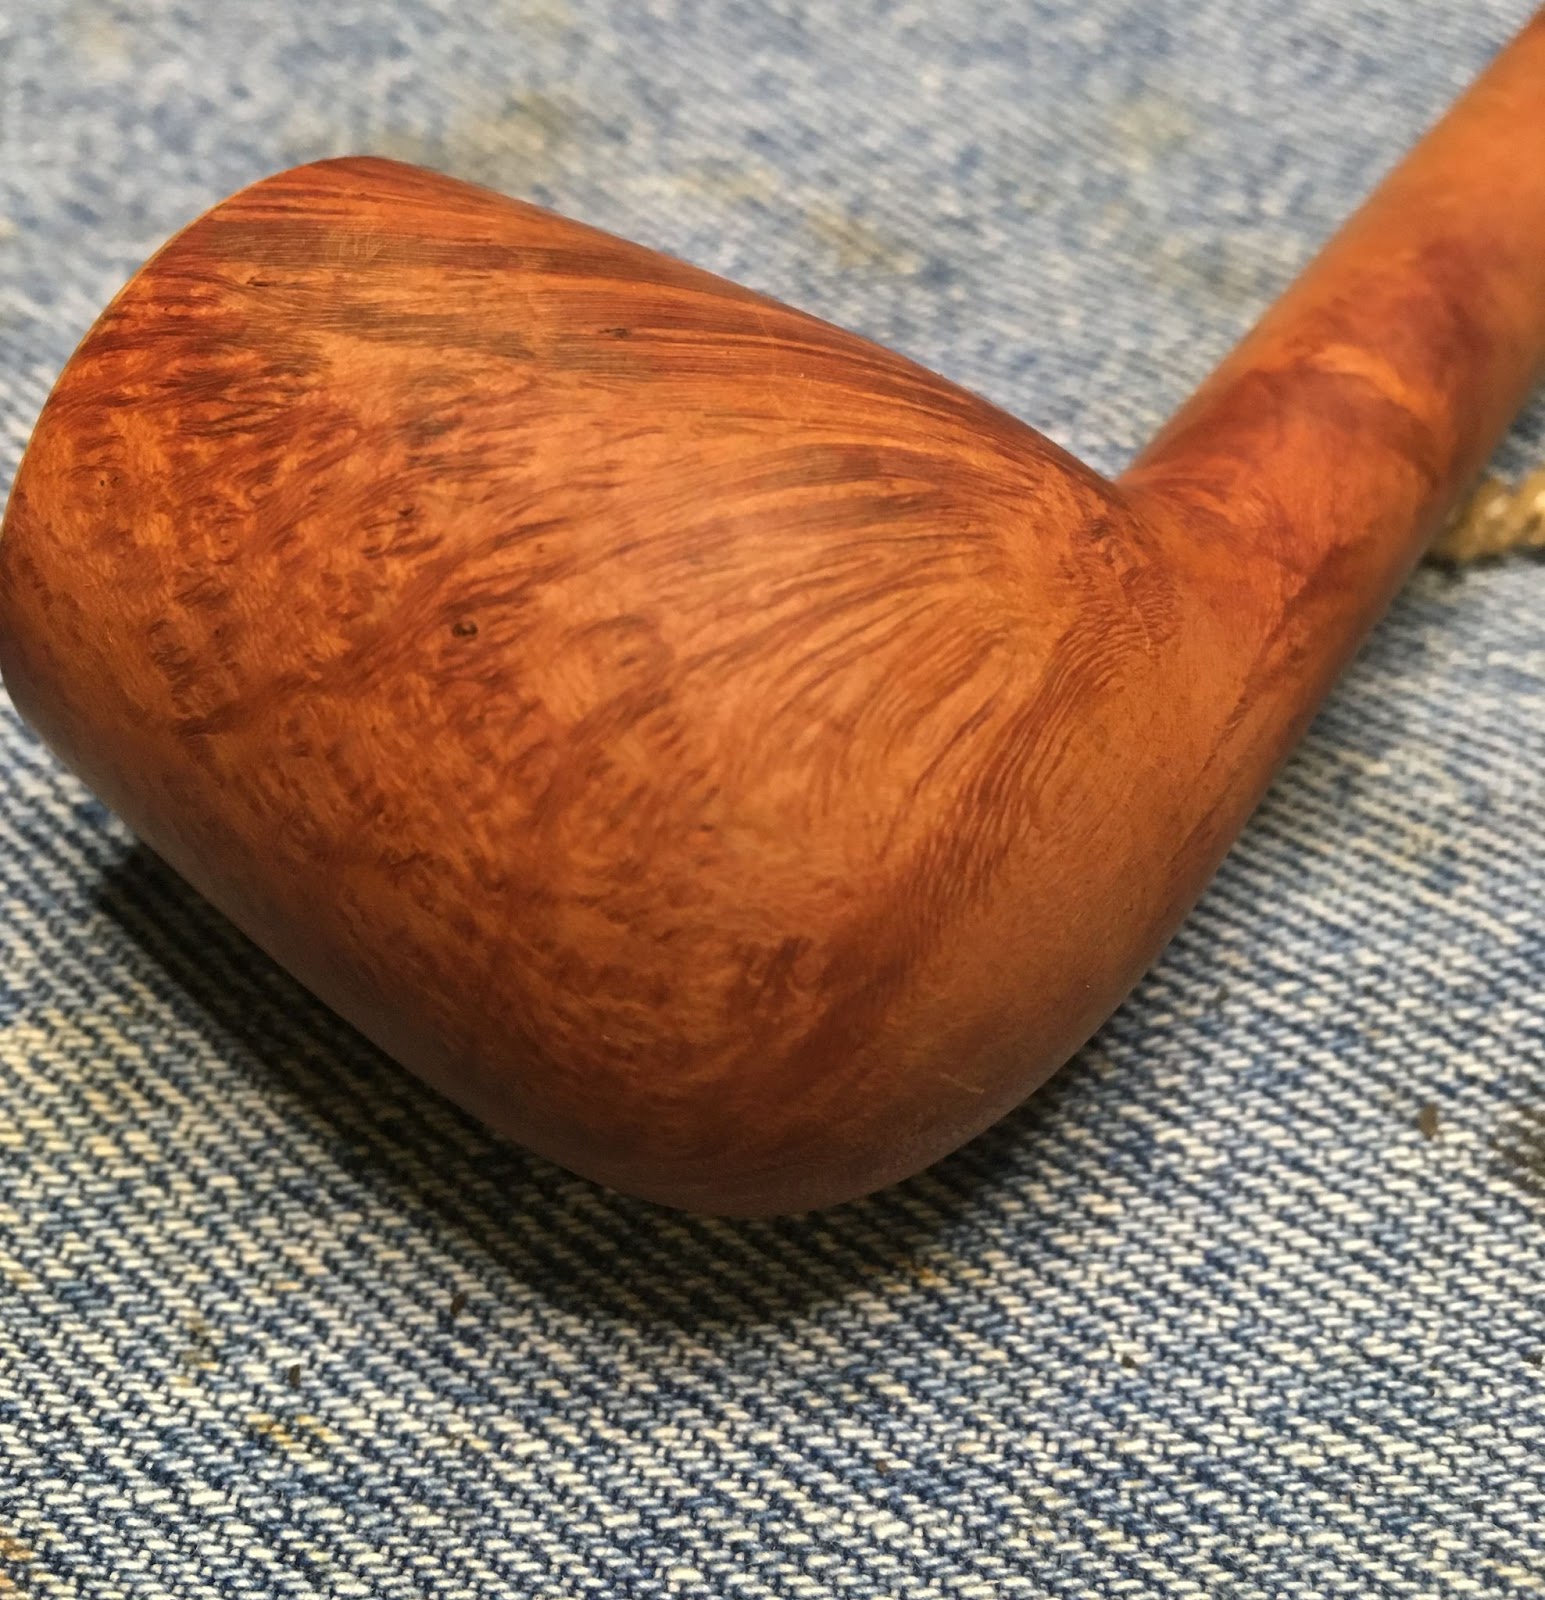


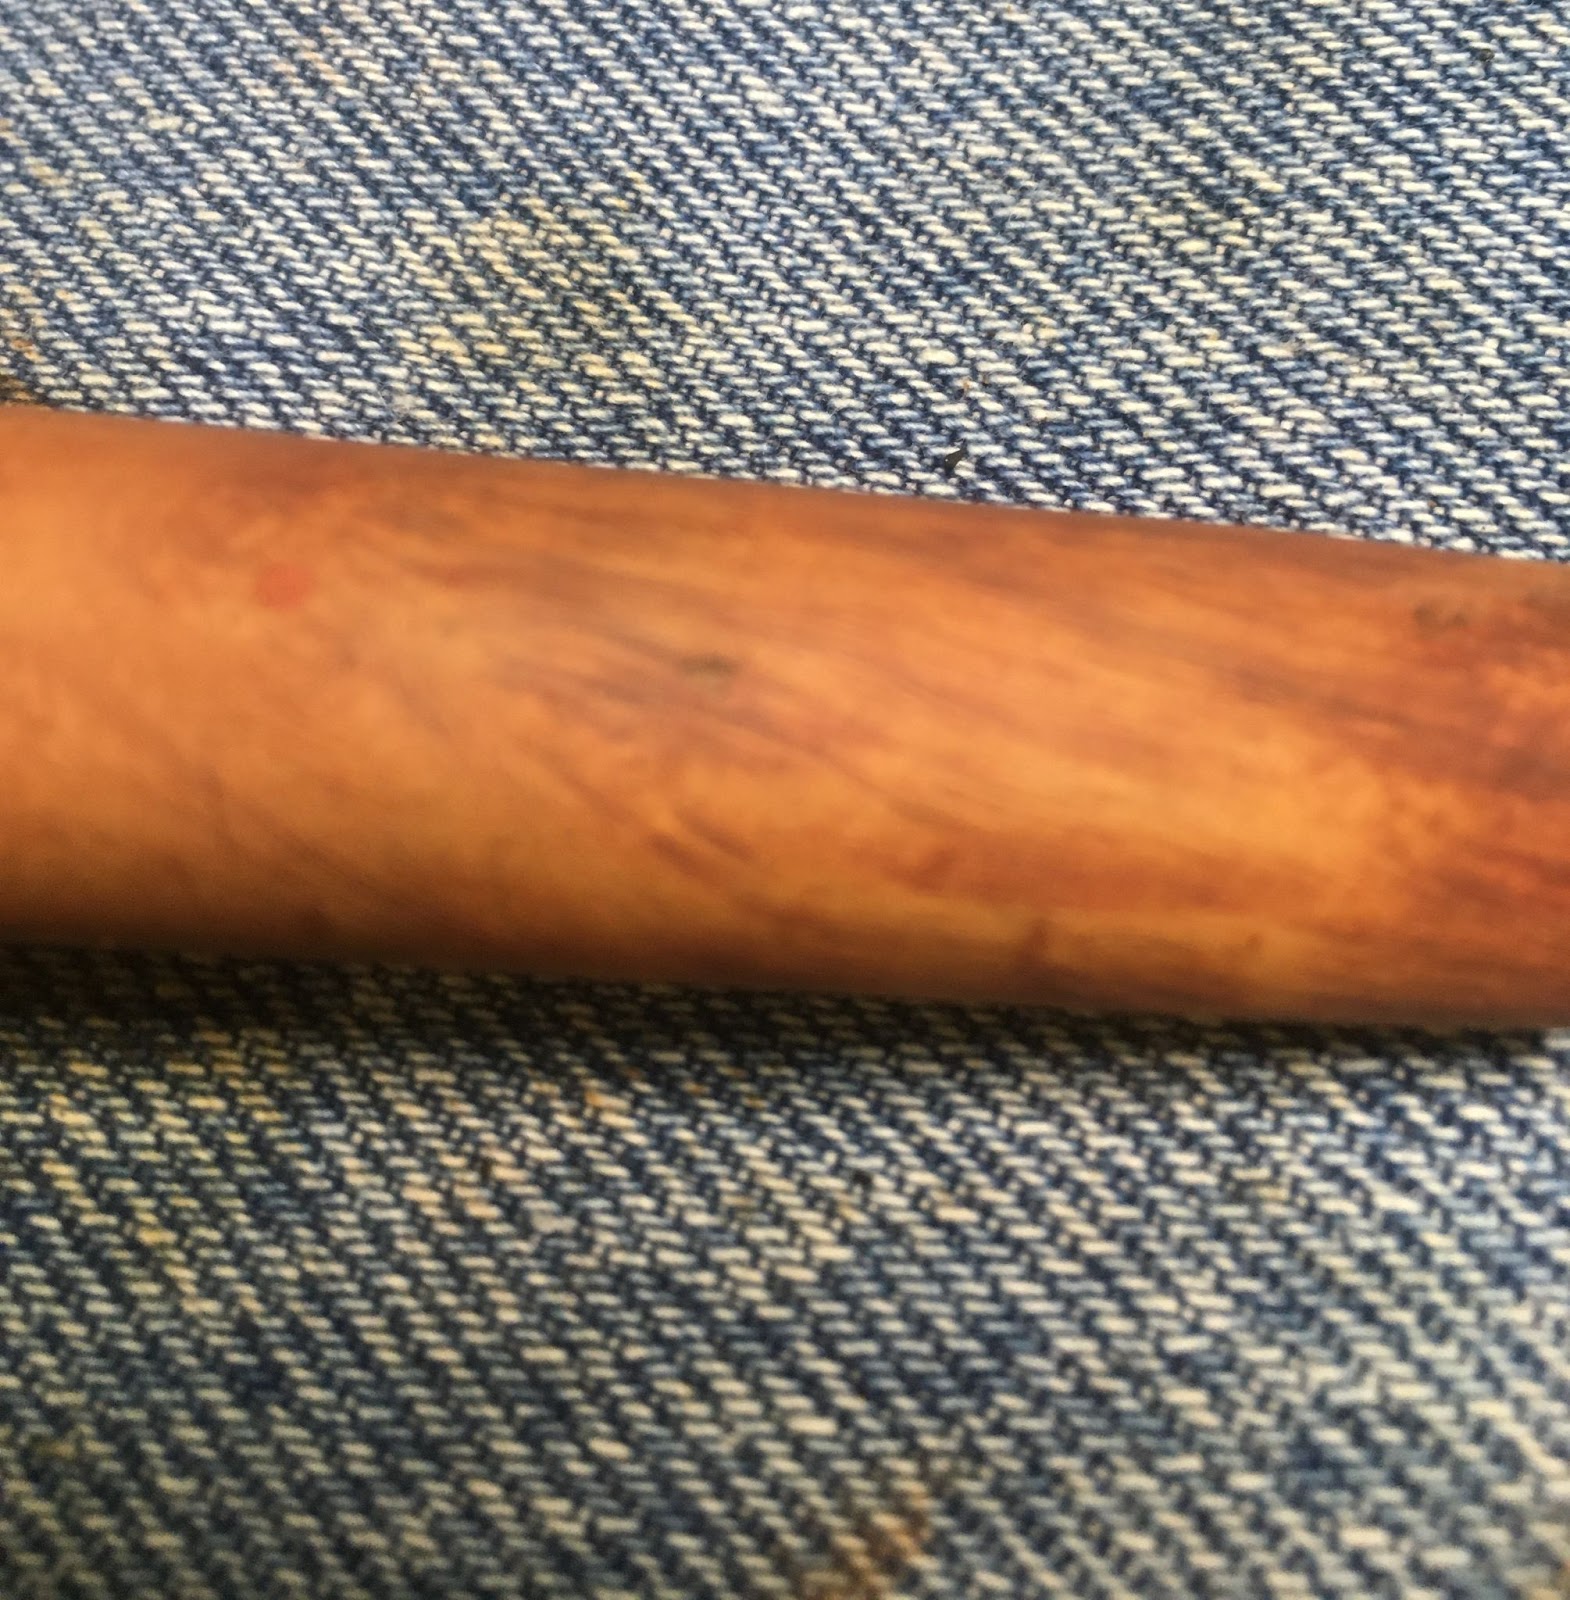
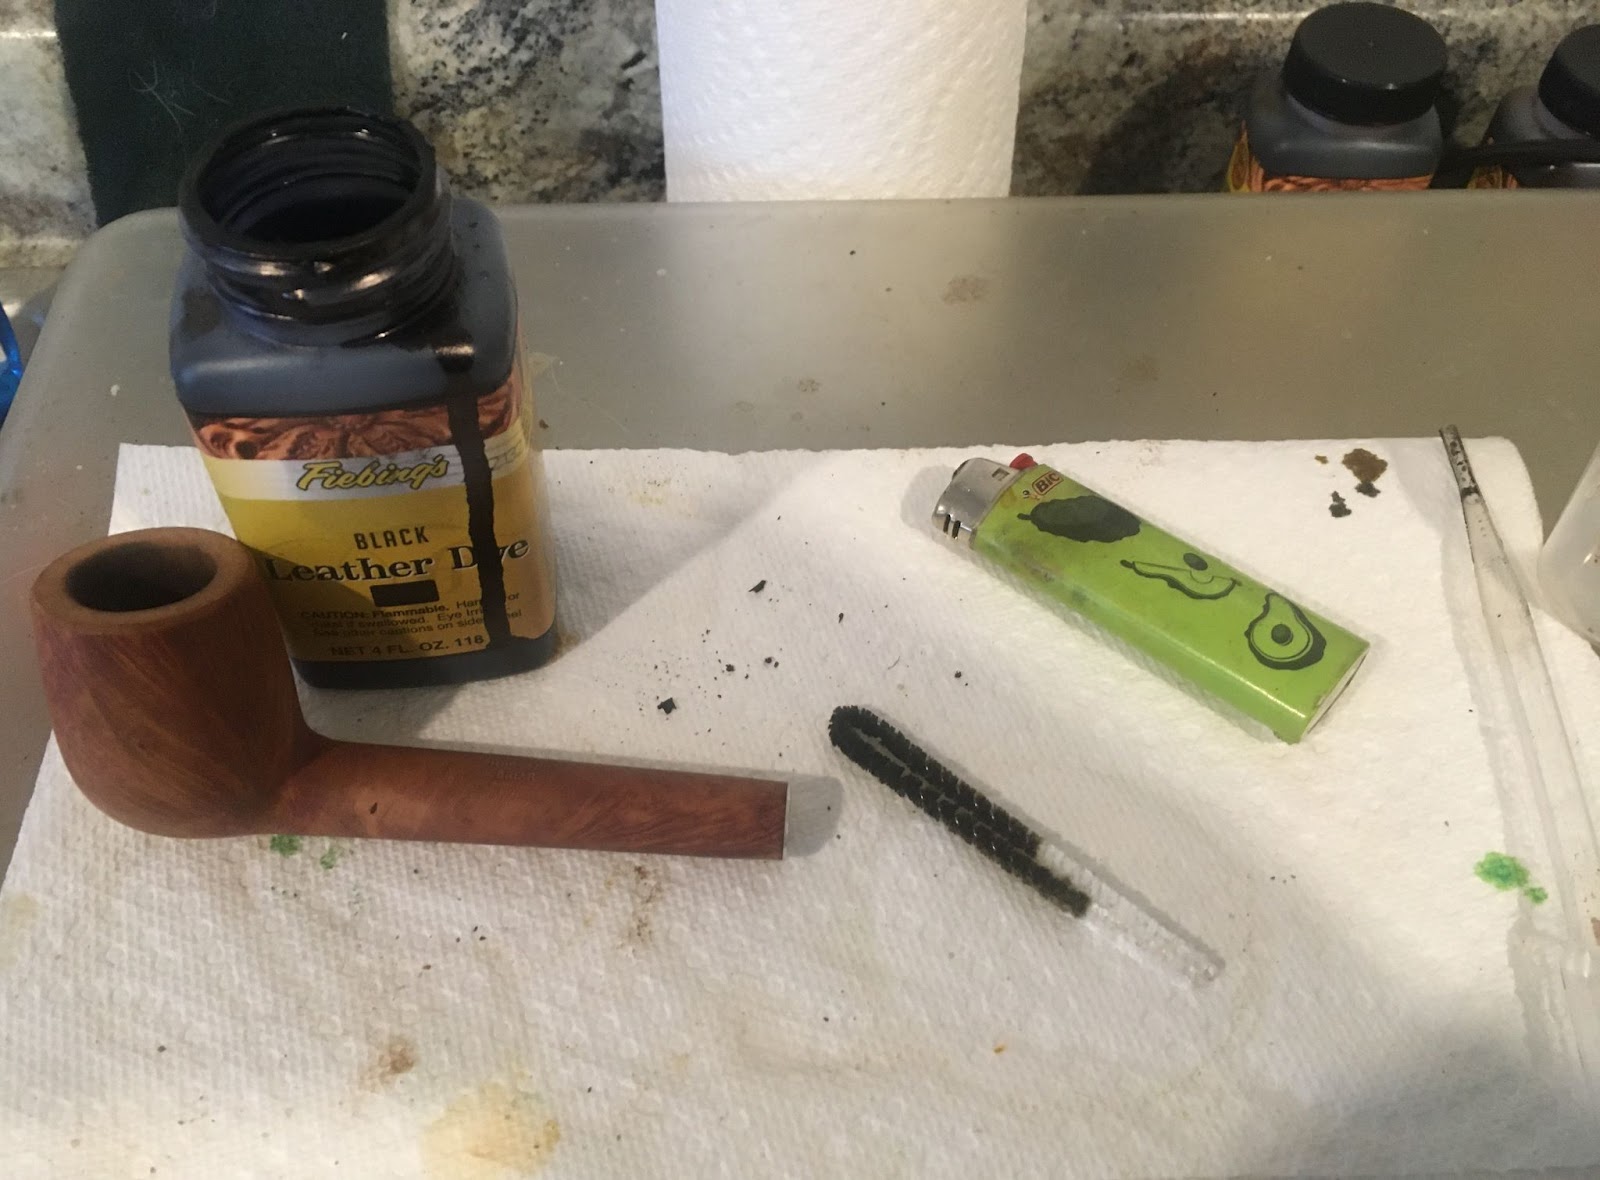


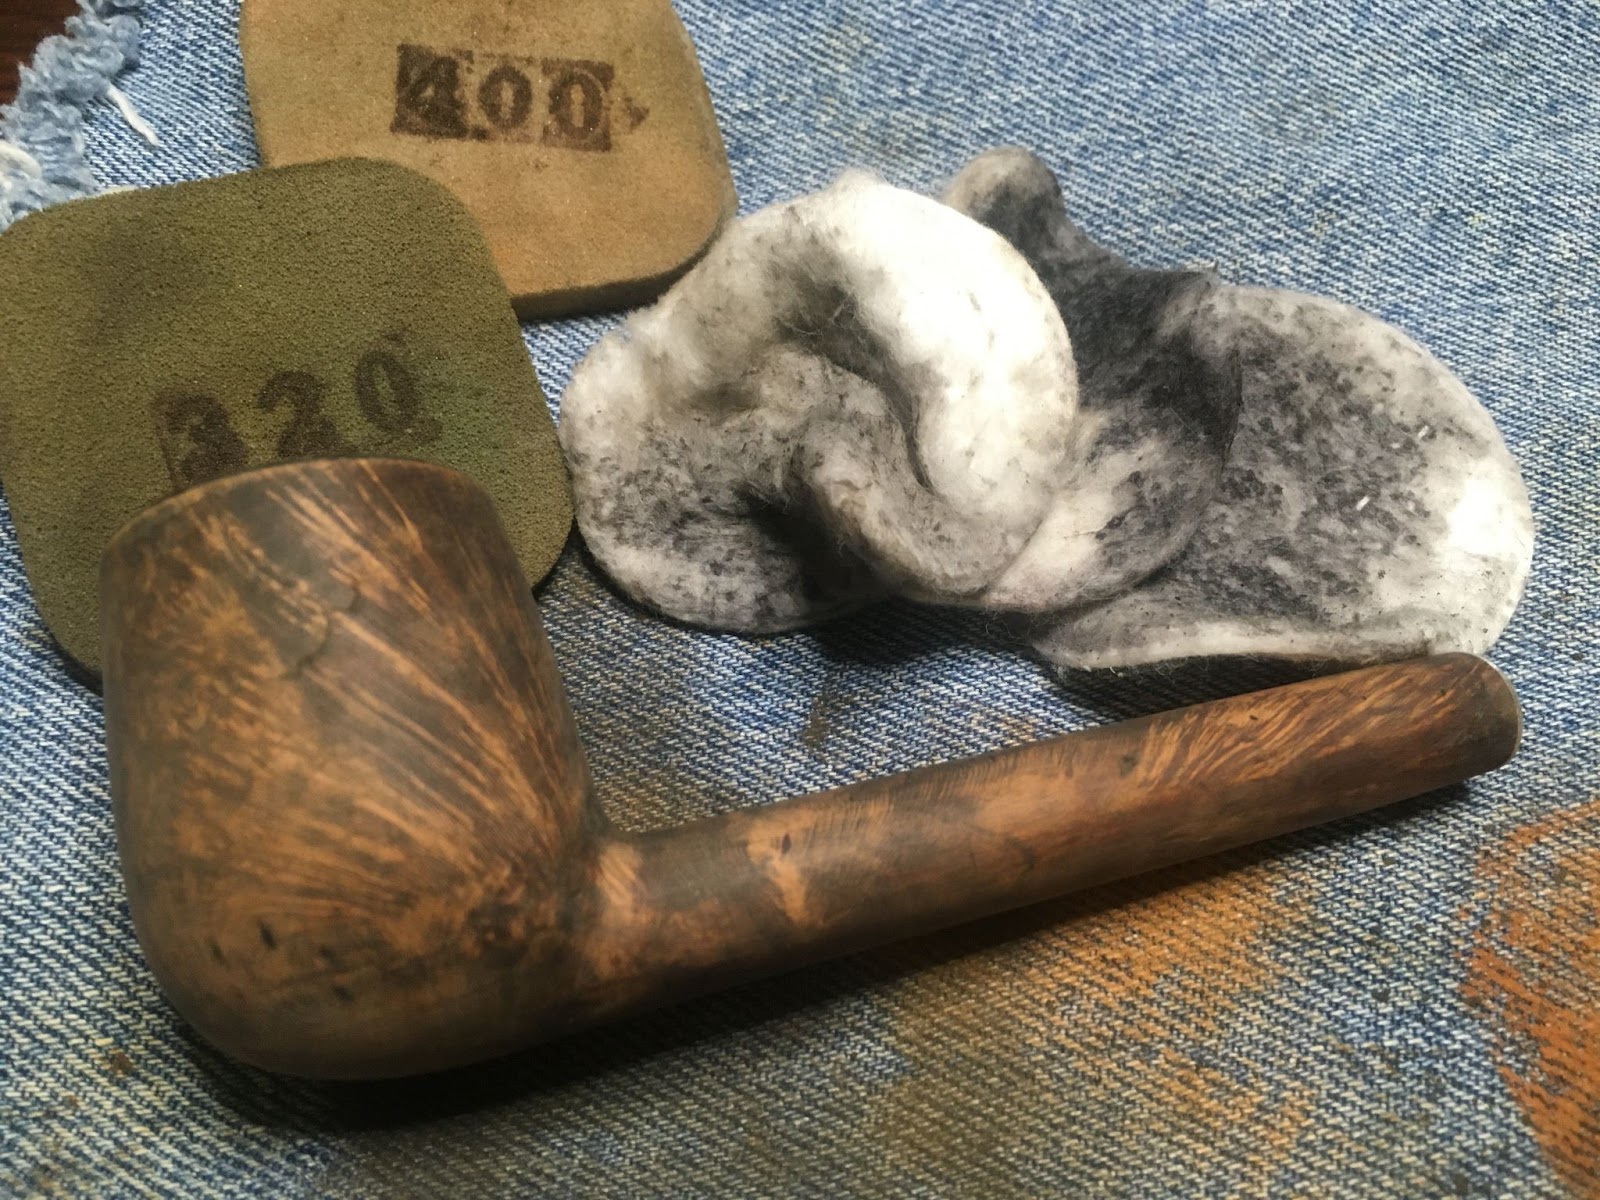
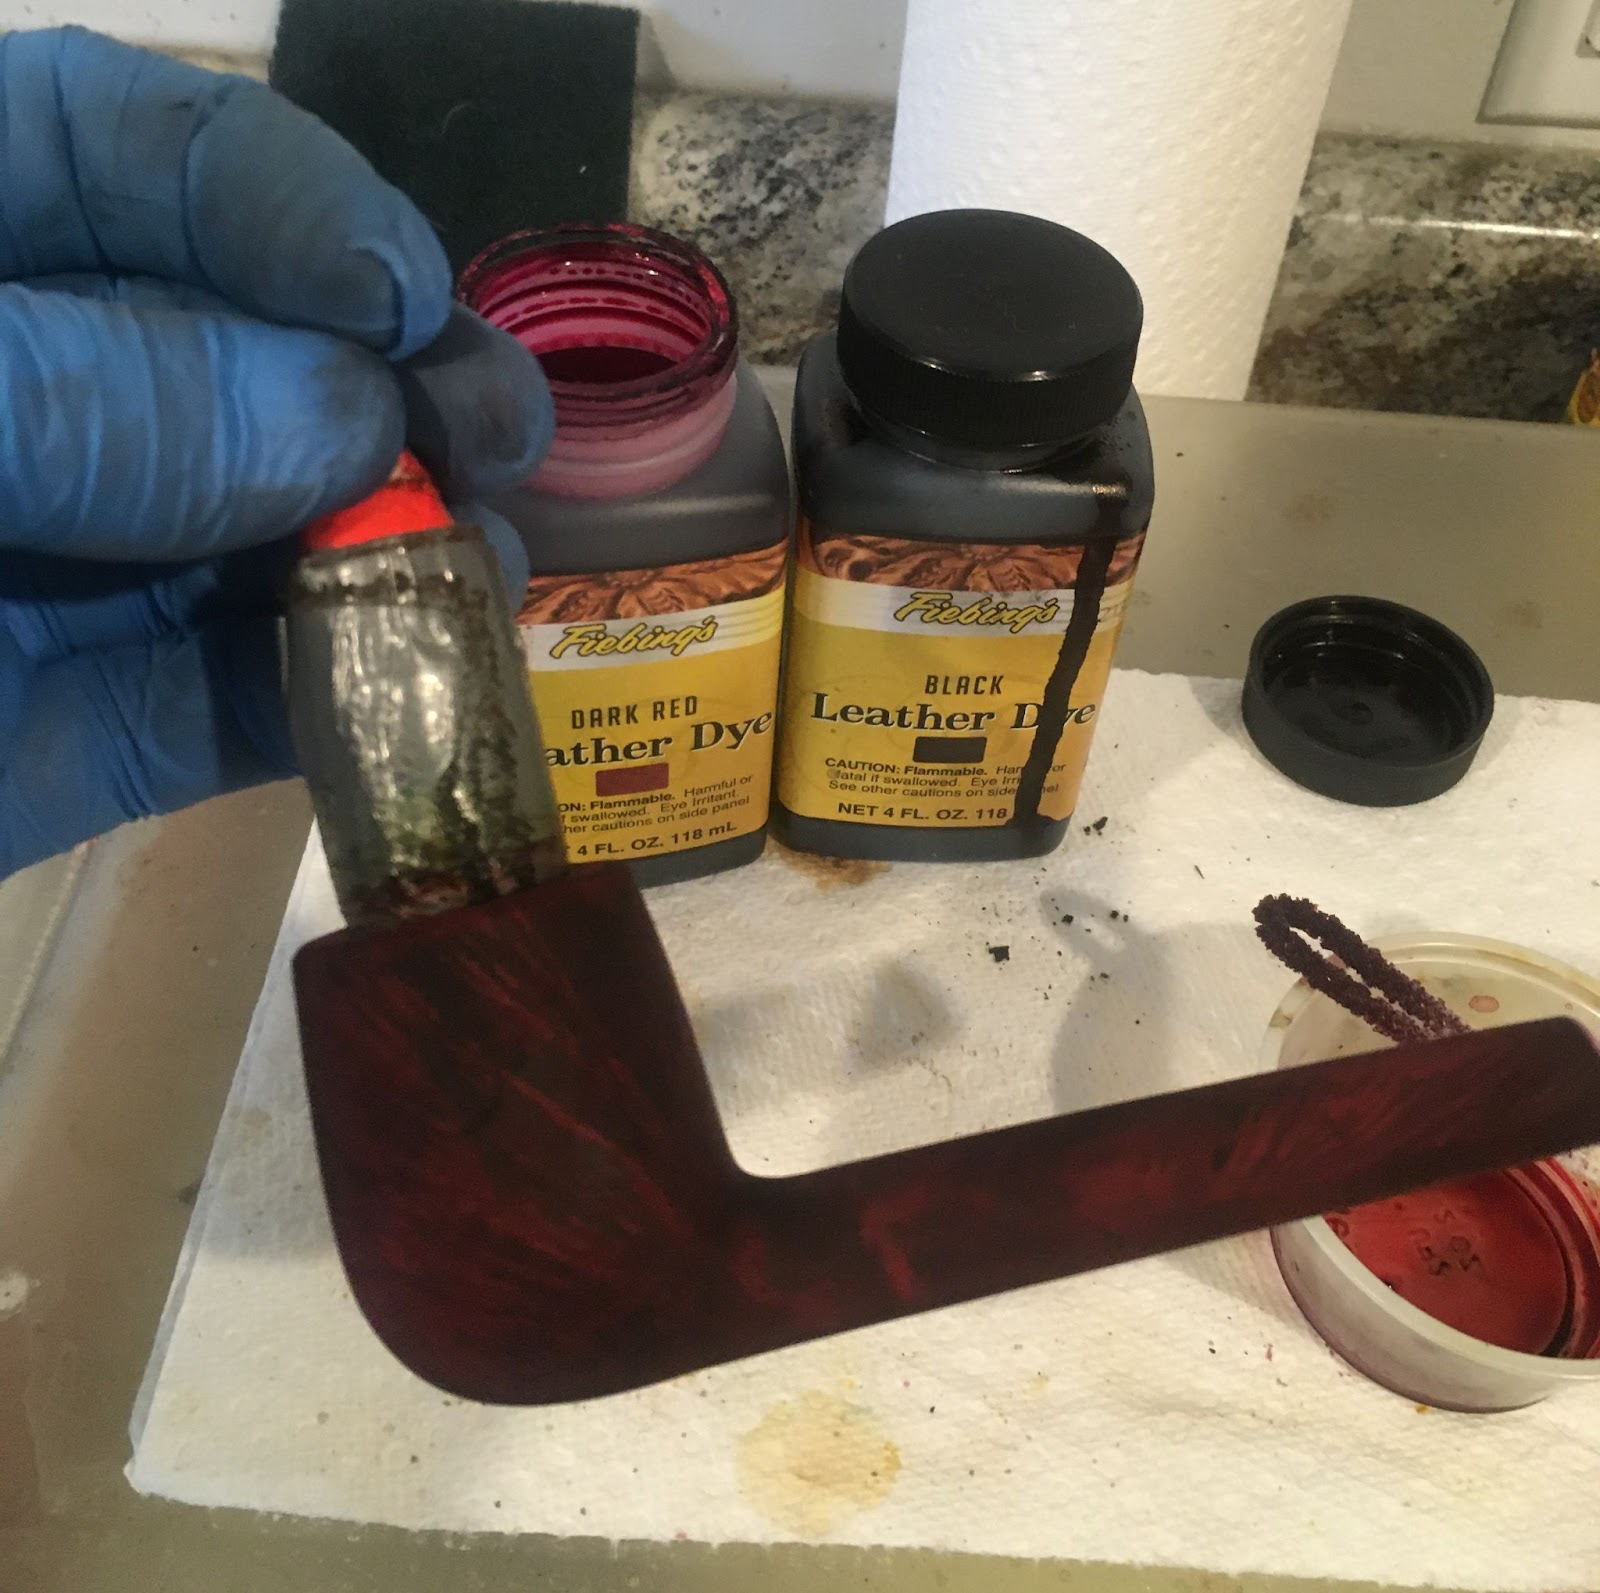

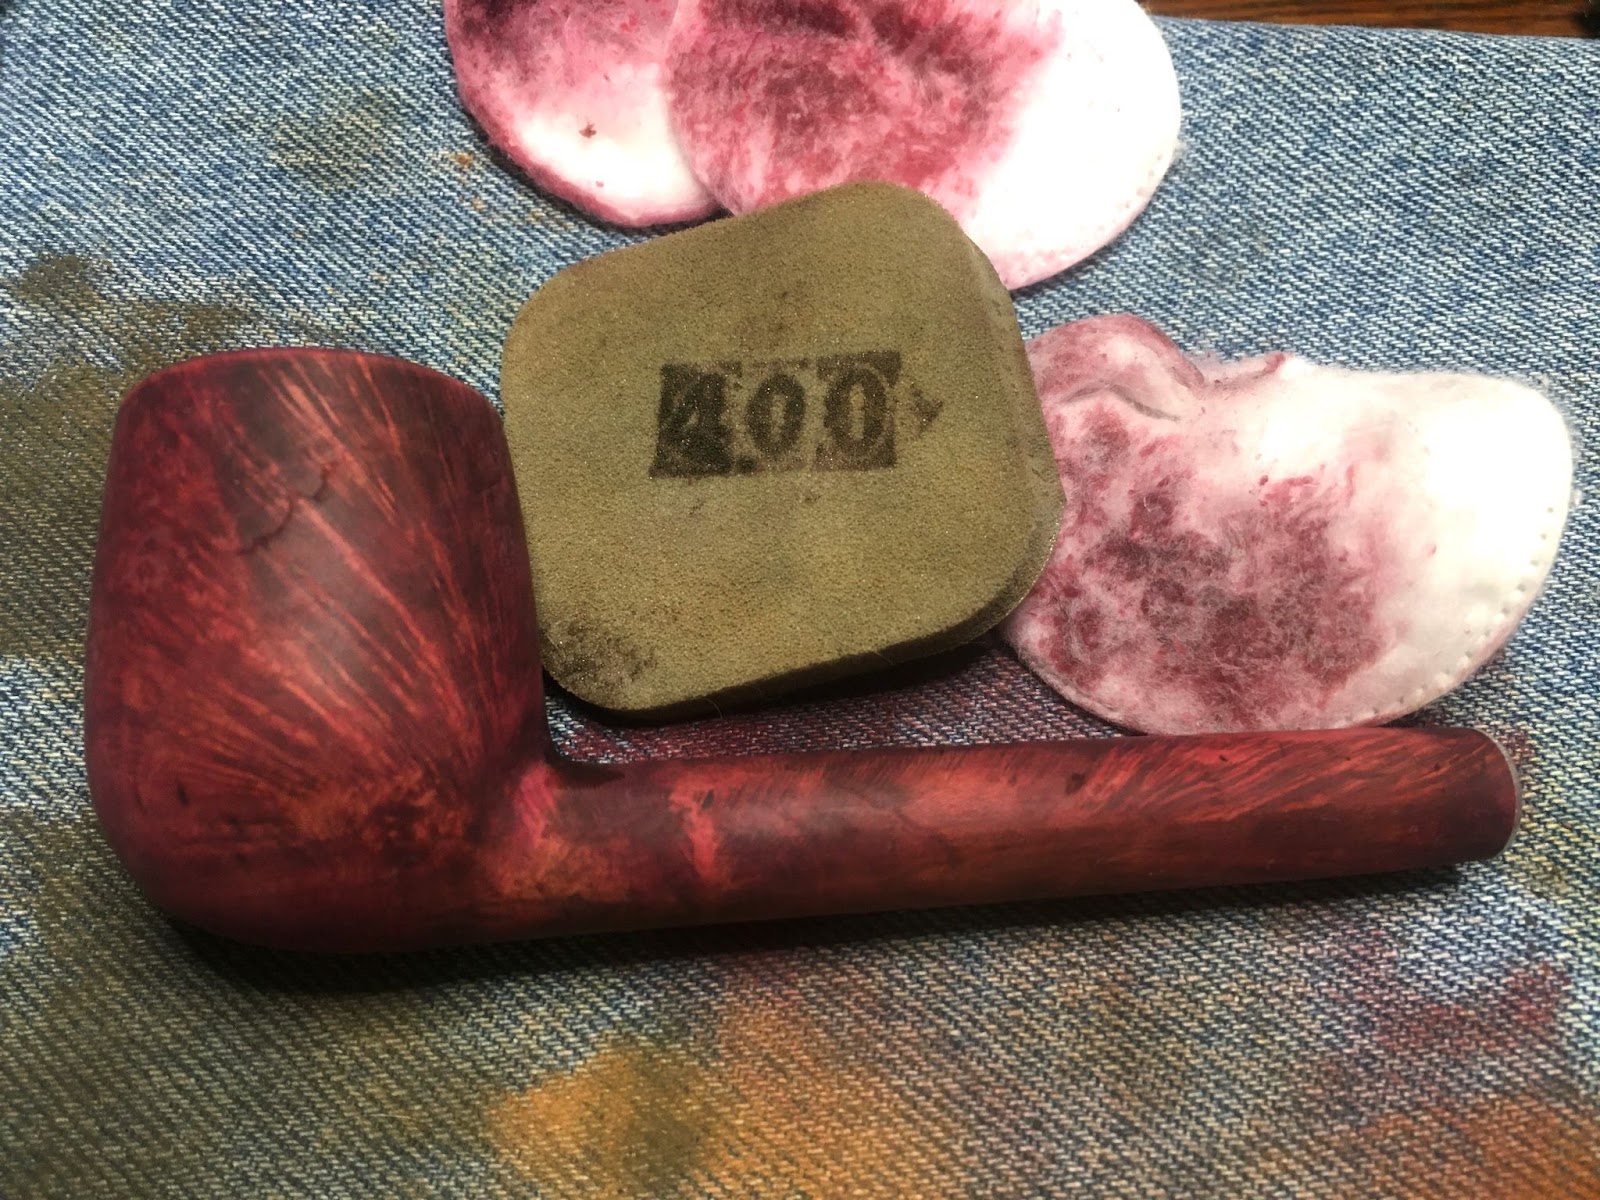


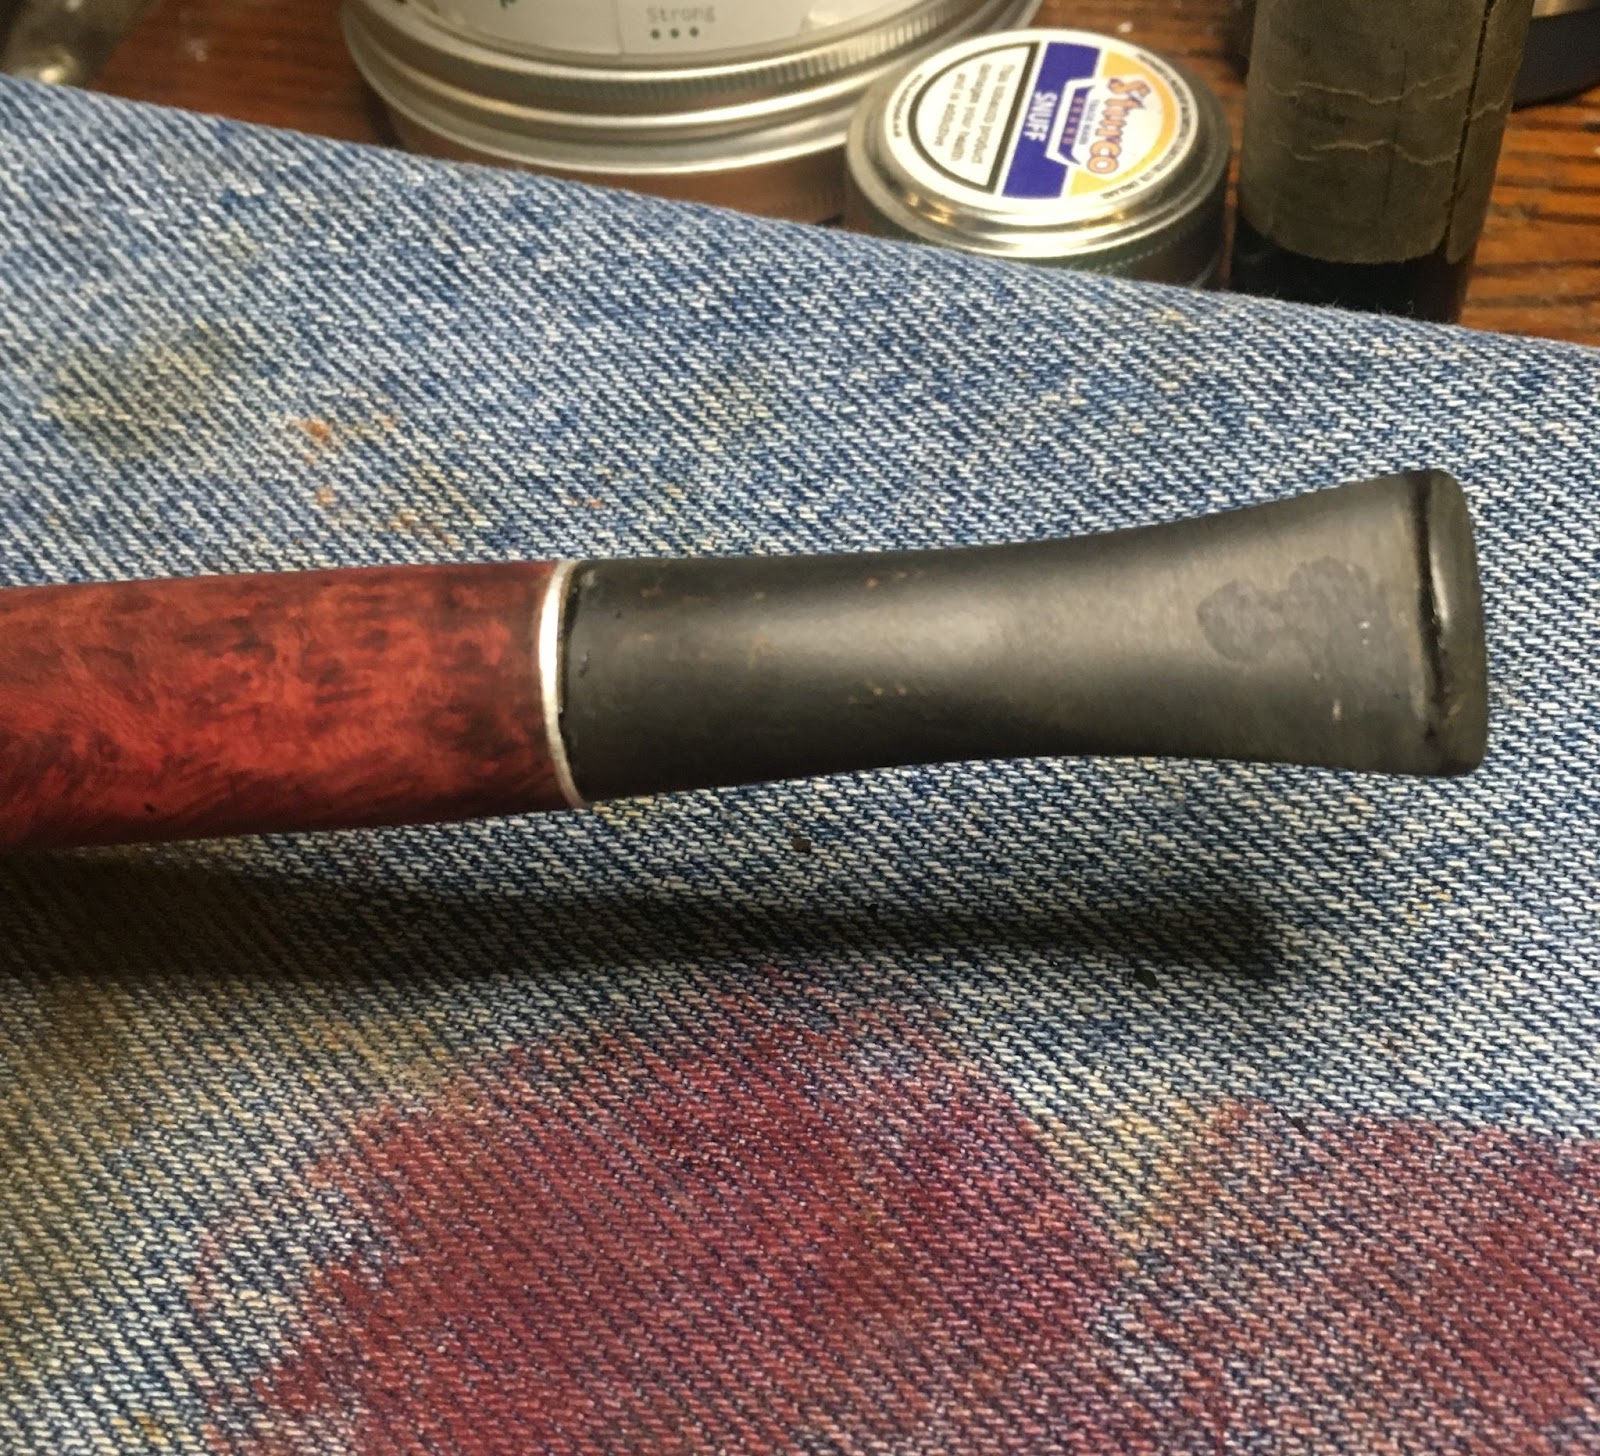

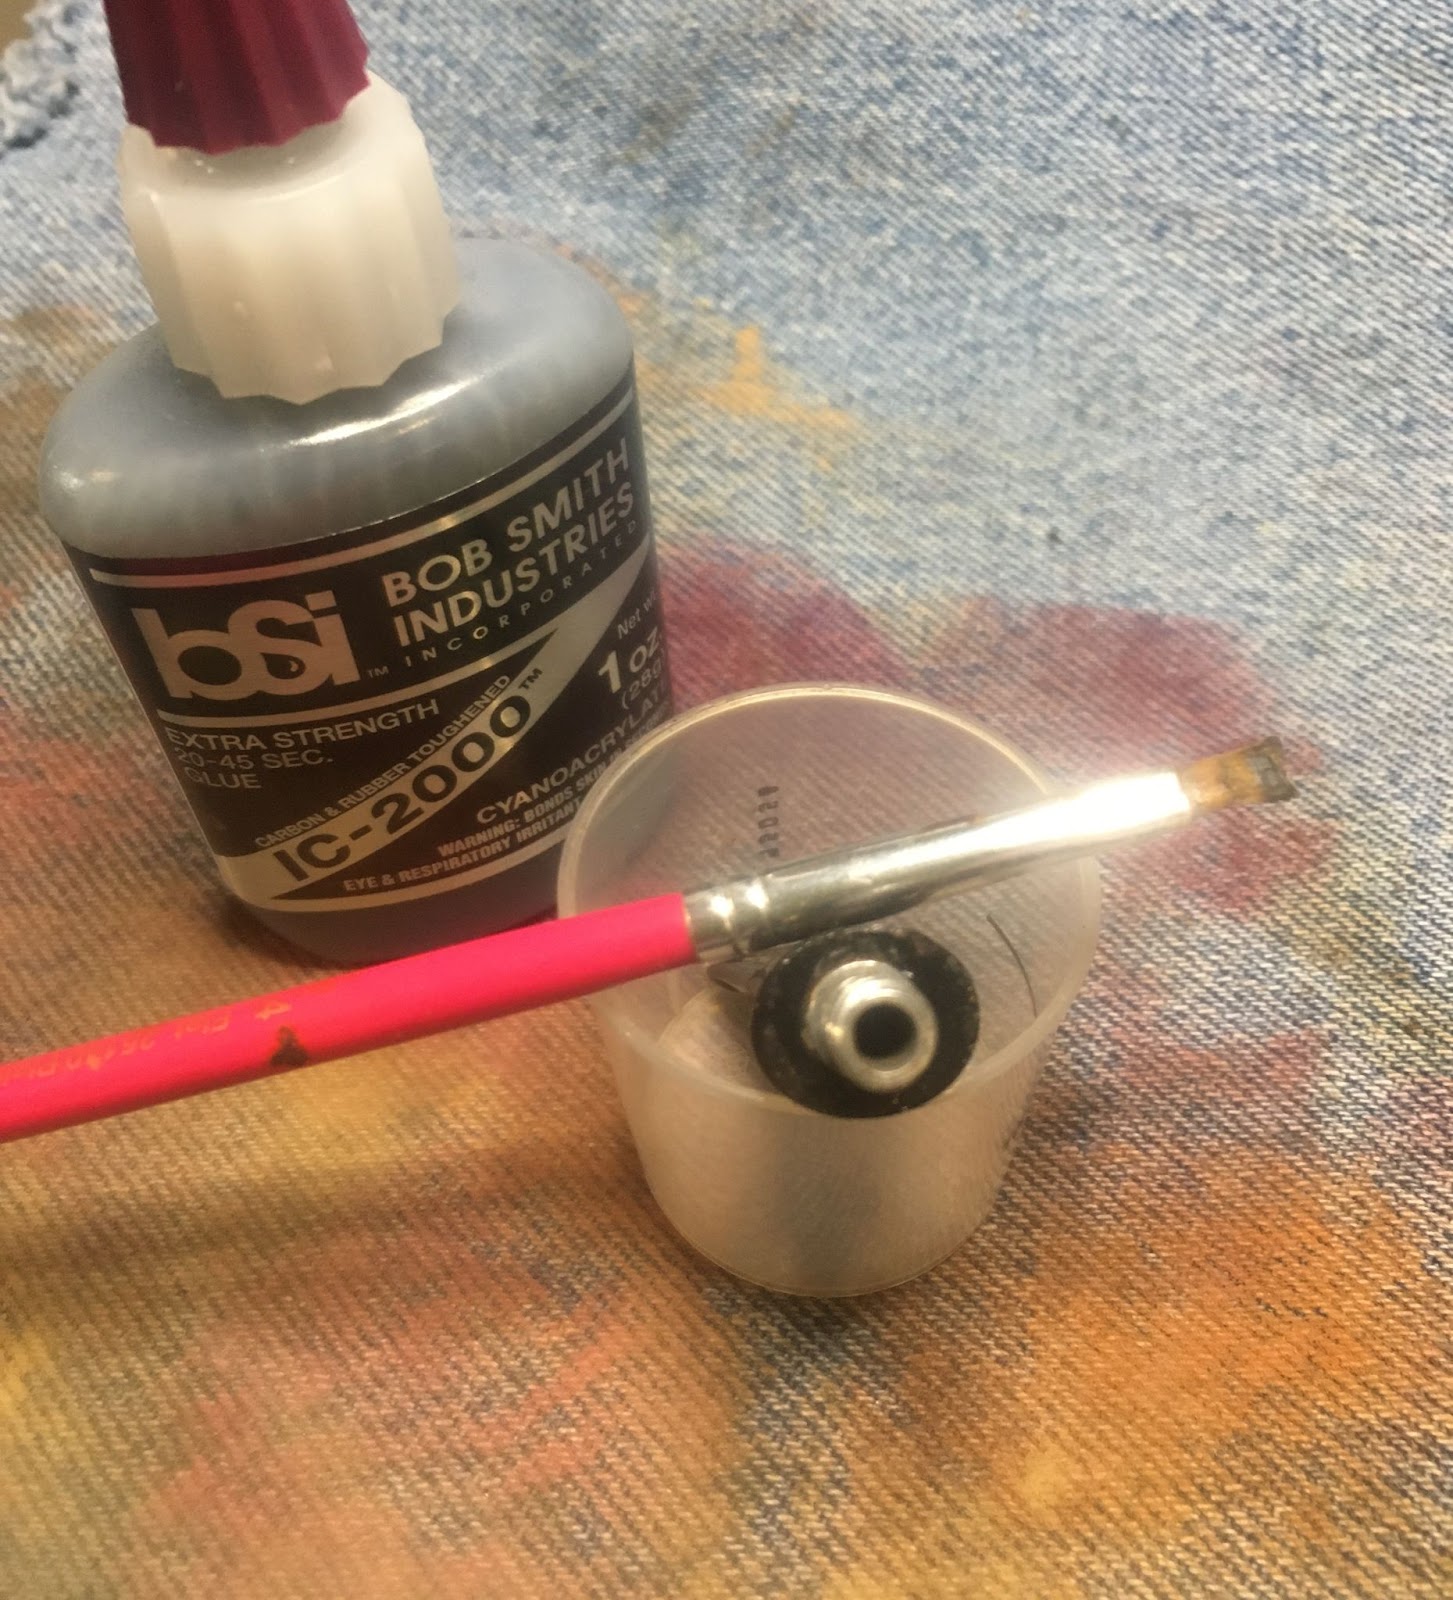

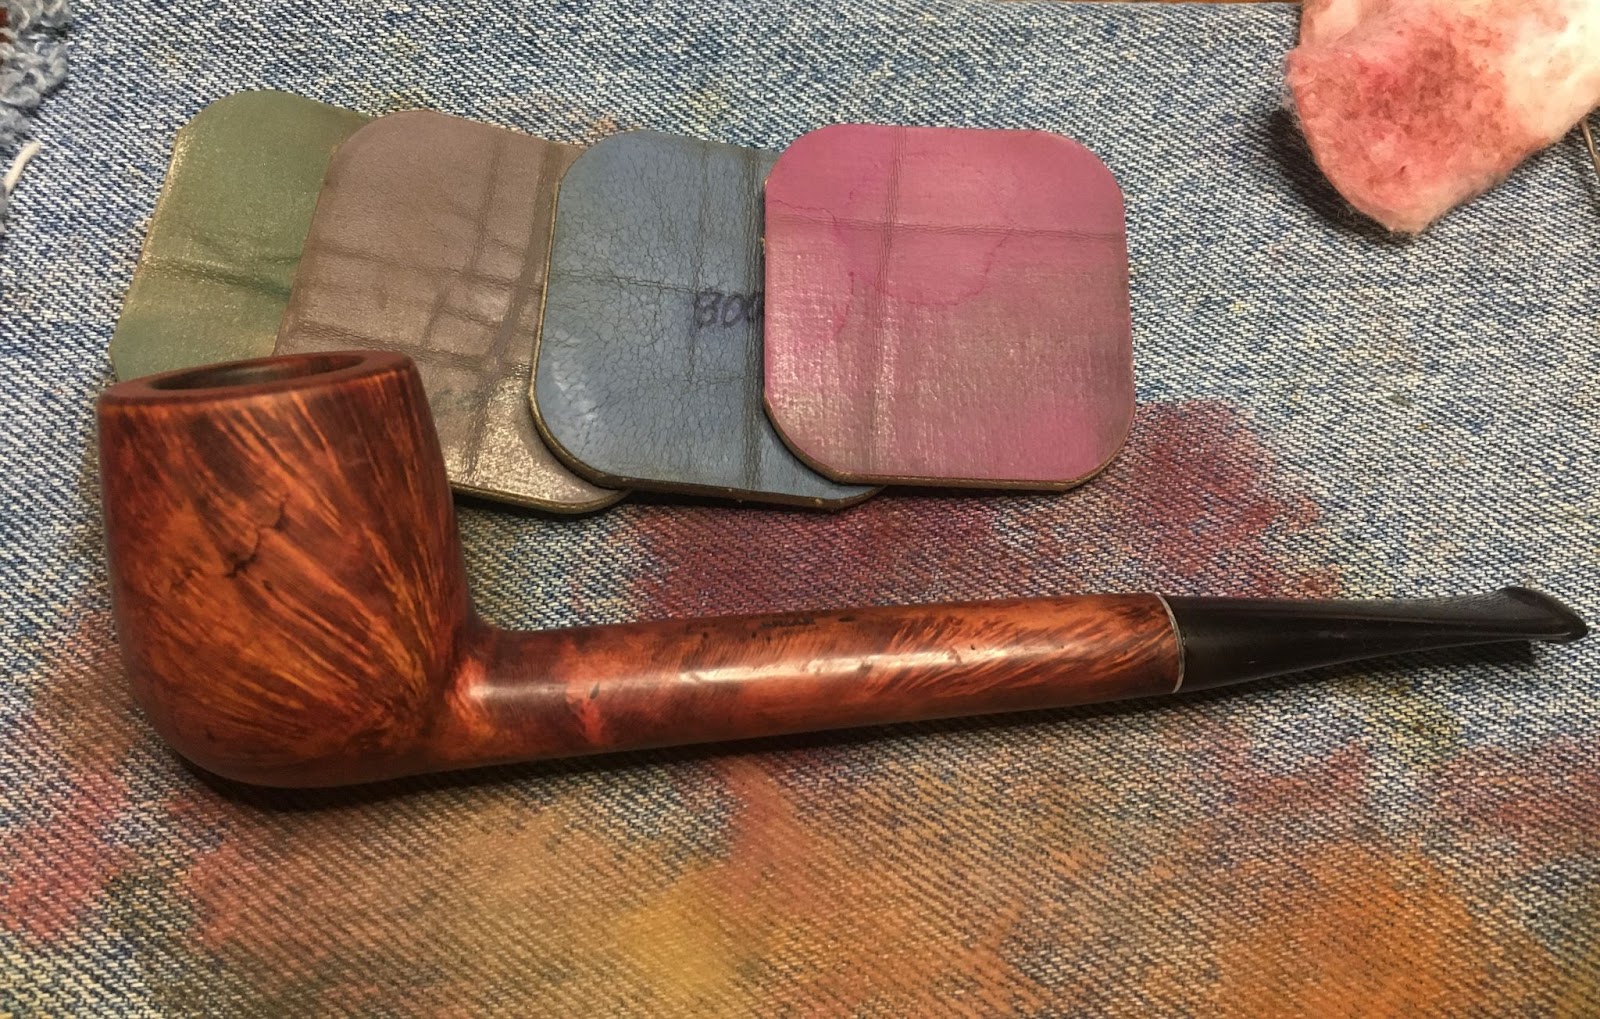
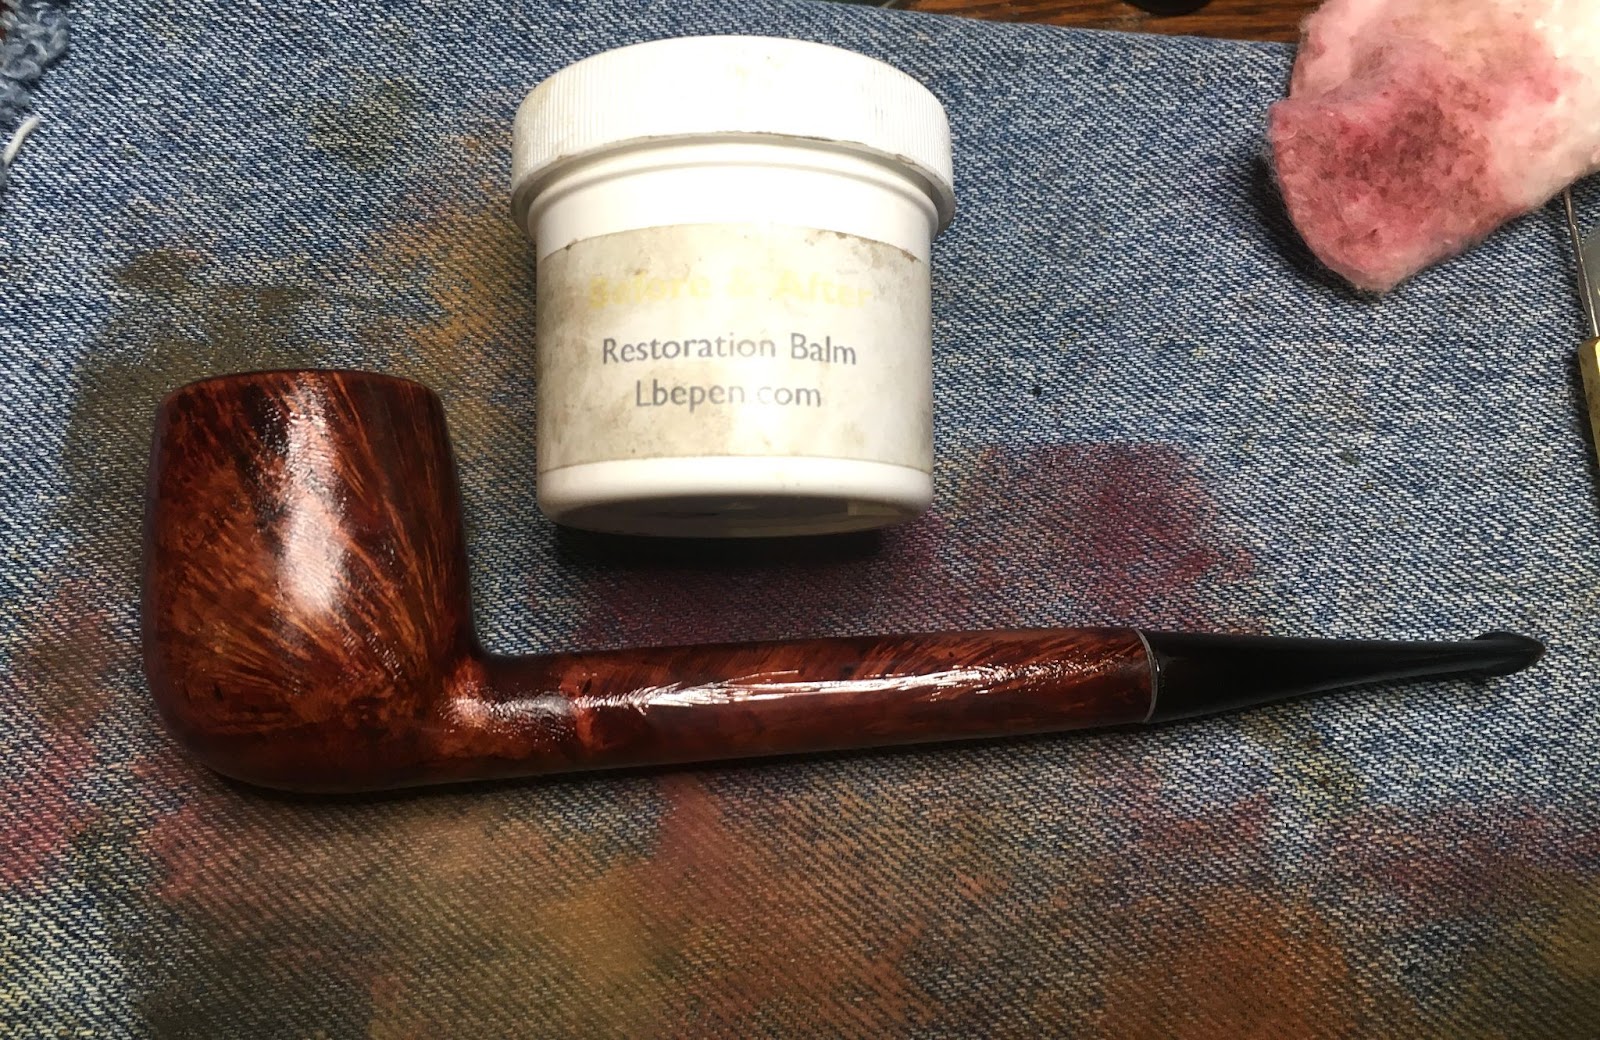
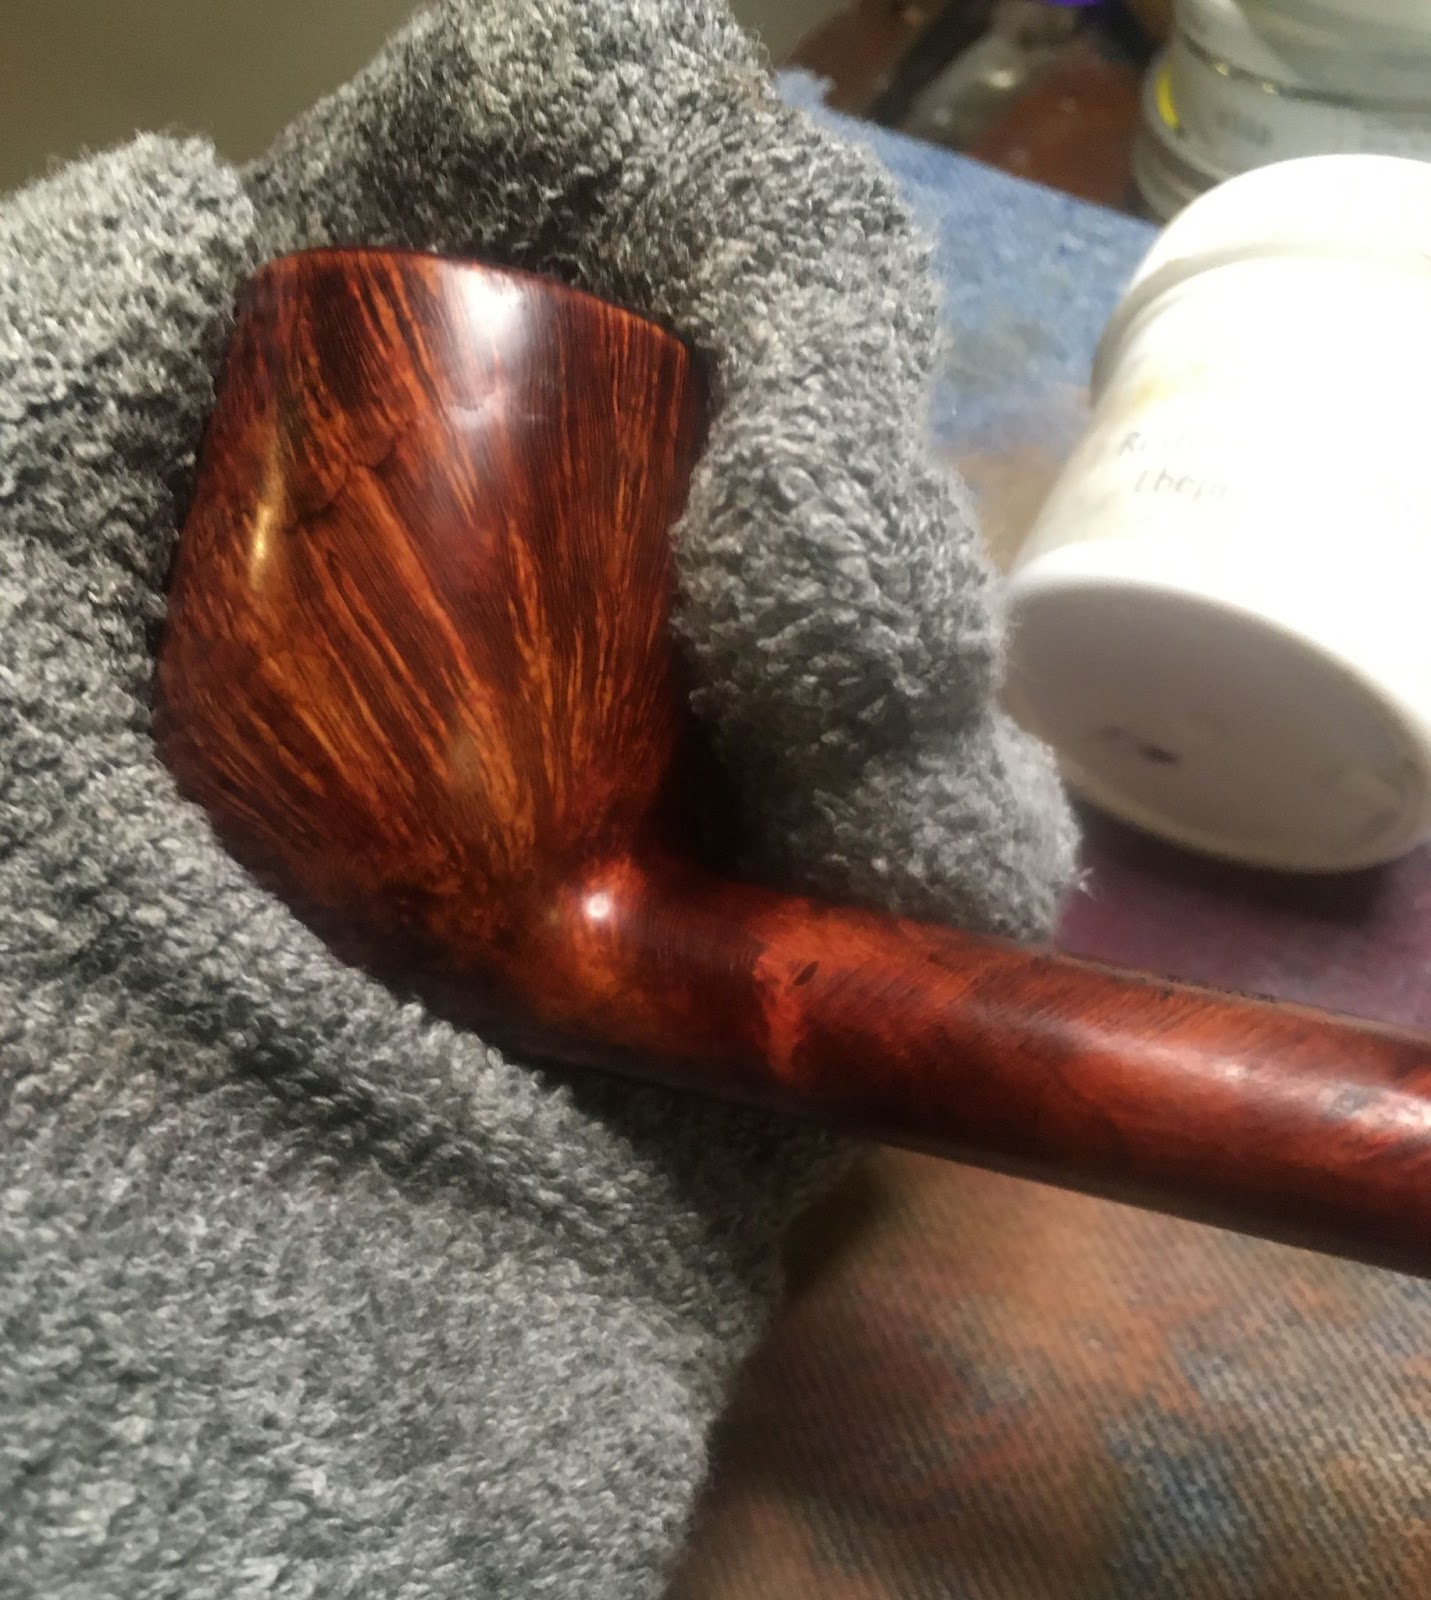


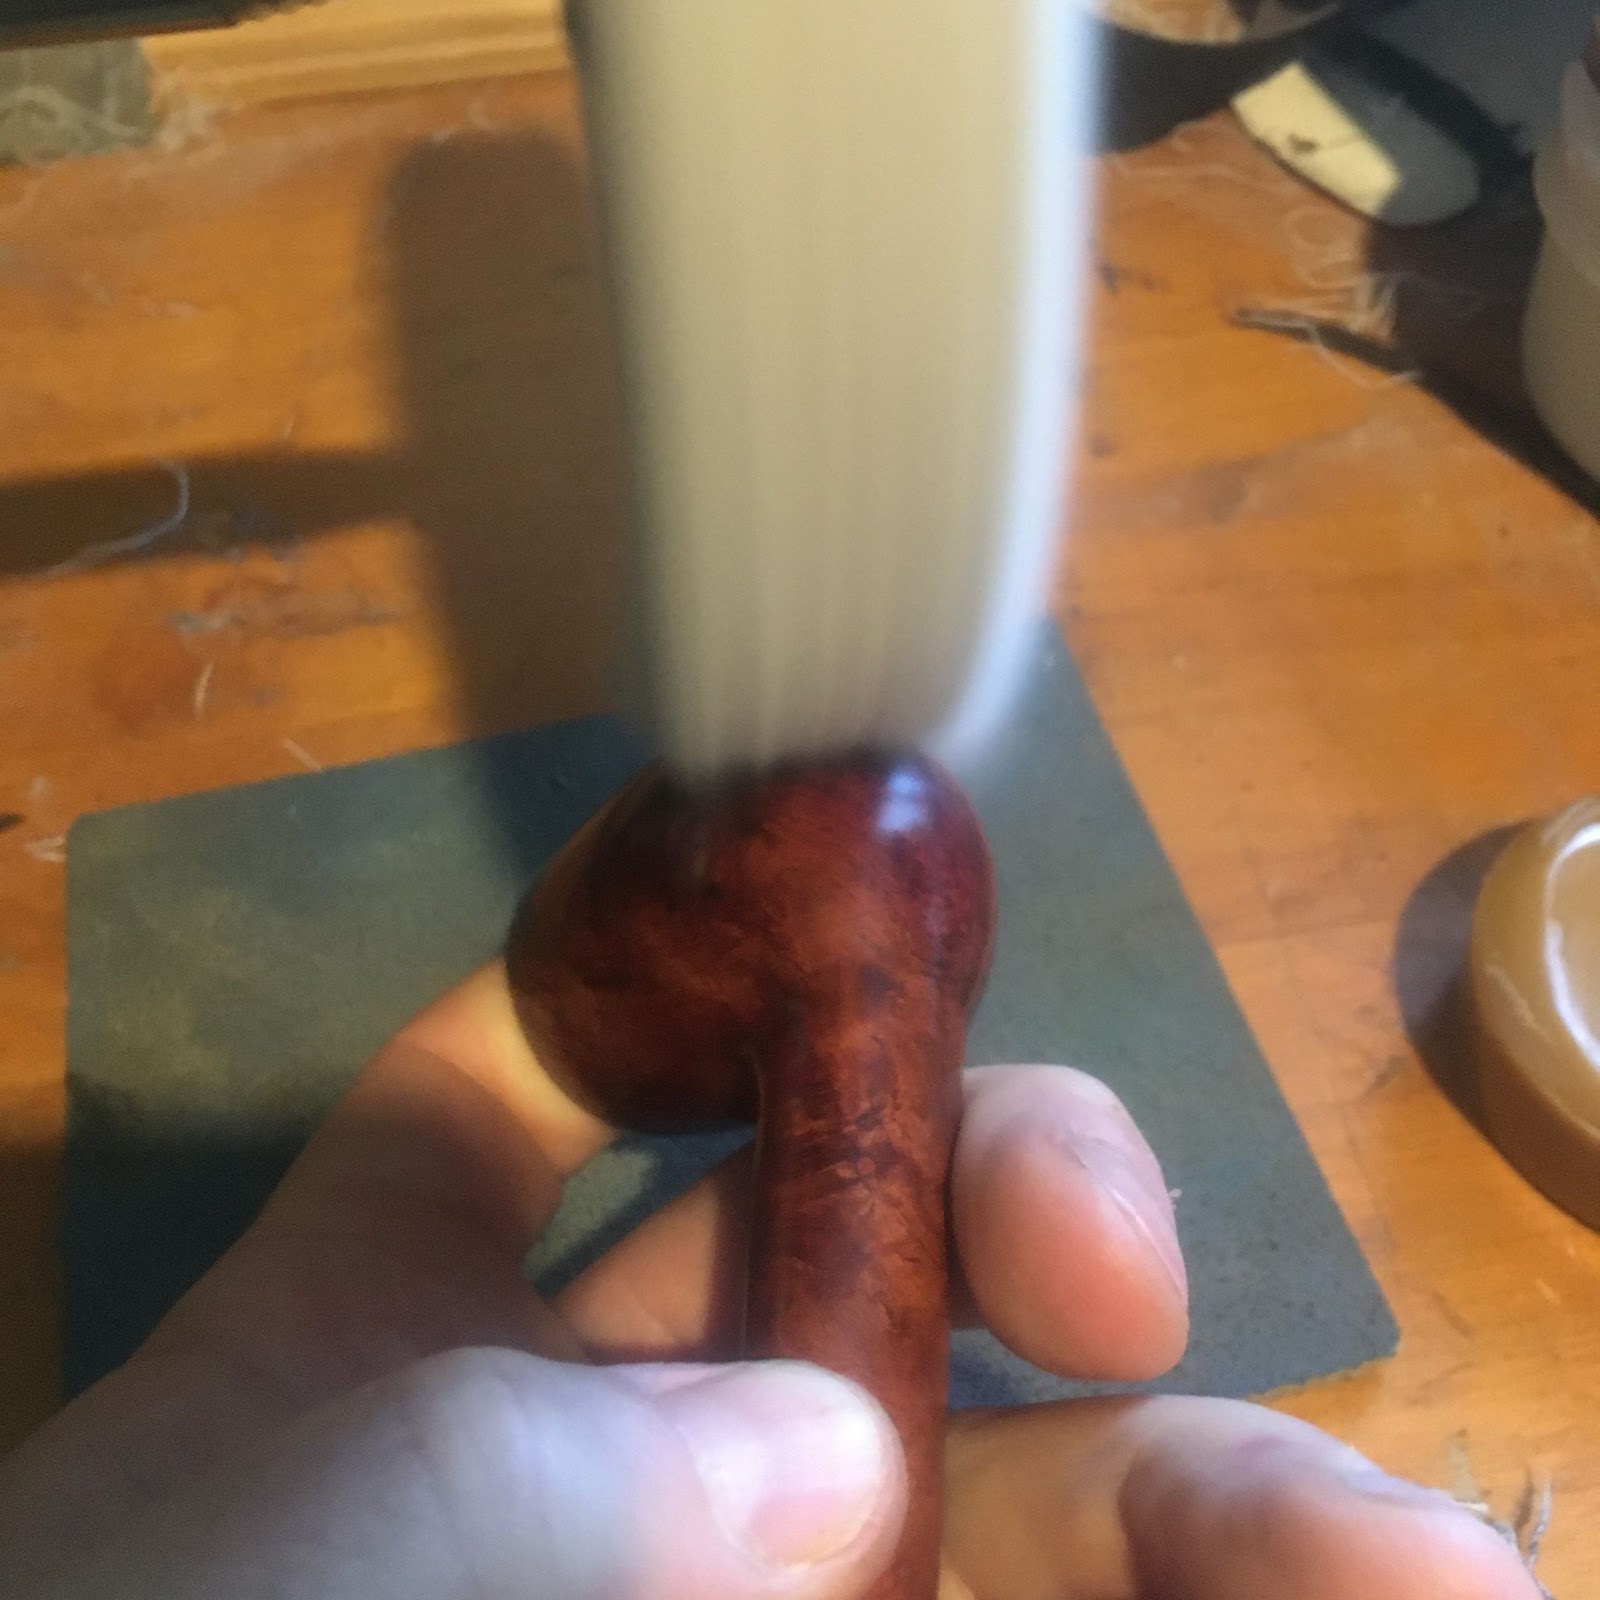

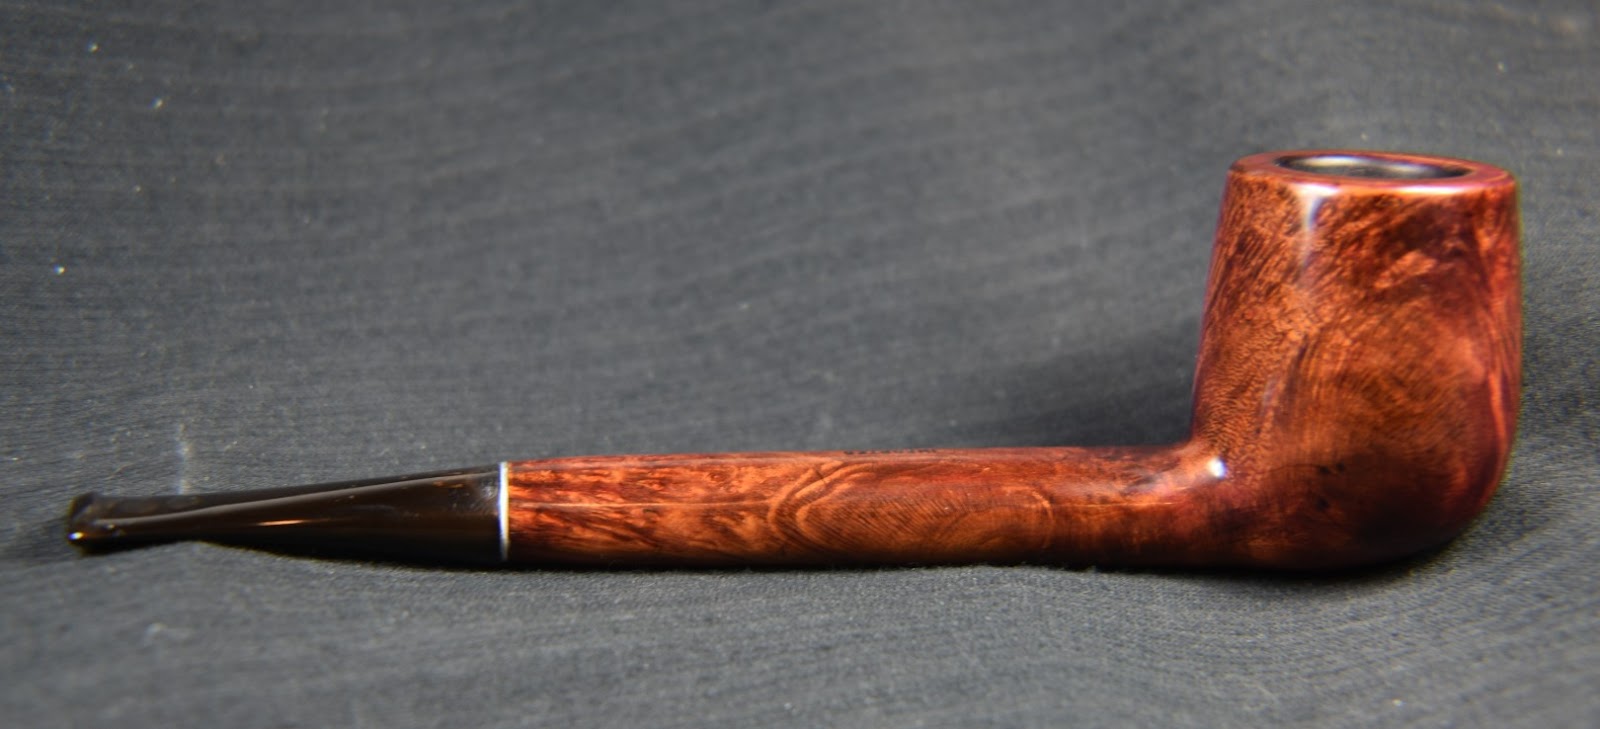
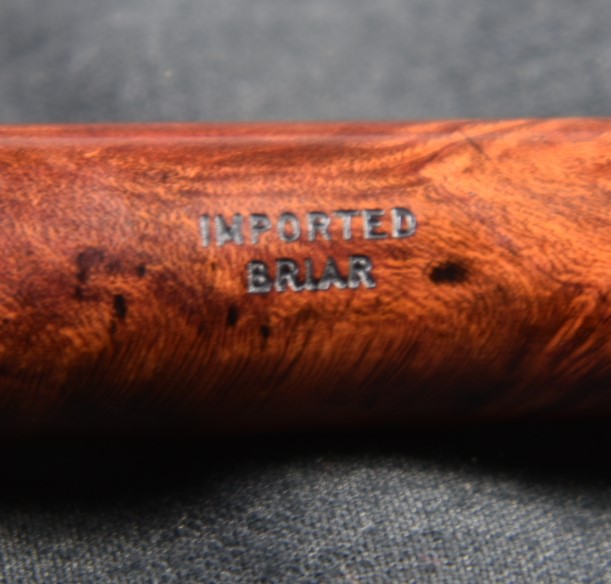
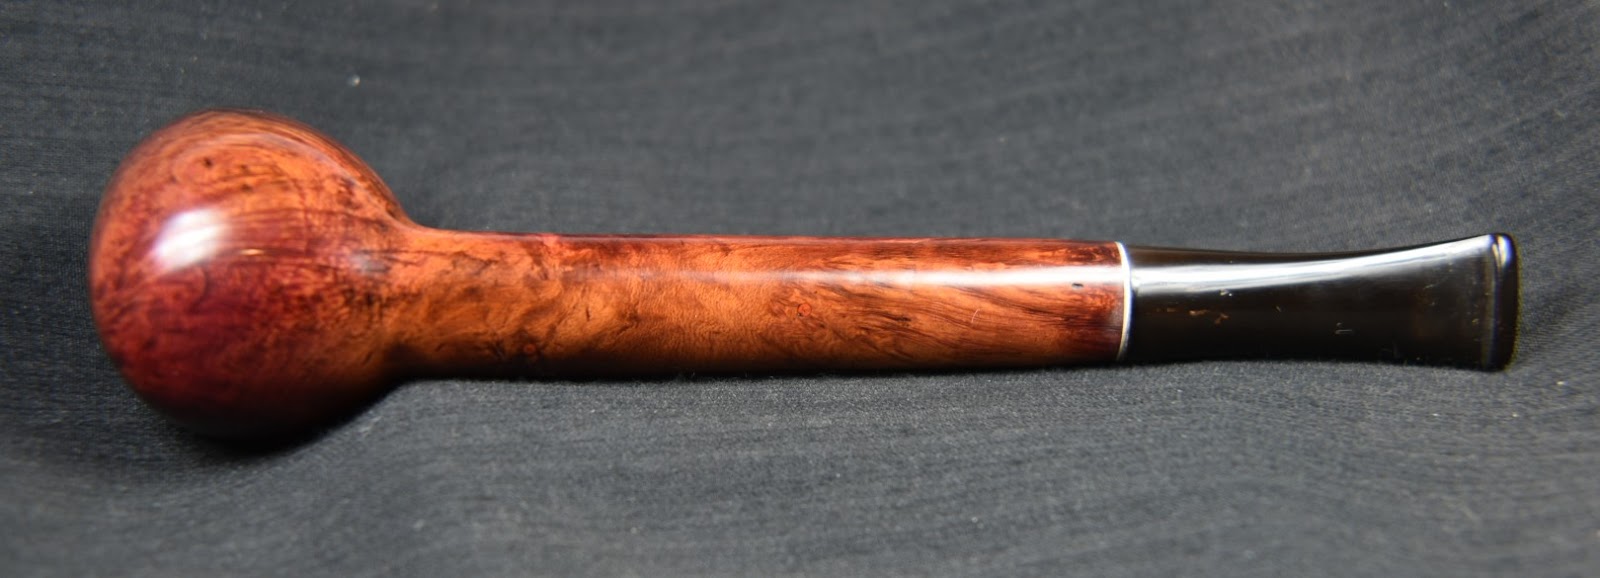


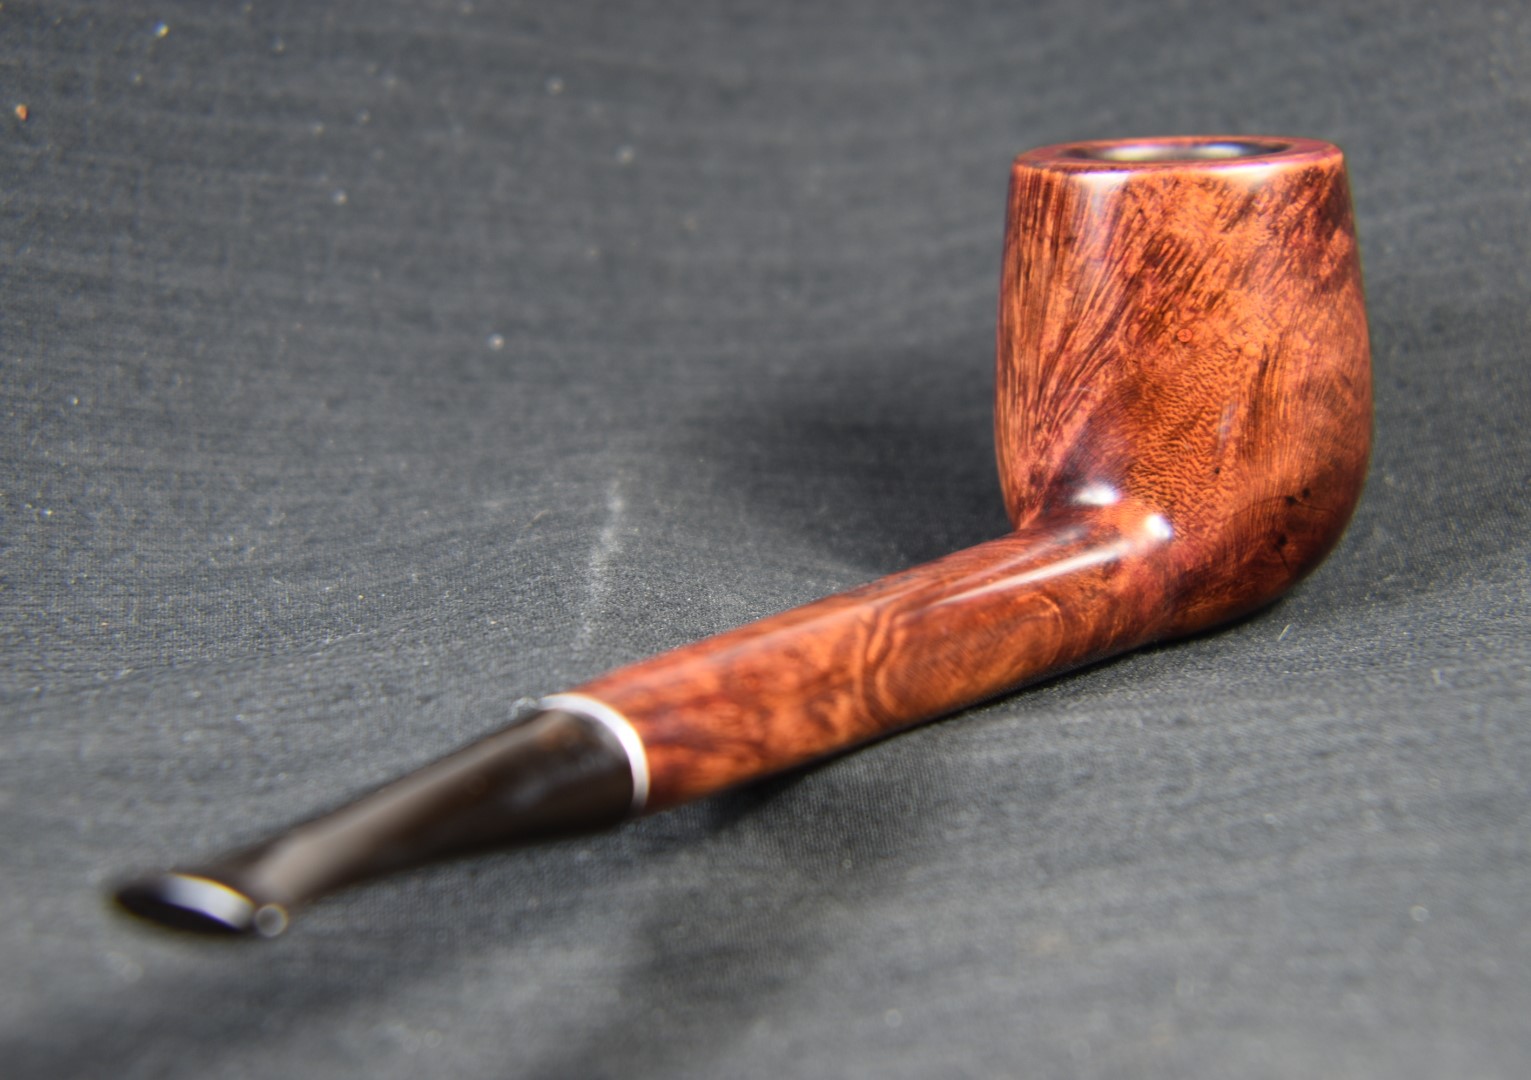


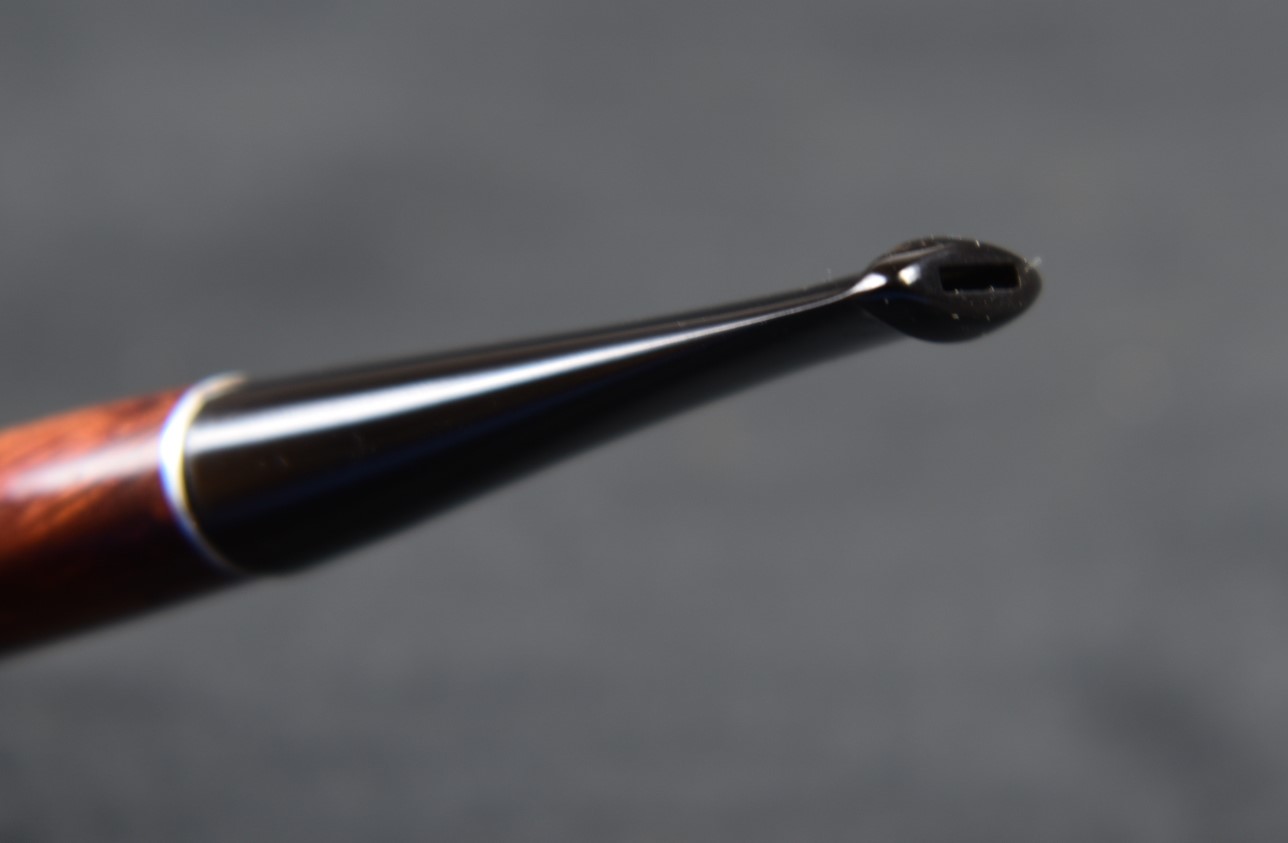
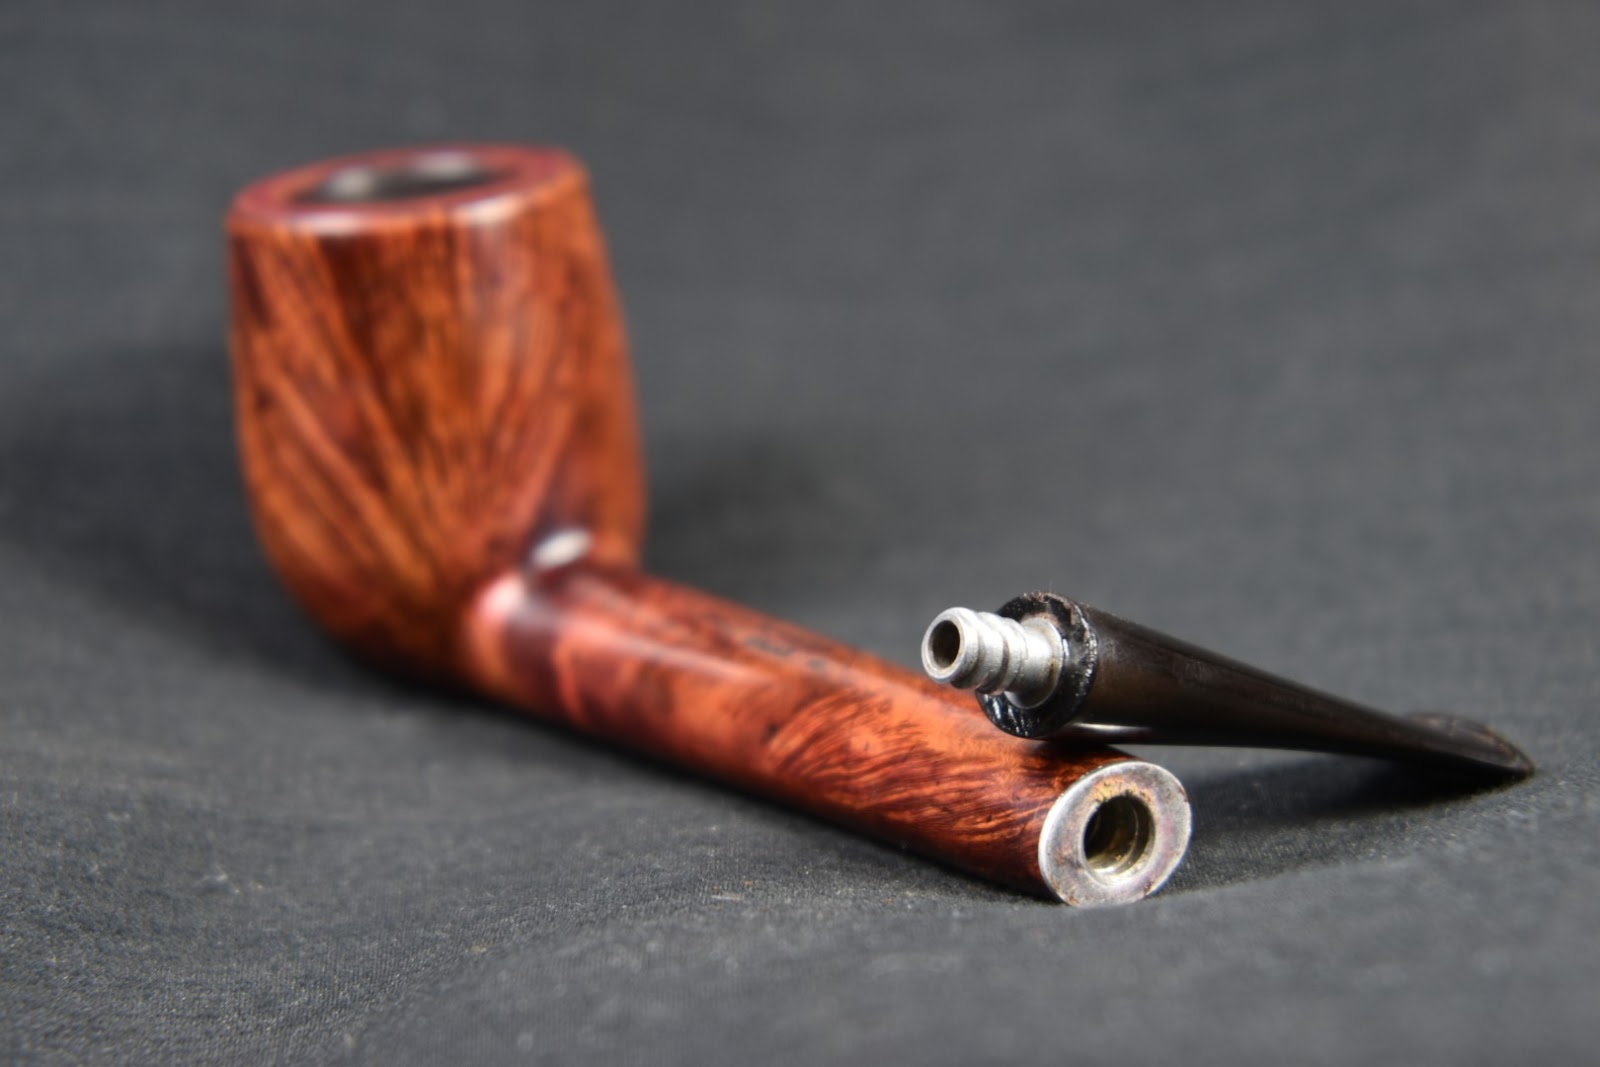


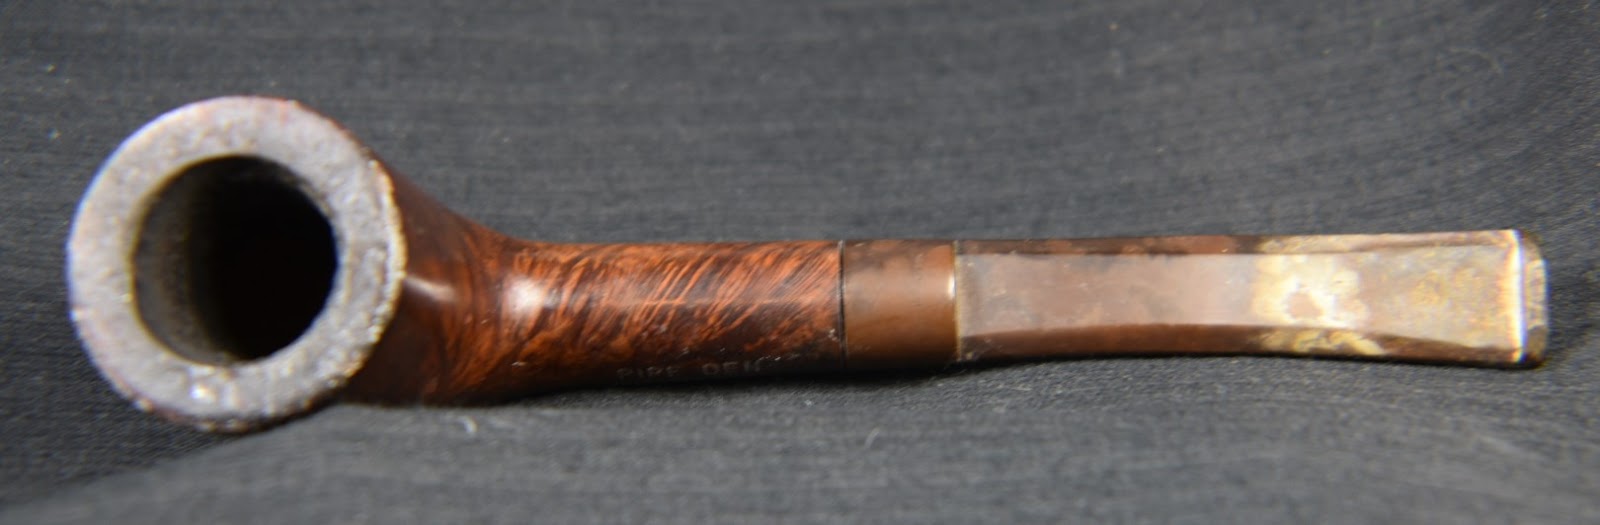

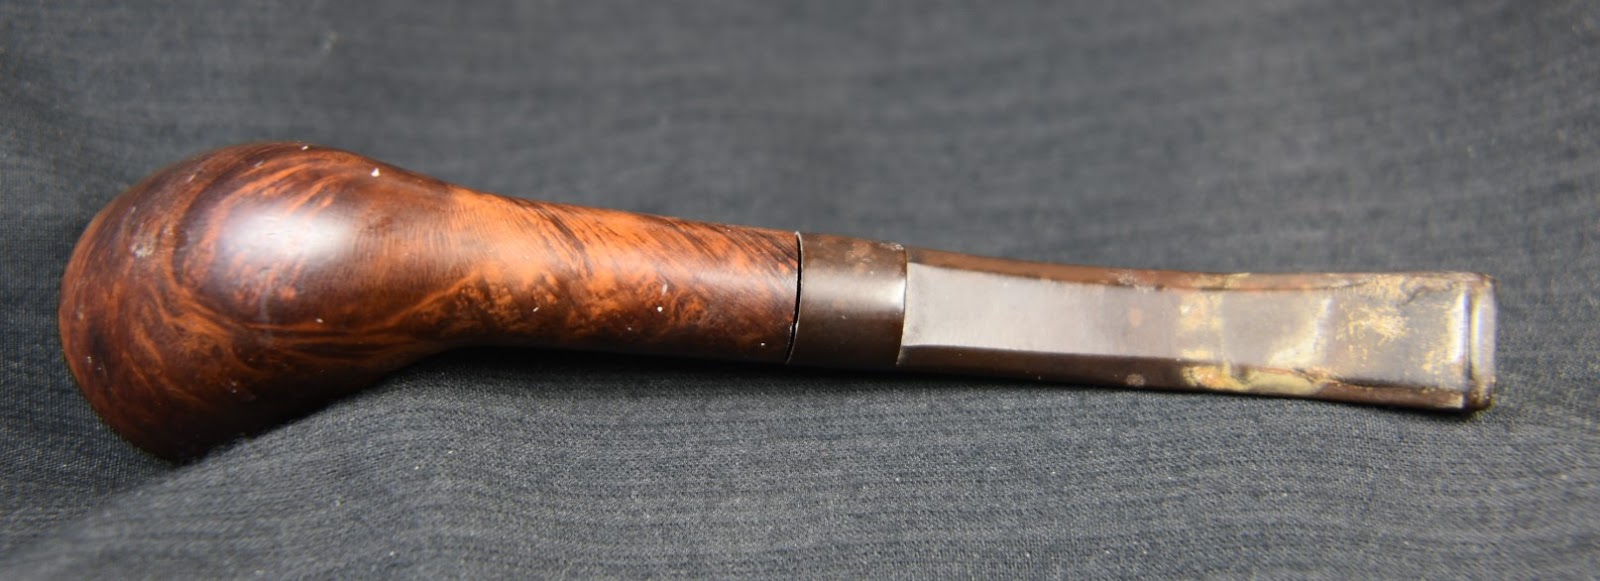
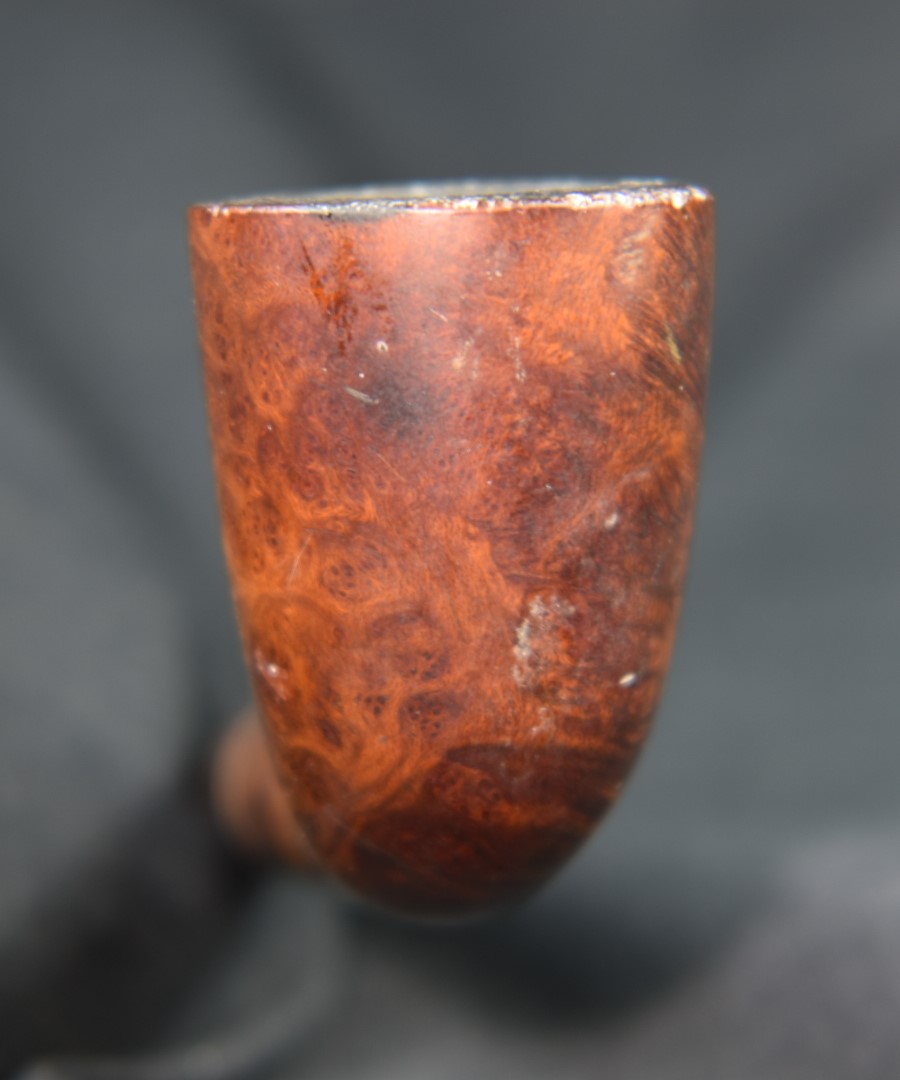


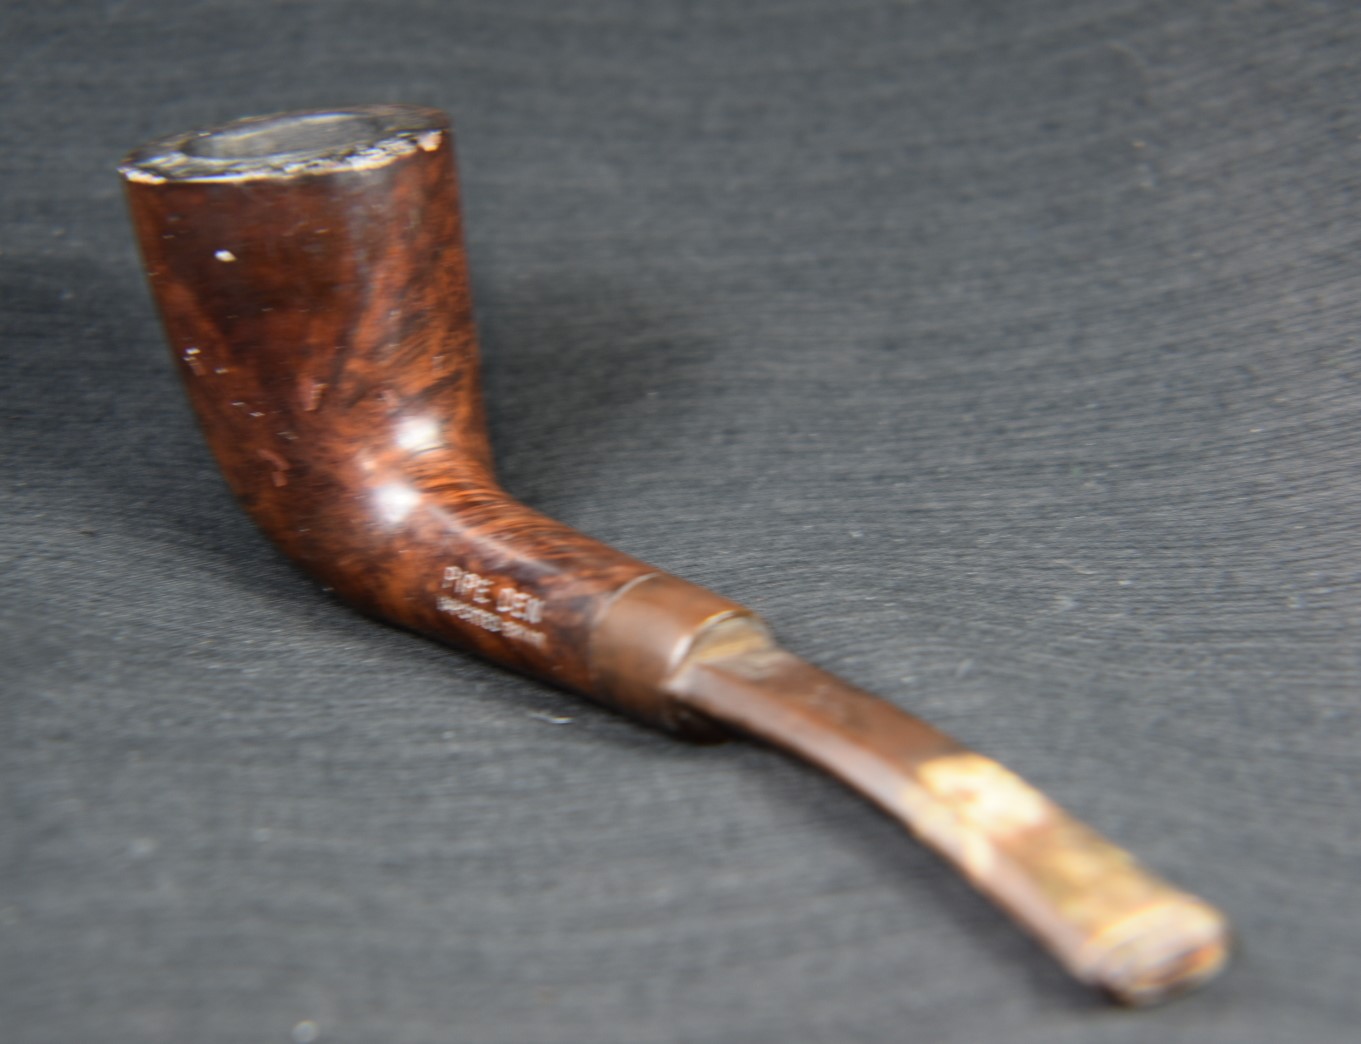
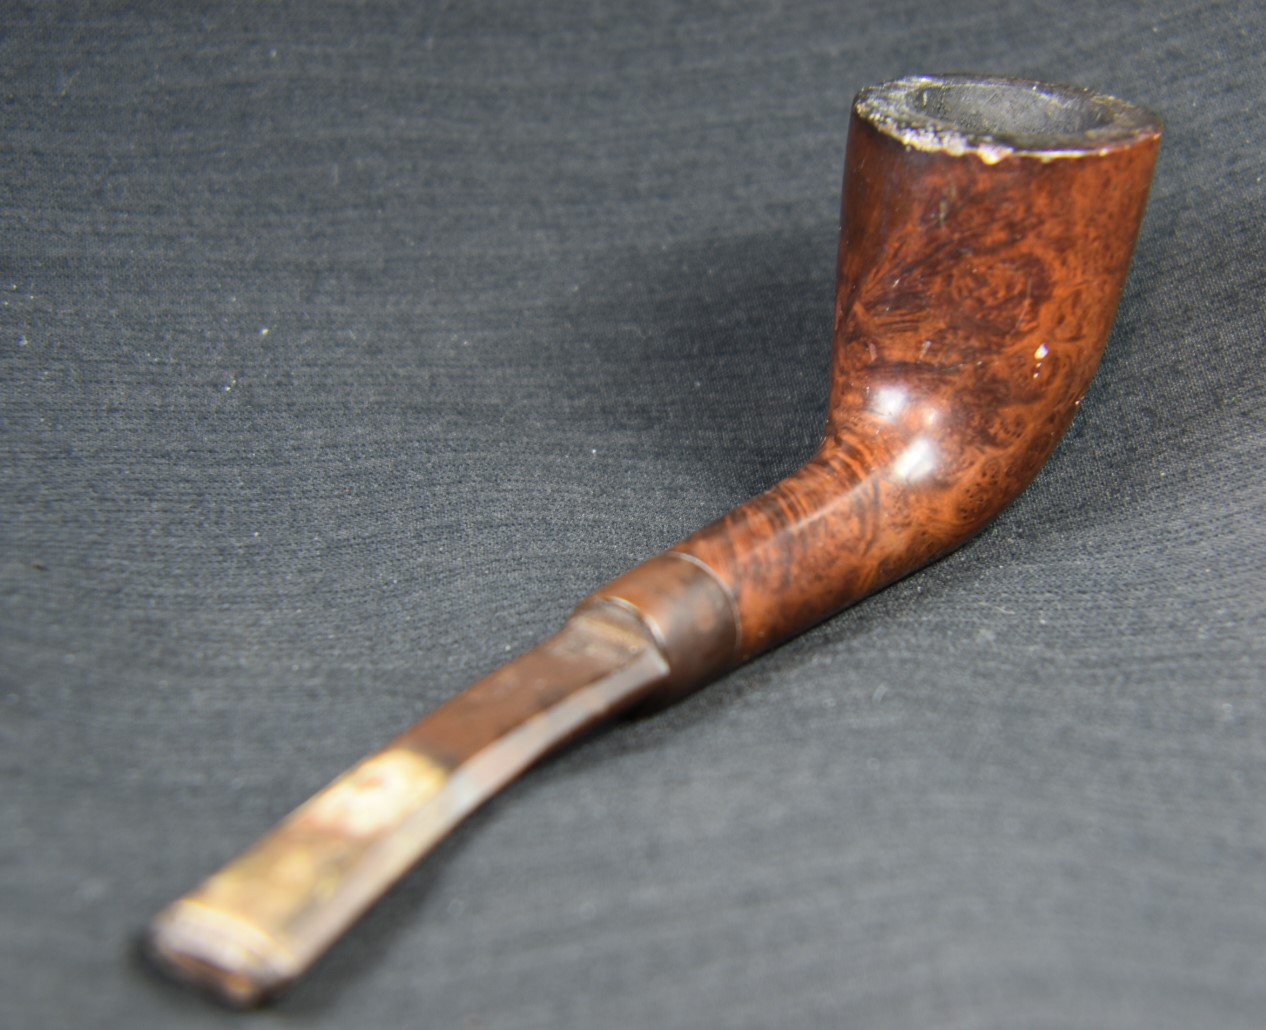


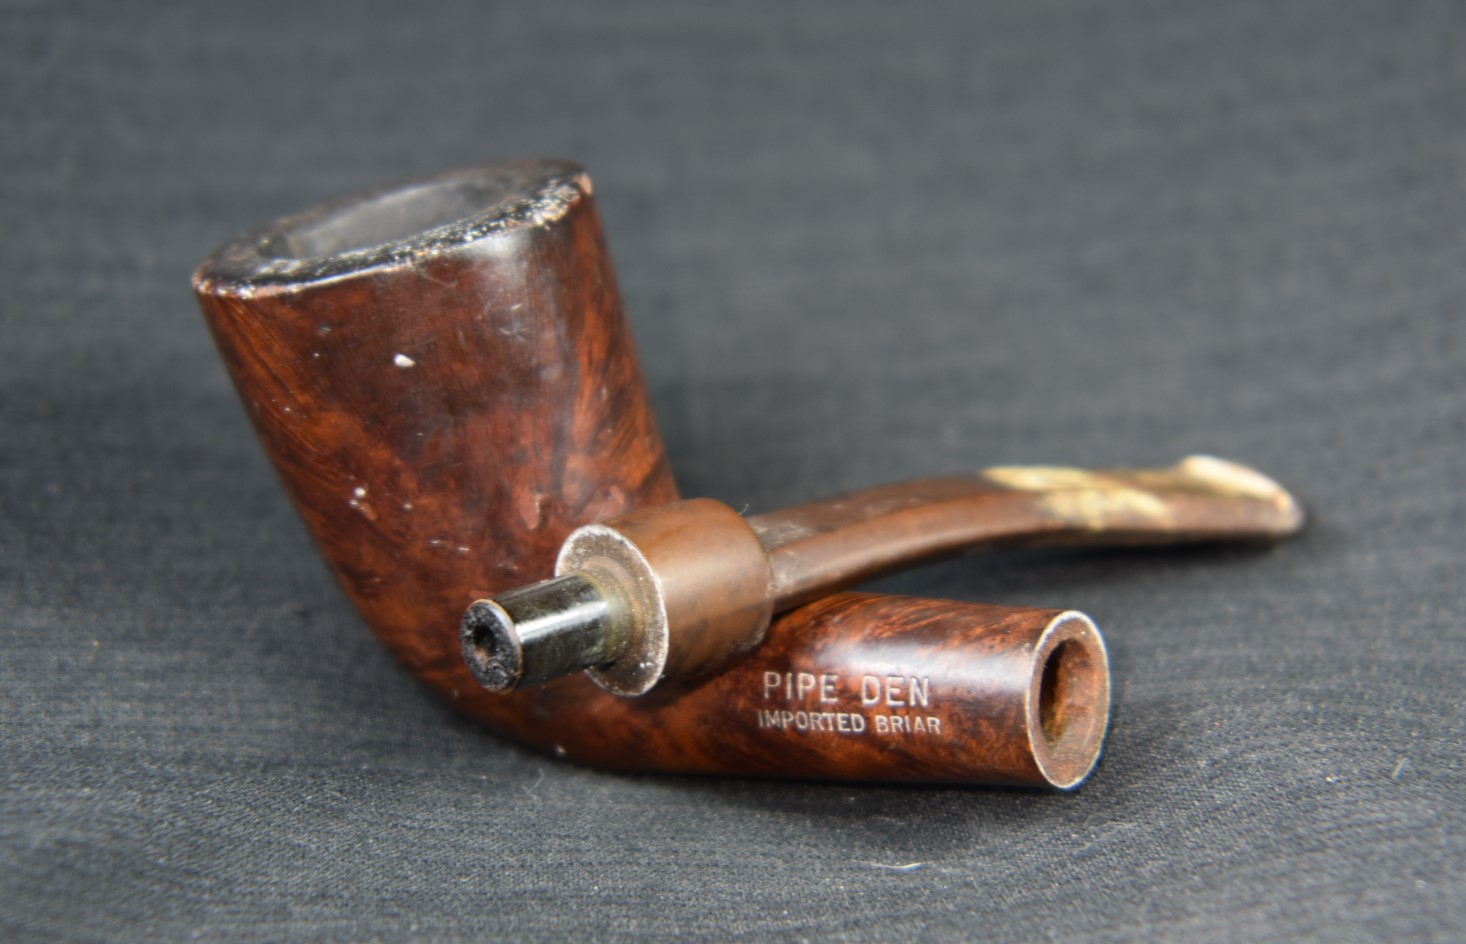
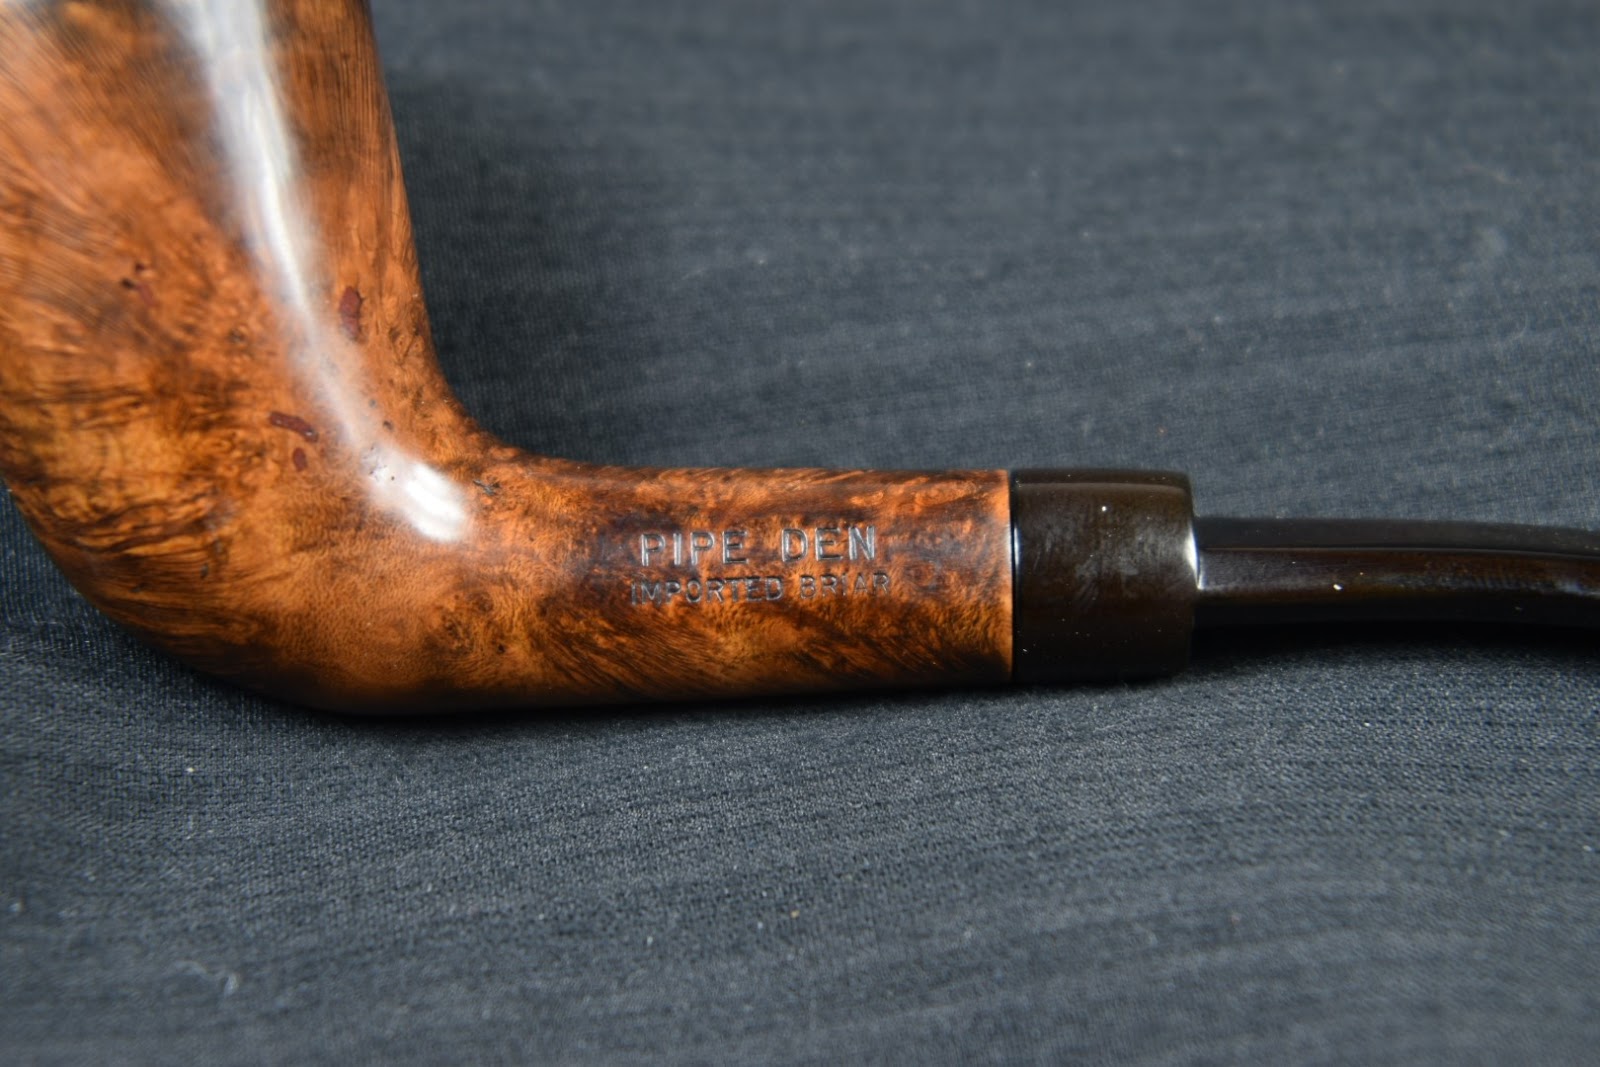

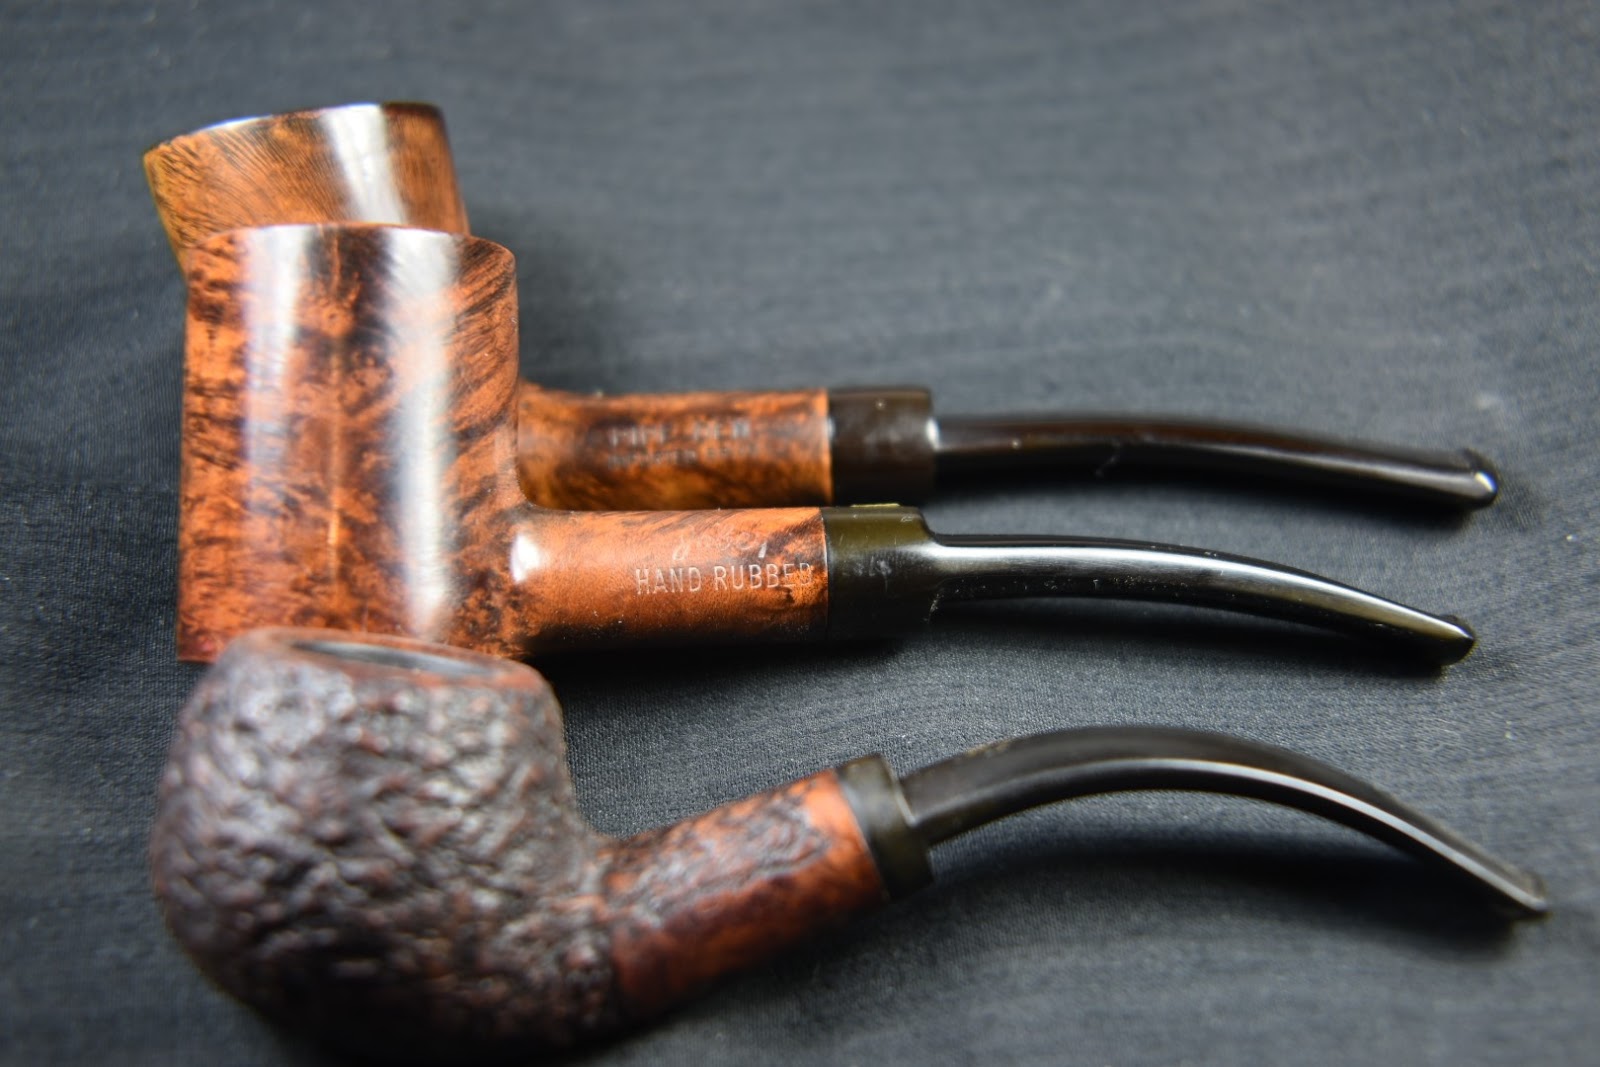 The quality of briar and the original stain color also match quite well. Given those last two qualities are hardly good indicators of a shared heritage but they do look similar. When looking up Jobey on pipedi.org, the first sentence of the entry says, “English – American – Danish – French… Sadly, solid information about Jobey is scamt…”(