
Photographed and written by
John M. Young
I have been wanting to practice my skills with horn and bone lately. Unfortunately, both materials are slightly more difficult to find nowadays. How could I resist this Mokin prince that popped up on eBay in early December of 2023? I saw the seller was from France and wondered how in the heck shipping was only $6? When the auction was won with only a $7 dollar bid I felt like I’d like a jackpot. A weird aluminum stinger (I like weird), horn stem, pretty grain, great shape, unfamiliar maker, great price, what wasn’t to like? Well, it took a couple of weeks to arrive, got to love the delayed gratification but, arrive it did. The pipe was stamped MOKIN within a circle over RESERVE on the left shank. The right shank had the number 7706. The stem was stamped with a white painted MOKIN circled. This stem logo looked to be embedded into the horn and painted. I found that interesting, not knowing much about the properties of horn. Here are some photographs of the pipe as it appeared before any work:


Now, I cannot say that I am a “green” or “sustainability” minded guy though, I have kept an active compost pile since 1998. That is more due to me being too cheap to buy someone else’s dirt for the garden. I find the idea of natural-ish materials for pipes is interesting. This pipe did not look like it would require a tremendous amount of work. Sure, a good cleaning, reaming, stem restoration but, overall it looked good.
Background
I have restored a couple of French pipes with similar aluminum tenons over the past year: A Country Panel Bent Rhodesian Restoration and A Super Majestic System V.D. Billiard Restoration. All three of these pipes have a cork lined mortise. I pondered the reasoning behind such a mortise and tenon. All I could come up with is that the heating and cooling of the aluminum tenon created greater expansion than the expansion of the shank’s briar. To allow for this the maker used a cork liner to absorb the aluminum expanding without stressing the briar. Well, that is thought anyway. For whatever reason it would certainly have been a labor intensive structure and was surely more costly than just a standard mortise and tenon. After thinking about this I turned to researching the maker – Mokin.
I began with a search for Mokin at pipephil.eu, the usual stop for all things logos. Here I found the following:

(Ml-Moq — Pipes: Logos & Markings). That diagram really made me want to find a “Neverbreak” pipe and restore it. Refocusing on the pipe at hand and attempting to subdue my attention deficit hyperactivity disorder (ADHD) I thought back to the other French makers who employed the cork lined mortise. The small French flag, in the upper right, helped confirm my French connection but was far from definitive.
Next, I turned to pipedia.org and searched Mokin. No results came up. I tried “Neverbreak”, “HPF”, “Brevete” and “SGDG”. Only Brevete returned a lead.

LMB in 1911, rue du Mont-Thabor, assures that “his systeme is recommend by the Medical profession, the efficient only one positively imbouchable, condensing 38 % of nicotine, getting clean avtomatiquement, and approve by the Societe d’ Hygiene of France”. He adapts the conduit in plexiglass transparent has the modern pipe by 1960.” (LMB – Pipedia). The photos from the pipedia.org site were interesting and the brochure dates were from the correct era, whichI suspected the pipe was made (1911-1930s). I will include some of these images below.


Above images of brochures and pipe are from (LMB – Pipedia).
Nothing from the LMB information looked like it pertained to this pipe other than the intricate nature of the aluminum stinger.
The research on this pipe was looking to be limited. I tried a general Google search for “Mokin tobacco pipes” and came across a listing from a Worthpoint auction with no photographs and one restoration of a Mokin Corsair pipe by Anthony Cook on Steve Laug’s rebornpipes.com (https://rebornpipes.com/tag/mokin-corsaire-pipe/). The restoration by Mr. Cook was nice but lacked any historical information on the maker. It did however show a photograph of the logo for affirmation of the logos and stampings of the pipe. The Corsair pipe also sported a bone stem and had a 4 digit number.

(https://rebornpipes.com/tag/mokin-corsaire-pipe/).
All of this leads me to the conclusion that this lovely Mokin prince was the product of a French maker prior to World War Two. If you have any additional information pertaining to the brand please feel free to include it in the comments.
The Restoration
This little round bottomed mademoiselle made her way to the bench and received a cleaned denim piece.

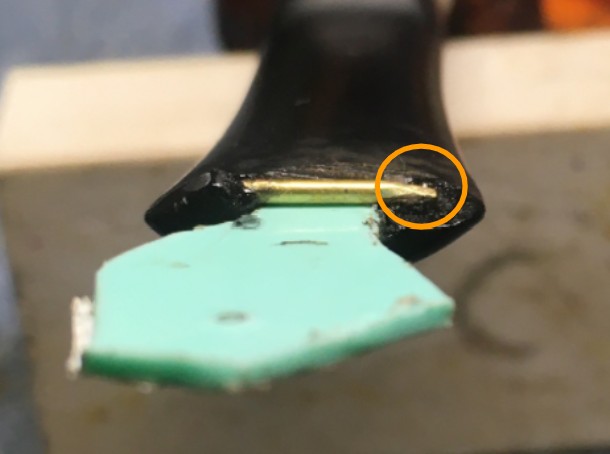
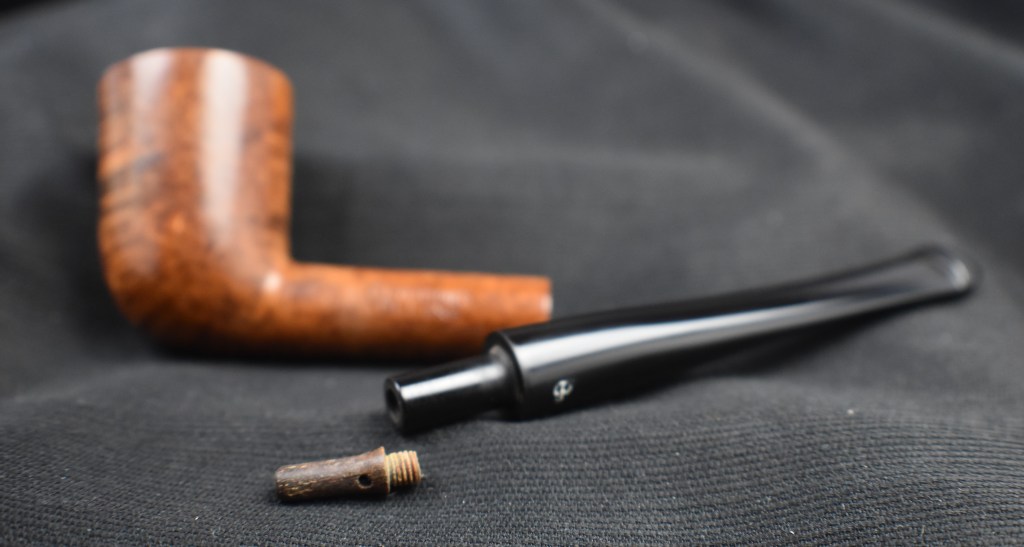
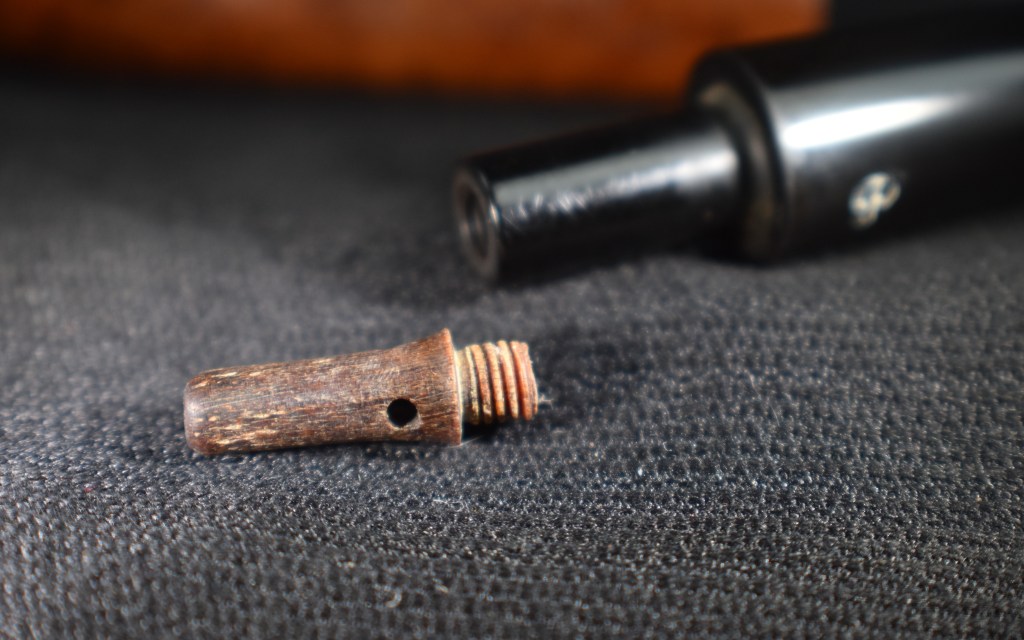
The first task was relieving the stem of its stinger. I quickly discovered that it was threaded. The threads were held fairly tightly with smoking residue and aluminum oxidation.

The stinger was placed in a medicine cup with 1bout 10 ml of ethyl alcohol. The alcohol was also used to dip bristle pipe cleaners for cleaning the stem airway.

After cleaning the interior of the stem I started to removed the tooth chatter with a small flat file. This slightly reduced the horn around the dents.

The same process was repeated on both top and bottom.

The filed areas were lightly sanded with 320 and 400 grit sanding sponges and the aluminum stinger was cleaned.

I used brown cyanoacrylate (CA, super glue) to fill the dents in the horn stem. The drying.curing of the CA was sped up with the use of a CA accelerator. The spots were filed and sanded smooth with a 400 sanding sponge

I then turned my attention to the reaming of the tobacco chamber. The PipNet, Smokingpipes Low Country Reamer and General triangular scraper were used to remove the light cake from the chamber.

The chamber appeared free of any damage due to heat.

The stummel was then taken to the sink for a scrubbing with undiluted Murphy Oil Soap and a nylon scrub brush. The soap was rinsed with warm water and the stummel dried with a cotton hand towel.

Returning to the workbench, the stummel was wiped with a make-up pad wetted with 95% ethyl alcohol. Little color came off on the pad. There did appear to be some type of finish remaining on the stummel.

I wetted another make-up pad with acetone and repeated the wiping. This time more color was removed.

A light sanding of the stummel and another wipe with acetone removed the remaining finish.

The only remaining finish was around the stamping. I avoided this area with the sanding but you can see it in the photo below.

Next came the removal of the old fills. There were a few scattered around the stummel.

The old fills were picked out using a fly tying bodkin.

The plan was to apply a small drop of brown CA with the bodkin, press sone briar dust into the wet CAthe sand the new fill with a sanding sponge. Topping of the new fill would be done with another dab of CA, if needed.

Below is a photo of the new fill prior to sanding.

With the fills redone, I taped over the stamps on both sides of the shank and the stem with masking tape. I wanted a tape that was thinner than painter’s tape and tried to cut it as close to the stampings as possible.

Before sanding I wanted to clean the stummel airway. I started with cotton swabs dipped in 95% ethyl alcohol , bristle pipe cleaners and a shank brush..

The cork shank liner made accessing the airway slightly problematic. I did not want to get too aggressive with the cleaning in fear of damaging the cork. I have successfully replaced a cork lining but it is a rather tedious process which I hoped to avoid.

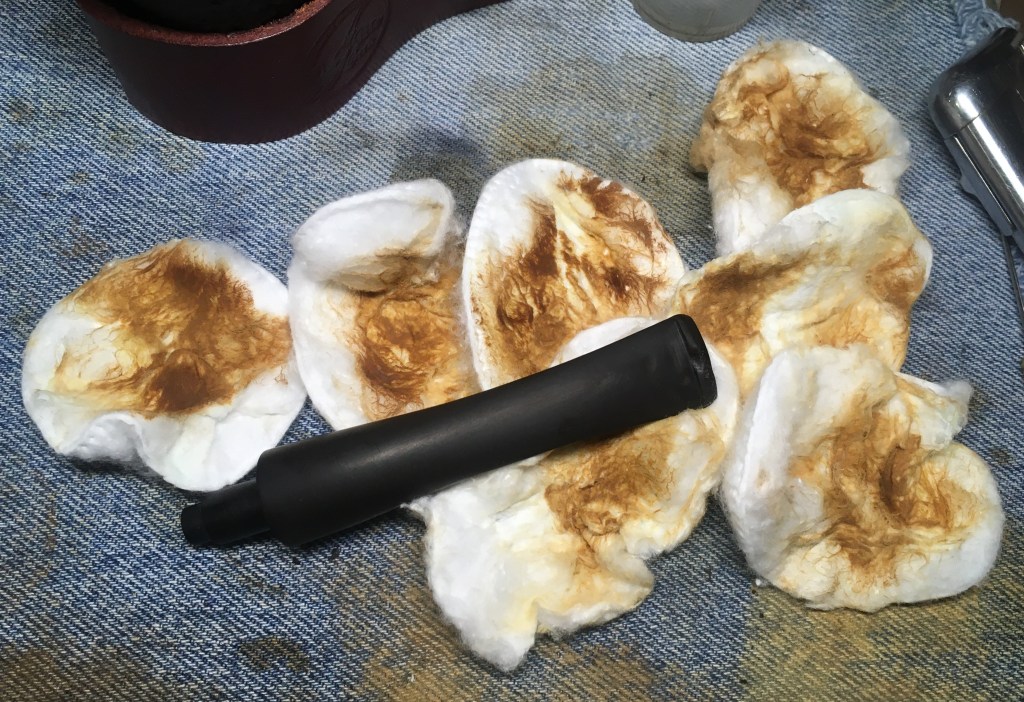
I thought that a cotton alcohol treatment would be a less vigorous way to soften and remove the smoking residues from the airway. Instead of packing the airway with cotton I folded a fluffy pipe cleaner 3 times. This filled the airway nicely.

The bowl was stuffed with cotton as usual.

Using a pipette, I saturated the cotton and pipe cleaner with 95% ethyl alcohol.

A little bit of overflow showed that the cotton was saturated. The alcohol was allowed to sit and evaporate overnight.

The next day the alcohol had dissolved the smoking residues which inturn had migrated into the cotton/pipe cleaner as the alcohol evaporated.

The cotton and pipe cleaner were removed.

The cleaning proceeded while the residues were hopefully still softened by the presence of the alcohol. There was still a good deal of yuck (that is the highly technical term for accumulated smoking residue used by highly trained pipe restorers) remaining in the airway. Many cotton swabs, some scraping with a dental scraper, some scrubbing with a folded bristle pipe cleaner, some more scrubbing with a shank brush… Well, you get the idea.

With all the scrubbing I feared that the cork lining may have suffered some catastrophic trauma. I tried to seat the stem and assess the damage. It fit fairly tight and sealed well. Yay, no sign of impending cork replacement was needed.

The sanding of the stem and stummel together proceeded. A sequence of sanding sponges in grits from 400-3500 was done with the pipe wiped with a make-up pad wetted with alcohol between each sponge to remove sanding debris.

The pipe was then worked with a sequence of micro-mesh pads 4000-12000. The wiping between pads was done as with the sanding sponges.

The pipe, both stem and stummel, were then coated with Before and After Restoration Balm and let alone for about 8 hours. Normally I only leave them for 20 minutes or so but I had errands and stuff to do.

Upon returning to the workbench, I wiped the pipe with an inside out athletic sock to remove the remaining Restoration Balm.

The stem was then polished using Before and After Fine and Extra Fine Polish. The polish was applied and hand rubbed with a soft cotton cloth.

The last steps were to apply several coats of carnauba wax with the buffer followed by a hand buffing with a microfiber cloth.
I was very pleased with how well this restoration went. The shape is becoming a favorite and the horn stem just makes it more attractive. Kind of like this was the original cumberland before the Dunhill boys made a synthetic version. The briar grain is attractive and the stem is both visually attractive and feels great while clenching. The pipe smokes very well, yeah, I think I’ll keep this one in the collection unless someone else really wants it. Don’t worry, I’ll clean it up again for you. The dimensions of the Alpha Calabash are:
Length: 5.47 in./ 138.94 mm.
- Weight: 1.29 oz./ 36.57 g.
- Bowl Height: 1.37 in./ 34.80 mm.
- Chamber Depth: 1.20 in./ 30.48 mm.
- Chamber Diameter: 0.69 in./ 17.53 mm. (Conically bored diameter is at the top)
- Outside Diameter: 1.57 in./ 39.88 mm.
I do hope that you have found something here useful to your own pipe care, maintenance or restorations. If you like this sort of thing, please click the like and subscribe buttons. Thank you for reading the ramblings of an old pipe lover.
Below are some photos of the completed Alpha Calabash pipe.


 (
(


 A 120F for “Flat” with an oval shank
 A 417 Donegal Rocky Sterling Band


Leave a comment