Geometry, design and art are not things that I have ever been trained in. Sure, I took an art history class in college and loved it but that could have been just for the nude women. I was 19 years old after all and in 1985 the internet was not a source of said nudies. Back to the aesthetics of pipes; panel shapes with their flats and curves draw me to them. I cannot explain why, perhaps it is like they are providing some order to the chaos of fire and smoke or, maybe they just look cool. Whatever the case may be, this panel caught my eye and the stamped name on the shank made me laugh. SMOKES STOGIES SNUFF AND STUFF. I made several assumptions here; the stamp referred to a tobacconist shop, the “SMOKES” referred to cigarettes, the “STOGIES” to cigars, “SNUFF” the nasal variety not the films and “STUFF” the catchall category. I definitely wanted to visit that shop as I am a snuff taker/pipe smoker who has not seen snuff in a brick and mortar establishment in more years than I can remember. I am not sure where this pipe came from. It was most likely part of an estate lot. My record keeping is poor at best and the secretary continues to not come to work. This is probably due to the fact that I’ve never hired one. The below photos are of the Smokes Stogies Snuff and Stuff pipe prior to working on it.
So many issues. The glaring ones are; the cloudy clear coat, oxidized stem, hole in stem and the tobacco still in the bowl. Well one of those will be easy to fix.
Whew, that’s a relief.
Background
I think it is safe to say that Smokes Stogies Snuff and Stuff is not the original maker of this pipe. A quick internet search did not produce the tobacco shop that I had imagined. I envisioned a castle-like structure with old world charm nestled in the historic section of an old New England town. Then I found this matchbook. Anchorage Alaska! That completely edited imagined scene. Now I envisioned rustic sea-side tobacconist along a wharf with a fleet of fishing boats moored. Instead of a wooden cigar-store Indian statue there was a haggard sea captain with a pipe, wooden leg and a harpoon in hand. Oh, the vivid mental images were running wild.
Alas there matey, little could be found of this tobacco shop. Fortunately there were the names of the proprietors on the mathbook – Mike Plipton and Wades Osborne. There was also the address. Hmm, Penney’s Mall didn’t sound like it fit my wharf scene and a search 412 W. 6th Avenue, Penney’s Mall Anchorage Alaska 99501 completely ruined my imagined scene. The below photo is of the Anchorage JCPenney. Not a fishing boat to be seen.
I then searched out Anchorage tobacco shops currently in business, hoping to find someone who knew of or about Smokes Stogies Snuff & Stuff or the proprietors. One of the shops that I contacted, via their website, was G&P Fine Tobaccos Limited (https://gptobacco.com/). I received the following email reply:
“Our shop started in the late 60’s and we know of this shop.
It was a small shop in the JC Penney’s mall in the mid 80’s and was very short lived according to our shop oracle (who starting working our group of shops in the early 80’s).
They were in business for about 2 years and abruptly closed
Ill let you know if he remembers more. Ill be meeting with him again soon
Best regards,” (personal communication, email)
A second avenue of research led me to the Alaska Pipe Club Facebook page. I posted an inquiry and a few photos of this pipe and asked if any group members had additional information. I received a few replies from kind and knowledgeable Alaskans.
From G&P / Tobacco Cache this morning: Our retired guys chimed in this morning with some history. It was a shop that formed in the mid 80’s in the penny’s mall. They recall it being in business for a couple years aprox 2- years then it abruptly closed. Hurriedly for some reason that no one recalls. No records exist on it aside from advertisements such as the match covers. Nice find. Always cool to discover shop stamped pipes. We have collected a few from the earliest Tobacco Cache and Pipe and Pouch FAIRBANKS, but haven’t seen much other. Happy collecting.” (Facebook, Alaska Pipe Club group chat)
Well, the approximate date of the pipe seemed quite certain now who made it was inquisition. Unfortunately, there was no shape number stamped on the pipe. I had restored a Telford’s Canadian pipe earlier this year. Telford’s is a tobacco shop outside of San Francisco, California. In talking to the Owner, he told me that the pipe I was restoring was made by Comoy’s and stamped by them for sale in his shop. I started looking at Comoy’s shapes for a panel billiard with a square stem. According to pipedia.org Comoy’s did produce such a pipe but there was no photograph or image to confirm the exact shape or the number of panels.
I posted my proposed manufacturer in the Alaska Pipe Club group and received the comment that Kaywoodie also made a very similar panel shape. The reply is below:
John M. Young it certainly looks like a GBD. I collect GBD’s and love them. Panels are super rare to fine. Also note that Kaywoodie made panels like that (identical shape) as well as GBD
I searched the Kaywoodie shapes and found a match from their 1968-69 catalog. Kaywoodie No. 44 Octagon Apple did appear to have the correct shape but it lacked the saddle stem and did not list the square shank.
Based on my limited searching I think it is a fairly safe assumption that the Smokes Stogies Snuff & Stuff pipe was produced by GBD in the mid 1980s.
The Restoration
As usual the pipe received a clean denim piece as a work surface.
I cleaned out the stem which surprisingly, was quite clean. 95% ethyl alcohol and bristle pipe cleaners were used and the stem was lightly sanded to remove the surface oxidation.
Next, a pipe cleaner was inserted into the tenon to act as a hanger for the stem as it was submerged into Before and After Extra Strength Deoxidizer.
The stem in the solution for 3 hours.
I hoped that the clear coat on the stummel was a shellac which would be easily removed with 95% ethyl alcohol. I tested this with alcohol on a make-up pad. It was not. This was not surprising since the pipe was of a more recent make. Though being lazy, I had hoped.
The reaming tools were assembled: Kleen-Reem, Smokingpipes Low Country reaming knife, General triangular scraper and a wood dowel wrapped with 220 sandpaper.
The Kleen-Reem did the majority of the work in removing the cake from the tobacco chamber. Minimal scraping was needed. I then sanded the interior to bare briar and saw no sign of any damage from heat to the chamber.
The stummel was scrubbed with undiluted Murphy Oil Soap and a medium stiff toothbrush. The soap was rinsed with warm water and the stummel dried with a cotton dish towel.
Since the clear coat was not soluble with alcohol I opted to soak the whole stummel in acetone to remove the finish.
The stummel wanted to float higher in the acetone than I like so an empty brass pistol cartridge (brass band doner) was used to weigh it down.
30 minutes later the stummel was removed and wiped with a make-up pad wetted with acetone. The finish had been removed but so had a good deal of the Smokes Stogies Snuff & Stuff stamp. I have found that some manufacturers will stamp on top of the clear coat rather than stamping the briar then applying the clear coat. This is more often done on lesser quality pipes. In these cases removal of the finish will also remove the stamping.
While the yuck, also known as smoking residue, was still soft from the acetone bath, I worked on removing it from the shank. This was done with a nylon shank brush, cotton swabs, bristle pipe cleaners and 95% ethyl alcohol.
The stem was removed from the Deoxidizer (deox) and allowed to drip the excess solution back into the jar. The not yet patented Deoxidizer Drip-O-Matic consists of the pipe cleaner hanger wedged into the lid of a taller bottle.
After dripping, the stem was vigorously rubbed with a coarse shop rage to absorb the remaining solution and to abbrade some of the loosened oxidation.
Below you can see the oxidation that was removed with the shop rag.
The stem was looking much better though slightly pitted by losing the oxidized rubber.
I then used several make-up pads with Soft Scrub cleanser to further rid the stem of oxidized rubber.
The stem was reattached to the stummel to preserve the joint where the two pieces meet. I then lightly sanded with a 400 and 600 grit sanding sponge. This prepared the stem for the rebuilding of material lost to tooth/biting damage.
I roughened the area that was to be rebuilt with 80 grit sandpaper.
A piece of a plastic lid was cut to act as a dam to stop the black cyanoacrylate (CA, super glue) from building up in the airway. The plastic dam was wrapped in several coats of cheap Scotch tape to add to its thickness. The good 3M tape does not work as well as the cheap stuff at resisting the CA and the CA drying accelerator used to speed the curing of the CA.
With the dam inserted into the mouthpiece, black CA was layered onto the button area. This CA was then spritzed with a drying accelerator. Several thin coats are preferred over one thick coating as the accelerator does not penetrate into a thick layer.
Below, you can see how the deeper dents were filled before the area was covered.
The new CA patch was then filed, smoothing the surface. Sanding sponges further smooth and remove the lines from filing.
The shiny spots on the photo below indicate places where additional CA needed to be applied and material built up.
This process was repeated until the damage was no longer obvious.
I wanted to give the stummel a little bit of a contrast stain to bring out the briar grain.
The stummel was pre-heated with a heat gun to open the pores of the briar. A duct-tape wrapped fishing bobber was inserted into the tobacco chamber to keep dye from entering. Most folks use a wine bottle cork for this but I’ve found that not drinking severely limits the availability of wine bottle corks.
The black Fiebing’s Leather Dye was applied with a folded pipe cleaner and flamed with a lighter.
The stummel was then wiped with a paper towel to remove excess dye.
I then took the stummel to the buffer where the new black dye was buffed from the surface of the pipe with rouge compound. Below you can see one panel buffed. The dye penetrates the softer grained briar more than the harder grains. When buffed off this contrast accentuates the grain.
The stem and stummel were then sanded with a series of sanding sponges from 400-3500. Between each sponge the stummel was wiped with a make-up pad dipped in alcohol. The Stem was rubbed with mineral oil and wiped with a paper towel.
The pipe was then worked with micro-mesh pads 4000-12000. Between pads the stummel was wiped with a make-up pad dipped in alcohol. The Stem was rubbed with Obsidian Oil and wiped with a paper towel.
The stummel was given a coating of Before and After Restoration Balm and allowed to sit for 20 minutes.
The Restoration Balm was wiped from the stummel using an inside out athletic sock.
The pipe was then taken to the buffer where it was given several coats of carnauba wax. The final step was hand buffin the pipe with a microfiber polishing cloth to further raise the level of shine.
I would like to thank the folks at G&P Fine Tobacco Limited (https://gptobacco.com/) and the Alaska Pipe Club for assisting with the research for this restoration. If you are ever in Anchorage please pay G&P Fine Tobacco Limited a visit. I think this piece of tobacciana known as, Smokes Stogies Snuff & Stuff paneled, square shank, saddle stem billiard turned out quite well. I was sad to see the stamp not make it through the finish removal completely intact. It is still legible but not with ease. The stem reconstruction turned out well and the contrast dye looks very nice and accentuates the briar grain. The dimensions of this Smokes Stogies Snuff & Stuff paneled, square shank, saddle stem billiard are:
Length: 5.53 in./ 140,46 mm.
Weight: 1.53 oz./ 43.70g.
Bowl Height: 2.09 in./ 53.09 mm.
Chamber Depth: 1.60 in./ 40.64 mm.
Chamber Diameter: 0.73 in./ 18.54 mm.
Outside Diameter: 1.41 in./ 35.81 mm.
I do hope that you have found something here useful to your own pipe care, maintenance or restorations. If you like this sort of thing, please click the like and subscribe buttons. Thank you for reading the ramblings of an old pipe lover.
Loading…
Below are some photos of the finished Smokes Stogies Snuff & Stuff paneled, square shank, saddle stem billiard.
It must be my four years of physical geography/geology undergraduate training that drew me to this pipe. It looks like a rock sample on a stick but I fell in love with it at first sight, scars and all. I remember seeing various examples with various natural rock-like shapes online but this one called to me. The funny part of this story is that I had just seen Steve Laug post in a Facebook group about a great antique store that he came across. I commented something about how the local antique stores in town really needed to “up their game” regarding old tobacco pipes and whined about how the local shops might have a Willard that looks as if it was last cleaned by placing it in a garbage disposal. Yeah, I was a bit jealous. The next day I made my way into town to pay taxes on the house and truck. While there I swung into one of the antique shops and asked if they had any old pipes. Out came the box. Low and behold, there was this Kiko. I was amazed, there were also two Willards that had last been cleaned not with a garbage disposal but with a technique involving chains and a gravel road – not sure how that one works. I don’t think the proprietor of the shop had any idea about the value of the Kiko. His mother was working the counter that day and we had a very nice conversation about meerschaum and how it really was a rock. I left her enlightened and with some cash as I returned home with a Kiko and new stickers on my license plates. When I got home I was able to examine the pipe more thoroughly and in a less excited state. There were no carvings or stamps on the stummel. The stem had the Kiko Elephant near the shank on the left and along the bottom was stamped TANGANYIKA. Below are some photos of the Kiko as it appeared prior to any work.
I’m not sure what the scars on the lower end of both sides were from. I can’t figure why you’d need to squeeze a meerschaum stummel with a channel lock pliers but that is what it looks like happened. The stem was oxidized suggesting that it was indeed vulcanite and had accompanied a previous owner on many a clenching expedition. This was going to be an interesting restoration. The first question: Do I re-carve the damaged spots and make the re-carvings blend with the original or, Do I patch the holes? Either pursuit was a novel idea for me. Research was required.
Background
The first step that I took in researching this pipe was to look up the logo at pipephil.eu. There I found the following:
Turning to pipedi.org for some history of Kiko led to the following entry:
“Kiko, meaning “pipe” in Swahili-Kiswahili to English translation, is probably the best known of the various brands listed below. In East Africa Meerschaum is found in Tanganyika, once known as German East Africa, and since 1964 part of the United Republic of Tanzania. The main deposit comes from the Amboseli basin surrounding the Lake Amboseli. Tanganyika Meerschaum is normally stained in shades of brown, black and yellow, and is considered to be inferior to Meerschaum from Turkey. Eventhough, the raw material is mined by the Tanganyika Meerschaum Corporation and to a large extent used for pipemaking. Uncounted pipemakers throughout the world were supplied with Amboseli Meerschaum, preferentially used for Meerschaum lined briars or leather-clad pipes. In Tanganyika the Kilimanjaro Pipe Company Ltd.” (Kiko – Pipedia)
And, more specifically the Caveman line of Kiko pipes.
“Caveman Fashioned from a piece of natural meerschaum.Every pipe is unique and – is in fact a geological specimen over a million years old.Attractively boxed.” (Kiko – Pipedia)
A second entry at pipedia.org discusses the Tanganyika Meerschaum Corporation in greater detail.
“From Pipes, Artisans and Trademarks, by José Manuel Lopes
Tanganyika Meerschaum Corporation is a company that formed in 1955 by Kenyan businessmen from Nairobi after the discovery of a meerschaum mine relatively close to the surface on Kilimanjaro. The meerschaum is tougher, less porous, and cheaper than the Turkish variety. Another mine was soon discovered in Sinya, in the famous Amboseli Game Park.
To give more depth to the meerschaum story here is a quick lesson in geography.
Lake Amboseli is a rainy season body of water along the shared border of Kenya and Tanzania, northwest of Mount Kilimanjaro. The straight white line on the image below is that border. Sinya refers to the Sinya Mine (https://www.mindat.org/loc-266724.html).
Zooming in on the south western shore of the temporary Lake Amboseli you can actually make out the excavations of the old mining activities. On the below image from google maps; pits, tailing piles, roads etc… can be discerned.
It appears that little to no mining is done at the site today. Several sources say that the meerschaum deposit were close to the surface, not very large and were played out
With all of that information in mind and assuming that the TANGANYIKA stamp on the stem is referring to the country of manufacture (COM) this pipe was made not after 1962.
The Restoration
As I said earlier, I had some research to do regarding how to patch meerschaum. Oh yeah, I decided to patch the damaged area rather than try my hand at carving the meerschaum. The first site I visited was that of Troy W. of Baccypipes (https://baccypipes.wordpress.com/author/troynov1965/). He had a unique “Old Time Meer Lining Repair Method On a Kaywoodie Shellcraft #5651” post describing the use of finely ground chalk and egg white. This patch was described for repairing a meerschaum bowl lining but I figured that it could be used for meerschaum in general. Here is the link to that blog post. A second blog post that I read was by Dal Stanton, published at rebornpipes.com, describing another meerschaum lining repair. That post can be found here. I frequently message Dal about various pipe related issues or the weather in Colorado. I asked him how the repair on the pipe he had done was holding up with use. His restoration was done as a commission for Paresh Deshpande. Paresh has also done restorations at rebornpipes.com (Here is an example by Paresh). Dal messaged Paresh and in very short order replied to me,
“I have heard of no failures! The concoction is pretty sturdy and a great way to salvage Meers.
Dal
I’ll ask Paresh for a report.
Dal
From Paresh:
Hey Dal,
The repairs have held up perfectly well and the pipe is still providing me hours of great smoke. Do say Hi to John for me.” (Dal Santon, personal communication)
That provided the confidence boost that I needed. Egg whites and powdered chalk, who would have thought that would be the solution (pun intended – though it is actually more of a mixture than a solution) to this restoration?
On the next trip into town I stopped by a local dollar store and purchased chalk. The trip was actually for groceries so eggs were already on the list. Returning home I set to work following Troy W.’s procedure. Troy used the handle of a screw driver, apparently he didn’t own a mortar and pestle either. I started with a breaker bar rather than a screwdriver.
The breaker bar worked well but the end was rather small in diameter. I looked in the garage for a larger caliber tool.
A small sledge hammer head with a broken handle seemed like the perfect choice. I don’t recommend that you break off the handle of your small sledge in order to reproduce this procedure. I’m sure the handle would not provide a significant source of error.
The hammer was washed and dried and put to work.
A point of reinforcement here, Troy mentions to finely grind the chalk and when you have it ground then grind it some more. I concur and can state that I did not follow this advice as well as I should have. You really want the chalk to be powdered. Not mostly powdered with some small pieces, like mine was. I am sure that a mortar and pestle is the proper tool for this endeavor and were I still an active science teacher I would have borrowed one from the lab. Drats, foiled again by life choices.
The chalk was mixed with egg white. I added chalk until I had a mixture that was like “soft peaks” when whipping cream. The damaged spots appeared to have plenty of rough surface to enable the mixture to adhere to. I did wipe the surrounding smooth surface with alcohol to remove any surface wax that might not allow the mixture to stick.
The mixture was applied and allowed to dry for 4 hours. I also wanted to test a spot of the mixture to see how I could stain it in order to blend the patch with the existing meerschaum. I placed a small blob on a scrap of cardboard and set it aside to dry. I put the unused mixture in an airtight container and refrigerated it.
Once dry the patch felt “chalky”. I don’t know what I was expecting, perhaps more “dried eggy”. The numerous air bubbles had also left pours that I was not happy with. You can see the bubble very distinctly on the dried test blob.
Hmm, I think I needed more chalk in my mixture to make it less liquid and more like putty. I added more chalk. I lightly sanded the dried patch in preparation for a second application.
This 2nd application was applied to both sides simultaneously. The mix was thick enough that It would not drip, had no air bubbles and I could work it more like a putty. “Living and learning” might become my new life motto.
I let this application dry for about 30 minutes then tried to add some texture to it in an attempt to match the existing texture.
Time to test this blob. I thought that I would cover ½ the blob with beeswax to see how the wax colored the patch then try painting the other half with a green tea I was drinking to see how that changed the color.
The first part of the plan worked as planned. ½ the blob was painted with hot beeswax.
The plan went bad when I used the heat gun to melt the beeswax and allow the excess to drip off. It did drip down but the force of the hot air also pushed the remelted wax up onto the unwaxed portion of the ½. Oh well, my plans frequently have difficulties with reality.
There was a slight yellowing of the patch with the application of the beeswax. This was good but not quite the color change I wanted. The texture also changed significantly. The blob was no longer chalky, it was much more like the meerschaum. I think the term in meerschaumy.
I smoothed the mostly dried patch with 400 wet/dry sandpaper and tried the green tea stain. The tea immediately resoftened the patch. Hmm, – note to self, dry time seems important. The tea did seem to color the patch successfully. I set the stummel aside to completely dry and harden, overnight, in this case.
The next day, I began melting the beeswax. I have decided that I really need one of those electric candle maker wax heating pots. Until I do get one I will continue with this system I devised: An aluminum pan with water, a small canning jar with beeswax and a stove top. I like the hot water bath because I can’t overheat the wax getting it to its flashpoint and once the wax is melted I can turn off the flame and the hot water will keep the wax liquid for several minutes.
I heated the stummel with the heat gun preparing it for the wax that I would be painting it with. I painted the entire stummel with melted beeswax. I was amazed at how much wax the meerschaum absorbed. Nearly none of the was applied dripped into the catch tin.
I started working on the stem. The tooth chatter was filed and the stem sanded to remove the hardened oxidized surface.
The stem was then placed into Before and After Extra Strength Deoxidizer (deox). Due to the long stem the jar had to be sealed and placed at an angle to allow the stem to be fully submerged.
Several hours later the stem was removed and allowed to drip excess solution back into the jar.
I used a coarse shop rag to wipe and hand buff the remaining solution from the stem.
The coarse material of the rag both absorbs the solution and acts as an abrasive to remove the newly softened oxidation. The dark residue can be readily seen in the photo below.
The stem was then scrubbed with Soft Scrub cleanser on make-up pads.
At this point I used painters tape to mask the logo and stamp then sanded the stem with sanding sponges in grits of 400-3500. Between sponges I rubbed the stem with mineral oil and wiped it with a clean dry paper towel. I failed to photograph this so I guess you will just have to believe me.
Before moving on to micro-meshing the stem I wanted to repaint the logo and try to paint the TANGANYIKA stamp.
The letters were faint and proved to to take well to the painting. I didn’t see any evidence that they ever had been painted so this was not a great loss. The elephant had been slightly degraded with the removal of the oxidation but remained accepting of the paint. The stem was then polished with micro-mesh pads 4000-12000. Between each pad the stem was rubbed with Obsidian Oil and wiped with a paper towel.
The stem was taken to the buffer for a final buff with Blue Diamond compound. The stem then received several coats of carnauba wax. The stummel was not waxed with carnauba since it had just received fresh beeswax.
This was a fun restoration. It did not turn out as well as I had hoped. The patched spots on the damaged meerschaum are actually quite an eyesore but I learned many things about working with meerschaum. This pipe is not one that will be offered for sale unless someone really wants it.The meerschaum remains a rugged thing of beauty to me even with the blemishes. The stem cleaned and polished nicely and provides a strangely satisfying contrast to the stummel. I was glad that the logo and stamps were preserved. I am also looking forward to another Kiko restoration, hopefully one without the deep scars that this pipe had. The dimensions of this Kiko Caveman are:
Length: 6.83 in./ 173.50 mm.
Weight: 1.34 oz./ 37.40 g.
Bowl Height: 2.33 in./ 59.18 mm.
Chamber Depth: 1.61 in./ 40.89 mm.
Chamber Diameter: 0.72 in./ 18.29 mm.
Outside Diameter: 2.00 in./ 50.68 mm.in line with shank
1.64 in. / 40.18 mm. Perpendicular to shank
I do hope that you have found something here useful to your own pipe care, maintenance or restorations. If you like this sort of thing, please click the like and subscribe buttons. Thank you for reading the ramblings of an old pipe lover.
Loading…
Below are some photos of the finished Kiko Caveman.
Troy W.’s
Chalk and egg white meerschaum bowl lining repair.
Being asked to restore a family heirloom is a flattering and frightening request. Flattered because the owner of the piece thinks highly of your ability to restore the item yet frightening because ethos is a one of a kind item that carries significant personal meaning. In this case personal and historical family meaning as well.
Background
Earlier this month I was contacted via email by a gentleman who had seen a link to my blog on Mark Irwin’s Peterson Pipe Notes. Below is an excerpt from an early email:
“I’m wondering if you do restoration work for others as well as for yourself?
I have an old Peterson System pipe that had belonged to my father’s Uncle, Richard McNamara. He would have bought the pipe while stationed in Northern Ireland as a technician with Lockheed Aircraft. He died unexpectedly in 1943 while still in Northern Ireland.
I intend to pass the pipe along to my nephew. I had sent it to Peterson’s for their assessment to date it and to clean it up a bit. I received a nice note from Glen Whelan, who set the pipe in the 1930’s/1940’s.
So, if you do restorations of this sort, I be happy to have you restore this pipe.”
I asked if it was possible to see some photos of the pipe in question to assess what I would recommend for the restoration. The following five photos were sent by the owner.
The pipe looked to be in very good condition. I replied,
“That is a beauty. I am assuming the Peterson boys told you that the pipe was probably from 1937-1945ish. That would be my guess anyway. Here is what I see that you may want to have restored:
The stem – Looks great. There are some very small scratches around the ferrule. Micro-meshing and a white diamond buff should make it like new.
The Cap – I saw a couple of small dents. The cap can be removed and the dents pressed/tapped out. Then polished and reglued into the original position.
The Stummel – The dings from contact with a rough surface can be 1) filled with cyanoacrylate and briar dust. This will smooth them but will also make for dark spots where each dent is. Or, 2) The dents can be steamed to see if the briar can rebound back. This may lessen the dent but probably not remove it.
The Internals – a general cleaning and yuck removal. “Yuck” is a highly technical restoration term referring to smoking residue. When in abundance, it can be called “yucky”.”
The owner replied,
“Thanks, it is a nice pipe with a special heritage.
All I got from Peterson’s was that it was from the 1930/40’s. But from further investigation I have learned that the 1937-1945 span is correct. Now, I’m assuming that my Uncle bought the pipe new as he was in Northern Ireland from about 1939 to 1943. I have photos of his travels to Dublin, so I’ll further my assumption that he bought it from Peterson’s.
Anyway, i agree with your suggestions about the stem and cap. I saw some crud around the button and the dents on the cap. As for the Stummel, I think I’d just as soon leave the dents as they are. After all, as far as I am aware, only my uncle Richard and I have used the pipe in it’s 80ish years, so, in my mind, it adds a touch of being authentic with continuity. The internals will need a cleaning. I don’t have the pipe in front of me now, it’s packed away in my pipe bin in our RV basement. I’ll pull it out in a day or two and check the bowl etc., but I don’t think it’s too bad.”
We agreed on the work to be done and arranged for shipping. A few days later the pipe arrived and was photographed prior to any work.
Though there was no sign of a shape number stamp, I think this is a 307 shape.
“The 307 is an original Patent bent billiard-shape, shown in the 1896 catalog as shape 9. It has retained its original shape number in the De Luxe version, but was issued in the 1937 catalog as the 307 (2nd quality) / 357 (3rd quality). Since then, it has also appeared as the 9S and 9B (De Luxe), Dunmore System 78 (1978-1983), and the Classic Range 9BC (1940s-1950s) / XL90 (1980s-Present). The 9B dating from the 1940s-1960s (the De Luxe System with a tapered rather than saddle bit) is rarely seen on the estate market. There have been changes in the shape since the 1960s, all toward less “cheeking,” making earlier versions, when available, preferable to those wishing to get back to the first, classic iteration of the shape.” (https://petersonpipenotes.org/146-a-guide-to-system-shapes-1896-2019-part-1-the-300-shape-group/). The 1937 issue of the SYSTEM 2 coincides precisely with the provenance of the pipe.
When I first received the pipe I thought that something had gone wrong like the wrong pipe was shipped. There were no dents on the left side of the stummel. Adding further to my confusion, which is pretty easy to do by the way, was the stem. A Peterson System 2 should have a bone tenon extension or “chimney”, as the Peterson factory folks call them. This tenon was smooth, without threads, and looked to be about 9mm. A closer examination of the pipe and comparison to the photos indicated that it was the same pipe pipe from the initial photos based on briar grain patterns. I could make out well done fills where the dents were supposed to be and there were slight bumps in a newly acquired finish. The finish looked like a lacquer and stain combo which had been sprayed on or maybe a lacquer sprayed onto a still damp stain. It also looked like the stem had received some of the lacquer then had been buffed with carnauba wax.
I emailed the owner with my questions. While awaiting a response I began working on the pipe.
The Restoration
As usual the pipe was taken to the workbench where it was placed on a relatively clean denim piece.
Next the tobacco chamber was reamed using the PipNet and #2 blades. The General triangular scraper and Smokingpipes Low Country Reamers also saw limited action. The chamber was then sanded with 220 sandpaper wrapped around a wood dowel. The sanding resulted in seeing the condition of the briar within the chamber which showed no signs of any damage from excessive heating or charring.
The stummel was then taken to the sink for a scrubbing with Murphy Oil Soap with a nylon scrub brush. The soap was rinsed with warm water and the stummel dried with a cotton hand towel.
Back at the workbench the stummel was wiped with a make-up pad dipped in 95% ethyl alcohol. This removed a good deal of color. Apparently the pipe had received a clear coat of some kind and a recent dye or stain. I could not believe that this was the original stain from the 1930’s or early 1940.
The stem was cleaned out with bristle pipe cleaners and ethyl alcohol and showed that the pipe was being well cared for and cleaned after use.
Oxidation, however, does not care how well a pipe is cared for and attacks at every chance it gets. This stem showed signs of oxidation though not very severe. I decided to remove the oxidation with Before and After Extra Strength Deoxidizer. The stem had a pipe cleaner inserted into the mouthpiece to act as a hanger and entered the deoxidizer solution.
During the reaming, I noticed an off smell from the removed cake. It was not a foul smell, just a slightly sour hint. I decided to give the stummel an alcohol treatment to remove any traces of old smoking and tobacco residue. I packed the tobacco chamber and shank with cotton and filled the respective volumes with 95% ethyl alcohol. The stummel was propped up to allow the alcohol levels to remain level while filled.
The below photo is after two hours of the alcohol treatment. The shank was discoloring far more than the tobacco chamber.
During this waiting time I was able to check emails. Yeah I know, a phone can be used to check emails but I’m old and stubborn. Phones are for calling, texting and photos. Typing is done on a computer. Anyway, the owner had gotten back to me regarding my questions about the condition of the pipe. He had said that he had sent the pipe to Peterson in Dublin.
“Perhaps the boys at Peterson’s did more than I realized. Good on them.”
“I just checked the box in which the pipe was returned from Peterson’s and the extra stem they sent does not match the curvature of the stem in my pictures. So, the stem you have is likely the original.
As for the 9mm part, perhaps that allowed for a bone extension rather a filter, but it’s just a guess.”
The timeline was making sense to my old brain now:
1) Original photos were taken.
2) The pipe was sent to Peterson’s in Dublin. While there the stummel fills were done and a new finish was applied.
3)The pipe was sent to me.
The tenon still was giving me confusion. There were no threads for a bone extension. I knew that Peterson did have a line of Filter pipes which were described in the 1947 catalog but this pipe pre-dated that by several years. I emailed the owner that I’d like to reachout to Mark Irwin for his thoughts. The owner agreed.
Below is the correspondence between me and Mark Irwin:
Subject: Hate to bother you
Hi Mark,
You know those four words in the subject line are going to be followed by “but…” right?
I got a commission to restore an old Pete for a gentleman whose granduncle picked it up while stationed in northern Ireland around 1940, just prior to his unexpected passing in 1943. I figured the pipe was from 1937-1945. My question is why in the world does it have what appears to be a 9mm (though it is smaller than 9mm) filter type stem? There are no threads for a bone tenon. Any idea or just rack it up to “it’s probably a replacement stem”.
“Hey John,
My best guess is that this pipe was drilled for a “Good Health” K&P 6mm filter. You can see a photo of the filter box in the identification guide at the back of the big Pete book, as these still sometimes appear on eBay. Try measuring it with your micrometer and seeing if you think a 6mm would fit!” (Mark Irwin, personal email)
Another potential piece of the puzzle – The stem appeared to have been drilled for one of the early GOOD HEALTH stems. Since it was already a Peterson System 2, today’s equivalent of a “Deluxe”, it was also not stamped as a GOOD HEALTH though it did receive a GOOD HEALTH stem. I notified the owner and he was pleased with the new information.
Time to get back to work. After 3 hours the stem was removed from deox. That is my term for the Before and After Extra Strength Deoxidizing solution. Kind of a play on the idea of detoxification or detox used for drug and alcohol abuse patients in rehab. The stem was hung by its pipe cleaner on a tall bottle and allowed to drip excess solution back into the jar.
After dripping, I hand buffed the stem with a coarse shop rag. The coarse material both absorbs the excess solution and helps abbrade some of the oxidized rubber from the stem.
The next step was to scrub the stem with Soft Scrub applied to make-up pads. This mild abrasive cleanser further removes oxidized surface material from the stem.
After the Soft Scrub scrub, that’s just fun to say, the stem was worked with a series of sanding sponges from 400-3500 grits. Between each sponge I rubbed the stem with mineral oils and wiped it with a clean dry paper towel.
The sanding was followed by micro-meshing with pads 4000-12000. Between each of the pads the stem was rubbed with Obsidian Oil and wiped with a paper towel.
At this point the stummel was still having the yuck removed the the ethyl alcohol as it slowly evaporated pulling the yuck from the briar and depositing it in the cotton. That continued overnight. In the morning I removed the cotton. It had done a fine job at removing any trace of smell from the tobacco chamber, reservoir and shank.
The stummel was then worked with micro-mesh pads from 2400-12000. The 2400 pad removed the finish which can be seen wiped onto the denim and on the two alcohol dampened make-up pads in the photo below. Between each pad the stummel was wiped with a make-up pad for removing debris from the micro-meshing.
After the micro-meshing the stummel received a coat of Before and After Restoration Balm and was allowed to sit for 20 minutes.
After 20 minutes the balm was wiped from the stummel using an inside out athletic sock.
The briar of the shank was covered with painters tape to protect the wood and the silver ferrule was lightly polished with the micro-mesh pads. After the peds I polished the silver with Before and After Fine and Extra Fine Polish. I failed to photograph the earlier steps of this process but did capture the final step.
The stem and stummel were taken to the buffer where they were buffed with Blue Diamond Polishing compound on a flannel wheel. Reunited with the stummel, both then received several coats of carnauba wax. The pipe was finally hand buffed with a microfiber polishing cloth to further raise the shine.
I can’t say what my favorite part of this restoration was. The pipe was a beautiful example of Irish craftsmanship by Peterson. The family history and the story of the great uncle were the things that I always wish I could know about these old pipes. The mysterious details of the pipe stem and the path that the pipe took, both geographically and through time, to get to me were a fun exploration. The happiness and gratitude of the owner upon receiving the restored piped was also fulfilling. Being honored and trusted to work on a family heirloom is daunting but exciting. All of these were part of this restoration and all of them were unique and unforgettable. The pipe turned out beautifully. I don’t mean to speak disparagingly about the clean-up that the Peterson crew did. Their fills were impressive but a custom hand polishing and finish is something that a manufacturing shop cannot take the time to do. I failed to mention in the above blog that I could not remove the silver ferrule. I tried seeping both ethyl alcohol and acetone into the glue to loosen it. I tried heating with a heat gun and even speaking softly and gently but I could not get the silver to budge. In the end I emailed the owner and admitted failure. He was understanding and we both agreed that the dents added to the history of the pipe.
I do hope that you have found something here useful to your own pipe care, maintenance or restorations. If you like this sort of thing, please click the like and subscribe buttons. Thank you for reading the ramblings of an old pipe lover.
Below are some photos of the finished Peterson System 2.
The term”big” doesn’t do this pipe justice. Giant, gargantuan, enormous all seem more fitting. I remember opening the package when it arrived in the mail. I’m pretty sure I said, “good Lord, that’s big.” Have I mentioned that “big” doesn’t do this pipe justice? For such a large pipe it felt remarkably good in my hand, then again, I am a fan of the apple shape. This pipe wore the stamps: MADE IN over ENGLAND in an oval to the left, SL over LONDON MADE all on the left shank. The right shank sported the stampings 52G while the stem bore an Old English script S on a shield. Below are some photos of the pipe prior to work being done.
Background
The stem logo on this pipe says, “I’m a Sasieni”. Well at least a Sasieni’s second…
That is where I started, with Sasieni. Joel Sasieni began building the company in London, England in 1919. I will let Stephen P. Smith, in his pipedia.com entry explain,
“In his book, “The Ultimate Pipe Book”, Richard Carleton Hacker writes American pipe collectors “seem to be more preoccupied with ’smokable’ brand names, of which the most collectible are Dunhill, Barling, Sasieni, and Charatan.” Theodore Justin Gage, the former publisher of the much missed “The Compleat Smoker”, called Sasieni pipes a “fascinating collectible, …representing all that is good about classic English pipe making.” And for good reason: the pipes made by the Sasieni company between the years 1919 and 1979 rank among the very best the London pipe industry had to offer. They featured superb wood, flawless bowls, outstanding smoking qualities, and a styling that was uniquely theirs.
Yet for all that, Sasieni’s are among the most underrated pipes on the collectible market, usually selling for far below their real worth. In this, they offer the astute collector a genuine opportunity, whether he or she is looking for a pipe with potential for appreciation, or simply a great pipe at a reasonable price.
However, in order for the collector to capitalize on this, it is vitally important to realize the Sasieni company changed hands on two occasions, and each owner had different priorities and agendas. Not surprisingly, this was reflected in the quality of the pipes made during these different times. All bore the Sasieni name, and yet they were very different pipes.
It is possible to divide the Sasieni history into three eras, similar to Barling. In fact, throughout this article, I will be referring to “Pre-Transition, Transition, and Post-Transition” Sasieni’s. While this may raise a few eyebrows, I believe it will become clear these classifications are actually quite appropriate.
Therefore, it will also become clear a collector must be able to distinguish between Sasieni’s of different eras, as it is mainly the family made pieces made between 1919 and 1979 which are truly desirable to collectors. The dual purposes of this article, then, are to trace the history of the Sasieni pipe, and to enable collectors to judge, with a reasonable degree of certainty, when the Sasieni in question was made.
A Brief History of the Sasieni Company
There is a great deal of mystery surrounding the Sasieni pipe, owing largely to the fact there is such a paucity of written information about them, as is the case with many collectible pipes. Even the name of the founder has been subject to debate. One respected source says the founder was named “Joel” Sasieni. Another equally respected source says with equal certainty the name was “Joseph” Sasieni. (A third, rather less reliable source once told me “Joel” and “Joseph” were brothers, but I think we can safely dismiss that.) An old Sasieni catalog which I came maddeningly identifies the founder as “J. Sasieni”. However, some research at the U. S. Patent Office conclusively shows that his first name was Joel.
Joel Sasieni apprenticed at Charatan, and moved on to Dunhill, where he eventually rose the position of factory manager. Many men would have been perfectly satisfied with such a position, but not Mr. Sasieni. He opened up his own factory in 1919, believing he could improve on some of Dunhill’s methods. Mr. Sasieni was, if nothing else, an optimist.
Things did not go smoothly for the new firm. The factory burned down almost immediately. Apparently undaunted, Mr. Sasieni simply rebuilt the factory and carried on.” (Sasieni – Pipedia)
Steven Smith’s writing goes on and is well done and informative. I highly recommend reading it if you are a burgeoning Sasieni fan or just interested.
As for this pipe, I could find no reference to the SL stamping. I assumed the 52G was a shape number and indeed a Sasieni shape chart from pipedia.org lists the 52 as a “Hurlington” and matches the shape of this pipe beautifully. I am assuming that the 52G is the Hurlington in a giant form.
Another Sasieni shape chart states that Sasieni has “160 SHAPES”.
(File:SasieniShapes.jpg – Pipedia). 160 is a remarkable number of shapes for a manufacturer to keep track of much less the carvers employed making those shapes. Remember, this was all long before a quick google search to remind oneself of the dimensions of a particular shape.
The Restoration
The Sasieni found its way to the workbench and a cleanish denim piece. The stem was a very tight fit after the photo shoot. I did not force it back into place as that’s where I planned to start with this restoration, anyway.
The calcium deposits on the stem were heavy and combined with the also heavy oxidation made for a rather ugly mess. I started by scraping the surface from the stem with a sharp pocket knife.
Once scraped, I buffed the stem with 0000 steel wool.
The airway was cleared of the tars and yuk which had taken up residence there. A good many bristle pipe cleaners and 95% ethyl alcohol were used to clean the airway.
With the inside and outsides cleaned, it was time for the stem to go into deox. That is my term of endearment for Before and After Extra Strength Deoxidizer. I thought this stem would require at least 4 hours of chemical love.
I turned my attention to the stummel. The reaming tools were assembled with the PipNet’s #2 and #3 blades getting used.
The reaming was done mainly with the PipNet.
The Smokingpipes Low Country reaming knife and the General triangular scraper. When the scraping was done the tobacco chamber was sanded to bare briar with 320 sandpaper wrapped around a wood dowel.
The lava on the rim was moistened with saliva and scraped with a sharp pocket knife.
The stummel was then scrubbed with undiluted Murphy Oil Soap and a nylon scrub brush. You can see the grime in the bristle of the brush, below. The soap was rinsed with warm water and the stummel dried with a cotton hand towel.
The Airway of the shank was equally as dirty as the stem’s. I used the Kleen-Reem shank drill tool to drill out the airway. That seemed to have done a great job at scraping. I still used the dental scraper along with several scrubs with the shank brush, bristle pipe cleaners and cotton swabs but the drill removed a large amount of tar from the airway.
The stamps were covered with painters tape to preserve their detail during the sanding.
The stummel was sanded with a series of sanding sponges from 400-3000 grit. Between each sponge I wiped the stummel with a make-up pad moistened with alcohol.
The final sanding sponge was the 3500 grit. This one was allowed to sand under the tape.
The stummel was then worked with micro-mesh pads 4000-12000 grit. Again between each pad I wiped the stummel with alcohol on a make-up pad.
The stummel received a coat of Before and After Restoration Balm and was allowed to sit for 20 minutes.
After 20 minutes the remaining balm was wiped with an inside out athletic sock.
After two hours I removed the stem and used the patented Deox Drip-Under-Matic Mechanical irrigation and Egress System (DDUMMIES) to drip dry the stem.
The stem was wiped with a coarse shop rag. This allows for the excess solution to be absorbed and abbrades some of the oxidized vulcanite at the same time.
The stem’s color looked much better but the wear of the stem and the removal of oxidation showed a much reduced stem. The button had been smoothed almost to oblivion. This was going to take some time to rebuild.
I first painted the stem with a butane light hoping to have the vulcanite rebound a little bit and reduce the tooth dents. This provided minimal effect. The stem was then painted with a coat of black cyanoacrylate (CA, super glue from the end of the button to about 1 ½ inches or 4 cm.
The CA was spritzed with a CA drying accelerator. This speeds the curing time to nearly immediate but does leave a roughened surface.
The rough surface was filed. The low spots remained more glossy and would require additional applications of black CA.
The second application still had some low spots but they were becoming smaller and fewer.
Finally I was down to only two spots for reapplication on both the top and bottom.
The final CA spots were smoothed with the small file and 400 sanding sponge.
The button received its final shaping and shaping.
Unfortunately the faint stem logo was lost with the exposure to the Before and After Extra Strength Deoxidizer Strength.
The stem was sanded with a series of sanding sponges with grits of 400-3500. Between each sponge the stem was rubbed with mineral oil and wiped with a dry paper towel.
The stem was further polished with 4000-1200o micro-mesh pads. I neglected to photograph this process but can state that between the pads the stem was rubbed with Obsidian Oil and wiped with a dry paper towel. The final polishing was done at the buffer with White diamond buffing compound and a clean flannel wheel. The pipe received several coats of carnauba wax with the buffer. A hand buffing with a microfiber polishing cloth was done to further raise the shine of the briar and vulcanite.
I have to admit that this Sasieni Hurington looks very impressive just by the nature of its size. The pipe feels great in the hand which is good, because there is no way that it is comfortable to clench for more than a few seconds. Its length and mass prove to be a physical feat of power lighting which would test the most capable jaw musculature. The briar looks beautiful with the rusticated spots concealing flaws in the piece while adding character. The stem turned out very nicely with hardly any sign of the reconstruction which was done to repair the aged and worn vulcanite. Overall it is a remarkable pipe which, the term “big” hardly does it justice, in case you had forgotten. The dimensions of this Sasieni SL 52G Hurlington are:
Length: 7.36 in./ 186.94 mm.
Weight: 2.48 oz./ 70.30g.
Bowl Height: 2.21 in./ 56.13 mm.
Chamber Depth: 1.77 in./ 44.96 mm.
Chamber Diameter: 0.82 in./ 20,82 mm.
Outside Diameter: 1.80 in./ 46.37 mm.
I do hope that you have found something here useful to your own pipe care, maintenance or restorations. If you like this sort of thing, please click the like and subscribe buttons. Thank you for reading the ramblings of an old pipe lover.
Loading…
Below are some photos of the finished Sasieni SL 52G Hurlington.
This may just be the longest restoration yet. Trust me when I say this project has been ongoing since August 15 and today is September 10. For context a normal restoration takes me 2-4 hours not including drying or soaking time. Let me start in the beginning which normally is where stories begin. This pipe was purchased on August 6. I knew it had issues, which you will see shortly, and would allow me to practice several techniques that I wanted to become better at. The pipe was listed on eBay as a “Buy now” for $20 or best offer. I offered the seller $16 and they accepted. In a few minutes you will think I am losing my cognitive faculties or that I probably never had that large of a faculty to start with.
The pipe was sent from Hudson, New York to the wilds of southeast Nebrask and arrived after 6 days, August 12. Upon opening the package I was a bit surprised at the severity of the issues which I had willingly adopted. I’ll let the photos speak for themselves. Here is the pipe prior to any work done.
Remember, I said it had issues. I can hear folks saying, “What kind of masochistic idiot are you?” and probably some comments about wanting to sell me fine swamp land in Louisiana or perhaps a bridge in Brooklyn. I wanted to practice the cracked bowl pinning technique by Charles Lemon (you can see that here), repairing cracked shanks and I am continuously working on different ways to repair chewed up mouthpieces (this time with black epoxy resin). So, now you see I thought I could do all of those things with one pipe. There was madness to my madness. No wait, that’s supposed to be, there was a method to my madness.
Background
Over the past almost a year, I have restored 7 Marxman pipes. This will be the 8th. And you say, “I thought you went by the name Nebraska Pete Geek?” Well, I just counted and I have done 12 Petersons so, the name is well founded. I do love an old Marxman pipe though. The amazing history of Robert Marx was summarized by me in an earlier blog which I will include again here:
On January 11, 2024 I blogged about a Marxman Gold banded Dublin (linked if you are interested) and wrote the following about Robert Marxman and Marxman pipes:
“My recent fascination with the post-World War Two (WWII, to properly use an acronym) led me to further appreciation of the Marketing genius of Robert Marx, the founder of Marxman Pipes Inc. Allow me to illustrate:
Those are the back covers of Pipe Lovers Magazine for each month of 1946. That represents a substantial investment in building and maintaining one’s brand name.
Here is a quick review of Marxman pipes from pipedia.org:
“Marxman (Marxman Pipe Company) was created by Robert (Bob) L. Marx in 1934, when he was 29, and after he had worked for the William Demuth Company. His pipes were not outstanding because of the quality of their wood (probably Algerian), but Bob started making unique sculpted pieces, which brought the brand fame in the World of Hollywood cinema. Actors like Zachery Scott, Dennis Morgan, Jack Carson, Alan Hale, Joel McRae, and Ronald Reagan were some of the faces that appeared on the bowls.
Bob knew how to innovate and took full advantage of marketing and press advertising in order to sell the brand–one of his slogans being “Relax with a Marxman”.
In a recent forum post on Pipesmagazine.com, contributor jguss posted the following from the February 2, 1935 issue of the UnitedStatesTobaccoJournal:
A remarkable article showing the business acumen as well as a photo of the man himself. Thank you, jguss.
This is one of my favorite quotes about Rober Marx:
“Ted also said: Several years before UST bought Mastercraft, M/C had aquired Marxman Pipes. A wonderful kind man, Bob Marx was still working as a salesman in NYC, and I was fortunate to make a few sales calls with him. You all remember Charles Atlas? Bob Marx was about 76 and had just been awarded the (I think) Atlas Award for being the finest speciman of manhood over 70 years old in NYC, or maybe the state.
M/C had some inventory of Marxman stuff, but not a lot. I know very little about Marxman. Did they make, import, or both?” (Mastercraft – Pipedia)
The “Ted”, who is being quoted above, was the nickname of Tom Douglas. Here is an announcement of Mr. Douglas’ passing from Pipesmagazine forum November 26, 2018:
“Tom Douglas passed away at 71 years of age, this past Saturday, in Florida. It seems he had an infection in his stomach, but I don’t know much more than that, regarding what actually contributed to his death. He did have a history of heart and other health complications. I just spoke very briefly with his wife Joyce; you can imagine how she’s doing.
The impact Tom had on the pipe community is huge…beginning with an immense library of pipe knowledge through the pages of the Dr. Grabow Collectors Forum….his 25 years of service at the Grabow / Sparta pipe factory (where he retired in 1991)….his executive leadership over Mastercraft distribution for many years…”
So, at 76 years old Robert Marx was still involved in the business that he must have loved. This would have been around 1980.”
Then last winter, Mark Irwin, of Peterson Pipe Notes and author of The Peterson Pipe book, sent me a c. 1945 Marxman Brochure. I photographed the pages of the brochure and included them below.
One of the easiest things to date is a Marxman pipe. The company was formed in 1939 and sold in 1953 to MasterCraft. Though the Marxman name continued after 1953 the pipes were made in France or Italy and stamped as such with Country of Manufacture (COM) stamps. This means that a non COM stamped Marxman pipe was made in New York City between 1939-1953.
This pipe is undoubtedly a Marxman Jumbo as seen on page six of the above brochure. As a “C” size this pipe would have commanded a price of $10 in 1945. According to the Consumer Price Index inflation calculator that would equate to $173.78 today (July 1945 to July 2024). (https://data.bls.gov/cgi-bin/cpicalc.pl?cost1=10&year1=194507&year2=202407)
The Restoration
Oh no, the poor battered beauty can’t even get an unstained denim piece to rest upon. The bright side is that it will look significantly worse shortly.
I started with the reaming of the tobacco chamber using a PipNet with the size 3 and 4 blades. The #4 rarely gets to come out and play.
Typical of Marxman pipe the reaming was very easy with the cake coming easily off the briar. The chamber was sanded with 320 sandpaper wrapped around a wood dowel and taken to bare wood. No heat damage was observed.
The shank was a dirty mess. For as easily as the tobacco chamber gave up it’s accumulated cake the airway clung to it’s smoking residues tenaciously. Several scrubs with 95% ethyl alcohol and a shank brush followed by alcohol dipped cotton swabs were used. I was getting frustrated and my thoughts turned to the next steps.
It was during the repetitions of scrubbing that my mind started to process ways to repair the cracked shank. The first thought was merely a brass band. I did this with a Marxman Mel-O and that restoration turned out very well as the below photo illustrates:
My thoughts shifted to considering an internal band. I had seen a video on how to make a pipe with a military mount by J. Alan of jalanpipes.com a few years ago. Here is that video. In the video he used a piece of brass and filed teeth into the brass tube. He then used the tube to cut a circular slot or hole just outside of the mortise on the shank. A piece of brass tube was inserted into this circular slot and the shank had a reinforcement that could take significant abuse. I filed that away in the back of my mind. For whatever reason the thought of a brass reinforcing band inside the shank of this pipe seemed like a good idea. The shank was thick and could easily accommodate a band and what the heck, it was already cracked. How badly could I screw this pipe up? In hindsight, I should have watched the video again or researched this technique more but I was in “problem solving” mode.
I looked through the stock of brass tubing that I had and found a piece which looked to be the perfect diameter. It was 5/8th inch outside diameter tubing. Next I started filing teeth on the edge of the tube. I couldn’t remember how many teeth were used in the video and couldn’t be bothered to rewatch it. As you may have guessed by my complete lack of video that I really do not like videos. I think it comes from being a teacher for 32 years. Rather than read, research and learn things like I did as a student, all students ever wanted to do was “watch a video”. This is fine and dandy for seeing how to replace the gas cap door on a 2004 Ford F150 (yeah, I just did that) but there isn’t a video on the life of Robert Marx. Videos are a great tool for some things but they are not the sole source of learning. Anyway, I filed some teeth.
They looked like they would cut briar. They also looked like they would have to be brought out of the hole and have the saw dust blown off of them frequently. I was in uncharted territory and expected some learning by trial and error.
In my imagination the brass tube/cutter would be clamped into a chuck of some type and spun at some speed, probably slow and lowered or slid into the shank which would be clamped somehow. Yeah, there was a lot of “some” in my thought process at this time. I do not have a drill press nor a lathe. The thought of using hand tools for this operation seemed ridiculous. I then contacted my son-in-law’s brother who is a machinist extraordinaire. The date was August 15, 2024. He replied the next day and was worried about brass being able to cut the briar. I then realized that he spent his days cutting far tougher material like steel, stainless steel, titanium and cobalt-chromium alloys. Yeah, he works in a prosthetics lab. He had the experience, tools and know-how needed to help with this endeavor. More on this later.
I had a rim to clean up and a stummel to scrub and a whole bunch of clean cotton swabs which were demanding to be filthy..
So that is what I did. The stummel was taken to the sink and scrubbed with Murphy Oil Soap, undiluted , and a nylon scrub brush. The years of dirt and the lava came off quickly. The soap was rinsed with warm water and the stummel dried with a cotton hand towel.
Back at the bench things were looking good both in the reality of the drying stummel and in the realm of my imagination of how the shank repair would proceed.
I certainly was back in reality, with a really dirty shank.
That brought me to the next new idea I wanted to try. In one of the Facebook groups that I am in, someone mentioned using two part epoxy to repair and reconstruct buttons. I wish I could remember what group or who the person was who had sown this seed in my brain. I thought that I needed to try it out and this stem was a perfect subject. The stem was cleaned using 95% ethyl alcohol and bristle pipe cleaners then lightly sanded to remove some of the surface oxidation and allow the Before and After Extra Strength Deoxidizer access to the vulcanite.
A pipe cleaner was inserted into the remaining button, to act as a hanger suspending the stem in the deoxidizer, and it was lowered into the deox ( my term for the liquid).
According to the time stamp on the photos the stem was in deox for 7.5 hours.
That gave me plenty of time to soil another stack of cotton swabs in an attempt to exorcize the tar demons from the airwair. Finally, I was victorious and the airway was clean.
The seemingly unending airway scrub did allow me time to ponder the next step and the next technique that I wanted practice with. That is the repair of a cracked bowl using strategically placed brass pins. I first saw this technique in a post by Charles Lemon of Dads Pipes. Charles is a real restorer, unlike me, and actually does this for a living bringing back family heirlooms and working magic with his impressive skills. You can find Charles’ pinning tutorial blog here. I had used pins to repair a cracked shank as a first time practice ordeal and again with a cracked bowl, both blogs are linked if you care to make fun of my attempts. This cracked bowl was more of a cosmetic crack in the briar. It did not extend through the wall of the tobacco chamber and looked more like it was from an improperly cured piece of briar rather than a case of excessive cake. Either way, I was going to repair it with brass pins. I first filled the crack with brown cyanoacrylate (CA, super glue) pushed into the crack with a fly tying bodkin. The CA was allowed to cure in it’s own time and was not accelerated by a CA drying accelerator.
Once cured the surface of the CA was roughened up a little bit to better blend it with the carving on the stummel. I used a round rat tail file and a diamond needle rat tail file for the roughening.
My jumping around from task to task with this restoration shows my desire to plan and think through each of the multi-step procedures used with each technique. I use the time stamps from the photos to sequence the restoration process that I present to you. I apologize if this makes it hard to follow while reading. This is the way it all happened though
I wanted to give the CA adequate time to cure so I busied myself with the repair/rebuilding of the stem. Someday I’ll get a drill press or a lathe and that cool tenon turning tool and I’ll just make stems rather than try to reconstruct them. There’s that imagination again. Anyway, the stem was removed from deox and wiped with a coarse shop rag. This more abrasive material is great for absorbing the excess deoxidizer and abrading away some of the oxidized vulcanite.
Aug. 15 (I’m using the dates here to show the curing times of the epoxy.)
To rebuild the button, I first cut a dam from a plastic lid. This dam was coated with petroleum jelly and inserted into the airway in an attempt to keep the epoxy for sealing it off. I mixed the two part J. B. Weld black epoxy as per product instructions.
I used a piece of Scotch tape around the bottom of the stem to aid in keeping the epoxy on the top then applied the epoxy to the fill area with a fly tying bodkin. The stem was set aside for 24 hours to cure.
Aug. 16
The next day, I checked on the epoxy to see how well it was working as a fill material.
The dam was removed easily and appeared to have work at keeping the epoxy from the airway.
I took the stem to the photography bench for some better than the phone photos.
The surface was roughed up with a 320 grit sanding sponge to give the next application of J.B. Weld something to bond to and the dam was reinserted.
Another batch of epoxy was mixed then applied to the area to build up the missing material for a proper button. This application was again set aside for 24 hours.
Aug. 17
This was nowhere near as quick as using a black cyanoacrylate (CA, super glue) to fill an area but I was still curious as to its effectiveness. I filed the 2nd application and reformed the button.
The epoxy filed and sanded more easily than CA would have. I was sure that it would cure to a harder consistency in a couple of days.
Aug. 18, 8:30am
A third application of J.B. Weld was applied to the stem. This time to a larger area. I wanted a wider area to use for blending the original stem to the new patch. This application also was spread on the top and bottom of the stem.
A pipe cleaner was inserted to act as a hanger and the stem was hung to cure.
Aug. 18, 9:50pm
13 hours later, I checked on the curing of the epoxy. The surface was rough rather than smooth, as it had been with the previous two applications. I did like the way tha material built up though.
Aug. 19, 1:00pm
Another 15 hours later and I returned to the cured epoxy on the stem. The rough texture remained and the epoxy felt more tacky than the previous iterations. The new material pulled away from the second application as I was filing it. Bah, that won’t do. I peeled the 3rd application off the stem. I was not sure if it was a bad mix or what had happened. One thing that I was certain about was that I preferred to use black CA for rebuilding buttons.
All this time between sessions with the pipe did allow me to thoroughly plan how I wanted the pinning to go. I drilled 3 holes with a 2mm drill bit. Each hole was drilled at a different angle and each transected the crack. The below photo shows each hole with a piece of 2mm brass rod. I had gotten better with my drilling and none of the holes had emerged all the way through the stummel.
The hole depths were measured with their respective rods. Each rod was cut slightly shorter than the depth of the hole.
I applied a small drop of brown CA to a hole and quickly pushed the corresponding rod into it to a point below the briar surface. The below photo shows all three rods pressed into place. You can still see the brass peeking from the holes.
The holes were then filled with another application of brown CA and topped with a small scoop of briar dust. The dust was pressing into the wet CA. The fill was then sanded smooth on the rim and slightly smoothed in the carved areas. This project took an intermission while I waited to schedule a visit to the machine shop of my fellow conspirator.
Sept. 9
A date had been set for the machine shop visit. This was a clandestine operation after hours. In preparation for the event, I needed to glue the shank crack with CA. I used a thin clear CA to penetrate the crack as deeply as possible. This was applied with the ever popular fly tying bodkin and quickly clamped.
The clamping provided no visual compression of the crack but it made me feel like I accomplished something. I then applied a thin line of brown CA to the crack to fill it with the fly tying bodkin.
Sept. 10
Now to protect my fellow conspirator’s identity, since we were infiltrating his shop after hours and without the knowledge of his overlord, I will refer to him as Christian. A fitting name and perhaps title. I explained what I thought we could do and how I imagined it happening. Christian immediately understood and dashed my imagined process with a healthy dose of reality. He said that this was a job for the milling machine. The first order of the new reality based procedure was to shorten my brass cutter to fit into a collar which could be mounted into the chuck of the milling machine.
Next we needed to clamp the stummel into position in a way that limited movement without marring the briar. This was done with a couple of scraps of a clear soft plastic between the vise jaws and the stummel.
The cutter was aligned with the shank.
Turtle speed was selected on the milling machine.
And the cutting was begun, very slowly, maybe 0.5 mm then I’d blow the dust away with the compressor.
This continued and was looking very promising. I hadn’t really thought about how deep to make the slot. It was determined that 5 mm would probably be sufficient.
The depth gauge was set to the 5 mm goal and the cutting proceeded.
Once achieved, the slot looked as good as I had imagined.
The next task was to cut a 4.7 mm wide brass band from the same tube the cutter was made with. This would ensure a perfect fit. We moved to the lathe to square up the end of the brass tube.
The lathe was set to cut a precise 4.7 mm wide band. We thought that this would allow me to press the band into the slot so that it would be flush with the face of the mortise and would require no sanding of the brass band. The no sanding was important for a proper fit with the stem to maintain the shank to stem joint.
The band cutting proceeded successfully on the second attempt after Christian had sharpened the cutter. The first attempt met with a hot mess. Literally, the dull cutter made an out of round band that was very hot.
The band seemed to fit beautifully. It was not pressed in fully as there was no way to extract it once it was in there. Also, my crack glue-job seemed to be holding without the reinforcing band.
After many thank-yous, a Mission Impossible like extraction from the machine shop and a drive back home the Marxman was back to the home workbench.
I thought about which glue to use, CA or epoxy for gluing in the band. I settled on epoxy due to my fear of not being able to move fast enough for the CA and having the CA set-up before I had the band fully pressed into place.
I applied a bead of epoxy to the slot.
Surprisingly, I remembered to roughen the inside and outside of the brass band with a sanding sponge.
The band was then pressed into position.
The excess epoxy was cleaned up with a cotton swab dipped in acetone and… (dramatic pause). OH CARP! There was about 0.2-0.5 mm of brass band sticking up above the surface of the mortise. What had gone wrong? I texted Christian, if that is his real name, and explained what I was seeing. We had both noticed that my brass cutter was significantly more dull when we finished cutting, back at the shop. He thought that the dulled teeth would have given a false 5 mm depth to the cut. I agreed and thought that maybe the epoxy would have added another fraction of a mm. In hindsight, the band would have been better cut at 4.5 mm to ensure greater clearance.
I used a small flat file to remove as much of the brass as I felt comfortable removing. I had to go very slowly and with great care to avoid filing any briar. I then took the stummel to the topping board there. I very slowly sanded the brass to flush with the briar. I failed to photograph any of this, apologies. I did photograph the resulting fit though.
Below is a photo of the internal brass band in all of it’s glory.
Now to finish this stem. I thought I could go over the patch on the bottom of the stem with black CA and that it would make the difference in the vulcanite and the black epoxy disappear. Once again the imagination was working beautifully and all of the imagined repairs were equally as beautiful.
I painted the bottom of the stem with the black CA.
The CA was then spritzed with a CA drying accelerator. The subsequent area was filed and sanded to blend the vulcanite with the patch. You’ll have to wait or jump to the end to see how reality dealt with my imagined results. This is mainly because I failed to photograph it. Umm, I mean, that I want to build anticipation. Yean, that’s the ticket.
To rebuild the button proper, I Scotch taped the stem right against the button This kept me from having to re sand the blended stem patch. It also allowed me to file and sand the button without scratching up the already smoothed stem. I applied layers of black CA to the button, spitzed with the drying accelerator and while the CA was still soft, I made a straight cut through the still pliable CA giving the button a more defined seam where it met the stem.
The above was done for both the top and bottom. Both sides were filed then sanded to a proper shape.
Here you can see the progress from the side.
Eventually the stem was sanded with a series of sanding sponges from 400-3500 grit. Between the sponges the stem was rubbed with mineral oil and wiped with a dry paper towel.
I was apparently getting tired and failed to photograph the micro-meshing of the stem. The next step was to coat the stummel with Before and After Restoration Balm and let it sit for 30 minutes.
After 30 minutes the Restoration Balm was wiped off with an inside out athletic sock.
It was at this point that I decided to try another novel technique on this pipe. I had not worked with a shellac finish on a pipe in a long time, perhaps even before I started blogging back in October of 2023. I slid the stem out about ¼ inch or ½ cm to provide a handle but not get any shellac on it. I used a disposable foam brush to apply a very thin coat of shellac to the stummel. The briar absorbed the shellac quickly and it dried as the alcohol solvent evaporated. Now for the weird part – I slightly wetted a paper towel with 99% isopropyl alcohol and wiped the stummel with the paper towel. This smoothed the shellac remaining on the surface of the panels. I only applied the single coat of shellac as I don’t really like the look of a clear coat on pipes. This wasn’t really a clear coat, more of a sanding sealer and a layer of protection of the carved surfaces from dirt and hand oils. I let the stummel dry for about 15 minutes then took it to the buffer for a polish with white diamond compound. The entire pipe was then wiped with a clean dry cotton cloth to remove any remaining buffing compound. The stem and stummel then received several coats of carnauba wax with the buffer. A quick hand buffing with a microfiber polishing cloth and she was finally finished.
I would like to thank you for making it this far into this dissertation. It is actually longer than many Masters Degree dissertations that I’ve read. Perhaps I’ll be awarded an honorary masters from some pipe restoration university. That’s a thing, isn’t it? A special thanks goes out to the machinist Christian, who may or may not actually go by that name. I had now successfully turned the $16 pipe into a $25 pipe, which equated to about $0.50/hour. Good thing I’m retired or the U.S. The Department of Labor would be filing suit for unfair pay. In all honesty, this pipe provided me with some new challenges and did exactly what I wanted it to do, allowed me to practice doing what I love to do – learn new and hone existing techniques. The pipe turned out amazingly well. This one will be joining my personal collection. The dimensions of this Marxman Jumbo C are:
Length: 6.01 in./ 152.65 mm.
Bowl Height: 1.73 in./ 43.94 mm.
Weight: 2.13 oz./ 60.60g.
Chamber Depth: 1.32 in./ 33.53 mm.
Chamber Diameter: 0.91 in./ 23.11 mm.
Outside Diameter: 1.76 in./ 44.70 mm.
I do hope that you have found something here useful to your own pipe care, maintenance or restorations. If you like this sort of thing, please click the like and subscribe buttons. Thank you for reading the ramblings of an old pipe lover.
Loading…
Below are some photos of the finished Marxman Jumbo C.
Just when I think I have moved on from my fascination with World War Two pipes I get drawn back in. Though this old pipe is more of a reminiscence of my youth and the semi annual visits to Sears for new school clothes. The candy counter was within the first 20 yards of the entrance and I could usually count on a white paper sack with a dollar’s worth of Swedish fish to help tide me through the horrendous task of trying on new clothes. I do not recall seeing pipes under the glass counter. I do recall that this was the only way I had ever seen Swedish fish though. Why the mention of Sears in this introduction? Well, I guess you will just have to read the “Background” for the answer to that question.
This lovely old Yorkshire Natural appears to live up to it’s name – natural. There seems to be little stain and no finish coating. The stamps on the left shank read; Yorkshire (script style lettering) arched (concave up) over NATURAL over ALGERIAN BRIAR arched (concave down).
This was looking like a straightforward restoration. Yes there were a lot of fills that I wanted to redo but other than that the pipe was in great condition. The stem was not badly oxidized and the bowl was not heavily caked.
Background
OK, you have waited long enough. Here is the reason for my back to school clothes /Swedish fish stroll down memory lane. According to pipedia.org, “Yorkshire Pipes was a brand sold exclusively through Sears Roebuck Catalogs, as seen in this 1941-42 catalog page. They were made in France of Algerian Briar, and some of the model names were: Bond Street, Royal, Aristocrat, Natural and Straight Grain. They were not stained nor finished with laquer, and had a natural honey color.”
For a second source confirmation of the heritage of the Yorkshire Natural in hand, I turned to pipephil.eu. Here I found the below images. Again it is confirmed that Sears & Roebuck sold the Yorkshire brand of pipes but here they mention that the pipes were made by Gasparini.
This creates a bit of confusion in my old damaged brain. The pipedia.org entry states a French manufacturer and the pipephil.eu entry states Gasparini. Last time I checked, Gasparini was and is an Italian maker. In examining the stamps the Yorkshire Natural that I have has stamps identical to the image from pipedia.org on the far right. So, I’ll say that this old girl is a French made apple from the 1940’s-1950’s. I know, not very specific with either part of the provenance. That might be the reason this blog is free – lazy Gen-X slacker of an author…
This next part is a little thought that I had and found entertaining. The location of the Sears of my youth was Omaha (yeah, that’s where I grew up). Sears was at a mall called Crossroads Mall. It was opened in 1960. The below photo shows the Sears entrance in 1961 with a crowd of people waiting to get in. I actually remember sitting there like that once.
The second photo below, is an image of Sears from 2019 taken from the same side of the building.
(https://omaha.com/photos-crossroads-mall-through-the-years/collection_086b8140-a744-5e25-a662-8e2aaba4858b.html#40). The entire mall lasted a mere 59 years, three generations of people. Now I find the fact that the entire mall was built, utilized and destroyed in about ½ the time that this single little pipe from the same company has been around, amazing. Businesses and buildings come and go but the pursuit of a relaxing smoke and the contemplation that it brings is a human pursuit which has survived for centuries. Enough of me blathering on let’s get to the restoration.
The Restoration
Here is our star taking up position on a clean piece of denim on the workbench.
The reaming crew was gathered; PipNet with #2 and #3 blades, Smokingpipes Low Country reaming knife, General triangular scraper (with the tip ground off) and 220 sandpaper wrapped around a wood dowel all atop a plastic coated shipping envelope.
The PipNet with the #2 blades did the lion’s share of the work, again. The #3 blades were too tight of a fit so the Kleen Reem pipe tool was used. It actually was a touch too small when fully extended but I pressed sideways with it around the bowl. The scrapers were used to finish the scraping.
The reamed bowl showed no signs of any damage from excessive heat. The chamber was sanded with 220 sandpaper on the wood dowel and 320 sandpaper with my finger.
The shank was far dirtier than I figured it would be. The initial wetting of the airway with 95% ethyl alcohol on cotton swabs produced a heavily blackened cotton. I then poured 3-4 ml of the alcohol into the bowl and scrubbed with a nylon shank brush. I then poured the alcohol into a medicine cup. This airwar would require a lot of scraping with the dental pick to clear as much of the accumulated tar as possible before further scrubbing.
Several scrapings later, the scrubbing with the nylon shank brush and the cotton swabs started to work their way through the accumulated smoking residue and eventually the airway was cleaned.
The stem proved much easier to clean than the shank. Apparently the previous steward was not averse to using a pipe cleaner on occasion. The airway was cleaned with bristle pipe cleaners dipped in 95% ethyl alcohol.
I then took the stummel to the sink for a scrubbing with undiluted Murphy Oil Soap and a nylon scrub brush. The soap was rinsed with warm water and dried with a cotton hand towel.
Back at the workbench the stummel was wiped with a make-up pad dipped in 95% ethyl alcohol. Very little color came off the briar indicating that surface was bare wood. Most of the color on the pad below was from the rim.
I began picking the old fill from the pits on the surface of the stummel. I counted 14 as I went along. The fills were generally solid and required a bit of force with the fly tying bodkin to get them out. ?Why take them out, then?”, you ask. Because I didn’t like the color.
To refill all 14 of the newly excavated pits, I used brown cyanoacrylate (CA, super glue) and briar dust. I dipped the fly tying bodkin into the CA then applied a small amount to the pit and worked it into the hole. I then used the dental scraper to scoop up a tiny scoop of briar dust and piled that onto the wet CA. The dust was then pressed into the pit with the heel of the scraper. Excess dust was brushed off with a brass brush. I only did about 2-4 holes at a time to avoid the CA curing before I had pressed the briar dust into the pit.
With all 14 pits refilled, I used a small flat file to file the CA/briar dust bump off. Then sanded the area with a 400 grit sanding sponge. After all of the pits had received one application and were sanded, I reapplied CA and additional briar dust. The process was repeated until the pits were smooth and flush with the surrounding briar. The stummel was then sanded with a 600 grit sanding sponge and wiped with a make-up pad dipped in ethyl alcohol.
I lightly topped the rim using 320 and 400 sandpaper laid flat on the countertop.
The stummel was stamped NATURAL. I wanted to keep this color finish true to the stamping. My first reaction to a stummel with this number of pits would normally be to give it a contrast dye of black. That would certainly conceal many of the fills but would also violate my sensibilities of maintaining the natural color of the stummel. To lighten the aged briar I decided to treat the wood with an application of oxalic acid. This “bleaches” the surface of the briar and can significantly lighten stained briar. If you are interested in a more heavily stained project see the W.O. Larsen restoration. The oxalic acid was applied with a cotton swab. I wetted the entire exterior 2-3 times and let it sit for 30 minutes before rinsing with copious amounts of was while scrubbing with a toothbrush.
Once dried the stummel looked a bit lighter and more vibrant than it did prior to the oxalic acid.
The stummel then had painters tape placed over the stamp and was sanded with a series of sanding sponges 1000-3500. Between each sponge I wiped the stummel with an alcohol dampened make-up pad.
The stummel was then micro-meshed with 4000-12000 pads. Between the pads I wiped the stummel with make-up pads wetted with ethyl alcohol.
The stummel was then given a coating of Before and After Restoration Balm and allowed to sit for 30 minutes.
After 30 minutes the Restoration Balm was wiped from the stummel using an inside out cotton athletic sock. The grain looked wonderful.
Unfortunately the stem did not look as wonderful. I used a small flat file to smooth the bite zone of the stem. The tooth dents were too deep to file them away without significantly thinning the stem. Filling the depressions with black CA was the chosen repair. I applied a coating of black CA from the button back 1 cm on the top and bottom of the stem. Both sides were then spritzed with a CA drying accelerator. I then shaped the button and smoothed the stem with the flat file. I then started smoothing and blending the patch with 320-600 grit sanding sponges. Between the sanding I rubbed mineral oil onto the stem with my fingertip and wiped away the excess with a dry paper towel.
The shank was taped with painters tape to protect it from the stem sanding. I needed them together to keep from rounding the joint where the stem meets the shank and to provide a handle for the stem.
The stem was sanded with a series of sanding sponges from 600-3500. Between sponges I rubbed the stem with mineral oil and wiped the excess with a dry paper towel.
I then polished the stem with micro-mesh pads 4000-12000. Between each pad I rubbed the stem with Obsidian Oil and wiped the excess with a paper towel.
At this stage I looked at the stem under the bright lights at the photography station. There was still a faint brown visible. I reapplied the painters tape to the shank and took the stem to the buffer. There I buffed the stem with white diamond buffing compound. After wiping the stem with a make-up pad moistened with ethyl alcohol I returned to the bright lights and the brown was gone. I returned to the bench and used Before and After Fine Polish of a soft cotton cloth.
The Before and After Extra Fine Polished was used after the Fine Polish with the same cotton cloth.
The pipe was returned to the buffer where I applied several coats of carnauba wax to both the stem and stummel. The final step was hand buffing the pipe with a microfiber polishing cloth to raise the shine before the final photography session.
I am very pleased with how this Yorkshire Natural Apple turned out. The grain of the briar is beautiful. Yes all the fill detract from the finish but it was an everyman’s mail order pipe from Sears and Roebuck. The stem polished up well and provides a sharp contrast with the light natural briar. Both stem and stummel sport a high gloss finish that complements the other. The shape of the robust apple bowl feels great which is good because the length and mass of the pipe are a bit much for a comfortable clencher. Perhaps one of those rubber cushions would help.. The dimensions of this Yorkshire Natural Apple are:
Length: 5.61 in./ 142.94 mm.
Weight: 1.48 oz./ 42.10 g.
Bowl Height: 1.78 in./ 45.21 mm.
Chamber Depth: 1.32 in./ 33.53 mm.
Chamber Diameter: 0.80 in./ 20.32 mm.
Outside Diameter: 1.59 in./ 40.39 mm.
I do hope that you have found something here useful to your own pipe care, maintenance or restorations. If you like this sort of thing, please click the like and subscribe buttons. Thank you for reading the ramblings of an old pipe lover.
Loading…
Below are some photos of the finished Yorkshire Natural Apple.
I am only speaking for myself here as your results may vary but, I have found that alcohol consumption fails to make my decisions or their results better. I think that may have been the case with this lovely little Larsen as well. When I first got the pipe I was quite pleased with its appearance. Closer examination soon revealed a layer of Scotch tape around the tenon. “Hmm, that is not normal”, I thought. I then carefully removed and examined the tape and tenon. I immediately thought that a previous steward had broken or cracked the tenon but all was well there. Another “Hmm”. The shank was then examined. All I could think is; “What?”, “Why?” and “Huh?” Yeah, I ran out of “W” words. The mortise appeared to have two extra attempted drill holes widening the mortise significantly thus requiring the thickening of the tenon with the Scotch tape. I envisioned a scene where the previous owner just finished off a 750 ml bottle of some 40% ethyl alcohol and the movie The Driller Killer and decided to turn this Larsen into a Peterson System pipe. See the first sentence of this blog.
Regardless of the origin story of this Larsen and how it came to be, the pipe was certainly worthy of some restorative care. The pipe was stamped 85 over WØ LARSEN over MADE IN DENMARK perpendicular to the axis of the shank. Below are some photos of the Larsen when it arrived here.
The glaring repair to the mortise, shank and airway was the major task. The pipe otherwise looked to be in very good condition. There was some staining around the shank/stem joint probably from tars and condensation leaking around a bad mortise tenon fit. The acrylic stem had minimal wear.
Background
The first section of the quote below is from pipedia.org and is credited to “FinePies.Com.
“W.Ø. Larsen was one of the most famous tobacco shops in Copenhagen, with a beautiful store located on Copenhagen’s famous “Walking Street.” During the flowering of the Danish pipe in the 1960’s, they first began retailing pipes by such carvers as Sixten Ivarsson, Sven Knudsen, Poul Rasmussen, and Brakner.
Urged on by his store manager Svend Bang (S. Bang), the owner, Ole Larsen, decided to begin making pipes in the basement of the shop. He first hired Sven Knudsen as the pipe maker, who soon passed the job to his protégé Hans “Former” Nielsen. Larsen’s fortunes rose along with the rest of the Danish pipe business, and Former was soon managing a group of carvers in the old Larsen cigar factory. Among these were Teddy Knudsen, Tonni Nielsen, Jess Chonowitsch, Peter Hedegaard and others, who were responsible for the Select and Straight Grain series before they branched out on their own. After Former left to start Bentley pipes in Switzerland, his duties were taken over by Soren Refbjerg Rasmussen, while the Straight Grains were made by Teddy’s student Benni Jorgenson. As Ole’s health began to fail, the reins were taken over by his son Nils. Nils became convinced that the way for Larsen to prosper was by entering the low-end market, and acquired the Georg Jensen pipe factory to make an array of less expensive pipes. This turned out to be a fatal error, and Larsen was recently sold to Stanwell, who continue to produce so-called “Larsen” pipes in their huge factory. Thus ended an important part of Danish pipe history. Courtesy, FinePipes.com”(W.Ø. Larsen – Pipedia)
The next section also from pipedia.org
“From The History of Danish Pipes, by Jakob Groth
The workshop of W.Ø.Larsen
W.Ø.Larsen is Denmark’s oldest and probably most famous pipes and tobacco store, placed in the center of Copenhagen on the main pedestrian street, Stroget. If you visit Copenhagen and do a “pipe crawl” this store is a must. In the beginning of the 1960’s the store began to sell Danish hand-made pipes, especially those of Poul Rasmussen. This went very well and Poul Rasmussen could not keep up with the demand. W.Ø.Larsen, with their dynamic business manager Svend Bang (who later started his own pipe business), decided to establish their own workshop in rooms next to the store.
The first manager of the pipe workshop was Sven Knudsen, but he soon left to make pipes under his own name. The next manager was Hans Nielsen, also known as “Former” (named after the late British actor George Formby, whom he was said to resemble. Coincidentally, in Danish, “Former” means “shapes”). Under the management of Former the workshop grew and W.Ø.Larsen pipes became a prominent name abroad. Among the prominent pipemakers educated here were Else Larsen (Denmark’s first female pipemaker),Poul Ilsted, Ph. Vigen, Teddy Knudsen, Tonni Nielsen, and Peter Hedegaard.
Typical for the W.Ø.Larsen School were semi-classic shapes, meaning classic shapes, but with slight differences, often bring a little more full or round. The pipes often had lower center of gravity. A typical billard would have a bowl shaped more like a pear and the connection between the bowl and the shank would be clearly distinguished. Yellow and orange were colors more widely used for the finishes.”(W.Ø. Larsen – Pipedia)
Trying to get a date on this Larsen I turned to pipephil.eu. Here under W.Ø.Larsen I found the following images:
The uppermost image shows an identical stem logo to the pipe in hand. It unfortunately does not indicate the age or year of production. I returned to the pipedia.org site to look through the available Larsen catalogs. There are 3 catalogs on the site: A 1960-61, 1961-62 and a 1963. There was no mention of a shape 85 in any of the catalogs and the stem logo on my Larsen was not observed in any of the catalogs. One thing I found interesting is that the shape number 85 is completely absent.
(wo1.pdf (danishpipemakers.com))(red circle added by me). Now this is just me and my conjecturing brain, I think this Larsen is probably a Stanwell made Larsen. My reasoning is twofold: The Crown with LARSEN looks very modern and factory made
The 85 shape is a Stanwell shape. According to pipedia.org’s Stanwell shape number guide:
Numerous sources said that W.O. Larsen was “recently” acquired by Stanwell. I only found one source that defined “recently” – A Facebook entry by Pipes Pens and Much More, “Danish company W. O. Larsen started making pipes during 1950s and it was run by Ole W. O. Larsen (1920-2002), who created the Larsen Handmades. Ole, a reputable designer, was a member of the Academie Internationale de la Pipe and founded, in 1977, the company’s Tobacco Museum which, like the brand shop, closed in 2005. The brand became an associate of Georg Jensen in 1999, with the company having been run, since 1993, by Niels Larsen, the fifth generation of the family in business, until it was bought by Stanwell in 2003.” (https://www.facebook.com/pipespensandmore/posts/danish-company-w-o-larsen-started-making-pipes-during-1950s-and-it-was-run-by-ol/178742246947159/).
During the writing of this blog I sent fellow pipe restorer from Germany, Sascha Mertens a photo of this W.Ø.Larsen pipe. He did a bit of digging and came across a great article in a German blog by Ralf Dings. Mr. Dings, with his much more close to home knowledge discussed the demise of Larsen. The below is from his blog, W.Ö.LARSEN – EINE DÄNISCHE TABAKDYNASTIE and used with permission of the author.
“Niels W.Ö. was still young, but he used what he had learned to ensure that the Larsen name continued to do good business and maintain a brilliant reputation. His idea was to take over the GEORG JENSEN pipe factory to gain a foothold in the now popular segment of inexpensive pipes and thereby broaden Larsen’s range. Unfortunately, this plan turned out to be a fatal mistake, costing Niels W.Ö. so much money that he had to give up and sell to Stanwell. In 1997, what Wilhelm Öckenholt Larsen founded in 1864 came to an end.
That would put this pipe’s date of manufacture after 1997 and before 2006, when the shape was discontinued by Stanwell. As for current production of W.O. Larsen pipes by Stanwell all I could find was the following: “Annually, W.O. Larsen features a Pipe Of The Year, designed and manufactured by Stanwell. These are distinctly Danish styles that are truly spectacular.” (https://www.pipesandcigars.com/category/shop-by-brand/wo-larsen/)
The Restoration
This restoration began like others, with a cleaned denim piece as a work surface.
The reaming tools included the PipNet with number 3 blades, Smokingpipes Low Country reading knife, General triangular scraper with tip ground off and a wood dowel wrapped with sandpaper.
The minimal cake was quickly removed with the PipNet.
I lightly scraped with the other scrapers and sanding returned the bowl to fresh briar. There was no indication of any damage to the tobacco chamber
The airway of the shank was next cleaned with cotton swabs dipped in 95% ethyl alcohol.
My plan was to fill the damaged airway with black J.B. Weld epoxy. To keep the epoxy from entering where I did not want it I planned to coat the contact surface of the tenon, a pipe cleaner (for the draft hole) and the end of a cotton swab. The cotton swab tip was to plug the “drilled reservoir” which a previous owner had drilled. I figured that the misguided bloke’s work should not be completely in vain. I will include another photo of the drill grooves I was planning on filling with epoxy, below. There was enough of the correct mortise remaining so, my thought was to fill the two drill paths to the right with epoxy, seat the greased tenon, clamp it to keep the tenon pressed to the left and let the epoxy cure. Hopefully the petroleum jelly would prevent the epoxy from adhering to the tenon. Once cured I could re-drill and smooth the airway.
I failed to photo the application of the epoxy as I was worried about it becoming too tacky. Below is the stem clamped in place.
A couple of hours later I removed the clamp and pulled the stem free. The Vaseline did what I hoped it would do, preventing the epoxy from adhering to the tenon. The airway remained clear of epoxy thanks to the Vaseline coated pipe cleaner and the cotton swab tip kept the epoxy from entering the reservoir. Success on everything so far. I allowed the epoxy to cure for a full two days.
I used a micrometer to measure the diameter of the tenon and discovered that a 5/16 in drill would allow a good fit of the tenon. I stepped the bit down to ¼ for the first re-drilling attempt. Then increased the bit size to the 5/16.
The re-drilling seemed successful and the tenon felt appropriately tight. Below you can see the epoxy patch. I was not happy with the seem around the patch but thought that black cyanoacrylate (CA, super glue) could be used to fill the slight gap to the patch.
The stummel was taken to the sink for a scrub with undiluted Murphy Oil Soap and a nylon scrub brush. The soap was rinsed with warm water and the stummel dried with a cotton hand towel.
Returning to the workbench I wiped the stummel with 95% ethyl alcohol on a make-up pad. A little bit of black stain came off onto the pad.
The scrubbing did little to remove the tar stains around the end of the shank.
I have successfully used oxalic acid to bleach briar previously. I thought that the technique might work here.
I applied the oxalic acid solution with a cotton swab to the unstained shank and set it aside to see if it would lighten the tar stains..
In the meantime I cleaned the pipe stem using 95% ethyl alcohol and bristle pipe cleaners.
A few minutes later I saw a marked lightening of the stained areas. Not completely removed but far better than they were.
I taped off the stem with painters tape to protect it during sanding of the shank and taped over the stamps to preserve them as well.
The shank was sanded with 1000-3500 grit sanding sponges.
At this point I used the black CA to fill the gap between the epoxy patch and the briar shank. I worked fairly well and was lightly sanded using the topping board and 400 sandpaper. There remained a very slight seem or gap. I filled this with clear Thin CA applied with a fly tying bodkin and lightly sanded with a 1000 grit sanding sponge. To reestablish the counterbore of the portise I used a small wood sphere wrapped in 320 sandpaper followed by 400 sandpaper. This was done because I was too lazy to go upstairs and into the garage for a countersink bit.
The end of the shank was touch-up stained black with a Furniture Touch-up Stain marker.
The stem and stummel were reunited and micr0-meshed with the 4000-12000 pads. This polished up the brass accent nicely.
The stem then received a hand buffing with Before and After Fine Polish on a soft cotton cloth.
The Fine Polish was followed by the Before and After Extra Fine Polish with the same cloth.
I worked some Renaissance Micro-Crystalline Wax Polish into the sandblasted surface of the stummel with a baby toothbrush and hand buffed it with a microfiber polishing cloth.
The pipe was then taken to the buffer where the stem and shank end received several coats of carnauba wax with the buffer.
This restoration was a project that required a bit of improvisation. I had never read of another restorer rebuilding a mortise using epoxy. I am sure it has been done as I doubt I am a very original thinker. The results seem to have worked. I have not smoked this pipe and admit that the remedy has not been tested under fire, pun intended. Overall I am quite happy with how this pipe turned out. It is a lovely shape with a great finish. I am looking forward to smoking it and testing out the repair. If you would like to know how the repair holds up feel free to ask in the comments.
The dimensions of this W.Ø. Larsen 85 Bent Billiard are:
Length: 5.71 in./ 145.03 mm.
Weight: 2.03 oz./ 57.70g.
Bowl Height: 2.09 in./ 53.09 mm.
Chamber Depth: 1.60 in./ 40.64 mm.
Chamber Diameter: 0.77 in./ 19.56 mm.
Outside Diameter: 1.62 in./ 41.15 mm.
I do hope that you have found something here useful to your own pipe care, maintenance or restorations. If you like this sort of thing, please click the like and subscribe buttons. Thank you for reading the ramblings of an old pipe lover.
Below are some photos of the finished W.Ø. Larsen 85 Bent Billiard.
Yep, it’s another Peterson. What do you expect from a guy that is also known as NebraksaPeteGeek? This pipe only had to cross the Missouri River to get here. The seller was from just east of Council Bluffs Iowa. I didn’t notice until the tracking said I could expect the pipe to arrive in two days. That’s when I looked at the seller’s location. I felt kind of dumb. Well maybe, dumber. I could have picked the pipe up on the way to visit my sister, east of Council Bluffs and finagle a free dinner out of the trip. Oh well, postal workers need posts just like dogs need head pats and I need more pipes to restore. Everybody is a winner.
The 306 was actually a shape which I did not own. The final 300 shape of the series void is no longer a void. The best part is that the pipe is a sitter and doesn’t really require a slot in a pipe rack. It can just sit in the cabinet next to the rack and look majestic and self-sufficient. This 306 bore the following stamps all immediately below the nickel collar on the left shank: Peterson (arched in the traditional script) over OF DUBLIN (also arched) over SYSTEM over STANDARD 306. The nickel ferrule dome was stamped with the expected K&P over PETERSON. Since this is a standard there were no hallmarks. Below are some photos of the 306 prior to it being worked on.
The briar was in great shape. A little bit of cake in the bowl and a smidge of lava overflowed onto the rim. The stem had seen some chomping and wore the scars. Looking at the indentations it appeared the chomper clenched on his right. Either way, those would need repairs. The whole restoration looked like it would be a relaxing endeavor.
Background
If you have been following this blog for a length of time you know I have done a few Peterson restorations in the past. If you are new here, welcome and I’ve done a few Peterson restorations in the past. I’m not going to go on and on about the history of the oldest continually operating pipe manufacturer in the world and arguably the best. I will however lead you to The Peterson Pipe book. Mark Irwin and Gary Marlburg’s book is a must read for a Pete Geek.
As a summary of the 306,, I am quoting the Peterson.ie site below. I figured that since this pipe is currently in production why not let the makers speak for themselves.
“About the Shape
Combining the sturdy stability of a Poker with convenient jaw-hanging balance, our flat-bottomed Oom Paul is a versatile design, able to sit stably on a desk or be easily clenched in the teeth. Its bold, muscular proportions resonate with our iconic House Style.”
“About the Series
Our flagship line, the System Standard stamp first appeared in 1945, but the entry-level design has been a staple in our catalogues since Charles Peterson secured his final patent in 1898. Designed to provide a cooler, drier smoke, each pipe features a deep reservoir within the shank to collect excess moisture; a graduated bore mouthpiece that funnels the smoke and allows moisture to collect within the reservoir; a sturdy nickel military mount, which allows the pipe to be broken down and cleaned without damage or warping; and our patented P-Lip bit, which draws the smoke upward, thus reducing tongue bite. While the P-Lip bit is the traditional choice, we also offer System Standard pipes with fishtail stems. Available here in the traditional walnut stain of the Smooth finish.”
“About the Range
In 1890, after 15 years of handling and repairing pipes while working for the Kapps, Charles Peterson secured a patent in his own name, titled “A certain new and useful improvement in Tobacco-Pipes,” which introduced a unique system comprised of a higher draft hole and a moisture reservoir bored into the shank and transition of a briar pipe. Over the next eight years, Charles continued to refine his System, applying for and securing patents for a graduated bore mouthpiece (1891), and a unique button design known today as the P-Lip (1894-1898). Designed to wick moisture away from the smoke, reduce tongue bite, and increase the longevity of the pipe, Peterson’s complete System patent sparked a tradition of innovation, one we continue to uphold to this day. The System Pipe is the invisible source behind our unique House Style: our pipes’ muscular shanks and transitions, tubular profile, and generous bends. Our overall shaping style has a distinctly antique form because it has remained largely unchanged for over 120 years.
In our System range, you’ll find a variety of shapes in myriad finishes, each featuring Charles Peterson’s groundbreaking improvements in the realm of tobacco pipes. Whether you’re looking for your first pipe or to enhance a robust collection, here you’ll find numerous options to suit any taste, all backed by our legacy of craftsmanship.”
Now, I would never think to tell Peterson how to do their business nor how to engage in marketing but the above blurb “About The Shape” is lacking a certain bit which I find necessary. According to Irwin and Marlberg, “System shapes 304/20FB De Luxe and 306/11FB created by Paddy Larrigan and introduced in 1992” (Irwin, Mark and Malmberg, Gary (2018). The Peterson Pipe The Story of Kapp & Peterson, First edition, second printing 2021. Briar Books Press, Canada. p215). Paddy Larrigan was a third generation Peterson factory worker who was also responsible for the Dunmore line of pipes. His footprint in the history of Peterson should be glossed over. For more information on the Peterson Dunmore line check out my last Dunmore blog: https://wordpress.com/post/scimansays1787.com/6410. That means that this pipe’s origin story could have begun as early as 1992. The Standard line of pipes are difficult to date as they do not have any defining characteristics like hallmarks of silver mounted pipes. I did check the current stampings to see if they offered any notable changes and they appear the same today as this pipe’s stamps.
In typical “me” fashion I began with a laundered denim piece. I cannot use the term clean as the stains from previous restorations are taking a toll on that term.
The reaming crew was called forth.
The PipNet with the #2 blades did most of the work clearing the cake from the tobacco chamber. Further scraping was done with both the Smokingpipes Low Country reaming knife and the General triangular scraper. The interior of the chamber was then sanded with 220 sandpaper wrapped around a wood dowel.
The interior of the tobacco chamber had some charring and heat damage. This was scraped and sanded as smooth as possible without drastically changing the interior shape. The damage was not severe nor very deep. I thought the best remediation would be a bowl coating and the end of the restoration.
The stem was next on the schedule. I place it into a fresh solution of Oxiclean and water. And allowed it to soak for 2 hours.
I returned attention to the stummel and took it to the sink for a scrubbing with undiluted Murphy Oil Soap and a nylon scrub brush. The soap was rinsed with warm water and the stummel was dried with a cotton hand towel.
Back at the workbench the stummel looked more clean but there remained some areas with more “shine” than others. I wiped the stummel with a make-up pad dipped in 95% ethyl alcohol. This worked at removing the shine and left the stummel looking more like flat unfinished briar.
The stamps were covered with painters tape to protect them from the upcoming sanding.
The shank and reservoir were then cleaned out with many cotton swabs, folded bristle pipe cleaners, a shank british and scrapings with a dental scraper. The Peterson System does work very well but when neglected it is far from an easy thing to clean.
The stummel was then sanded with a series of sanding sponges with grits of 320-3500. Between each sponge the stummel was wiped with a make-up pad wetted with 95% ethyl alcohol.
The stem was removed from the Oxiclean solution and scrubbed with a couple of Soft Scrub cleanser treated make-up pads. A good deal of oxidized material came off but not as much as I was expecting.
The airway was cleaned with cotton swabs and bristle pipe cleaners dipped in ethyl alcohol. I could still see brown oxidized vulcanite on the stem and decided to give it a dip in the Before and After Extra Strength Deoxidizer. I inserted a pipe cleaner into the P-lip to act as a hanger in the Deoxidizer.
Below, the stem entered the Deoxidizer and was left overnight.
The following morning I removed the stem and allowed it to drip excess solution back into the jar.
The stummel had been sanded. Now it was time for the micro-mesh pads. I micro-meshed the stummel with the 4000-12000 pads. Again between each pad I wiped the stummel with a make-up moistened with ethyl alcohol.
The stummel then received a coating of Before and After Restoration Balm and was allowed to sit for as long as it took for the stem repair, sanding and micro-meshing.
Back to the drip dried stem. I used a coarse shop rag to wipe/scrub the remaining Deoxidizer from the stem. The air way had 2 pipe cleaners run through it to remove the solution.
At last the stem was looking brilliantly black. A bit pitted but the pits were black too.
I again used Soft Scrub cleanser on make-up pads on the stem. Much less oxidized rubber came off. The inside of the tenon and airway were again cleaned making sure that any remaining Deoxidizer was removed.
I sanded the Chomped areas with a 600 grit sanding sponge to ensure fresh vulcanite to work with. By “work with”, I mean to fill with black cyanoacrylate (CA, super glue). Below you can see the button top and bottom areas to repair.
The CA I was using has carbon and rubber in the formula making the fills more vulcanite-like. In other words, rubberizing the CA rather than the more hard and brittle black CA I used last winter. Small dabs of CA were placed onto the indentations.
The wet CA was then spritzed with a CA drying accelerator. This cures the CA in seconds as the accelerator evaporates.
The cured CA was then filed level with the surrounding vulcanite. The dark spots in the photo below indicate areas where additional CA needs to accumulate. I use several small applications rather than one large one.
The same for the bottom side of the stem.
Eventually with additional applications and filings the stem was sanded smooth.
With the fills completed the whole stem was sanded with the series of sanding sponges 400-3500. Between each sponge I applied a fingertip of mineral oil to the stem, rubbed it in and wiped the stem with a dry paper towel.
After the sanding the stem was micro-meshed with the 4000-12000 pads. Between each pad I applied a small drop of Obsidian Oil to the stem, rubbed it in and wiped with a paper towel.
The stem was polished using Before and After Fine Polish rubbed with a soft cotton cloth.
The Fine Polish was followed by the Before and After Extra Fine Polish with the same cloth.
The stummel was wiped of the Restoration Balm with an inside out athletic sock.
The pipe was then taken to the buffer for several coats of carnauba wax. This is where my forgetfulness comes to light. I photographed the “finished” pipe at this time. Upon completing the photo shoot, I realized that I still needed to coat the bowl. Darn old people… I was out of pure maple syrup but I did have a jar of German organic honey, a gift from a Europe traveling niece. I lightly coated the inside of the bowl with honey. I then plugged the draft hole with a pipe cleaner. I used half a capsule of carbon powder poured into the bowl, covered the rim with my hand and shook the stummel for several seconds. I ended up with a very nice circle of carbon powder on the thick part of my thumb and a well coated tobacco chamber. That is the last photo in the “finished” section below.
That is it, the relaxing restoration of a Peterson System Standard 306. I am very pleased with how well this Pete looks. At least on the outside. As with any damaged interior I will have to smoke it and monitor it closely. I can say that the inaugural smoke was with a lightly packed Five Brothers shag cut Burley. I didn’t want to scrape any of the coating off so a very soft cut tobacco was used. Everything went as planned, the honey baked in nicely with the carbon powder and it appears to be on its way to a solid carbon coating. Back to the restoration. The vulcanite was rid of the oxidation and it looks great. The briar with its bird’s eyes on the left and flame grain on the right are beautiful. I am sure this pipe will continue to be used many times while contemplating my next restoration. The dimensions of this Peterson System Standard 306 are:
Length: 6.63 in./ 168.28 mm.
Weight: 2.08 oz./ 59.20 g.
Bowl Height: 1.91 in./ 48.51 mm.
Chamber Depth: 1.61 in./ 40.89 mm.
Chamber Diameter: 0.77 in./ 19.56 mm.
Outside Diameter: 1.46 in./ 37.08 mm.
I do hope that you have found something here useful to your own pipe care, maintenance or restorations. If you like this sort of thing, please click the like and subscribe buttons. Thank you for reading the ramblings of an old pipe lover.
Below are some photos of the finished Peterson System Standard 306.
Back in the 1990s I worked with a fellow teacher and Nebraska Air Guard F4 pilot who often said, “Better lucky than good, any day.” That phrase has stuck with me over the years and applies to so very many daily occurrences. The acquisition of this pipe for instance. It was part of a lot of 12 pipes. The other 12 were nothing to be too excited about; Yello-Boles, Dr Grabows, a split seam leather Longchamp, etc… and what appeared to be a Peterson Meerschaum hiding in the background ashamed at it’s lot in life. The photos of the lot were as usual, less than perfect yet, I knew what I thought I was seeing. I was sure that someone else would see the same thing and the lot would sell quickly. It didn’t. The auction closed with no sale and was relisted. I cannot remember how many times this relisting occurred. I finally couldn’t take the thought of a Peterson meerschaum going unloved and messaged the seller with an offer. The auction was not set as a “Make Best Offer” but I figured it was worth a shot. The seller messaged me back saying that he reduced the price to my offer. Well, that was easy.
Needless to say, after a few days of waiting the package arrived here in the wilds of southeast Nebraska. The anticipation was palpable as I tore through the packaging. I eventually unwrapped a P-lip stem with the unmistakable P stamped clearly. I knew it! Next the stummel emerged from it’s protective tissue paper. The seller knew how to package and ship pipes and not just for dramatic effect. The stem and stummel were reunited and I saw my latest prize. As typical, the only stamp was the Peterson stem logo but the shape was unmistakable a 120 Dublin. Below are some photos of the pipe prior to doing any work on it.
Background
Earlier this year I restored a Peterson meerschaum 406 Prince. I will use a good deal of the “Background” from that blog here again:
I included a few links concerning the history of Peterson pipes. I will include those here also. “For a great history Mark Irwin and Gary Marlburg’s book is a must read for a Pete Geek.
For the history of Peterson Meerschaums I will mainly be citing Irwin and Marlberg’s The Peterson Pipe book. Peterson has a long history of meerschaum pipe making dating back to the 1870s (Irwin, 2018 p. 15). At the time when Charles Peterson began working for the Kapp brothers in Dublin, meerschaum was the old traditional material while briar was a new innovation destined to become more popular in the next century. It was with briar that Charles Peterson created his original patents for the reservoir in 1890 and for the graduated-bore mouthpiece with what we call the “Patent-Lip” (P-Lip) today, in 1894. 1893 was the year that Charles Peterson and Henry Kapp bought out the shares of Christian Kapp of the Family business, which the brothers had run together. “Christian was evidently not happy with this arrangement and disliked Dublin. He trained to become a doctor, and on 12 June 1893 he sold his share of the business to his brother and Charles Peterson” (Irwin, 2018 p. 48). The Kapp & Peterson company was born and the Peterson System has continued for over 130 years.
Now obviously the lovely Peterson meerschaum pipe in hand is not something made at the turn of the century. According to Irwin and Malmberg, “ In 1968, Peterson returned to making block-meerschaum pipes after forty years. They had made block meerschaums in all Patent Systems and many Classic Range shapes from 1896 until about 1929. The scarcity and rising cost of amber, fragility of meerschaum and popularity of briar all contributed to the end of meerschaum production.” (Irwin, 2018 p. 158). The authors go on to state that, “These Republic-era meerschaums were first made in partnership with Manxman Pipes, Ltd., on the Isle of Man, a company Peterson bought outright in the early 1970’s (Irwin, 2018 p. 158).
I am not quite sure how the purchase of Manxman pipes worked. Manxman was an apparent subsidiary of Laxey Pipes Ltd. According to pipedia.org:
“Laxey Pipes Ltd. resided in a historical 19th century four-storey Man stone building at The Quay, Old Laxey, Isle of Man, which thankfully has been preserved.
The company specialised in the production of meerschaum pipes using the Meerschaum mined by the Tanganyika Meerschaum Corporation in the Amboseli basin in Tanganyika (since 1964 part of the United Republic of Tanzania).
Please note: you may often find names like “Manx Pipes Ltd.”, “Man Pipe Co.” and others more, but there is no indication of another Isle of Man pipe producer other than Laxey Pipe Ltd. at any time!
Laxey Pipes Ltd. marketed own brands like “Manxpipe”, “Manxman”, “Manxland” e.c. Names like “John Bull”, “White Knight” (unwaxed), “Domino” (black, or lined) indicated some shapes / colours of Laxey’s own series. The stems either showed the astronomical sign for “male” or “man” (circle + arrow), or the crest of the Isle of Man, the 3-legged X in a circle. Manxpipes and Laxey’s other brands were available through pipe retailers in general, but also were sold (mainly) to tourists through their own shop in Laxey.
Furthermore Laxey Pipes Ltd. manufactured the meer bowls for Peterson, Barling, Nørding and others from the later 1960’s until 2001. Man Pipe e.g. was a brand distibuted by Comoy’s. The bowls usually showed no nomenclature indicating the orderer. “Genuine Block Meerschaum” was engraved frequently. Often, just the stems were different, while bowls were the same.
Supply of meerschaum from East Africa run out (Kenya / Tanzania exhausted, Somalia inaccessible), and thus the last Laxey meers were supplied to trade in May, 2001. Laxey Pipes Ltd. tried to survive continuing with briar pipes – mainly in the Danish style -, but to no success. It closed down business in July, 2002.”
As for the age of this 120 Dublin, the first documented 120 shape I found in The Peterson Pipe book was on the 1947 shape chart (Irwin, 2018 pp. 156-157). During the Free State Era ( 1922-1937 the Dublin looking shape had an R413 number. The Patent Pipes from 1890-1921 had a Dublin-esque shape named the “Kaffir” and did not have shape numbers (Irwin, 2018 p. 122, 124).
In the “A New Leaf” meerschaum brochure from 1968 there appear photos of the Peterson meerschaums offered (Irwin, 2018 p. 105). The 120 shape is represented however the stem/shank joint is very flush and smooth with a continuous taper. This 120 has a rounded shank end at the stem shank joint. The 1975 catalog photos show meerschaum pipes with stem/shank joints like this pipe (Irwin, 2018 p. 164, 166). This leads me to believe that this Peterson Meerschaum was made in the mid1970s-early 1980s.
The Restoration
Like I usually do, I began with a clean denim piece to work on.
My old Oxiclean solution was getting discolored and was not smelling very good so a new solution was made. 1 ½ tablespoons of Oxiclean powder in about 500 ml of tap water.
The stem of the Peterson was placed in the solution for a soak in the oxy.
Reaming with a reaming tool like the PipNet is not recommended for meerschaum due to it’s brittle nature and the torque generated with a tool like the PipNet would probably not be a good thing. Instead I used the Smokingpipes Low Country reaming knife and the General triangular scraper. The tip of the General had been ground from the original sharp point to a more rounded tip with a grinding wheel. A wood dowel wrapped in 220 sandpaper joined in.
The scraping did not produce a great deal of removed cake but it did clear the tobacco chamber.
When cleaning the rim I noticed what appeared to be filled cracks. I saw no evidence that these cracks joined together and actually represented a large piece of the pipe that had been broken off and later repaired. Though looking at the outer stummel surface the finish is smoothed (without rustication) between the two cracks. The area between the crack also looked thinner than the rest of the stummel. I think this was evidence of a repair by a previous owner or an attempt by the factory to salvage a flawed stummel. Either way the stummel looked and felt structurally sound.
Scraping the tobacco chamber was difficult as the cake was very hard and held firmly to the walls of the chamber. Sanding was slow and exposed fresh meerschaum at the rim of the chamber.
After the chamber was sanded I scrubbed the stummel with warm water and a medium toothbrush. The traditional Murphy Oil Soap was not used, only warm water. The water and toothbrush did appear to remove some of the accumulated grime making the stummel look a bit more clean than previously.
To unify the staining of the pipe’s rim, I used furniture touch-up stain markers.
I started with black around the rim.
I then used the mahogany immediately below the black. Sorry about the blurriness of the photo.
After the stain had dried a few minutes I used a make-up pad wetted with 95% ethyl alcohol to blend the two lines of stain together. Below you can see the results of my blending.
The stem was removed from the oxi bath after 2 hours and was wiped vigorously with a dry cotton make-up pad. A good deal of oxidized vulcanite was removed.
I cleaned the shank airway with folded over bristle pipe cleaners, a nylon shank brush and cotton swabs dipped in 95% ethyl alcohol.
The stem was then scrubbed with Soft Scrub cleanser applied to make-up pads. After scrubbing I applied a layer of mineral oil to the stem.
The airway of the stem was cleaned with bristle pipe cleaners dipped in 95% ethyl alcohol.
The pipe sat neglected for a whole day due to the incredibly busy schedule of a retired slacker, I mean teacher. When I returned to work on the stem I wiped the excess mineral oil and lightly sanded with the 320 sanding sponge.
There were a few deep dents in the stem that would require filling with black cyanoacrylate (CA, super glue). Small drops of CA were placed onto each of the dents.
The CA was then spritzed with a CA drying accelerator. This allows the CA to cure almost instantly.
The cured CA was then lightly filed with a small flat file. This removes the top of the CA fill, getting it smooth with the surrounding vulcanite.
The new fill was then sanded with 320 and 400 grit sanding sponges. The logo was covered with a piece of painters tape to protect the logo from further sanding. The stem was then sanded with a series of sanding sponges from 600-3500. Between each sponge the stem was rubbed with a dab of mineral oil by fingertip and wiped with a dry paper towel.
The flaws on the surface of the rim were filled with a different black CA. The product I use for the stem is “rubberized”. I wanted a hader CA fill for the rim so I used a non-rubberized black CA. I placed a drop of the black CA on the bottom of an upside down medicine cup. I dabbed a fly tying bodkin into the drop to get some CA onto the bodkin then applied it to the flaws. This allowed me to have precise placement of the CA limiting the sanding of excess CA fill.
I allowed the CA to cure on its own without any accelerator. This was a slow process with a good deal of waiting between applications. Once cured, I very lightly sanded the rim with a 400 and 600 sanding sponge to remove the excess CA.
Several applications and sandings later I was pleased with the result. You can see that the sanding was very light leaving most of the previously dyed rim black or, mostly so.
The rim was then re-dyed with the black stain touch-up marker. And allowed to dry.
The finished rim has imperfections which I purposely left. I thought that a pristine smooth finish would look out of place with the rustication of the stummel.
Next I cleaned the logo of any Obsidian Oil with a cotton swab dipped in 95% ethyl alcohol.
Using white acrylic model paint and a fine detail paint brush I applied white paint to the logo. This acrylic paint is water based and dries quickly.
The 4000 grit micro-mesh dam was used to remove the excess white paint.
I worked the stem with micro-mesh pads 4000-12000. Between each pad I applied a small drop of Obsidian Oil, rubbed it onto the stem and wiped with a dry paper towel.
Before and After Fine Polish was used with a soft cotton cloth on the stem to increase the level of polish.
The Fine Polish was followed with Before and After Extra Fine Polish applied and hand buffed with the same soft cotton cloth.
To finish the stummel I needed to prepare for a beeswax coating. I gathered the heat gun, canning jar with beeswax & brush, a catch tin for wax drips and a shallow pan with water. The pan and water help to heat/melt the wax and keep it melted while I work.
The canning jar with beeswax was placed into the water in the pad and the stove lit. The boiling water will melt the wax.
WHile I was waiting for the wax to liquify, I waxed the Peterson stem at the buffer with carnauba wax.
The hot water bath melted the wax. I heated the stummel with the heat gut. I have to admit I was a bit worried about heating the mortise and tenon too much.
With the stummel hot and the beeswax melted I started painting the liquid wax onto the stummel. I painted the top 1.3 and the entirety of the shank. As I painted the accumulating wax was cooling making a lumpy looking mess.
The heat gun was again turned on and the stummel was rotated in all directions in the flow of hot air. The wax remelted and flowed over the surface of the stummel. I herded the wax around with the paint brush to make sure that everything was getting it’s fair share of melted wax. The excess wax drips were accumulating in the catch tin.
With every part of the stummel well coated with hot liquid wax I used a paper towel to absorb the remaining excess wax from the stummel.
The pipe was hot to the touch so I laced it onto the workbench to cool.
There you have it, the restoration of a Peterson Meerschaum 120 Dublin. This old girl turned out pretty well. I still wonder what happened to the Dublin Darling from the Isle of Man regarding the cracks in the bowl. I believe that the whole rear of the bowl was chipped out at some time and repaired with a pretty darn good glue job. The crack seems can kind of be made out in the photo below of the back/shank side of the pipe. Whatever happened she should continue being a grand little pipe for many years. The fresh beeswax looks good and the stem polished up very well. The dimensions of this 120 Dublin are:
Length: 6.00 in./ 152.40 mm.
Weight: 1.28 oz./ 36.50 g.
Bowl Height: 1.71 in./ 43.43 mm.
Chamber Depth: 1.47 in./ 37.34 mm.
Chamber Diameter: 0.74 in./ 18.80 mm.
Outside Diameter: 1.33 in./ 33.53 mm.
I do hope that you have found something here useful to your own pipe care, maintenance or restorations. If you like this sort of thing, please click the like and subscribe buttons. Thank you for reading the ramblings of an old pipe lover.
Below are some photos of the finished Peterson Meerschaum 120 Dublin.
This is a pipe I read about in 2023 and have been searching the auctions for since. One showed up in Italy a few months ago and the price was just too steep for my tastes. Finally this one showed up with an estate lot. I didn’t really want any of the other pipes in the lot but they were a package deal. I watched the auction run to the allotted time and still would not pay the asking minimum bid. The seller relisted the lot and my watch began anew. Again no one met the minimum asking price. The item was relisted a third time, with a “Make Best Offer” option. “Okay, now we’re talking”, I thought. I waited a few days then sent an offer with a note that I was only really interested in the Needham. The offer was accepted and I received the lot a few days later.
I was ecstatic when I saw the Needham in the flesh. The condition was much better than I expected or than the photos showed. Actually, a couple of the other pipes were also quite interesting and will most likely be seen in the future. The Needham looked to have only been smoked a few times, if that. The bottom of the tobacco chamber appeared unfired. The stamps on the base of the pipe were clear and well imprinted and read, NEEDHAM over IMPORTED BRIAR over PAT’D. There is no stem logo. The only other distinguishing feature is the red anodized aluminum screw at the front of the stummel base. Below are some photos of the pipe as it appeared upon arrival.
Background
The advertisement which originally sparked my interest in the Needham pipe is the below from the November issue of Pipe Lovers magazine 1946, page 365.
Now, you would think with an idea this great and a shape this cool and a pipe market that was smoking (pun intended) this would have been a great success with tomes written about and chronicling this wondrous development of human ingenuity. Umm, no. Here is what Pipedia.org has to say about Needham pipes:
Perhaps pipephil.eu has access to the hoards of documentation for the brand?
Bah, fortunately, dear reader I am not easily dissuaded by failure. I did come across a few interesting reads regarding the original Needham patent and the flush of smoking pipe innovations from the late 1800s-mid1900s. First lets take a look at the original Needham patent submitted September 30, 1942.
The second article shows a condensed form of the previous long description:
The final is an essay by Ben Rapaport, with my favorite quote where he is describing fundamental changes to smoking pipes over the past 100 years, “So what’s left? Asked and answered: all the quirky, kitschy, zany-looking concoctions, contraptions, and gimmicks, the Rube Goldbergian attempts at either changing the pipe’s outer appearance or reengineering the interior’s performance. Quite a few offered to the smoking public in the early to mid-20th century were, literally and figuratively, pipe bombs—not the homemade, improvised explosive devices—pipes that never got much consumer traction; their designs were of questionable functionality and of dubious benefits. A few were advertised as delivering a healthier smoke. Others were so butt-ugly that no self-respecting pipe smoker would have been seen puffing one of these in public.” (https://pipedia.org/images/e/e9/Rapaport-Pipe_Bombs.pdf) Ben Rapaport does have a nice description of the Needham and it’s intended improvements:
In examining the stummel and measuring drilling depths, I came up with the following diagram (measurements and their corresponding representations are approximate and not to scale):
Do I think that this system would work? Not really. The theory is reasonable but the dimensions don’t seem appropriate. If the condensing chamber were to be tripled in length and the moisture drain would be drilled larger in diameter, then maybe. It would then be a pipe more like a horizontal Cavelier. As built, I think that the small amount of moisture condensed would foul the moisture drain and not accumulate in the Moisture chamber.
Needham pipe advertisements appear in the 1946 November and December issues of Pipe Smokers magazine. The patent for the Needham was applied for in 1942 and issued in 1944. I cannot find anything about the Needham pipe factory or what became of it. I think it is safe to say that this pipe was made around 1946.
The Restoration
As usual the restoration began with a clean piece of denim to work on.
The reaming tools, though hardly necessary, were gathered.
I used the PipNet with the #2 blades to ream the tobacco chamber. I can’t really call the smoking residue that was present cake. It was more like a communion wafer than a cake. I scraped the chamber clean and sanded with the 320 sandpaper wrapped around a wood dowel.
Not surprisingly, the walls of the Neeham were nearly pristine.
Next the shank and the lower moisture chamber (as it was called in the advertisement) were cleaned using cotton swabs and bristle pipe cleaners both dipped in 95% ethyl alcohol.
The below photo shows the two holes drilled in the stummel. The top hole is the draft hole while the bottom is supposedly the hole where the condensation will drain into the moisture chamber.
Here I have run a pipe cleaner through the lower hole and out the front of the moisture chamber.
Here a pipe cleaner is run through the upper hole and into the tobacco chamber.
After the shank was cleaned I turned my attention to the stem.
With the inside clean, I sanded the surface with a 400 grit sanding sponge and prepared the stem for a dip into the Before and After Extra Strength Deoxidizer or, as I like to call it deox.
Into the deox with you.
The pipe cleaner inserted into the tenon acts as a hanger for the stem.
I left the stem in deox for about three hours, it was two episodes of rewatching The Umbrella Academy while working on the stummel and a lunch break. The stummel was taken to the sink for a scrubbing with a nylon scrub brush and undiluted Murphy Oil Soap. The soap was rinsed with warm water and the stummel dried with a cotton dish towel.
Upon returning to the workbench the stummel was wiped with 95% ethyl alcohol on a make-up pad. There appeared to be some residual finish on the briar.
The scrub and wipe did reveal several pits which would require filling with cyanoacrylate (CA, super glue) and briar dust.
There remained some kind of finish on the wood. I used acetone on a make-up pad and that seemed to be what was needed to remove the stubborn clear finish.
I sanded the stummel with a 400 grit sanding sponge. At this time I applied thin coats of CA to the grooves seen earlier. The sanding dust provided the briar dust needed to combine with the CA and fill the depressions. The shallow grooves only took one application of the CA while the deeper groove required 3 and subsequent sanding to fill it. The series of sanding sponges then continued from 600 through the 3500 grit. Between each sponge I wiped the stummel with a make-up pad moistened with ethyl alcohol.
After lunch the stem was taken from the deox and allowed to drip dry using the pipe cleaner hanger pinched into a bottle lid.
When finished dripping the stem was vigorously rubbed with a coarse shop rag to remove the deox loosened oxidation. This can be seen as the discoloring on the shop rag, below. The stem ‘s surface looked pitted and rough.
I scrubbed the stem with several make-up pads sprinkled with Soft Scrub cleanser to remove more of the surface oxidation. The stem was now black and received a coating of mineral oil before the next step.
Next came the sanding sponges, 320-1000 grit. I first wrapped the shank with painters tape to protect it. I needed to reattach the stem to the stummel to ease holding the stem.Between each sponge I applied mineral oil, rubbed it in with my fingers and wiped the stem with a clean dry paper towel.
The pitting was sanded away and revealed a much more uniform black vulcanite. This was further sanded with the 1500-3500 sanding sponges again with the mineral oil rub and wipe between each sponge.
The tape was removed and the stummel and sem were worked with the 4000-12000 micro-mesh pads. The stummel was again wiped with alcohol on a make-up pad between micro-mesh pads. The stem now received a small drop of Obsidian Oil rubbed in and wiped with a paper towel.
Before and After Restoration Balm was then applied to both the stem and stummel and allowed to sit for an episode of The Umbrella Academy, about 45 minutes.
The Restoration Balm was wiped off using an inside out athletic sock and energetic hand buffing to clear the balm from the carvings.
The pipe looked amazing. I then took it to the buffer for several coats of carnauba wax. The wax was worked into and with the scratch-like rustications. This took considerably longer than a typical wax and buff.
I was very pleased with the restoration of this Needham Not just because I finally found one to restore, although that was pretty cool in itself. The briar grain is pretty and I wonder why the rustication was used. I have not seen any versions of a Needham pipe with a smooth finish. The vulcanite cleaned-up well and looks great. I have yet to smoke the Needham and experience the effectiveness of this system. I do have my doubts about the need for the extra drillings and chamber. Who knows, I will be completely happy with either result – a nice relaxing smoke with a neutral tobacco. I’m thinking Peterso’s Early Morning Pipe blend. If you want to know my impressions of the system let me know in the comments. Also if you have any information about the Needham Pipe Company or Edward F. Needham, I’d love to read that as well. The dimensions of this Needham are:
Length: 5.67 in./ 144.02 mm.
Weight: 1.47 oz./ 41.80 g.
Bowl Height: 1.74 in./ 44.20 mm.
Chamber Depth: 1.29 in./ 32.77 mm.
Chamber Diameter: 0.85 in./ 21.59 mm.
Outside Diameter: 1.38 in./ 35.05 mm.
I do hope that you have found something here useful to your own pipe care, maintenance or restorations. If you like this sort of thing, please click the like and subscribe buttons. Thank you for reading the ramblings of an old pipe lover.





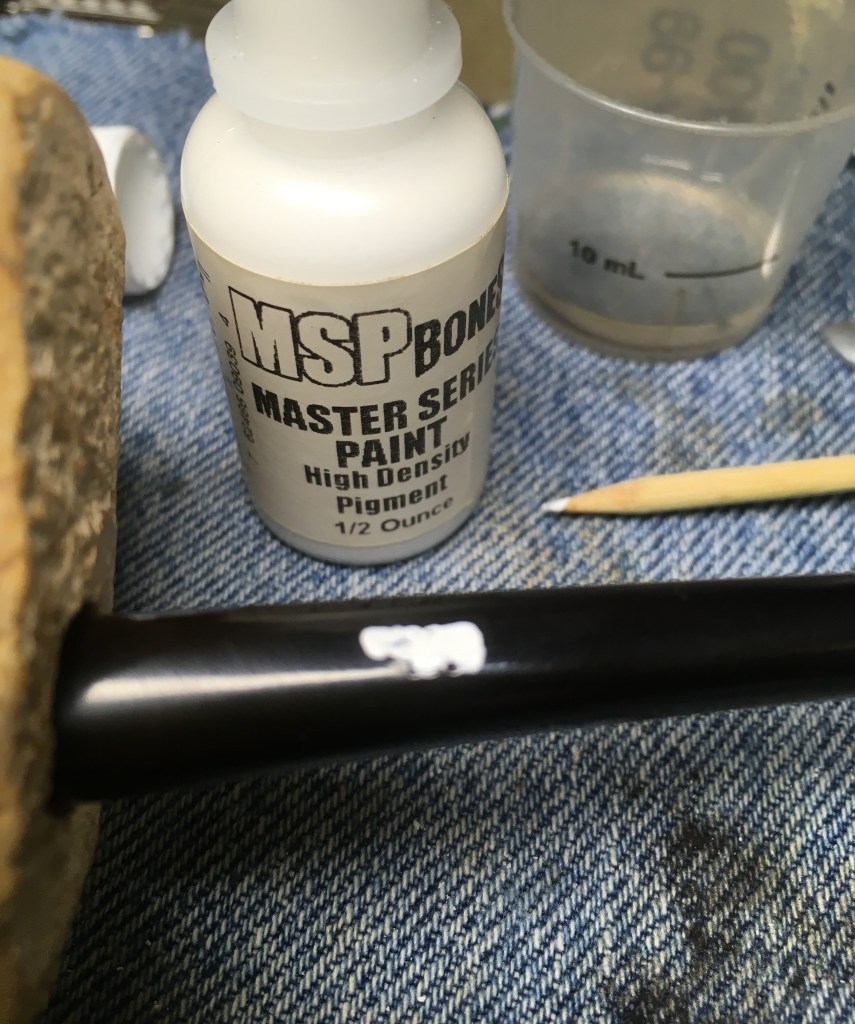


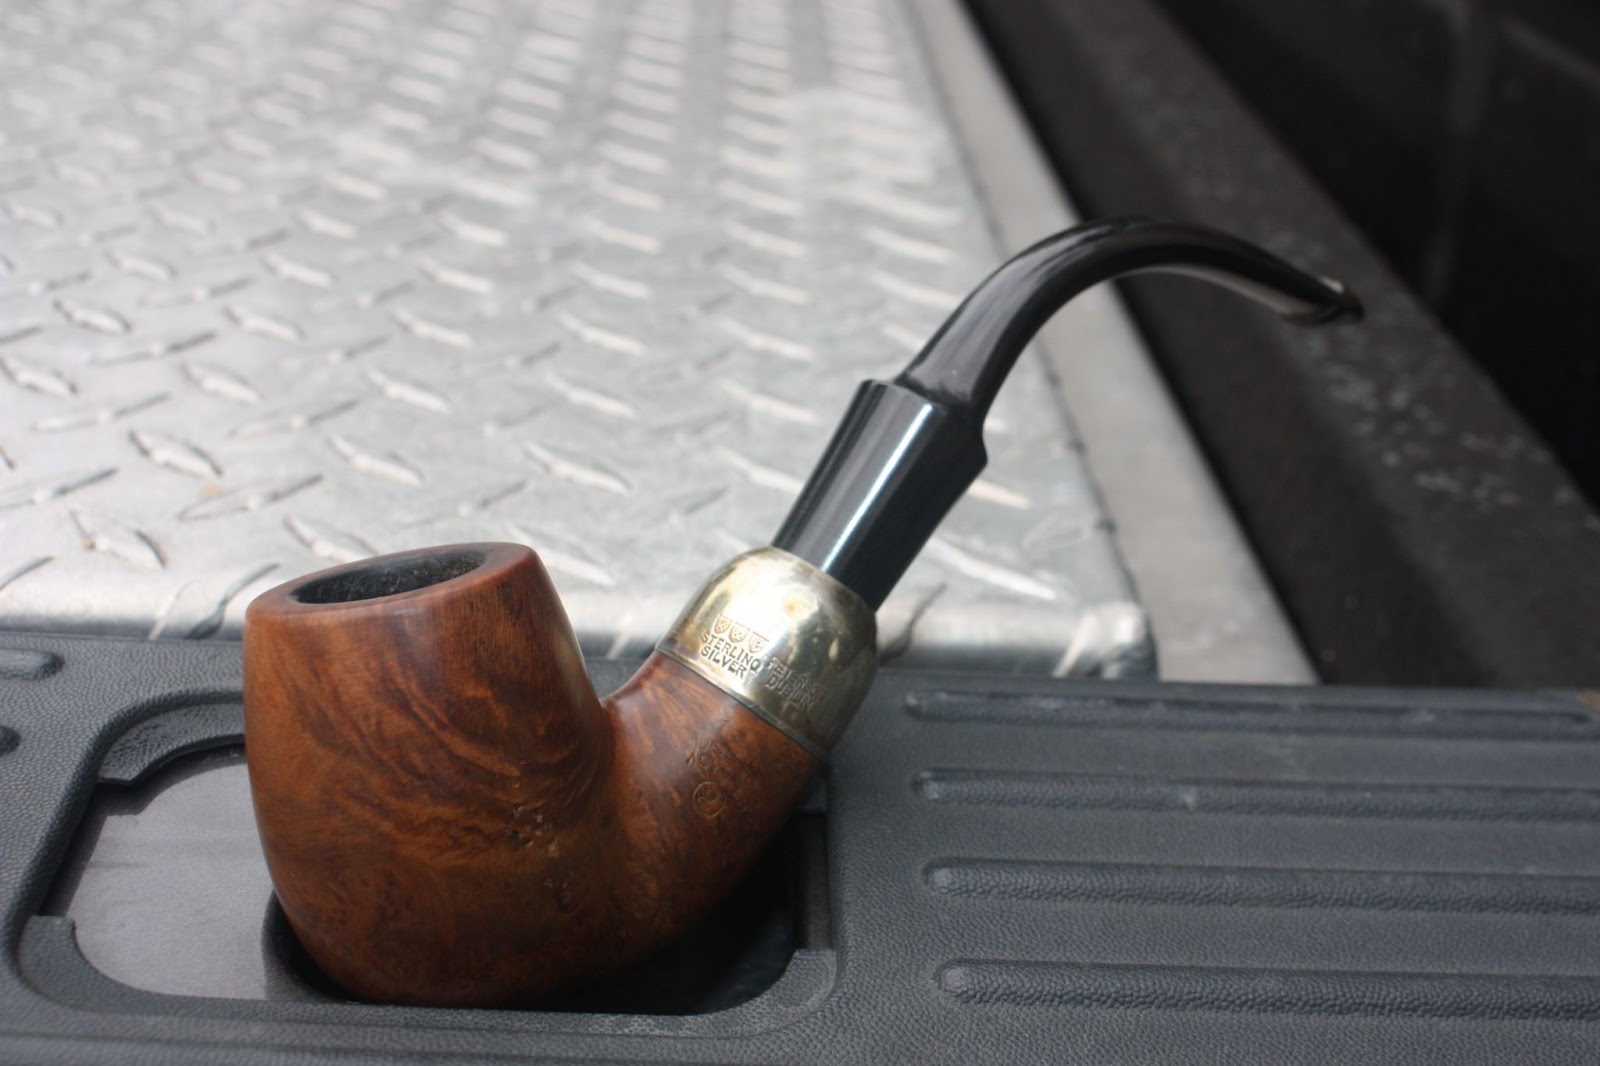


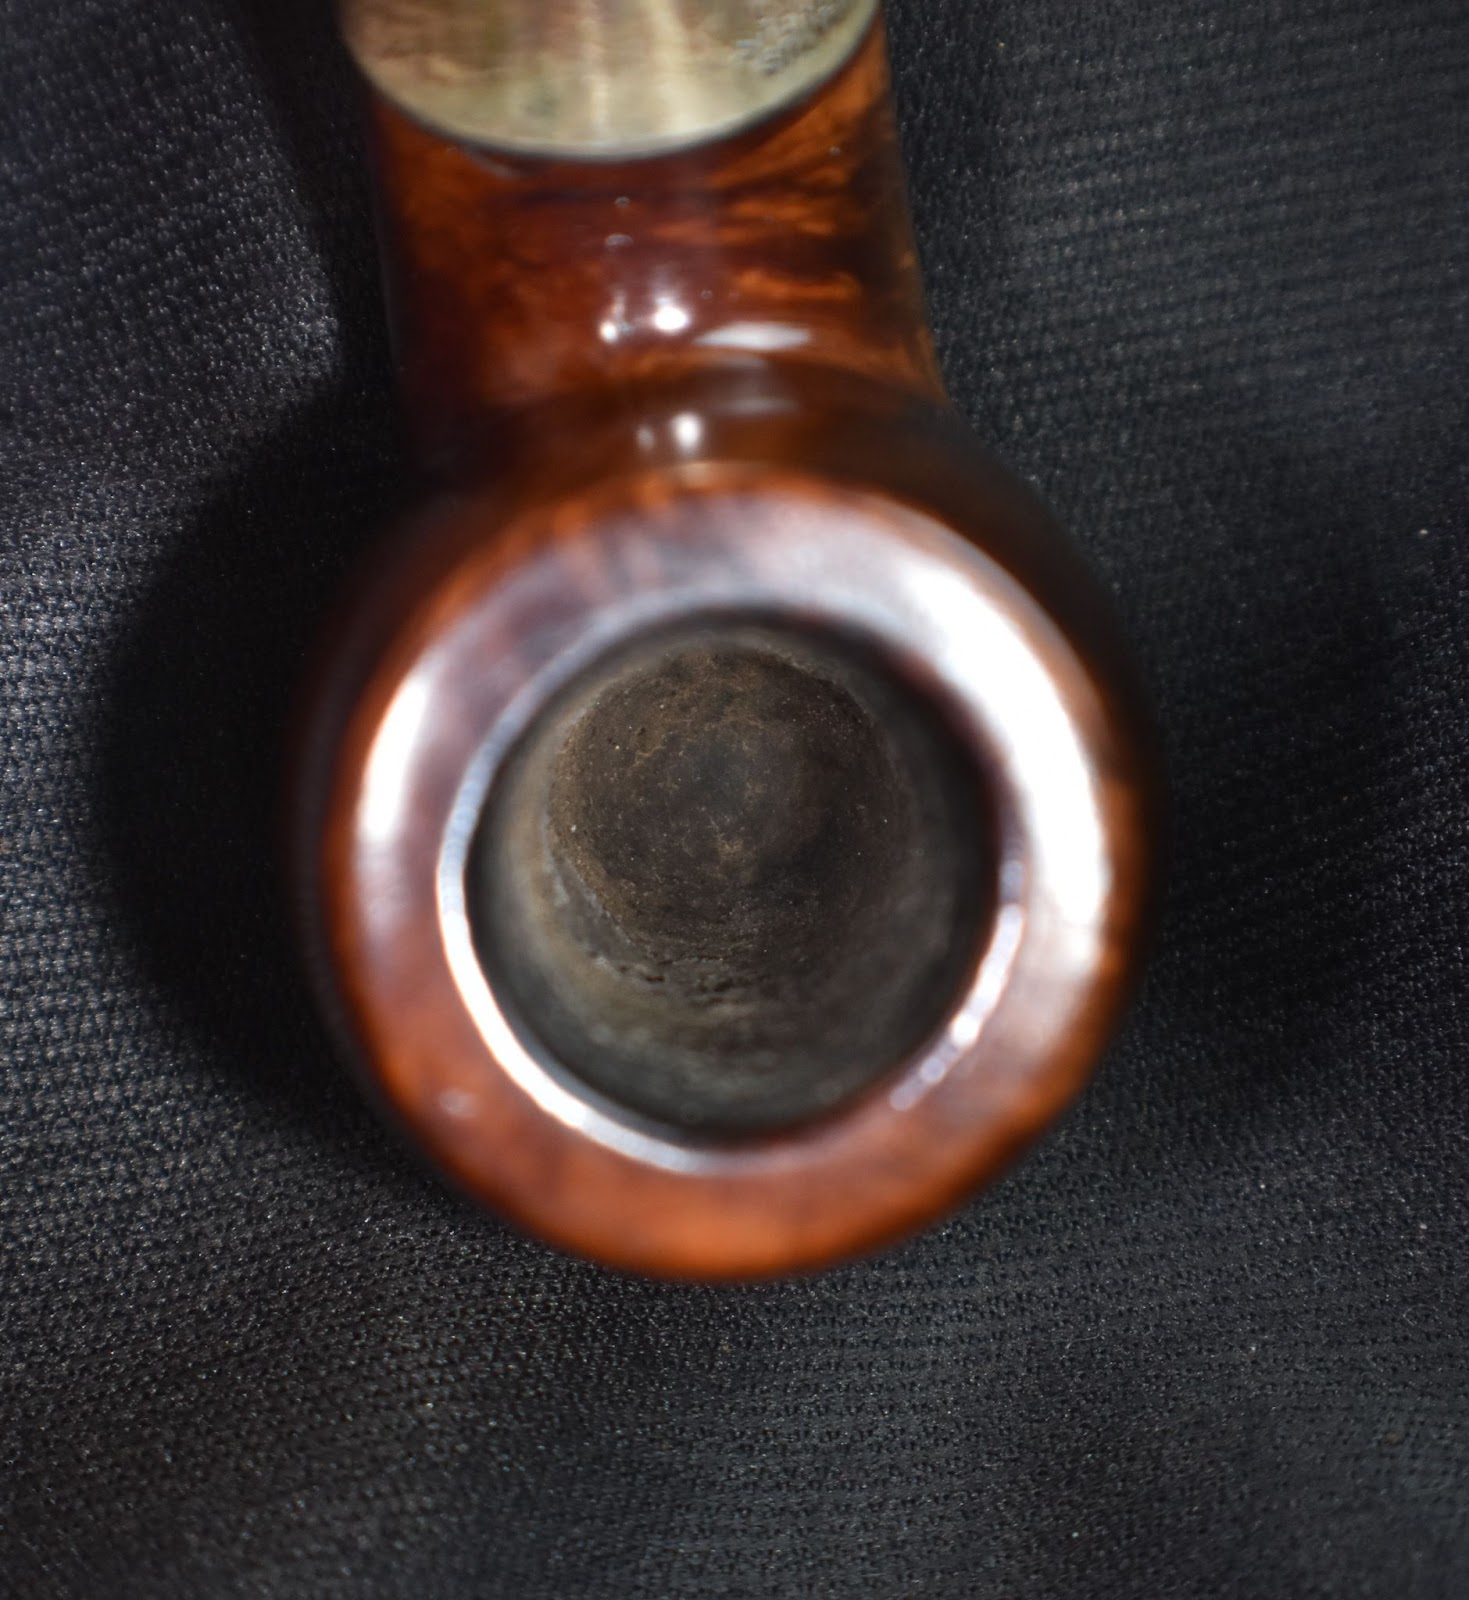

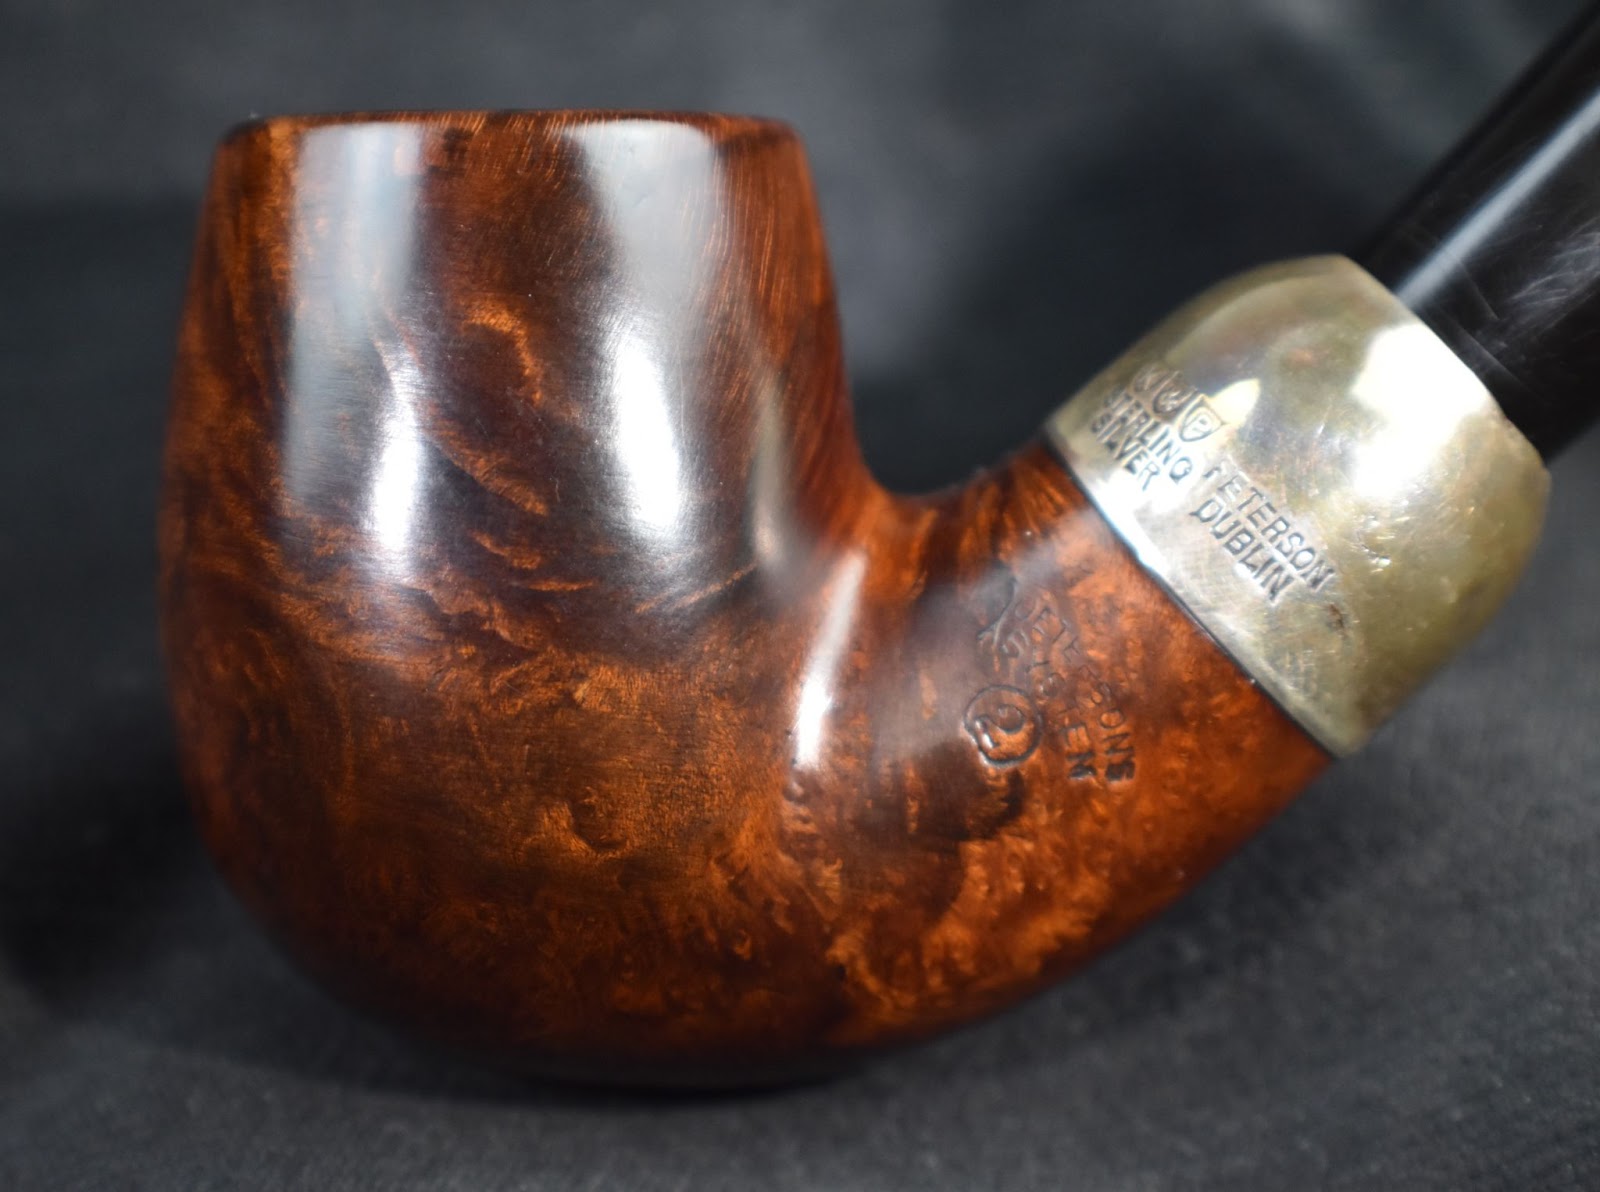
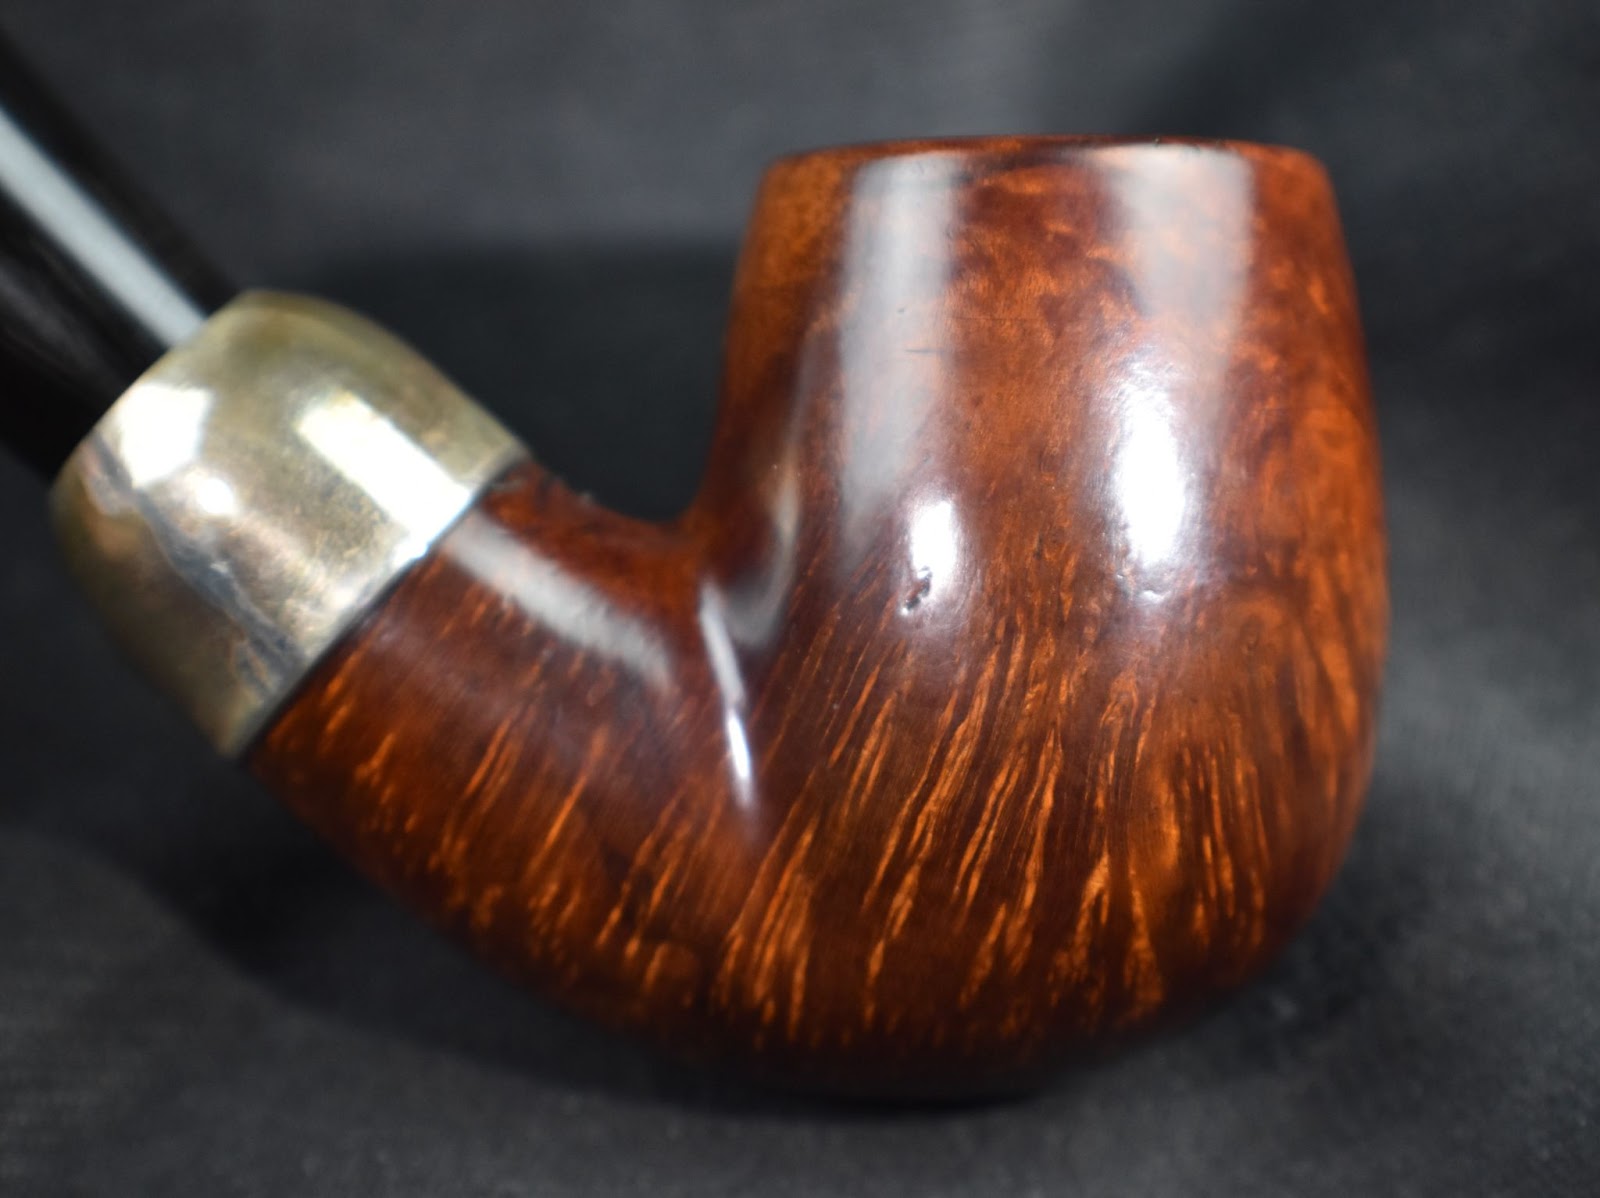


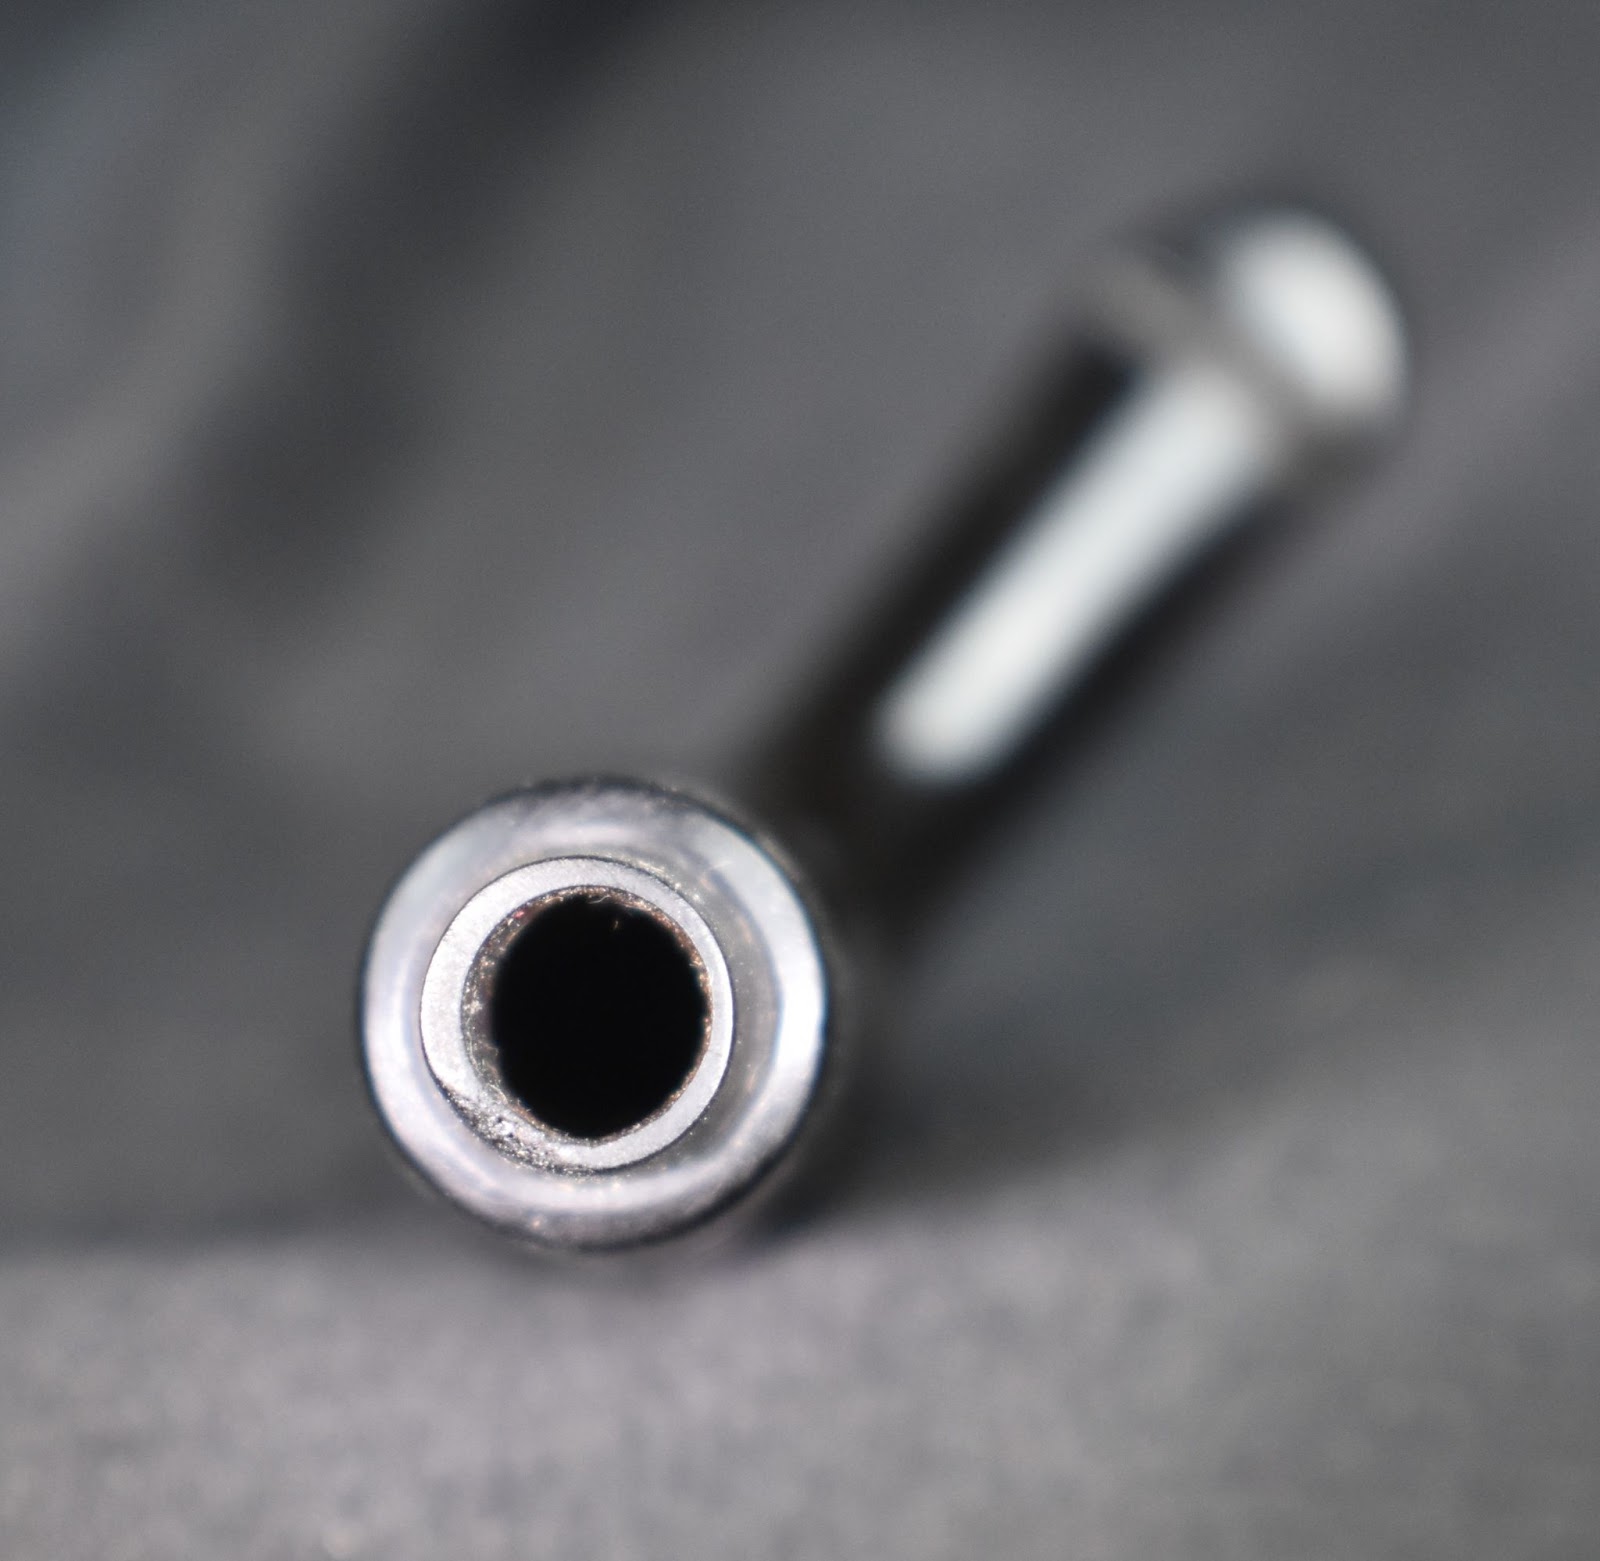


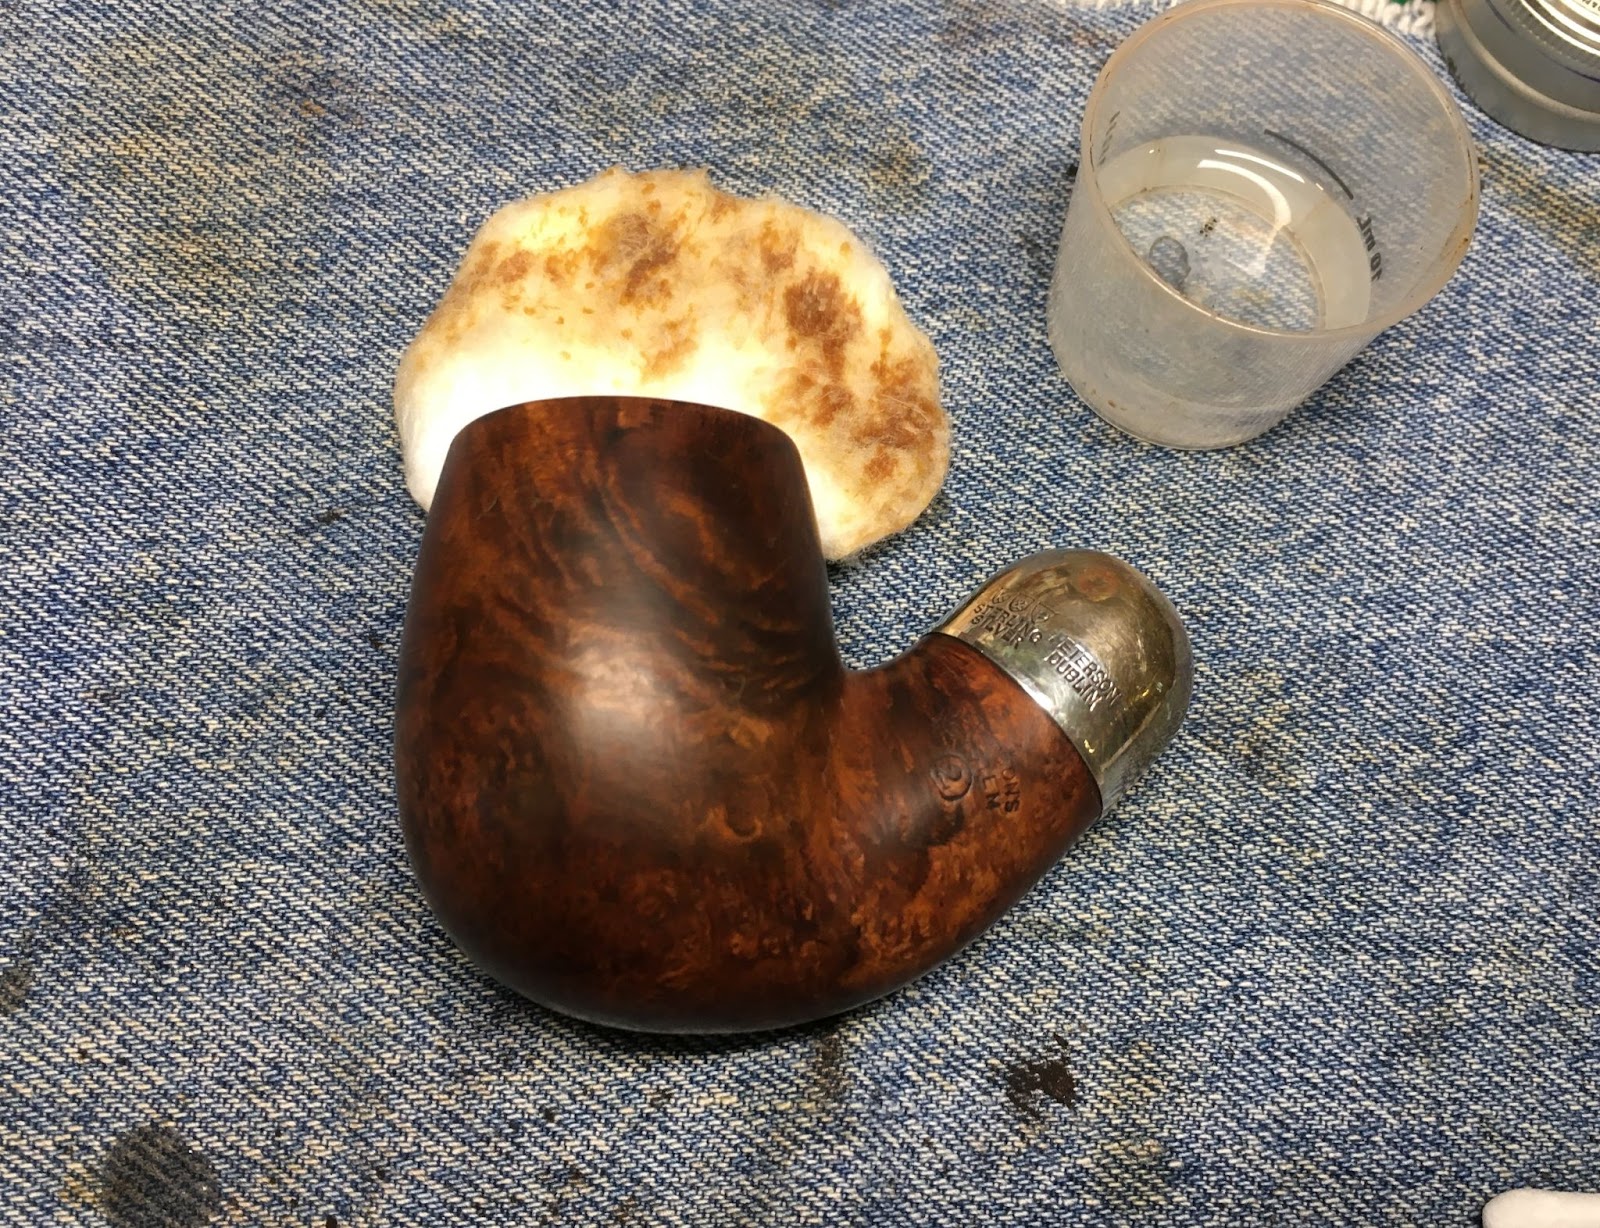
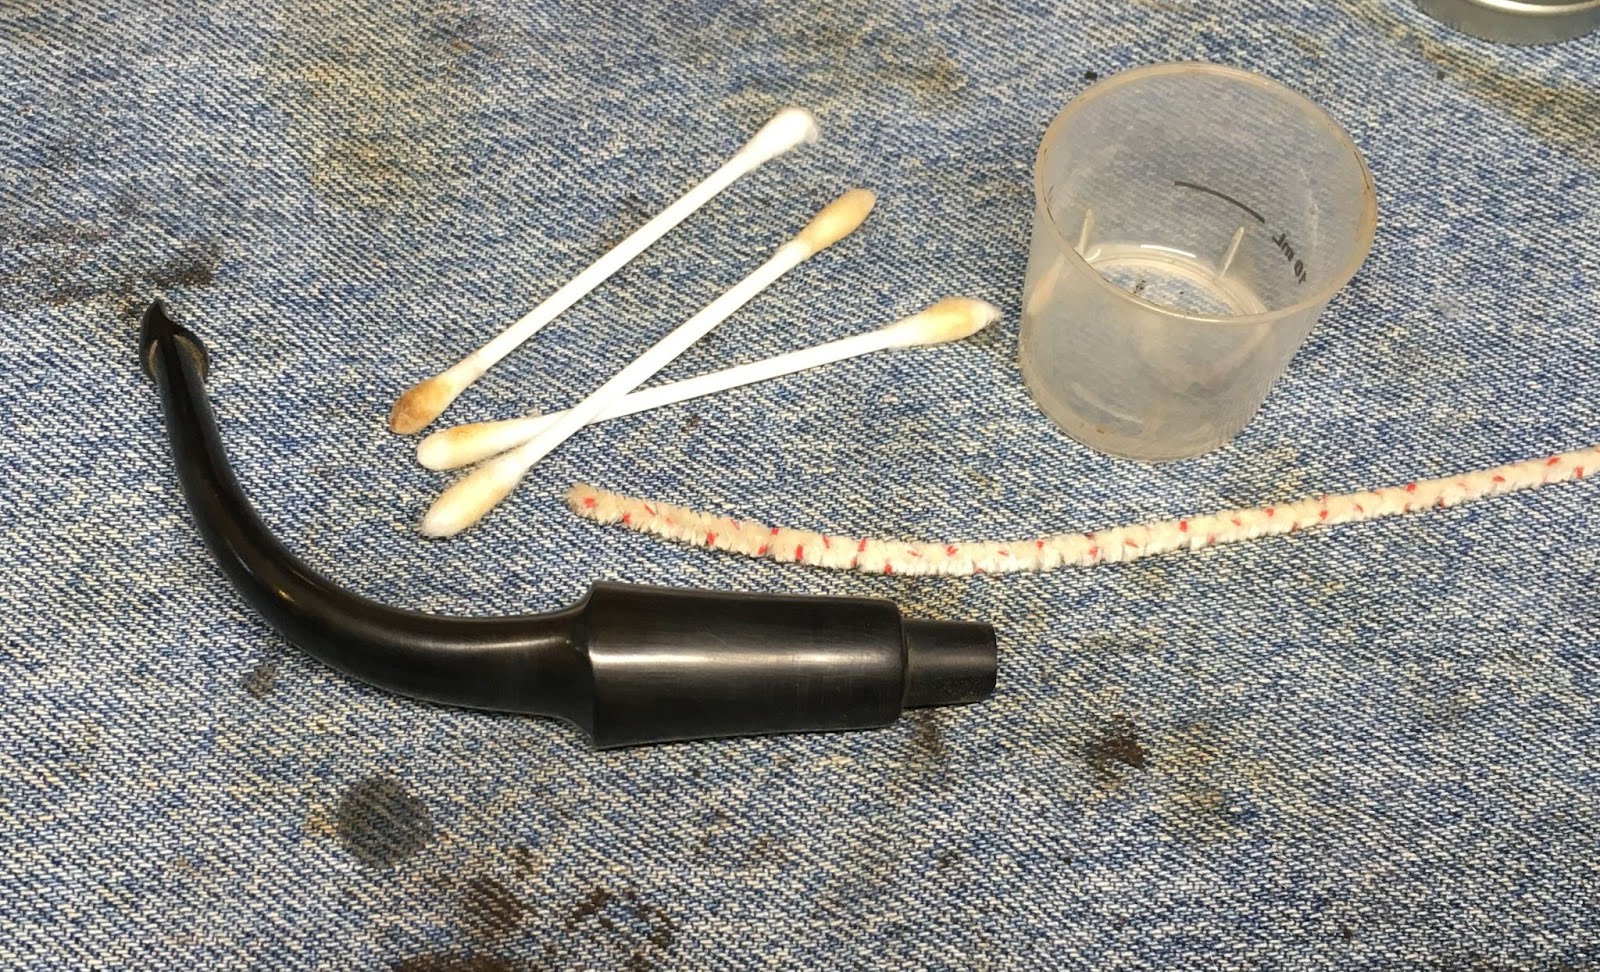
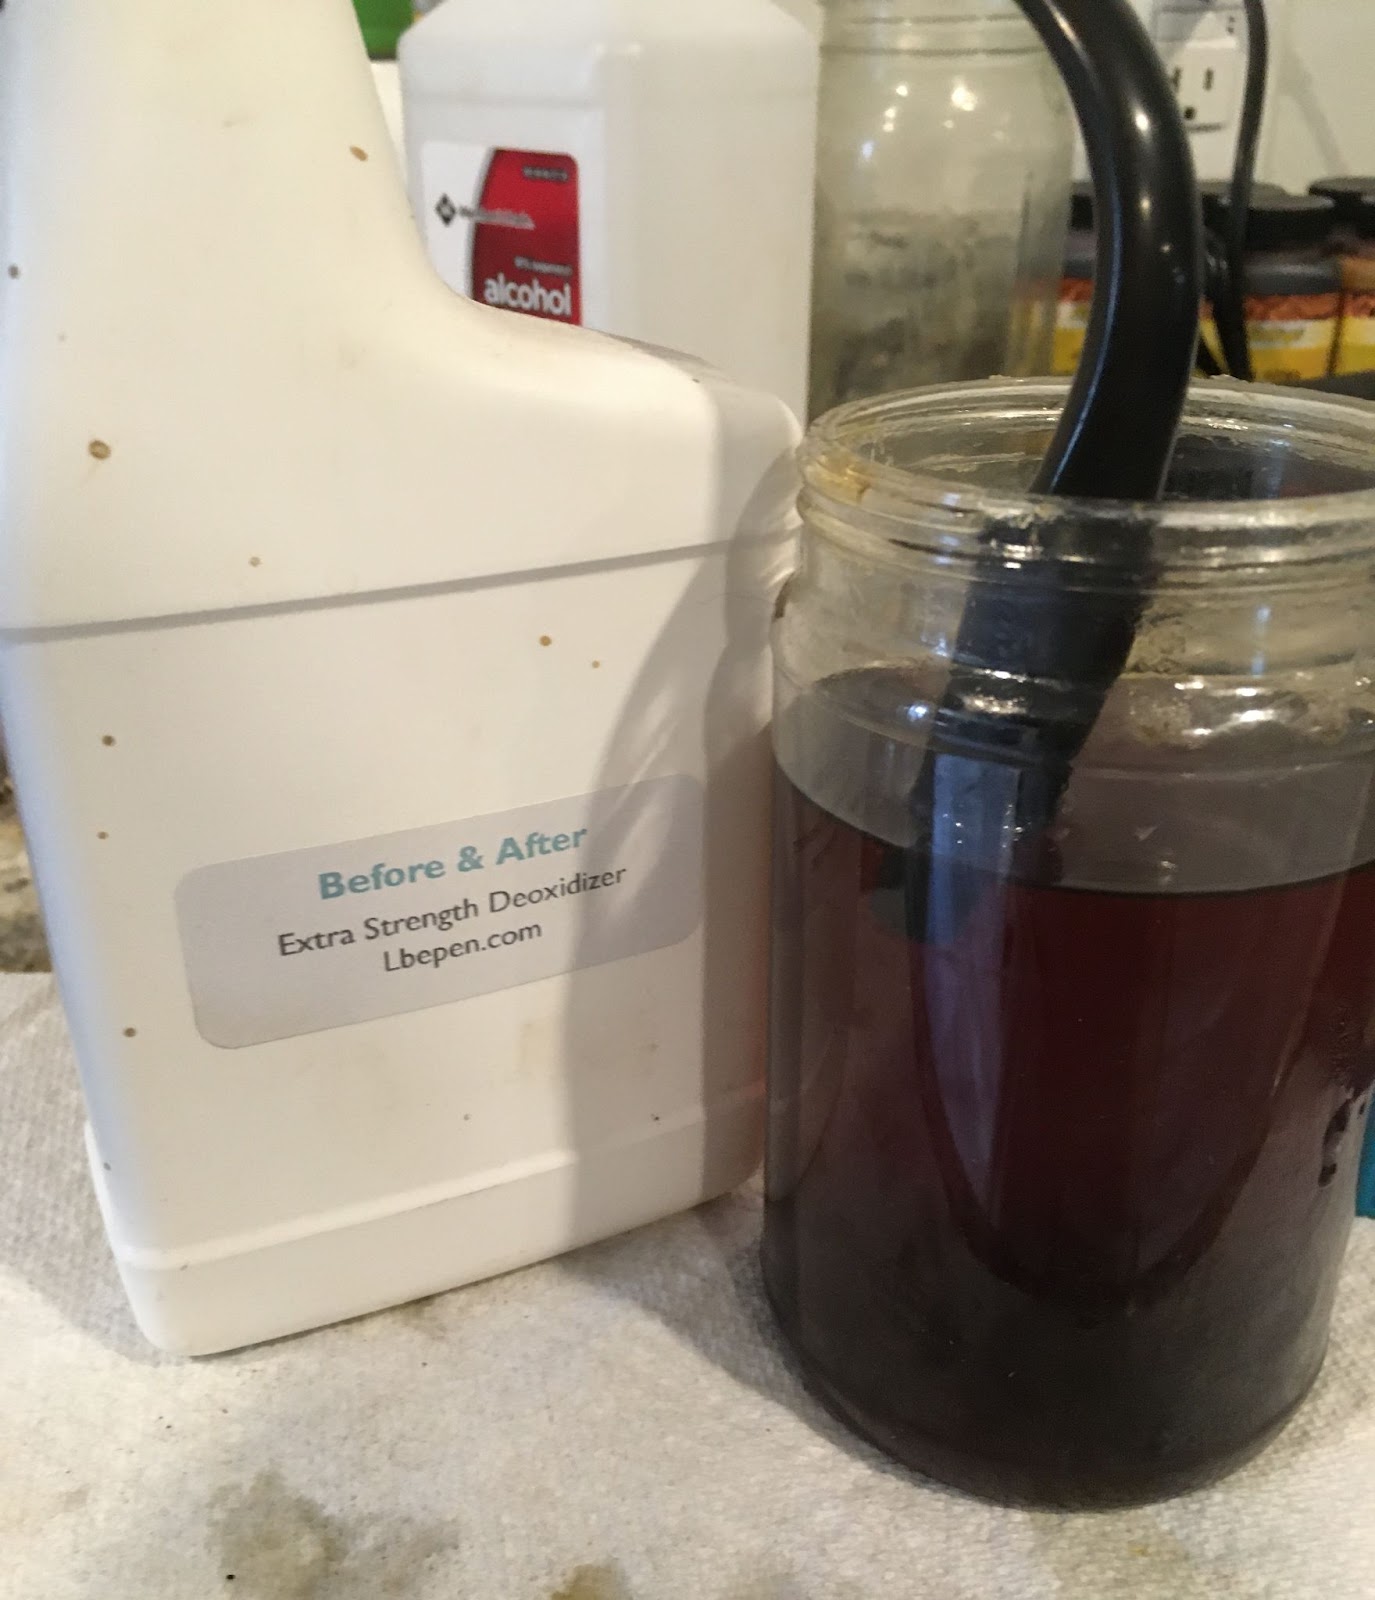
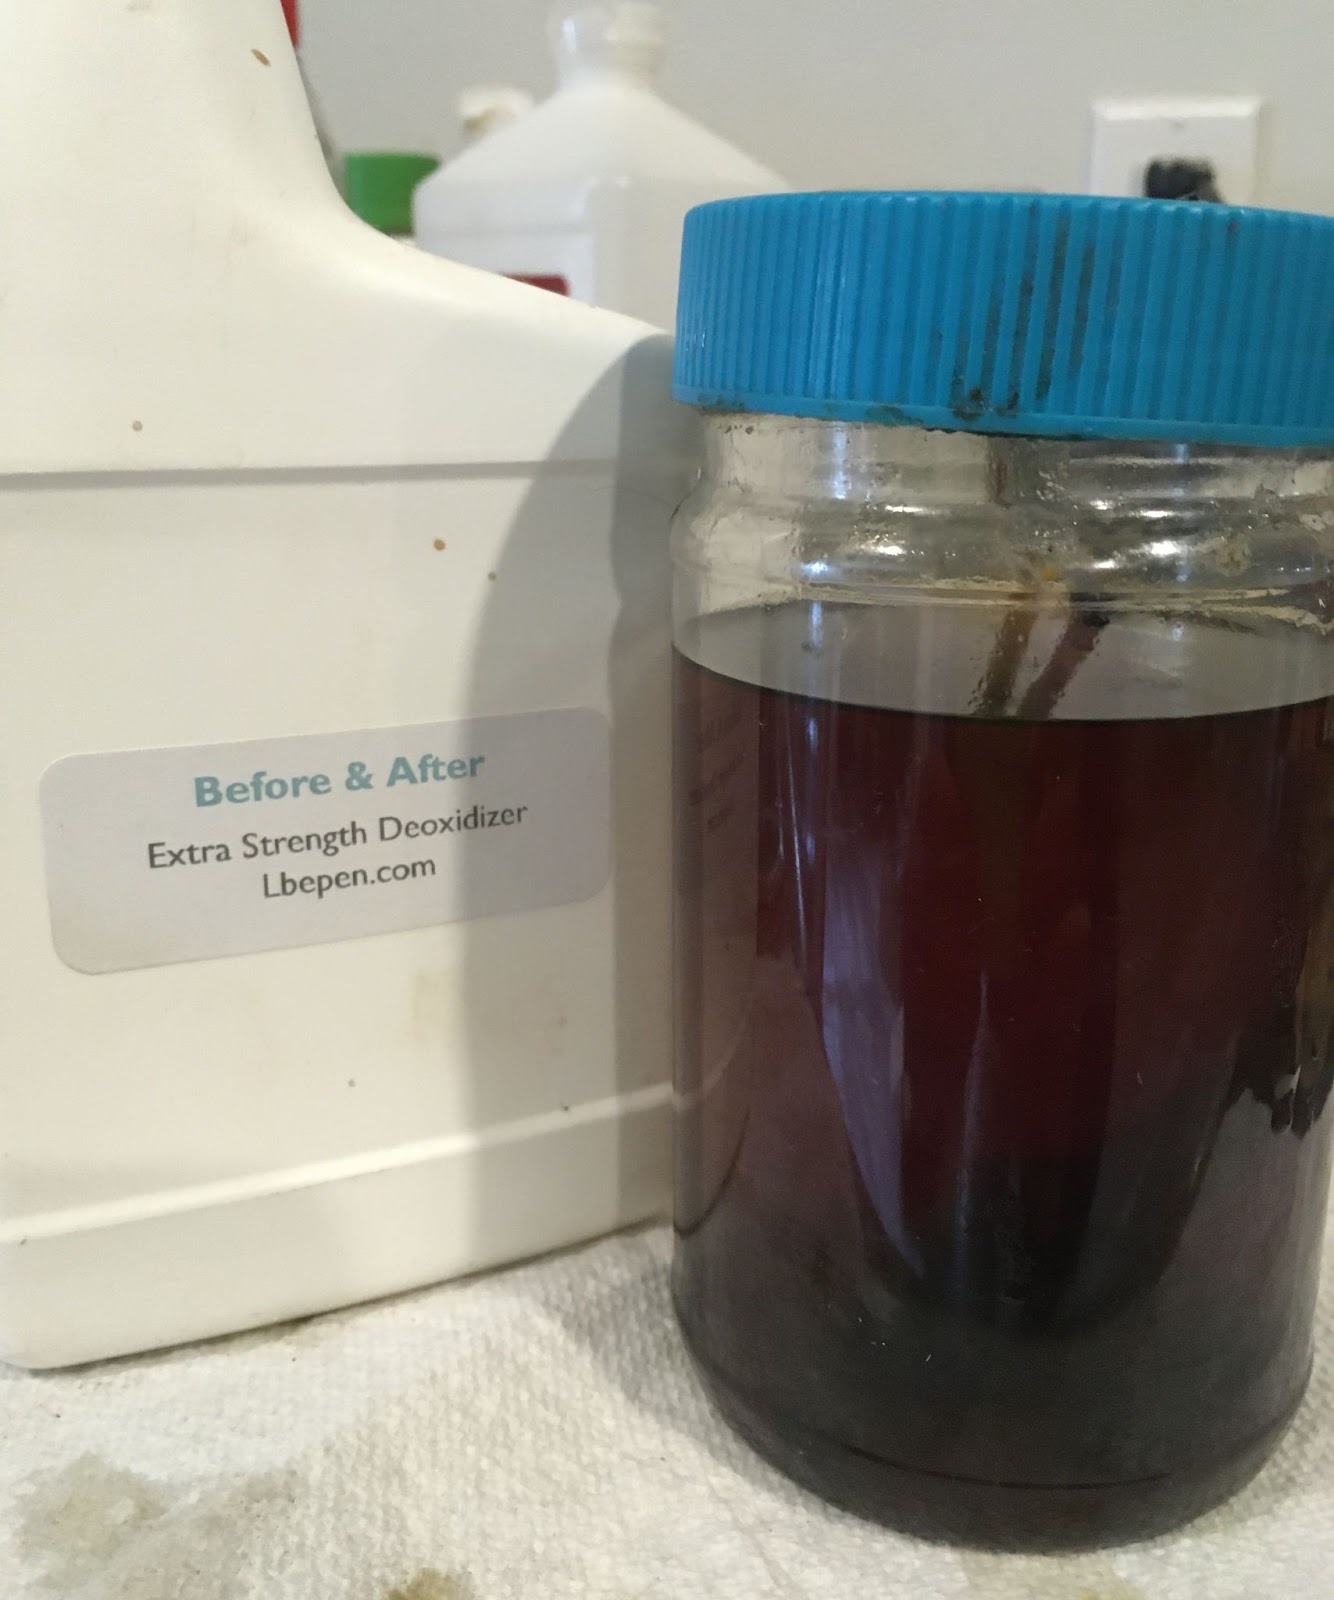


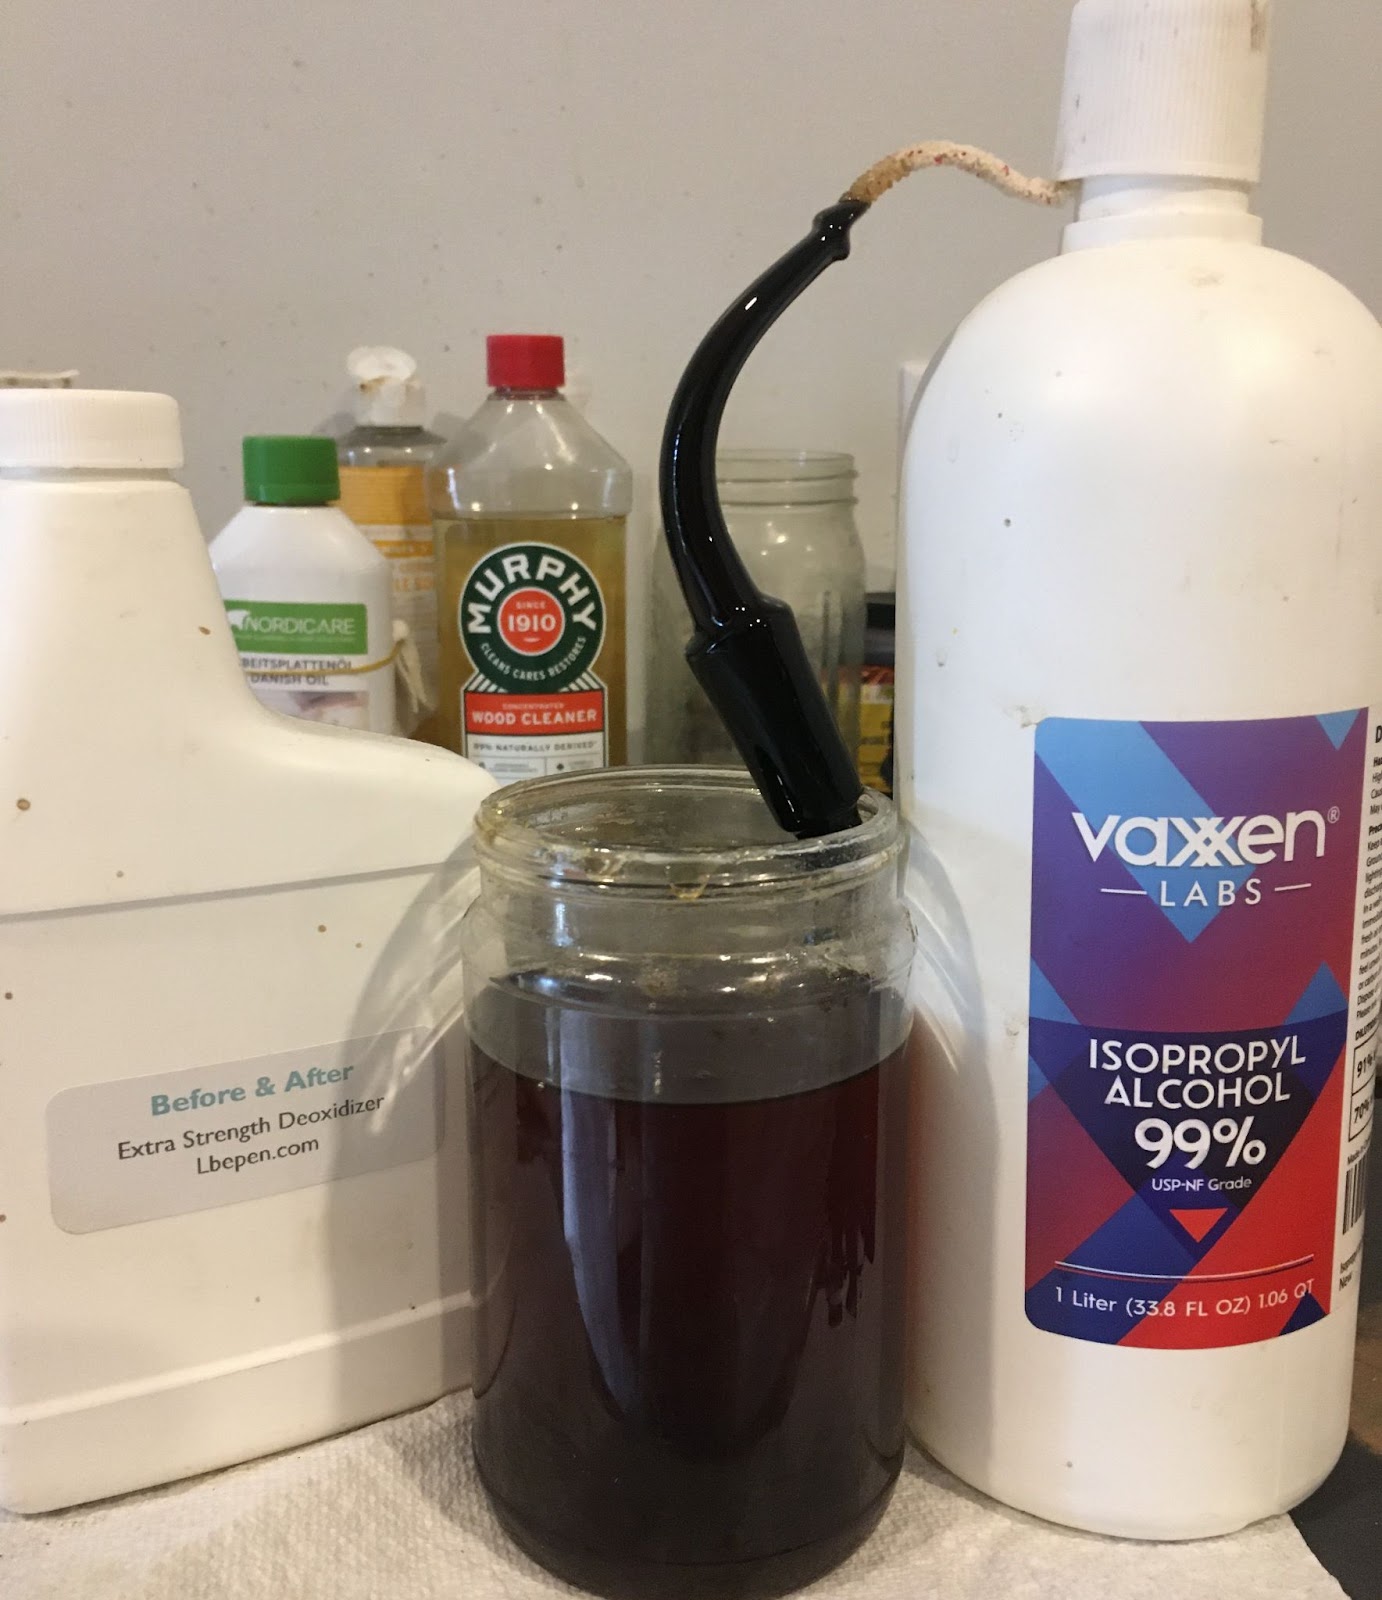


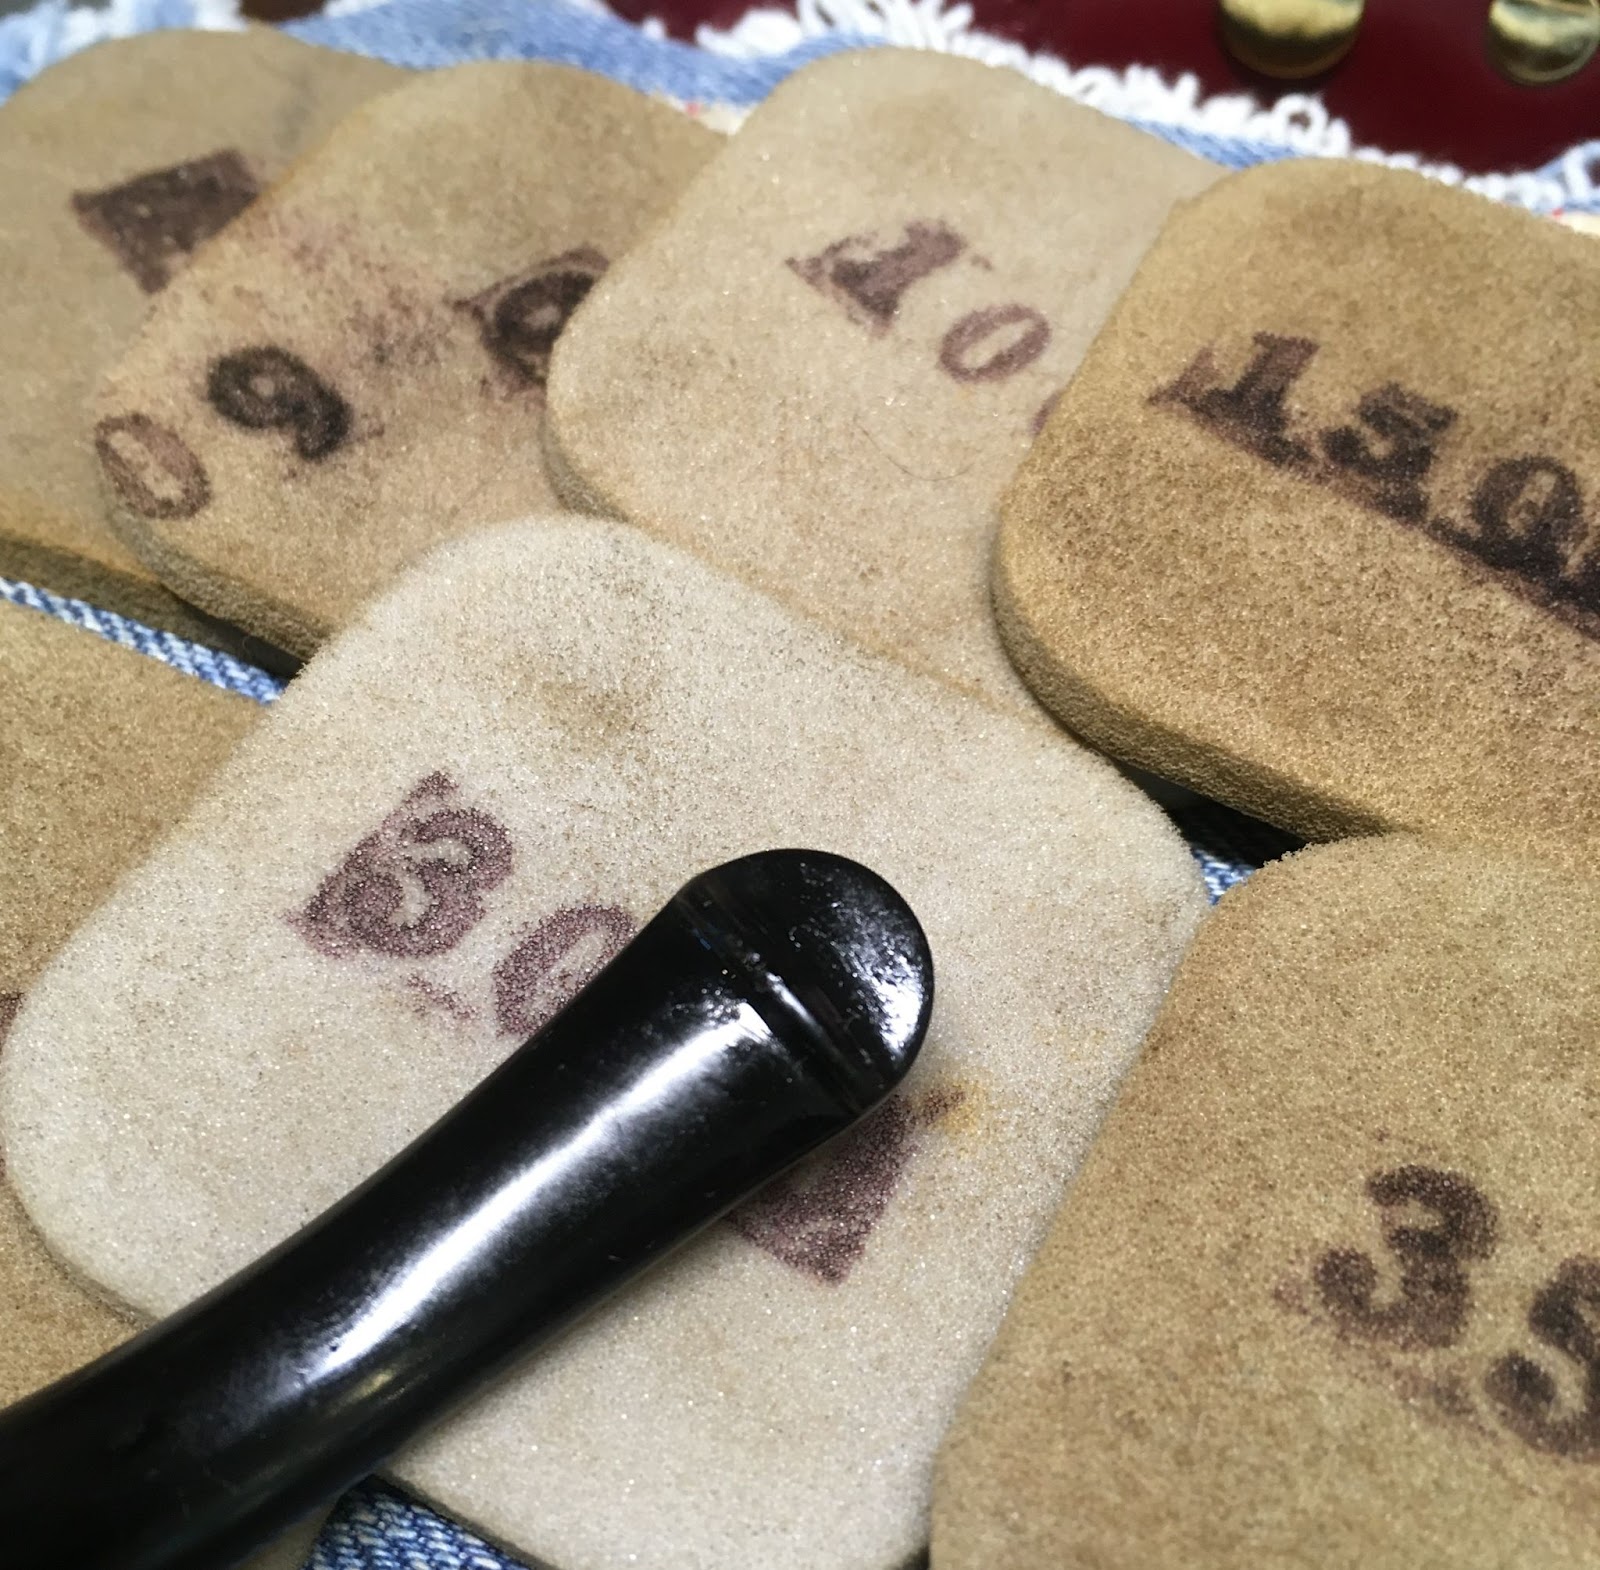

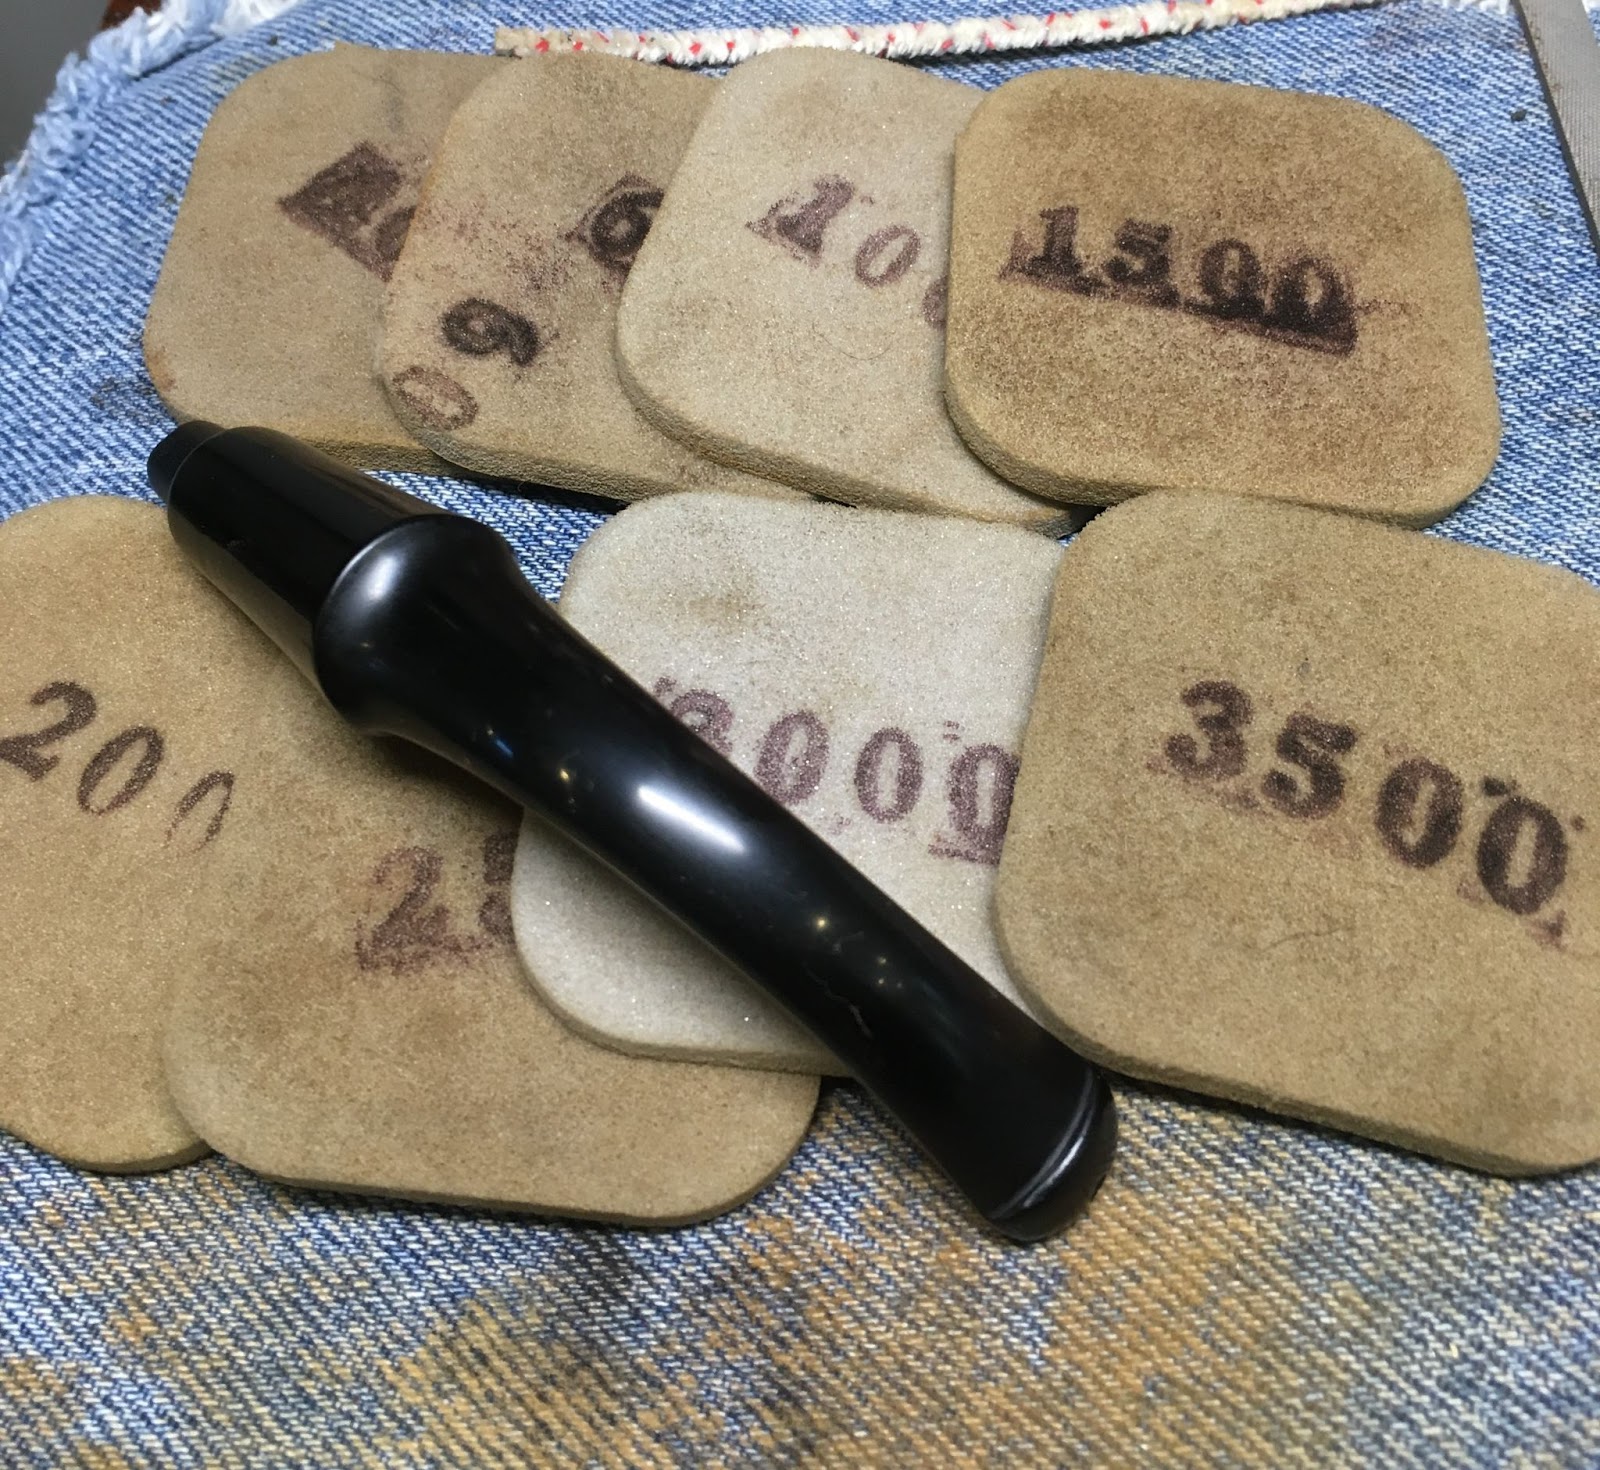

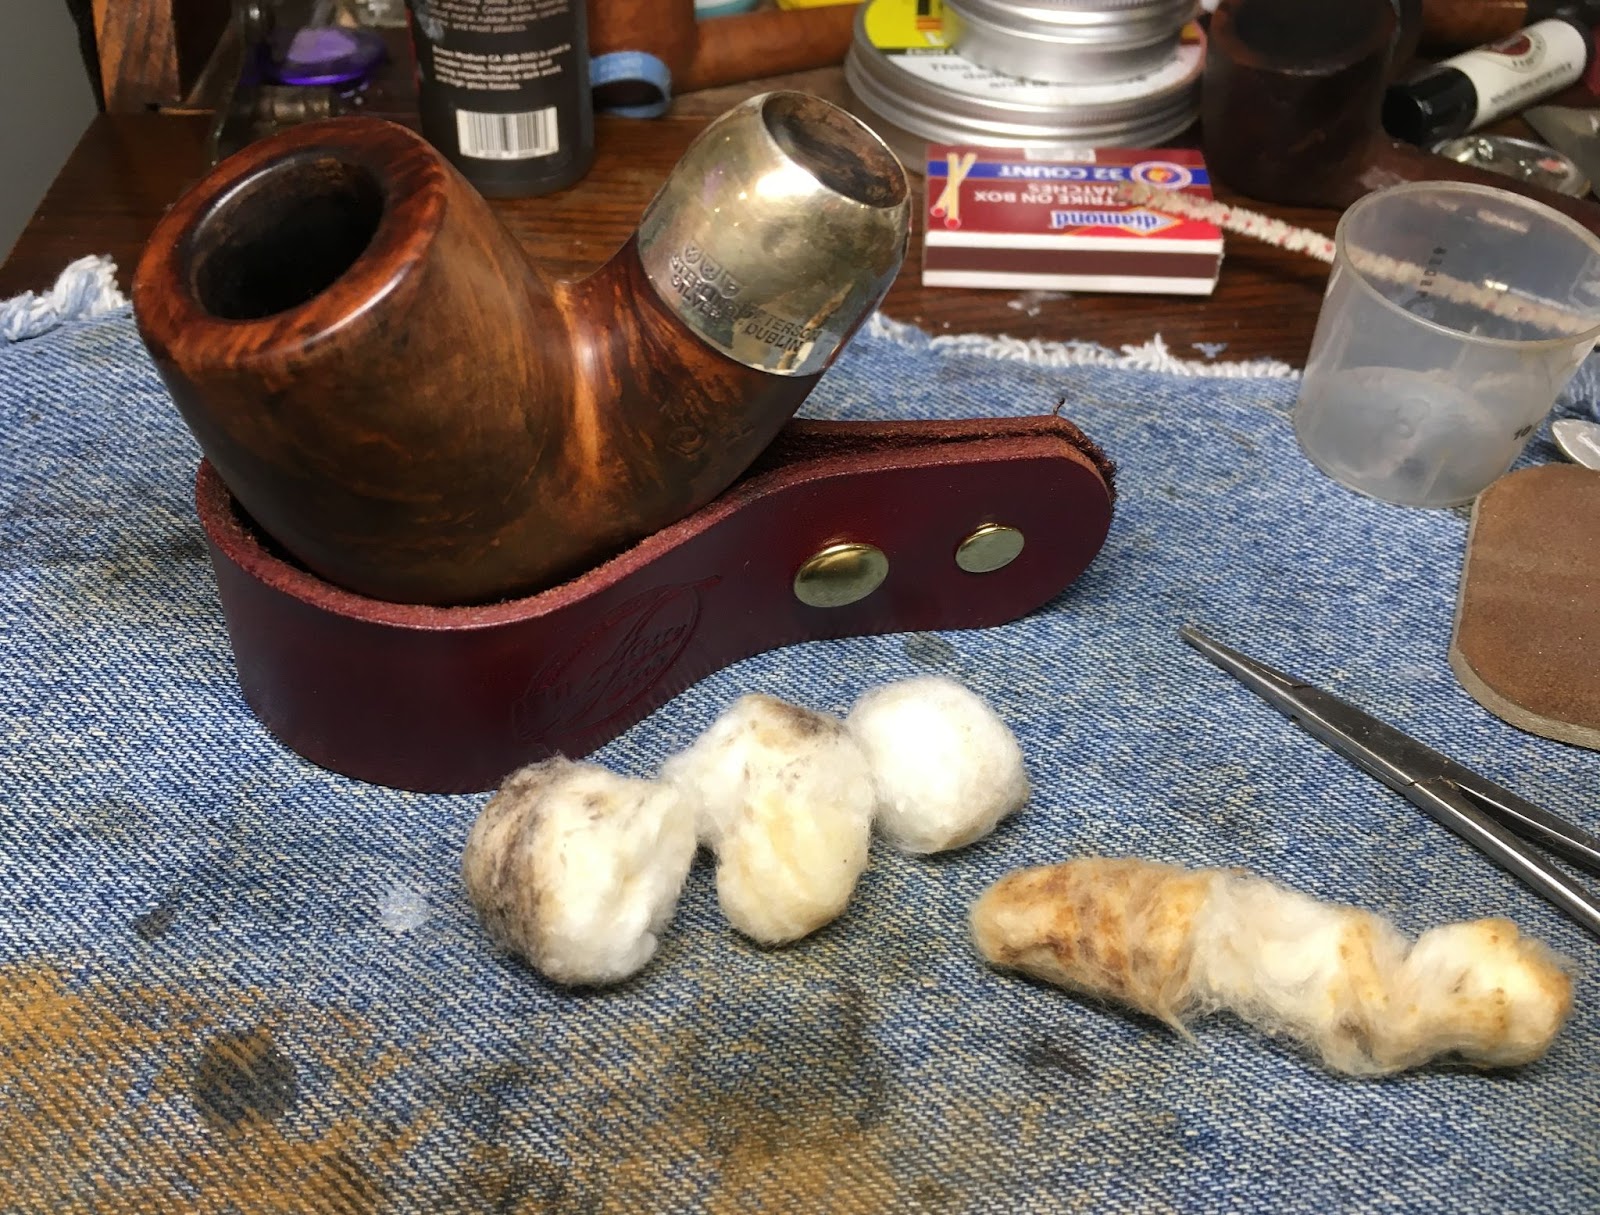


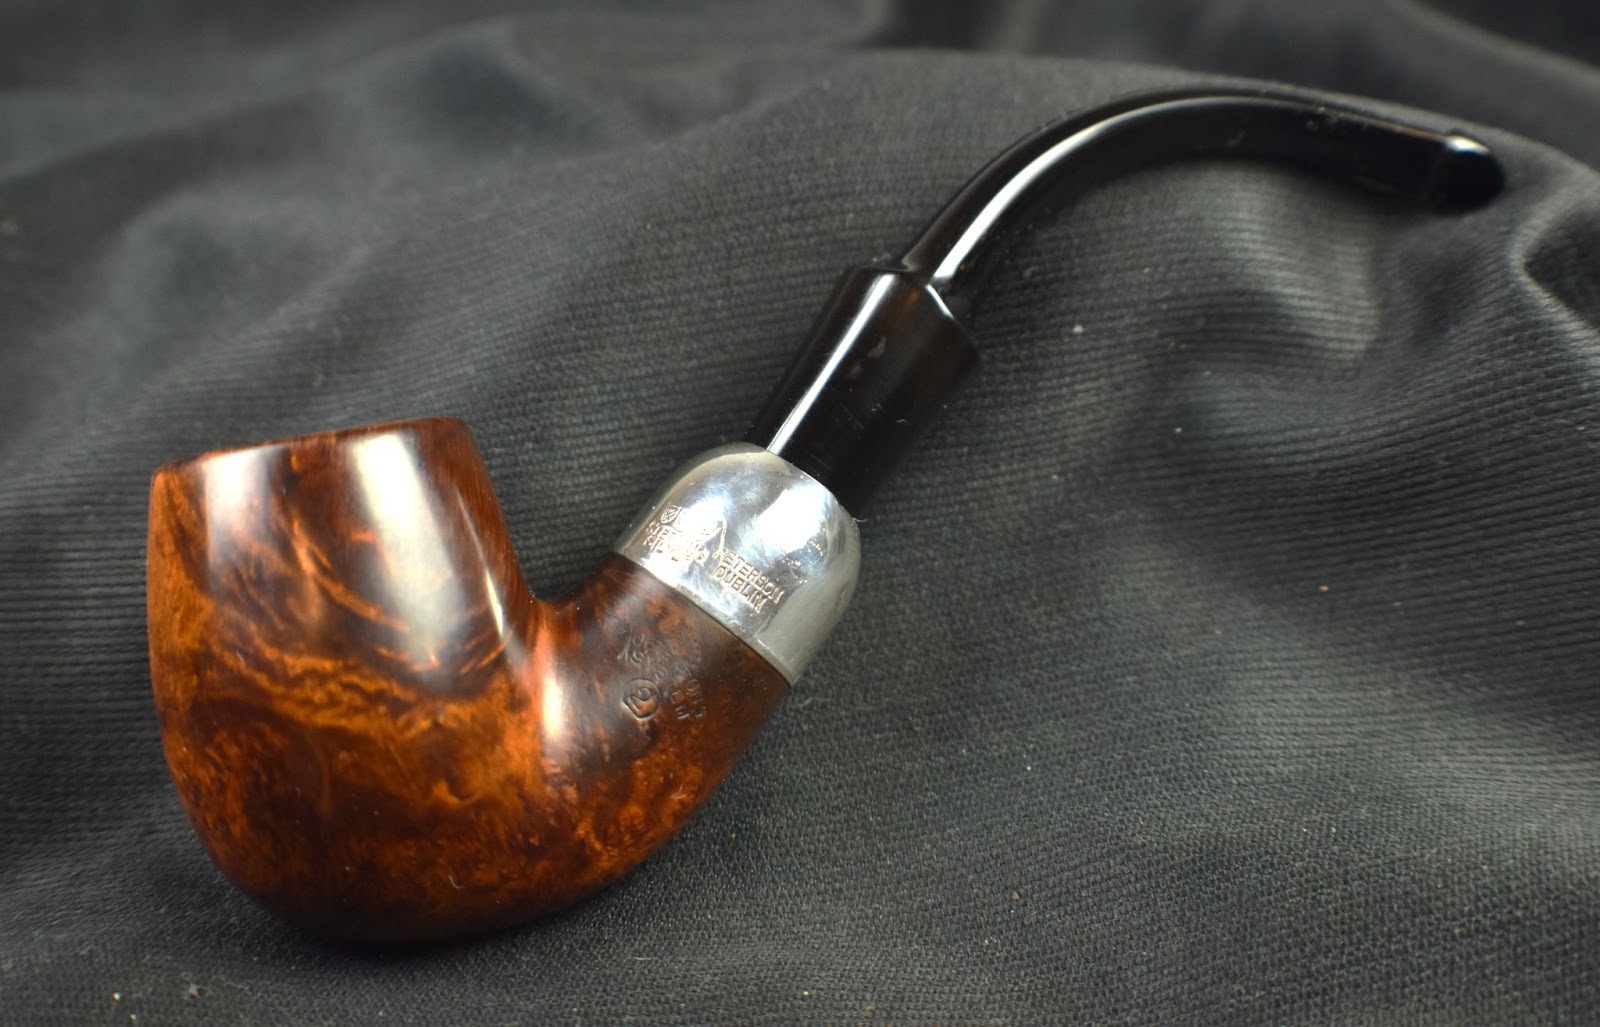
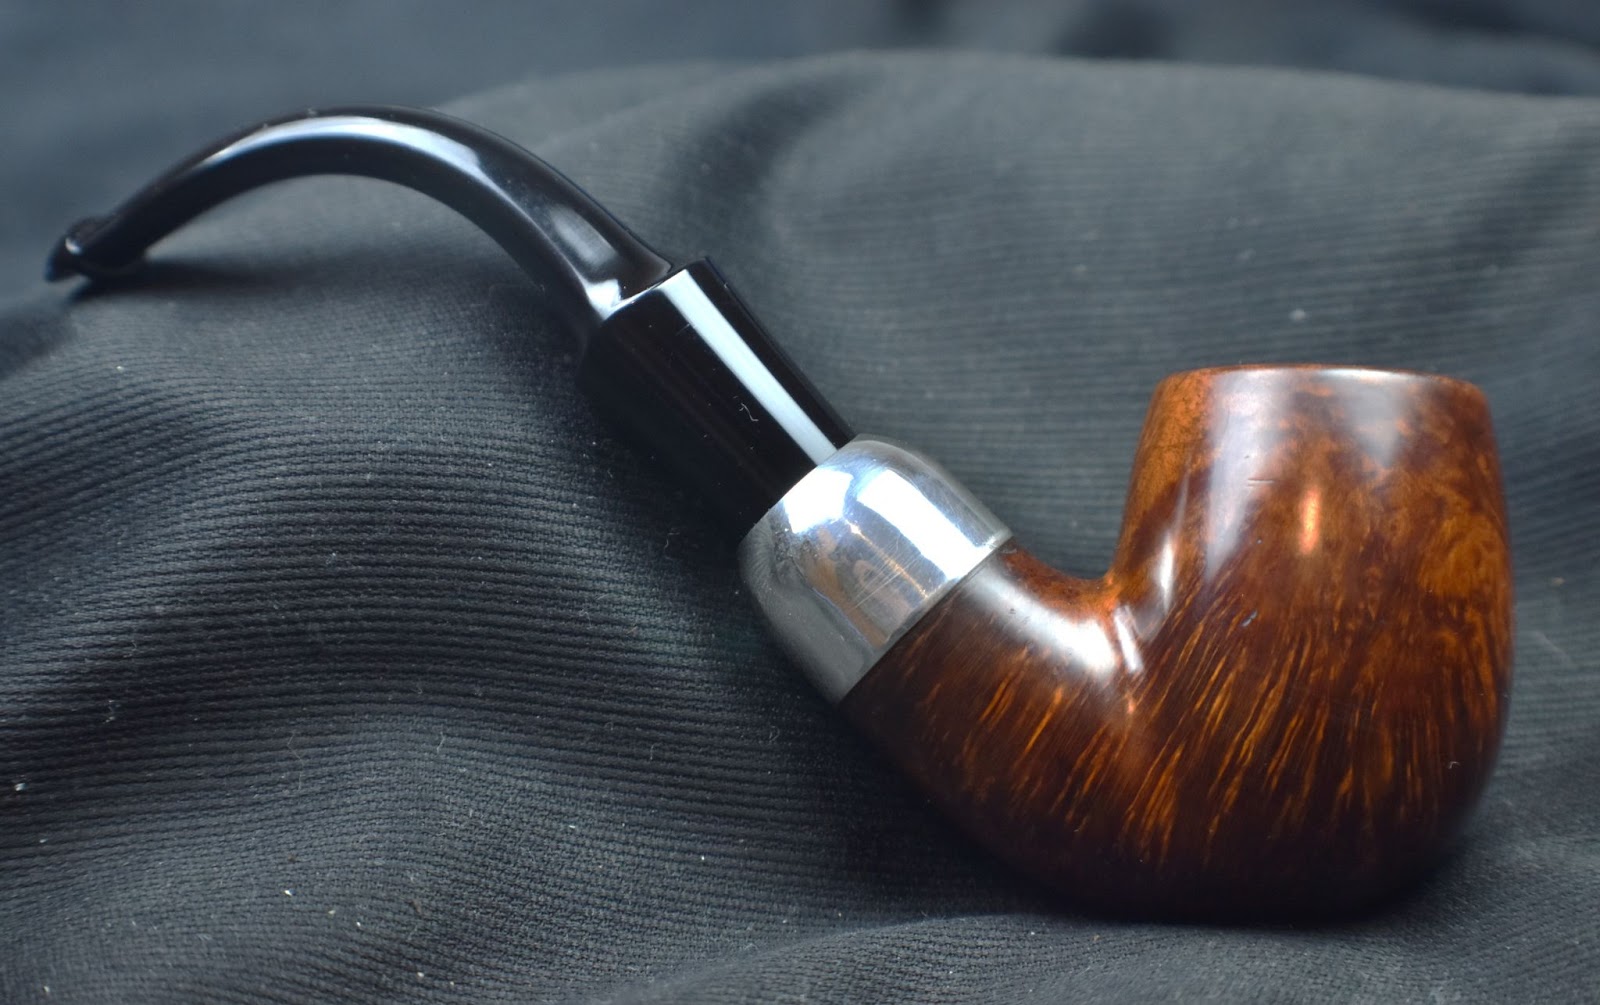


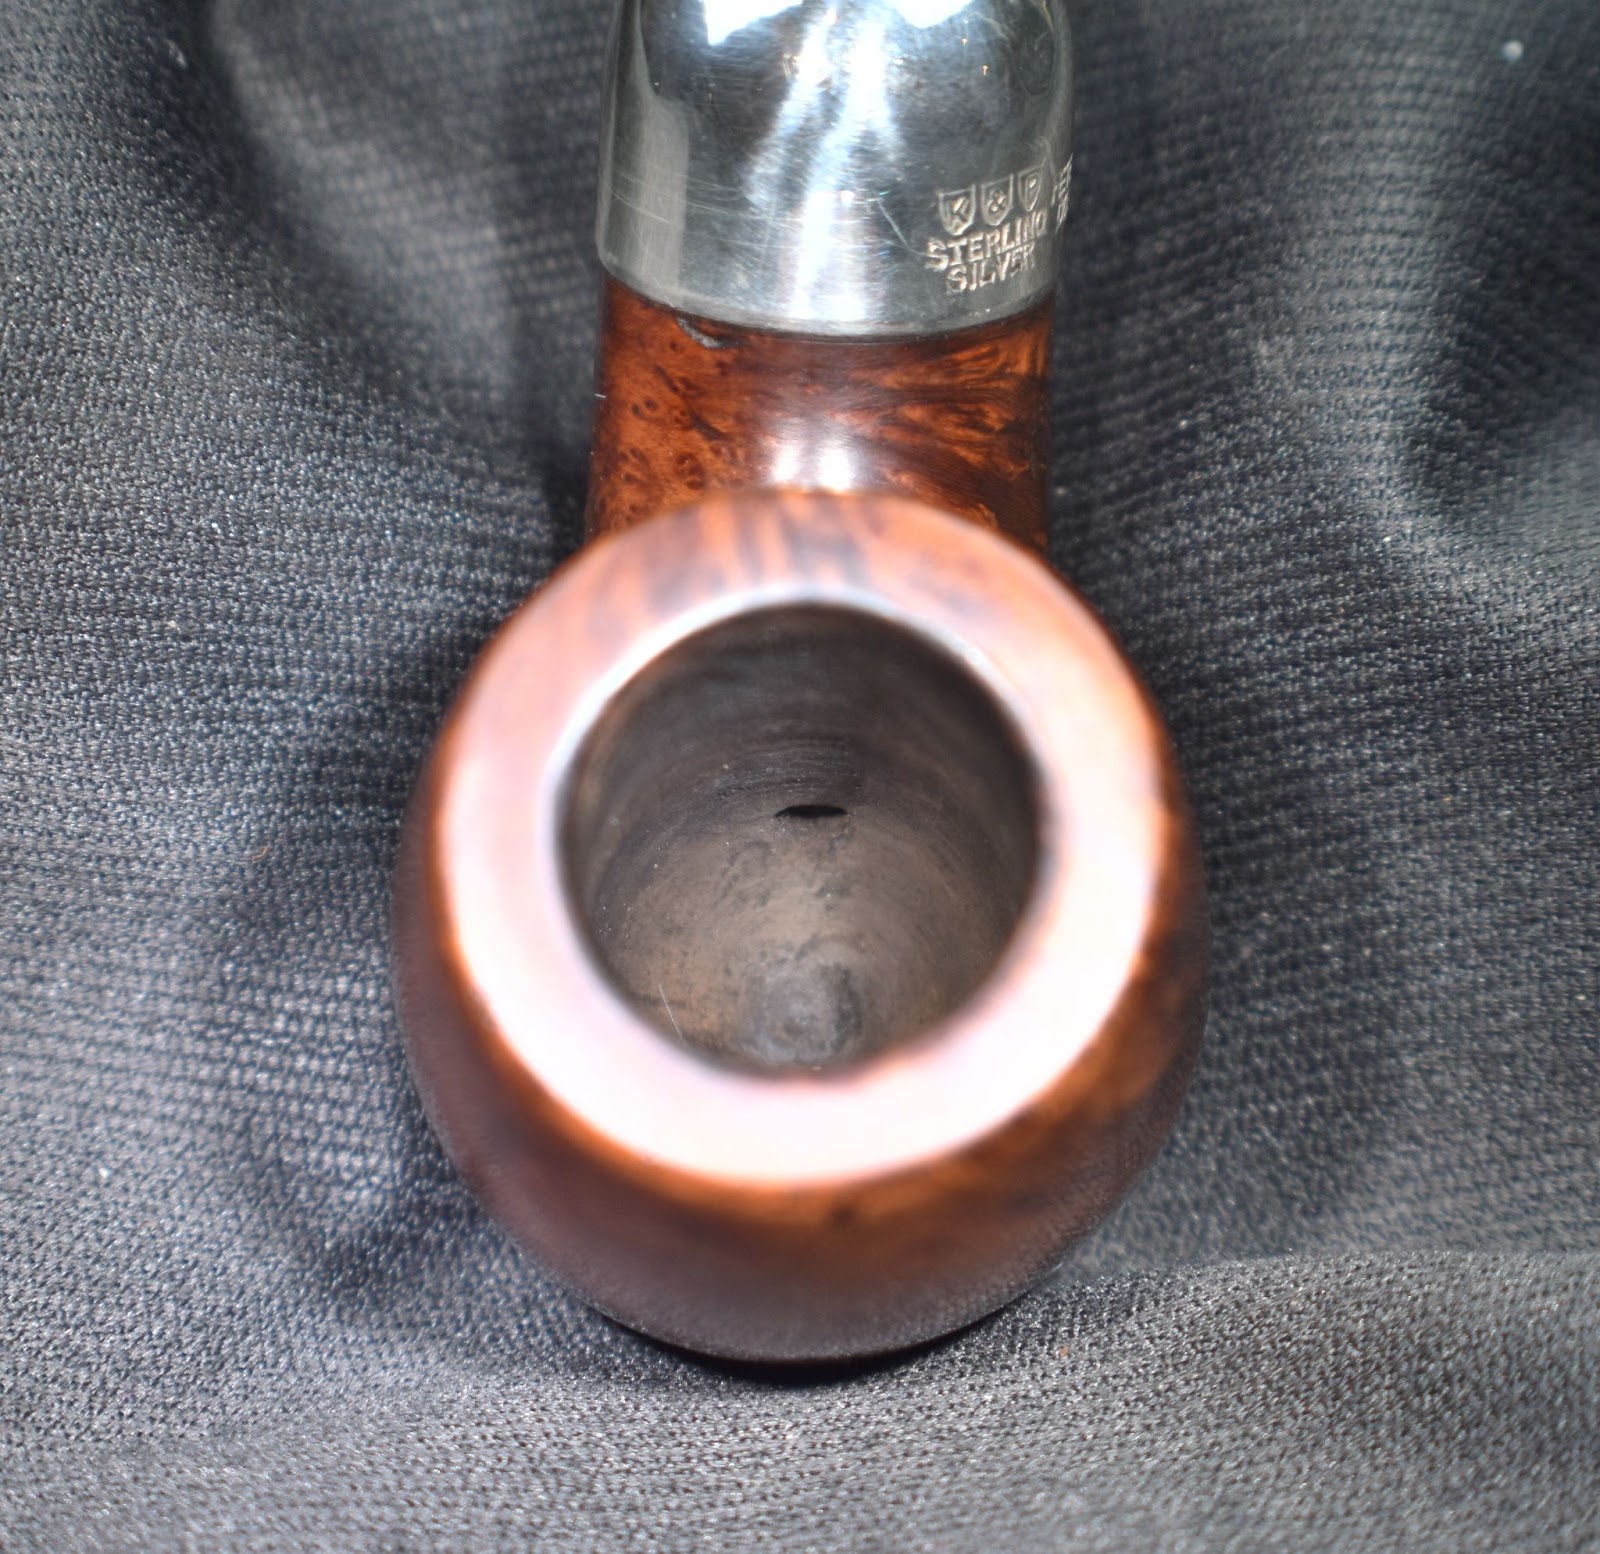
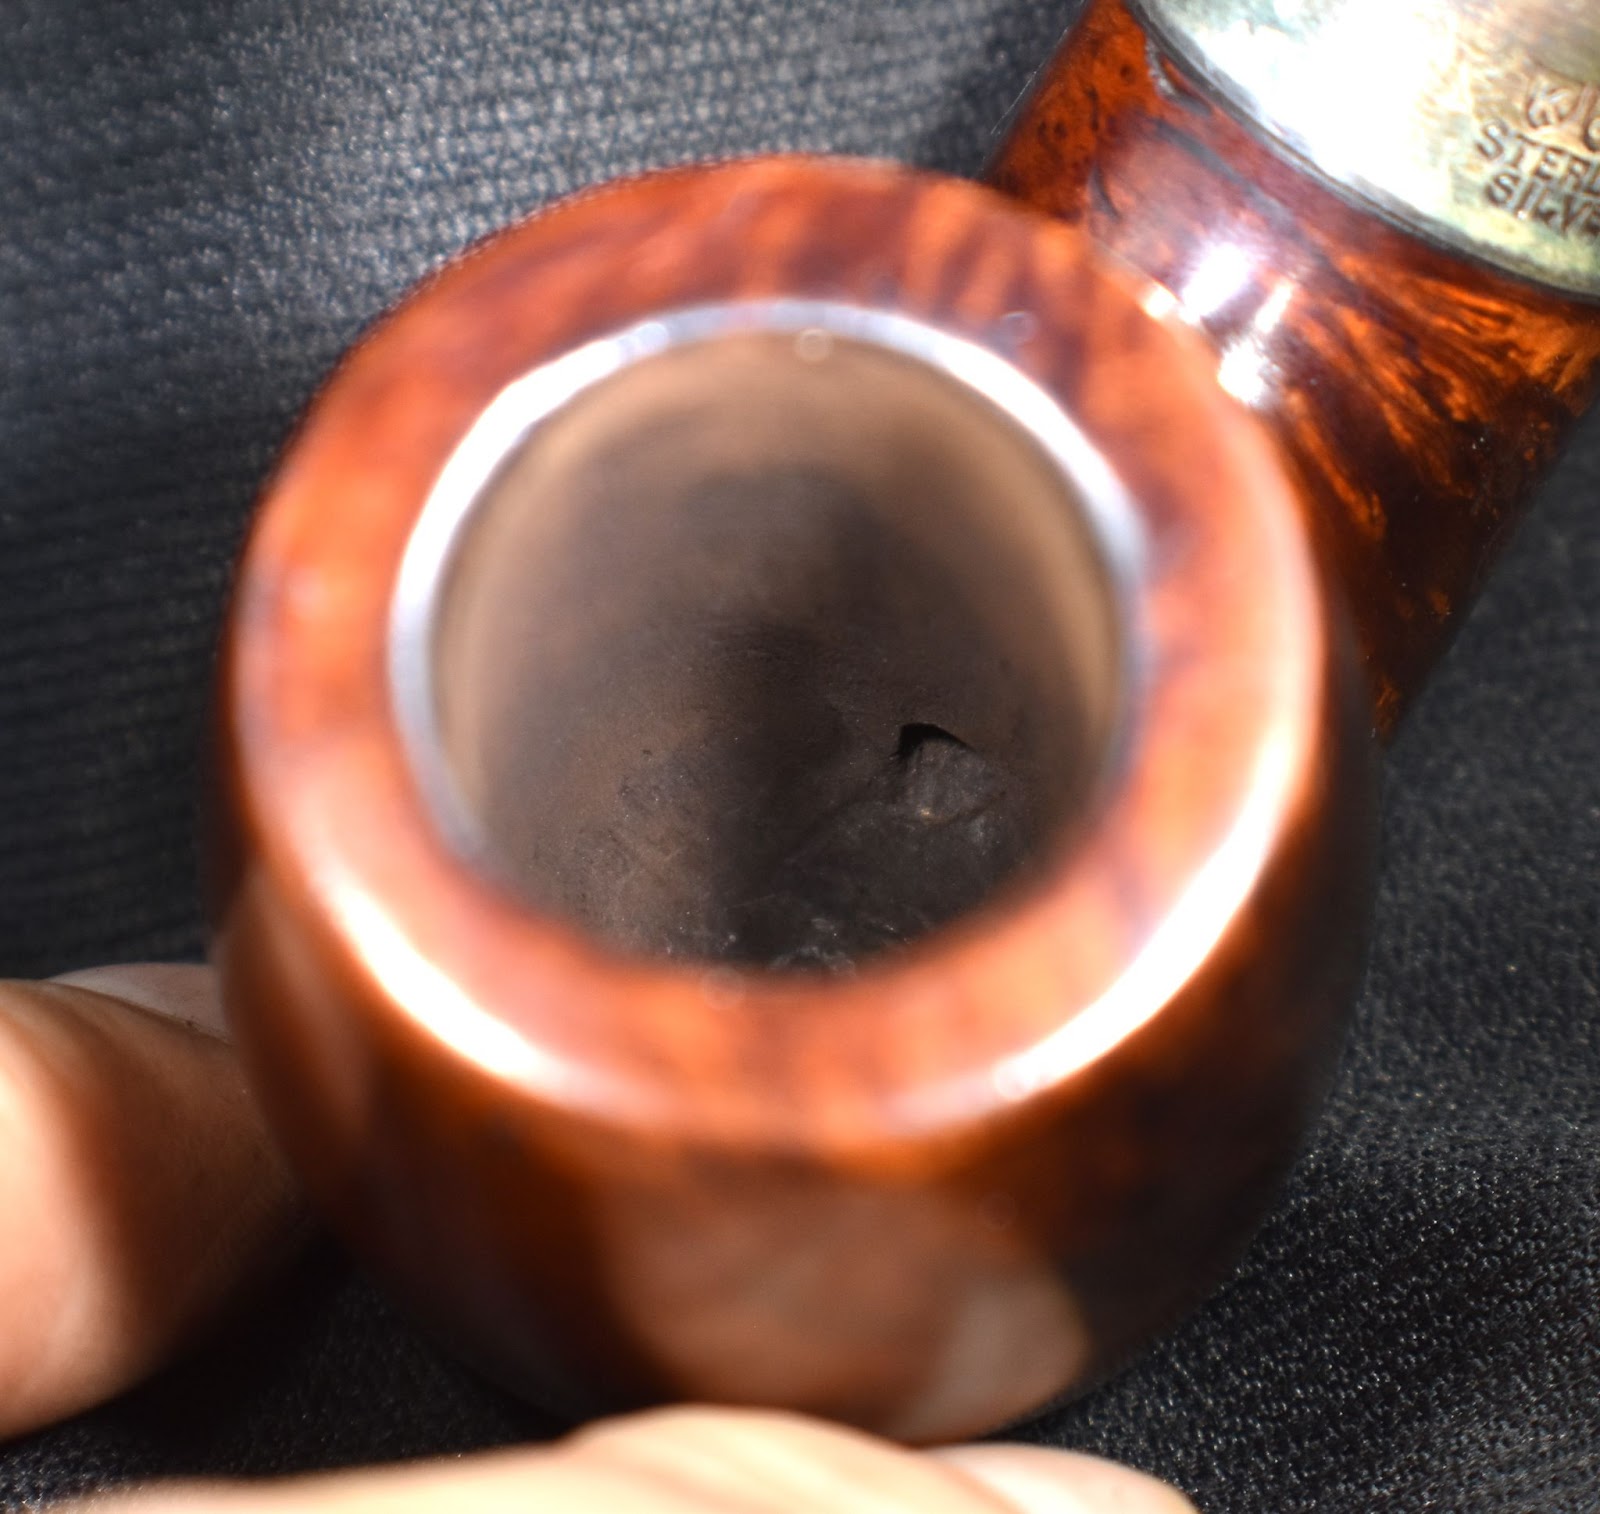

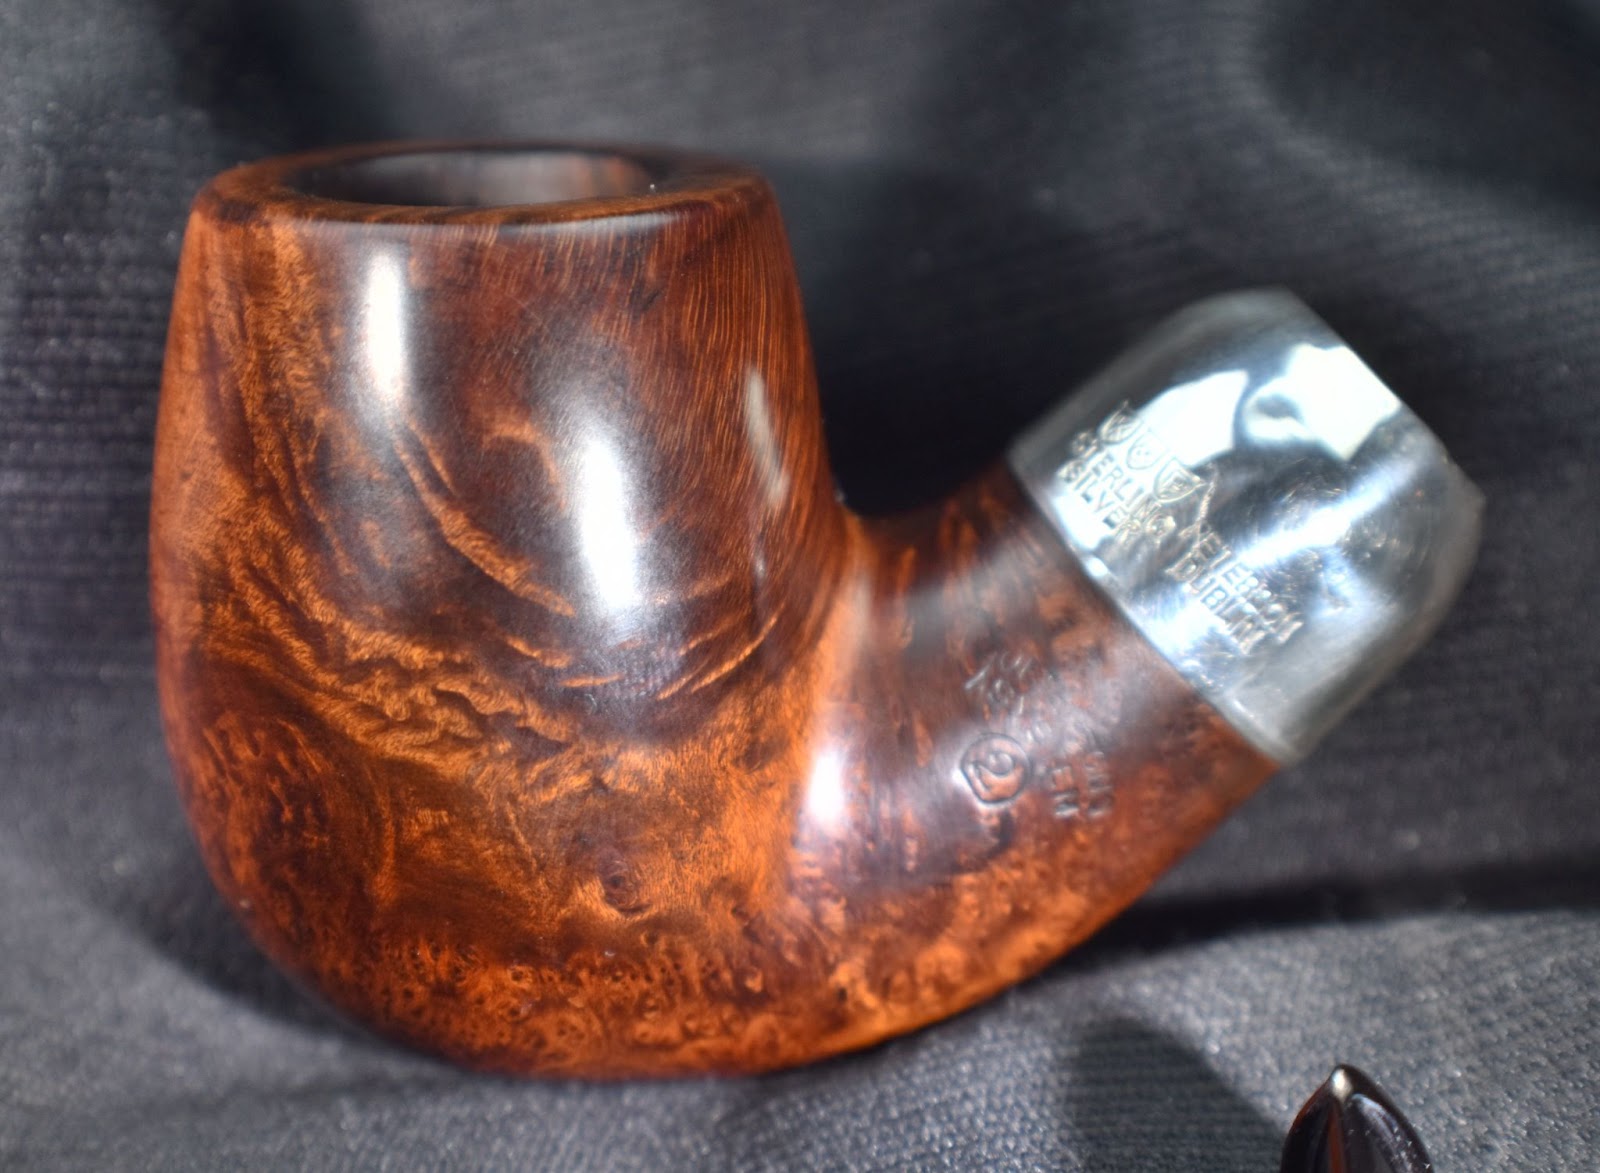


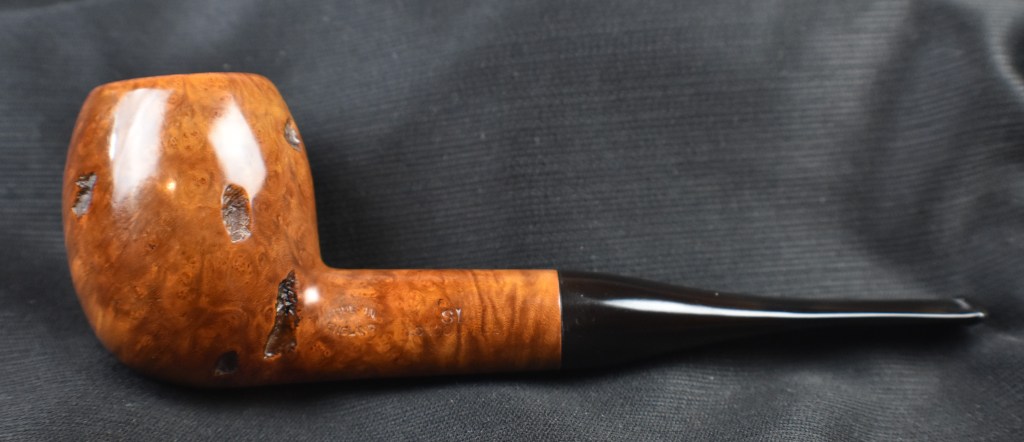


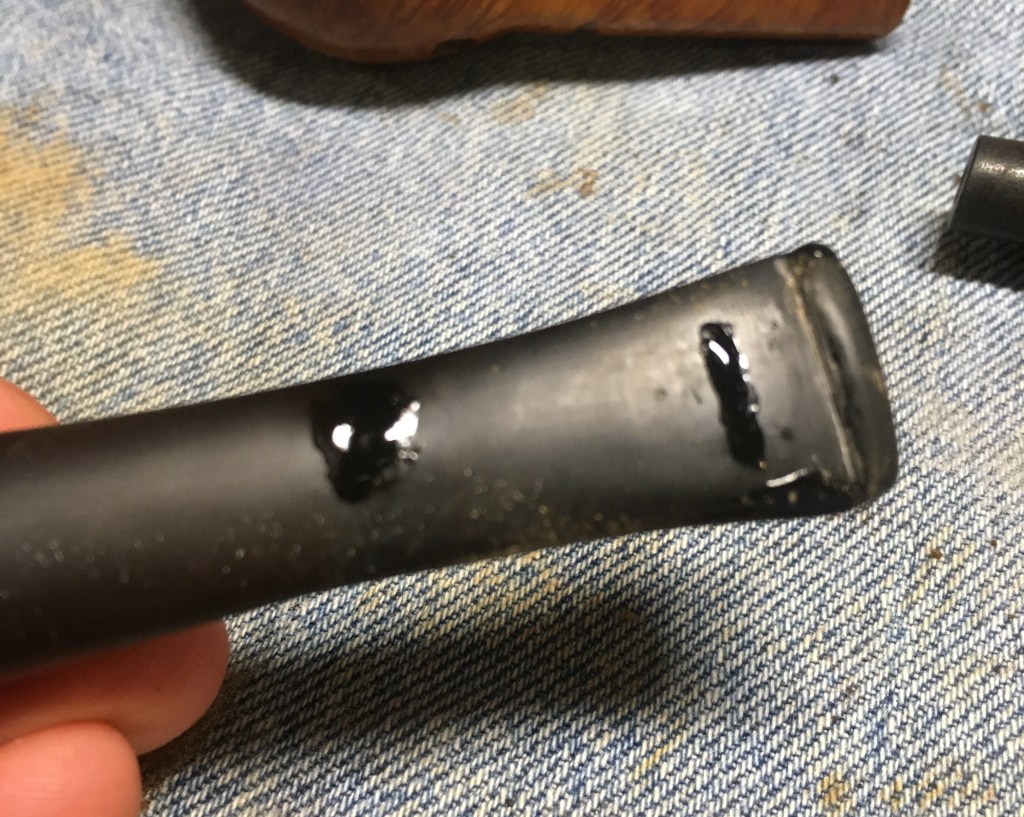


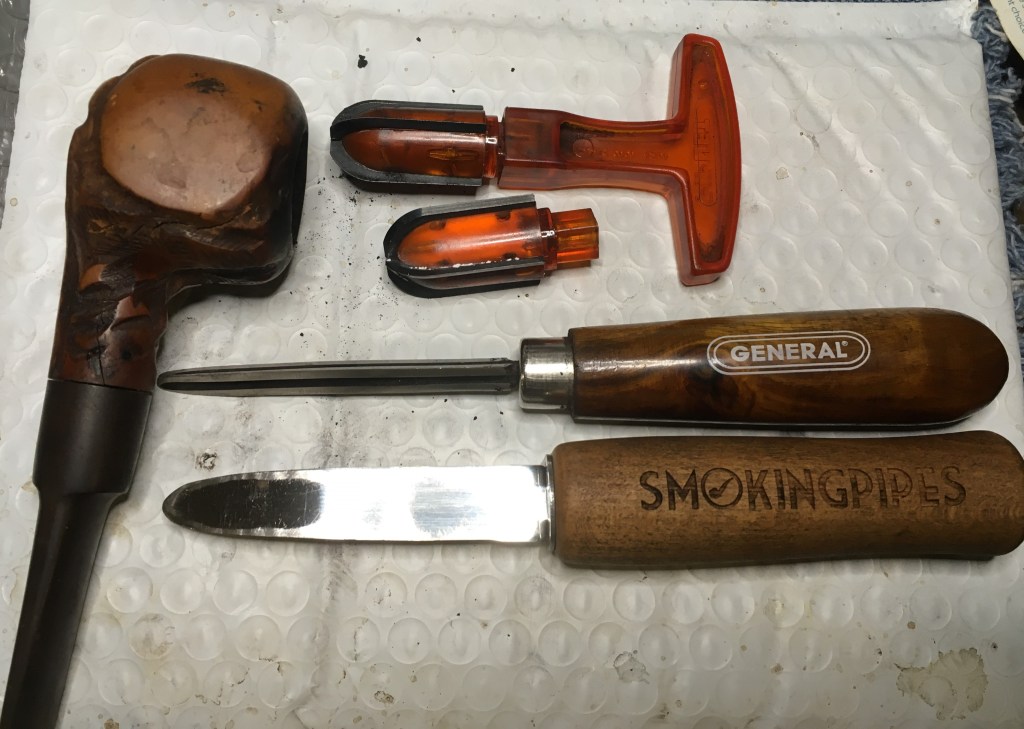


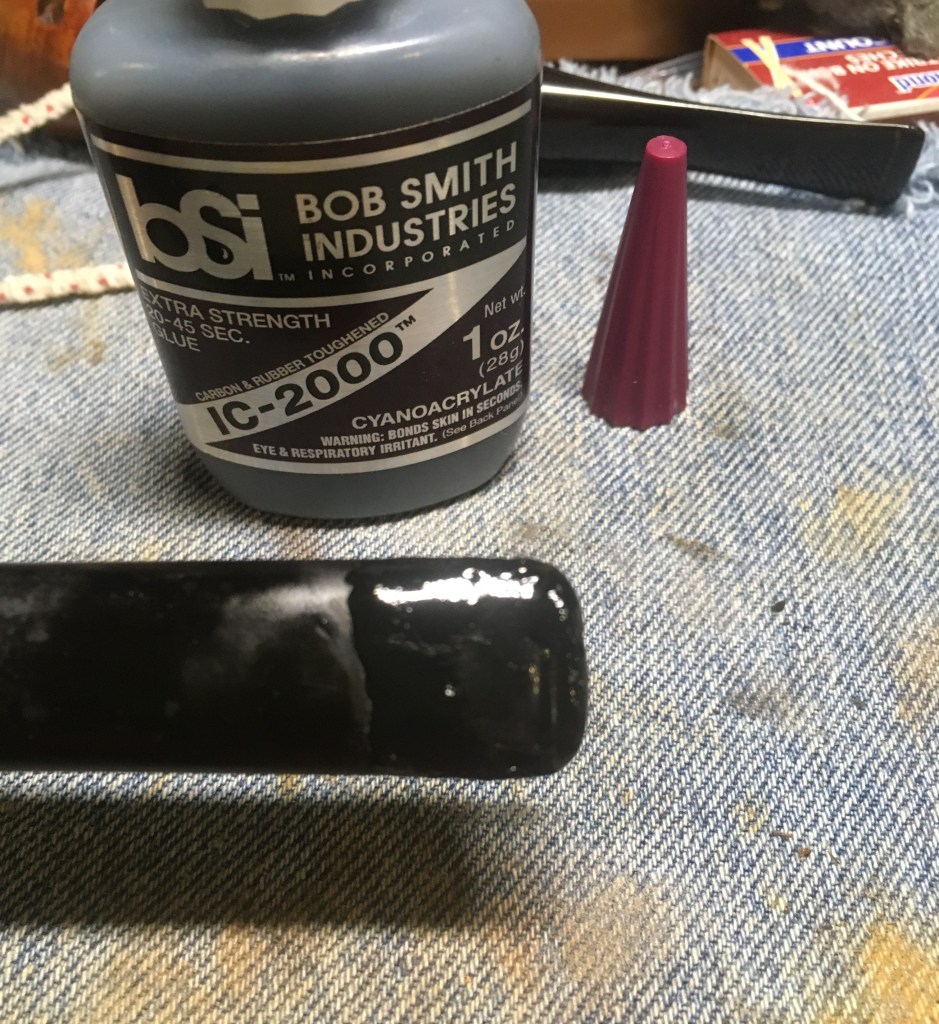


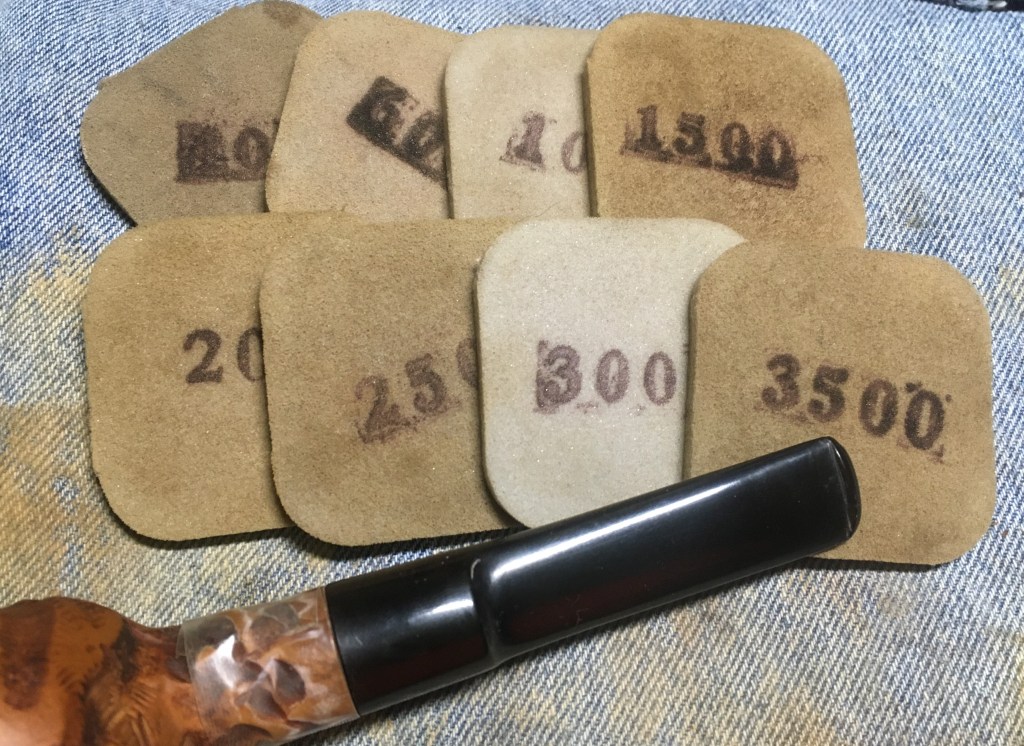





 (


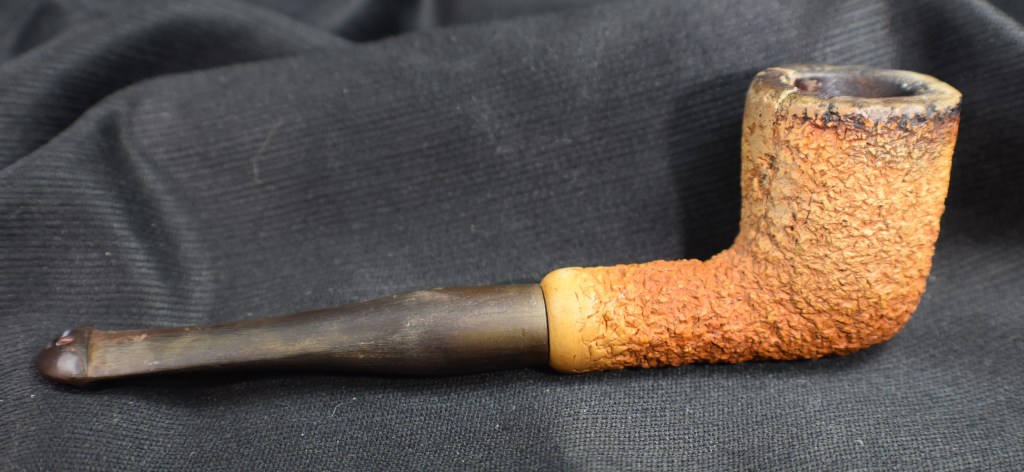


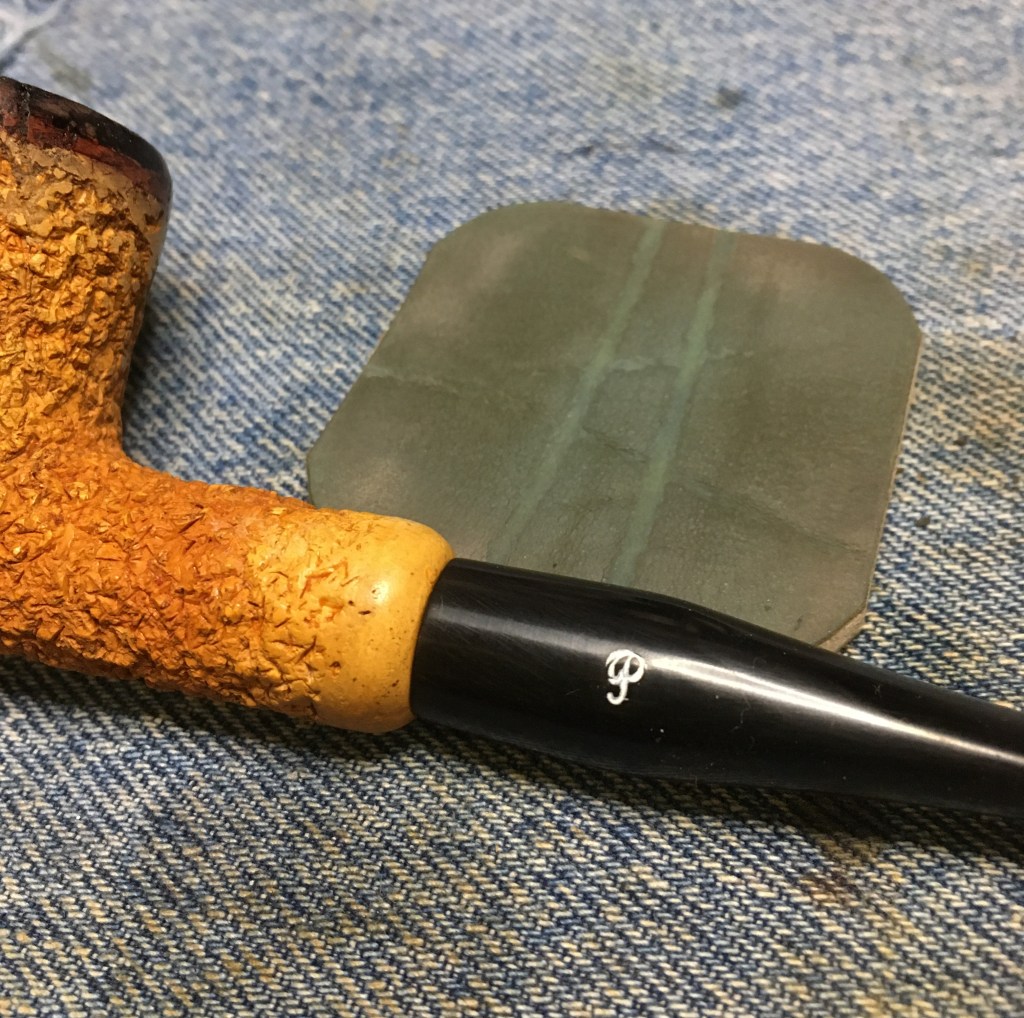


 Bah, fortunately, dear reader I am not easily dissuaded by failure. I did come across a few interesting reads regarding the original Needham patent and the flush of smoking pipe innovations from the late 1800s-mid1900s. First lets take a look at the original Needham patent submitted September 30, 1942.


 (


