
Photographed and written by
John M. Young
Tom Howard, Tracy Mincer and Wally Frank are all names that I think of when I imagine the archetypal pipe makers of the World War II era. Yeah, I know Wally was an importer of pipes but darn it, it’s my imagination. I envision an older guy dressed in a flannel shirt under a worn leather apron, duck cotton pants, Red Wing leather boots and a liberal dusting of wood shavings sprinkled from head to toe. The workshop is equally dusty and briar shaving covered with electric light emanating from bare incandescent light bulbs swinging above each tool station. OSHA be damned! I suppose this is a romanticized image yet, it remains how I imagine the pipes of those days were made. Tom Howard pipes have always struck me as a bit chunky and unrefined, in a good way. Like a toy made by the loving hands of a grandfather for a grandchild. Grandpa’s lack of formal training, precision tooling and general lack of formal designing create a very usable toy that will most likely be used and abused. These are the jobs of both the grandpa and the grandchild. They are not making/enjoying art, they are making/enjoying life.
This Tom Howard pipe had been made to be used and used it was. I would consider it used to the point of abuse.
The original listing of this pipe was spotted on eBay and looked far better than the actual pipe. After the purchase the pipe made its way from Cedar City, Utah to the wilds of southeast Nebraska.

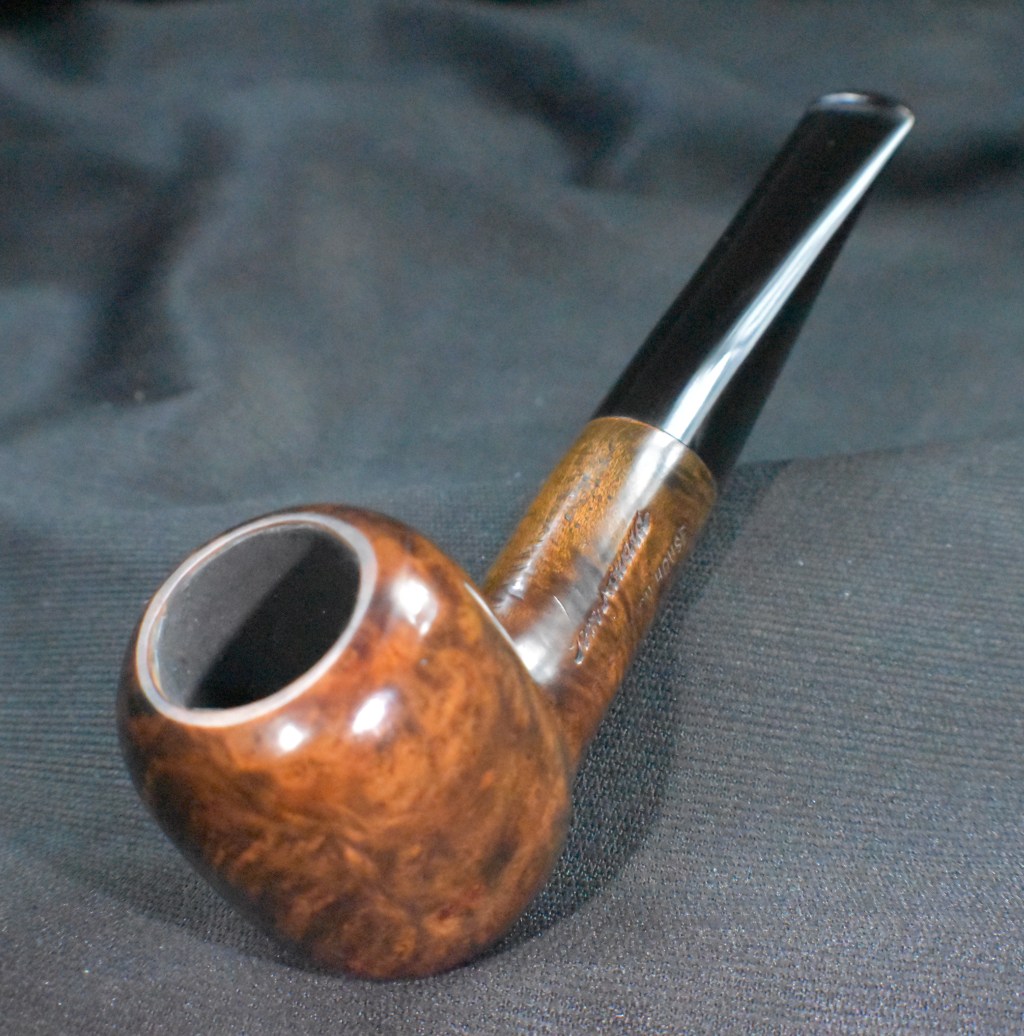
Upon arrival the pipe looked good overall the grime concealing most of the flaws quite well. Below are some photographs taken before any work was done.


Upon closer examination and with the bright photography lights I was able to see that this pipe had been used more than the advertised “Lightly”. The tobacco chamber was well caked and there was a significant lava deposit on the rim. There was a thin crack on the backside of the bowl which appeared to go completely through. The stem was heavily oxidized on one side but did not look as though it had been clenched or chewed. Another day in pipe restoration paradise.
Background
I have to say that I was unfamiliar with any of Tom Howard’s work outside of pipemaking. I began with a search for his pipes on pipephil.eu. Here there was a short entry:

(Hi-Ht — Pipes : Logos & Markings)
THe next stop was pipedia.org. At that site there was more information but not a great deal. According to pipedia.org,
“Tom Howard was a popular comedian and personality in the 1940s/50s, known for vaudeville stage and radio work. But he also was a skilled pipe maker. In a Popular Mechanic article from 1947 he is written up as the “Hobbyist of the Month, Tom Howard.” He made pipes in his workshop outside his home in Red Bank, NJ. starting about 1939, and looks like into the late 1940’s or later. He purchased briar blocks by the bag as well as stem blanks, and in his well equipped shop he hand crafted his pipes, in about three hours on average. He was a true craftsman, also specializing in intricate model boats, trains and brass cannons, all built to scale.” (Howard – Pipedia)
There were also several photos of Tom Howard working in his shop. I found these interesting and includ ethem below.

(File:TomHoward16.jpg – Pipedia)

(File:TomHoward17.jpg – Pipedia)

(File:TomHoward15.jpg – Pipedia)
This pipe was likely made between 1939-1950 in the shop of Tom Howard in New Jersey. I had done a restoration of a Greenwich pipe back in November of 2023 that restoration can be seen HERE. Little information was available other than Greenwich House Corporation of New York City produced or imported Algerian briar pipes and produced and sold a metal pipe, Thoro-Kleen.
The Restoration
The restoration began uneventfully with a cleaned piece of denim on the workbench.

I wanted to get the stem in the Briarville Pipe Stem Oxidation Remover quickly so as to speed along this project. The internals of the stem was cleaned with bristle pipe cleaners and 95% ethyl alcohol. The outside was lightly sanded with a 320 grit sanding sponge.

I quickly tapered the tenon with a countersink bit.

A pipe cleaner was inserted into the stem to act as a handle for easy removal from the solution in a few hours.

I then turned to the reaming of the tobacco chamber. The “ream team” was gathered.

The PipNet with the #3 blades started the process and quickly revealed that the tobacco chamber was quite severely charred. The Smokingpipes Low Country reaming knife was used to clean out as much of the charred and damaged briar as possible. The chamber was then sanded with 320 sandpaper wrapped around a wood dowel.

The photo below shows the sanded tobacco chamber. The walls don’t look bad but they were damaged from charring and were far from straight boring. They were actually curved out.

The bowl appeared like the advertisement below – concave walls. This was not something that I wanted to have when finished. As I continued I was contemplating remedies for this bow-bowled condition.

The airway of the shank was far dirtier than the stem had been. I started the cleaning with alcohol dipped cotton swabs and a dental scraper.

More scraping, cotton swabs, a nylon shank brush and even a brass bore brush were used.

Eventually the airway’s tar deposits were vanquished.

The stummel was taken to the sink for a scrubbing with undiluted Murphy Oil Soap and a nylon brush. The soap was rinsed with warm water and the stummel dried with a cotton hand towel.

The scrubbing had softened the old fills. They were picked from the briar using a fly tying bodkin.

There were more pits scattered around the stummel.

I was ready for the crack repair. The crack itself was small and was quite tight even though it ran a good deal of the bowl’s length. I used a 2 mm drill bit with the depth taped off with masking tape.

Three holes were drilled at different angles through the crack in the briar on each side. Brass pins were cut from a length of 2 mm brass rod.

The below photo shows the pins partially inserted and their angles.

I forced some JB Weld into the drilled hole using a fly tying bodkin. The brass pins were roughed up with sandpaper then pressed into their respective holes. I used a thin CA to penetrate the crack.

The remaining epoxy was spread into the tobacco chamber using a nitrile gloved finger. The stummel was set aside and allowed to cure/dry for 2 hours. During this time I removed the stem from deox and vigorously rubbed the remaining solution from the vulcanite.

I reattached the stem to the stummel while it was still curing. The stem like the oxidation had not been removed but this was just surface oxidation that would be removed with sanding.

After the curing/drying time, I used brown CA and briar dust to refill the excavated pits.

The stem was then sanded with a series of sanding sponges from grits 320-3500. Between each sponge I wiped the stummel with a make-up pad wetted with alcohol. Below you can see that the shank was wrapped with masking tape to keep the joint where the two pieces meet from being rounded.

The stummel was sanded with grits 320-600. The sanding avoided the stamped areas. I did not sand finer than the 600 because this was in preparation of giving the stummel a contrast dye. I don’t think the dye absorbs as well into the briar if the surface has been sanded with very fine sandpaper.

The dye kit consisted of black Fiebing’s Leather Dye, a lighter, a cork and a folded pipe cleaner as an applicator.

The dye was applied with the pipe cleaner and flamed with the lighter. This burns off the solvent portion of the dye and allows it to better stain the briar. The cork acted as a plug keeping the dye from the inside of the tobacco chamber. The stummel was then wiped with a paper towel.

I did not care about giving the dye drying time as I was only interested in the dye penetrating the softer grained briar. I took the stummel to the buffer where I buffed the black dye outer layer of briar from the stummel using the rouge compound and rouge wheel.

The resulting color is shown in the photo below. The stummel was then lightly sanded with a series of sanding sponges from 1000-3500. Between each sponge the surface was wiped with an alcohol wetted make-up pad.

The stummel was then given a coating of Before and After Restoration Balm and allowed to sit for 20 minutes.

An inside out athletic sock was used to wipe away any remaining balm.

The epoxy in the tobacco chamber had cured for about 3 hours. It still remained slightly soft. I used the PipNet with the #3 blade to remove the epoxy from the high points of the chamber. There was still a rather significant curve to the inside walls. A second batch of epoxy was mixed. I planned on using the pocket knife below as a trowel to apply the epoxy to the tobacco chamber. This epoxy sets-up in about 15 minutes so I allied the freshly mixed epoxy to sit for about 5 minutes before applying.

This application better filled the remaining low areas. I used a single finger from a nitrile glove to spread the epoxy into the low spots.

Below you can see the interior at this time. The epoxy was again set aside for a couple of hours to cure.

After the curing time, I again used the PipNet and #3 blades to remove the high spots and reform a cylindrical tobacco chamber. The results were far better with only a couple of areas that remained depressed. These were again filled with fresh epoxy and allowed to cure. I failed to take any photos, apologies. Once the final epoxy had cured for a couple of hours the PipNet was used again. This time the tobacco chamber had been restored to a nice cylindrical cavity. I had to wait overnight to allow the epoxy to fully harden enough for sanding. The next day the tobacco shamber was sanded with 320 sandpaper. I wanted a good bowl coating to cover the epoxy and chose to use 100% maple syrup and carbon powder for the coating. A cotton swab was used to apply an even coating of syrup to the tobacco chamber. A pipe cleaner was inserted into the airway to prevent syrup and carbon powder from entering.

A capsule of carbon powder was poured into the chamber/

The rim was covered with a piece of masking tape.

The stummel was then shaken, rotated, shaken, rotated, shaken, etc… After a few minutes of this the tape was removed and the remaining powder dumped. The resulting bowl coating would take a couple of days to dry.

The final step was a hand buffing with a microfiber polishing cloth further improving the shine.
Tom Howard made a sturdy pipe and this one withstood the abuse of hard use and time and came through it still smoking. I am very pleased with how well this old pipe turned out even though it took days longer than I had intended. The briar grain is quite pretty and the contrast dye brought the grain forward. The sturdy shank compliments the round bowl nicely. Pinning the cracked bowl with 3, 2 mm brass pins winn undoubtedly hold the crack together and not allow it to be an issue in the future. The old vulcanite polished up beautifully and the high gloss finish accentuates the black dye contrasts in a cohesive fashion. I am sure this old pipe will be a sturdy smoking companion for many years to come.The dimensions of the Tom Howard Billiard are:
Length: 5.72 in./ 145.29 mm.
Weight: 1.59 oz./ 45.08 g.
Bowl Height: 1.97 in./ 50.04 mm.
Chamber Depth: 1.52 in./ 38.61 mm.
Chamber Diameter: 0.80 in./ 20.32 mm.
Outside Diameter: 1.55 in./ 39.37 mm.
I do hope that you have found something here useful to your own pipe care, maintenance or restorations. If you like this sort of thing, please click the like and subscribe buttons. Thank you for reading the ramblings of an old pipe lover.
Below are some photos of the finished Tom Howard Billiard.


3 responses to “A Tom Howard Billiard Restoration”
Fantastic! I’ve read it twice and will read it again. Many thanks.
LikeLike
Thank you. I cannot take credit for the pinning technique. I picked that up from Charles Lemon and have done a few of them now. I even have used the brass pins on cracked shank repairs. That was the most epoxy I have ever used in repairing a charred tobacco chamber. As I type this, I am smoking the pipe with a bowl of very dry Peterson Early Morning Pipe, 2/3 finished. So far, no tastes or smells from the epoxy.
John
LikeLike
[…] last Tom Howard pipe I restored could probably be considered a salvage rather than a restoration, here’s that one. This pipe is in far better shape, though still in dire need of some restorative care. […]
LikeLike