

Photographed and written by
John M. Young
Expecting perfection from a new corn cob pipe is kind of like expecting a perfect first date. Sure it can happen but more often than not the pipe will have flaws typical of cobs like a first date will undoubtedly have awkward, “damn, I should never have said that” moments. I recently bought three brand new Missouri Meerschaum Riverboat Gamblers with very pale complections, brass collars and white stems.

My thought was to dye the stummels black and make some very sharp looking custom cobs. Well the thought worked out well for two of the three pipes. The third pipe had a stem that was cracked at the base of the tenon. This crack led to a break while trying to remove the stem. This is not something that I have had occur with a new pipe but I wasn’t too upset by it thinking that this was an excuse to purchase a Forever Stem from Vermont Freehand for the pipe.

A drywall screw was used to pull the broken tenon from the shank.

“To the Internet!” was the battle cry. I chose and ordered a replacement stem from the great options from Vermont Freehand. The shipping was quick and I soon had a replacement stem. I still wanted to dye the cob and stem black as I was very happy with how the other two Riverboat Gamblers turned out.
I wanted to maintain the Missouri Meerschaum logo sticker so I covered it with Vallejo Liquid Mask. This is a quick drying latex that is used to keep paint from areas where it is not wanted. Once dried it can be easily peeled off.
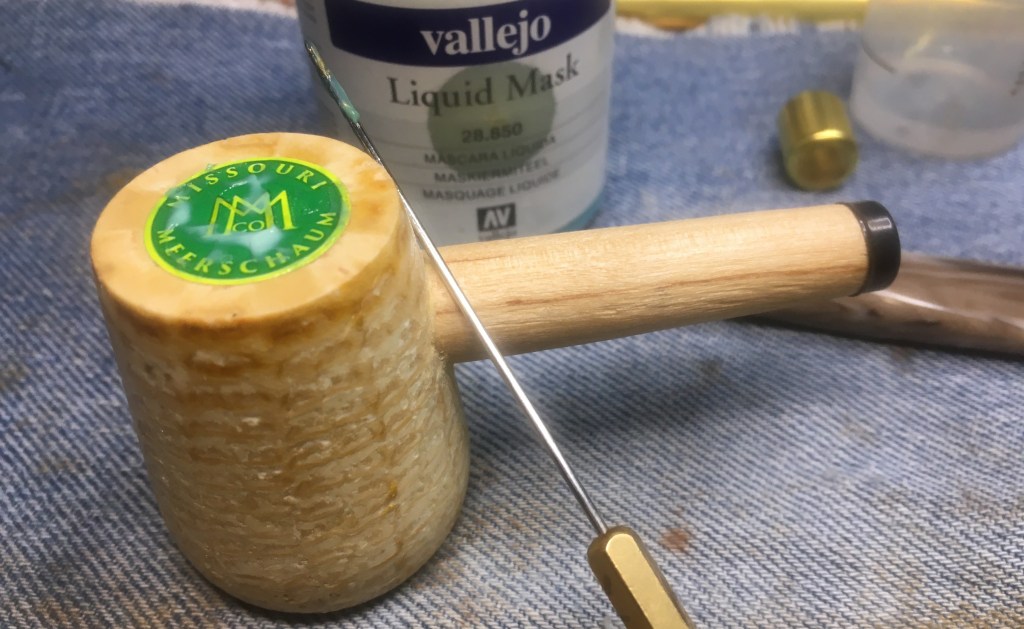
The cob and stem were sanded with 320 and 400 grit sanding sponges. I do not like to go finer than that before dying briar due to my thoughts that finer sanding does not allow the dye to penetrate as well into the wood. I was not concerned with masking the band at the end of the shank since the brass collar would completely cover it.

Once the sanding was completed I prepared the dye gear. This included a cork to plug the tobacco chamber and act as a handle, a lighter for flaming the wet dye, a bend pipe cleaner as an applicator, a paper towel surface cover and the Fiebing’s Leather Dye in black. I also had a heat gun to heat the cob before applying the dye.

The cob was briefly heated then painted with the black Fiebing’s Leather Dye. The first coating was applied and quickly absorbed into the cob and stem. I tried to flame the stummel but there was just nothing to burn.

I applied a second coating of Fiebing’s this time the flaming attempt did work but very briefly. The pipe was taken to a vise where I clamped it and allowed it to dry overnight.

The next day I applied a third coating of black dye and set the pipe to dry for two hours. Once completely dry I wiped/rubbed the cob and stem with a paper towel to remove any of the dye that might come off on a person’s hands while handling it. I then proceeded to apply a coating of Danish Oil to the cob and stem. I used a fluffy pipe cleaner to apply the Danish Oil.

I allowed the Danish oil to dry for about an hour and applied a second coat. This one was allowed to dry for another hour.

I peeled the Liquid Mask latex from the logo sticker.

The mask did exactly what it was supposed to do and kept the dye from coloring the sticker.


The last steps included giving the pipe a couple of coats of carnauba wax with the buffer followed by a hand buffing with a microfiber cloth.
I do hope that you have found something here useful to your own pipe care, maintenance, restorations or customizations.If you are interested the two Riverboat Gamblers from the earlier customizations are available. Feel free to message me in the comments if you would like one of them. If you like this sort of thing, please click the like and subscribe buttons. Thank you for reading the ramblings of an old pipe lover.
Below are some photos of the finished RIverboat Gambler 2.


How it looks after one bowl of Prince Albert. The light interior of the tobacco chamber is now properly colored, as well.

