Photographed and written by
John M. Young
Just when I thought my Peterson Pipe Acquisition Disorder (PPAD) was in remission I had a flare up of activity. I could blame it on the weather, or maybe the fact that just smoking Peterson pipes (AKA self medicating) wasn’t enough to keep the demons at bay. Then come the justifications: “You know you have been focusing on post WWII- 1950s pipes and this poor 1949-1957 Killarney fits that description.” Or, “Well, if I don’t adopt her she might end up in an abusive home.”
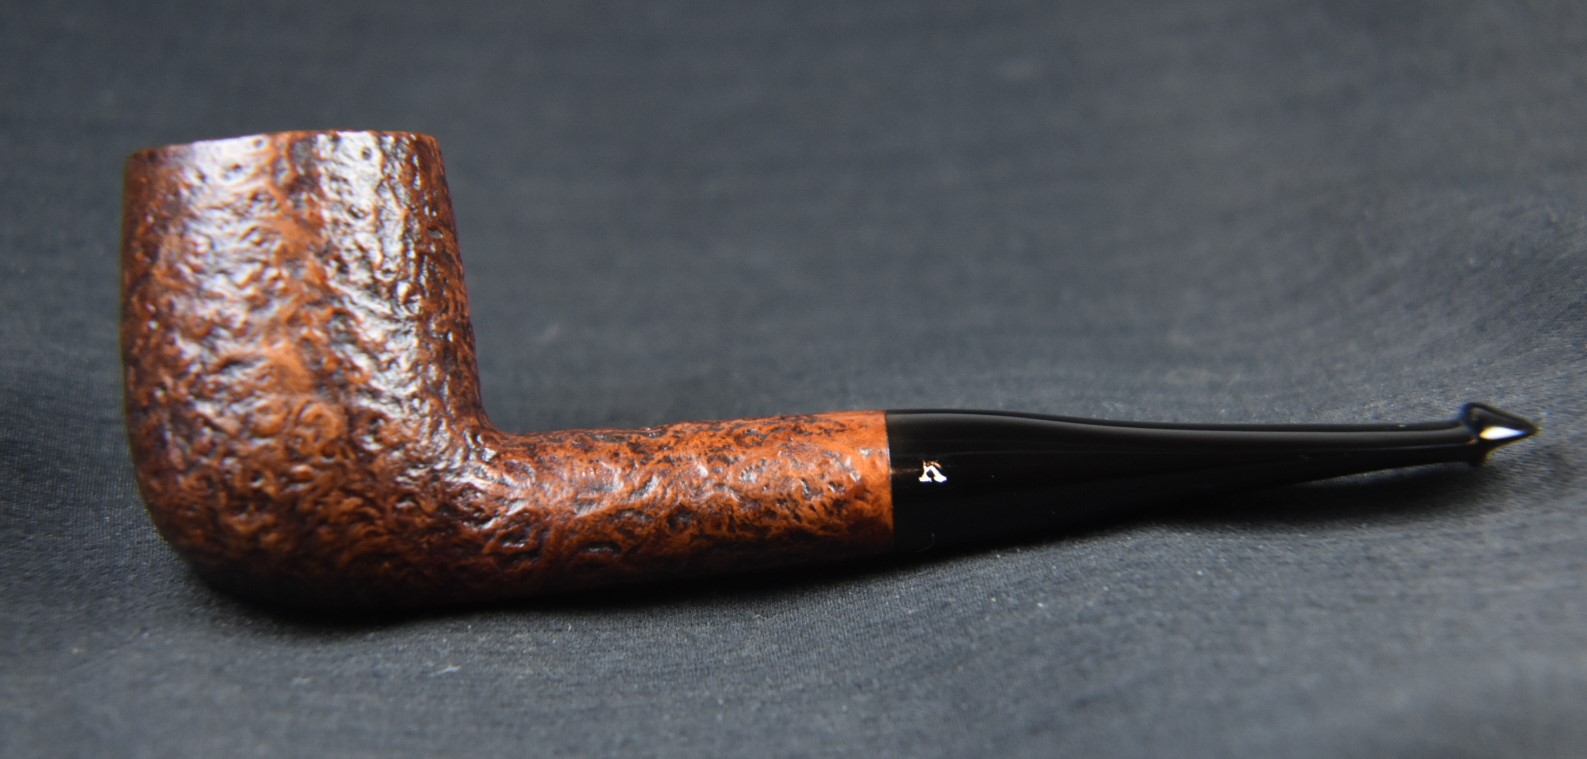
Whatever the reasons, I am now the proud companion of the above Peterson Killarney. The auction was won from a reputable seller and was described as “It’s been cleaned and polished … and is ready to enjoy.” There was also a disclaimer, “We clean all our pipes before sale but only minimally. We do this to give the buyer an easier job to finish cleaning your pipe to your standards before smoking.” The Killarney was indeed clean compared to a typical estate pipe and had been buffed/waxed. The bowl had been reamed and was free of cake. I was quite pleased with the purchase. I remember several years ago, during my early PPAD, if I could get a Peterson for under $45 I was happy. This purchase still met that criteria. That price point is today a relic of the past with even beat-up Peterson pipes demanding prices half again as much and more.
The Killarney Before Restoration
Here are some photos of the pipe as it appeared before any work was done by me.

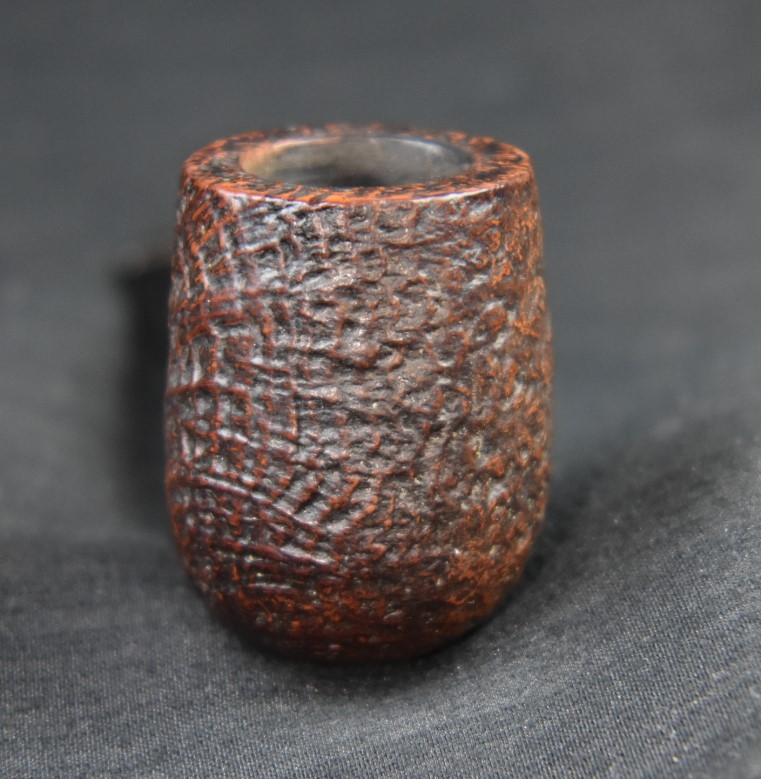


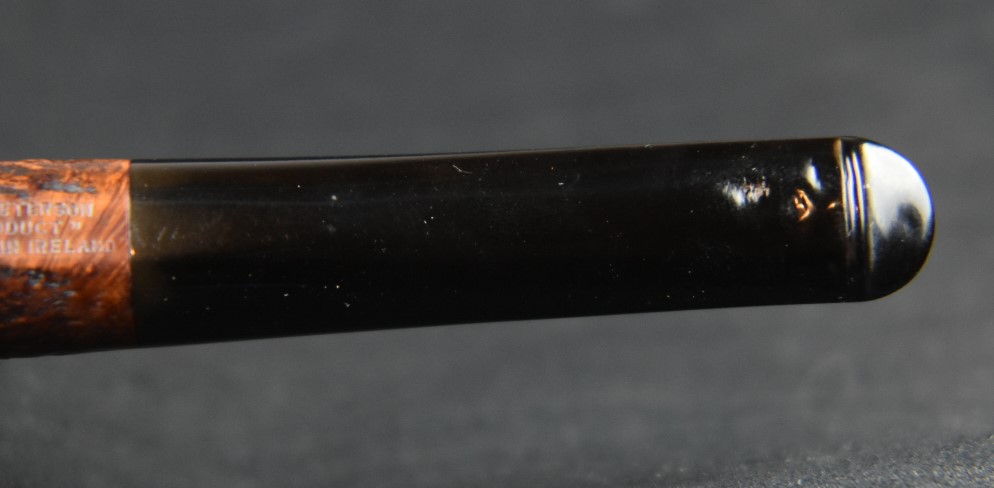
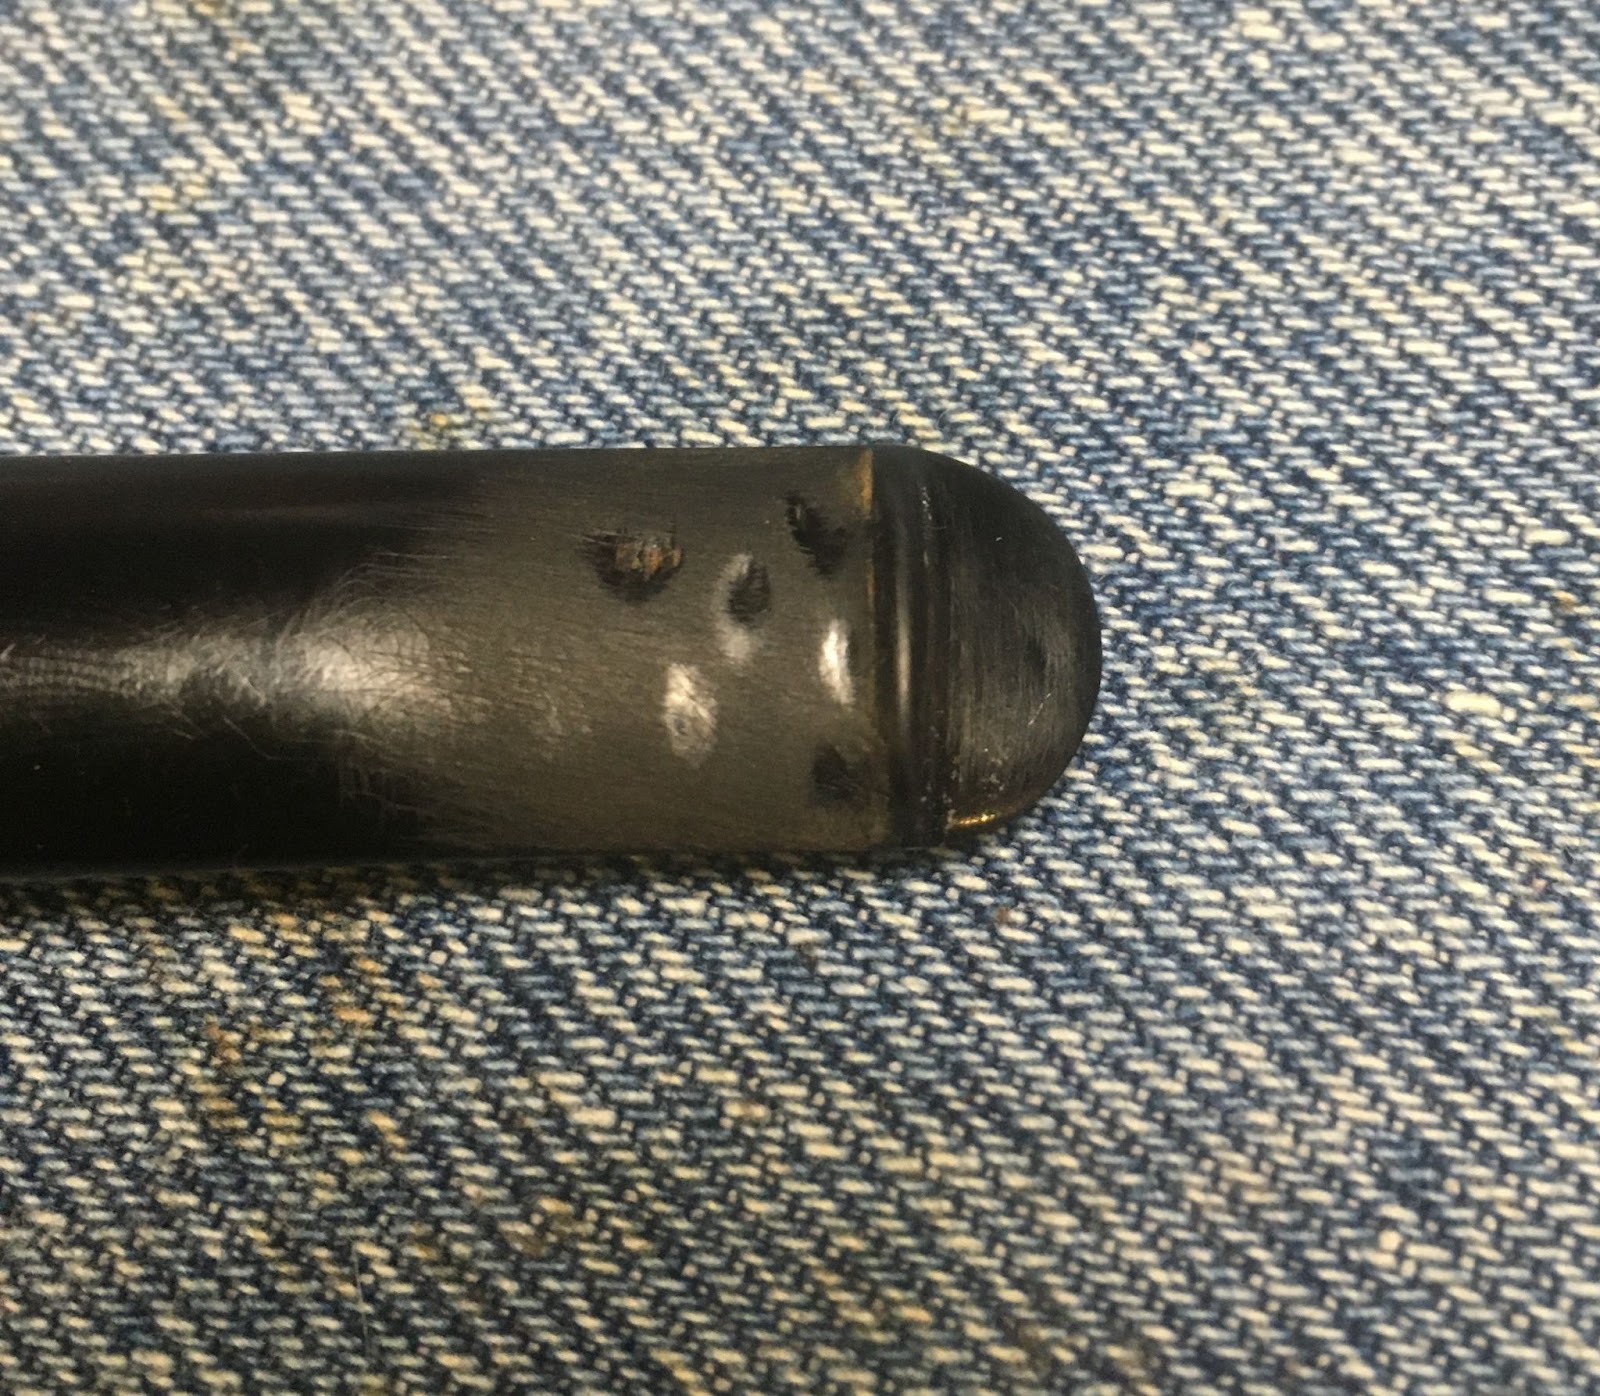
The largest issue I saw with the pipe was the deep bite marks in the stem. My photos fail to show their true nature as the buffing and waxing helped to keep them from the camera. Other than that the Killarney was a very nice specimen. Besides, I do enjoy a relaxing restoration over some of the recent “not-so-easy” restorations.
A brief background on the Peterson Killarney
I cannot do the history of Peterson pipes justice in this blog. In the words of Peterson, “As the oldest continuously operating briar pipe factory in the world, we at Peterson have a certain tradition to uphold, a legacy of craftsmanship dating back over 150 years.” (https://www.peterson.ie/pipes/). There is a wonderful book by Mark Irwin and Gary Marlmberg, The Peterson Pipe, which explores the history of the company and their products since their inception.

(https://www.smokingpipes.com/accessories/books/moreinfo.cfm?product_id=471478)
I will only be focussing here, on the Killarney line. The following is taken from Irwin & Malmberg’s The Peterson Pipe (Irwin, Mark. The Peterson Pipe: The History of Kapp & Peterson. First Edition, second printing 2021 ed., Canada, Briar Books Press, 2018.).
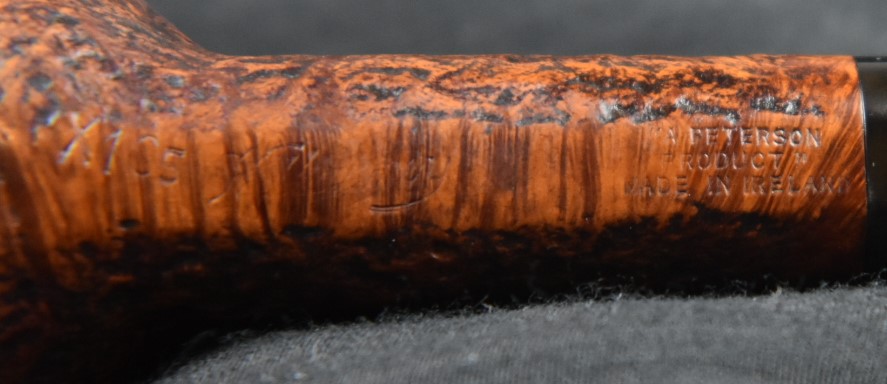
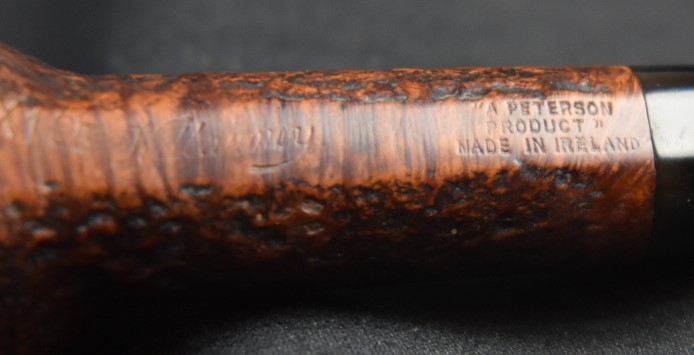
Killarney (1949-) Entry line with smooth finish and P-Lip mouthpiece. May have either K or P stamped on mouthpiece; may have aluminum stinger (not to be confused with the tenon extension tube found on straight System pipes). 1949-c.1957 examples made for the US market may have any of the following COM stamps: MADE IN IRELAND (forming a circle), “A PETERSON PRODUCT” over MADE IN IRELAND or LONDON MADE over ENGLAND. Some early specimens stamped KILLARNEY over NATURAL (a higher grade) have MADE IN IRELAND (forming a circle). Examples c 1986-90 feature a nickel band, which was replaced in ‘91 with a shank extension of nickel band with black acrylic inlay. Fishtail mouthpiece from ‘86, although P-Lip is sometimes seen. For the current German market the Killarney is stamped CONNEMARA.” (Irwin and Malmberg p. 306)
In examining the Peterson Killarney X105:
P-Lip mouthpiece.
The K stamp on the mouthpiece.
No to the “may have aluminum stinger”.
“A PETERSON PRODUCT” over MADE IN IRELAND
Based on this information I am going to wager that this Peterson Killarney is a product of the Dublin factory dating from 1949-1957.
The Restoration
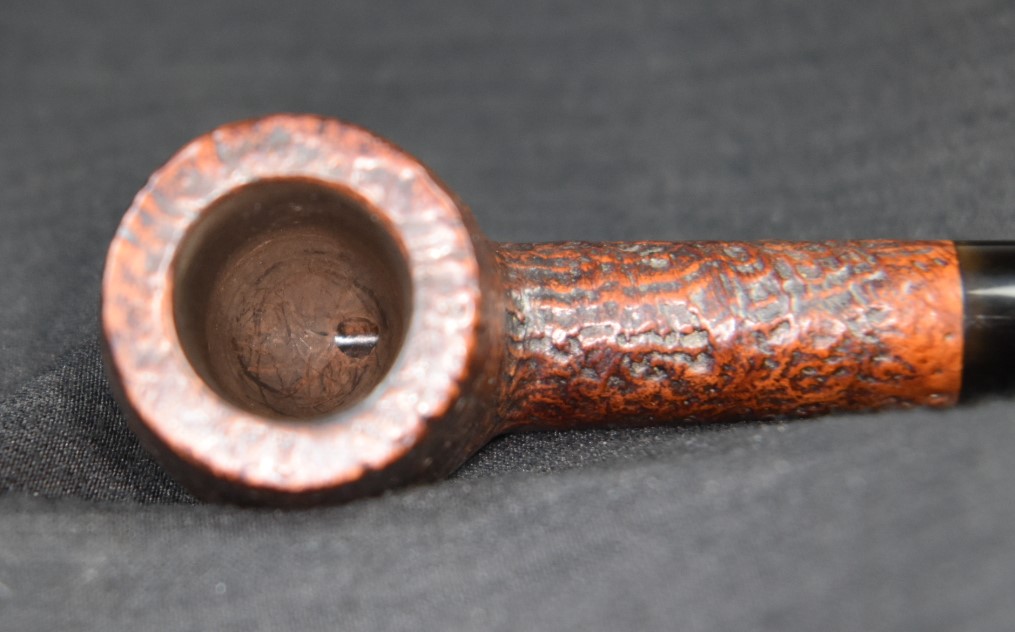
I began with a clean denim piece under the reaming plastic coated envelope. The reaming tools were gathered and really got to see darn little action. The tobacco chamber was well reamed and I only could scrape out a little bit of additional carbon. I did sand the chamber though with 220 and 320 sandpaper.

Below is a poor photo of the chamber interior.

Next came the cleaning of the shank. The terms”clean and ready to enjoy” and “minimally” popped into my head while cleaning out the airway. I realize that clean is a subjective descriptor and everyone probably has a slightly different operational definition of ”clean” but it was clean when I finished.

The stem airway was cleaned out next. It was in better shape than the shank but still required a few alcohol dipped pipe cleaners to achieve the clean that I wanted.

With the internals cleaned I started work on the stem. First I sanded away the freshly buffed waxed surface to reveal the tooth dents.

Fortunately the button had not received any real chomping and was in good shape. I used black cyanoacrylate (CA, super glue) to fill the dents. A small drop was placed in each drop on the top and bottom of the stem.


The CA was then spritzed with a CA drying accelerator. The dried or cured CA was then filed with a flat needle file.


Next, additional black CA was applied. This too was spritzed with accelerator and filed then sanded with a 400 sanding sponge to smooth the surface and blend the new CA fills with the existing stem. The process was repeated until I was satisfied with the result.


I then taped the shank of the pipe in painters tape, reattached the stem to the stummel and sanded the stem with the sequence of sanding sponges 400-3500. Between sponges I rubbed mineral oil onto the stem and wiped away the excess oil with a paper towel. Once finished with the sanding sponges I used micro-mesh pads 4000-12000 in sequence. Between each of these pads I applied a drop of Obsidian Oil, rubbed it onto the stem with my finger and wiped the stem with a paper towel.

On to the stummel. I used Murphy Oil Soap and a medium stiff toothbrush to scrub the stummel. The soap appeared to be removing quite a bit of something from this “clean” pipe. I then applied a second blob of Murphy’s and upgraded to a stiffer nylon scrub brush. The stummel was rinsed with warm water and dried with a cotton dish towel.

I returned to the workbench and wiped the stummel with a make-up pad dipped in 95% ethyl alcohol. I scrubbed the surface with the pad re-dipping it a couple of times.
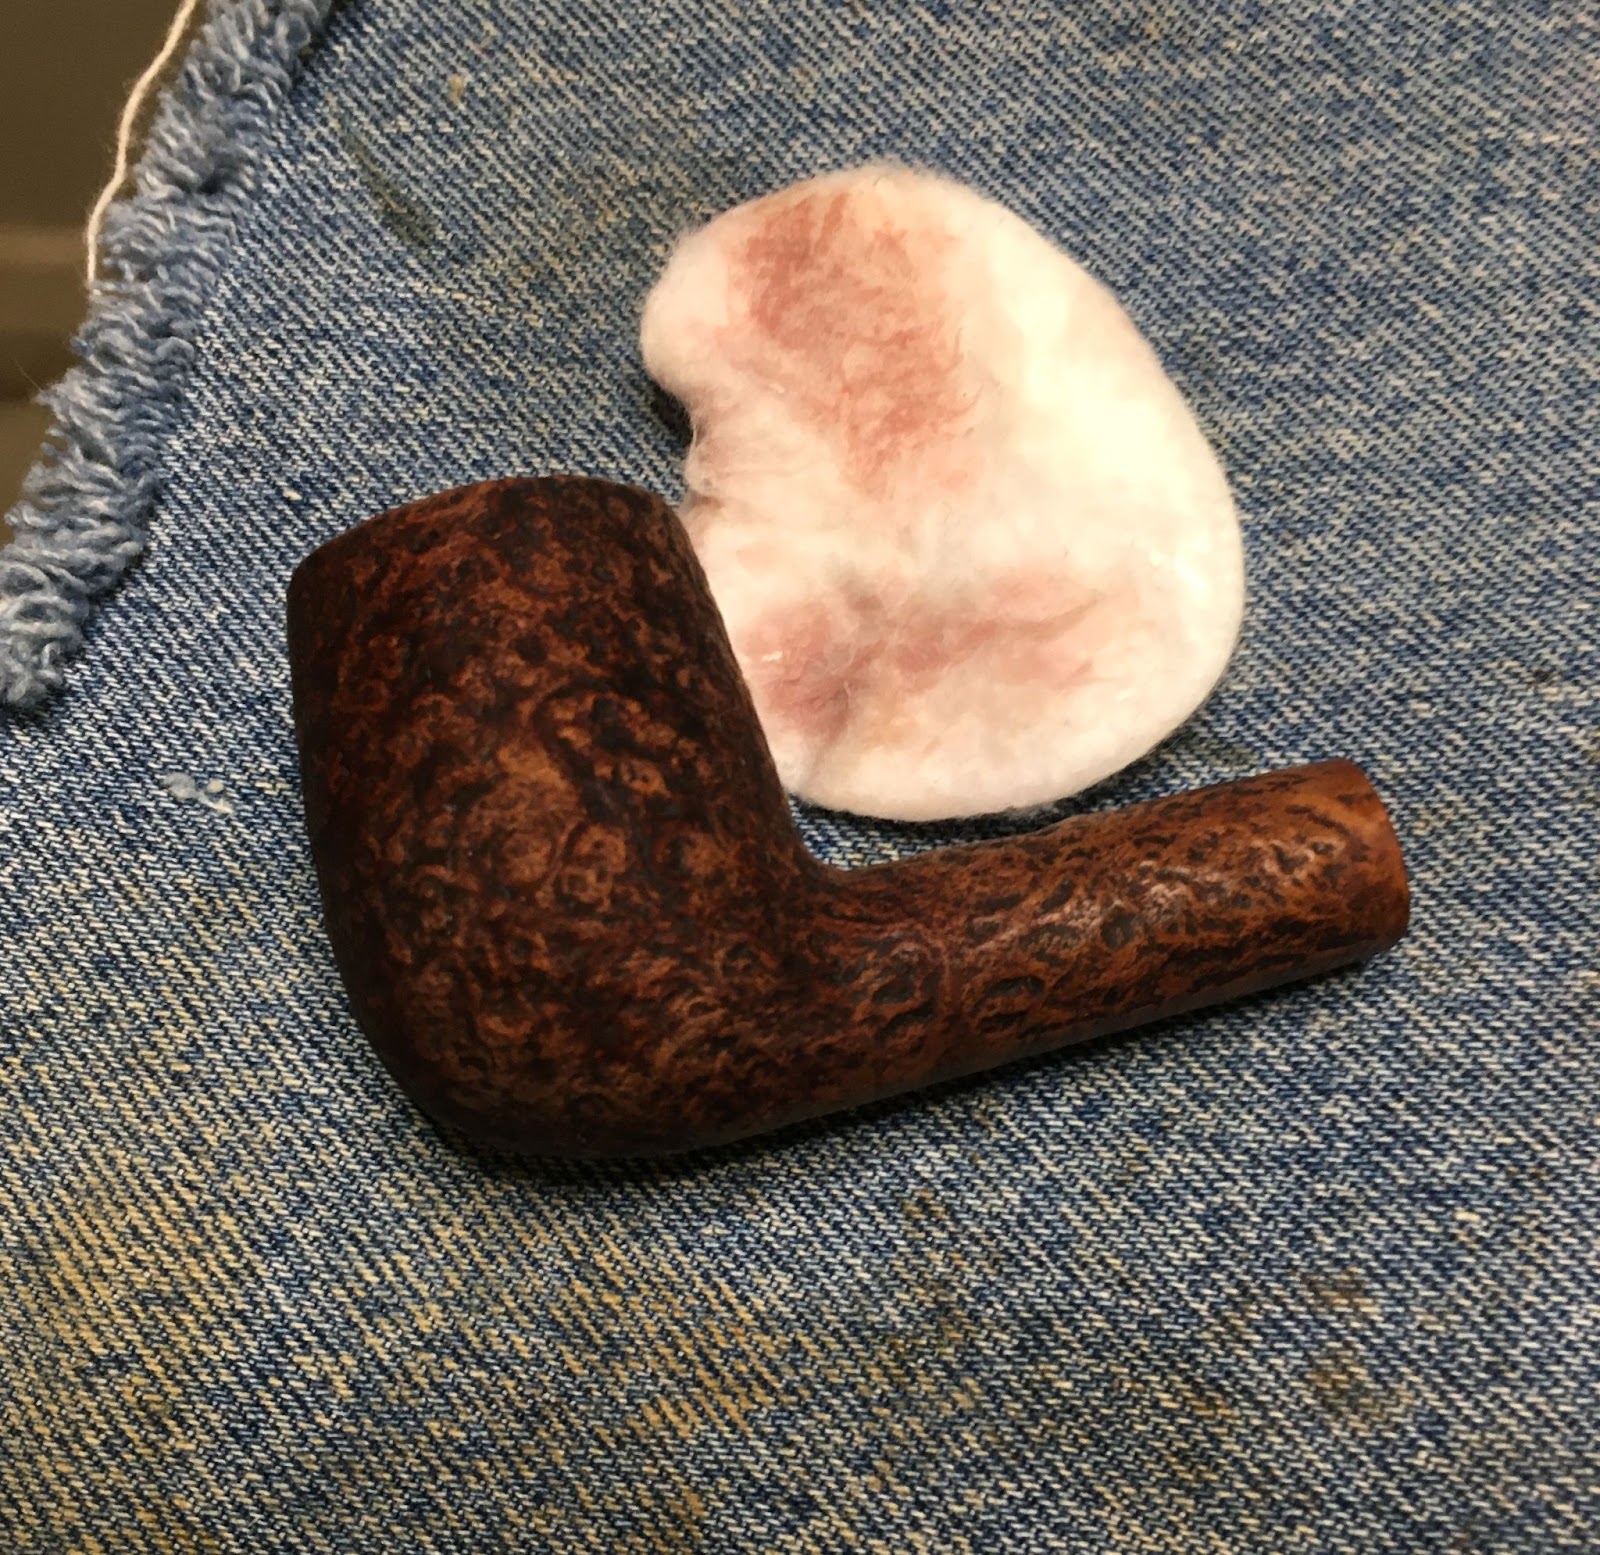
Below is a photo of the stummel after the soap scrub and alcohol wiping along with the filled/sanded/micro-meshed stem.

I applied a coat of Before and After Restoration Balm to the stummel and worked it into the sandblasted surface with a baby toothbrush. The balm was allowed to work it’s magic for 30 minutes.

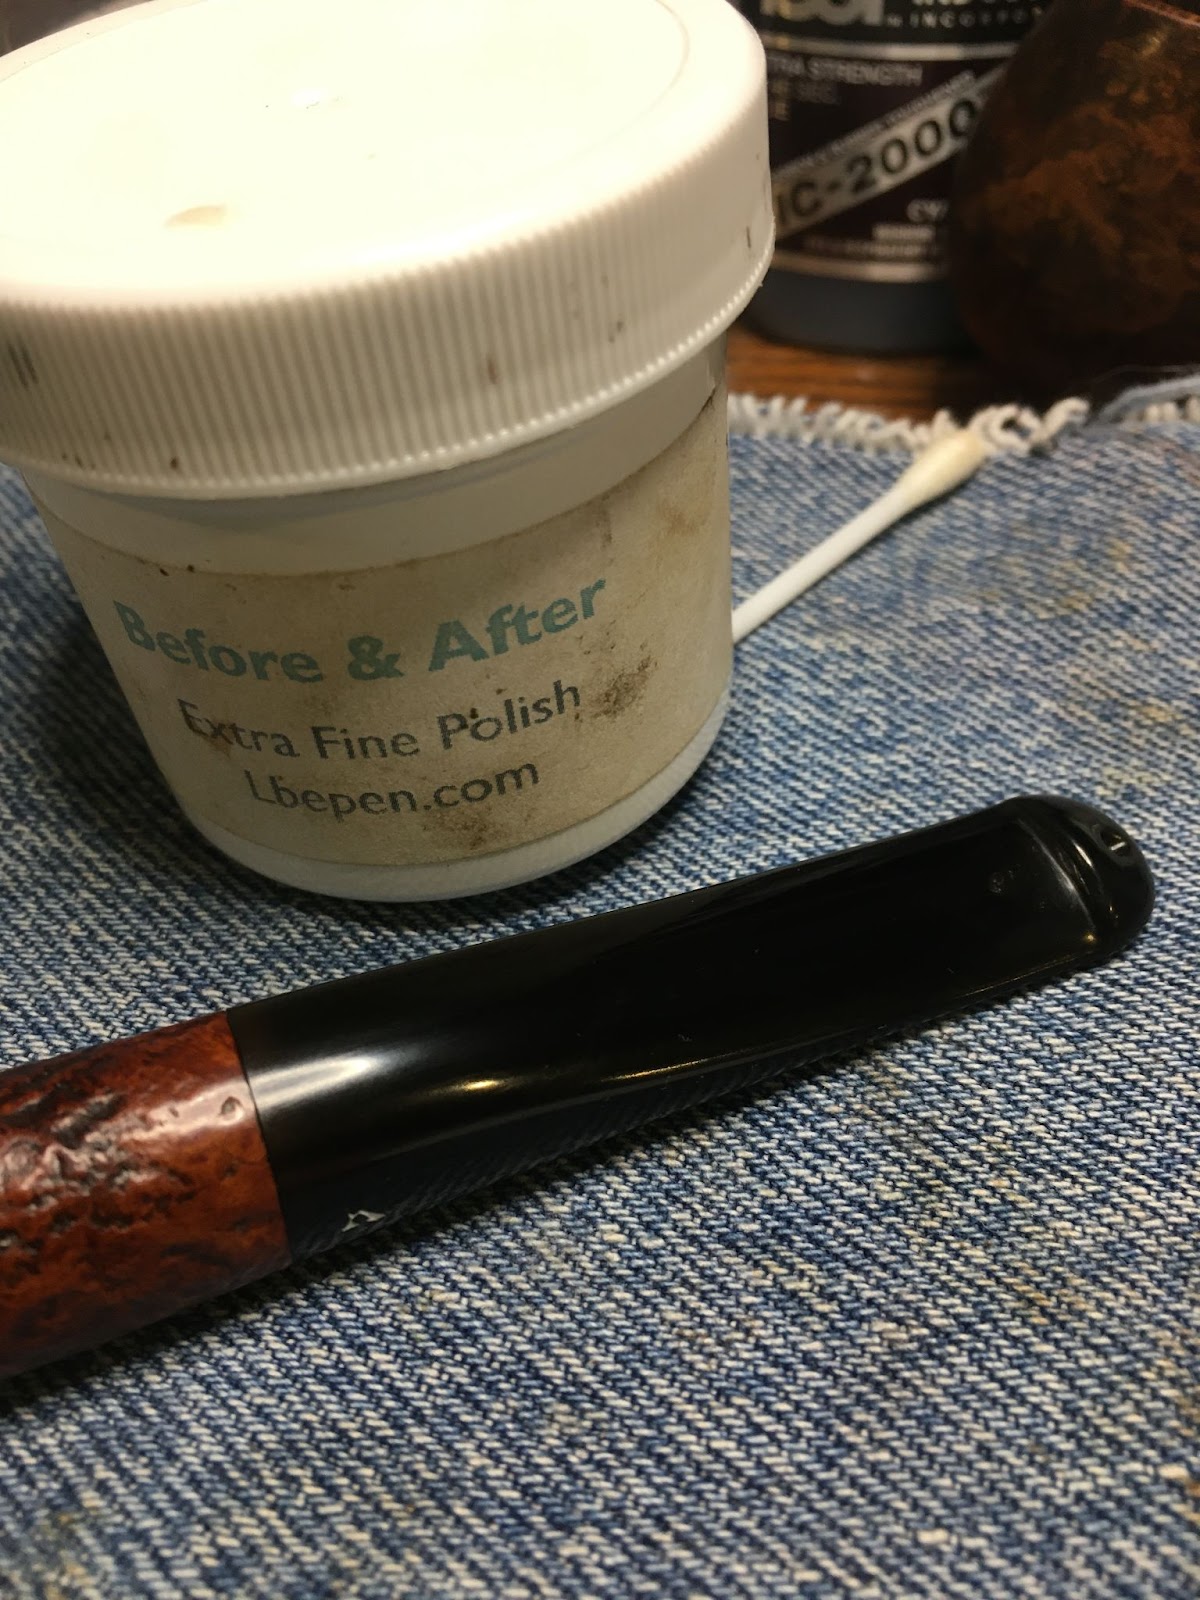
During the magic working, I occupied myself with polishing the stem with Before and After Fine Polish. The polish was applied by fingertip and rubbed with a soft cotton cloth.

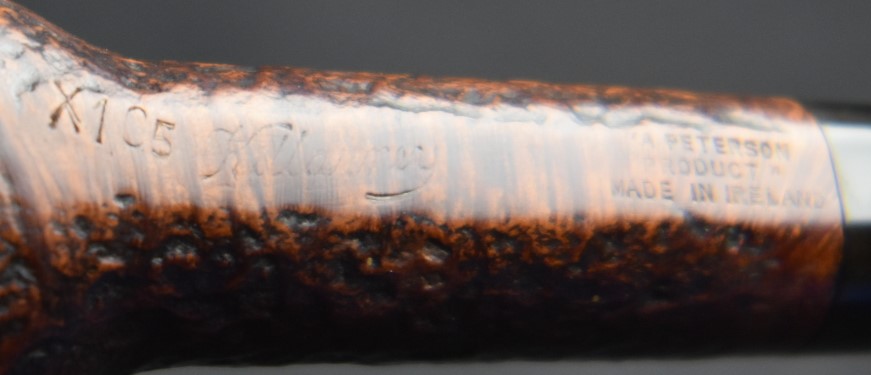
I wanted to repaint what remained of the logo. I used a cotton swab dipped in alcohol to remove any oil from the logo area. I then applied white acrylic model paint to the K. This paint dries quickly. I then used a rigid piece of plastic to scrape over the surface of the logo. This removed the paint from the stem except where it was in the depressions of the logo.

For the remainder of the 30 minutes I involved myself with laundry but, I am sure you don’t want to read about that. After 30 minutes, the balm was wiped away using an inside out athletic sock.

With the stummel looking very nicely and the acrylic paint now completely dry, I was able to use the Before and After Extra Fine Polish to polish the stem.
I wanted a wax to protect the briar but I do not like using carnauba wax on sandblasted surfaces. I opted to use Renaissance Micro-Crystalline Wax. I applied the wax with my finger and worked it into the rough surface with a baby toothbrush. I allowed the wax to dry for about 10 minutes.
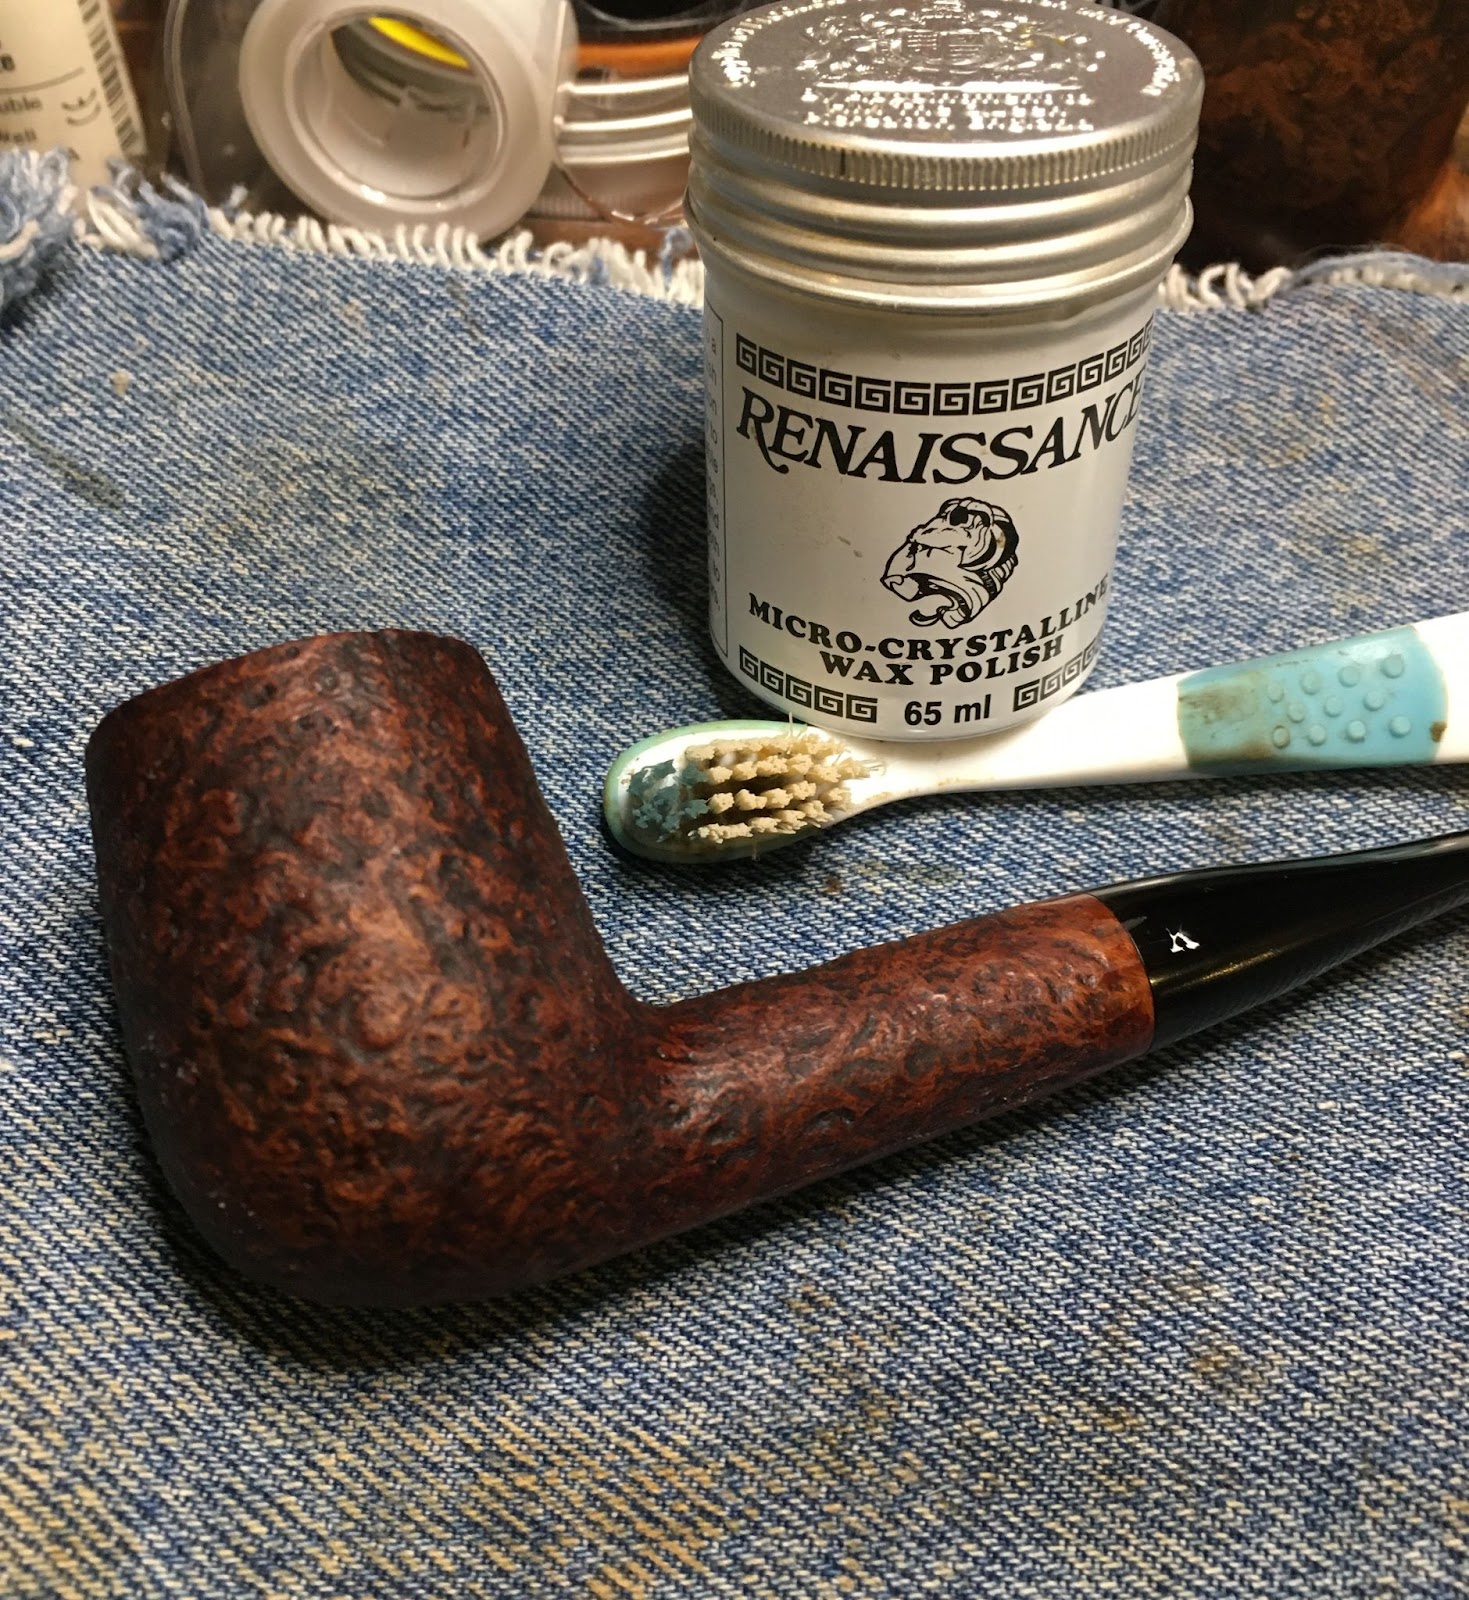
I then took the pipe to the buffer. I put a clean flannel wheel on the buffer and buffed the wax stummel. The waxing was repeated and rebuffed. I swapped out the clean wheel for my carnauba waxing wheel and applied a couple of coats of carnauba wax to the stem.

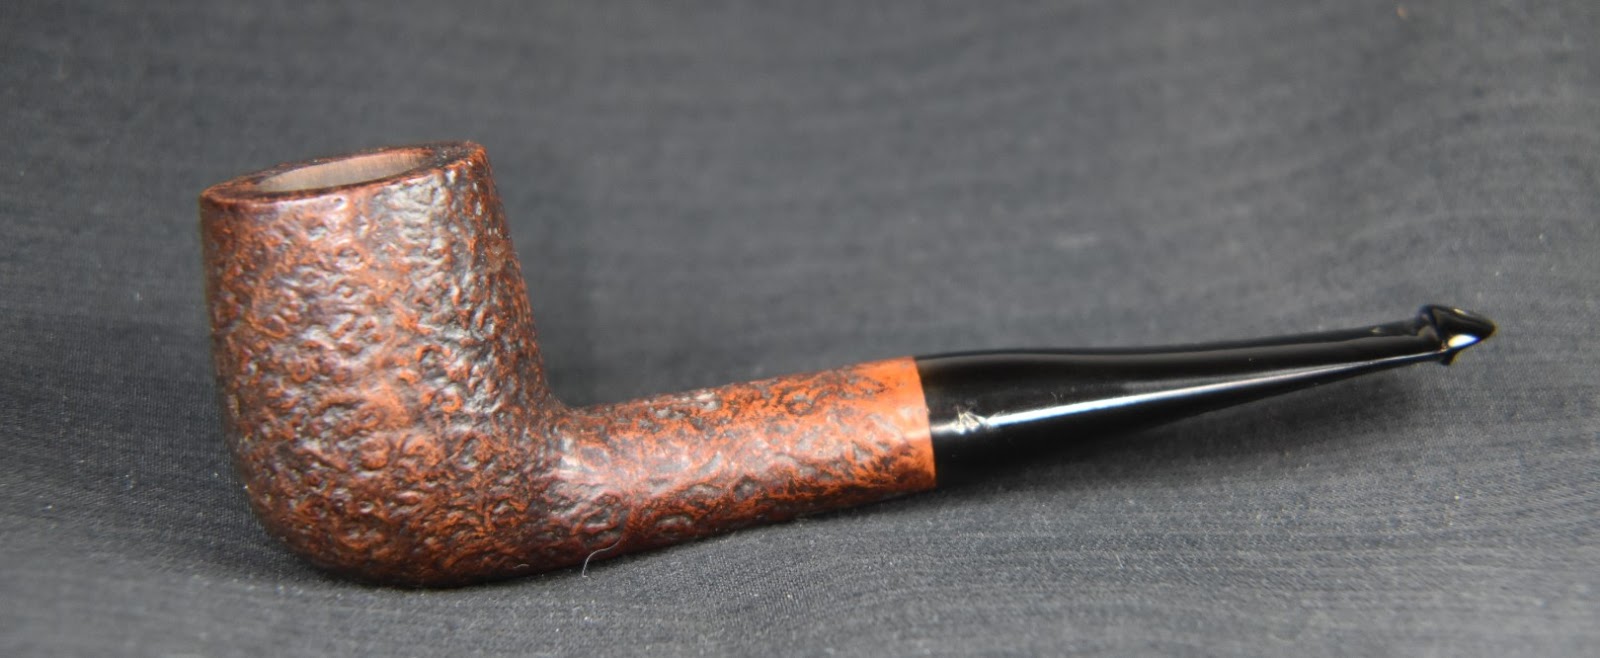
Overall, I am very pleased with this Peterson Killarney. The 105 is a stout billiard design with Peterson’s masculine traditional proportions. This pipe is very comfortable to hold with the sandblast being pleasant feeling yet allowing a better grip than with a smooth pipe. I’m sure it will be a pleasure to smoke. The P-Lip stem or mouthpiece as Mark Irwin calls it in The Peterson Pipe book, is something that I find very comfortable and this one polished up very nicely after the rebuilding. This pipe sports a large bowl and would surely make a 45 minute drive much more enjoyable. The dimensions of this pipe are:
- Length: 5.56 in./ 141.22 mm.
- Weight: 1.40oz./ 39.70 g.
- Bowl Height: 1.85 in./ 43.43mm.
- Chamber Depth: 1.44 in./ 36.58 mm.
- Chamber Diameter: 0.76 in./19.30.
- Outside Diameter: 1.38 in./ 35.05 mm.
I do hope that you have found something here useful to your own pipe care or restorations. If you like this sort of thing, please click the like and subscribe buttons. Thank you for reading the ramblings of an old pipe lover.
Below are some photos of the finished Peterson Killarney X105.