
Written and Photographed by
John M. Young
Okay, I know what you are thinking:
1) “John, didn’t you suffer enough with that last Marxman Dublin?” And,
2) “Hey, you changed the color of your photo background.”
Well, first of all, I’m glad we are on a first name basis now. Secondly, yes I was remembering the Marxman Dublin from Hades restoration the other day while smoking it. That is a great smoking pipe. I now know why it had been so heavily used – because it is awesome. I didn’t have to deal with miniature La Brea Tar Pits within this one, it was unfired. Yeah, you read that correctly. A 1947’ish unfired Marxman Jumbo. And further, yes, I am trying a black background. I am not sure if I prefer it over the blue but that blue would change shades between photos occasionally.
Oh, so now you are thinking, “This guy is a hack! Claiming to restore a pipe that hasn’t even been used. What a kind of deceitful shenanigans is he up to? Next he’ll be running for office.” Dang, calm down there, buddy. I did stuff to it. Restorer stuff, even. I guess you are just going to have to read about my creative process or, flip through the photos and get to the good stuff at the end. Wink.
If you have read a few of my blogs you know that I am a Marxman lover. If you are a newer reader, thank you for stopping by and by the way, I am a Marxman pipe lover. Since I started blogging at the end of October 2022, I have done 4 Marxman pipes. Crazy as that sounds, I actually have many more Petersons than Marxmans. Why the preponderance of Marxmans? I can afford them. Have you seen the prices they are asking for Peterson pipes these days? Thanks alot, Mark Irwin for writing an incredible book, The Peterson Pipe – The Story of Kapp & Peterson (Irwin, Mark and Malmberg, Gary. 2018. Canada, Briar Books Press.) and making people want to collect Peterson pipes (feel free to read this with a sarcastic tone) By the way, Mark knows that little of what I say is serious and I will be giving him a heads-up before I publish this.
I suppose some history of Marman is in order. Feel free to read my prior Marxman blogs (Marxman; Regular Apple, Super Briar, Quarter Bent Big Boy Rhodesian and Marxman Dublin) as they contain histories and commentary as well. Here is a quick review of Marxman pipes from pipedia.org:
“Marxman (Marxman Pipe Company) was created by Robert (Bob) L. Marx in 1934, when he was 29, and after he had worked for the William Demuth Company. His pipes were not outstanding because of the quality of their wood (probably Algerian), but Bob started making unique sculpted pieces, which brought the brand fame in the World of Hollywood cinema. Actors like Zachery Scott, Dennis Morgan, Jack Carson, Alan Hale, Joel McRae, and Ronald Reagan were some of the faces that appeared on the bowls.
Bob knew how to innovate and took full advantage of marketing and press advertising in order to sell the brand–one of his slogans being “Relax with a Marxman”.
The Marxman Jumbo that is the subject of this blog is an example of a Jumbo. Here is a 1946 advertisement discussing the qualities of a Jumbo.

(https://pipedia.org/wiki/File:MarxmanBM15.jpg)
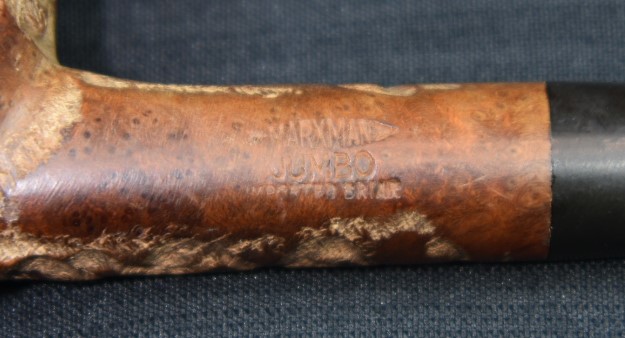
This pipe does not have a size stamp though, judging from other Marxmans in my collection it is a smaller pipe. It also is stamped IMPORTED BRIAR indicating that it was not made in France but rather at the New York factory using Algerian briar. I would judge this pipe was made prior to the Mastercraft purchase of Marxman in 1953 as it does not have a foreign maker. Again referring to pipedia.org,
“Bob also produced other brands, such as the “Bench Made”. The company lasted until 1953, the year in which it merged with Mastercraft, then the USA’s biggest pipe importer. Marxman Pipes Inc., was located at 27 West 24th St. New York 10, NY.” (Marxman – Pipedia)
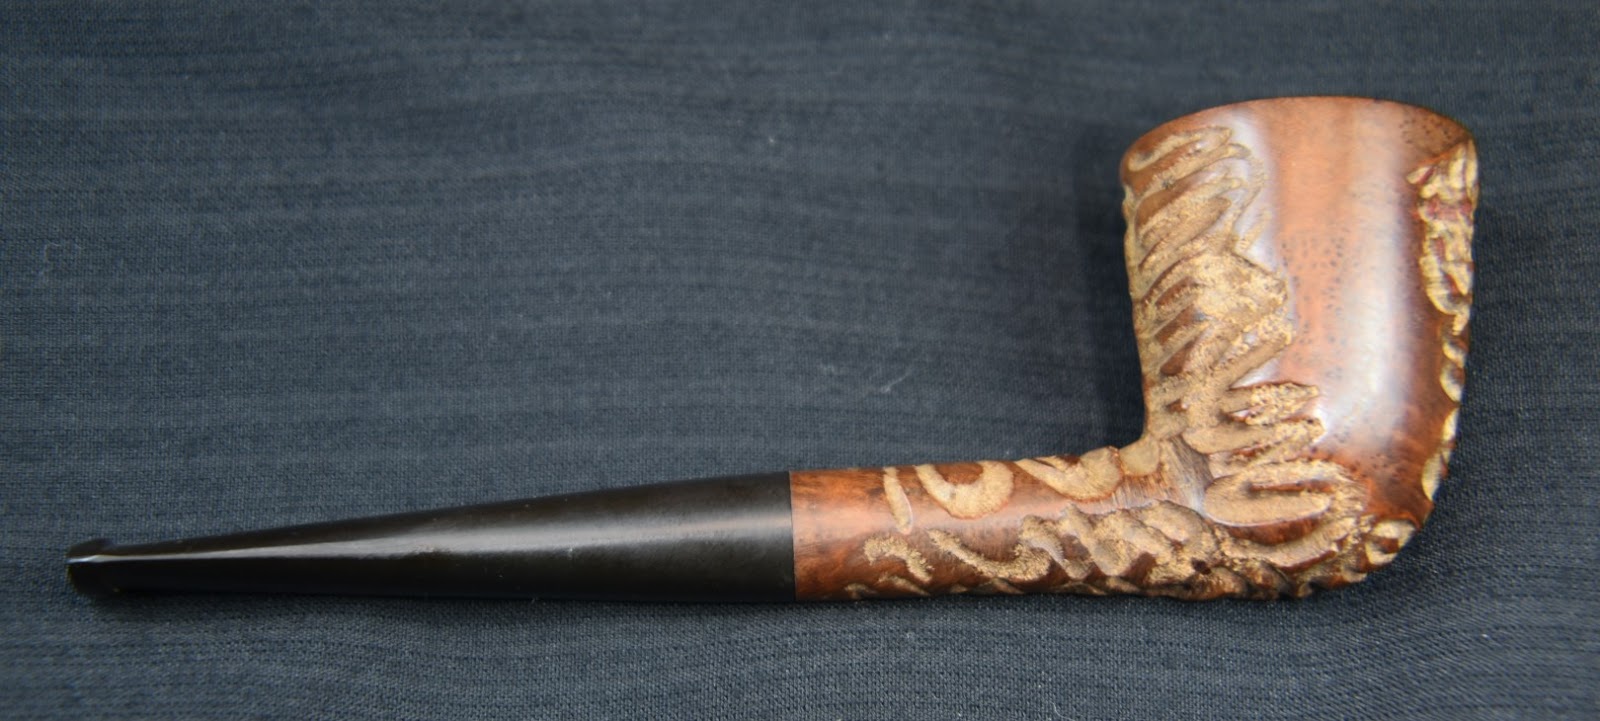
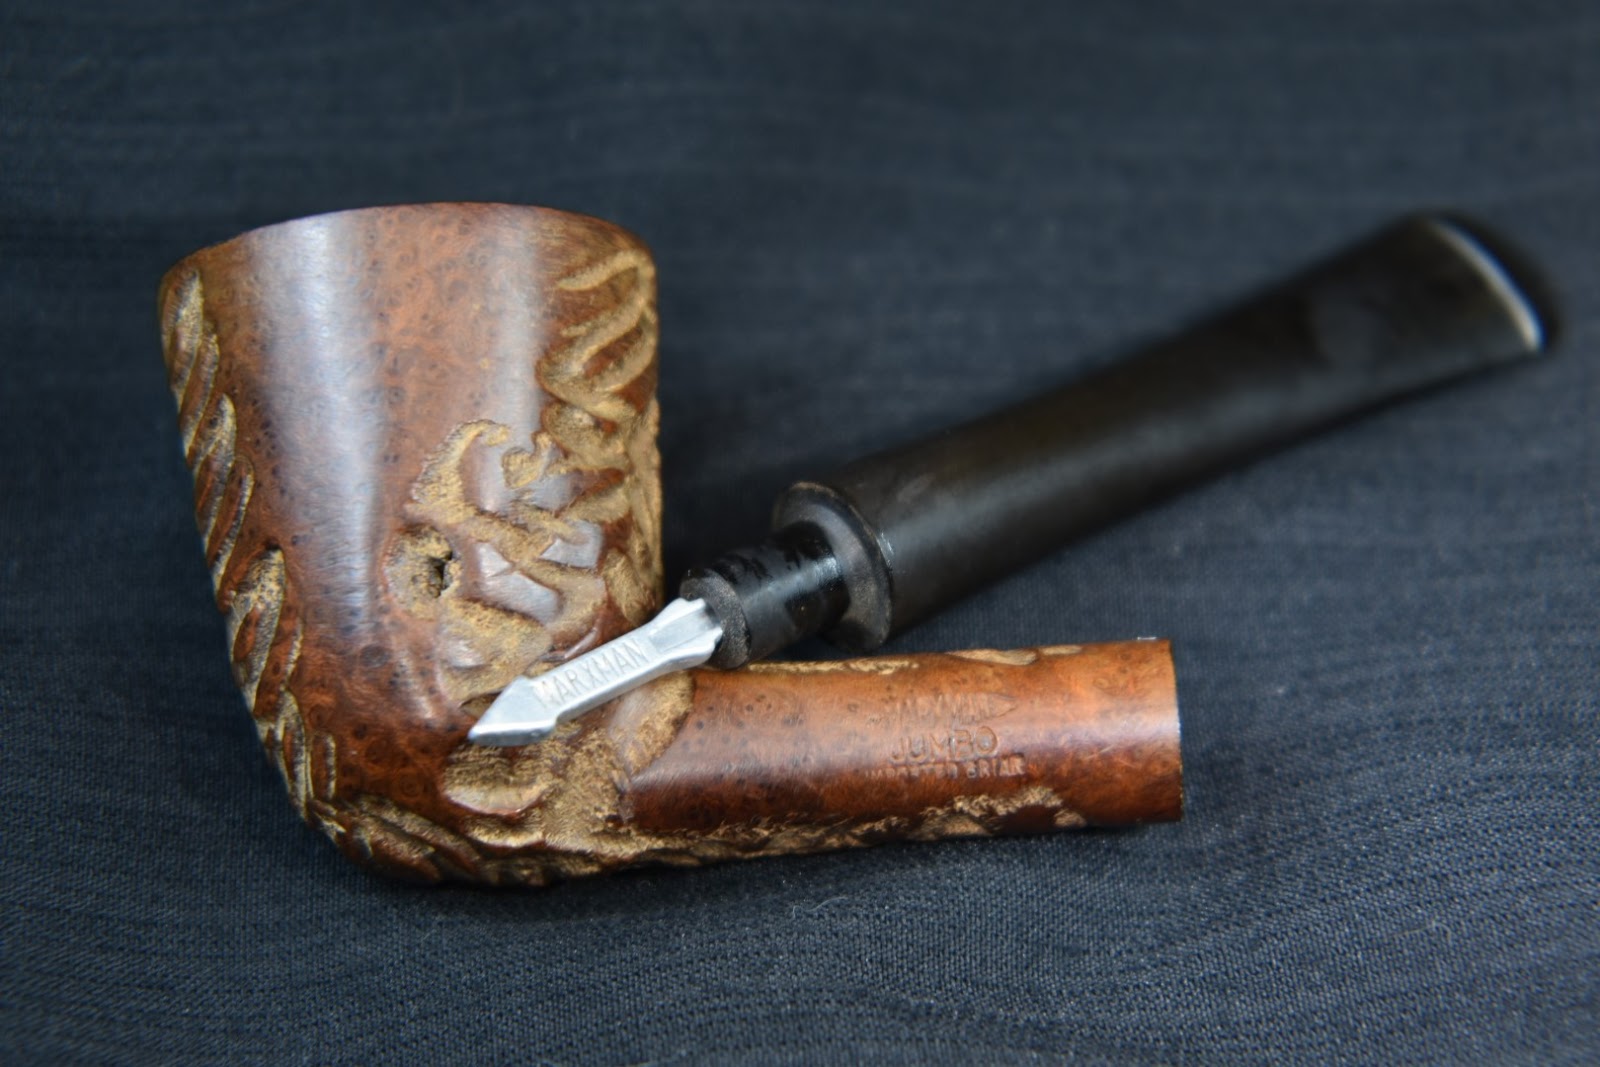
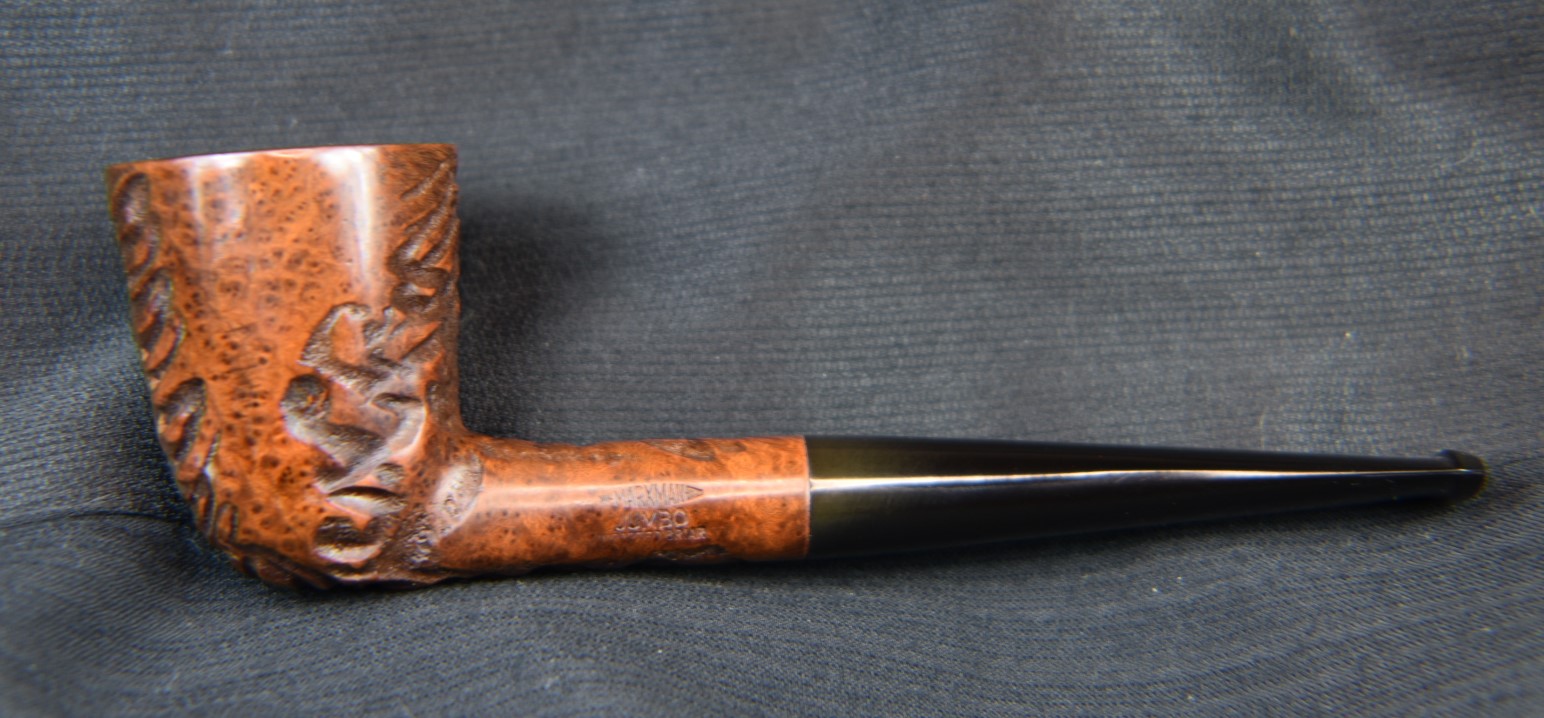
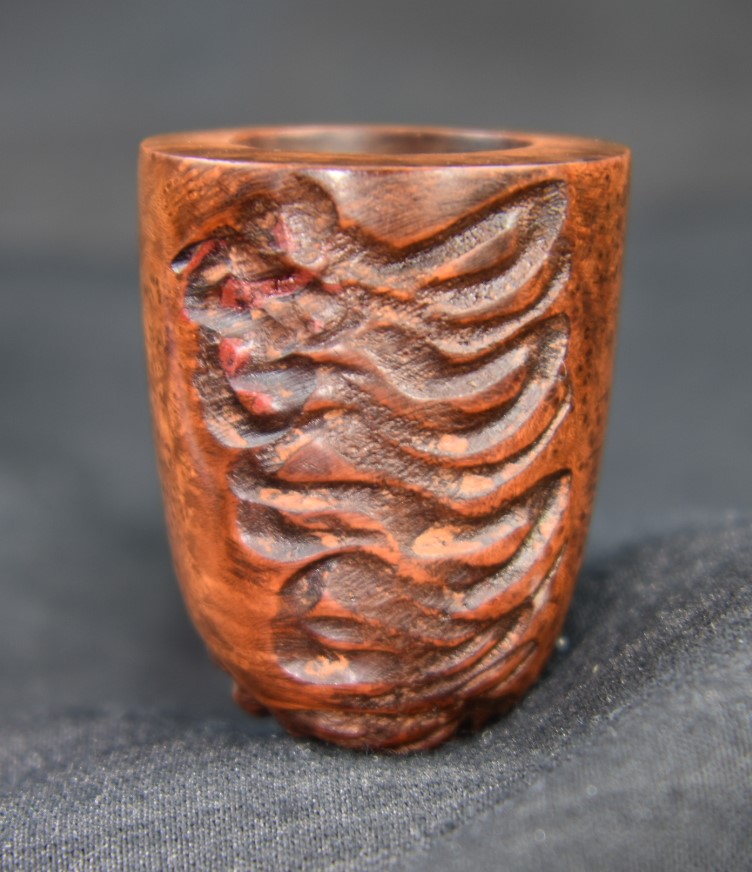
Below are photos of the Marxman Jumbo prior to me doing any work to it.


On to the restoration, and yes, I do consider it a restoration as the pipe is being restored to a condition more similar to how it looked as it left the New York factory (probably a great deal better, in all honesty). Due to the pipe never having been smoked my task of cleaning it was very easy. There was no need to ream the tobacco chamber. Actually there were still chuck marks visible within the chamber. I did clean the airway within the shank using cotton swabs dipped in 95% ethyl alcohol.

I am not sure what the dark colored stuff on the cotton swab was, perhaps a stain or just sanding dust residue? THe stem was even less eventful. I used bristle pipe cleaners dipped in the alcohol. I should say I used one bristle and one non-bristle as I could not get a bristle pipe cleaner through the button.

Next, I took the stummel to the sink for a scrub with Murphy’s Oil Soap. It still had dirt and dust from 70+ years accumulation on it.

See, I did do something to it. The stummel was scrubbed with Murphy’s, undiluted, and a medium stiff toothbrush. After scrubbing the stummel was rinsed with warm water and dried with a cotton dish towel. I returned to the workbench and wiped the exterior of the stummel with a make-up pad dipped in 95% ethyl alcohol. This pad did show some color after the wiping indicating that the pad and alcohol removed something from the stummel.

I am still not sure if the material removed was a light coating of shellac or some residual stain.
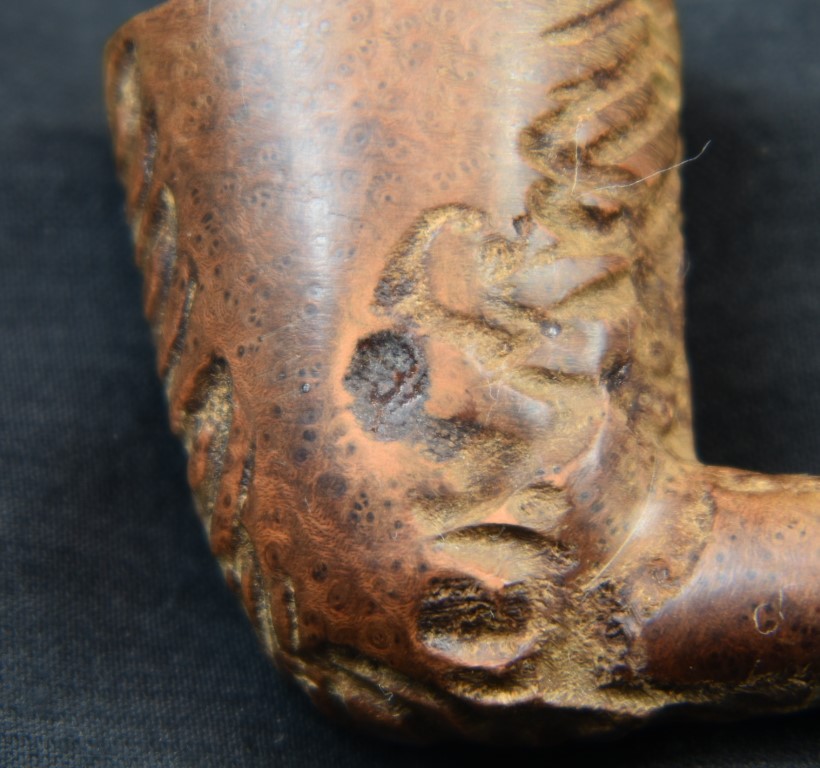
I did notice a large sand pit or as I called it when labeling photos a “Weird hole” on the side of the stummel. Although it looked imposing it was only about 1 mm deep and did not appear to be anything more than a surface flaw. A surface flaw that I was not content to leave alone.

The treatment that I chose for this weird hole was to fill it with briar dust then apply a drop of thin cyanoacrylate (CA, super glue) to the briar dust. I thought that the CA would penetrate into the dust and fuse it all together and to the surrounding briar. Good plan, eh?
I assembled the tools I thought I’d need for this hole filling. A cotton swab, fly tying bodkin, small snuff spoon, briar dust and thin CA.

I used a small snuff spoon to place a scoop of briar dust on top of the hole. I then pressed the briar dust into the hole using the back side of the spoon. I also used a fly tying bodkin to force the dust into the hole making sure it had penetrated and filled the opening.I then used a cotton swab to dust the area around the briar dust filled hole.

I thought that a pipette would be the best way to apply the CA to the briar dust.

I placed a small drop on the dust and it soaked in with a little extra pooling on top of the fill. I used the cotton swab to quickly absorb the pooled CA. I was fast enough that the CA did not bond the cotton to the briar. Better lucky than good, any day. Below is the photo of the CA once dry.

I didn’t like where I slightly overfilled the hole so I used the 400 grit sanding sponge to roughen up the carved area. I did not worry about the high spots around the carving as I knew I’d be sanding and micro-meshing the stummel. Below you can see a better photo of the roughened-up fill. The hole was gone.
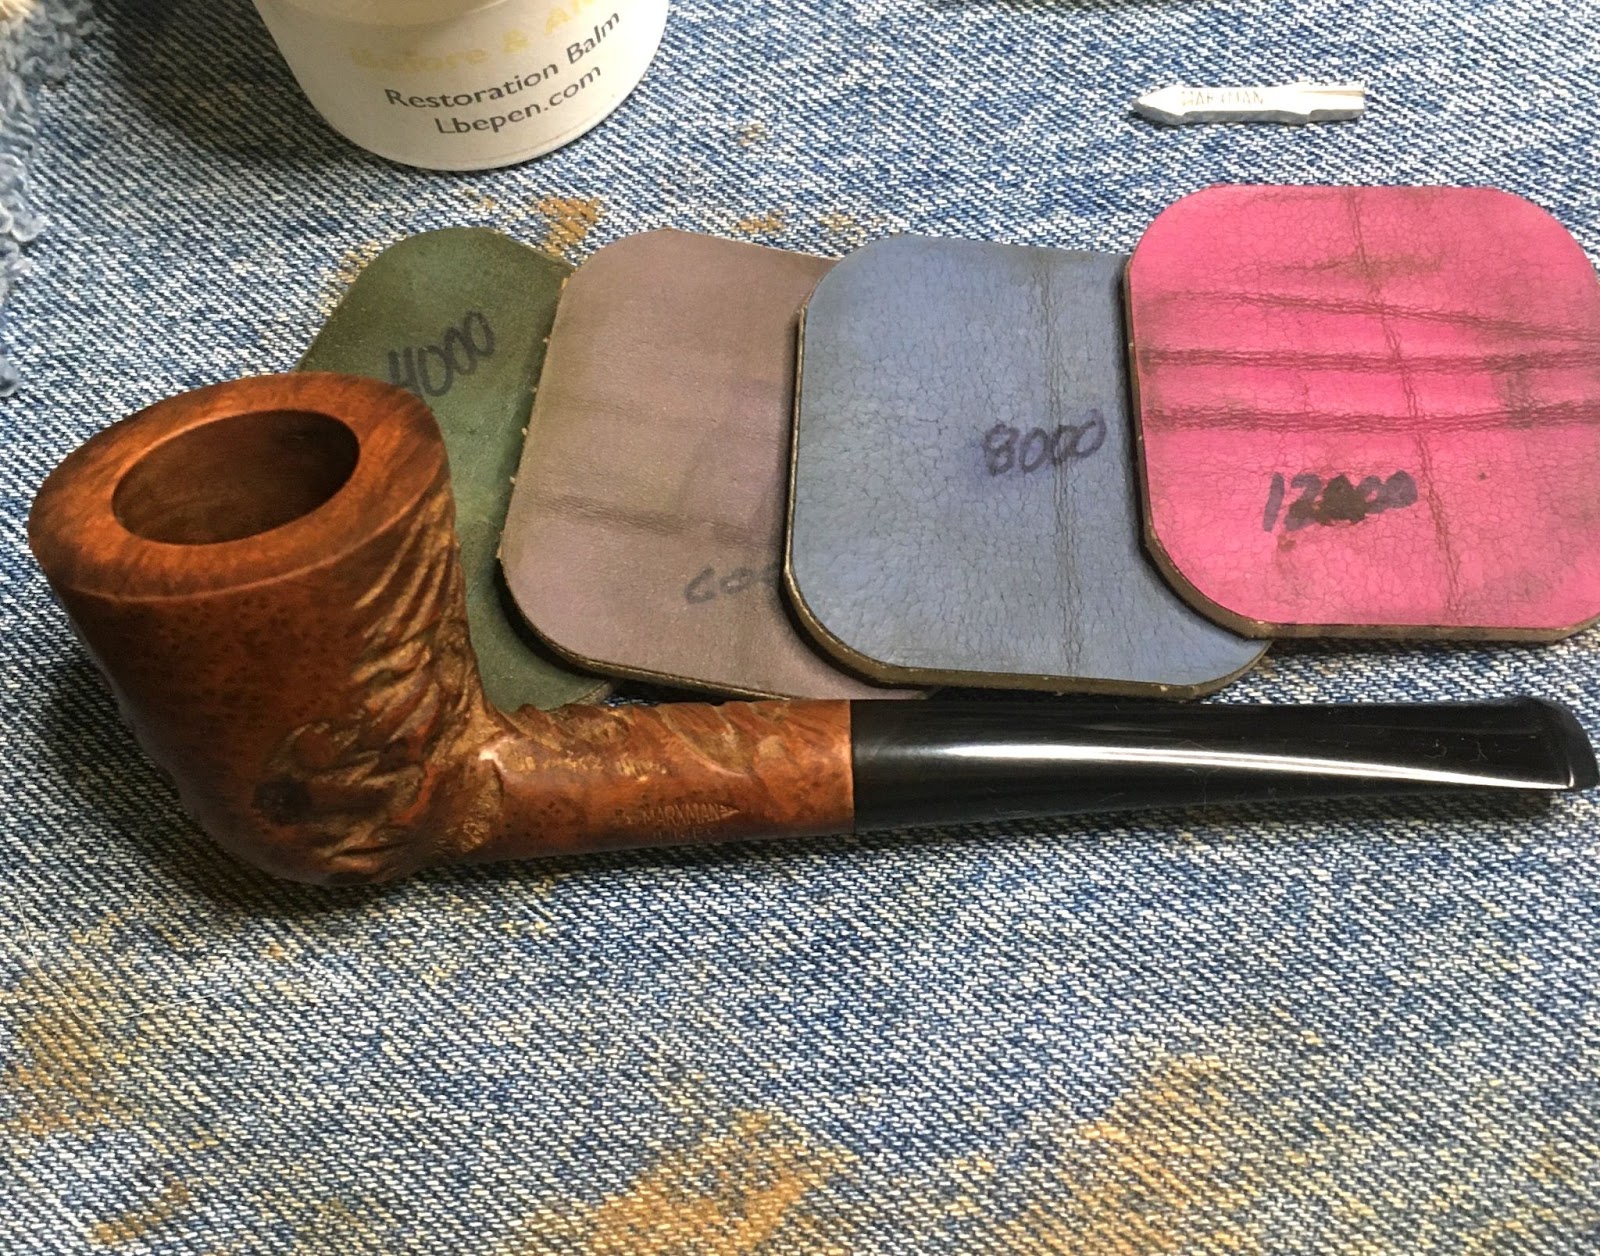
Next I sanded the stummel with the 600-3500 sanding sponges. Between each sponge I wiped the sponge off on the denim work surface and wiped the stummel with a make-up pad moistened with 95% ethyl alcohol.when finished with the series of sponges the stummel looked like this. I was careful to sand around the stamp. I did not tape over the stamp to protect them.

The shank was then taped with painters tape to protect the stampings.

I sanded the stem with the 600 and 1000 sanding sponges. I wanted to make sure there was no deeper oxidation so, I scrubbed the stem with Soft Scrub on a make-up removal pad. This pad became discolored with oxidized rubberAfter a thorough scrubbing, I did not see any further browning of oxidation. I continued through the sanding sponge series 1000-3500. Between each sponge I would dip my finger tip into mineral oil and rub that onto the stem then wipe the excess away with a paper towel.

Following the sanding sponges I removed the painters tape and proceeded to micro-mesh both the stem and the stummel together. The stummel was wiped with an alcohol wetted make-up pad between pads while the stummel received a drop of Obsidian Oil, rubbed in and a paper towel wipe.
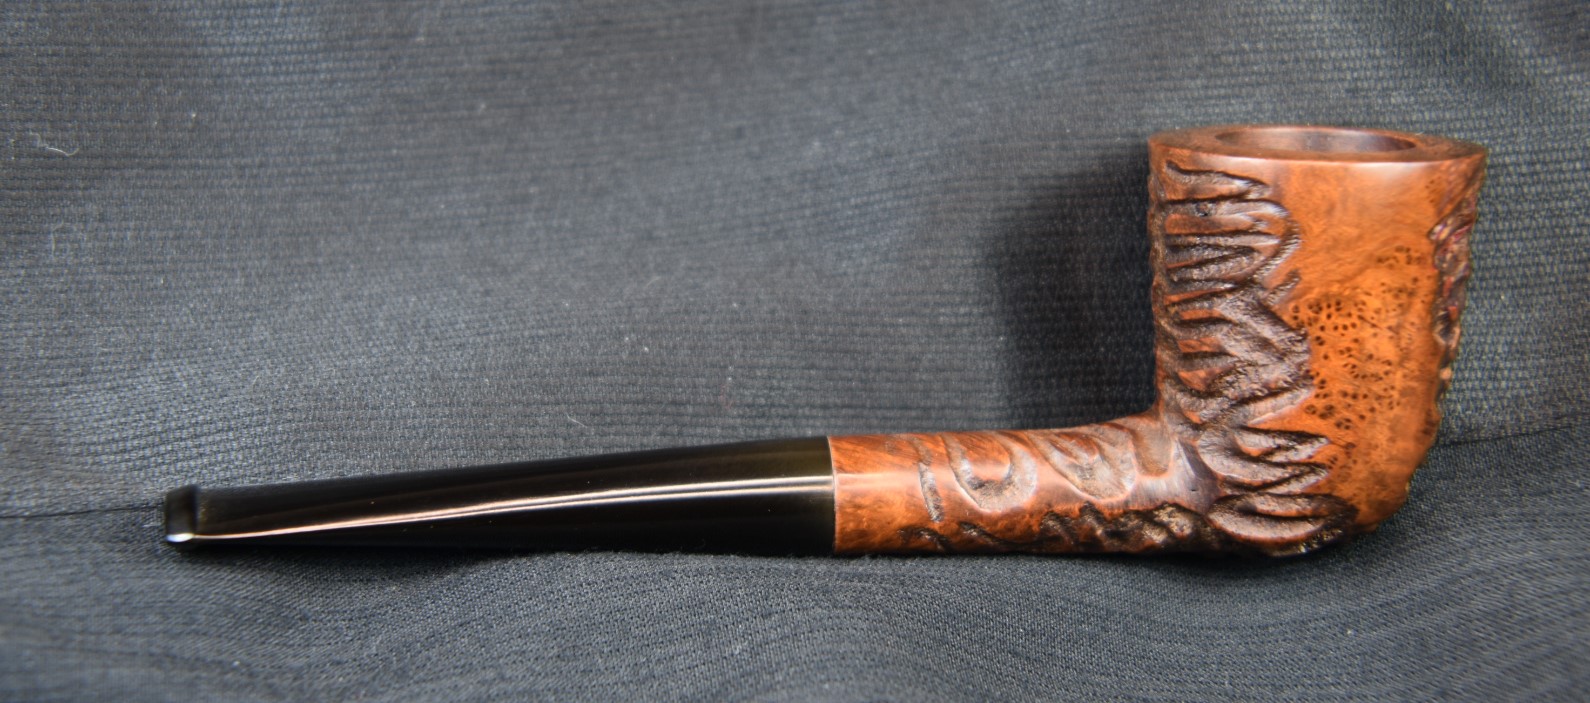
All that remained was to use the buffer to apply a couple of coats of carnauba wax to the smooth surfaces of the stummel and the stem.
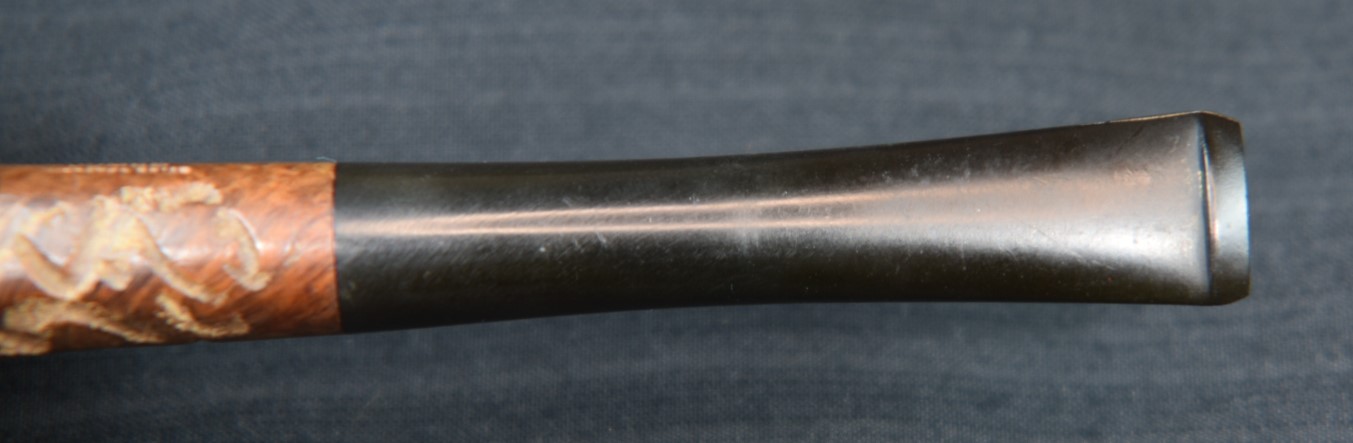
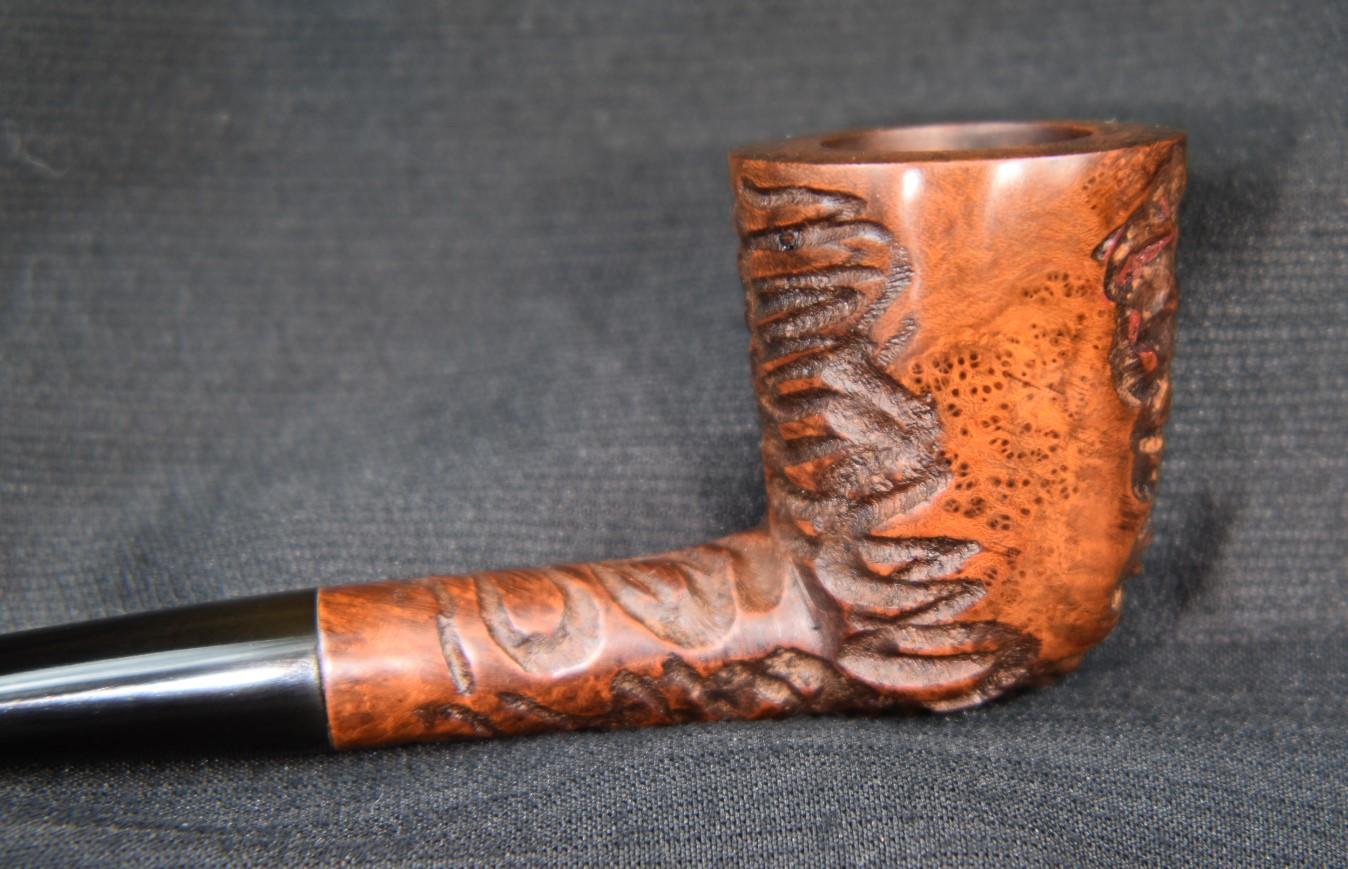
This Marxman was a breeze to restore compared to the previous gold band Dublin. Never having been smoked certainly does make a restorer’s job easier. I think the high gloss black stem sets off the briar grain of the smooth areas while retaining the traditional carved appearance of a Marxman pipe. Algerian briar is not renowned for having great grain. This pipe does show a number of small birds eyes on either smooth side. I think the most remarkable aspect of this pipe is the fact that it is 70 plus years old and had never been used for the purpose that it was made. I admit to being torn between wanting to give it some tobacco or leaving it unsmoked for its next companion. I hope that something here was found useful or entertaining. If you like this sort of thing, please click the like and subscribe buttons. Thank you very much for reading the ramblings of an old pipe lover.
Below you will find some photos of the Marxman Jumbo Dublin. Let me know in the comments if you like or dislike the black background.


One response to “A Marxman Jumbo Dublin Restoration”
[…] A Marxman Jumbo Dublin Restoration […]
LikeLike