Written and photographed by John M. Young

I love to read old pipe advertisements from the 1940s and 1950s. Where else can you find gems like “bitter juices” and “trap unwanted moisture and slugs” in an ad for pipes?

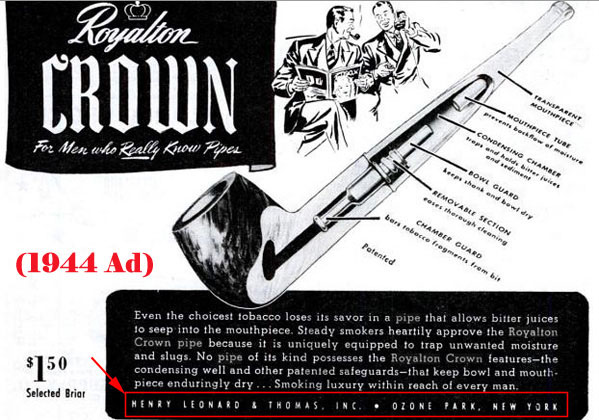
(RoyaltonCrown13.jpg (599×420) (pipedia.org))
Or, this one from 1946 Pipe Lovers Magazine ad: “YOU ARE EVERLASTINGLY SAFE from unsavory juices and bitter slugs when your pipe is a Royalton” (Pipe Lovers Magazine 1946 all numbers : Free Download, Borrow, and Streaming : Internet Archive, p.113). Apparently “slugs” were of a major concern to Royalton pipe smokers as well as gardeners in the 1940s. The advertisements illustrate the spending of the major suppliers of the 1940s pipe marketing world. Full page ads are seen by Marxman, Kaywoodie and HTL. Sterncrest, Weber and Kirsten frequent the magazines as well with frequent ½ and 1/4 page ads.
Henry Leoneard and Thomas Ltd. was the forebears of the great pipe dynasty Sparta Industries and would later become part of MasterCraft.
“Henry Leonard & Thomas, Inc. (HLT) was founded in Ozone Park, Queens, New York by Henry J. Lavietes and two partners on May 31, 1938. The company patented a stem design for pipes and cigarette holders designed by Henry on March 9, 1943. Henry was the son of David Lavietes, who moved to Sparta, North Carolina in the early 1940s to purchase laurel and rhododendron burl to ship back to his son and HLT. Lavietes decided to stay in Sparta and founded the D&P Pipe Works with his other son Paul, originally as a 15 person operation. David Lavietes was the inventor of the Ajustomatic feature incorporated into Dr. Grabow pipes even today.
In 1944, the trademark for the Royalton filter well was granted to HLT. Soon after, however, Henry Lavietes closed the New York operation with little warning and moved the entire production to Sparta, North Carolina. At this time in addition to the Royalton line, HLT was making many other lines of pipes.
In 1953, HLT acquired all assets and equipment of the Dr. Grabow company of Chicago, Illinois, and began production of Grabow and Hollycourt pipes. At the same time, they acquired the Continental Briar Company, owner of the Royal Duke, Duke of Dundee, and Honeydew pipe brands still evident in the common use of the word “Duke” to name Grabow pipes.
On October 21, 1969, United States Tobacco company, owners of the Mastercraft brand, announced that it had acquired HLT. It still ran as a separate company until 1985, however, when Sparta Pipes, Mastercraft and HLT were merged into Sparta Industries, Inc.
While, even after this time, the HLT brand was sold to Lane, and later, in 2006 to International Pipes & Assessories, the current owners, IPAL continues to make and sell the Royalton pipe with the original HLT logo as part of the Grabow line.” (Henry Leonard & Thomas Inc. – Pipedia)
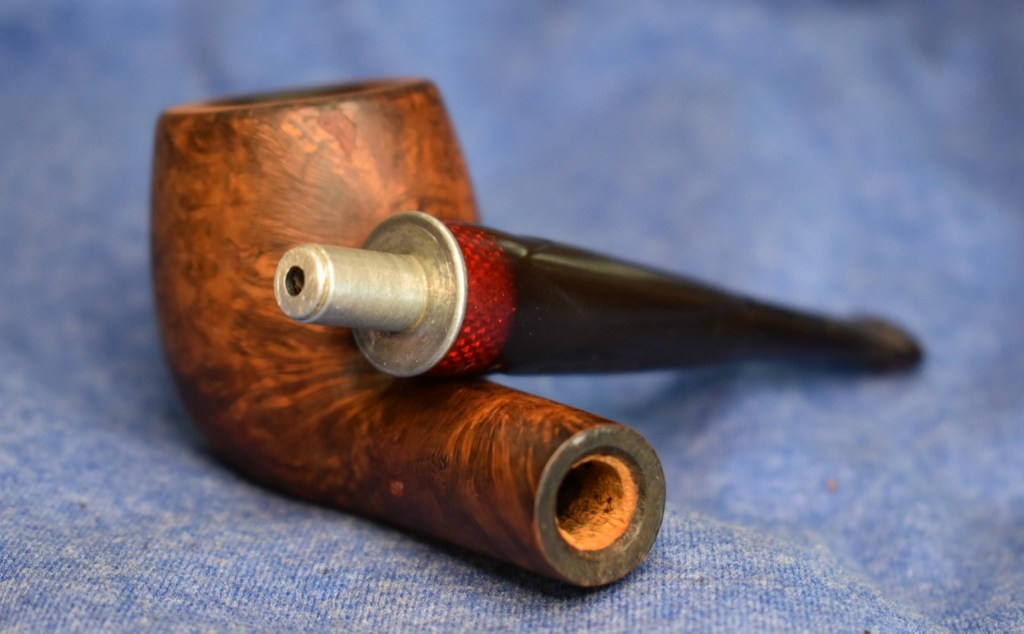
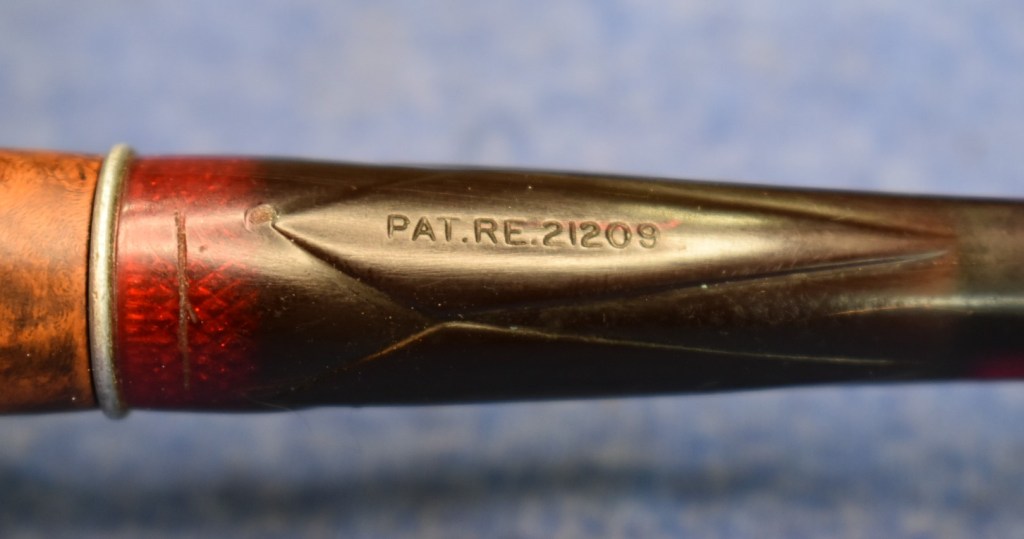
Unfortunately I could find little else on the Royalton line of pipes. The HTL Royalton billiard breaks from the advertisement diagrams by having a cork mortise to seat the aluminum tenon. The use of cork indicates an older manufacture date. I searched the patent number stamped on the stem of the

Royalton “pat. Re. 21209” to no avail. The only thing I could find was a 1943 patent for a “SMOKER’S APPLIANCE”, which was actually for a cigarette holder and a pipe stem. Two separate items on the same patent form. The pipe stem is a complex piece of engineering with 3 beads within the stem, “The beads are somewhat smaller in diameter than the well, and may freely assume random positions, thus causing the smoke to take an indirect and tortuous or sinuous path around and through the beads. This helps cool the smoke and helps precipitate moisture, bits of tobacco, and nicotine.”. (https://image-ppubs.uspto.gov/dirsearch-public/print/downloadPdf/2313648).
I will just call this HT&L Royalton billiard produced prior to the factory move to Sparta, NC in 1944. I say this because for the first years after the move pipe production was mainly done with Mountain Laurel, not briar. After the war, pipe makers wanted to assure buyers that their pipes were actually made with briar and they stamped pipes to indicate this. This pipe is a rather large piece of briar, for the 1940s, and is not stamped with any “imported briar”, “genuine briar”, or any briar guarantee stamps.
I picked up this pipe in March of 2023. It must have been in response to my ongoing fascination with the old advertisements as I don’t remember being terribly familiar with the Royalton line. As you can see from the amount paid, I spared no expense for my new quest. The poor old pipe languished in a small cardboard box until a couple of days ago. I think I must have done a little bit of work on it as the tobacco chamber airway and stem were very clean. Perhaps, I felt overwhelmed by the amount of work that the stem would require or, at the number of fills or, I forgot what I was doing and threw it in a box. Whatever the reason, she is out now and ready to entertain.

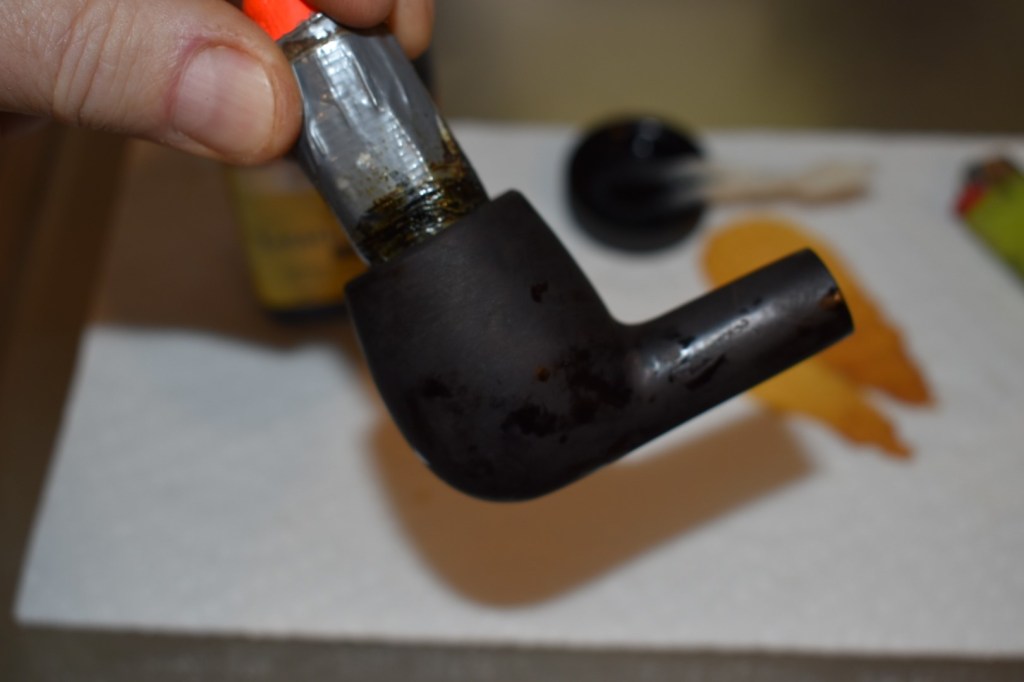
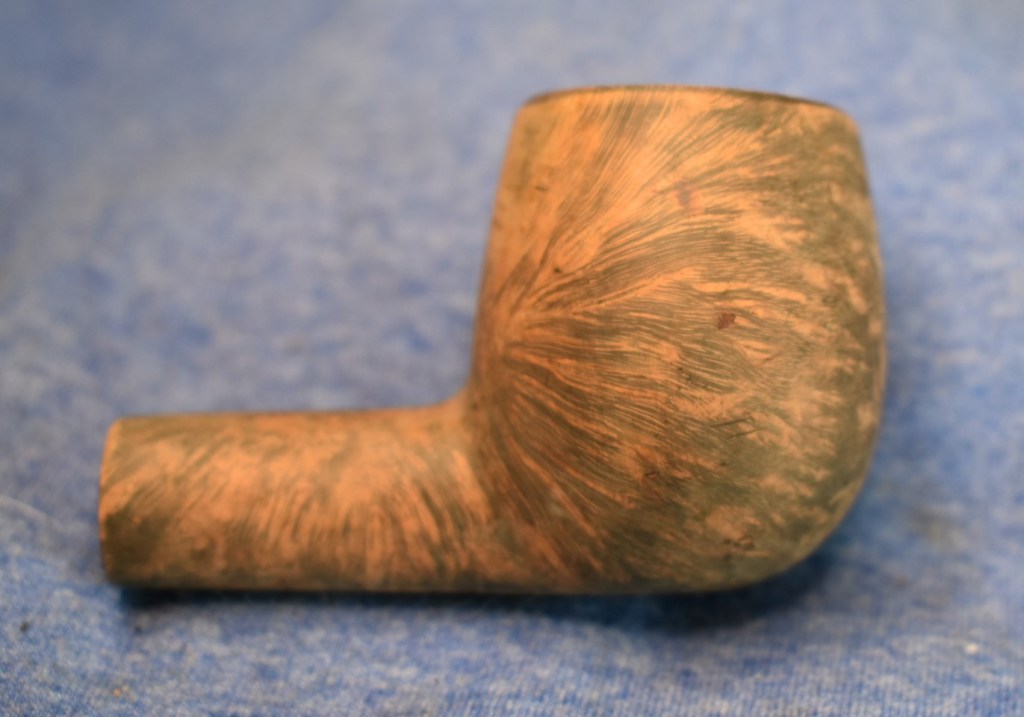
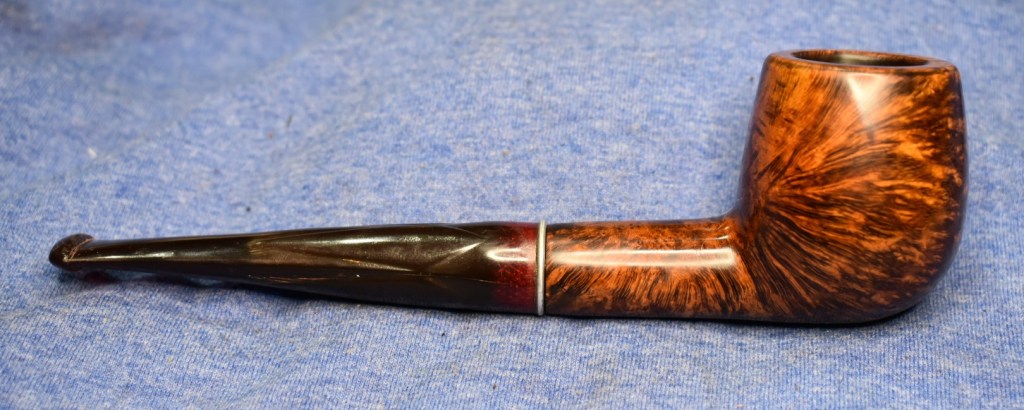
Here is what she looked like upon her reemergence:


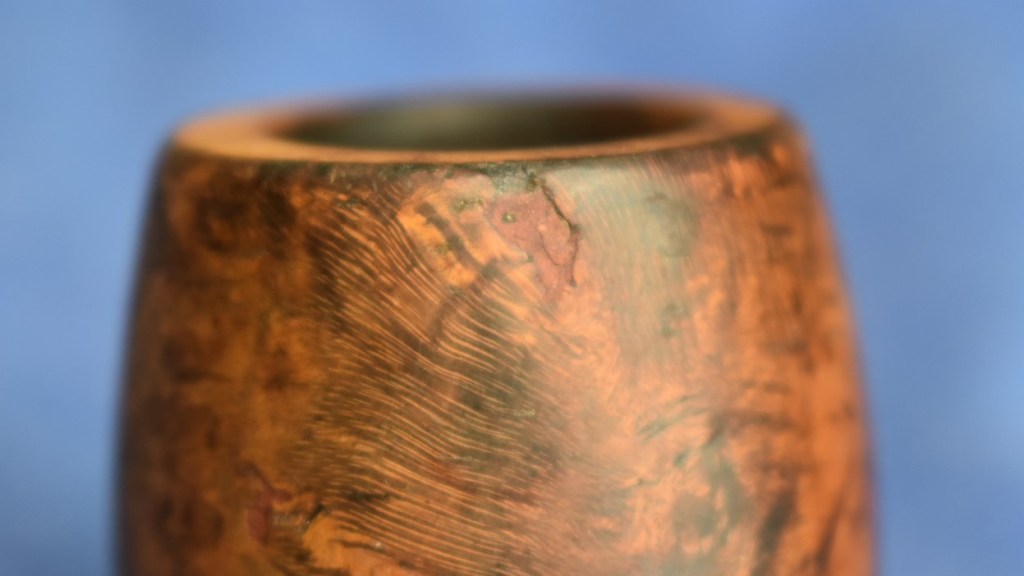


The one word that comes to mind is “Yikes”. Okay, recovered from that. What needs to be done? Reaming the tobacco chamber, cleaning of the airway, topping the bowl, stripping the finish, filling the pits/dents/dings, restain the stummel, rebuild the button, sand/micro-mesh the whole thing and finish with carnauba wax. That sounds like it. As good as that plan sounded, I was pretty sure that the deployment of the plan would go less smoothly than the writing of the plan.
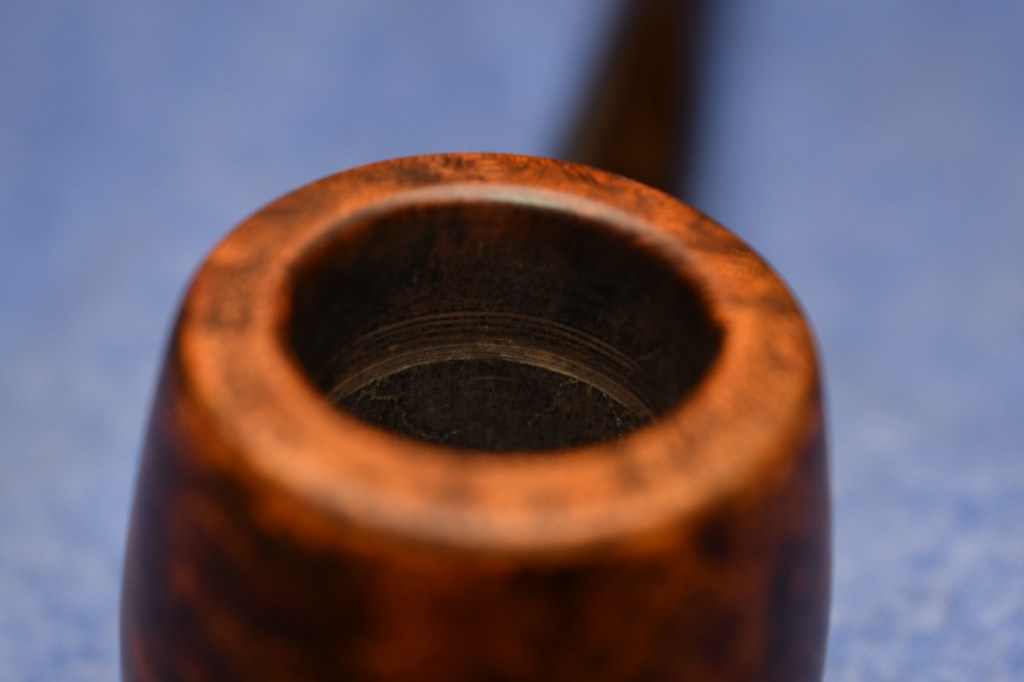
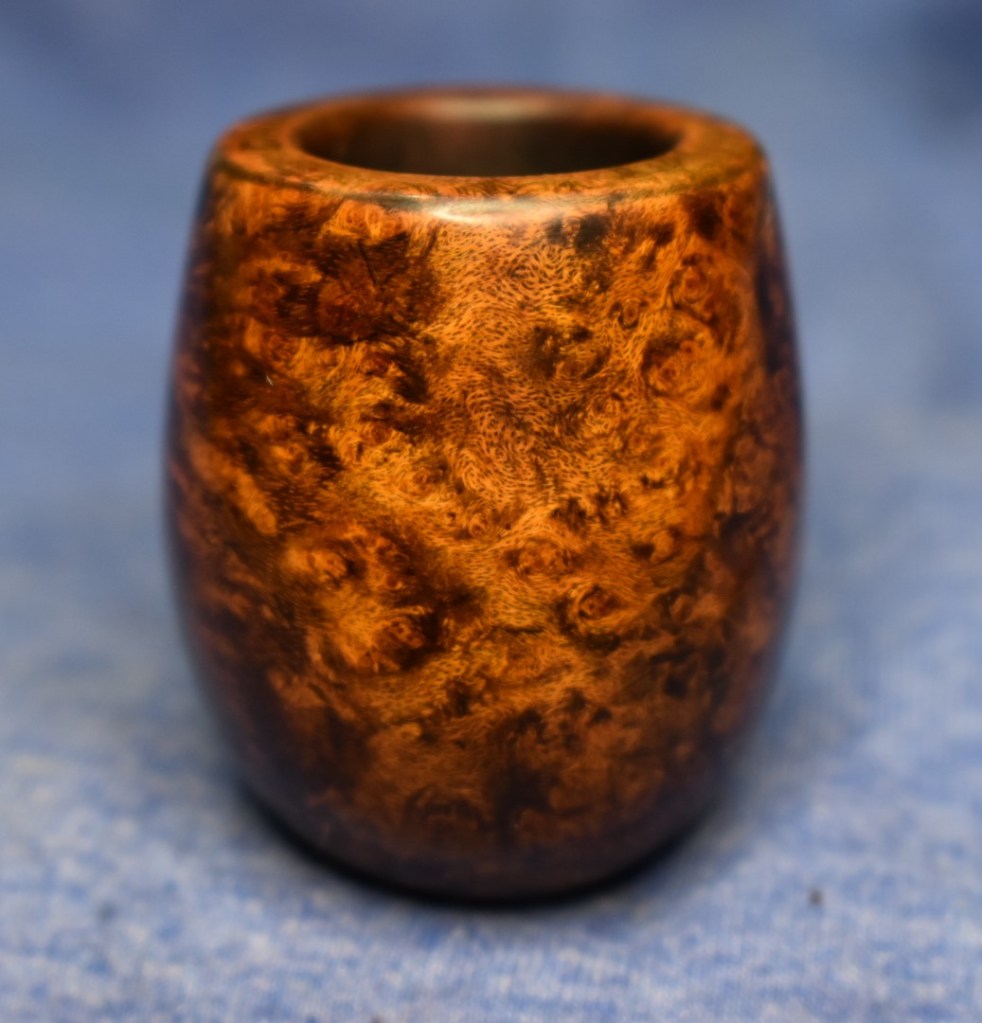
The tobacco chamber had been mostly reamed though not sanded. I used the PipNet reaming tool pretty much just to let it think it was a necessary part of the restoration. It wasn’t needed. The General triangular scraper on

the other hand was quite useful as was the 320 sandpaper wrapped around a wood dowel. There was not much cake to remove and the chamber looked good except for a strange indented ring that ran around 1/3 of the tobacco chamber.
The next thing to address was the numerous fills. They ranged in size from pinpricks to a 5 mm chip. They were filled with a small drop of cyanoacrylate (CA, super glue) then a pinch of briar dust pressed into the CA. Once cured the CA/briar dust was filed and sanded smooth. The one exception to this fill technique was the large chip on the rim. For this one I pressed the briar dust into the hole then applied thin CA to the dust. The thin CA soaked into the dust and cured almost immediately. After smoothing a depression was observed it was again given a small drop of the CA and a second pinch of briar dust.


The fill in the middle of the stamp was troublesome. I wanted to retain as much of the stamp as possible. I concluded that part of the stamp would


have to be sacrificed. I used a piece of scotch tape and applied it to the stamp that I wanted to preserve. The lower part of the stamp was very light and couldn’t be read. I then filled the hole with briar dust pressing it into place with a dental scraper. I then used a fly tying bodkin dipped into the thin CA to hold a drop of the CA. I placed this drop onto the briar dust. It soaked it and cured immediately. I repeated the drop of CA to any areas that did not receive a good wetting of CA. With the tape still in place I carefully smoothed the CA briar dust fill with a flat needle file then 320 sandpaper and finally 400 sandpaper. I then removed the tape.

Once the fills were completed I topped the stummel using 220 sandpaper on a flat counter. I rotated the stummel in hand as I sanded with a circular motion. I continued until the majority of the rim dings had disappeared. I repeated the topping with 400 sandpaper to further smooth the new rim.


There remained some dings around the rim. I decided to remove them by adding a slight bevel to the outer rim. I used a piece of 220 sandpaper glued to the inside of a funnel. The stummel was rotated inside the funnel to bevel the edge of the rim. The inside rim edge was also slightly beveled using a wood sphere wrapped in 220 sandpaper then smoothed with 400 sandpaper.
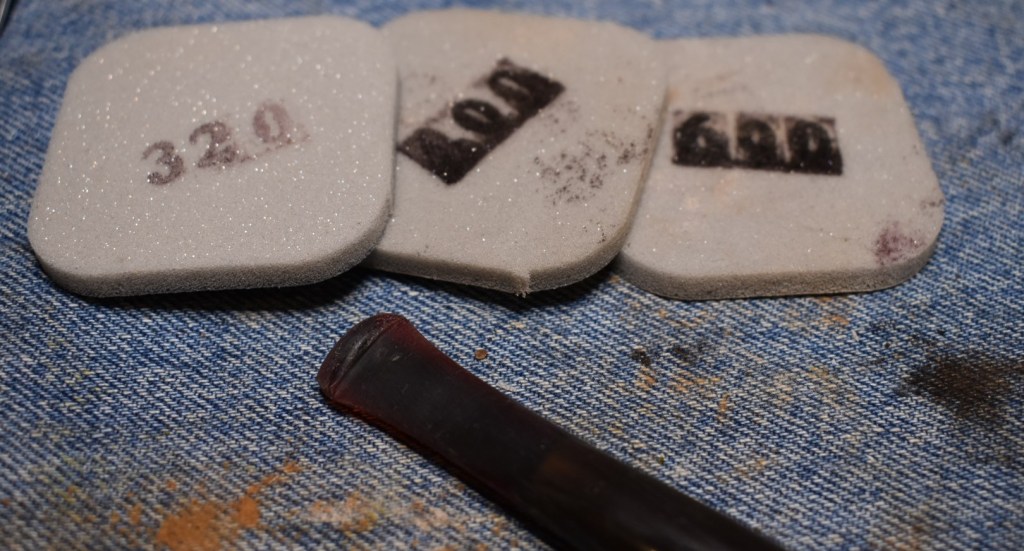
With the rim reworked I sanded the stummel using a set of new sanding pads. Steve Laug recently mentioned these sanding sponges in a recent blog on rebornpipes.com and for $10 (6 sponges of each grit), I couldn’t pass them up. The sponges felt a bit more aggressive or coarse grit than the wet dry sandpaper so I started with the 1000 sponge and used it with a light touch. After sanding I wiped the stummel with a make-up pad moistened with 99% isopropyl alcohol.
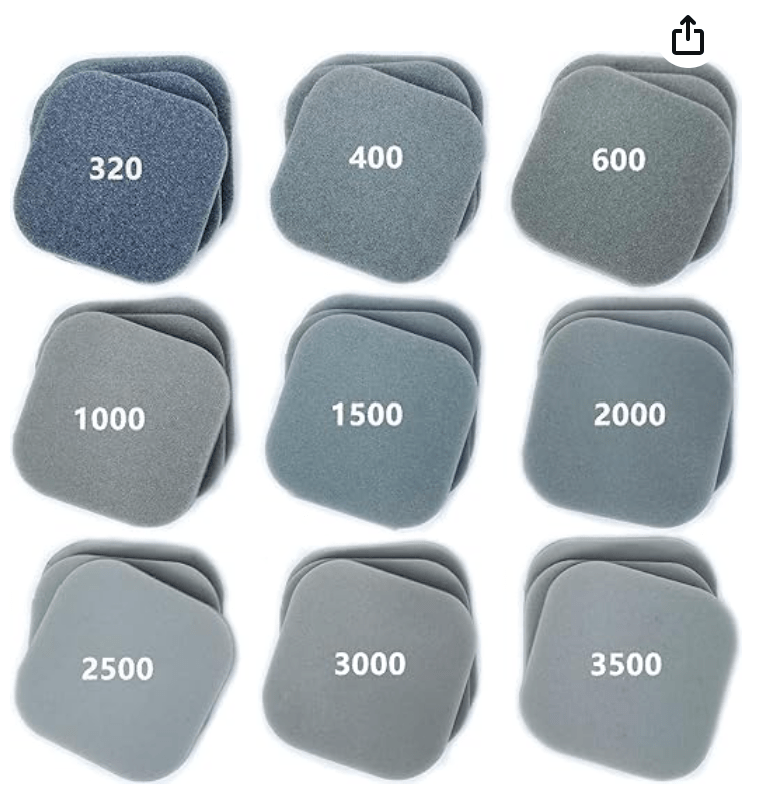
(https://www.amazon.com/dp/B0BMPWHXJC?psc=1&ref=ppx_yo2ov_dt_b_product_details)
I wanted this pipe to have a contrast stain more like it did originally. I didn’t think that the stummel retained enough of the original dark base stain after sanding the fills so I went with a black Fiebing’s Leather Dye as a base. I probably could have used Fiebing’s Dark Brown for this with equal results. I gathered the staining gear: An upside-down plastic tub was used as a base to protect the counter from spills, paper towel surface, the Fiebing’s, a pipe cleaner applicator, a disposable lighter and the official duct tape wrapped fishing bobber – most people use a wine cork.

I gave the stummel a complete coat of the Fiebing’s Black Leather Dye and flamed the dye to set the color.
Once dyed I set the stummel to dry for about an hour while I turned my attention to the pipe stem.

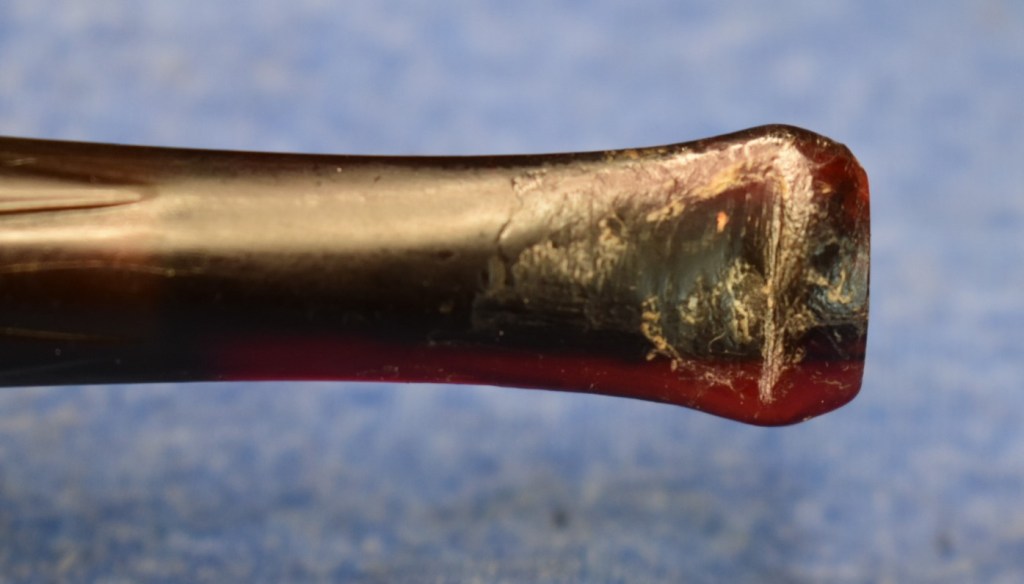
With it’s scary appearance, the stem had apparently daunted my restoration efforts since this pipe arrived. I began smoothing out the area near the button with a file. The plastic filed easily and I graduated to a finer flat needle file to remove the deeper smooth the filed area.


Once the dents had been smoothed I began sanding with 220 then 320 sandpapers.

This went much better than I had feared it would. I then tried the new sponges. This plastic was not affected by the 99% isopropyl alcohol so, I used the alcohol on a make-up pad to wipe the stem between sponges.


The button did need to be rebuilt. I failed to photograph the process used. I know, I am prone to forget to do this when rebuilding stems. I will include some photos illustrating the steps with a different pipe, a Marxman Super Briar bent bulldog. (That restoration can be seen here https://wordpress.com/post/scimansays1787.wordpress.com/949). Apologies.
To rebuild the button I used a technique that I have not seen other restorers use. I first smoothed the area below the button with 400 sandpaper.

Scotch tape applied to the stem immediately below the button.

Black CA applied to the button to build-up the area.

The CA was spritzed with accelerant and “cut” at the back of the button with an Exacto knife while the CA was still soft. You only have a few seconds between the spritzing and the curing of the CA. The “cut” needs to be made during these critical seconds when the CA is still soft.

Scotch tape removed along with the CA that was “cut”.

The new button is shaped with needle files and sandpaper.
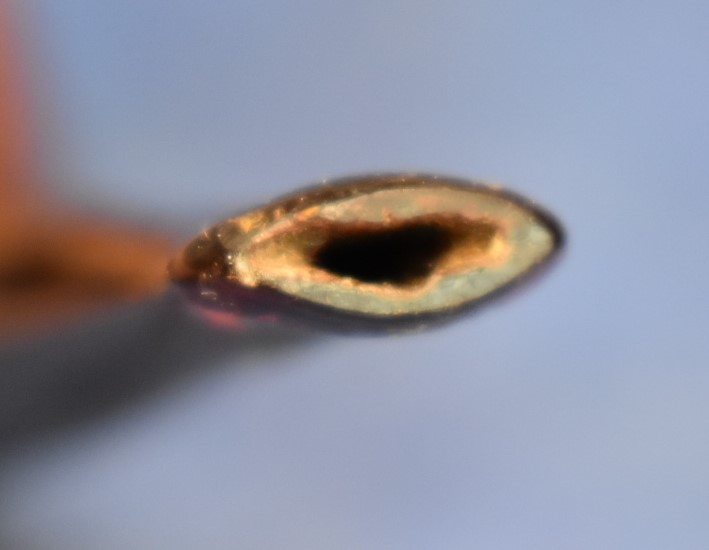
The above process was the same as I used for this stem except I used clear CA rather than the black CA. To repair the damage to the opening of the button
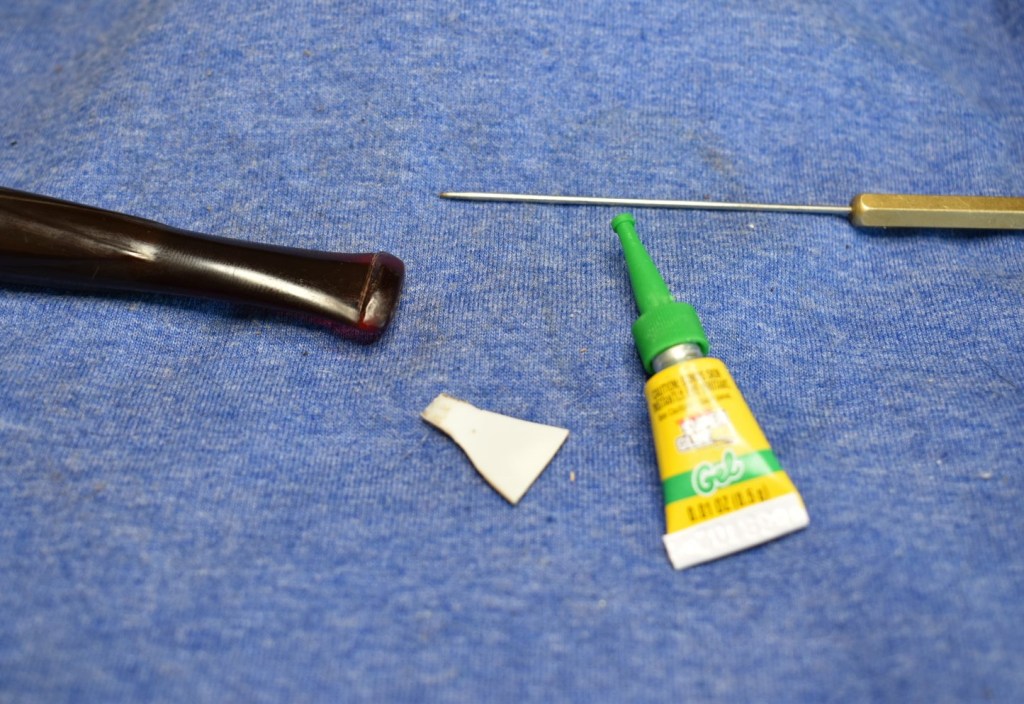

I cut a piece of flat plastic lid to the shape of the interior of the button. This was then inserted into the airway. Clear gel CA was then worked into the gap around the insert. The CA was spritzed with CA curing accelerant. The insert was removed and additional accelerant was spritzed into the airway to harden any CA within the airway entrance. This was repeated for the top and bottom. Once the button airway had been reformed I used a thin strip of 400 sand paper folded in half, for stiffness, to smooth the airway inside the button.


After the stem work was finished I returned to the black dyed stummel, kind of regretting my decision to use the black dye. I wiped the excess dye off with a couple of make-up pads soaked in 99% isopropyl alcohol. Once evaporated I used the 600 sanding sponge to remove the black stain from the stummel. This was followed by an alcohol wipe and then sanded with the 1000 sanding sponge and again wiped with alcohol. Below are photos of the contrast staining.


I was pleased with how the black dye penetrated into the softer, more open grain of the stummel. I wanted a warmer look to the lighter briar. I decided to use a diluted Feibin’g Light Brown Leather Dye to give the highlights a more yellow, warmer contrast. I used 3 ml of 95% ethyl alcohol in a medicine cup. I dipped a bent clean pipe cleaner into the dye and stirred it into 3 ml of ethyl. I used this to apply a coat of light brown to the stummel. After flaming off the dye I wiped it down with an alcohol soaked make-up pad.


The results were what I was after. Maybe not as “orange” as the original but this was looking pretty close.


I worked the stummel sith the micro-mesh pads 4000-12000 with an alcohol wipe between each pad. After the final wipe I applied a coating of Before and After Restoration Balm to the stummel and set it aside to let the balm work it’s magic.
Returning to the stem I micro-meshed the plastic with the 3200-12000 micro-mesh pads with an alcohol wipe between pads. Once finished with the micro-meshing of the stem I wiped away the excess Restoration Balm from the stummel and reintroduced the two parts. The cork mortise was not very tight. This can be seen in the second photo below.


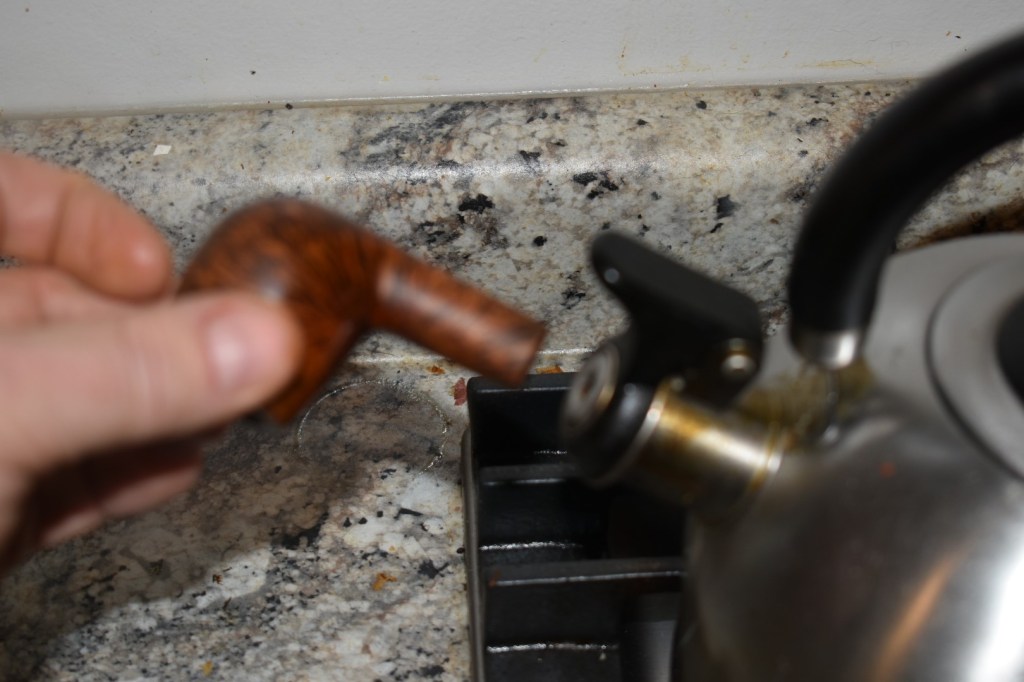
I did not have a wine bottle cork to use as a replacement to the existing cork. I thought about ways to expand the existing cork and thought that steam might do the trick. I put the kettle on the stove and heated the water.

The steam venting from the spout seemed like the perfect delivery method so I held the stummel allowing the steam to enter the shank. Holding it this way was a bit uncomfortable but after a couple of minutes I dried the stummel and tried the stem for fit. It worked beautifully. I applied a bit of petroleum jelly to the cork and allowed the pipe to dry for about 30 minutes.
The pipe still looked flat, for lack of a better word. Even after the restoration balm. I decided to give it a coat of Danish Oil in hopes of livening-up the grain. Below are photos of the stummel after the coat of Danish Oil had dried.


I returned the stummel to the workbench and reworked the surface with the 4000-12000 micro-mesh pads, with a slightly water dampened make-up pad. This brought out a much nicer shine to the stummel. All that was left to this restoration was to apply a few coats of Carnauba wax with the buffer.
Overall I am quite pleased with how this restoration turned out. The contrast stain shows off the briar’s grain. The rep plastic of the stem revitalized well and the rebuilt button is comfortable. The large number of fills blend away as well as can be expected and don’t draw too much attention away from the wood’s beauty. I was sad to see some of the stamping worn away but glad that I was able to preserve as much of it as possible. Fills and stamps do not go well together. This old pipe is now returned to proper condition for many more years of faithful service. I hope that some of the techniques used in this restoration are useful in your own work. If not, then I hope you were at least entertained. If you like this sort of thing please hit the Like and Subscribe buttons, below. Thank you for reading the ramblings of an old pipe lover.
Below are some photos of the finished Henry Leonard & Thomas Royalton Crown Billiard.


One response to “A Henry Leonard & Thomas Inc. Royalton Crown Billiard Restoration”
[…] A Henry Leonard & Thomas Inc. Royalton Crown Billiard Restoration […]
LikeLike