Written and photographed by John M. Young
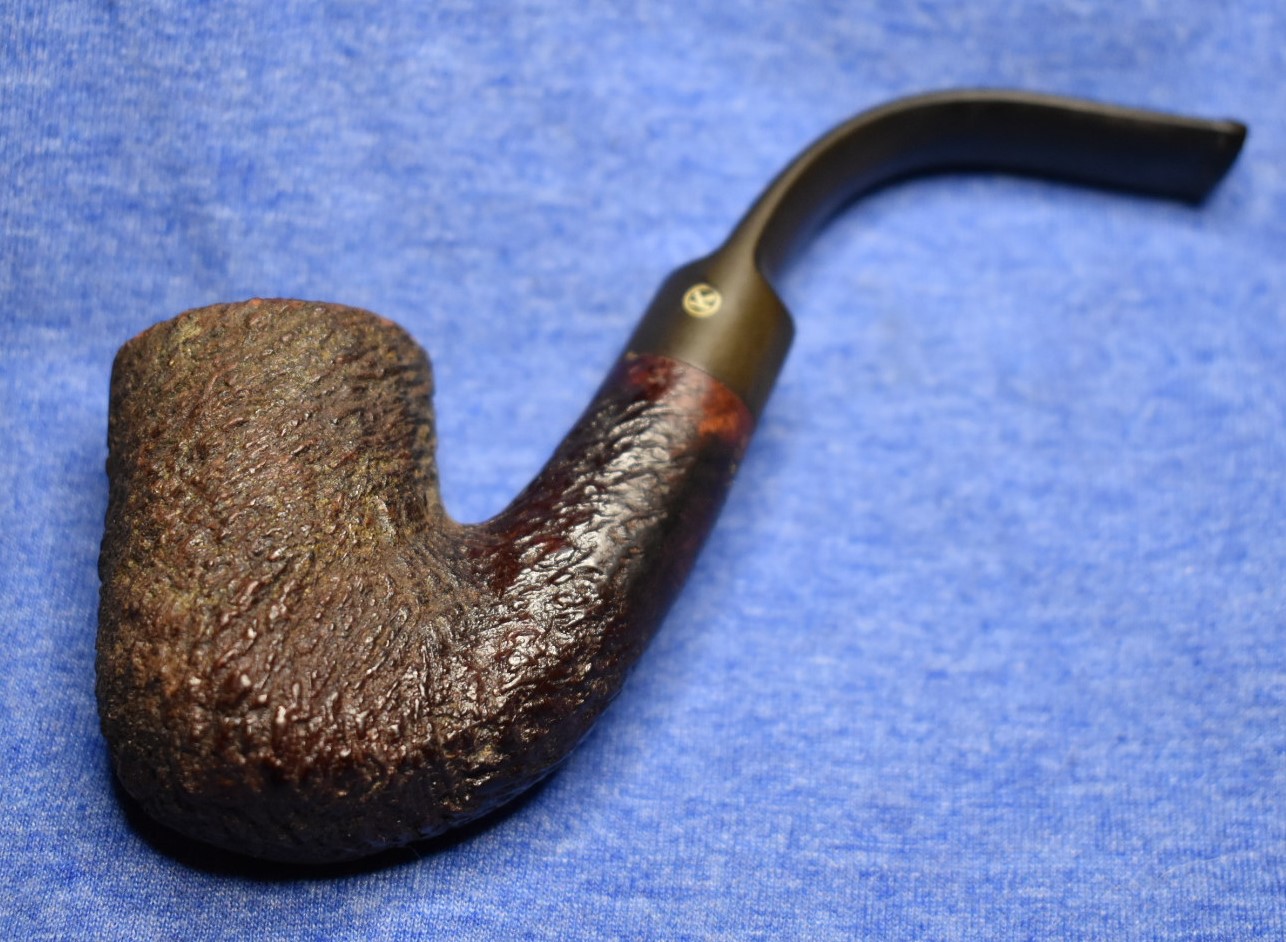
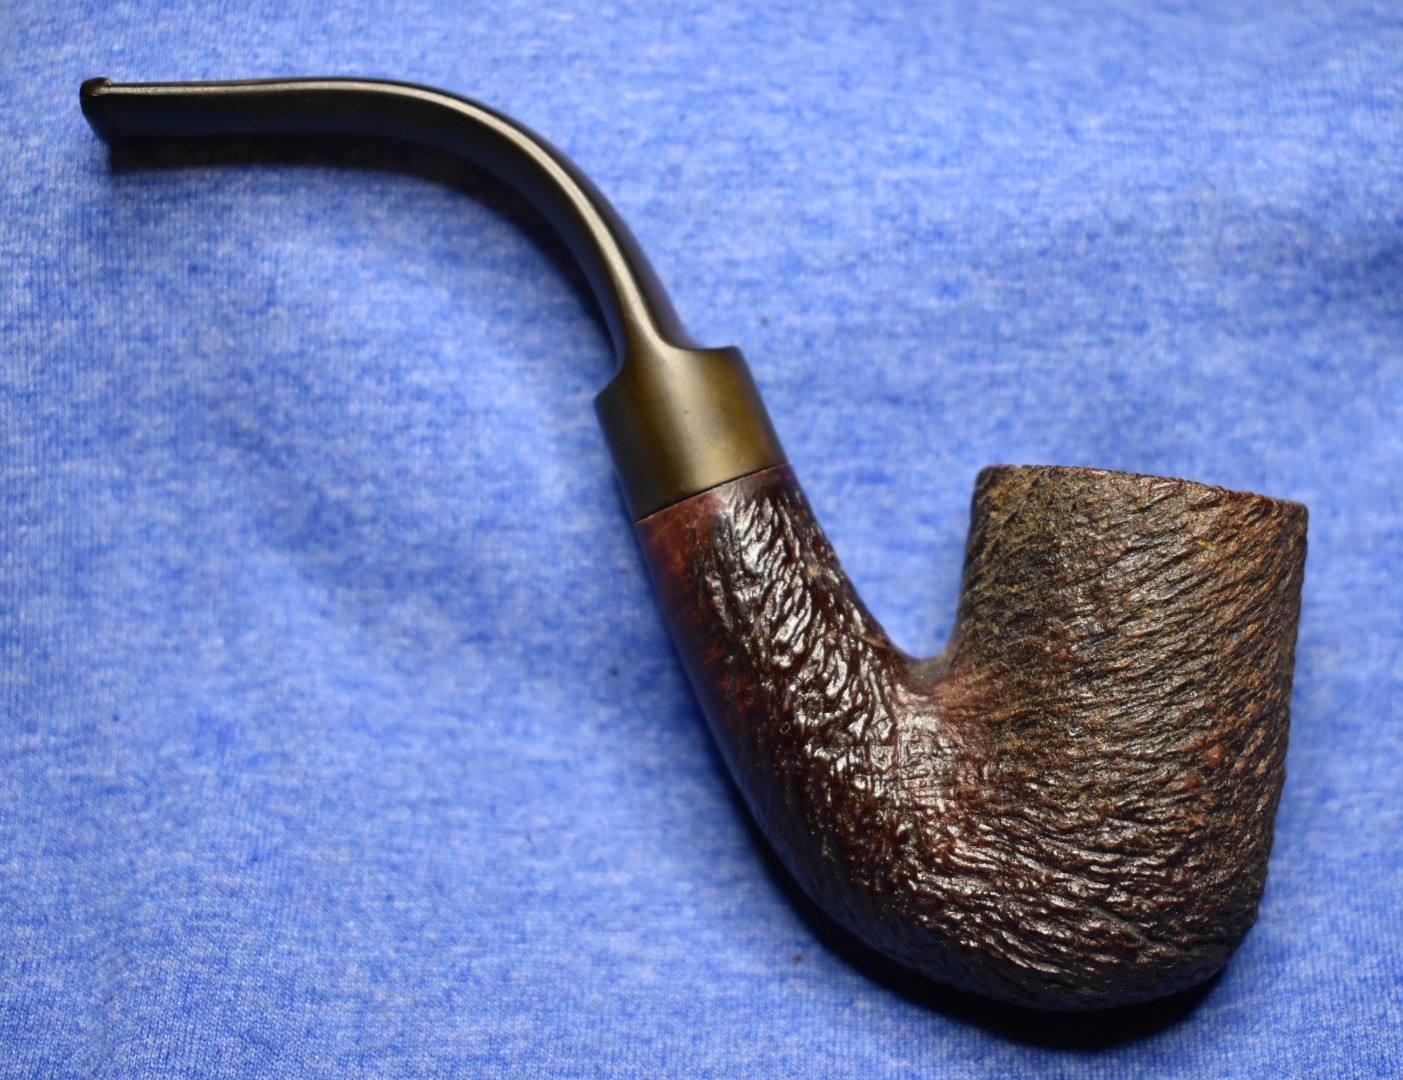
You may recall from an earlier restoration that I had acquired an assortment of Kings Cross pipes. This is a continuation of that set of pipes. Here we have another “MADE IN ENGLAND” Kings Cross.


These were pipes made by the Chapuis-Comoy company in both their English and French factories. The “Made in England” being Comoy’s while the “France” indicates Chapuis. The pipe lovers of the world are indebted to the Comoy family for their contributions of bringing briar to the pipe making world. If you are interested in the Chapuis-Comoy family history, and it is amazing, take a look at the previously mentioned blog post or these links:
- https://pipedia.org/wiki/Comoy%27s
- https://pipedia.org/wiki/Kings_Cross
- https://pipedia.org/wiki/Chapuis-Comoy
- https://pipedia.org/wiki/Comoy%27s_Shape_Number_Chart
- http://www.pipephil.eu/logos/en/logo-comoy.html
- http://www.pipephil.eu/logos/en/infos/connect-en.html
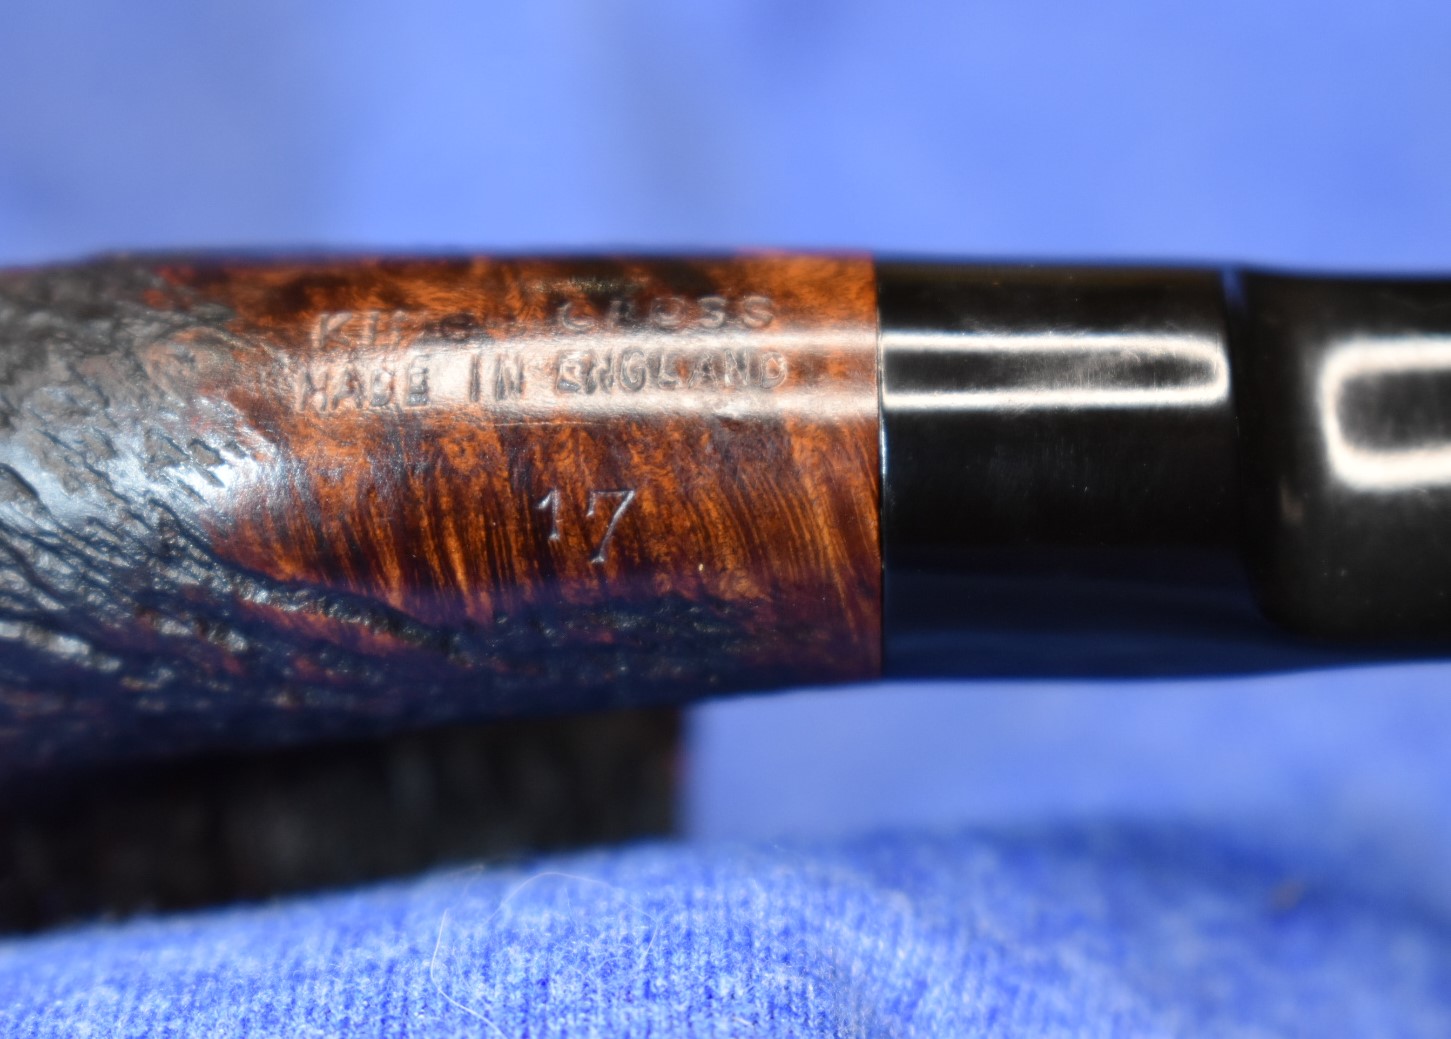
As for the history of this specific pipe it has the Comoy shape number of 17. According to the Comoy’s shape chart:


(https://pipedia.org/wiki/Comoy%27s_Shape_Number_Chart)
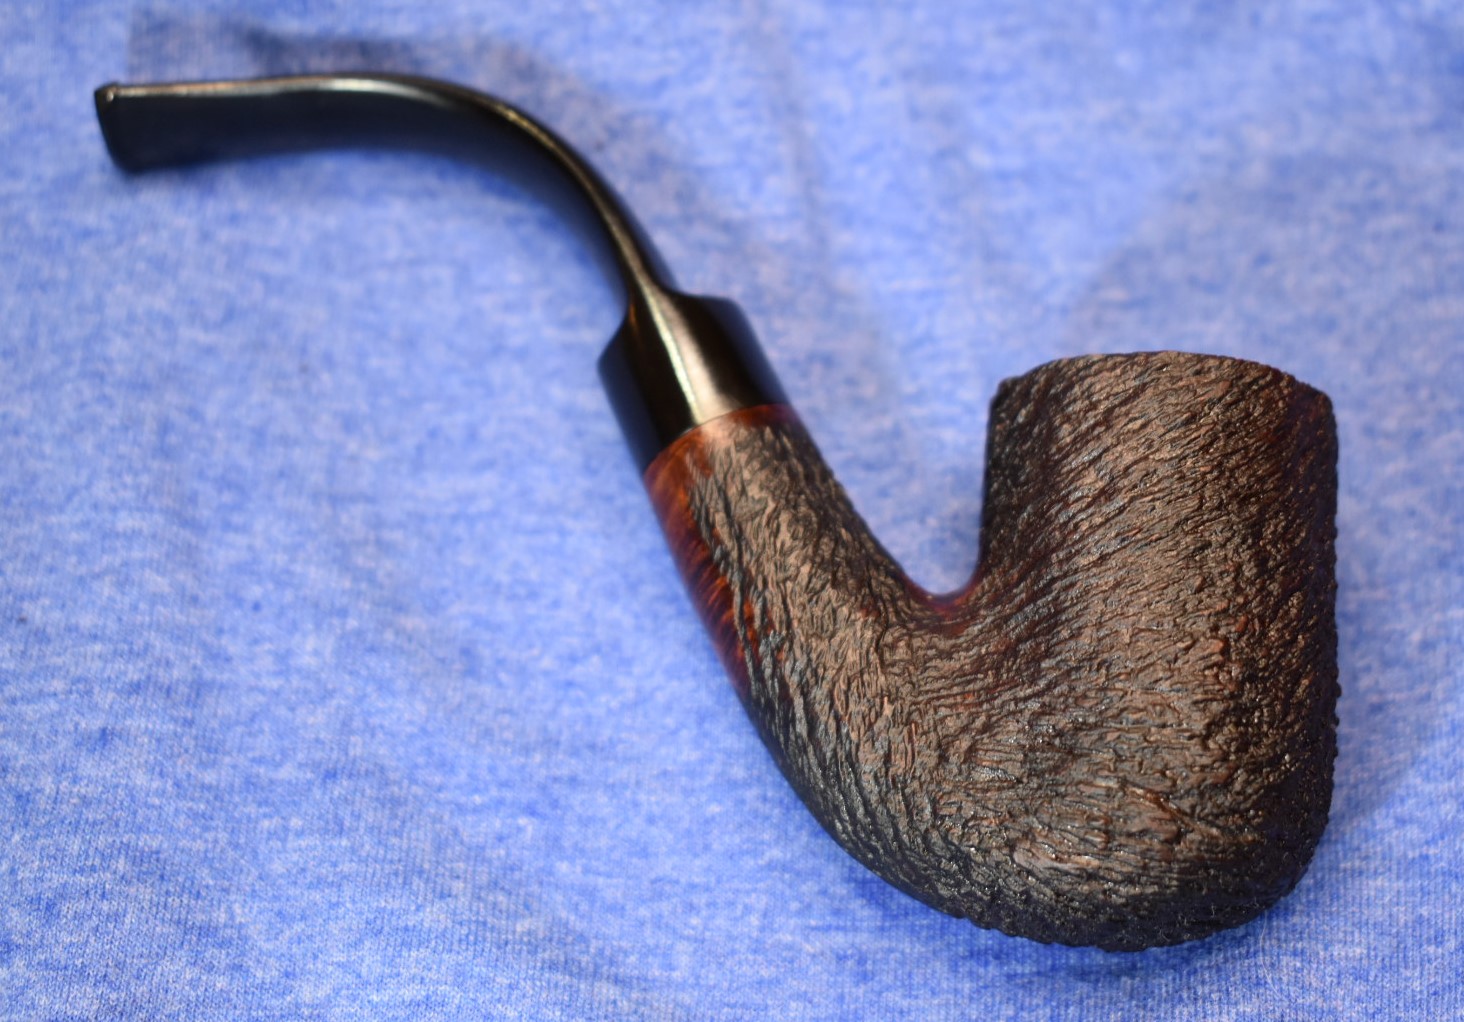
Shape 17 is a Kruger, after Paul Kruger* (typically referred to as an Oom Paul), ½ bent, medium size saddle stem. That sounds like our girl.
*Kruger, Paul according to the Kruger National Park site: “In 1882, the 57 year old Paul Kruger was elected president of Transvaal. He left for England in 1883 to revise the Pretoria Convention of 1881, an agreement which was reached between the Boers and the British that ended the first Anglo Boer War. Paul Kruger acquired many allies in Europe during this time.” (https://www.krugerpark.co.za/Krugerpark_History-travel/paul-kruger-history.html)
As for the date this Kruger was made, I have little idea. I thought I had some idea when I was researching the Kings Cross Foursquare but, I think I was reading too much into all of those sources. For the sake of positive determination of this pipe’s providence I can only say it is a Comoy’s make pipe. If you know more about the dates of these pipes please let me know in the comments.
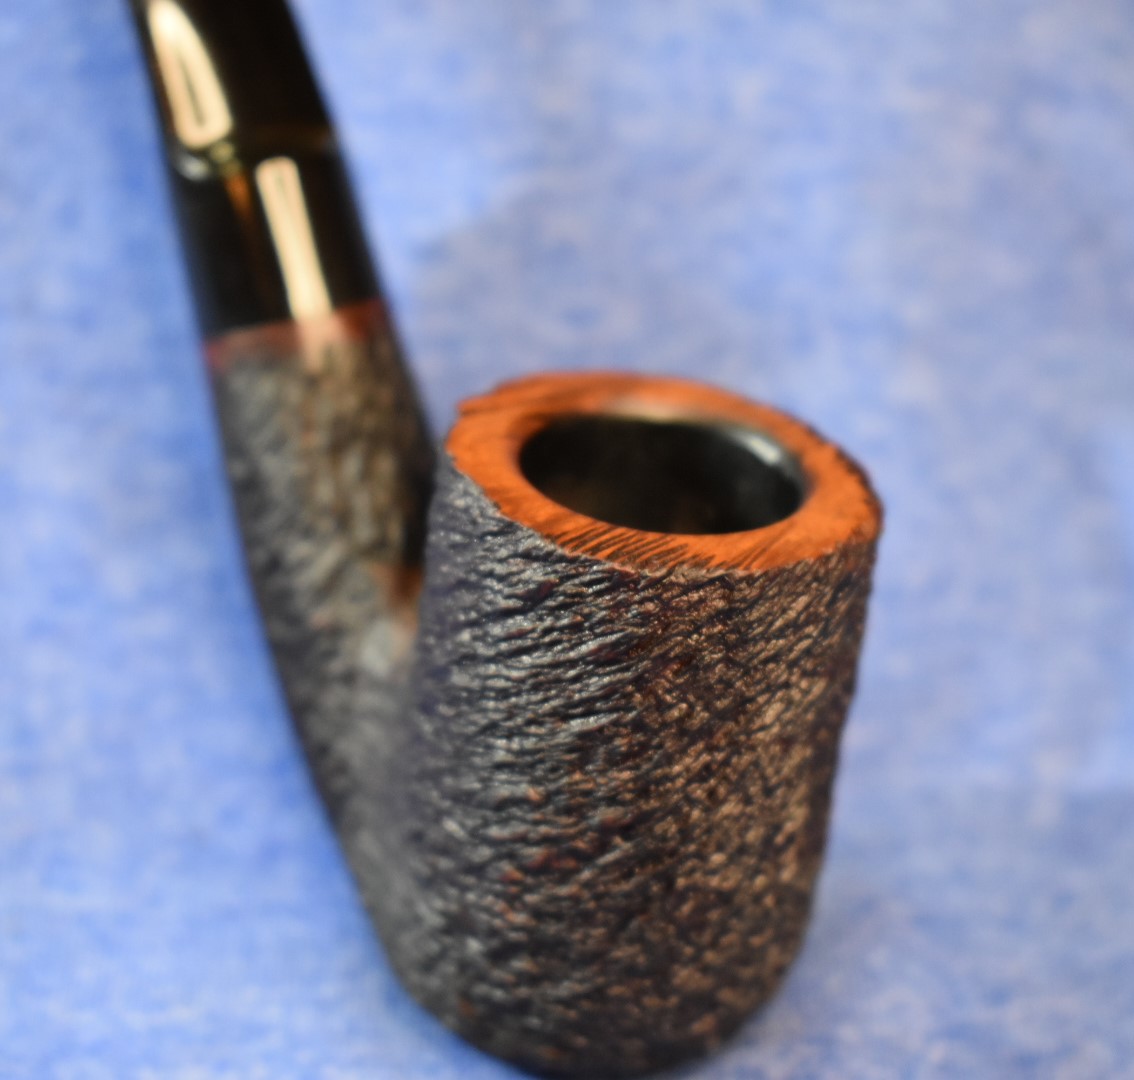
To the restoration. First step ream the bowl. Initially it looked good but that was just to top ¼. There was significant cake built up on the lower portion of the chamber. Nothing that the PipNet and the reaming knives could take care of. Oh, I am trying out a new reaming knife. It is a General brand triangular scraper. I did have to round the tip with a grinder as it had a very sharp point. The edges are quite sharp and require care when using but it seems to be a very capable tool.


Next stop the sink for the ever popular Murphy’s Wood Cleaner and toothbrush scrubbing. The Murphy’s is used undiluted with a medium stiff bristle toothbrush. Extra time was spent at this stage due to the coarse nature of the rustication. The stummel was then rinsed with warm water and dried with a cotton dish towel. Since I was over at the sink, I figured this would be a good time to top the rim of the stummel. I thought that a smoothed rim would add a touch of class to this rusticated pipe. I did leave a few of the deeper rustications because I thought they added a unifying touch to the overall appearance. The topping was done with 200 sandpaper followed by 400 sandpaper laid flat on the countertop with the stummel rotated to achieve equal pressure and sanding across the rim.
This stummel had a finish coat that remained mostly intact after the scrub. I did not want this old finish. On a prior pipe restoration of another Kings Cross pipe I found that the finish was susceptible to acetone. I chose to do the same treatment with this pipe as I did with the previous pipe. I placed it into a jar filled with acetone and left it for about 30 minutes. After the 30 minutes I removed the pipe and scrubbed it with a brass brush dipped in the acetone. After a good scrub I would dip the stummel into the acetone as a rinse, allow it to dry and look so shiny spots where finish remained. I would then scrub those areas with acetone and the brass brush. Eventually, I no longer saw any shine.
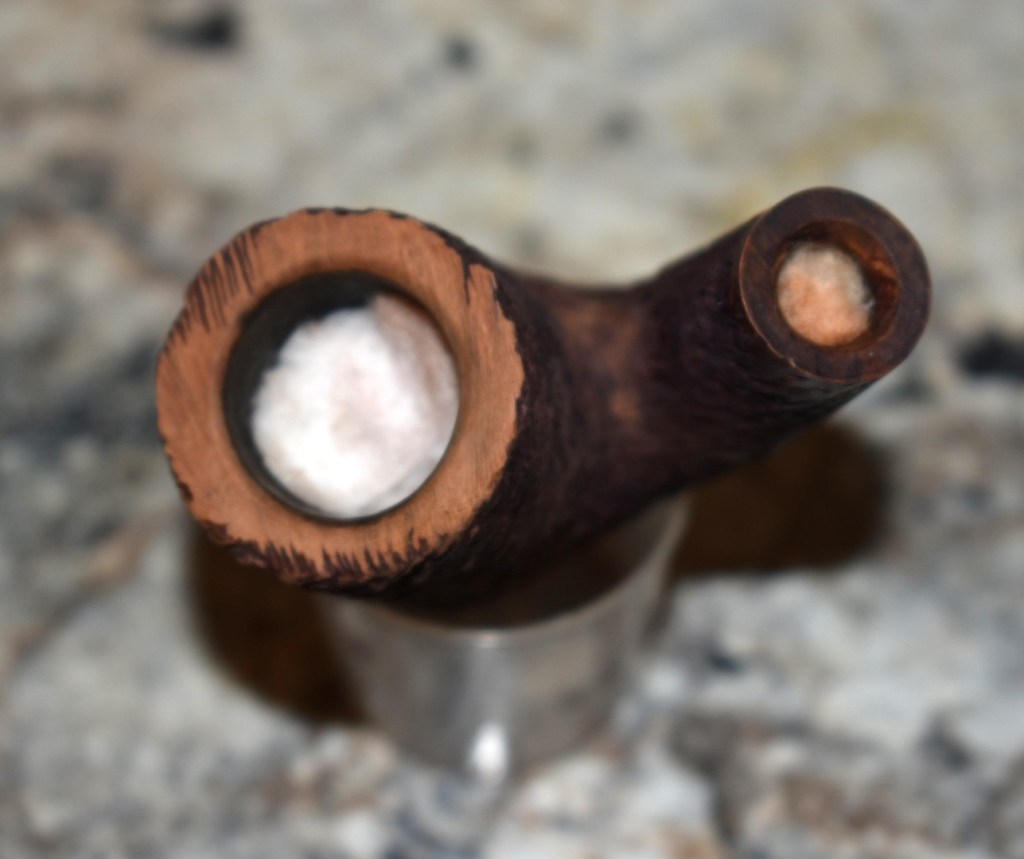
Returning to the workbench I tried to scrape out the airway to get as much of the built up tars out before using the pipe cleaners with alcohol. The airway appeared clean and I was unable to scrape any significant material from it. I soaked the tip of a bristle pipe cleaner in 99% isopropyl alcohol and ran it through the airway – it came back black with smoking residue. Hmm, I looked down the mortise with a flashlight and saw that this pipe had a
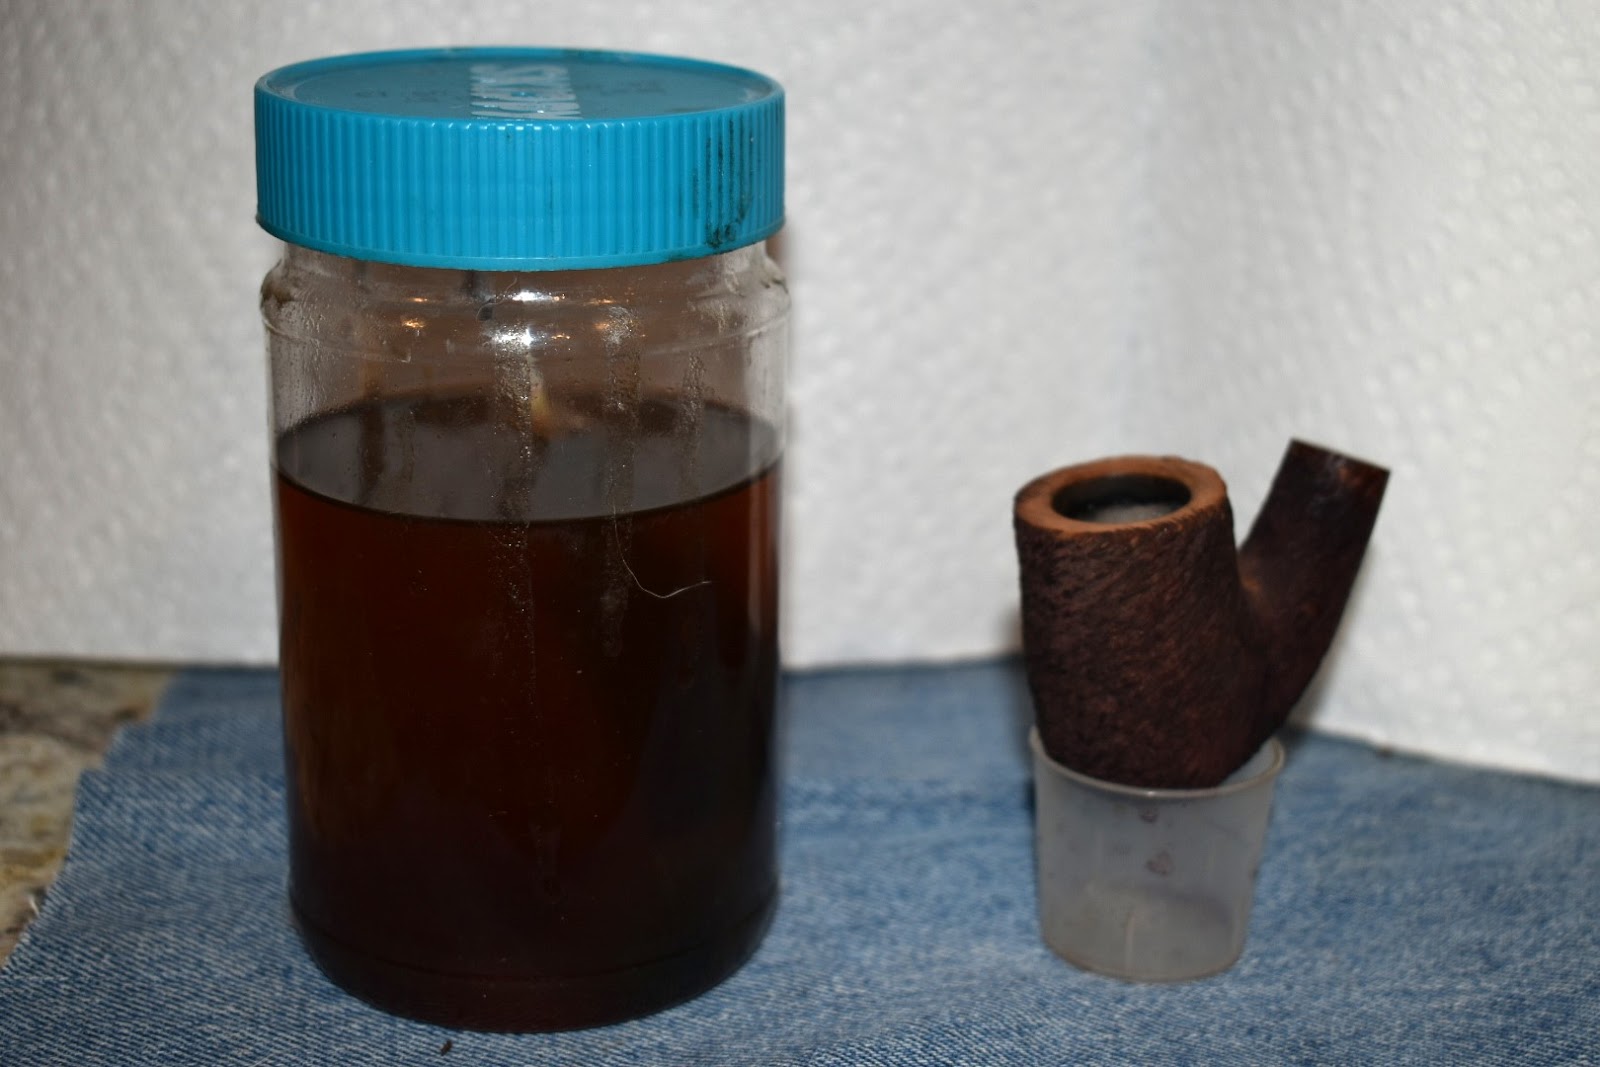
reservoir that continued down past the airway. It looked like a Peterson System copy-cat. Very cool. Also, with a well used and seldom cleaned pipe, a pain to clean out. This was looking more like it was not going to be the straight forward restore that I thought. I poured about 5 ml of 99% isopropyl alcohol into the bowl and began scrubing the airway with a nylon brush. The brush came back filled with tar. I wiped it off on a paper towel and continued scrubbing. I had to wipe tar from the brush numerous times through this scrubbing. Occasionally I would pour the alcohol into a medicine cup and pour fresh alcohol into the bowl. Eventually the alcohol turned more of an amber color then dark brown. I then tried the bristle pipe cleaner soaked in alcohol. They came out brown but were not black. I repeated with the pipe cleaners until they came back clean.
During the above airway cleaning, the reservoir was soaking in alcohol as I was cleaning the airway. This allowed the tar there to soften. I did not keep track of the number of cotton swabs, soaked with alcohol, that it took to clean the reservoir. This was probably due to my inability to count that high. Needless to say, it was a lot.
The stummel still had the aroma of “Granny purse”. That is a term I use to describe the smell left by Lakeland blends. The floral fragrances remind me of the perfume that saturated my grandmother’s purses. To remedy this I packed the reservoir and tobacco chamber with cotton. I then started adding 95% ethyl alcohol by a pipette until it pooled slightly on both surfaces. The surfaces were held level to one another. I let this treatment set overnight.

In the morning I returned to the granny purse infused stummel to find that the cotton in the bowl looked pretty clean while the shank side cotton had discolored, proving that I had not cleaned the shank as well as I

thought I did. I removed the cotton and assessed the results. Yeah, the alcohol had removed some tar and stuff but had also further softened the remaining tars and stuff (stuff is another technical term used by restoreres).
Back to the workbench. More cotton swabs later I was still getting brown residue. I then tried a technique I’ve not seen other restorers use. I tore a piece of paper towel about 2 in2 (5 cm2) I rolled this paper towel around a
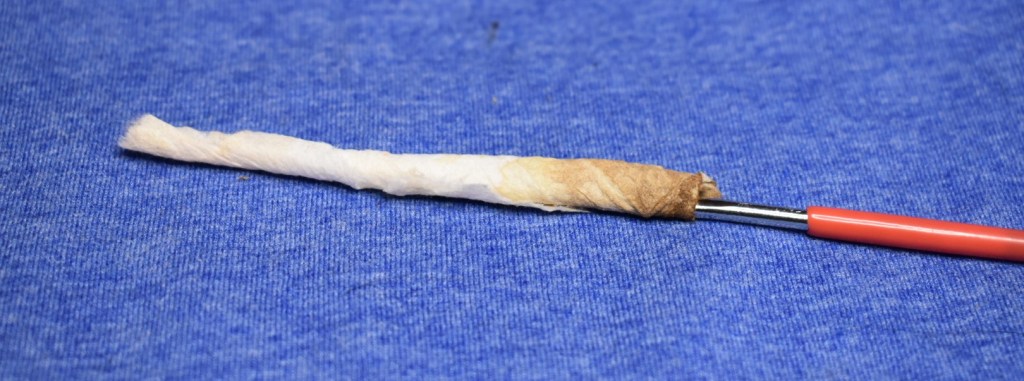
round needle file, dipped the tip into the alcohol and scrubbed the inside of the mortise/reservoir with it. After the end of the paper towel gets saturated

with yuck (yuck is another technical term used by restorers), you can unroll the paper and reroll the clean end, dip and repeat. This works well for tough jobs that need more pressure than is possible with a cotton swab. After a few pieces of paper towel I went back to the cotton swabs and was happy to see they were getting progressively cleaner. I finally got to the “clean” stage.
Here, I started working on the stem. I rubbed the surface with 0000 steel wool to remove the worst of the oxidation, inserted a pipe cleaner into the


tenon end of the stem and took it to the Deoxidation Solution jar. I placed the stem in the solution so it was submerged and put the lid back onto the jar. While the stem was soaking I figured I may as well treat the stummel with the cotton and alcohol a second time.
Normally I only leave a stem in deox for an hour or two, I got busy and returned after 4 hours. I checked the stummel first. The cotton came out clean. Next I removed the stem from the deox solution. I allowed most of the excess to drip back into the jar. I then used a coarse shop towel to vigorously rub the remaining solution from the stem. I ran two pipe cleaners through the stem to remove any remaining solution from inside. I then used a spot of Soft Scrub on a make-up removal pad to remove remaining oxidized vulcanite. The stem looked good.
I returned to the workbench and oiled the stem inside and out with mineral oil. The pipe cleaners cane out relatively clean. I thought this strange because the airway of the stummel had been filthy. I dipped the tip of a bristle pipe cleaner into the isopropyl alcohol and inserted it into the tenon end of the stem. It moved easily up the stem until it got close to the button. I pulled it free and saw what I expected – a very dirty pipe cleaner. I then tried to repeat the process from the button end. I was met with a great deal of resistance. After several bent pipe cleaners I finally pierced the layers of grime inside the stem and could get a pipe cleaner through. I then took a long churchwarden pipe cleaner, the stem and a pipette filled with alcohol to the vise. I clamped one end of the churchwarden pipe cleaner into the vice and threaded the stem onto the pipe cleaner. I used the pipette to wet the pipe cleaner above and below the stem with alcohol. I held the top end of the pipe cleaner with one hand and moved the stem up and down

the length of the pipe cleaner. This removed a good deal of the yuck from inside the stem. After this I returned to the workbench and started running pipe cleaner through the stem as normal. Well, I was shocked to see how filthy this stem was, no wonder a pipe cleaner had trouble getting through. You get the idea. Many pipe cleaners and much alcohol later the stem was clean. When placed back on the stummel there was no Granny purse remaining.
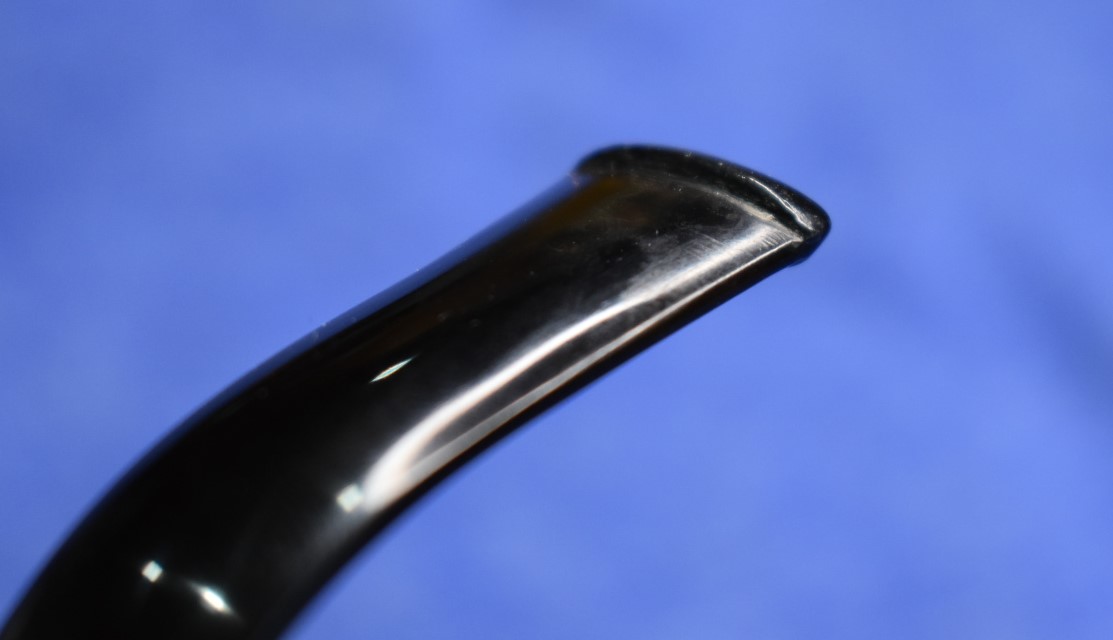
Next was sanding to address the tooth chatter and rebuilding the button. I wrapped 400 wet dry sandpaper around a small foam block to give it additional stiffness. I then sanded the area beyond the button to rid the stem of the dents from clenching. The dents were shallow so after a bit of sanding I tried to paint them with a light in hopes of raising them. This worked a little but I didn’t need much. Happy with the dent eradication I wrapped a piece of scotch tape up against the edge of the button. This would provide a straight edge for filing the black cyanoacrylate (CA, super glue). I applied a bead of glue along the top of the button. I quickly inverted it so the CA would be hanging down. I adjusted the drip by rotating the stem until it looked like it was filling the depression. I then spritzed the CA with an accelerant to speed the curing. I then used a flat needle file to reshape the button. I had to repeat the application of CA a few times to build-up material where I wanted it and file it off to regain the shape of a proper button. Once satisfied with the shape I used 400 sandpaper to smooth and polish the rough edges. One of these days I will actually remember to photograph this process rather than getting caught up in the moment.
The stem was then sanded with micro-mesh pads. The 1500 and 1800 pads were used with a drop of water on them. Between each pad I would apply a drop of Obsidian Oil, rub it in with my finger and wipe away the excess with a paper towel. After the first two pads, the remaining series was used dry with the application of oil and wiping the same. The stem was taken to the buffer where I applied several coats of carnauba wax.
I do not like applying carnauba wax to heavily rusticated stummels. I did apply a couple coats of carnauba wax to the flat surface of the stamp. The rest of the stummel received Dacatur No-Buff Wax applied with my fingers and a soft bristle baby toothbrush. This was allowed to dry for 15 minutes and rubbed off with a clean dry terry cloth towel.
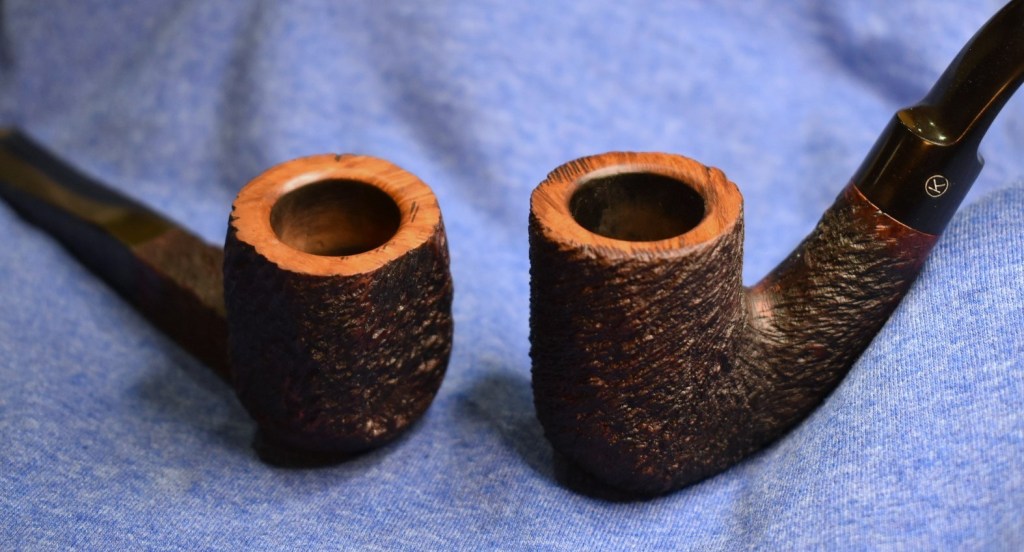
I think this pipe turned out very nicely. It makes a fine companion for the Kings Cross Foursquare from a previous restoration. I wanted an easy

restoration and for the most part this was one. I think the smoothing of the rim really adds to the appearance of these pipes. I hope that you found
something that you can use in your own restorations or that you found this interesting/entertaining. Thank you for stopping by and reading the rambling of an old pipe lover.
Below are some photos of the finished Kings Cross Kruger: