Or, part two of a Pipe by Lee Restoration
Written and photographed by John M. Young
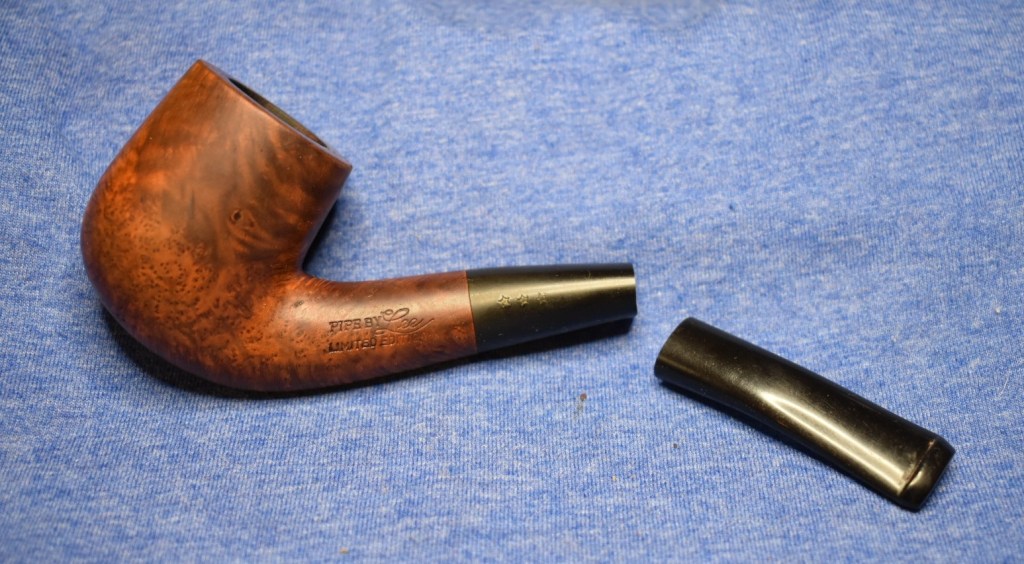
Welcome back. I was impatiently waiting to see what I’d do to fix that stemageddon from the first part of this restoration too. If this is your first time here to the blog, I am referring to “A Restoration of a Pipe by Lee”. In that blog I was adding the finishing touches to a stem by giving it more bend when the stem broke. I prefer not to use the words “when I broke the stem”. A bit too accusatory, eh? Anyway, after a great deal of pondering, a couple of conversations with Steve Laug and Donald Cole and a wee bit of rocking in a corner while sucking my thumb, I came up with a potential fix to the broken stem.
During my pondering sessions, I thought about; pinning the stem by drilling two small holes in each half and using something like copper wires in the holes or, using a small screw screwed into one broken half then cutting the head off the screw and screwing in the other half onto the screw or, using a tube to bridge the pieces, I also considered magic. I remembered a granddaughter telling me how to make pizza: You take some donuts, put them in a bowl, add some water, mix and – ta-dah – pizza. All of those had their merits but lining up the stem pieces seemed to me to be the issue. Except for the magic. The two broken pieces could be held together with a minimal seam. I needed to make sure this minimal seam was maintained by whatever method I chose for fusing them together.
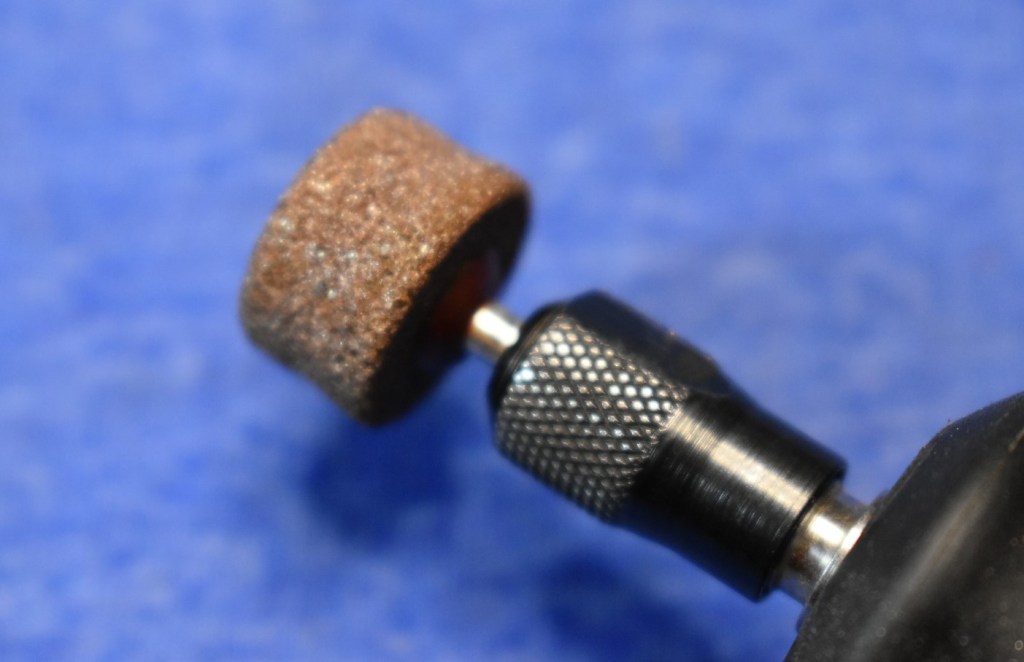
Donald Cole showed me photos of a stem repair he did with a break that occurred at the tenon. He used a stainless steel “sleeve”. Here are some photos he provided (thank you Don).


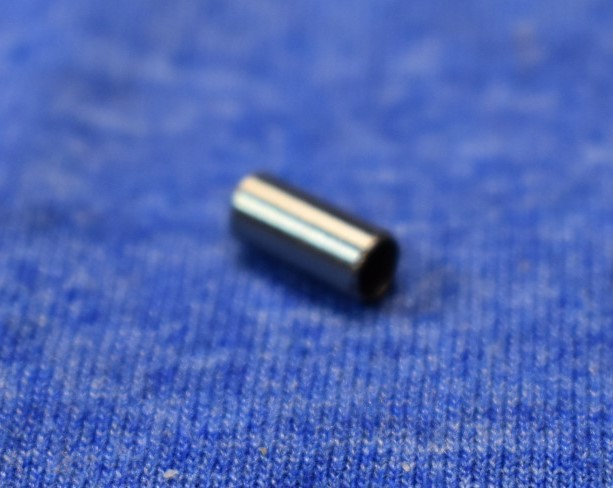
I thought this sounded like it may be the easiest way to maintain the alignment of the pieces thus minimizing the scar that the fusion would undoubtedly leave behind. It would also allow for additional surface area for the glue to hold to. After researching stainless steel tubing, AKA shopping on Amazon, I found they had 3 mm inside diameter stainless steel tubing with an outside diameter of approximately 4 mm. That sounded like the best solution.
New plan. No rocking rocking in a corner nor thumbsucking needed.
- Cut a piece of tubing .4 inches or 1 cm. Chamfer the inside and outside edges.
- Drill out the existing 3mm airway to 4mm for approximately .2 inches or 5 mm.
- Glue the inserted tubing in place with J. B. Weld
- Glue the two broken pieces back together with black cyanoacrylate glue.
- Ta-dah
The plan seemed simple enough although the implementation turned out quite a bit more complex. Little issues came up throughout the deployment.
Step #1. I figured that I would just use a pipe cutter to cut the stainless steel tubing. Problem: 4 mm tubing is too small to be held by my hands, it would
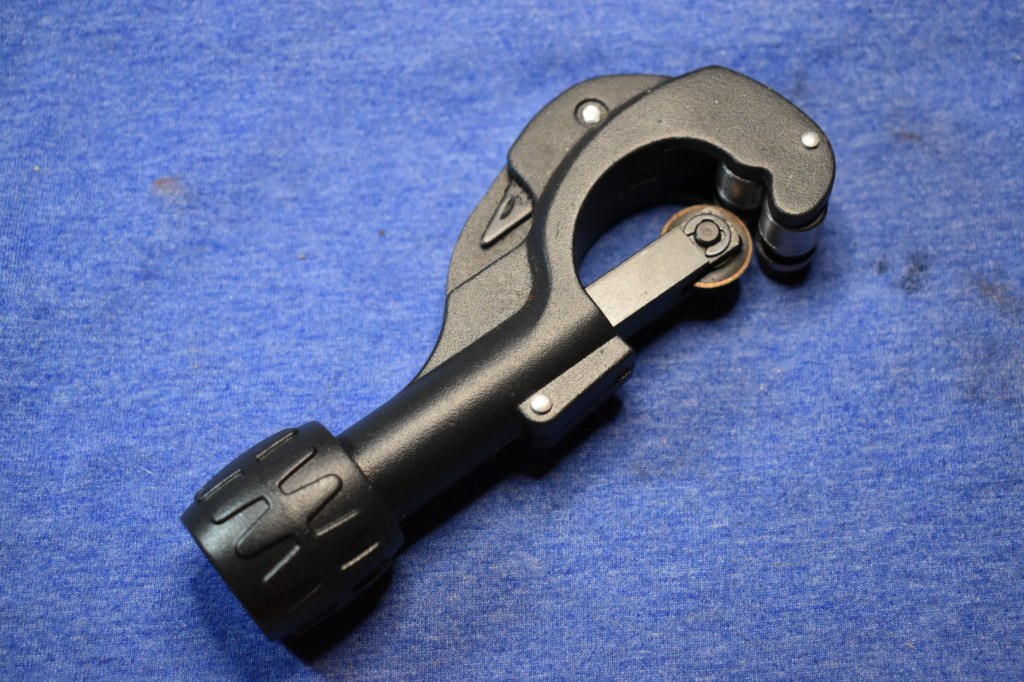

just spin. When I tried to hold it with pliers it would spin in the jaws also. Not wanting to crush the tubing I ended up using the Dremel tool and a cut-off disk. I then used the pliers to hold the tube while I deburred the inside of both ends with the dremel and a deburring bit. After that I used
the Demel and the grinding bit to give the outside edges just a bit of chamfer. Alright! Step one complete. .348’ish inches or 8.84’ish mm.

Step #2 “Drill out the existing 3mm airway to 4mm for approximately .2 inches or 5 mm.”
Again, this sounds simple, right? With a drill press and multi-axis clamp, it perhaps would have been. I have neither of those very cool devices. I decided to make a jig or clamp for my drill. I used a 44 inch long 2×6 board and a come-along strap. Why a 44 inches long 2×6? Umm, because that’s what was in the garage and I figured that would add stability. Next I figured where I wanted the come-along ratchet to be located, wrapped the nylon strap around the drill, stapled the nylon strap to the 2×6 and – ta-dah – instant sideways drill push? Definitely not a drill press. 


This lathe-wannabe device required my hand to be the chuck and only a 2 jawed chuck at that. I needed something that I could slide and help me hold the broken pieces as I drilled out the airway to 4 mm. I tried various things that I had around. ¾ inch plywood too short, 2×4 too tall, 2 ceramic tiles stacked too short, 3 ceramic tiles too tall, etc… Then I tried a plastic snus container – ta-dah – just right.


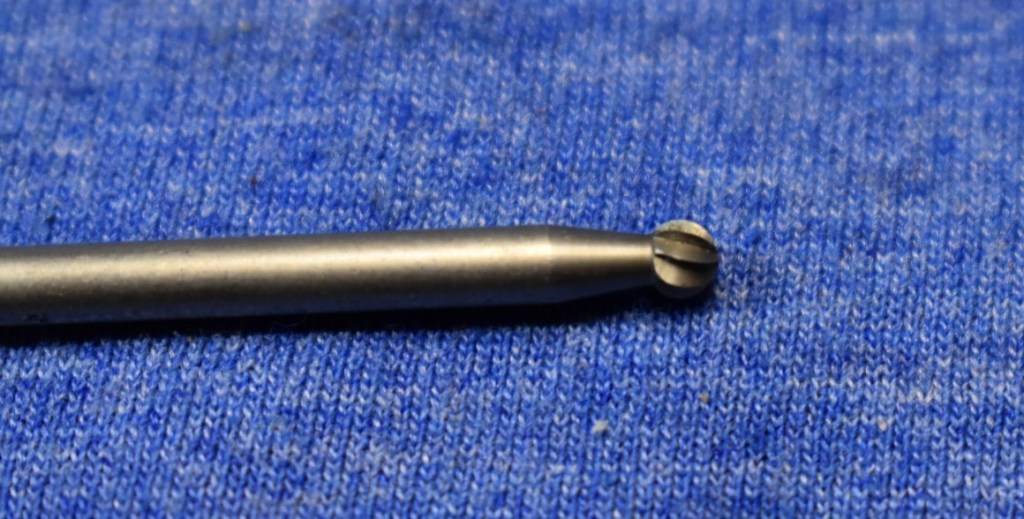
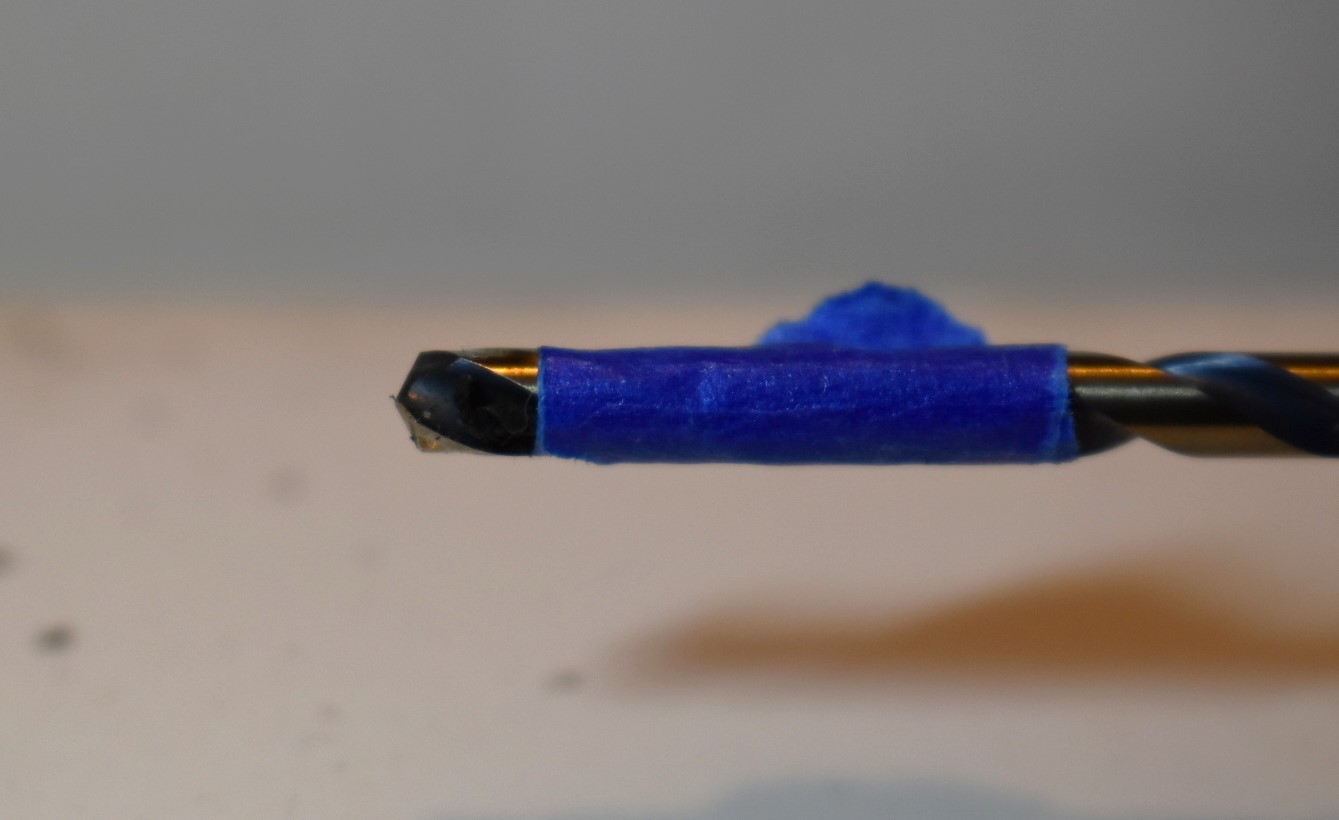
Next I had to measure exactly the depth of the new drilling. I did this by dividing the length of the tube by two. .348 2 = .174 inch or 8.84 2 = 4.42 mm. Using the caliper I marked the drill bit with a Sharpie marker. I then wrapped a piece of tape around the bit at this mark.
This was starting to look like it was going to work. I did not want to have the first time that I used this high tech piece of engineering to be with the only broken stem that I had. In the unlikely event something were to go wrong with an untested piece of equipment with an equally untested operator, I thought maybe, I should try this with something other than the ONLY stem I have. I found an extra stem that was close to the same size and broke it. Well actually, I tried and couldn’t so I clamped it in a vice and broke it with a pair of pliers.

Side note – Now if you are thinking, “Hey, he is doing product placement for Craftsman!”. I assure you that I am not. However, if you are with the fine people of Craftsman Tools, please have your people get in touch with me.
Now with a test subject “broken” stem I tried to expand the airway with the drill and a 4 mm drill bit. I set the drill to is fasted revolutions per minute (rpm). “Why the fasted?”, you ask. Because the drill has a button that you can use to lock it in that position/speed. I then started pushing the broken bit forward. It went very smoothly for the first 1 mm then the bit caught and jerked the piece in my hand and broke the broken piece even further. I noticed two things:

1) My high-tech snus-can-hand-rest deployment system was not sliding freely.
2) High rpm may not be the best choice. Just because there is a button locking the trigger in place doesn’t make it the best speed to use.
I returned to the 2×6 drill base and decided that a wrapping of wax paper would make the can slide smoothly. This was taped in place using 2 inch painters tape. Next, I practiced using my right hand on the trigger of the drill while moving the stem piece with my left. Good thing there are two pieces when you break a test stem in half.
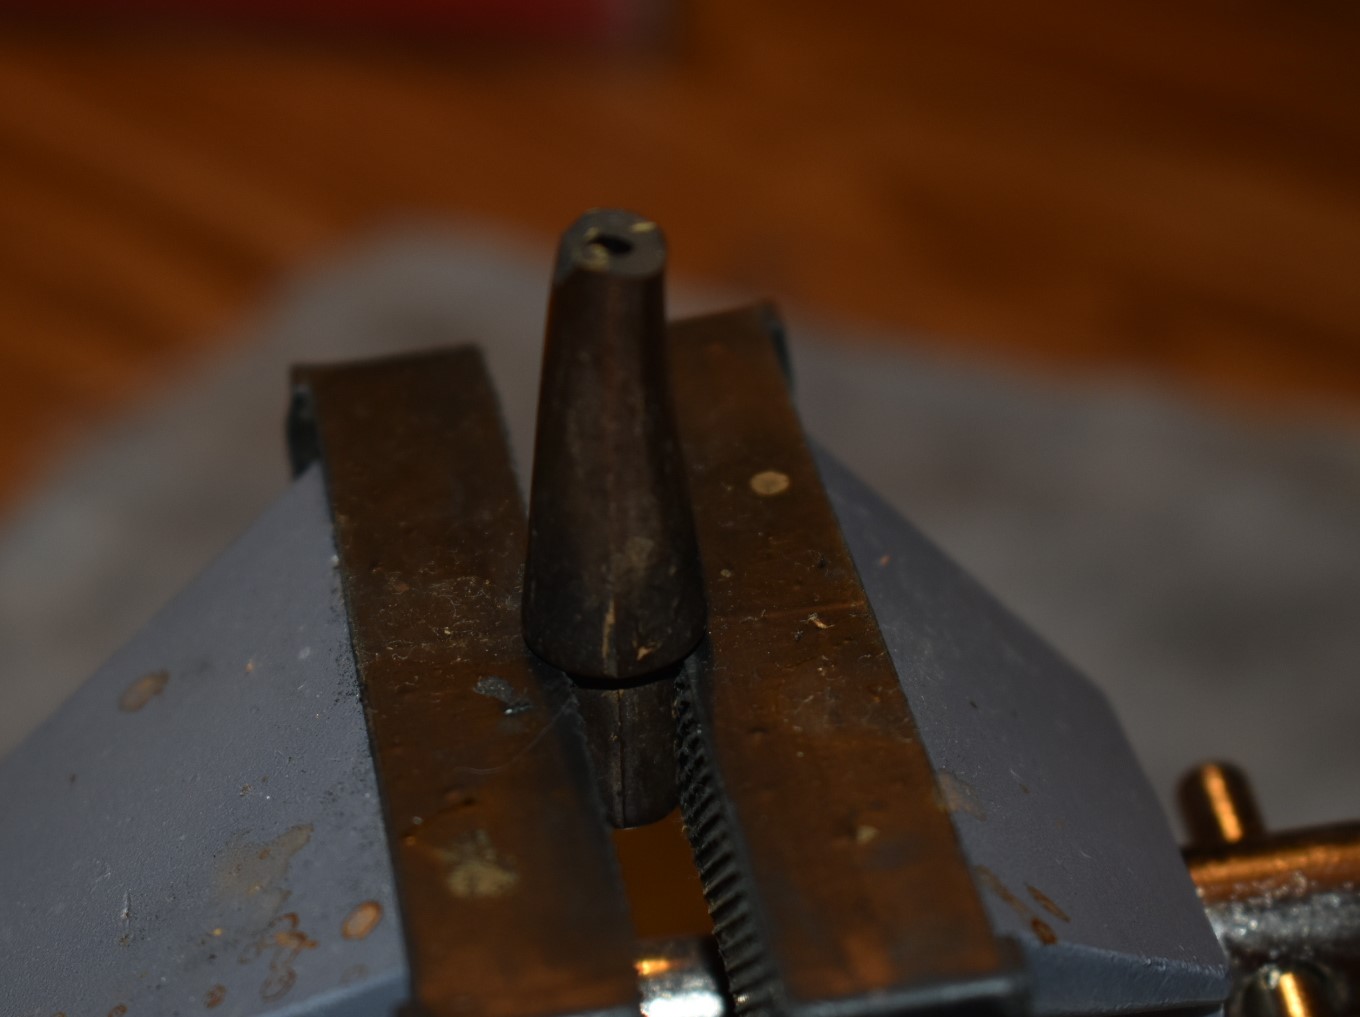
I began the test drilling again with the thicker of the two test stem pieces. The wax paper worked exactly like I had hoped. The slow turning of the drill bit allowed me greater control. When the drill bit started to bite and the piece started moving too much I could quickly stop. Twist the piece off the bit and readjust my speed. I was very glad that I had tried drilling the airway with a sample before I moved on with the real thing. Here are a couple photos of the test fitting after the test drilling:


The actual drilling went very smoothly using the above process. I used the 4 mm bit and slowly increased the airway diameter in each stem piece. A test fit of the stainless steel tube (tube, from now on) was good, a little tight, and the seam along the break was very close. Not as good as with no tube. This was due to the drill bit not being precisely centered into the previous airways. I decided that instead of drilling the airway at 4 mm, I would increase it one drill bit size. The next largest bit that I have is 11/64 or .172 inch or 4.37 mm. I placed that bit in the chuck, marked the drill bit with marker and taped it to mark the depth. This drilling also went very smoothly. Now when test fitting the tube I had more wiggle room to align the two pieces together. I figured that the extra space would also allow for a bit more epoxy when it came time for gluing.


Wow, I just realized that was only the end of step #2. Good thing Steps #3 and #4 go together.
Steps #3 & #4
That brings me to a couple more “pre-glue” tasks. During an email exchange with Steve Laug concerning this stem. He recommended bending the stem before gluing it back together. In my life I have learned that there are two main ways to acquire knowledge; one is to do it yourself and learn from doing (mistakes) and two is to listen to others who have done what you are attempting before. Also in my experience one of these methods is free and doesn’t hurt (physically or economically) while the other costs in many ways. I took Steve’s advice and tried to bend the short, 2 inch, piece of stem. I knew it would not be the bend that I had really wanted for this pipe but it would be far more comfortable than it presently was.
I used the heat gun to heat the stem piece moving it constantly a few inches in front of the heat gun nozzle. Since this piece was so short, I used a needle-nose pliers with painters tape wrapped around each of the jaws. When the piece flexed freely I bent it as much as I felt comfortable with and called it good. Apologies for not photographing the bent nub. The other task was to roughen up the tube with a bit of 220 sandpaper. I hoped that this would increase the surface area and give the epoxy a better surface to adhere to.
It was time to get to gluing. I assembled all the necessary gear; acetone, black cyanoacrylate (CA), cotton swabs, J.B. Weld, mixing tray, pipe cleaner, stem pieces, tube. The plan not quite simple but, close:
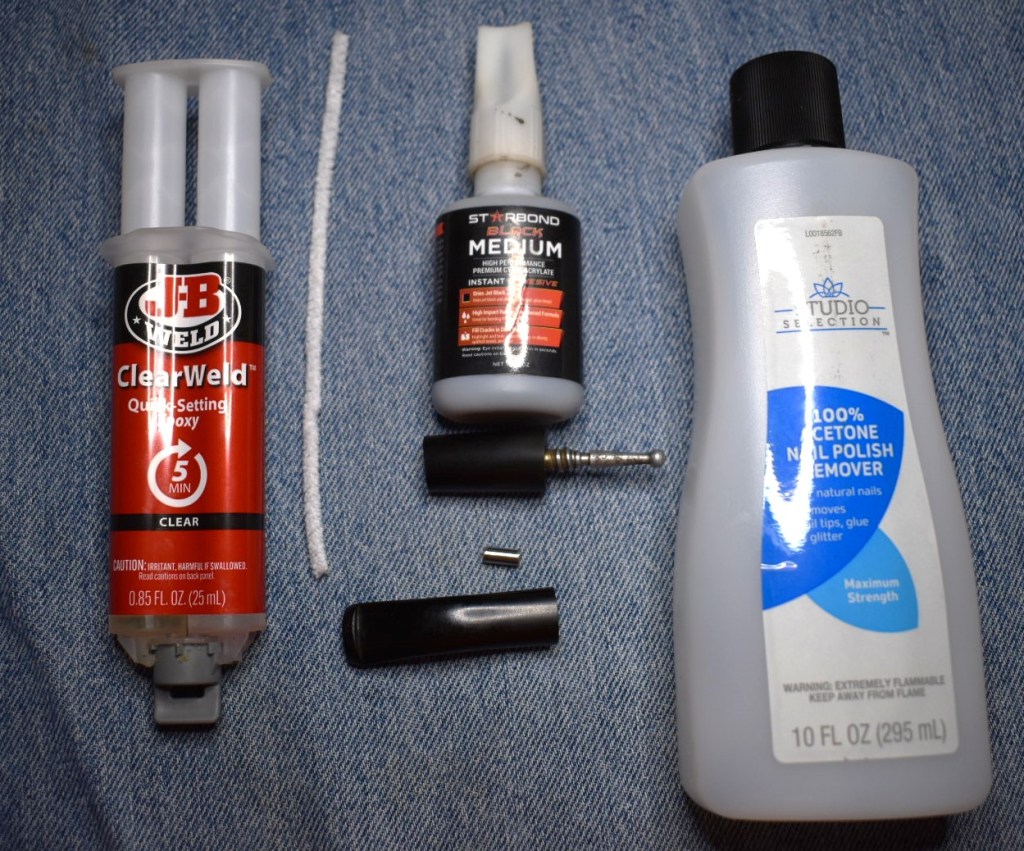
- Clean the break surfaces with cotton swab and acetone.
- Mix epoxy.
- Apply epoxy to the drilled holes.
- Insert tube and push together leaving a small gap for the CA.
- Apply CA one drop to each side in the gap.
- Align seam press and hold tight for 30 seconds.
- Dampen pipe cleaner with acetone and run through airway to wipe away any epoxy that may have gotten in airway.
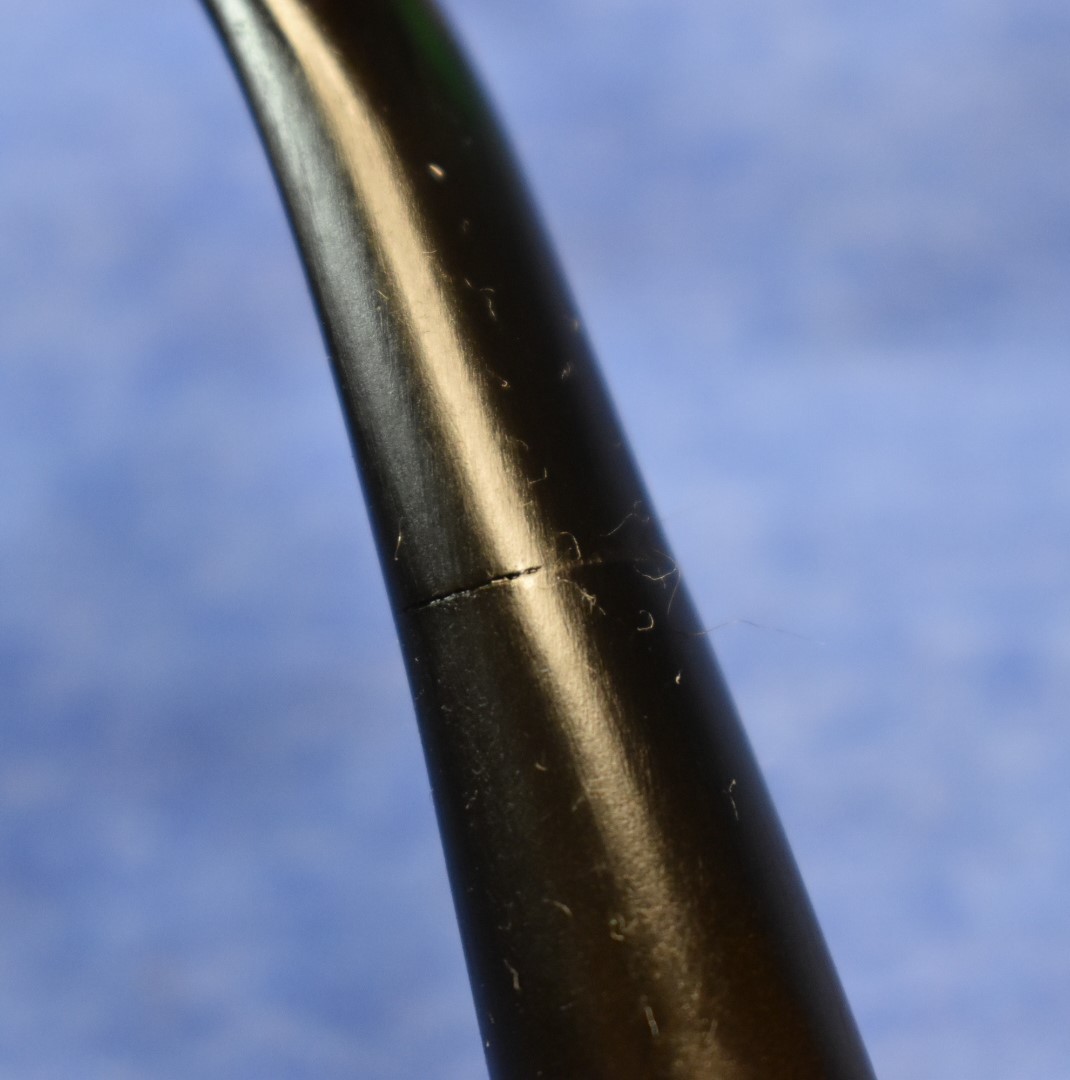
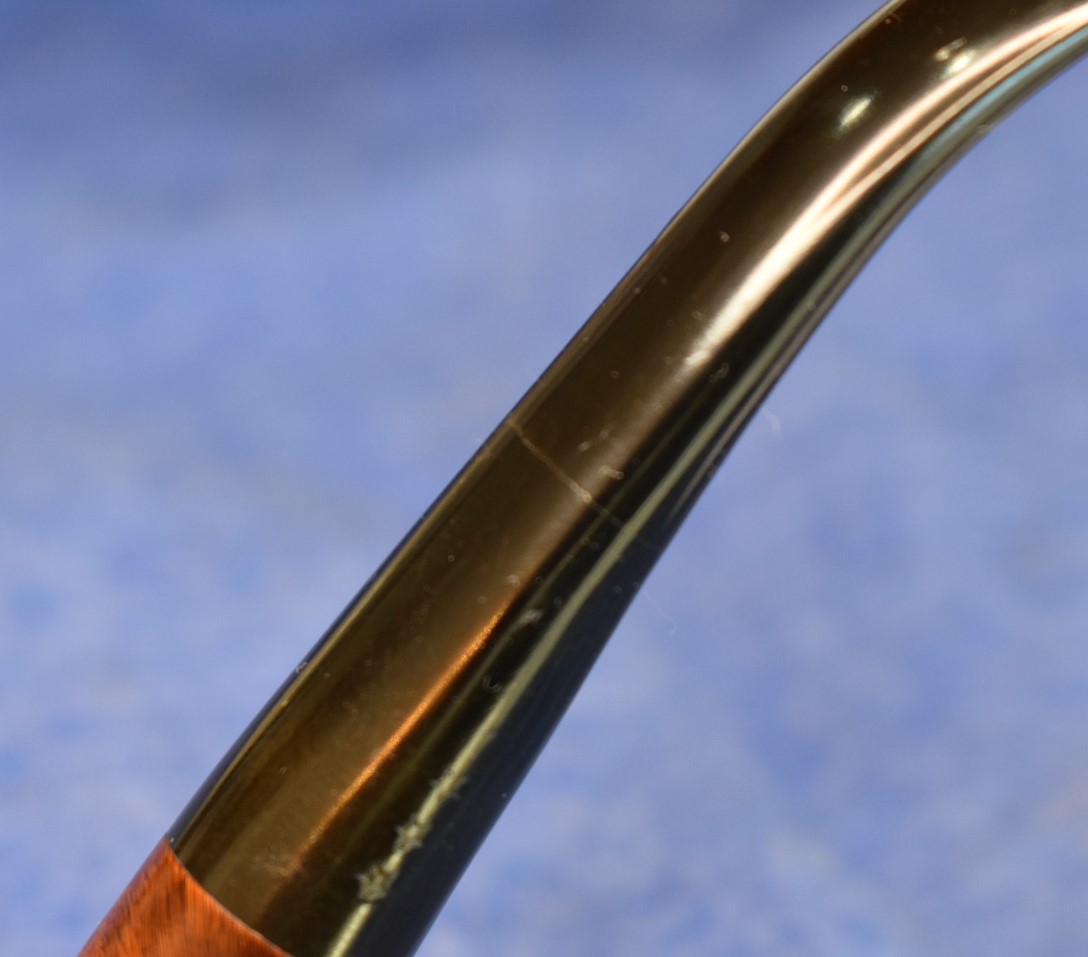
It went pretty much as planned. There were of course a couple of hitches. There was a bit of epoxy on the break surfaces after the tube was inserted. I used the swab and acetone to wipe these clean again. The other was that I ran several acetone dampened (just slightly damp) pipe cleaners through the airway. I set the stem aside to allow the glues ample curing time. I swore not to touch it until morning. Well, not touch it again after photographing it.


In the morning it seemed to have set very nicely. I took the stem down to the workbench and started sanding the seam. CA is harder than vulcanite and required the sandpaper to be wrapped around something. I use small wood block or even an emery board, like for finger nails. I also used emery boards of various grits. I worked the seam with 220 sandpaper initially then moved to 400. After the 400 O used an emery board to smooth and blend the surface. Notice that I did not use the entire set of micro-mesh pads.


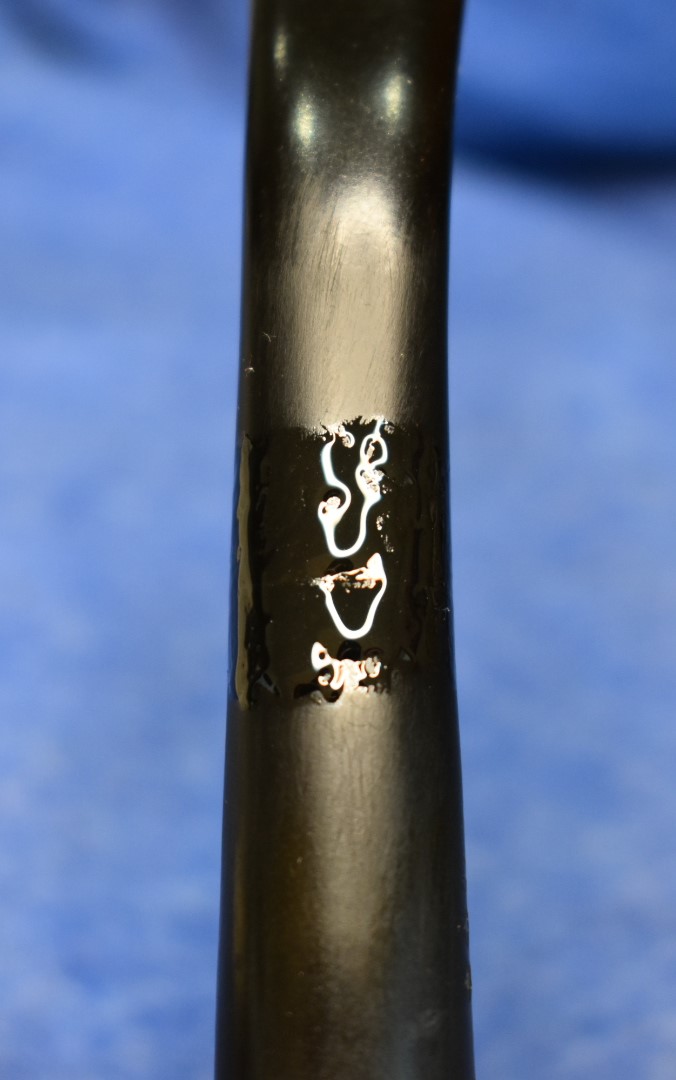
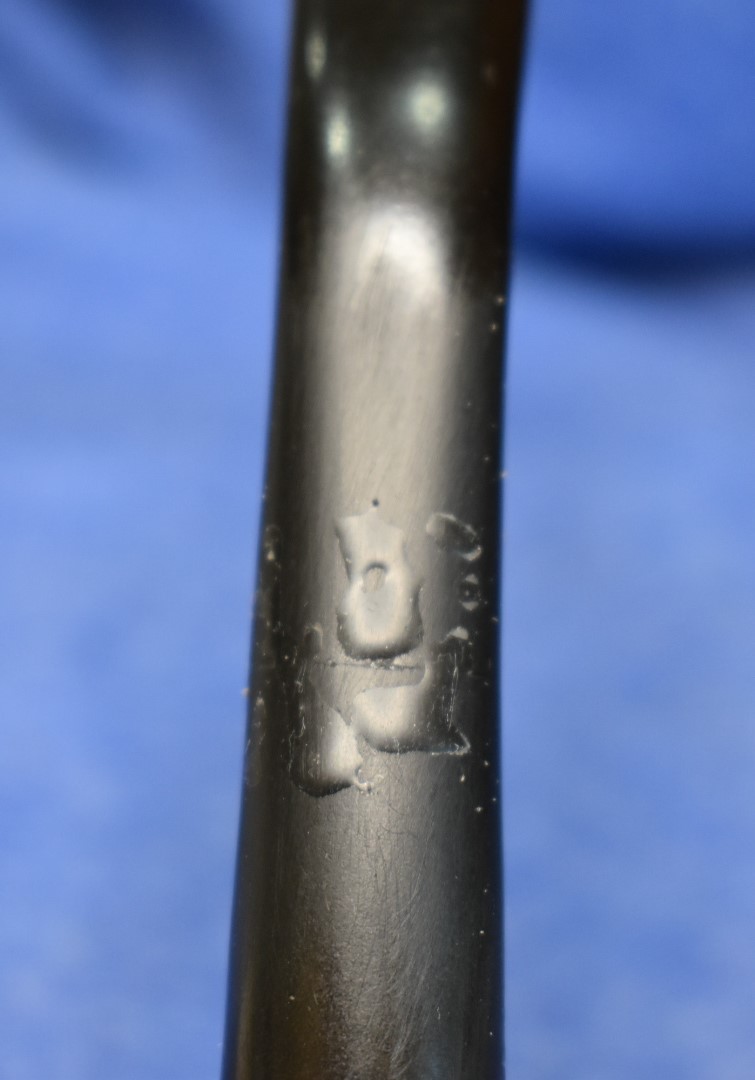
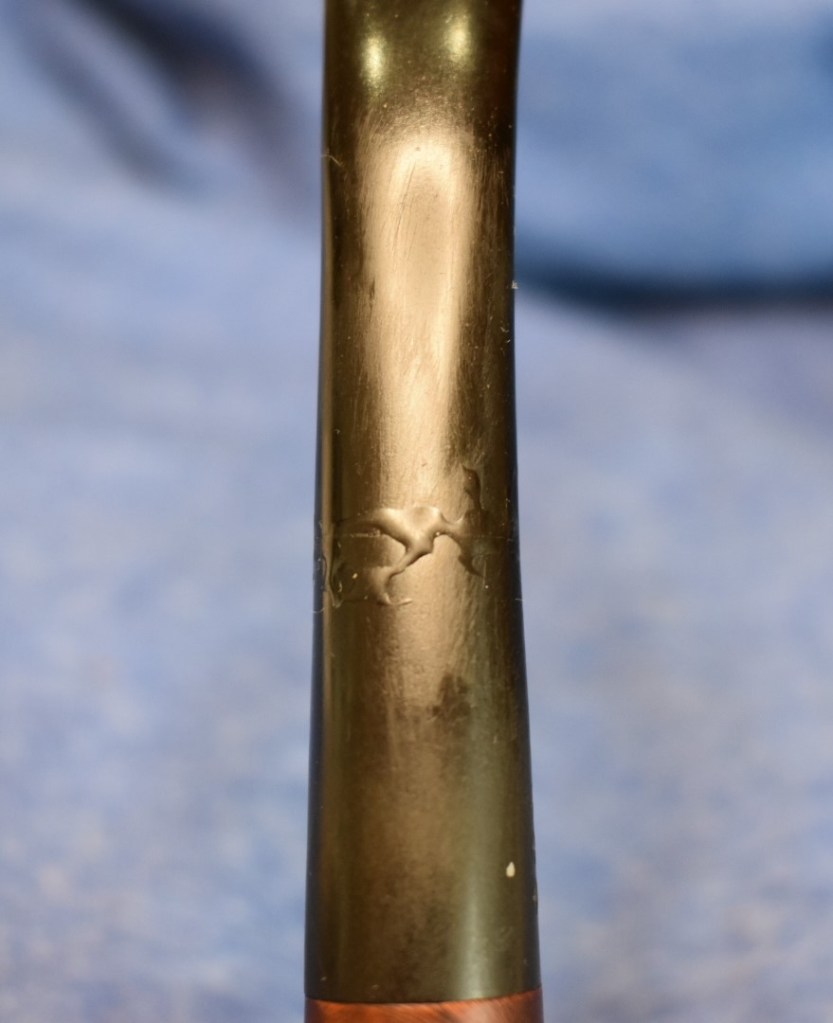
Final touches to this Pipe by Lee. The three stars logo on the stem needed to be restored. This required acrylic gold paint applied with a very fine detail brush. The excess was scraped off with an edge of an Exacto knife blade. The

surface was then micro-meshed. This allowed only the paint inside of the stars to remain. The surface of the stars and the area around, about 2 mm one each side was then painted with thin clear ultra violet (UV) resin. The resin was set by shining the light from a UV flashlight.
Now here is the real reason this blog has taken so long to be finished. By the way, thank you for your patience. I wanted to try something new. The new thing is black ultra violet (UV) resin. I have tried using UV resin with a Peterson 312 stem. The previous lover of the Peterson ran countless pipe cleaners through the stem. Which is normally a good thing however, the pipe cleaners’ sharp edges had cut into the inside top of the airway and had thinned the vulcanite so much that a hole had developed. When I received the pipe I was able to fill the hole using carbon powder mixed with cyanoacrylate (superglue or CA). After the initial hole was sealed I built up an elongated ridge of CA which was sanded to blend in rather nicely. This patch had lasted for a couple of years. The other day a new elongated hole opened up towards the shank, in line with the previous hole. I decided to try using UV resin to seal the hole and build up a new ridge. It worked. I was able to blend the UV resin quite nicely again with the existing vulcanite. The problem was that the UV resin that I used was clear. When the stem was in normal light everything looked normal but when a pipe cleaner was inserted
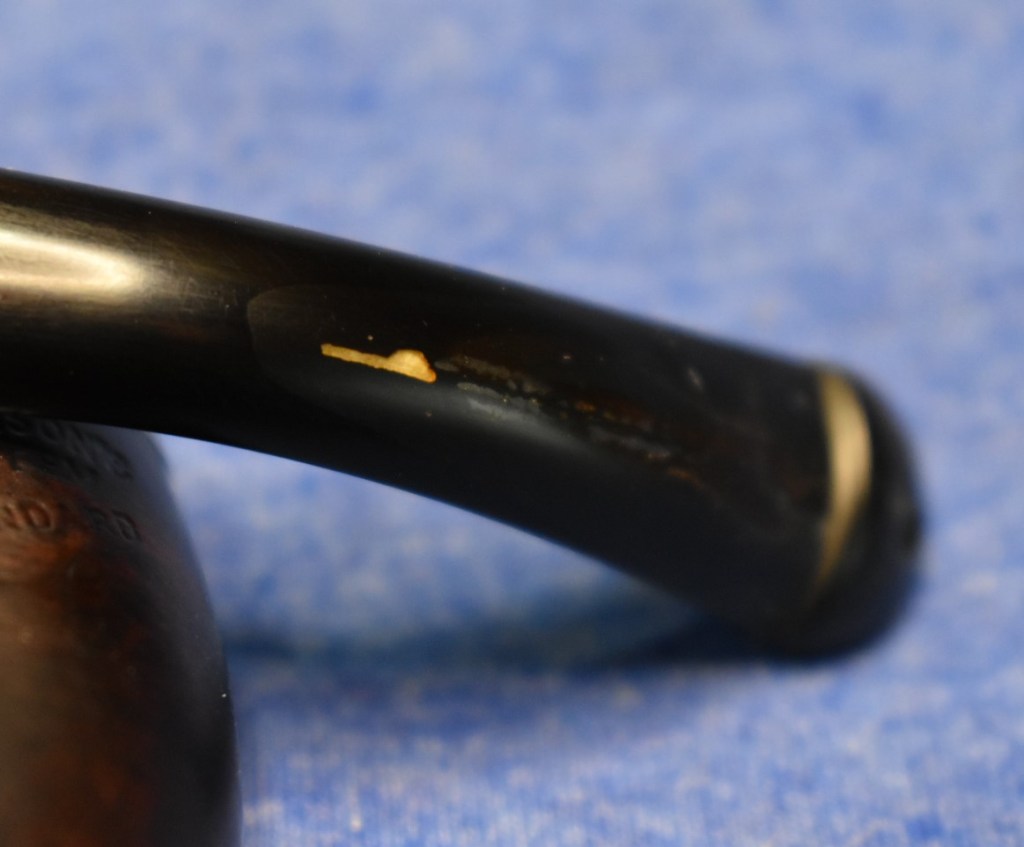
the white of the pipe cleaner showed through the clear UV resin like a window. This made me laugh and reminded me of the windows that veterinarians placed in cows’ stomachs. I then ordered black UV resin on November 14 as a way to cover the repair seam on the 3 star Pipe by Lee. Today is November 21. According to the tracking the Black UV resin has made it through customs but not yet to my house.
It finally arrived! November 28 and it finally ended the journey it began on November 14. I assembled all of the gear for the big event. I thought I’d better test the new stuff before I go using it though.
Test 1) Does it stick to the plastic? No. The drops separate pretty well from the plastic lid. Success
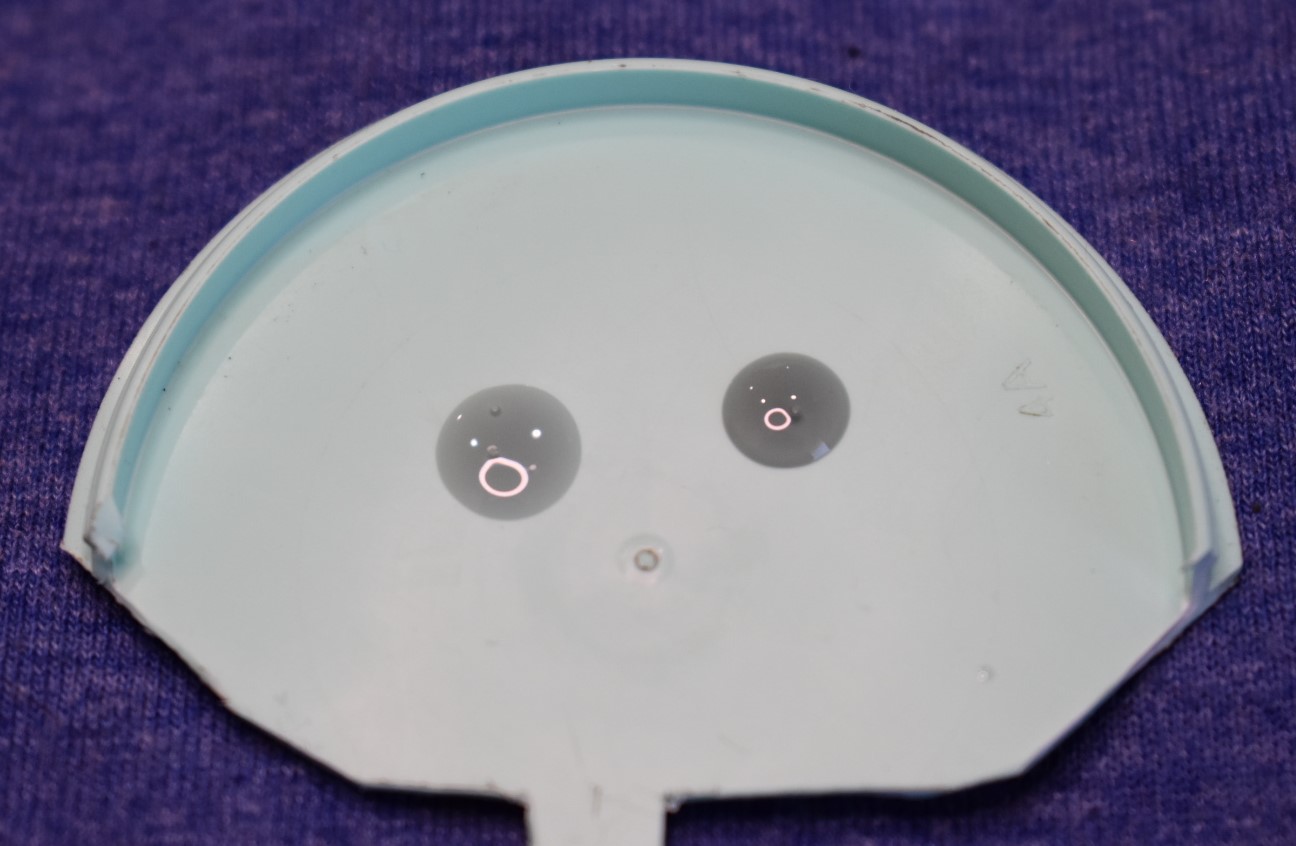
Test 2) Is it black? No, more like a clear smoke. Failure
Test 3) Will it adhere to vulcanite? Initial test looks good. Success?
Test 4) Is it sandable? Yes. Success, though it is much softer than the vulcanite. This softness makes seams with vulcanite problematic.
Test 5) Can it be exposed to alcohol? No. It began peeling from the surface of the vulcanite immediately. Failure
Verdict – Not approved for pipe restoration.
Greatly disappointed is a good way to describe my feelings towards the Black UV resin. I had very high expectations. I did still have my old clear fly tying
UV resin. It had been tested with the same procedures as above and I had given it my “Approved for pipe restoration” stamp.
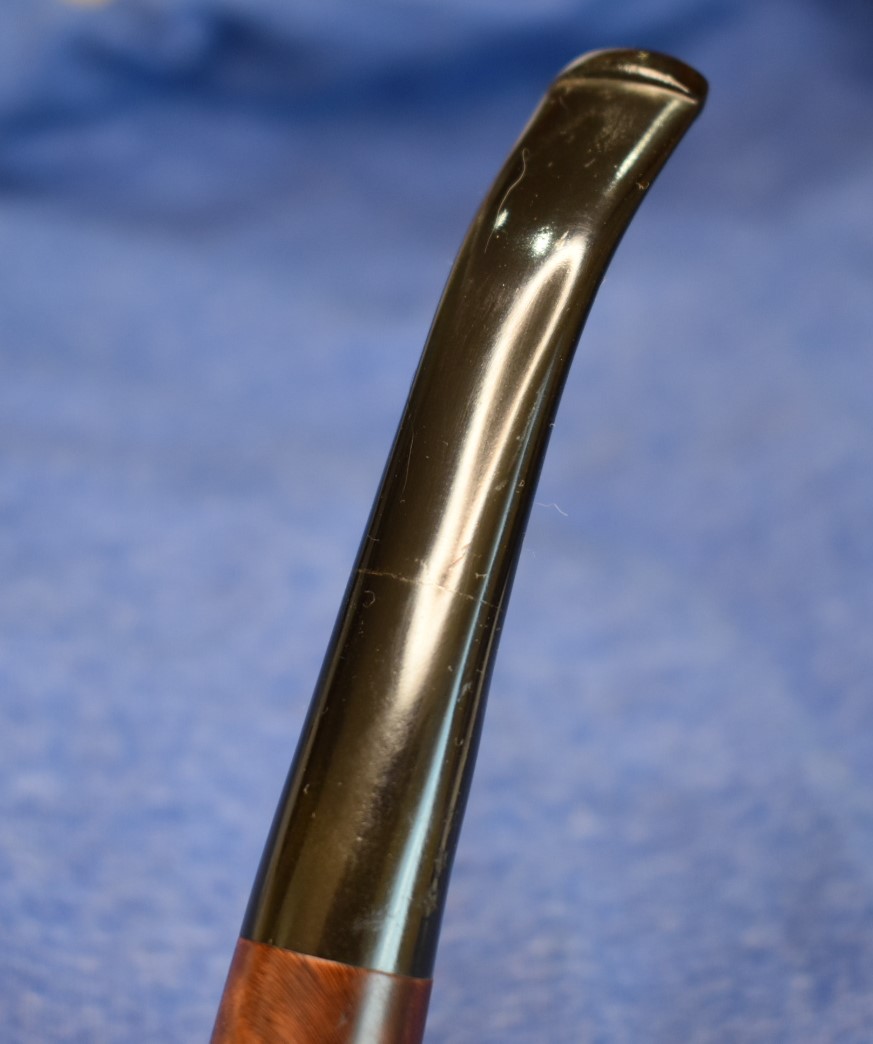
The area around the seam where the two pieces were glued was then “painted” with the Thin Original-Clear UV resin. Once painted the stem was rotated by holding the aluminum stinger. Rotating it continuously between my fingers allows the UV resin, which is very thin, to flow. This rotating it keeps it evenly distributed. The UV resin is set by UV light from the flashlight.
I then sanded the resin using 400 wet dry sandpaper wrapped around a small foam block. The block gave the sandpaper the rigidity needed to sand the high spots of the cured resin. Once smooth I used the micro-mesh pads. 1500 and 1800 wet used moistened with water. Between each pad I applied Obsidian Oil with my fingers and wiped it with a paper towel. I then proceeded to use the entire set of micro-mesh pads in order of increasing grit. Between each pad I again applied and wiped the Obsidian Oil.
After the micro-mesh pads the stem was polished with Fine then Extra Fine Polish. These were applied to the stem with my finger then buffed with a clean cotton cloth. I then reattached the stem to the stummel and took the pipe to the buffer for several coats of carnauba wax. I polished the entire pipe with a microfiber cloth to further deepen the shine.
This was only the second time I have tried to use the UV resin as part of a stem restoration. I have used UV resin for years in tying flies for fishing. It is used to build heads on certain patterns and used to cover over areas where extra protection is desired like over the tops of plastic eyes on a fly.

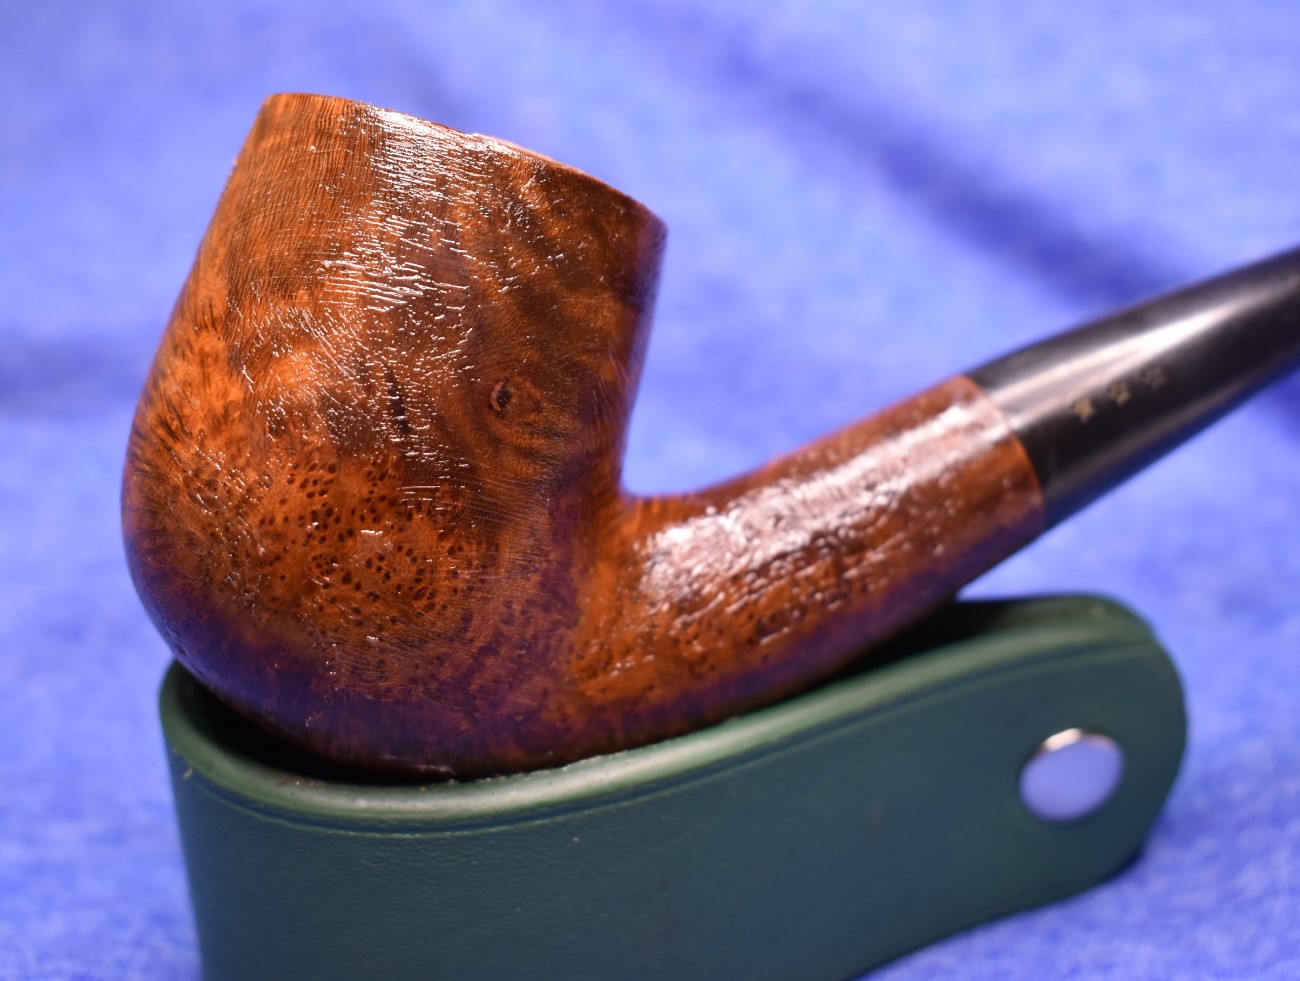
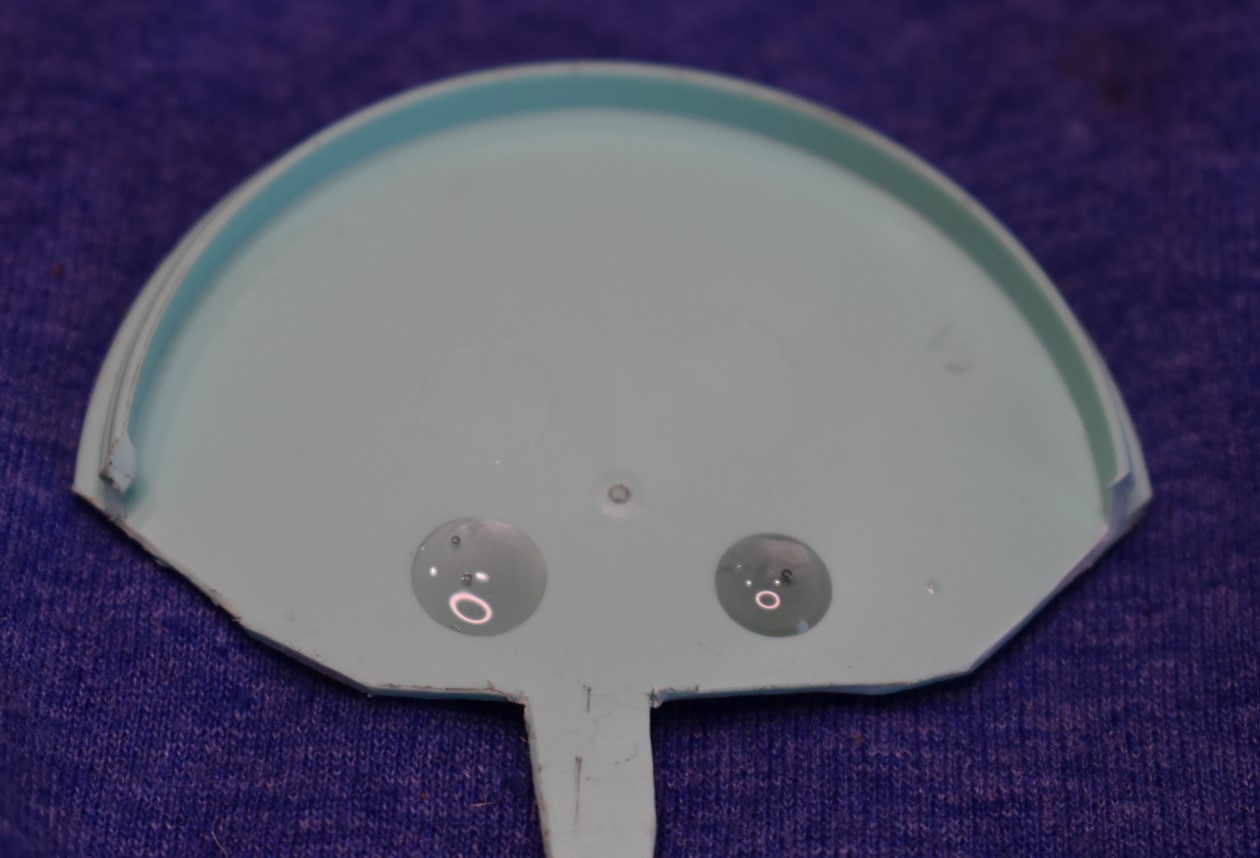
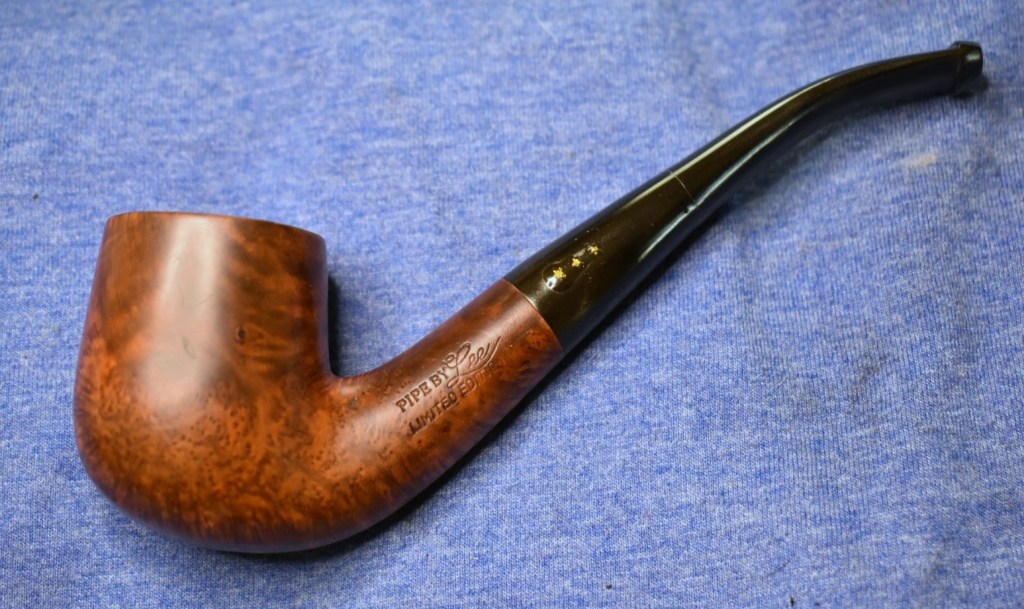
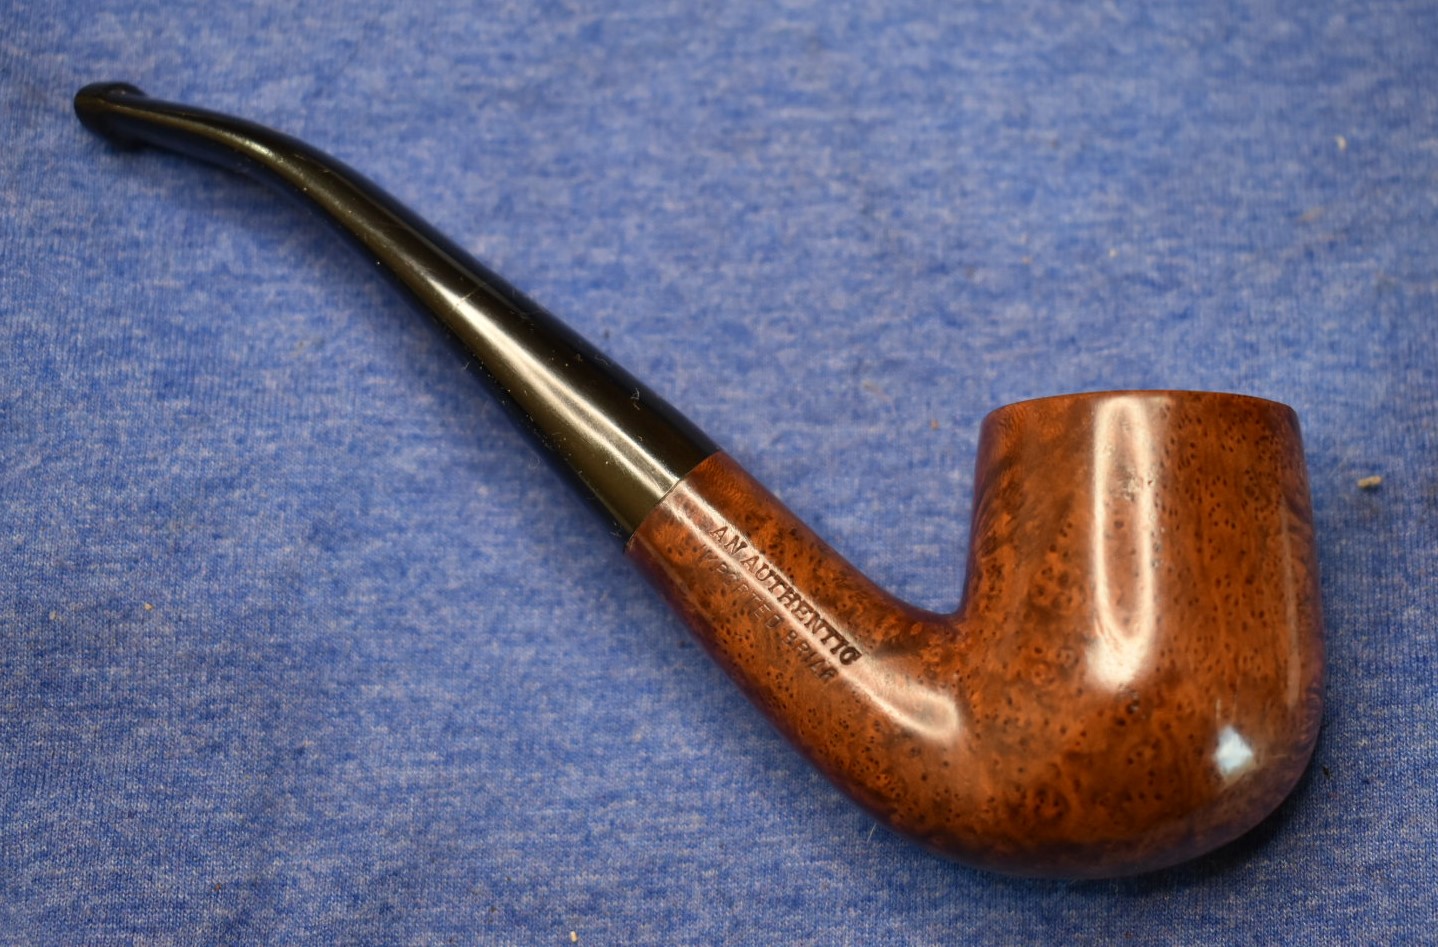
This restoration began with me thinking, “this should be an easy restore” and it was until the stem break. Overall, I am pleased with the restoration of this pipe. I am not happy with the bend of the stem but that is going to have to be acceptable. I hope that you have found my mistakes and the remedy for them helpful and/or entertaining. I thank you for reading the ramblings of an old pipe lover. And, ta-dah, the finished Pipe by Lee 3 three star bent billiard photos:


One response to “A Restoration of a Pipe by Lee Restoration”
[…] A Restoration of a Pipe by Lee Restoration […]
LikeLike