Written and photographed by John M. Young

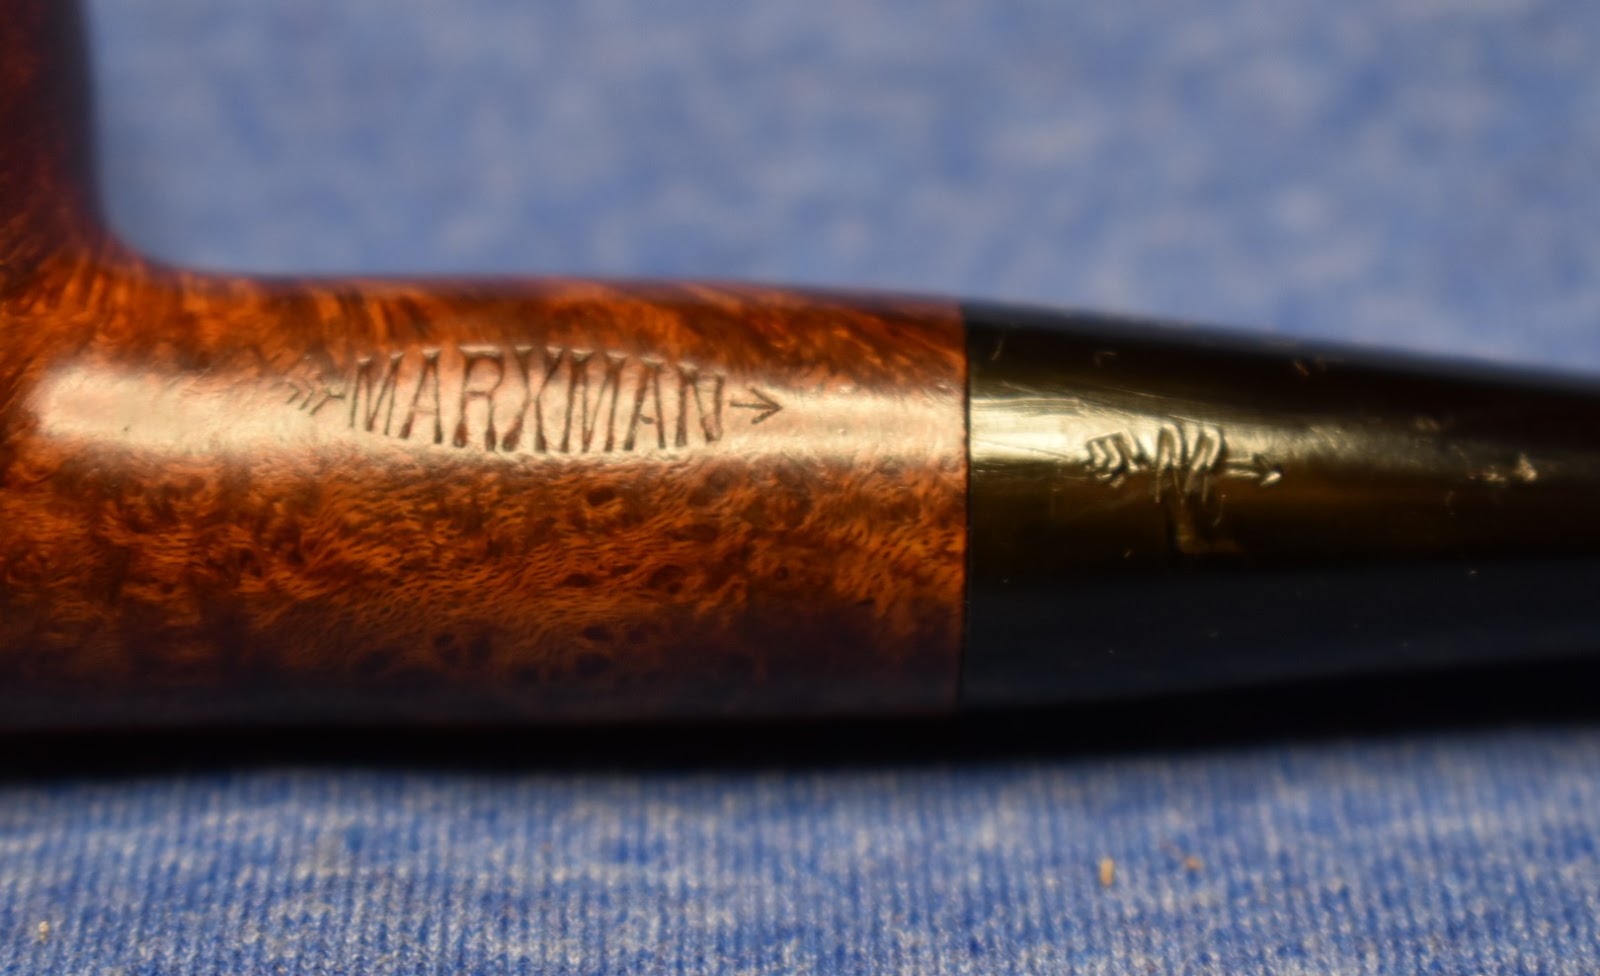
I remember when I first started down my pipe restoration path. I’d picked up an estate lot figuring that would be the best way to practice and hone my skills. Within the lot there was a dark dirty poorly grained small billiard pipe. The stamping said “MARXMAN”. It was quite nondescript. I immediately had an aversion to the name, as many of my generation might, Carl Marx was no hero of mine. I started researching Marxman pipes to find out more about this company which I hadn’t heard of. As I read, I became fascinated. Yes, many of the Marxman pipes were filled with fills, others so ugly that they were kind of cute, and there were the carved pipes of people (effigies that today would probably get you in trouble for being racist), animals and famous celebrities as well as the traditional pipe shapes. Indeed something for everyone.
The history of Robert (Bob) Marxman was also intriguing. To start a company at 29 years old and turn it into a successful business is impressive but to do that when the world is at war and the supply of your main material, briar, is cut off due to the war is even more impressive. Then to see the marketing; innovative, clever, good advertising all creating success. I saw parallels in Marxman’s business to things we do in restoration – like making the best with what you have. I also discovered that there is no book about the history of Marxman. There are great books that can be used to research Falcon pipes or Peterson pipes and web sites for Dr. Grabow and Custom-bilt pipes but alas, little to go on for Marxman. All we have for certain are the dates of a beginning in 1934 and a merger with Mastercraft in 1953. I guess that makes dating then easy. (https://pipedia.org/wiki/Marxman)
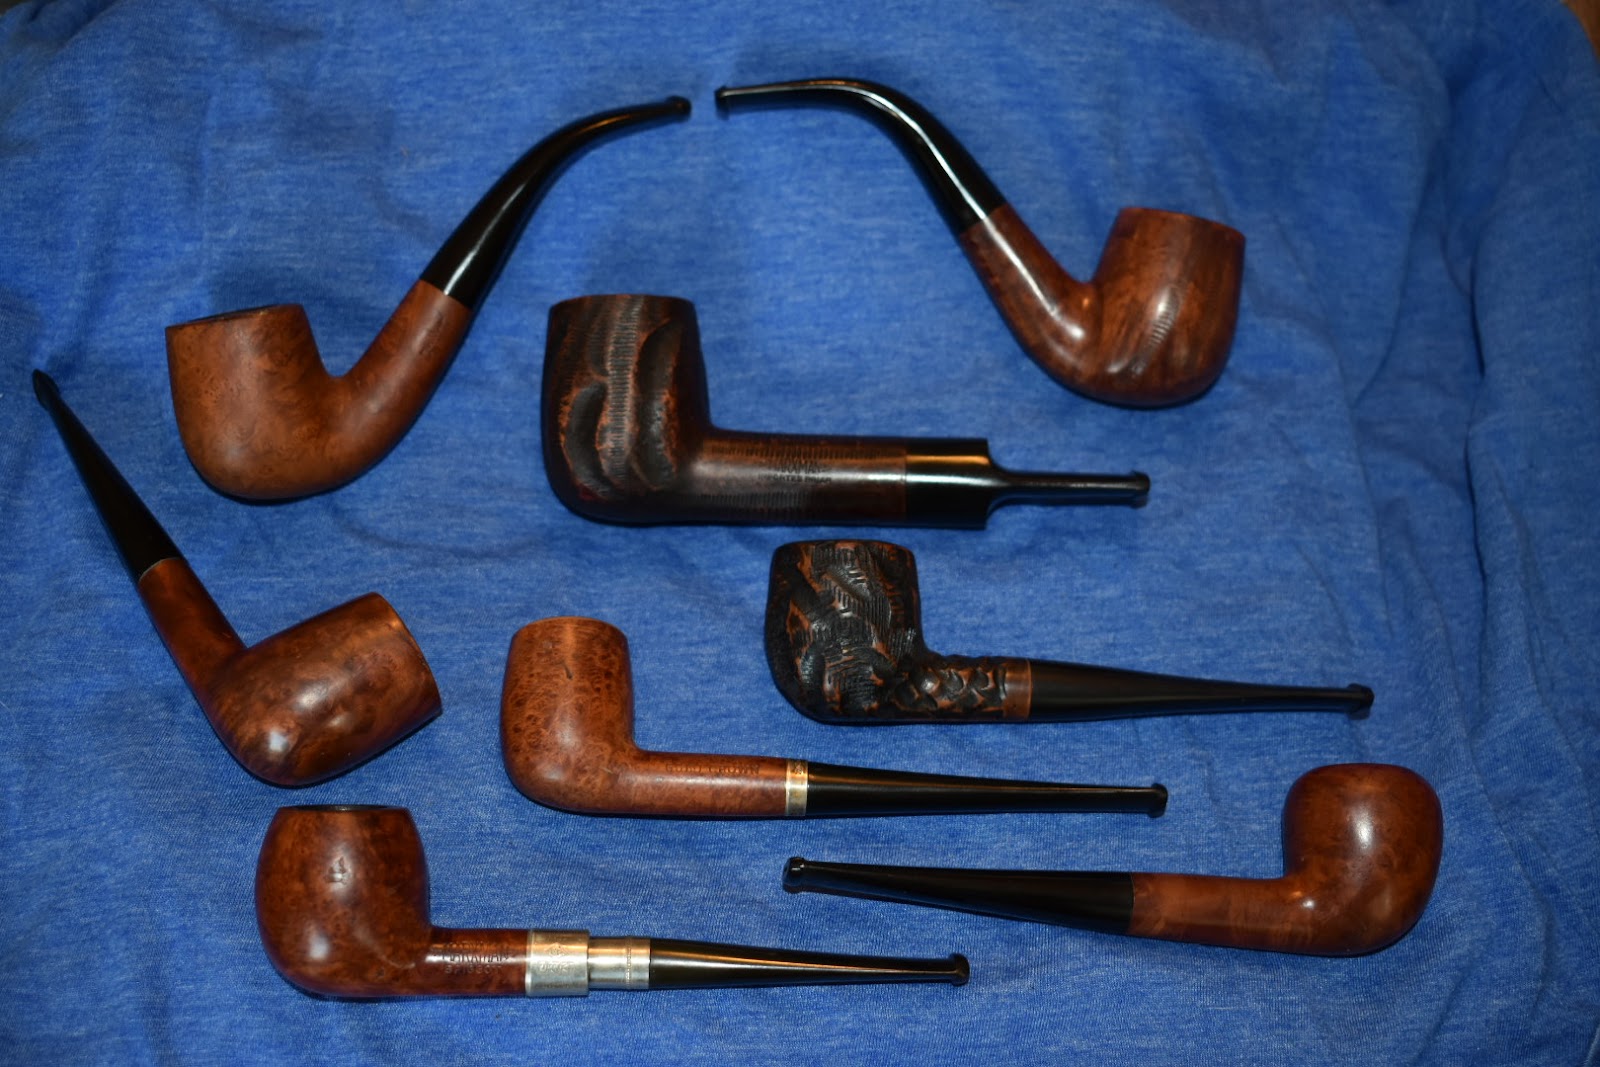
I have restored a number of Marxman pipes and find them fun and relatively inexpensive to practice with. At the same time some are my favorite pipes to smoke. The spigot and the chunky lovat, to the left, are great smoking pipes. The lovat is one that I would surely be ridiculed for if I tried entering her in a beauty contest.
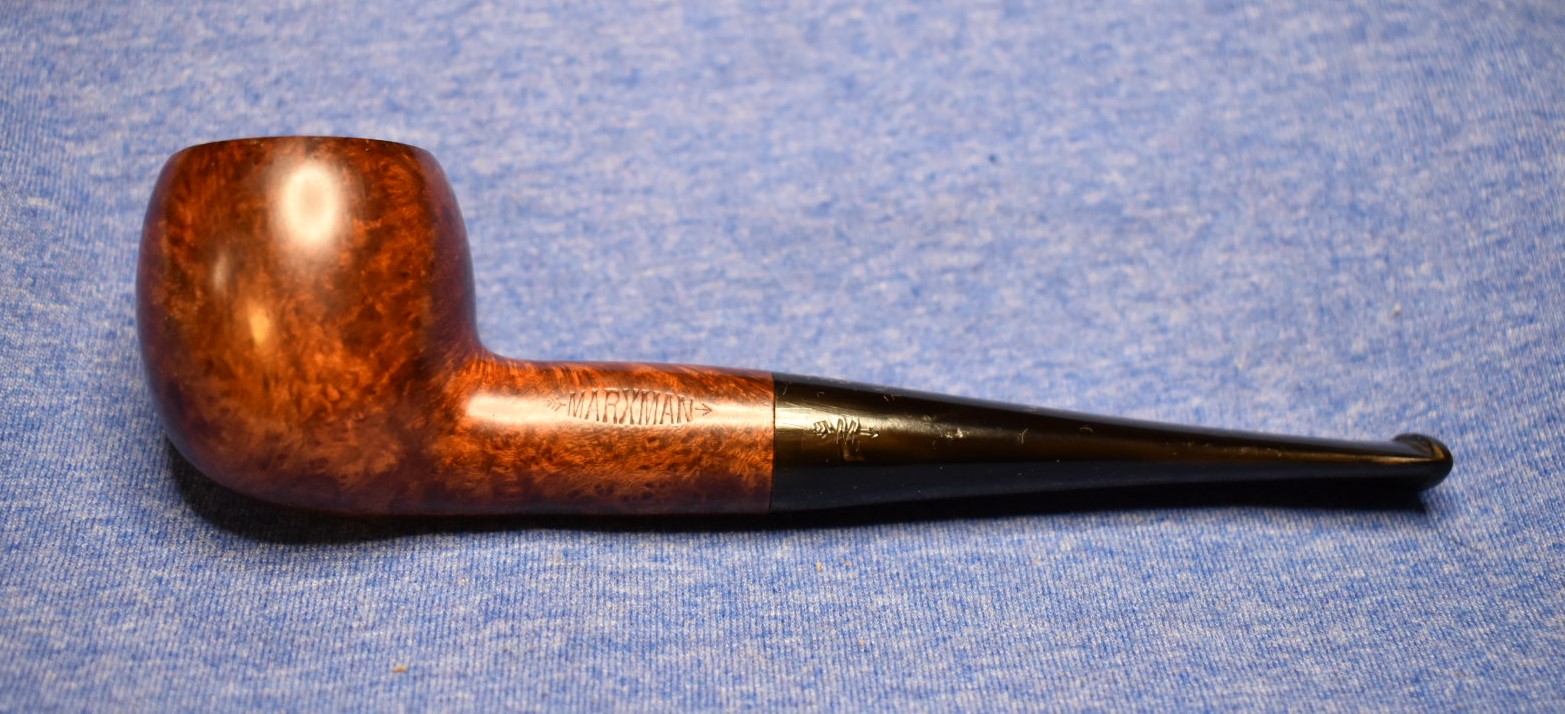
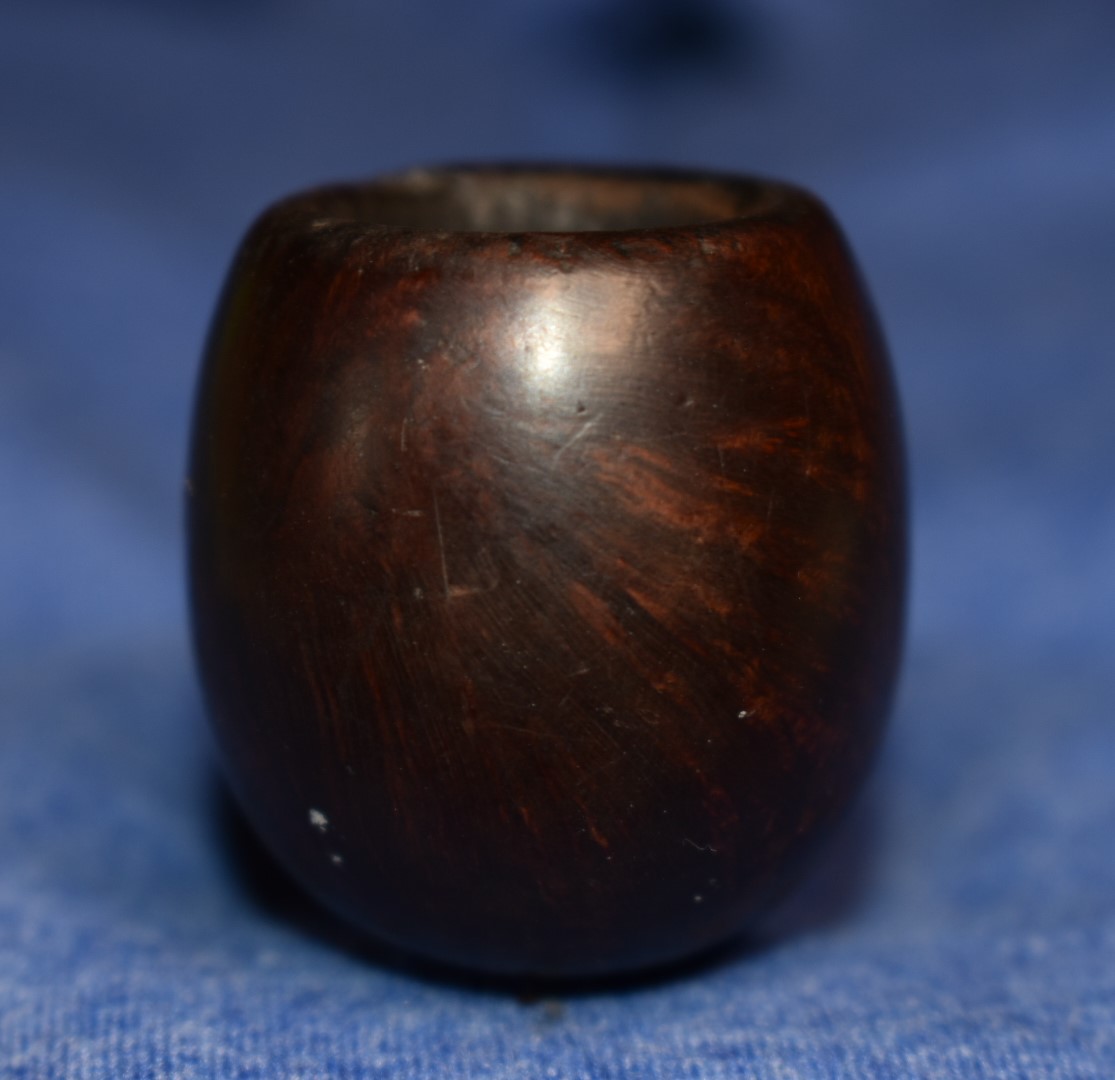
This brings us to the Marxman Regular Apple, the topic of this restoration and the photo at the top of the page. This little darling arrived as many Marxmans do – well used. That is a polite way of saying beat-up and filthy. She had a cake so thick that only a tiny bowl of tobacco could be smoked. How she avoided a cracked bowl is amazing. This cake was equally as thick as the briar walls of the tobacco chamber.

The bright lights used in these original photographs actually make her look better than the normal room lighting. I could see very little grain of any kind.


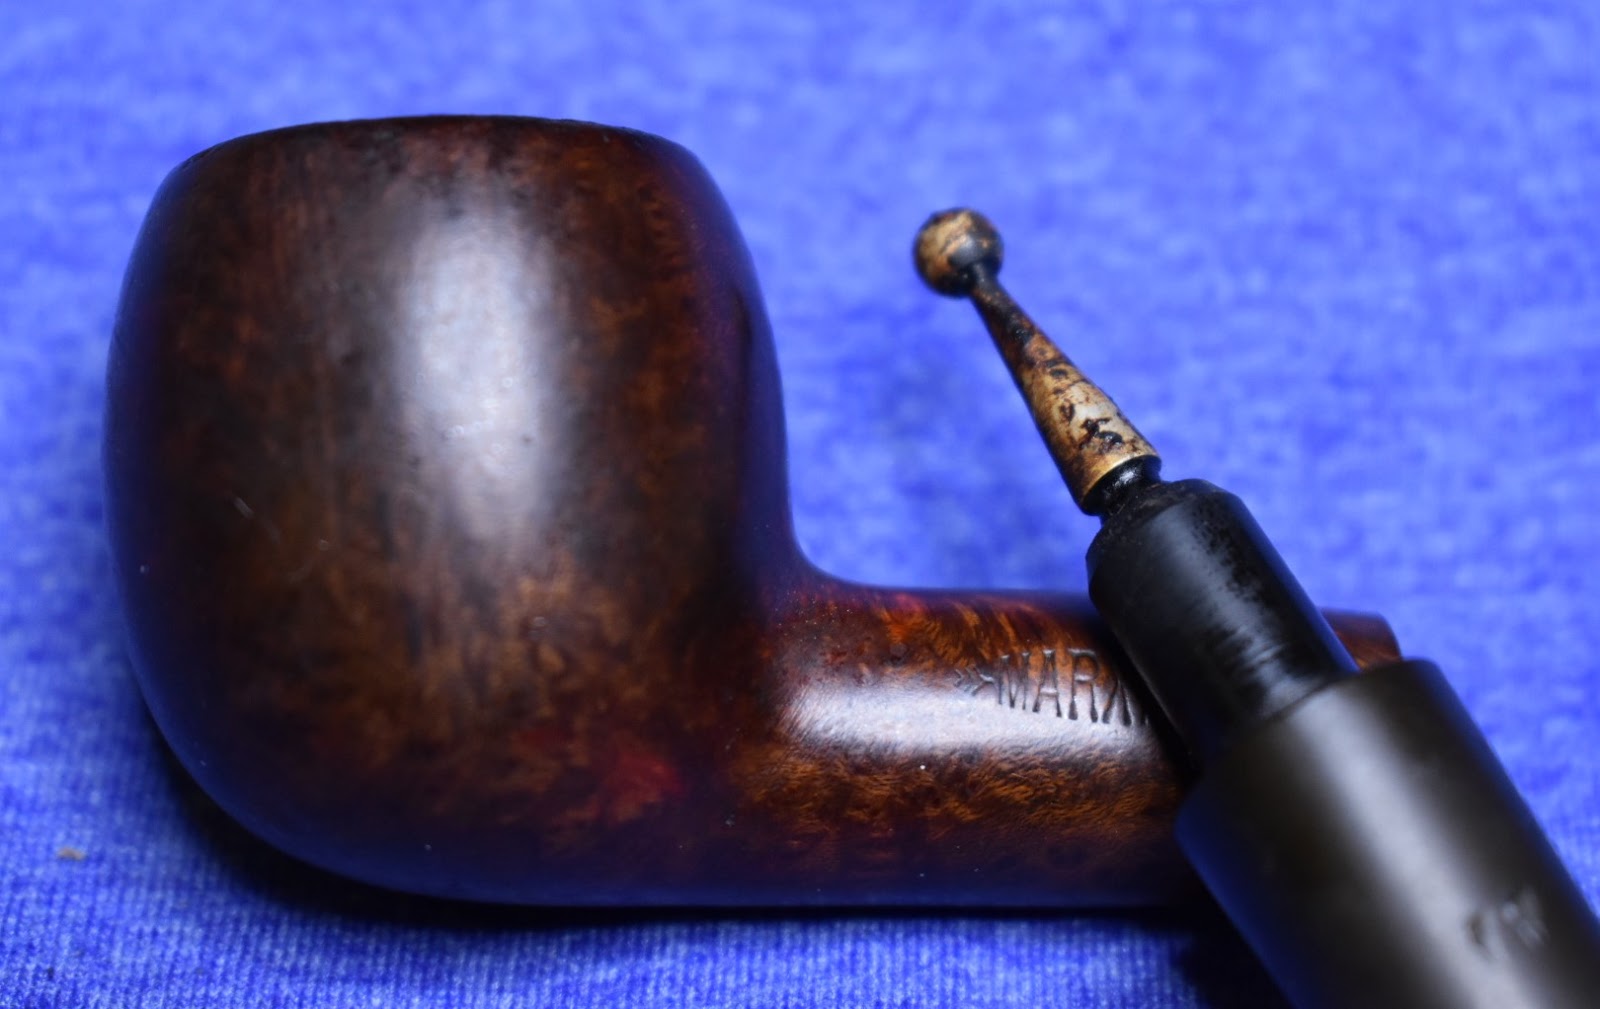
Then there was the condition of her stem – all I could think of was that a teenager with a channel-lock had heard there was a $20 bill in the shank and he was going to be the first to retrieve it.


Of course the internals were in a condition that is expected of a pipe in this state.

Other than those issues this should be fun, although fun to a restorer may not be universally accepted.

Normally I start with a thorough cleaning of the exterior of the stummel. This time I started with the reaming of the tobacco chamber. I was actually afraid that it might just burst like a balloon cracking into several pieces. Okay, slight exaggeration, there. I began with the PipNet and the Smoking pipes knife. I soon realized that I did not want to put that much pressure on the handle of my PipNet.
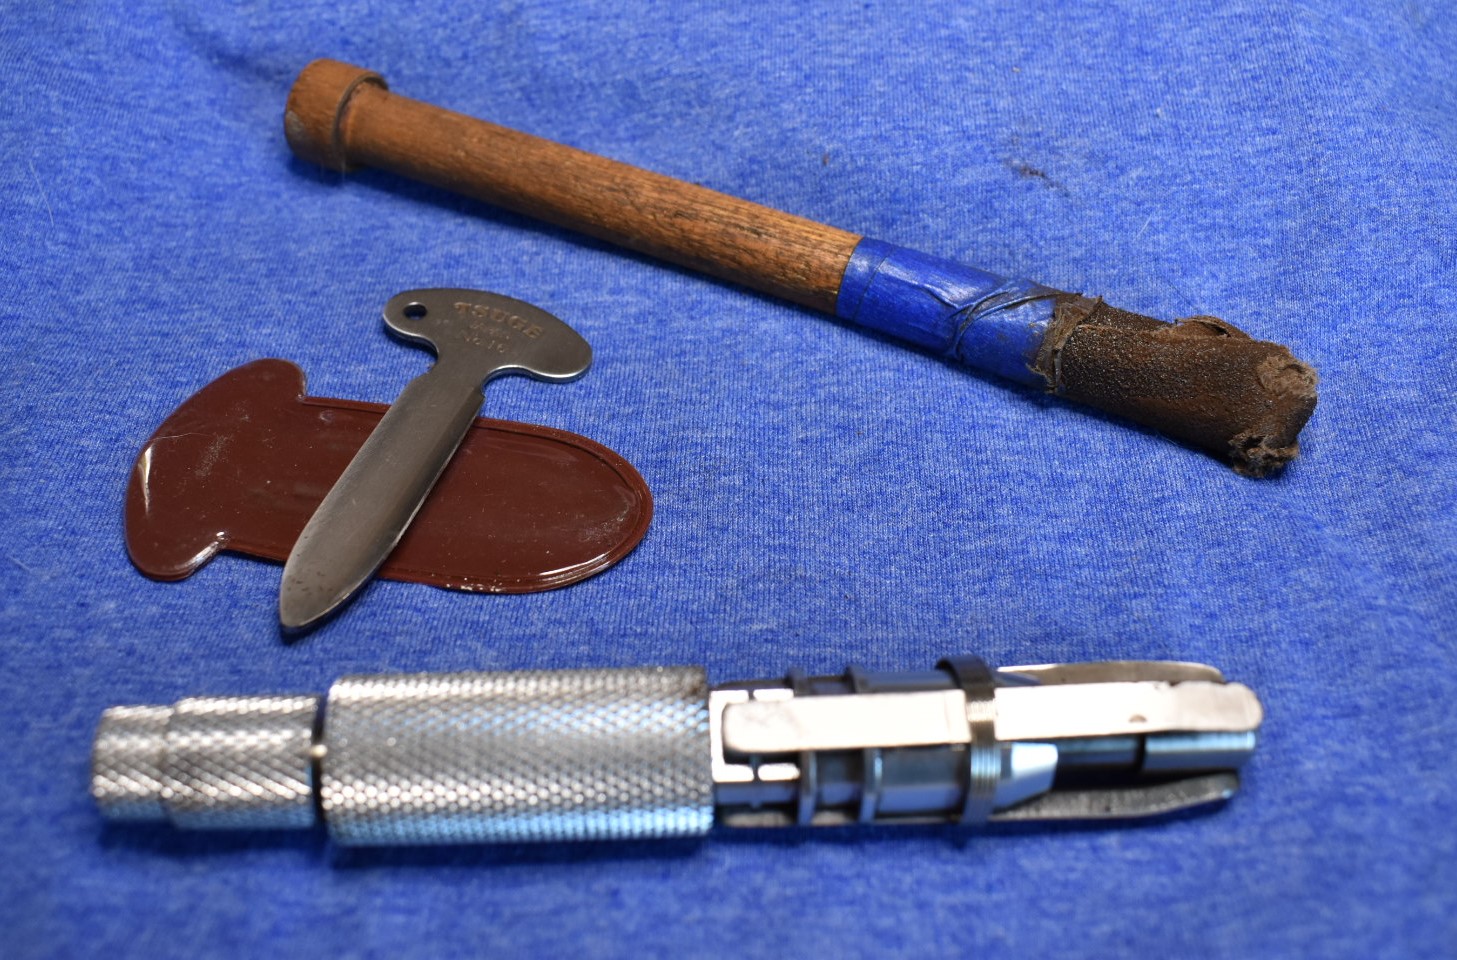
I got out the Tsuge reaming blade and the Scotte adjustable reamer. I started opening up the chamber one step at a time and finished with the PipNet. The aftermath of the reaming was a pile of carbon cake that if properly sequestered will aid with global carbon control. The chamber was finally sanded with 220 sandpaper on a wooden dowel. The chamber looked good with no signs of any damage from excessive heat.
With the chamber reamed I turned my attention to reaming out the shank and draft hole. I used the draft hole reamer from the Scotte tool to clear the airway. It felt rather “greasy”. I took this to mean that there was still a thick residue of tar and yuck in the shank. I tried scraping the airway with a dental pick without much success.
To the sink. I took the stummel to the sink to scrub the externals with Murphy Wood Cleaner and a medium stiff toothbrush. Given, my hands still had carbon on them from the reaming but, wow. The dirt and grime that came off the stummel with the soap was impressive. It was still impressive with the second application of Murphy’s. By the third time I removed the years of accumulated grime. Now for the shank. I started that with the nylon bore brush with Dawn dish soap. The lather produced was dark brown. This was rinsed with hot water. The bore brushing with additional Dawn and rinsing continued several cycles. Finally the lather was not brown. I was sure that the entire stummel would need to be dried overnight with all of that exposure to water.
I returned the stummel to the workbench and proceeded to wipe it down with a make-up pad soaked in 99% ethyl alcohol. The pad removed little else from the stummel, just picking up a very slight brown tint, probably a bit of dye from the wood. I poured a couple milliliters of alcohol into the chamber and sloshed it about and allowed it to fill the draft hole with my finger plugging the mortise end. The alcohol will draw much of the water out of the wood as it is very hydrophilic. I poured the remaining alcohol into a medicine cup and used a paper towel to dry the remaining alcohol from the bowl. I then used a small round needle file to feel for tar in the shank. The needle file came back with tar embedded in the teeth. Hmm, lets try a little technique I came up with – wrapping/rolling a piece of paper towel around the needle file, dip the tip in alcohol and scrub the shank. It works and it allows you to put more pressure on than you can with a cotton swab. The tip end will absorb the tars and can be unwrapped, flipped over, rerolled for a clean side. After doing this repeatedly I finally made progress cleaning the draft hole.


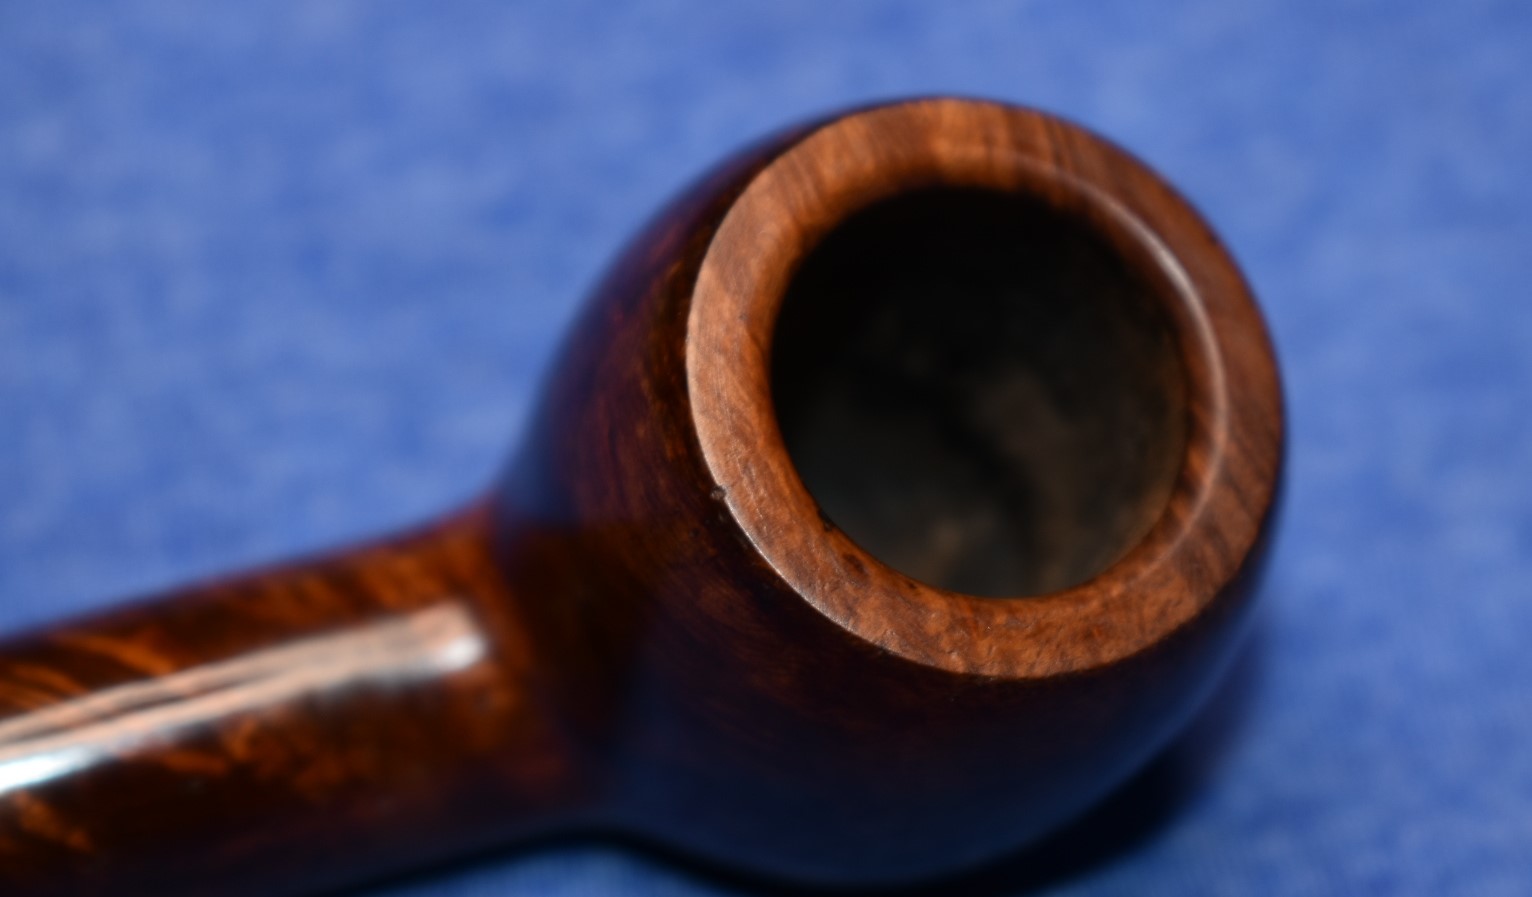
Here is what the Marxman Regular Apple looked like after the scrubbing:


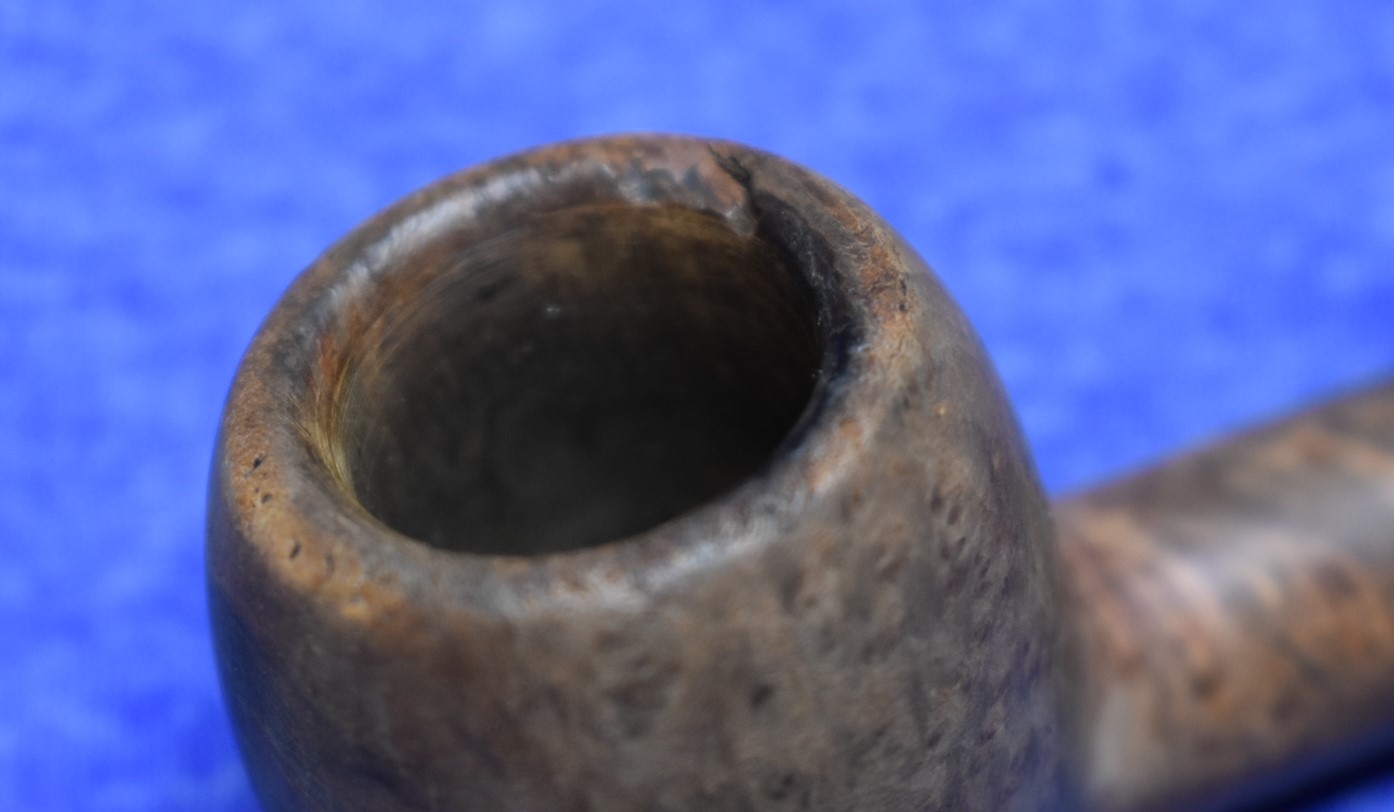
You can really see that there is some wood grain and some big dings and chips to the rim. To the topping table. This is actually just a new piece of 220 sandpaper laid flat on the counter. I sanded in a circular pattern until I had removed most of the dings. I rotated the stummel in my hand several times to keep the pressure even across the entire rim. There was still the chip. For that I sanded until the remaining chip could be removed by beveling the inside edge of the chamber using a wooden ball wrapped in a small piece of sandpaper. After the 220 sandpaper I repeat the process with 400 sandpaper.

The left photo is topped only while the lower photo is topped and beveled.
The sanding of the stummel was done starting with 400 wet dry sandpaper. I was careful of the stampings as to not remove any material from them. After the sandpaper the stummel was

wiped off with an alcohol soaked make-up pad. I then began using the micro-mesh pads. The most coarse pad I have is 1500. This pad was used with a couple drops of water on the pad. Between pads the stummel was wiped off with the alcohol dampened make-up pad. After the 1500 came the 1800, also with a bit of water. I continued up through the micro-mesh pads to 4000, wiping between each with the alcohol.

Once the stummel had been sanded and micro-meshed I gave it a coating of Restoration Balm and allowed it to marinade in the balm while I addressed the stem. I did not soak the stem in the Deoxidizing solution since I knew that it was going to be sanded extensively in order to remove the numerous dents and teeth marks from what appeared to be pliers. The cleaning of the stem began with the removal of the stinger. Stingers or “metal filters” are

kind of a misnomer as they hardly filter the smoke. They most likely allow a surface onto which water can condense out of the smoke and maybe some smoking particles will absorb into this water but, filter? They are usually press-fit into the stem. This one was quite stuck. I tried to soften the dried residue with alcohol and used a brass brush to clean it off. Eventually I wrapped the stinger in a piece of denim and pulled it out with a pair of pliers. I then dropped the stinger into a medicine cup with alcohol to soften the dried residue. Knowing how dirty the shank had been and not wanting to use hot water on the stem and risk discoloring it. I decided to use a technique with long churchwarden bristle pipe cleaners, a pipette with alcohol and a vice. You clamp one end of the pipe cleaner in the vice, thread the stem onto the

pipe cleaner, lightly moisten the pipe cleaner with alcohol (not dripping wet, just moist) then holding the free end of the pipe cleaner tight you vigorously move the stem along the full length of the long pipe cleaner. This can be repeated as many times as needed. After an alcohol soak the stinger cleaned easily and was re-inserted into the now cleaned stem.
I had to be careful not to sand the tenon end of the stem as I did not want to change the shape or size of the stem to make fitting with the shank unsightly. I used 180 sandpaper to roughly sand the problem areas. This rough sanding was smoothed and blended by lighter sanding with 220 followed by 400 sandpaper. This was a slow process and I was sure that the results would leave a stem that had waves along the surface where I had to remove so much material in order to erase the dents. Eventually I got to the point where I was happy with the look of the stem. I then proceeded to use the finer and finer grade micro-mesh pads. The stem was wiped down with Obsidian Oil between each of the different micro-mesh pads. When finished I could still see some of the dings from the abuse but overall I was pleased with the look of the finish.
With the stem in acceptable condition and the stummel well marinated, it was time to reassemble the renovated darling. I wiped the remaining Restoration Balm off the pipe and gave it a good rub with the inside of a cotton athletic sock. It always amazes me at how well the Restoration Balm breathes life back into a piece of dry briar. Truly amazing stuff. The pipe needed a few coats of carnauba wax applied via the buffer. After the buffer waxing I hand buffed the entire pipe with a microfiber polishing cloth to add that little extra shine.
If I were a professional restorer I would have been more inclined to strive for perfection. The only problem there is how perfect can a well used 80 year old pipe get? This one will most likely be either used by me as a work-in-the-yard/fishing pipe or it will be gifted to someone and I was quite pleased at the improvement. Either way it has returned to the task that it was originally made for: To be used to smoke tobacco and look darn good doing it. I hope that you can use some of the techniques that you see here in your own work, were slightly entertained or both. Thank you for reading the ramblings of an old pipe lover.
PS: Here are those books/websites I referred to earlier:
Back From The Ashes: Uncovering the Lost History of G. L. Hunt and the Falcon Pipe,
by Worth, K. A.
Available at: https://www.amazon.com/Back-Ashes-Uncovering-History-Falcon-ebook/dp/B006VOOFNC/ref=sr_1_1?keywords=falcon+pipe+history&qid=1699996641&sr=8-1 ($2.99 digital version on Amazon)
The Peterson Pipe: The Story of Kapp & Peterson,
by Mark Irwin and Gary Malmburg
Available at: https://www.smokingpipes.com/accessories/books/moreinfo.cfm?product_id=471478 (Still available from Smokingpipes.com, though not $2.99 it is a remarkable book)
Review of: THE CUSTOM-BILT PIPE STORY, by William E. Unger, Jr.,Ph.D
https://pipedia.org/wiki/Custom-Bilt
The Pipes of Sparta: Dr. Grabow, by Leigh Ann Henion https://www.ourstate.com/the-pipes-of-sparta-dr-grabow-tobacco-pipes-north-carolina/
Below are some photos of the finished Marxman Regular Apple.