Written and photographed by John M. Young
This little Wally Frank came to me via an eBay auction recently. I feel a strange attraction to the oddities and this one is a bit odd. Firstly, the oval shape. Secondly, there is the wood itself, definitely not briar. Thirdly, there is the stem, oddly rounded. The second and the third “oddities” indicate the age of the pipe. I am going out on a speculative limb here and say that this old girl is from the World War II years.
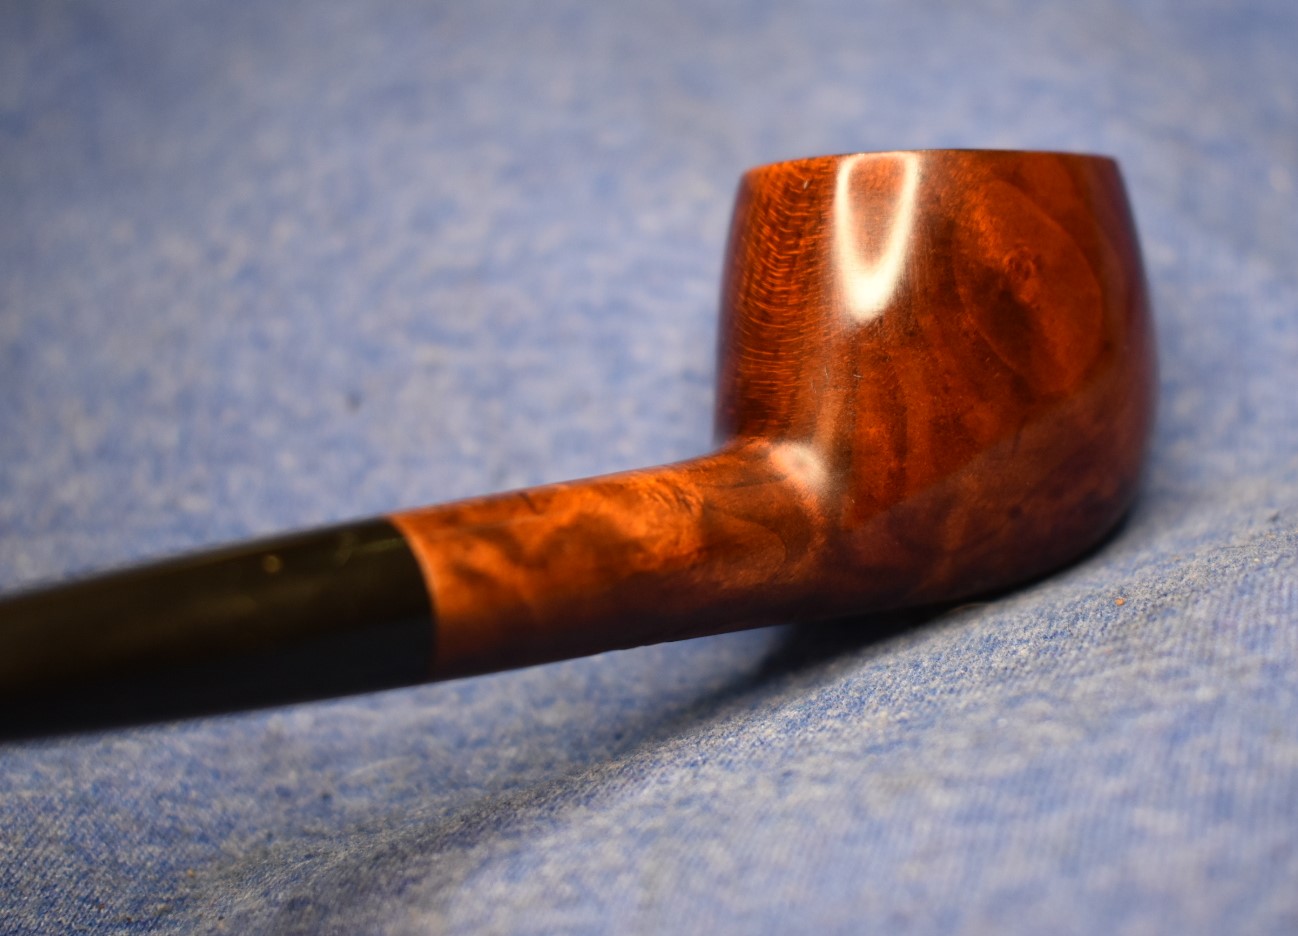
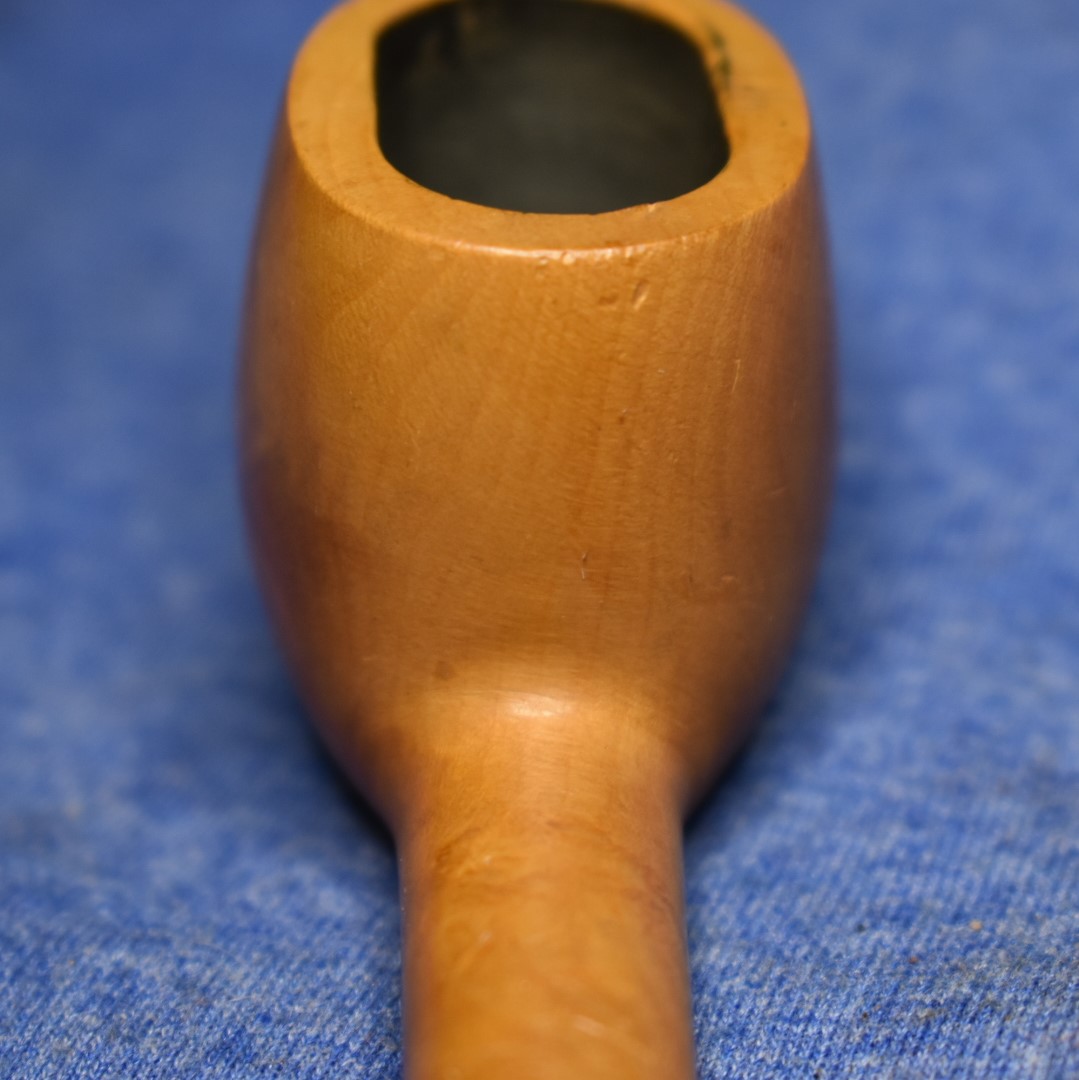
Here is what the Wally Frank Oval looked like upon arrival:


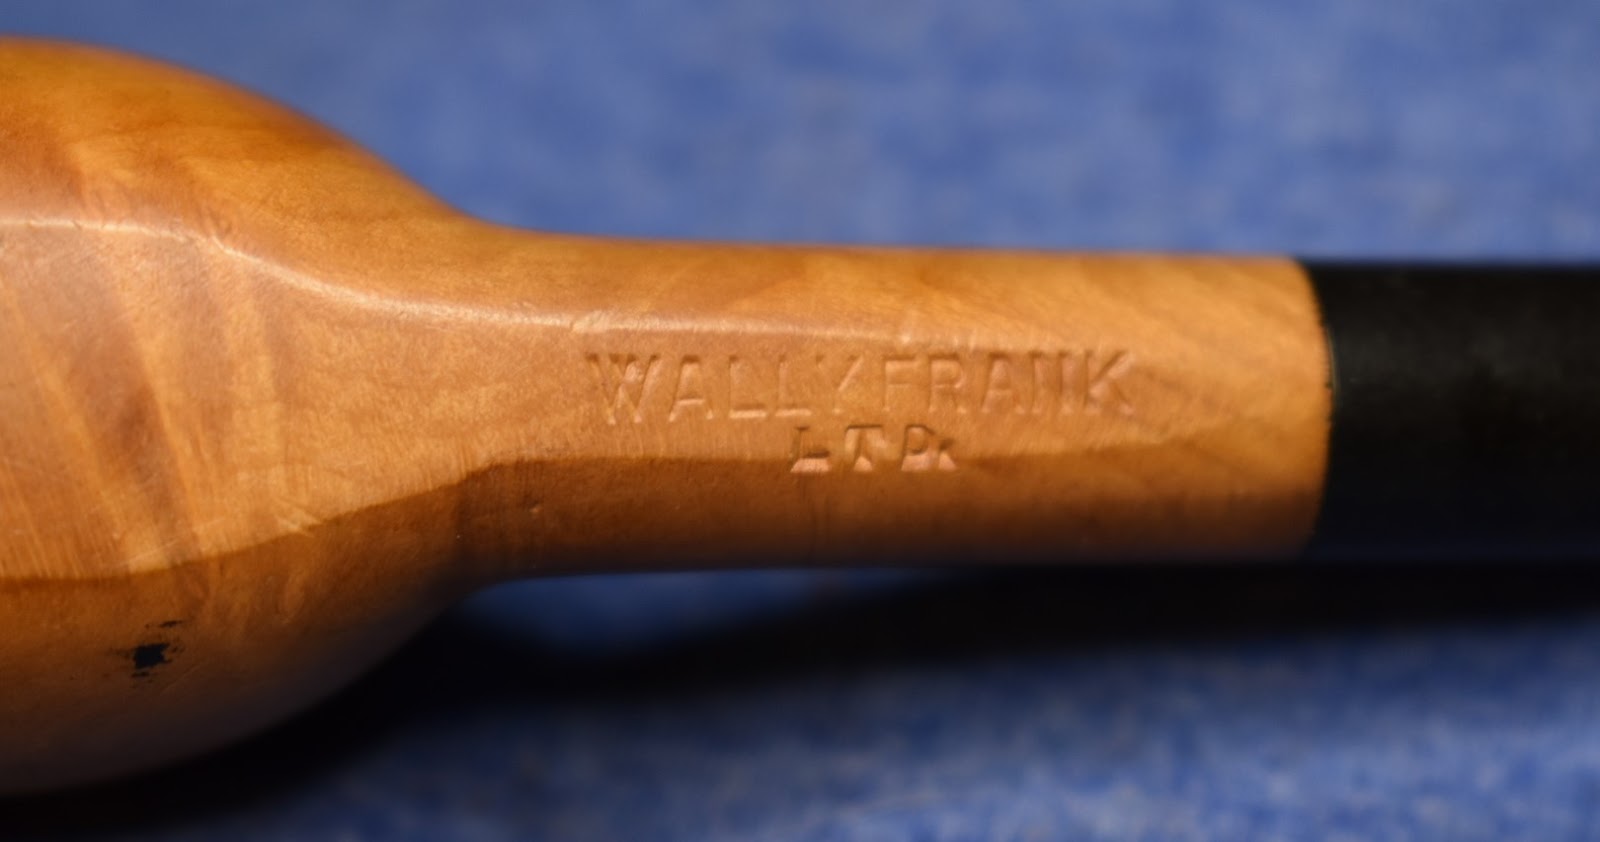


Now let me address the points made in the introduction. Wally Frank was a tobacconist who started his career in the 1930s. I will use pipedia.org’s first paragraph to set the stage for the company,
“Wally Frank, Ltd. was one of America’s oldest and most respected names in pipes and tobaccos, beginning in the early 1930’s. Wally Frank operated a chain of tobacco stores in New York City (the flagship store was in Lexington Avenue) and had a vast catalog business for pipes and pipe tobaccos. Their numerous private-label pipes were made by many makers, including Charatan, Sasieni, Weber, and many others. Wally Frank, Ltd. also owned the Pioneer brand of meerschaum pipes, made from both Turkish and African meerschaum. In addition to importing pipes, he had many pipes made in his own name and also employed pipemakers like Peter Stokkebye, Svend Bang, and Ed Burak (who later became the owner of Connoisseur). As a result, each Wally Frank pipe must be individually evaluated on its own merit.” (Wally Frank – Pipedia)
I found a very interesting “Wally Frank story” from 1992. While the piece has no annotations and a few points in the article appear to be creatively written it does provide a very fun read of the history of the company. (A&MG_V4_I1.pdf (pipedia.org)). This is not the first Wally Frank pipe that I have blogged about. If you are interested in the previous blog, here is the link – https://wordpress.com/post/scimansays1787.wordpress.com/735.
I called this shape an Oval as I transferred and labeled the photos. There is no shape chart for Wally Frink pipes as Frank was not so much a manufacturer. He was a tobacconist who bought, imported and sold pipes. I correct the name Oval to Opera. The following describes the Opera.
Opera

Castello: ‘Castello’ Opera
The Opera is a pipe shape that, in profile, often resembles an Apple, but the sides have been compressed for a more slender overall width, creating an oblong chamber — though some renditions feature a standard circular chamber. The shape was designed for formal occasions to fit comfortably in the breast pocket of a jacket without disrupting the suit’s lines.
With the shape of the pipe established I will turn to the wood of this Opera. It does not appear to be Mediterranean briar. The pipe is natural or unstained and has the characteristics of Mountain Laurel. Mountain Laurel is a species, Kalmia latifolia, is in the same family as our beloved briar yet from North America. Steve Laug, of Rebornpipe.com, did a wonderful blog about alternate woods used in pipe making. I will link his blog here for those interested in the history of the plant in the Second World War.
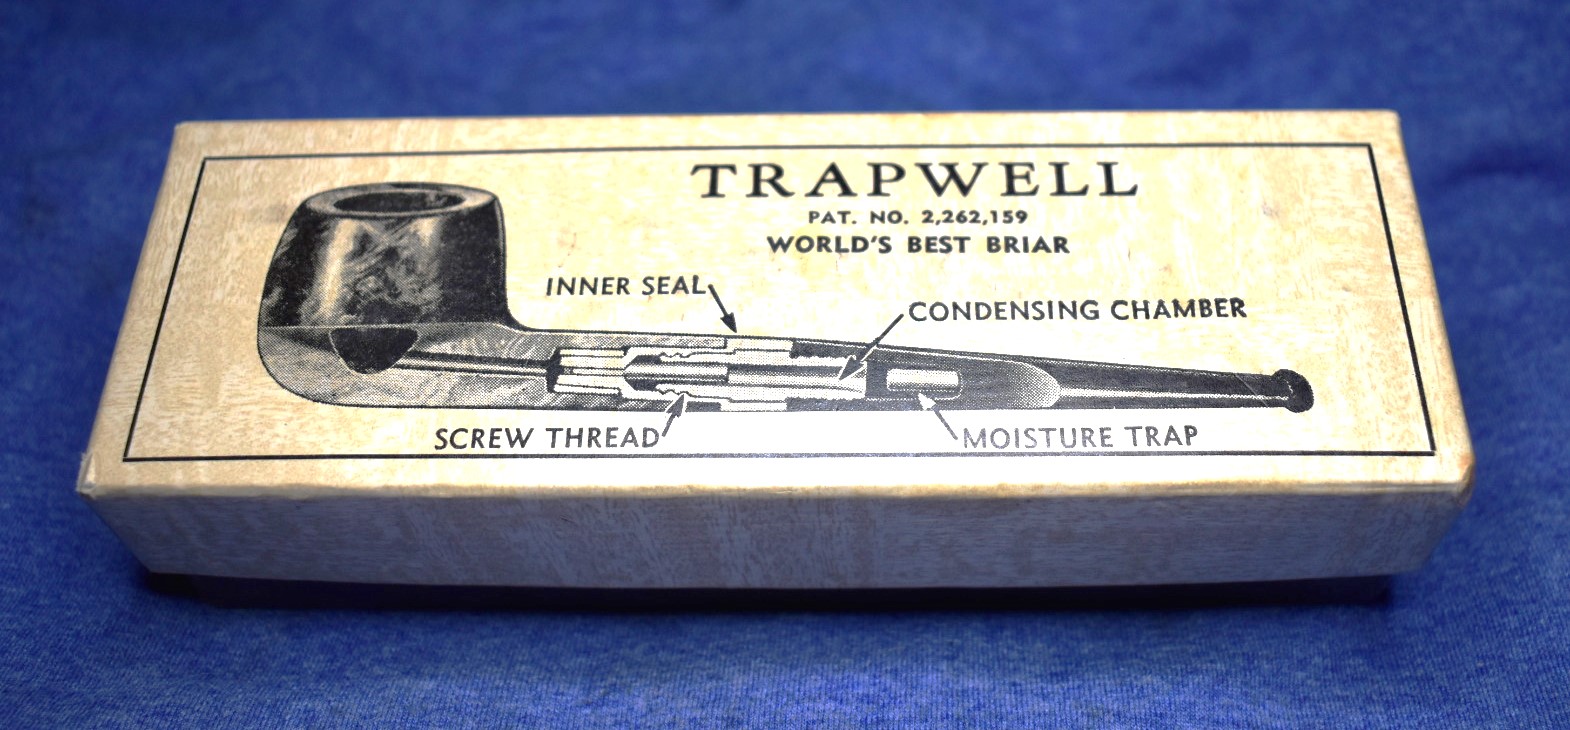
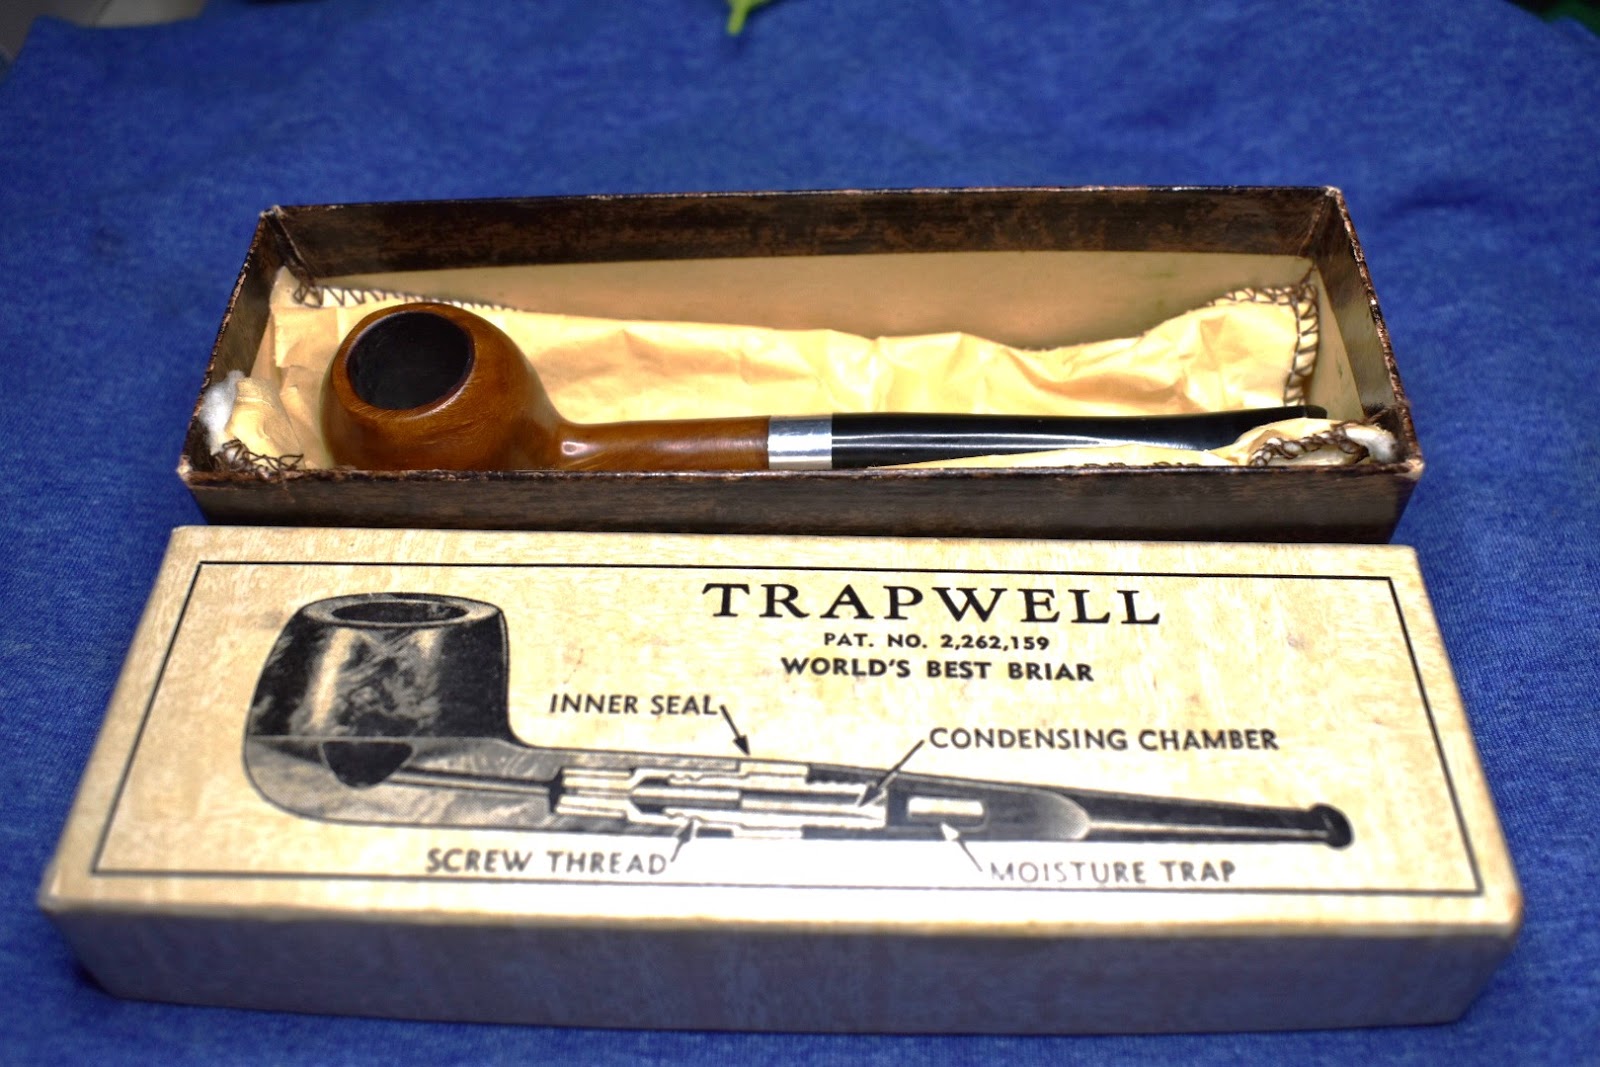
I have a nice example of a Mountain Laurel pipe. It is stamped as “World’s Best Briar” which was Trapwell’s marketing ploy used during the war years. Here are photos of the Trapwell:


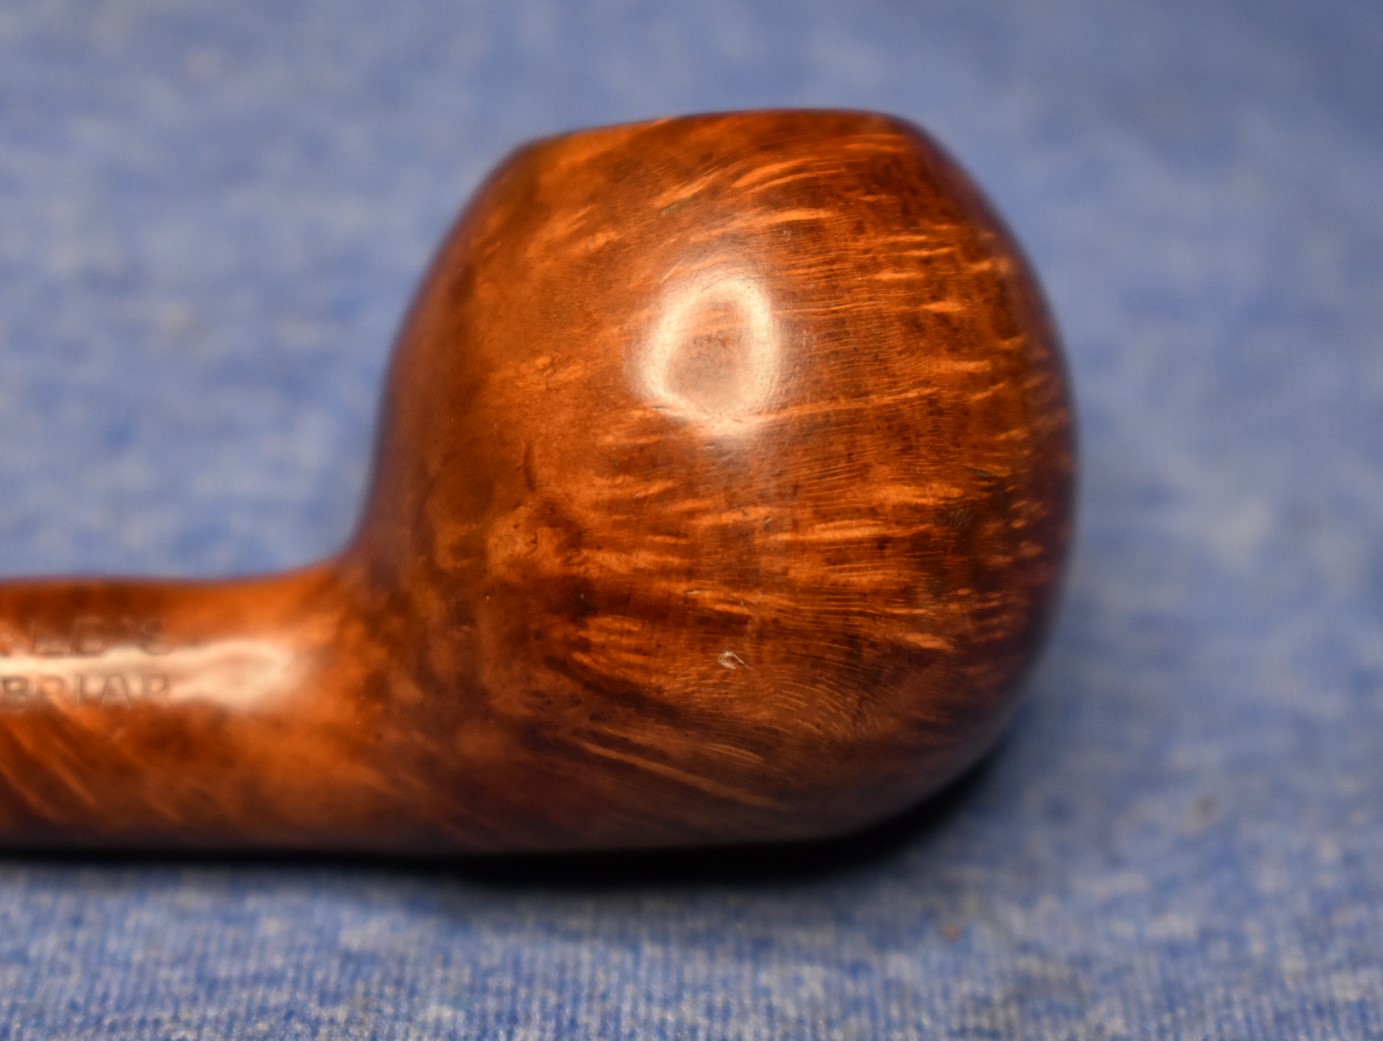
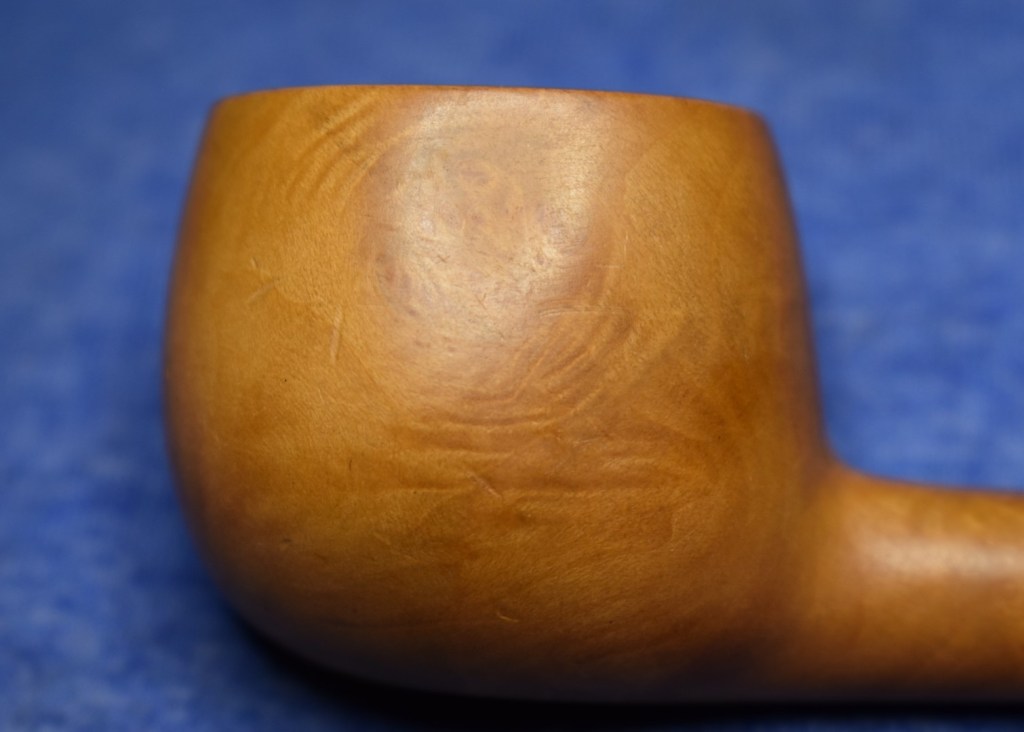
Notice the absence of bird’s eyes that are common in Mediterranean briar.
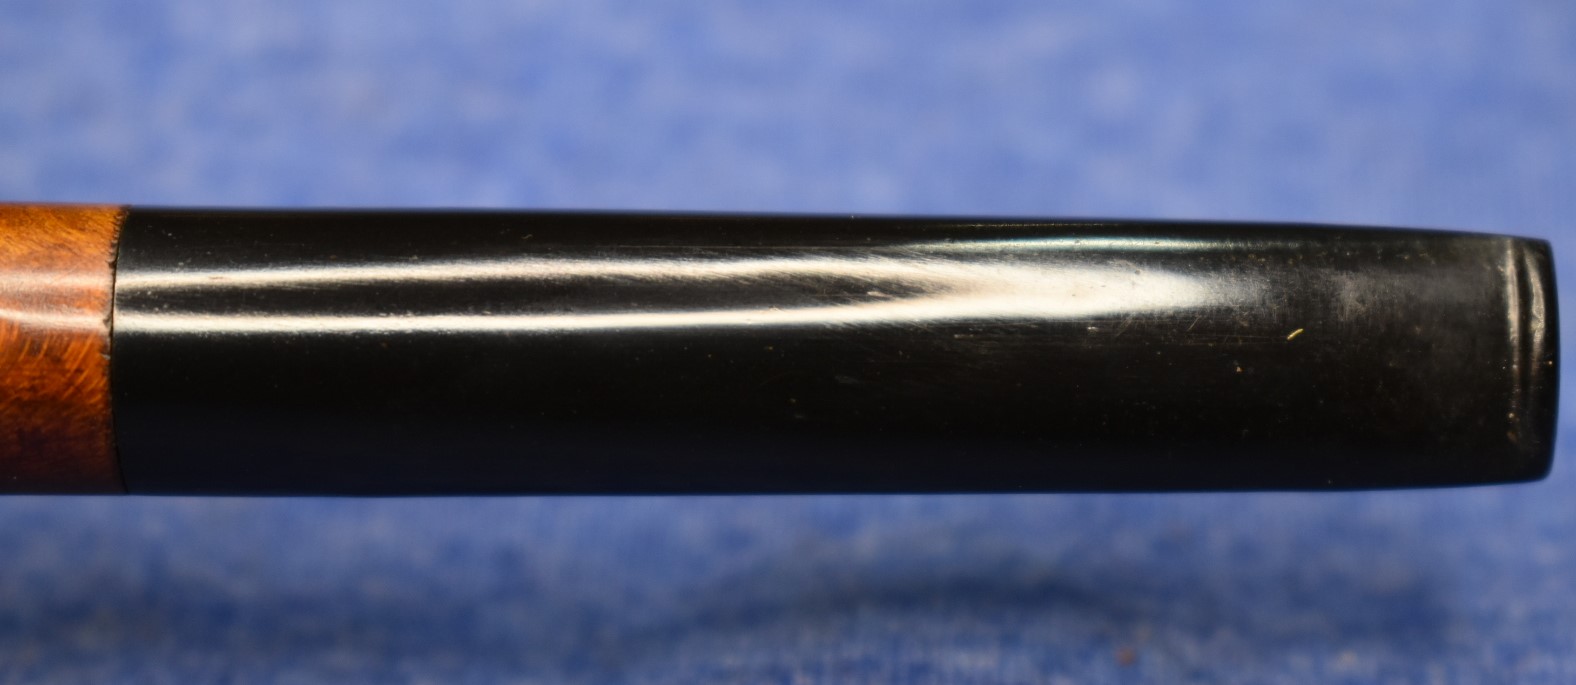
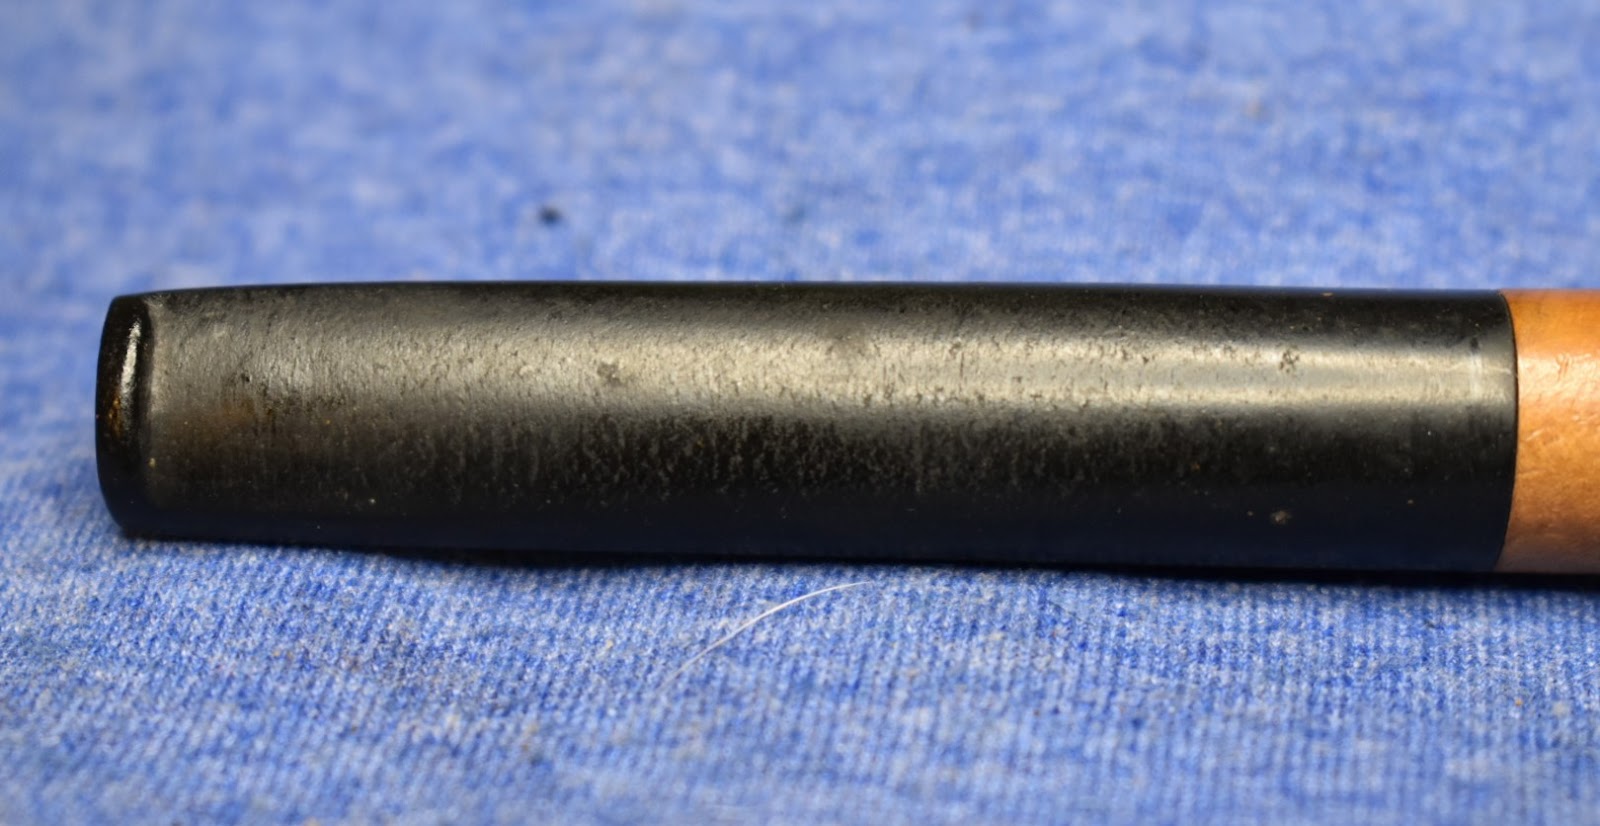
Lastly I referred to the stem as being different from modern pipes. The shape and the material are not like today’s stems. There are pieces or bits of metal in the rubber. This belies the fact that during WWII a great deal of rubber was going to the war effort. Here is a quote indicative of the times, “Likewise, vulcanite for stems was either rationed or forbidden, so that many, if not most of the pipes produced during the war were equipped with horn stems (horn is a very comfortable material, but is easily cracked).” (WWII Phase – Pipedia). Now, that quote was from England regarding Dunhill’s

production. The United States also had rationing and supply issues as well. I believe that the bits of metal in the stem were from recycled tires being used for other rubber products, in this case a pipe stem.
So here we have what I think is a 1940-1950 Wally Frank Opera made from North American mountain Laurel and recycled rubber. During the early sanding of this pipe I emailed Steve Laug about dyeing the wood and expressed my concerns, “I feel that might be near sacreligious.” In the end I did dye the pipe as you will read, below, and it improved the appearance significantly.
Normally when restoring a pipe I will begin with the tobacco chamber. In the case of this Opera the chamber had never been fired. Step one – easy mode. After the chamber I will move on to either a Murphy’s Oil Soap scrub or cleaning the airway in the shank. Step two and three – easy mode. After the scrub the pipe would normally return to the workbench for the wipe
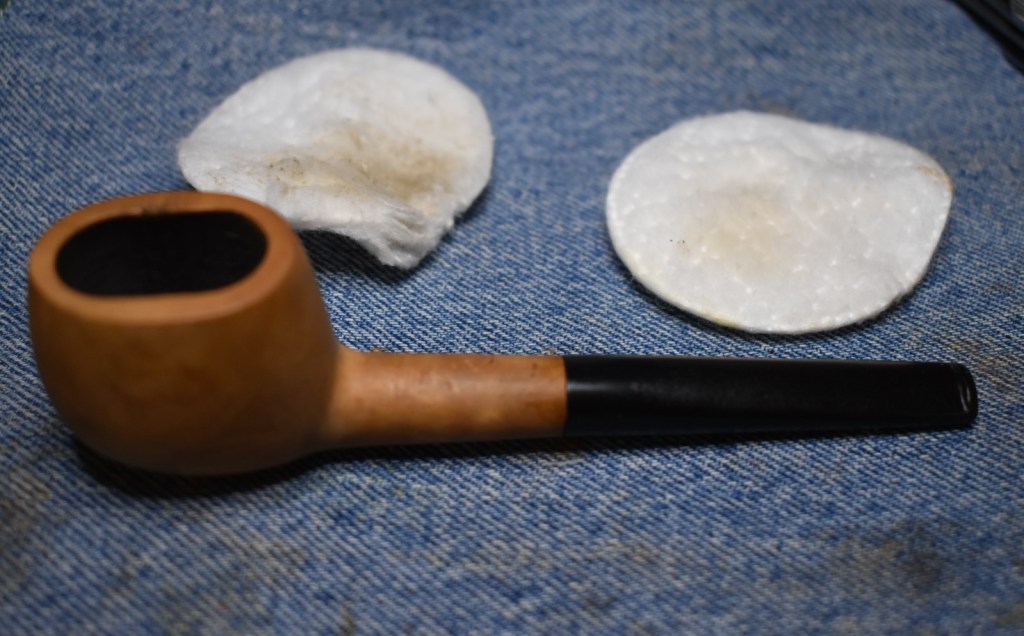
down with an alcohol wetted make-up pad. I did this and very little color was present on the pad. So I repeated it with a pad moistened with acetone. The alcohol is on the left pad, acetone on the right. Neither solvent removed any stain, indicating that this was indeed an unstained piece of wood. The alcohol pad probably removed years of dust and maybe some surface wax applied at the factory.
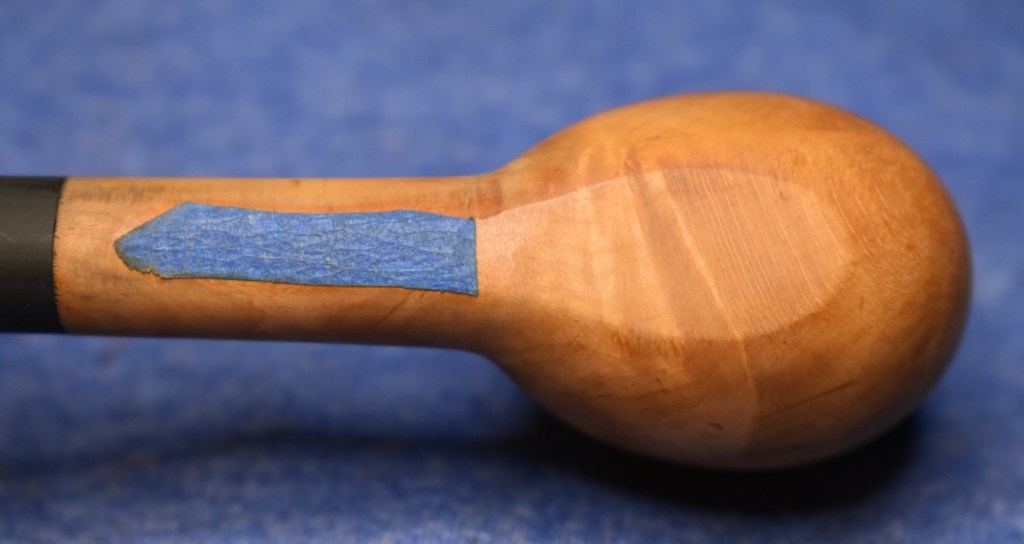
Next, I started sanding the dents and ding this stummel had received over the years. I noticed a tiny hairline crack at the rim. The crack did not appear to
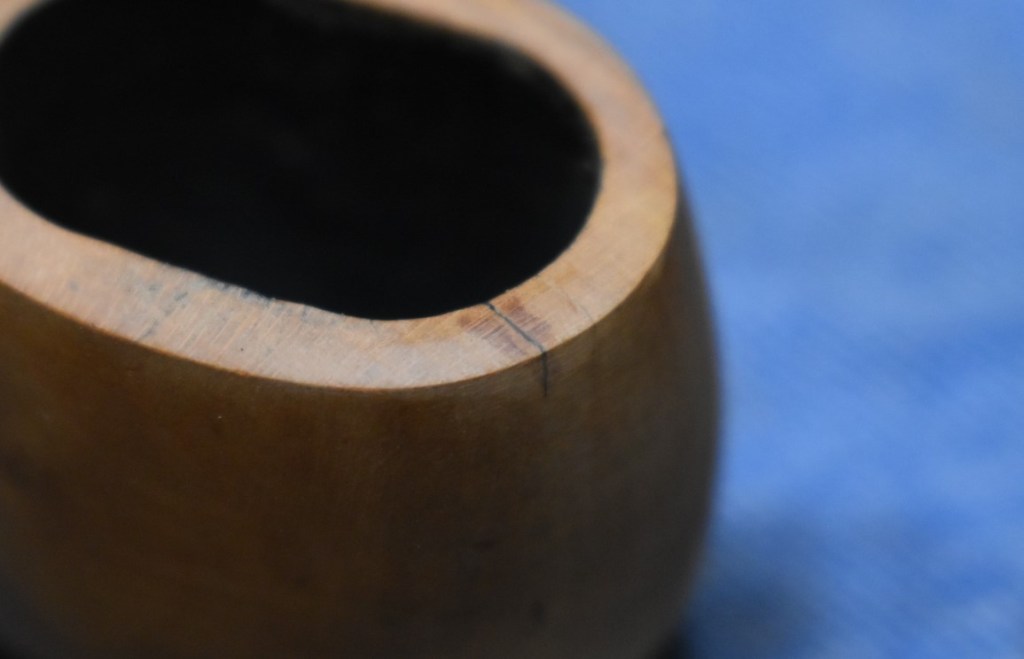
advance more that a couple of mm. I thought it best to use a drop of cyanoacrylate (CA, or super glue) to reinforce the area. Other dents were removed with 400 sandpaper. There was one other dent that was too deep to sand and one additional pit. Both were filled with CA and wood dust provided from sanding.
I attached the stem to the stummel to allow sanding them together. Before starting I taped the stamp with painters tape to protect the stamp from sanding. I started sanding around the button with 400 wet dry sandpaper. It would look good, I’d wipe it off with a clean paper towel and then work a drop of Obsidian Oil onto the surface. The stem appeared to absorb the oil. By the time I had tried to wipe off the excess oil the rubber would look black but nearly dry. The strangest part was that all of the sanding seemed to be in vain. The stem still appeared to have a rough surface with tiny cracks seeming to run perpendicular to the length of the stem.


I am pretty sure if I had this on a t-shirt which said “Polished, WTF?”. I would sell out at a pipe restoration conference.
I continued with the stummel and the micro-mesh pads 1500-3600. Between each pad, I would wipe the stummel with an alcohol dampened make-up removal pad. Then proceed to the next pad. Needing a break from micro-meshing I and wondering how to address the stem issue moved on to coloring.
I decided that the stummel needed some color. I did not want to go too dark and settled with Fiebing’s Light Brown Leather Dye. One of the tips Steve Laug gave me was to heat the stummel prior to staining. The remaining dye gear is shown in the photo. A clean pipe cleaner was used as the applicator
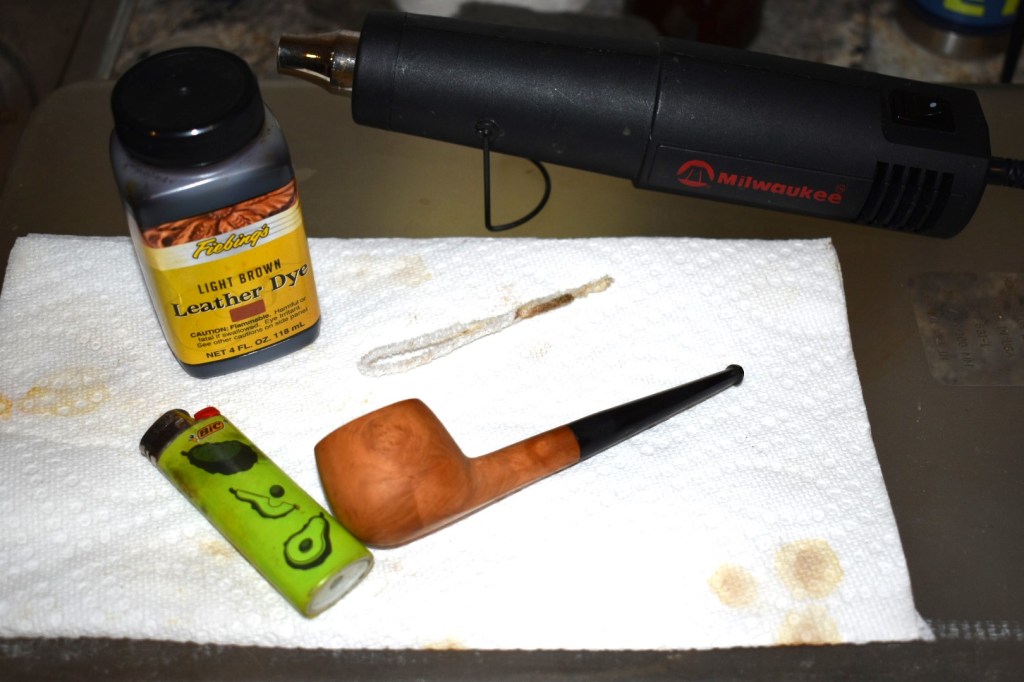
and the lighter to flame the dye setting it into the wood. I first heated the stummel with the heat gun until it was too hot to hold the wood. I applied several coats of the dye to the stummel. With the first two the alcohol of the dye evaporated very quickly the third coat did allow me to flame the stummel with the lighter. I was worried that I had gone far too dark

with the stain. I allowed the stain to dry for 2 hours. I used an alcohol wetted make-up pad to remove excess dried dye from the stummel. I repeated this two more times. I then started to micromesh the stummel with the 2400 micromesh pad. The pad would quickly fill with dyed wood dust and was cleaned from the pad with a toothbrush dipped in alcohol. I removed the most heavily dyed wood from the surface revealing a slight contrast stained stummel. It was a great improvement over the original very blonde/bland grain of the natural wood.


I continued through the micro-mesh pad series from 4000-12000. Again , between each pad I would wipe the stummel with an alcohol dampened make-up removal pad.
“What to do with that stem?” kept running through my mind. I thought I would try an experiment on the bottom of the stem. I scrubbed the surface clean of any oil with an alcohol wetted pad. I then used a paintbrush to paint Clear Thin CA onto the surface. This was allowed to set and cure. I then repeated with a second coat to smooth the depressions in the first coat. The brush idea was not a good one as the brush gave a puff of magic smoke and set up within seconds of the first coat. After the CA had hardened, I used 400 sandpaper to smooth the CA. This was wiped with a dry paper towel. I then worked through the micro-mesh series. Between each pad I wiped with an alcohol dampened pad. Here are a couple of photos of the result. Much better than the polished version but I could still see the tiny fractures in the rubber. You can also see two of the small metal pieces in the rubber, Let’s just call them glitter.


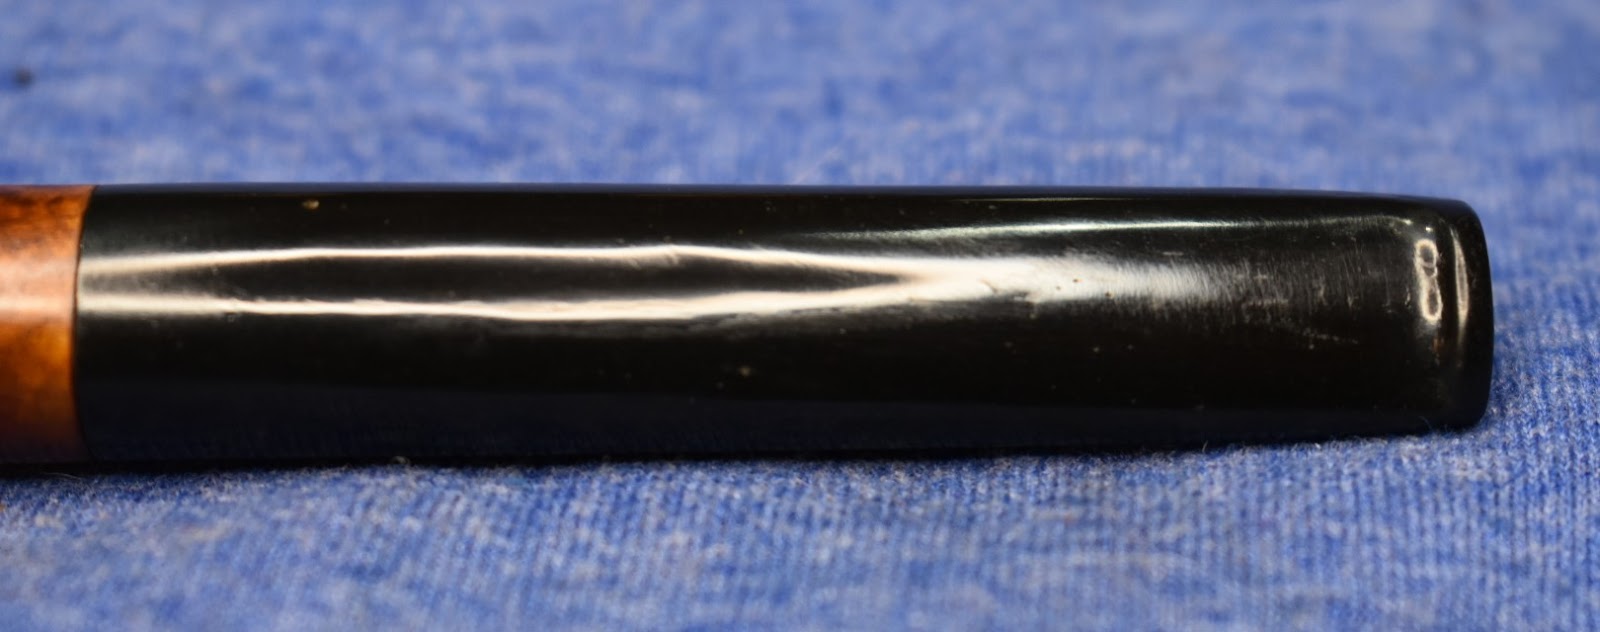
I decided to repeat the whole process with the top surface. I repeated everything with the top surface with the same result. Great improvement over the original surface but still the tiny fractures were visible.
With the stem and stummel finished all that remained was to give the whole pipe a few coats of carnauba wax at the buffer. The wax brought the grain of the wood out even better and seemed to mask the stem fractures. After the application and buffing of the wax I hand buffed the pipe with a microfiber cloth.
This pipe while beginning in easy mode soon progressed into something a bit more complex. If any readers have insights as to working with rubber with these characteristics or flaws please feel free to mention it in the comments. I would love to hear how others have dealt with issues like this. The staining turned out well and my experimental CA fills of tiny fractures in the stem seemed to work. I have no idea what the long term effects will be. If you have found this helpful and or entertaining please click the like and subscribe. Thank you for taking the time to read the ramblings of an old pipe lover.
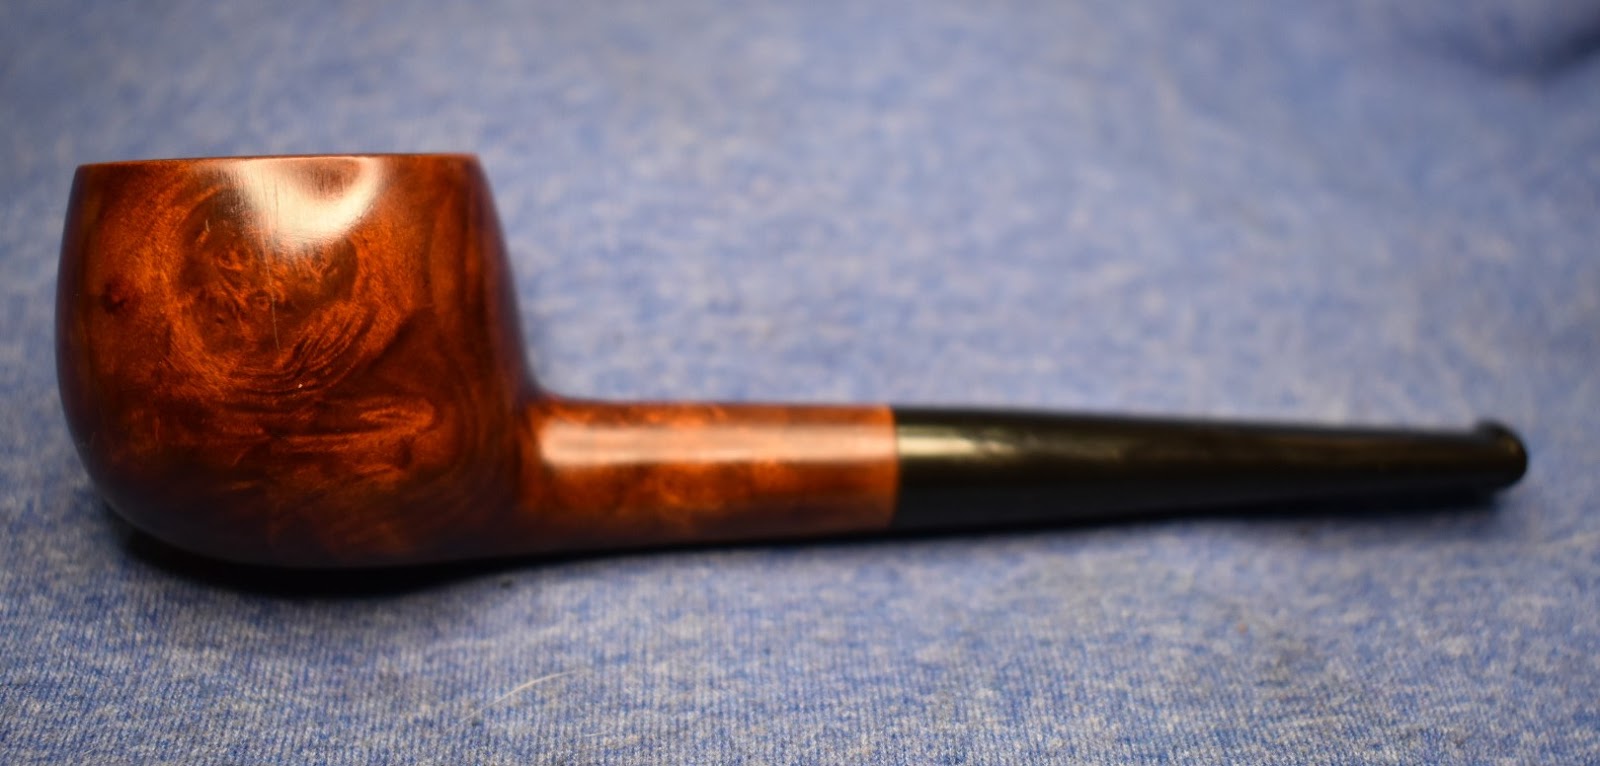
Below are some photos of the finished Wally Frank Opera.