Well, I have good news and bad news. Or maybe, it’s good news and good news. I have an Italian oval shank billiard, here. The bad news is that I can’t do much about the history of a pipe when the only stamp on it is “ITALY”. Now, if you find my histories or background sections annoying this is good news. The other good news is how well this pipe turned out. She is a very attractive no name.
The pipe came to me as part of an estate lot purchased in March of 2024. It was not the target of the lot. After looking over the pipes I found the shank shape very interesting. It was kind of an oval but with points on the ends and it was tapered from wide at the bowl to narrower at the stem. I thought that it was more like a Canadian shape but Canadian shanks are not tapered. The grain of the briar looked pretty uninteresting, at first glance, and there were no identifying markings so, it went back into the box of future projects. Several weeks later I was looking through the box again and the stem drew me back to the pipe. Here is what I was seeing:
Just another old pipe, right? But that shank was cool. I thought, “wait, there is some interesting grain under the grime and crappy stain. This old girl will clean up nice.” Well, spoiler alert – A contrast stain would really show off the grain. Yeah, the stem was a mess, she was dirty, there were pits to fill, and who knows what lies under that lava covered rim?
The Restoration
As usual a clean denim piece was added to the workbench. I knew this piece of denim was not going to look clean for very long.
I began with the stem. I figured that it was going to be in the Before and After Deoxidizing solution for several hours so, best to get it in there first. I sanded the worst of the oxidation and calcium from the stem with a 320 grit sanding sponge.
Yep, so much for the clean denim.
Next I cleaned out the inside of the stem with bristle pipe cleaners dipped in 95% ethyl alcohol. Ignore the aluminum stinger soaking in the alcohol, that’s part of another project. After the cleaning the stem went into deox (my term for the Before and After Deoxidizing solution).
With the stem in deox, I turned to reaming the stummel. The pipe had a large diameter bowl and was drilled with a tapered tobacco chamber. This required using the PipNet with the #2, #3 and the Scotte reaming tools.
The reaming was finished with the General triangular scraper and sanded with 220 sandpaper wrapped around a wood dowel. The tobacco chamber showed no signs of any heat damage. The rim on the other hand was still doing it’s impression of a Hawian island with it’s lava flows.
The lava was softened with saliva and scraped from the rim using a sharp pocket knife.
After the reaming and rim scraping the stummel was taken to the sink. Here it was scrubbed with undiluted Murphy’s Oil Soap and a medium stiff toothbrush. The soap was rinsed with warm water and the stummel dried with a cotton dish towel.
After the scrub, I sanded the stummelwith 320 and 400 grit sanding sponges searching for pits, dents and dings to fill.
Several were found a couple had to have the old fill or dirt picked from them. ALl were filled using brown cyanoacrylate (CA, super glue) and briar dust.
The next day, I returned to the deox tank. The stem had been soaking for 12-14 hours. I removed the stem and let the excess solution drip back into the jar.
The stem was then hand buffed with a coarse shop rag.
Returning to the workbench I started scrubbing the stem with Soft Scrub on make-up pads.
I progressed to using the Soft Scrub with the remnants of my Magic Eraser.
Once the pads started to provide a significantly less color change the step was coated with mineral oil and allowed to sit.
I thought that a contrast stain would allow the grain of the briar to be more apparent. I chose Dark Brown mixed with Black Fiebing’s Leather Dye. I mixed the brown to black at a 2:1 ratio. Prior to applying the dye I heated the stummel with the heat gun, shown below. The dye was applied with a folded pipe cleaner and flamed with the lighter. Two coats were applied and flamed.
Returning to the workbench, I dipped make-up pads into 95% ethyl alcohol and wiped the stummel. I wanted to get as much of the dye off of the stummel as possible.
Once the dye had been wiped from the stummel I started sanding the surface with a 320 sanding sponge. The sponge needed to be wiped off on the denim frequently to free it from the accumulated briar dust. Below shows the stummel ½ sanded illustrating the accentuation of the grain.
When finished with the 320 sanding sponge I sanded with a 400 sponge. Between the sandings I wiped the stummel with a make-up pad dipped in alcohol.
I wanted to sand the stem and the stummel together to avoid rounding the edges of each piece. This meant that I needed to finish the stem. I wiped the mineral oil from the stem and used a cotton swab dipped in alcohol to clean the oil from the area I would be working on. I used black CA to fill the tooth dents.
I applied the black CA into the dents and spritzed the stem with a CA drying accelerator.
The cured CA was then filed smooth with a flat needle file.
Additional coats of CA were added to further smooth and blend the repaired areas.
I prefer to work with several light coats rather than a single heavy coat of CA. Below the dark spots are areas where another application is needed to fill a depression.
Below is after filing and sanding to 400 grit.
The same process was done for the bottom side of the stem.
Once the stem had been sanded with the 600 grit sanding sponge the two pieces were reattached and the pipe was sanded together. The 1000-3500 sanding sponges were used in series with care not to sand the ITALY stamp. Between each sponge the stummel was wiped off with an alcohol moistened make-up pad. The stem had a bit of mineral oil rubbed inby fingertip and then wiped with a paper towel.
The pipe was then polished with a series of micro-mesh pads from 4000-12000. Between each pad the stummel was wiped off with an alcohol moistened make-up pad. The stem had a small drop of Obsidian Oil rubbed in by fingertip and then wiped with a paper towel.
The stummel received a coating of Before and After Restoration Balm and was allowed to sit for 20 minutes.
20 minutes later the Restoration Balm was wiped from the stummel using an inside-out athletic sock.
The final step of the restoration was to apply several coats of carnauba wax to the pipe using a buffer.
This lovely Italian oval shank billiard may not have a stamp indicating a maker and will thus be considered a “less than” pipe but looking at the before and after photo below, I dare you to call her “less than”. She is more than average in quality of briar, workmanship and quality of finish. I am quite pleased at how well this billiard turned out. The stem had me a bit
worried but after the repair it polished up nicely. The Contrast stain did indeed make the briar grain shine. This old girl will be a grand smoker and will hopefully bring someone many years of enjoyment.
The dimensions of this little beauty are:
Length: 5.50 in./ 139.7 mm.
Weight: 1.34 oz./ 37.80 g.
Bowl Height: 1.97 in./ 50.04 mm.
Chamber Depth: 1.72 in./ 43.69 mm.
Chamber Diameter: .82 in./ 20.83 mm.
Outside Diameter: 1.47 in./ 37.39 mm.
I do hope that you have found something here useful to your own pipe care, maintenance or restorations. If you like this sort of thing, please click the like and subscribe buttons. Thank you for reading the ramblings of an old pipe lover.
Below are some photos of the finished Italian No Name Oval Shank Billiard.
Wow, I have to work on that button. The bright light makes it look oxidized.
I received this pipe as part of an estate lot. I liked the shape, a healthy sized billiard, and the unfinished briar with grass-like carvings. I thought about what to do with it for several weeks as it was patiently waiting for its turn upon the workbench. Finally it hit me – Realtree-style camouflage. I didn’t have any green Fiebing’s Leather Dye so that ordering of that piece bumped the project back down the list a couple of spots. Finally the green dye arrived and it was time to see if I could make my vision a reality, a Realtree-like (I’m pretty sure that if I add “-like” I can’t be sued by the Realtree folks) reality.
The pipe was free of any markings or stamps on the stummel. There were a couple of marks on the tenon of the stem. I am getting ahead of myself. Let me show you what the pipe looked like prior to working on it.
The pipe had been smoked but very heavily. There was some minimal cake in the tobacco chamber and lava on the rim. The singer appeared as if it had been cut off and it remained firmly attached initially. A pliers was used to loosen and remove it. The stem had some tooth chatter and was oxidized. The stamps on the stem appeared to read ADE over IN ITALY. I assumed the top line should have read MADE. Overall a straight forward restoration of a good quality piece of briar.
Background of the pipe
Due to the lack of any stampings on the stummel and only the MADE over IN ITALY, I was not able to deduce much about the provenance of the pipe. A search of logos on pipephil.eu did not turn up any similar stamings on stems. I like to imagine the history of the pipe as a training piece used by an apprentice pipe carver. The young carver had mastered the traditional English billiard shape and had impressed his Master Carver with the stummel. The Master then asked him to practice stamping a stem. Upon doing so revealed that he needed more practice. Then the Master carver assigned him the task of carving the briar which he did with some success. The master congratulated him on his efforts but was unwilling to allow the shop name to be stamped on the pipe as the young apprentice failed to leave a flat surface for such a stamp. The young apprentice then received a quick smack to the back of his head and heard a few choice remarks about his inexperience and lack of functional brain cells in his native Italian. It’s my imagination and I’m sticking with it!
The restoration
As usual I started with a clean piece of denim on the workbench.
Thi show was substantial and required both the PipNet #2 and #3 blades. Given, there wasn’t much for them to scrape out but, they nevertheless gave it their all. The chamber was sanded with 220 sandpaper wrapped around a wood dowel. There was no damage in the tobacco chamber and I could actually see the lathe marks from the original turning of the stummel.
Next came the airway cleaning of the shank. This was accomplished using folded over bristle pipe cleaners dipped in 99% isopropyl alcohol/
After the shank was cleaned the stummel was scrubbed with Murphy’s Oil Soap and a medium stiff toothbrush. The soap was rinsed with warm after and the stummel dried with a cotton dish towel. I returned to the workbench and wiped the stummel with a cotton ball dipped in 95% ethyl alcohol to remove anything that the scrubbing failed to.
Next came the cleaning and deoxidation of the stem. I initially sanded it with a 320 sanding sponge to remove the outer layer of hard oxidation and some of the tooth chatter.
The stem was then placed in a tub of water and Oxiclean. I have no idea what the concentration of the solution was as it was one that I had mixed months ago and failed to write the amounts upon the lid.
With the stem soaking in Oxiclean, I turned my attention to the stummel. I had recently received the green Fiebing’s Leather Dye and was looking forward to trying it out. The dying gear was gathered and the work area prepped with a couple layers of paper towels.
I was as surprised as you are about remembering to wear nitrile gloves.
I was actually quick enough to catch a bit of blue flame with this shot. I applied two coats of green and flamed each.
The second coat flamed a bit longer than the first and allowed a better flame photo.
Below is how the green dyed stummel looked after being wiped off with a paper towel.
I returned the stummel to the workbench and wiped it off with a couple of alcohol soaked cotton balls/make-up pads.
And a couple more. In hindsight, I wish I would have kept wiping until I couldn’t remove any green dye. I then started sanding the high area with 320 and 400 grit sanding sponges.
The sanding revealed the underlying undyed briar while allowing the low spots to remain green.
The stem, having spent a couple of hours in the Oxiclean solution, was removed and rinsed with water. I used Soft Scrub on cotton balls to remove the oxidized vulcanite from the stem. Once finished scrubbing I oiled the stem with mineral oil.
The interior of the stem cleaned up quickly with bristle pipe cleaners dipped in 99% isopropyl alcohol. I did not bother cleaning the stinger as I did not figure I would include it as part of the finished pipe.
The stem was sanded using a series of sanding sponges from 600-3500. Between each sponge I would dip the tip of my finger into the mineral oil and rub this over the stem. The excess oil was then wiped away with a dry paper towel.
The process was repeated with micro-mesh pads 4000-12000. The only difference being that I used Obsidian Oil rather than mineral oil between pads.
I lightly sanded the stummel with 1000-3500 sanding sponges. I wiped the stummel with a make-up pad dipped in alcohol between sponges. I micro-meshed the stummel with the 4000-12000 micromech pads wiping with the alcohol dipped make-up pad between micro-mesh pads. When finished I applied a coating of Before and After Restoration balm to the exterior of the stummel and brushed it into the carvings with a baby toothbrush.
20 minutes later I wiped the excess balm from the stummel with the inside of an athletic sock. Twe terry cloth of the sock enabled me to clean the balm from the grooves and polish them quite nicely. The pipe was then taken to the buffer and given several coats of carnauba wax.
The pipe turned out quite well. The green dye is a definite green color. I did not achieve the exact effect that I wanted but that is more due to the nature of the carvings. As I was finishing the pipe I couldn’t help but think this was a great Easter themed pipe. With Easter right around the corner I thought it would make a great gift for my son-in-law who loves straight pipes and I was sure that he would appreciate this billiard. I gave it to him on Easter and he was quite pleased. I have yet to hear how it smoked, though I have little doubt that it was a winner. I do hope that you have found something here useful to your own pipe care, maintenance or restorations. If you like this sort of thing, please click the like and subscribe buttons. Thank you for reading the ramblings of an old pipe lover.
Below are some photos of the finished Realtree-like Italian Billiard.
Happy Easter, Sebastian. Enjoy the new pipe. Love, Dad.
My infatuation with pipes from post World War Two through the 1950s has not ended. We are just on a break. I have a long line of pipes in que and the above Kaywoodie should have been subjected to the back of the line. I couldn’t do it. It was just too cute and had such a long noble heritage. Okay, that is an exaggeration. At the time this pipe was produced by Kaufman Brothers and Bondy, KB&B had been in business less than 20 years. That is how old this pipe is. So, maybe she pulled seniority and jumped to the front of the line not with the agility of a teenage gymnast but with the grace of a seasoned digitary of the House of KB&B.
This little darling came from an eBay auction where apparently no one saw the uniqueness of the pipe. Well, not no one, since there were other bidders but, $5.50 for my win? That was welcome and unexpected.
I say unique due to the triangular stem, paneled bowl, carburetor and the four digit shape number. Each of these features is interesting on their own but together I find them very interesting. Allow me to show some photos of the Kaywoodie prior to wany work being done.
Judging from the photos you may find the next statement difficult to believe. The Kaywoodie was in good shape for a well used pipe of this age. I’ll get more into that in a minute. Yes it looked to be in rough condition but other than the stem reconstruction, the pipe was mostly just filthy. I saw stem deoxidizing and rebuilding, filling pits in the briar, cleaning and sanding.
Background on KB&B Kaywoodies
I have restored several KB&B pipes in the past few weeks. There were the four large Hand Mades and one Yello-Bole that came to mind. I love the history of the company and their passion for the Kaywoodie stinger or condenser. I will come right out and say it: I do not like stingers. My favorite Kaywoodie pipes are models which do not have the signature stinger. Having said that, I appreciate a company who remained “all in” in their design for the 80 years or so of production.That shows dedication to their ideas and to their loyal customers.
Kaywoodie has a long and colorful history dating back to their origins, “Kaywoodie name first appearing in February of 1919.” (Kaywoodie History – Greywoodie LLC) The history of Kaywoodie pipes is fortunately well documented thus, allowing rather precise dates for a Kaywoodie collector to declare the provenance of their charges. Rather than deposit it here, I will link the two outstanding histories of KB&B/Kaywoodie – Gewywoodie’s site is great written history of the company (Kaywoodie History – Greywoodie LLC) and pipedia.org has pretty much the same written history with a rich library of Kaywoodie catalogs, photos and images of old print advertisements, (https://pipedia.org/wiki/Kaywoodie). I can’t recommend them enough for those interested in reading more about the company and the products. There is a third document which provides information more specific for tracing the providence of a specific pipe or model of pipes and that is he Collector’s Guide to Kaywoodie Pipes (https://pipedia.org/wiki/Collector%27s_Guide_to_Kaywoodie_Pipes).
Now a little more on this specific pipe. As I previously mentioned the four digit number is indicative of a Kaywoodie being made before 1936. I quote from Collector’s Guide to Kaywoodie Pipes: “If the pipe has a 4-digit shape number, the pipe is probably of “pre-1936” vintage.” (https://pipedia.org/wiki/Collector%27s_Guide_to_Kaywoodie_Pipes) or you can download the original document here.
Another mention of the four digit shape number from the Collector’s Guide states, , “Early (pre-1936) Kaywoodies had an “elongated” white cloverleaf on the bit, a large fitment, and four-digit shape numbers. The 1936 catalog shows a larger, “fuller” leaf, but lists two-digit shape numbers. Sometime between 1936 and 1947, the better pipes were marked on the bits with a black cloverleaf in a white circle. The white cloverleaf continued on the lesser pipes. However, this was not a consistent convention, as pipes of the same grade could have either type of leaf.” (https://pipedia.org/wiki/Collector%27s_Guide_to_Kaywoodie_Pipes)
BOth of the above quotes reaffirm the pre-36 date of origin. The strange patent stamping of this pipe provides additional information. An internet search of the US patent number led me to the following:
Now the question arises, “How can a “pre-1936” pipe have a stamp for a patent that was not awarded until June 1, 1937?”
The final piece of the puzzle comes from the 1936 Kaywoodie catalog. This catalog clearly shows the Kaywoodie in question as the top pipe in the image below.
(https://pipedia.org/wiki/File:Kaywoodie_1936shapes6.jpg). It also clearly shows the model as being called a “03 Triangular Setter Apple”. The stamp of this Kaywoodie Triangular Setter Apple is not a “03” but rather an “8803”.
I donned my thinking hat also know as a conjecture cap and came to the following conclusion:
This pipe was made prior to the switch to the “new-shape numbering system” to match the upcoming 1936 catalog. During this transition the patented “Carburator” had been in production and had been incorporated into some pipes, even prior to the formalized granting of the patent paperwork. The shape number does end in “03” indicating a carryover from the “old system”. It does not take too much imagination to assume that the production at the factory would occur at a different rate than the churning of a bureaucratic patent office or the time lag of catalog development and printing. All of these factors lead me to the conclusion that this pipe is a 1935-36 Kaywoodie Carburator Triangular Setter Apple.
The Restoration
As with nearly all my restorations, this one too began with a clean piece of denim to work on.
Reaming was the first task for this pipe. The tools were assembled. No PipNet due to the small diameter of the tobacco chamber and the fact that the carburetor rose up from the bottom of the bowl about 5 mm.
Most of the reaming was done with the General triangular scraper so as to not damage the carburetor.
The below photo shows the rim after a good deal of lava had been scraped from the surface.
Next came the cleaning of the stem. The stinger made this slightly more difficult but this stinger did not interfere with the stem cleaning as much as some Kaywoodies that I had done. The bristle pipe cleaners were dipped in 99% isopropyl alcohol to aid in the dissolution of the tars in the airway.
Scrubbing the stummel was next. Murphy’s Oil Soap was used undiluted and scrubbed with a medium bristle toothbrush. The lava around the rim proved to be very adhered to the briar and a stiff nylon brush was used around the rim. The soap was rinsed with warm water and the stummel dried with a cotton dish towel. At this time I decided to scrub the airway of the shank with a nylon shank brush and Dawn dish soap to soften and remove some of the residues inside. This worked and released the strong aroma of old tobacco smoking residue. From this I knew that the shank cleaning would be a long task.
The scrubbing failed to remove all of the lava around the rim. Further scraping with a sharp pocket knife was done. I also used a Scotchbrite pad dipped in 99% isopropyl alcohol to help clear the lava. You can also see in the photo below an old fill that had lost the fill material.
With the lava finally cleared away I chose to work on the fills next. It looked like most of the fills had come loose with wear. Some picking of the old fill material was done with a fly tying bodkin. New fills were made using brown cyanoacrylate (CA, super glue) and briar dust. The fill received a drop of CA from the fly tying bodkin. I then placed a small amount of briar dust onto the CA filled pit and pressed the dust into the pit.
Below photo shows a CA/dust filled pit.
The new fill was then filed smooth and sanded with a 400 grit sanding sponge.
Here were two small pits below the rim.
Another pit filled along the bottom of the shank.
With the fills done and sanded with a 400 sanding sponge, I turned to cleaning the exterior of the stem. I chose to use Soft Scrub on make-up pads to remove the oxidation from the stem. The stem was first sanded with a 400 grit sanding sponge to remove the outer surface oxidation then the several Soft Scrub pads were used. After the scrubbing the stem was coated in mineral oil and allowed to absorb the oil while I worked on other tasks.
Next came the cleaning out of the shank airway. The photo below shows the dry crumbly tars that were scraped free with the dental scraper. The cotton swabs and folded over pipe cleaners were dipped in 99% isopropyl alcohol.
Once a good deal of the tars had been scraped free the cotton swabs helped moisten the tars. This led to the scrapings being more tarlike. You can see a couple streaks of tar residues wiped onto the denim near the scraping pile lower right. I also used alcohol dipped nylon shank brush scrubbings to help free the airway. I could effectively use a favored method of pouring alcohol into the bowl and scrubbing with the pooled alcohol and a shank brush due to the hole in the bottom of the bowl that is the carburetor. Eventually the shank returned clean cotton swabs.
With the shank cleaned out I turned my attention back to the stem. Rebuilding the button, to be exact. Using a piece of flat plastic approximately 2 mm thick, from a lid, I measured and cut a “dam”. This would be used to stop the black CA from flowing into the airway and keep the liquid CA out of places where I did not want new material deposited. The airway was “painted with petroleum jelly to help seal the dam to the area where I didn’t want CA.
The dam was placed into the airway. I had tested the plastic to make sure that the CA did not readily adhere to the plastic.
A thin coating of black CA was applied to the vulcanite. I used a Cyanoacrylate drying accelerator spritzed onto the wet CA to quickly cure the CA. I added additional coats of black CA filling the gap and spritzing with accelerator. I have found that numerous thin applications will allow the CA to build up and cure better than fewer thicker applications.
The below photo shows the fill at about four applications of CA.
At this point I used a flat needle file to start shaping the flat surface of the reconstruction.
I gripped the plastic dam with a needle nose pliers and pulled it free of the new CA material. The CA that was over flowed past the button was trimmed with scissors and flattened with the flat needle file and sandpaper.
Sorry about the photo quality. The phone camera does not do well focusing on buttons, I guess.
Additional beads of black CA were added to the button to add material. These were then spritzed with accelerator and shaped with the needle file and sandpaper to arrive at a shape that was acceptable.
I assembled the pipe and tried the draft to make sure the airway remained open. I received the taste of “old pipe”, or rather the taste of old tobacco smoking residue. Hmm, not acceptable. It was getting late so I decided to pack the stummel with cotton, fill it with 95% ethyl alcohol and let the alcohol work by drawing the residues from the briar and into the cotton overnight.
I taped off the carburetor with Scotch tape in an attempt at keeping the alcohol in the bowl.
Using a disposable pipetteI added the ethyl alcohol slowly, allowing it to fill and saturate the cotton.
Approximately 12 hours later I returned to the workbench and discovered that my cleaning of the bowl and stummel were not as complete as I had assumed they were..
The cotton in the shank was quite dark with tars and smoking residue.
The ethyl alcohol and cotton had performed their jobs well. Testing the draw of the pipe delivered the taste of ethyl alcohol. I guess I’d have to wait another couple hours to see if a second treatment of cotton and alcohol would be required.
Moving on. You probably noticed that I had used painters tape to cover the stamps earlier. That was in preparation for the sanding that I knew would be coming. And, here it is. I sanded the pipe as a single piece. Using the sanding sponges in series I sanded from the 1000-3500 grits. Between each sponge I rubbed a finger dipped in mineral oil to the stem and wiped with a paper towel. I would then dip a make-up pad in alcohol and wipe off the stummel before continuing to the next sponge.
After the sanding came the micro-mesh pads. The pads were used in sequence from 4000-12000. I again wiped the stem and stummel between pads. A slight difference here is that instead of mineral oil I used Obsidian Oil on the stem.
The Pipe was looking very good. I have to admit that sanding and micromeshing the panels of the pipe was far more tedious than working with a rounded shape. Trying to maintain the flat characteristics of the panels took careful pressure and left little room for carelessness or watching television. The stummel was given a coating of Before and After Restoration Balm and was allowed to sit for an episode of a silly aime I’d been ignoring.
After 20 minutes the Restoration Balm was wiped from the stummel using the inside of an athletic sock.
The final treatment of the Kaywoodie was to apply several coats of carnauba wax with the buffer.
This Kaywoodie turned out beautifully. In bright light I did notice tinges of oxidation that remained on the stem. I am debating giving the stem a dip in the Before and After Deoxidizing solution. I probably will but the effect of the deoxidizing solution of the reconstructed area worries me. The finish of the stem is just gorgeous under normal room lighting. The smooth polished briar shows grain that was completely obscured by the grime that the pipe initially had and shows wonderful bird’s eyes on both sides. As with most pipes from this era this is a smaller specimen. The dimensions of this pipe are:
Length: 5.40 in./ 137.16 mm.
Weight: 1.18 oz./ 33.45 g.
Bowl Height: 1.50 in./ 38.10 mm.
Chamber Depth: 1.17 in./ 29.72 mm.
Chamber Diameter: 0.65 in./ 16.51 mm.
Outside Diameter: 1.34 in./ 34.04 mm.
I do hope that you have found something here useful to your own pipe care, maintenance or restorations. If you like this sort of thing, please click the like and subscribe buttons. Thank you for reading the ramblings of an old pipe lover.
Below are some photos of the finished Kaywoodie Triangular Setter Apple Carburetor.
I remember a good friend of mine saying, “There are two kinds of battles in the world: Those worth fighting and those that aren’t. If it’s worth fighting then you’d better be damn sure you’re going to win.” Spoken like the true F-4 pilot that he was and darn good advice. So, why in the world did I try to restore the above dismal darling? I mean, you can buy a new one for under $100. That poor thing’s issues had issues. Perhaps it was Saint Jude Thadeus whispering in my ear? No, I’m not Catholic. Maybe it was because my right shoulder angel had a substitute that day and it was a Bad-Idea Fairy. Whatever the reason, I decided that this Savinelli Roma would live to smoke again.
Well deciding something and actually carrying through with the decision are two dramatically different things. If you frequent my ramblings, thank you, you may remember a similarly damaged Savinelli, Porto Cervo 677 KS. If you are new here, thank you as well. I’ll link it here for those who might be interested. This pipe had issues that the previous Savinelli had nightmares about. OK, I’ll show you what I mean rather than taunting your imagination with unspeakable eldritch pipeological horrors (yeah, I tried to make it sound like an H. P. Lovecraft horror story there).
Still, pretty scary, eh? The list of things to be addressed were long and would certainly stretch my comfort level as a restorer. The stem would need a great deal of oxidation removal and rebuilding of material to once again have a functional button. The bowl interior was charred and misshapen. The exterior would need reshaping, retextured, restrained and refinished. All of that was just discernible from a cursory evaluation. What diabolical horrors would lie within? Okay, there I go again in Lovecraft mode. Apologies.
Background on Savinelli
A good deal of this background is information what I wrote or ,used from other sources, from the Savinelli Porto Cervo restoration. I am a Generation-X slacker and have to live up to (or down) to that reputation.
Early Origins
“1876 was a year of breakthroughs: Thomas Edison patented the mimeograph, Julius Wolff-Eastport canned sardines for the first time, Alexander Graham Bell made the first telephone call,
Pyotr Ilyich Tchaikovsky completed Swan Lake, Melville Bissel patented the first carpet sweeper, Mark Twain published Tom Sawyer, and in Milan, Italy, Achille Savinelli opened one of the first shops exclusively focused on tobacco and smoking accessories.
That last item may seem relatively unimportant in the global scheme of advancements, but for those of us who love pipes, it was a monumental achievement, made even more difficult by the Italian government, which held a monopoly on tobacco. In addition, Achille was convinced that briar pipes represented the future of pipe smoking at a time when the market was dominated by clay and meerschaum. It may not have been obvious in 1876, but Achille Savinelli’s commitment to briar pipes would prove to be visionary.
He soon began designing his own pipes (different from the styling we associate with Savinelli today) and arranged their manufacture by local pipemakers in the Varese district of north-west Italy. The pipes became so popular that some were exhibited at the 1881 Esposizione Industriale Italiana (Italian Industrial Exposition)—the precursor to today’s Milan Fair, one of the largest trade fairs in the world.” (https://pipedia.org/wiki/Savinelli)
Post-WWII
“With his two best friends, Amleto Pomé and Mario Vettoruzzo, he assembled a team of fifteen employees to start a new business in the Varese region—the same area of northwest Italy in which his grandfather, Achille Sr., commissioned his own designs more than 60 years before.
Savinelli Pipes began production in 1948 and, although the pipes were of a superior quality and unique in their aesthetic, the brand wasn’t an immediate success. Few new brands are. It takes time for the public to catch on. Retailers were skeptical of placing Italian pipes alongside their best sellers from England or France, and customers, in turn, were hesitant to purchase a Savinelli over pipes by already established, foreign brands. Achille Jr. stood by his product, however; he knew it was only a matter of time before the world realized that these pipes were of a far superior quality, capable of competing with even the most well-established pipe manufacturers in the world. As it turns out, he was right. In less than a year, Savinelli pipes gained prestige in markets all across the world—heralded for their delicate balance of innovation and tradition, of form and function. Savinelli pipes were placed alongside the likes of Dunhill and Comoy’s in tobacconists from the United States to Europe, and, in time, this exposure modified Italy’s reputation; it was not only the premier exporter of briar, but now a premium source of fine briar pipes.” (https://pipedia.org/wiki/Savinelli)
The term “Roma” in English often relates to the ethnic people, Roma or Romani. In Italian Roma is Rome. I highly doubt that a worldwide company like Savinelli is referring to anything other than Rome with this line of pipes.
The current Savinelli line continues to offer a Roma 677 KS but with a lucite stem.
DESCRIPTION
Savinelli Roma Lucite pipe shows a charming and modern composition. The dark rusticated finish color highly contrasts with the bright colors of the particular acrylic stem. 677 KS is a model with great appeal. Its triangular shank ,which only few manufacturers are able to offer, easily slides into the perfectly carved bowl. A really well designed pipe.
I add the below description of a Savineli Apple, 626 due to the nice description of the styling of the line.
DESCRIPTION
Roma Series is for sure one of the most famous Savinelli pipe in the world. Its dark rusticated finish gives a very masculine style. Thanks to the smooth bowl’s rim you could appreciate how a finish can change the briar final color result. In fact both rim and bowl are stained using the same natural burgundy color. A little brass band adorn the ebonite stem. Model 626 fully personifies all the Apple style elegance. Its soft lines and dimensions make it an aesthetically and well-proportioned pipe.
The 677 KS shape is “A bent Billiard with a supple, Brandy-like taper toward the rim, Savinelli’s “677 KS” is a compact yet full-bodied take on the classic English shape. Per the Italian marque’s shaping conventions, Savinelli has elaborated on the standard design, adding mass to the base and transition with extra height and taper lent to the bowl, all paired to one of their signature triangular shanks.” according to Smokingpipes.com. That is a mouthful of a description. Also you will later see that the “extra height” is a bit less extra after the restoration. The three digit shape code for Savinelli pipes was established in the 1970s according to information from pipephil.eu. One more detail is the “KS” – this stands for King Size.
I started this restoration with a clean piece of denim on the workbench. In the back of my mind I was thinking, “you are going to need a couple of those,”
I admit that I was more than a bit daunted by the prospect of rusticating or texturing a stummel to match the amazing work that Savinelli does. So, I avoided that part. I addressed the part of the pipe I felt comfortable working on – the stem. Yeah, I know, “chicken, buck buck bawk.”
The stem had thick calcium deposits on both top and bottom, I scraped these with a sharp pocket knife and sanded with a 320 grit sanding sponge.
The remaining calcium was picked from the dents using a dental pick and brushing with an alcohol dipped brass brush.
Next the interior of the stem was cleaned using 95% ethyl alcohol, bristle pipe cleaners and cotton swabs.
It was at this point I started to rebuild the damage caused by the clenching habits of the previous owner. In hindsight, I wish that I would have scrubbed the stem with Soft Scrub with Oxiclean at this time and worked on the rebuilding after that. Alas, I hope that you can learn from what I consider my mistakes. I used a product that was newer to me, Bob Smith Industries IC-2000. It is a cyanoacrylate (CA, super glue) which has been toughened with rubber. It is designed to be used with rubber and sounds like it would be perfect for this use. I applied an initial few dabs to the depressions of both the top and bottom of the stem.
I use a CA drying accelerator to speed the drying of the CA. Both surfaces were spritzed with this accelerator. It makes the CA cure or dry in seconds. The cured CA was then filed with a flat needle file and smoothed with a 400 grit sanding sponge. The shiny surfaces in the photos below are areas where the file and sandpaper rode above and did not contact the CA in the depression. Further applications were required to fill the entire depression. I prefer to use several thin applications over a single thick application.
More applications followed by more filing and sanding. Voila.
And then of course there is more sanding. Here is where I scrubbed the stem with Soft Scrub with Oxiclean.
I am not sure if this discolored the CA fills or if the new rubberized CA doesn’t have the same black color as the CA that I was used to previously. Either way I was not as happy with the results as I had been previously. Here is a photo of the finished stem and the fill is much more obvious than what I was used to.
Leaving my comfort zone, I started working on the stummel. This started out normally with the gathering of the reaming tools.
I began with the #2 blades in the PipNet reaming tool. This is where “normal” stopped and became “is this pipe salvageable” started. The cake was dry, hard and brittle. The reaming was a very rough feeling with large pieces of both cake and charred briar breaking off. The chamber was very rough and uneven. I moved to the #3 blades. They fit into the mouth of the chamber and with effort removed the cake and charred briar to the bottom of the chamber.
Scrapping with the reaming knife and General triangular scraper revealed large area of severely charred wood. This was chipped and broken out as thoroughly as possible. Some of the damaged wood was still strong while other places were quite brittle. Eventually the soft damaged wood was removed allowing me to sand the interior with the 220 sandpaper wrapped dowel. I failed to take photographs of the chamber, perhaps in fear of my inability to remedy the situation. The best photo I had was the following:
In the above photo the middle chamber area was undercut by several millimeters. I Thought it too deep to effectively use J.B. Weld, a product which I had successfully used for charred briar in the past. This time though, the damage was much more severe and the volume of material to be replaced was far greater. I decided to move on and think about other options.
I took the stummel to the sink for a scrubbing. If the internal charing was very bad it would undoubtedly darken the briar on the outside of the stummel. I wanted to see what was under the external grime. I started by using undiluted Murphy Oil Soap with a medium bristle toothbrush. As the photo below shows, the grime was extensive. This first scrubbing was rinsed with warm water and dried with a cotton dish towel. Afterwards the stummel still appeared dirty.
I scrubbed the stummel a second time with Murphy’s and a stiff nylon brush. This improved the results but after rinsing and drying there remained a tacky feeling residue. I scrubbed a third time again with Murphy’s Oil Soap but with a brass brush. Finally the grime rinsed away and left a clean surface when dried.
Below are photos taken of the scrubbed stummel back at the workbench. There was darkening of the briar around the rim, front and back. The wood in these areas seemed thick and solid enough for me to proceed and not throw the entire stummel into the dust bin.
To be sure of the integrity of the briar I needed to top the bowl quite a bit. The front edge was several millimeters lower than the sides. This was done using 220 sand paper laid flat on a countertop. A circular motion was used with the stummel being rotated in hand every few circles to keep the pressure and sanding even.
It appeared as though someone had tried to sand the charred wood from the front of the rim at some prior time. This had removed the factory texturing leaving a smoothed and darkened surface.
The topping of the rim did achieve a flat rim though a shorter stummel with a pronounced forward cant.
Not wanting to remove any more briar than absolutely necessary, I stopped sanding. The inside edge of the rin would be beveled as the pipe was originally made. Before this beveling, I wanted to address the filling of the charred material of the tobacco chamber. I had previously chatted with a fellow restorer about a “mortar” that he had used. The ingredients were plaster of paris (POP), charcoal powder and salt. In thinking about these materials I did not think that the charcoal dust was anything other than a coloring agent and it wouldn’t be strengthening the chemical bonds of the POP. If anything it would weaken the crystalline lattice of the calcium sulfate hemihydrate (chemical name of POP when hardened). I opted to try POP in this instance due to the its properties:
“There are two main properties of Plaster of Paris:
Non-flammable:
Non-combustible
Plaster of Paris is non-flammable as well as non-combustible as it has a low chemical reactivity. In extreme conditions, it also acts as an oxidizing agent. Plaster of Paris has fire resistance quality and its material is ideal for heat insulation. The material does not shrink when it sets. Hence, there are no cracks on the surface of the dry Plaster of Paris. At high temperatures, the plaster of Paris also decomposes and becomes toxic oxides.” (https://www.vedantu.com/jee-main/chemistry-plaster-of-paris)
The “toxic oxides” would be sulfur oxides. POP can withstand temperatures of 1200F (650C) without decomposing. A typical pipe will be combusting tobacco at 500-900F (260-482C) well below this threshold. (https://cameochemicals.noaa.gov/chemical/25054)
The POP powder was mixed with tap water as per product instructions. It was then applied to the interior of the tobacco chamber in an even coating using a wood splint. A pipe cleaner was used in the airway to prevent the POP from blocking it.
While the POP was setting-up I began working on re-texturing the stummel. I used a Dremel rotary tool with the bit shown in the below photo. I tried to carve irregular sized and shaped indentations to the surface of the stummel where they had been worn away.
The POP had begun to harden. While it was still soft enough to mold, I used the PipNet and the #3 blades to carve an even hole for the tobacco chamber. This newly surfaced chamber was smoothed with my finger wetted with water.
While still damp, I emptied a capsule of activated carbon powder (charcoal) into the tobacco chamber, plugged it with my palm and shook the stummel vigorously. The excess was dumped out aht I blew through the pipe to remove the remaining dust. The POP was allowed to dry for another 15 minutes.
With the stummel now re-textured it needed to be dyed. According to the Savinelly website the original dye or stain was a “natural burgundy color”. I did not have a natural burgundy dye so I used black. The black Fiebing’s Leather dye was applied with a folded pipe cleaner and flamed with a disposable lighter.
I then wiped the stummel dry with a paper towel. I was not concerned with waiting for a certain amount of time for the dye to dry or set. I was just wanting the dye to stain the textured indentations darker than the raised surfaces.
I returned the stummel to the workbench where I wiped the stummel with several make-up pads wetted with 95% ethyl alcohol to remove excess dye.
The stummel was then sanded with a 400 grit sanding sponge. This removed the black dyed briar surface revealing.
The sanding could not completely lighten the previously charred briar at the front, back and around the rim.
The stummel was lightly sanded with a series of sanding sponges from 1500-3500. The stummel was wiped with an alcohol wetted make-up pad between sponges. I then micro-meshed the stummel with the 40000-12000 micro-mesh pads. I again wiped the stummel with an alcohol wetted make-up pad between pads.
I then applied a coating of Before and After Restoration Balm to the stummel and let it sit for 30 minutes.
30 minutes later the excess balm was wiped away using the inside of a cotton athletic sock. The terry cloth did a fine job of getting into the textured surface and made the stummel look better than it had in many years.
With the stummel looking very nice it needed a stem to go with it. I taped the shank with painters tape to protect it from my sanding.
I then sanded the stem with a sequence of sanding sponges from 1000-3500. Between sponges I rubbed mineral oil onto the stem and wiped away the excess oil with a paper towel.
Once finished with the sanding sponges I used micro-mesh pads 4000-12000 in sequence. Between each of these pads I applied a drop of Obsidian Oil, rubbed it onto the stem with my finger and wiped the stem with a paper towel.
I polished the stem with Before and After Fine polish using a soft cotton cloth.
The last polishing was done with Before and After Extra Fine polish using the same soft cotton cloth. Although a clean spot was used.
To protect the briar frown the elements I chose to use Renaissance Micro-crystalline Wax. And, no not because I love the smell of it, which I do. I applied it with a finger and a baby toothbrush. The product instructions say that it hardens instantly with a rub from a soft sloth. I allowed it to dry for a few minutes before buffing with a soft cloth. I did this 3 times then took it to the buffer where I buffed it with a clean flannel wheel. The stem received several coats of carnauba wax with the carnauba wax wheel from the buffer.
Overall I feel victorious with this restoration. No, the Roma will certainly not win any beauty contests but it has been returned to serviceable and it looks pretty darn good. I am not pleased with the finish of the stem. The more I think about it, the more I think it was my error in applying the CA prior to scrubbing the stem with Soft Scrub. I think the bleaching action of the Soft Scrub is what led to the discoloring of the black CA. Given, it can only be readily seen with bright light, it still annoys me. The polish of the stem turned out well. I am also rather pleased with my first attempt at re-texturing a Savinelli pipe. Though far from perfect it was definitely a learning process and one that I think deserves far more practice. The pipe feels very nice in hand and has proven to be a shape that is comfortable to clench. I am sure it will be a fine companion for outdoor activities where a more refined specimen might not venture; activities like gardening, fishing, yard work, etc… I do hope that you have found something here helpful in the care, maintenance or restoration of your own smokey companions. If you like this sort of thing, please click the like and subscribe buttons. I thank you for reading the rambling of an old pipe lover.
Below are some photos of the finished Savinelli Roma 677 KS.
I am the first to admit that love at first sight is a convenient trope which heroic epics and princess stories utilize. Well, I should say “I was the first”, that is until I saw this Oxford bent brandy on a well known internet auction site. I was smitten. Though not usually a fan of saddle stems, because they are hard to sand well. And, also not a fan of aluminum stingers which the aluminum band indicated would be present. This little darling had two strikes against her from the start. I couldn’t stop thinking about her. When the end of the auction drew near no one had even granted her a starting bid. I picked her up for just that, the starting bid.
I suppose I had better show you what I was seeing before we go any further.
About this Oxford
I have very limited knowledge of pipes made in the Netherlands or as this pipe is stamped OXFORD over MADE IN HOLLAND, I did know that Holland is a region of the western edge of the Netherlands. See Dr. Barris, I was paying attention in The Geography of Europe, spring semester 1985. I have worked on Amphora and Hilson pipes, two historic and Dutch pipe makers. The Oxford name, met with rather empty results when I searched pipedia.org and pipephil.eu. Oh sure there were hits from pipes carrying the Oxford name but none made in Holland. I used pipephil.eu’s “Search by country” -> Netherlands and received a list of makers with Dutch pedigrees. From this list I was able to view stampings and look for the illusive MADE IN HOLLAND stamp.
The list of suspects:
Big-Ben Barbados – MADE IN HOLLAND in a circle and shape number
Well shoot, that was a lot of work for nothing. Now I know what the prosecution in the O.J. Simpson trial felt like. With no definitive answer to the pedigree of this pipe I am using editorial conjecture to call it a likely product of the Gubbels factory. Here is where I imagine you saying. “What? Who the heck is this Gubbels and where did he come from?” Good questions, both. I will defer to pipedia.org for a nice account of the briar pipe manufacturing in the Netherlands.
“With the help of his family the father of Elbert Gubbels Sr. started a retail shop for tobacco pipes and other smoker’s equipment in 1870.
In 1924 Elbert Gubbels Sr., now father / grandfather of the present owners, transformed it into a wholesale trade business. The company grew steadily and imported pipes from various countries as there were no factories producing briar pipes in the Netherlands. The most important suppliers came from France and England.
When German troops occupied the Netherlands in May of 1940, a period of almost five years began in which the Gubbels family could hardly operate their business at all. During this years of forced rest Elbert Gubbels had a notion to become independent of foreign suppliers and he drew up plans to start his own production of tobacco pipes after World War II.
Immediately succeeding the war it was very difficult to obtain good pipes for the import of foreign pipes was limited and so the time was right to go for something new. In 1946 he launched pipe production at Godsweerdersingel No. 20 in Roermond with a couple of new machines and some workers, a couple of them being foreign specialists and considered himself to commence. Yet the cramped accomodations and the needy equipment of the workshop showed the limits all too soon. It was obvious that the workshop was inadequate and Mr. Gubbels invested in another building covering an area of 900m² that also offered a sufficient warehouse. Now the production could be increased going hand in hand with developing new models and improving the quality of the pipes being produced.
The production grew steadily but it showed now that an “international” brand name was required for further expansion on international markets – obviously no one cared too much for pipes made in the Netherlands. Feeling that the time involved to get a new brand established was too lengthy, Mr. Gubbels bought a small trade company in Amsterdam which owned all the rights to the brand Big Ben and was already well established in other countries selling pipes among other goods. A real happenstance – Gubbels products could be marketed now in all European countries, the USA, Canada and many other countries, and nowadays they can be found in almost every country world-wide.
In December 1972 the company opened new and very modern factory in Roermond at Keulsebaan 505. With the official opening by the Governor of the Province of Limburg, the Gubbels company was, on behalf of Her Majesty Queen Juliana of the Netherlands, granted the title “Royal” so that the official name became: Elbert Gubbels & Zonen – Koninklijke Fabriek van Tabakspijpen (Elbert Gubbels & Sons – Royal Dutch Pipe Factory).
In honour of this title, a new brand was designed and named Royal Dutch. This brand was also created, to negate the belief that Big Ben was of English origin.
At the end of the 1970’s, there were only two briar pipe factories in the Benelux countries: Gubbels in the Netherlands and Hillen in Bree, Belgium. When the latter encountered major financial difficulties in 1980, Gubbels bought the company together with its brand Hilson – a well established brand, which was selling better on the most important German market than Gubbels’ mainstay Big Ben. The factory in Bree was closed soon, so Gubbels is presently the only briar pipe producer in the Benelux countries. (Exept less than a handful of pipemakers!)
More recentely Gubbels got known as producer of the Porsche[1] and Bugatti design pipes. Elbert Gubbels & Zonen B.V. is one of the worldwide biggest pipe producers today. Annually 250,000 – 300,000 pipes are made by ca. 60 employees. More than 70% of the production is exported.
In march 2012 Elbert Gubbels & Sons filed for bankruptcy.
You might also enjoy listening to Brian Levine’s interview of Elbert Gubbles on the PipeMagazine Radio Show“
Now do you see why I said Gubbels? The quote, “as there were no factories producing briar pipes in the Netherlands.” kind of gave it away. There was a long and great history of clay pipe production in Holland and the Netherlands was well as being the major trading hub of tobacco from 1700-1948 (Dutch tobacco trade | Dutch Pipe Smoker). I will include a few more sources of great information for those interested in the pipes and tobacco of the Netherlands:
The restoration, like most others, started with a clean piece of denim to work on. The term clean is beginning to be questionable. Maybe, freshly washed and still stained , would be more accurate.
The pipe looked clean enough for me to skip the Murphy’s Oil Soap scrub and wipe the stummel with a make-up pad dipped in 95% ethyl alcohol. Hmm, perhaps skipping the scrub was a mistake?
Next I wanted to pick out all of the original fill material. Here is the before photo. Oh, notice that cool grain pattern right of the glare. I had never seen that before.
After the picking.
There was a second strange grain circle pattern on the opposite side and more picking.
And picking on the shank.
None of the fills were large and there really were not that many. Well, compared to a Mastercraft pipe.
Little fill here, little fill there.
When I finished picking on the stummel I decided to ream the tobacco chamber. The usual tools were gathered; PiNet with #2 blades, Smokingpipes Low Country Reamer wood dowel wrapped in 220 sandpaper. In the wings were the General triangular scraper and the Sharpie marker wrapped in 320 sandpaper.
I thought this would be easy as it looked like the pipe had been smoked less than 10 times. WRONG! There was a bowl coating in place that was like a rubberized pipe mud. It was gray in color and wouldn’t scrape off easily. I tried scraping, sanding, and alcohol to dissolve it, but nothing really worked. The stuff would clog sandpaper immediately and require a wire brush to clean it out of the sandpaper.
Eventually I did get it cleaned out and could see clean briar. There was no damage to the chamber. This was mostly because the pipe had been so seldom used but also because the impenetrable rubberized krypton bowl liner. That supposedly quick job took over 30 minutes.
Next I addressed filling all the pits that I had picked open. This was done using brown cyanoacrylate (CA, super glue) and briar dust. I applied a dab of CA to the pit, if it was a millimeter or larger I then pressed a pinch of briar dust into the pit and rotated my finger. This pushed the briar dust into the CA wetted pit as well as bonded briar dust to the tip of my index finger. One of those was the result I was after. The newly filled fill was then sanded with a 400 sanding sponge.
For smaller pits I would just apply the CA to the pit and sand over it with a dusty (dusty with briar dust) sanding sponge. The sanding dust combined with the wet CA to fill the pit and it is sanded. Sometimes this took a couple of applications of CA and additional sanding.
Eventually all of the pits were willed and I was ready to move on to the stem.
The stem was oxidized but lacked significant tooth chatter. I again attribute this to the fact that the pipe had not been smoked much. I didn’t even bother photographing the two pipe cleaners that it took to clean out the airway. The one cotton swab used to clean out the 9mm filter space was left in the photo. Also I think I failed to mention that the aluminum accent ring was just that. An accent ring. It was not part of a screw in tenon. I guess that makes one of the two strikes that I mentioned at the beginning, a ball, not a strike. Although the whole 9mm filter thing is a strike. So we are back to two strikes and one ball. Oh, and the aluminum ring had broken free of the glue bond holding it to the stem.
I sanded the stem with the 400 and 600 sanding sponges preparing the stem for a bath in Before and After Deoxidizing solution.
I like to call this “going into deox”. Normally I put a stem in for 2-4 hours, forget about it for another hour or so, then remove it. This time I purposefully left it overnight, to be retrieved in the morning. Then I forgot about it for 2 hours. Total deox time 14 hours.
In the meantime I decided that I wanted to contrast-stain (please allow me to use stain and dye as synonyms) this stummel. The plan had two parts. Part one was to give it a coating of black to darken the softer grain of the briar, sand the surface removing the outer layer of darkened briar but keeping the soft grained area darker and the harder grained, less deeply dyed, areas lighter. Part two would be to redye the stummel with a diluted light brown dye, which is actually more yellow, allowing this to add a more yellow color to the light grained areas while not being noticed on the blackened areas.
Here we go: Black Fiebing’s Leather Dye preparations. Cover the work area with a couple paper towels and gather the gear needed; disposable lighter, folded over pipe cleaner, black dye, a duct tape wrapped fishing bobber (wine cork if you have them) and the subject stummel. I taped the stamping in an attempt to keep the dye from staining it. If it had gotten stained then I’d have to sand over the stamping , weakening the stamp, in order to make the stain look like it was blended and not like a “CENSORED” rectangle.
Use the folded pipe cleaner as the applicator for the dye and coat the stummel with dye. The duct tape wrapped bobber keeps unwanted dye out of the tobacco chamber and provides a handle since you need to forget to wear nitrile gloves. While the stummel is still wet, the wet dye aflame with the lighter. Look around for someone to show this blue flaming stummel to then realize your dogs don’t care.
I wiped the stummel with a paper towel to remove excess dye, mainly because I wasn’t wearing nitrile gloves and didn’t need black hands.
Back at the workbench I noticed that my tape had come off early in the dying process but it had worked long enough to keep the stamp mostly free of dye. I wiped the entire stummel with a make-up pad wetted with 95% ethyl alcohol.
Next came the sanding of the stummel with a 400 sanding sponge. The sponge was wiped off on the denim surface frequently to keep the sponge clean and remove the black dyed outer layer evenly. After the 400 sponge I used the 600 and 1000 sponges to further smooth and remove a little more black from areas. The stummel was then wiped with an alcohol wetted make-up pad.
It was now time for the coloring of the lighter areas. I used Fiebing’s Light Brown Leather dye diluted to 50% with 95% ethyl alcohol. A disposable pipette was used to measure out equal amounts of each liquid. I used a medicine cup for the mixing. The same procedure was used as before. And yes, I forgot to wear nitrile gloves again.
Below you can see the stummel has a more yellow or orange tint to it. This will lighten more with additional sanding and the wiping off of the stummel.
I returned to the workbench and wiped the stummel with an alcohol dampened make-up pad. Removing some of the light brown dye.
The below photo shows the stummel wet with alcohol.
The photo below shows the alcohol evaporated away.
I sanded the stummel with the sequence of sanding sponges 1500-3500. The stamping was avoided as much as possible to keep from weakening the stamp. Between each sponge I wiped the stummel with a make-up pad wetted with alcohol.
I micro-meshed the stummel with a sequence of 4000-12000 micro-mesh pads. Again wiping the stummel between each pad as done with the sanding sponges.
The stummel then received a coat of Before and After Restoration Balm applied by finger. The balm was allowed to sit and work it’s magic for 30 minutes.
The next morning, well two hours after I intended to, I removed the stem from the deox bath. It was hung and allowed to dip off excess solution. The stem was then vigorously rubbed with a coarse shop rag to remove any remaining deox solution.
I ram a couple of pipe cleaners through the airway and cleaned the 9mm filter opening with cotton swabs to eliminate the deox solution within. The H logo survived the deox bath. Yay!
Next came the soiling of many cotton make-up pads with Soft Scrub, elbow grease and oxidized vulcanite. The stem exterior was rubbed with mineral oil while the airway received a mineral oil dipped pipe cleaner run through it. The oil was allowed to sit for 30 minutes.
After the 30 minute oil absorption timer rang. It was at this time that I reglued the aluminum accent ring back onto the stem. I used a black CA bead around the base of the tenon then slid the ring into position. I applied a thin film of mineral oil to the tenon and the aluminum that contacted the shank in case any of the CA seeped away from where I wanted it. I hoped that the mineral oil would keep it from bonding to the shank or mortise. I taped the end of the shank and stem logo with painters tape. Either the mineral oil worked or the CA didn’t seep – after a few minutes the stem was removed from the shank and the aluminum ring was secure.
The logo was first scrubbed with an alcohol dipped cotton swab to remove oil and allow the tape to adhere. I then started sanding with a sequence of sanding sponges from 1000-3500 grit sanding sponges. Between each sponge, I would dip my fingertip in the mineral oil and rub the stem with oil then wipe away the oil with a paper towel.
The stem needed a new application of paint to the stamped logo. I used white acrylic model paint. The logo area was first cleaned of oil with a cotton swab dipped in alcohol then painted white.
The logo was then gently sanded with the 3000 grit sanding sponge to remove the paint not in the depressions of the logo.
I removed the tape from the shank and began micro-meshing the stem with a series of micro-mesh pads 4000-12000. Between each pad I applied a small drop of Obsidian oil, rubbed it onto the stem then wiped it away with a paper towel.
After the micro-meshing, I used Before and After Fine Polish followed by the Before and After Extra Fine Polish. Each polish was applied by finger then vigorously rubbed with a soft cotton cloth
The final step was to apply several coats of carnauba wax with the buffer. The wax was applied to both the stummel and stem. I then used a nanofiber polishing cloth to hand buff the pipe.
I liked the look of this pipe before and now after the restoration I liked it even more. The contrast staining produced the effect I was trying for although I did wish those two strange circular spots would have stained a bit better to show off the iris-like grain pattern. The stem polished up very nicely with the H now looking like a real logo. I did not have any 9mm pipe filters to use with this pipe to see if I like using a filter but I can attest to the pipe smoking very well without a filter. The thick briar provided a very cool smoke as well as feeling wonderful in hand. I did forget to mention that this pipe is drilled like a Peterson system pipe with a reservoir continuing down below the draft hole in the shank. I will try to photograph that and show it in the “finished” photos below. I do hope that you have found something here that you can use in the care or restoration of your pipes. If you like this sort of thing, please click the like and subscribe buttons. I thank you very much for reading the ramblings of an old pipe lover.
Below are some photos of the finished Oxford, made in Holland Bent Brandy.
Going from one extreme to the next. The previous blog was an elegant little Medico Jet Stream, this pipe is neither of those things. It is big and bold. I am not sure why I can’t settle on a pipe shape that is my favorite. Last time I checked my top three list of favorite shapes had 5 shapes in it. I know what you are thinking, “What the heck? A top three list with only 5?” Oh, not what you were thinking? Well I guess I’m not good at counting nor interpreting thoughts. Anyway, here I have a large Kaywoodie HandMade Colossus that I picked up on eBay after having so much fun with three previous Kaywoodie HandMade pipes. Here are links to them if you are interested: HandMade Saddle Stem, HandMade Tapered Stem and just HandMade. All three of those pipes were large blocky paneled Custombilt style pipes. This one has curves, I like curves.
The Kaywoodie upon arrival
Before I get too carried away with qualitative emotional nonsense let’s have a look at what I was looking at.
Yeah, it was big, bold and a mess. This pipe had been smoked a lot more than the previous HandMades. Perhaps that meant that it was a pipe that was clenched. The previous HandMades had masses that would test the jaw strength of Charles Atlas himself. Okay, that was an attempt at 1949-style humor (about the time of these pipes).
Besides, by the look of the chunk missing from the bottom of the stem, clenching most likely was involved. I had a dirty, oxidized, busted-up, relic of a bygone era and I was in heaven.
Kaywoodie HandMade Background
I am going to use the historical information from the previous blogs about Kaywoodie HandMade pipes because I am a rather lazy Gen-X slacker and I don’t have to credit myself, do I?
“Kaywoodie name first appearing in February of 1919.” (Kaywoodie History – Greywoodie LLC) The history of Kaywoodie pipes is fortunately well documented thus, allowing rather precise dates for a Kaywoodie collector to declare the provenance of their charges. The above pictured Kaywoodie is stamped HANDMADE over KAYWOODIE (left) and IMPORTED BRIAR (right). No shape number is present.
Using this information and referring to the Kaywoodie Collectors’ Guide listed on pipedia.org I found that these pipes were made during the following years:
“The Oversize Kaywoodies were, as the name implies, “Giants”. Lowndes notes that these pipes were stamped simply, “Hand-Made”. The pipes were all roughly “bulldogish” in appearance and were available in the following styles and grades7 :
All of this generally fits this pipe. I still wanted to give this pipe a Kaywoodie name rather than “bulldogish” as mentioned above. Looking at the below two pages from the 1947 Kaywoodie catalog, I would have to say that the Kaywoodie HandMade in hand is either a “Colossus” or a “John Henry”.
Now examining the areas circled on the two images from the 1947 Kaywoodie catalog and the photograph of this pipe I am more inclined to call this pipe a “Colossus”. Now, this could probably be argued either way but the beading appears to have a slight vertical increase or rise from the shank in both this pipe and the Colossus image. This pipe is certainly large enough to have included another line for stamping “Colossus”- darn it Kaywoodie.
So, I guess I will have to call this pipe a Kaywoodie HandMade Colossus. This also means that my Obsessive-compulsive disorder (OCD) will demand that I change all of the photos that I have taken and labeled as “bulldog” to Colossus. Bah! There, 34 photos and one folder relabeled as well the term “bulldog” within the document have been changed to Colossus.
The Colossus Restoration
As usual the restoration began with a clean denim piece as a work surface. I was a little worried about the condition of the rim and cleaning it of the lava.
Before I could address the rim I wanted to ream the tobacco chamber and inspect it. The tools were gathered and included the PipNet with #2 and #3 blades, General triangular scraper (with the tip ground round), Smokingpipes Low Country Reamer and a wood dowel wrapped in 220 sandpaper.
The tobacco chamber of the Colossus was not heavily caked indicating that it had been reamed on occasion. The existing cake was very hard and resisted reaming. Once removed the interior of the chamber was sanded and revealed no heat damage from smoking but there were a couple of small gouges from exuberant scraping.
Next, I took to cleaning out the stem. I continue to not be a fan of non-removable stingers. This stem required several more pipe cleaners than pictured to remove all the yuck (yuck is the technical term for smoked tobacco residue) from such a small hole and short stem.
No, I did not cut off the stinger, in a bout of frustration. It’s just hiding behind the pipe cleaner which is acting as a hanger for the stem as it goes into the Before and After Deoxidizing solution. The stem soaked in deox (my term for the Deoxidizing solution) for 4 hours.
With the stem in deox, I turned my attention to the stummel. It was time to see what it looked like without 70+ years worth of dust, dirt and grime. The stummel was initially scrubbed with a medium bristle toothbrush and undiluted Murphy’s Oil Soap. I say initially because there were 3 applications of soap and an upgrade to a stiffer nylon scrub brush. Wow, I just realized that I need to clean that faucet of all the Murphy’s spatter. The stummel was rinsed with warm water and dried with a cotton dish towel. While I was at the sink I also used a nylon shank brush with a bit of Dawn dish soap to scrub the airway within the shank. This didn’t do much other than soften the yuck in the shank.
With the exterior mostly clean, except the rim, I attacked the shank. The first thing I did was an exploratory cotton swab dipped in 99% isopropyl alcohol. It came back fouled with yuck. Next I started scraping with a dental scraper. The scraping produced a good amount of yuck which was surprisingly dry and crumbly. The next attack was of the chemical variety – Geneva Convention be damned. I poured about 4 ml of the 99% isopropyl alcohol into the bowl and left it to flow into the shank. I then scrubbed the shank with a nylon shank brush and the alcohol and poured it into the medicine cup. The alcohol was significantly darkened.
After numerous series of scraping – alcohol scrubbing – cotto swabbing – folded bristle pipe cleaner scrubbings the shank was cleaned out.
Then came the dreaded lava removal from the rim. The rim had received frequent splashes of alcohol during the shank cleaning and this helped to soften the lava. I used a brass brush dipped in 99% isopropyl alcohol to scrub the rusticated rim in line with the rustications. This worked very well. A couple of spots did require scraping with a fine pointed dental pick.
WIth the rim cleaned off and the grime removed from the stummel I examined it for spots to fill. I only found one that I thought needed attention. It probably would have been fine to leave it alone but I filled it with brown cyanoacrylate and carefully placed briar dust anyway.
The new fill was lightly sanded with a 400 grit sanding sponge then gouged with a fly tying bodkin and dental scraper to add lines in an attempt to match the surrounding rustication.
Since this stummel was heavily carved and rusticated there was nothing to sand or micro-mesh. I then applied a coat of Before and After Restoration Balm with my finger and worked the balm into the rustications with a baby toothbrush.
After 4 hours of soaking in the Before and After Deoxidizing solution the stem was removed from the solution and allowed to drip off some of the solution. The below photo also shows that I followed local electrical code when finishing the basement – ground fault interrupter outlets and all.
The excess Deoxidizing solution was vigorously rubbed from the stem with a coarse shop rag to absorb the solution and abrade off some of the oxidized rubber. The color of the stem was much improved.
Back at the workbench, I ran a couple more pipe cleaners through the stem to rid the airway of any deox solution and began scrubbing the stem with Soft Scrub on make-up pads. The oxidation of the stem was quite heavy and several pads and additional Soft Scrub were used.
More Soft Scrub. Eventually the stem looked nice and black with no brown. It was then coated with a layer of mineral oil both outside and in the airway. I allowed the oil to soak into the vulcanite for 30 minutes before continuing to work on the stem.
I removed the mineral oil from the button area of the stem using 99% isopropyl alcohol on a cotton swab. I needed to rebuild the broken piece of the stem. Here is the before photo to illustrate what I was rebuilding.
I needed a “dam” to stop the CA from flowing into and blocking the airway. I chose to use a This Falcon pipe cleaner folded in half as the basis of this dam. I then wrapped the folded end of the pipe cleaner in clear Scotch tape. The cheap stuff, not the 3M product. CA does not adhere well to Scotch tape and the clear tape does not dissolve with applications of CA drying accelerator like the good stuff, 3M, does. The excess tape was trimmed from the dam with scissors. The dam was then inserted into the airway. I failed to photo document the early stages of the CA building. I get into a “rebuilding tunnel vision mentality” when doing this and frequently forget to photograph the process. When I did remember, I had applied about 4-5 layers of CA and spritzed each with a CA drying accelerator. A key to doing this is to use several small applications rather than trying to fill the whole gap all at once.
Eventually I had enough material built up to allow me to file the new fill smoothly to the existing stem. I used a flat needle file for the smoothing. There remained one depression that would require additional CA.
With additional applications, filing and sanding the stem was mostly rebuilt. Now I had to rebuild the button. To do this I use the clear Scotch tape to seal off the newly constructed stem surface. This will allow only the button to receive new CA. The CA is applied in a thin layer. The stem is then flipped over so the CA hangs down by surface tension. While holding the stem upside down I spritzed the wet CA with the accelerator. Quickly before the accelerator completely cures the CA, I turn the stem back over and use a sharp knife to cut a straight line for the back of the button.
After the CA cured completely, I removed the tape and the excess CA came off with it.
The new button is then shaped with a flat needle file and a 400 sanding sponge.
Here is a photo of the new button in profile.
The reconstruction of the broken area was complete but the airway was not very well shaped. The lower part needed additional material and a nice smooth surinterior surface. I needed another dam. I cut a piece from a plastic lid.
Here you can see the area I wanted to fill. The stem is held upside down.
The new dam would allow the CA to flow on top of it and adhere to the vulcanite above it.
Two applications were applied with drying accelerators spritzed onto each. The first penetrated into the stem while the second built up additional material on the outer button.
The dam was removed
A wood block was used to cut away some excess CA. The remaining material was filed then sanded.
To smooth the airway I cut a tapered piece from an emery board.
This abrasive emery board was used to sand the interior of the stem’s airway.
Another view of the emery board.
The airway was smooth with the proper shape.
The last reconstructive surgery needed to rebuild the top of the button. I wrapped the stem below the button with clear Scotch tape to protect the stem from additional CA.
A bead of black CA was applied to the button. This was held upside down and spritzed with an accelerator..
While still soft before the curing completed, I cut along the back side of the button with an Exacto Knife. I actually did this twice as I failed to photograph the first tape removal. A second taping was done and a second application of CA. this was also cut as before..
Here is a photo of the excess CA from the second application.
The cured CA was then filed and sanded to shape.
Further sanding defined the shape better.
The shank of the pipe was taped to protect the carving and rustications while the stem was then sanded with the 400-1000 sanding sponges
The sanding progressed from the 1000-3500 sanding sponges. I applied a coating of mineral oil to the stem between sponges. The oil was rubbed in by finger tip and wiped off with a paper towel.
Further fine finishing was then done with micro-mesh pads 4000-12000. Between each of these pads a light coating of Obsidian Oil was applied by finger tip and wiped off with a paper towel.
Final polishing was done with Before and After Fine Polish applied by finger tip and vigorously rubbed with a soft cotton cloth.
The final polishing was done with Before and After Extra Fine Polish as above.
The final step of the restoration was to apply several coats of carnauba wax with the buffer. I swapped a clean flannel wheel after waxing and used it to heat and absorb any excess was from the pipe in an attempt to avoid an excess carnauba wax deposit within the rustication grooves.
The fourth Kaywoodie HandMade was completed. Overall I was happy with the restoration. The old vulcanite never did look like I had hoped it would, as there are still shades of brown visible in bright light. The surface polished well but the color is not the black I wanted. The rustication of this pipe obscures any sign of briar grain save for some lovely straight grain on the flat stamped surfaces and swirling bird’s eye on the bottom. The wood did appear to come back to life with the cleaning and Restoration Balm. The pipe feels excellent in hand due to the rustication and size. I am sure that it will provide long smoking sessions that will remain very cool due to the substantial bowl and thick briar walls. The dimensions of this pipe are as follows:
Length: 5.35 in./ 135.89 mm.
Weight: 2.29 oz./ 65.00 g.
Bowl Height: 1.71 in./ 43.43mm.
Chamber Depth: 1.39 in./ 35.31 mm.
Chamber Diameter: 0.83 in./ 21.08 mm.
Outside Diameter: 2.12 in./ 53.85 mm.
I do hope that you have found something here useful to your own pipe care or restorations. If you like this sort of thing, please click the like and subscribe buttons. Thank you for reading the ramblings of an old pipe lover.
Below are some photos of the finished Kaywoodie HandMade Colossus.
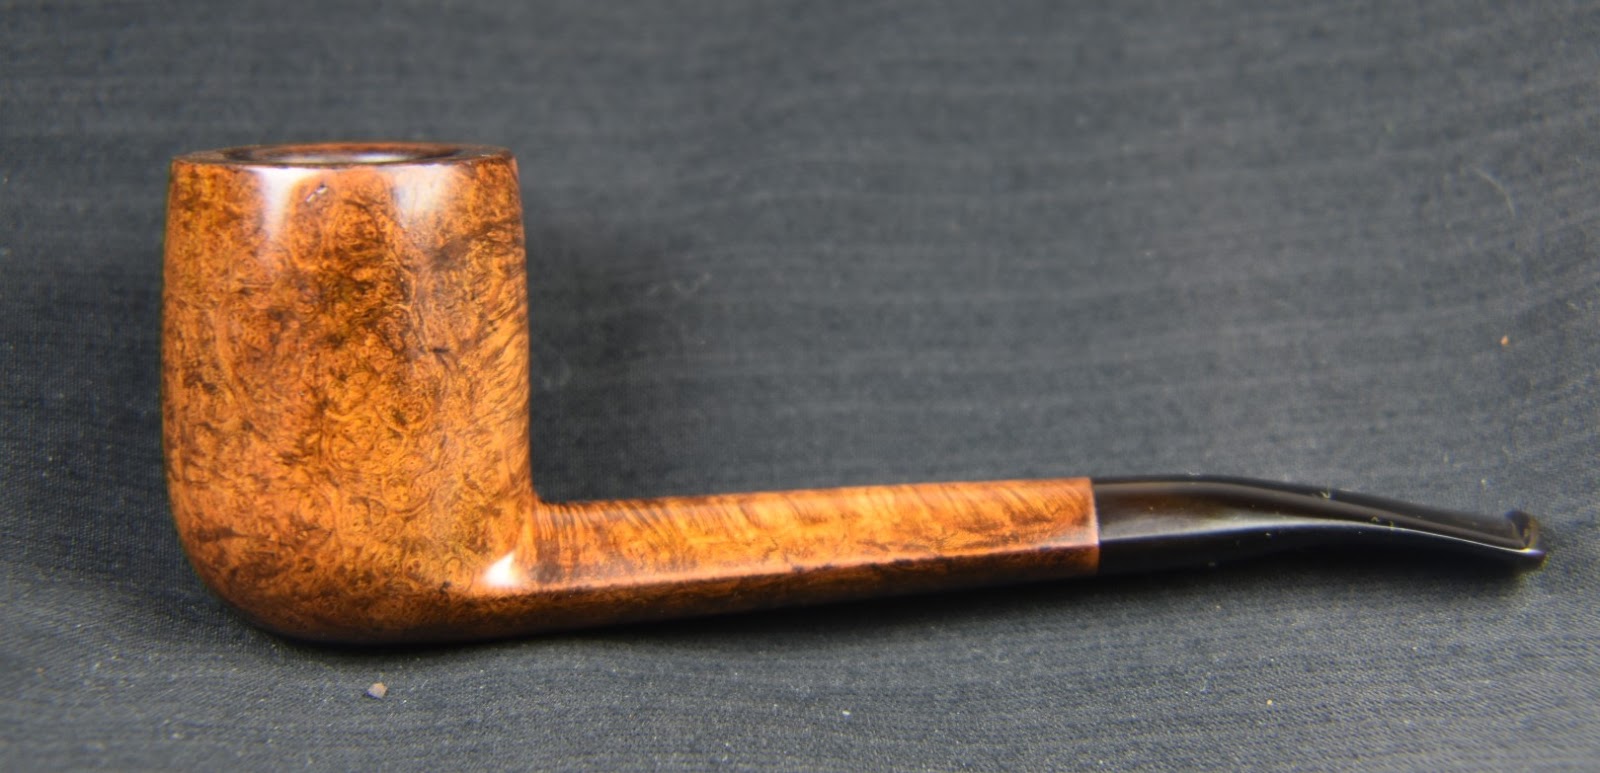

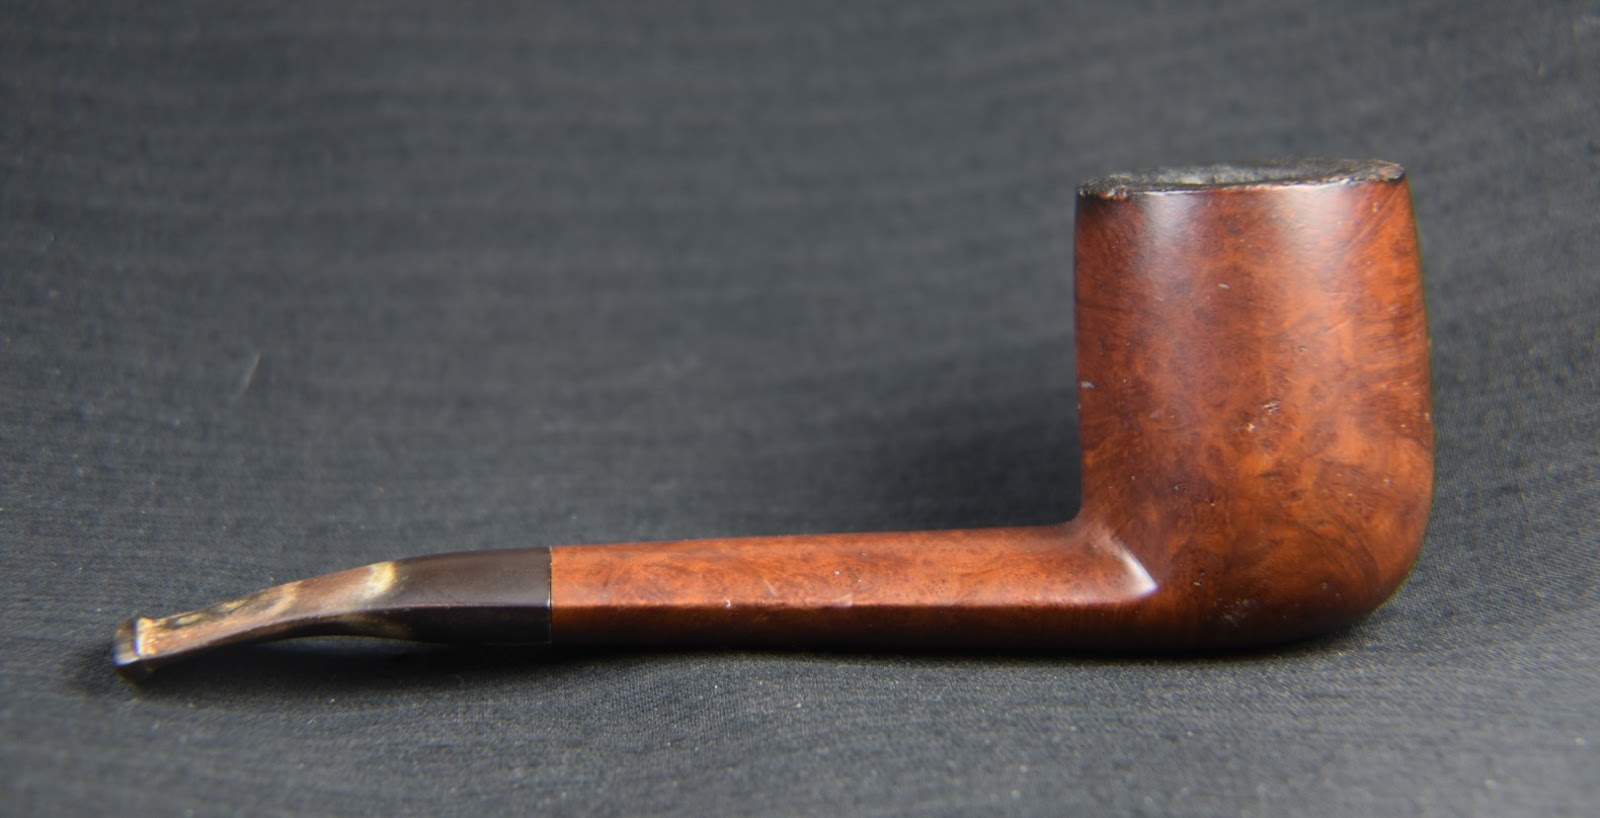
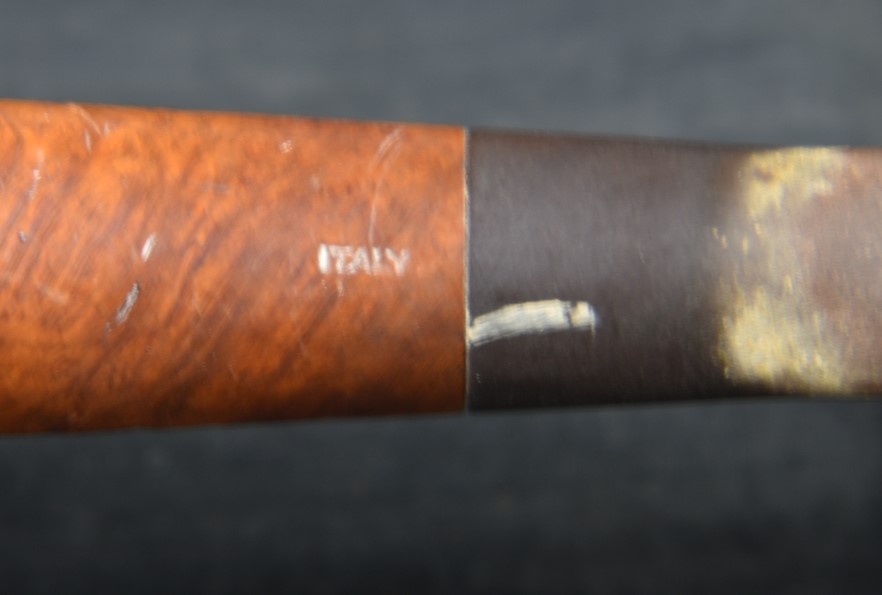

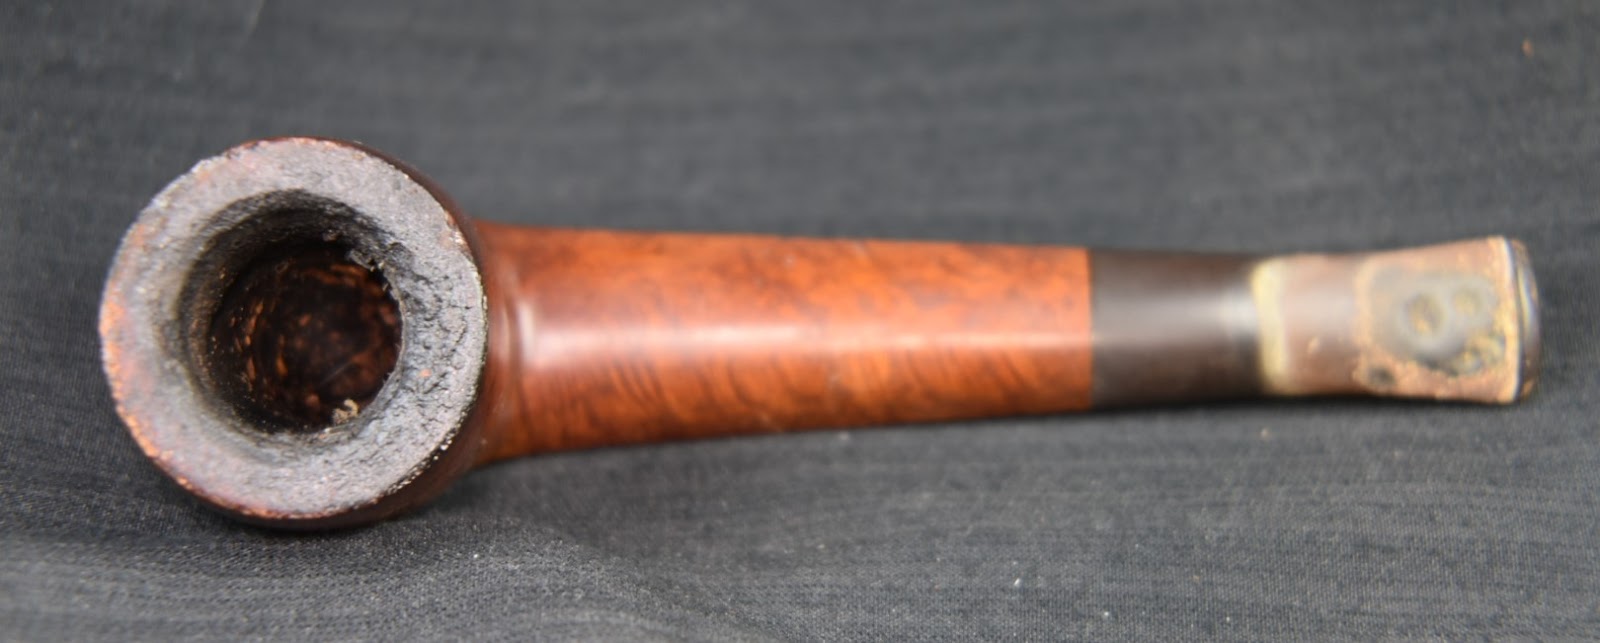


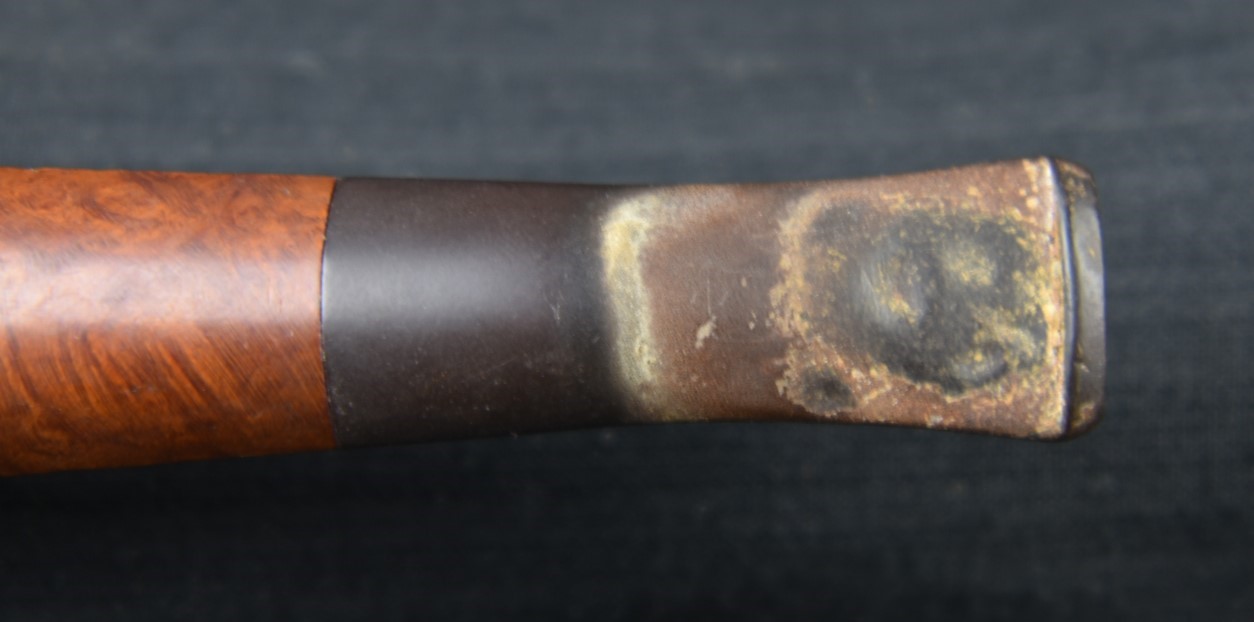

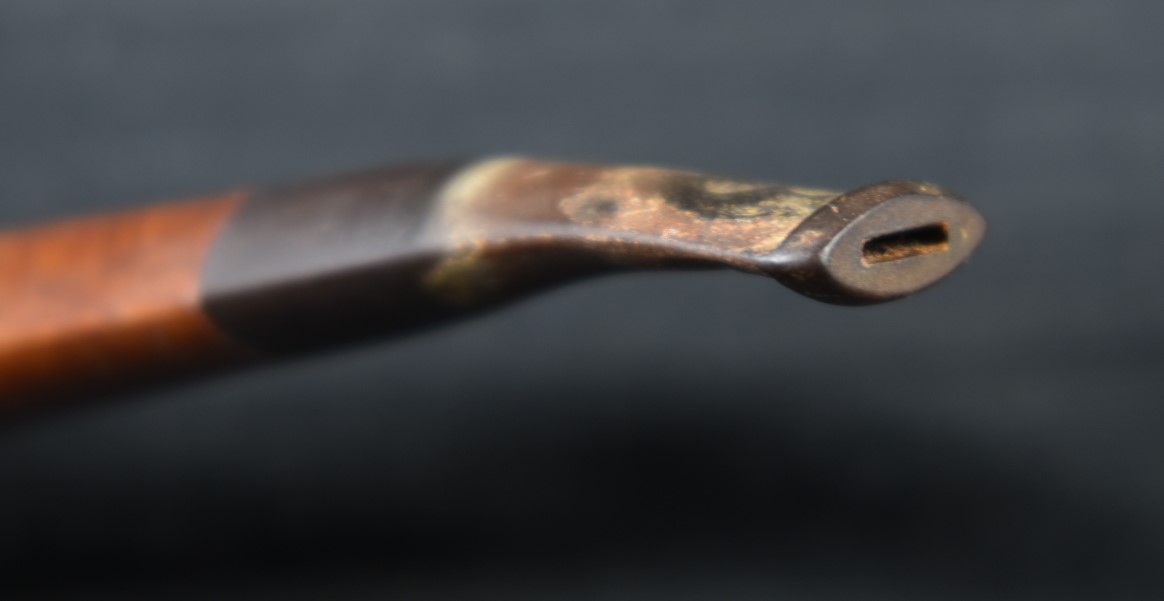


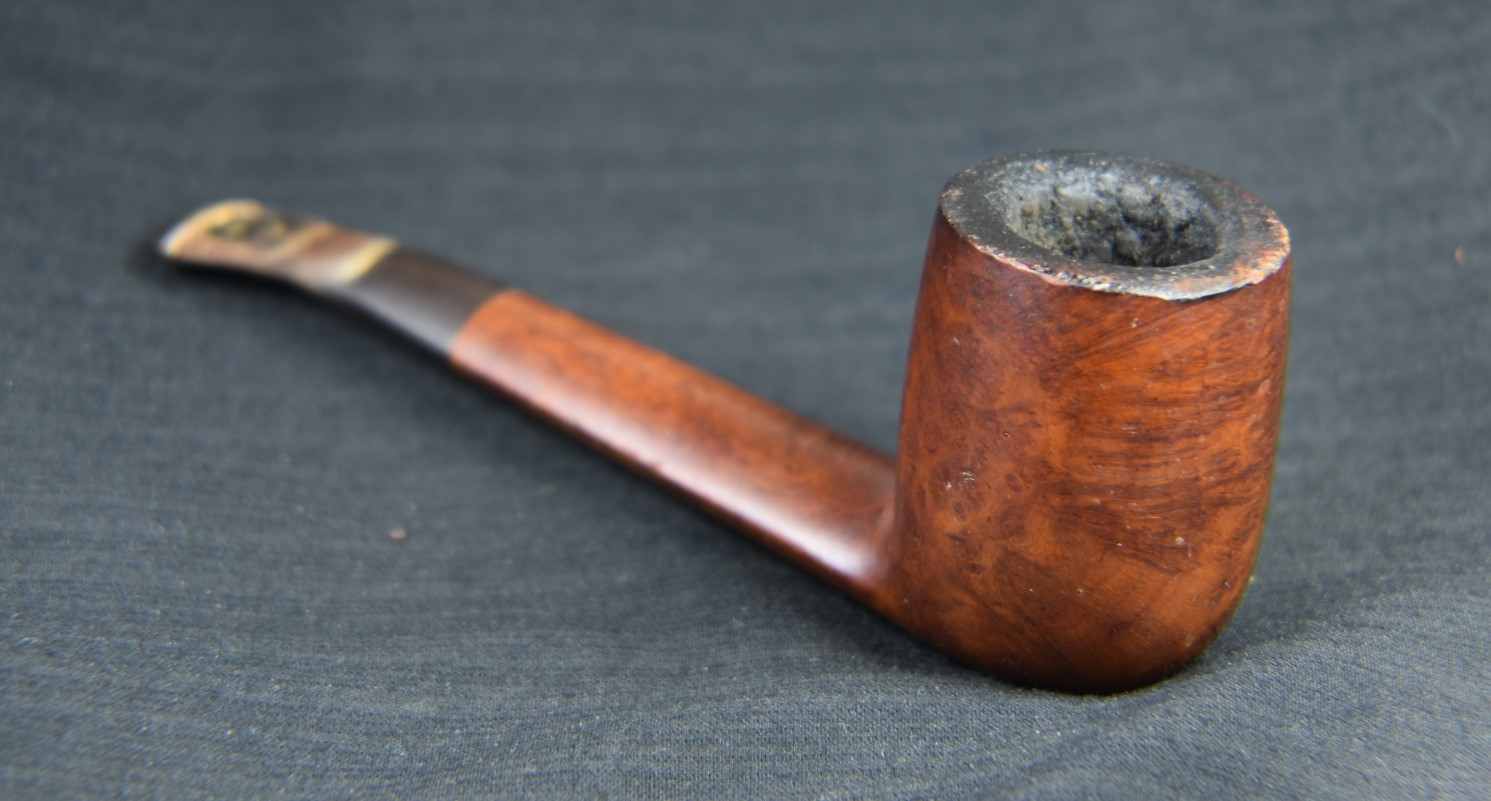
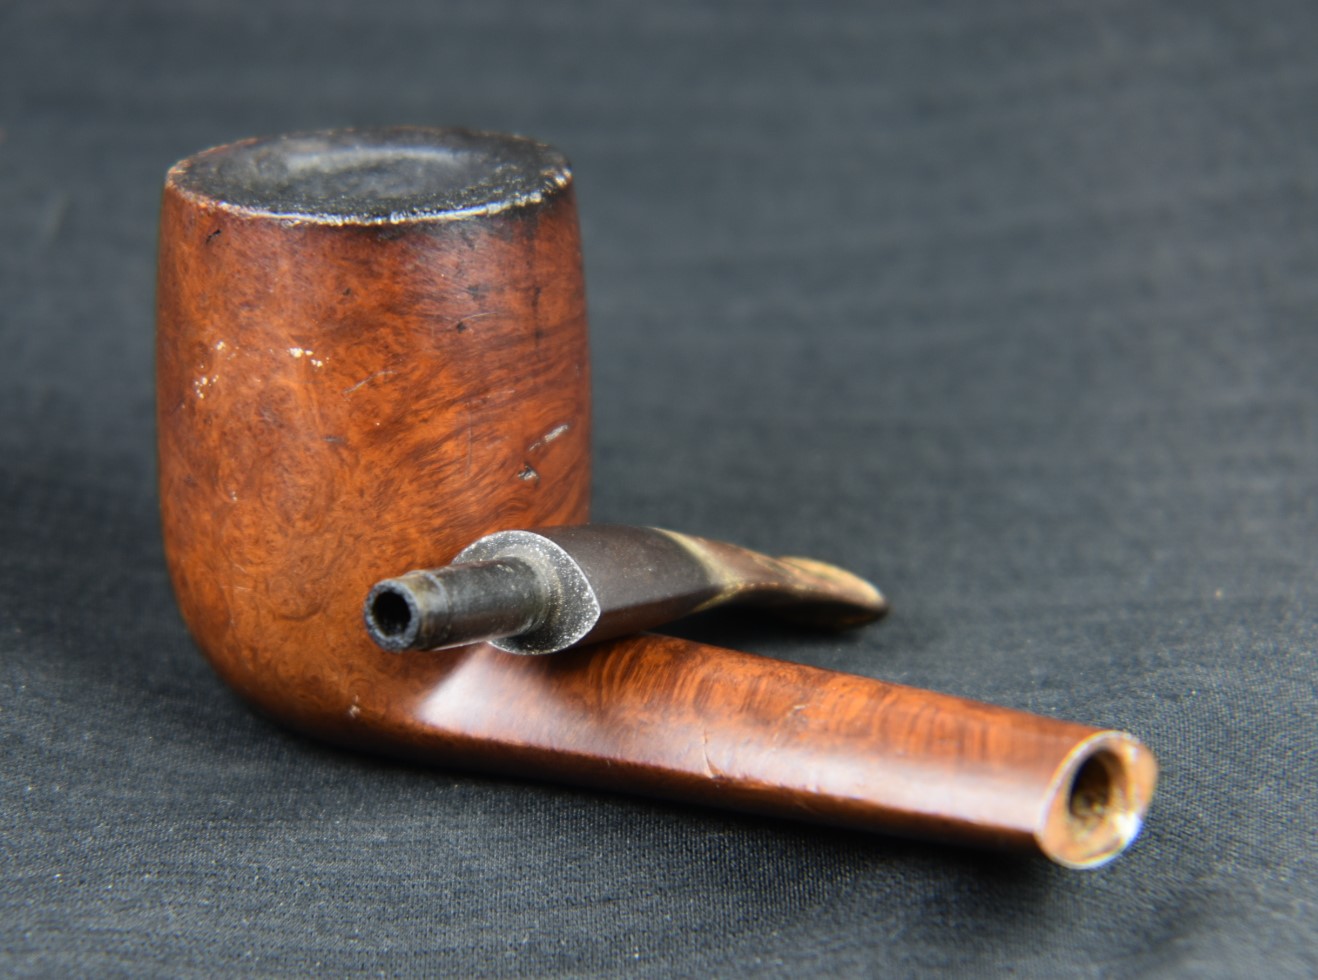


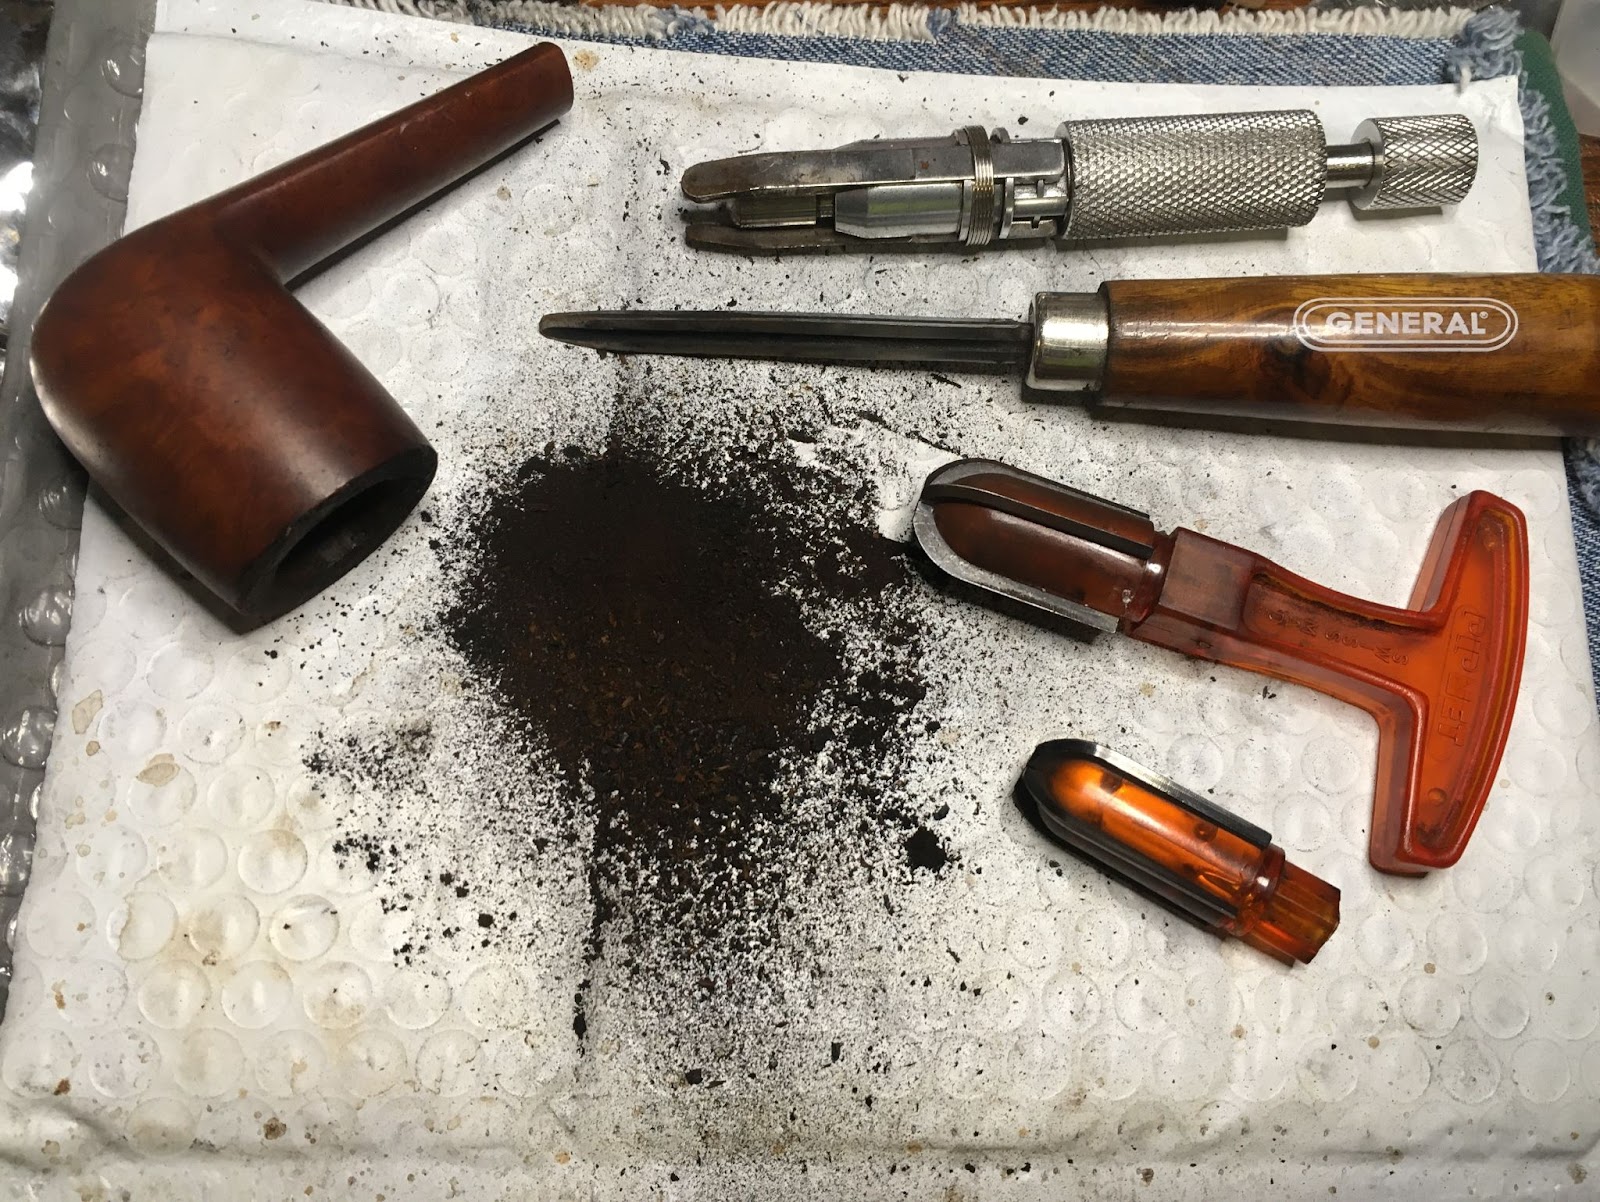
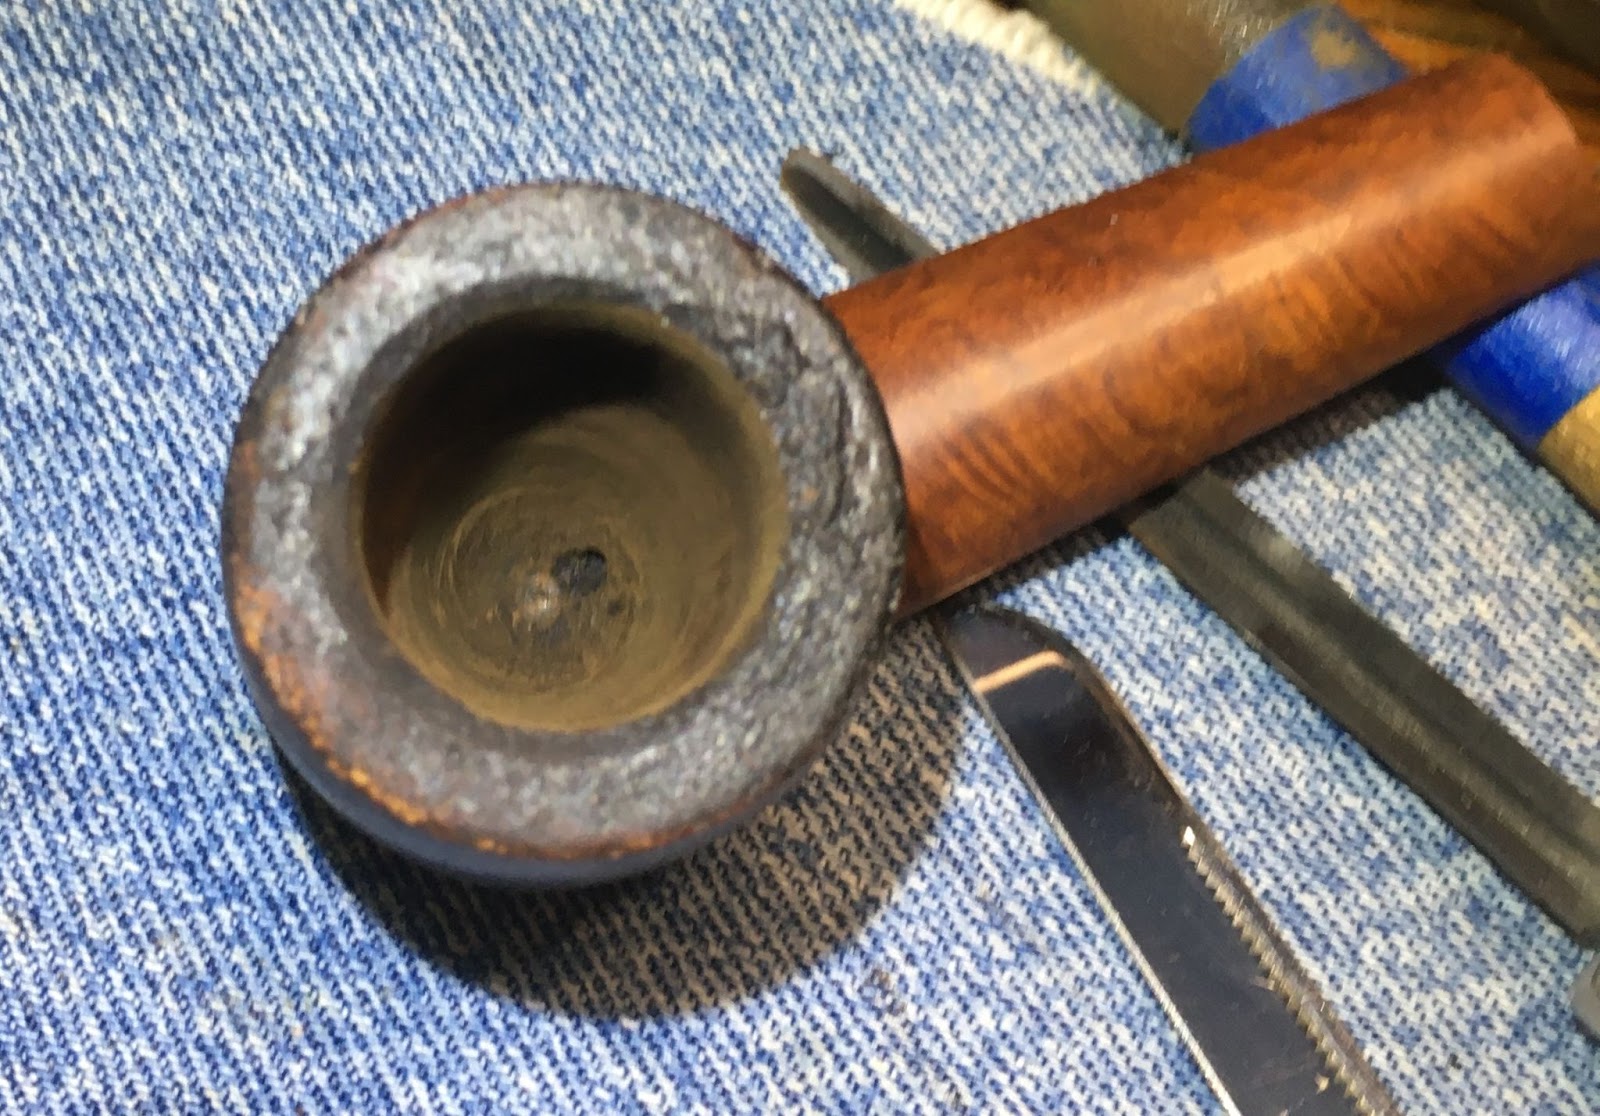

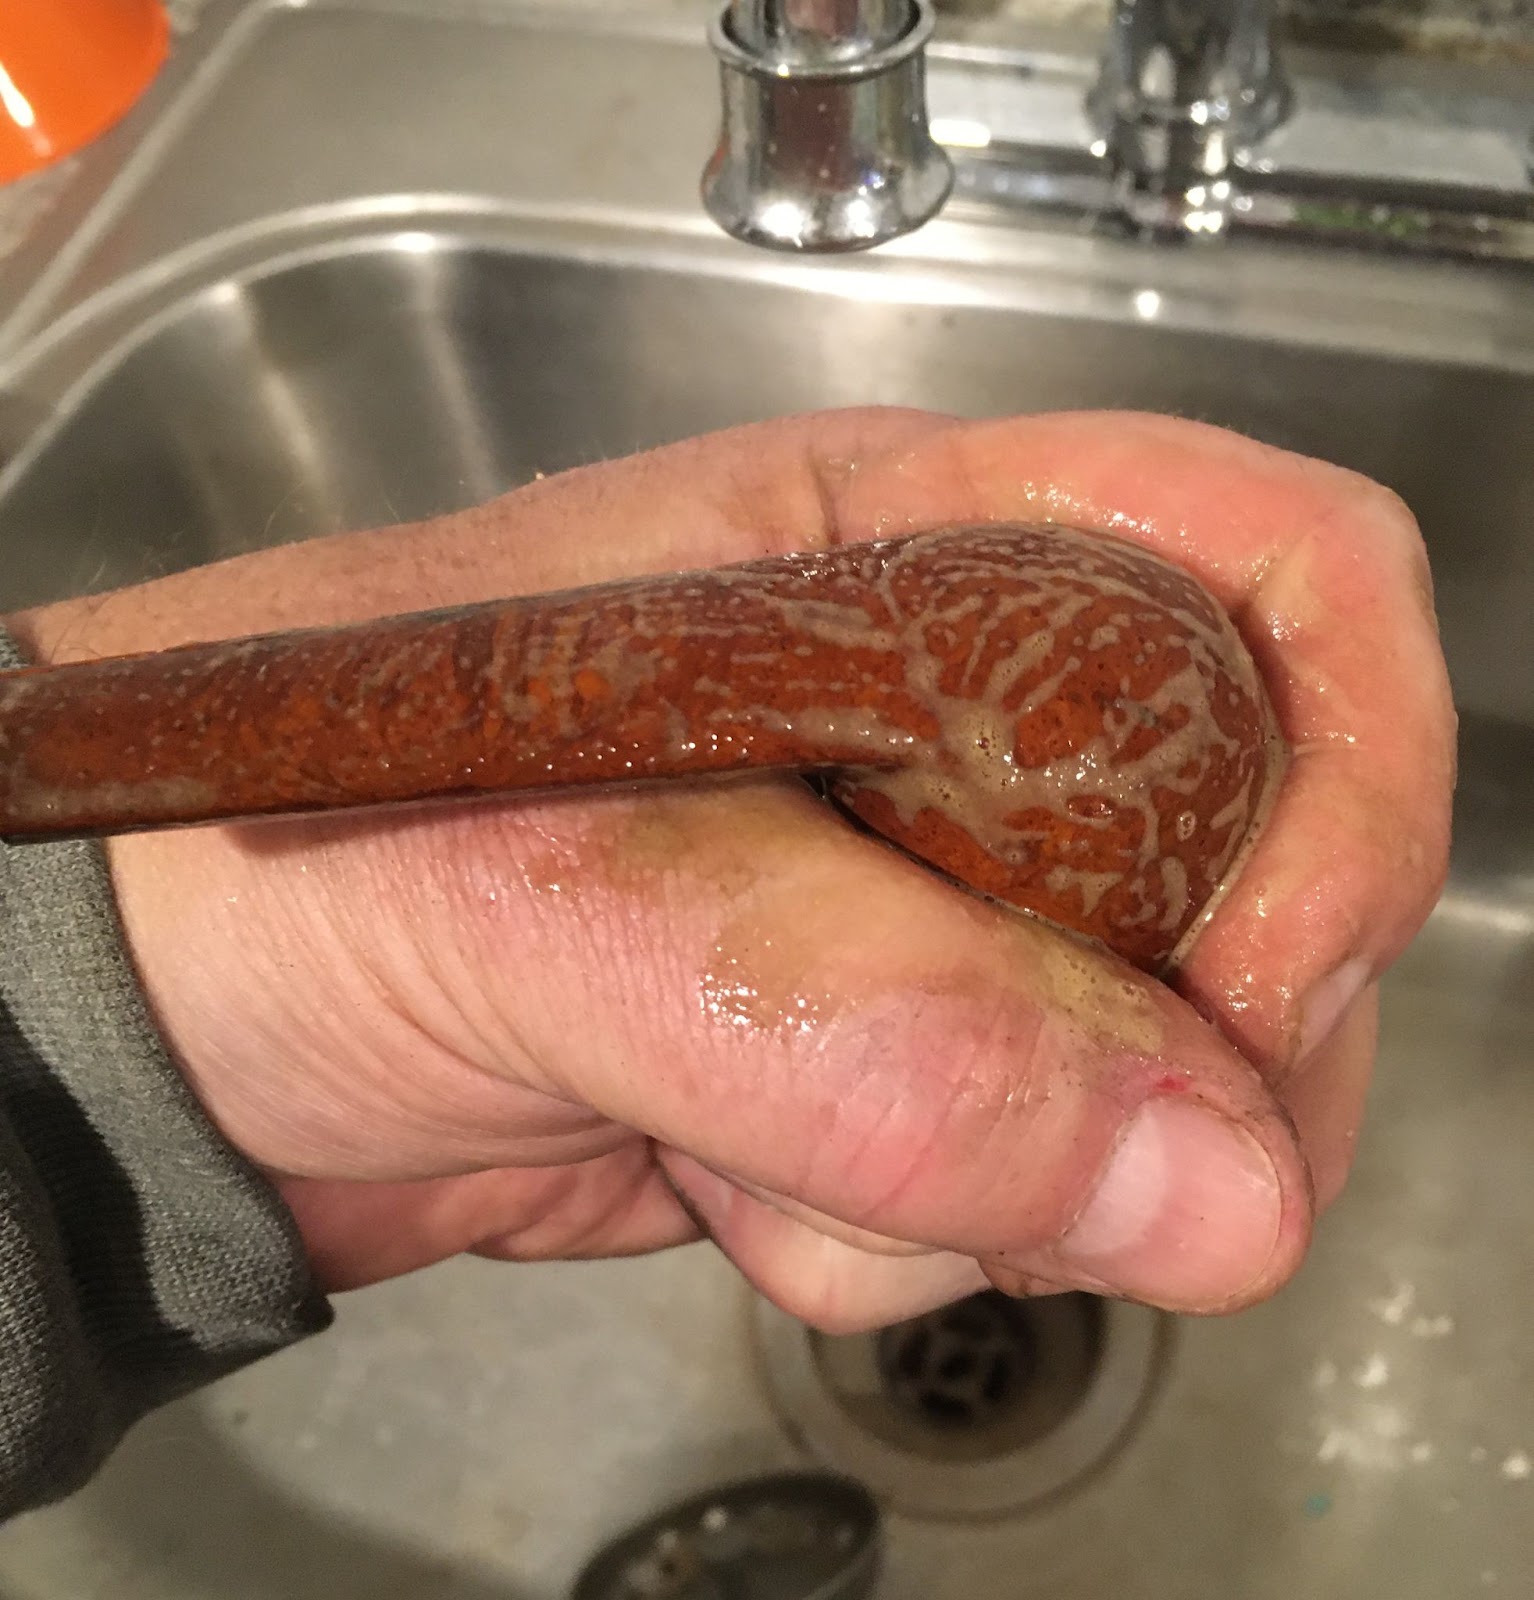
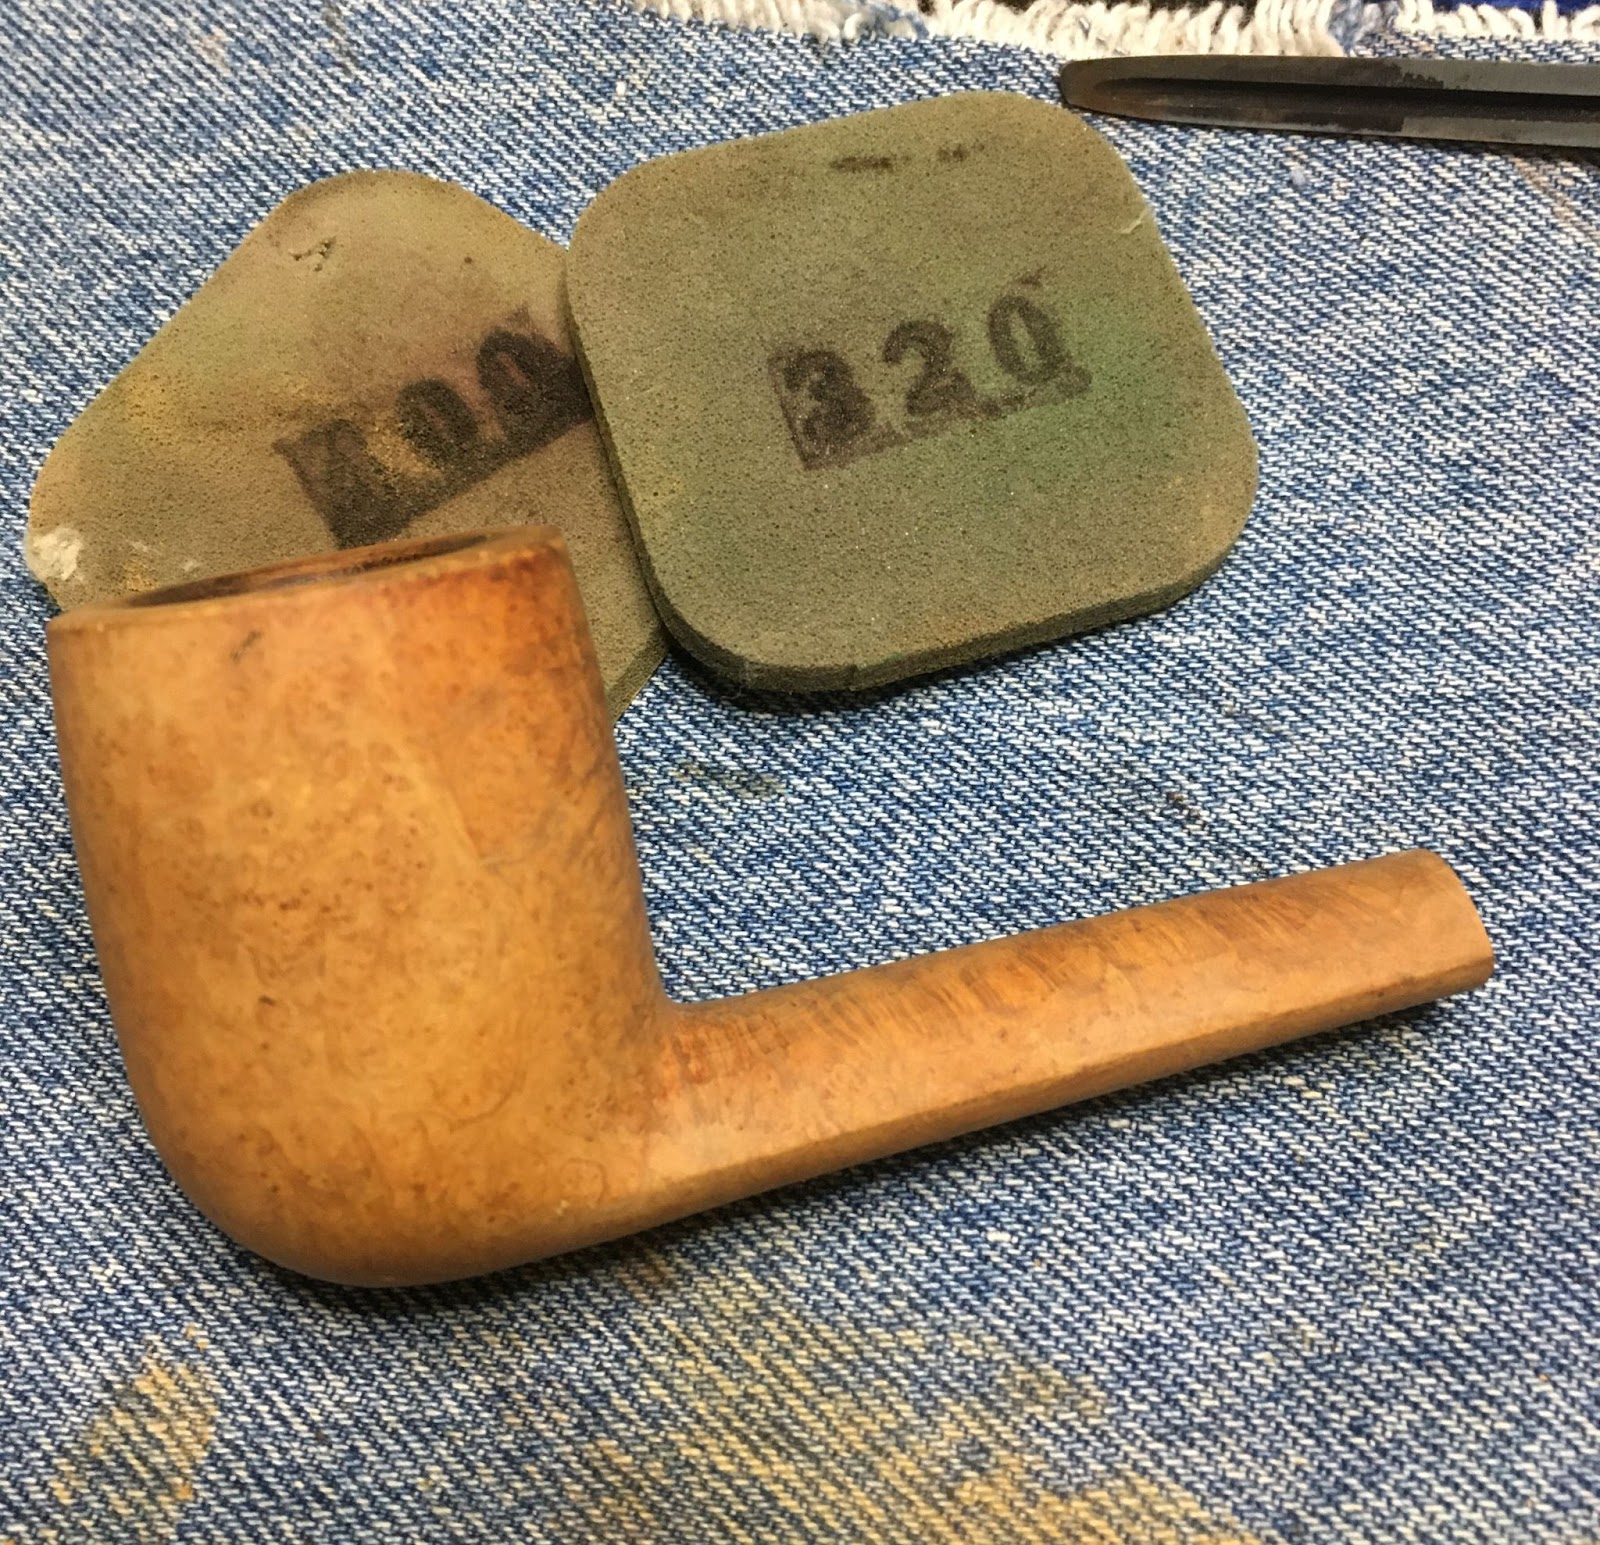
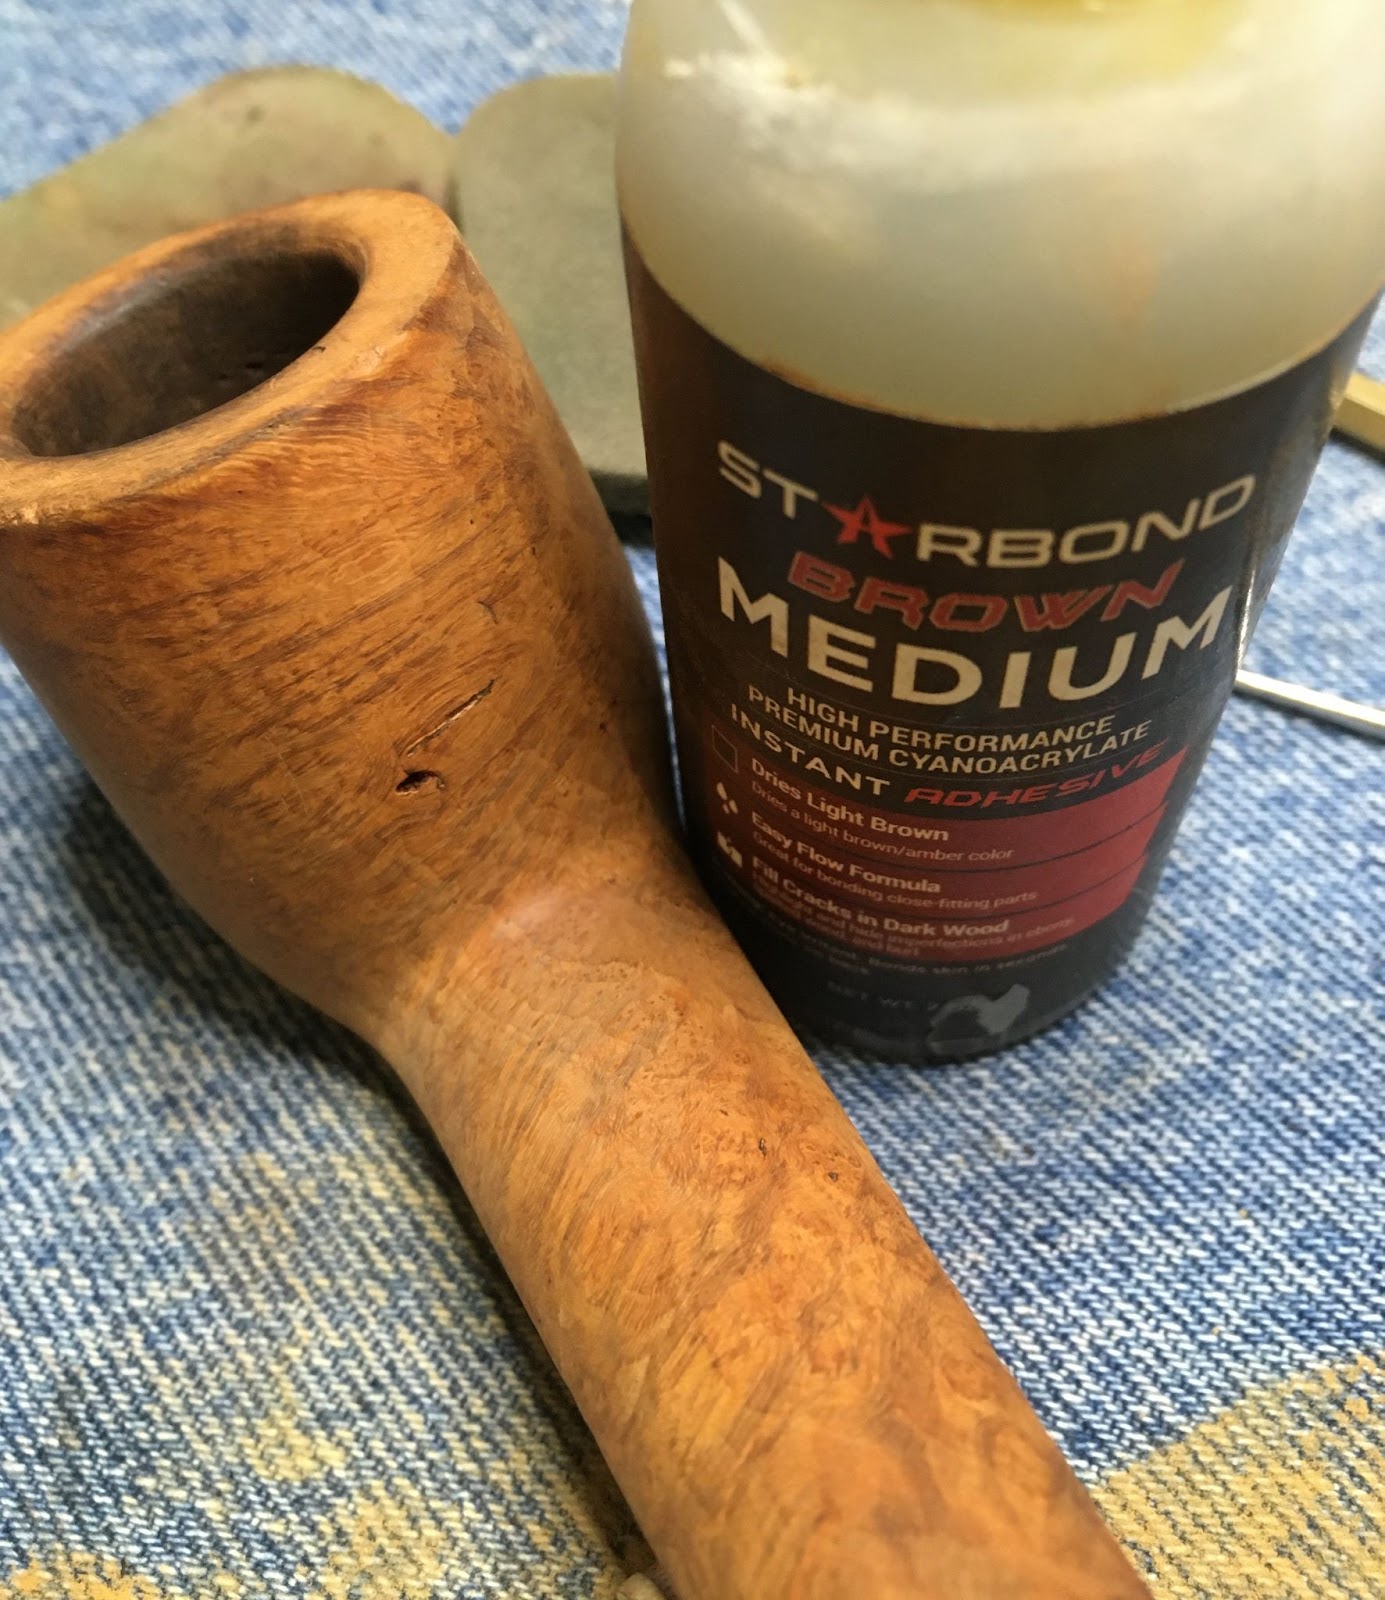


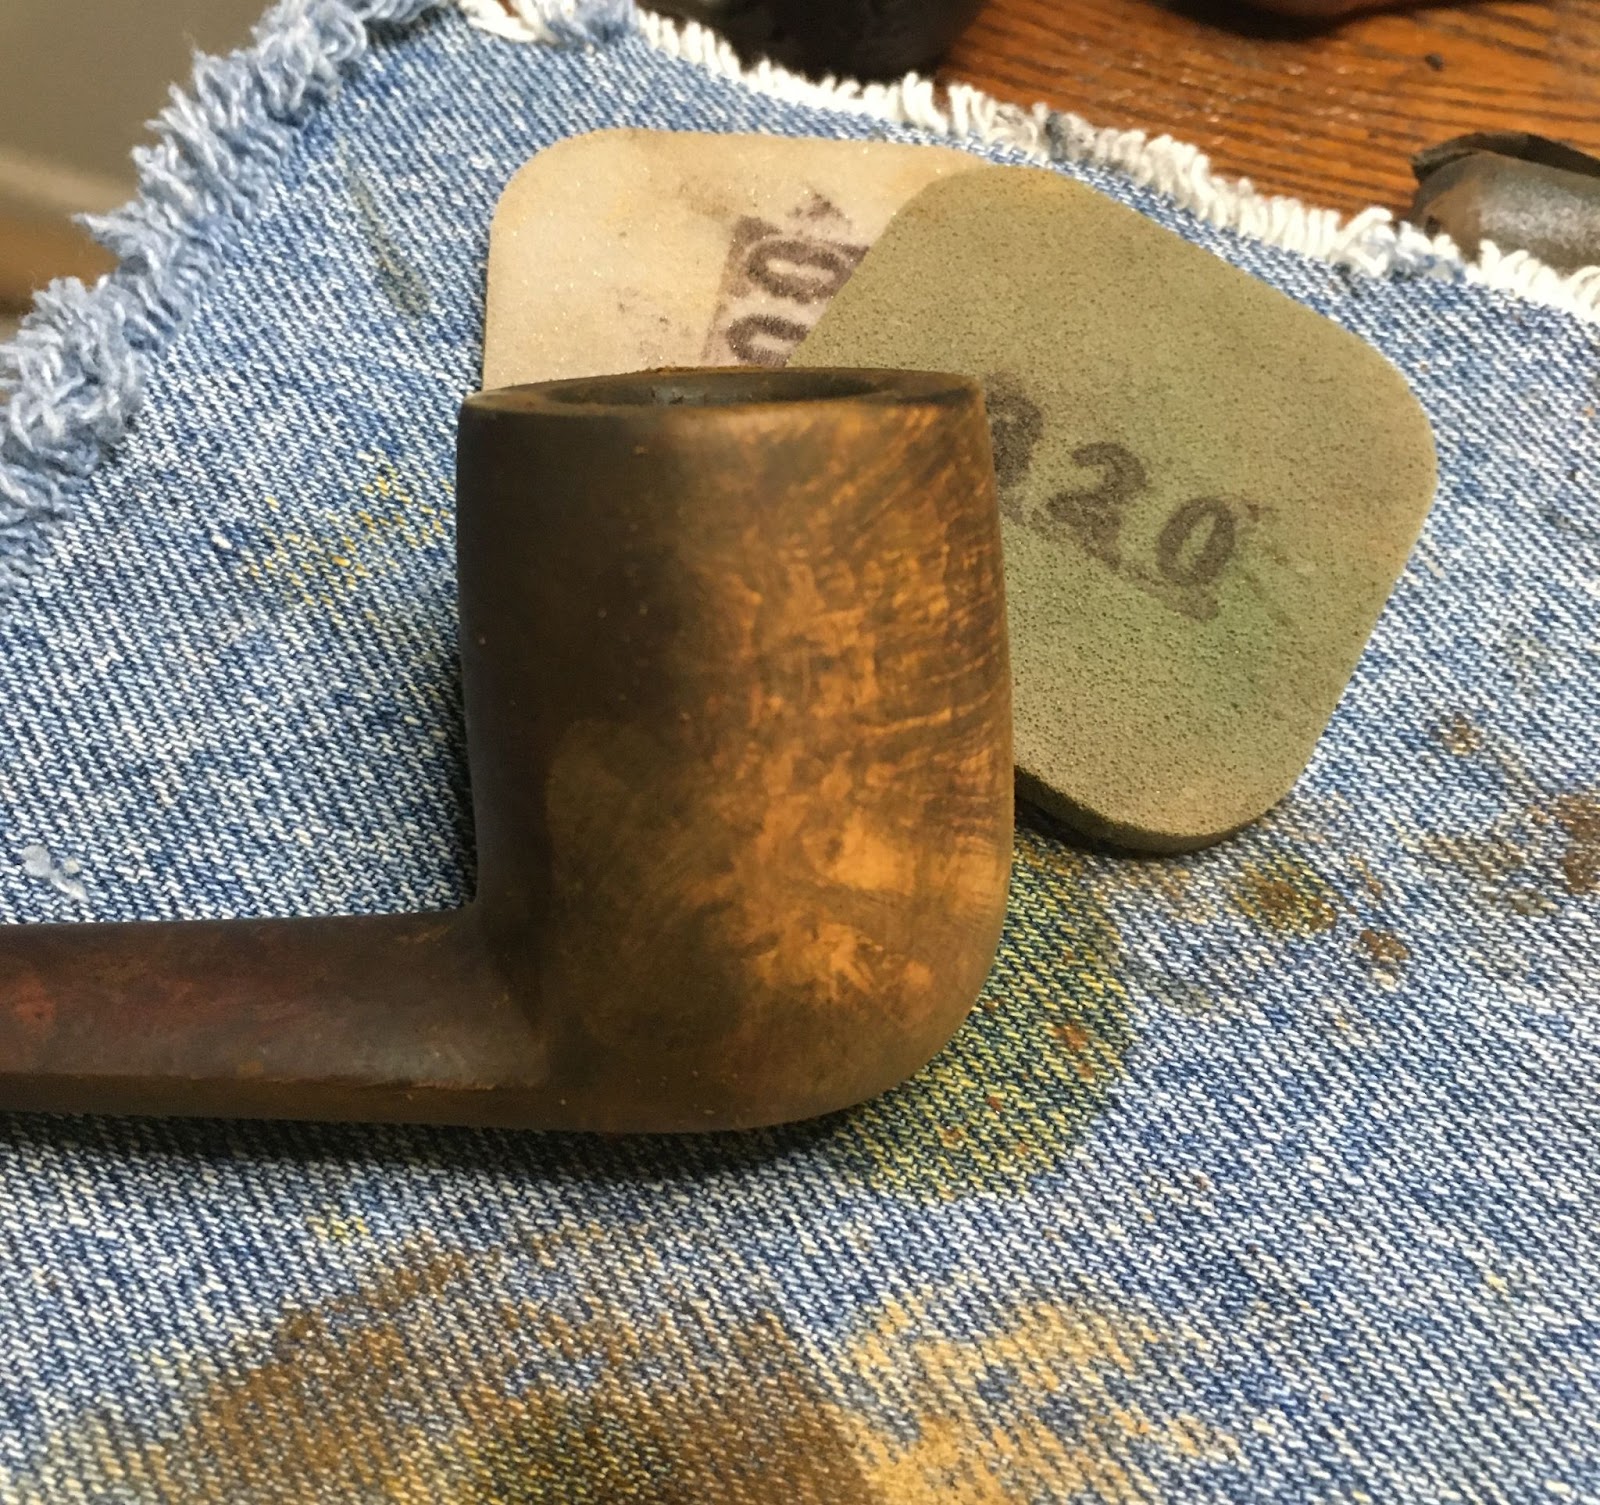

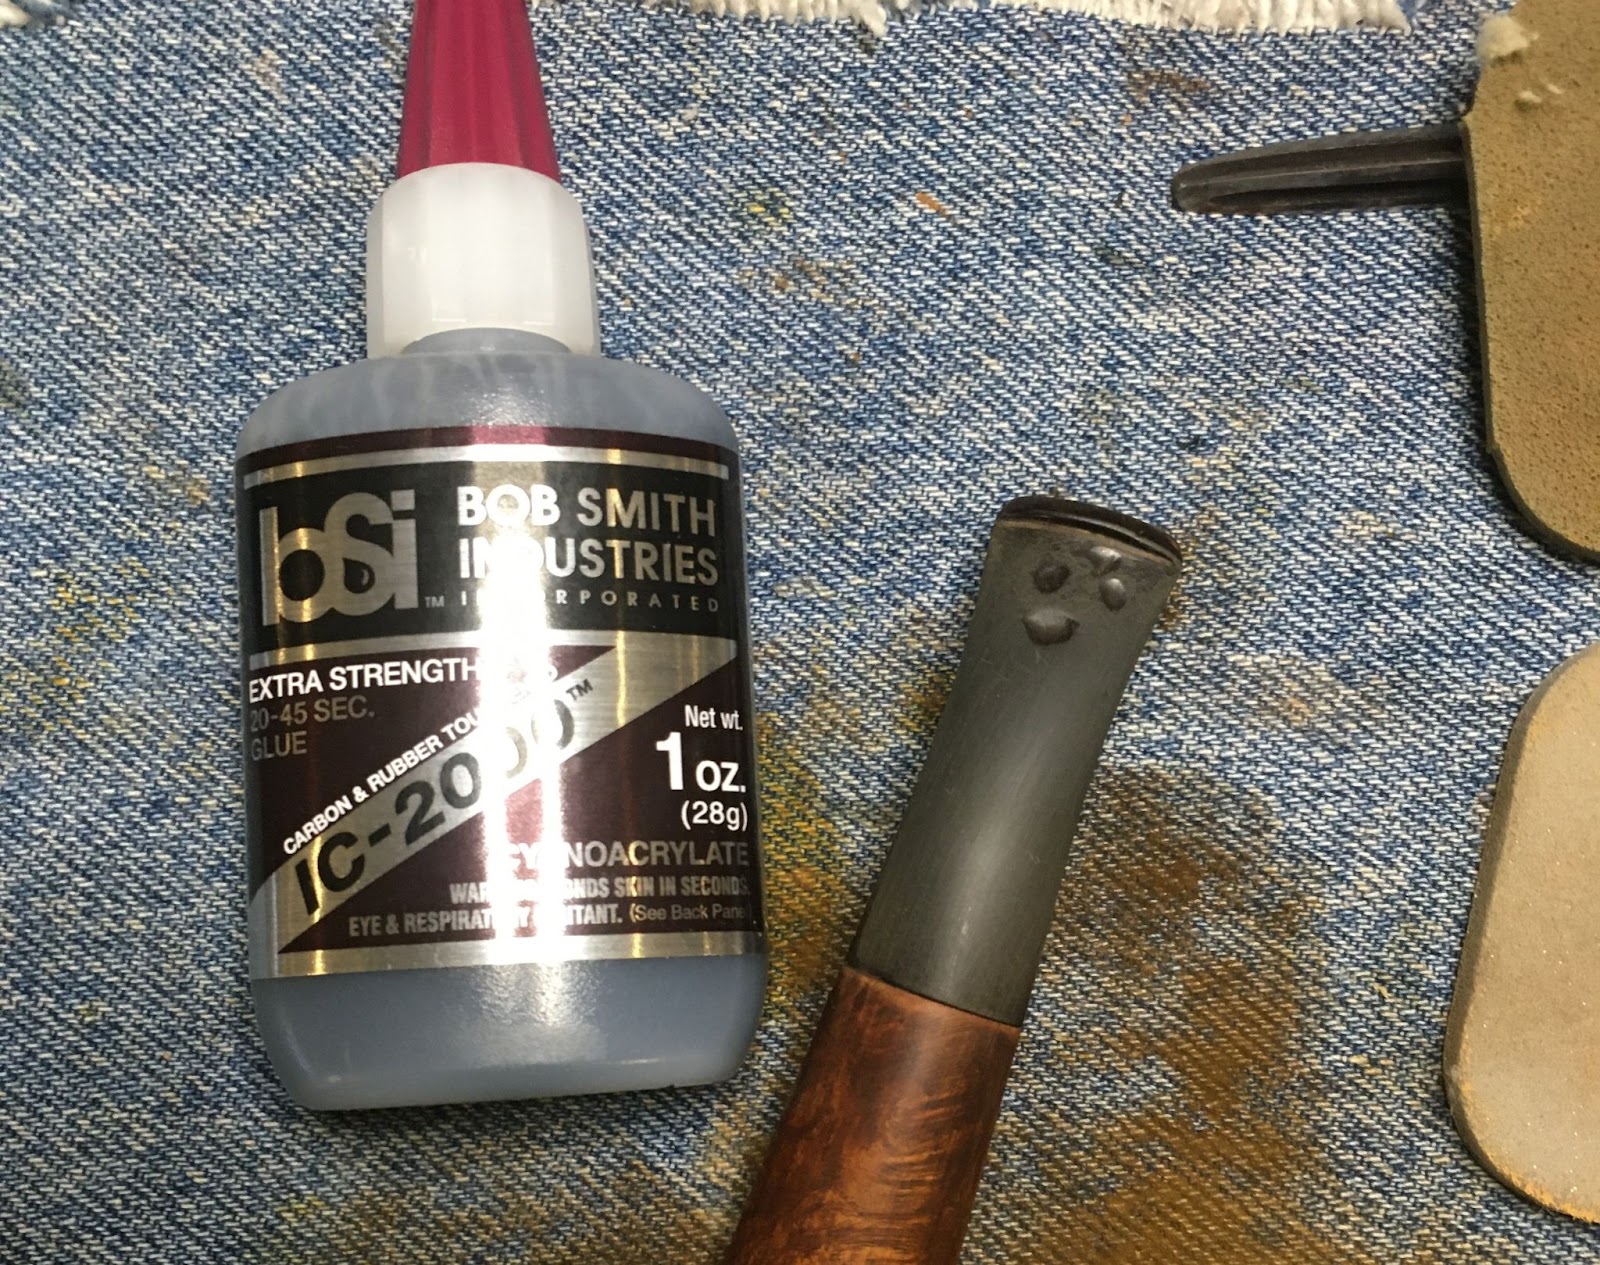
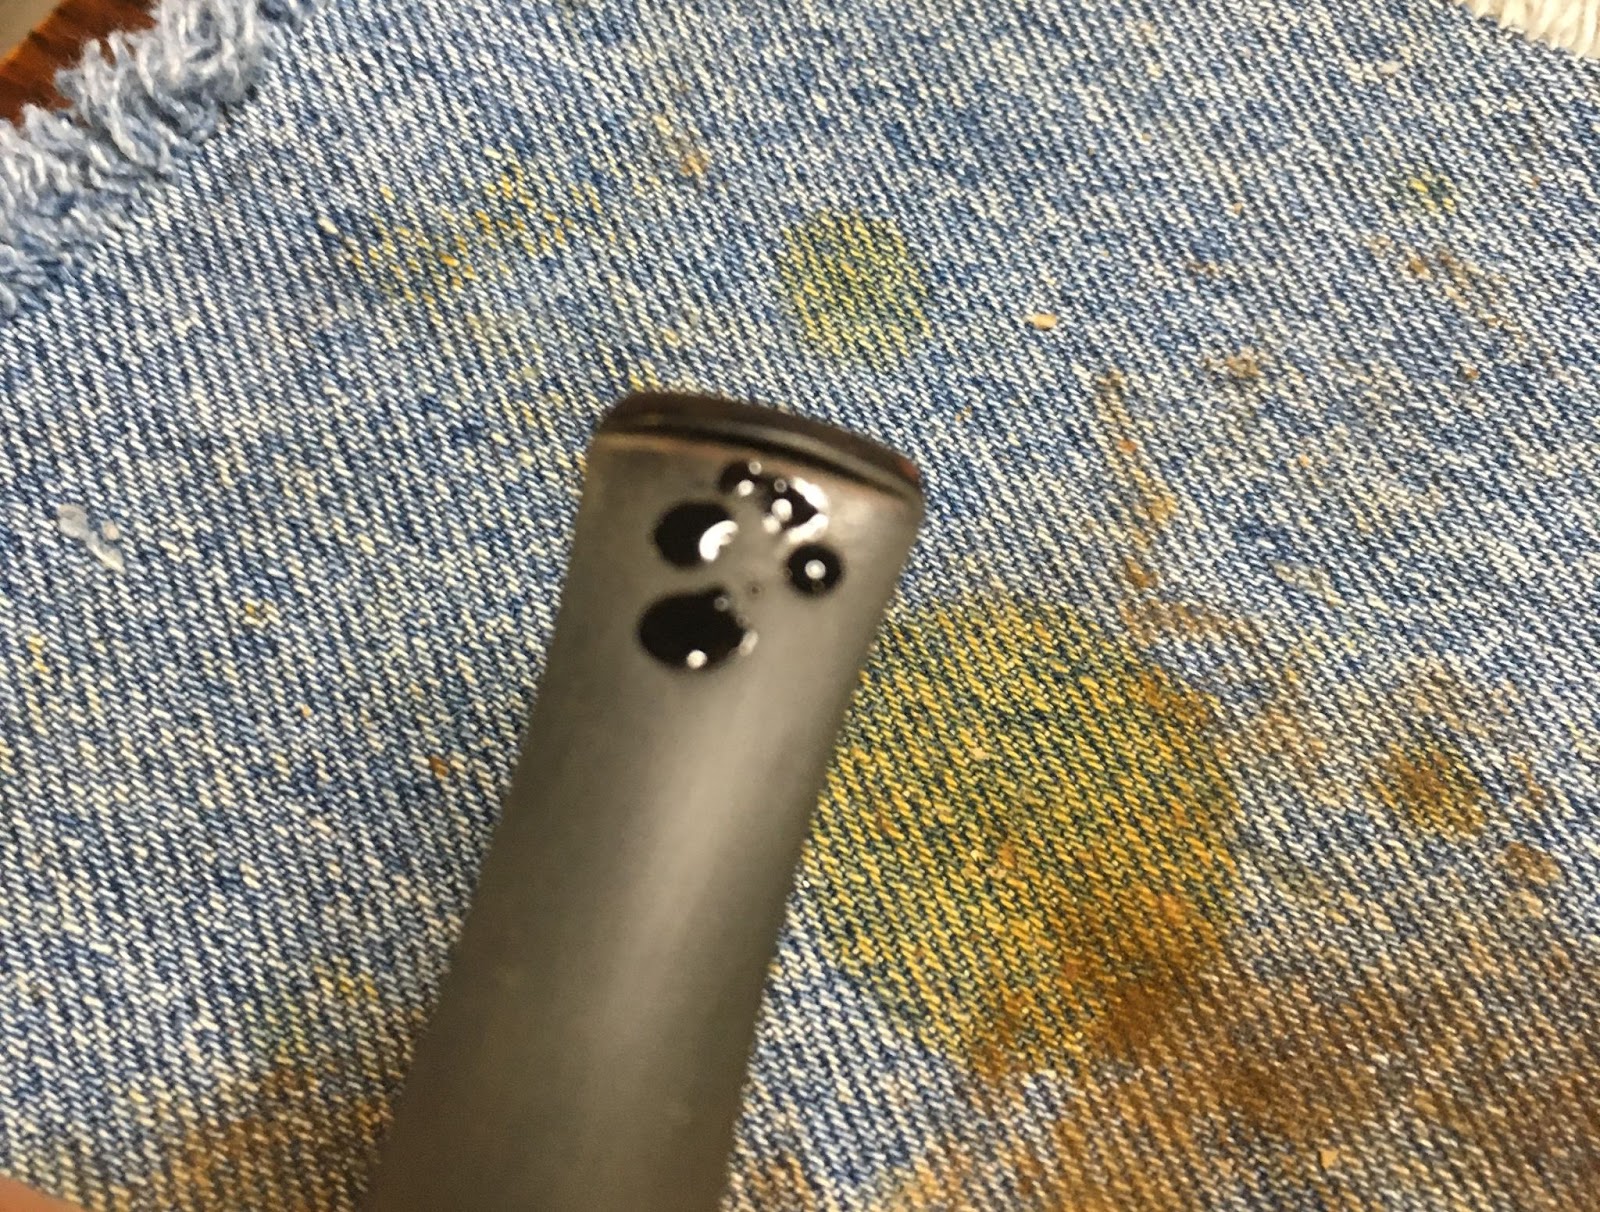

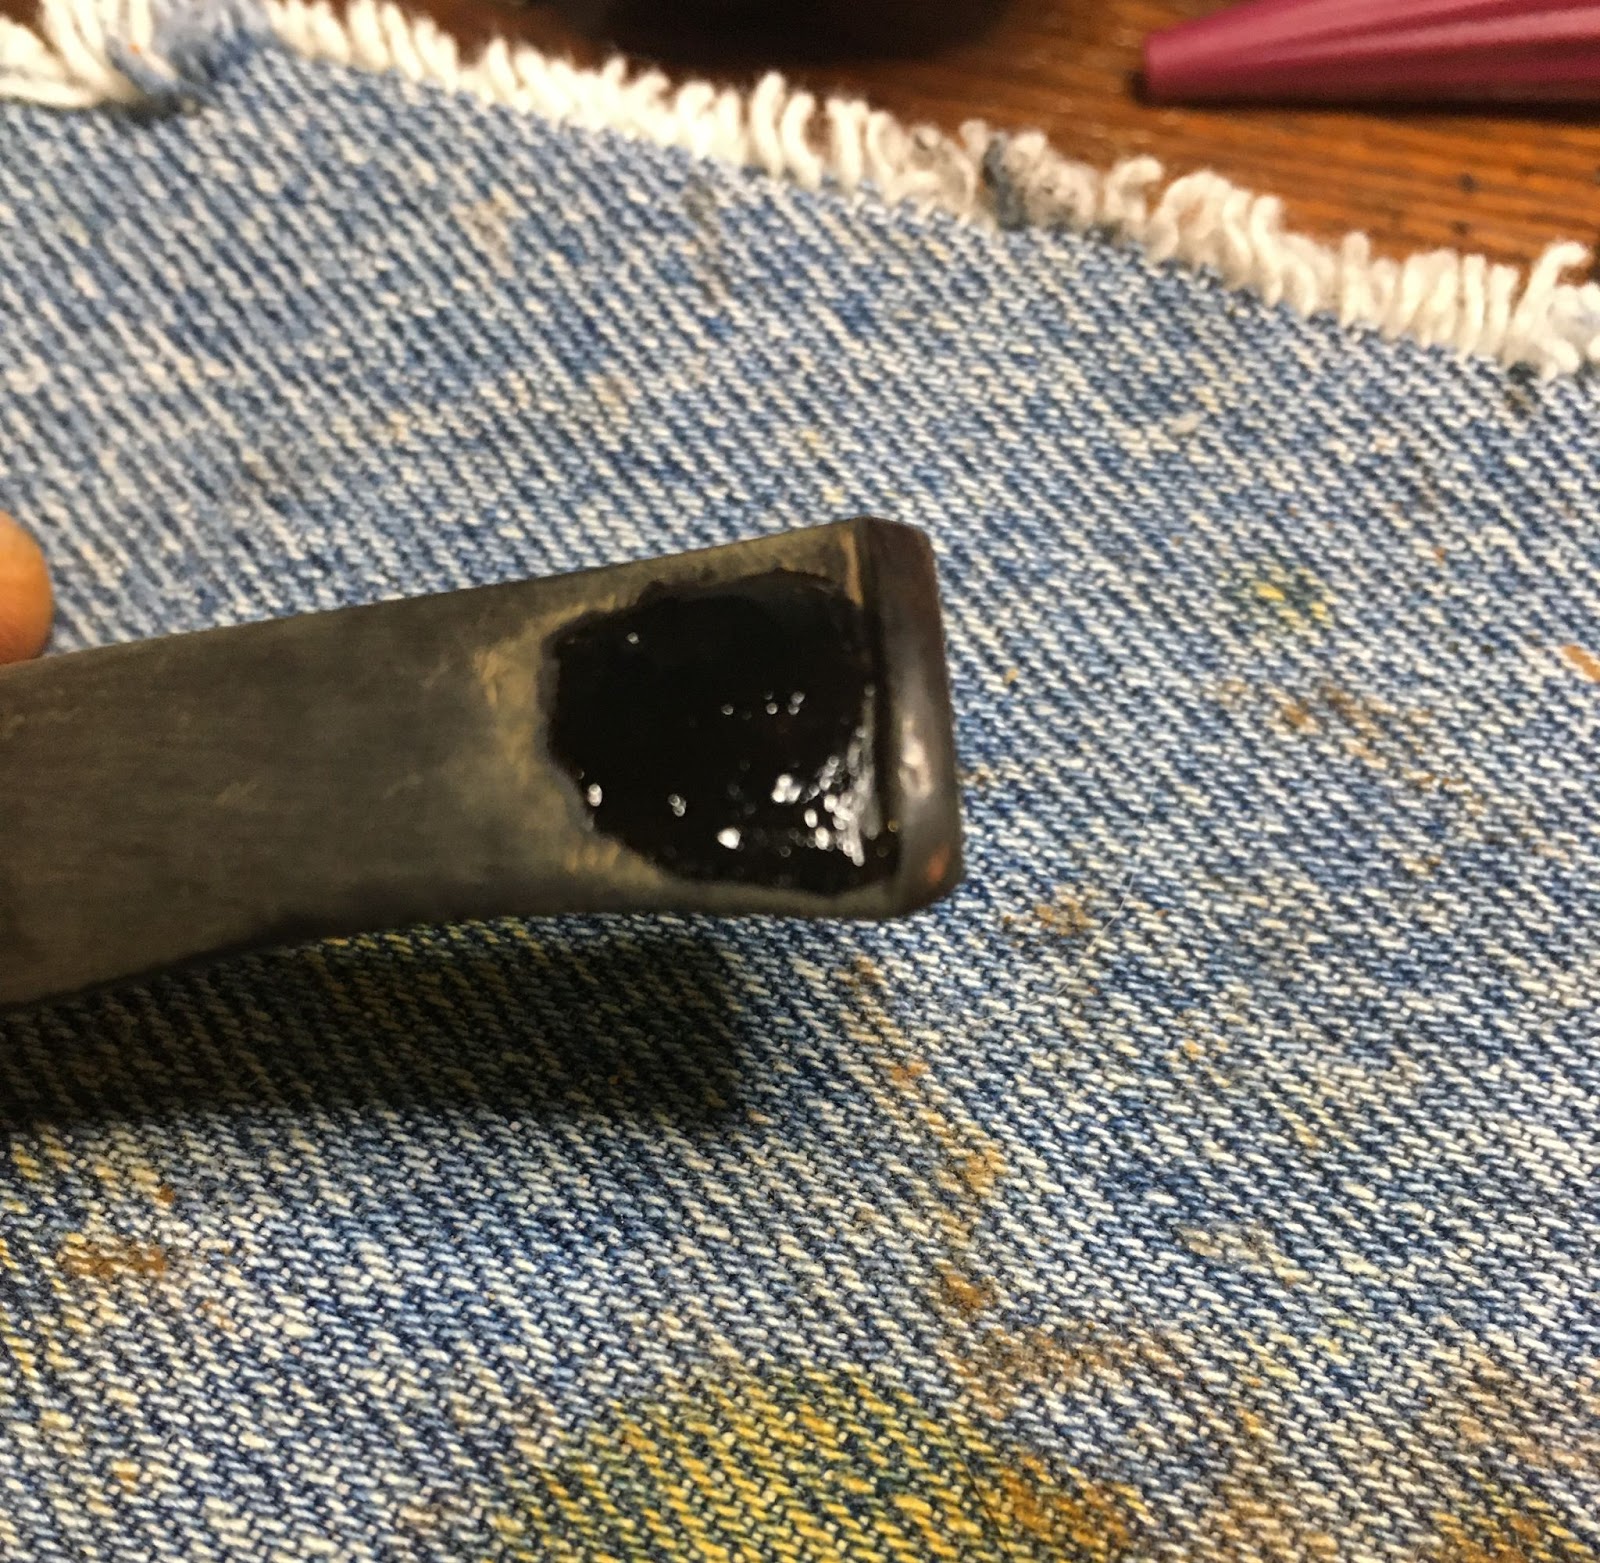


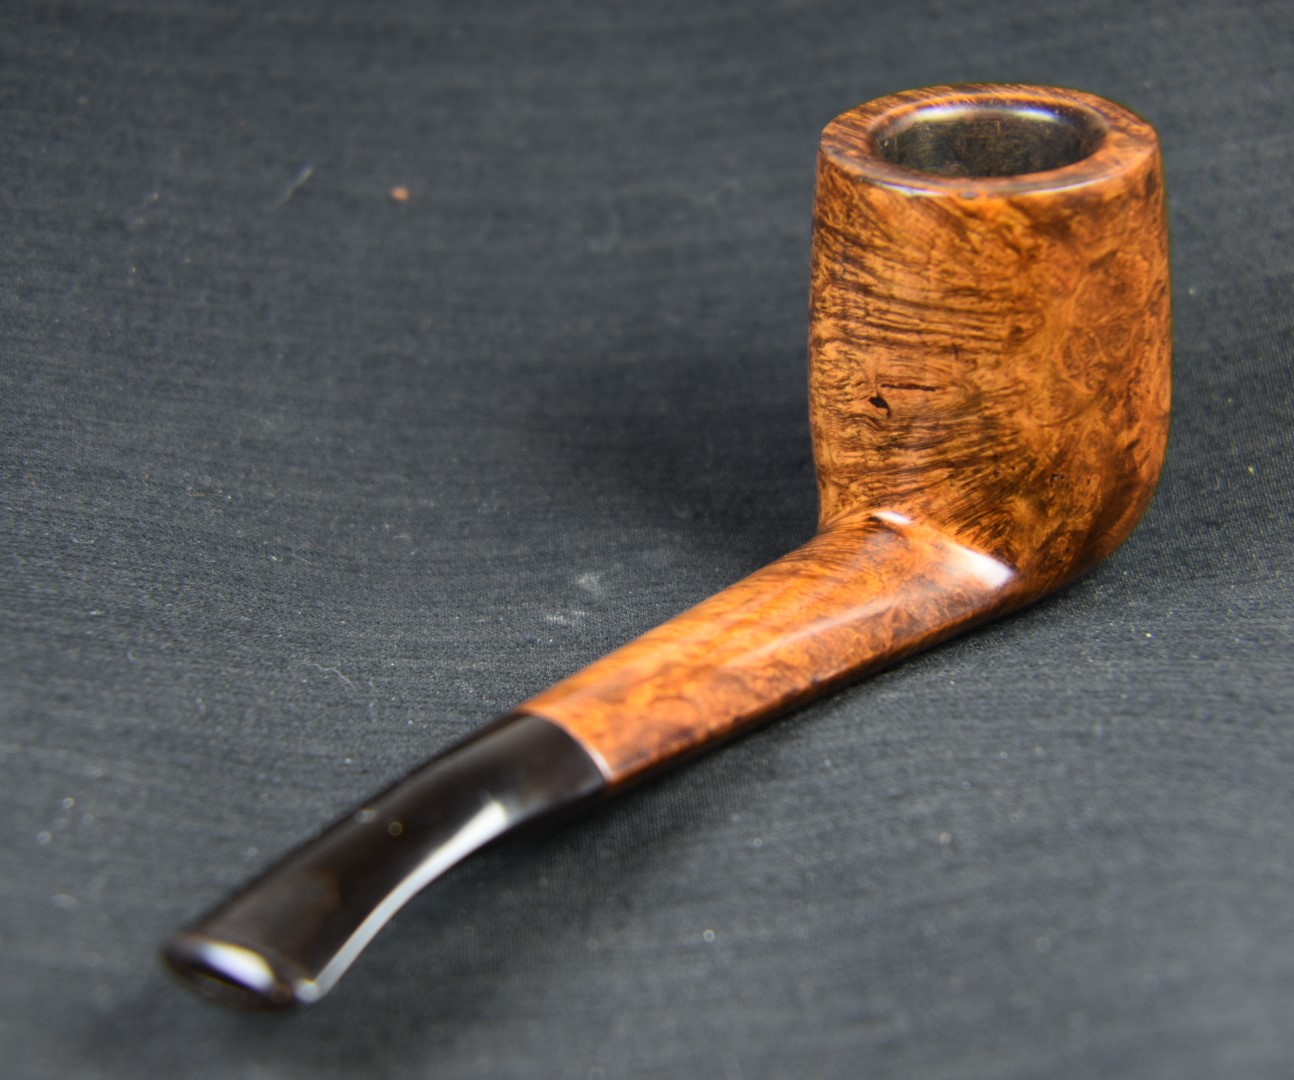


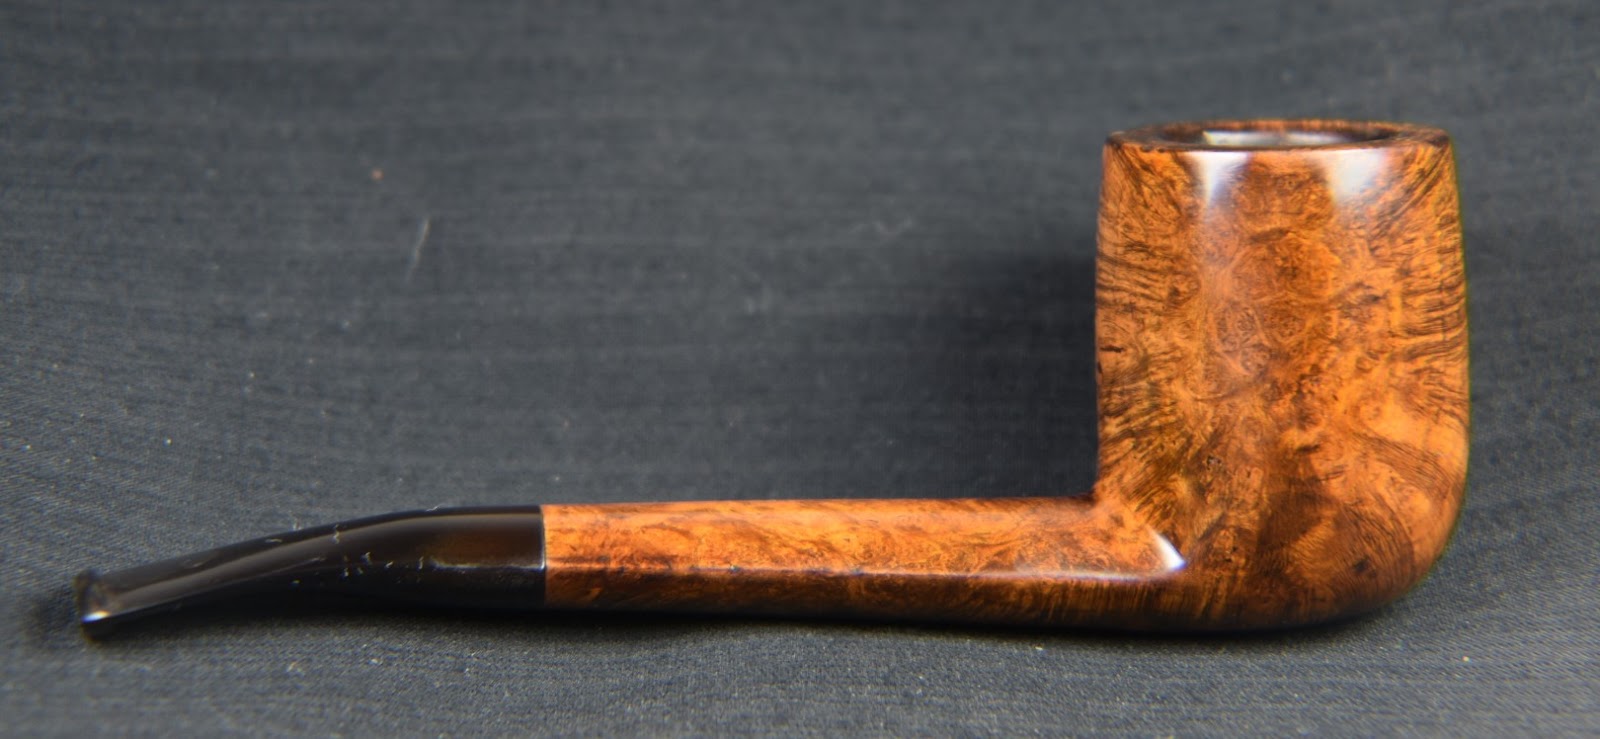


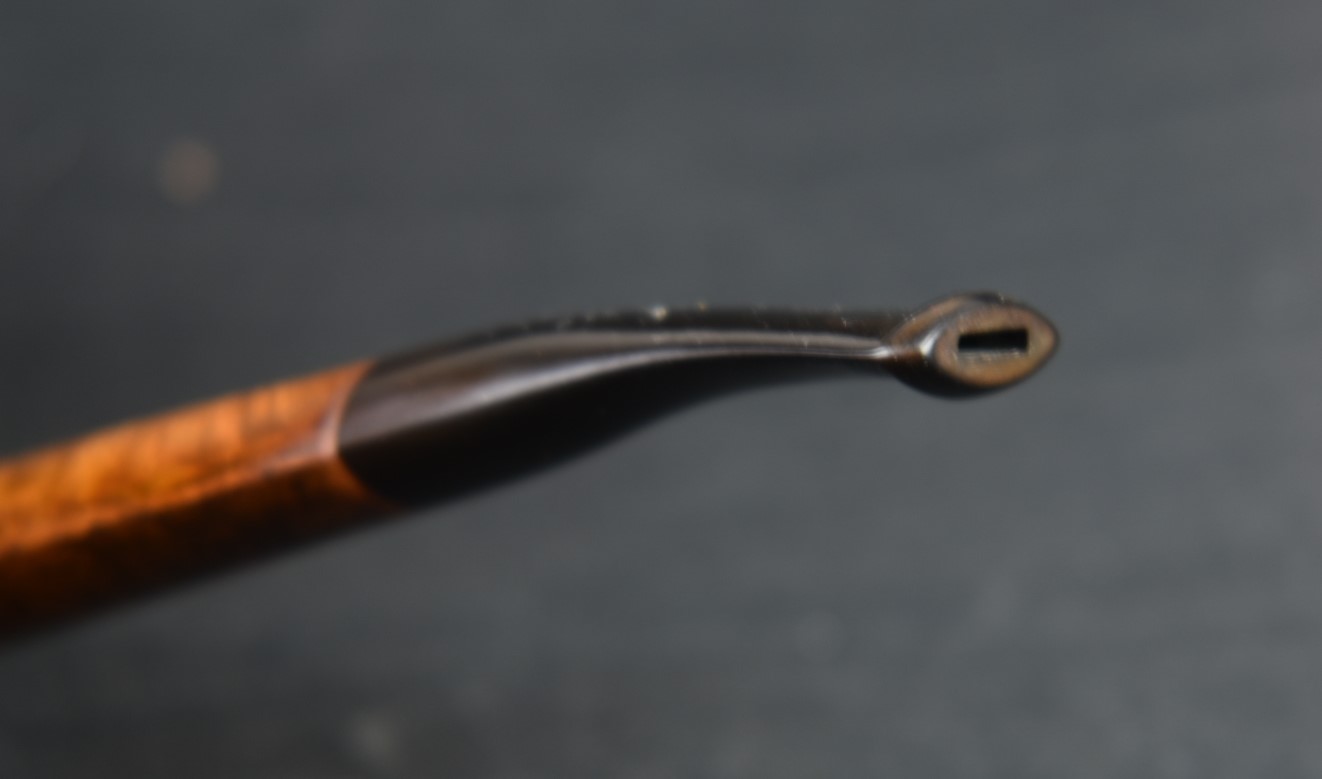
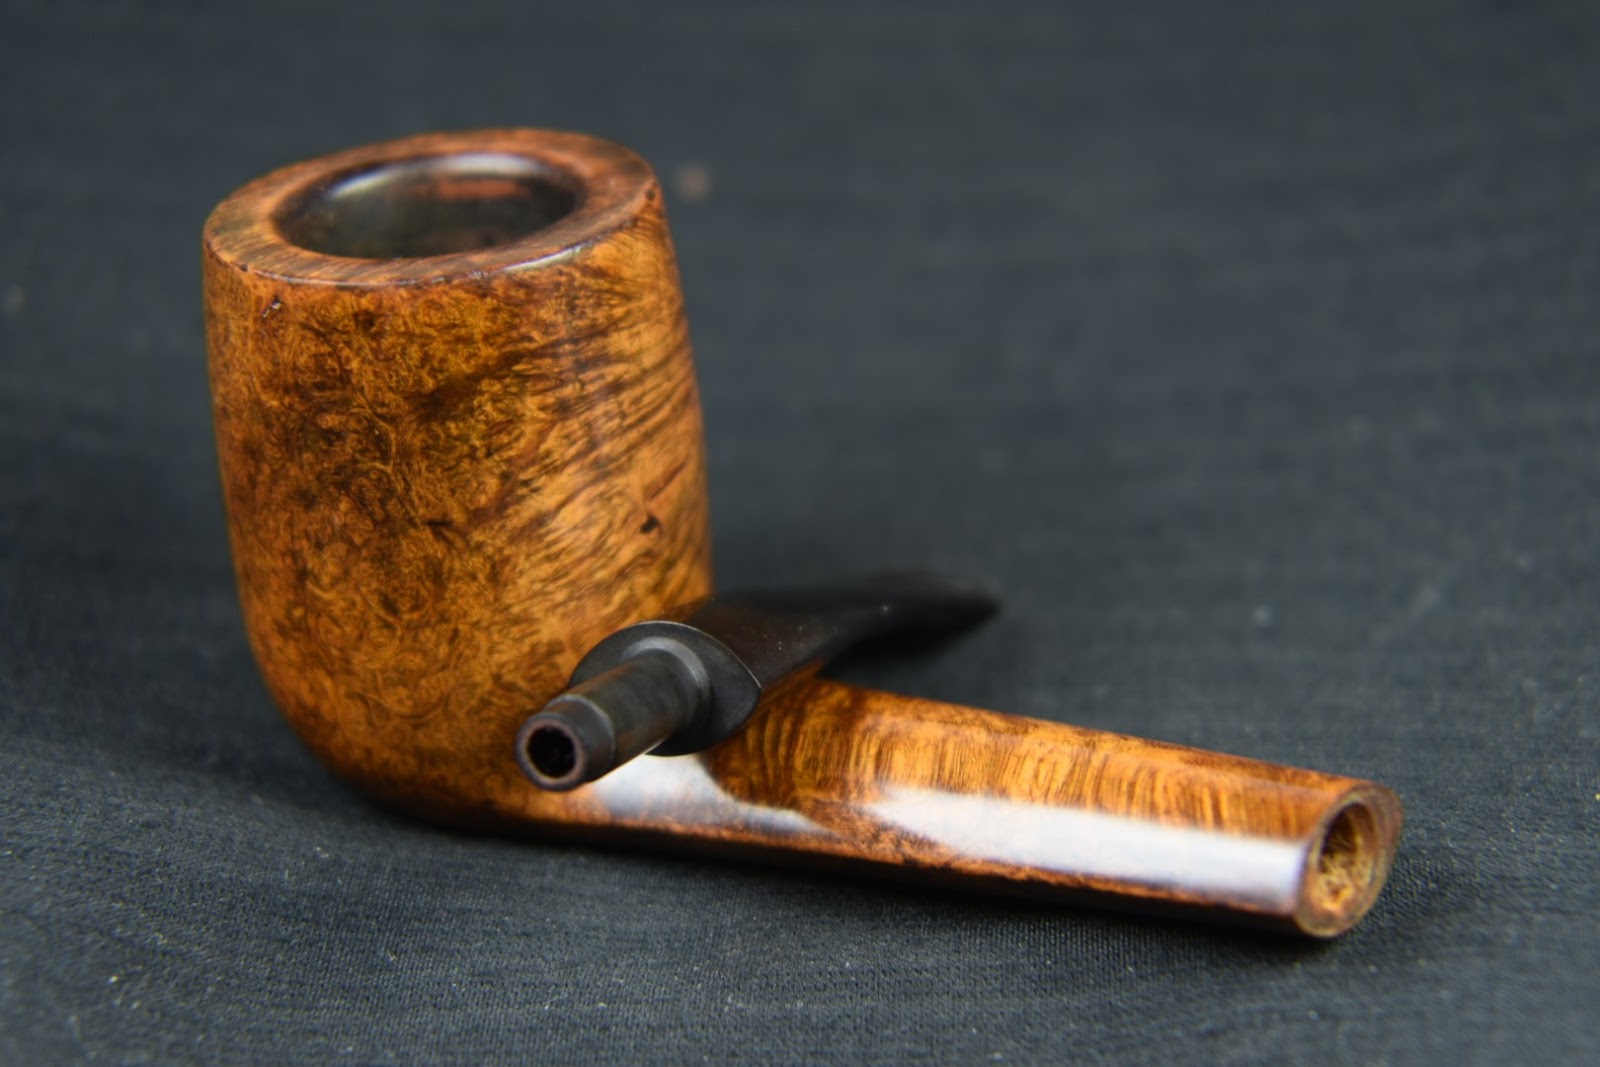

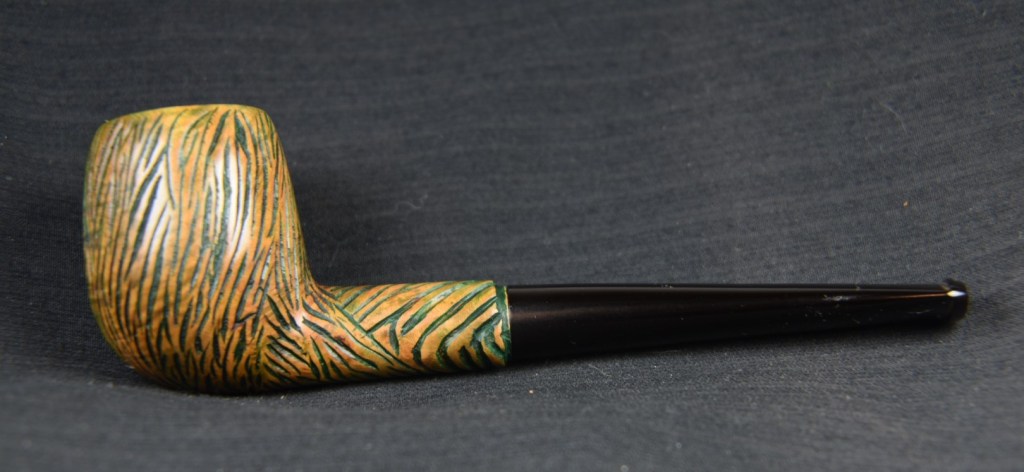


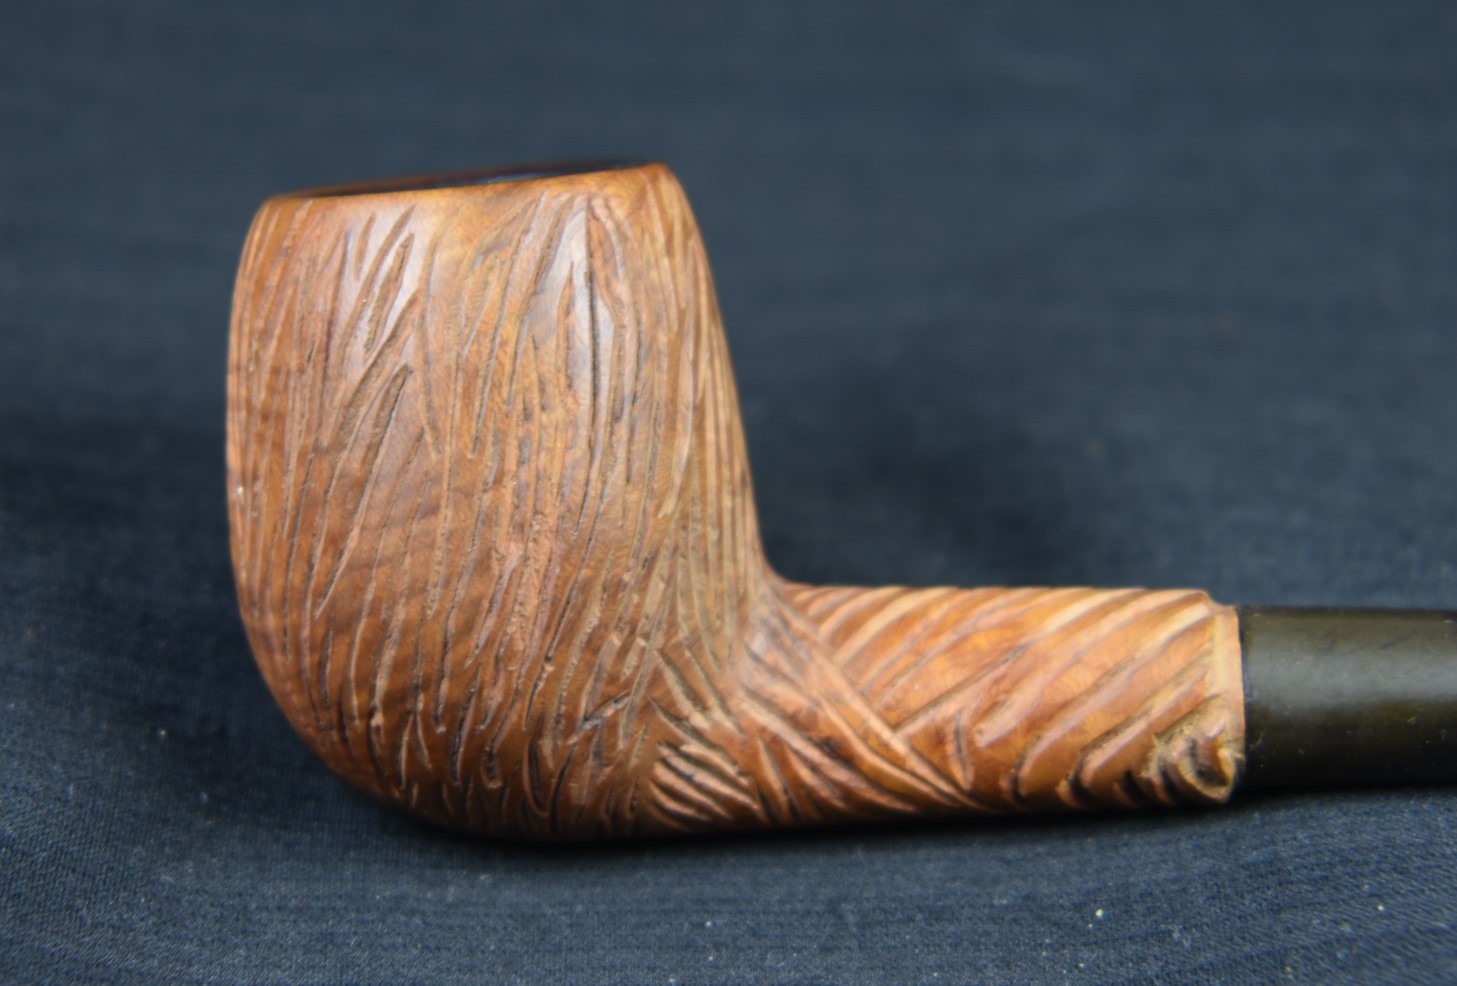


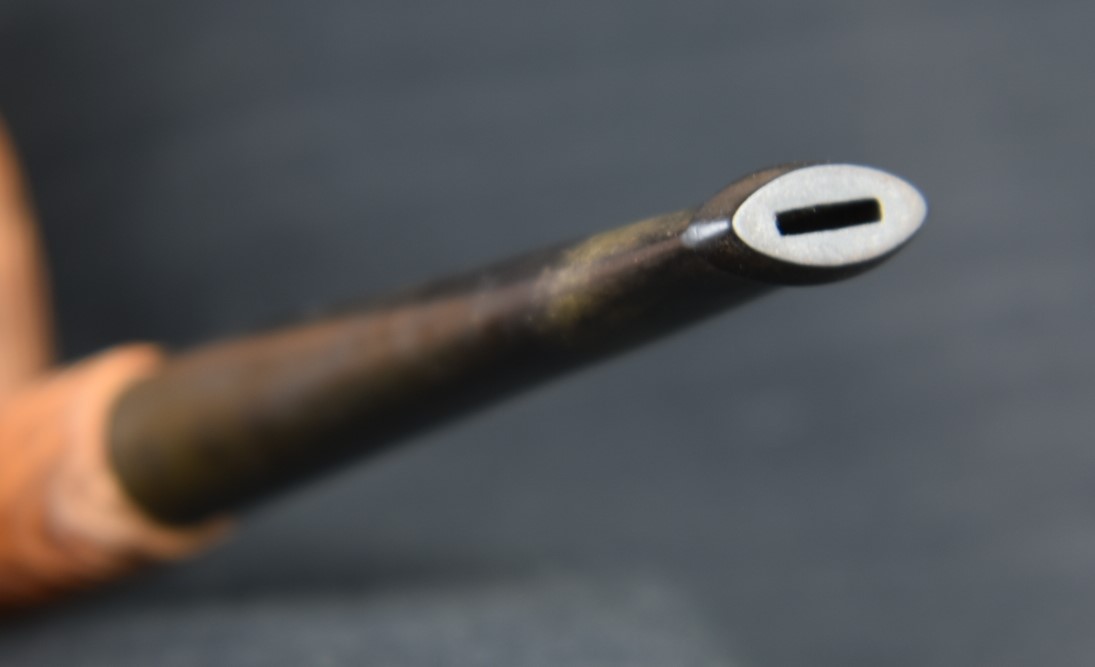
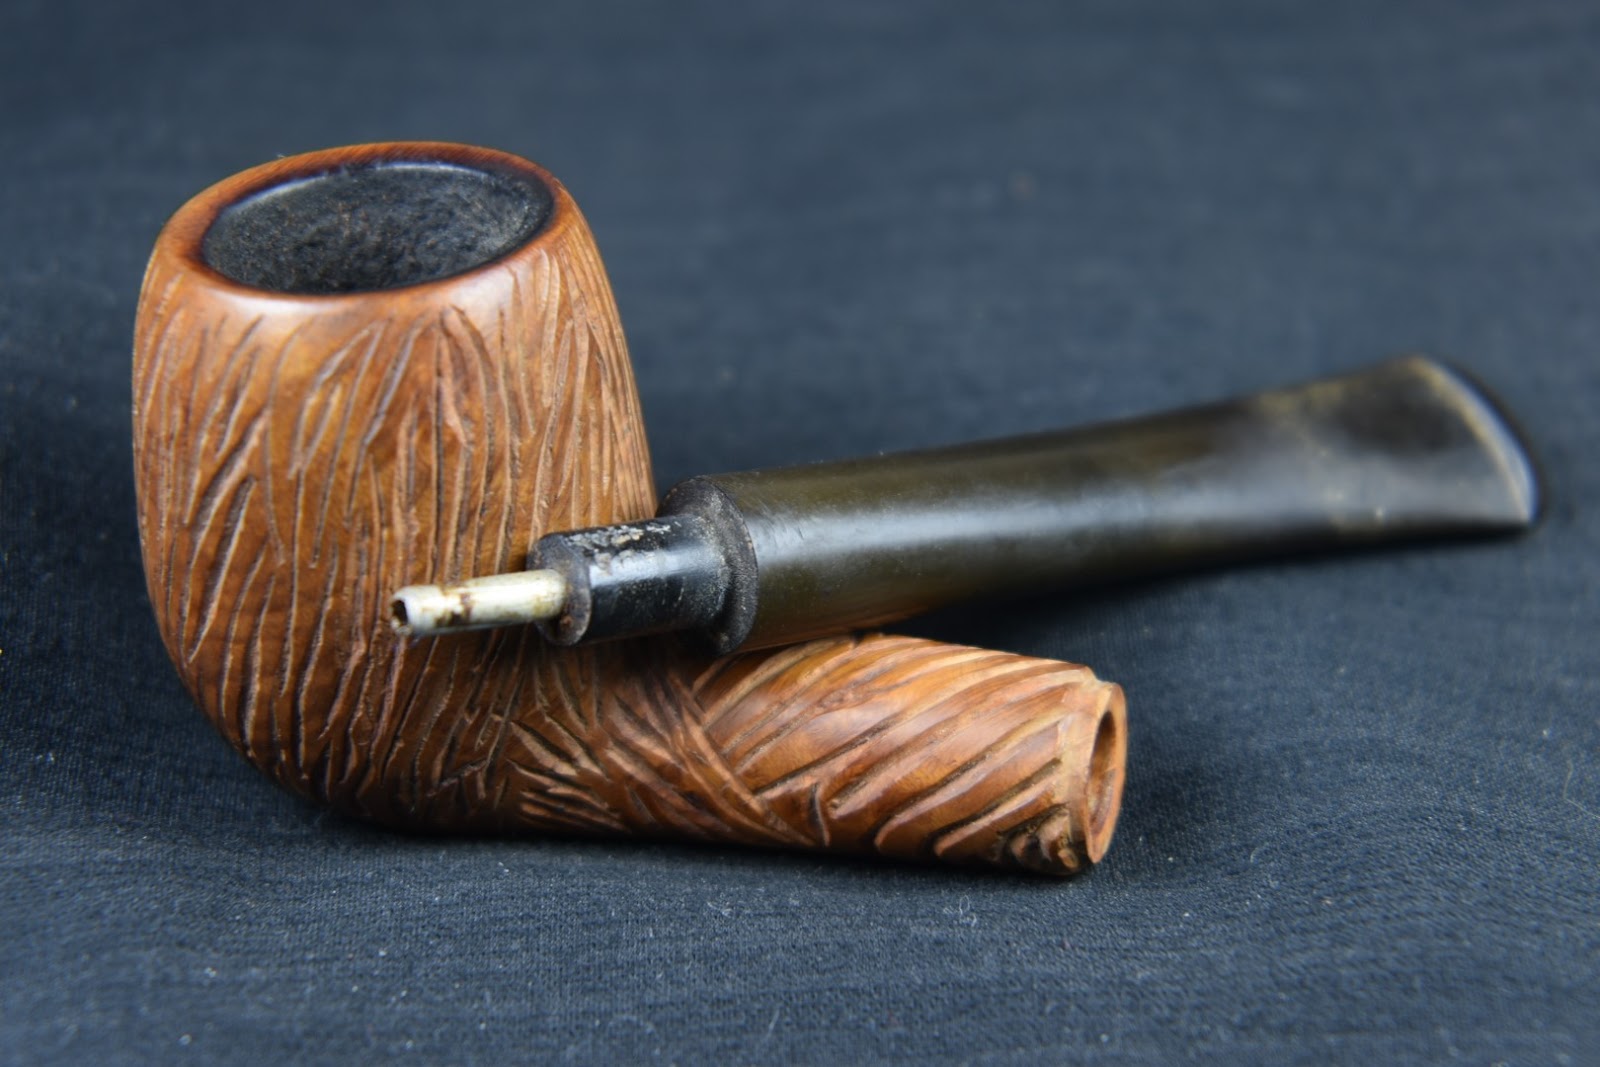


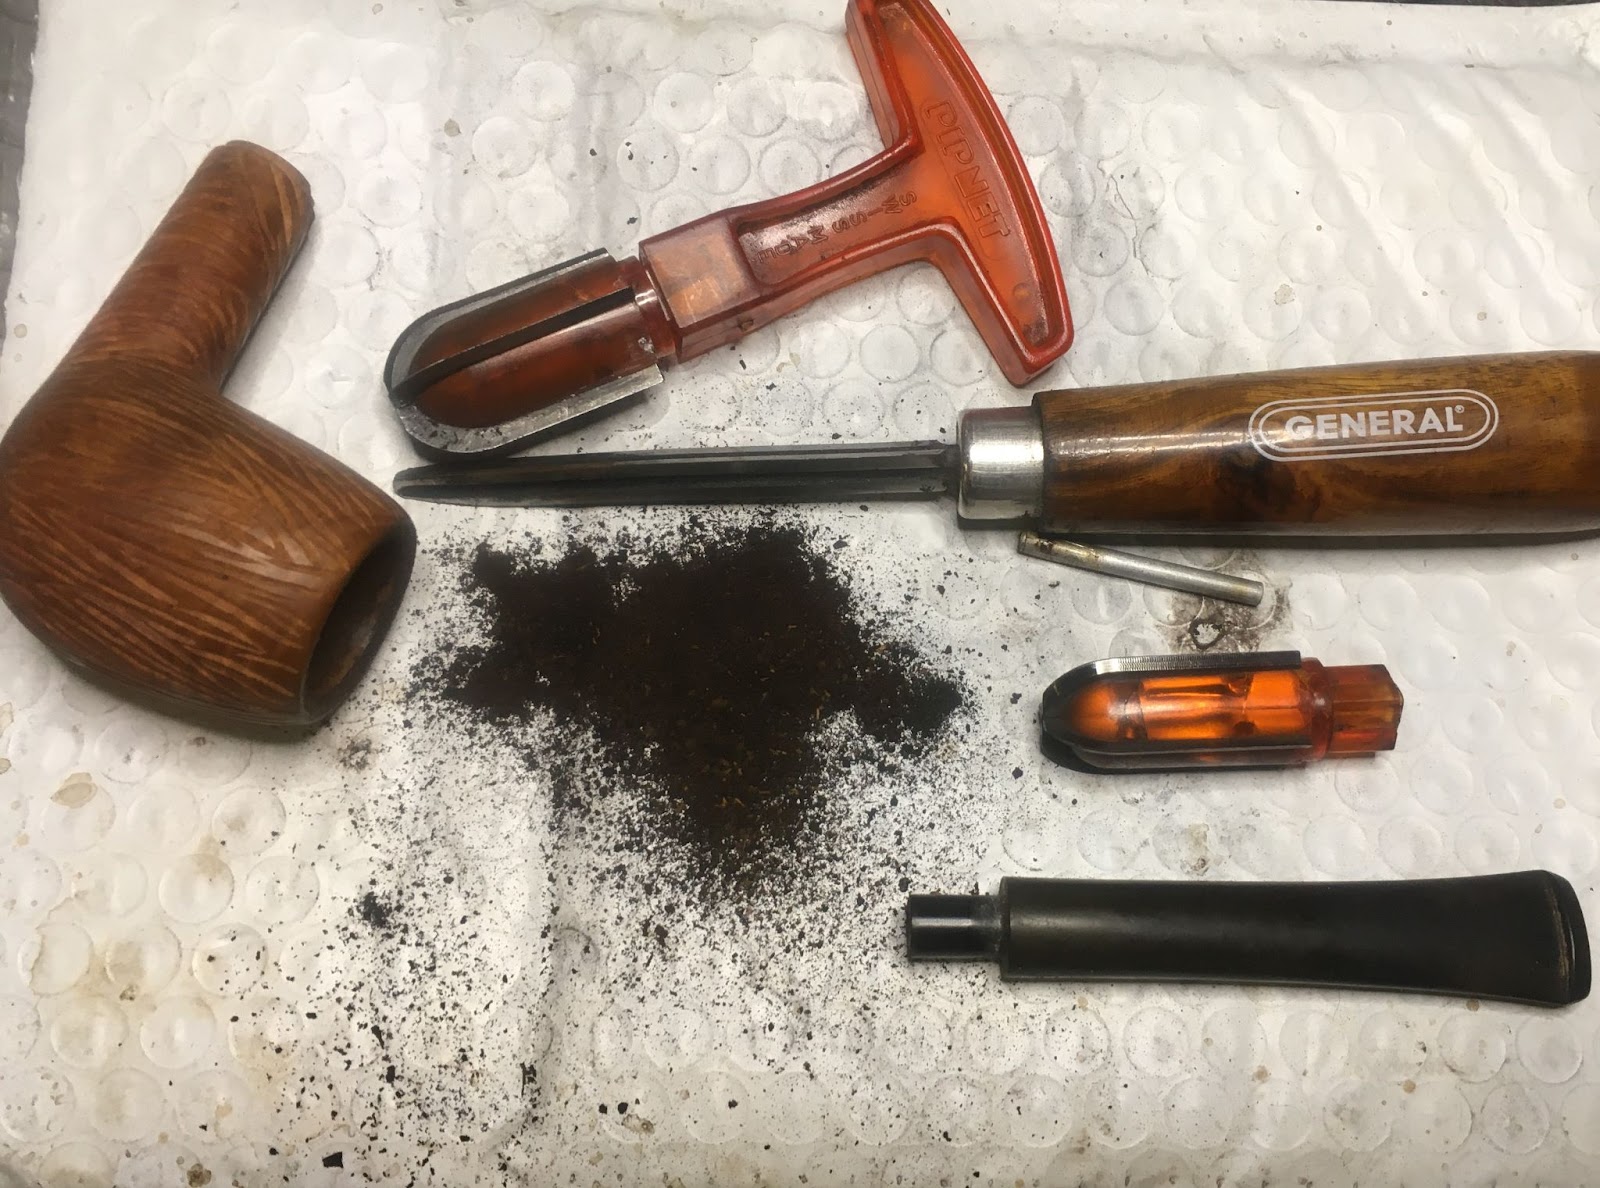
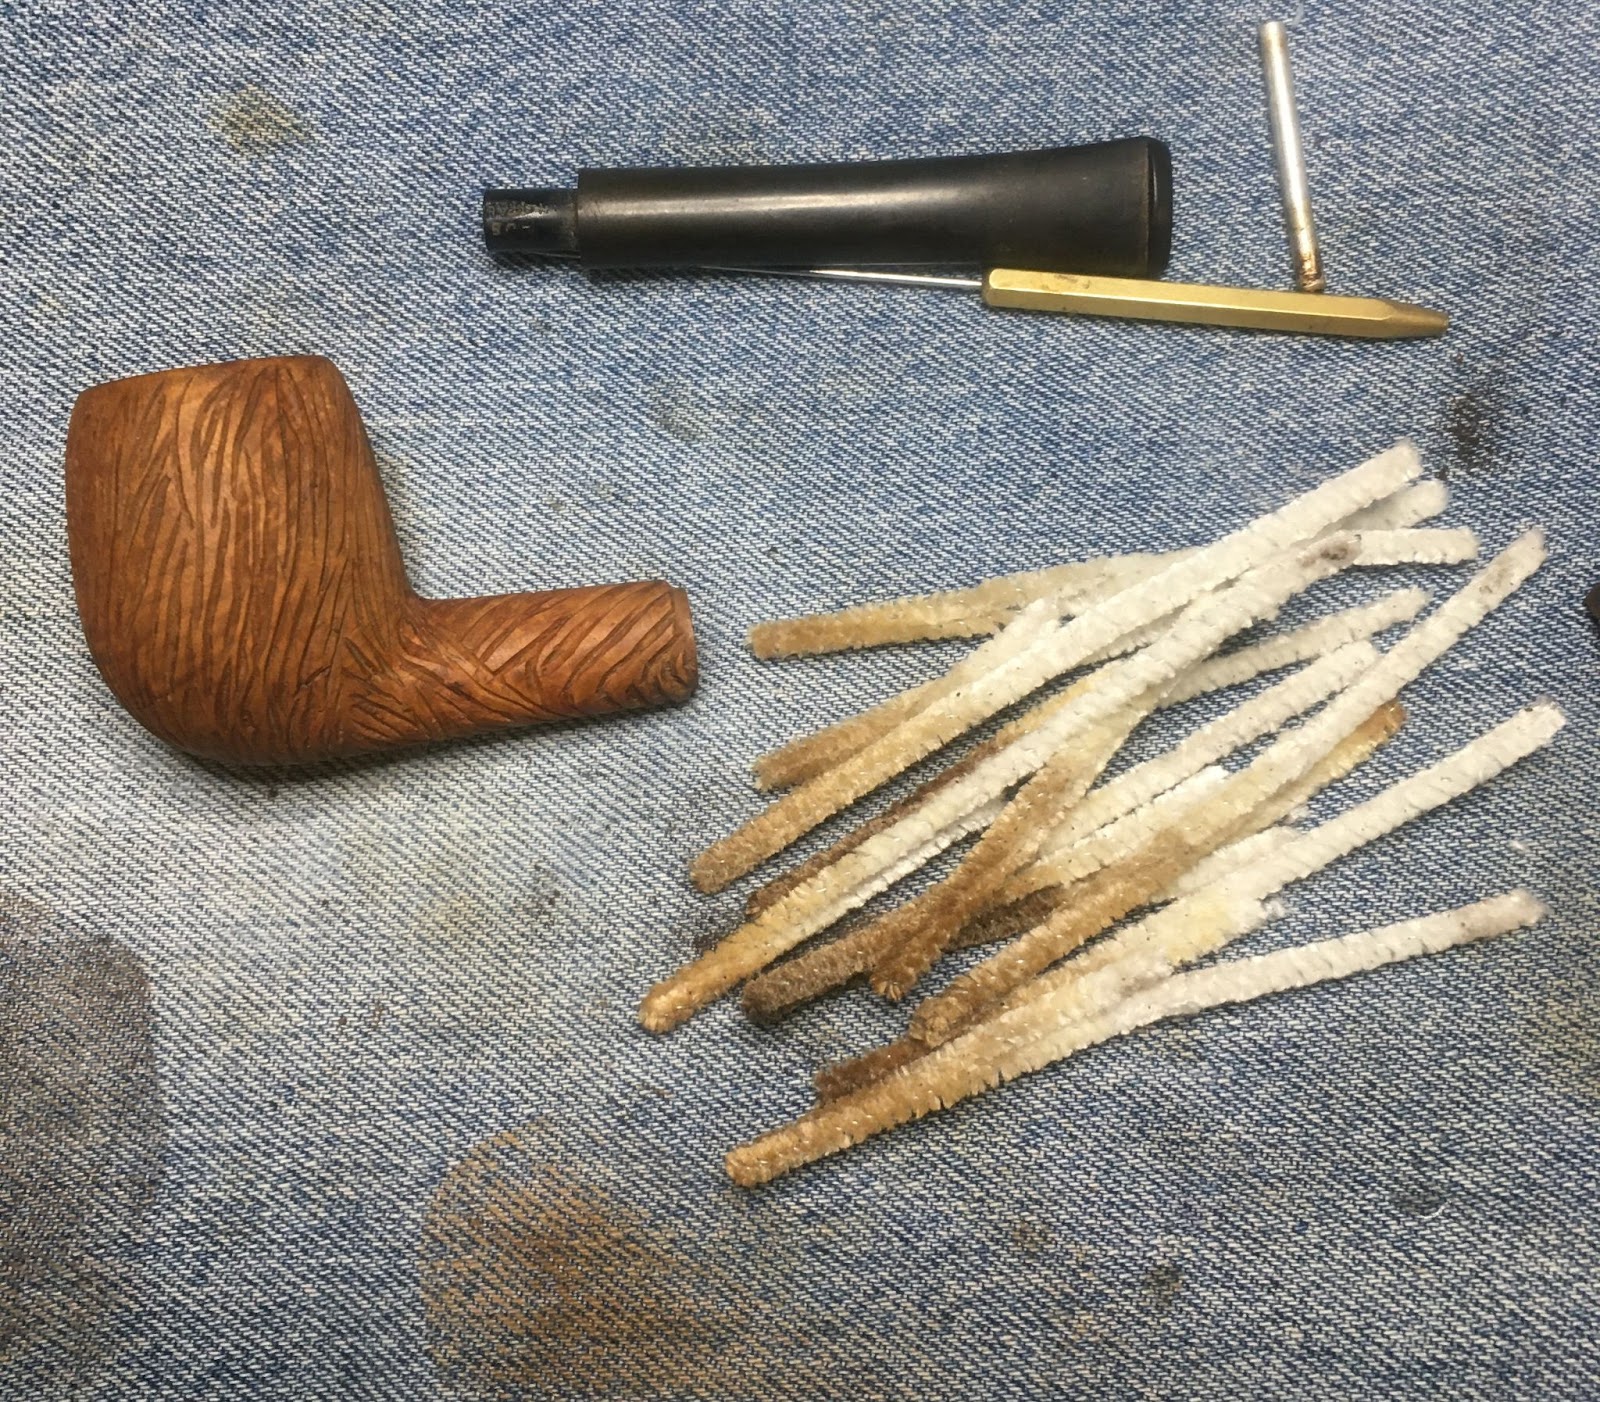

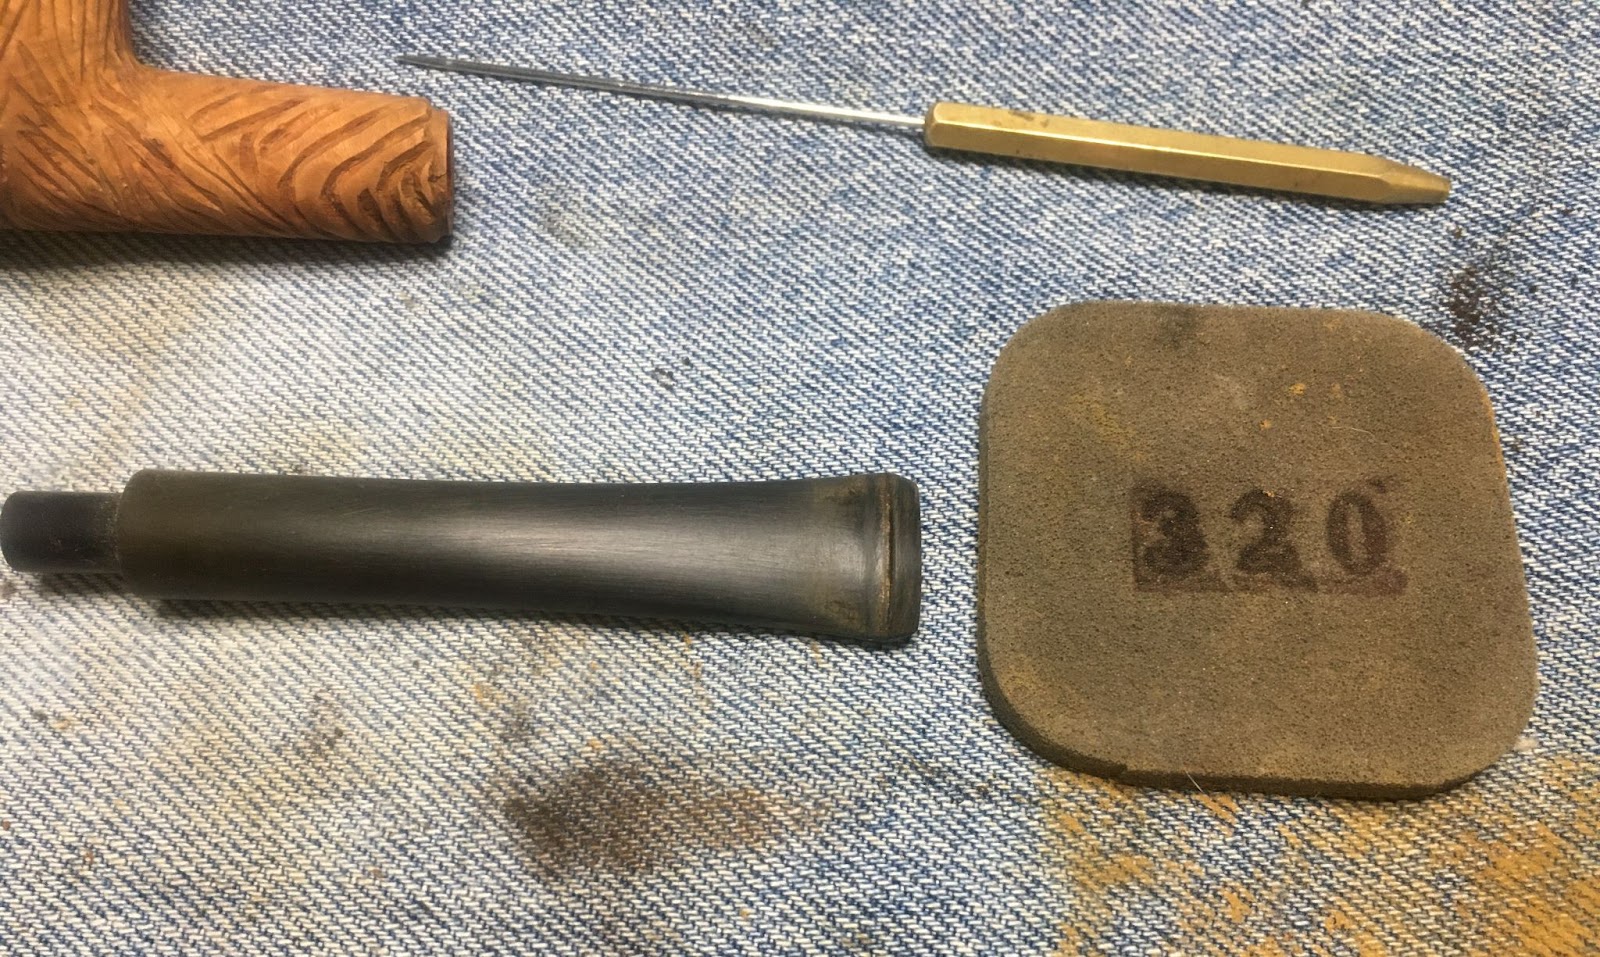


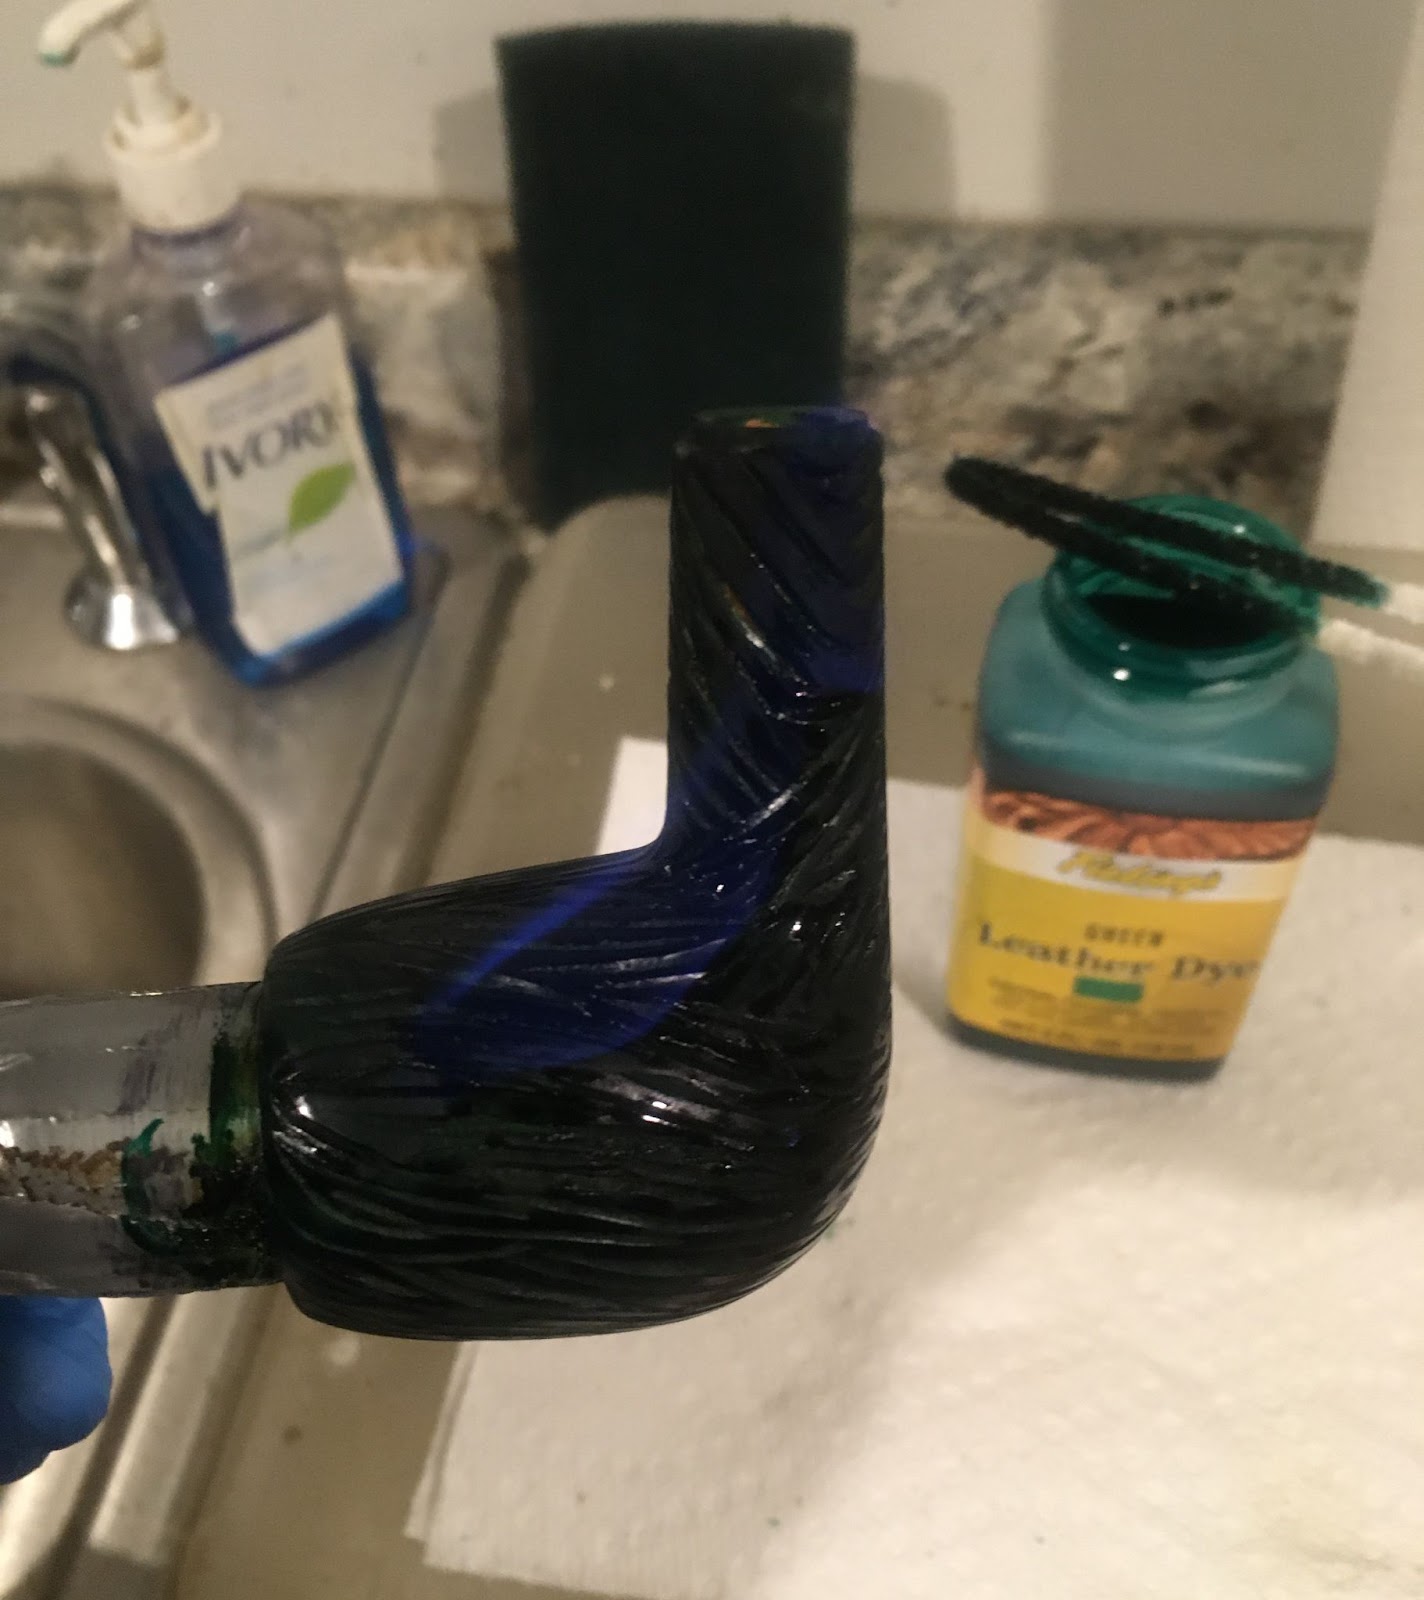
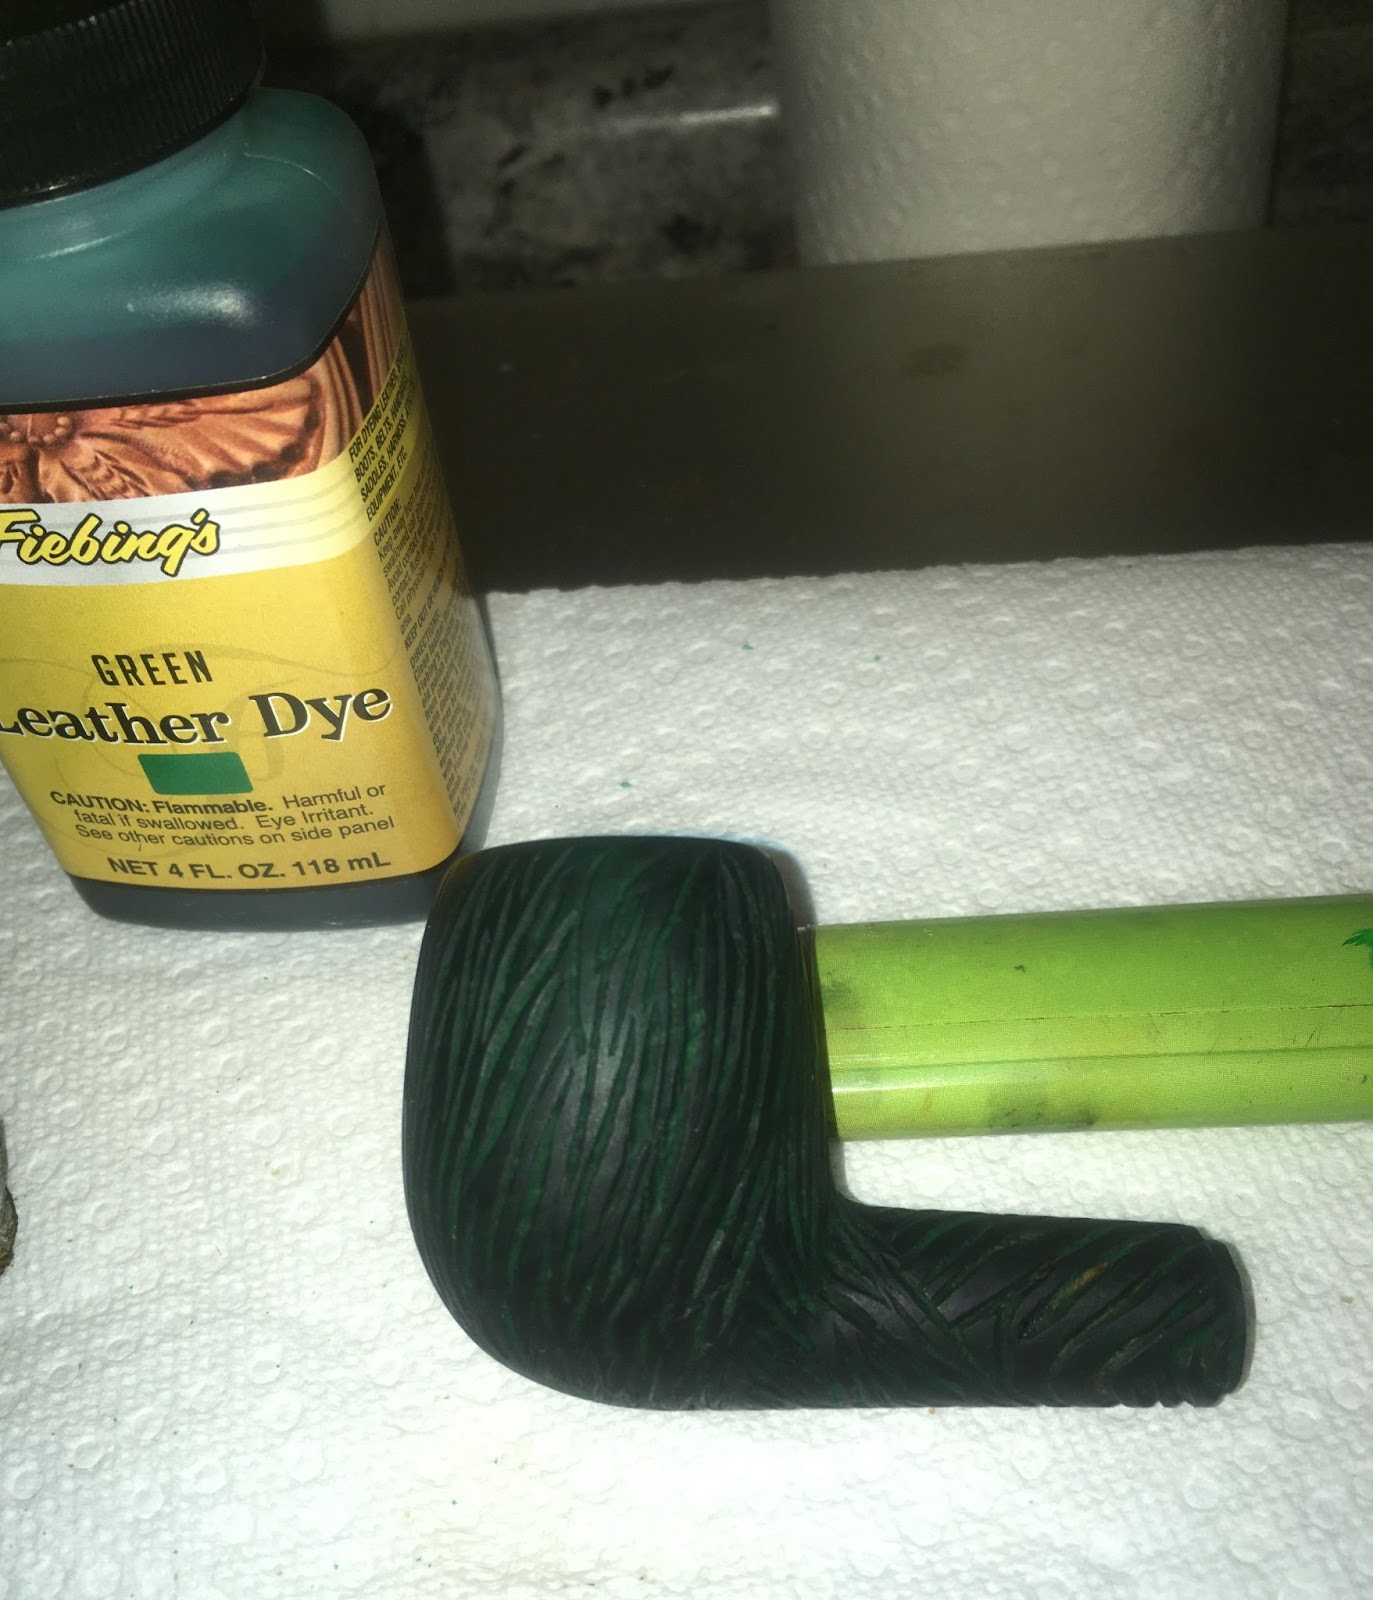

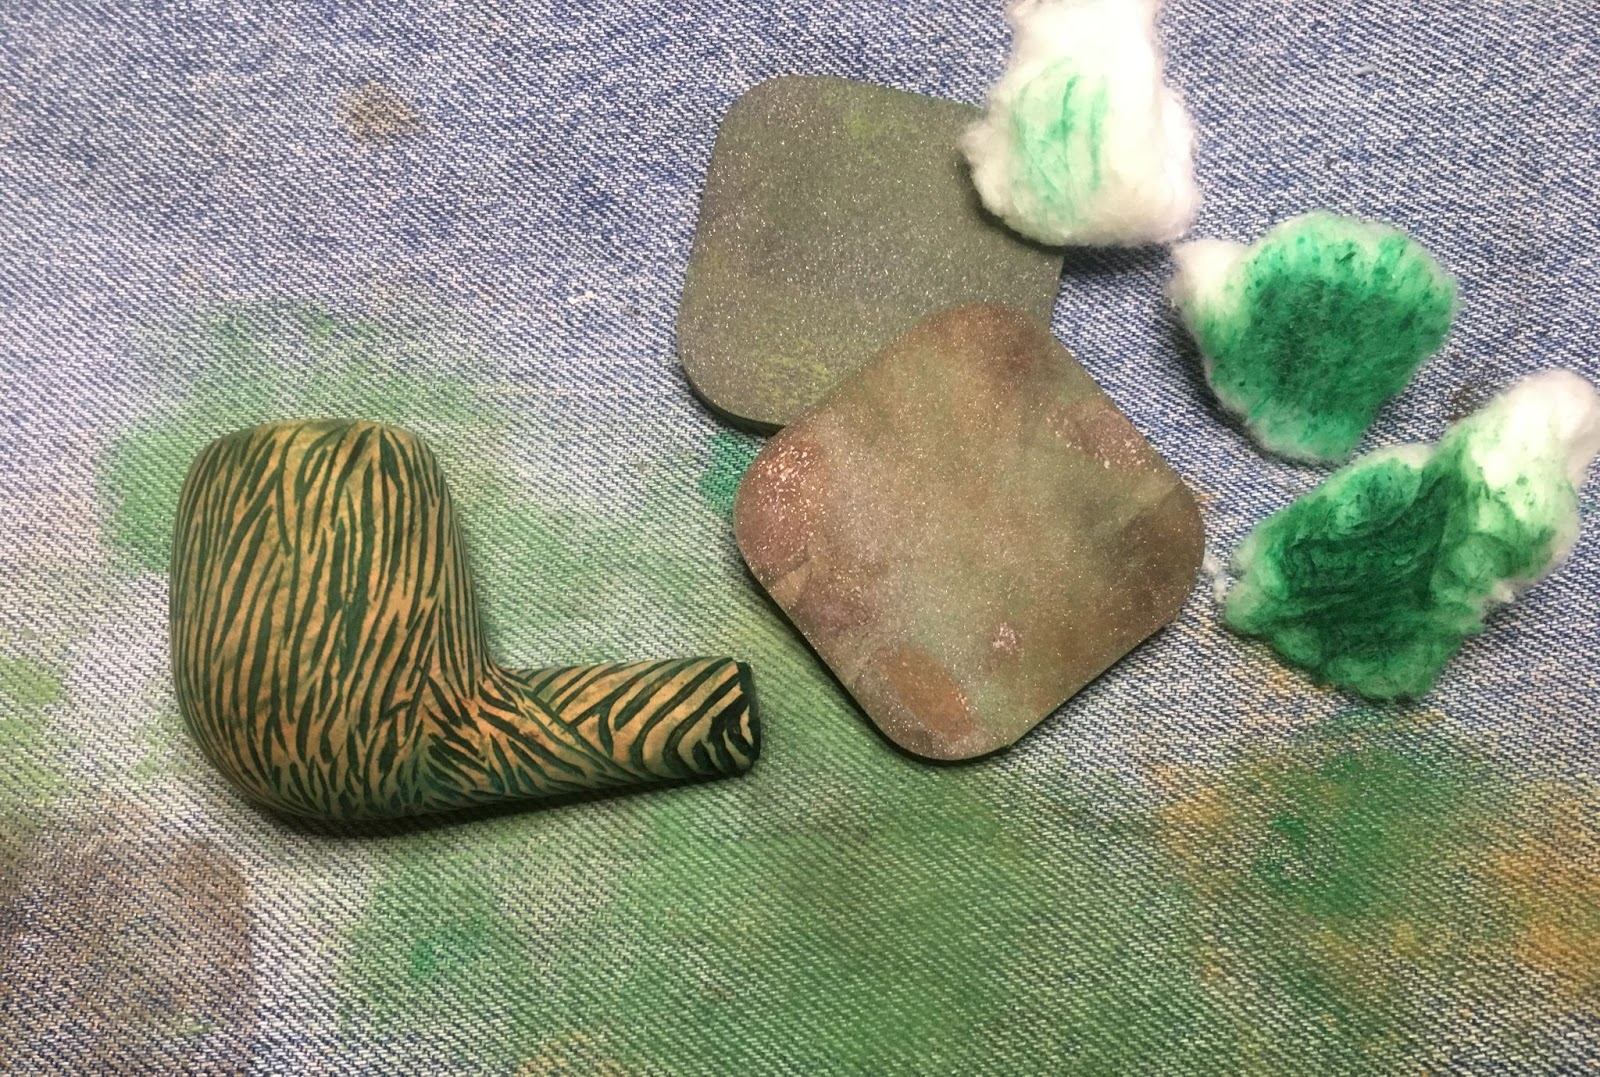


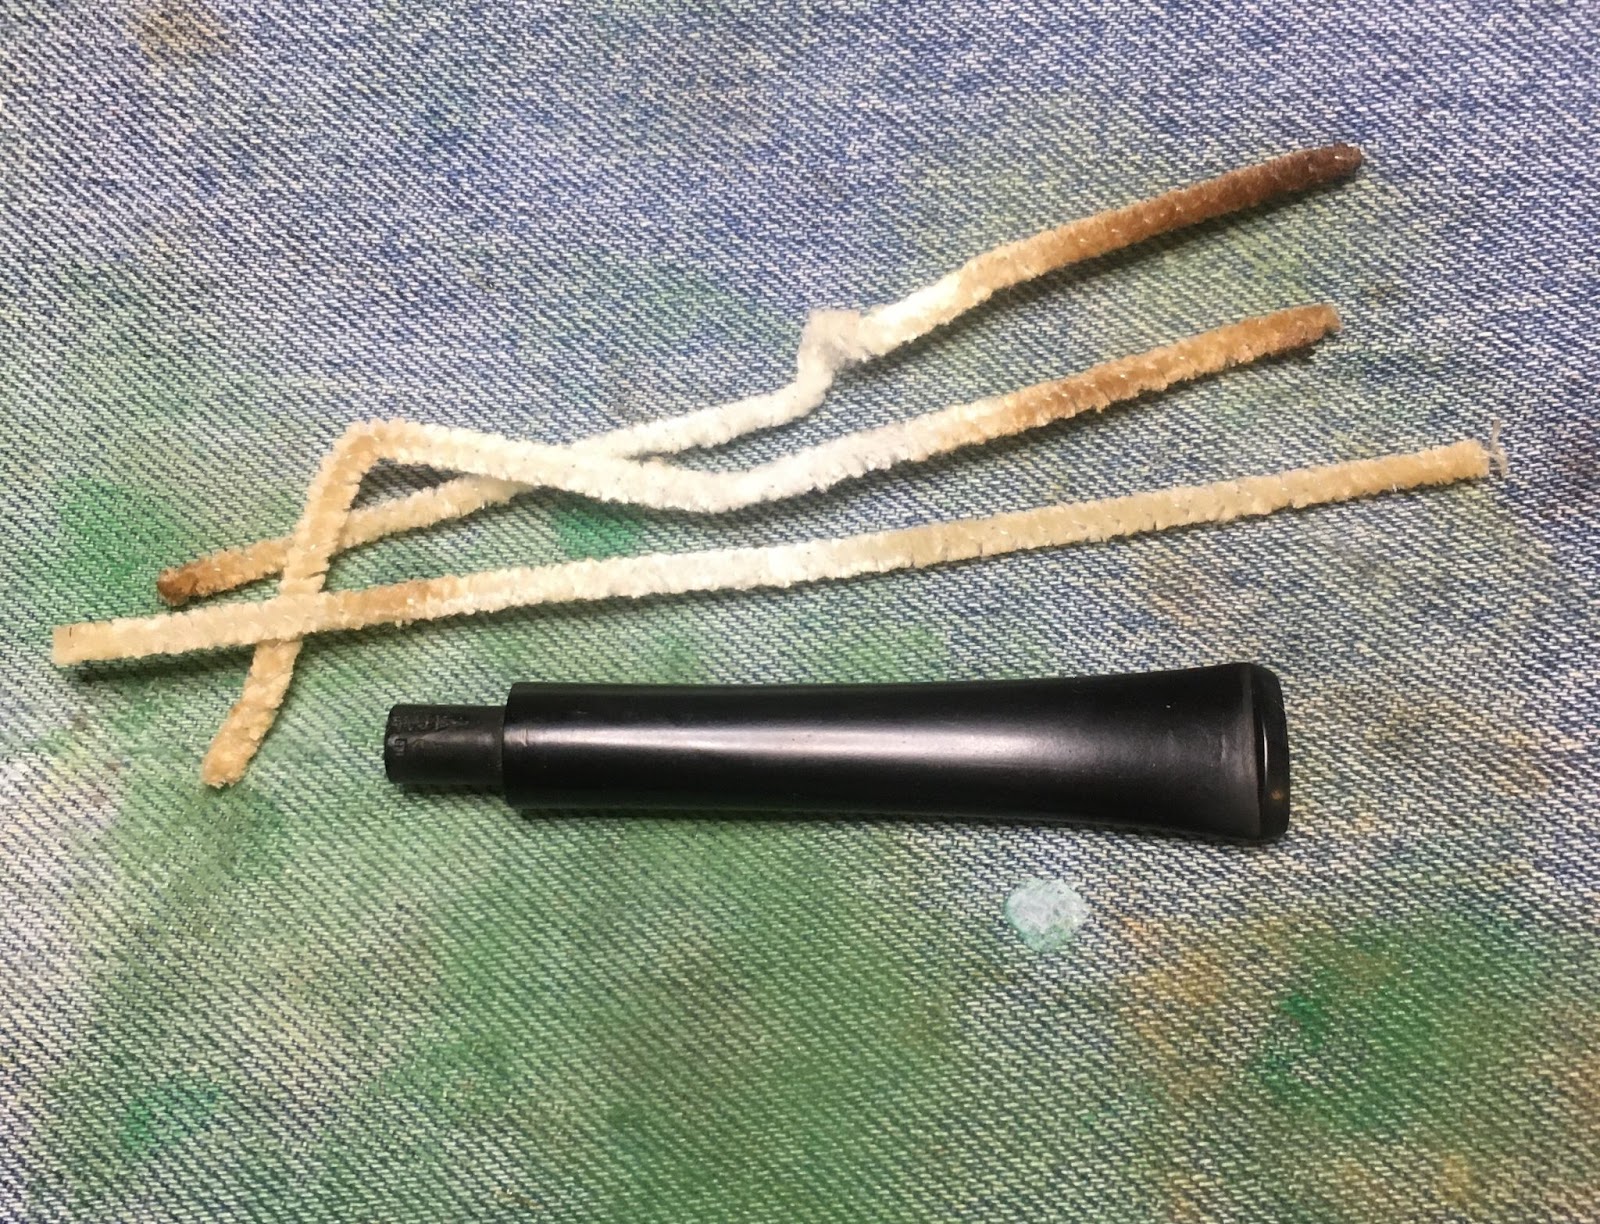

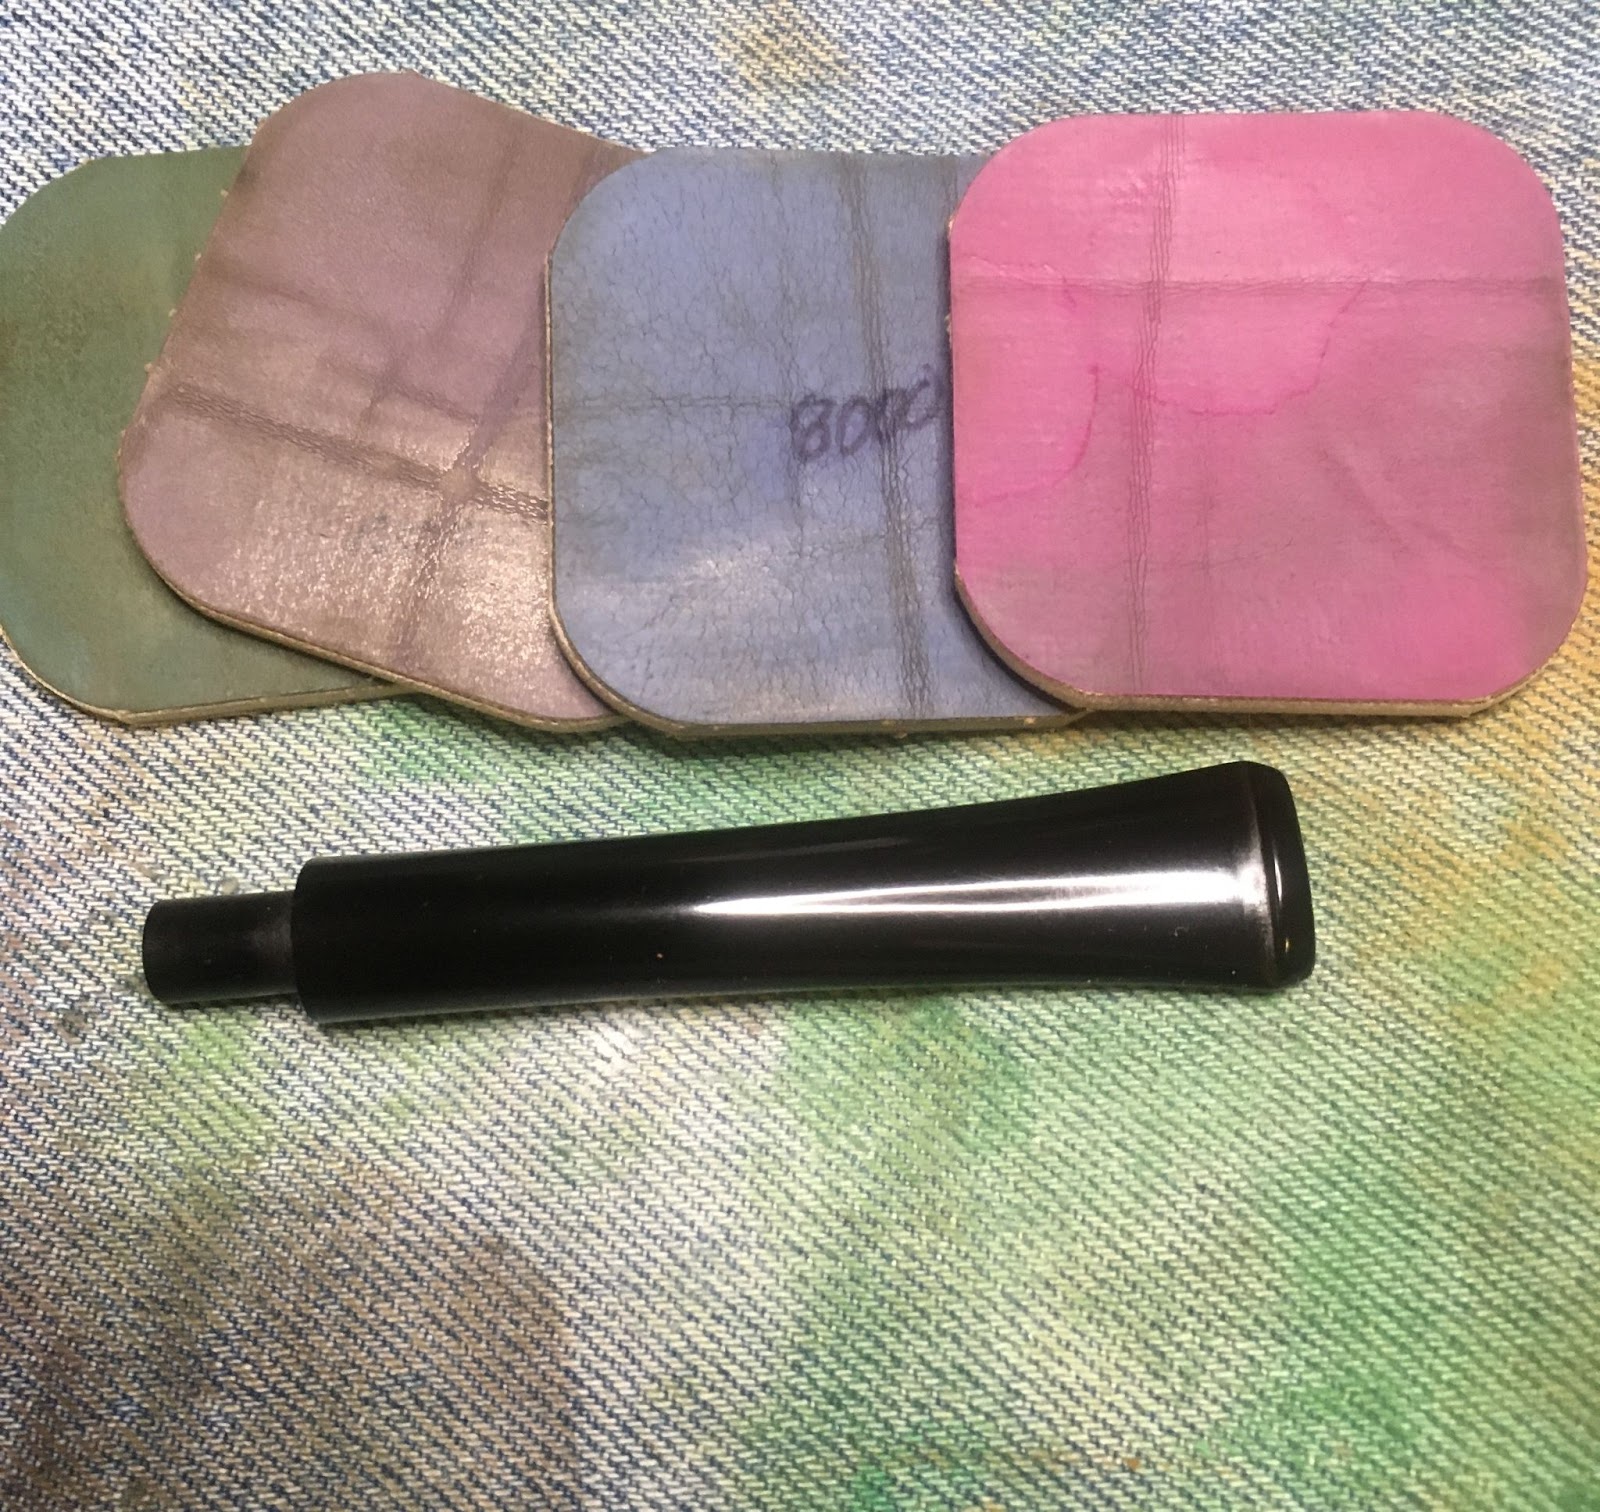
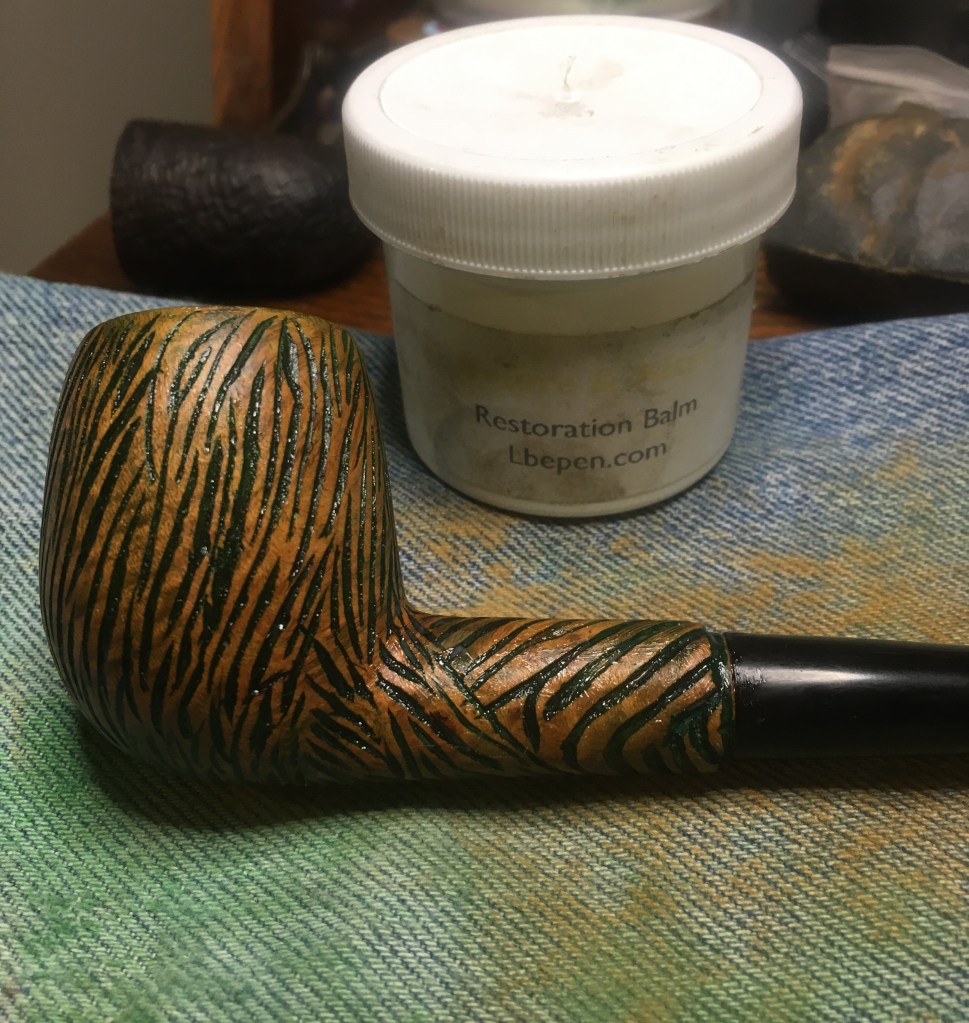

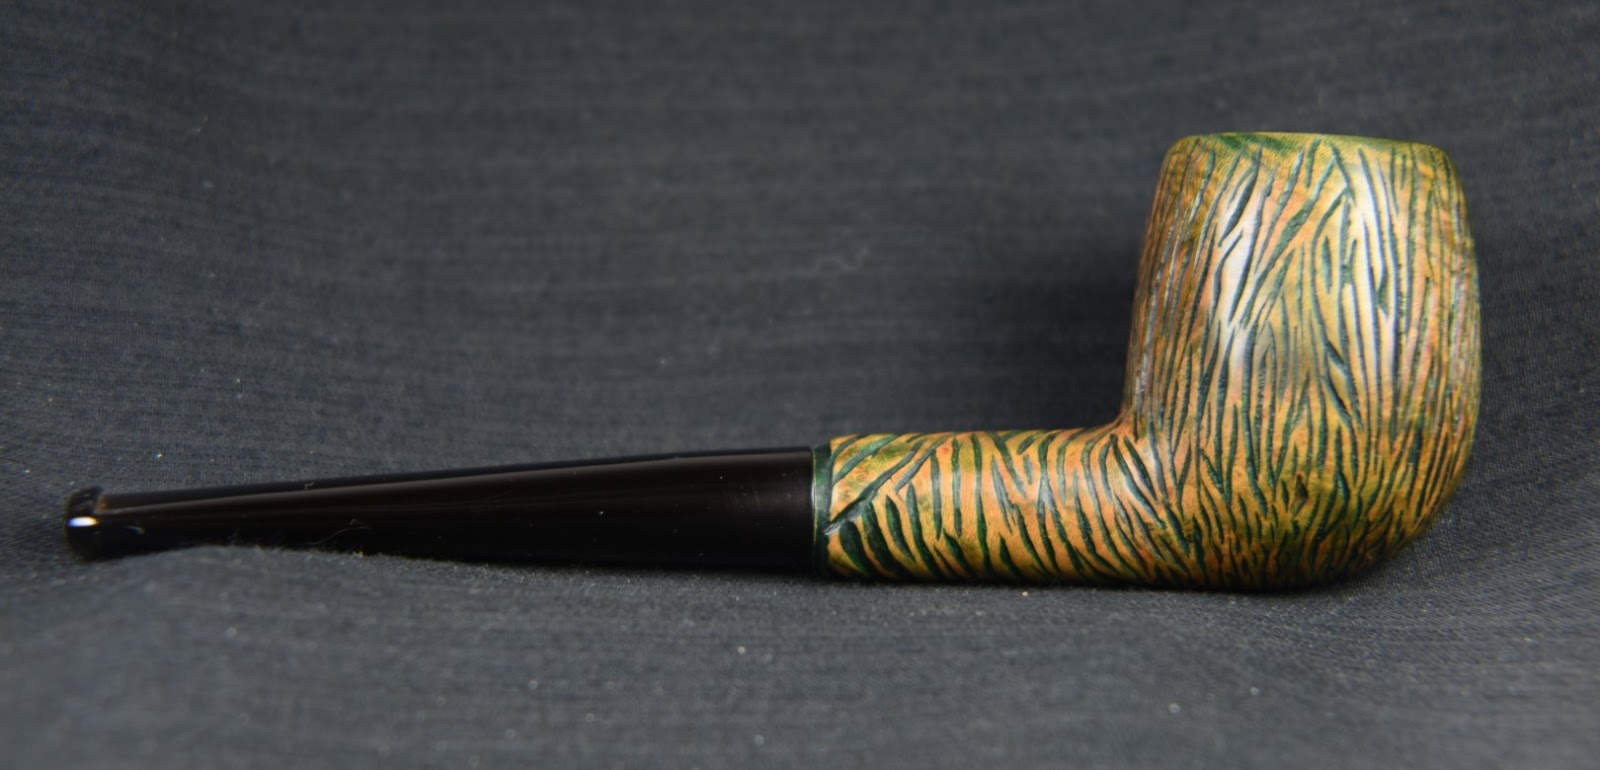

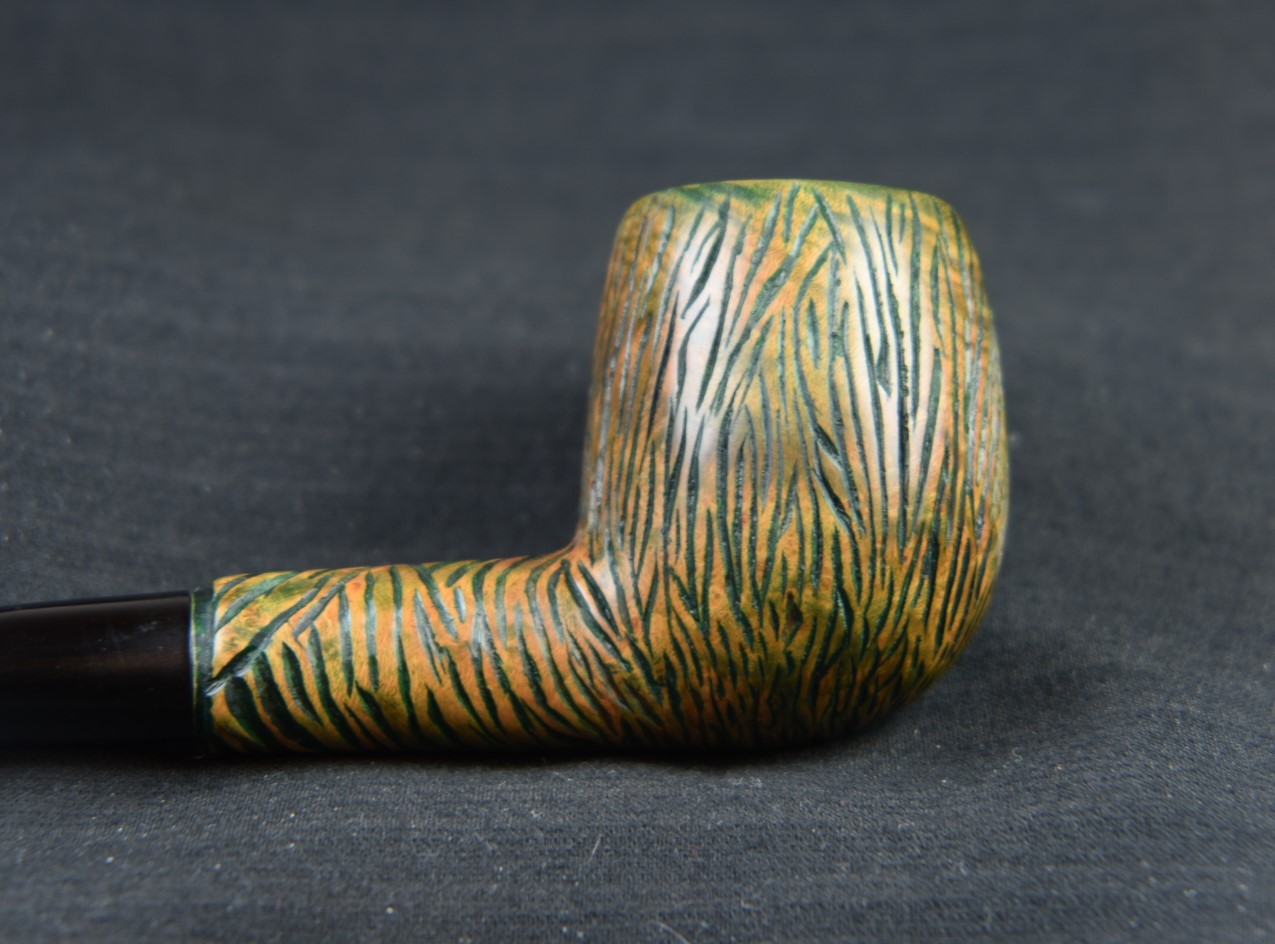

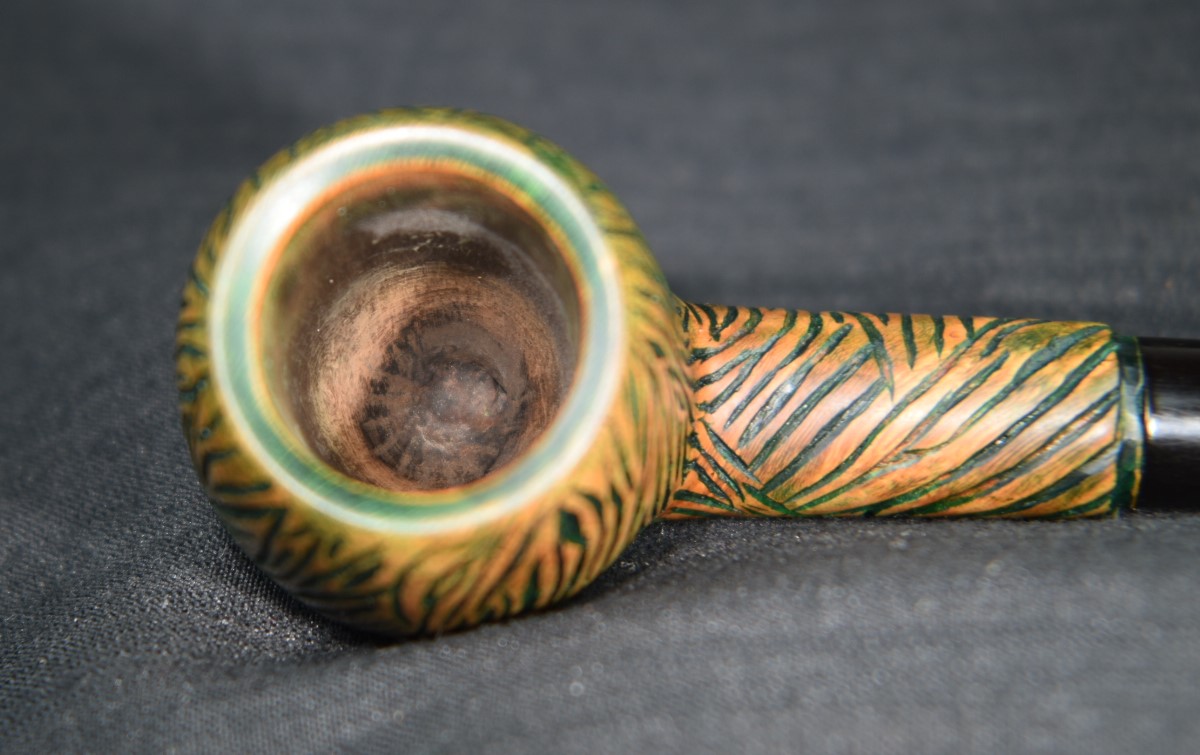


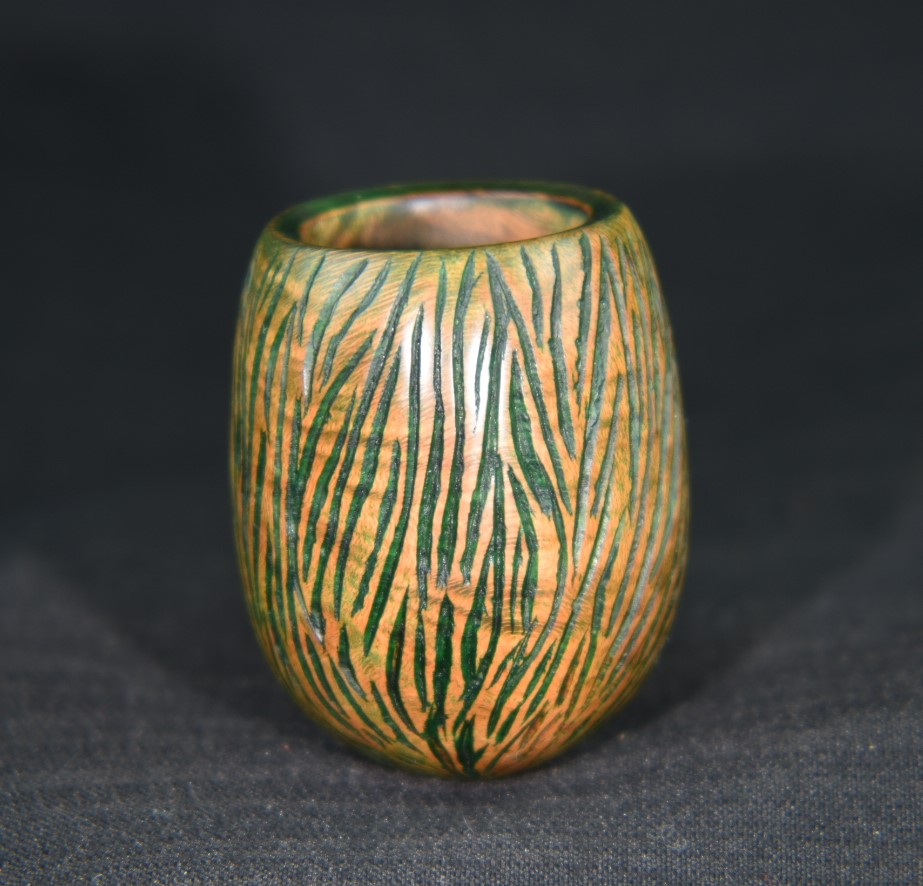
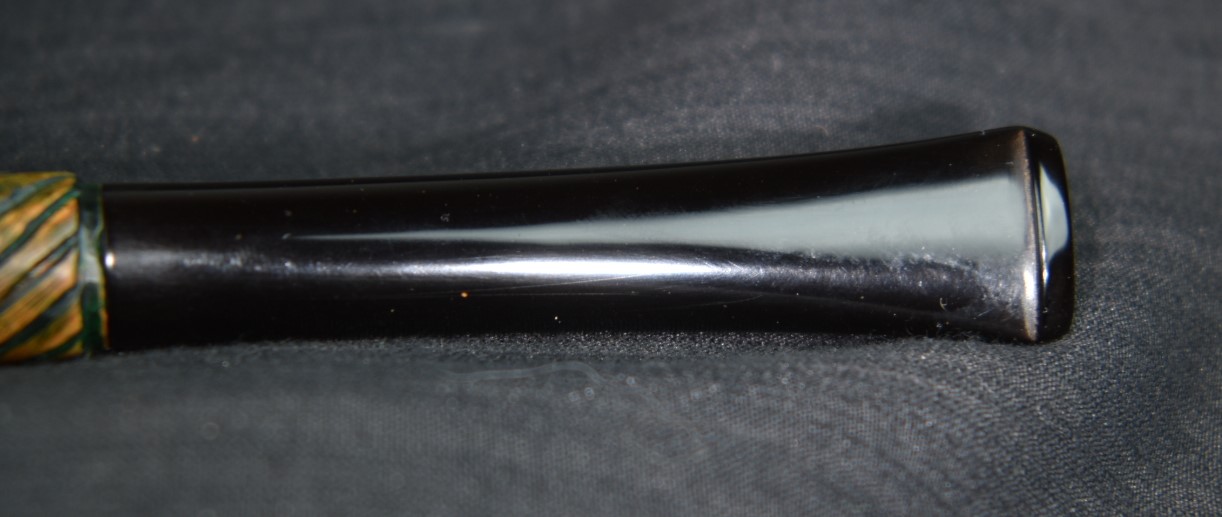
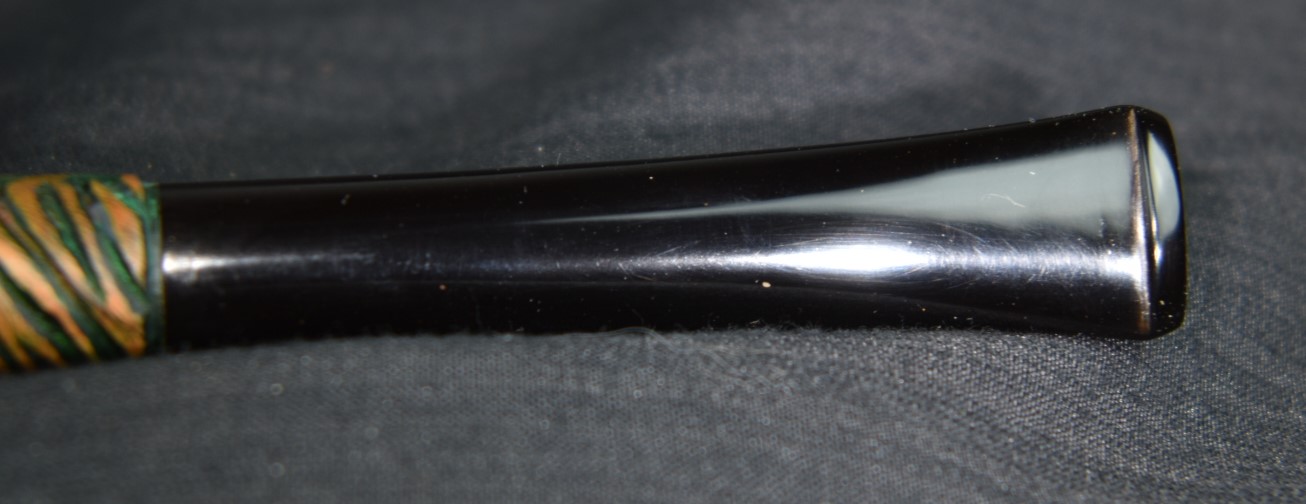

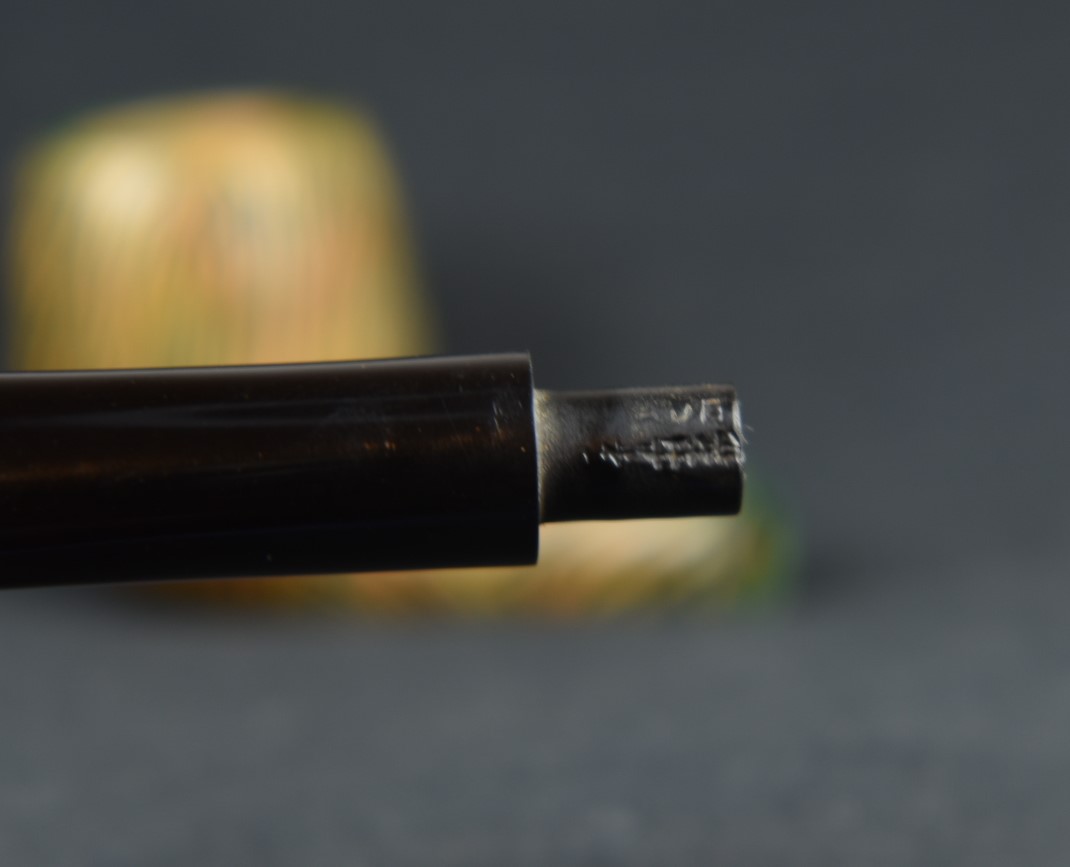
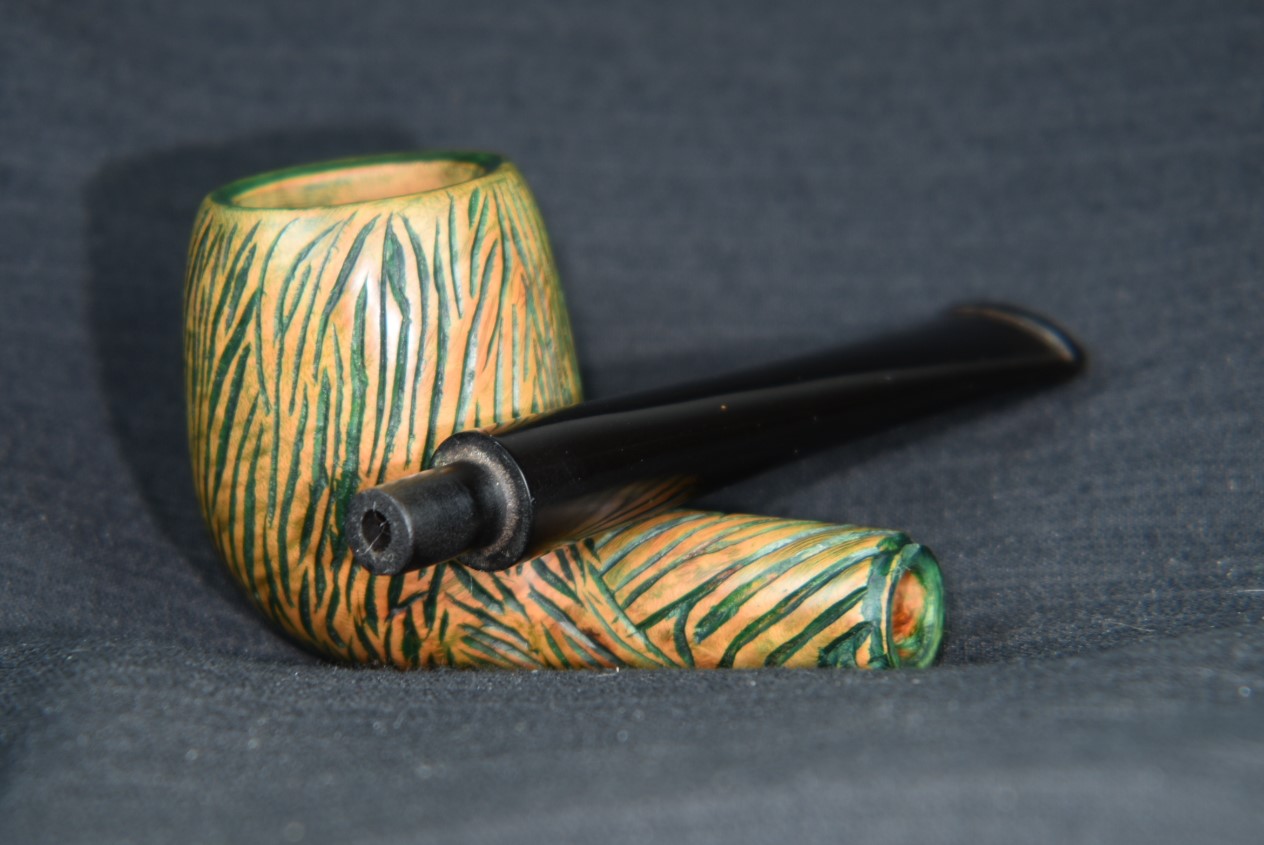
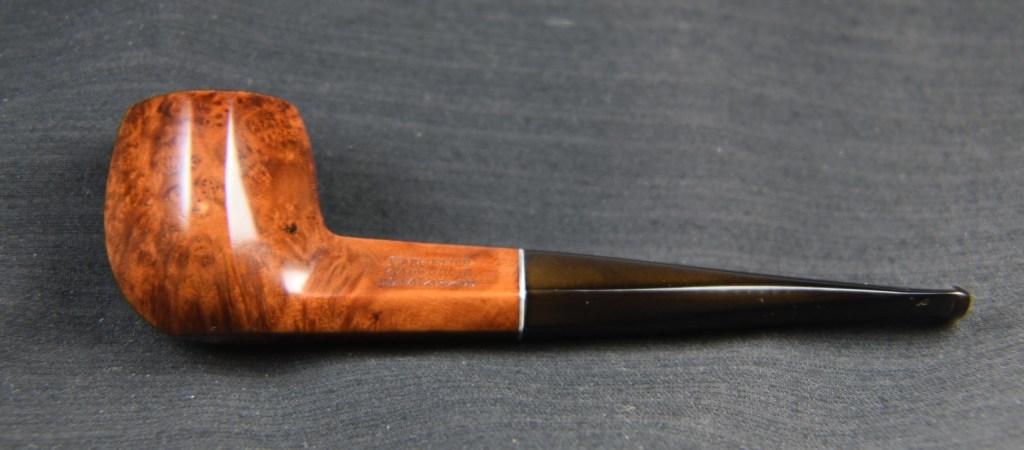


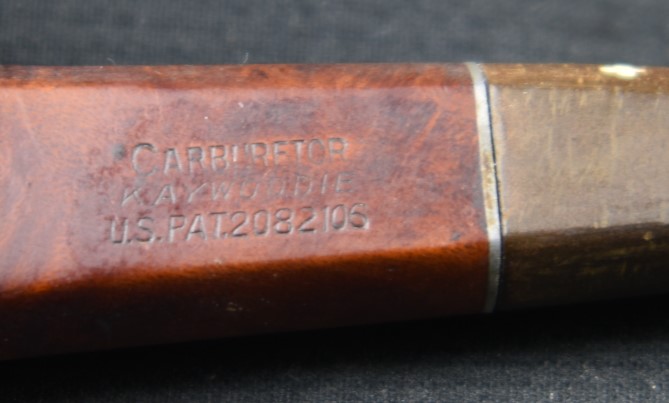

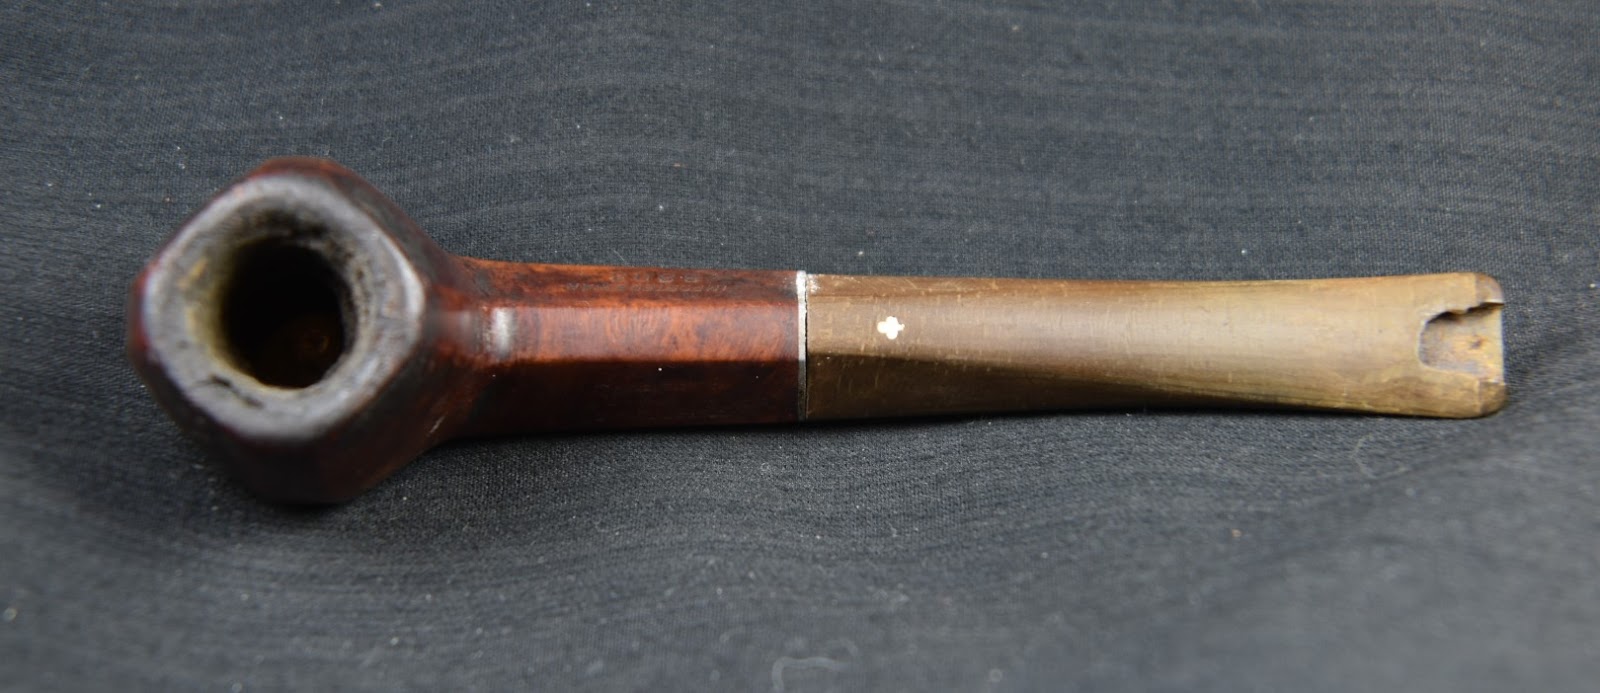


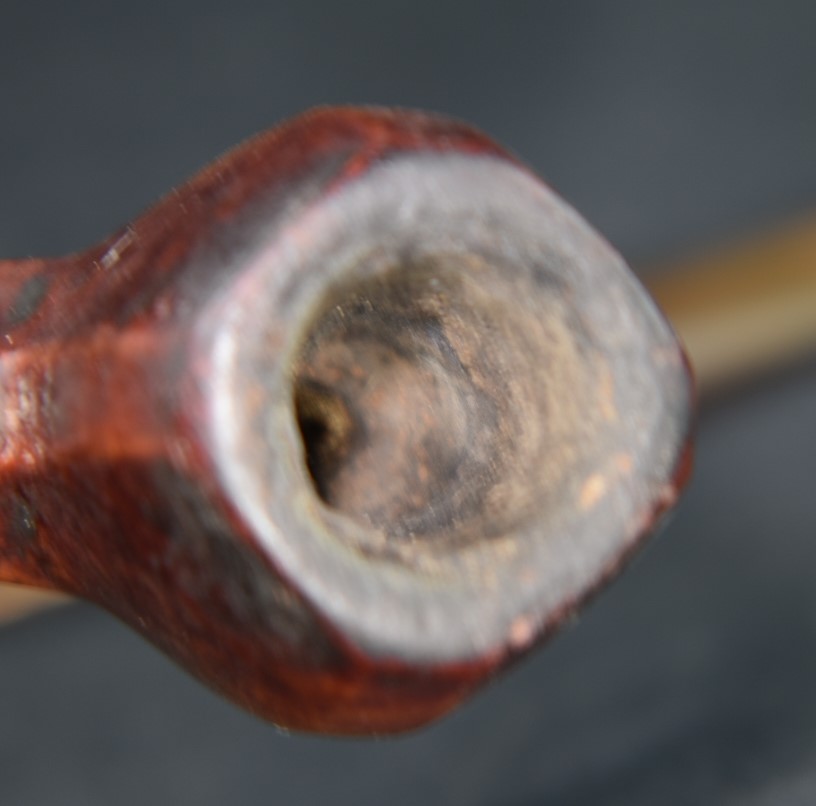
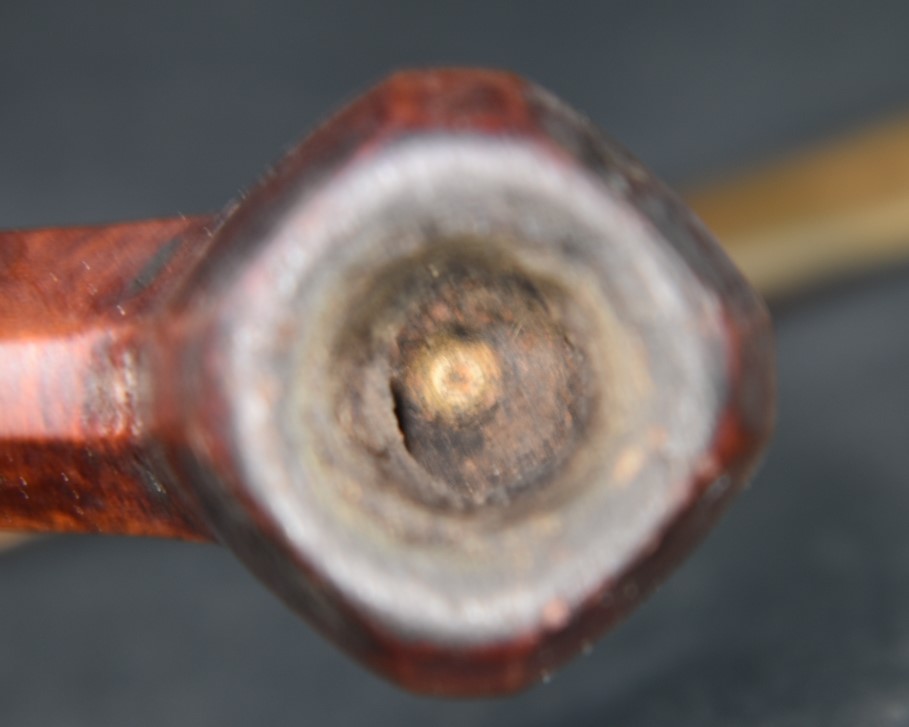

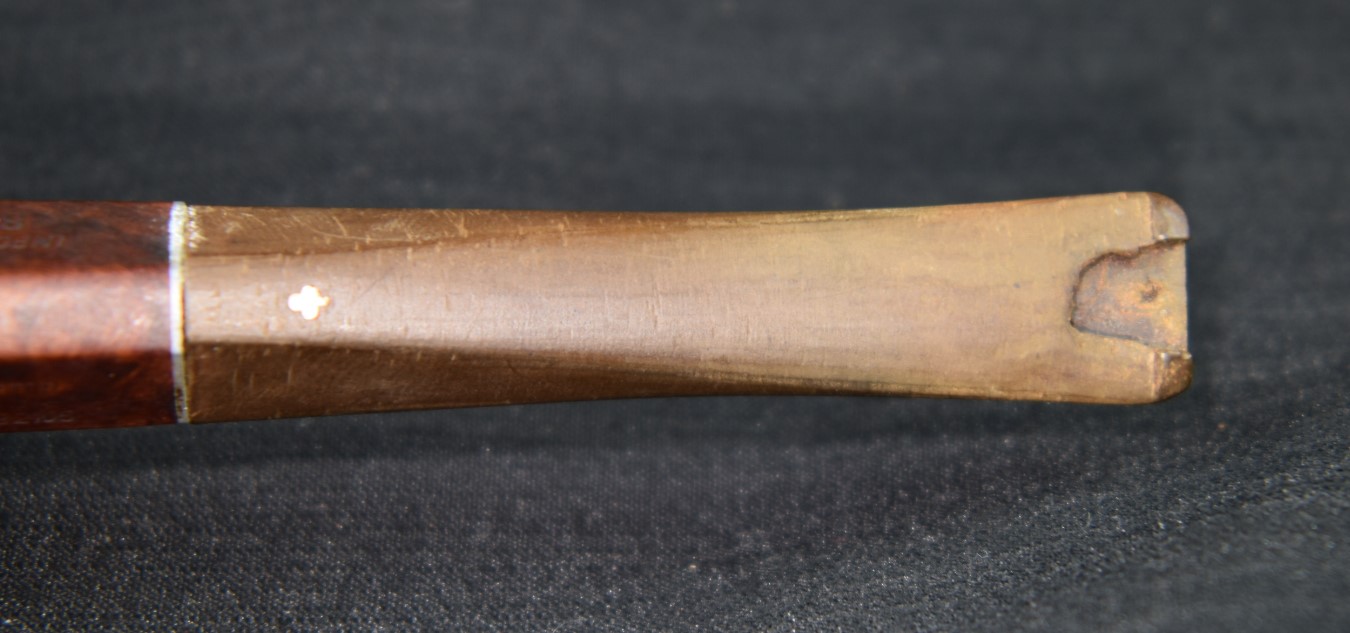


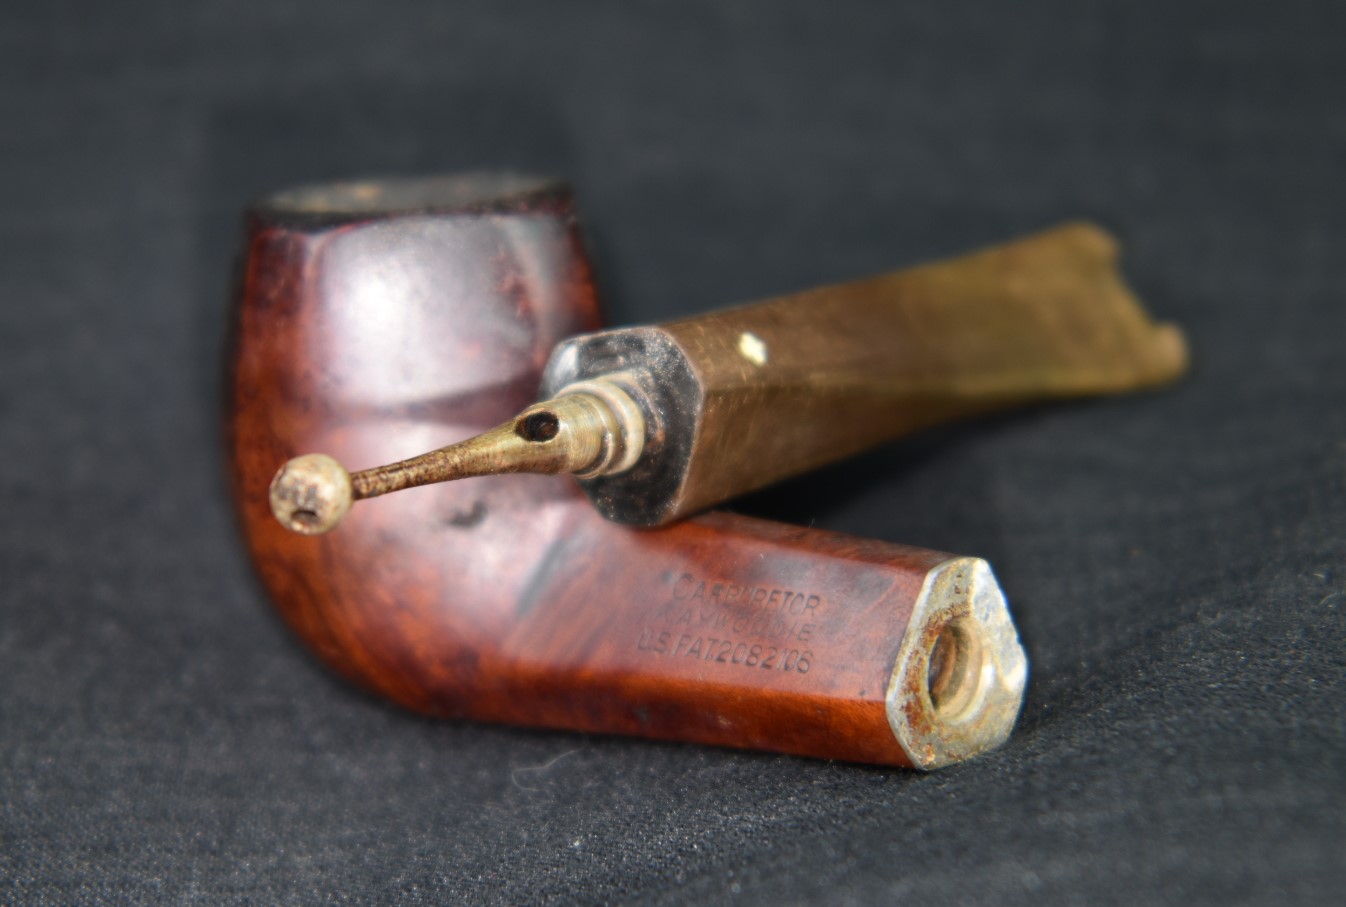


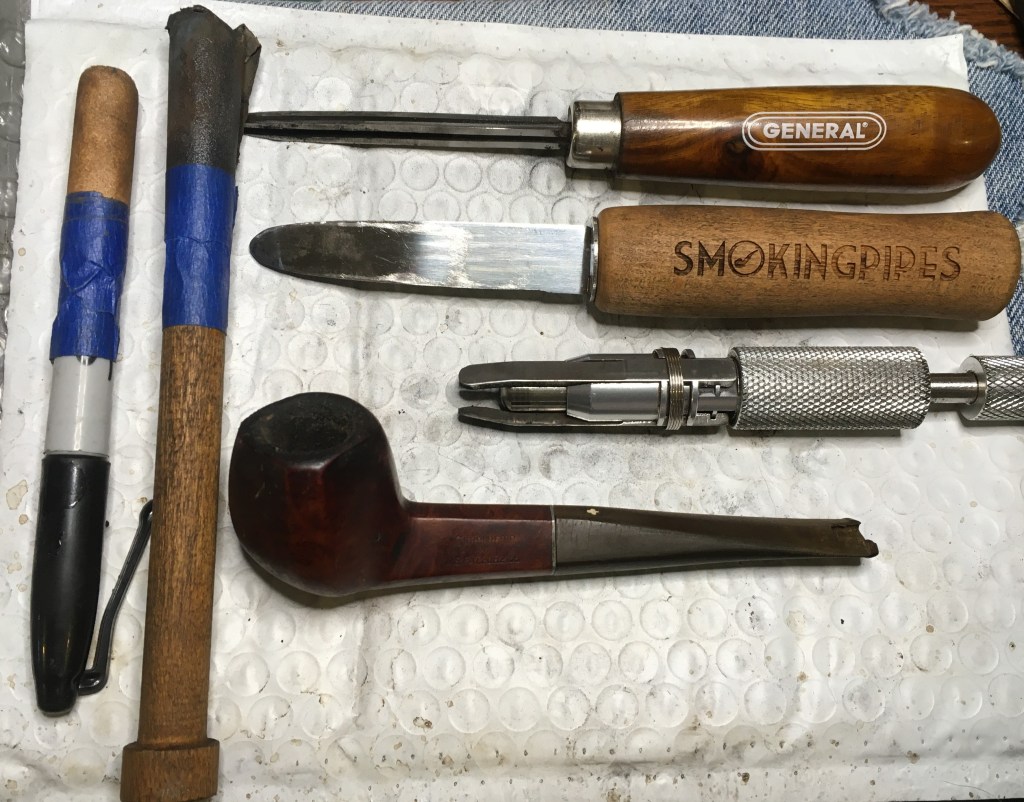
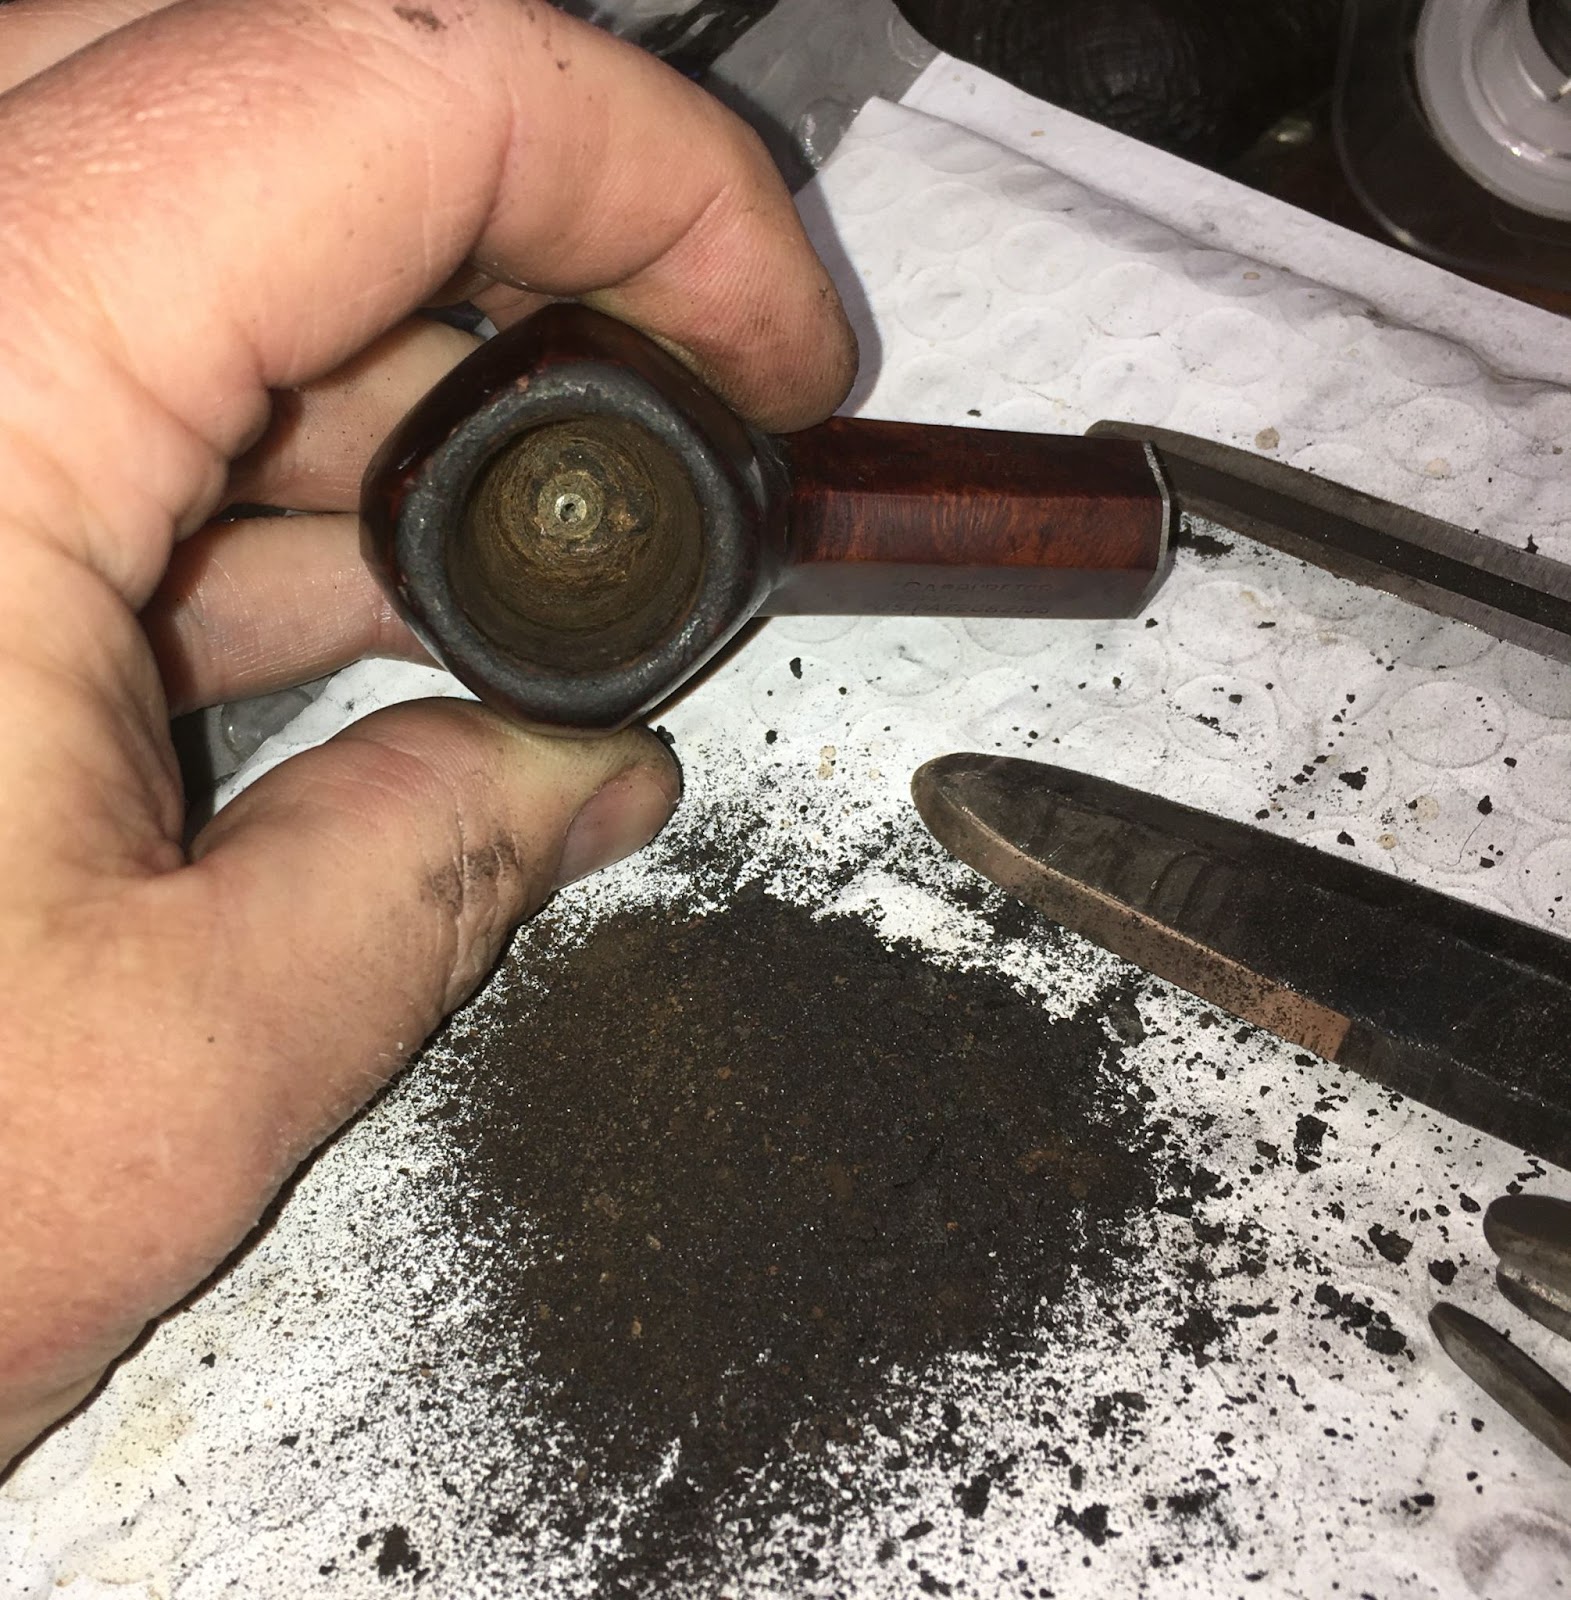


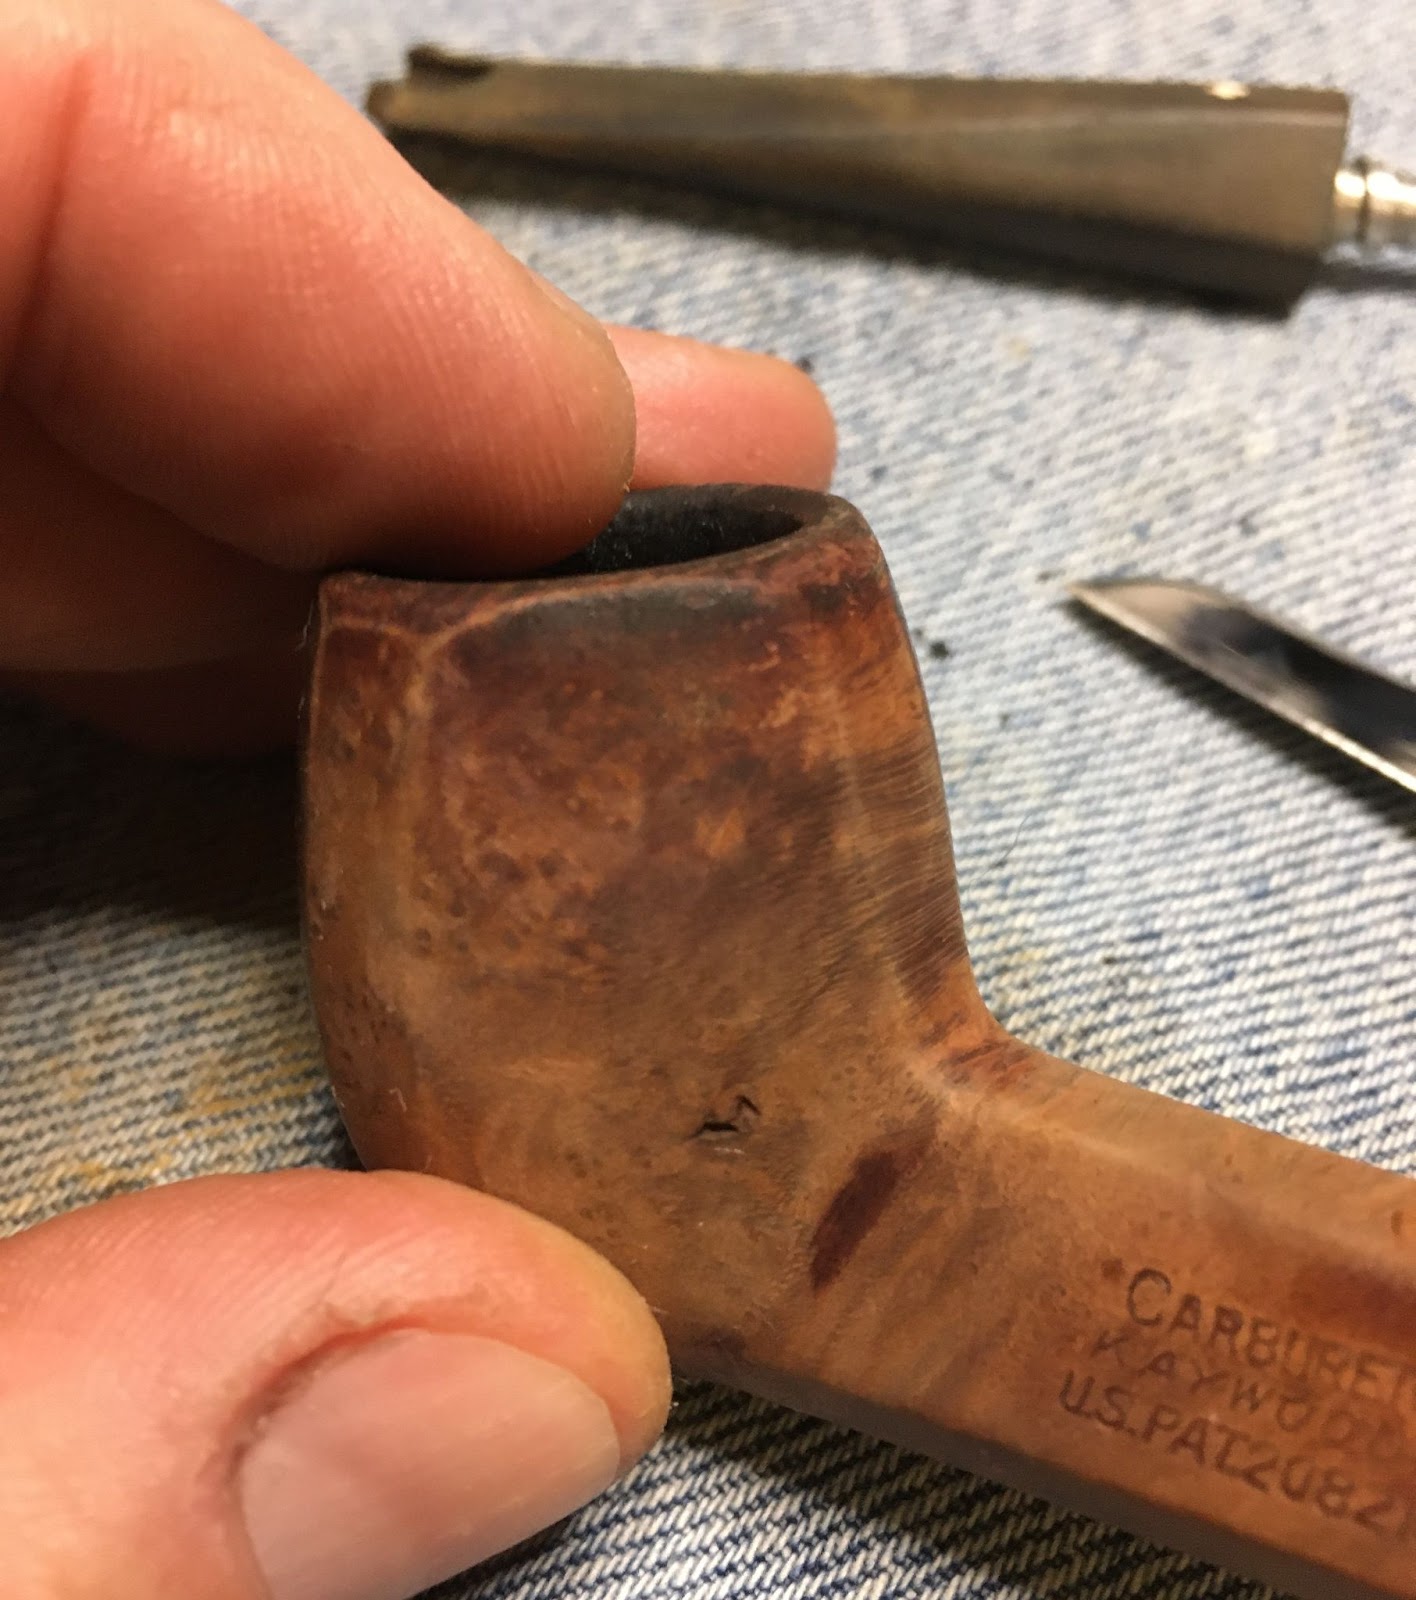

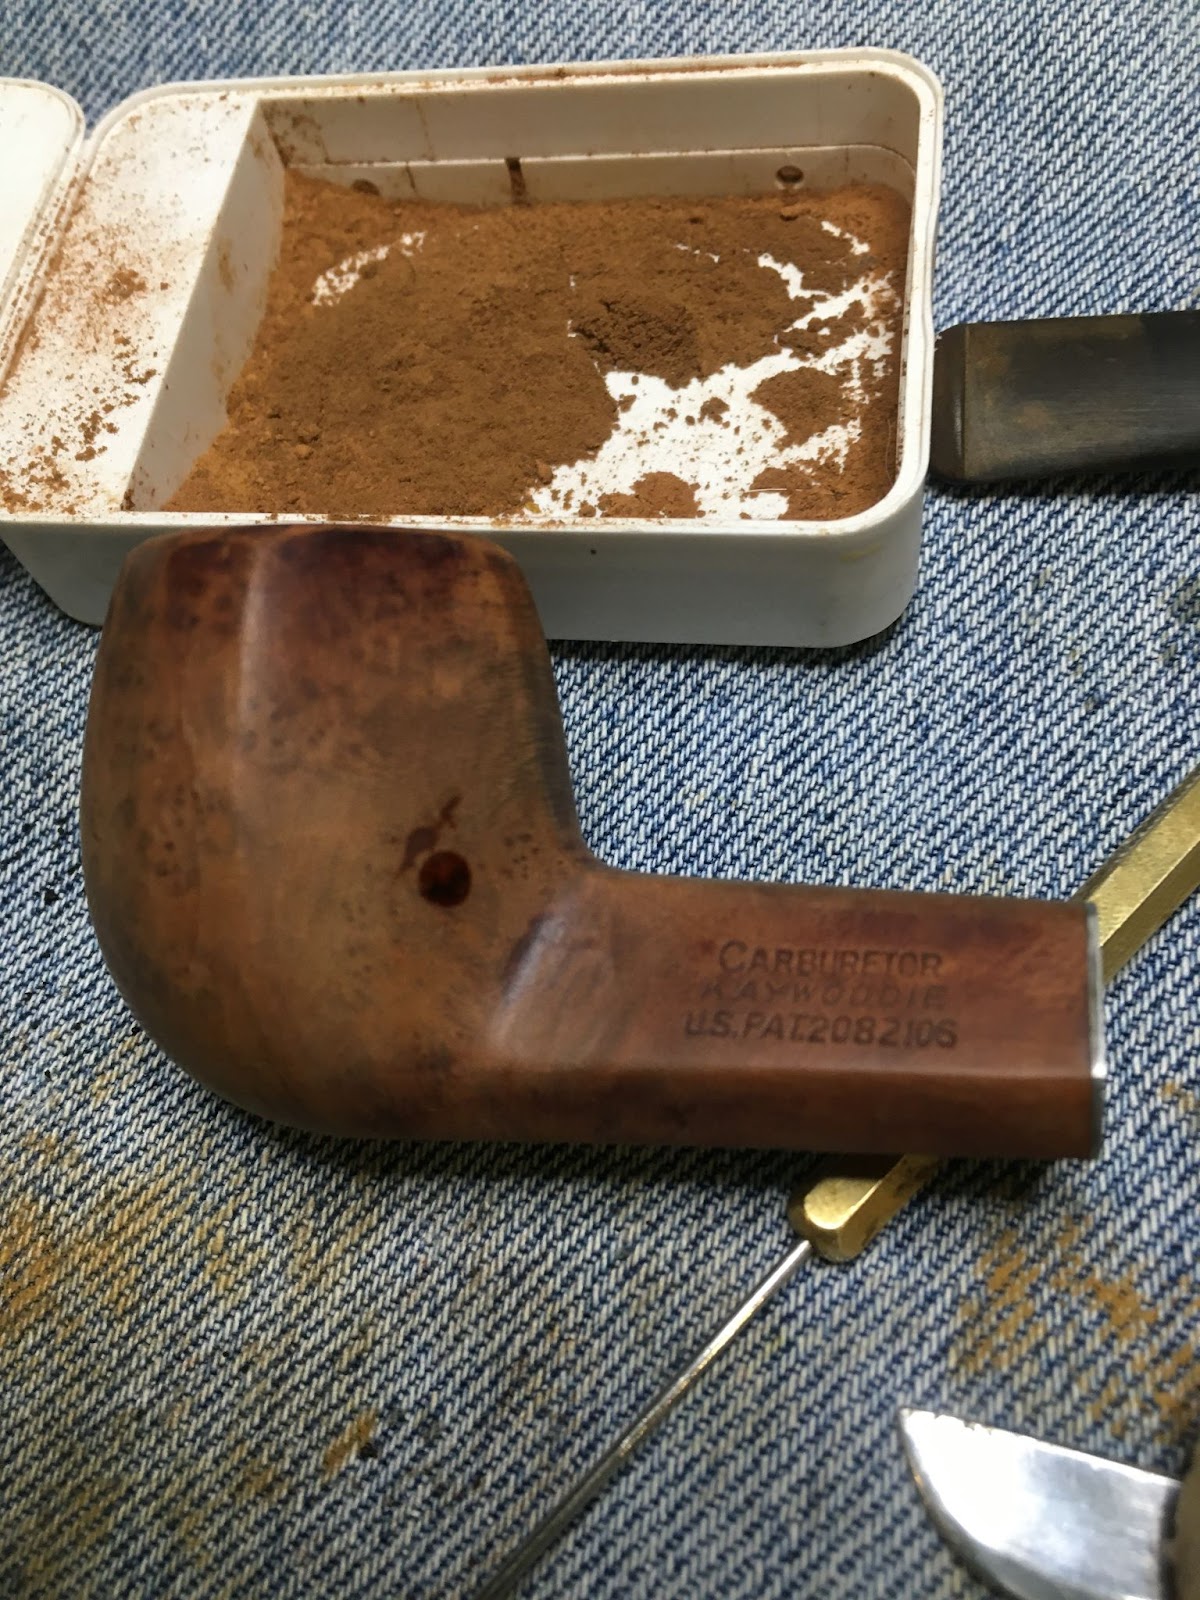


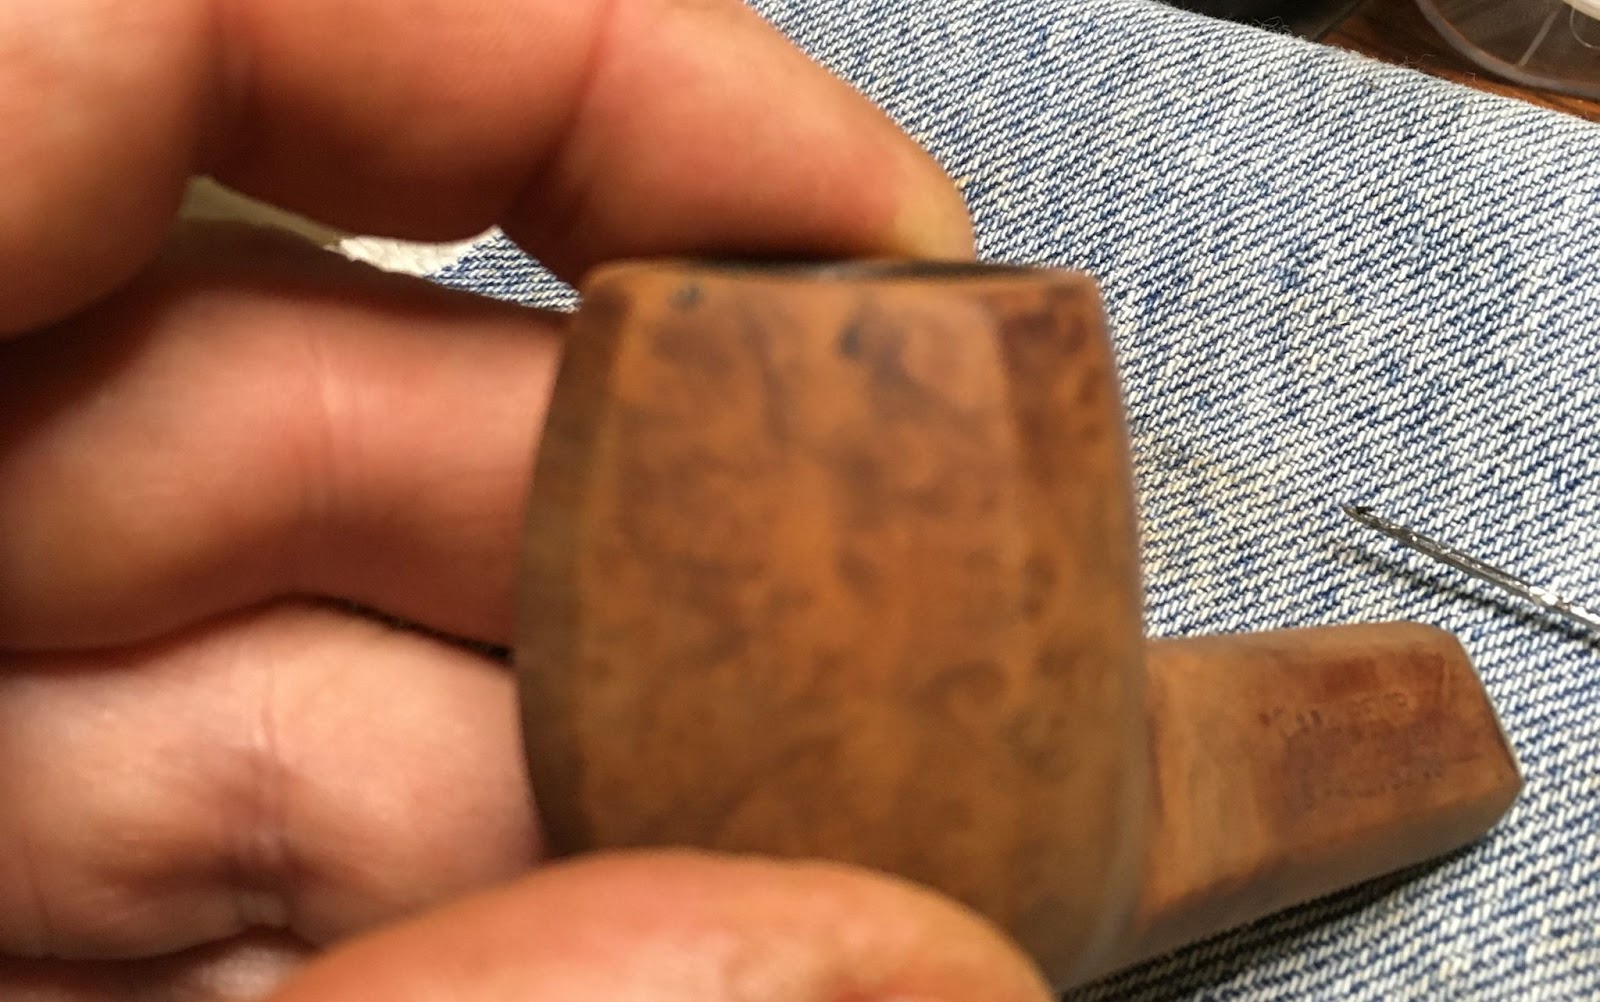

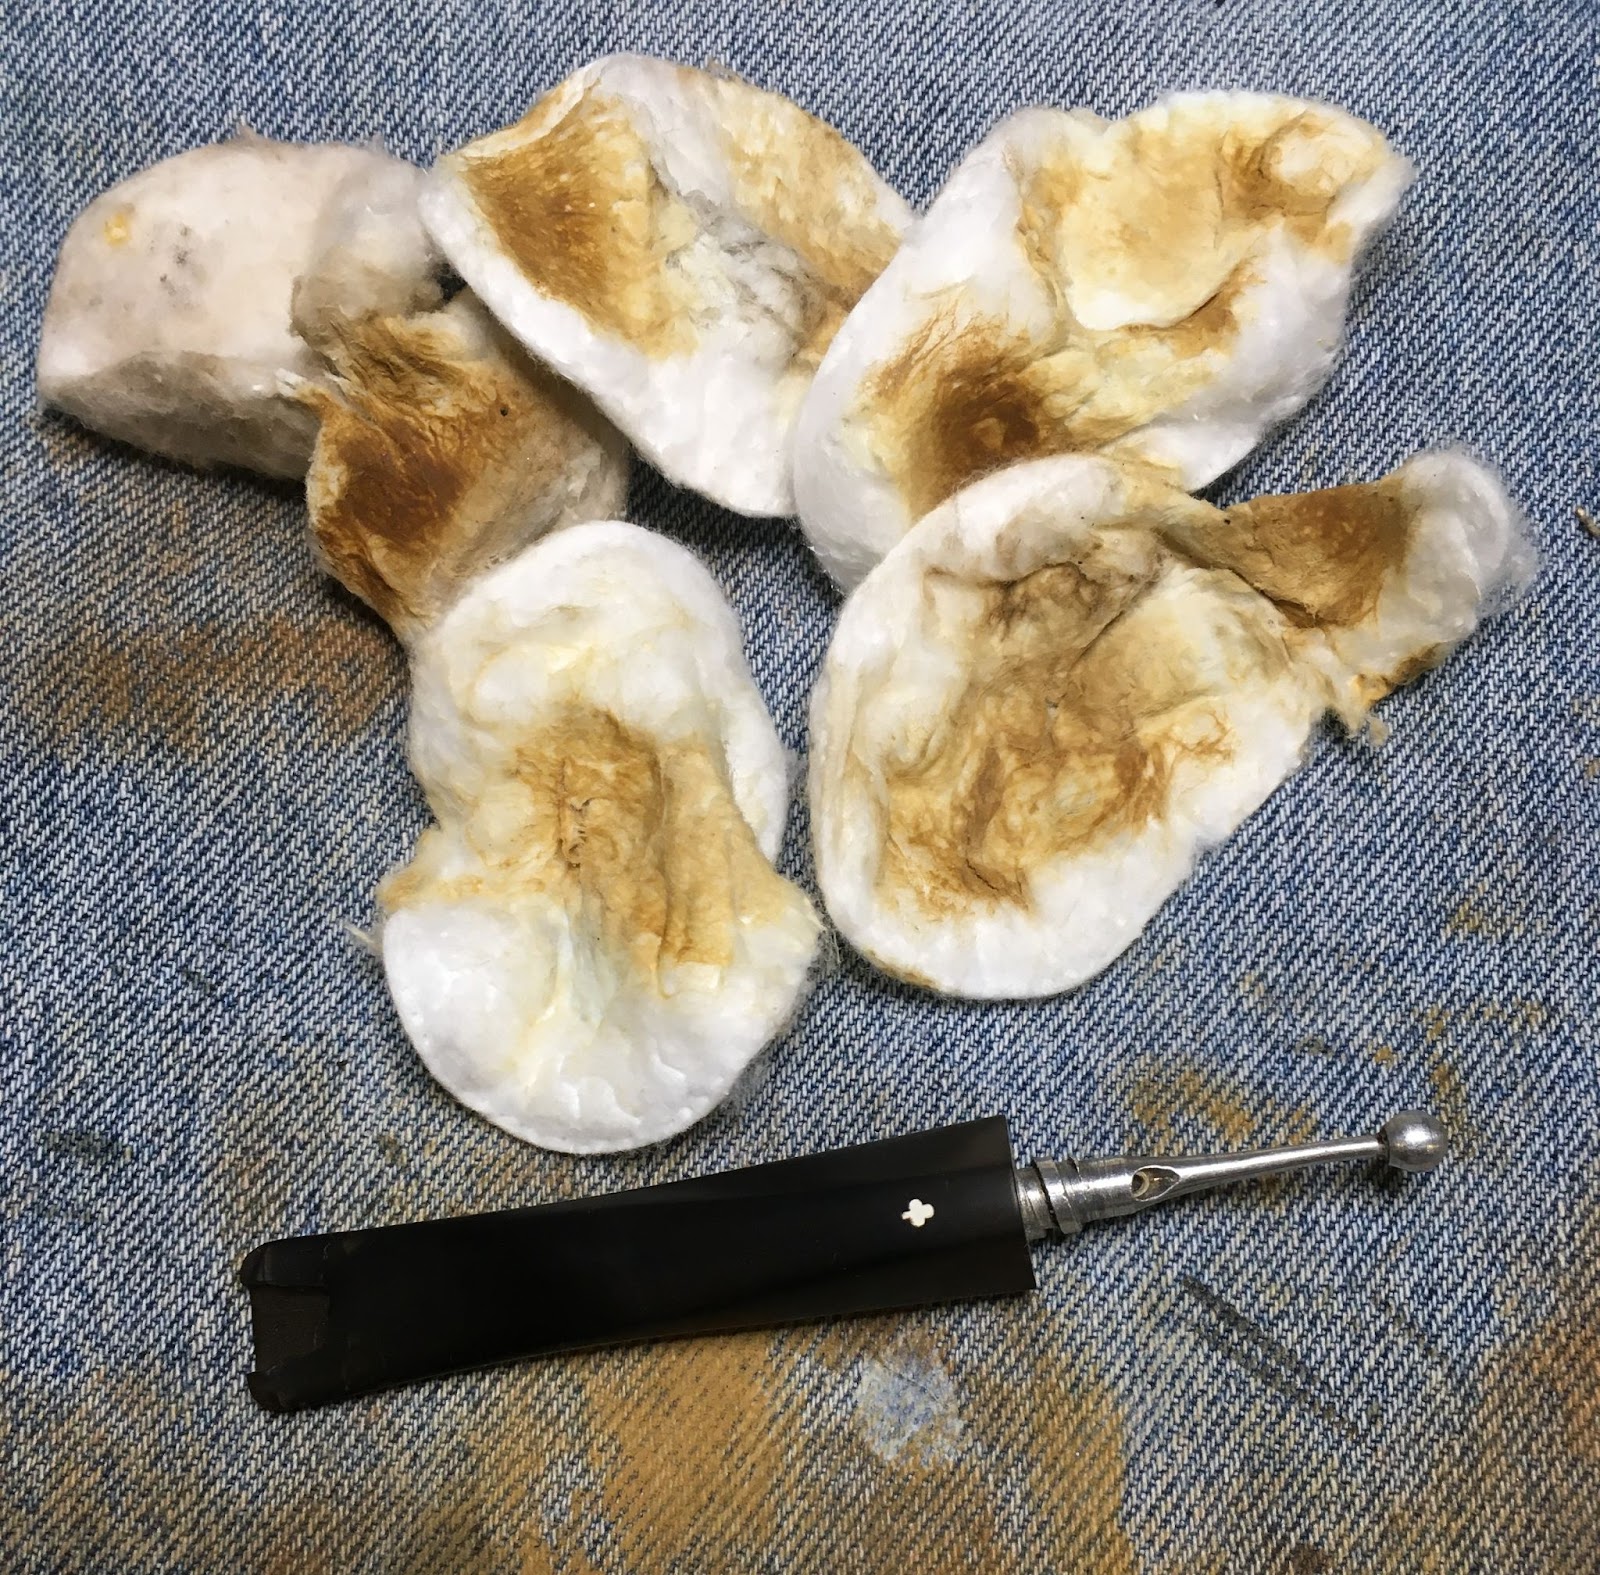


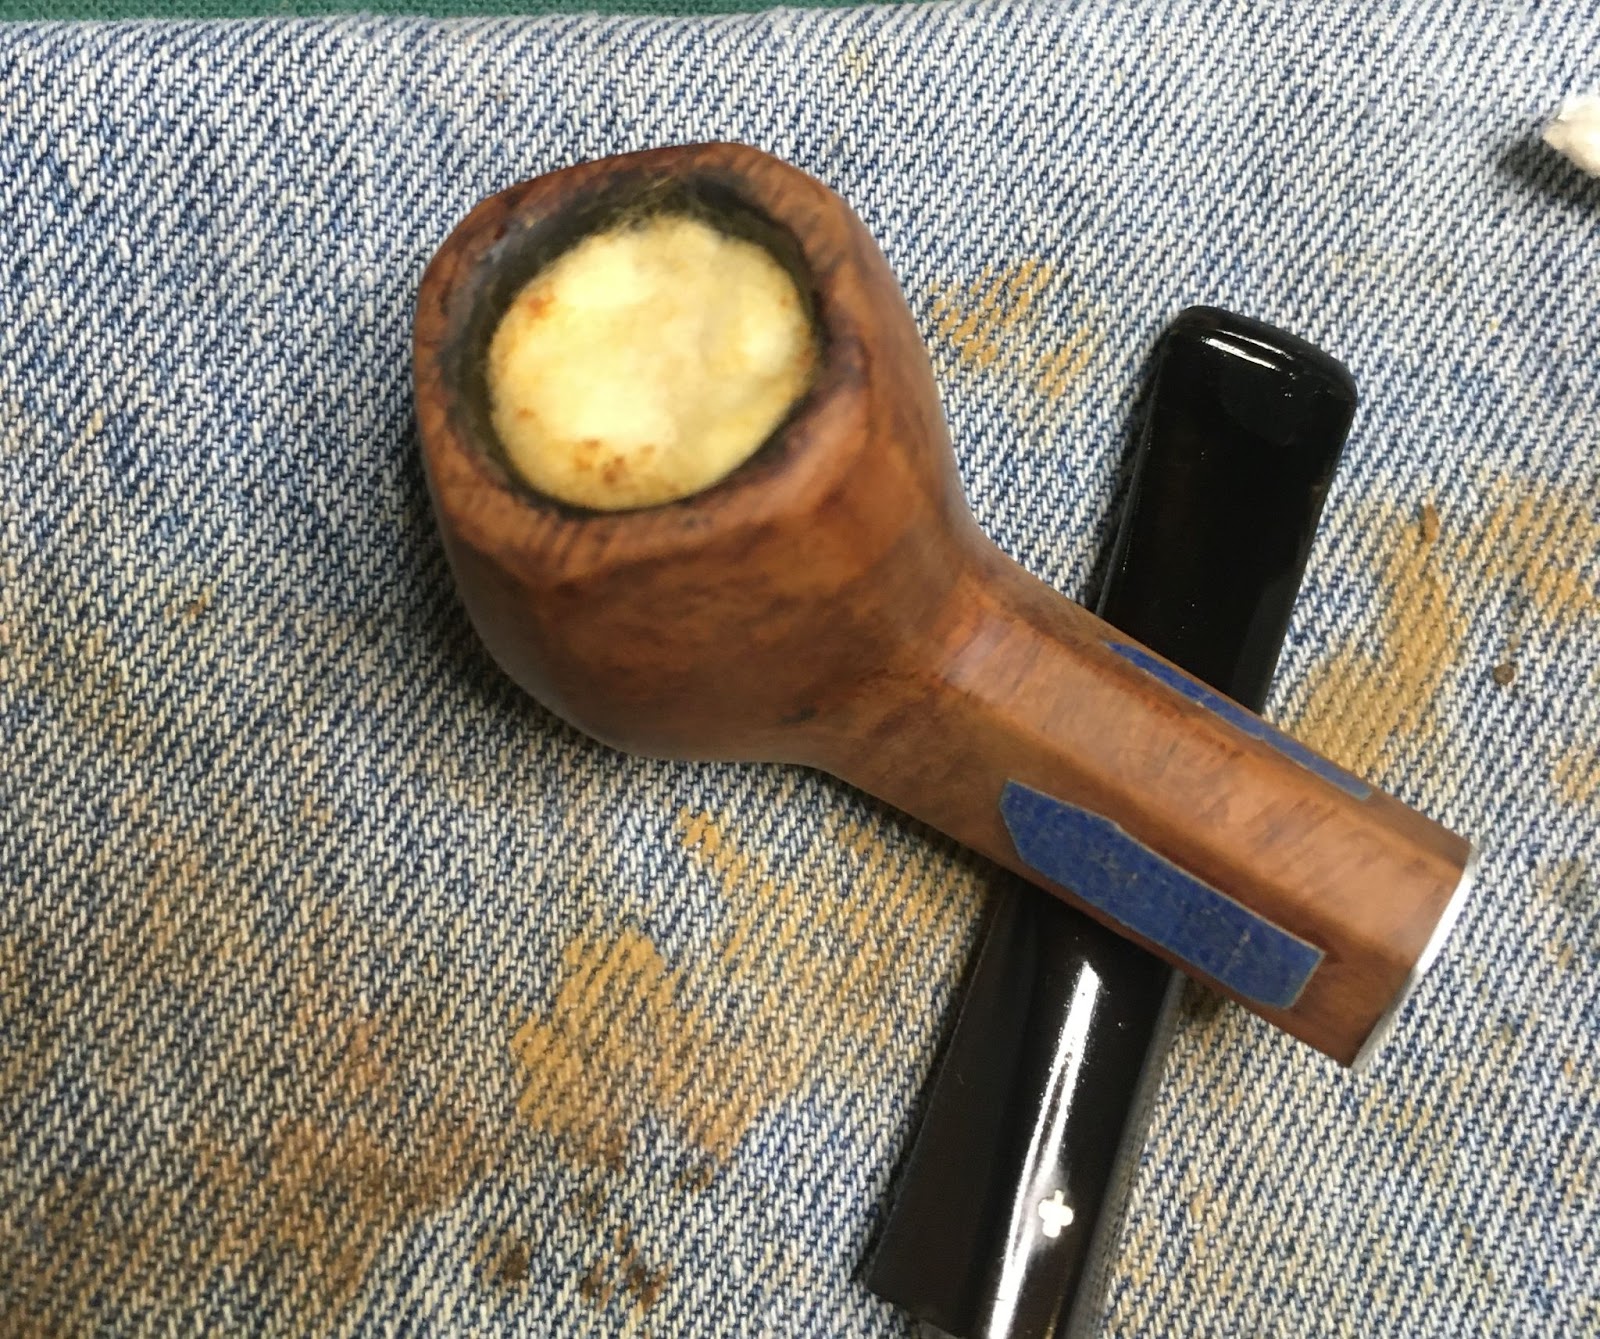


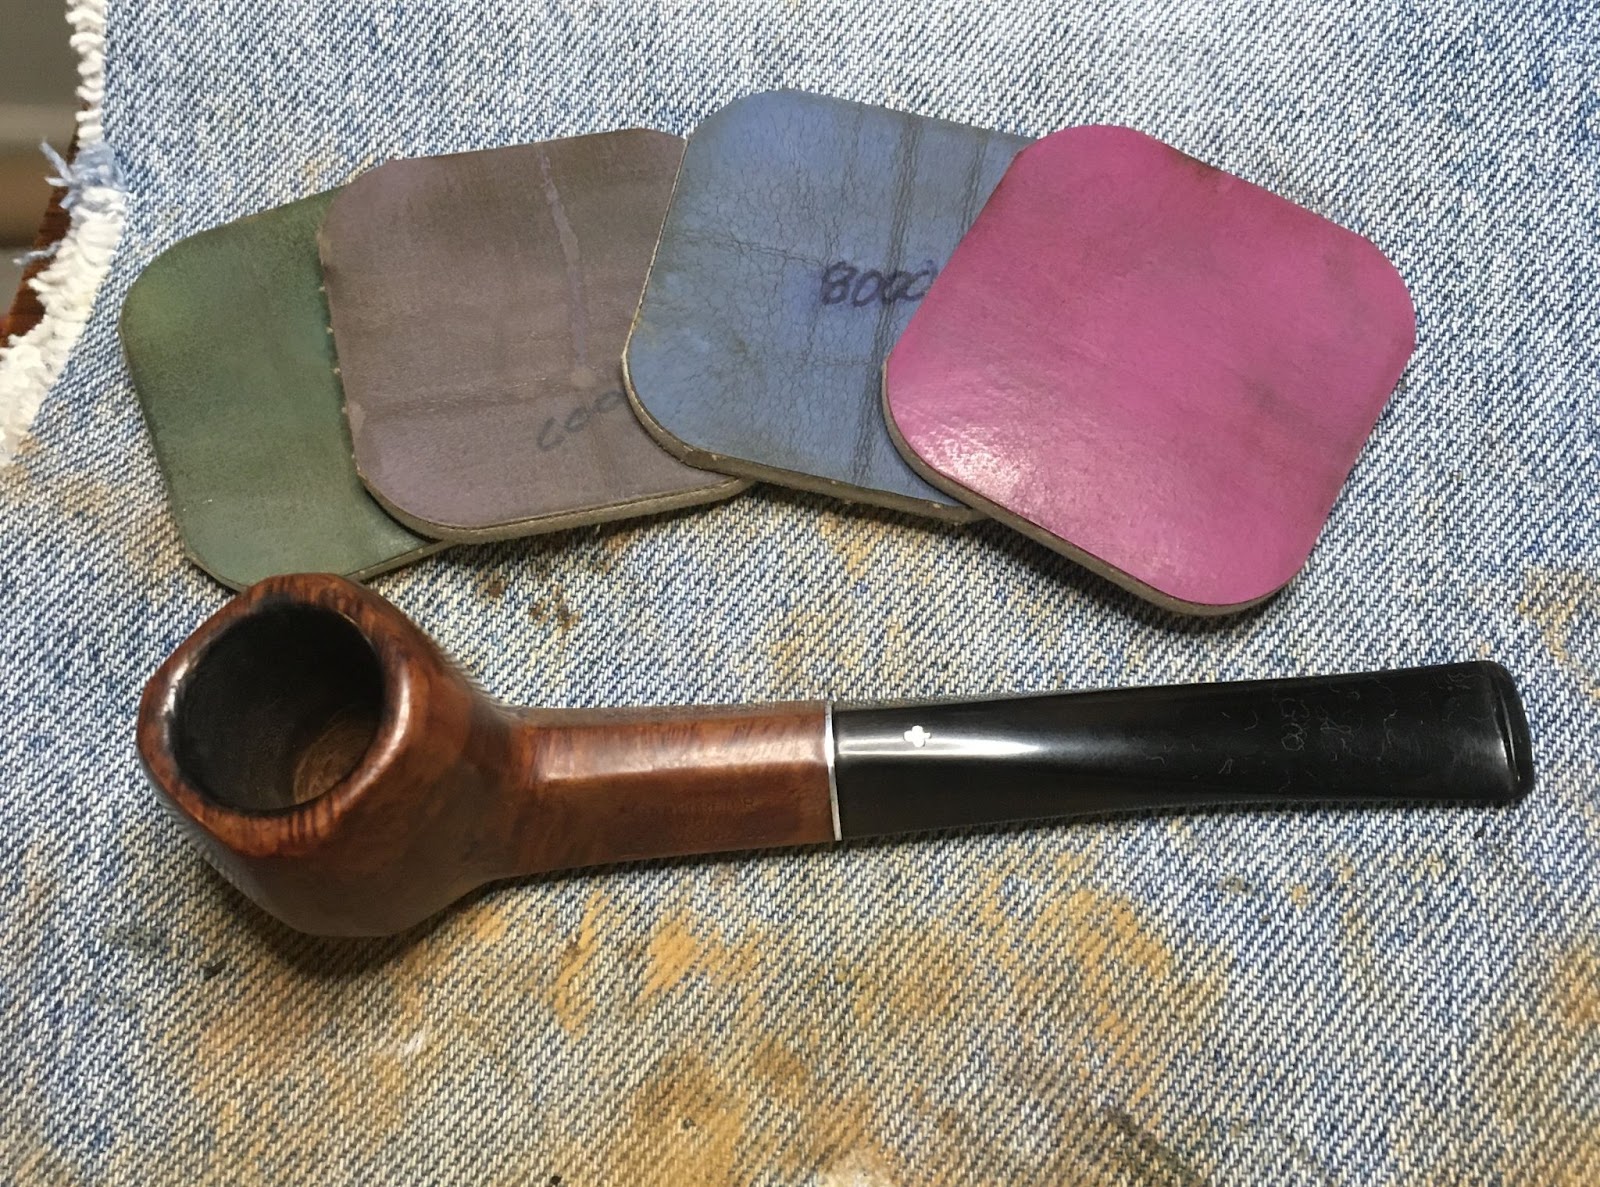

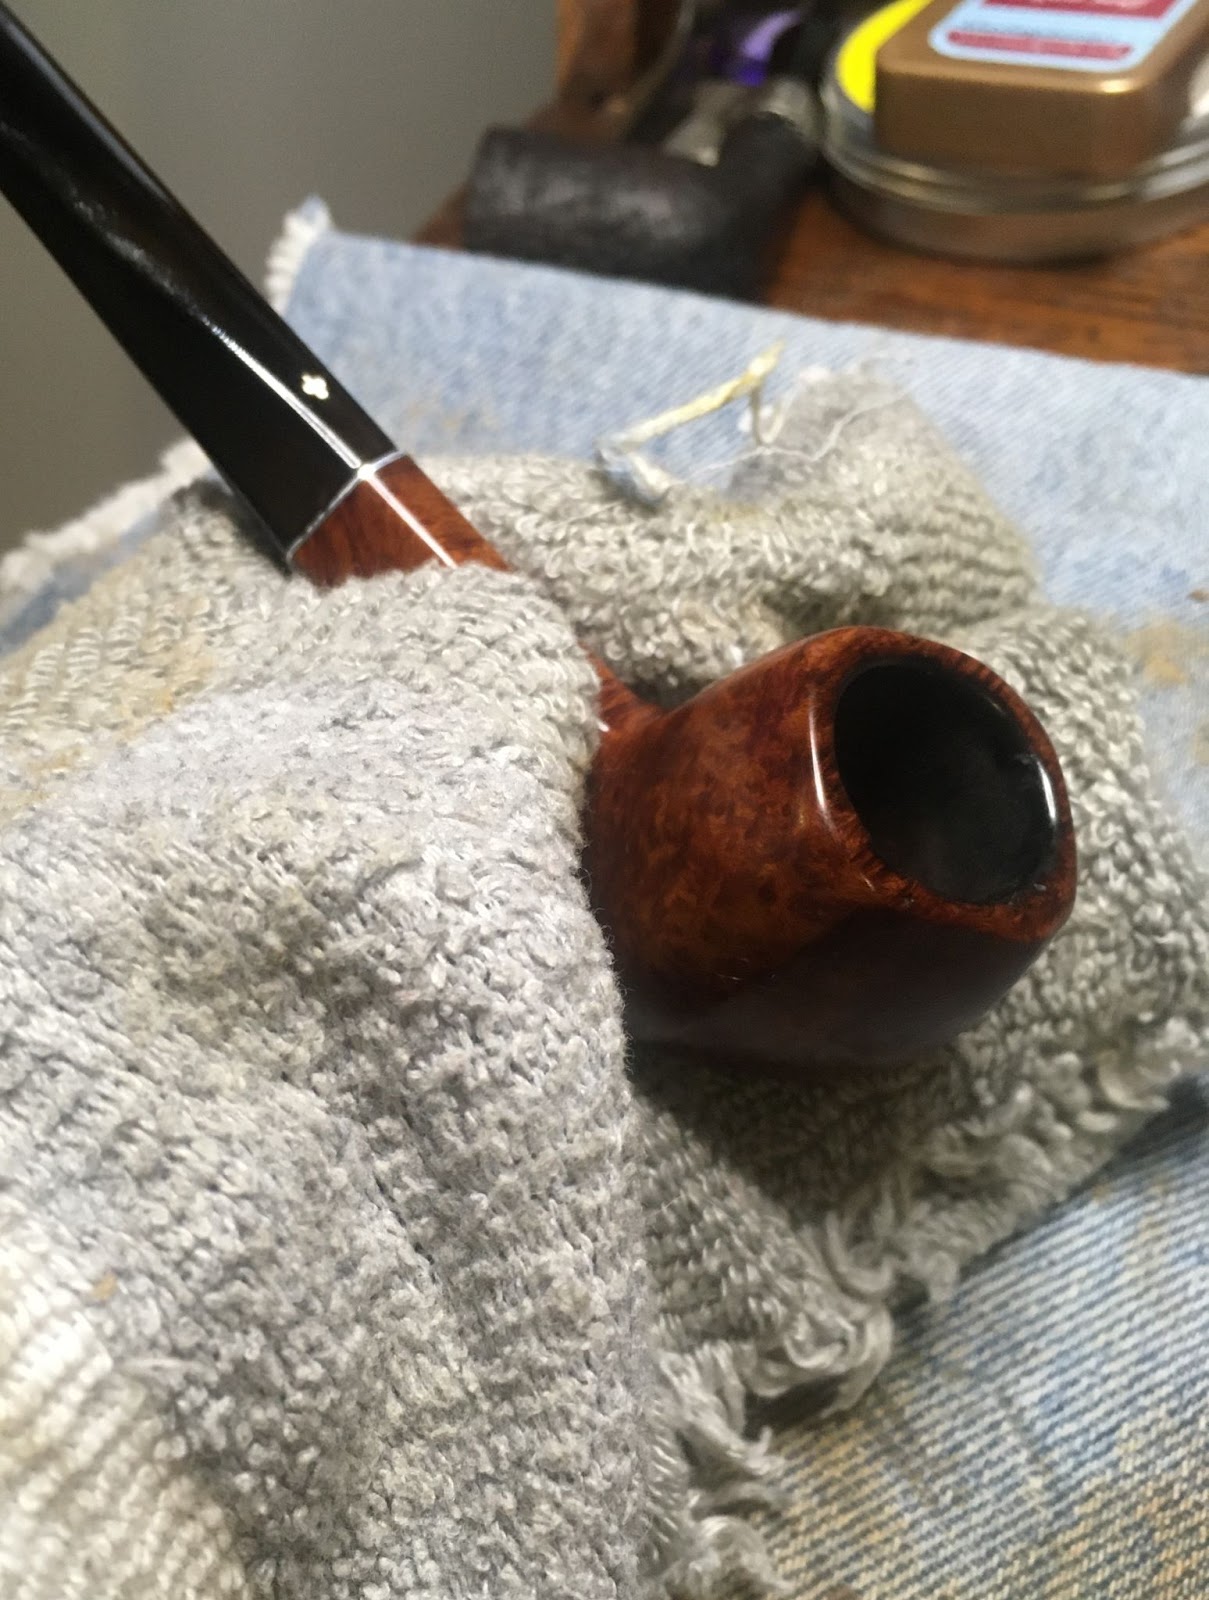

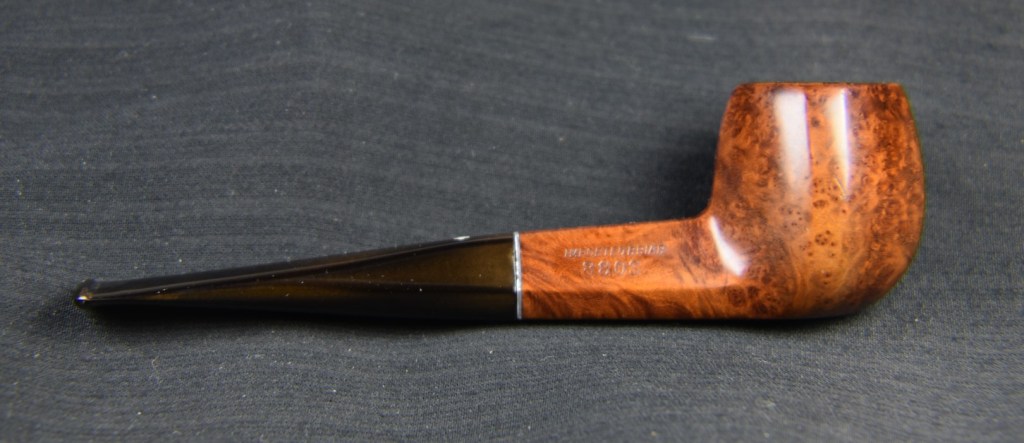


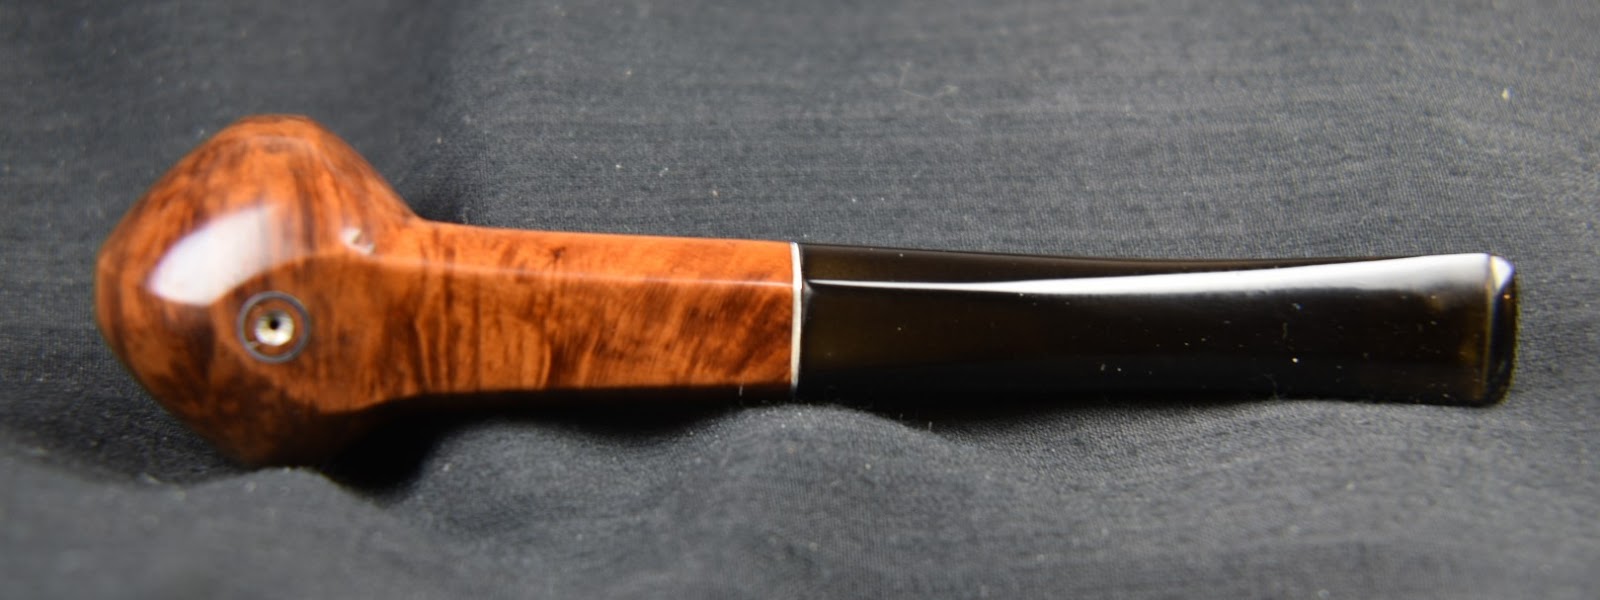

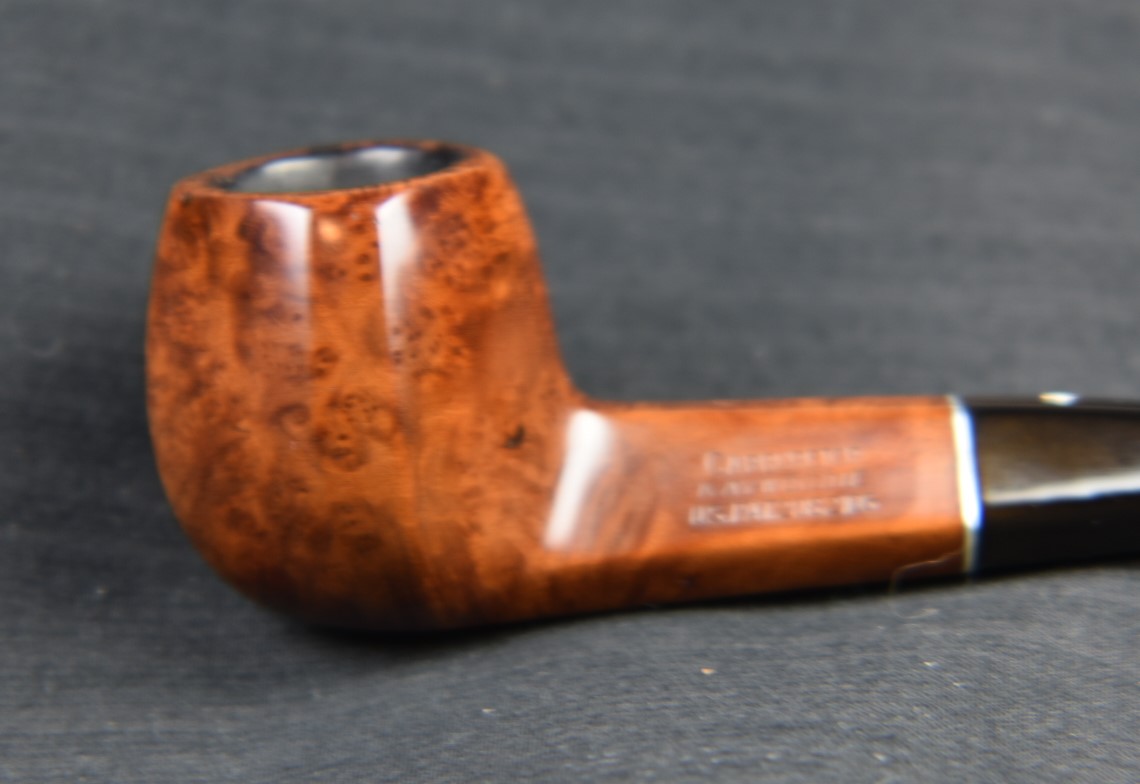
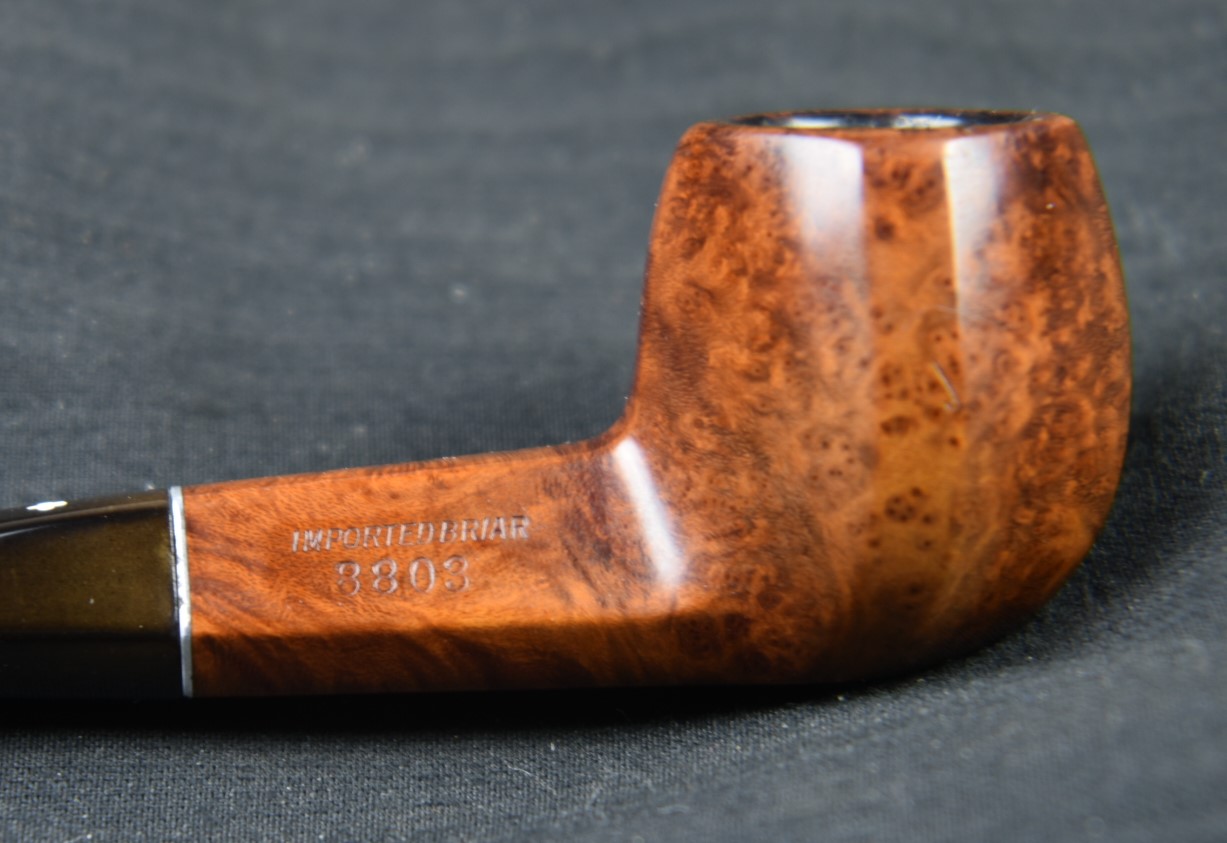

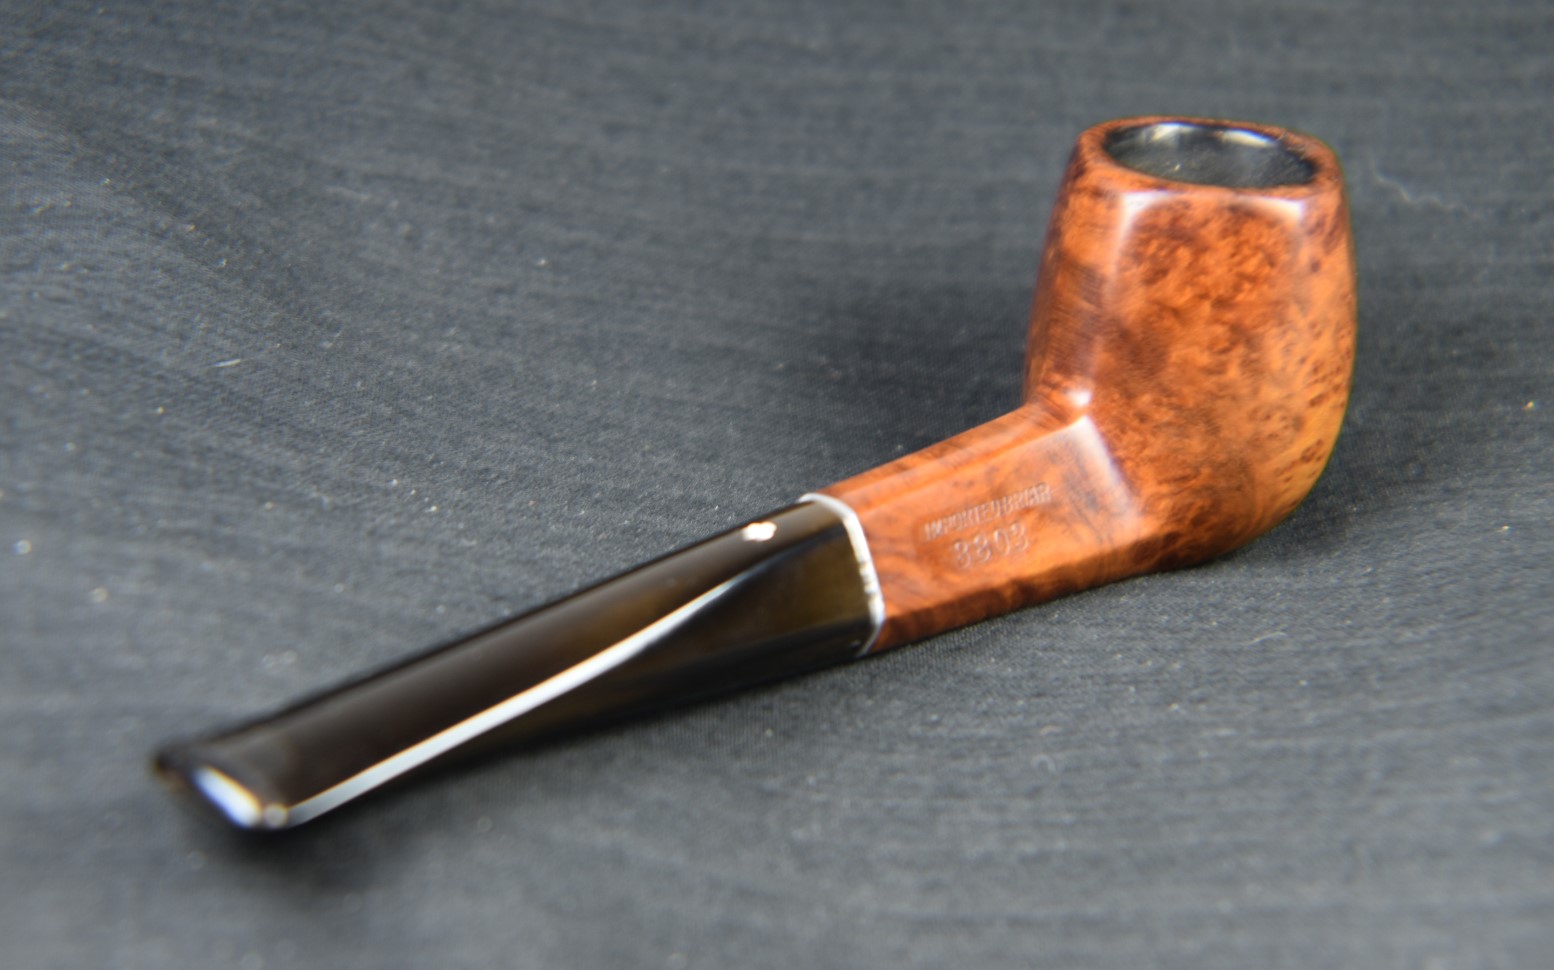

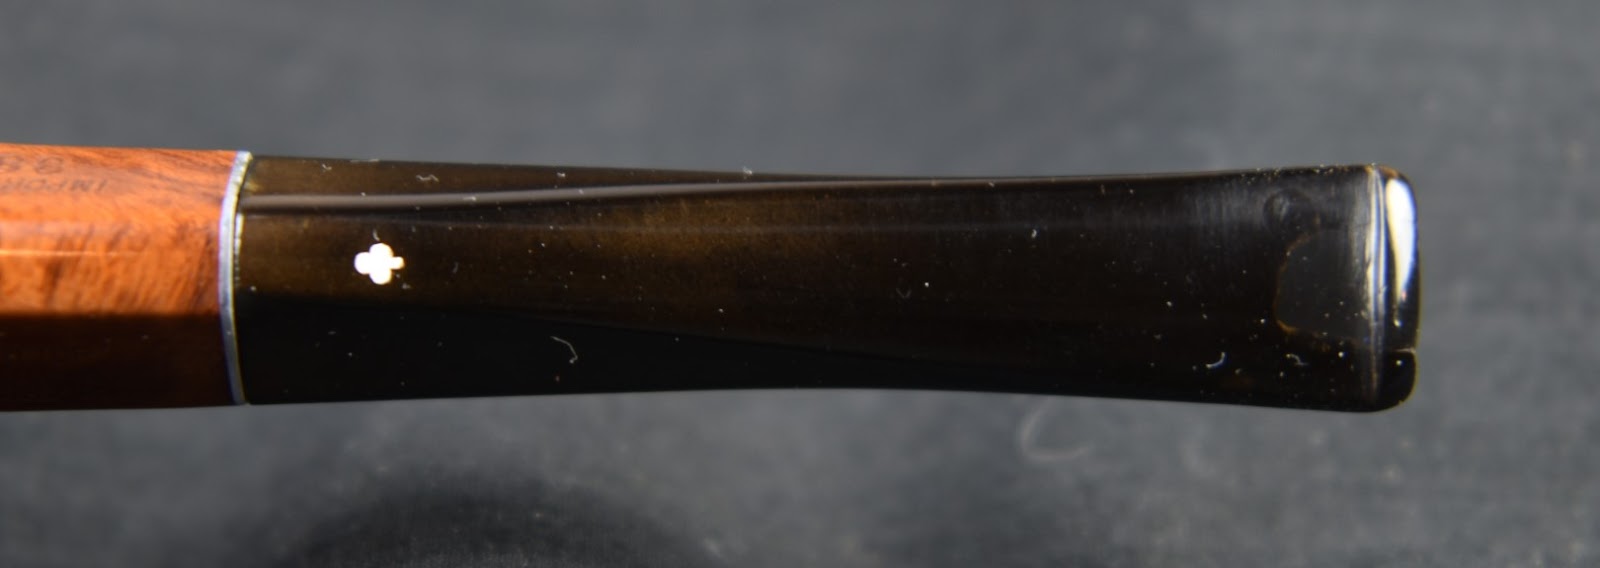


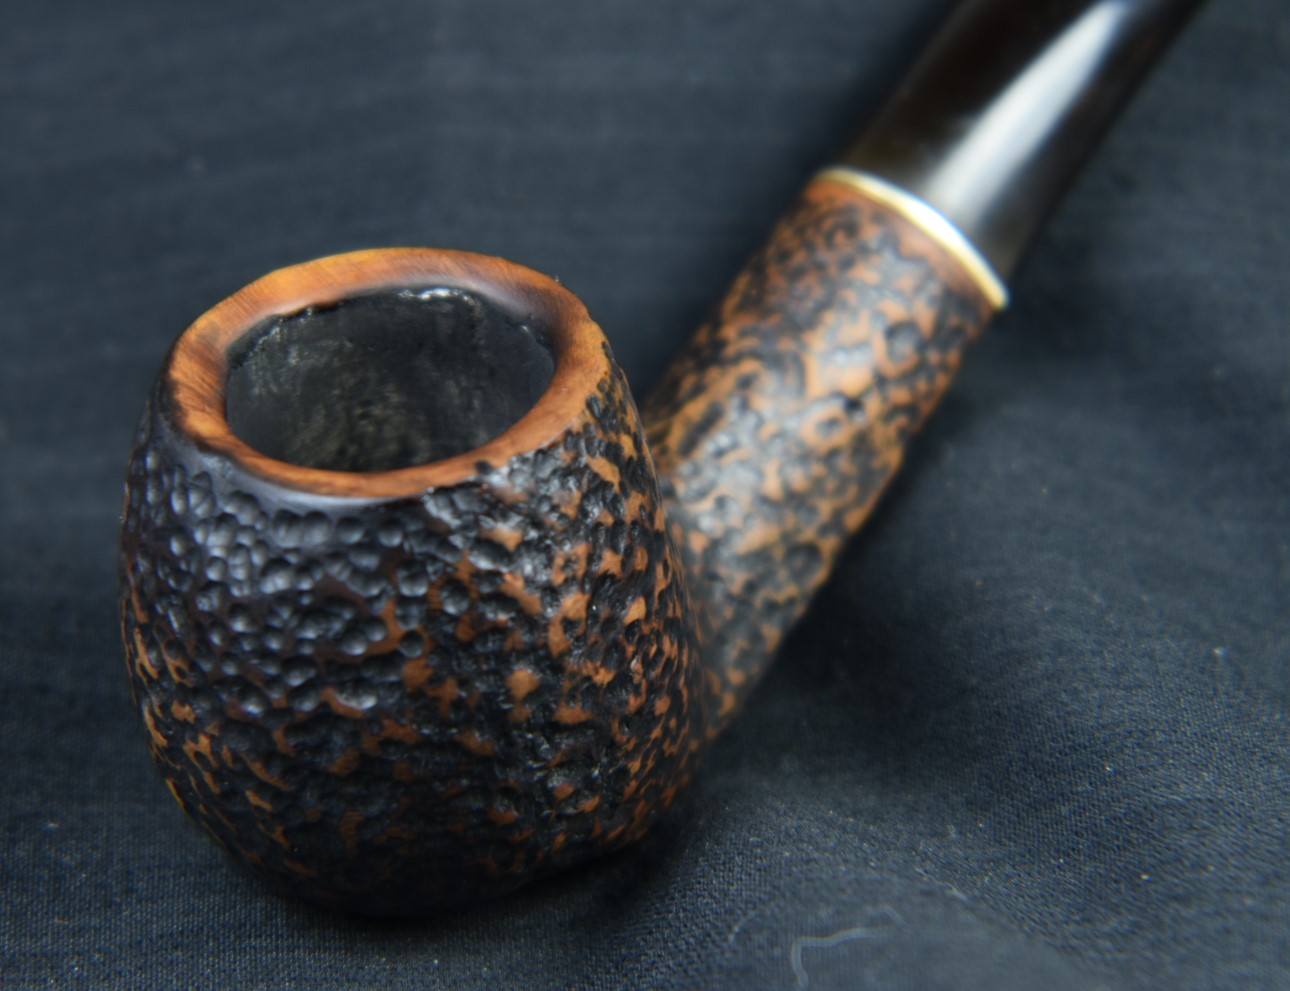
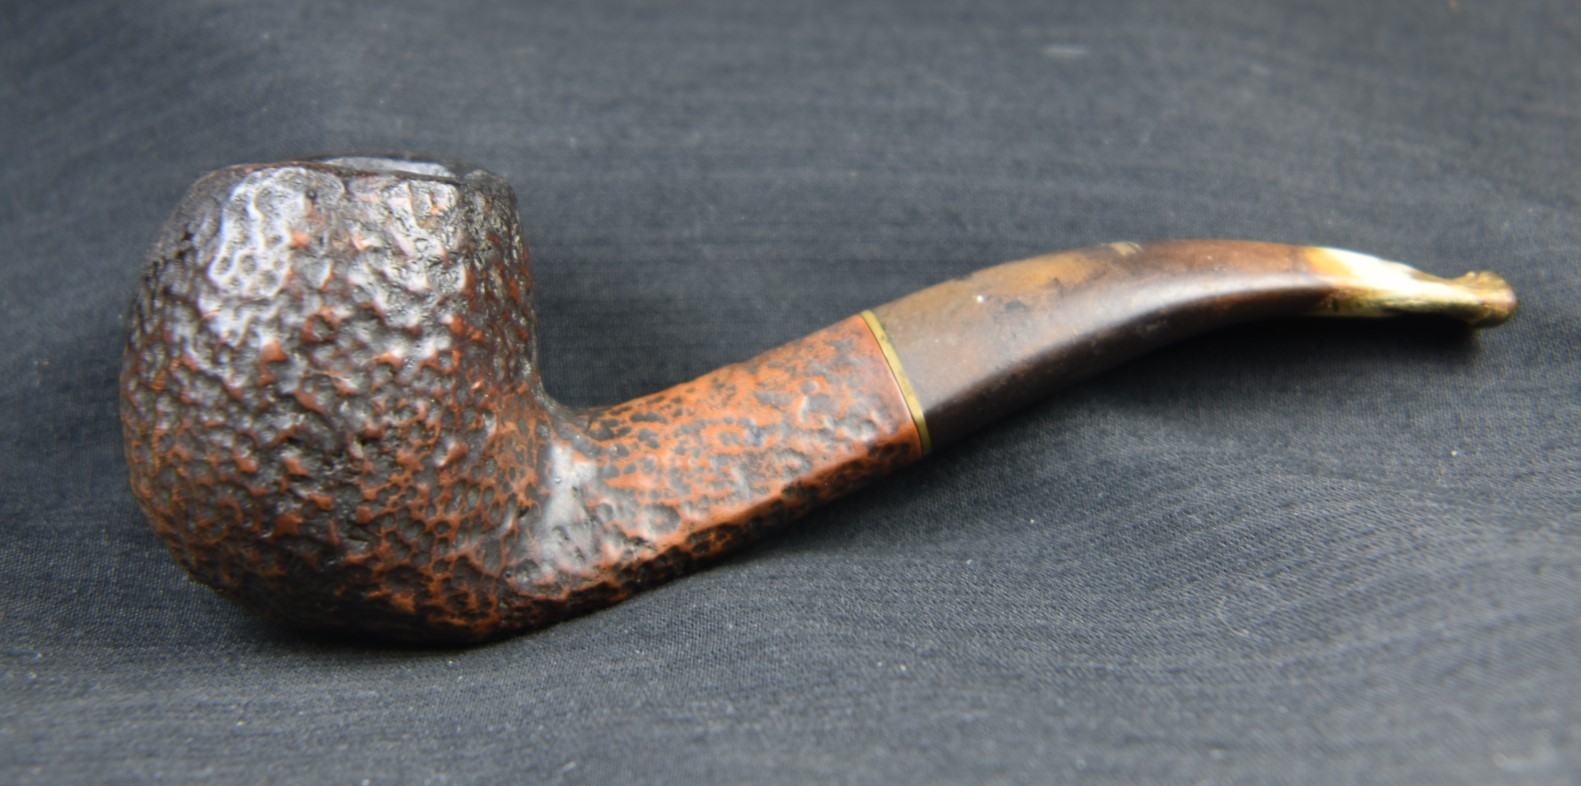


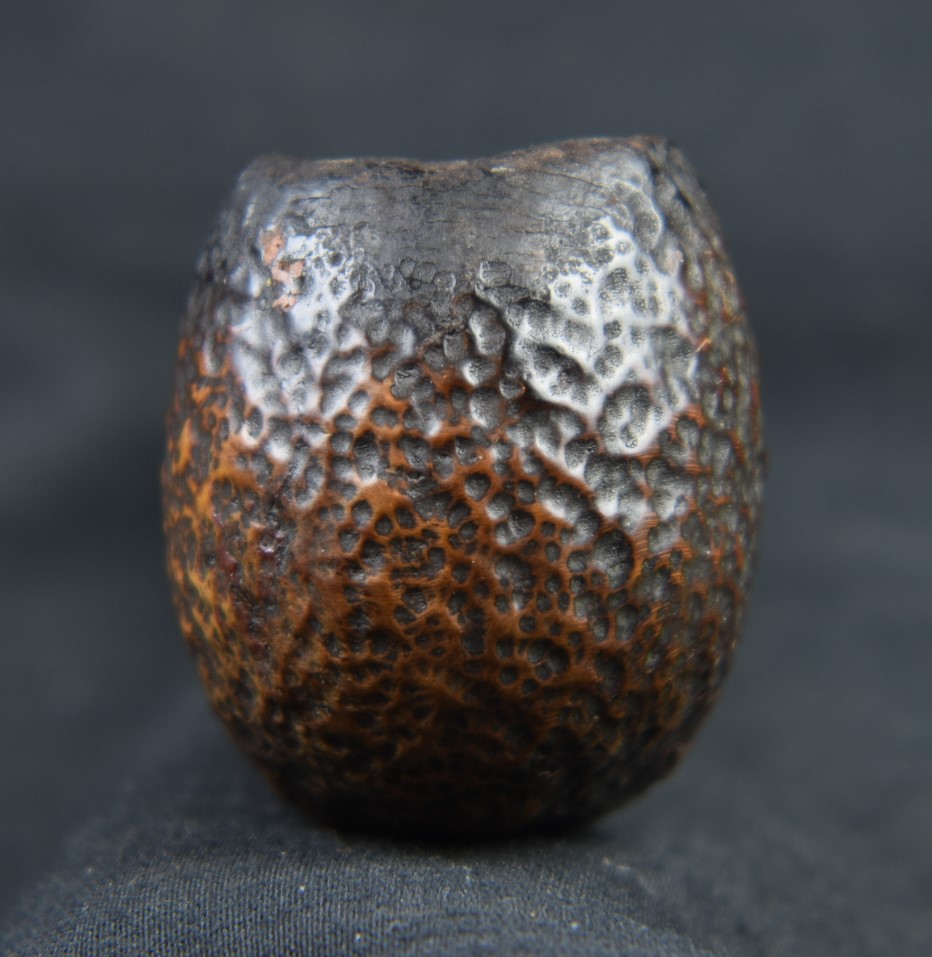


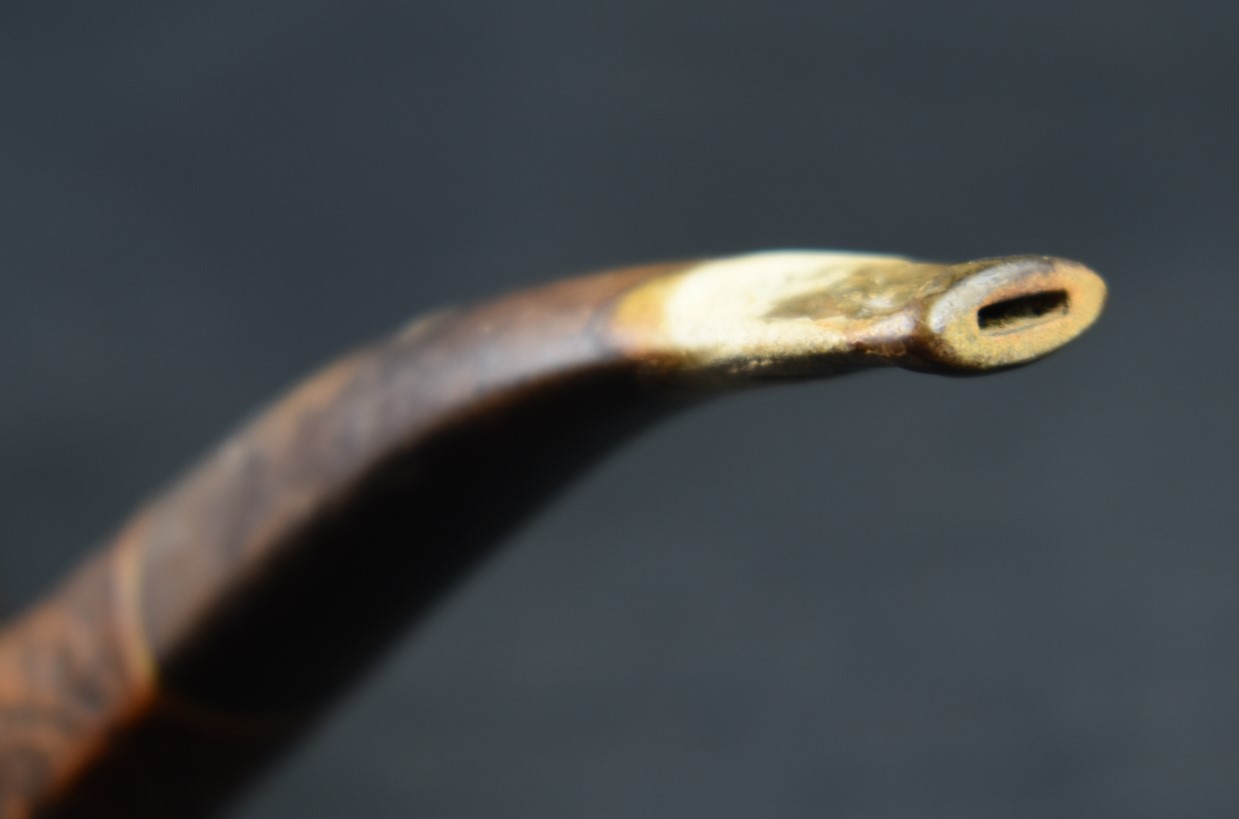

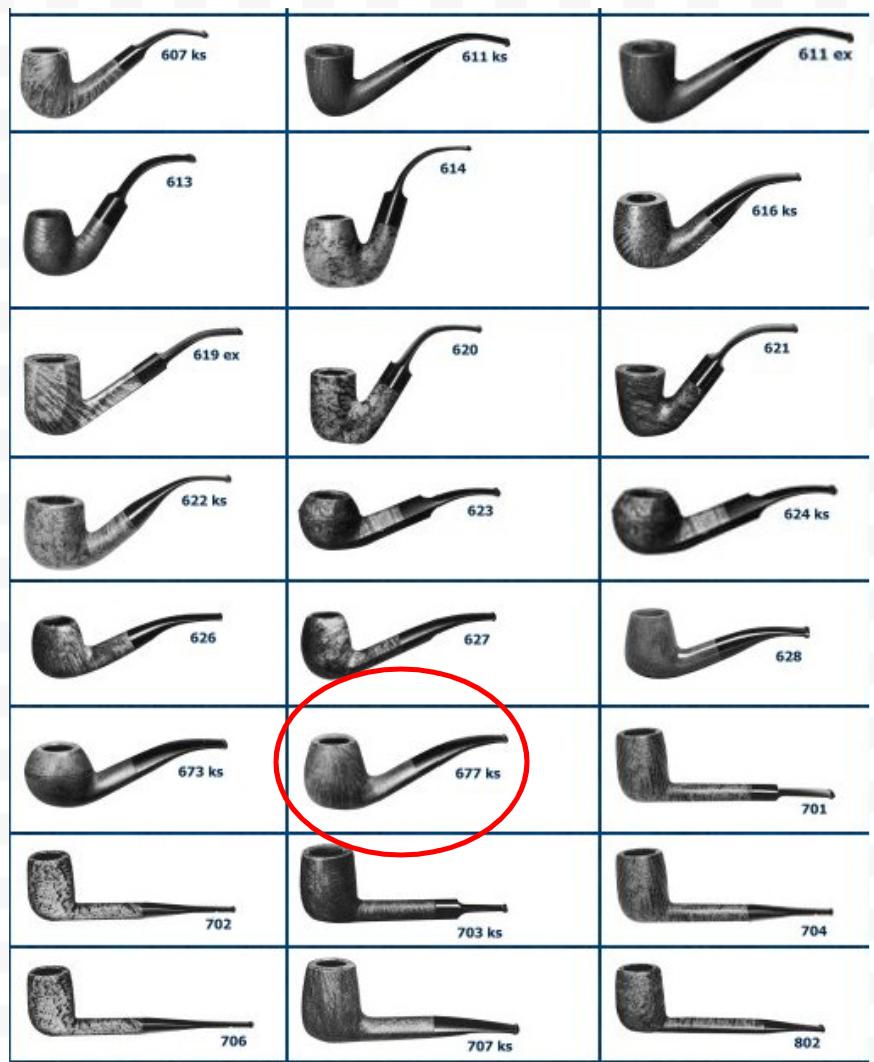


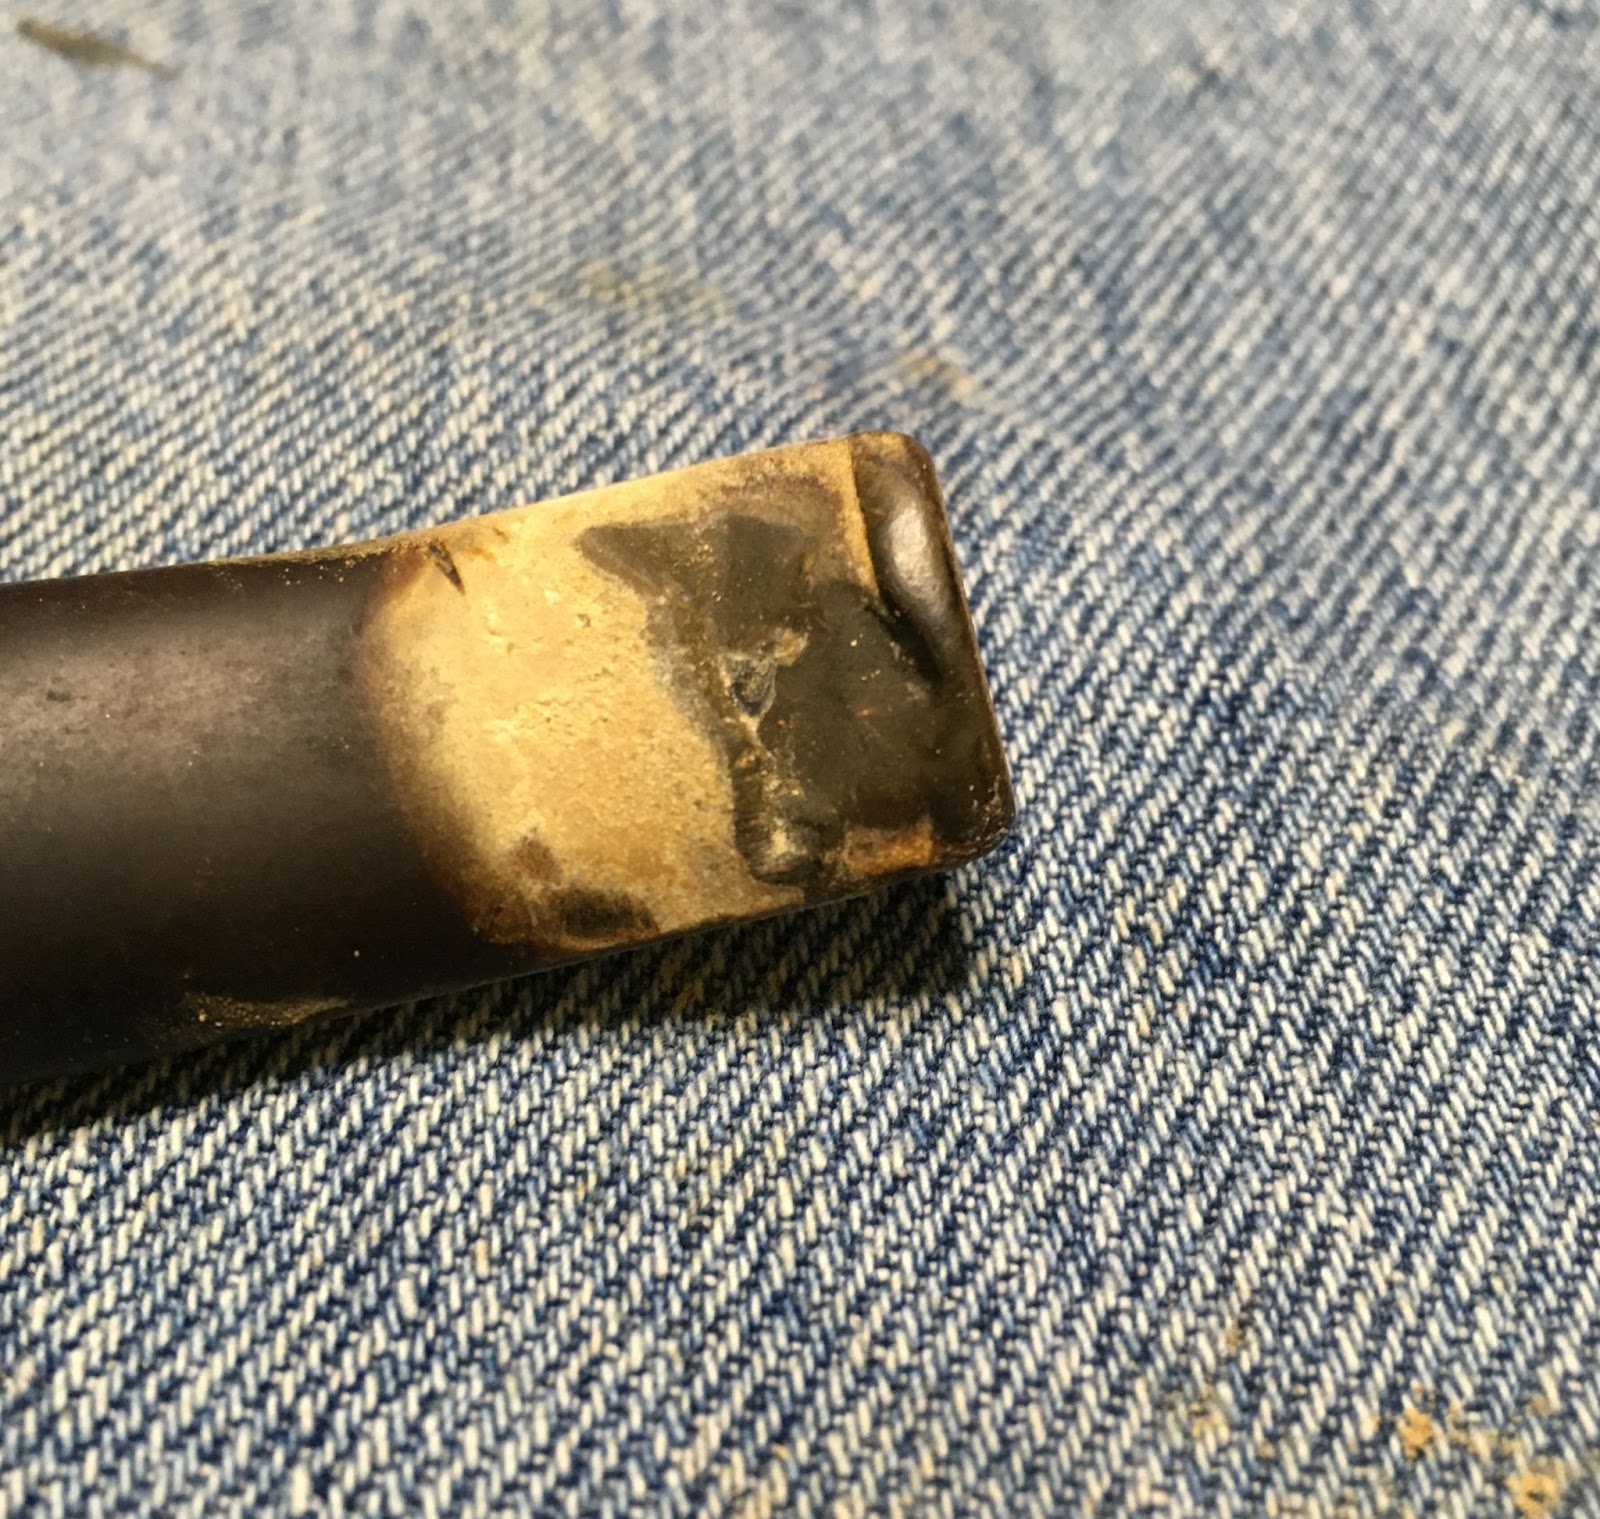

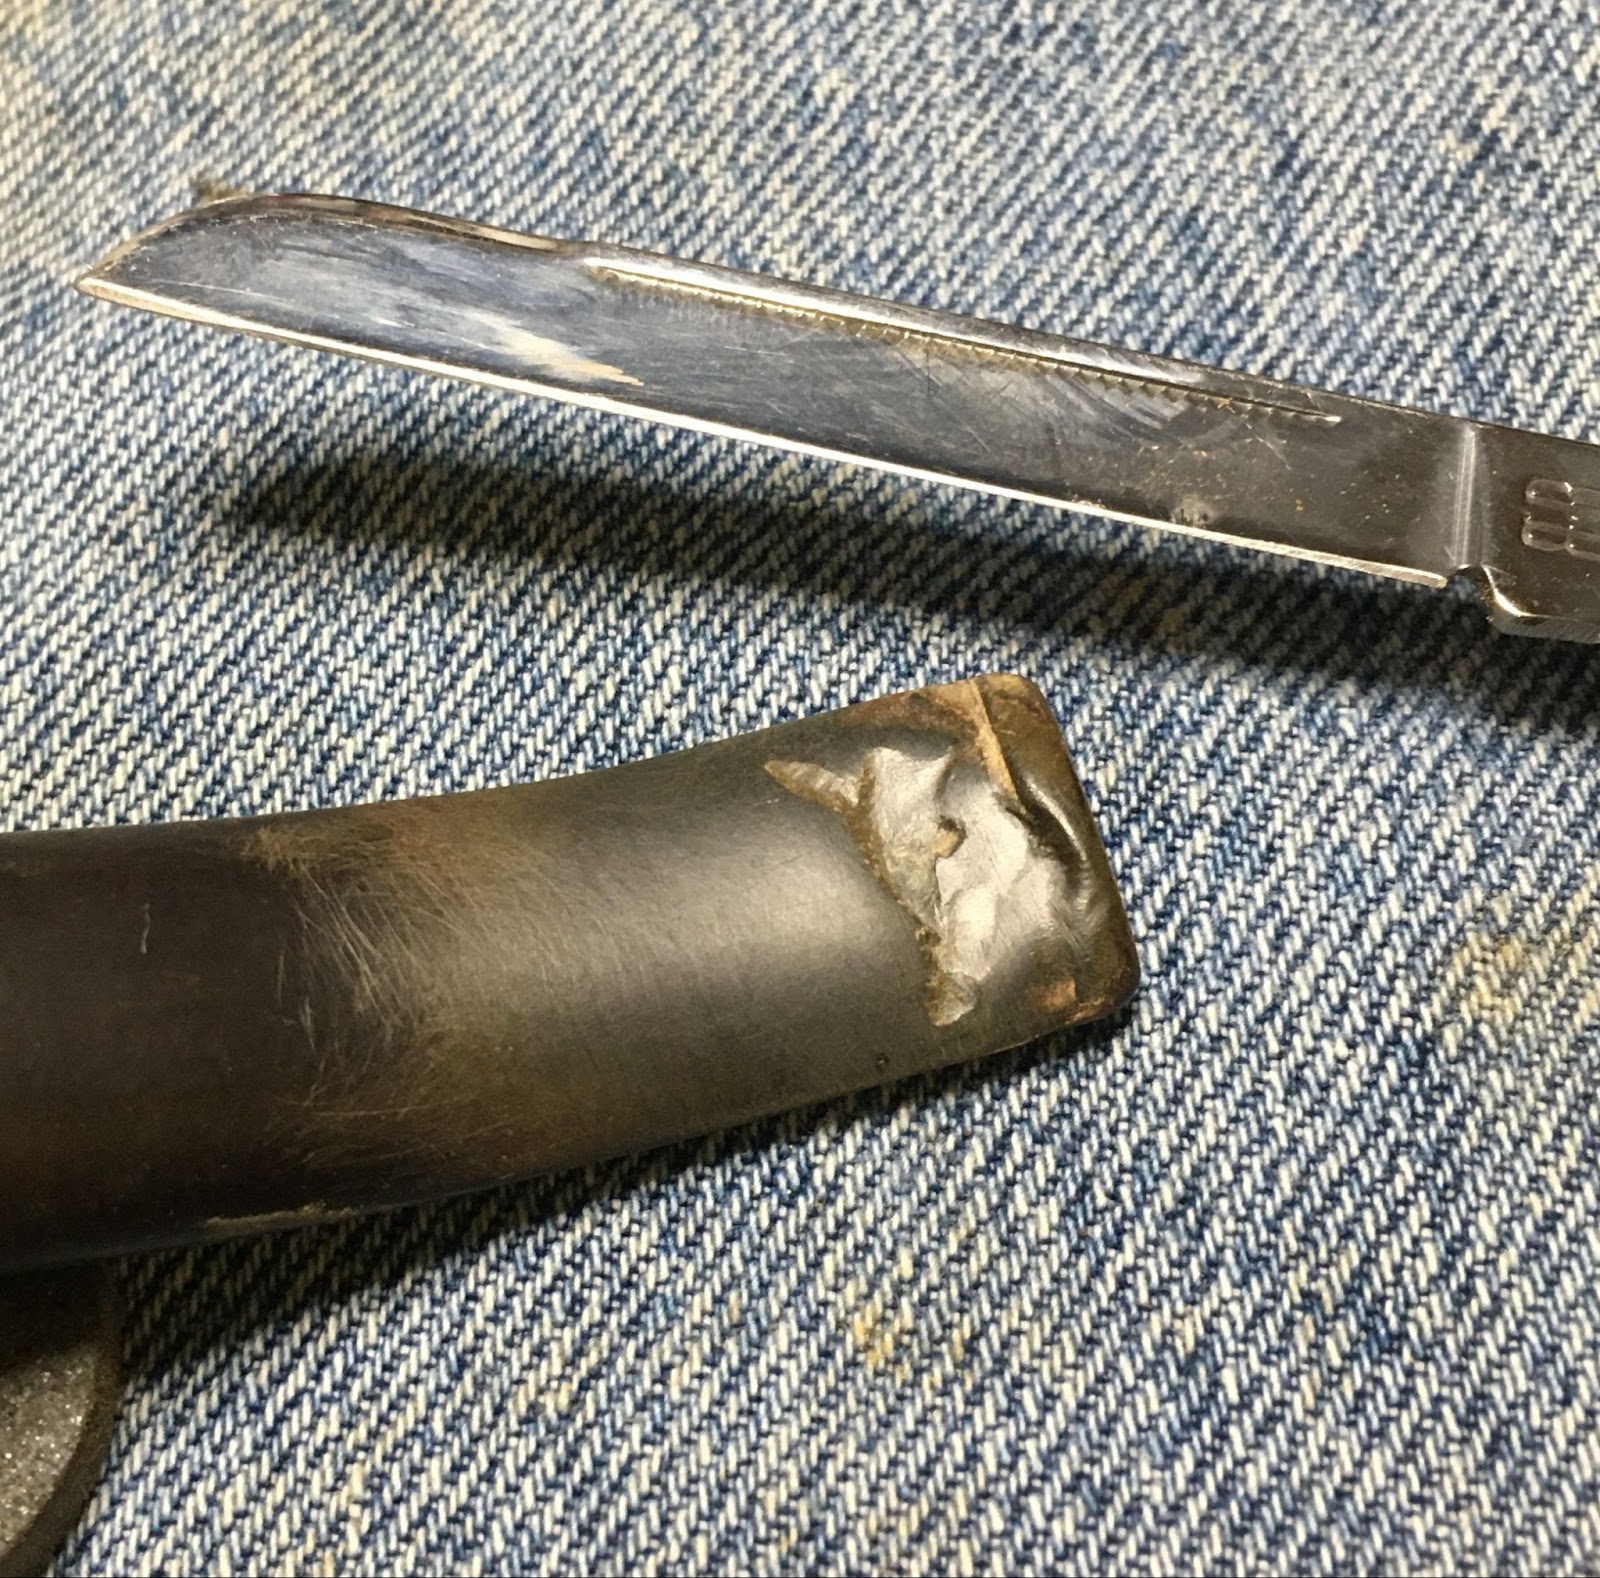


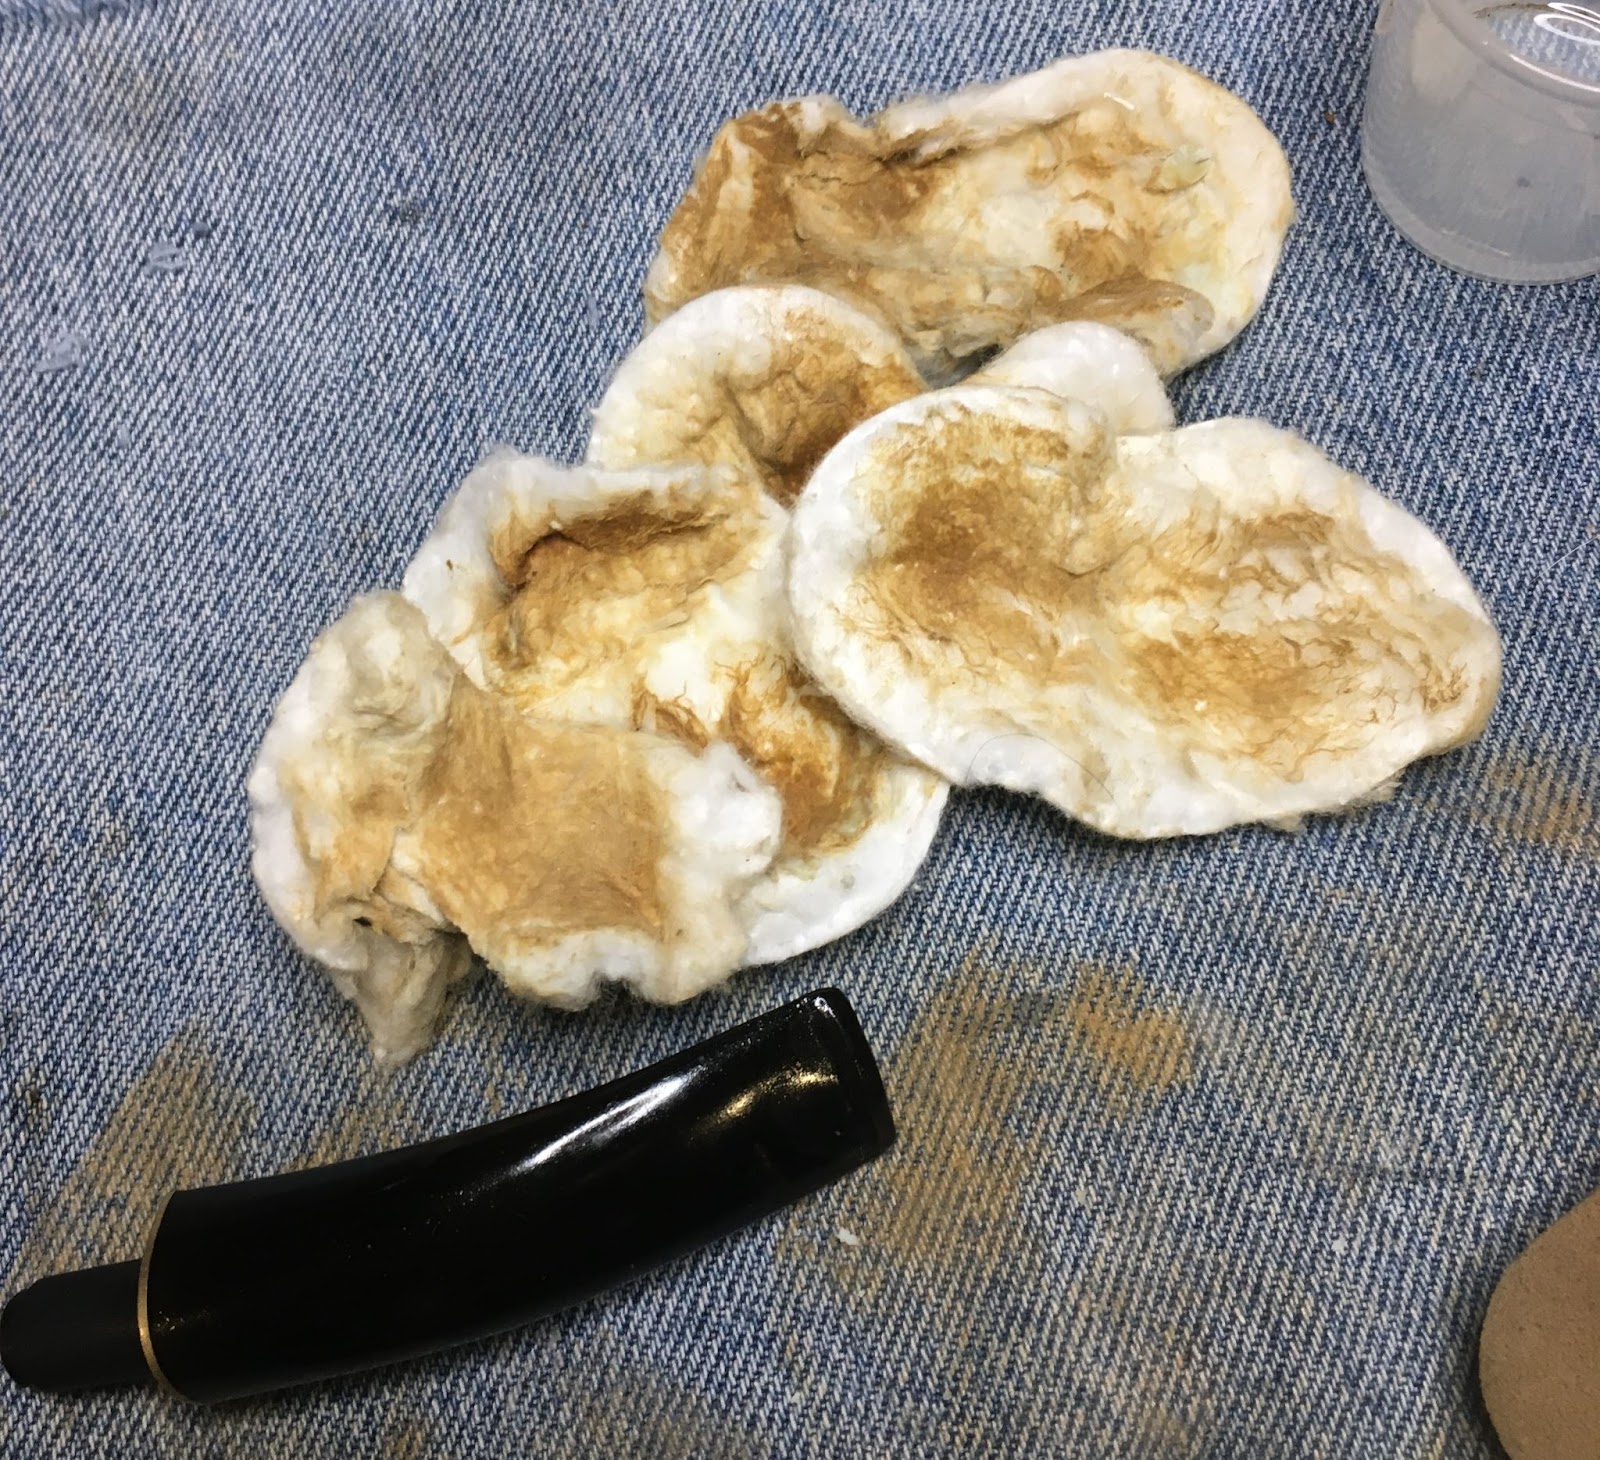
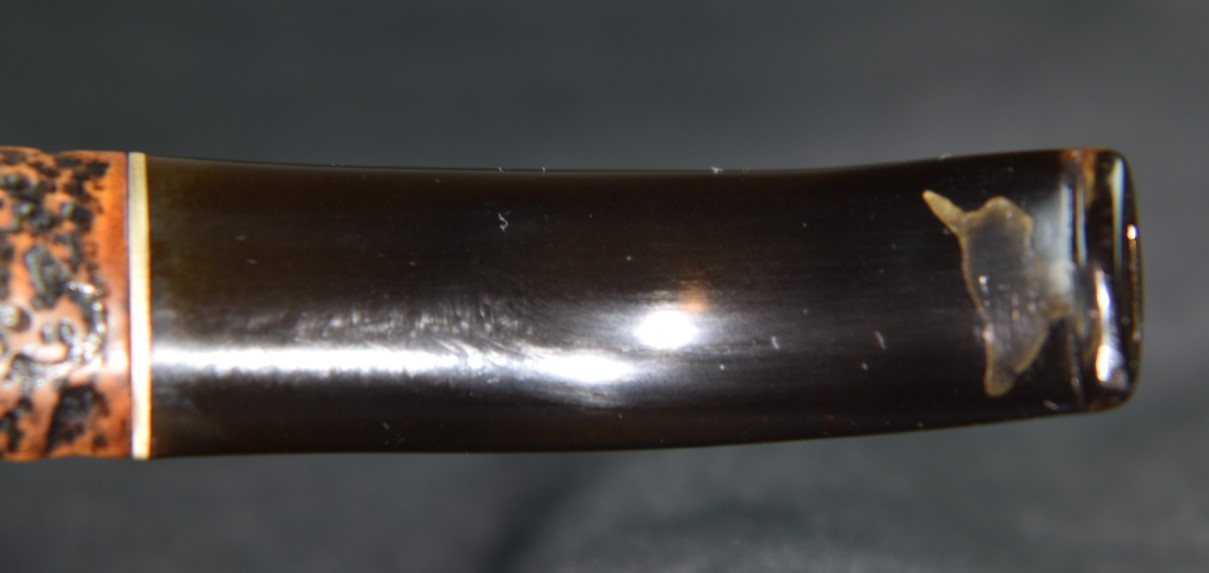


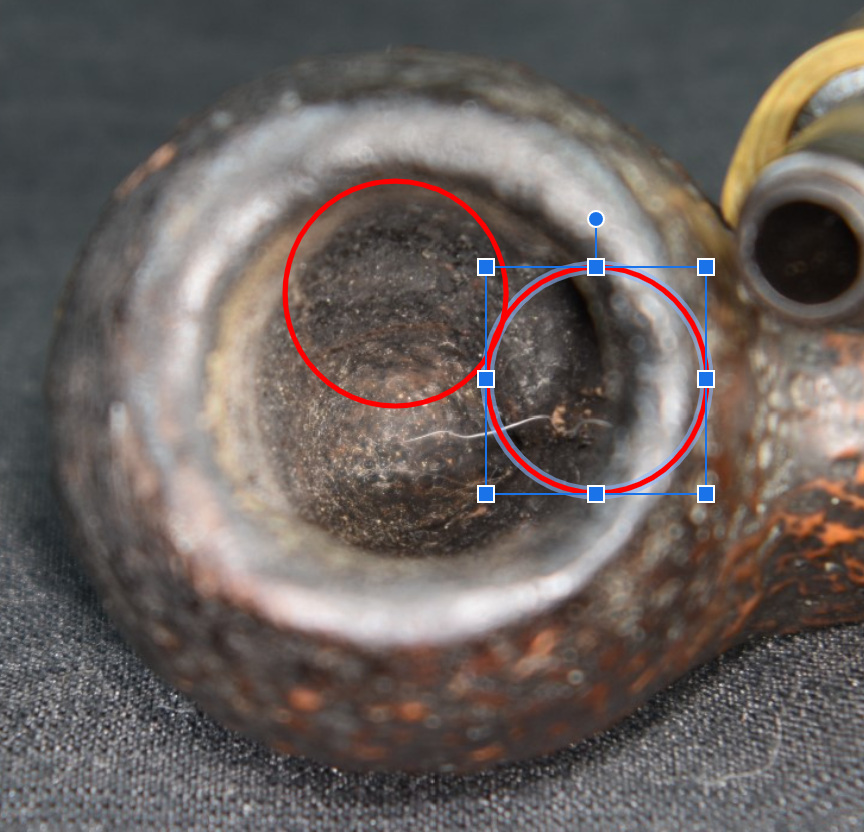

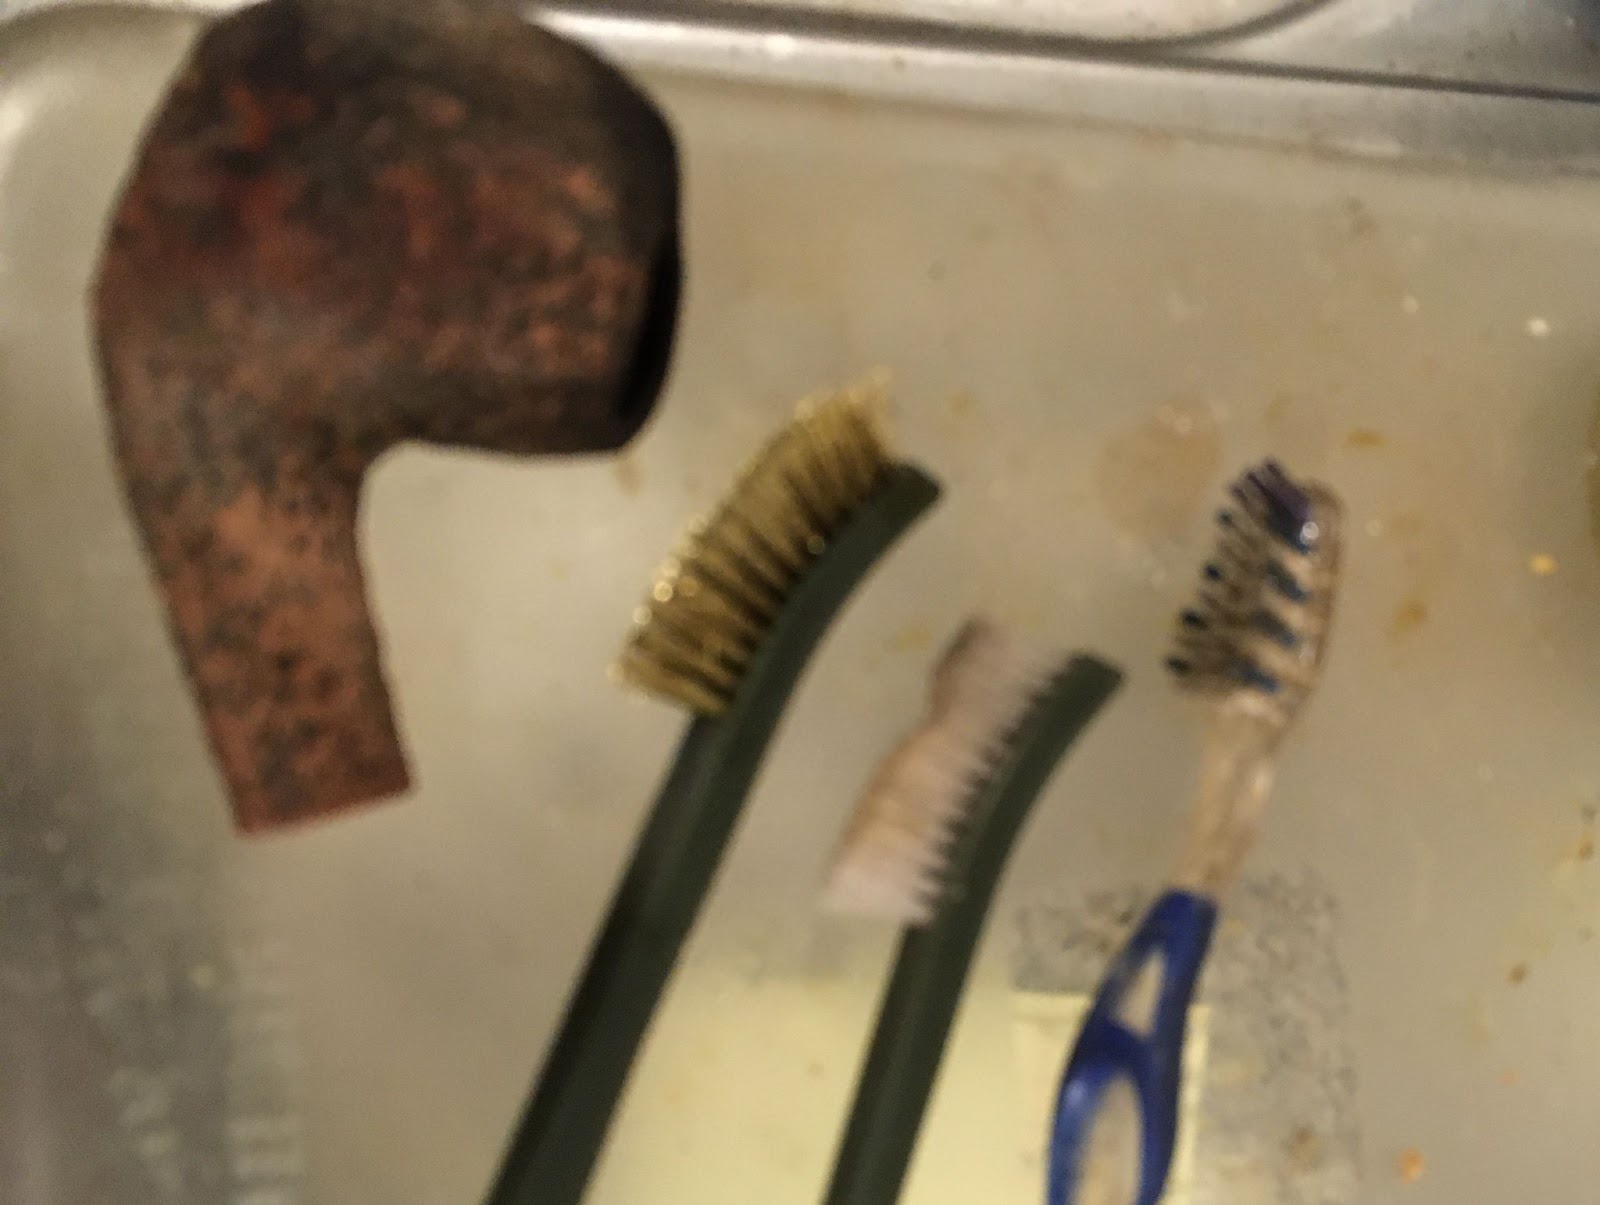

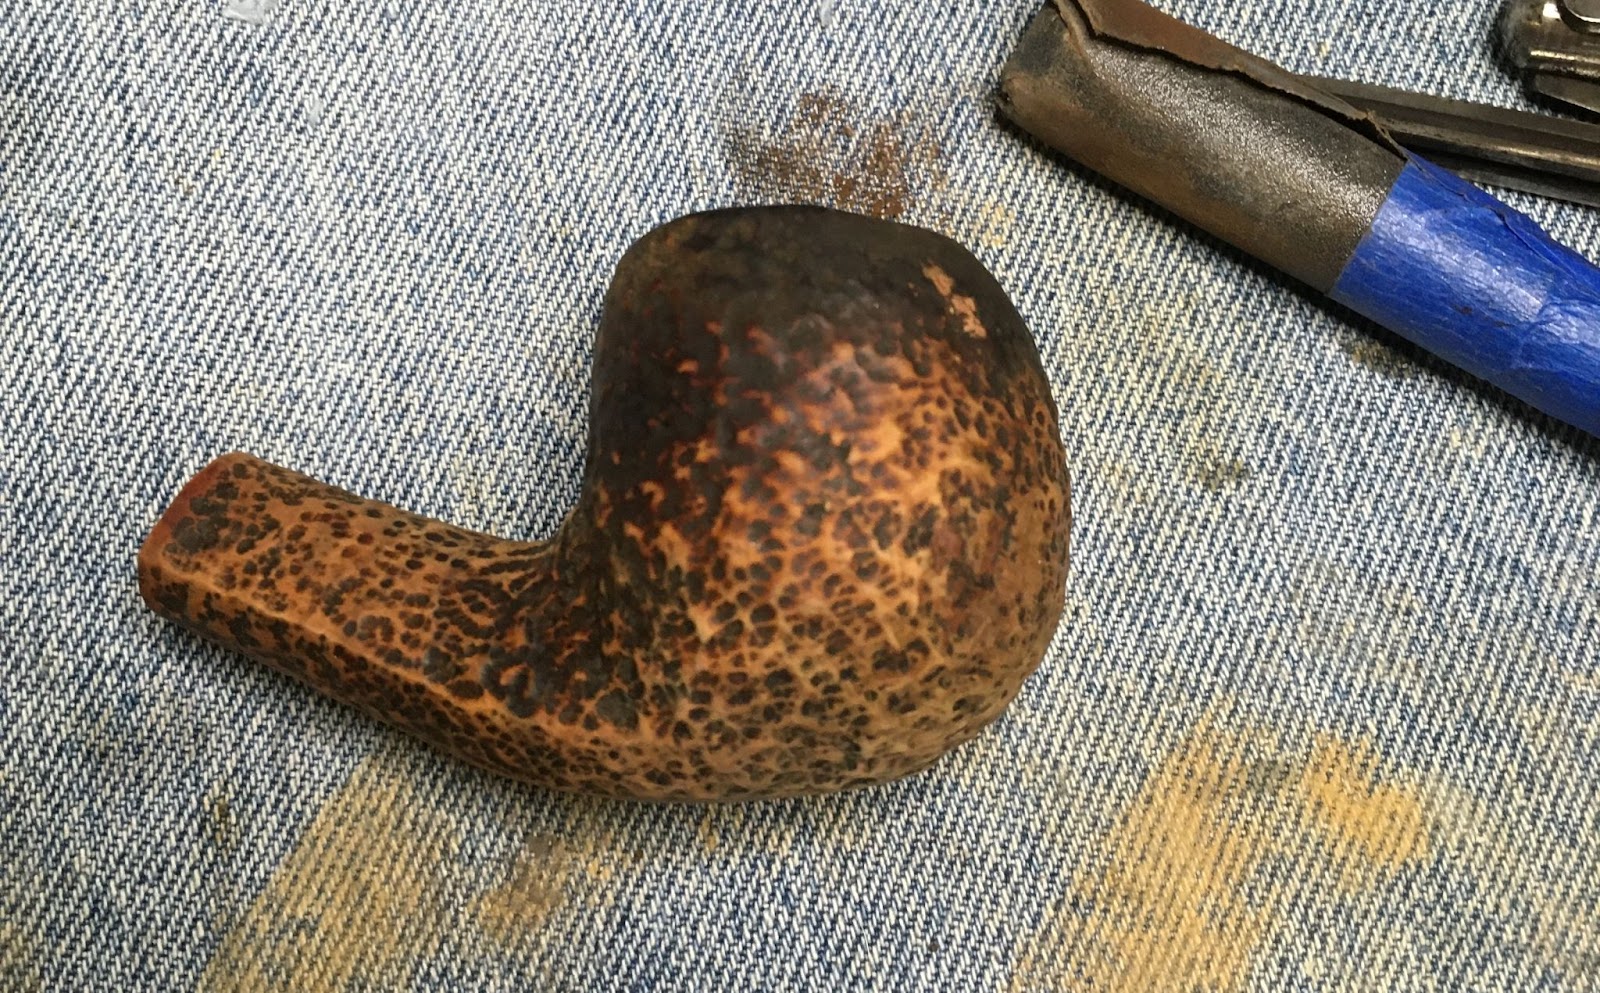
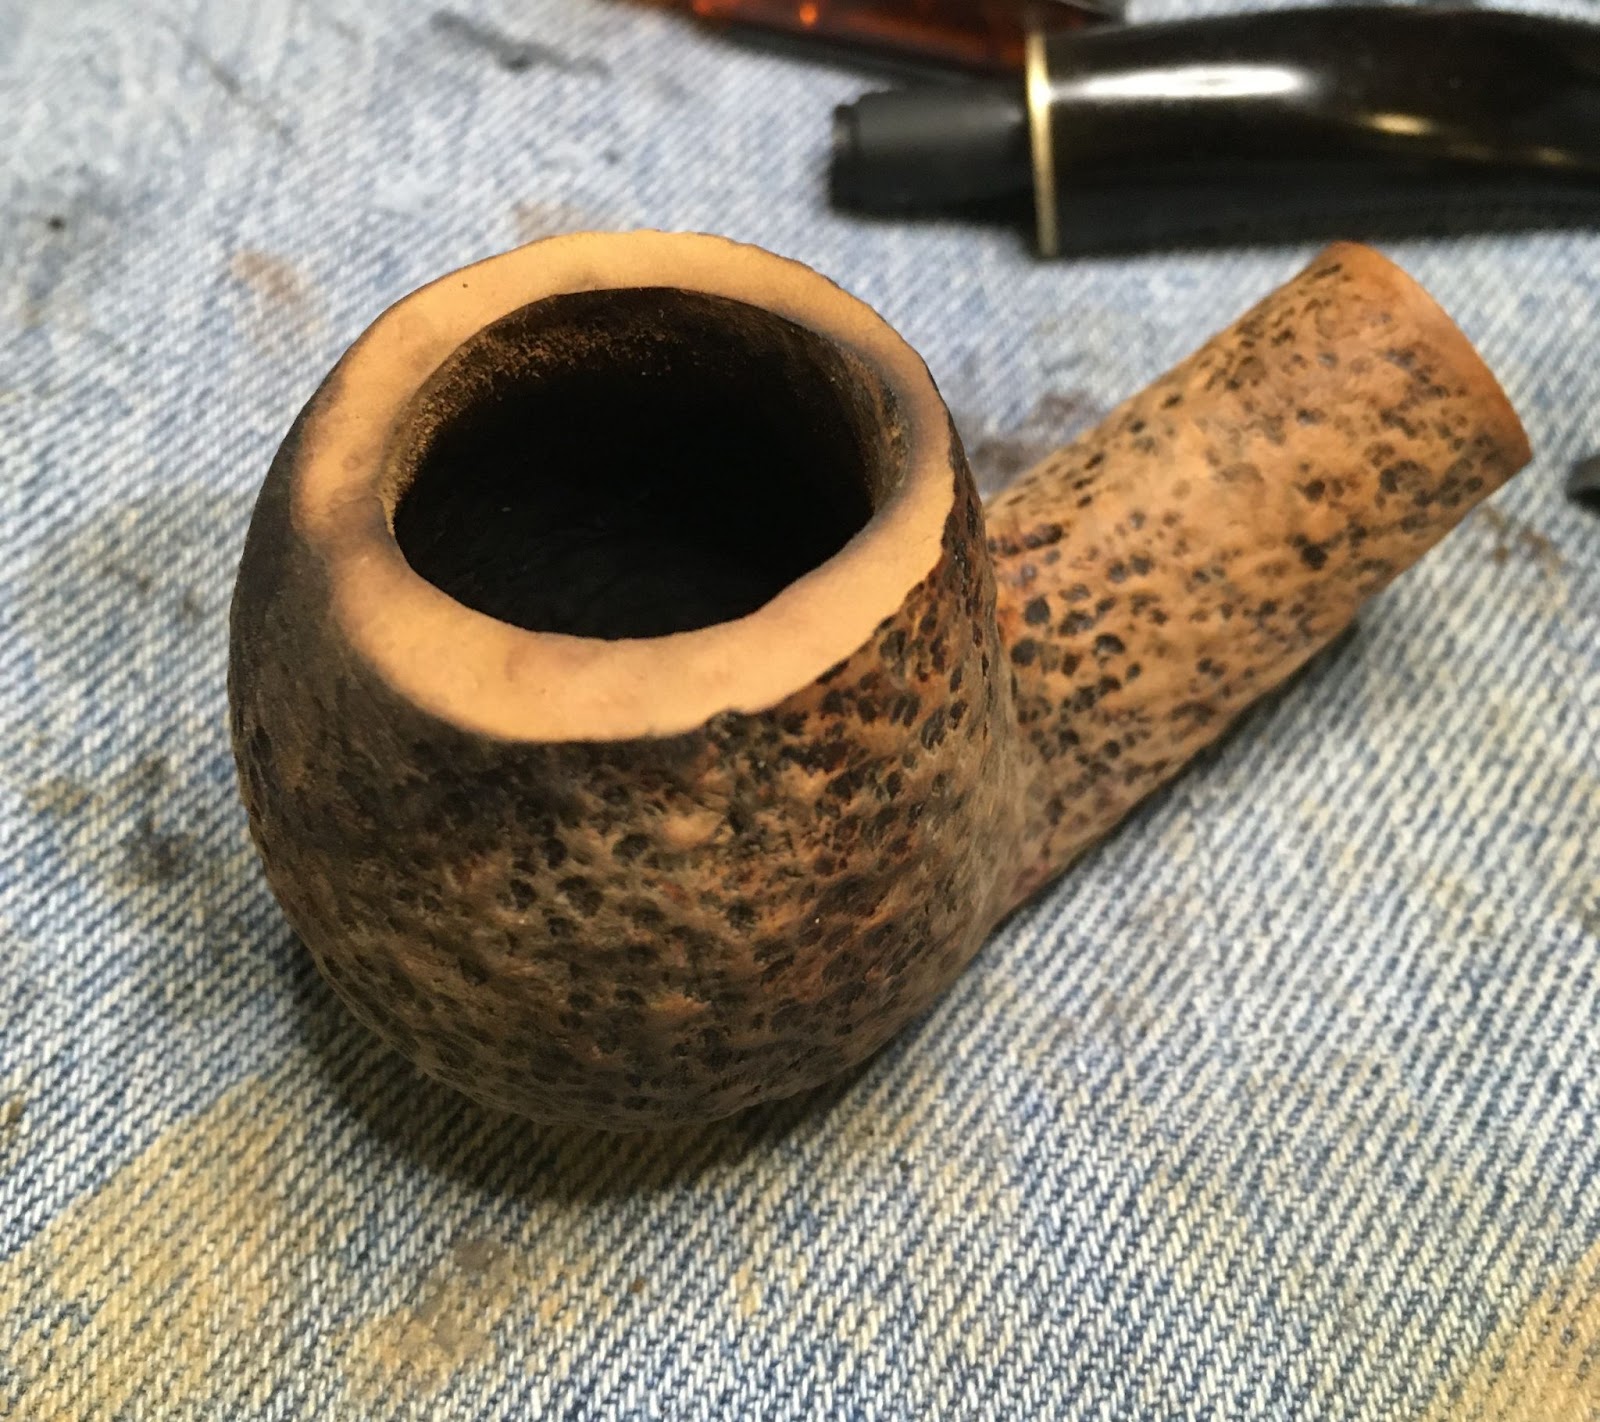

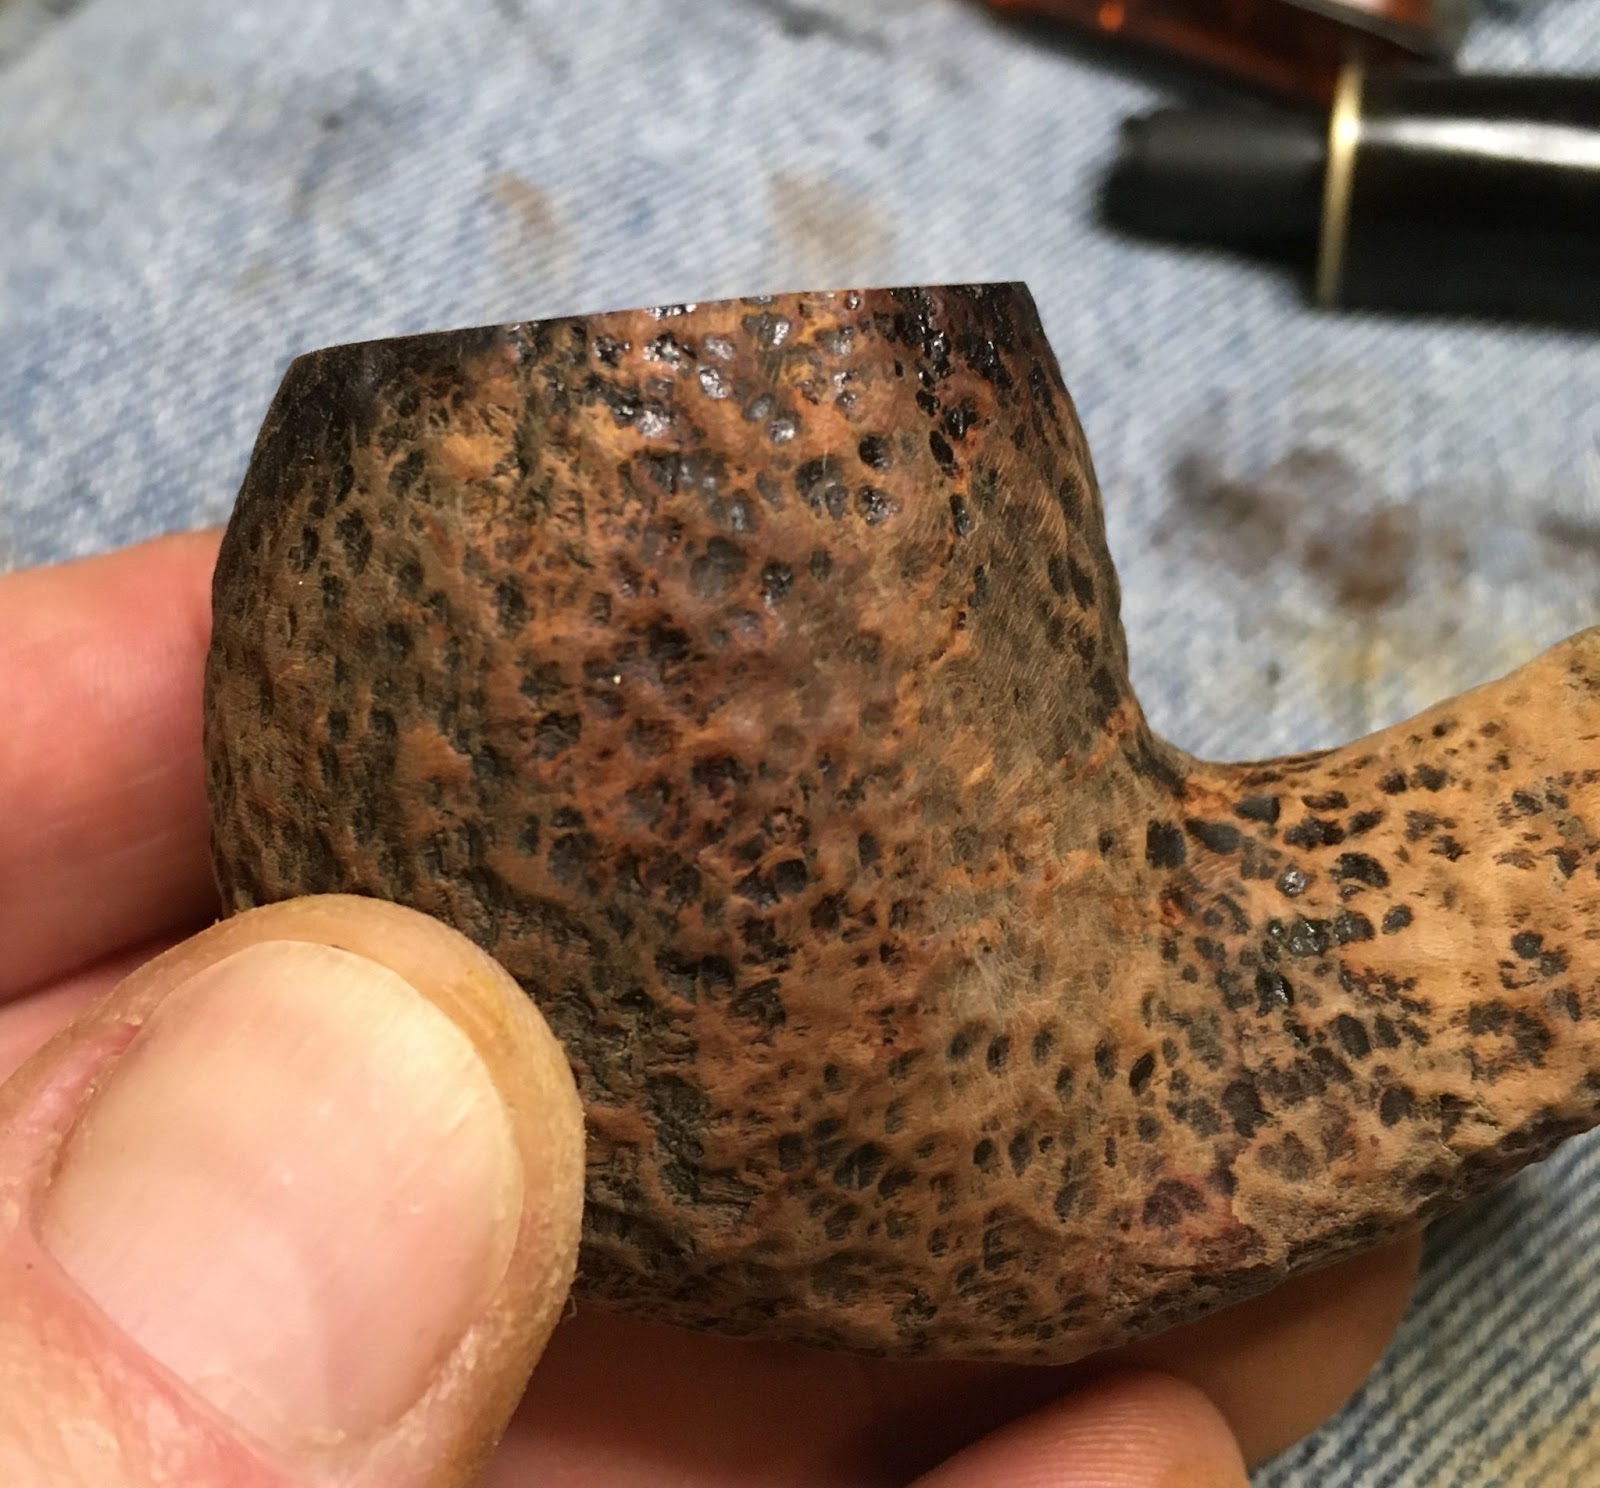


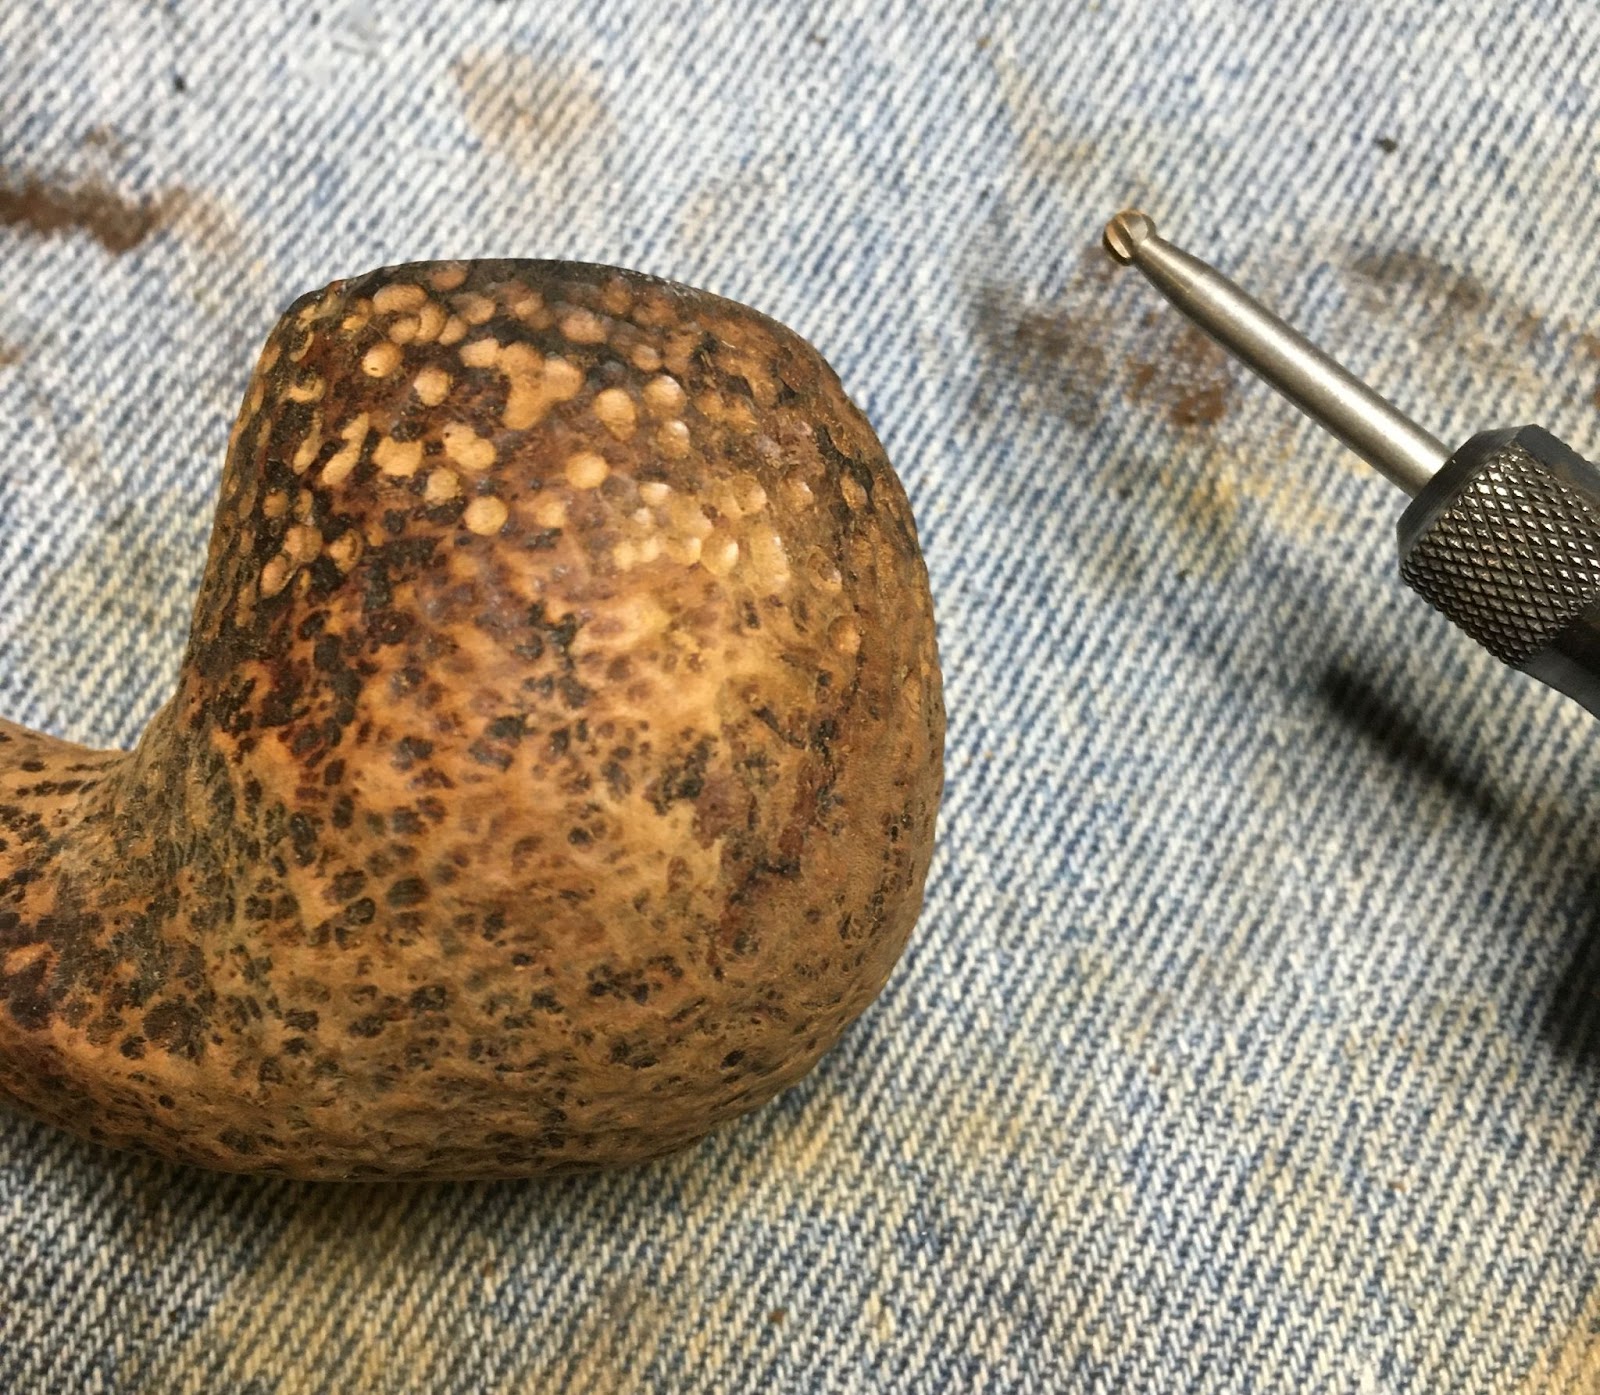
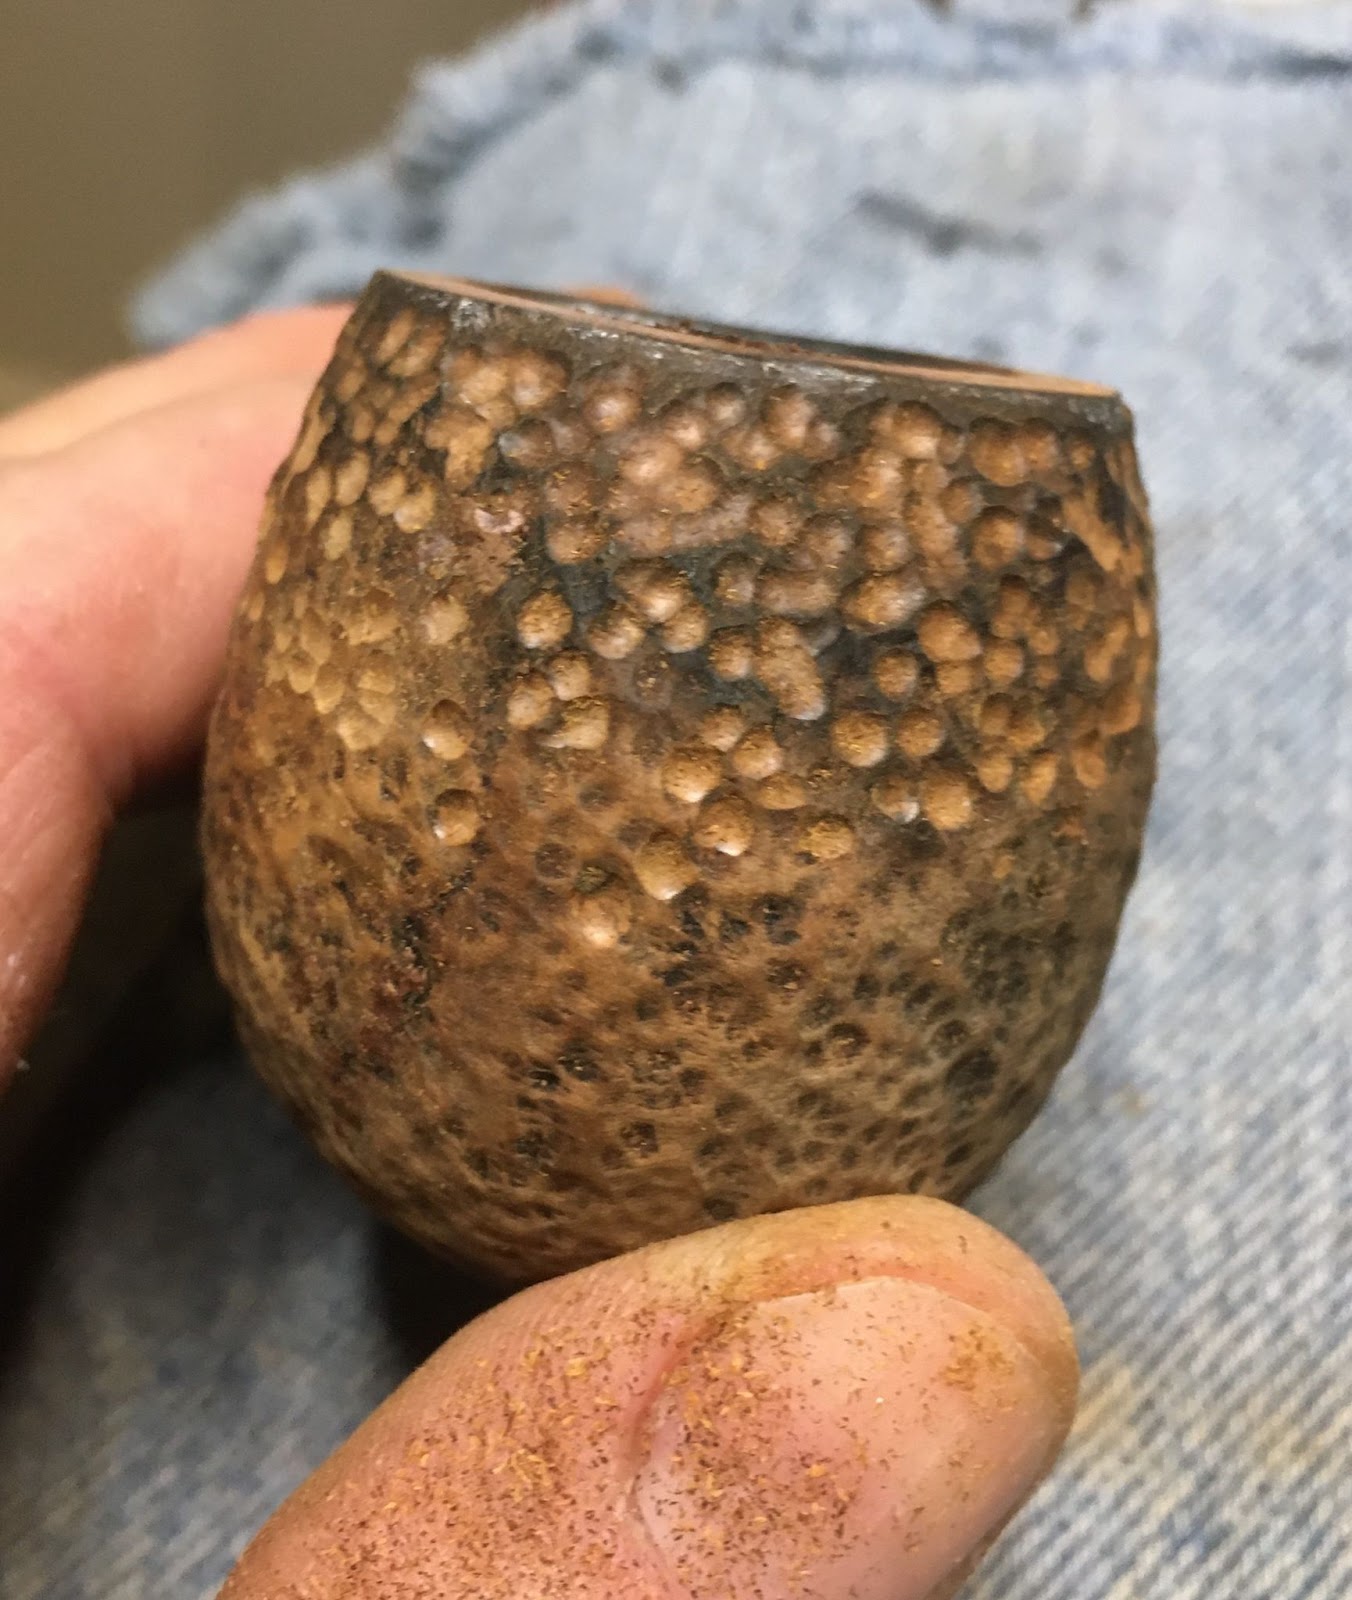


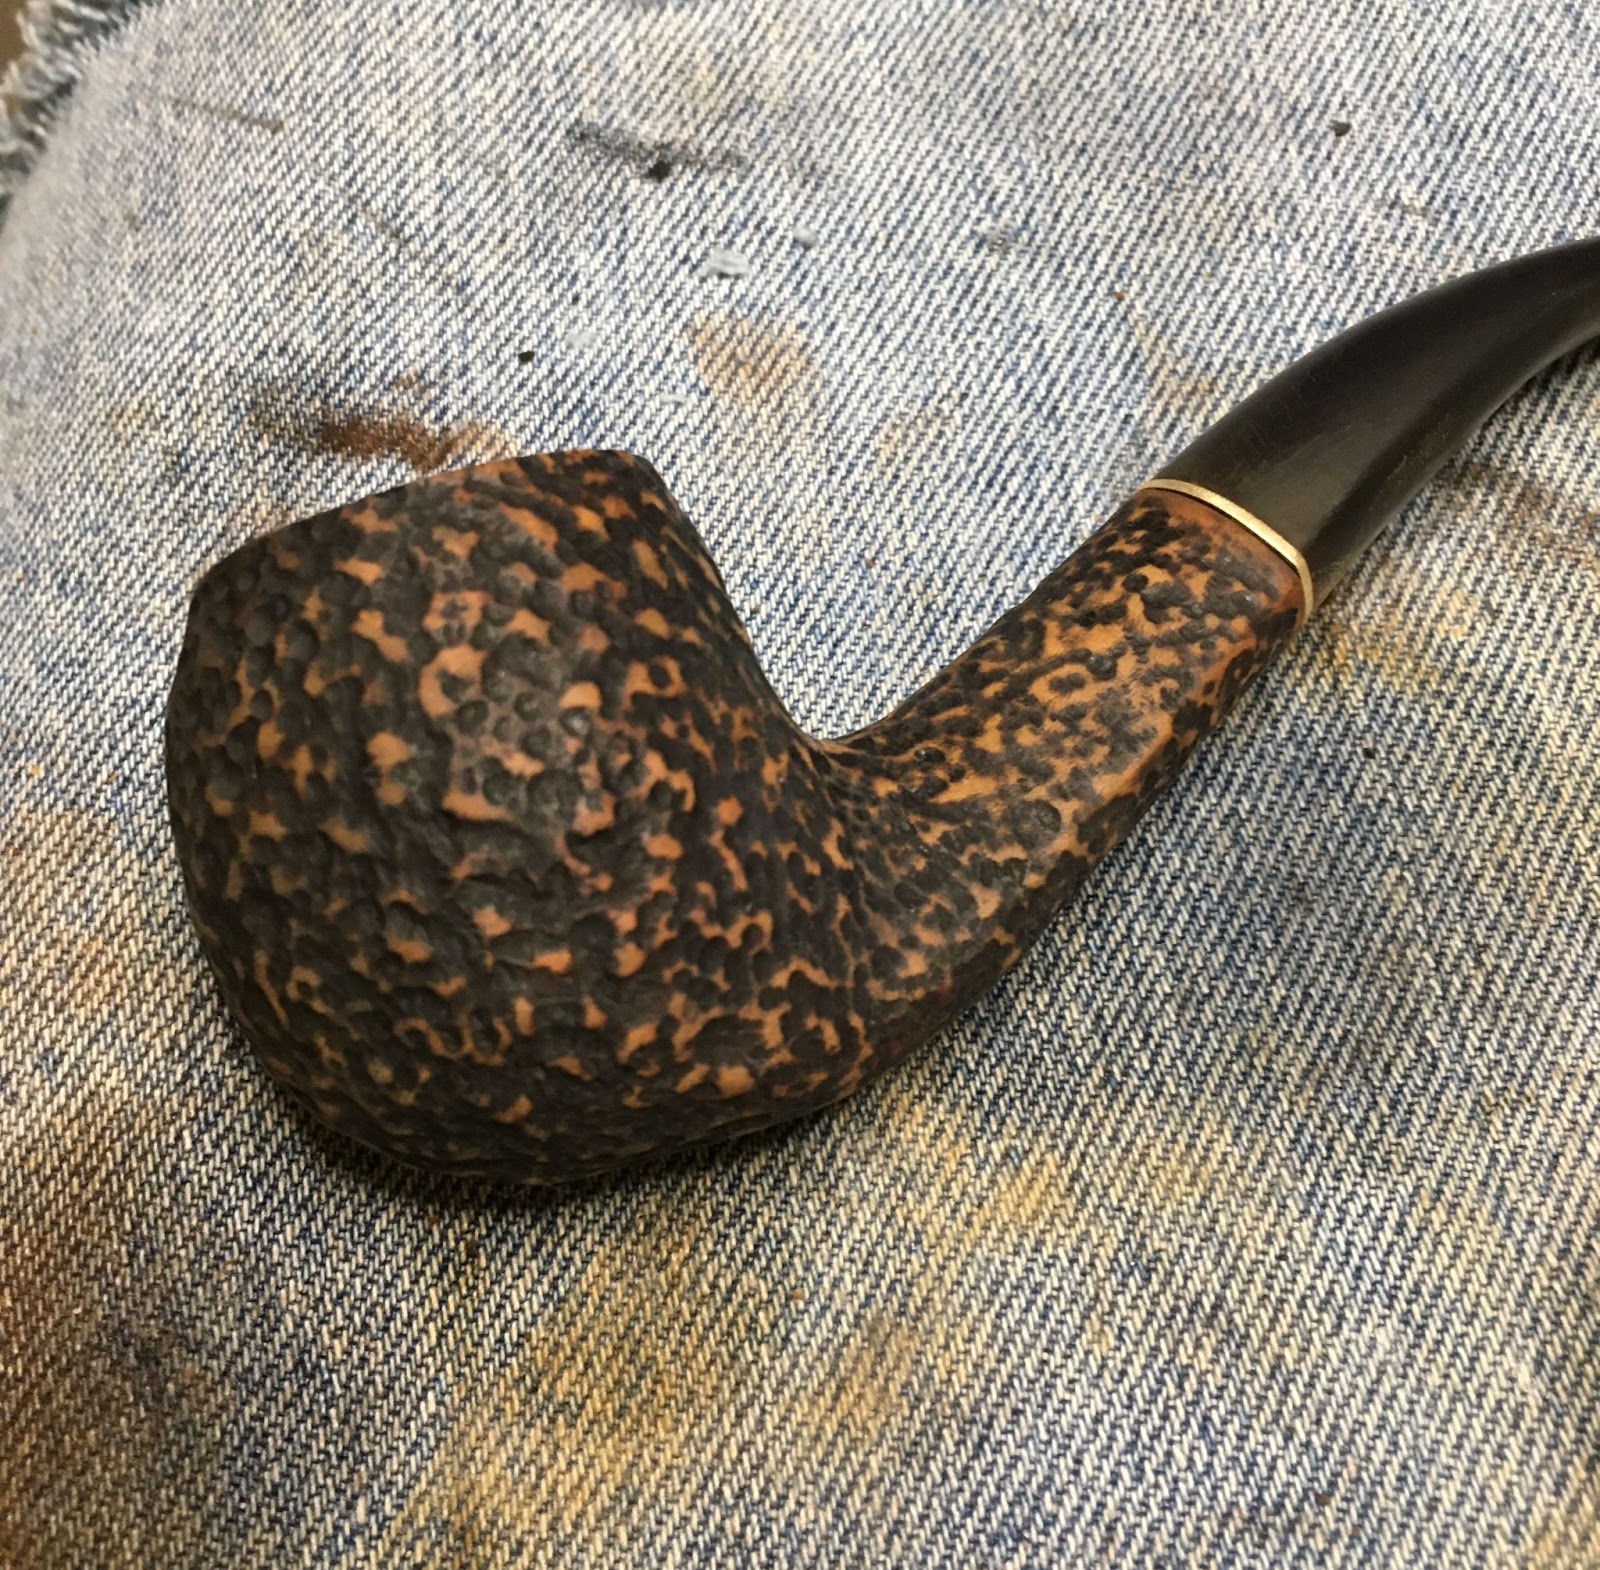


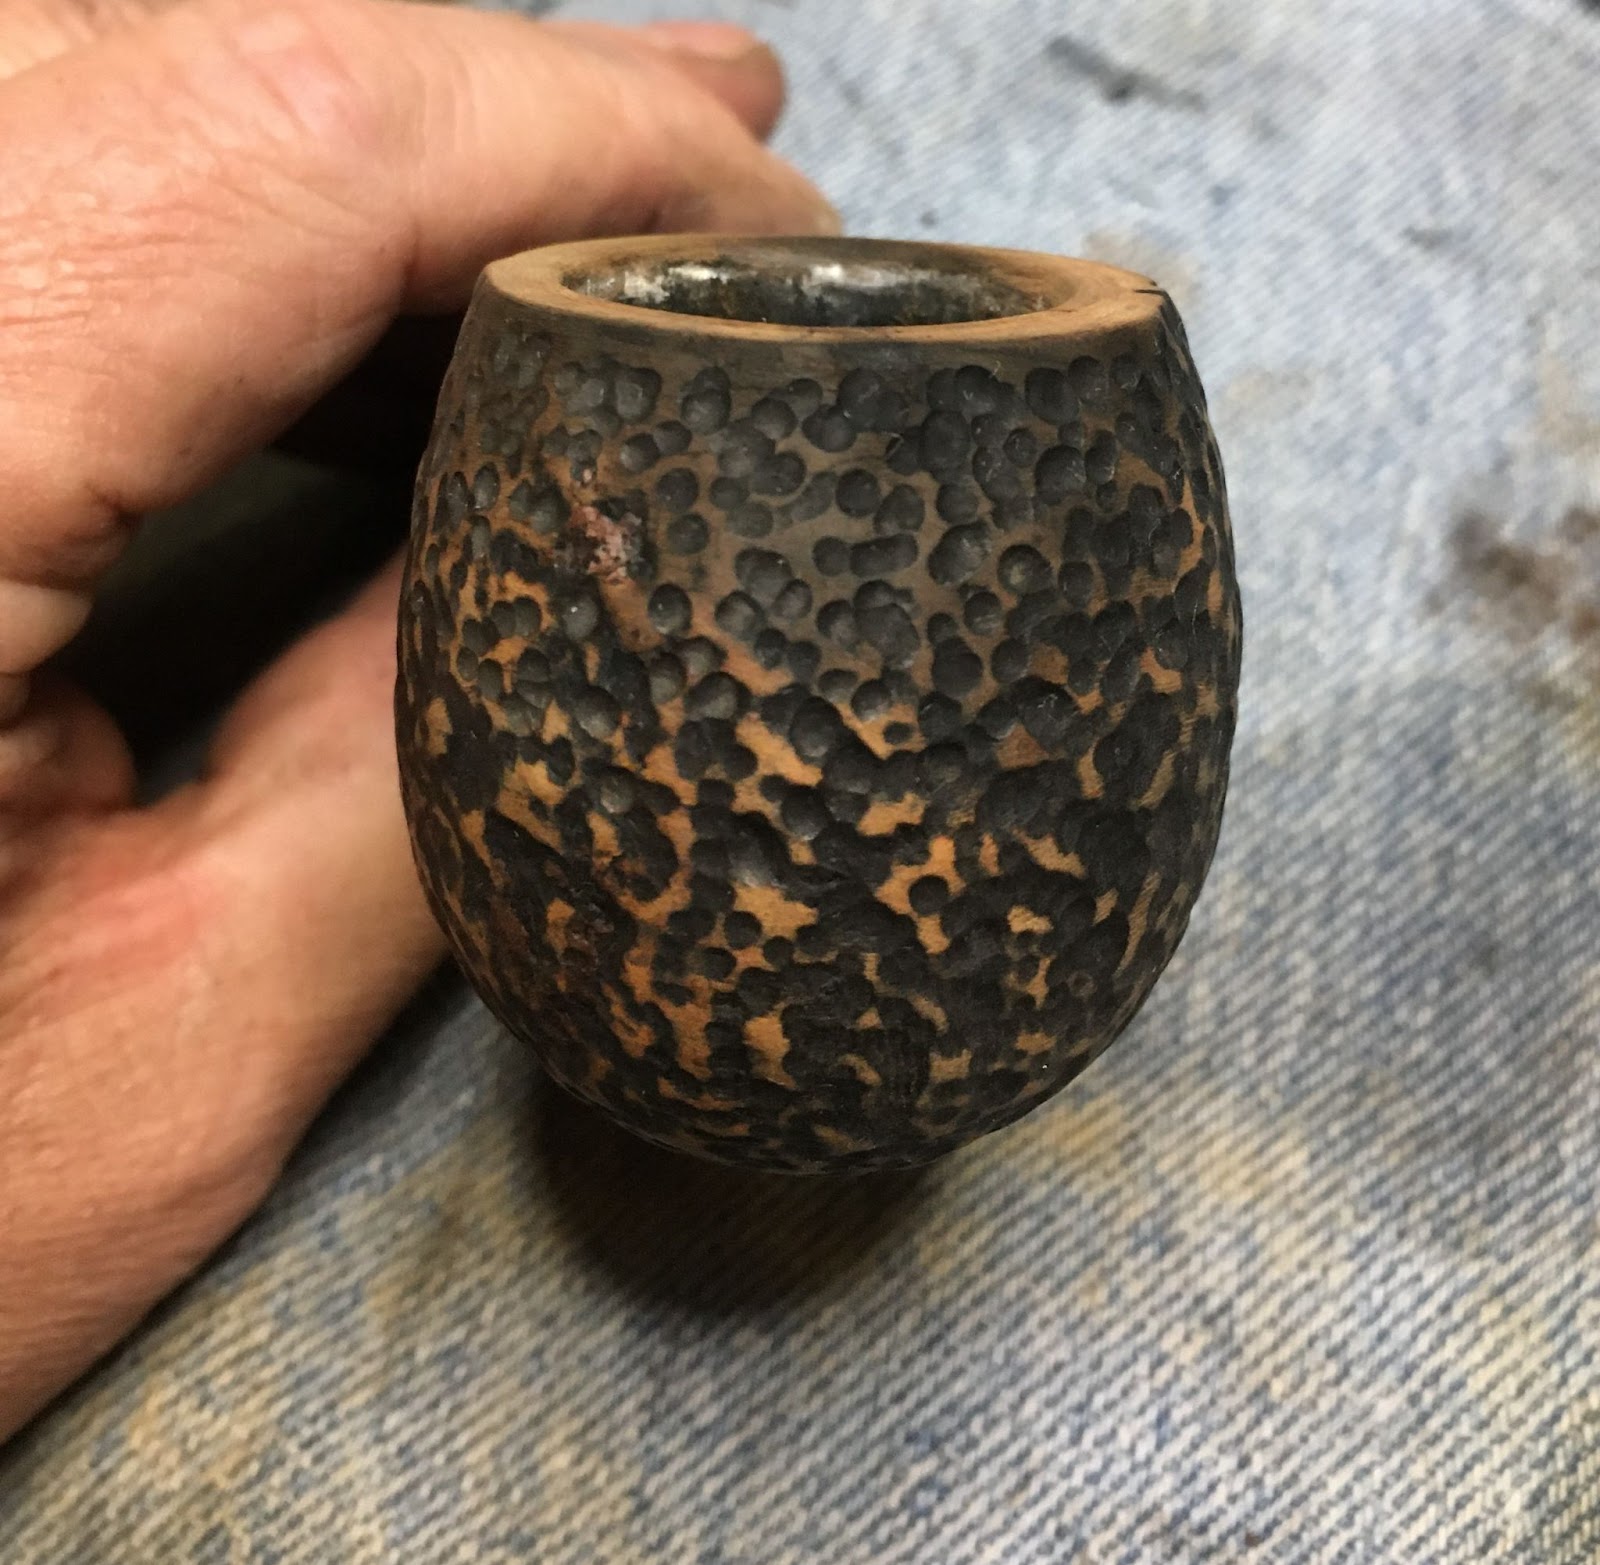


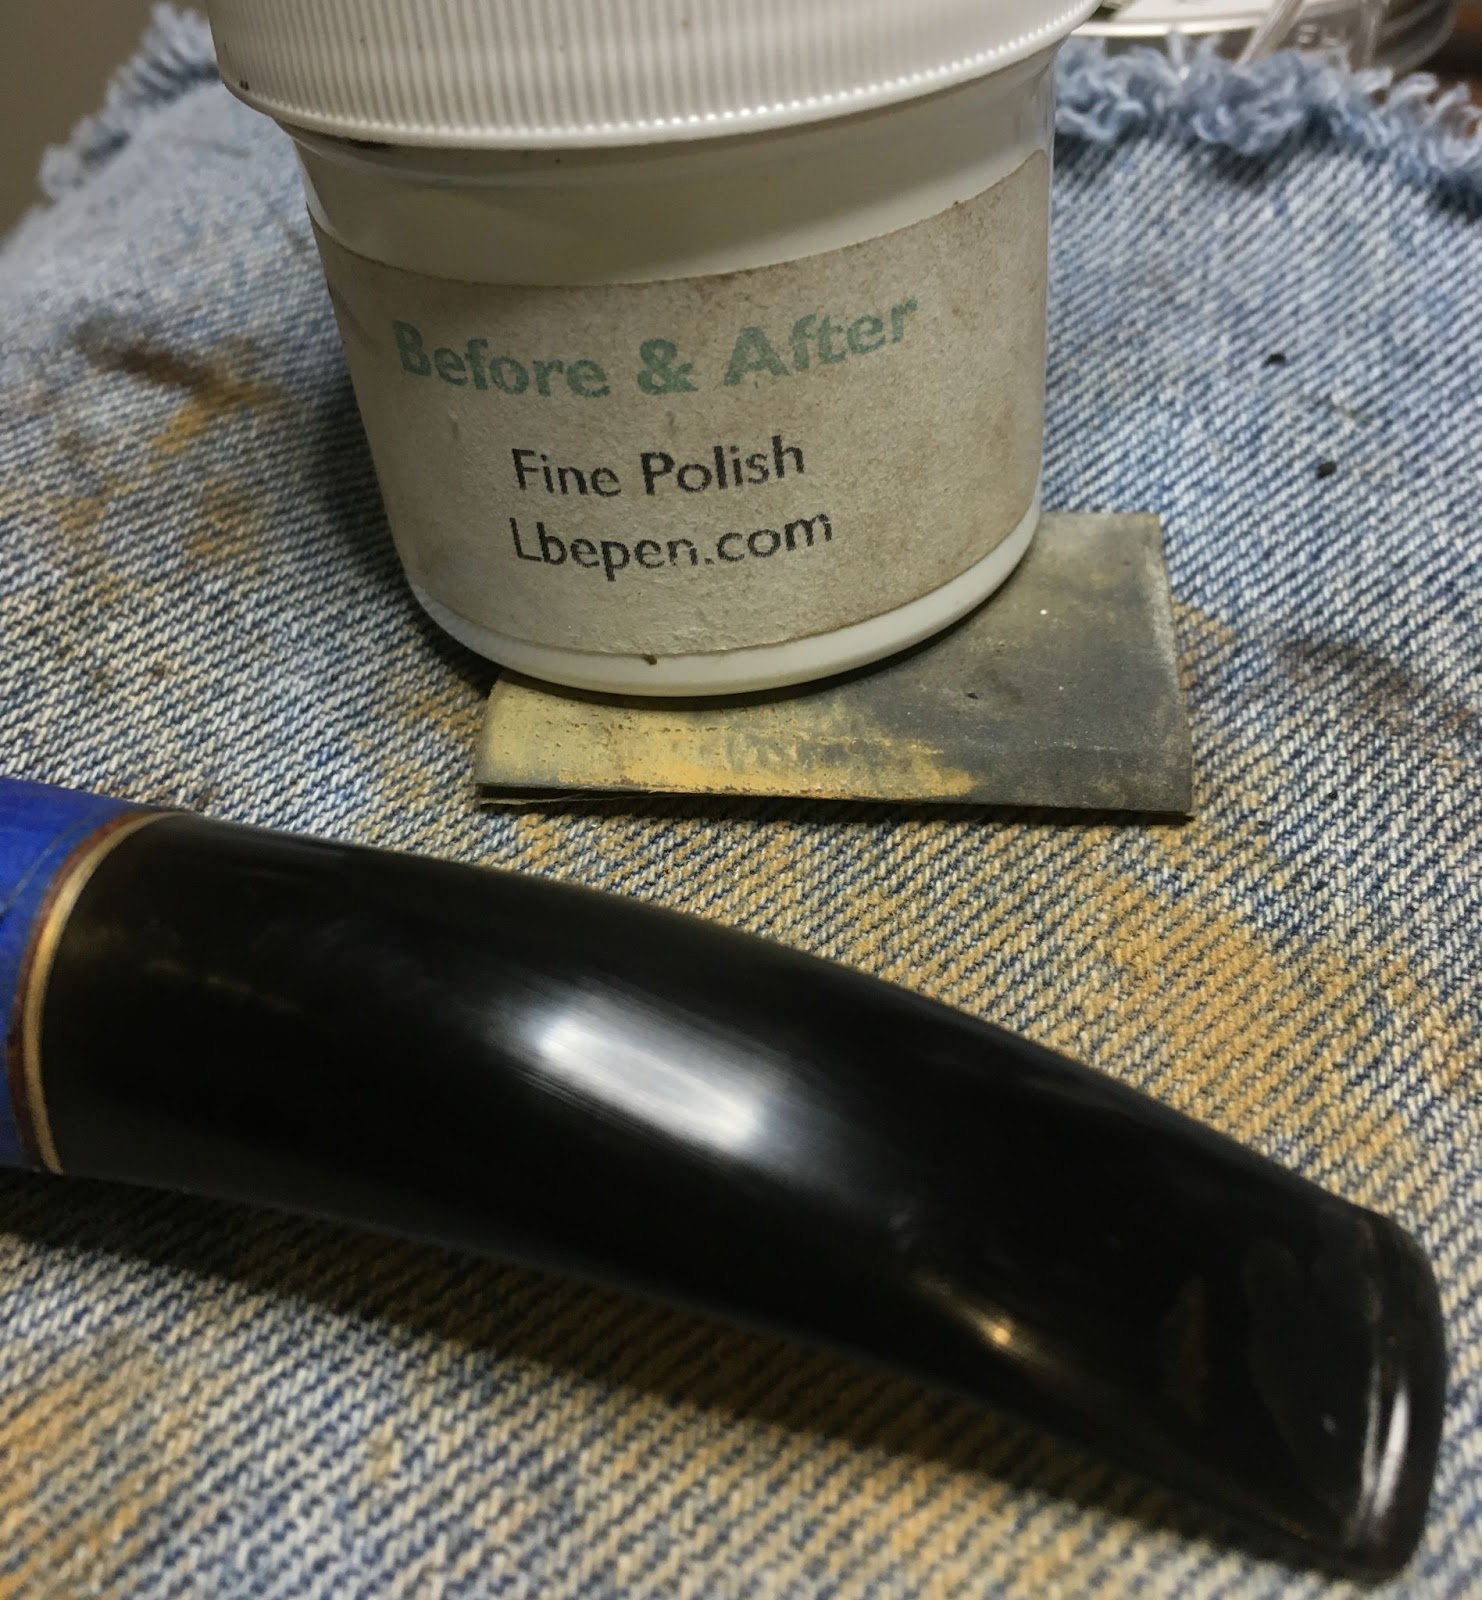


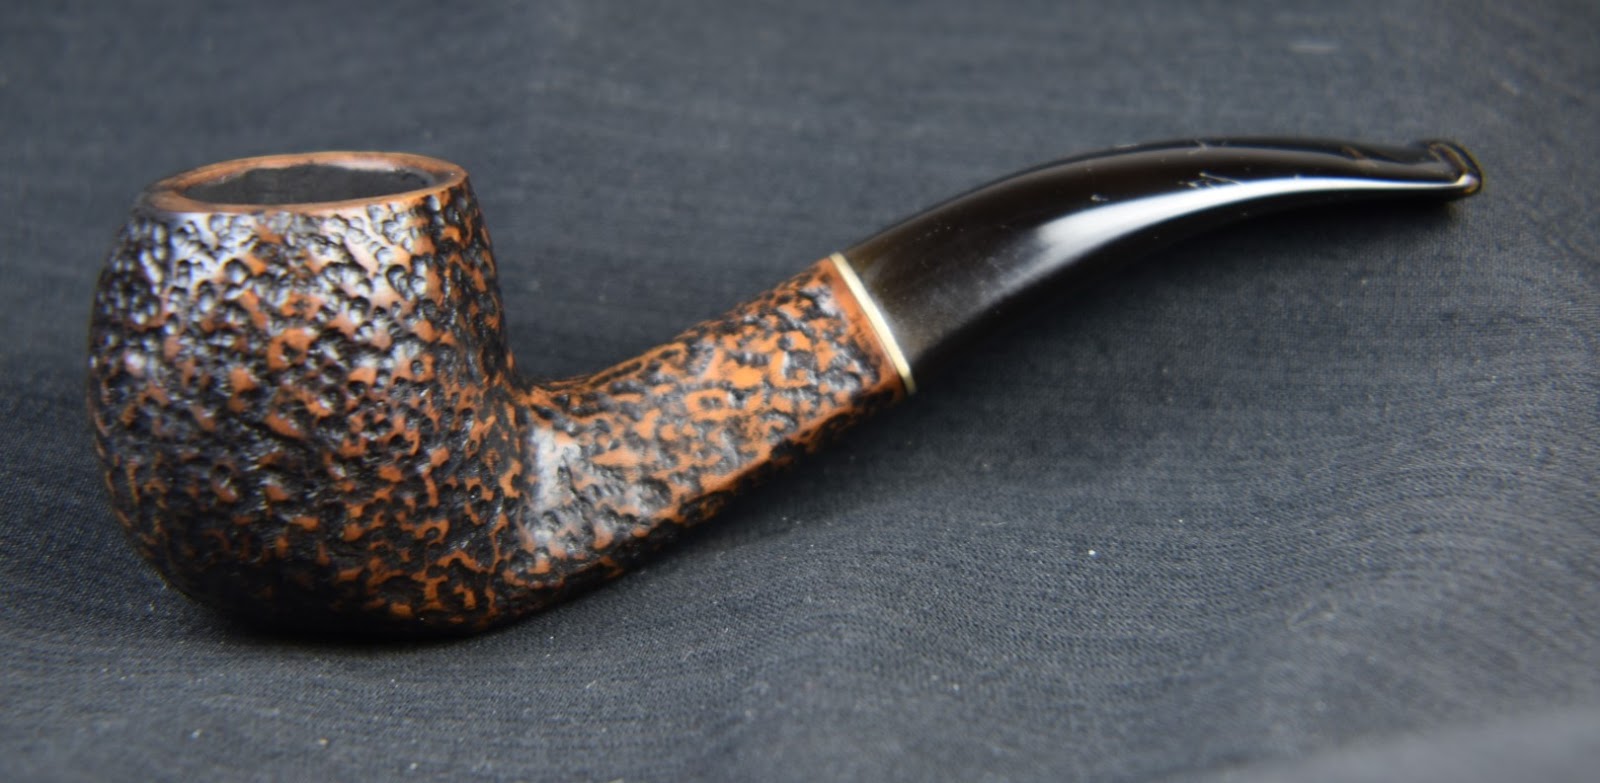


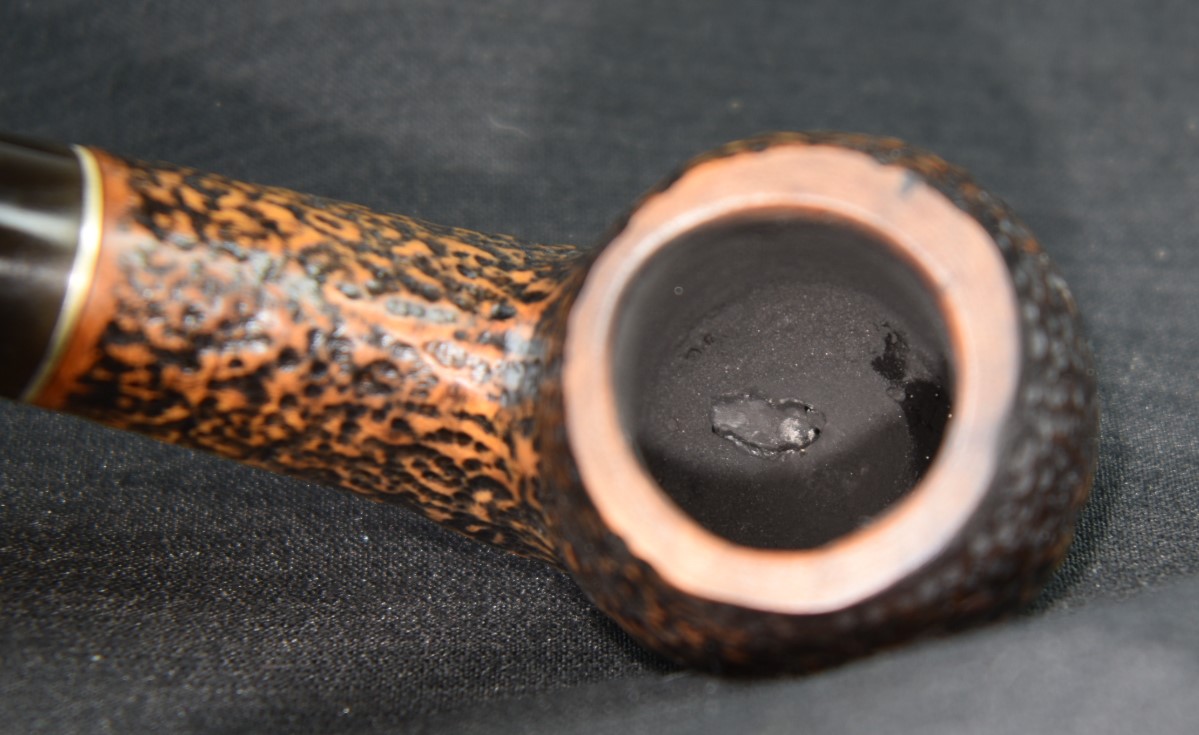

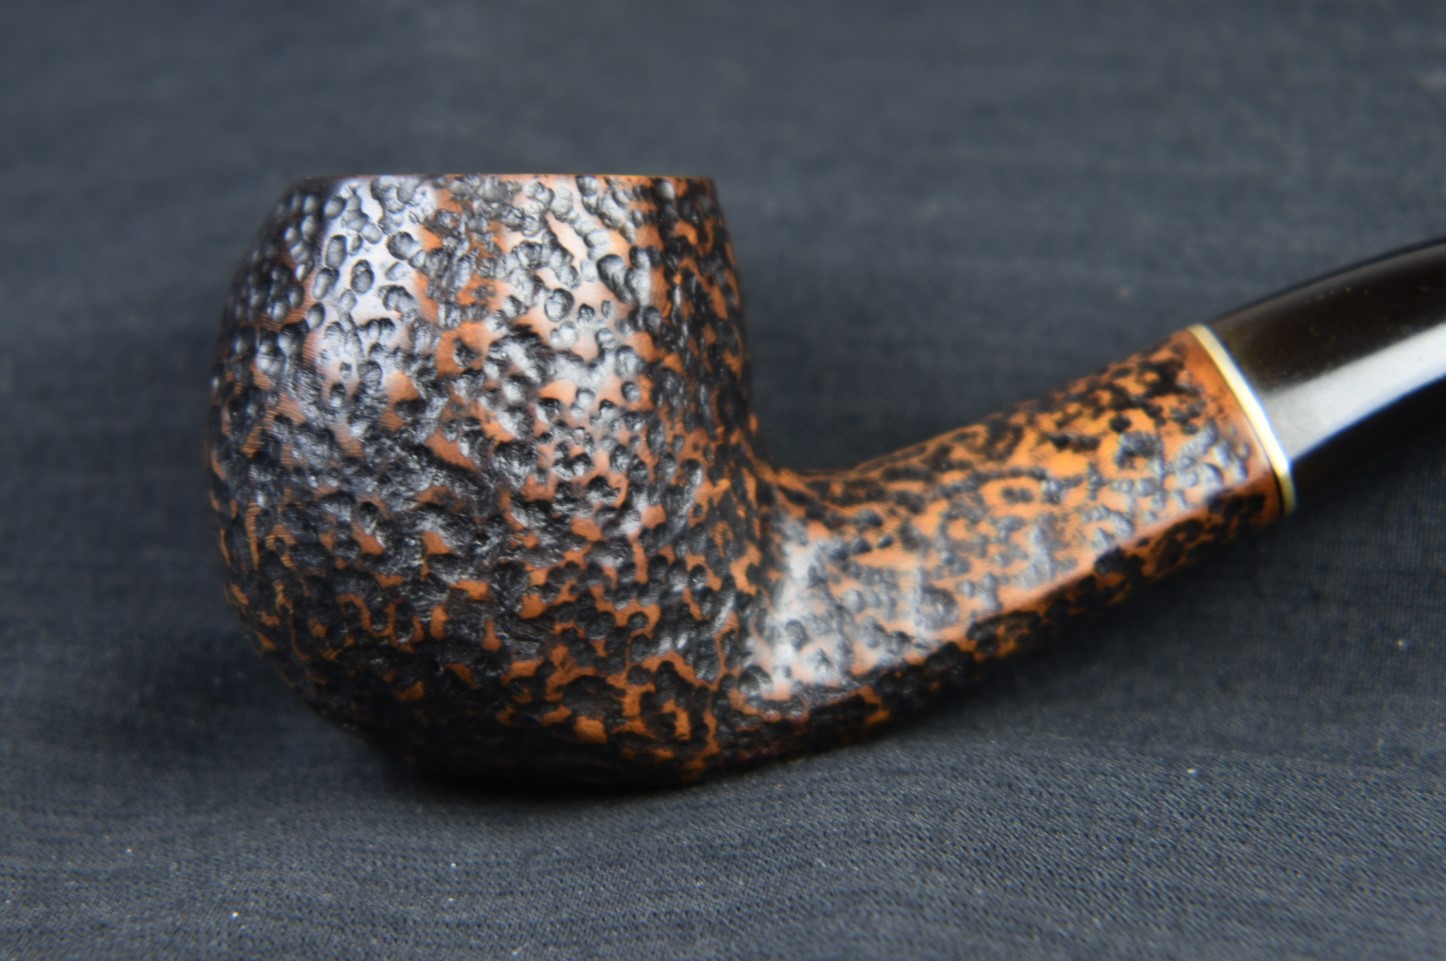

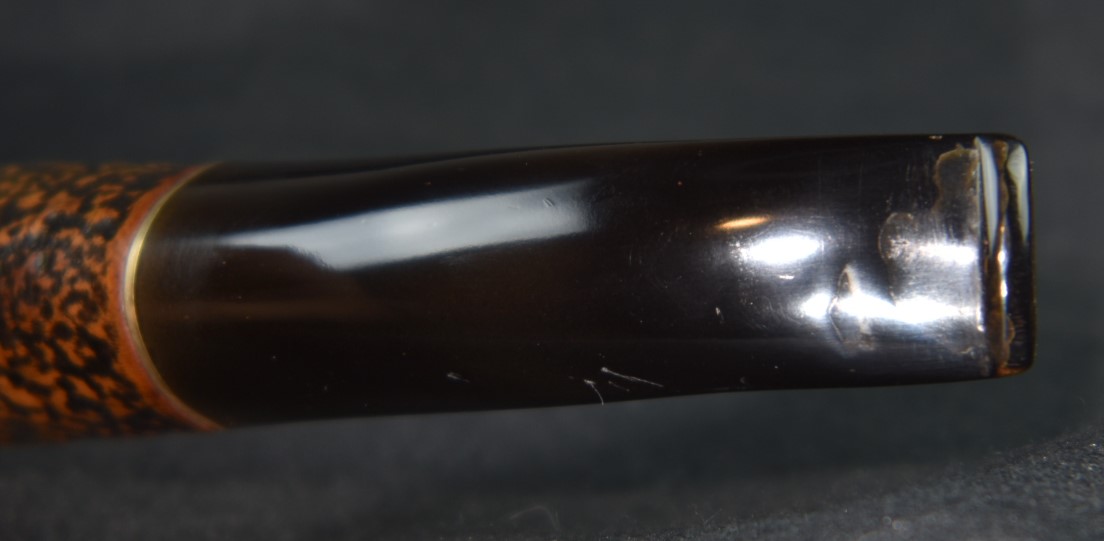
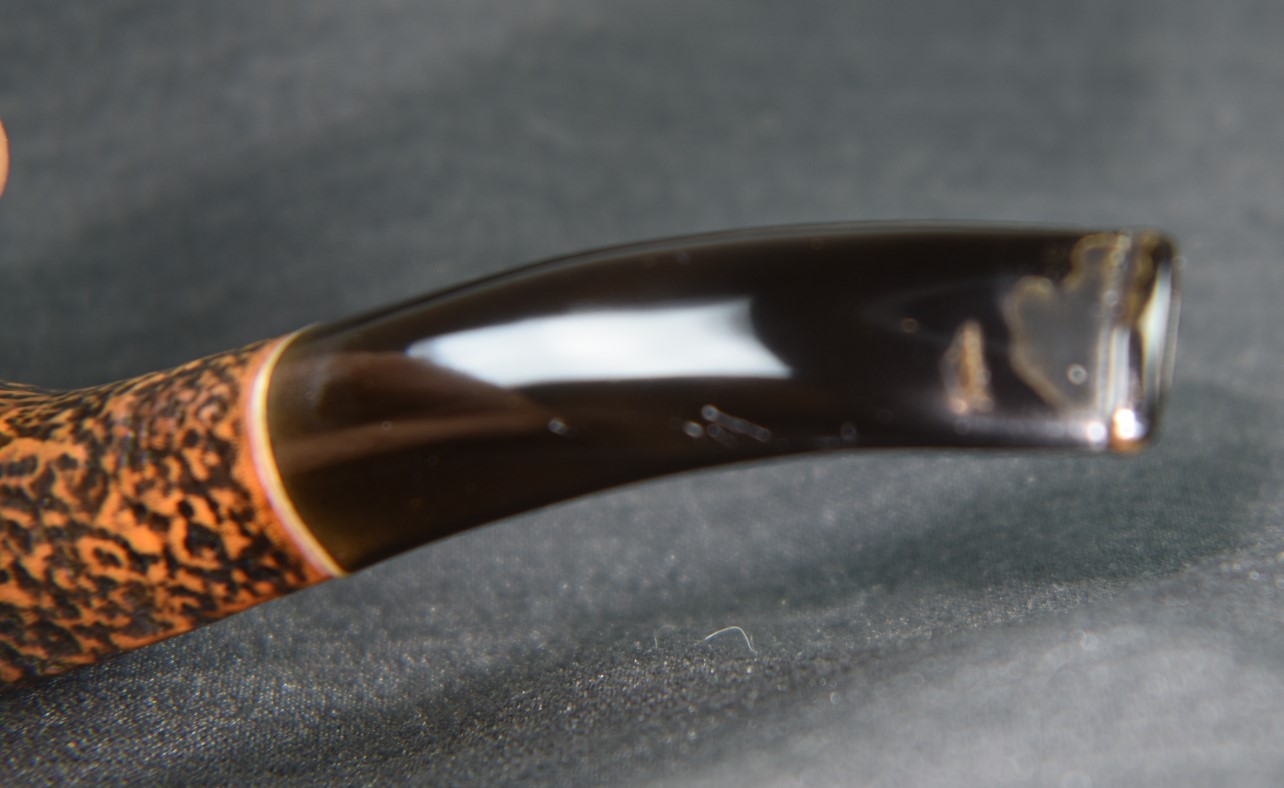


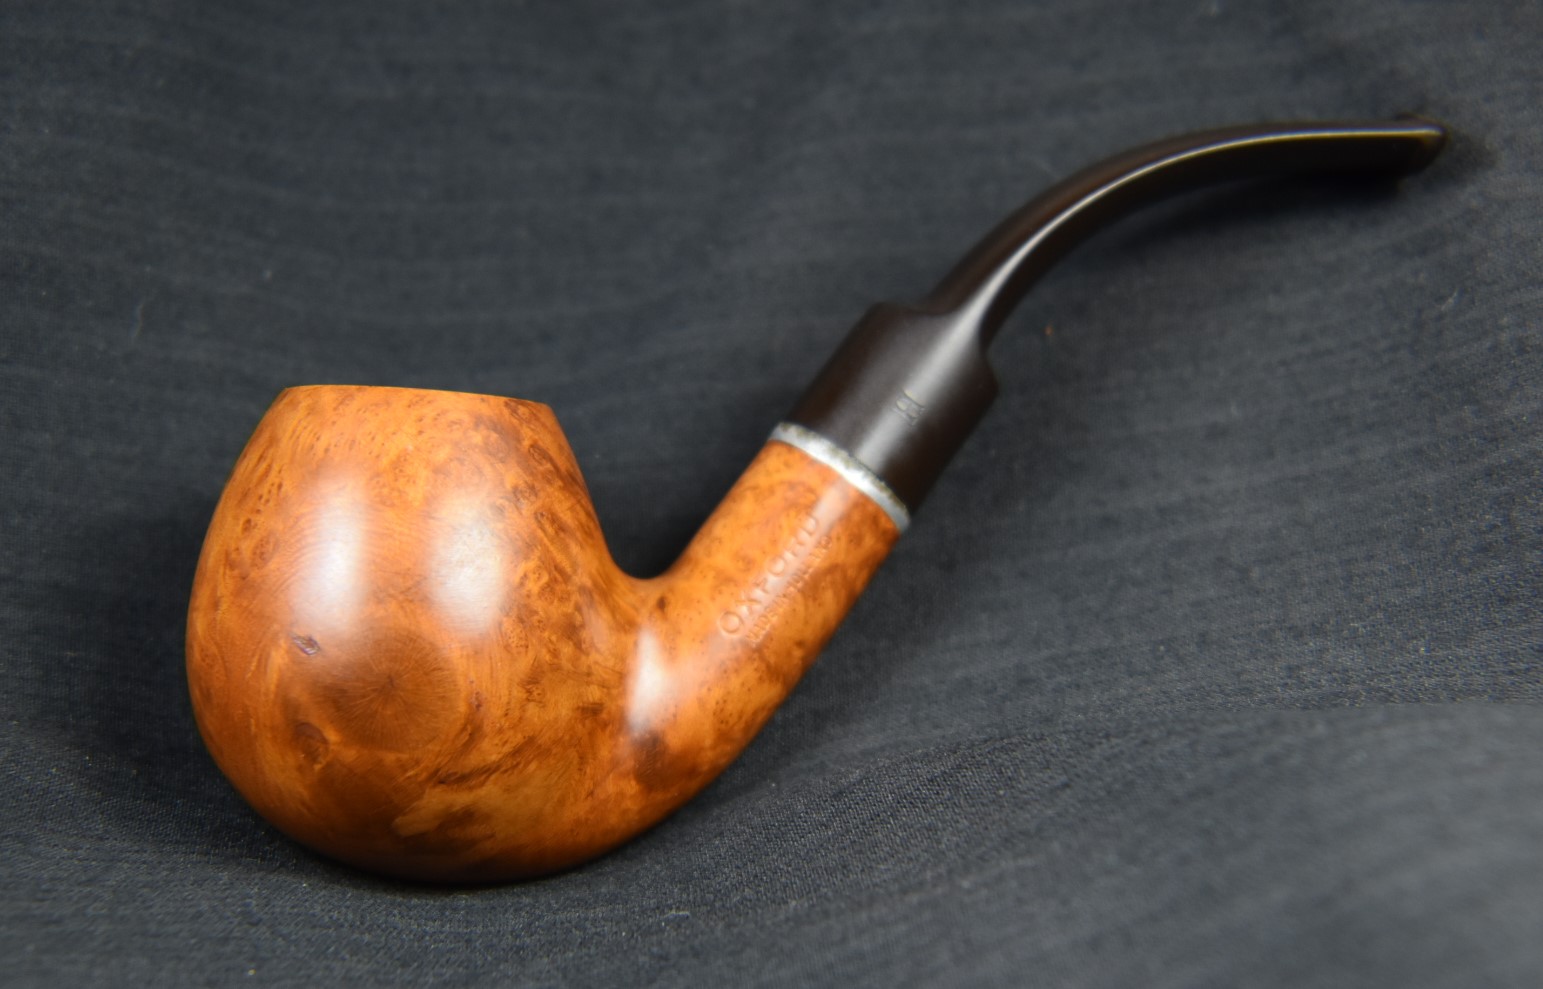


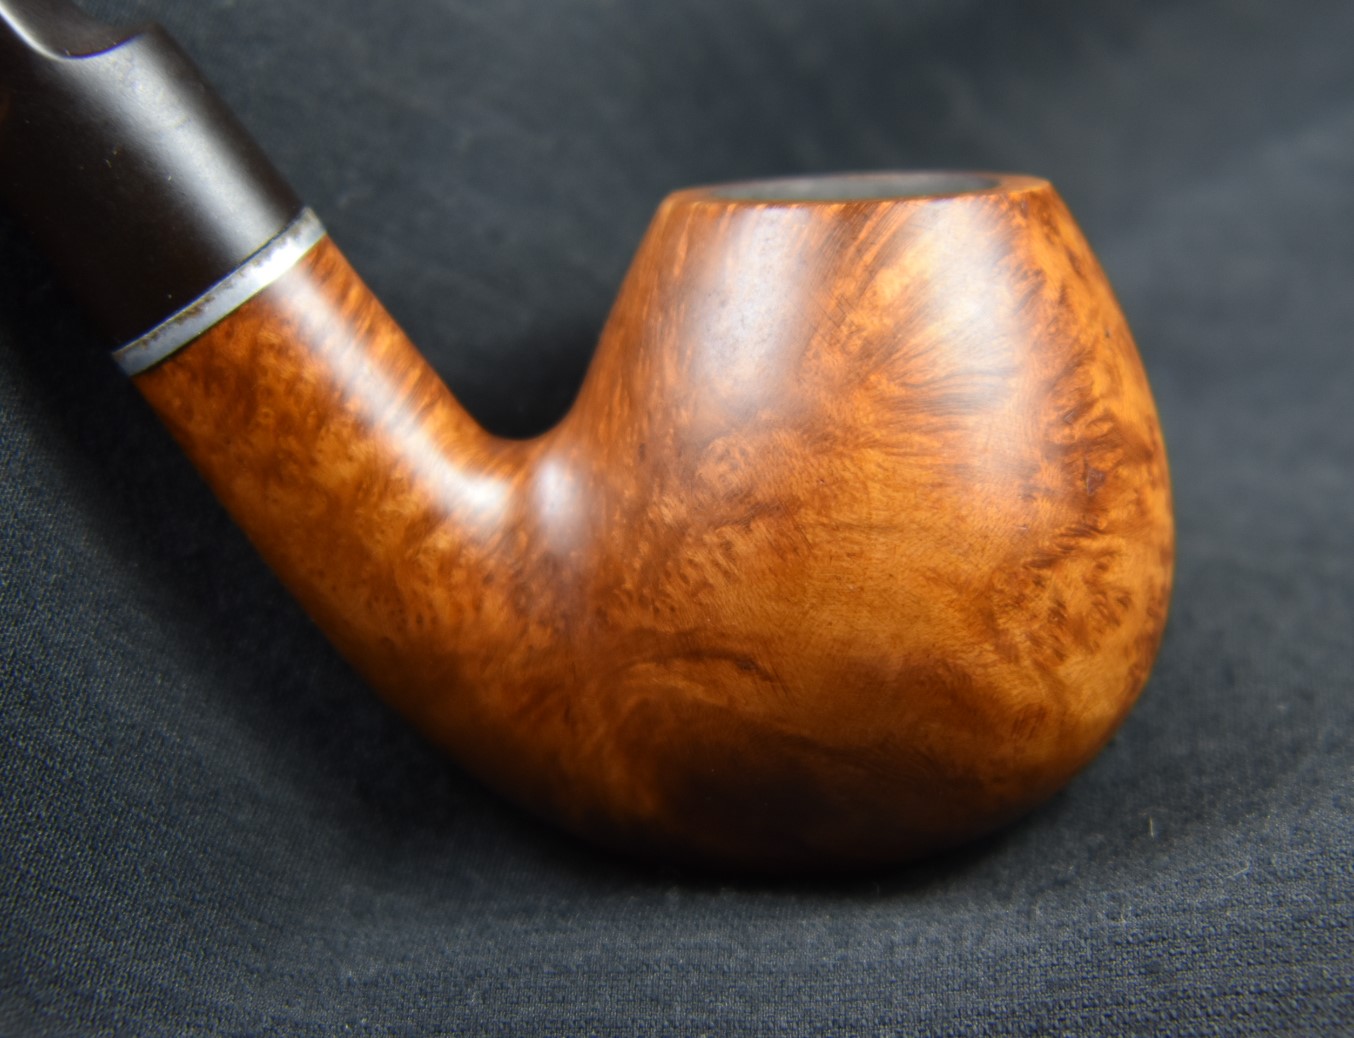


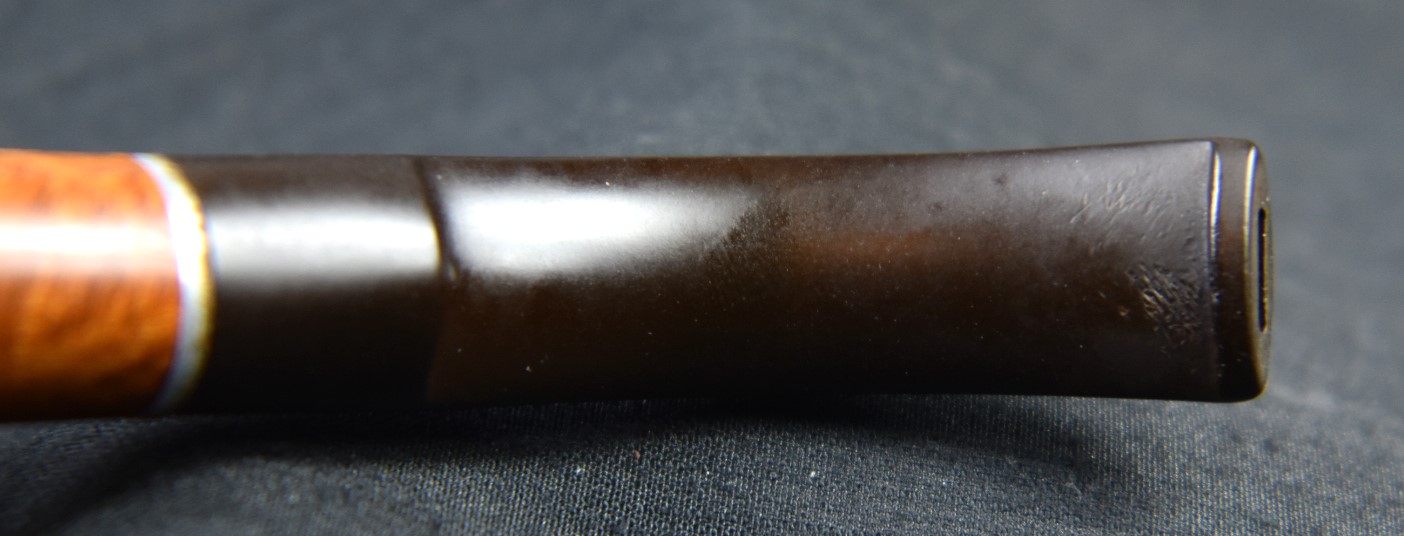

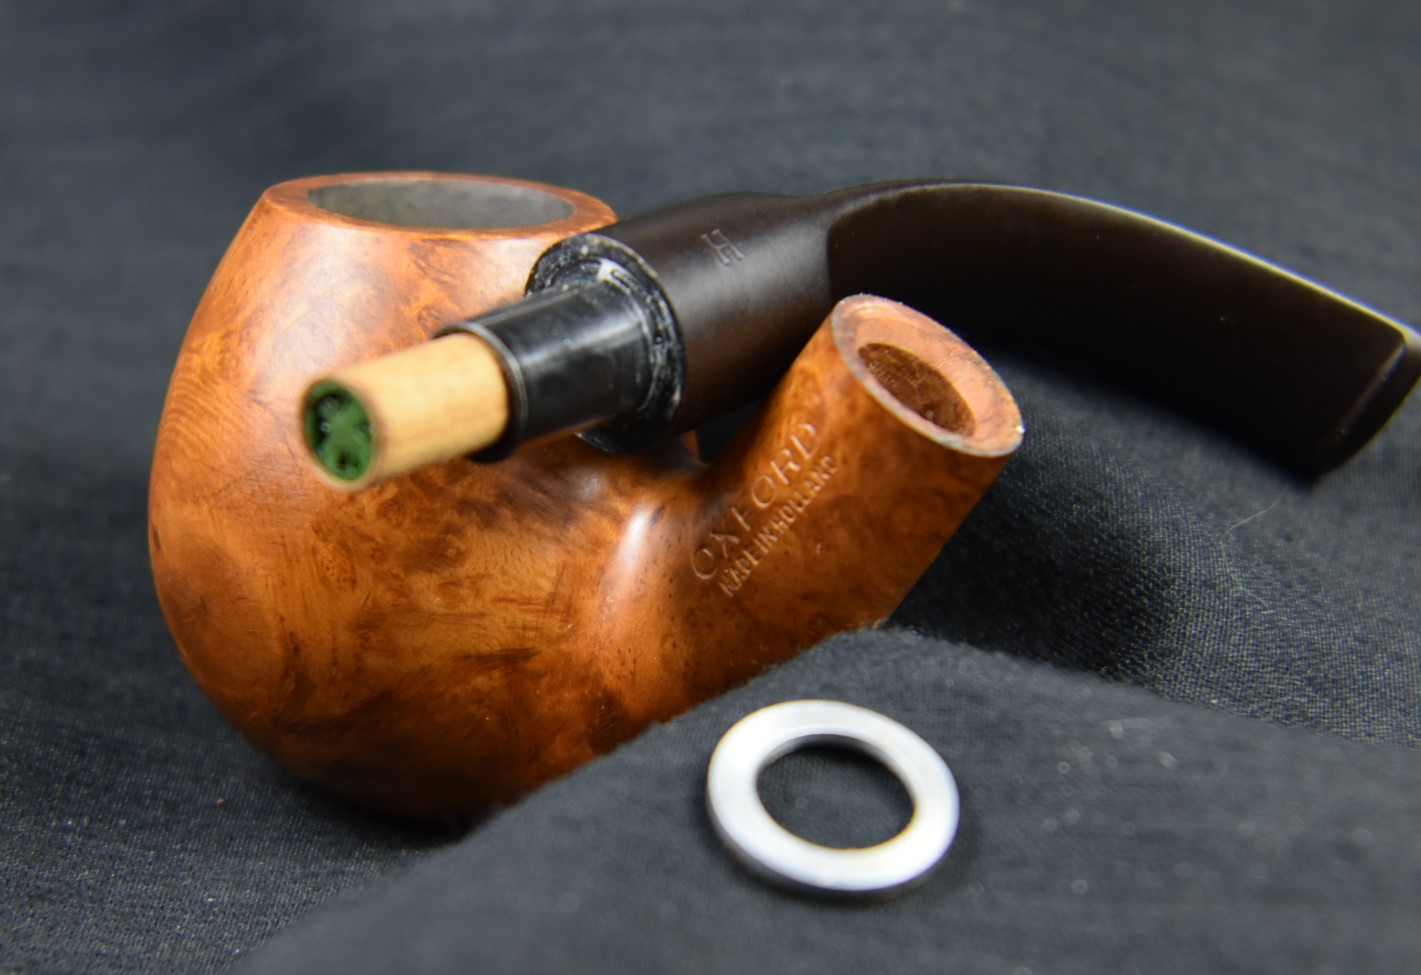
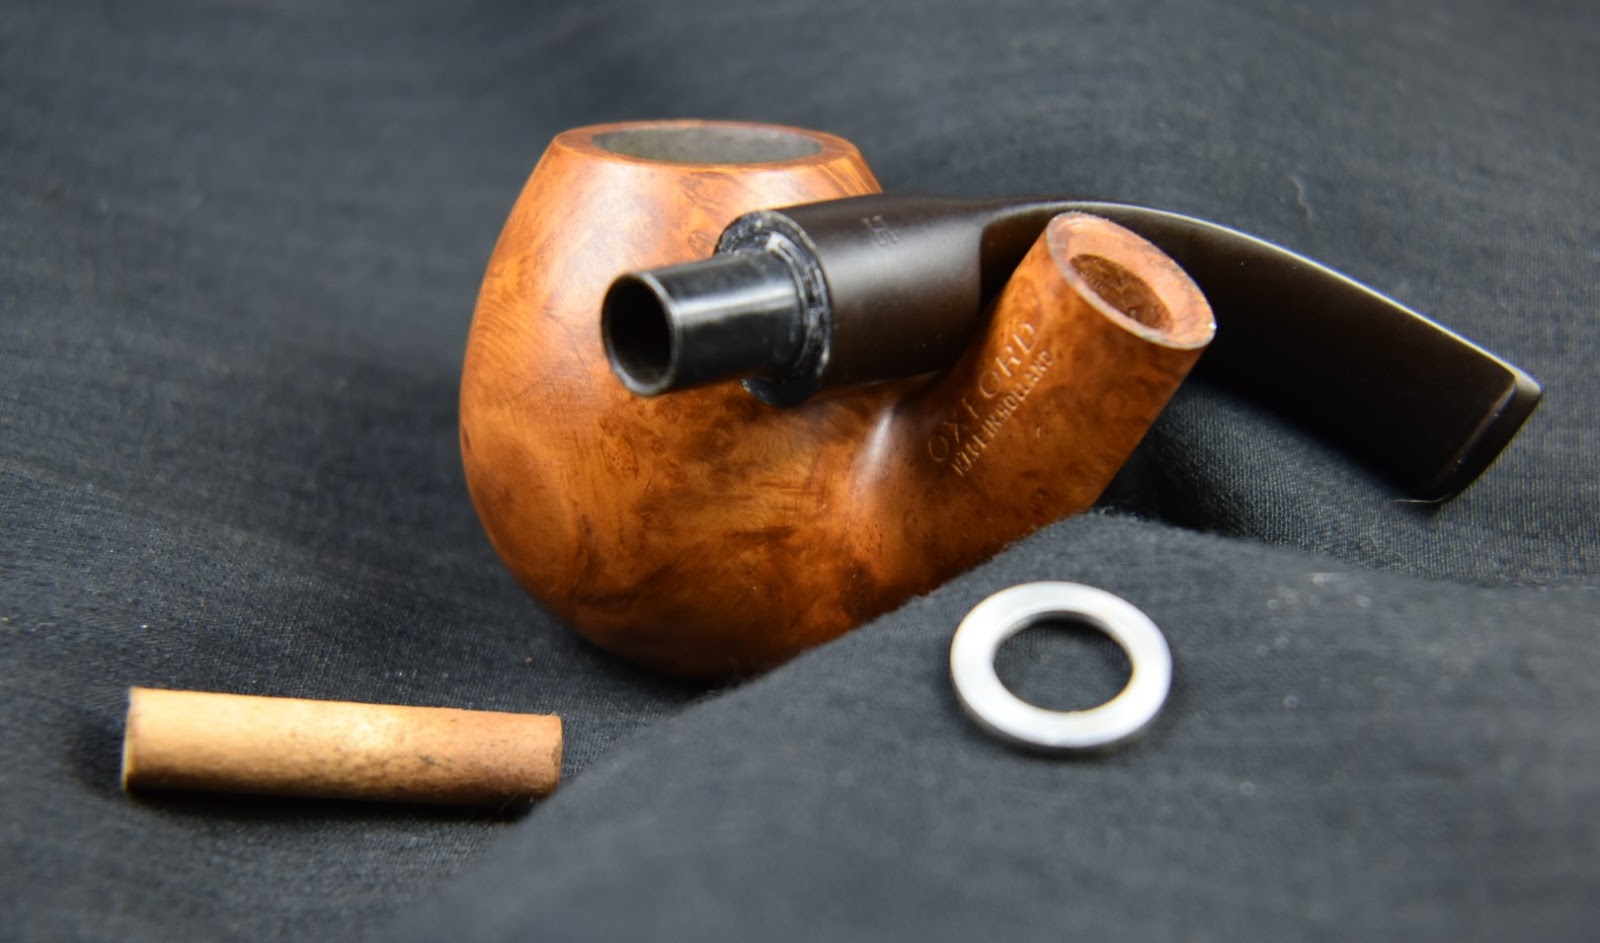
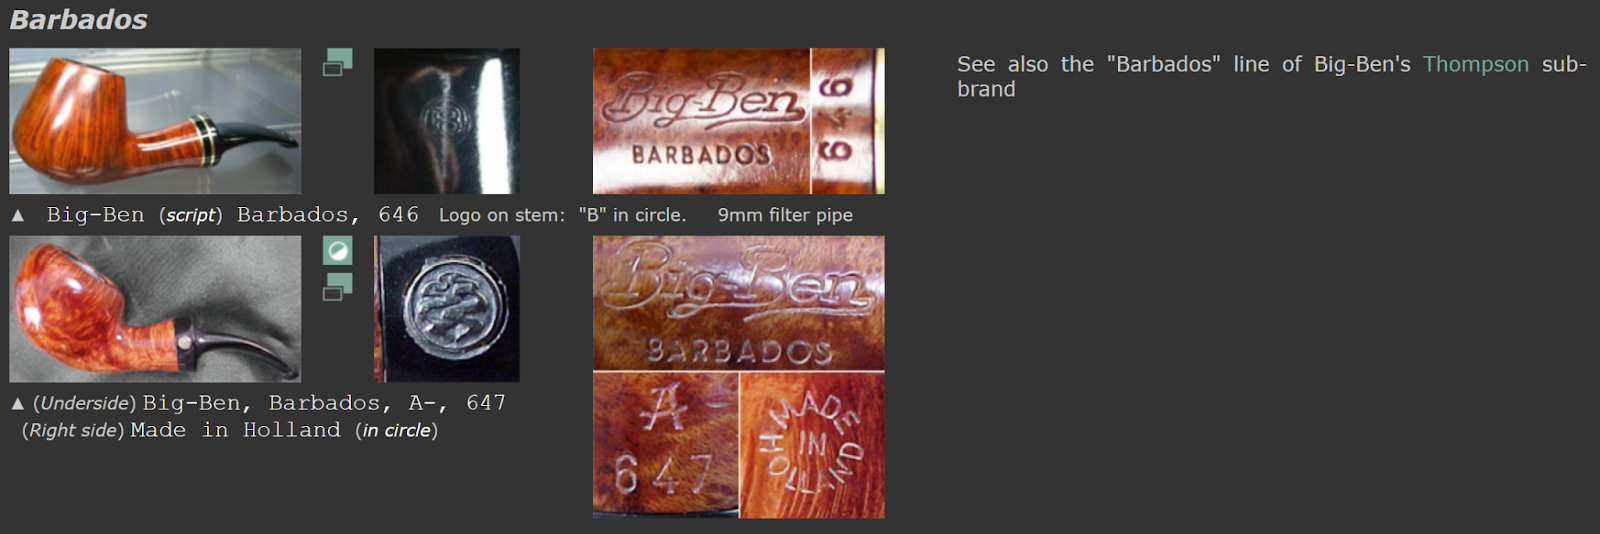


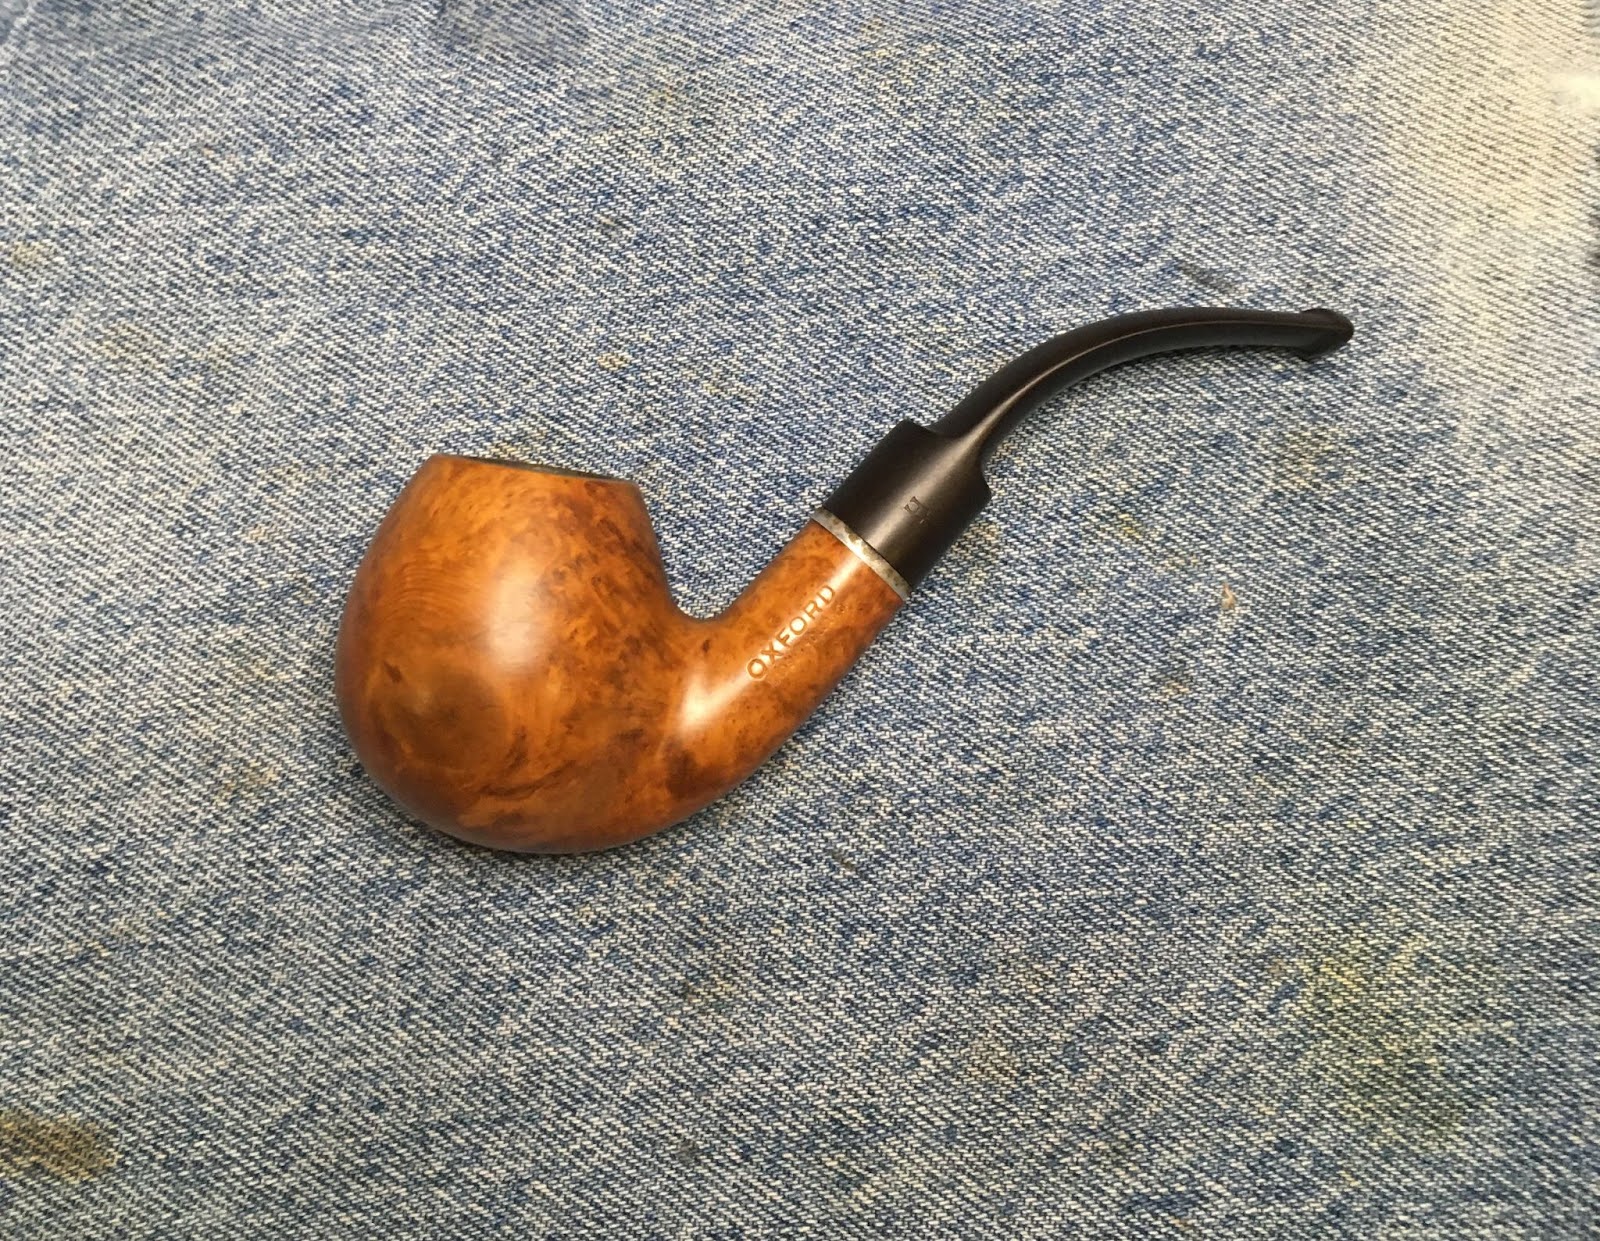


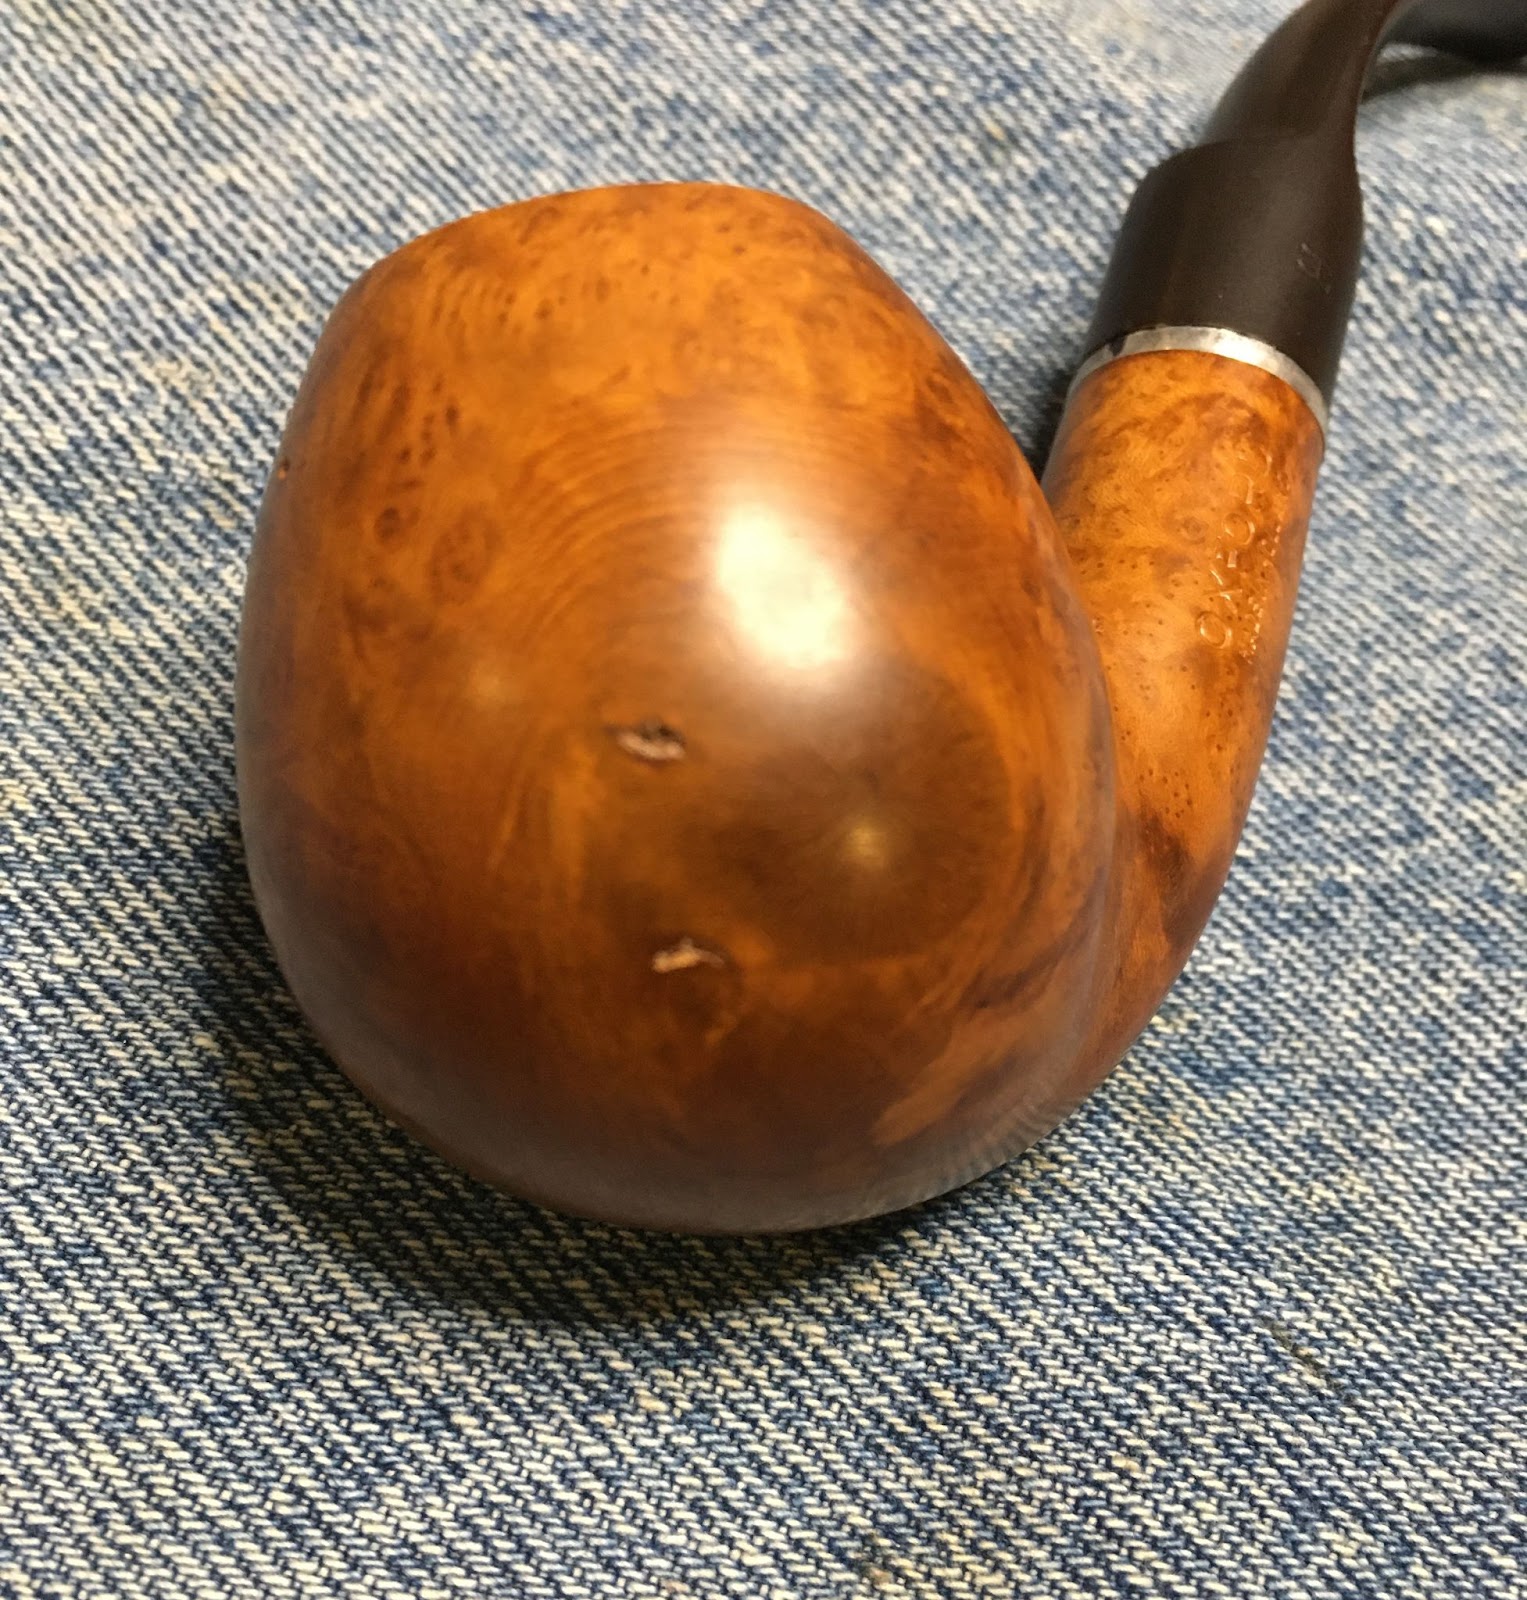


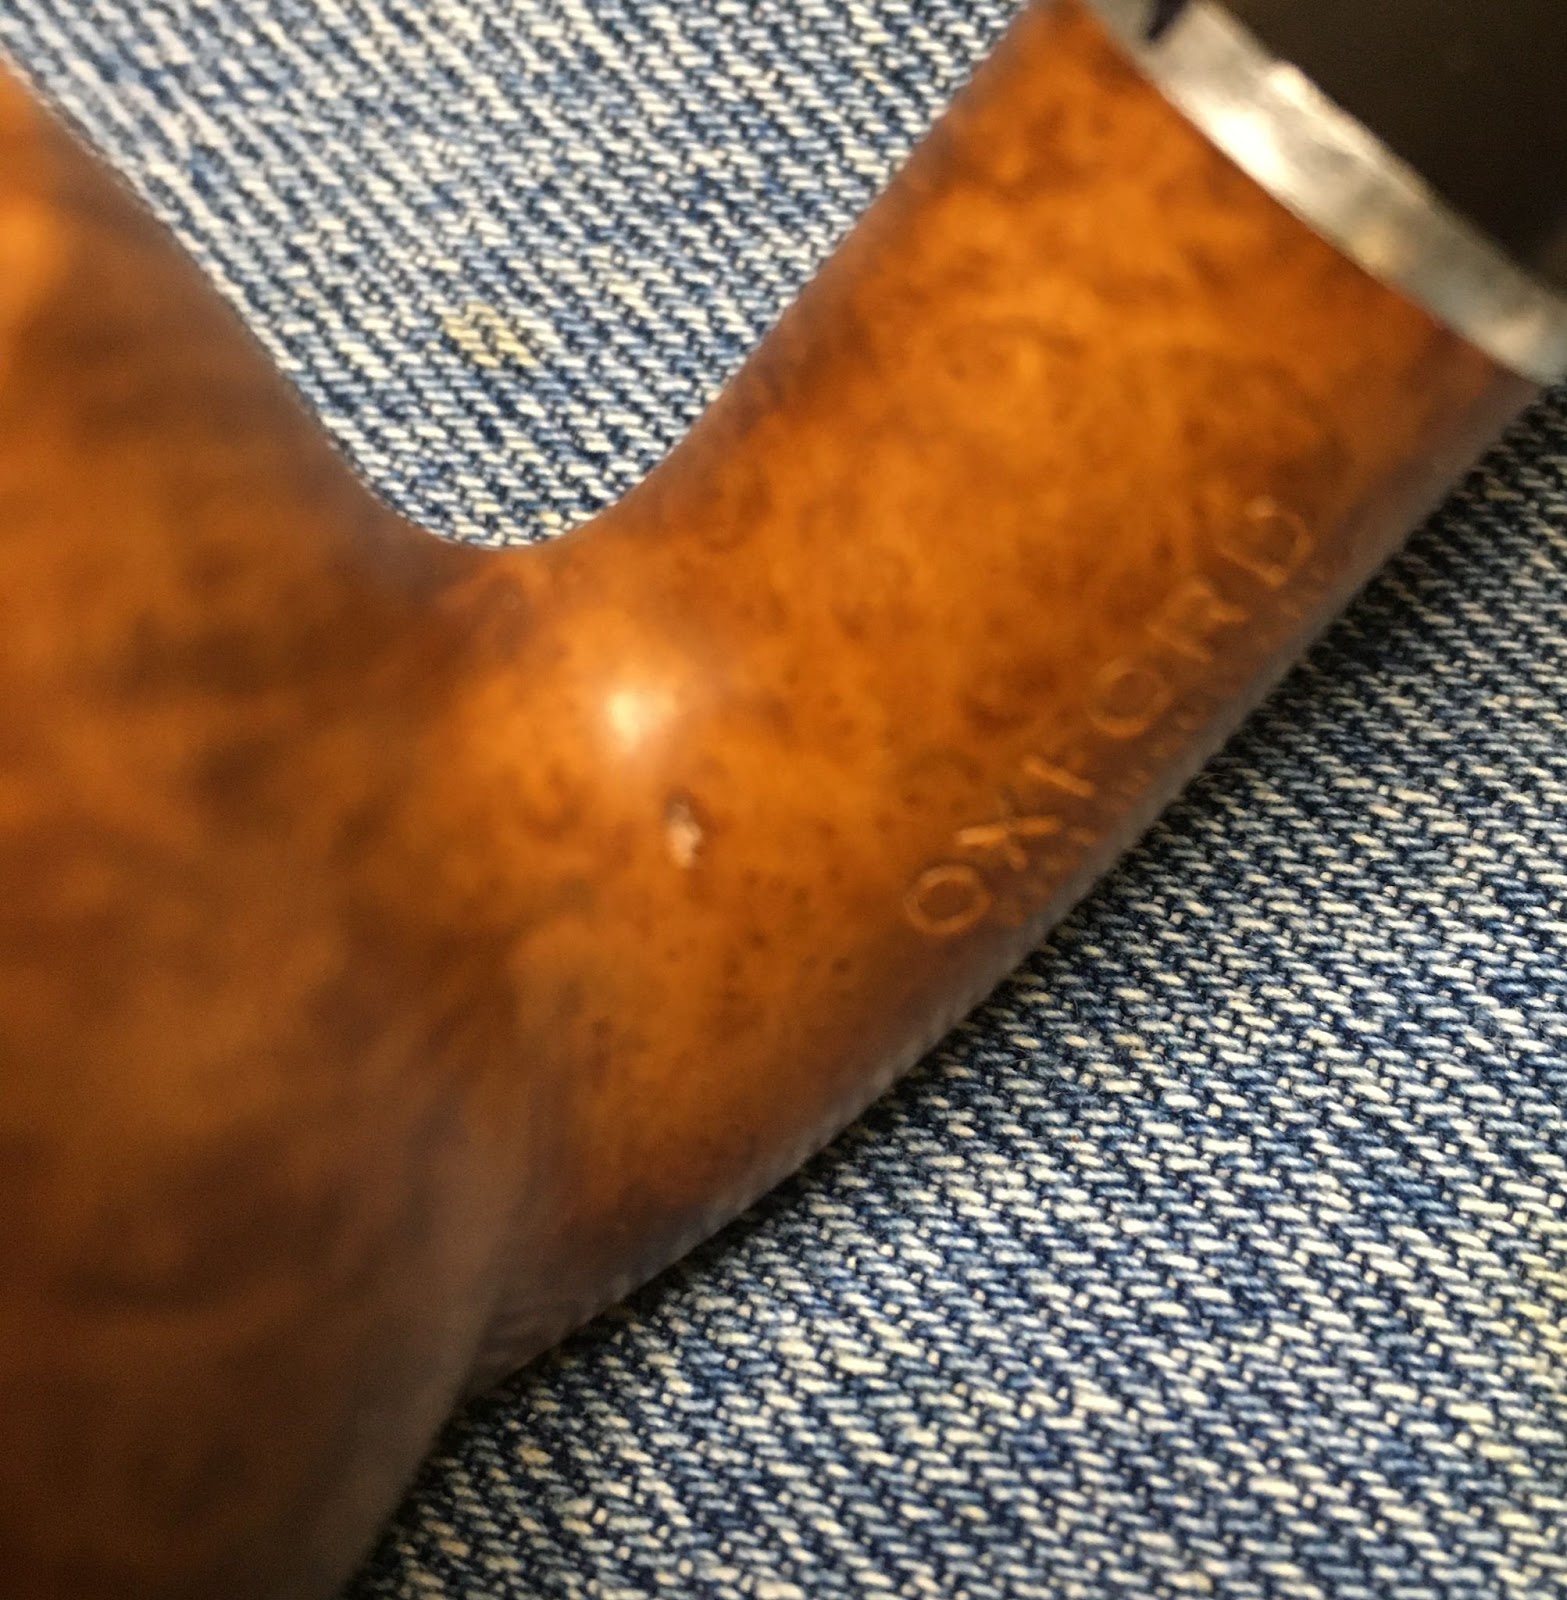


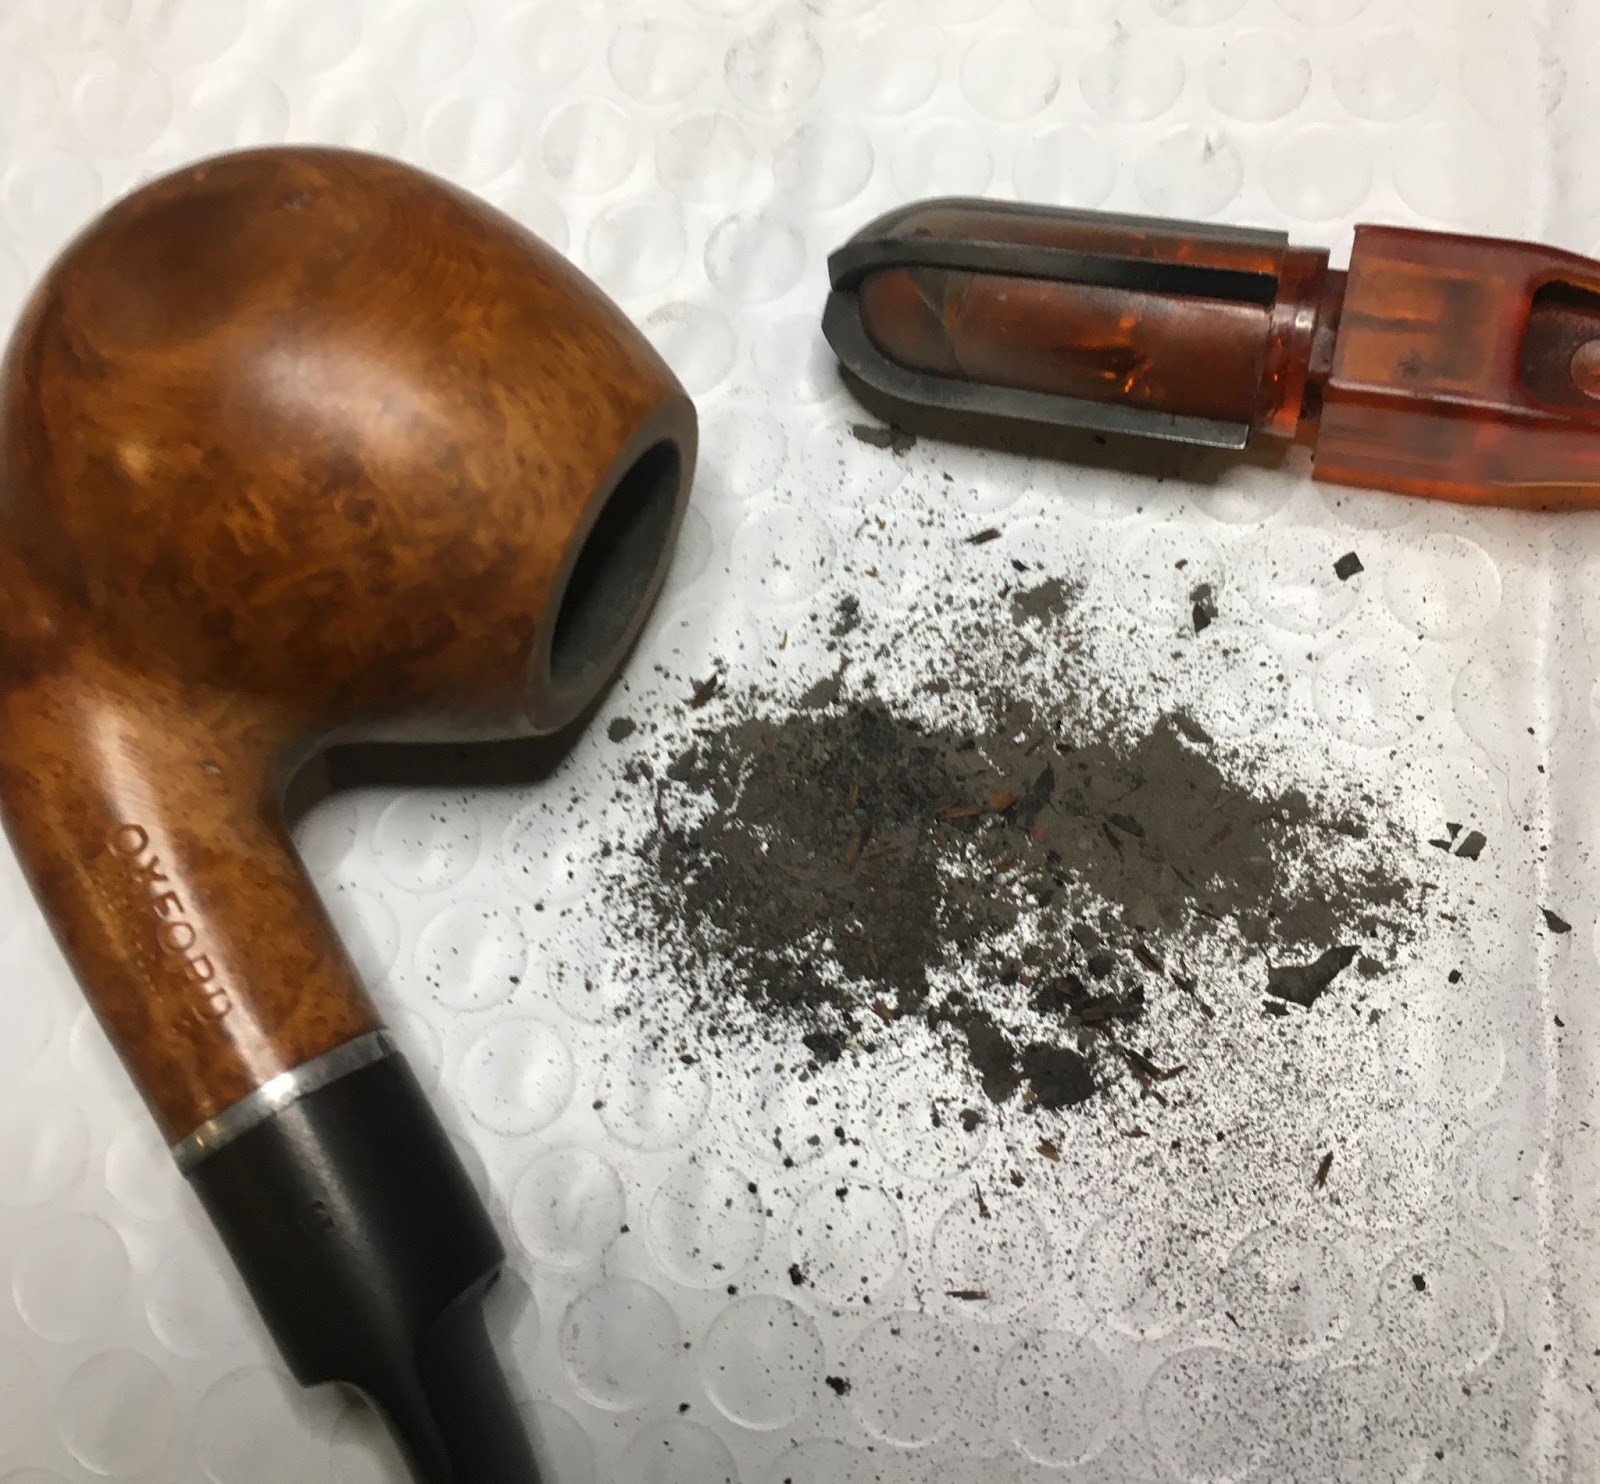


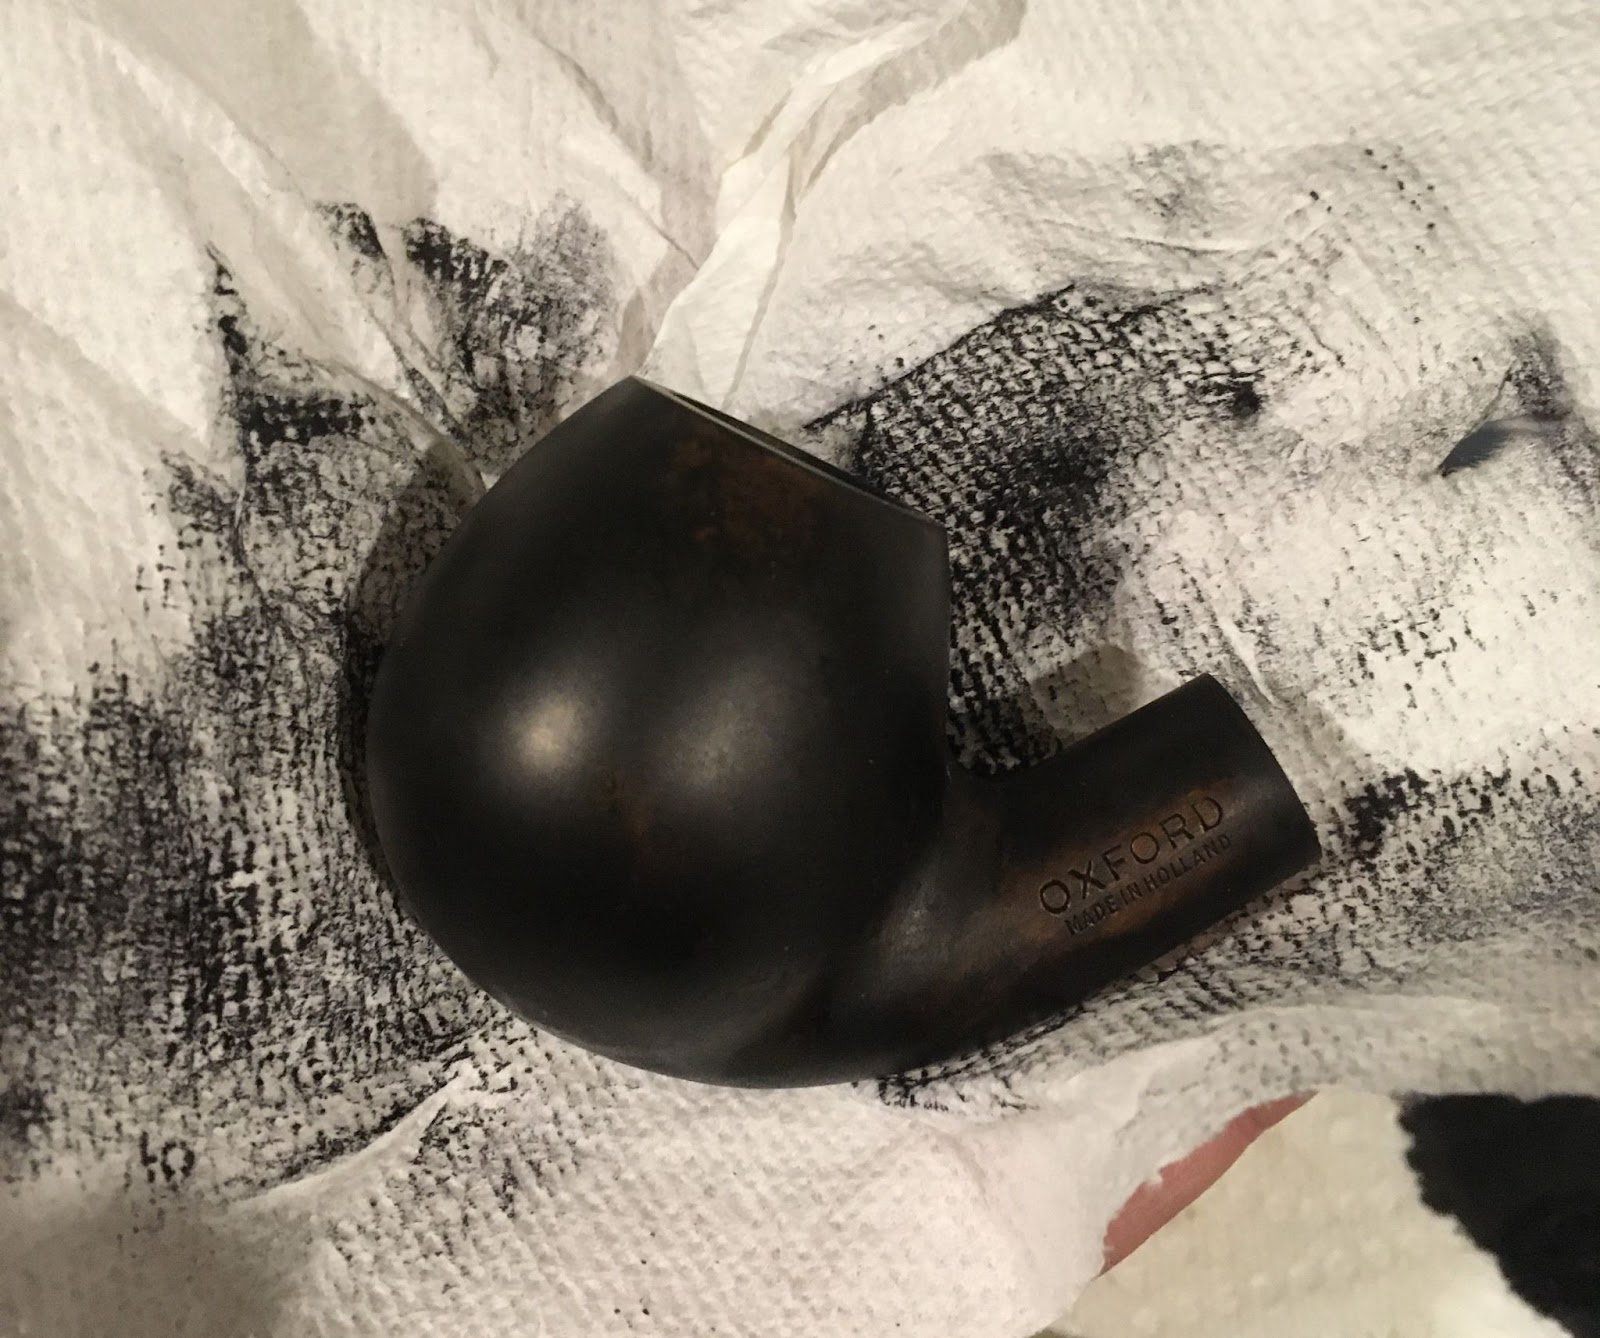


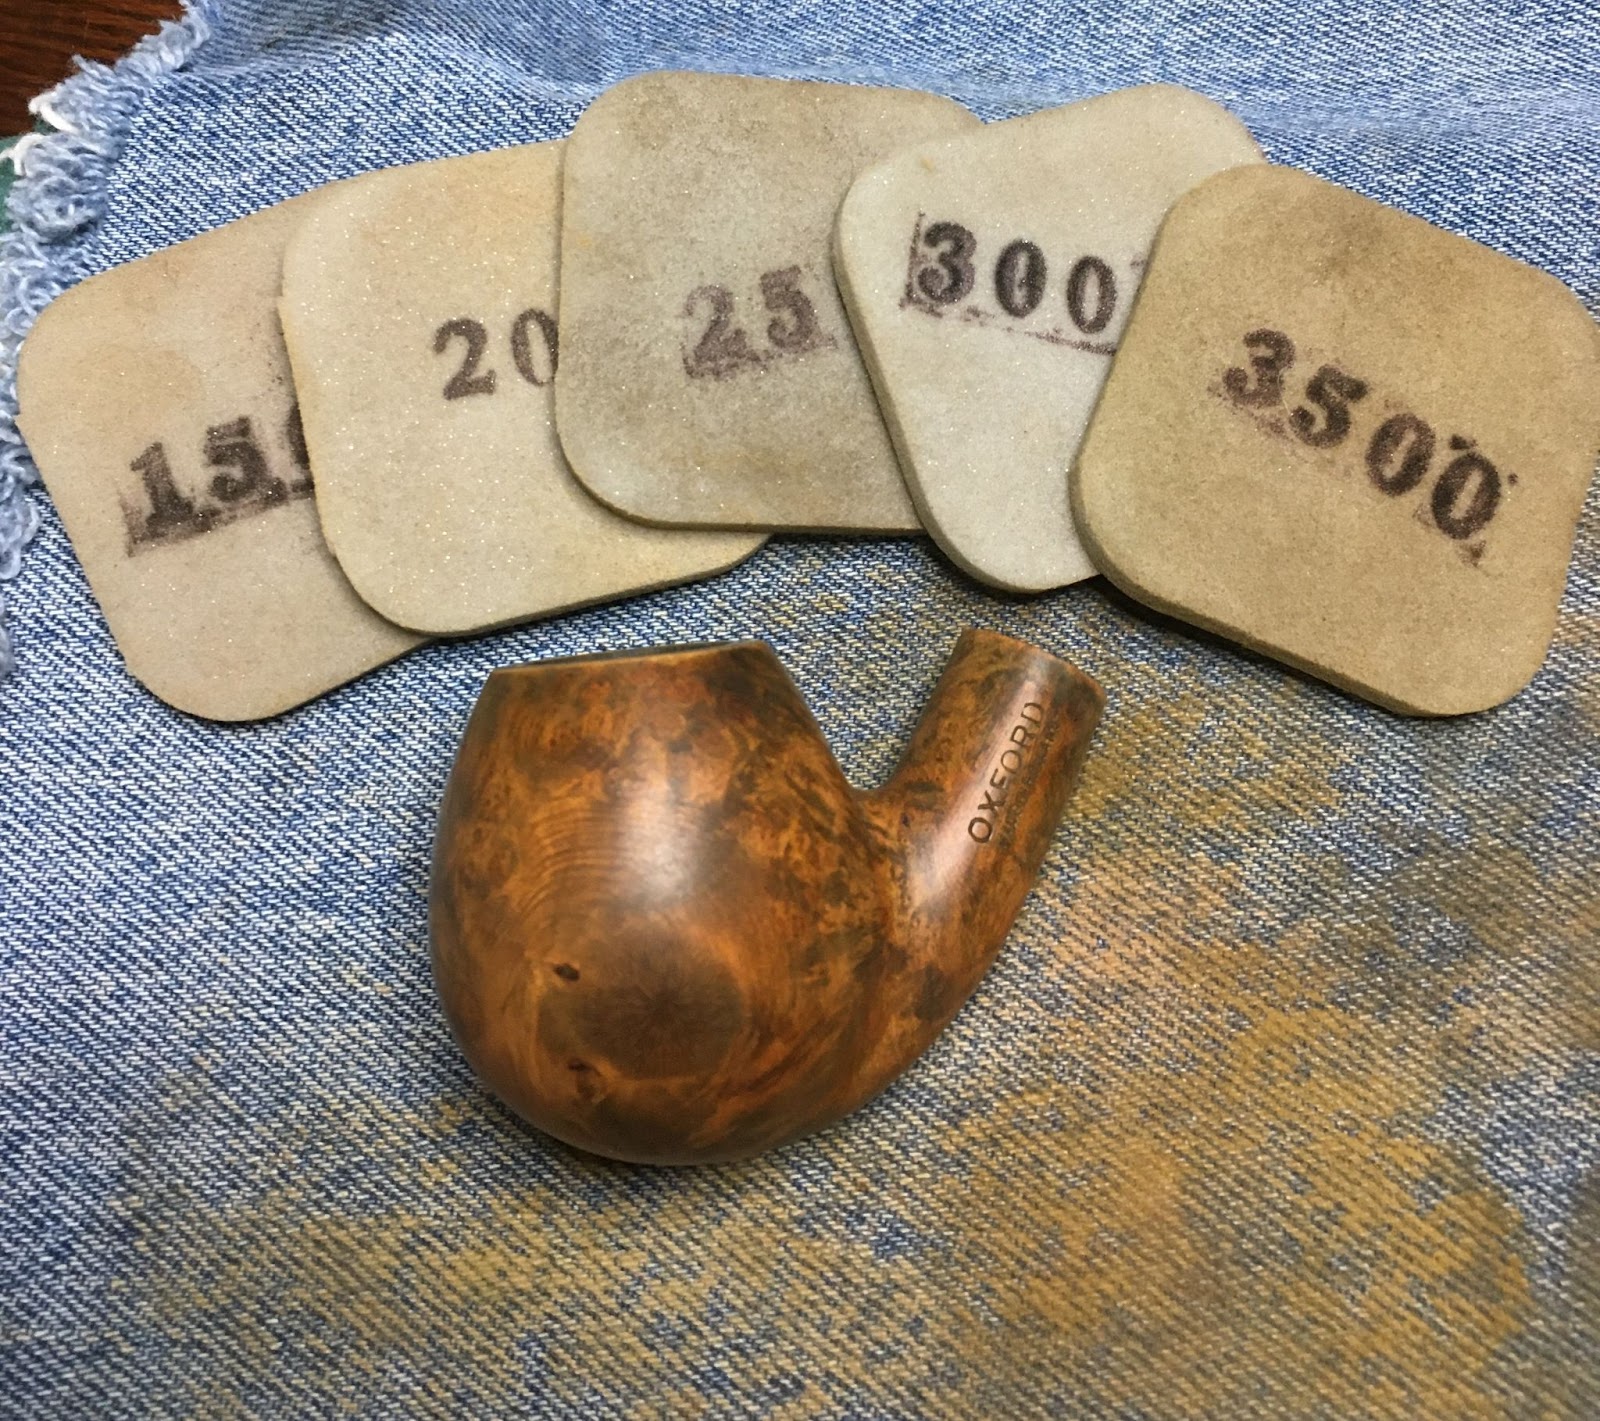

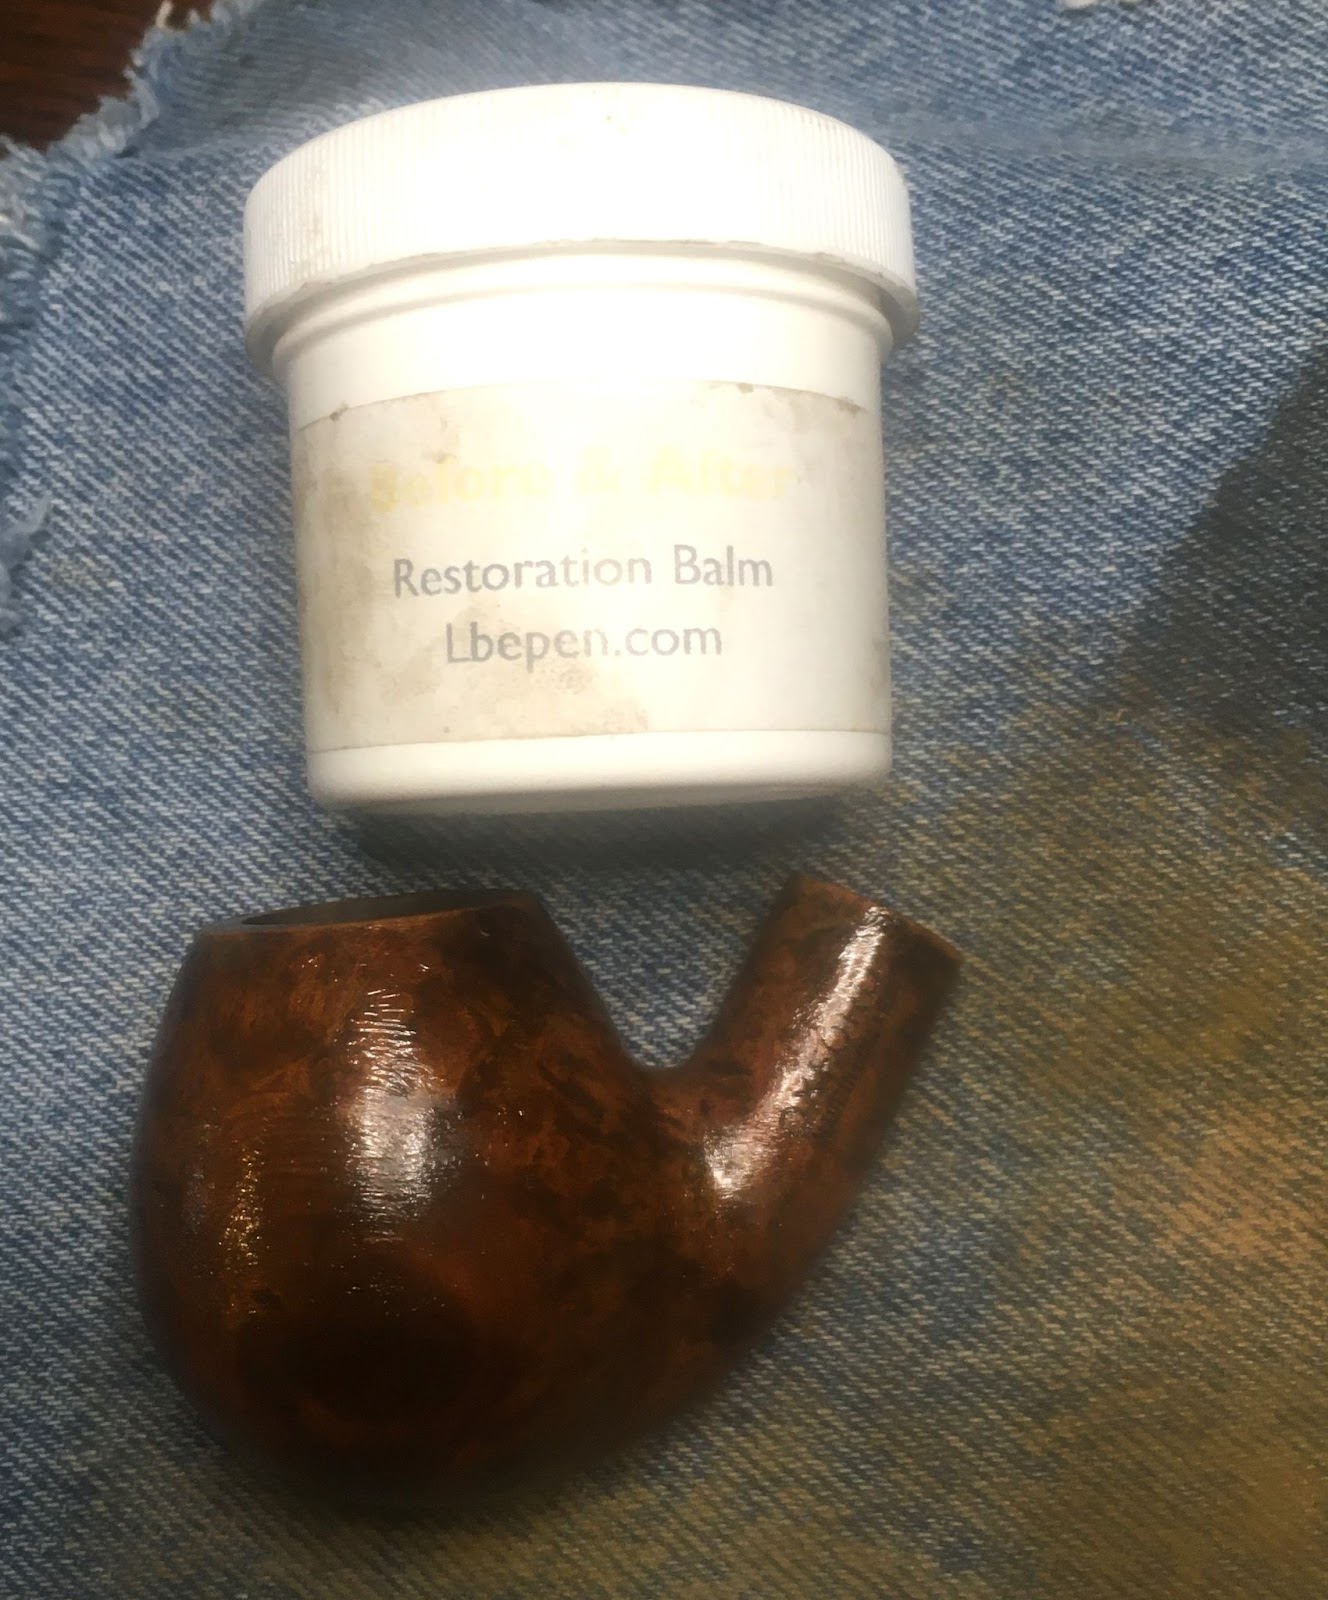


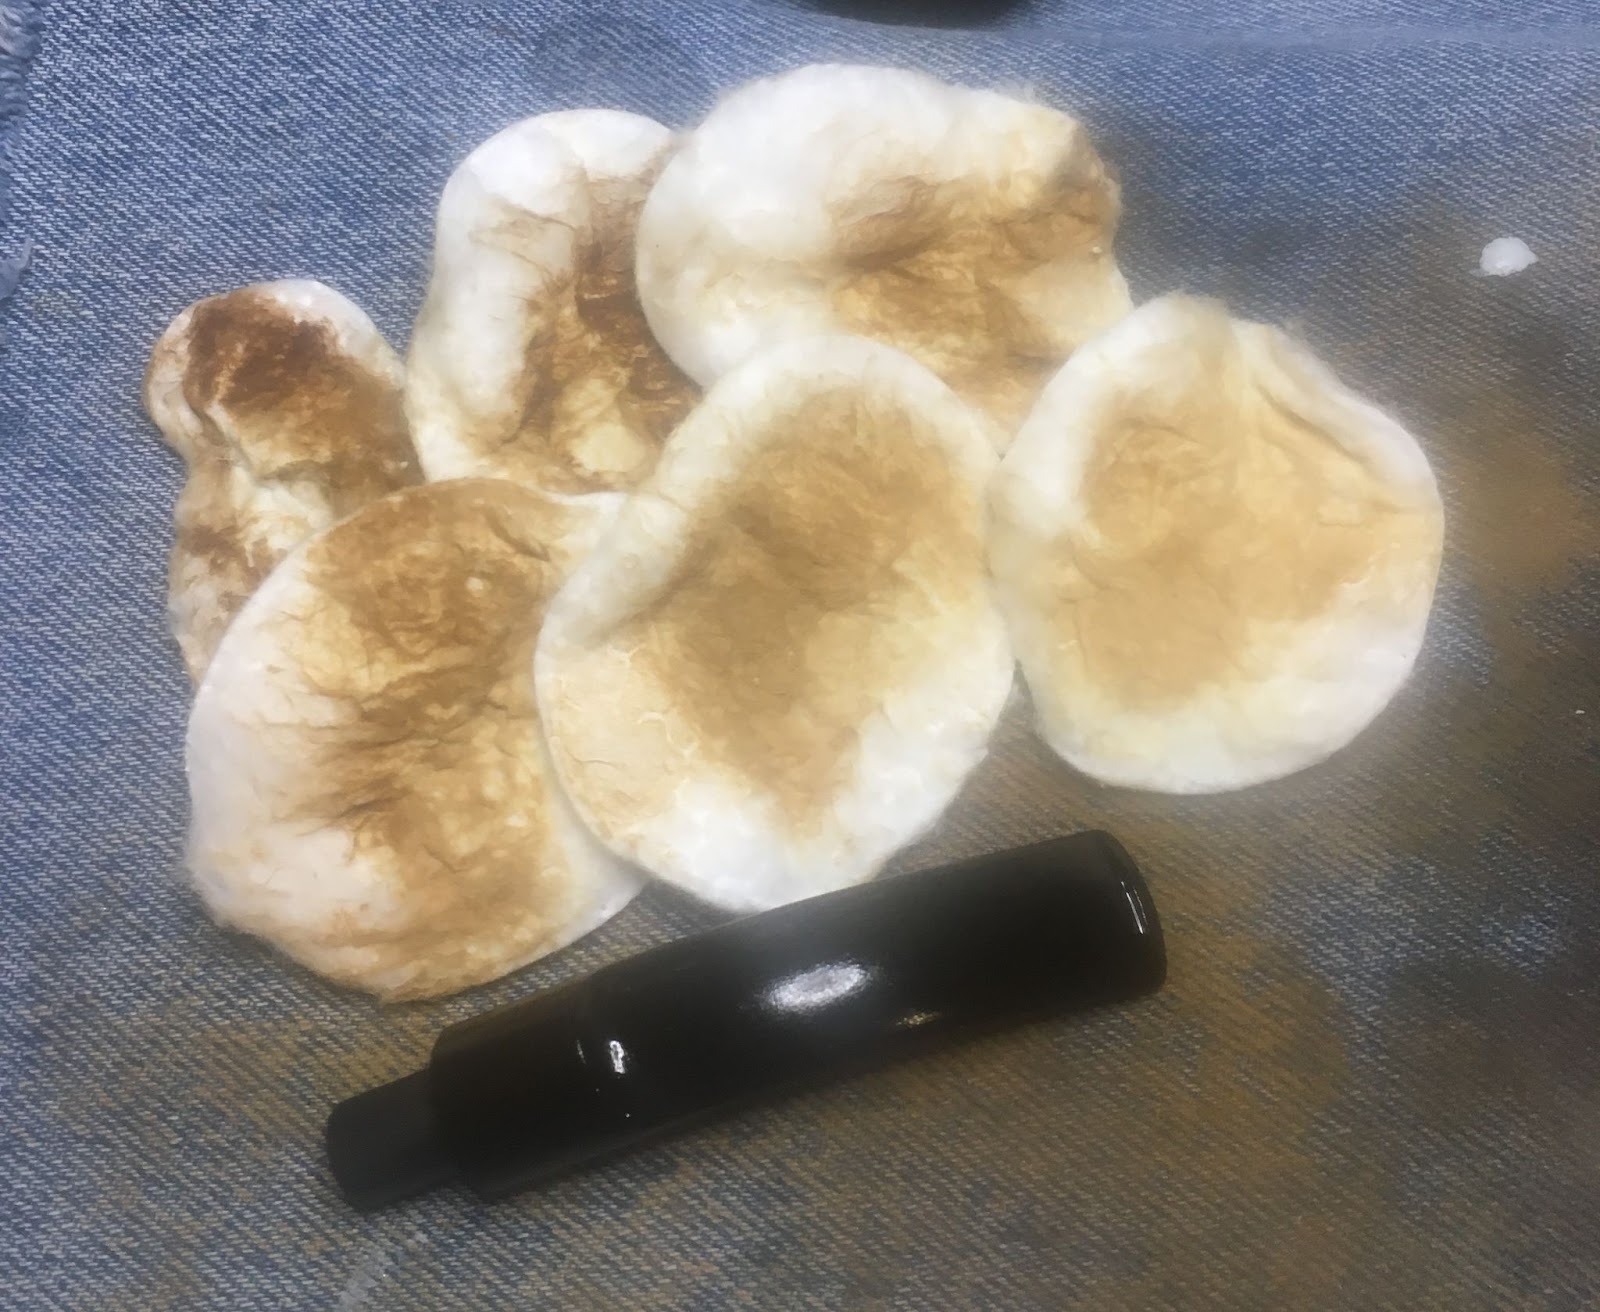


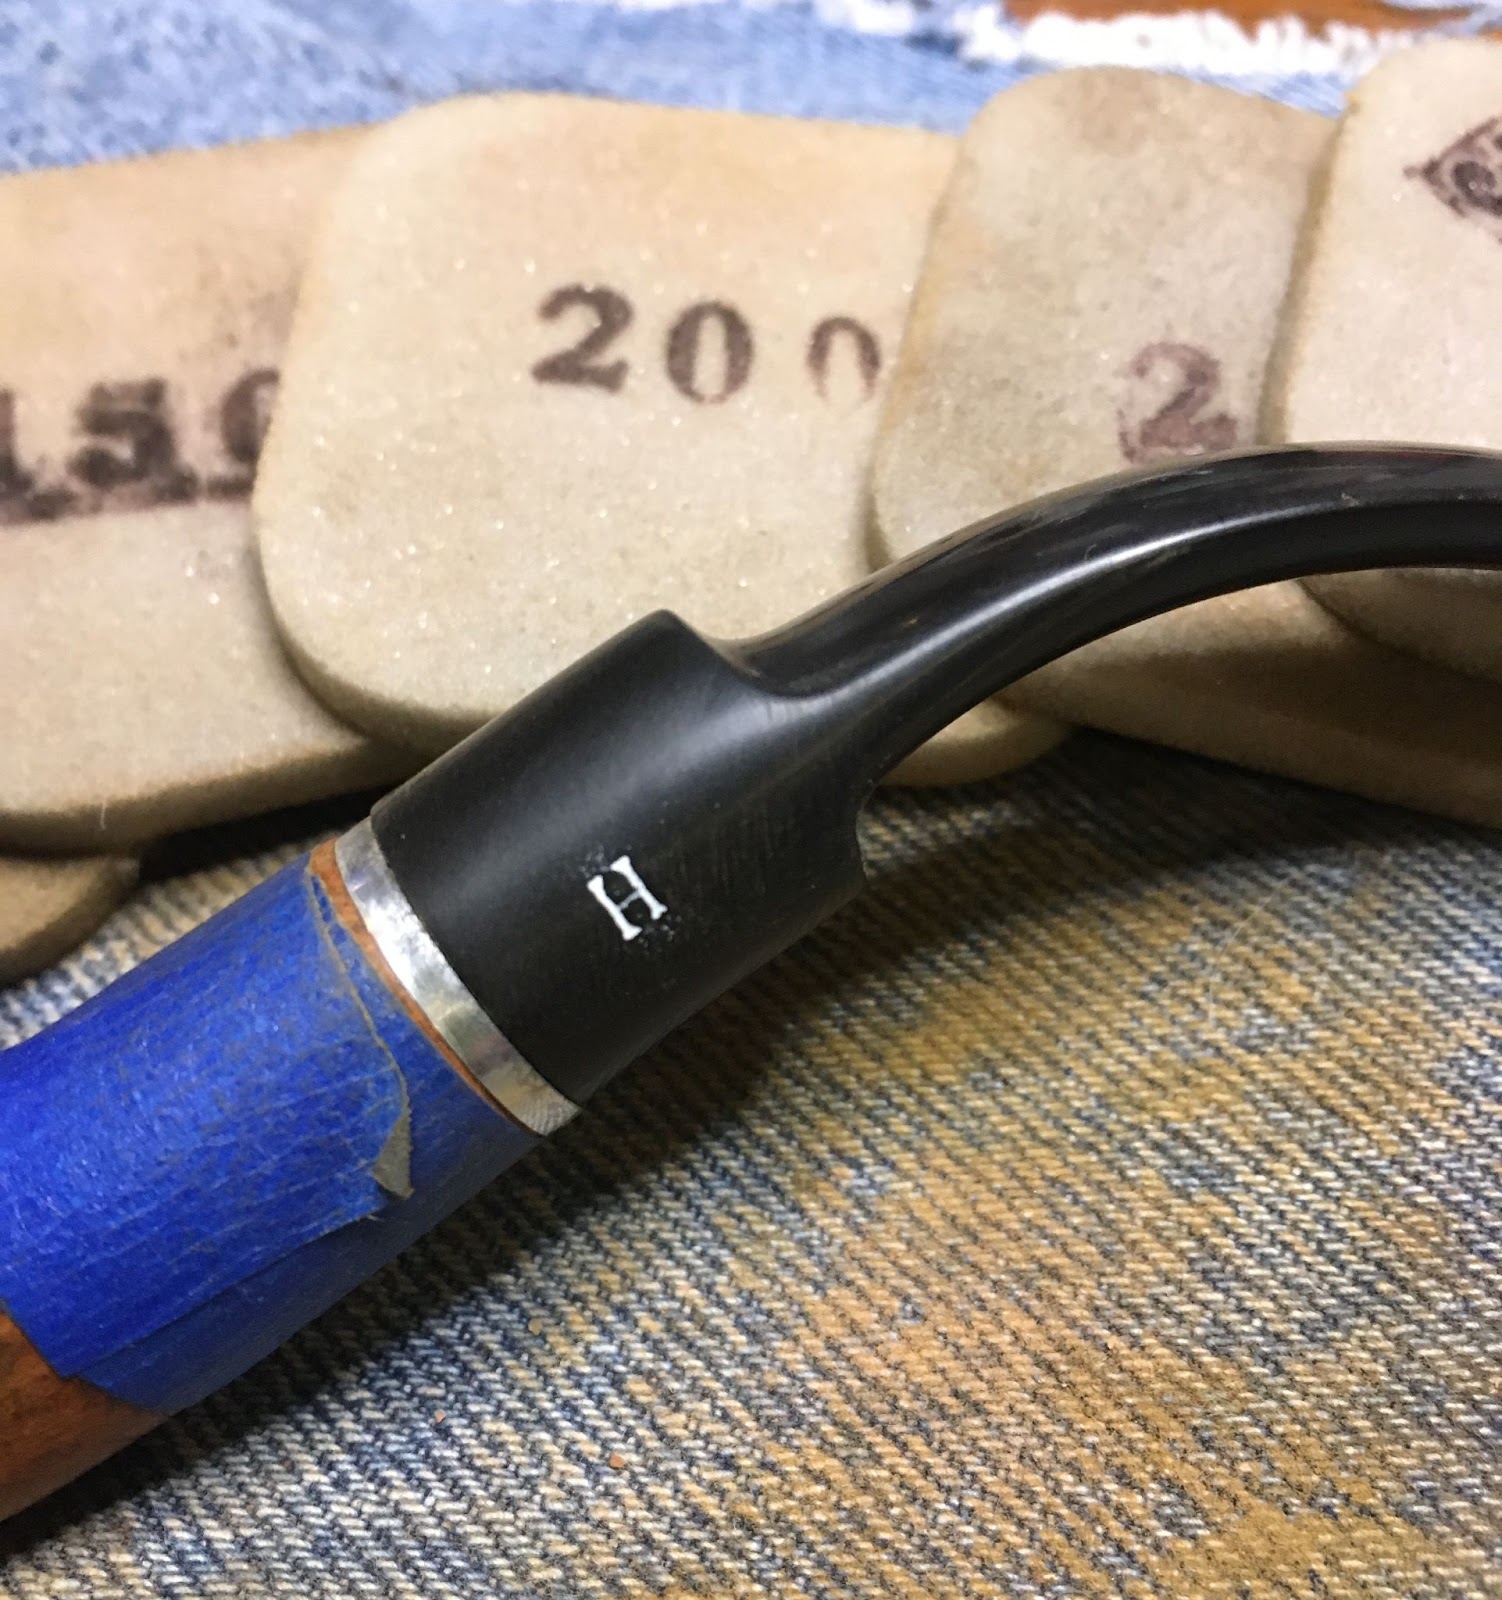


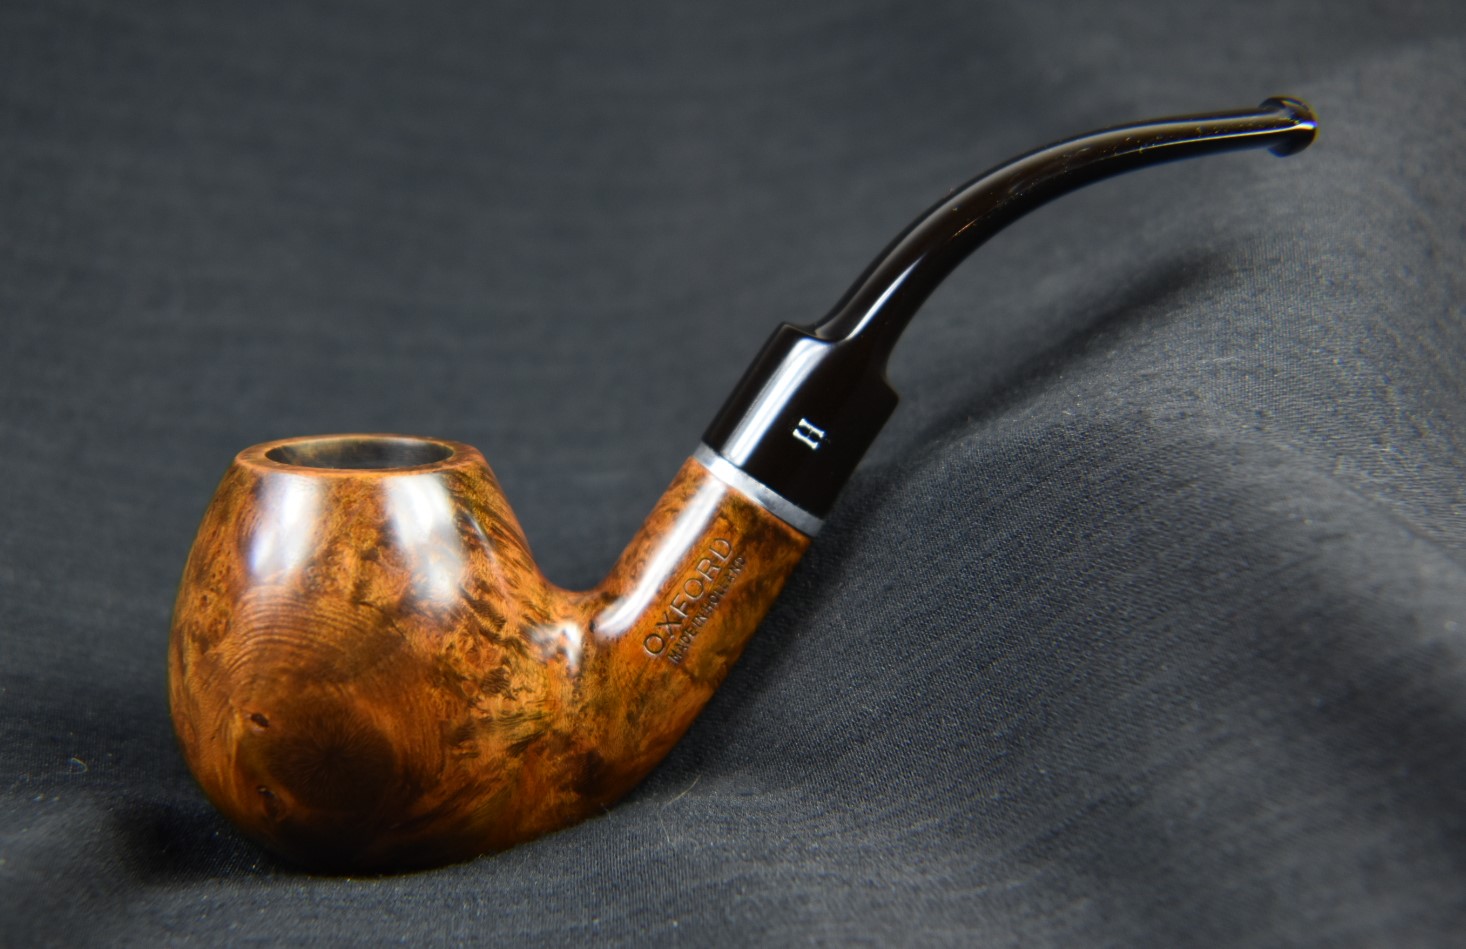
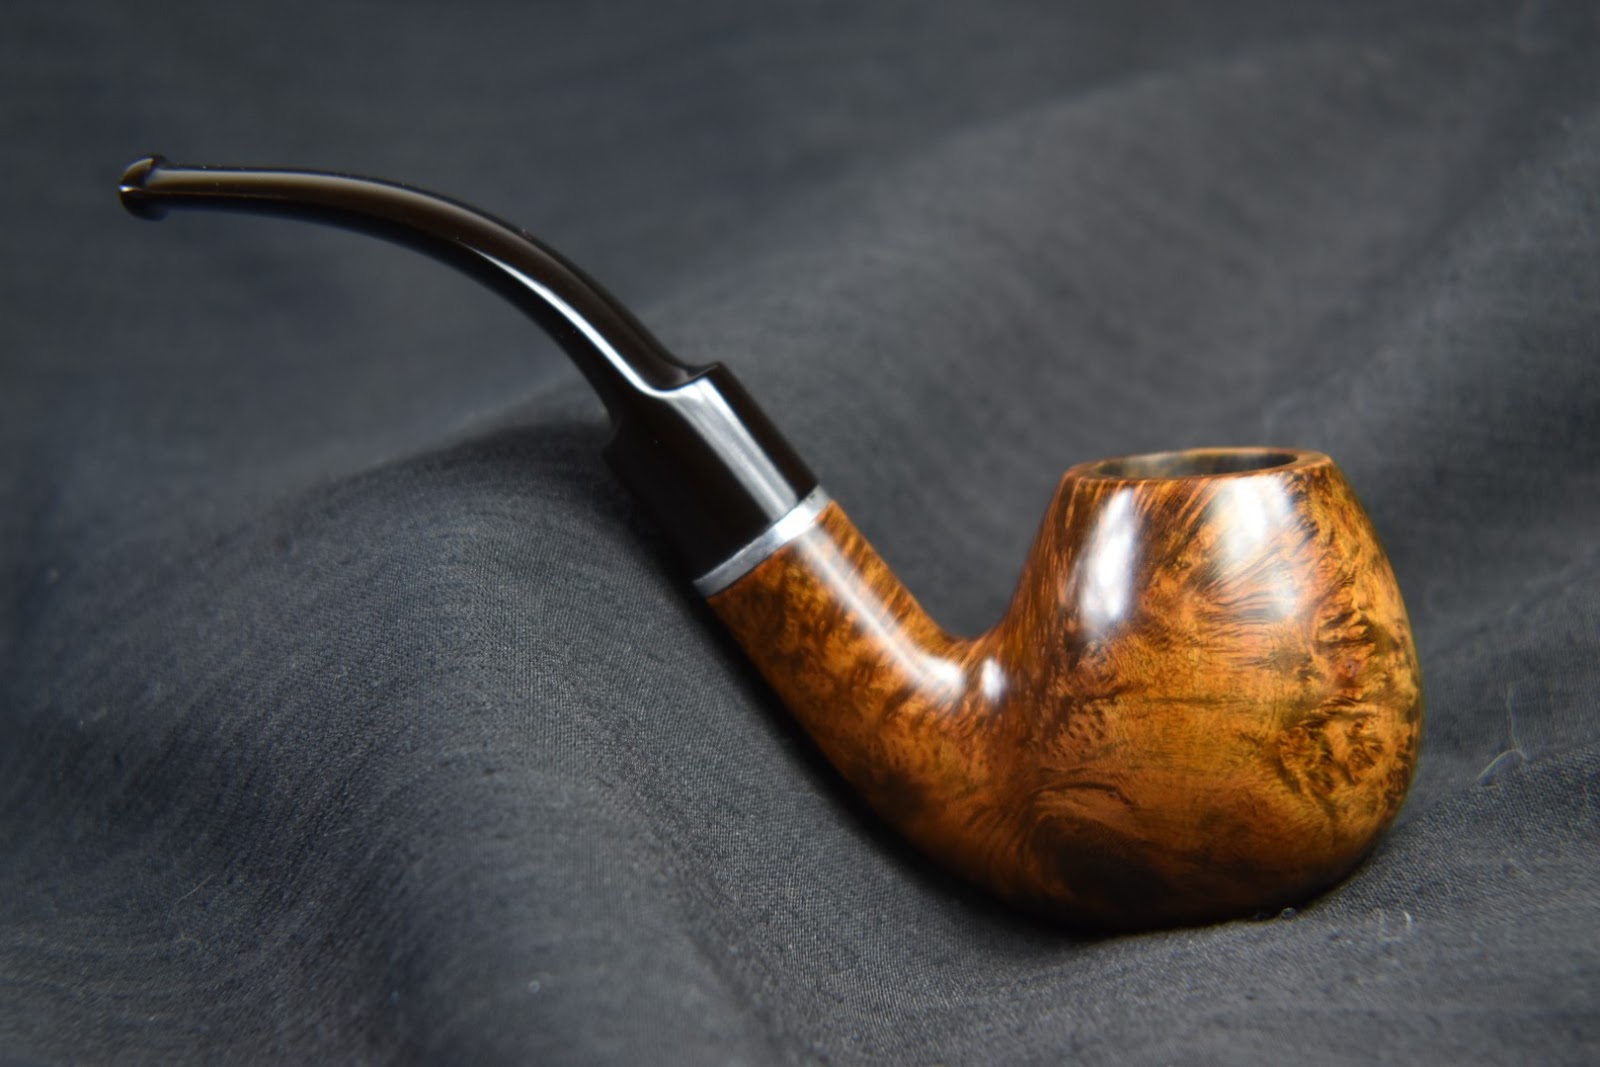


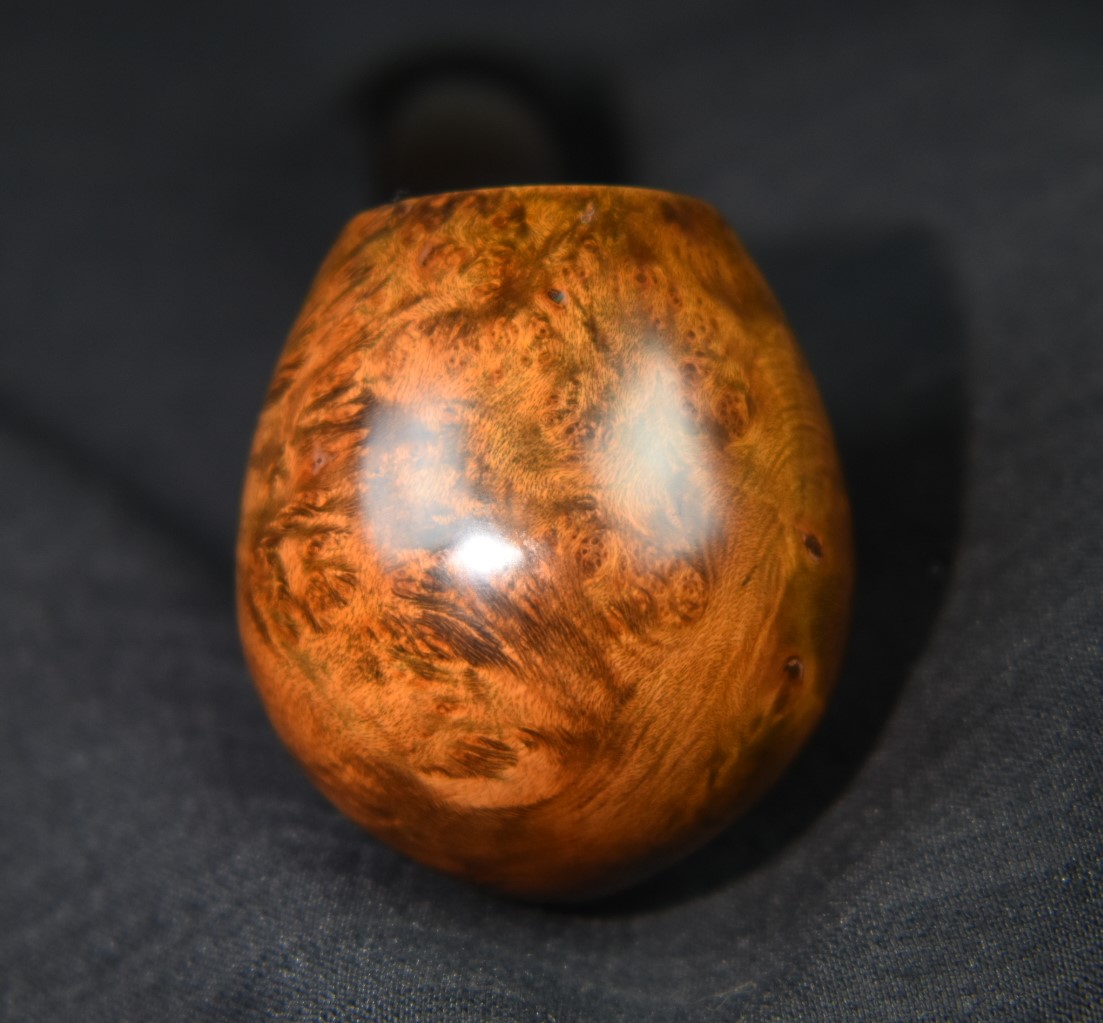


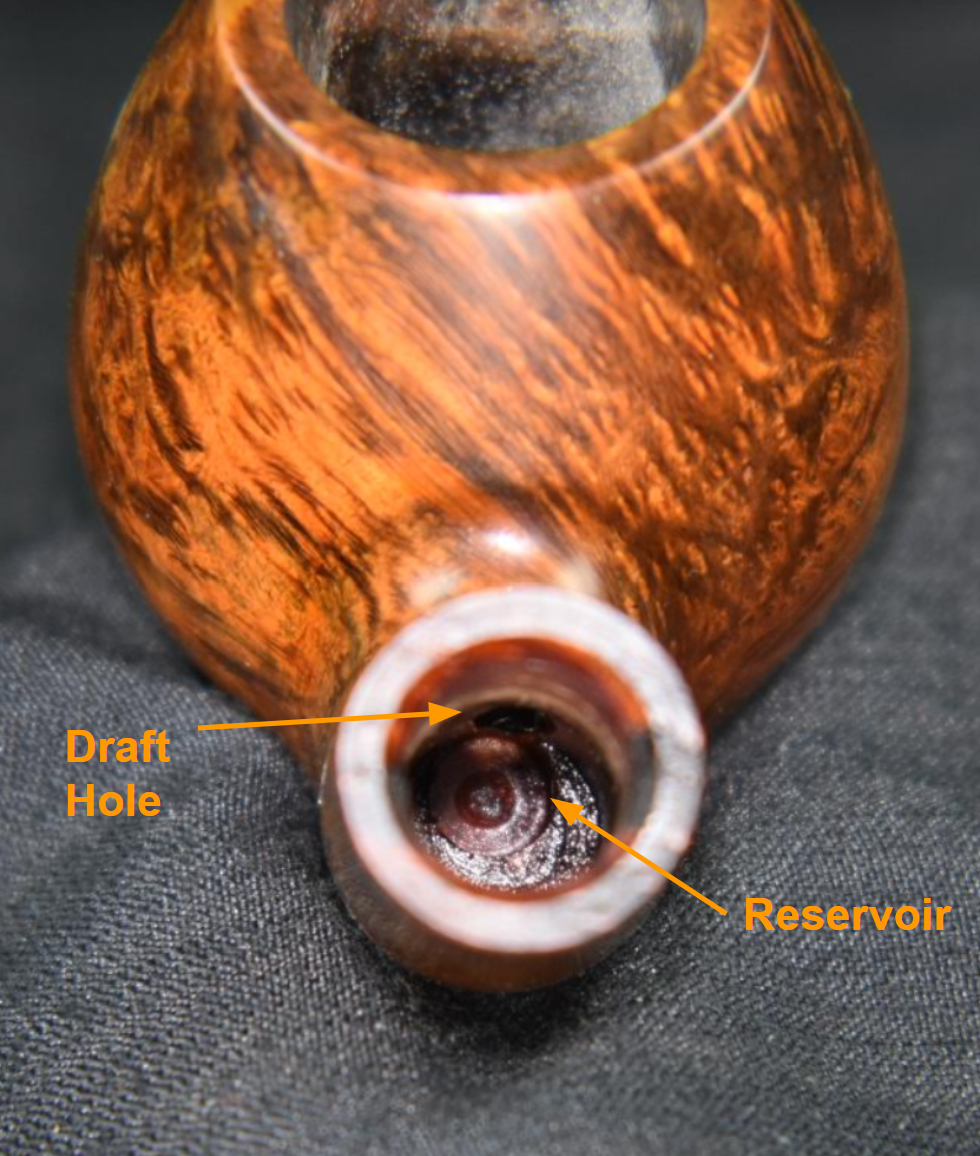


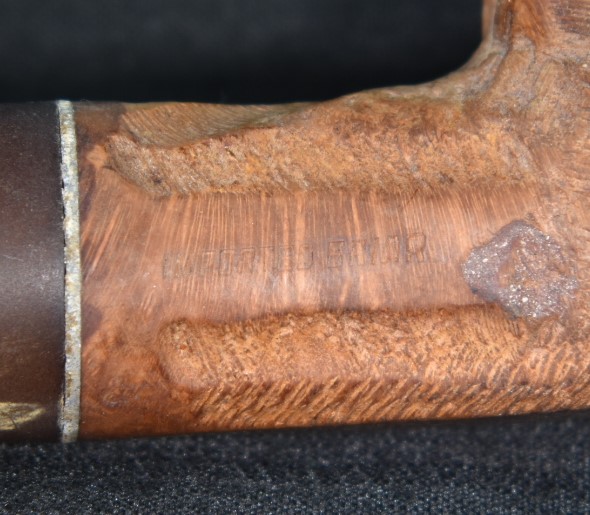
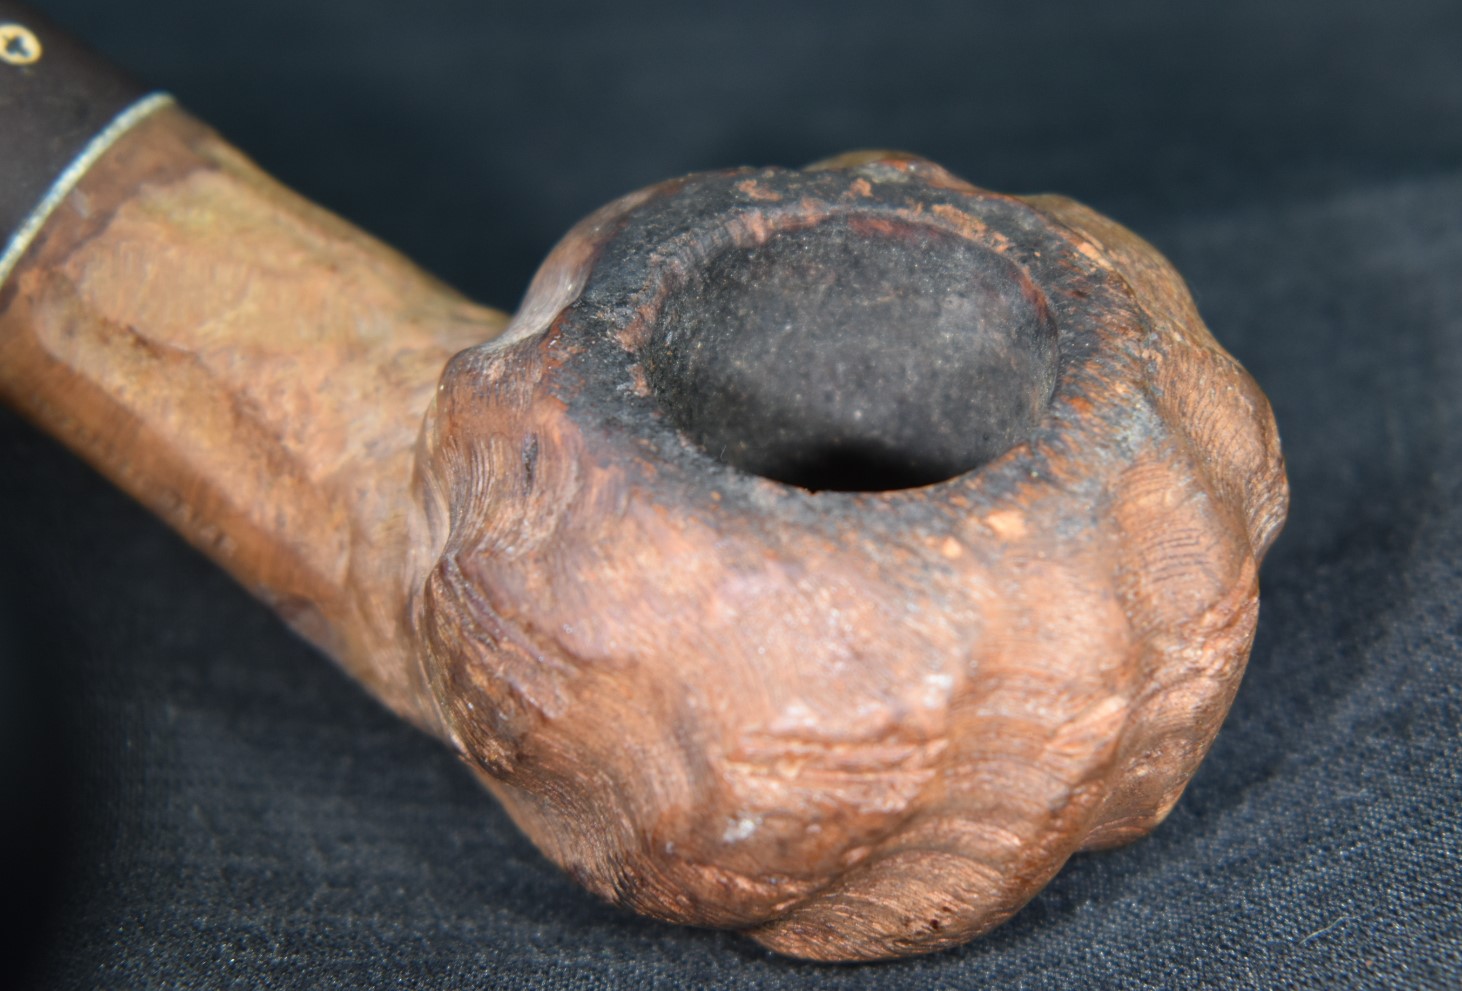


 (
(


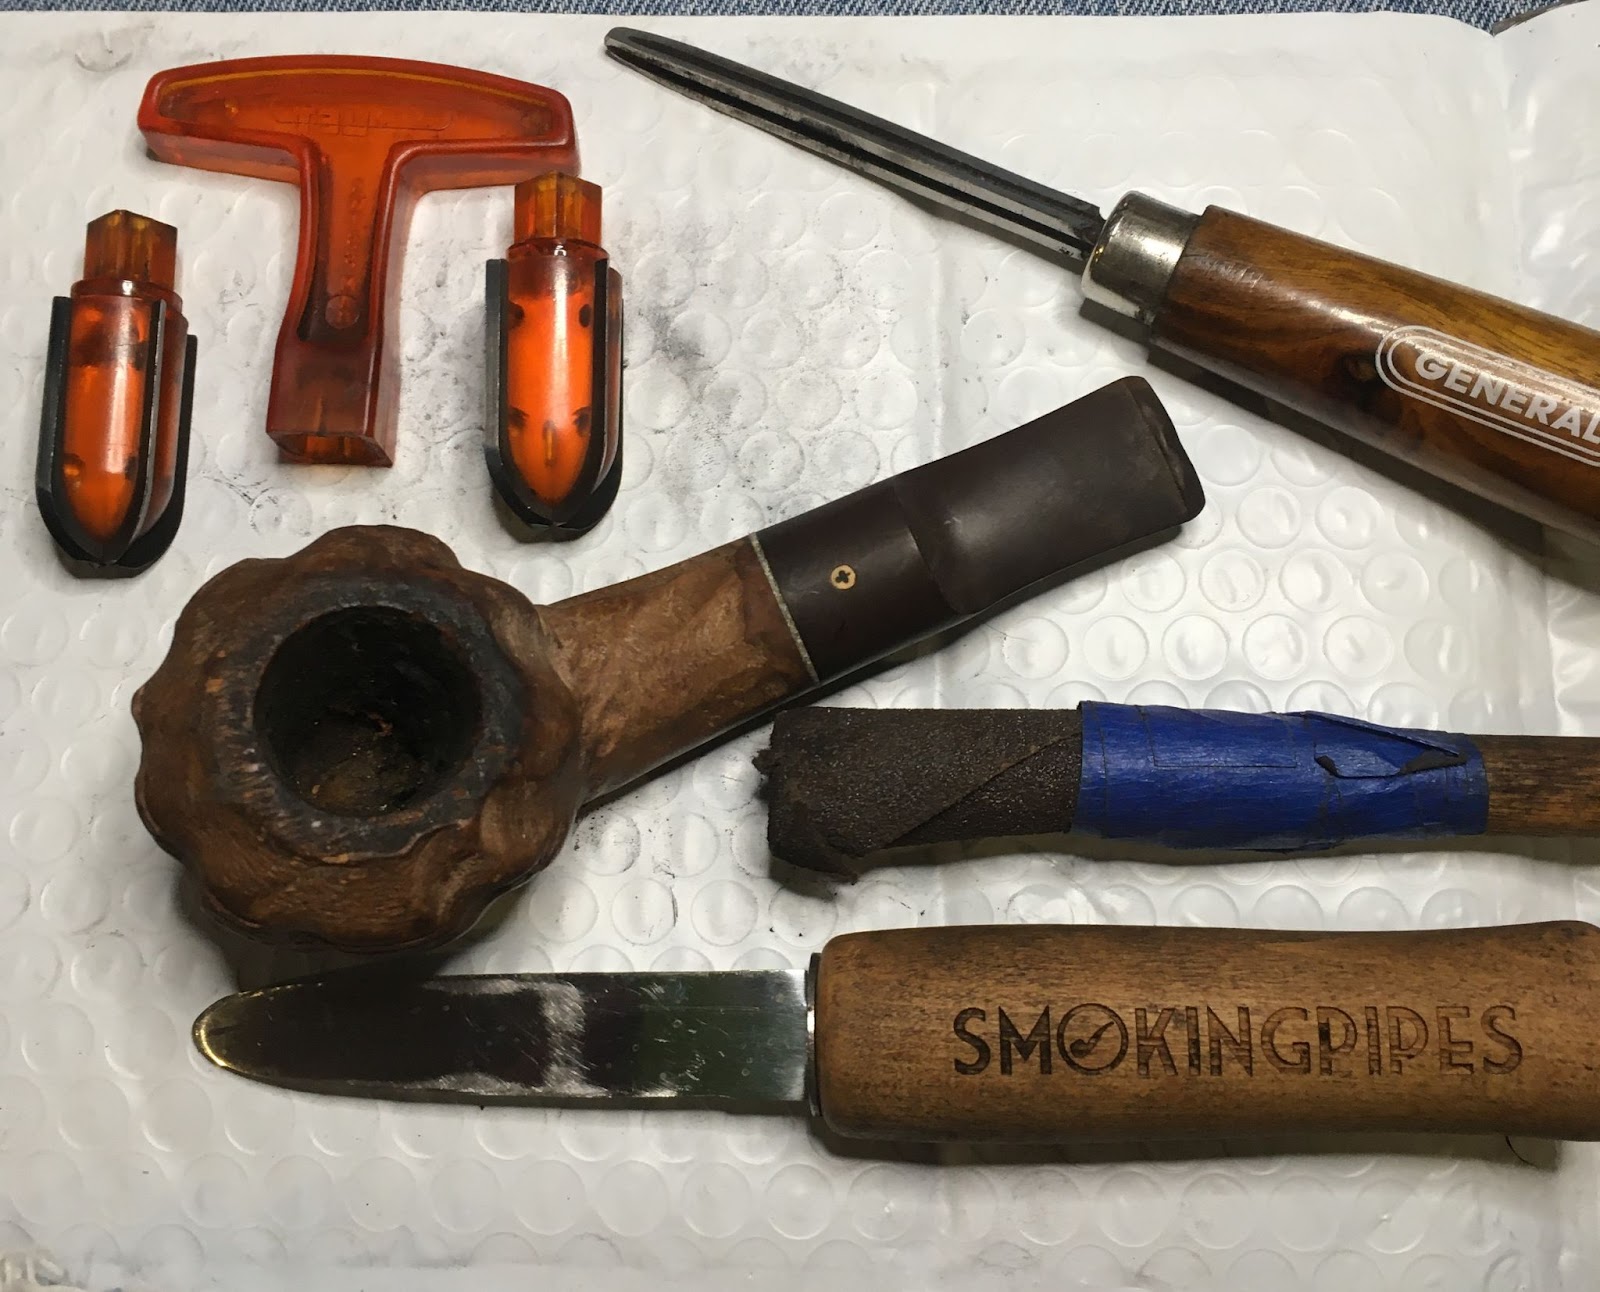


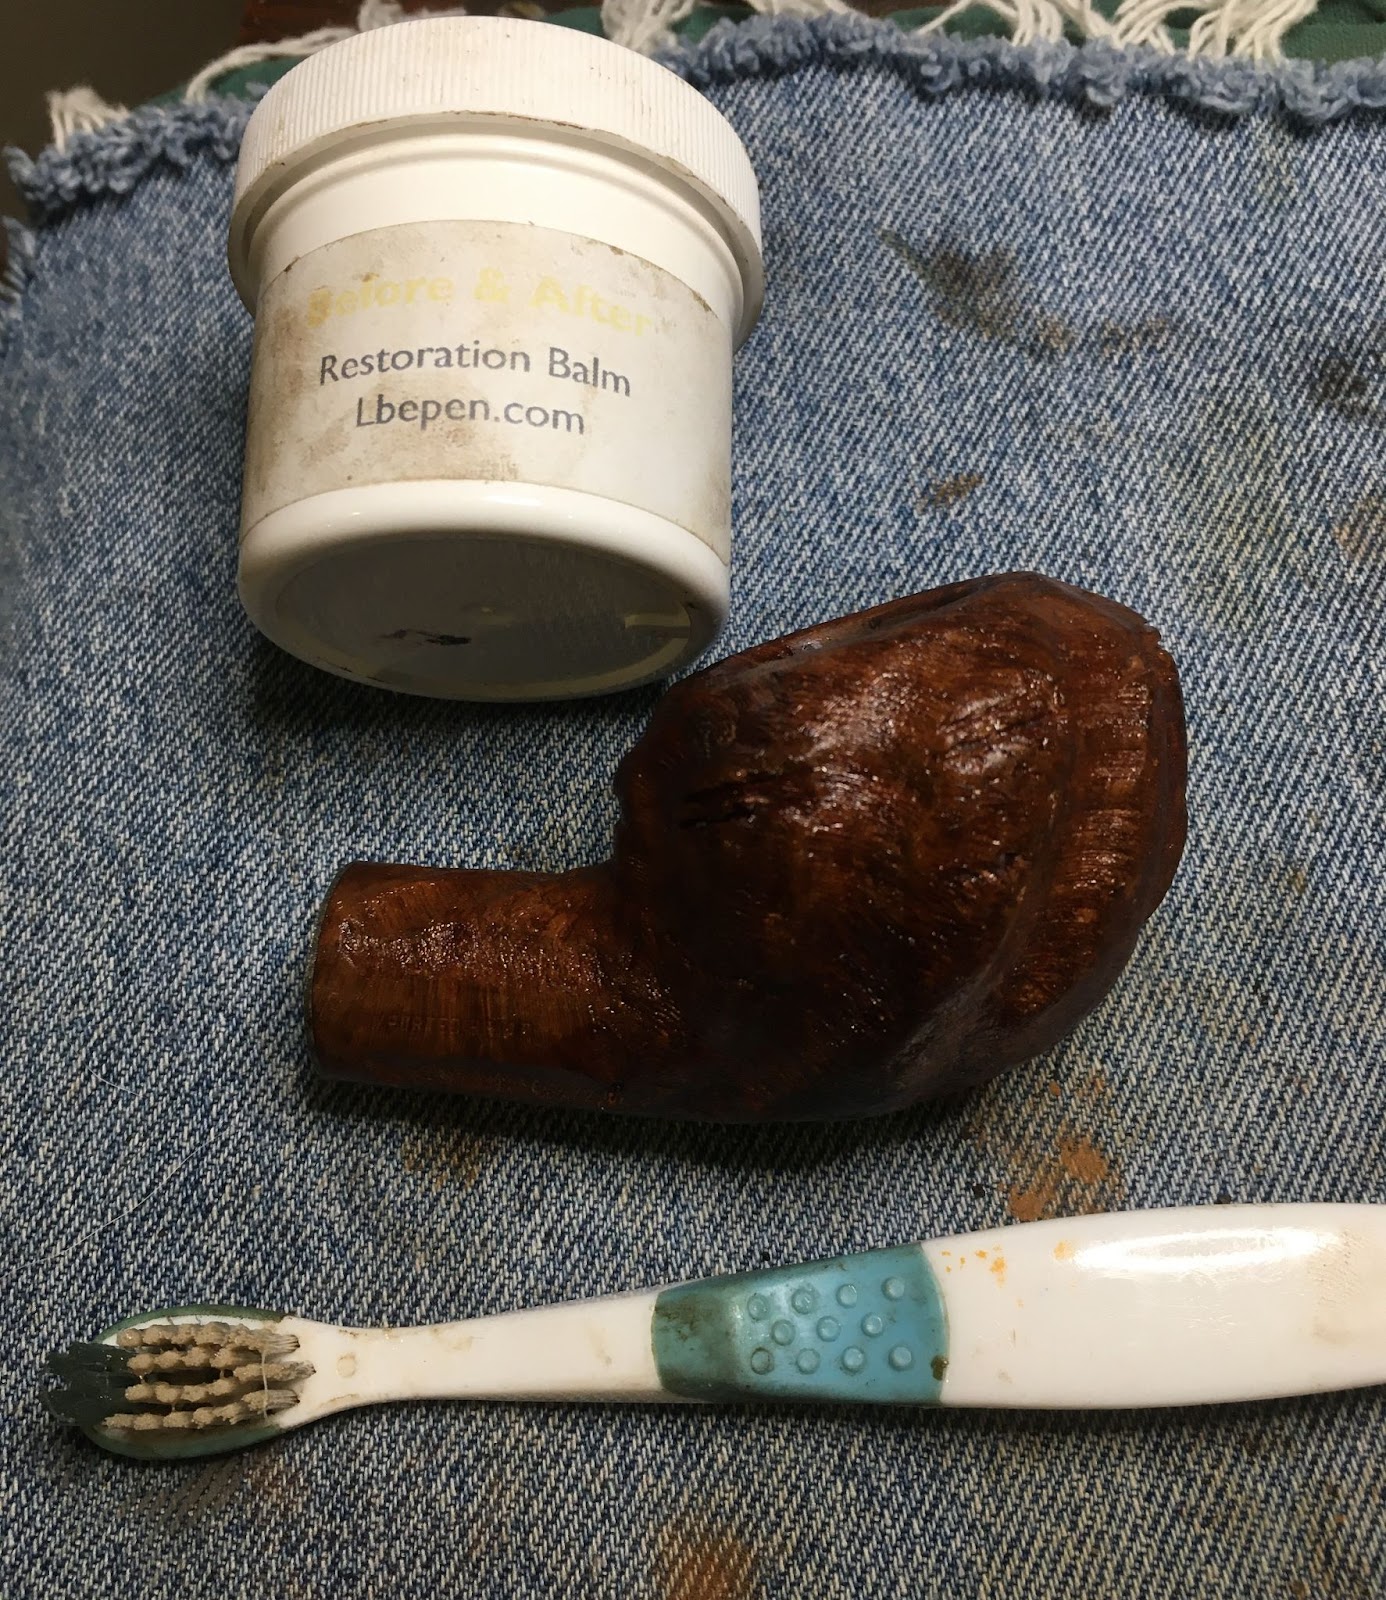


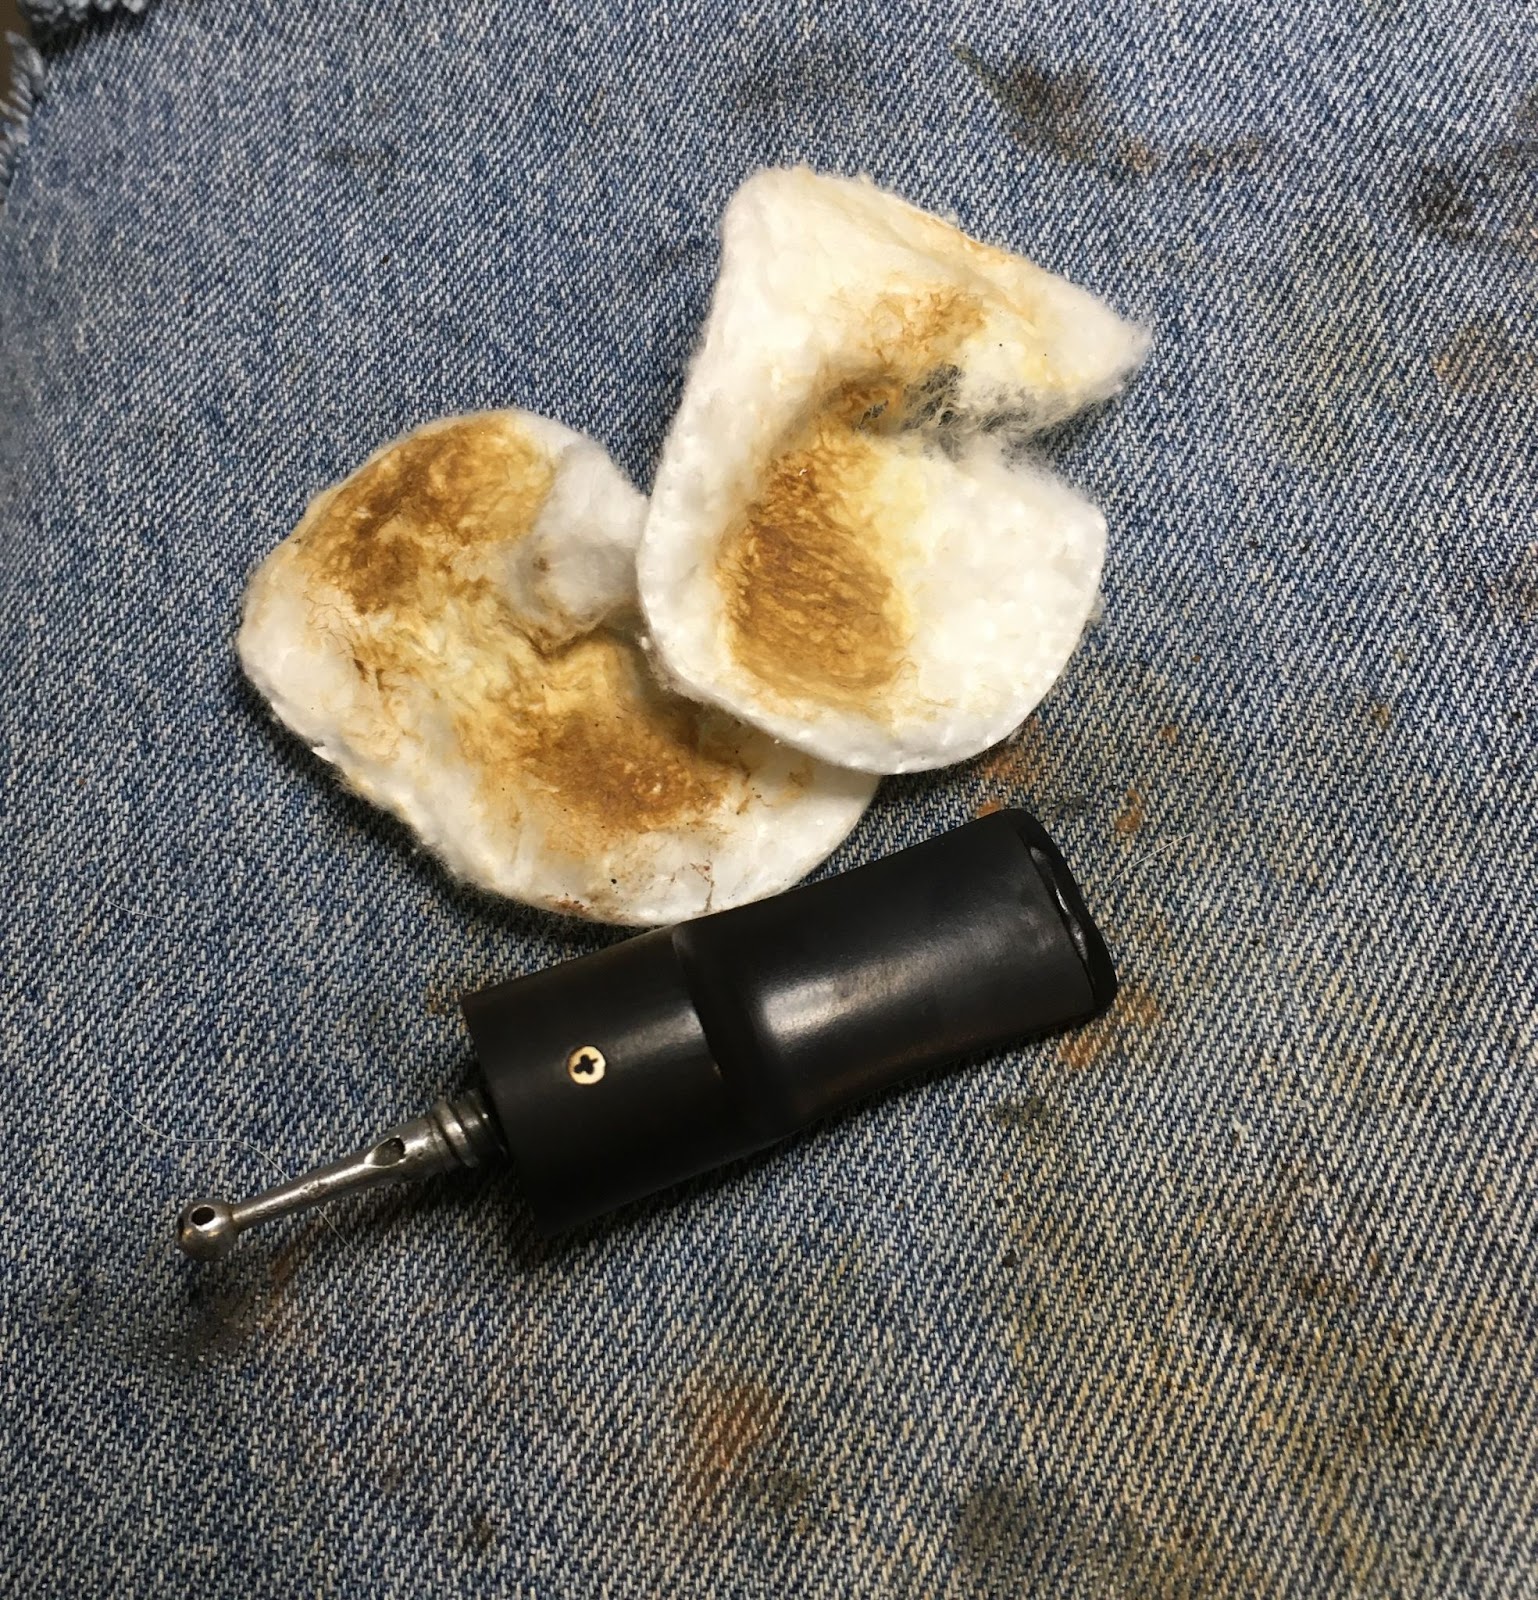


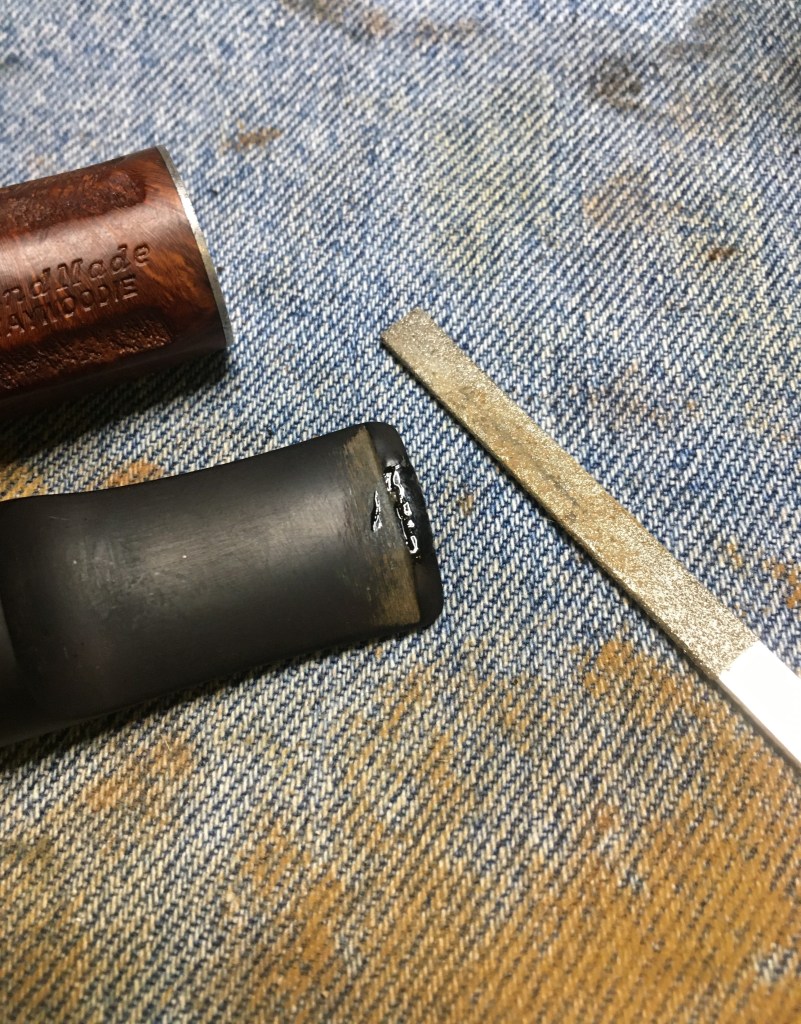


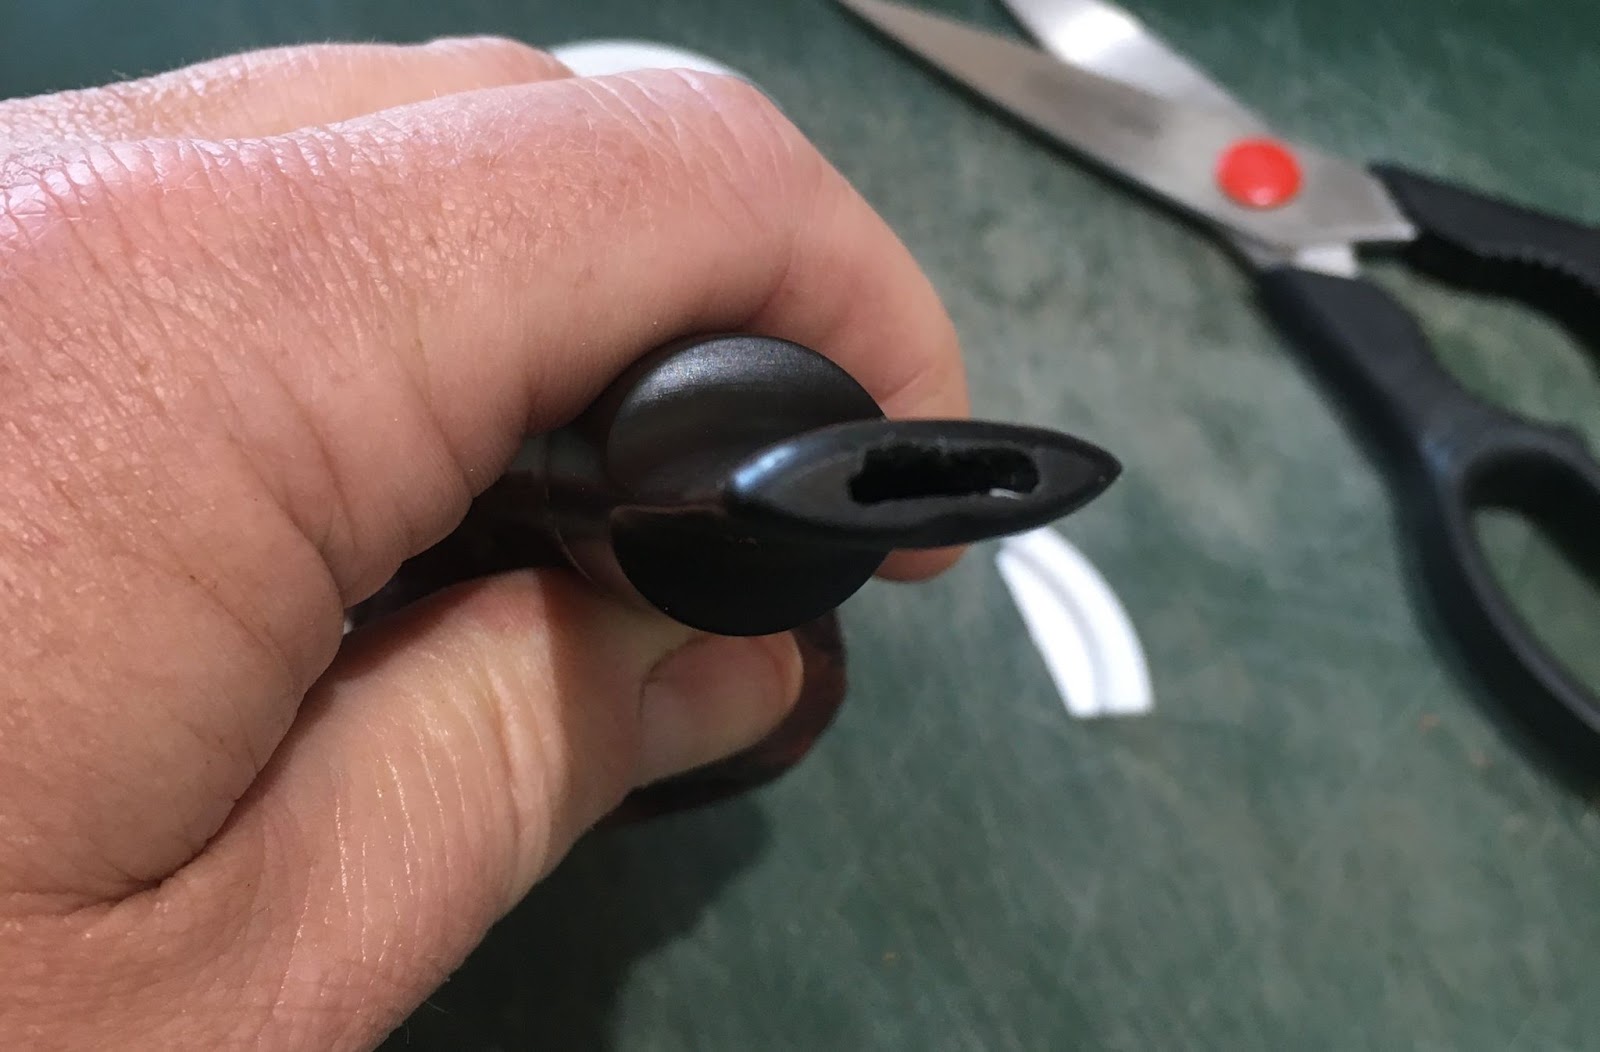

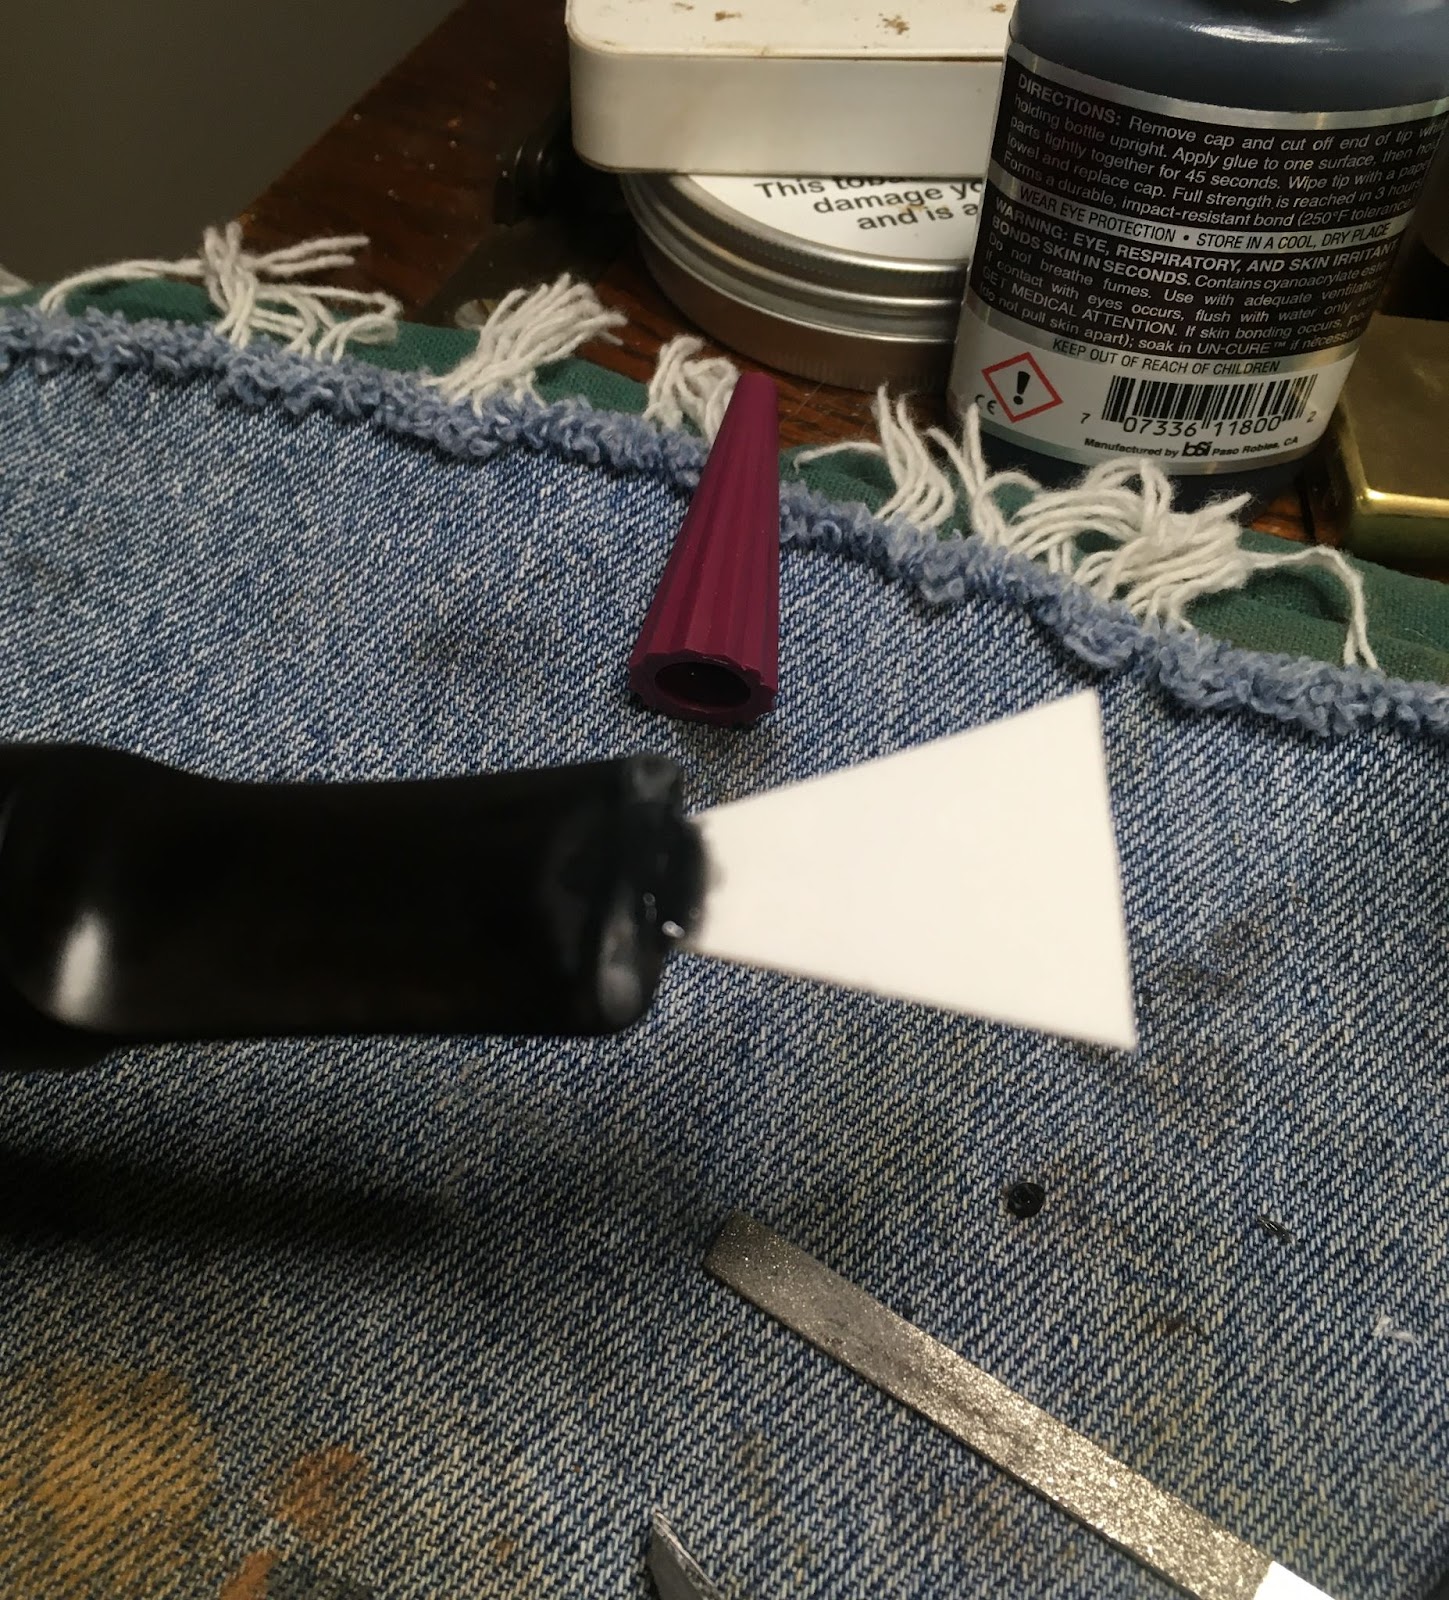


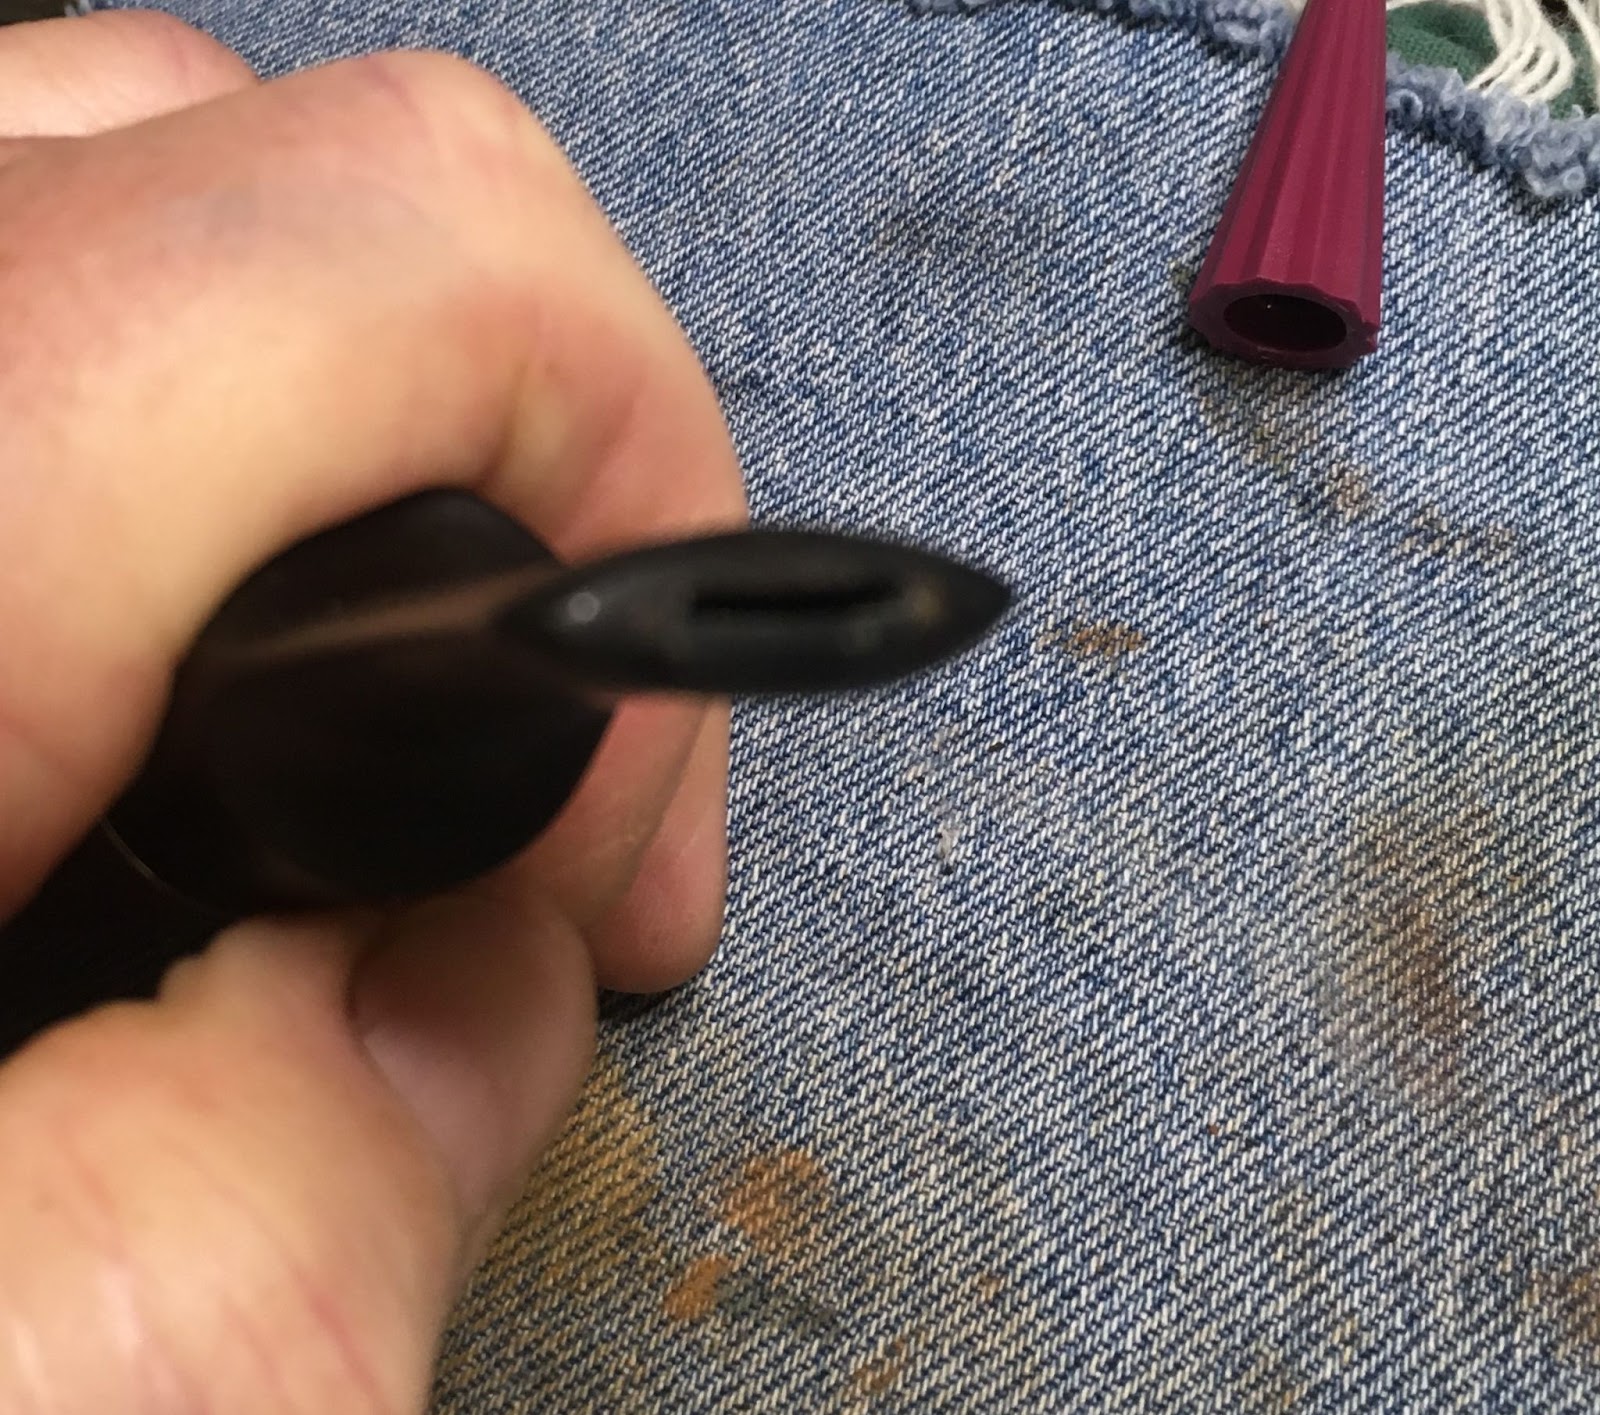

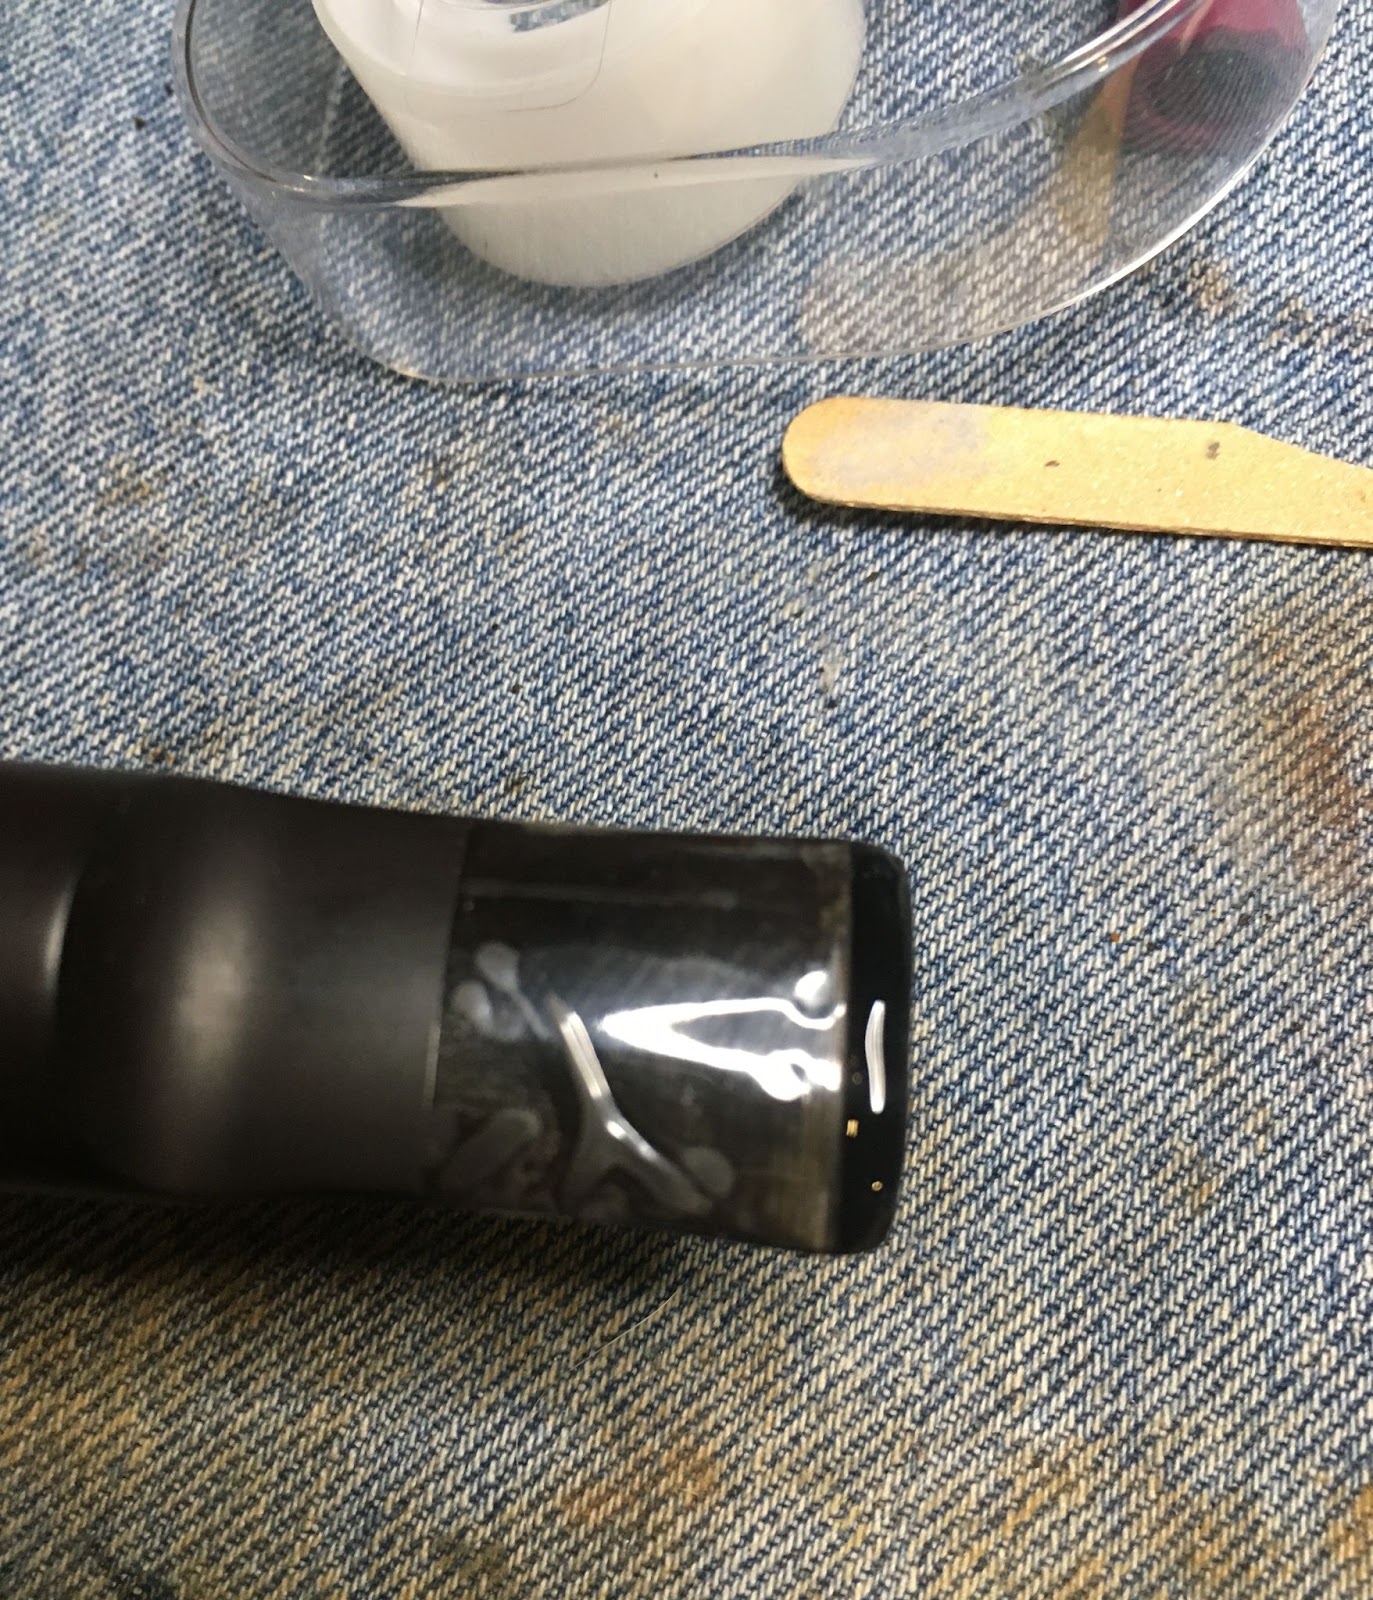
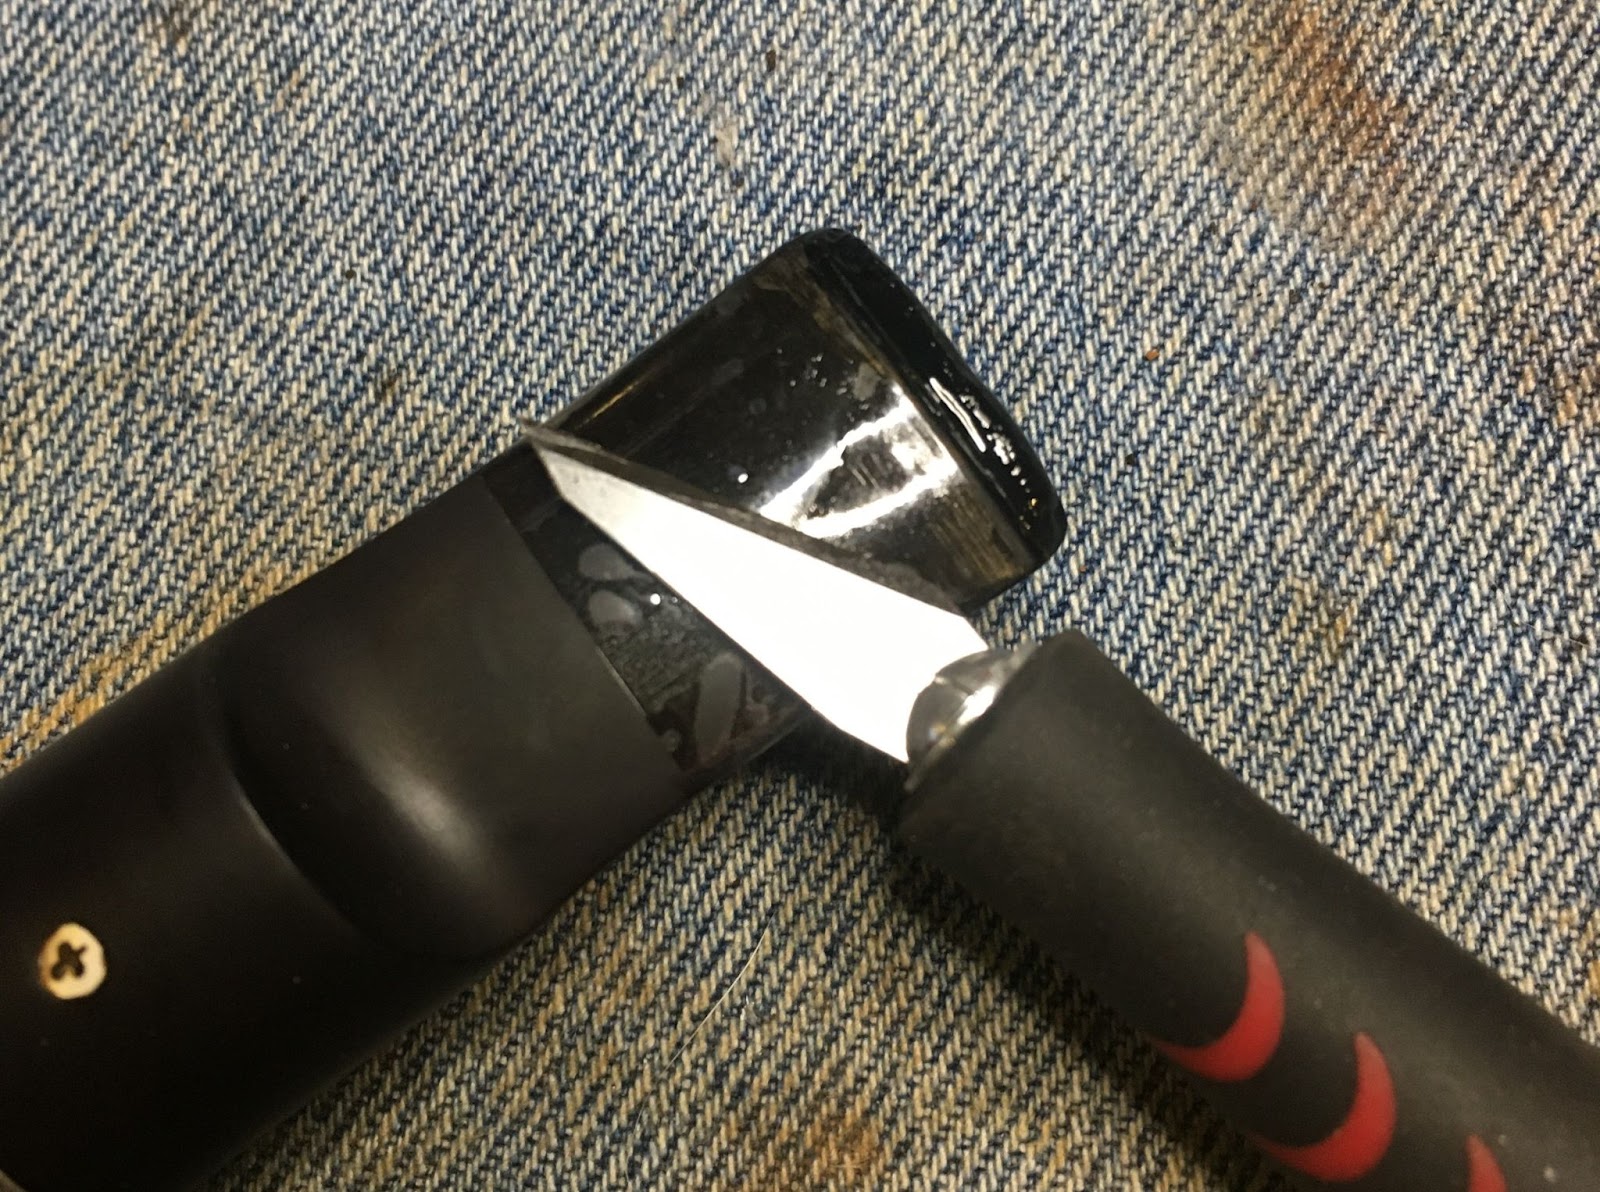

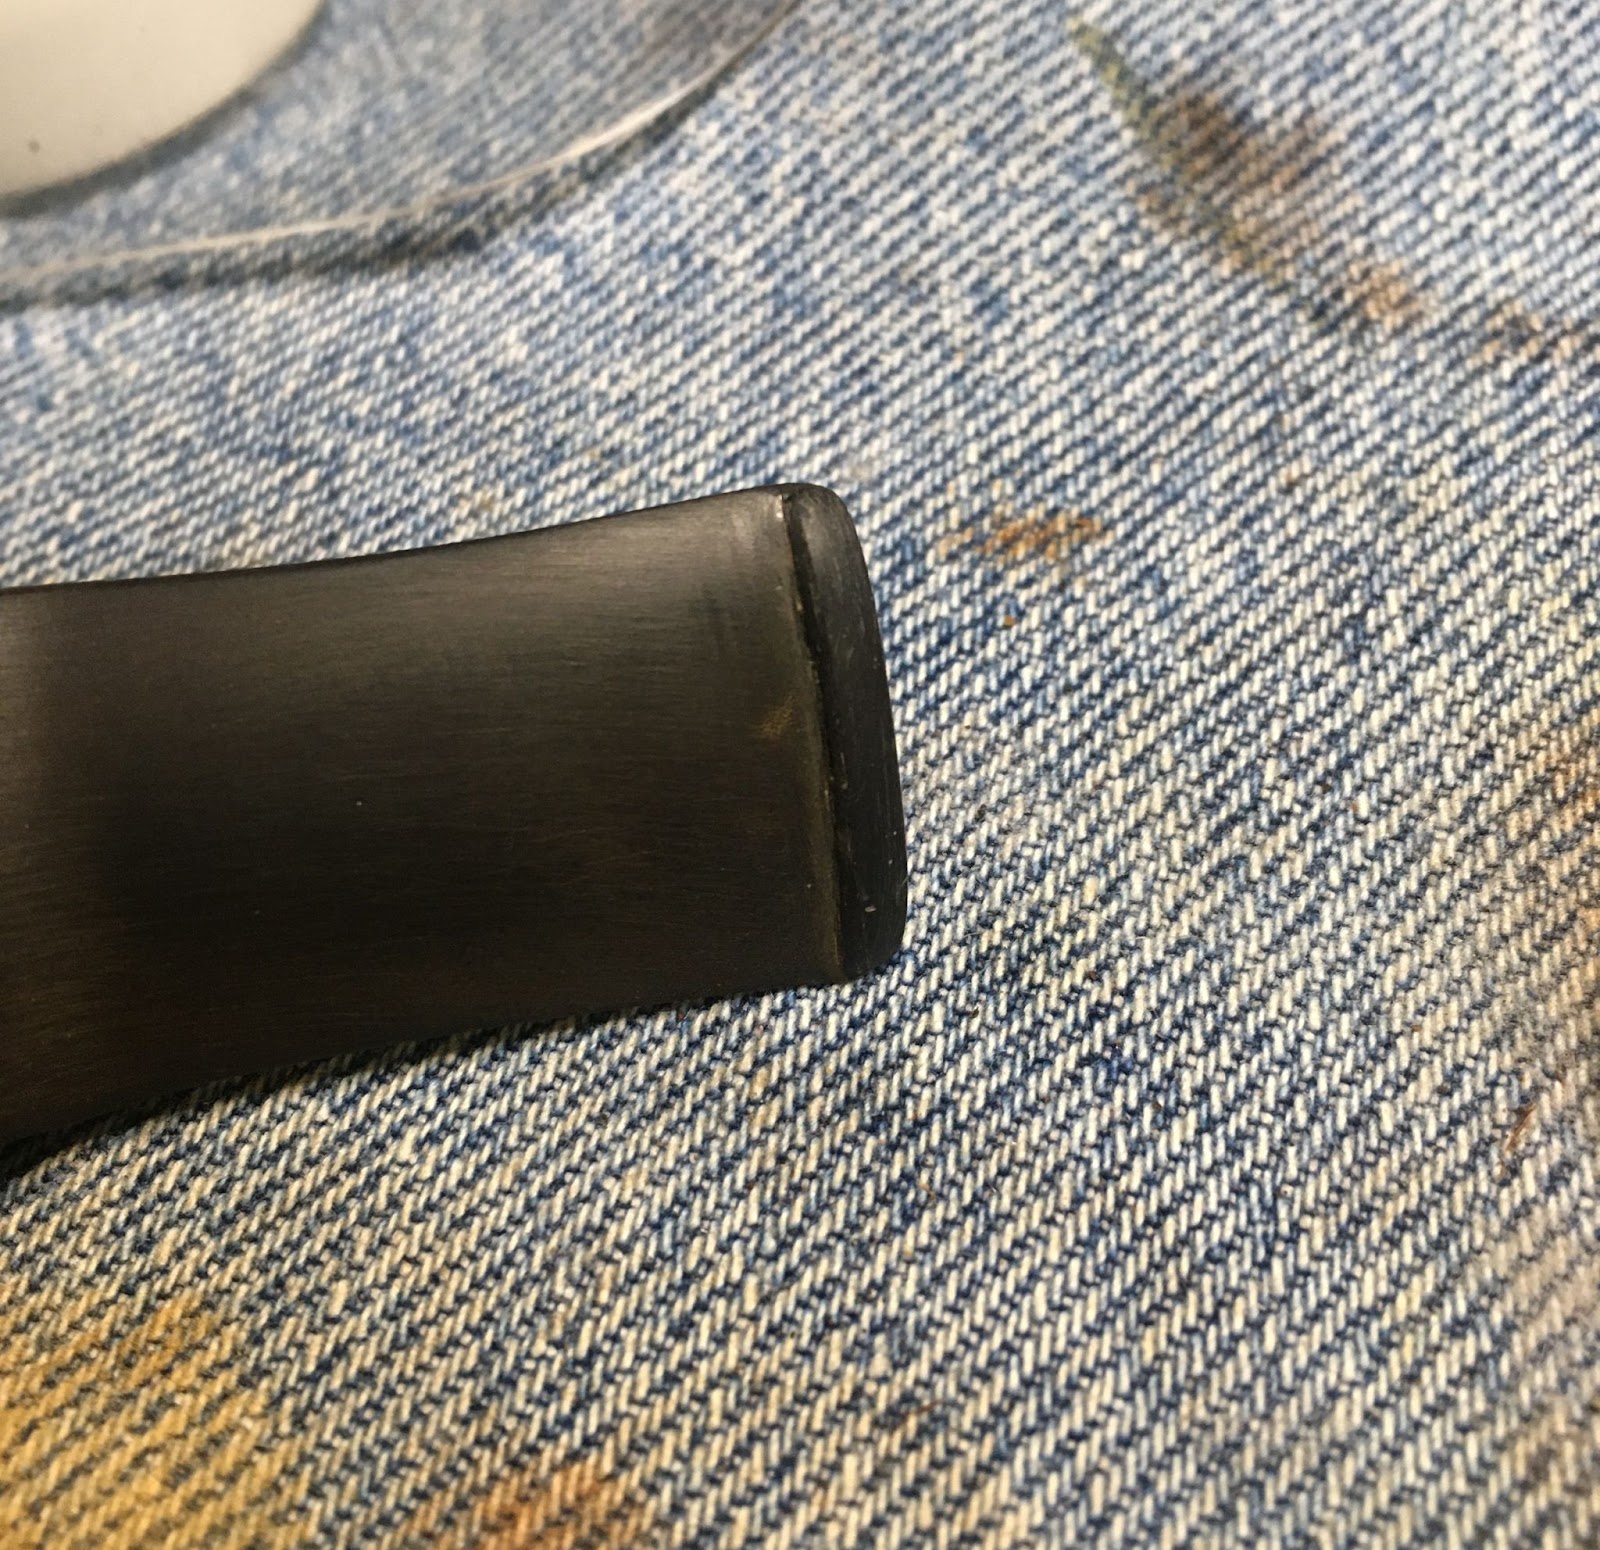


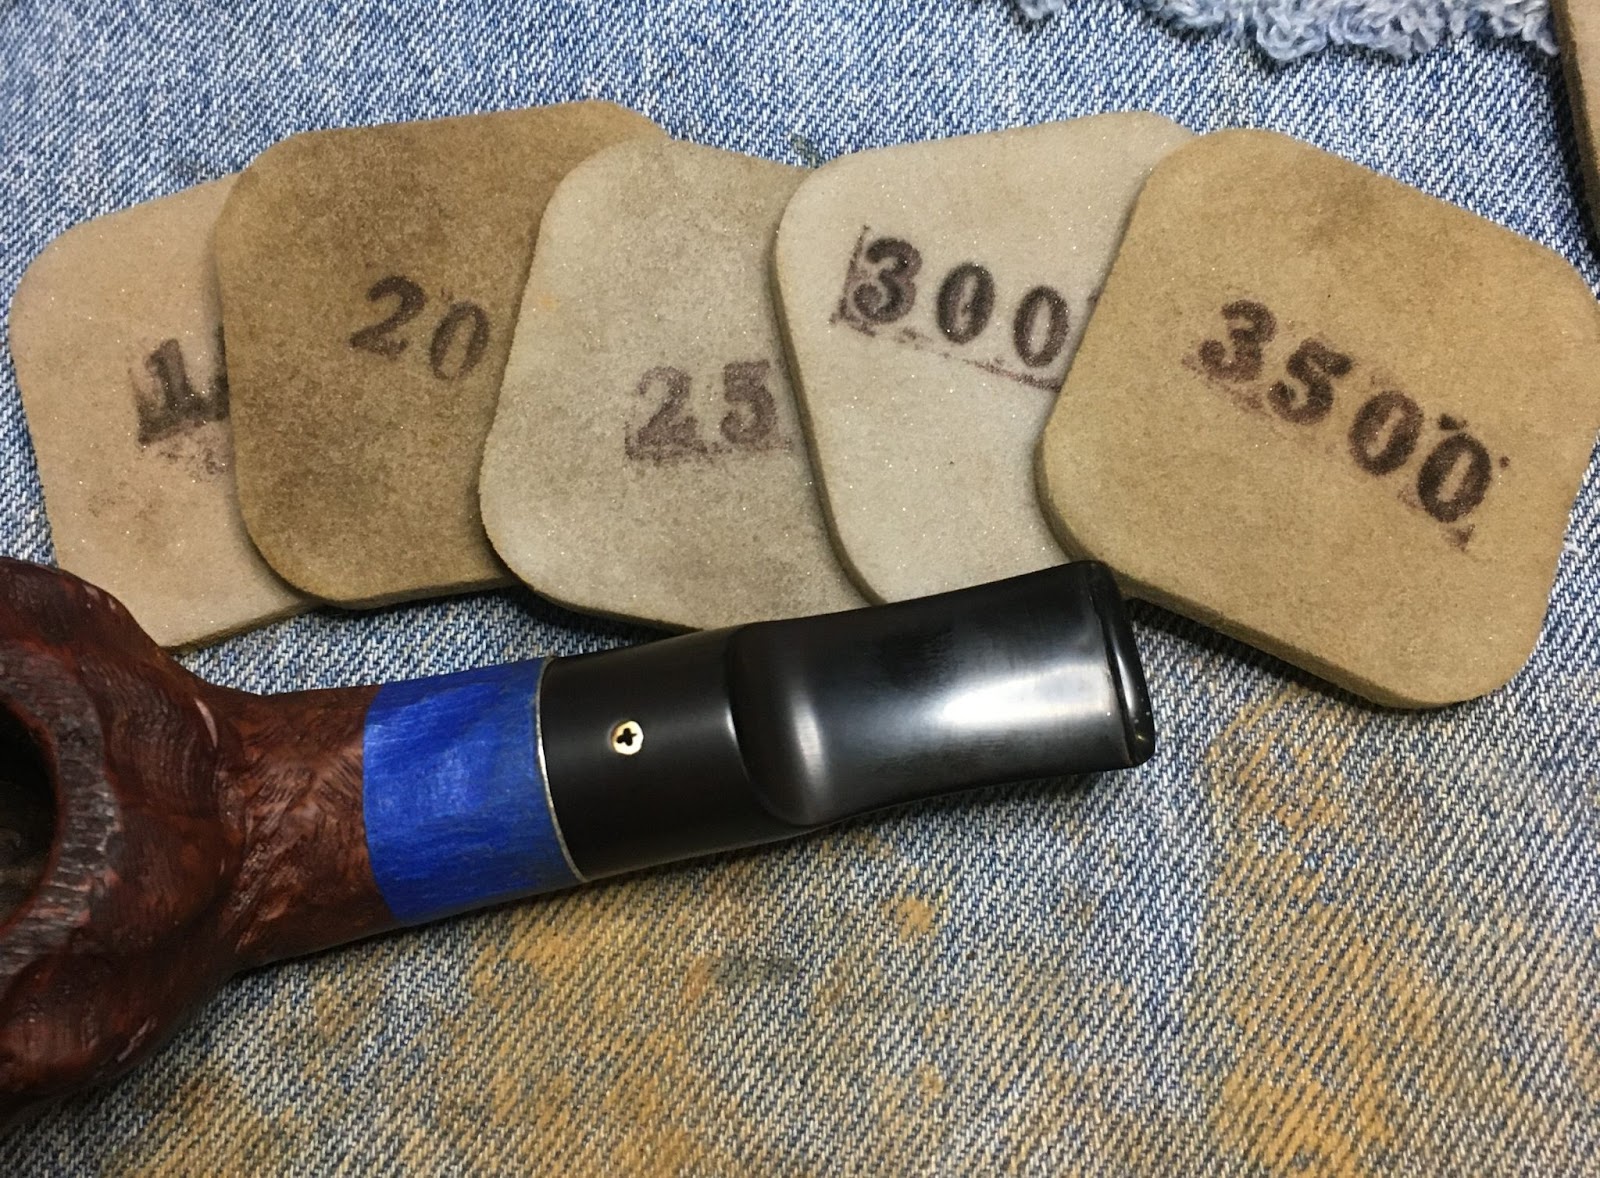

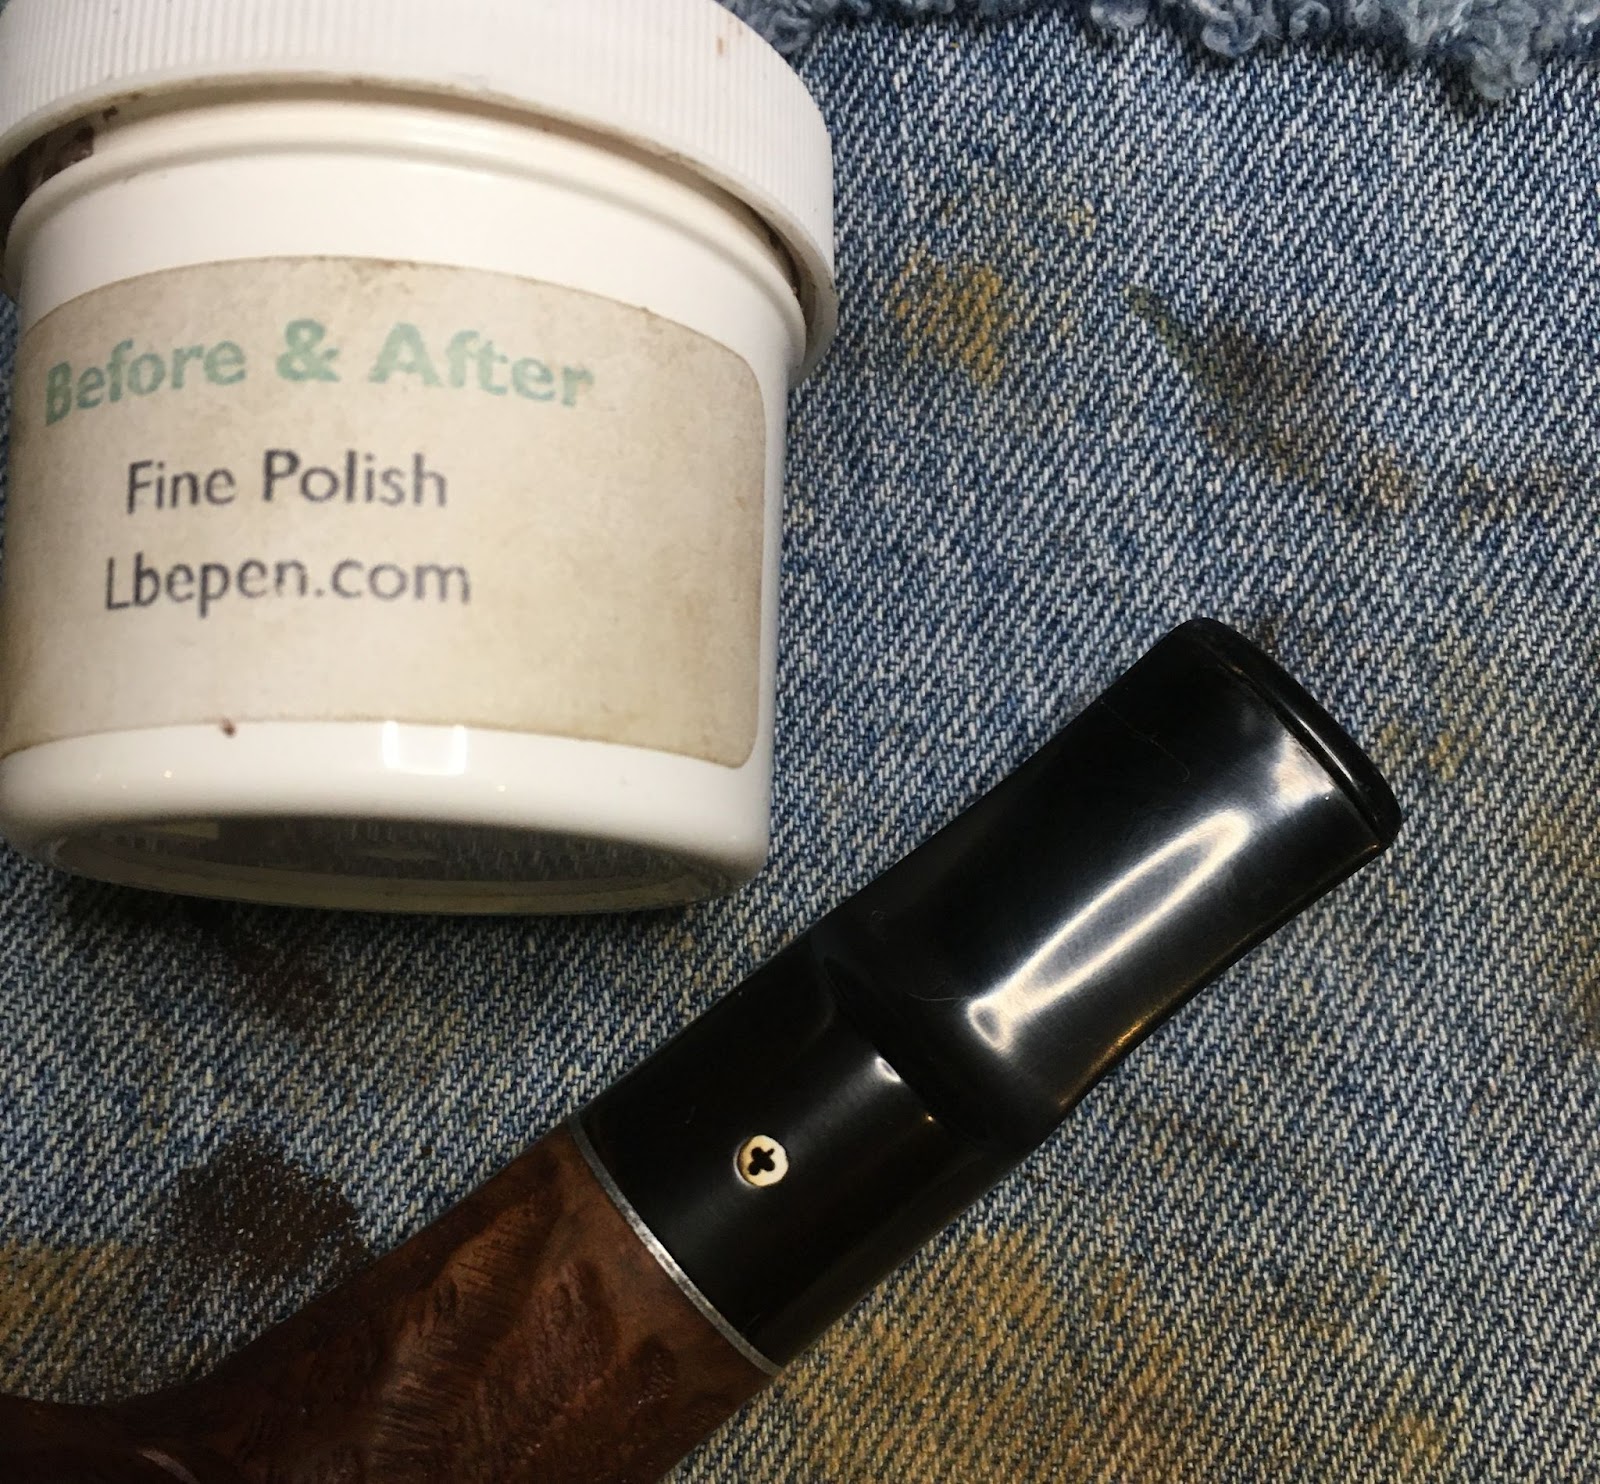


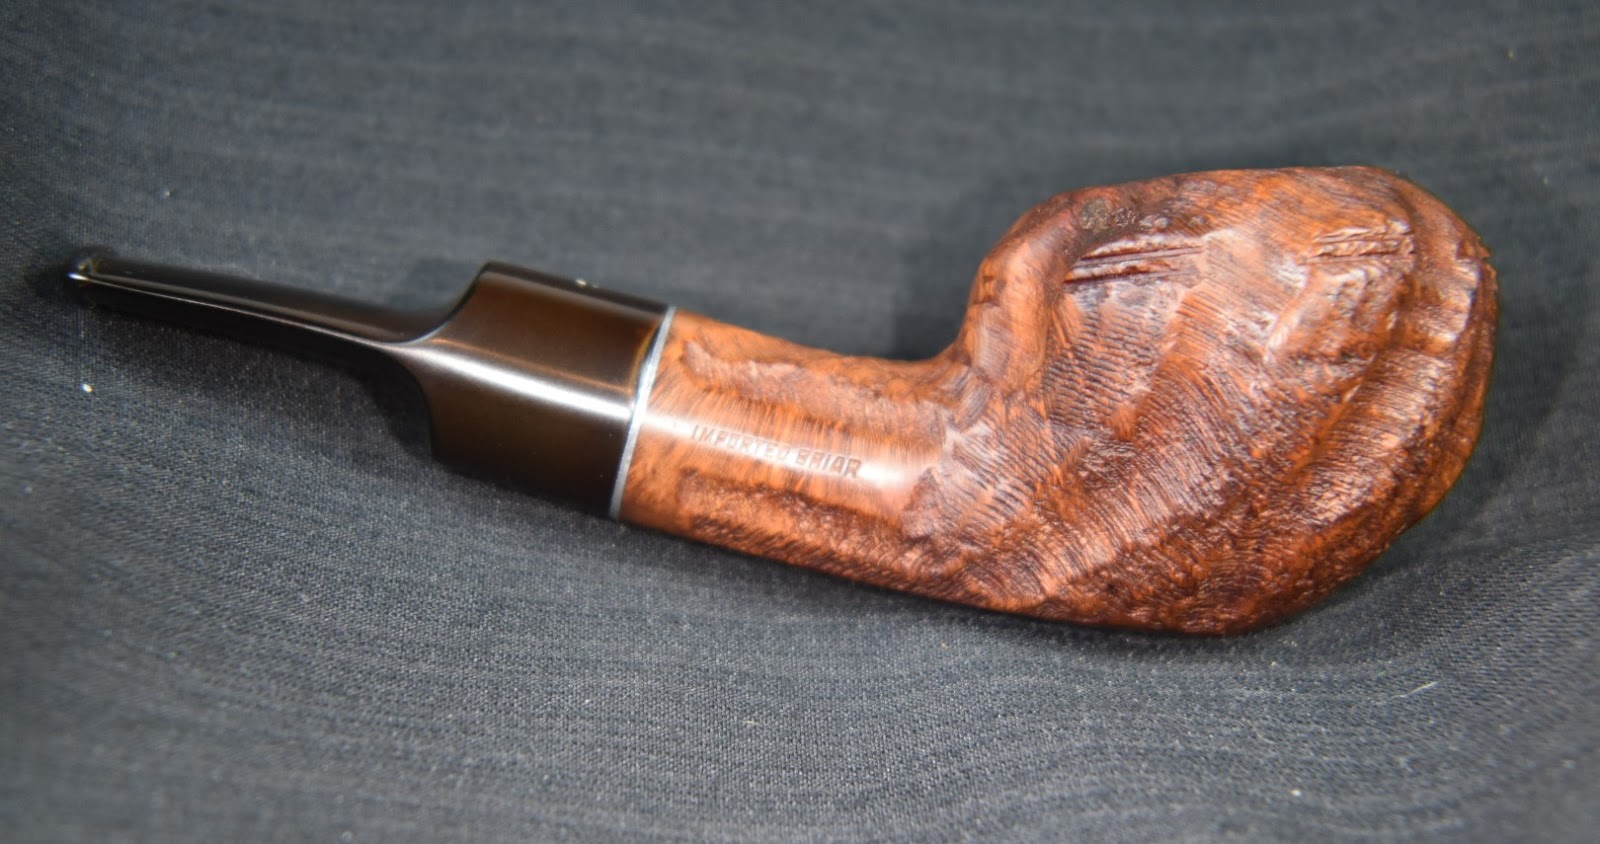


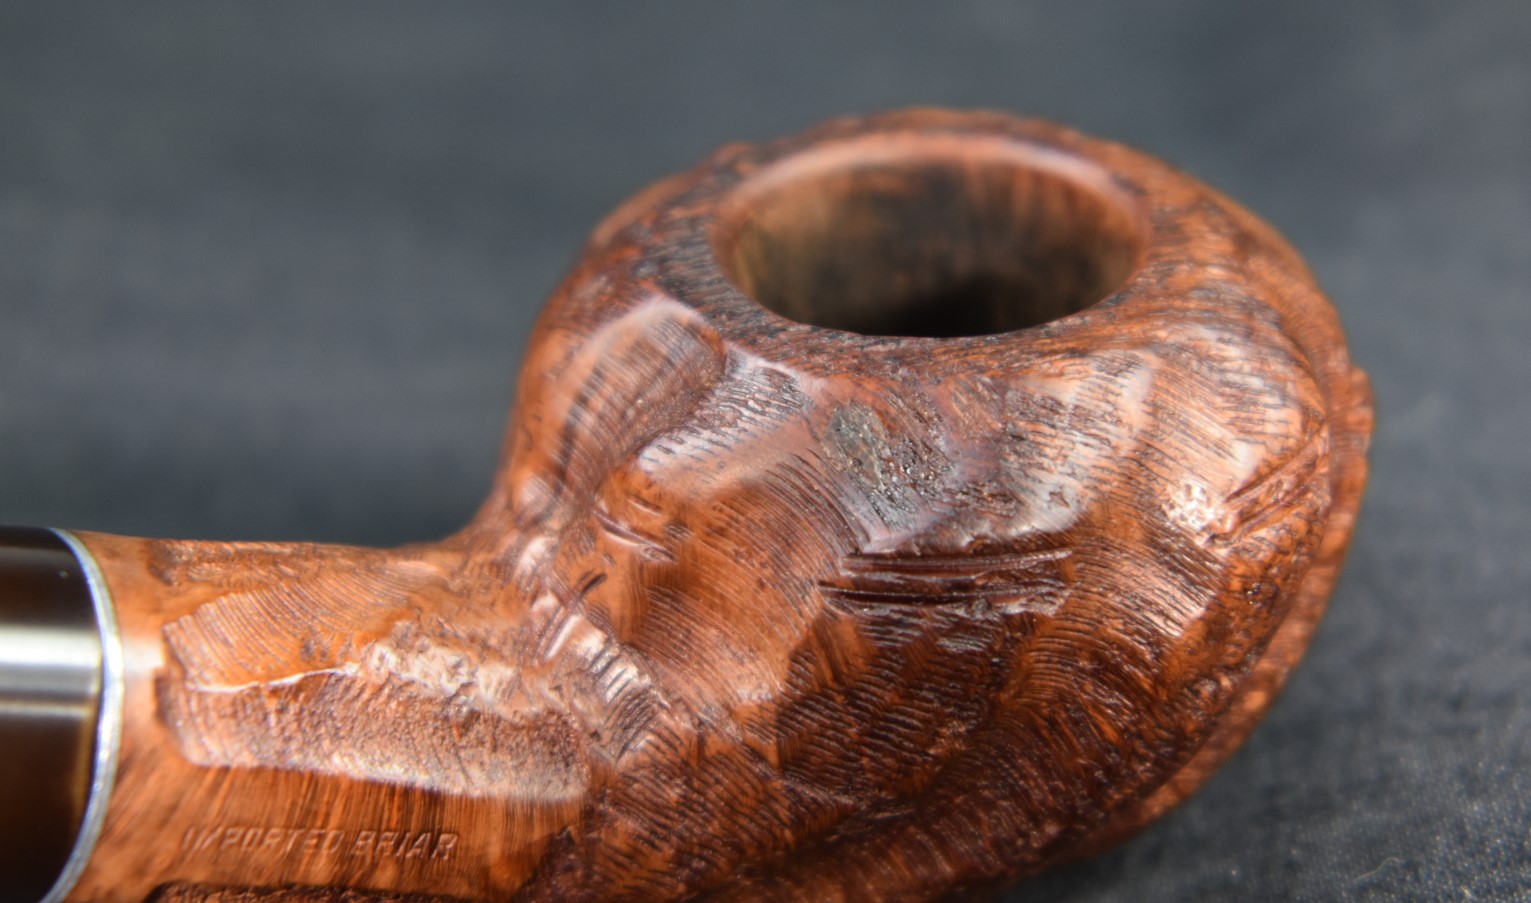
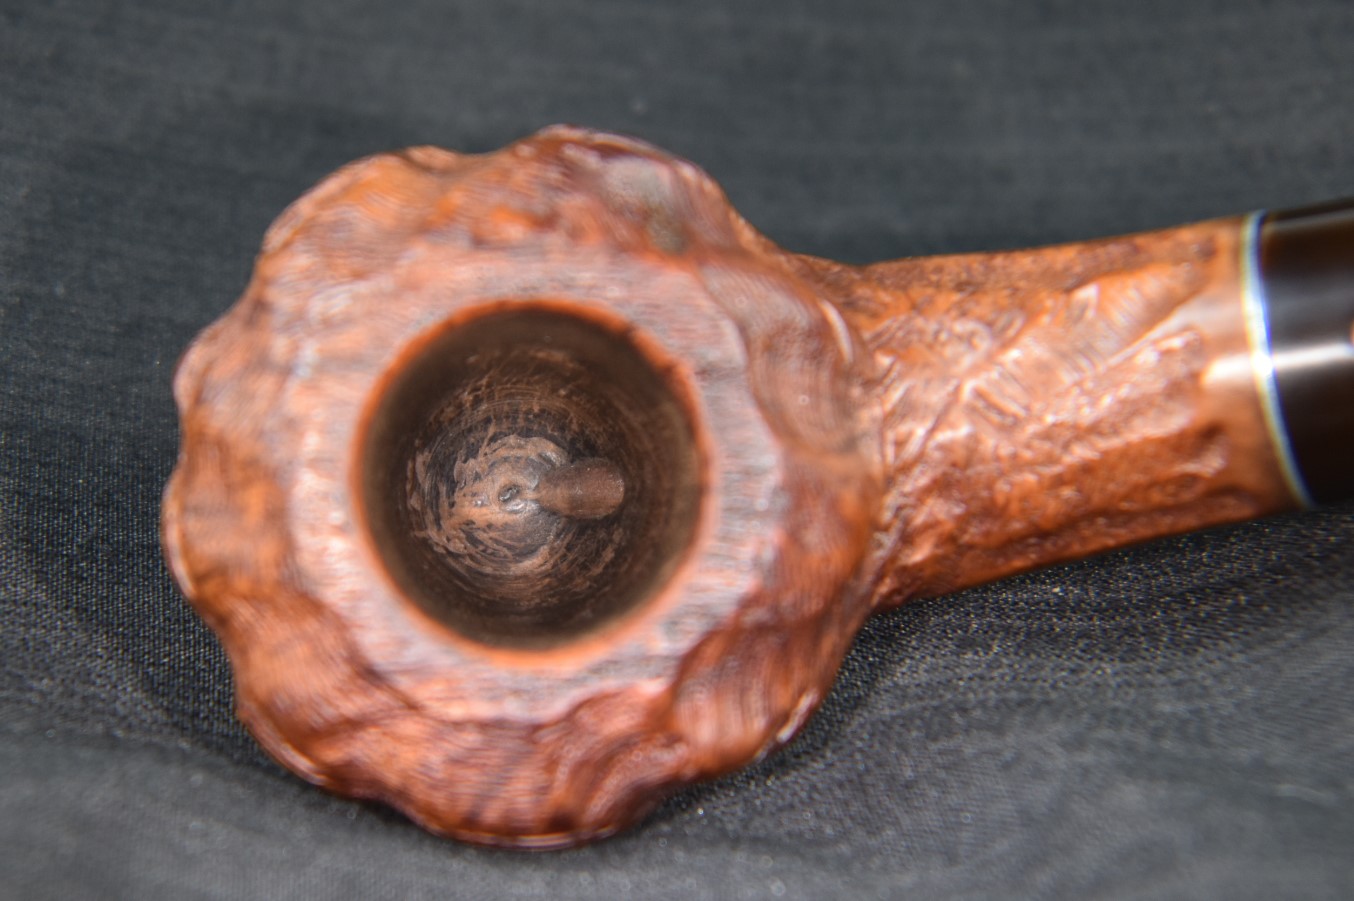
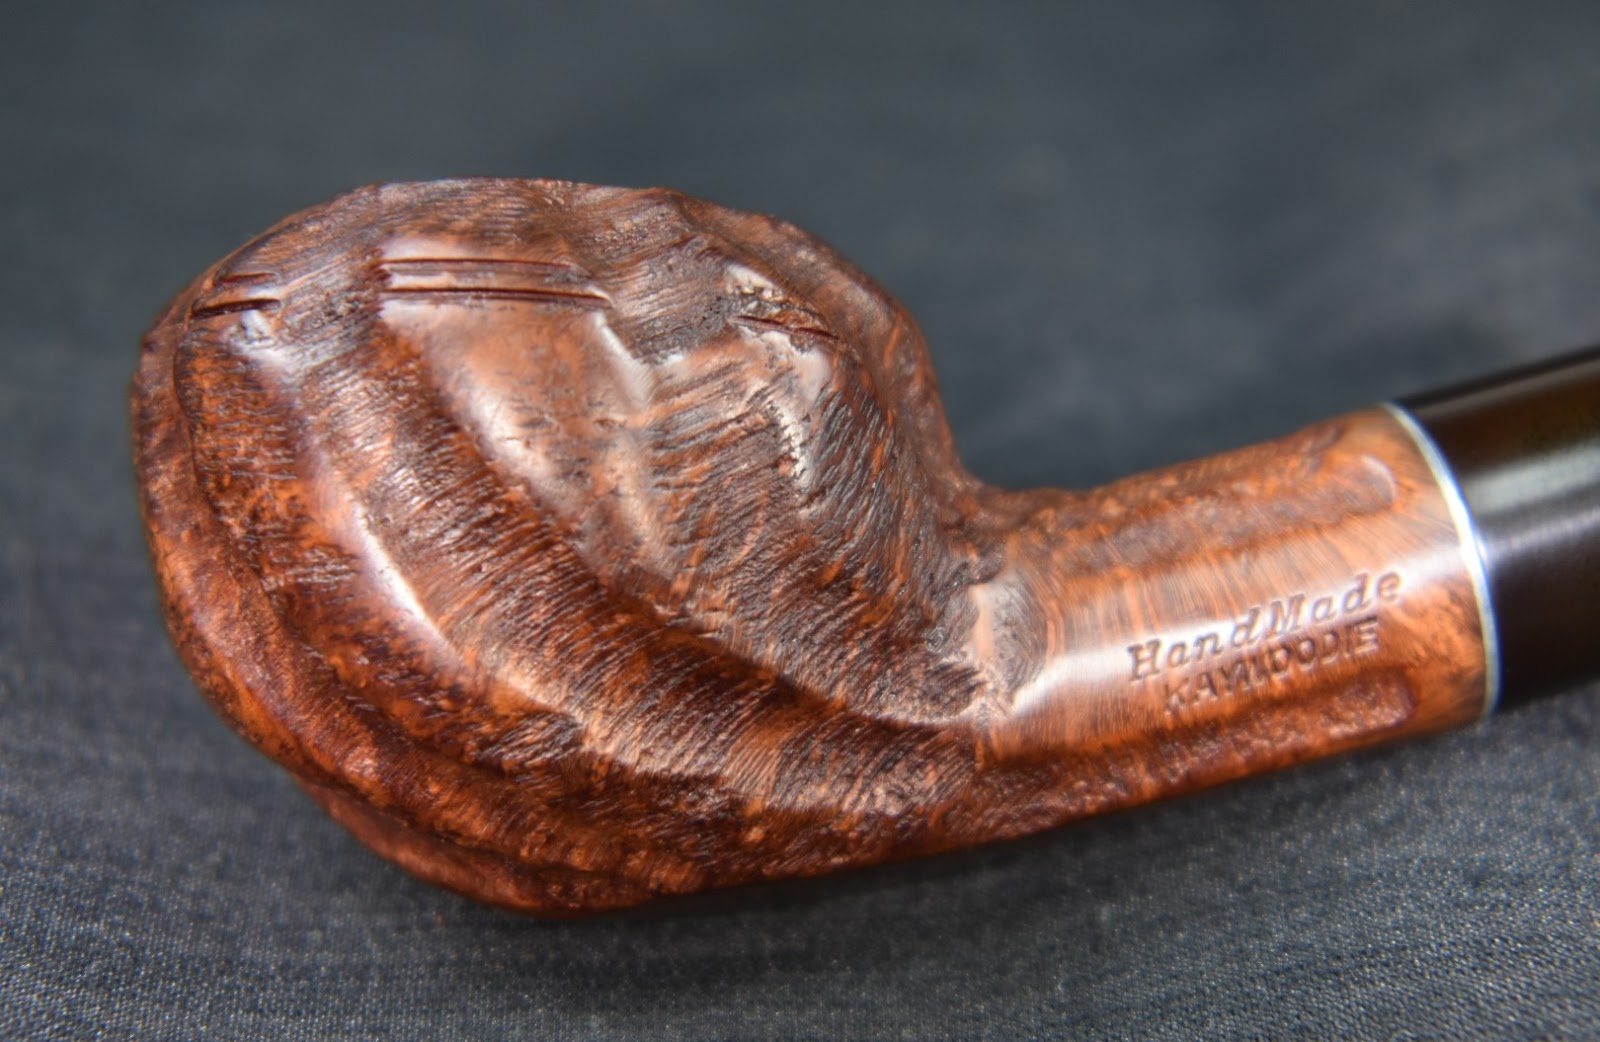


