Well, I have good news and bad news. Or maybe, it’s good news and good news. I have an Italian oval shank billiard, here. The bad news is that I can’t do much about the history of a pipe when the only stamp on it is “ITALY”. Now, if you find my histories or background sections annoying this is good news. The other good news is how well this pipe turned out. She is a very attractive no name.
The pipe came to me as part of an estate lot purchased in March of 2024. It was not the target of the lot. After looking over the pipes I found the shank shape very interesting. It was kind of an oval but with points on the ends and it was tapered from wide at the bowl to narrower at the stem. I thought that it was more like a Canadian shape but Canadian shanks are not tapered. The grain of the briar looked pretty uninteresting, at first glance, and there were no identifying markings so, it went back into the box of future projects. Several weeks later I was looking through the box again and the stem drew me back to the pipe. Here is what I was seeing:
Just another old pipe, right? But that shank was cool. I thought, “wait, there is some interesting grain under the grime and crappy stain. This old girl will clean up nice.” Well, spoiler alert – A contrast stain would really show off the grain. Yeah, the stem was a mess, she was dirty, there were pits to fill, and who knows what lies under that lava covered rim?
The Restoration
As usual a clean denim piece was added to the workbench. I knew this piece of denim was not going to look clean for very long.
I began with the stem. I figured that it was going to be in the Before and After Deoxidizing solution for several hours so, best to get it in there first. I sanded the worst of the oxidation and calcium from the stem with a 320 grit sanding sponge.
Yep, so much for the clean denim.
Next I cleaned out the inside of the stem with bristle pipe cleaners dipped in 95% ethyl alcohol. Ignore the aluminum stinger soaking in the alcohol, that’s part of another project. After the cleaning the stem went into deox (my term for the Before and After Deoxidizing solution).
With the stem in deox, I turned to reaming the stummel. The pipe had a large diameter bowl and was drilled with a tapered tobacco chamber. This required using the PipNet with the #2, #3 and the Scotte reaming tools.
The reaming was finished with the General triangular scraper and sanded with 220 sandpaper wrapped around a wood dowel. The tobacco chamber showed no signs of any heat damage. The rim on the other hand was still doing it’s impression of a Hawian island with it’s lava flows.
The lava was softened with saliva and scraped from the rim using a sharp pocket knife.
After the reaming and rim scraping the stummel was taken to the sink. Here it was scrubbed with undiluted Murphy’s Oil Soap and a medium stiff toothbrush. The soap was rinsed with warm water and the stummel dried with a cotton dish towel.
After the scrub, I sanded the stummelwith 320 and 400 grit sanding sponges searching for pits, dents and dings to fill.
Several were found a couple had to have the old fill or dirt picked from them. ALl were filled using brown cyanoacrylate (CA, super glue) and briar dust.
The next day, I returned to the deox tank. The stem had been soaking for 12-14 hours. I removed the stem and let the excess solution drip back into the jar.
The stem was then hand buffed with a coarse shop rag.
Returning to the workbench I started scrubbing the stem with Soft Scrub on make-up pads.
I progressed to using the Soft Scrub with the remnants of my Magic Eraser.
Once the pads started to provide a significantly less color change the step was coated with mineral oil and allowed to sit.
I thought that a contrast stain would allow the grain of the briar to be more apparent. I chose Dark Brown mixed with Black Fiebing’s Leather Dye. I mixed the brown to black at a 2:1 ratio. Prior to applying the dye I heated the stummel with the heat gun, shown below. The dye was applied with a folded pipe cleaner and flamed with the lighter. Two coats were applied and flamed.
Returning to the workbench, I dipped make-up pads into 95% ethyl alcohol and wiped the stummel. I wanted to get as much of the dye off of the stummel as possible.
Once the dye had been wiped from the stummel I started sanding the surface with a 320 sanding sponge. The sponge needed to be wiped off on the denim frequently to free it from the accumulated briar dust. Below shows the stummel ½ sanded illustrating the accentuation of the grain.
When finished with the 320 sanding sponge I sanded with a 400 sponge. Between the sandings I wiped the stummel with a make-up pad dipped in alcohol.
I wanted to sand the stem and the stummel together to avoid rounding the edges of each piece. This meant that I needed to finish the stem. I wiped the mineral oil from the stem and used a cotton swab dipped in alcohol to clean the oil from the area I would be working on. I used black CA to fill the tooth dents.
I applied the black CA into the dents and spritzed the stem with a CA drying accelerator.
The cured CA was then filed smooth with a flat needle file.
Additional coats of CA were added to further smooth and blend the repaired areas.
I prefer to work with several light coats rather than a single heavy coat of CA. Below the dark spots are areas where another application is needed to fill a depression.
Below is after filing and sanding to 400 grit.
The same process was done for the bottom side of the stem.
Once the stem had been sanded with the 600 grit sanding sponge the two pieces were reattached and the pipe was sanded together. The 1000-3500 sanding sponges were used in series with care not to sand the ITALY stamp. Between each sponge the stummel was wiped off with an alcohol moistened make-up pad. The stem had a bit of mineral oil rubbed inby fingertip and then wiped with a paper towel.
The pipe was then polished with a series of micro-mesh pads from 4000-12000. Between each pad the stummel was wiped off with an alcohol moistened make-up pad. The stem had a small drop of Obsidian Oil rubbed in by fingertip and then wiped with a paper towel.
The stummel received a coating of Before and After Restoration Balm and was allowed to sit for 20 minutes.
20 minutes later the Restoration Balm was wiped from the stummel using an inside-out athletic sock.
The final step of the restoration was to apply several coats of carnauba wax to the pipe using a buffer.
This lovely Italian oval shank billiard may not have a stamp indicating a maker and will thus be considered a “less than” pipe but looking at the before and after photo below, I dare you to call her “less than”. She is more than average in quality of briar, workmanship and quality of finish. I am quite pleased at how well this billiard turned out. The stem had me a bit
worried but after the repair it polished up nicely. The Contrast stain did indeed make the briar grain shine. This old girl will be a grand smoker and will hopefully bring someone many years of enjoyment.
The dimensions of this little beauty are:
Length: 5.50 in./ 139.7 mm.
Weight: 1.34 oz./ 37.80 g.
Bowl Height: 1.97 in./ 50.04 mm.
Chamber Depth: 1.72 in./ 43.69 mm.
Chamber Diameter: .82 in./ 20.83 mm.
Outside Diameter: 1.47 in./ 37.39 mm.
I do hope that you have found something here useful to your own pipe care, maintenance or restorations. If you like this sort of thing, please click the like and subscribe buttons. Thank you for reading the ramblings of an old pipe lover.
Below are some photos of the finished Italian No Name Oval Shank Billiard.
Wow, I have to work on that button. The bright light makes it look oxidized.
I received this pipe as part of an estate lot. I liked the shape, a healthy sized billiard, and the unfinished briar with grass-like carvings. I thought about what to do with it for several weeks as it was patiently waiting for its turn upon the workbench. Finally it hit me – Realtree-style camouflage. I didn’t have any green Fiebing’s Leather Dye so that ordering of that piece bumped the project back down the list a couple of spots. Finally the green dye arrived and it was time to see if I could make my vision a reality, a Realtree-like (I’m pretty sure that if I add “-like” I can’t be sued by the Realtree folks) reality.
The pipe was free of any markings or stamps on the stummel. There were a couple of marks on the tenon of the stem. I am getting ahead of myself. Let me show you what the pipe looked like prior to working on it.
The pipe had been smoked but very heavily. There was some minimal cake in the tobacco chamber and lava on the rim. The singer appeared as if it had been cut off and it remained firmly attached initially. A pliers was used to loosen and remove it. The stem had some tooth chatter and was oxidized. The stamps on the stem appeared to read ADE over IN ITALY. I assumed the top line should have read MADE. Overall a straight forward restoration of a good quality piece of briar.
Background of the pipe
Due to the lack of any stampings on the stummel and only the MADE over IN ITALY, I was not able to deduce much about the provenance of the pipe. A search of logos on pipephil.eu did not turn up any similar stamings on stems. I like to imagine the history of the pipe as a training piece used by an apprentice pipe carver. The young carver had mastered the traditional English billiard shape and had impressed his Master Carver with the stummel. The Master then asked him to practice stamping a stem. Upon doing so revealed that he needed more practice. Then the Master carver assigned him the task of carving the briar which he did with some success. The master congratulated him on his efforts but was unwilling to allow the shop name to be stamped on the pipe as the young apprentice failed to leave a flat surface for such a stamp. The young apprentice then received a quick smack to the back of his head and heard a few choice remarks about his inexperience and lack of functional brain cells in his native Italian. It’s my imagination and I’m sticking with it!
The restoration
As usual I started with a clean piece of denim on the workbench.
Thi show was substantial and required both the PipNet #2 and #3 blades. Given, there wasn’t much for them to scrape out but, they nevertheless gave it their all. The chamber was sanded with 220 sandpaper wrapped around a wood dowel. There was no damage in the tobacco chamber and I could actually see the lathe marks from the original turning of the stummel.
Next came the airway cleaning of the shank. This was accomplished using folded over bristle pipe cleaners dipped in 99% isopropyl alcohol/
After the shank was cleaned the stummel was scrubbed with Murphy’s Oil Soap and a medium stiff toothbrush. The soap was rinsed with warm after and the stummel dried with a cotton dish towel. I returned to the workbench and wiped the stummel with a cotton ball dipped in 95% ethyl alcohol to remove anything that the scrubbing failed to.
Next came the cleaning and deoxidation of the stem. I initially sanded it with a 320 sanding sponge to remove the outer layer of hard oxidation and some of the tooth chatter.
The stem was then placed in a tub of water and Oxiclean. I have no idea what the concentration of the solution was as it was one that I had mixed months ago and failed to write the amounts upon the lid.
With the stem soaking in Oxiclean, I turned my attention to the stummel. I had recently received the green Fiebing’s Leather Dye and was looking forward to trying it out. The dying gear was gathered and the work area prepped with a couple layers of paper towels.
I was as surprised as you are about remembering to wear nitrile gloves.
I was actually quick enough to catch a bit of blue flame with this shot. I applied two coats of green and flamed each.
The second coat flamed a bit longer than the first and allowed a better flame photo.
Below is how the green dyed stummel looked after being wiped off with a paper towel.
I returned the stummel to the workbench and wiped it off with a couple of alcohol soaked cotton balls/make-up pads.
And a couple more. In hindsight, I wish I would have kept wiping until I couldn’t remove any green dye. I then started sanding the high area with 320 and 400 grit sanding sponges.
The sanding revealed the underlying undyed briar while allowing the low spots to remain green.
The stem, having spent a couple of hours in the Oxiclean solution, was removed and rinsed with water. I used Soft Scrub on cotton balls to remove the oxidized vulcanite from the stem. Once finished scrubbing I oiled the stem with mineral oil.
The interior of the stem cleaned up quickly with bristle pipe cleaners dipped in 99% isopropyl alcohol. I did not bother cleaning the stinger as I did not figure I would include it as part of the finished pipe.
The stem was sanded using a series of sanding sponges from 600-3500. Between each sponge I would dip the tip of my finger into the mineral oil and rub this over the stem. The excess oil was then wiped away with a dry paper towel.
The process was repeated with micro-mesh pads 4000-12000. The only difference being that I used Obsidian Oil rather than mineral oil between pads.
I lightly sanded the stummel with 1000-3500 sanding sponges. I wiped the stummel with a make-up pad dipped in alcohol between sponges. I micro-meshed the stummel with the 4000-12000 micromech pads wiping with the alcohol dipped make-up pad between micro-mesh pads. When finished I applied a coating of Before and After Restoration balm to the exterior of the stummel and brushed it into the carvings with a baby toothbrush.
20 minutes later I wiped the excess balm from the stummel with the inside of an athletic sock. Twe terry cloth of the sock enabled me to clean the balm from the grooves and polish them quite nicely. The pipe was then taken to the buffer and given several coats of carnauba wax.
The pipe turned out quite well. The green dye is a definite green color. I did not achieve the exact effect that I wanted but that is more due to the nature of the carvings. As I was finishing the pipe I couldn’t help but think this was a great Easter themed pipe. With Easter right around the corner I thought it would make a great gift for my son-in-law who loves straight pipes and I was sure that he would appreciate this billiard. I gave it to him on Easter and he was quite pleased. I have yet to hear how it smoked, though I have little doubt that it was a winner. I do hope that you have found something here useful to your own pipe care, maintenance or restorations. If you like this sort of thing, please click the like and subscribe buttons. Thank you for reading the ramblings of an old pipe lover.
Below are some photos of the finished Realtree-like Italian Billiard.
Happy Easter, Sebastian. Enjoy the new pipe. Love, Dad.
My infatuation with pipes from post World War Two through the 1950s has not ended. We are just on a break. I have a long line of pipes in que and the above Kaywoodie should have been subjected to the back of the line. I couldn’t do it. It was just too cute and had such a long noble heritage. Okay, that is an exaggeration. At the time this pipe was produced by Kaufman Brothers and Bondy, KB&B had been in business less than 20 years. That is how old this pipe is. So, maybe she pulled seniority and jumped to the front of the line not with the agility of a teenage gymnast but with the grace of a seasoned digitary of the House of KB&B.
This little darling came from an eBay auction where apparently no one saw the uniqueness of the pipe. Well, not no one, since there were other bidders but, $5.50 for my win? That was welcome and unexpected.
I say unique due to the triangular stem, paneled bowl, carburetor and the four digit shape number. Each of these features is interesting on their own but together I find them very interesting. Allow me to show some photos of the Kaywoodie prior to wany work being done.
Judging from the photos you may find the next statement difficult to believe. The Kaywoodie was in good shape for a well used pipe of this age. I’ll get more into that in a minute. Yes it looked to be in rough condition but other than the stem reconstruction, the pipe was mostly just filthy. I saw stem deoxidizing and rebuilding, filling pits in the briar, cleaning and sanding.
Background on KB&B Kaywoodies
I have restored several KB&B pipes in the past few weeks. There were the four large Hand Mades and one Yello-Bole that came to mind. I love the history of the company and their passion for the Kaywoodie stinger or condenser. I will come right out and say it: I do not like stingers. My favorite Kaywoodie pipes are models which do not have the signature stinger. Having said that, I appreciate a company who remained “all in” in their design for the 80 years or so of production.That shows dedication to their ideas and to their loyal customers.
Kaywoodie has a long and colorful history dating back to their origins, “Kaywoodie name first appearing in February of 1919.” (Kaywoodie History – Greywoodie LLC) The history of Kaywoodie pipes is fortunately well documented thus, allowing rather precise dates for a Kaywoodie collector to declare the provenance of their charges. Rather than deposit it here, I will link the two outstanding histories of KB&B/Kaywoodie – Gewywoodie’s site is great written history of the company (Kaywoodie History – Greywoodie LLC) and pipedia.org has pretty much the same written history with a rich library of Kaywoodie catalogs, photos and images of old print advertisements, (https://pipedia.org/wiki/Kaywoodie). I can’t recommend them enough for those interested in reading more about the company and the products. There is a third document which provides information more specific for tracing the providence of a specific pipe or model of pipes and that is he Collector’s Guide to Kaywoodie Pipes (https://pipedia.org/wiki/Collector%27s_Guide_to_Kaywoodie_Pipes).
Now a little more on this specific pipe. As I previously mentioned the four digit number is indicative of a Kaywoodie being made before 1936. I quote from Collector’s Guide to Kaywoodie Pipes: “If the pipe has a 4-digit shape number, the pipe is probably of “pre-1936” vintage.” (https://pipedia.org/wiki/Collector%27s_Guide_to_Kaywoodie_Pipes) or you can download the original document here.
Another mention of the four digit shape number from the Collector’s Guide states, , “Early (pre-1936) Kaywoodies had an “elongated” white cloverleaf on the bit, a large fitment, and four-digit shape numbers. The 1936 catalog shows a larger, “fuller” leaf, but lists two-digit shape numbers. Sometime between 1936 and 1947, the better pipes were marked on the bits with a black cloverleaf in a white circle. The white cloverleaf continued on the lesser pipes. However, this was not a consistent convention, as pipes of the same grade could have either type of leaf.” (https://pipedia.org/wiki/Collector%27s_Guide_to_Kaywoodie_Pipes)
BOth of the above quotes reaffirm the pre-36 date of origin. The strange patent stamping of this pipe provides additional information. An internet search of the US patent number led me to the following:
Now the question arises, “How can a “pre-1936” pipe have a stamp for a patent that was not awarded until June 1, 1937?”
The final piece of the puzzle comes from the 1936 Kaywoodie catalog. This catalog clearly shows the Kaywoodie in question as the top pipe in the image below.
(https://pipedia.org/wiki/File:Kaywoodie_1936shapes6.jpg). It also clearly shows the model as being called a “03 Triangular Setter Apple”. The stamp of this Kaywoodie Triangular Setter Apple is not a “03” but rather an “8803”.
I donned my thinking hat also know as a conjecture cap and came to the following conclusion:
This pipe was made prior to the switch to the “new-shape numbering system” to match the upcoming 1936 catalog. During this transition the patented “Carburator” had been in production and had been incorporated into some pipes, even prior to the formalized granting of the patent paperwork. The shape number does end in “03” indicating a carryover from the “old system”. It does not take too much imagination to assume that the production at the factory would occur at a different rate than the churning of a bureaucratic patent office or the time lag of catalog development and printing. All of these factors lead me to the conclusion that this pipe is a 1935-36 Kaywoodie Carburator Triangular Setter Apple.
The Restoration
As with nearly all my restorations, this one too began with a clean piece of denim to work on.
Reaming was the first task for this pipe. The tools were assembled. No PipNet due to the small diameter of the tobacco chamber and the fact that the carburetor rose up from the bottom of the bowl about 5 mm.
Most of the reaming was done with the General triangular scraper so as to not damage the carburetor.
The below photo shows the rim after a good deal of lava had been scraped from the surface.
Next came the cleaning of the stem. The stinger made this slightly more difficult but this stinger did not interfere with the stem cleaning as much as some Kaywoodies that I had done. The bristle pipe cleaners were dipped in 99% isopropyl alcohol to aid in the dissolution of the tars in the airway.
Scrubbing the stummel was next. Murphy’s Oil Soap was used undiluted and scrubbed with a medium bristle toothbrush. The lava around the rim proved to be very adhered to the briar and a stiff nylon brush was used around the rim. The soap was rinsed with warm water and the stummel dried with a cotton dish towel. At this time I decided to scrub the airway of the shank with a nylon shank brush and Dawn dish soap to soften and remove some of the residues inside. This worked and released the strong aroma of old tobacco smoking residue. From this I knew that the shank cleaning would be a long task.
The scrubbing failed to remove all of the lava around the rim. Further scraping with a sharp pocket knife was done. I also used a Scotchbrite pad dipped in 99% isopropyl alcohol to help clear the lava. You can also see in the photo below an old fill that had lost the fill material.
With the lava finally cleared away I chose to work on the fills next. It looked like most of the fills had come loose with wear. Some picking of the old fill material was done with a fly tying bodkin. New fills were made using brown cyanoacrylate (CA, super glue) and briar dust. The fill received a drop of CA from the fly tying bodkin. I then placed a small amount of briar dust onto the CA filled pit and pressed the dust into the pit.
Below photo shows a CA/dust filled pit.
The new fill was then filed smooth and sanded with a 400 grit sanding sponge.
Here were two small pits below the rim.
Another pit filled along the bottom of the shank.
With the fills done and sanded with a 400 sanding sponge, I turned to cleaning the exterior of the stem. I chose to use Soft Scrub on make-up pads to remove the oxidation from the stem. The stem was first sanded with a 400 grit sanding sponge to remove the outer surface oxidation then the several Soft Scrub pads were used. After the scrubbing the stem was coated in mineral oil and allowed to absorb the oil while I worked on other tasks.
Next came the cleaning out of the shank airway. The photo below shows the dry crumbly tars that were scraped free with the dental scraper. The cotton swabs and folded over pipe cleaners were dipped in 99% isopropyl alcohol.
Once a good deal of the tars had been scraped free the cotton swabs helped moisten the tars. This led to the scrapings being more tarlike. You can see a couple streaks of tar residues wiped onto the denim near the scraping pile lower right. I also used alcohol dipped nylon shank brush scrubbings to help free the airway. I could effectively use a favored method of pouring alcohol into the bowl and scrubbing with the pooled alcohol and a shank brush due to the hole in the bottom of the bowl that is the carburetor. Eventually the shank returned clean cotton swabs.
With the shank cleaned out I turned my attention back to the stem. Rebuilding the button, to be exact. Using a piece of flat plastic approximately 2 mm thick, from a lid, I measured and cut a “dam”. This would be used to stop the black CA from flowing into the airway and keep the liquid CA out of places where I did not want new material deposited. The airway was “painted with petroleum jelly to help seal the dam to the area where I didn’t want CA.
The dam was placed into the airway. I had tested the plastic to make sure that the CA did not readily adhere to the plastic.
A thin coating of black CA was applied to the vulcanite. I used a Cyanoacrylate drying accelerator spritzed onto the wet CA to quickly cure the CA. I added additional coats of black CA filling the gap and spritzing with accelerator. I have found that numerous thin applications will allow the CA to build up and cure better than fewer thicker applications.
The below photo shows the fill at about four applications of CA.
At this point I used a flat needle file to start shaping the flat surface of the reconstruction.
I gripped the plastic dam with a needle nose pliers and pulled it free of the new CA material. The CA that was over flowed past the button was trimmed with scissors and flattened with the flat needle file and sandpaper.
Sorry about the photo quality. The phone camera does not do well focusing on buttons, I guess.
Additional beads of black CA were added to the button to add material. These were then spritzed with accelerator and shaped with the needle file and sandpaper to arrive at a shape that was acceptable.
I assembled the pipe and tried the draft to make sure the airway remained open. I received the taste of “old pipe”, or rather the taste of old tobacco smoking residue. Hmm, not acceptable. It was getting late so I decided to pack the stummel with cotton, fill it with 95% ethyl alcohol and let the alcohol work by drawing the residues from the briar and into the cotton overnight.
I taped off the carburetor with Scotch tape in an attempt at keeping the alcohol in the bowl.
Using a disposable pipetteI added the ethyl alcohol slowly, allowing it to fill and saturate the cotton.
Approximately 12 hours later I returned to the workbench and discovered that my cleaning of the bowl and stummel were not as complete as I had assumed they were..
The cotton in the shank was quite dark with tars and smoking residue.
The ethyl alcohol and cotton had performed their jobs well. Testing the draw of the pipe delivered the taste of ethyl alcohol. I guess I’d have to wait another couple hours to see if a second treatment of cotton and alcohol would be required.
Moving on. You probably noticed that I had used painters tape to cover the stamps earlier. That was in preparation for the sanding that I knew would be coming. And, here it is. I sanded the pipe as a single piece. Using the sanding sponges in series I sanded from the 1000-3500 grits. Between each sponge I rubbed a finger dipped in mineral oil to the stem and wiped with a paper towel. I would then dip a make-up pad in alcohol and wipe off the stummel before continuing to the next sponge.
After the sanding came the micro-mesh pads. The pads were used in sequence from 4000-12000. I again wiped the stem and stummel between pads. A slight difference here is that instead of mineral oil I used Obsidian Oil on the stem.
The Pipe was looking very good. I have to admit that sanding and micromeshing the panels of the pipe was far more tedious than working with a rounded shape. Trying to maintain the flat characteristics of the panels took careful pressure and left little room for carelessness or watching television. The stummel was given a coating of Before and After Restoration Balm and was allowed to sit for an episode of a silly aime I’d been ignoring.
After 20 minutes the Restoration Balm was wiped from the stummel using the inside of an athletic sock.
The final treatment of the Kaywoodie was to apply several coats of carnauba wax with the buffer.
This Kaywoodie turned out beautifully. In bright light I did notice tinges of oxidation that remained on the stem. I am debating giving the stem a dip in the Before and After Deoxidizing solution. I probably will but the effect of the deoxidizing solution of the reconstructed area worries me. The finish of the stem is just gorgeous under normal room lighting. The smooth polished briar shows grain that was completely obscured by the grime that the pipe initially had and shows wonderful bird’s eyes on both sides. As with most pipes from this era this is a smaller specimen. The dimensions of this pipe are:
Length: 5.40 in./ 137.16 mm.
Weight: 1.18 oz./ 33.45 g.
Bowl Height: 1.50 in./ 38.10 mm.
Chamber Depth: 1.17 in./ 29.72 mm.
Chamber Diameter: 0.65 in./ 16.51 mm.
Outside Diameter: 1.34 in./ 34.04 mm.
I do hope that you have found something here useful to your own pipe care, maintenance or restorations. If you like this sort of thing, please click the like and subscribe buttons. Thank you for reading the ramblings of an old pipe lover.
Below are some photos of the finished Kaywoodie Triangular Setter Apple Carburetor.
I remember a good friend of mine saying, “There are two kinds of battles in the world: Those worth fighting and those that aren’t. If it’s worth fighting then you’d better be damn sure you’re going to win.” Spoken like the true F-4 pilot that he was and darn good advice. So, why in the world did I try to restore the above dismal darling? I mean, you can buy a new one for under $100. That poor thing’s issues had issues. Perhaps it was Saint Jude Thadeus whispering in my ear? No, I’m not Catholic. Maybe it was because my right shoulder angel had a substitute that day and it was a Bad-Idea Fairy. Whatever the reason, I decided that this Savinelli Roma would live to smoke again.
Well deciding something and actually carrying through with the decision are two dramatically different things. If you frequent my ramblings, thank you, you may remember a similarly damaged Savinelli, Porto Cervo 677 KS. If you are new here, thank you as well. I’ll link it here for those who might be interested. This pipe had issues that the previous Savinelli had nightmares about. OK, I’ll show you what I mean rather than taunting your imagination with unspeakable eldritch pipeological horrors (yeah, I tried to make it sound like an H. P. Lovecraft horror story there).
Still, pretty scary, eh? The list of things to be addressed were long and would certainly stretch my comfort level as a restorer. The stem would need a great deal of oxidation removal and rebuilding of material to once again have a functional button. The bowl interior was charred and misshapen. The exterior would need reshaping, retextured, restrained and refinished. All of that was just discernible from a cursory evaluation. What diabolical horrors would lie within? Okay, there I go again in Lovecraft mode. Apologies.
Background on Savinelli
A good deal of this background is information what I wrote or ,used from other sources, from the Savinelli Porto Cervo restoration. I am a Generation-X slacker and have to live up to (or down) to that reputation.
Early Origins
“1876 was a year of breakthroughs: Thomas Edison patented the mimeograph, Julius Wolff-Eastport canned sardines for the first time, Alexander Graham Bell made the first telephone call,
Pyotr Ilyich Tchaikovsky completed Swan Lake, Melville Bissel patented the first carpet sweeper, Mark Twain published Tom Sawyer, and in Milan, Italy, Achille Savinelli opened one of the first shops exclusively focused on tobacco and smoking accessories.
That last item may seem relatively unimportant in the global scheme of advancements, but for those of us who love pipes, it was a monumental achievement, made even more difficult by the Italian government, which held a monopoly on tobacco. In addition, Achille was convinced that briar pipes represented the future of pipe smoking at a time when the market was dominated by clay and meerschaum. It may not have been obvious in 1876, but Achille Savinelli’s commitment to briar pipes would prove to be visionary.
He soon began designing his own pipes (different from the styling we associate with Savinelli today) and arranged their manufacture by local pipemakers in the Varese district of north-west Italy. The pipes became so popular that some were exhibited at the 1881 Esposizione Industriale Italiana (Italian Industrial Exposition)—the precursor to today’s Milan Fair, one of the largest trade fairs in the world.” (https://pipedia.org/wiki/Savinelli)
Post-WWII
“With his two best friends, Amleto Pomé and Mario Vettoruzzo, he assembled a team of fifteen employees to start a new business in the Varese region—the same area of northwest Italy in which his grandfather, Achille Sr., commissioned his own designs more than 60 years before.
Savinelli Pipes began production in 1948 and, although the pipes were of a superior quality and unique in their aesthetic, the brand wasn’t an immediate success. Few new brands are. It takes time for the public to catch on. Retailers were skeptical of placing Italian pipes alongside their best sellers from England or France, and customers, in turn, were hesitant to purchase a Savinelli over pipes by already established, foreign brands. Achille Jr. stood by his product, however; he knew it was only a matter of time before the world realized that these pipes were of a far superior quality, capable of competing with even the most well-established pipe manufacturers in the world. As it turns out, he was right. In less than a year, Savinelli pipes gained prestige in markets all across the world—heralded for their delicate balance of innovation and tradition, of form and function. Savinelli pipes were placed alongside the likes of Dunhill and Comoy’s in tobacconists from the United States to Europe, and, in time, this exposure modified Italy’s reputation; it was not only the premier exporter of briar, but now a premium source of fine briar pipes.” (https://pipedia.org/wiki/Savinelli)
The term “Roma” in English often relates to the ethnic people, Roma or Romani. In Italian Roma is Rome. I highly doubt that a worldwide company like Savinelli is referring to anything other than Rome with this line of pipes.
The current Savinelli line continues to offer a Roma 677 KS but with a lucite stem.
DESCRIPTION
Savinelli Roma Lucite pipe shows a charming and modern composition. The dark rusticated finish color highly contrasts with the bright colors of the particular acrylic stem. 677 KS is a model with great appeal. Its triangular shank ,which only few manufacturers are able to offer, easily slides into the perfectly carved bowl. A really well designed pipe.
I add the below description of a Savineli Apple, 626 due to the nice description of the styling of the line.
DESCRIPTION
Roma Series is for sure one of the most famous Savinelli pipe in the world. Its dark rusticated finish gives a very masculine style. Thanks to the smooth bowl’s rim you could appreciate how a finish can change the briar final color result. In fact both rim and bowl are stained using the same natural burgundy color. A little brass band adorn the ebonite stem. Model 626 fully personifies all the Apple style elegance. Its soft lines and dimensions make it an aesthetically and well-proportioned pipe.
The 677 KS shape is “A bent Billiard with a supple, Brandy-like taper toward the rim, Savinelli’s “677 KS” is a compact yet full-bodied take on the classic English shape. Per the Italian marque’s shaping conventions, Savinelli has elaborated on the standard design, adding mass to the base and transition with extra height and taper lent to the bowl, all paired to one of their signature triangular shanks.” according to Smokingpipes.com. That is a mouthful of a description. Also you will later see that the “extra height” is a bit less extra after the restoration. The three digit shape code for Savinelli pipes was established in the 1970s according to information from pipephil.eu. One more detail is the “KS” – this stands for King Size.
I started this restoration with a clean piece of denim on the workbench. In the back of my mind I was thinking, “you are going to need a couple of those,”
I admit that I was more than a bit daunted by the prospect of rusticating or texturing a stummel to match the amazing work that Savinelli does. So, I avoided that part. I addressed the part of the pipe I felt comfortable working on – the stem. Yeah, I know, “chicken, buck buck bawk.”
The stem had thick calcium deposits on both top and bottom, I scraped these with a sharp pocket knife and sanded with a 320 grit sanding sponge.
The remaining calcium was picked from the dents using a dental pick and brushing with an alcohol dipped brass brush.
Next the interior of the stem was cleaned using 95% ethyl alcohol, bristle pipe cleaners and cotton swabs.
It was at this point I started to rebuild the damage caused by the clenching habits of the previous owner. In hindsight, I wish that I would have scrubbed the stem with Soft Scrub with Oxiclean at this time and worked on the rebuilding after that. Alas, I hope that you can learn from what I consider my mistakes. I used a product that was newer to me, Bob Smith Industries IC-2000. It is a cyanoacrylate (CA, super glue) which has been toughened with rubber. It is designed to be used with rubber and sounds like it would be perfect for this use. I applied an initial few dabs to the depressions of both the top and bottom of the stem.
I use a CA drying accelerator to speed the drying of the CA. Both surfaces were spritzed with this accelerator. It makes the CA cure or dry in seconds. The cured CA was then filed with a flat needle file and smoothed with a 400 grit sanding sponge. The shiny surfaces in the photos below are areas where the file and sandpaper rode above and did not contact the CA in the depression. Further applications were required to fill the entire depression. I prefer to use several thin applications over a single thick application.
More applications followed by more filing and sanding. Voila.
And then of course there is more sanding. Here is where I scrubbed the stem with Soft Scrub with Oxiclean.
I am not sure if this discolored the CA fills or if the new rubberized CA doesn’t have the same black color as the CA that I was used to previously. Either way I was not as happy with the results as I had been previously. Here is a photo of the finished stem and the fill is much more obvious than what I was used to.
Leaving my comfort zone, I started working on the stummel. This started out normally with the gathering of the reaming tools.
I began with the #2 blades in the PipNet reaming tool. This is where “normal” stopped and became “is this pipe salvageable” started. The cake was dry, hard and brittle. The reaming was a very rough feeling with large pieces of both cake and charred briar breaking off. The chamber was very rough and uneven. I moved to the #3 blades. They fit into the mouth of the chamber and with effort removed the cake and charred briar to the bottom of the chamber.
Scrapping with the reaming knife and General triangular scraper revealed large area of severely charred wood. This was chipped and broken out as thoroughly as possible. Some of the damaged wood was still strong while other places were quite brittle. Eventually the soft damaged wood was removed allowing me to sand the interior with the 220 sandpaper wrapped dowel. I failed to take photographs of the chamber, perhaps in fear of my inability to remedy the situation. The best photo I had was the following:
In the above photo the middle chamber area was undercut by several millimeters. I Thought it too deep to effectively use J.B. Weld, a product which I had successfully used for charred briar in the past. This time though, the damage was much more severe and the volume of material to be replaced was far greater. I decided to move on and think about other options.
I took the stummel to the sink for a scrubbing. If the internal charing was very bad it would undoubtedly darken the briar on the outside of the stummel. I wanted to see what was under the external grime. I started by using undiluted Murphy Oil Soap with a medium bristle toothbrush. As the photo below shows, the grime was extensive. This first scrubbing was rinsed with warm water and dried with a cotton dish towel. Afterwards the stummel still appeared dirty.
I scrubbed the stummel a second time with Murphy’s and a stiff nylon brush. This improved the results but after rinsing and drying there remained a tacky feeling residue. I scrubbed a third time again with Murphy’s Oil Soap but with a brass brush. Finally the grime rinsed away and left a clean surface when dried.
Below are photos taken of the scrubbed stummel back at the workbench. There was darkening of the briar around the rim, front and back. The wood in these areas seemed thick and solid enough for me to proceed and not throw the entire stummel into the dust bin.
To be sure of the integrity of the briar I needed to top the bowl quite a bit. The front edge was several millimeters lower than the sides. This was done using 220 sand paper laid flat on a countertop. A circular motion was used with the stummel being rotated in hand every few circles to keep the pressure and sanding even.
It appeared as though someone had tried to sand the charred wood from the front of the rim at some prior time. This had removed the factory texturing leaving a smoothed and darkened surface.
The topping of the rim did achieve a flat rim though a shorter stummel with a pronounced forward cant.
Not wanting to remove any more briar than absolutely necessary, I stopped sanding. The inside edge of the rin would be beveled as the pipe was originally made. Before this beveling, I wanted to address the filling of the charred material of the tobacco chamber. I had previously chatted with a fellow restorer about a “mortar” that he had used. The ingredients were plaster of paris (POP), charcoal powder and salt. In thinking about these materials I did not think that the charcoal dust was anything other than a coloring agent and it wouldn’t be strengthening the chemical bonds of the POP. If anything it would weaken the crystalline lattice of the calcium sulfate hemihydrate (chemical name of POP when hardened). I opted to try POP in this instance due to the its properties:
“There are two main properties of Plaster of Paris:
Non-flammable:
Non-combustible
Plaster of Paris is non-flammable as well as non-combustible as it has a low chemical reactivity. In extreme conditions, it also acts as an oxidizing agent. Plaster of Paris has fire resistance quality and its material is ideal for heat insulation. The material does not shrink when it sets. Hence, there are no cracks on the surface of the dry Plaster of Paris. At high temperatures, the plaster of Paris also decomposes and becomes toxic oxides.” (https://www.vedantu.com/jee-main/chemistry-plaster-of-paris)
The “toxic oxides” would be sulfur oxides. POP can withstand temperatures of 1200F (650C) without decomposing. A typical pipe will be combusting tobacco at 500-900F (260-482C) well below this threshold. (https://cameochemicals.noaa.gov/chemical/25054)
The POP powder was mixed with tap water as per product instructions. It was then applied to the interior of the tobacco chamber in an even coating using a wood splint. A pipe cleaner was used in the airway to prevent the POP from blocking it.
While the POP was setting-up I began working on re-texturing the stummel. I used a Dremel rotary tool with the bit shown in the below photo. I tried to carve irregular sized and shaped indentations to the surface of the stummel where they had been worn away.
The POP had begun to harden. While it was still soft enough to mold, I used the PipNet and the #3 blades to carve an even hole for the tobacco chamber. This newly surfaced chamber was smoothed with my finger wetted with water.
While still damp, I emptied a capsule of activated carbon powder (charcoal) into the tobacco chamber, plugged it with my palm and shook the stummel vigorously. The excess was dumped out aht I blew through the pipe to remove the remaining dust. The POP was allowed to dry for another 15 minutes.
With the stummel now re-textured it needed to be dyed. According to the Savinelly website the original dye or stain was a “natural burgundy color”. I did not have a natural burgundy dye so I used black. The black Fiebing’s Leather dye was applied with a folded pipe cleaner and flamed with a disposable lighter.
I then wiped the stummel dry with a paper towel. I was not concerned with waiting for a certain amount of time for the dye to dry or set. I was just wanting the dye to stain the textured indentations darker than the raised surfaces.
I returned the stummel to the workbench where I wiped the stummel with several make-up pads wetted with 95% ethyl alcohol to remove excess dye.
The stummel was then sanded with a 400 grit sanding sponge. This removed the black dyed briar surface revealing.
The sanding could not completely lighten the previously charred briar at the front, back and around the rim.
The stummel was lightly sanded with a series of sanding sponges from 1500-3500. The stummel was wiped with an alcohol wetted make-up pad between sponges. I then micro-meshed the stummel with the 40000-12000 micro-mesh pads. I again wiped the stummel with an alcohol wetted make-up pad between pads.
I then applied a coating of Before and After Restoration Balm to the stummel and let it sit for 30 minutes.
30 minutes later the excess balm was wiped away using the inside of a cotton athletic sock. The terry cloth did a fine job of getting into the textured surface and made the stummel look better than it had in many years.
With the stummel looking very nice it needed a stem to go with it. I taped the shank with painters tape to protect it from my sanding.
I then sanded the stem with a sequence of sanding sponges from 1000-3500. Between sponges I rubbed mineral oil onto the stem and wiped away the excess oil with a paper towel.
Once finished with the sanding sponges I used micro-mesh pads 4000-12000 in sequence. Between each of these pads I applied a drop of Obsidian Oil, rubbed it onto the stem with my finger and wiped the stem with a paper towel.
I polished the stem with Before and After Fine polish using a soft cotton cloth.
The last polishing was done with Before and After Extra Fine polish using the same soft cotton cloth. Although a clean spot was used.
To protect the briar frown the elements I chose to use Renaissance Micro-crystalline Wax. And, no not because I love the smell of it, which I do. I applied it with a finger and a baby toothbrush. The product instructions say that it hardens instantly with a rub from a soft sloth. I allowed it to dry for a few minutes before buffing with a soft cloth. I did this 3 times then took it to the buffer where I buffed it with a clean flannel wheel. The stem received several coats of carnauba wax with the carnauba wax wheel from the buffer.
Overall I feel victorious with this restoration. No, the Roma will certainly not win any beauty contests but it has been returned to serviceable and it looks pretty darn good. I am not pleased with the finish of the stem. The more I think about it, the more I think it was my error in applying the CA prior to scrubbing the stem with Soft Scrub. I think the bleaching action of the Soft Scrub is what led to the discoloring of the black CA. Given, it can only be readily seen with bright light, it still annoys me. The polish of the stem turned out well. I am also rather pleased with my first attempt at re-texturing a Savinelli pipe. Though far from perfect it was definitely a learning process and one that I think deserves far more practice. The pipe feels very nice in hand and has proven to be a shape that is comfortable to clench. I am sure it will be a fine companion for outdoor activities where a more refined specimen might not venture; activities like gardening, fishing, yard work, etc… I do hope that you have found something here helpful in the care, maintenance or restoration of your own smokey companions. If you like this sort of thing, please click the like and subscribe buttons. I thank you for reading the rambling of an old pipe lover.
Below are some photos of the finished Savinelli Roma 677 KS.
Going from one extreme to the next. The previous blog was an elegant little Medico Jet Stream, this pipe is neither of those things. It is big and bold. I am not sure why I can’t settle on a pipe shape that is my favorite. Last time I checked my top three list of favorite shapes had 5 shapes in it. I know what you are thinking, “What the heck? A top three list with only 5?” Oh, not what you were thinking? Well I guess I’m not good at counting nor interpreting thoughts. Anyway, here I have a large Kaywoodie HandMade Colossus that I picked up on eBay after having so much fun with three previous Kaywoodie HandMade pipes. Here are links to them if you are interested: HandMade Saddle Stem, HandMade Tapered Stem and just HandMade. All three of those pipes were large blocky paneled Custombilt style pipes. This one has curves, I like curves.
The Kaywoodie upon arrival
Before I get too carried away with qualitative emotional nonsense let’s have a look at what I was looking at.
Yeah, it was big, bold and a mess. This pipe had been smoked a lot more than the previous HandMades. Perhaps that meant that it was a pipe that was clenched. The previous HandMades had masses that would test the jaw strength of Charles Atlas himself. Okay, that was an attempt at 1949-style humor (about the time of these pipes).
Besides, by the look of the chunk missing from the bottom of the stem, clenching most likely was involved. I had a dirty, oxidized, busted-up, relic of a bygone era and I was in heaven.
Kaywoodie HandMade Background
I am going to use the historical information from the previous blogs about Kaywoodie HandMade pipes because I am a rather lazy Gen-X slacker and I don’t have to credit myself, do I?
“Kaywoodie name first appearing in February of 1919.” (Kaywoodie History – Greywoodie LLC) The history of Kaywoodie pipes is fortunately well documented thus, allowing rather precise dates for a Kaywoodie collector to declare the provenance of their charges. The above pictured Kaywoodie is stamped HANDMADE over KAYWOODIE (left) and IMPORTED BRIAR (right). No shape number is present.
Using this information and referring to the Kaywoodie Collectors’ Guide listed on pipedia.org I found that these pipes were made during the following years:
“The Oversize Kaywoodies were, as the name implies, “Giants”. Lowndes notes that these pipes were stamped simply, “Hand-Made”. The pipes were all roughly “bulldogish” in appearance and were available in the following styles and grades7 :
All of this generally fits this pipe. I still wanted to give this pipe a Kaywoodie name rather than “bulldogish” as mentioned above. Looking at the below two pages from the 1947 Kaywoodie catalog, I would have to say that the Kaywoodie HandMade in hand is either a “Colossus” or a “John Henry”.
Now examining the areas circled on the two images from the 1947 Kaywoodie catalog and the photograph of this pipe I am more inclined to call this pipe a “Colossus”. Now, this could probably be argued either way but the beading appears to have a slight vertical increase or rise from the shank in both this pipe and the Colossus image. This pipe is certainly large enough to have included another line for stamping “Colossus”- darn it Kaywoodie.
So, I guess I will have to call this pipe a Kaywoodie HandMade Colossus. This also means that my Obsessive-compulsive disorder (OCD) will demand that I change all of the photos that I have taken and labeled as “bulldog” to Colossus. Bah! There, 34 photos and one folder relabeled as well the term “bulldog” within the document have been changed to Colossus.
The Colossus Restoration
As usual the restoration began with a clean denim piece as a work surface. I was a little worried about the condition of the rim and cleaning it of the lava.
Before I could address the rim I wanted to ream the tobacco chamber and inspect it. The tools were gathered and included the PipNet with #2 and #3 blades, General triangular scraper (with the tip ground round), Smokingpipes Low Country Reamer and a wood dowel wrapped in 220 sandpaper.
The tobacco chamber of the Colossus was not heavily caked indicating that it had been reamed on occasion. The existing cake was very hard and resisted reaming. Once removed the interior of the chamber was sanded and revealed no heat damage from smoking but there were a couple of small gouges from exuberant scraping.
Next, I took to cleaning out the stem. I continue to not be a fan of non-removable stingers. This stem required several more pipe cleaners than pictured to remove all the yuck (yuck is the technical term for smoked tobacco residue) from such a small hole and short stem.
No, I did not cut off the stinger, in a bout of frustration. It’s just hiding behind the pipe cleaner which is acting as a hanger for the stem as it goes into the Before and After Deoxidizing solution. The stem soaked in deox (my term for the Deoxidizing solution) for 4 hours.
With the stem in deox, I turned my attention to the stummel. It was time to see what it looked like without 70+ years worth of dust, dirt and grime. The stummel was initially scrubbed with a medium bristle toothbrush and undiluted Murphy’s Oil Soap. I say initially because there were 3 applications of soap and an upgrade to a stiffer nylon scrub brush. Wow, I just realized that I need to clean that faucet of all the Murphy’s spatter. The stummel was rinsed with warm water and dried with a cotton dish towel. While I was at the sink I also used a nylon shank brush with a bit of Dawn dish soap to scrub the airway within the shank. This didn’t do much other than soften the yuck in the shank.
With the exterior mostly clean, except the rim, I attacked the shank. The first thing I did was an exploratory cotton swab dipped in 99% isopropyl alcohol. It came back fouled with yuck. Next I started scraping with a dental scraper. The scraping produced a good amount of yuck which was surprisingly dry and crumbly. The next attack was of the chemical variety – Geneva Convention be damned. I poured about 4 ml of the 99% isopropyl alcohol into the bowl and left it to flow into the shank. I then scrubbed the shank with a nylon shank brush and the alcohol and poured it into the medicine cup. The alcohol was significantly darkened.
After numerous series of scraping – alcohol scrubbing – cotto swabbing – folded bristle pipe cleaner scrubbings the shank was cleaned out.
Then came the dreaded lava removal from the rim. The rim had received frequent splashes of alcohol during the shank cleaning and this helped to soften the lava. I used a brass brush dipped in 99% isopropyl alcohol to scrub the rusticated rim in line with the rustications. This worked very well. A couple of spots did require scraping with a fine pointed dental pick.
WIth the rim cleaned off and the grime removed from the stummel I examined it for spots to fill. I only found one that I thought needed attention. It probably would have been fine to leave it alone but I filled it with brown cyanoacrylate and carefully placed briar dust anyway.
The new fill was lightly sanded with a 400 grit sanding sponge then gouged with a fly tying bodkin and dental scraper to add lines in an attempt to match the surrounding rustication.
Since this stummel was heavily carved and rusticated there was nothing to sand or micro-mesh. I then applied a coat of Before and After Restoration Balm with my finger and worked the balm into the rustications with a baby toothbrush.
After 4 hours of soaking in the Before and After Deoxidizing solution the stem was removed from the solution and allowed to drip off some of the solution. The below photo also shows that I followed local electrical code when finishing the basement – ground fault interrupter outlets and all.
The excess Deoxidizing solution was vigorously rubbed from the stem with a coarse shop rag to absorb the solution and abrade off some of the oxidized rubber. The color of the stem was much improved.
Back at the workbench, I ran a couple more pipe cleaners through the stem to rid the airway of any deox solution and began scrubbing the stem with Soft Scrub on make-up pads. The oxidation of the stem was quite heavy and several pads and additional Soft Scrub were used.
More Soft Scrub. Eventually the stem looked nice and black with no brown. It was then coated with a layer of mineral oil both outside and in the airway. I allowed the oil to soak into the vulcanite for 30 minutes before continuing to work on the stem.
I removed the mineral oil from the button area of the stem using 99% isopropyl alcohol on a cotton swab. I needed to rebuild the broken piece of the stem. Here is the before photo to illustrate what I was rebuilding.
I needed a “dam” to stop the CA from flowing into and blocking the airway. I chose to use a This Falcon pipe cleaner folded in half as the basis of this dam. I then wrapped the folded end of the pipe cleaner in clear Scotch tape. The cheap stuff, not the 3M product. CA does not adhere well to Scotch tape and the clear tape does not dissolve with applications of CA drying accelerator like the good stuff, 3M, does. The excess tape was trimmed from the dam with scissors. The dam was then inserted into the airway. I failed to photo document the early stages of the CA building. I get into a “rebuilding tunnel vision mentality” when doing this and frequently forget to photograph the process. When I did remember, I had applied about 4-5 layers of CA and spritzed each with a CA drying accelerator. A key to doing this is to use several small applications rather than trying to fill the whole gap all at once.
Eventually I had enough material built up to allow me to file the new fill smoothly to the existing stem. I used a flat needle file for the smoothing. There remained one depression that would require additional CA.
With additional applications, filing and sanding the stem was mostly rebuilt. Now I had to rebuild the button. To do this I use the clear Scotch tape to seal off the newly constructed stem surface. This will allow only the button to receive new CA. The CA is applied in a thin layer. The stem is then flipped over so the CA hangs down by surface tension. While holding the stem upside down I spritzed the wet CA with the accelerator. Quickly before the accelerator completely cures the CA, I turn the stem back over and use a sharp knife to cut a straight line for the back of the button.
After the CA cured completely, I removed the tape and the excess CA came off with it.
The new button is then shaped with a flat needle file and a 400 sanding sponge.
Here is a photo of the new button in profile.
The reconstruction of the broken area was complete but the airway was not very well shaped. The lower part needed additional material and a nice smooth surinterior surface. I needed another dam. I cut a piece from a plastic lid.
Here you can see the area I wanted to fill. The stem is held upside down.
The new dam would allow the CA to flow on top of it and adhere to the vulcanite above it.
Two applications were applied with drying accelerators spritzed onto each. The first penetrated into the stem while the second built up additional material on the outer button.
The dam was removed
A wood block was used to cut away some excess CA. The remaining material was filed then sanded.
To smooth the airway I cut a tapered piece from an emery board.
This abrasive emery board was used to sand the interior of the stem’s airway.
Another view of the emery board.
The airway was smooth with the proper shape.
The last reconstructive surgery needed to rebuild the top of the button. I wrapped the stem below the button with clear Scotch tape to protect the stem from additional CA.
A bead of black CA was applied to the button. This was held upside down and spritzed with an accelerator..
While still soft before the curing completed, I cut along the back side of the button with an Exacto Knife. I actually did this twice as I failed to photograph the first tape removal. A second taping was done and a second application of CA. this was also cut as before..
Here is a photo of the excess CA from the second application.
The cured CA was then filed and sanded to shape.
Further sanding defined the shape better.
The shank of the pipe was taped to protect the carving and rustications while the stem was then sanded with the 400-1000 sanding sponges
The sanding progressed from the 1000-3500 sanding sponges. I applied a coating of mineral oil to the stem between sponges. The oil was rubbed in by finger tip and wiped off with a paper towel.
Further fine finishing was then done with micro-mesh pads 4000-12000. Between each of these pads a light coating of Obsidian Oil was applied by finger tip and wiped off with a paper towel.
Final polishing was done with Before and After Fine Polish applied by finger tip and vigorously rubbed with a soft cotton cloth.
The final polishing was done with Before and After Extra Fine Polish as above.
The final step of the restoration was to apply several coats of carnauba wax with the buffer. I swapped a clean flannel wheel after waxing and used it to heat and absorb any excess was from the pipe in an attempt to avoid an excess carnauba wax deposit within the rustication grooves.
The fourth Kaywoodie HandMade was completed. Overall I was happy with the restoration. The old vulcanite never did look like I had hoped it would, as there are still shades of brown visible in bright light. The surface polished well but the color is not the black I wanted. The rustication of this pipe obscures any sign of briar grain save for some lovely straight grain on the flat stamped surfaces and swirling bird’s eye on the bottom. The wood did appear to come back to life with the cleaning and Restoration Balm. The pipe feels excellent in hand due to the rustication and size. I am sure that it will provide long smoking sessions that will remain very cool due to the substantial bowl and thick briar walls. The dimensions of this pipe are as follows:
Length: 5.35 in./ 135.89 mm.
Weight: 2.29 oz./ 65.00 g.
Bowl Height: 1.71 in./ 43.43mm.
Chamber Depth: 1.39 in./ 35.31 mm.
Chamber Diameter: 0.83 in./ 21.08 mm.
Outside Diameter: 2.12 in./ 53.85 mm.
I do hope that you have found something here useful to your own pipe care or restorations. If you like this sort of thing, please click the like and subscribe buttons. Thank you for reading the ramblings of an old pipe lover.
Below are some photos of the finished Kaywoodie HandMade Colossus.
I love the oddities and curiosities, as I call them, regarding the designs of pipes. I have a 4 pipe rack on my mantle that holds pipes which rotate out occasionally as I find a new oddity. Currently they are; a c.1924 MLC Hell Maria, a Wally Frank Windcapped Horn, a Tracy Mincer Doodler and Weber Windpruf. These have all been featured in previous blogs and I linked their respective blogs to their name.
Medico’s Jet Stream fits in the category of oddities and curiosities with its uniquely streamlined shape and place in history. As a kid growing up in the late 1960s and 1970’s I remember advertisements for products using terms like “futuristic”, ”rocket age”, “space age polymers”, etc… Heck, George Jetson even sported a pipe back then,
I would never accuse Mr. Jetson of contributing to my obsession with tobacco pipes or addiction to nicotine , rather that was the world some of us grew up in. This Medico Jet Stream epitomizes that world for me.
Background on Medico and the Jet Stream
Medico, as a company, has roots back far further than that. According to TobaccoPipes.com,
“When you trace the Medico tobacco pipes history, you have to trace it back to the origins of the company that created it. The company that originated the Medico brand is the S.M Frank & Co. This company dates back to the year 1900. In that year, a man named Sam Frank began selling pipes and related tobacco products. Eventually, the company began making its own line of pipes. With the help of an experienced pipe manufacturer, Ferdinand Feuerbach, the company produced the popular Royal DeMuth and Hesson Guard Milano tobacco pipes. The company continued to grow well into the early part of the 1930s.
By the early 1930s, there were some concerns about the tars and nicotine found in tobacco smoke. In order to mellow out the flavor of hot tobacco smoke as well as to capture the tars and nicotine, the S.M. Frank & Co. introduced the Medico pipe filter. This is an absorbent paper filter that many people still use to this day. In order to accommodate the new filter, the company developed an accompanying brand of pipes known as Medico. That line of pipes continues in production today.
The company ended up buying some of their main competition in 1955. That year the Kaywoodie brands came under the S.M. Frank Company. The Medico brand continued production through this transition without many changes. The next big change for the brand came in the late 1960s. In 1966, the company developed a synthetic material that combined the traditional briar wood with resins. It is known as Brylon. At that time, all Medico pipes were made from imported briar wood. In order to keep production costs down, the company began offering some lines with Brylon. Today, that is still true.
Today, the Medico brand of pipes is still a top selling one for the S.M Frank & Co. This line of pipes comes in thirteen different finishes with five made of briar wood and the rest from Brylon. All come with the push bit with a filter inside. The filter is easily changed out when the smoker desires. In the briar wood finishes, this line includes the Silver Crest, Premier, Bold Rebel, Kensington, and Windsor. In the Brylon, the line includes the Lancer, Apollo, Standard, Varsity, Conqueror, Medalist, Cavalier, and V.E.Q. As far as price, the briar wood pipes tend to be higher in cost that the Brylon ones.” (Medico Pipes History | TobaccoPipes.com)
There was no mention of the Jet Stream in the above article. Further research into the Jet Stream led me to a post by Anthony Cook, on Steve Laug’s rebornpipes.com, from January 2015. Anthony was restoring a Jet Stream and wrote:
From all of the above I can pretty assuredly state that this Medico Jet Stream was produced sometime between 1963-1971.
The pipe upon arrival
This pipe came to me as one of 12 pipes in a lot from Minneapolis Minnesota. The Jet Stream was not the target of this acquisition. It was a bonus. Below are some photos of the condition of the pipe prior to any work being done.
The little pipe was in very good condition. It had been smoked though not very heavily. There were some lava deposits on the rim and there was a light cake in the tobacco chamber. The filter within the stem showed obvious signs of use as did the tooth chatter on the stem. The finish on the pipe was a heavy clear coat which I hoped was not some “space age polymer”. This looked like it would be a relaxing evening restoration of a pipe that may share my birthday.
The Restoration
This restoration, like most, started with a clean denim piece as a work surface.
I started working with the stem. The aluminum tenon cleaned up quickly with cotton swabs and 99% isopropyl alcohol. Deeper in the stem whe airway changed to the plastic or nylon of the stem. Here the cleaning became a bit more difficult. The draft hole was 6 mm for a good deal of the length of the stem, the aluminum inner tube. This is to fit the 2 ¼ inch Medico filter length. Apologies for changing measuring units, there. There was a slight change in diameter where the draft hole changed from aluminum to plastic. This “step” seemed to have trapped and deposited smoking residues. The diameter was too large to be cleaned with a single pipe cleaner but a doubled over cleaner worked well.
The shank cleaned up very quickly. This indicated that the previous owner had not only smoked the pipe little but also used a filter regularly. The draft hole from the bowl to the shank was the typical diameter and was cleaned out with bristle pipe cleaners dipped in 99% isopropyl alcohol. I failed to photograph this.
Next I addressed the lava around the rim. The heat from smoking or from previous cleanings appeared to have removed some of the finish from the immediate rim. There also appeared to be some charring of the briar at the front rim area. I wetted the rim with saliva and scraped it with a sharp pocket knife.
Next I tried removing the old finish with 95% ethyl alcohol. The finish laughed at me and remained untouched. Hmm. The next assault was with acetone on a make-up pad. This met with success.
Several acetone soaked make-up pads and cold fingers later, the finish was removed. I will admit to using a little bit of 0000 steel wool dipped in acetone as well for a couple of spots where the finish coating had pooled.
Next came the reaming. This bowl is small in size and due to the PipNet having a broken #1 blade, I was forced to use the Scottie Stainless Steel Reaming Tool.
The Scottie performed well and cleared out the cake. I only had to scrape a minimal amount and sanded the chamber with 220 sandpaper wrapped around a wood dowel and finish sanded with 320 sandpaper wrapped around a Sharpie marker. The chamber was taken down to bare briar and showed no signs of any damage.
Next I addressed a few of the fills that the pipe had received during manufacture. They were the pink wood fill that was used by many makers. These were hard and difficult to pick out.
In preparation for the sanding that comes with new fills I taped the stampings to protect them.
None of the replacement fills were very deep. I used brown cyanoacrylate (CA, super glue) and briar dust to fill the pits. The fills were then sanded with a 400 sanding sponge.
With The new fills finished I taped over the “Jet” logo to keep it safe from my sanding. None of the tooth chatter was deep enough to require filling with black CA.
I wanted the pipe to remain intact for the sanding to preserve the tight contact joints on the stummel from being rounded by sanding. I sanded both the stem and stummel with the sequence of sanding sponges from 400-1500. The stummel and stem were wiped with a make-up pad dipped in alcohol between each sponge. Since this pipe had a nylon stem, I did not worry about it discoloring like vulcanite would have with alcohol wipes.
The sanding progressed through the 200-3500 sponges followed by alcohol wipes as above. The protective tape was removed with the completion of the 3000 sponge.
The final smoothing and polish came from using the micro-mesh pads in sequence from 4000-12000. Again wiping between pads with the alcohol moistened make-up pad.
I applied a coating of Before and After Restoration Balm to the stummel and allowed it to sit for 30 minutes.
After 30 minutes the balm was wiped away using the inside of an athletic sock.
The “Jet” logo had gotten noticeably lighter with all the micro-meshing. I decided to paint it with a white acrylic model paint.
Once the paint was dry I lightly buffed the surface with the 4000 micro-mesh pad. In a couple of places I used the fly tying bodkin to scrape unwanted white paint from places between the letters.
The final steps of this restoration were to apply several coats of carnauba wax with the buffer.
Overall I am very pleased with how well this little Jet Stream turned out. I am not a fan of the clear coat finish and was quite glad to see it gone. The briar grain, though not spectacular, is nice. In hindsight, I think a contrast stain might have been interesting. The nylon stem sanded and polished better than I had thought it would. The light weight of this pipe would make for a very comfortable clencher but the small bowl is not something I would prefer. The dimensions of this pipe are as follows:
Length: 5.37 in./ 136.40 mm.
Weight: 0.88 oz./ 25.00 g.
Bowl Height: 1.22 in./ 30.99 mm.
Chamber Depth: 1.04 in./ 26.42 mm.
Chamber Diameter: 0.75 in./ 19.05 mm.
Outside Diameter: 1.30 in./ 33.02 mm.
I do hope that you have found something here useful to your own pipe care or restorations. If you like this sort of thing, please click the like and subscribe buttons. Thank you for reading the ramblings of an old pipe lover.
Below are some photos of the finished Medico Jet Stream.
I have a Passatore here. Wait a minute, I am getting ahead of myself. Let me start with what I had in my hand. This pipe came to me from Greece as part of a 6 pipe estate lot. Previous blogs have discussed a Parker and a Savinelli that were part of the same lot. I linked their names to the respective blog posts if you are interested in reading about them. Here are some photos of the pipe upon its arrival before I knew what to even call this beauty.
I looked at the stampings on the pipe in hand and tried to decipher the weak stamp and ornate logo.
I was thinking the stamp looked like it started with a “J” and was first drawn towards Jeantet. All of the “J” Jeantet logos were very clearly a “J” and not ornate. I started scouring pipephil.eu logos. Not finding any matches with their single letter or circled letter logos was getting disheartening. I then clicked their “ornate spot” logo and found a match.
This was the entry on pipephil.eu which led me to the maker. Though the photo was not great it was definitely the same as the pipe in hand. This led me to Passatore.
What I was thinking was a “J” from the weak stamp and logo was a “P”. The 3 digit shape stamp, I assume it is a shape stamp, also was present on the Passatore in hand.
Passatore. That was a pipe maker that I had never heard of. Actually it was a word I wasn’t familiar with either. It sounded Italian so I started with that.
That in itself is kind of fun, I think of it as, one’s pipe is a “guide” on how to live life – with relaxed and contemplative being key practices.
I struggled to find any substantial information about Passatore as a pipe brand. I reached out to Steve Laug, of rebornpipes.com, to see if he was familiar with the brand. He said that he had not restored one, which is saying something, but that he had received a Passatore box used to package a pipe sent to him from Budapest.
(Photo courtesy of Steve Laug)
Further internet searches led to a couple of European pipe shops that carried Passatore pipes:
https://www.haddockspipeshop.com/en/ This shop had 15 different Passatore models as well as an assortment of Passatore accessories like lighters, pipe tools and leather pouches.
All of my searching for historical information on Passatore was not leading me anywhere and I certainly do not need to go shopping for more pipes, even very pretty olive woods. I turned to restoring the Passatore that I had. Initial inspection revealed a pipe that needed some restoration to return it to glory or at least return it to proper working condition. The stem had come unglued to it’s brass accent bands and had deep tooth chatter on both surfaces, the rim was lava encrusted and probably darkened with char, the tobacco chamber had a respectable cake and there appeared to be two area where someone had attempted to glue cracks in the stummel. Both of these cracks looked superficial and not structural.
Cleaning the Stem
I started with a clean denim piece on the work surface. The parts of the stem made me
think of the old Wendy’s commercial “Parts is parts”. I’ll link to that for those wondering about my sanity or sense of humor. The first thing I did with the parts was to clean the existing glue from the surfaces to be reglued. This was done by softening the existing glue remnants with 95% ethyl alcohol and scraping with a sharp pocket knife. Removing the old glue was necessary to get a tight fit of the parts.
Before I reglued I wanted to clean the stem completely. It being apart made the cleaning much easier. Scraping with the brass rings and tenon would have been impossible.
With the stem cleaned I started scraping the calcium from the button end of the stem.
The calcium in the tooth dents was problematic until I used a brass brush. The brush dipped in alcohol made the process quick and easy.
Below you can see that the dent on the bottom side was deep.
The stem cleaned out quickly with alcohol dipped bristle pipe cleaners.
Ready for gluing. Black cyanoacrylate (CA, super glue) was used to glue the stem parts back together.
Reaming the Tobacco Chamber
Once glued I turned my attention to the stummel while the CA was setting up. I gathered the reaming gear onto the plastic envelope I use as a reaming surface; the PipNet with #2 and #3 blades, Smokingpipes Low Country knife, General triangular scraper, the 220 sandpaper wrapped wood dowel and the 320 sandpaper wrapped Sharpie marker.
The PipNet with #2 blades enlarged the tobacco chamber by removing the first layers of cake. The cake was hard and brittle.
Subsequent reaming was done with the PipNet and #3 blades along with the knife and scraper. Once reaming was completed I sanded the interior with the 220 and 320 sandpapers to get to bare briar. This is when the first larger problem revealed itself. The chamber was charred with fairly deep burn damage. I looked like an over exuberant scraping had occurred and the charring occurred along the scraped surfaces.
I knew I would have to deal with the chamber interior in time. For now I continued with the exterior. The rim needed to be rid of the lava deposits. I did this with a sharp pocket knife and careful scraping.
Cleaning the Stummel
Next came the Murphy Oil Soap scrub. The Murphy’s was used undiluted and scrubbed with a medium bristle toothbrush. I should say the first application of Murphy’s was done as above. The second and third applications were also undiluted but with a more rigid nylon scrub brush. The stummel was very dirt and grime encrusted.
The stummel was rinsed with warm water and dried with a cotton dish towel.
I returned to the workbench and addressed the old crack repair glue. I used a pocket knife to carefully scrape the glue.
The same with the glue along the shank, careful scraping with a pocket knife.
Once the glue was scraped off I wiped the stummel off with a make-up pad dipped in 95% ethyl alcohol. The pad was removing some old finish or wax and stain.
There still remained a few shiny spots so I switched to acetone on a make-up pad and repeated the wipe. This eliminated the shiny spots and removed a bit more of whatever was left on the stummel.
I began sanding with the 320 sanding sponge. I wanted to remove the darkened briar from the rim without having to actually “top” it.. This worked, kind of. Oh, in the photo below you can see that tobacco chamber scrape burn scarring that I was trying to explain earlier.
The rim remained darkened with char. Below you can see the rim is lighter but still not what I wanted. I had only used oxalic acid one other time. That was a technique that I want to add to my toolkit. Practice makes perfect, eh?
My jar of oxalic acid from last week.
Oh yeah, it is supersaturated now. New crystals growing in the jar.
I applied the solution to the stummel with a cotton swab and let it sit for 30 minutes.
After 30 minutes I applied a second coat and let that sit for 30 minutes. There is another better look at the tobacco chamber scrape charring (below).
During the hour that I was waiting for the oxalic acid to do what it does, I started working on another pipe. I really do not like having two projects going at the same time if I am trying to photo-document them. Hopefully the next pipe will be in a future blog. It is a Millard Dublin. Well, I guess I just ruined that surprise…
An hour later I took the stummel to the sink and rinsed off any of the white oxalic acid crystals and residue. I made a baking soda solution and dipped the nylon scrub brush into the baking soda and scrubbed the stummel. I re-dipped the brush many times in an attempt to neutralize the oxalic acid with the baking soda.
I returned the stummel to the workbench and wiped the stummel with a make-up pad dipped in 95% ethyl alcohol. Below are photos where I tried to show the lightening of the briar by the oxalic acid and the tobacco chamber damage.
The detail for the chamber damage is evident but the lightening with oxalic acid remained a work in progress.
Repairing the Tobacco Chamber
The next task was to deal with the tobacco chamber damage. I have successfully used J.B. Weld epoxy to repair heat damage like this before. I have also successfully used sodium silicate also known as waterglass in similar repairs. It had been a long time since I had used the sodium silicate so, I opted for it.
I used a disposable pipet to pull 2 ml of sodium silicate from the stock bottle and placed it onto a plastic tray.
I then opened a capsule of activated charcoal and mixed ½ of the contents to the sodium silicate.
The mixture was stirred with the pipe spike on my pocket knife. Once mixed the consistency was that of room temperature butter. It would spread but not flow. The spike was used to apply the mixture to the interior of the chamber filling the grooves. I put on a nitrile glove and used my finger to work the mixture into the rough areas and smooth the interior surface.
The stummel was set aside to dry for 24 hours. This is not a magic number. That is just how long I waited to sand the chamber. I still worked on the pipe since the sodium silicate was not flowing and had set-up within 20 minutes.
Repairing the Stem
While the sodium silicate was drying I continued to work on the now dry stem. I have to say, this may be my best documented stem rebuilding yet. Still not perfect but pretty complete. This stem was acrylic not vulcanite so there was no oxidation to deal with. I sanded the area that I was going to work on to roughen the surface and aid the CA sticking to it. Then I applied drops of black CA to the dents. None of these dents were too deep so I thought only one application would be sufficient to fill them.
Next I use a CA drying accelerator to spritz the wet CA . I did not photograph that stem but here is the product that I use.
The accelerator dries the CA in seconds greatly speeding up this process. Next, I filed the drops smooth to the acrylic stem surface with a flat needle file and smooth with a 320 and/or 400 sanding sponge.
The stem was wiped with a paper towel very lightly moistened with alcohol. This removes the sanding dust. I applied a drop of fresh black CA and spread it evenly over a larger area. The larger area makes it easier to blend the fills and is less noticeable when finished.
The larger area is spritzed with accelerator and again filed then sanded.
Tadah!
Now to rebuild the button. This is where my photo documenting went to heck. I used the cheap transparent Scotch tape, not the good stuff. The satin finish 3M tape, the good stuff, starts to dissolve with this accelerator while the cheap stuff doesn’t. I wrap the tape immediately behind the button sealing off the newly repaired surface from more CA. I then apply a layer of CA to the button. I then flip the stem over so the CA hangs down like a drop of water hanging off your fingertip. While holding the stem upside down I spritz the CA with the accelerator. Then before the CA completely sets up, you have about 3-5 seconds, I flip the stem back over and cut the still soft CA with a sharp knife along the back side of the button. This cut goes down to the acrylic stem. The Scotch tape is removed along with the excess CA that is now hard. Leaving you with a straight edge that requires little sanding or shaping. The button is then shaped with a needle file and sandpaper.
If you missed any of those steps, I will do it again with the bottom. And less typing this time.
Application of black CA to the dent. This one was deeper so a couple of applications were applied. Spritz with accelerator.
Apply additional CA, because it was a deep dent. Spritz with accelerator.
File the CA smooth
File and sand smooth.
Apply CA to a larger area. Spritz with accelerator. File and sand smooth.
Tape with Scotch tape.
Apply a layer of CA to the button. Invert and spritz.
Before it hardens, cut along the edge of the button with a sharp knife.
Peel the tape off along with the cut-off CA.
Shape the button with a file and sandpaper. Tadah! Now you know my process.
Filling the flaws in the Stummel
This stummel needed only a few fills but two of them were big ones; the crack at the bowl-shank junction and the bottom of the shank were long. I used a fine sharp dental pick to get as much material out of the crack as I could. Next I applied a layer of Thin CA with a fly tying bodkin to the crack, the thin CA flowed readily though the crack. I then sanded the crack with a dust filled (AKA dirty)sanding sponge. THe dust from the sponges along with new dust generated by the sponge filled in the crack and combined with the thinCA to fill the crack. It still was visible as a CA Fill appears dark but it was a strong smooth surface.
The pits on the stummel were filled using briar dust pushed into the pit. Then a small drop of Thin CA was applied to the dust. The CA soaked into the dust and affixed it to the surrounding briar. The surface was then sanded smooth.
Contrast Staining the Stummel
I was not happy with the oxalic acid lightening of the briar. I think I need more patience. I will continue to practice. Below you can see the pipe sanded from the 400-1000 sanding sponge. It was ready for the next step on my impatience.
Rather than patience and practice, I chose to contrast stain the stummel with Black Fiebing’s Leather Dye. I gathered the dye materials: Fiebing’s black, a pipe cleaner to use as an applicator, a disposable lighter, and covered the work surface with paper towels.
Below the stummel has been dyed black and flamed. The flaming is just that, since the dye is an alcohol based dye, flaming it lights the stummel on fire burning off the alcohol. There is a pretty blue flame that goes out quickly but the heat helps the dye set to the briar. THe whole thing is pretty much dry immediately after the flaming.
Since I did not care to let the dye dry, since I was going to be removing it from the majority of the stummel. I did not wait for it to dry completely. I started sanding with a 320 sanding sponge to remove the outer surface that was just dyed. The dye penetrates the soft textured briar more deeply than the harder briar. By sanding the surface I removed the outermost layer of briar leaving some of the grain darker from dye than other grain. THis accentuates the grain and darkens the whole stummel slightly.
More sanding with the 400-1000 sanding sponges. Care was taken around and on the stamps to remove as little material as possible to retain as much of the stamp as possible.
Now I was back to where I was before I dyed the stummel and it was bedtime.
Final sanding and Micro-Meshing
The next day was spent typing up this monstrosity of a restoration. I am so looking forward to doing a couple easy ones after this and the preceding restore. Anyway, the sanding employed the 1500-3500 sanding sponges in sequence. Between each sponge the stummel and stem were wiped with an alcohol wetted make-up pad.
Next, I used the 4000-12000 micro-mesh pads in sequence. Between the pads the pipe was wiped with an alcohol wetted make-up pad.
The pipe then received a coating of Before and After Restoration Balm.
The balm was allowed to sit for 45 minutes then it was wiped with an inside out athletic sock.
I was finally getting close to finishing this project. I polished the stem with Before and After Fine Polish followed by Before and After Extra Fine. Each polish was hand rubbed using a soft cotton cloth.
The pipe was reassembled and taken to the buffer for several coats of carnauba wax applied with the flannel buffer wheel. There are stories of how Civil War surgeons were rated by how much blood they wore on their aprons. More blood equated to a better surgeon. If that holds true for pipe restorations then I must be a truly amazing pipe surgeon. I mean look at the denim piece on the work surface (AKA, my apron).
Overall I am darned glad this restoration is over, I mean I am happy with the way this pipe turned out. The gluing of the stem is secure and looks like nothing ever happened. The acrylic stem polished nicely. The contrast stain looks good and conceals the blemishes of the rim charring. The tobacco chamber repairs resulted in a smooth chamber that will receive a bowl coating of maple syrup and carbon powder in the morning. While the two large cracks are still obvious they are now smooth and have lost the Braille texture and appearance. This Passatore is a pleasure to hold and to clench. It is a super feeling little pipe. I am not sure what Passatore calls the shape 349 but whatever it is it is a great little shape in hand. I do hope that you not only survived the longest pipe restoration in the world but also can use something from this in the restorations or pipe care of your own. If you like this sort of thing, please click the like and subscribe buttons. I thank you for sticking with this blog and reading the ramblings of an old pipe lover.
Below are some photos of the finished Passatore 349.
The interior looks rough but it feels smooth.
There is a slightly noticeable color difference between the black acrylic and black CA stem
I have a few Savinelli pipes and they are all fine smokers. This poor beat-up Porto Cervo must be an absolutely wonderful smoking pipe. It had been smoked so much that I questioned if it was even salvageable. I wondered this more than once during this restoration, “Can I return this pipe to service?” That is why I left the “before” photo up there with the title. I didn’t know if I could restore it and you, dear reader, are perhaps wondering the same thing.
This pipe came from an estate lot which I won from Greece. The Parker from the previous blog was also in this lot. When I first looked I thought that the pipes looked challenging to restore and so far I have not been disappointed. Here are a couple of screenshots of the lot. There were some interesting shapes and makers
Challenging can be fun. Testing one’s abilities and skills is seldom routine and so far the restorations have tested my abilities and made me think of some unique workarounds to problems. I will try to keep this write-up short but it was a rather extensive operation.
First off , let me provide some history of Savinelli. As usual I employed pipedia.org and pipephil.eu for source information. The pipedia.org section of Savinelli is well written and very informative. I know I said I wanted to keep this brief but much of this is worthy of repeating especially the “origins” of the company in 1876 and the post-WWII company as we know it.
Early Origins
“1876 was a year of breakthroughs: Thomas Edison patented the mimeograph, Julius Wolff-Eastport canned sardines for the first time, Alexander Graham Bell made the first telephone call,
Pyotr Ilyich Tchaikovsky completed Swan Lake, Melville Bissel patented the first carpet sweeper, Mark Twain published Tom Sawyer, and in Milan, Italy, Achille Savinelli opened one of the first shops exclusively focused on tobacco and smoking accessories.
That last item may seem relatively unimportant in the global scheme of advancements, but for those of us who love pipes, it was a monumental achievement, made even more difficult by the Italian government, which held a monopoly on tobacco. In addition, Achille was convinced that briar pipes represented the future of pipe smoking at a time when the market was dominated by clay and meerschaum. It may not have been obvious in 1876, but Achille Savinelli’s commitment to briar pipes would prove to be visionary.
He soon began designing his own pipes (different from the styling we associate with Savinelli today) and arranged their manufacture by local pipemakers in the Varese district of north-west Italy. The pipes became so popular that some were exhibited at the 1881 Esposizione Industriale Italiana (Italian Industrial Exposition)—the precursor to today’s Milan Fair, one of the largest trade fairs in the world.” (https://pipedia.org/wiki/Savinelli)
Post-WWII
“With his two best friends, Amleto Pomé and Mario Vettoruzzo, he assembled a team of fifteen employees to start a new business in the Varese region—the same area of northwest Italy in which his grandfather, Achille Sr., commissioned his own designs more than 60 years before.
Savinelli Pipes began production in 1948 and, although the pipes were of a superior quality and unique in their aesthetic, the brand wasn’t an immediate success. Few new brands are. It takes time for the public to catch on. Retailers were skeptical of placing Italian pipes alongside their best sellers from England or France, and customers, in turn, were hesitant to purchase a Savinelli over pipes by already established, foreign brands. Achille Jr. stood by his product, however; he knew it was only a matter of time before the world realized that these pipes were of a far superior quality, capable of competing with even the most well-established pipe manufacturers in the world. As it turns out, he was right. In less than a year, Savinelli pipes gained prestige in markets all across the world—heralded for their delicate balance of innovation and tradition, of form and function. Savinelli pipes were placed alongside the likes of Dunhill and Comoy’s in tobacconists from the United States to Europe, and, in time, this exposure modified Italy’s reputation; it was not only the premier exporter of briar, but now a premium source of fine briar pipes.” (https://pipedia.org/wiki/Savinelli)
Who doesn’t love a success story where hard work and producing a quality product pays off and builds a dynasty? A story for the soul. Anyway, the whole article is worth a read.
The line, Porto Cervo, refers to a seaside resort town on the island Sardinia (That’s the big island that looks as if the boot of Italy is kicking it towards France). This little port town with a resident population of only 421 is renowned as a hotspot for wealthy resort goers. As Tripadvisor claims, “Once an exclusive retreat for the crème de la crème of society, Porto Cervo is still one of the world’s most luxurious resorts, but thanks to the 2004 opening of an airport in nearby Olbia, you don’t have to own a megayacht to vacation here. You do, however, need to realize this is definitely not a backpack-and-Eurail Pass destination. Designer boutiques, luxury spas, fine restaurants and exclusive nightspots abound.” (https://www.tripadvisor.com/Tourism-g194856-Porto_Cervo_Arzachena_Province_of_Olbia_Tempio_Sardinia-Vacations.html)
The 677 KS shape is “A bent Billiard with a supple, Brandy-like taper toward the rim, Savinelli’s “677 KS” is a compact yet full-bodied take on the classic English shape. Per the Italian marque’s shaping conventions, Savinelli has elaborated on the standard design, adding mass to the base and transition with extra height and taper lent to the bowl, all paired to one of their signature triangular shanks.” according to Smokingpipes.com. That is a mouthful of a description. Also you will later see that the “extra height” is a bit less extra after the restoration. The three digit shape code for Savinelli pipes was established in the 1970s according to information from pipephil.eu. One more detail is the “KS” – this stands for King Size.
So let’s take a look at what this Savinelli Porto Cervo 677 KS looked like upon arrival.
Now, I think you see why I called it a salvage rather than a restoration. This old girl had been through some rough treatment. Upon examination I thought, “can I save this one?”, several times. I decided that I could but that the shape of the stummel would have to be significantly altered. A close look at the front of the stummel below the rim showed an area that I initially thought was just very beaten up by dottle knocking, proved to have deep charing fractures. It looked as if the front of the pipe had been lit aflame then filed off in an attempt to hide the evidence of the crime. Then there was the condition of the stem – deep bite marks and calcium deposits reminiscent of limestone. Oh well, it ain’t gonna get done by talking about it.
A clean denim piece was added to the work surface and I was off and running. What to do first? I admit that the stummel had intimidated me, so I started with a more familiar task, the stem. I used a sharp pocket knife to scrape away the calcium deposits on the stem. There was no good way to get into the bite dents with the knife or with a dental pick so I used a brass brush dipped in a bit of 99% isopropyl alcohol. The results looked better.
The stem was then sanded with the 320 and 400 sanding sponges. I wanted to remove the oxidation and roughen up the surface to allow the black cyanoacrylate (CA, super glue) a better surface to adhere to.
I placed small drops of the black CA into the dents on the top side of the stem. I figured this would take several smaller applications with filing and sanding in between applications. THe drops were spritzed with a CA drying accelerator then filed flat..
After filing came a little bit of sanding.
This led to another application of CA to fill depressions over a much larger area. The larger area allows the blending of fill. This application also received a spritz of accelerator.
More filing and sanding to smooth and blend the repair.
Notice that I had not addressed the button. I prefer to get the dents smoothed before I try to rebuild the button. This process was then repeated on the bottom of the stem. Initial small drops, accelerator, filing, sanding and repeat.
Below is application 3, now over a larger area.
I Threw this photo in to show that the CA has a much smoother texture before the accelerator is used. THe rapid drying makes the surface rough and more bumpy.
After filing and smoothing with 320 and 400 sanding sponges I was ready to start rebuilding the button. This button did not need very much material added. The previous owner fortunately was not interested in mauling both the button and the stem. I like the cheap shiny Scotch tape for this next technique. The more expensive matte finish 3M tape dissolves when exposed to the CA accelerator. I wrap the newly smoothed stem in a layer of tape right up against the button. This will keep the next application of CA off the previous applications.
I then add CA to the area I want to build-up. I immediately invert the step so the wet CA hangs down but doesn’t drip (If it drips then I was using too much CA, thin coats are easier to work with). While holding the stem upside down, I spritzed with the accelerator. Now for the part that you have to do fast you will have about 5 seconds to work with. Flip the stem back over and while the CA is still soft use a sharp knife to cut along the edge of the button. This will give you a nice straight flat edge that you will not have to spend a lot of time filing and sanding. Once the CA was set-up the tape was removed. The cut off piece of excess CA was stuck to the tape and removed with it. The edge was straight.
The button was shaped with a flat needle file and smoothed with sanding sponges.
The above was then done with the top side button. Once both the top and bottom side were filed and smoothed I applied a thin coating of Thin CA over an even larger area. I did this to allow the Thin CA to penetrate into any small seams between the CA fils and the vulcanite and to fill and fine depressions which I may have missed.
This was then spritzed with a CA drying accelerator and sanded. Below is the rebuilt stem prior to finishing sanding and micro-meshing.
I think that may have been the best step-by-step procedure that I’ve written. I hope you find it useful.
Next, I cleaned the interior of the stem using bristle pipe cleaners and 99% isopropyl alcohol.
Now onto the object of intimidation and dread – the stummel. Normally I will ream the tobacco chamber first. This time I wanted a more clear idea of what I was working with so I proceeded to scrub the stummel’s exterior. The scrubbing was done at the sink with undiluted Murphy Oil Soap and a medium bristle toothbrush.
A typical scrubbing uses one application of soap. This one used 3 and a stiffer nylon scrub brush in addition to the toothbrush. The stummel was rinsed with warm water and dried with a cotton dish towel. Hmm, I was still wondering if this pipe could be saved.
I returned to the workbench and started the reaming. I used a plastic envelope to catch the reaming residue and the PipNet with the #2 blades. The cake in the tobacco chamber was softened by the water but it was still quite hard. I had to stop several times to scrape
with the Smokingpipes Low Country knife and the General triangular scraper then proceed with the PipNet. I replaced the #2 blades with the #3 blades and further cleared the cake from the chamber. The #3 blades proved to be too small to reach across the chamber as more cake was removed. This led me to scraping with the knife and the triangular scraper. Eventually the cake was removed and the chamber was sanded using a wooden dowel wrapped in 220 sandpaper. I felt certain that the walls of the chamber had to be charred due to the amount of material I was removing but upon inspection with a flashlight I saw no evidence of charring.
I did not bother with trying to scrape the rim clean of lava. In order to reshape the stummel the rim was going to lose about ⅛ of an inch of briar so scraping became a mute point.
I took the stummel to the counter where I top pipes. Here a sheet of 220 sand paper is laid flat on the counter and used to sand during topping. I started the sanding and quickly wished that I had a belt of disk sander. I moved the stummel in a circular motion every few circles, I would rotate the stummel 90 degrees. I was trying to keep an even pressure on the entire rim. The back of the rim looked good but the front was still showing charred wood. I decided that the new shape of this stummel would have to have a forward cant. Additional pressure was put on the front of the stummel during the sanding. The result looked pretty good.
Now to address the reshaping of the front of the pipe. I used a piece of 80 grit emery cloth wrapped around a wood block to coarsely remove and reshape the stummel. The goal was to remove the char while retaining most of the character of the Savinelli shape. I apologize for not photo-documenting this stage. Once happy with the progress I used 220 sandpaper to smooth the stummel. Eventually I was back to using the 320 sanding sponge followed by the 400 sandi sponge. THe below photos show the pipe at this point.
I was now certain that the Savinelli Porto Cervo 677 KS could be saved. The question of: “But, how will it look?” remained.
When I would wipe the stummel with alcohol I would get the following dark color below the rim at the front. I did not like the dark color. I had read about work workers using oxalic acid to bleach wood. This was usually done to remove water or iron stains from wood. I bought some oxalic acid thinking that someday I’d try it. Hmm, does oxalic acid work on burned spots with briar? I asked that very question in a pipe restoration group on Facebook. THe response from several people was yes.
Preparing chemical solutions was something that I had years of experience with as a high school chemistry teacher. I figured that I’d just prepare a saturated oxalic acid solution. I cleaned out my induction kettle with vinegar and soap then rinsed it with distilled water. I washed out a glass jar and lid and rinsed them with distilled water also. I brought 300 ml of distilled water to boiling in the kettle. I poured 250 ml into the clean jar. I added 2
teaspoons of oxalic acid crystals. They dissolved immediately. Hmm, maybe I should have read a recipe? Na, this is bucket chemistry. I added another 2 teaspoons. Again totally dissolved. One more – didn’t completely dissolve. Wait a few minutes. Crystals remained at the bottom of the jar. We have a saturated solution that will become supersaturated as it cools.
I allowed the solution to cool to room temperature and took the solution down to the workbench. I applied a coat to the stummel using a cotton swab. The oxalic acid solution
was absorbed quickly by the briar. I applied a second coat. I had read to allow the oxalic acid 20-30 minutes to work on the wood. I waited for about 40 minutes. In the meantime I prepared a baking soda solution to neutralize the oxalic acid on the briar. 40 minutes later I was ready to rinse away the oxalic acid and scrub the stummel with the baking soda solution.
I don’t know if the oxalic acid lightened the charred area a noticeable amount. I guess I should have taken before and after photos.
I returned to the workbench and worked on reestablishing the inner rim bevel that the Porto Cervo had before I so rudely sanding it away. I used a 2 inch polyvinyl chloride (PVC) pipe with a 2 inch PVC round end cap. The end cap was wrapped with 220 sandpaper. This gave me a uniform curved surface to reestablish the curve of the rim bevel. If you are interested in the real purpose of this tube, ask me in the comments.
With the Stummel reshaped and the rim beveled it was time to start sanding. I used painters tape to cover the stamps. I wanted to keep the stem and the stummel together for the sanding to avoid rounding any of the edges where joined from being rounded.
I used the 320-400 sanding sponges on the stummel only. The 600-1000 sanding sponges were used on both parts. In between sponges I wiped the stummel with an alcohol moistened make-up pad to remove the dust . I applied a drop of mineral oil with my fingertip to the stem and wiped that with a paper towel.
While wiping the stummel I couldn’t help focusing on the dark spot at the front of the pipe where the briar had been burnt. It still seemed too dark for my liking. I decided to give the stummel a contrast stain. I thought that maybe a black dye might penetrate into the softer grained areas giving them a darker appearance while I sanded the black dye off of the harder, more resistant grain. This would darken the pipe overall but would still show off the existing grain patterns.
I prepped the counter for dying. Actually for mitigating a dye spill if one occurred. I used an inverted plastic container as a work surface. This was topped with a couple of paper towels. The black Fiebing’s Leather dye, a disposable lighter, a folded pipe cleaner, a small medicine cup with 5 ml of 95% ethyl alcohol were gathered and the fishing bobber wrapped in duct tape. The bobber was pushed into the tobacco chamber giving me a handle. The pipe cleaner was the dye applicator. The lighter is to flame the dye once applied to the pipe.
I put on nitrile gloves and applied a single coating of the Fiebing’s Leather dye to the stummel. I flamed this with the lighter. This burns off the alcohol base of the dye and sets it into the briar.
After the stummel had been flamed I wiped the surface with a dry paper towel to remove any remaining dye. I was not concerned about the dye drying for a certain time as I was going to remove the majority of the dyed wood in short order.
I returned the stummel to the work bench and began sanding away the newly dyed briar from the surface of the stummel. I was very careful to avoid sanding the stamped areas.I wiped the sanding sponge off frequently of the denim work surface to keep the sponge clean. I used a barely wetted with alcohol make-up pad to wipe away the dyed briar dust and assess where I needed to sand in order to have a uniform color. Below is how the stummel looked after the black dye was sanded.
I was fairly pleased with how the black had accentuated the grain while masking the burned area.
The sanding continued as before with the 1500-3500 sanding sponges. I did not tape the stamps but I was careful to avoid them. I had to get close to avoid having a “CENSORED” box appearance around the stamps. As before, I wiped the stummel with a make-up pad between sponges.
It was at this point that I realized that I had completely forgotten to clean the shank airway. If you are a regular reader, you will probably be saying something like: “Forgot, nothing. You just didn’t want to do it.” Yeah, it’s not my favorite job. I did clean the shank, thank you very much. I started by pouring 3 ml of 95% ethyl alcohol into the bowl and letting it flow into the shank. I then used a nylon shank brush to scrub the airway with the alcohol. After a vigorous scrub, I poured the alcohol into a medicine cup to assess the progress. This process is repeated ad nauseam. After a few scrubs I would go back to the workbench and see if I could scrape some yuck out of the airway, scrub with a cotton swab and repeat the 3 ml alcohol scrub routine.
After what seemed like 4 hours of repeating the process the cotton swabs emerged clean. I did notice a cherry aromatic smell throughout this process. I had never had a pipe so heavily infused with cherry aromatic tobacco before. It wasn’t a bad smelling blend, just very cherry.
Next was the micro-meshing. Here I used the 4000-12000 micro-mesh pads in sequence on both the stem and stummel. Between each pad I wiped the stummel with an alcohol dipped make-up pad. The stem received a drop of Obsidian Oil rubbed in with my finger and wiped with a paper towel between pads.
I was in the home stretch, the end was in sight. All that remained was to polish the stem and apply some carnauba wax with the buffer. So, that’s what I did.
The polish was Before and After Fine Polish followed by Before and After Extra Fine Polish. Both were applied by finger and rubbed with a soft cotton cloth. The waxing was done with my low speed grinder converted to a buffer and carnauba wax.
Well, I wasn’t sure if this pipe would be salvageable, much less restorable. I am glad to report that I smoked it today and it was lovely. Remember when I said that it had a definite cherry aroma? Well I may be giving her a cotton ball alcohol treatment. I didn’t find it annoying but it certainly did alter my Lane BCA to a vanilla cherry. The pipe looks pretty darn good. I am sure that a Savinelli connoisseur will spot that it is not really a 677 KS any longer. I bet they would agree that the contrast stain turned out nicely. I worried about it being too dark for the brass and wood banding on the stem but I think they work well together. The stem rebuilding also was a success and polished equally as well as the waxed stummel. I do hope that you found something here useful in restoring or just caring for your own pipes. If you like this sort of thing, please click the like and subscribe. I know I said I wanted to keep this brief and I have done anything but that. Thank you for reading the ramblings of an old pipe lover.
Now for the moment you have all been waiting for: Some photos of the finished Savinelli Porto Cervo 677 KS.
It is kind of an American tradition to love the underdog. Maybe it goes back to our founding when 13 little colonies took on the greatest empire of the time. Nothing personal, United Kingdom. I look at Yello-Bole pipes in a similar light. They kind of have the reputation of being third string benchwarmers to the “real” players of Kaywoodie. Sure they were a second, but I am a guy who loves leftovers from the night before meals. So I kind of have a soft spot in my heart for seconds.
This little Yello-Bole billiard caught my eye because of the stamp “Honey Cured Briar”. This is a bit more of a rarity than the usual “Cured with Real Honey”. According to pipedia.org, “Pipes from 1933-1936 they were stamped “Honey Cured Briar” (https://pipedia.org/wiki/Yello-Bole). That provides pretty finite dates for this old pipe. Let me show you what it looked like upon arrival.
Yello-Bole was started as a processor of briar that did not meet the quality standards for Kaywoodie pipes. I’ll allow pipedia.org to tell the story as a more reputable source than my failing memory.
“In 1932 Kaufmann Bros. & Bondy (KB&B), est. 1851, expanded their programm consisting of KB&B pipes, Reiss-Premier and Kaywoodie as the mainstay brand by introducing the Yello-Bole line. Yello- Bole was designed as an outlet for lower grade briar not used in Kaywoodie production.
At that time KB&B produced their brands in Union City and in West New York, both New Jersey. Deviating from that, Yello-Boles were manufactured by The New England Briar Pipe Company in Penacook, New Hampshire to use this KB&B subsidiary to capacity.1966 Add
As briar was hardly had during World War II, the KB&B Company embarked on a project of domestically grown briar wood, called Mission Briar or manzanita early in 1941. The Pacific Briarwood Company, a subsidiary founded for this purpose, began harvesting the burls growing on the slopes of the Santa Cruz Mountains of California. Though this wood is botanically the same as briar form the Mediterranean countries, the smoking characteristics were not quite as good and the project was abandoned after the war.
Was it for that reason? Advertising from the 1940’s pictures the Yello-Bole “Honey Girl”, who gently urges the pipe smoker to smoke the pipe with “a little honey in every bowl.” In fact, honey was an ingredient of the material used to coat the inside of the bowl. It was said to provide a faster, sweeter break-in of the pipe.
In 1952, 101 years after the Kaufmann brothers had opened a small pipe shop in the Bowery section of New York City, Kaufmann Bros. & Bondy Company with all subsidiaries was purchased by an unknown company strange to pipe industry. (At least, the new owner was economical because the KB&B managers had to leave their luxurious bureaus on 630 Fifth Avenue, New York – the Rockefeller Center – for new rooms in the factory on 6400 Broadway, West New York.) This interlude ended after only 3 years in March of 1955, when S. M. Frank & Co. bought Kaufmann Bros. & Bondy, The Kaywoodie Company, Reiss-Premier Corp., The New England Briar Pipe Co. and – of course – Yello-Bole.
From the time of S.M. Frank’s purchase in 1955 until 1972 Yello-Bole was run as a separate company, as division of the parent. Through this period, Yello-Bole, same as Kaywoodie, had it’s own officers, sales force and maintained the production facilities in West New York. These 17 years were probably the most glorious years in Yello-Bole’s history.” (https://pipedia.org/wiki/Yello-Bole).
“Tips for Dating Yello-Bole Pipes
KBB stamped in the clover leaf indicates it was made in 1955 or earlier as they stopped this stamping after being acquired by S.M. Frank.
Pipes from 1933-1936 they were stamped “Honey Cured Briar”
Post 1936 pipes were stamped “Cured with Real Honey”
Pipe stems stamped with the propeller logo were made in the 1930’s or 1940’s – no propellers were used after the 1940’s.
Yello Bole used a 4 digit code stamped on the pipe in the 1930’s.
Pipes with the Yello-Bole circle stamped on the shank it were made in the 1930’s, this stopped after 1939.
Pipes stamped BRUYERE rather than BRIAR it was made in the 1930’s.”
Using the above guidelines this pipe represents the 1st, 2nd and 5th bullet points:
KBB stamped in the clover leaf
“Honey Cured Briar”
4 digit code
Other than the stampings it also had some of the hallmarks of an older pipe. The button for example was filed in a “not so modern” fashion and had a narrow rectangular draft hole. Overall the pipe was in good condition for a 90 year old pipe that I paid less than 5 dollars for. Heck, the shipping cost more than the pipe. In examining the old girl I could still see some of the yellow bowl coating in the tobacco chamber. The stem was very tight, actually “scary tight”. I rubbed the tenon with olive oil when I reassembled it for the before photos.
I figured that the restoration would be fairly simple. It needed a light reaming, airway cleaning, stinger removal and cleaning, oxidation removal from the stem, stummel sanding and fills, button rebuilding with cyanoacrylate (CA, super glue), briar refurbishing, stem polishing and a wax. That sounded like a relaxing evening.
I started out with a clean denim piece to protect the work surface. Even though this pipe looked pretty clean I knew the denim wouldn’t stay clean
for long. I wanted to get the stinger out of the stem so I could let it soak in alcohol and soften the tar lacquer (that is my new name for that version of yuck – tar lacquer). The darn thing was stuck. I tried wrapping it in fabric and gripping it with pliers. Tried wiggling, tried sweet talking and swearing but it wouldn’t budge. When all else fails, alcohol. I used to use that saying for more things than a stuck stinger.
With the stem occupied with the alcohol, I turned my attention to the stummel.
The reaming of the tobacco chamber was easy and uneventful. I probably even could have skipped it. After the reaming I sanded the chamber smooth, some of the original yellow bowl coating didn’t want to budge so I left it to remind me that it was a Yello-Bole and because it’s probably a lead based paint. Just kidding, the environmental control laws of the 1930’s are well known for their extensive product testing. Yeah, kidding again.
I didn’t think the shank airway could be too dirty since the pipe did not appear to have smoked very much. Cotton swabs dipped in 95% ethyl alcohol would clear out any tar lacquer and associated yuck. I have to admit being a bit surprised by the number of swabs it took to get the airway clean but clean it was.
I must have been feeling lazy because I did not give this stummel the usual Murphy’s Oil Soap scrubbing. I figured that I would just clean and remove the finish in one fell swoop. Using 95% ethyl alcohol on a make-up pad I started wiping the exterior of the stummel.
Now I remembered why I used Murphy’s. The first pad just removed the accumulated dirt and grime from 90 years of existence. The next pad did remove a little finnish but the alcohol was not having the desired effect of removing all of the finish.
Pad number three was enlisted with acetone. This one did what I wanted it to do. The acetone dissolved the finish readily.
A couple more for good measure and the stummel was ready for sanding.
I checked back on the stem. The stem retained it’s death grip on the stinger. Again, the pliers, fabric, sweet talk and swearing were employed with no result. I will be victorious, just not yet. I gave the stem a little bit of work with the flat needle file and 320 sanding sponge to smooth out the roughness around the button. How a pipe that appeared relatively little smoked could have a stem chewed up this badly is a mystery to me. Perhaps it had been smoked frequently and just well cleaned. That concept broke with my experience with pipes from this era but remained a possibility.
Once the worst of the oxidation had been removed by sanding, I started the rebuilding of the button. The dent above the button was filled first using thin applications of black CA, spritzing with CA drying accelerator, filing and sanding. The resulting area then received a second coat of black CA with the above speed drying and smoothing until it was filled.
The below photo shows the rebuilt area smoothed inside a yellow square.
The draft hole of this Yello-Bole was rectangular, nearly square. I thought about items to use to support the liquid CA prior to it setting-up with a CA accelerator. The cotton swabs I had been using had a plastic “stick portion. I thought I could square this off with a bit of force and make it work. I worked very well. The CA did not stick to the plastic and the size and shape fit with near perfection. The plastic was inserted into the airway, while I applied a drop of black CA to the chewed through section of the button. The wet CA was then inverted and held upside-down while I spritzed it with the CA drying accelerator.
Once the CA had set-up I continued adding additional thin layers of black CA followed by spritzing with the accelerator. Eventually the gap had been spanned with new material. This new material was shaped with a flat needle file and smoothed with a 400 sanding sponge.
Final shaping and smoothing were done until I was happy with the results. My reshaping did take away that “older look” and did make the stem look more modern. I have conflicting feelings about that. It is more comfortable and looks more finished but It lost that apparent “old pipe” look.
After the button was finally shaped I started cleaning the airway in the stem. This went quite smoothly using bristle pipe cleaners and 99% isopropyl alcohol.
For the sanding I wanted the two pieces together so as to not round the edges of the joint where the pieces join. I taped off the stampings; right, left and bottom. The sanding was done with a series of sanding sponges from 600-3500 grit. Between each sponge I wiped the stummel with a make-up pad moistened with 95% ethyl alcohol. The stem was rubbed with my finger dipped in mineral oil then wiped with a dry paper towel.
Next, I worked the pipe with the micro-mesh pads 4000-12000. I wiped the stummel as above but the stem received a drop of Obsidian Oil rubbed in with my finger and wiped with a paper towel.between pads.
The final stem polishing was done with Before and After Fine and Extra Fine Polish, respectively. Each polish was applied by fingertip and hand rubbed with a soft cotton cloth.
The entire pipe was coated with aBefore and After Restoration Balm and allowed to sit for 30 minutes.
Once 30 minutes were up, I used the inside of an athletic sock to wipe away the excess balm.
THe stinger was still stuck. I said that I would be victorious and I had some thought as to how that could come about. The first plan was to try to soak the stinger in boiling water. The thought was that the aluminum would heat up the surrounding tar lacquer, softening it so that I could remove the stinger with a little bit of force. Good idea, no results.
THe next idea was to apply heat in the form of flame. The hotter than boiling water temperature would soften the tar lacquer releasing it’s death grip on the stinger and allow me to remove it. As I was heating the stinger I was steam coming from the point where the stinger was inserted into the stem. Some water must have seeped into the stem and was being vaporized by the flame heating the aluminum stinger. I knew that if the water was vaporizing I was at the boiling point of water also the temperature that vulcanite begins to soften. I wrapped the stinger in a cotton handkerchief and pulled on the wrapped stinger with a pair of pliers. It came free. Victory! I then cleaned the stinger with 99% isopropyl alcohol and a nylon scrub brush. I ran a couple more alcohol dipped pipe cleaners through the stem, now unimpeded to get it completely cleaned also.
All that remained was to apply several coats of carnauba wax with the buffer to the whole pipe.
I love how this 90 year old Yello-Bole turned out. The wood grain is beautiful. Sure, it has some fills. I left the old olds and only fixed a couple of small scratches while I was sanding. It was a “second” after all. The stem was cleaned-up and polished nicely. The logo and stampings all remained intact and are more clearly legible now than they were under the grime and finish. I did get to smoke this pipe earlier and it smokes very well for being a smaller pipe. The walls are thick enough that they remained cool throughout the bowl of tobacco. This pipe was never intended to be a showcase item and I intend to use it as it was designed as a nice pipe to smoke on the way to town for errands when a 15-20 minute smoke is what is needed. I hope that you have found something here useful to your restorations or were entertained. If you like this sort of thing, please click the like and subscribe. Thank you for reading the ramblings of an old pipe lover.
Below are some photos of the finished Yello-Bole Billiard.
I am starting to feel like I work at a lumber yard. This is the third Kaywoodie HandMade restored in the past couple of weeks. Good thing they are fun to work on. The first one had a push stem and no Kaywoodie logo on the stem. The second was a tapered stem with a white circle with a black 3 leaf clover logo. This one is all decked out with a saddle stem and the same white and black logo as the tapered stem. That logo was discontinued after 1955, according to pipedia.org and the shape first appeared in the 1947 catalog.
I’m just going to copy the historical information from the first HandMade restoration.. I am pretty sure that nothing historical has changed in the last few days.“Kaywoodie name first appearing in February of 1919.” (Kaywoodie History – Greywoodie LLC) The history of Kaywoodie pipes is fortunately well documented thus, allowing rather precise dates for a Kaywoodie collector to declare the provenance of their charges. The above pictured Kaywoodie is stamped HANDMADE over KAYWOODIE (left) and IMPORTED BRIAR (right). No shape number is present.
Using this information and referring to the Kaywoodie Collectors’ Guide listed on pipedia.org I found that these pipes were made during the following years:
“The Oversize Kaywoodies were, as the name implies, “Giants”. Lowndes notes that these pipes were stamped simply, “Hand-Made”. The pipes were all roughly “bulldogish” in appearance and were available in the following styles and grades7 : • Hand-carved “Colossus” ($10) • Walnut finish, banded “Hercules” ($20) • Hand-carved “John Henry” ($10) • Virgin finish, specimen grain “Paul Bunyan” • ($25)Virgin finish, banded specimen grain “Goliath” • ($25)Walnut finish “Atlas” • ($20)Hand-carved, Meerschaum-Inlaid “Samson” ($15)” (Kaywoodie Collector’s Guide – p10.pdf)
Looking into the stampings, I went to piphil.eu for confirmation. ThereI was able to find an exact match of this pipe’s stampings.
Well, that was easy. This large Kaywoodie Hand Made, though not very “bulldogish” was most likely made between 1947 and 1955 at the West New York, New Jersey factory. If you would like to see the 1947 Kaywoodie catalog here is a link: Kaywoodie_1947.pdf (pipedia.org). It is a fascinating read with great old marketing photos and illustrations. Just out of curiosity I wondered what $10 in 1947 was equivalent to today. According to a bis.gov inflation calculator it is $131.09 (Using Dec. 1947 and Dec. 2023)(CPI Inflation Calculator (bls.gov)). I highly recommend reading the above links for further Kaywoodie history.
This Kaywoodie HandMade saddle stem came from Las Vegas Nevada to southeast Nebraska. All three Kaywoodie HandMades were from the same seller. The first one bought on a whim the second two were negotiated for. I will link the first two restorations for you, if you are interested in reading about them: Hand Made 1 and HandMade 2. This third pipe was stamped HANDMADE over KAYWOODIE on the left shank and IMPORTED BRIAR on the right. No stampings were on the bottom. Below are photos of how the pipe appeared upon arrival.
This restoration began like most others with a fresh clean denim piece for the work surface. I should show the final version of the denim, I’ll probably forget but it’s worth a shot.
Since this stem was badly oxidized I decided to give it a several hour long soaking in the Before and After Deoxidizing Solution. I first sanded the stem with a 400 grit sanding sponge and cleaned out the interior with several alcohol dipped bristle pipe cleaners. The final pipe cleaner You see in the photo above, inserted into the stinger.
The stem was too long to hang in the solution. I ended up using a wood sanding block to tilt the jar of Deoxidizing solution (deox, as I like to call it).
It wasn’t perfect but I was certain that it would work. At this point I actually went upstairs to type up the restoration of the second Kaywoodie HandMade. Oh, this is confusing. About 4 hours later, I returned to the deox jar to retrieve the stem. After allowing most of the excess solution to drip off the stem, I like to use a coarse cotton shop rag to vigorously rub off the remaining solution.
The stem looked much better. You can see the black has returned but the surface was rough and pitted.
I used Soft Scrub on make-up pads to rub off the remaining oxidized vulcanite.
After the Soft Scrub I oiled the stem with a coating of mineral oil and allowed it to soak up the oil while I started work on the stummel.
Looking back at my photos I apparently neglected to photograph the reaming of this HandMade. Don’t worry, you are not missing much. This pipe had been smoked very little as you will see when I describe the shank cleaning. The reaming was very quick and uneventful. I used the PipNet with the #3 blades to barely mess up my plastic drop surface. The scraper and knife were not used and the tobacco chamber was sanded with 220 sandpaper on a wood dowel followed by 320 sandpaper wrapped around a Sharpie marker. The most interesting part was that there was a shallow groove inside the chamber that ran along the left side. I remembered that the second Kaywoodie HandMade also had a groove in it’s chamber. Upon looking very closely at both with a bright flashlight I saw what appeared to be a thin crack in both chambers. It did not go from the top to the bottom; rather it was about ½ to ¾ inches long in the center of the chamber on both pipes. It almost looked like it was a crack from improper drying or the chamber was bored out while the wood was not completely dried. I then remembered that both of these pipes had come from Las Vegas Nevada, a place not known for their humidity. Perhaps years of storage in the desert had not been good for the pipes. Either way I thought it would be best to mix up some J.B. Weld and fill the crack from within the chamber. Allow the epoxy to set and sand it smooth with the chamber surface. I thought that I would come back to do that step with both pipes when I was finished with the restoration.
I took the stummel to the sink. There I scrubbed the stummel with undiluted Murphy’s Oil Soap and a medium bristle toothbrush. The years of dirt and grime were evident in the lather. The stummel was rinsed in warm water and dried with a cotton dish towel.
When finished drying I poured 5 ml of 95% ethyl alcohol into the tobacco chamber and allowed it to flow into the shank. Without pouring the alcohol out I used a nylon shank brush to scrub the airway within the shank with the alcohol. This alcohol was poured into a medicine cup. The color indicated the extent of the tar accumulation in the airway.
THe very light color of the alcohol led me to believe the shank was relatively clean. A few alcohol dipped cotton swabs confirmed this.
With the internals cleaned out I returned to the exterior of the stummel. There seemed to be some yuck (the technical term for unwanted debris) in the grooves of the carvings. I wetted a make-up pad with 95% ethyl alcohol and wiped-down the exterior of the stummel. Very little color came off.
I then used a stiff nylon bristle brush dipped in the alcohol to scrub the carvings. Again I wetted a make-up pad and wiped the surface. This time the grooves looked deyuckified and it showed on the make-up pad.
The rim looked very clean after the alcohol and nylon brush scrubbing. Although it did show a bit of charring around the inside edge of the rim.
Now to deal with that charring. I used a wood sphere with a piece of 220 sandpaper. The sphere provided an even angle for a bevel and erased the charred briar. THe bevel was then sanded smooth with the sanding sponges by using the 400, 1000, 1500 and 2500 sponges in sequence.
The stummel required no real sanding other than a light buff with the previously mentioned sanding sponges. I wiped the stummel off with an alcohol dampened make-up pad and let it dry. The stummel was then coated with Before and After Restoration Balm and allowed to sit overnight.
In the morning the Restoration Balm was hand buffed from the stummel using the inside of an athletic sock. The terrycloth of the sock worked excess balm from the rustications of the carvings and left a very pretty shine on the stummel.
The stummel needed an equally attractive stem, so back to work. I wiped the excess mineral oil from the stem and began sanding with the series of sponges – 1000-3500. Between each sponge I would dip my finger in the mineral oil, rub the stem and wipe it dry with a paper towel. I would also wipe the sponge off on the denim to keep the sponges kind of clean.
After the sanding I started to micro-mesh the stem. Here I used the 4000-12000 micro-mesh pads in sequence. Between each pad I applied a drop of Obsidian Oil. The oil was rubbed in with my finger and wiped away with a paper towel.
The final steps in polishing the stem were done with Before and After Fine and Extra Fine Polish. The polish was applied by finger tip and hand rubbed with a soft cotton rag. Fine Polish followed by the Extra Fine Polish.
The final touch was the application of several coats of carnauba wax with the buffer. I tried to only apply the wax to the high area but gave up on that. I used the edges of the buffing wheel to work the wax into the carvings. When I was finished I replaced the waxing wheel with a clean flannel wheel. I used this wheel without any wax and used the corner edge of the wheel to get into the carving grooves. My thought was to melt and absorb as much of the wax from the grooves as possible while still leaving a thin coating to protect the briar. It looked good.
Overall I was very pleased at how well this Kaywoodie turned out. These were fun pipes to work on and their size makes you feel like you have accomplished a real feat. The briar cleaned up beautifully and the stem again shines like new vulcanite should. As for the dimensions of this pipe, as I said it is large, the dimensions are as follows:
Weight: 3.12 ounce/ 88.45 g.
Length: 6.42 in./ 163.07 mm.
Bowl Height: 2.18 in./ 55.37 mm.
Chamber Depth: 1.85 in./ 46.99 mm.
Chamber Diameter: 0.84 in./ 21.34 mm.
Outside Dimension (side-side): 1.60 in./ 40.64 mm.
Outside Dimension (front-back): 1.91 in./ 48.51 mm.
These are not pipes that you can clench while raking leaves or shoveling snow. This pipe demands you attention. I am sure the reward for such demands is a very nice cool smoke. I do hope that you have found this to be useful and entertaining. If you enjoy this sort of thing, please click the like and subscribe. I thank you for reading the ramblings of an old pipe lover.
Below are some photos of the Kaywoodie HandMade Saddle Stem.
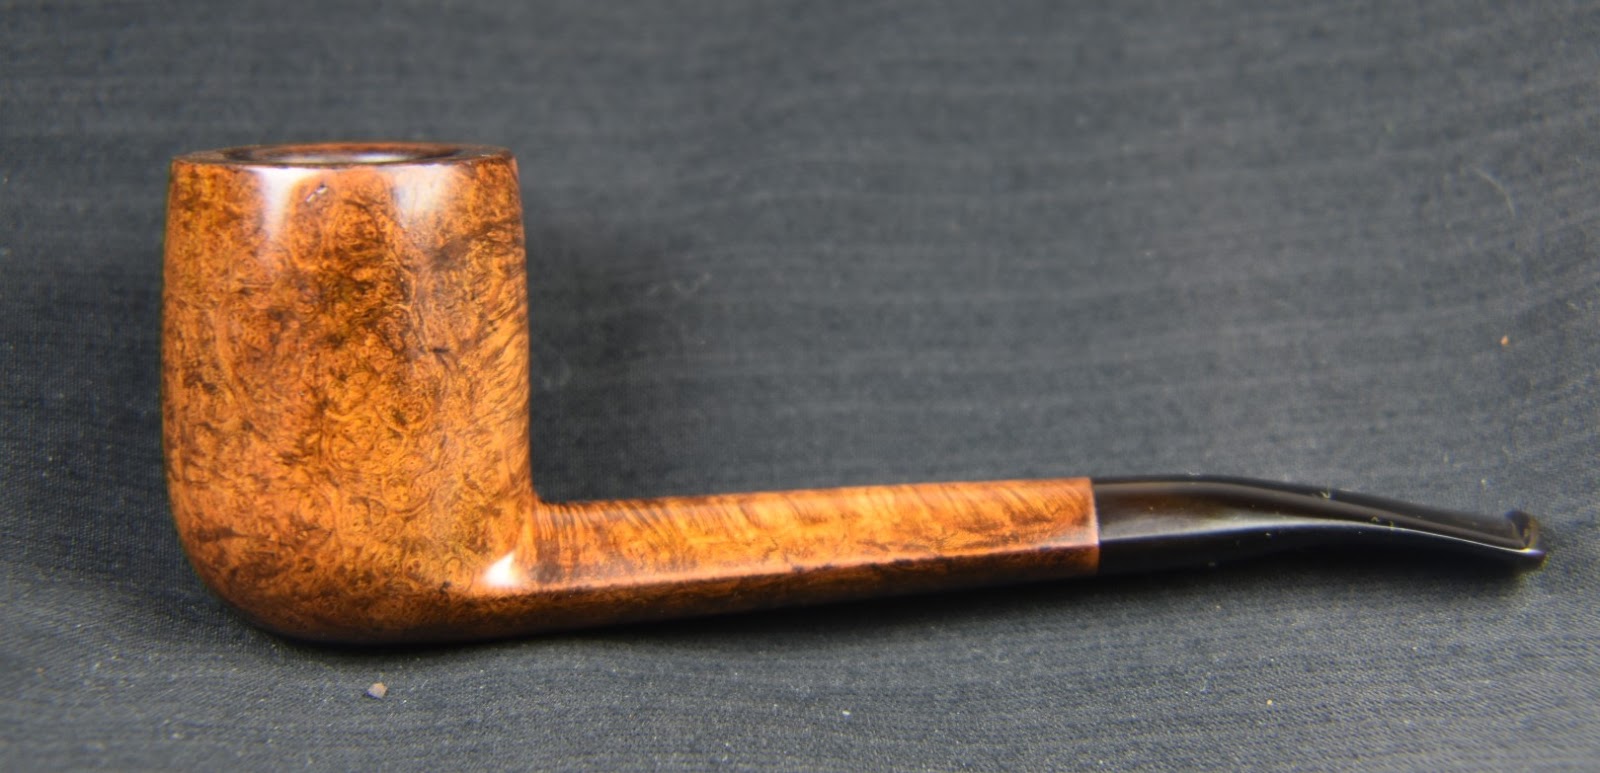

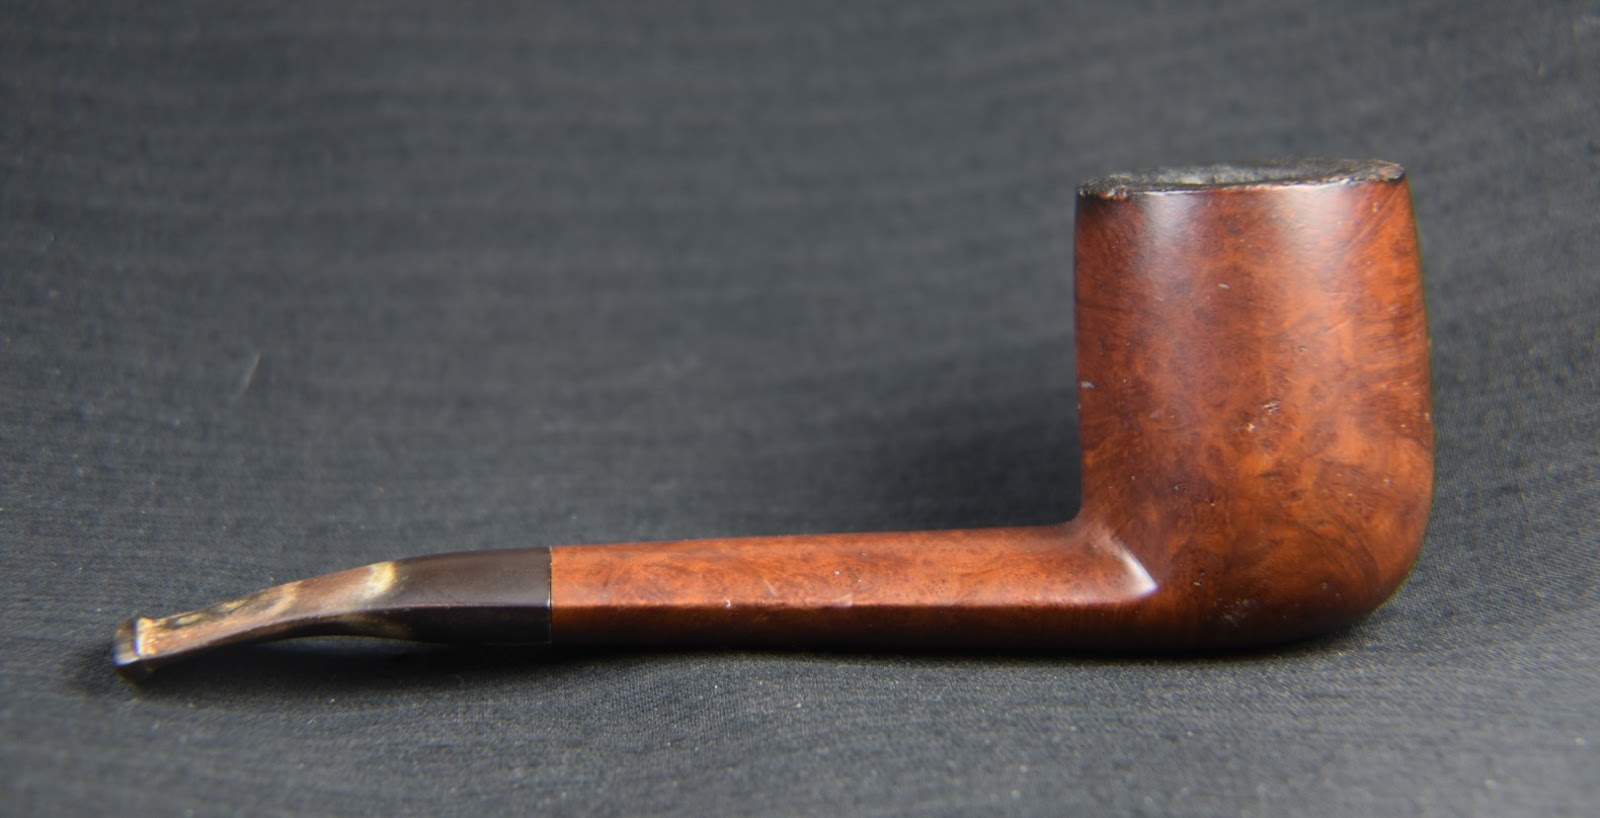
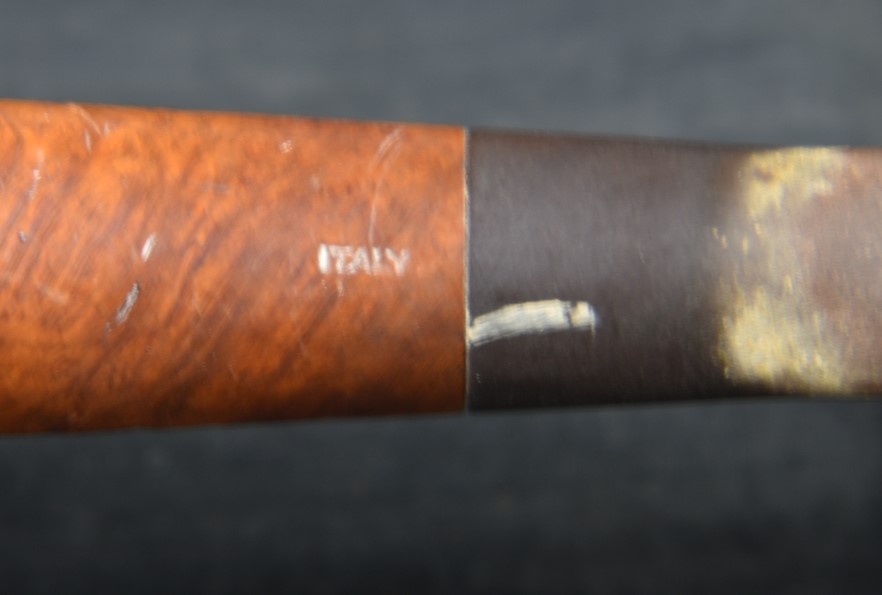

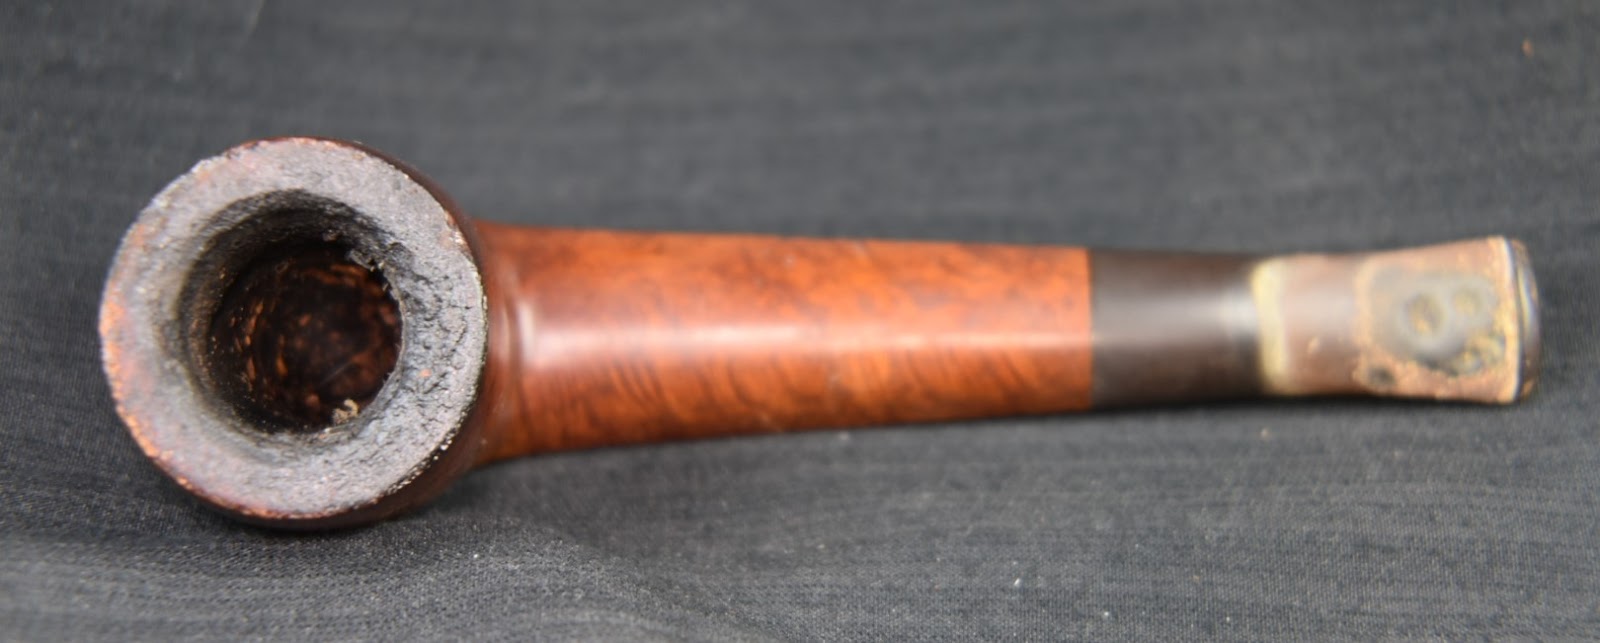


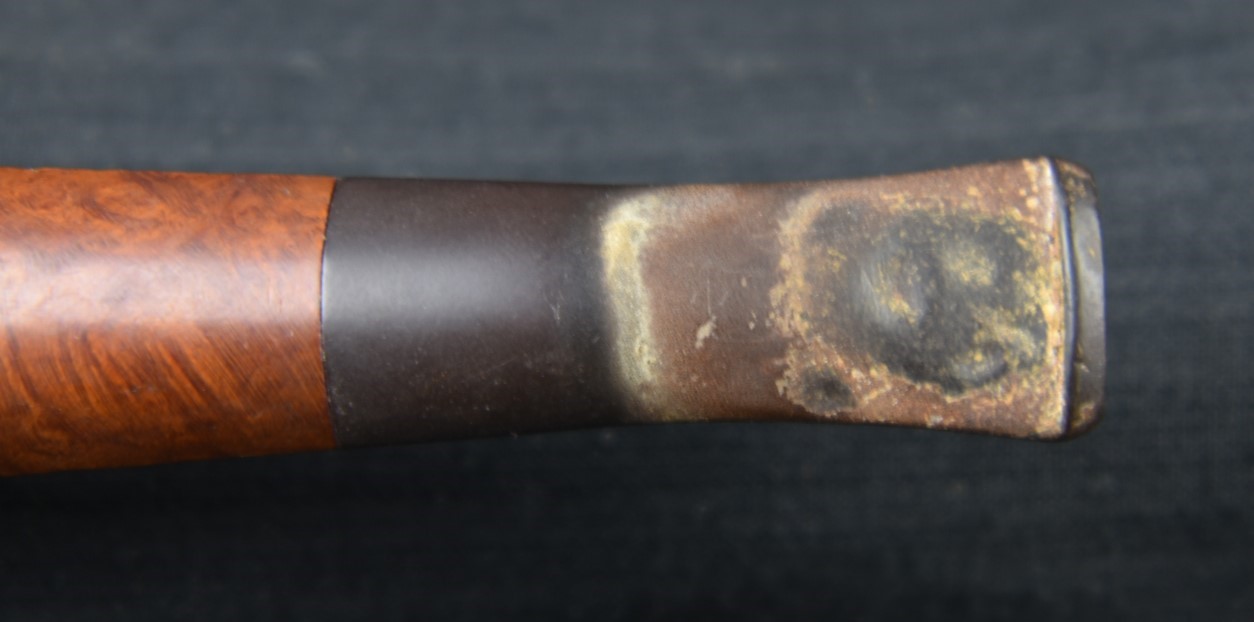

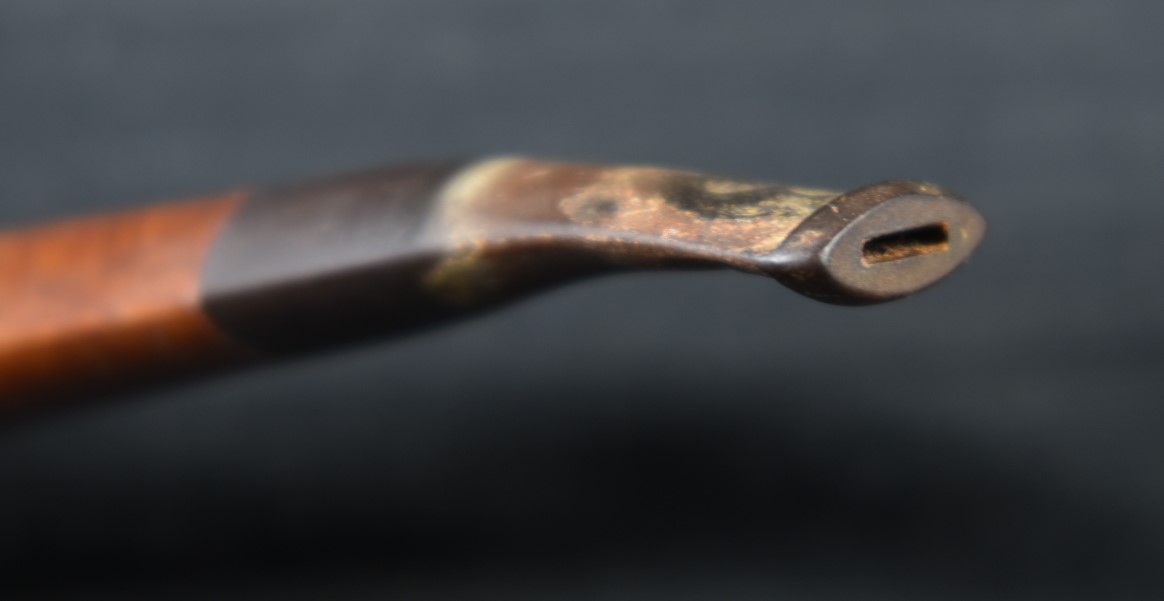


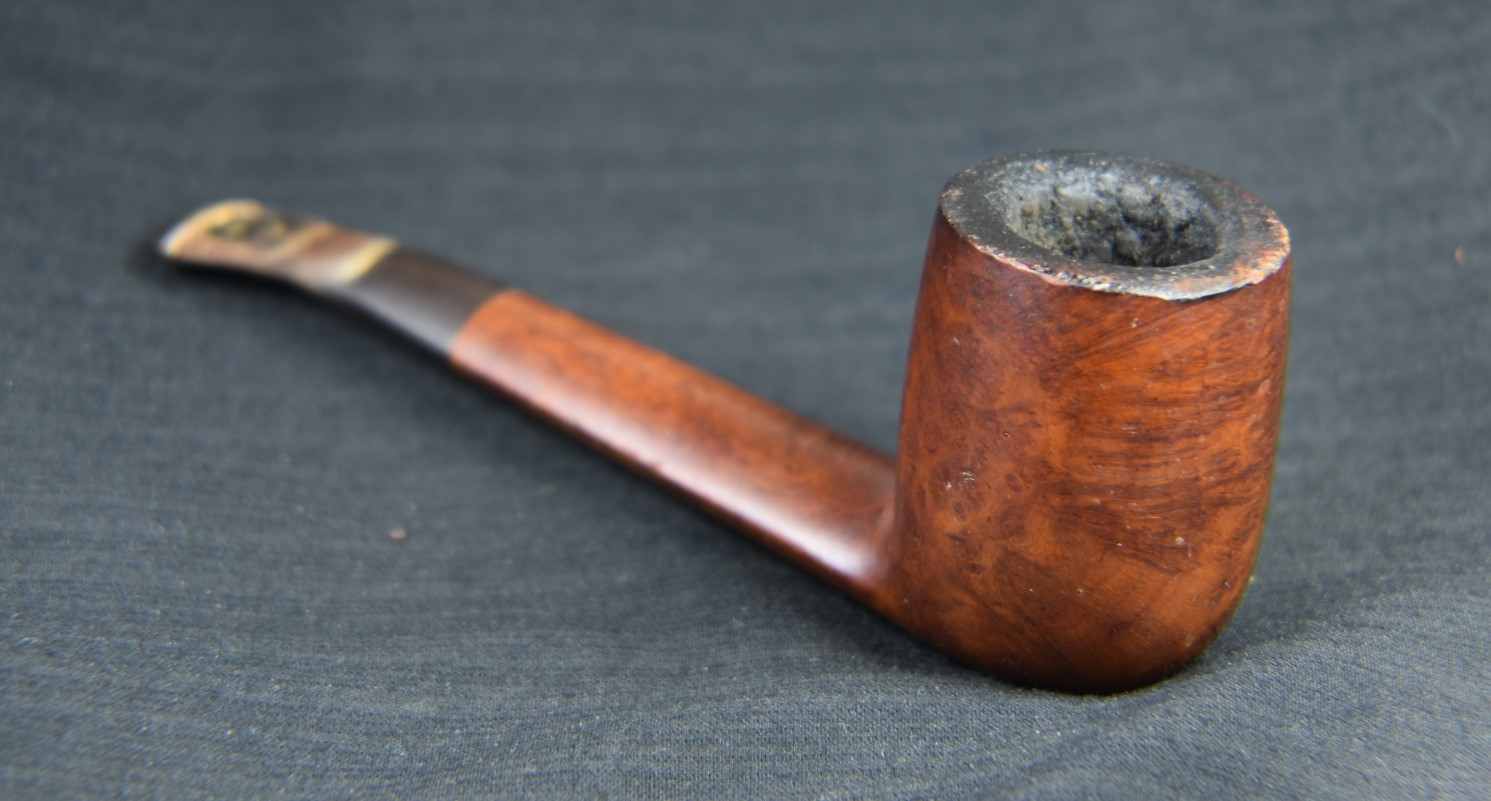
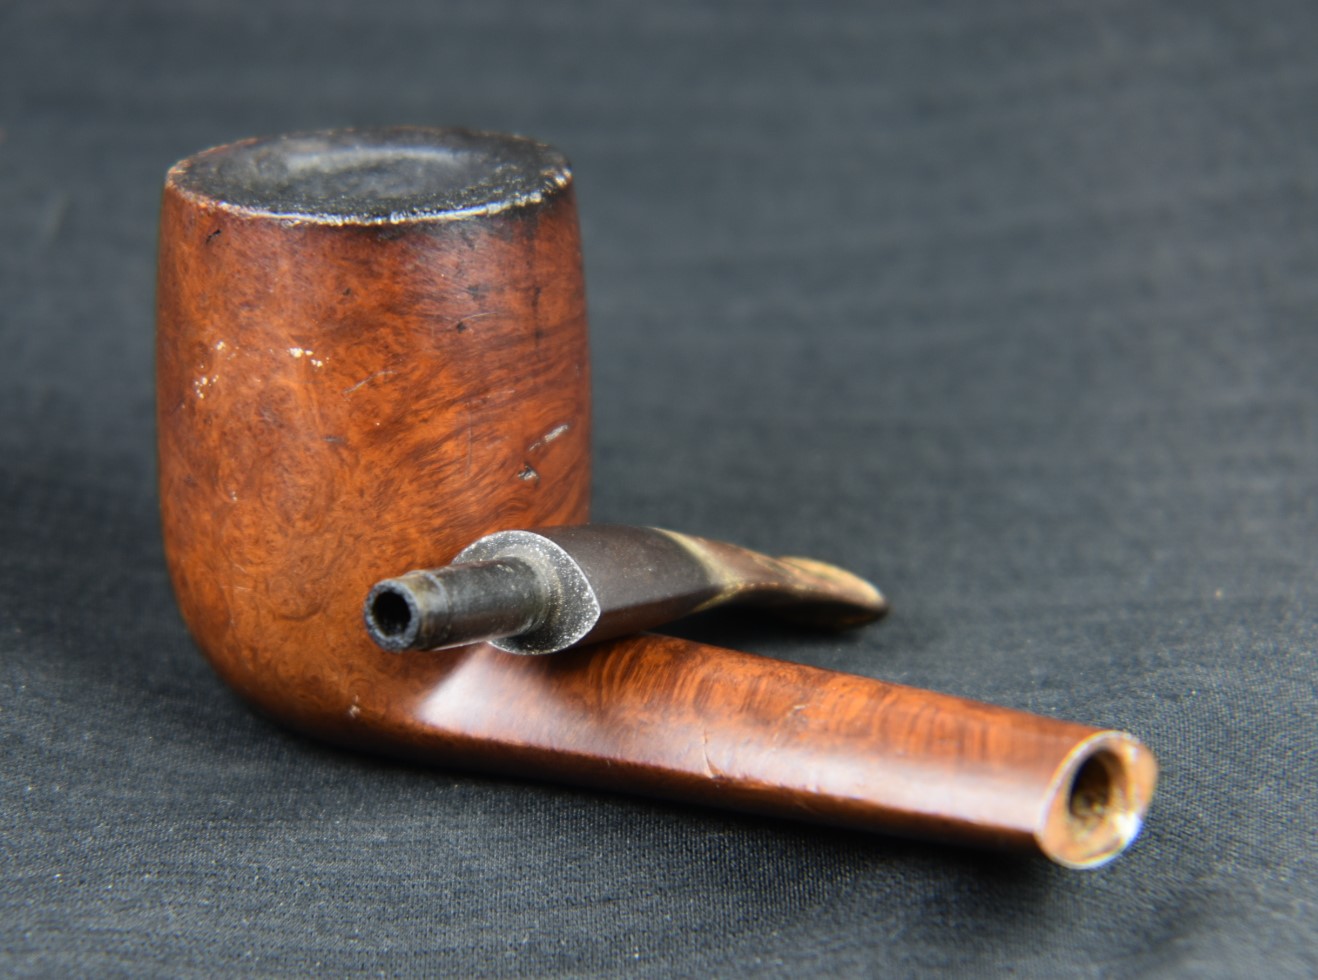


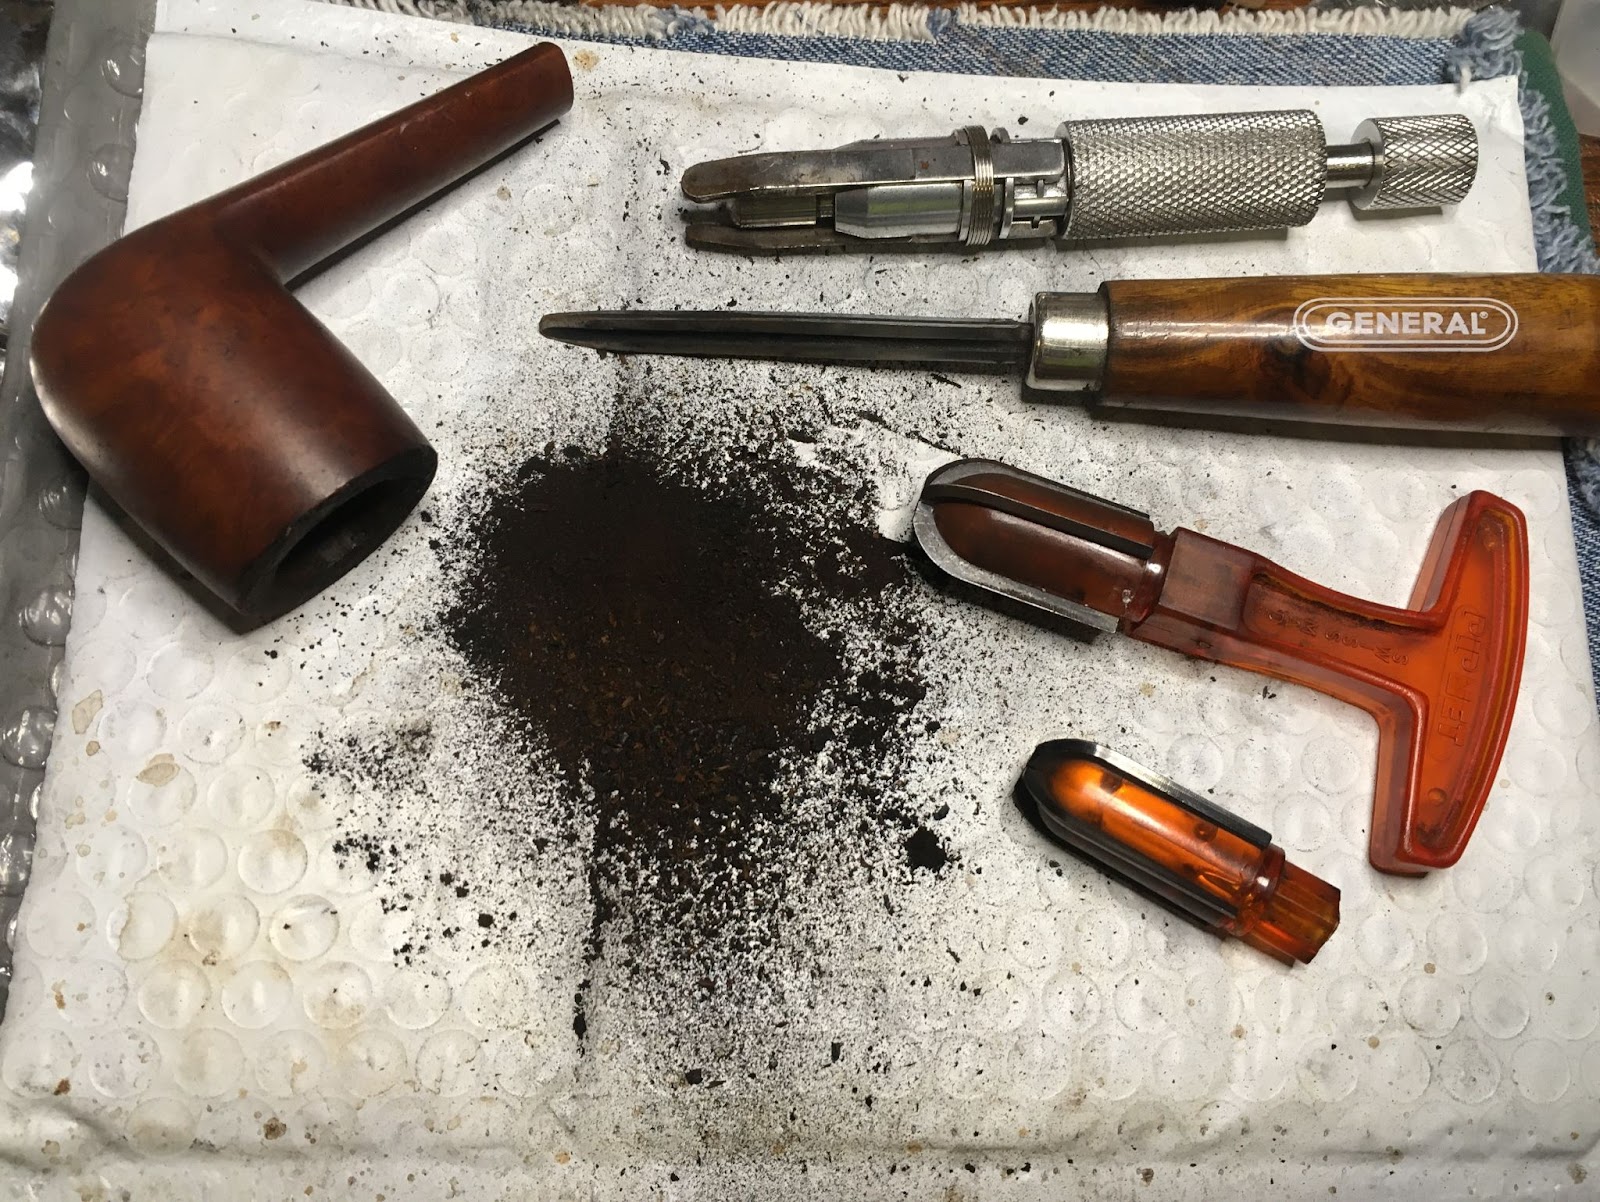
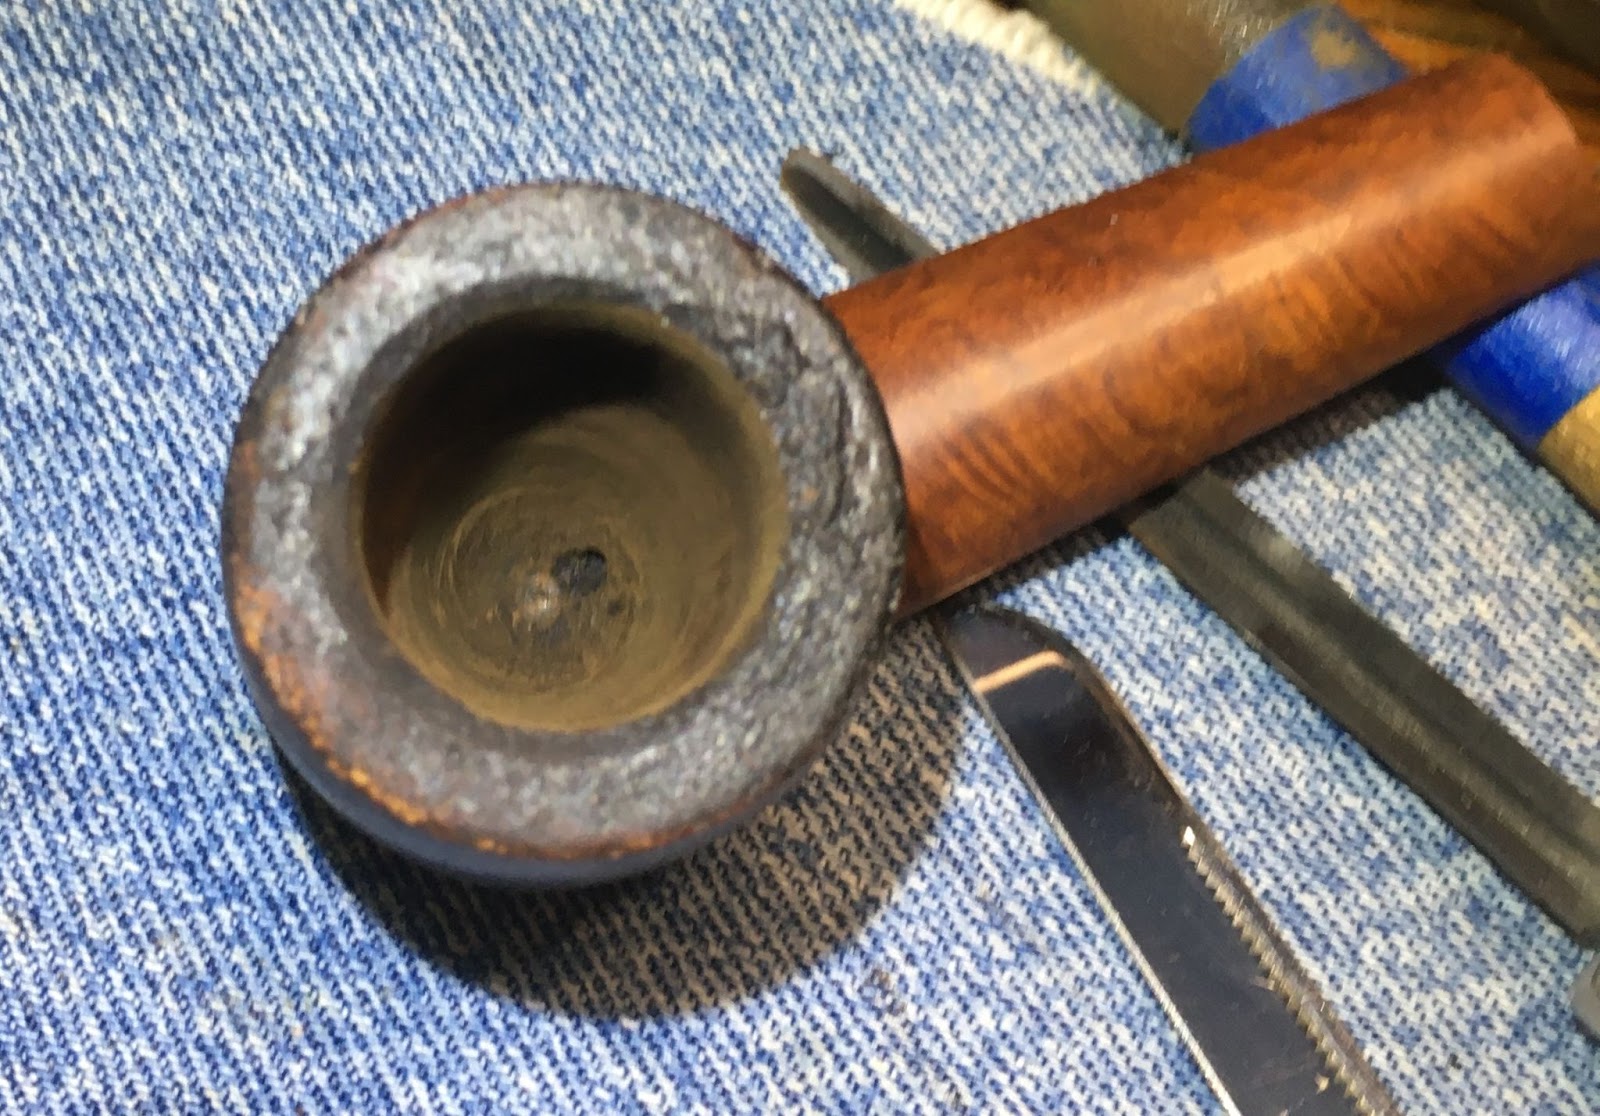

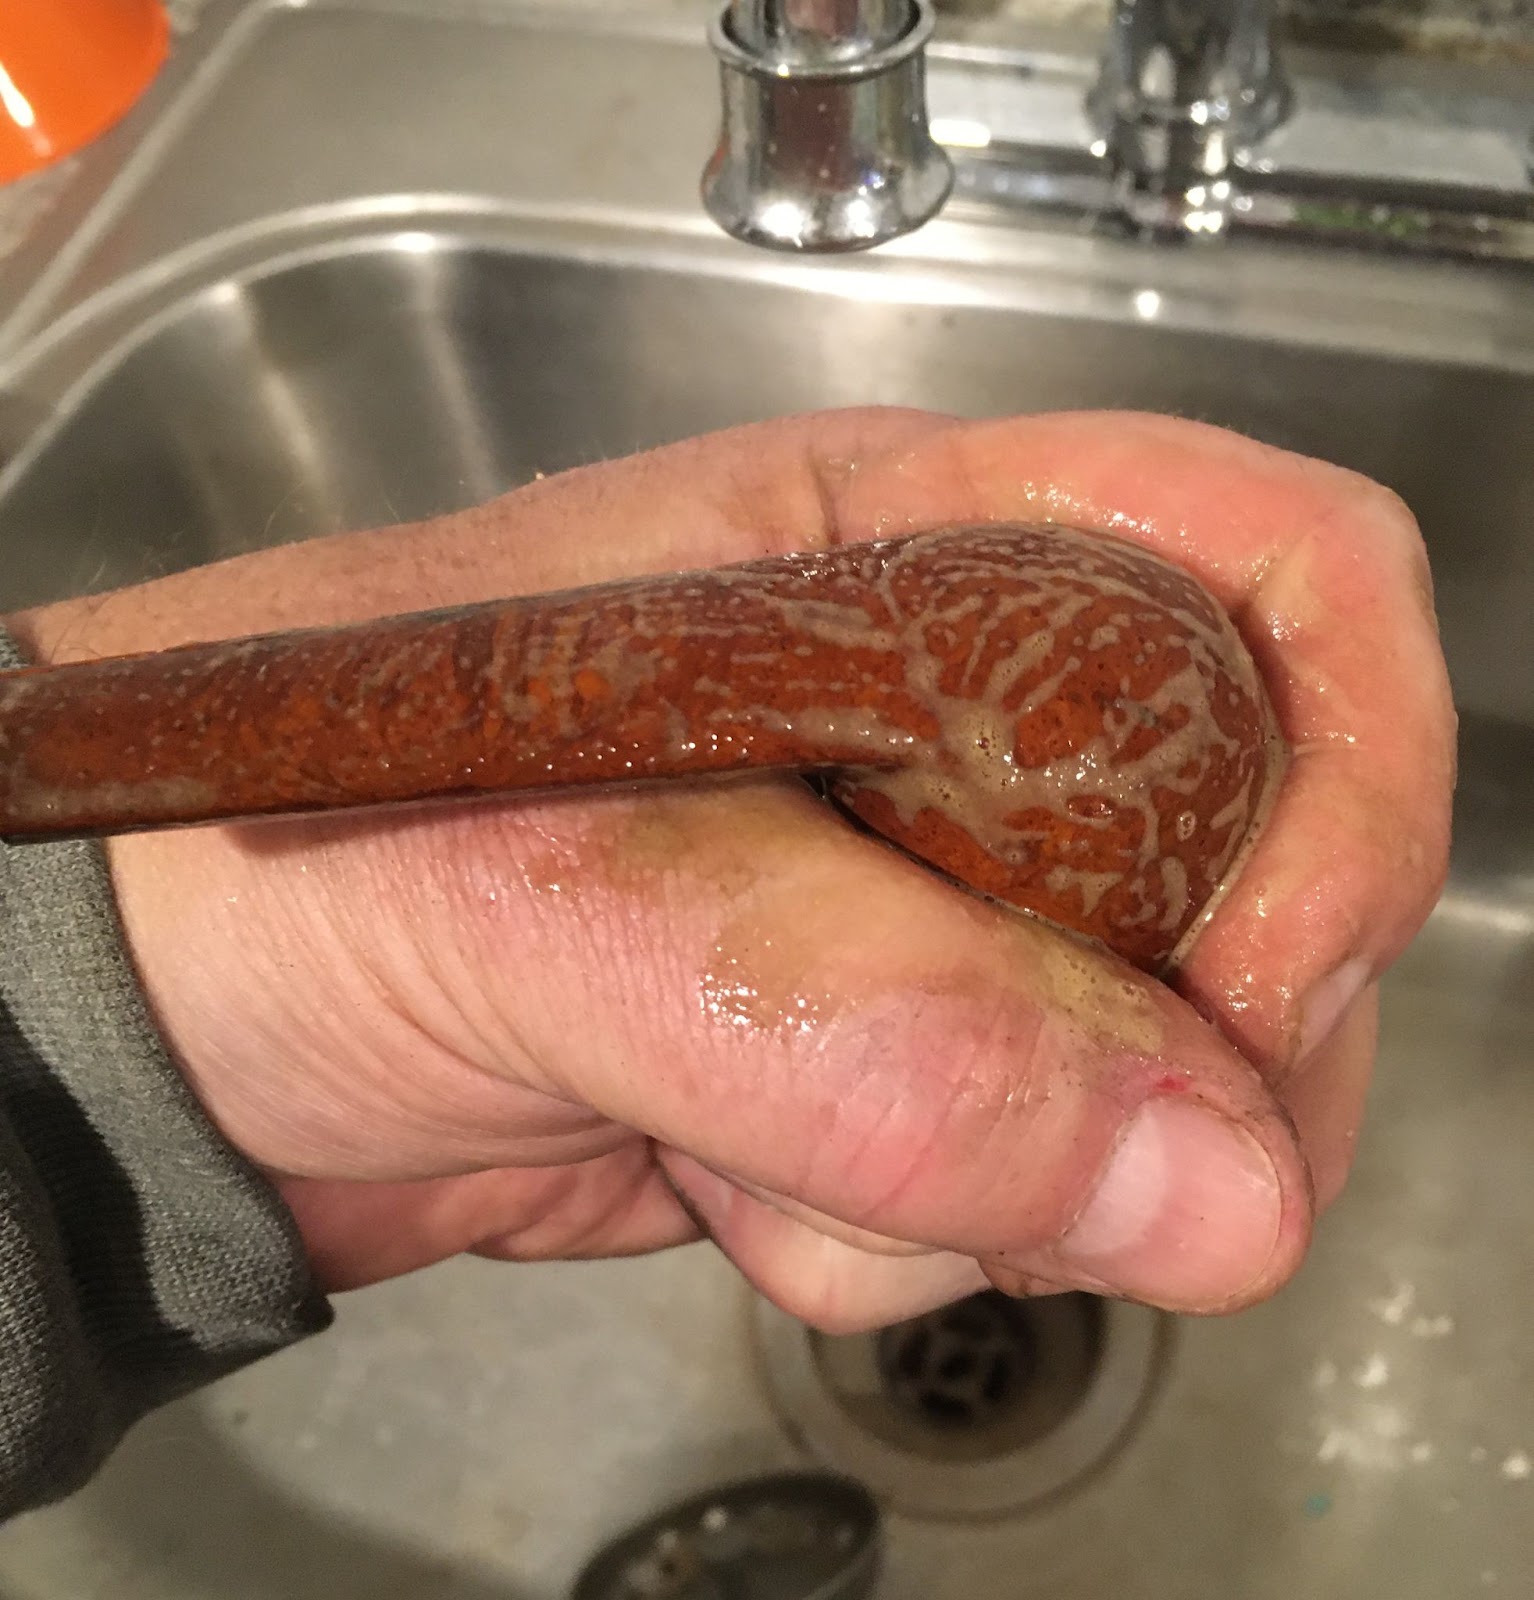
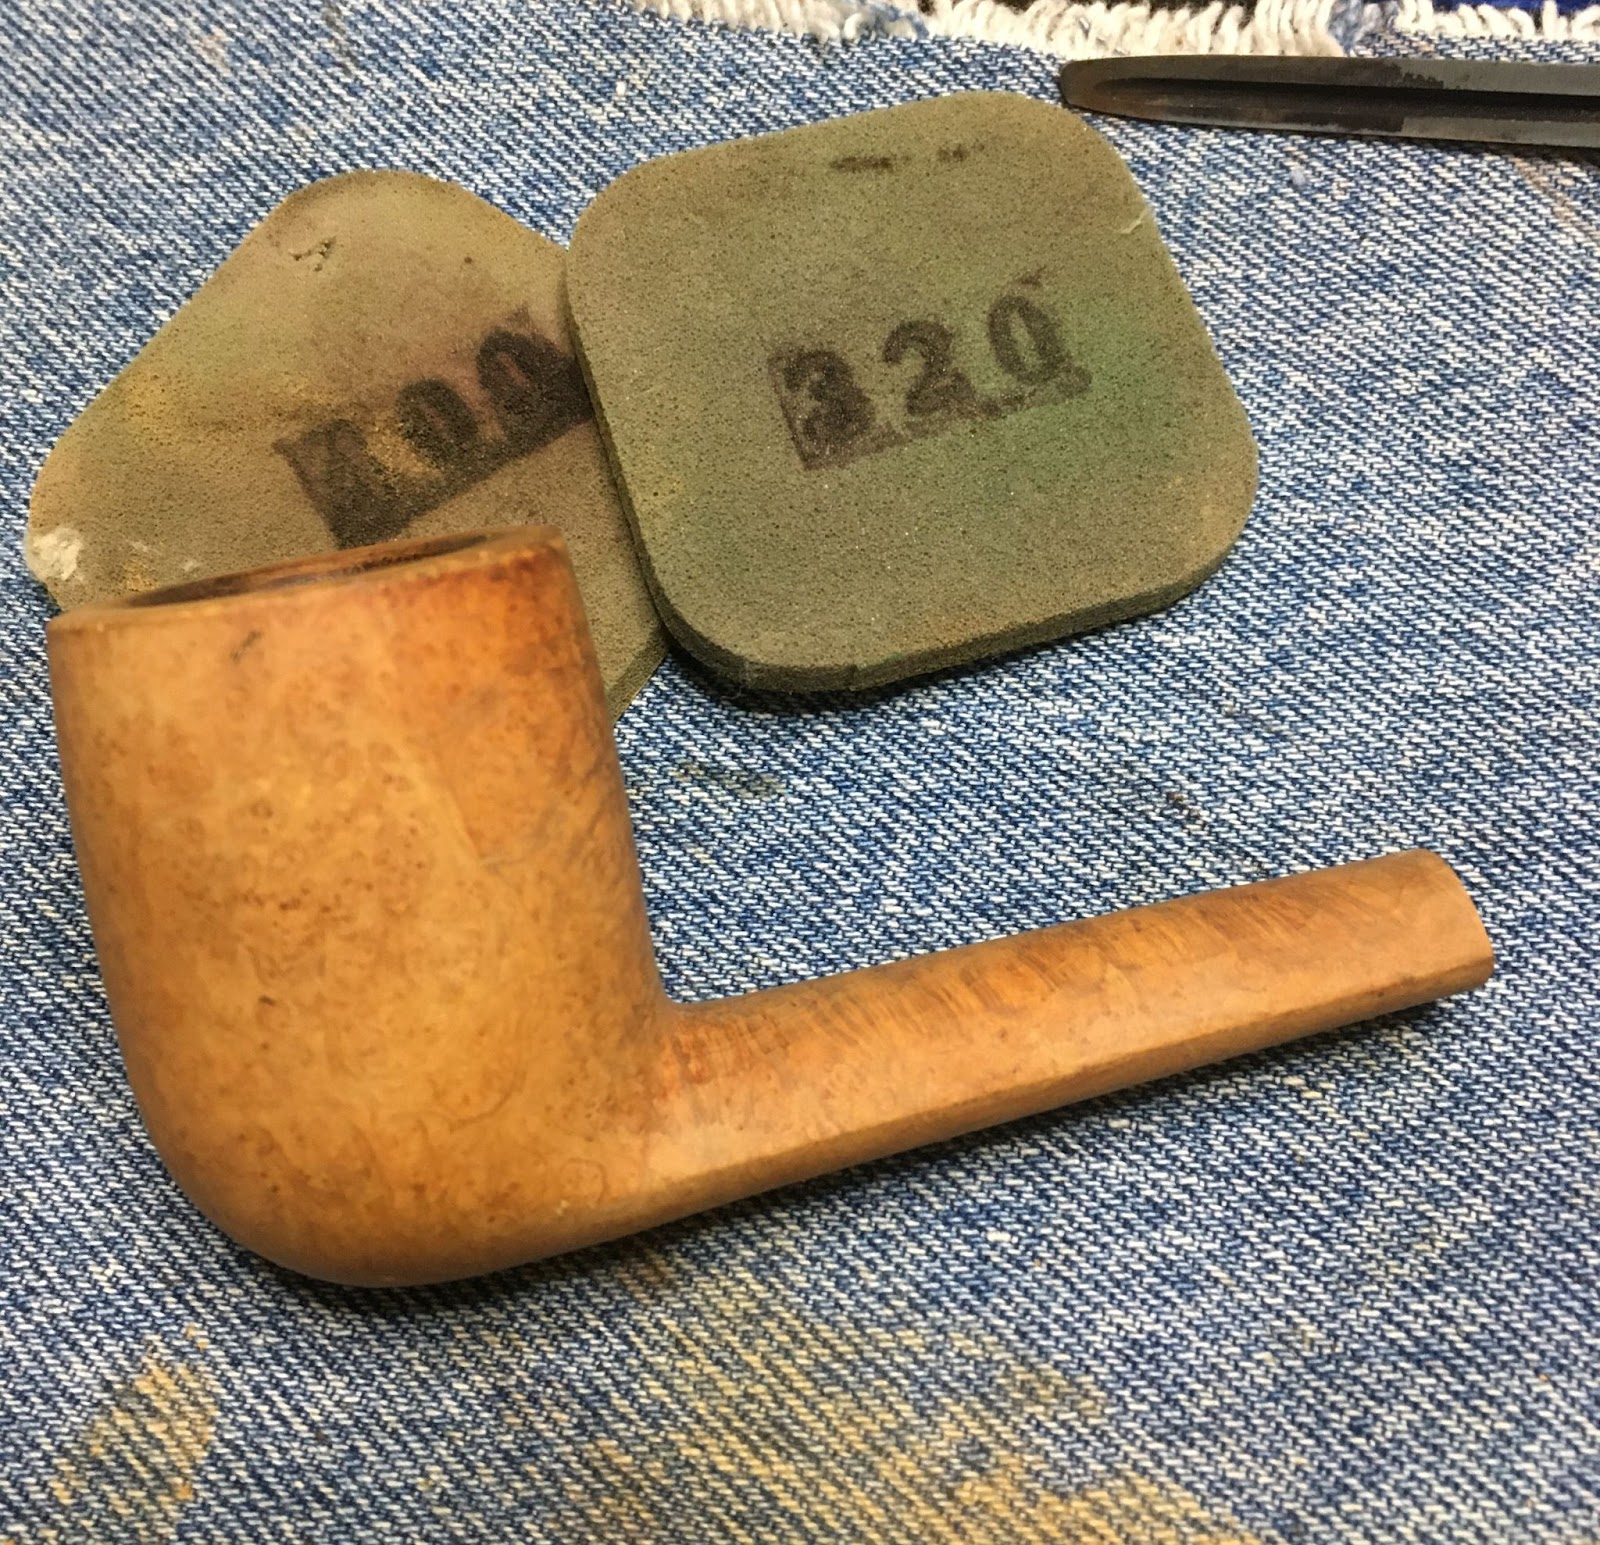
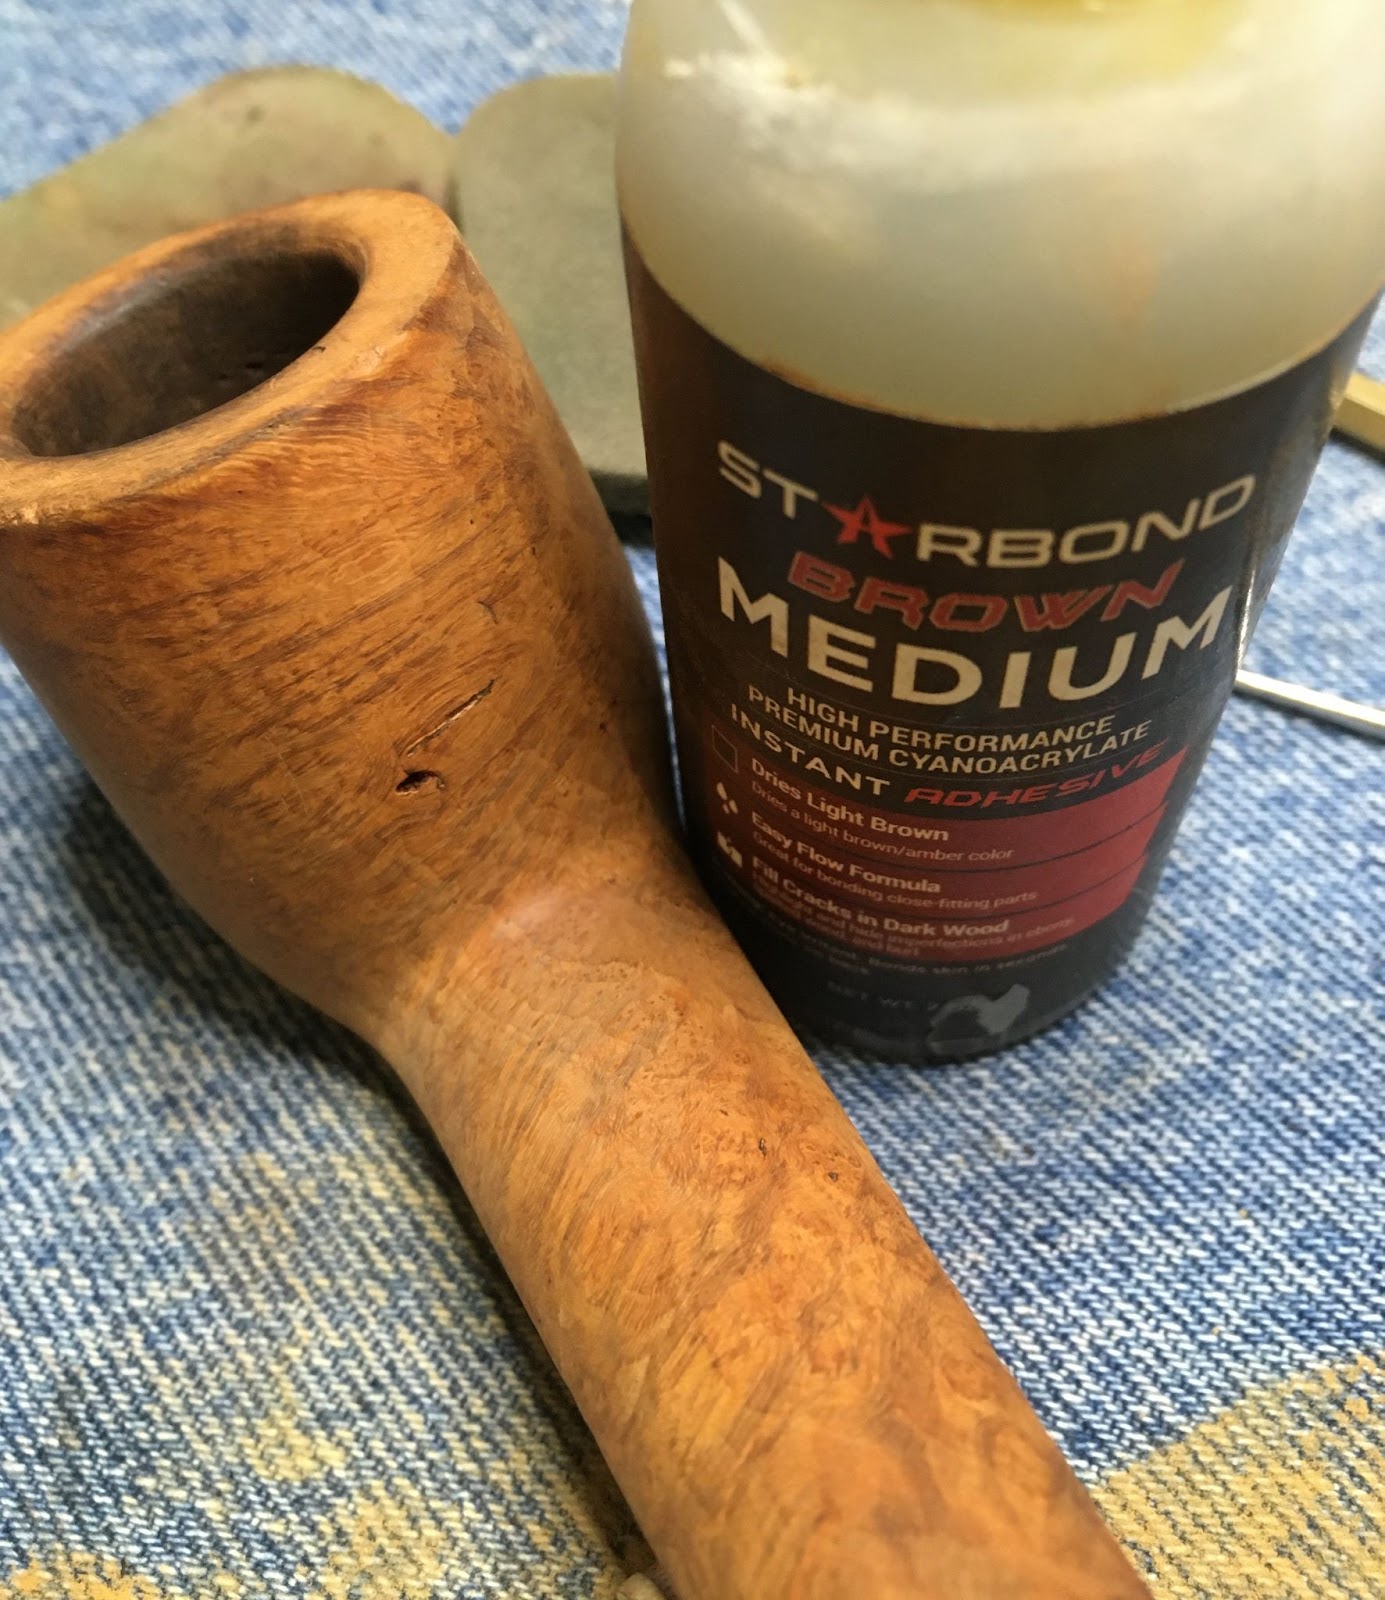


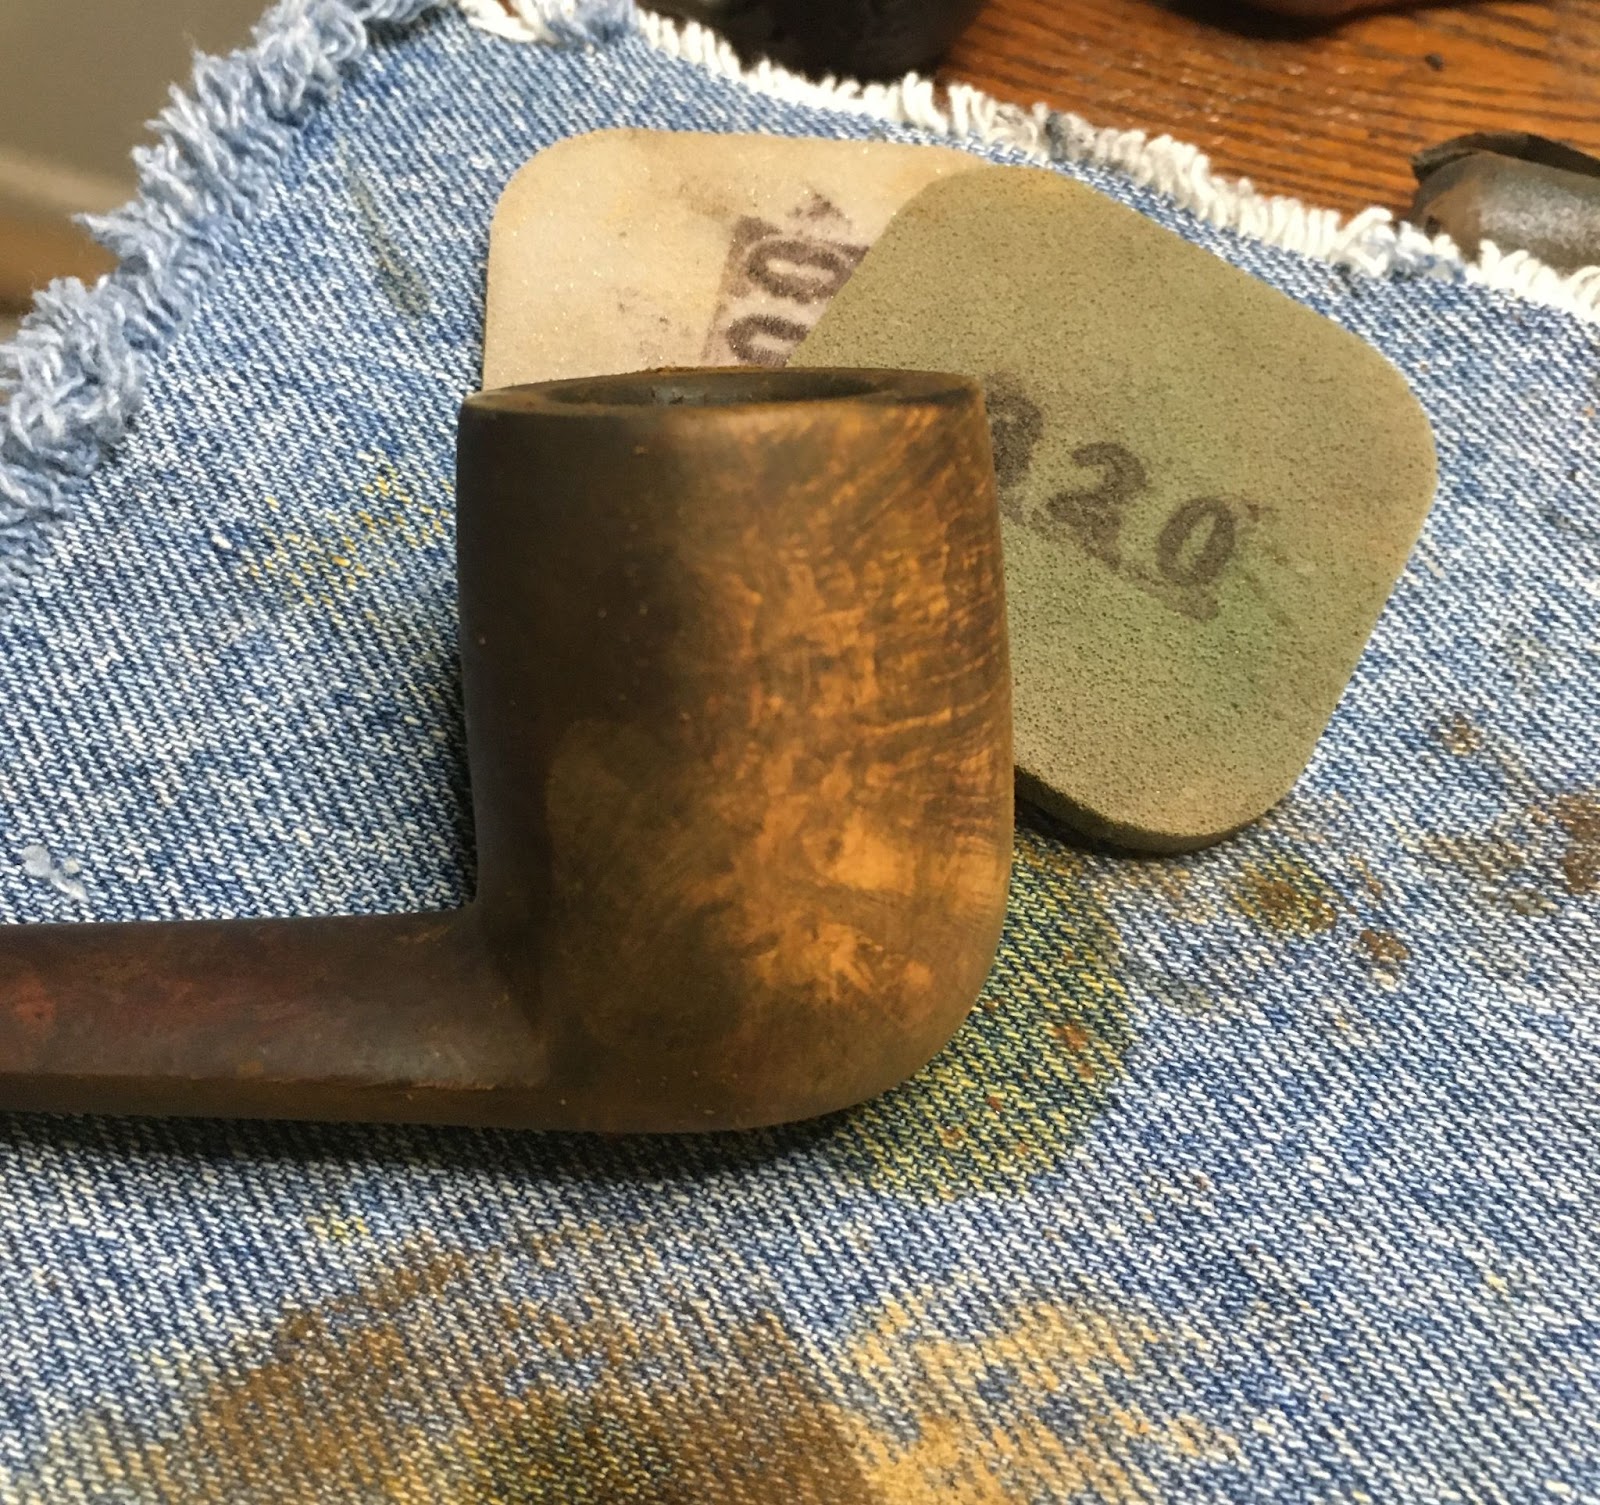

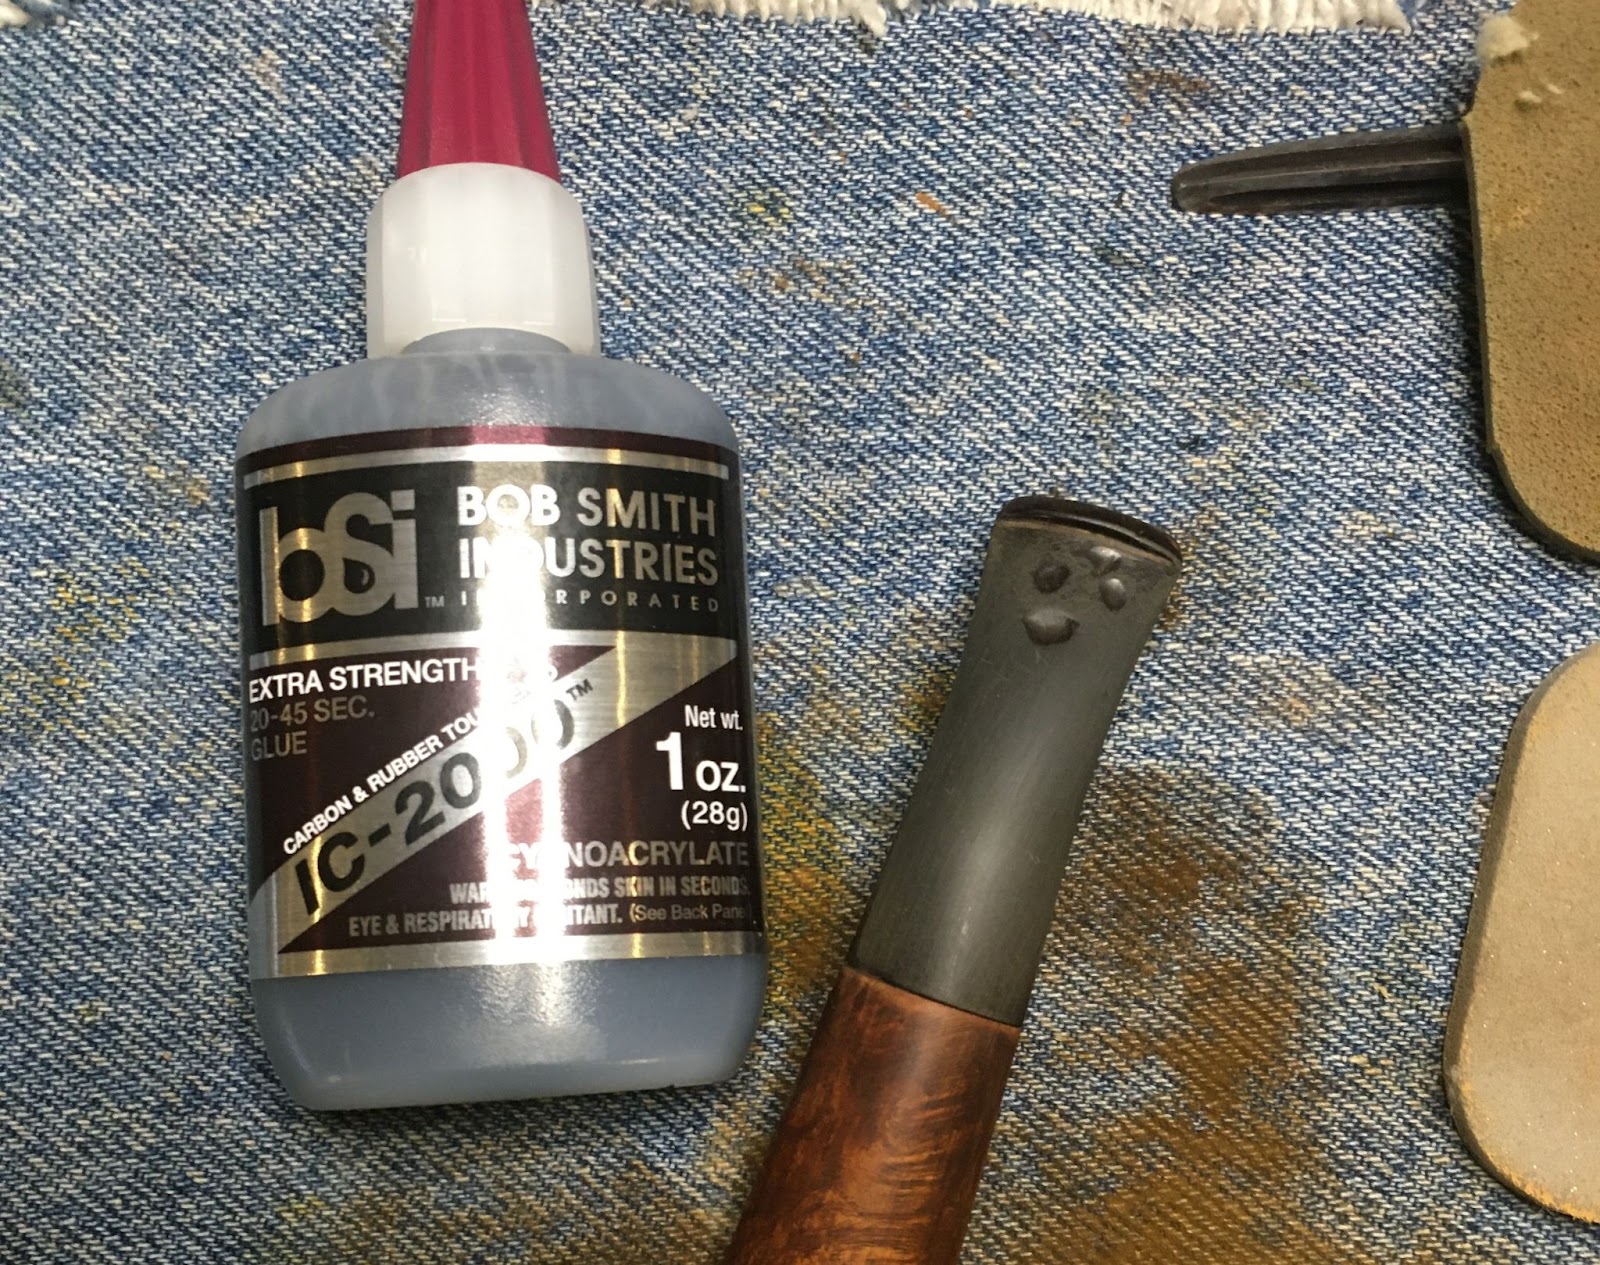
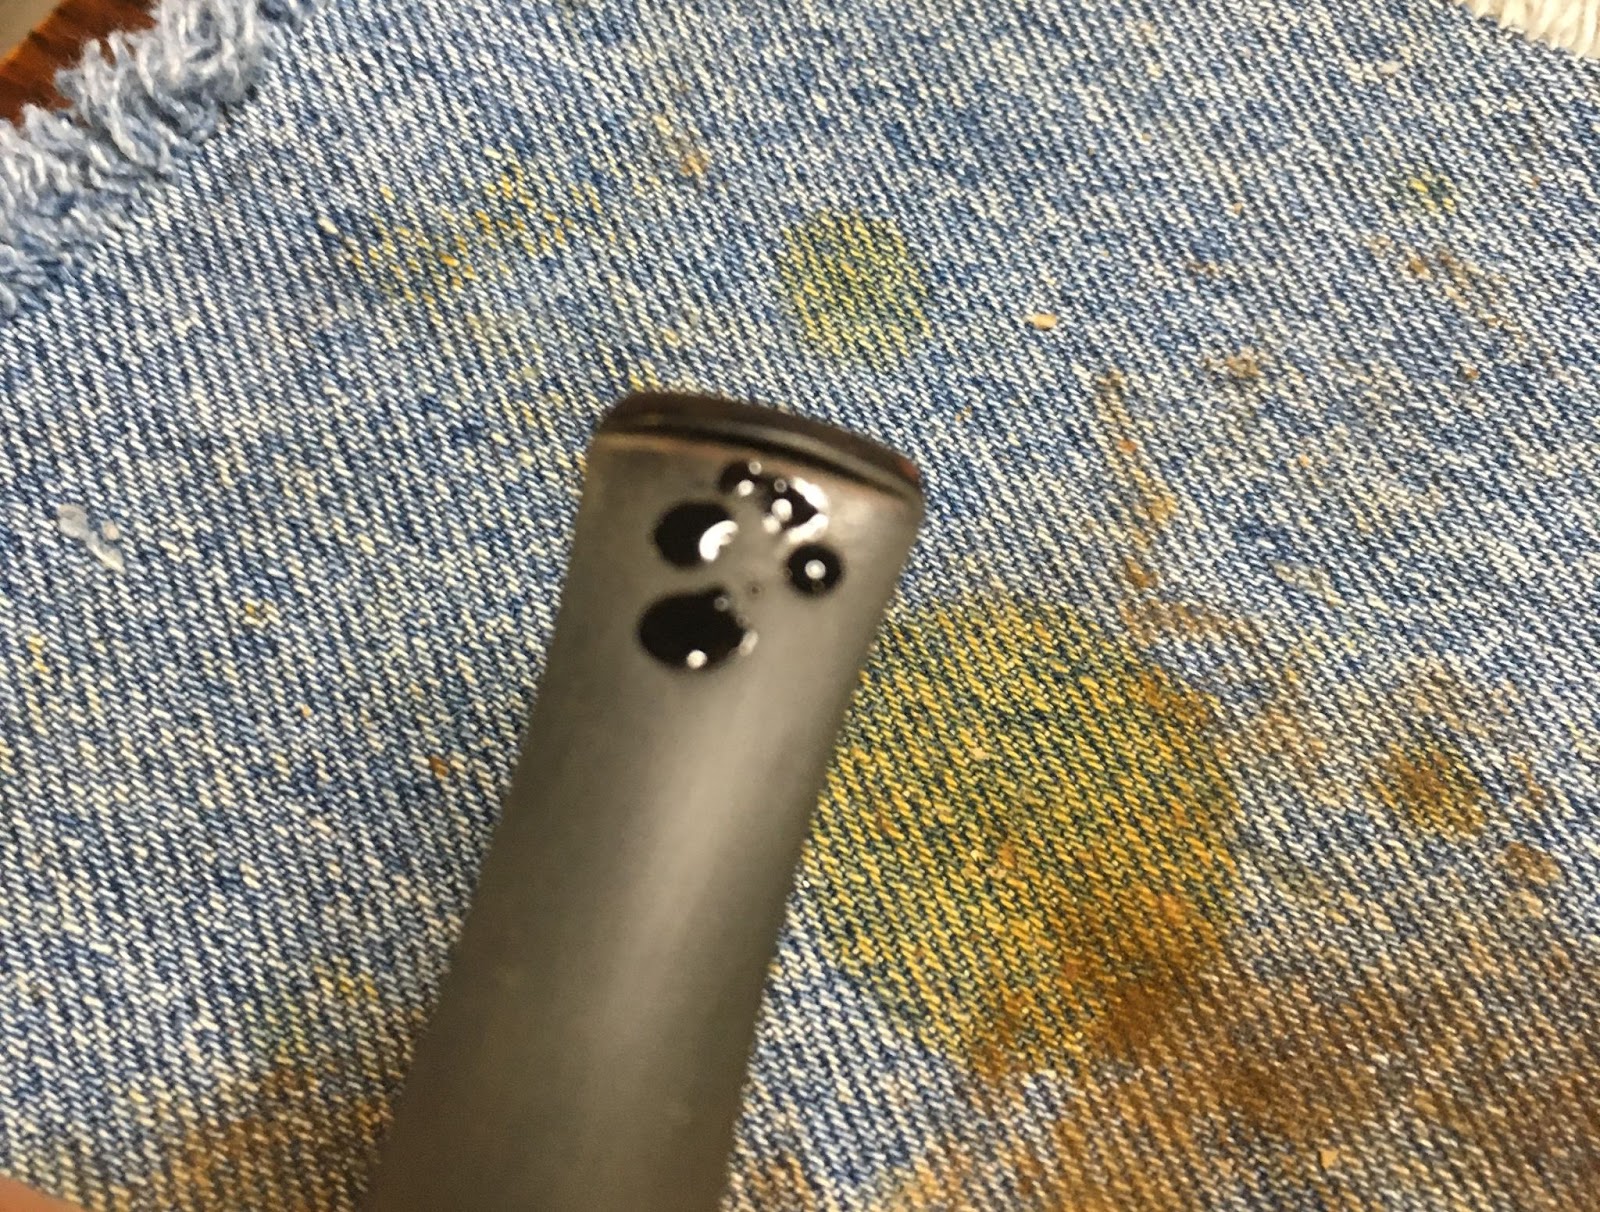

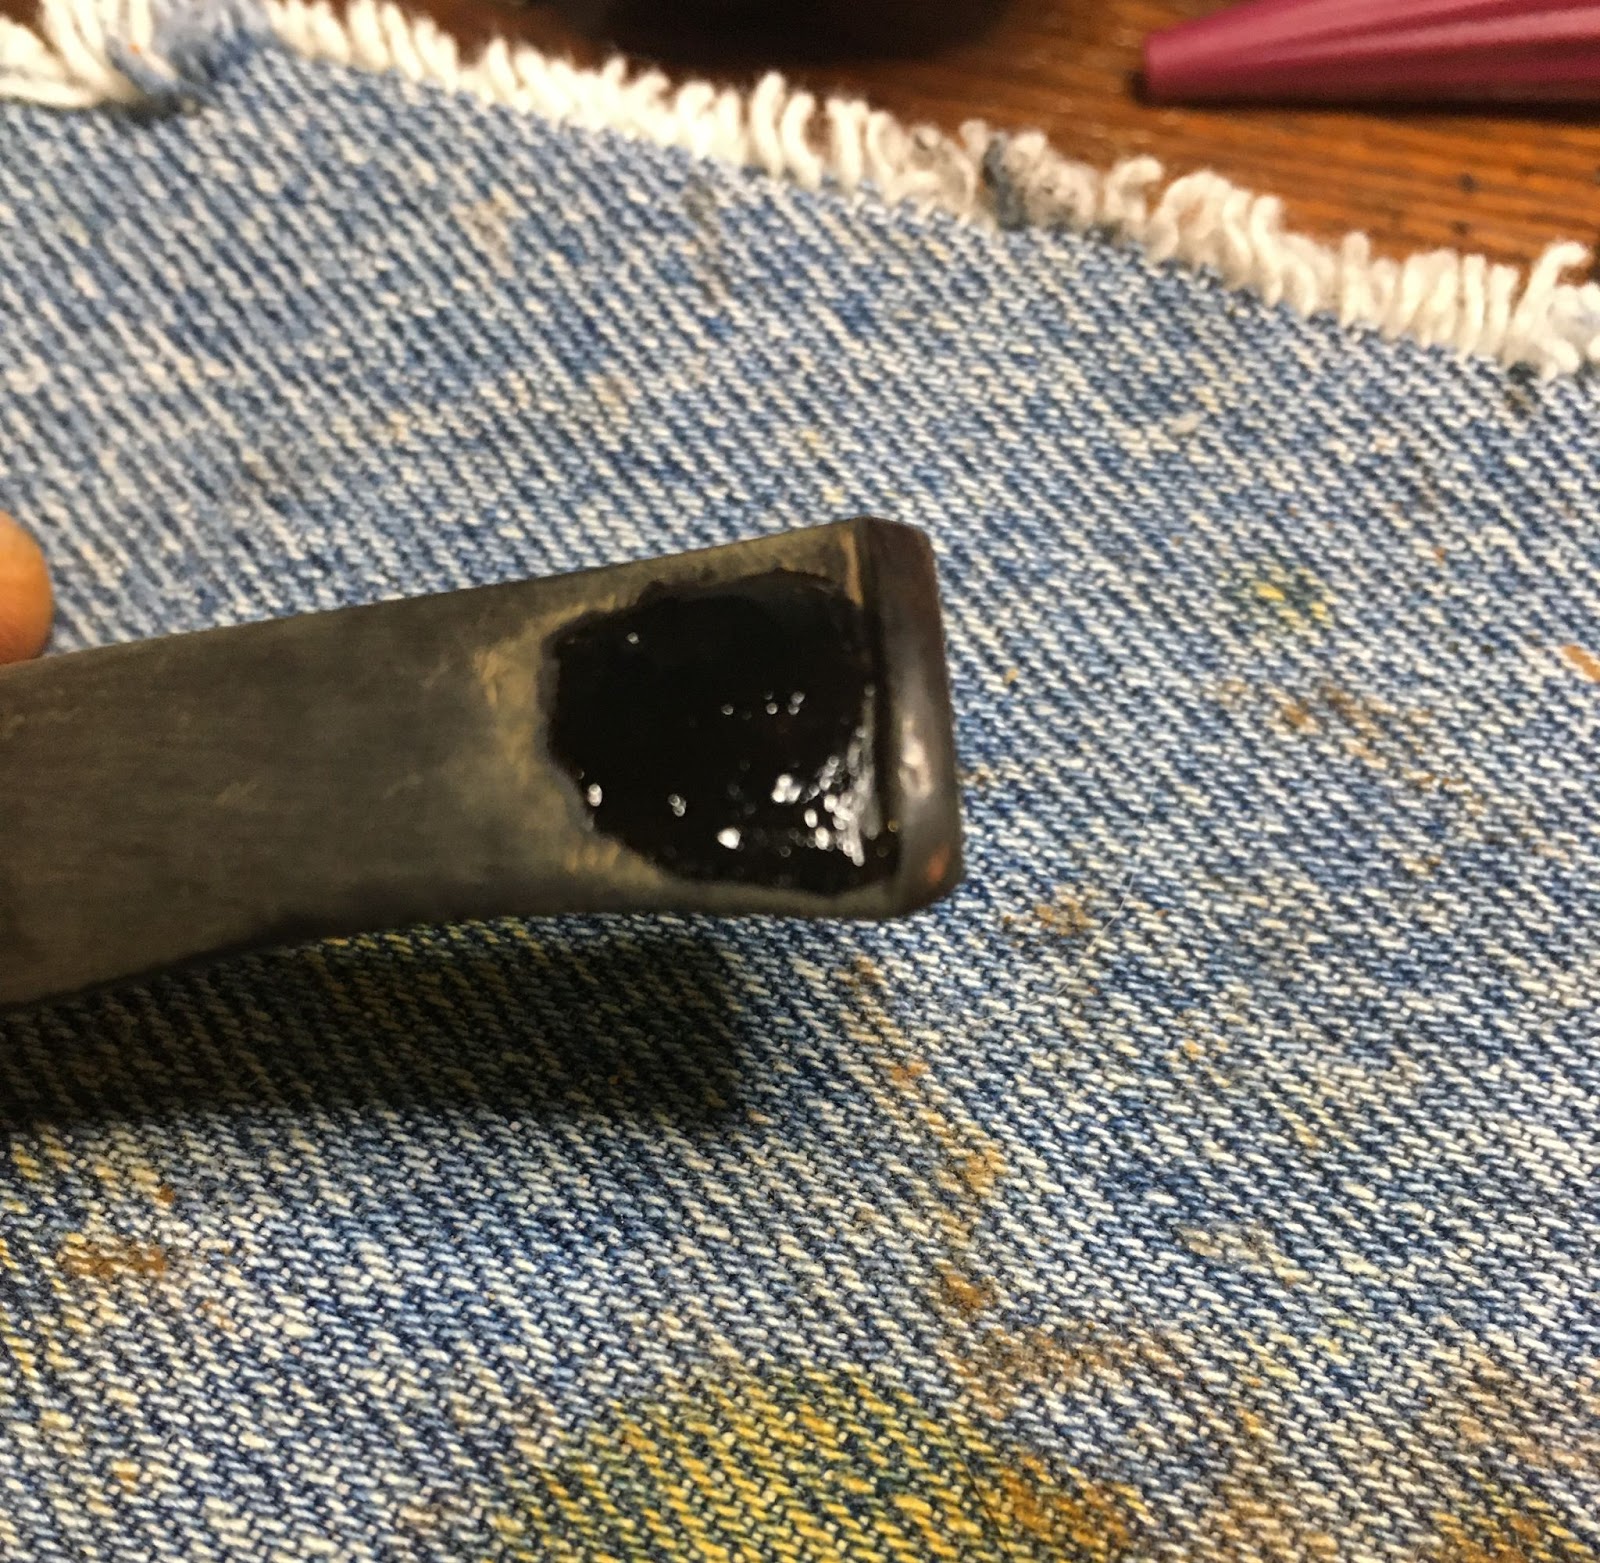


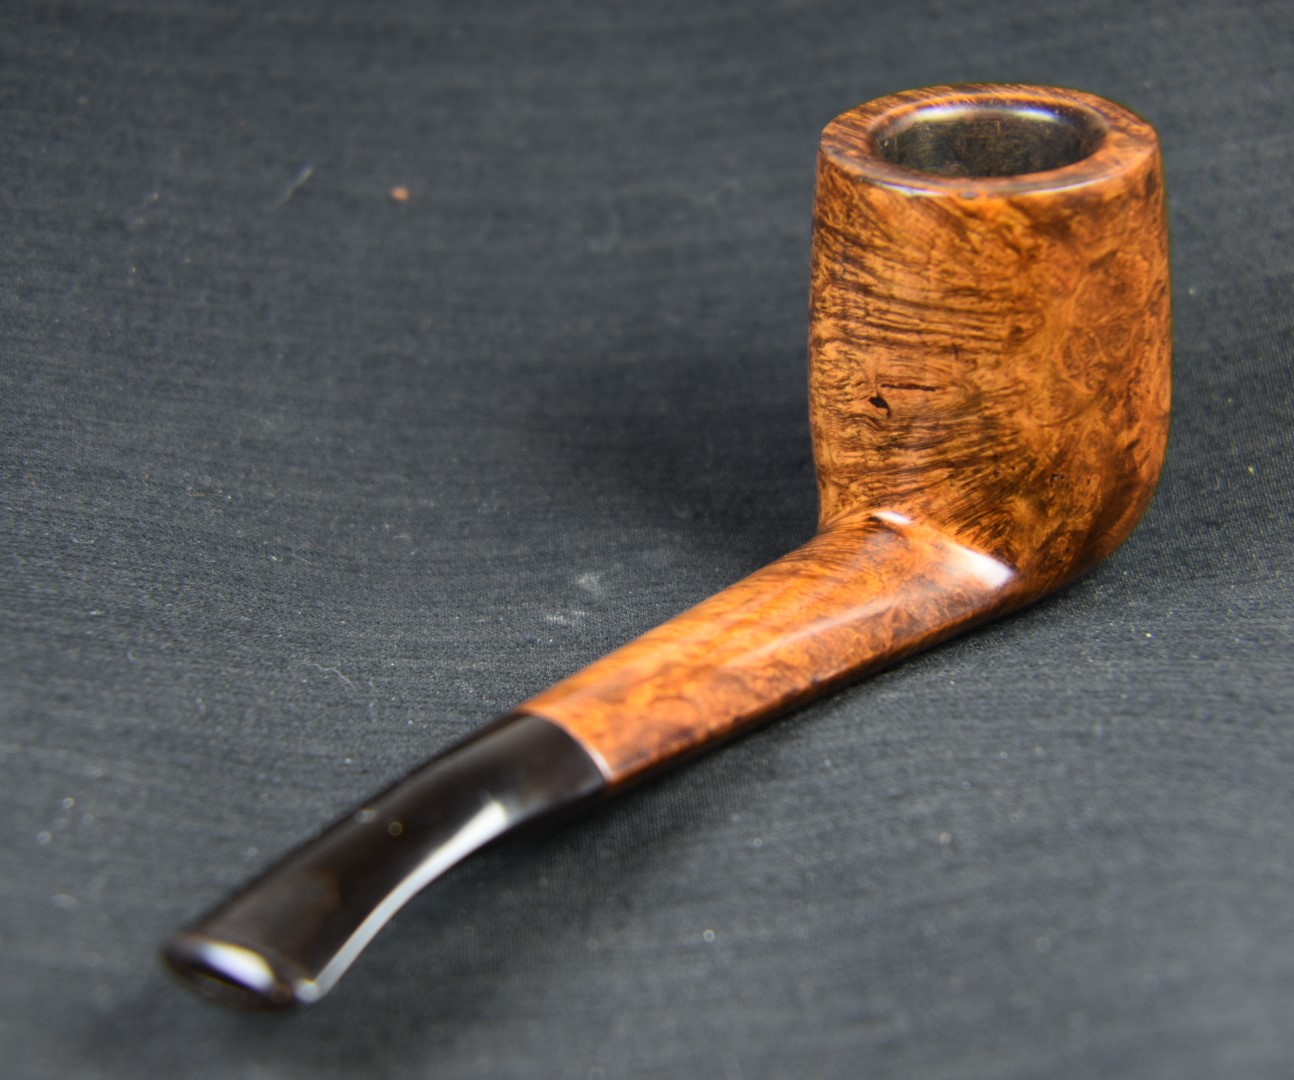


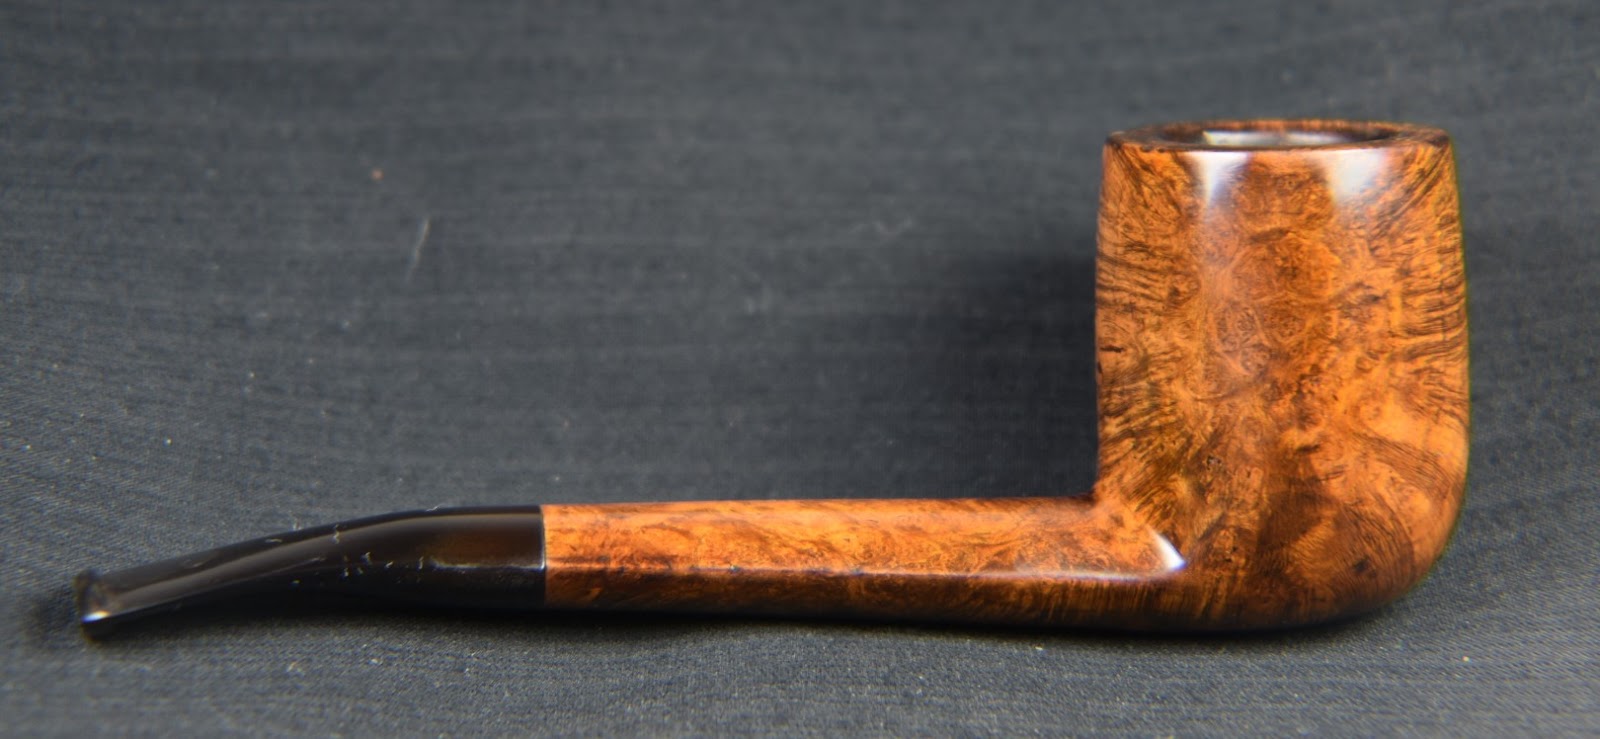


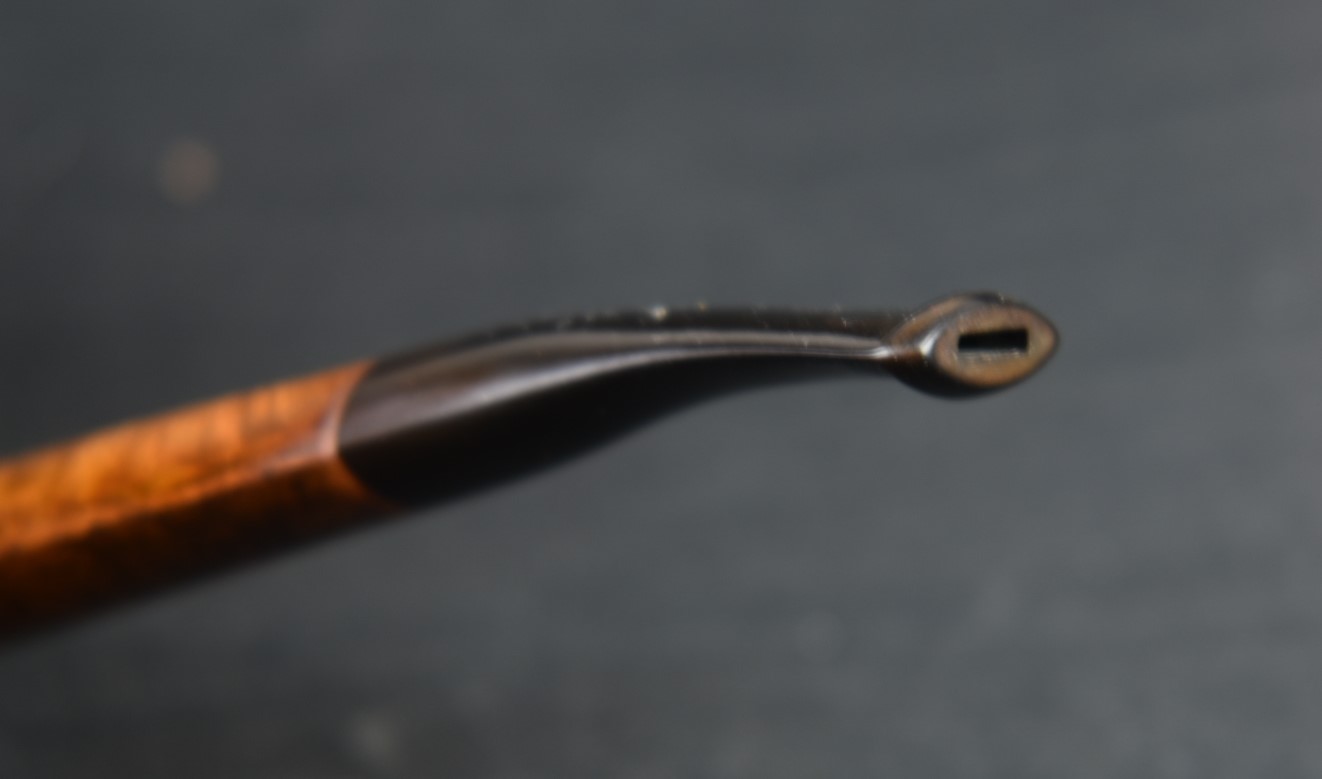
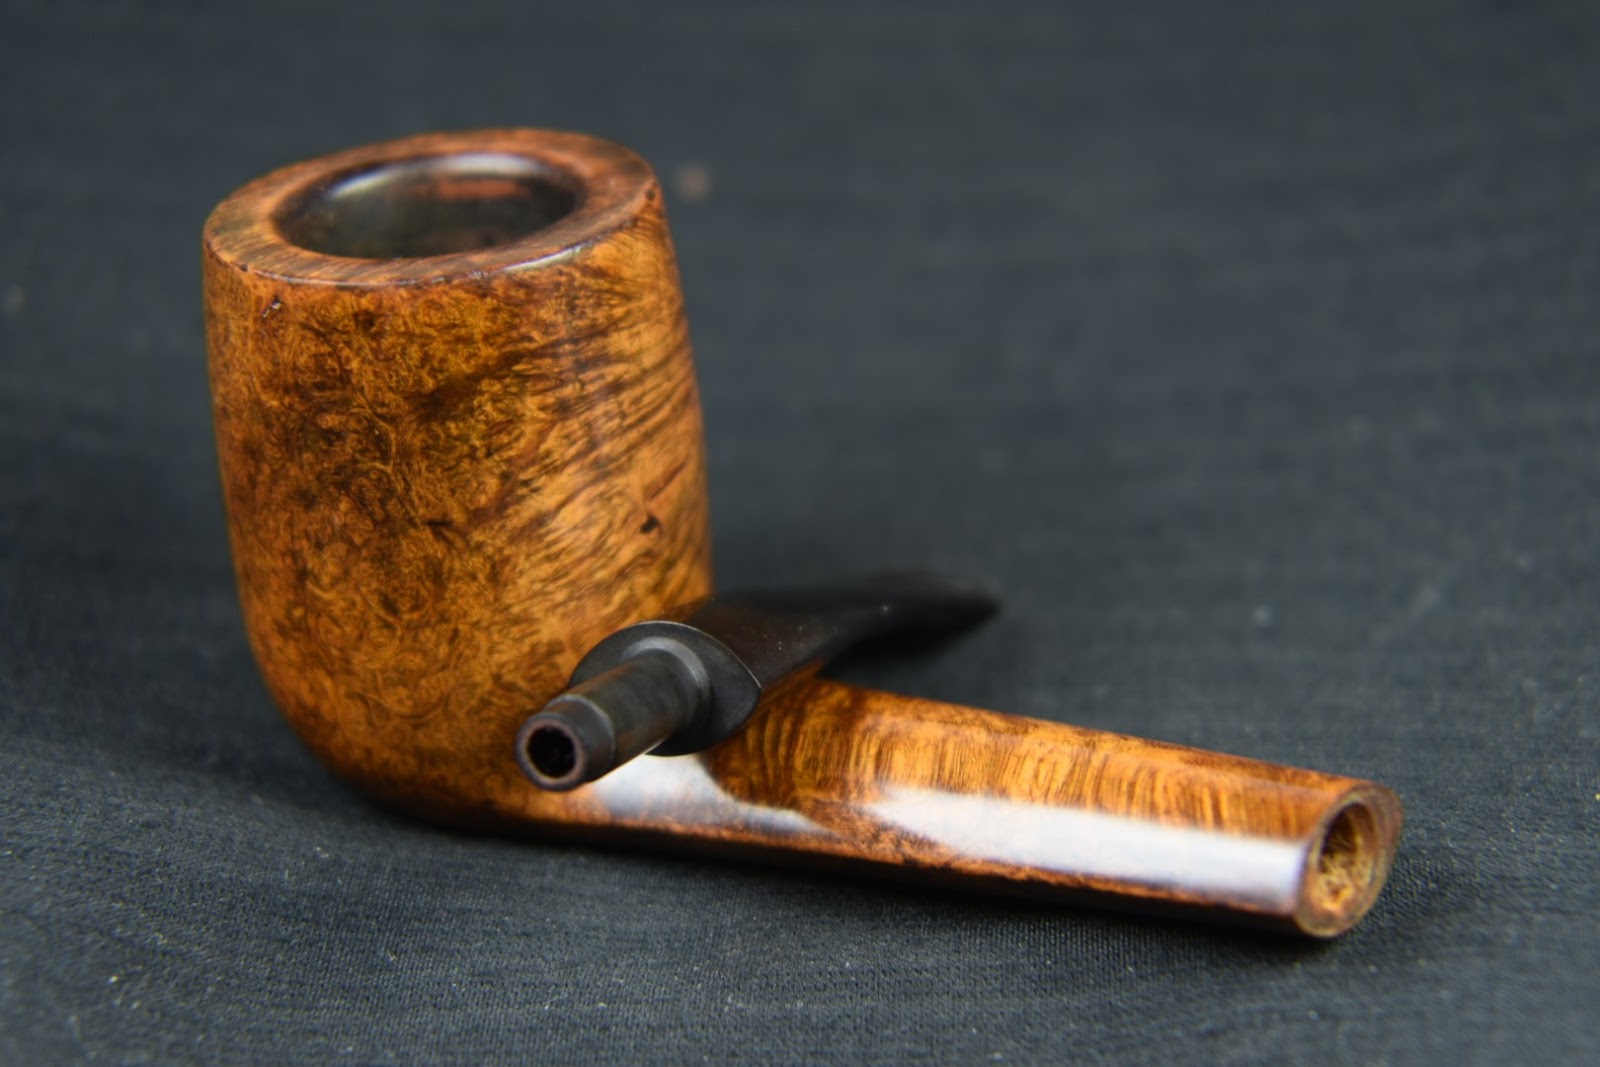

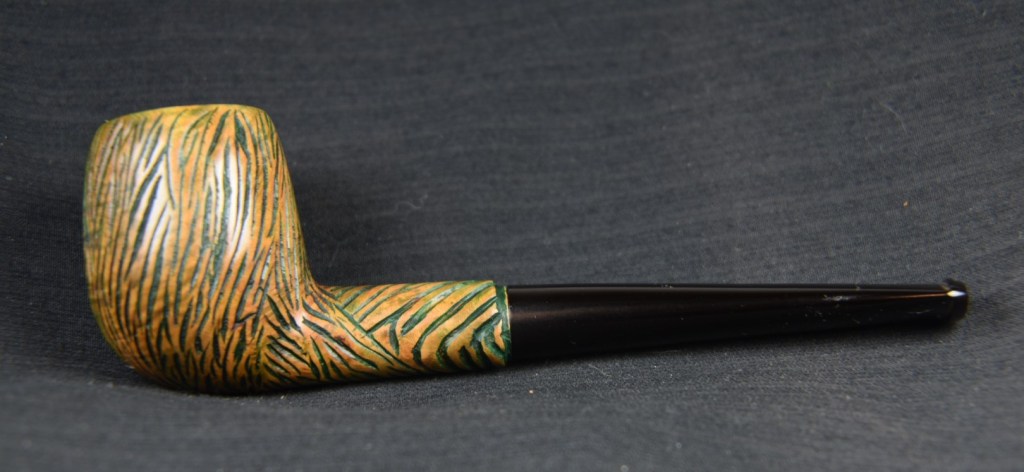


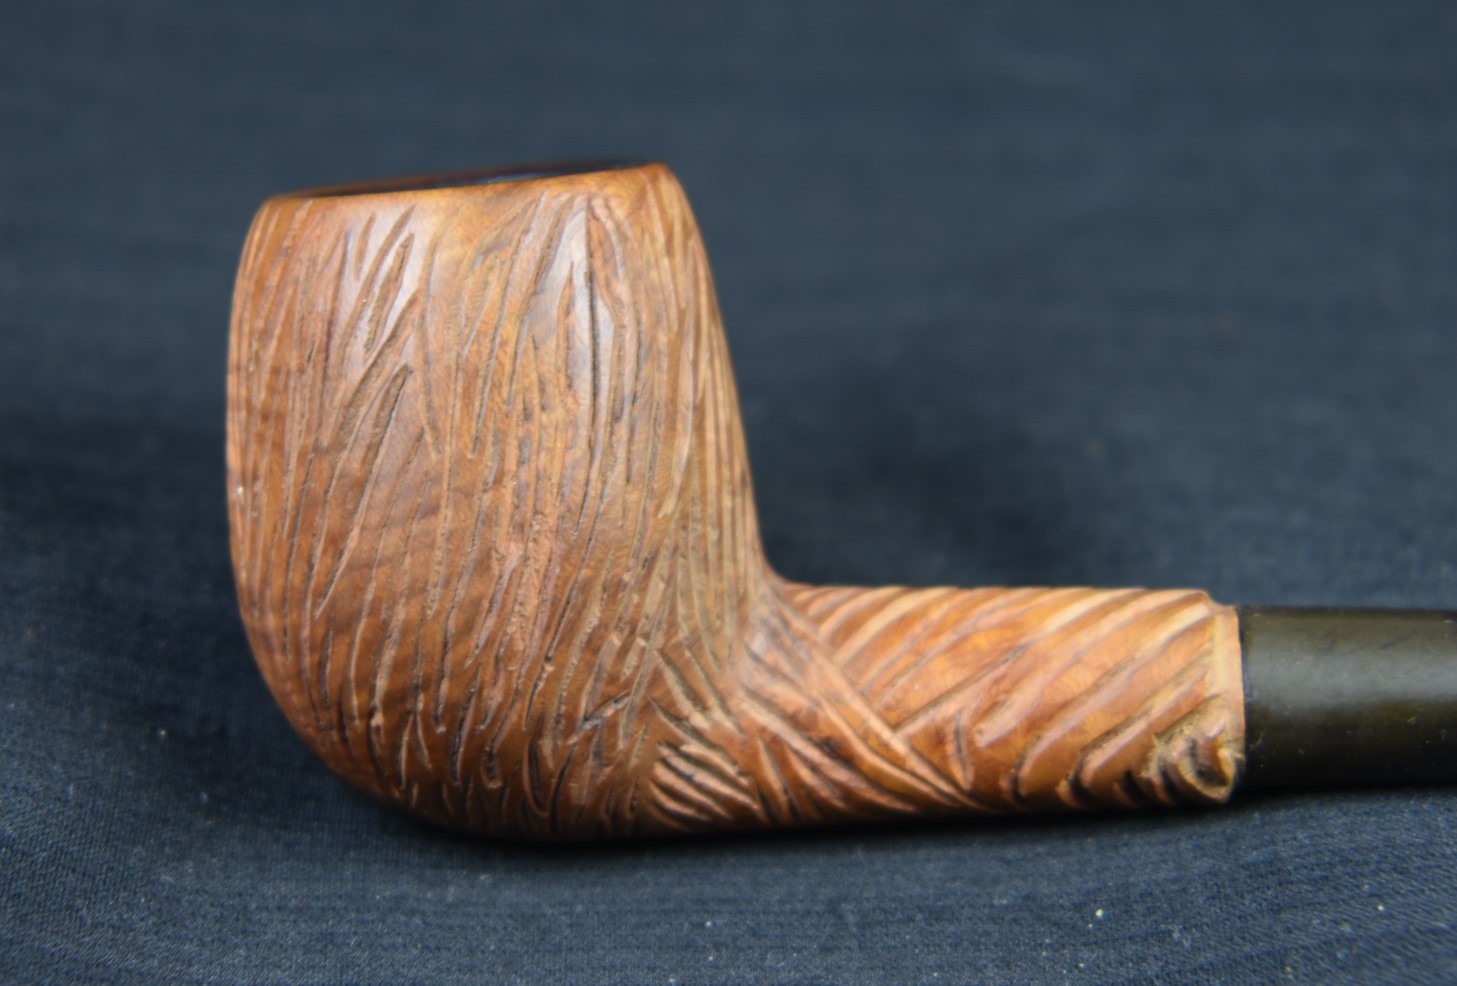


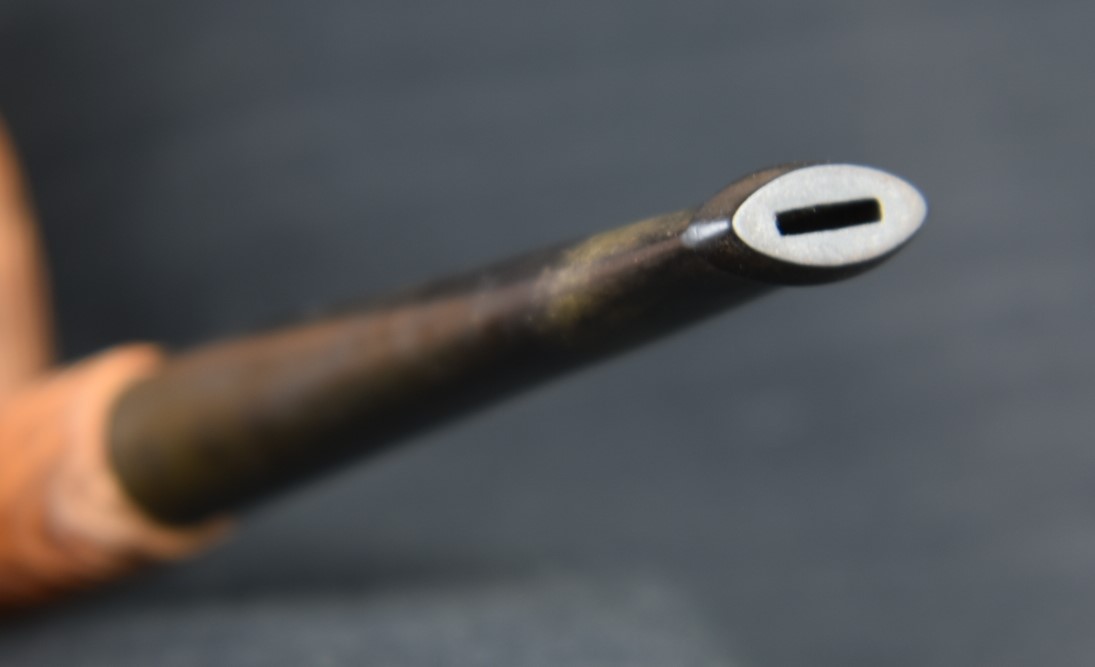
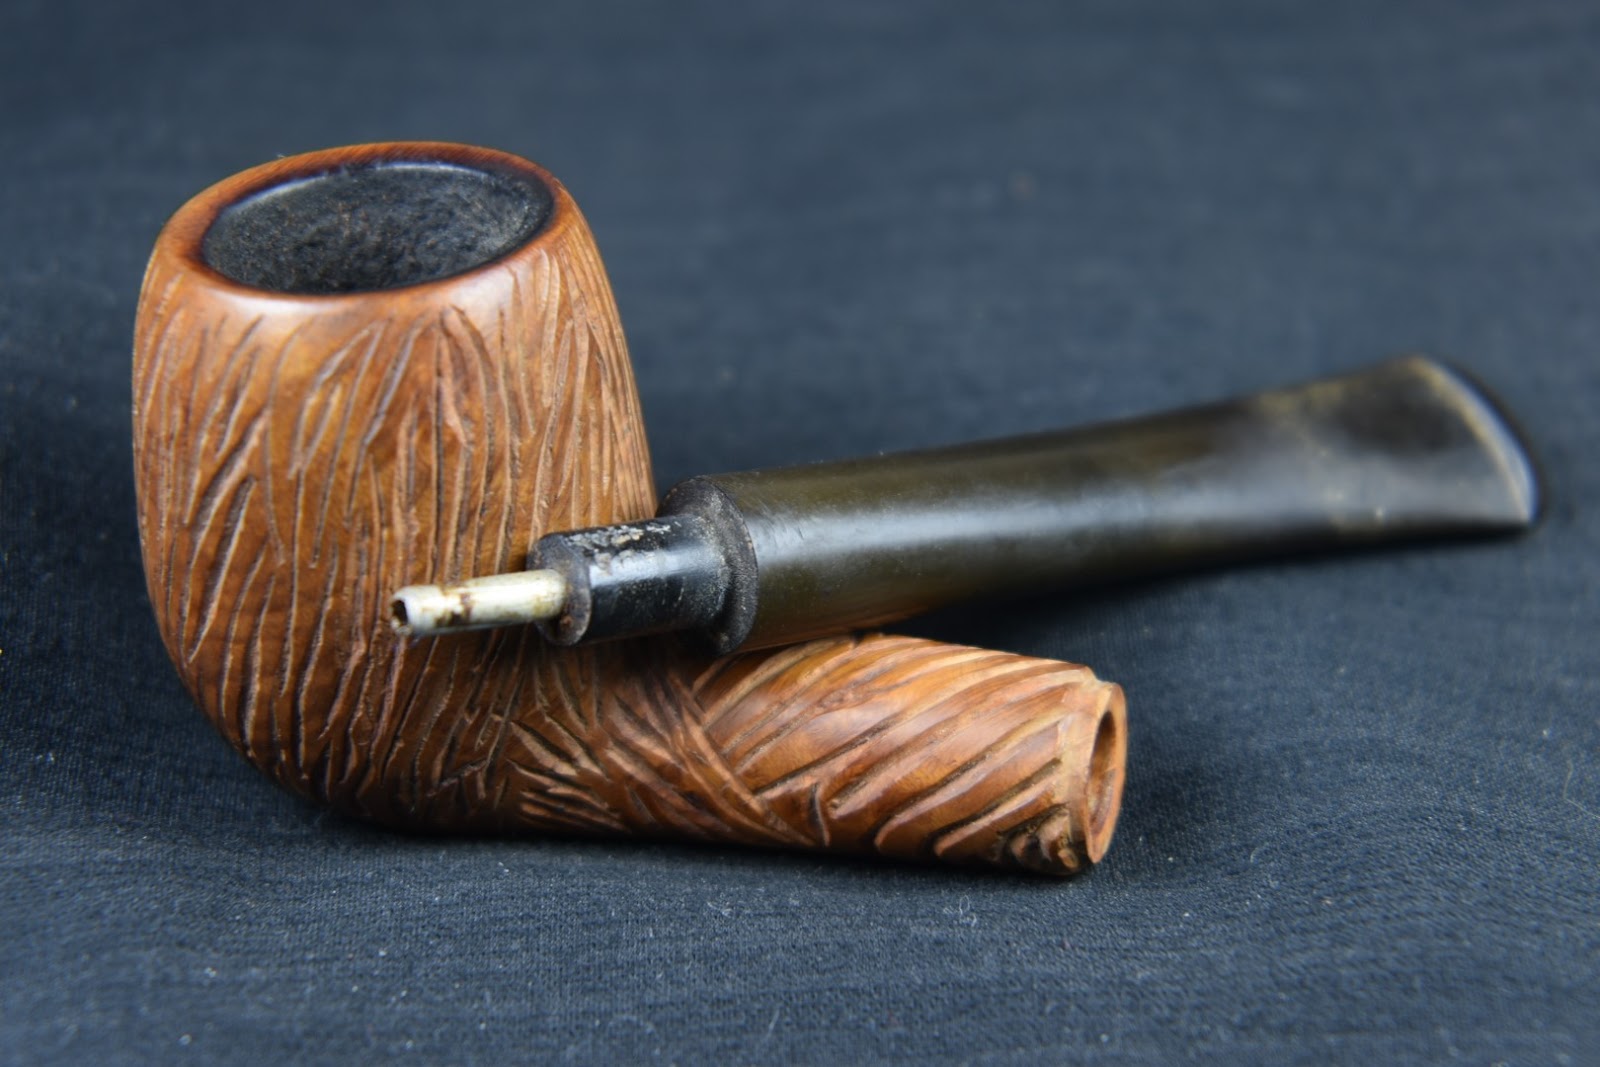


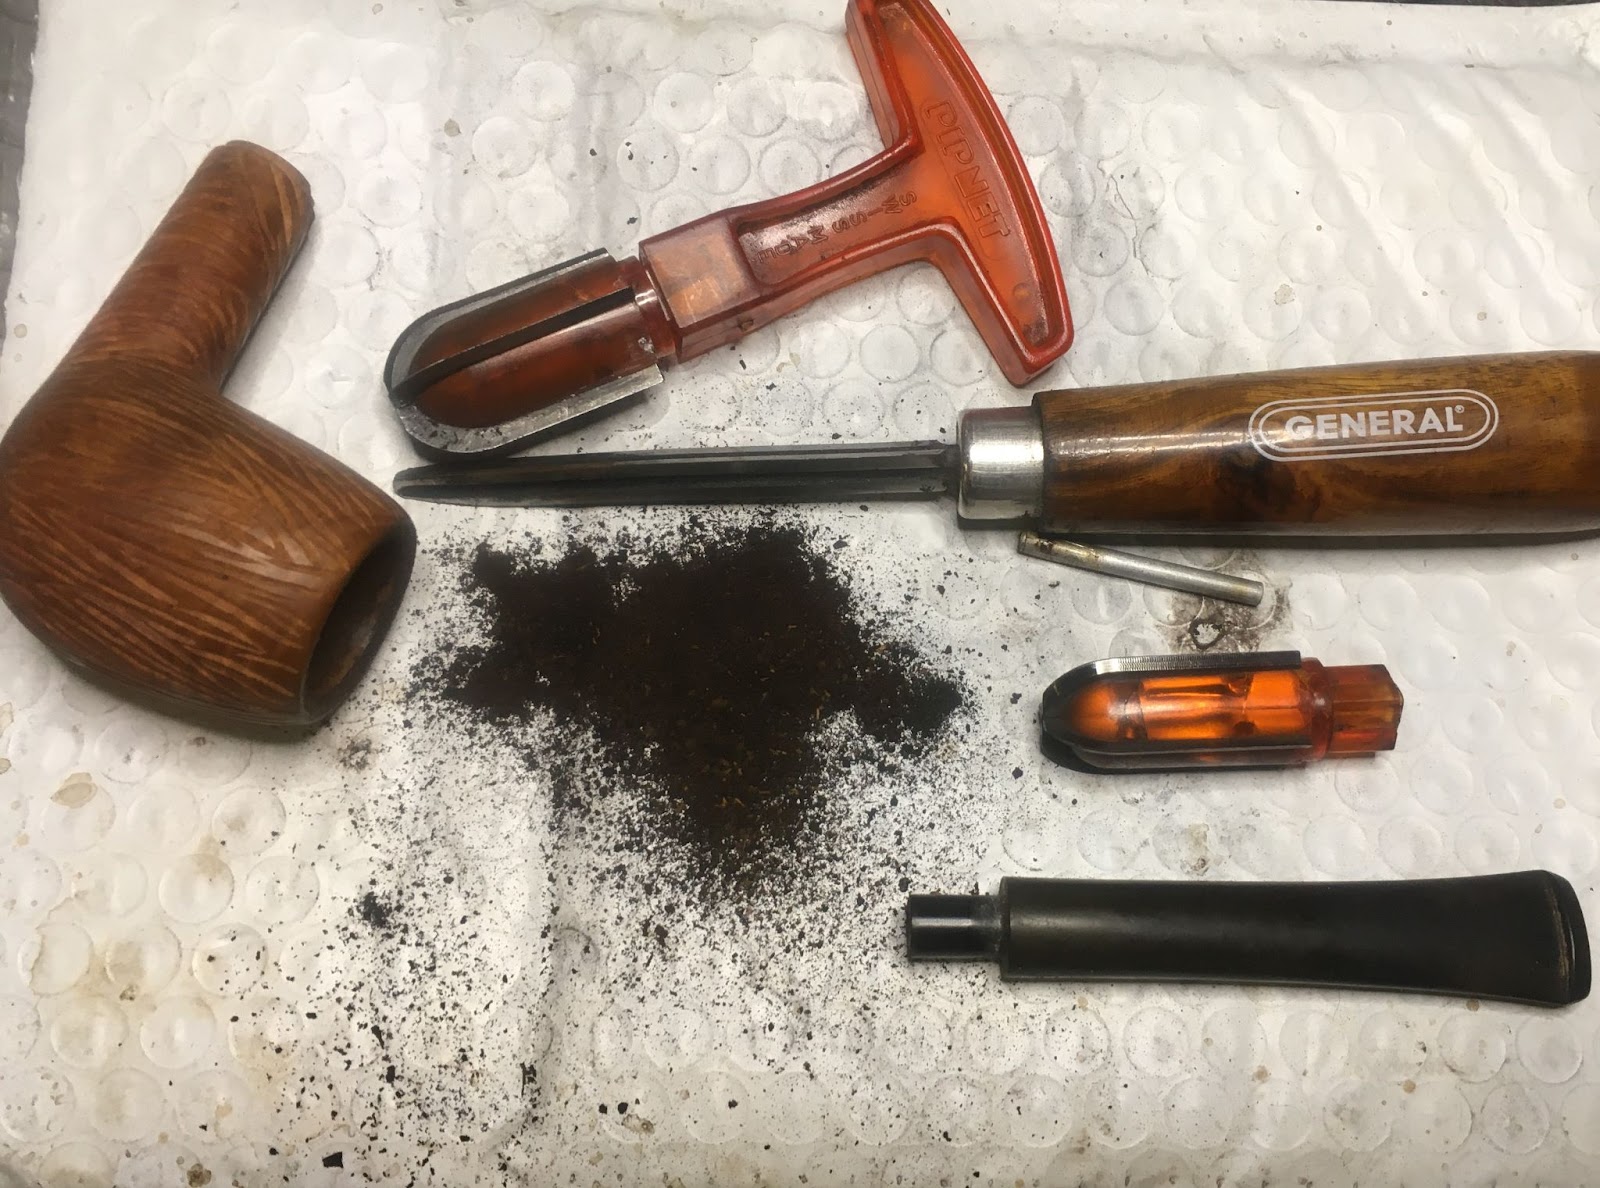
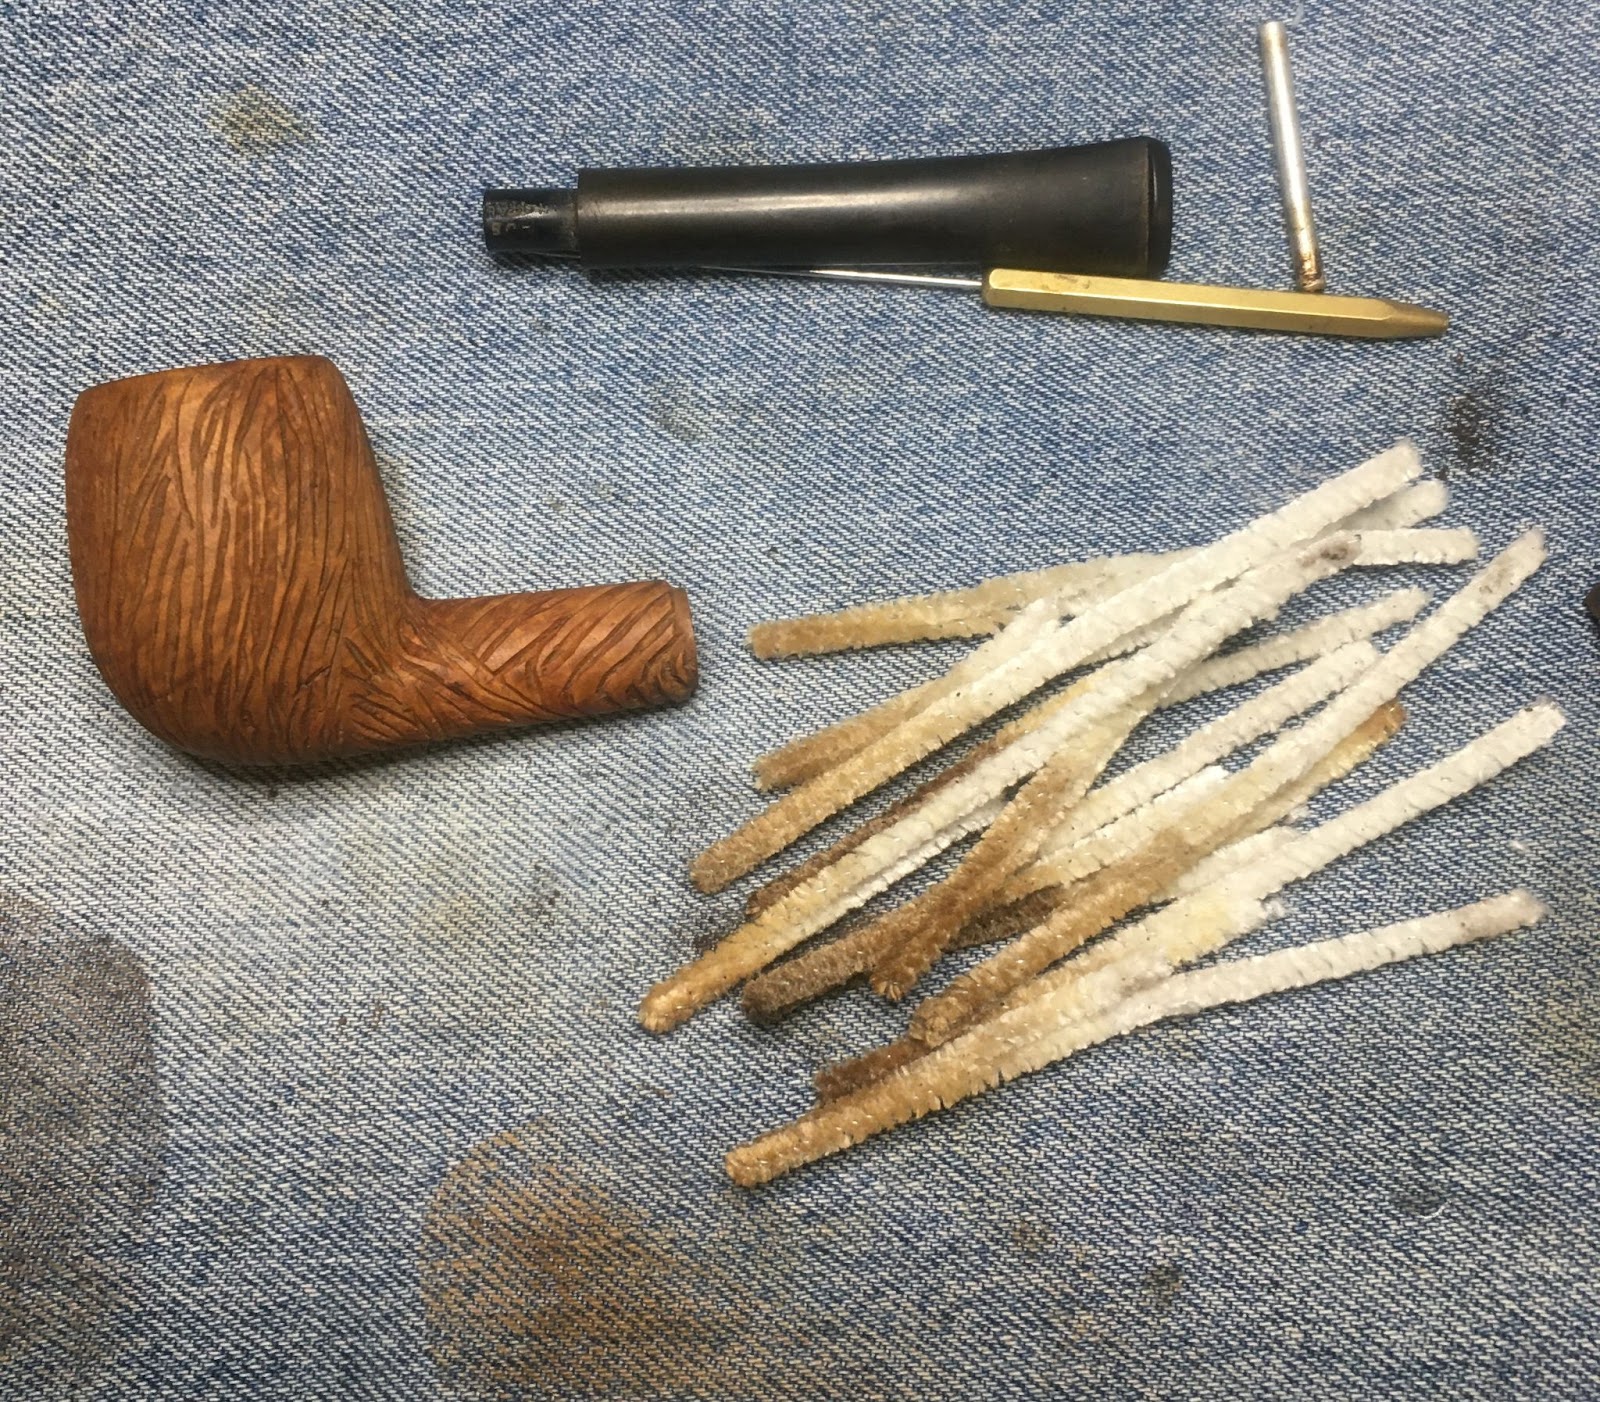

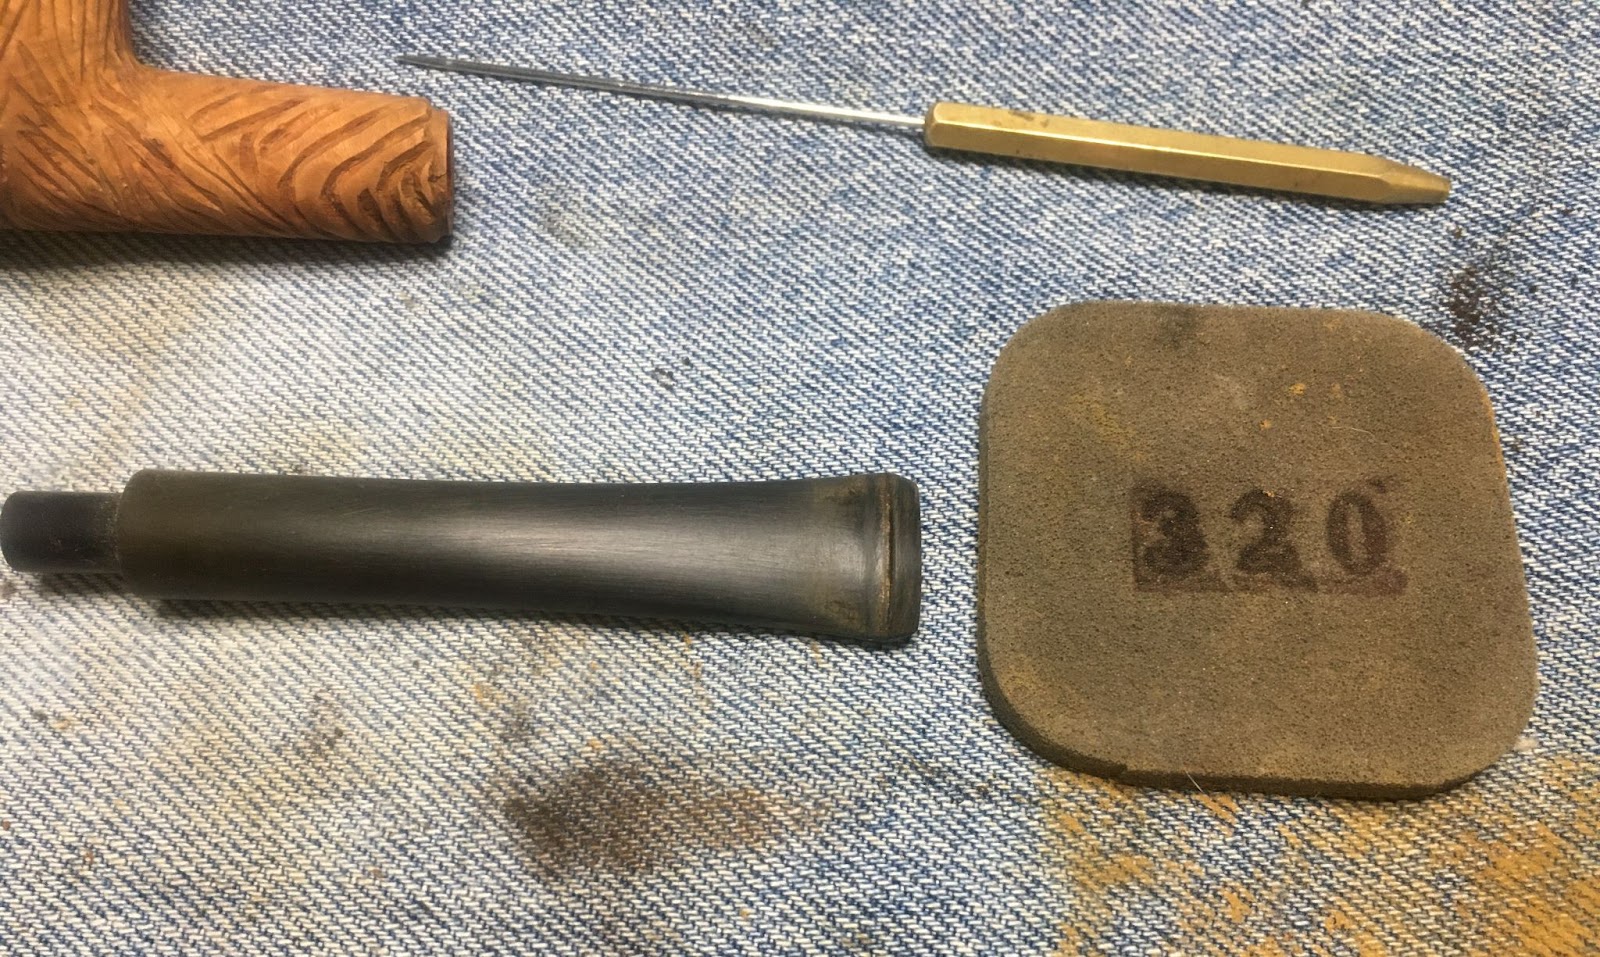


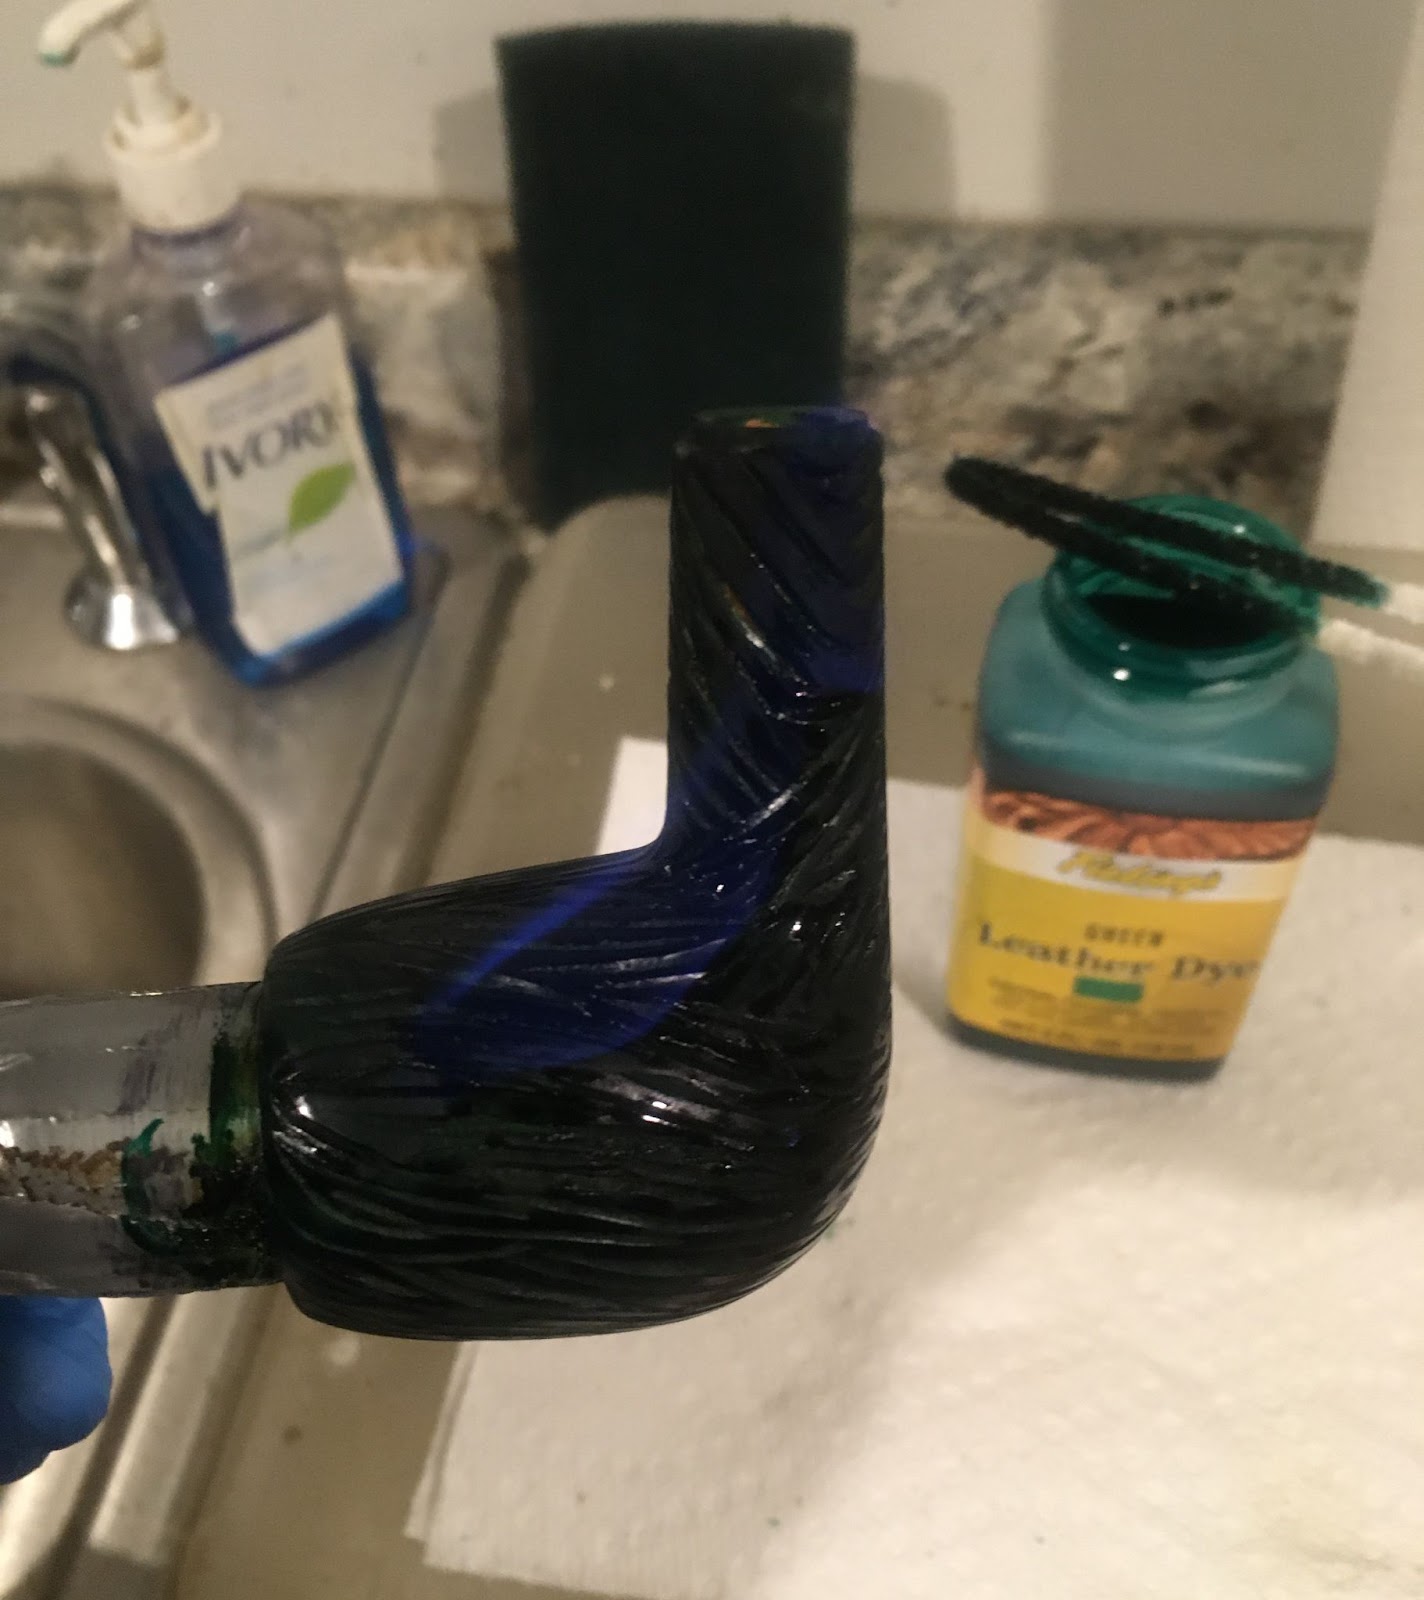
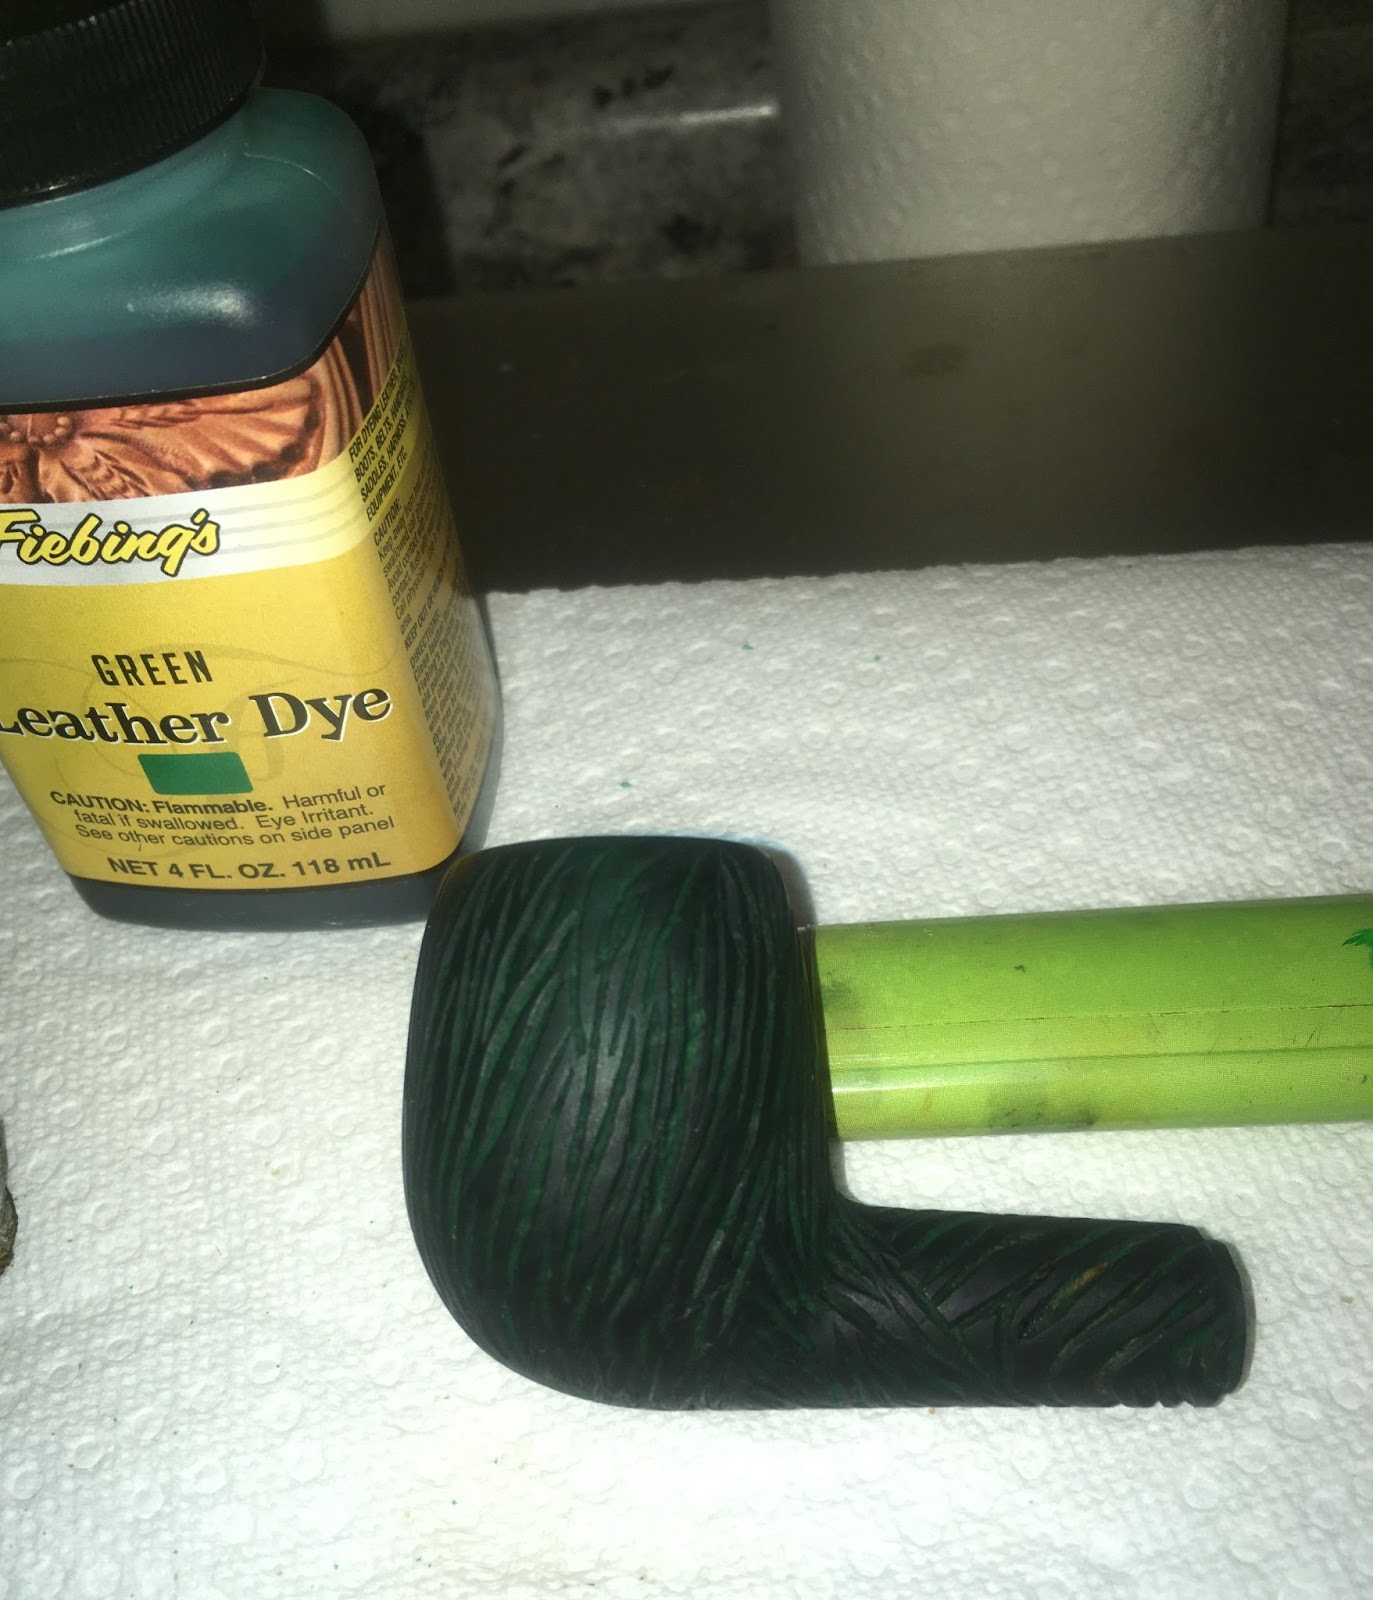

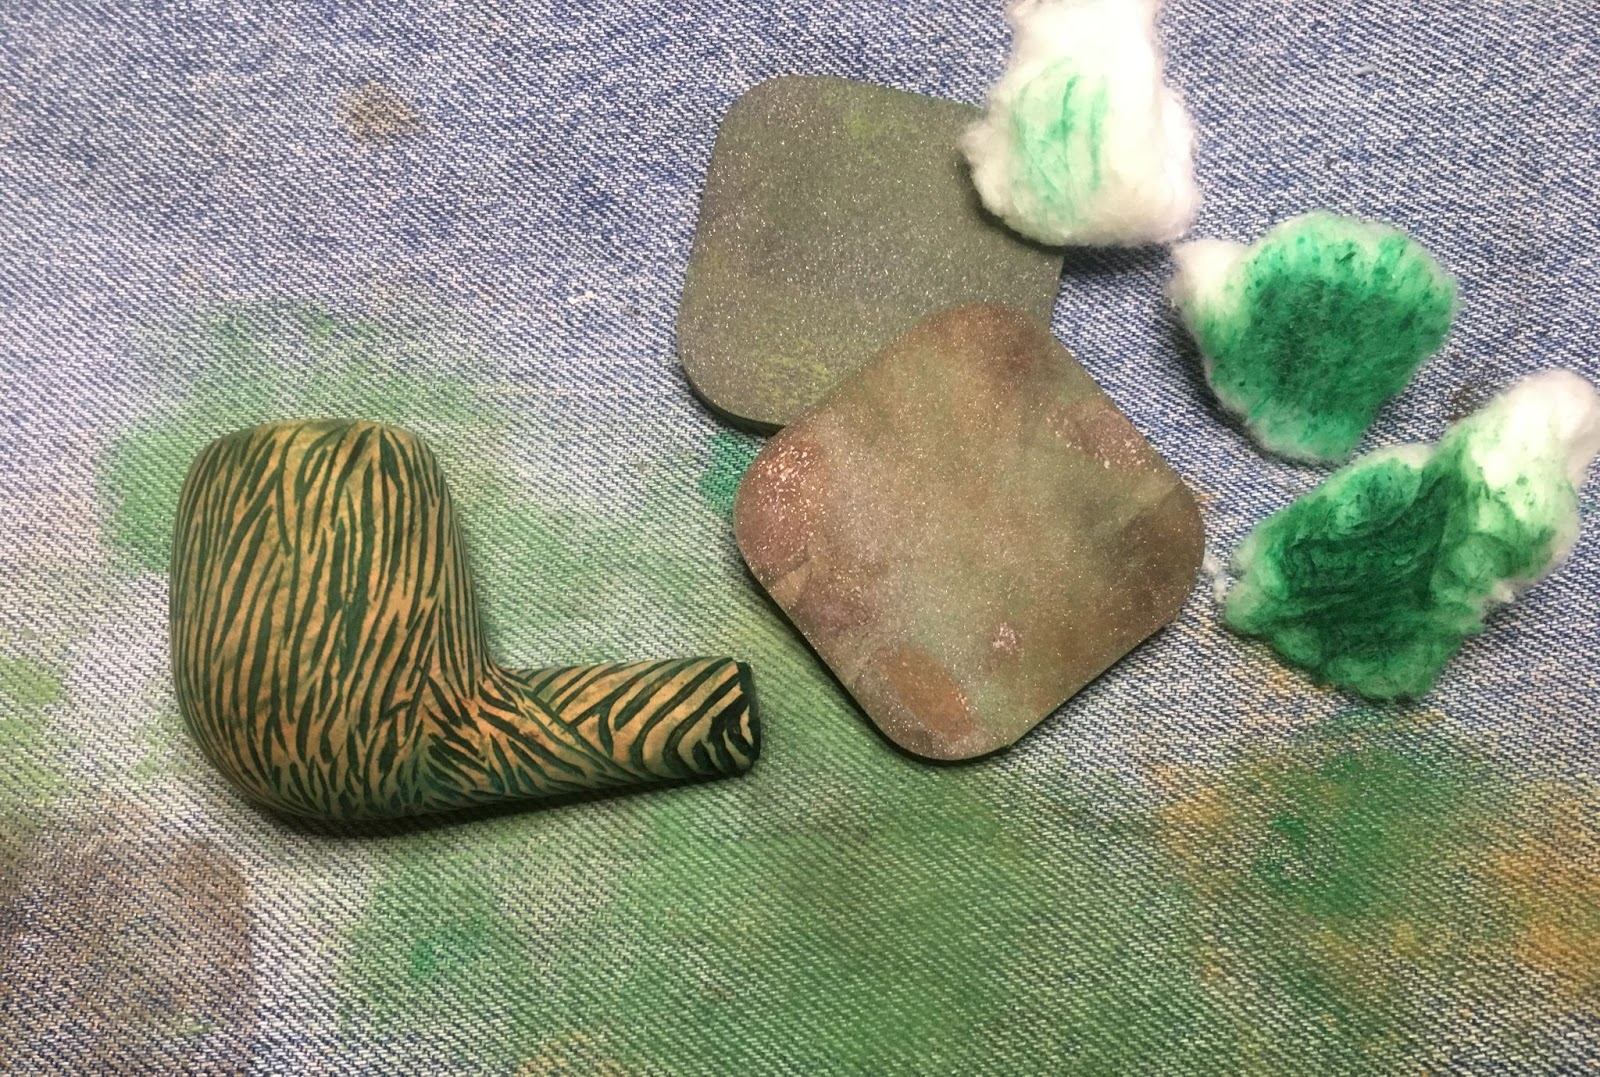


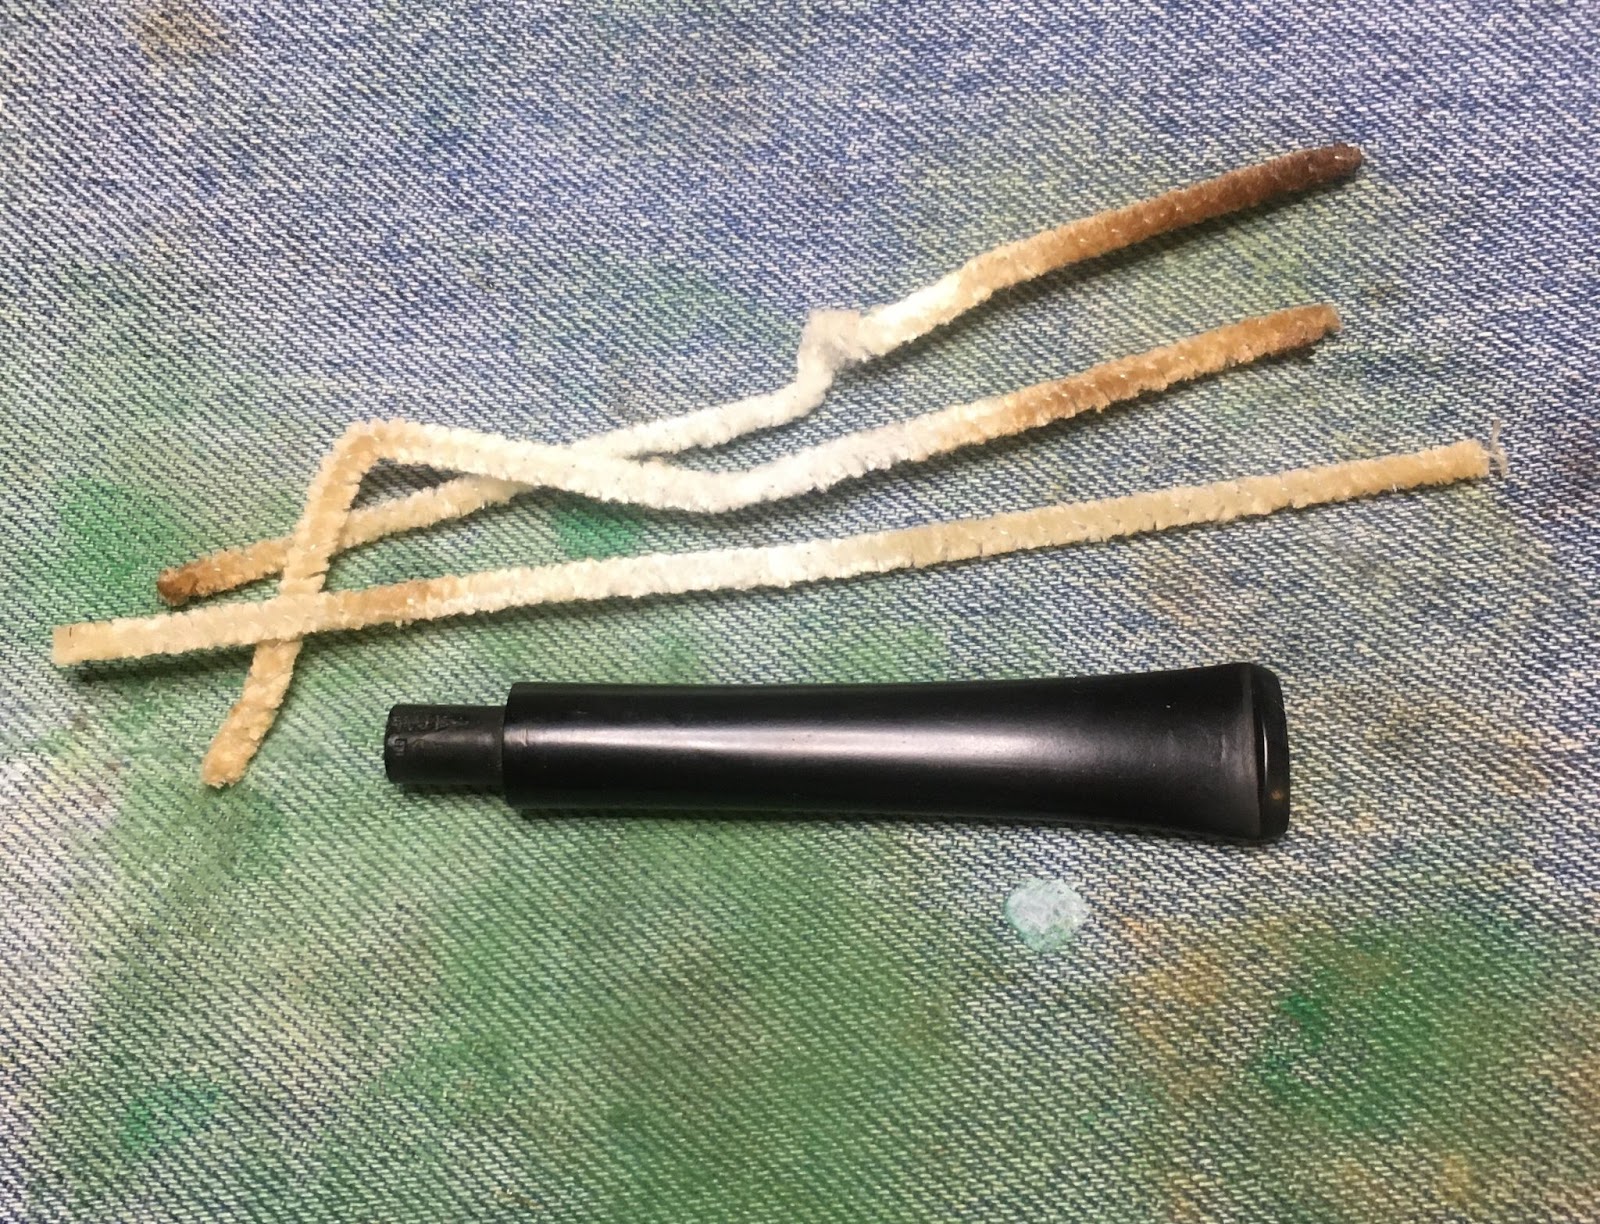

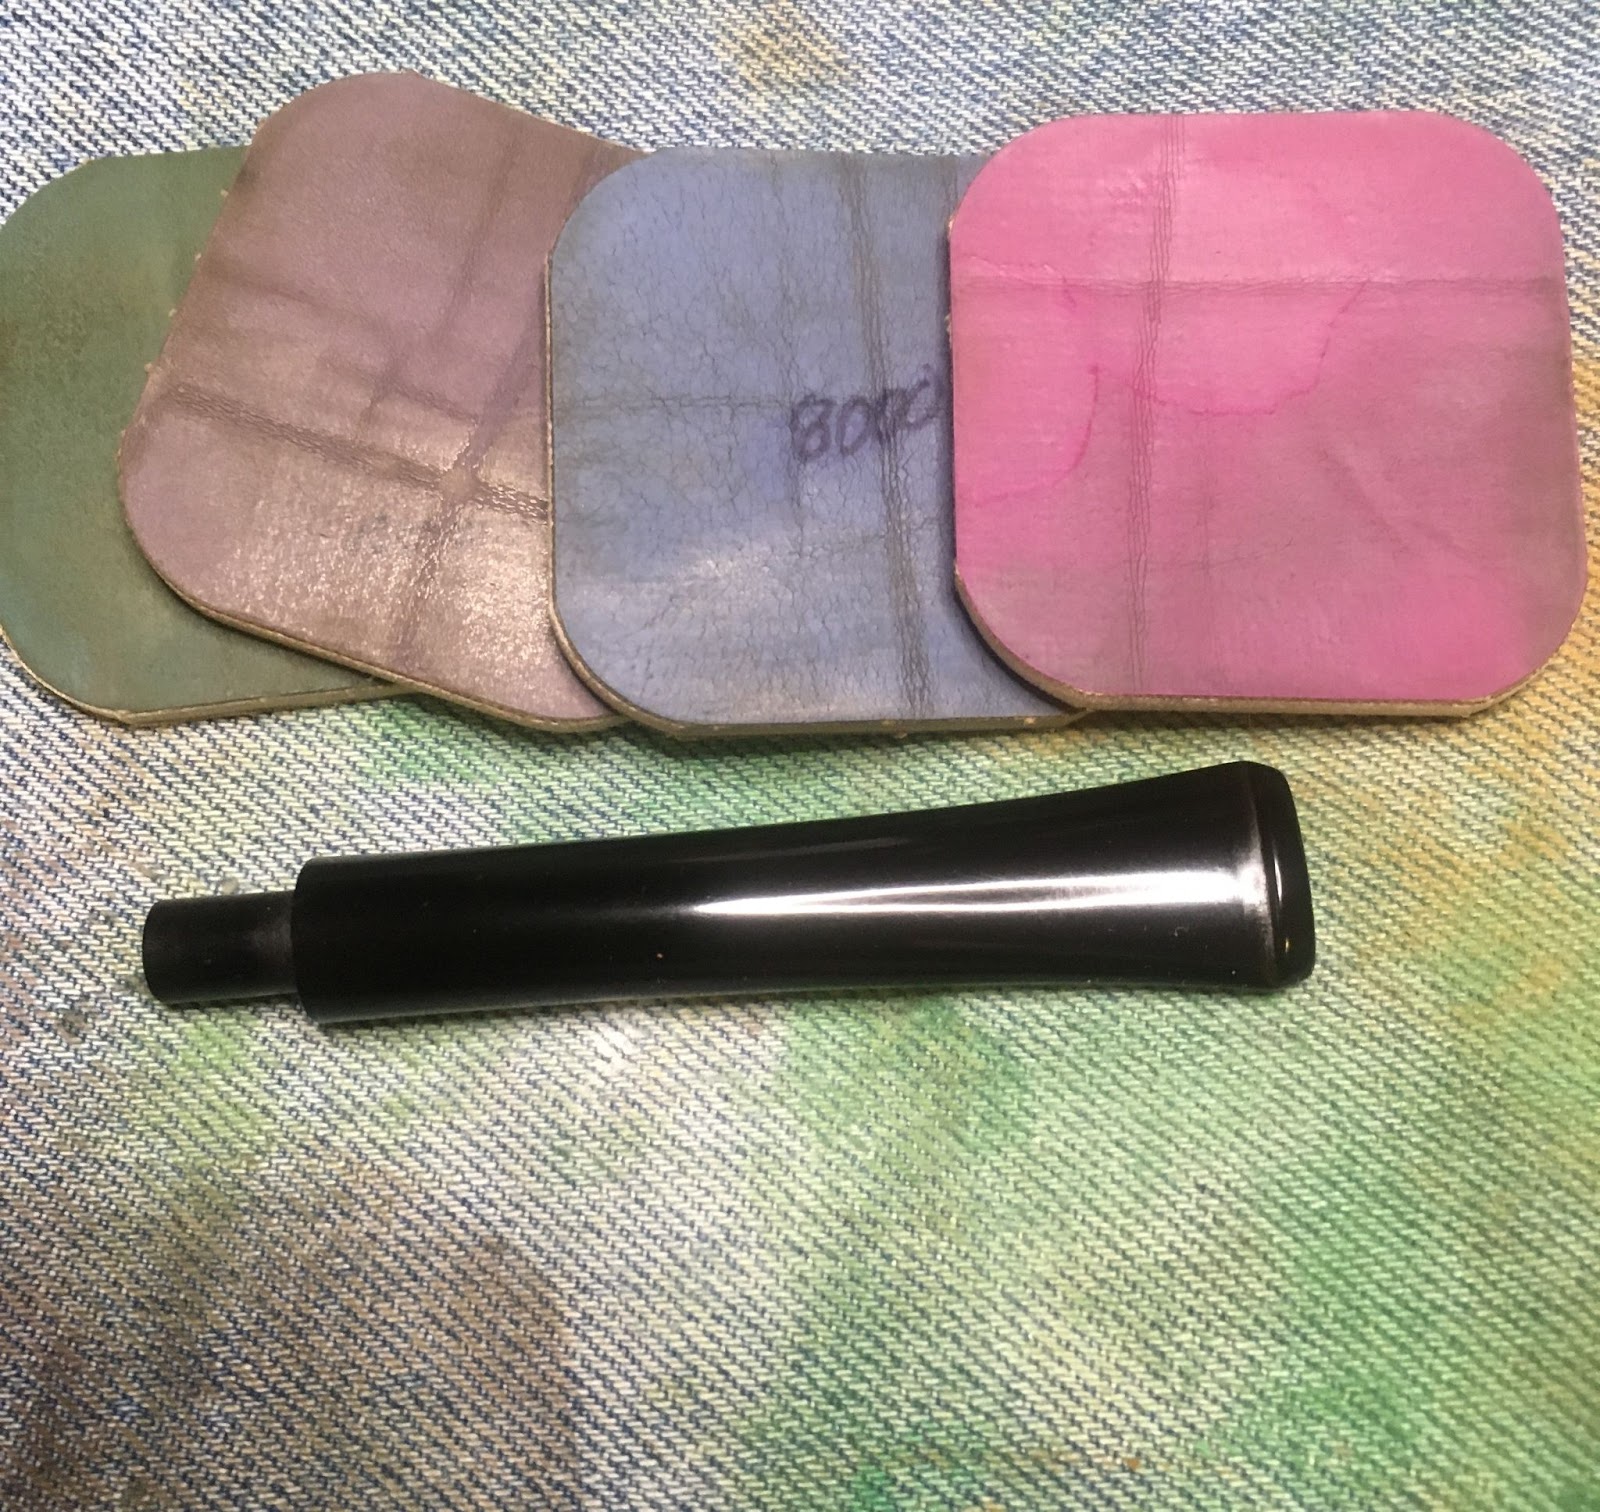
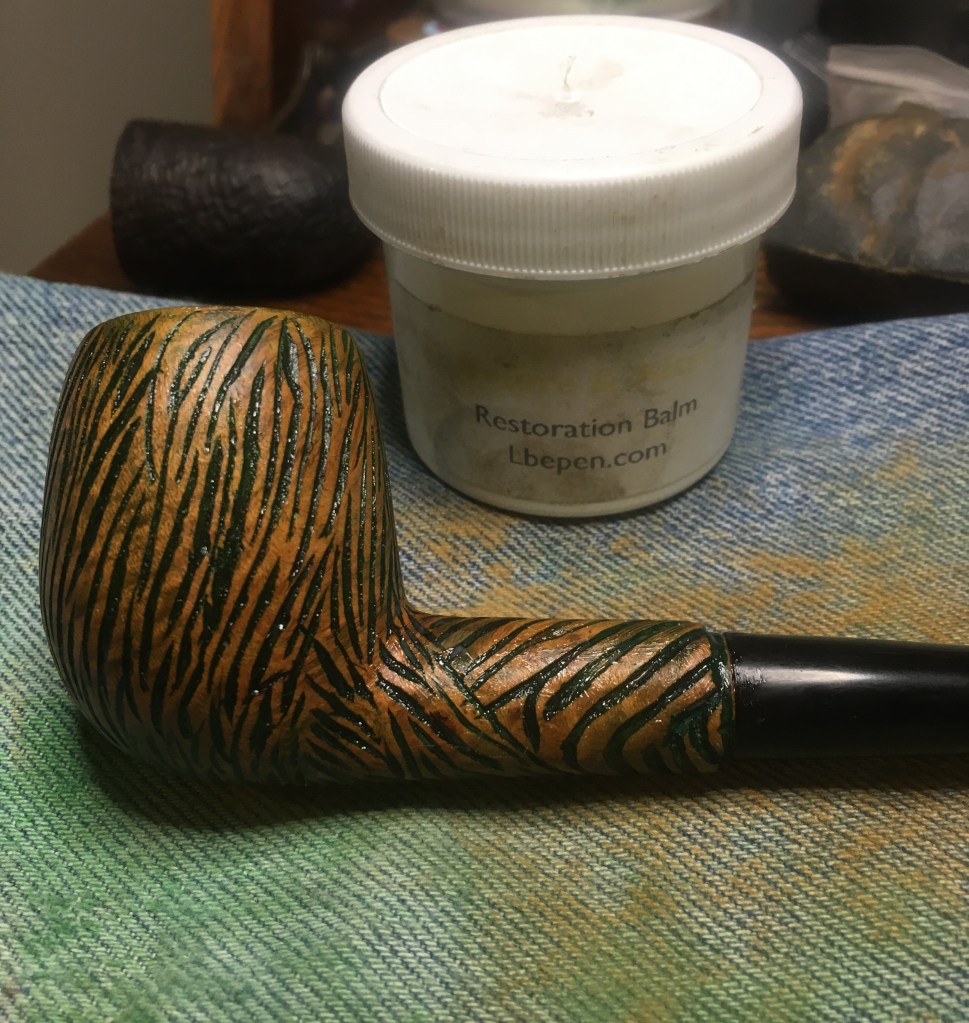

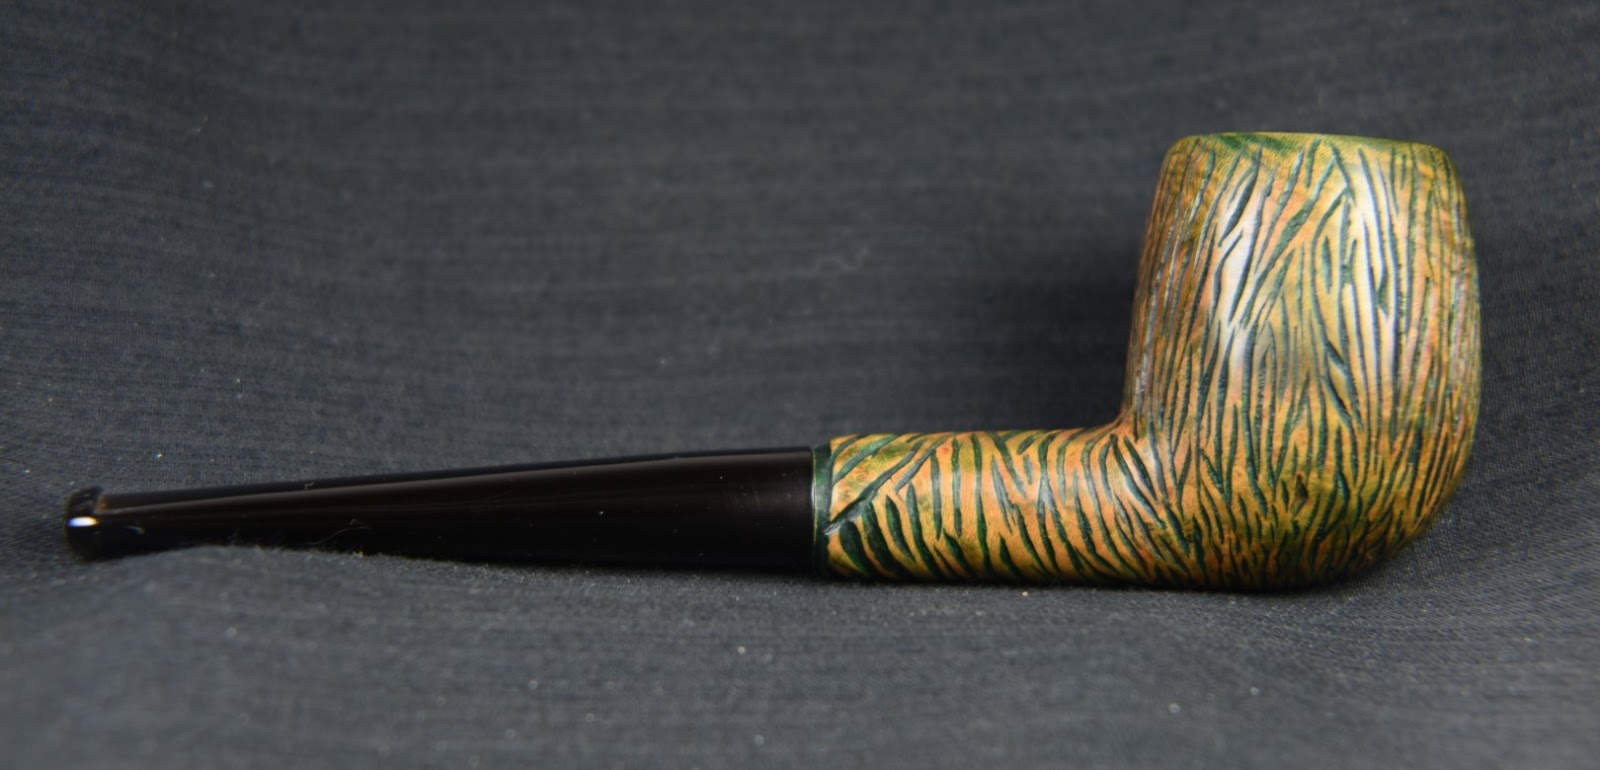

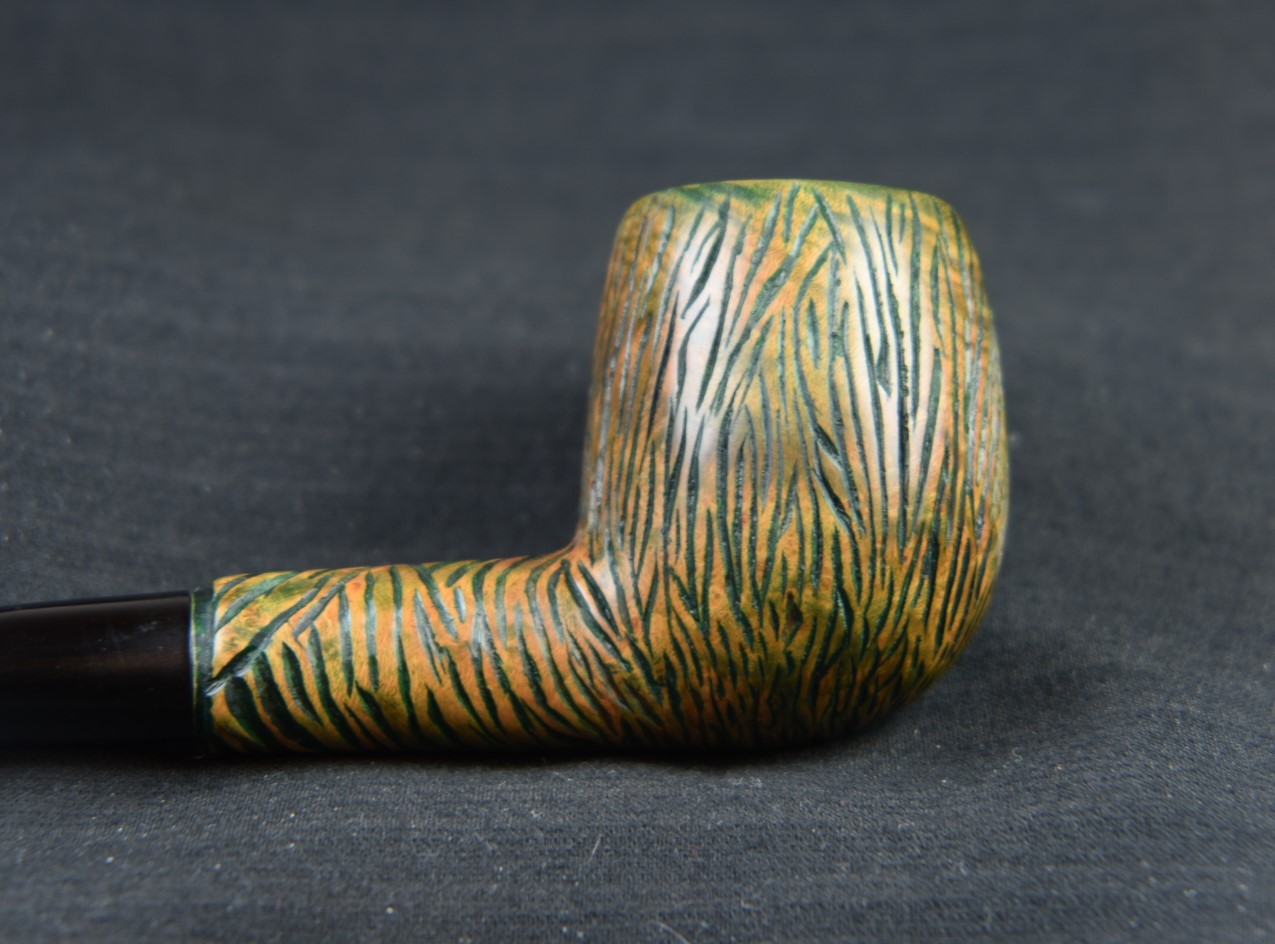

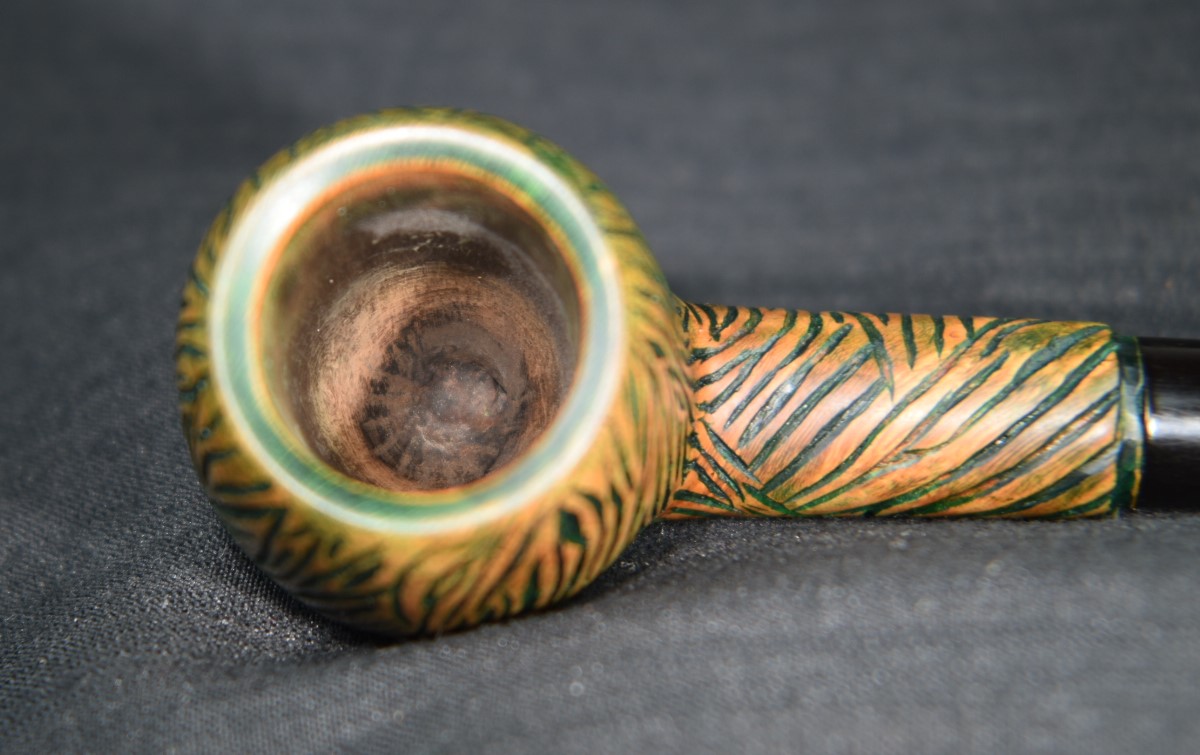


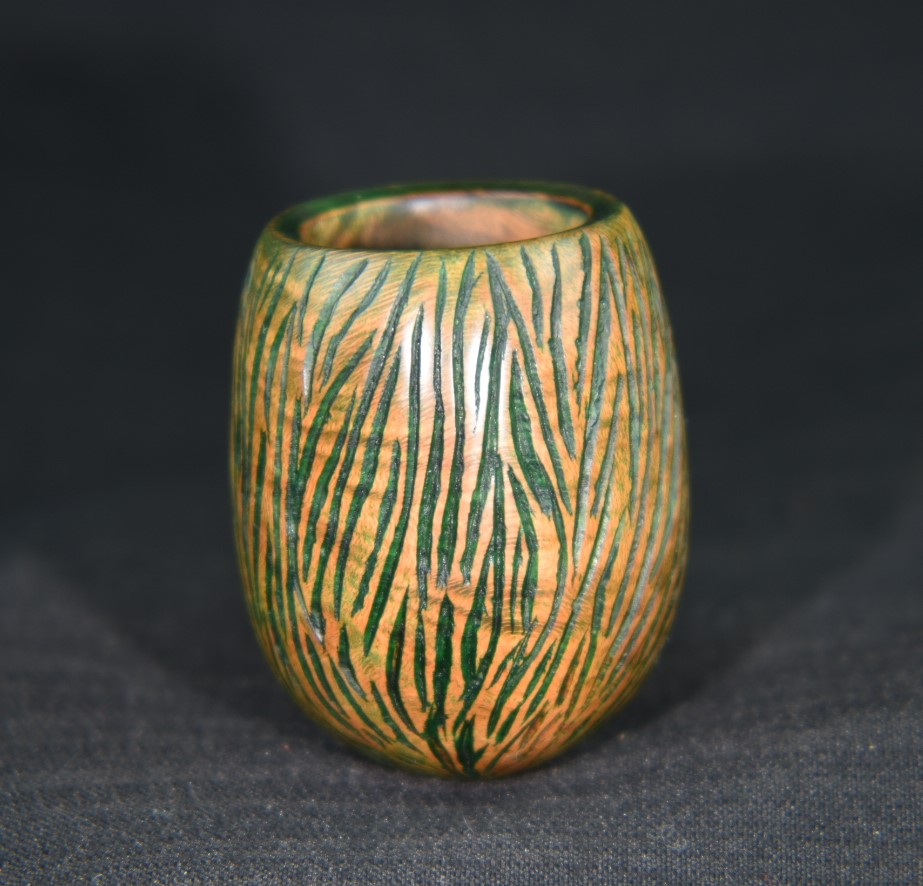
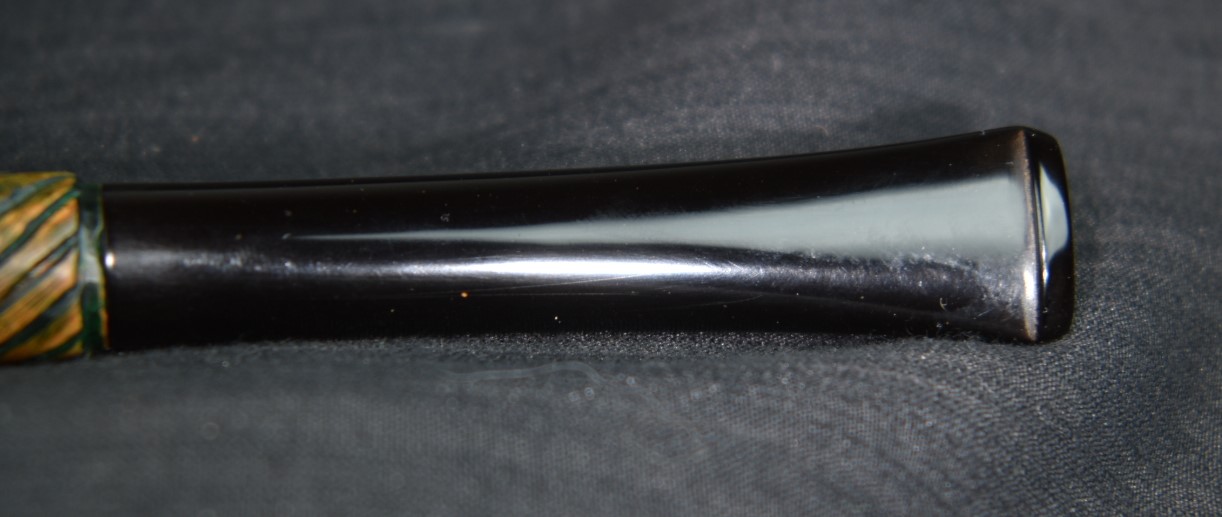
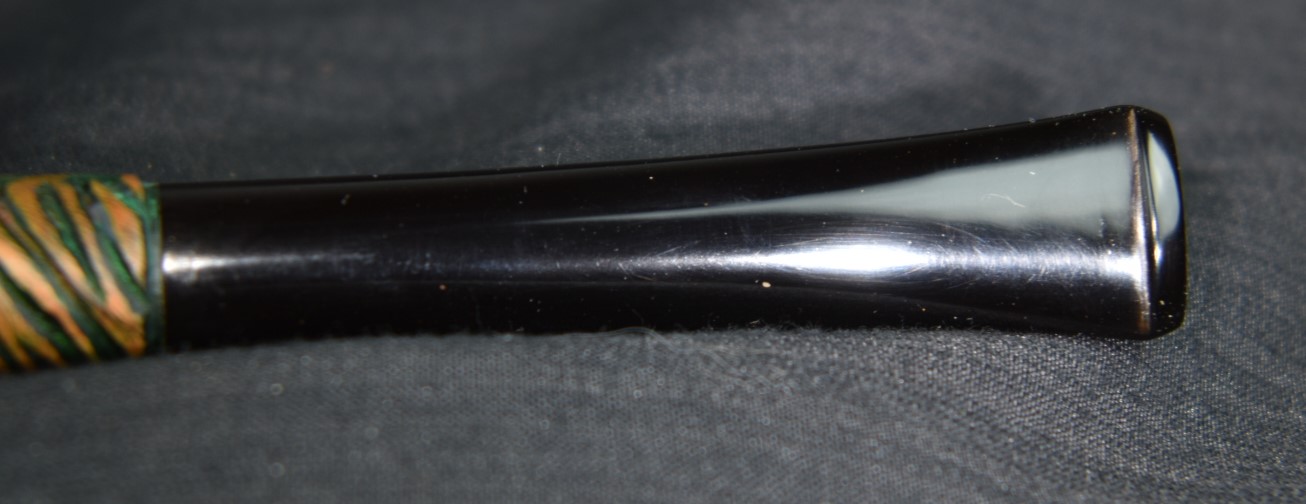

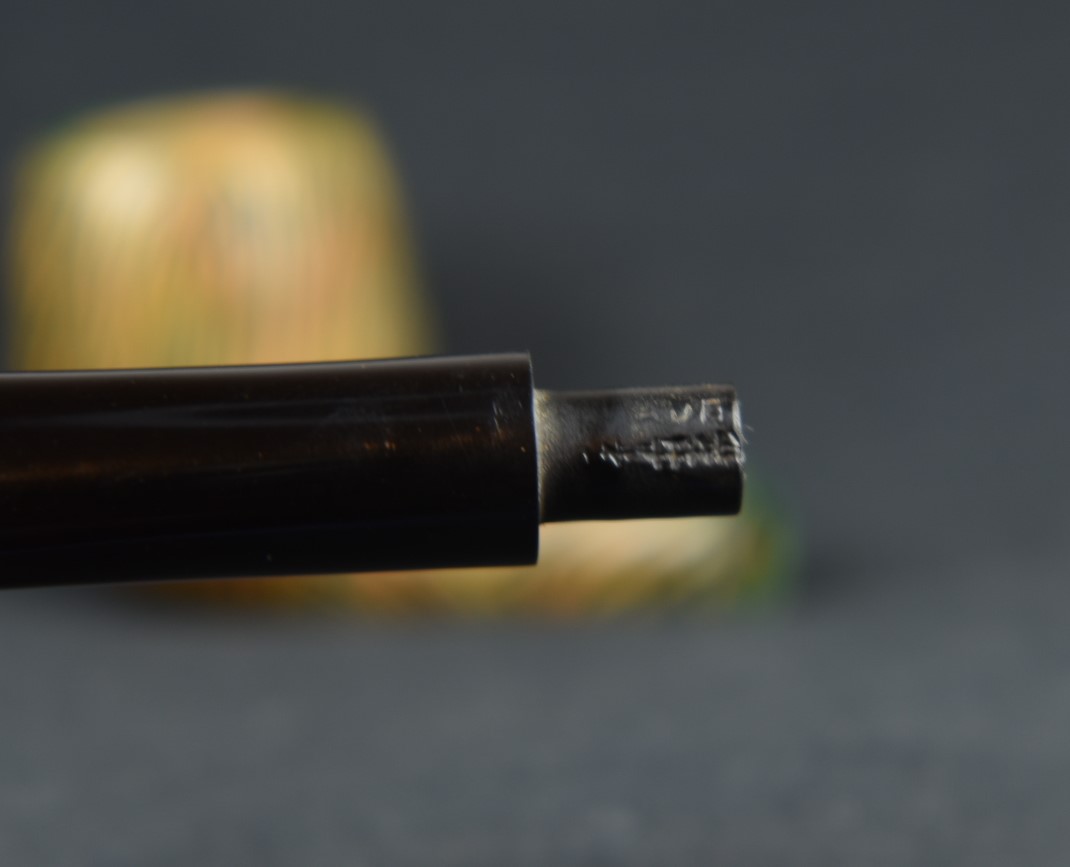
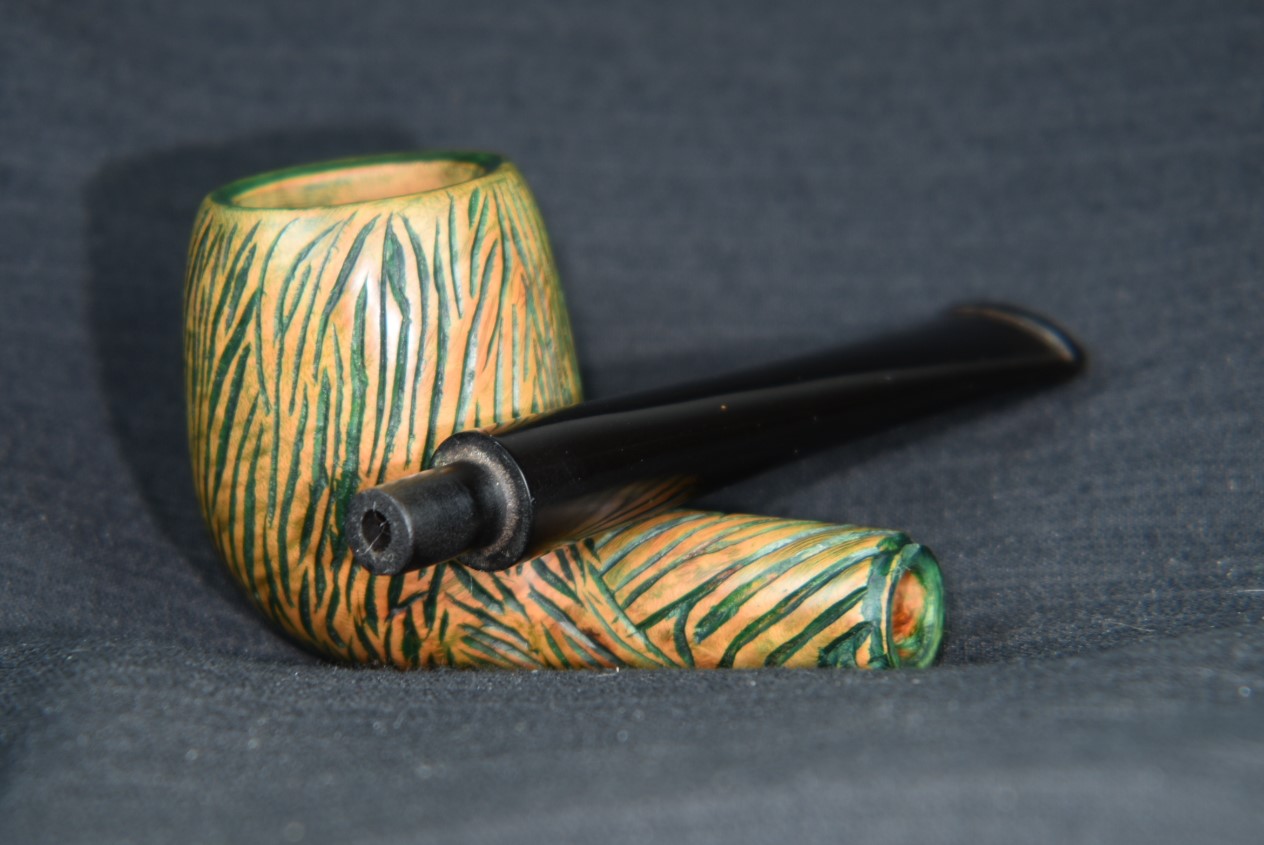
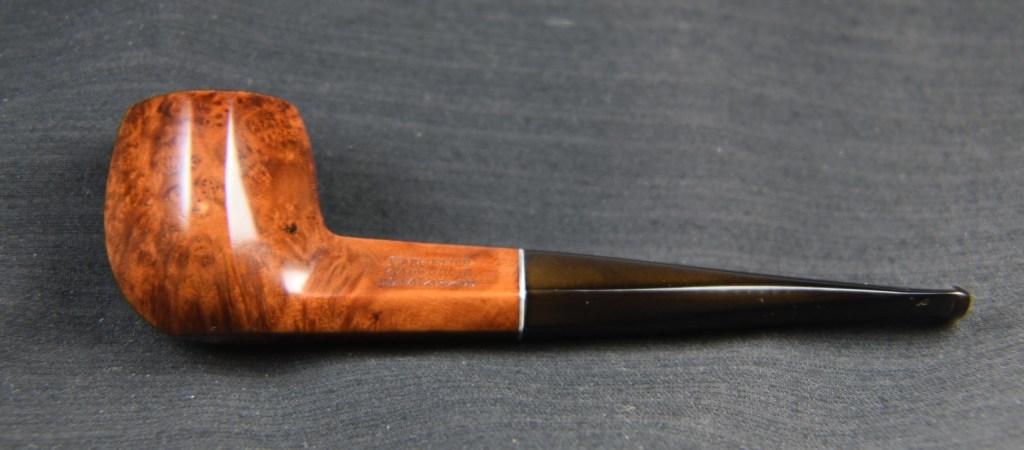


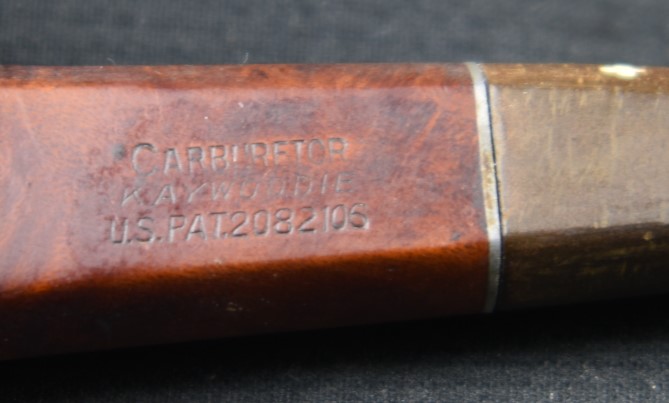

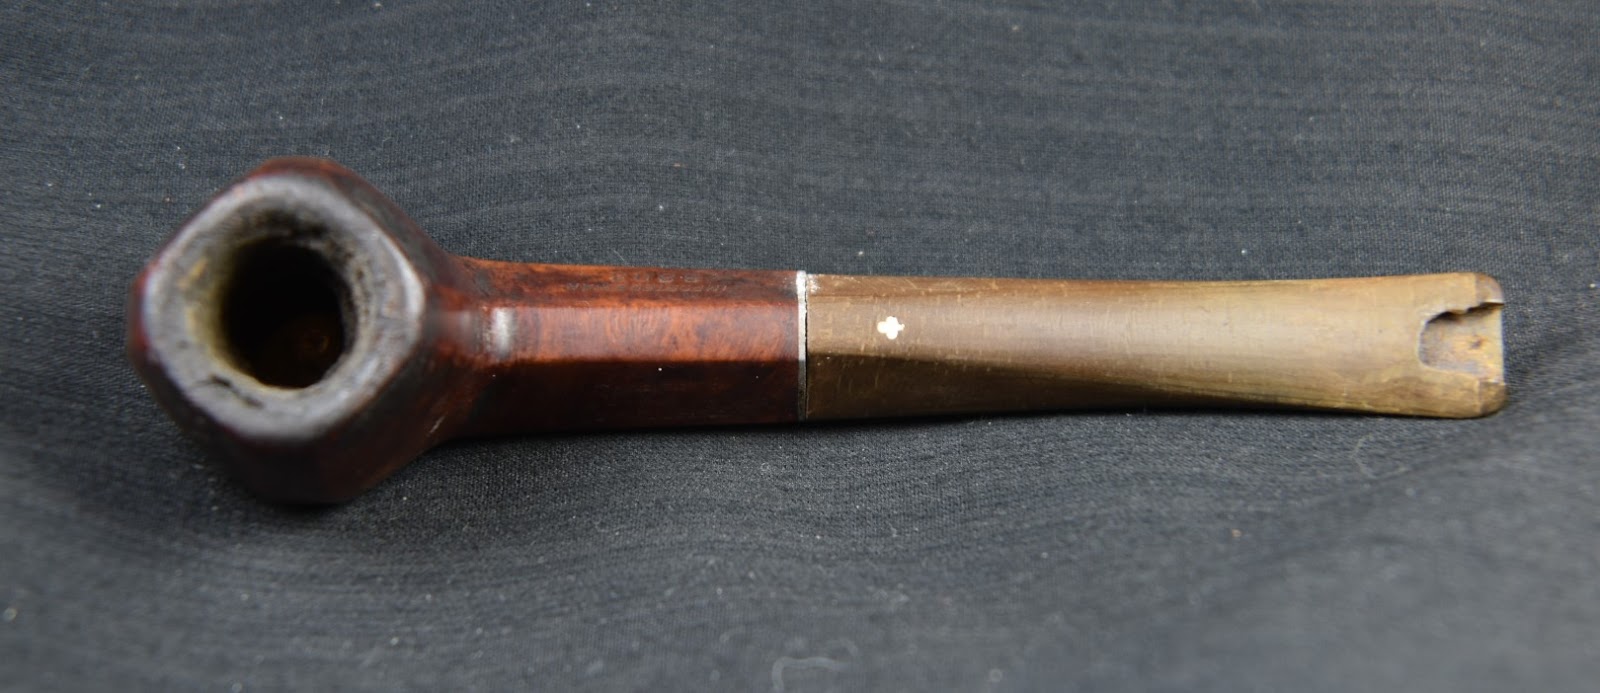


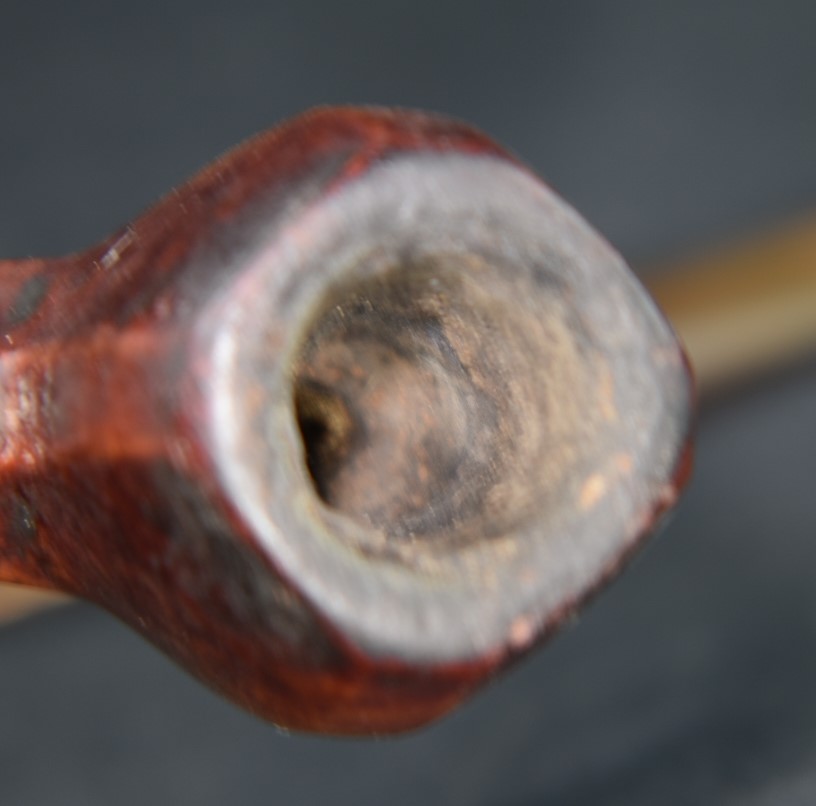
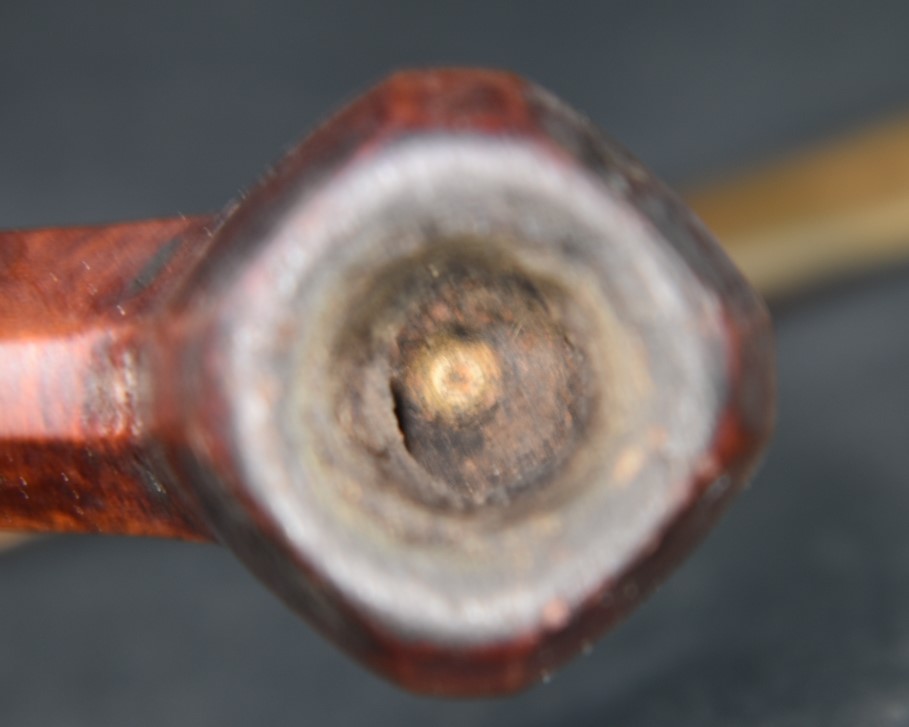

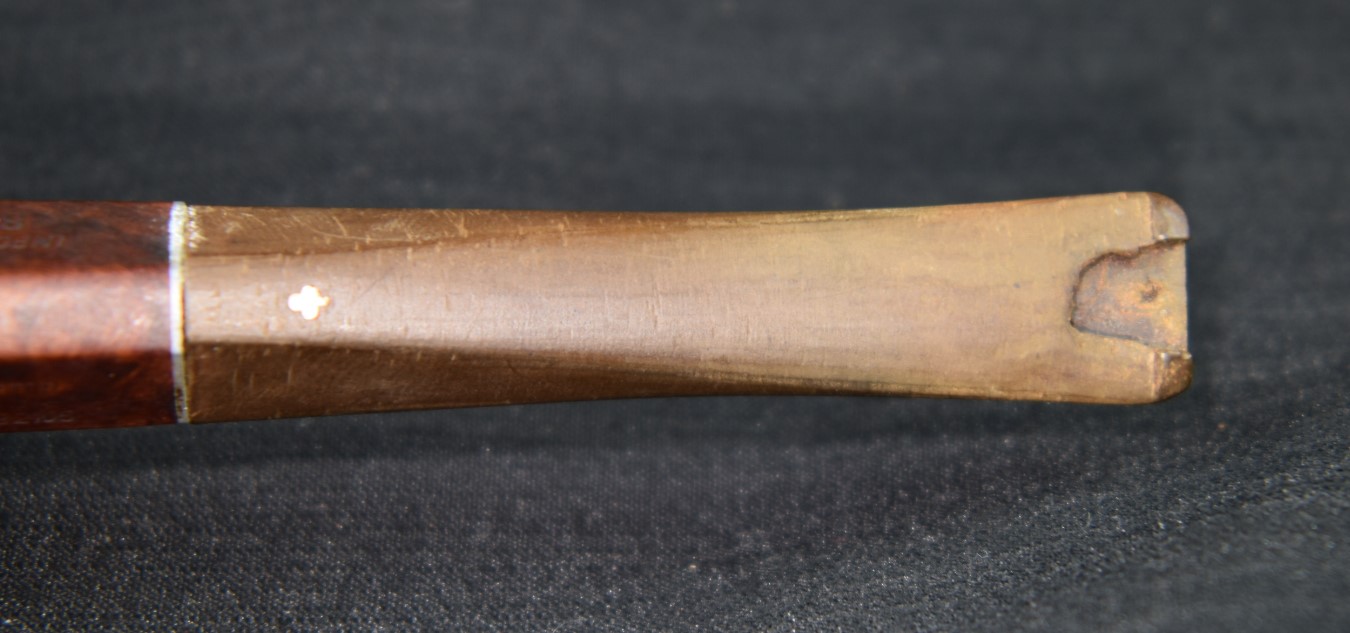


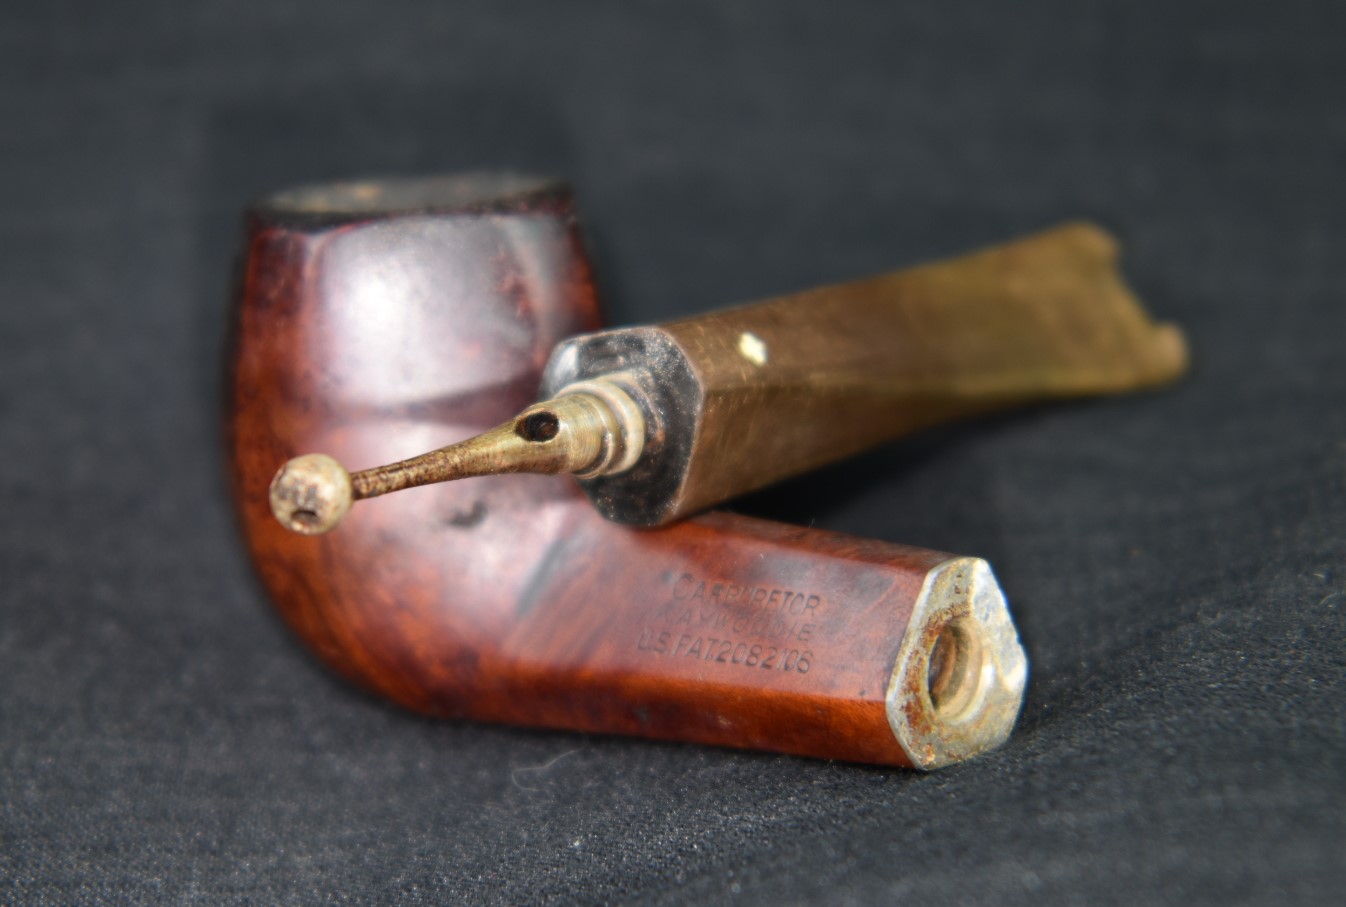


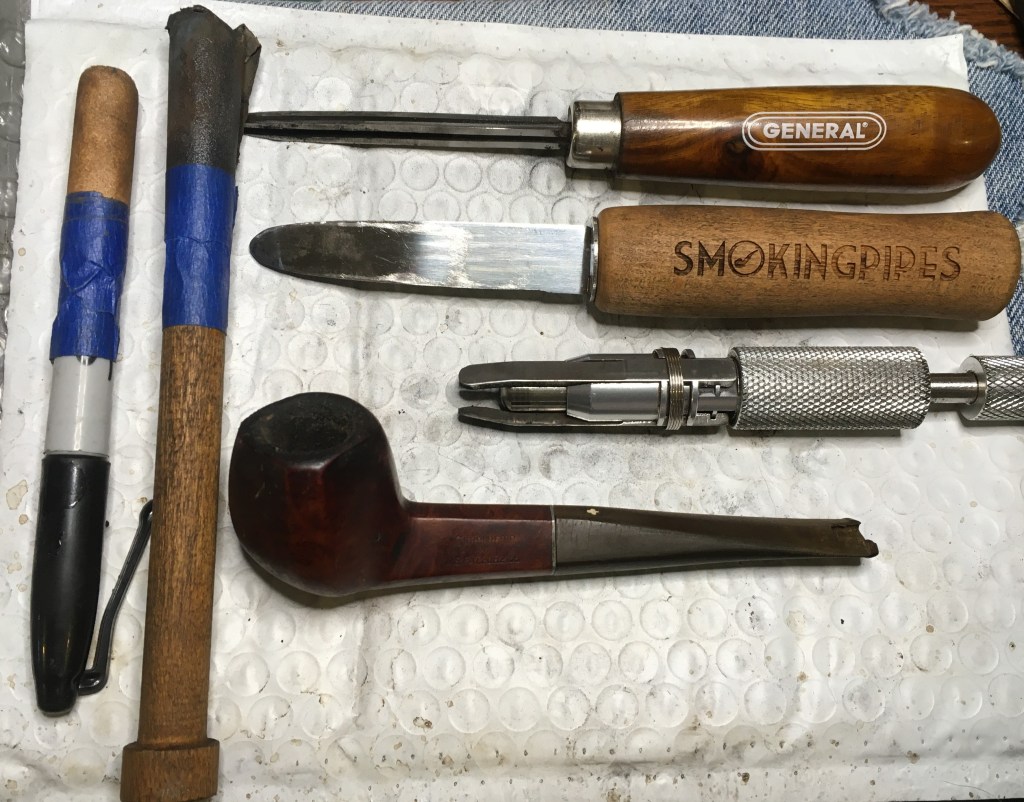
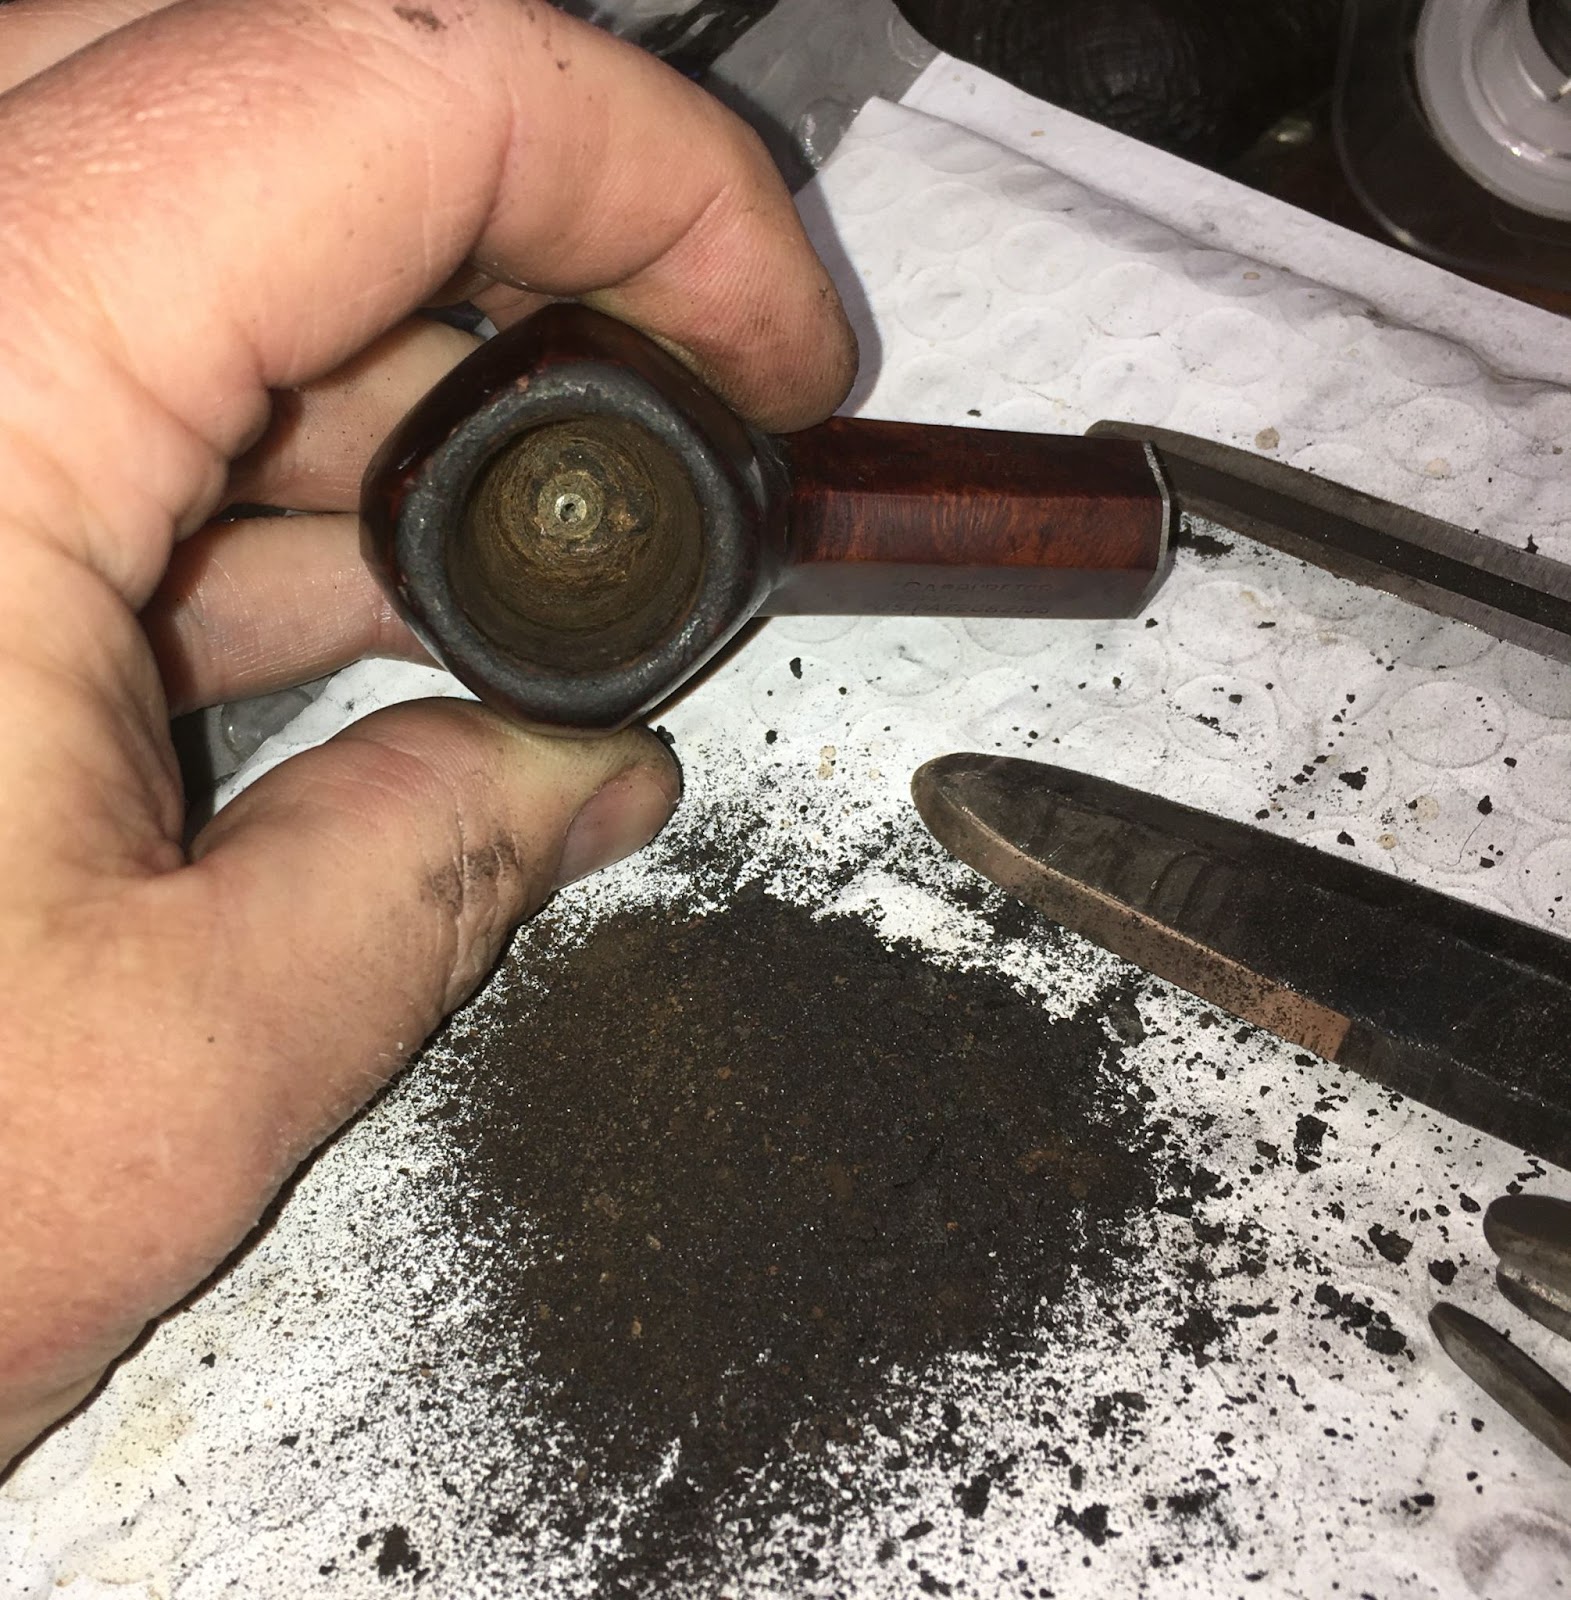


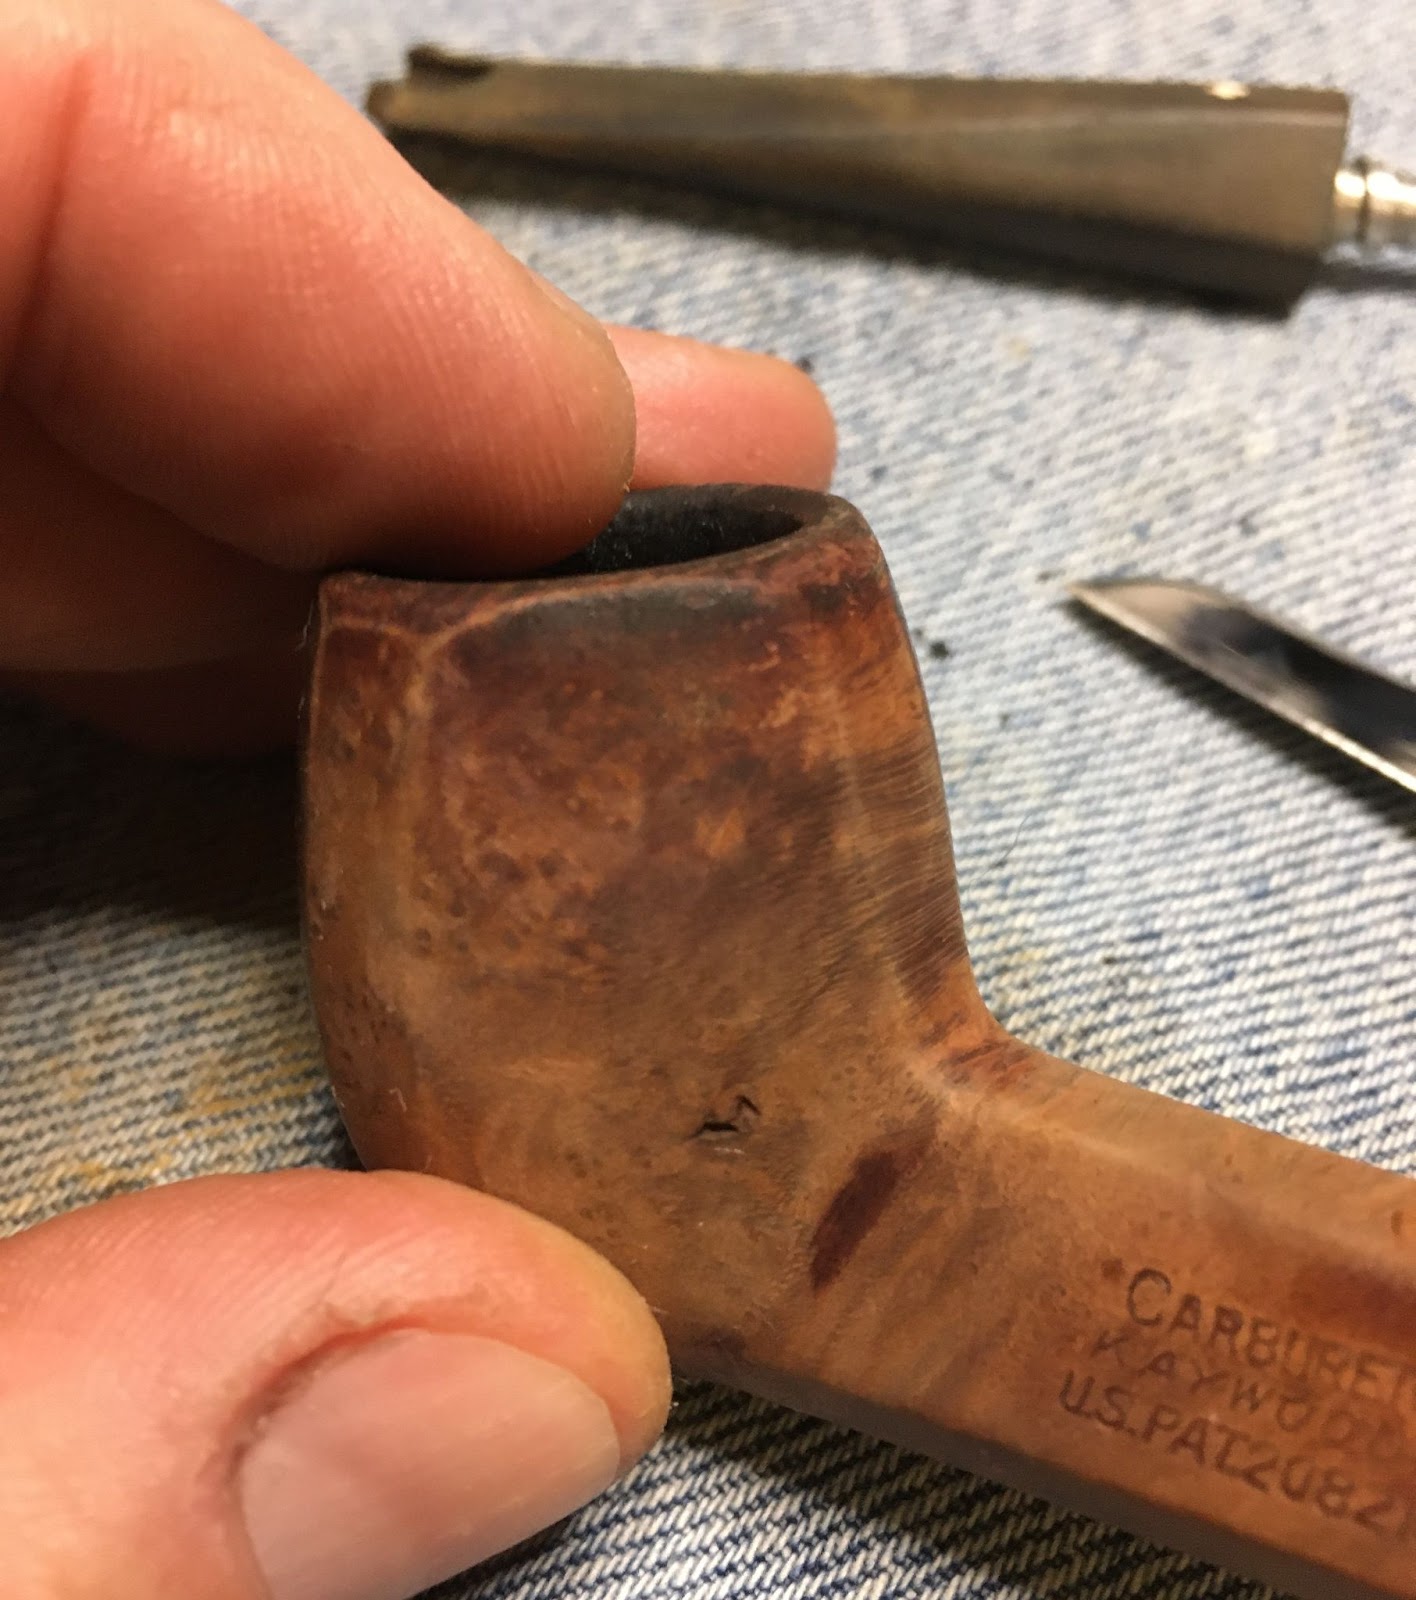

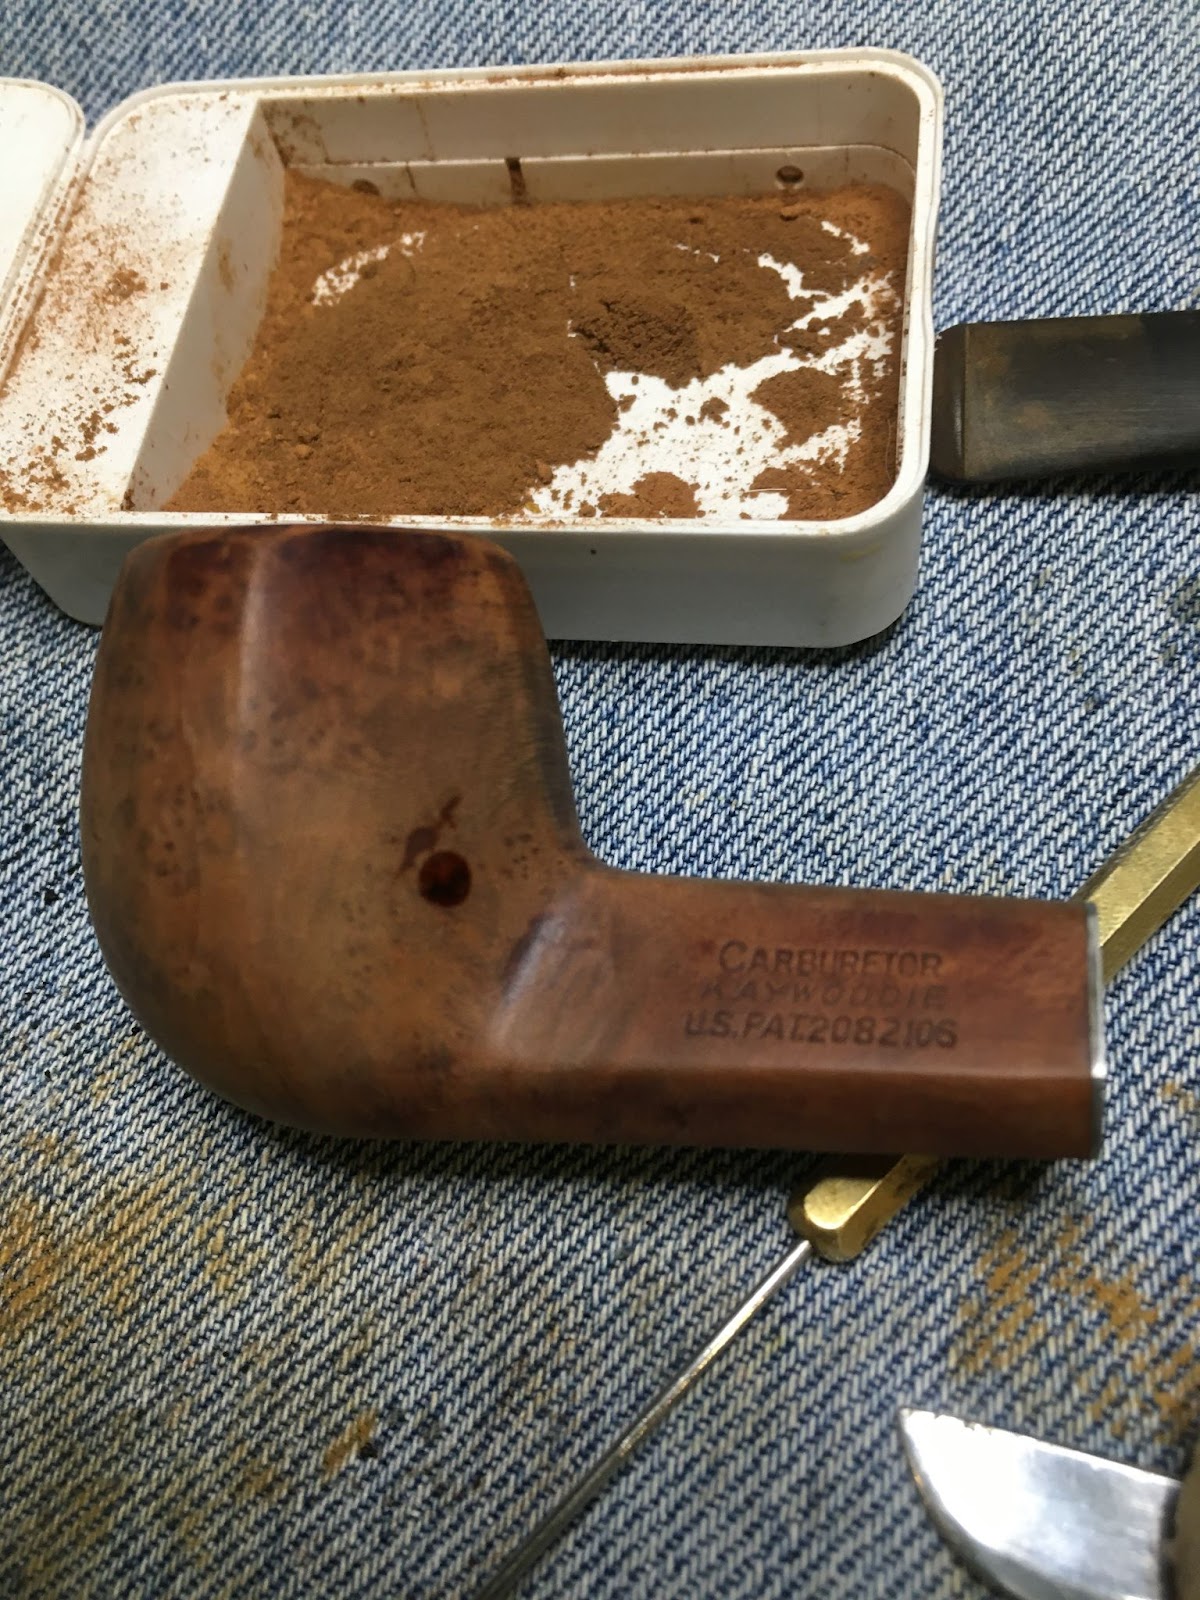


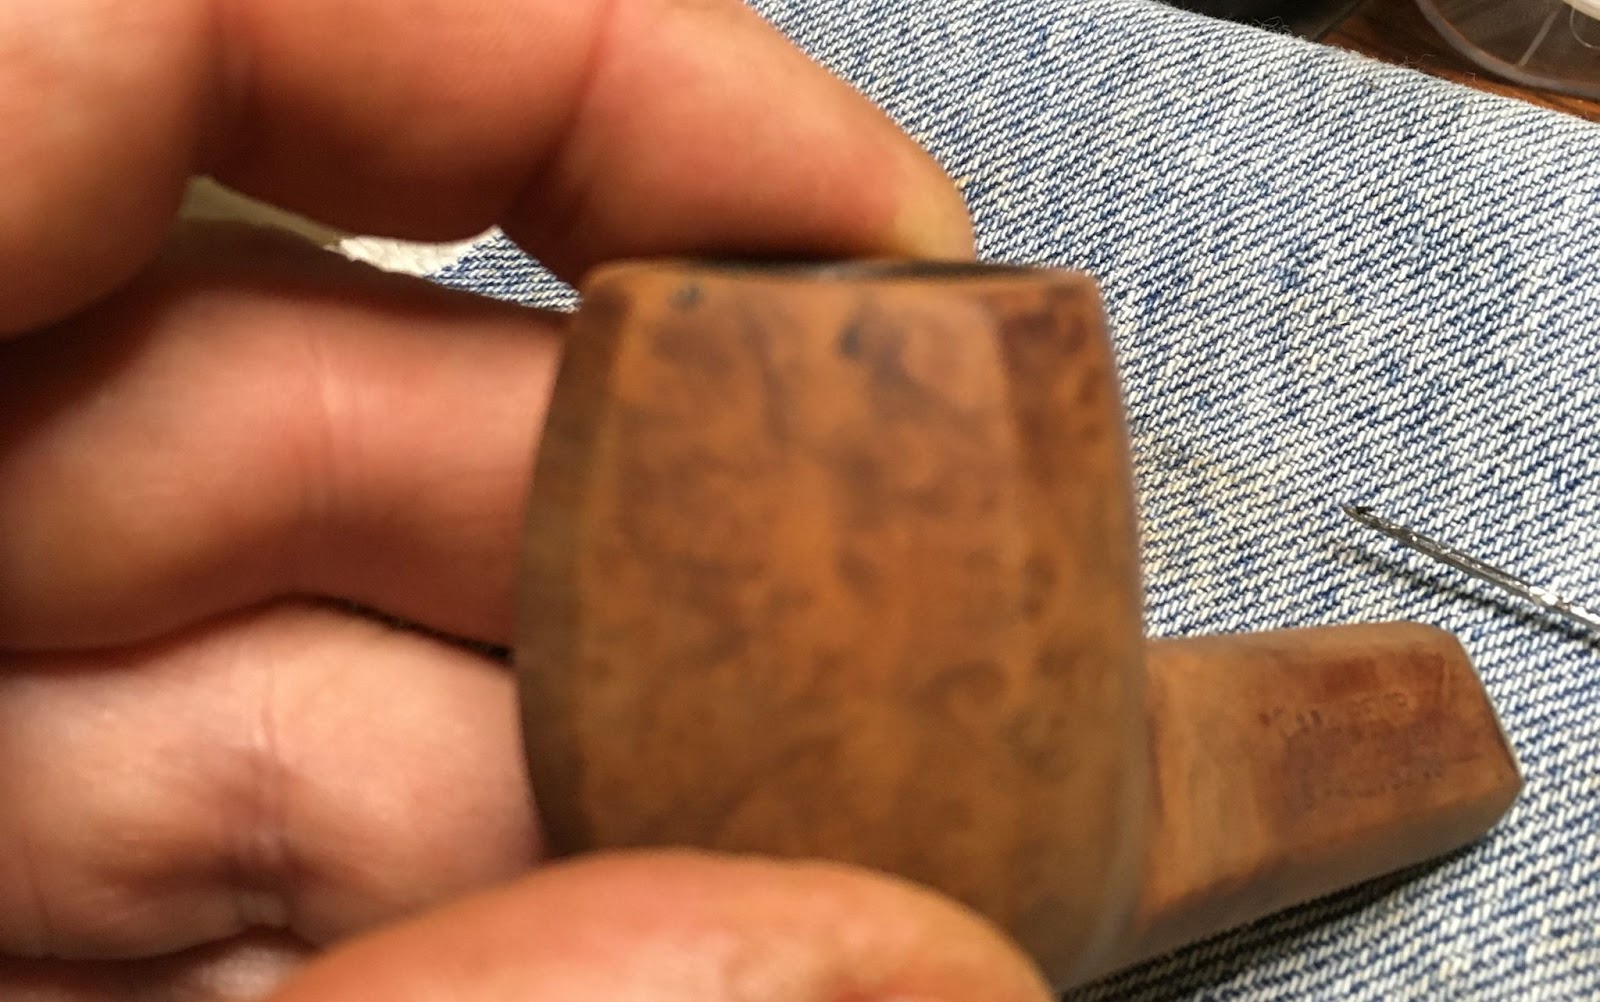

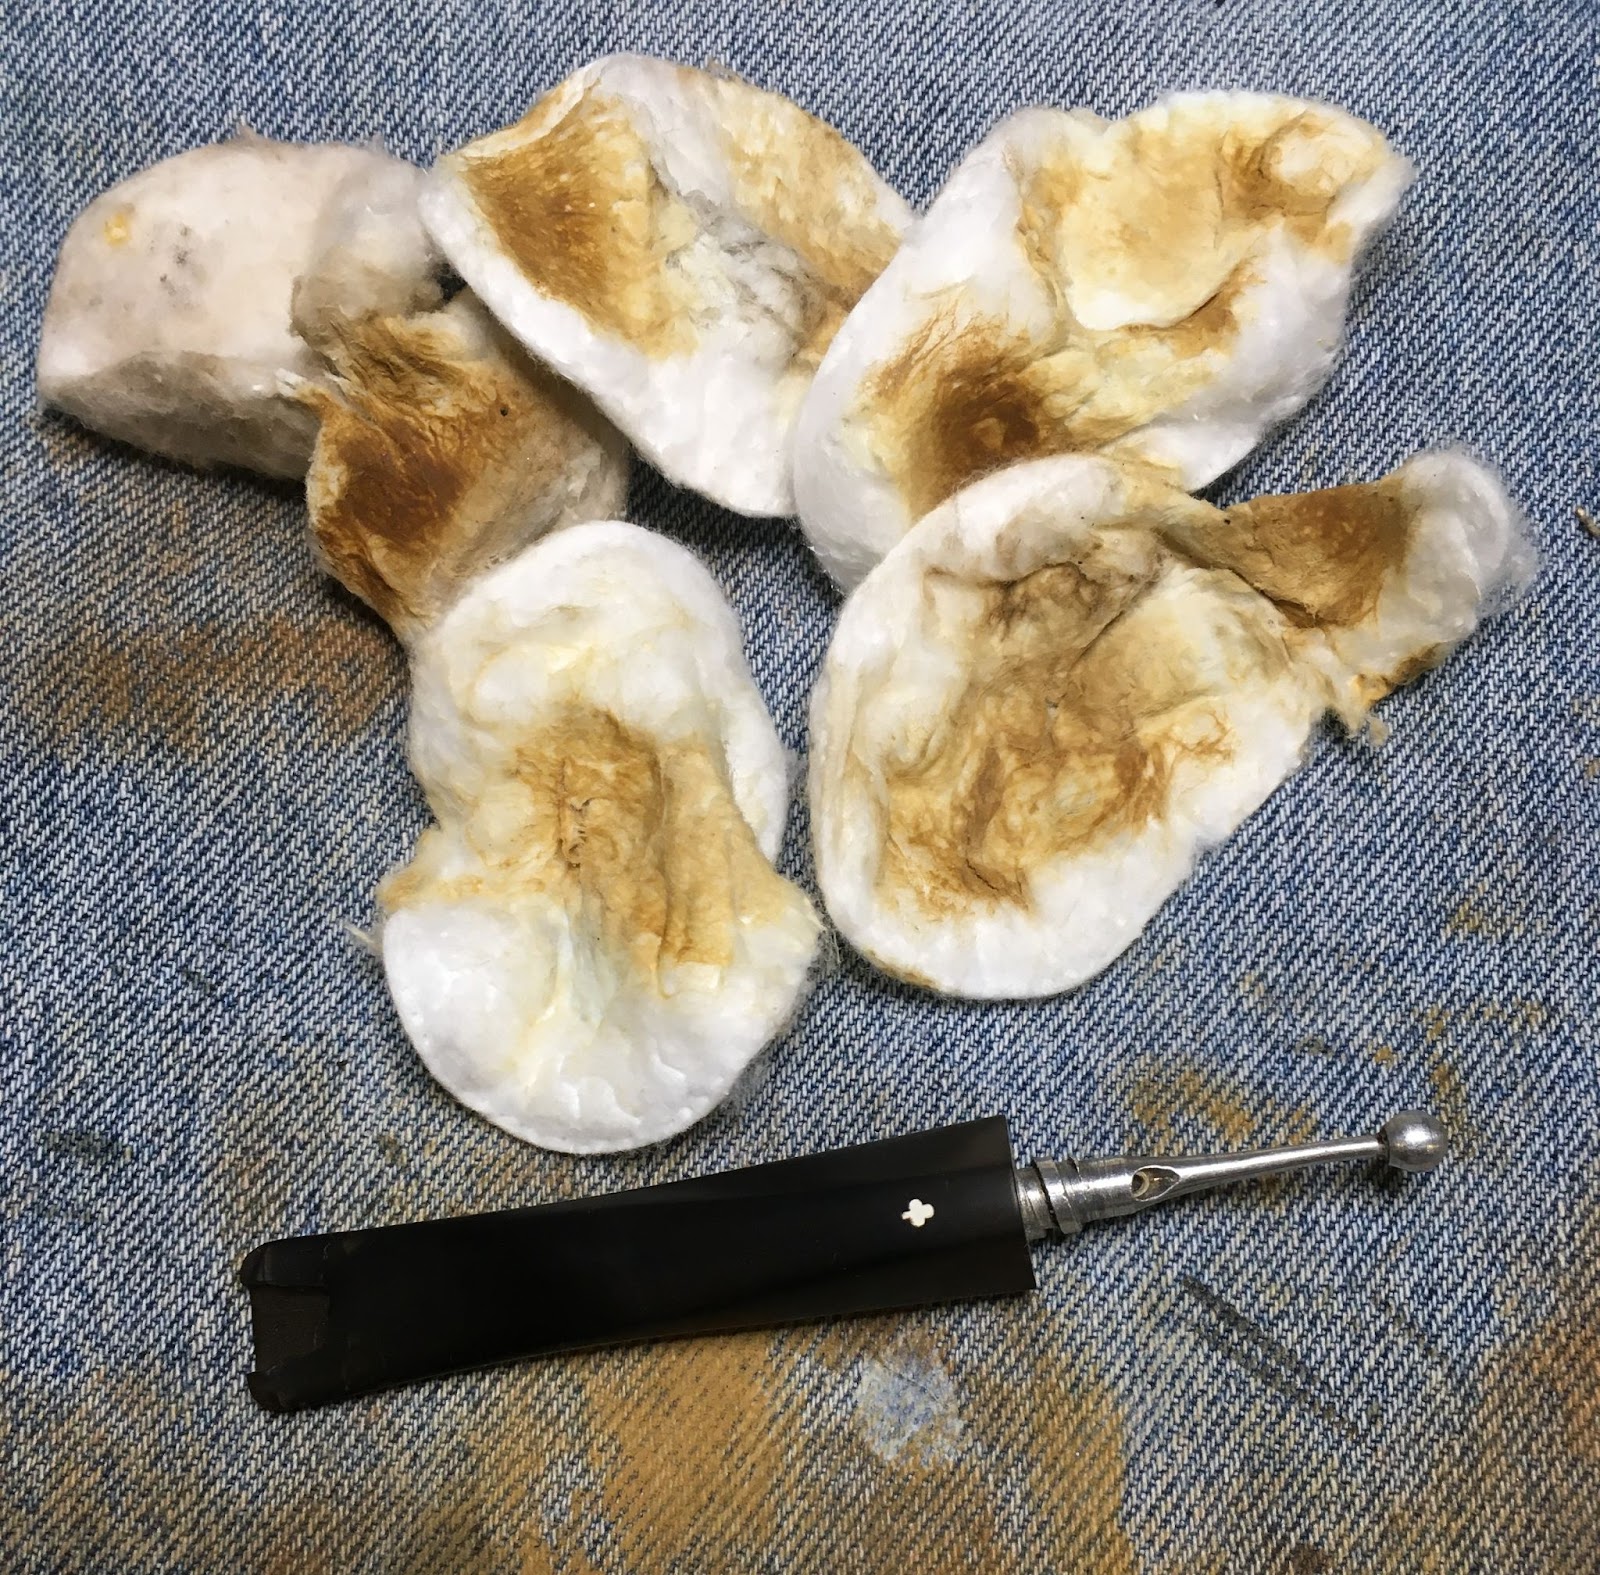


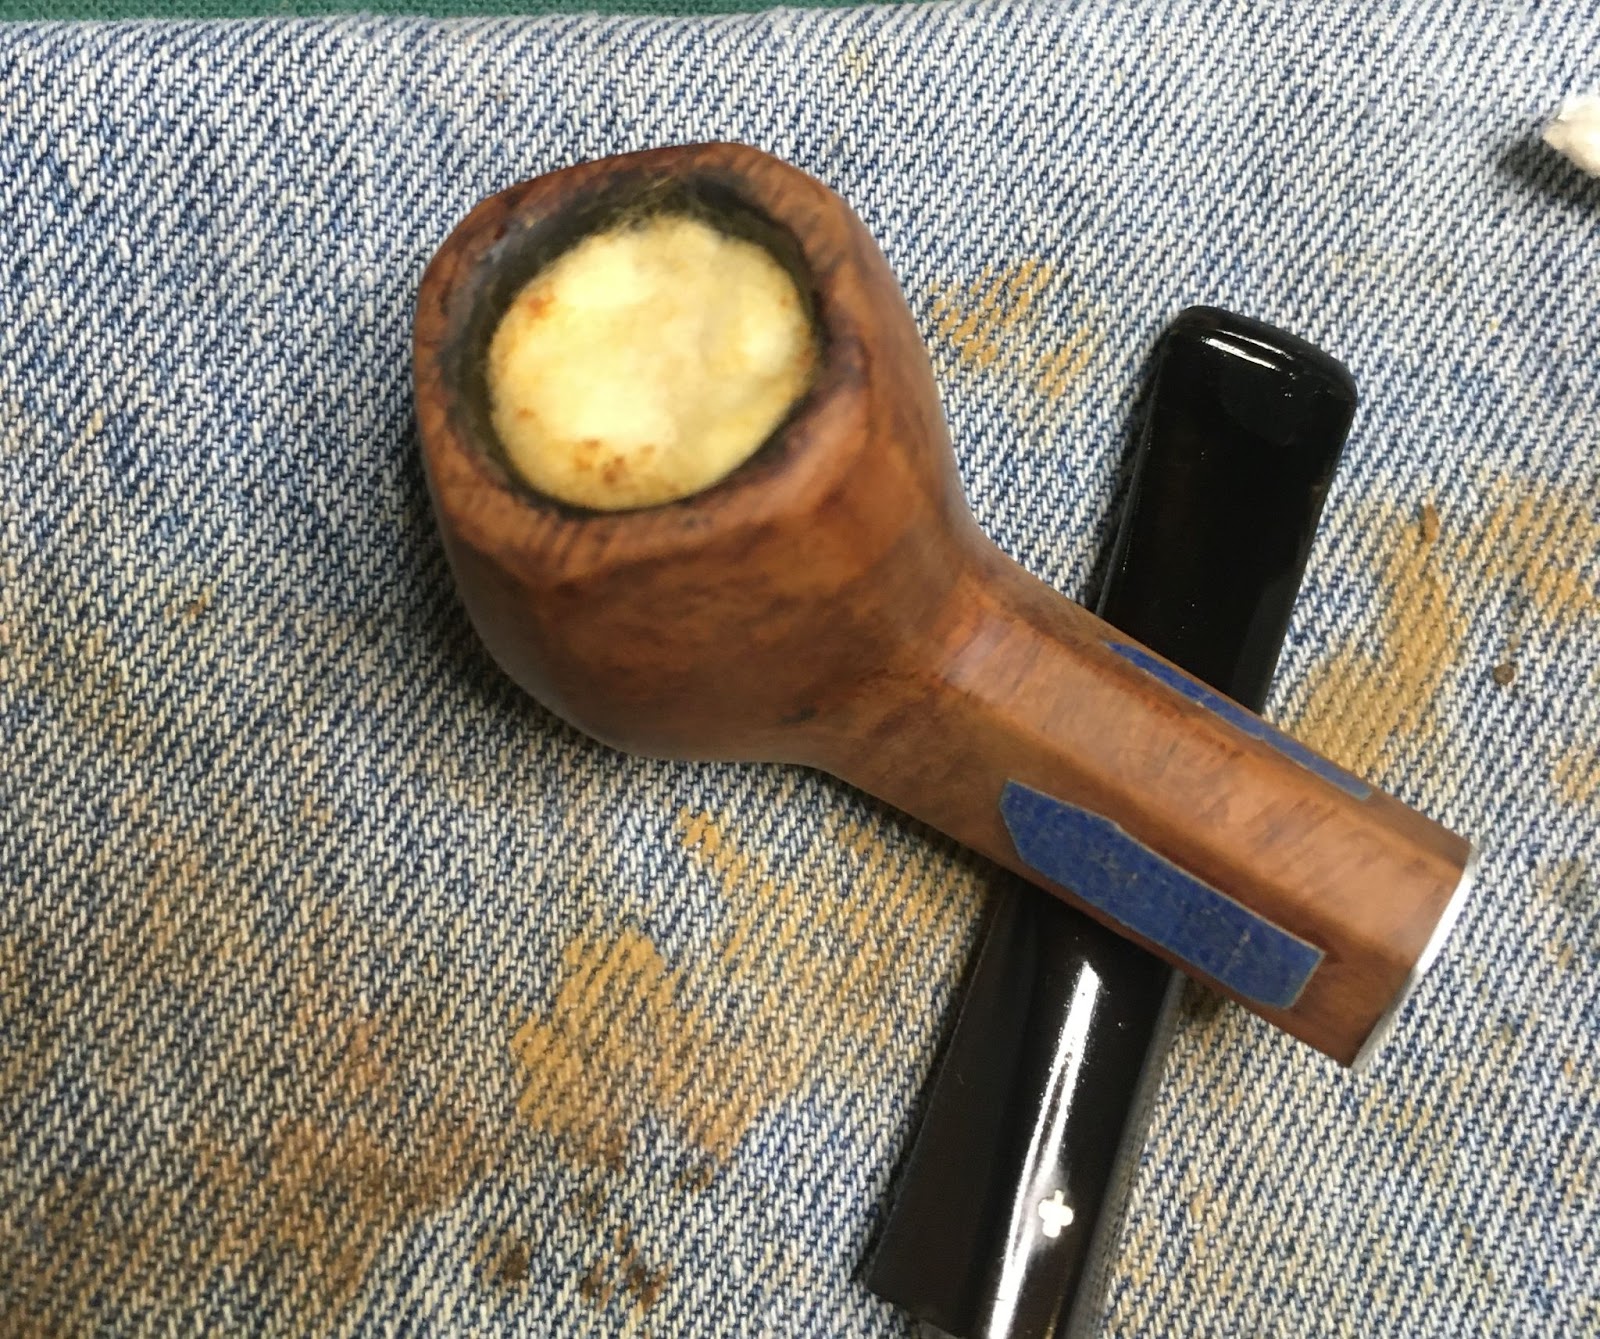


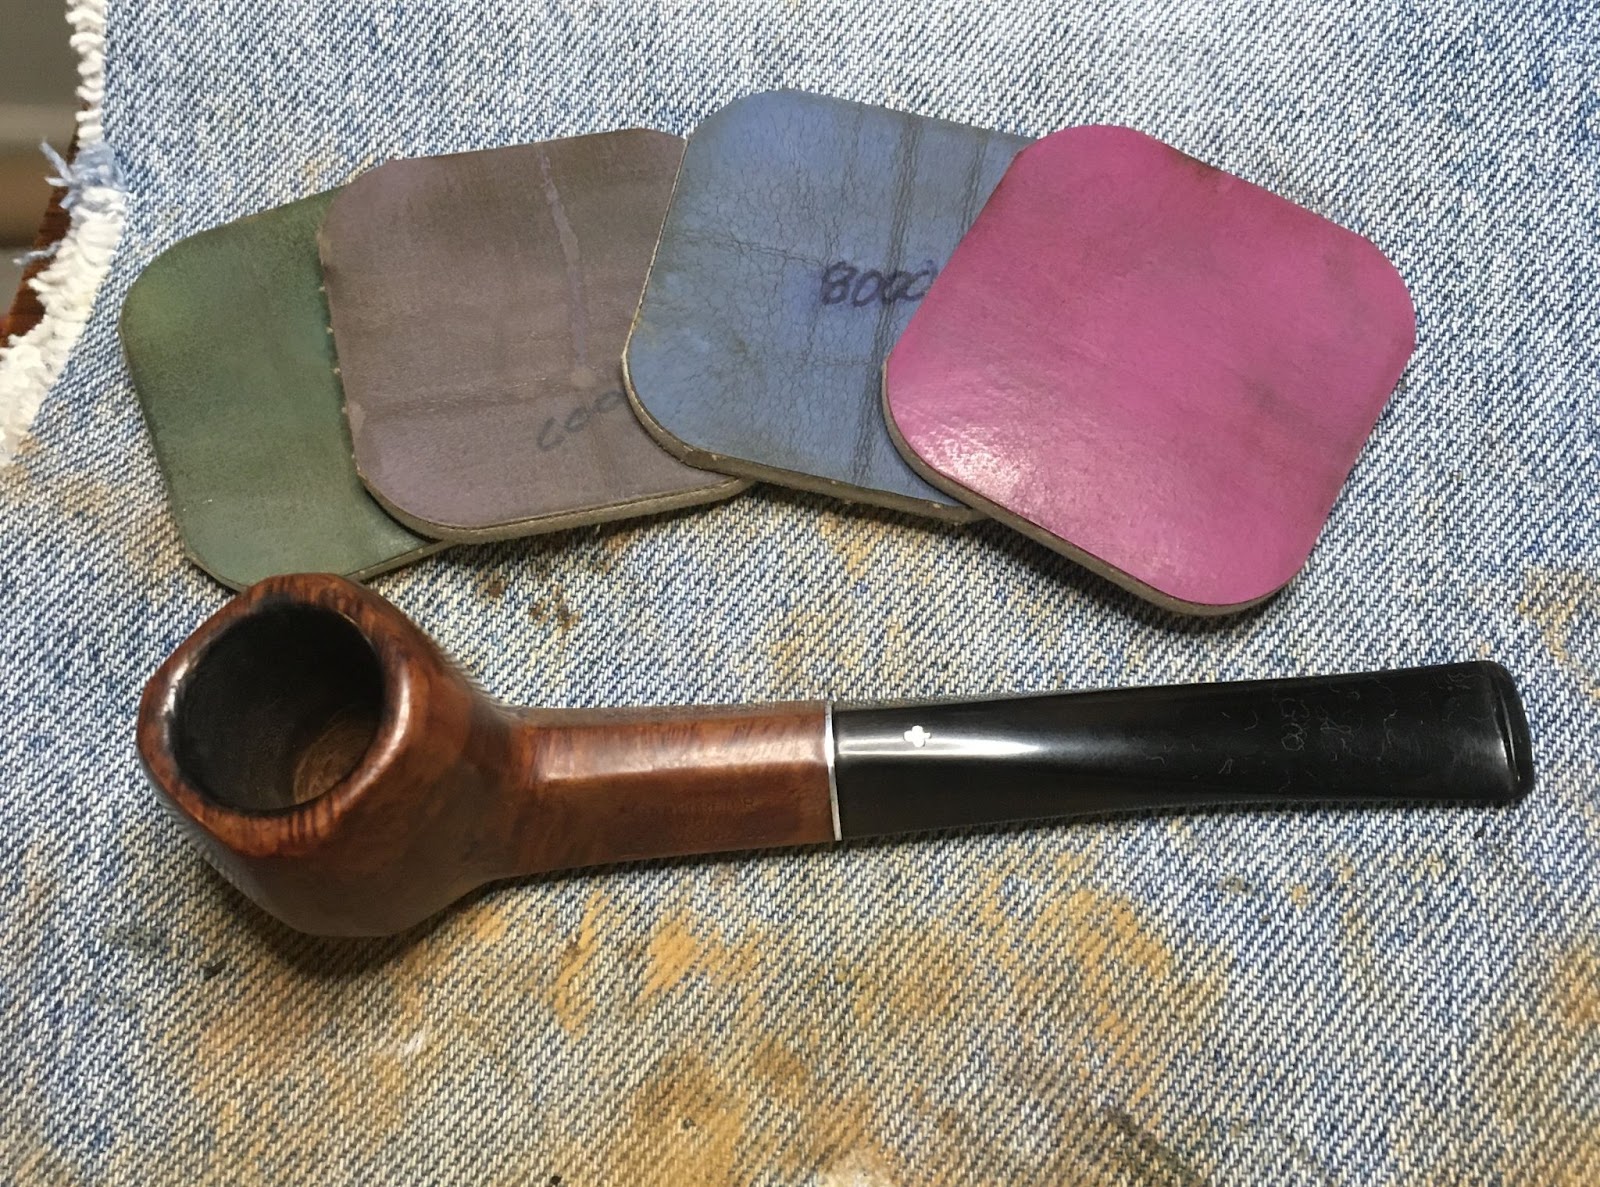

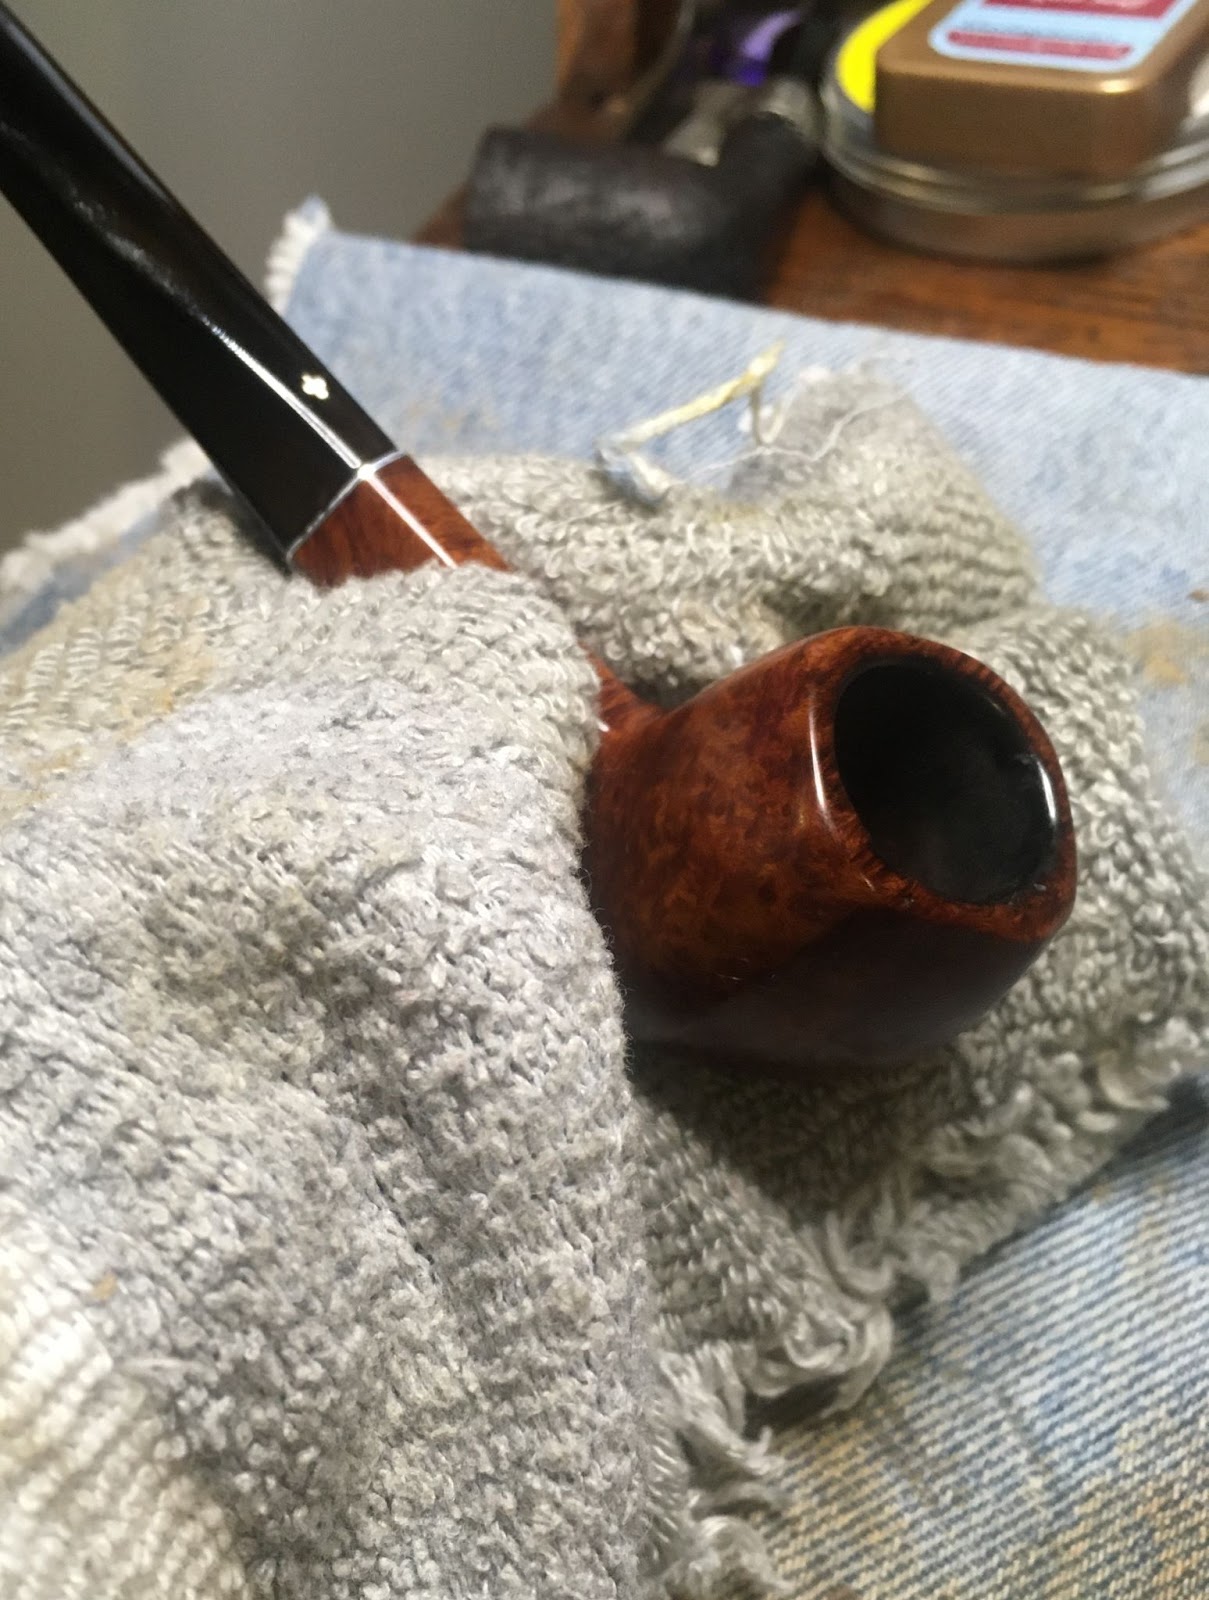

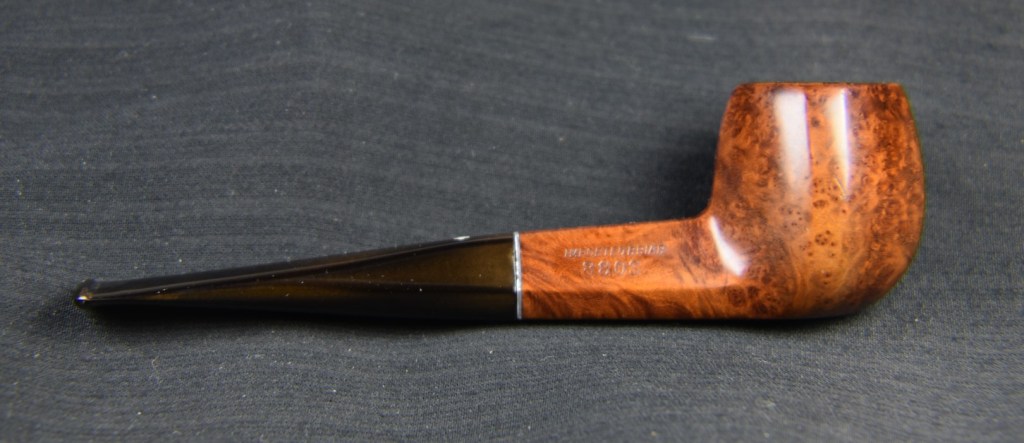


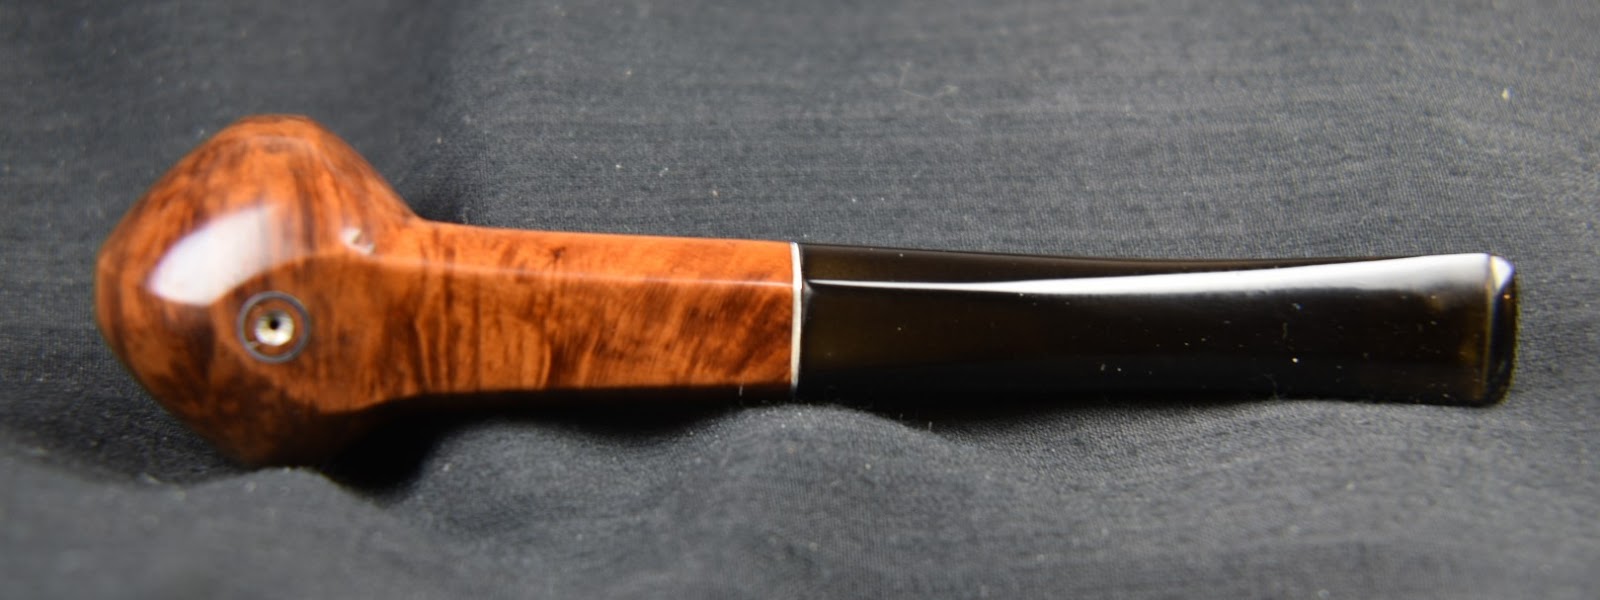

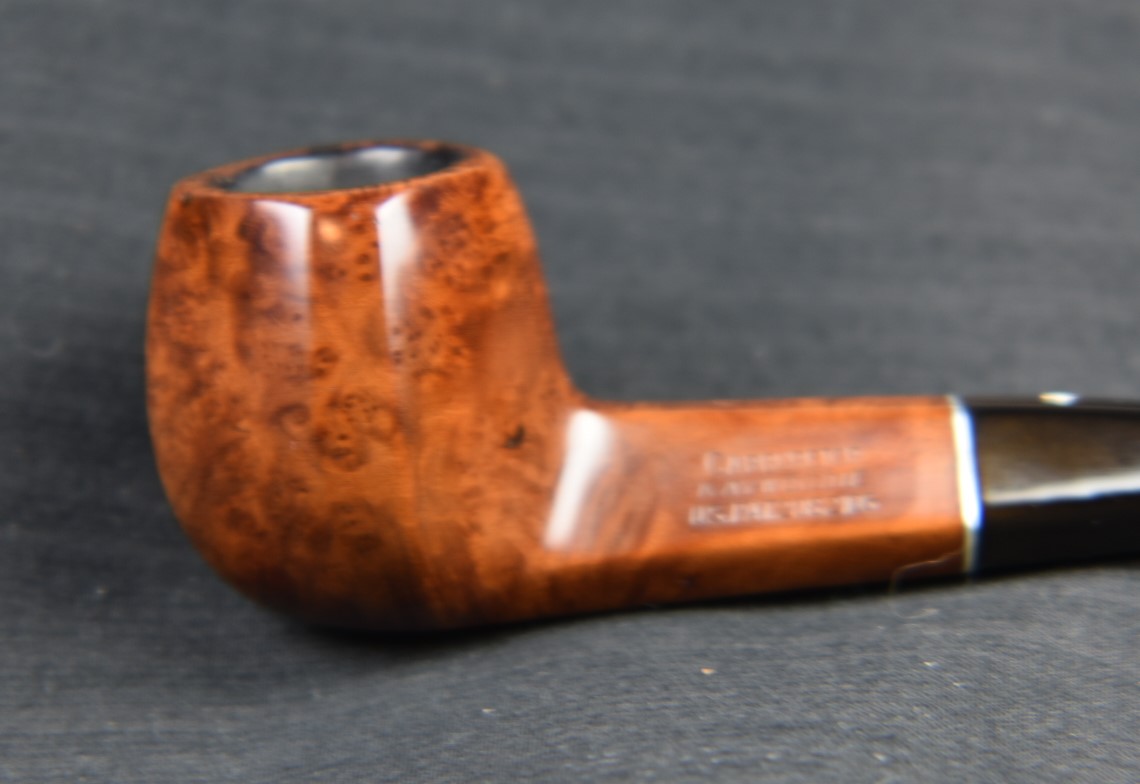
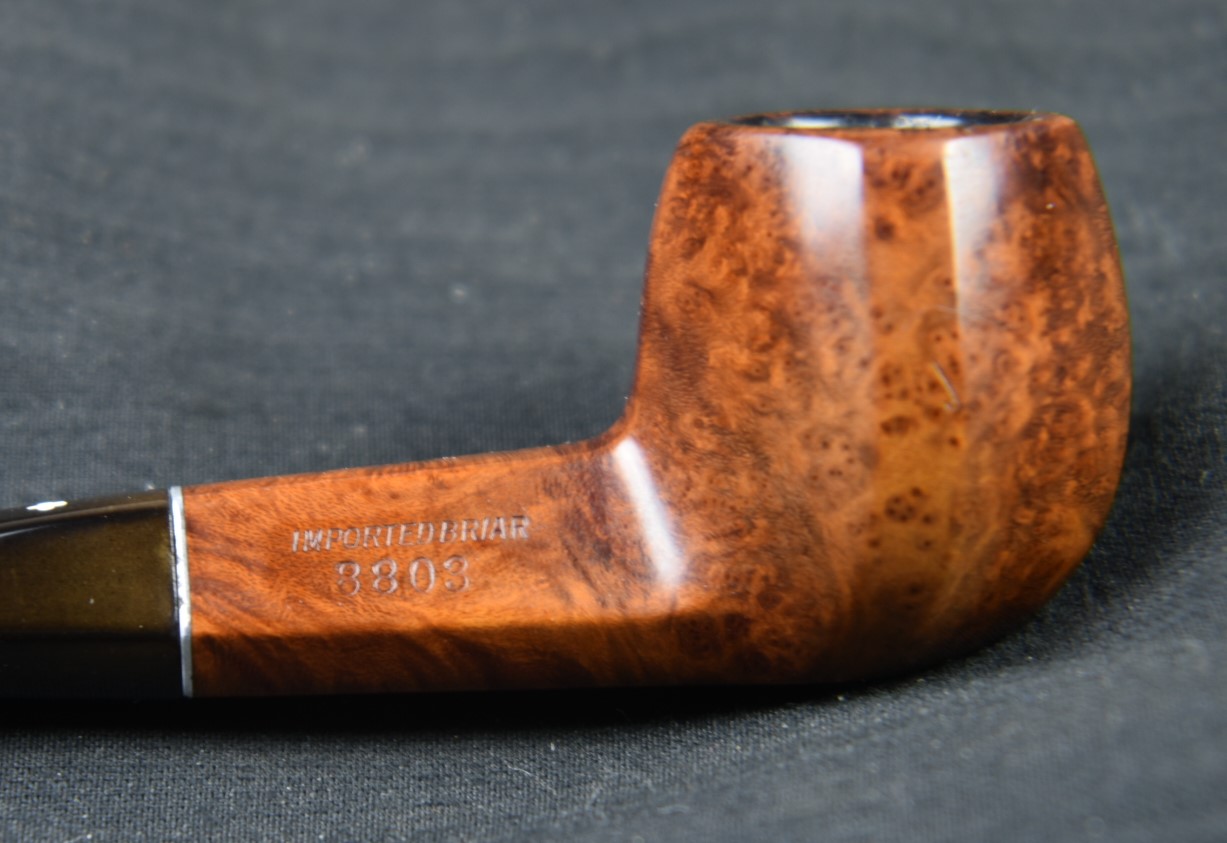

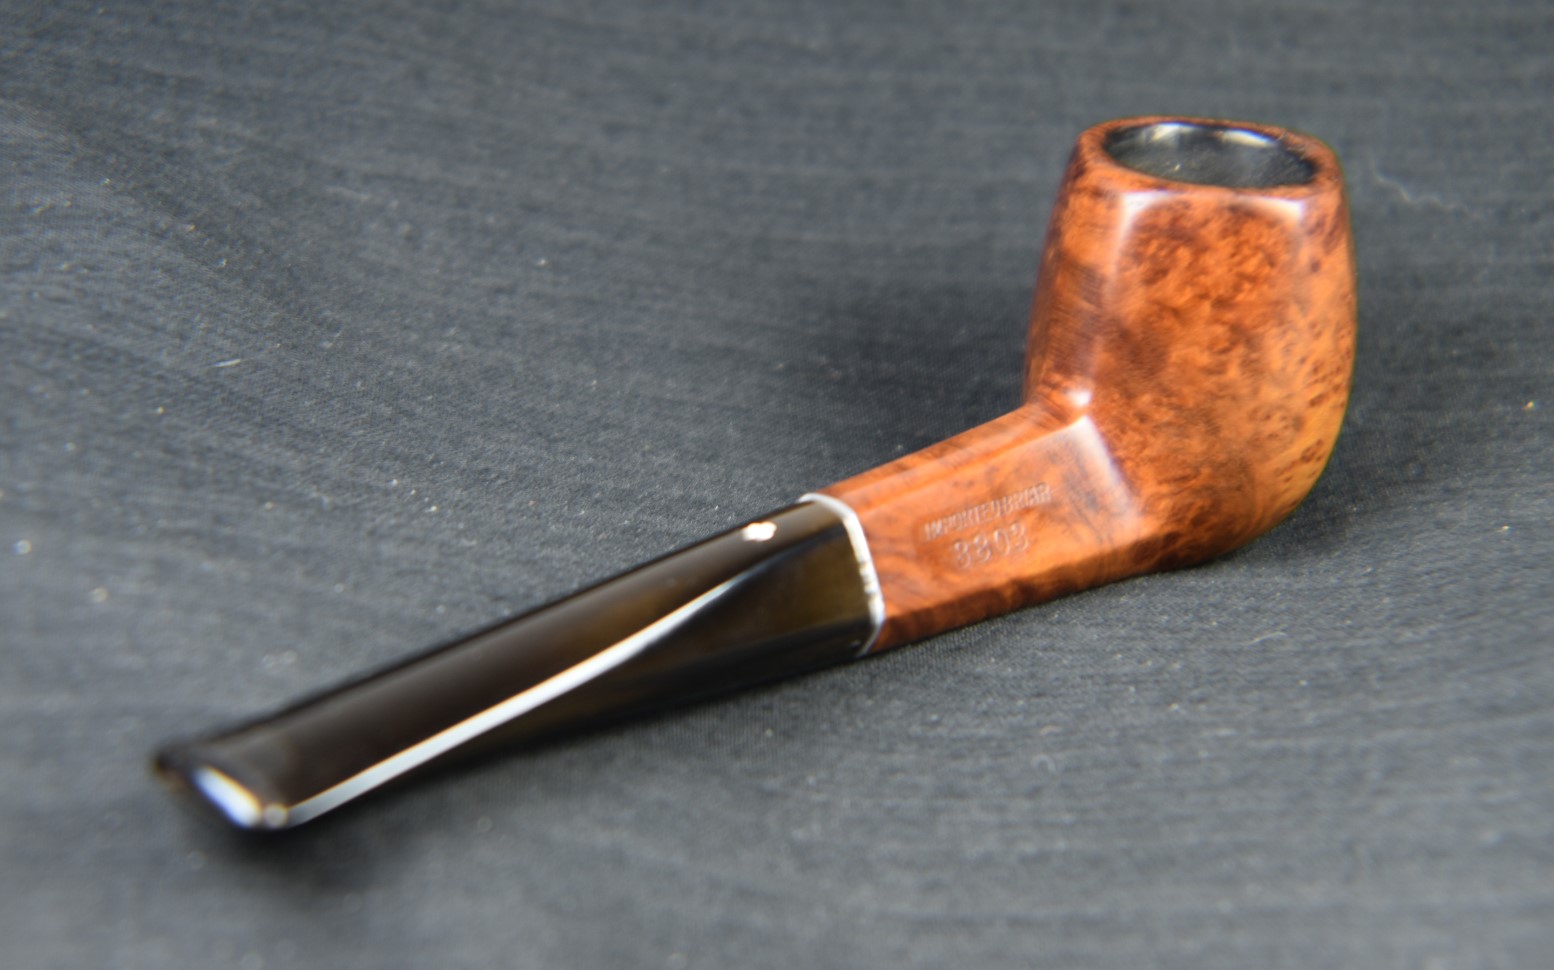

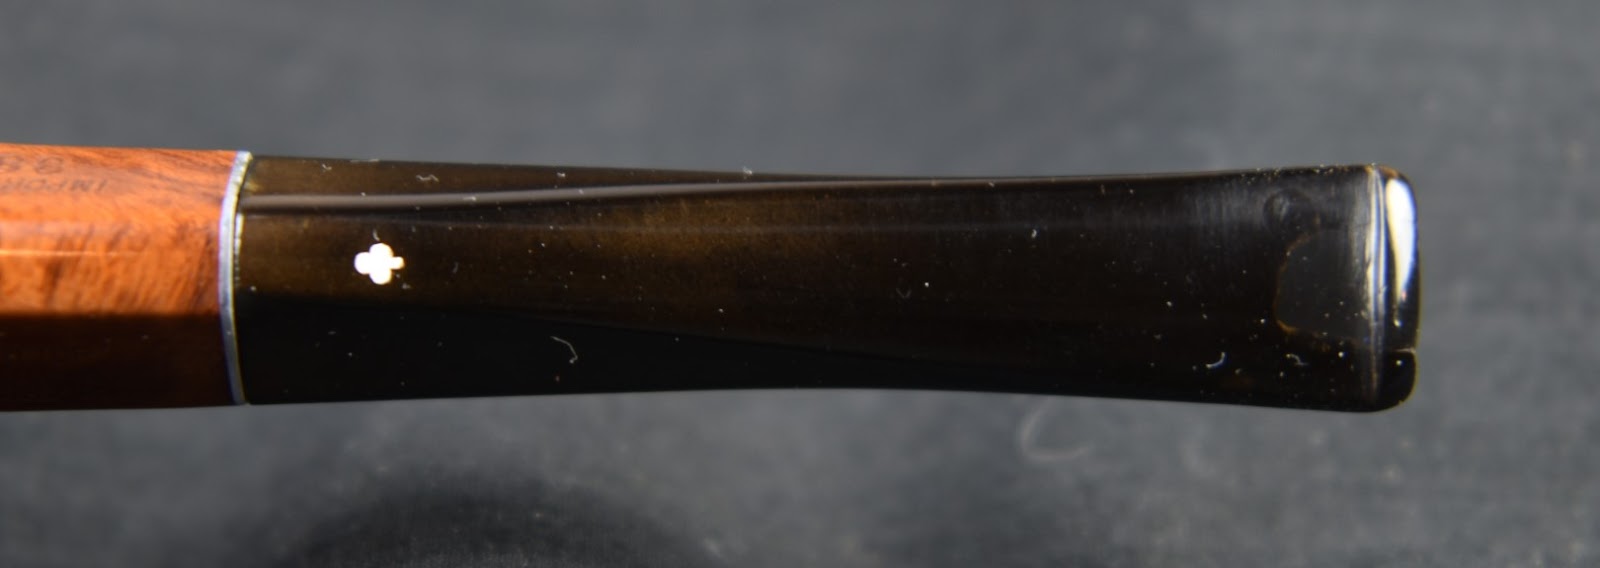


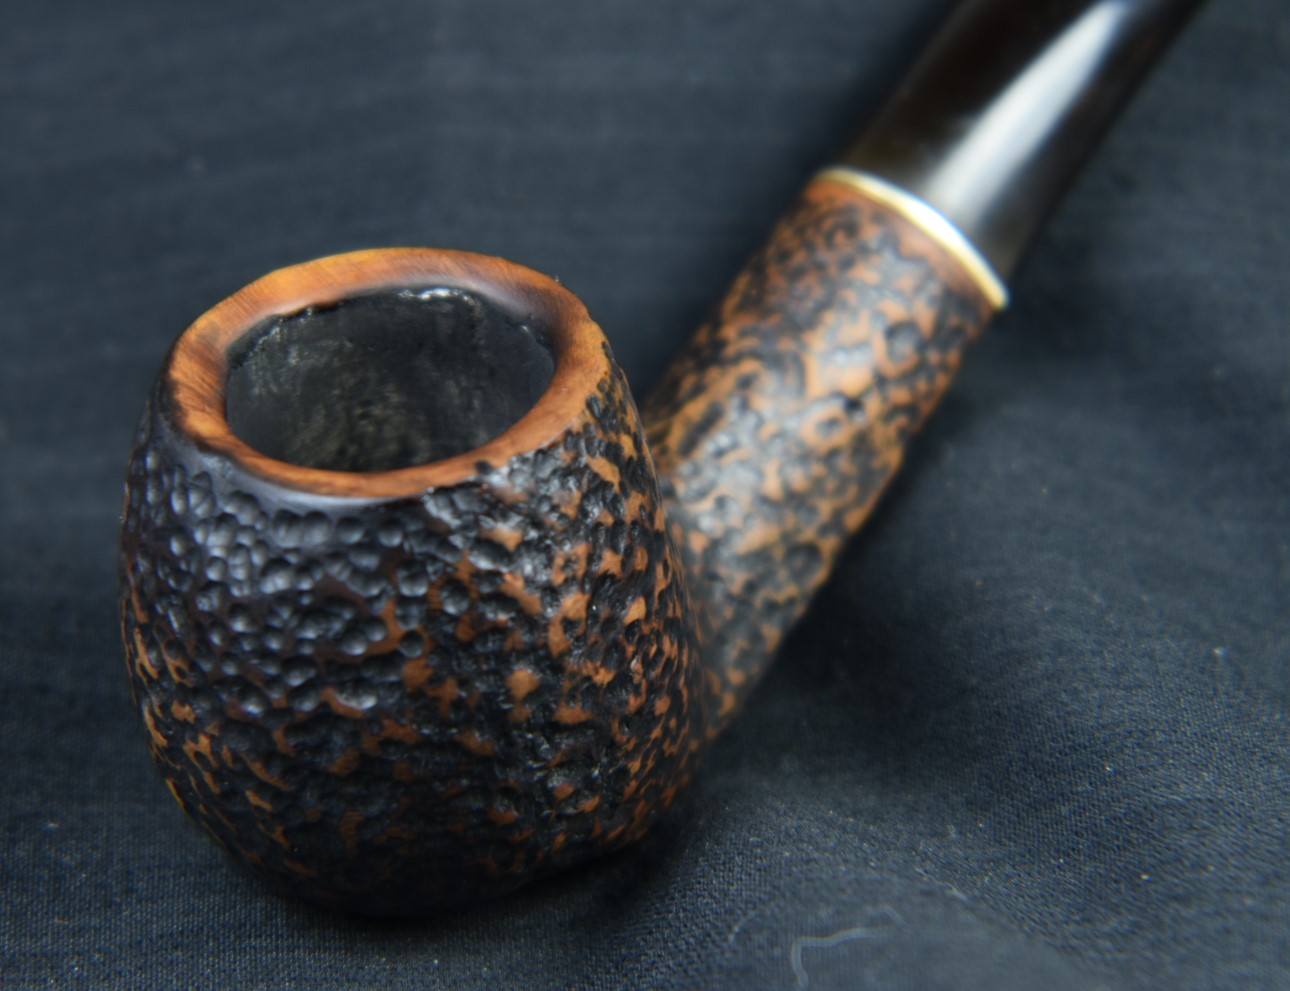
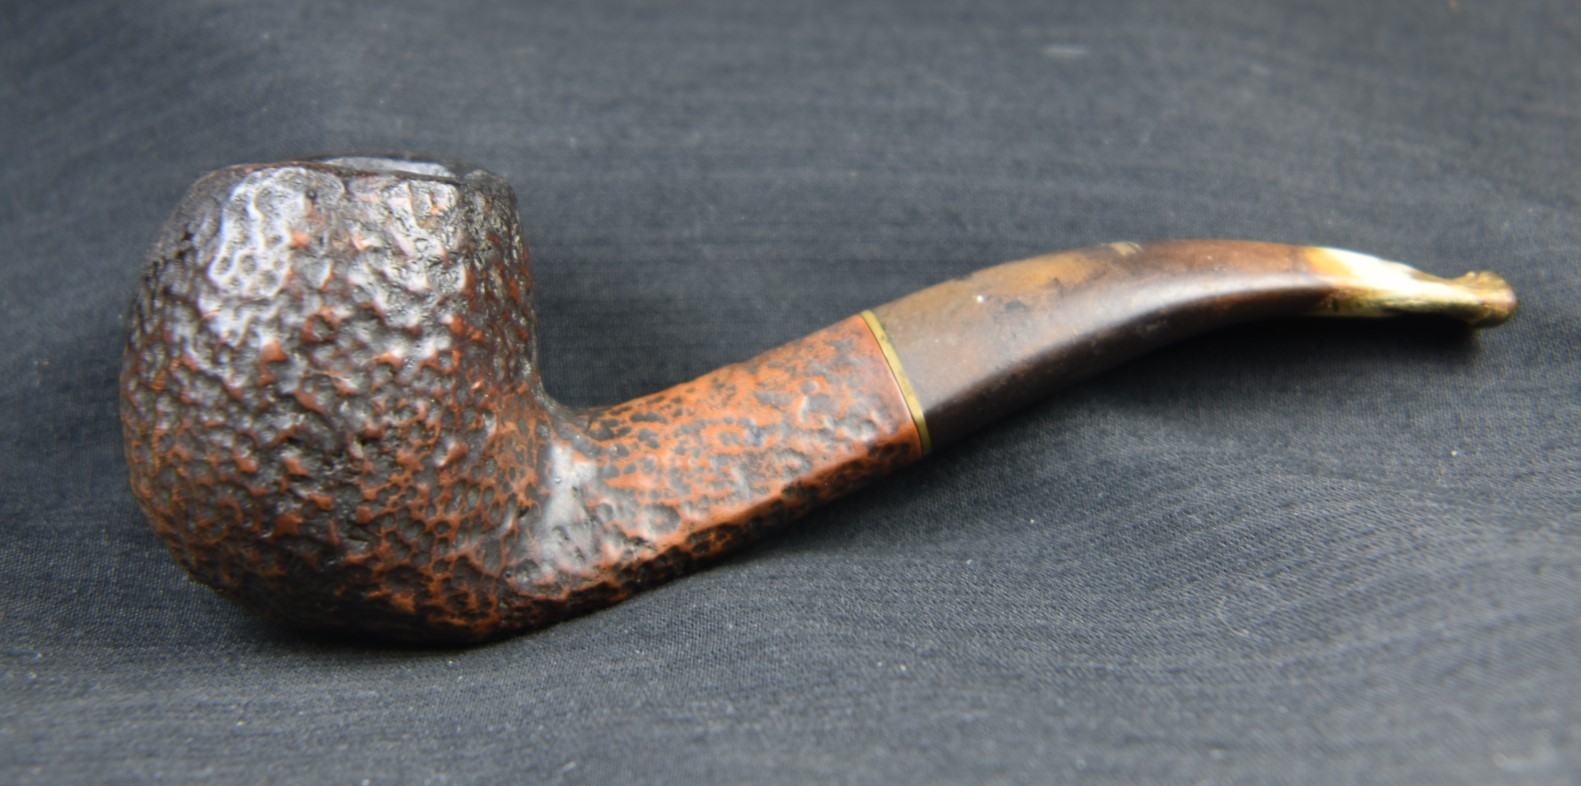


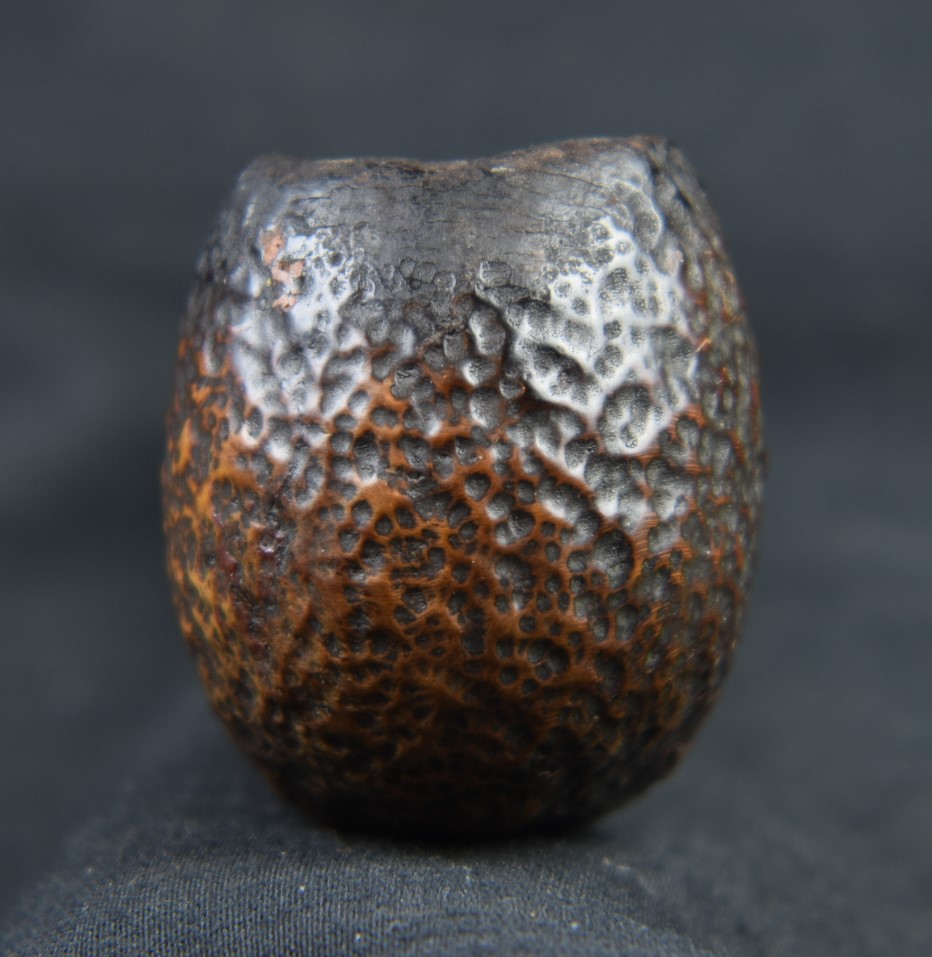


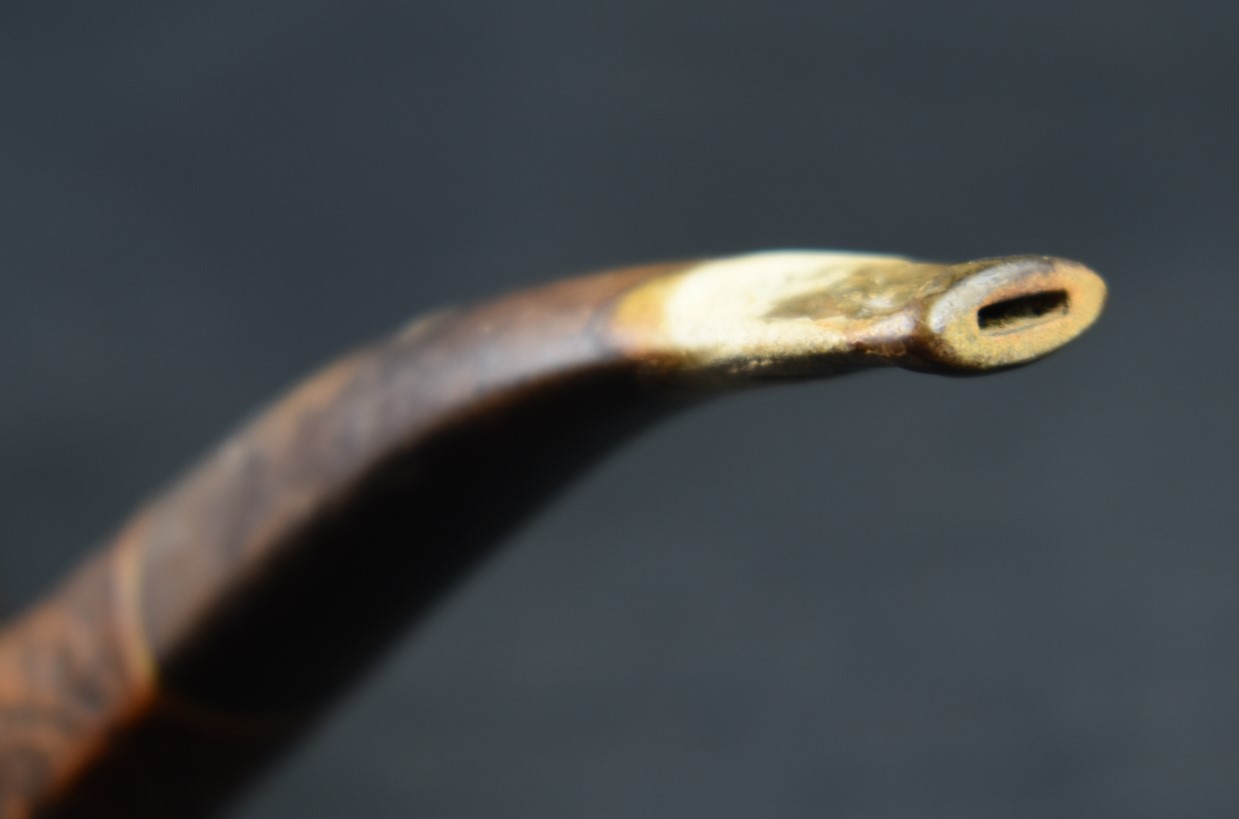

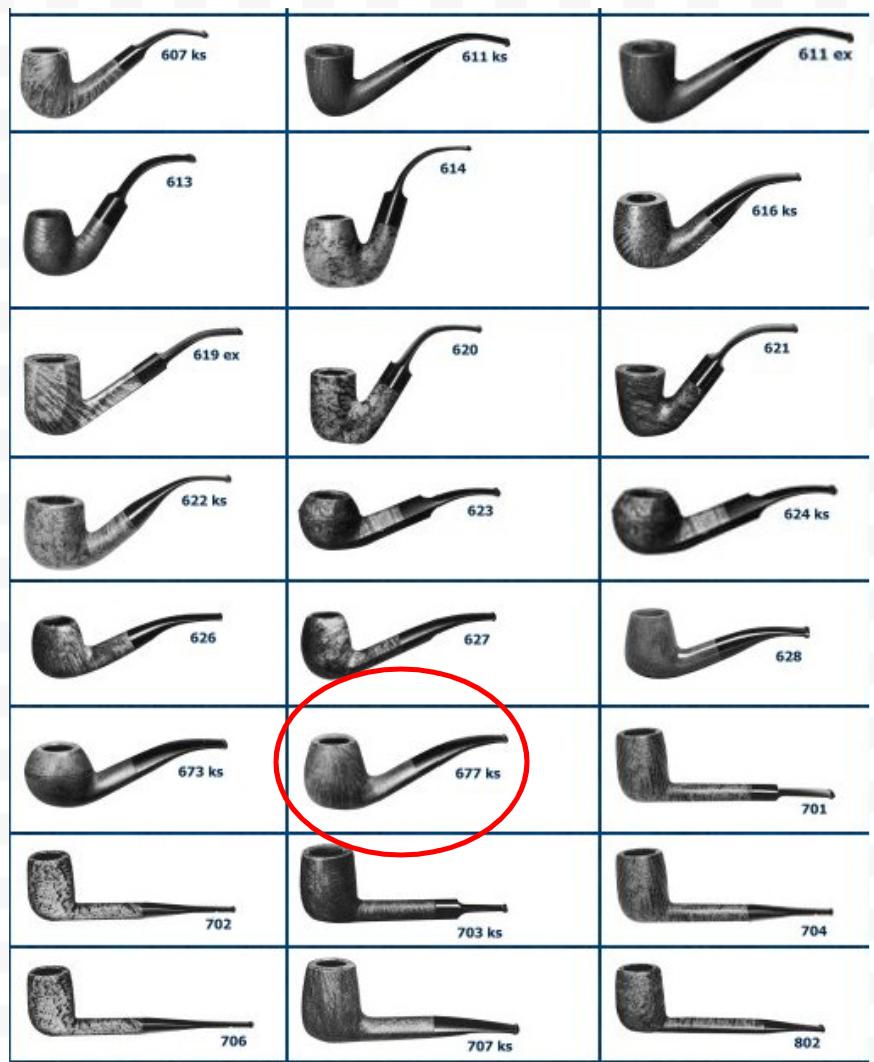


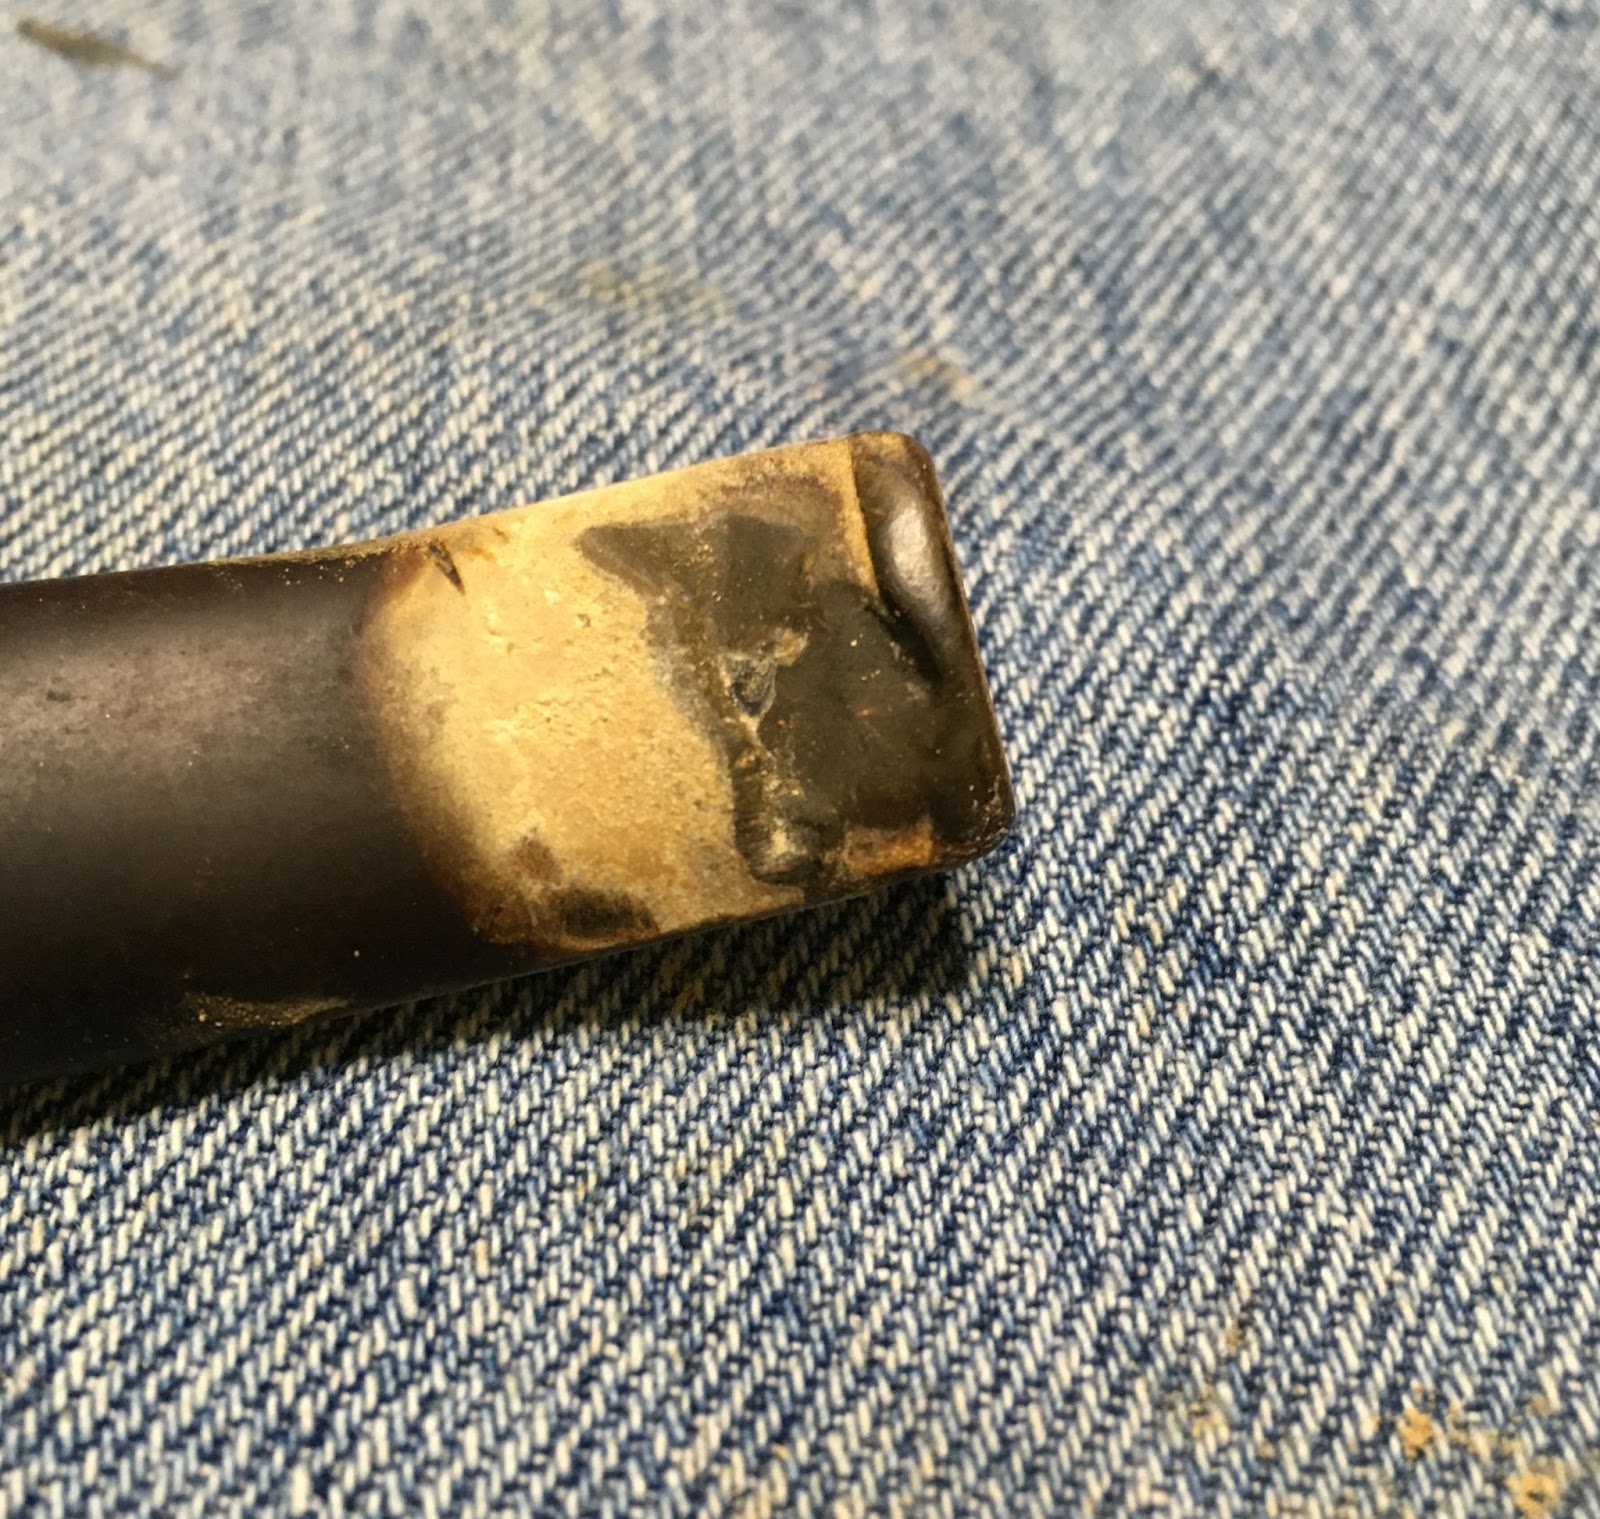

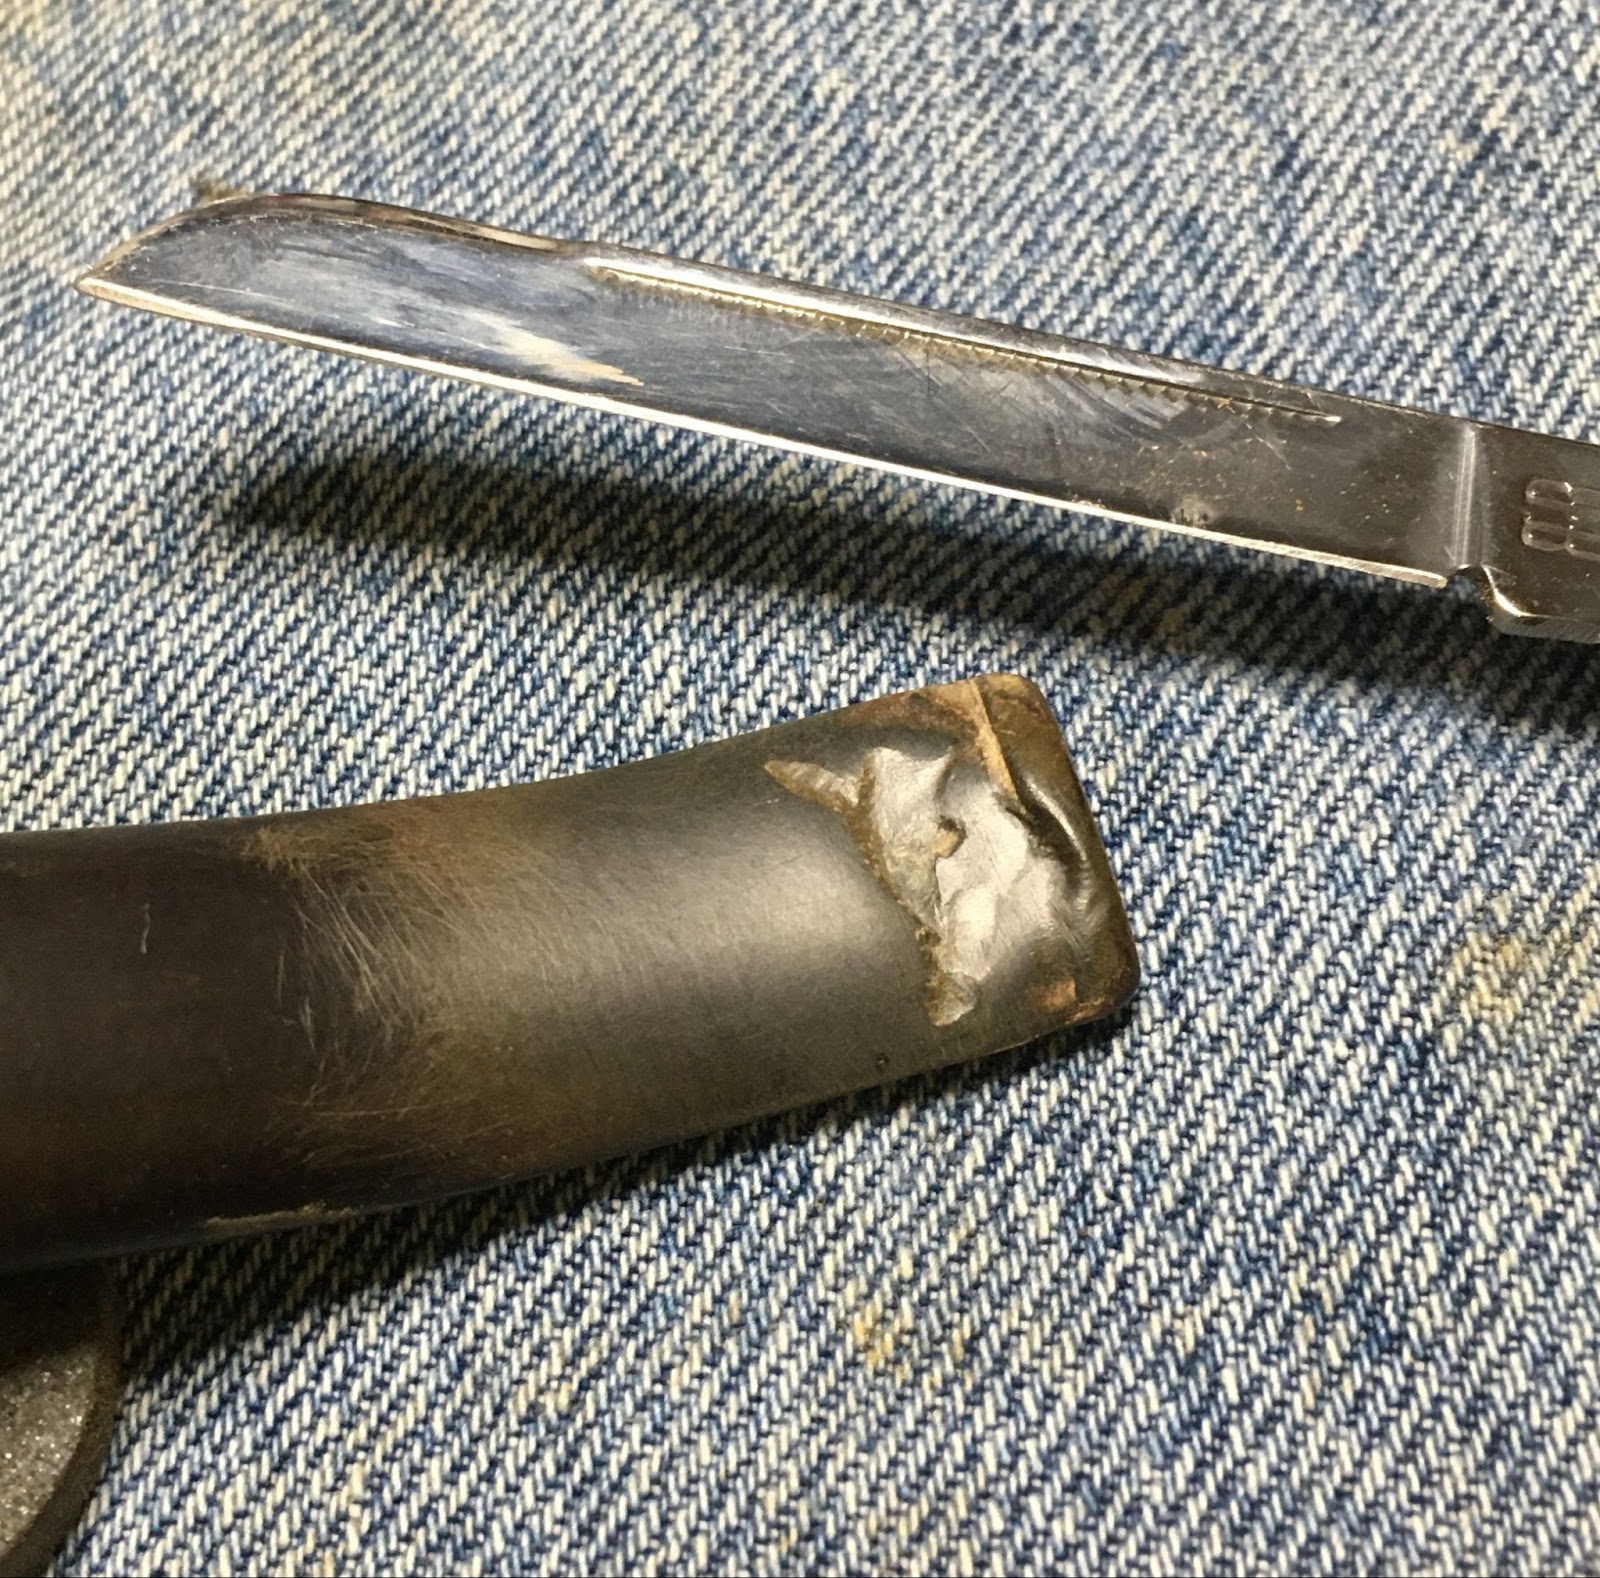


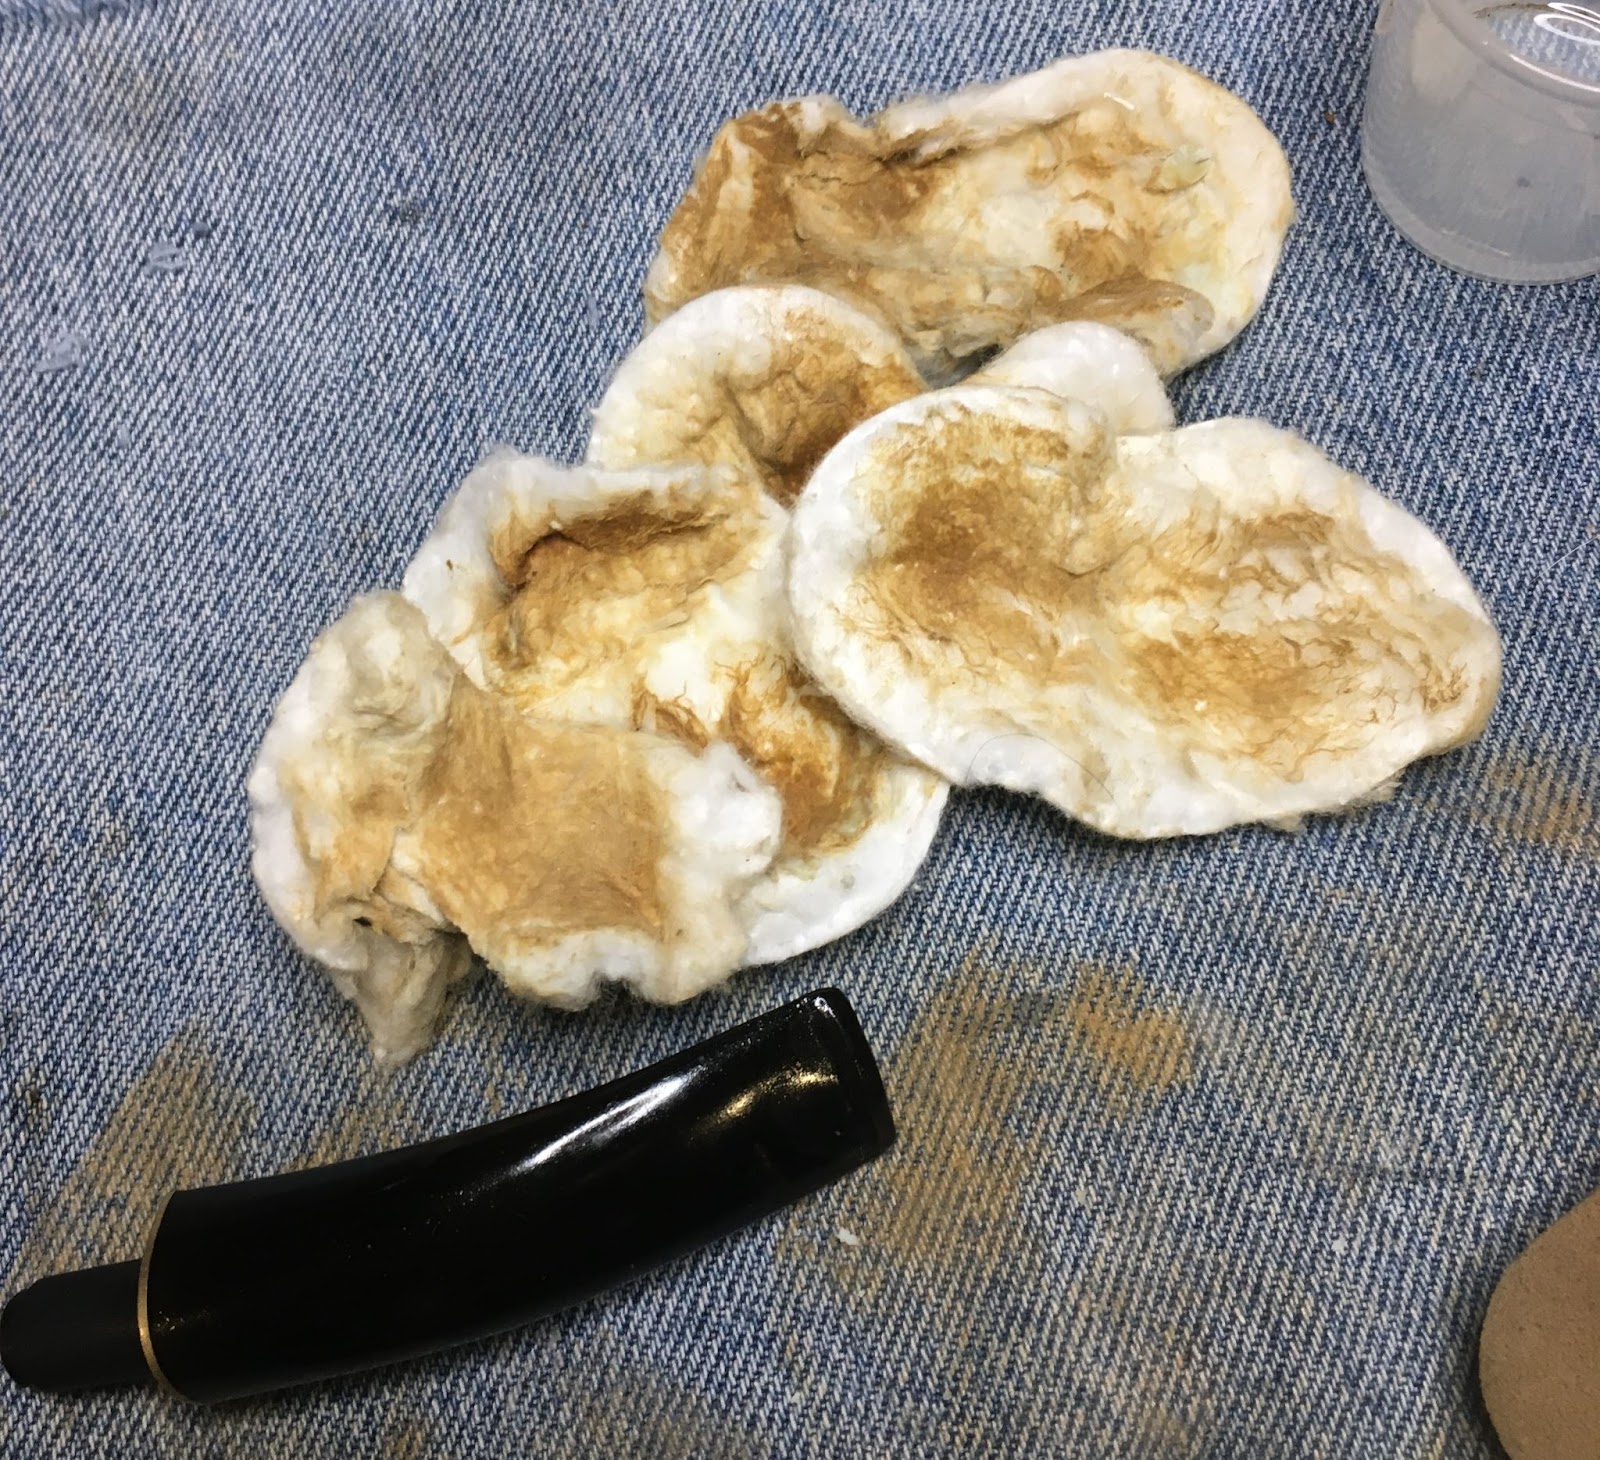
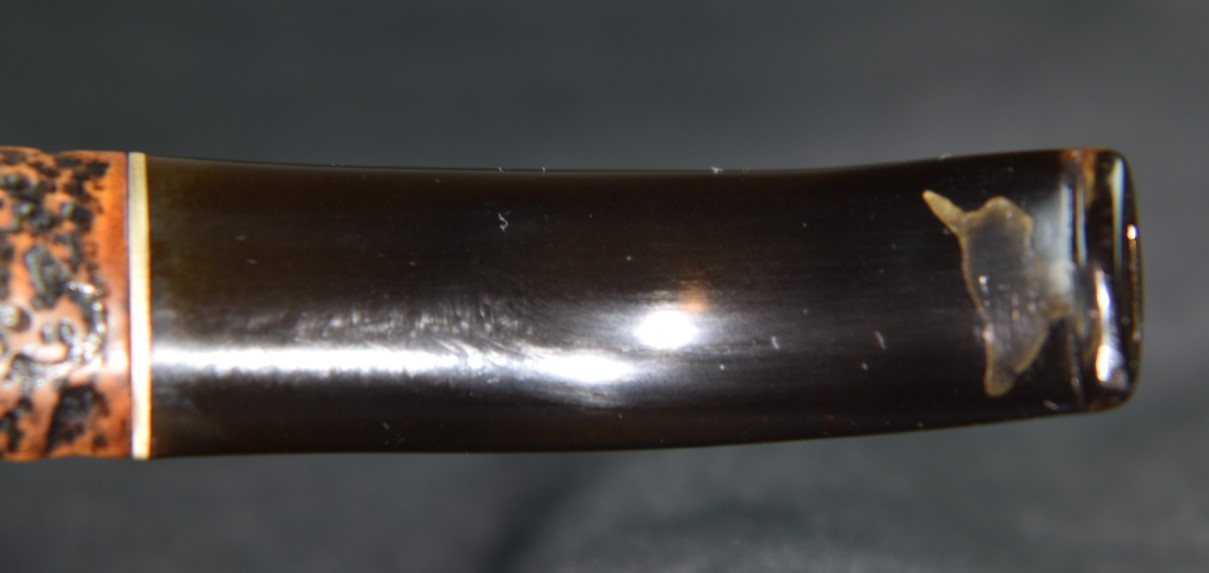


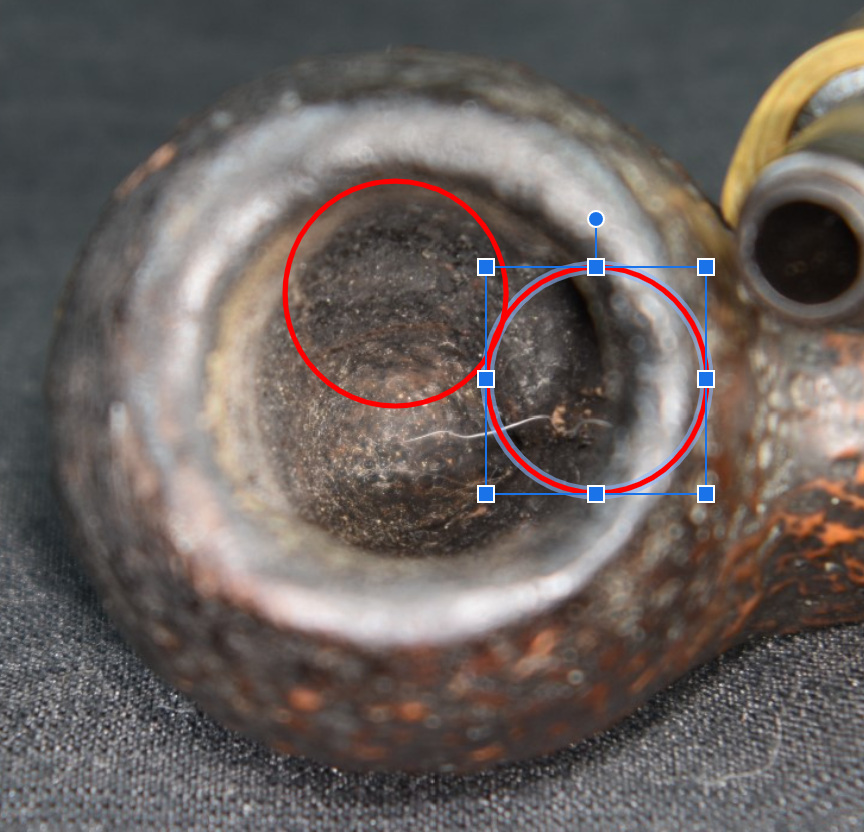

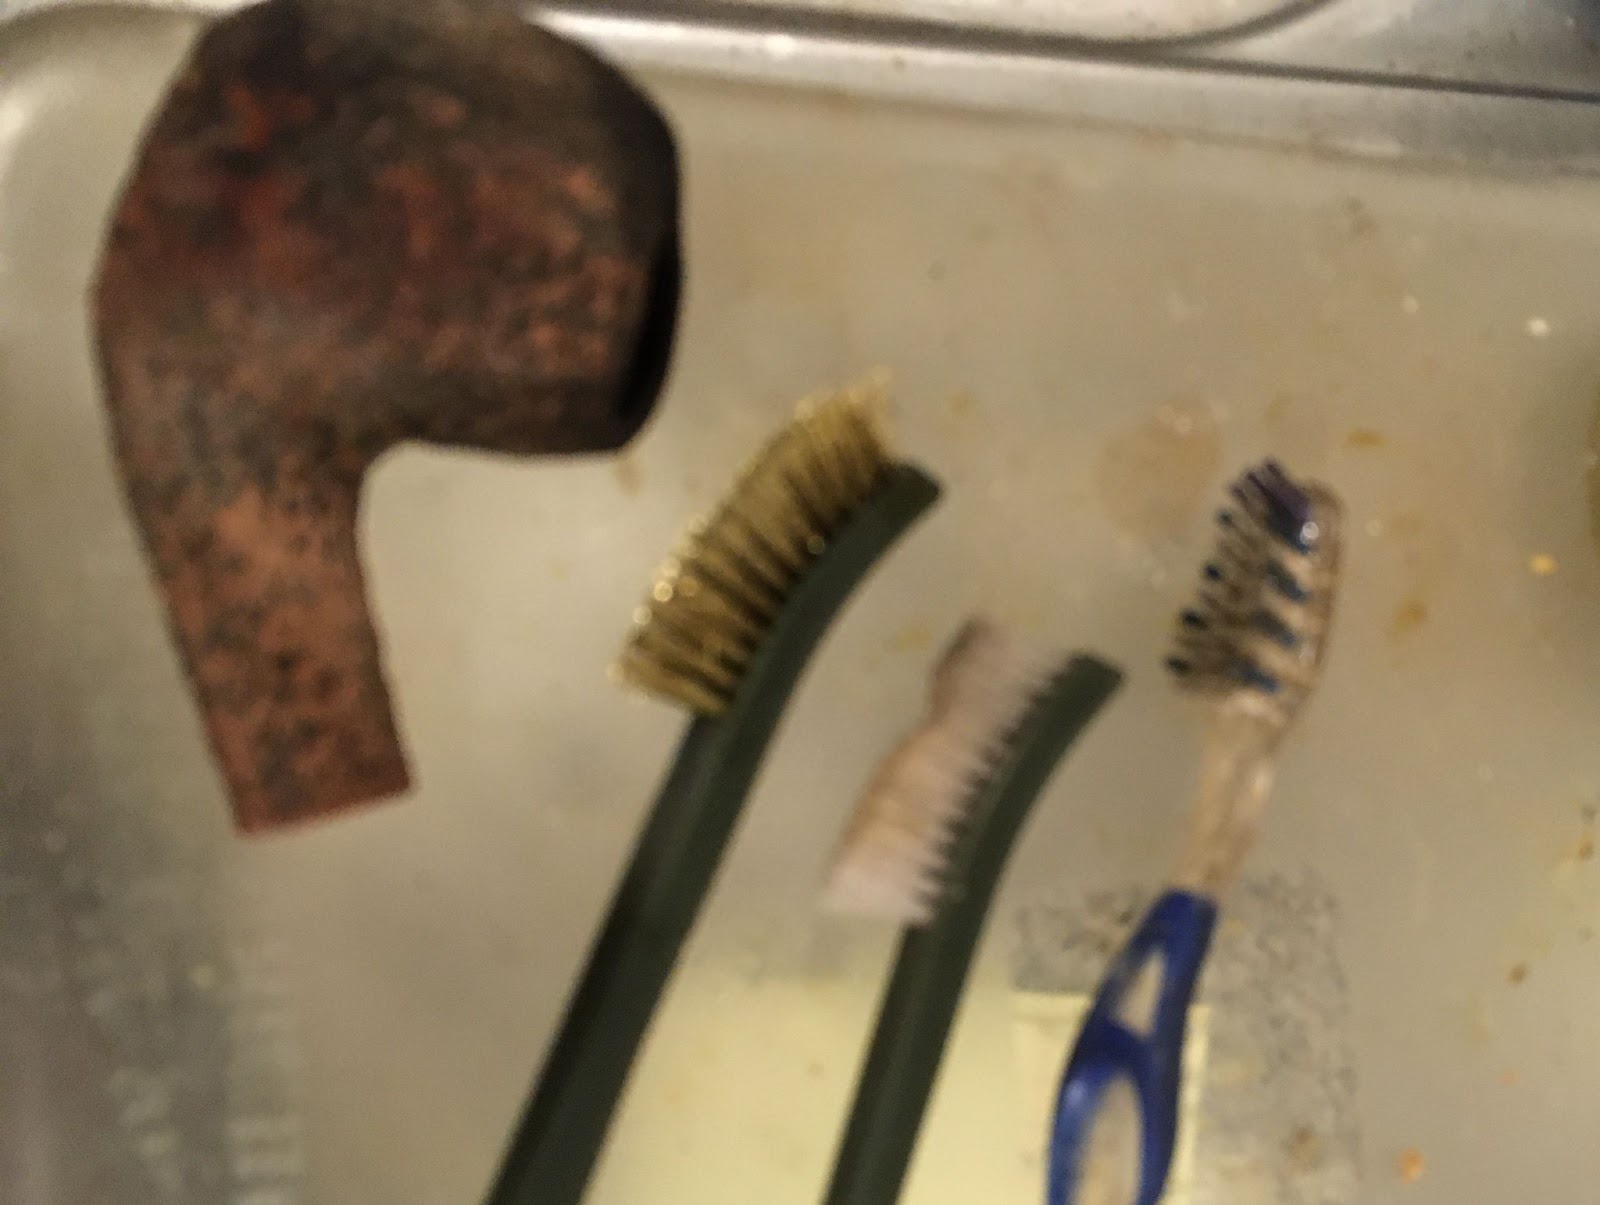

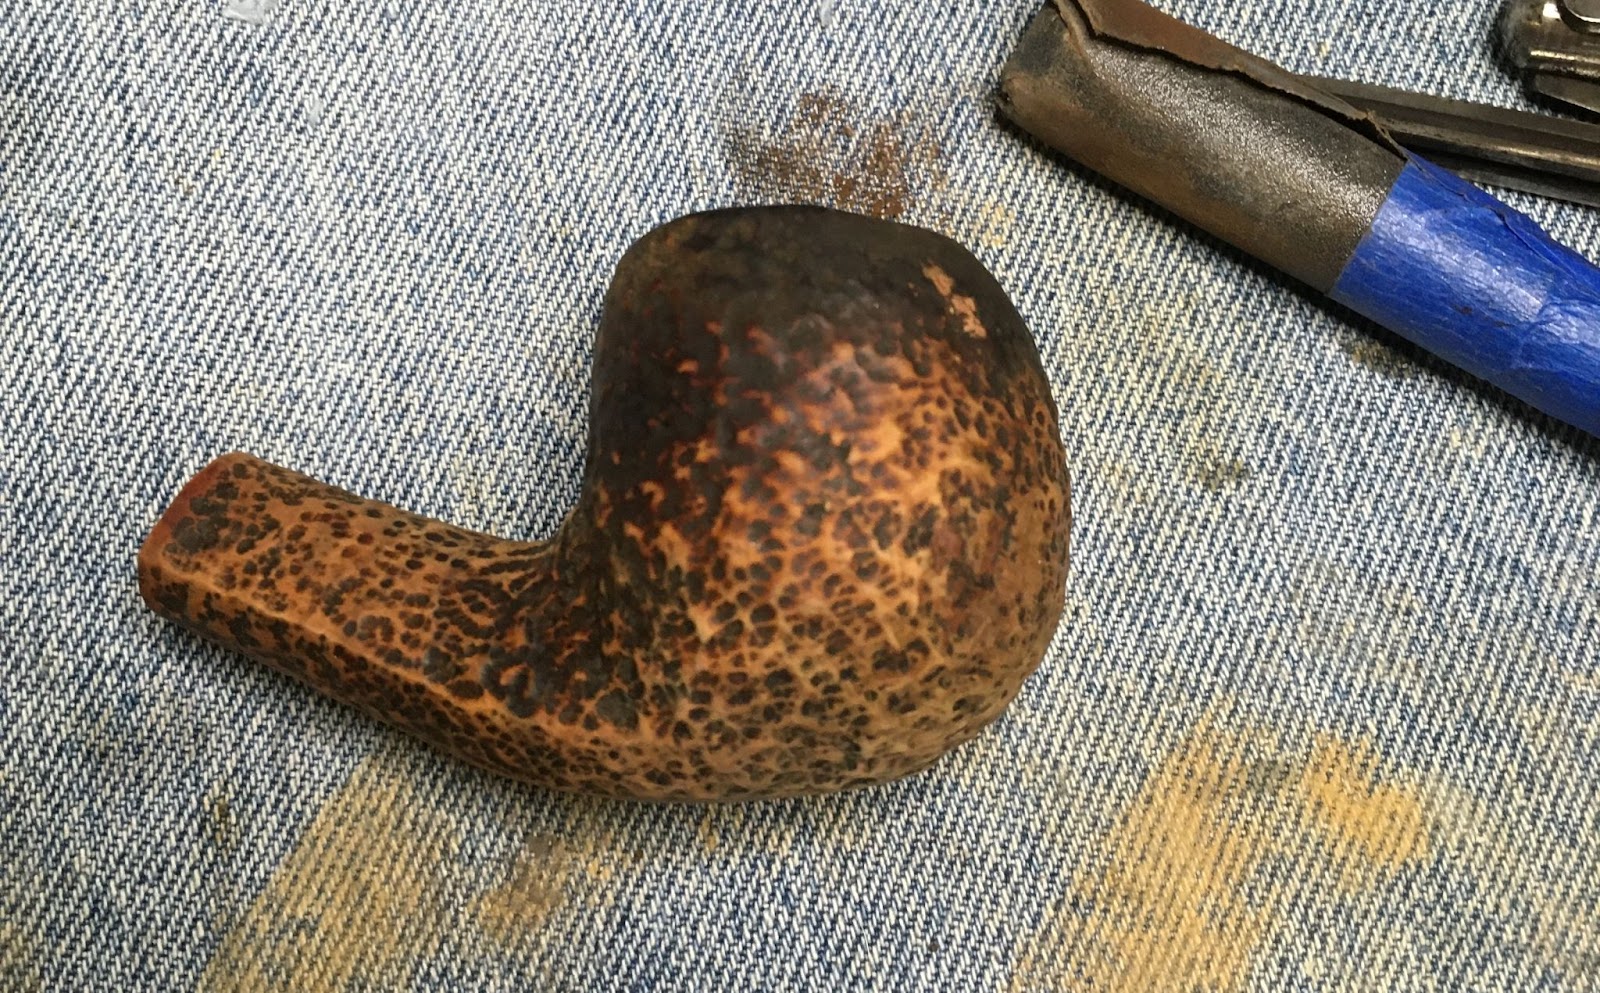
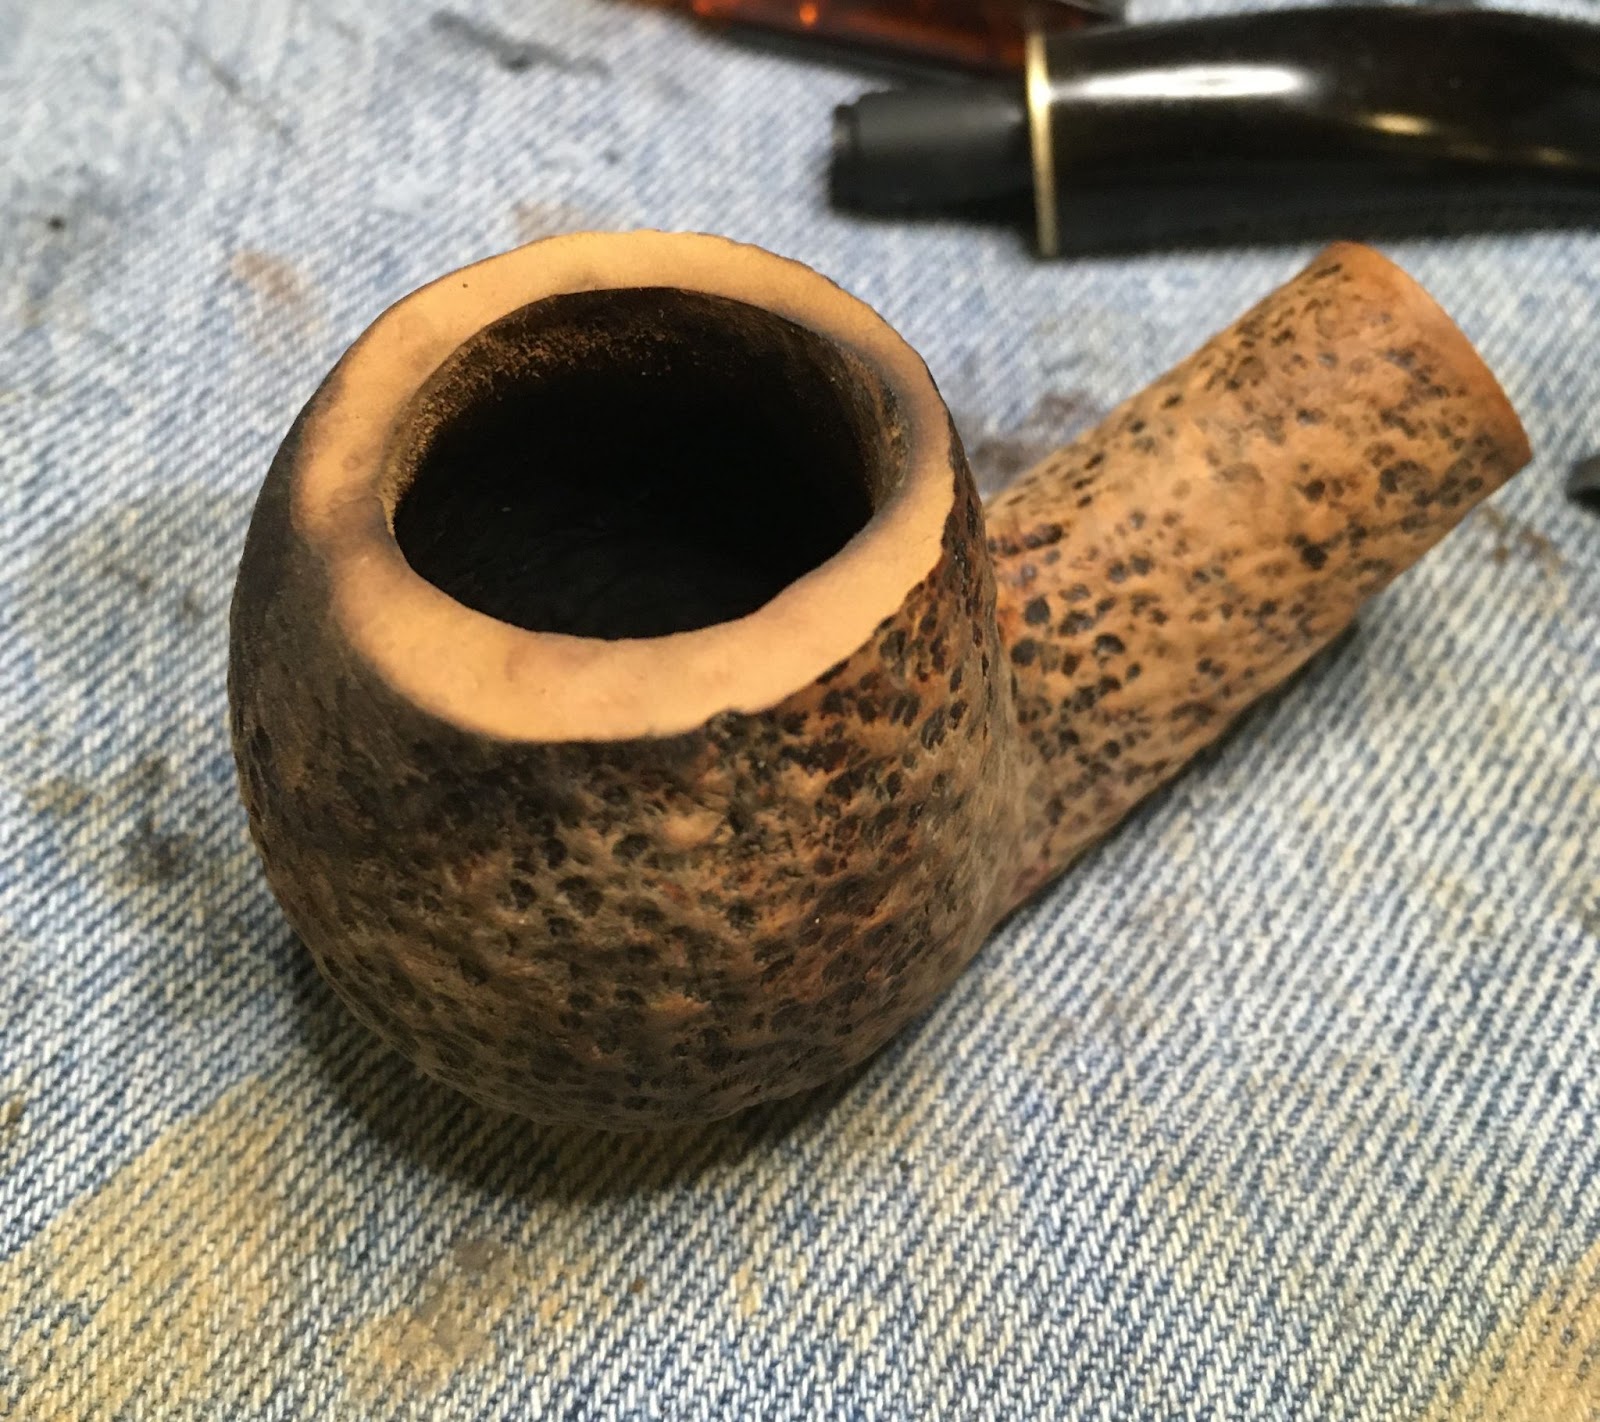

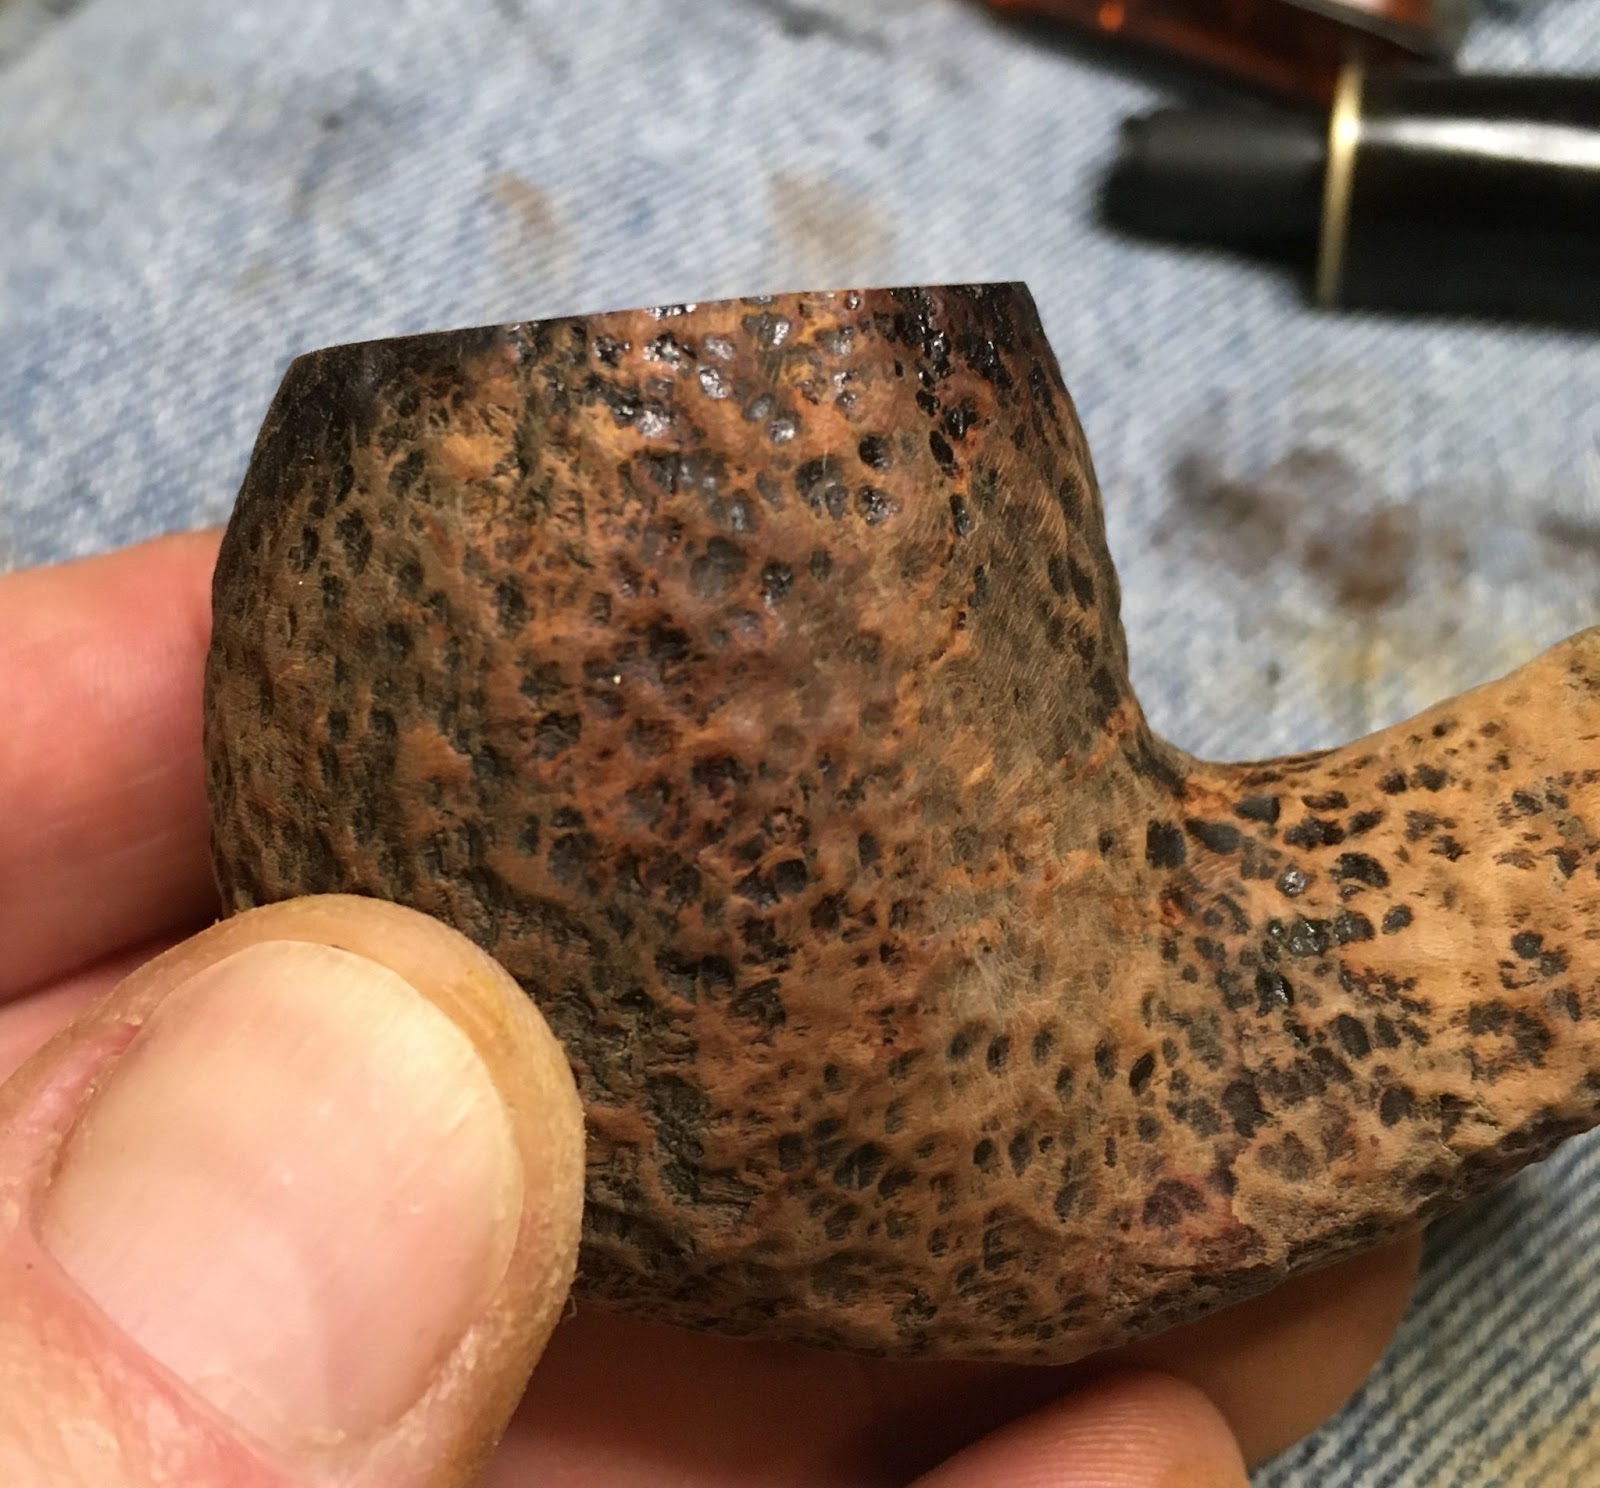


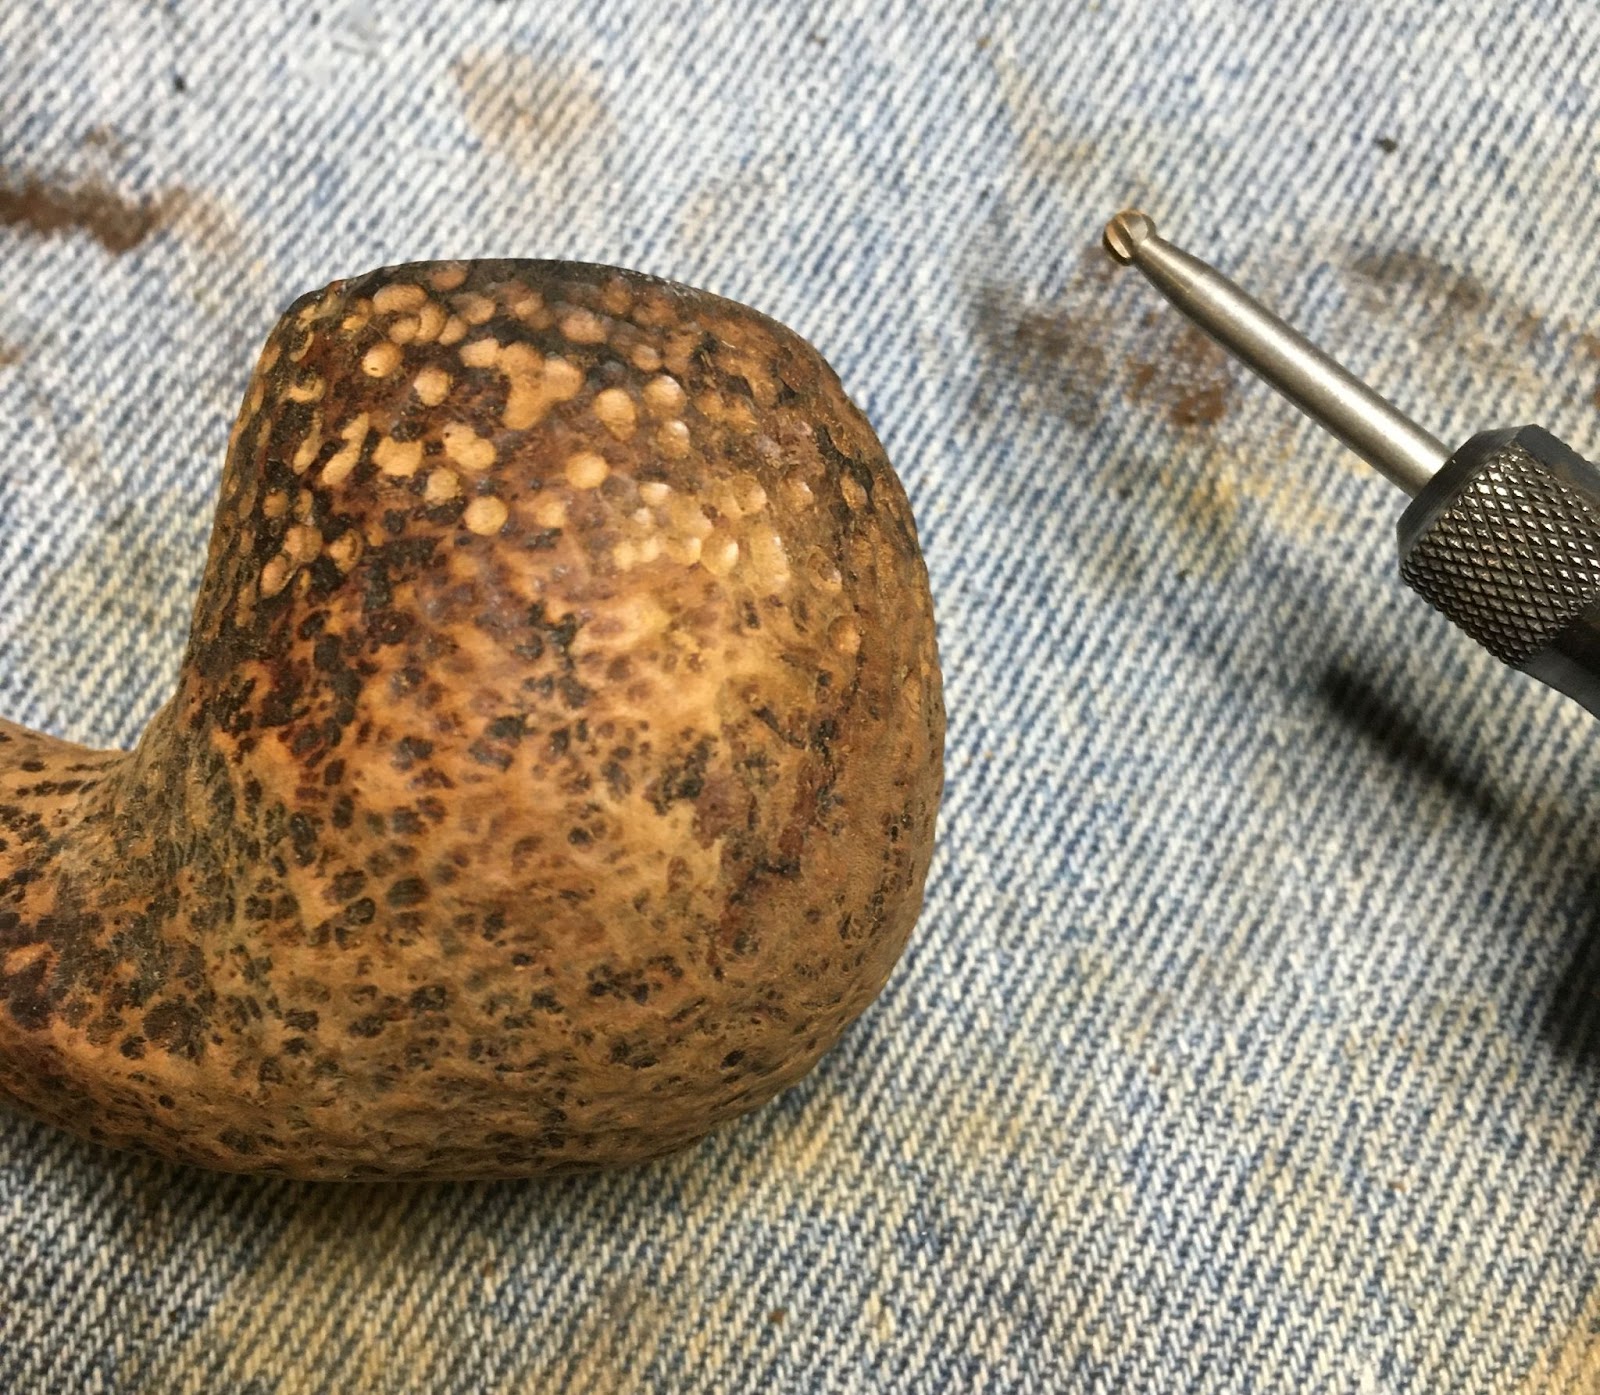
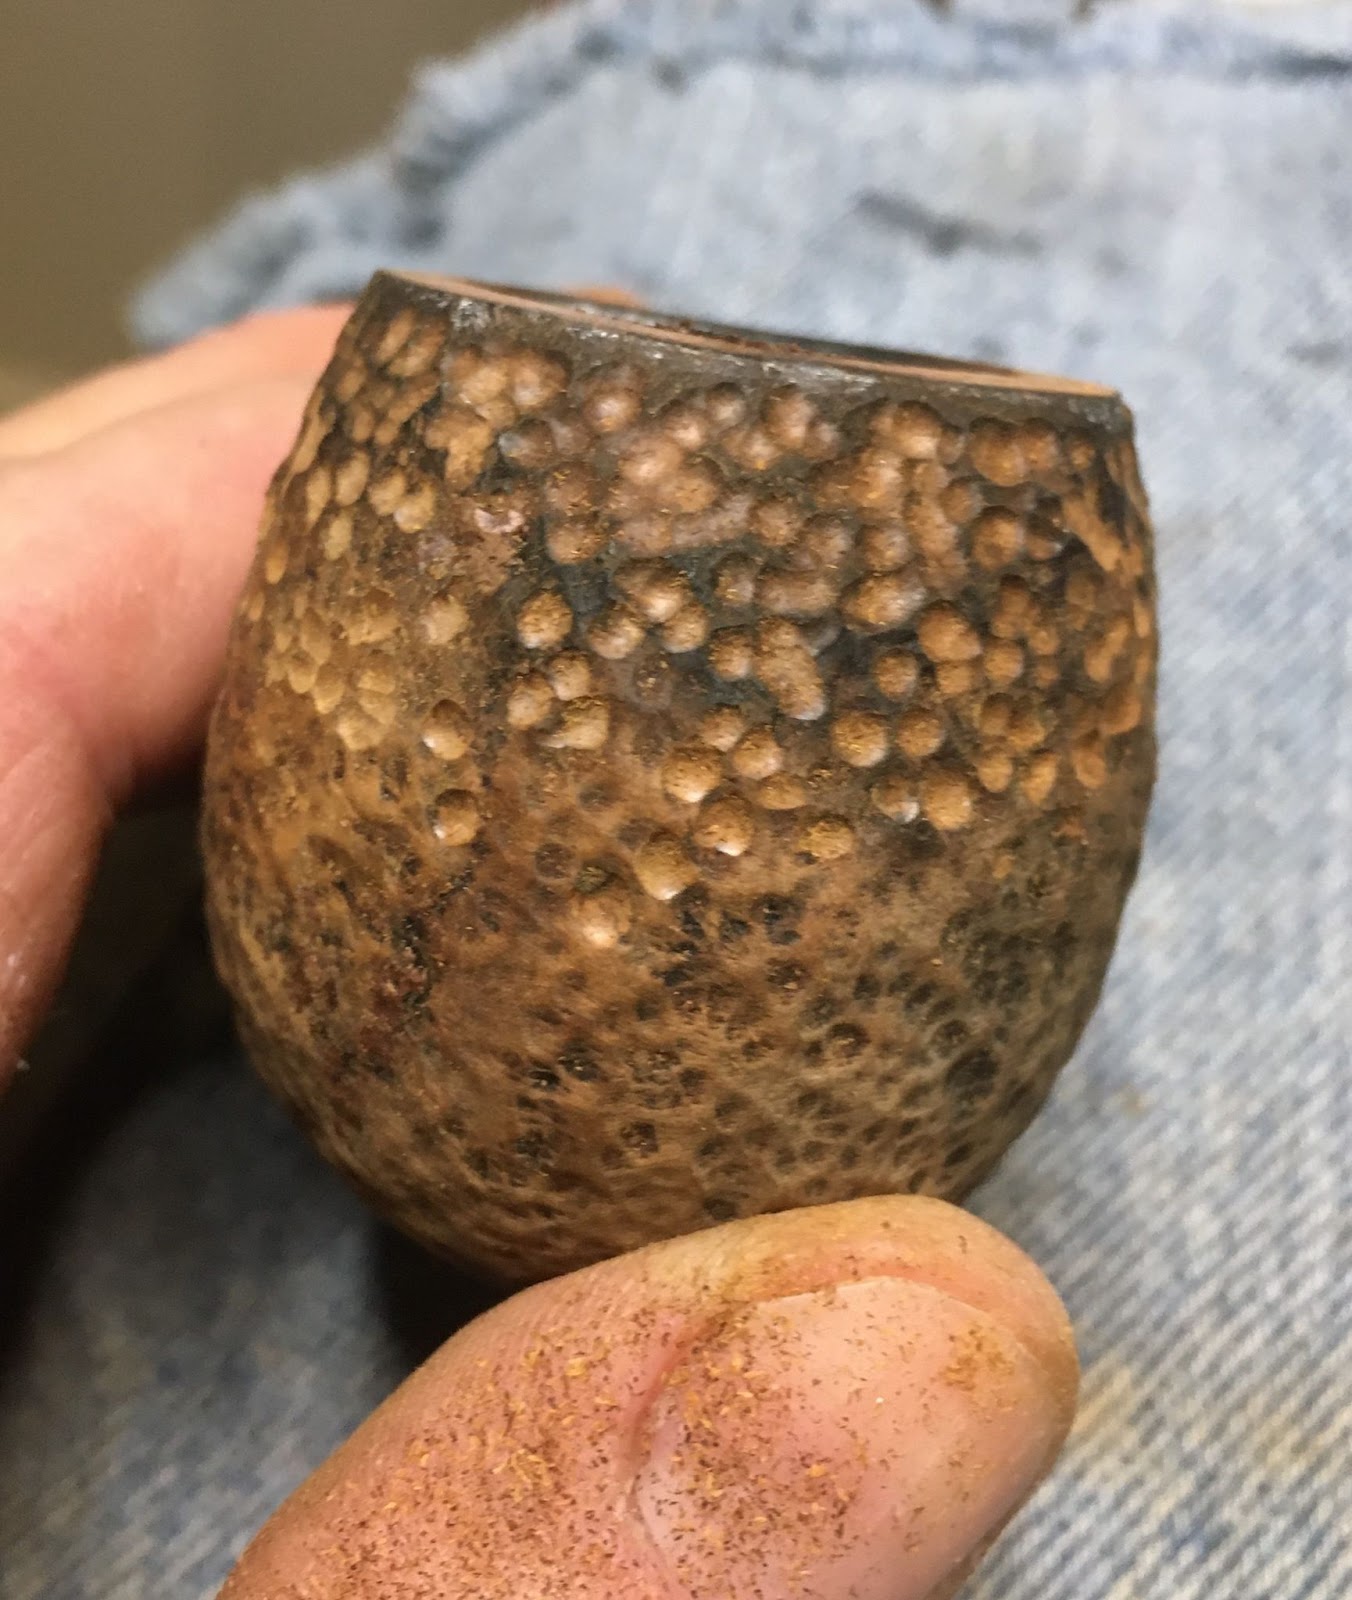


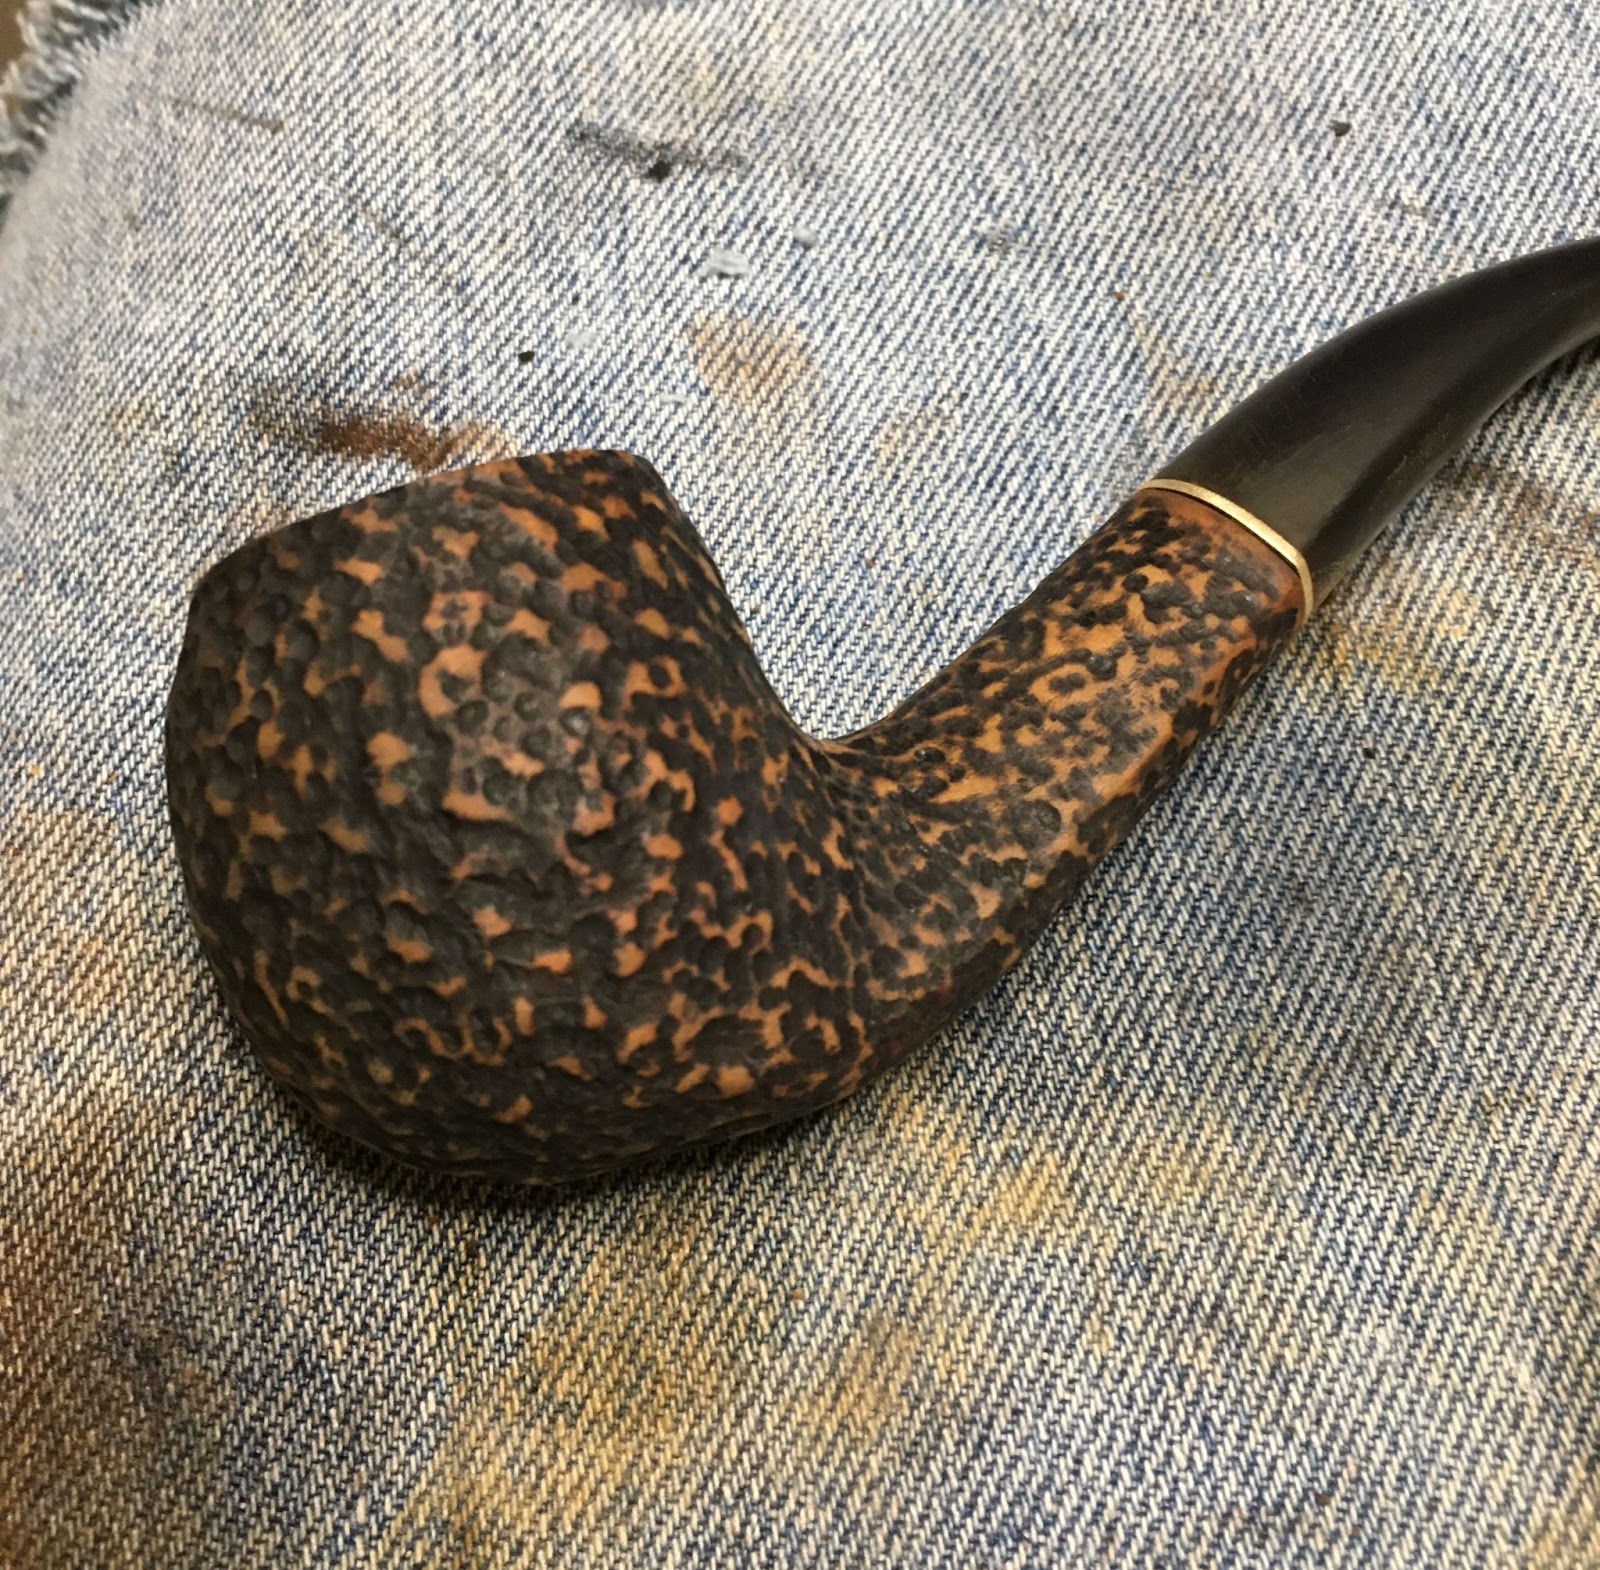


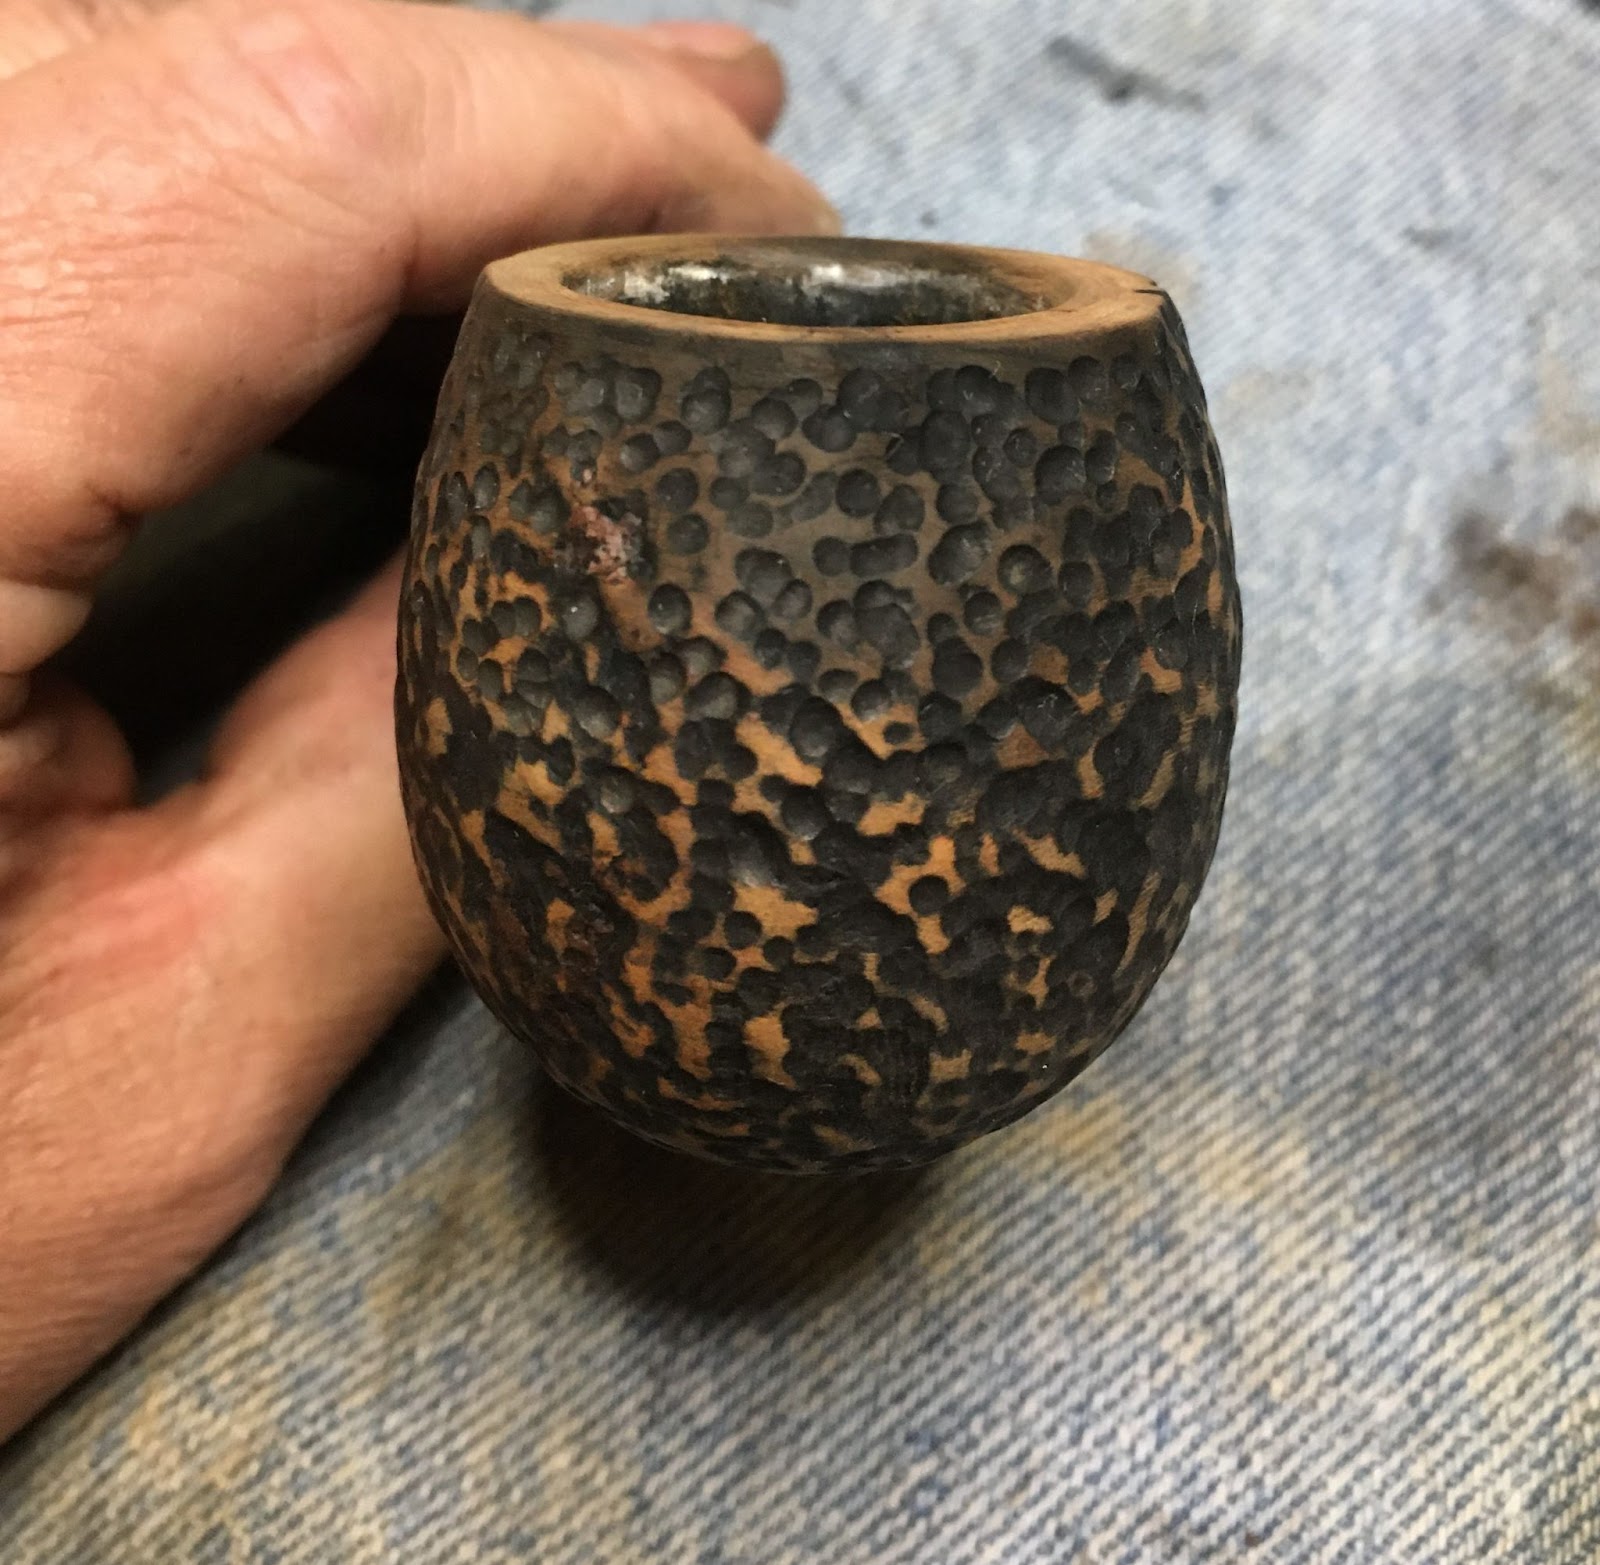


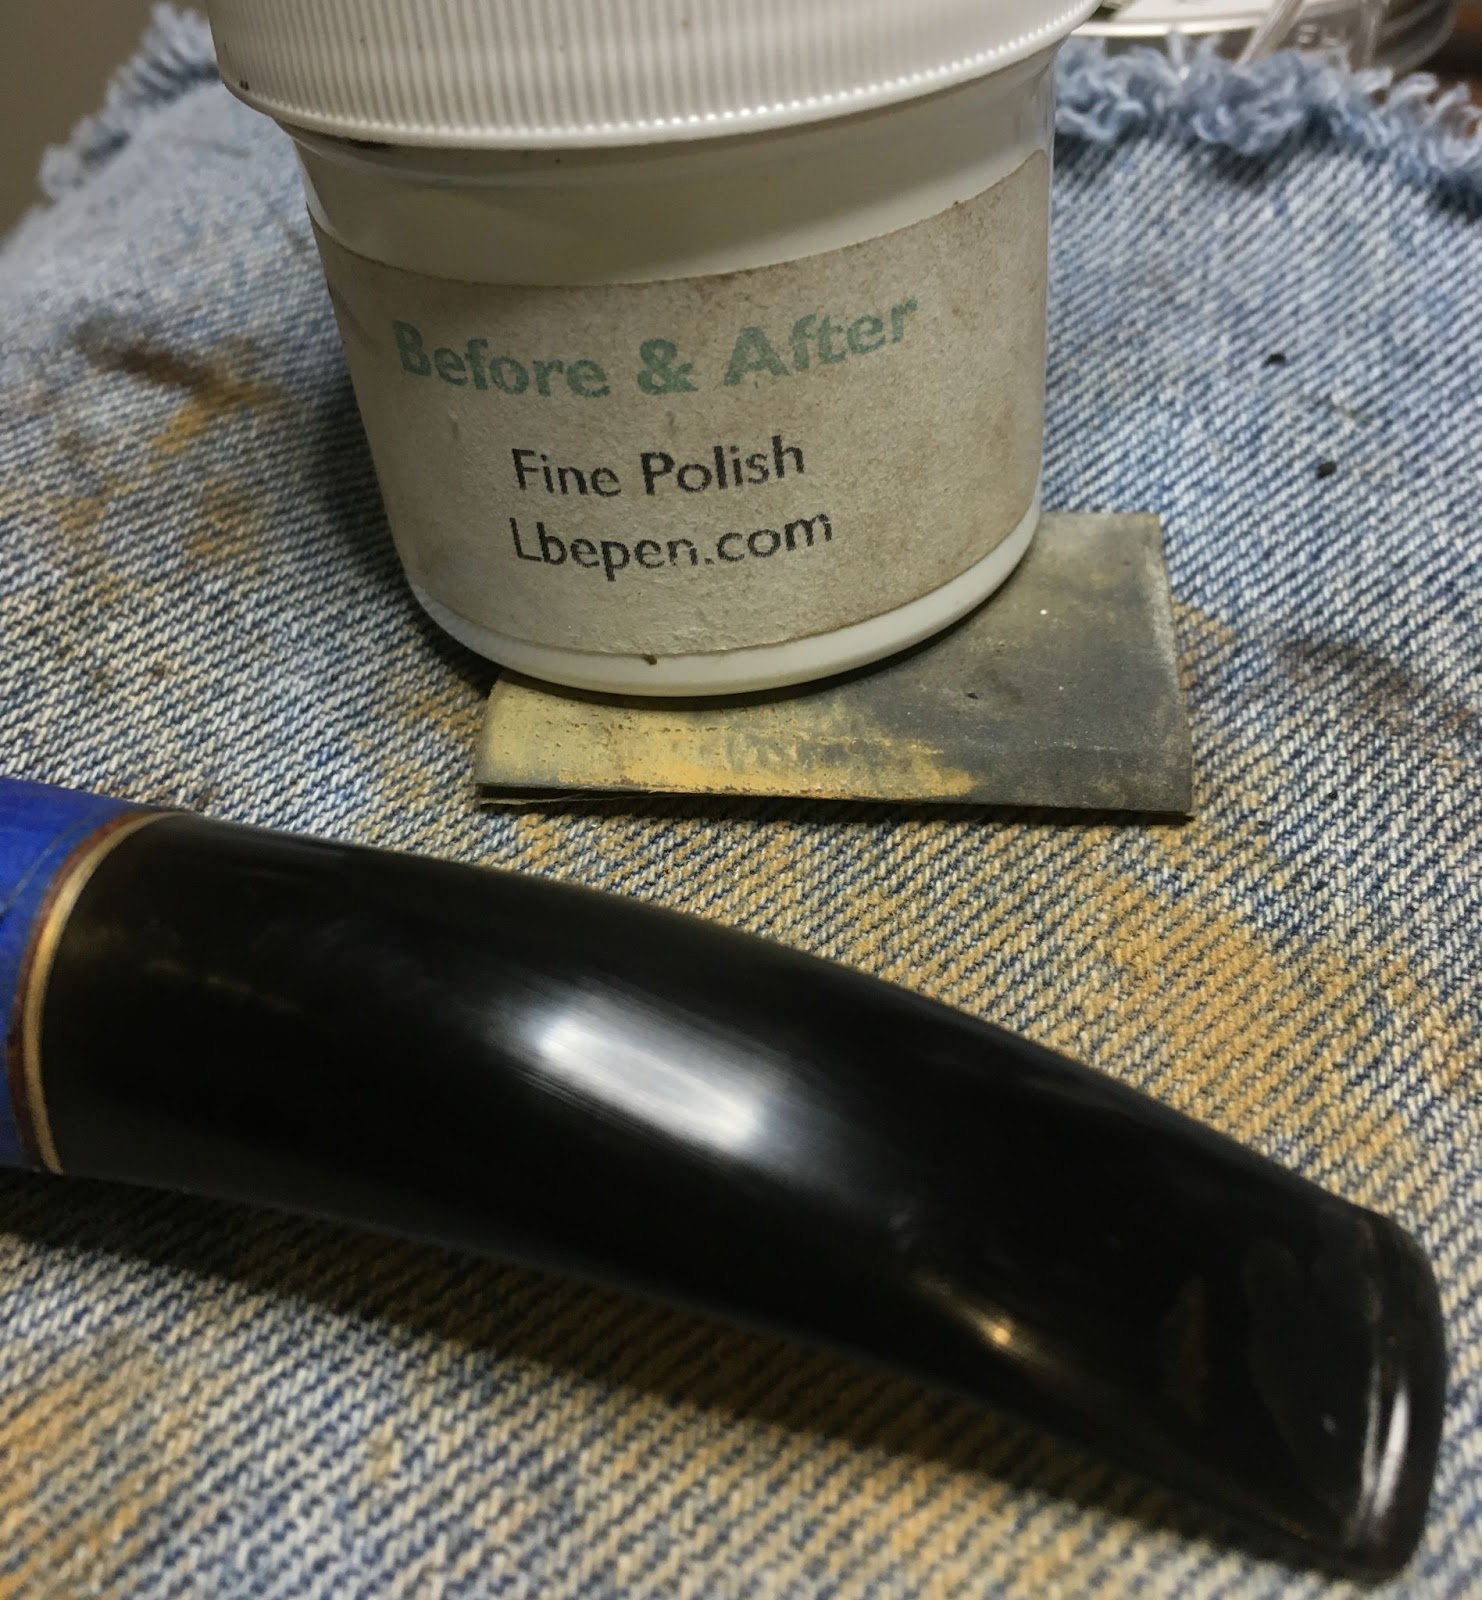


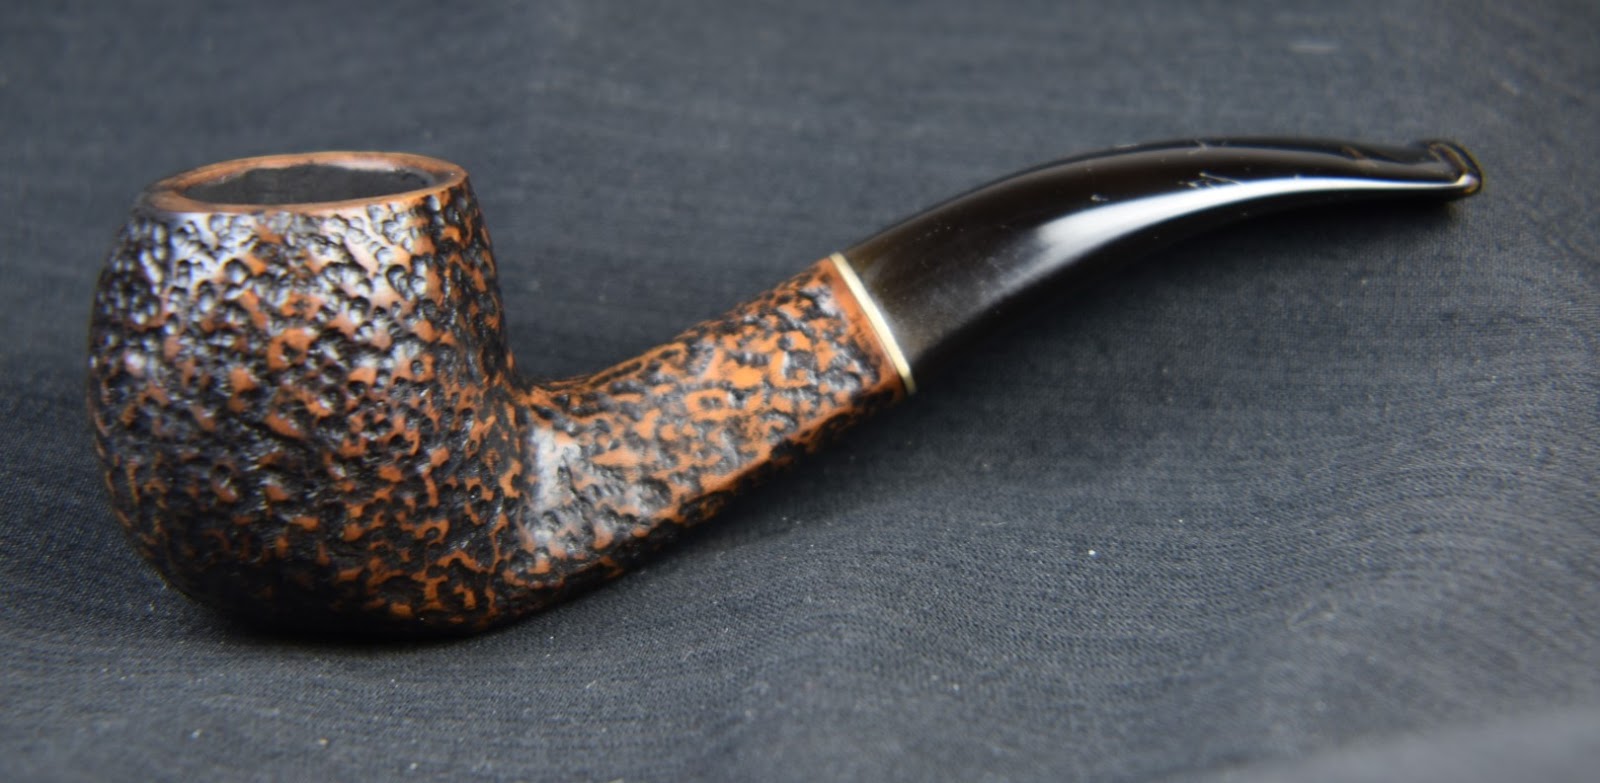


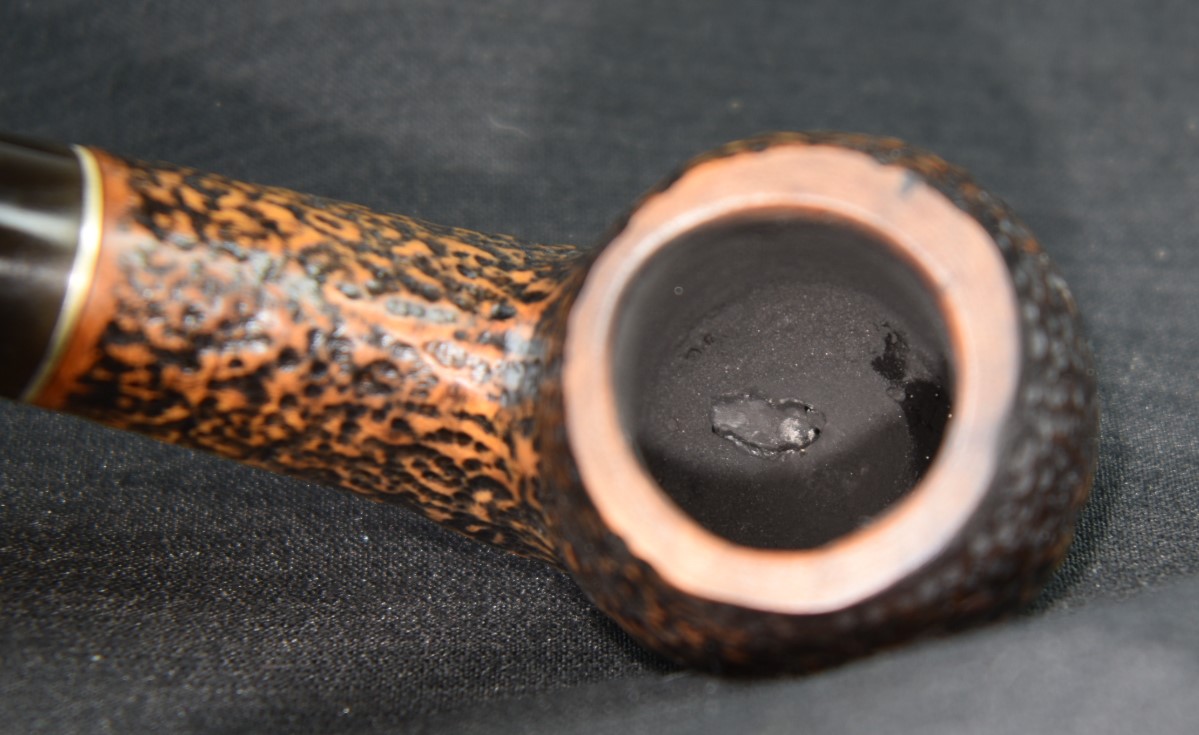

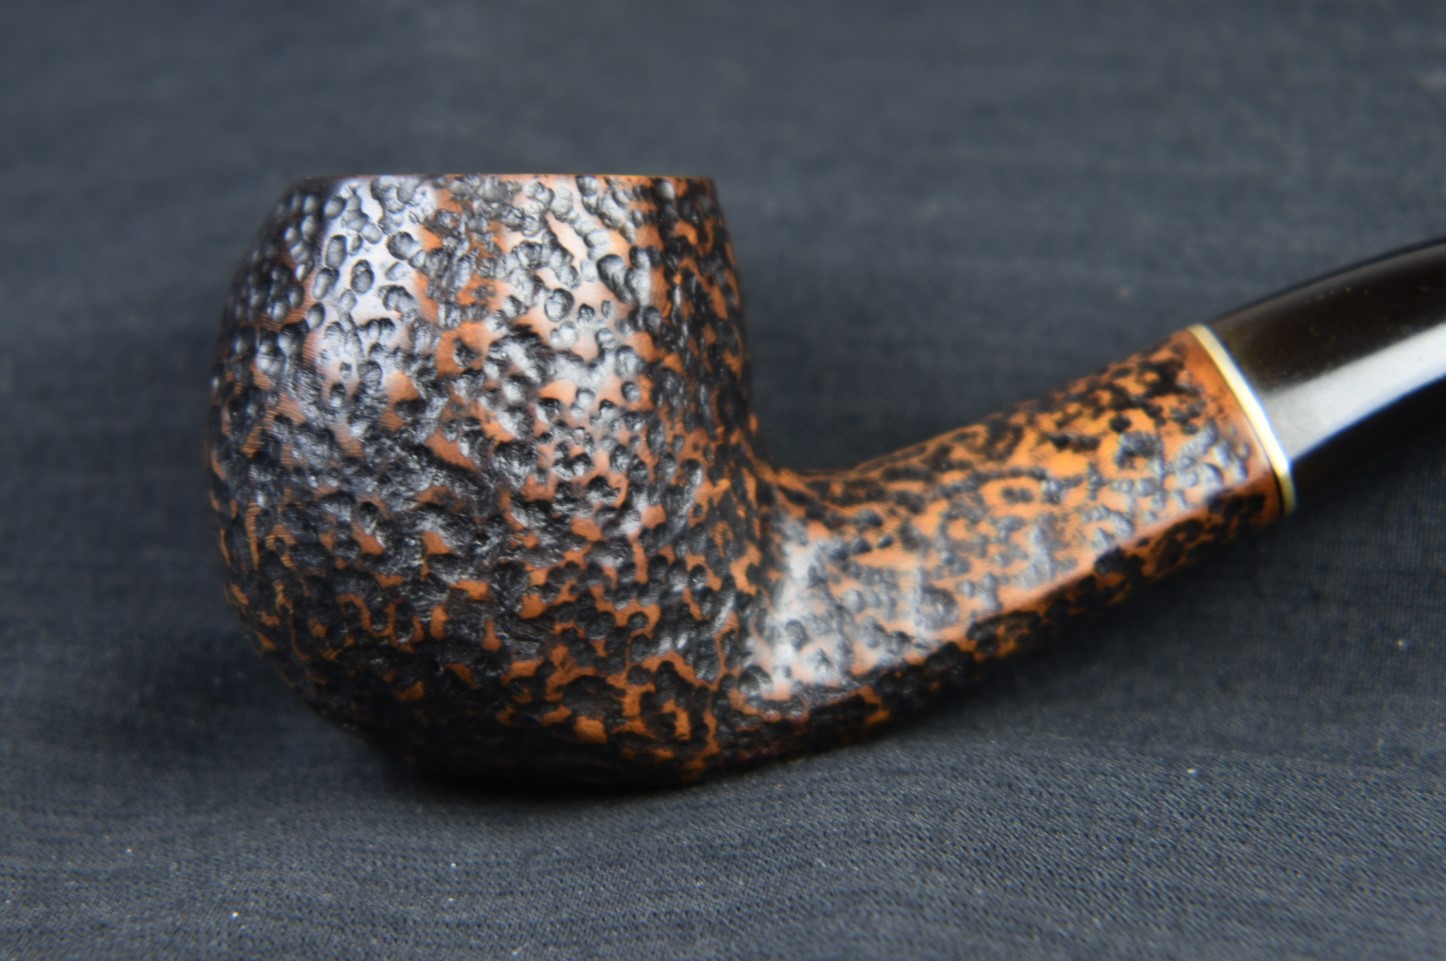

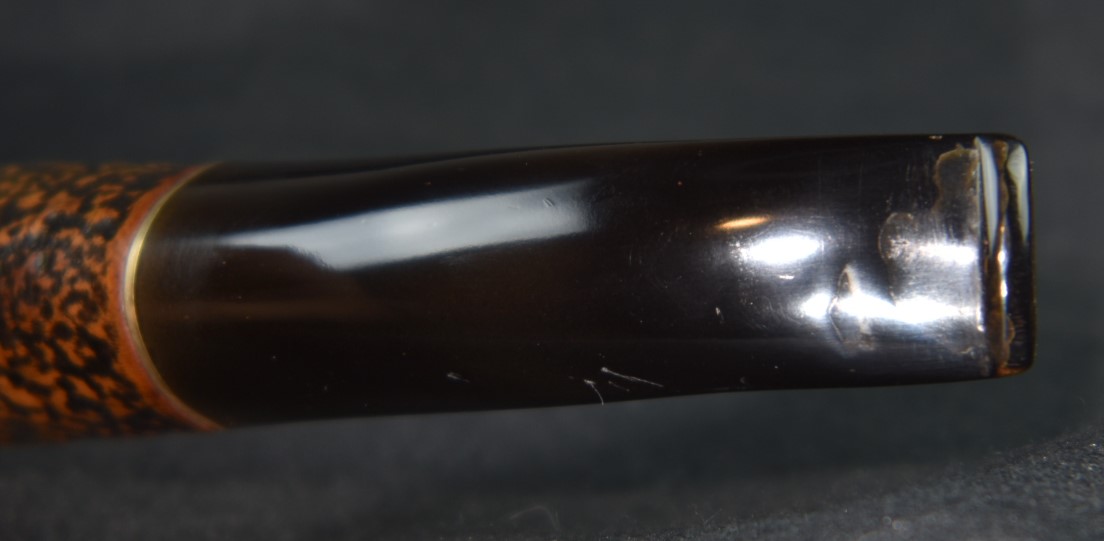
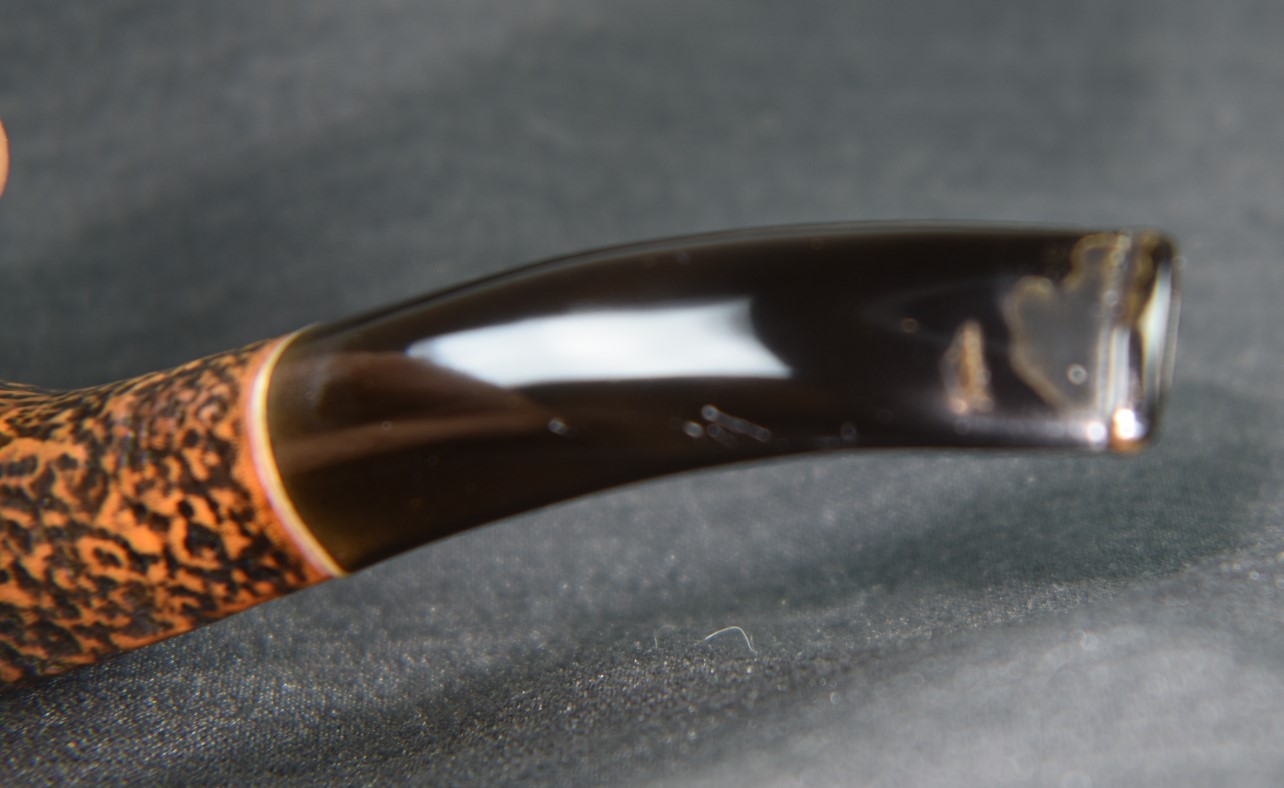


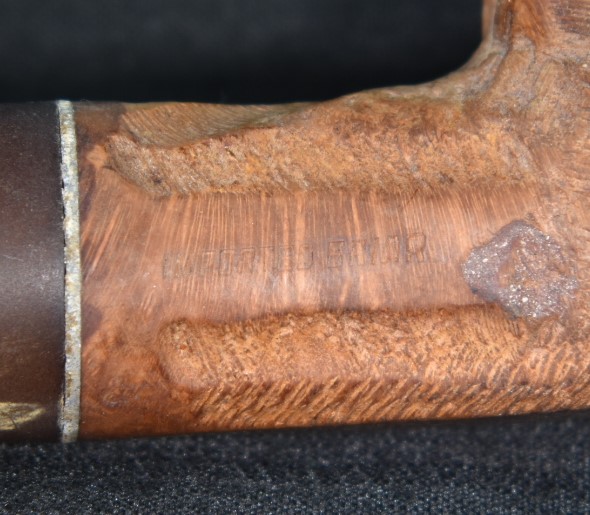
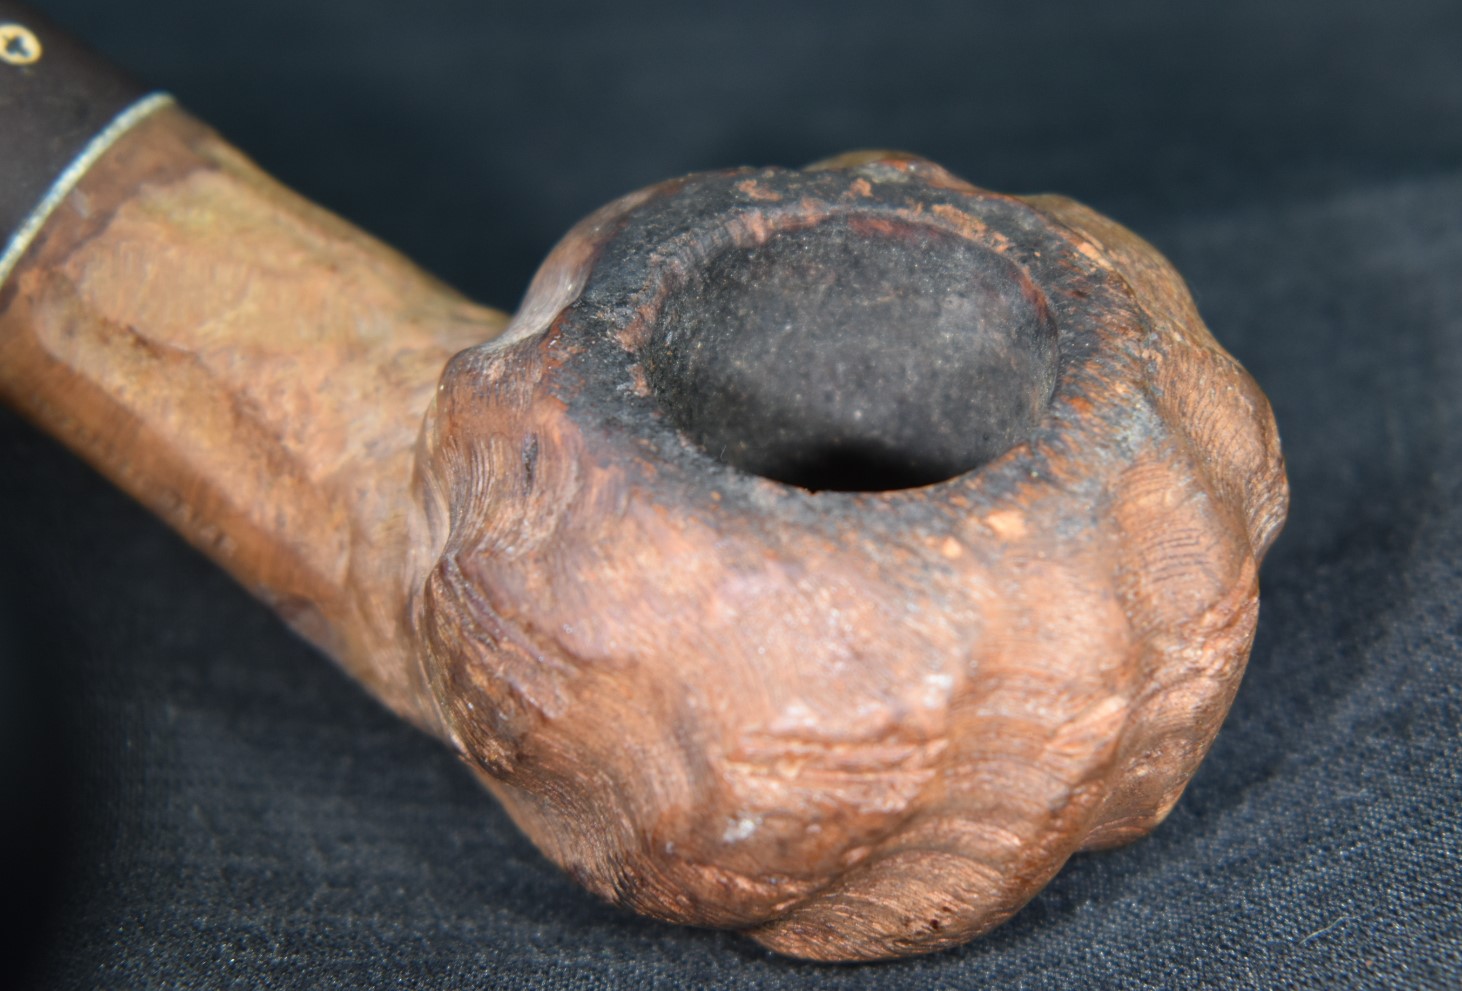


 (
(


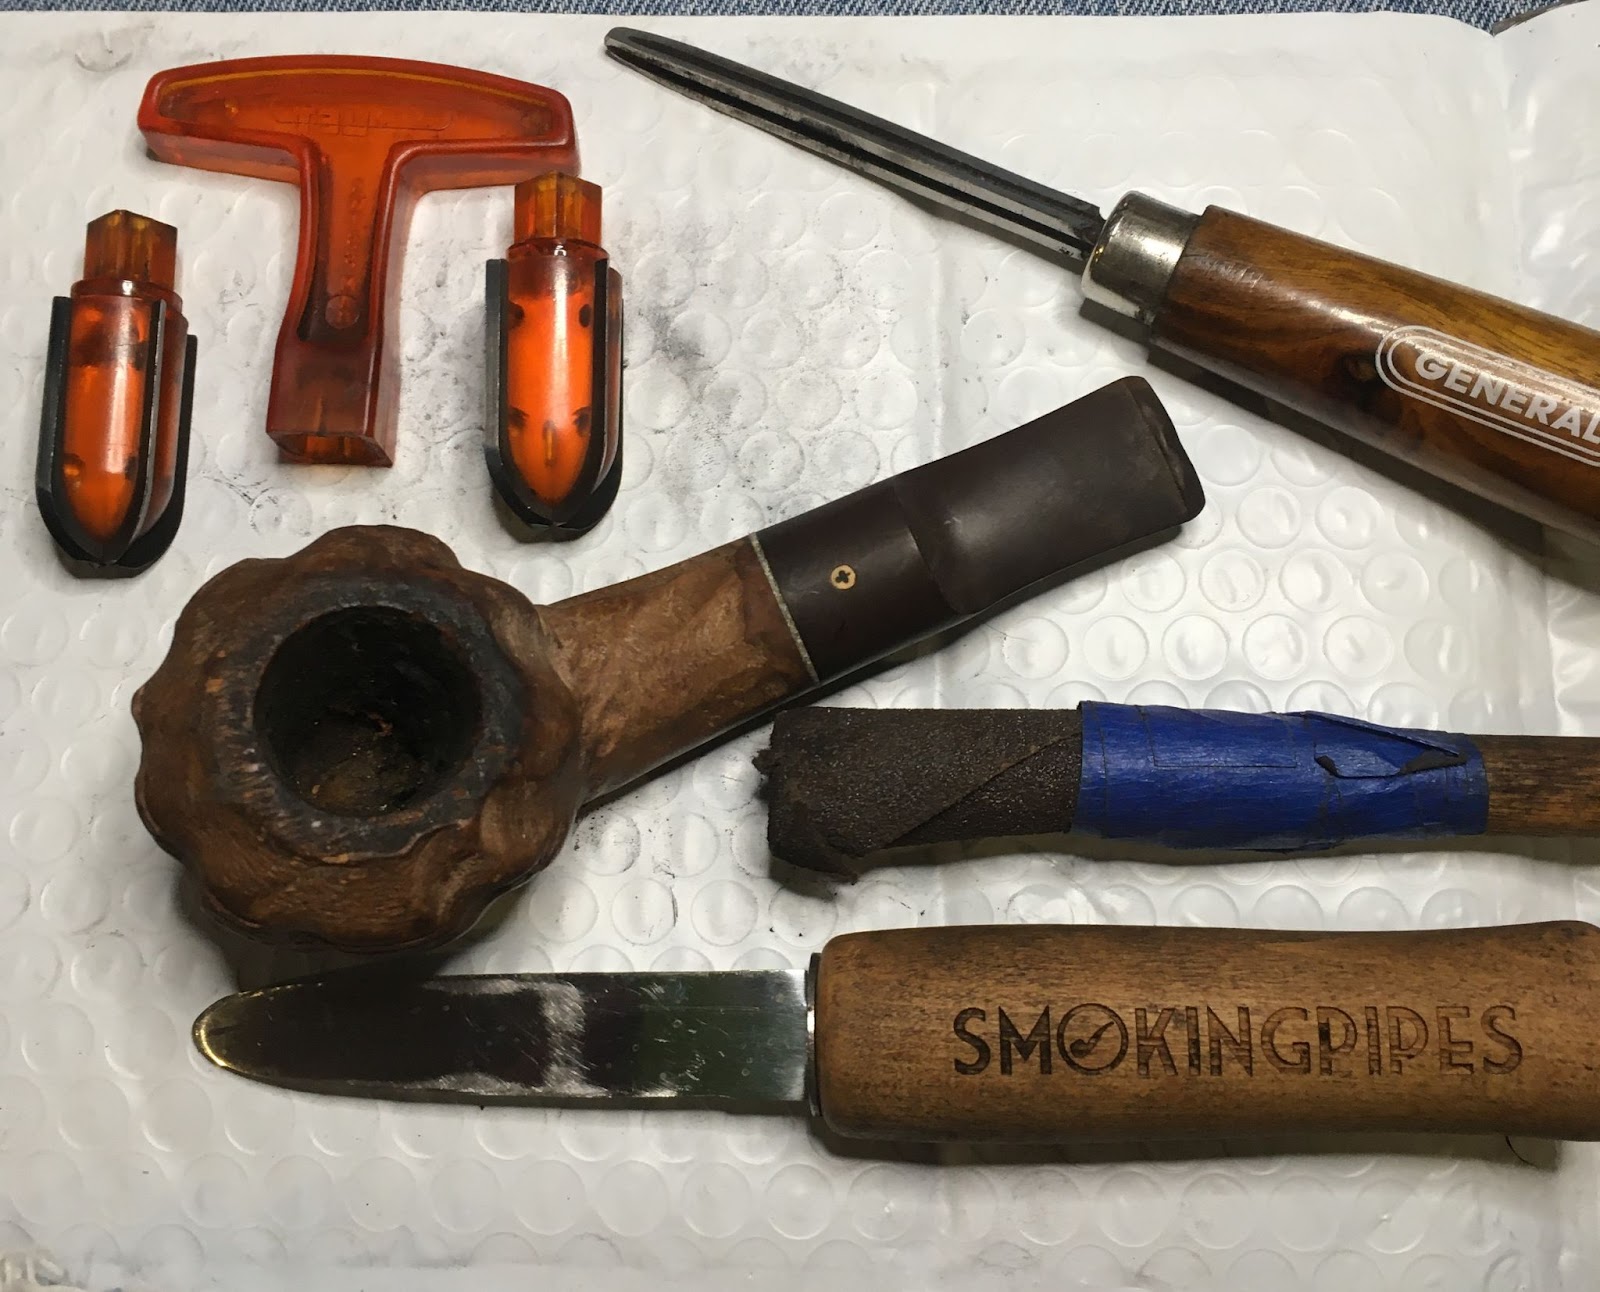


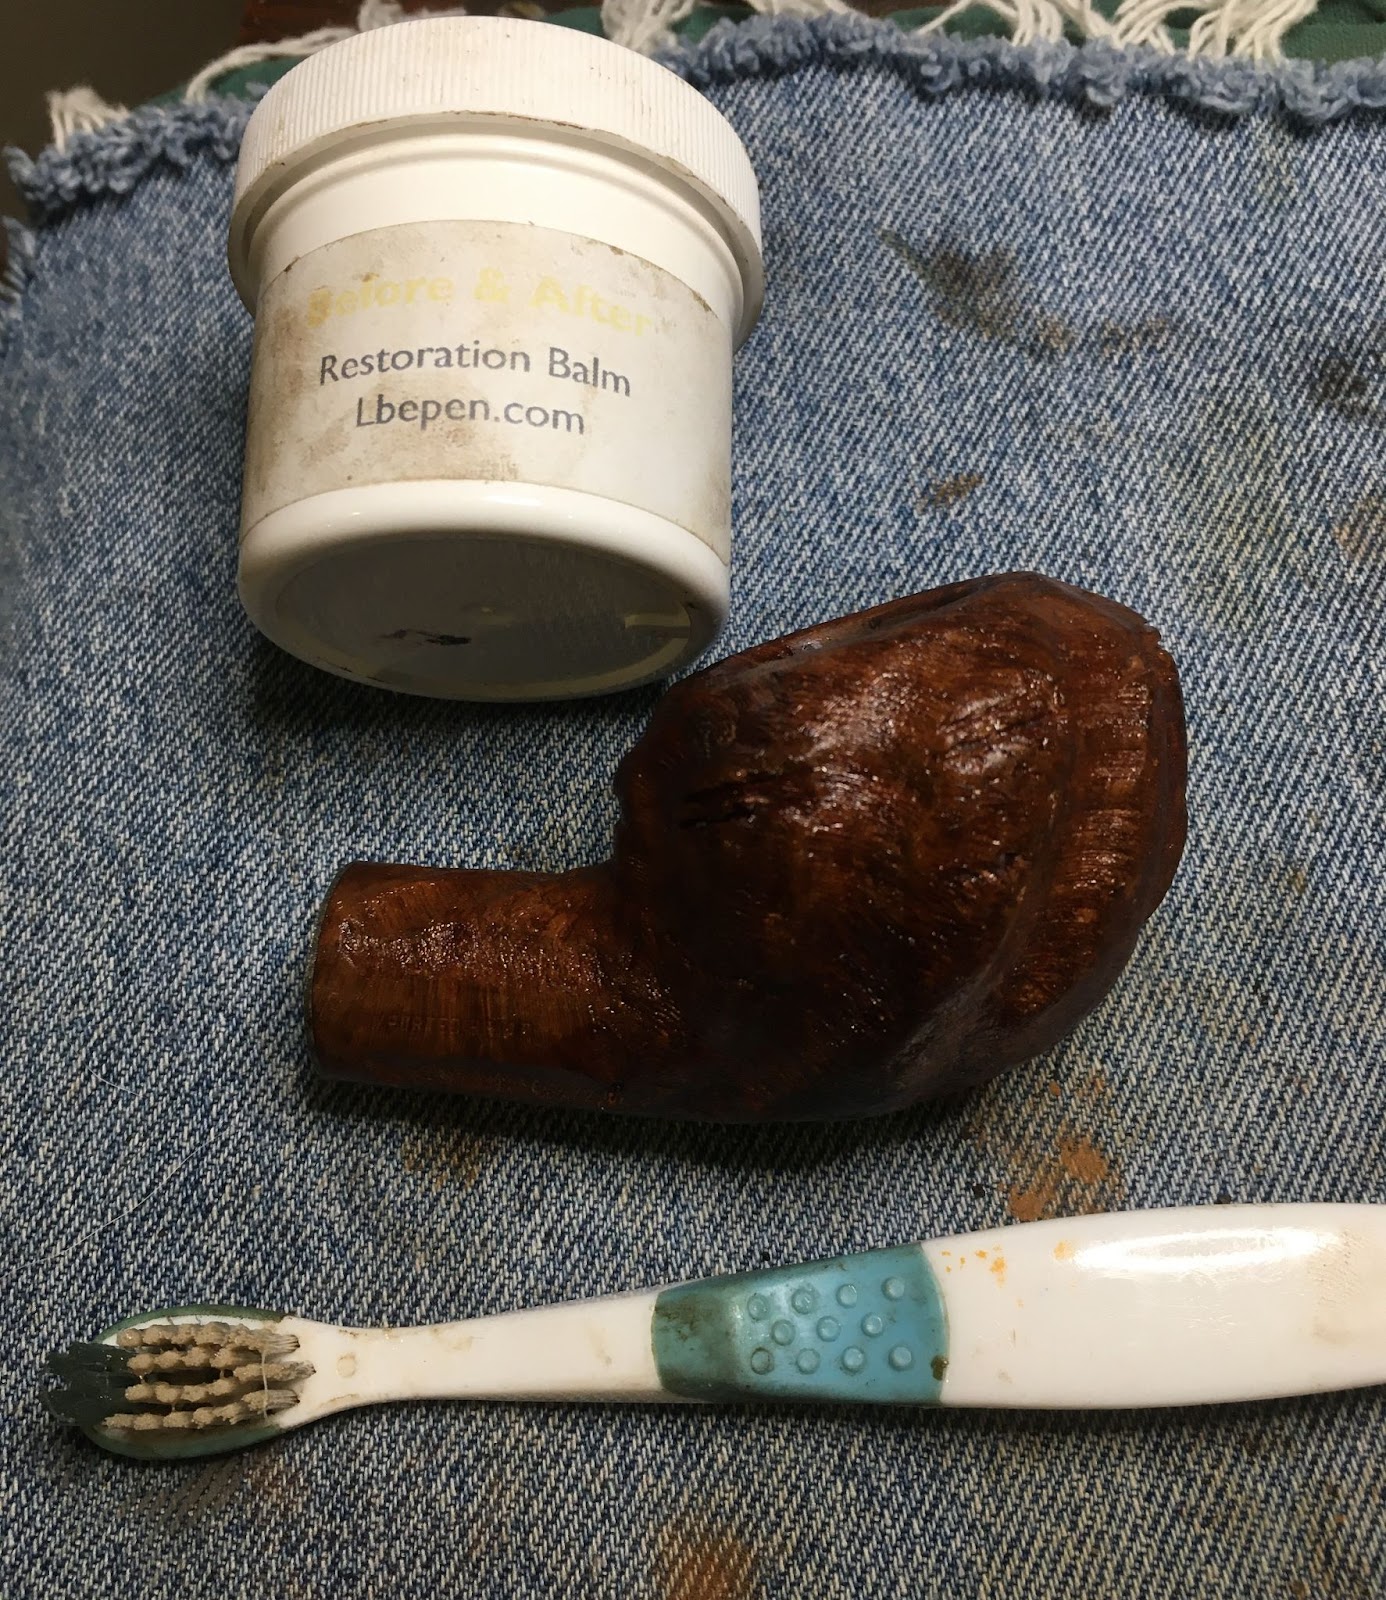


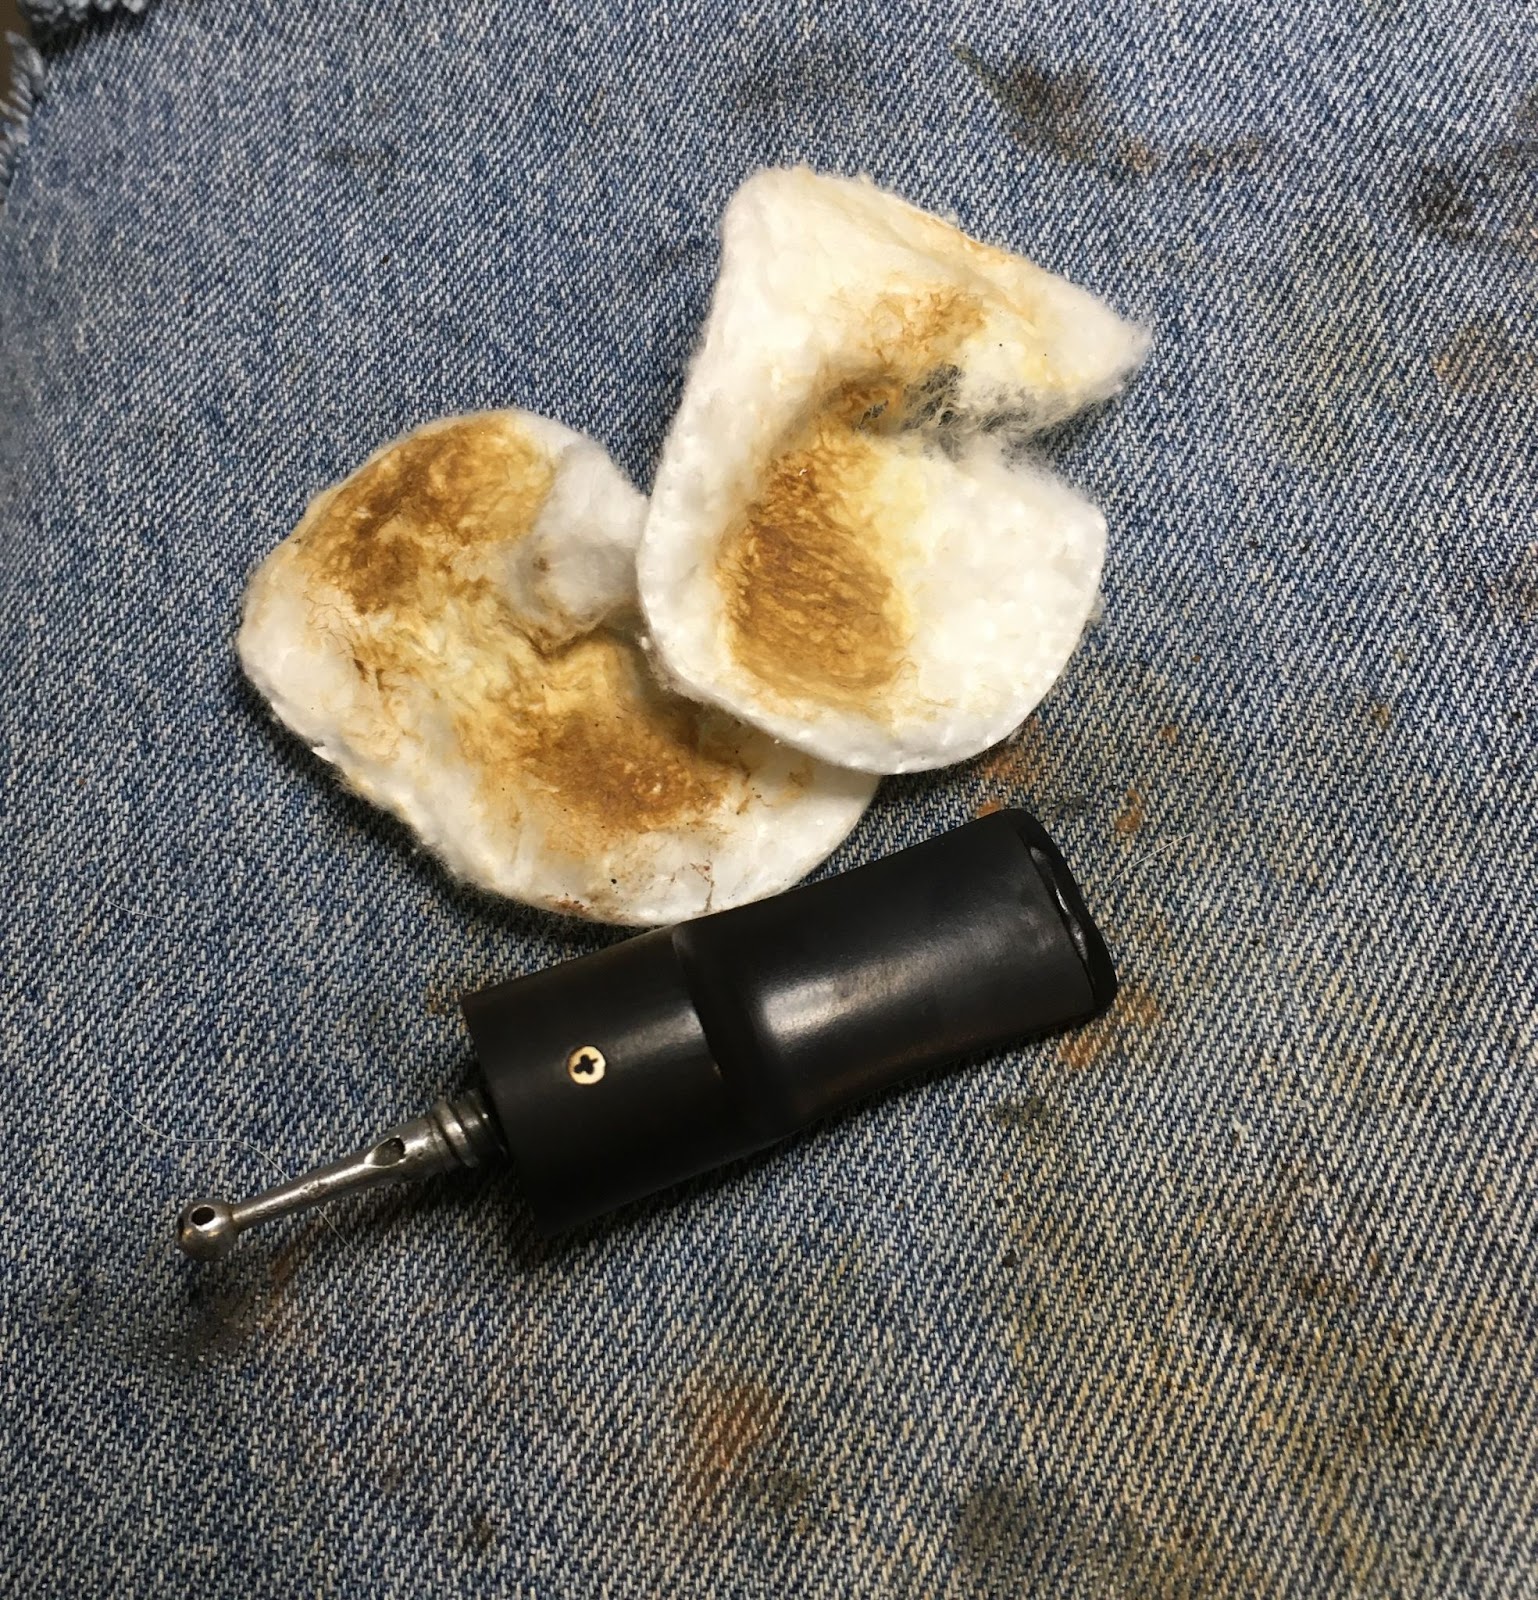


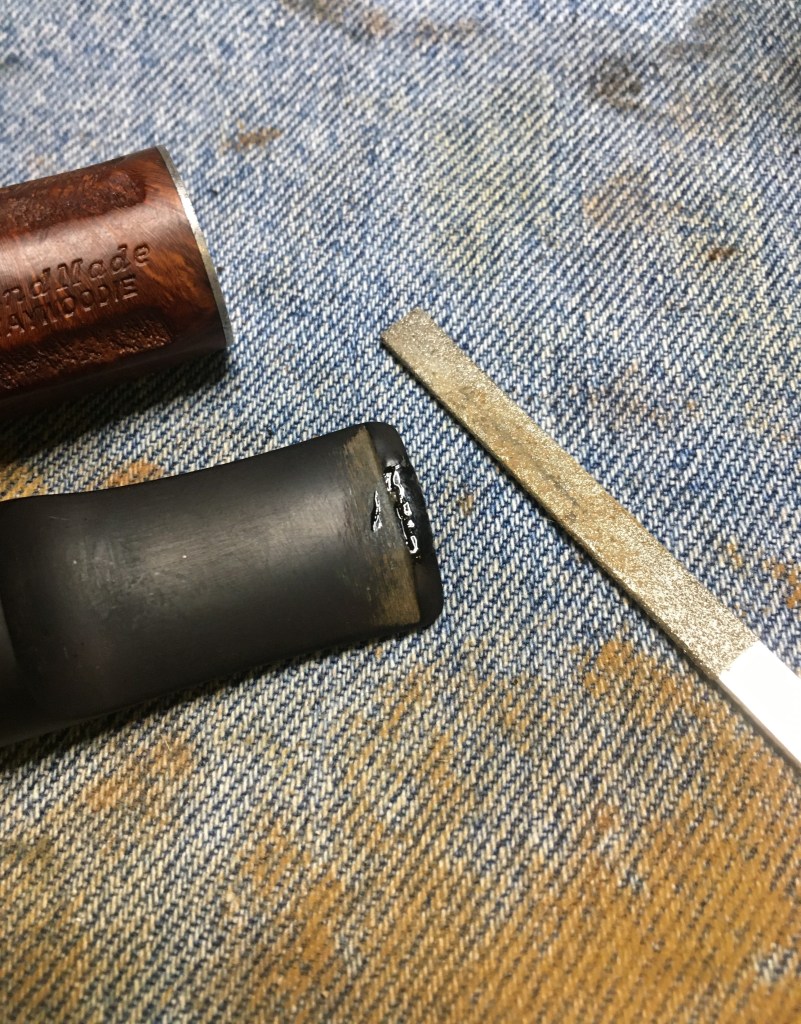


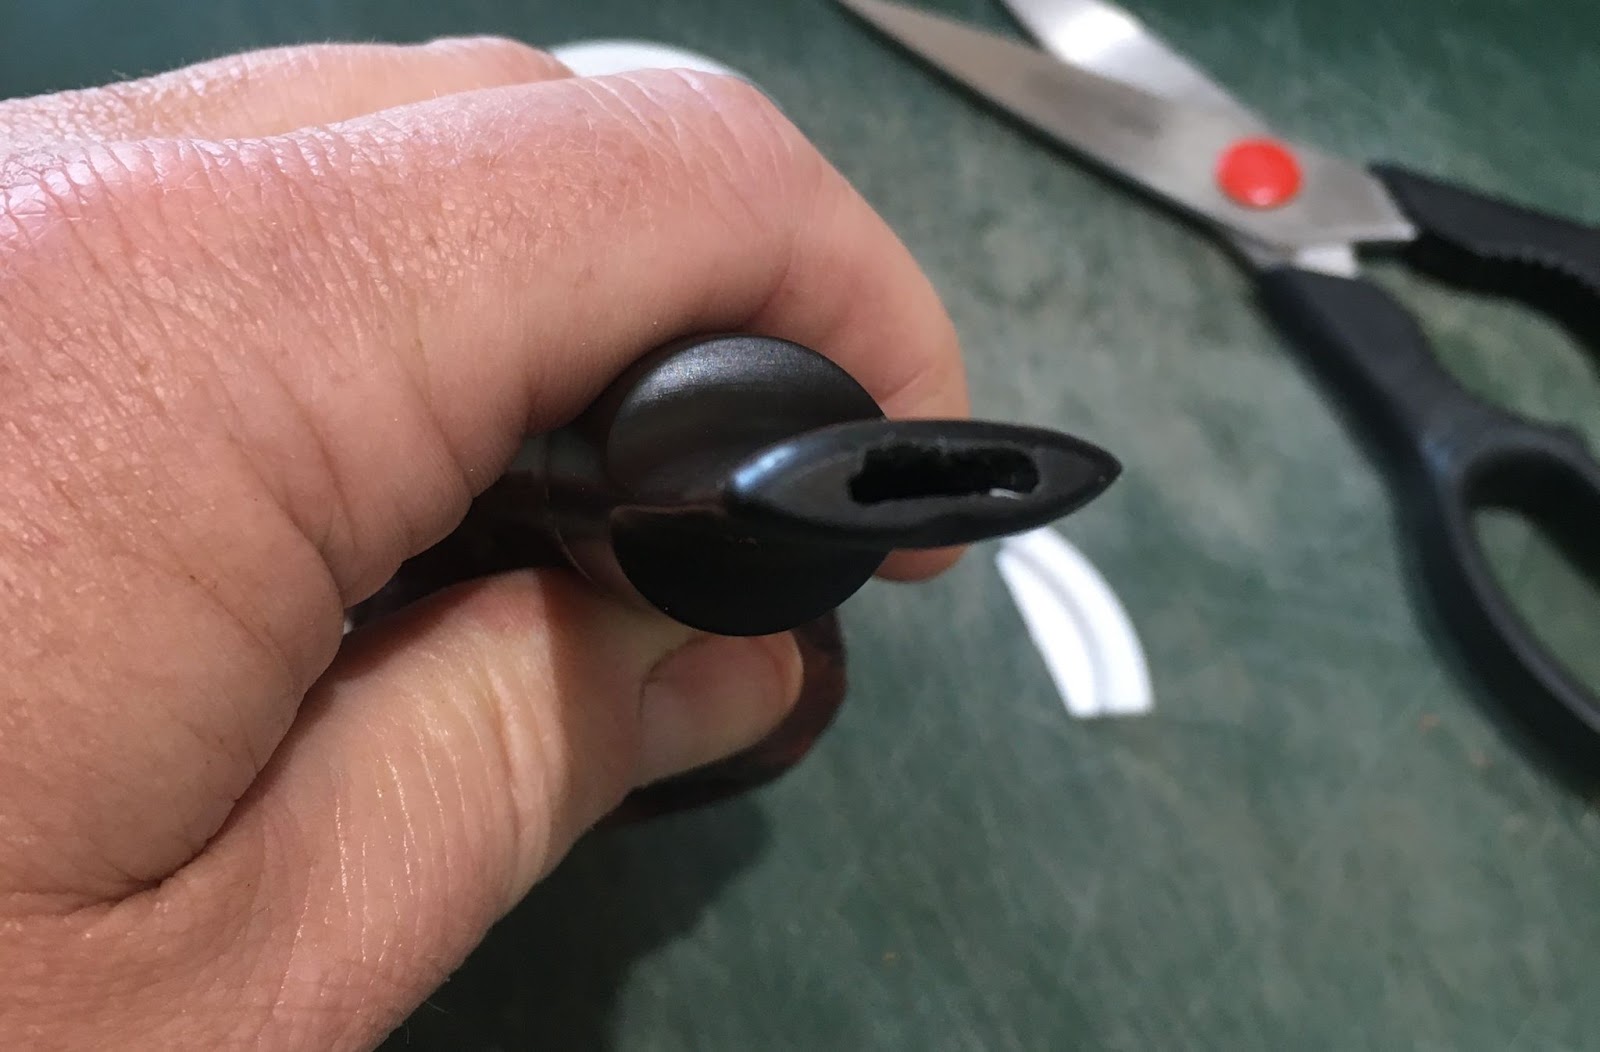

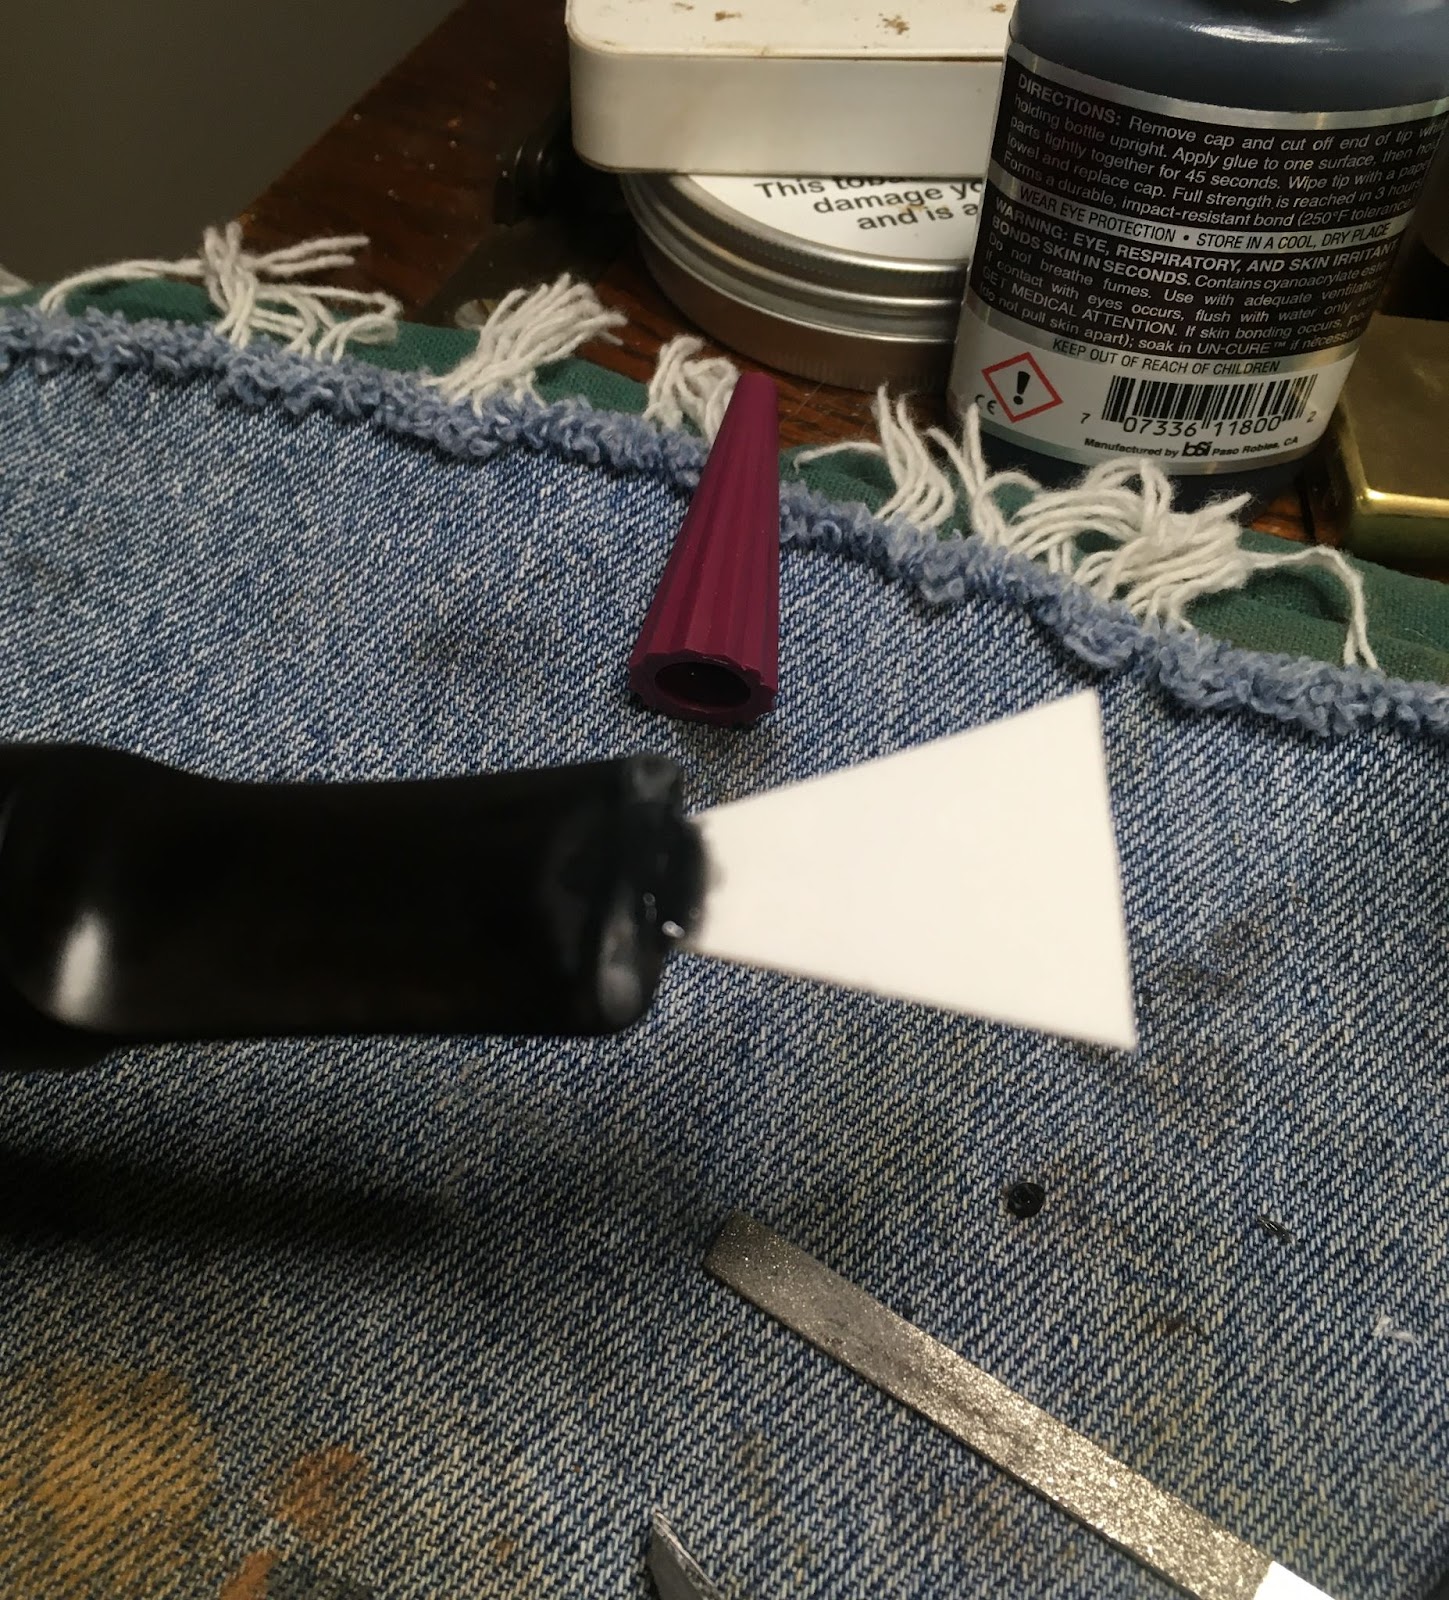


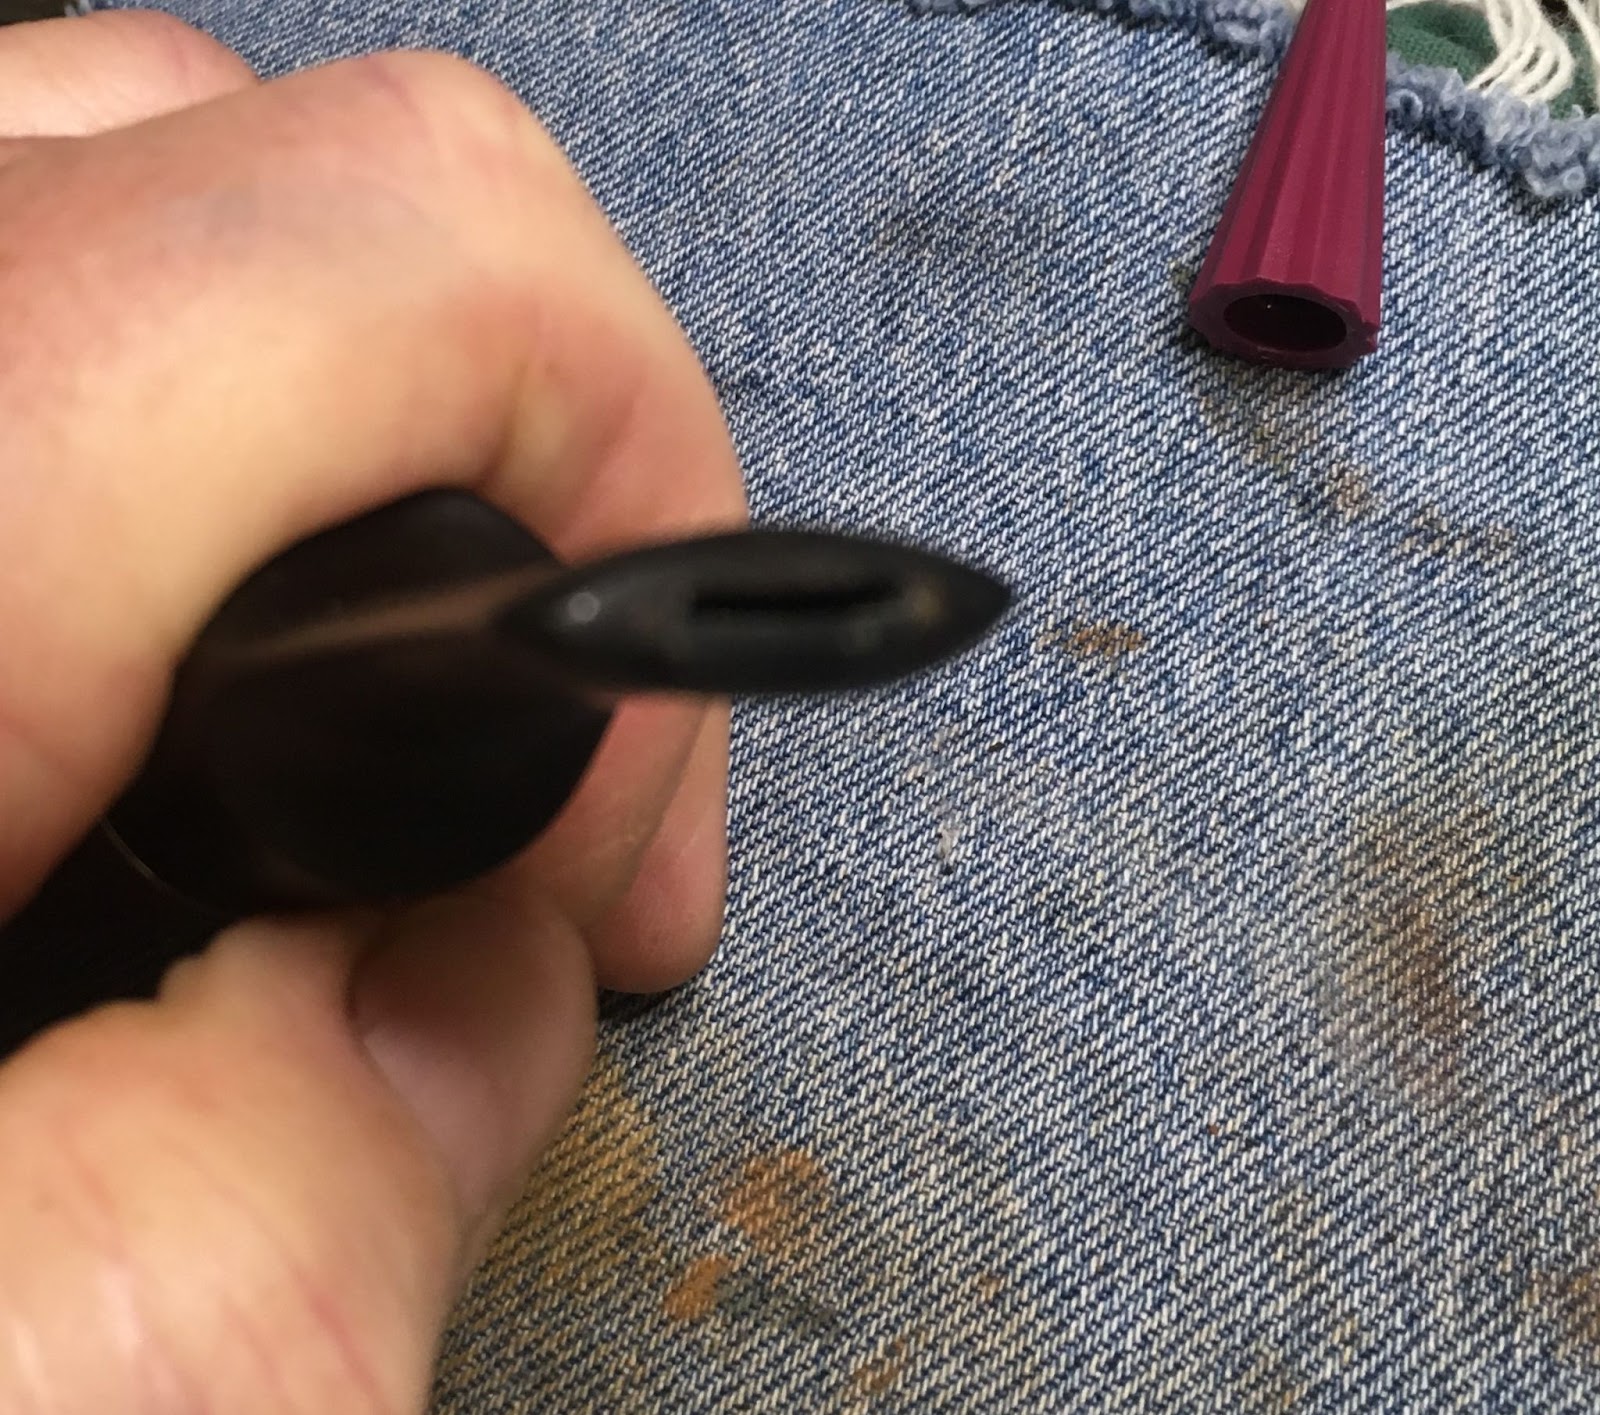

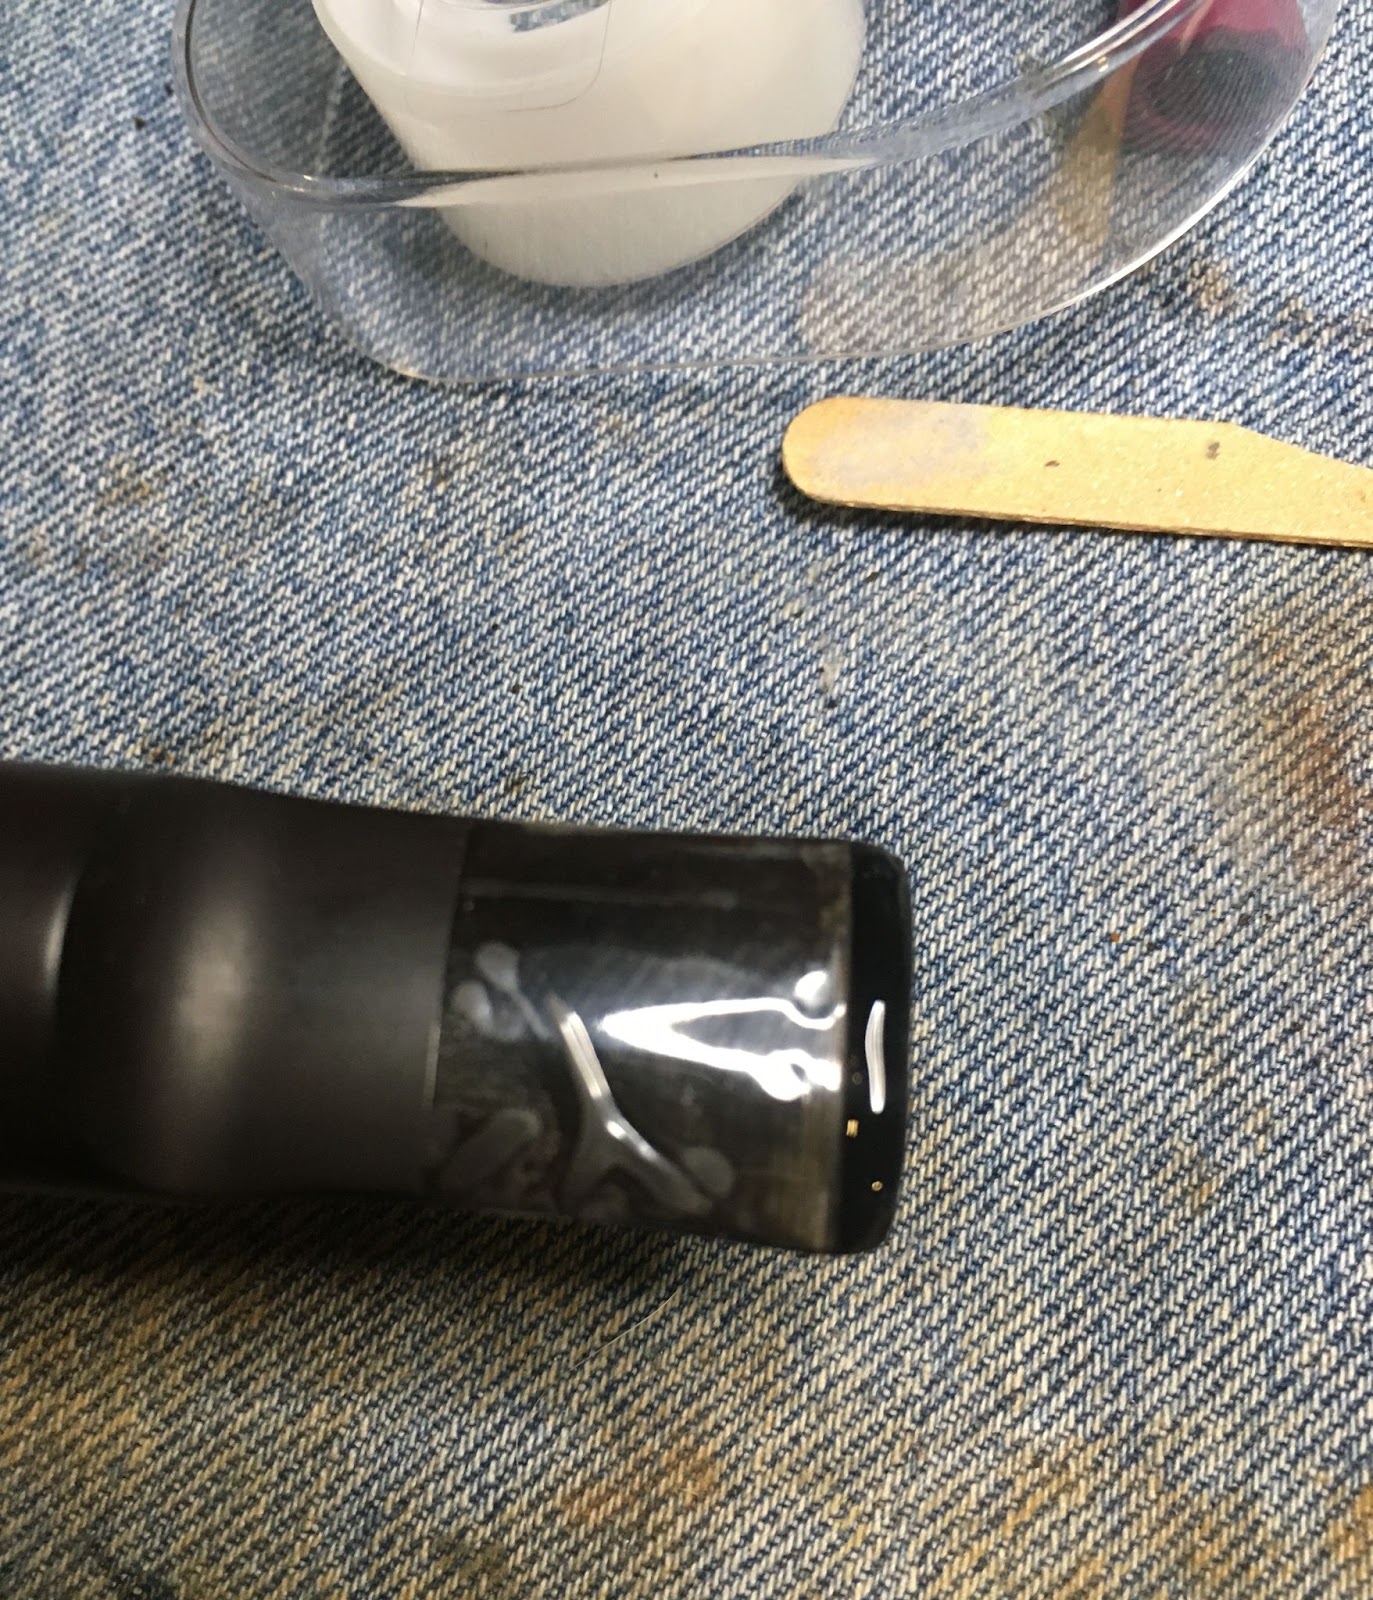
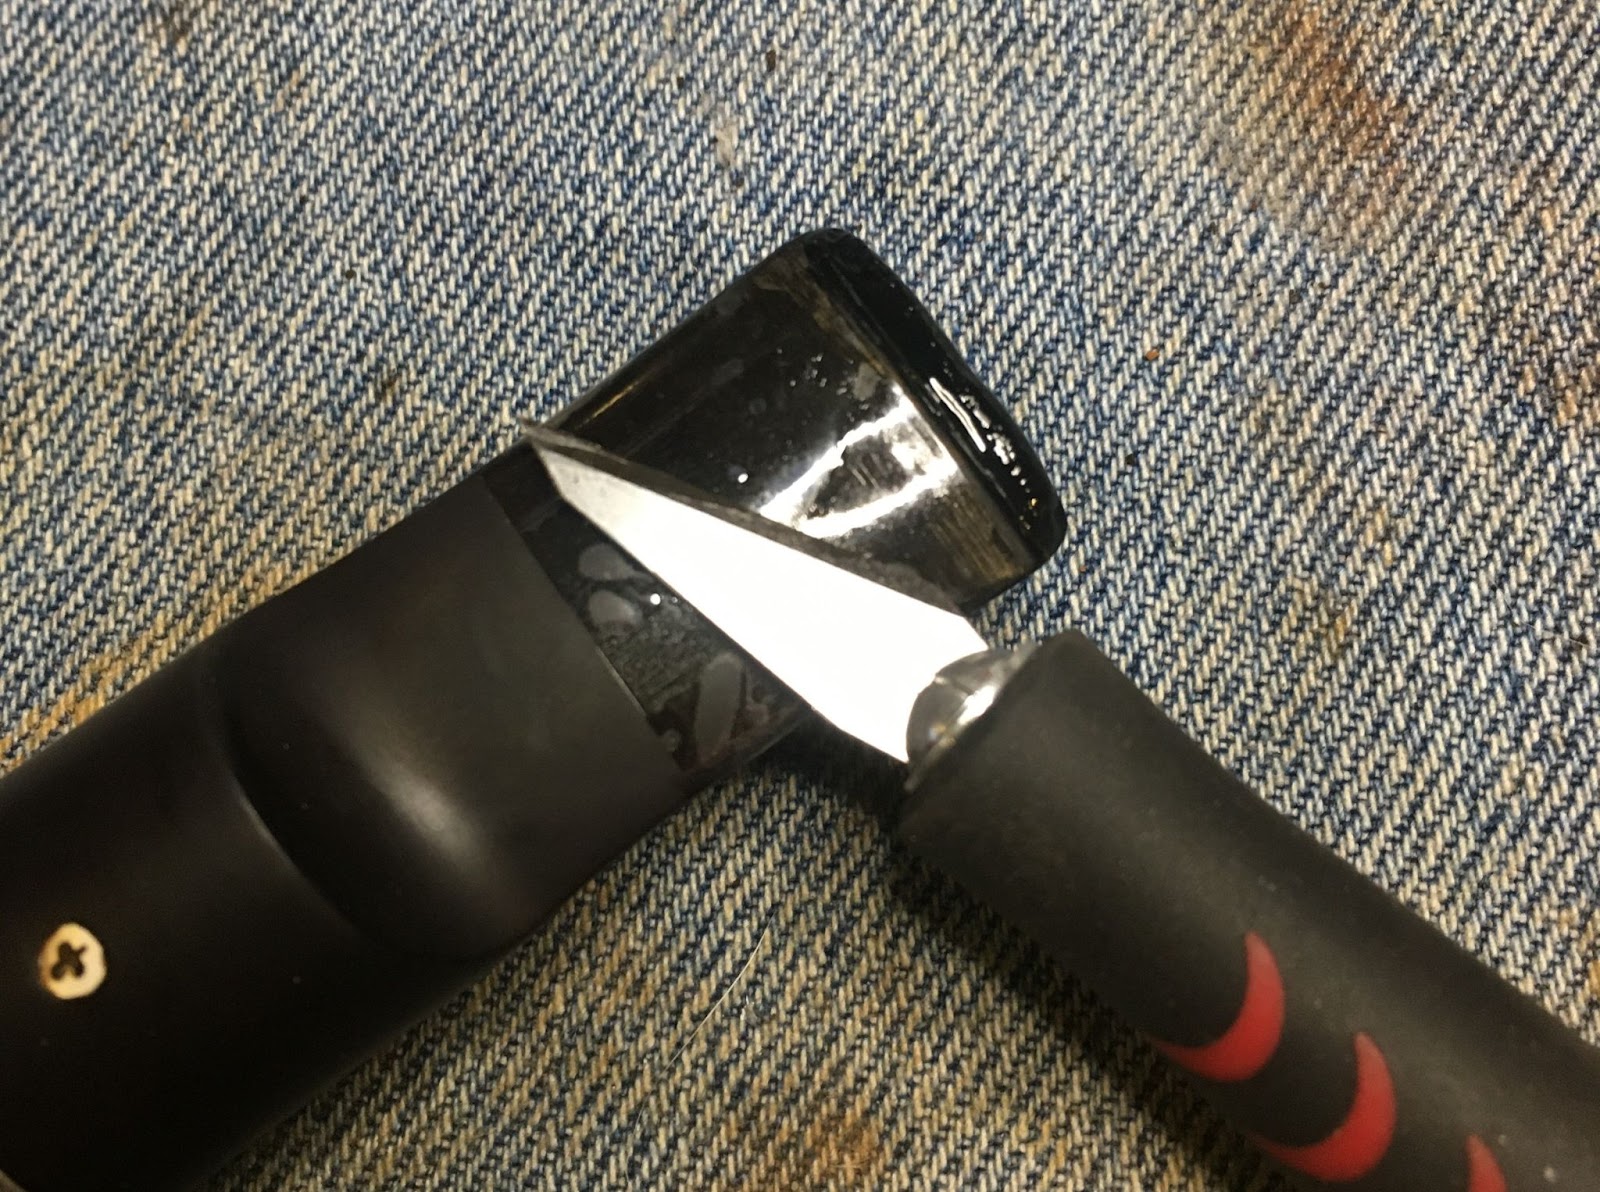

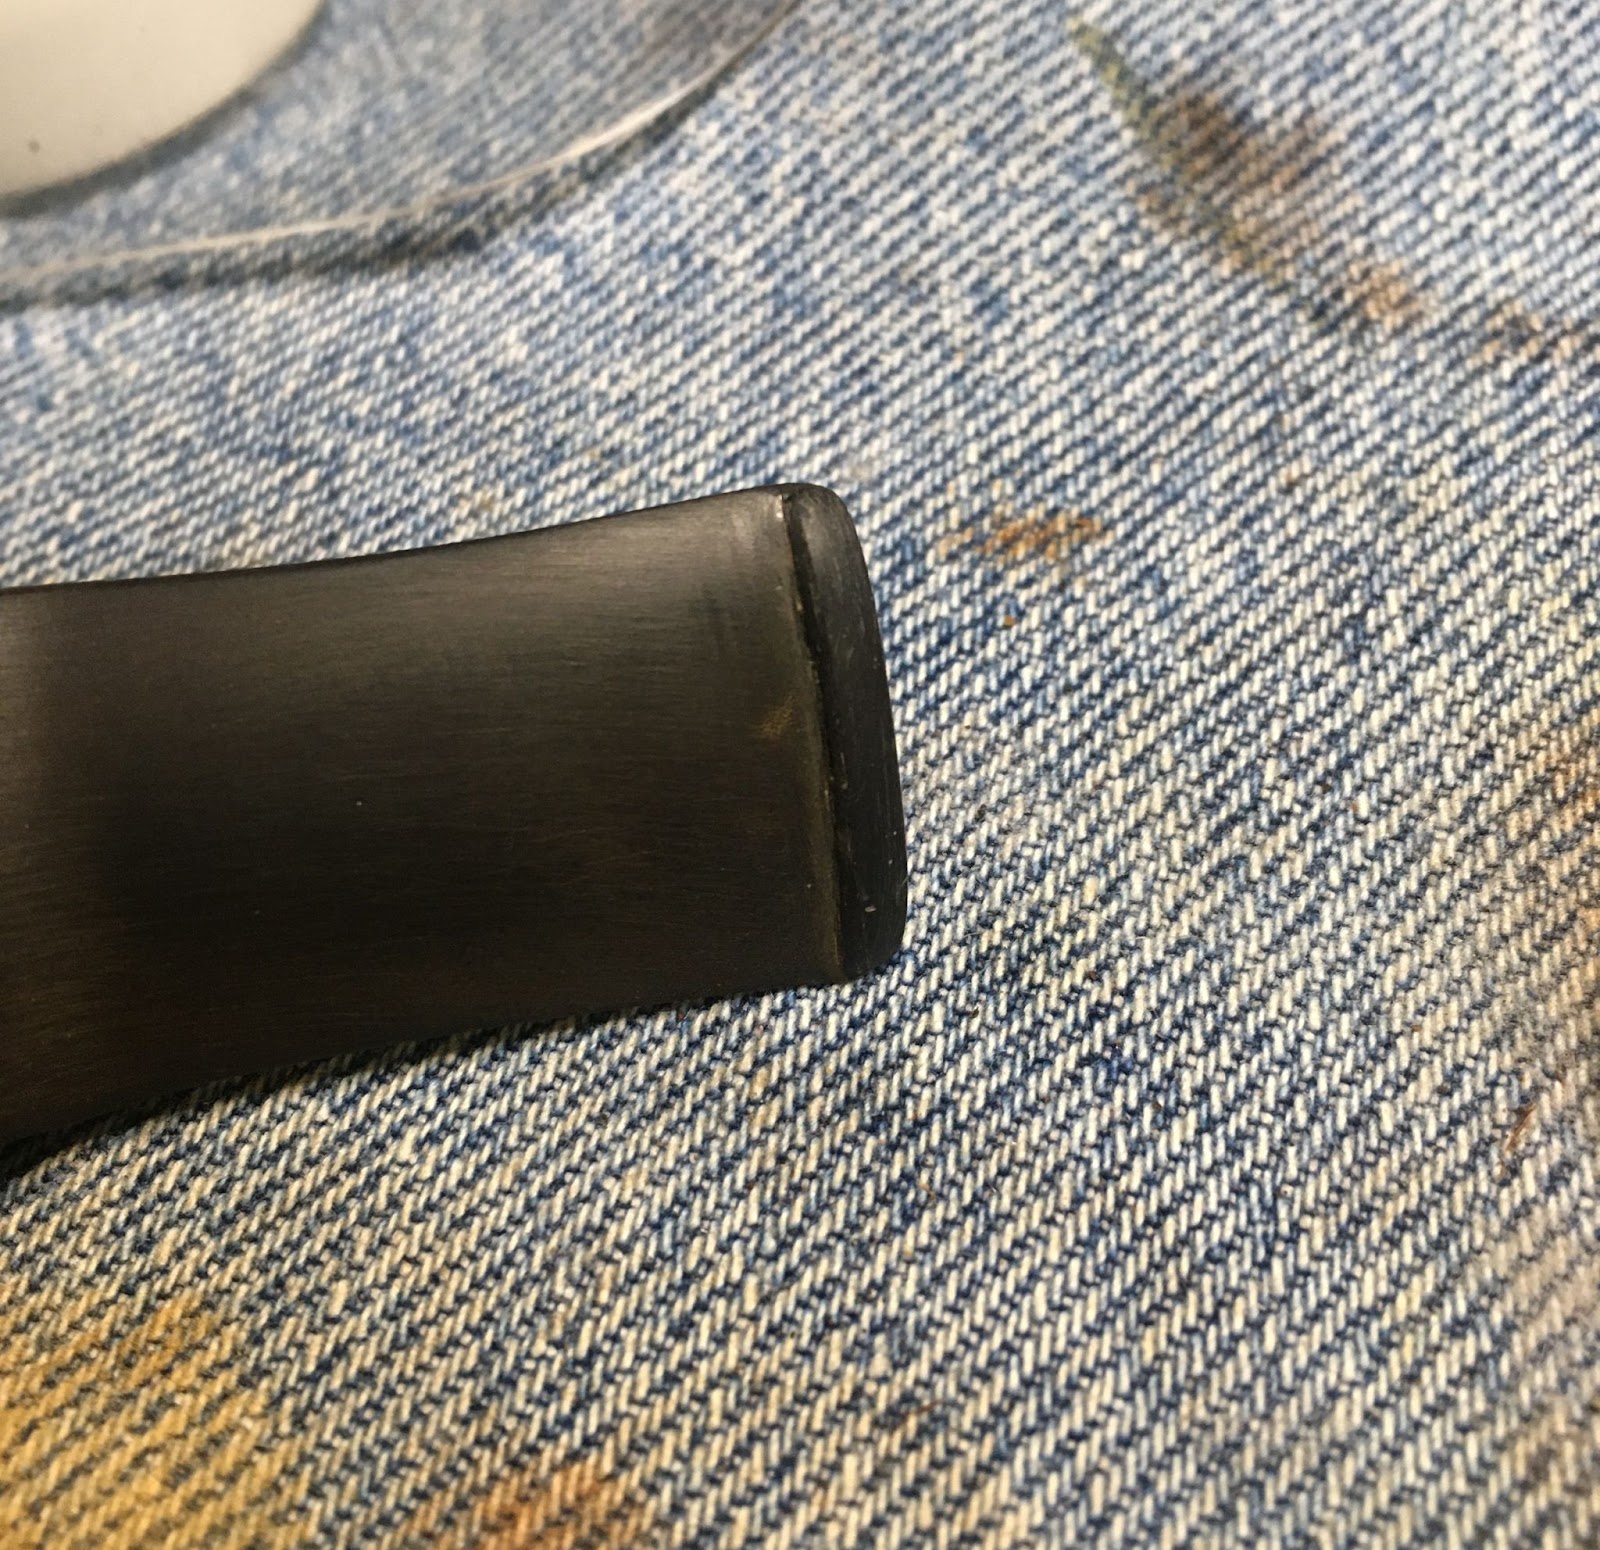


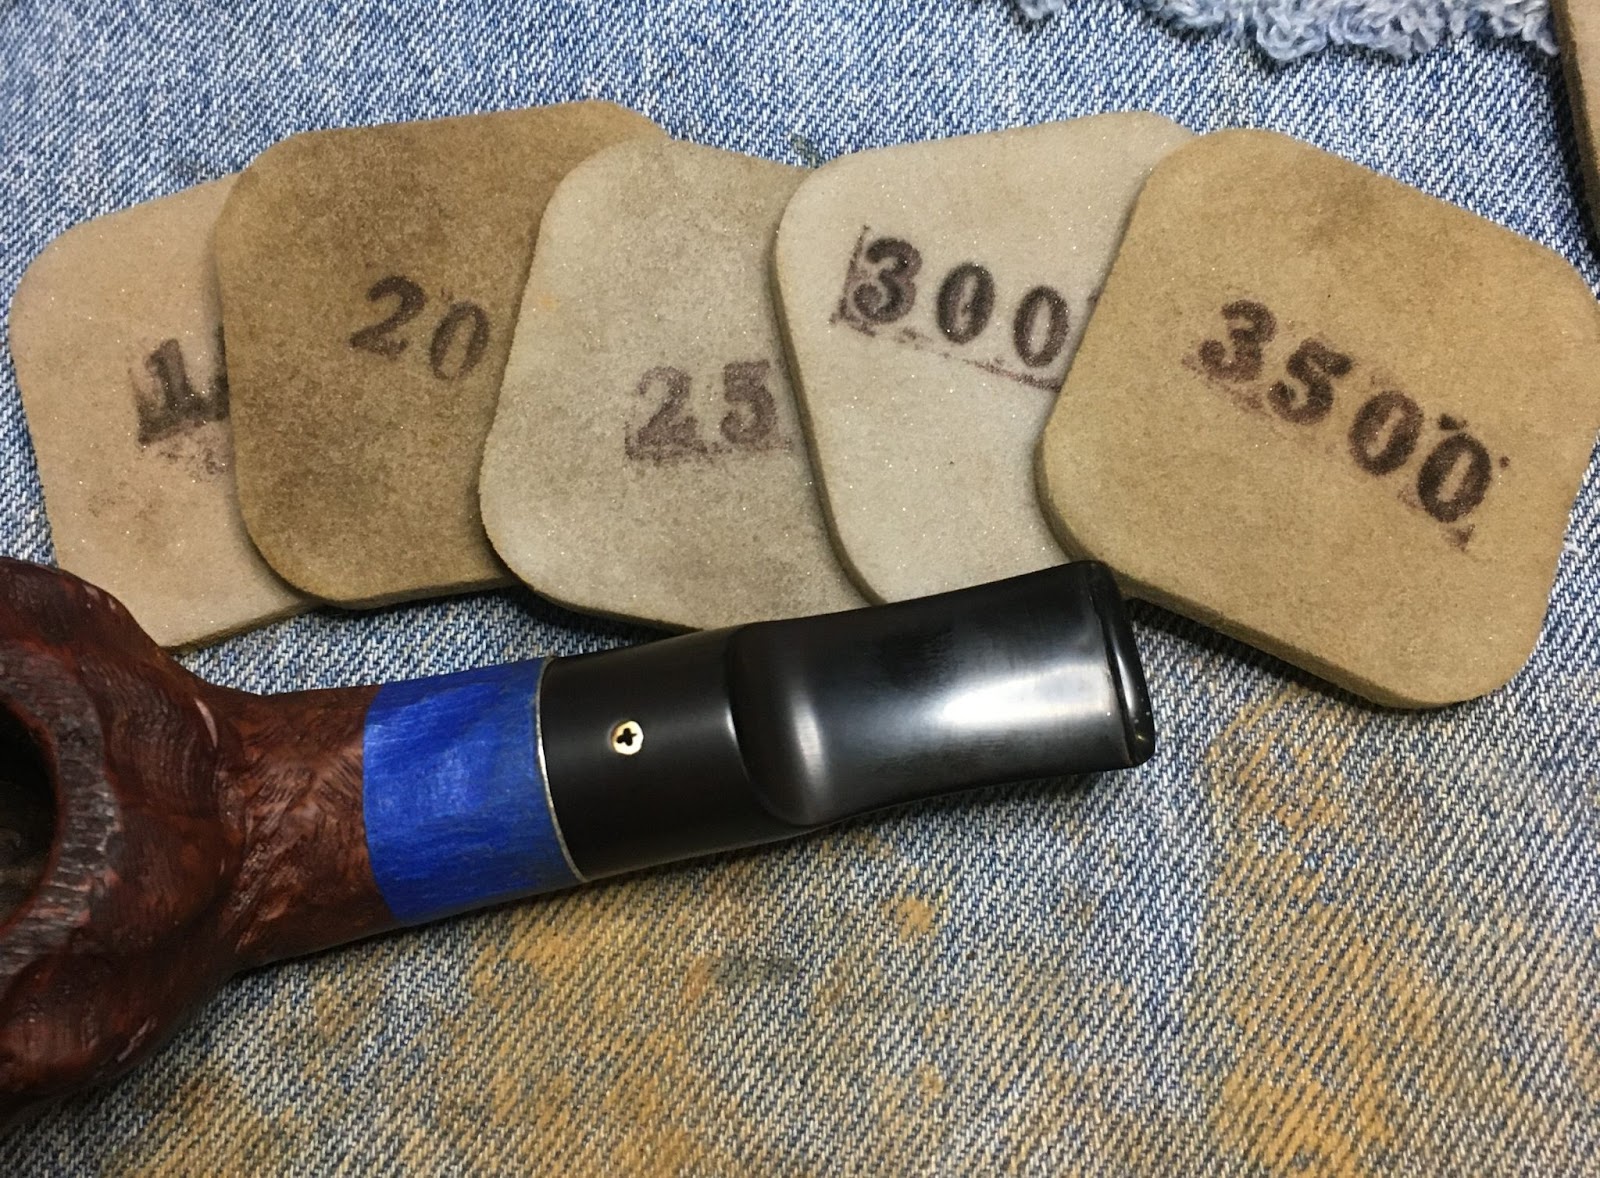

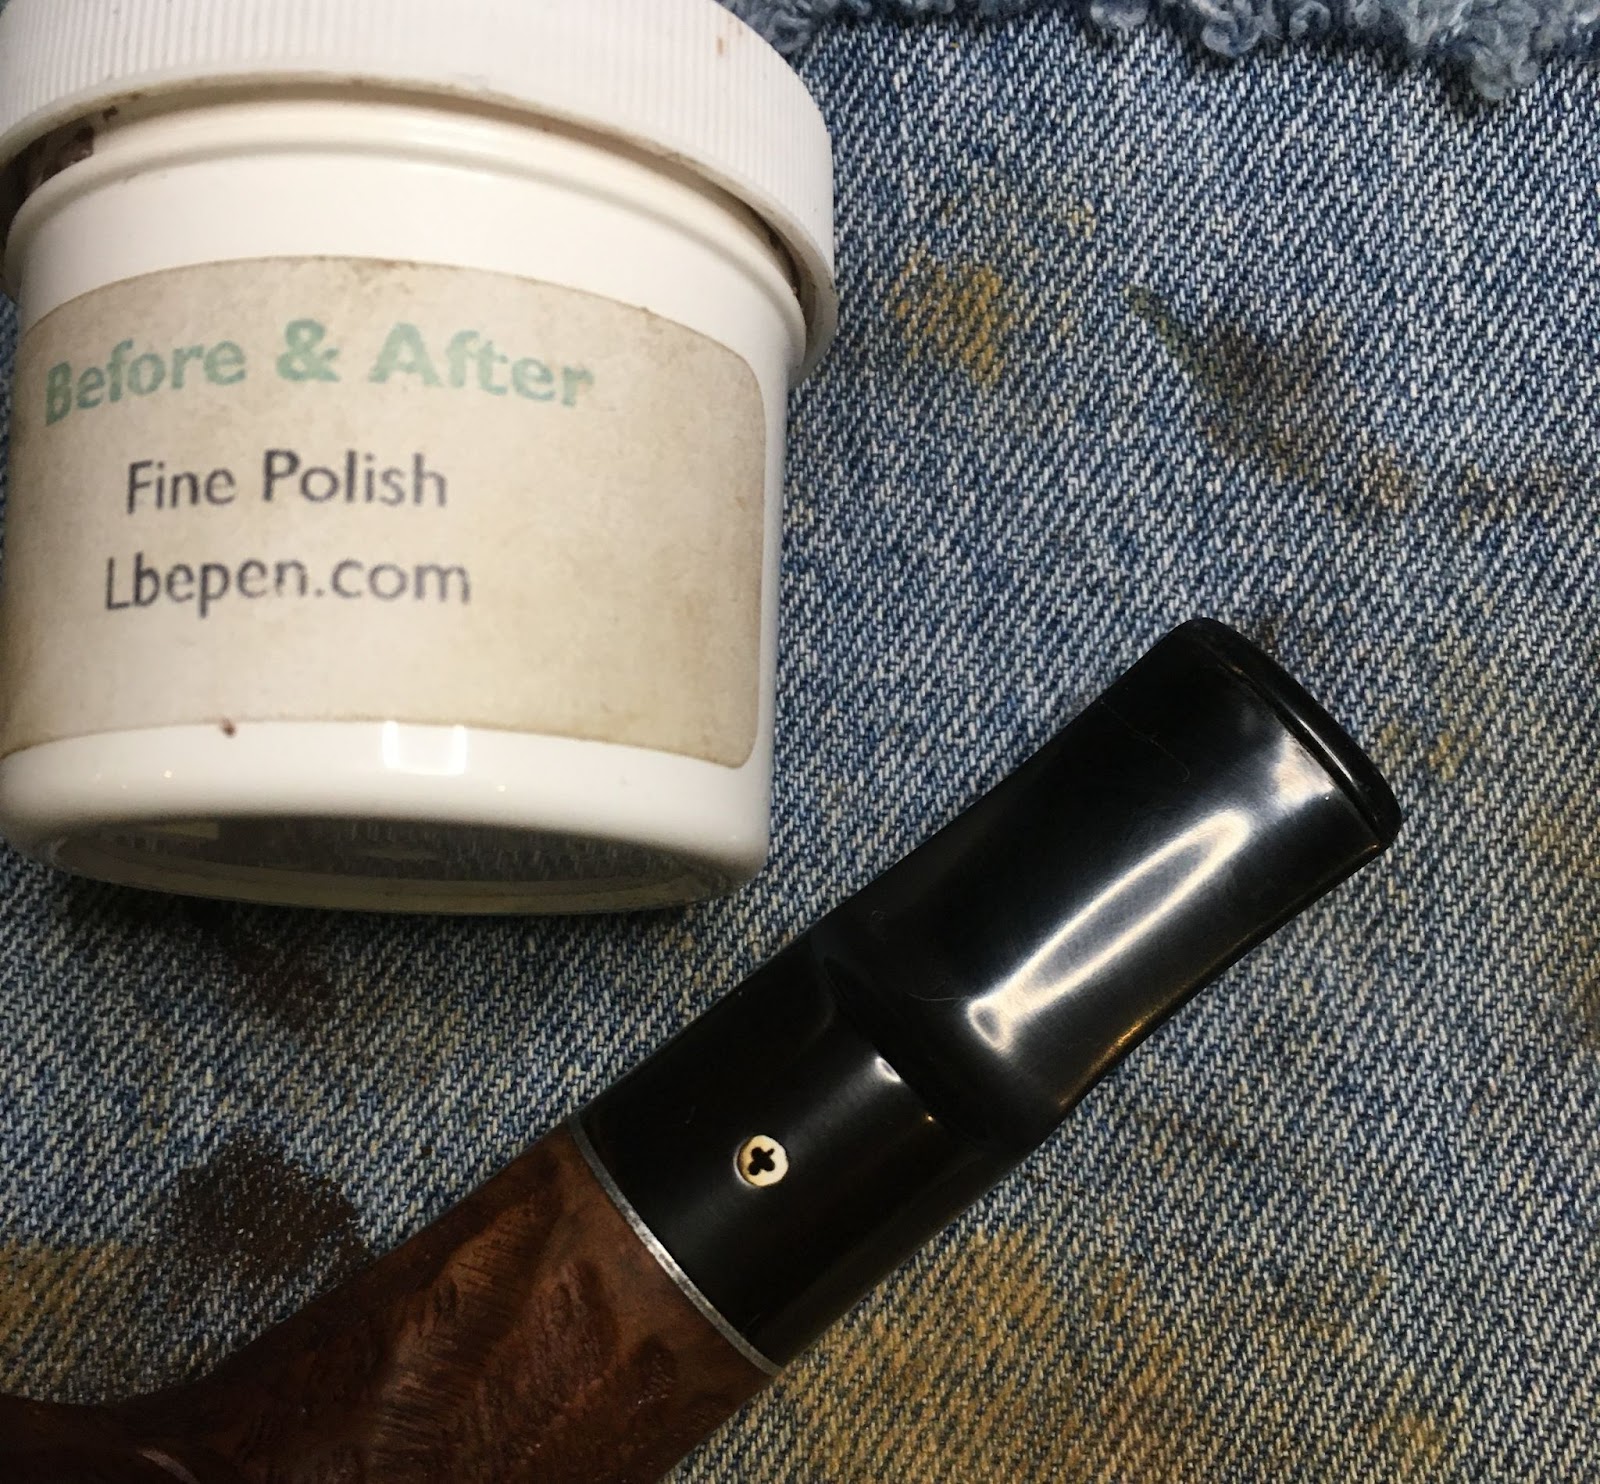


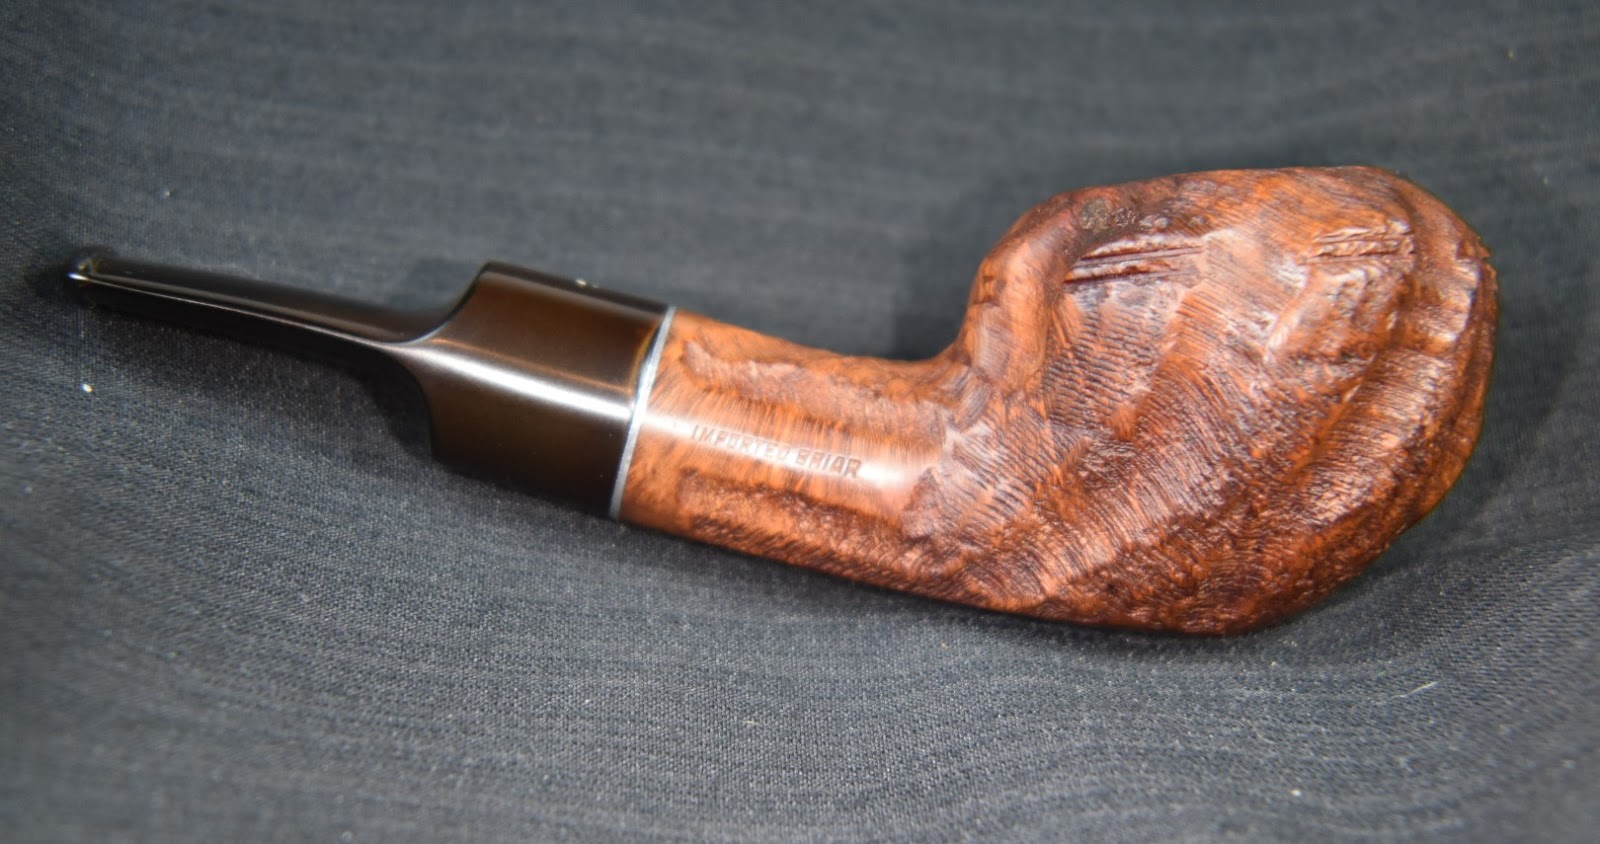


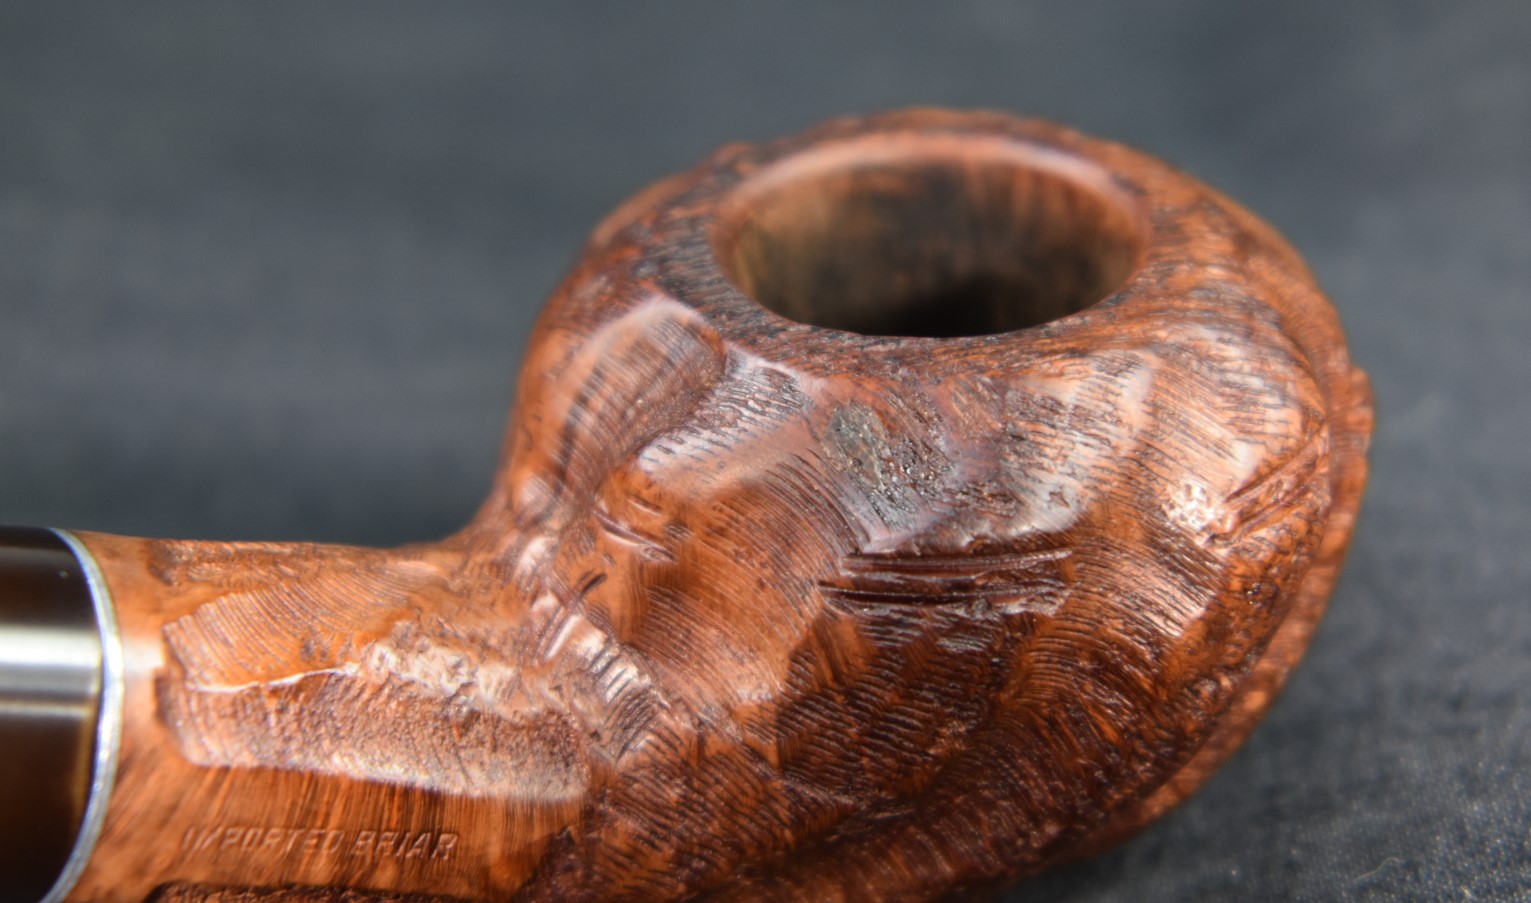
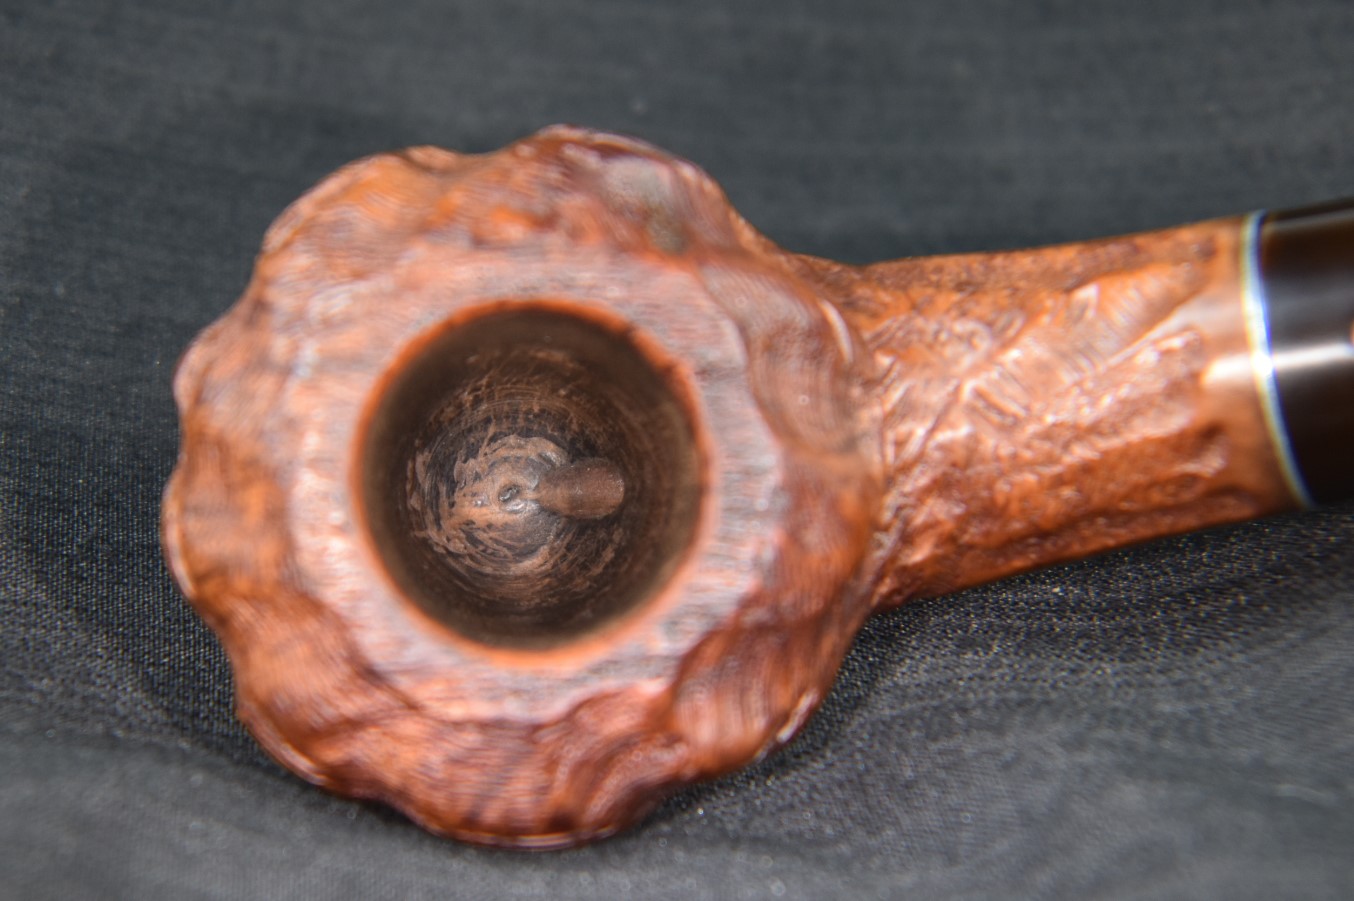
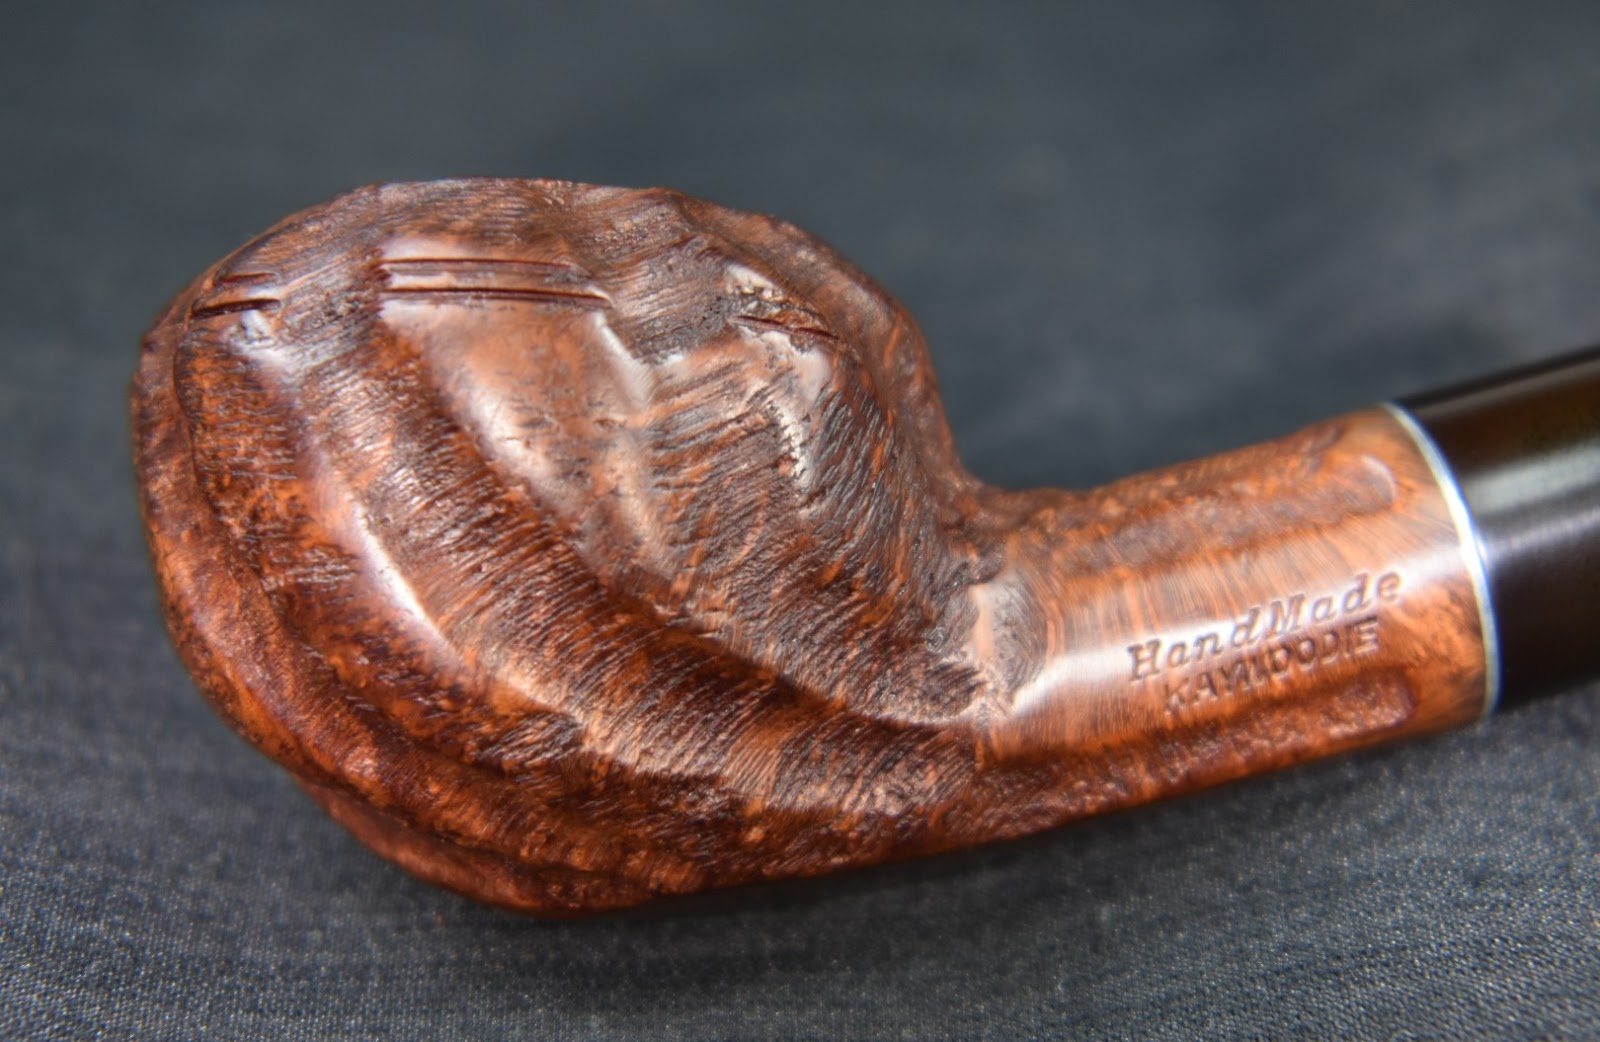


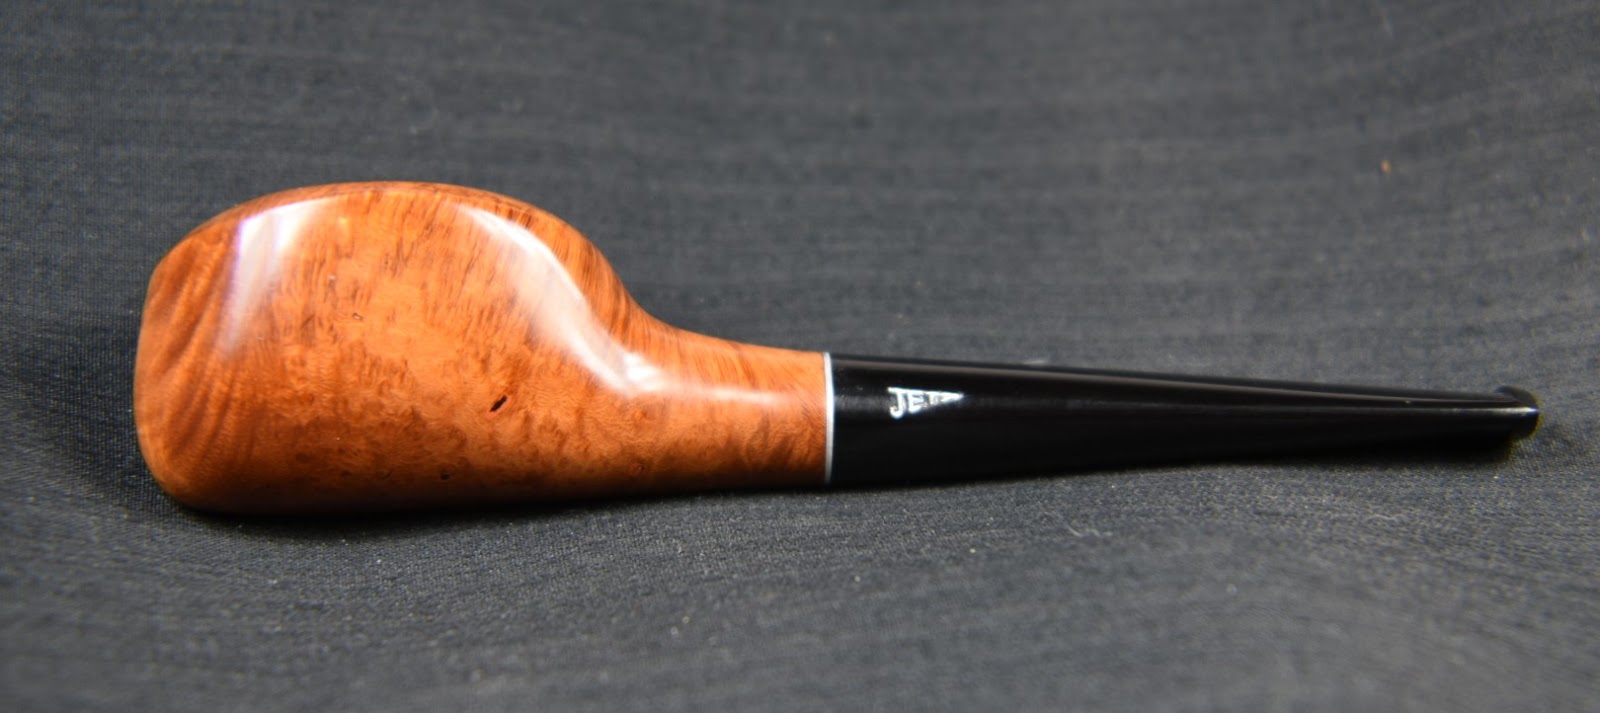
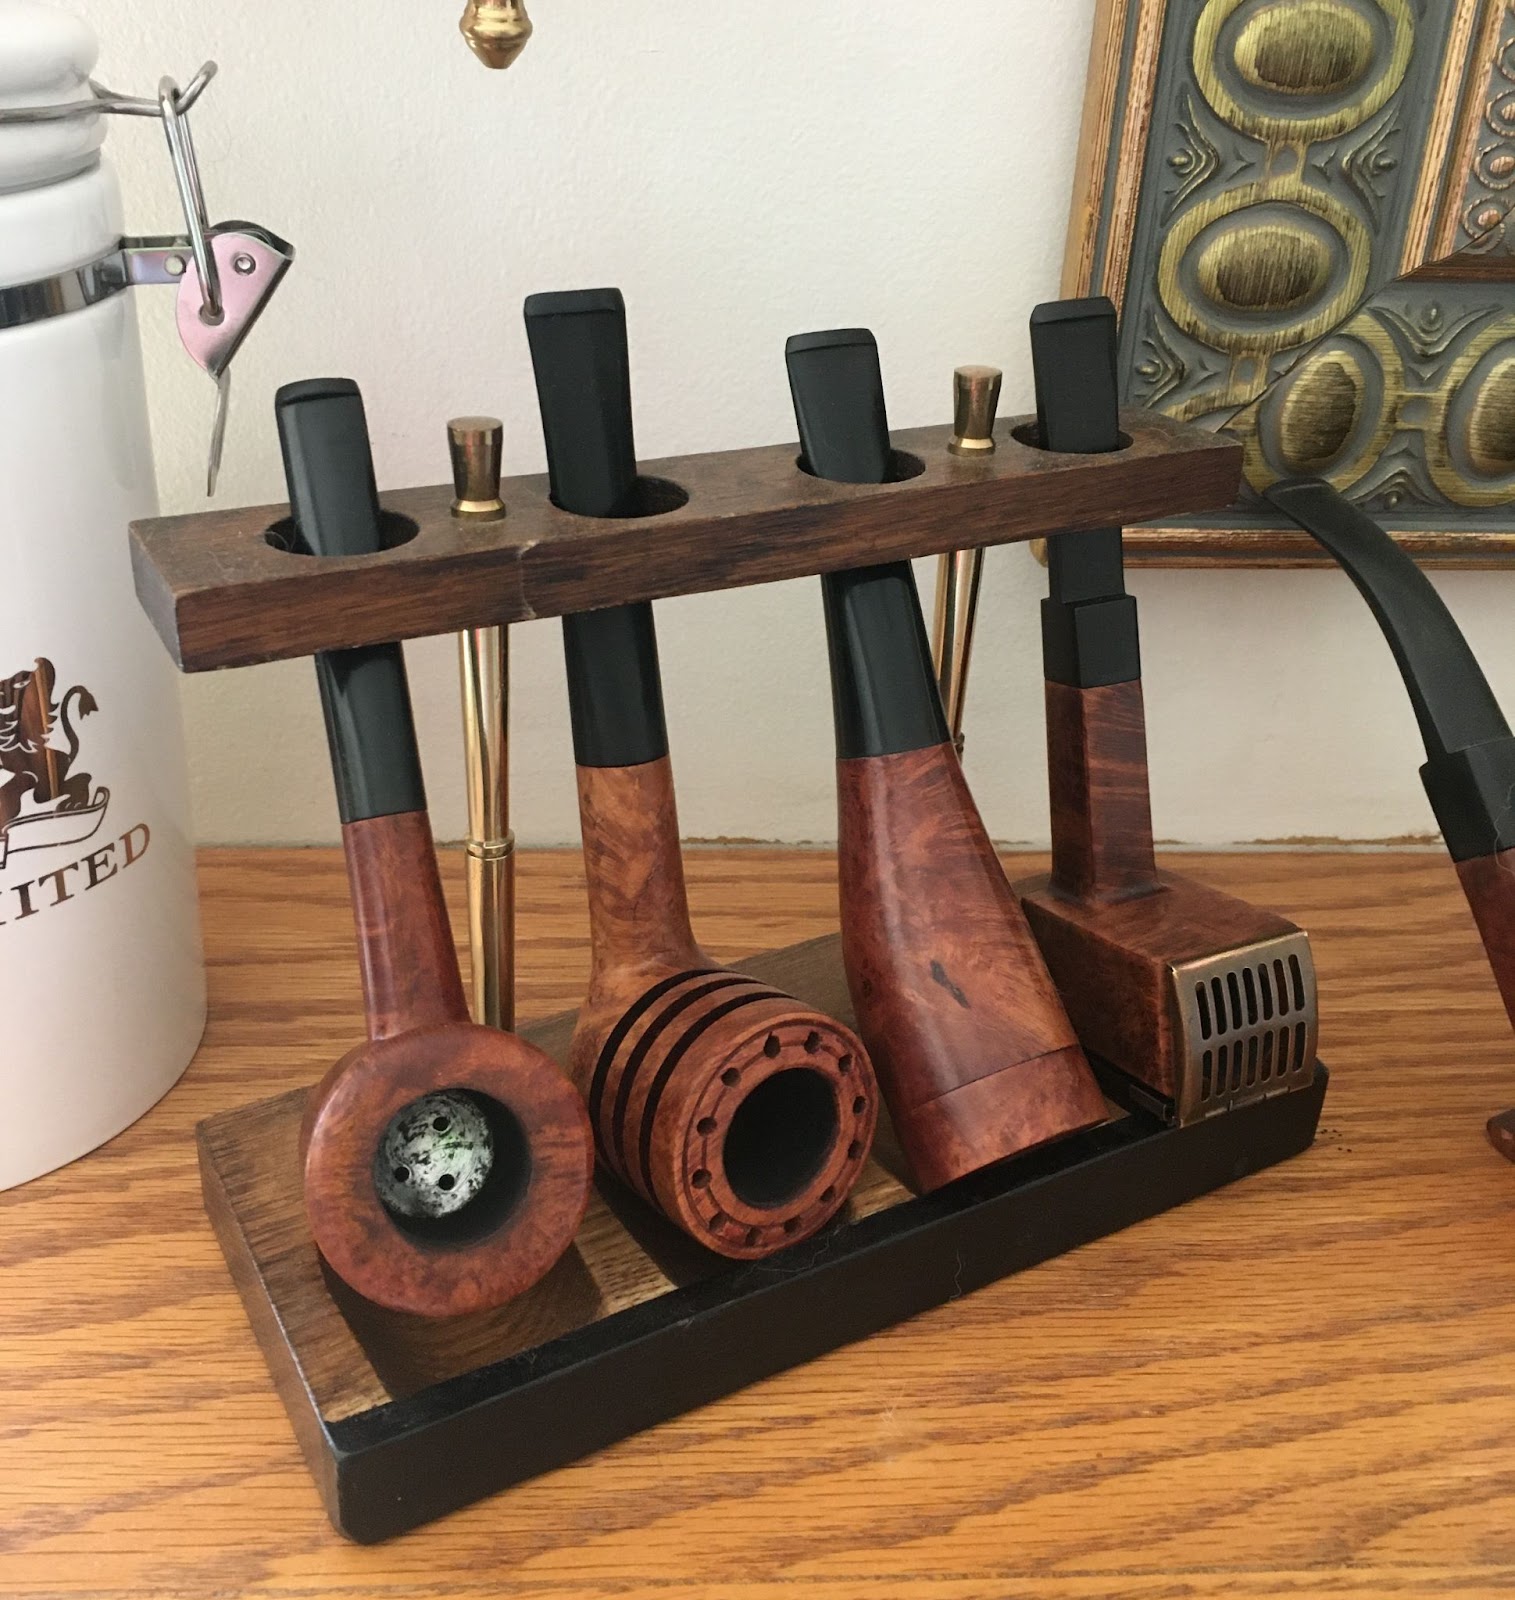
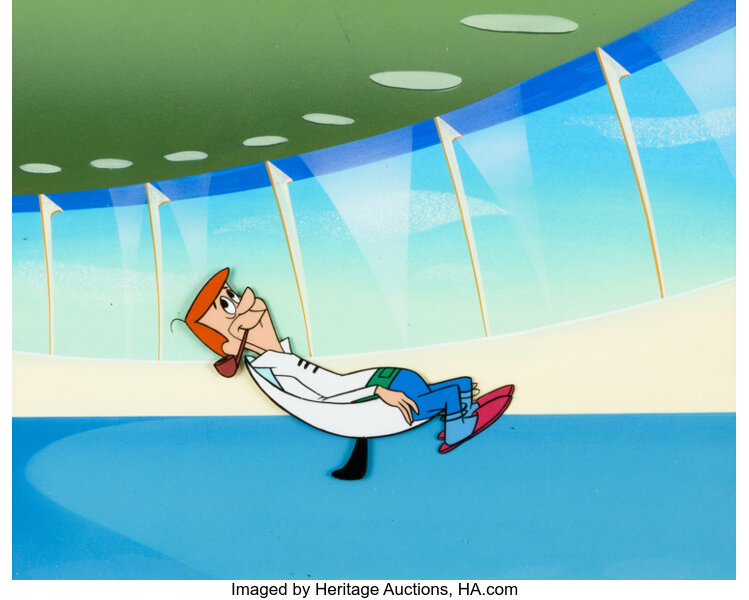

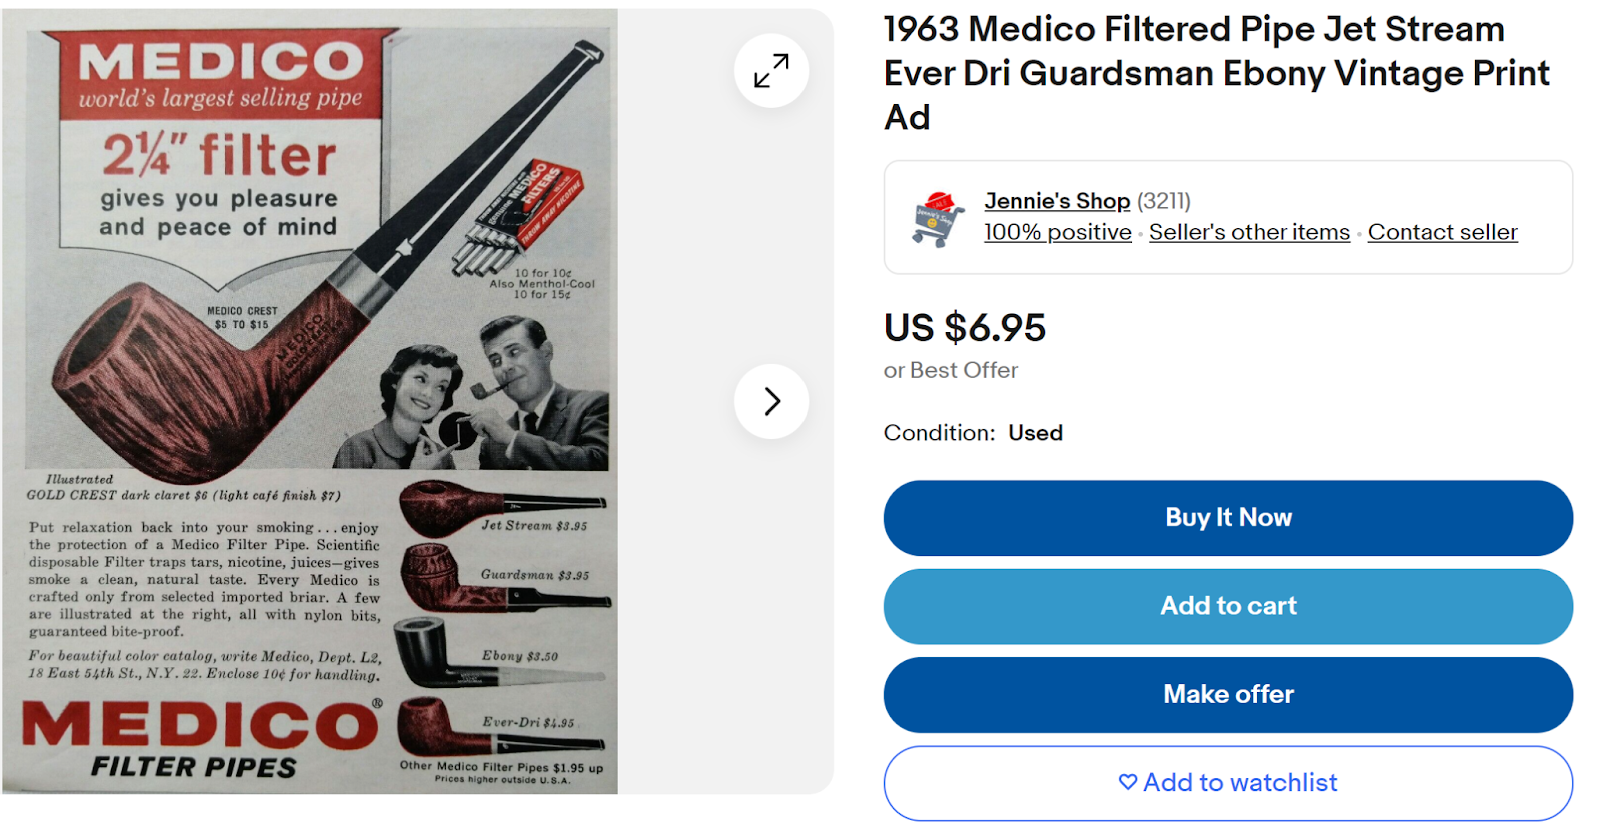 (
(


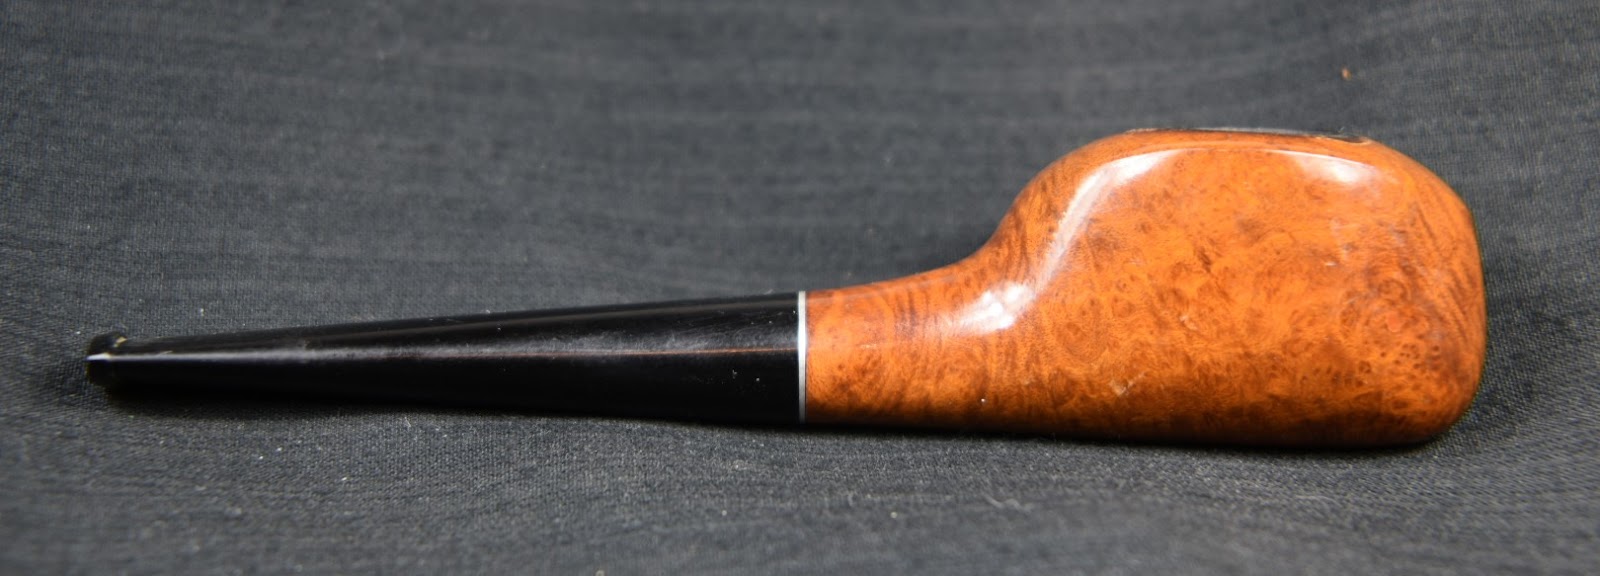


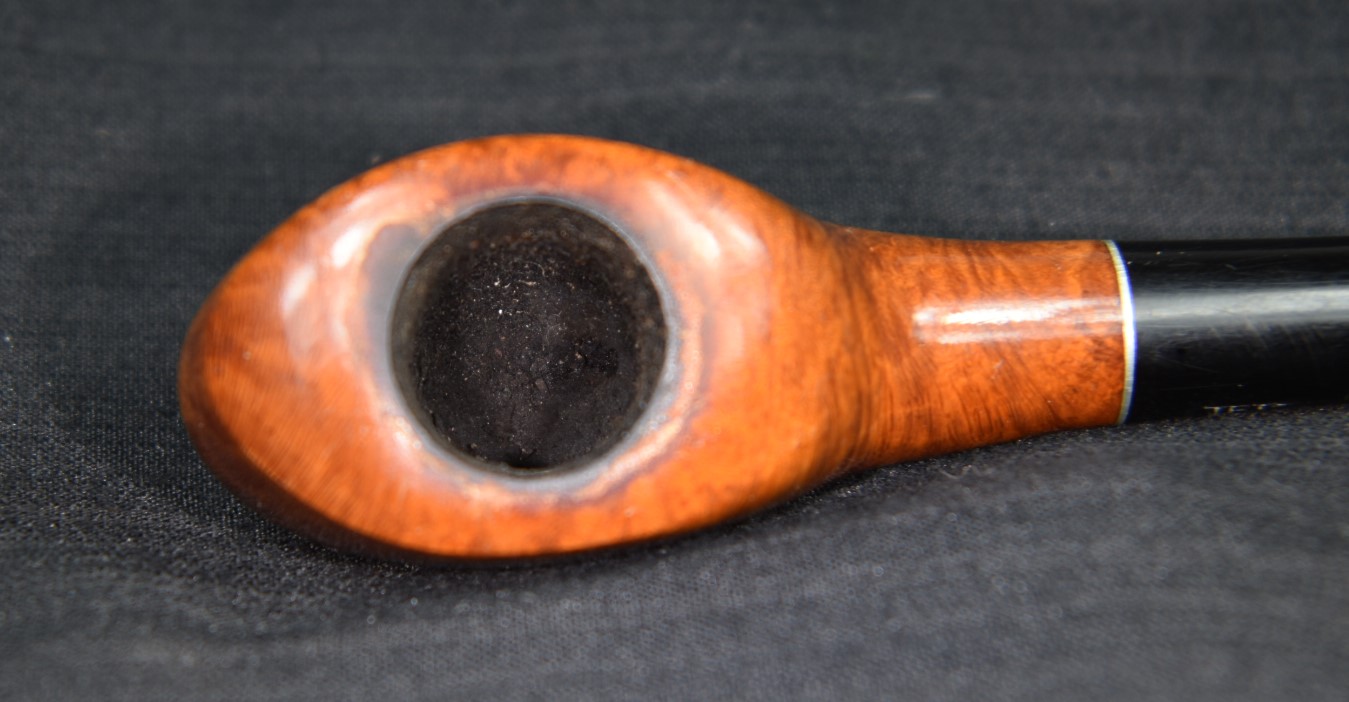


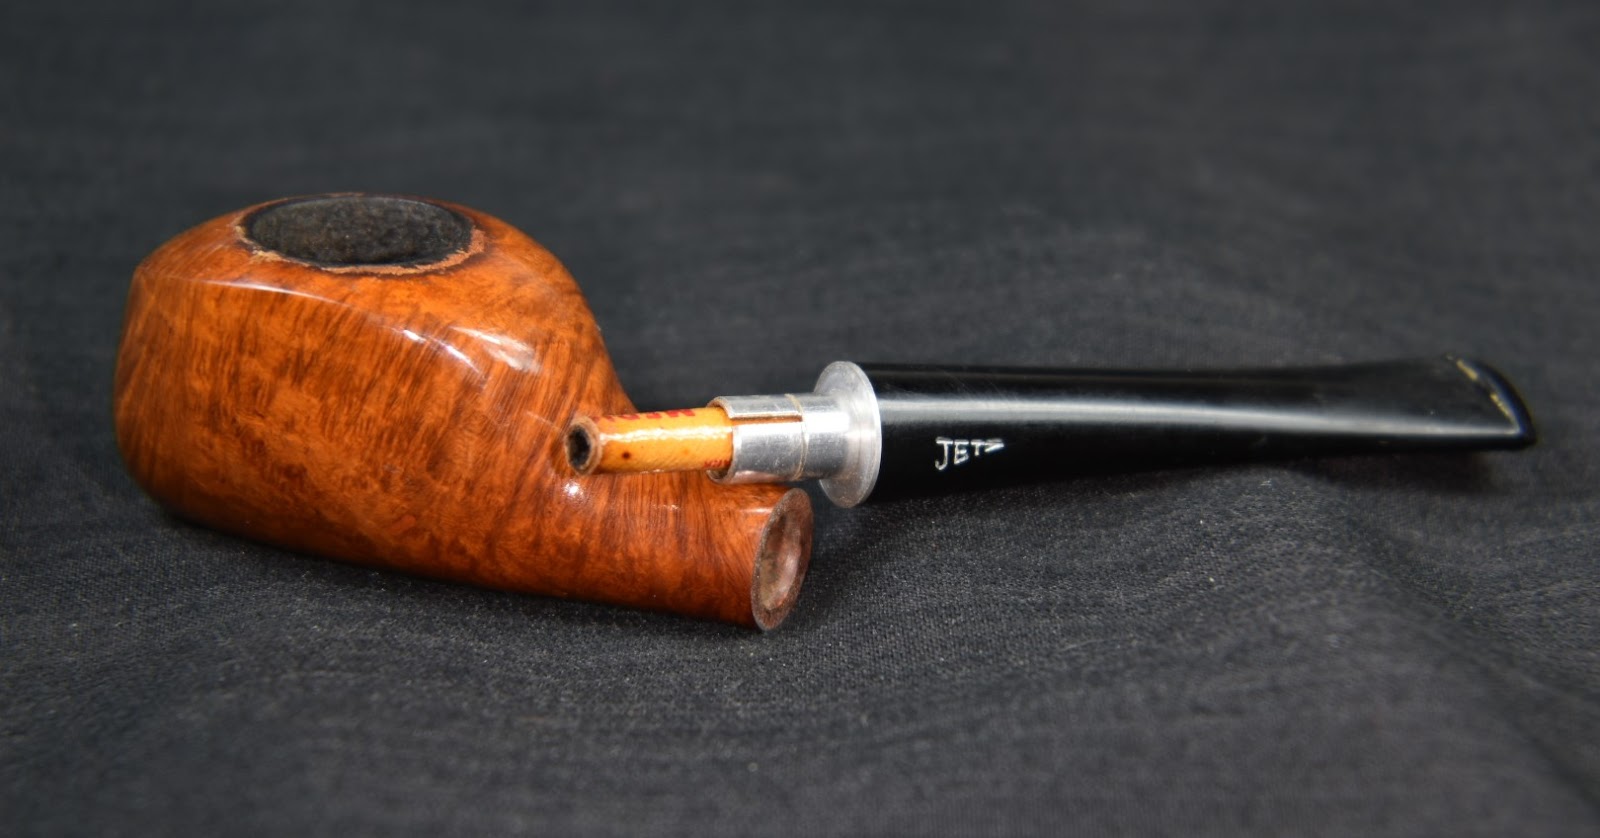


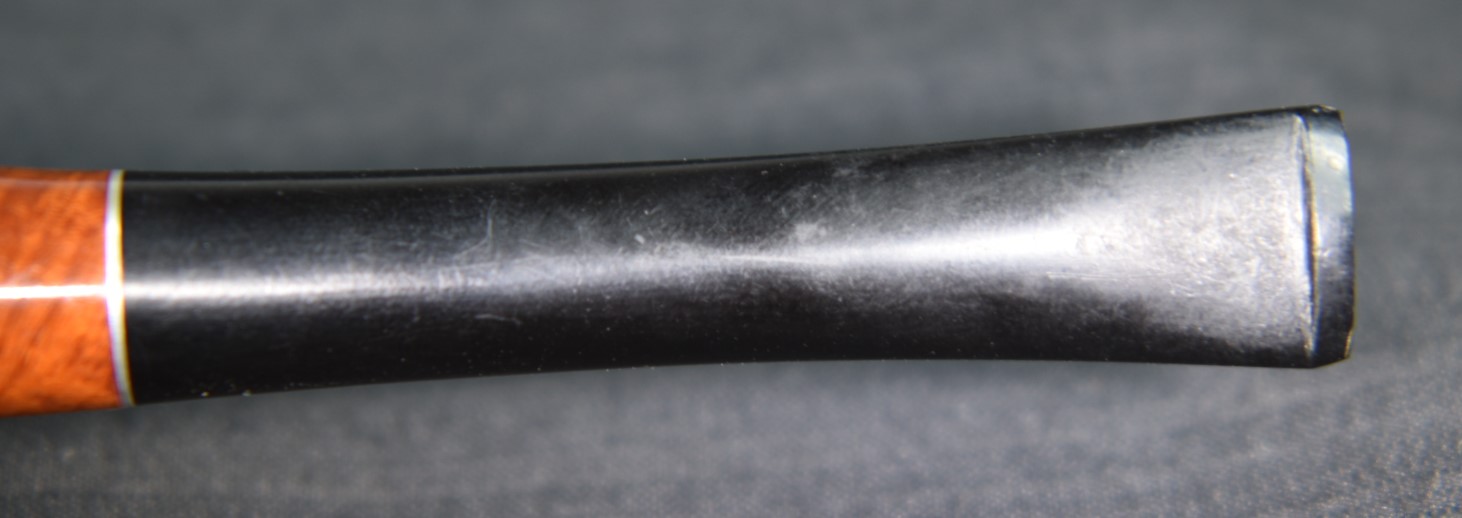


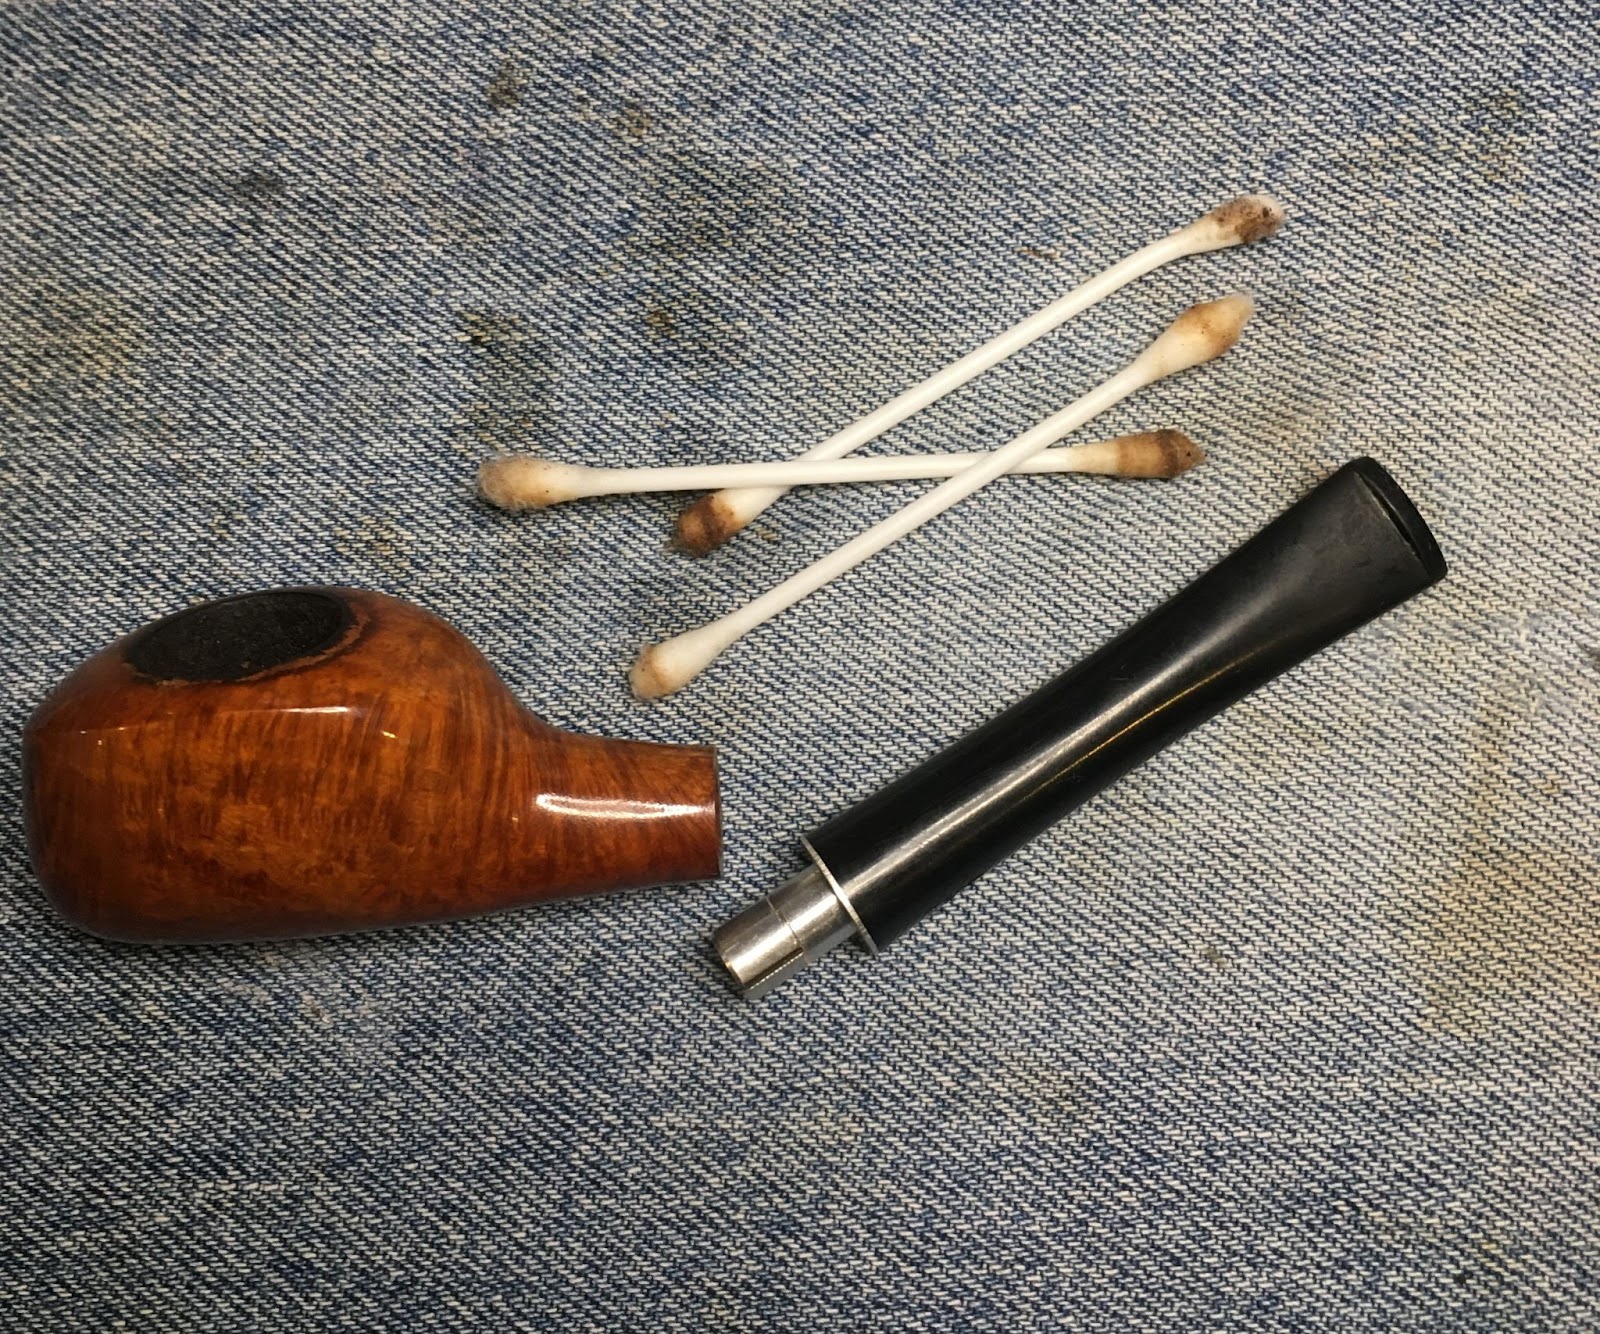


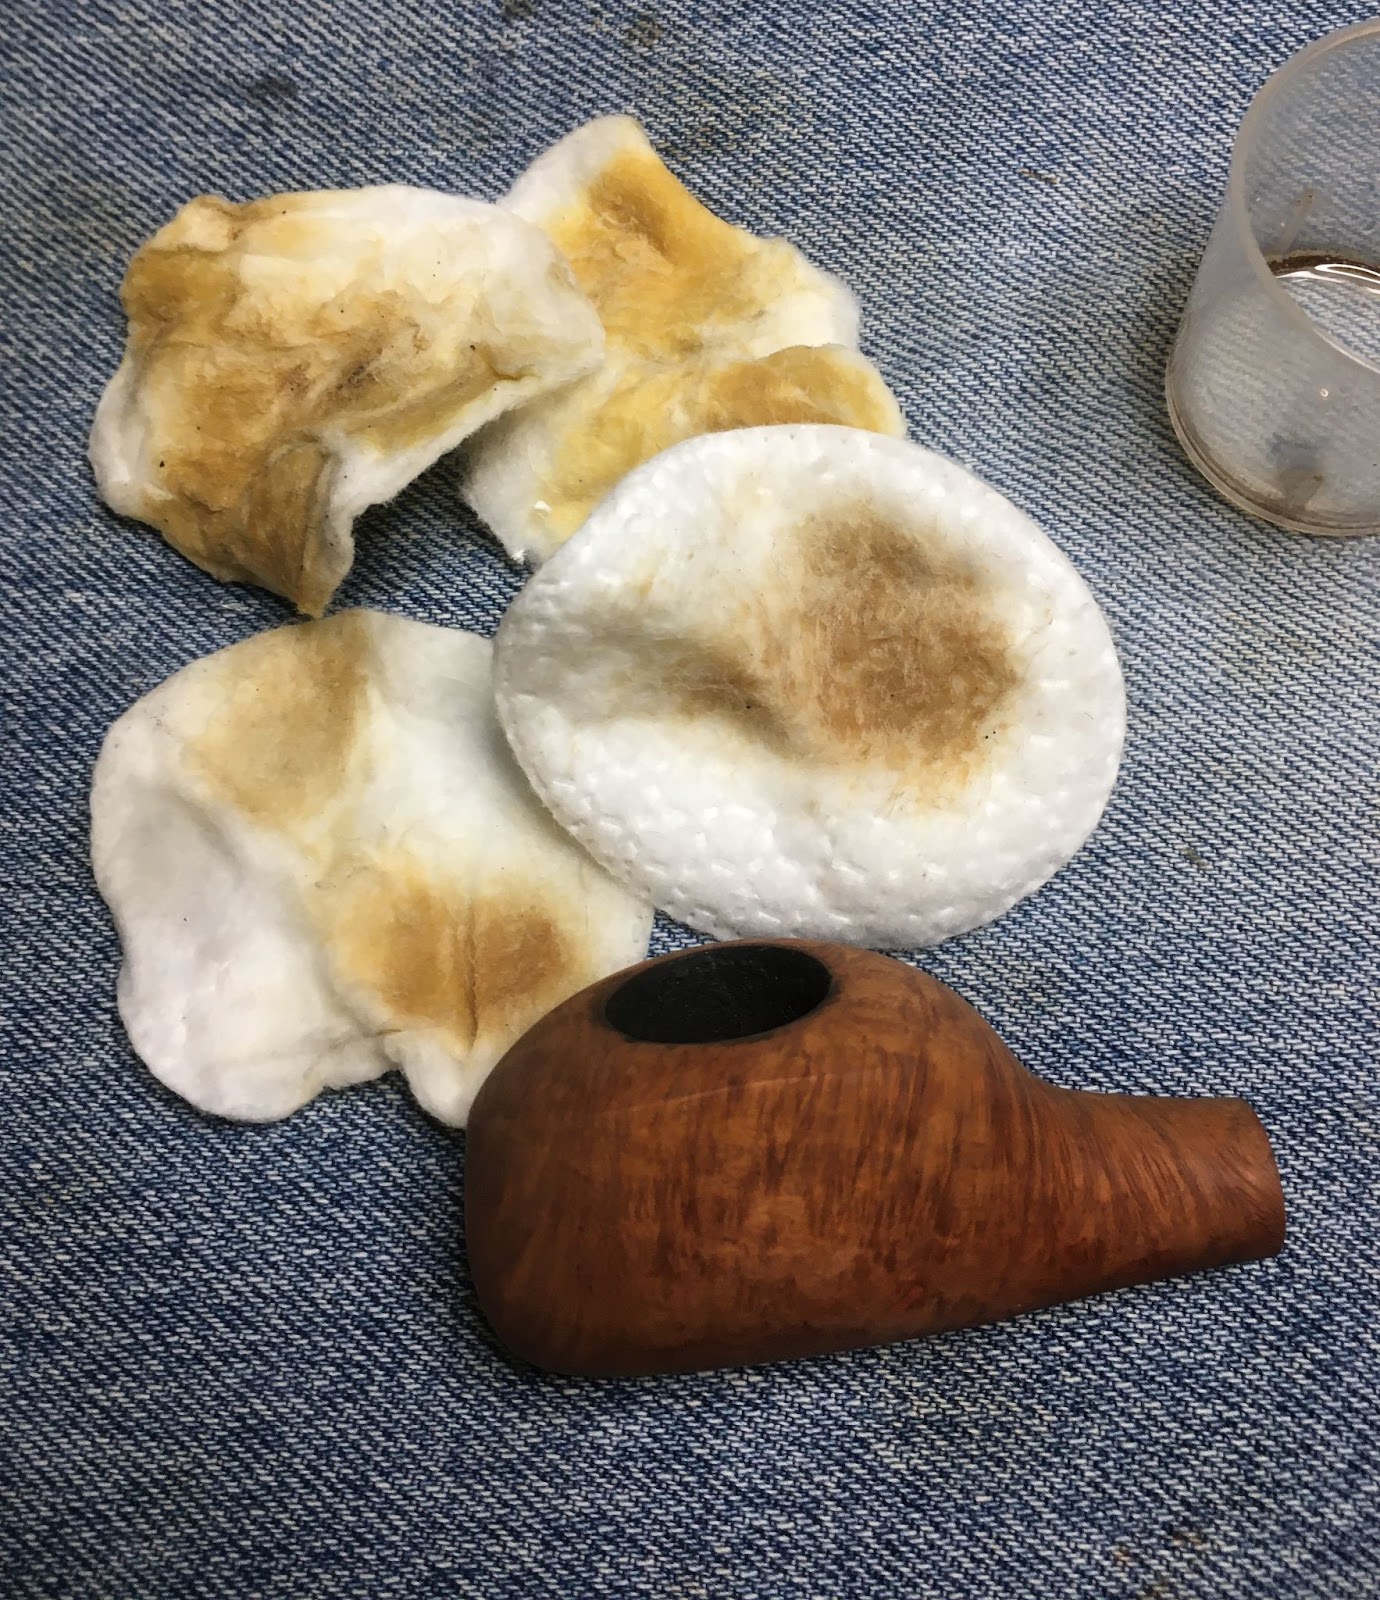


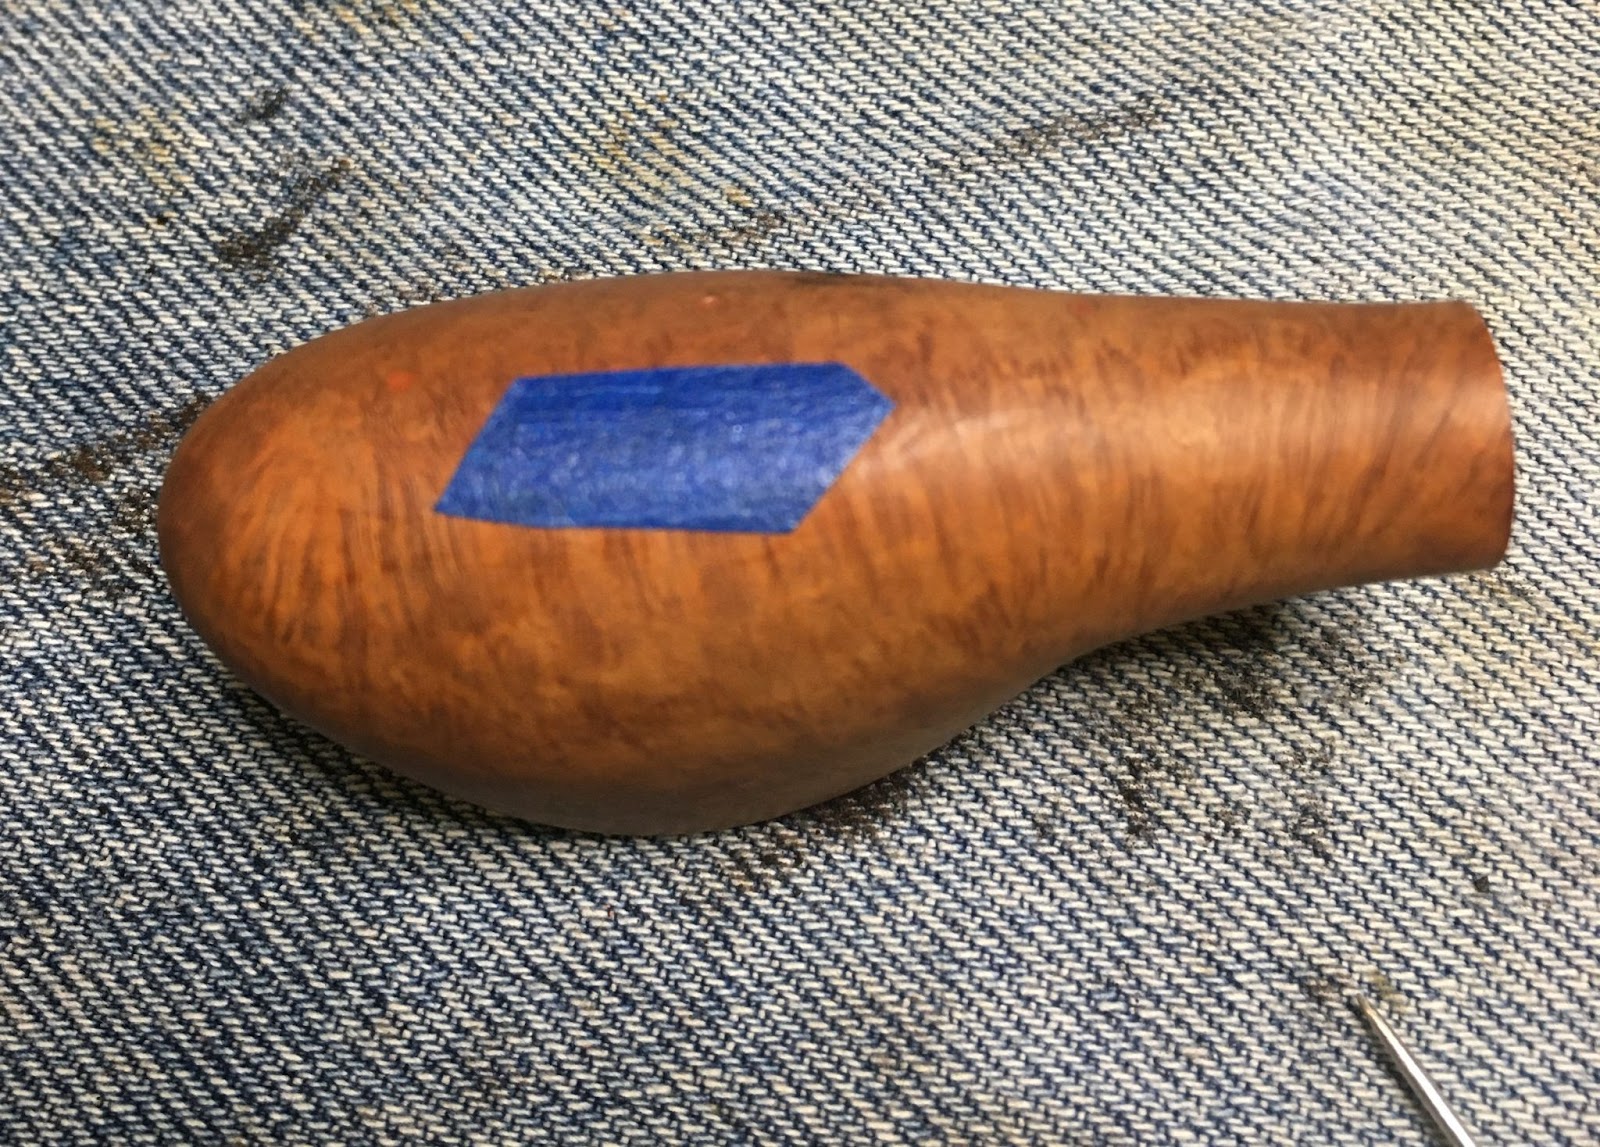


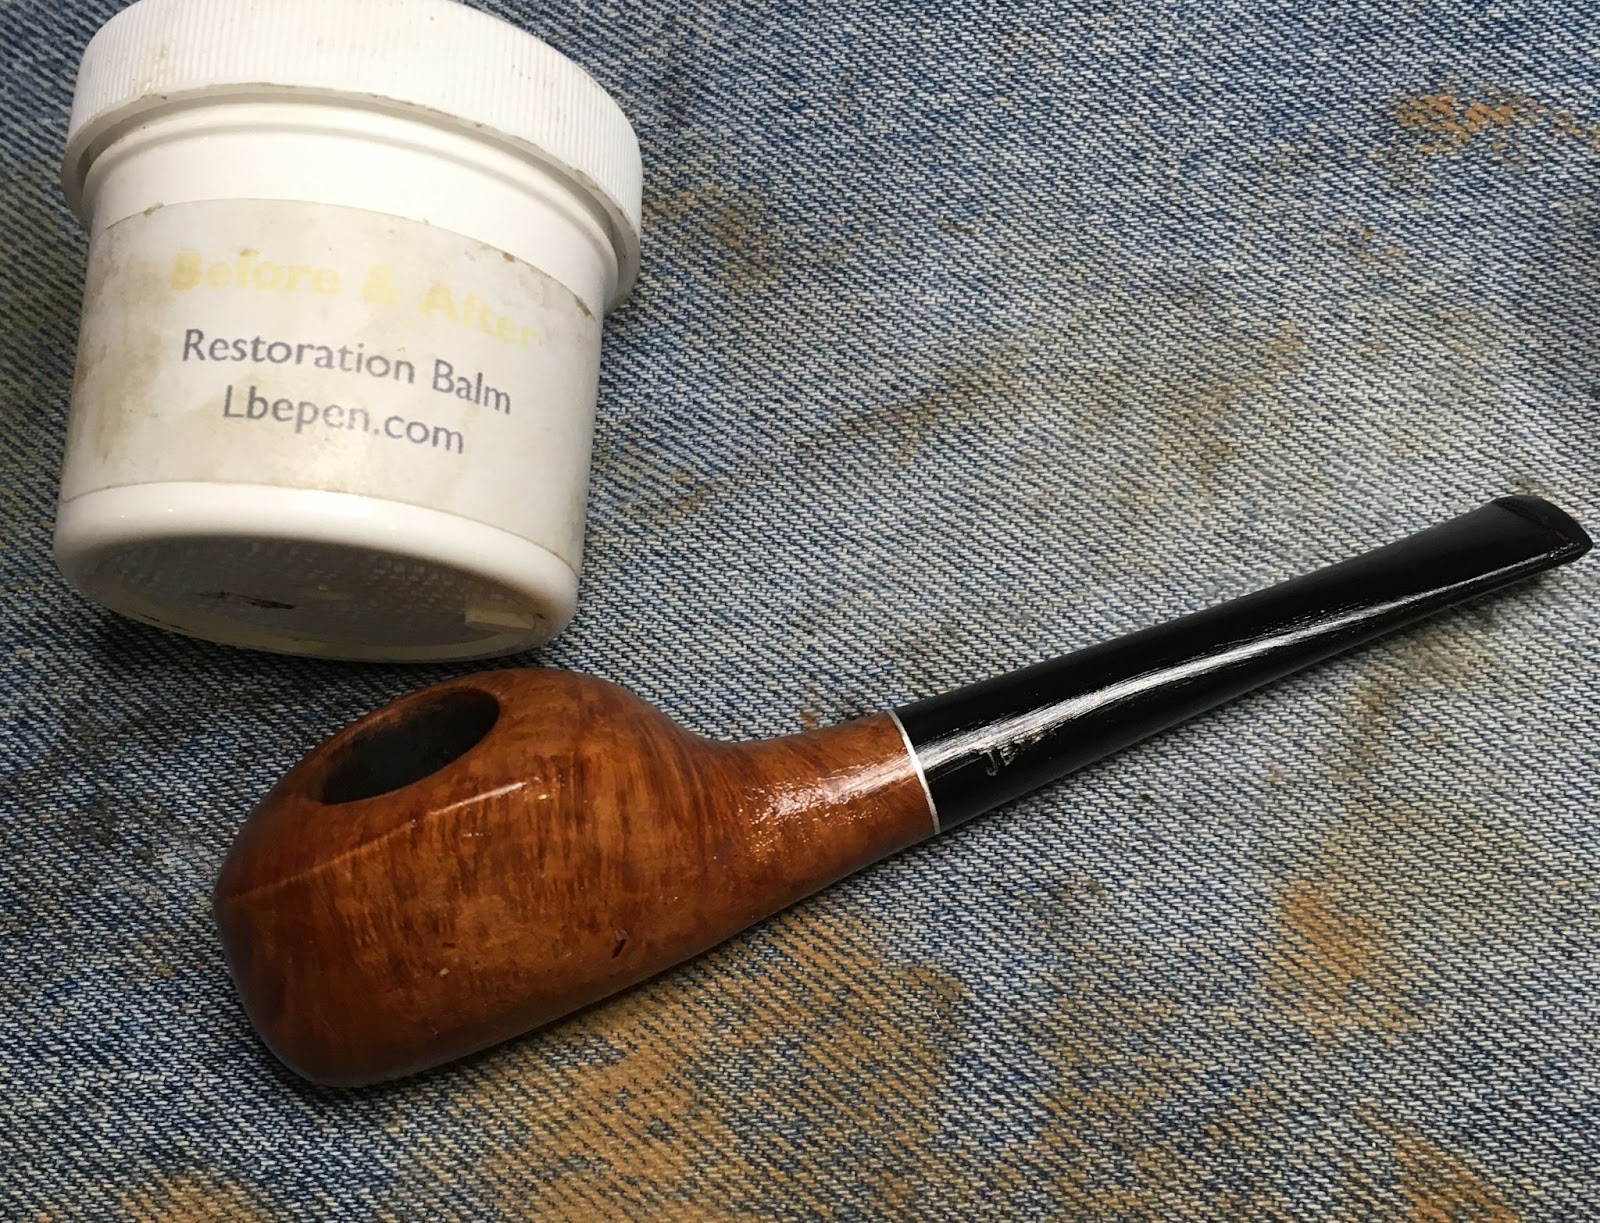

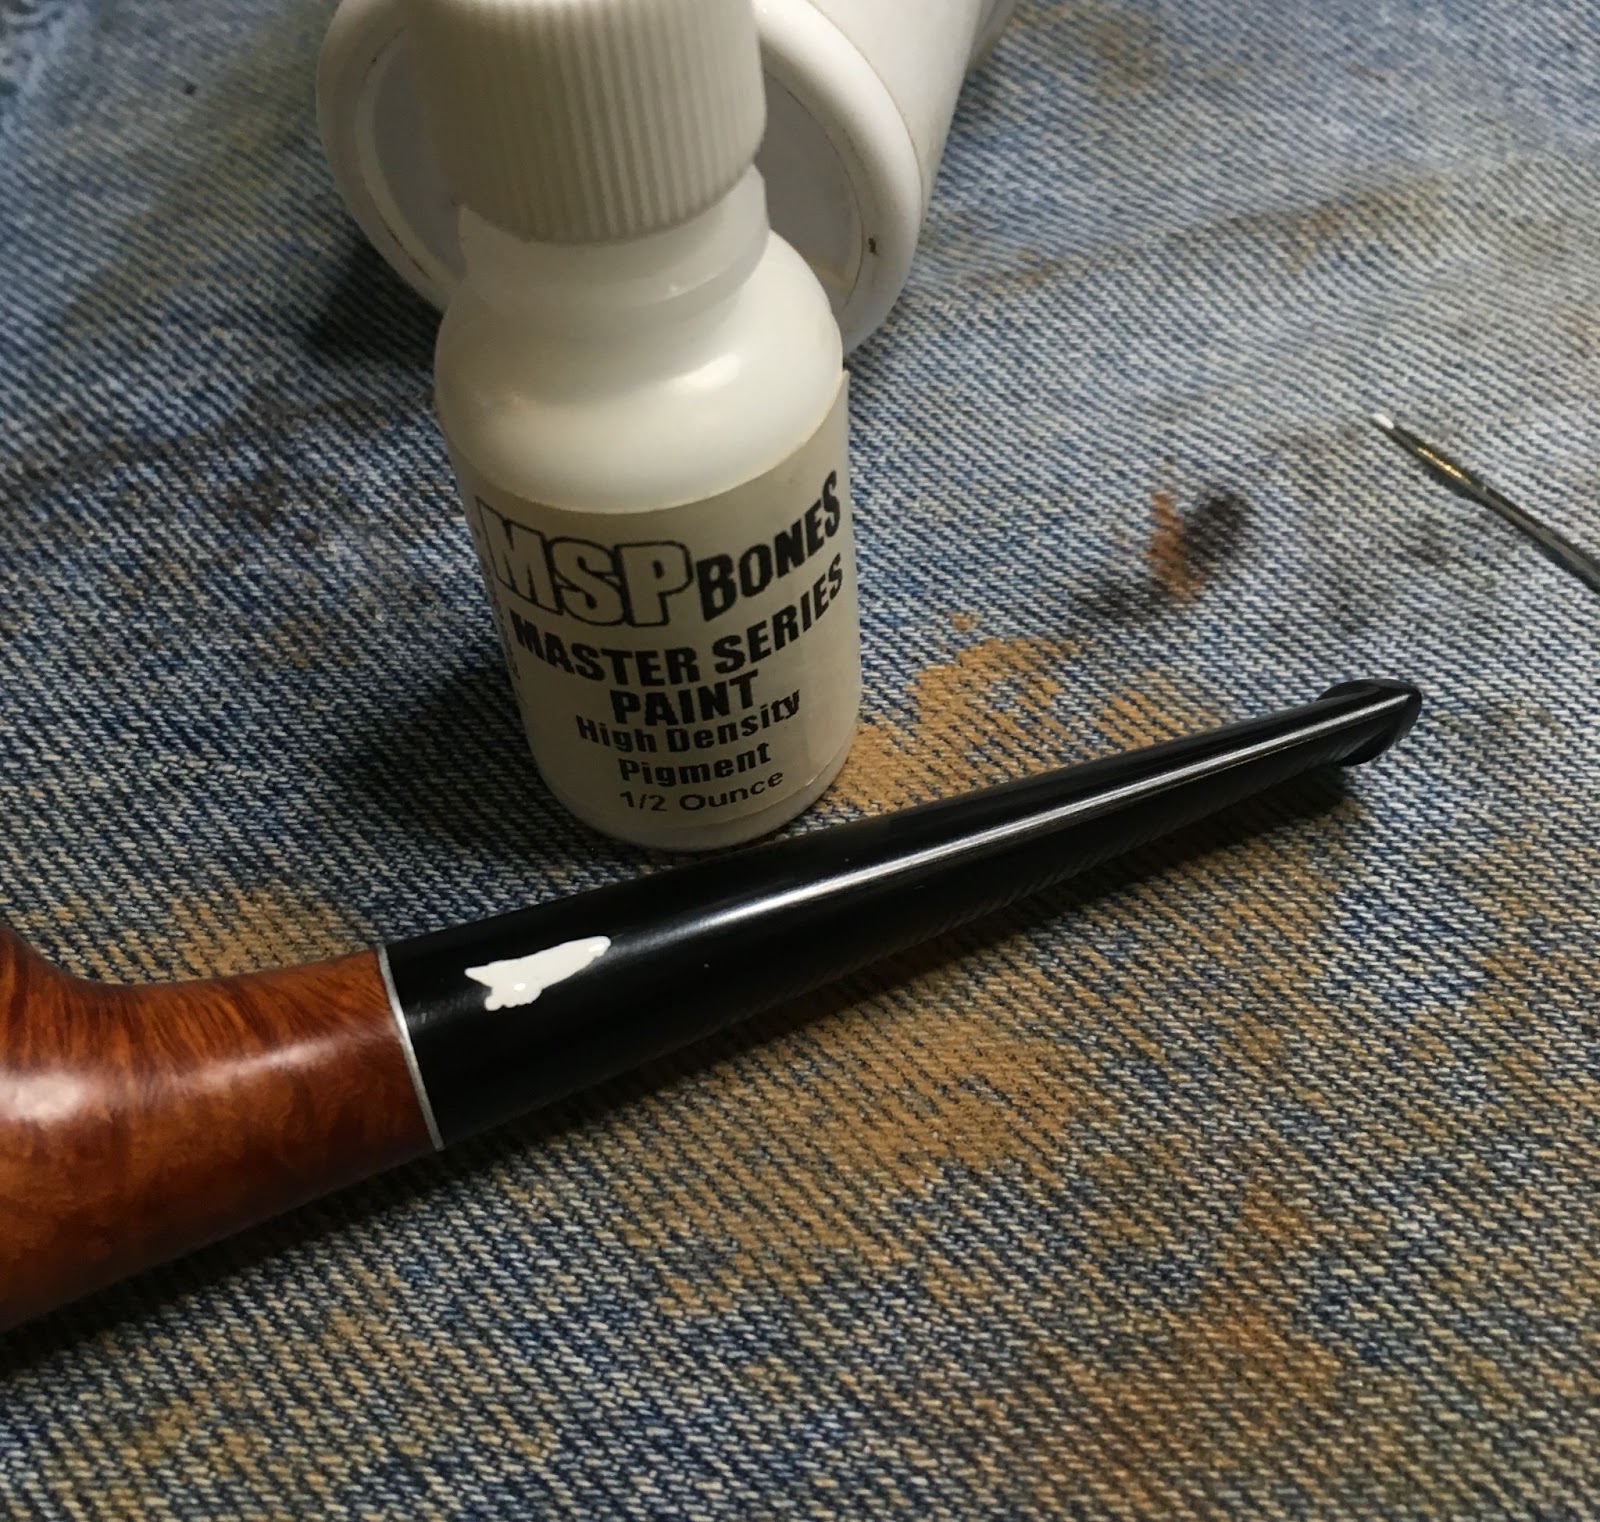


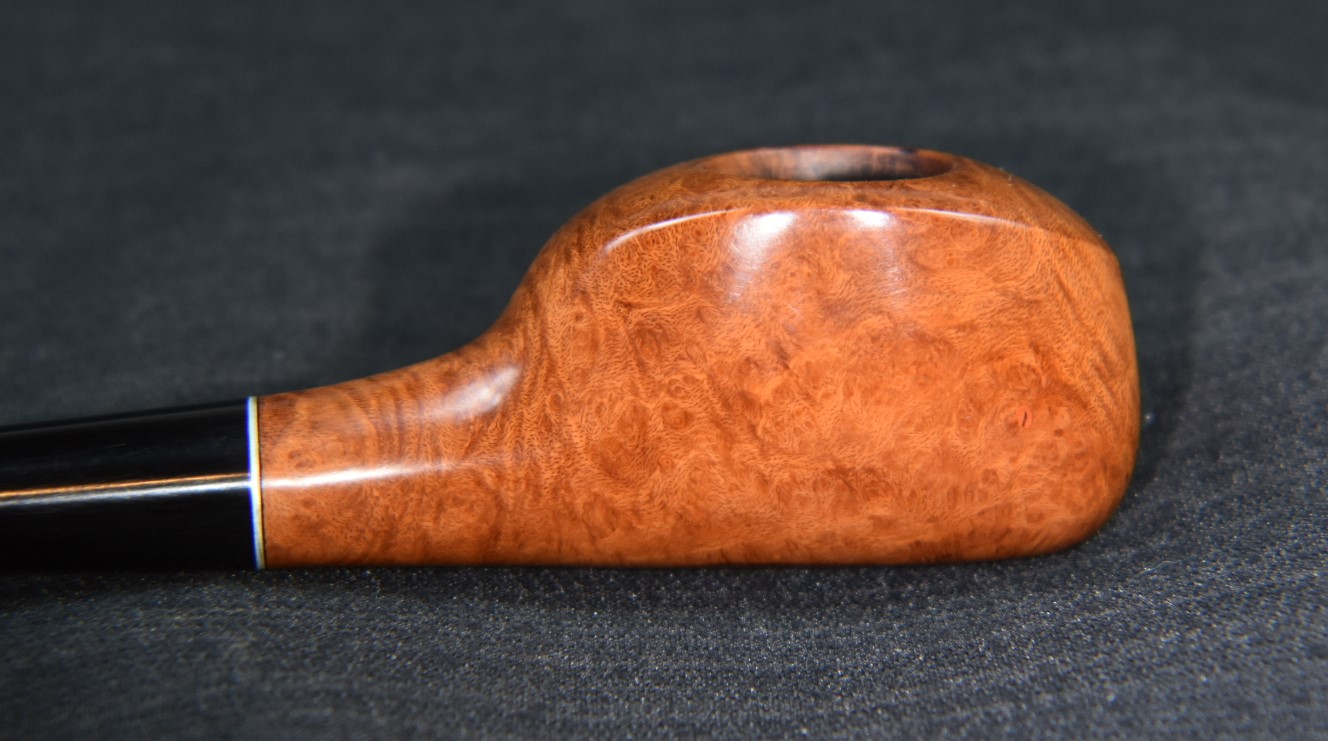
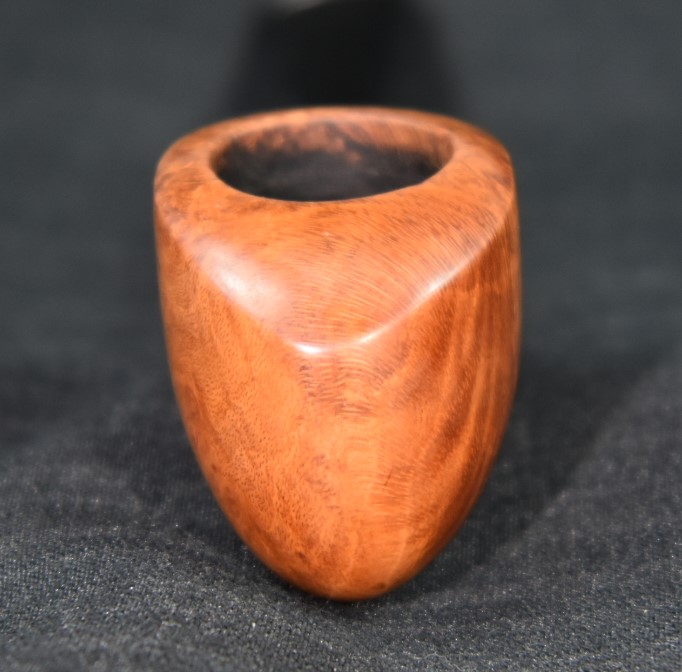


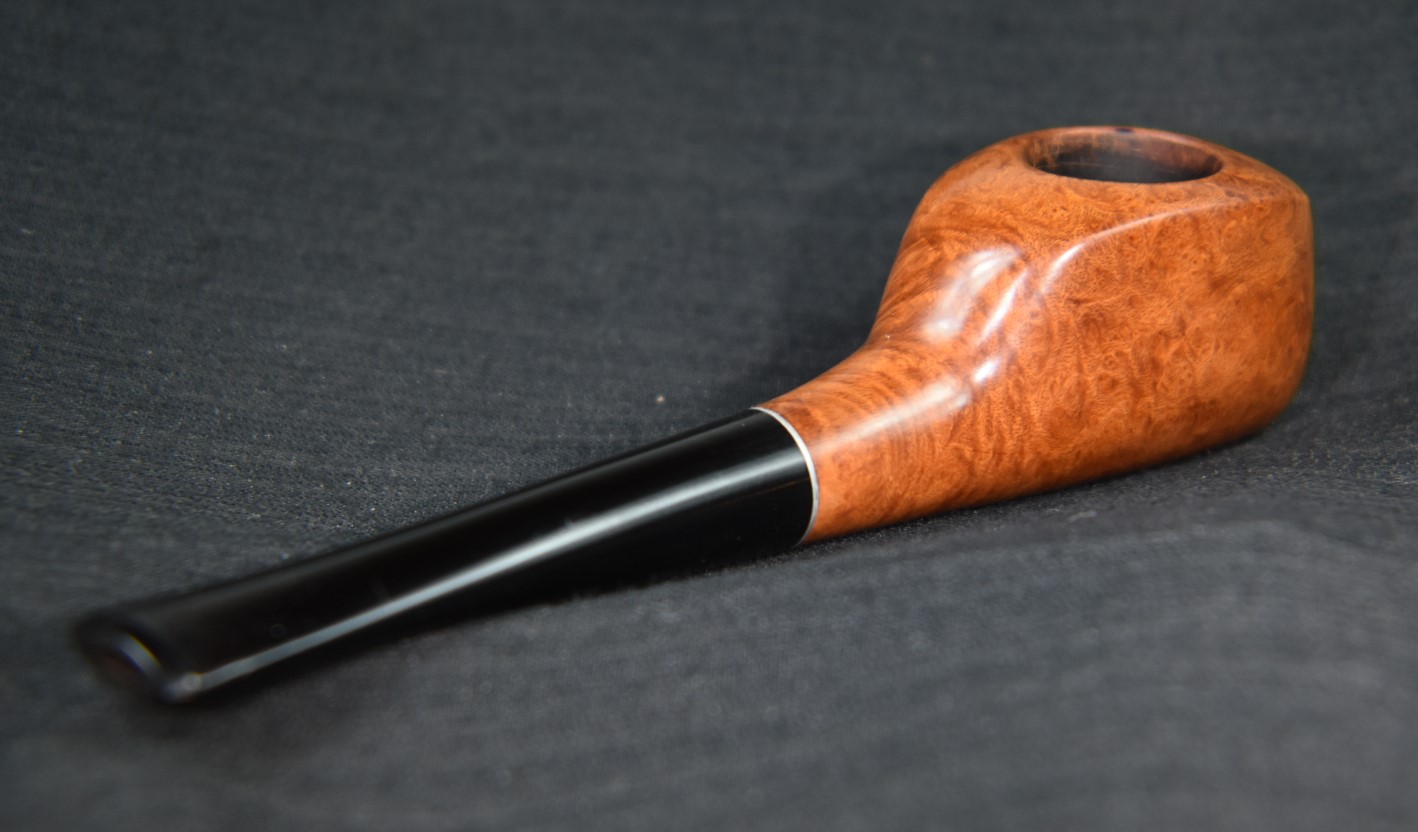


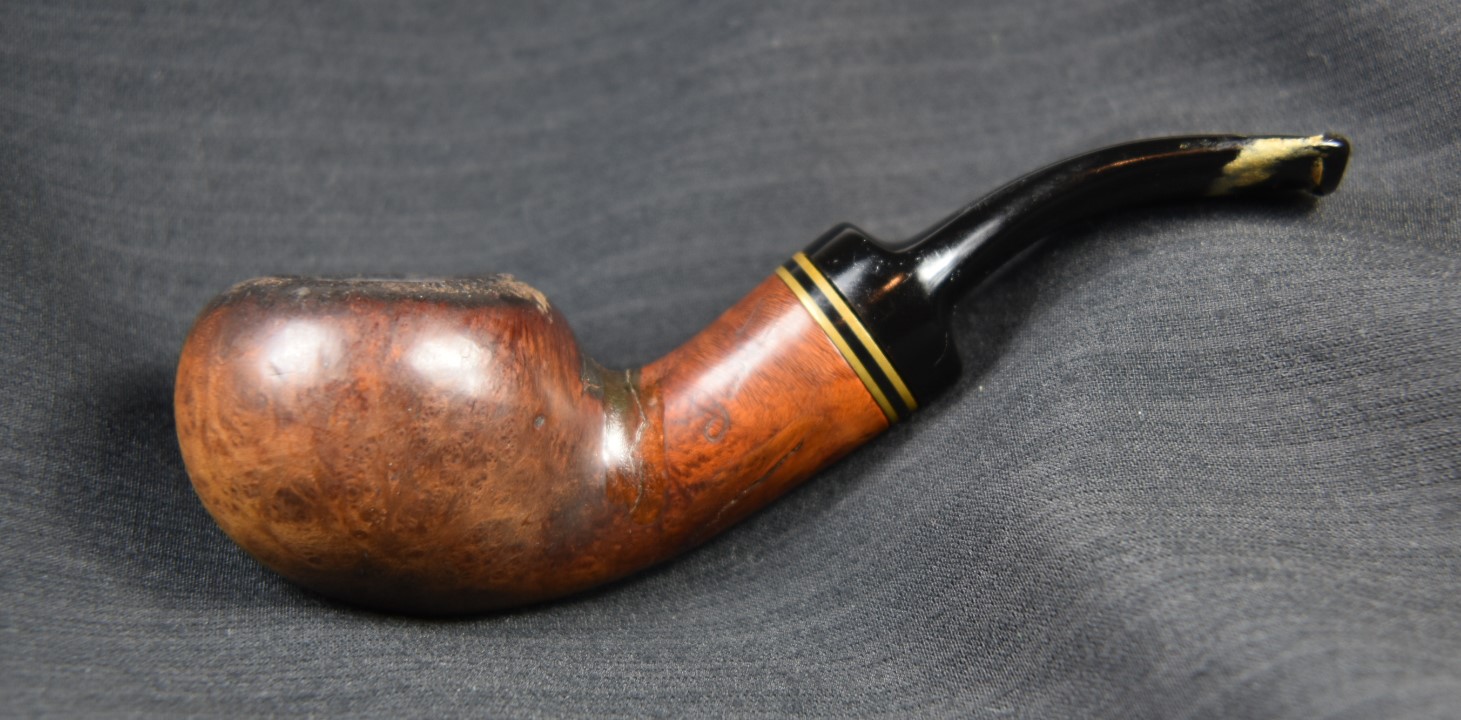

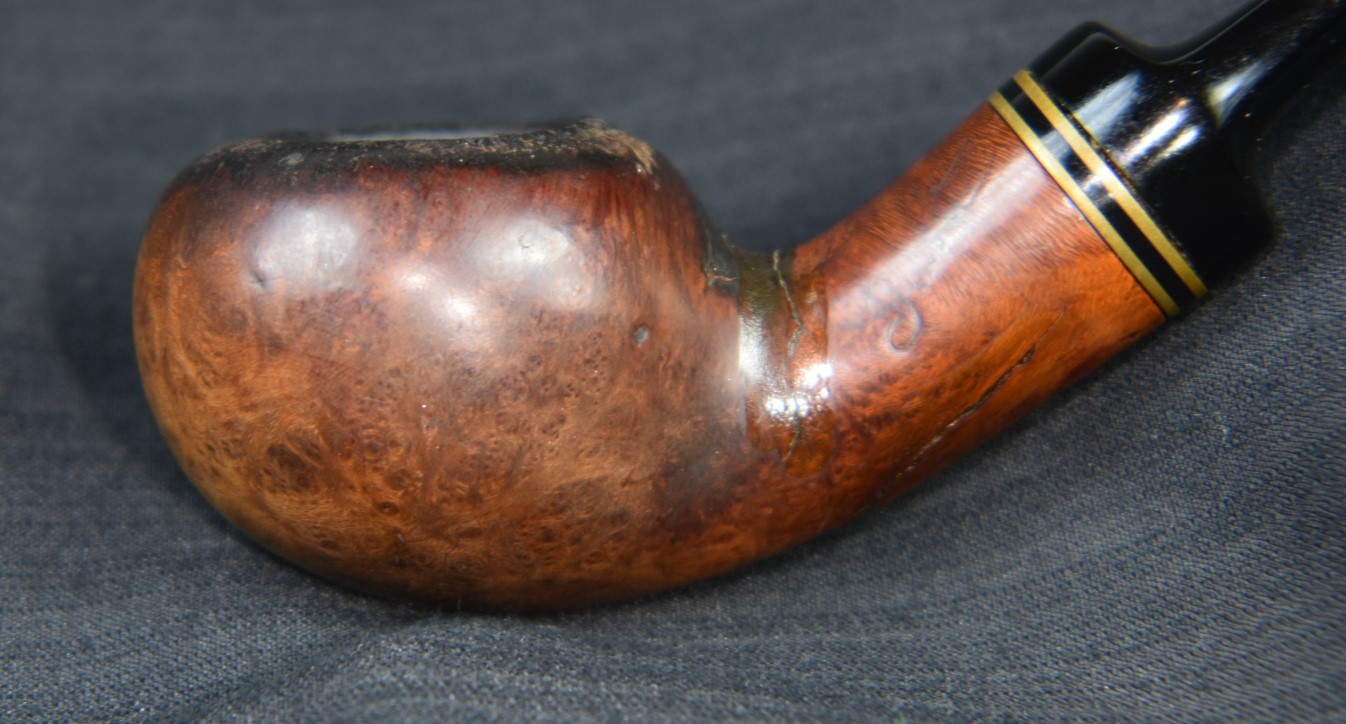
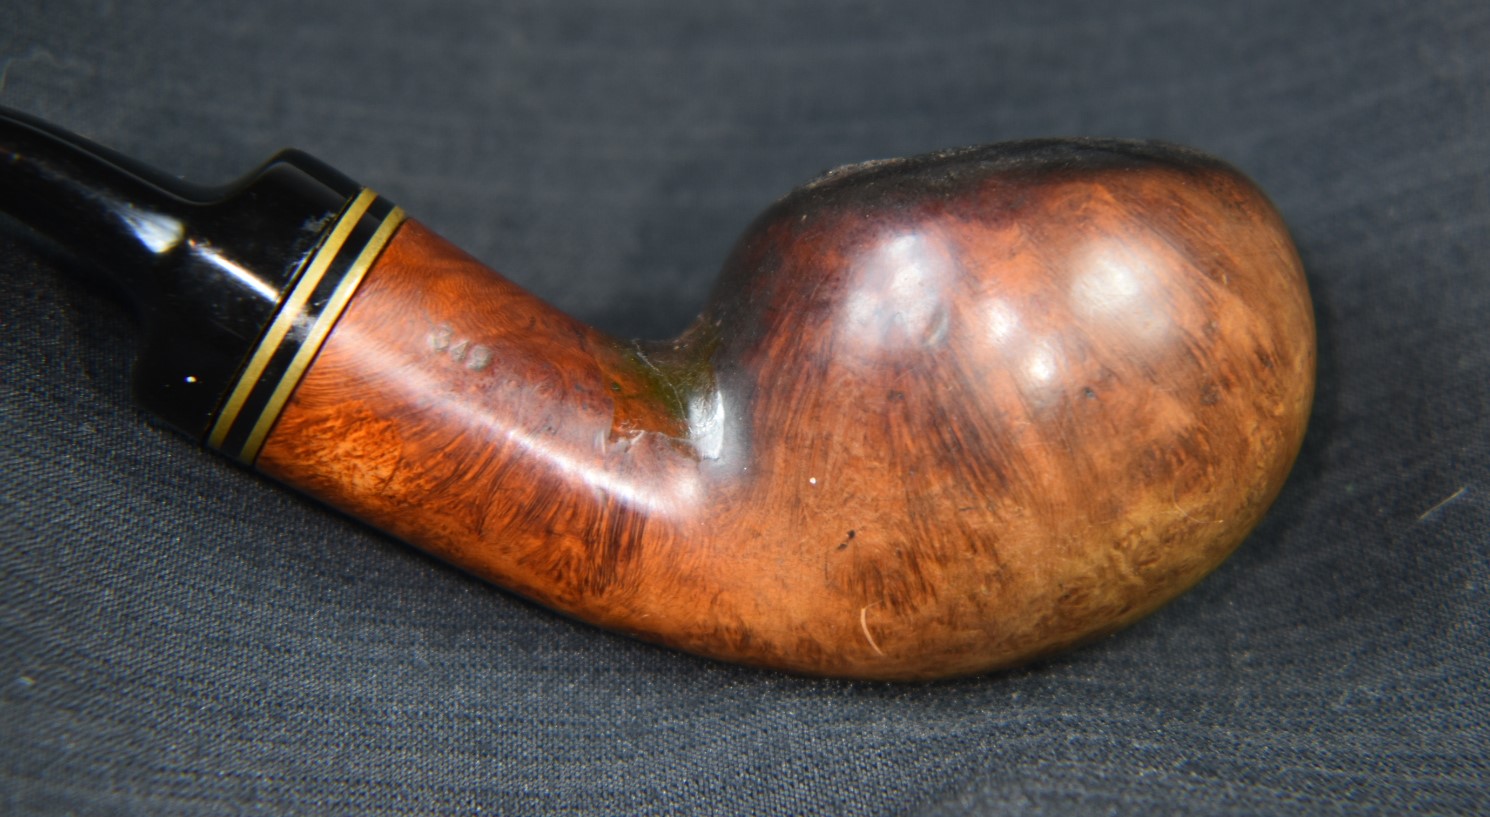
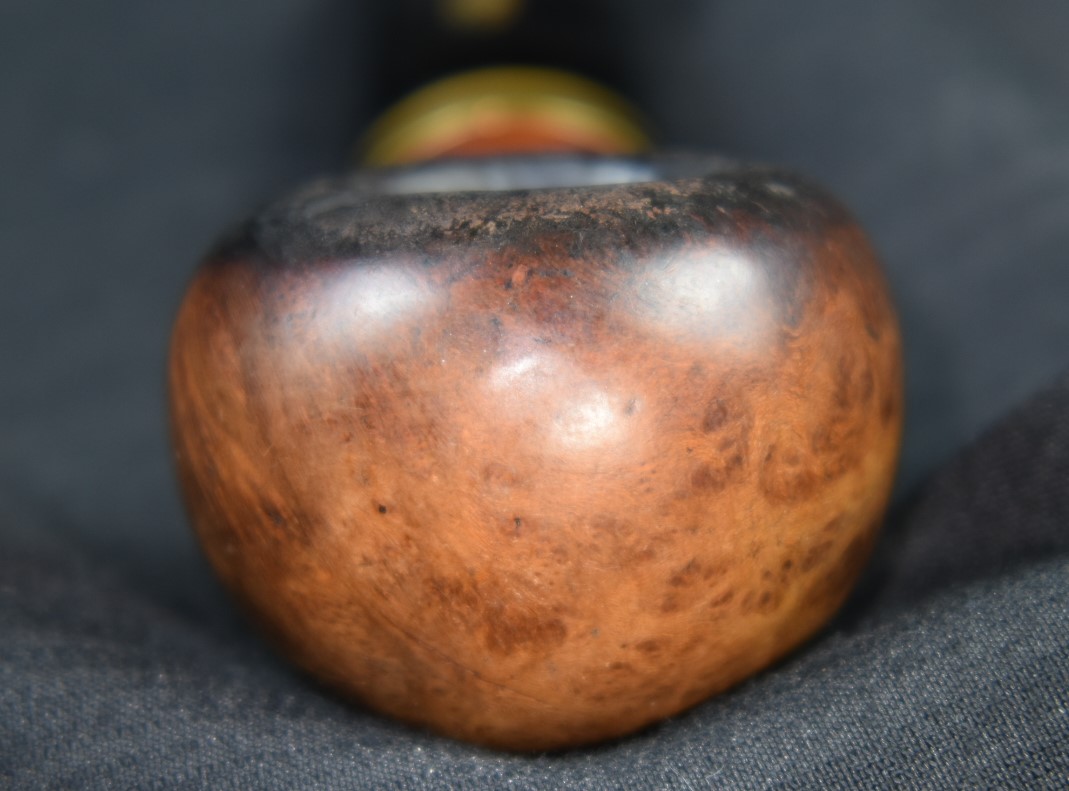
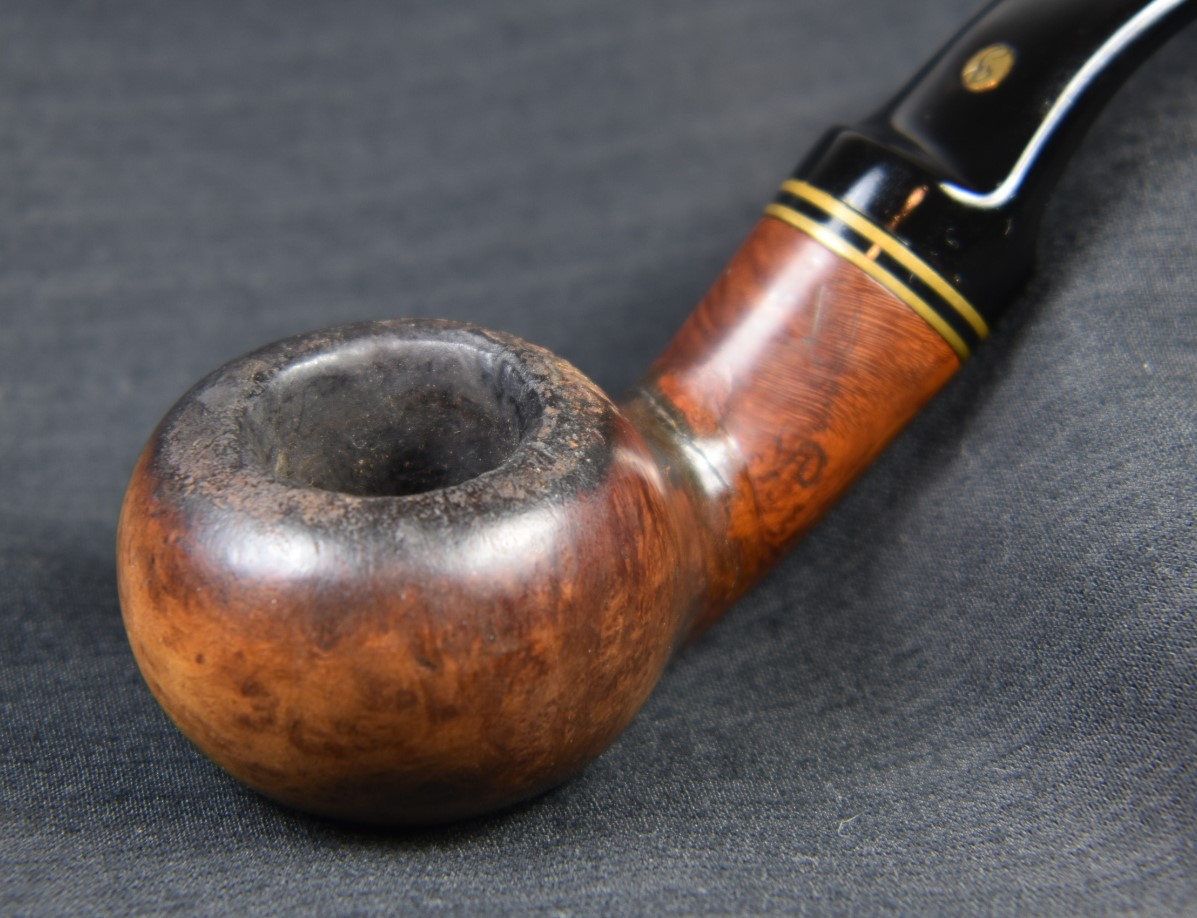

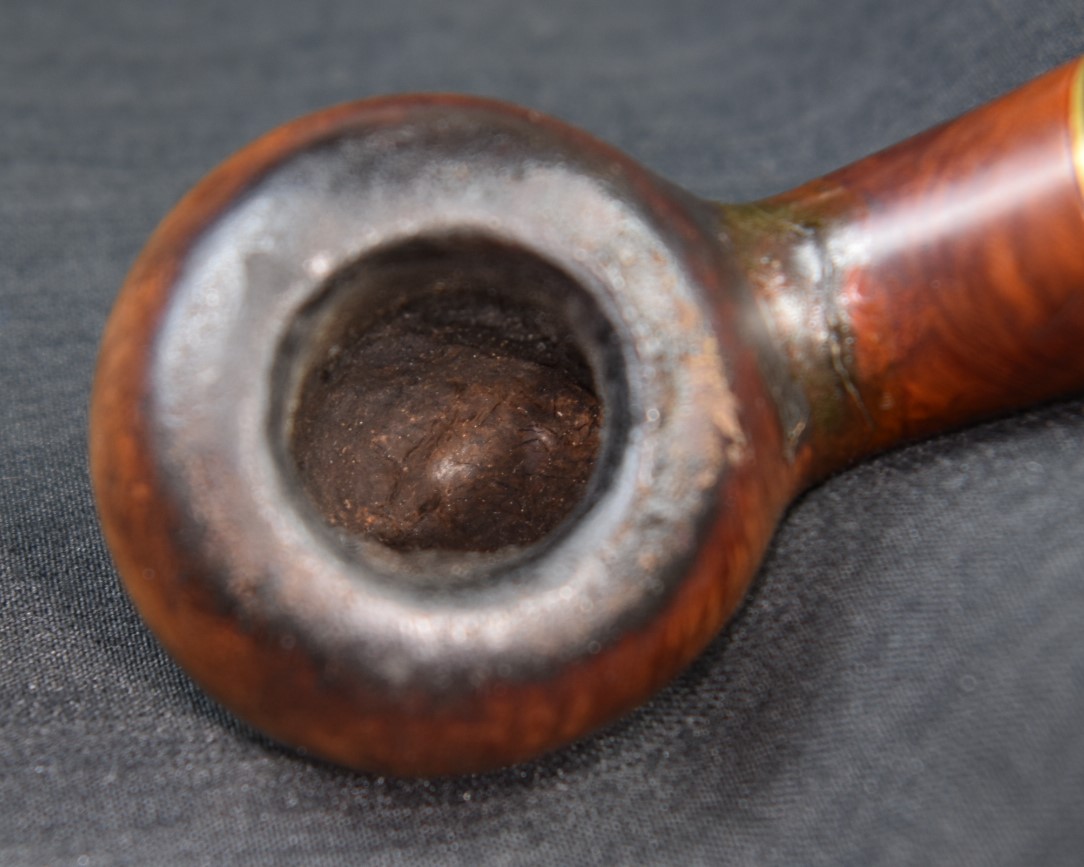

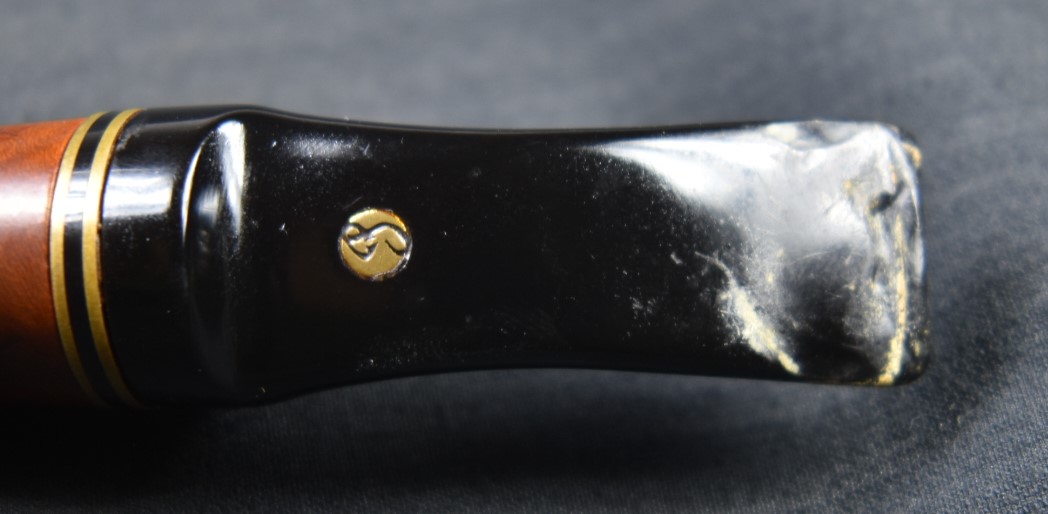


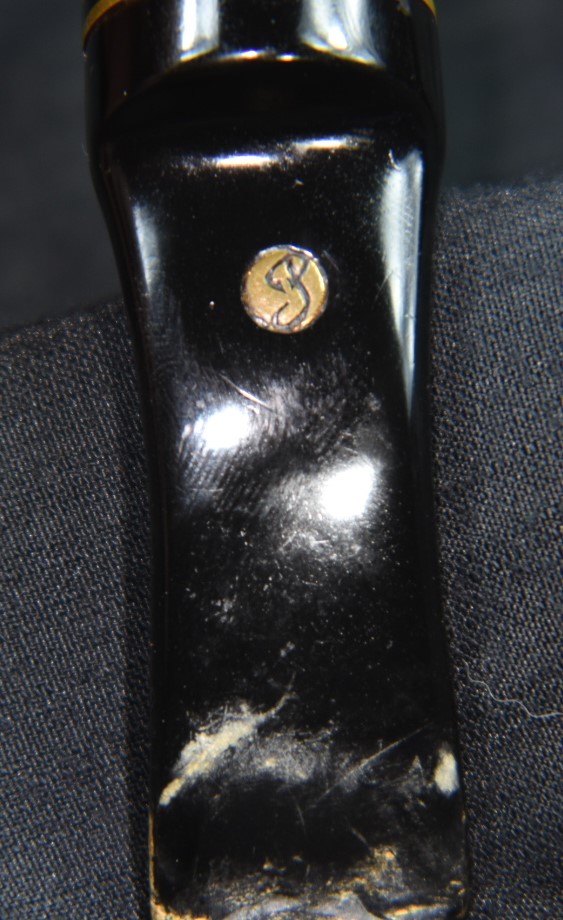
 (
(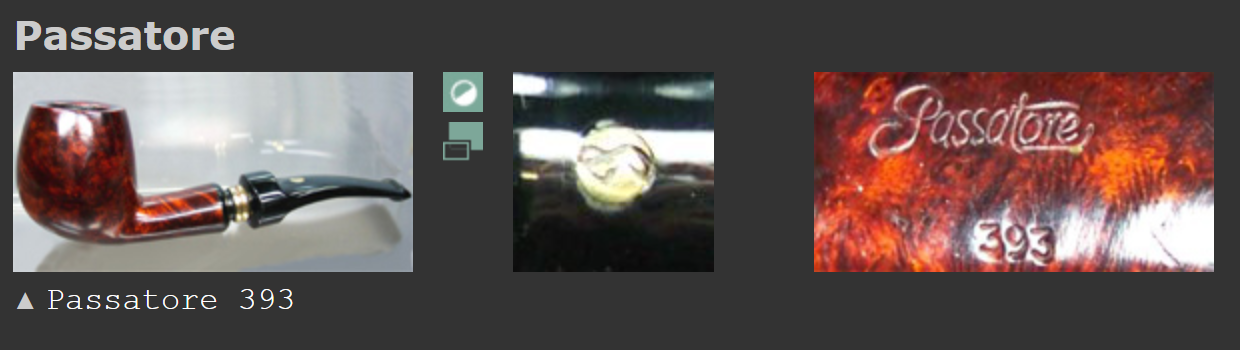
 (Photo courtesy of Steve Laug)
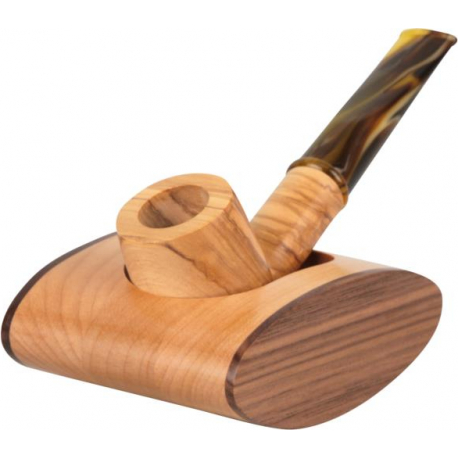

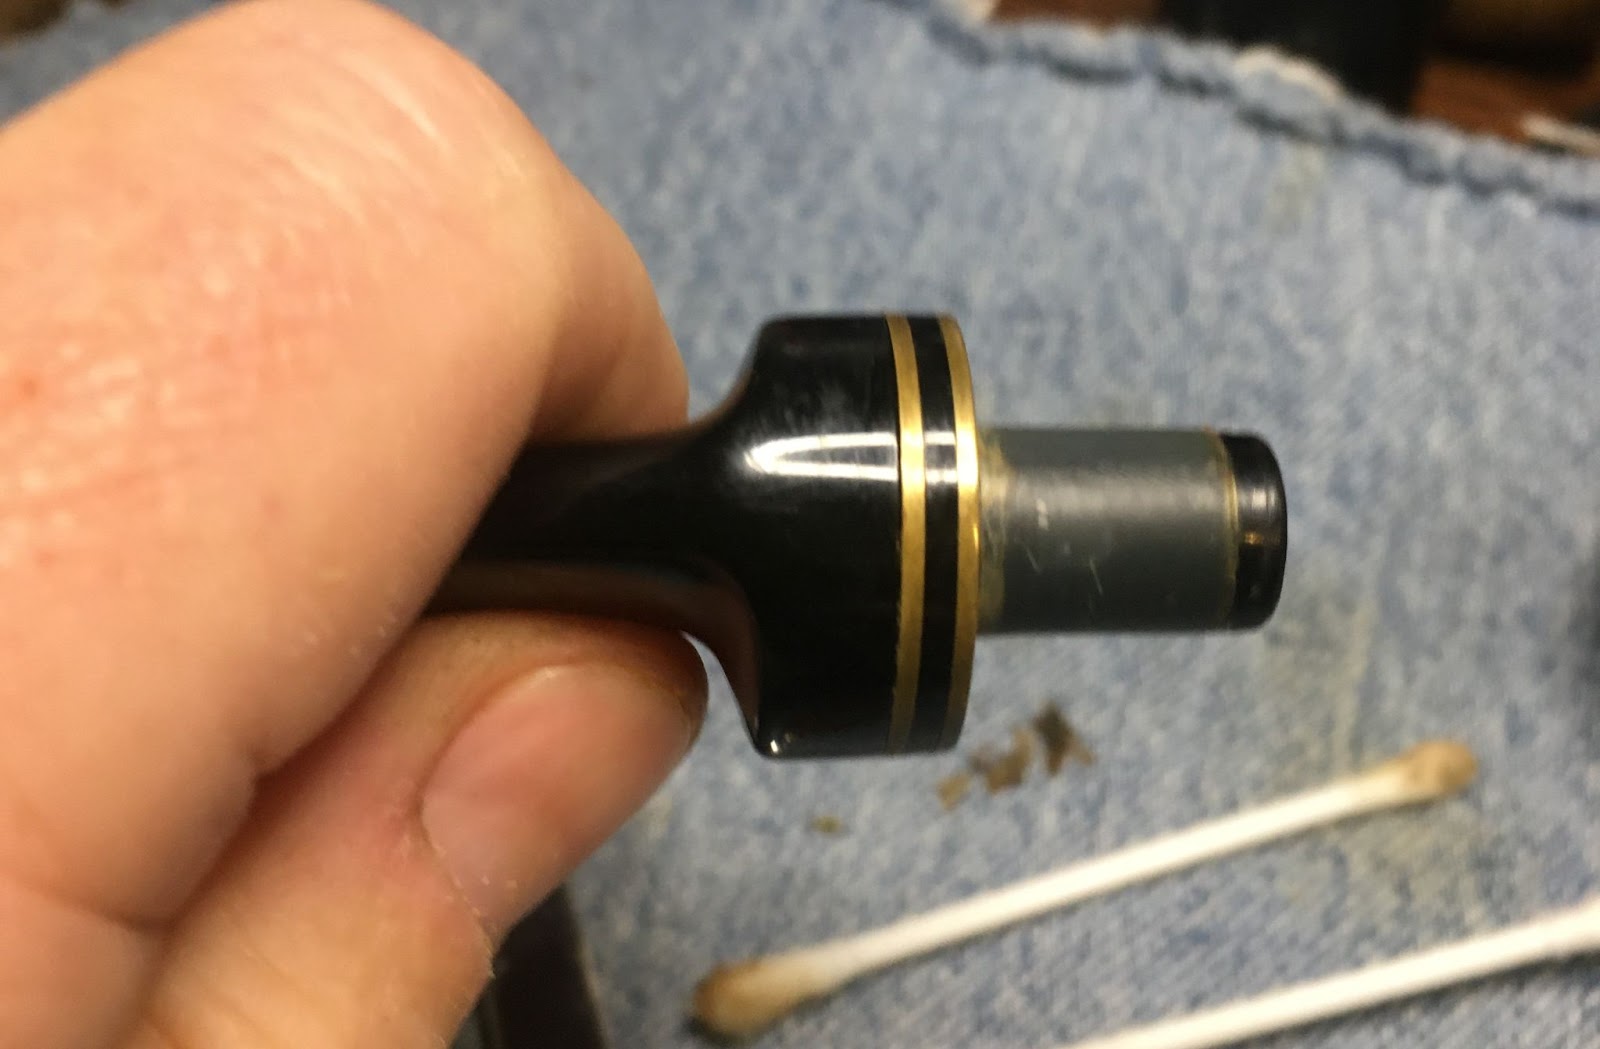

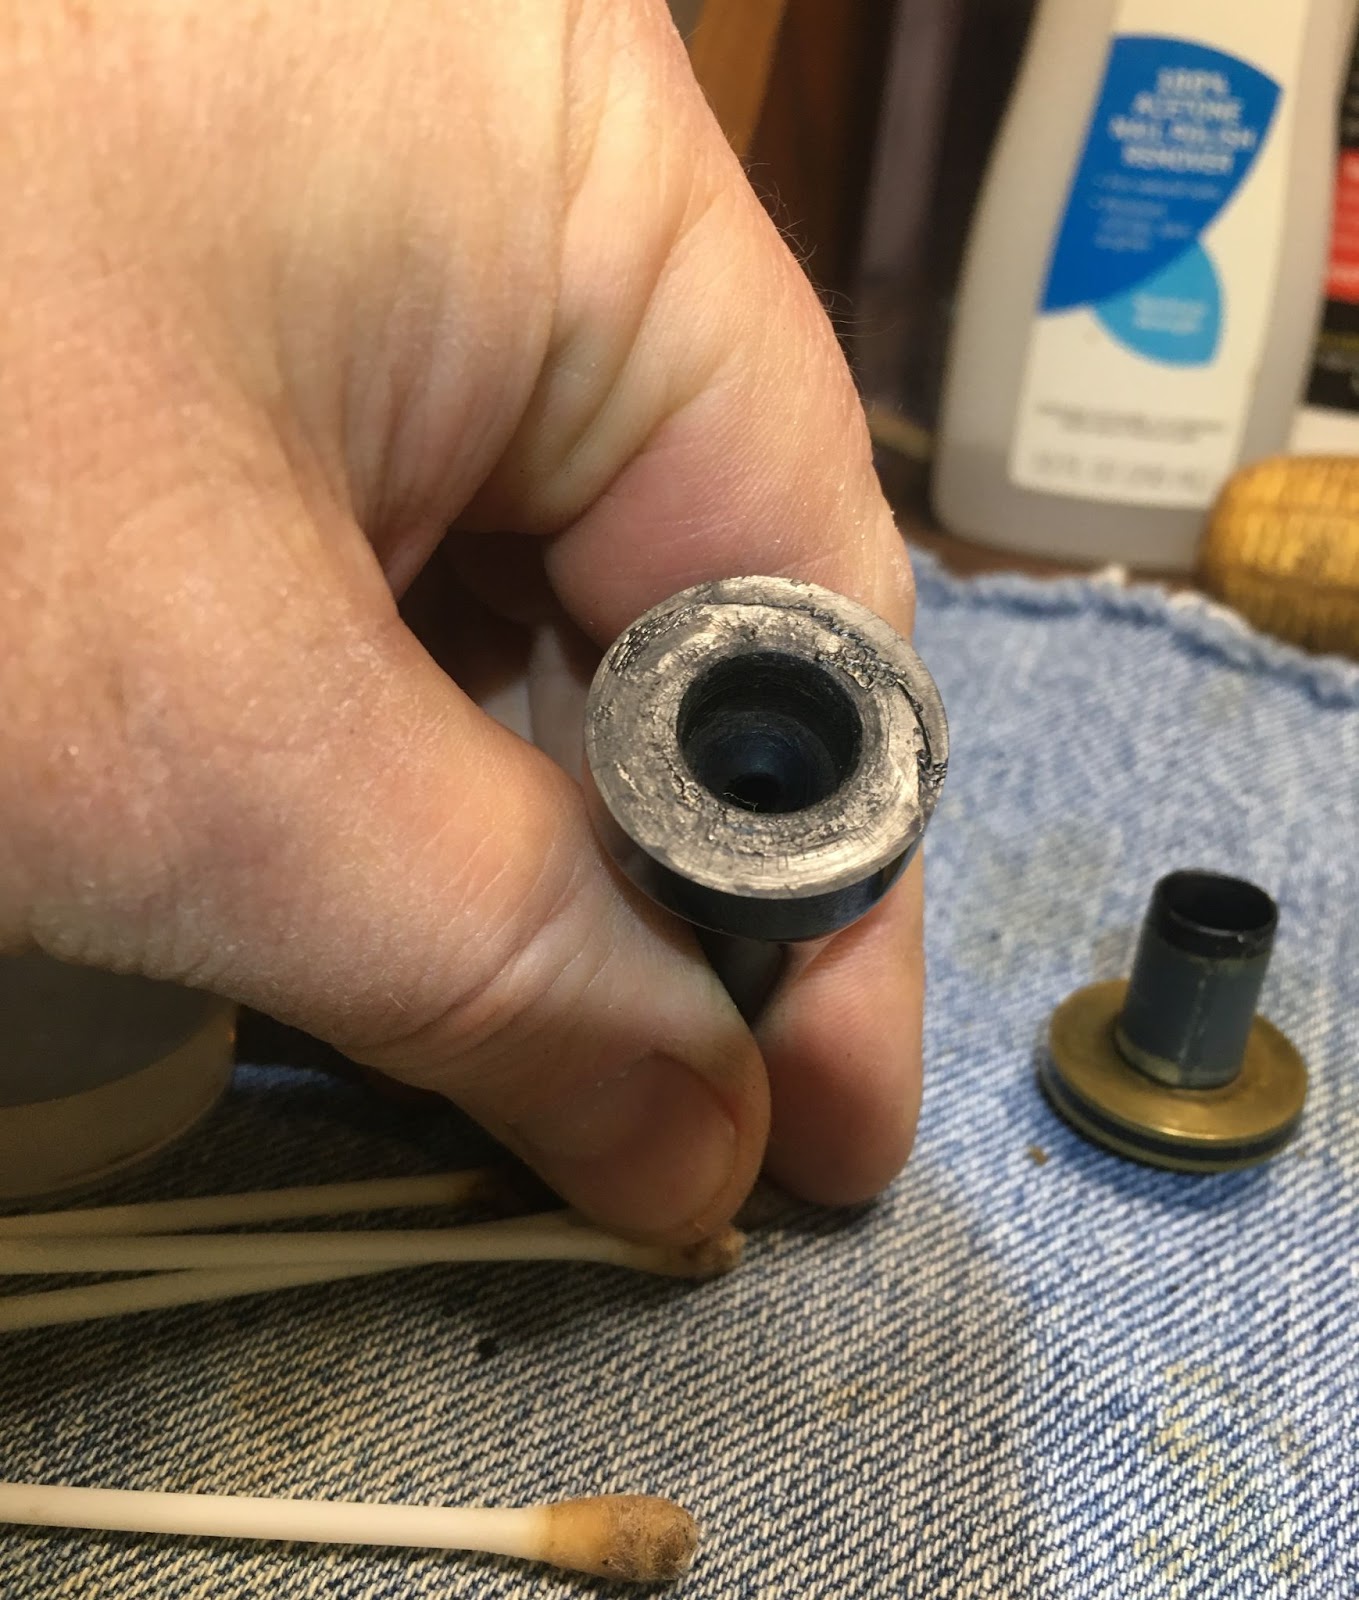


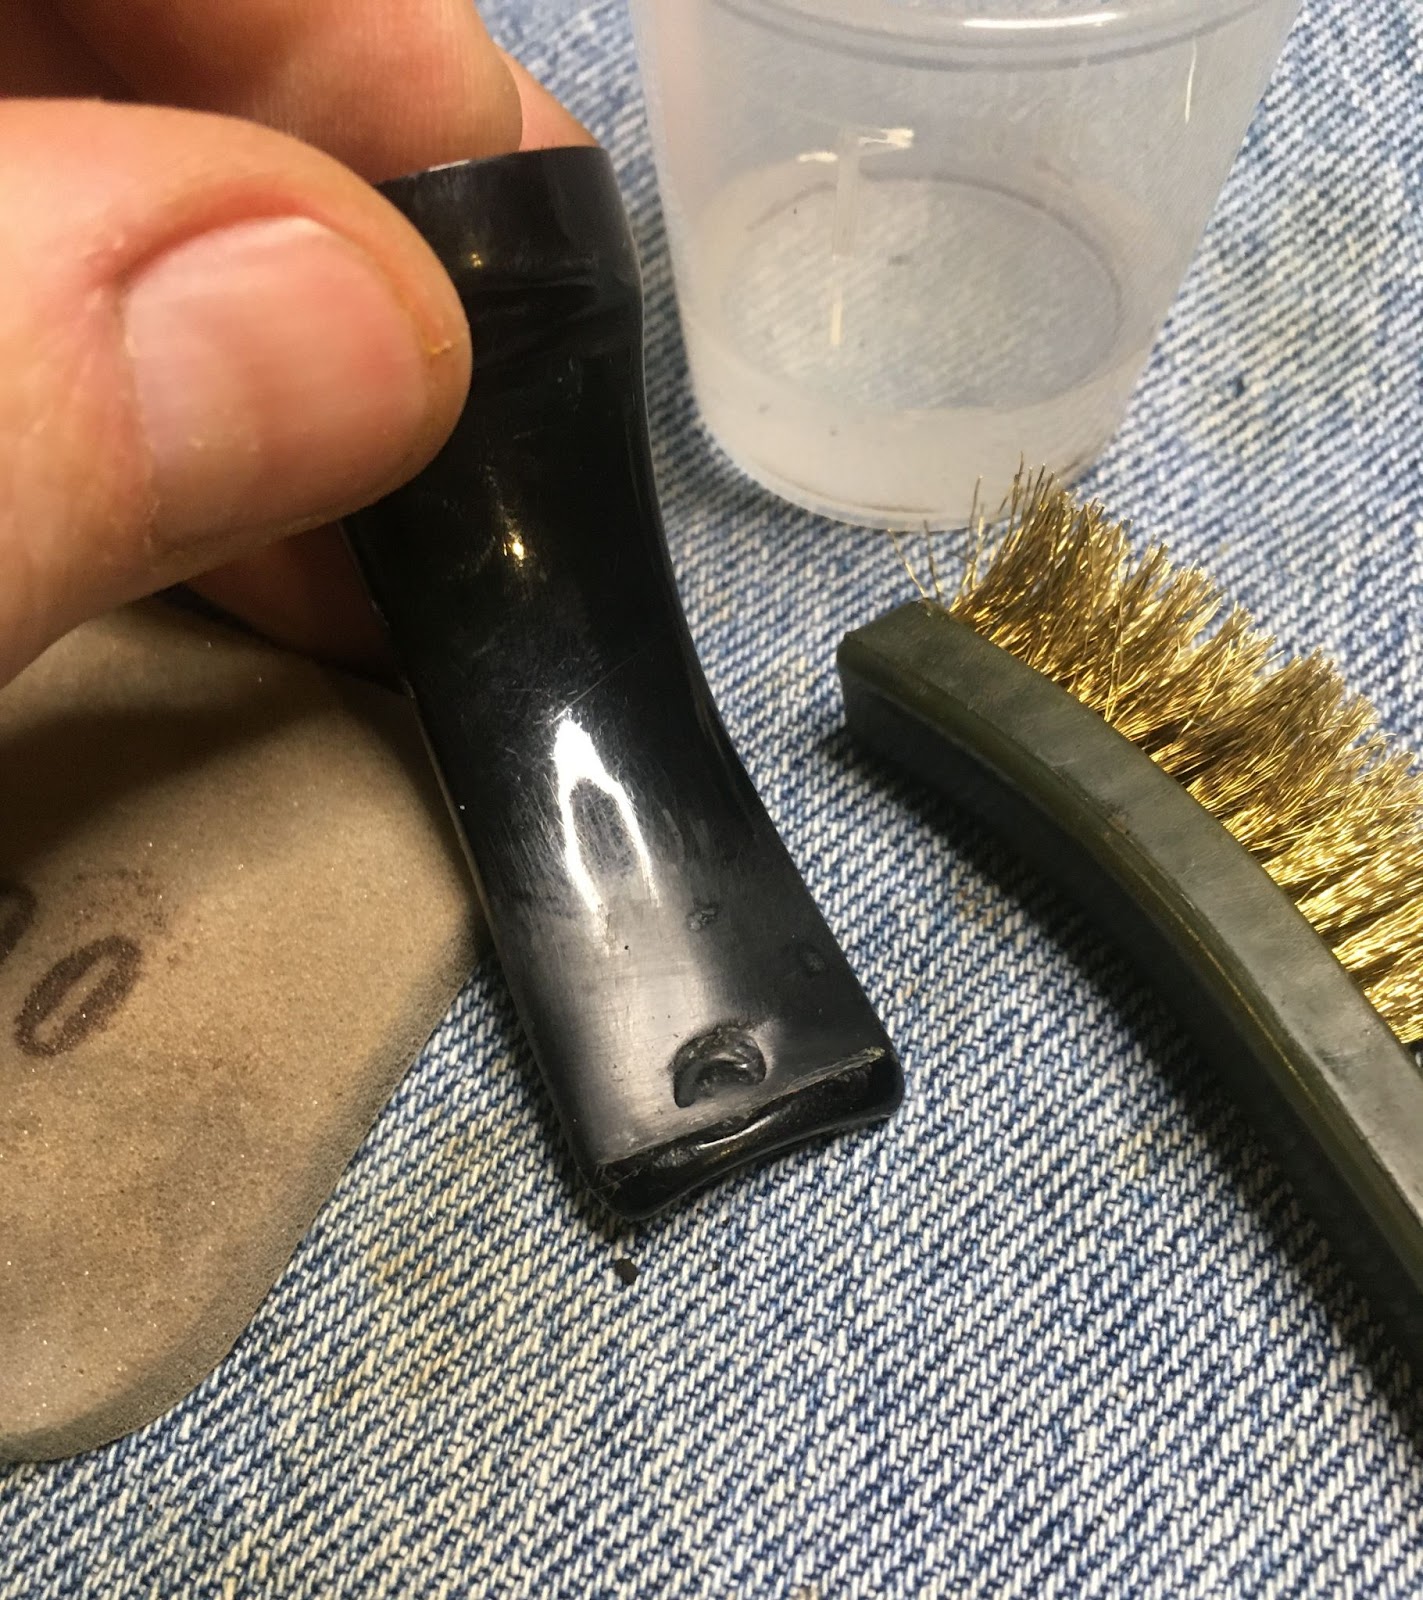


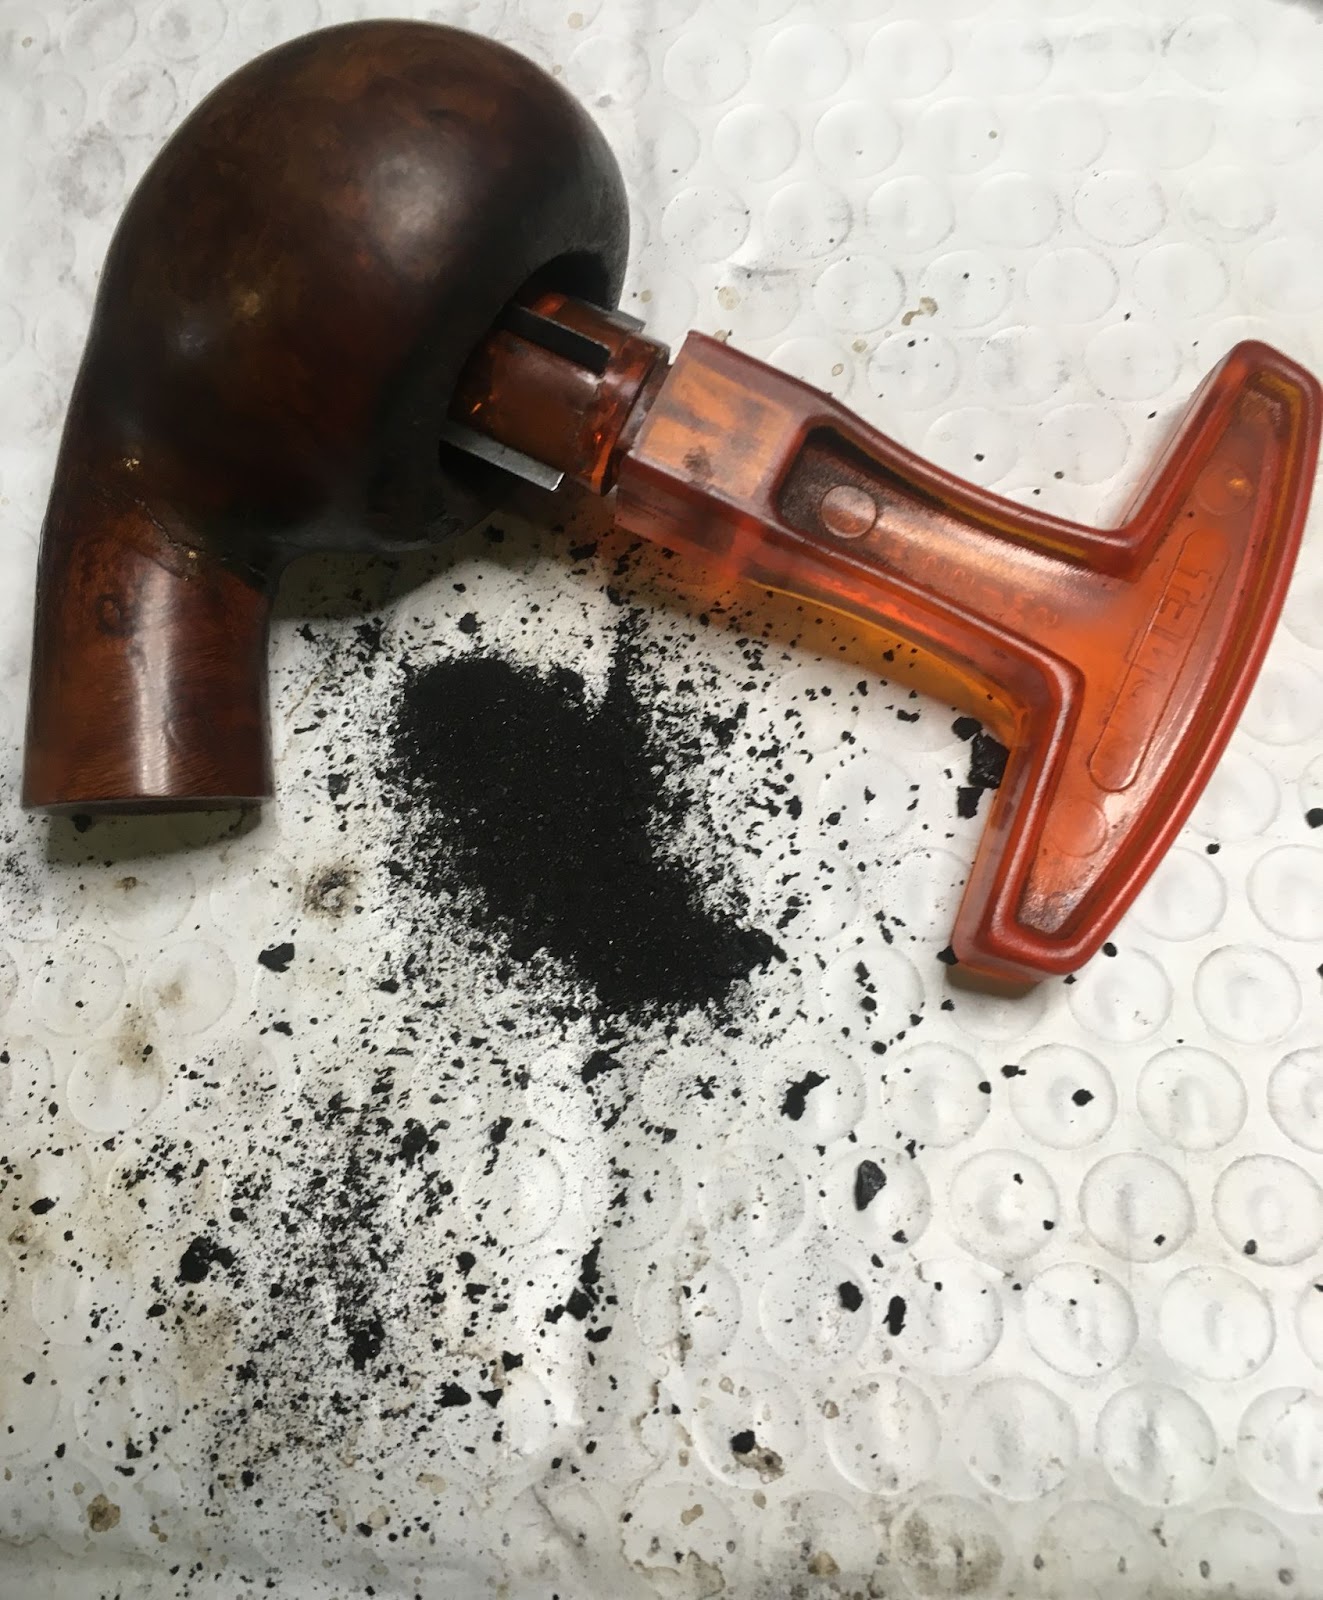
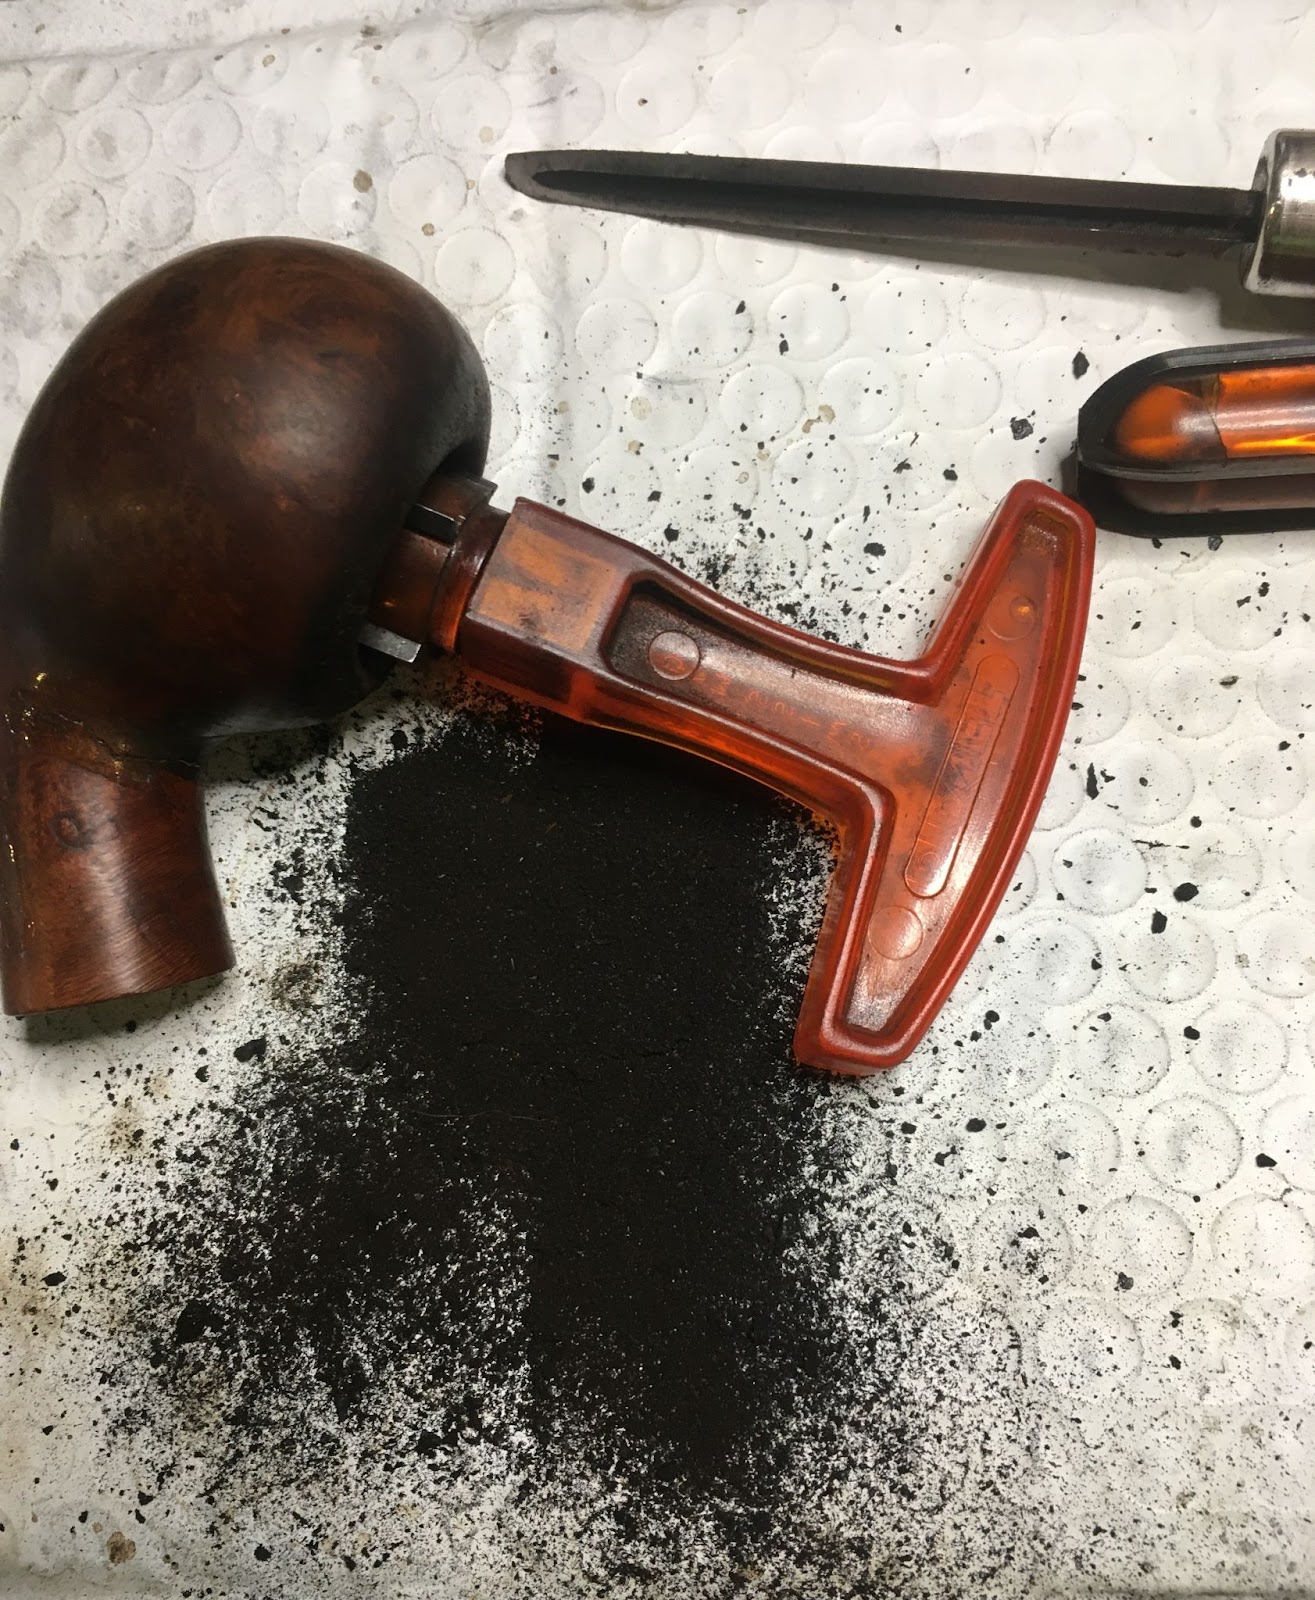

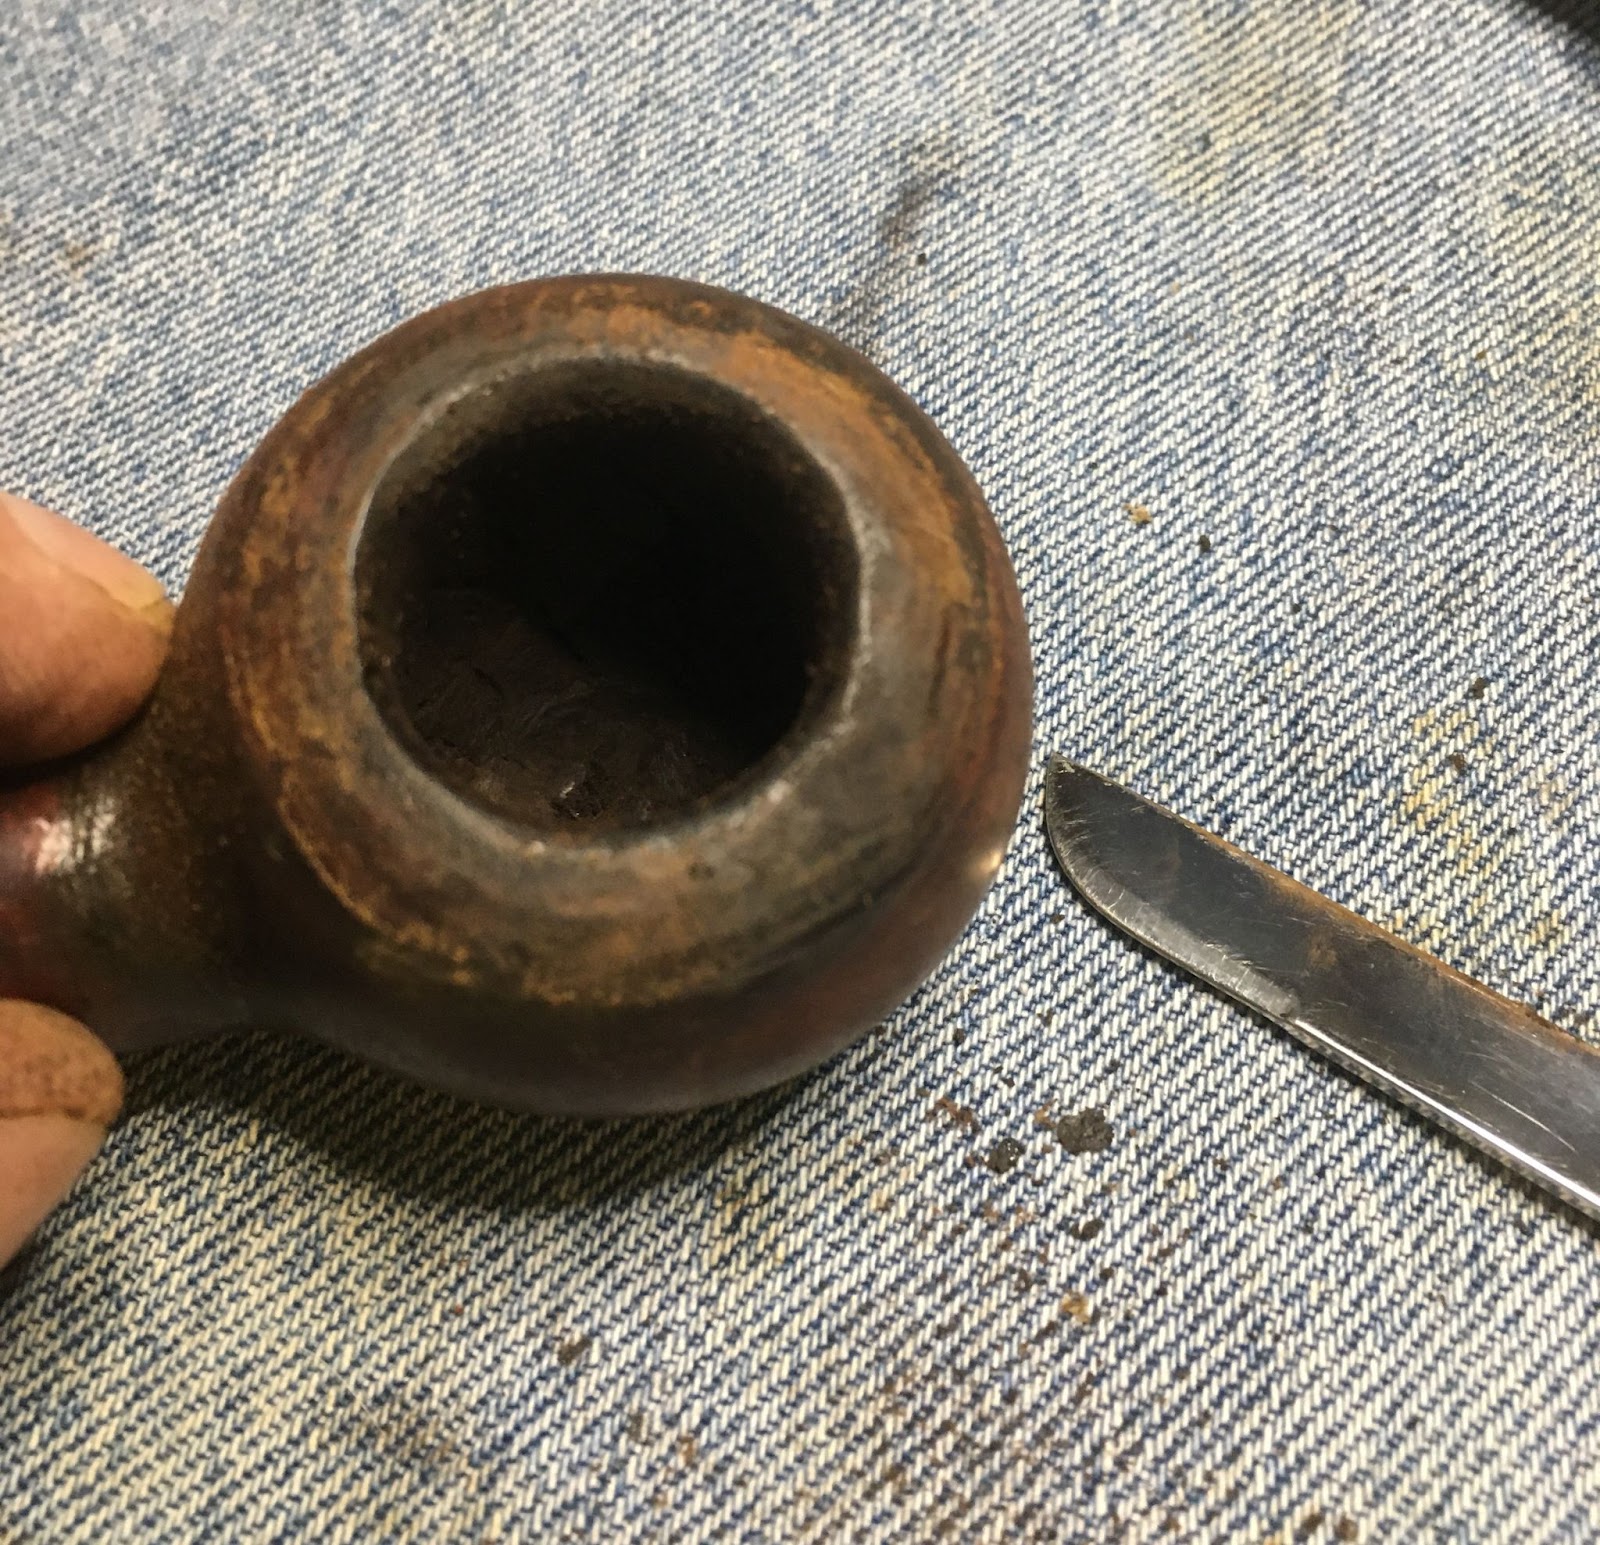


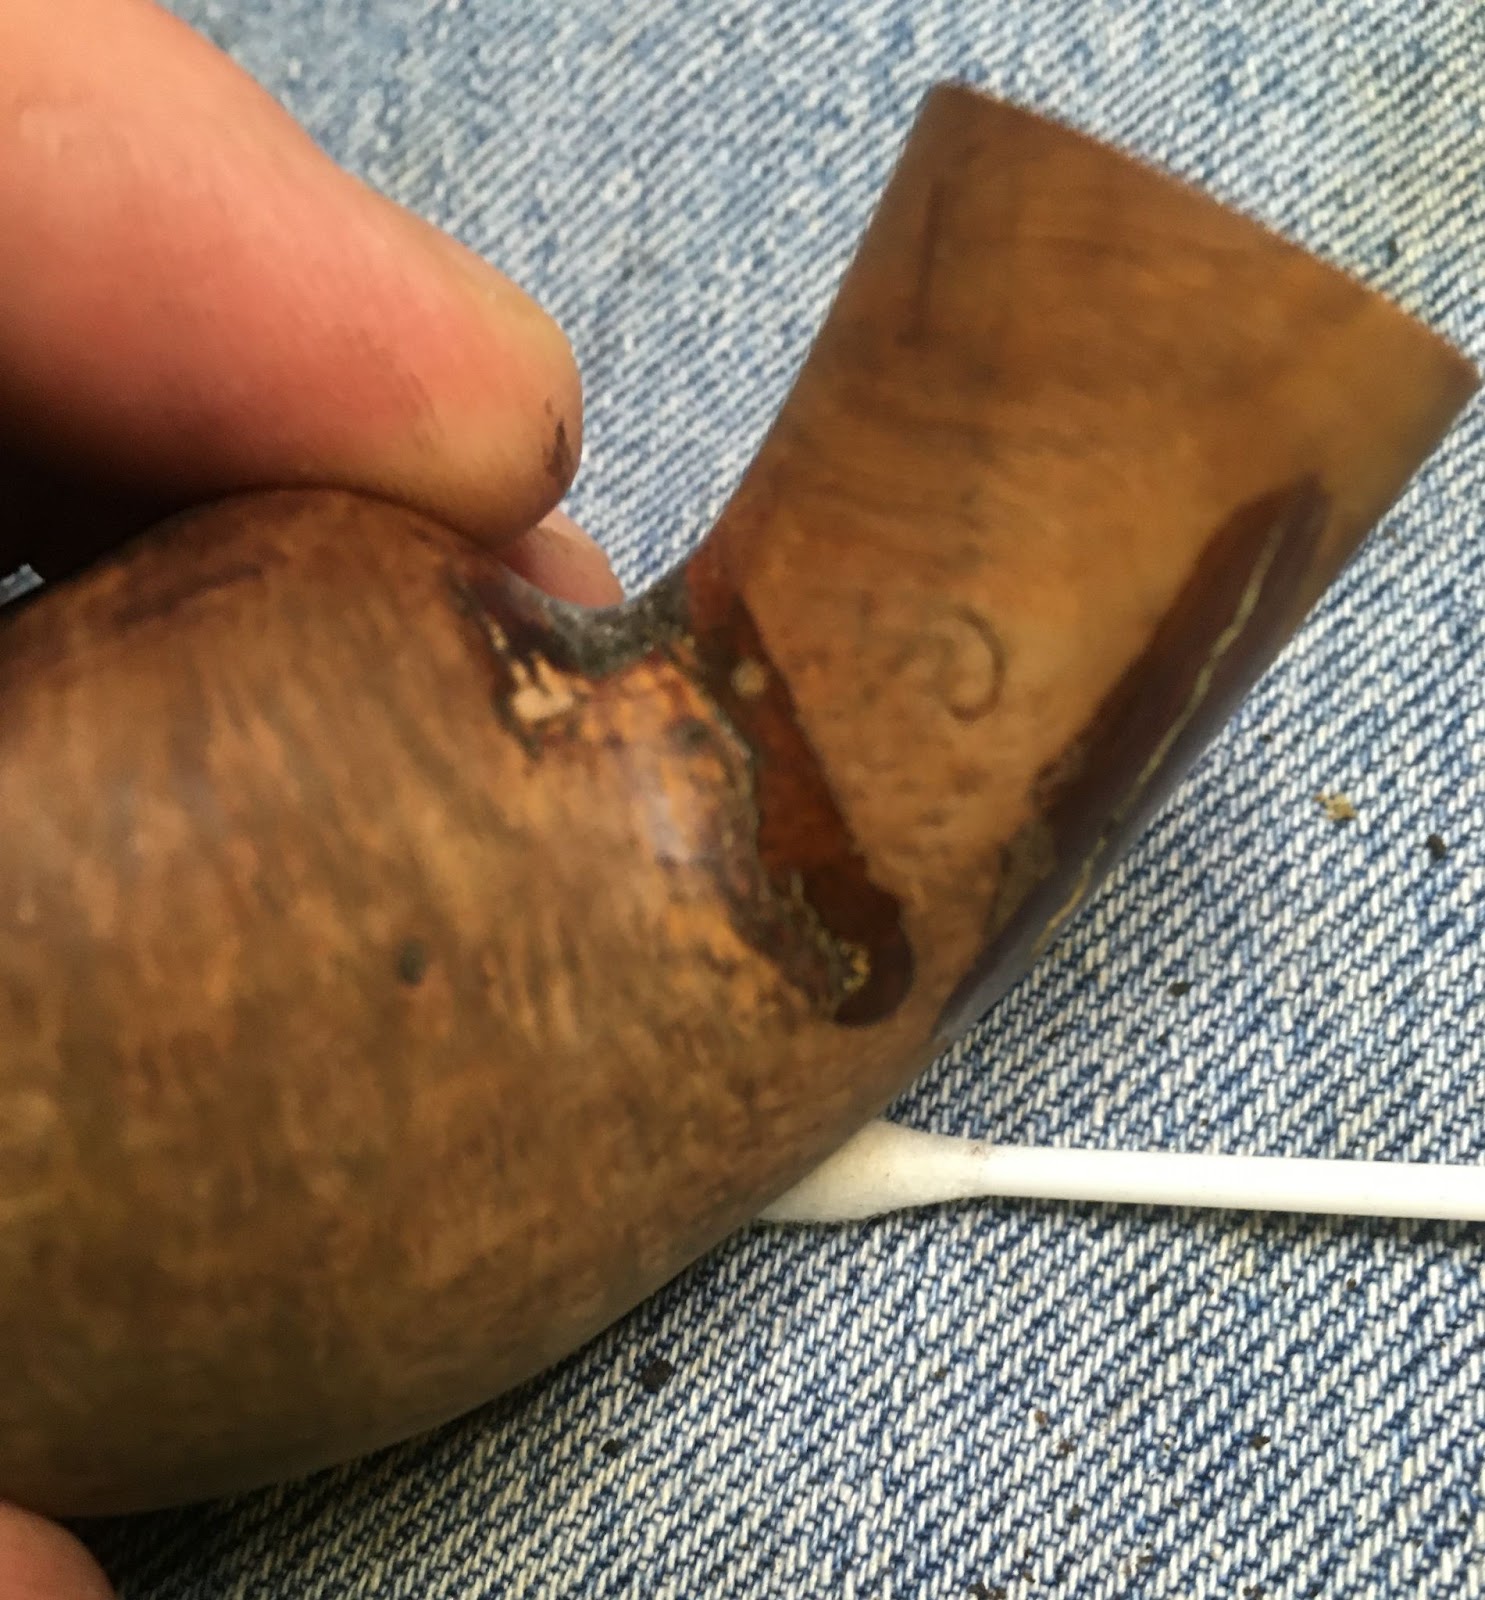


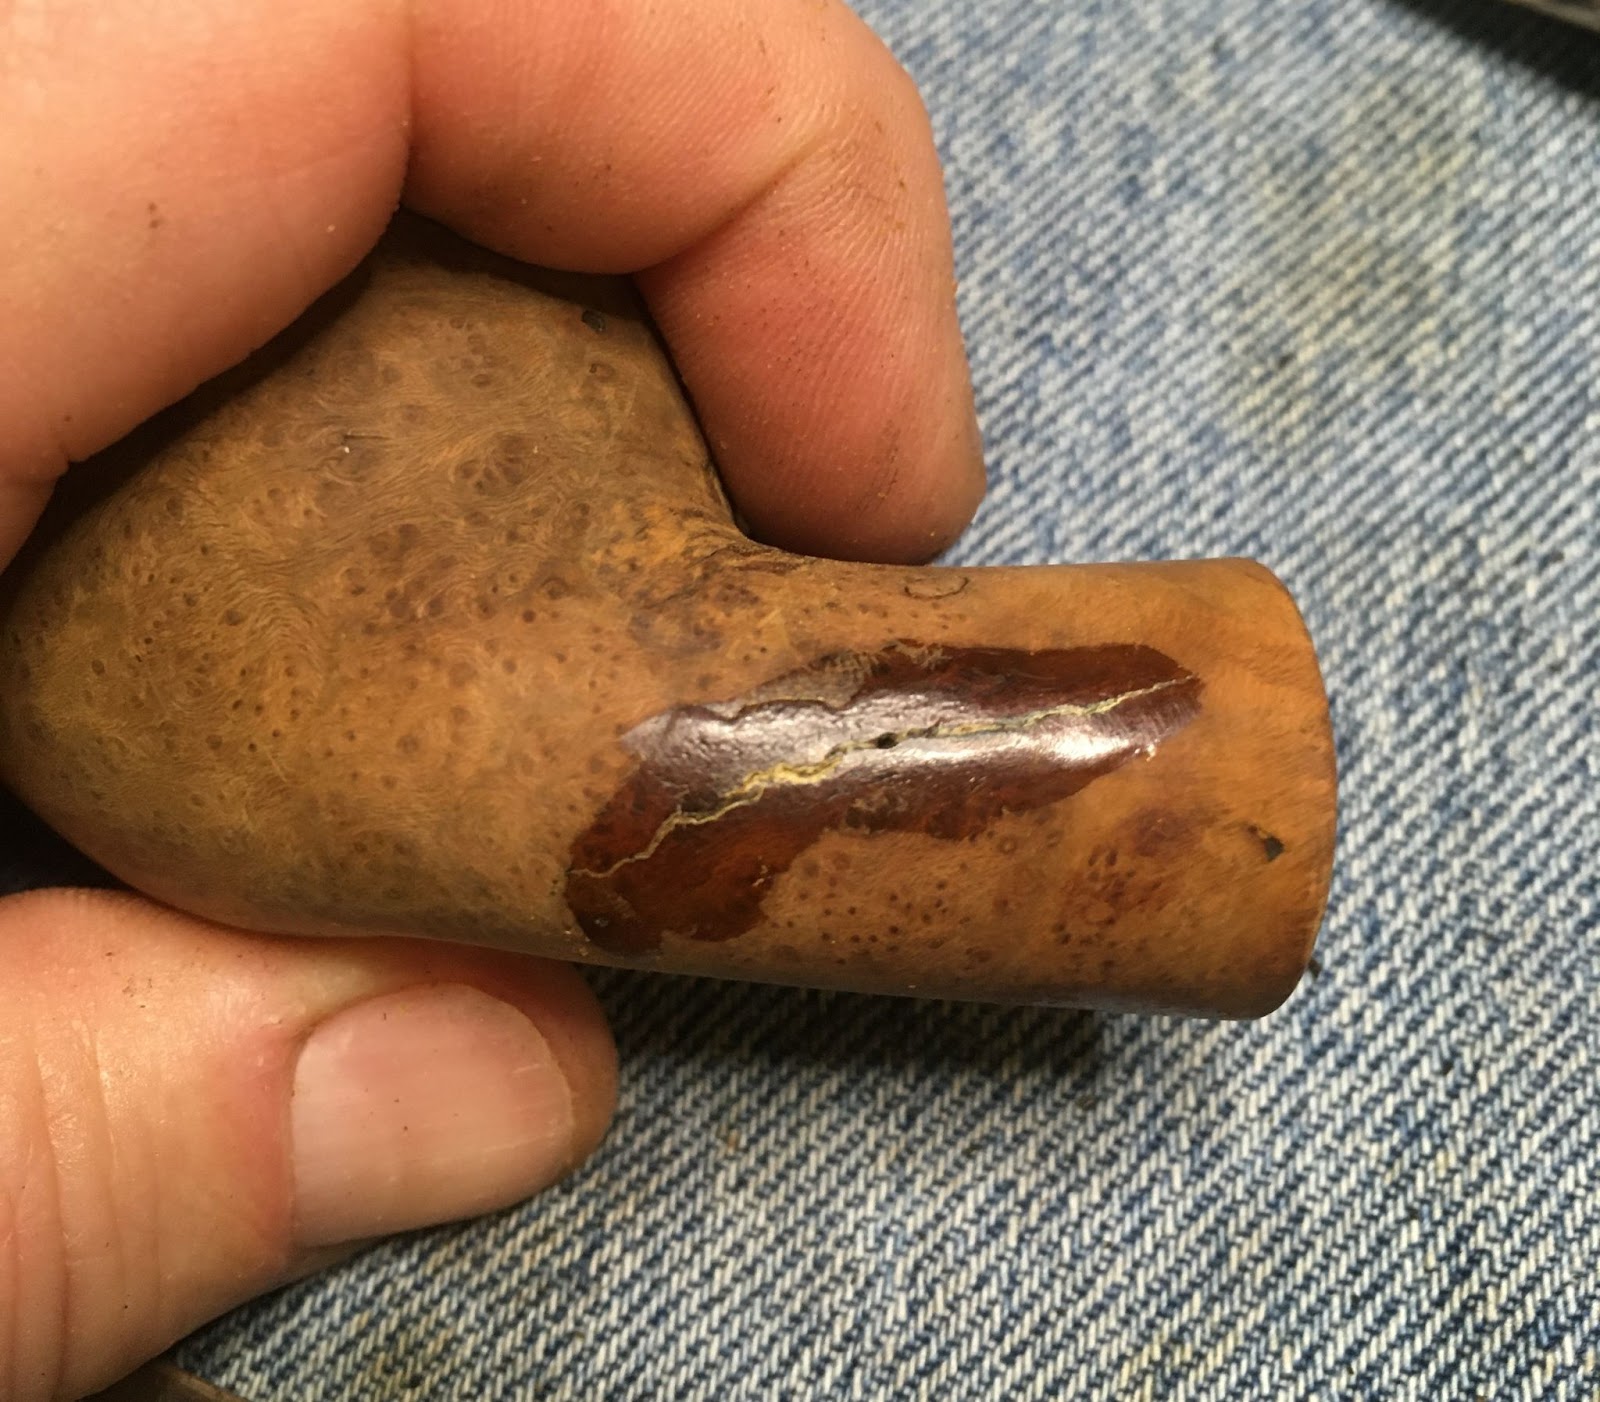

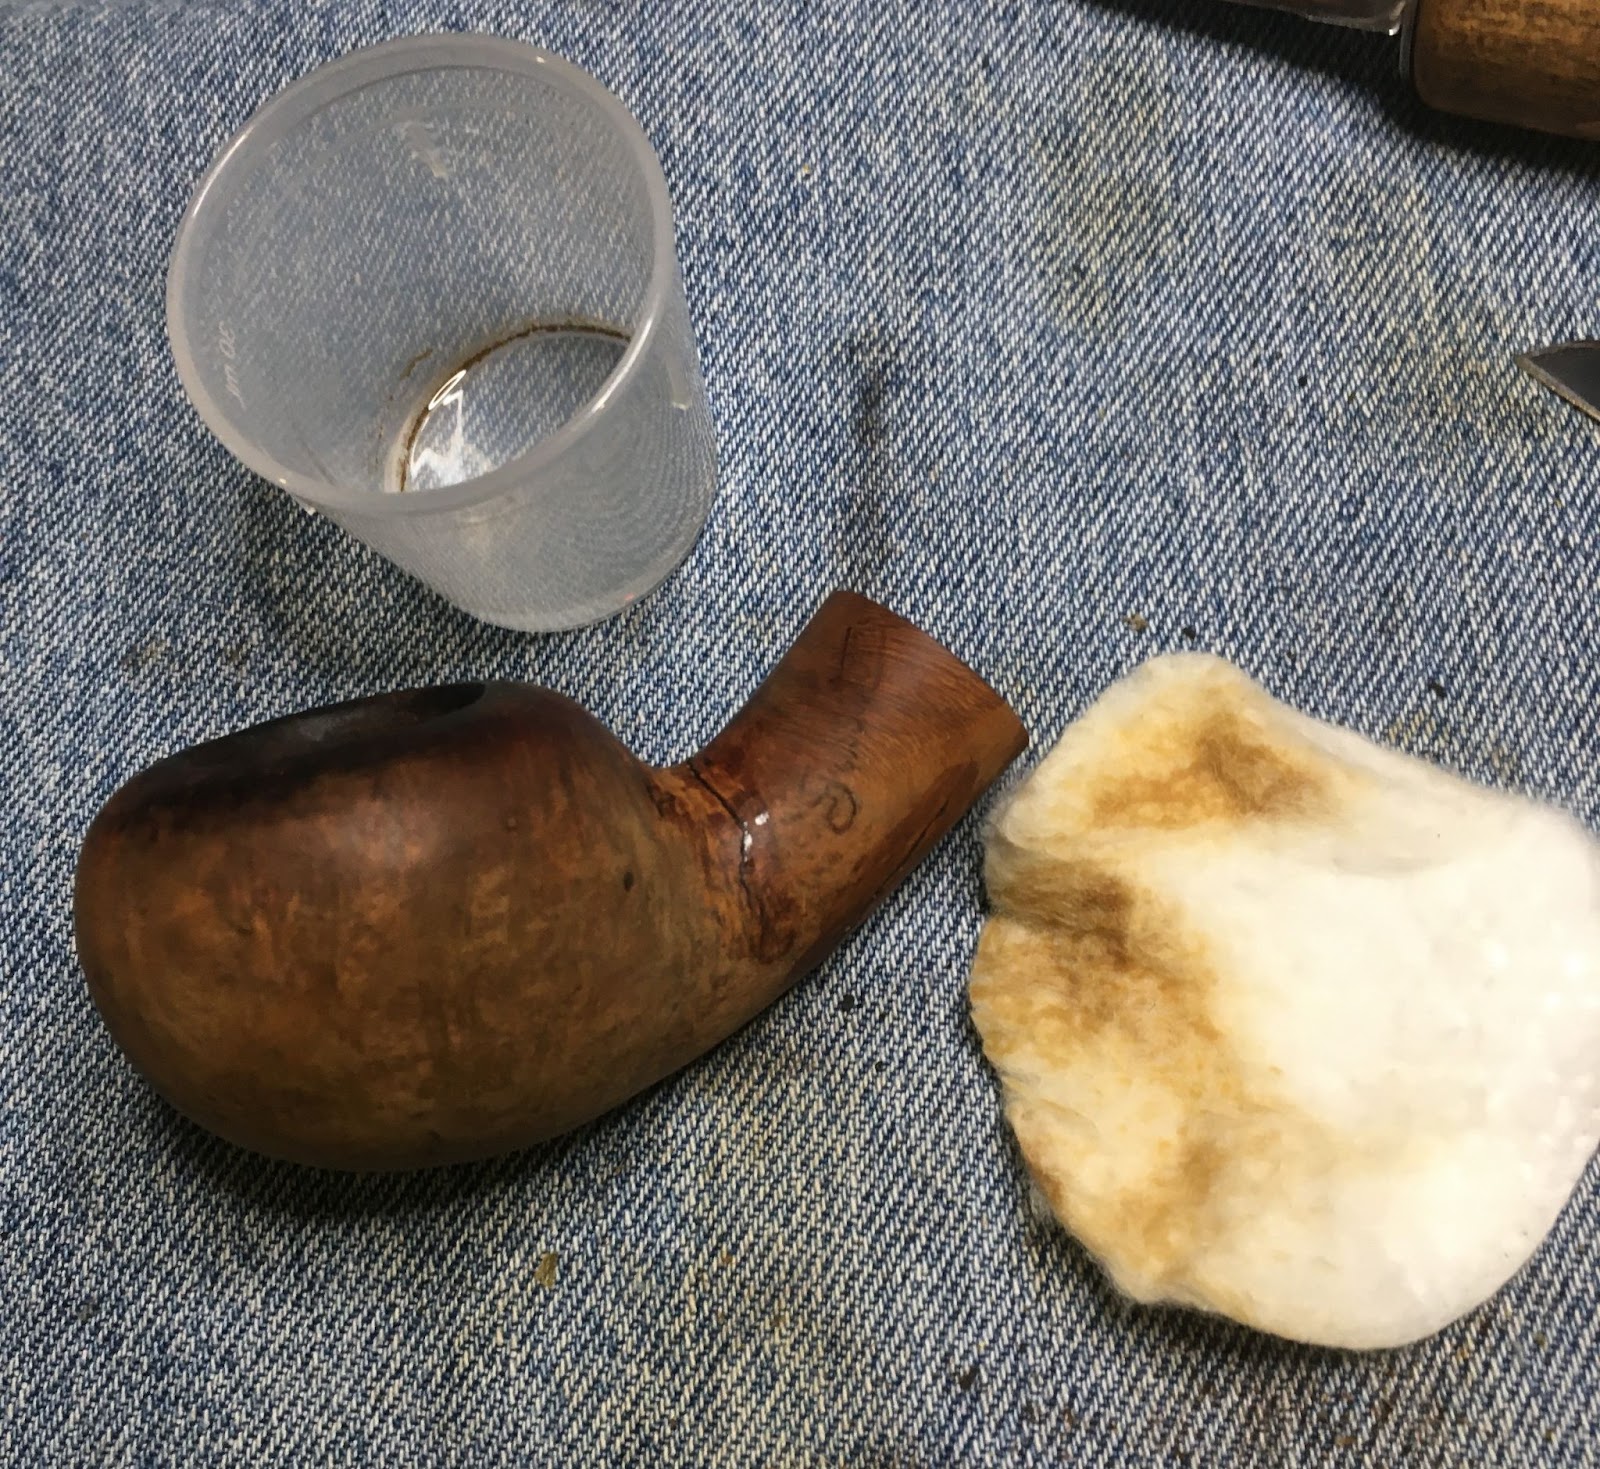


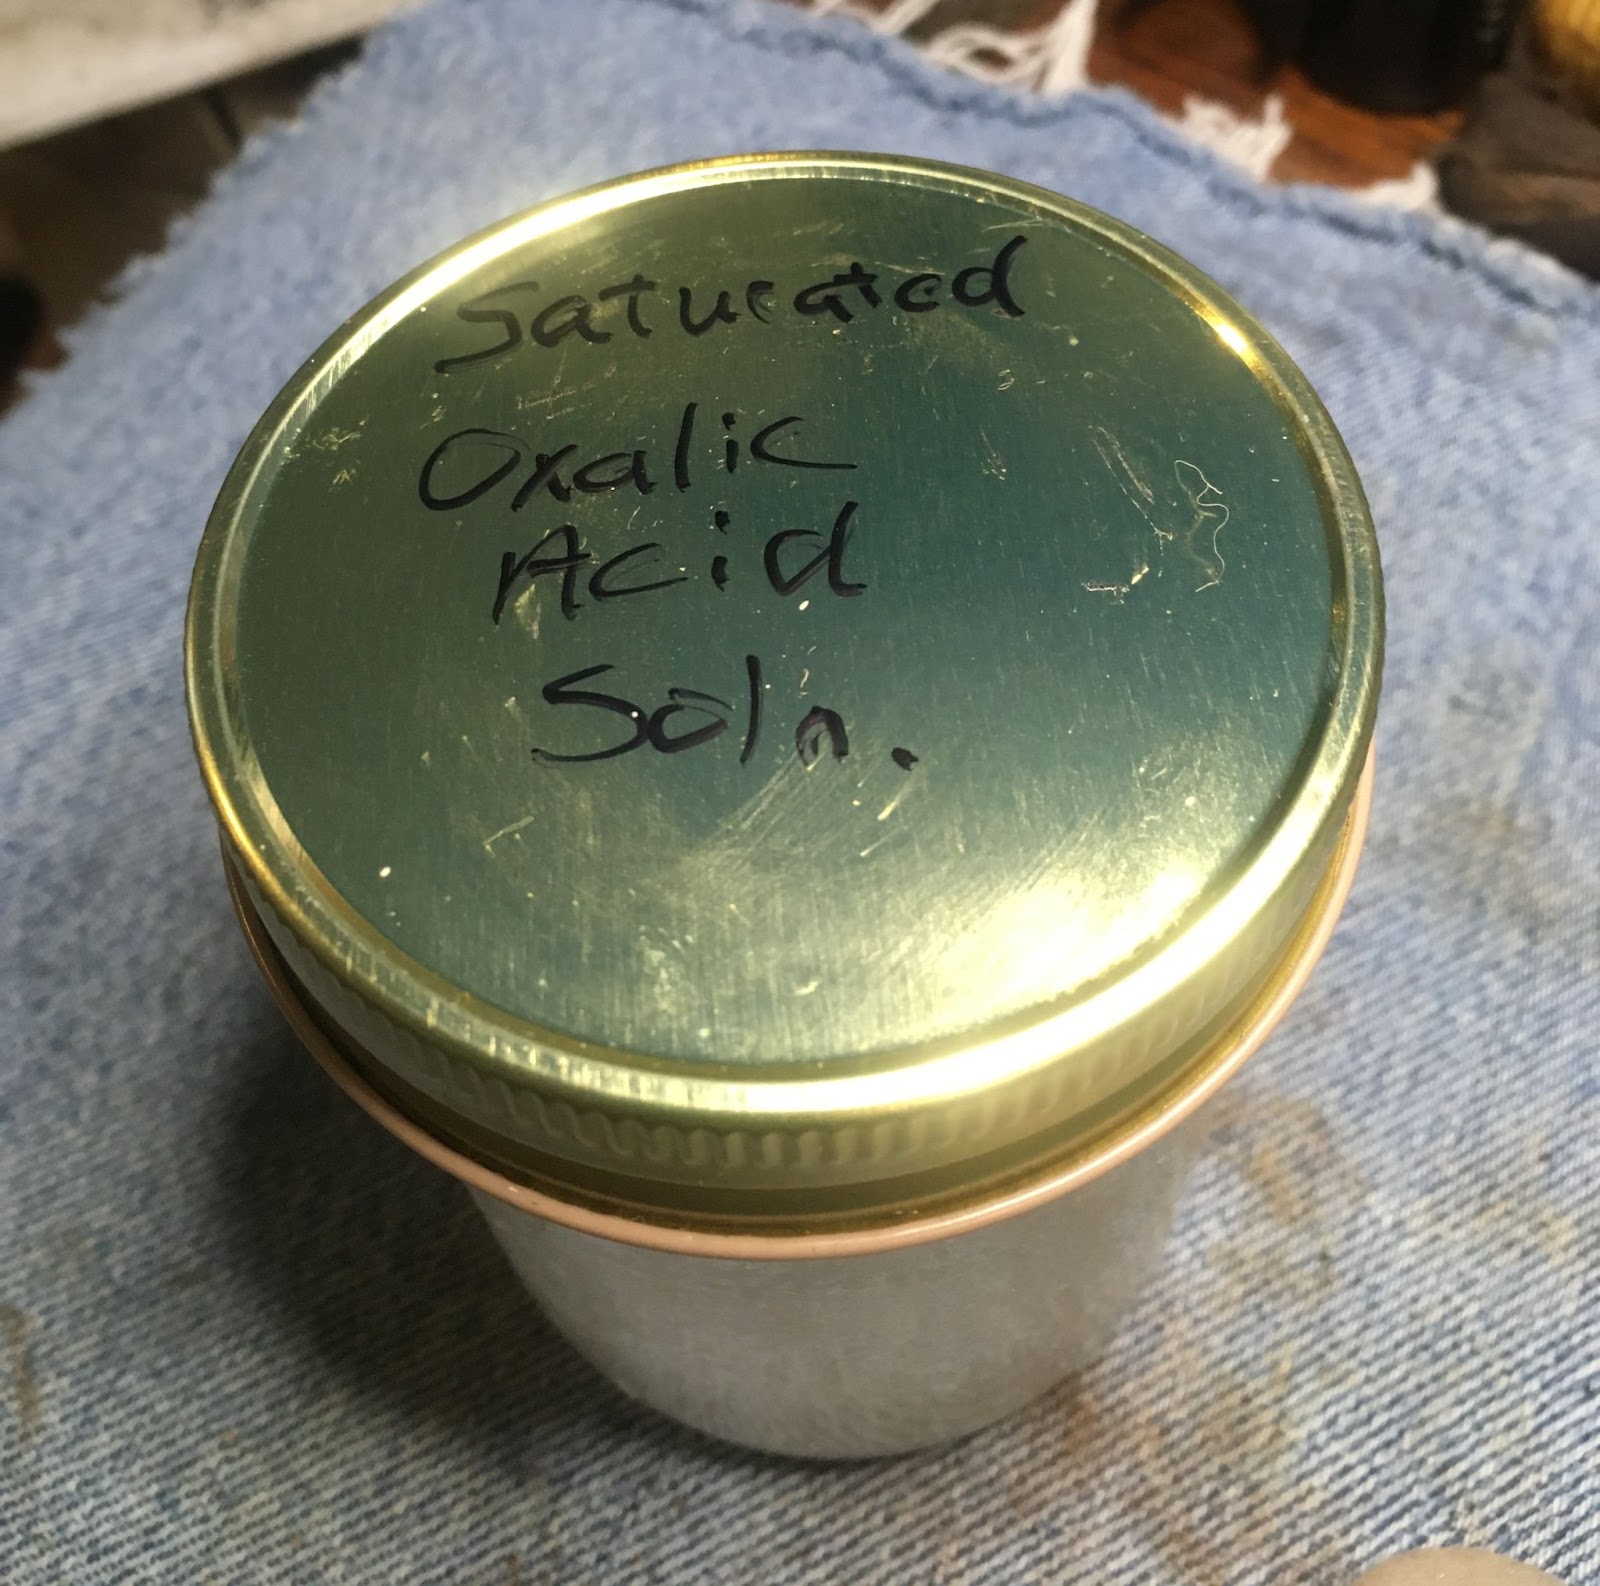


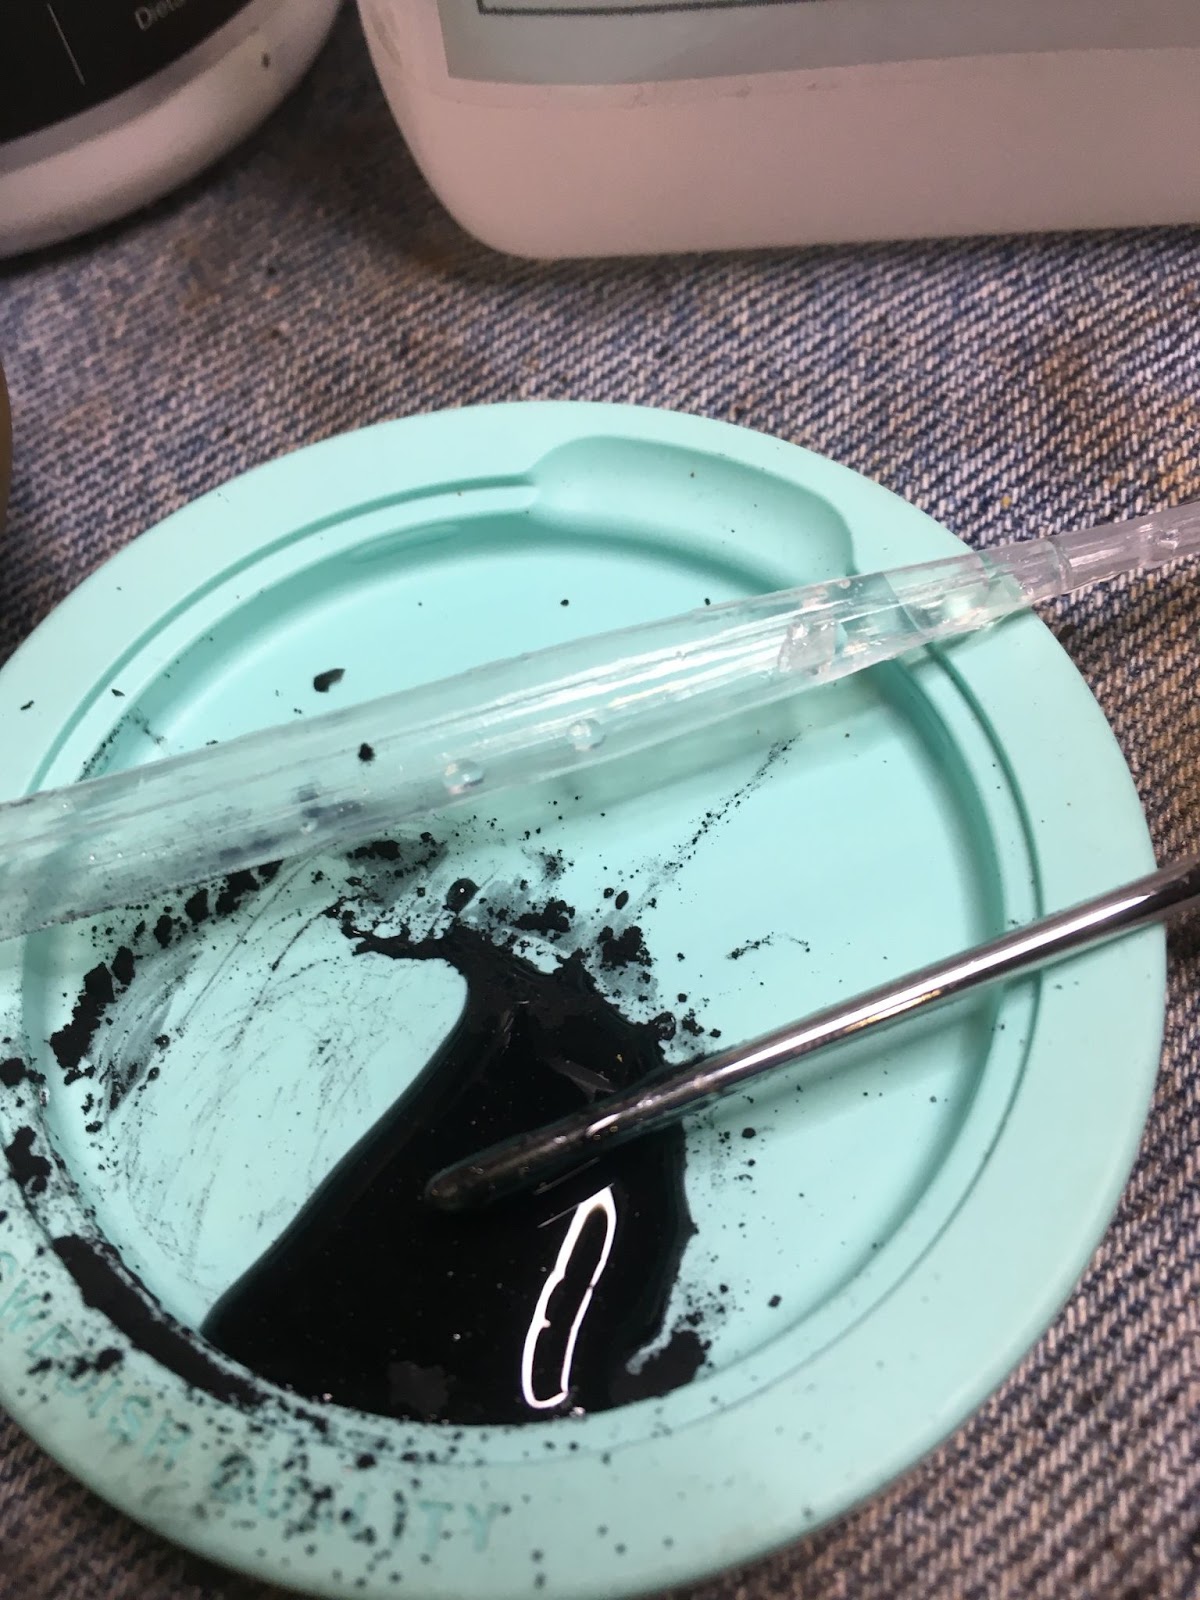
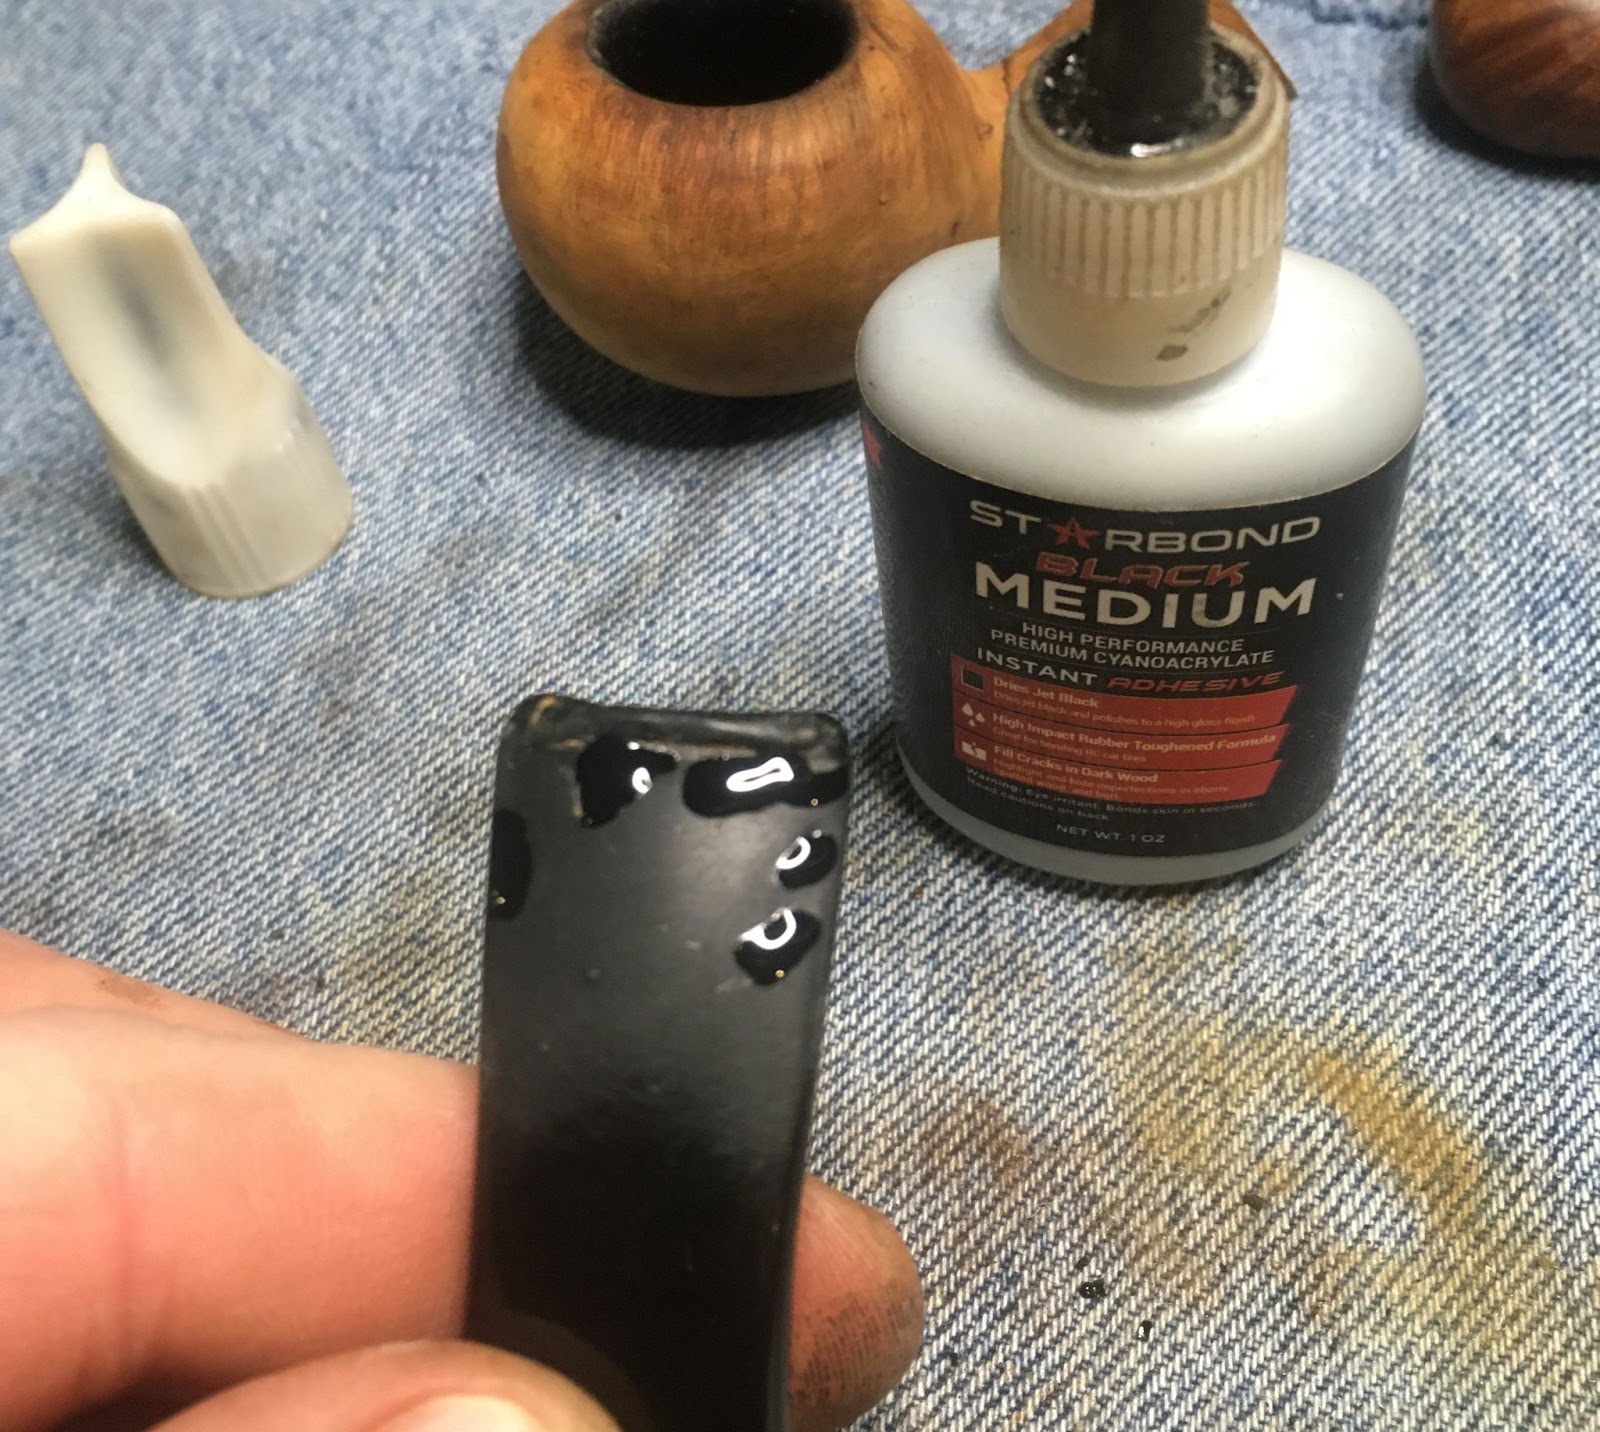

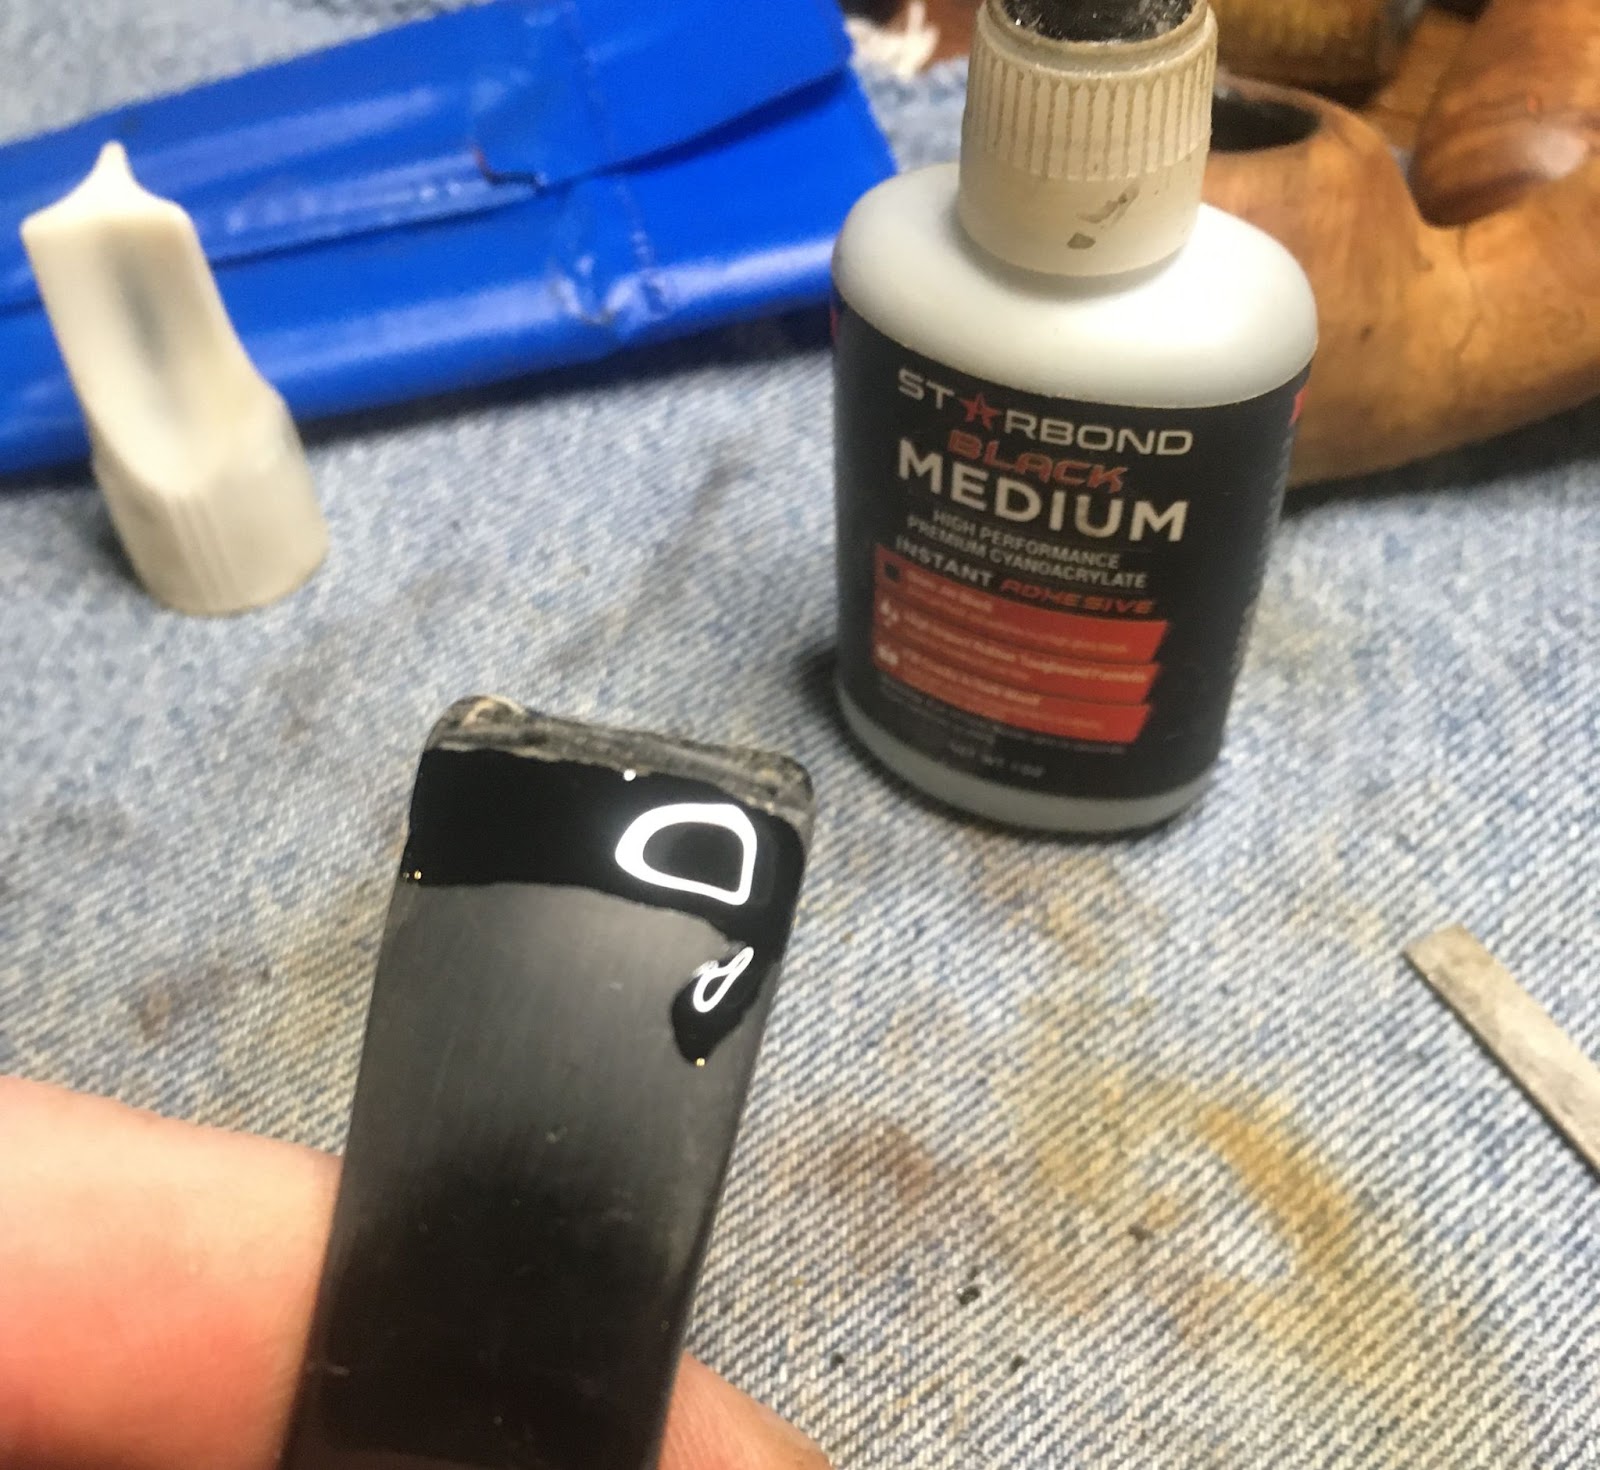
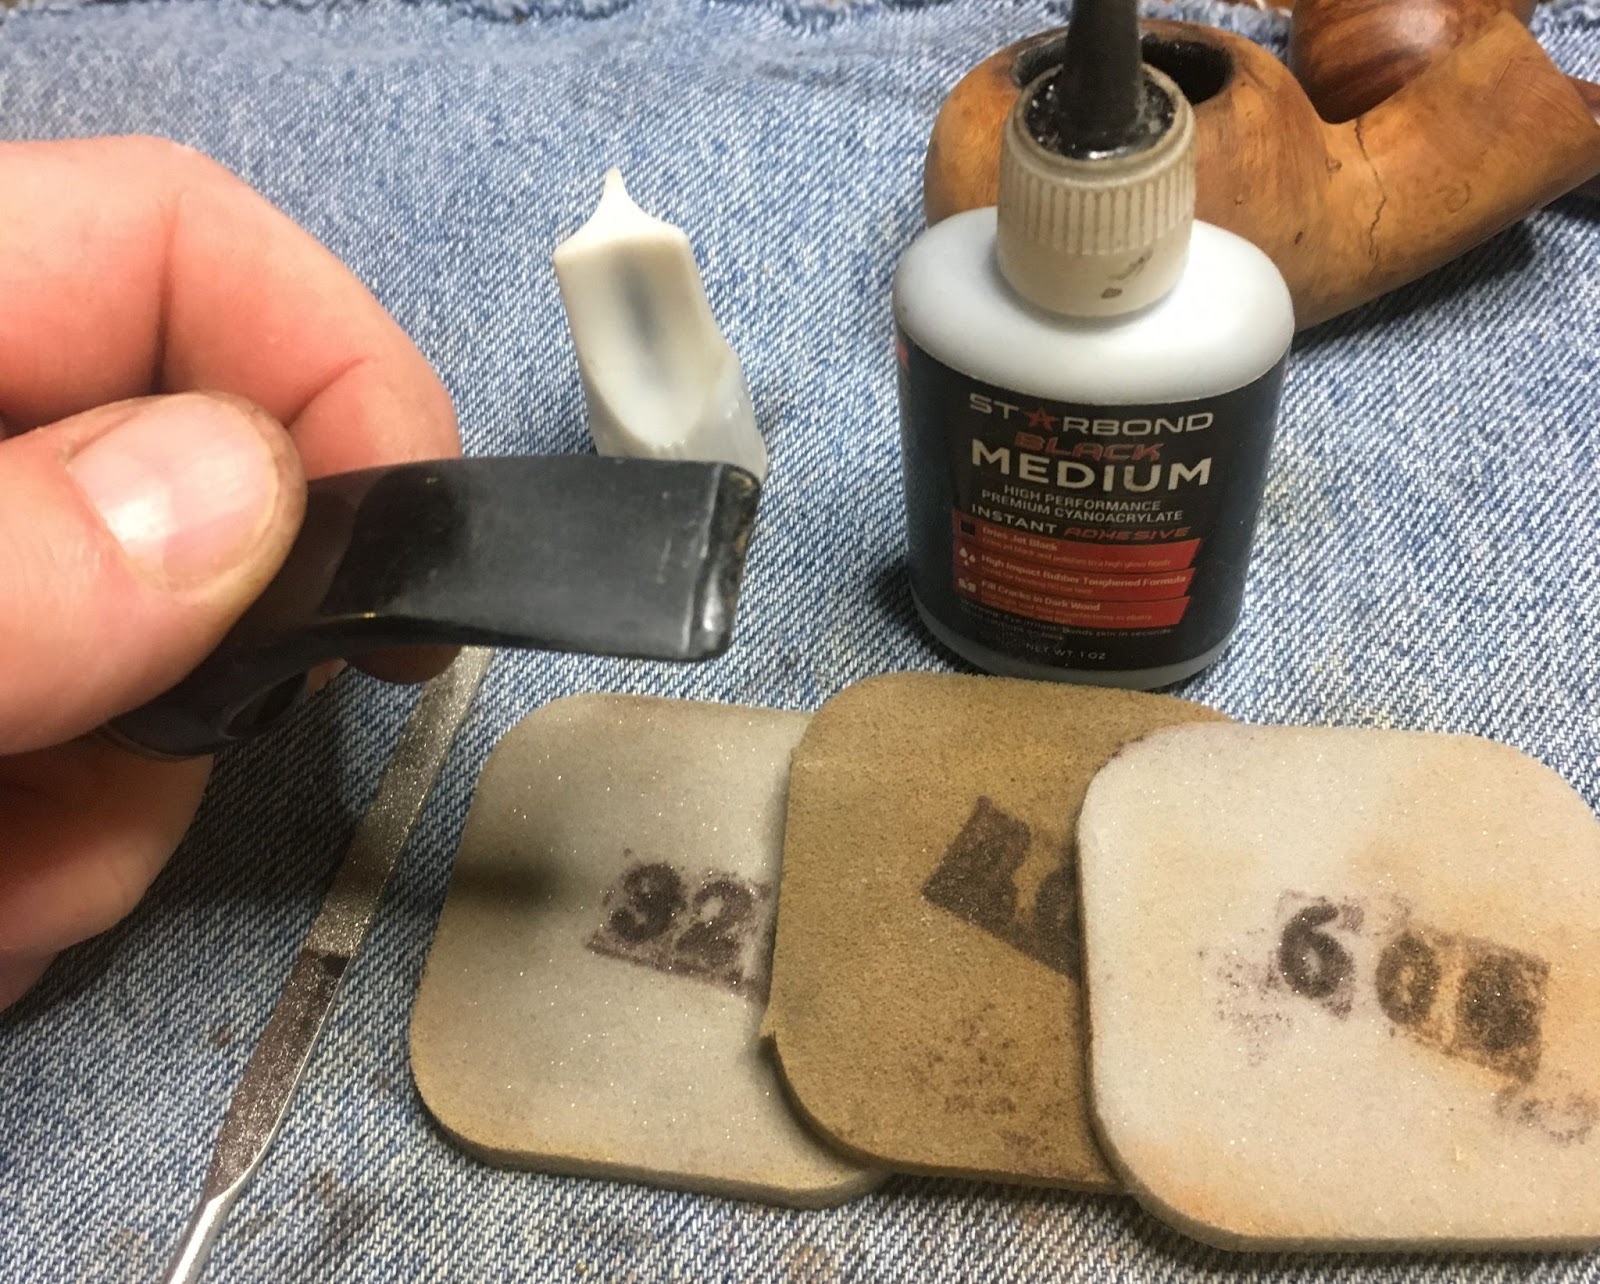
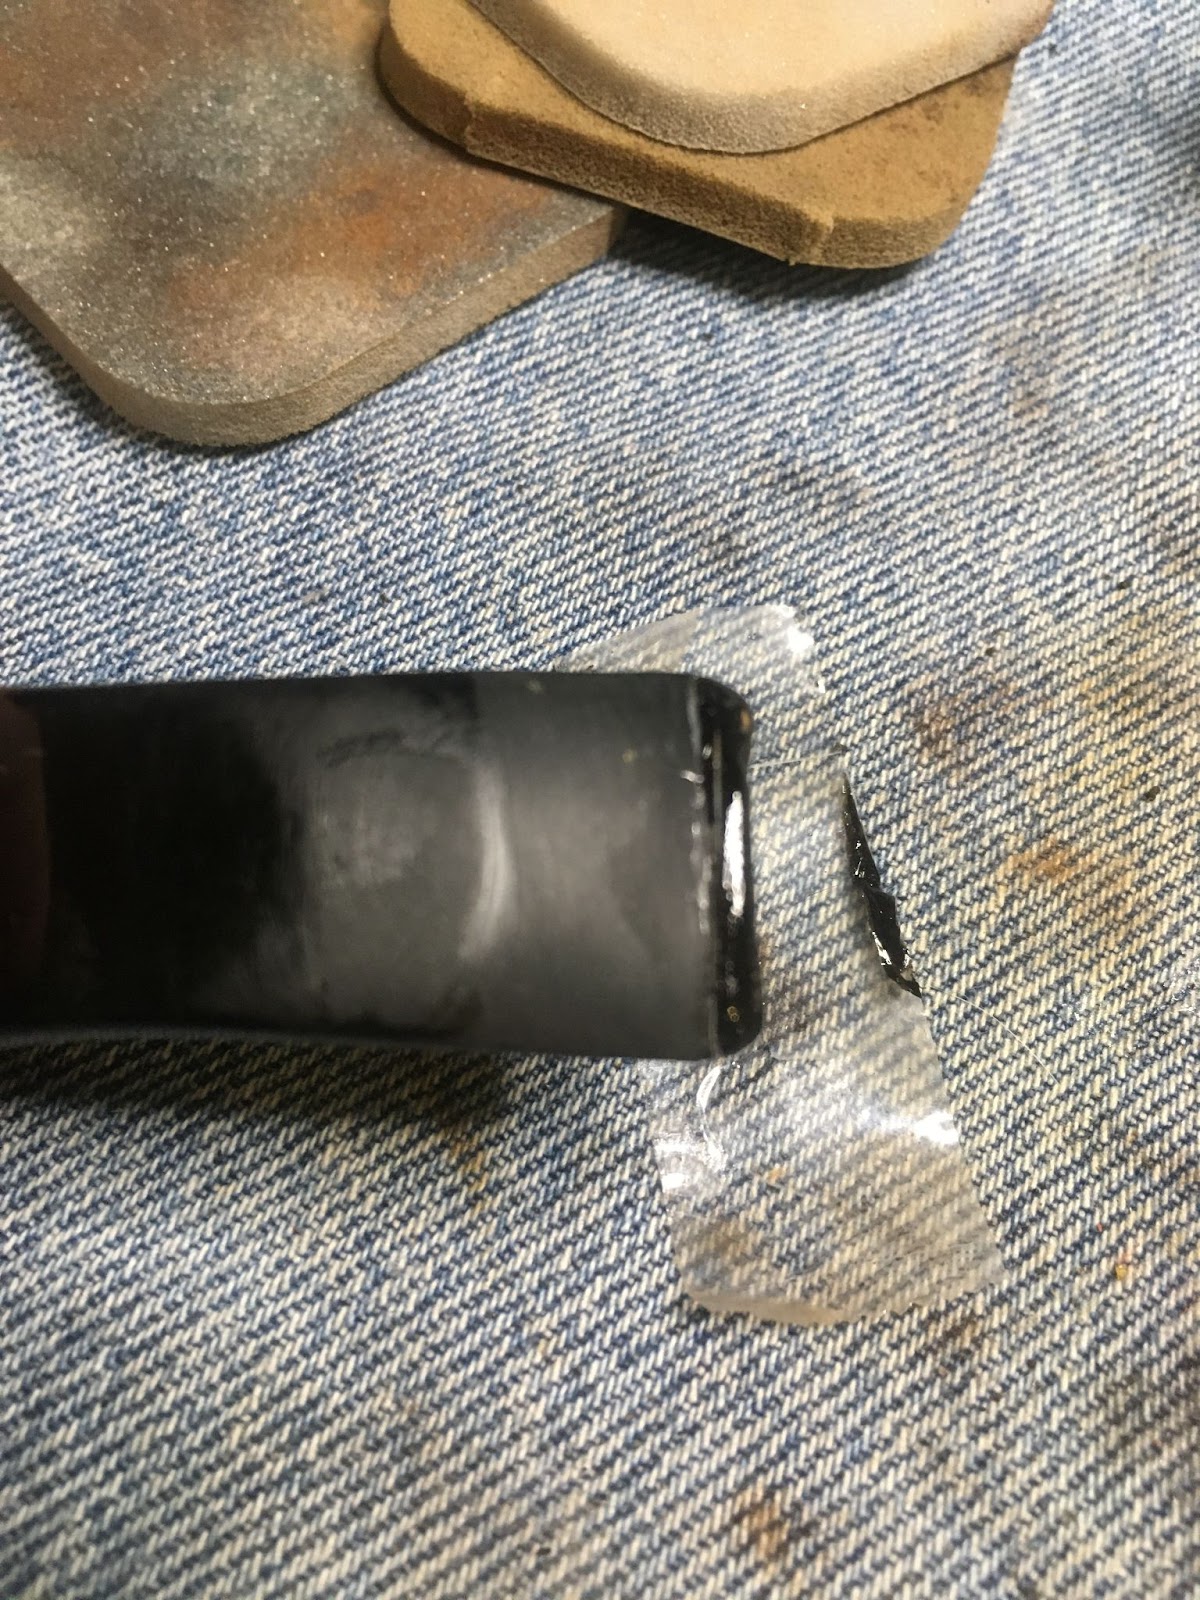


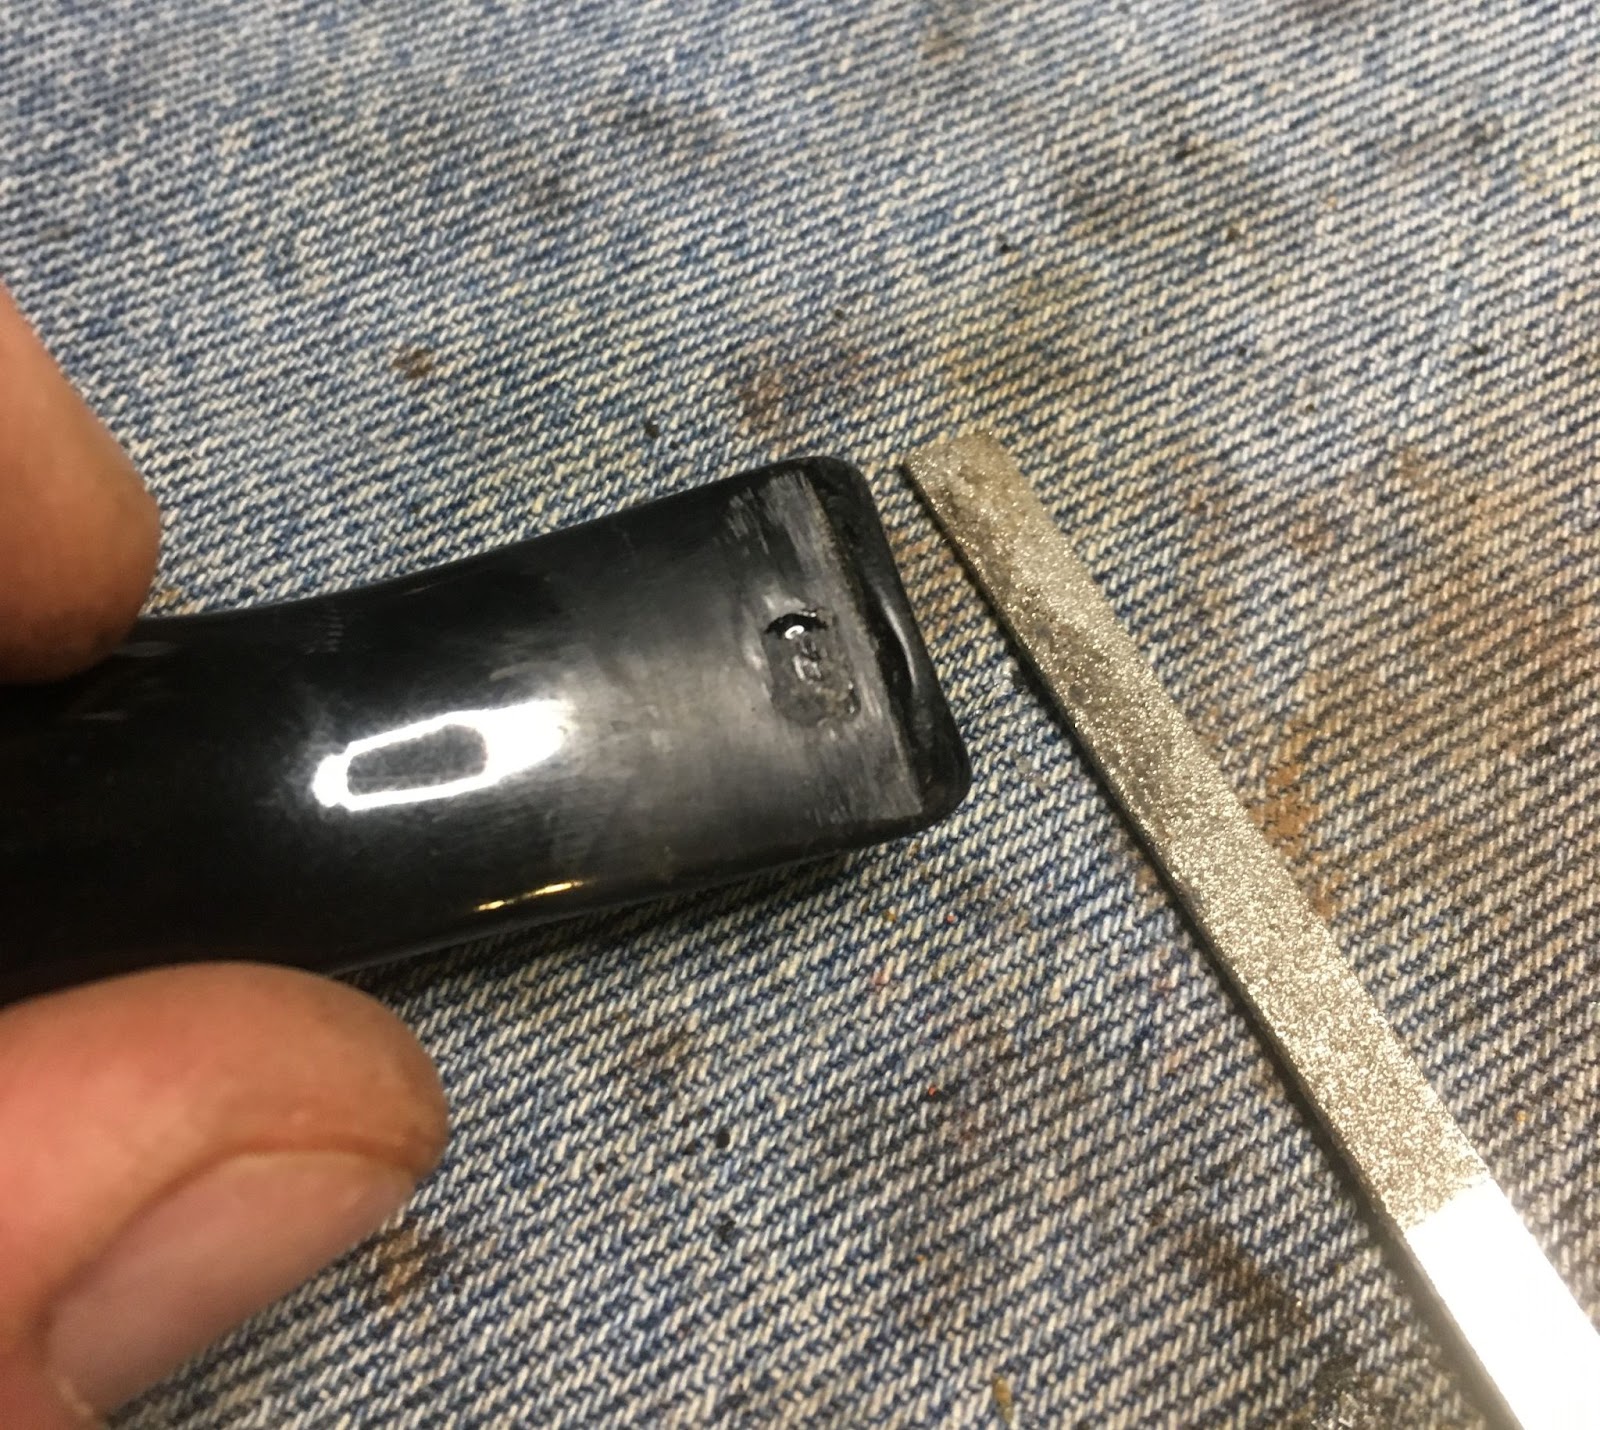


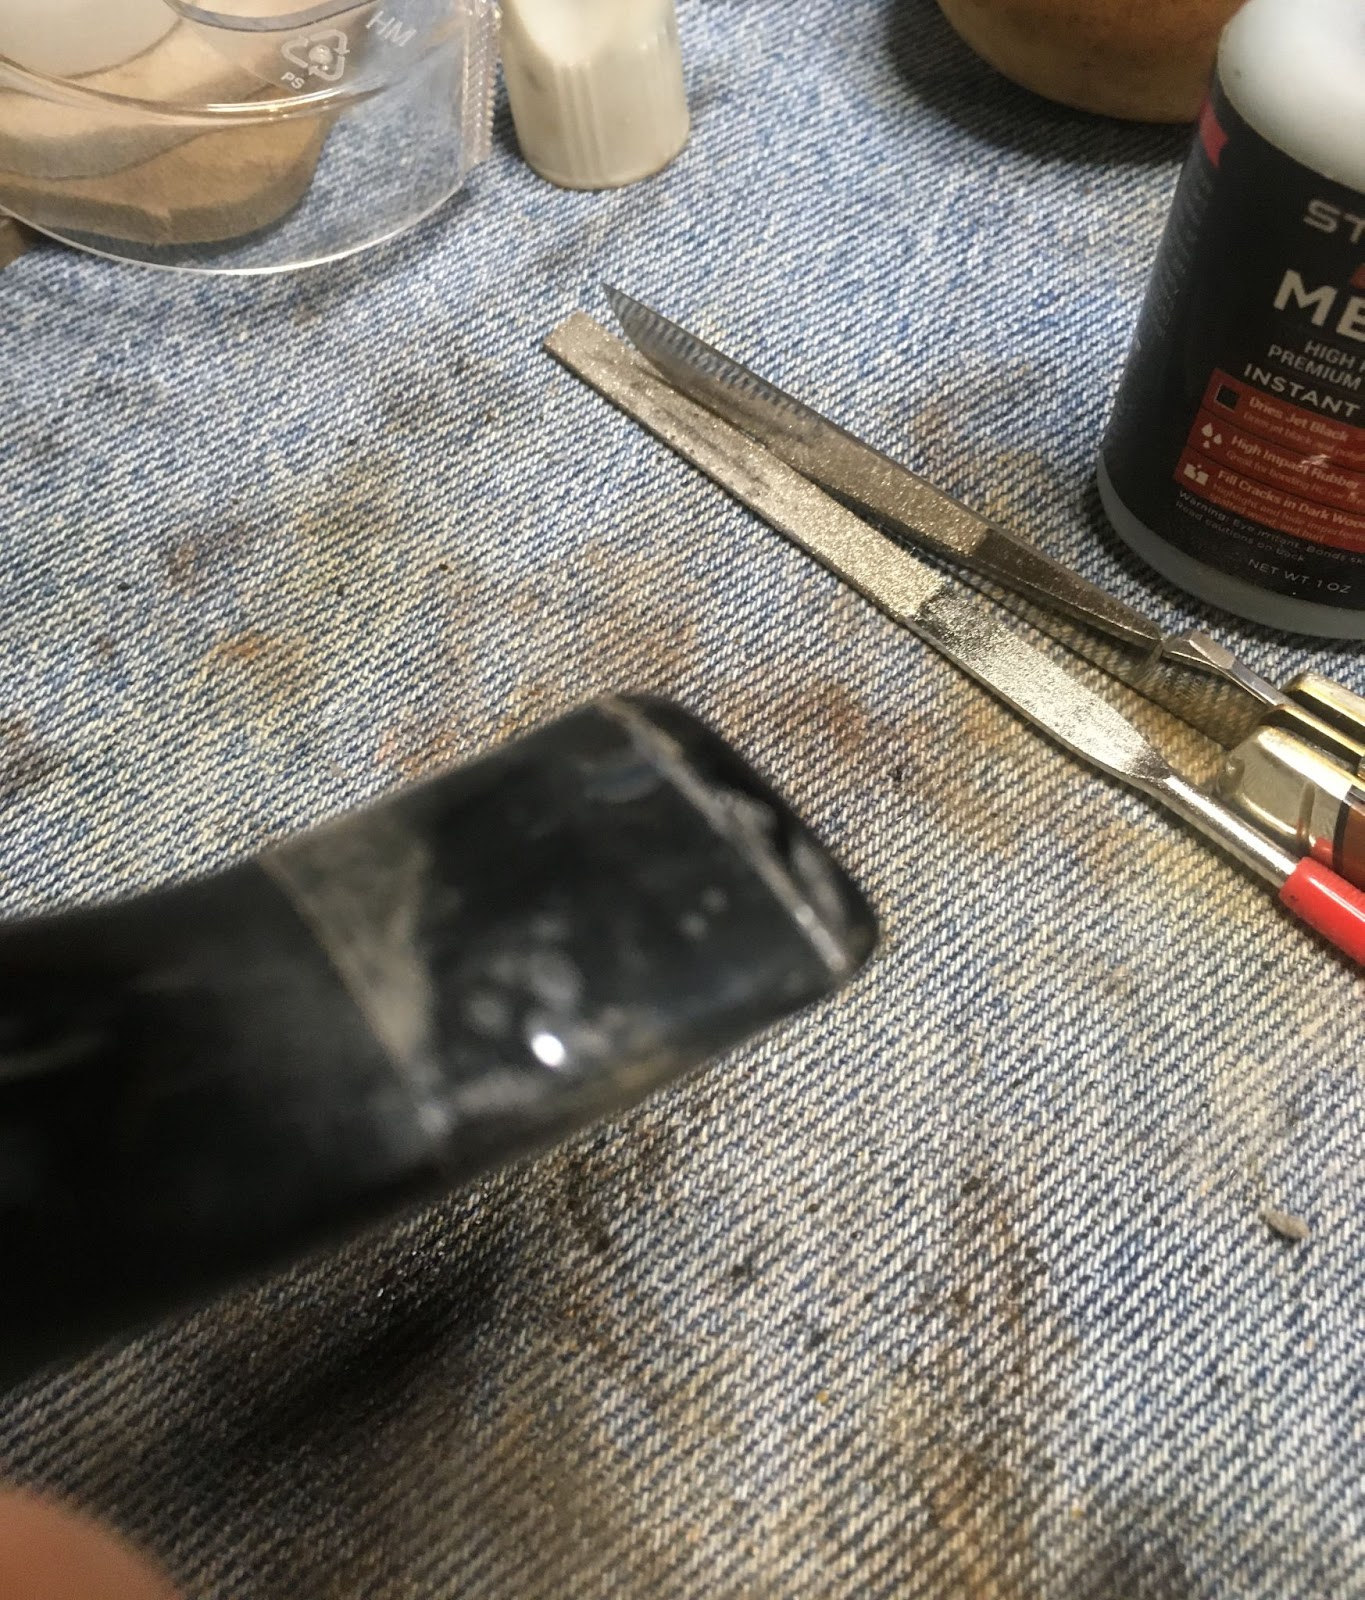
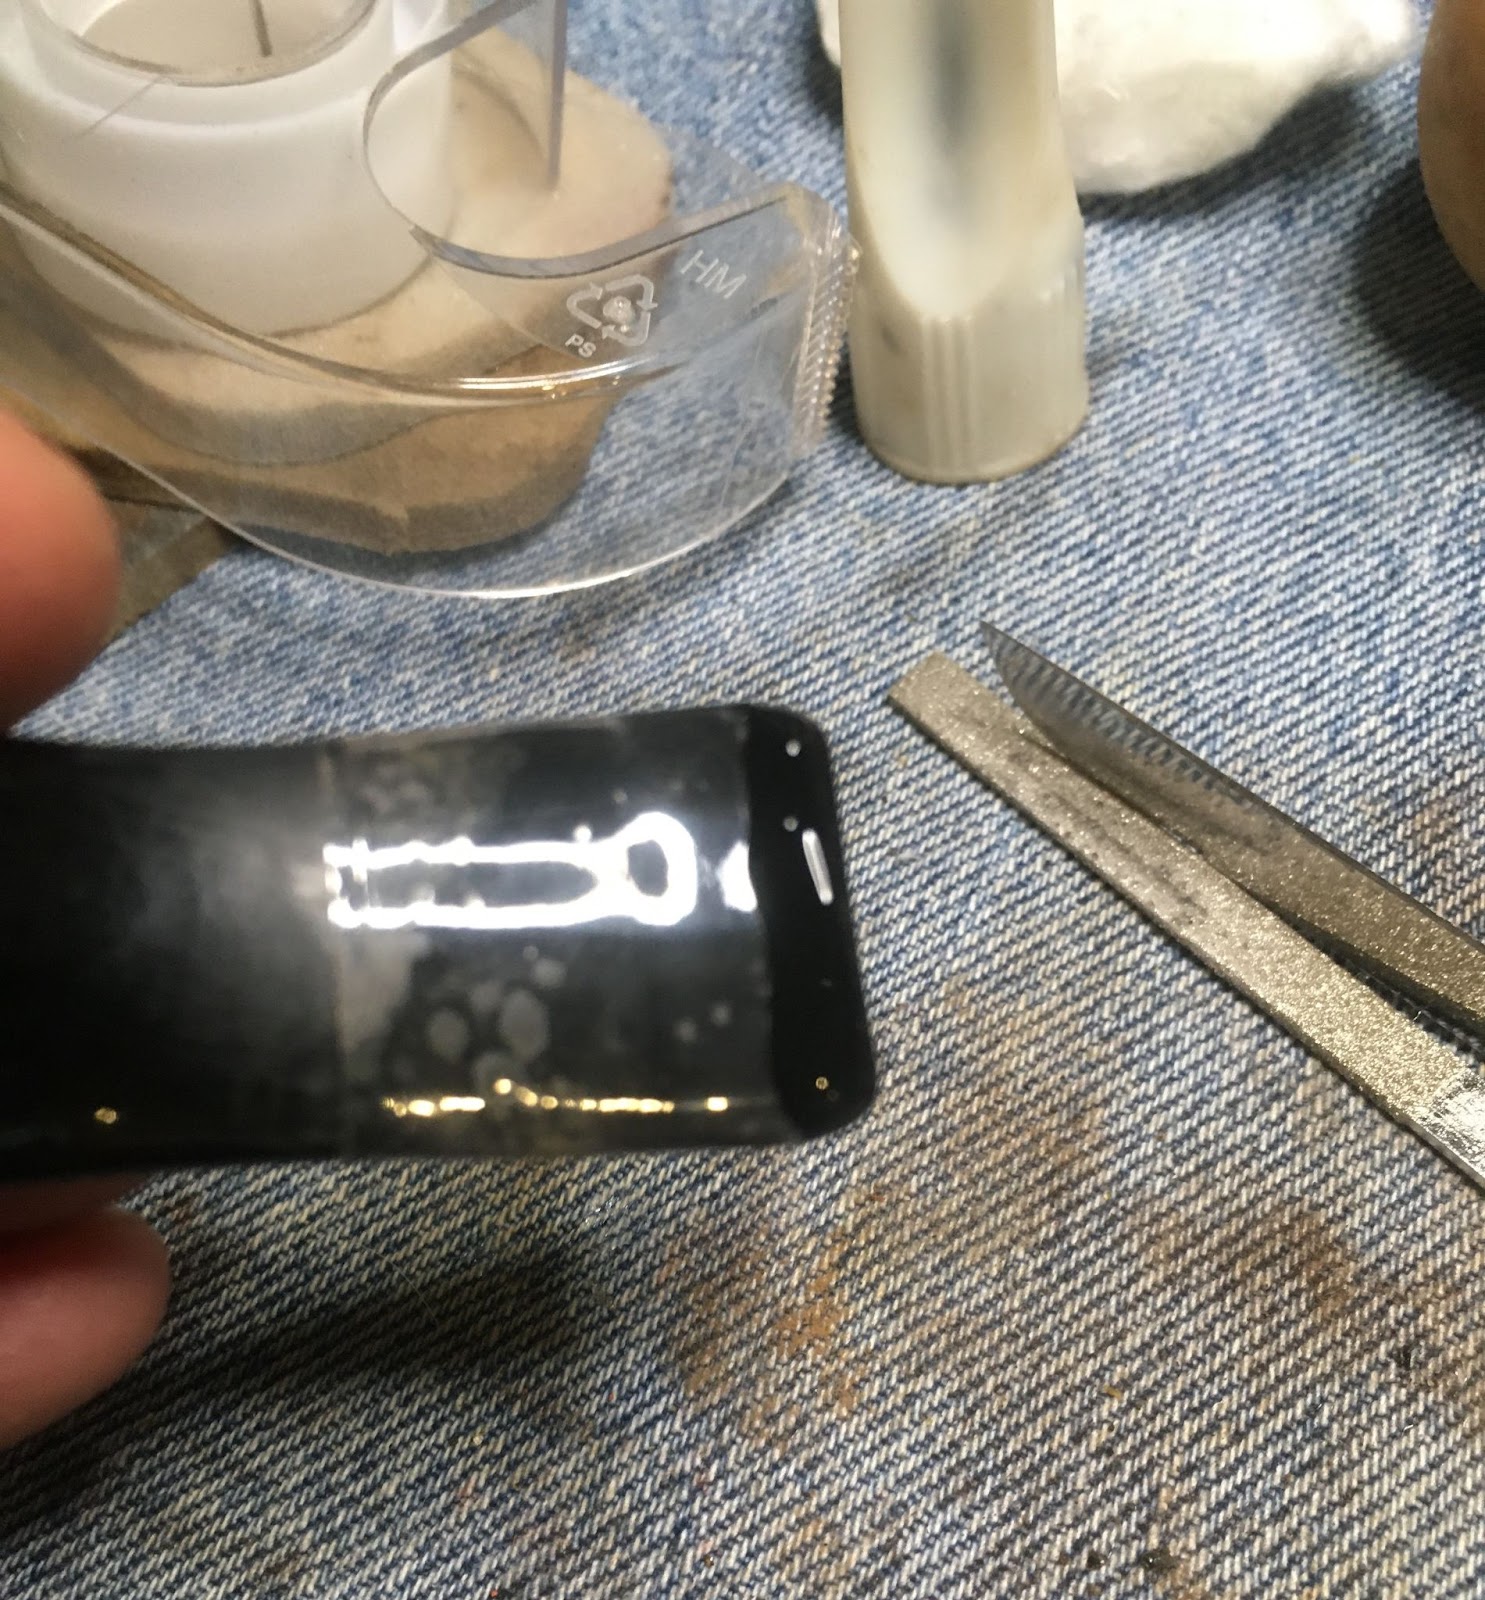


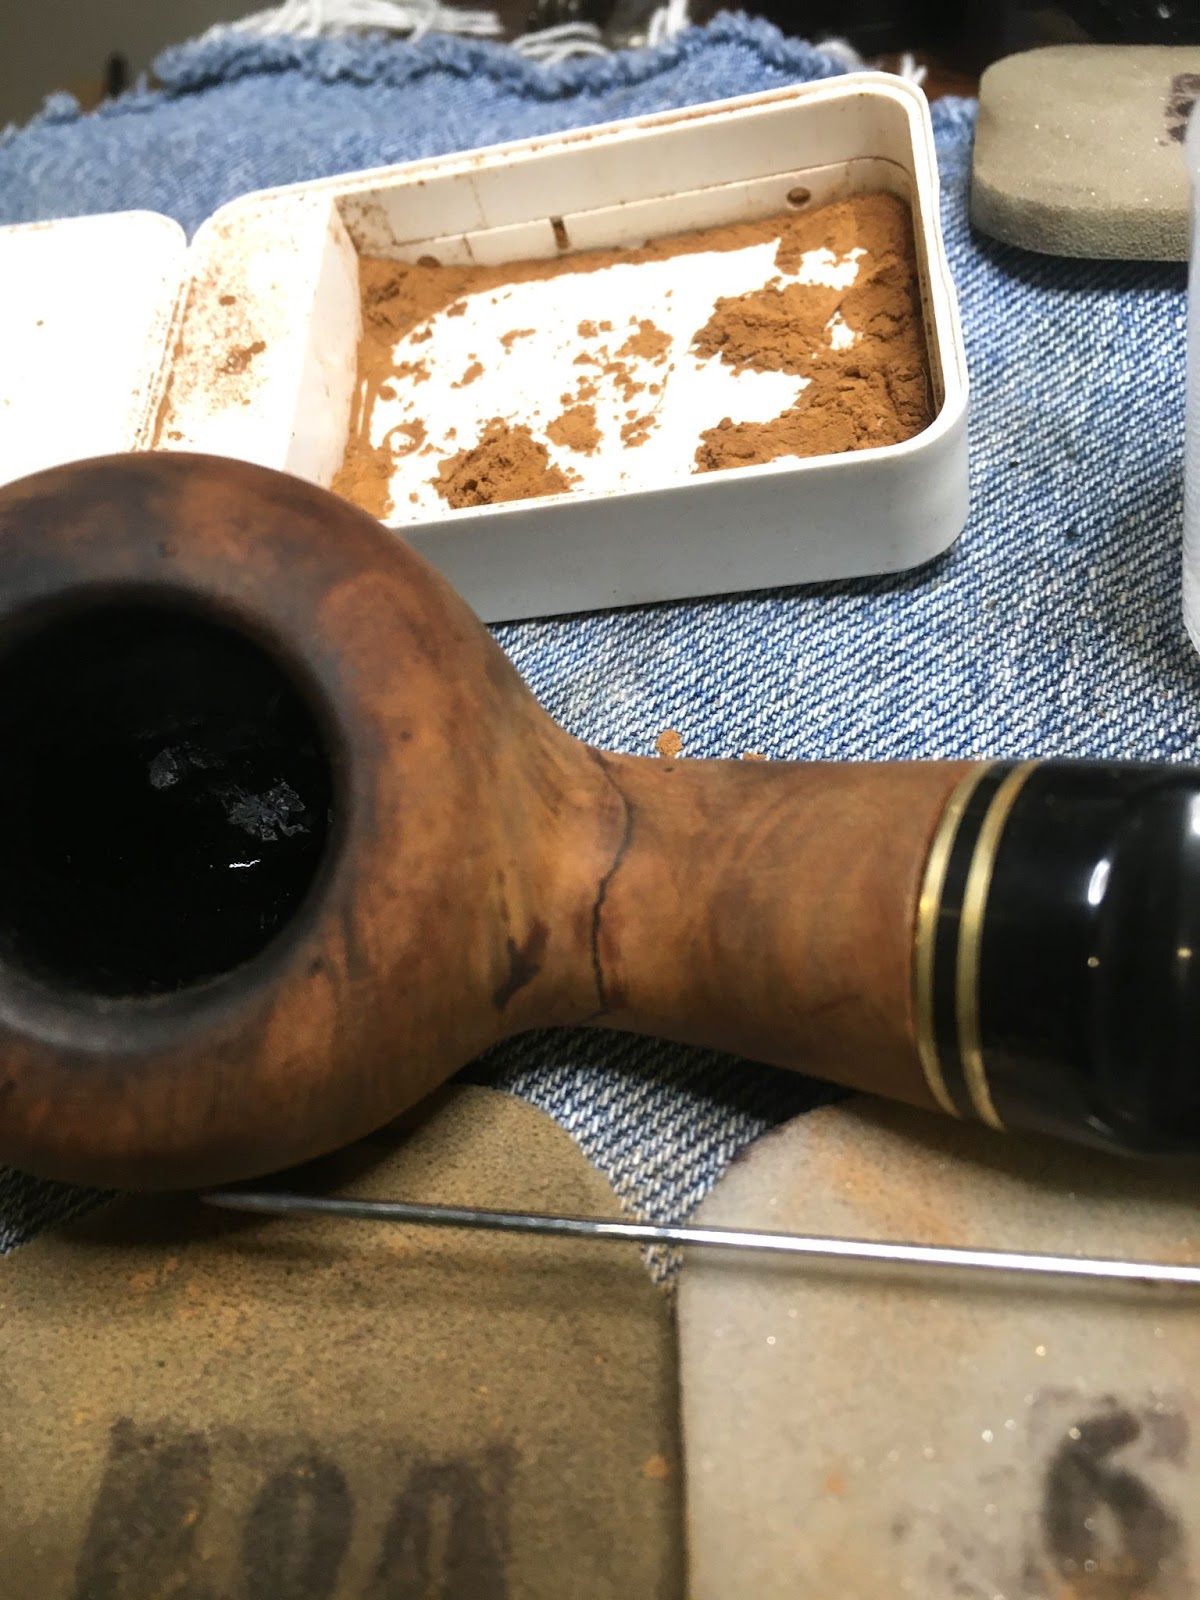

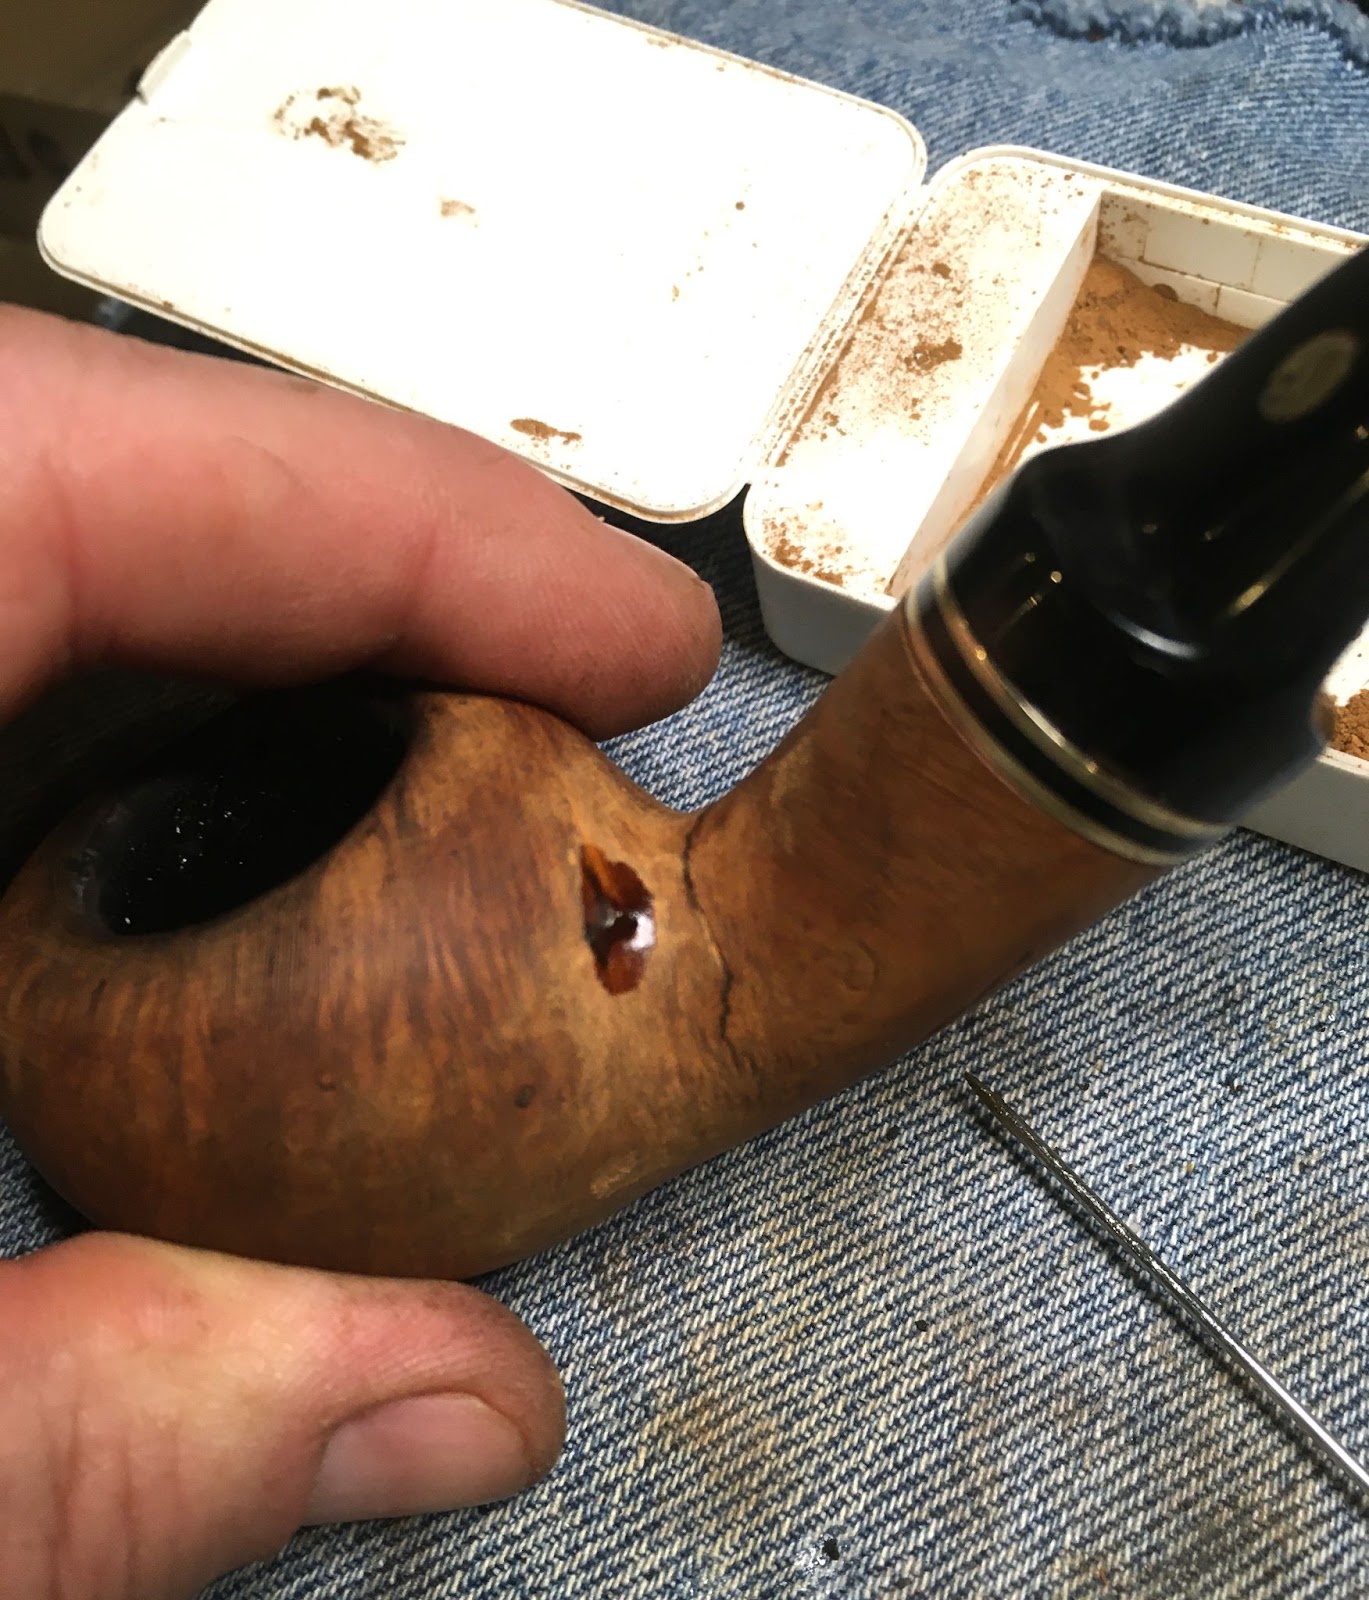
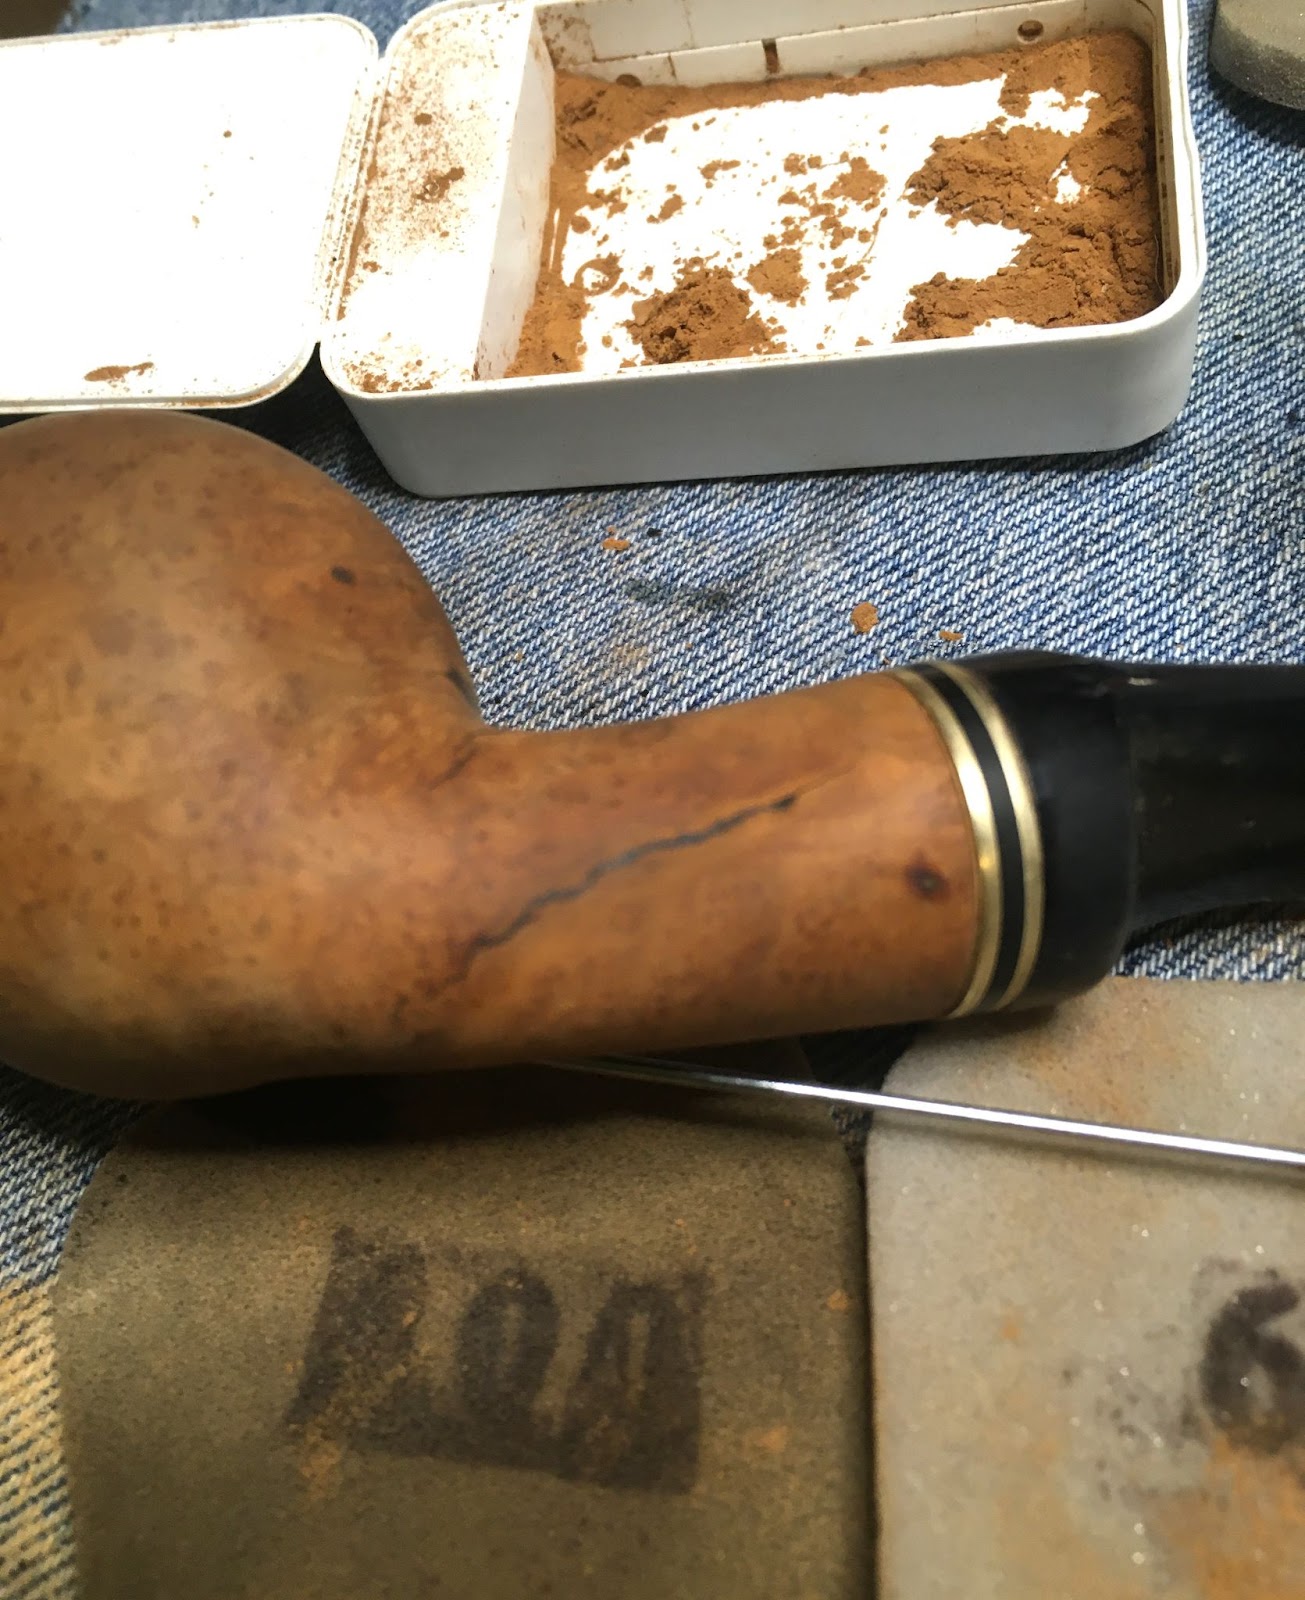


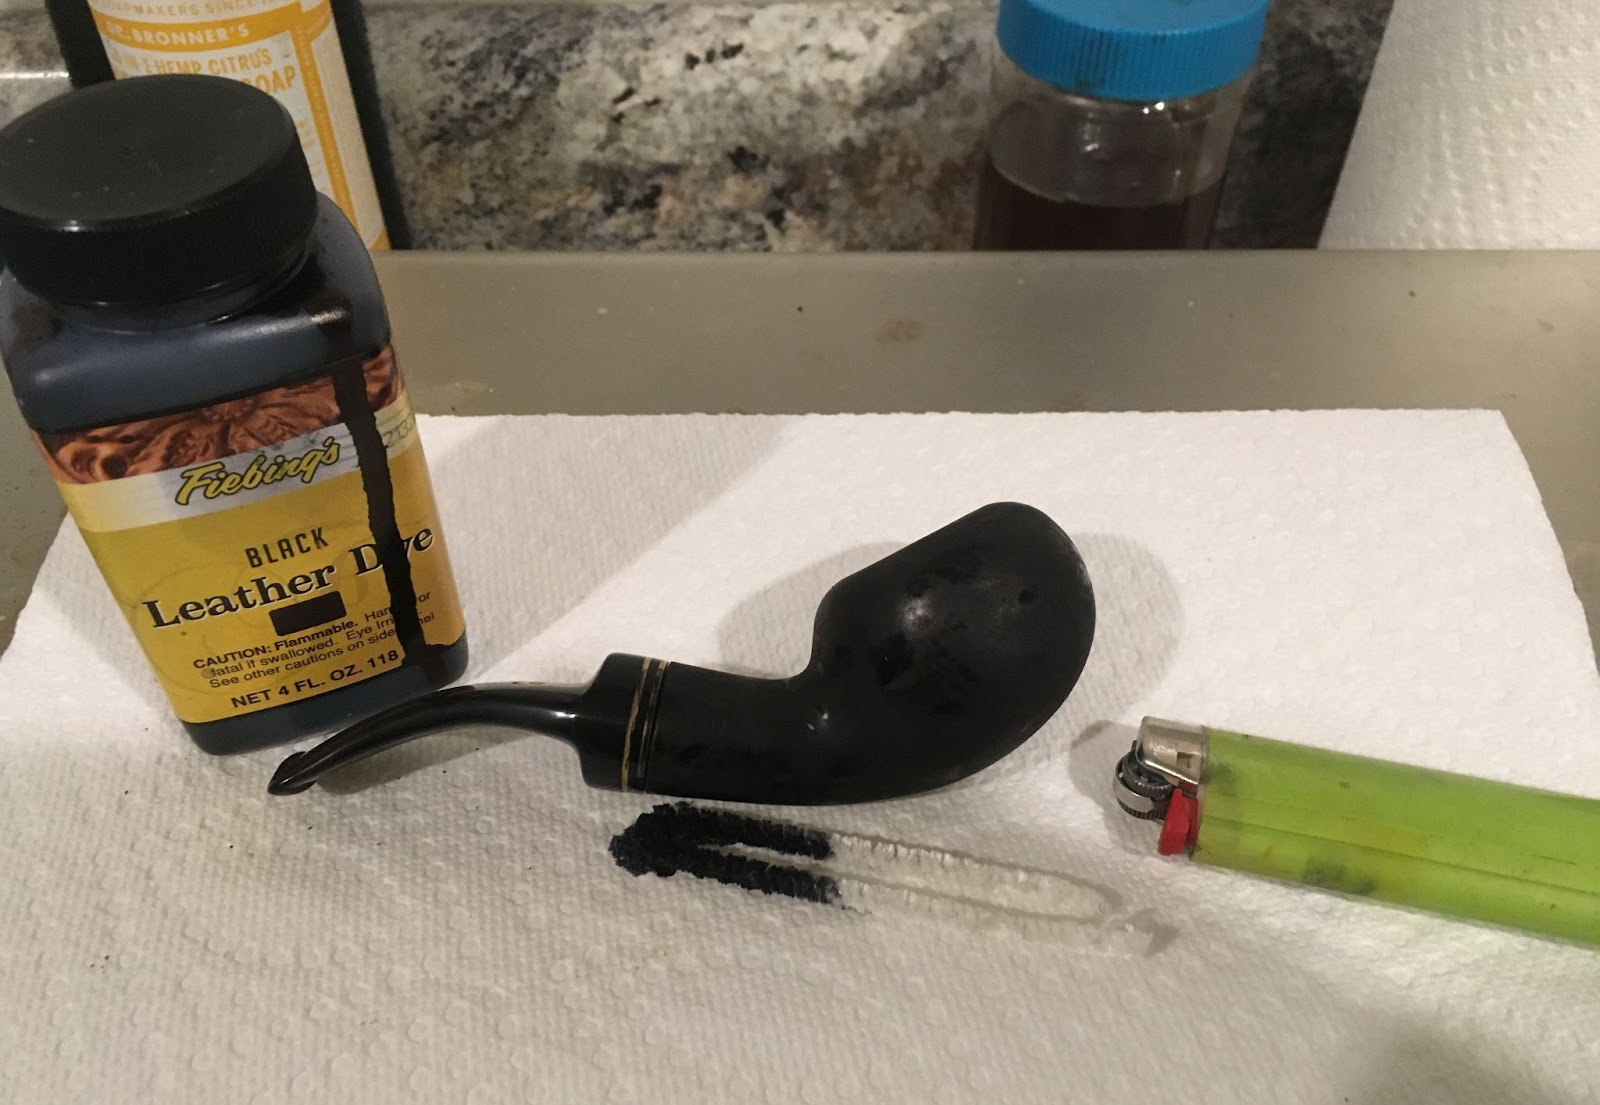

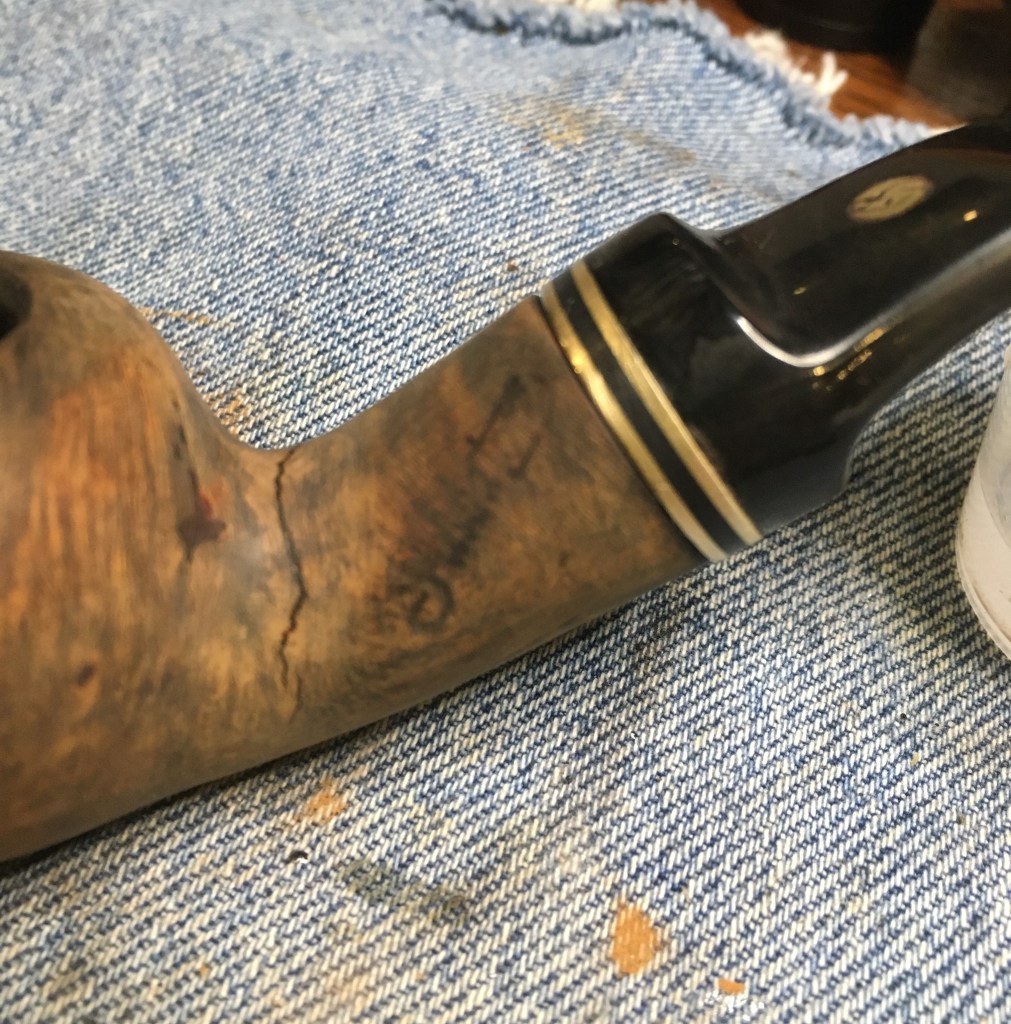
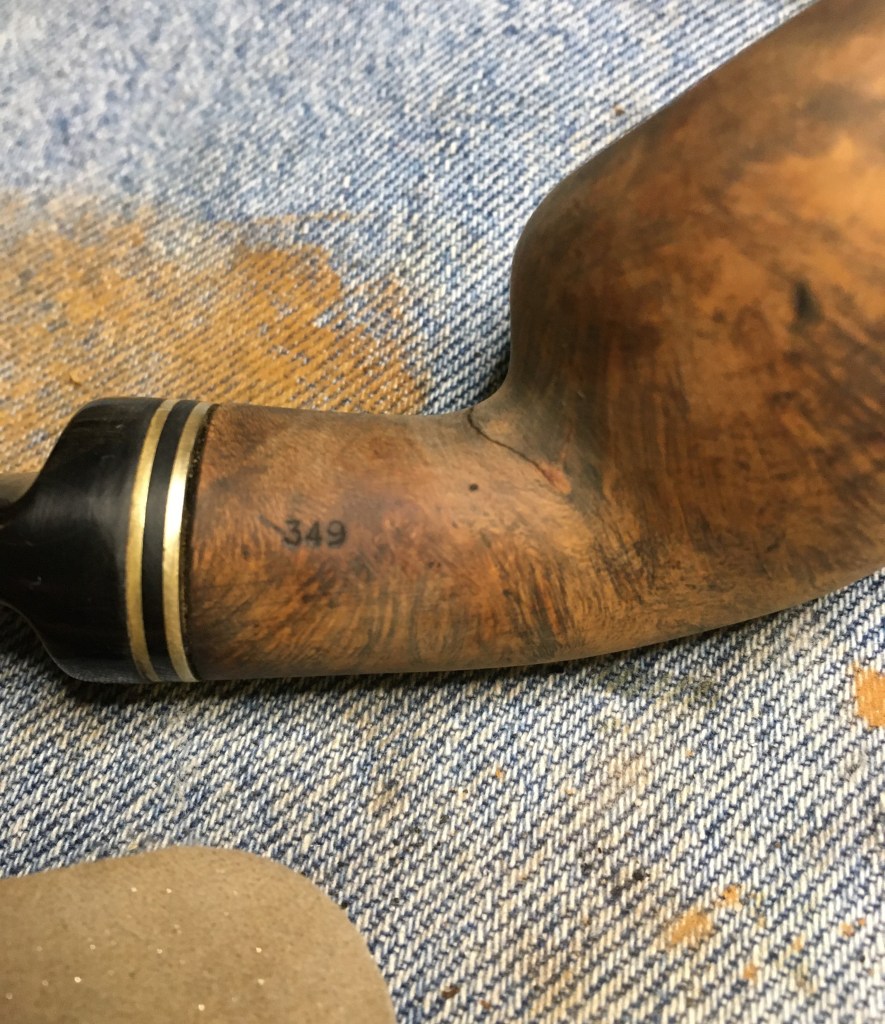

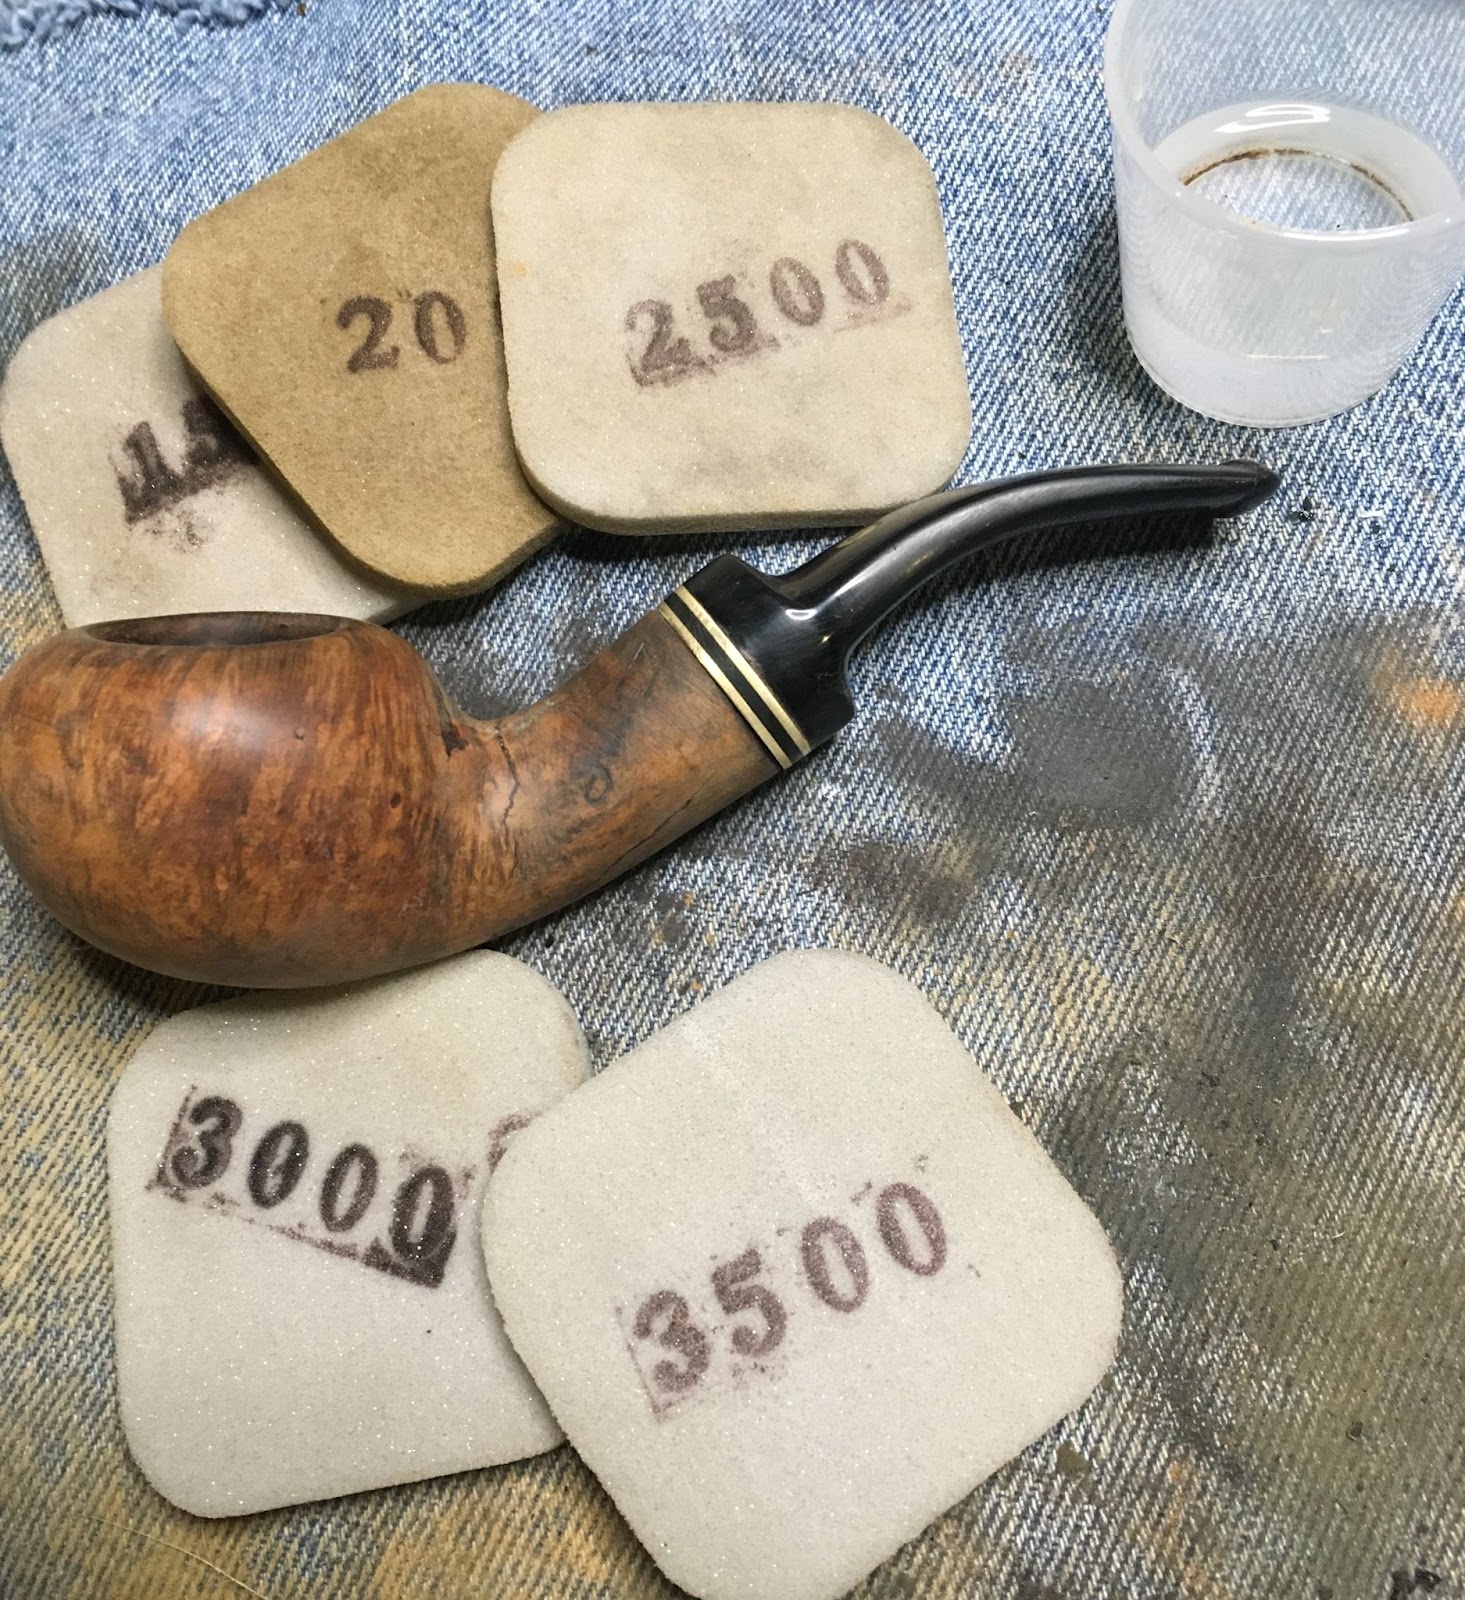
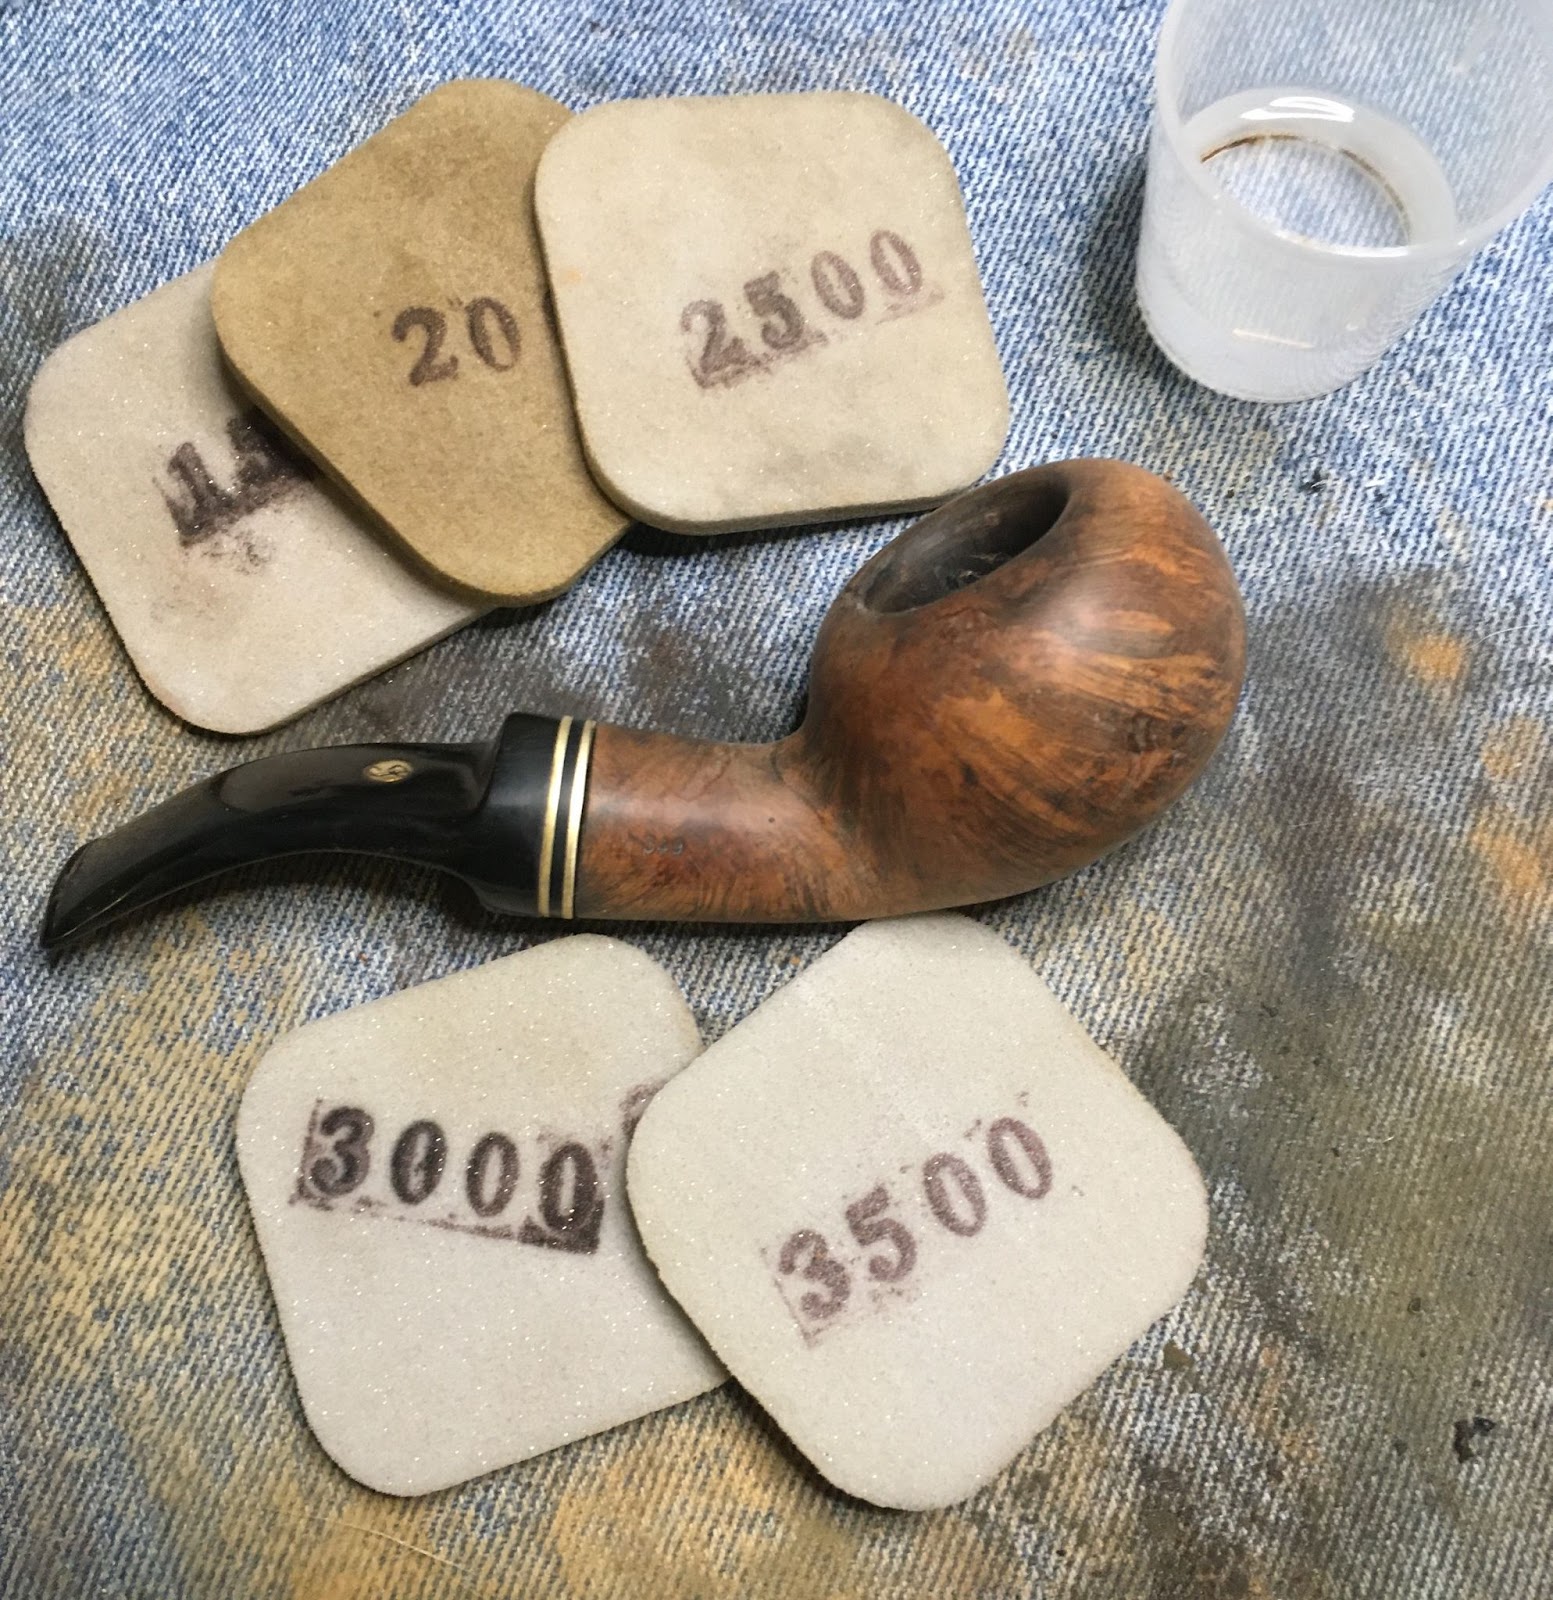

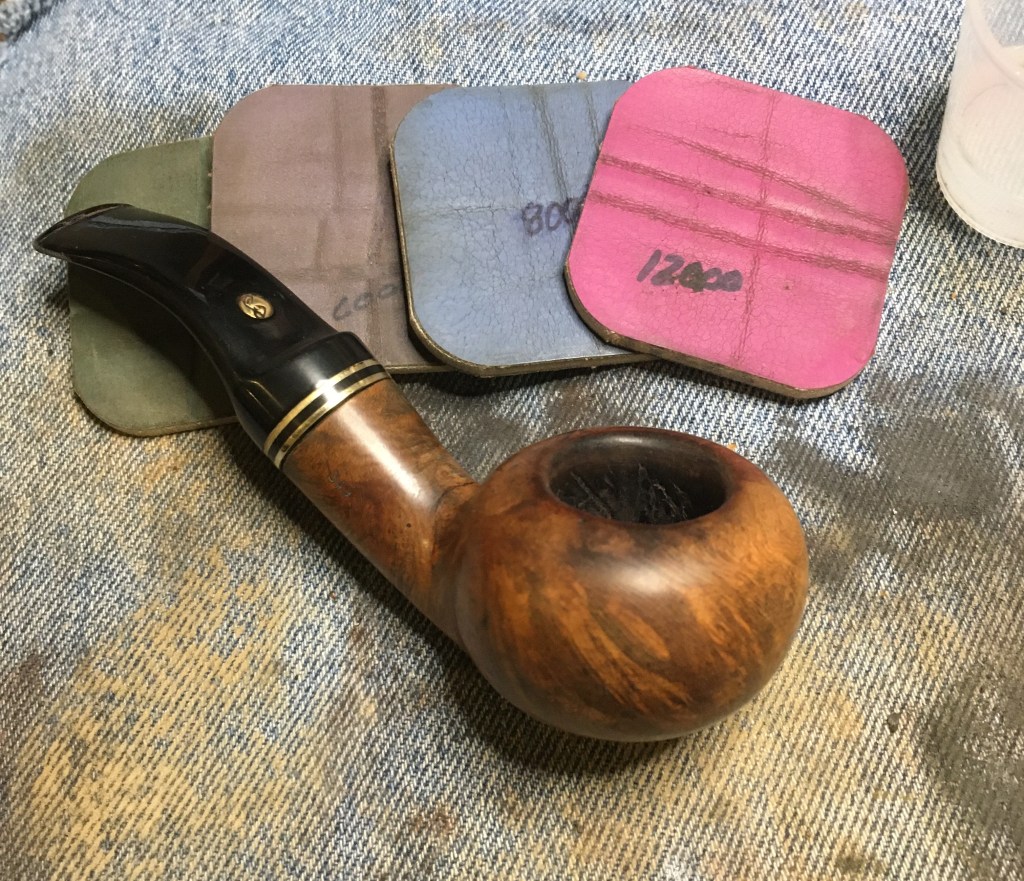


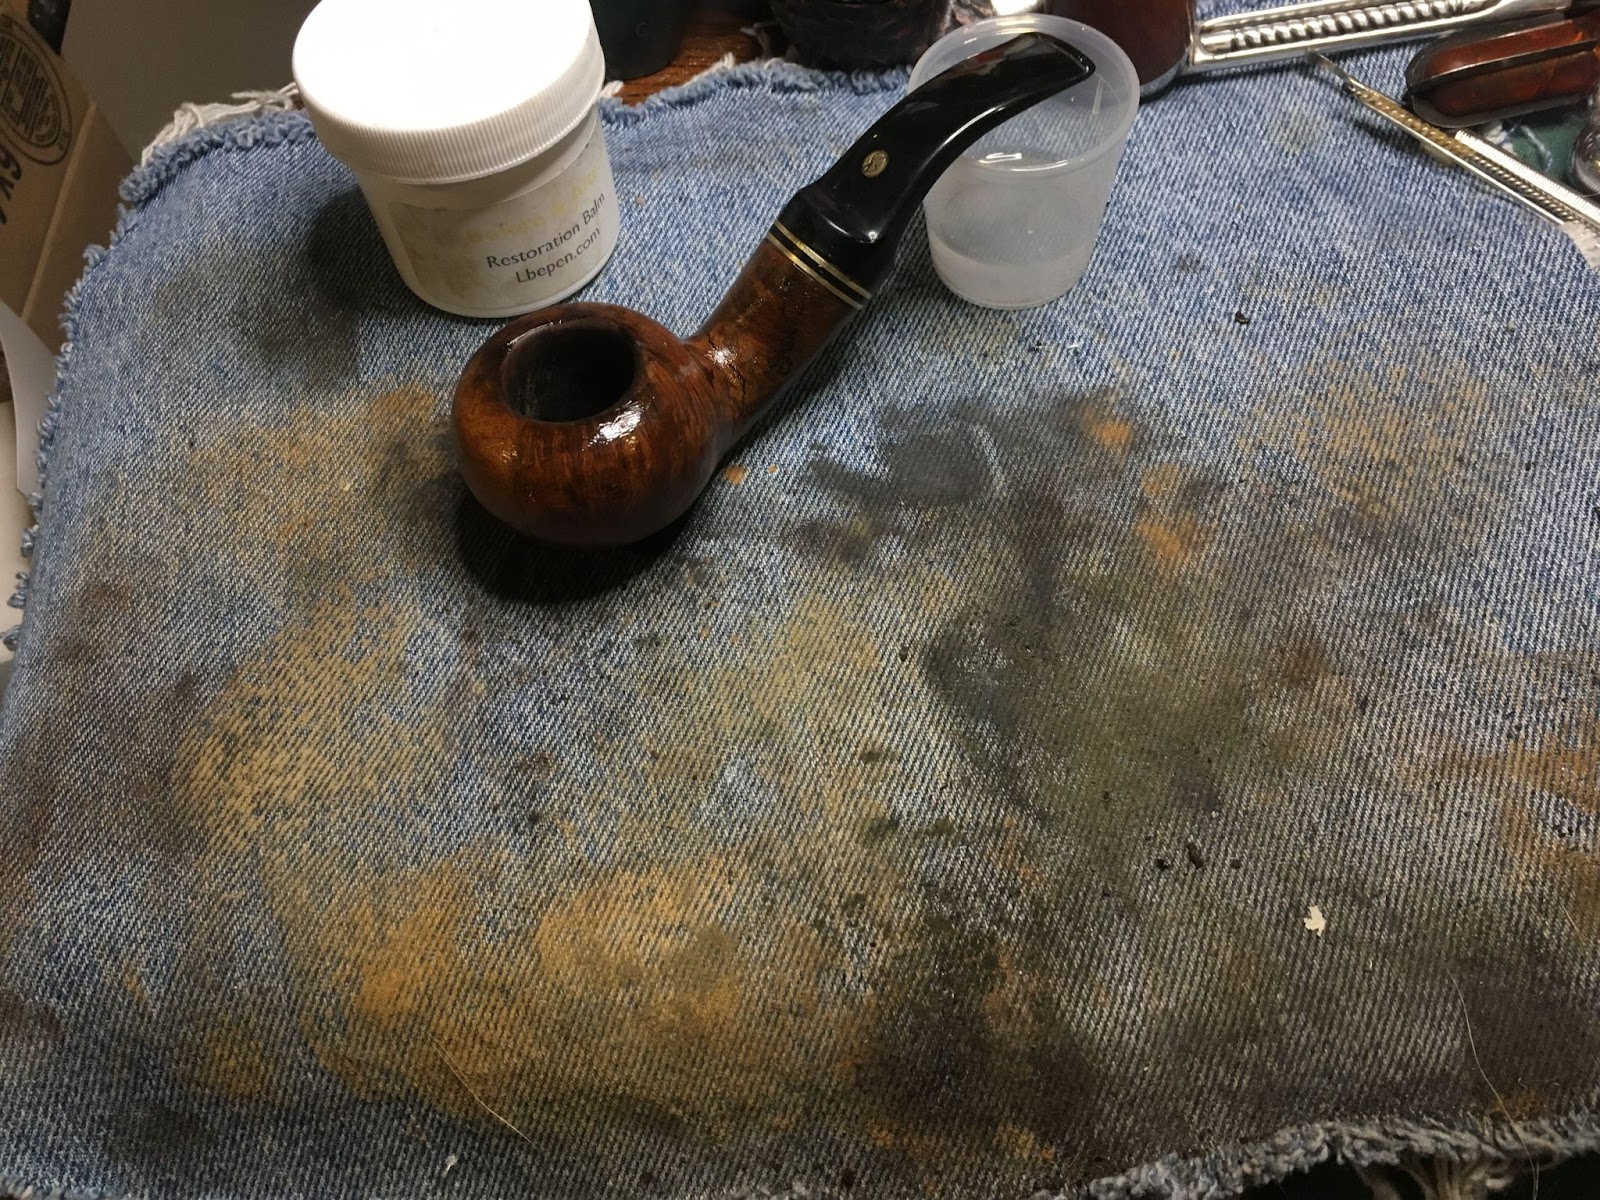

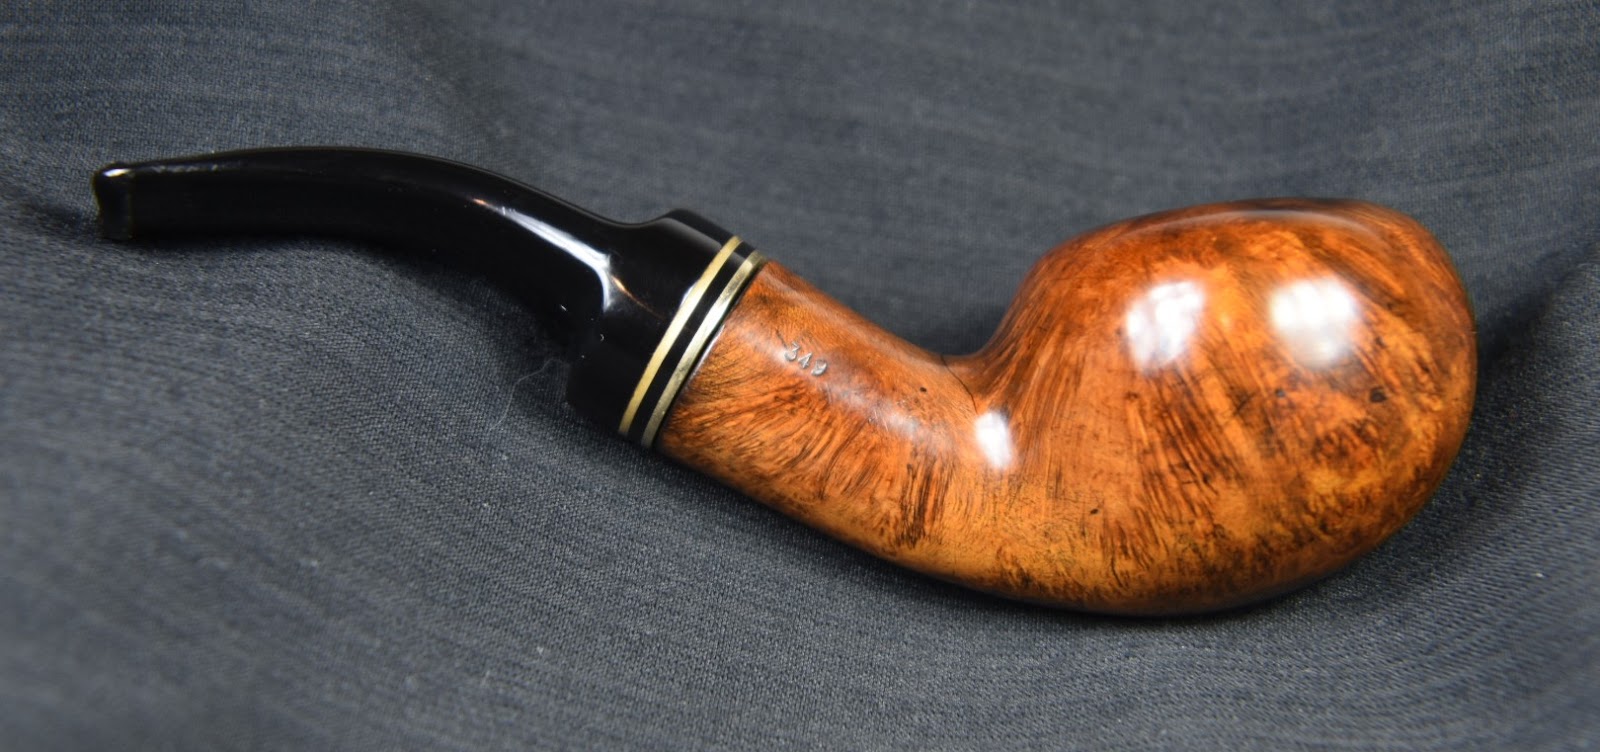


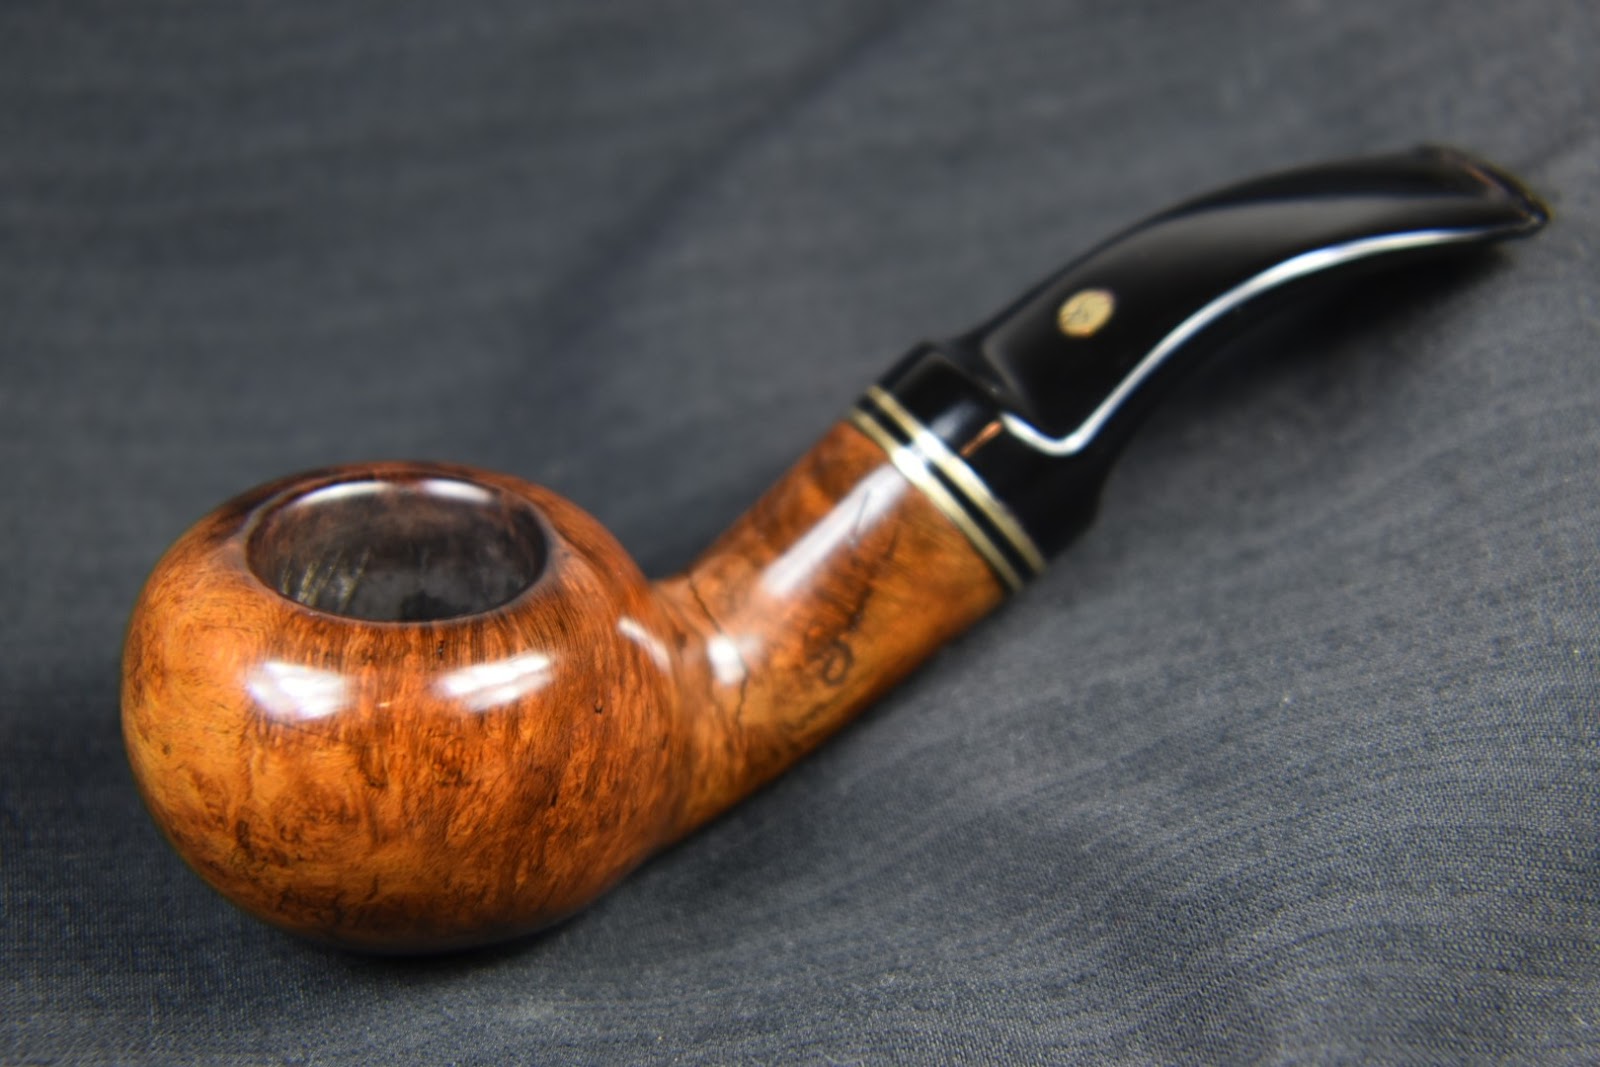
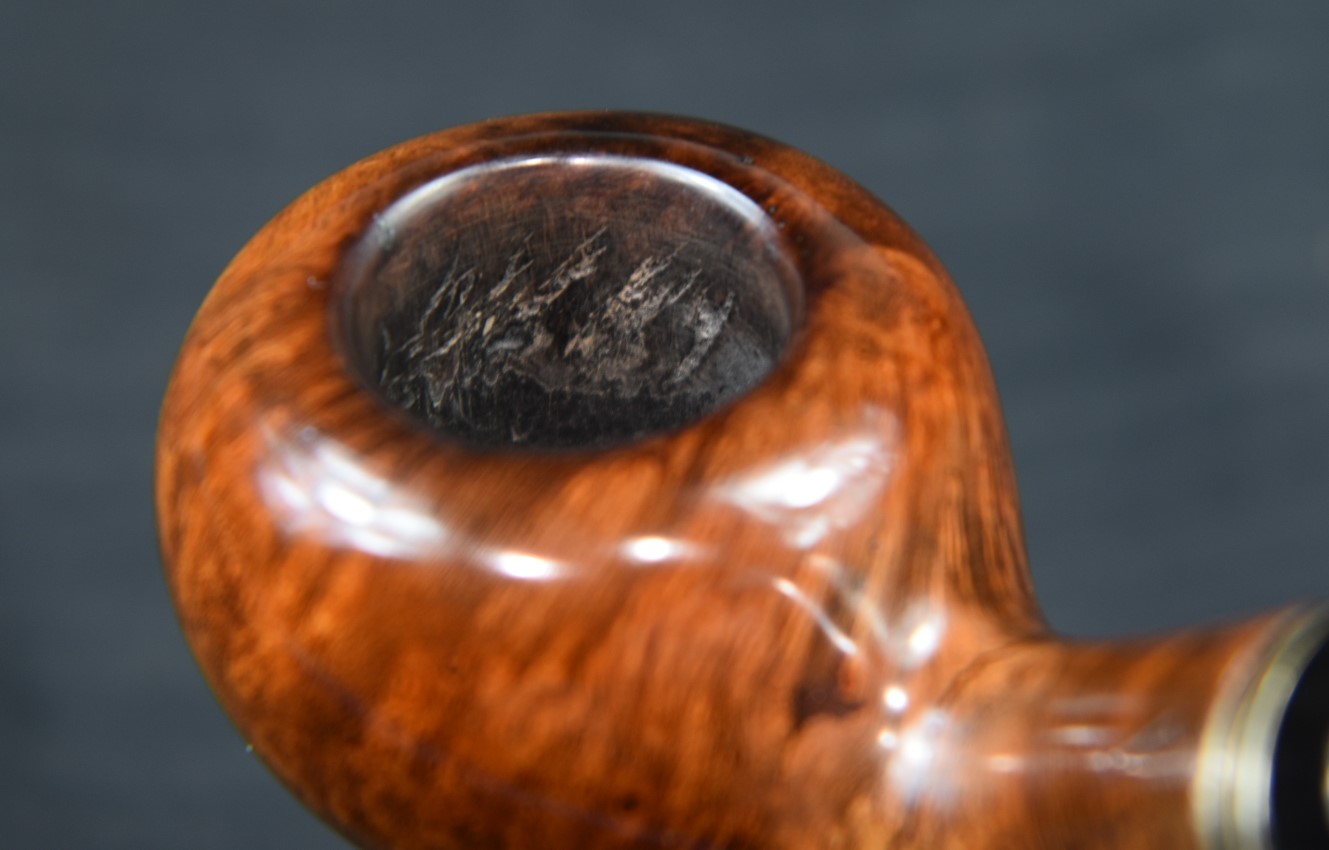


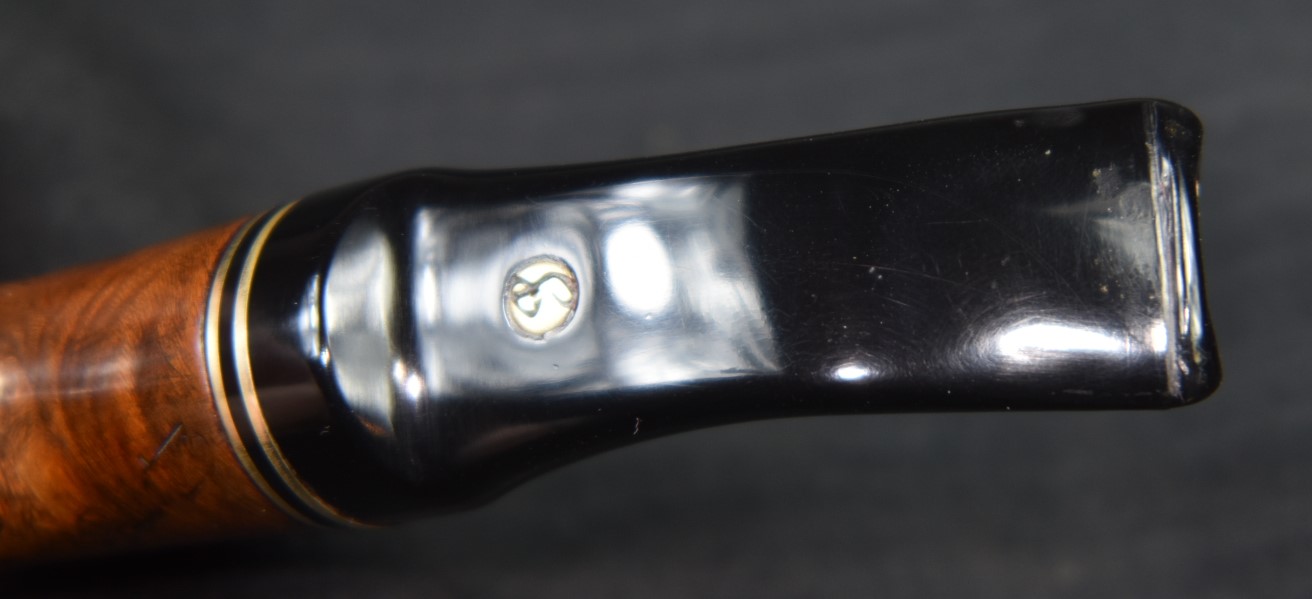


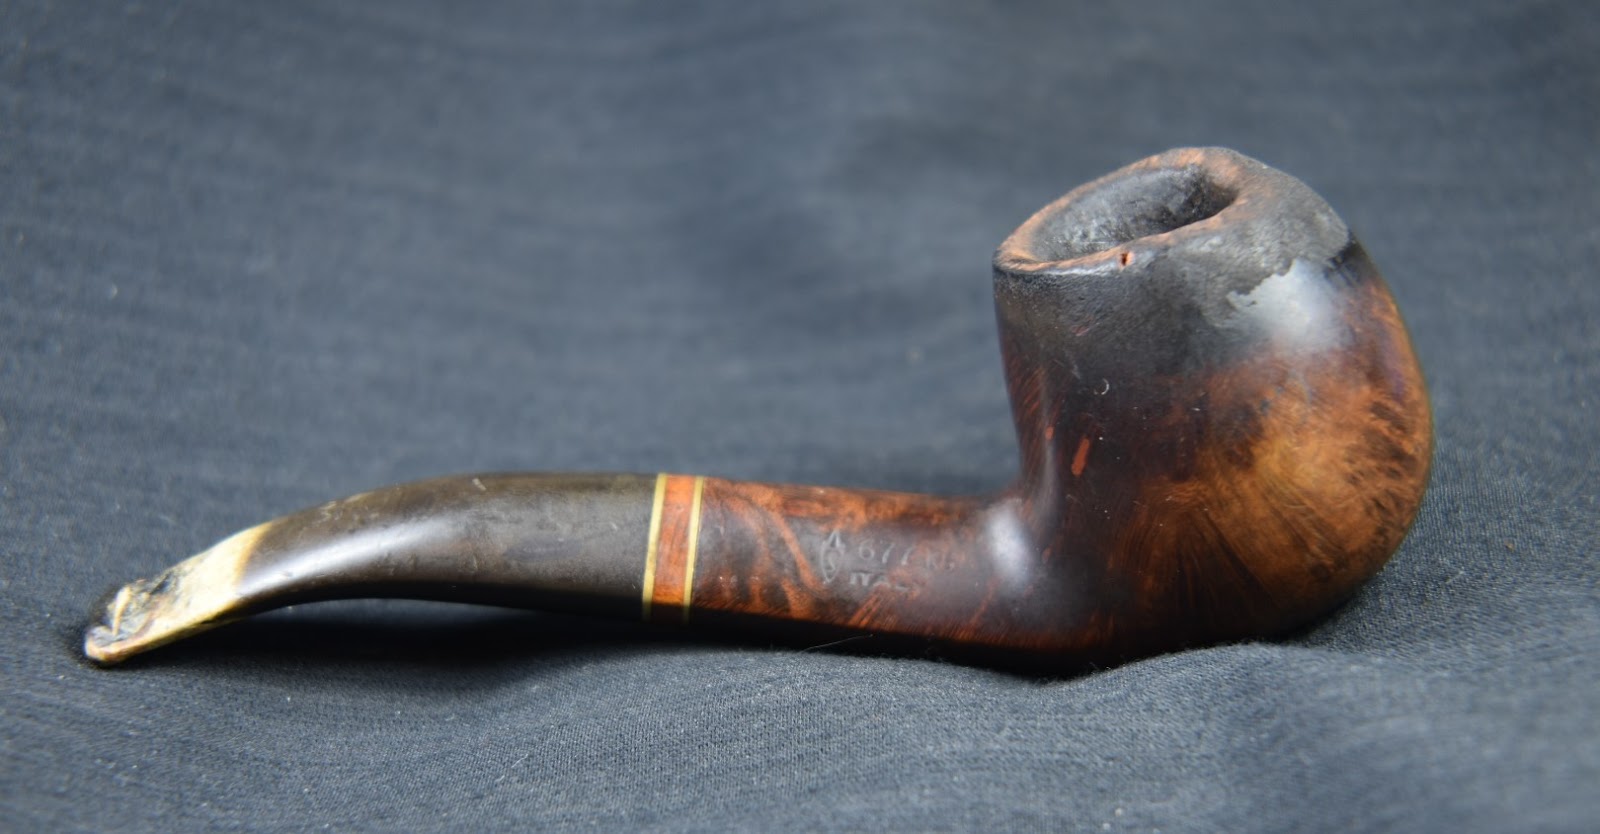


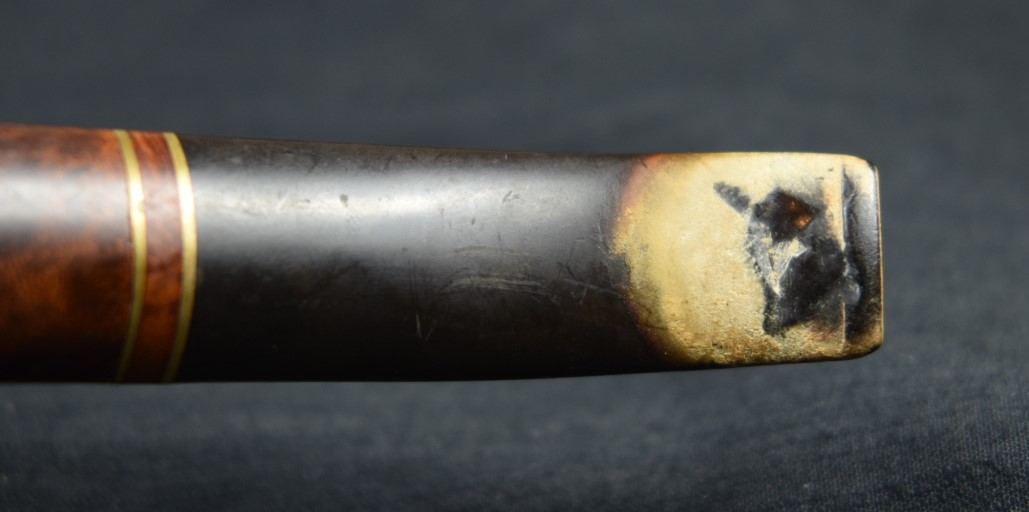
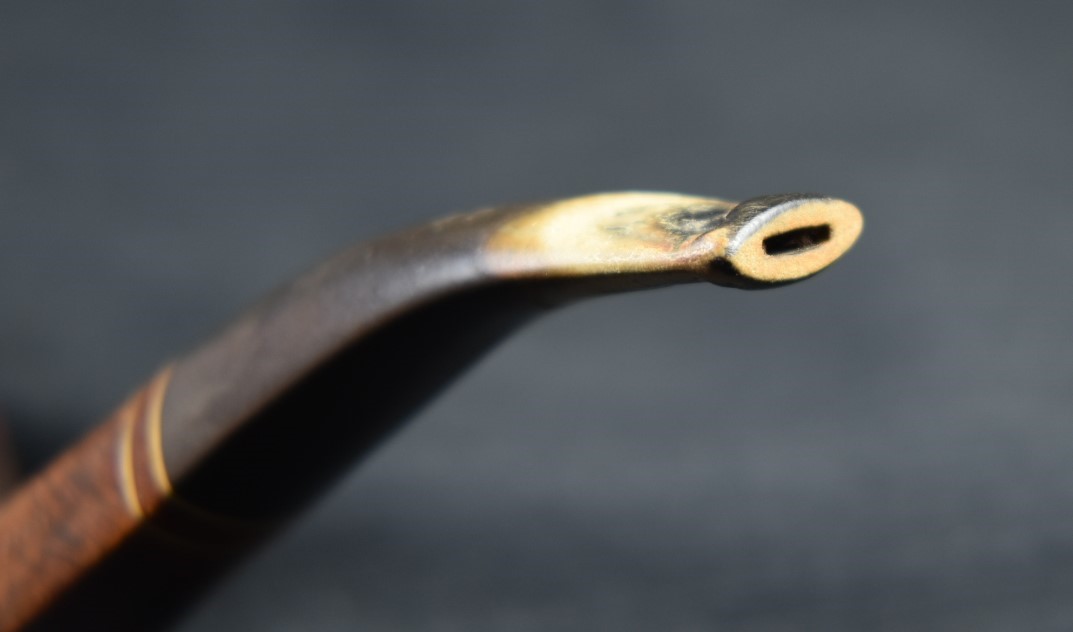


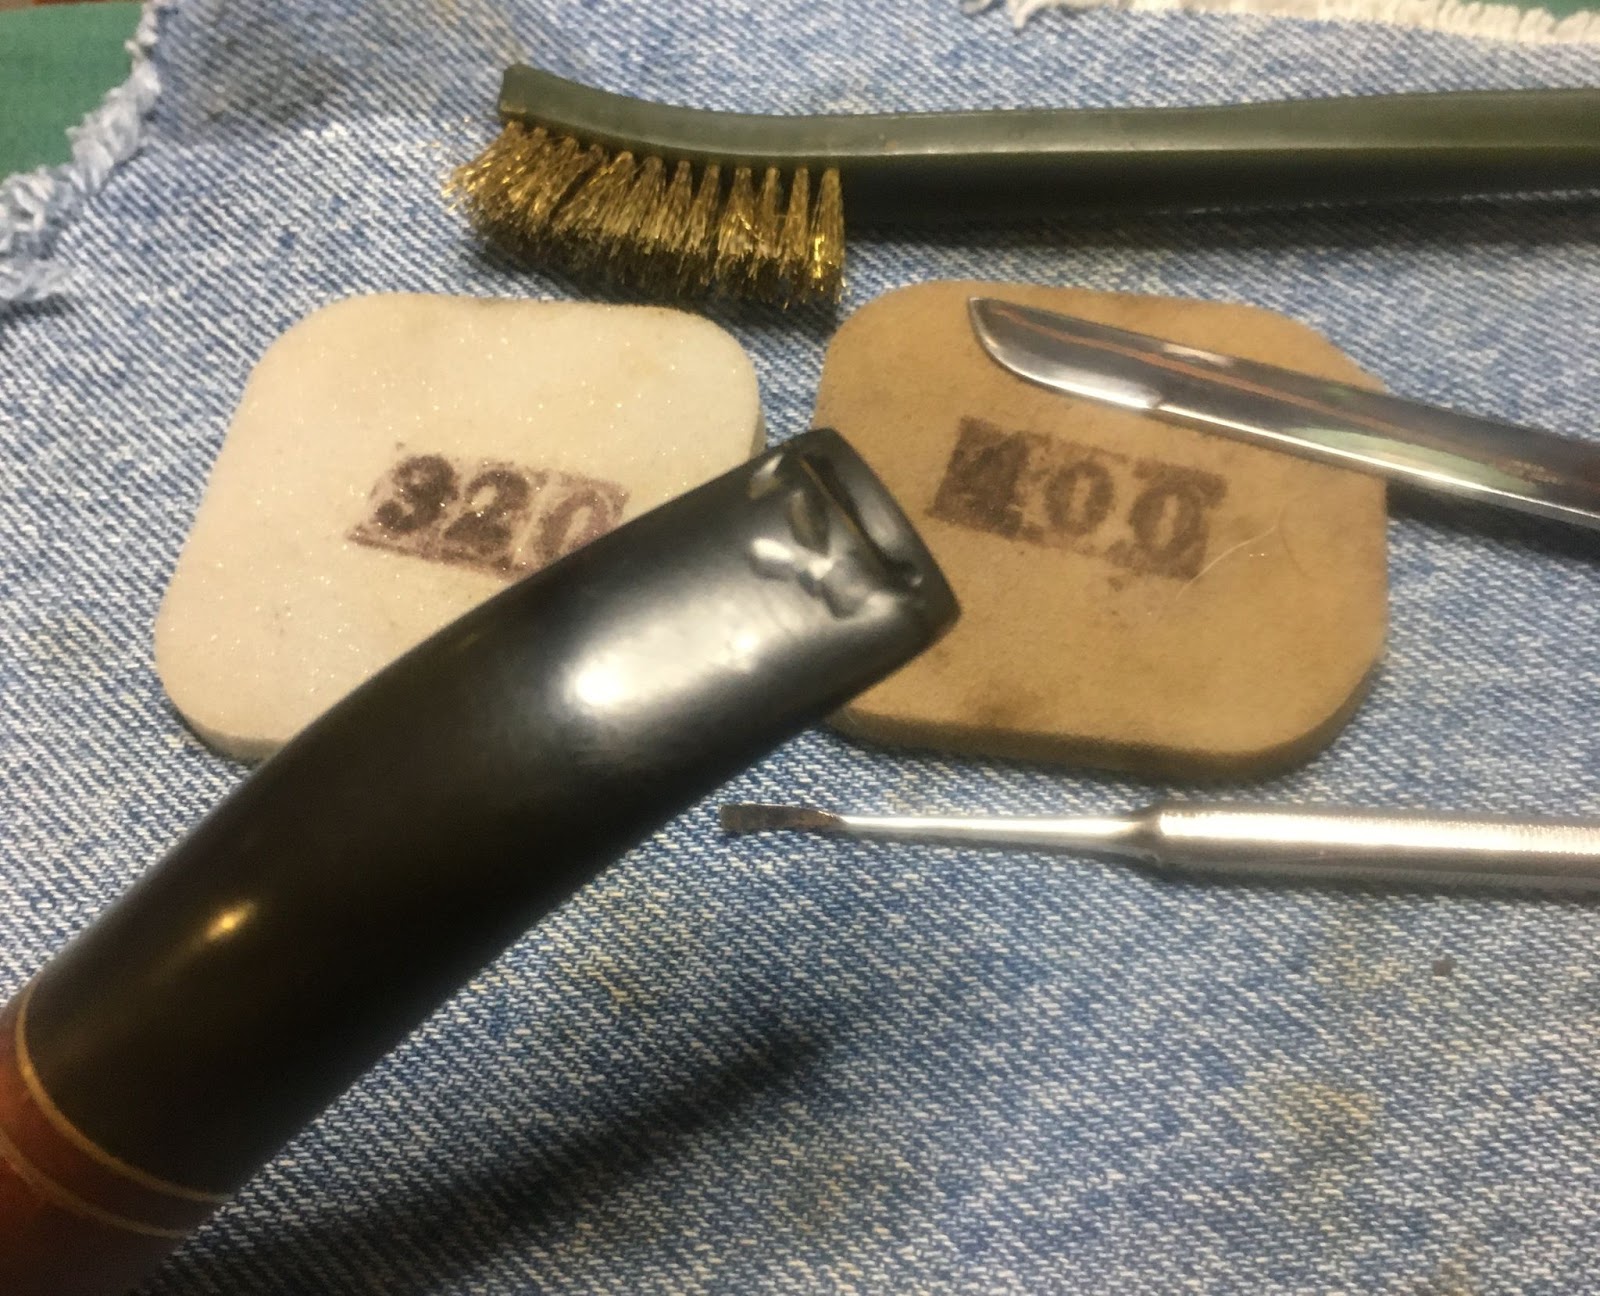
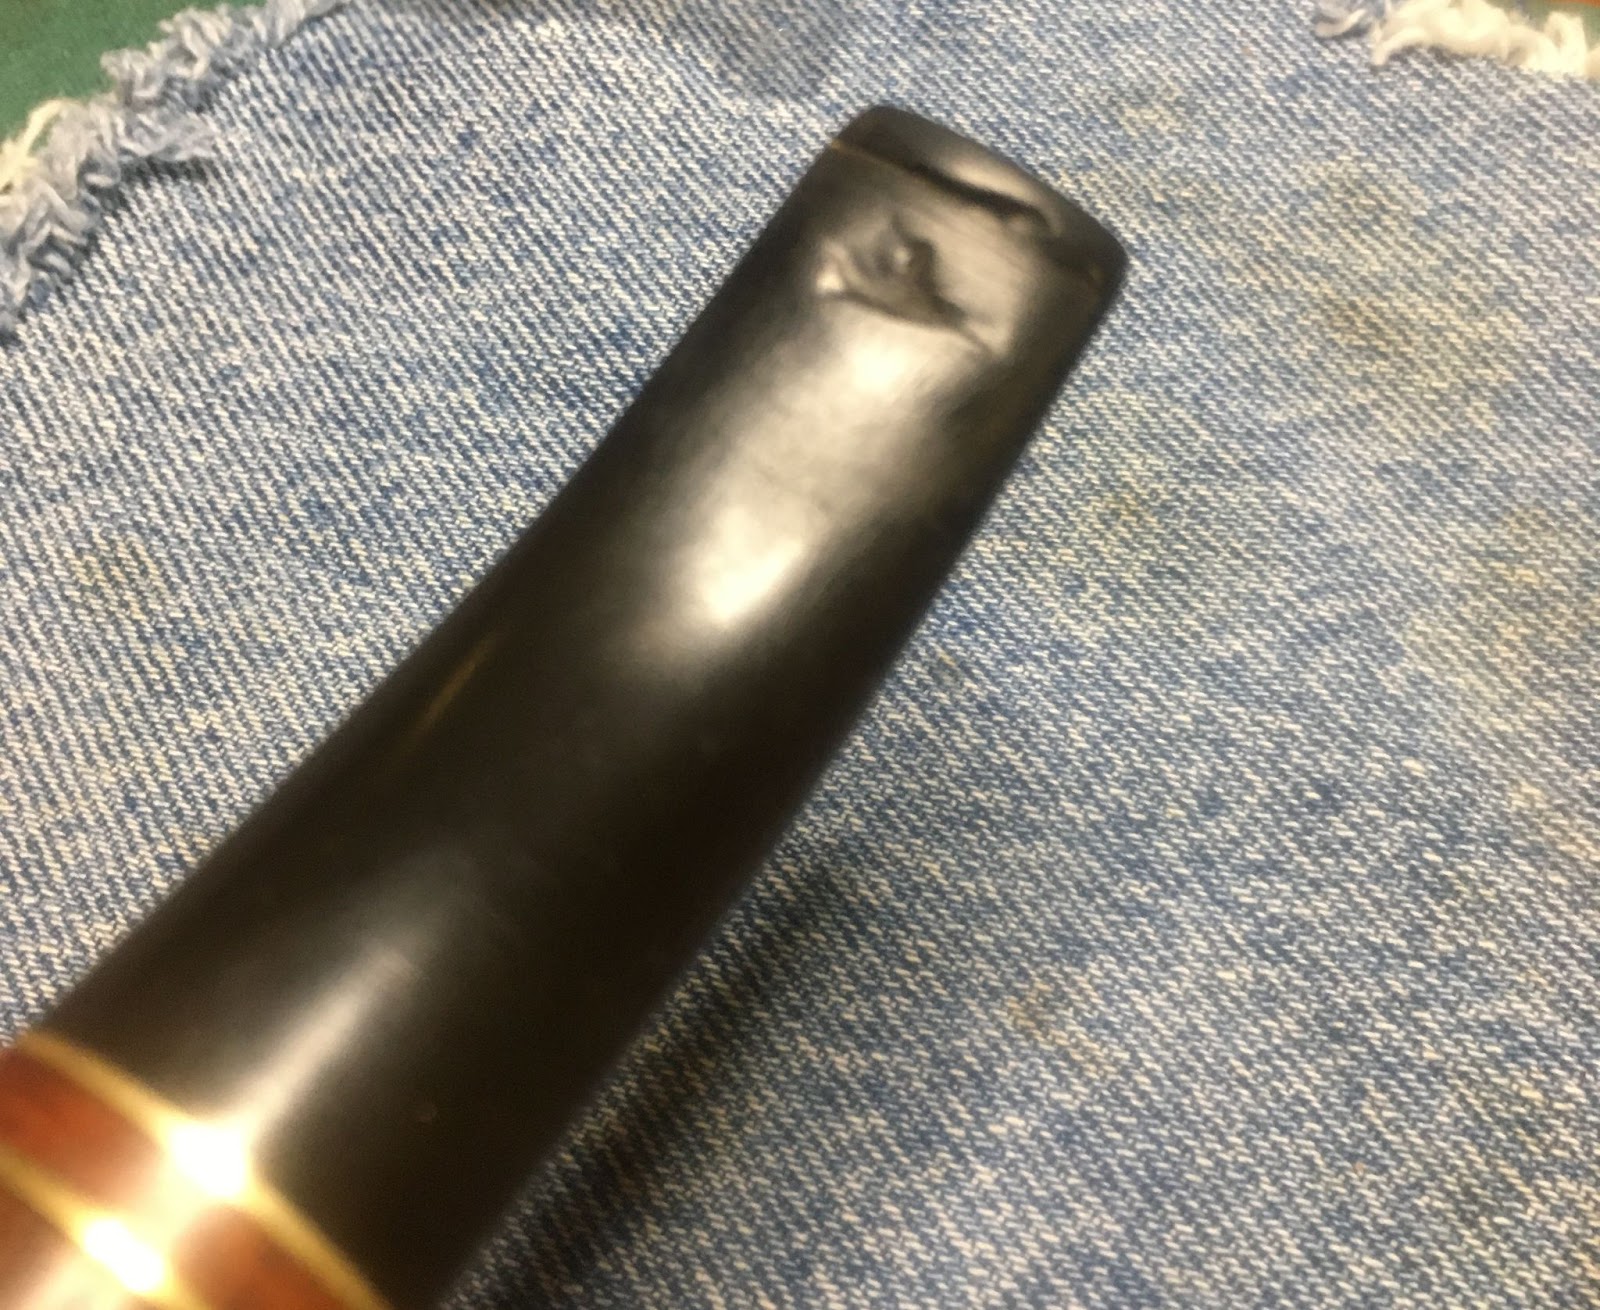


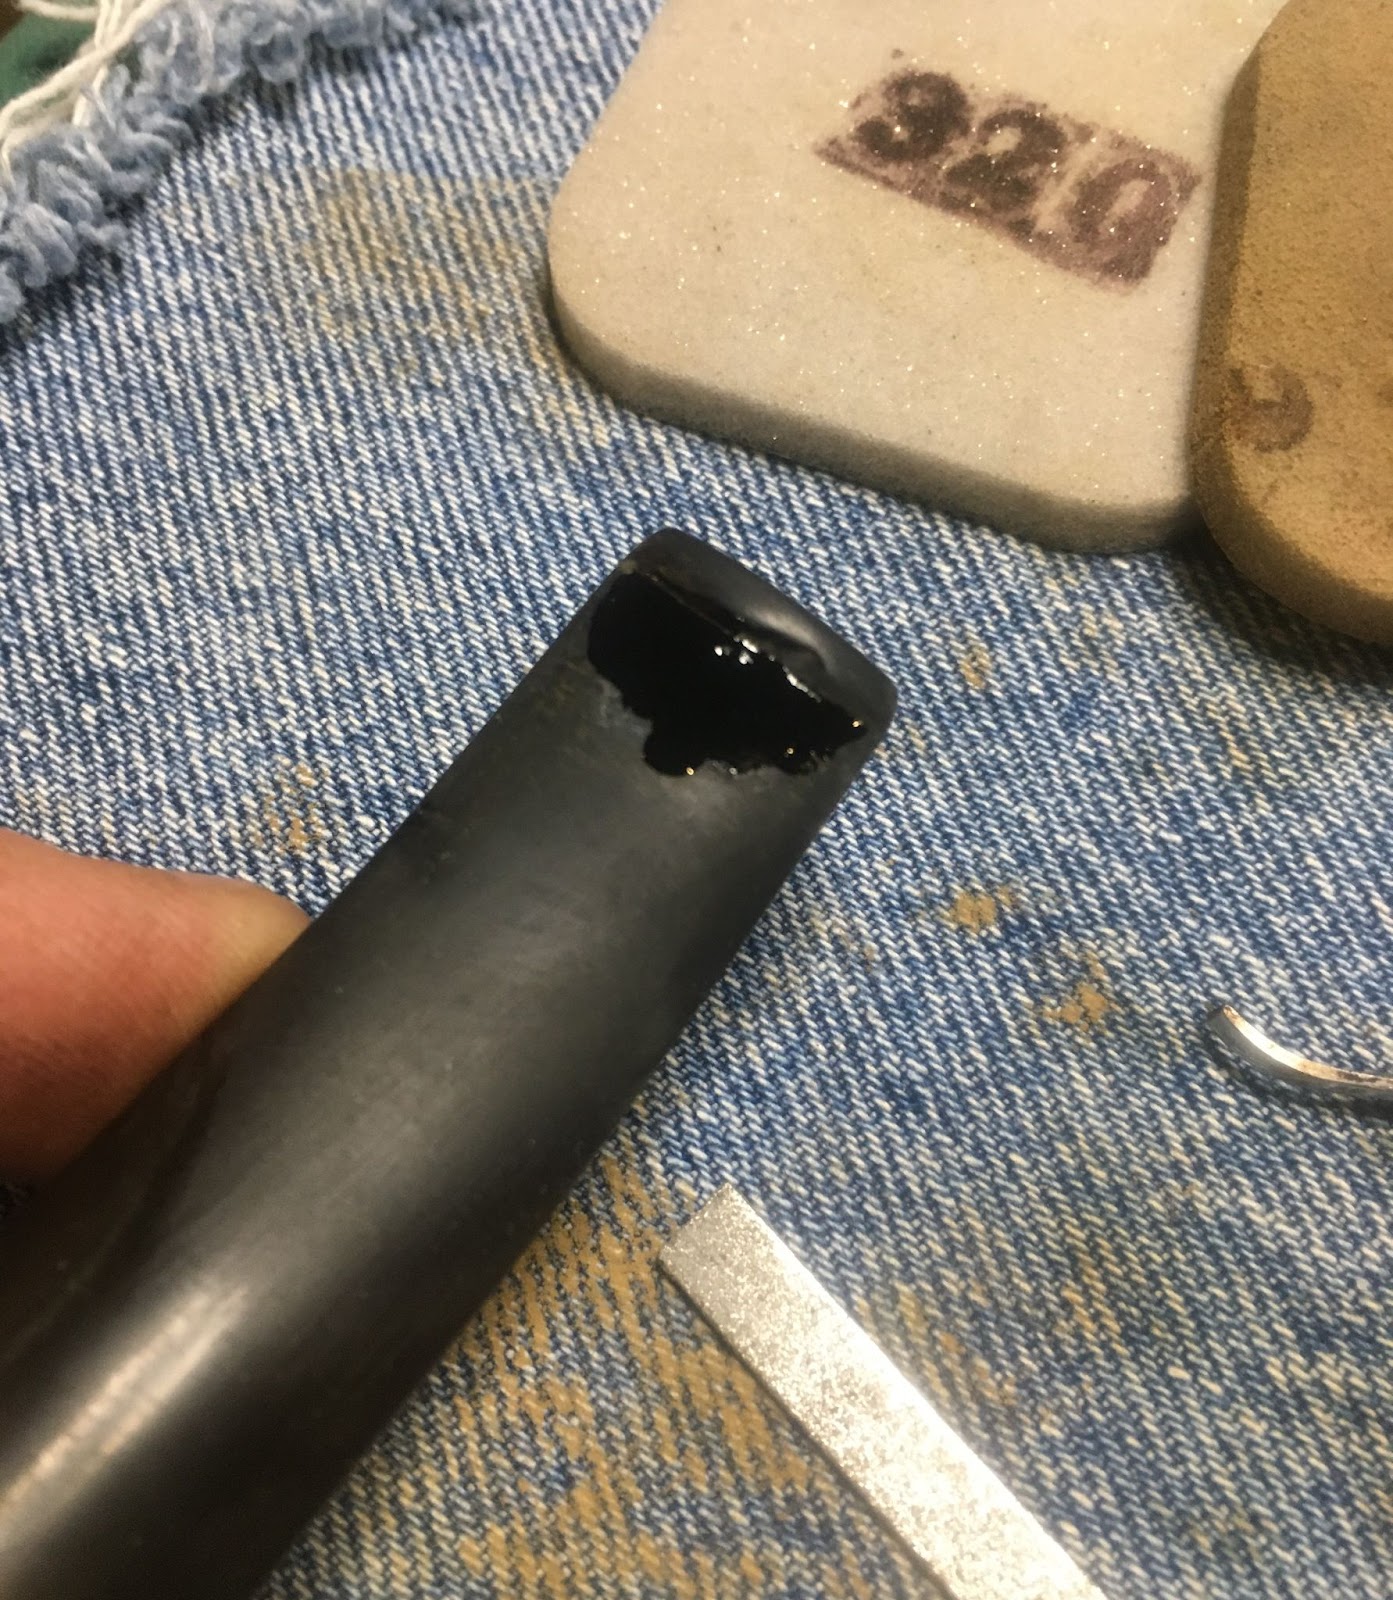
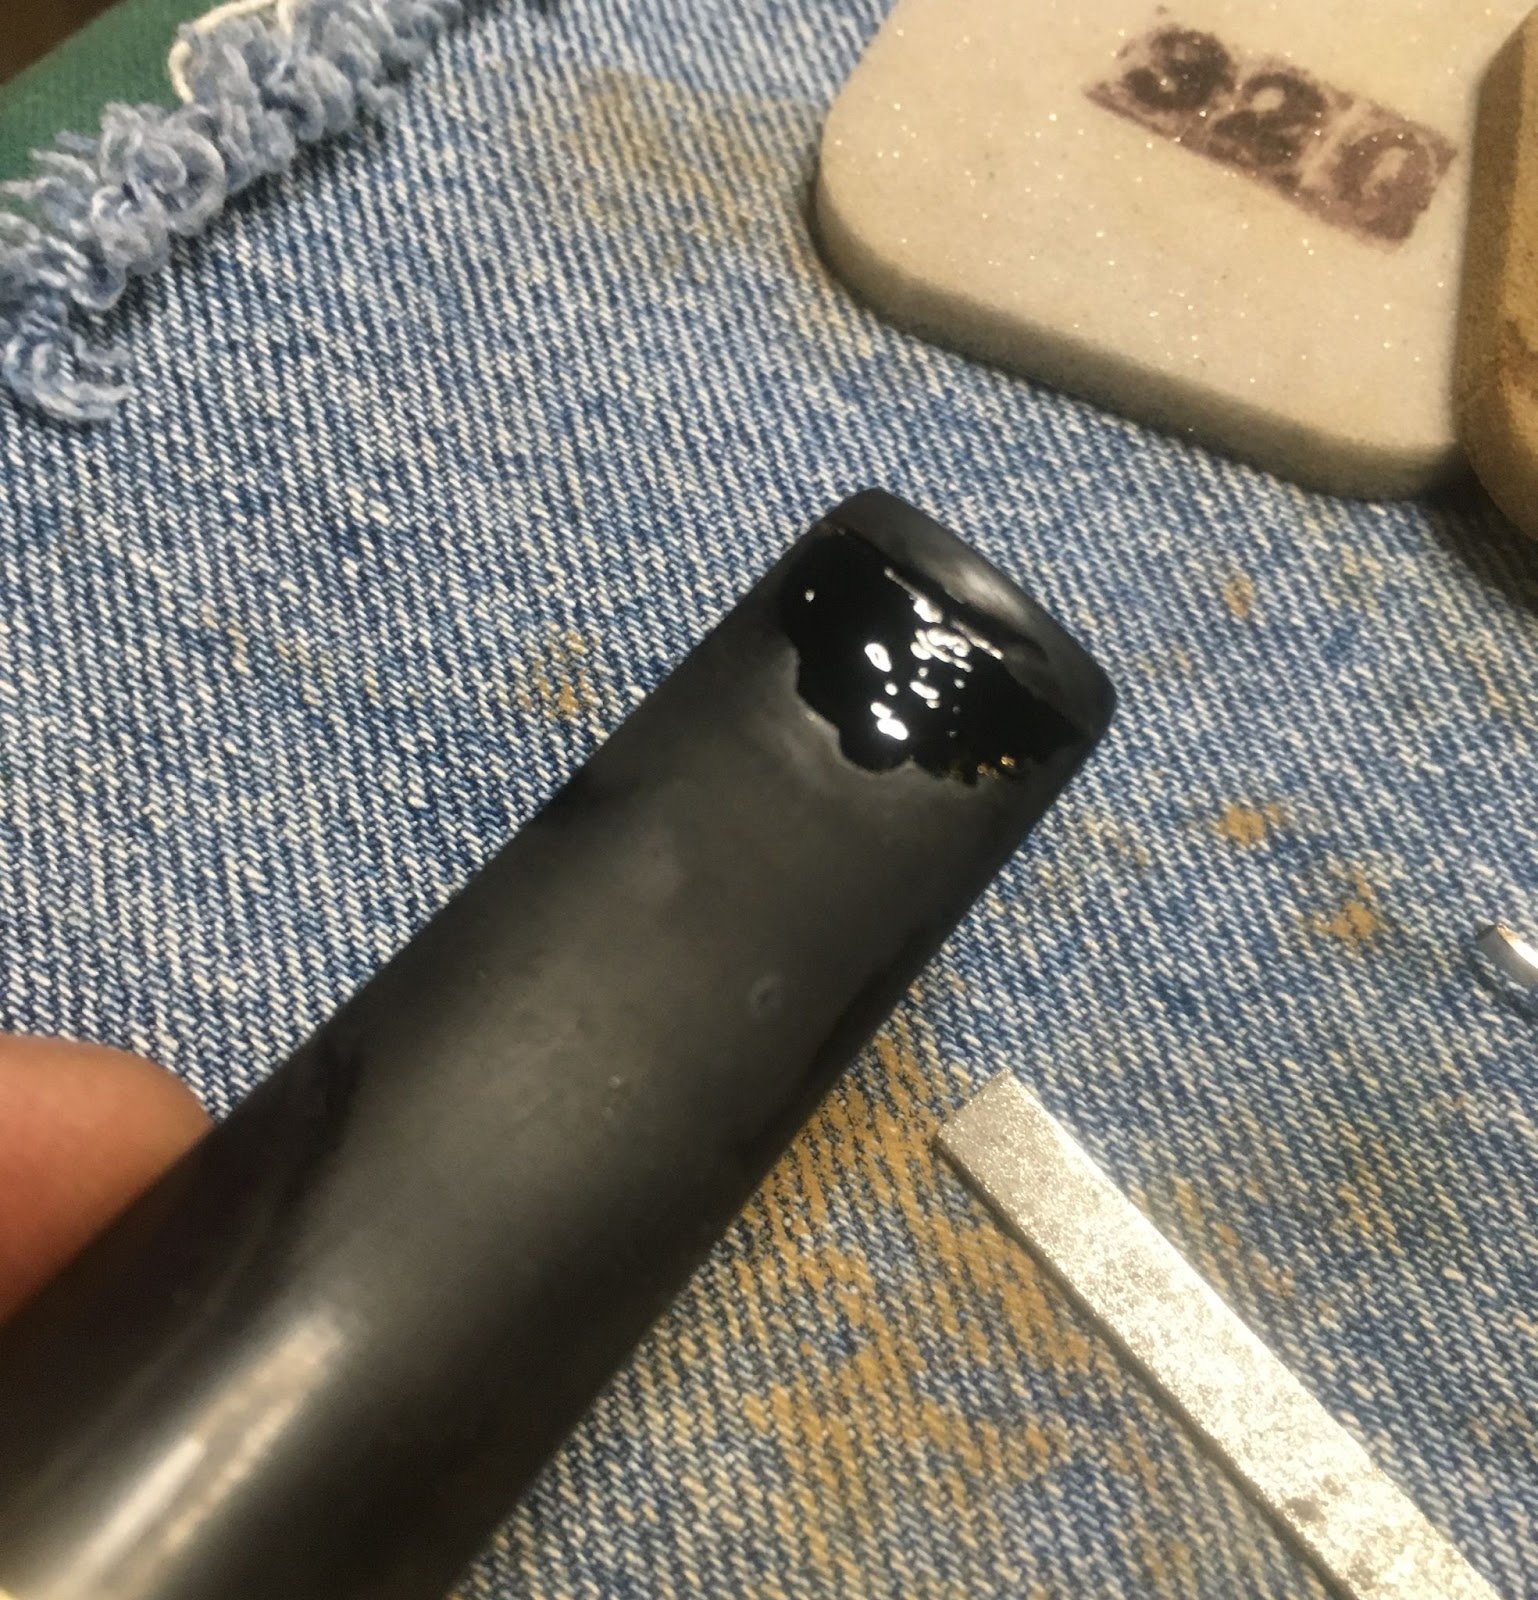


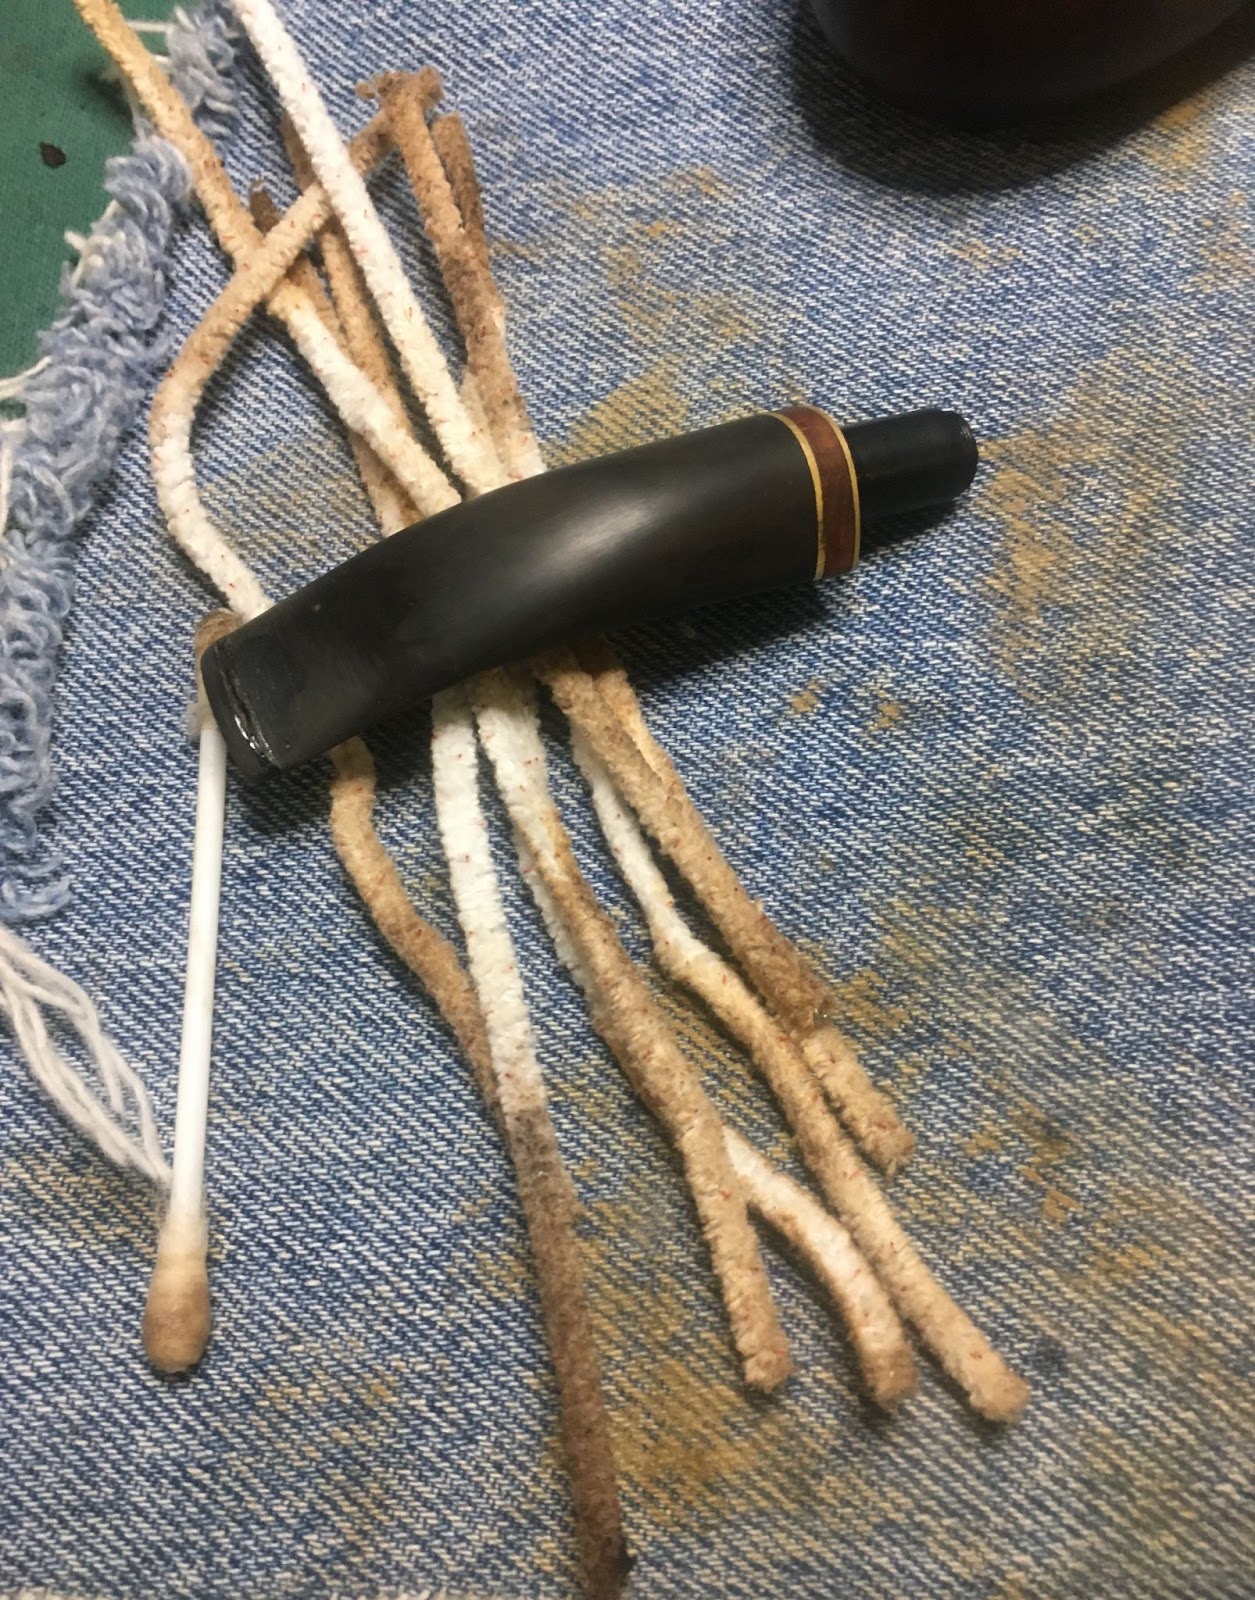

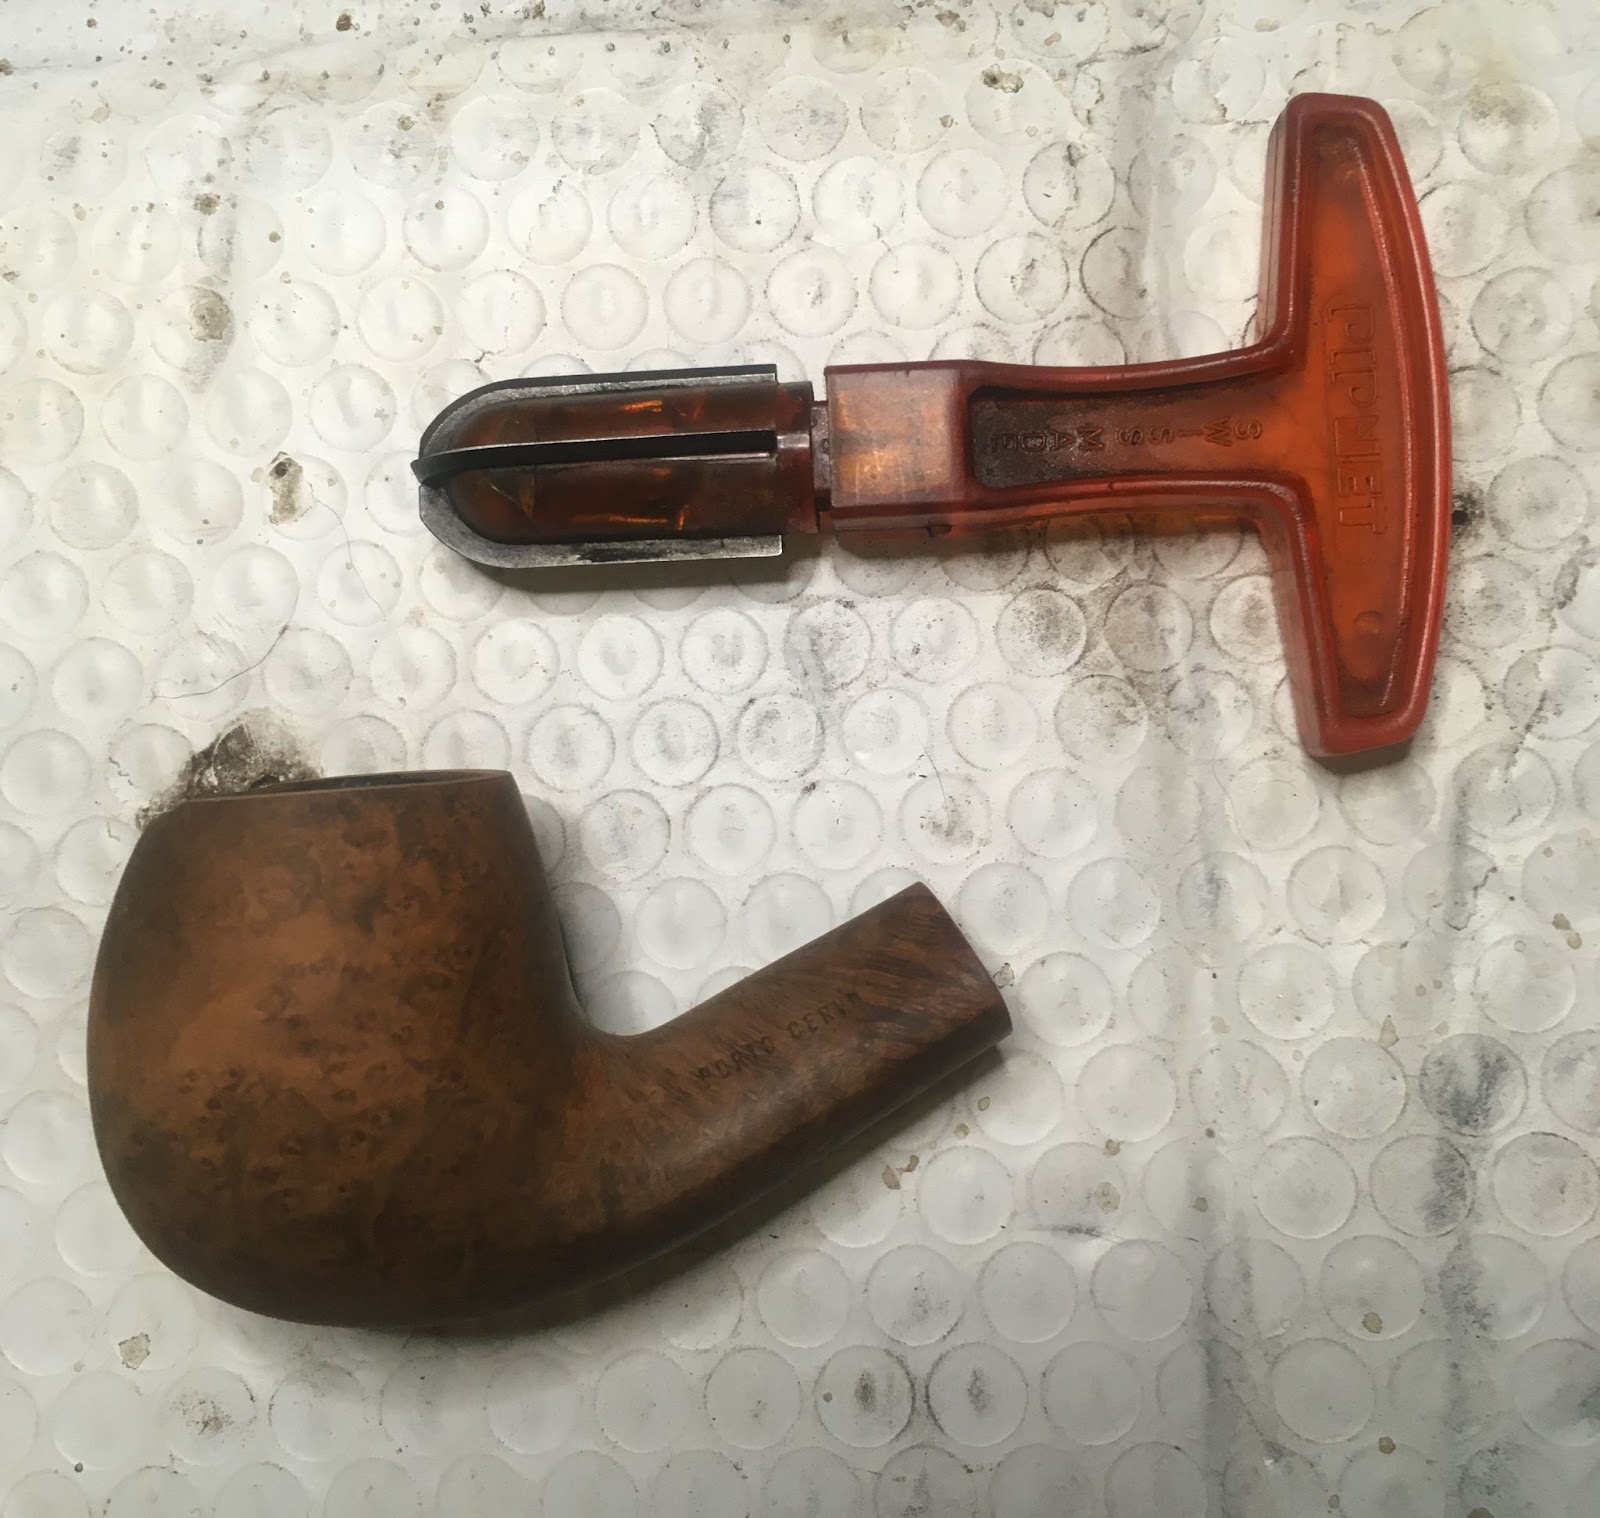


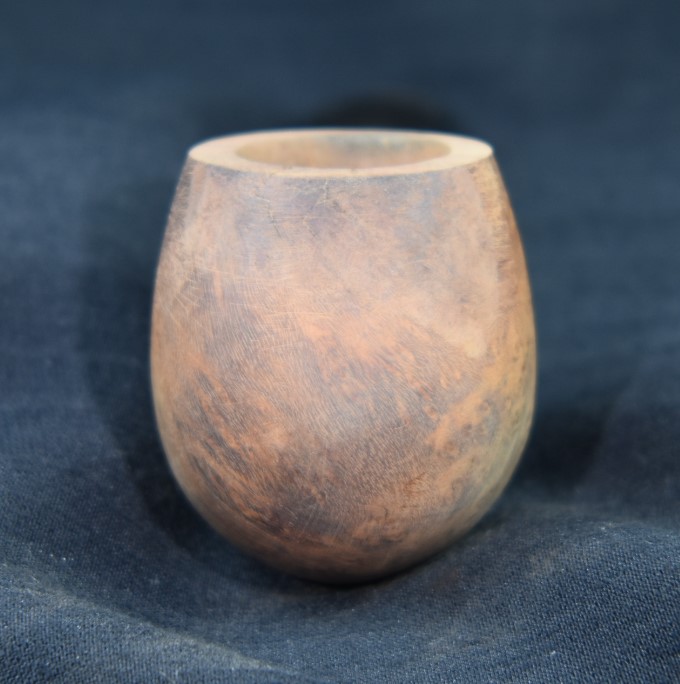


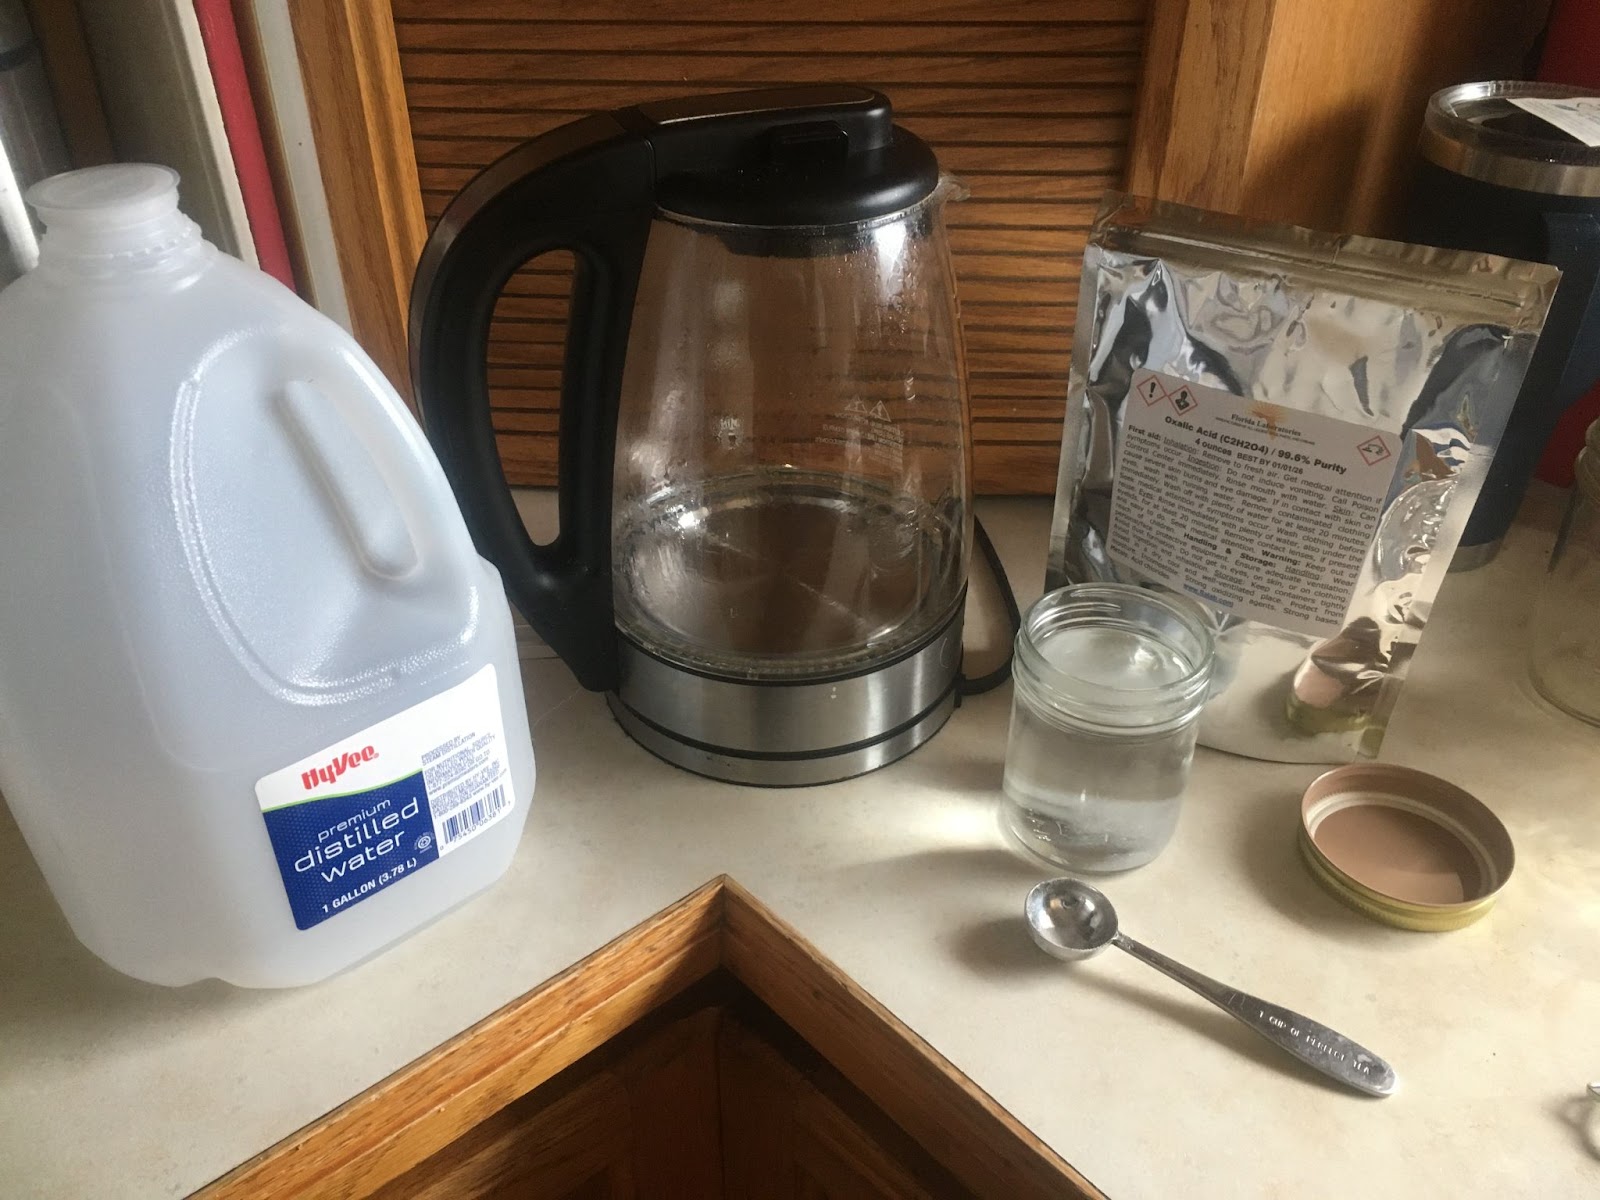


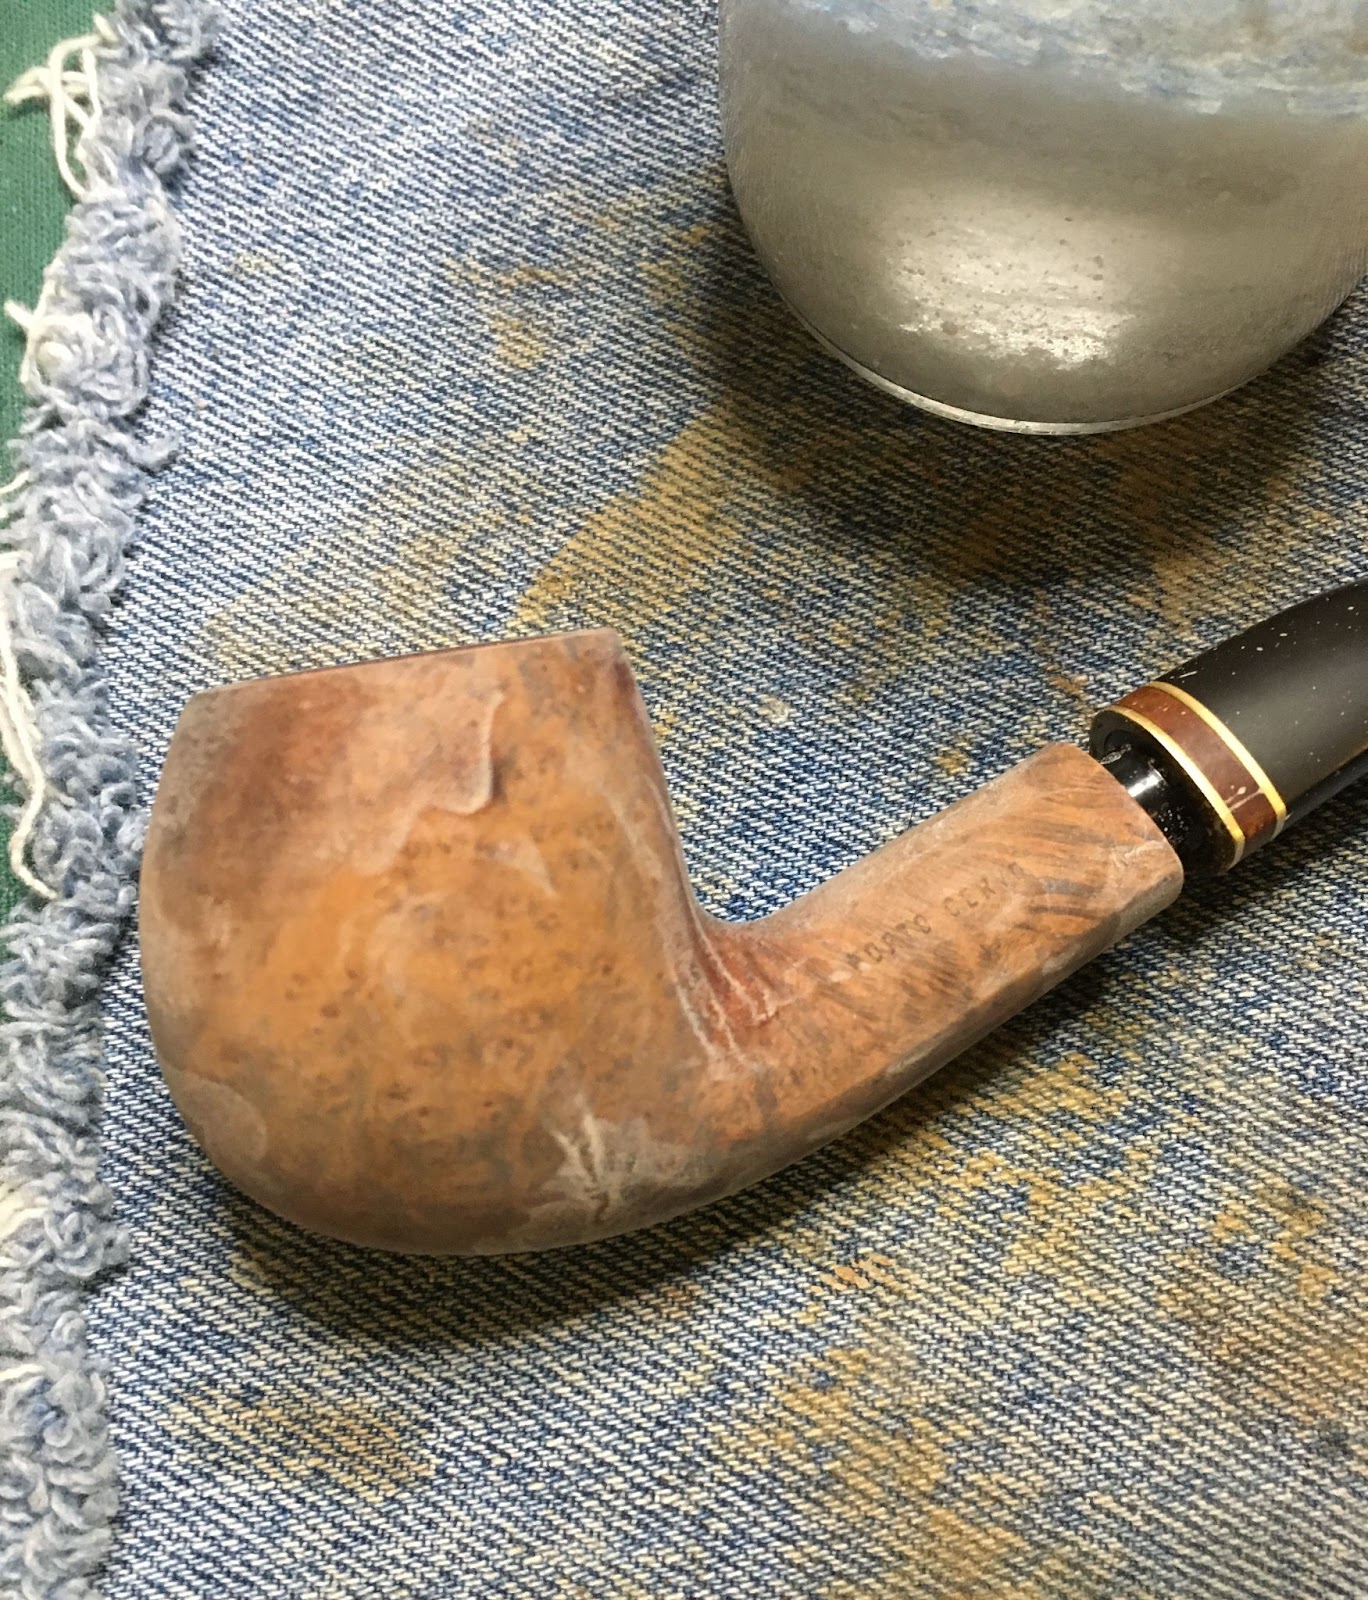

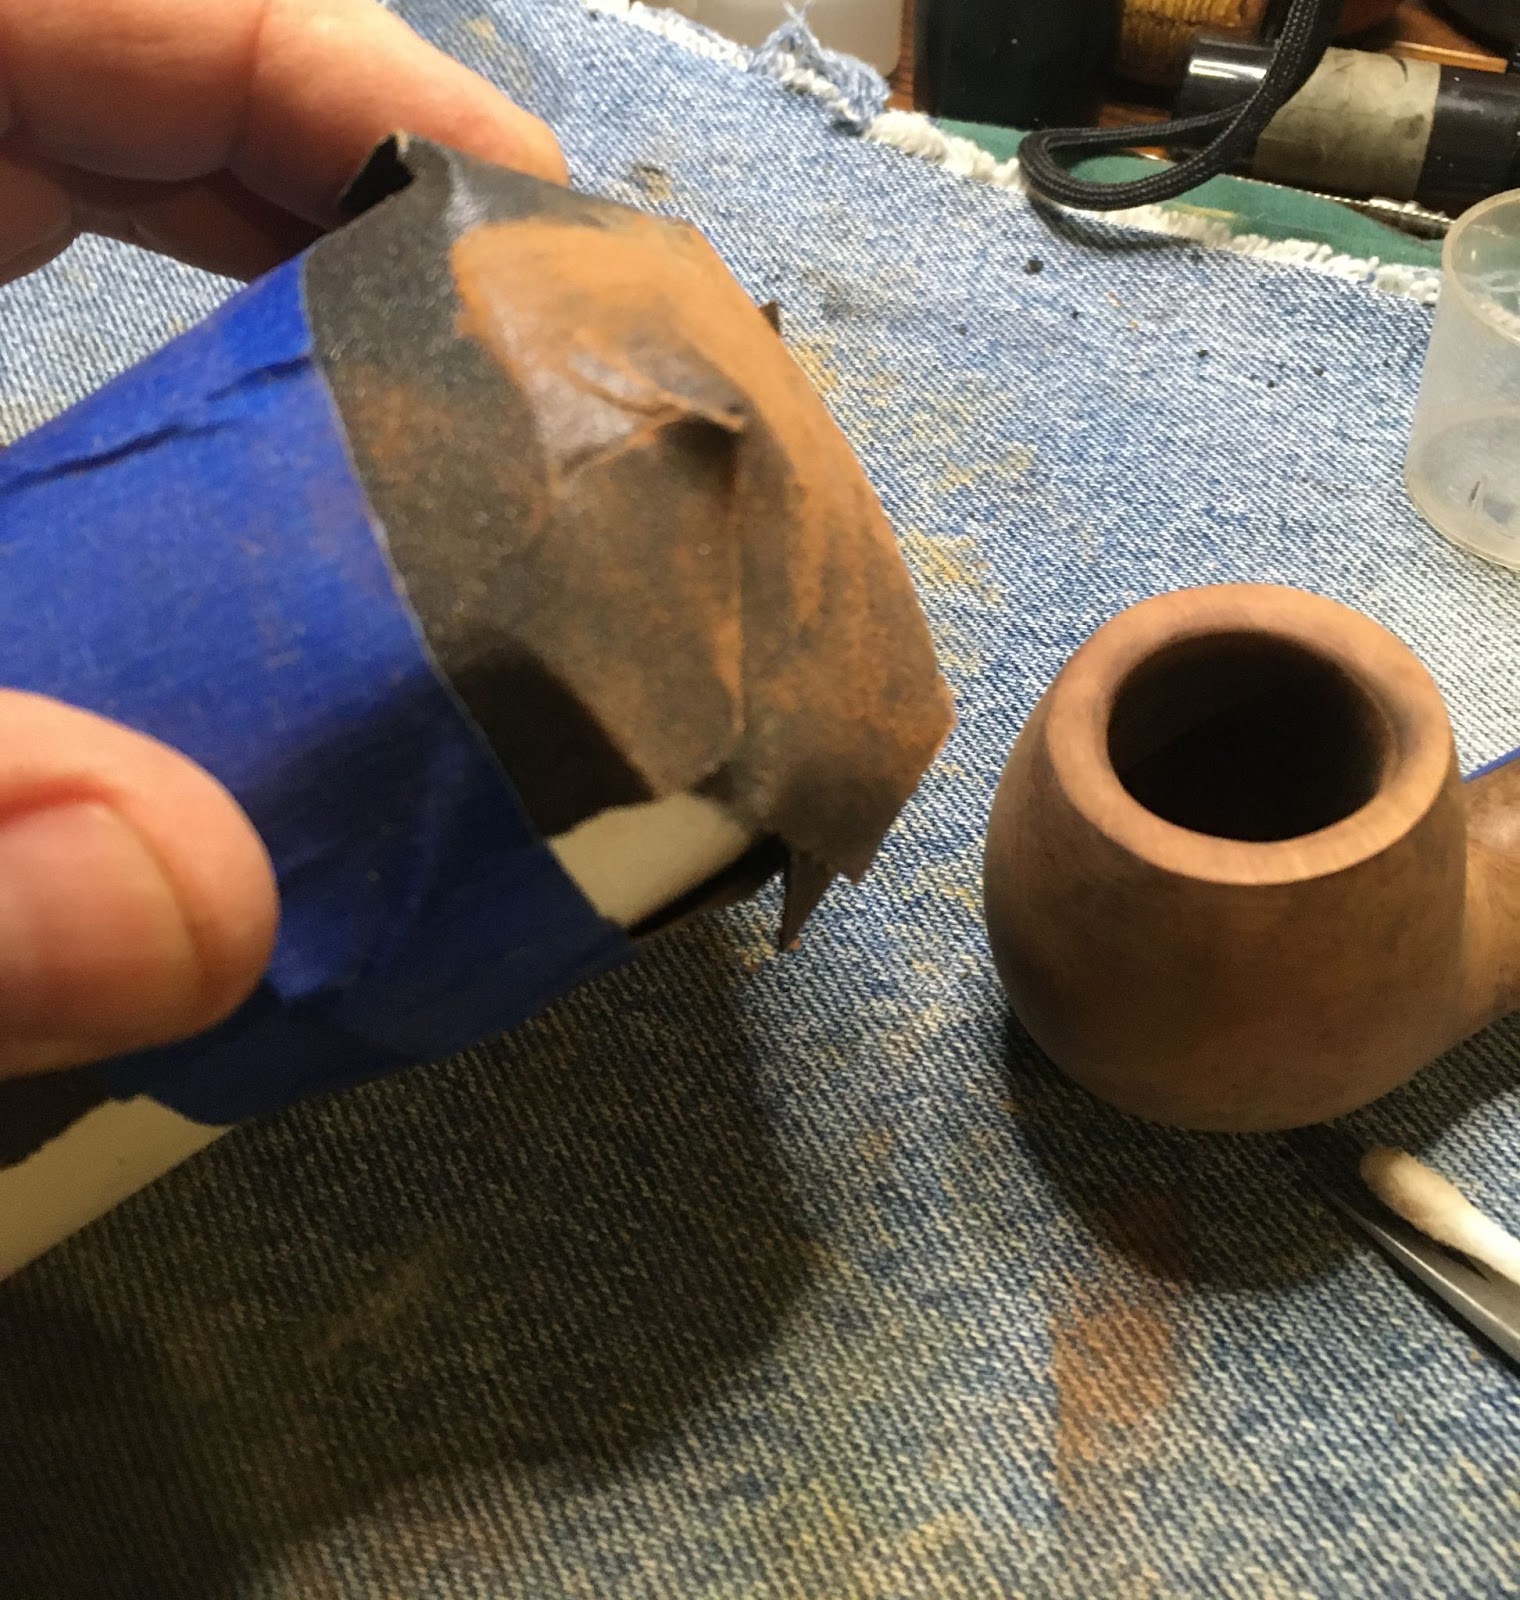


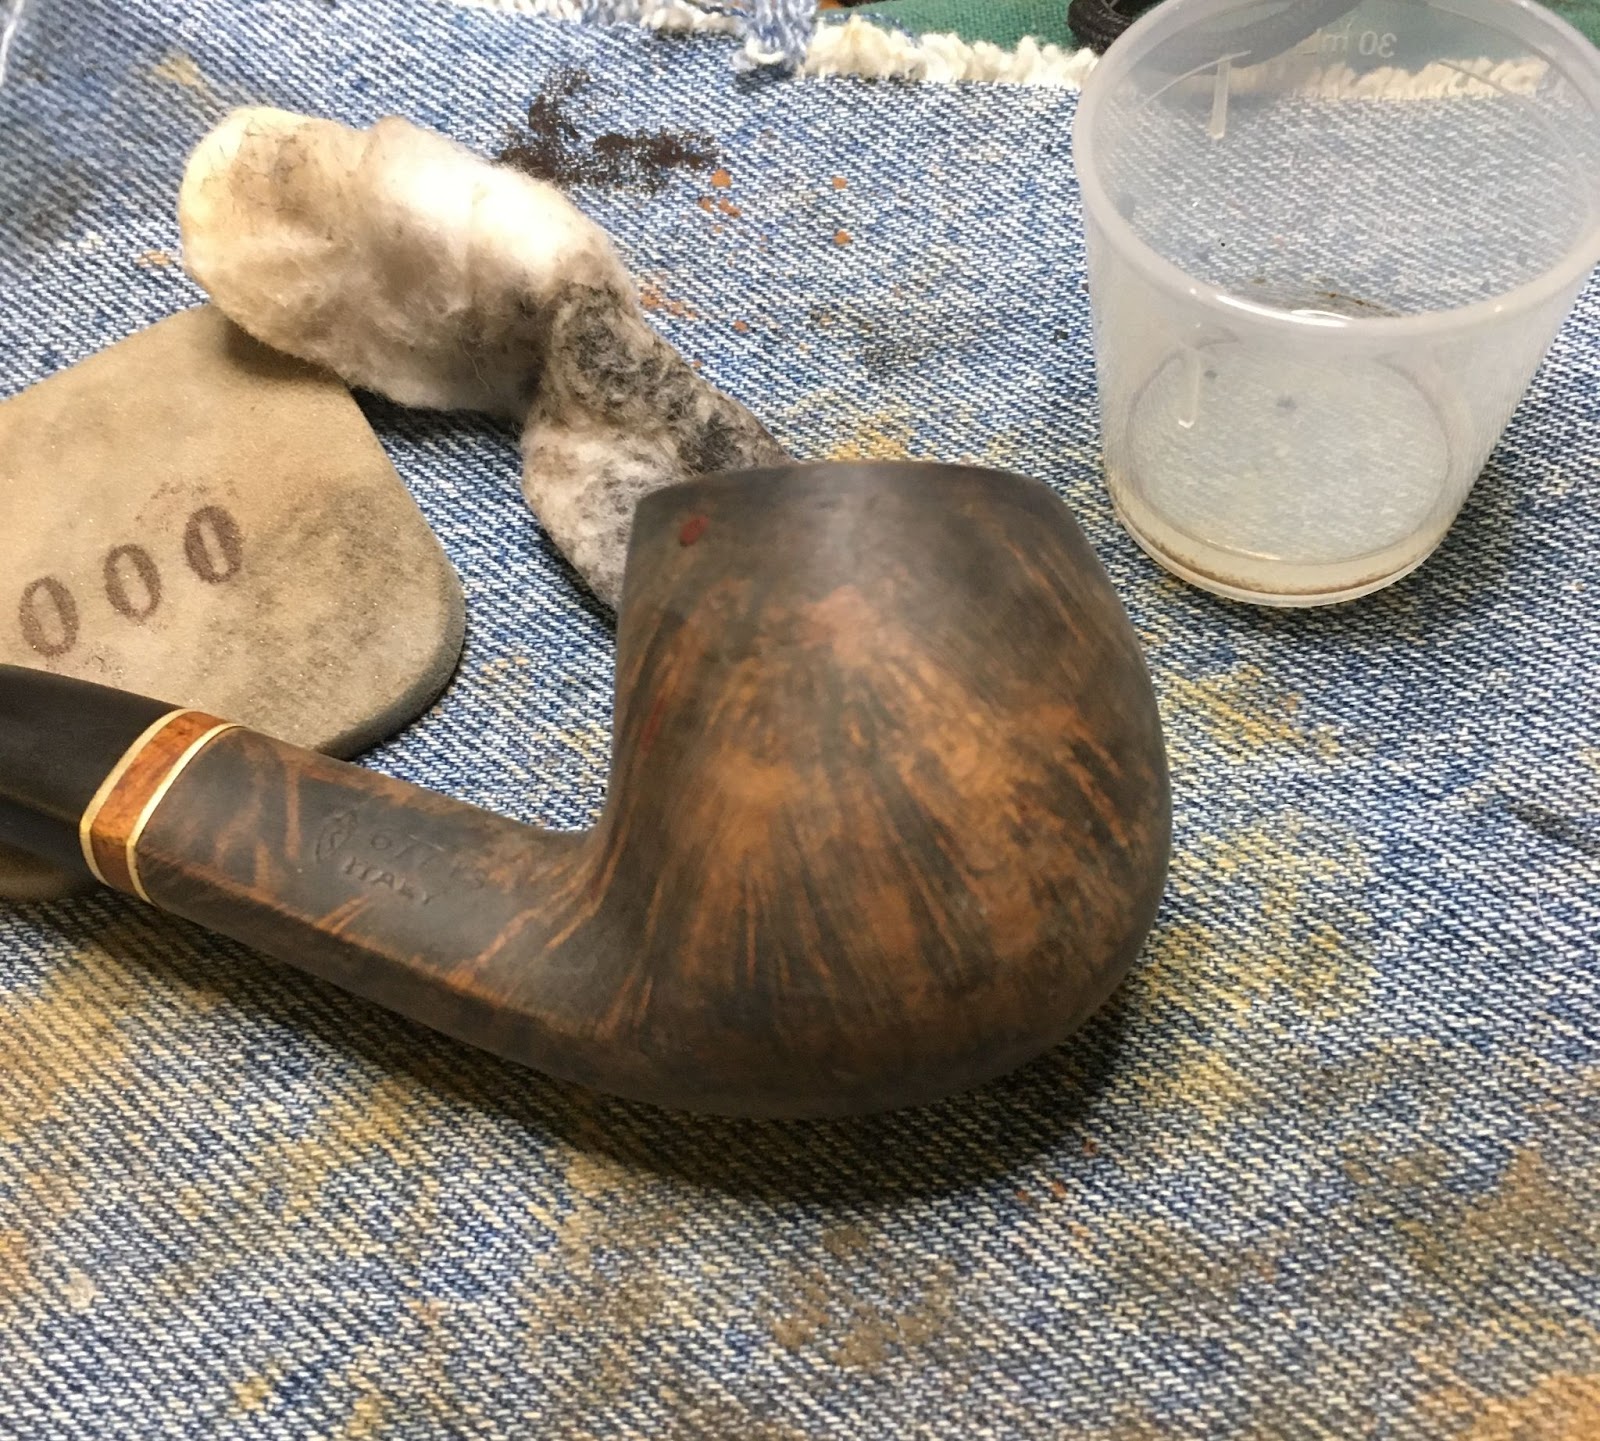


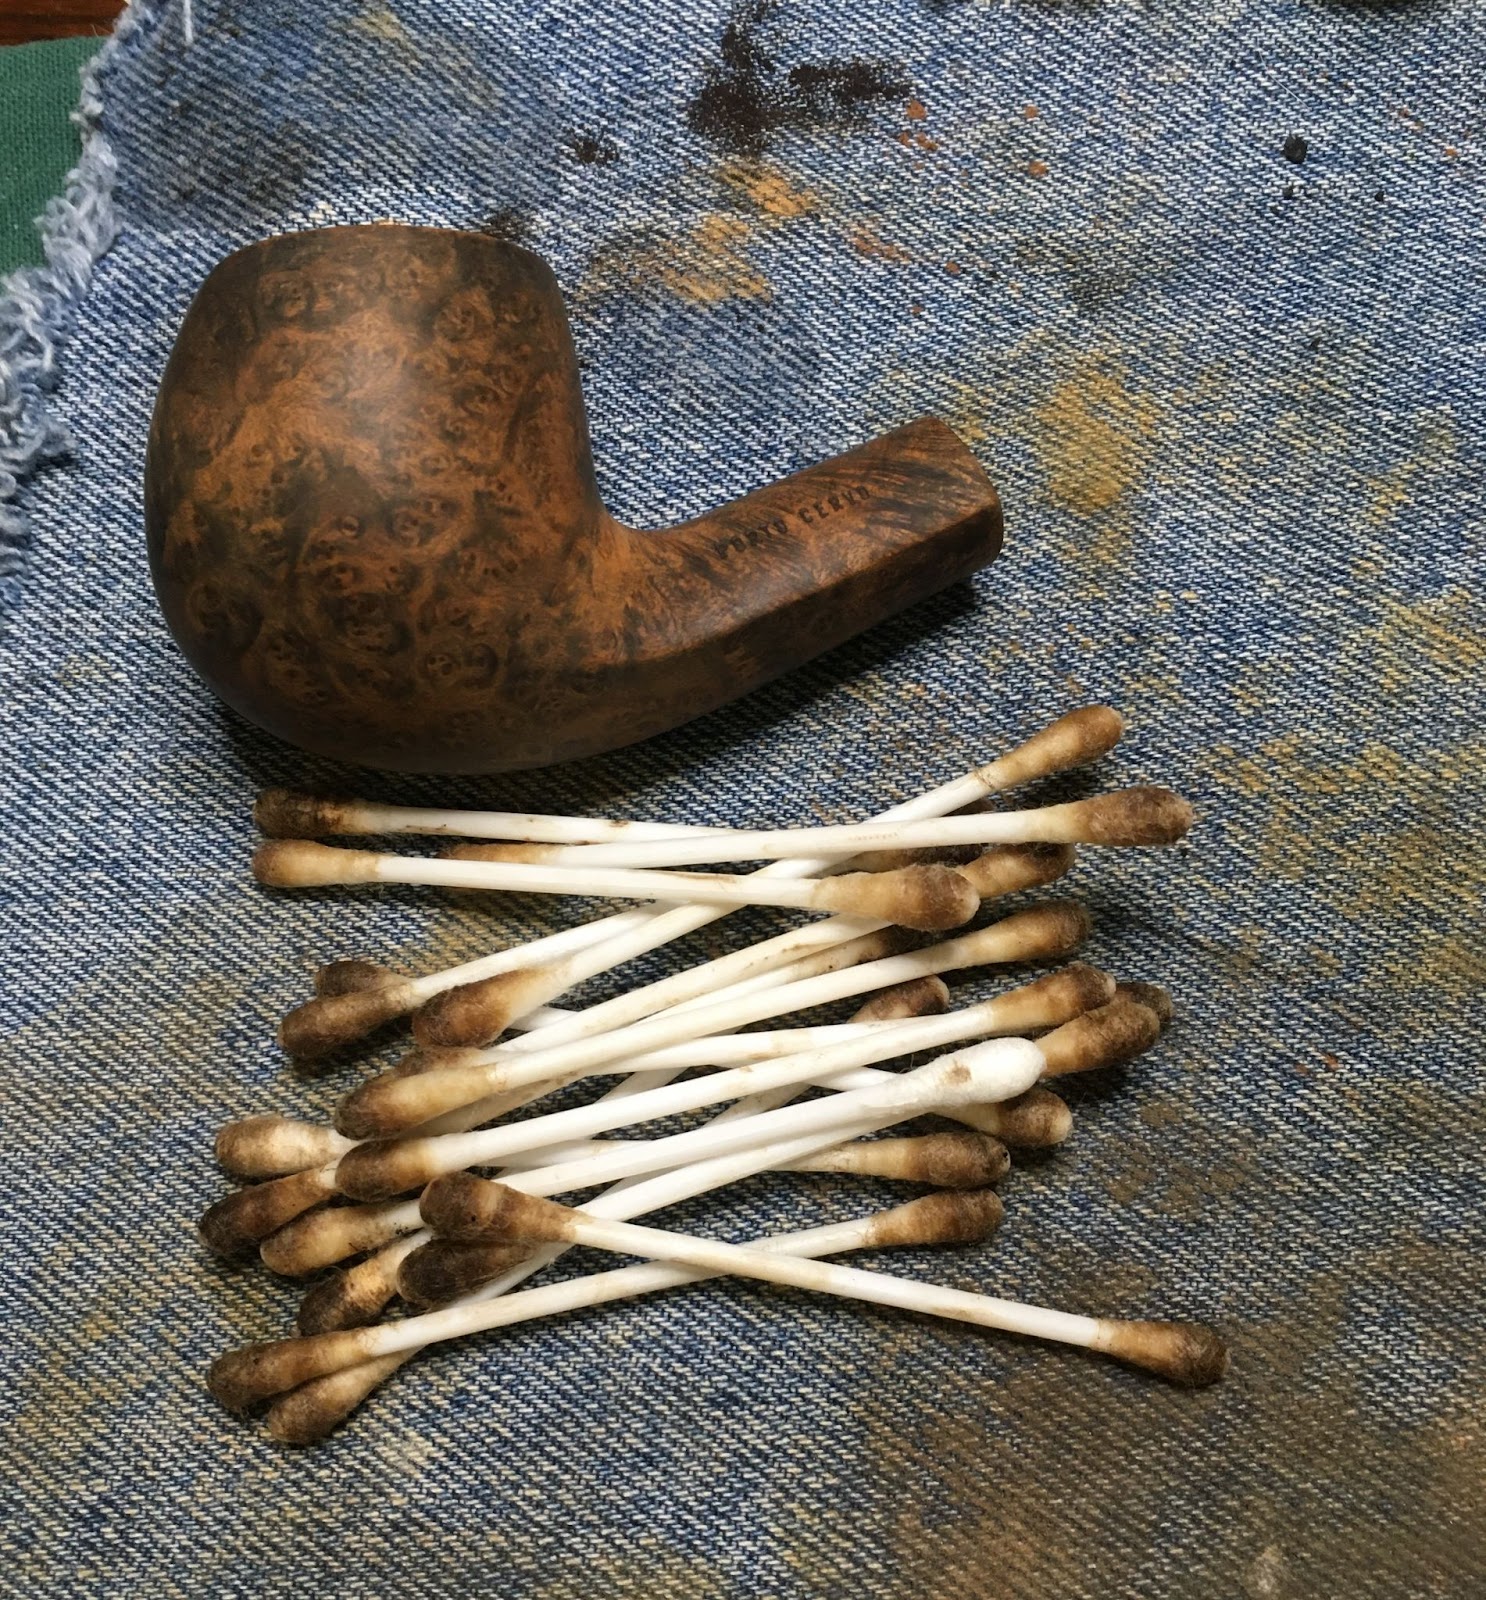


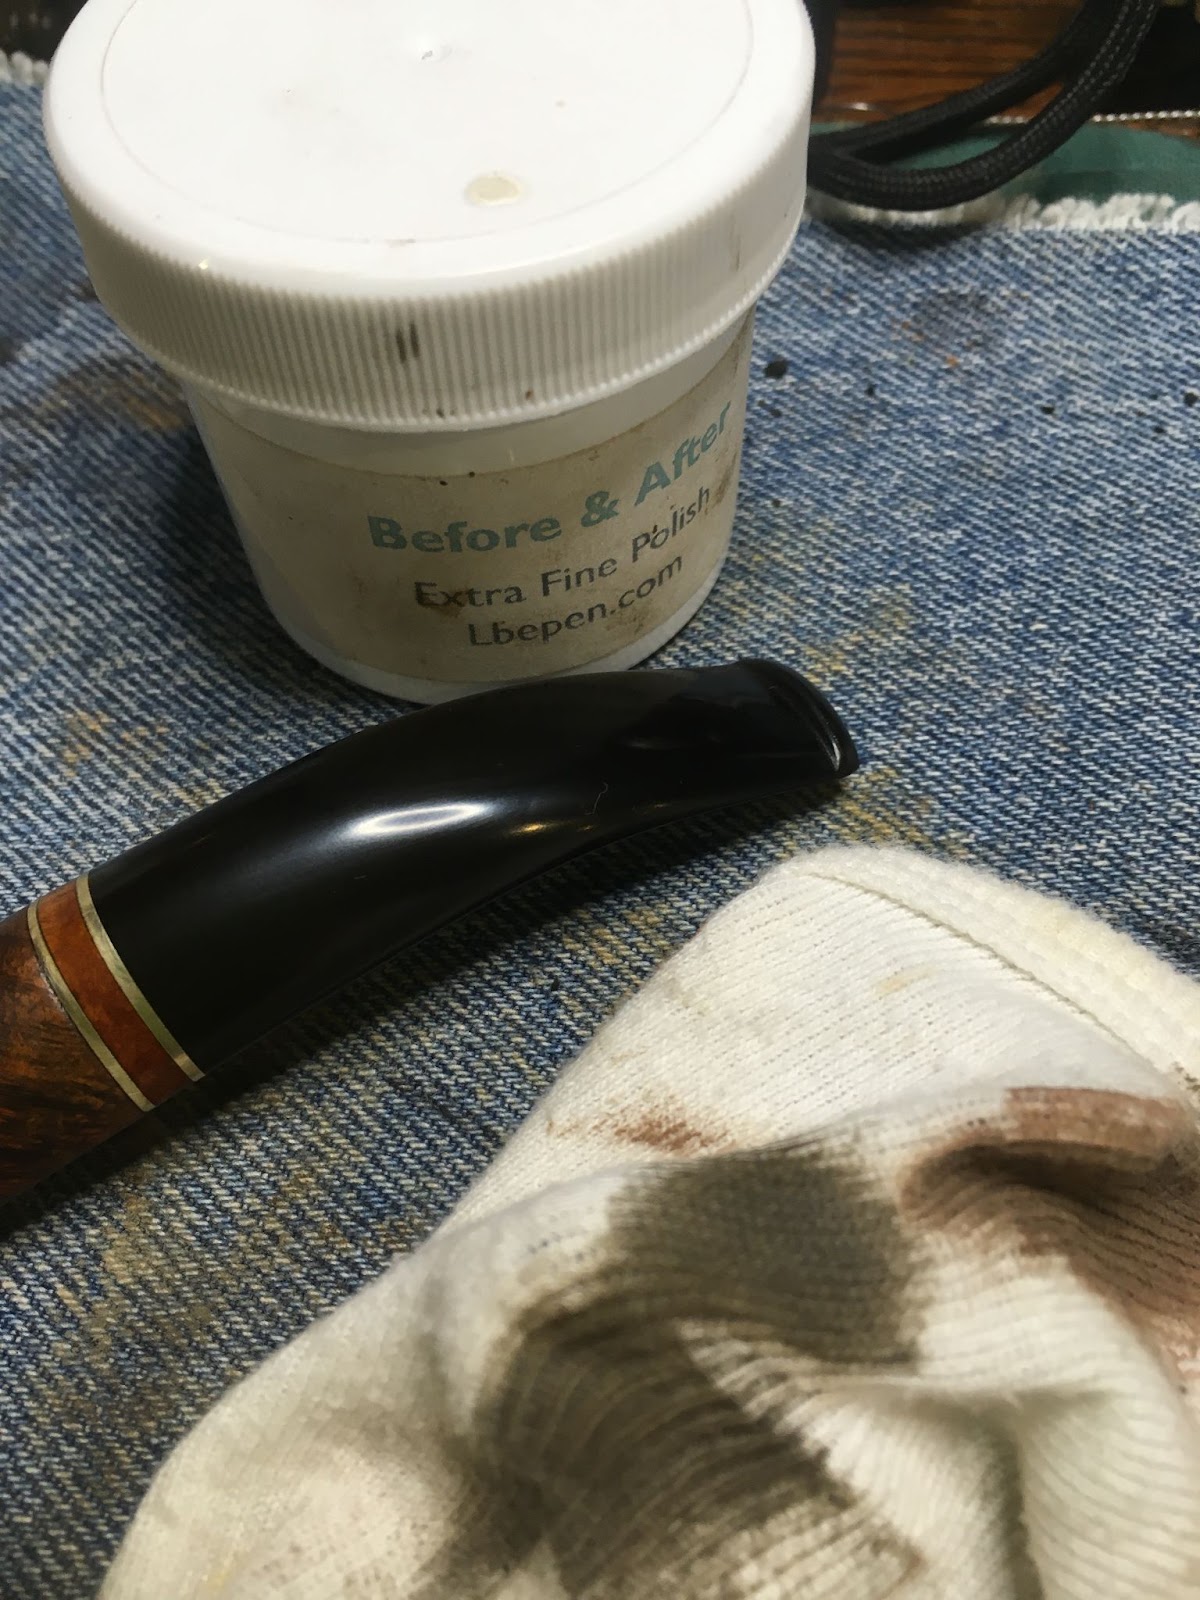


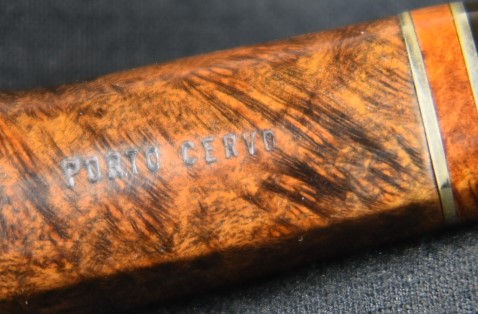

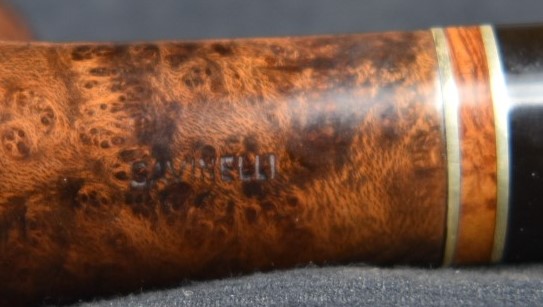


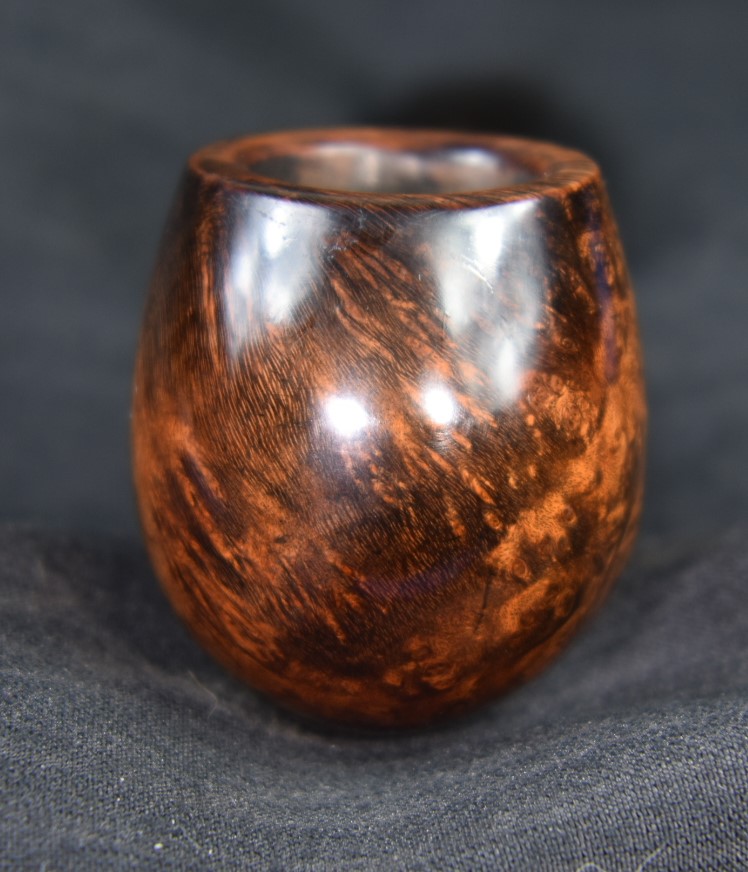
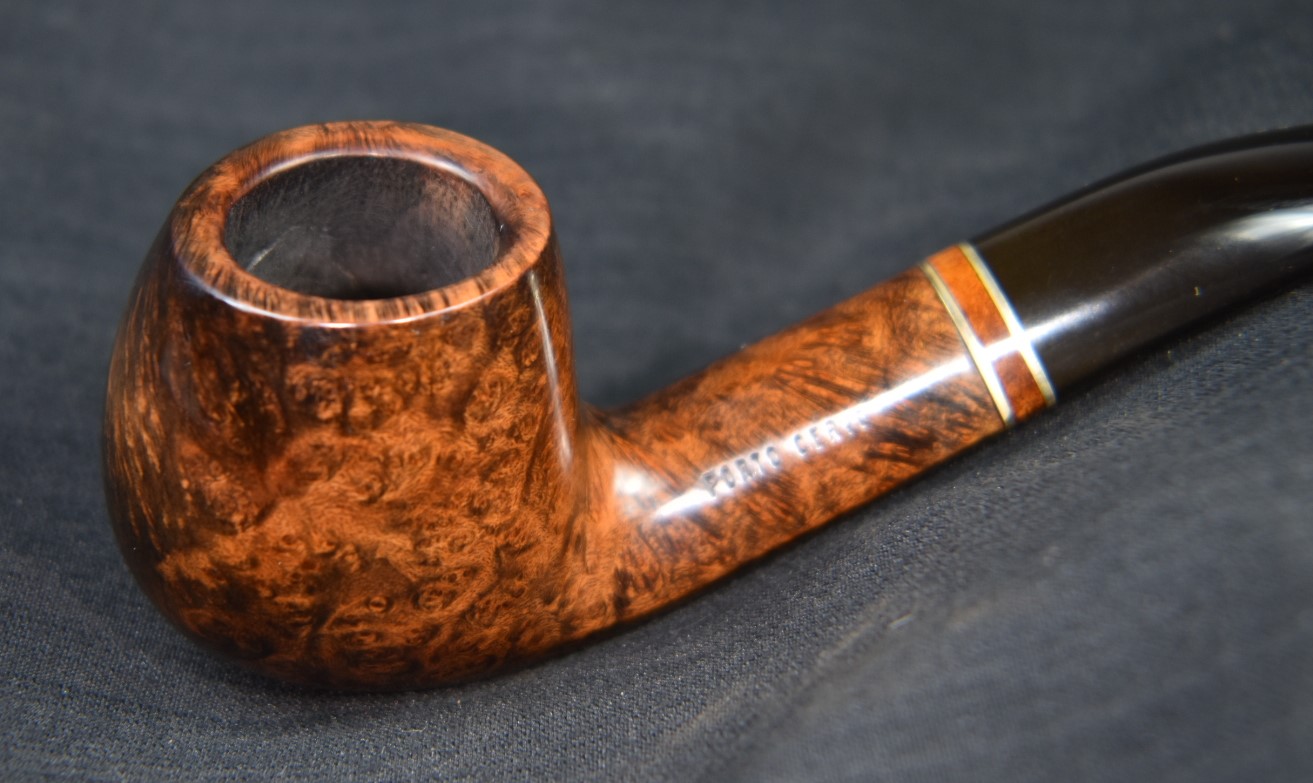

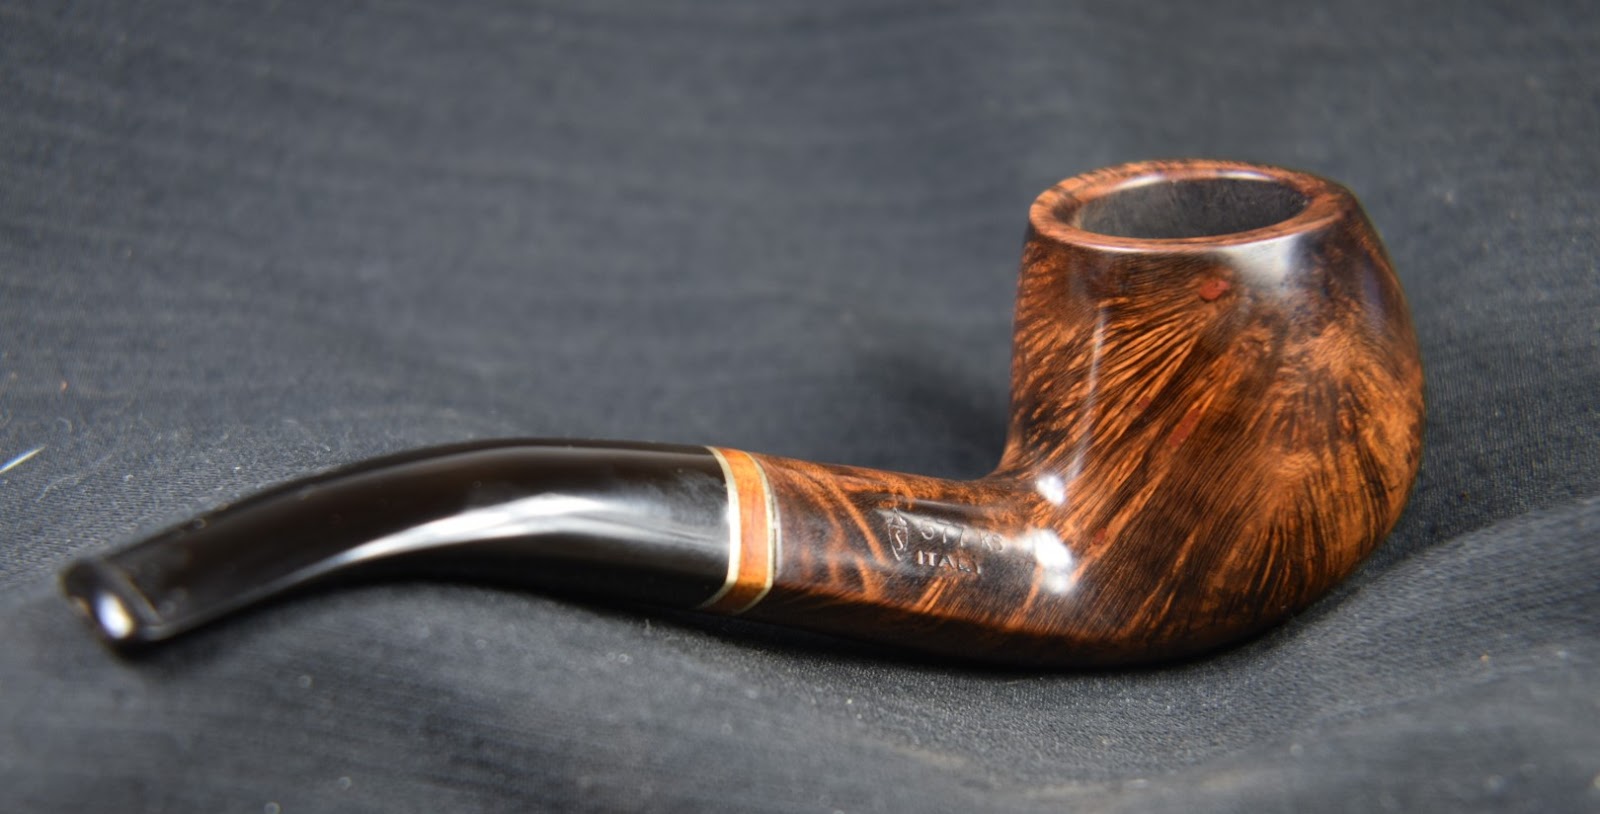

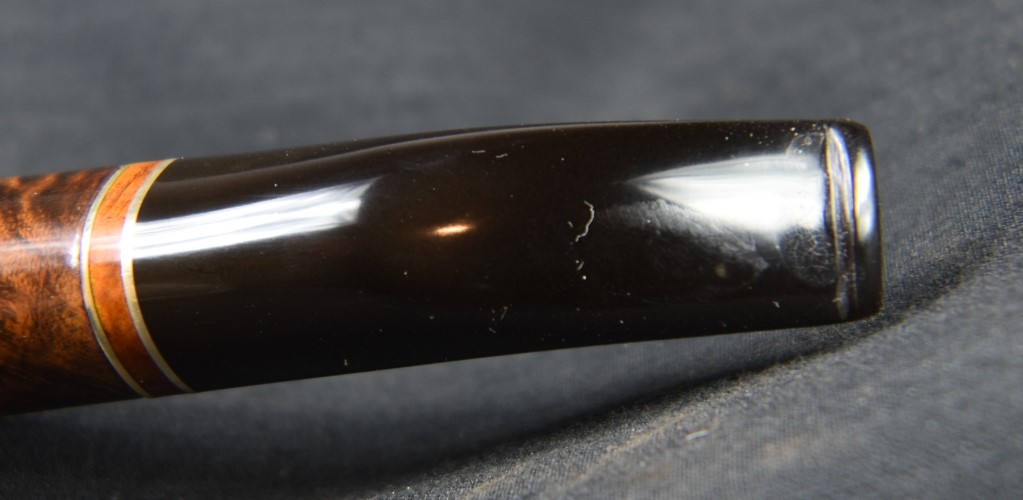

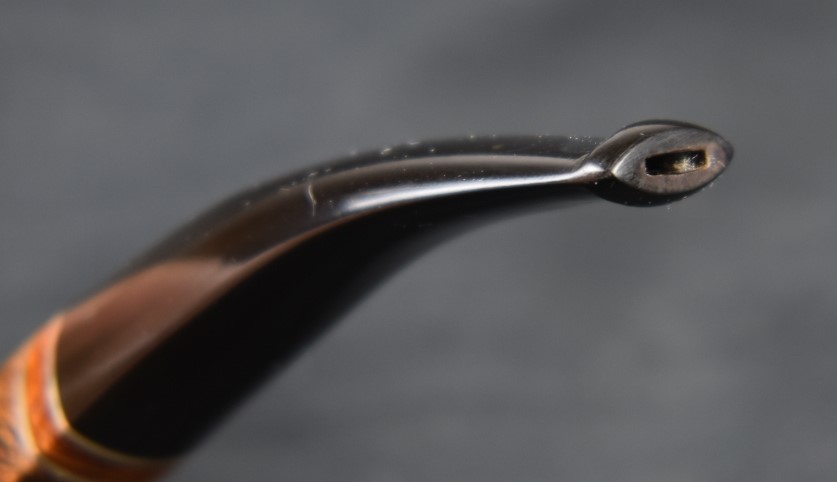


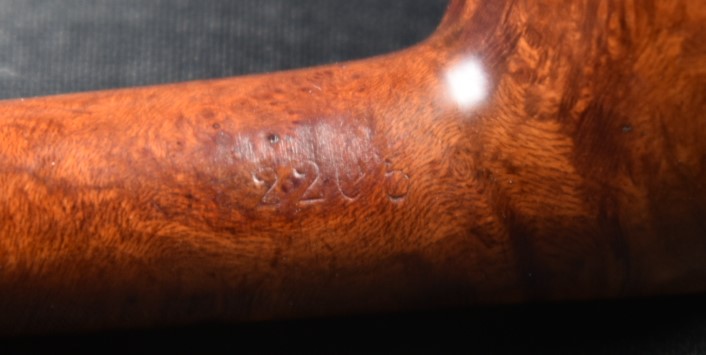
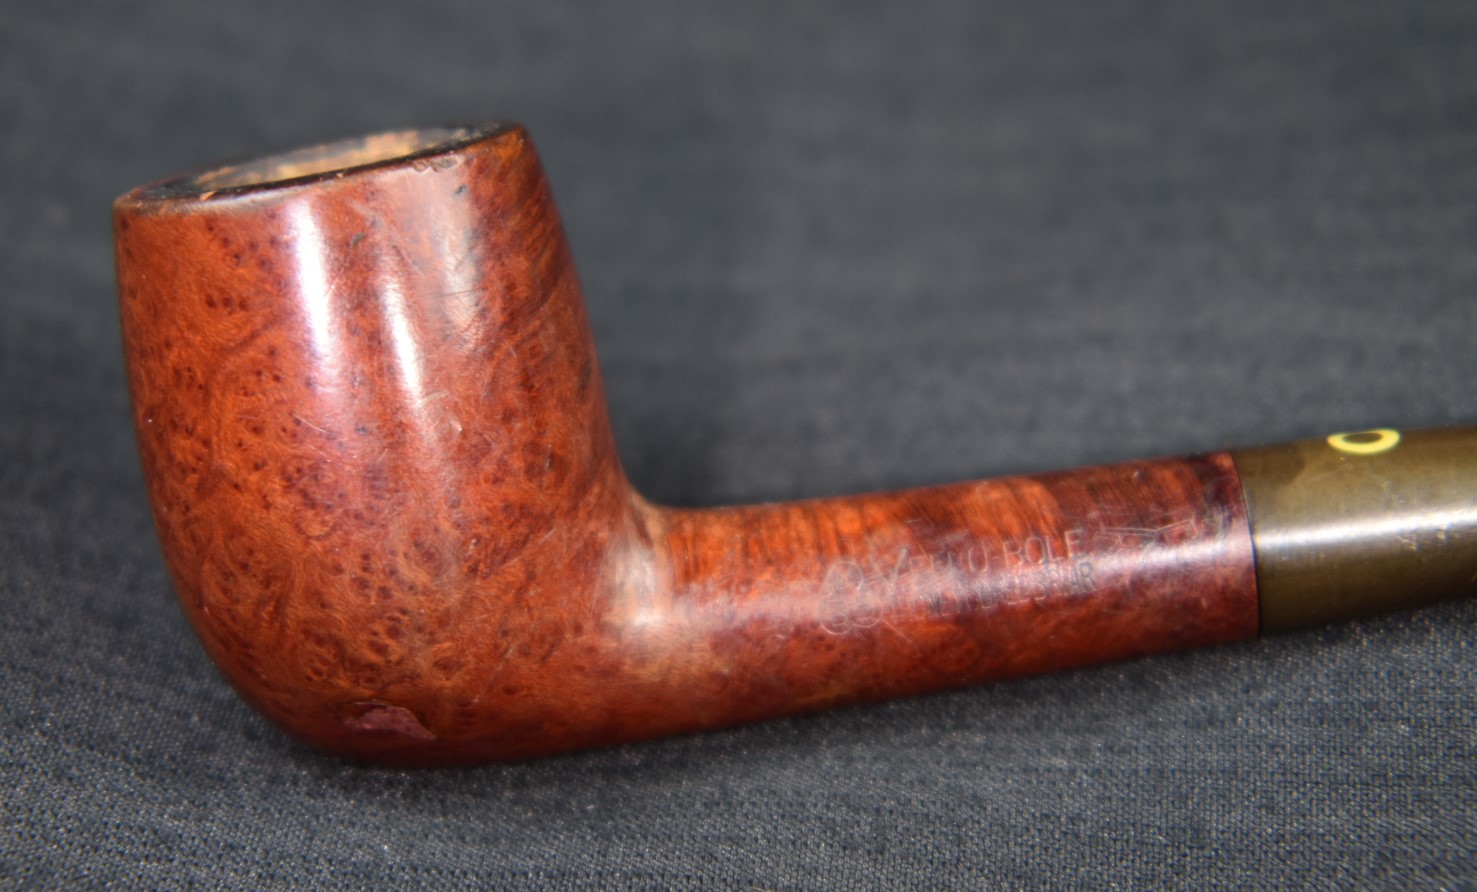


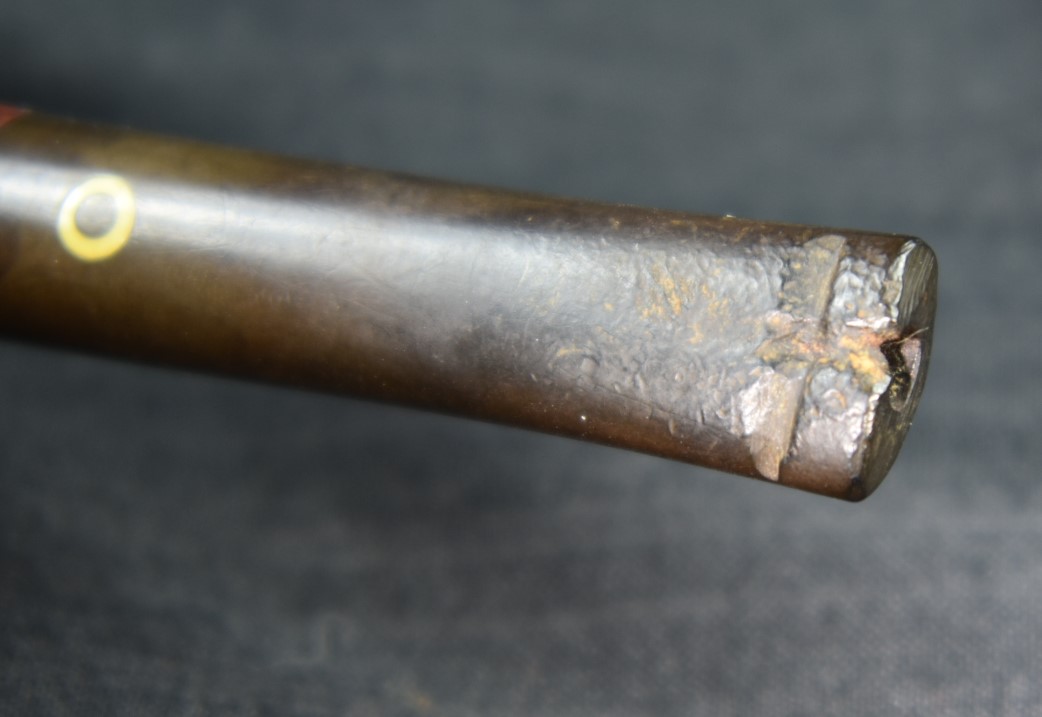


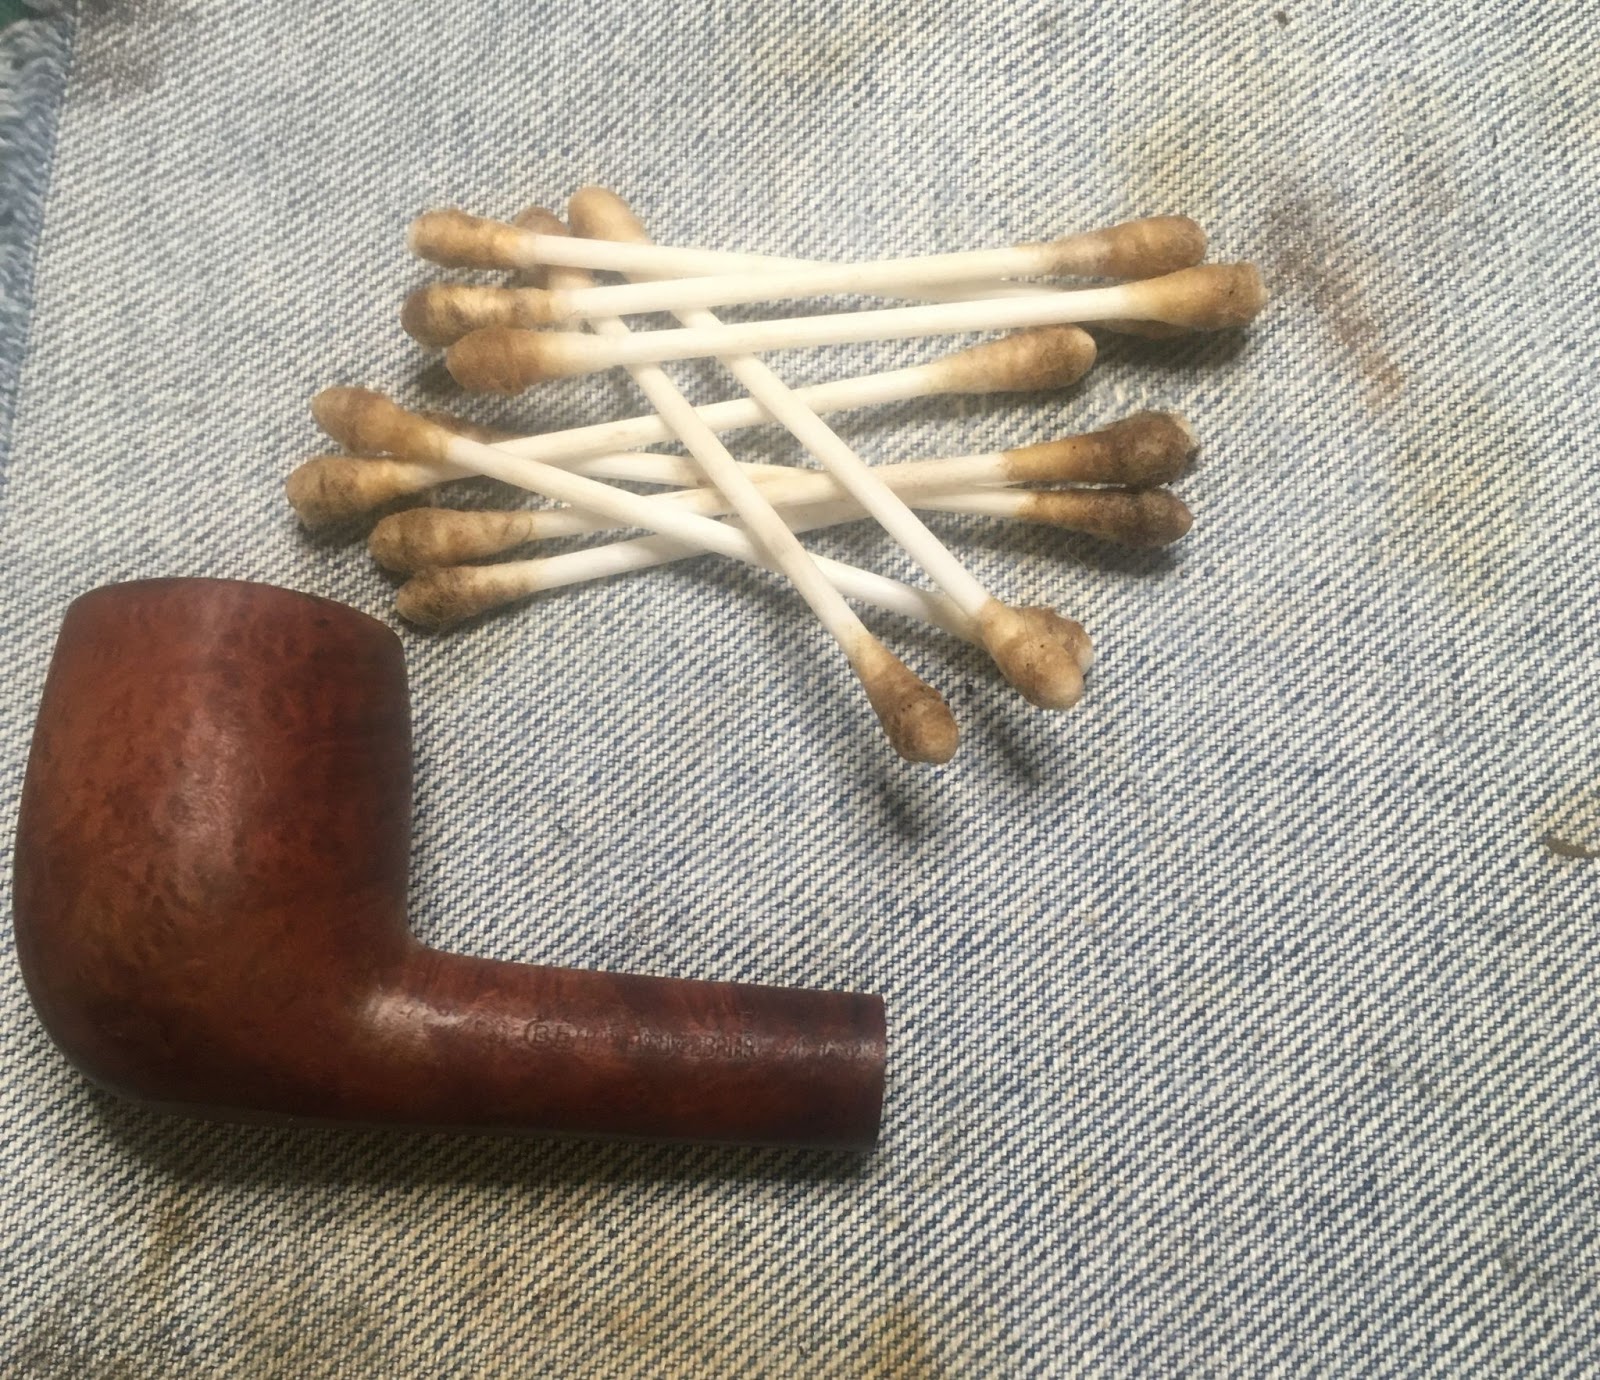


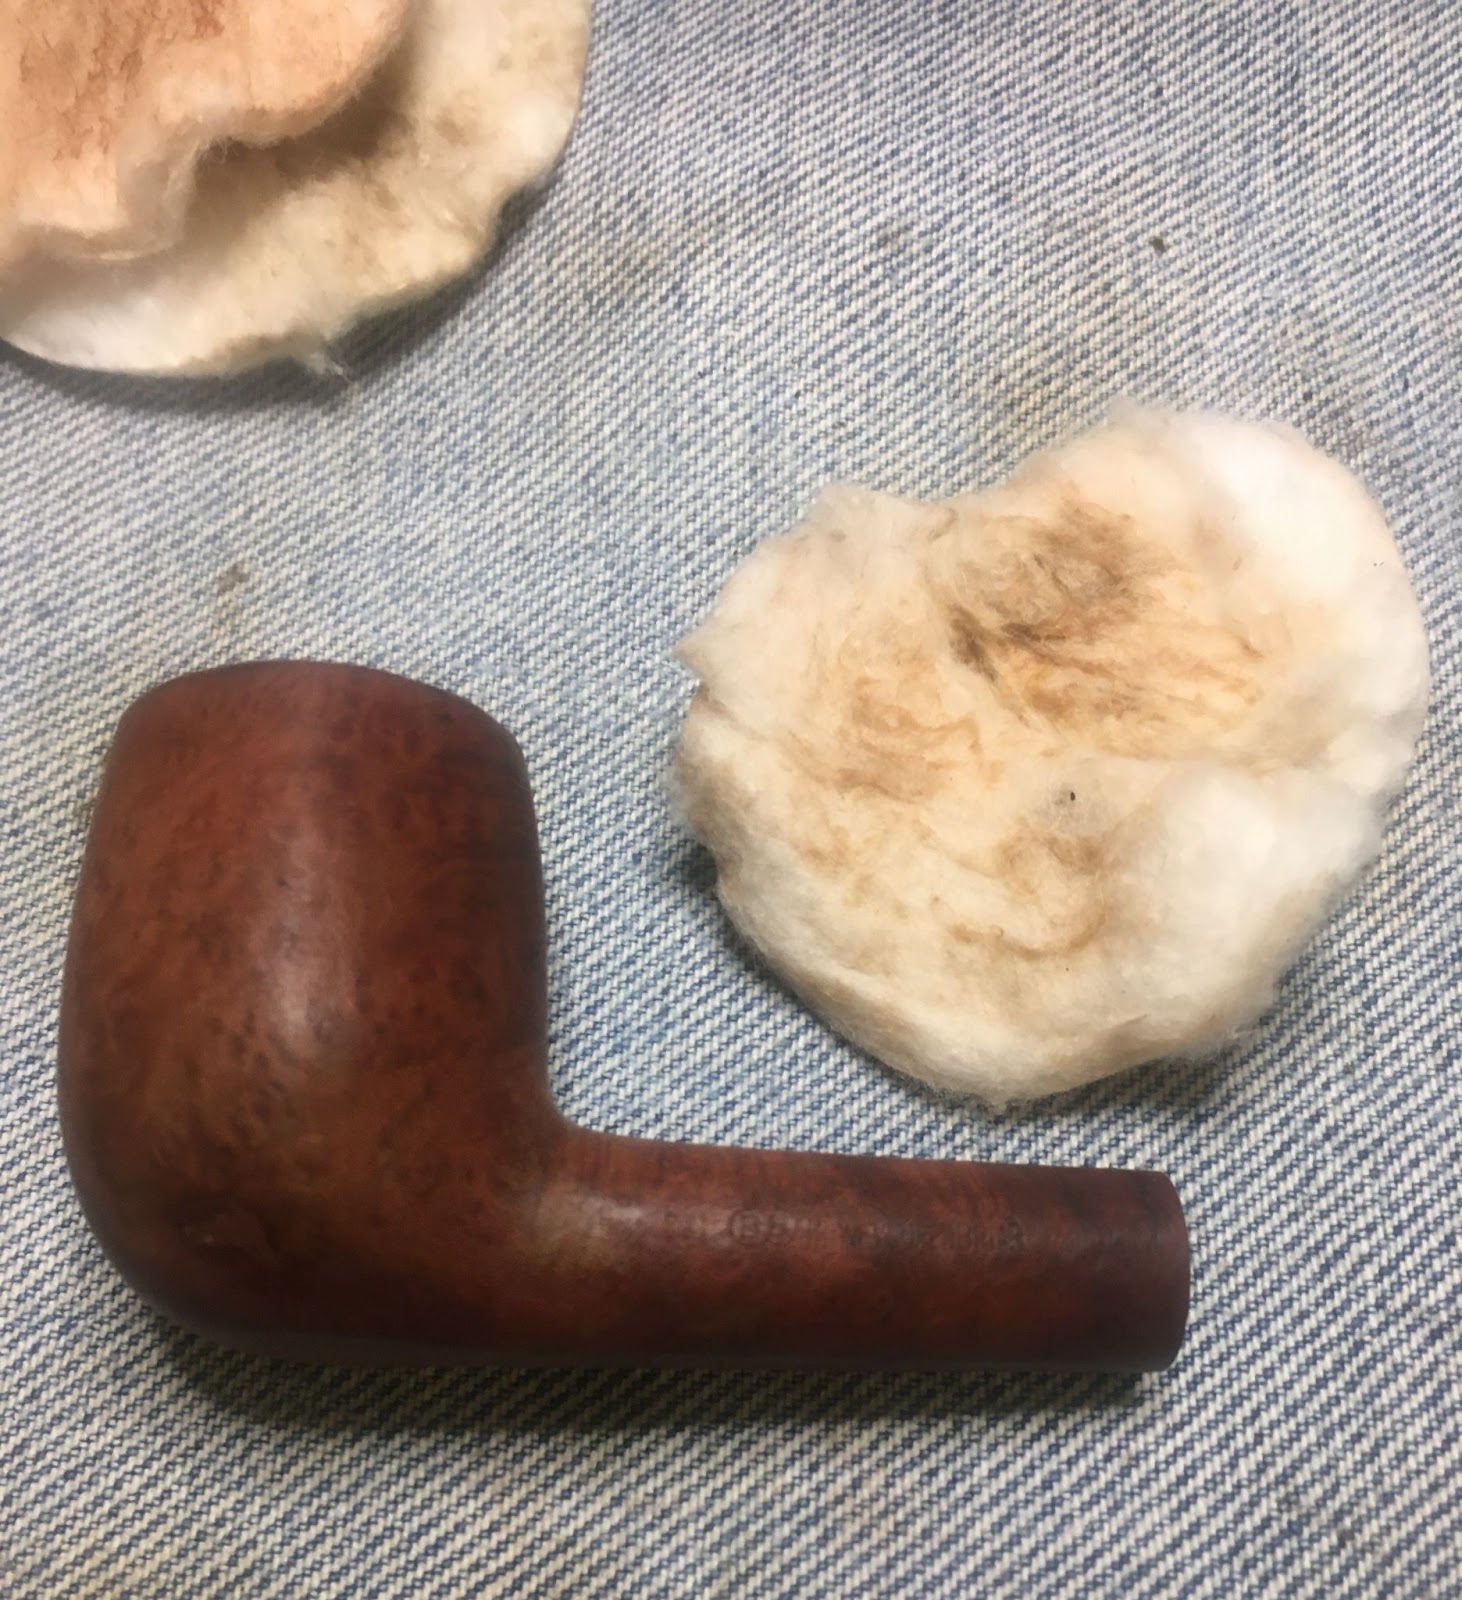


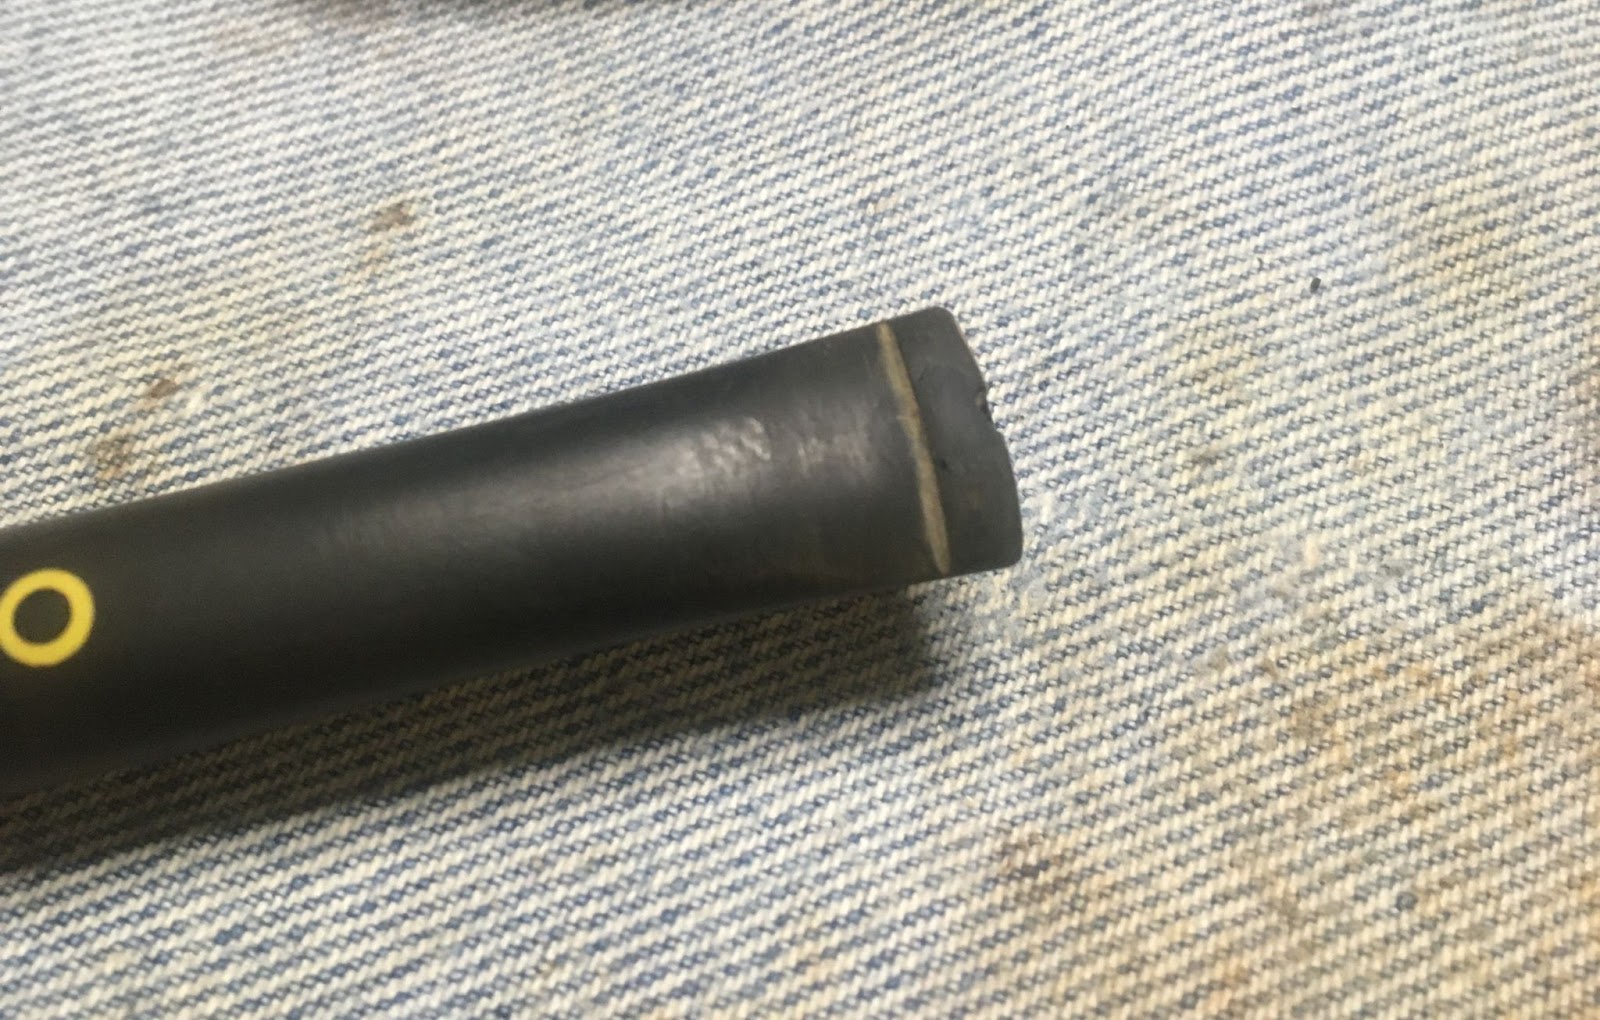
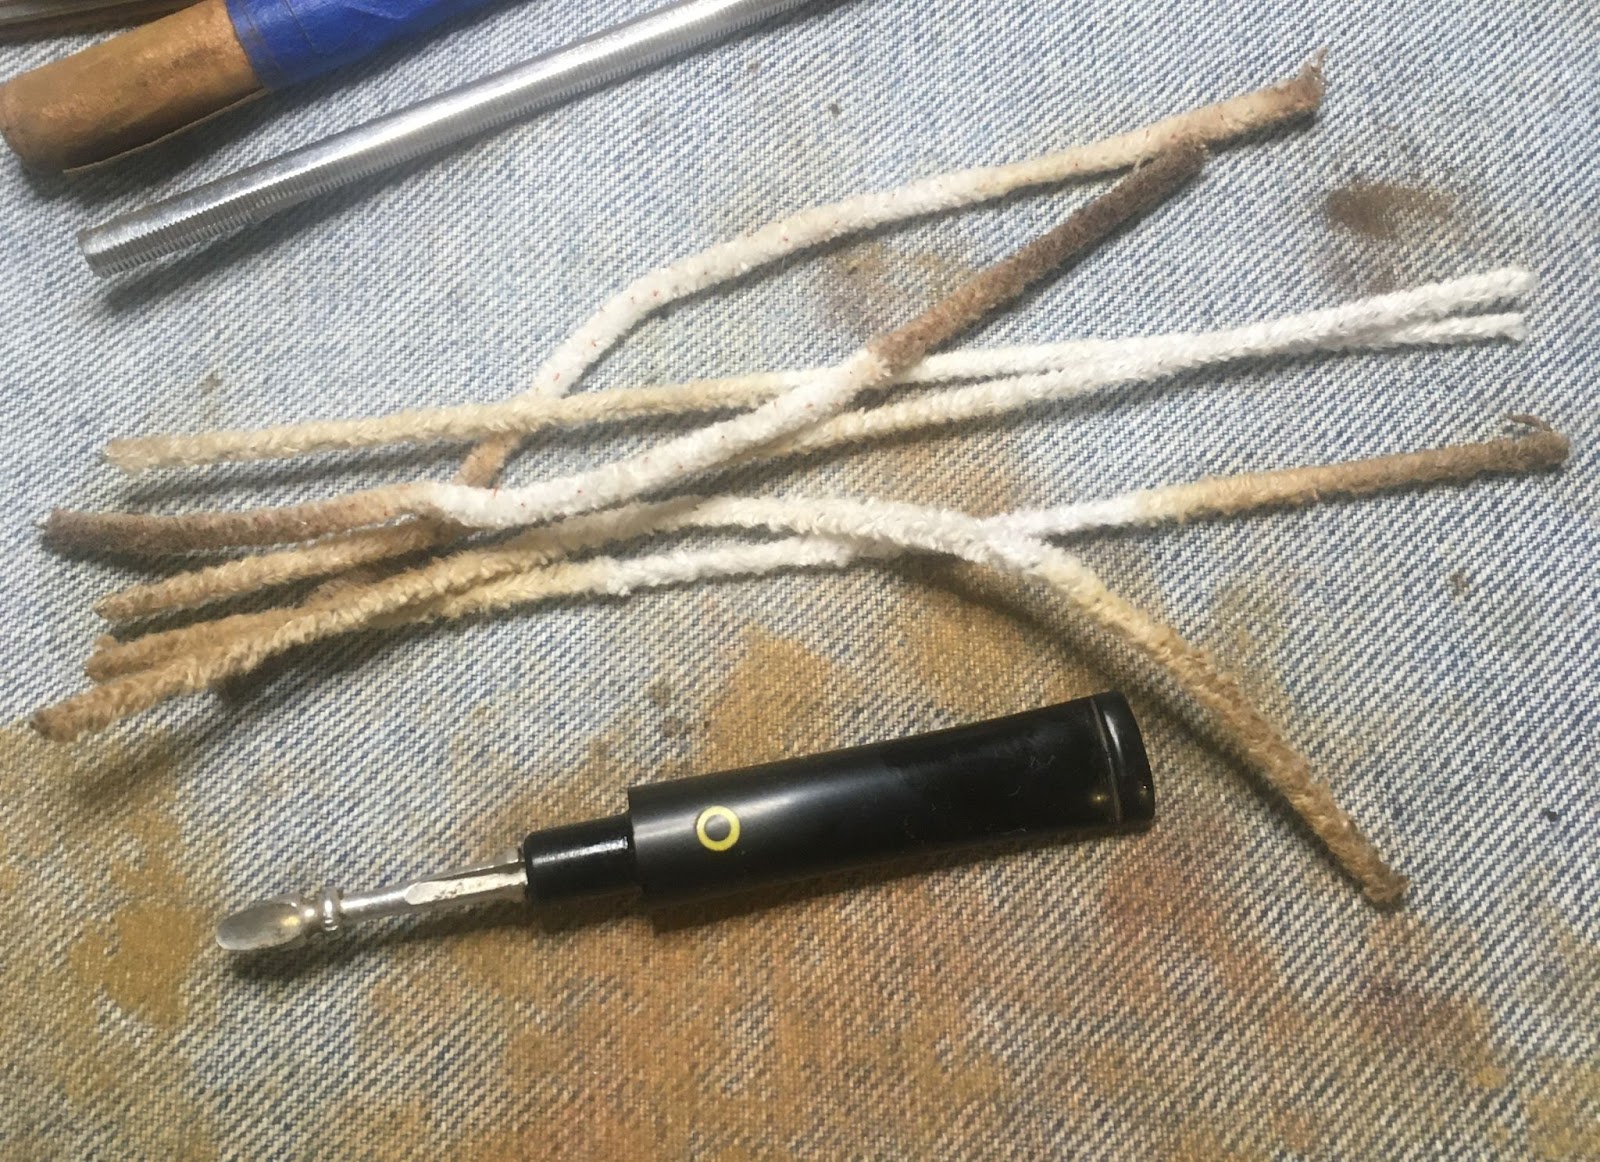

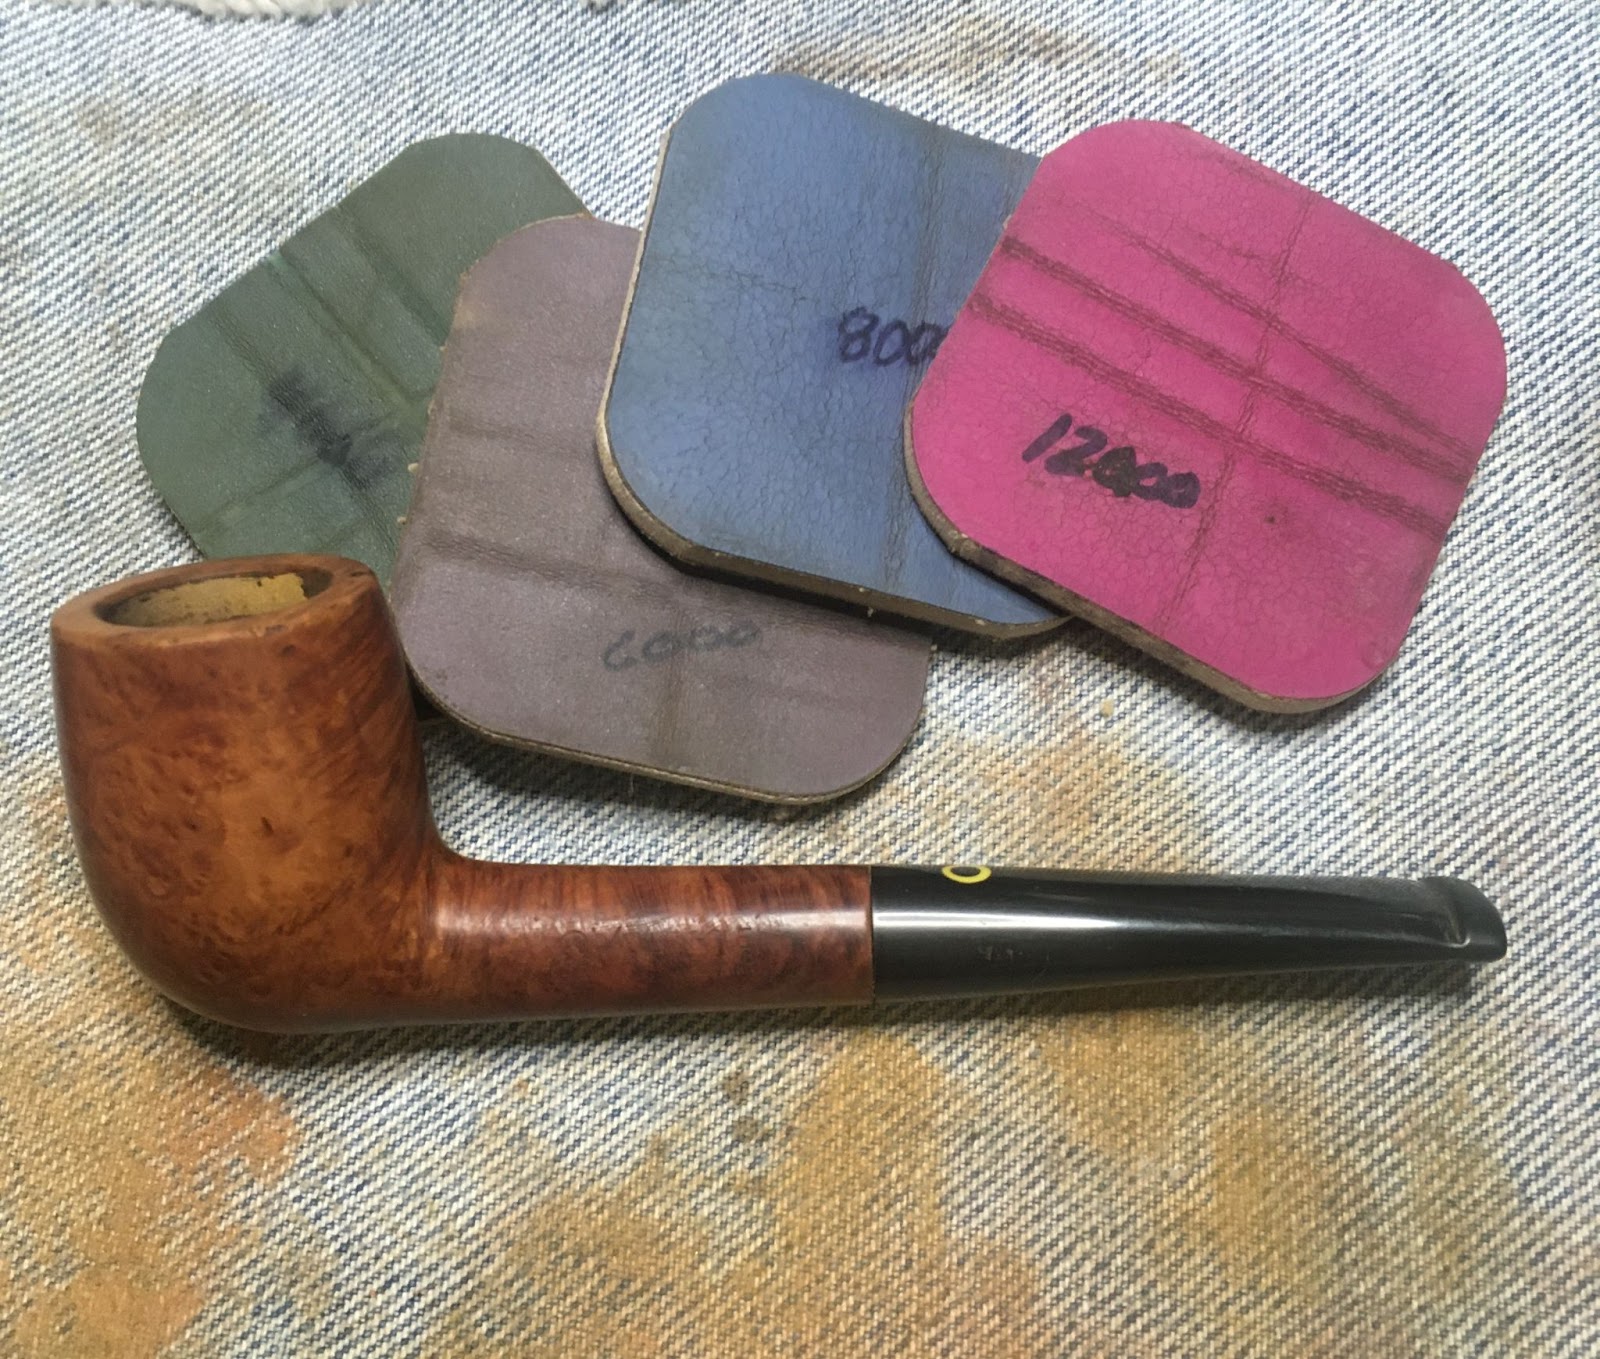


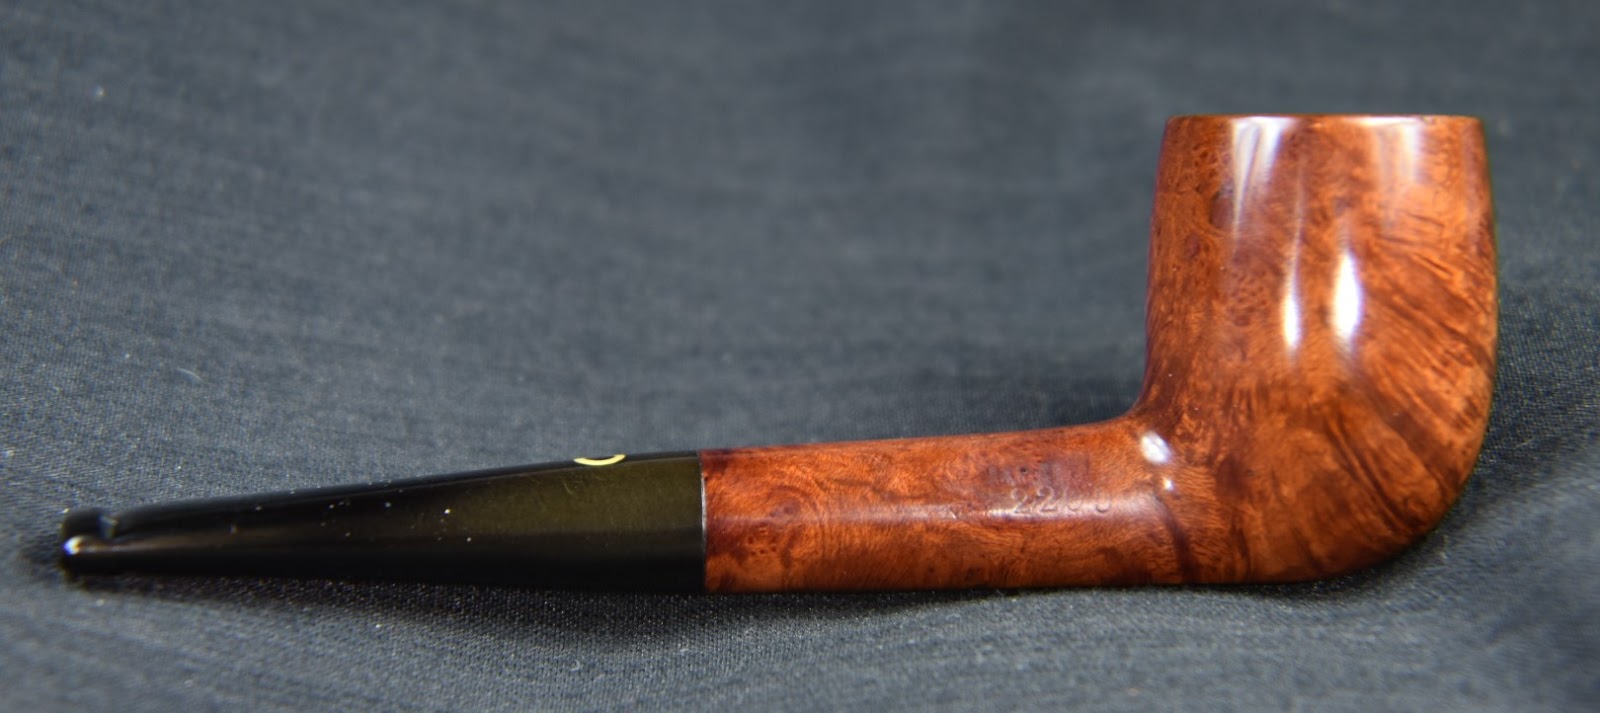


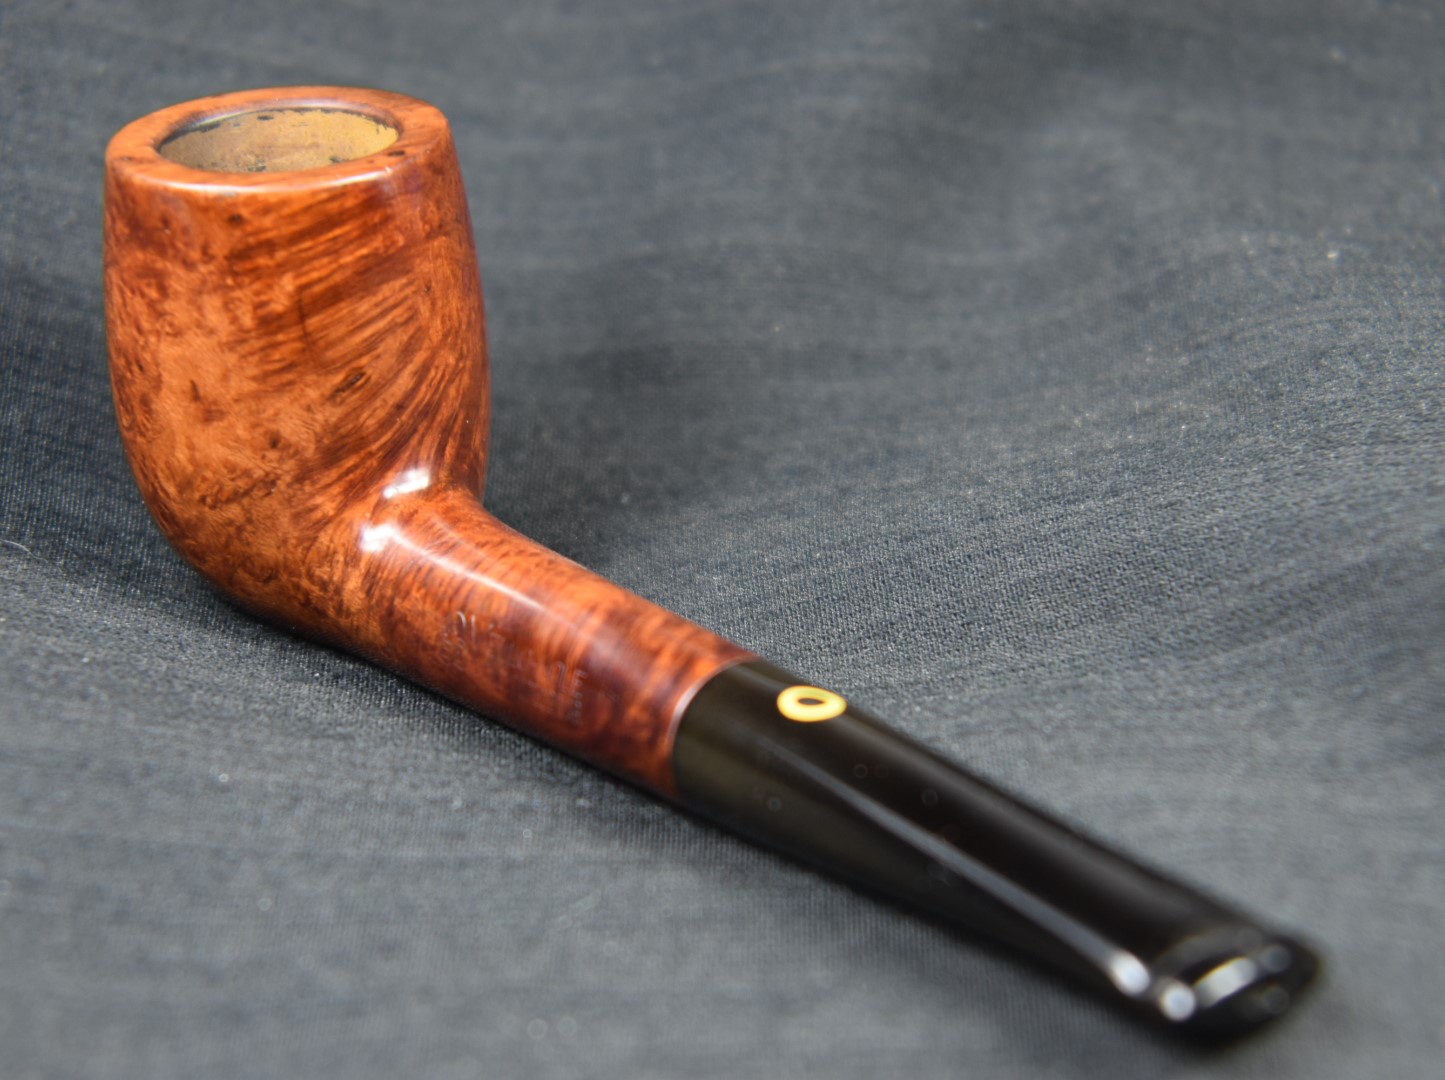

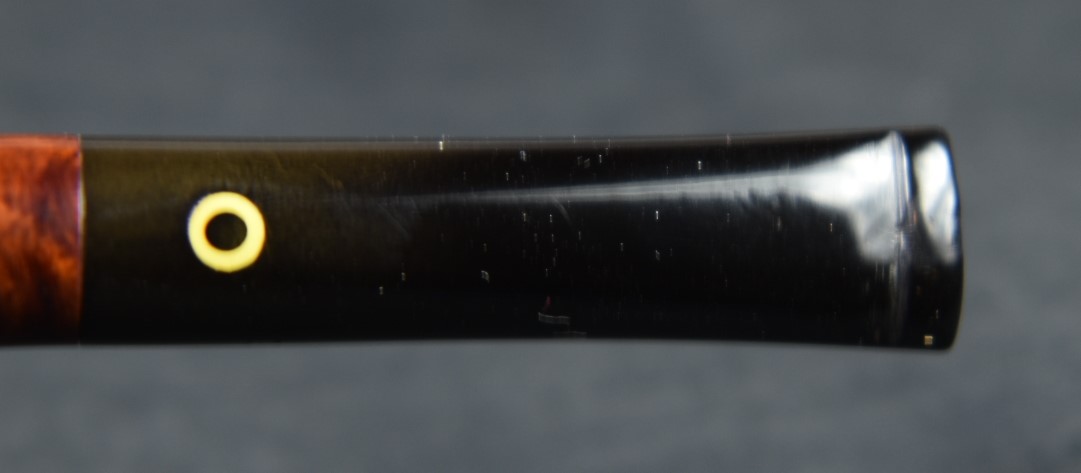


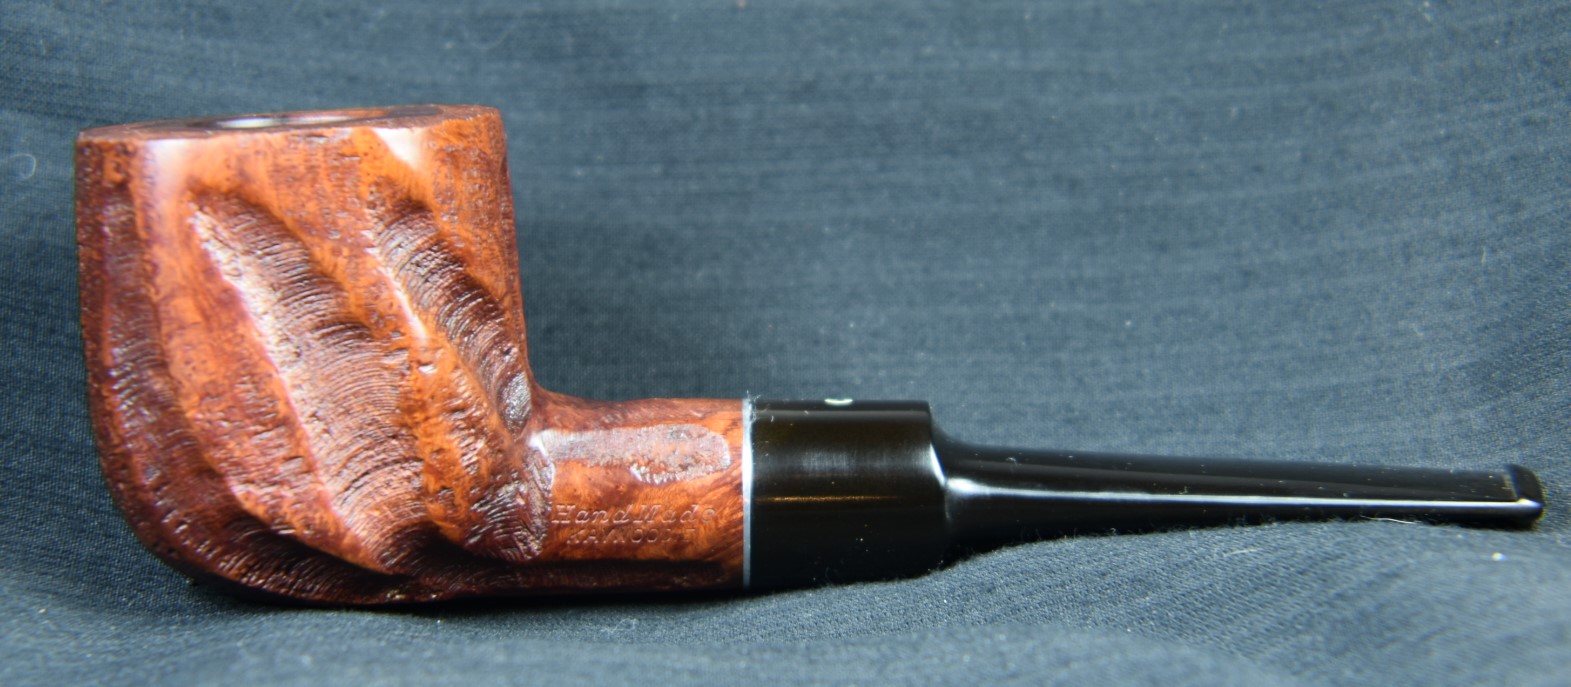

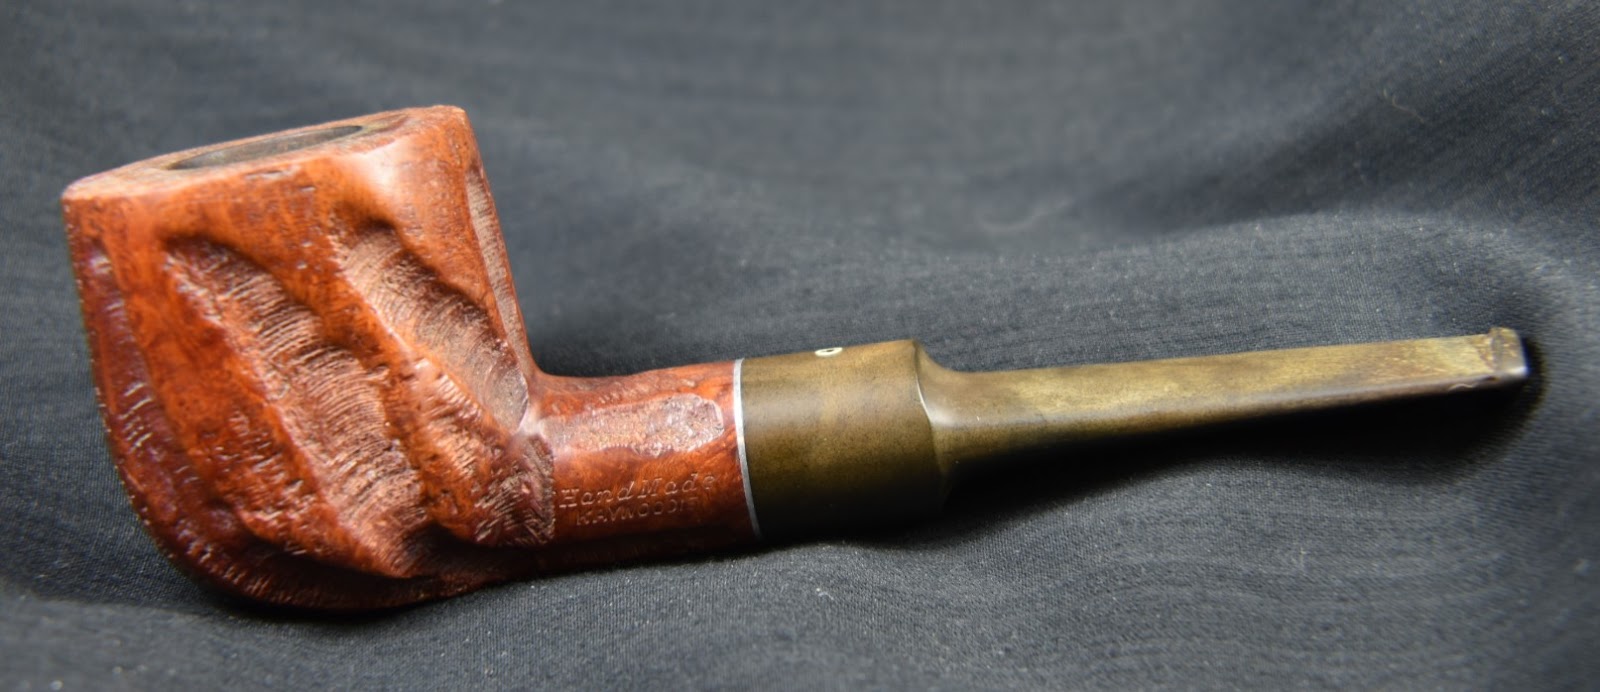


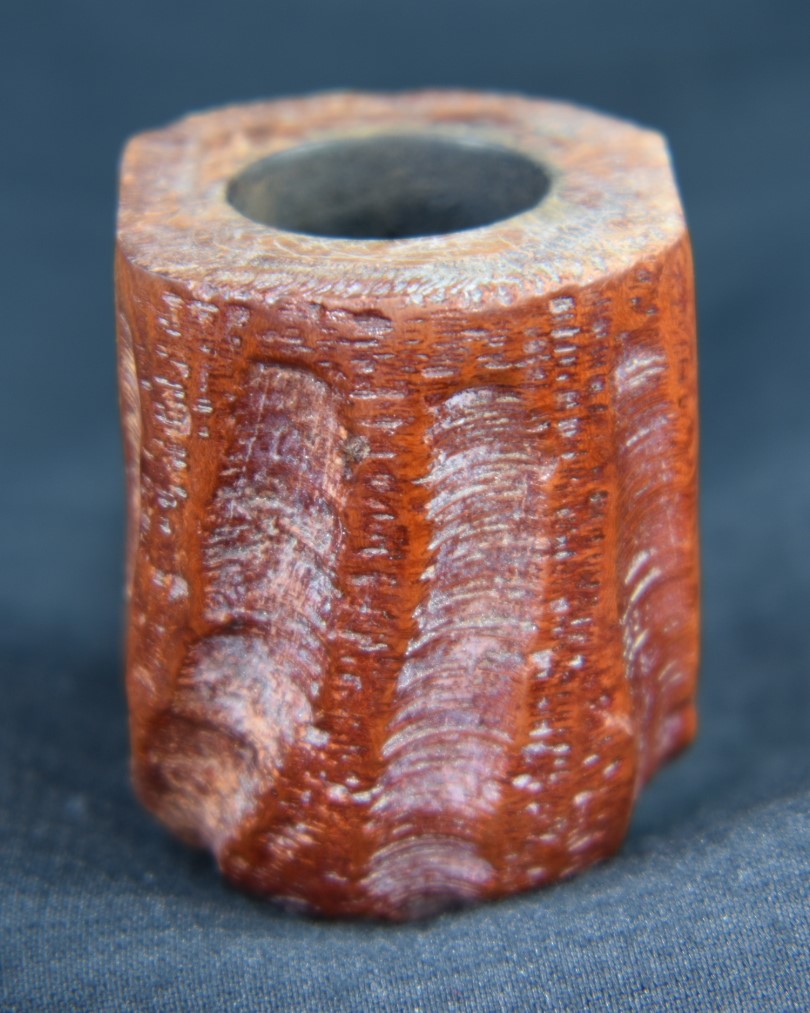

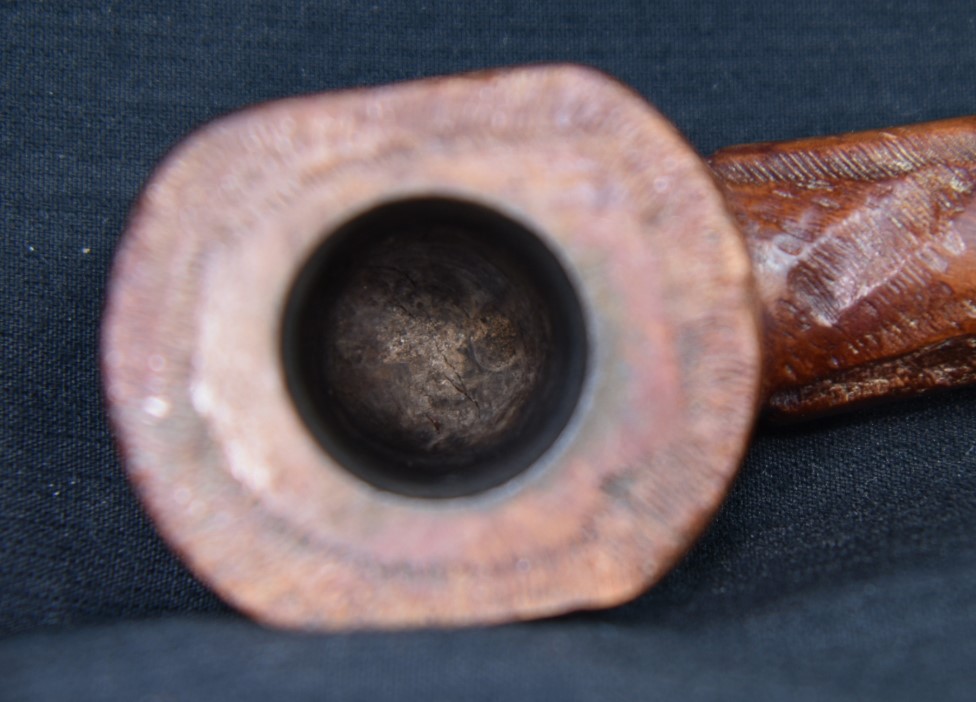


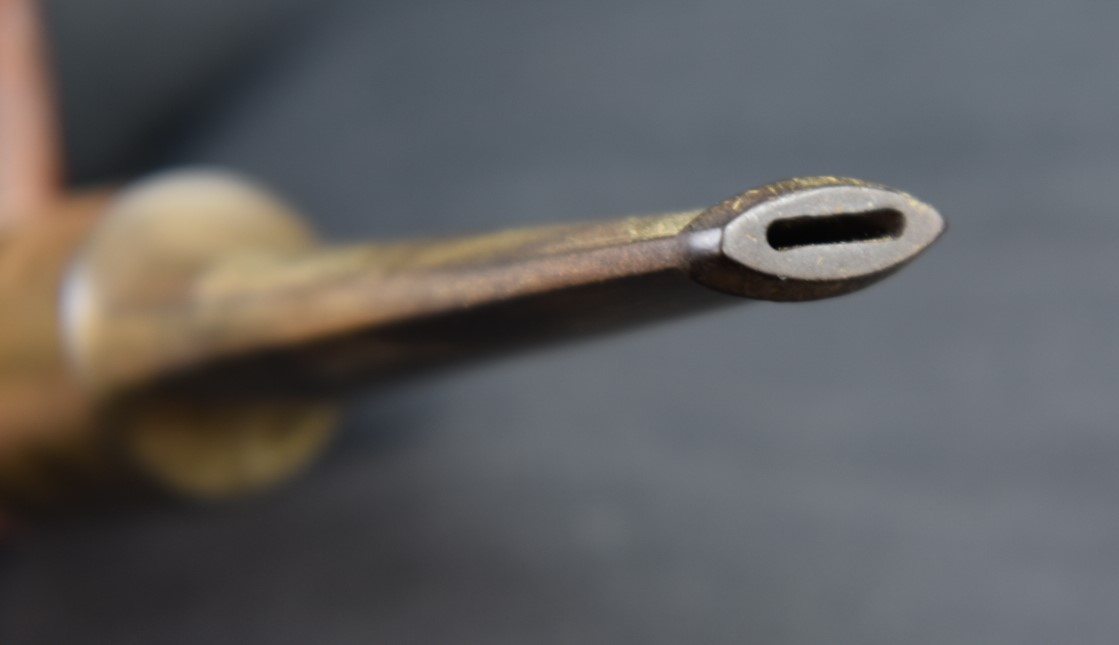
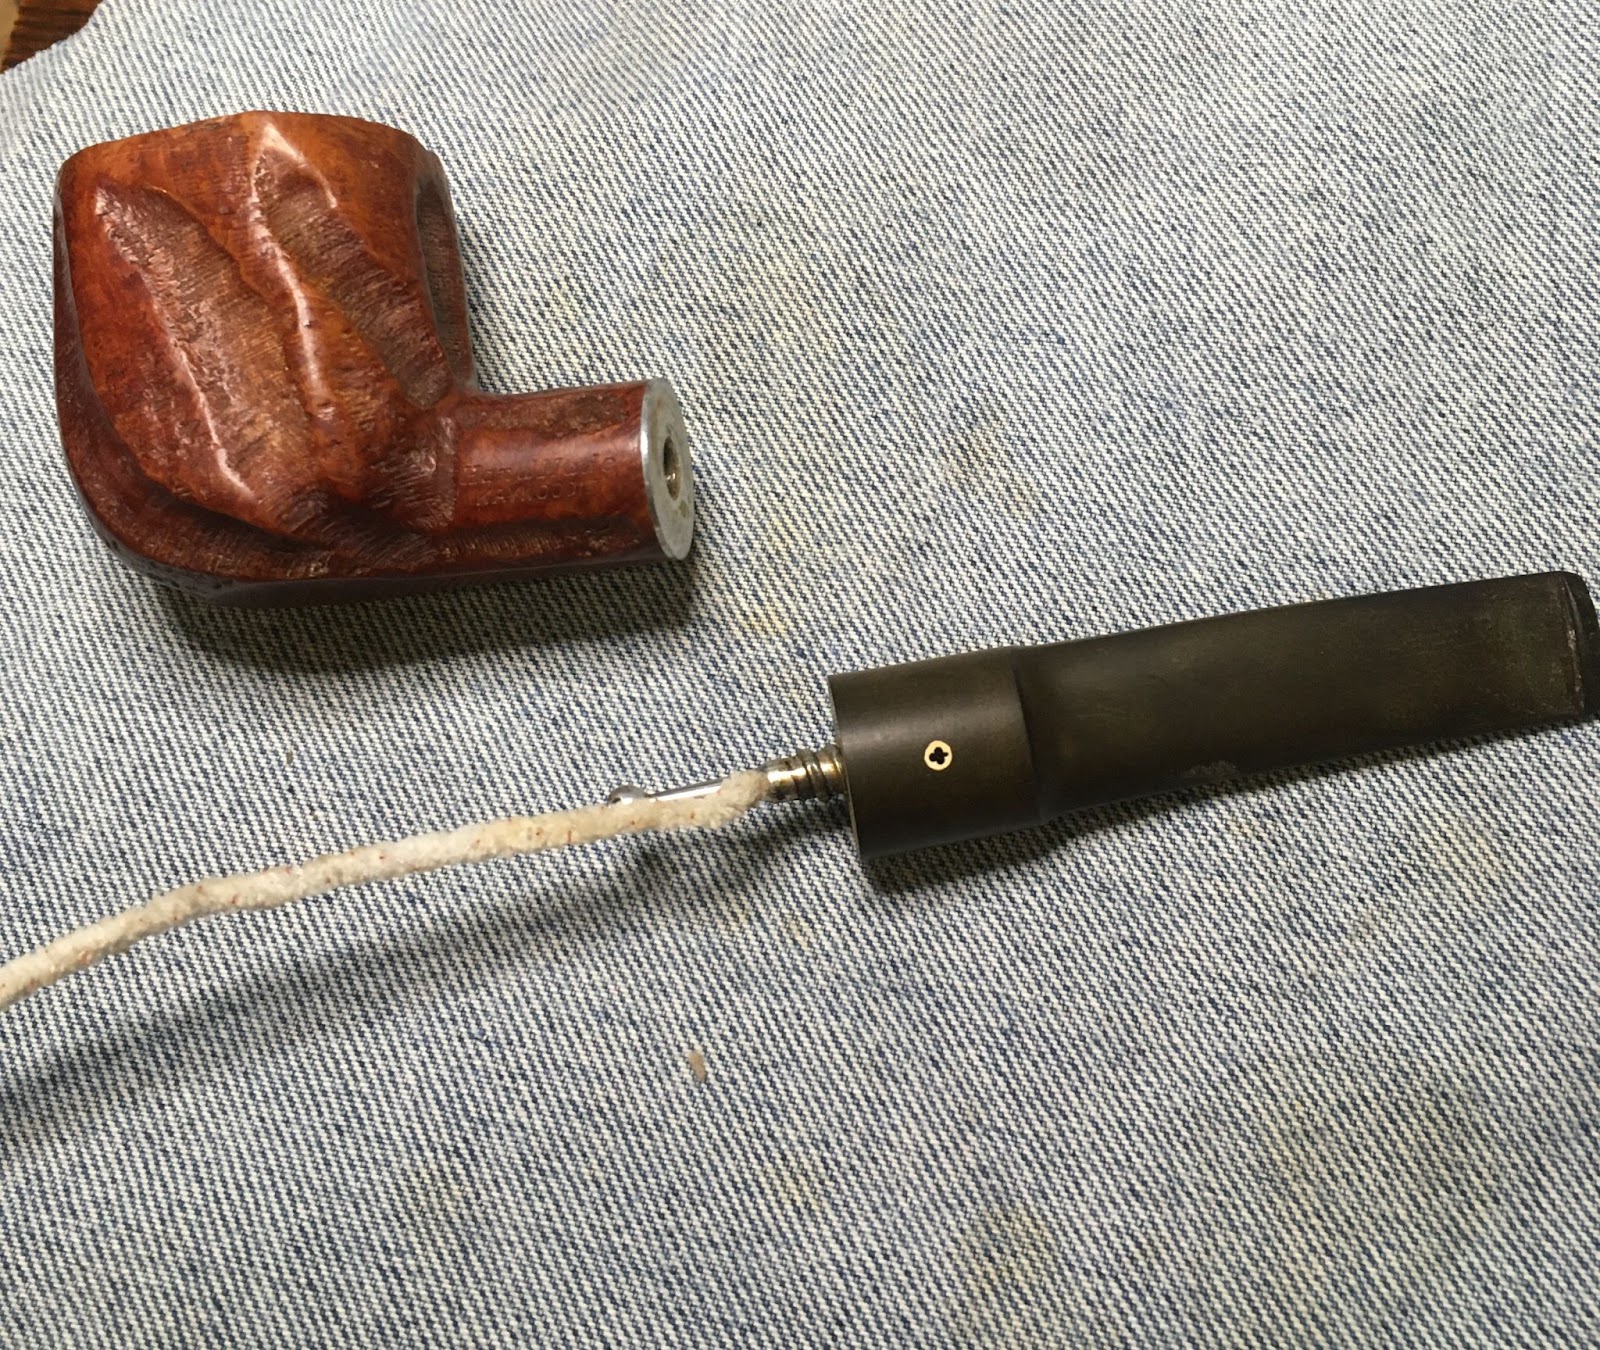


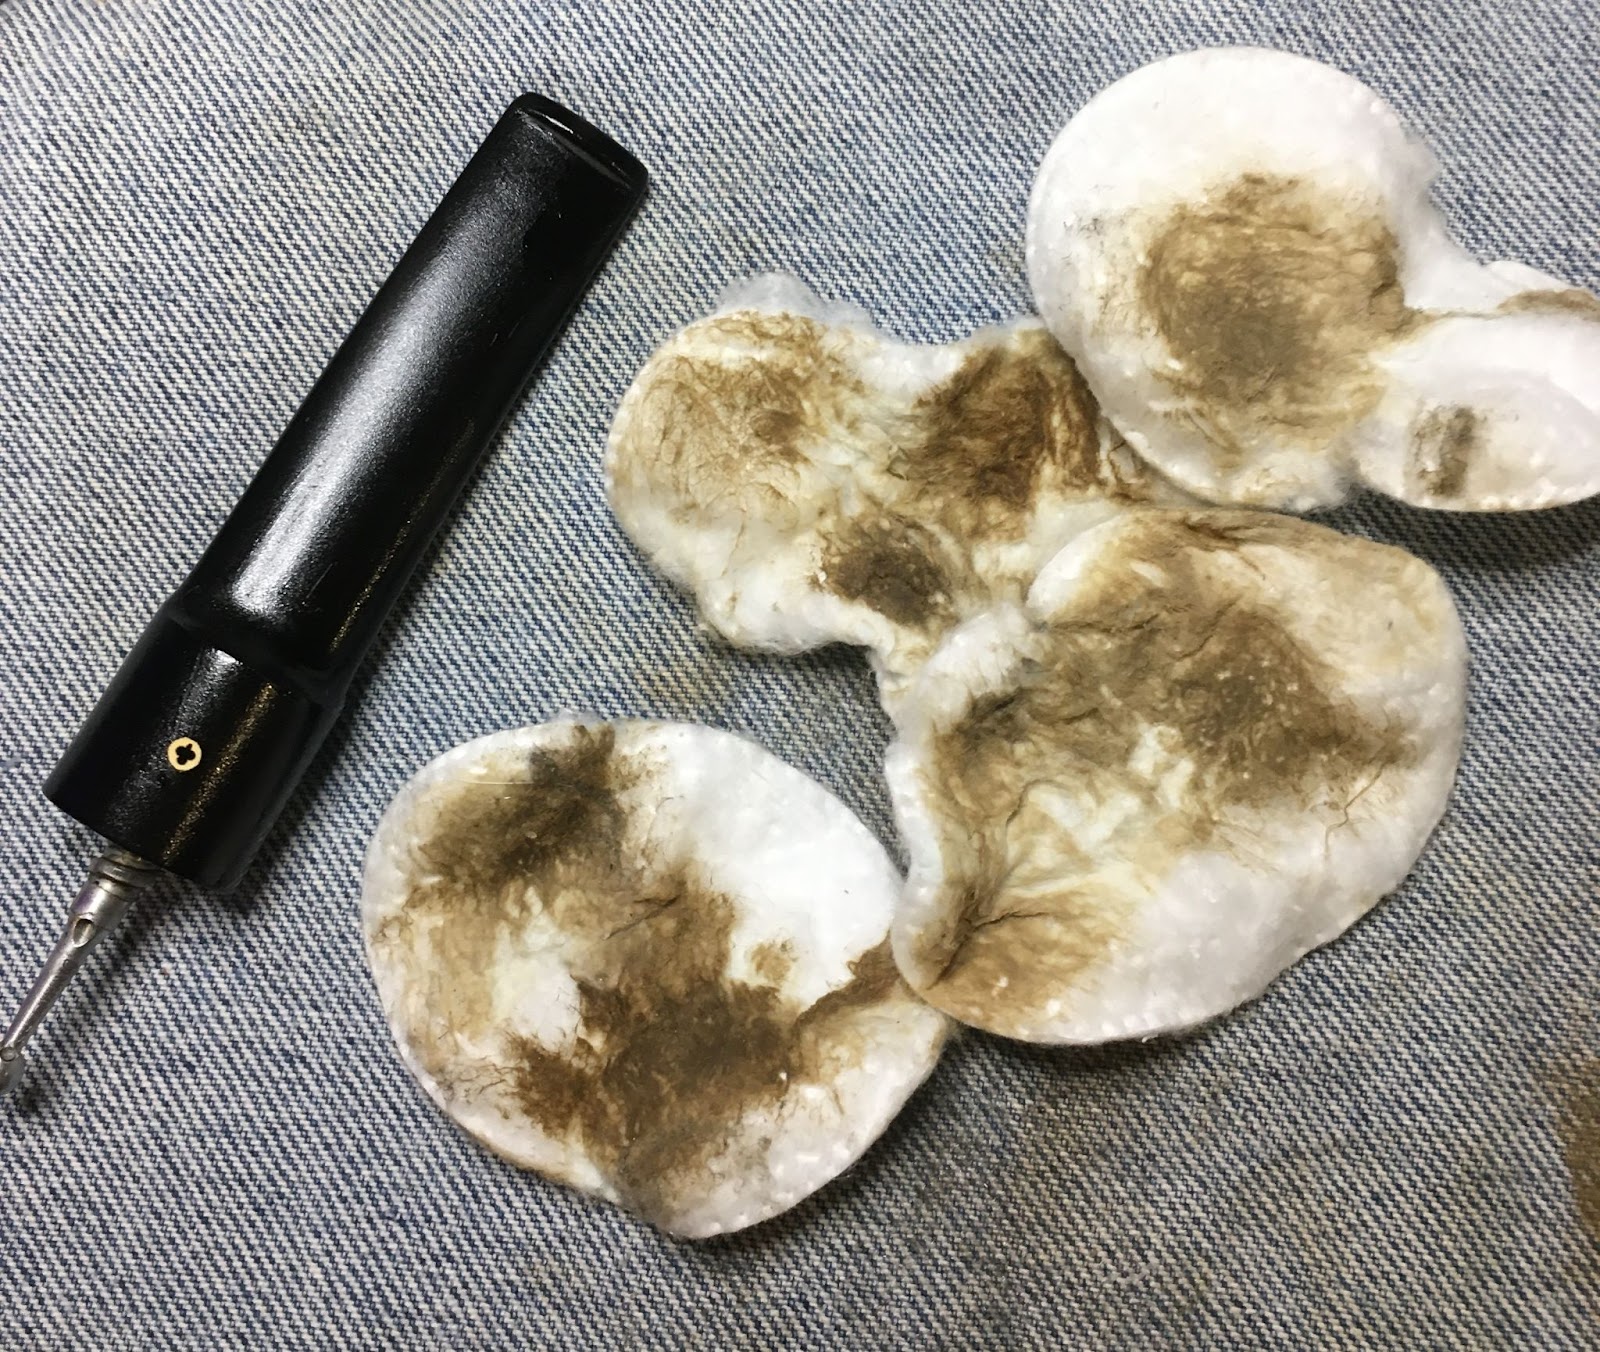


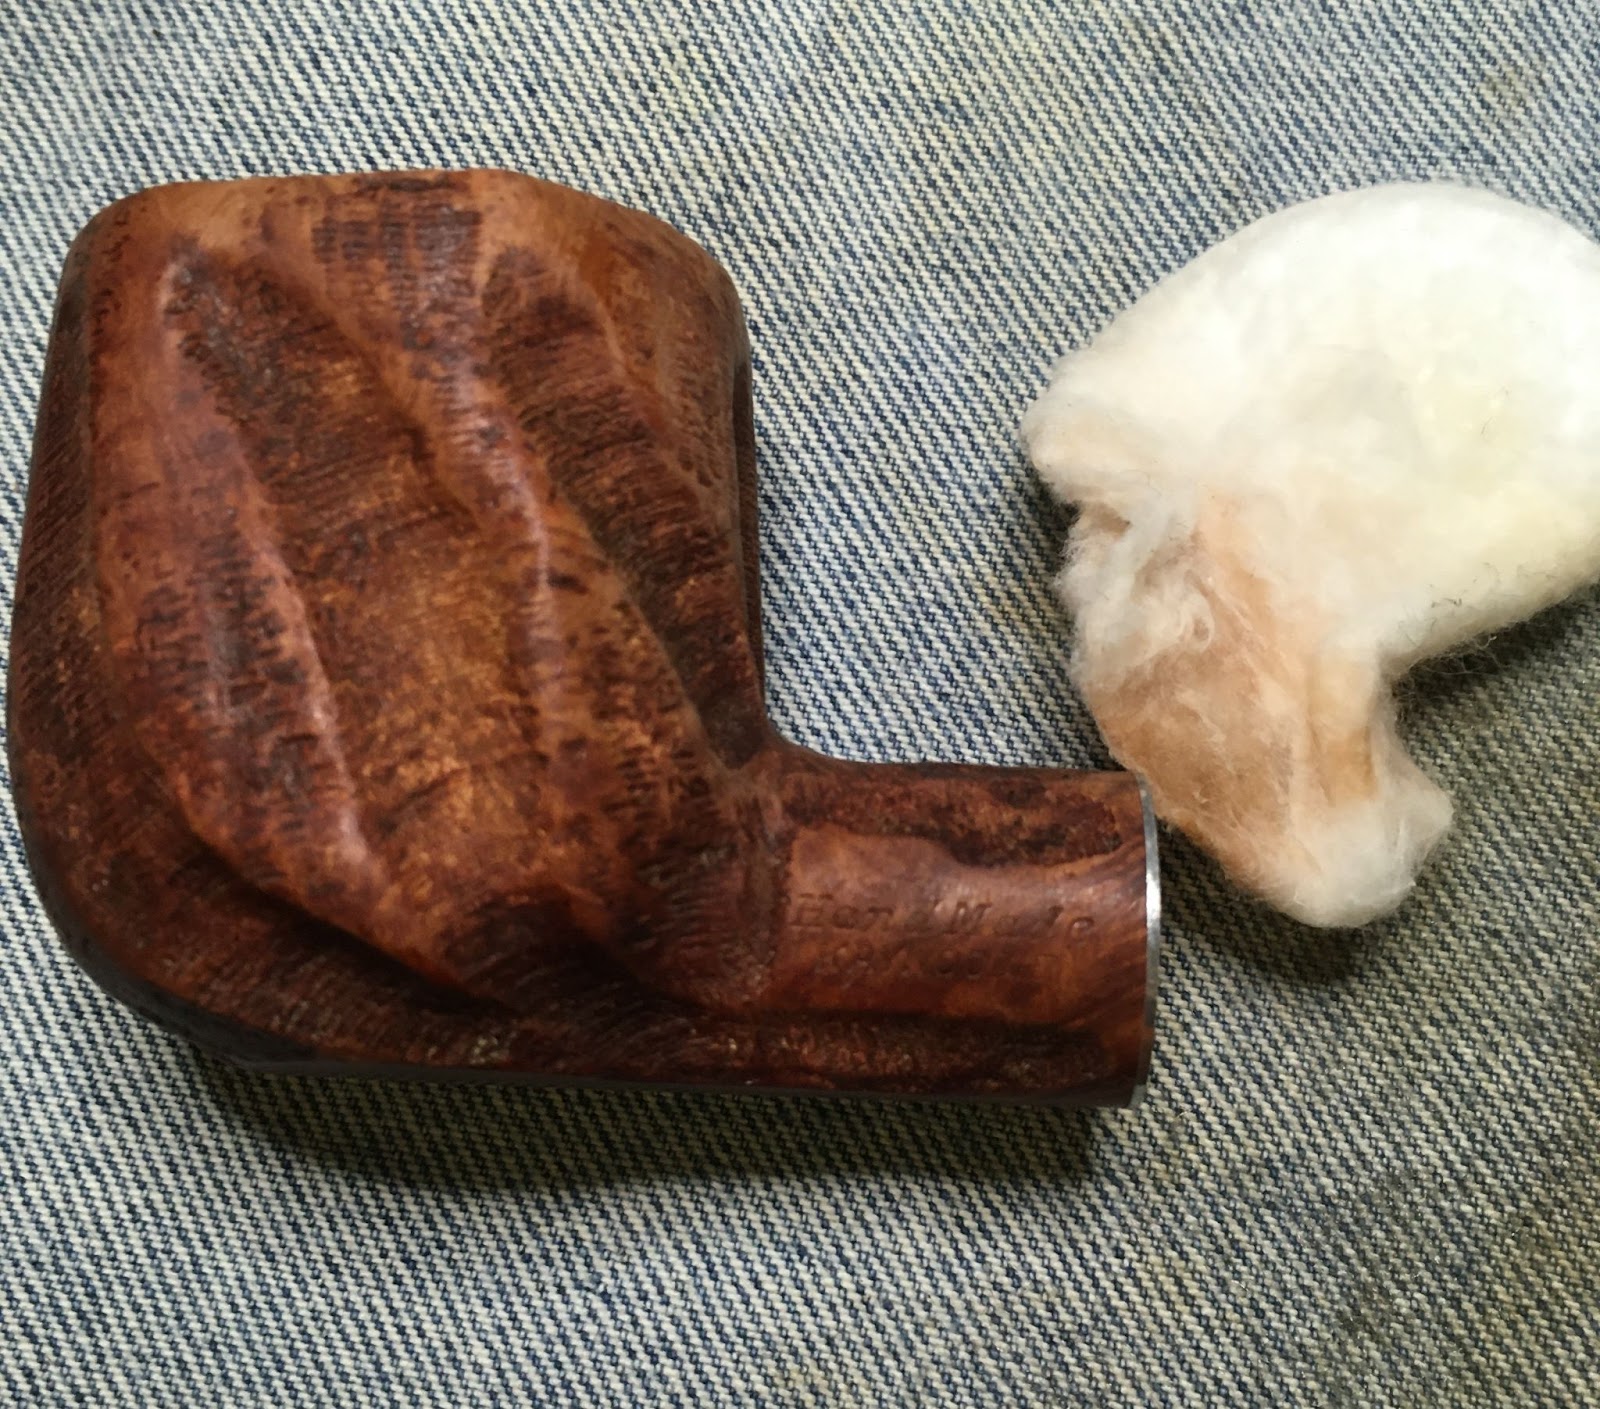
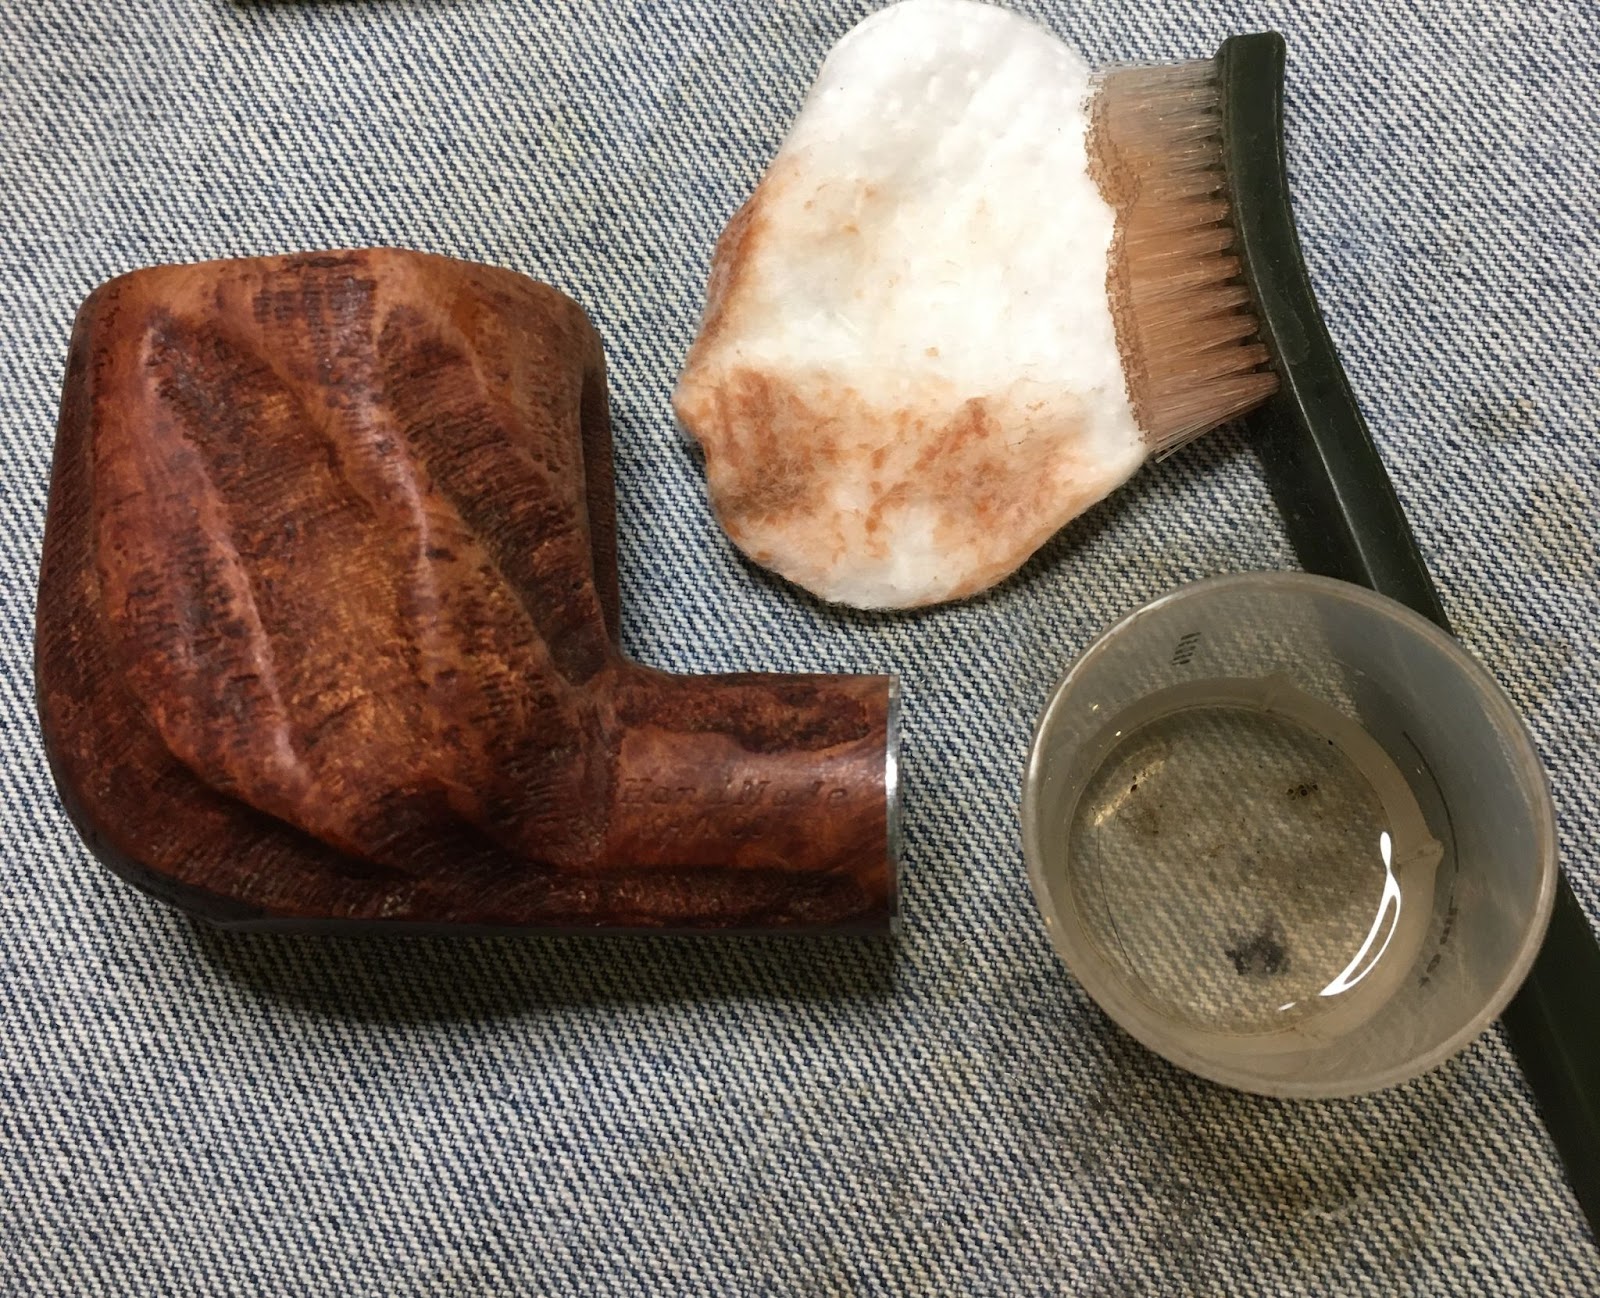
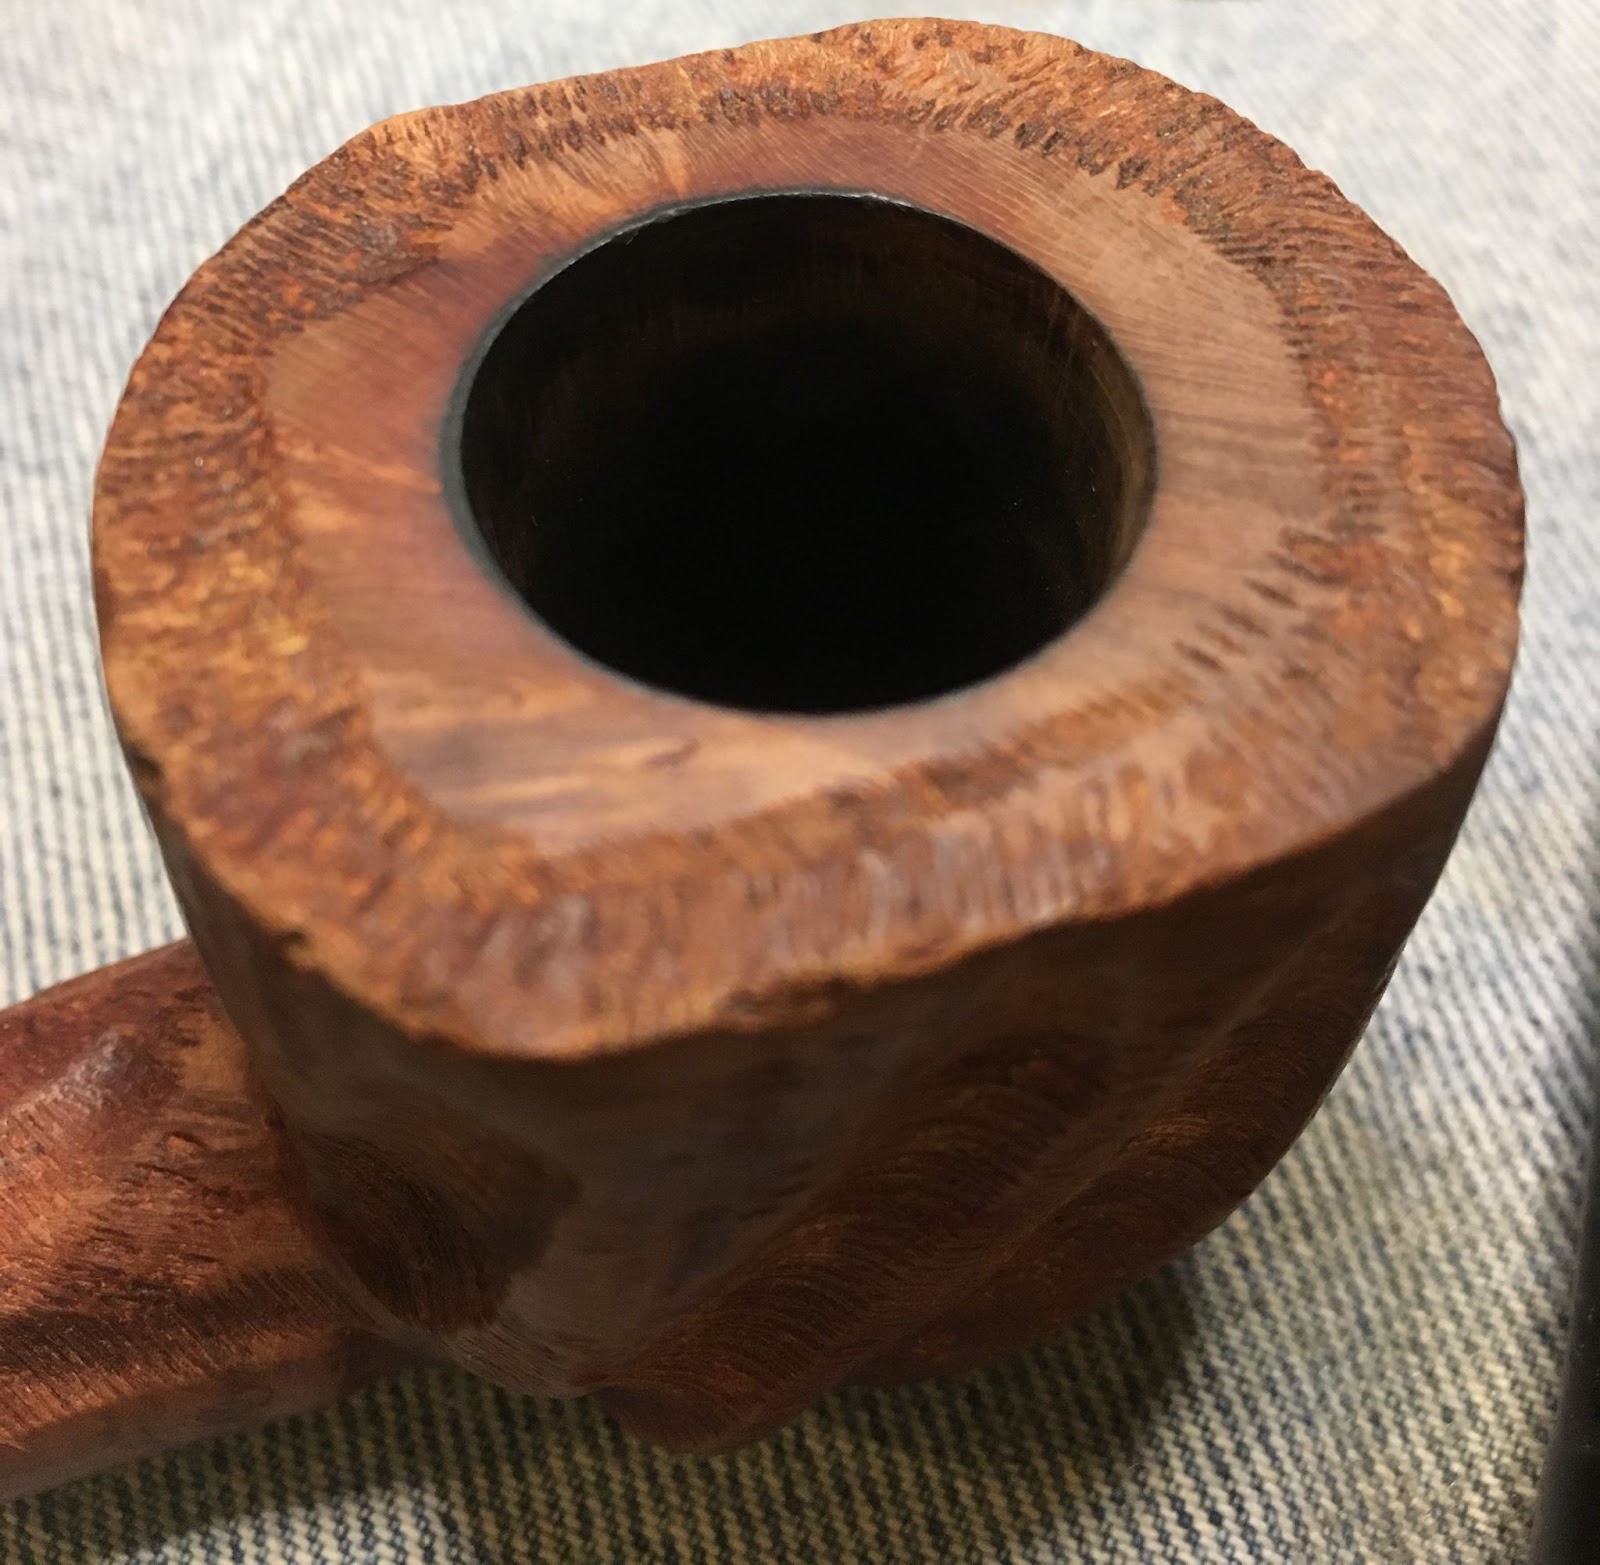
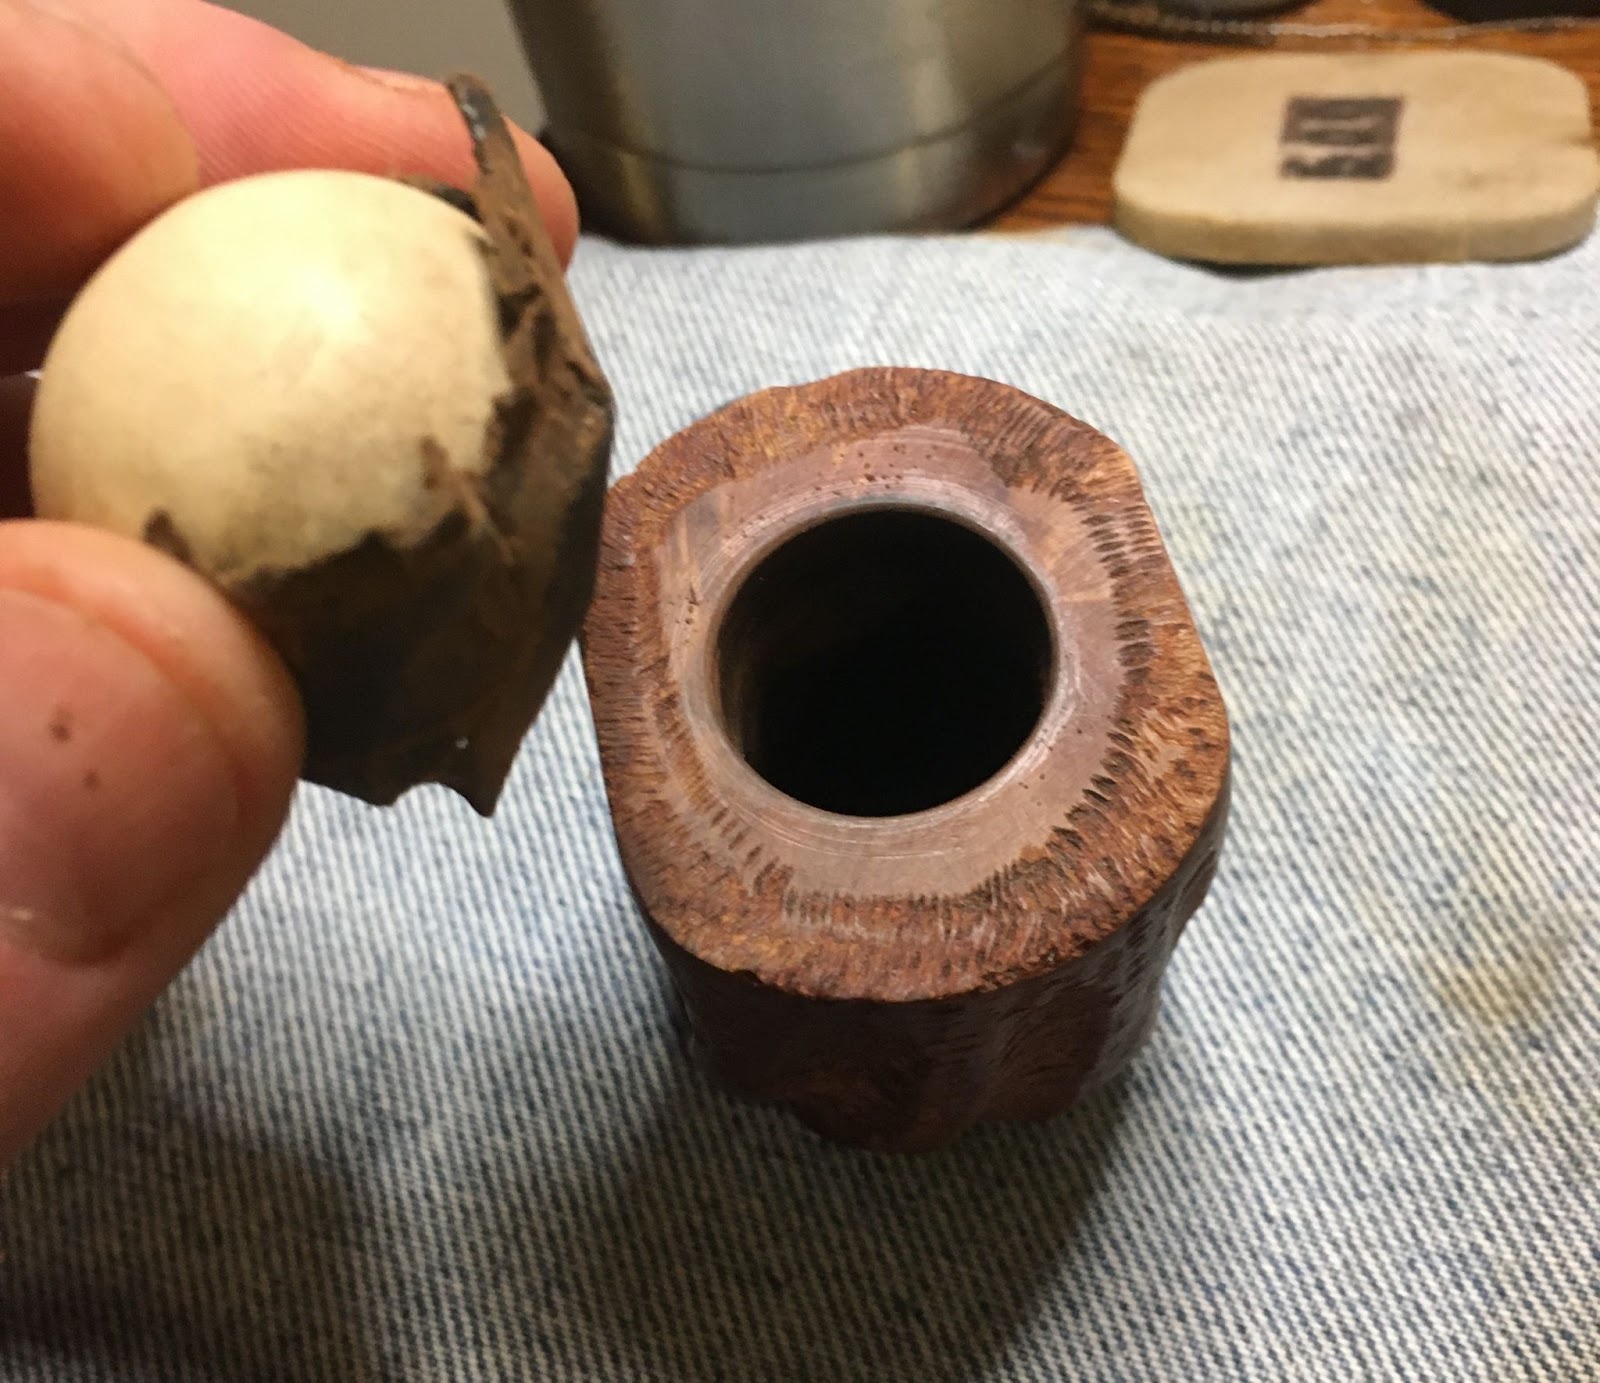


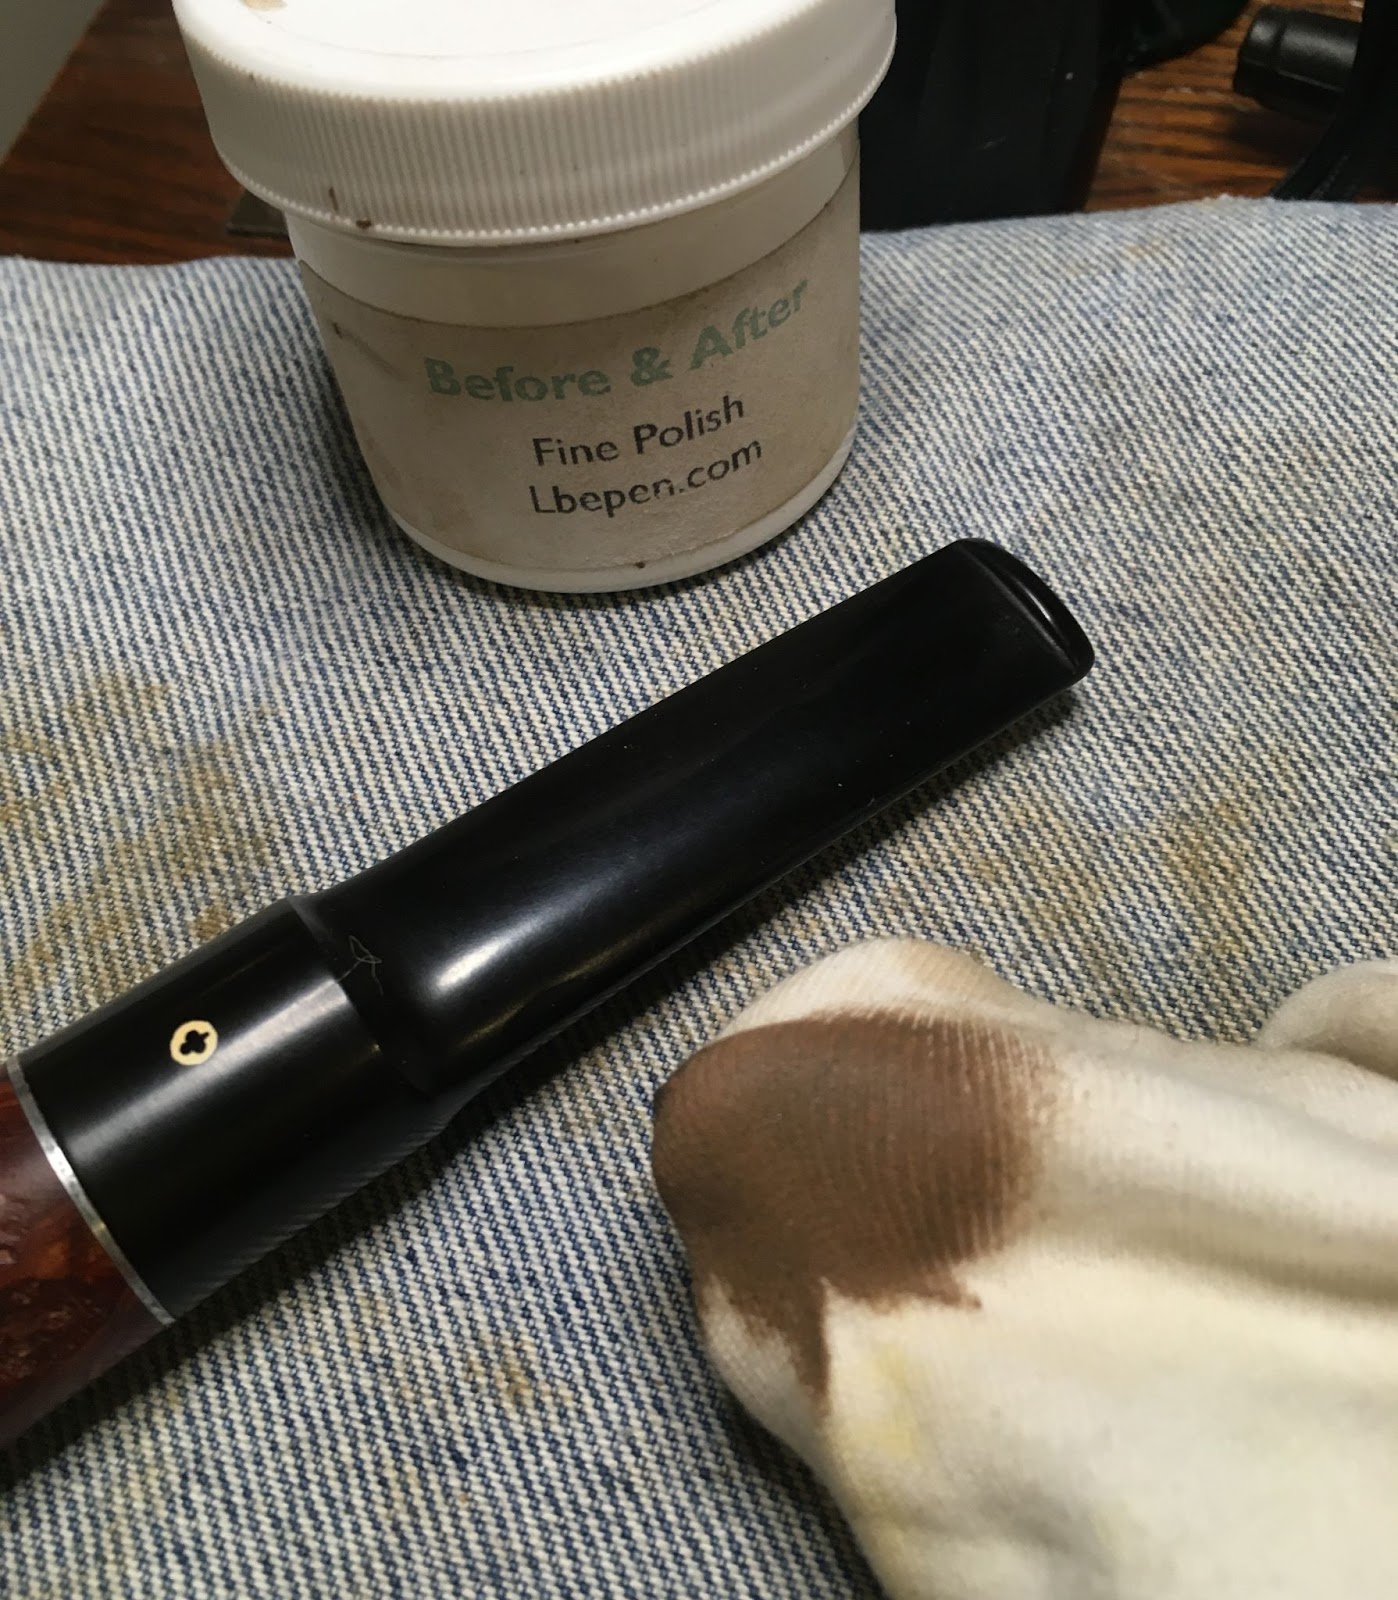


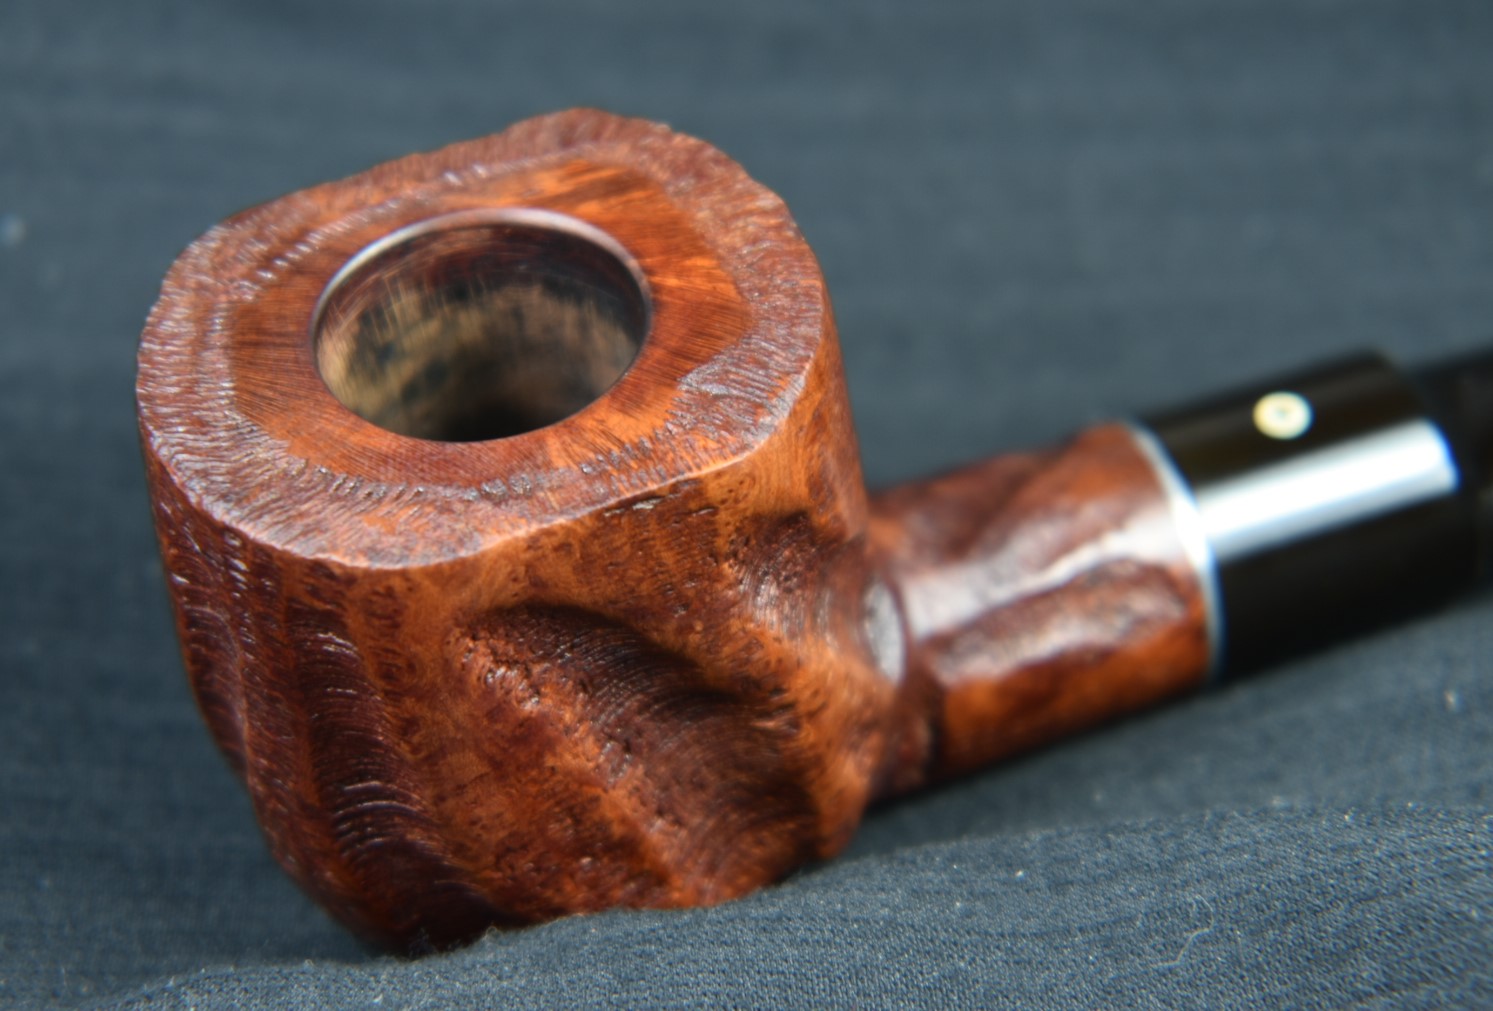


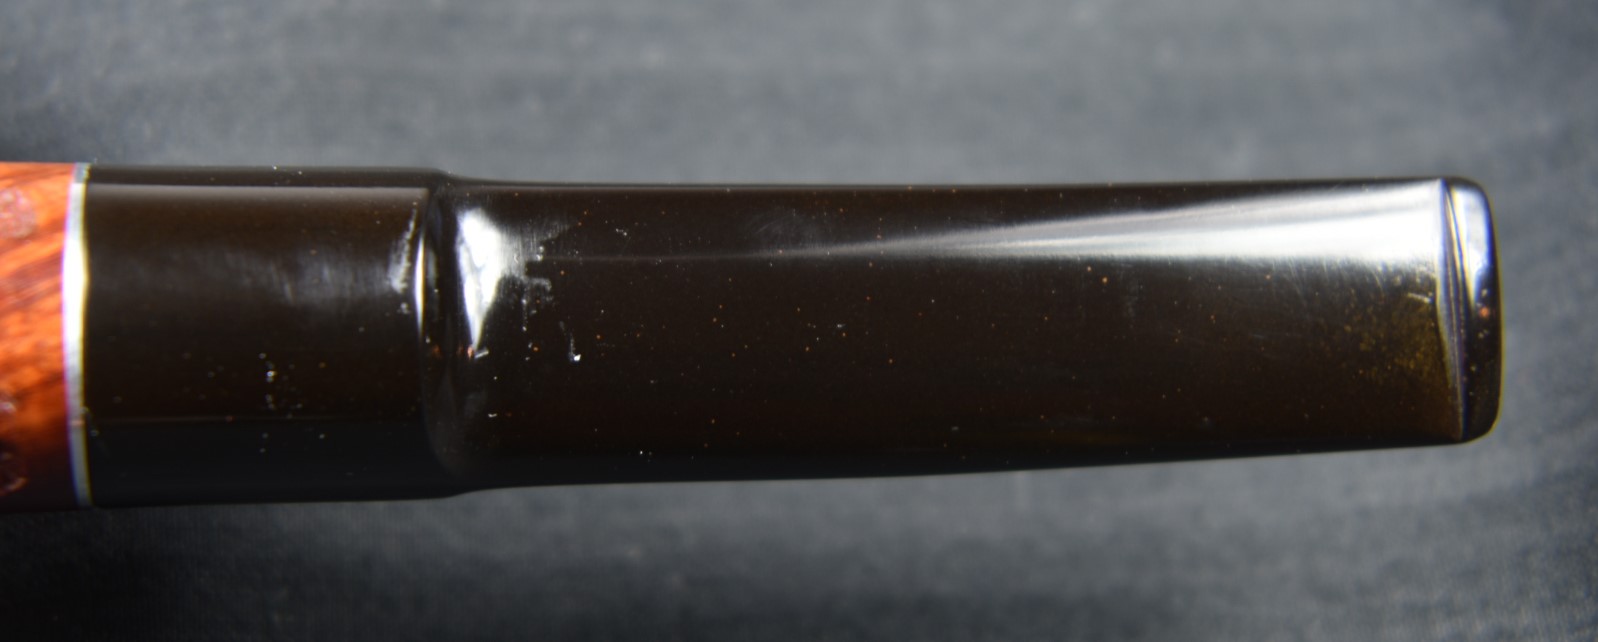

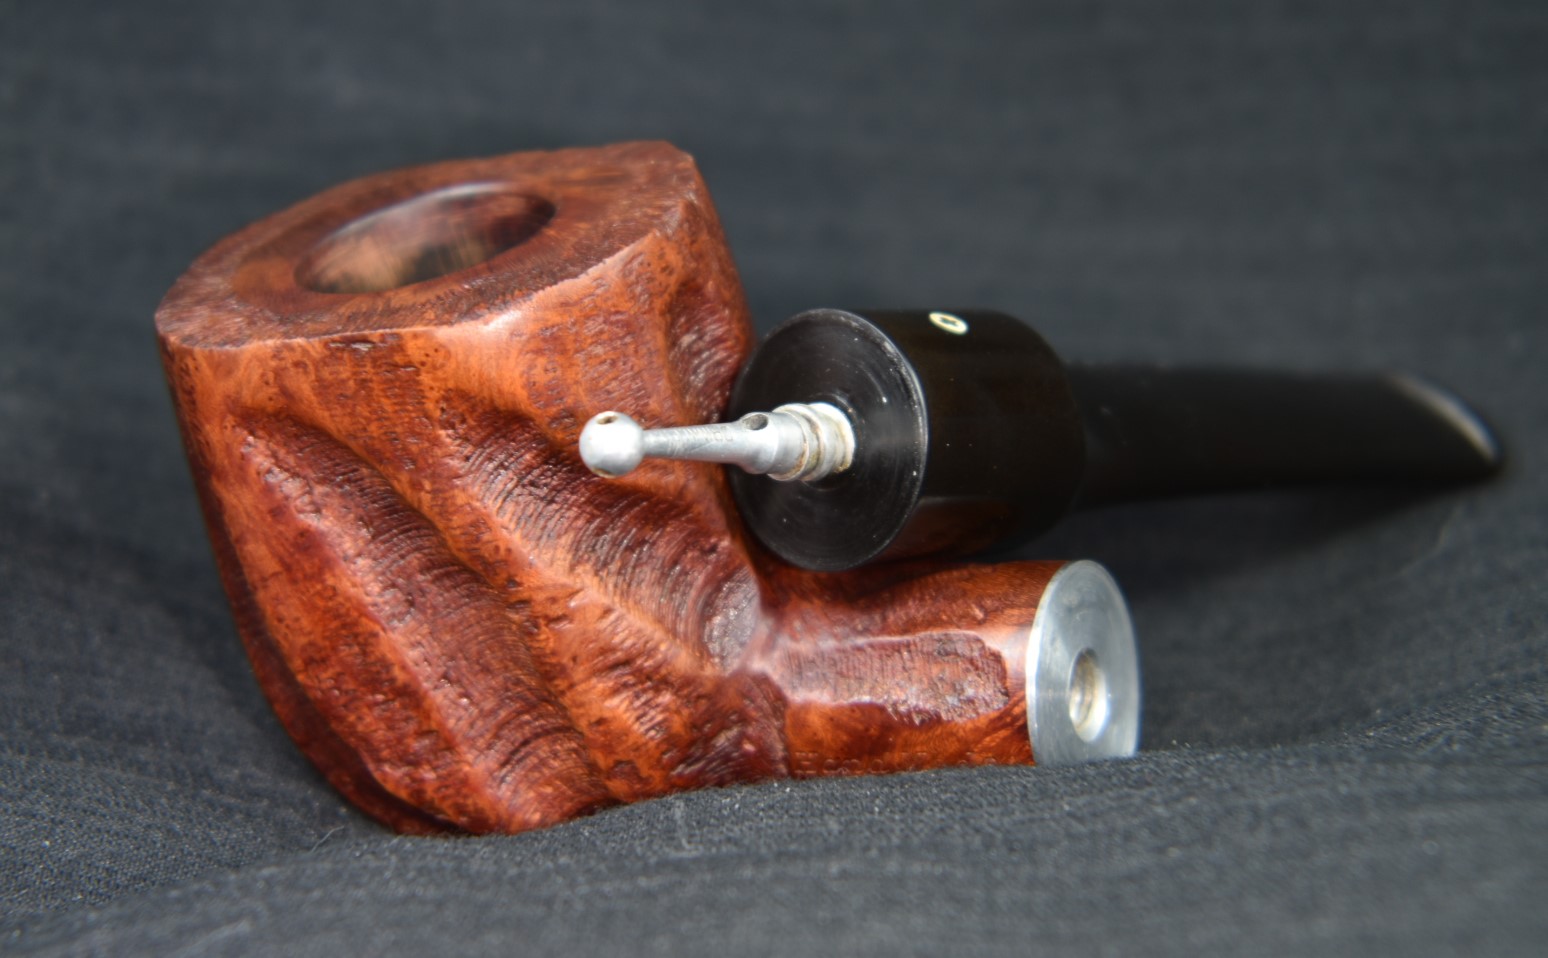

