Here we have another Denicotea. I know what you are thinking, “Young, you chose that one so you wouldn’t have to do a bunch of research for the background section”. Wow, you guys are a tough crowd who are a bit cynical of my motives. True there is little information about Denicotea pipes but that is hardly the reasoning behind restoring this curvaceous cutie. I like a black sandblast and am drawn to the elegant curves of this old pipe. Besides, if I restore a couple of Denicoteas per year it makes my German friend Sascha Mertens happy.
This bent beauty came as part of an estate lot from Norman Park, Georgia earlier this summer. It was not the object of desire from the lot. The real target was a 2020 Dr Grabow Collector but this pipe trumped the Collector in the queue due to its intriguing shape and my desire to see how the Denicotea P-lip compared to that of my beloved Peterson pipes. The pipe has a full bend with the robust Denicotea shank/stem fitting for a pipe which takes a 9mm filter. The stampings are “denicotea” over “jolle” with a 0823 shape number to their right all on the bottom of the shank. The stem has a D within a circle. The stamps are well formed and sharp while the logo is much lighter. Below are some photos of the Denicotea as it appeared on arrival.
The black finish showered overall signs of wear with numerous spots of briar showing through the black. The stem surface was oxidized but free of tooth chatter or dents. The bowl needed a reaming and the rim a good scrubbing but all told this looked to be a straightforward restoration.
Background
As alluded to in the beginning, Denicotea pipes are rather lacking in the documentation of their carving, manufacture and business. As stated in my previous blog regarding a Deicotea billiard (linked), ““Willy Heineberg founded the company Denicotea in 1932 and began manufacturing and selling smoking accessories such as filters, filter inserts, cigarette holders and pipes.[1] The company headquarters was initially in Cologne, but was relocated to Bergisch Gladbach after the Second World War.[2]
Denicotea is actually the name of a silica gel filter, cigarette holders and care products for pipes and cigarette holders.
I still find it a bit confusing as Denicotea seems to be a company[3] and a brand as well which is operated by COMPOSING-STUDIO GmbH[4].” (Denicotea – Pipedia).
I cannot find anything pertaining to the shape numbers of Denicotea pipes yet in the photos that I have seen online there are almost always shape numbers stamped on the pipes. The company itself is registered as a German firm as an be seen from the pipephil.eu entry for Denicotea:
(Den-Dh — Pipes : Logos & Markings (pipephil.eu)). Anyone with any experience with German products knows that the Germans are exceptional and meticulous craftsmen. This can also be seen in their business and record keeping. Below is just a clip of the German registration of Denicotea:
(DPMAregister | Marken – Registerauskunft)(translated by Microsoft Edge). I show this because I think it is funny. According to the pipedi.org site Aldo Mollini is, “is a fictional name. The brand Aldo Morelli has been registered for Denicotea on February 26th, 1992.”(Denicotea – Pipedia). I find the fact that a fictional Italian appears to be the signatory for a German company. Yeah, I know it is just a brand and not the executive officer but it makes me think of Hamlet, “Something is rotten in the state of Denmark.” Or in this case northern Germany.
In conclusion we have a Denicotea Jolle made somewhere and at sometime by a German company with brands named after fictional characters.
The Restoration
Fortunately the restoration was more clear than that of the background. I began with a cleaned denim piece for the work surface.
The reaming tools were assembled. The cake was not very thick and little overflow lava was noticed.
The cake was hard and dry but the PipNet with the #2 blades made short work of it. The interior of the tobacco chamber was scraped with the two reaming knives then was sanded with the 320 sandpaper wrapped around a wood dowel. There was no indication of any heat damage to the briar within the chamber.
Next came the cleaning of the shank airway. This was a repetitive process of scrubbing the airway with an alcohol dipped nylon shank brush, followed by alcohol dipped bristle pipe cleaners and cotton swabs. Eventually the pipe cleaners and swabs emerged nearly the same color as when they entered.
The stem was cleaned in a similar fashion but without the use of the shank brush.
Once cleaned inside the stem was submerged in an OxyClean solution and set aside to soak for an hour or so.
The stummel was taken to the sink for a scrub. Here, undiluted Murphy Oil Soap was used with a nylon scrub brush. The soap was rinsed with warm water and the stummel dried with a cotton dish towel.
Returning to the workbench the stummel was wiped with a cotton make-up pad wetted with 95% ethyl alcohol. Some color came off though this was mainly from the rim.
The scrubbing and alcohol wipe revealed the numerous scuff marks which had worn away the black stain from the briar.
I thought that a fresh dye application of black Fiebing’s Leather Dye would restore the overall color of the stummel. The Fiebing’s dye gear was gathered and included the dye, a folded pipe cleaner (as an applicator) , a duct tape wrapped fishing bobber (most folks use a wine bottle cork), and lighter.
Using the fishing bobber as a handle and to keep dye out of the tobacco chamber, I applied a couple of coats of the Fiebing’s Dye to the stummel. After each coat I flamed the wet dye burning off the alcohol solvent and fixing the dye to the briar. The excess dye was wiped from the stummel with a paper towel. Back at the workbench the stummel looked much better with a fresh coat of black dye.
The stem was retrieved from the OxyClean and wiped with a dry make-up pad. Some oxidation had been softened and lifted by this.
The stem was then scrubbed with Soft Scrub cleanser applied to make-up pads. The first pads became darkly covered with brown oxidized rubber. I did not want to get too aggressive with scrubbing the shank-ward end of the stem as the logo was not particularly deep and I feared the abrasive cleanser would remove it.
The stem was reattached to the stummel for easier holding. The shank was then covered with painters tape to protect it from sanding.
The stem logo was also taped for its protection.
The stem was sanded with a series of sanding sponges from 400-3500 grit. Between each sponge I dipped my finger tip into mineral oil, rubbed this onto the stem and wiped it with a dry paper towel.
The stem was then worked with 4000-12000 micro-mesh pads further polishing the vulcanite. Between each pad I rubbed in a small drop of Obsidian Oil and wiped the stem with a paper towel.
The now slightly fainter logo was given a fresh Rub’nBuff gold leaf application. I did not know what the original logo looked like but I thought the gold would look appropriate with the all black pipe.
All that remained was to apply several coats of carnauba wax with the buffer.
Overall I was very pleased with the restoration of this Denicotea Jolle 0823. The draw is very open and feels like it is meant to have a filter, when I placed a Stanwell 9mm filter into the stem the pipe retained a good comfortable draw. The pattern of the blast shows a nice ring grain on the left and interesting bird’s eyes on the right. The stem polished up fairly well but does still show a tinge of oxidation around the shank. I did not want to get too aggressive with the removal and diminish the stem logo.
The dimensions of this Denicotea Jolle 0823 are:
Length: 5.95 in./ 151.13 mm.
Weight: 1.86 oz./ 52.90 g.
Bowl Height: 1.80 in./ 45.72 mm.
Chamber Depth: 1.56 in./ 39.62 mm.
Chamber Diameter: 0.72 in./ 18.29 mm.
Outside Diameter: 1.46 in./ 37.08 mm.
I do hope that you have found something here useful to your own pipe care, maintenance or restorations. If you like this sort of thing, please click the like and subscribe buttons. Thank you for reading the ramblings of an old pipe lover.
Below are some photos of the finished Denicotea Jolle 0823.
SilverKing a name that everyone has heard of and associates with … Umm, what? Haven’t heard of em, eh? Well neither had I but it is still a darn fine looking piece of briar. And it’s made in France, maybe. Okay, I am reaching for some enthusiasm . This lovely old billiard was one of six pipes that I won from ebay back in June of this year from Hollywood, Florida. The target of my desire was the Peterson meerschaum (2nd from the right) which was hiding amongst these pipes as seen in the photo below. I have restored all but one of the lot. As a matter of fact, the Barclay Rex was sold right after the restoration blog was published. I will add links to the restorations of the others for those who might be interested: Canted Dublin, Barclay Rex, Telford’s Canadian, Peterson meerschaum. The finished pipes look far better than their below photo.
Back to the subject at hand, this lovely Silverking billiard. The pipe was stamped with SILVERKING over SYNCHROMATIC on the left shank and ALGERIAN BRIAR over FRANCE on the right shank. The stem has a crown stamped logo and the silver band is stamped EP within a diamond and three Hallmarks (middle and stem-ward worn to illegible). Below are photos of the Silverking billiard prior to working on it.
This looked to be a straightforward restoration with no glaring difficulties. There were a few deep fills to be made to the briar, a slightly overclocked stem and the missing stinger but other than that a nice relaxing afternoon in the basement avoiding the heat of mid-summer.
Background
I would love to be able to tell a good story about the trials and tribulations of the Silverking pipe factory but alas, there is scant information concerning this maker. If you have any additional information, please feel free to leave it or links in the comments. All I could find is the following from pipephil.eu:
(Si-Siq — Pipes: Logos & Markings (pipephil.eu)). Referring to the “?” at the top right of the screenshot below, I am not sure why there is a question about the country of manufacture (COM) of this pipe as it is clearly stamped MADE IN FRANCE or in the case of my Silverking FRANCE. “Made in France” is also stated in the text above.
I looked at the “Otherline from this factory” links and they are included here:
Not much to work with. A quick search on pipdedia.org resulted in the following quote,
“This is probably not a brand but rather the name of a line of an unknown french factory.
Other line from this factory: Big Ben Reputation , Gold King”(Silverking – Pipedia).
It looked like pipedia.org got their information from pipephil.eu as well.
Now we can assume a bit of information about the date of production. Algeria had been a source of briar from the mid to late 1800s and into the early 1900s. During the years of World War Two briar production was severely limited. After the war briar production returned. Algeria was a French colony and like many colonies during the mid 20th Century, experienced a wave of anticolonialism. The French attempted to squelt this anticolonialism leading to the Algerian war of independence from 1954-1962. During this time Briar production from Algeria was greatly reduced. According to the Wikipedia.com article fatalities of the conflict were, “between 400,000 and 1,500,000 Algerians,[40][24][22] 25,600 French soldiers,[15]: 538 and 6,000 Europeans.” (https://en.wikipedia.org/wiki/Algerian_War).
Well that about sums up all I know about this old pipe. It was made in France of Algerian Briar. Most likely between the second world war and 1954.
The Restoration
As typical this restoration began with a relatively clean denim piece as a work surface.
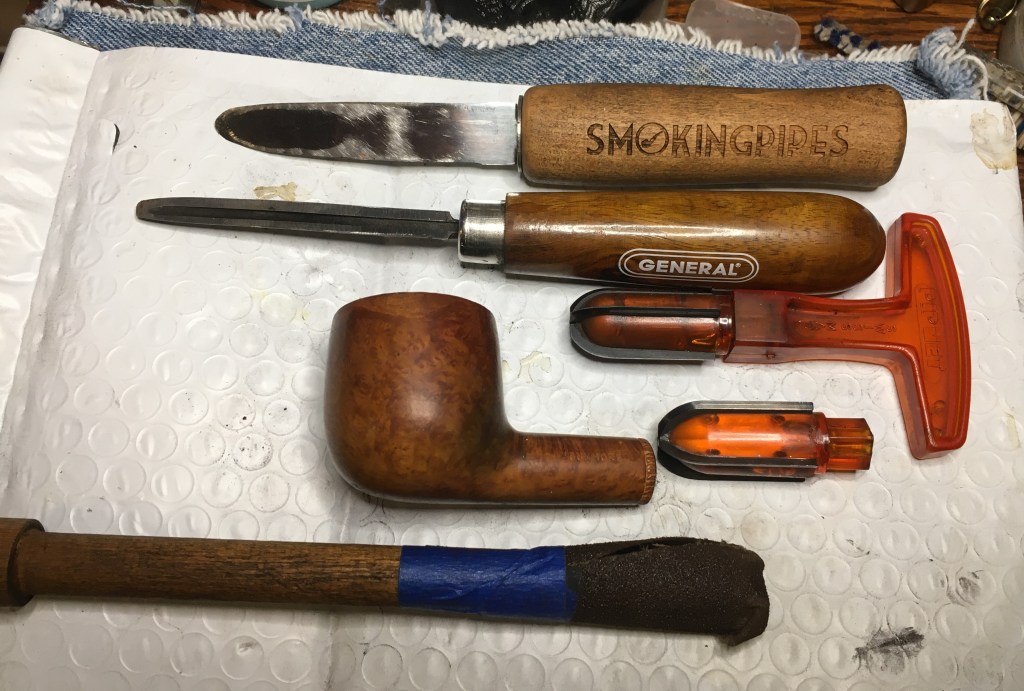
The reaming tools were gathered and included the Scotte Stainless Steel reamer rather than the traditional PiNet reamer due to the narrow tobacco chamber and the fact that my PiNet #1 blade suffered a catastrophic failure. The Scotte did a fine job and only required a small amount of scraping with the Smokingpipes Low Country Reaming knife and the General triangular scraper.
After the reaming the chamber was sanded with 320 sandpaper wrapped around a wood dowel. No heat damage was observed in the chamber.
The shank cleaning was done with 95% ethyl alcohol, a nylon shank brush, bristle pipe cleaners and cotton swabs.
After the shank was cleaned I turned my attention to the stem. Here the ethyl alcohol and bristle pipe cleaners were used to clean the airway of the stem.
The rim of this old French billiard had definite lava accumulations. This was softened with saliva and scraped with a sharp pocket knife.
The scraped rim looked better but would require a good scrubbing.
Seque to the scrubbing. The stummel was taken to the sink for a scrubbing with undiluted Murphy Oil Soap and a medium toothbrush. The soap was rinsed with warm water and the stummel was dried with a cotton dish towel.
Back at the workbench the stummel appeared to have most of the finish removed during the scrubbing. The briar looked dull and flat except in a few areas where some finish remained.
An 95% ethyl alcohol wetted make-up pad was used to scrub the stummel. A good deal of color came off the stummel. This indicated that wax, finish and stain were being removed.
A second alcohol wipe yielded more color.
To make sure no coatings remained a wipe with a make-up pad with acetone was used. This time only a little bit of stain was present on the pad.
All of the scrubbing and wiping allowed me to see the pits and damage to the stummel. These would require a fill of brown cyanoacrylate (CA, super glue) and briar dust.
The gouges received a small drop of CA applied with a fly tying bodkin. While the CA was still wet I scooped a small amount of briar dust with a dental scraper and placed the dust on the wet CA. This was then pressed into the wet CA in the depressions..
The briar dust causes the CA to cure almost instantly so once the dust is placed, pressing had to occur immediately. The excess dust was brushed off with a brass brush.
The new fill was filed with a flat diamond needle file to remove and smooth the fill then was sanded with a 400 grit sanding sponge.
In deeper fills this process was repeated until the fill was complete. The completed fills appear much darker than the surrounding briar. The light spots seen below are slight depressions with dry briar dust from sanding in them. A final coat of clear thin CA was applied to the dry spots and they were sanded with a dusty 400 grit sanding sponge. The dust was incorporated into the slight depression with the clear thin CA to fill the last of the low spots.
The above procedure was used to fill pits of the shank.
And the heel of the stummel.
To conceal the fills and to add contrast to the briar grain, I decided to contrast dye this stummel. Black Fiebing’s Leather Dye was chosen for this. The duct tape wrapped fishing bobber acts as a plug to keep dye out of the tobacco chamber and as a handle. The folded pipe cleaner is the applicator for the dye while the lighter provides a flame when burning off the alcohol solvent of the dye fixing it to the briar. Notice that I used painters tape to cover the stamps. This is done to keep the dye from penetrating the briar on the stamp. Were that area to become darkly dyed, extra sanding/buffing would have reduced the stamps.
Below is the black dyed stummel, still wet with Fiebing’s Leather Dye.
I wiped off the remaining damp dye with a paper towel. This also removed my painters tape stamp protectors. Here you can see that the stamped area received less dye thus reducing the amount of sanding/buffing that the stamp will be exposed to.
The blackened stummel was taken to the buffer where rouge buffing compound was used to buff away the router black dyed briar. The results looked good but I wanted the stummel to be lighter overall in color.
To further lighten the briar I lightly sanded the stummel with 320 and 400 grit sanding sponges. This removed more of the black dyed briar. When I was happy with the shade, I sanded the stummel with a series of sanding sponges 600-3500 grits and wiped the stummel with an alcohol dampened make-up pad between each sponge..
I turned my attention to the stem. The slightly over-clocked stem could have been adjusted a couple of different ways; by heating the aluminum threads until the rubber softened and then turning the aluminum slightly or to add a bead of black cyanoacrylate to the end of the stem. I chose the later as the overclocking was so slight. Here I sanded the stem from about its middle to the button with 320 and 400 grit sanding sponges.
I then used Soft Scrub cleanser on make-up pads to scrub the entire stem. The pads became very dark with oxidized stem material. I was uncertain as to the material used with this stem. Normally oxidized vulcanite yields a brown color on the make-up pad. This was nearly black. I coated the stem with mineral oil and allowed it to sit for 30 minutes. After the sitting, the stem looked black with no signs of a brown oxidized stem.
The stem was then sanded with a sequence of sanding sponges from 600-3500 grit. I did cover the stem logo with a small piece of painters tape to protect it from the sanding. Between each sponge I rubbed mineral oil onto the stem with my fingertip and wiped the stem with a paper towel.
After the sanding sponges the stem was polished with 4000-12000 micro-mesh pads. Between each pad I applied a drop of Obsidian Oil to the stem, rubbed it in with a fingertip and wiped the stem with a paper towel.
After micro-meshing the stem, I cleaned the logo area with a cotton swab dipped in alcohol to remove any oil.
I then used Silver Leaf Rub’nBuff on the logo. The silver was worked into the stamped logo, allowed to dry for a couple minutes and buffed with a paper towel to remove the excess. I know, the pipephil.eu information said that the Silverking used white on the logo but I thought that silver would look a touch more classy.
The stummel was micro-meshed in a similar fashion except without the Obsidian oil. Here I wiped the stummel with an alcohol dampened make-up pad between pads.
The stummel was given a coat of Before and After Restoration Balm and allowed to sit for 20 minutes. I failed to photo this step. After 20 minutes the Restoration Balm was wiped off with an inside out athletic sock. I failed to photo that as well. The final step was to take the pipe to the buffer for several coats of carnauba wax.
This pipe turned out very well. I really like how the contrast staining brought out the differences in the grain. It made the bird’s eyes stand out much better than I hoped it would. The stem polished up well. I still do not know exactly what the stem material is but it looks good and didn’t turn my lips black when I sampled the draw of the pipe. I do wish the stinger was intact though the draw is very nice without it. I am sure this will be a nice smoking pipe for someone who loves a long billiards. With it’s relatively tall and narrow tobacco chamber I expect it would make a fine Virginia or Virginia Perique blend pipe. The dimensions of this French beauty are:
Length: 6.34 in./ 161.04 mm.
Weight: 1.38 oz./ 39.30 g.
Bowl Height: 1.83 in./ 46.48 mm.
Chamber Depth: 1.53 in./ 38.86 mm.
Chamber Diameter: 0.69 in./ 17.53 mm.
Outside Diameter: 1.46 in./ 37.08 mm.
I do hope that you have found something here useful to your own pipe care, maintenance or restorations. If you like this sort of thing, please click the like and subscribe buttons. Thank you for reading the ramblings of an old pipe lover.
Below are some photos of the finished Silverking Synchromatic billiard.
Decisions, decisions. That is what I was thinking before selecting this Telford’s Canadian for the next restoration. The SilverKing and the no-name billiard were looking for love but it all went to the Telford’s.
I have a few restoration blogs finished and scheduled for publication on Tuesday and Thursday mornings. I figured that I could try my hand at a restoration that might require some extra time and I didn’t want to feel rushed with a self-imposed deadline. This Telford’s has a cracked bowl and will be my second attempt at using the Charles Lemon pinning technique (I linked it so you can read the original).
I had never heard of Telford’s as a pipe maker and assumed it to be a tobacco shop which had stamped it’s name on a pipe made by a London based pipe maker. Why London? Well, the stamps on the bottom of the shank read TELFORD”S in the center on the end of the shank by the stem there was a 296, I assumed was a shape number. There was a circular MADE over IN over LONDON with the “IN” inside the circle and the “MADE and LONDON forming the circle and an E stamped on the end of the shank. Below are some photos of the Telford’s as it appeared prior to work being done.
Oh yeah, some serious work would be required to get this old girl back into the game. Obviously there was the cracked bowl to repair. There were some big fills to be made on the left heel area and the right shank. The stem was severely oxidized with some deep tooth imprints and a layer of calcium. The bowl itself was caked with carbon and the subsequent lava flow onto the rim.
Background
Normally the first place I go when researching a brand is to pipedia.org. The search for “Telford’s” met with “no results matching the query”. Strike one. The second place I usually visit is pipphil.eu. Here the “Telford’s” search led me to the following:
One question remained, who made this pipe? I started with Comoy’s due to the fact that I had seen a couple of mentions of Comoy’s pipes on Telford’s website. Comoy’s shape chart from pipedia.org verified that the 296 shape was indeed a Canadian.
(https://pipedia.org/wiki/Comoy%27s_Shape_Number_Chart). That was enough proof for me. Using the Telford’s shop website as a timeline source the pipe was made from the early 1980s-present. The pipe did appear to have been heavily used with worn sandblast and heavy oxidation so I assumed it was used heavily during the 1980s and 1990s. That call to Telford’s might provide a more narrow date.
I was able to contact Brian Telford at his shop and he was quite gracious with his time. He said that this pipe would have been for the 1970-1980s. During this time Comoy’s would offer lots, usually a gross, of their “seconds”. These were pipes that had imperfect blasts or fills which made them ineligible for sale as “Comoy’s” pipes. Mr. Telford explained that Comoys made a stamp for Telford’s and stamped the pipes for the shop (personal communication with Brian Telford 7-30-2024).
This narrowed down the maker and date of production of this Telford’s 296 Canadian made by Comoy’s of London. Now it was time to return this old girl to service.
The Restoration
The restoration began with a light buffing of the stem with 0000 steel wool to remove the calcium and outermost oxidation.
A pipe cleaner was inserted into the tenon end of the stem as a hanger and the pipe was placed into Before and After Extra Strength Deoxidizer. And allowed to soak overnight.
The reaming tools were assembled and put to work.
The PipNet with its #2 blades did most of the reaming. The #3 blades were too large and the tobacco chamber needed a good deal of scraping after the PipNet.
Below you can see a much better photo of the cracked bowl from inside the chamber.
The chamber did show signs of light spider webbing all around the interior of the chamber.
The stummel was taken to the sink for a scrubbing with undiluted Murphy Oil Soap and a medium toothbrush. A second scrubbing of Murphy’s was done with a stiffer nylon scrub brush to better remove the accumulated grime. The stummel was rinsed of soap with warm water and dried with a cotton hand towel.
Back at the workbench the stummel looked much cleaner and the crack could be examined in greater detail.
Other areas in need of repair were also made more apparent, the two deeper pits on the right shank and (shown below).
And the two depressions immediately above the left heel.
The rim also still had lava issues and would require a light topping. There were a couple of smaller surface cracks which appeared to be only superficial in nature.
I wiped the surface of the stummel with a make-up pad dipped in 95% ethyl alcohol. The made came back with more grime. My scrubbing was not as good as I thought it was.
I then proceeded to scrub the stummel with the toothbrush and 95% ethyl alcohol and wipe it with a clean make-up pad. More accumulated grime came off.
A repeat of the above scrubbing cleaned off additional grime.
And a third alcohol toothbrush scrub.
All told, the stummel was scrubbed 3 times with alcohol and toothbrush after the double Murphy Oil Soap scrub. I was pretty sure the previous owner was a car mechanic who smoked the pipe while working on car engines with dirty oily hands during the day and labored in a coal mine at night. Now the coal mine scenario might be a stretch as coal dust and smoking would probably create a bit of mischief but I’m sure you see my reasoning.
The shank cleaning was next. Cleaning here included pouring 3-4 ml of 95% ethyl alcohol into the tobacco chamber and scrubbing with a nylon shank brush. After the scrubbing the alcohol was poured into a medicine cup. The airway was then scrubbed with bristle pipe cleaners dipped in ethyl alcohol. Alcohol dipped cotton swabs were also used to clean out the mortise area. This process was repeated numerous times. I was making progress albeit slowly. I decided to give the airway a cotton alcohol overnight soak to dissolve and loosen the remaining tar deposits. The tobacco chamber and shank were stuffed with cotton and 95% ethyl alcohol was added to the cotton via a disposable pipette until the alcohol pooled on top of the cotton. The pipe was angled allowing the shank end and rim to be approximately level and saturated with alcohol.
The next morning the cotton showed that it had absorbed old smoking residue as the alcohol evaporated.
The cotton, now fairly dry, was removed and with it a good deal of the tar.
Further cleaning of the airway went much faster and soon revealed clean pipe cleaners.
The stem was removed from the Before and After Extra Strength Deoxidizer and allowed to dip excess solution back into the jar.
The remaining residual solution was wiped with a coarse shop rag.
The stem looked much better.
Several make-up pads drizzled with SoftScrub were used to scrub the remaining oxidized rubber from the stem surface.
I then went to work repairing and rebuilding the tooth damaged stem using sanding sponges to prepare the damaged areas.
The dents were painted with the flame of a lighter in an attempt at raising the dent a little bit. This met with little success. Filling the dents with black cyanoacrylate (CA, super glue) was required. The dents received a light fill of the black CA.
This was then spritzed with a CA drying accelerator. This allows the CA to cure within seconds.
The cured CA was then filed with a flat diamond needle file to smooth the CA.
The remaining depressions appear shiny as they had not been touched by the file.
An additional fill of black CA was applied and spritzed with a drying accelerator.
The second application once cured was then filed and smoothed with a 320 followed by a 400 grit sanding sponge.
Additional small applications of CA, filing and sanding were done.
Eventually the stem looked far more acceptable.
The stem airway was cleaned out using bristle pipe cleaners dipped in 95% ethyl alcohol.
It was time to start planning the crack repair. A little about this technique: Charles Lemon of dadspipes.com wrote a wonderful restoration blog about his technique for repairing cracked bowls (https://dadspipes.com/2016/03/08/a-crack-pinning-tutorial/). I had tried this pinning with a cracked diamond stem on a blog a while back (https://wordpress.com/post/scimansays1787.com/5886). Now I realize that I tried to use it on a stem not a bowl but I was more interested in practicing using the technique and to see if it would work with a stem. Besides, I did not have a pipe with a cracked bowl at that time. Anyway, It worked and I learned several things from my hands-on practice. Feel free to check out my blog and comment on all my mistakes, I own-up to all of them. Below you can see the steps of Charles’ pinning technique as they were intended.
I first marked the two entrance points where I wanted to drill two 2mm holes to place the 2mm brass rods. The brass rods reinforce the cracked area and are glued in place.
I used a rat-tail needle file to make depressions for the drill bit.
The plan was to drill the holes at two different angles to prevent the crack from being able to widen.
Below is a photo attempting to show the two angles without a big dumb thumb in the way.
The stummel was clamped into an adjustable vise allowing the best angle for me to comfortably drill while seeing the path of the drill bit.
I accidentally went too far with the top hole and exited the stummel. I had marked the drill bit with a sharpie marker but either I was not paying enough attention or the path of the boring was shorter than anticipated. The bottom drilling went as planned and did not exit on the far side of the entrance. Note that you can see the top brass pin through the crack.
Another view of the pinning angles.
And another view.
I used a wire cutter to cut the brass rod to length. I wanted the rods short enough that there would be no brass visible when they were placed into the holes. This was something I learned from my first attempt. The brass rods were roughed up with 320 sandpaper to allow the glue additional surface area to bond to.
I mixed J-B Weld 2 part epoxy as per the instructions on a plastic lid.
Once thoroughly mixed the epoxy was dabbled into the hole with a longer piece of brass rod and worked into the crack itself.The sanded rod pieces were pressed into place and pushed deeply into their respective hole with a longer piece of brass rod. Epoxy pushed out through the miss-drilled exit hole. This made me happy to know that the glue had indeed made it deep into the holes.
The excess epoxy was removed using a dry cotton swab. The area on each side of the crack was cleaned of epoxy with a cotton swab dipped in acetone. The interior of the tobacco chamber was wiped of excess epoxy with a small wooden popsicle stick. A clamp was used to compress the sides of the stummel and the stummel was set aside to dry/cure for 24 hours.
The next day, Iremoved the clamp and everything looked like it had gone according to plan.
It was now time to work on filling the holes, crack and other flaws in the briar. I used brown CA and briar dust for the fills.
Careful placement of CA with a fly tying bodkin was needed for this as the blast patterns would not allow for sanding. I then used a dental scraper to scoop up a small pile of briar dust and placed it onto the wet CA and used the back side of the scraper to press the briar dust into the CA. The extra briar dust was then brushed off with a brass brush and the fill was filed with a rounded or rat-tail diamond needle file. I tried to file to match the grain pattern of the blast.
The depression of the crack on the rim was filled in similar fashion to the above. Here I was able to sand the fill smooth with a topping board, AKA a piece of 320 sandpaper laid flat on a counter.
The shank depressions were also filled with CA and had briar dust pressed into them. The new fill was filed and in an attempt to leave some texture to match the existing blast pattern.
The heel fill proved to be quite large. This area had most of the blast pattern worn away by I assumed, use. I used a Dremel rotary tool to retexture the surrounding area.
Once all the fills were completed, I wanted to blend and conceal the fills. I chose Dark Brown Fiebing’s Leather Dye for this. The needed dye kit was gathered.
Below is the pipe after having been dyed and flamed with the lighter.
I then took the pipe to the buffer and used rouge buffing compound to buff away the outermost layer of dark brown dyed briar. Returning to the workbench I wiped the stummel with a couple of make-up pads dipped in 95% ethyl alcohol.
The pipe was given a coating of Before and After Restoration Balm and allowed to sit for 15 minutes absorbing the balm and letting it work its magic.
The pipe was then taken to the buffer for several coats of carnauba wax. Normally I don’t like to use carnauba wax and the buffer for rusticated or sandblasted pipes but the blast of this old pipe had been worn quite smooth by handling and I thought that it would turn-out ok.
Upon seeing the stem of the Telford’s Canadian under the bright light of the photography station I was unhappy with the way it turned out. Given, it was far better than it was upon arrival.
Back to the workbench. I taped the shank of the pipe and redid the entire sanding sequence. This is probably never going to be a pipe put up for sale so I wasn’t sure why I was doing this. I guess my obsessive-compulsive disorder (OCD), which should be CDO so that the letters are in alphabetical/proper order, got the best of me. After the sanding sponges I micro-meshed the stem and failed to photograph that.
The stem was rewaxed and returned to the photo station. It was better but… I was done, this time.
If the goals of this restoration were to successfully repair a cracked bowl using brass pins and to find the provenance of the pipe, I was successful. Regarding the worn nature of the blast, the oxidation of a stem or the heavily and hotly smoked tobacco chamber, there was only so much restoration could do. Still the pipe turned out fairly well.The crack repair and the subsequent blending of the repair looks good. The fills and their retexturing also turned out well. The rebuilding of the stem is nice and comfortable. Its appearance is not what I would call good. I cannot figure out how brown oxidation is still showing. I layered at least three coats of black CA over that sanded vulcanite and the result remains brown in appearance. Well at least in normal room lighting it looks good. The final let down is the fact that the MADE IN LONDON, 296 and the E were lost during the restoration. These were all on the faint side to begin with and seemed to have been stamped onto the finish of the pipe rather than onto bare briar. Their loss still bothers me. The dimensions of this beat-up beauty are:
Length: 5.80 in./ 147.32 mm.
Weight: 1.12 oz./ 31.30 g.
Bowl Height: 1.70 in./ 48.01 mm.
Chamber Depth: 1.73 in./ 43.94 mm.
Chamber Diameter: 0.83 in./ 21.08 mm.
Outside Diameter: 1.35 in./ 34.29 mm.
I do hope that you have found something here useful to your own pipe care, maintenance or restorations. If you like this sort of thing, please click the like and subscribe buttons. Thank you for reading the ramblings of an old pipe lover.
Below are some photos of the finished Made in London Telford’s Canadian 296.
I had to take one photo of how the stem appears at a slight distance. It looks good.
As if Majestic wasn’t a good enough name they had to add the SUPER. That made me laugh when I first read the stampings. Here we have a delightful classic billiard pipe that has gained its turn at the workbench. The pipe was purchased as a single from a seller in Green Bay Wisconsin. I was attracted to it by the name and star inlay logo. I had seen neither and thought they looked intriguing. Besides, how can a guy say no to an attractive lass with good briar like this for under $15? The pipe was stamped SUPER (diagonally) Majestic (script) over SYSTEM V.D.. There was no country of manufacture (COM) leading me to think it was an American made product. The stem, as mentioned, had a silver-like 5 pointed star inlay. Below are some photos prior to working on the pipe:
The pipe showed signs of frequent use. There was a definite, though far from excessive cake in the bowl, the stinger had a coating of dried tarlac ( personal term combining tar with shellac). There were some minor tooth chatter dents on the stem and the strange banded oxidation. The oxidation pattern was perhaps due to the darker part being in a pipe rack and slightly protected from light. The stinger contraption was very unique, it looked as if it were machined by a prison inmate car engine fan wanting to make a stinger look like a crankshaft and be able to double as a shank (prison weapon). The final interesting part to note was that the shank had a cork insert acting as the mortise for the aluminum tenon. This struck me as a rather old fashioned connection of the stem and shaft.
Background
As you may expect there is not much information on Majestic pipes. Pipephil.eu led me to a couple deadends.
Catalog Listing similar to the EPC Majestic example
A. Pandevant & Roy Co. of Paris had its beginning in 1884 and disappeared with the commencement of WWII in the late 30s or early 40s. “E.P.C.”, “La Savoyarde”, “MAJESTIC”, “La Parisienne” and “E.P.” were registered trademarks of the company.
Now, let it be known that Dal Stanton is a wonderful restorer of old pipes. Though his skills are very impressive, one of the things that I admire most is his attention to detail when writing up the history of a pipe that he is working on. The above is a perfect example of his diligence. While I was reading about the restoration of the above pipe I came across his description of the mortise of his pipe: “What I see next surprises me. I see the briar shank ringing something else inserted into to the mortise. A lining of some sort. I discover then that it appears to be cork. Cork seats the horn tenon in the mortise much like cork seats the Meerschaum bowl on a Gourd Calabash. I have never seen this before, but it seems to work quite well. I will condition the cork with a little petroleum jelly later. The challenge becomes protecting the cork while I’m cleaning the rest of the stummel internals. I’m not sure that I want the cork saturated with alcohol – I’m not sure that will be the best thing.” (Discovering the History with the Reclamation of this Petite EPC Majestic Bent Horn Stem Billiard | rebornpipes) (italics added by me).
There it is the same cork insert that I am looking at with the Majestic which I am restoring. Coincidence? I think not. I believe that the Super Majestic Billiar is indeed an EPC Majestic produced prior to WWII in France.
I asked Dal Stanton to review this blog prior to publishing. He also saw the similarities that I did. He was unsure about the claim that my Majestic was an EPC product due to the differences in stem material, the star logo and the lack of the three hearts associated with the EPC stamping. He also recommended discussing the pipe with Steve Laug. I reached out to Steve, and sent him a link to this article as well. Steve also thought the link between the two Majestic pipes was reasonable. He commented, “I think you are right in connecting the two. There is a link. The fact that the bone insert is replaced with a metal can help to date it a bit. I am pretty sure that between WW1 and WW2 metal was used for the tenons in replacing the bone ones.” (Steve Laug, personal communication)
I think the Majestic Systeme V.D. Billiard is an EPC made pipe produced several years later than the Majestic pipe which Dal Stanton had restored. Perhaps the Systeme V.D. specimen was one of the latter pipes produced prior to WWII and the demise of the company.
The Restoration
The restoration began with a clean denim piece to protect the workbench
Due to the narrow bore of this pipe and the fact that I had broken my #1 blade of my PipNet, I relied on the Scotte Stainless Steel reamint tool.
The Scotte is more than adequate for the job and was aided by the Smokingpipes Low Country reaming knife and the General triangular scraper. The tobacco chamber was sanded with 220 sandpaper wrapped around a wood dowel.
The chamber was sanded to bare briar and no sign of heat damage was observed. Yes, the resident white German Shepherd is always living up to her better descriptor of German Shedder.
The rim had a respectable layer of lava on it.
This was moistened with saliva and scraped with a sharp pocket knife.
The stummel was taken to the sink where it received a scrubbing with undiluted Murphy Oil Soap and a medium stiff toothbrush. The soap was rinsed with warm water and the stummel dried with a cotton hand towel.
While waiting for the stummel to air dry, I began work on the stem. The sinter was firmly attached to the stem and would not budge. I wasn’t sure if it was just a push fit stinger or if it was threaded. Either way it was stuck. I submerged it in 95% ethyl alcohol for a soak.
While the stinger was soaking I examined the stummel. The briar was of good quality and no pits were observed. The scrubbing had removed most, though not all of the finish. Patches of shiny finish can be seen in the photos below.
Back to the stinger. I scrubbed the stinger with a brass brush frequently dipped in the ethyl alcohol. The shape of the stinker was even more amazing when cleaned. This was a serious piece of millwork.
I started to clean out the shank of the pipe. Attempting to be cautious around the cork insert. A dental scraper was used to clean the tar from the airway as well as a nylon shank brush, numerous cotton swabs and folded bristle pipe cleaners. Eventually the airway was cleaned.
While in the cleaning mode, I cleaned the airway of the stem. This only used bristle pipe cleaners and 95% ethyl alcohol. Oh yeah, I forgot. The stinger was threaded into the stem. I don’t know why I would have expected anything less after seeing the machine work used for its manufacture.
The stem was given a light hand buffing with 0000 steel wool to allow the Before and After Deoxidizer solution access to the oxidized vulcanite.
A pipe cleaner was inserted into the tenon and used as a hanger to suspend the sem into the solution.
This stem was fairly oxidized so I figured at least 2 hours would be needed perhaps overnight.
I returned attention to the stummel. I wiped the surface with a make-up pad wetted with 95% ethyl alcohol. I hoped that the finish was shellac which is soluble in alcohol.
The alcohol seemed to have worked but to be completely sure I wiped the stummel with a make-up pad wetted with acetone.
If a little acetone is good, more must be better. This removed the last of any finish remaining on the stummel.
The briar was nice in that it had no pits of outward flaws; it also did not have much in terms of grain. I thought that a contrast dye would add a bit of depth to the existing grain. I did not want to sand and risk reducing the stamps so I taped over them with painter tape. This should keep the majority of the dye from the stamps and allow me to touch-up dye them later.
The stummel was then lightly sanded with 400 and 600 grit sanding sponges with the white German Shepherd attachments.
I applied a coating of black Fiebing’s Leather Dye to the stummel with a folded pipe cleaner and flamed the wet dye burning off the alcohol solvent.
The pipe was then rinsed with 91% isopropyl alcohol over the sink.
The stummel was then wiped with a paper towel to remove the excess dye. Notice the areas where the tape had been. The briar there is much lighter colored than the surrounding wood.
The stummel was then sanded to remove the outer layer of black dyed briar. The dye penetrated the softer open grain of the briar more than the harder grain. When sanded the area where the dye penetrated deeply is darker than the area where the dye was more on the surface.
I returned attention to the stem. It was removed from the Before and After Deoxidizer and allowed to drip excess solution back into the container. This drip dry device is quite the remarkable feat of engineering, eh?
After the stem drip dried for a few minutes I wiped any remaining solution off with a coarse shop rag. Two pipe cleaners were also run through the airway to clear it of solution as well.
The stem was lightly sanded with a 400 grit sanding sponge.
The stem was then scrubbed with SoftScrub cleanser on make-up pads to remove the oxidized rubber.
To try something different I decided to take the pipe to the buffer and buff the entire pipe with rouge buffing compound. I had seen restorers use the buffer to remove the outer layer of dyed wood. I had tried it in the past and never felt comfortable with the technique. I thought, practice and trying new things is good, right? Below you can see the results.
I liked the way the briar looked but I was not happy with the stem. That would need the old fashioned sanding sponges and micro-mesh pads. Another thing I noticed when buffing the pipe was that the stem was too loose. I thought about ways to refresh the cork. I read how Dal Stanton used petroleum jelly. I thought to myself, wood swells with moisture. Why not try steaming the cork? I put the kettle on and it soon started its annoying whistle. The exiting steam was allowed to flow into the shank. It flowed right through the shank out the tobacco chamber and onto my hand. Hmm, maybe a glove would have been a good idea. The steam worked very nicely at swelling the cork and a the stem was a perfect tight fit afterwards.
The buffing did not produce the finish that I thought this pipe was worthy of. I returned to doin things the way I was used to doing them. The stem was sanded with a sequence of sanding sponges from 400-3500 grit. Between each sponge I dipped my finger tip into mineral oil, rubbed this onto the stem and wiped the stem off with a clean dry paper towel.
I then used the 4000-12000 micro-mesh pads to polish the stem. This time I used a drop of Obsidian Oil between sponges, rubbed in and wiped off with a paper towel.
The stem was then further polished with Before and After Fine Polish on a soft cotton rag.
The Before and After Extra Fine Polish was used with the same cotton cloth.
The entire pipe was given a coating of Before and After Restoration Balm and allowed to sit for 30 minutes to ensure the Balm had enough time to work it’s magic.
The pipe was then wiped, cleaning off the Restoration Balm with an inside out athletic sock.
It was then taken back to the buffer to receive several coats of carnauba wax.
This Majestic turned out quite nicely. It is of a darker finish than I usually strive for but I think it works well with the classic elegant lines of this billiard. The silver tone star inlay on the stem also accentuates a darker finish and looks great surrounded by the glossy black vulcanite. I am not sure how I feel about using the buffer with red polishing compound rather than sanding to achieve a smooth finish. I mean it looks good but still it feels like cheating somehow. Either way, this pipe will make a fine smoker for its next companion. Te dimensions of the Super Majestic are:
Length: 5.98 in./ 151.89 mm.
Weight: 1.00 oz./ 28.40g.
Bowl Height: 1.72 in./ 43.69 mm.
Chamber Depth: 1.42in./ 36.07 mm.
Chamber Diameter: 0.74 in./ 18.80 mm.
Outside Diameter: 1.30 in./ 33.02 mm.
I do hope that you have found something here useful to your own pipe care, maintenance or restorations. If you like this sort of thing, please click the like and subscribe buttons. Thank you for reading the ramblings of an old pipe lover.
PS: If you know anything about the brand or the meaning behind the “V.D. stamping, please leave a comment. Thank you.
Below are some photos of the finished Super Majestic Billiard.
I just can’t stop myself from working on those darn 1940s pipes. This little gem is one of those World War II Mediterranean briar substitutes. Kind of like a substitute teacher, they try but just are not the same as the regular version. I’ll get to more detail on that in the Background section, below. I have restored a handful of Trapwell pipes over the years
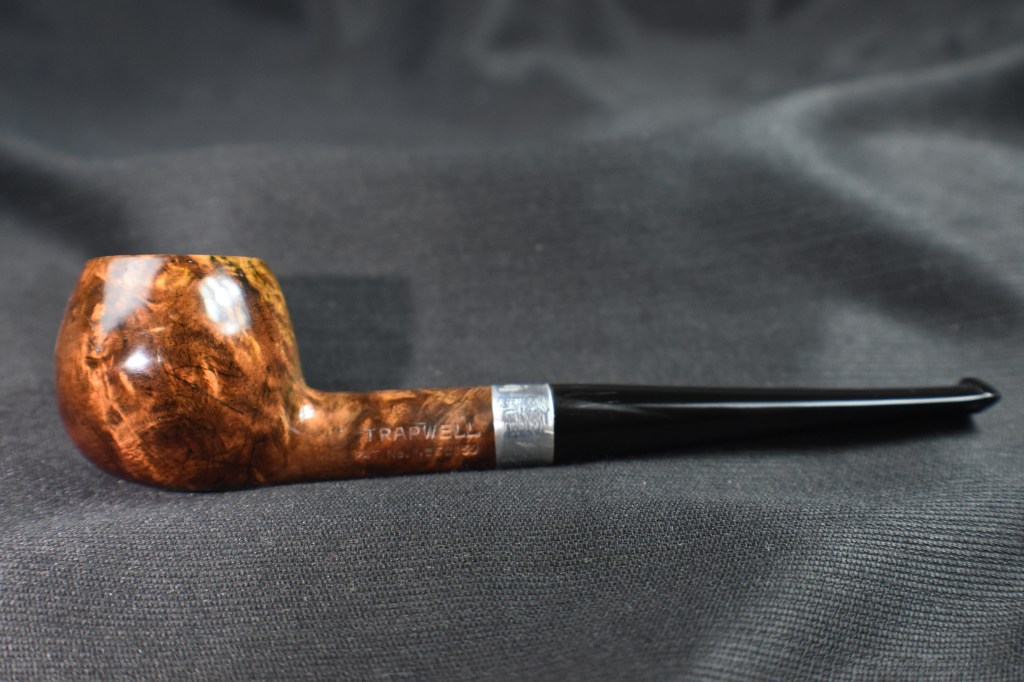
and found them to be exceptional smokers. They all share the same system for cooling the smoke and condensing out steam. It is this system that makes them good smokers but also a bit troublesome to clean. The subject of this blog is a large apple that has seen some tough handling. The pipe was purchased through eBay and was not part of an estate lot, just a single pipe. After a journey from Union Dale, Pennsylvania to the wilds of southeast Nebraska the old girl arrived. Below are some photos of this Trapwell as she appeared prior to any work.
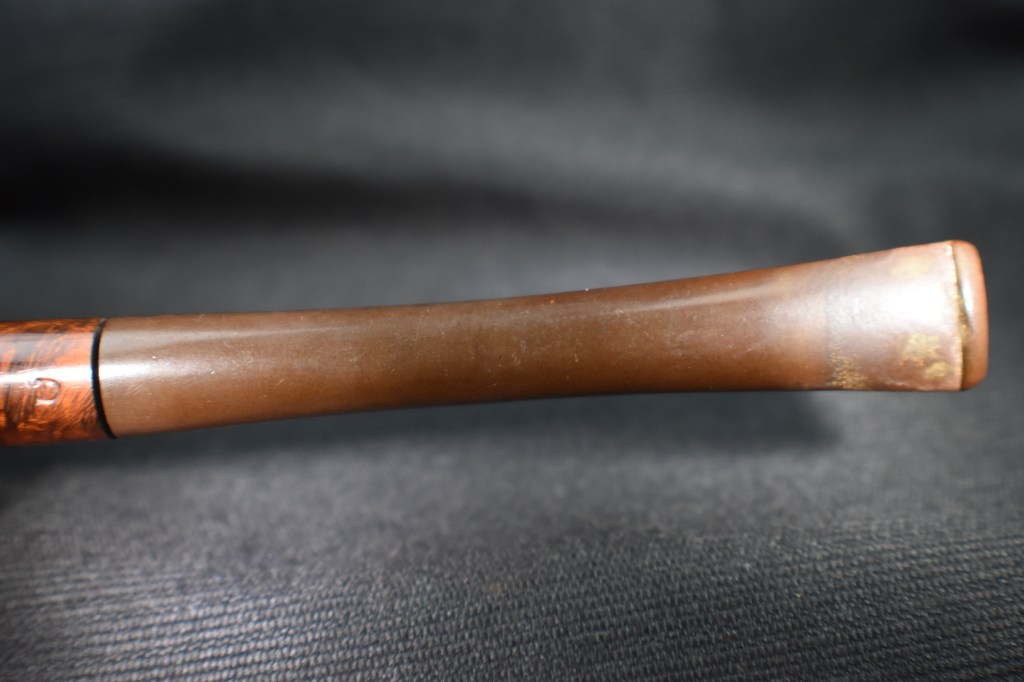
I am not all that familiar with pipe care practices in different parts of the country. Apparently in Pennsylvania, pipes are frequently placed into cages with hyperactive irate badgers. I could be wrong on this but it would explain the numerous gouges, scratches, dings, dents and other surface scars that the Trapwell had. There were also signs that the pipe was smoked in between badger treatments and perhaps tumble drying sessions with the previous owner’s rock collection. There was a definite lava accumulation on the rim and some caking within the tobacco chamber. The stem and band had marks along their length that indicated that the badgers of Pennsylvania have acquired the use of pliers. These tool marks indicated to me that the stem was probably quite stuck in the shank (It was). The stem also had a bit of tooth chatter which would have to be repaired. Overall, it looked like a fairly straight forward restoration (It wasn’t).
Background
To have an understanding of Trapwell, we have to look into their origin story. No, there are no radioactive spiders but it is still a good story. “Henry Leonard & Thomas, Inc. (HLT) was founded in Ozone Park, Queens, New York by Henry J. Lavietes and two partners on May 31, 1938. The company patented a stem design for pipes and cigarette holders designed by Henry on March 9, 1943. Henry was the son of David Lavietes, who moved to Sparta, North Carolina in the early 1940s to purchase laurel and rhododendron burl to ship back to his son and HLT. Lavietes decided to stay in Sparta and founded the D&P Pipe Works with his other son Paul, originally as a 15 person operation. David Lavietes was the inventor of the Ajustomatic feature incorporated into Dr. Grabow pipes even today.
In 1944, the trademark for the Royalton filter well was granted to HLT. Soon after, however, Henry Lavietes closed the New York operation with little warning and moved the entire production to Sparta, North Carolina. At this time in addition to the Royalton line, HLT was making many other lines of pipes.
In 1953, HLT acquired all assets and equipment of the Dr. Grabow company of Chicago, Illinois, and began production of Grabow and Hollycourt pipes. At the same time, they acquired the Continental Briar Company, owner of the Royal Duke, Duke of Dundee, and Honeydew pipe brands still evident in the common use of the word “Duke” to name Grabow pipes.
On October 21, 1969, United States Tobacco company, owners of the Mastercraft brand, announced that it had acquired HLT. It still ran as a separate company until 1985, however, when Sparta Pipes, Mastercraft and HLT were merged into Sparta Industries, Inc.
While, even after this time, the HLT brand was sold to Lane, and later, in 2006 to International Pipes & Assessories, the current owners, IPAL continues to make and sell the Royalton pipe with the original HLT logo as part of the Grabow line.” (Henry Leonard & Thomas Inc. – Pipedia) (Italics are mine)
So we have David Levietas and son, Paul, setting up a North American briar harvesting venture in North Carolina. All of this due to the Nazis waging war on Europe and shutting down exportation of the pipemans’ favorite wood – briar. That dynamic duo was D&P Pipeworks.
“Trapwell pipes marked with “World’s best briar” are made of Mountain Laurel (Kalmia latifolia) a species from the Ericaceae family.
The brand was made by D & P Pipe Works, owned by D. P. Levitas and located in Sparta, Alleghany County, North Carolina close to the population of Mountain Laurel in the area. Later, this company changed its name to Sparta Pipe Works and still later to Sparta Industries.
There were at least three pipe brands made from the Mountain Laurel: Trapwell, Breezewood and Custombilt.” (Trapwell – Pipedia)
David Levietas, as previously mentioned was the inventor of the “Ajustomatic”. He also was the inventor of the Trapwell system. The below diagram from the original US patent 2,262,159 was screenshot from the PDF. This PDF can be found here: US2262159A – Smoker’s pipe – Google Patents for those interested in the original.
It is this feature that makes the Trapwell pipe what it is – a fine smoking tool.
The Restoration
This restoration began with me attempting to unscrew the stem from the shank of the pipe. This unscrewing actually removed the aluminum mortise from the shank. This was not an intended part of David Levietas’ design. From the photos above you can see the following images:
The photo on the right is what is supposed to happen when unscrewing the stem. Using a pliers with the jaws wrapped in painters tape, as to not mar the stem nor aluminum, I was able to unscrew the two aluminum threaded parts. I would have to reinsert and glue the mortise section back into the shank. This comes later in the restoration.
I set out cleaning the threads of the tenon by soaking the threads in 95% ethyl alcohol. The threads were then scrubbed with a brass brush dipped in the alcohol. This cleaned any residual tars and removed most of the oxidized aluminum.
The shank piece of aluminum was larger and required a larger medicine cup for soaking. It also required more alcohol. I opted to use 91% isopropyl alcohol for this larger amount. Yeah, I’m cheap. Isopropyl is far less expensive than ethyl. That extra carbon and two hydrogens of the isopropyl must reduce both the effectiveness of it as a solvent and the cost. It still worked to clean the aluminum along with cotton swabs and bristle pipe cleaners.
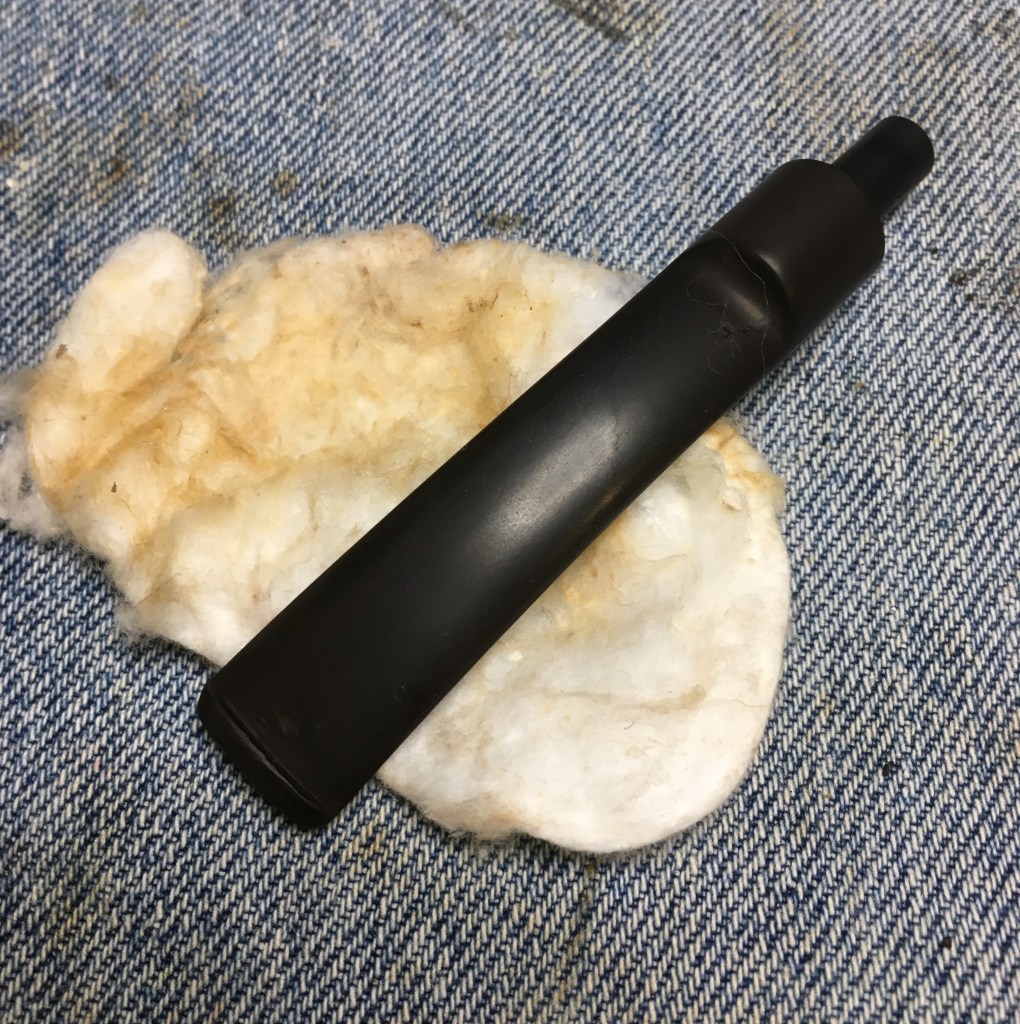
The stem was cleaned out with 95% ethyl alcohol and bristle pipe cleaners.
With the insides clean it was time to address the exterior. I lightly sanded the stem with a 320 and 400 sanding sponge. I then painted the tooth chatter with a lighter in hopes of raising the dents.
The sanding and flame painting helped with the tooth chatter but were unable to do much to the pliers scars. These would require filling with black cyanoacrylate (CA, super glue).
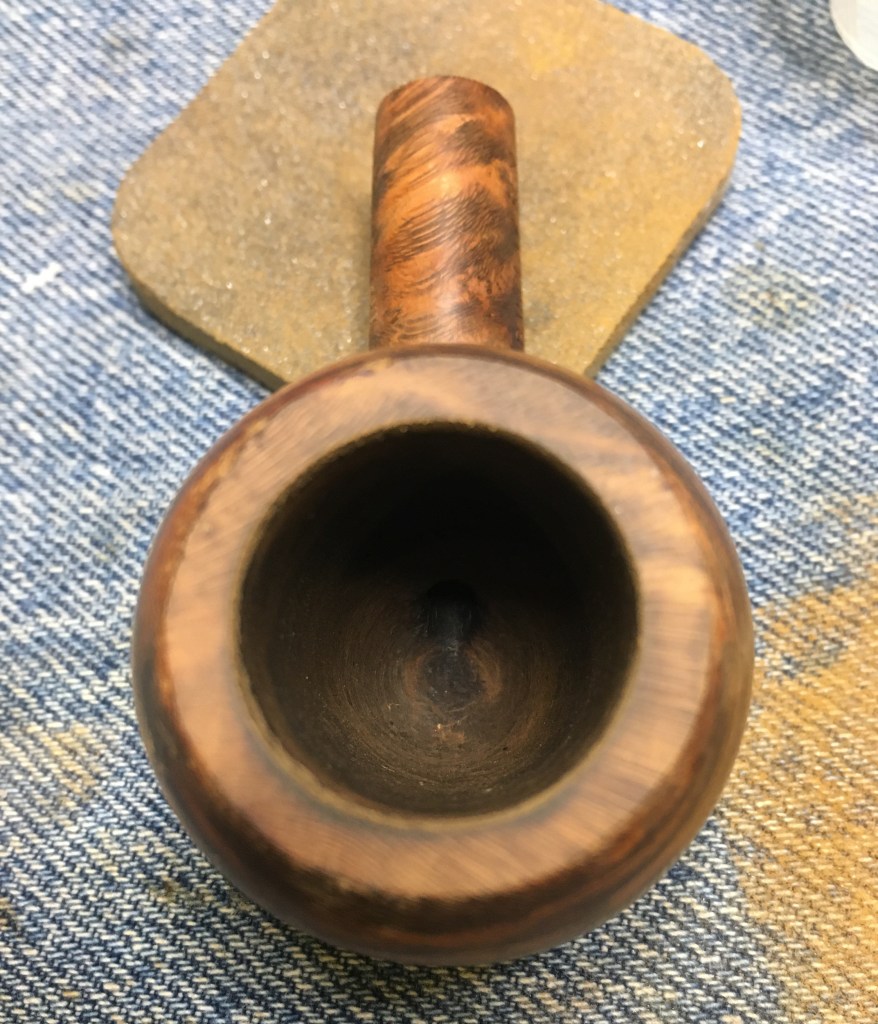
I switched tasks to the stummel. Yeah, ADHD isn’t just for kids. I gathered the reaming tools and started working on the tobacco chamber. This was a relatively narrow chamber and would not fit my PipNet Reaming tool since I had broken the smallest size blades for it. The Scotte Stainless Steel reamer would suffice.
Looking down into the chamber I couldn’t see any damage from heat. It still needed additional scraping and sanding but still the Mountain Laurel appeared to be heat resistant. Not the badger claw marks through the lava.
Next the stummel was taken to the sink. Here it was scrubbed with undiluted Murphy Oil Soap and a medium toothbrush. The soap was rinsed with warm water and then the stummel was dried with a cotton hand towel.
Back at the workbench you can see the grain of the Mountain Laurel. It is different from briar and lacks the bird’s eyes. I can’t say that it is unattractive, just different.
I wiped the surface with a make-up pad dipped in 95% ethyl alcohol to remove any wax and or finish from the stummel. I got some color on the pad. It looked more like a stain than a finish.
The stummel was then sanded with a 320 and a 400 grit sanding sponge.
The rim needed topping to address the dents and dings on the surface. This was done with a piece of 320 sandpaper laid flat on a countertop. I used a circular pattern with rotations of the stummel in my hand every 3-4 circles. This process was repeated with 400 grit sandpaper.
In preparation of a contrast dye, I taped the stamps to keep them from being as heavily dyed as the stummel. The tape was cut in irregular patterns to avoid the blocky appearance when finished.
I planned to use a mixture of ⅓ black to ⅔ dark brown Fiebing’s Leather Dye.
The dye was measured out with a disposable pipette and mixed in a medicine cup. It was then applied to the stummel using a bent pipe cleaner as an applicator. The wet dye was flamed with a lighter to burn off the alcohol solvent of the dye.
The stummel was then rinsed with 91% isopropyl alcohol over the sink.
Excess dye was wiped from the stummel with a paper towel. The protective tape also came off during the wiping but it had done its job.
Back at the workbench the stummel was wiped with a couple of make-up pads dipped in 95% ethyl alcohol. I was not sure how the Mountain Laurel would take the dye as I had never dyed Mountain Laurel before. The softer portions of the wood absorbed the dye very well while the harder grain seemed to repel the dye to some extent. This looked to give the wood a very interesting pattern.
I then tried to sand off the outermost black dyed layer of wood. It was here that I realized how woefully inadequate my previous sanding had been. The badger claw marks were everywhere. Stupid badger.
After thinking about how to deal with the scratches and dents for what seemed like hours, I thought, “try steaming them out”. I plugged in the iron, set it to high, wetted a washcloth and donned a left glove. I wrapped the washcloth around the stummel and proceeded to roll it over the hot iron. I would have taken pictures of this process had I more than the two hands.
The results of the steaming were better but still required far more sanding. And yes, it’s a kevlar glove, I clean fish down at this sink on occasion.
Okay, back to sanding. Lots of sanding. And then some more sanding.
Finally I was wondering if I had done so much sanding that the contrast dye had been completely removed. Out of curiosity I grabbed the Before and After Restoration Balm and gave the stummel a coating. I waited 15 minutes for the balm to do what it does – magic. Many of the dents and scratches seemed to have disappeared.
There were a couple of dents that were too much for even the wonders of Restoration Balm. These would have to be filled with brown CA and briar dust. Now that I write that I realize I should have used Mountain Laurel dust. I certainly had enough.
The new fills were filed with a flat needle file then smoothed with 400 sandpaper.
I must have left stummel mode and entered CA fill mode. I started filling the tooling and tooth dents on the stem. Here I used black CA and spritzed it with a CA drying accelerator.
These areas were again filed flat with a flat needle file then smoothed using a 400 grit sanding sponge.
For a final finish I applied a light top coat of thin clear CA. This CA flows more easily and filled any small depressions that remained. Once cured the areas were filed and sanded as above.
The wood of the shank was taped with painters tape and the stem was sanded using a series of sanding sponges from 400-1500. Between each sponge I dabbed mineral oil onto the stem, rubbed it in with my fingertip and wiped the stem with a paper towel.
The above was repeated with the 2000-3500 sanding sponges.
The stummel got new tape over the stamps. Then was sanded sith the sanding sponges 1000-3500. Between sponges I wiped the wood with a make-up pad moistened with alcohol.
The tape was removed and the adhesive wiped off with alcohol. The pipe was then polished with the micro-mesh pads 4000-12000. The stummel was wiped with alcohol on a make-up pad between pads. The stem received a drop of Obsidian Oil, rubbed onto the vulcanite and a wipe with a dry paper towel.
Once finished with the micro-meshing I pulled the aluminum shank insert out. Cleaned the hole and the aluminum with a cotton swab dipped in alcohol then applied a light coat of white all purpose glue to the toothed end of the aluminum and reinserted it into the shank. I adjusted the bit while the glue was wet. The joint where the two pieces meet was wiped with a paper towel and a bit of alcohol. The pipe was then taken to the buffer for several coats of carnauba wax.
This Trapwell Apple turned out far better than I thought it would. During the restoration I still had my doubts as to how it would look finished. It is truly a stunning pipe. Some of the scratches are still evident but the Mountain Laurel nearly has a glow to it. In sunlight it is remarkable. The contrast dye did far better than I hoped it would, even after all my post-dye sanding. The stem polished up nicely as well. There remain some deep scratches in the aluminum but removing them would probably alter the straight smooth shank to stem junction. Overall I am very pleased at how this pipe turned out. The dimensions of this beauty are:
Length: 6.11 in./ 155.19 mm.
Weight: 1.34 oz./ 38.00g.
Bowl Height: 1.47 in./ 37.34 mm.
Chamber Depth: 1.26 in./ 32.00 mm.
Chamber Diameter: 0.68 in./ 17.27 mm.
Outside Diameter: 1.56 in./ 39.62 mm.
I do hope that you have found something here useful to your own pipe care, maintenance or restorations. If you like this sort of thing, please click the like and subscribe buttons. Thank you for reading the ramblings of an old pipe lover.
Below are some photos of the finished Trapwell Large Apple.
I am a sucker for a Dublin shaped pipe and I love the look of a forward canted bowl. These two features are present with the above The Sterling Pipe. I had never heard of the Brand but the briar looked like it was pretty good quality. The stampings on the pipe read, THE over STERLING over PIPE in an almost bubble-like block font. The logo looked like a cursive L or S, I assumed an S. Handwriting was never a strong point of mine. On the right side the shank is stamped AN EXCLUSIVE IMPORT over ENGLAND with 530 offset further towards the bowl. Only the 530, I assume shape number, is definite. The other stamps are all light and I feared that they would be hard to preserve intact. Below are some photos of how The Sterling Pipe appeared prior to work.
The terms; dirty, dinged, oxidized and pitted all came to mind. Yet with all the work needing to be done the “coolness” of the shape shined through and held promise. And the fact that the briar grain was pretty darn interesting too.
Background
An internet search of “The Sterling Pipe” only produced one result of note. A mention of a The Sterling Pipe” from an earlier auction:
I then tried the big English makers searching to match the shape number to a known maker’s shape. Again no luck with Charatan, Comoy’s, GBD, Lorenz,e Rossi etc… Next I tried the “Phone a friend” approach. Well, actually it was a message a friend. I reached out to Steve Laug via Facebook private messenger, showed him a few photos and asked what he thought. He replied quickly with the following “According to Who Made that Pipe The Sterling was made by Comoy’s for export” (personal communication). “Who Made That Pipe” refers to the book:
With that piece of the puzzle solved I proceeded on with the project.
The Restoration
Starting with a clean denim piece as a work surface I began work. The reaming was the starting point with this pipe even though I knew that the stem would require more work than the briar.
The reaming tools were assembled.
The reaming went very quickly. I find it interesting how different pipes take to the reaming. In my experience softer briar reams far more easily than harder briar. My favorite pipes to clean are the old Marxman Algerian briars. There is something about that briar that almost seems like the briar sloughs off the cake with a little pressure. This pipe did the same.
The tobacco chamber was sanded with 220 sandpaper on a wooden dowel to bare briar and an inspection of the chamber revealed no damage to the chamber walls.
The airway of the pipe was very constricted and I could barely draw air through the pipe. I used the long drill bit-like tool from the Scotte Stainless Steel reaming tool to hand drill the airway clean.
With the airway open I took the stummel to the sink. Here it was scrubbed with undiluted Murphy Oil Soap and a medium toothbrush. The soap was rinsed with warm water and the stummel dried with a cotton hand towel.
Back at the workbench I got a much better look at the numerous pits and their old fills. I took out the dental picks and tried excavating the old fill material. It was very hard, nearly rock-like. The fine sharp points of the picks would not penetrate the fill material.
I thought, maybe a bit of 95% ethyl alcohol would soften the fill and sell as remove any remaining wax and or finish. The alcohol dipped make-up pad did show some color as it removed something from the briar.
I had no more success with the dental picks after the alcohol. I tried using a sharp tipped round needle file, hoping the harder and more stiff steel of the file would be more effective against the fills. Success.
The newly opened pits were filled with brown cyanoacrylate (CA, super glue) and briar dust. These were filed with a flat needle file and smoothed with 32 then 400 sanding sponges. This did leave several dark fill spots over the surface of the stummel. More on this later.
The rim of The Sterling Pipe had damage from knocking against things other than a palm of cork ashtray knockers. I think the previous owner preferred to knock out a dottle on pieces of broken concrete or lava rocks. To each their own…
I topped the rim using 220 sand paper laid flat on the countertop. A circular motion where I rotated the stummel in my hand was used to evenly sand the rim. Once topped to remove most of the dings I used a 1 ½ in round polyvinyl chloride (PVC) pipe cap wrapped with 220 sandpaper to give the inner rim it’s bevel.
The worst of the dings were still present. To these I applied a bead of brown CA and pressed the rim into a flat bottomed container of briar dust. This pressed the dust into the CA wetted depressions. The rim was then topped using 400 sandpaper to smooth the new rim fills. I unfortunately did not photograph this step, apologies.
I turned my attention to the stem. It was lightly sanded with a 400 grit sanding sponge to remove the outermost oxidation. Then the stem was placed into a solution of OxyClean and water. It soaked in the Oxy for 2 hours.
Below you can kind of see the brownish clouds of oxidized rubber on both sides of the stem.
Upon removal the stem looks quite brown.
Rubbing the stem with a clean dry make-up pad removed a good deal of oxidized rubber.
The stem then got a pipe cleaner run through the airway to remove Oxy solution and was scrubbed with SoftScrub on make-up pads.
The stem was shedding oxidized rubber but looked little different after each pad. The oxidation was worse than I had originally thought. I decided to give the stem an overnight bath in Before and After Extra Strength Deoxidizer. A pipe cleaner was inserted into the stem to be used as a suspension hook.
This allowed me to hang the stem suspending it in the solution.
I had decided that I was going to give this stummel a black dye base coat and try to achieve a contrast stain look. This would allow all those darker spots from the numerous fills to me slightly hidden and give the grain some added contrast. I did not want the rim to share in this contrast. I had used Vallejo Liquid Mask on a previous project to keep areas free from dye and thought this would be a perfect place to work on my technique with the product.
The mask is a relatively thick liquid that goes on blue-green and dries more clear. One dry it can be peeled off. I applied a coating of the Liquid Mask with a cotton swab. The mask was allowed to dry overnight.
The next day, I removed the stem from the Deoxidizer solution and let it drip off excess solution.
The stem was wiped with a coarse shop rag and a couple of pipe cleaners were run through the airway to remove any remaining solution.
The stem was returned to the workbench and scrubbed with numerous make-up pads with SoftScrub on them. Eventually the stem looked free of oxidation.
Next came the repair of the tooth chatter and hole in the stem. I used black CA for this. A plastic dam was used to stop the CA from penetrating the airway. This is just a piece of a plastic lid cut into a triangle. I wrapped scotch tape around the triangle until it was a tight fit into the airway.
Black CA was then applied to the button edge and the area where the hole was. I find that it is better to use several thin coats as compared to a single thick coat of CA when building up material in an area to be reconstructed.
The filled area was then spritzed with a CA drying accelerator. Photos of the product used are further below.
The new fill was then filed with a flat needle file and smoothed with a 320 grit sanding sponge.
As the fill progressed I applied the black CA to a wider area to allow for a more smooth blending of the flll.
Below is how the fill was progressing and what it looked like with further filing. It was eventually smoothed with 320 and 400 sanding sponges and the button was reshaped.
With the stem reconstruction completed I turned to dying the stummel with black Fiebing’s Leather Dye. The needed kit was gathered; a folded pipe cleaner as the applicator, a disposable lighter for flaming the dye and the duct tape wrapped fishing bobber for a handle and plug eeping dye from the tobacco chamber. Also notice the taped stamps. I did not want to have to sand the black dye from the stamps and further degrade the already faint stamping. I hoped the tape would keep most of the dye from the stamps.
The dye was applied to the briar and flamed with the lighter. This burns off the alcohol solvent of the dye and fixes the dye to the briar.
The tape was removed.
The stummel was then rinsed with 91% Isopropyl alcohol. Why Isopropyl? Because that is what was sitting next to the sink.
The stummel was then wiped with make-up pads dipped in 95% ethyl alcohol to remove excess dye. I must have grabbed a make-up pad from by the sink that had a spot of red dye on it. There was no red dye used for the contrast staining.
The Vallejo Liquid Mask was peeled off the rim. Only a slight seeping or bits where I didn’t apply it well enough remained undyed.
The black dyed stummel was then sanded with 320-600 grit sanding sponges to remove the outermost black dyed briar. This left the softer grained, more deeply black penetrated, wood black and removed the harder grained briar where the black had only slightly penetrated.
The stamps and loge were taped again with painters tape to protect them during the next sanding of the entire pipe. Sanding continued with the series of sponges from 320-3500. Between each sponge I wiped the stummel with an alcohol moistened make-up pad. The stem was rubbed with a dab of mineral oil on my fingertip and wiped with a paper towel.
The stem and stummel then were worked on with the 4000-12000 micro-mesh pads. The wiping between each pad was as with the sponges except I used Obsidian Oil rather than mineral oil on the stem.
The pipe was given a coating of Before and After Restoration Balm and allowed to sit for 30 minutes.
The balm was wiped off with an inside out athletic sock with extra white German Shepherd hair. These dogs are also known as German Shedders by people who share homes with them.
The logo was repainted with Silver Leaf Rub’nBuff.
The pipe was then given several coats of carnauba wax with the buffer.
There you have it. A real beauty, The Sterling Pipe 530 Canted Dublin restoration. I am very happy with how well this one turned out and not just because I find the shape so intriguing. The pipe cleaned up nicely. The Contrast dye did what I wanted it to do – bring out the grain a bit more and conceal the fill spots. The stem polished up better than I thought it would after seeing how deep the oxidation had gone into the vulcanite. I was afraid that the stamping would be lost completely. They do remain but are so faint that they are hard to read without bright light and magnification. I am sure it will be a great little pipe for someone to enjoy for years to come. The dimensions of the The Sterling Pipe 530 Canted Dublin are:
Length: 5.67 in./ 144.02 mm.
Weight: 0.97 oz./ 27.5 g.
Bowl Height: 1.66 in./ 42.16 mm.
Chamber Depth: 1.22 in./ 30.99 mm.
Chamber Diameter: 0.80 in./ 20.32 mm. (conically bored)
Outside Diameter: 1.35 in./ 34.29 mm.
I do hope that you have found something here useful to your own pipe care, maintenance or restorations. If you like this sort of thing, please click the like and subscribe buttons. Thank you for reading the ramblings of an old pipe lover.
Below are some photos of the finished The Sterling Pipe 530 Canted Dublin.
I have to admit that I had no idea that Barclay Rex was a high end members only pipe shop. Actually I had never heard of a pipe shop where you could only access the premises via a membership. Although the old American Express ads where they said “Membership has its privileges”,’ now means a lot more to me. The below is from Barclays (https://www.barclayrex.com/rex-club)
I guess the good news is that you can redeem your quarterly dues for baccy and drinks. I do wonder what an accessory is. I would ask but the answer would probably come with another fee. Dang, I am glad I live in Nebraska and far removed from such things.
Back to the topic at hand, this lovely Barclay Rex 357. I’m not sure what shape to call it and cannot find anything on Barclay Rex shapes online. It is shaped similar to prince but with a straight stem the bowl is very apple shaped but slightly squashed. The pipe was part of the estate lot that contained the Peterson Red Premier Meerschaum 406 Prince which was blogged about a couple of weeks ago. I linked it if you are interested in that one. The lot came from Hollywood, Florida. This Barclay Rex 357 wears the following stamps: BARCLAY REX on the left and LONDON, ENGLAND over 357 on the right. On the bottom towards the stem there is a D stamped on the shank. Here are some photos of the Barclay Rex upon arrival.
There you can see the D stamp on the bottom of the shank.
Overall the pipe looked to be in very good shape. The stem was badly oxidized but it was oxidized evenly and there was no severe tooth chatter. The stain was brilliant and I wanted to keep that as original as possible. The briar had what appeared to be a clear coat of some kind, which had to go. The stampings were clear and defined. Yes, there was a lava deposit on the rim and some tobacco leaves in the bowl but the tobacco chamber was pretty clean. This looked to be a non taxing relaxing restoration.
Background
As previously mentioned Barclay Rex is a pipe shop in New York City. I will let Barclay’s speak for themselves, the following is from their website..
“REX THE FAITHFUL GREAT DANE
In 1910, Vincent Nastri, a pipe maker from Salerno, Italy, expanded his reach into the world of tobacco. A century later his vision is kept alive as Barclay Rex, a premiere Wall Street retail store. Originally nestled between Barclay and Church Streets, the store also borrowed inspiration from Nastri’s faithful Great Dane, called Rex, which led to the name Barclay Rex. In 1949, Barclay Rex moved to Maiden Lane, under the careful watch of Vincent Nastri and Vincent Nastri II.
For more than a half-century, father and son crafted pipes and expanded into other tobacco products. The torch would be handed down again as Vincent Nastri III stepped into the world that he had grown up in. At the turn of the millennium, Barclay Rex moved to a new location at 75 Broad Street, where it remained for 15 years.” (https://www.barclayrex.com/history)
Pipedia has an entry concerning Bracla’s as well. That article says this:
“Barclay-Rex, a downtown Manhattan tobacconist, was founded in 1910 by Vincent Nastri, a pipemaker from Salerno, Italy. The store was originally located at Barclay and Church Street, and the name was taken from that location and Nastri’s beloved Great Dane, Rex. The business is still run by Vincent Nastri, III and owned by Vincent Nastri, Jr.. They have several locations in New York City. The store has carried pipes from all fine makers, and the Barclay-Rex line of pipes is also much sought after, in that pipes were made in a range from the very inexpensive into the several hundreds of dollars. The pipes were, at least into the 1960’s, made of Algerian briar.
In addition to pipes made by Mr. Nastri over the years, Mr. Nastri, III, has been quoted as stating that a pipemaker just leaving Dunhill made pipes with a small off-white dot on the stem for a time for the shop. As was discovered by Steve Laug of Reborn Pipes, they were evidently made by a pipemaker whose initials were HGP, and stamped on the pipe as such. These pipes were made for a single run only, and then never made again.
While purportedly the initials of a pipe maker under the employ of Barclay-Rex, the initials “HGP” also appear in advertising for the Barclay Pipe Shop as early as 1920; the “HGP” initials evidently formed part of a trademark (see advertising below; The Pauw Wow, St. Peter’s College NJ 1935-left, and The Nation 1921-right) that was featured on pipes and (perhaps later) tobacco. If one accepts that Dunhill began manufacturing its pipes in earnest “from start to finish” in 1920, a year by which the “HGP” trademark was already in use by the Barclay Pipe shop, the likelihood of “HGP” signifying the initials of a pipemaker formerly in the employ of Dunhill diminishes considerably.
In addition, Sasieni at least for a time made private label pipes stamped with the Barclay-Rex name, but with their own shapes and shape numbers.” (Barclay Rex – Pipedia)
What can be gleaned from this? Well, I surmise that Barclay Rex did make pipes at one point. They are also known to outsource the pipe making to other companies and stamp their name on other makers’ pipes. This was a common practice for retail pipe merchants. Sasieni was a known supplier. Sasieni doesn’t produce a shape 357. What about other large English pipe manufacturers? Comoy’s do produce a 359 which is,
GBD does produce a shape 357 and according to their shape chart,
It fits the pipe very well. The only discrepancy is the ⅛ bend to the stem. This most likely straightened with age and/or with heat (GBD Shapes/Numbers – Pipedia). I will therefore be referring to this pipe as the Barclay 357 Prince from here on. Judging by the oxidation on the stem I can say that this pipe has likely been exposed to years of light, heat and well, years. It did come from Florida after all and was part of an estate cadre that included the previously mentioned Peterson meerschaum pipe which was dated with pretty good certainty to the late 1970-early 1980s. I think this pipe is also of that era.
The restoration
As usual this pipe received a clean denim piece. Or, I should say, “The workbench received a clean denim piece” to protect it from the carelessness of the narrator.
The oxidation on the stem was job one. I started by buffing it with 0000 steel wool.
The stem stem was placed into a bath with OxyClean and water.
The reaming tools were gathered.
The PipNet did most of the work with this job. I only had to employ the scrapers near the end. The tobacco chamber was sanded with 220 sandpaper wrapped around a wood dowel. The bare briar showed no signs of any heat damage.
The rim had a relatively thick layer of lava.
This was moistened with saliva and carefully scraped off with a sharp pocket knife.
The stummel then made its way to the sink. Here it was scrubbed with undiluted Murphy Oil Soap and a medium stiff toothbrush.
The Murphy scrub seemed to have removed what I thought was a clear coat finish. Hmm, water soluble finish? I highly doubted that but was happy to see the unfinished briar.
The rim cleaned up nicely as well with the scrubbing.
The stummel was then wiped with a make-up pad dipped in 95% ethyl alcohol to make sure that there was no finish nor wax remaining. There was some color on the pad. This was mostly due to remnant tars on the rim.
The shank airway was cleaned next. This was done with numerous bristol pipe cleaners, cotton swabs and several ml of ethyl alcohol.
The airway still had the scent of old tar and smoking residue. I decided to give the stummel an alcohol treatment by packing the bowl and shank with cotton, filling them with 95% ethyl alcohol and letting them sit overnight.
The cotton was saturated using a disposable pipette while positioning the stummel so the rim and the shank were at the same relative level
The stem was retrieved from the OxyClean bath. The color of the vulcanite was different than I was used to, more of a flat gray.
I started vigorously rubbing the stem with a make-up pad. A surprising amount of oxidized rubber came off the stem. This was just with a dry make-up pad.
I cleaned the stem with bristle pipe cleaners and more ethyl alcohol then lightly sanded the stem with a 400 grit sanding sponge. You can see where I wiped the dust from the sponge on the denim in the photo below.
The stem still showed a great deal of discoloration from oxidized rubber after the sanding. I thought that an overnight dip in the Before and After Deoxidizer solution was in order. I pushed a pipe cleaner into the tenon end of the stem as a hanger and submerged the stem into the solution.
Overnight unturned into 24 hours due to the birthday party for my youngest granddaughter. Happy birthday, Lael. The next evening the alcohol had mostly evaporated, drawing the tars from the briar and depositing them in the cotton.
The cotton was removed from the bowl and shank.
Upon drying out I could no longer smell the scent of old tar and smoking residue. I could see rim damage from about the 10:00-12:30 position on the photo below. This would have to be addressed with a light reshaping with sandpaper and topping the rim.
It is difficult to see in the photos but the outer edge was sanded around the rin and the rim topped using 320 sandpaper, sponges and the topping board (AKA sandpaper laid flat on the counter). Further sanding was done by repeating this with 400 grit.
The stamps were taped with painters tape for their protection. I like to use irregular cuts on the tape to avoid the boxy look that can sometimes result from rectangular pieces of tape.
The stem was lifted from the solution and allowed to drip the excess solution back into it’s jar. The high tech deoxidizer drip device was used for this process – patent pending.
The stem was then vigorously rubbed with a coarse cotton shop rag. The rough cotton helps to abrade some of the oxidized bubber as it absorbs the remaining solution.
After wiping away the solution and running a couple of pipe cleaners through the airway the stem was lightly oiled with mineral oil. It finally looked black.
The stem was then rubbed with several make-up pads with Soft Scrub applied to the pads. You can see a general lightening of the color on the pads as the oxidized material was removed leaving non oxidized vulcanite behind.
The stem and stummel were reunited for the sanding. I did not want to sand them apart as that can leave rounded edges at the joint where the stem meets the shank. Between each sponge I wiped the stummel with a make-up pad moistened with alcohol. The stem received a rubbing of mineral oil by fingertip and was wiped with a dry paper towel between sanding sponges. The tape was removed after the 2500 grit sanding sponge.
The final two sanding sponges, 3000 and 3500 were used without the tape covering the stamps. The between sponge wipes occurred as above.
The pipe was then worked with 4000-12000 micro-mesh pads. I again wiped the stummel with an alcohol wetted make-up pad . I used Obsidian Oil rather than mineral oil between the pad on the stem.
The pipe was then coated with Before and After Restoration Balm, stem and stummel. The Balm was allowed to sit for 30 minutes.
30 minutes later the excess Restoration Balm was wiped away using an inside out athletic sock.
The pipe looked stunning. I took it to the buffer and applied several coats of carnauba wax. Then took all the “finished” photos for the blog. When I was typing I realized that I had not given the Prince the final bend to the stem. DOH! I retrieved a couple of my favorite Princes for comparison.
I then heated the stem in the oven to 250 degrees Fahrenheit. With a gloved hand I carefully bent the stem. I cooled the stem in cold running water at the sink to set the bend. I then re-waxes at the buffer and photographed the real “finished” shots of the left and right.
I am very pleased with how this Barclay Rex 357 Prince turned out. I was able to keep the original stain and preserve it’s wonderful contrast. The stem cleaned up very well and the high gloss black of the vulcanite really accents the briar. The ghost of any smell or taste from previous use is completely gone. The bend to the stem looks and feels great. I am sure that this pipe will be a grand easy to enjoy a nice English blend of tobacco.
The dimensions of the Barclay Rex 357 Prince are:
Length: 6.20 in./ 157.48 mm.
Weight: 1.28 oz./ 36.40 g.
Bowl Height: 1.44 in./ 36.58 mm.
Chamber Depth: 1.23 in./ 31.24 mm.
Chamber Diameter: 0.79 in./ 20.07 mm.
Outside Diameter: 1.69 in./ 42.93 mm.
I do hope that you have found something here useful to your own pipe care, maintenance or restorations. If you like this sort of thing, please click the like and subscribe buttons. Thank you for reading the ramblings of an old pipe lover.
Below are some photos of the finished Barclay Rex 357 Prince.
The below photos were taken pre-bending of the stem.
I left the style of this pipe blank and only used the shape number for reasons that you will see in a minute. I’ve restored a few GBD pipes over the years but this is the first that I have blogged about. This pipe seems very French or maybe Danish to me. A very nice shape which I would be inclined to describe as a slightly bent billiard. The pipe came in an estate lot which also brought a Jarl (https://wordpress.com/post/scimansays1787.com/6336) a Stanwell (https://wordpress.com/post/scimansays1787.com/6189) and 2 other pipes from Sacramento, California to the wilds of southeast Nebraska. I included the links to the previously restored two pipes.
This GBD was in need of some work. As my father used to say, “ Looks like it was rode hard and put away wet”. That phrase was originally intended for horses but dad used it for various things and occasionally women. The stamps were discernible through the grime and read; GBD, within an oval, over SIERRA offset to the right and perpendicular was 1350 over MADE IN FRANCE. The later stamp was quite faint and difficult to make out. Below are photos of the pipe prior to work being done.
The pipe was pretty filthy, the finish was faded, the stem heavily oxidized, bowl caked and the internals were anyones’ guess. This was going to be a fun one. I looked through a few GBD photos and found the below image:
That is the color that I wanted for this pipe. Yeah, I know, I am getting ahead of myself but I heard once that setting goals is important. Though, I think I’ll try to avoid getting dye in the tobacco chamber.
Background
The history of GBD is a long one. I reread the pipedia.org site and realized that including all of that might dissuade some readers from the blog. I will include the first paragraph mainly pertaining to the originators of the company and its name and include the link for those who would like more information.
In 1850 three gentlemen got together in Paris to establish a firm dedicated to the fabrication of Meerschaum pipes – a courageous step in politically restless times. Ganneval probably came from the area of Saint-Claude where he had learned making wooden pipes. Bondier’s family obviously came from Paris and had emigrated in 1789 to Geneva. He himself had worked as a wood turner in the clay and china pipe industry in and around Saint-Claude making stem extensions etc. Donninger was an Austrian or Swiss and had worked in Vienna, the world’s center of the Meerschaum pipe. They agreed on the acronym GBD selecting the initials of their surnames. Bondier survived his partners for nearly 30 years. Their places were taken by others. Hence the property of GBD and therewith the company’s official name changed several times.
Ganneval, Bondier & Donninger
Bondier, Ulrich & Cie.
Bine, Marechal & Cie. and finally
A. Marechal, Ruchon & Cie.
Meanwhile the GBD name was well established and thus retained. August Marechal and Ferdinand Ruchon led the firm into the 20th century. They were in charge of the company for more than 50 years.” (GBD – Pipedia)
In clicking another link from the above site I came across the following,
“The company was founded in Paris, France in the 19th century by Ganeval, Boundier and Donninger who were no longer associated with the company by the turn of the century. By the time they left the GBD name was well established and thus retained. In 1903 an additional factory was built in England and ran by Oppenheimer. The Paris factory moved to Saint-Claude in 1952. Since 1981 the majority of GBD pipes come from the English factory. At about that same time GBD merged with Comoys, since then all production for both GBD and Comoy comes from a single factory. ( I wasn’t kidding when I said it was brief! )
More history and addition information can be read in the main GBD article.”
“shapes with an * are non standard bowl shapes, and stem angles with a “rev” conotation refer to pipes with bowls that are canted forward.” (GBD Shapes/Numbers – Pipedia). Now, I personally would not consider this pipe a Dublin nor an apple, I will differ and go with the “apple” designation.
Pepidia.org does have a listing of the models attributed to GBD and their “Seconds”. The Sierra is listed as,
Unfortunately, that is all. As for the age of the GBD 1350 apple, I cannot be certain of much other than it was made in France likely after 1970.
The Restoration
As usual I began with a clean denim work surface protection device (AKA a square of old blue jeans).
The stem would need some time soaking in an OxyClean and water solution so that was the first task. I hand buffed the stem with 0000 steel wool to remove the outermost oxidation.
The stem was then placed in the solution and allowed to soak for a couple of hours.
After the reaming the stummel needed to be rid of the years of accumulated grime. It was taken to the sink for a scrub with undiluted Murphy Oil Soap and a couple of different scrub brushes. The first brush was a medium stiff toothbrush. The stummel was rinsed and dried then I scrubbed it again with Murphy’s and a stiffer nylon scrub brush. This too was rinsed with warm water and dried again with a cotton hand towel.
Back at the workbench the stummel was scrubbed agin, this time with the nylon scrub brush and 95% ethyl alcohol.
TO make sure there was no finish remaining I scrubbed the stummel again with acetone and the nylon scrub brush. The stummel was wiped with a make-up pad dipped in acetone as well.
The shank was pretty well tar coated. I scraped with a dental scraper then poured 3-4 ml of 95% ethyl alcohol into the bowl and allowed it to flow into the shank. I then used a nylon shank brush to scrub the airway with the alcohol. I dumped the darkened alcohol into a second medicine cup. The shank brush was wiped on a cotton wash cloth to clean the tar from the bristles and the airway was scrubbed with cotton swabs dipped in additional clean alcohol.
This rotation of scraping, alcohol/shank brush scrubbing, cotton swab scrubbing went on for several rotations until the shank was clean.
The stummel had darkened with all the years worth of wear and tear and my scrubbing so I decided to bleach the briar with a bit of oxalic acid. I used a saturated solution of oxalic acid crystals in distilled water.
The solution was applied with a cotton swab and allowed to sit for 20 minutes.
After the 20 minutes the stummel was rinsed with copious warm water and again scrubbed with the nylon scrub brush, dried with a cotton hand towel and allowed to air dry for 15 minutes. Below is how the stummel looked after all the scrubbing and oxalic acid.
Next it was time for me to see if I could match the red/black dye of the GBD photos from pipedia.org. I gathered the dark red Fiebing’s Leather Dye and other needed gear. I couldn’t find the fishing bobber that I normally use to plug the tobacco chamber and provide a handle so I improvised. A spent 20 gauge shotgun shell fit nicely into the chamber.
The stummel was dyed dark red with the Fiebing’s Leather Dye applied with a folded pipe cleaner.
The dye was flamed with a disposable lighter. I recommend closing your jar of Fiebing’s prior to the flaming. I’ve never had one ignite but it’s probably a good idea to close it anyway.
The stummel was red, very red.
I allowed the dye to air dry for 20-30 minutes. I then mixed up some black Fiebing’s Leather Dye. I did this by diluting it – 2 parts black dye to one part 95% ethyl alcohol.
The stummel was then dyed black over the red. I was not quick enough to capture the flaming of the black dye. I allowed the black to air dry for 20-30 minutes.
Below are photos taken with the good camera of the dyed stummel.
The stummel was then taken to the buffer where I used a rouge buffing compound to lightly buff the high spots of the rustication.
The stummel was then wiped by hand with a clean cotton terry cloth towel to remove any remaining compound and wiped with a coating of Before and After Restoration Balm.
It was time for the stem to exit the Oxy solution and return to the atmosphere. I wiped the stem vigorously with a make-up pad to dry the solution and buff off some of the loosened oxidation.
Next the stem was scrubbed with SoftScrub applied to make-up pads.
The outside of the stem was looking much better. It was now time to clean the airway of the stem. It was far better than the shank but still required several bristle pipe cleaners and alcohol.
I couldn’t wait any longer to see how the stummel would look. I used an inside out athletic sock to hand buff the excess Restoration Balm from the stummel. Eureka! I was pleased with the dye job.
Back to the stem. I thought I could get rid of the tooth chatter by painting the stem with a flame and sanding. I was wrong. There was one spot that I was not happy with so it got the old black cyanoacrylate (CA, super glue) treatment. The depression received a small drop of black CA. This was then spritzed with a CA drying accelerator. The cured drop was filed with a flat needle file and sanded with a 400 grit sanding sponge. This meant that I had to re-sand the top of the stem but the results were well worth it.
The stem was sanded with a series of sanding sponges from 600- 3500. Between each sponge I would dip the tip of my finger into mineral oil, rub the oil over the stem and wipe with a dry paper towel.
The stem was polished with Before and After Fine followed by the Extra Fine Polish. Then the pipe received several coats of carnauba wax on the buffer.
I think this GDB 1350 Apple turned out very nicely. Especially when looking back at the before photos. My goal of matching the red/black or burgundy stain was a success and the stem turned out better than I thought it would. The glossy black of the stem really works with the dark red dye on the briar. I do wonder how it would look with a bright brass band. I know it didn’t need a band but I think it would add something special to the pipe.
The dimensions of the GBD Sierra 1350 areas follows:
Length: 5.90 in./ 149.86 mm.
Weight: 1.13 oz./ 33.10 g.
Bowl Height: 1.81 in./ 45.97 mm.
Chamber Depth: 1.39 in./ 35.31 mm.
Chamber Diameter: 0.69 in./ 17.53 mm.
Outside Diameter: 1.26 in./ 32.00 mm.
I do hope that you have found something here useful to your own pipe care, maintenance or restorations. If you like this sort of thing, please click the like and subscribe buttons. Thank you for reading the ramblings of an old pipe lover.
Below are some photos of the finished GBD Sierra 1350 Apple.
My Peterson Pipe Acquisition Disorder (PPAD) has come out of remittance and I have experienced an attack. Then again it was fully expected. I can’t run around with a name like NebraskaPeteGeek and not have full blown PPAD at least semiannually. The lovely 606 in the photo above did not arrive like that. It was spotted at an auction on eBay a couple of weeks ago. I couldn’t believe my eyes at first. A Peterson Dunmore with a shape other than the 300 System shape was very interesting. I’ll get more into that in the “Background” below.
This pipe has Peterson’s over “DUNMORE” on the left, the Peterson P on the stem and MADE IN THE over REPUBLIC over OF IRELAND and 606 on the right. There is also a beaded edge at the shank end, a characteristic of the Dunmore line. When the pipe arrived it appeared in the photos below.
Background
As much as I love the history of the Kapp and Peterson company and Peterson pipes, I will not get into that other than give you resources to read the history for yourself. I will delve into the Dunmore, or Dunmoor line of pipes at greater depth.
For a great history Mark Irwin and Gary Marlburg’s book is a must read for a Pete Geek.
Now to the stuff regarding this pipe: A Peterson Dunmore. I refer to Mark Irwin again here and his blog, Peterson Pipe Notes. I can wholeheartedly recommend the free at
I will include the text here in it’s entirety but recommend the link for the photos. This is used with permission of the author (thank you Mark).
“226. Documenting the Dunmore System and Classic Lines
Milos “Mike” Bera at PipesPens&More.com on eBay recently wrote me to say that he’d run across two examples of a Peterson Dunmore Classic line he’d never seen before—a higher-grade line with a briar-in-brass sandwich band. As I thought they were not only gorgeous but undocumented, the time seemed right to take a look back at the history of the Dunmore System and Classic lines.
I’ve been a fan of the Dunmore lines since I first saw them through the case back in the late 1980s and had to have one, a fat-bottom 72 (the 302 equivalent). Like everyone else, I thought there was some kind of mistake—“Where’s the nickel mount?” I remember asking. But the Dunmore System set out to be something a little different, yet within the classic Kapp & Peterson house style.
The line originated in collaboration with Iwan Reis in 1971. How it came about is anyone’s guess at this point. Chuck Levi, the man who more than any other was responsible for bringing the great Danish artisan pipes to the US, was working with the creative minds at K&P to bring something new to the IRC catalog, and this was one of about a dozen K&P lines that debuted as exclusives in the Iwan Reis catalogs of that era.
The concept was to modernize the System pipe by removing what was perceived as the old-fashioned nickel mount. And old-fashioned it was—if you look at pipe catalogs from the 1940s on through most of the rest of the 20th century, nickel ferrules and even bands were almost non-existent. K&P was virtually the only hold out, using sterling bands on the Sterling Silver Classic line and on the Premier & De Luxe Systems. A bead was then carved around the stummel at the mortise end. As you can see from the IRC detail, sometimes the contrast stain made the beads stand out, and sometimes not.
But there were two more ingredients to the original Dunmore aesthetic which can be seen the photo below. Paddy Larrigan, K&P’s master-craftsman, was always striving to push the envelope in pipe engineering, and one of the things he dearly loved was a pipe that would sit, so he shaved off the bottom of the shank to allow the Dunmore System to sit on its shank and button, which gives it its uniqueness in the catalog. The downside of this is that I am not convinced that all the Dunmore reservoirs, being slightly smaller than the traditional System, are quite as effective.
The third distinguishing mark of the original Dunmore lines is the stem. Both the System and Classic versions utilized the wide-shoulder “Comfort Lip,” with a painted gold P on the stem. This doubtless helps the System sit as well as giving it a more muscular visual balance, strength being a long-standing concept in the design language of the company. While it gives the illusion of being an army “push” mount, of course it isn’t, but is a traditional tenon-mortise or “navy mount” as the old hands at K&P used to call it.
The 1971 IRC catalog description reads, “dunmoor briar IRC ’71 modern system without sterling band, natural $12.00.” This intentional misspelling of “Dunmore” would persist through subsequent IRC catalogs, the copy-writer evidently under the spell of e.e. cummings and favoring an English flavor to his pipes. The name, like almost all K&P line names, is taken from the Irish landscape, in this case the town in County Galway famous for Dunmore Castle.
The 1975 Orange Catalog shows the initial Dunmore System release was in only seven shapes:
This was later expanded to include both the original bent dublin shape 5 (75) and XL5 (XL75) and the replacement calabash shape 5 and XL5. The remaining “new” System shapes were also added to the Dunmore lineup, the 01 becoming the Dunmore 73, the 02 the 70 and the 03 the 76. The fact that the 304 and 306 “setters” introduced in 1984 never entered the Dunmore System lineup adds the probability that the line had been discontinued by then.
The smooth Dunmore System features a light brown natural finish, sometimes occurring with broad flames, as can be seen in these photos of an unsmoked 77 System:
The rusticated version of the Dunmore System seems to have been finished in at least two techniques or versions. Neither is as deep as the Pebble Rustic finish but they still feel very therapeutic under thumb and finger.
Even when we were beginning our research on the Peterson book (due out in reprint later this year), most Pete fans had no idea there was also a Dunmore Classics line featuring the same beading at the mortise and wide Comfort Lip mouthpiece. Documentary proof was found in the rare 1978-79 Peterson-Glass catalog:
The Dunmore System and Classic Lines from the 1978-79 Peterson-Glass Catalog
I don’t know whether the Dunmore Classics was a short-lived line or whether it was primarily available in Europe, but it almost never appears on the estate market here in the US. As you can see from the catalog and the 406 pictured above, the same aesthetic was followed for the Classic line—light brown, nearly natural, higher-quality smooth bowl (or dark rustic) and faux army mount with gold-painted P, wide saddle and P-Lip stem. Only the Dunmore System, as far as I have been able to document, had the flattened stummel allowing it to set.
I have always hoped to run across an unsmoked rustic Dunmore System with the dark contrast stains seen in the Peterson-Glass catalog. I wonder if this finish actually went into production, because the ones I’ve seen all look more-or-less like the XL75 shown above.
The original Dunmore lines seemed to have been dropped at about the time the company went through its worst redundancy in 1984, as there are no more traces of it in the company’s ephemera from 1983 on. I remember the proprietor of my B&M, Cavalier Pipe & Tobacco in Barracks Road Shopping Center in Charlottesville, telling me when I bought my shape 73 Dunmore that the line was out of production, so I’d better get it if I wanted it (don’t you miss high-pressure salesmen?)—and that would have been 1986 or ’87.
The second iteration of the Dunmore Classics line is that recently discovered by Mike at PipesPens&More on eBay. I would tentatively date it to c. 1995, well after K&P had gotten on its feet again and was doing some new and fascinating things. It seems to belong with three other briar adornment lines from the same period: Paddy Larrigan’s Briar in a Circle Systems and the Galway and Kapp-Royal higher-grade lines with their wonderful inset briar rings.
Mike’s Dunmore Classics line is certainly on a par, from the two examples he’s found, with the Galway and Kapp Royal briars and maybe better, although probably not as fine as the Briar in a Circle Systems. Take a closer look at this 80S, which Mike sold within 24 hours of posting it on eBay:
The last Dunmore Classics line made a brief appearance in the Dublin era’s second decade, somewhere in the 2000s, probably around 2005 or so. Jim Lilley’s old blog site made a reference to them, and I remember seeing them for sale at internet shops.
I know it appeared well before I got interested in writing the Peterson book, because I don’t have any internet images of it in my files. These photos of the B5 and B11 give a good idea of what the line was like, although it appears to have begun in a higher range and then slipped to a lower.
Updated Identification Guide
Dunmore (1971–c. 1984; c. 1995; 2006–2010) Appeared in 1971 as Iwan Reis & Co. exclusive line “Dunmoor,” Premier-grade unmounted System in smooth natural or rustic dark chocolate contrast in all shapes, with beading at the shank, faux wide-saddle P-Lip with gold paint P. Documented in Associated Imports catalog from 1973. Classic Range line from 1978 with same faux army mount and finishes. Second scarce Classic Range line, c. 1990, higher-grade smooth bowl with brass sandwich and briar band, P-Lip. A third Classic Range line, 2006–2010, mid-grade, featured standard and some B shapes, with beading around bowl instead of shank-face, for European market.
With that information at hand I can date this Peterson Dunmore with a good deal of certainty. The 606 shape is of the “Classic Range line” thus from 1978-1984. A mere 6 year window.
The Restoration
There is a clean denim piece for a work surface so, it must be time to start another project.
The stem was the part of this that needed the most attention and it went into the OxyClean solution first.
The reaming tools were gathered. The PipNet with its #2 and #3 blades for this nice wide chamber would see some action.
The reaming started easy with the PipNet and the #2 blades. The the #3 blades were a tight fit and required some scraping with both scrapers to allow it access to the tobacco chamber. Eventually the chamber was reamed and sanded with 220 sandpaper wrapped around a wood dowel. I finish sanded with 320 sandpaper and my finger. The chamber looked great with no signs of any damage.
The chamber may look good but the rim was lava encrusted.
Saliva and a sharp knife were used to scrape the rim.
The stummel then made its way to the sink for a scrub with undiluted Murphy Oil Soap and a medium bristle toothbrush. The soap was rinsed with warm water and the stummel dried with a cotton hand towel.
Returning to the workbench the stummel looked much better.
A quick wipe with a make-up pad dipped in 95% ethyl alcohol to make sure there was no remaining wax or finish remaining was done. This produced some color on the pad but I think it was just dirty old wax and maybe a bit of stain.
I did see a few pits that would require filling with cyanoacrylate (CA, super glue) and briar dust.
I turned my attention to cleaning out the airway within the shank. I used a couple of alcohol soaked cotton swabs to soften the old smoking residues in the airway. I then poured 3-4 ml of 95% ethyl alcohol into the bowl and allowed it to flow into but not through the shank. I used a nylon shank brush to scrub the airway with the alcohol. The alcohol was poured into a medicine cup to assess the dirtiness of the airway. Not bad but still quite a bit of cleaning and repealed alcohol scrubs. Oh yeah, folded bristle pipe cleaners were also used to scrub with. Numerous more cotton swabs, folded pipe cleaners and a few ml of ethyl alcohol later the shank was clean.
The stem came out of the Oxy bath and was vigorously wiped with a dry make-up pad. The pad was heavily stained with oxidized rubber.
Several more make-up pads with SoftScrub were used to try to remove the stubborn oxidation. Adjectives other than “stubborn” may have been uttered during this process.
I oiled the stem and left it for 24 hours. The next day I returned and used SoftScrub again to remove the oil. Well, more than oil came off.
Back into the Oxy bath went the stem. It was there for another hour.
I turned my attention to filling the pits. A small drop of brown CA was applied to the pit and a small scoop of briar dust was then placed onto the wet CA and pressed into the pit. The excess briar dust was brushed off with a bristle pipe cleaner. This was repeated for each of the fills. The CA and briar dust set-up very quickly and were filed with a flat needle file then sanded with a 400 grit sanding sponge.
The stummel was then sanded with a series of sanding sponges from 600-3500 grit, in sequence. Between each sponge the stummel was wiped with an alcohol moistened make-up pad.
The stummel was then worked with a series of micro-mesh pads 4000-12000 grit. Between each pad the stummel was wiped with a make-up pad dipped in alcohol.
The stummel then was coated with Before and After Restoration Balm and allowed to sit for 30 minutes.
The stem was retrieved from the Oxy bath for the second time. And wiped with a dry make-up pad. This time much less oxidized rubber came off of the stem.
The stem was sanded with a series of sanding sponges from 600-3500. Between sponges I would rub a small drop of mineral oil onto the stem and wipe it with a paper towel. This was followed by the micro-mesh pads 4000-12000. Between the pads I applied a drop of Obsidian Oil to the stem, rubbed it onto the surface and wiped with a paper towel. I failed to photograph any of the stem sanding and micro-meshing, sorry if you were looking forward to that.
The stummel was wiped clean of any remaining Restoration Balm with an inside out athletic sock.
I debated showing this next step as it was a mistake. Since I am rather adept at making mistakes I thought I’d show you what not to do. I thought the Peterson P logo on the stem should be repainted in white. I cleaned the surface with a cotton swab and 95% ethyl alcohol and gave it a coating of white acrylic model paint.
While the paint was still slightly pliable I scraped the high spots of the logo with a plastic card and wiped away any paint from around the logo.
I then proceeded to wax the pipe with the buffer and carnauba wax and do the “finished” photographs. It wasn’t until I was refreshing my memory and writing the background section that I came across the “P-Lip with gold paint P” from Mark Irwin’s Peterson Pipe Notes dunmore description. Well the white P just wouldn’t do. Back to the workbench, I recleaned the white acrylic paint from the logo using the ethyl alcohol and a cotton swab.
I then made an applicator for the gold Rub’nBuff from the plastic tube of a cotton swab. I cut one end from the tube, heated the plastic with a lighter and flattened the hot plastic with a knife blade.
I used scissors to cut the flattened plastic into a micro-spatula type device.
The gold Rub’nBuff was applied with the plastic tool. The excess gold was wiped onto the denim. I let the gold Rub’nBuff dry for a minute of two and used the tool to scrape away the excess gold from around the logo. The area was then hand buffed with a soft cotton cloth.
There, that’s more like it and correct. Living and learning. I hope my mistakes help you to avoid making some of your own.
The pipe went back to the buffer for a touch-up re-waxing with carnauba. Then back to taking the real finished photos.
Overall this Peterson Dunmore 606 Pot turned out pretty well. I have to admit to not being happy with the finish of the stem. The oxidation was deep into the vulcanite. Even after the Oxy baths, SoftScrub and sanding it can still be seen. Given under normal light conditions the stem looks fine, bright light makes the oxidation stand out. I did not want to use the Before and After Deoxidizing solution for fear of losing the logo. That may be the only way to address the issue short of sanding the entire stem and losing the logo to that. This will be a personal pipe for the time being. Unless someone really wants it and makes me an offer I can’t refuse. The briar of the 606 is lovely, showing off Peterson’s Premier-grade and I was able to keep the original stain without altering it. Of the areas that I filled I think only one was a flaw in the briar and the others were dings from use. The very nature of the Dunmore non-System shape is a rarity and a pretty rarity at that. The dimensions of the Peterson Dunmore 606 Pot are:
Length: 6.21 in./ 157.73 mm.
Weight: 1.44 oz./ 41.00 g.
Bowl Height: 1.65 in./ 41.91 mm.
Chamber Depth: 1.36 in./ 34.54 mm.
Chamber Diameter: 0.82 in./ 20.83 mm.
Outside Diameter: 1.58 in./ 40.13 mm.
I do hope that you have found something here useful to your own pipe care, maintenance or restorations. If you like this sort of thing, please click the like and subscribe buttons. Thank you for reading the ramblings of an old pipe lover.
Below are some photos of the finished Peterson Dunmore 606 Pot.
Oops, there is a finished photo showing the white logo. Darn lazy, I say.
There’s another white logo. Why do you keep reading stuff by this guy?
Capturing the essence of an old pipe is part of the fun of restoration for me. I had never held a Jarl pipe before this battered darling arrived. It was part of the estate lot with the Stanwell from a previous blog. (I linked it if you would like to see that one also.) I searched through photographs online to see as many Jarl pipes as possible. They looked similar to Stanwell pipes, with their Danish characteristics of more delicate shanks and sweeping curves. More whimsical and fluid than the traditional shapes of France and England. The drillings on this pipe were exceptional. It looked like a quality piece of briar even before the restoration had begun. The stamps of the Jarl were mostly clear and read JARL over MADE IN DENMARK. There was also a 1502 as what I assume was a shape number stamped around the bottom of the shank. Let me show you the pipe as it appeared before making it to the workbench.
It may be difficult to see the qualities that I saw from the above photos. The finish was long gone and the fit of the stem to the shank seemed out of alignment. The oxidation of the stem was pretty bad as well. Maybe it was just me looking through my rose tinted lenses or seeing the glass as half full rather than half empty. Whatever the reasoning, I thought this old Dane would certainly make someone a grand smoker.
Background
There was not a great deal of information to be found on Jarl pipes. I perused the “go to” sites of pipephil.eu for information on logos first. The below screen capture shows everything that pipephil.eu had on Jarl.
It was the middle section of the three that was most similar to the pipe in hand. The stamps matched nearly perfectly save for the different shape number. The photograph showed non rusticated patches on the sides and bottom very similarly to the Jarl I had.
The next search was on pipedia.org. Jarl there led to a page with little information but a great number of photographs of Jarl pipes. Here is the text in its entirety: “In December of 2010 Ellen Jarl wrote that Jarl pipes were made by her grandfather, Niels Mogens Jørgensen in a little factory in the town of Bramdrupdam, just outside Kolding, Denmark. We have no reason to doubt that Niels Mogens Jørgensen is the maker of these pipes:
Examples and details, courtesy Doug Valitchka” (Jarl – Pipedia)
Like I said, not much information and darn near every article online includes this quote from Ellen Jarl. Of the many photographs present there were several examples of rusticated Jarl pipes. I will show a few to exemplify why I chose to refinish the Jarl 1502 the way that I did.
The two photos above show the rusticated areas as unstained left and nearly black right.
The above two show the rusticated area stained darker but not black.
The final photo below shows what I am calling a worn black stain to the rusticated area. This stain looks like it was originally black with some of the black buffed or wiped off.
That was the finish that I would try to emulate. All of the above photos are from
On to the workbench with a clean denim piece and another beautiful old pipe hiding under the years of neglect.
The reaming tools were gathered.
And, put to work. This tobacco chamber was deep with a conical taper at the bottom. The PipNet couldn’t ream out that shape but the scrapers could.
The chamber was then sanded with 220 sandpaper wrapped around a wood dowel. No damage to the interior was observed.
The stummel made its way to the sink for a scrubbing with undiluted Murphy Oil Soap and a toothbrush. The rustications were actually scrubbed twice, once with the toothbrush and a second time with a stiff nylon brush. The soap was rinsed with warm water.
I hoped to soften and loosen the residue in the shank with warm water and a scrub with a shank brush and a bit of Dawn dish soap. The soap lathered up brown and was thoroughly rinsed with water.
Back at the workbench the stummel showed signs of a finish of some kind. Note the darker shiny area along the shank.
I used a make-up pad wetted with 95% ethyl alcohol to remove the finish. This colored the pad indicating that the finish was being removed. It also darkened the briar significantly, weird…
I used a toothbrush dipped in ethyl alcohol and scrubbed the stummel and rewiped the stummel. More finish was removed.
Finally I wiped the stummel with acetone on a make-up pad. This yielded some finish removed and allowed me to see a large red fill. I picked the old fill material from the pit. The stummel’s color remained darkened.
I started scraping the airway of the shank using a dental scraper. I am not sure why but, the darkened briar bothered me. I stopped working on the airway.
I wanted to address this darkened briar. I have had mixed results using a saturated oxalic solution on briar to bleach the wood. I thought this might work well here.
The solution was applied with a cotton swab and allowed to sit for 30 minutes. The stummel was rinsed with copious amounts of warm tap water and scrubbed with a nylon brush during the rinsing.
After the stummel dried I could see that the oxalic acid did a wonderful job at lightening the briar and returning it to a natural color.
The stamping remained in great condition.
Next, I needed to soften up the oxidized surface of the vulcanite. I used a solution of water and OxyClean. The stem was allowed to soak for an hour.
I returned to cleaning the airway. More scraping with the dental scraper, scrubbing with a shank brush and alcohol and cotton swabs dipped in 95% ethyl alcohol. I forgot to photograph the shank cleaning other than the photo below. Apologies if you love seeing many tar stained cotton swabs.
As previously alluded to I wanted to darken the rusticated area while keeping the smooth panels natural. I had purchased a product which I read about for painting miniatures for gaming. This product was a water based latex that could seal off an area where no paint was wanted. The latex could then be peeled off. I thought that the stuff sounded interesting and had ordered a bottle of it a year or so ago. I now had what I thought would be the perfect job for it. Using a detailing paint brush I painted the Vallejo Liquid Mask onto the smooth surfaces. As the mask dries it turns more clear. I set the stummel aside to allow the mask to dry.
I turned my attention back to the stem.
Once removed from the Oxy bath I used a clean make-up pad to vigorously wipe the Oxy solution from the vulcanite. This removed some of the surface oxidation.
I proceeded to use make-up pads and SoftScrub to scrub the surface of the stem. Eventually the pads were no longer removing oxidized rubber.
The mask appeared to be dry. I continued with the stem cleaning to allow more mask drying time. Bristle pipe cleaners dipped in 95% ethyl alcohol were used to clean the stem’s airway. Hey, there are some of the cotton swabs from the shank cleaning. The stem was then coated in a layer of mineral oil.
Time to test the mask and dye the rusticated areas. I prepped the area for dying and assembled the Fiebing’s Black Leather Dye, a folded pipe cleaner (applicator) and a lighter.
The black dye was applied and flamed with the lighter burning away the alcohol of the dye.
I rinsed the stummel with a stream of 70% ethyl alcohol to rinse excess dye and wiped the surface with a paper towel. I took the stummel to the buffer and buffed the stummel with rouge compound on a flannel wheel. The buffer removed the outermost dye and the mask. The masked areas were completely unaffected by the dye. Success! A little bit of scrapping with a sharp blade and sanding to clean up the edges would be needed to make the edges beautiful. Looking at many of the Jarl pipe photos his pipes often have a reddish tint to the briar. I liked the more golden, natural shade that I had and decided against a red or orange dye wash.
After the scraping and sanding I applied a layer of Before and After Restoration Balm to the stummel and allowed it to sit for 20 minutes.
20 minutes later the balm was wiped away using an inside out athletic sock to reveal a lovely two tone rustication.
The stem was sanded using a series of sanding sponges from 400-3500 grit. Between each sponge I rubbed in a dab of mineral oil and wiped it with a paper towel.
I worked the stem with 4000-12000 micro-mesh pads. Between each pad I rubbed in a small drop of Obsidian Oil and wiped it with a paper towel.
The stem was polished with Before and After Fine Polish applied with my fingertip and hand buffed with a soft cotton cloth.
Before and After Extra Fine Polish was then used to hand buff the stem again with a soft cotton cloth.
The stem logo was repainted using white acrylic modeling paint.
This was a fun restoration. I got to work on a new brand and try a new product. I think the pipe turned out very nicely. Of course I have never seen another Jarl pipe and only had internet photos to base my judgment on. I’ve heard the saying, “ignorance is bliss”. I am therefore a blissful ignoramus regarding Jarl pipes. Nevertheless, I think this pipe looks great. The Vallejo Liquid Mask did exactly what it is supposed to preserve the natural grained briar from the black dye. The “worn black” dye that I was trying to achieve turned out how I imagined it would. The stem polished up pretty well, I didn’t want to be too aggressive with the restoration and obliterate the J logo. I think that I captured the essence of the pipe.
The dimensions of the Jarl 1502 Bent Billiard are:
Length: 5.66 in./ 143.76 mm.
Weight: 1.25 oz./ 35.70 g.
Bowl Height: 1.96 in./ 49.78 mm.
Chamber Depth: 1.72 in./ 43.69 mm.
Chamber Diameter: 0.75 in./ 19.05 mm.
Outside Diameter: 1.49 in./ 37.85 mm.
I do hope that you have found something here useful to your own pipe care, maintenance or restorations. If you like this sort of thing, please click the like and subscribe buttons. Thank you for reading the ramblings of an old pipe lover.
Below are some photos of the finished Jarl 1502 Bent Billiard.


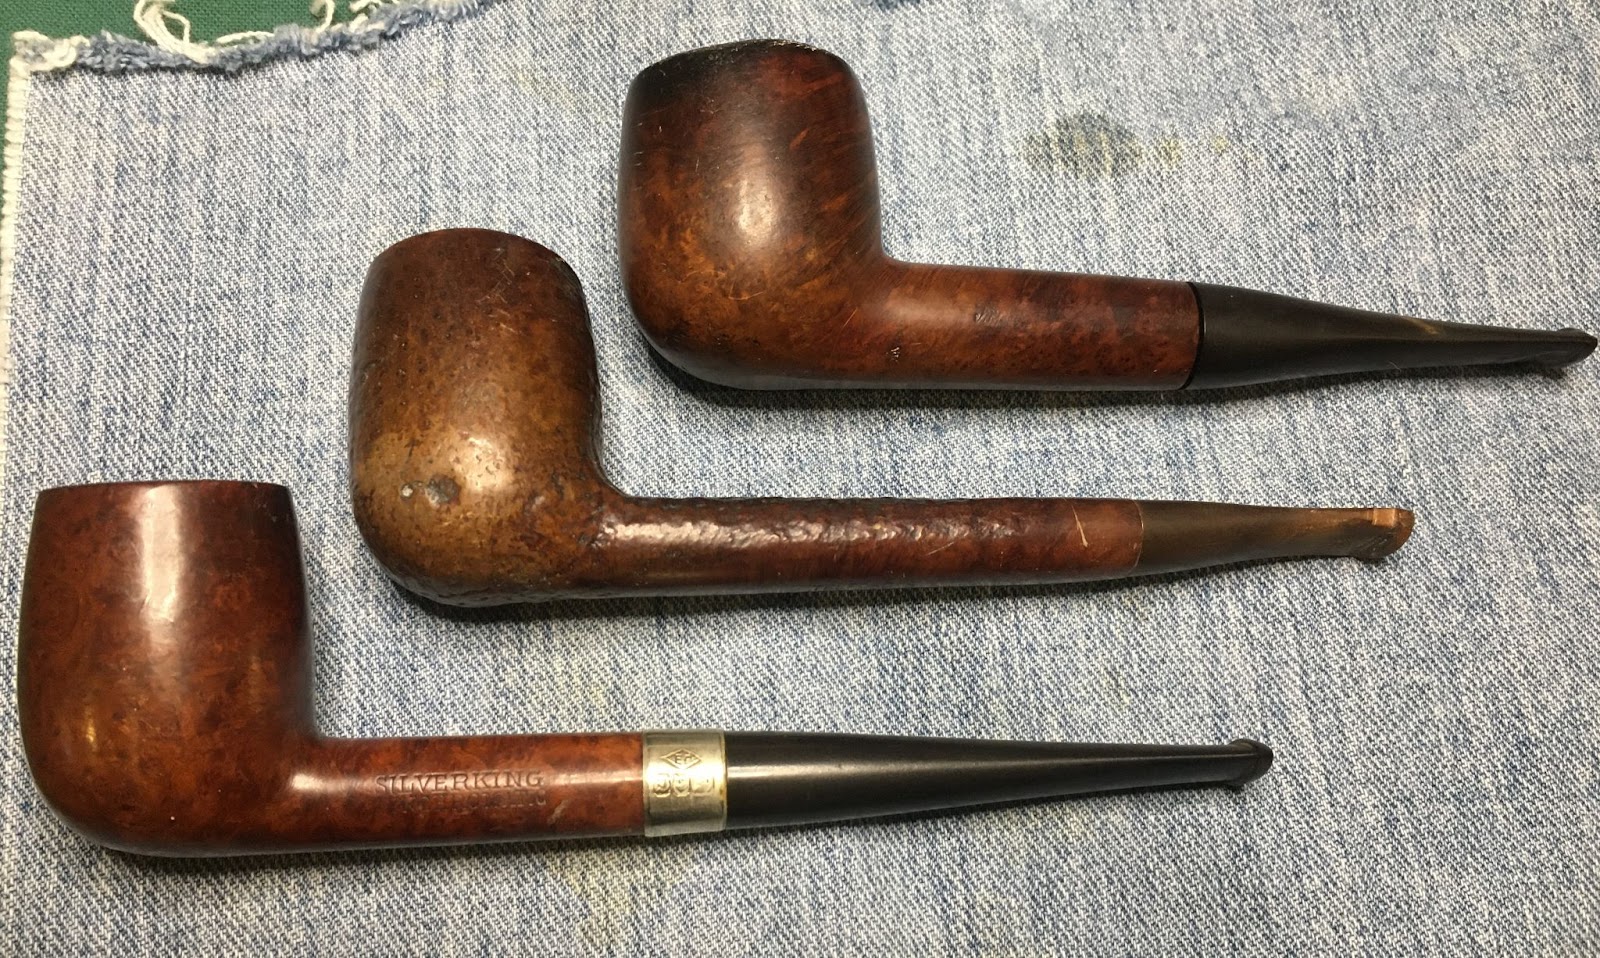

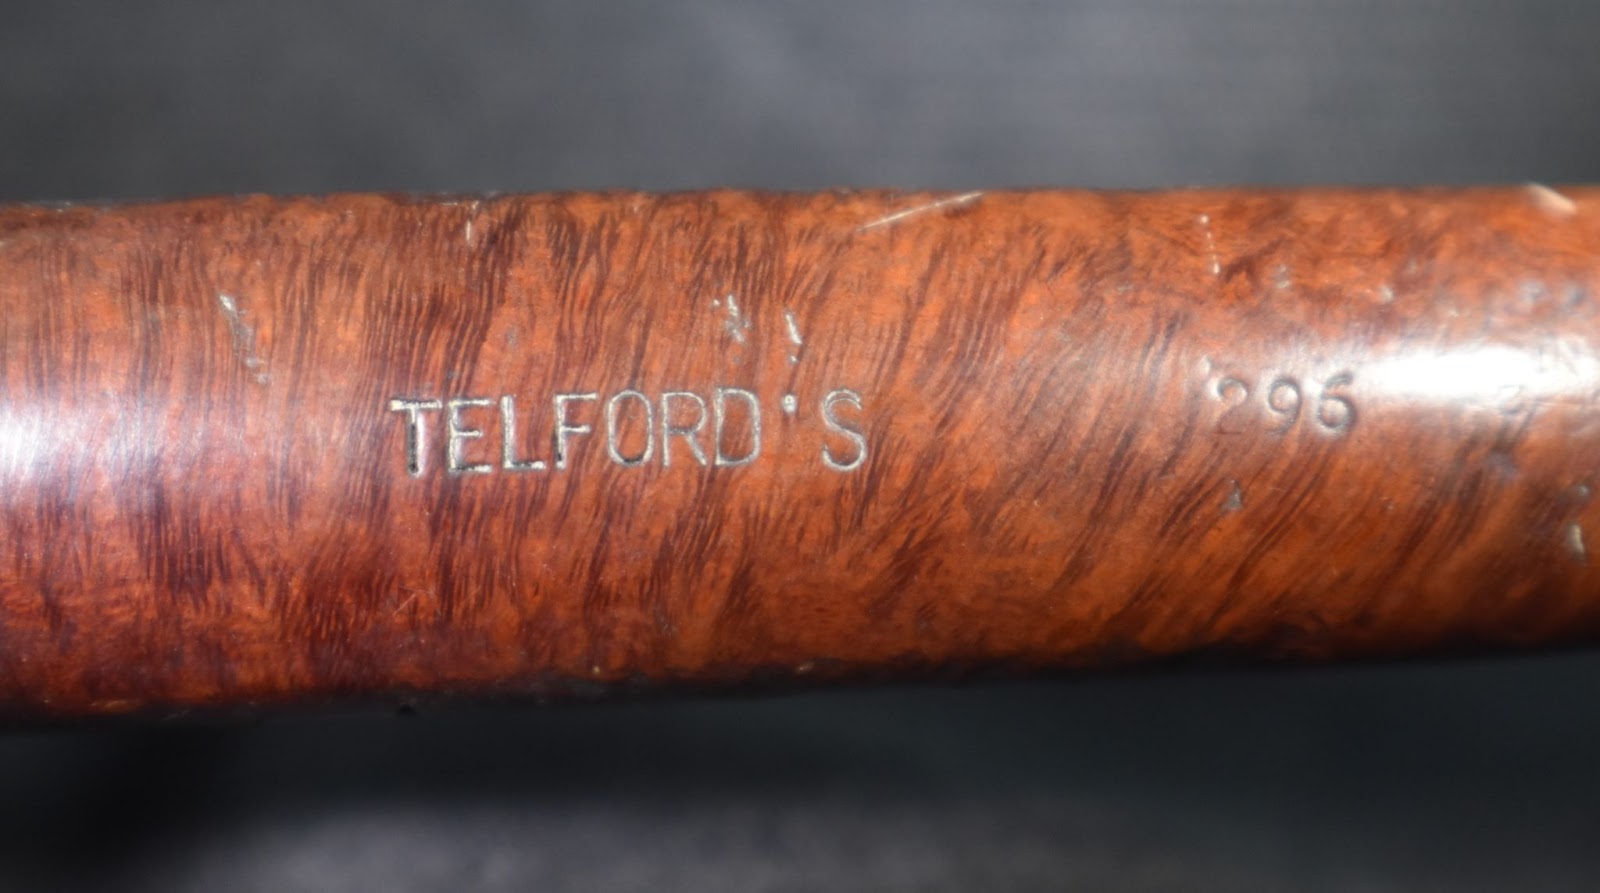
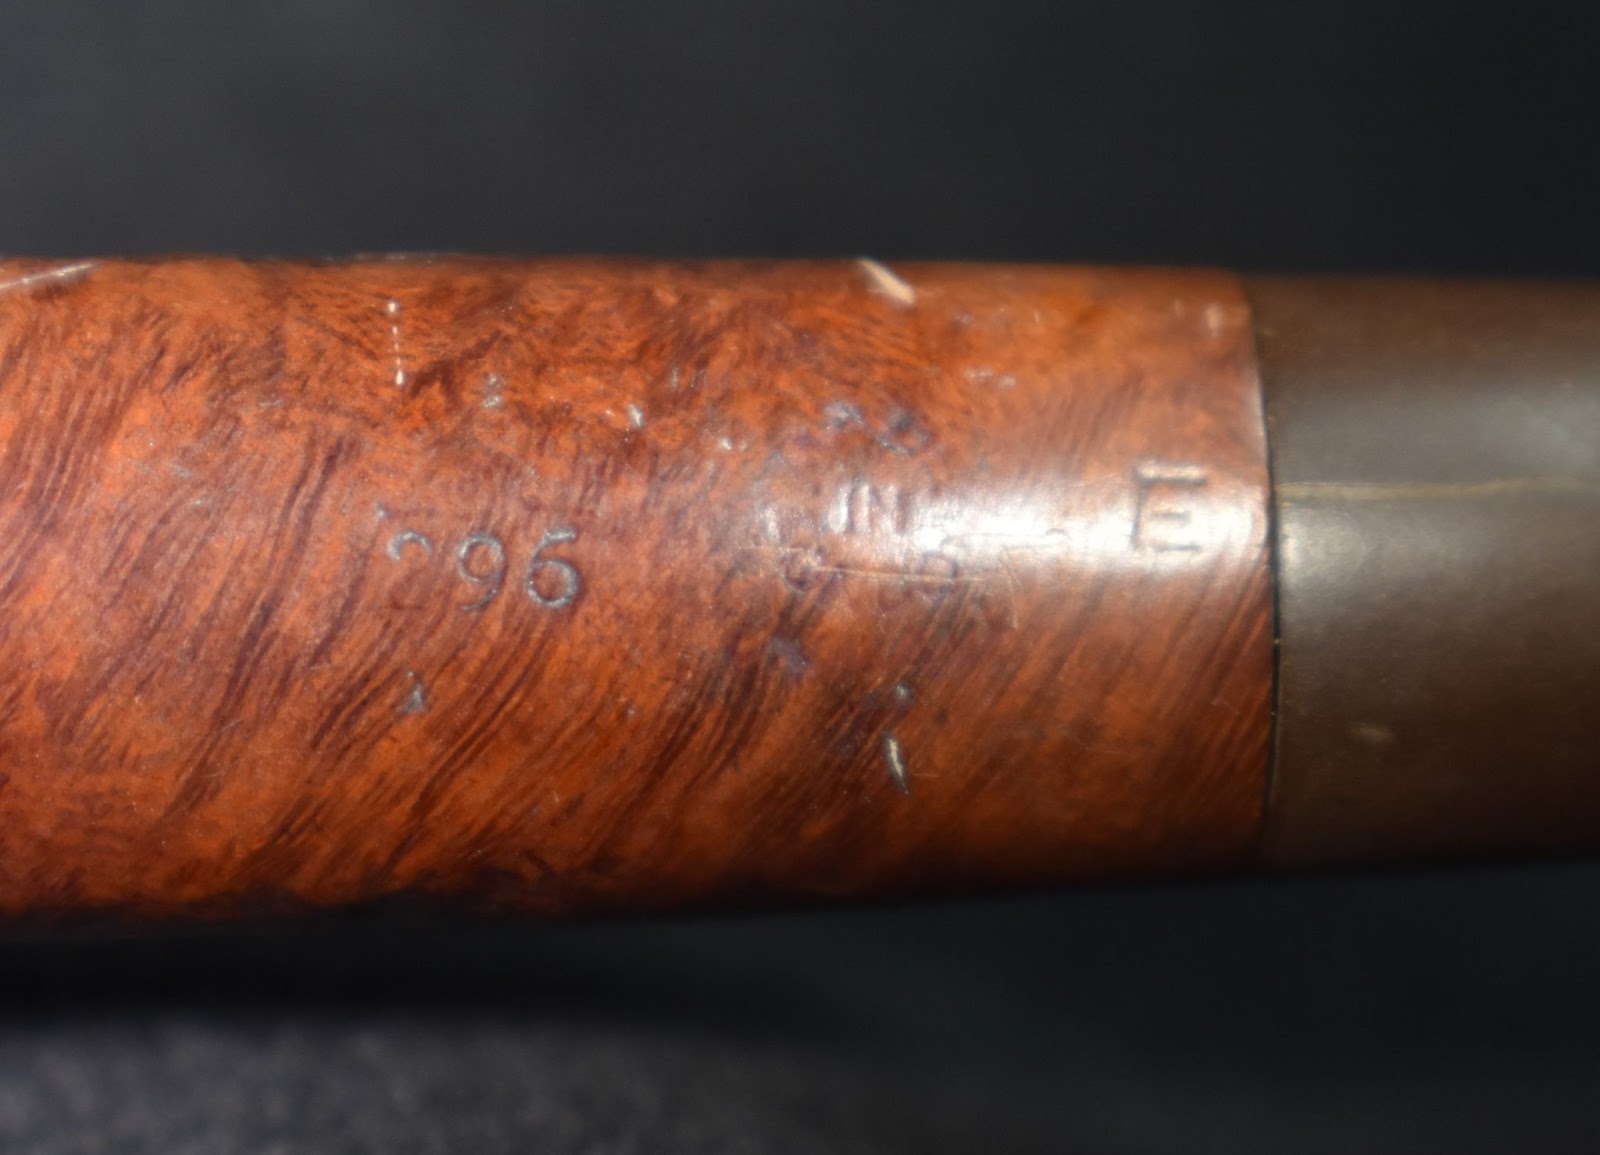


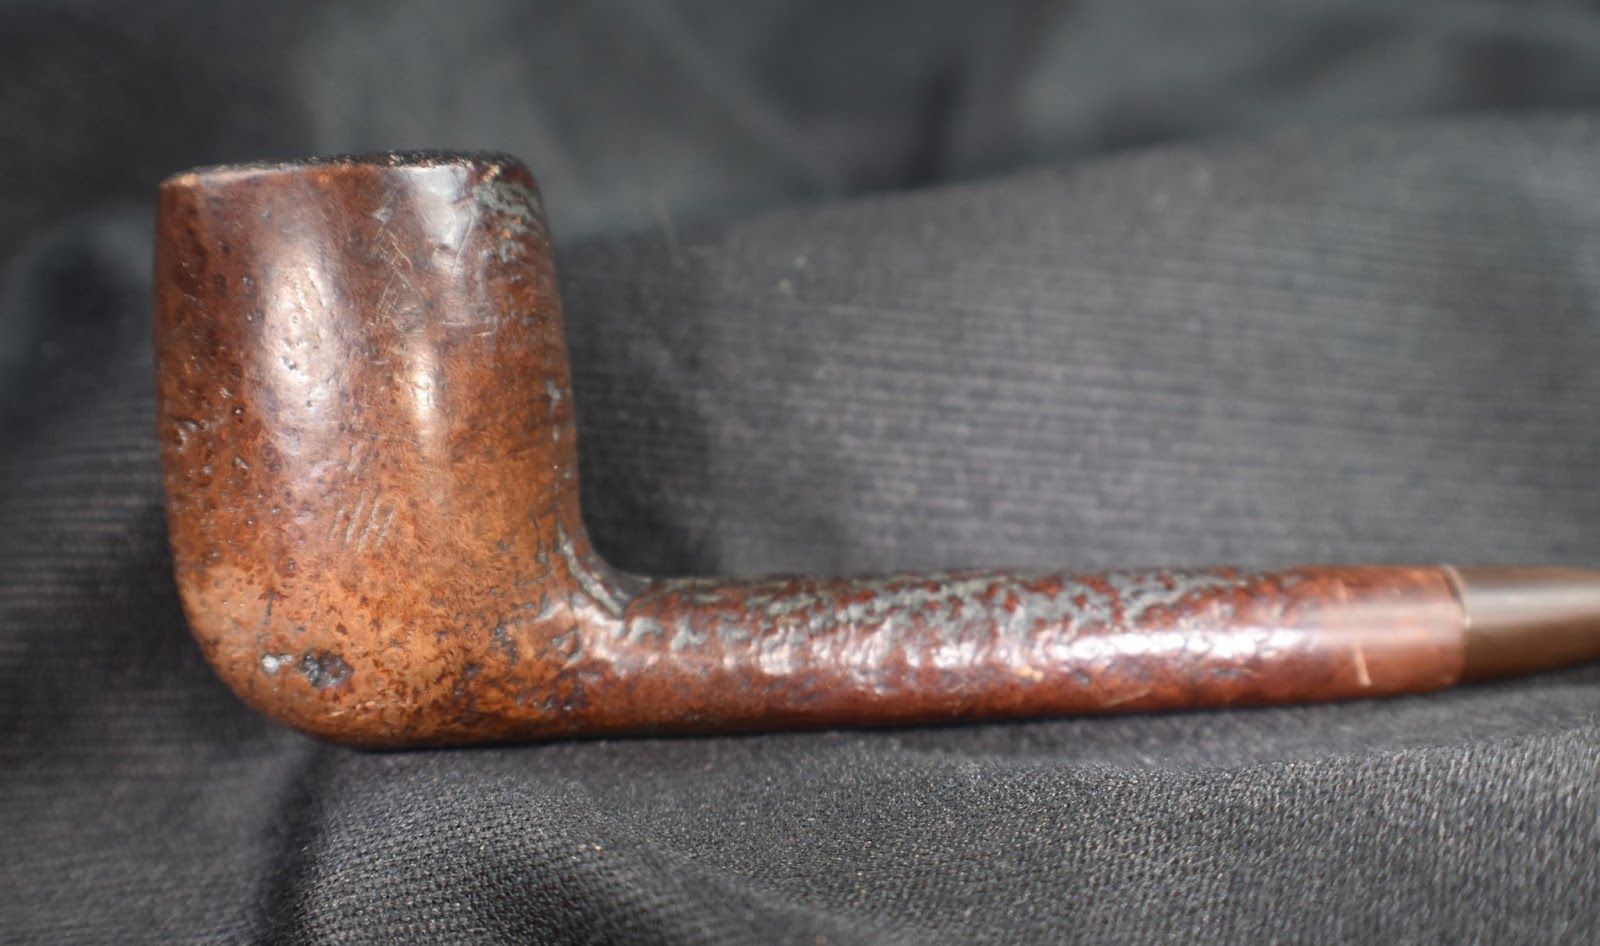


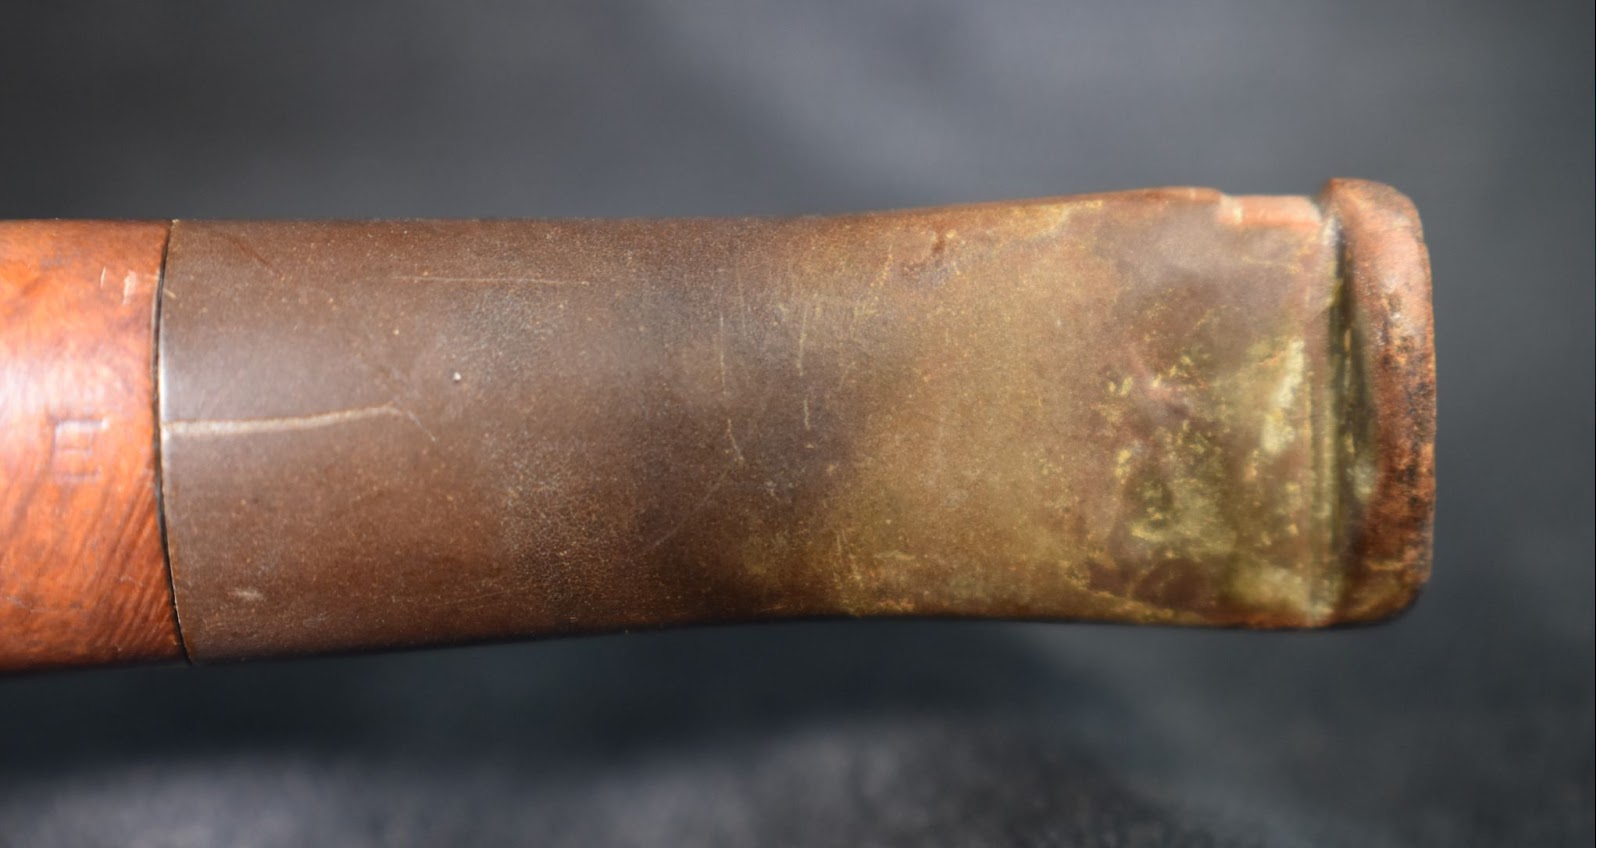


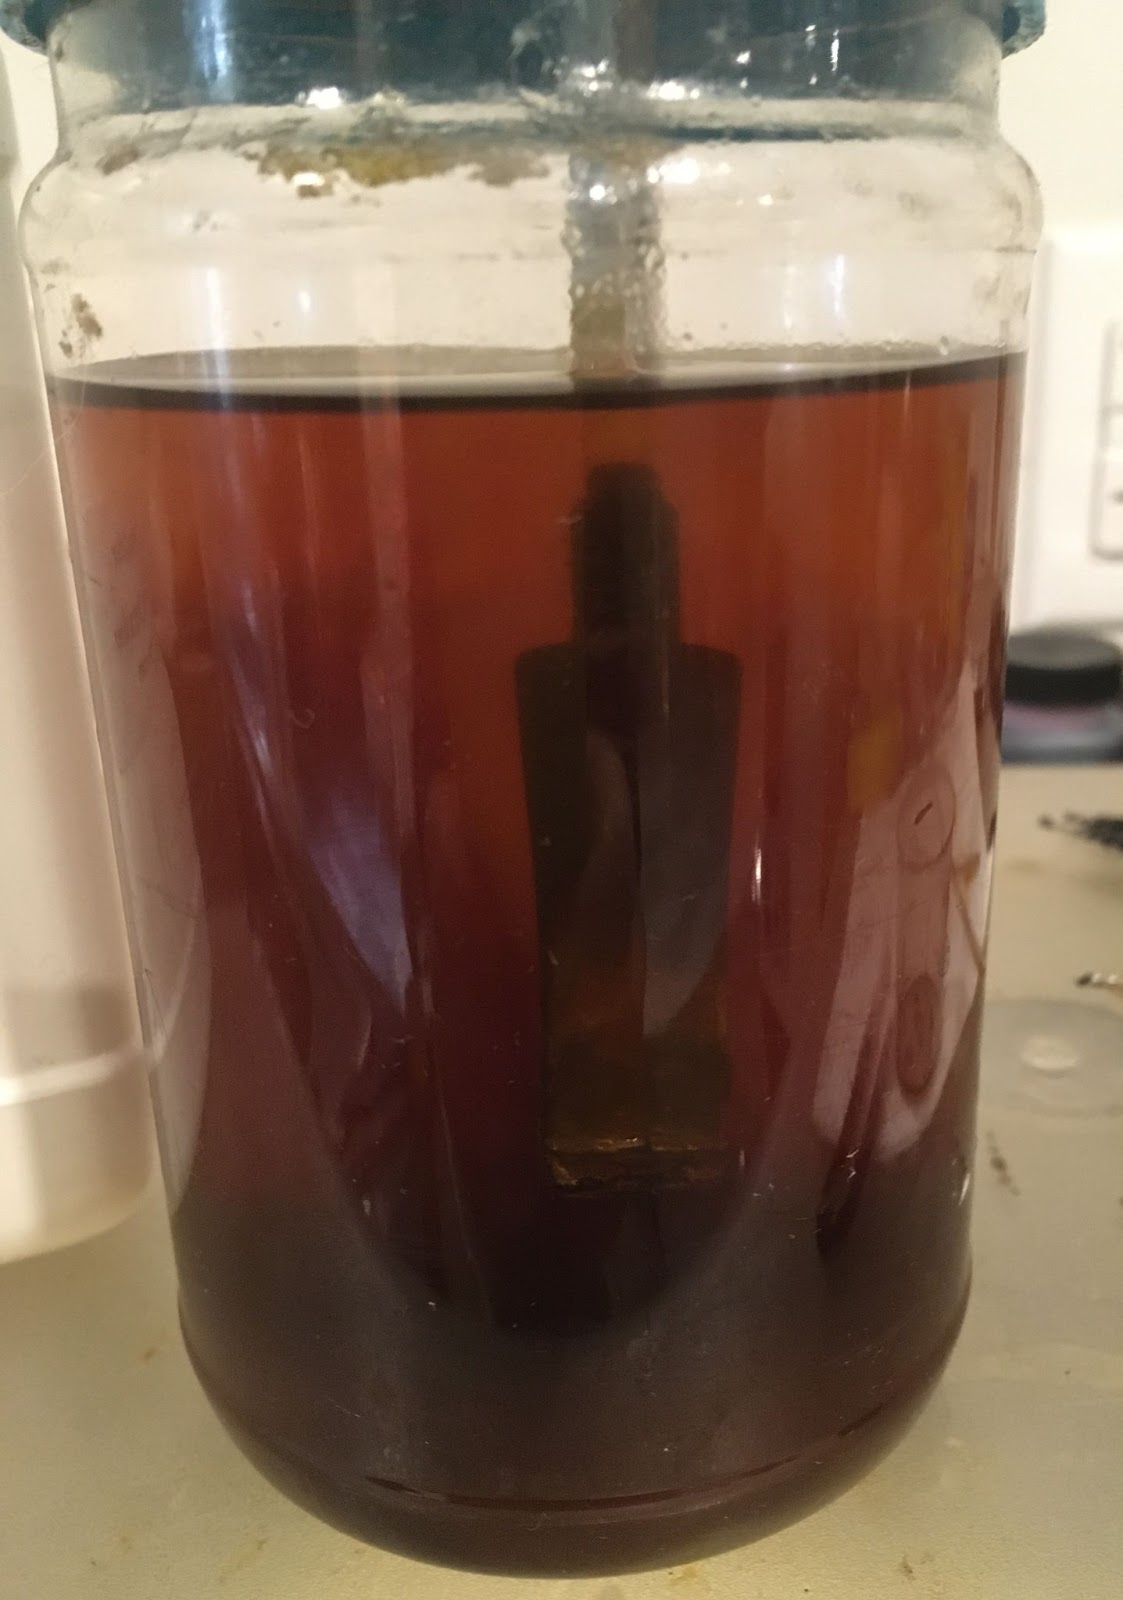
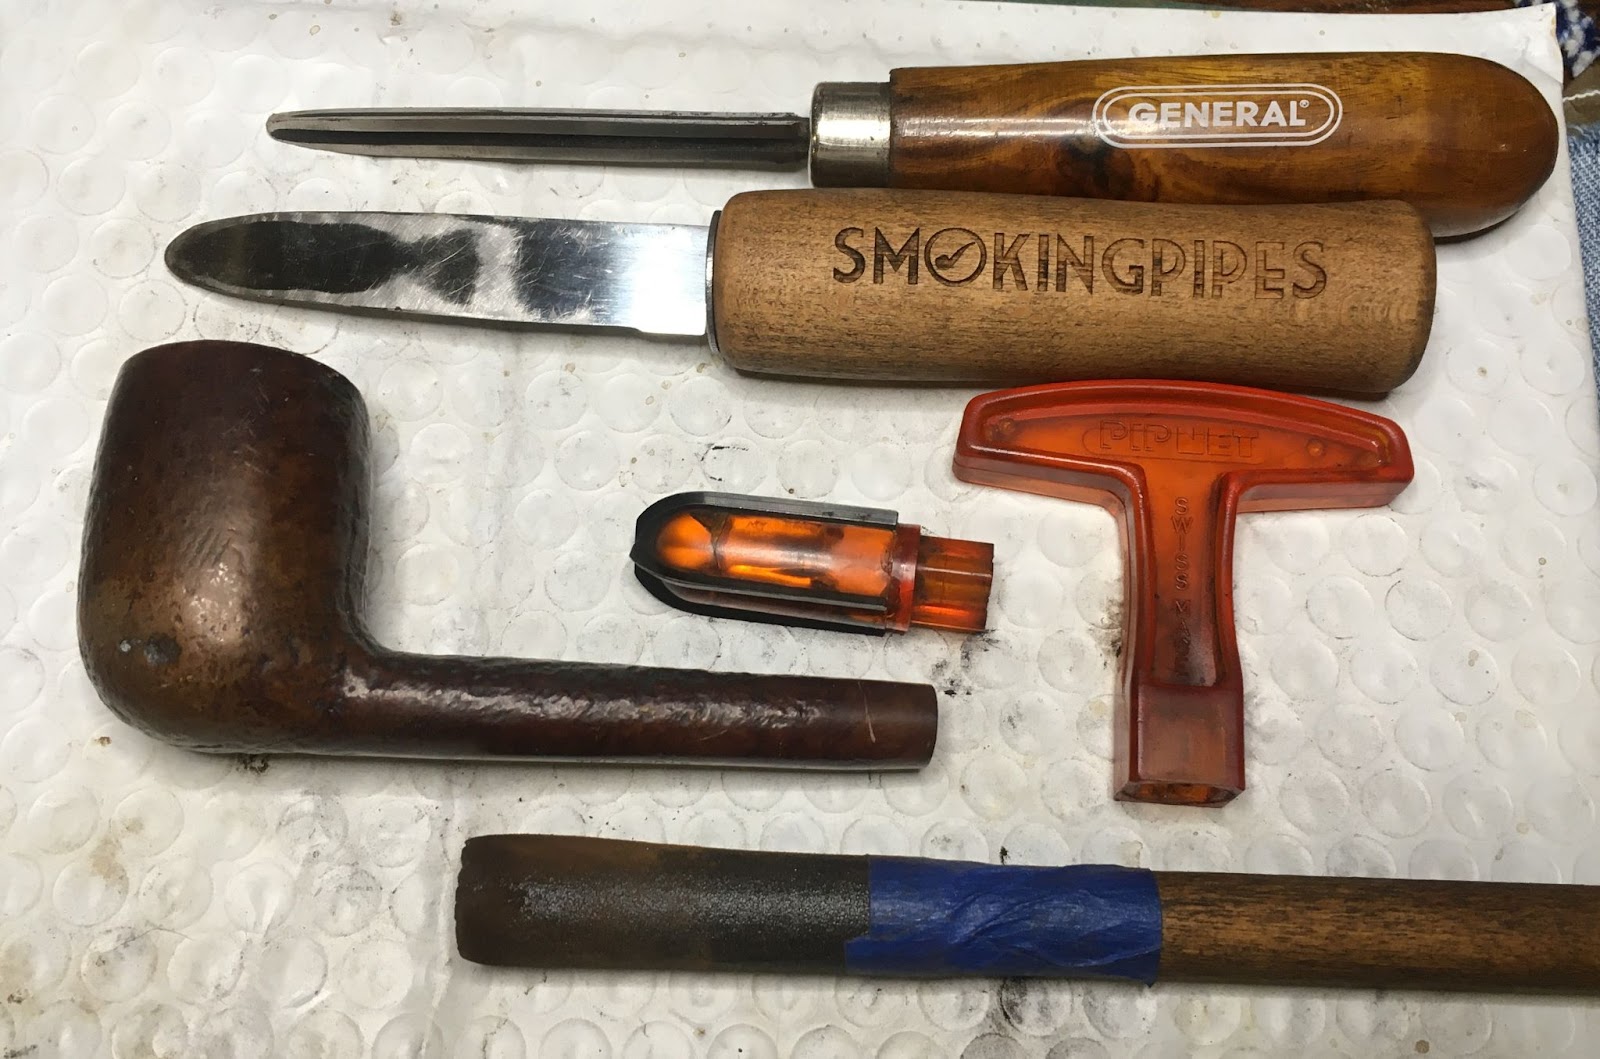


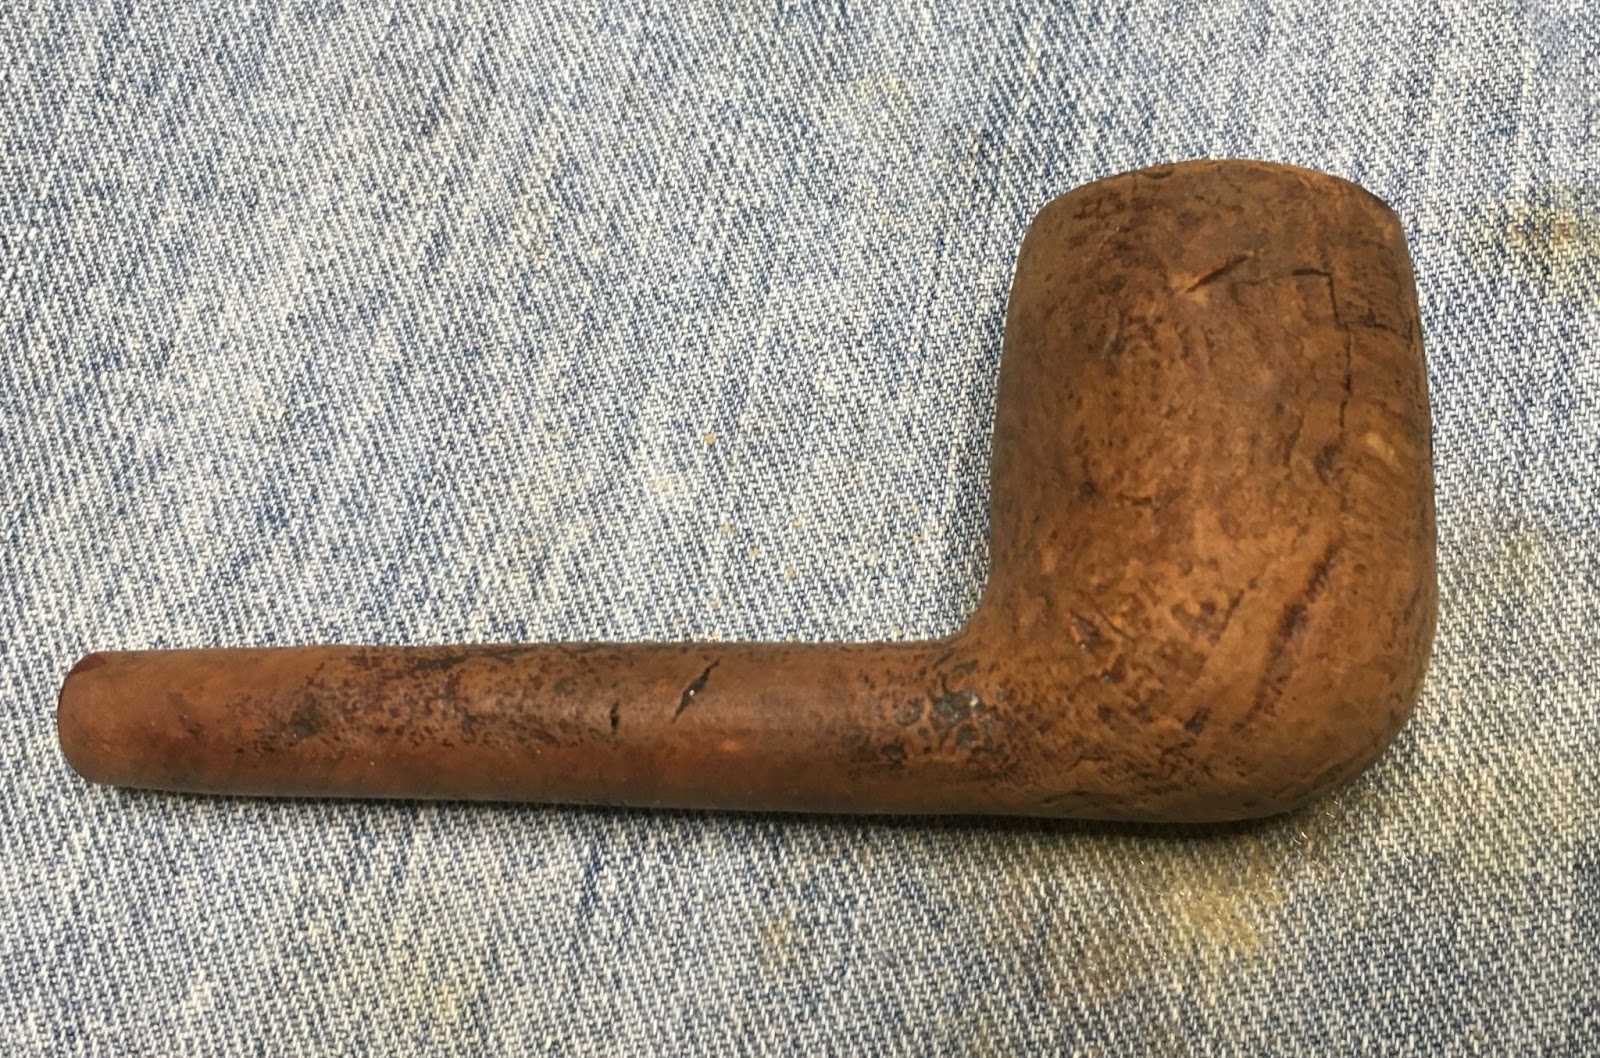


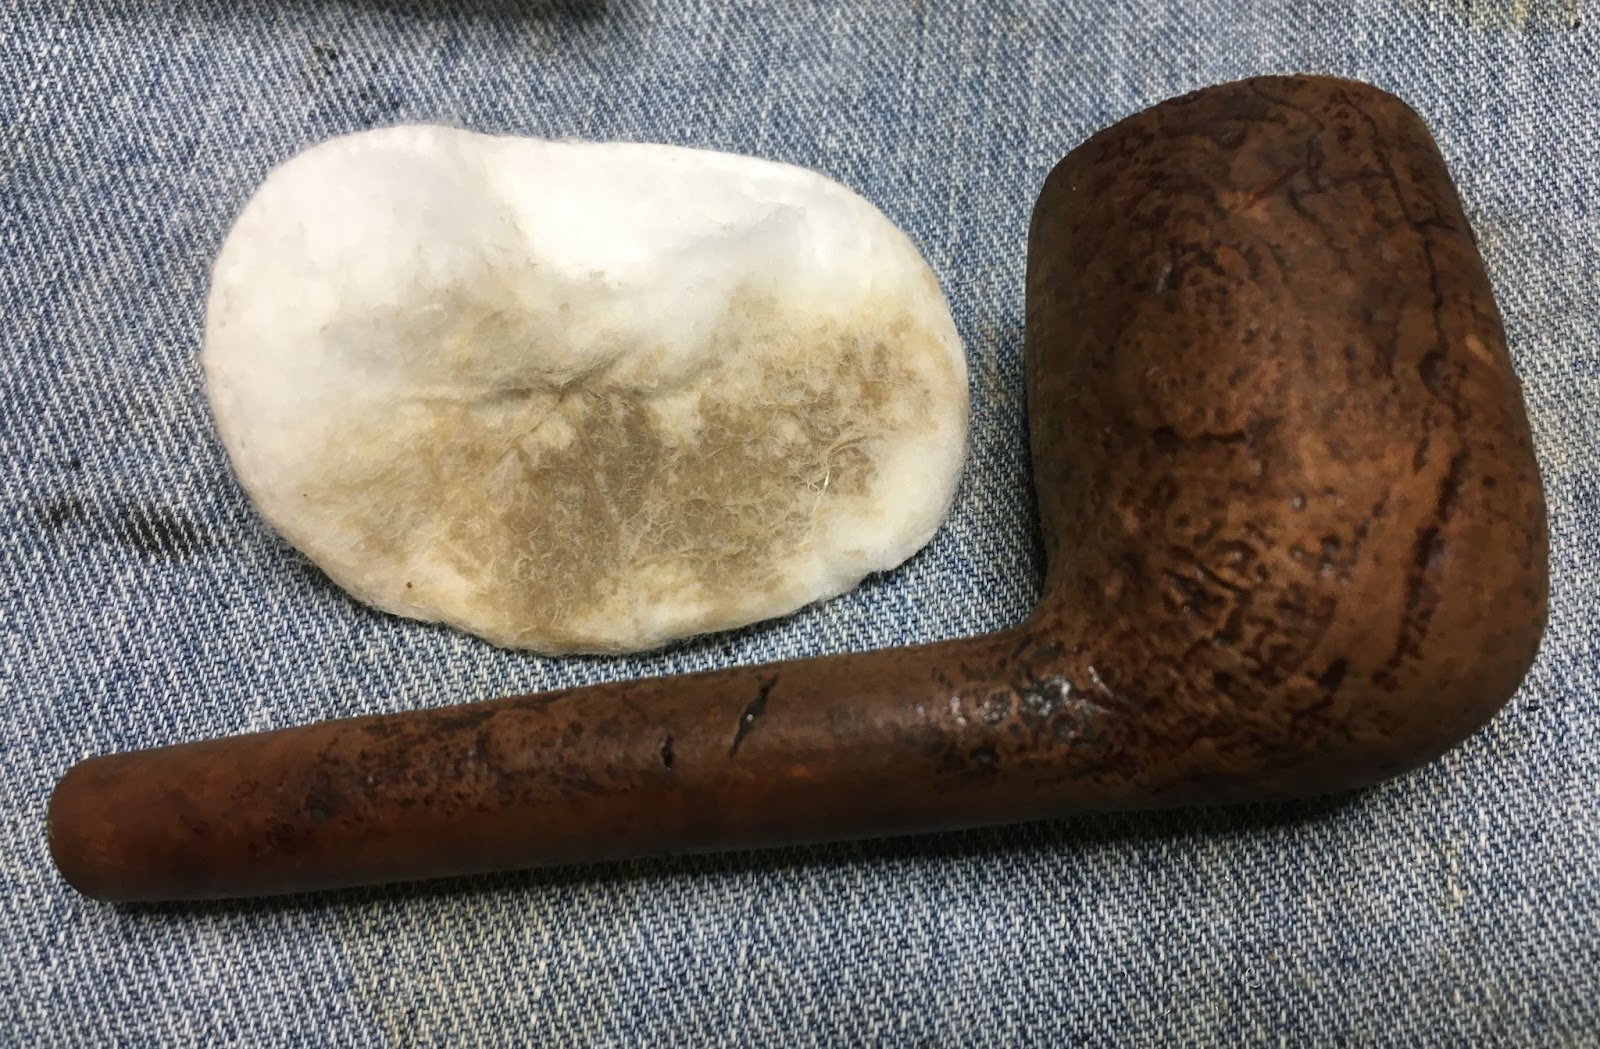


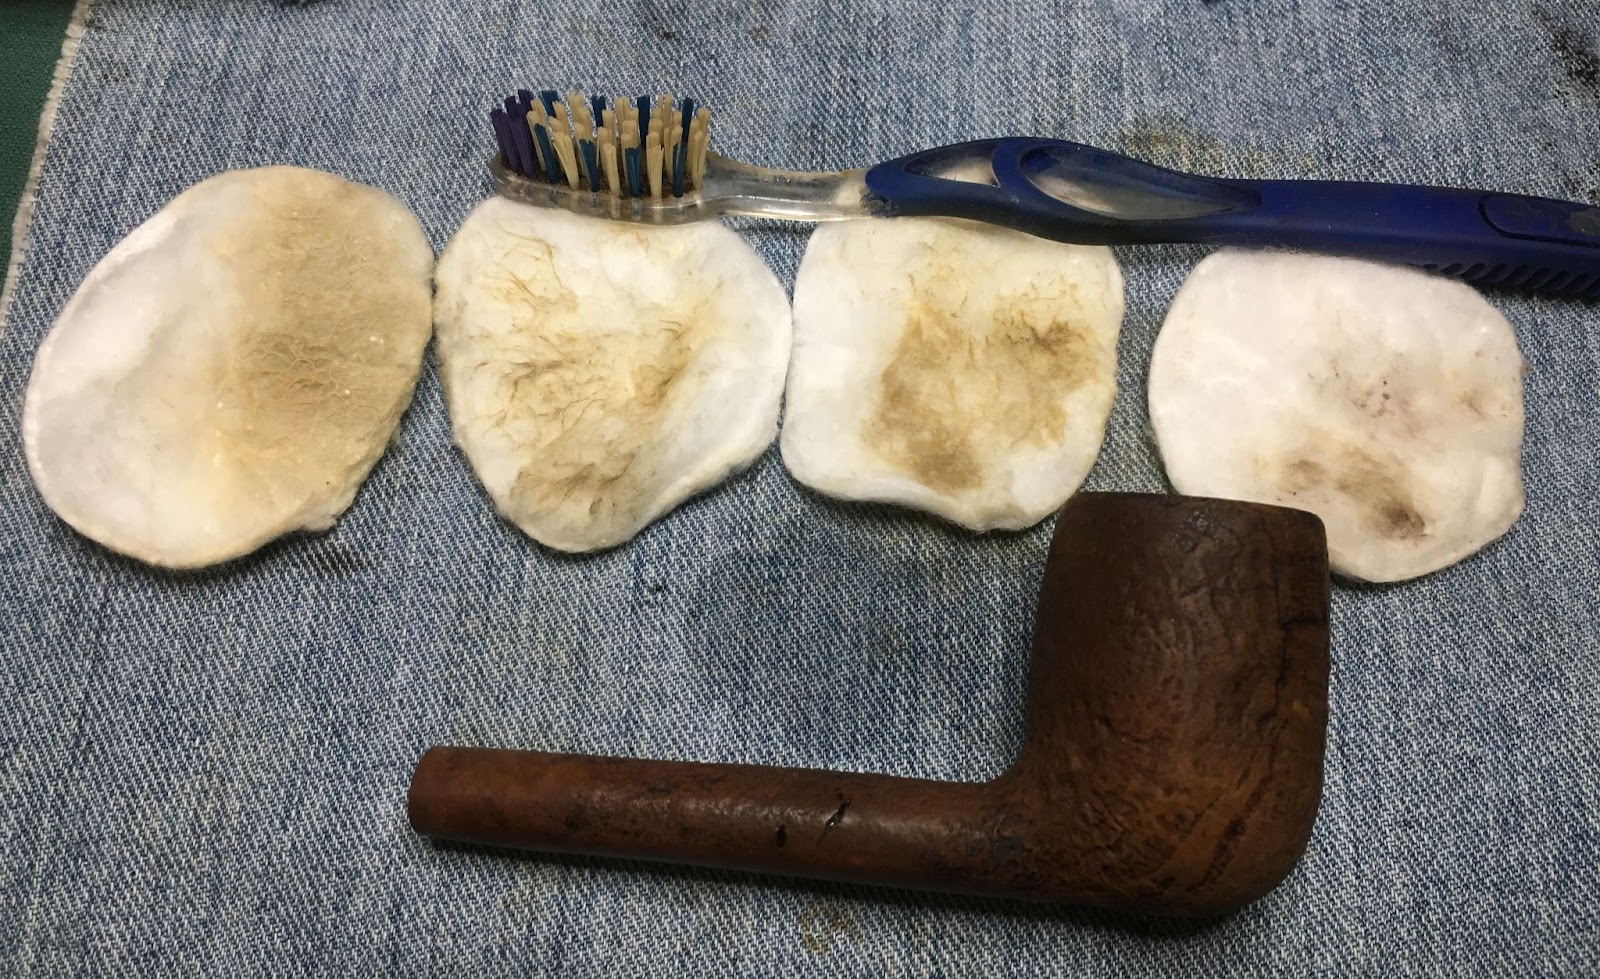


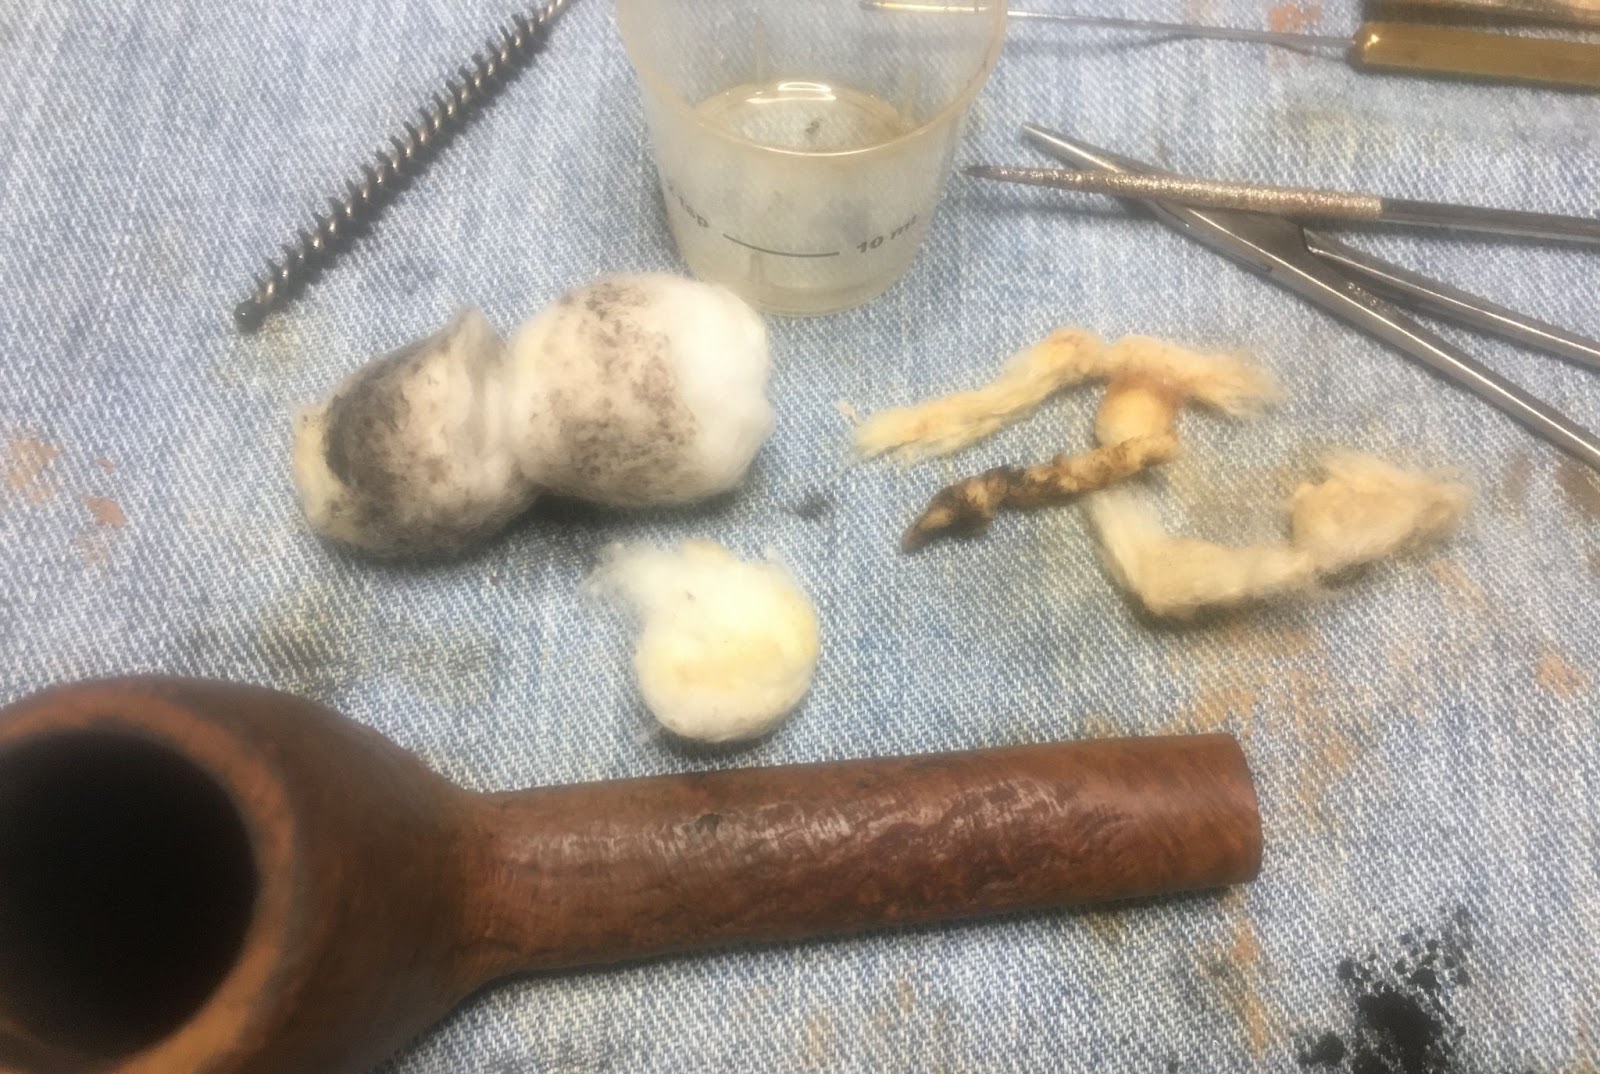
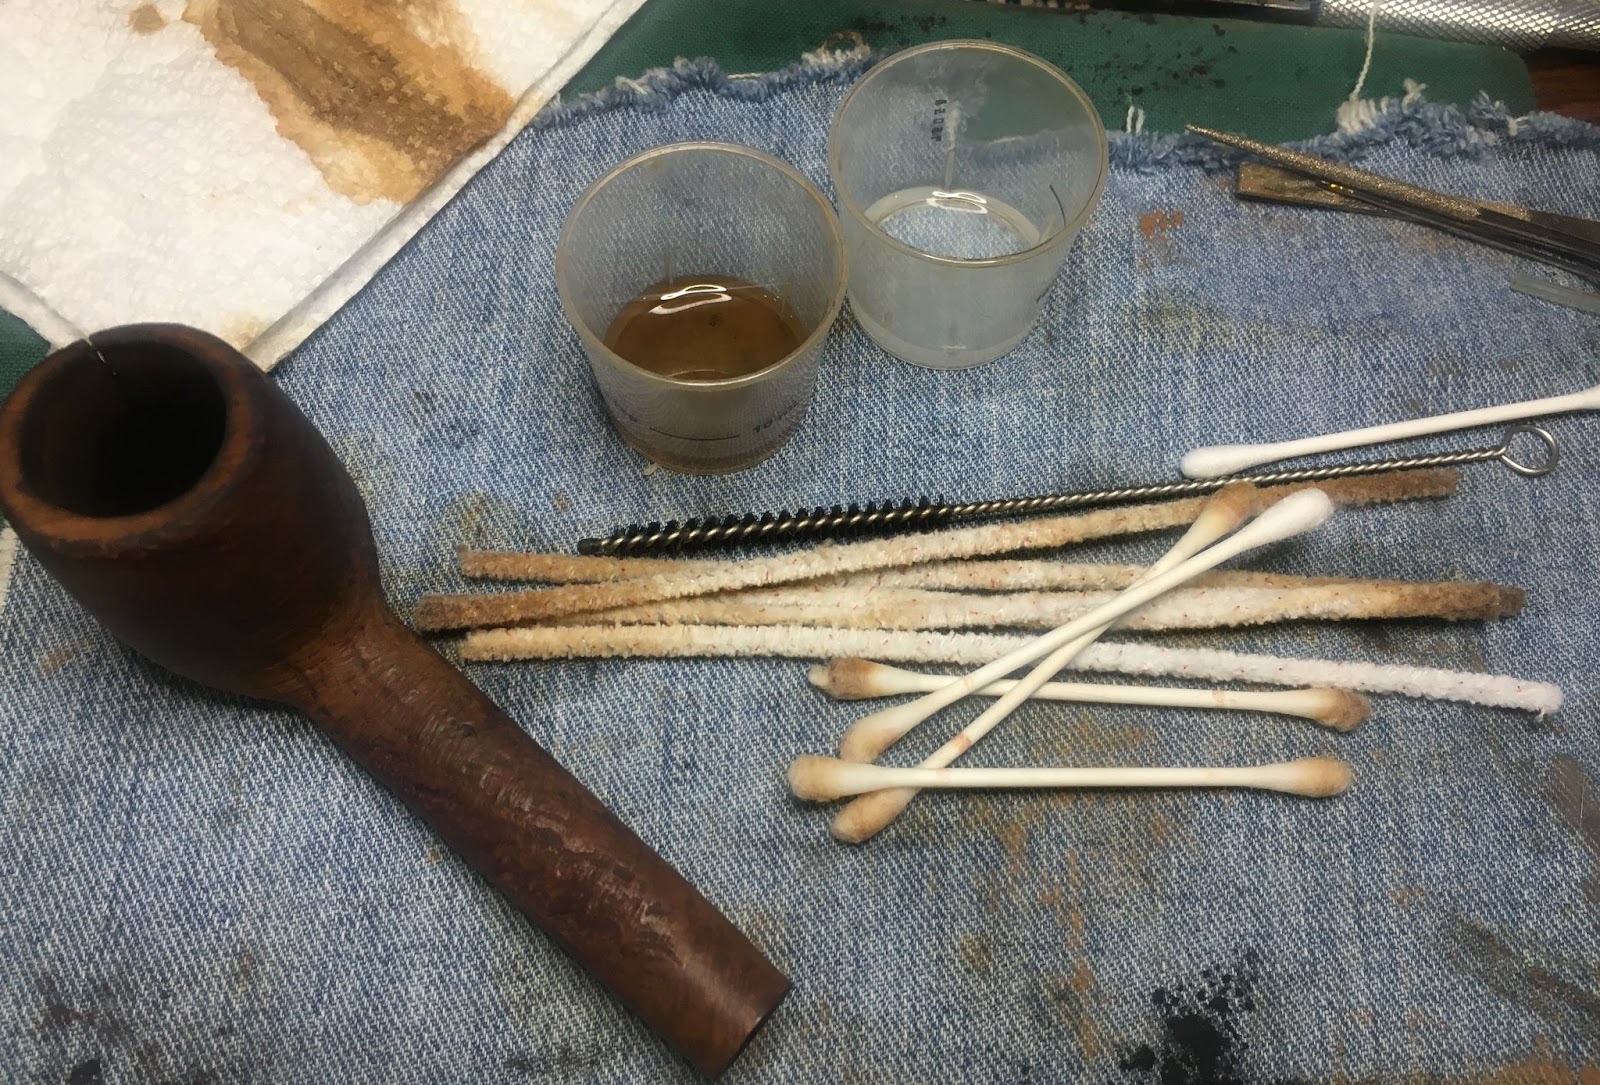


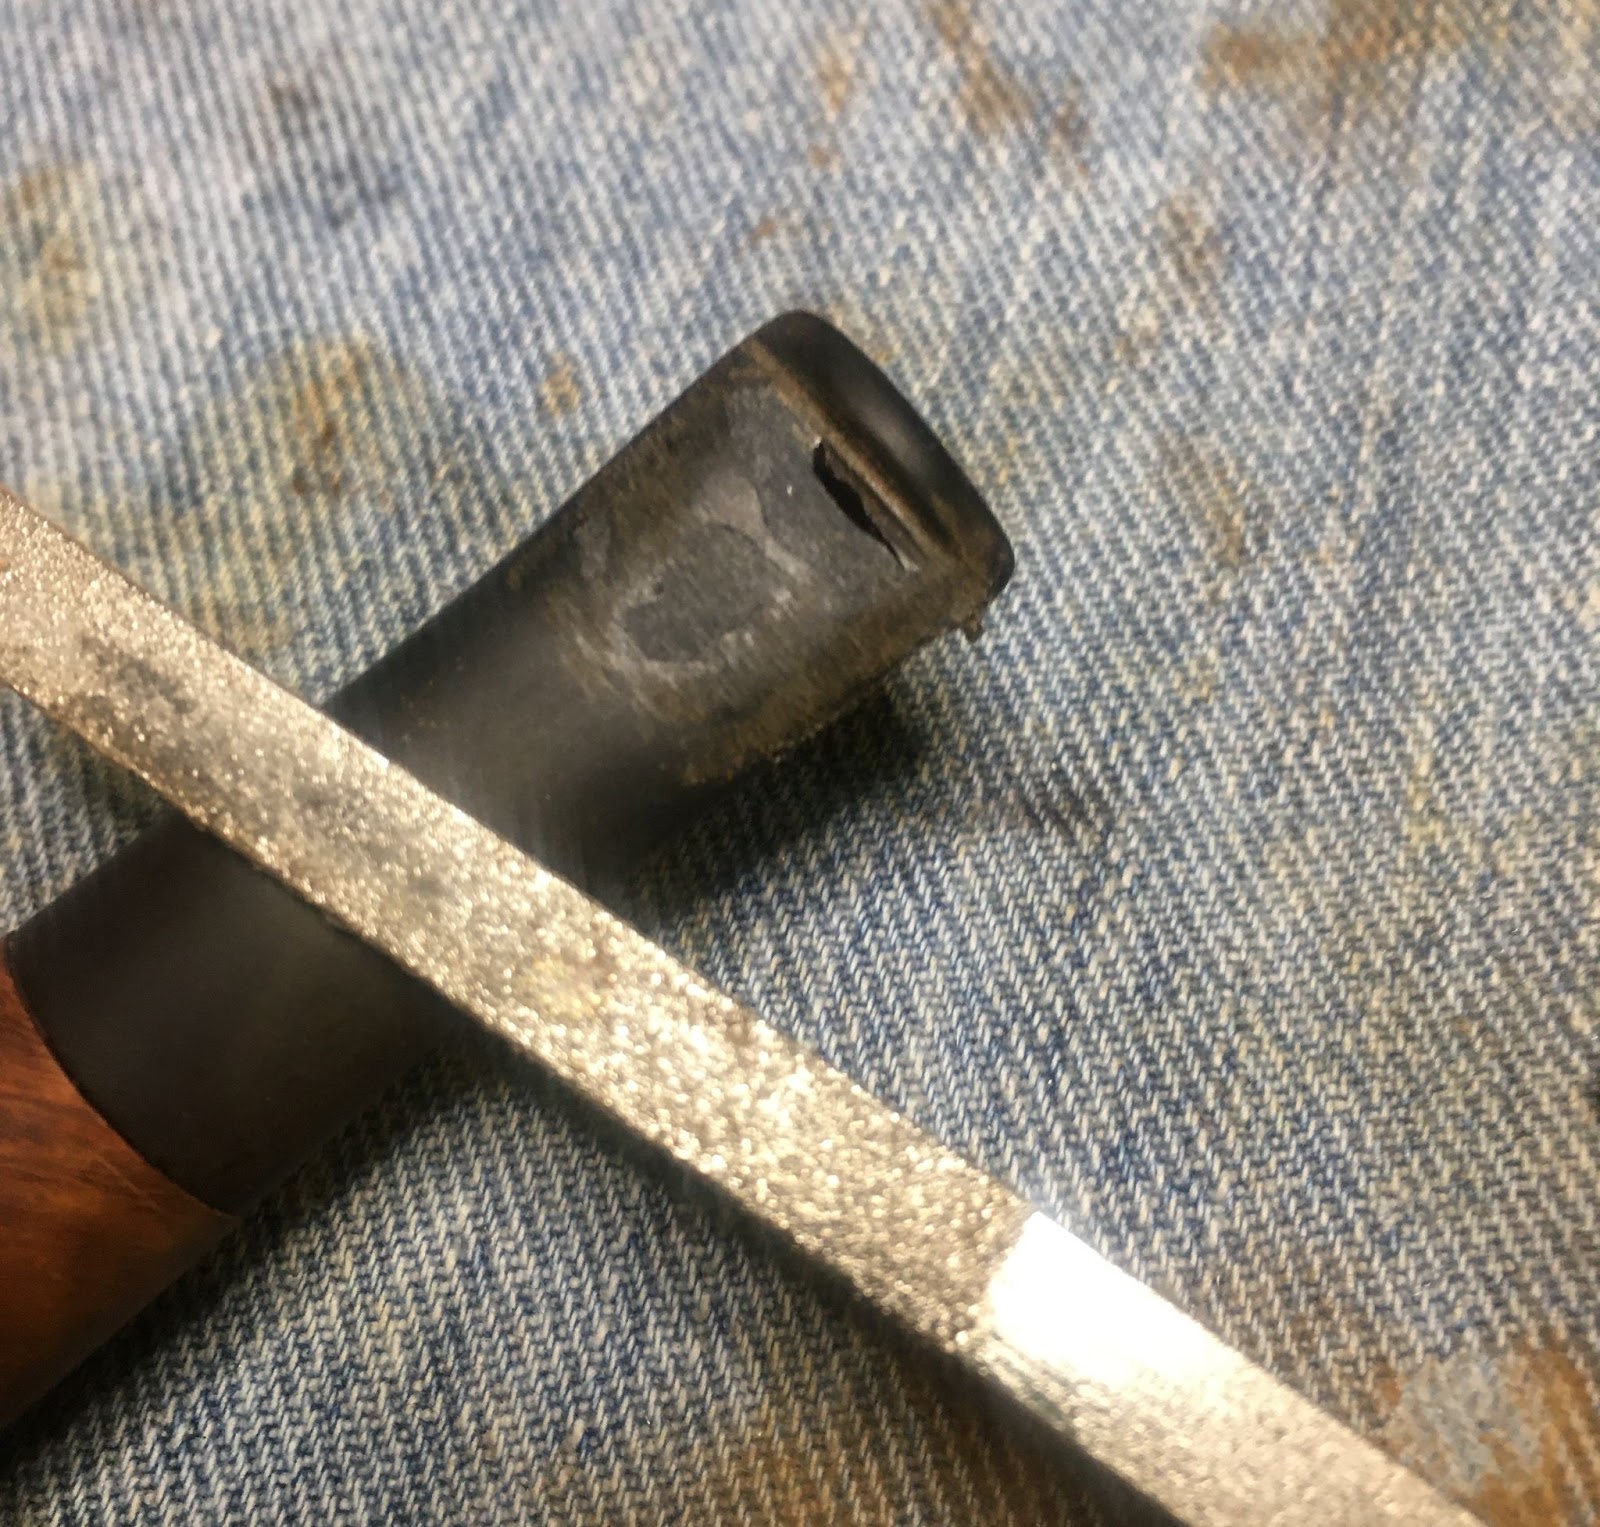

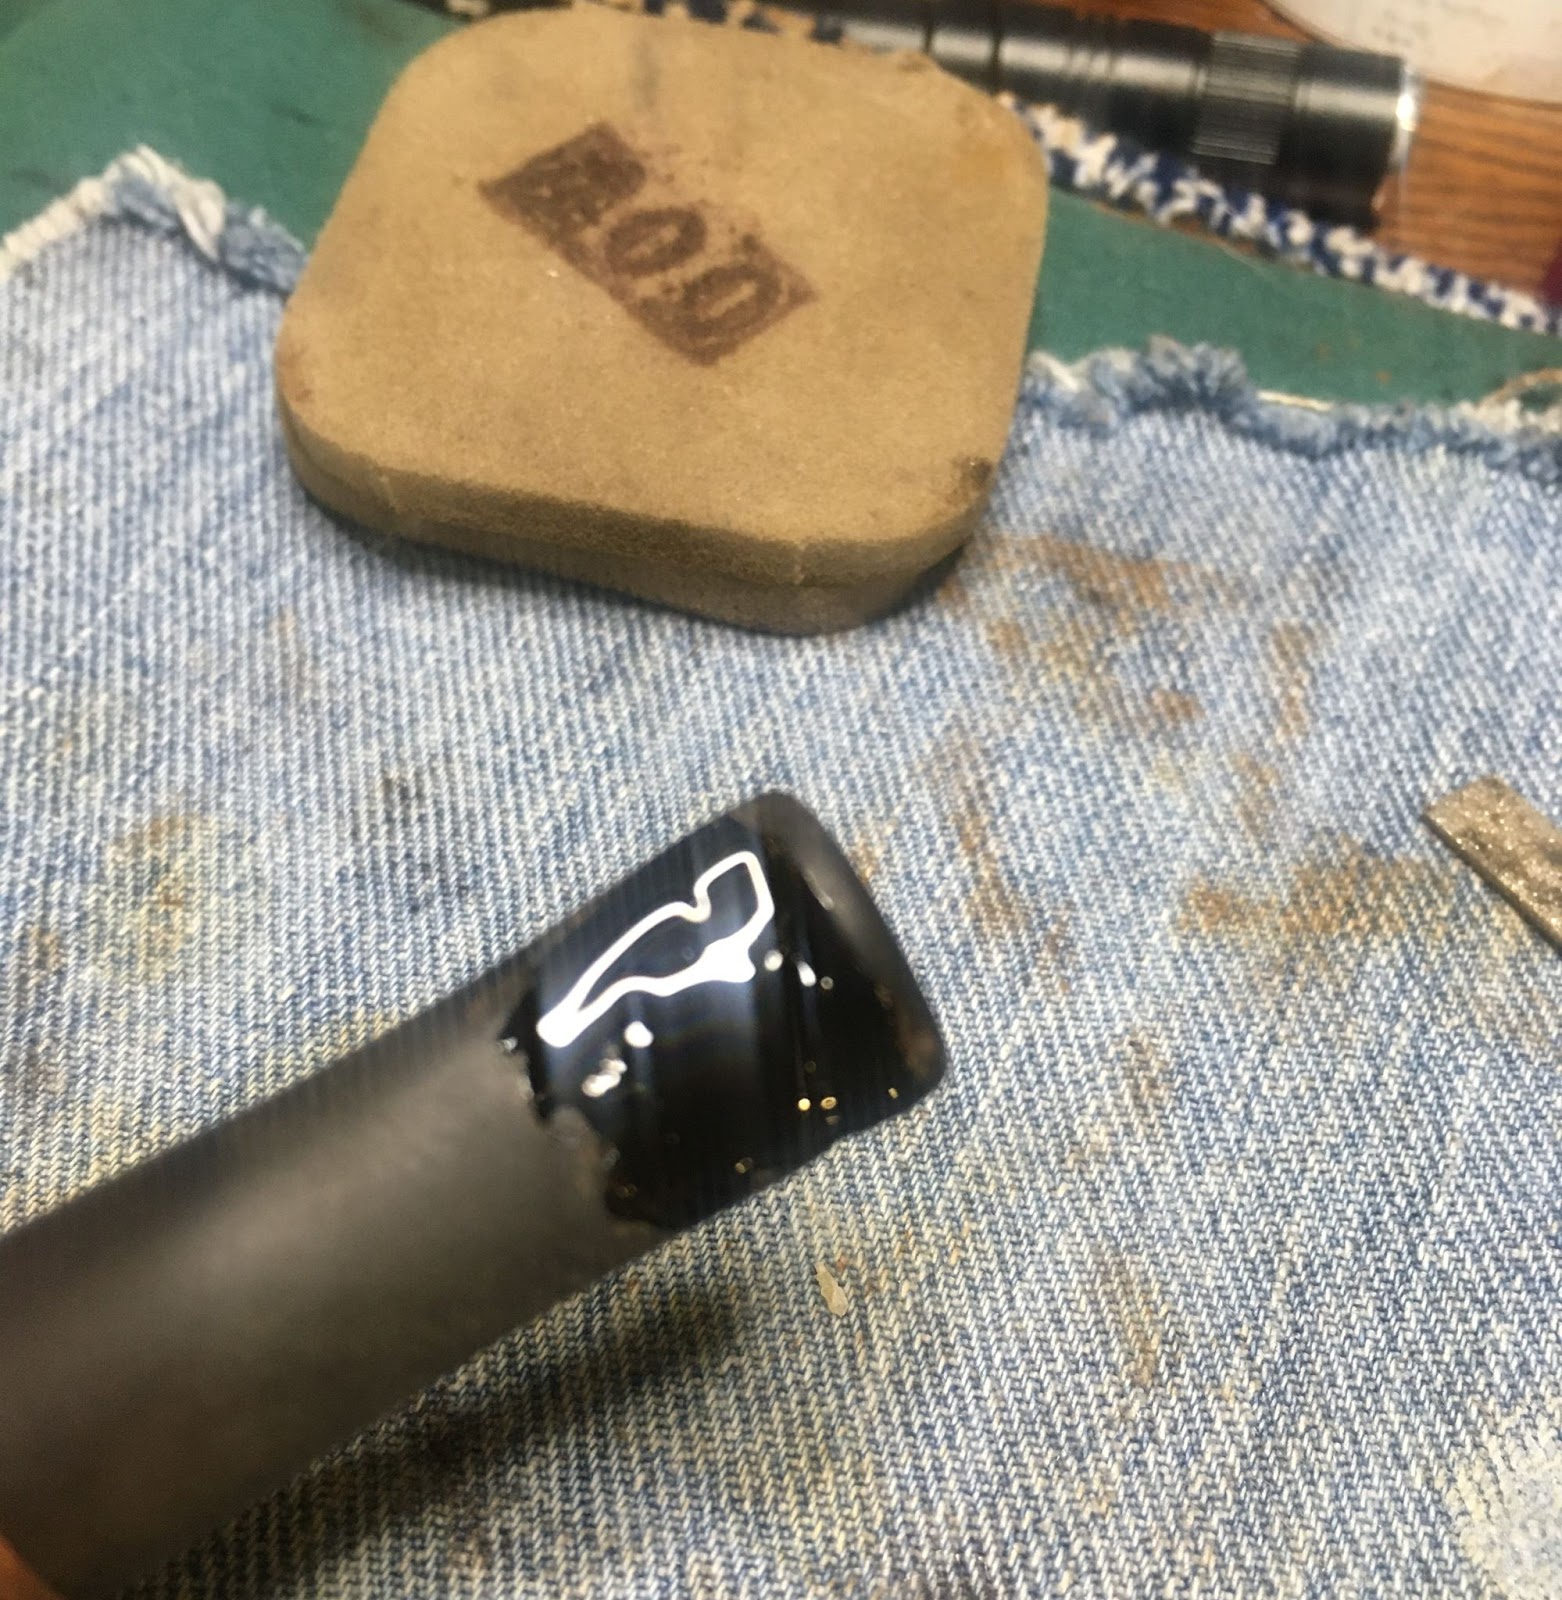


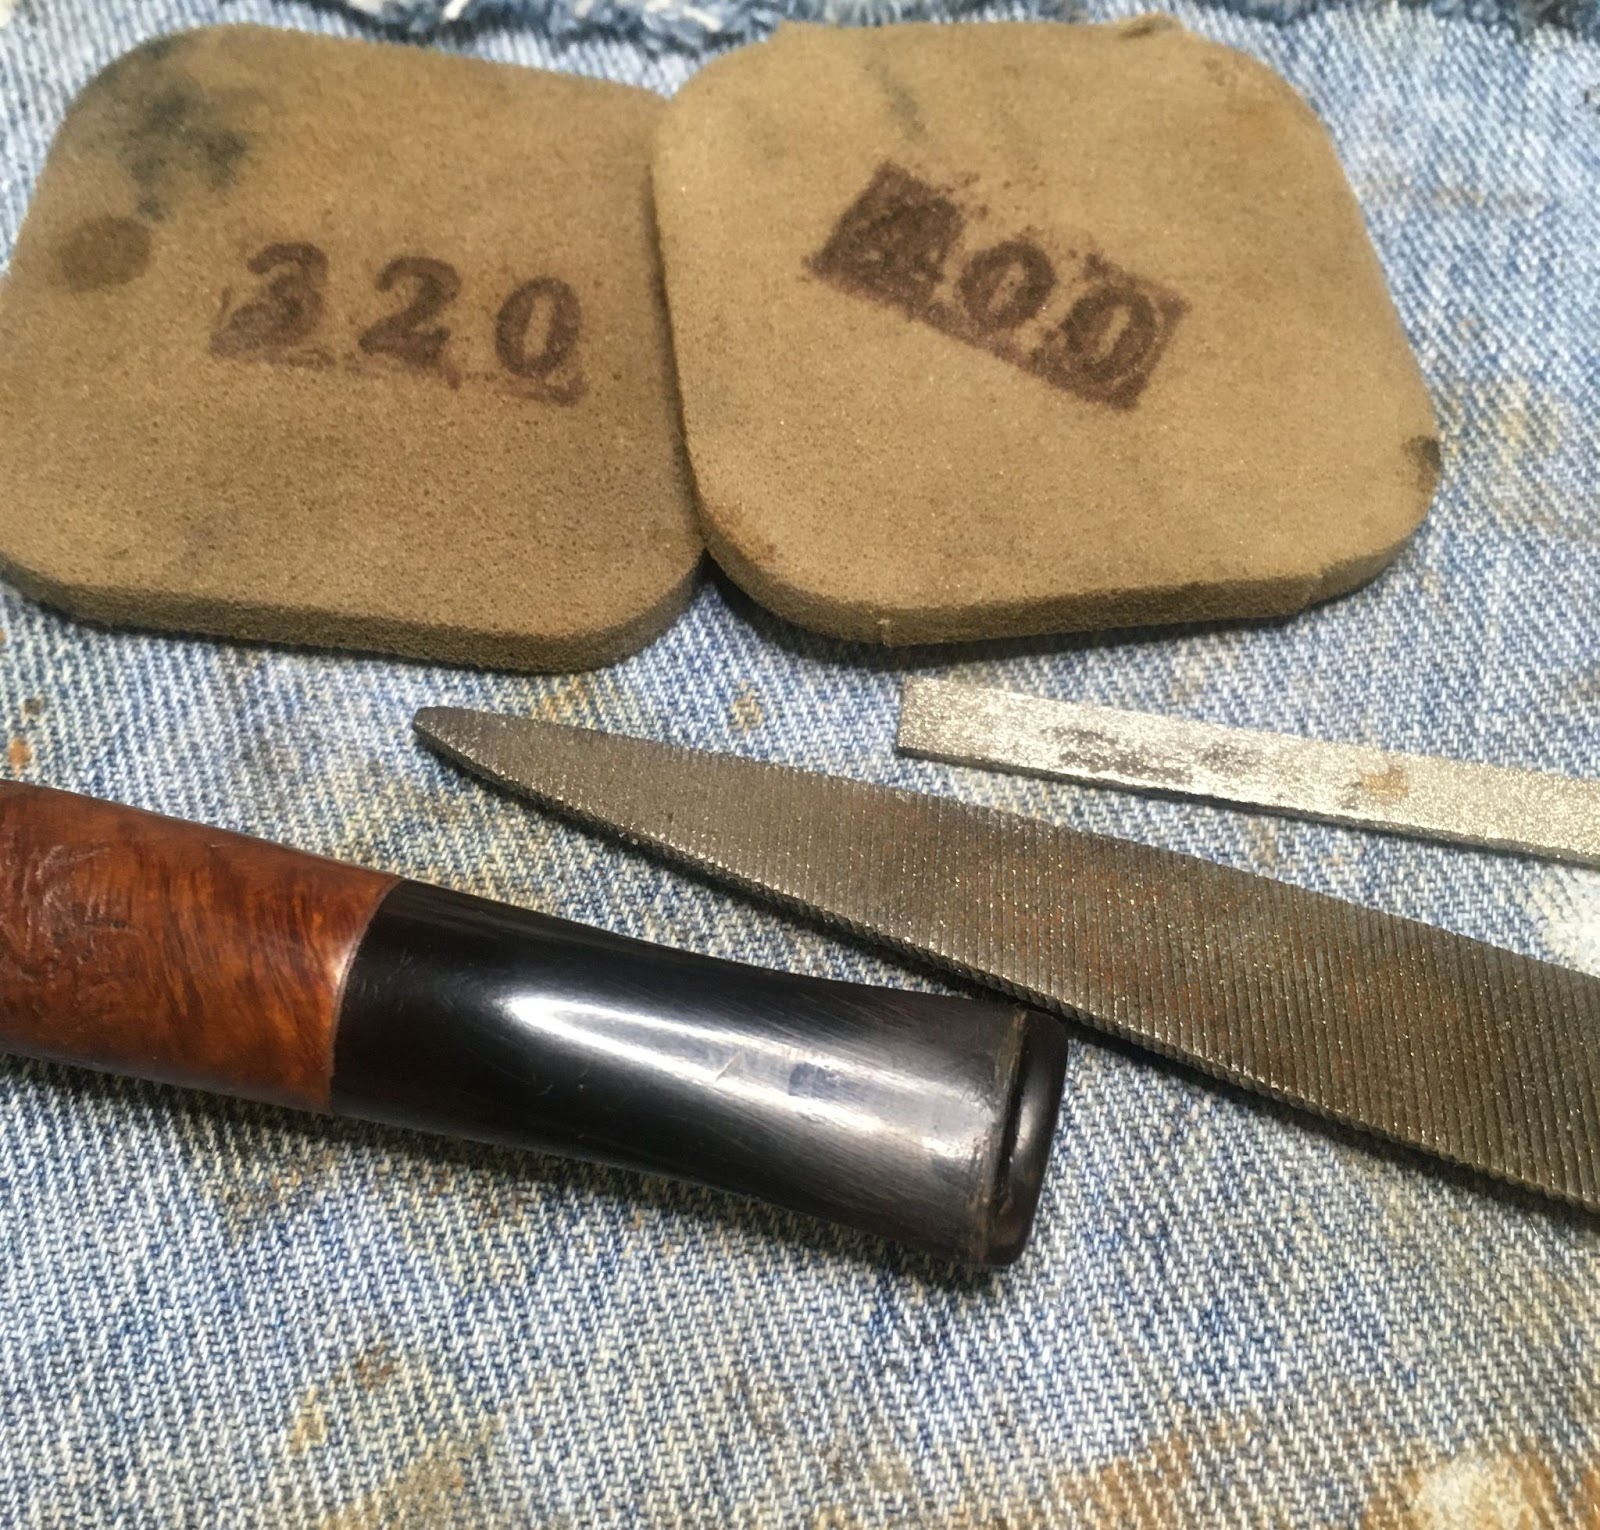

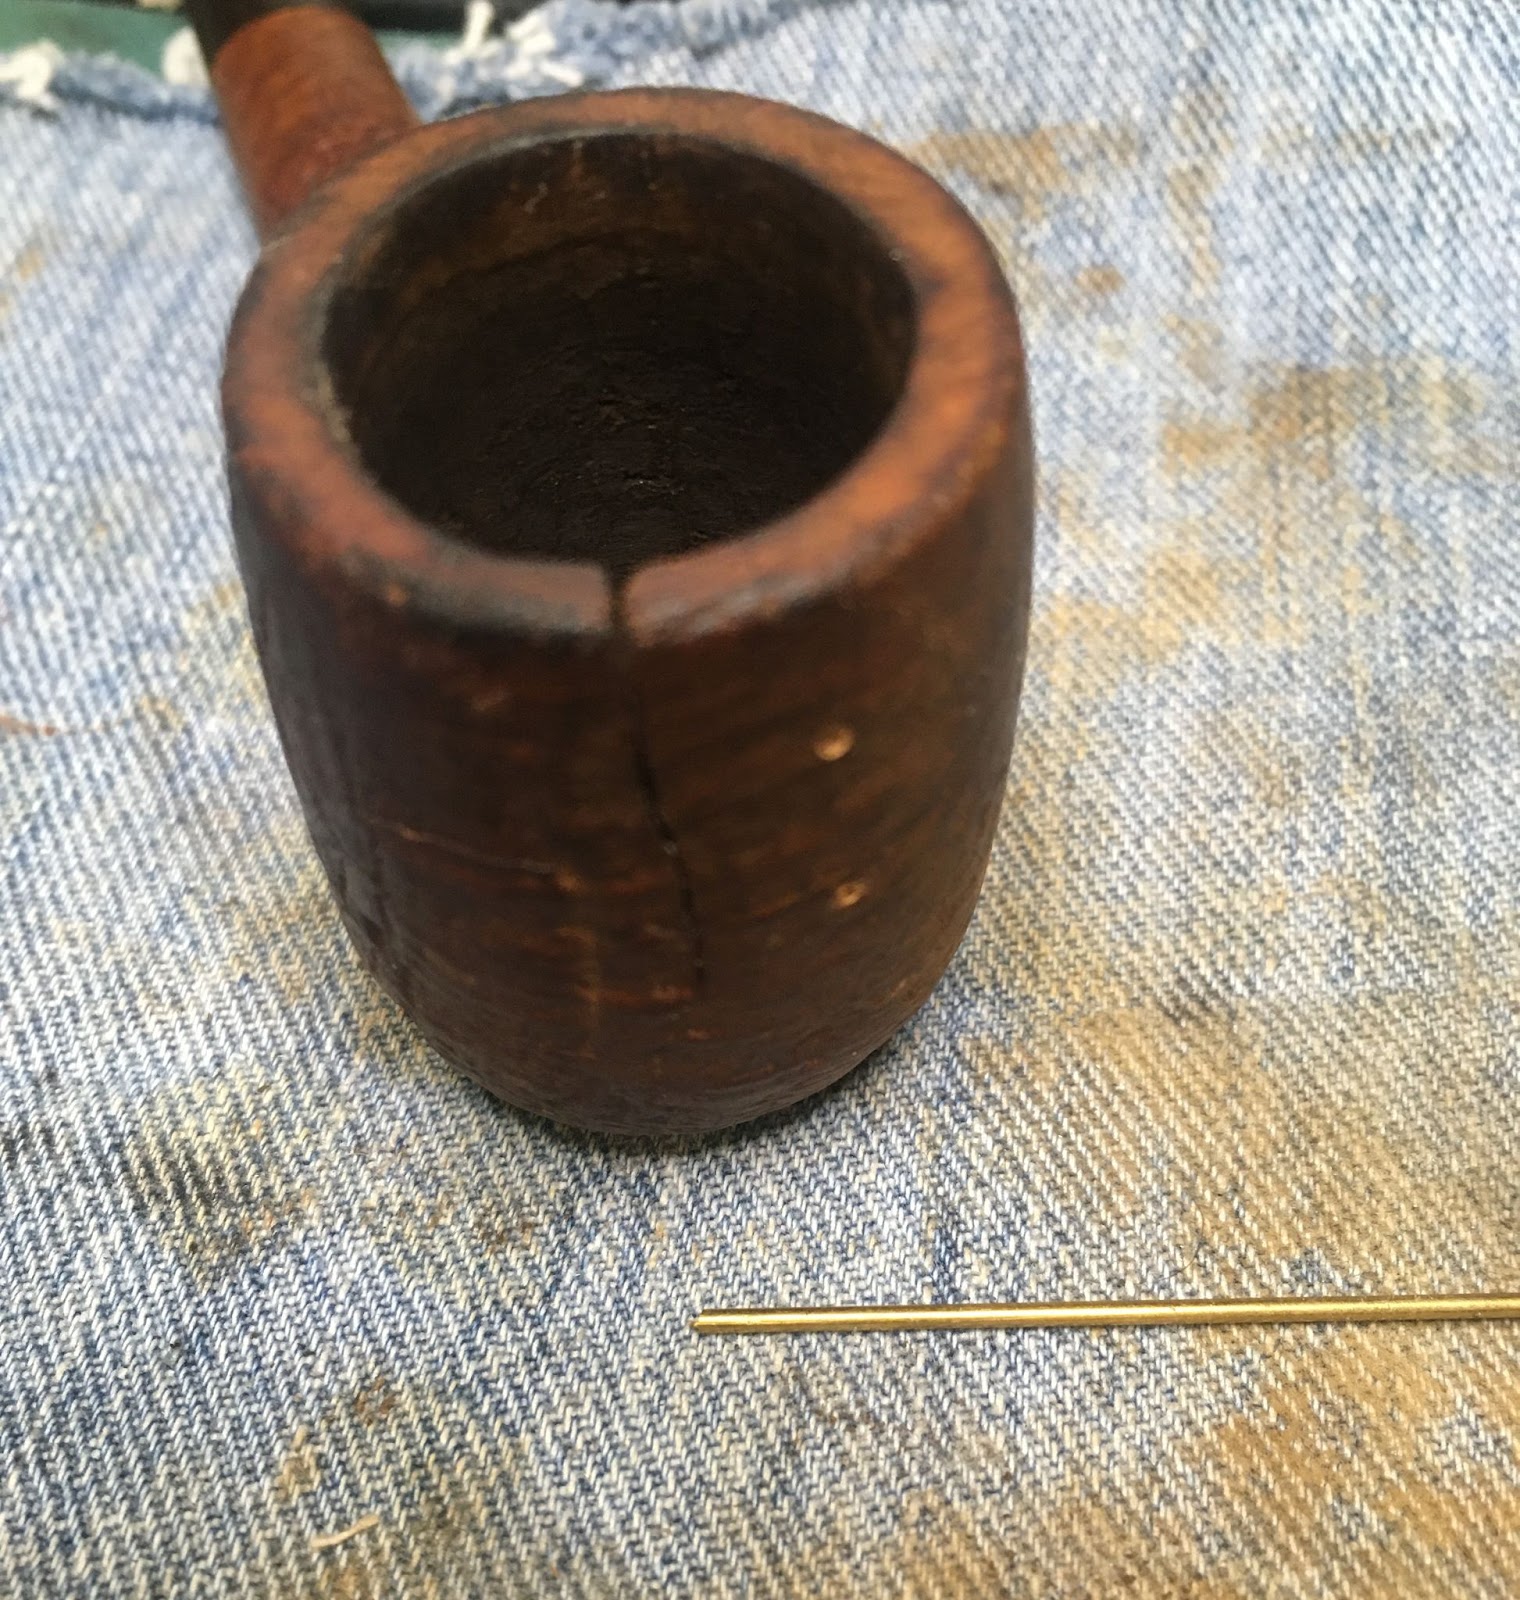


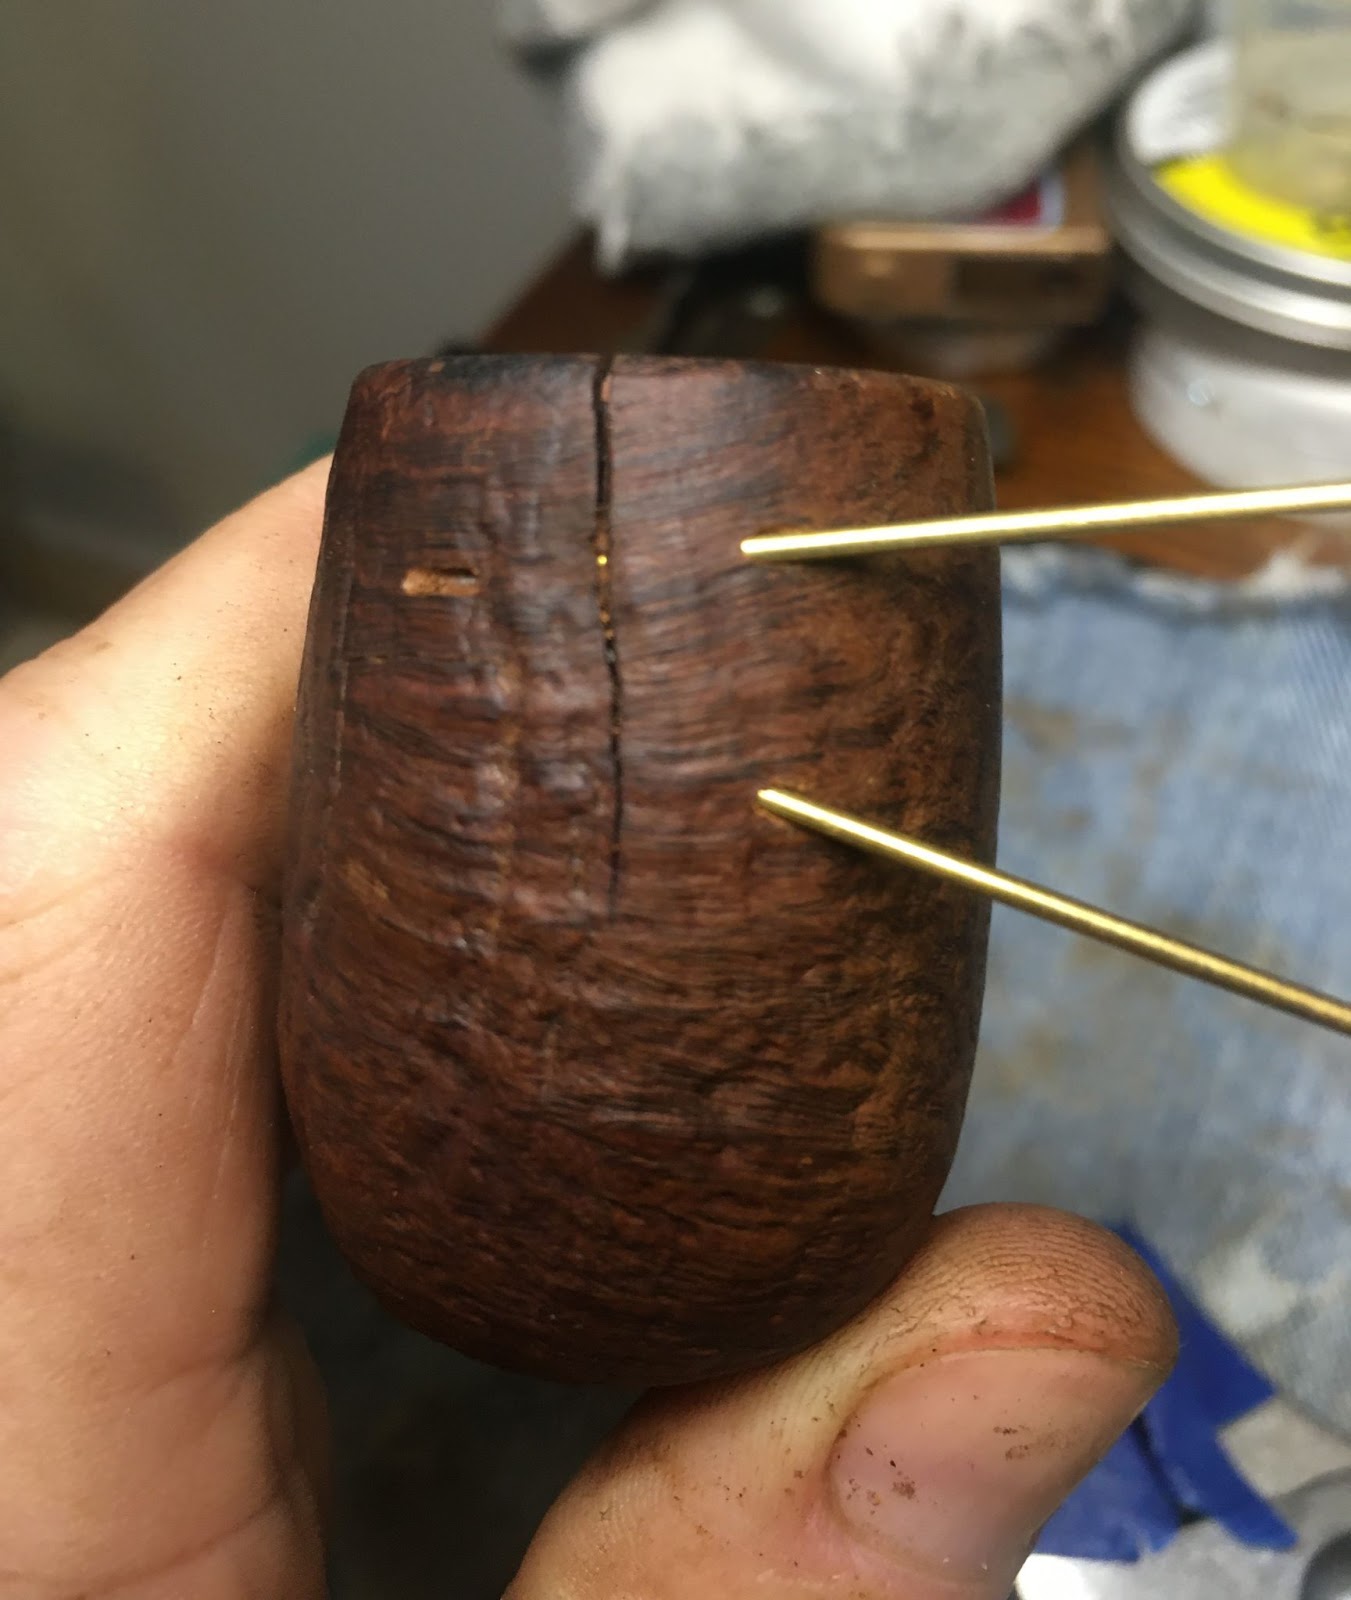

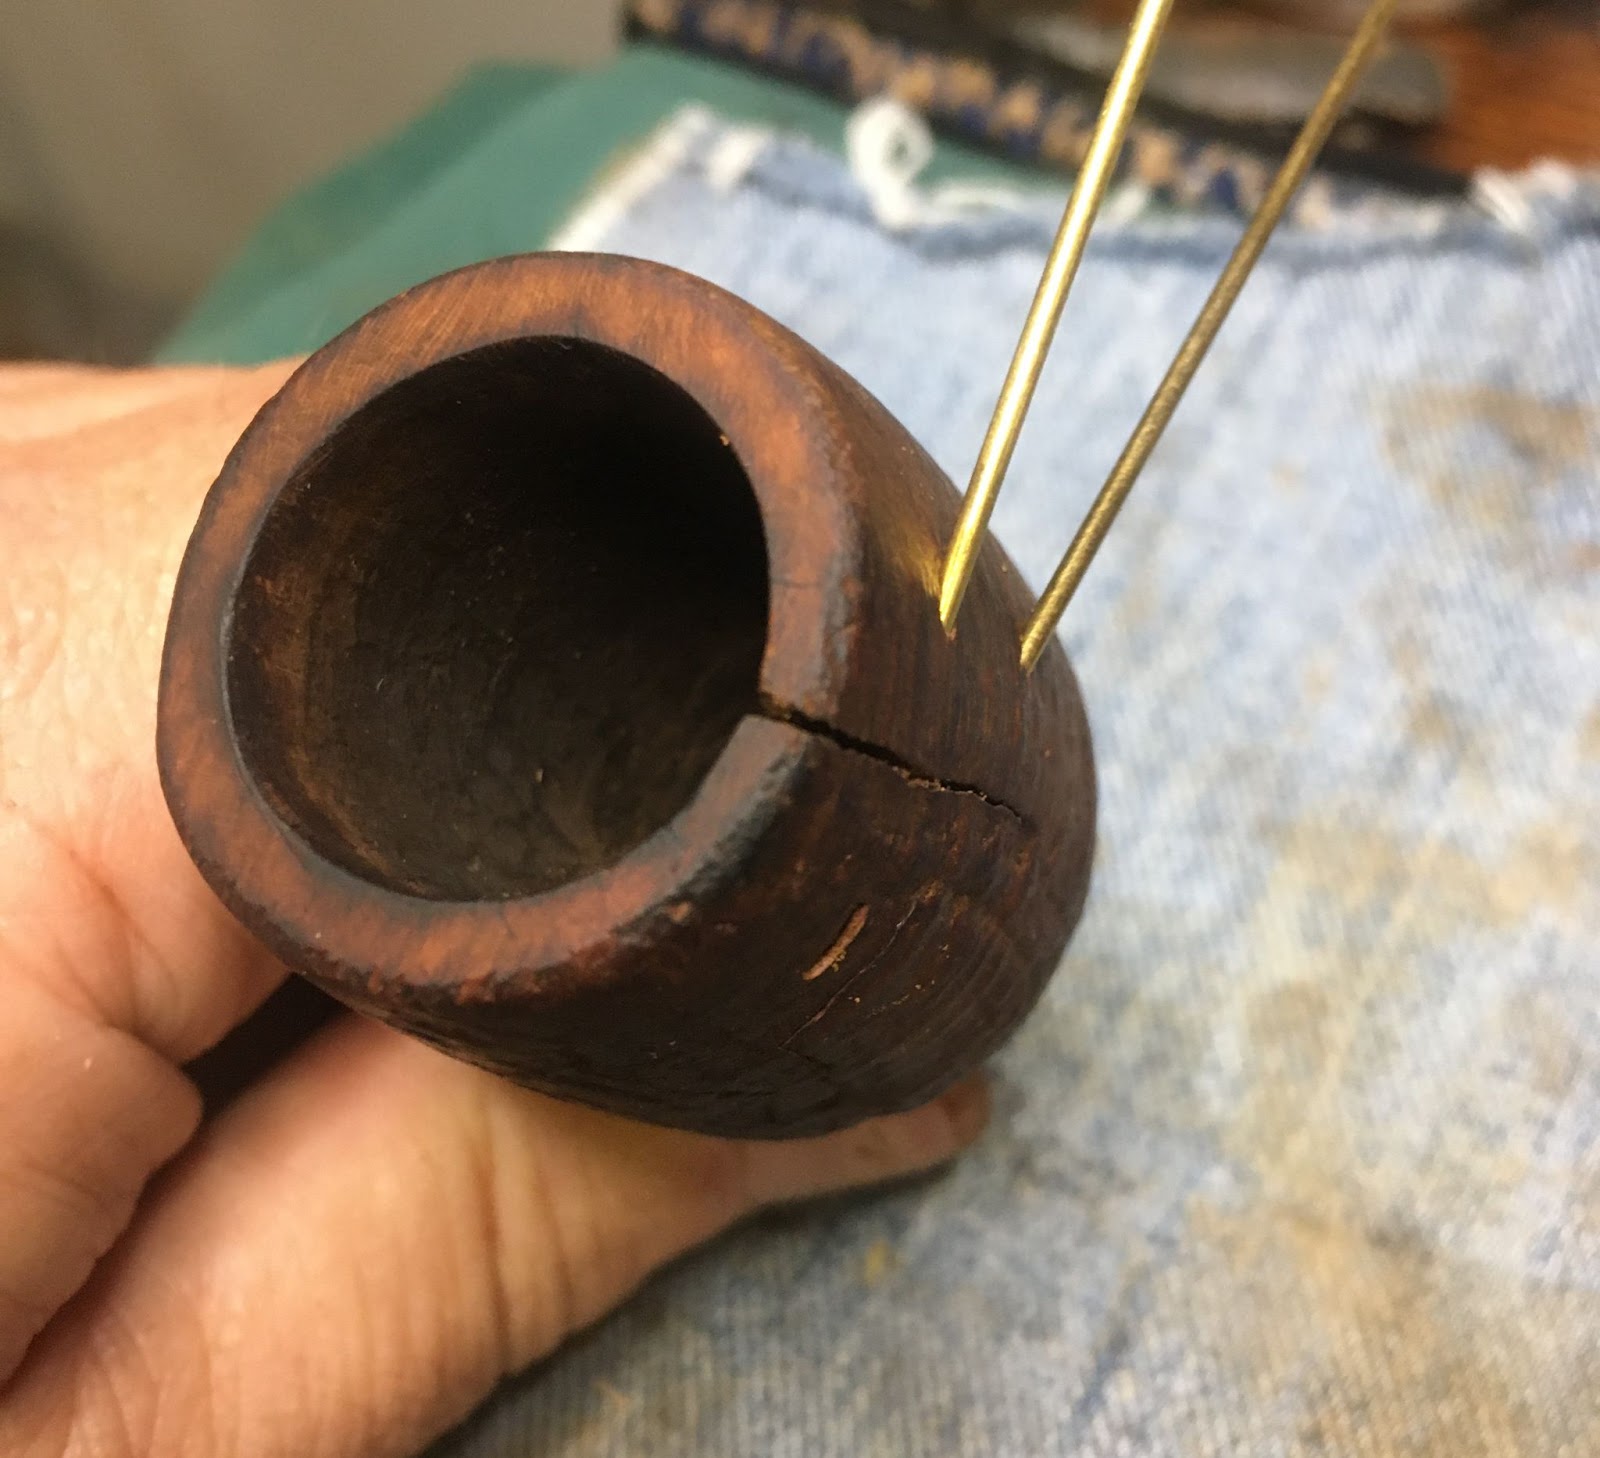


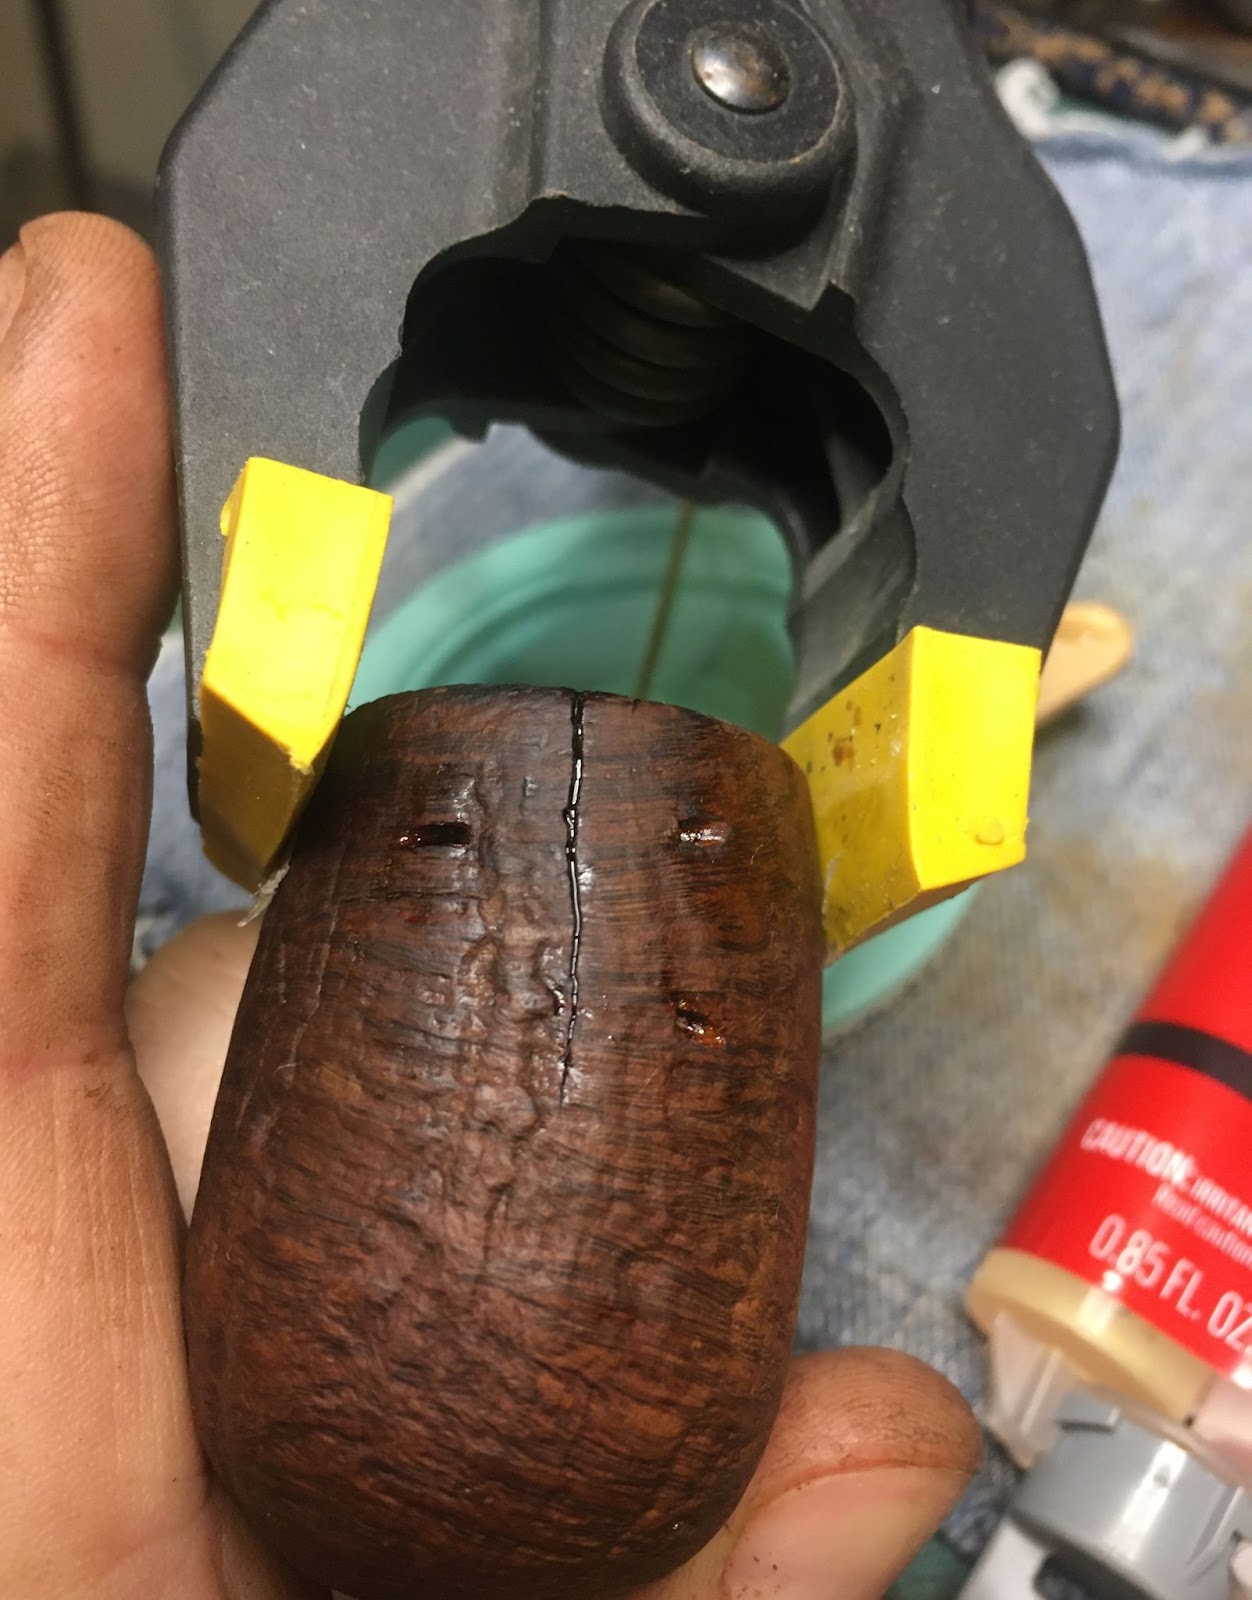


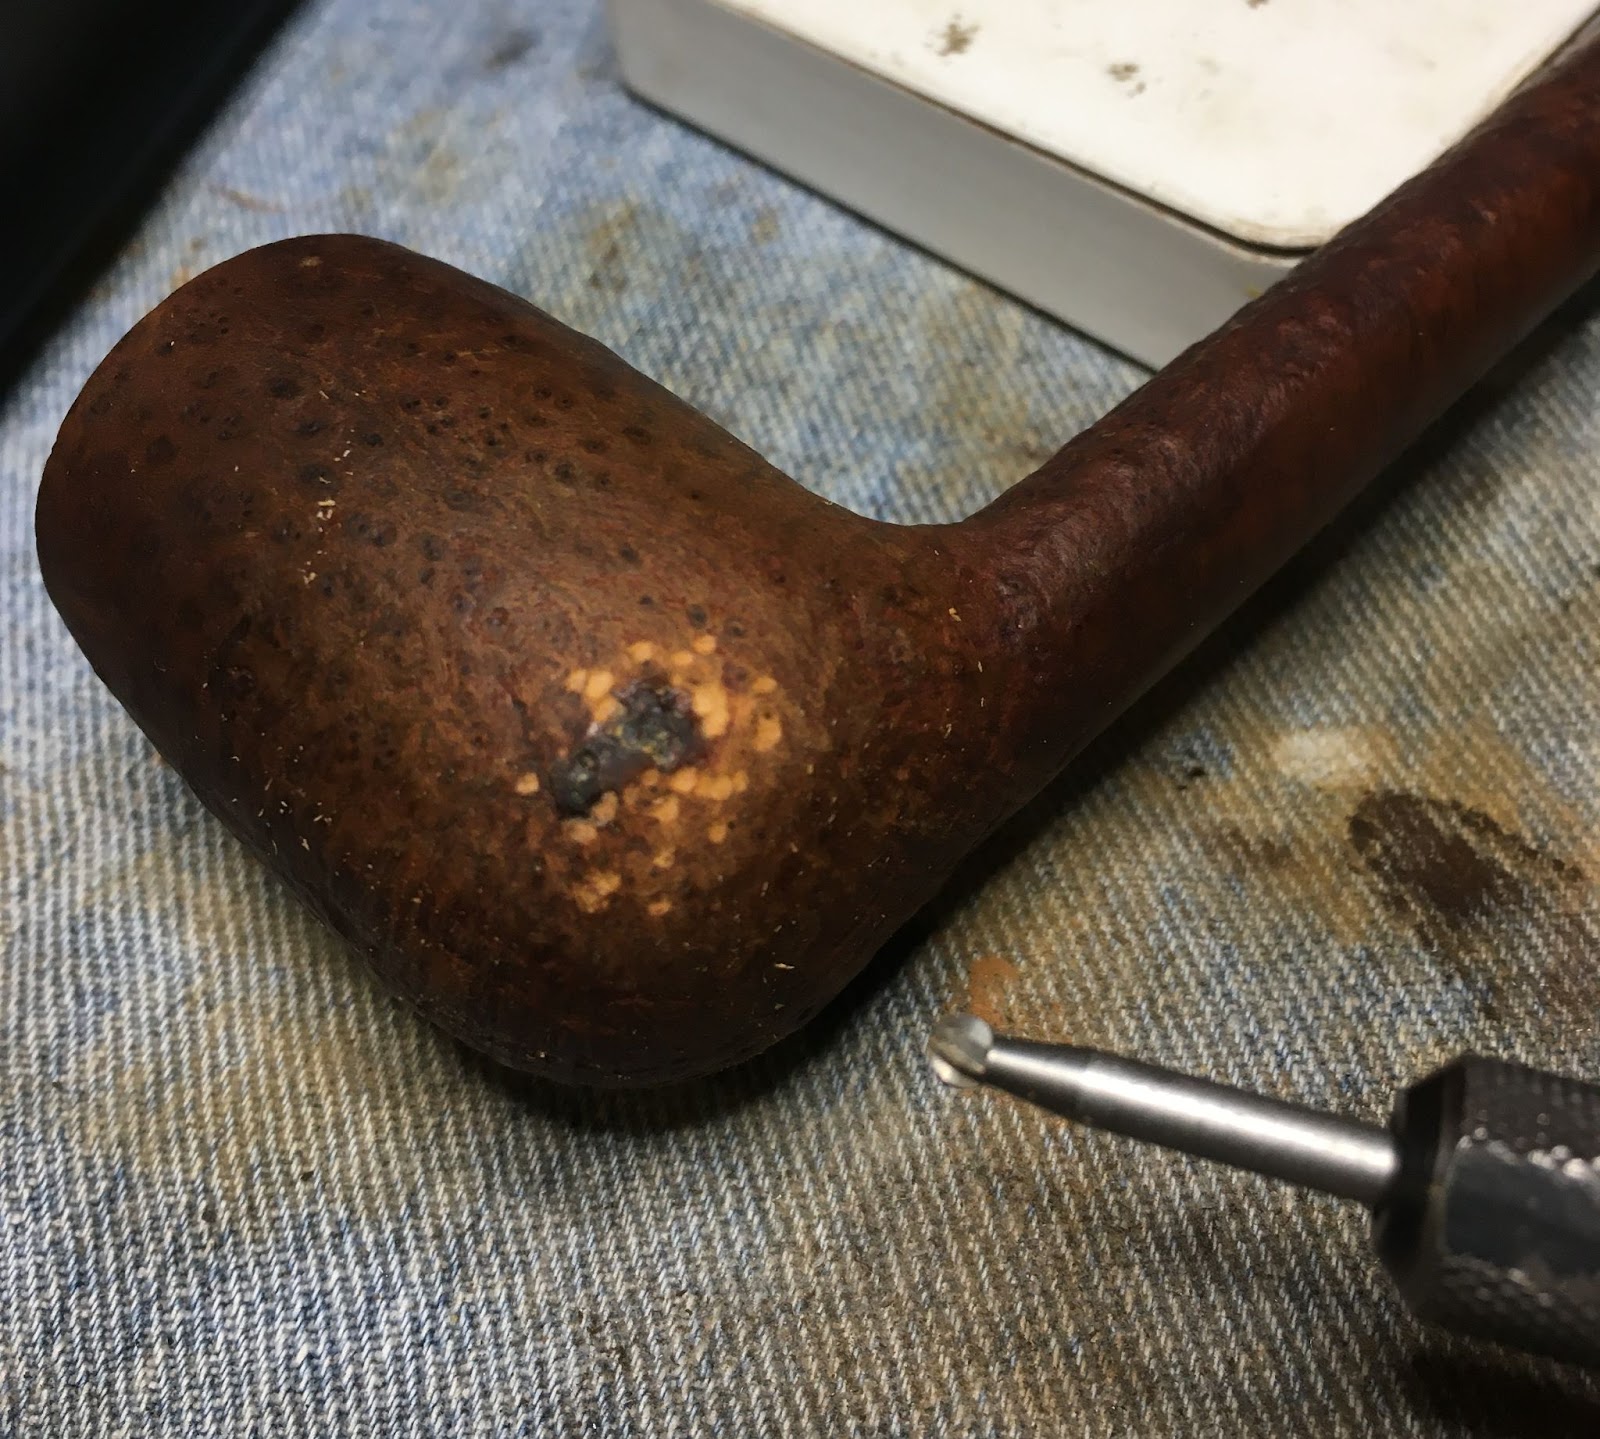


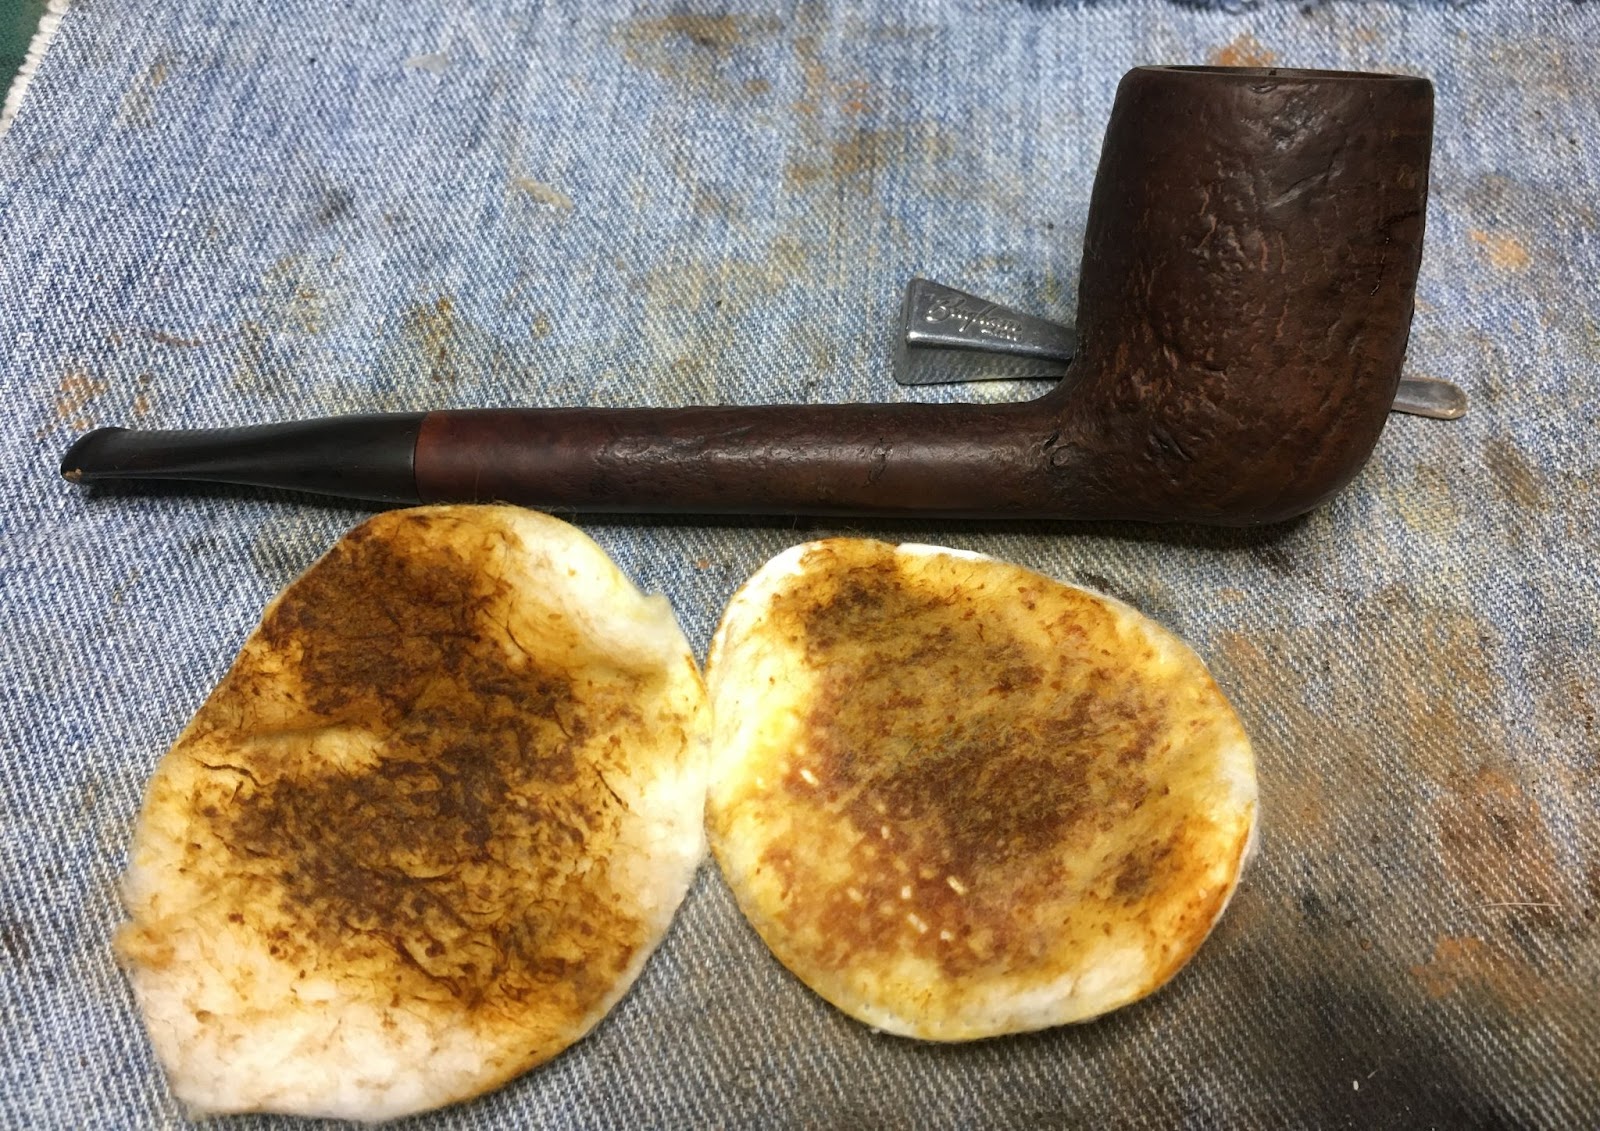


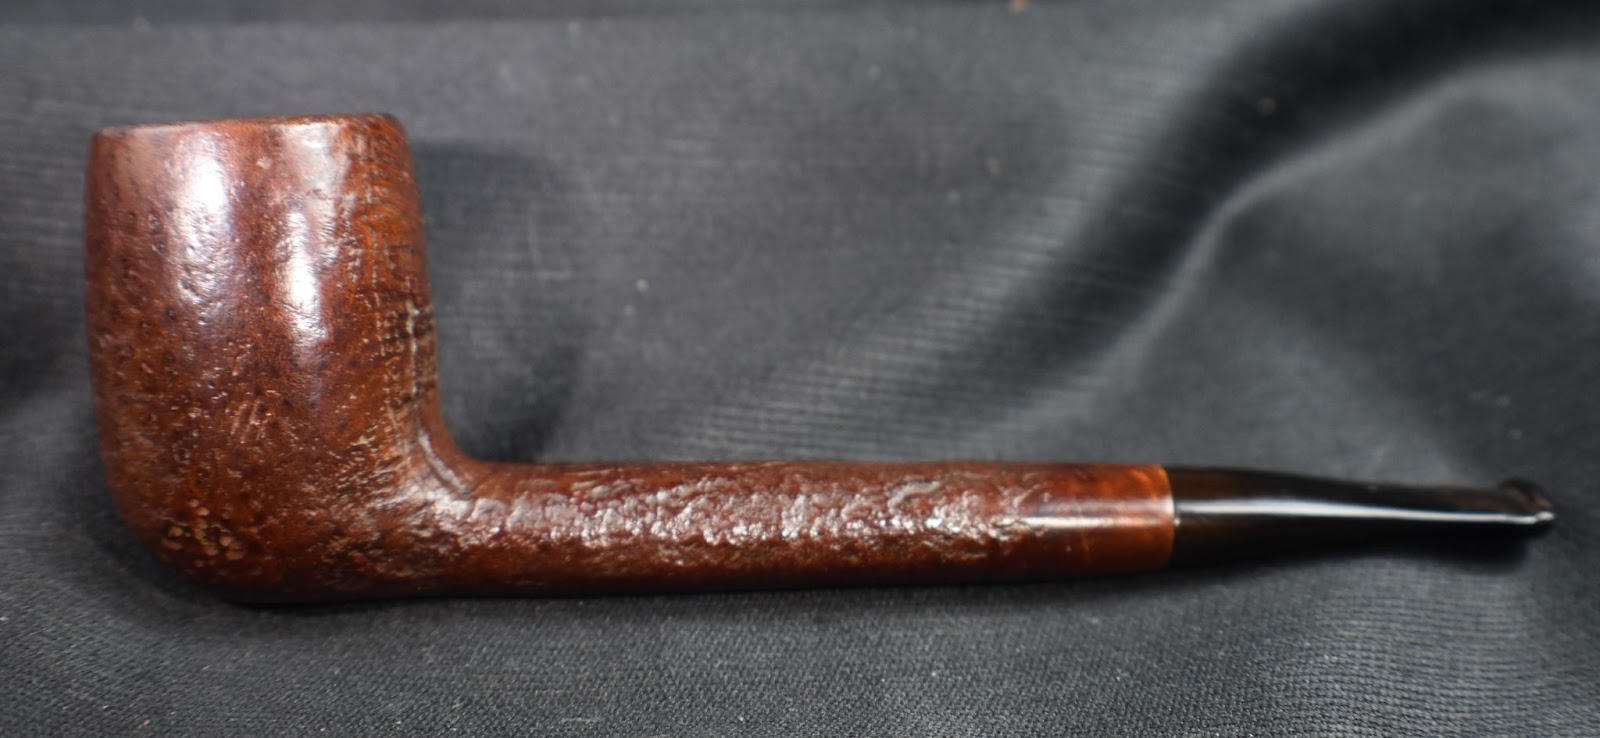
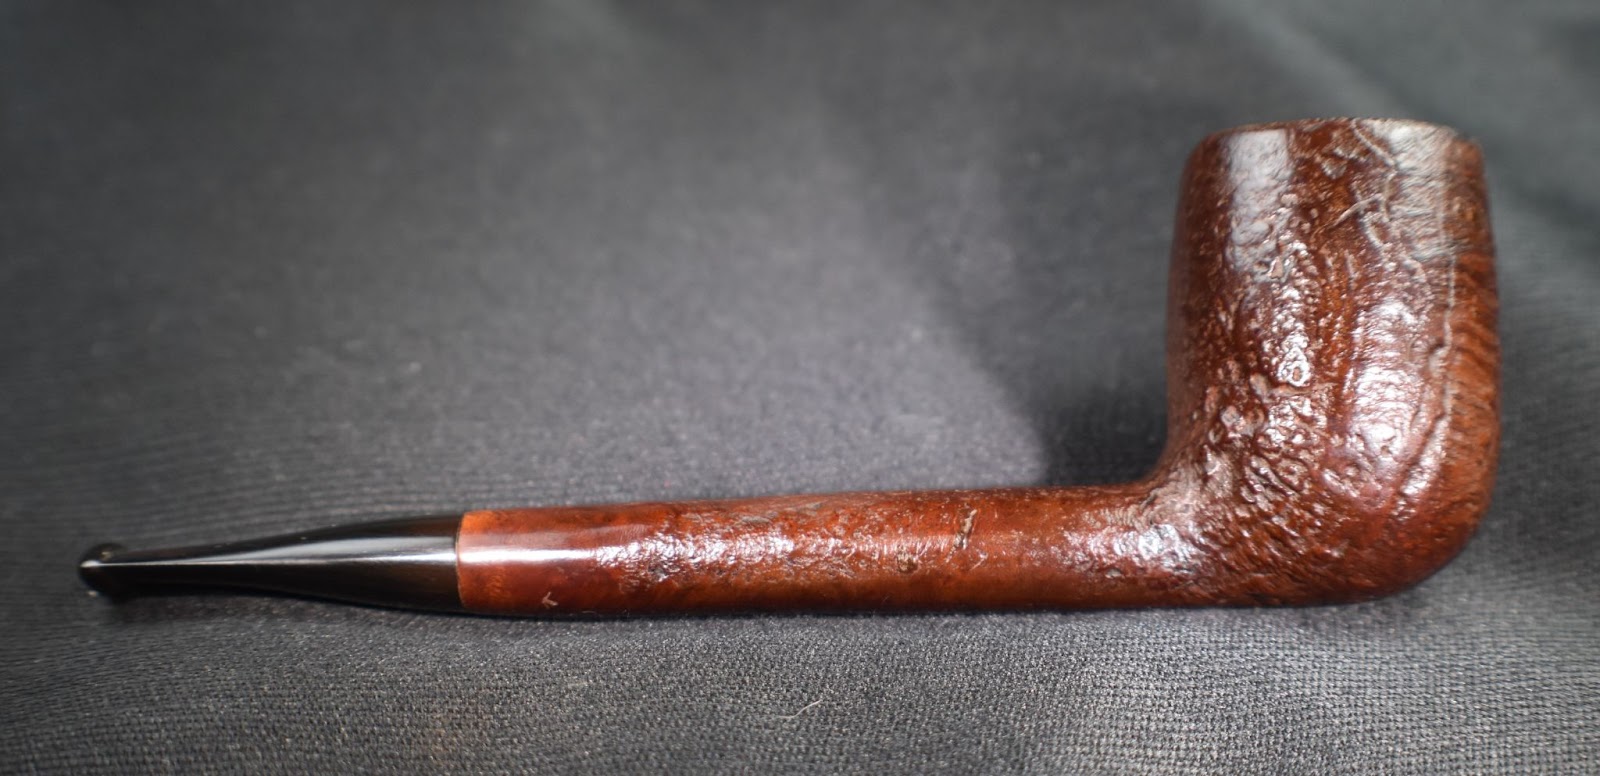
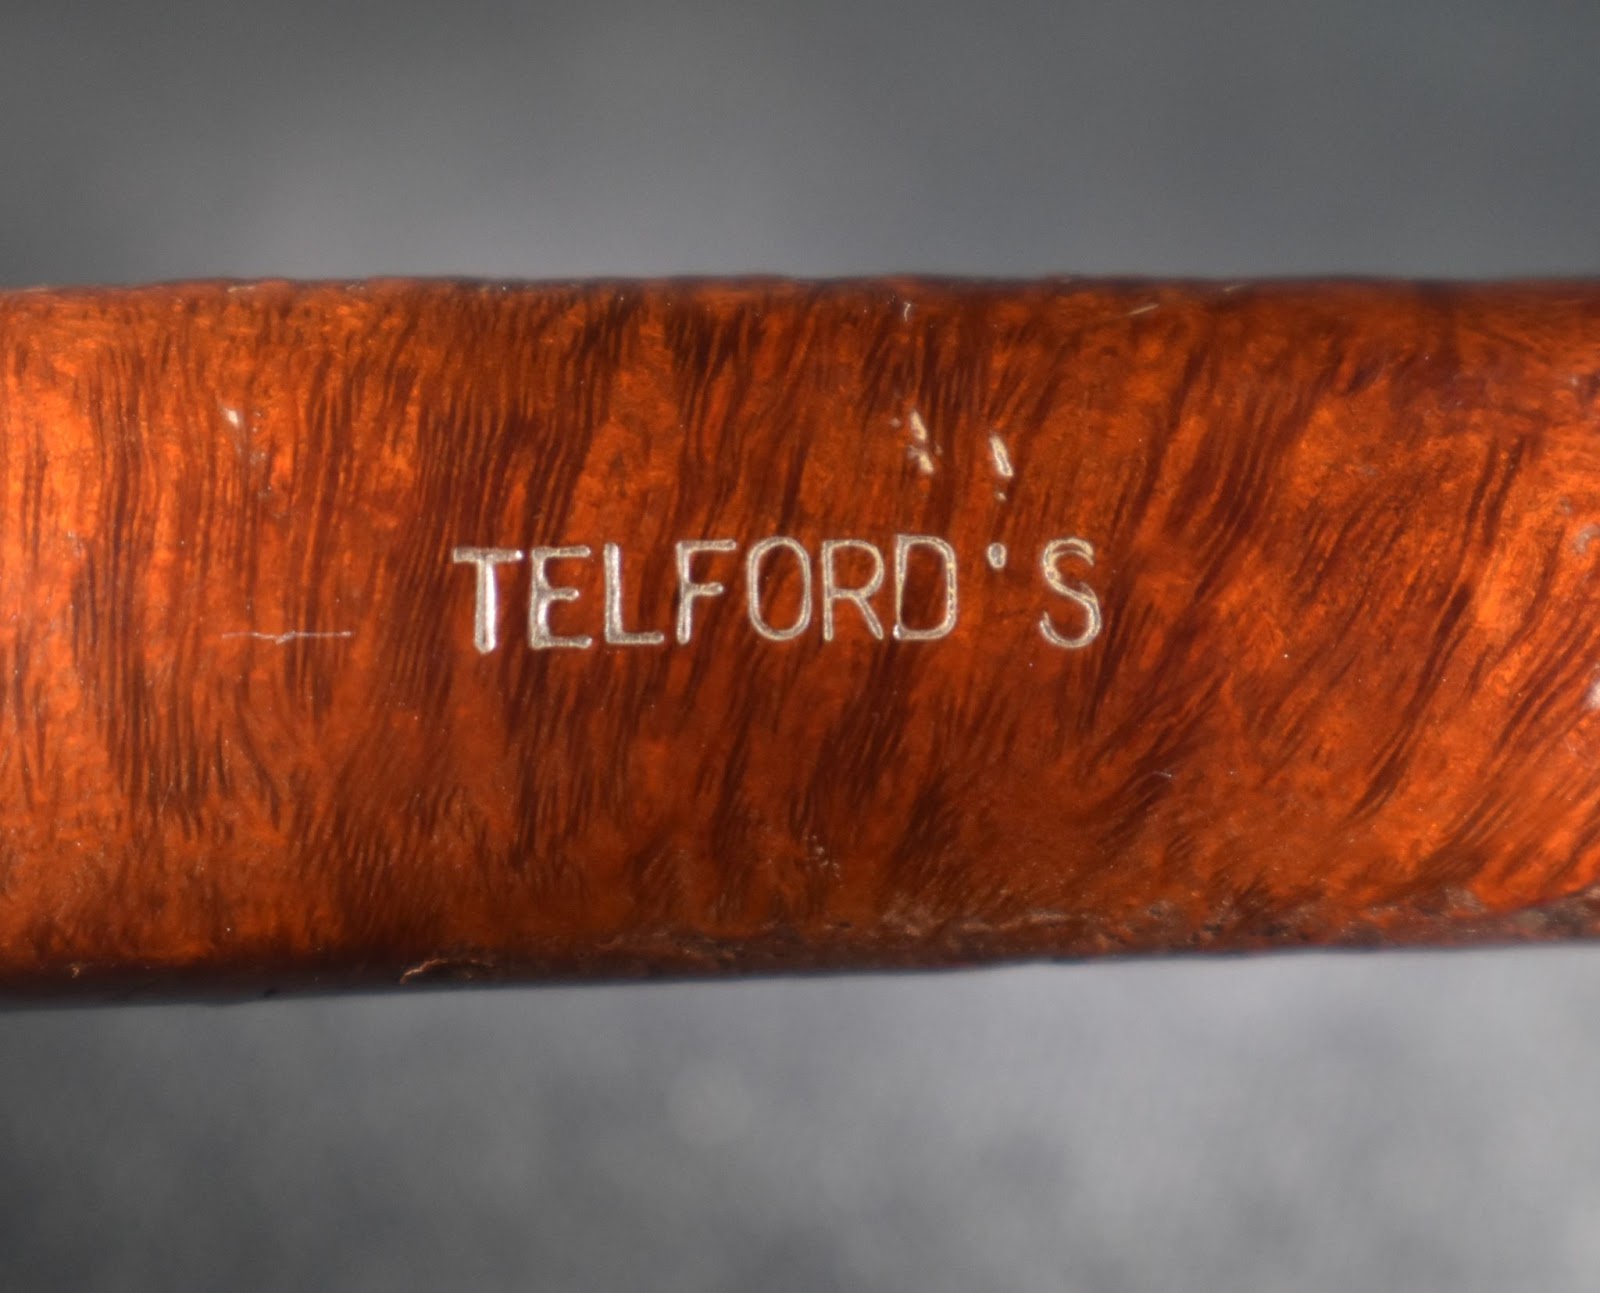
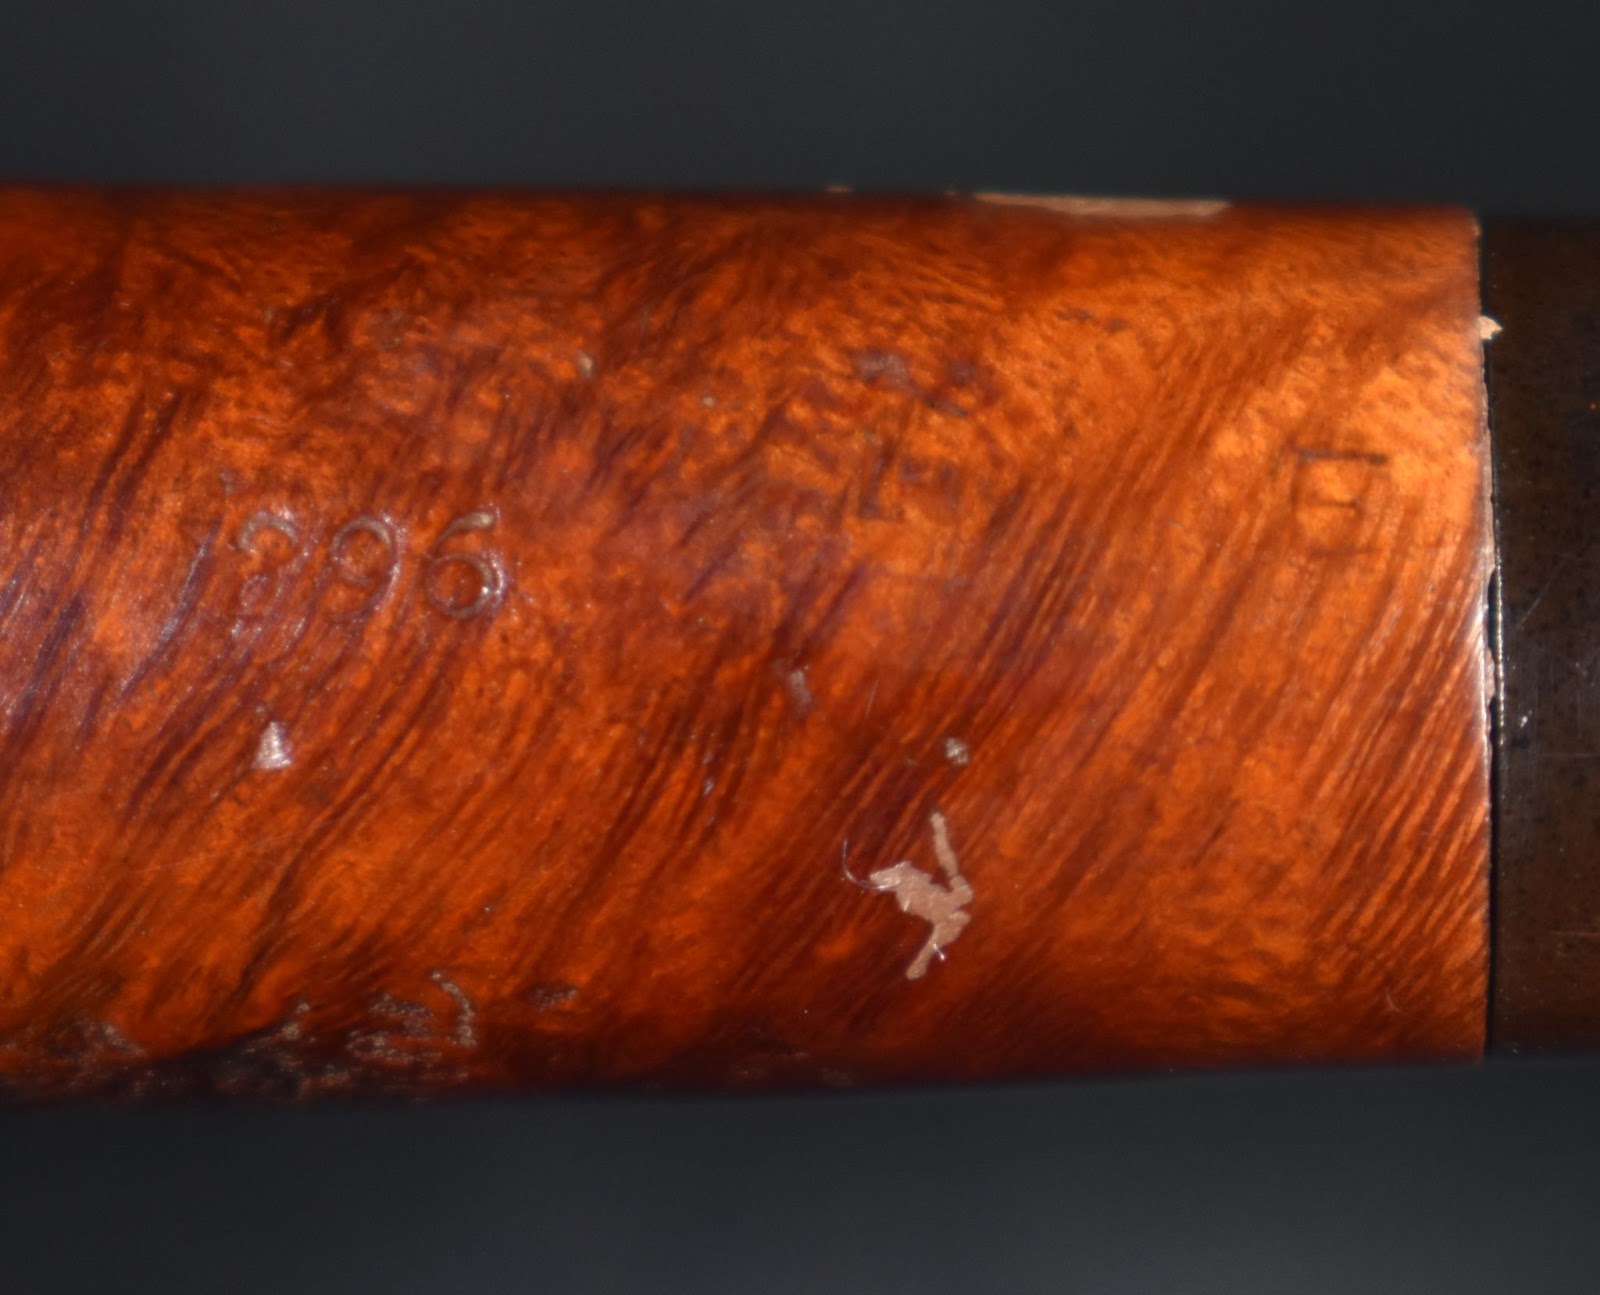
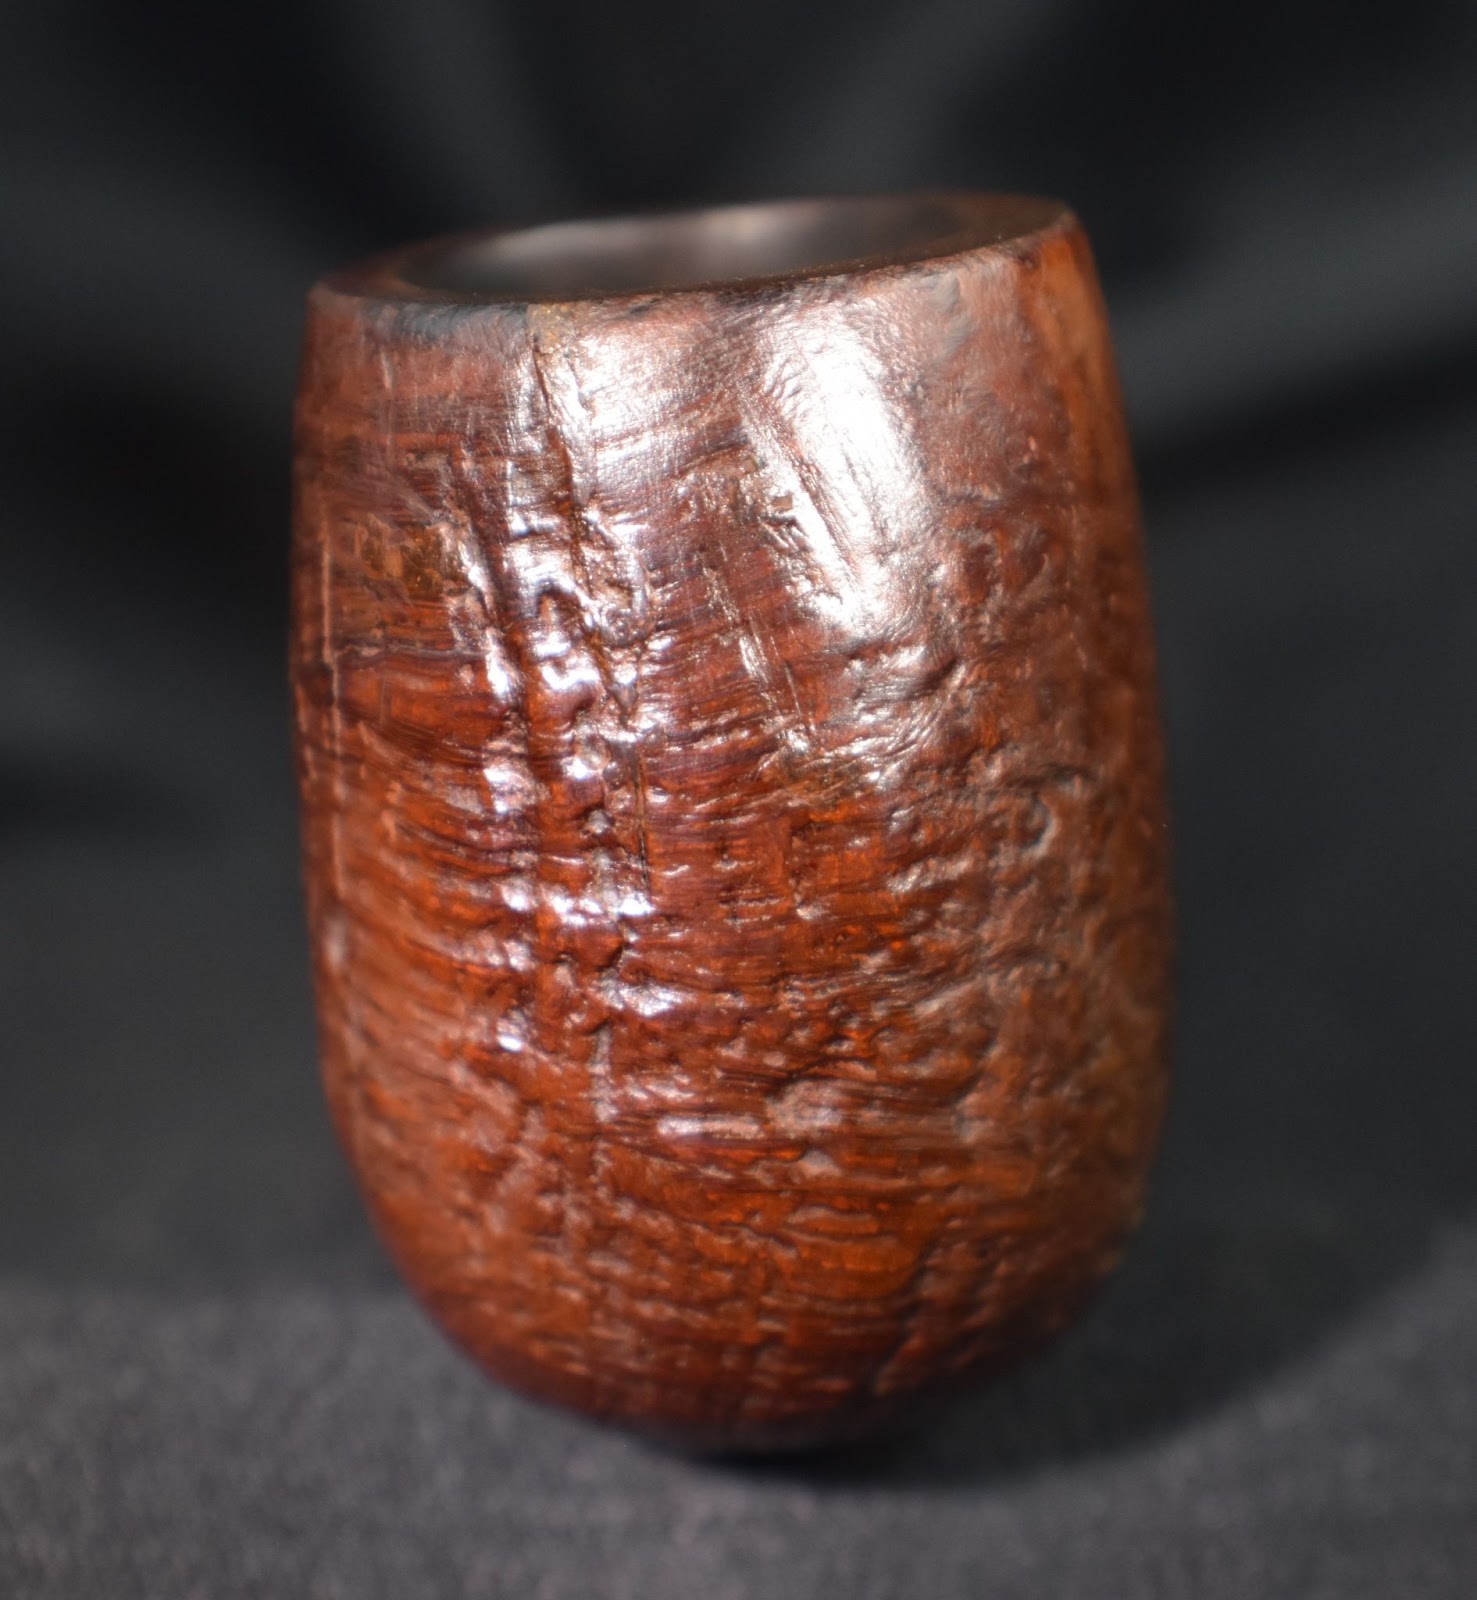


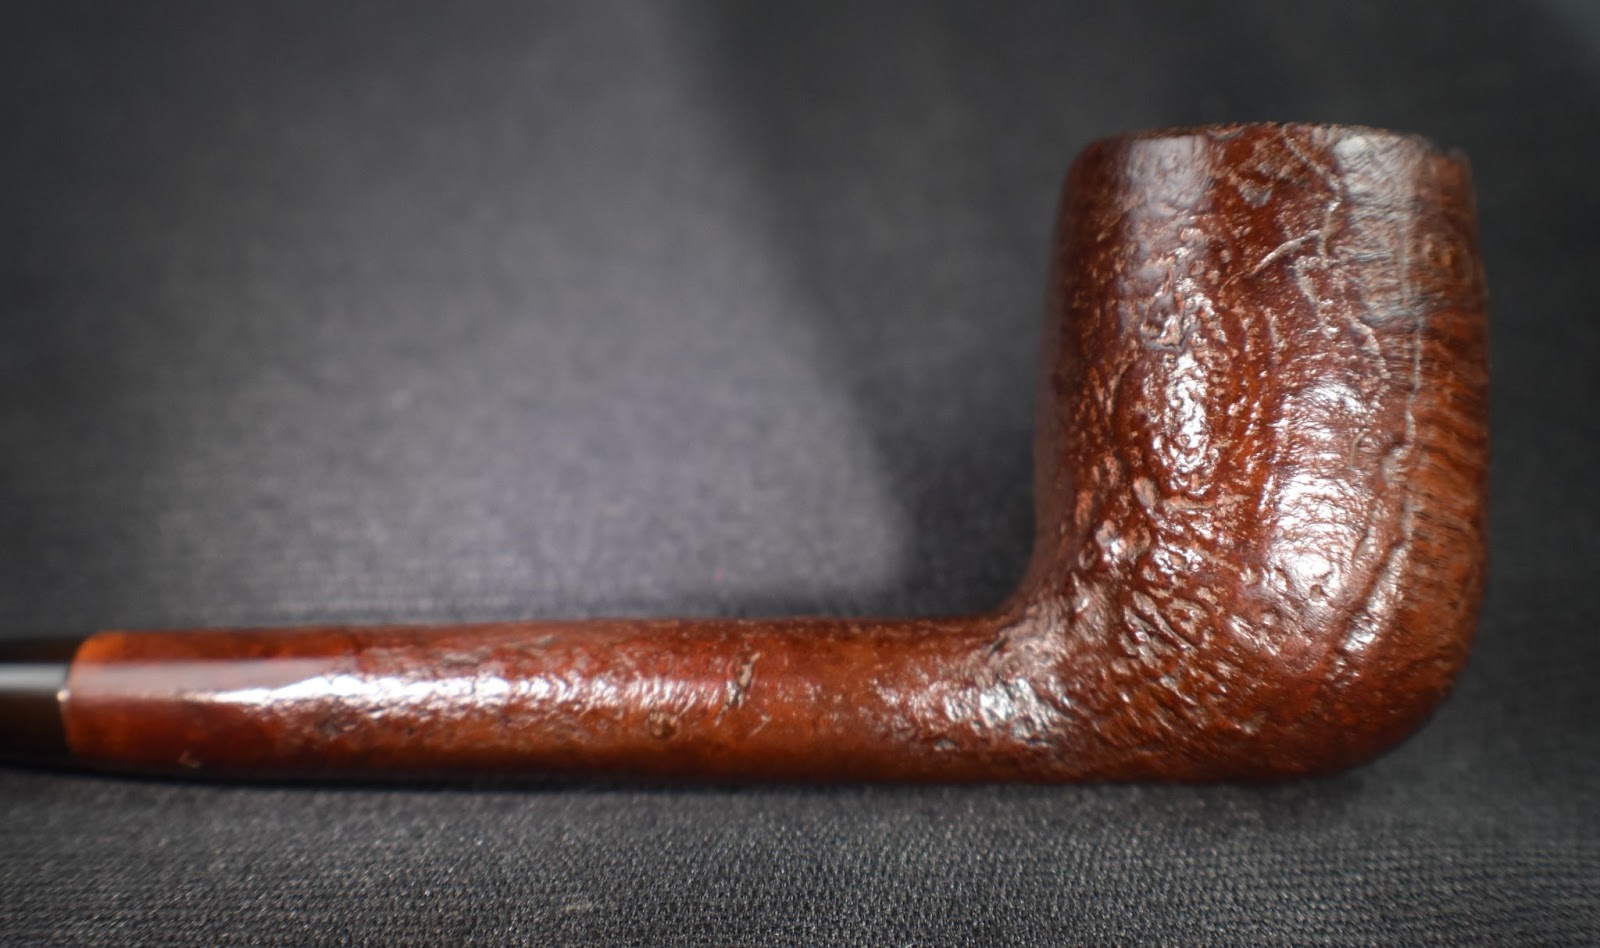

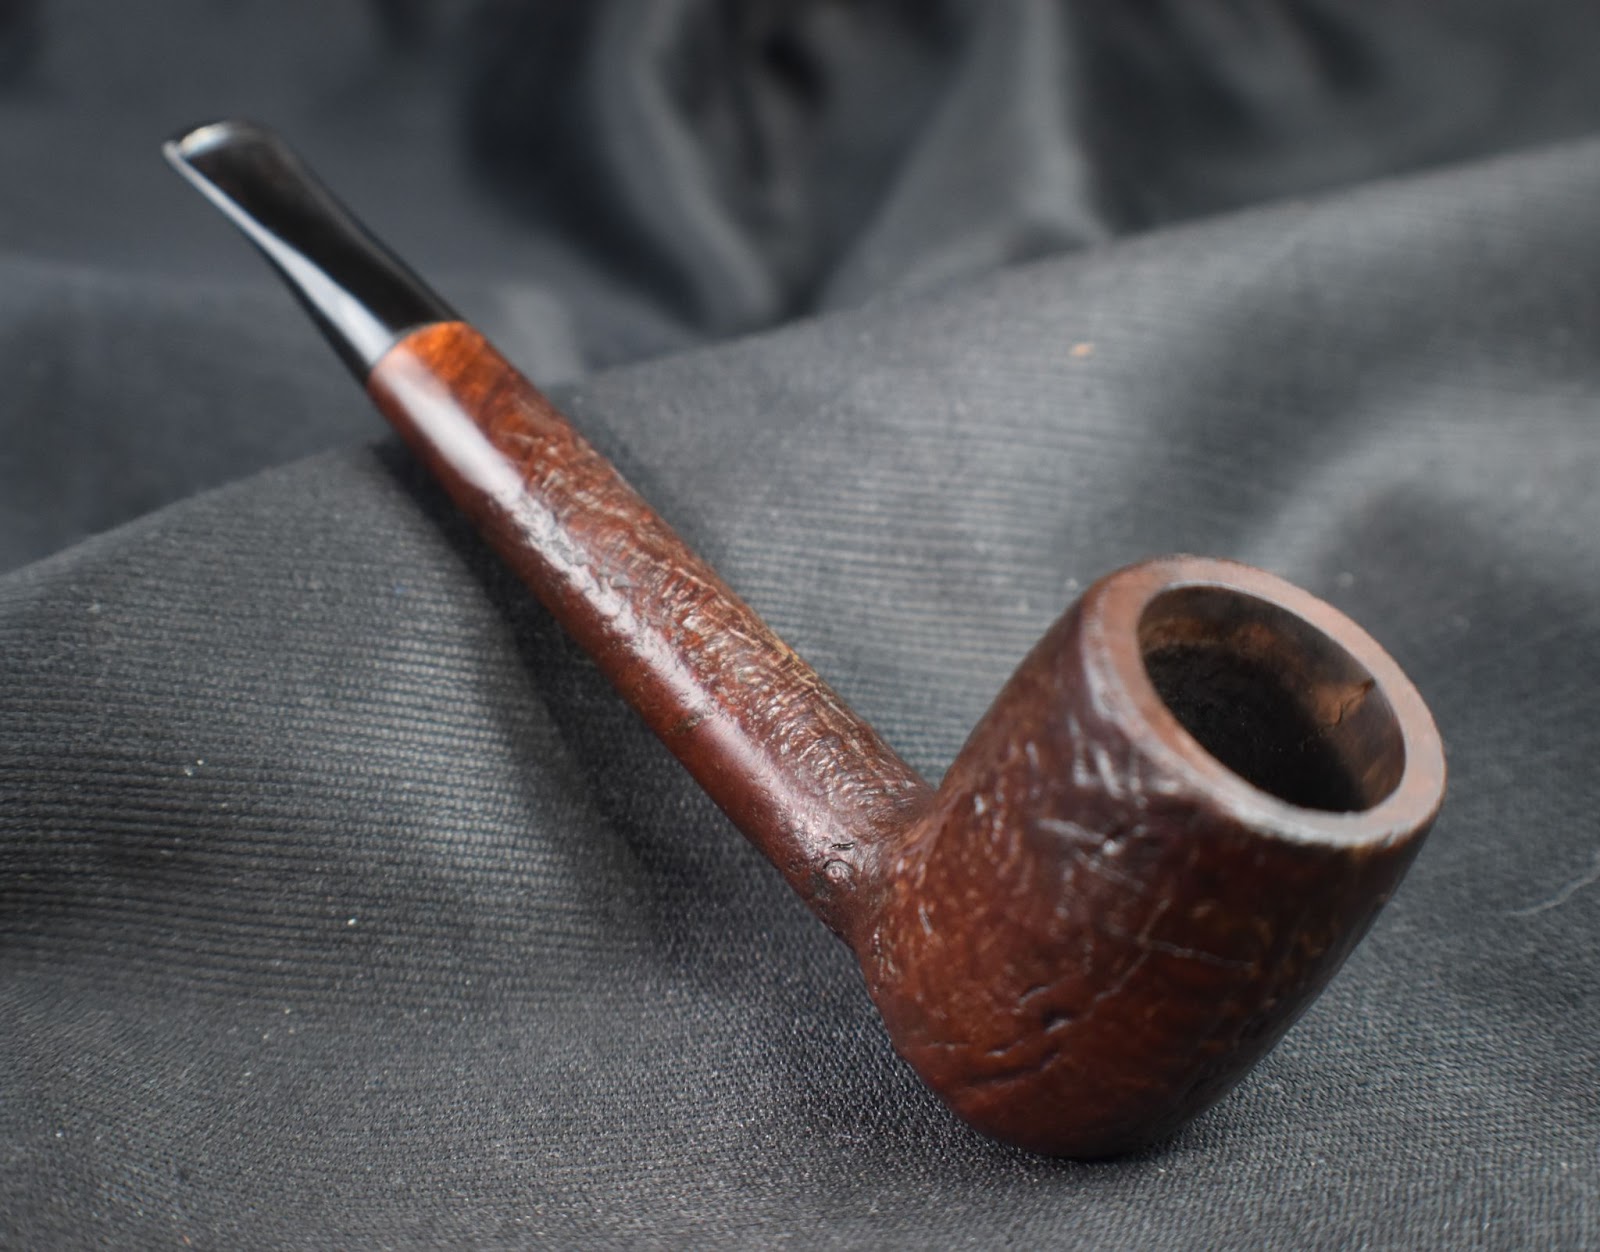

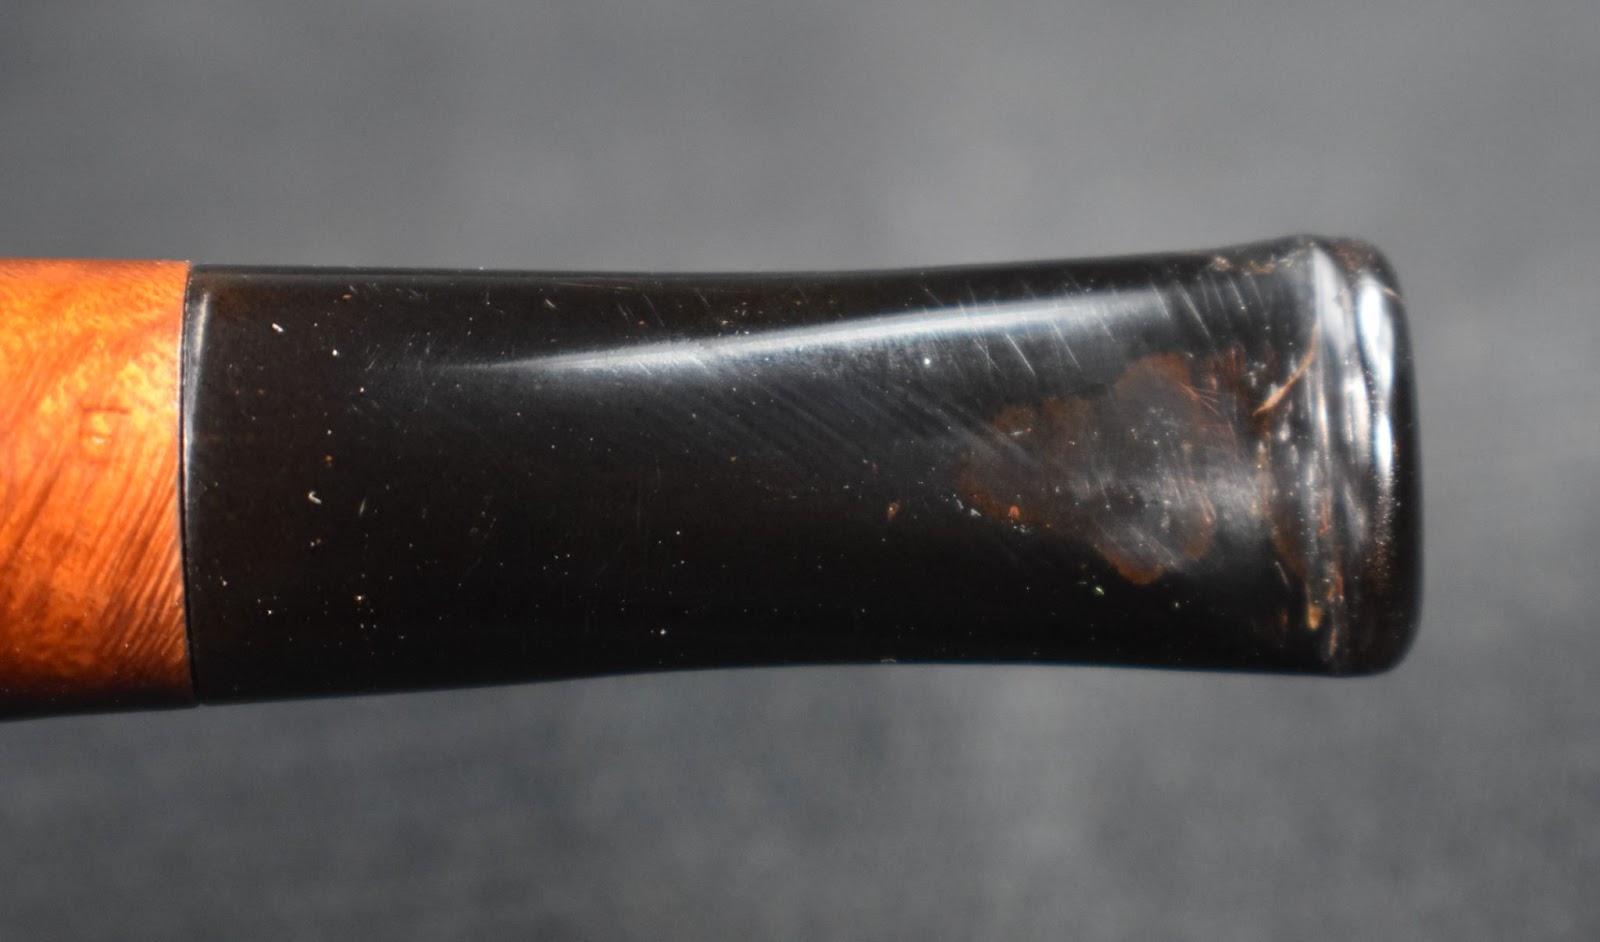
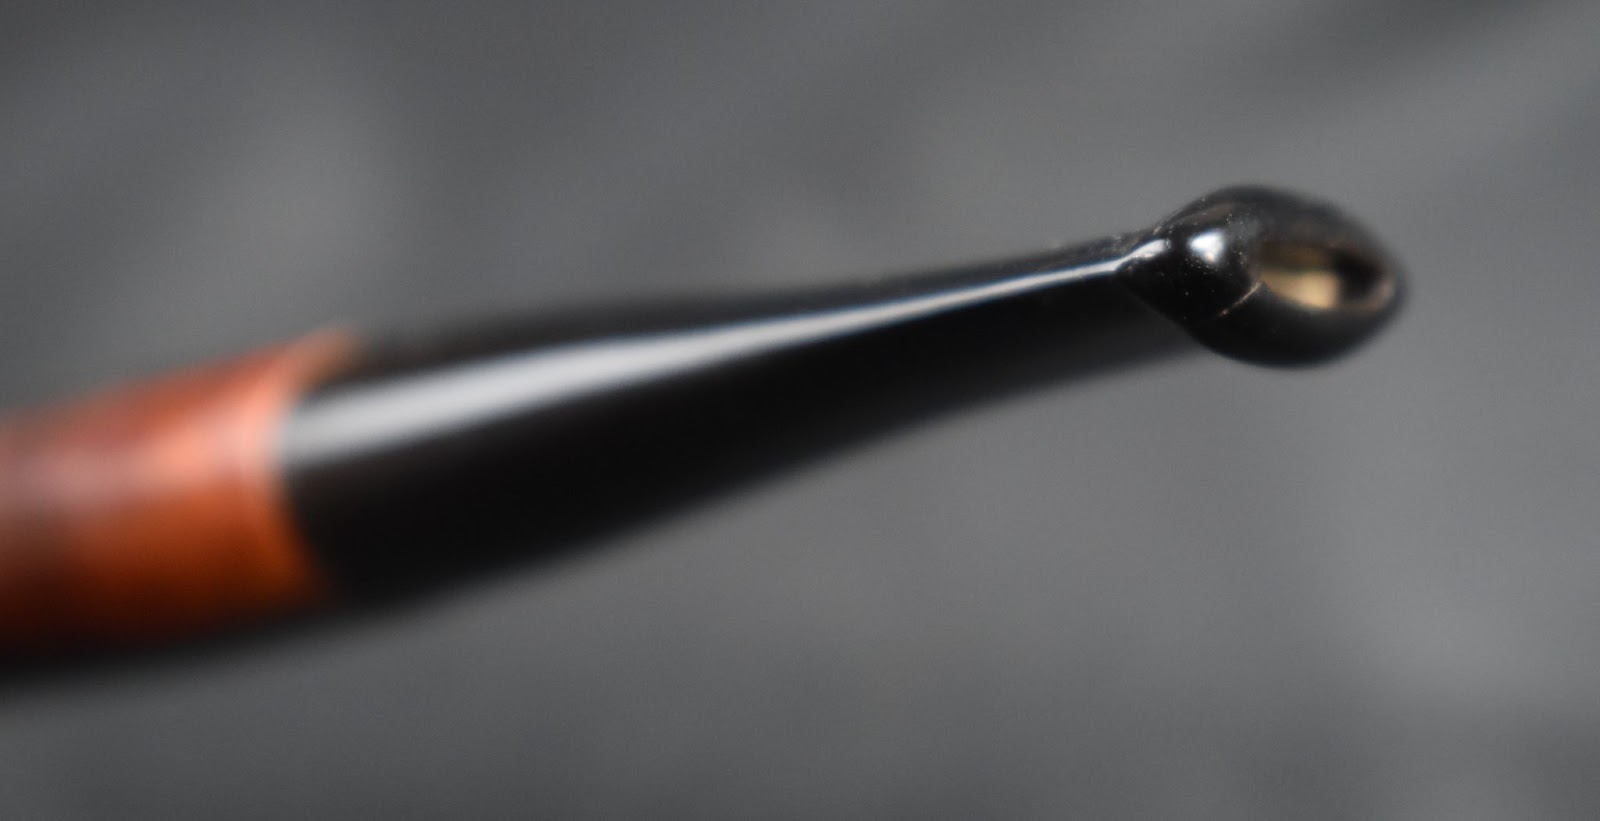


 ” (
” (