Here is a pipe which I had my doubts about ever possessing. I first saw the eBay auction in the spring of 2023, I think. The price was more than I was willing to spend but I was intrigued by the shape. The pipe was never sold and was relisted. This went on for numerous cycles. I eventually started making offers to the seller which met with no reply nor counter offer from the seller. I thought that I must be just offering too little to warrant a response. Well, long story shortened, after over a year of this the seller agreed to my offer and I received the pipe in July of 2024. I guess this proves that something is only worth what someone is willing to pay.
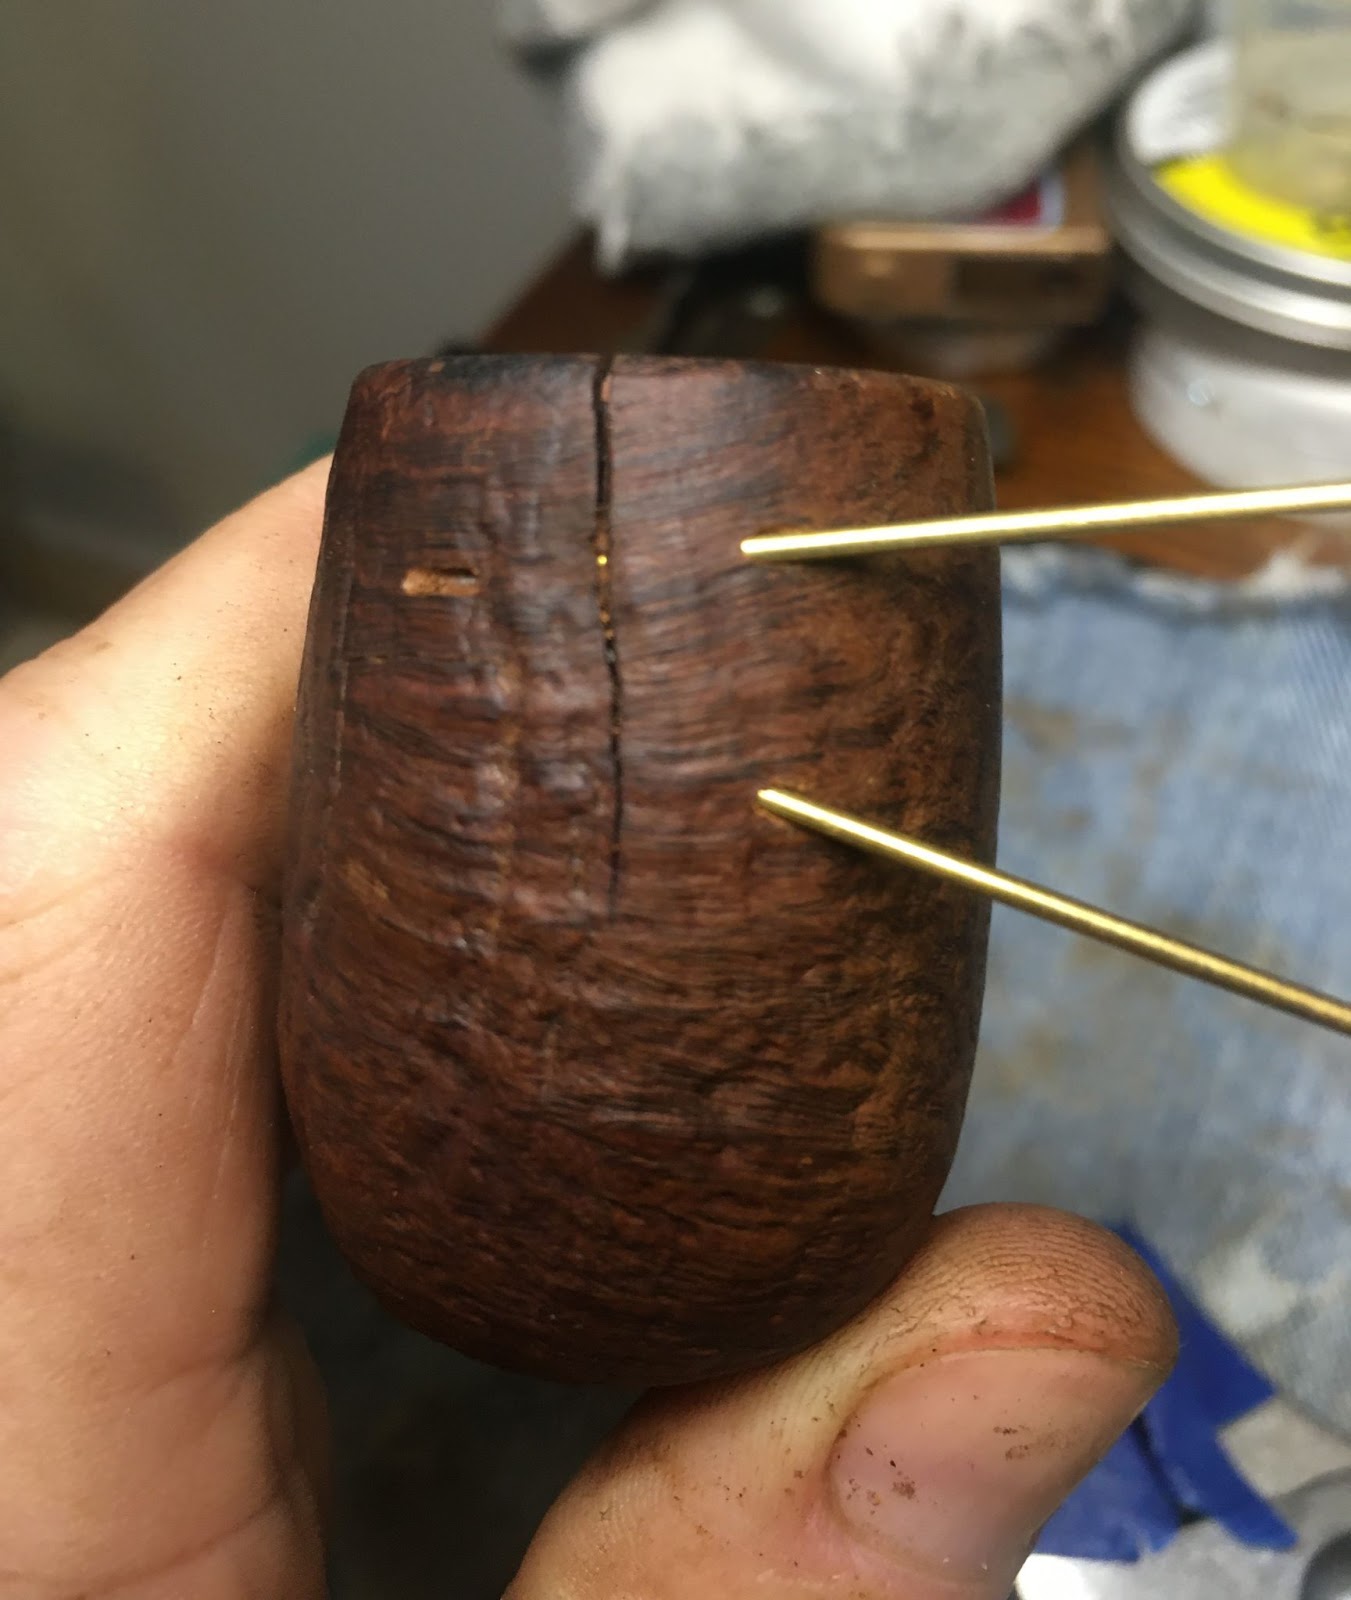
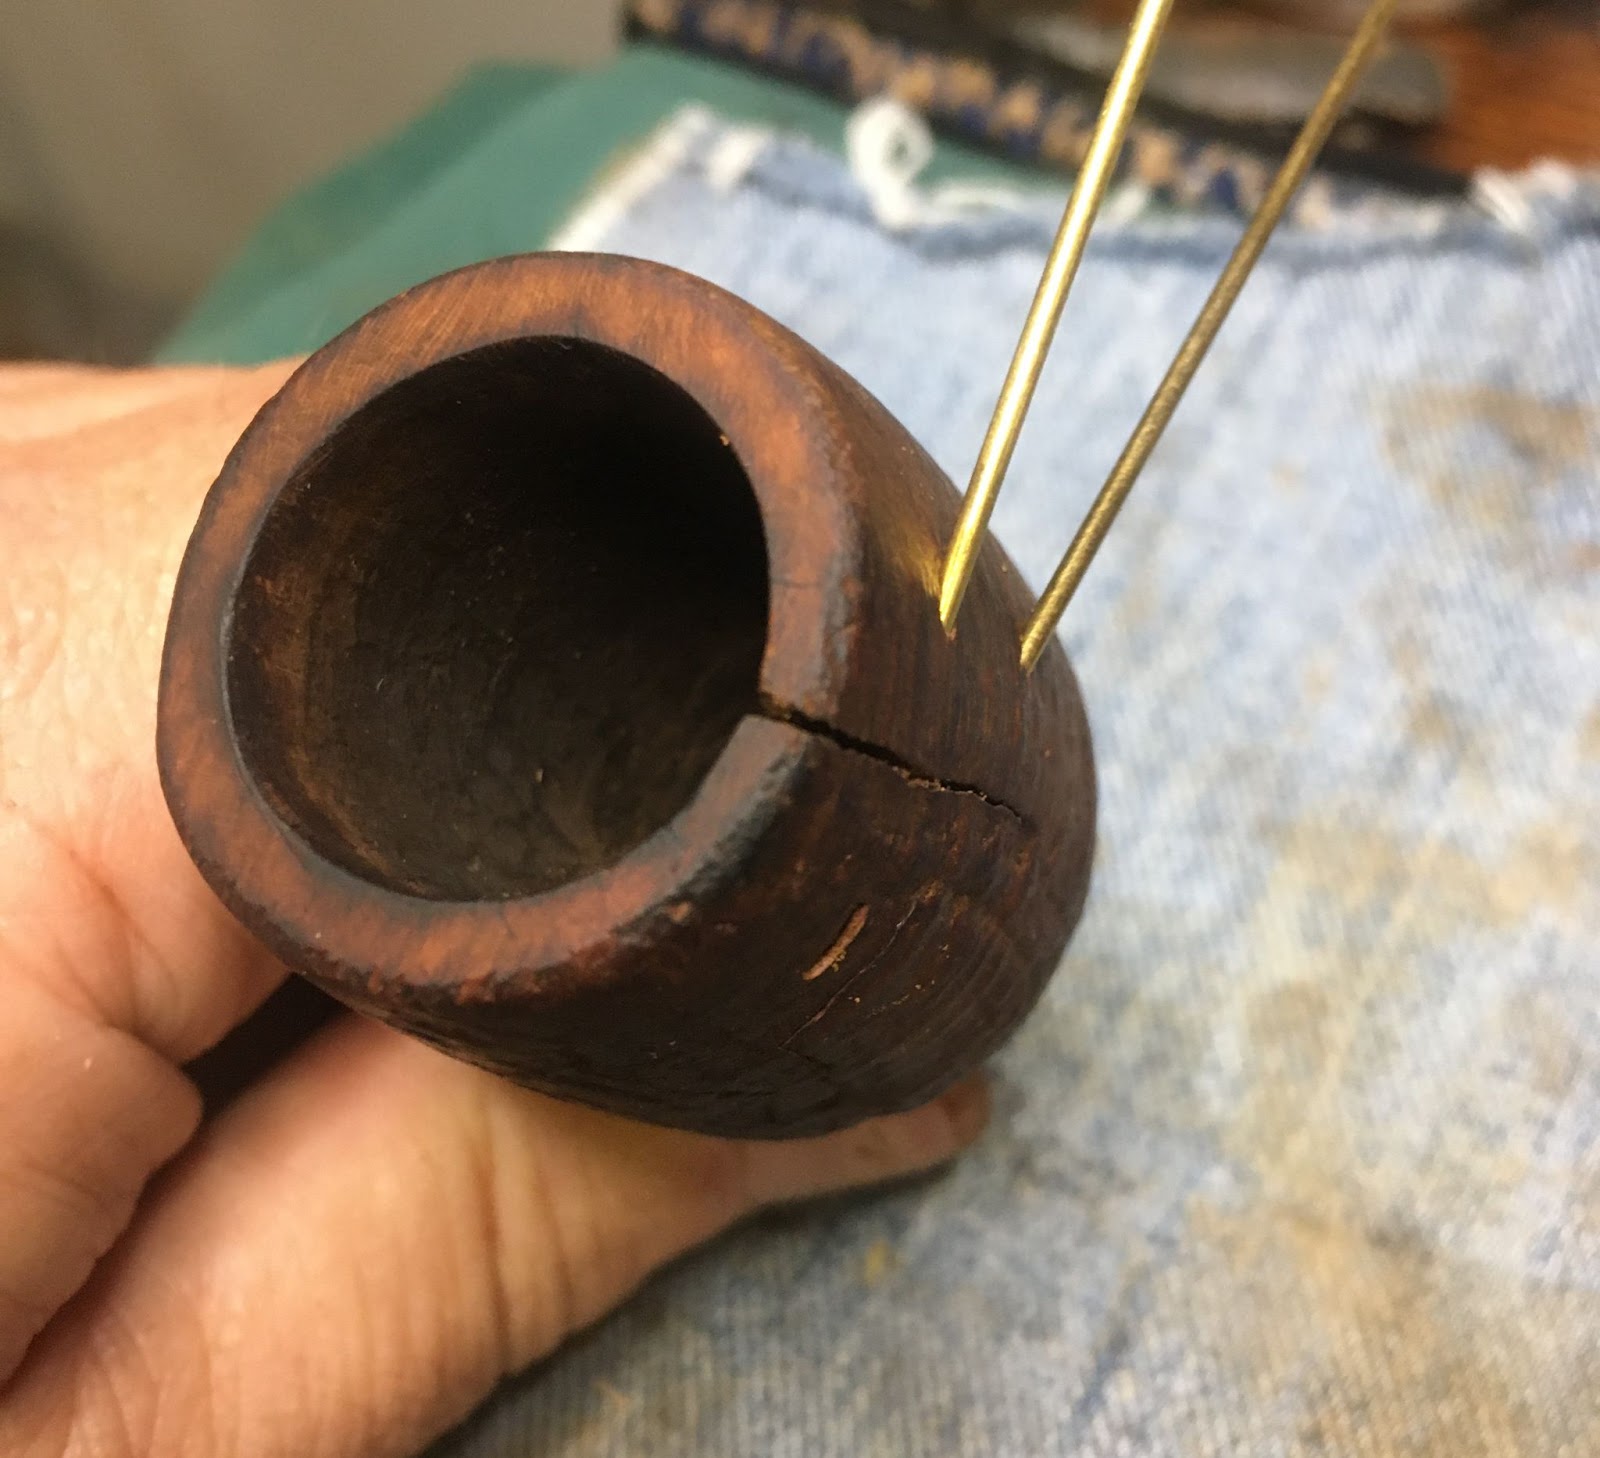
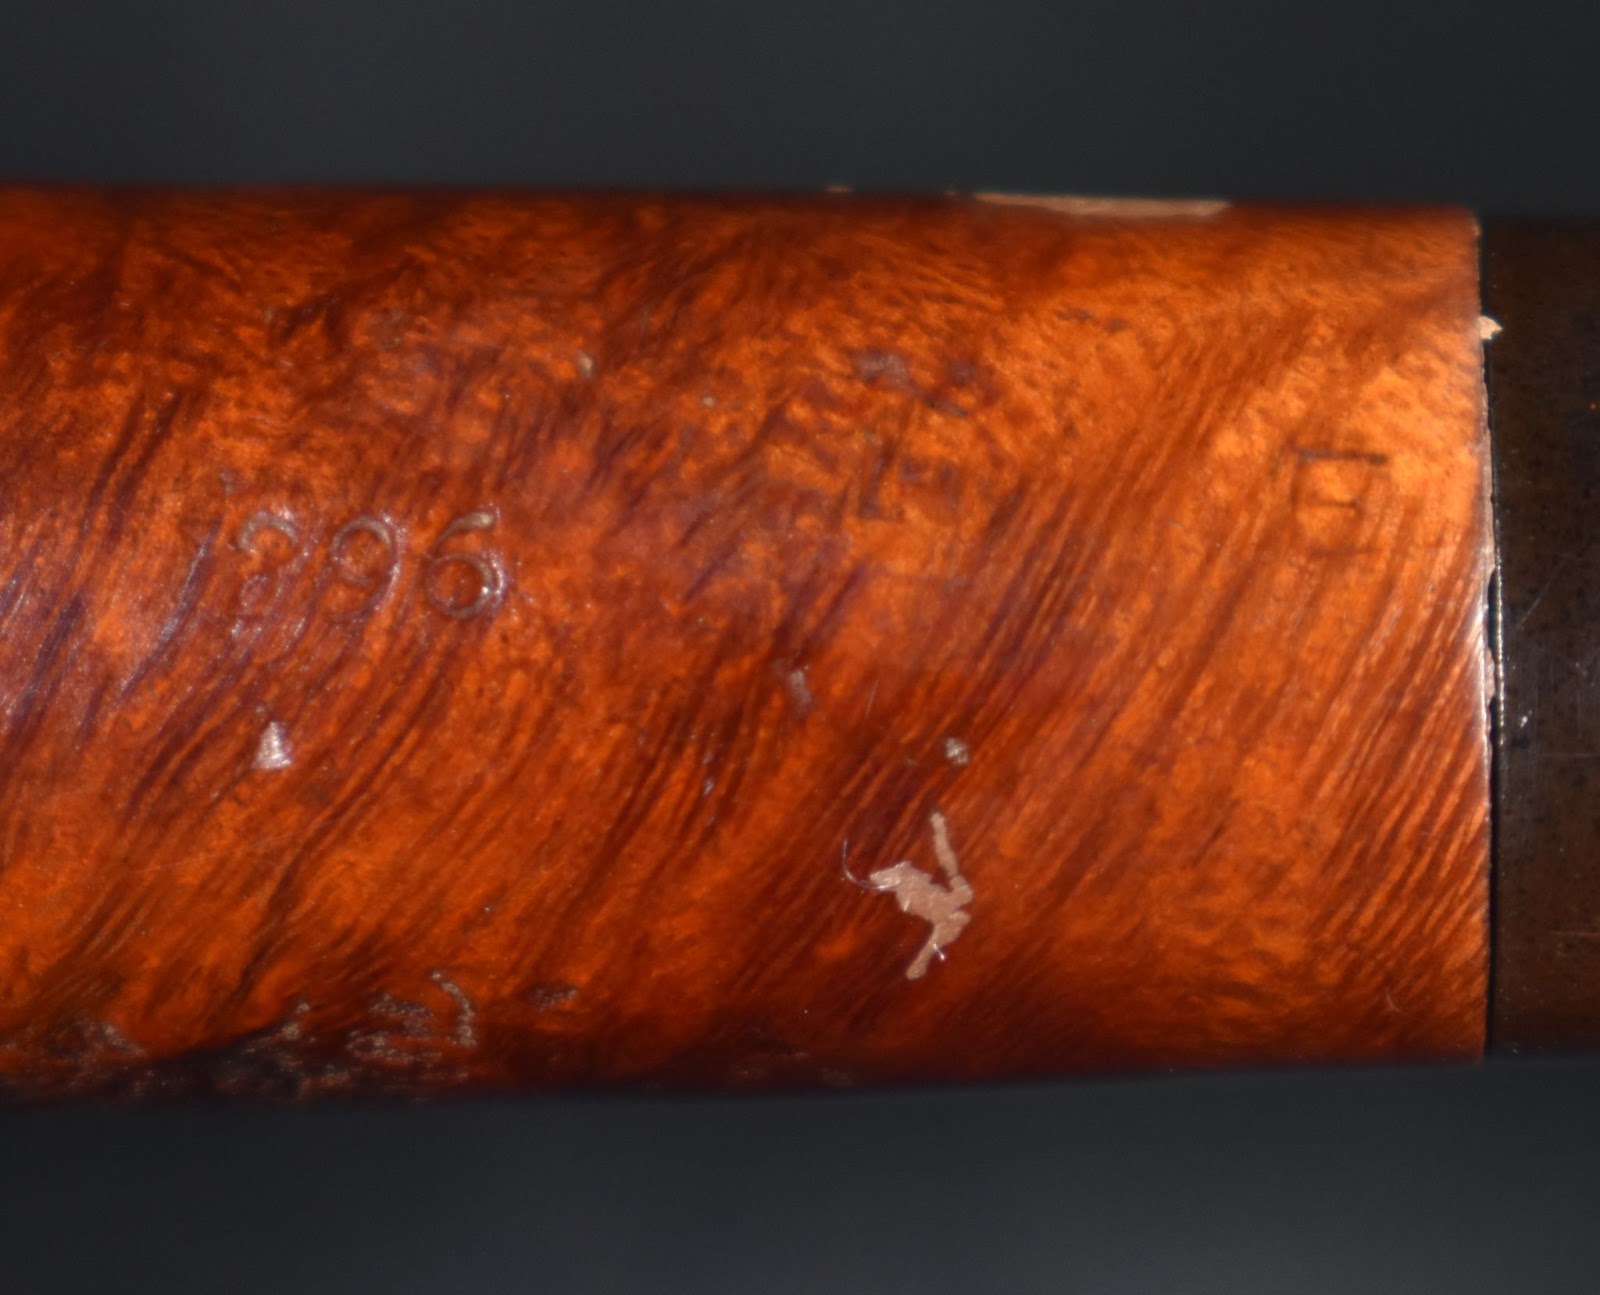
When the pipe arrived I was amazed at the detail which the photos failed to show. The stem had a matching bell shape and crack. The front of the pipe had the 1776 and 1976 pressed into the meerschaum as well as the crack. The bottom of the pipe had a stylized clapper or the “hanging ringer thingy”. Unfortunately there was no maker’s mark indicating who carved this piece of American history. Below are some photos before I began work on the pipe.
The most notable issues were the lava on the rim and the tooth dents on the top and bottom of the stem. The photos don’t show the dents well but they were there and annoying.
Background
1976 was a time, which I remember as nostalgic and optimistic. There were continuous celebrations of the 200 year birth of the nation. Lots of fireworks displays, parades and advertising all in support of the bicentennial year of our founding. From Saturday morning cartoons (yeah, that was about the only time we got them) to the minting of bicentennial coins, nationalism and patriotism were on full display. Apparently this also made its way to meerschaum pipes. I was able to find a couple of examples of Liberty Bell meerschaum pipes but none matched the shape or style of this piece.
With nothing to really work with I reached out to the meerschaum experts in a Facebook group I am part of. I posted photos of the Liberty Bell and said that I thought it to be from 1976 and asked if anyone could provide any additional information. Unfortunately, I did not get a response by anyone to further clarify the potential origin of this pipe.
The Restoration
I am preparing myself for some new workbench protective pieces of cloth. As this summer closes out I will be retiring a couple of pairs of cargo shorts thus I’ll be entering a new phase of workbench protection. Until then I’ll just have to deal with these rather stained denim pieces.
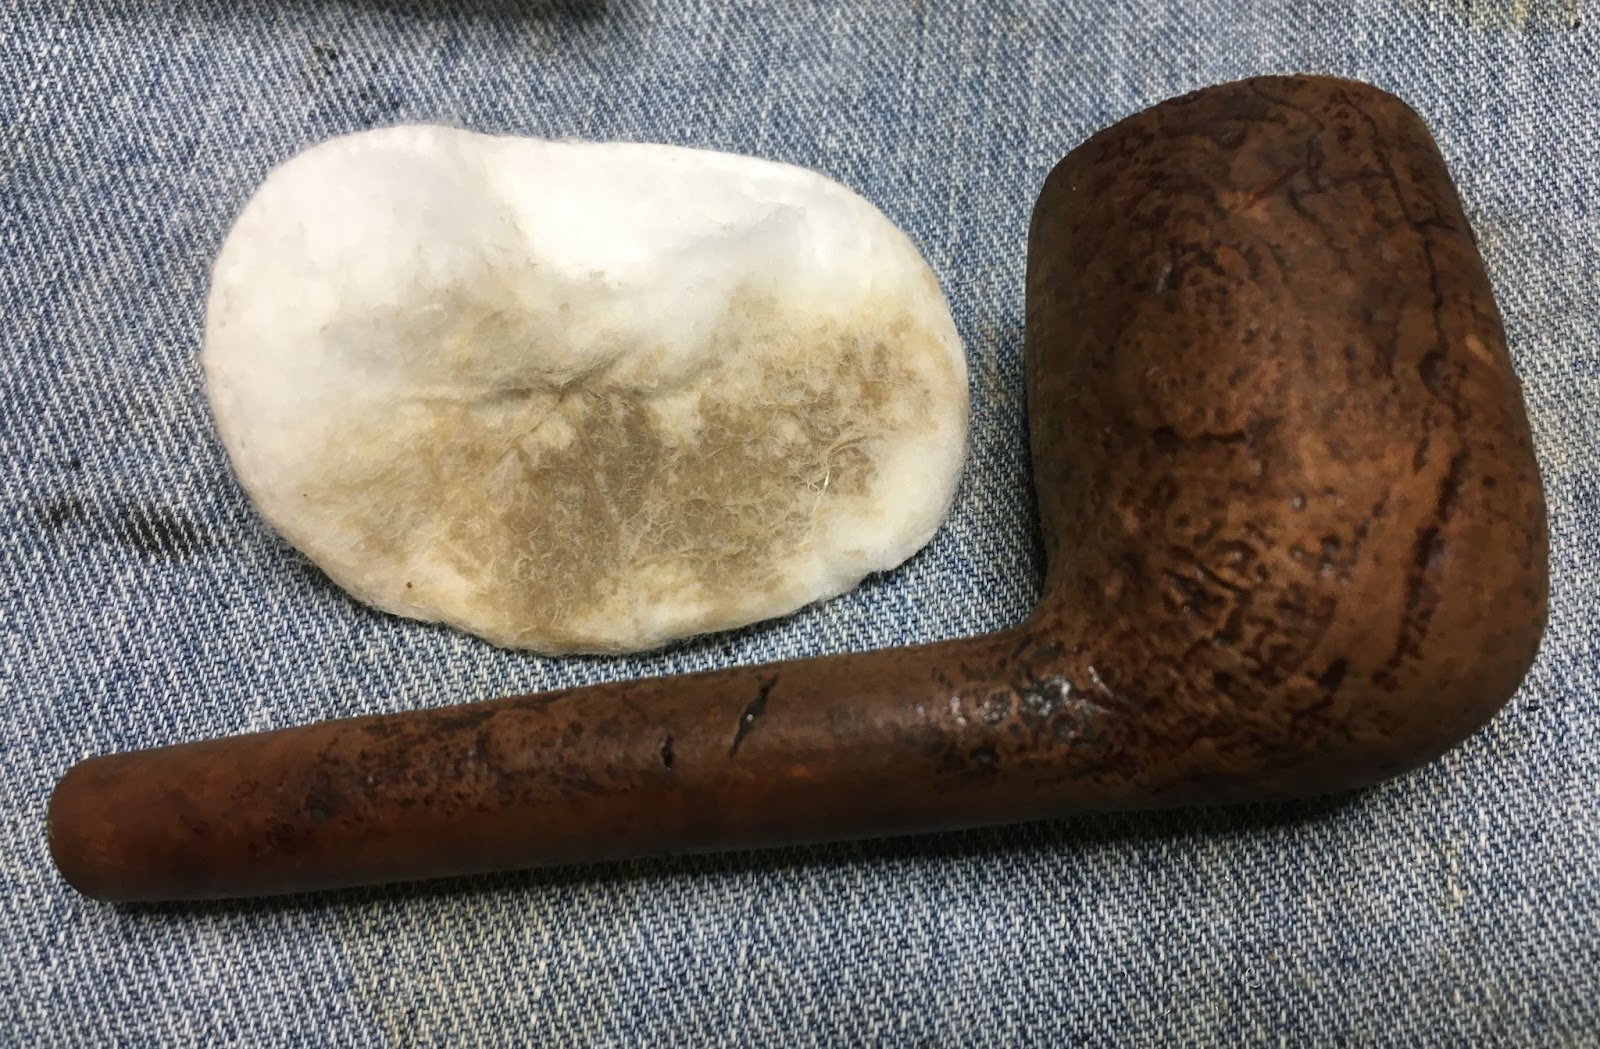
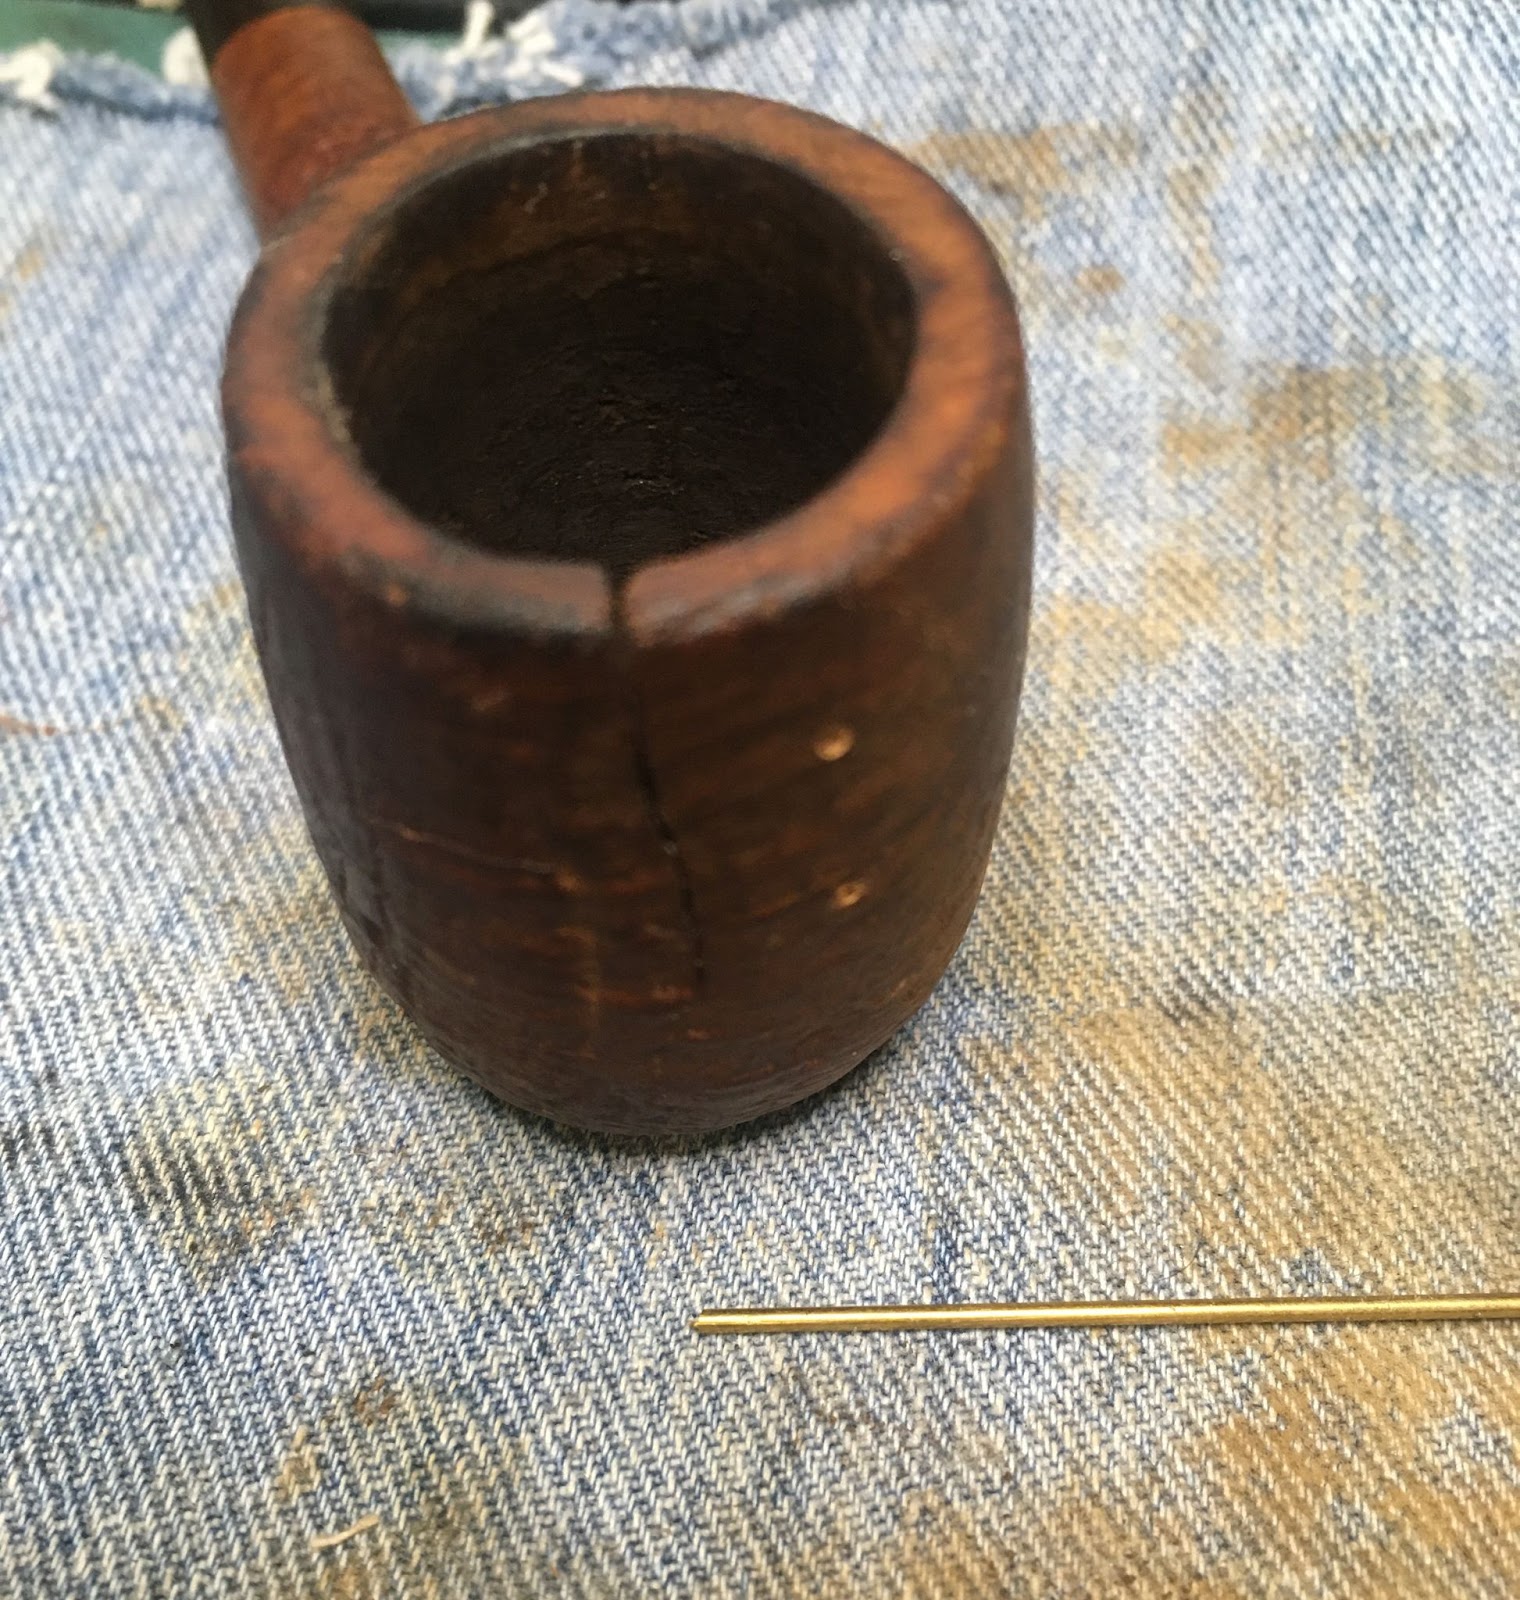
The below photo shows the rim of the Liberty Bell and it’s slightly lava encrustation.
Cotton swaps dipped in 95% ethyl alcohol were used to clear away this lava. I didn’t want to wear away the rustications of the carvings so a light touch was employed.
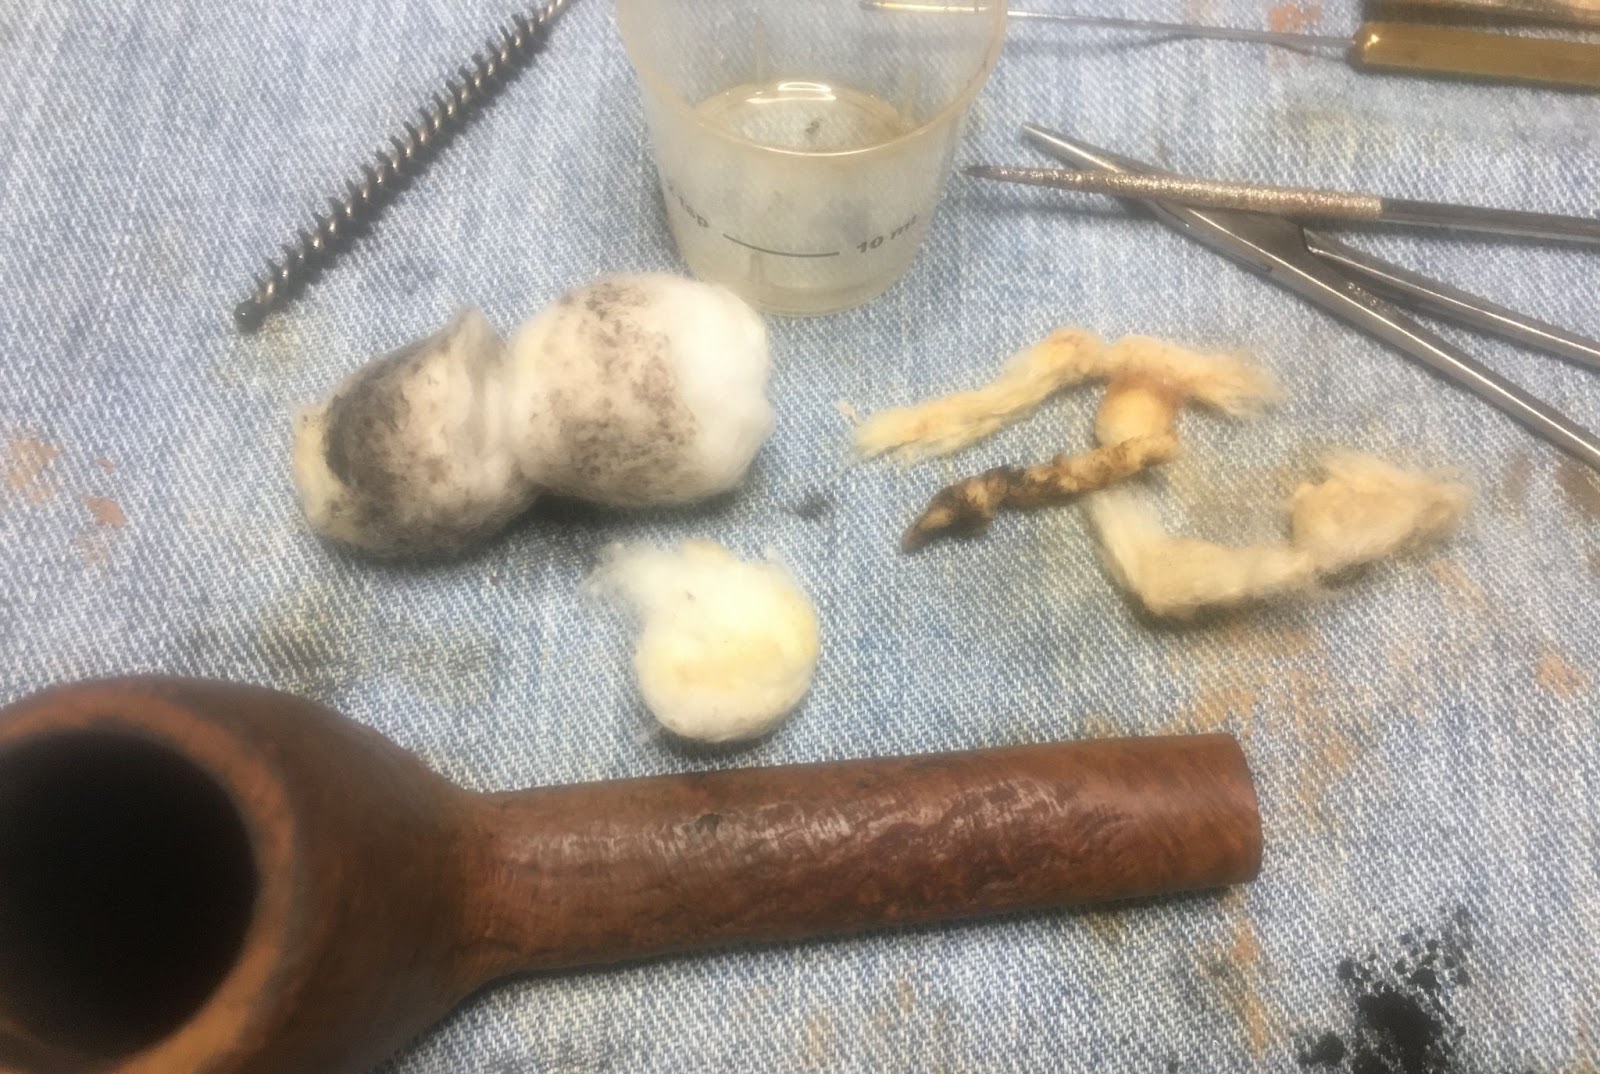
My unfamiliarity with meerschaum led me to not cleaning as thoroughly as I probably could have. My fear was that I’d overdo the cleaning and smooth the surface of the meerschaum.
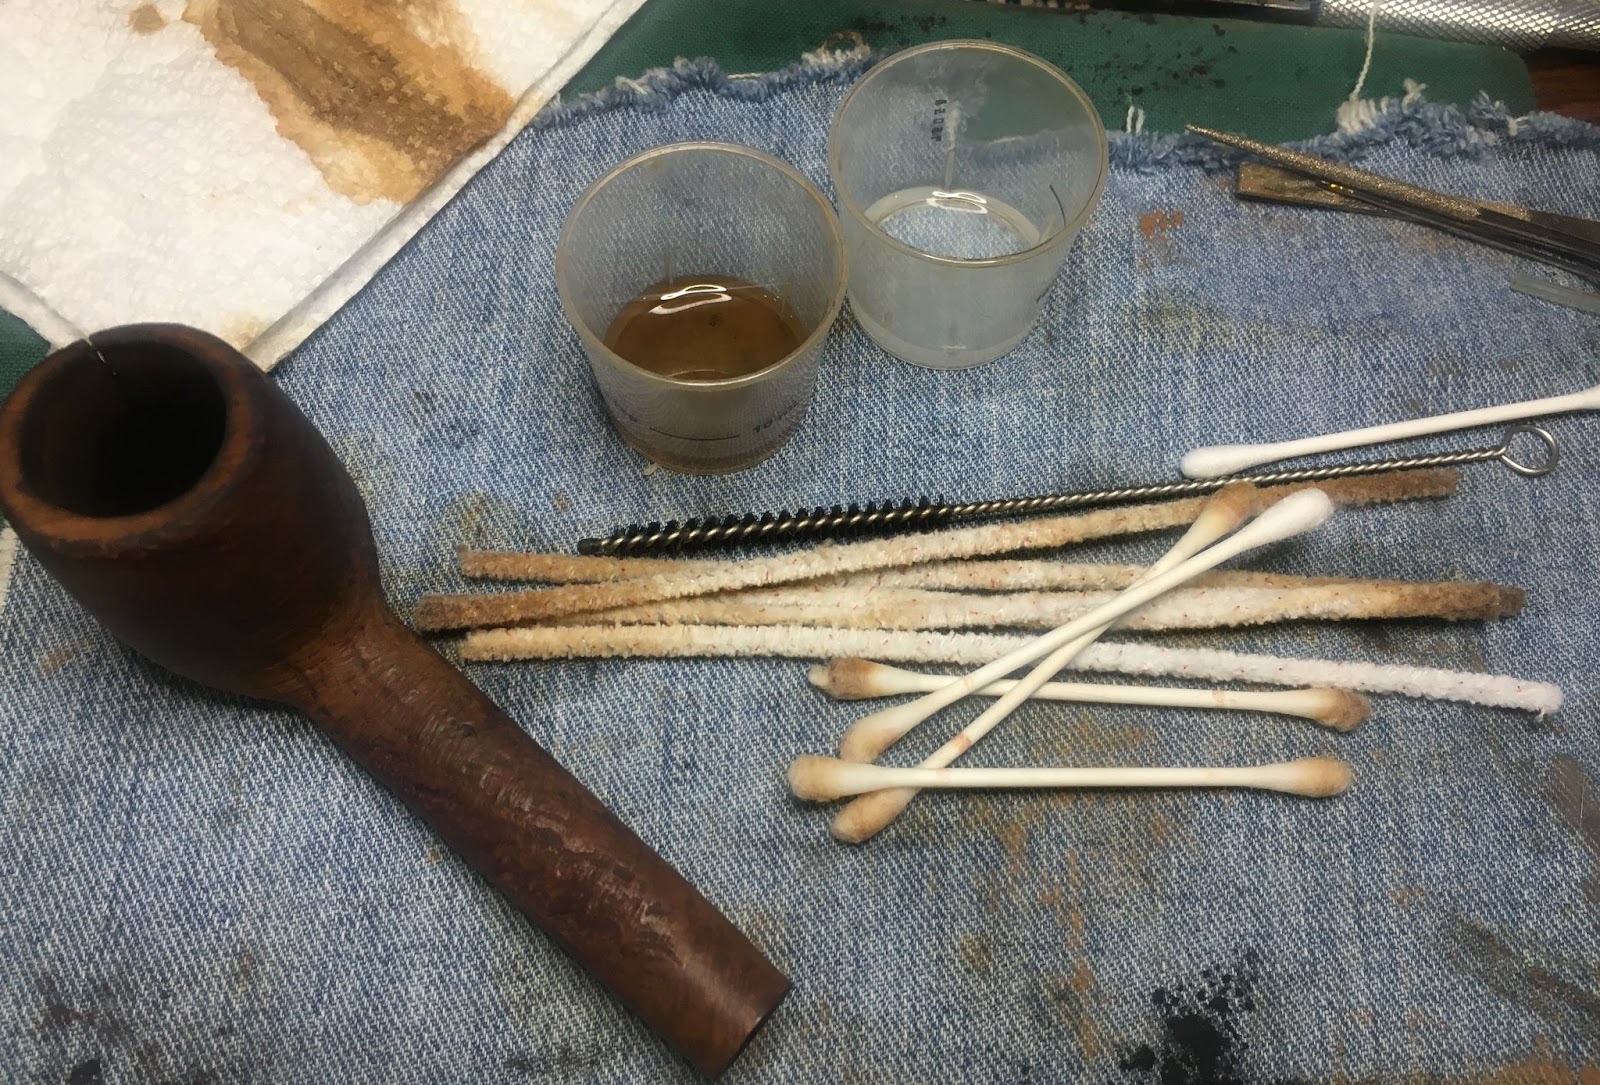
The stem was cleaned with bristle pipe cleaners dipped in ethyl alcohol.
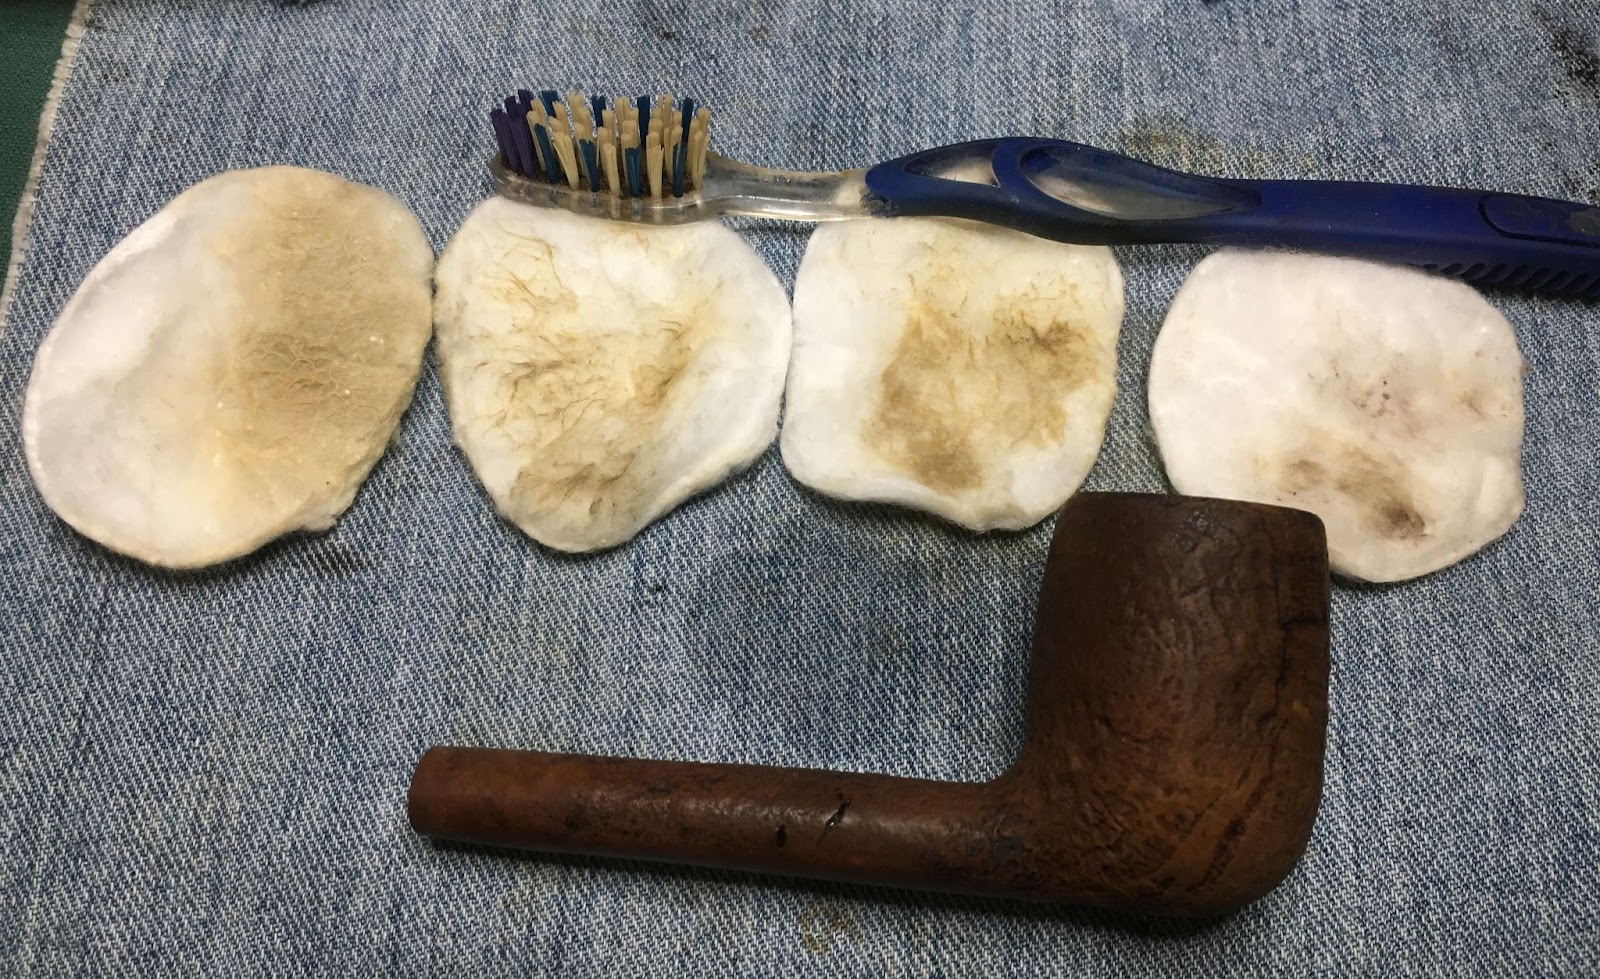
I scrubbed the stummel with warm water and a medium stiff toothbrush. The stummel was dried with a cotton hand towel and looked better than it did prior to the cleaning.
I found myself washing my hands constantly during work on the meerschaum. I did not want to have my grubby finger leaving marks on the pipe.
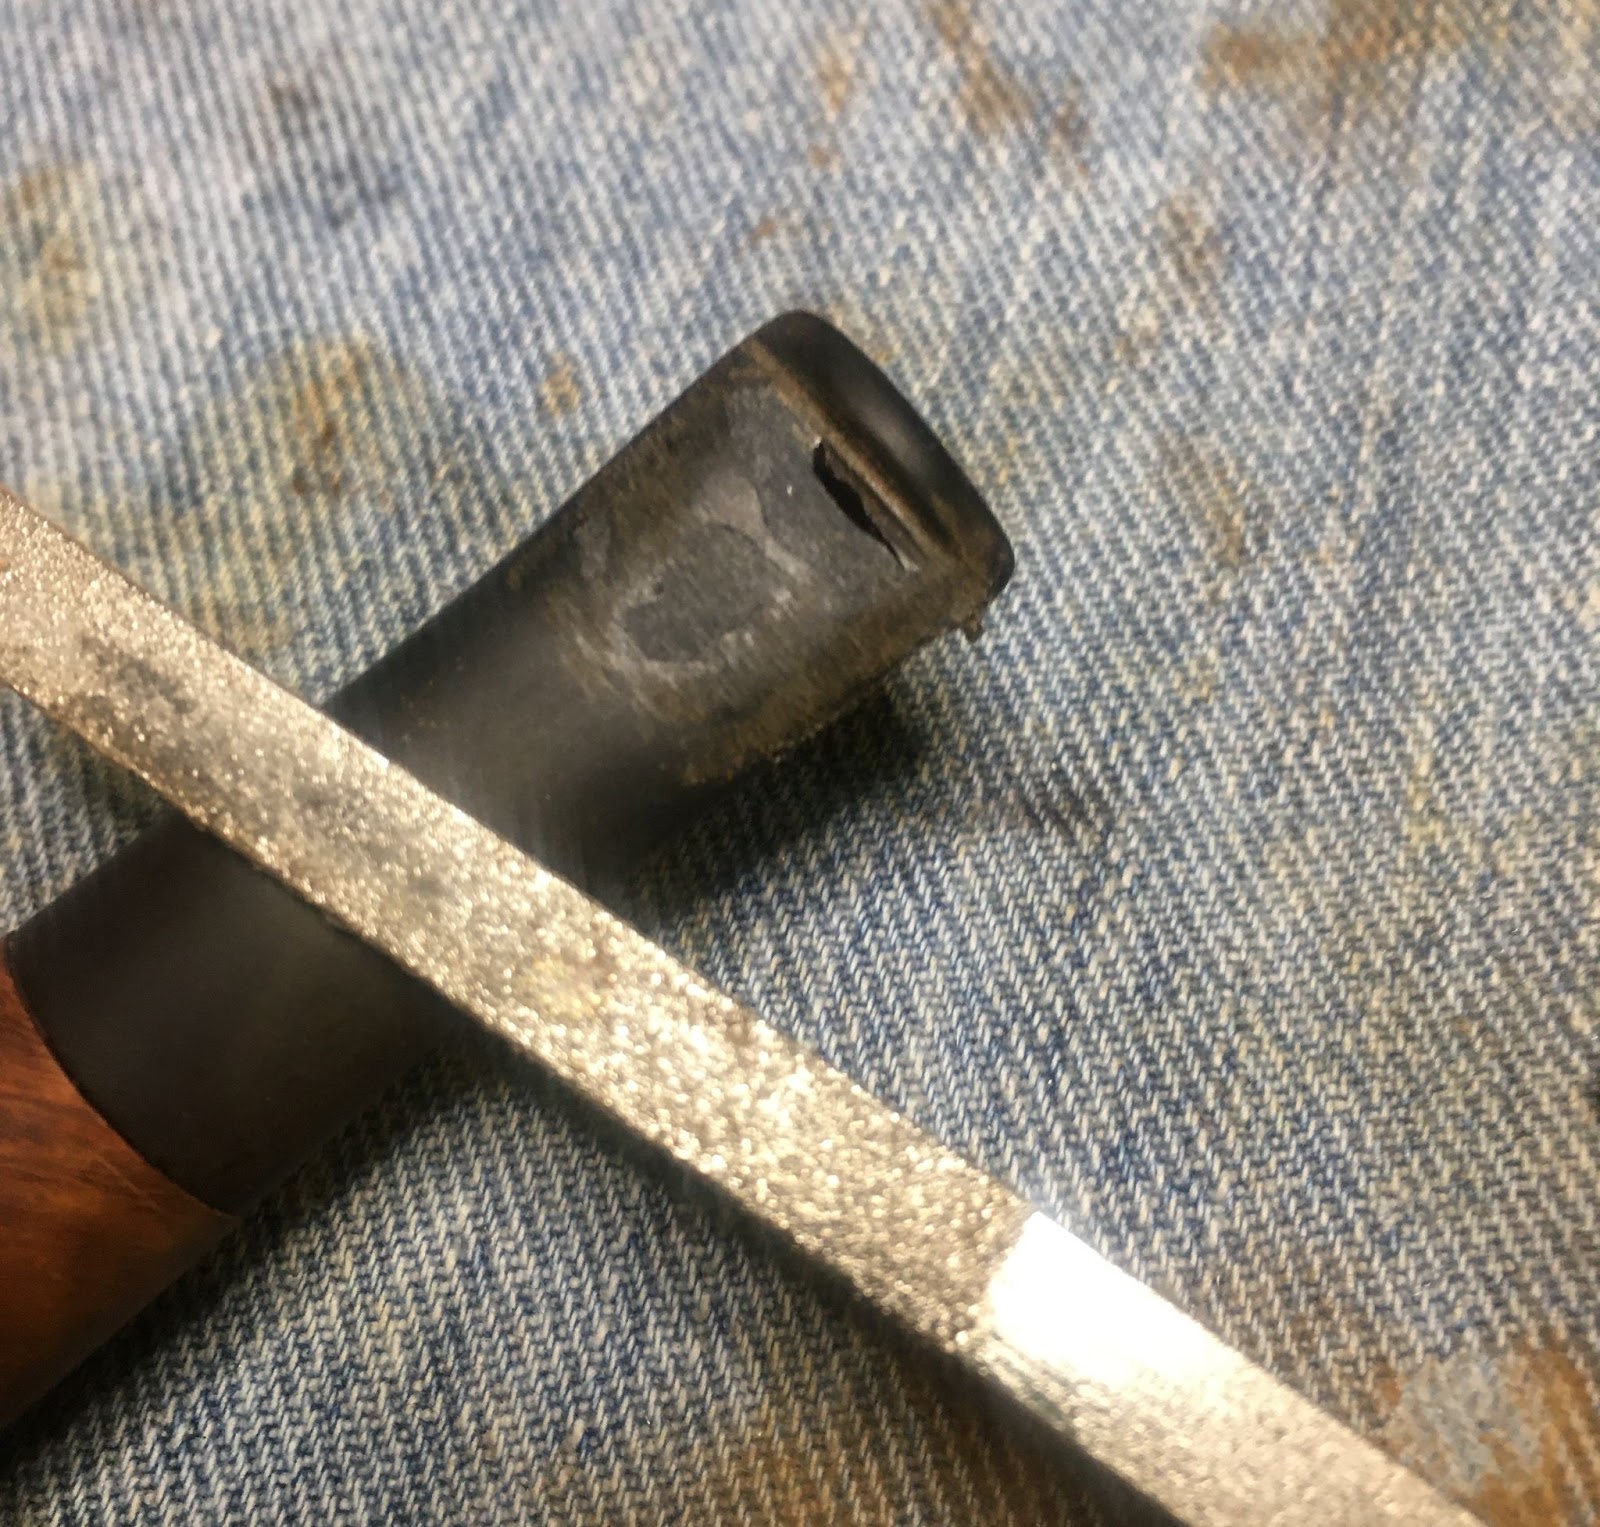
The two photos below show the tooth indentations better than the initial photos.
These dents needed to be filled with thin clear cyanoacrylate (CA, super glue) applied with a fly tying bodkin. If you are wondering, the CA bottle is glued to the card to make spilling less likely.
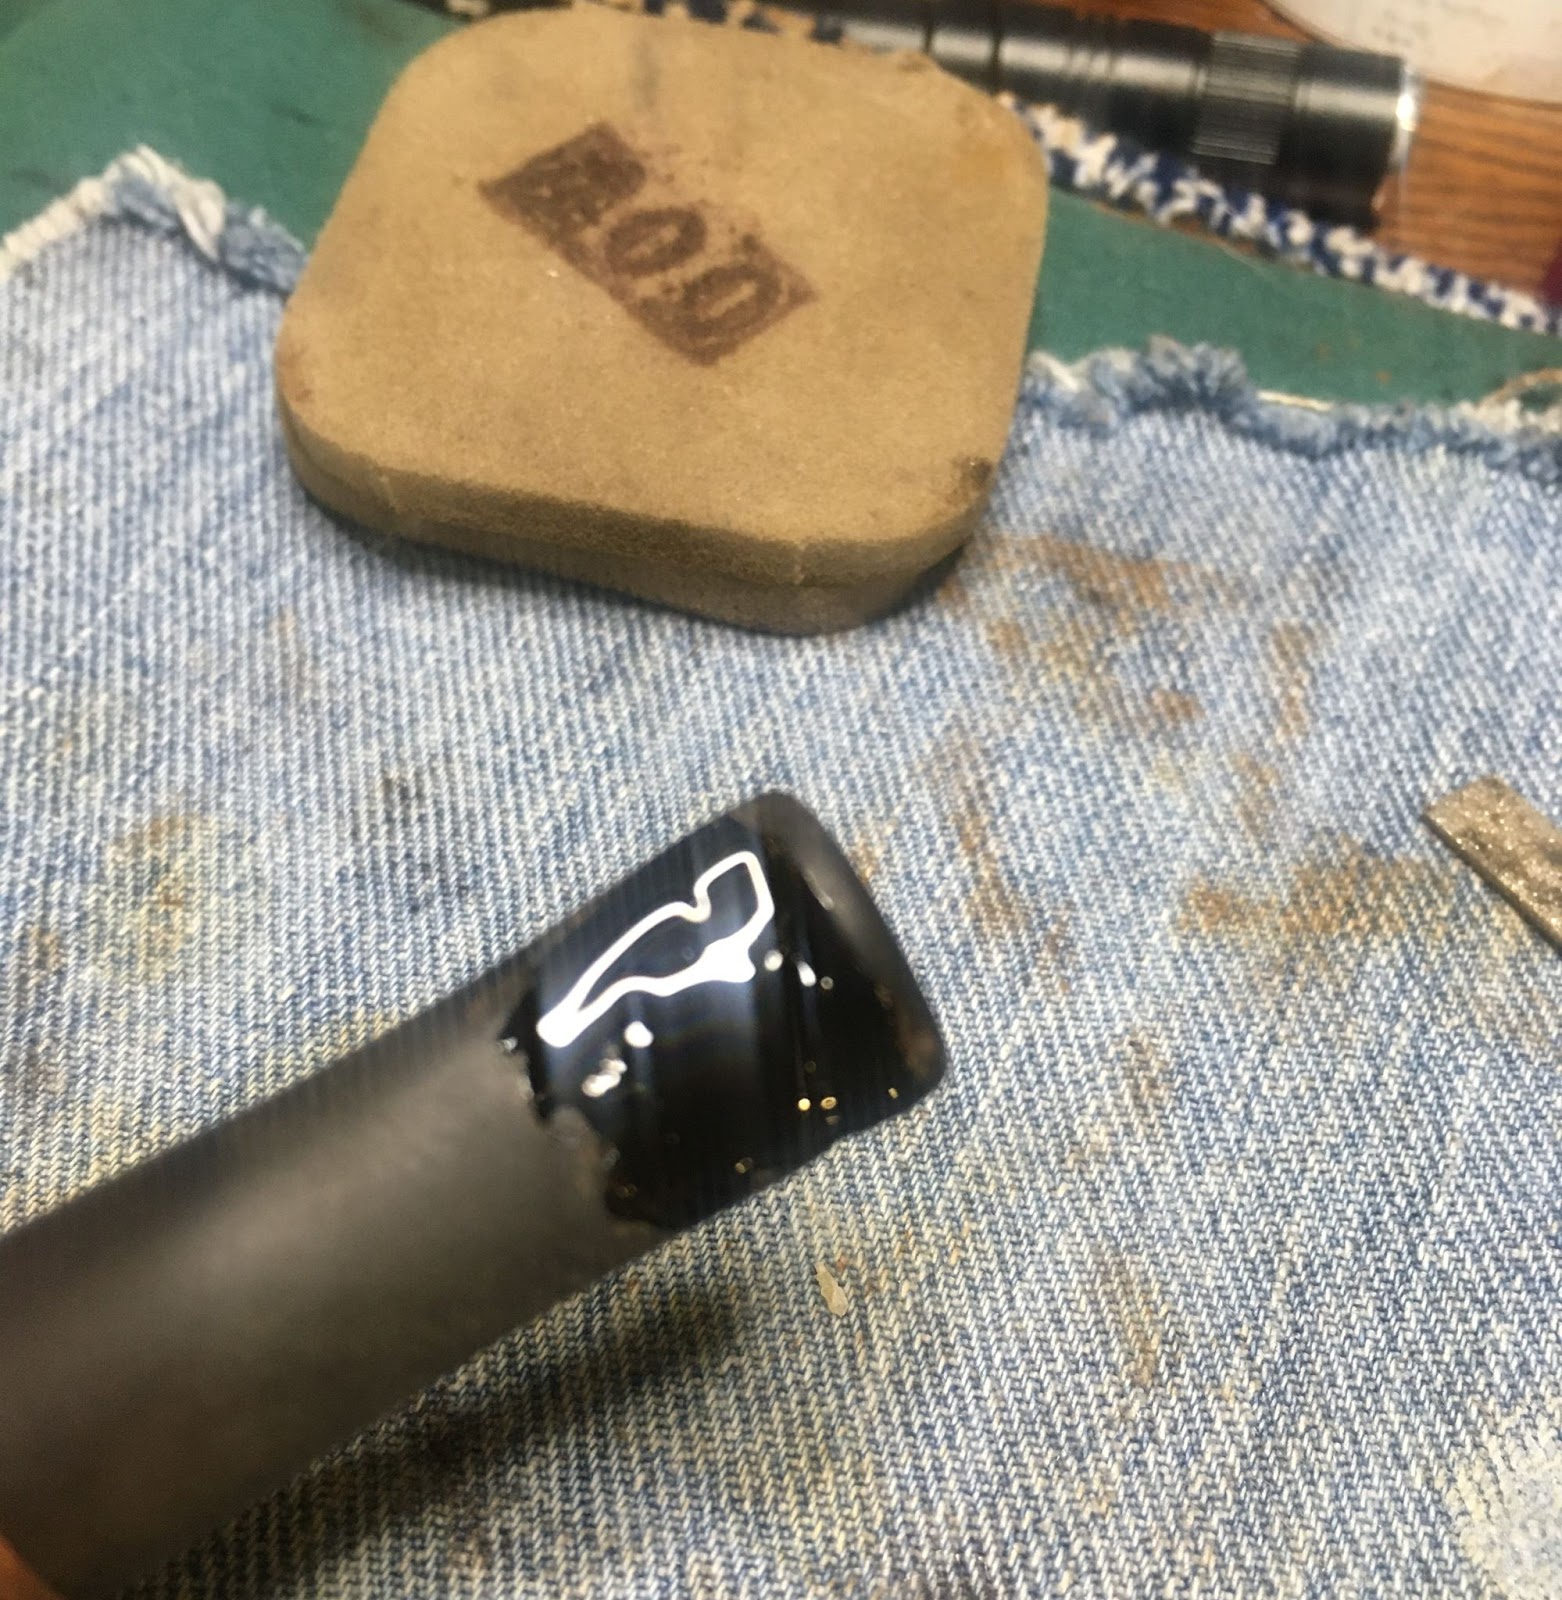
I started with the bottom side of the stem. The thin CA flows very readily and fills the surface imperfections well.
I spritzed the wet CA with a CA drying accelerator. This makes the CA cure almost instantly and gives it a rough surface texture.
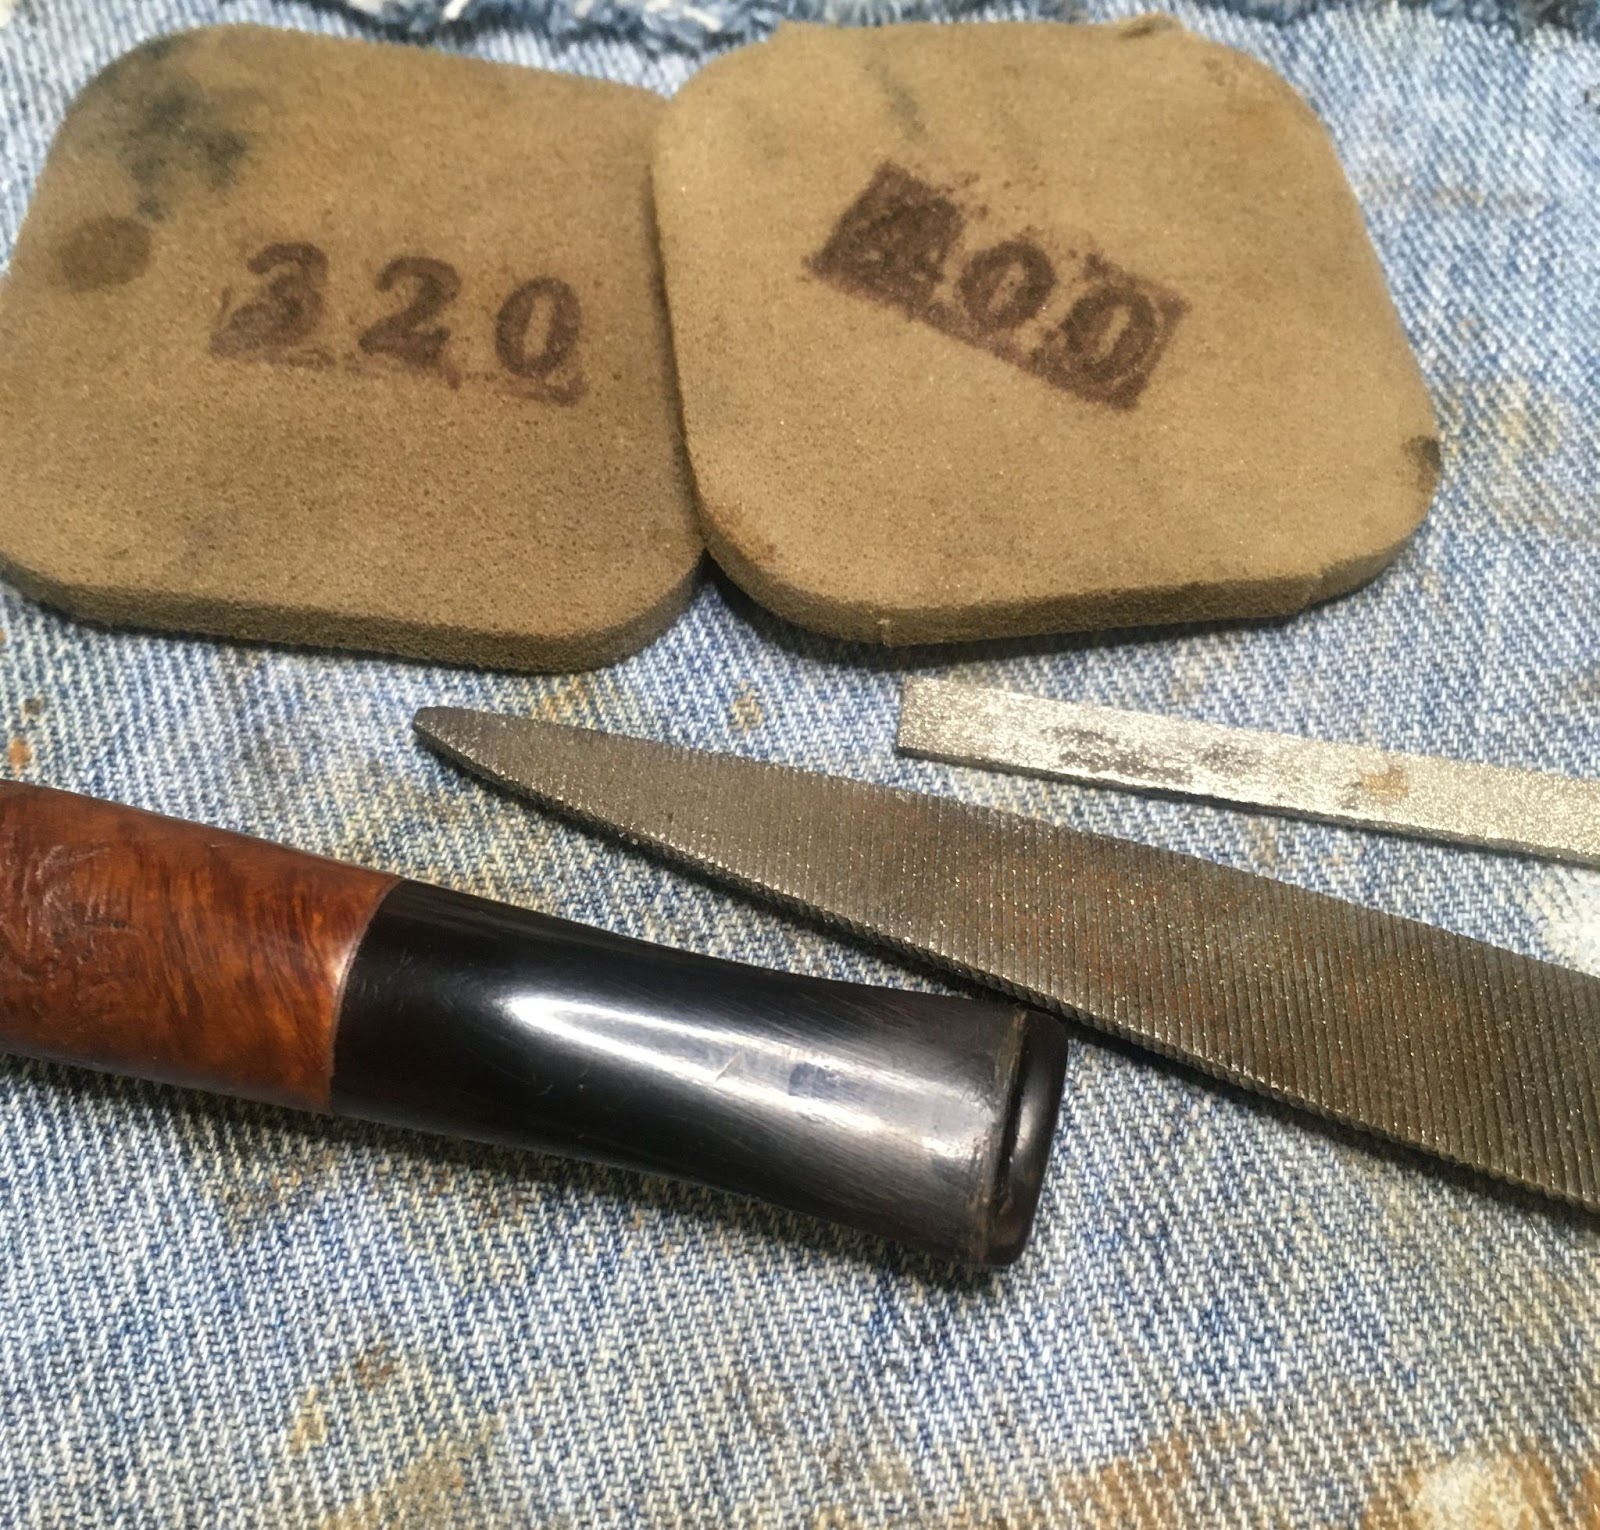
The rough CA was filed with a small flat file to smooth the fill and blend it with the surrounding acrylic stem.
The fill was then sanded with a 400 grit sanding sponge.
The process was repeated for the top of the stem. Below shows the application of the CA to the dents.
Again the wet CA was spritzed with drying accelerator.
Filing and sanding of the fills was done and they were far less noticeable than before.
The stem was then sanded with a series of sanding sponges from 400-3500 grit. Between each sponge I wiped the stem with a water dampened paper towel to remove sanding debris.
After the sanding I used micro-mesh pads in grits 4000-12000 for further polishing the stem. Between these pads I applied a small drip of Obsidian Oil and wiped it with a paper towel. The fills were nearly invisible.
Top view of the micro-meshed stem.
Bottom view of the stem.
I used a double boiler type set-up to melt the beeswax. The wax sat in a small glass jar placed in a pan of boiling water. The tin to the left of the pan was used to catch the drips of wax during application and as the meerschum is heated with the heat gun.
I prepared the meerschaum for waxing by heating it with a heat gun.
The meerschaum was then covered with hot liquid wax via a paintbrush.
The meerschaum was then heated with the heat gun again and the remelted wax allowed it to drip from the pipe into the tin. The photo of this step was so blurred by me moving too much to be useful. The final step was using a paper towel to absorb any excess wax from the still hot stummel. I put on a kevlar glove here not for protection from being cut but because that was the only glove at hand. This sink and counter are used for cleaning fish on occasion, thus the kevlar glove.
The pipe was taken to the buffer where the stem received several coats of carnauba wax. The stummel did not receive any carnauba as it just got fresh beeswax.
The fresh beeswax darkened the meerschaum slightly and gave it a richer color. I am very pleased with how well the fills on the stem came out. The cyanoacrylate blended in with the swirling amble to make nearly perfect fixes. I do wonder if I should have used the brown CA instead then I wonder if I’m just being too critical. The rim also bothers me slightly with the darkening of the rustications with a touch of old lava. The original Liberty Bell did not have a rusticated dome so maybe I should have smoothed this one and completely eliminated the crevasses and their blackened grooves. Oh well, none of these petty grievances detract much from this old pipe and I can attest to it being a grand smoker. The dimensions of this Liberty Bell meerschaum are:
Length: 7.16 in./ 181.86 mm.
Weight: 1.79 oz./ 51.00 g.
Bowl Height: 2.15 in./ 54.61 mm.
Chamber Depth: 1.57 in./ 39.88 mm.
Chamber Diameter: 0.81 in./ 20.57 mm.
Outside Diameter: 1.33 in./ 33.78 mm. (at the shank)
1.86 in./ 47.24 mm. (at the flared bottom)
I do hope that you have found something here useful to your own pipe care, maintenance or restorations. If you like this sort of thing, please click the like and subscribe buttons. Thank you for reading the ramblings of an old pipe lover.
Loading…
Below are some photos of the finished Liberty Bell meerschaum pipe.
This is the fourth pipe in my briar free stage apparently. I have to say that I am looking forward to returning to work on briar pipes. The meerschaums are fun but their frequent lack of a documented heritage leaves me wanting and since I mainly do this for entertainment and relaxation the absence of a feeling of completion doesn’t sit well with me. I know what you are thinking, ‘quit complaining and get on with it.’ You are correct. Besides, the next pipe in the queue is another meerschaum.
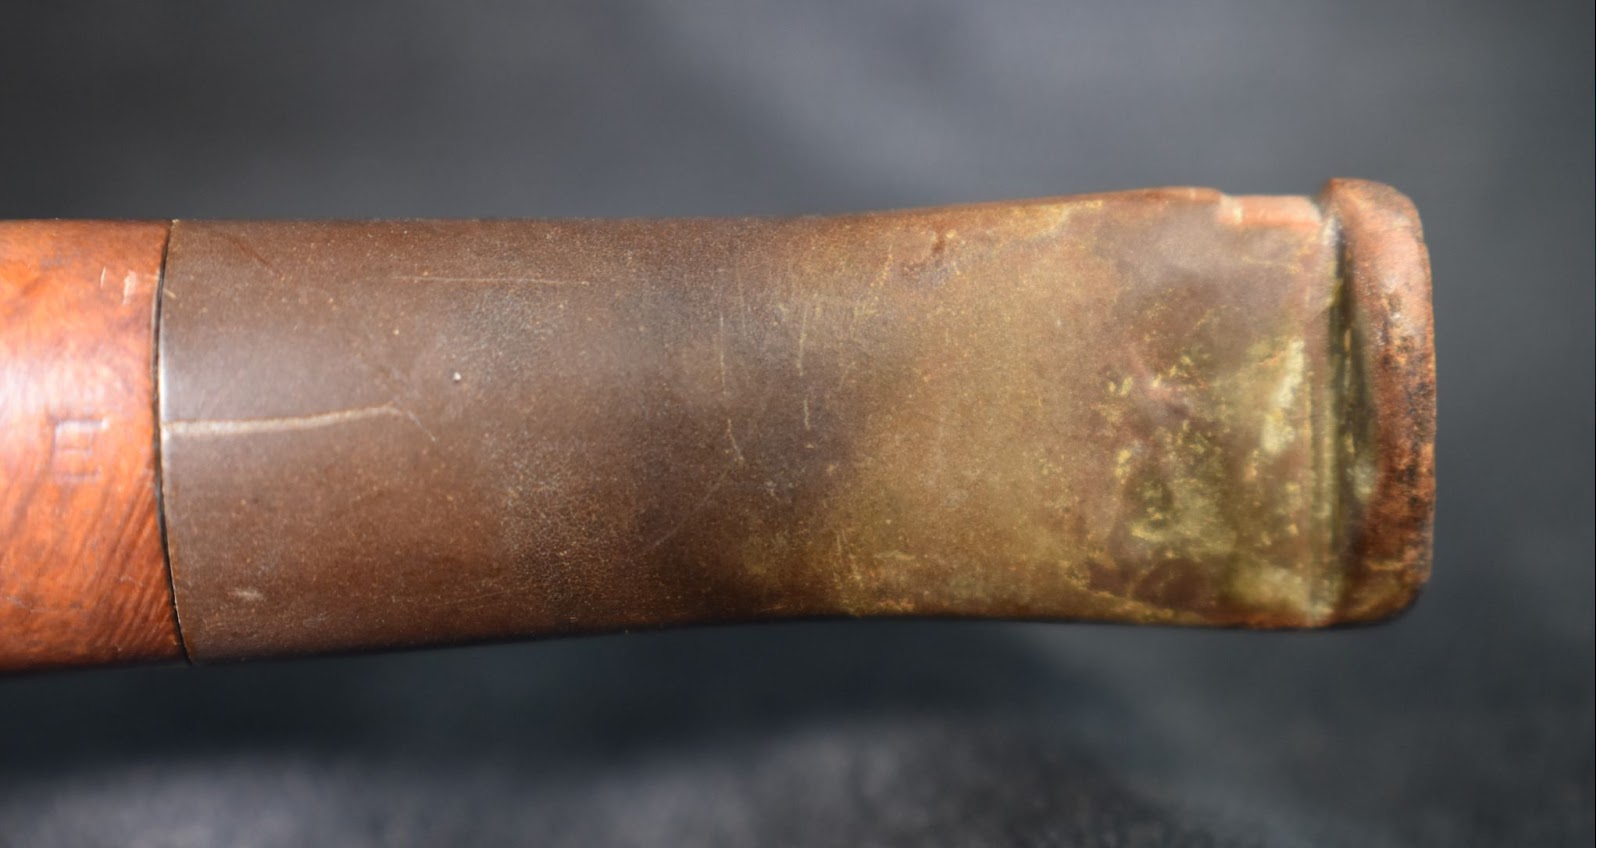
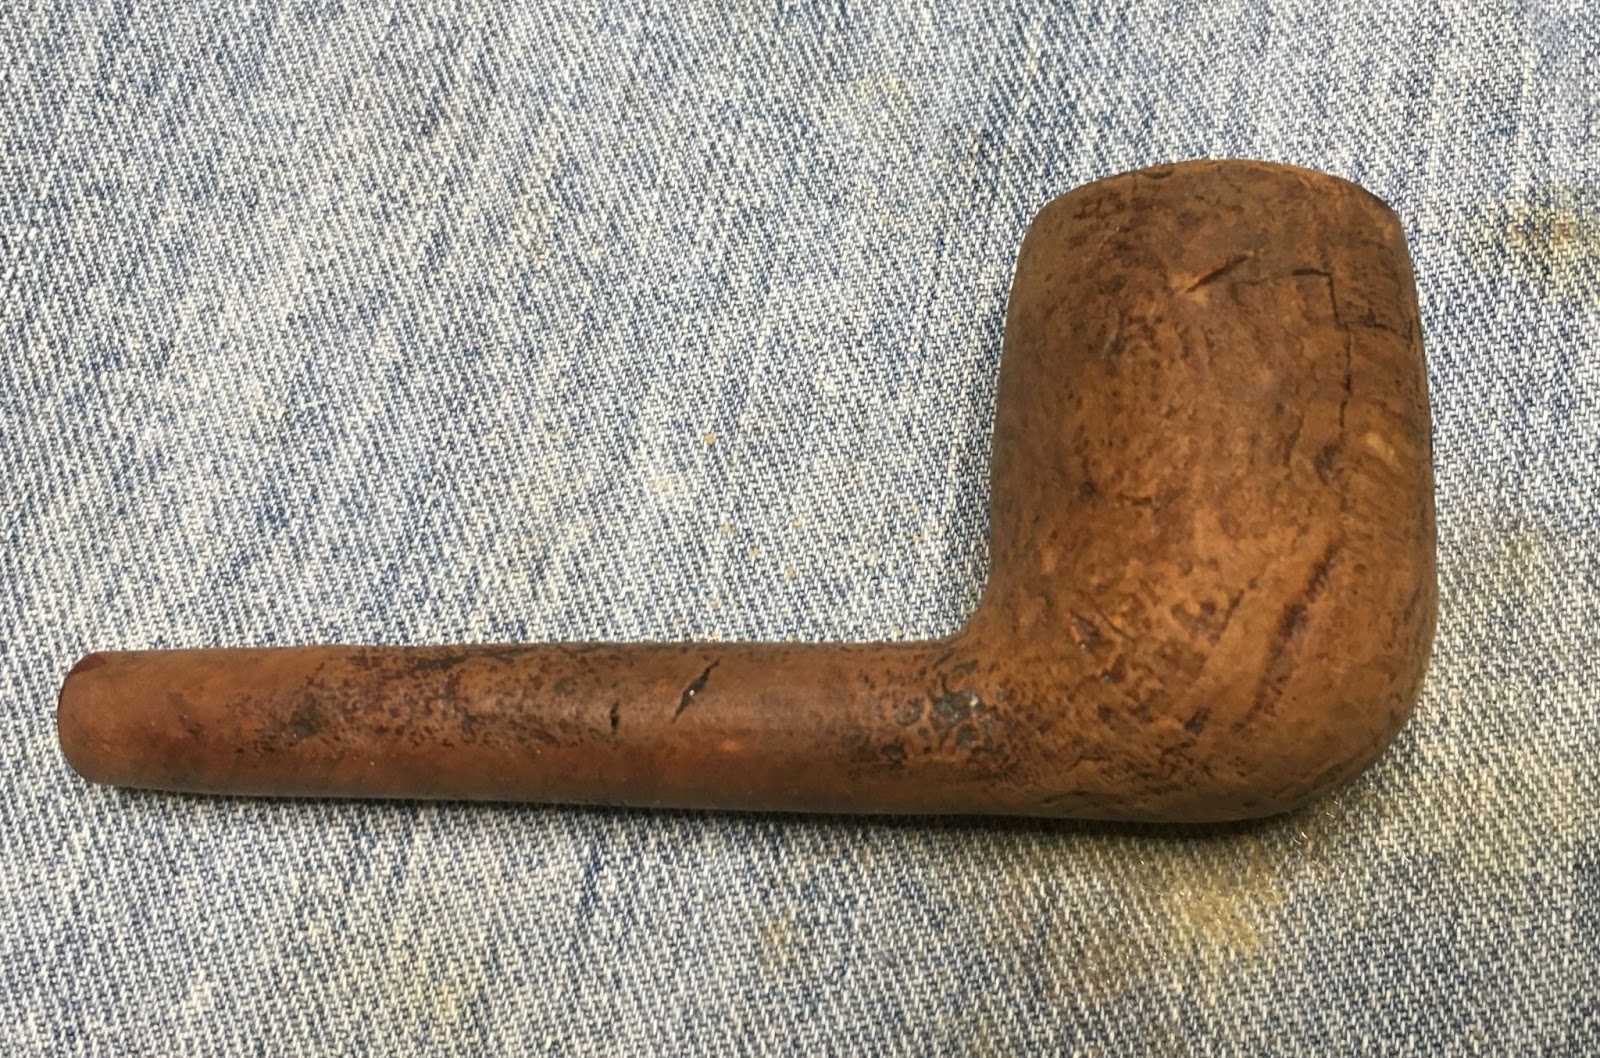
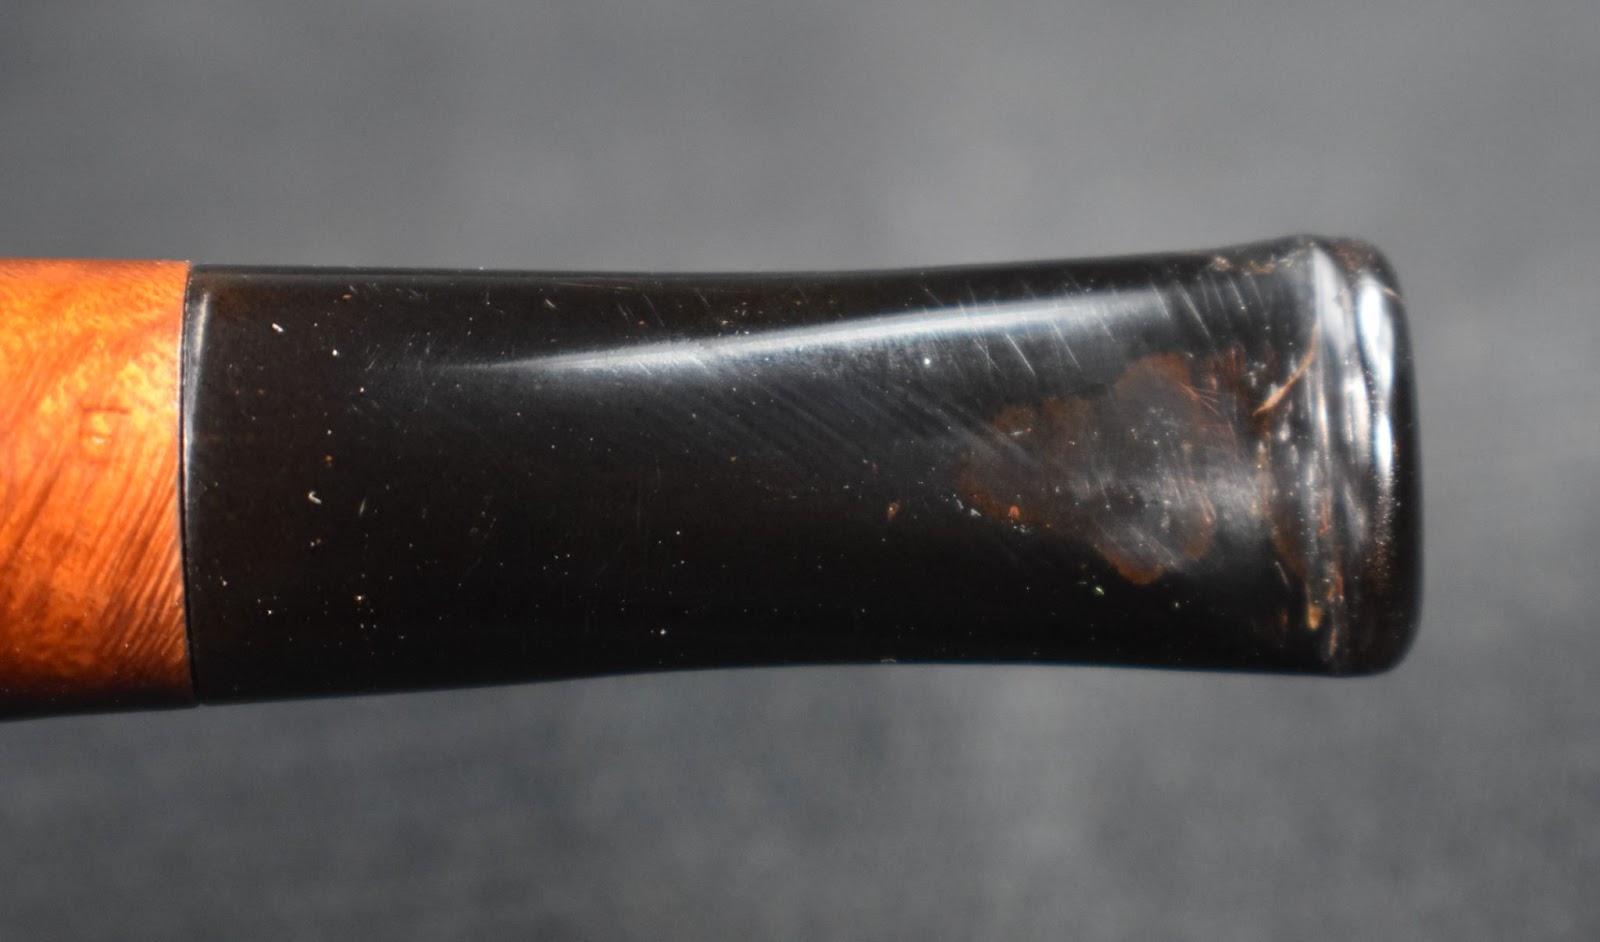
This adorable little darling was purchased to allow me to work on a few novel traits. First, an amber stem, second an orific bit and third meerschaum. The threaded bone tenon was a bonus. The pipe came with a fitted case which had a distinctive mildew smell. The leather exterior of the case had almost completely deteriorated with only a few scraps remaining. What was left was paper thin and very brittle to the touch. The interior of the case had remnants of a velvet-like green lining which was also severely deteriorated by age. Inside the lining could be made out and read REAL MEERSCHAUM. The pipe had no markings. Below are photos of the case and pipe prior to any work done.
The joining where the shank met the stem was in remarkably good alignment and showed only a slight “overclocking”.
In all honesty, I was pretty sure that I would screw up major parts of this restoration. I was ready to do so and call any errors on my part inexperience. Then I thought that would do a disservice to the legacy of the old pipe and merely be an excuse for mistakes. I searched Steve Laug’s rebornpipes.com for meerschaum restorations and read several. The handful of meerschaum restorations which I had done all were rusticated pipes. This would be the first smooth meerschaum that I’d tackled. Everything about it seemed fragile; the disintegrating case, the amber stem, the bone tenon and the delicate smooth meerschaum stummel. So here goes, good or bad, I’ll show you all what I did.
Background
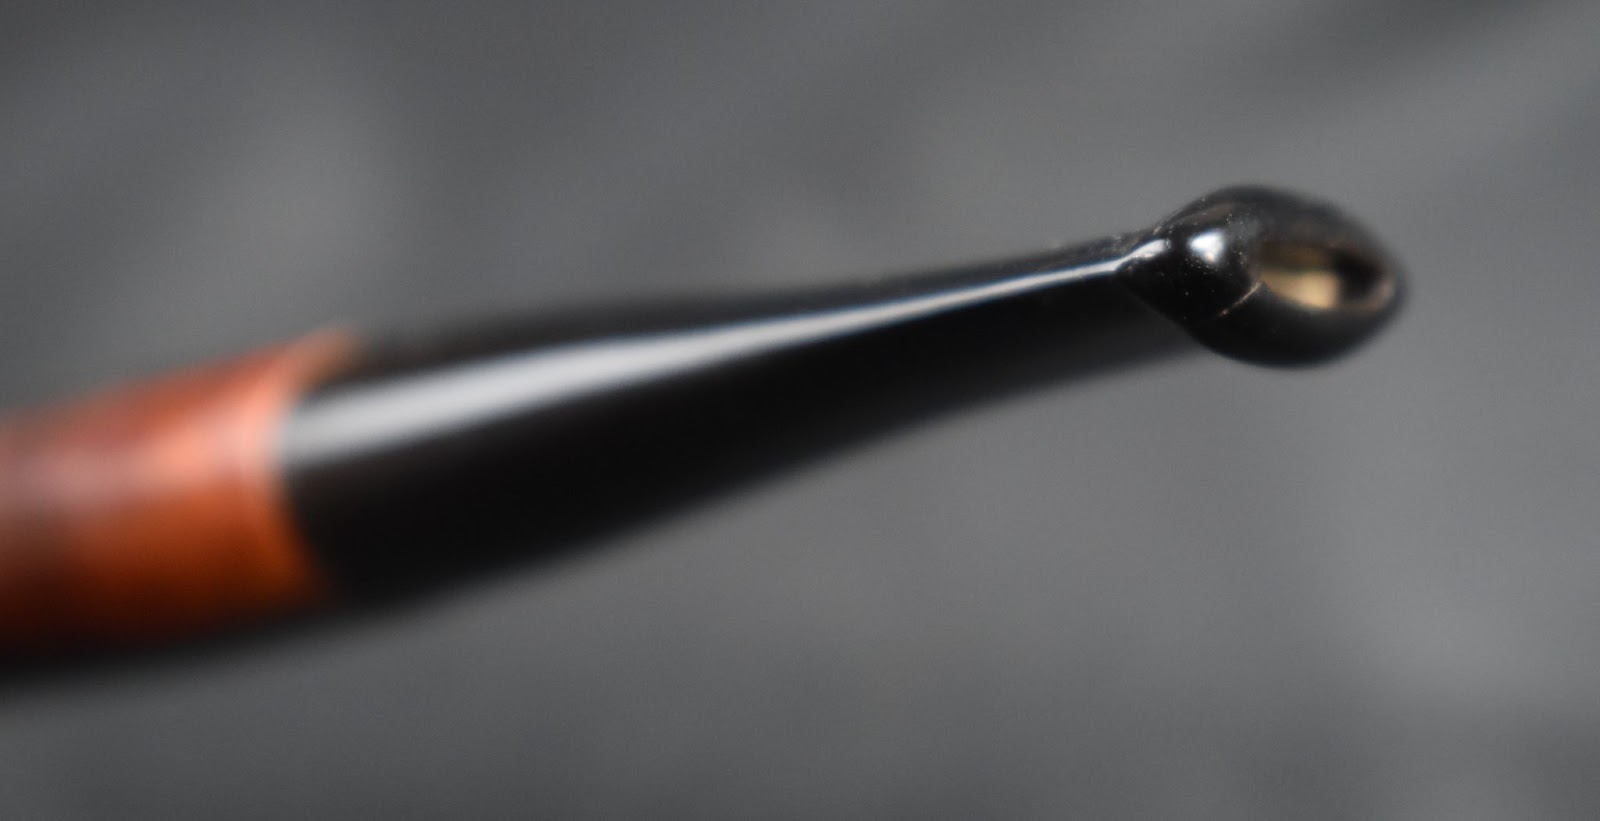
This is an easy one. There, done. Really, I have nothing to go one. I tried searching for “REAL MEERSCHAUM” marked cases – no matches. Most of the cases are actually marked”Genuine Meerschaum” so, I thought I might get lucky with the “Real” but, no. I guess we can talk about the orific bit quickly. Mouthpieces with orific bits seem to have gone out of favor by 1920 and were replaced with the slot which we are all more familiar with. Steve Laug wrote a great blog on the demise of the orific button and I’ll link to it here.
Judging by the case, the amber stem and the orific button, I think I can safely say that this pipe is from before 1920 and most likely carved in Europe.
The Restoration
Dirty little pipe on a clean piece of denim.
The reaming was done with scrapers and sandpaper only. Twisting reamers are considered too aggressive for meerschaums due to their potential torque.
The Scraping was slower than normal as I was trying to be careful of the meerschaum. I am still developing a feel for the amount of pressure which can be used. Also the sound. Briar has a squeak, to my ears, that is different from the sound of a scraper on cake. I have not had enough experience reaming meerschaum to have developed an “ear” for it. I know, practice, practice, practice.
The reamed bowl before the sanding.
After the reaming, I started cleaning the airway. How something so short could have enough tar to take down a saber-tooth cat I’m not sure. Many bristle pipe cleaners and cotton swabs dipped in 95% ethyl alcohol later the airway was clean.
It was a bit difficult for me not to grab the Murphy Oil Soap when cleaning a stummel. I didn’t. The stummel was scrubbed with only warm water and a medium bristle toothbrush.
I forgot to mention that I lightly sanded the rim while I was sanding the tobacco chamber. This was done in an attempt to remove the lava which had formed over the rim.
I didn’t want to take away too much of the surface meerschaum as I thought that a ring of fresh mineral would look ridiculous with the rest of the colored meerschaum.
Below is the scrubbed stummel, left and right.
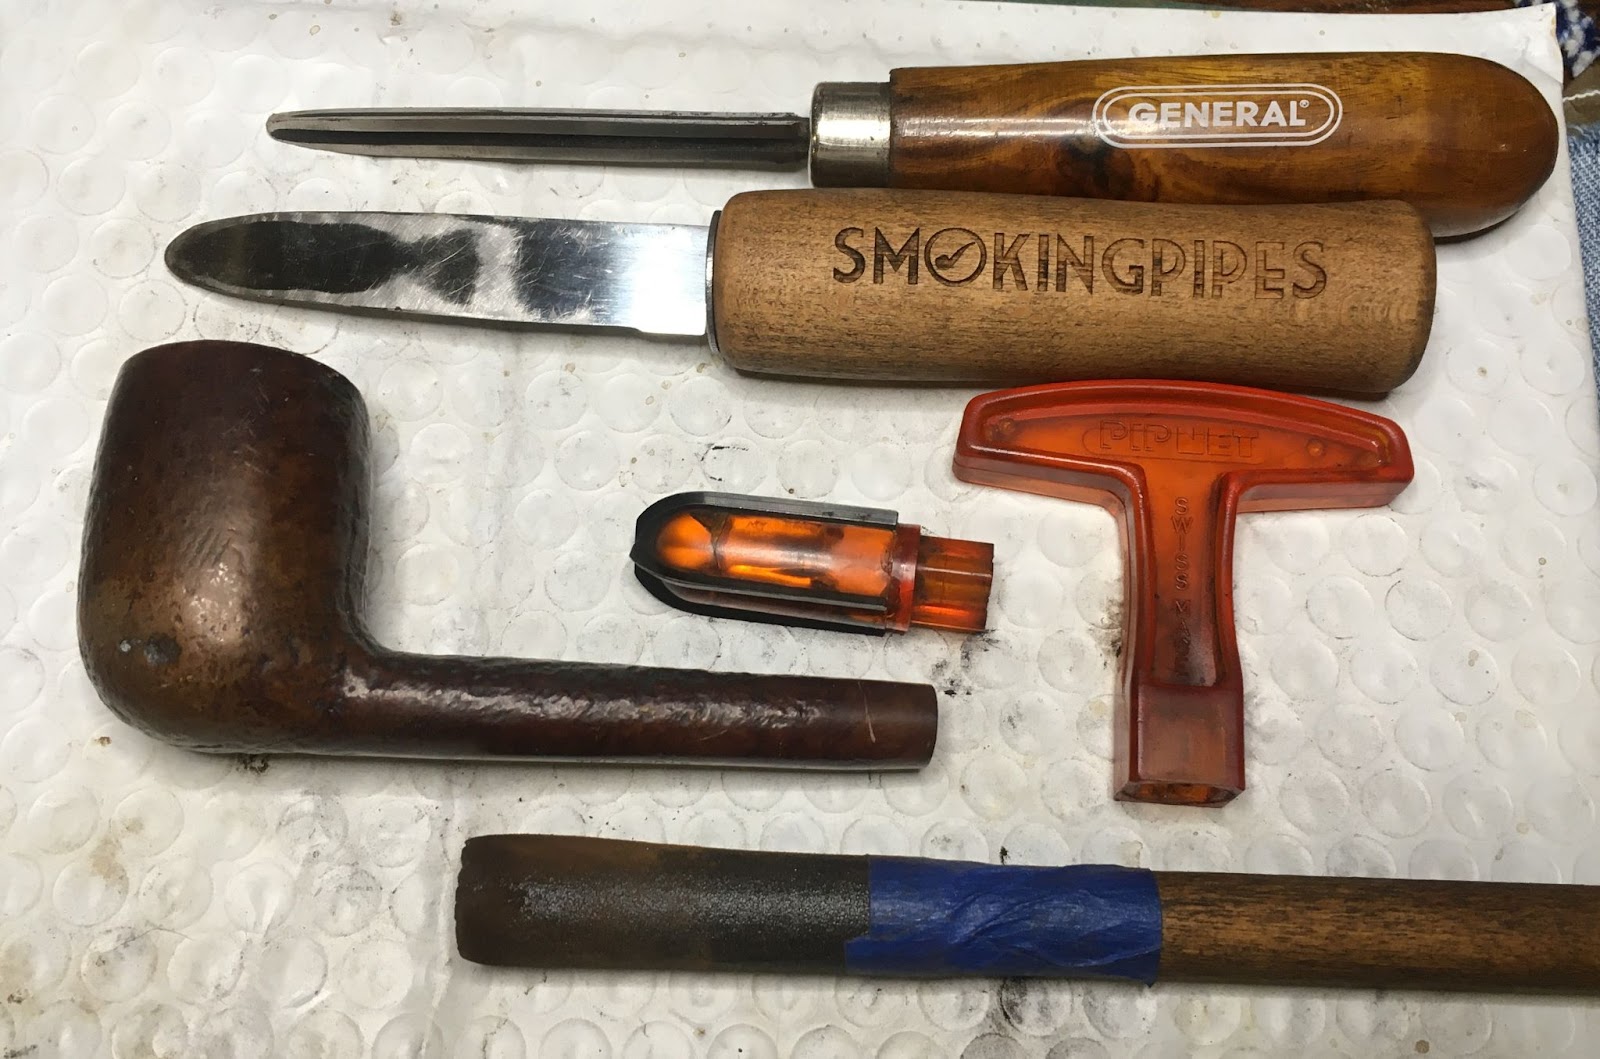
With the stummel cleaned I turned my attention to the stem. Fortunately it was nowhere near as dirty as the shank had been. Alcohol dipped bristle pipe cleaners made short work of this. The bone tenon was slightly overclocked when tightened. I added a very light coat of thin clean cyanoacrylate (CA, super glue) to the threads of the bone tenon. I hoped that this slight increase in their thickness would be enough to reduce the overclocking.
The stem immediately behind the button had teeth dents both above and below. These were filled by first lightly sanding the amber to provide additional surface area for the CA to adhere to. The dents each received a small drop of CA. You can see the damaged button in the photo below. I will come back to how I repaired it.
The CA was spritzed with a CA drying accelerator. This cured the CA as it evaporated. The newly cured CA was then filed and sanded smooth and blended with the existing amber.
The CA added to the bone tenon had cured without the use of an accelerator and allowed for a correct alignment of the stem with the shank. Better lucky than good, any day. I then used a series of micro-mesh pads from 1500-2400 wetted with a couple drops of water. The micro-mesh pads 3200-12000 were used dry. Between each pad I wiped the pipe off with a paper towel moistened with water.
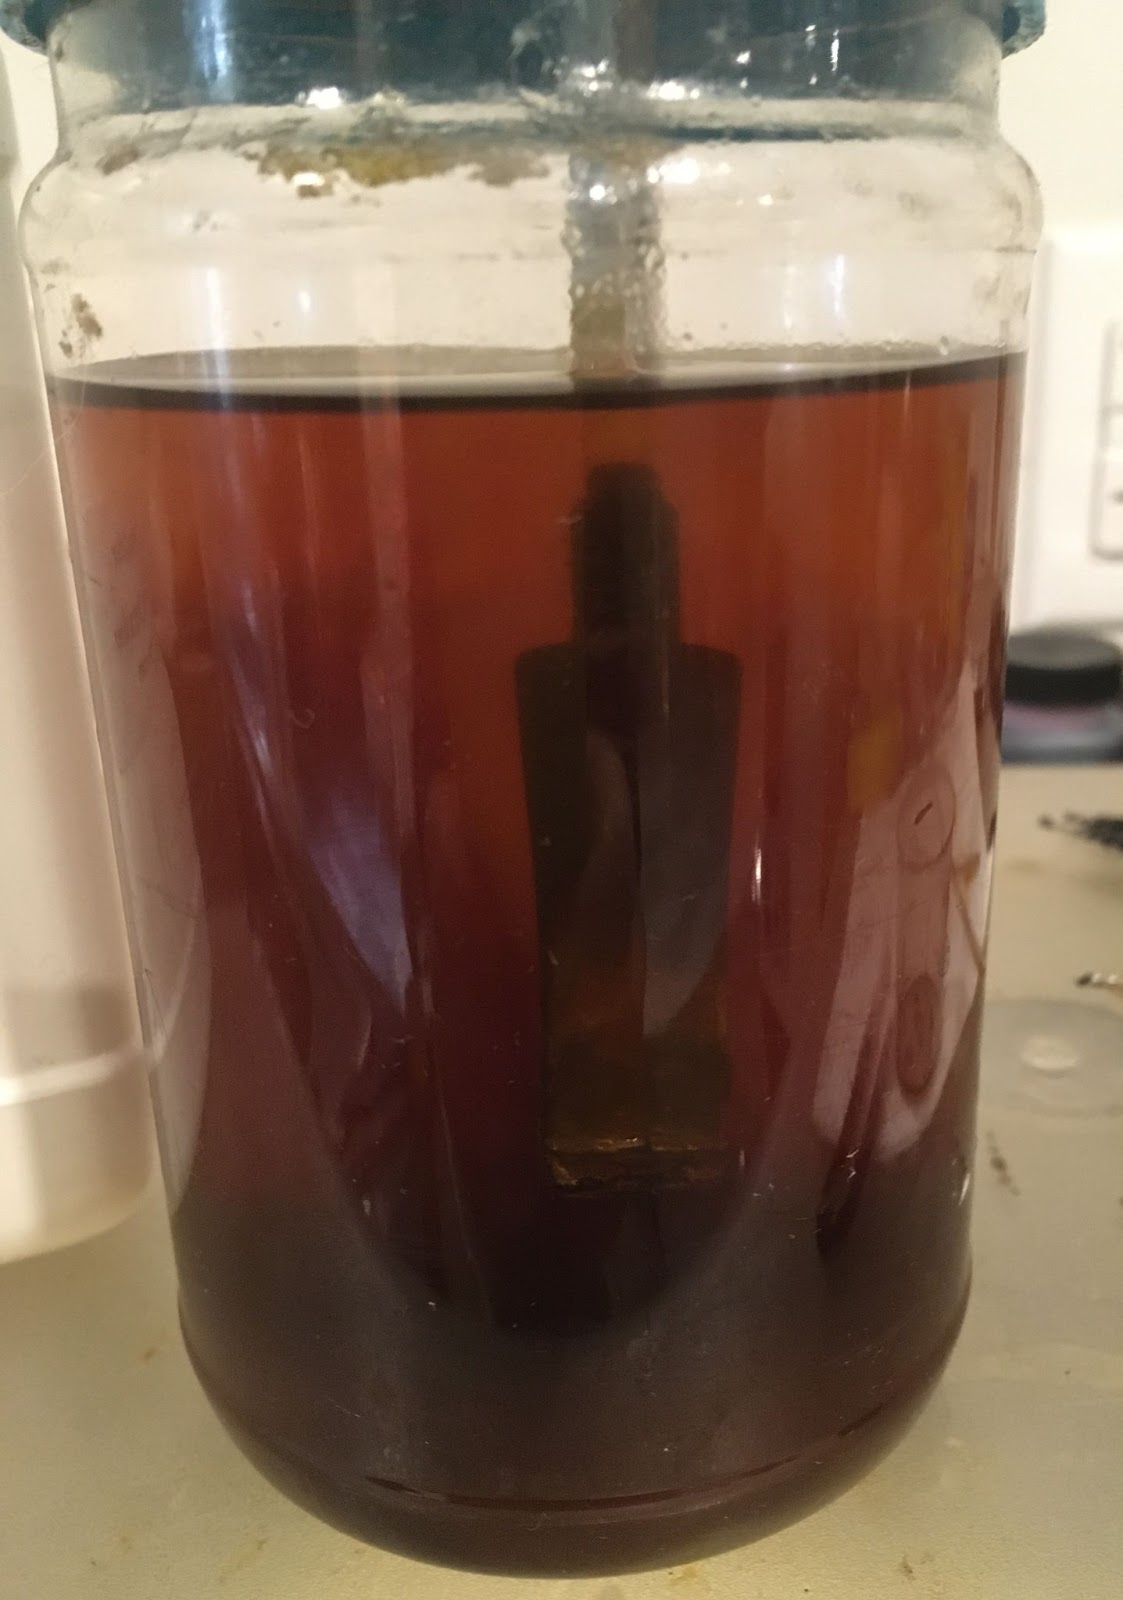
It was time to give the small Bulldog a fresh coat of beeswax. The kit that I used is illustrated with a photo from a previous meerschaum waxing. I place beeswax in a small glass jar and place the jar in a pan with water. The boiling water melted the wax and allowed me more time to apply the liquid wax. It is kind of like a double boiler and a hot water bath. The working surface has a heat gun and an empty tin to collect wax drippings. The wax is moved close to the work surface hopefully keeping my dripping to a minimum as I apply the wax to the stummel with a paintbrush.
As the wax was melting I heated the stummel with the heat gun.
Below is the boiling water melting the beeswax.
Once the entire stummel was “painted” with wax, I used the heat gun to remelt the wax. The dripping wax was collected in the tin. As I was melting the wax from the pipe I was also spreading it around with the paintbrush to ensure complete coverage.
Once the wax had either been absorbed by the meerschaum or had dripped into the tin, I put on the nearest glove and wiped the stummel with a dry paper towel. The glove was a necessary part as the stummel was very hot.
The color of the meerschaum had softened and took on a more warm golden hue.
Now, back to that button repair, I promised you.
Great idea: Use a toothpick wrapped in Scotch tape as a plug for the airway. The CA shouldn’t stick to the tape.
I inserted the toothpick, good thing this is an orific button.
I then used a fly tying bodkin as a dropper for brown CA. The brown CA was filled in around the toothpick. I used a medium CA rather than a thin formulation. It took a couple of applications to fill the broken voids.
The CA was allowed to cure on its own rather than using a drying accelerator.
After the CA had cured I removed the toothpick, pretty sure that my great idea would work but still cautious.
Success! I used a round diamond rat-tail file to smooth the interior of the airway. The button was reshaped using a flat file and sandpaper.
A sub-par photograph. I guess you will either have to wait for the “finished” photos or jump down to them.
Ugg, the case. I am sure that it once had a leather covering. That was long gone. I think all that remained was a papier mache shell. At least I think that is what it was made of.
There was also at one time a wooden frame around the case. Below you can still see a couple of flakes of old leather, the blackish paper tin stuff.
Enter great idea number two: Coat the whole exterior with sodium silicate, also known as water glass. That should act as an adhesive which would penetrate the papier mache and better hold it together. It would do the same for the wood frame. In my imagination this worked wonderfully. I removed the disintegrating flaking leather and started painting the exterior of the case.
I worked. I was not happy with the color though. It didn’t look like my imagination at all.
Well, I was rather committed at this point. I continued and painted the edges as well.
Great idea number three: Lightly sand the case, dye it with Fiebing’s black leather dye then give it a coat of black shoe polish. I know it didn’t have any leather but, It sounded good to me.
The case was sanded then dyed black. I did not flame the dye. My imagination told me that was a really bad idea. For once I listened.
The case was allowed to dry for an hour then I applied the black shoe polish with a cotton swab. Once applied, I used a shoe shine brush to buff the shoe polish.
The pipe was taken to the buffer where the stem received several coats of carnauba wax. The stummel did not receive any carnauba as it just got fresh beeswax.
Yeah, it is still a beaten, battered, scared, little bulldog but it is a cute little beaten, battered, scared bulldog. I am not sure if sanding would have removed all of the scratches. If the pipe had been that severely sanded, it most likely would not have any color of a developed meerschaum pipe. I am okay with the scars and think they show that this old pipe has stories which would probably amaze all of us if only it could tell them.The repairs to the amber stem turned out very well. The brown CA is a near perfect match to the color of the amber. The dimensions of this Small Amber Stem Meerschaum Bulldog are:
Length: 4.51 in./ 181.86 mm.
Weight: 0.82 oz./ 23.40 g.
Bowl Height: 1.63 in./ 54.61 mm.
Chamber Depth: 1.05 in./ 39.88 mm.
Chamber Diameter: 0.70 in./ 20.57 mm.
Outside Diameter: 1.40 in./ 33.78 mm.
I do hope that you have found something here useful to your own pipe care, maintenance or restorations. If you like this sort of thing, please click the like and subscribe buttons. Thank you for reading the ramblings of an old pipe lover.
Loading…
Below are some photos of the finished Small Amber Stem Meerschaum Bulldog.
The Jima pipe is one of those things that when you see one you just want to have one. They look so cool and 1960 futuristic. I am pretty sure if Captain James T. Kirk smoked a pipe on Star Trek. It would have been a Jima. Even the advertisements had a Bohr model-esque image:
(Jima – Pipedia). But like all things mainly fashioned in one’s imagination reality enters the picture. I recently succumbed to the Juima bug. Searching through the eBay auctions I found what looked to be a good example and a reasonable price, $25, and I decided that I had to have it. The wait for it to arrive from Hudson, Florida was tolerable with me imagining shooting space aliens while puffing happily with my restored Jima between my teeth.
When the Jima arrived, I have to say I was impressed with the look of the pipe and the condition which it was in. It looked as though it had only been smoked a few times. The feel of the pipe was much different than I had imagined. It felt like the whole thing was made of plastic. I had a chat with Steve Laug recently about Jima and his quote struck me as very insightful and funny. He said, “I have done a few Jimas and they always feel like kids bubble pipes” (Laug,Steve, personal communication) That is exactly what this Jima felt like, a toy pipe. I tried disassembling it, thinking that the bowl should unscrew. It didn’t. Or maybe the mouthpiece slip off, nope. I finally visited smokingmetal.co.uk and discovered the following:
“A plated metal frame holding the mouthpiece, an internal metal filter and the outer bowl of various colours of plastic. The bowl appears to be a ceramic material, which I have not managed to remove.
To access the filter, the barrel ( various patterns) of the inner stem is unscrewed on some models, or simply slid back on others
Mouthpiece of plastic and stamped JIMA on top and �Brevete France & Etranger� �Modele Depose Made in France�
Also available as GARLAND with the Brevet France etc stampings
Since acquiring the Garland which has all text in English, realise the bowl is not intended to be removed by the users. However it seems politric to leave it here lest other try to remove their ceramic bowl Overall Length: 144 m/m” (http://www.smokingmetal.co.uk/pipe.php?page=159).
Now I know this introduction has bled over into the “Background” portion of this blog but, I am trying to show the sequence of events as they occurred. I’ll get back on track. Here are some photos of the Jima and it’s condition upon arrival.
This is another of those restorations which really isn’t much of a restoration. Sure, the stem needs a bit of chatter removal and the parts need cleaning but, that is really about all there was to it.
Background
The Alexandria Library of pipes, also known as pipedia.org, has the following to say about Jima:
“An innovative system pipe, the “Jima” (for export also known under the name “Garland” and to a lesser extent in the Netherlands) was a pipe with a silver-plated or gold-plated steel metal frame, connecting a plastic mouthpiece to a plastic outer shell that housed the pipe bowl. This plastic pipe came in a few different colors, black and ivory being the most popular and later various mottled pastel shades showing depressing sales. While the housing was made of hard plastic, the bowl proper was made of a pressed white clay which has been mistaken for meerschaum or sepiolite. The bowl was made detachable by using a screw in fitting which could be loosened or tightened using an Allen key. The fittings on both the bowl and evaporator (stinger) used a plastic compression gasket to keep tar and moisture from seeping out and air from leaking in.
The “Jima” was equipped with an innovative filter design previously unemployed which made it an unforgettable part of the system pipe revolution that began in 1880 with the increasing popularity of new, moist aromatic tobaccos. In the “Jima” was found a filter which was made of spiral wound (sometimes double wound) “electrostatic” metal wire dubbed the “filtres serpentins helicoidaux”. It was said that the electrostatic properties of this filter caused the tars and residues to cling more readily to the filter medium. It is more likely that the extreme turbulence produced by this system caused particles of tar to fall and moisture to condensate as the smoke cooled rapidly. In this instance the evaporator worked to great effect relative to the amount of tar and moisture which accumulated in the stem.
To access the filter, the stem (plastic and in other iterations metal) can be unscrewed, by use of a spring system, or simply slid back, tilted downward and finally pulled off. In nearly every instance the words “Breveté France & Etranger” or “Modèle Deposé Made in France” can be found on the underside of the mouthpiece near the stem.
French brand created in the 1960s by Mayeux, which had a very modern look. This modern look was emphasized by the manufacturer in the promotion material. The slogan speaks of “la pipe de l’an 2000” or “The pipe of the year 2000” . The factory was sold to Chapel Frés, which became part of the Berrod-Regad group in 1987. The Jima pipe is no longer made.”(Jima – Pipedia)(I added the italics)
The above entry also contains numerous photos of Jima pipes in various colors. The one photo that makes me sad is the photo of the “filtres serpentins helicoidaux” or metal filter. This pipe did not come with the original filter. The other thing which I wished that this pipe had is the screw allowing for the disassembly of the bowl from the pipe. That too is not something common to this Jima.
The third site that I checked for background on Jima was pipephil.eu. Here there is a single entry with three links. The left top two links are to other pipe makers associated
with Jima. The “More infos here” link takes you to the smokingmetal.co.uk site for Jima. The final link, “The Chapel Freres & Cie factory” delivers you to a page which shows the building housing the factory. This building now is quite literally housing.
This all leads me to say with some certainty that this Jima was made in France in the 1970s.
The Restoration
The Jima started out with a clean denim piece, like usual.
Since most of the required work on this pipe appeared to be on the stem, that is where I began. I used a wood block to raise the stem slightly to allow a more curved action when filing. I lightly filed the tooth chatter with a small flat file.
The filed surface was then sanded with a 320 grit sanding sponge. You can see on the photo below that the stem stamps were covered with painters tape for protection.
The sanding was done to both the top and bottom sides.
The stem was then sanded with a series of sanding sponges from 320-3500 grits.
The stem was polished with micro-mesh pads 4000-12000.
I failed to photograph the buffing of the plastic stummel with the buffer and white diamond compound. You are not really missing much as there wasn’t much to do.
The Jima’s shank, for lack of a better word, was removed by sliding it towards the mouthpiece then tilting it downward and sliding it off. This tube was cleaned with cotton swabs dipped in 95% ethyl alcohol.
The two short airways were cleaned with bristle pipe cleaners again dipped in ethyl alcohol.
The bowl was cleaned out with cotton swabs and, you guessed it – ethyl alcohol.
The pipe was reassembled and taken to the buffer for a couple of coats of carnauba wax then a hand buffing with a microfiber polishing cloth.
The best part about this restoration is that I can mark it off the list of pipes to restore. I can’t say that I was terribly impressed with the Jima. I mean yeah, they look very cool but the plastic-like feel just did not appeal to me. It is also true that I never smoked the pipe. It may completely redeem itself with a bowl of tobacco. The amber plastic is very pretty and the gold accents it remarkably. The amber looking stem brings the whole pipe together in a very attractive way and I still admit that I love the aesthetics of the pipe. The design and engineering also are of great quality, The o-rings seal beautifully even with their age and the finish of the pipe is good. I do not like the slight gap around the gold rim and the amber plastic of the stummel but I am sure that is there to allow expansion and contraction of the two plastics and the ceramic bowl. I just can’t get over how it feels in my hand. Perhaps this makes me tactile-ist. A new word I am claiming in reference to being snobbish and elitist regarding the feeling of things. The dimensions of this Jima are:
Length: 5.68 in./ 144.27 mm.
Weight: 1.35 oz./ 38.30 g.
Bowl Height: 1.61 in./ 40.89 mm.
Chamber Depth: 1.31 in./ 33.27 mm.
Chamber Diameter: 0.70 in./ 17.78 mm.
Outside Diameter: 1.48 in./ 37.59 mm.
I do hope that you have found something here useful to your own pipe care, maintenance or restorations. If you like this sort of thing, please click the like and subscribe buttons. Thank you for reading the ramblings of an old pipe lover.
Just when I think I have moved on from my fascination with World War Two pipes I get drawn back in. Though this old pipe is more of a reminiscence of my youth and the semi annual visits to Sears for new school clothes. The candy counter was within the first 20 yards of the entrance and I could usually count on a white paper sack with a dollar’s worth of Swedish fish to help tide me through the horrendous task of trying on new clothes. I do not recall seeing pipes under the glass counter. I do recall that this was the only way I had ever seen Swedish fish though. Why the mention of Sears in this introduction? Well, I guess you will just have to read the “Background” for the answer to that question.
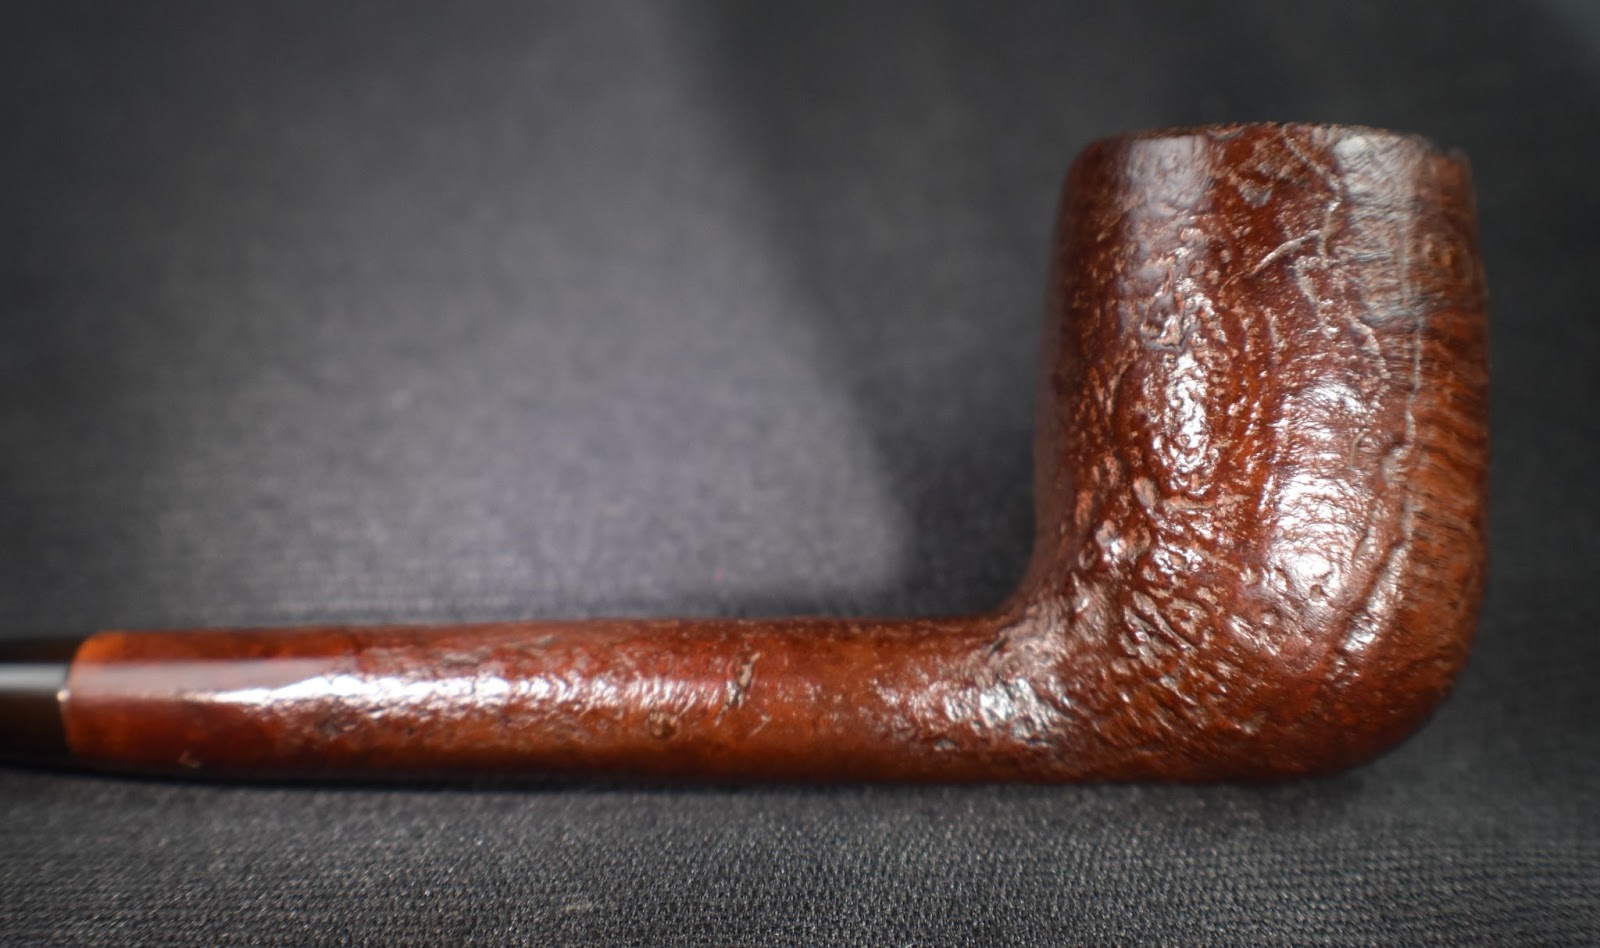
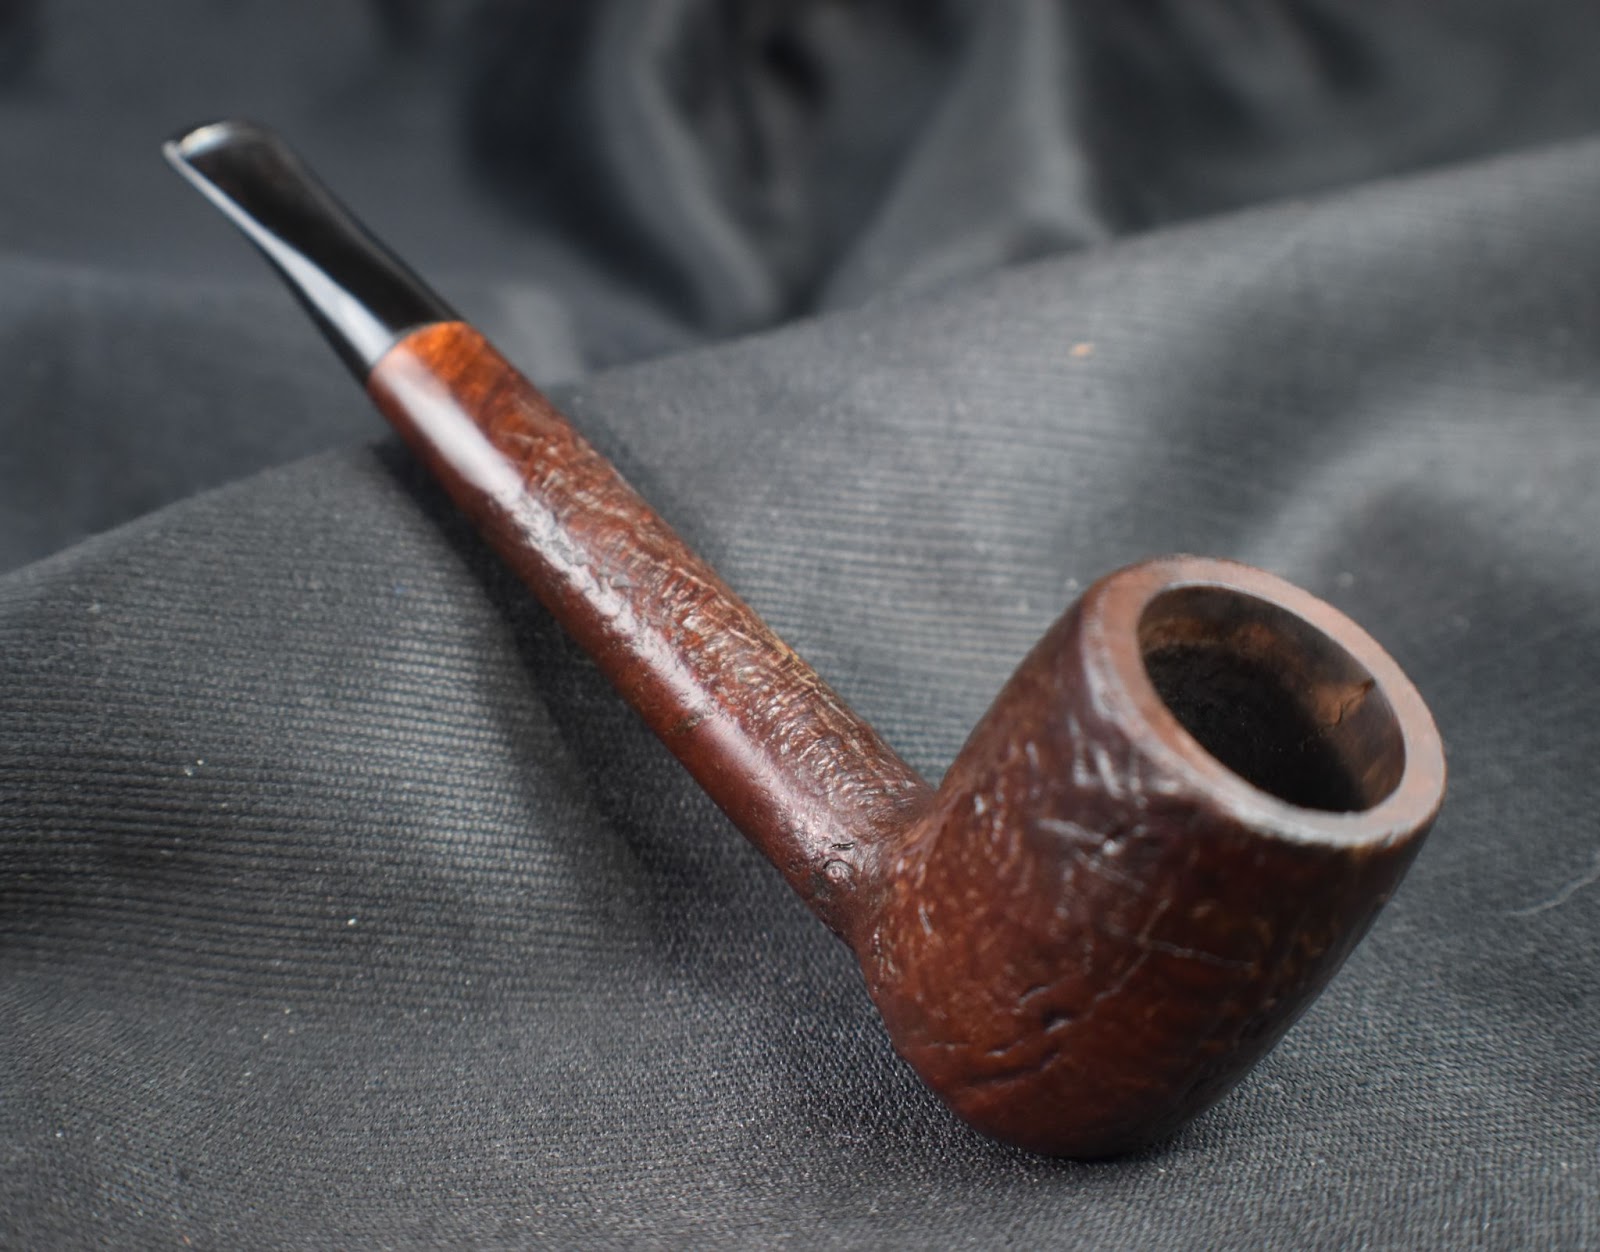
This lovely old Yorkshire Natural appears to live up to it’s name – natural. There seems to be little stain and no finish coating. The stamps on the left shank read; Yorkshire (script style lettering) arched (concave up) over NATURAL over ALGERIAN BRIAR arched (concave down).
This was looking like a straightforward restoration. Yes there were a lot of fills that I wanted to redo but other than that the pipe was in great condition. The stem was not badly oxidized and the bowl was not heavily caked.
Background
OK, you have waited long enough. Here is the reason for my back to school clothes /Swedish fish stroll down memory lane. According to pipedia.org, “Yorkshire Pipes was a brand sold exclusively through Sears Roebuck Catalogs, as seen in this 1941-42 catalog page. They were made in France of Algerian Briar, and some of the model names were: Bond Street, Royal, Aristocrat, Natural and Straight Grain. They were not stained nor finished with laquer, and had a natural honey color.”
For a second source confirmation of the heritage of the Yorkshire Natural in hand, I turned to pipephil.eu. Here I found the below images. Again it is confirmed that Sears & Roebuck sold the Yorkshire brand of pipes but here they mention that the pipes were made by Gasparini.
This creates a bit of confusion in my old damaged brain. The pipedia.org entry states a French manufacturer and the pipephil.eu entry states Gasparini. Last time I checked, Gasparini was and is an Italian maker. In examining the stamps the Yorkshire Natural that I have has stamps identical to the image from pipedia.org on the far right. So, I’ll say that this old girl is a French made apple from the 1940’s-1950’s. I know, not very specific with either part of the provenance. That might be the reason this blog is free – lazy Gen-X slacker of an author…
This next part is a little thought that I had and found entertaining. The location of the Sears of my youth was Omaha (yeah, that’s where I grew up). Sears was at a mall called Crossroads Mall. It was opened in 1960. The below photo shows the Sears entrance in 1961 with a crowd of people waiting to get in. I actually remember sitting there like that once.
The second photo below, is an image of Sears from 2019 taken from the same side of the building.
(https://omaha.com/photos-crossroads-mall-through-the-years/collection_086b8140-a744-5e25-a662-8e2aaba4858b.html#40). The entire mall lasted a mere 59 years, three generations of people. Now I find the fact that the entire mall was built, utilized and destroyed in about ½ the time that this single little pipe from the same company has been around, amazing. Businesses and buildings come and go but the pursuit of a relaxing smoke and the contemplation that it brings is a human pursuit which has survived for centuries. Enough of me blathering on let’s get to the restoration.
The Restoration
Here is our star taking up position on a clean piece of denim on the workbench.
The reaming crew was gathered; PipNet with #2 and #3 blades, Smokingpipes Low Country reaming knife, General triangular scraper (with the tip ground off) and 220 sandpaper wrapped around a wood dowel all atop a plastic coated shipping envelope.
The PipNet with the #2 blades did the lion’s share of the work, again. The #3 blades were too tight of a fit so the Kleen Reem pipe tool was used. It actually was a touch too small when fully extended but I pressed sideways with it around the bowl. The scrapers were used to finish the scraping.
The reamed bowl showed no signs of any damage from excessive heat. The chamber was sanded with 220 sandpaper on the wood dowel and 320 sandpaper with my finger.
The shank was far dirtier than I figured it would be. The initial wetting of the airway with 95% ethyl alcohol on cotton swabs produced a heavily blackened cotton. I then poured 3-4 ml of the alcohol into the bowl and scrubbed with a nylon shank brush. I then poured the alcohol into a medicine cup. This airwar would require a lot of scraping with the dental pick to clear as much of the accumulated tar as possible before further scrubbing.
Several scrapings later, the scrubbing with the nylon shank brush and the cotton swabs started to work their way through the accumulated smoking residue and eventually the airway was cleaned.
The stem proved much easier to clean than the shank. Apparently the previous steward was not averse to using a pipe cleaner on occasion. The airway was cleaned with bristle pipe cleaners dipped in 95% ethyl alcohol.
I then took the stummel to the sink for a scrubbing with undiluted Murphy Oil Soap and a nylon scrub brush. The soap was rinsed with warm water and dried with a cotton hand towel.
Back at the workbench the stummel was wiped with a make-up pad dipped in 95% ethyl alcohol. Very little color came off the briar indicating that surface was bare wood. Most of the color on the pad below was from the rim.
I began picking the old fill from the pits on the surface of the stummel. I counted 14 as I went along. The fills were generally solid and required a bit of force with the fly tying bodkin to get them out. ?Why take them out, then?”, you ask. Because I didn’t like the color.
To refill all 14 of the newly excavated pits, I used brown cyanoacrylate (CA, super glue) and briar dust. I dipped the fly tying bodkin into the CA then applied a small amount to the pit and worked it into the hole. I then used the dental scraper to scoop up a tiny scoop of briar dust and piled that onto the wet CA. The dust was then pressed into the pit with the heel of the scraper. Excess dust was brushed off with a brass brush. I only did about 2-4 holes at a time to avoid the CA curing before I had pressed the briar dust into the pit.
With all 14 pits refilled, I used a small flat file to file the CA/briar dust bump off. Then sanded the area with a 400 grit sanding sponge. After all of the pits had received one application and were sanded, I reapplied CA and additional briar dust. The process was repeated until the pits were smooth and flush with the surrounding briar. The stummel was then sanded with a 600 grit sanding sponge and wiped with a make-up pad dipped in ethyl alcohol.
I lightly topped the rim using 320 and 400 sandpaper laid flat on the countertop.
The stummel was stamped NATURAL. I wanted to keep this color finish true to the stamping. My first reaction to a stummel with this number of pits would normally be to give it a contrast dye of black. That would certainly conceal many of the fills but would also violate my sensibilities of maintaining the natural color of the stummel. To lighten the aged briar I decided to treat the wood with an application of oxalic acid. This “bleaches” the surface of the briar and can significantly lighten stained briar. If you are interested in a more heavily stained project see the W.O. Larsen restoration. The oxalic acid was applied with a cotton swab. I wetted the entire exterior 2-3 times and let it sit for 30 minutes before rinsing with copious amounts of was while scrubbing with a toothbrush.
Once dried the stummel looked a bit lighter and more vibrant than it did prior to the oxalic acid.
The stummel then had painters tape placed over the stamp and was sanded with a series of sanding sponges 1000-3500. Between each sponge I wiped the stummel with an alcohol dampened make-up pad.
The stummel was then micro-meshed with 4000-12000 pads. Between the pads I wiped the stummel with make-up pads wetted with ethyl alcohol.
The stummel was then given a coating of Before and After Restoration Balm and allowed to sit for 30 minutes.
After 30 minutes the Restoration Balm was wiped from the stummel using an inside out cotton athletic sock. The grain looked wonderful.
Unfortunately the stem did not look as wonderful. I used a small flat file to smooth the bite zone of the stem. The tooth dents were too deep to file them away without significantly thinning the stem. Filling the depressions with black CA was the chosen repair. I applied a coating of black CA from the button back 1 cm on the top and bottom of the stem. Both sides were then spritzed with a CA drying accelerator. I then shaped the button and smoothed the stem with the flat file. I then started smoothing and blending the patch with 320-600 grit sanding sponges. Between the sanding I rubbed mineral oil onto the stem with my fingertip and wiped away the excess with a dry paper towel.
The shank was taped with painters tape to protect it from the stem sanding. I needed them together to keep from rounding the joint where the stem meets the shank and to provide a handle for the stem.
The stem was sanded with a series of sanding sponges from 600-3500. Between sponges I rubbed the stem with mineral oil and wiped the excess with a dry paper towel.
I then polished the stem with micro-mesh pads 4000-12000. Between each pad I rubbed the stem with Obsidian Oil and wiped the excess with a paper towel.
At this stage I looked at the stem under the bright lights at the photography station. There was still a faint brown visible. I reapplied the painters tape to the shank and took the stem to the buffer. There I buffed the stem with white diamond buffing compound. After wiping the stem with a make-up pad moistened with ethyl alcohol I returned to the bright lights and the brown was gone. I returned to the bench and used Before and After Fine Polish of a soft cotton cloth.
The Before and After Extra Fine Polished was used after the Fine Polish with the same cotton cloth.
The pipe was returned to the buffer where I applied several coats of carnauba wax to both the stem and stummel. The final step was hand buffing the pipe with a microfiber polishing cloth to raise the shine before the final photography session.
I am very pleased with how this Yorkshire Natural Apple turned out. The grain of the briar is beautiful. Yes all the fill detract from the finish but it was an everyman’s mail order pipe from Sears and Roebuck. The stem polished up well and provides a sharp contrast with the light natural briar. Both stem and stummel sport a high gloss finish that complements the other. The shape of the robust apple bowl feels great which is good because the length and mass of the pipe are a bit much for a comfortable clencher. Perhaps one of those rubber cushions would help.. The dimensions of this Yorkshire Natural Apple are:
Length: 5.61 in./ 142.94 mm.
Weight: 1.48 oz./ 42.10 g.
Bowl Height: 1.78 in./ 45.21 mm.
Chamber Depth: 1.32 in./ 33.53 mm.
Chamber Diameter: 0.80 in./ 20.32 mm.
Outside Diameter: 1.59 in./ 40.39 mm.
I do hope that you have found something here useful to your own pipe care, maintenance or restorations. If you like this sort of thing, please click the like and subscribe buttons. Thank you for reading the ramblings of an old pipe lover.
Loading…
Below are some photos of the finished Yorkshire Natural Apple.
I am only speaking for myself here as your results may vary but, I have found that alcohol consumption fails to make my decisions or their results better. I think that may have been the case with this lovely little Larsen as well. When I first got the pipe I was quite pleased with its appearance. Closer examination soon revealed a layer of Scotch tape around the tenon. “Hmm, that is not normal”, I thought. I then carefully removed and examined the tape and tenon. I immediately thought that a previous steward had broken or cracked the tenon but all was well there. Another “Hmm”. The shank was then examined. All I could think is; “What?”, “Why?” and “Huh?” Yeah, I ran out of “W” words. The mortise appeared to have two extra attempted drill holes widening the mortise significantly thus requiring the thickening of the tenon with the Scotch tape. I envisioned a scene where the previous owner just finished off a 750 ml bottle of some 40% ethyl alcohol and the movie The Driller Killer and decided to turn this Larsen into a Peterson System pipe. See the first sentence of this blog.
Regardless of the origin story of this Larsen and how it came to be, the pipe was certainly worthy of some restorative care. The pipe was stamped 85 over WØ LARSEN over MADE IN DENMARK perpendicular to the axis of the shank. Below are some photos of the Larsen when it arrived here.
The glaring repair to the mortise, shank and airway was the major task. The pipe otherwise looked to be in very good condition. There was some staining around the shank/stem joint probably from tars and condensation leaking around a bad mortise tenon fit. The acrylic stem had minimal wear.
Background
The first section of the quote below is from pipedia.org and is credited to “FinePies.Com.
“W.Ø. Larsen was one of the most famous tobacco shops in Copenhagen, with a beautiful store located on Copenhagen’s famous “Walking Street.” During the flowering of the Danish pipe in the 1960’s, they first began retailing pipes by such carvers as Sixten Ivarsson, Sven Knudsen, Poul Rasmussen, and Brakner.
Urged on by his store manager Svend Bang (S. Bang), the owner, Ole Larsen, decided to begin making pipes in the basement of the shop. He first hired Sven Knudsen as the pipe maker, who soon passed the job to his protégé Hans “Former” Nielsen. Larsen’s fortunes rose along with the rest of the Danish pipe business, and Former was soon managing a group of carvers in the old Larsen cigar factory. Among these were Teddy Knudsen, Tonni Nielsen, Jess Chonowitsch, Peter Hedegaard and others, who were responsible for the Select and Straight Grain series before they branched out on their own. After Former left to start Bentley pipes in Switzerland, his duties were taken over by Soren Refbjerg Rasmussen, while the Straight Grains were made by Teddy’s student Benni Jorgenson. As Ole’s health began to fail, the reins were taken over by his son Nils. Nils became convinced that the way for Larsen to prosper was by entering the low-end market, and acquired the Georg Jensen pipe factory to make an array of less expensive pipes. This turned out to be a fatal error, and Larsen was recently sold to Stanwell, who continue to produce so-called “Larsen” pipes in their huge factory. Thus ended an important part of Danish pipe history. Courtesy, FinePipes.com”(W.Ø. Larsen – Pipedia)
The next section also from pipedia.org
“From The History of Danish Pipes, by Jakob Groth
The workshop of W.Ø.Larsen
W.Ø.Larsen is Denmark’s oldest and probably most famous pipes and tobacco store, placed in the center of Copenhagen on the main pedestrian street, Stroget. If you visit Copenhagen and do a “pipe crawl” this store is a must. In the beginning of the 1960’s the store began to sell Danish hand-made pipes, especially those of Poul Rasmussen. This went very well and Poul Rasmussen could not keep up with the demand. W.Ø.Larsen, with their dynamic business manager Svend Bang (who later started his own pipe business), decided to establish their own workshop in rooms next to the store.
The first manager of the pipe workshop was Sven Knudsen, but he soon left to make pipes under his own name. The next manager was Hans Nielsen, also known as “Former” (named after the late British actor George Formby, whom he was said to resemble. Coincidentally, in Danish, “Former” means “shapes”). Under the management of Former the workshop grew and W.Ø.Larsen pipes became a prominent name abroad. Among the prominent pipemakers educated here were Else Larsen (Denmark’s first female pipemaker),Poul Ilsted, Ph. Vigen, Teddy Knudsen, Tonni Nielsen, and Peter Hedegaard.
Typical for the W.Ø.Larsen School were semi-classic shapes, meaning classic shapes, but with slight differences, often bring a little more full or round. The pipes often had lower center of gravity. A typical billard would have a bowl shaped more like a pear and the connection between the bowl and the shank would be clearly distinguished. Yellow and orange were colors more widely used for the finishes.”(W.Ø. Larsen – Pipedia)
Trying to get a date on this Larsen I turned to pipephil.eu. Here under W.Ø.Larsen I found the following images:
The uppermost image shows an identical stem logo to the pipe in hand. It unfortunately does not indicate the age or year of production. I returned to the pipedia.org site to look through the available Larsen catalogs. There are 3 catalogs on the site: A 1960-61, 1961-62 and a 1963. There was no mention of a shape 85 in any of the catalogs and the stem logo on my Larsen was not observed in any of the catalogs. One thing I found interesting is that the shape number 85 is completely absent.
(wo1.pdf (danishpipemakers.com))(red circle added by me). Now this is just me and my conjecturing brain, I think this Larsen is probably a Stanwell made Larsen. My reasoning is twofold: The Crown with LARSEN looks very modern and factory made
The 85 shape is a Stanwell shape. According to pipedia.org’s Stanwell shape number guide:
Numerous sources said that W.O. Larsen was “recently” acquired by Stanwell. I only found one source that defined “recently” – A Facebook entry by Pipes Pens and Much More, “Danish company W. O. Larsen started making pipes during 1950s and it was run by Ole W. O. Larsen (1920-2002), who created the Larsen Handmades. Ole, a reputable designer, was a member of the Academie Internationale de la Pipe and founded, in 1977, the company’s Tobacco Museum which, like the brand shop, closed in 2005. The brand became an associate of Georg Jensen in 1999, with the company having been run, since 1993, by Niels Larsen, the fifth generation of the family in business, until it was bought by Stanwell in 2003.” (https://www.facebook.com/pipespensandmore/posts/danish-company-w-o-larsen-started-making-pipes-during-1950s-and-it-was-run-by-ol/178742246947159/).
During the writing of this blog I sent fellow pipe restorer from Germany, Sascha Mertens a photo of this W.Ø.Larsen pipe. He did a bit of digging and came across a great article in a German blog by Ralf Dings. Mr. Dings, with his much more close to home knowledge discussed the demise of Larsen. The below is from his blog, W.Ö.LARSEN – EINE DÄNISCHE TABAKDYNASTIE and used with permission of the author.
“Niels W.Ö. was still young, but he used what he had learned to ensure that the Larsen name continued to do good business and maintain a brilliant reputation. His idea was to take over the GEORG JENSEN pipe factory to gain a foothold in the now popular segment of inexpensive pipes and thereby broaden Larsen’s range. Unfortunately, this plan turned out to be a fatal mistake, costing Niels W.Ö. so much money that he had to give up and sell to Stanwell. In 1997, what Wilhelm Öckenholt Larsen founded in 1864 came to an end.
That would put this pipe’s date of manufacture after 1997 and before 2006, when the shape was discontinued by Stanwell. As for current production of W.O. Larsen pipes by Stanwell all I could find was the following: “Annually, W.O. Larsen features a Pipe Of The Year, designed and manufactured by Stanwell. These are distinctly Danish styles that are truly spectacular.” (https://www.pipesandcigars.com/category/shop-by-brand/wo-larsen/)
The Restoration
This restoration began like others, with a cleaned denim piece as a work surface.
The reaming tools included the PipNet with number 3 blades, Smokingpipes Low Country reading knife, General triangular scraper with tip ground off and a wood dowel wrapped with sandpaper.
The minimal cake was quickly removed with the PipNet.
I lightly scraped with the other scrapers and sanding returned the bowl to fresh briar. There was no indication of any damage to the tobacco chamber
The airway of the shank was next cleaned with cotton swabs dipped in 95% ethyl alcohol.
My plan was to fill the damaged airway with black J.B. Weld epoxy. To keep the epoxy from entering where I did not want it I planned to coat the contact surface of the tenon, a pipe cleaner (for the draft hole) and the end of a cotton swab. The cotton swab tip was to plug the “drilled reservoir” which a previous owner had drilled. I figured that the misguided bloke’s work should not be completely in vain. I will include another photo of the drill grooves I was planning on filling with epoxy, below. There was enough of the correct mortise remaining so, my thought was to fill the two drill paths to the right with epoxy, seat the greased tenon, clamp it to keep the tenon pressed to the left and let the epoxy cure. Hopefully the petroleum jelly would prevent the epoxy from adhering to the tenon. Once cured I could re-drill and smooth the airway.
I failed to photo the application of the epoxy as I was worried about it becoming too tacky. Below is the stem clamped in place.
A couple of hours later I removed the clamp and pulled the stem free. The Vaseline did what I hoped it would do, preventing the epoxy from adhering to the tenon. The airway remained clear of epoxy thanks to the Vaseline coated pipe cleaner and the cotton swab tip kept the epoxy from entering the reservoir. Success on everything so far. I allowed the epoxy to cure for a full two days.
I used a micrometer to measure the diameter of the tenon and discovered that a 5/16 in drill would allow a good fit of the tenon. I stepped the bit down to ¼ for the first re-drilling attempt. Then increased the bit size to the 5/16.
The re-drilling seemed successful and the tenon felt appropriately tight. Below you can see the epoxy patch. I was not happy with the seem around the patch but thought that black cyanoacrylate (CA, super glue) could be used to fill the slight gap to the patch.
The stummel was taken to the sink for a scrub with undiluted Murphy Oil Soap and a nylon scrub brush. The soap was rinsed with warm water and the stummel dried with a cotton hand towel.
Returning to the workbench I wiped the stummel with 95% ethyl alcohol on a make-up pad. A little bit of black stain came off onto the pad.
The scrubbing did little to remove the tar stains around the end of the shank.
I have successfully used oxalic acid to bleach briar previously. I thought that the technique might work here.
I applied the oxalic acid solution with a cotton swab to the unstained shank and set it aside to see if it would lighten the tar stains..
In the meantime I cleaned the pipe stem using 95% ethyl alcohol and bristle pipe cleaners.
A few minutes later I saw a marked lightening of the stained areas. Not completely removed but far better than they were.
I taped off the stem with painters tape to protect it during sanding of the shank and taped over the stamps to preserve them as well.
The shank was sanded with 1000-3500 grit sanding sponges.
At this point I used the black CA to fill the gap between the epoxy patch and the briar shank. I worked fairly well and was lightly sanded using the topping board and 400 sandpaper. There remained a very slight seem or gap. I filled this with clear Thin CA applied with a fly tying bodkin and lightly sanded with a 1000 grit sanding sponge. To reestablish the counterbore of the portise I used a small wood sphere wrapped in 320 sandpaper followed by 400 sandpaper. This was done because I was too lazy to go upstairs and into the garage for a countersink bit.
The end of the shank was touch-up stained black with a Furniture Touch-up Stain marker.
The stem and stummel were reunited and micr0-meshed with the 4000-12000 pads. This polished up the brass accent nicely.
The stem then received a hand buffing with Before and After Fine Polish on a soft cotton cloth.
The Fine Polish was followed by the Before and After Extra Fine Polish with the same cloth.
I worked some Renaissance Micro-Crystalline Wax Polish into the sandblasted surface of the stummel with a baby toothbrush and hand buffed it with a microfiber polishing cloth.
The pipe was then taken to the buffer where the stem and shank end received several coats of carnauba wax with the buffer.
This restoration was a project that required a bit of improvisation. I had never read of another restorer rebuilding a mortise using epoxy. I am sure it has been done as I doubt I am a very original thinker. The results seem to have worked. I have not smoked this pipe and admit that the remedy has not been tested under fire, pun intended. Overall I am quite happy with how this pipe turned out. It is a lovely shape with a great finish. I am looking forward to smoking it and testing out the repair. If you would like to know how the repair holds up feel free to ask in the comments.
The dimensions of this W.Ø. Larsen 85 Bent Billiard are:
Length: 5.71 in./ 145.03 mm.
Weight: 2.03 oz./ 57.70g.
Bowl Height: 2.09 in./ 53.09 mm.
Chamber Depth: 1.60 in./ 40.64 mm.
Chamber Diameter: 0.77 in./ 19.56 mm.
Outside Diameter: 1.62 in./ 41.15 mm.
I do hope that you have found something here useful to your own pipe care, maintenance or restorations. If you like this sort of thing, please click the like and subscribe buttons. Thank you for reading the ramblings of an old pipe lover.
Below are some photos of the finished W.Ø. Larsen 85 Bent Billiard.
This is a pipe I read about in 2023 and have been searching the auctions for since. One showed up in Italy a few months ago and the price was just too steep for my tastes. Finally this one showed up with an estate lot. I didn’t really want any of the other pipes in the lot but they were a package deal. I watched the auction run to the allotted time and still would not pay the asking minimum bid. The seller relisted the lot and my watch began anew. Again no one met the minimum asking price. The item was relisted a third time, with a “Make Best Offer” option. “Okay, now we’re talking”, I thought. I waited a few days then sent an offer with a note that I was only really interested in the Needham. The offer was accepted and I received the lot a few days later.
I was ecstatic when I saw the Needham in the flesh. The condition was much better than I expected or than the photos showed. Actually, a couple of the other pipes were also quite interesting and will most likely be seen in the future. The Needham looked to have only been smoked a few times, if that. The bottom of the tobacco chamber appeared unfired. The stamps on the base of the pipe were clear and well imprinted and read, NEEDHAM over IMPORTED BRIAR over PAT’D. There is no stem logo. The only other distinguishing feature is the red anodized aluminum screw at the front of the stummel base. Below are some photos of the pipe as it appeared upon arrival.
Background
The advertisement which originally sparked my interest in the Needham pipe is the below from the November issue of Pipe Lovers magazine 1946, page 365.
Now, you would think with an idea this great and a shape this cool and a pipe market that was smoking (pun intended) this would have been a great success with tomes written about and chronicling this wondrous development of human ingenuity. Umm, no. Here is what Pipedia.org has to say about Needham pipes:
Perhaps pipephil.eu has access to the hoards of documentation for the brand?
Bah, fortunately, dear reader I am not easily dissuaded by failure. I did come across a few interesting reads regarding the original Needham patent and the flush of smoking pipe innovations from the late 1800s-mid1900s. First lets take a look at the original Needham patent submitted September 30, 1942.
The second article shows a condensed form of the previous long description:
The final is an essay by Ben Rapaport, with my favorite quote where he is describing fundamental changes to smoking pipes over the past 100 years, “So what’s left? Asked and answered: all the quirky, kitschy, zany-looking concoctions, contraptions, and gimmicks, the Rube Goldbergian attempts at either changing the pipe’s outer appearance or reengineering the interior’s performance. Quite a few offered to the smoking public in the early to mid-20th century were, literally and figuratively, pipe bombs—not the homemade, improvised explosive devices—pipes that never got much consumer traction; their designs were of questionable functionality and of dubious benefits. A few were advertised as delivering a healthier smoke. Others were so butt-ugly that no self-respecting pipe smoker would have been seen puffing one of these in public.” (https://pipedia.org/images/e/e9/Rapaport-Pipe_Bombs.pdf) Ben Rapaport does have a nice description of the Needham and it’s intended improvements:
In examining the stummel and measuring drilling depths, I came up with the following diagram (measurements and their corresponding representations are approximate and not to scale):
Do I think that this system would work? Not really. The theory is reasonable but the dimensions don’t seem appropriate. If the condensing chamber were to be tripled in length and the moisture drain would be drilled larger in diameter, then maybe. It would then be a pipe more like a horizontal Cavelier. As built, I think that the small amount of moisture condensed would foul the moisture drain and not accumulate in the Moisture chamber.
Needham pipe advertisements appear in the 1946 November and December issues of Pipe Smokers magazine. The patent for the Needham was applied for in 1942 and issued in 1944. I cannot find anything about the Needham pipe factory or what became of it. I think it is safe to say that this pipe was made around 1946.
The Restoration
As usual the restoration began with a clean piece of denim to work on.
The reaming tools, though hardly necessary, were gathered.
I used the PipNet with the #2 blades to ream the tobacco chamber. I can’t really call the smoking residue that was present cake. It was more like a communion wafer than a cake. I scraped the chamber clean and sanded with the 320 sandpaper wrapped around a wood dowel.
Not surprisingly, the walls of the Neeham were nearly pristine.
Next the shank and the lower moisture chamber (as it was called in the advertisement) were cleaned using cotton swabs and bristle pipe cleaners both dipped in 95% ethyl alcohol.
The below photo shows the two holes drilled in the stummel. The top hole is the draft hole while the bottom is supposedly the hole where the condensation will drain into the moisture chamber.
Here I have run a pipe cleaner through the lower hole and out the front of the moisture chamber.
Here a pipe cleaner is run through the upper hole and into the tobacco chamber.
After the shank was cleaned I turned my attention to the stem.
With the inside clean, I sanded the surface with a 400 grit sanding sponge and prepared the stem for a dip into the Before and After Extra Strength Deoxidizer or, as I like to call it deox.
Into the deox with you.
The pipe cleaner inserted into the tenon acts as a hanger for the stem.
I left the stem in deox for about three hours, it was two episodes of rewatching The Umbrella Academy while working on the stummel and a lunch break. The stummel was taken to the sink for a scrubbing with a nylon scrub brush and undiluted Murphy Oil Soap. The soap was rinsed with warm water and the stummel dried with a cotton dish towel.
Upon returning to the workbench the stummel was wiped with 95% ethyl alcohol on a make-up pad. There appeared to be some residual finish on the briar.
The scrub and wipe did reveal several pits which would require filling with cyanoacrylate (CA, super glue) and briar dust.
There remained some kind of finish on the wood. I used acetone on a make-up pad and that seemed to be what was needed to remove the stubborn clear finish.
I sanded the stummel with a 400 grit sanding sponge. At this time I applied thin coats of CA to the grooves seen earlier. The sanding dust provided the briar dust needed to combine with the CA and fill the depressions. The shallow grooves only took one application of the CA while the deeper groove required 3 and subsequent sanding to fill it. The series of sanding sponges then continued from 600 through the 3500 grit. Between each sponge I wiped the stummel with a make-up pad moistened with ethyl alcohol.
After lunch the stem was taken from the deox and allowed to drip dry using the pipe cleaner hanger pinched into a bottle lid.
When finished dripping the stem was vigorously rubbed with a coarse shop rag to remove the deox loosened oxidation. This can be seen as the discoloring on the shop rag, below. The stem ‘s surface looked pitted and rough.
I scrubbed the stem with several make-up pads sprinkled with Soft Scrub cleanser to remove more of the surface oxidation. The stem was now black and received a coating of mineral oil before the next step.
Next came the sanding sponges, 320-1000 grit. I first wrapped the shank with painters tape to protect it. I needed to reattach the stem to the stummel to ease holding the stem.Between each sponge I applied mineral oil, rubbed it in with my fingers and wiped the stem with a clean dry paper towel.
The pitting was sanded away and revealed a much more uniform black vulcanite. This was further sanded with the 1500-3500 sanding sponges again with the mineral oil rub and wipe between each sponge.
The tape was removed and the stummel and sem were worked with the 4000-12000 micro-mesh pads. The stummel was again wiped with alcohol on a make-up pad between micro-mesh pads. The stem now received a small drop of Obsidian Oil rubbed in and wiped with a paper towel.
Before and After Restoration Balm was then applied to both the stem and stummel and allowed to sit for an episode of The Umbrella Academy, about 45 minutes.
The Restoration Balm was wiped off using an inside out athletic sock and energetic hand buffing to clear the balm from the carvings.
The pipe looked amazing. I then took it to the buffer for several coats of carnauba wax. The wax was worked into and with the scratch-like rustications. This took considerably longer than a typical wax and buff.
I was very pleased with the restoration of this Needham Not just because I finally found one to restore, although that was pretty cool in itself. The briar grain is pretty and I wonder why the rustication was used. I have not seen any versions of a Needham pipe with a smooth finish. The vulcanite cleaned-up well and looks great. I have yet to smoke the Needham and experience the effectiveness of this system. I do have my doubts about the need for the extra drillings and chamber. Who knows, I will be completely happy with either result – a nice relaxing smoke with a neutral tobacco. I’m thinking Peterso’s Early Morning Pipe blend. If you want to know my impressions of the system let me know in the comments. Also if you have any information about the Needham Pipe Company or Edward F. Needham, I’d love to read that as well. The dimensions of this Needham are:
Length: 5.67 in./ 144.02 mm.
Weight: 1.47 oz./ 41.80 g.
Bowl Height: 1.74 in./ 44.20 mm.
Chamber Depth: 1.29 in./ 32.77 mm.
Chamber Diameter: 0.85 in./ 21.59 mm.
Outside Diameter: 1.38 in./ 35.05 mm.
I do hope that you have found something here useful to your own pipe care, maintenance or restorations. If you like this sort of thing, please click the like and subscribe buttons. Thank you for reading the ramblings of an old pipe lover.
Here we have another Denicotea. I know what you are thinking, “Young, you chose that one so you wouldn’t have to do a bunch of research for the background section”. Wow, you guys are a tough crowd who are a bit cynical of my motives. True there is little information about Denicotea pipes but that is hardly the reasoning behind restoring this curvaceous cutie. I like a black sandblast and am drawn to the elegant curves of this old pipe. Besides, if I restore a couple of Denicoteas per year it makes my German friend Sascha Mertens happy.
This bent beauty came as part of an estate lot from Norman Park, Georgia earlier this summer. It was not the object of desire from the lot. The real target was a 2020 Dr Grabow Collector but this pipe trumped the Collector in the queue due to its intriguing shape and my desire to see how the Denicotea P-lip compared to that of my beloved Peterson pipes. The pipe has a full bend with the robust Denicotea shank/stem fitting for a pipe which takes a 9mm filter. The stampings are “denicotea” over “jolle” with a 0823 shape number to their right all on the bottom of the shank. The stem has a D within a circle. The stamps are well formed and sharp while the logo is much lighter. Below are some photos of the Denicotea as it appeared on arrival.
The black finish showered overall signs of wear with numerous spots of briar showing through the black. The stem surface was oxidized but free of tooth chatter or dents. The bowl needed a reaming and the rim a good scrubbing but all told this looked to be a straightforward restoration.
Background
As alluded to in the beginning, Denicotea pipes are rather lacking in the documentation of their carving, manufacture and business. As stated in my previous blog regarding a Deicotea billiard (linked), ““Willy Heineberg founded the company Denicotea in 1932 and began manufacturing and selling smoking accessories such as filters, filter inserts, cigarette holders and pipes.[1] The company headquarters was initially in Cologne, but was relocated to Bergisch Gladbach after the Second World War.[2]
Denicotea is actually the name of a silica gel filter, cigarette holders and care products for pipes and cigarette holders.
I still find it a bit confusing as Denicotea seems to be a company[3] and a brand as well which is operated by COMPOSING-STUDIO GmbH[4].” (Denicotea – Pipedia).
I cannot find anything pertaining to the shape numbers of Denicotea pipes yet in the photos that I have seen online there are almost always shape numbers stamped on the pipes. The company itself is registered as a German firm as an be seen from the pipephil.eu entry for Denicotea:
(Den-Dh — Pipes : Logos & Markings (pipephil.eu)). Anyone with any experience with German products knows that the Germans are exceptional and meticulous craftsmen. This can also be seen in their business and record keeping. Below is just a clip of the German registration of Denicotea:
(DPMAregister | Marken – Registerauskunft)(translated by Microsoft Edge). I show this because I think it is funny. According to the pipedi.org site Aldo Mollini is, “is a fictional name. The brand Aldo Morelli has been registered for Denicotea on February 26th, 1992.”(Denicotea – Pipedia). I find the fact that a fictional Italian appears to be the signatory for a German company. Yeah, I know it is just a brand and not the executive officer but it makes me think of Hamlet, “Something is rotten in the state of Denmark.” Or in this case northern Germany.
In conclusion we have a Denicotea Jolle made somewhere and at sometime by a German company with brands named after fictional characters.
The Restoration
Fortunately the restoration was more clear than that of the background. I began with a cleaned denim piece for the work surface.
The reaming tools were assembled. The cake was not very thick and little overflow lava was noticed.
The cake was hard and dry but the PipNet with the #2 blades made short work of it. The interior of the tobacco chamber was scraped with the two reaming knives then was sanded with the 320 sandpaper wrapped around a wood dowel. There was no indication of any heat damage to the briar within the chamber.
Next came the cleaning of the shank airway. This was a repetitive process of scrubbing the airway with an alcohol dipped nylon shank brush, followed by alcohol dipped bristle pipe cleaners and cotton swabs. Eventually the pipe cleaners and swabs emerged nearly the same color as when they entered.
The stem was cleaned in a similar fashion but without the use of the shank brush.
Once cleaned inside the stem was submerged in an OxyClean solution and set aside to soak for an hour or so.
The stummel was taken to the sink for a scrub. Here, undiluted Murphy Oil Soap was used with a nylon scrub brush. The soap was rinsed with warm water and the stummel dried with a cotton dish towel.
Returning to the workbench the stummel was wiped with a cotton make-up pad wetted with 95% ethyl alcohol. Some color came off though this was mainly from the rim.
The scrubbing and alcohol wipe revealed the numerous scuff marks which had worn away the black stain from the briar.
I thought that a fresh dye application of black Fiebing’s Leather Dye would restore the overall color of the stummel. The Fiebing’s dye gear was gathered and included the dye, a folded pipe cleaner (as an applicator) , a duct tape wrapped fishing bobber (most folks use a wine bottle cork), and lighter.
Using the fishing bobber as a handle and to keep dye out of the tobacco chamber, I applied a couple of coats of the Fiebing’s Dye to the stummel. After each coat I flamed the wet dye burning off the alcohol solvent and fixing the dye to the briar. The excess dye was wiped from the stummel with a paper towel. Back at the workbench the stummel looked much better with a fresh coat of black dye.
The stem was retrieved from the OxyClean and wiped with a dry make-up pad. Some oxidation had been softened and lifted by this.
The stem was then scrubbed with Soft Scrub cleanser applied to make-up pads. The first pads became darkly covered with brown oxidized rubber. I did not want to get too aggressive with scrubbing the shank-ward end of the stem as the logo was not particularly deep and I feared the abrasive cleanser would remove it.
The stem was reattached to the stummel for easier holding. The shank was then covered with painters tape to protect it from sanding.
The stem logo was also taped for its protection.
The stem was sanded with a series of sanding sponges from 400-3500 grit. Between each sponge I dipped my finger tip into mineral oil, rubbed this onto the stem and wiped it with a dry paper towel.
The stem was then worked with 4000-12000 micro-mesh pads further polishing the vulcanite. Between each pad I rubbed in a small drop of Obsidian Oil and wiped the stem with a paper towel.
The now slightly fainter logo was given a fresh Rub’nBuff gold leaf application. I did not know what the original logo looked like but I thought the gold would look appropriate with the all black pipe.
All that remained was to apply several coats of carnauba wax with the buffer.
Overall I was very pleased with the restoration of this Denicotea Jolle 0823. The draw is very open and feels like it is meant to have a filter, when I placed a Stanwell 9mm filter into the stem the pipe retained a good comfortable draw. The pattern of the blast shows a nice ring grain on the left and interesting bird’s eyes on the right. The stem polished up fairly well but does still show a tinge of oxidation around the shank. I did not want to get too aggressive with the removal and diminish the stem logo.
The dimensions of this Denicotea Jolle 0823 are:
Length: 5.95 in./ 151.13 mm.
Weight: 1.86 oz./ 52.90 g.
Bowl Height: 1.80 in./ 45.72 mm.
Chamber Depth: 1.56 in./ 39.62 mm.
Chamber Diameter: 0.72 in./ 18.29 mm.
Outside Diameter: 1.46 in./ 37.08 mm.
I do hope that you have found something here useful to your own pipe care, maintenance or restorations. If you like this sort of thing, please click the like and subscribe buttons. Thank you for reading the ramblings of an old pipe lover.
Below are some photos of the finished Denicotea Jolle 0823.
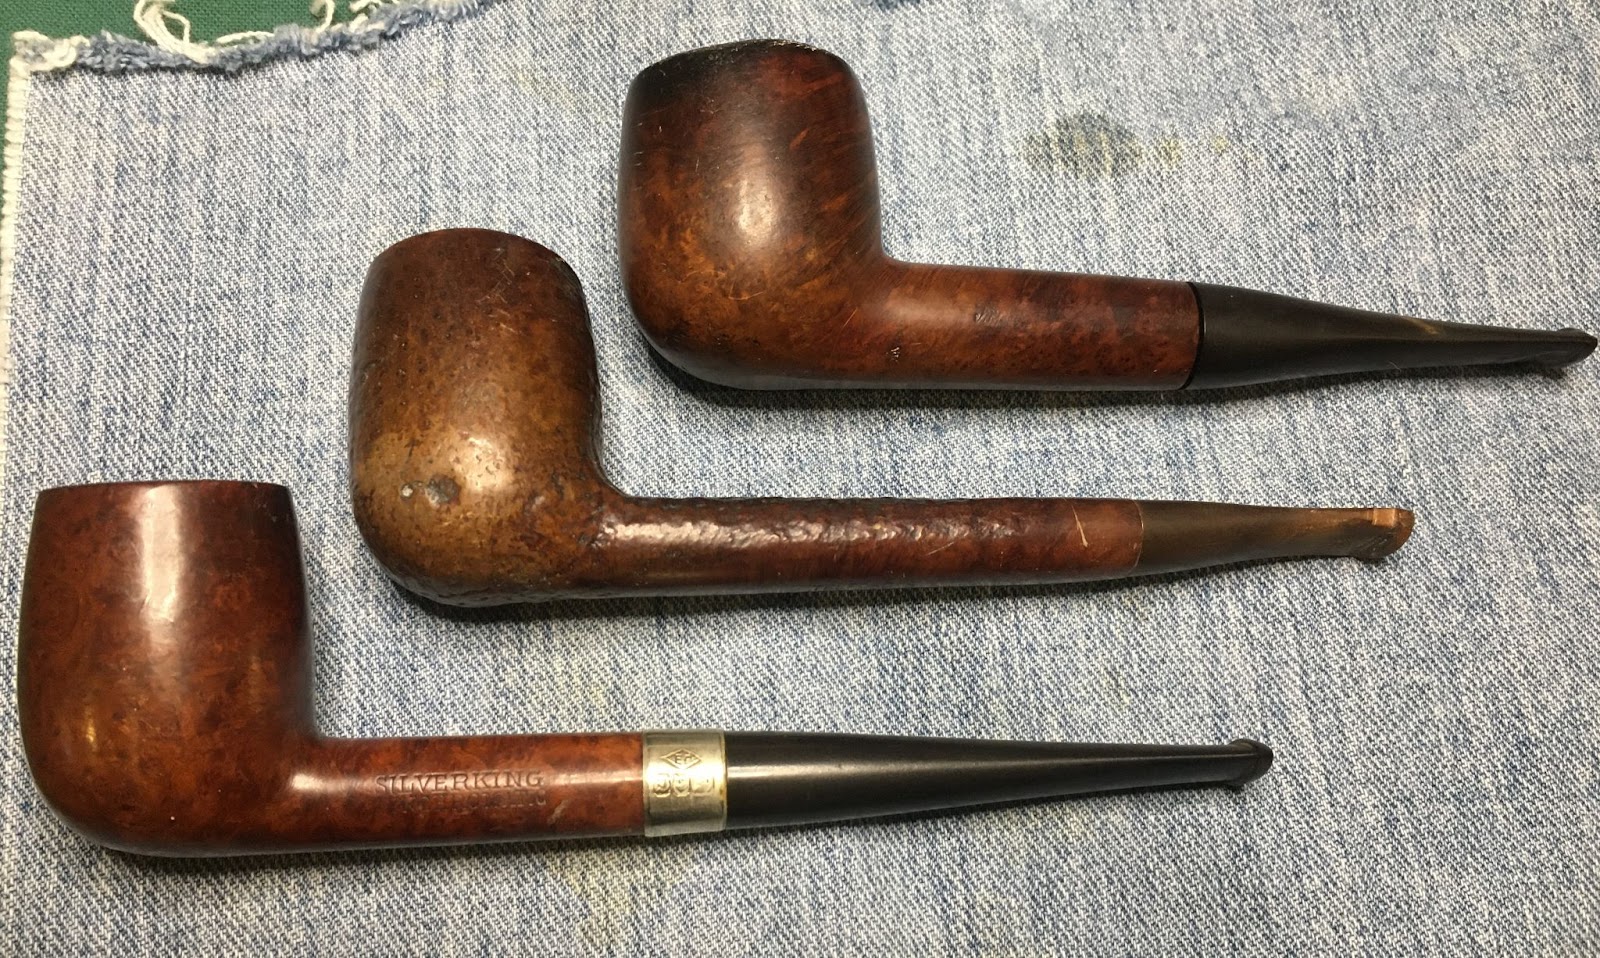
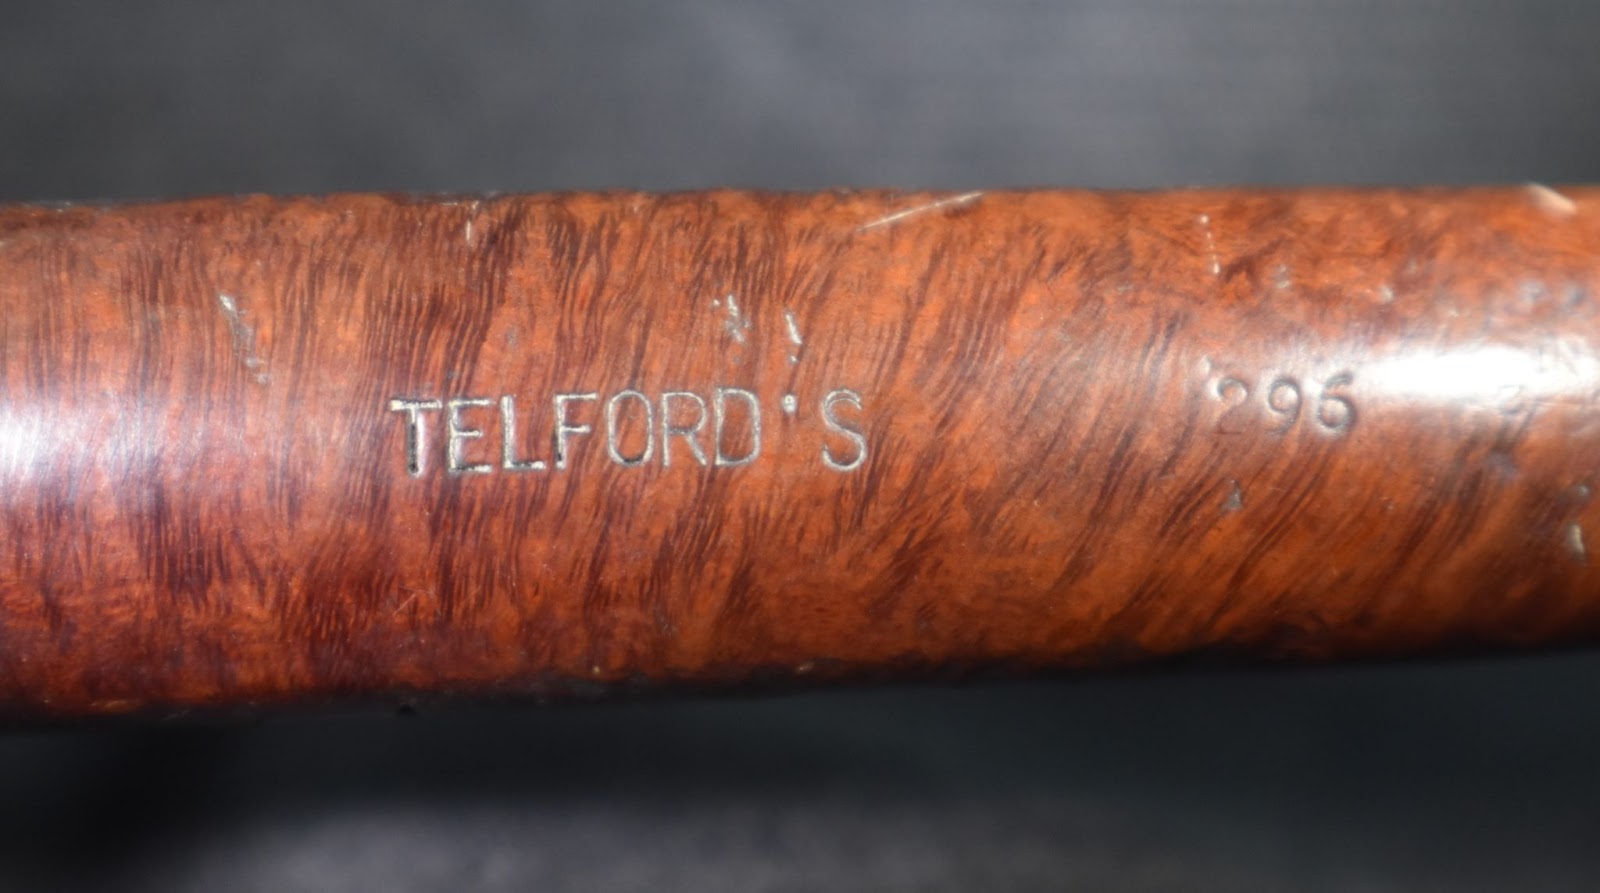
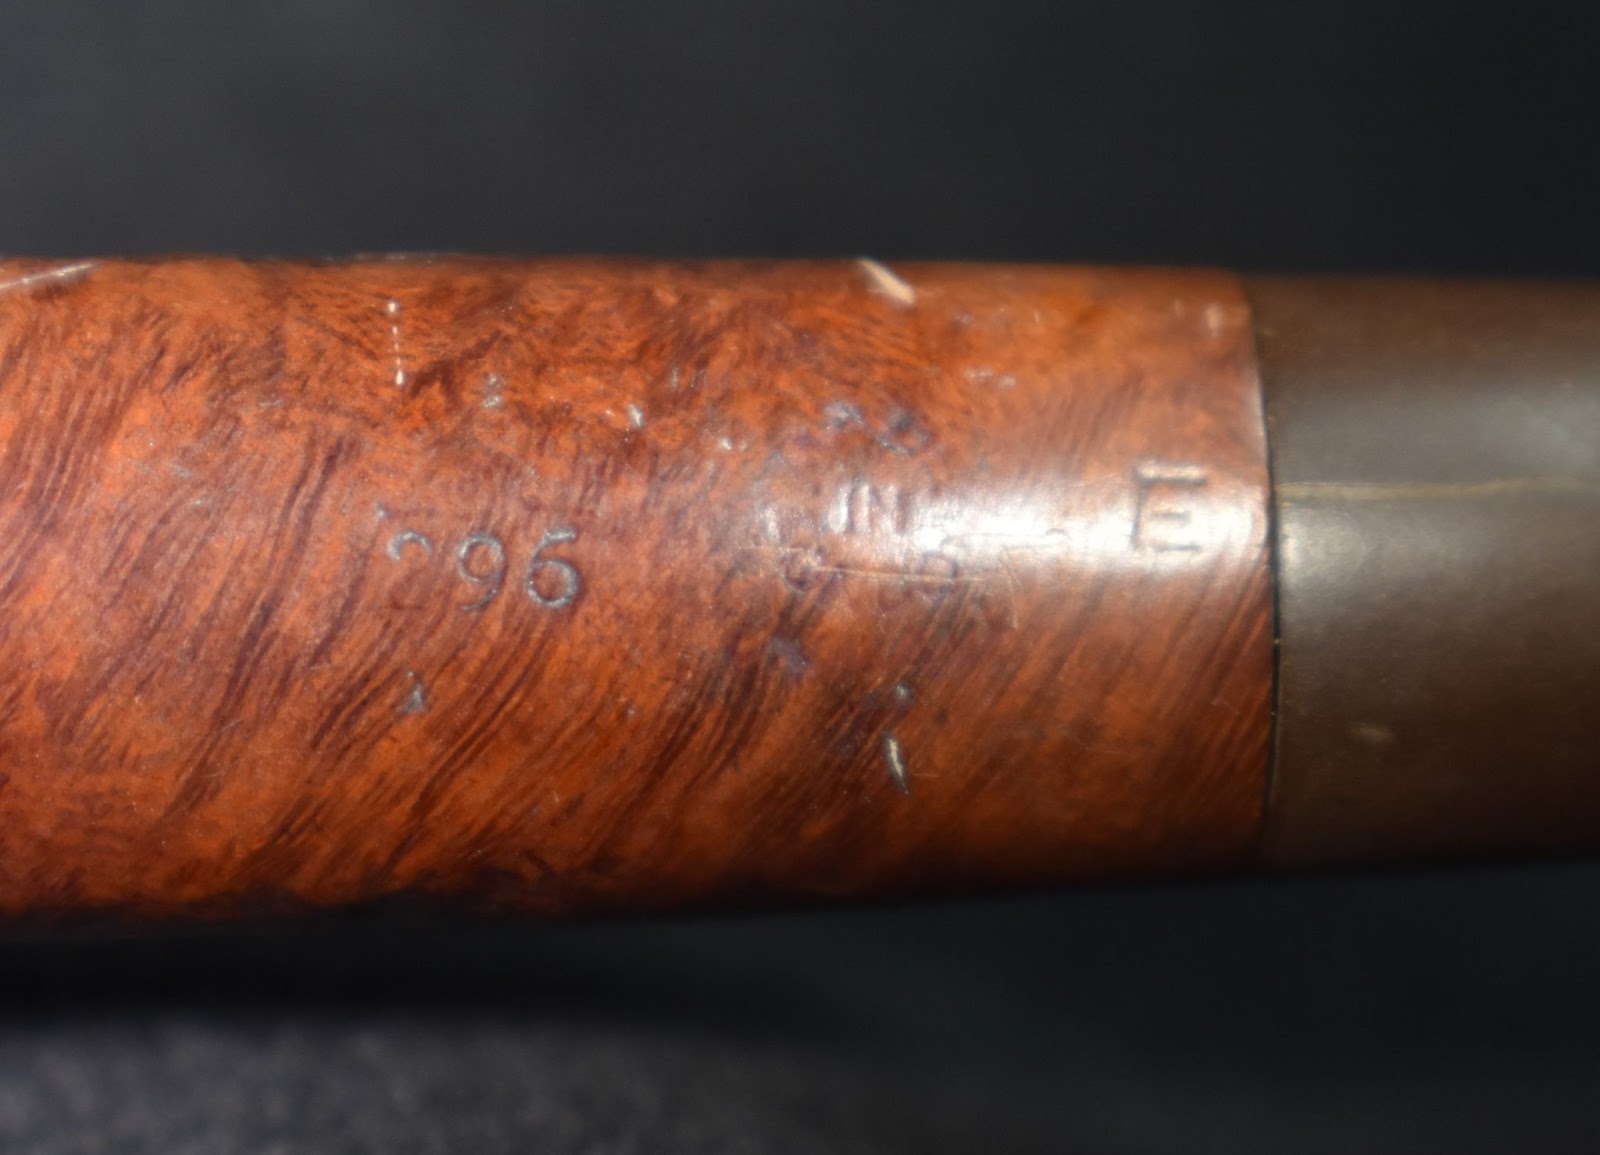
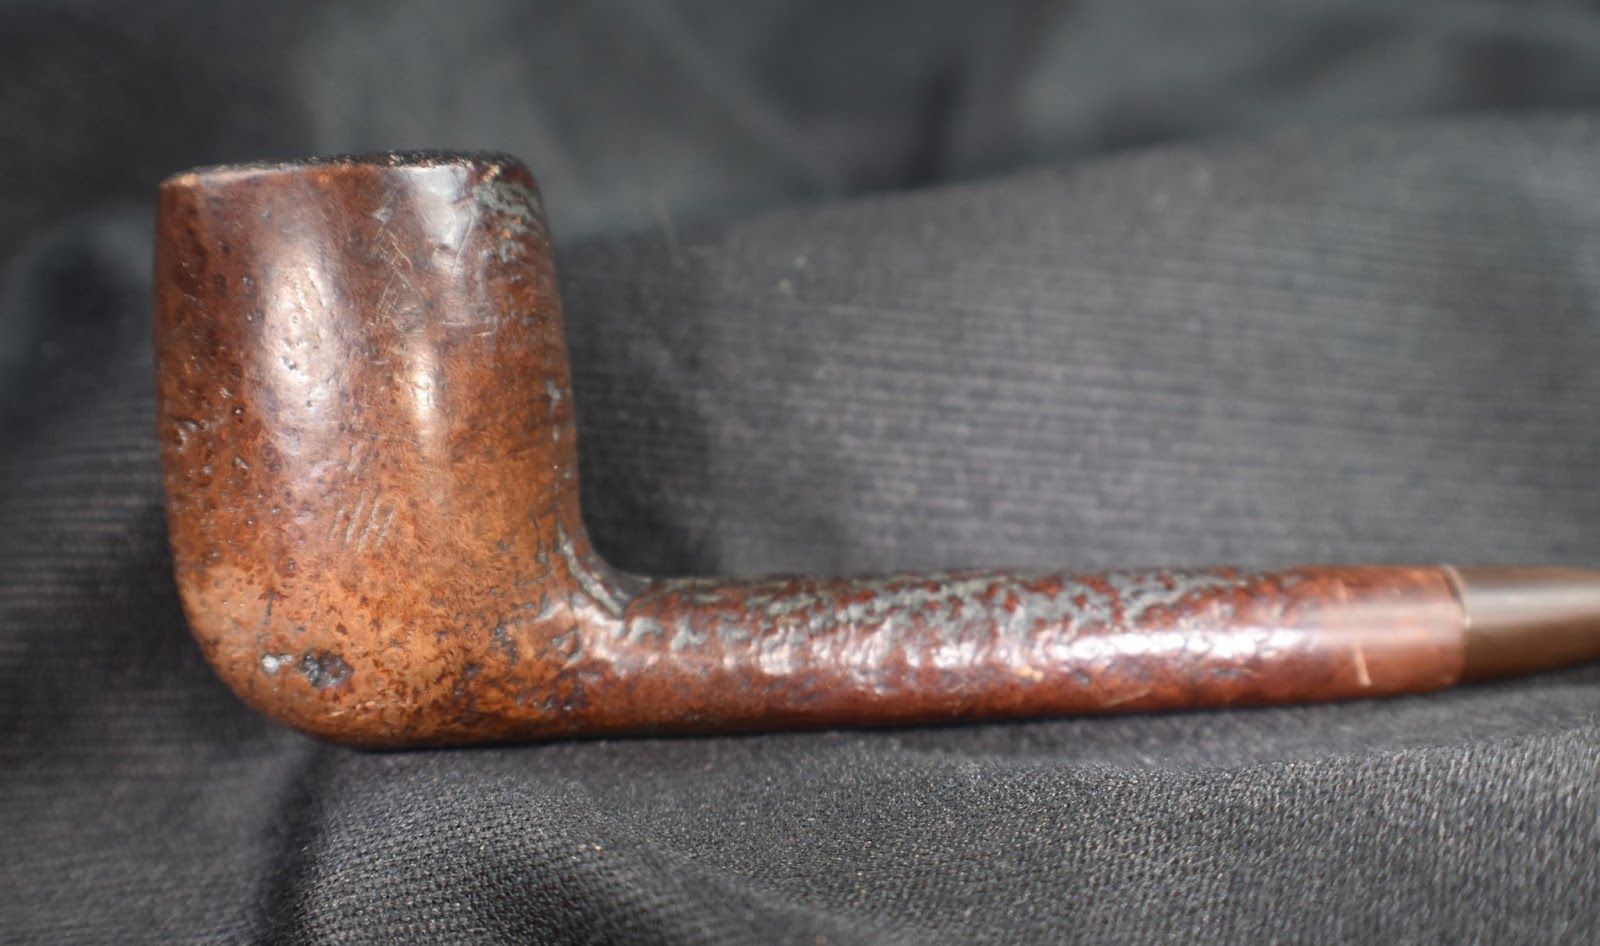
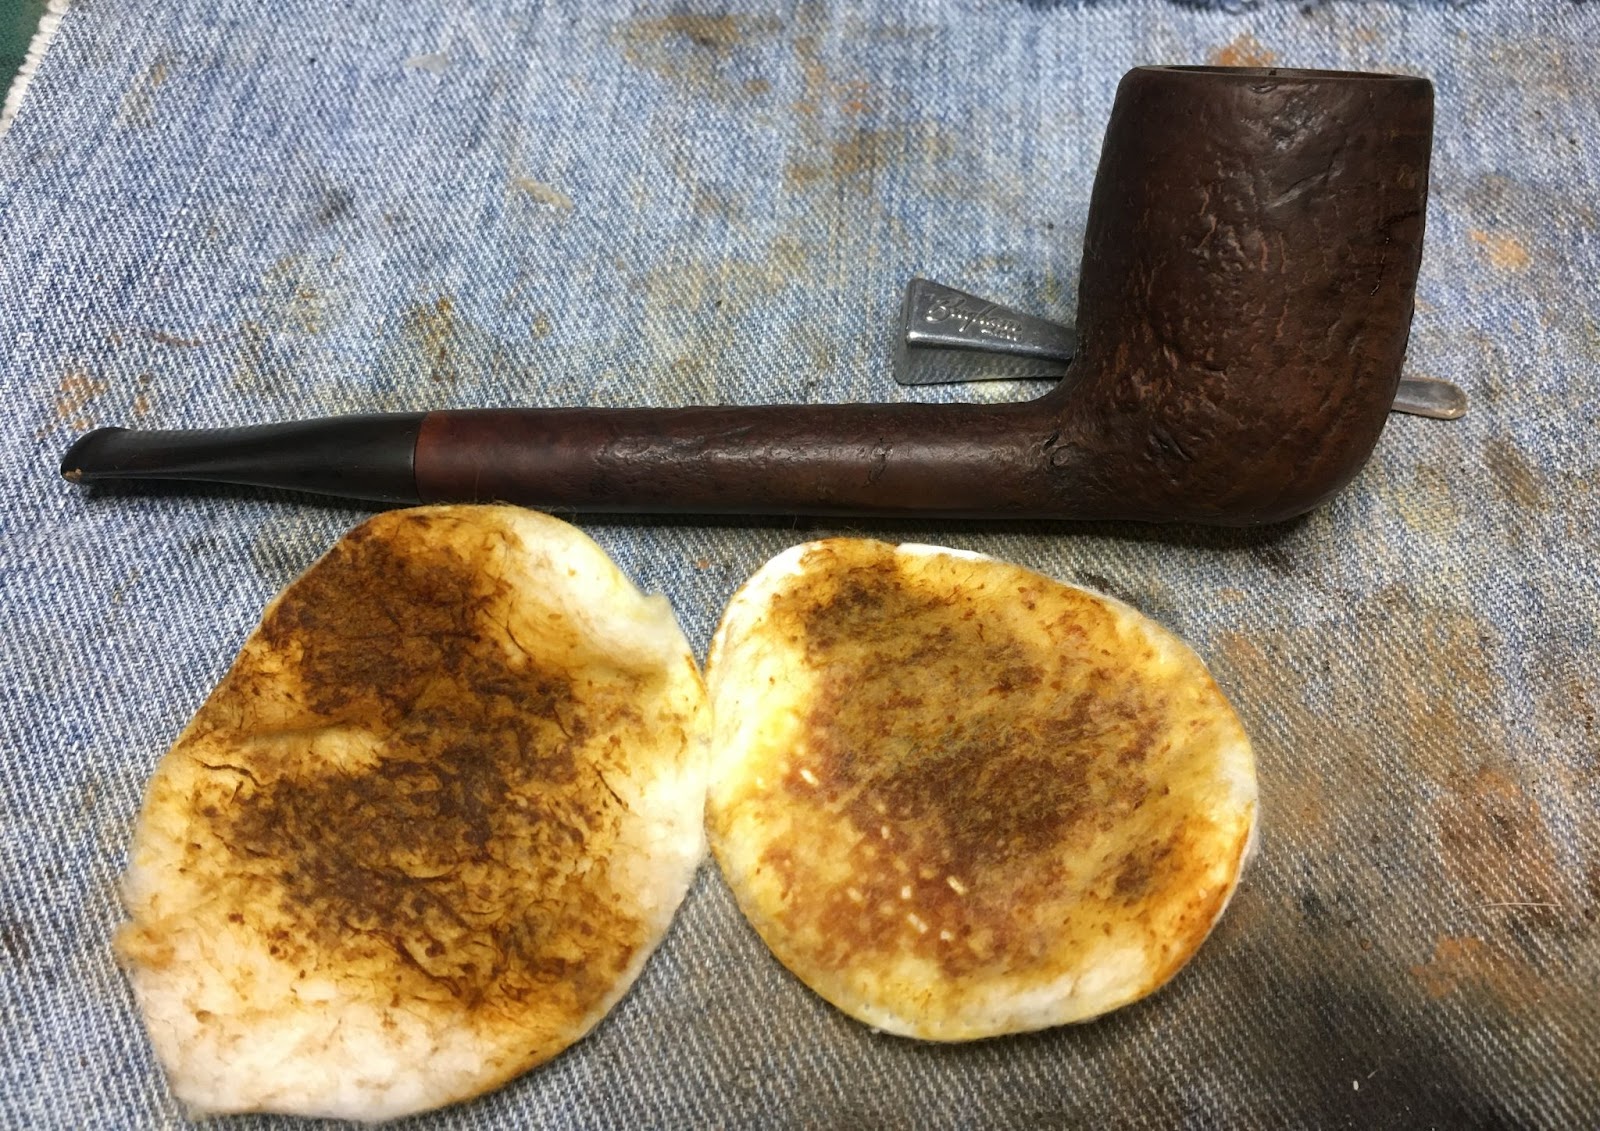
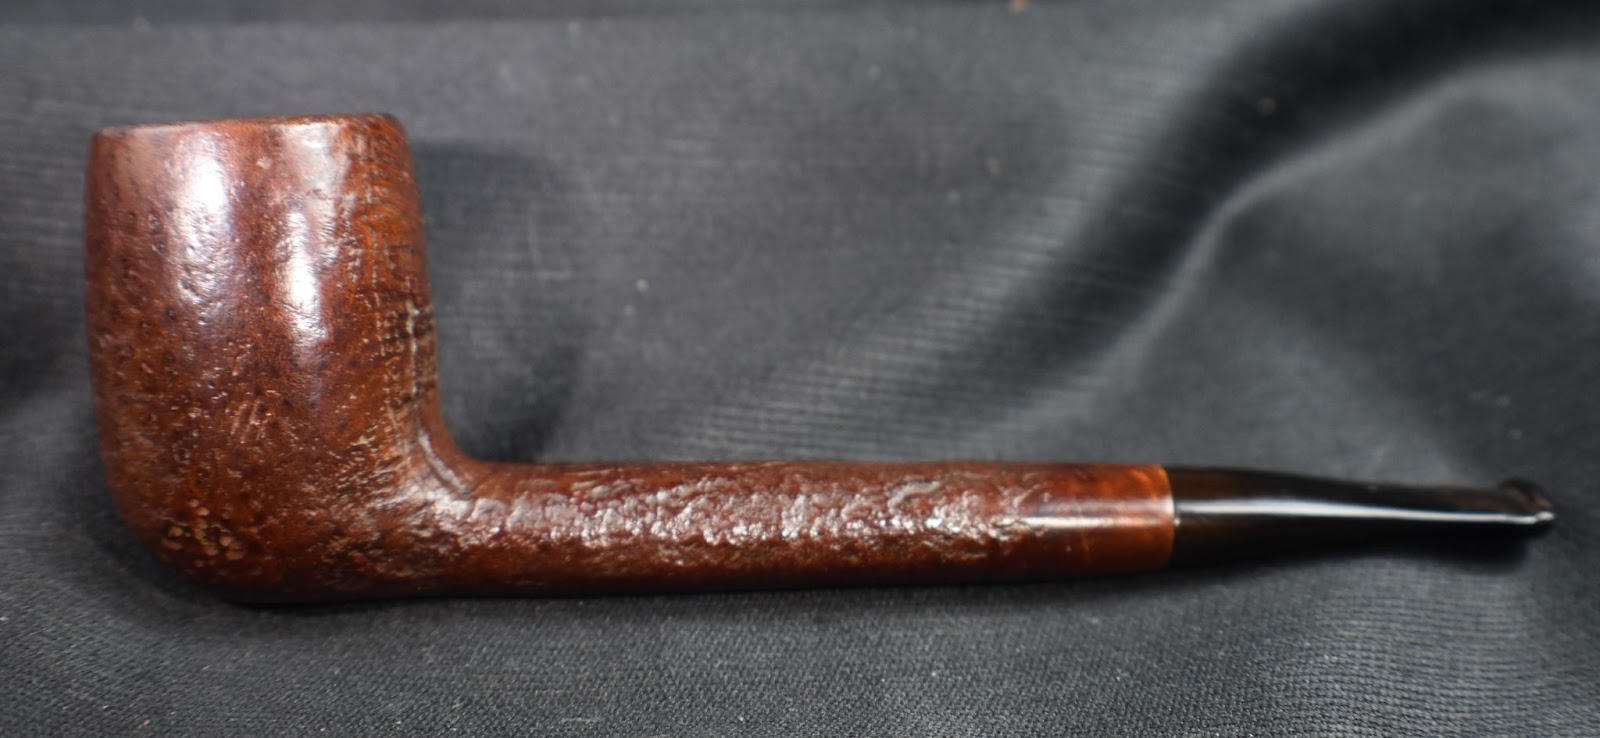
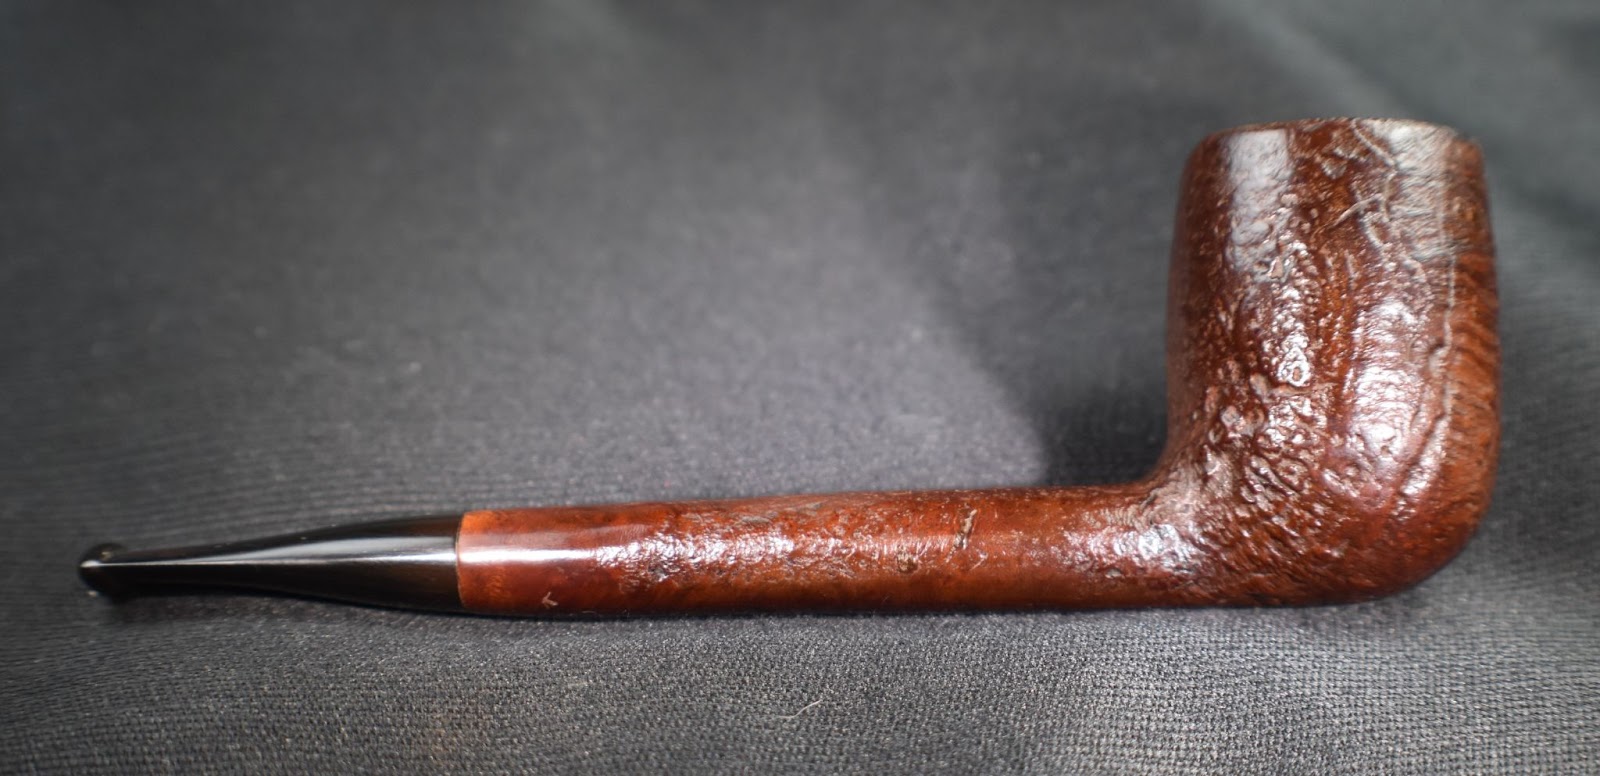
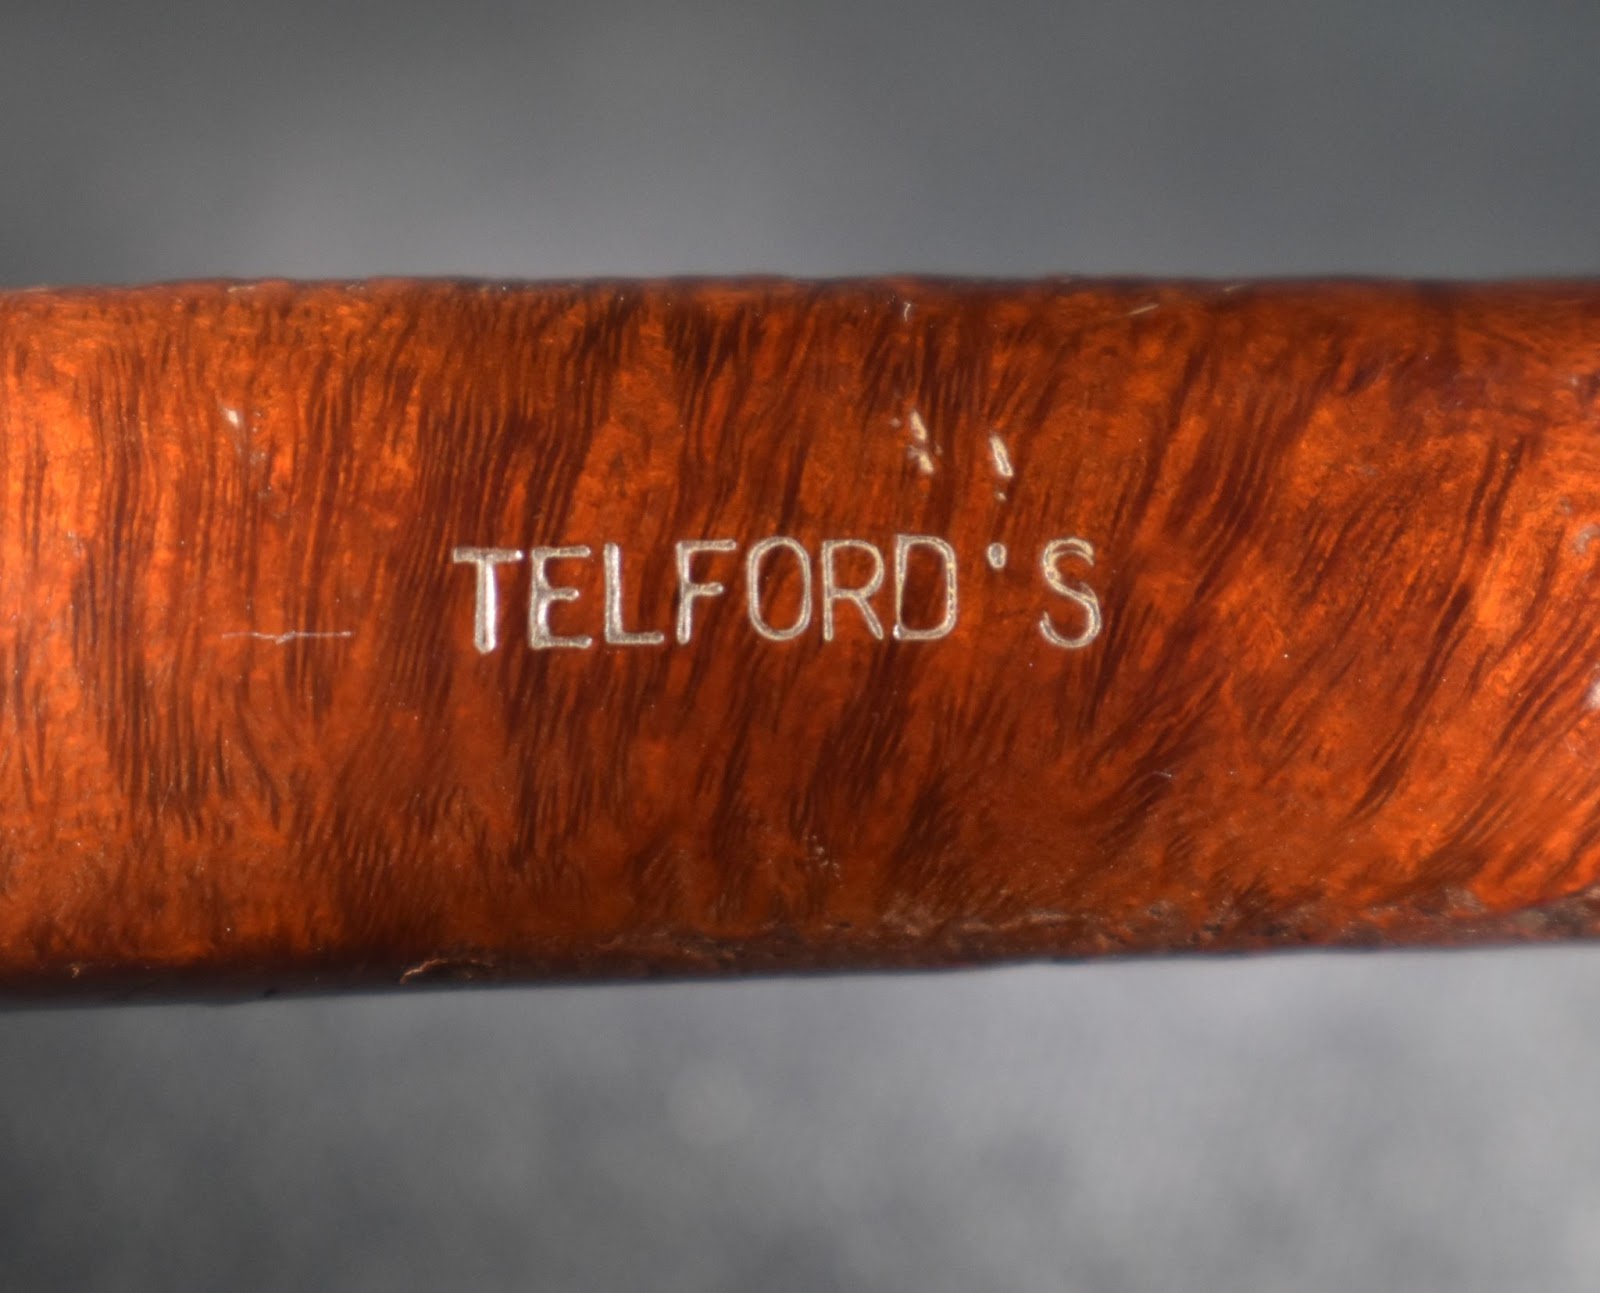
SilverKing a name that everyone has heard of and associates with … Umm, what? Haven’t heard of em, eh? Well neither had I but it is still a darn fine looking piece of briar. And it’s made in France, maybe. Okay, I am reaching for some enthusiasm . This lovely old billiard was one of six pipes that I won from ebay back in June of this year from Hollywood, Florida. The target of my desire was the Peterson meerschaum (2nd from the right) which was hiding amongst these pipes as seen in the photo below. I have restored all but one of the lot. As a matter of fact, the Barclay Rex was sold right after the restoration blog was published. I will add links to the restorations of the others for those who might be interested: Canted Dublin, Barclay Rex, Telford’s Canadian, Peterson meerschaum. The finished pipes look far better than their below photo.
Back to the subject at hand, this lovely Silverking billiard. The pipe was stamped with SILVERKING over SYNCHROMATIC on the left shank and ALGERIAN BRIAR over FRANCE on the right shank. The stem has a crown stamped logo and the silver band is stamped EP within a diamond and three Hallmarks (middle and stem-ward worn to illegible). Below are photos of the Silverking billiard prior to working on it.
This looked to be a straightforward restoration with no glaring difficulties. There were a few deep fills to be made to the briar, a slightly overclocked stem and the missing stinger but other than that a nice relaxing afternoon in the basement avoiding the heat of mid-summer.
Background
I would love to be able to tell a good story about the trials and tribulations of the Silverking pipe factory but alas, there is scant information concerning this maker. If you have any additional information, please feel free to leave it or links in the comments. All I could find is the following from pipephil.eu:
(Si-Siq — Pipes: Logos & Markings (pipephil.eu)). Referring to the “?” at the top right of the screenshot below, I am not sure why there is a question about the country of manufacture (COM) of this pipe as it is clearly stamped MADE IN FRANCE or in the case of my Silverking FRANCE. “Made in France” is also stated in the text above.
I looked at the “Otherline from this factory” links and they are included here:
Not much to work with. A quick search on pipdedia.org resulted in the following quote,
“This is probably not a brand but rather the name of a line of an unknown french factory.
Other line from this factory: Big Ben Reputation , Gold King”(Silverking – Pipedia).
It looked like pipedia.org got their information from pipephil.eu as well.
Now we can assume a bit of information about the date of production. Algeria had been a source of briar from the mid to late 1800s and into the early 1900s. During the years of World War Two briar production was severely limited. After the war briar production returned. Algeria was a French colony and like many colonies during the mid 20th Century, experienced a wave of anticolonialism. The French attempted to squelt this anticolonialism leading to the Algerian war of independence from 1954-1962. During this time Briar production from Algeria was greatly reduced. According to the Wikipedia.com article fatalities of the conflict were, “between 400,000 and 1,500,000 Algerians,[40][24][22] 25,600 French soldiers,[15]: 538 and 6,000 Europeans.” (https://en.wikipedia.org/wiki/Algerian_War).
Well that about sums up all I know about this old pipe. It was made in France of Algerian Briar. Most likely between the second world war and 1954.
The Restoration
As typical this restoration began with a relatively clean denim piece as a work surface.
The reaming tools were gathered and included the Scotte Stainless Steel reamer rather than the traditional PiNet reamer due to the narrow tobacco chamber and the fact that my PiNet #1 blade suffered a catastrophic failure. The Scotte did a fine job and only required a small amount of scraping with the Smokingpipes Low Country Reaming knife and the General triangular scraper.
After the reaming the chamber was sanded with 320 sandpaper wrapped around a wood dowel. No heat damage was observed in the chamber.
The shank cleaning was done with 95% ethyl alcohol, a nylon shank brush, bristle pipe cleaners and cotton swabs.
After the shank was cleaned I turned my attention to the stem. Here the ethyl alcohol and bristle pipe cleaners were used to clean the airway of the stem.
The rim of this old French billiard had definite lava accumulations. This was softened with saliva and scraped with a sharp pocket knife.
The scraped rim looked better but would require a good scrubbing.
Seque to the scrubbing. The stummel was taken to the sink for a scrubbing with undiluted Murphy Oil Soap and a medium toothbrush. The soap was rinsed with warm water and the stummel was dried with a cotton dish towel.
Back at the workbench the stummel appeared to have most of the finish removed during the scrubbing. The briar looked dull and flat except in a few areas where some finish remained.
An 95% ethyl alcohol wetted make-up pad was used to scrub the stummel. A good deal of color came off the stummel. This indicated that wax, finish and stain were being removed.
A second alcohol wipe yielded more color.
To make sure no coatings remained a wipe with a make-up pad with acetone was used. This time only a little bit of stain was present on the pad.
All of the scrubbing and wiping allowed me to see the pits and damage to the stummel. These would require a fill of brown cyanoacrylate (CA, super glue) and briar dust.
The gouges received a small drop of CA applied with a fly tying bodkin. While the CA was still wet I scooped a small amount of briar dust with a dental scraper and placed the dust on the wet CA. This was then pressed into the wet CA in the depressions..
The briar dust causes the CA to cure almost instantly so once the dust is placed, pressing had to occur immediately. The excess dust was brushed off with a brass brush.
The new fill was filed with a flat diamond needle file to remove and smooth the fill then was sanded with a 400 grit sanding sponge.
In deeper fills this process was repeated until the fill was complete. The completed fills appear much darker than the surrounding briar. The light spots seen below are slight depressions with dry briar dust from sanding in them. A final coat of clear thin CA was applied to the dry spots and they were sanded with a dusty 400 grit sanding sponge. The dust was incorporated into the slight depression with the clear thin CA to fill the last of the low spots.
The above procedure was used to fill pits of the shank.
And the heel of the stummel.
To conceal the fills and to add contrast to the briar grain, I decided to contrast dye this stummel. Black Fiebing’s Leather Dye was chosen for this. The duct tape wrapped fishing bobber acts as a plug to keep dye out of the tobacco chamber and as a handle. The folded pipe cleaner is the applicator for the dye while the lighter provides a flame when burning off the alcohol solvent of the dye fixing it to the briar. Notice that I used painters tape to cover the stamps. This is done to keep the dye from penetrating the briar on the stamp. Were that area to become darkly dyed, extra sanding/buffing would have reduced the stamps.
Below is the black dyed stummel, still wet with Fiebing’s Leather Dye.
I wiped off the remaining damp dye with a paper towel. This also removed my painters tape stamp protectors. Here you can see that the stamped area received less dye thus reducing the amount of sanding/buffing that the stamp will be exposed to.
The blackened stummel was taken to the buffer where rouge buffing compound was used to buff away the router black dyed briar. The results looked good but I wanted the stummel to be lighter overall in color.
To further lighten the briar I lightly sanded the stummel with 320 and 400 grit sanding sponges. This removed more of the black dyed briar. When I was happy with the shade, I sanded the stummel with a series of sanding sponges 600-3500 grits and wiped the stummel with an alcohol dampened make-up pad between each sponge..
I turned my attention to the stem. The slightly over-clocked stem could have been adjusted a couple of different ways; by heating the aluminum threads until the rubber softened and then turning the aluminum slightly or to add a bead of black cyanoacrylate to the end of the stem. I chose the later as the overclocking was so slight. Here I sanded the stem from about its middle to the button with 320 and 400 grit sanding sponges.
I then used Soft Scrub cleanser on make-up pads to scrub the entire stem. The pads became very dark with oxidized stem material. I was uncertain as to the material used with this stem. Normally oxidized vulcanite yields a brown color on the make-up pad. This was nearly black. I coated the stem with mineral oil and allowed it to sit for 30 minutes. After the sitting, the stem looked black with no signs of a brown oxidized stem.
The stem was then sanded with a sequence of sanding sponges from 600-3500 grit. I did cover the stem logo with a small piece of painters tape to protect it from the sanding. Between each sponge I rubbed mineral oil onto the stem with my fingertip and wiped the stem with a paper towel.
After the sanding sponges the stem was polished with 4000-12000 micro-mesh pads. Between each pad I applied a drop of Obsidian Oil to the stem, rubbed it in with a fingertip and wiped the stem with a paper towel.
After micro-meshing the stem, I cleaned the logo area with a cotton swab dipped in alcohol to remove any oil.
I then used Silver Leaf Rub’nBuff on the logo. The silver was worked into the stamped logo, allowed to dry for a couple minutes and buffed with a paper towel to remove the excess. I know, the pipephil.eu information said that the Silverking used white on the logo but I thought that silver would look a touch more classy.
The stummel was micro-meshed in a similar fashion except without the Obsidian oil. Here I wiped the stummel with an alcohol dampened make-up pad between pads.
The stummel was given a coat of Before and After Restoration Balm and allowed to sit for 20 minutes. I failed to photo this step. After 20 minutes the Restoration Balm was wiped off with an inside out athletic sock. I failed to photo that as well. The final step was to take the pipe to the buffer for several coats of carnauba wax.
This pipe turned out very well. I really like how the contrast staining brought out the differences in the grain. It made the bird’s eyes stand out much better than I hoped it would. The stem polished up well. I still do not know exactly what the stem material is but it looks good and didn’t turn my lips black when I sampled the draw of the pipe. I do wish the stinger was intact though the draw is very nice without it. I am sure this will be a nice smoking pipe for someone who loves a long billiards. With it’s relatively tall and narrow tobacco chamber I expect it would make a fine Virginia or Virginia Perique blend pipe. The dimensions of this French beauty are:
Length: 6.34 in./ 161.04 mm.
Weight: 1.38 oz./ 39.30 g.
Bowl Height: 1.83 in./ 46.48 mm.
Chamber Depth: 1.53 in./ 38.86 mm.
Chamber Diameter: 0.69 in./ 17.53 mm.
Outside Diameter: 1.46 in./ 37.08 mm.
I do hope that you have found something here useful to your own pipe care, maintenance or restorations. If you like this sort of thing, please click the like and subscribe buttons. Thank you for reading the ramblings of an old pipe lover.
Below are some photos of the finished Silverking Synchromatic billiard.
Decisions, decisions. That is what I was thinking before selecting this Telford’s Canadian for the next restoration. The SilverKing and the no-name billiard were looking for love but it all went to the Telford’s.
I have a few restoration blogs finished and scheduled for publication on Tuesday and Thursday mornings. I figured that I could try my hand at a restoration that might require some extra time and I didn’t want to feel rushed with a self-imposed deadline. This Telford’s has a cracked bowl and will be my second attempt at using the Charles Lemon pinning technique (I linked it so you can read the original).
I had never heard of Telford’s as a pipe maker and assumed it to be a tobacco shop which had stamped it’s name on a pipe made by a London based pipe maker. Why London? Well, the stamps on the bottom of the shank read TELFORD”S in the center on the end of the shank by the stem there was a 296, I assumed was a shape number. There was a circular MADE over IN over LONDON with the “IN” inside the circle and the “MADE and LONDON forming the circle and an E stamped on the end of the shank. Below are some photos of the Telford’s as it appeared prior to work being done.
Oh yeah, some serious work would be required to get this old girl back into the game. Obviously there was the cracked bowl to repair. There were some big fills to be made on the left heel area and the right shank. The stem was severely oxidized with some deep tooth imprints and a layer of calcium. The bowl itself was caked with carbon and the subsequent lava flow onto the rim.
Background
Normally the first place I go when researching a brand is to pipedia.org. The search for “Telford’s” met with “no results matching the query”. Strike one. The second place I usually visit is pipphil.eu. Here the “Telford’s” search led me to the following:
One question remained, who made this pipe? I started with Comoy’s due to the fact that I had seen a couple of mentions of Comoy’s pipes on Telford’s website. Comoy’s shape chart from pipedia.org verified that the 296 shape was indeed a Canadian.
(https://pipedia.org/wiki/Comoy%27s_Shape_Number_Chart). That was enough proof for me. Using the Telford’s shop website as a timeline source the pipe was made from the early 1980s-present. The pipe did appear to have been heavily used with worn sandblast and heavy oxidation so I assumed it was used heavily during the 1980s and 1990s. That call to Telford’s might provide a more narrow date.
I was able to contact Brian Telford at his shop and he was quite gracious with his time. He said that this pipe would have been for the 1970-1980s. During this time Comoy’s would offer lots, usually a gross, of their “seconds”. These were pipes that had imperfect blasts or fills which made them ineligible for sale as “Comoy’s” pipes. Mr. Telford explained that Comoys made a stamp for Telford’s and stamped the pipes for the shop (personal communication with Brian Telford 7-30-2024).
This narrowed down the maker and date of production of this Telford’s 296 Canadian made by Comoy’s of London. Now it was time to return this old girl to service.
The Restoration
The restoration began with a light buffing of the stem with 0000 steel wool to remove the calcium and outermost oxidation.
A pipe cleaner was inserted into the tenon end of the stem as a hanger and the pipe was placed into Before and After Extra Strength Deoxidizer. And allowed to soak overnight.
The reaming tools were assembled and put to work.
The PipNet with its #2 blades did most of the reaming. The #3 blades were too large and the tobacco chamber needed a good deal of scraping after the PipNet.
Below you can see a much better photo of the cracked bowl from inside the chamber.
The chamber did show signs of light spider webbing all around the interior of the chamber.
The stummel was taken to the sink for a scrubbing with undiluted Murphy Oil Soap and a medium toothbrush. A second scrubbing of Murphy’s was done with a stiffer nylon scrub brush to better remove the accumulated grime. The stummel was rinsed of soap with warm water and dried with a cotton hand towel.
Back at the workbench the stummel looked much cleaner and the crack could be examined in greater detail.
Other areas in need of repair were also made more apparent, the two deeper pits on the right shank and (shown below).
And the two depressions immediately above the left heel.
The rim also still had lava issues and would require a light topping. There were a couple of smaller surface cracks which appeared to be only superficial in nature.
I wiped the surface of the stummel with a make-up pad dipped in 95% ethyl alcohol. The made came back with more grime. My scrubbing was not as good as I thought it was.
I then proceeded to scrub the stummel with the toothbrush and 95% ethyl alcohol and wipe it with a clean make-up pad. More accumulated grime came off.
A repeat of the above scrubbing cleaned off additional grime.
And a third alcohol toothbrush scrub.
All told, the stummel was scrubbed 3 times with alcohol and toothbrush after the double Murphy Oil Soap scrub. I was pretty sure the previous owner was a car mechanic who smoked the pipe while working on car engines with dirty oily hands during the day and labored in a coal mine at night. Now the coal mine scenario might be a stretch as coal dust and smoking would probably create a bit of mischief but I’m sure you see my reasoning.
The shank cleaning was next. Cleaning here included pouring 3-4 ml of 95% ethyl alcohol into the tobacco chamber and scrubbing with a nylon shank brush. After the scrubbing the alcohol was poured into a medicine cup. The airway was then scrubbed with bristle pipe cleaners dipped in ethyl alcohol. Alcohol dipped cotton swabs were also used to clean out the mortise area. This process was repeated numerous times. I was making progress albeit slowly. I decided to give the airway a cotton alcohol overnight soak to dissolve and loosen the remaining tar deposits. The tobacco chamber and shank were stuffed with cotton and 95% ethyl alcohol was added to the cotton via a disposable pipette until the alcohol pooled on top of the cotton. The pipe was angled allowing the shank end and rim to be approximately level and saturated with alcohol.
The next morning the cotton showed that it had absorbed old smoking residue as the alcohol evaporated.
The cotton, now fairly dry, was removed and with it a good deal of the tar.
Further cleaning of the airway went much faster and soon revealed clean pipe cleaners.
The stem was removed from the Before and After Extra Strength Deoxidizer and allowed to dip excess solution back into the jar.
The remaining residual solution was wiped with a coarse shop rag.
The stem looked much better.
Several make-up pads drizzled with SoftScrub were used to scrub the remaining oxidized rubber from the stem surface.
I then went to work repairing and rebuilding the tooth damaged stem using sanding sponges to prepare the damaged areas.
The dents were painted with the flame of a lighter in an attempt at raising the dent a little bit. This met with little success. Filling the dents with black cyanoacrylate (CA, super glue) was required. The dents received a light fill of the black CA.
This was then spritzed with a CA drying accelerator. This allows the CA to cure within seconds.
The cured CA was then filed with a flat diamond needle file to smooth the CA.
The remaining depressions appear shiny as they had not been touched by the file.
An additional fill of black CA was applied and spritzed with a drying accelerator.
The second application once cured was then filed and smoothed with a 320 followed by a 400 grit sanding sponge.
Additional small applications of CA, filing and sanding were done.
Eventually the stem looked far more acceptable.
The stem airway was cleaned out using bristle pipe cleaners dipped in 95% ethyl alcohol.
It was time to start planning the crack repair. A little about this technique: Charles Lemon of dadspipes.com wrote a wonderful restoration blog about his technique for repairing cracked bowls (https://dadspipes.com/2016/03/08/a-crack-pinning-tutorial/). I had tried this pinning with a cracked diamond stem on a blog a while back (https://wordpress.com/post/scimansays1787.com/5886). Now I realize that I tried to use it on a stem not a bowl but I was more interested in practicing using the technique and to see if it would work with a stem. Besides, I did not have a pipe with a cracked bowl at that time. Anyway, It worked and I learned several things from my hands-on practice. Feel free to check out my blog and comment on all my mistakes, I own-up to all of them. Below you can see the steps of Charles’ pinning technique as they were intended.
I first marked the two entrance points where I wanted to drill two 2mm holes to place the 2mm brass rods. The brass rods reinforce the cracked area and are glued in place.
I used a rat-tail needle file to make depressions for the drill bit.
The plan was to drill the holes at two different angles to prevent the crack from being able to widen.
Below is a photo attempting to show the two angles without a big dumb thumb in the way.
The stummel was clamped into an adjustable vise allowing the best angle for me to comfortably drill while seeing the path of the drill bit.
I accidentally went too far with the top hole and exited the stummel. I had marked the drill bit with a sharpie marker but either I was not paying enough attention or the path of the boring was shorter than anticipated. The bottom drilling went as planned and did not exit on the far side of the entrance. Note that you can see the top brass pin through the crack.
Another view of the pinning angles.
And another view.
I used a wire cutter to cut the brass rod to length. I wanted the rods short enough that there would be no brass visible when they were placed into the holes. This was something I learned from my first attempt. The brass rods were roughed up with 320 sandpaper to allow the glue additional surface area to bond to.
I mixed J-B Weld 2 part epoxy as per the instructions on a plastic lid.
Once thoroughly mixed the epoxy was dabbled into the hole with a longer piece of brass rod and worked into the crack itself.The sanded rod pieces were pressed into place and pushed deeply into their respective hole with a longer piece of brass rod. Epoxy pushed out through the miss-drilled exit hole. This made me happy to know that the glue had indeed made it deep into the holes.
The excess epoxy was removed using a dry cotton swab. The area on each side of the crack was cleaned of epoxy with a cotton swab dipped in acetone. The interior of the tobacco chamber was wiped of excess epoxy with a small wooden popsicle stick. A clamp was used to compress the sides of the stummel and the stummel was set aside to dry/cure for 24 hours.
The next day, Iremoved the clamp and everything looked like it had gone according to plan.
It was now time to work on filling the holes, crack and other flaws in the briar. I used brown CA and briar dust for the fills.
Careful placement of CA with a fly tying bodkin was needed for this as the blast patterns would not allow for sanding. I then used a dental scraper to scoop up a small pile of briar dust and placed it onto the wet CA and used the back side of the scraper to press the briar dust into the CA. The extra briar dust was then brushed off with a brass brush and the fill was filed with a rounded or rat-tail diamond needle file. I tried to file to match the grain pattern of the blast.
The depression of the crack on the rim was filled in similar fashion to the above. Here I was able to sand the fill smooth with a topping board, AKA a piece of 320 sandpaper laid flat on a counter.
The shank depressions were also filled with CA and had briar dust pressed into them. The new fill was filed and in an attempt to leave some texture to match the existing blast pattern.
The heel fill proved to be quite large. This area had most of the blast pattern worn away by I assumed, use. I used a Dremel rotary tool to retexture the surrounding area.
Once all the fills were completed, I wanted to blend and conceal the fills. I chose Dark Brown Fiebing’s Leather Dye for this. The needed dye kit was gathered.
Below is the pipe after having been dyed and flamed with the lighter.
I then took the pipe to the buffer and used rouge buffing compound to buff away the outermost layer of dark brown dyed briar. Returning to the workbench I wiped the stummel with a couple of make-up pads dipped in 95% ethyl alcohol.
The pipe was given a coating of Before and After Restoration Balm and allowed to sit for 15 minutes absorbing the balm and letting it work its magic.
The pipe was then taken to the buffer for several coats of carnauba wax. Normally I don’t like to use carnauba wax and the buffer for rusticated or sandblasted pipes but the blast of this old pipe had been worn quite smooth by handling and I thought that it would turn-out ok.
Upon seeing the stem of the Telford’s Canadian under the bright light of the photography station I was unhappy with the way it turned out. Given, it was far better than it was upon arrival.
Back to the workbench. I taped the shank of the pipe and redid the entire sanding sequence. This is probably never going to be a pipe put up for sale so I wasn’t sure why I was doing this. I guess my obsessive-compulsive disorder (OCD), which should be CDO so that the letters are in alphabetical/proper order, got the best of me. After the sanding sponges I micro-meshed the stem and failed to photograph that.
The stem was rewaxed and returned to the photo station. It was better but… I was done, this time.
If the goals of this restoration were to successfully repair a cracked bowl using brass pins and to find the provenance of the pipe, I was successful. Regarding the worn nature of the blast, the oxidation of a stem or the heavily and hotly smoked tobacco chamber, there was only so much restoration could do. Still the pipe turned out fairly well.The crack repair and the subsequent blending of the repair looks good. The fills and their retexturing also turned out well. The rebuilding of the stem is nice and comfortable. Its appearance is not what I would call good. I cannot figure out how brown oxidation is still showing. I layered at least three coats of black CA over that sanded vulcanite and the result remains brown in appearance. Well at least in normal room lighting it looks good. The final let down is the fact that the MADE IN LONDON, 296 and the E were lost during the restoration. These were all on the faint side to begin with and seemed to have been stamped onto the finish of the pipe rather than onto bare briar. Their loss still bothers me. The dimensions of this beat-up beauty are:
Length: 5.80 in./ 147.32 mm.
Weight: 1.12 oz./ 31.30 g.
Bowl Height: 1.70 in./ 48.01 mm.
Chamber Depth: 1.73 in./ 43.94 mm.
Chamber Diameter: 0.83 in./ 21.08 mm.
Outside Diameter: 1.35 in./ 34.29 mm.
I do hope that you have found something here useful to your own pipe care, maintenance or restorations. If you like this sort of thing, please click the like and subscribe buttons. Thank you for reading the ramblings of an old pipe lover.
Below are some photos of the finished Made in London Telford’s Canadian 296.
I had to take one photo of how the stem appears at a slight distance. It looks good.
I blame or give credit, depending on your view, to Steve Laug of rebornpipes.com for my fascination with Malaga pipes. I remember reading his blogs about the history of the brand and the maker and thought it to be an American success story. Maybe not the empire building story of a Wally Frank but nevertheless a story worthy of a pipeman’s attention. Perhaps fascination is too strong of a word as I have only restored two Malaga pipes so far. Interest, may be a better descriptor. This lovely bulldog came to my attention via a saved search for Malaga pipes on eBay. Those pesky email alerts can be handy on occasion.
The Malaga Bulldog came to southeast Nebraska via Davenport, Iowa. A journey of a mere 325 miles (523 km). The pipe was stamped “MALAGA ” on the top left shank and IMPORTED BRIAR on the adjacent topright. No other stampings were observed. Below are some photos of the pipe upon arrival.
Though not Unfired, the pipe was nearly in a “new – old stock” condition. There was very slight charing around the inside rim or perhaps a light lava deposit. The stem had oxidation and light tooth chatter. The briar was free of flaws, pits or fills. There was virtually no cake accumulated within the tobacco chamber. This looked like more of a clean-up than a restoration.
Background
In a previous blog of a Malaga Apple , I wrote the following:
“Piedia.org has a nice history of Malaga pipes. I will include the text here in its entirety:
“The Malaga Pipe Company was founded circa 1939 by George Khoubesser, (b.1892 d.1971), and located in Royal Oak, Michigan at 1406 East Eleven Mile road. The second generation owner’s name was Emmanuel Khoubesser (b. 1942 d. 1981), who everyone knew him as “Manny”. He was a big jovial man that was easy to converse with, always had a smile and a good joke to tell his very loyal customers. He had the ability to befriend anyone within minutes. The small store was packed with curious customers every Saturday morning looking for the latest design made earlier in the week. He also carried a full line of custom mixed tobaccos that you could sample and an array tobaccos in tins.
I was first introduced to him in 1969. I remember him taking me in the back to show me each step involved in pipe making. He was very serious about the quality of the product he sold and would never sell a flawed pipe, even if it was very minor. My step father purchased several of his pipes and really enjoyed them. He once said he’s never found a better pipe (his words).
Manny passed away in 1981 and his wife and oldest children took over the business. Malaga closed in 1999 after 60 years in business. The building still exists on Eleven mile, looking almost like it did back then, but now houses the Michigan Toy Soldier Company. I would think the pipes Manny produced are now more valuable than ever. If you happen across one of these pipes, you’ll know a little bit more about it’s rich history. Enjoy!”
The Malaga received a laundered denim piece to protect the work surface. I would say clean but, the denim was a bit stained from previous restores.
The reaming gear was gathered.
Then put to work. Well work might be an exaggeration. Put to use, is a better term. The PipNet with the #2 blades did remove some cake from the tobacco chamber, mainly from the bottom of the bowl.
The PipNet’s #3 blades did fit better in the chamber and removed significantly more cake. The scrapers were also used to clear any remaining tobacco residuals then the chamber was sanded with 220 sandpaper wrapped around a wood dowel. The chamber showed no signs of any damage.
Next was a trip to the sink for a scrubbing with undiluted Murphy Oil Soap and a medium stiff toothbrush. The soap was rinsed with warm water and the stummel dried with a cotton hand towel.
Back at the workbench the stummel looked very good. No signs of any finish or wax remained.
The rim had cleaned up nicely as well.
The stummel was wiped off with a make-up pad dipped in 95% ethyl alcohol. The pad showed nearly no color change indicating that the stummel was bare briar inside the chamber and out.
The airway of the shank did have some yuck. Yuck is a very technical term used by pipe restorers to describe the accumulation of tar and smoking residue. Typically yak is dark brown or black in color with an aroma of general yuckiness. This yuckiness can approach vomit inducing levels of perfume sprayed composting flowers in the case of a pipe used for Lakeland blends. Frequently this disgusting perfumy smell is called “Granny purse”. Fortunately there was no Granny purse present with this lovely old Malaga. The airway was scrubbed with a nylon shank brush with 3-4 ml of 95% ethyl alcohol. The alcohol was then poured into a medicine cup.
Repeated alcohol/nylon shank brush scrubbings were followed by cotton swabs and folded bristle pipe cleaners, both dipped in ethyl alcohol. How a pipe that was used relatively little had this much yuck is a bit of a mystery.
The airway of the stem was also cleaned with bristle pipe cleaners and ethyl alcohol and had yuck levels that were more acceptable.
The exterior of the stem was scrubbed with SoftScrub on make-pads to remove the light oxidation. The stem was then coated with mineral oil.
The stummel was prepared for sanding with a couple slivers of painters tape to cover the stamps.
Sanding was done with a series of sanding sponges with grits of 400-3500. The Stem and stummel were connected and sanded together. Thus avoiding any rounding of their edges. Between each sanding sponge I wiped the stummel with a make-up pad wetted with alcohol while the stem received a dab of mineral oil rubbed on by fingertip and wiped away with a dry paper towel.
The pipe was then worked with micro-mesh pads from 4000-12000 grit. Again the stummel was wiped with a make-up pad wetted with alcohol the stem now received a small drop of Obsidian Oil rubbed in and wiped with a paper towel between pads.
The stummel was coated with Before and After Restoration Balm and allowed to sit for 30 minutes while the balm did whatever magic that the balm does.
30 minutes later the Restoration Balm was wiped away with an inside out athletic sock revealing that the magic had occurred. I often wish that I could capture the puff of glitter and the mini-rainbow that accompanies the magic but alas, I keep missing that part.
The stem was hand polished with Before and After Fine Polish and a soft cotton cloth.
The Fine Polish was followed by Before and After Extra Fine Polish hand worked with the same soft cloth.
The pipe was then taken to the buffer where it was given several coats of carnauba wax. After waxing the pipe was hand buffed with a nanofiber polishing cloth which raised the shine a bit more.
This Beautiful Malaga Bulldog turned out well, beautifully. This is now the second Malaga pipe that I have restored. I am very impressed with the briar which Manny Khoubesser selected for his pipes. It was exceptional, not a fill or flaw to be seen. The vulcanite polished up well. The previous owner of the pipe must have buffed the stem and stummel separately causing the very slight rounding of the edges where the two parts meet. The pipe is very light weight and feels wonderful in my hand. It was truly a shame that Mr. Khoubesser left us so young, his pipes are a testament to his character and I hope to discover and restore more of them in the future. The dimensions of this beauty are:
Length: 5.71 in./ 145.03 mm.
Weight: 0.98 oz./ 27.90 g.
Bowl Height: 1.70 in./ 43.18 mm.
Chamber Depth: 1.50 in./ 38.10 mm.
Chamber Diameter: 0.81 in./ 20.57 mm.
Outside Diameter: 1.49 in./ 37.85 mm.
I do hope that you have found something here useful to your own pipe care, maintenance or restorations. If you like this sort of thing, please click the like and subscribe buttons. Thank you for reading the ramblings of an old pipe lover.
Below are some photos of the finished Malaga Bulldog.


 This all leads me to say with some certainty that this Jima was made in France in the 1970s.


 Bah, fortunately, dear reader I am not easily dissuaded by failure. I did come across a few interesting reads regarding the original Needham patent and the flush of smoking pipe innovations from the late 1800s-mid1900s. First lets take a look at the original Needham patent submitted September 30, 1942.


 (
(