Photographed and written by
John M. Young
Decisions, decisions. I had the urge to work on a bulldog this week but which one from the queue would be the lucky victim?

I had worked on Peterson and Marxman pipes recently, so they were out of the running. That left the Briars and Blends pipe (bottom) and the Captain Fortune (top). Well, from the title of this blog you have probably surmised my choice. TheCaptain Fortune was a purchase made to help out a Nebraska antique dealer I came across while looking for restoration subjects. I don’t usually opt to lend a hand to specific businesses but these guys were new, from Nebraska and had a pipe that I found interesting. Below is the original listing:

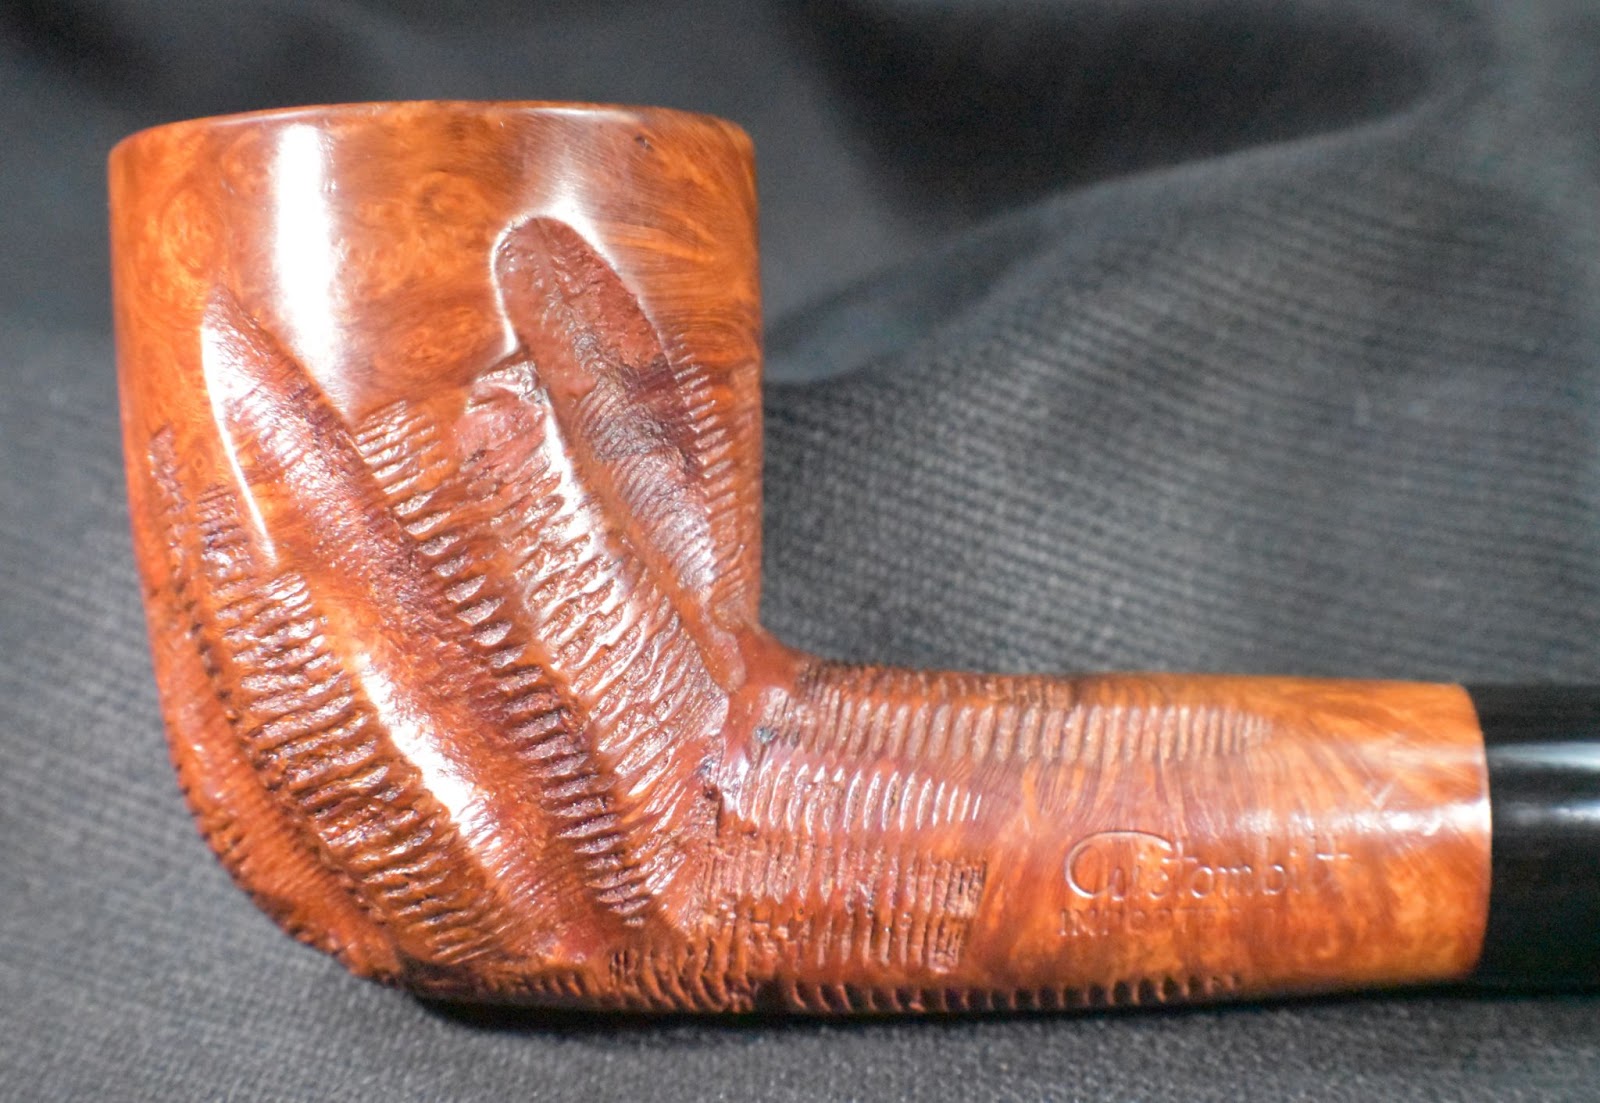
After submitting an offer, which was accepted, The pipe was on its way from northeast to southeast Nebraska. Upon arrival the pipe looked like the below photos.
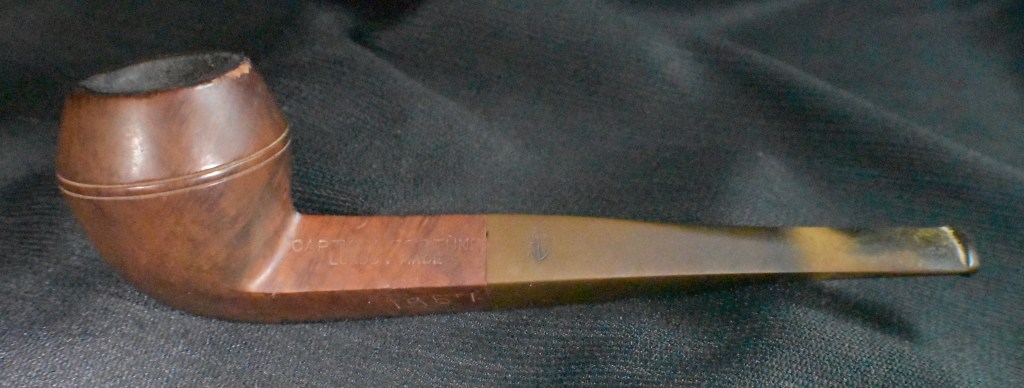
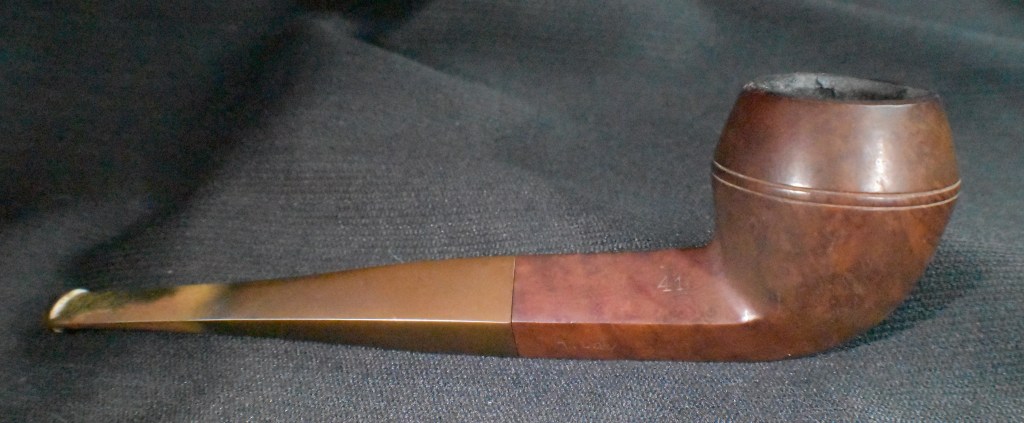


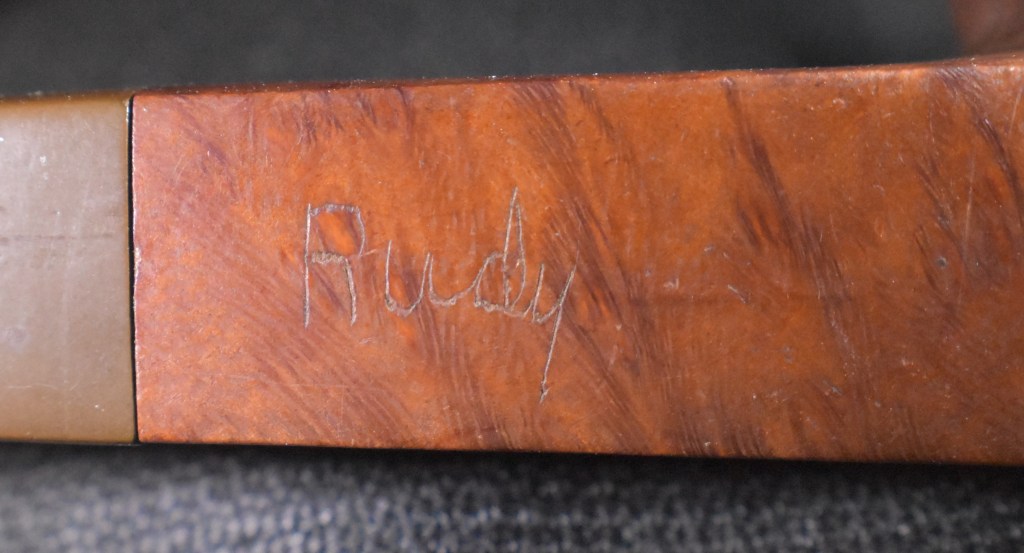
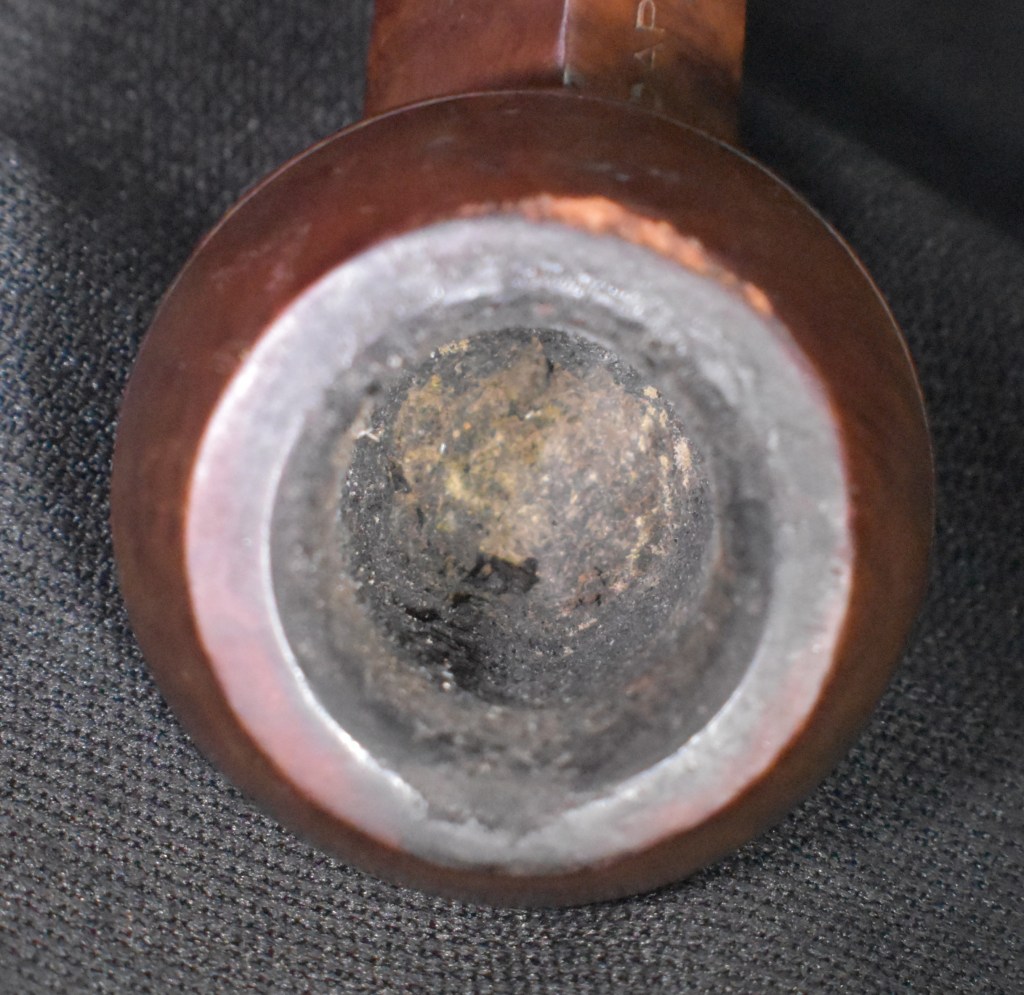

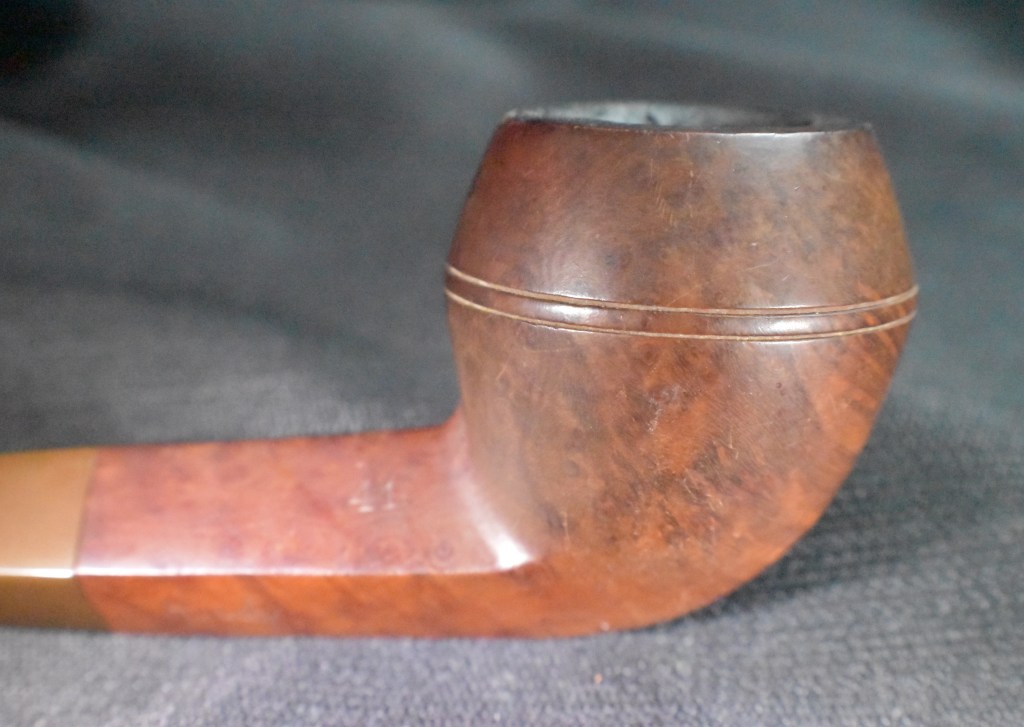


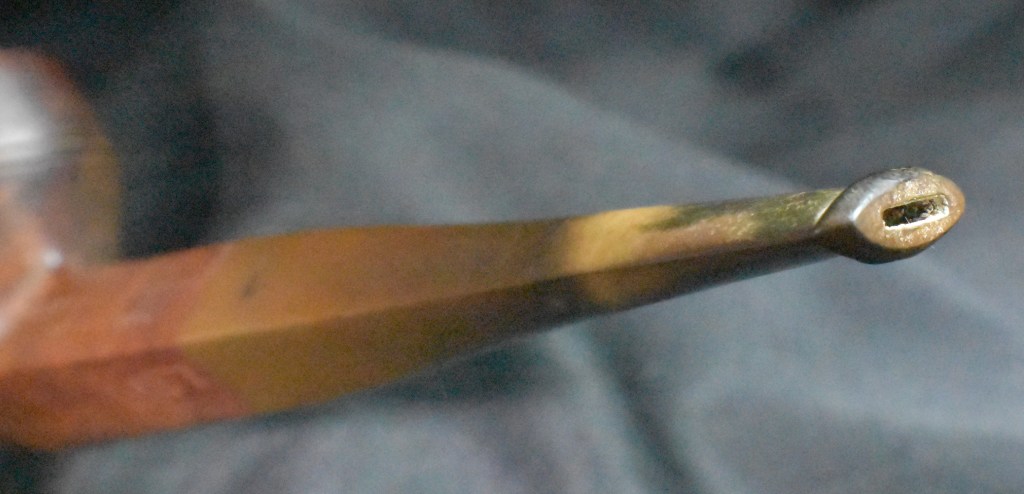


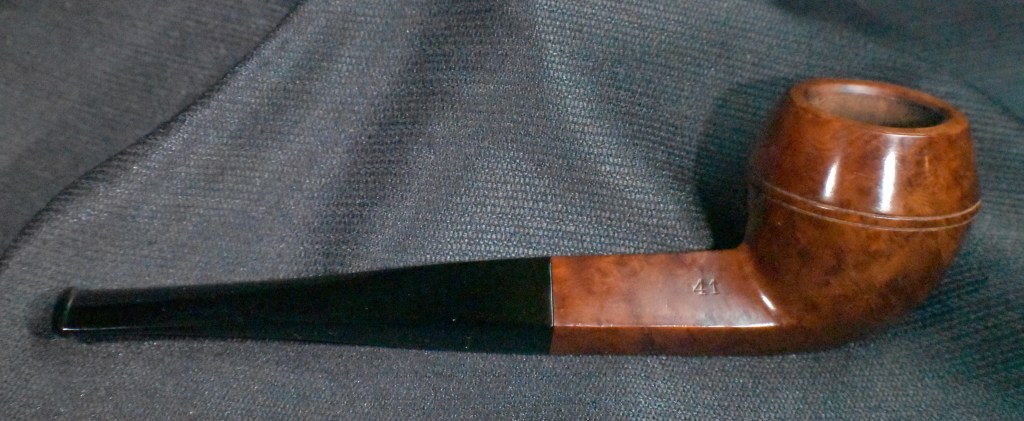
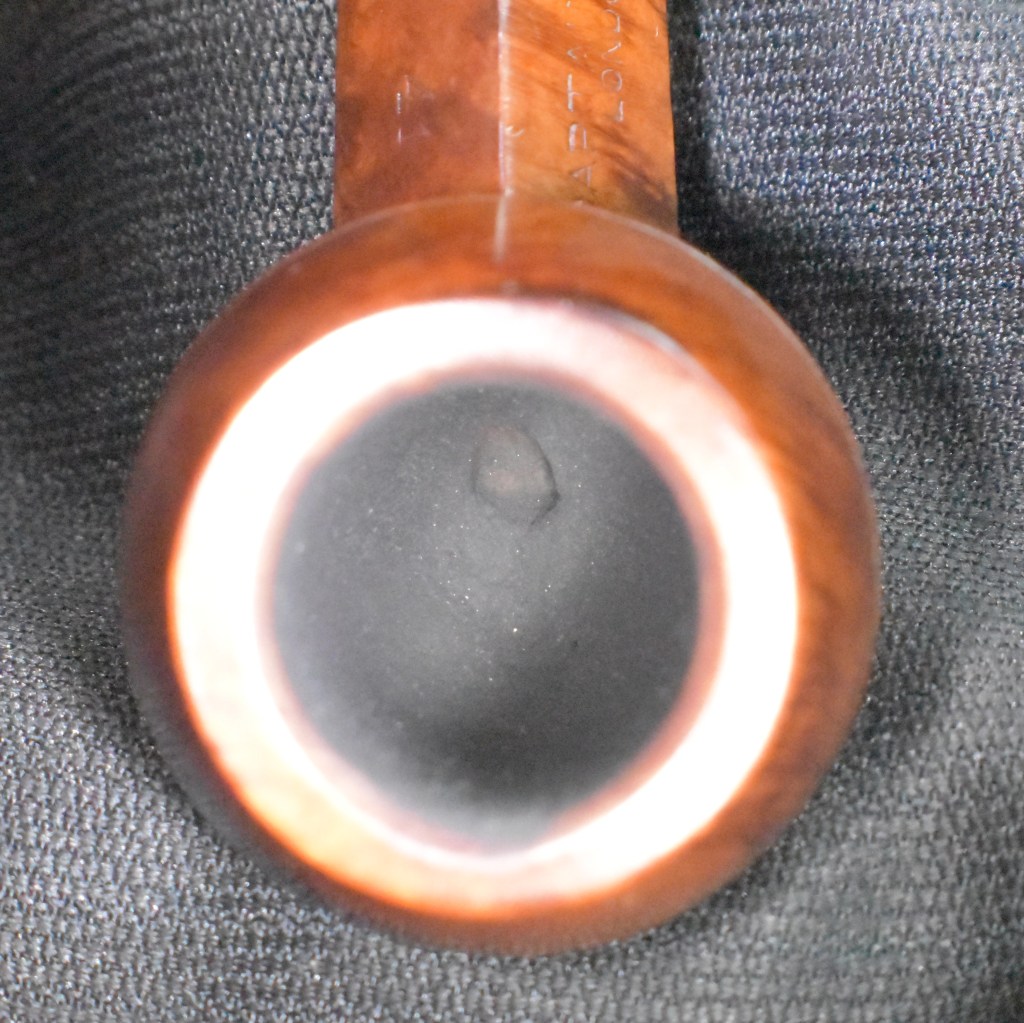
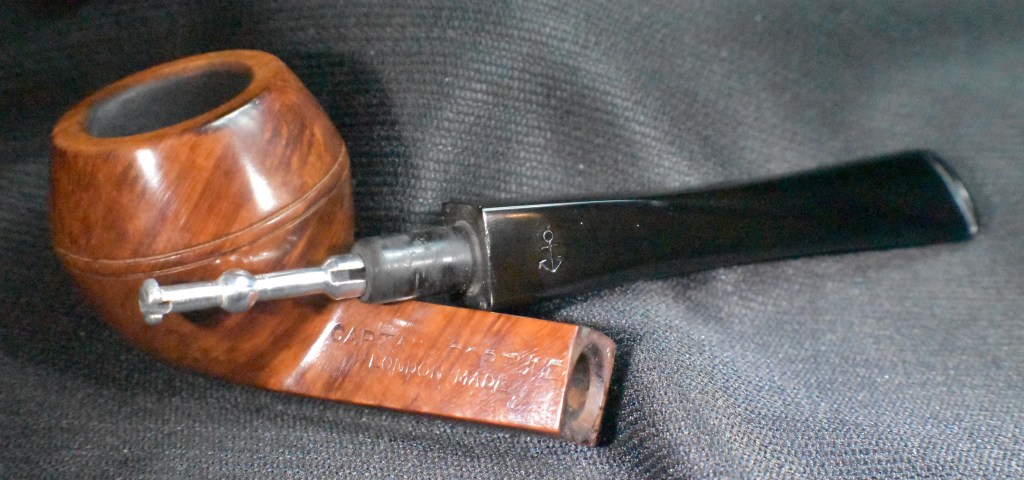
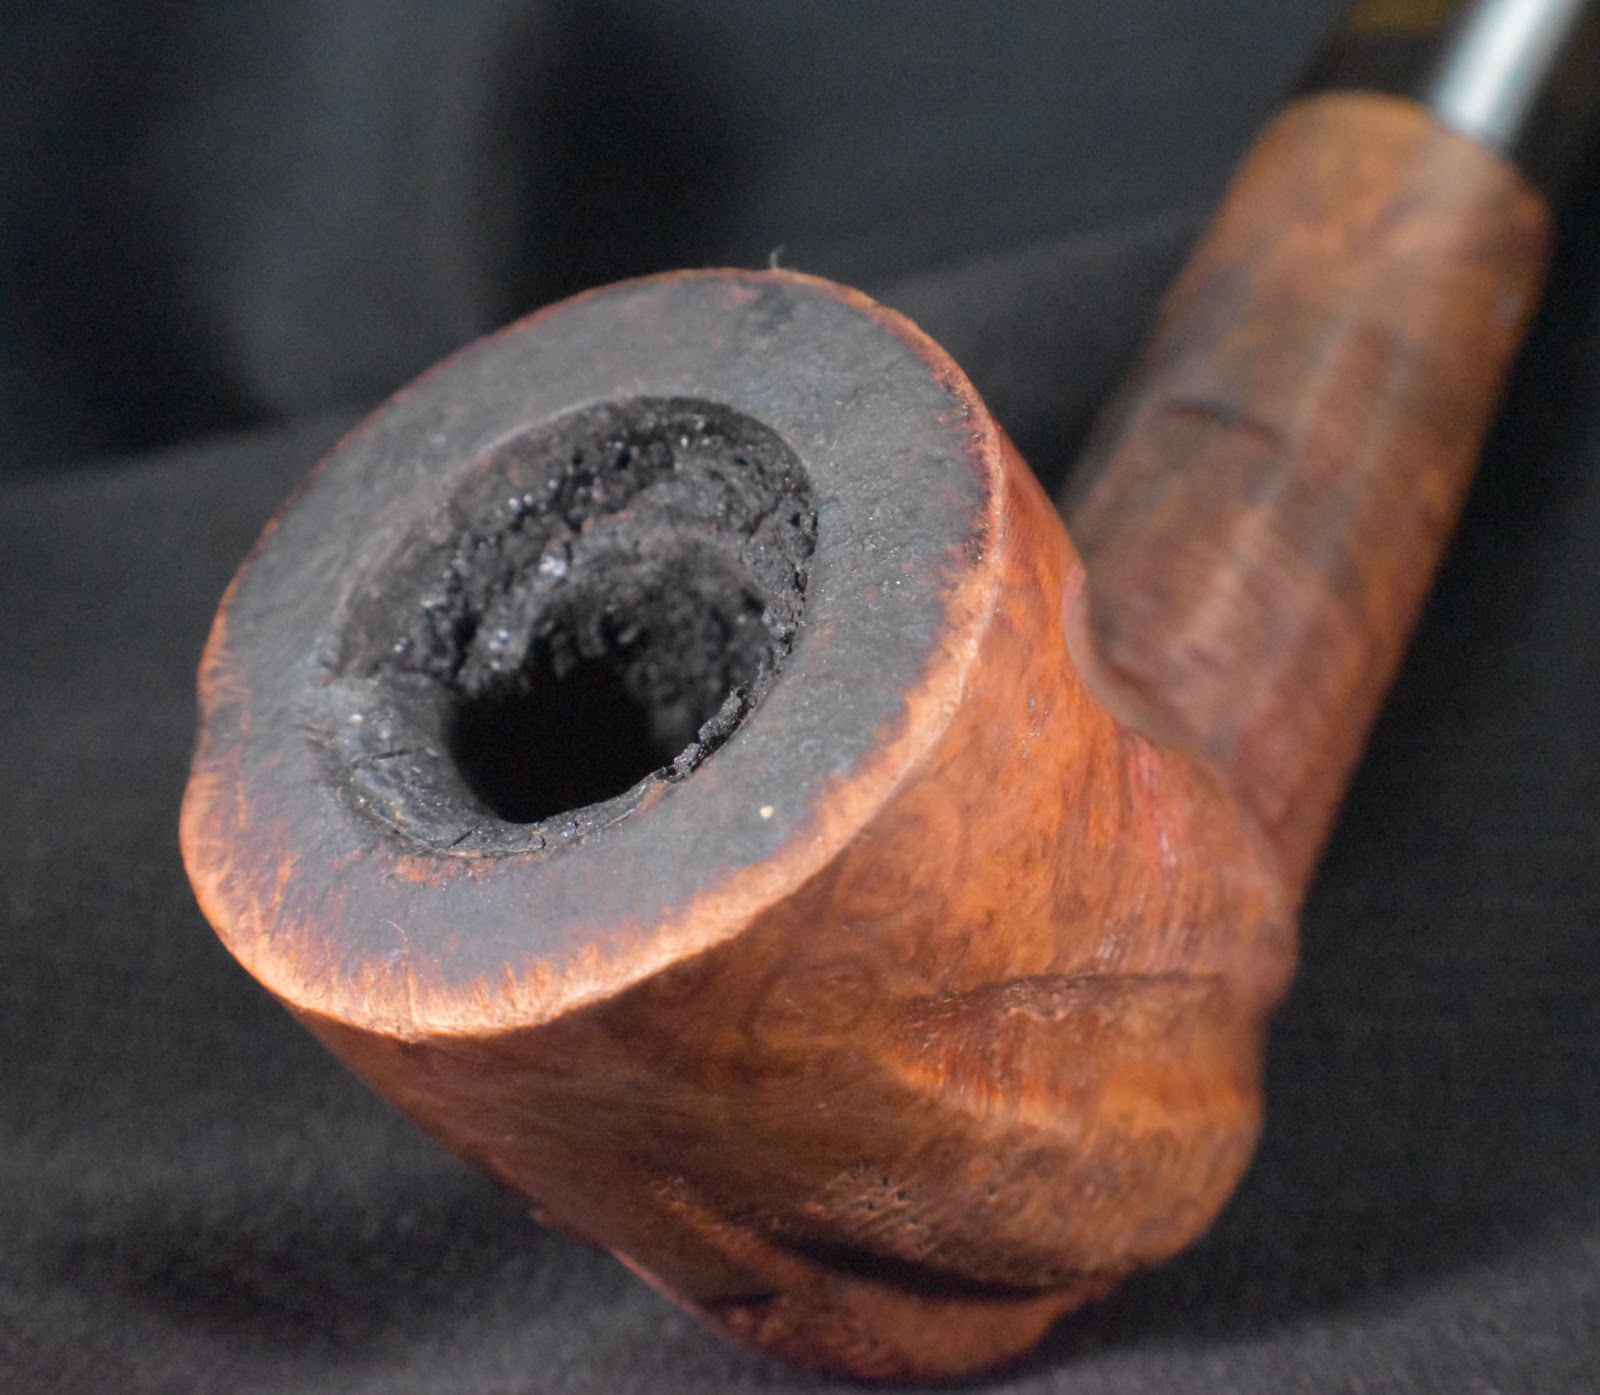
The pipe had definitely been used. The condition of the stem with its calcium deposits, discoloration and bite hole on the underside indicated that. The bowl, as well, showed substantial cake. The rim had a lava deposit and several chips indicating that the dottle was knocked out on hard rough surfaces. There was also an area on the inside front of the rim that looked like charring from lighting the pipe from the front with a non-pipe lighter. The stinger looked surprisingly clean but oxidized. Perhaps the previous owner loved this pipe and a clean airway. That would explain the lack of smoking residue on the stinger. I doubted that the additional markings of Rudy and 1977 were factory marks, but they did add some context to the age of the pipe and when it was being smoked.
Background
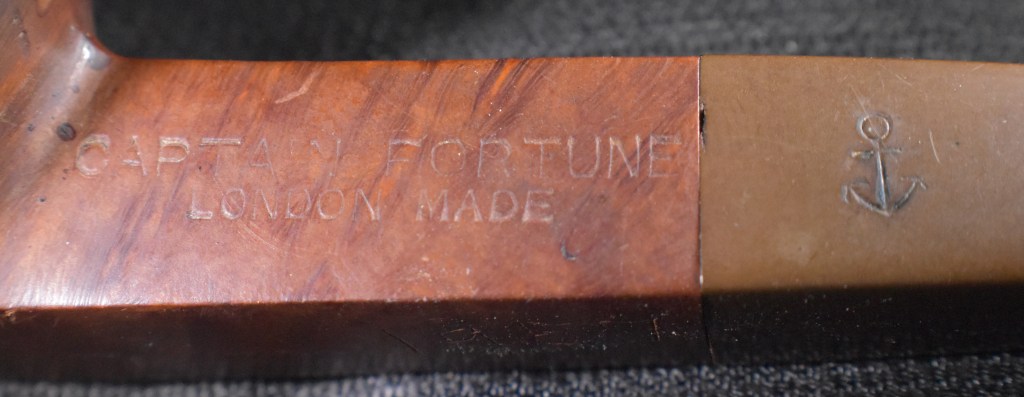
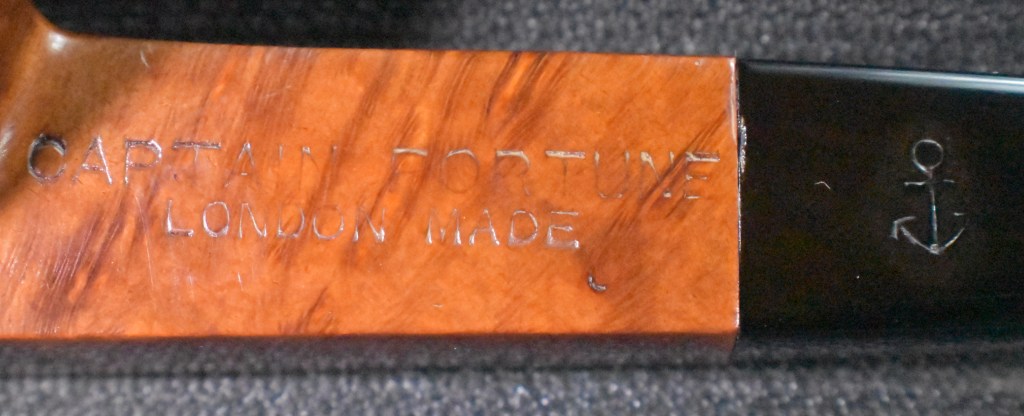
Captain Fortune is a brand of pipes made by John Redman Ltd. and British Empire Pipe company. According to pipedia.org’s brief entry,
“Other lines include Aristocrat, Buckingham, Buckingham Palace, Canberra, Captain Fortune, Dr John, Golden Square, Redonian, Richmond (not Sasieni), Twin Bore
Former factory located at 3-11 Westland Place, Hackney, London N1 7LP” (John Redman Ltd./British Empire Pipe Co. – Pipedia). That was not much to work with then I recalled working on another John Redman pipe back in December of 2024. I will link to that restoration here. The research for that pipe was more productive and I will include a quote from it below:
“My thirst for knowledge remained unfulfilled. I tried searching the internet without a guide and found a wonderful article by an anonymous author on the vkpipes.com site.
“This famous picture above is perhaps the only broad known illustration to materials about John Redman LTD & British Empire Pipe Co. And the majority of sources doesn’t move usually far beyond a couple of sentenses: this company did really exist, it was located at this address and there is their former building. However…
However, this Edwardian building on Westland Place was only an annex and no actual manufacturing was located there. The principle place of business and offices were located in Whitecross Street 123/5/7, within 15 minutes of slow walking from Westland Place. Therefore, one of their series was named Whitecross – you may find it in the catalogue below. The building on Whitecross St. still stands there and you may see it on the picture below. The crossing street is the Fortune St., so we have got an explanation of another Redman’s brand name – Captain Fortune.
Indeed, many Redman’s brands bear such toponomical signs: the “Golden Square” series comes from the Golden Square located between the Lower John and Upper John streets, “Dr. John” is the most probably related to the abovementioned John streets. There are also Canberra road and Canberra House in London (which might inspire stamping of the famous Canberra pipes) as well as Canterbury House (Canterbury series). Burlington pipes named after the Burlington Arcade (see also H. Simmons). The majority of them are located quite close to John Redman’s main office. No wide explanations are needed for the series Westminster and Kensington. And of course, some British imperial charm was added with names Aristocrat, Redman’s Royal, King’s Ransom.
John Redman (as it happened later to Eric Nording) was both a carver and an owner of a business of the same name. The first pipes were born in 1934, but personal efforts appeared soon to be insufficient, what inevitably led to emerging of the name John Redman LTD. Unfortunately, we don’t have artifacts, which could be unambiguously carried to the “pre-war” period. In the WWII years the company could hardly got to the list of lucky manufacturers, who received scarce briar from the state.
But by the end of 1950s John Redman’s firm offered a well balanced portfolio – from popular and practical “Captain Fortune”, “Dr John”, “Golden Square” to top graded Redman’s Royal made of best briar and almost without any stains (comparable to GBD Virgin, but the “Royals” were usually much larger and carved in their own unique style). And of course, we shouldn’t forget about qualitative and still affordable Redonians, Aristocrats and Canberras – a very strong middle (and upper middle) segment. More details, list of offered brands as well as presentation and gift sets can be seen in the catalogue.
It is known that in late sixties and later a part of the production was ordered from subcontractors, for example Blakemar Briars, and since 1992 trademarks of John Redman were taken over by Gerald Grudgings of Loughborough; this company wasn’t a top manufacturer, but many sources attribute the invention of the lovat shape to it.
As the conclusion we are proud to express our sincere and warmest thanks to Robert Deering, who worked for John Redman in 1960s and gave us a number of very important directions.
Below you may enjoy the catalogue of the John Redman Ltd products approximately from the 1960s. A very rare finding!” (JOHN REDMAN Catalogue – Very Keen on Pipes)

(JOHN REDMAN Catalogue – Very Keen on Pipes)” (A Golden Square Apple Restoration – NebraskaPeteGeek)
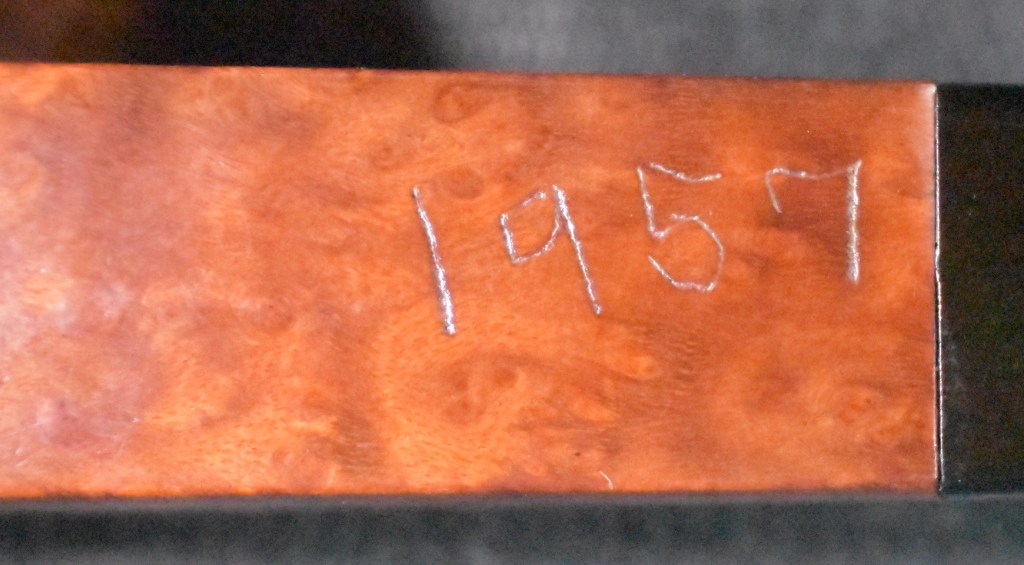
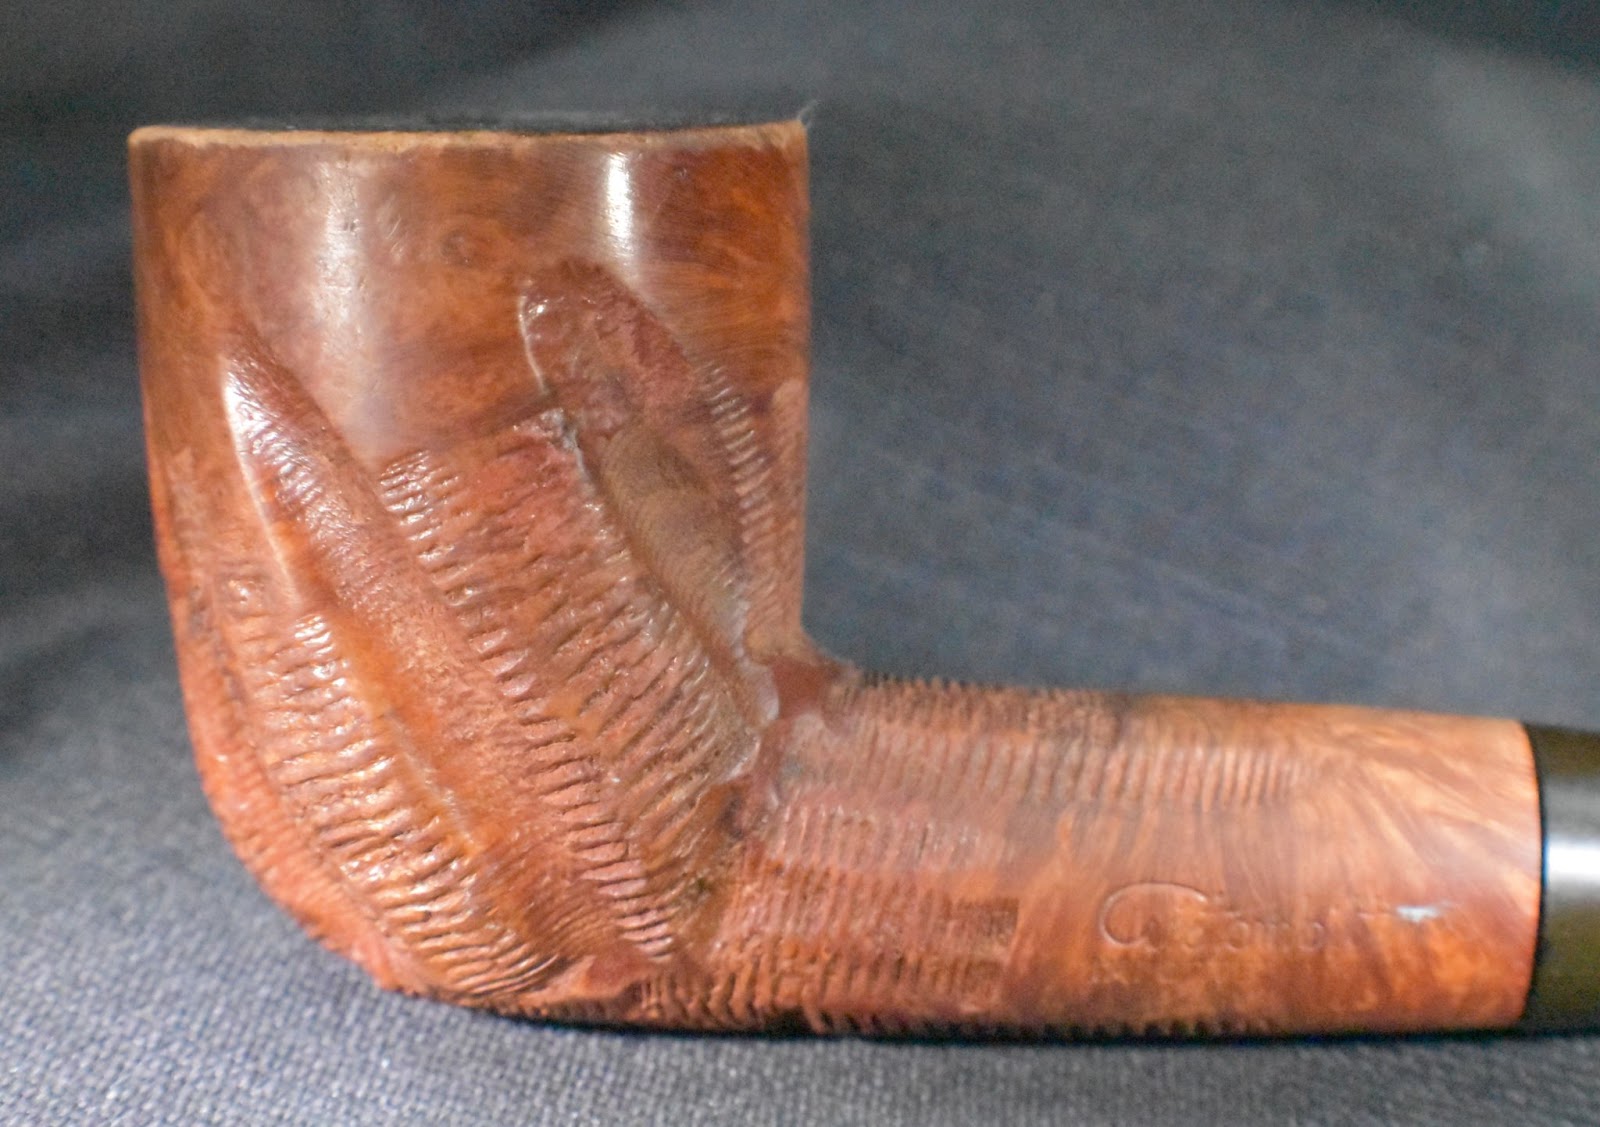
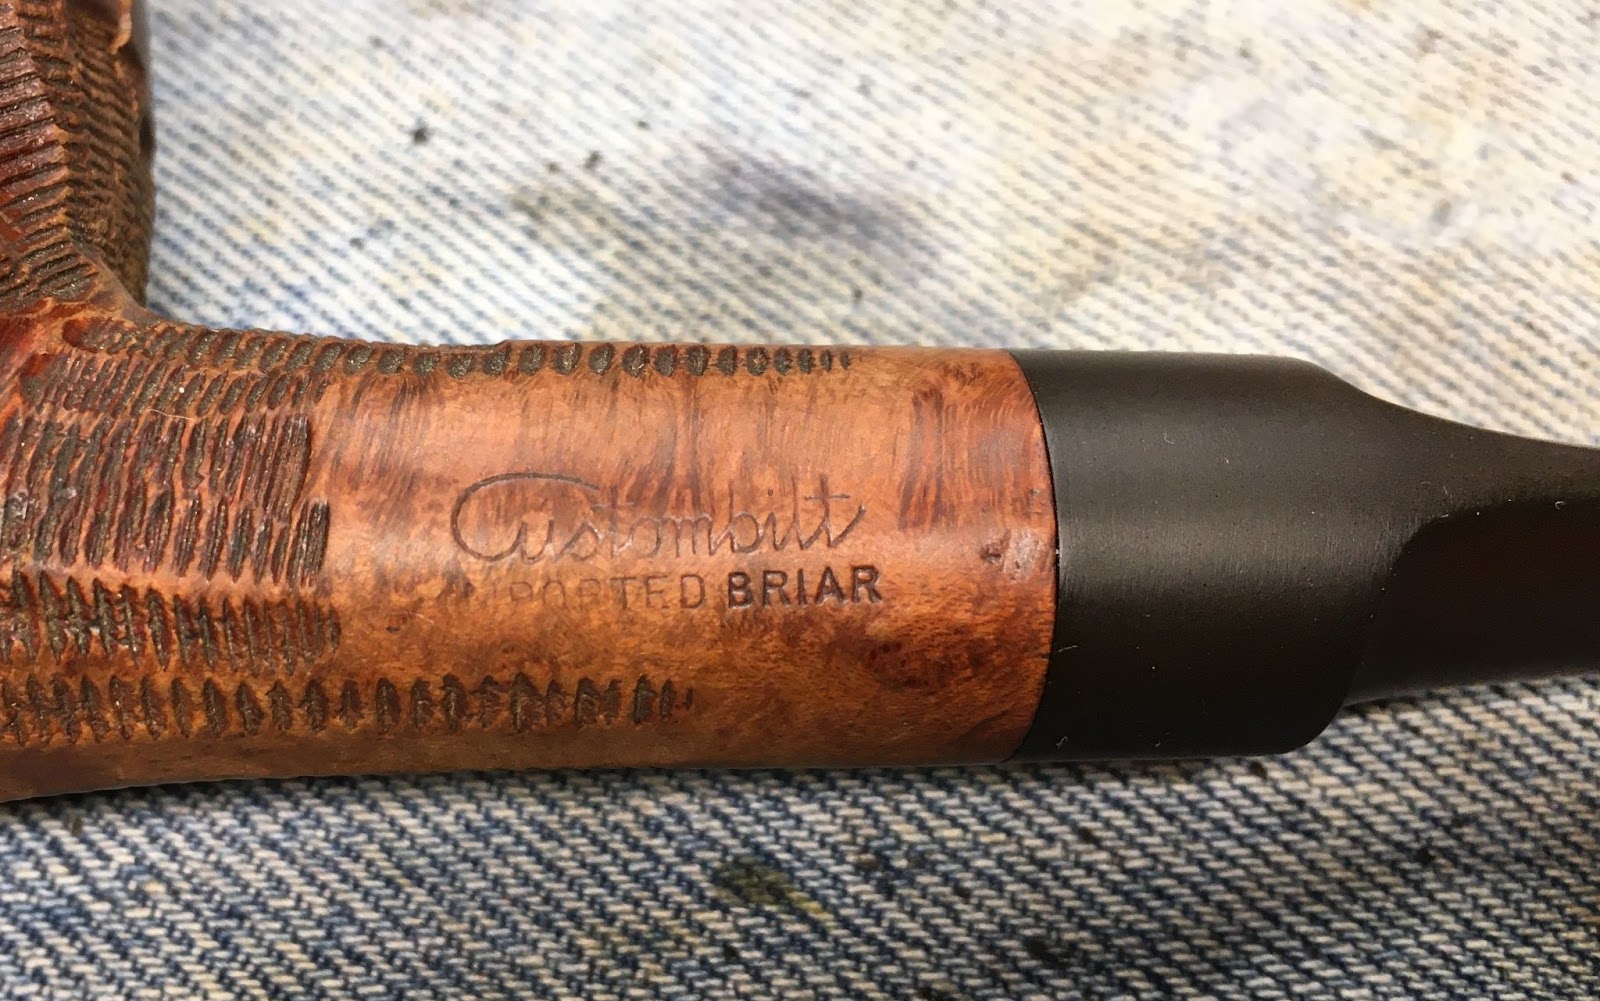
Now, the Captain Fortune pipe in hand has what I assume to be an owner’s autograph and a date etched into the briar along the underside of the shank. It reads “Rudy” and “1957”. I am going to go out on a limb here and say that those are not factory originated marks. I am also going to say that 1957 was the year that that date was inscribed. That would place this pipe squarely into the time quoted by the above article as of the , “end of 1950s John Redman’s firm offered a well balanced portfolio – from popular and practical “Captain Fortune…” This supposition and the apparent age of the pipe itself would make this Captain Fortune bulldog produced in London during the latter 1950s.
The Restoration
The captain Fortune made its way from the photo table to the workbench, a grueling 18 foot distance and to its denim piece.

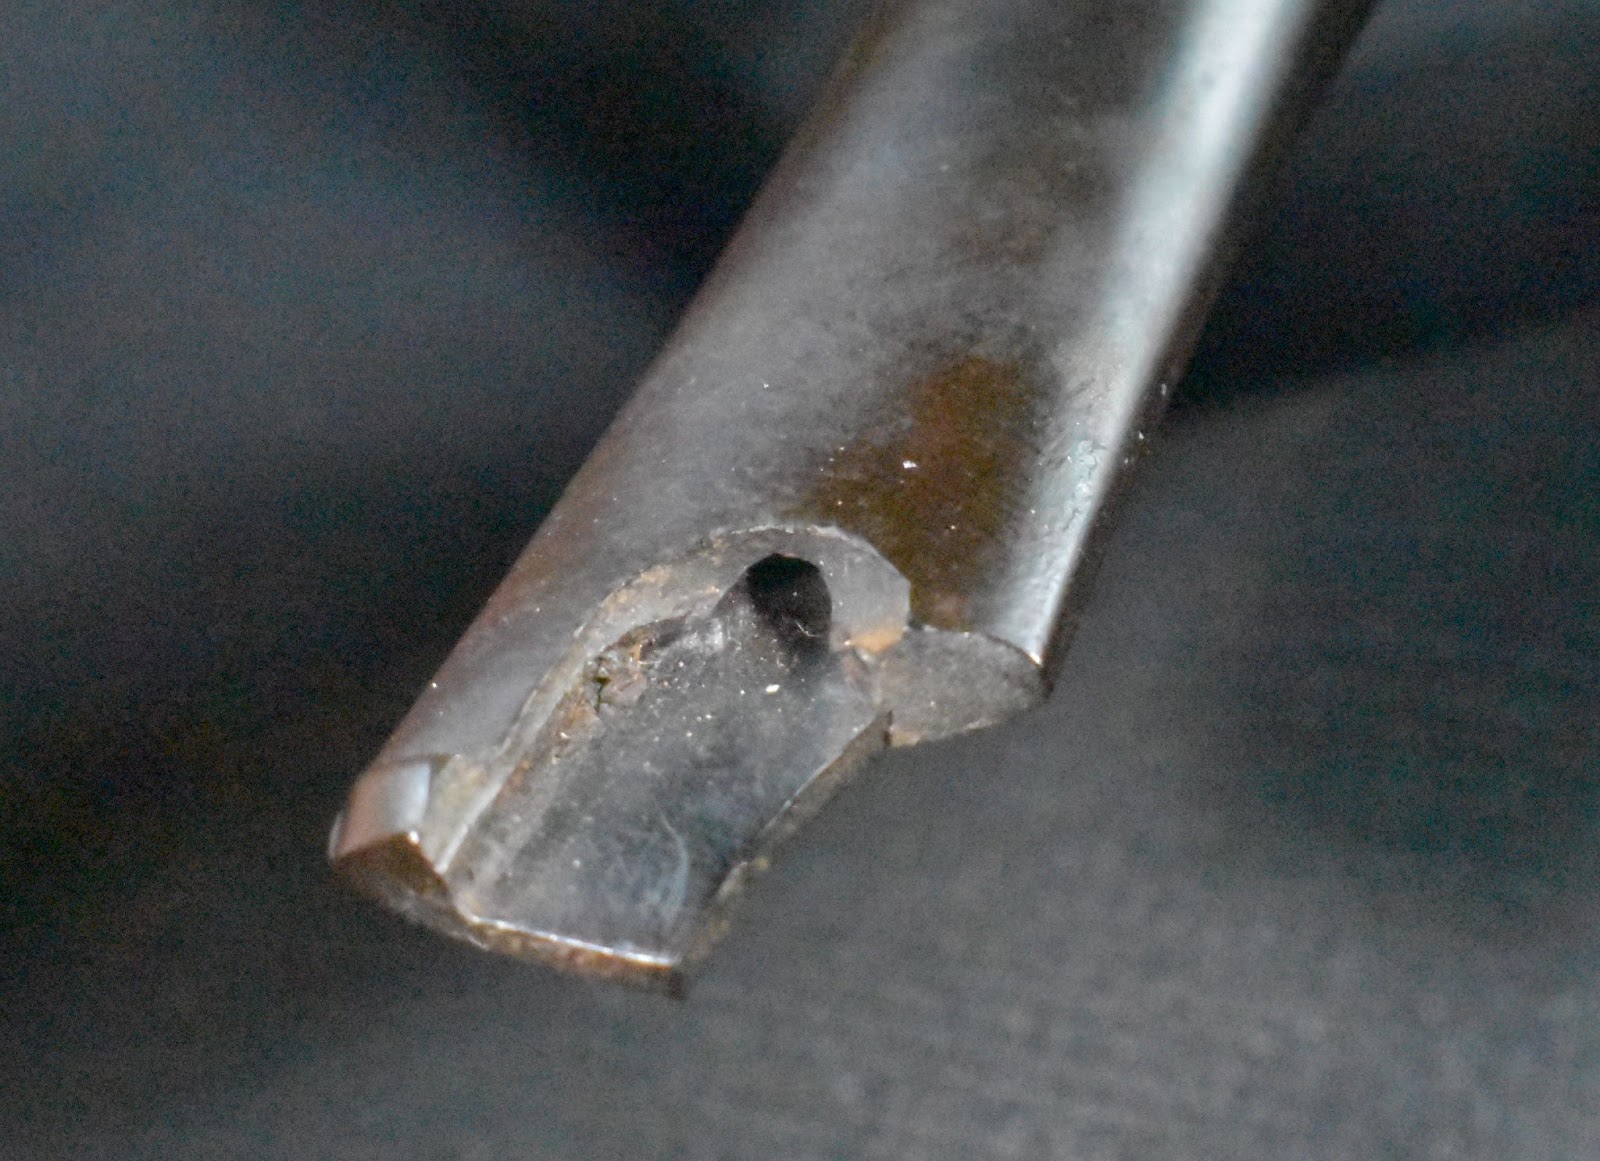
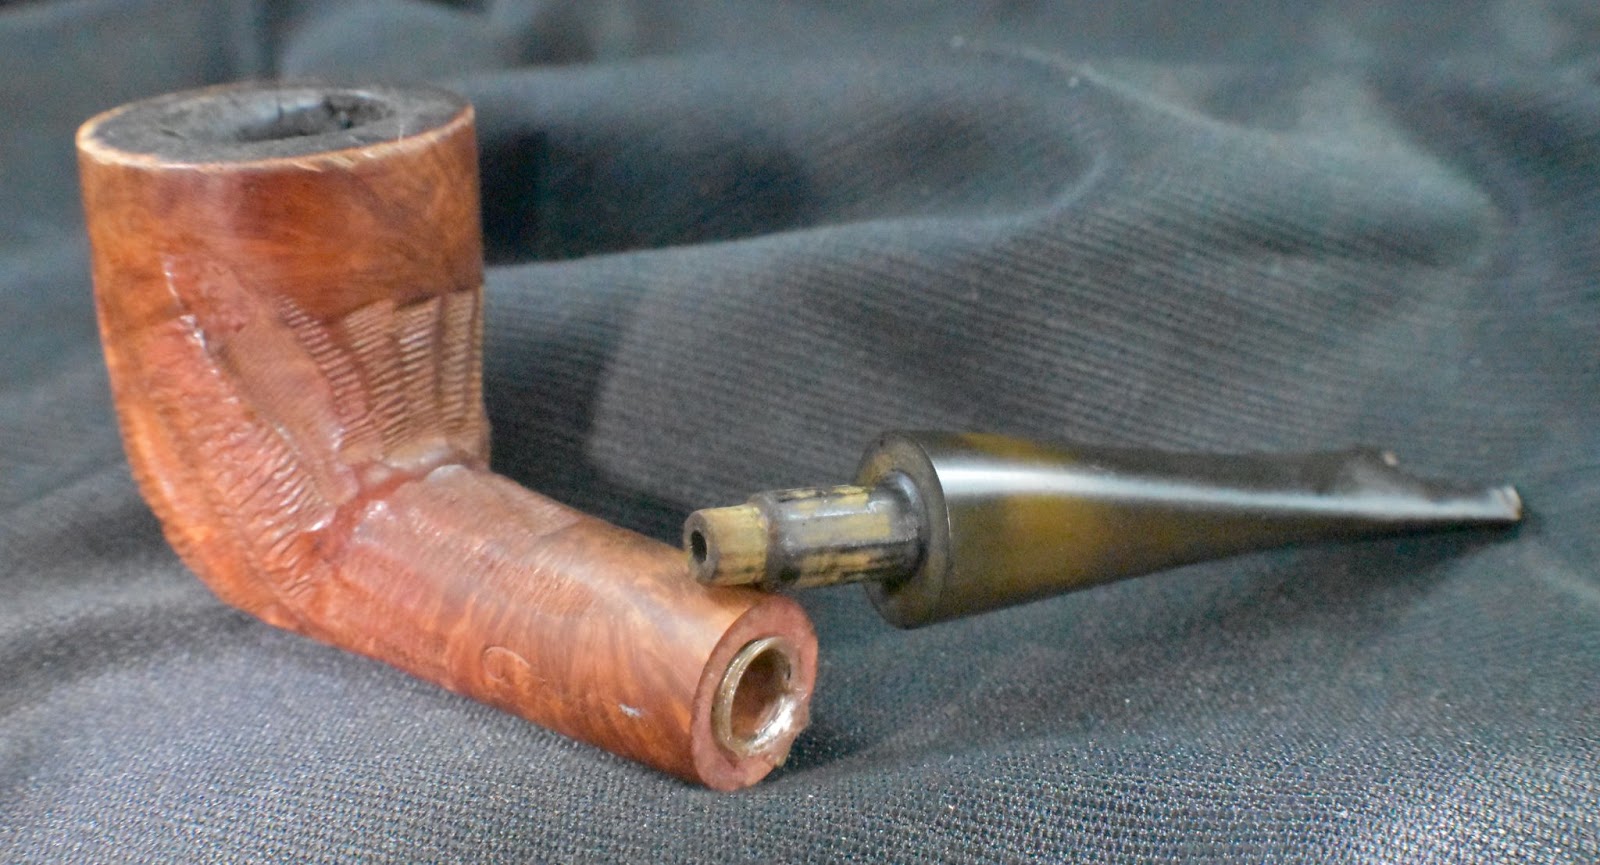
Once at the workbench I removed the stem and gathered my official Stinger Extraction Device (SED). The SED is actually a strip of thick leather used to protect the aluminum of a stinger from the jaws of a pliers.
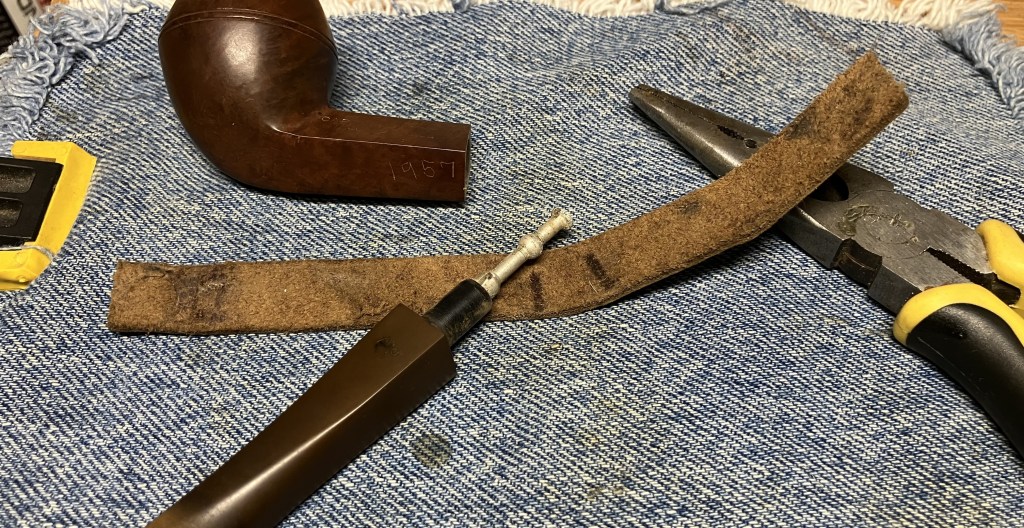
The suckedness of this stinger led to absolute failure in its removal. Not wanting to risk breaking the vulcanite, I devised plan B.

Being a big believer of Plan Bs, in general, I chose to soak the stinger and end of tenon in a medicine cup with 99% ethyl alcohol. Now, I know what you are thinking, “That stem is too heavy to stay in that little medicine cup.” Trust me, it will be fine.

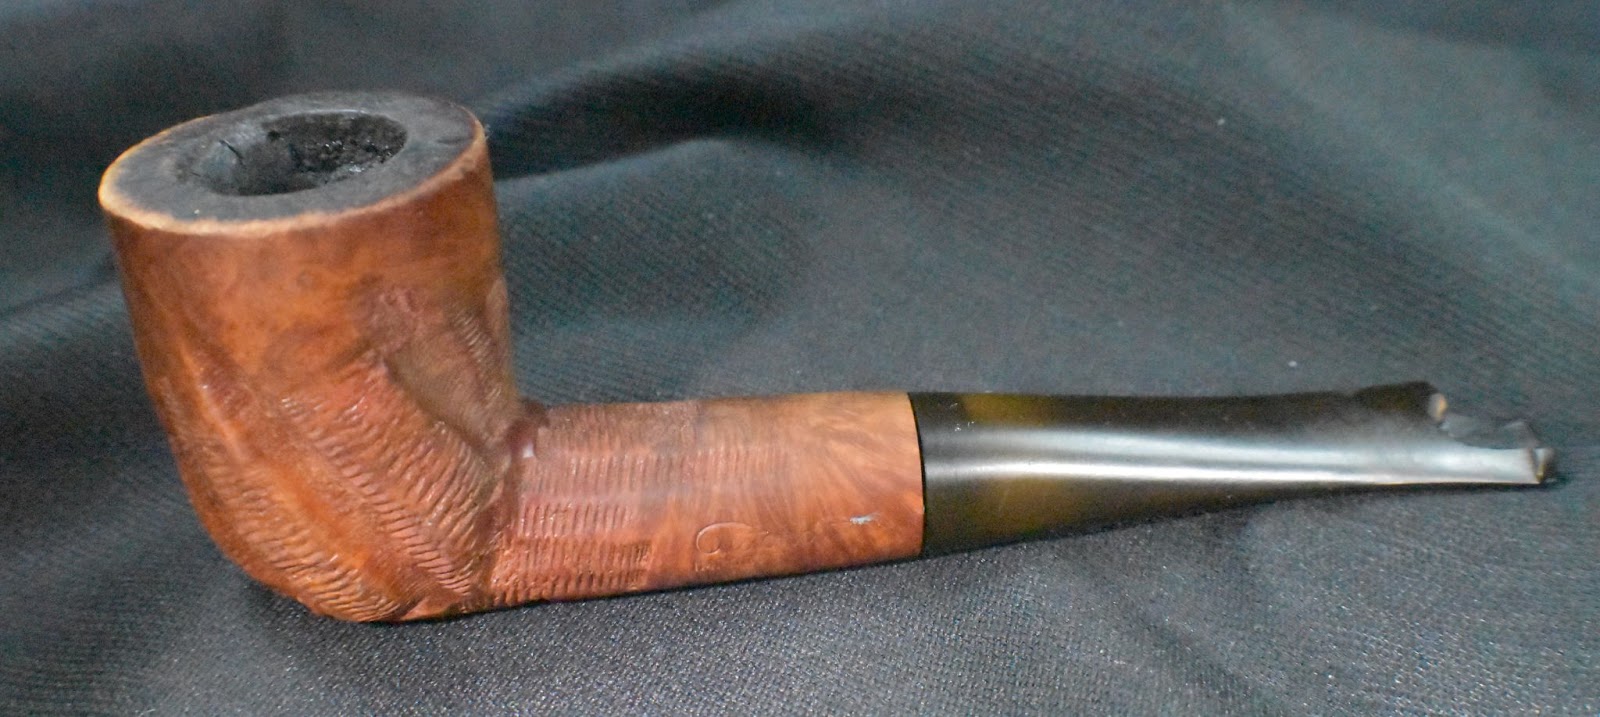
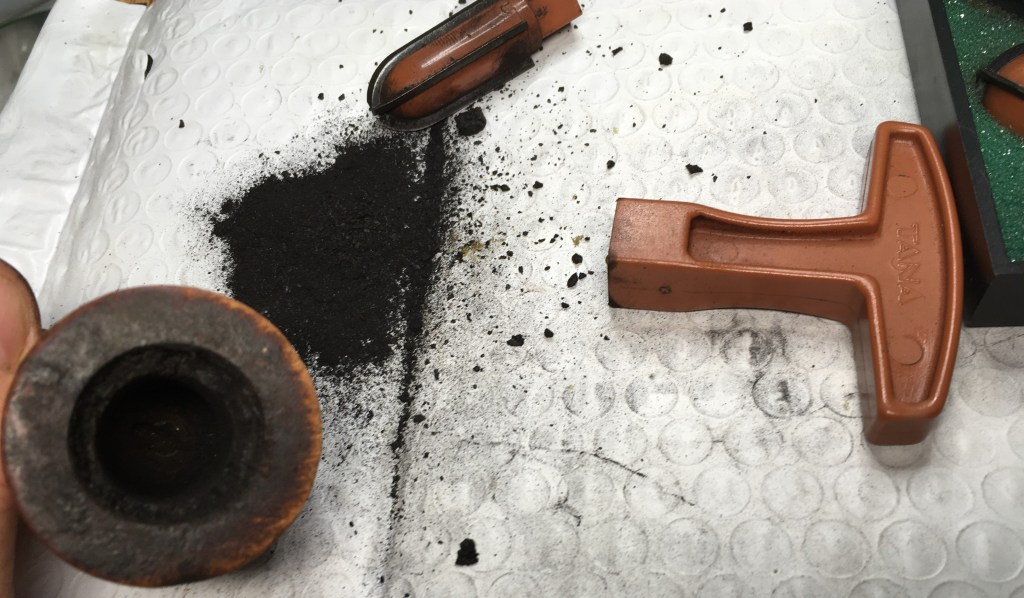
PipNet led the ream team with the #1 blades.

That was until I realized that the cake was much thicker than I thought it was. The PipNet #2 blades came out and earned their keep. The Smoking pipes Low Country reamer was great for the curve at the bottom of the chamber and the General triangular scraper did cleanup on the interior walls.

The tobacco chamber looked much better and more spacious.

The chamber was sanded with 320 sandpaper wrapped around a wood dowel.

Now, normally sanding does create some shaking of the workbench. This shaking was just enough to tell me that the stinger was ready to come out of the stem. No, the top heavy stem did not tip over the medicine cup of alcohol and spill the alcohol all over the workbench. That would indicate that the restorer was a total clutz and perhaps an idiot. No, let’s just say that after some using alcohol to clean the top of the workbench the stinger was ready removed using the official SED.

Now, back to the sanding. Things looked pretty good until I used alcohol wetted cotton swabs to clean out the sanding debris from the tobacco chamber. As the alcohol evaporated I saw several spiderweb patterns of heat damage to the chamber.

The below photo shows the webbing while the alcohol was evaporating, making the lines look darker. There were more spider webs on the interior right than left. None of them were very bad nor deep. The chamber felt nice and smooth to my finger. I thought that I should give this pipe a bowl coating to protect it and aid in the formation of a light cake.

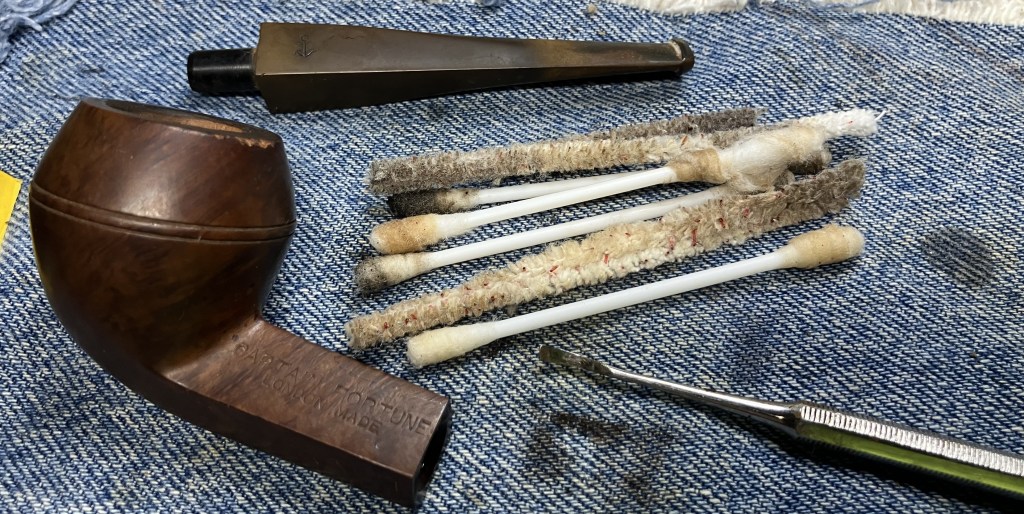
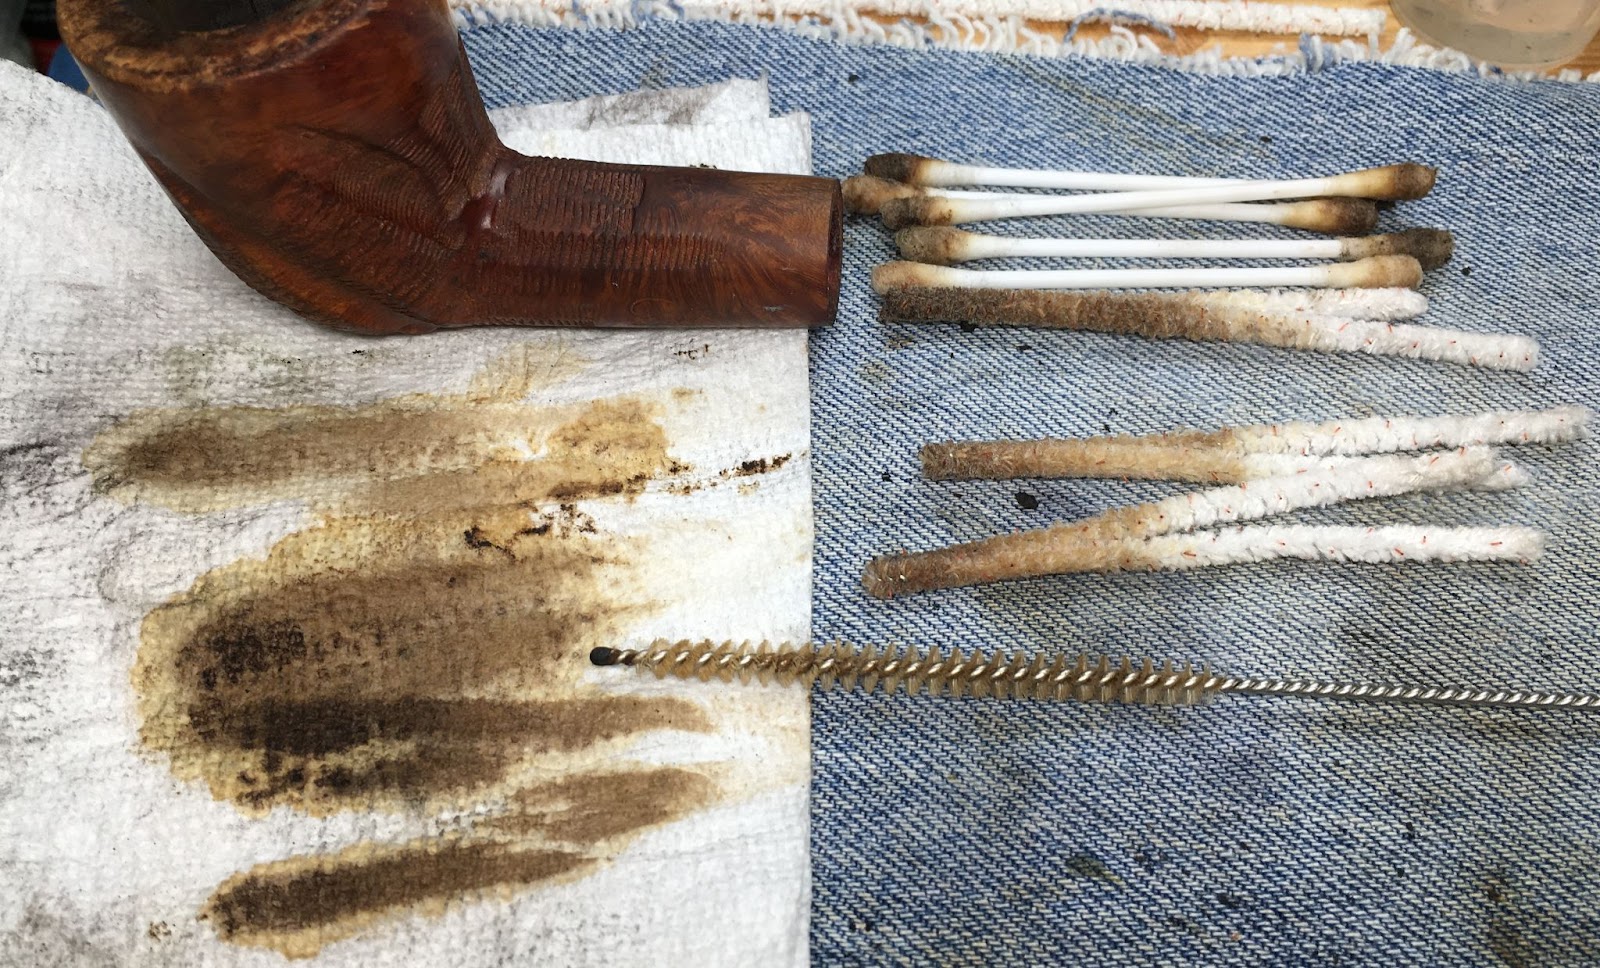
Cleaning the shank came next. This was done with several bristle pipe cleaners and cotton swabs all dipped in 95% ethyl alcohol. There was also some scraping with a dental scraper. Every successful scrape removed reduced the cotton swabs and pipe cleaners needed dramatically.
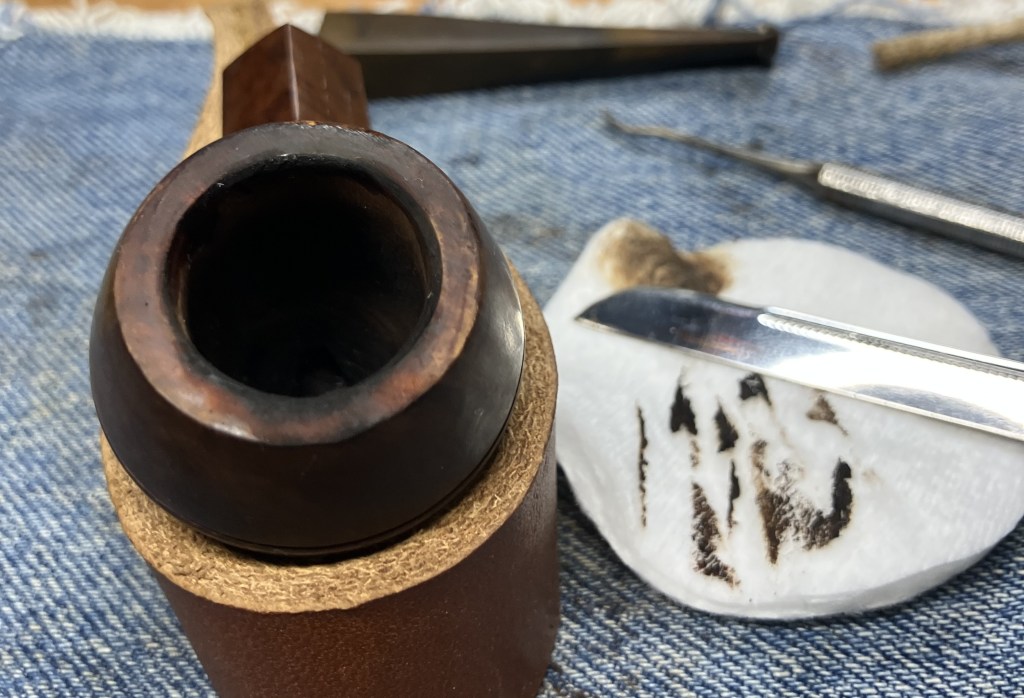
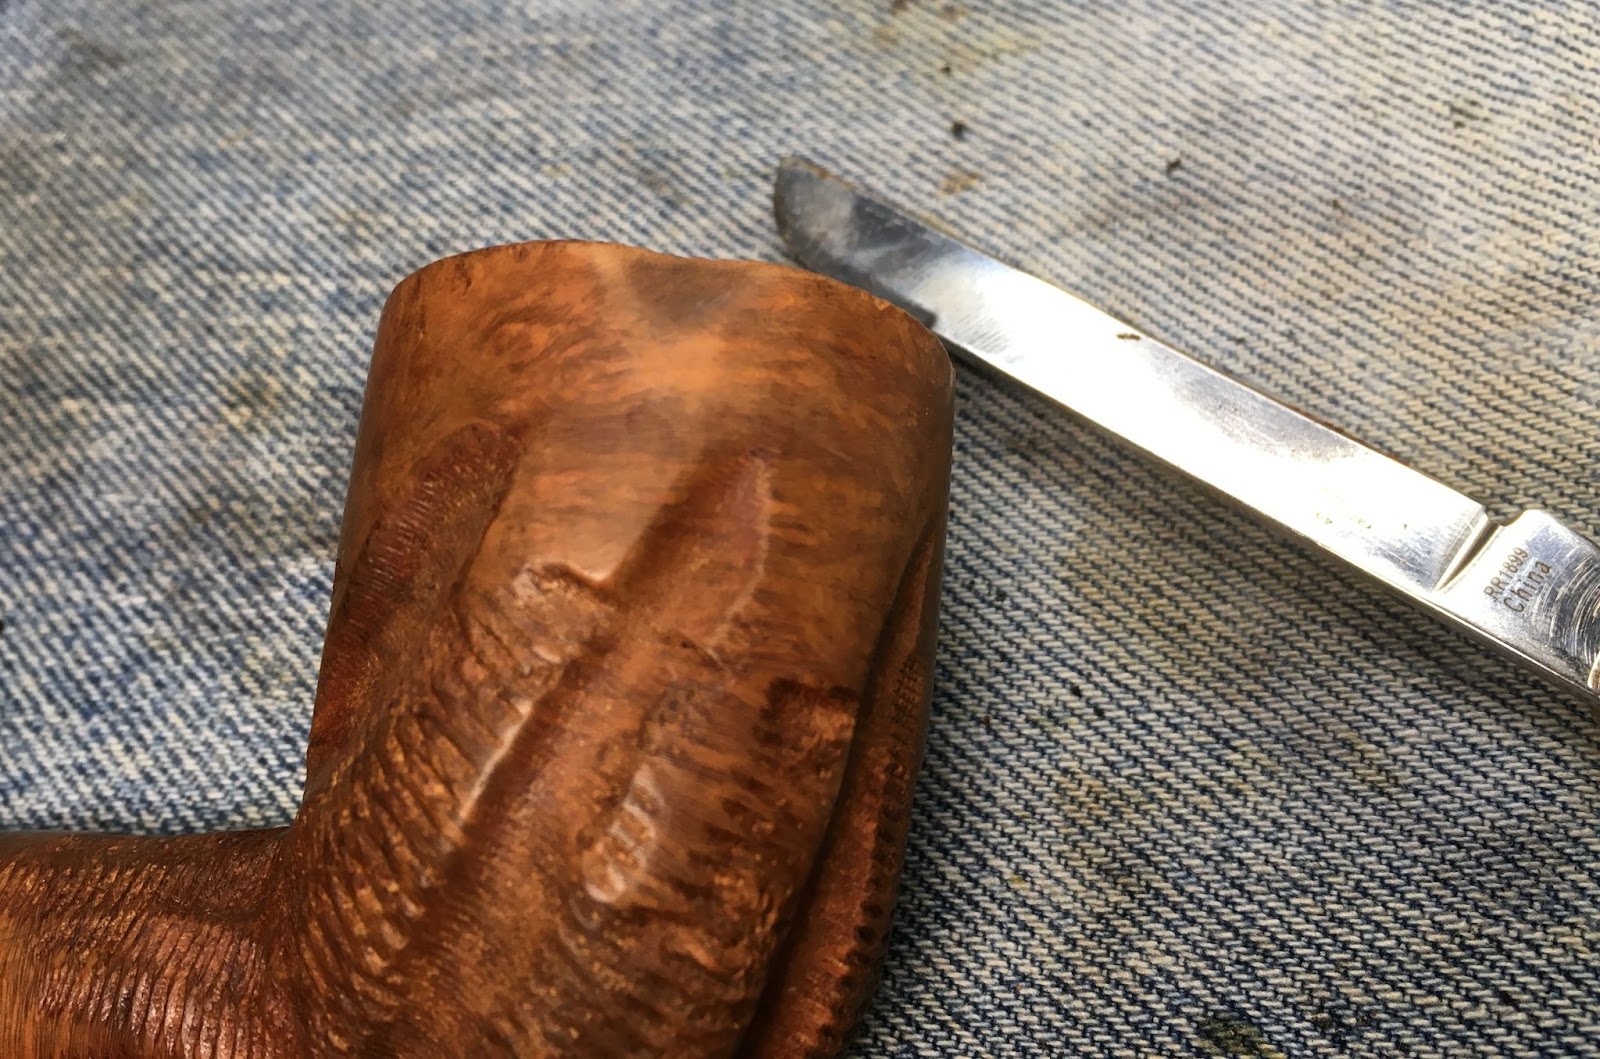
Next came the rim. I was a bit worried what I’d find under that layer of lava.

The lava was moistened with saliva and allowed to soak for a couple of minutes. Then I lightly scraped with a very sharp pocket knife. This did reveal some charring but not as bad as I had feared.
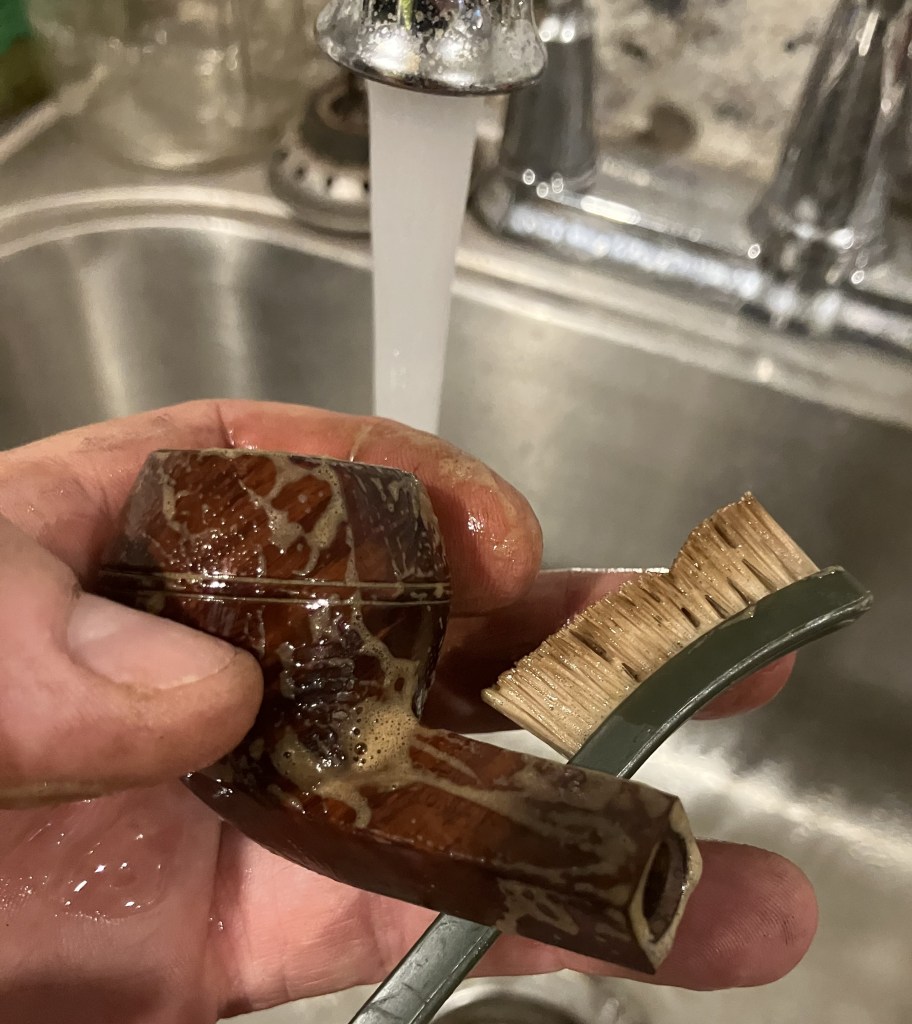
The stummel was taken to the sink for a scrubbing with a nylon brush and undiluted Murphy Oil Soap. The soap was rinsed with warm water and the stummel dried with a cotton hand towel.
Returning to the workbench, the stummel was wiped with an alcohol wetted make-up pad. This removed remaining wax and some lingering grime.

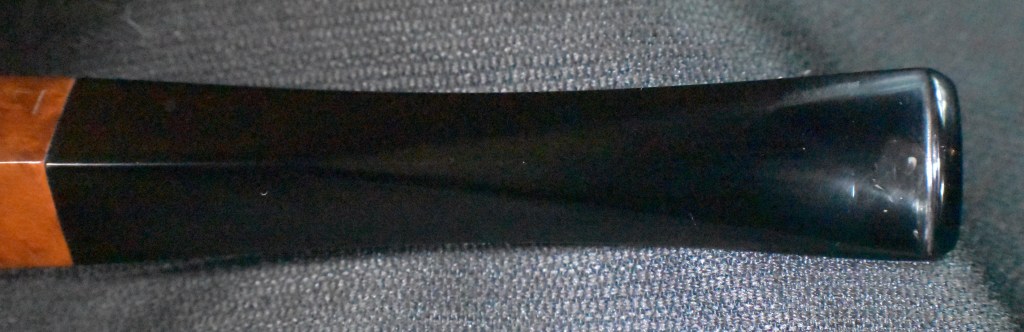
I turned my attention to the stem. This was cleaned with bristle pipe cleaners and 95% ethyl alcohol. The stem was surprisingly clean.

I inserted a pipe cleaner into the tenon for easier removal of the stem in the morning. The plan was to leave it in deox, that’s what I like to call time spent in Briarville’s Pipe Stem Oxidation Remover. I have to say, this product is a good one and is available here: Briarville Stem Oxidation Remover 8oz | Briarville, Inc. And no, your’s will not come looking like this, it will be a bright yellow.

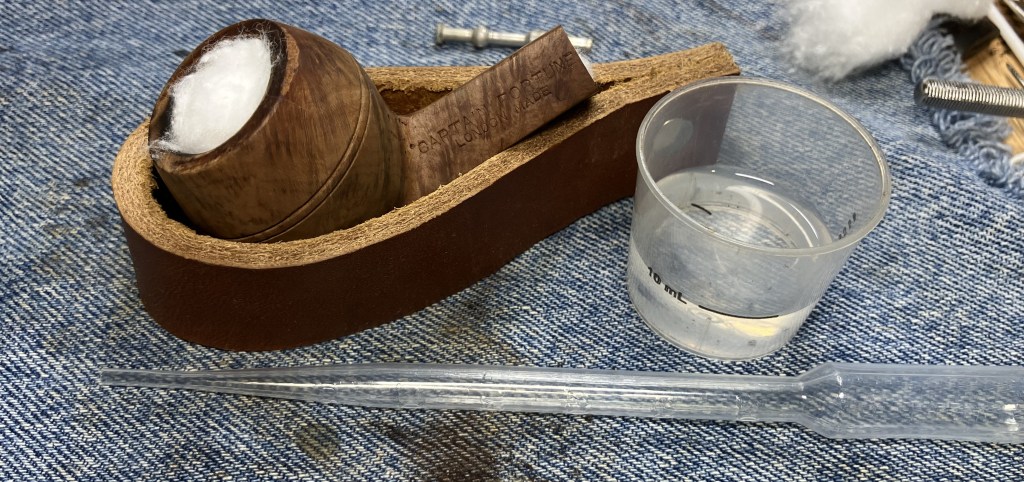
I thought this pipe would benefit from an alcohol cotton treatment so I stuffed the bowl and the shank with cotton.
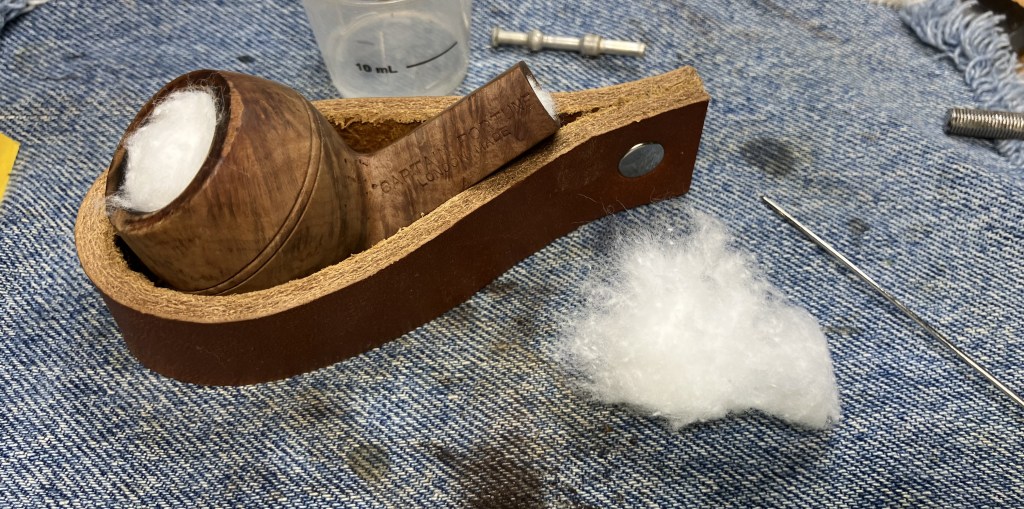
I then poured out 10 ml of 95% ethyl alcohol into a medicine cup, thinking that would be about the amount needed. A disposable pipette was used to transfer the alcohol to the cotton.
Lucky guess, you say. I say I missed it by 1 ml. This needed to sit and evaporate overnight and the stem was soaking overnight, I guessed it was time for me to end this session.

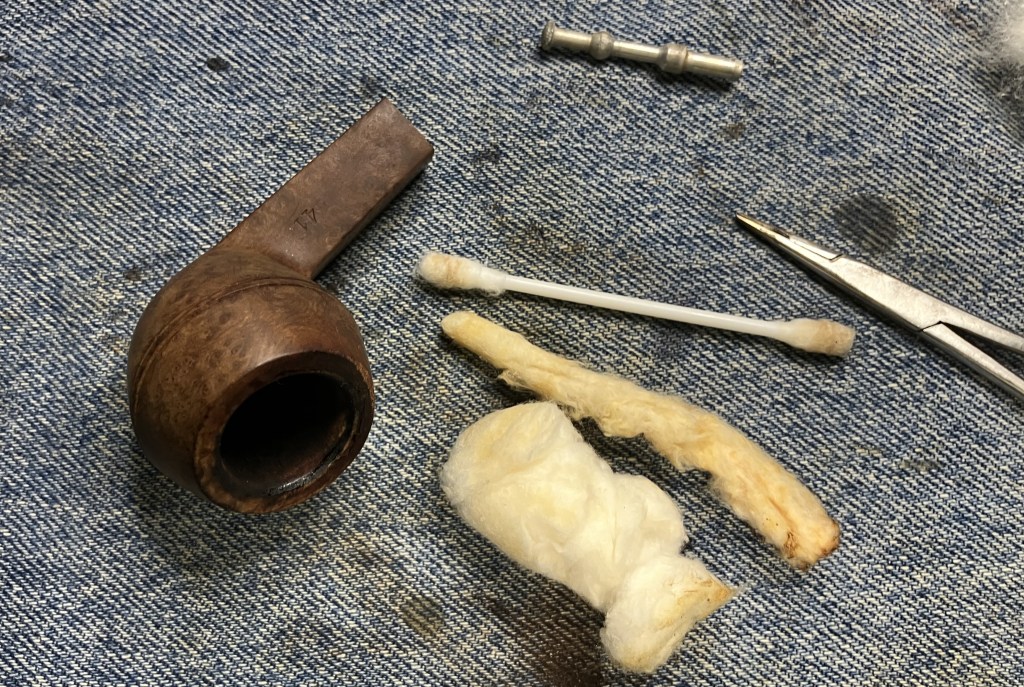
In the morning the cotton was no longer white. The evaporating alcohol had worked to dissolve the tar and smoking residues from the briar and move them into the cotton.

I removed the cotton and cleaned the airway with a cotton swab. It came back with minimal residue.
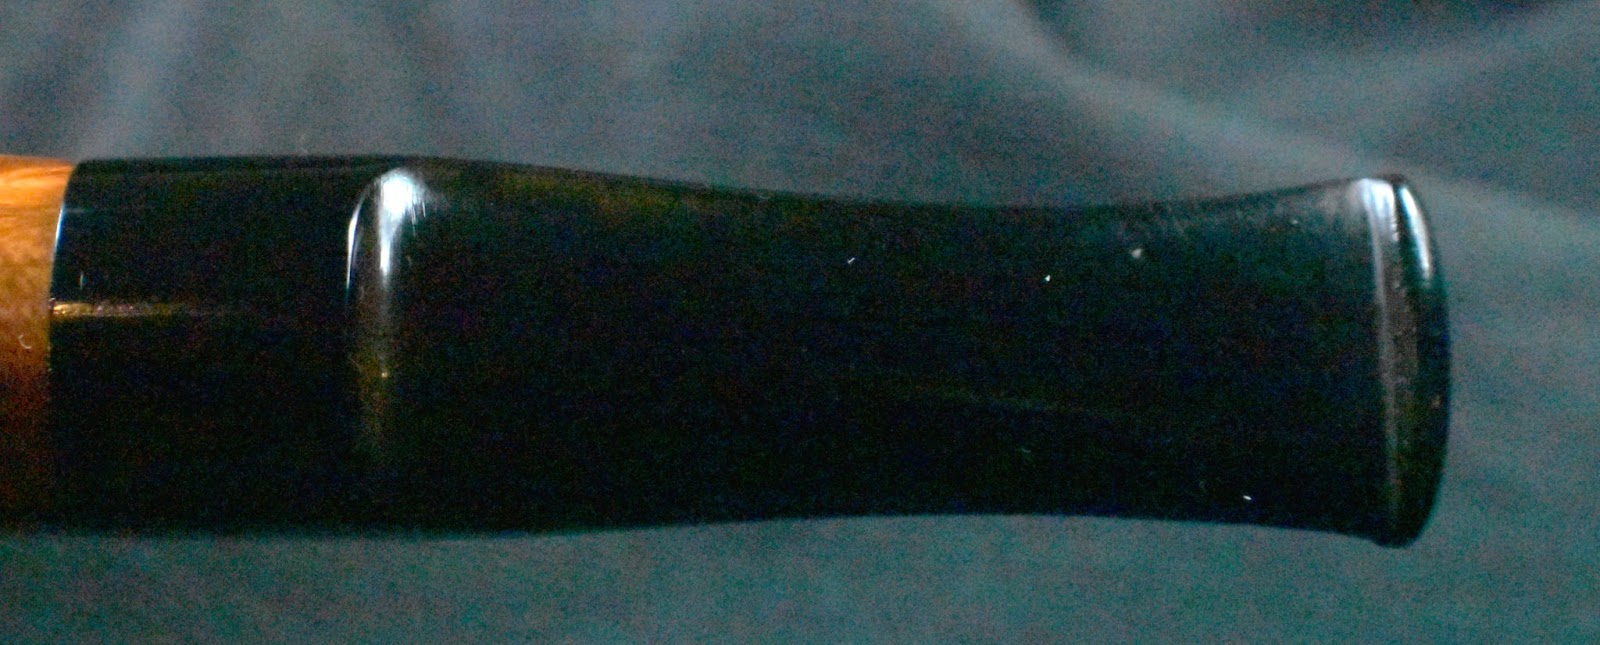
The stem was retrieved from deox and vigorously rubbed with a coarse shop rag. This removed quite a bit of the oxidized vulcanite.
The stem logo was still visible but it was more faint. Extra care would have to be used to keep this stamp.
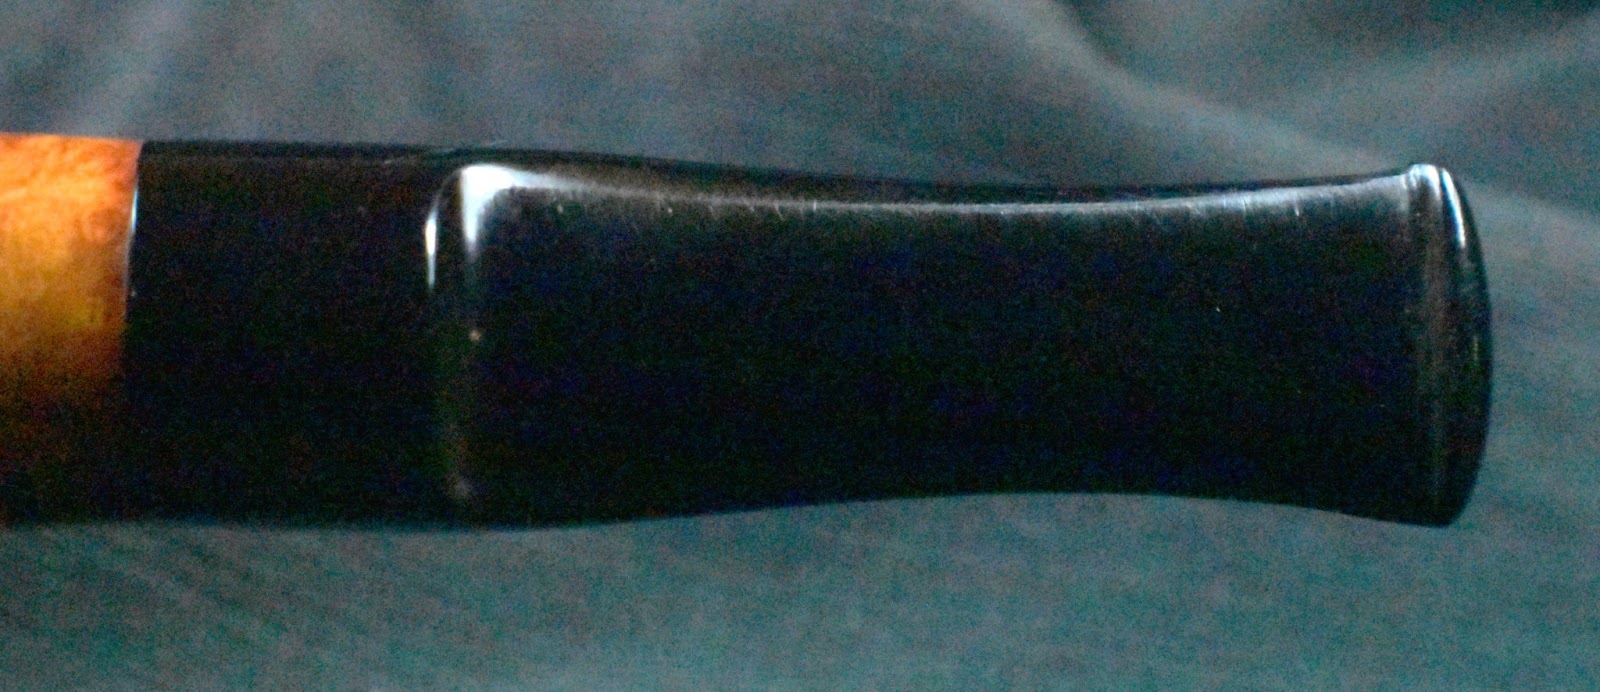
I used a piece of a plastic lid to act as a dam to keep the cyanoacrylate (CA. super glue), that I planned on using to fill the hole, from entering the airway.
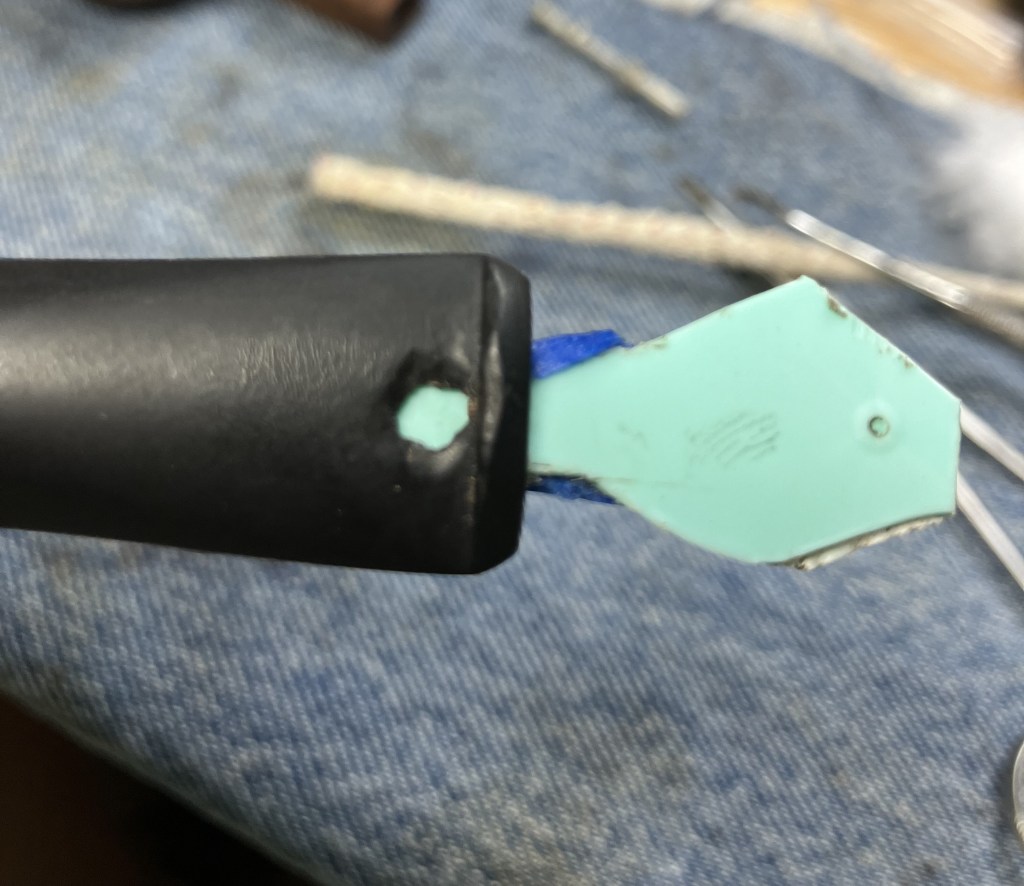
I added several layers of painters tape to thicken the dam to achieve a tight seal.

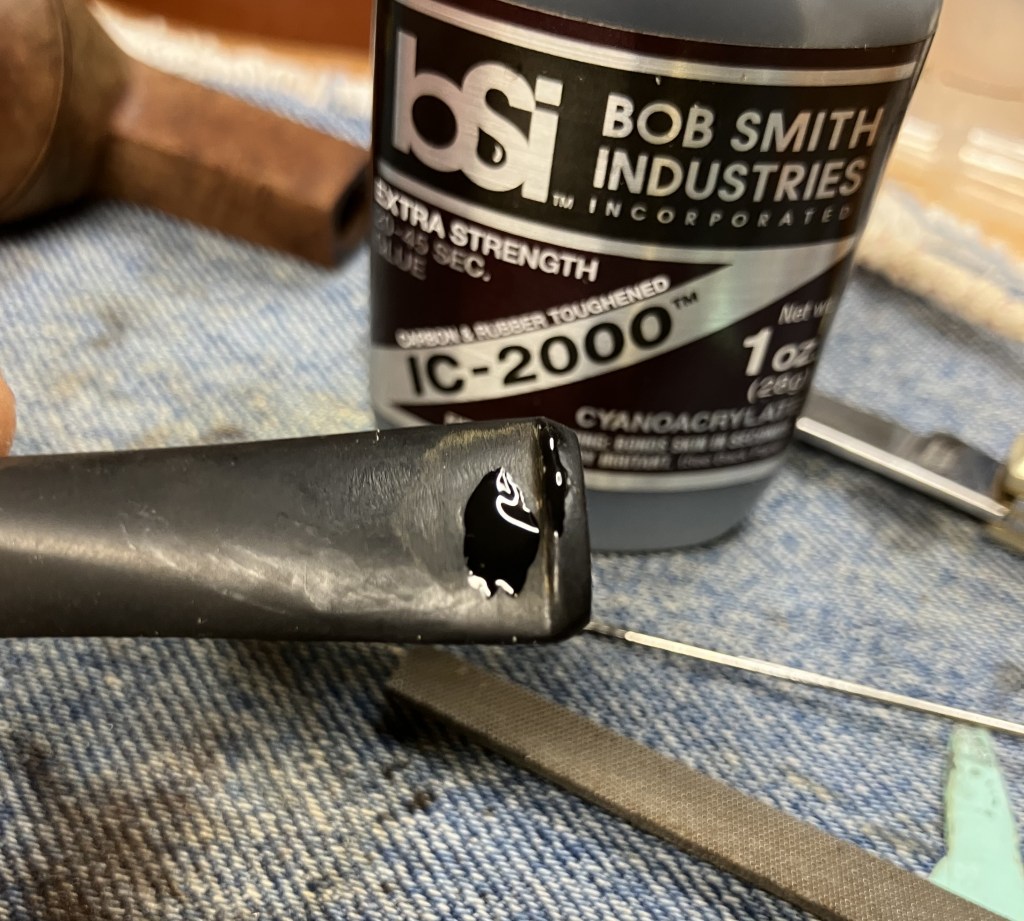
The Bob Smith black CA was the product of choice due to having rubberizing agents in the formula. This gives it a bit more flex than regular CA. I applied the CA to the gap with a fly tying bodkin. I intended to allow the CA to cure on its own but after 15 minutes, I got impatient and spritzed it with a CA drying accelerator. I removed the dam and squirted some accelerator into the airway as well to assist in speeding up the curing process.

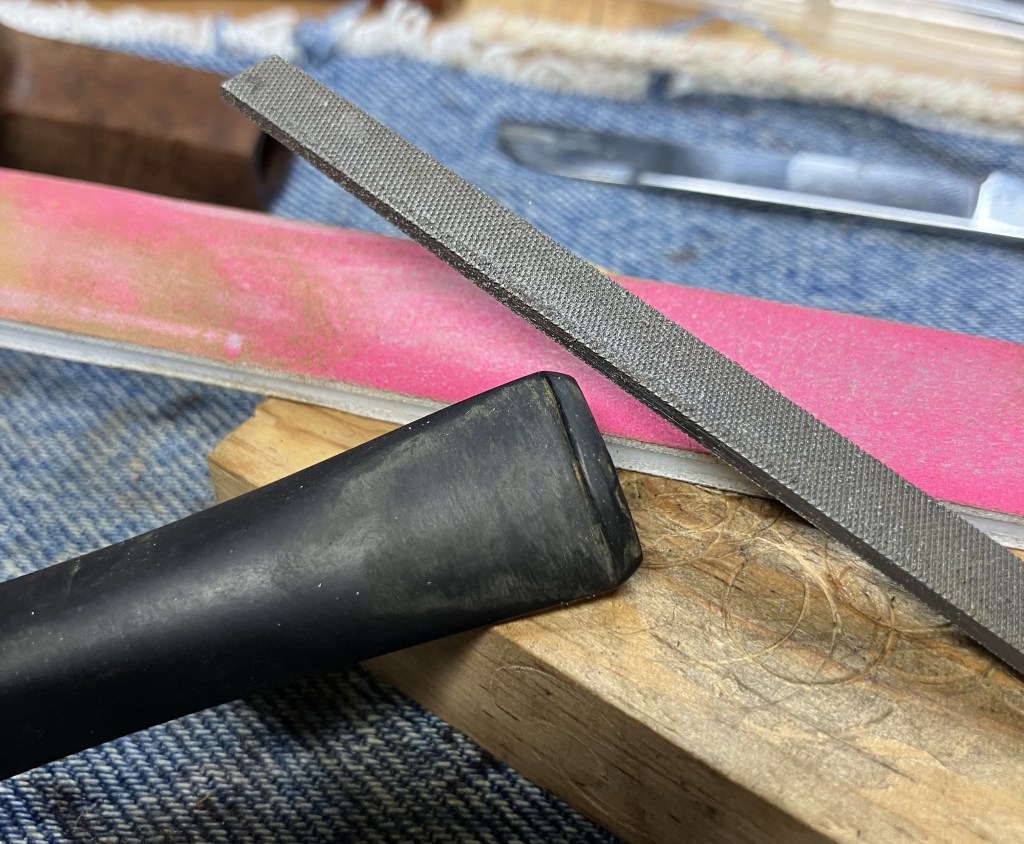
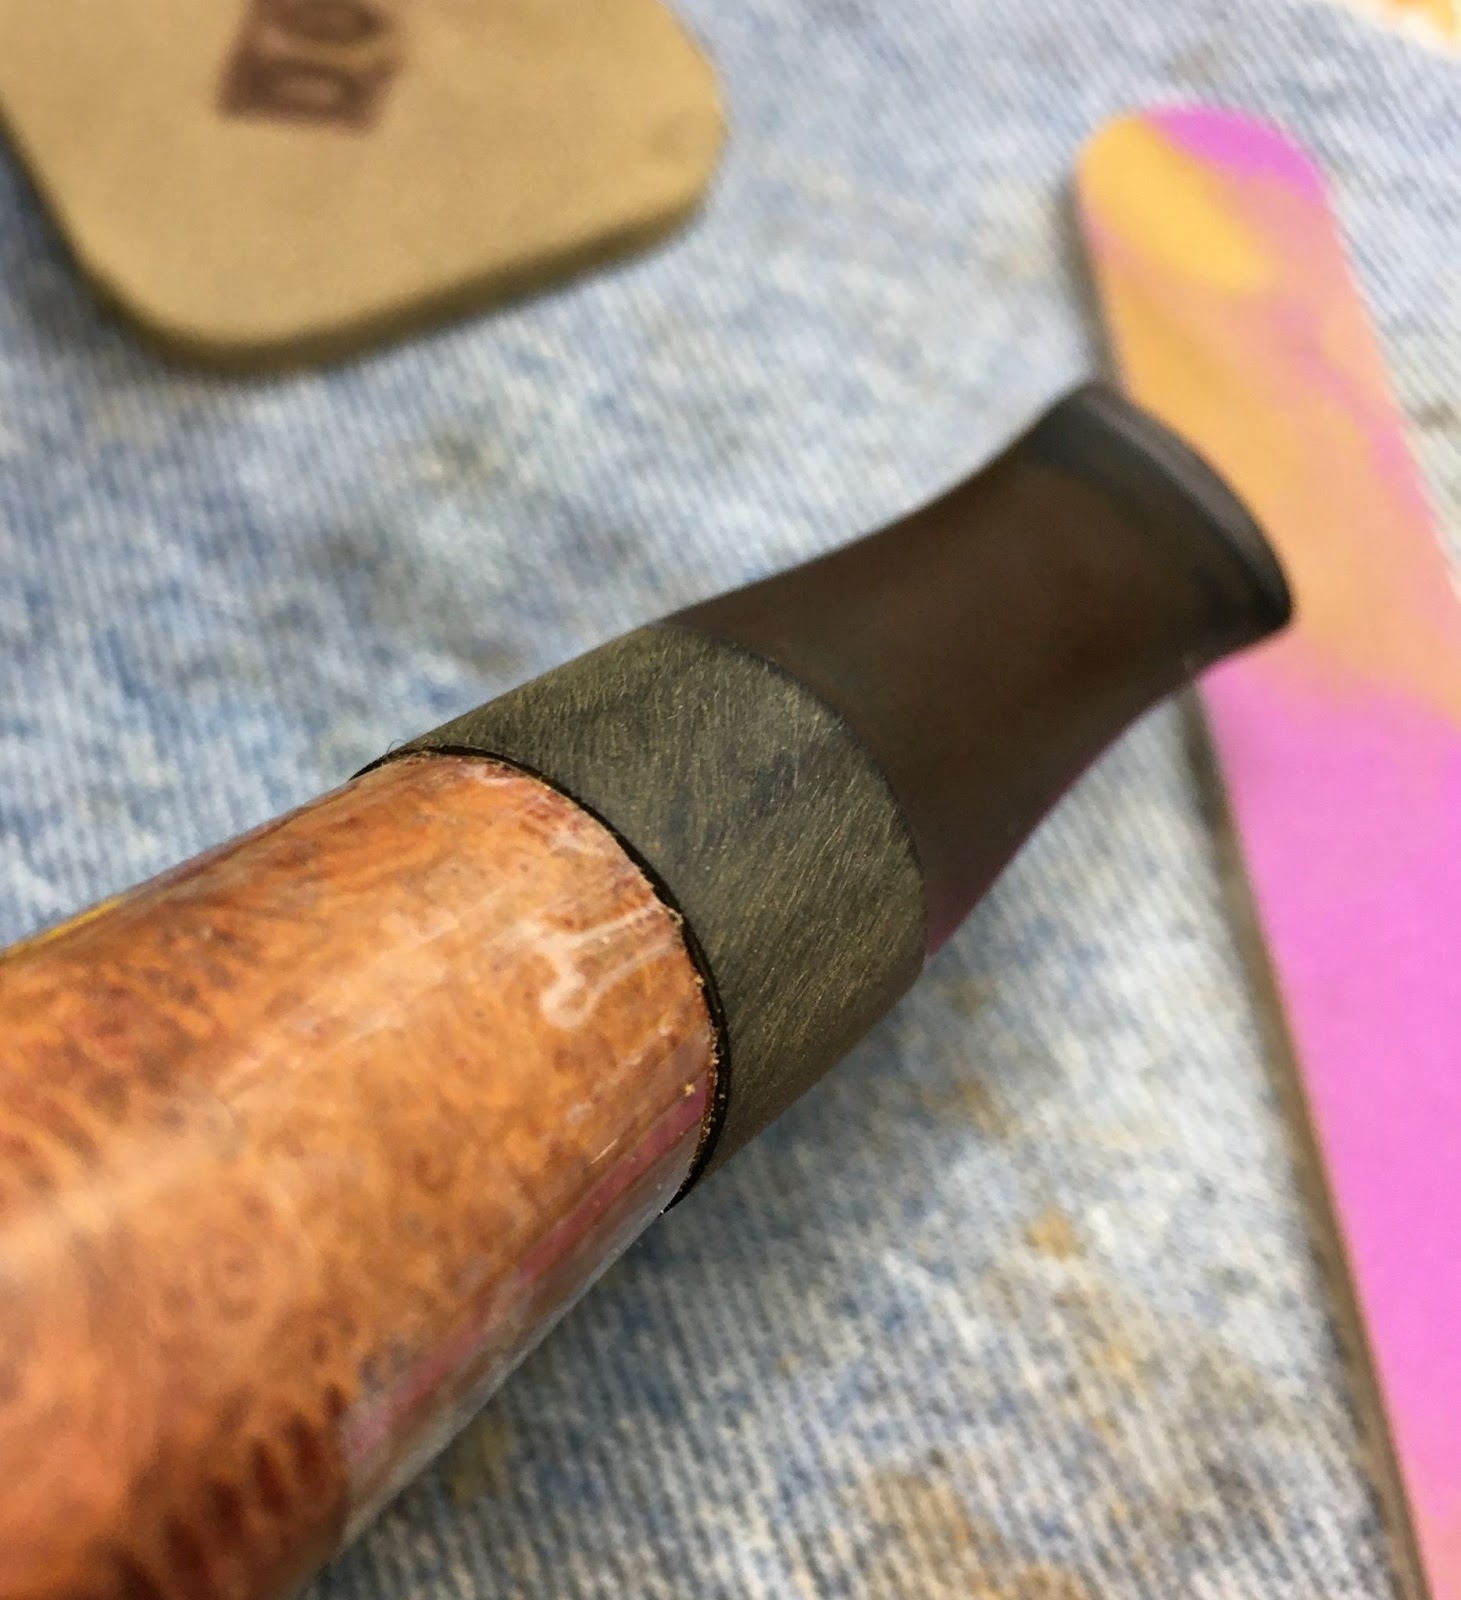
Once hardened, I filed the fill with a small flat file. There remained a small depression and the button also showed signs of wear.

A second application of the black CA to both the depression and the button edge was done with the fly tying bodkin.
Again lacking patience I spritzed the wet CA and sped the curing along.

The small flat file was again used to smooth the fill and reshape the button and an emery board for getting the angle of the button right.. Ahh, much better.
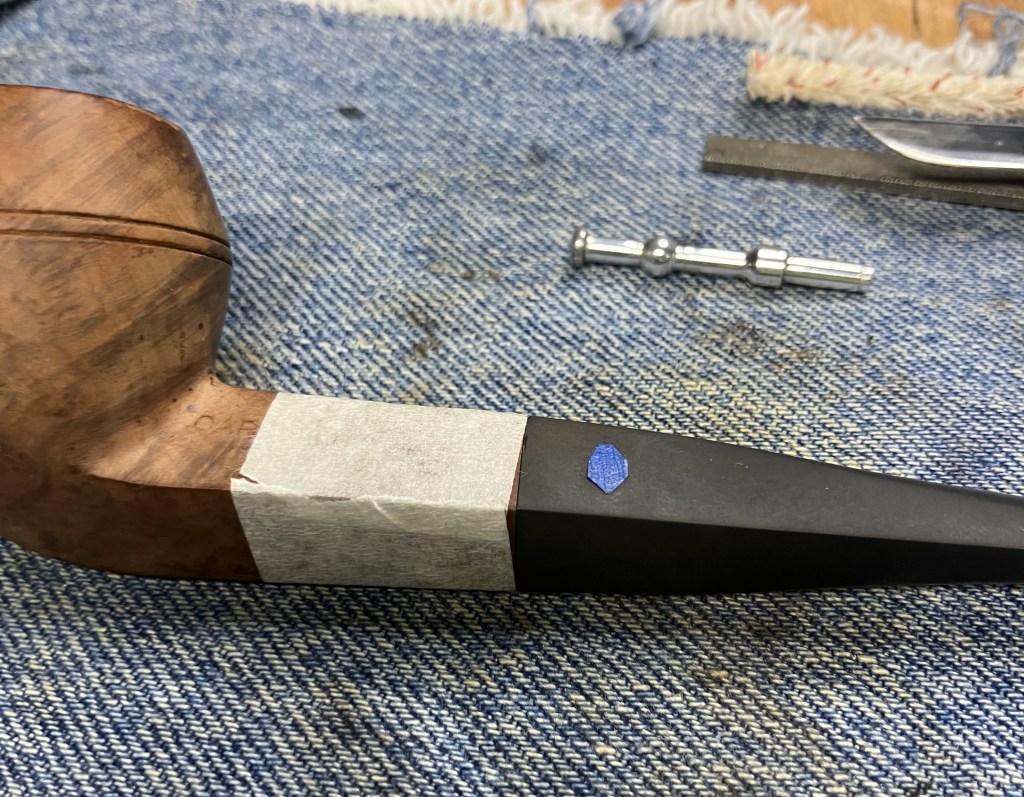
In preparation of the stem sanding, I covered the stem logo with a small piece of painters tape.

The shank was also masked off to keep the briar stamps from the evils of sanding.
The sanding was done with a series of sanding sponges in grits of 400-1500. Between each sponge the stem was rubbed with mineral oil and wiped with a paper towel. Yeah, the stem logo protector had to be replaced more than once.
The sanding continued with sanding sponges 2000-3500. The oiling and wiping were continued as well.

The next step in sanding/polishing the stem was a series of micro-mesh pads 4000-12000. After the 4000 pad, I removed the masking tape from the logo and cleaned the logo with alcohol.

The 4000-12000 micro-meshing continued. After each pad, I rubbed the stem with Obsidian Oil and wiped the stem with a paper towel.

The stem was looking very good. I now turned to the stummel. There were no areas which required filling but there was a damaged rim to address. The inner front of the rim was charred from a flame and the outer rear was damaged from dottle knocking. I planned on addressing these with a three pronged attack:
- Topping the rim.
- Using a wooden ball and sandpaper to establish an inner rim bevel, and
- Use CA and briardust to build up the damaged outer rim.

Here you can see how the triploid plan is progressing.

And a close-up of the outer rim reconstruction.

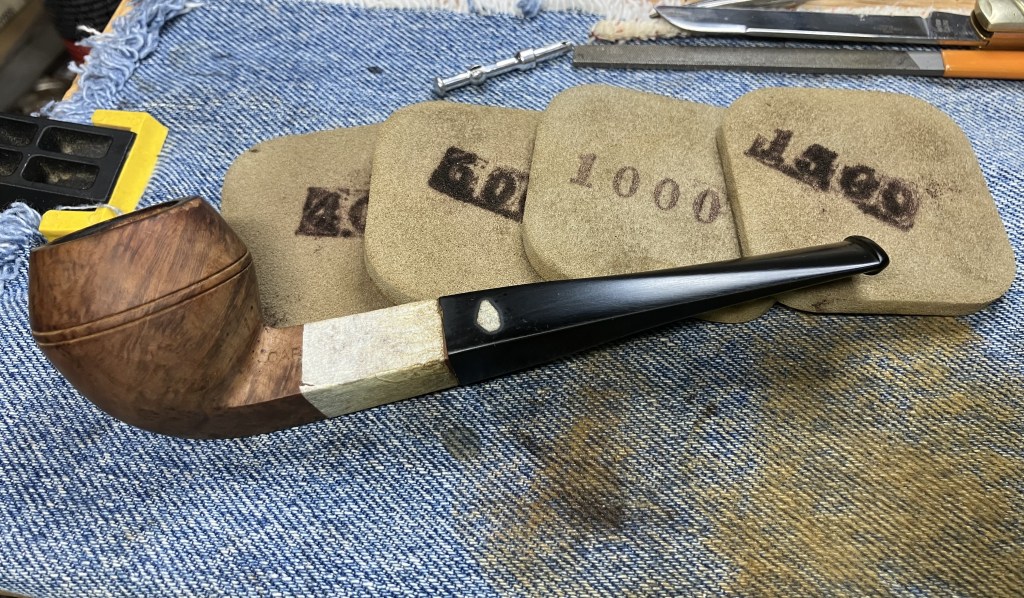
Time to sand the stummel. I used a series of sanding sponges here as well. O didn’t mask the shank as the stamping covered the whole length. What I did instead was not sand it. The sanding was only done on the bowl. Between sponges I wiped the sanding debris from the stummel with a make-up pad dipped in alcohol.
The final sanding was done with sponges 2500-3500 with the same wiping as earlier.

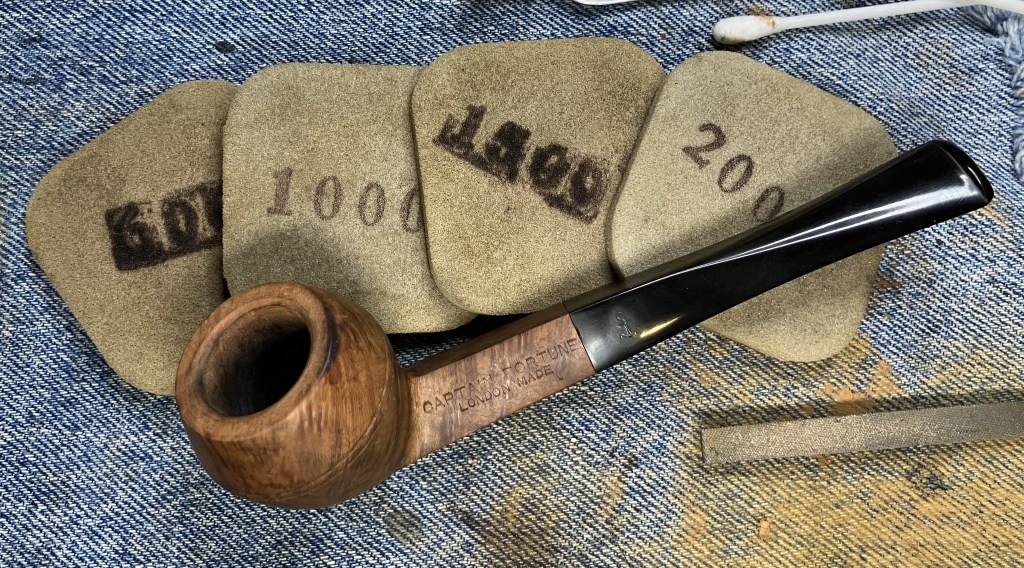
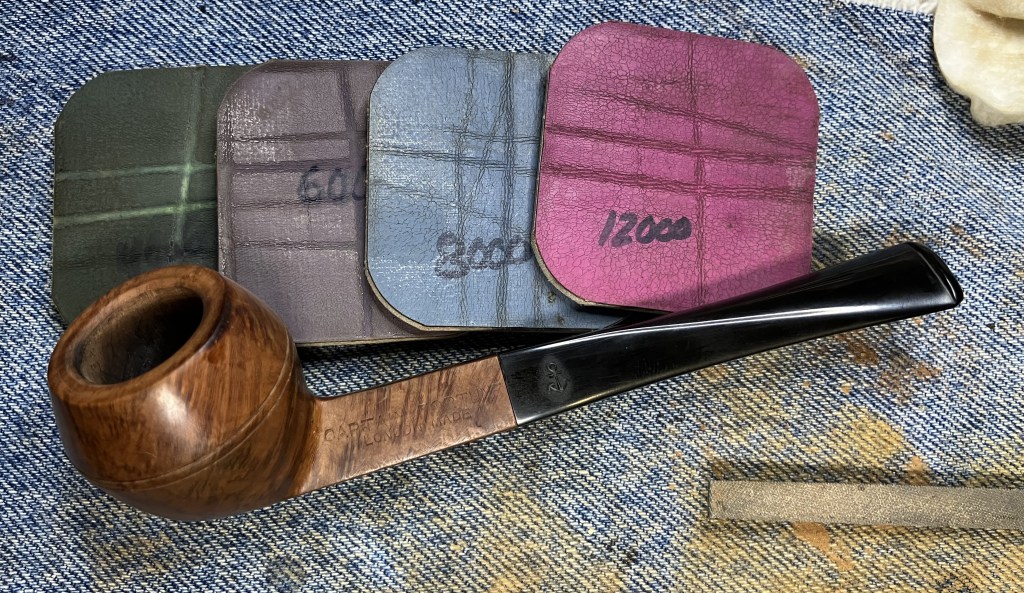
The briar was finally micro-meshed with pads 4000-12000. Between each pad I continued to wipe with the alcoholic make-up pad.
The stummel was then coated with Before and After Restoration Balm. This is another great product and since I gave a shout-out to Briarville, I feel I owe one to Mark Hoover as well. Restoration Balm can be found here: Restoration Balm | La Belle Epoque
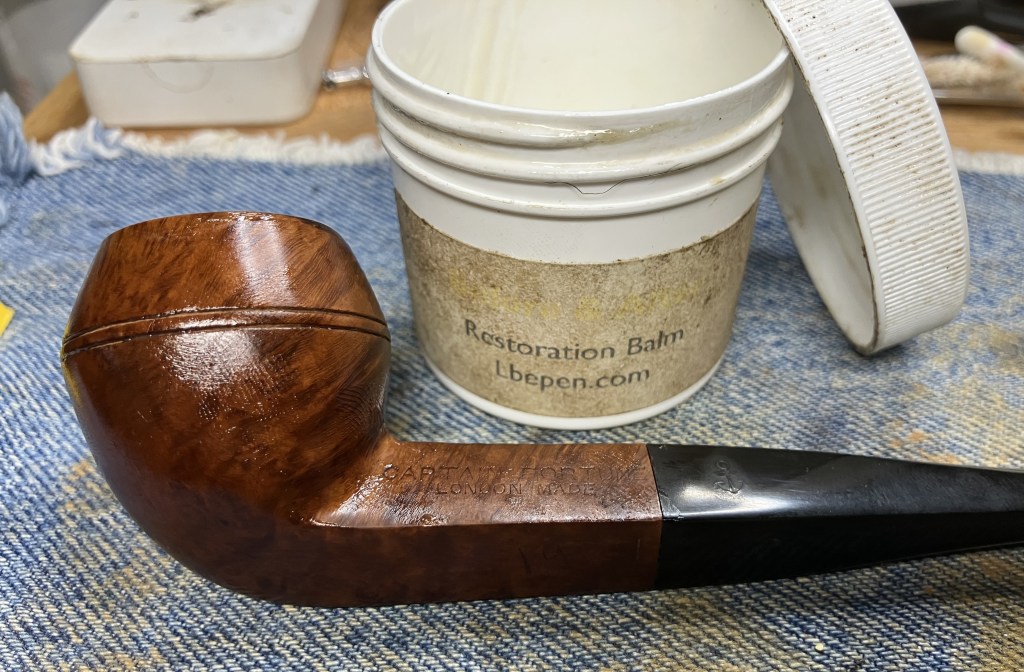
I waited about 30 minutes for the balm to do its magic before wiping the excess away using an inside out athletic sock.

The pipe was then taken to the buffer where it received several coats of carnauba wax.

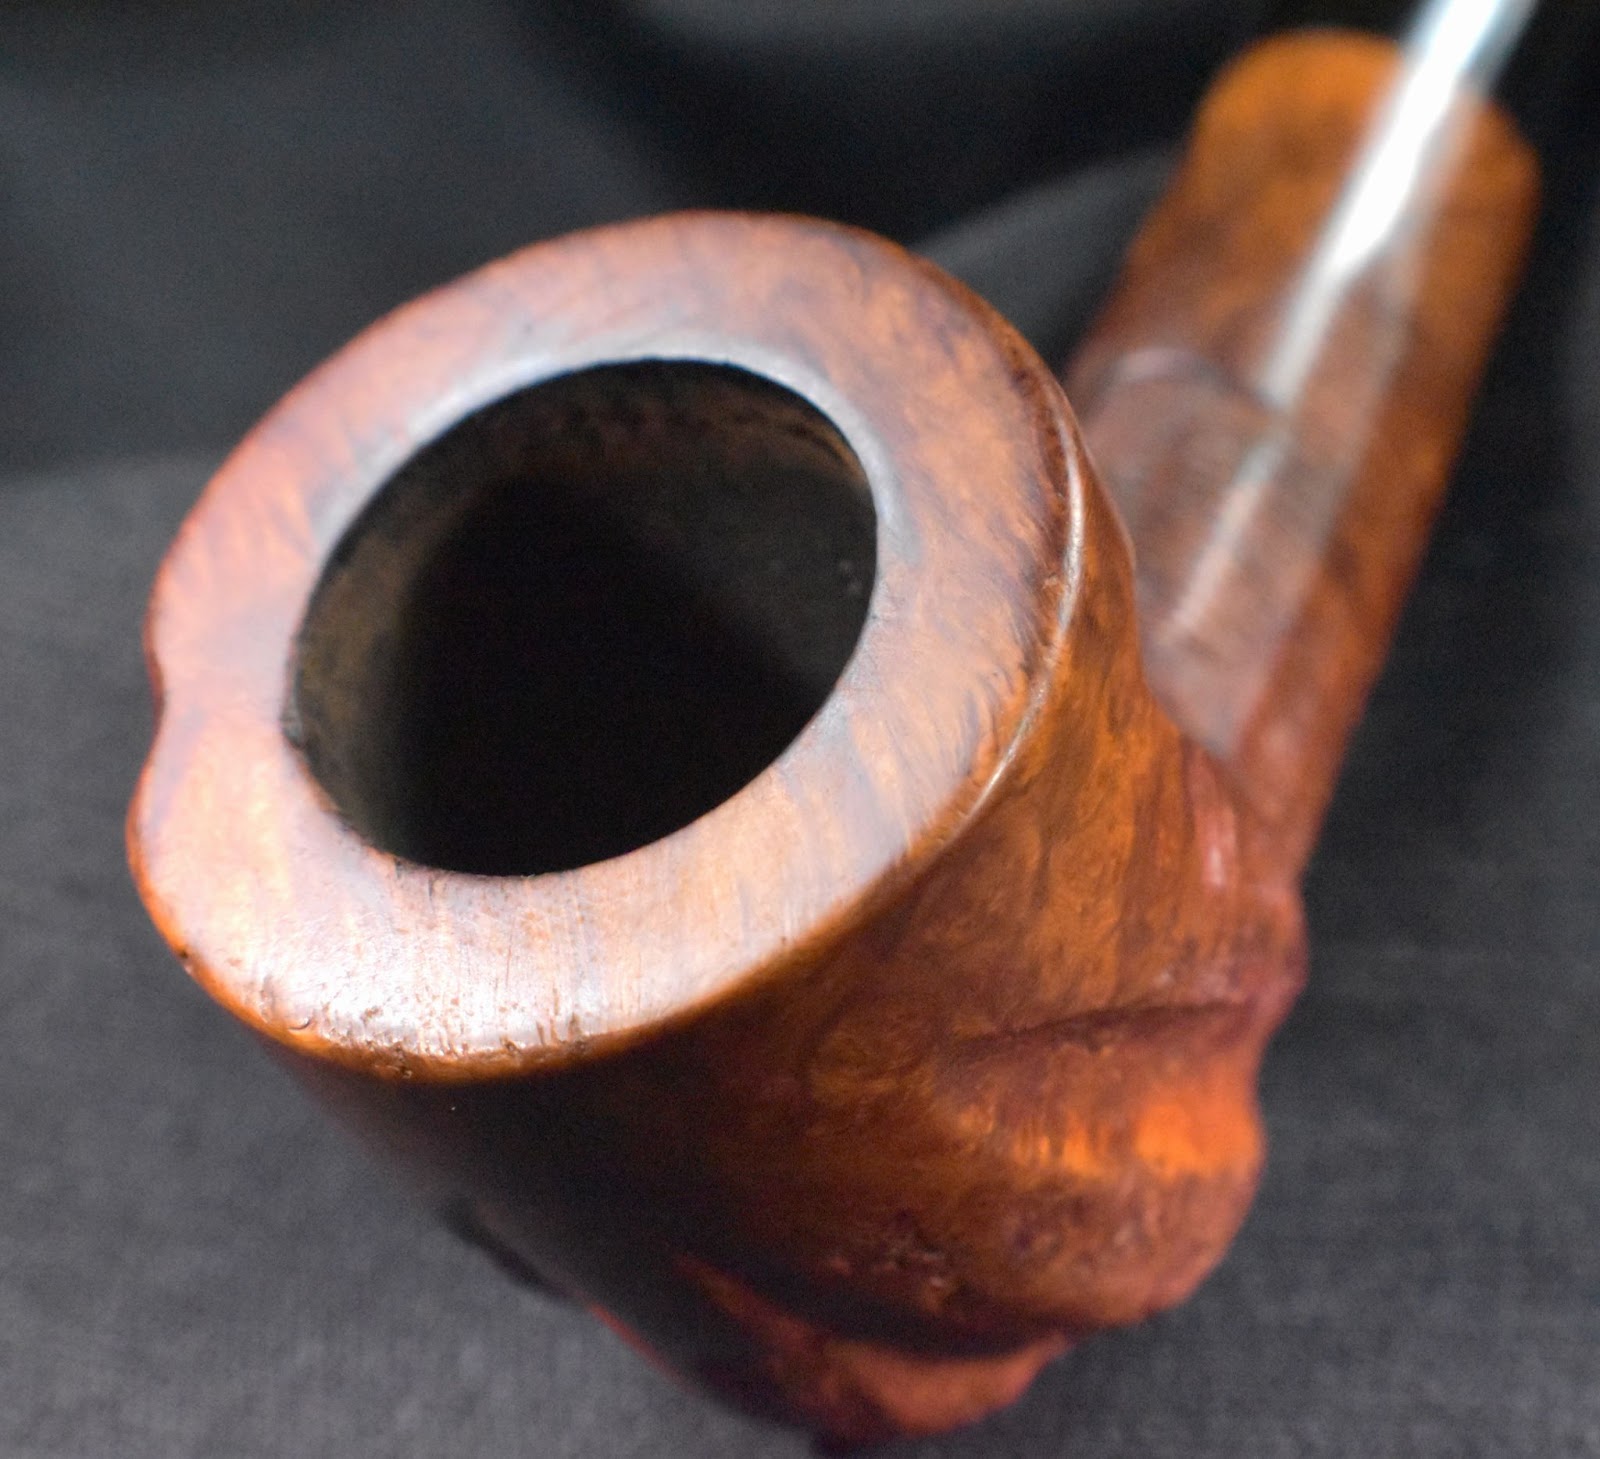
The final step was to hand buff the pipe with a microfiber polishing cloth. I then took the pipe to the photography table for the “finished” photos. Upon seeing that I forgot to do the bowl coating I immediately went back to the workbench. DOH! I used a cotton swab to apply a light coat of pure maple syrup to the interior of the tobacco chamber.
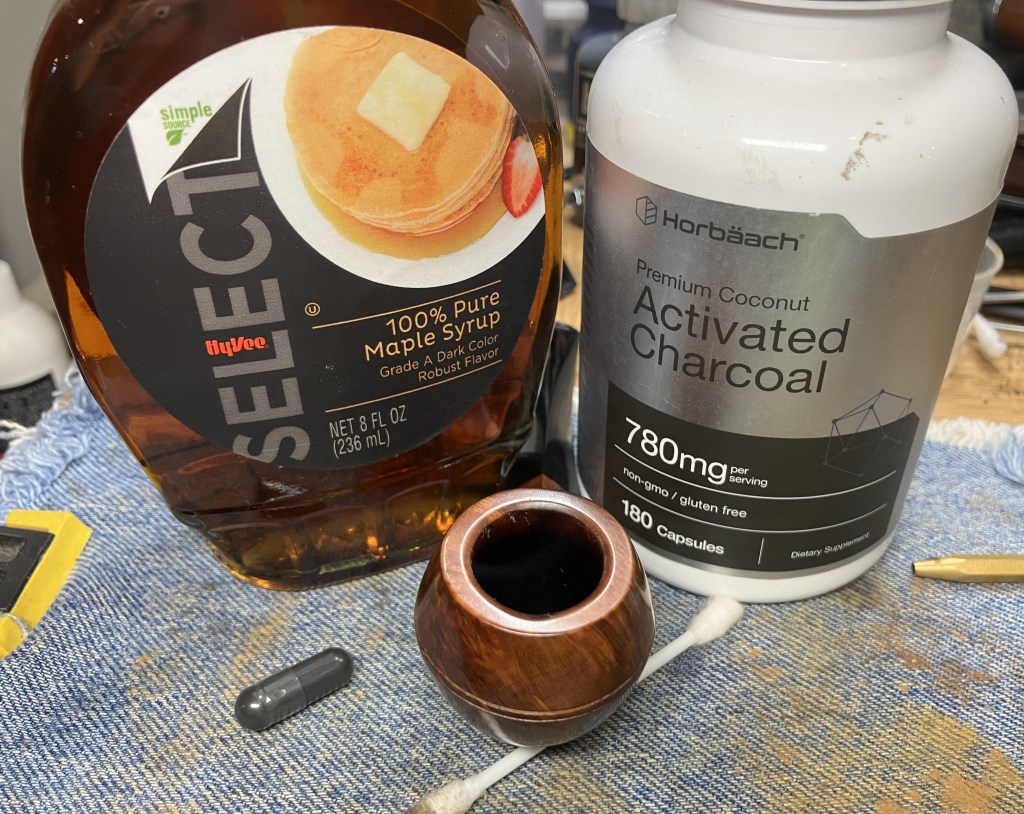
I then plugged the airway with a pipe cleaner and dumped about ½ of an activated charcoal capsule into the chamber. The rim was covered with a piece of painter’s tape. The stummel was then vigorously shaken for about a minute. The tape and pipe cleaner were removed then the stem reinserted and given a puff of air to clean excess carbon from the chamber.

The final touch was to hand buff the entire pipe with a microfiber polishing cloth, AGAIN.
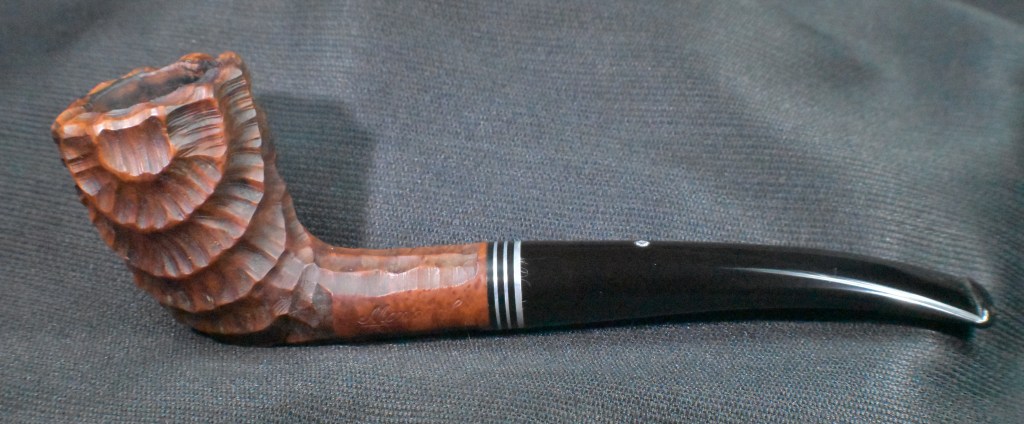
This pipe turned out beautifully. I am sure Rudy would agree. I decided to leave the etched name and date because it told a bit of history about the pipe. I doubt any one named Rudy will buy this pretty Captain Fortune but, you never know. The briar has lovely grain and a rich color. The stem polished up beautifully and I think the repair will hold and enable years of faithful use. The dimensions of this Captain Fortune Bulldog are:
Length: 5.60 in./ 142.24 mm.
Weight: 1.02 oz./ 28.92 g.
Bowl Height: 1.64 in./ 41.66 mm.
Chamber Depth: 1.42 in./ 36.07 mm.
Chamber Diameter: 0.72 in./ 18.29 mm.
Outside Diameter: 1.43 in./ 36.32 mm.
I do hope that you have found something here useful to your own pipe care, maintenance or restorations. If you like this sort of thing, please click the like and subscribe buttons. Thank you for reading the ramblings of an old pipe lover.
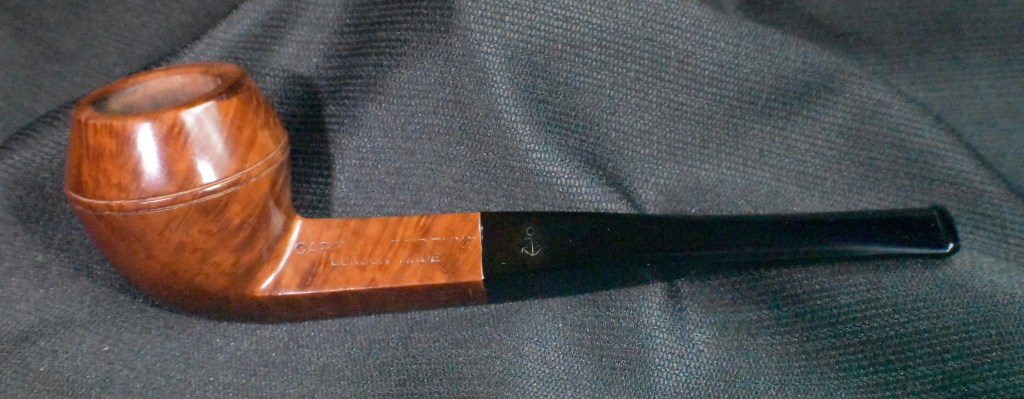
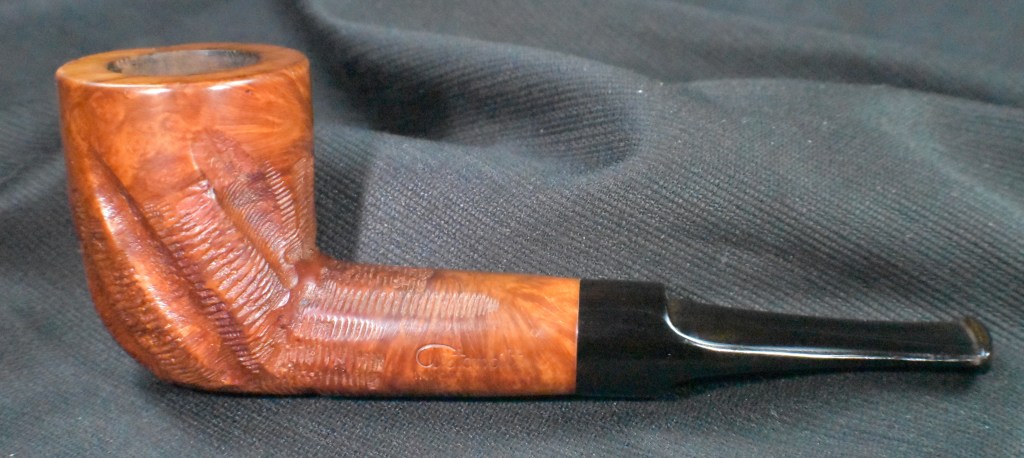
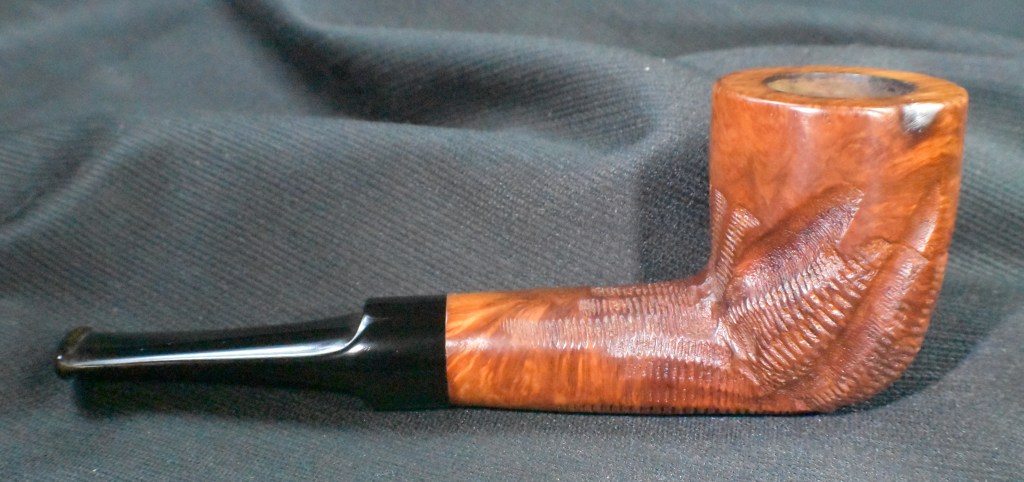
Below are some photos of the finished John Redman Captain Fortune Bulldog.

Yeah, those first two photos were taken before I realized that I had not done the bowl coating.


The above photo was also taken before the bowl coating was done.


 (
(


 I took all of the aluminum parts to the buffer and polished the metal using white buffing compound on the flannel wheel dedicated to buffing this the white compound. I neglected to photograph any of this process partly out of the embarrassment caused by the oxymoronic black colored white compound wheel and partially/mostly because I forgot to. At this stage in a restoration I find it very helpful to go fishing during the half hour before and after sunset. This vital break allowed the CA the curing time it needed and me a break from sitting on my lazy butt.


 I reattached the stem and tried the draw. Yikes! There was barely any airflow. I pulled the stem and tried it. The stem was clear. I looked into the mortise.


 (
(


