
Photographed and written by
John M. Young
I will probably catch grief for calling this a squat apple and be corrected by some saying it is a tomato or an author but to my eye, it looks like an apple and to be specific an Cortland Apple sans the anthocyanins and their red. Sorry, my previous life as a chemistry teacher emerged and demanded recognition. This plump little darling caught my eye along with its long shanked Marxman coconspirator. The eBay listing only had two photos, the below is a screenshot of one of them:

Those adorable chubby cheeks demanded that I buy the pair. There was a little bit of drama but I’ll leave that to the blog about the Marxman but after a few days wait, the E. Wilke and Marxman both arrived.
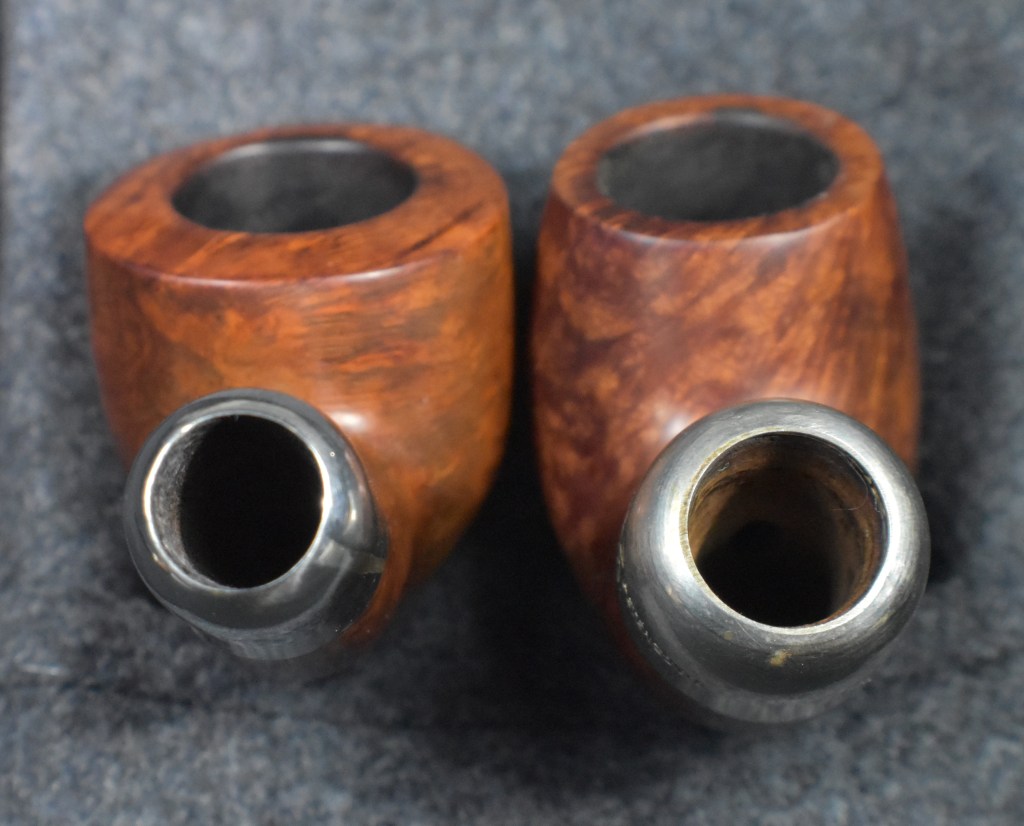
Below are some photos of the pipe prior to working on it.


Yeah, it had some issues but that shape, that amazingly round bowled shape. I was smitten. The stem looked like a Weber that had been left out in the sun. The pipe had obviously been smoked and showed the signs of moderate use, as shown by the charring and lava on the rim. There was also that strange dark streak of the right shank and that truly dreadful fissure on the bottom of the shank but those chubby cheeks could not be denied. I would reclaim this dilapidated doll and make her mine.
Background
E. Wilke stamped on the shank of this pipe refers to Edwin Wilke. According to pipedia.org,
“Edwin Wilke founded Wilke Tobacco in 1872. As the story goes, according to a 1937 New York World-Telegram article, he had no sons, and so he taught his two daughters, Anna and Louisa Wilke, how to make pipes and blend tobacco, and by his death in 1930 they were well versed in both trades, and adamant about only using quality briar. In 1950, when they were the focus of an article in the Sarasota Herald-Tribune, they were the only women pipe makers in the United States, and had sold pipes to Herbert Hoover, Lord Halifax, John Steinbeck and others. The sisters also blended pipe tobacco and repaired pipes. They did not, however, smoke pipes.
Wilke prided itself on “unpainted pipes”, and promised that only Macedonian briar was used, without paint, varnish, plug, or putty of any kind. As of 1950, some of their pipes were selling for up to $100.00, or just under $1,000.00 dollars today. By the release of a 1970 New York Magazine highlight of the shop, that claim had risen to $500.00, or over $3,000.00 today.
The Wilke Pipe Shop was located for decades at 400 Madison Avenue and 48th, in New York City, and in the 1970s opened a satellite store in the famed Wanamaker’s department store in Philadelphia, selling Wilke pipes made by Steven Johnson. In 1983, the brand was purchased by pipe maker Elliott Nachwalter and his wife, Carole Burns. They continued to operate the Madison Avenue store until the early 1990’s, at which point the couple moved to Vermont and Pipeworks & Wilke was born as a mail-order business.
Carole Burns[1] continued blending tobacco in Montpelier, Vermont till July 2017. Now John Brandt looks to continue blending Wilke’s traditional blends and bringing back some of the older blends from the early days to keep the 145 year old brand alive and growing.[2]“ (Wilke – Pipedia)
Now, this pipe did seem to fit a couple of the characteristics from the pipes.org article; it was unvarnished and it did not seem to have any putty filling imperfections in the briar. I cannot speak to the “Macedonian briar” as there is no stamp indicating the origin of the briar. I still think that the stem of this pipe reminds me of Weber made pipes from the same era. In researching further I found an old Google Groups discussion of E. Wile pipes from 2002. Here the user “” started a thread with the following,
“Can anyone give me a brief history about this manufacturer or brand? I
am curious about… if this was a NY company that made pipes, still in
business, overall quality…etc. thanks!” (https://groups.google.com/g/alt.smokers.pipes/c/w34OVfPNFfE?pli=1)
The interesting part came from another user named “LDaneman”. LDaneman, states the following”
“As a former employee and pipemaker for Edwin Wilke Company, I can give you a
little history. The little shop on Madison Avenue was purchased by a Stanley Becker, a jewish NY lawyer. Some pipes were left over from Wilke’s hey-day, . . . I forget the name of the Italian pipemaker who did extra-large art deco shapes.
Through the 80’s the old (80+) tobacconist still blended up on the 4th Floor
and I have fond memories of ‘time-traveling’ with him. The 524 blend was better
than Dunhill, and the 400 was pretty good as well. The key was an unflavored
golden Cavendish and a dark fine cut Cavendish in the 524.
I started a new pipemaking workshop in Philadelphia for Wilke’s concession shop
in John Wanamaker’s department store. Our pipes made national news and we
shipped tobaccos to European customers. My pipes sold from $65 to $1000 but our
main pipemaker was Stephen Johnson. Last I heard Steve worked for Zino
Davidoff.
Steve made some sweet smoking pipes and I smoke a few of my own make with the Wilke stamp, but still own a couple by Steve as well.
I was fired under dubious circumstances. The management of Wanamakers hated me since I successfully marketed Eltron razors when they failed, pens, and really
hit the roof when I began blending a men’s fragrance.
Wilke in Philly folded less than a year after my departure into the perfume
business and the New York shop was sold soon after that. I heard Wilke finally
vanished after the buyer was hit with unpaid employee taxes and was bankrupted,
but that is just a rumor to me, . . . I don’t know if that is true or not.
Most the Wilke pipes are not especially good, mass-manufactured by a factory
whose name escapes me. Unless made by the old Italian fellow (an indented tenon
is usually an indication of his make) or by Steve Johnson, . . . well just
forget it.
A grand history in the 20’s through 50’s. The 60’s brought on a slow demise.” (https://groups.google.com/g/alt.smokers.pipes/c/w34OVfPNFfE?pli=1)
In a later post LDaneman writes,
“. . . ., and if anyone is interested, most of the post Wilke sister pipes were
mass-produced by Weber pipe company. I think anyway. Trying to remember the
name of that company. They were crap and that’s why I set up the new pipemaking
shop on the mezzanine level at Wanamakers. It was in the original teak paneled
Tobacco Shop John Wanamaker used to hang his hat and coat in. Was lost when
they enlarged an underground parking garage.” (https://groups.google.com/g/alt.smokers.pipes/c/w34OVfPNFfE?pli=1)
Now, I have no reason to doubt anything that LDanman writes. The pipeda.org information indicates that the location of the Wanamaker’s in Philadelphia occurred in the 1970s and that LDaneman “Set up a new pipe making shop” on Wanamakers mezzanine. This too would likely be during the 1970s. His knowledge of the company is interesting but his jumping around in time, frustrating. The part about the Weber made pipes was particularly interesting as I thought the stem of this pipe looked like a Weber made stem.
The Weber connection is further supported by information again from pipedia.org,
“The firm grew to be one of the giants of the American pipe industry focusing itself in the middle price and quality zone. Trademark: “Weber” in an oval. Beside that Weber – especially in the years after 1950 – was a most important supplier for private label pipes that went to an immense number of pipe shops. Alone in New York, exactly the same pipes were found at Wilke’s, Barclay Rex, Trinity East, Joe Strano’s Northampton Tobacconist in Ridgewood, Queens, Don-Lou in Bensonhurst, Brooklyn… Nearly all pipes for Wilke were unstained and many models, for example the “Wilke Danish Bent”, could hardly deny originating of Weber.” (Weber Pipe Co. – Pipedia)
So, the question remains, “who made this pipe and when?” I honestly do not know. I feel pretty sure of my original thought that this was a Weber made pipe, likely from the 1970 or later. Produced for the E. Wilke company.
The Restoration
As usual the pipe made its way to the workbench and a clean denim piece. I actually undertook the restoration of two pipes during this project. That is not something I really like to do but my schedule has been filled with essential time sucking activities. Okay, I’ve been doing a bit of fishing and have not been at the workbench as much as I should.

The stem required some work before I could put it into the Before and After Extra Strength Deoxidizer solution (deox). This will be called pre-deox and involved; some scraping of calcium/oxidation, filing tooth dents and light sanding with a 400 grit sanding sponge.

The stem was also cleaning out internally with bristle pipe cleaners dipped in 95% ethyl alcohol.

The stem had trouble passing a pipe cleaner through the button so I did work on opening the airway a little bit. I used a tapered piece of an emery board to sand the interior of the airway.

The resulting airway was much better.

The stems of the two project pipes, the E. Wilke and another oval stemmed piece were suspended in deox with pipe cleaners as hangers. They each spent about four hours in the solution.

During this time I continued work on the E. Wilke stummel. The shank was cleaned out using a dental scraper, nylon shank brush, cotton swabs and pipe cleaners with 95% ethyl alcohol.

Once the shank was clean I turned to the tobacco chamber. The PiNet #1 and #2 blades along with the General triangular scraper and the Smokingpipes Low Country Reamer were used.

The below photo shows the results of each tool.

After reaming the chamber was sanded with 220 sandpaper wrapped around a wood dowel. The tobacco chamber showed no signs of charring or heat damage.

Next, the stummel went to the sink where it was scrubbed with undiluted Murphy Oil Soap and a nylon scrub brush. The soap was rinsed with warm water and the stummel dried with a cotton hand towel.

The scrubbing revealed an unsightly charred rim and a dark stain I thought was accumulated grime.

A second scrubbing of the stummel was done with no effect on the supposed grime.

Back at the workbench I got a good look at the two areas of concern. The charred rim would require topping and then some.

The rest of the stummel looked pretty good.

An alcohol wipe confirmed that there was no finish on the stummel.

I took the stummel to the counter where I laid a piece of 320 sandpaper flat on the counter.

Using a figure 8 motion I topped the rim removing the charred wood.

The results of the topping are shown in the photo below.

The charred area below the rim was lightly filed and I attempted to blend the filing to minimize the noticeability of the filing.

The dark streak on the lower right shank was some strange stain on the briar.

I have had good results using a saturated oxalic acid solution to bleach stains from wood and thought it might be useful for both the rim and the shank.

The oxalic acid was applied to the darkened areas with a cotton swab and allowed to sit for 20 minutes.

After the initial 20 minutes I applied more oxalic acid to the entire stummel. This was allowed to sit for another 30 minutes.

After the stummel was scrubbed a third time using Murphy Oil Soap and a copious amount of rinsing the stummel was dried using the cotton hand towel. Once dry the results of the oxalic acid were observed. The stummel looked better but not as good as I had hoped.

The darkened areas had been lightened but they remained darker than the surrounding briar.

I started repairing the blemish on the bottom of the shank. I know E. Wilke was proud of their “no putty” but that pit was unacceptable to me.

I applied brown cyanoacrylate (CA, super glue) to the pit with a fly tying bodkin.

A dental scraper was used as a spoon to scoop a small amount of briar dust and place it on the wet CA.

The back of the dental scraper was used to press the briar dust into the wet CA in the pit.

Additional brown CA was applied to the pit after the dust had been brushed off.

A second application of brown CA was applied once the first had cured.

After the second application had cured and set up, I filed the fill using a small flat file to remove the new fill material and smooth the surface.

The new fill was then sanded with a 400 grit sanding sponge.

I sanded the entire stummel with a 400 sanding sponge followed by a sanding with a 600 sponge. I was looking for additional spots which might require CA filling. I found none.

I figured the best way to conceal the darker areas caused by the charring or staining was to give the stummel a contrast dye. I thought a black undercoat of dye might be the perfect camouflage. I covered the stamp with painters tape hoping this would prevent the dye from dying the stamp area. It didn’t.

The stems were removed from deox and allowed to drip excess solution back into the jar.

The E. Wilke stem was vigorously rubbed with a coarse shop rag to remove both remaining solution and oxidized vulcanite.

The stem was then scrubbed with Soft Scrub cleanser applied to make-up pads. This removed more oxidized vulcanite.

Below you can see the E. Wilke and the other restoration victim. Both stems had been oiled with mineral oil after their Soft Scrub ordeals.

The dye kit was gathered. It consisted of Fiebing’s Black Leather Dye, a cork to keep dye from the tobacco chamber, a lighter and a pipe cleaner as an applicator.

The Fiebing’s Dye was applied and flamed, burning away the alcohol solvent of the dye and fixing it to the briar.
The stummel was then rinsed with 99% isopropyl alcohol and wiped with a paper towel.

Back at the workbench the results of the black dye can be seen. The dye penetrated the softer grained briar more than the harder grain. A light sanding removed the outermost layer of briar revealing lighter and darker areas due to penetration depth.

Below is a photo of the sanded stummel.

The stem and stummel were then sanded with a series of sanding sponges from 400-3500 grit. The stummel was wiped with an alcohol dampened make-up pad between each sponge while the stem was rubbed with mineral oil and wiped with a paper towel between sanding sponges.

The stem and stummel were then worked with micro-mesh pads from 4000-12000. Again stummel wiping with an alcohol make-up pad between micro-mesh pads was done. Between pads the stem was runned with Obsidian Oil and wiped with a paper towel.

The pipe was then taken to the buffer where it received several coats of carnauba wax.
The final step was a hand buffing with a microfiber polishing cloth.
Overall, I am very pleased at how well this E. Wilke pipe turned out. Though it is likely not an example of the highest quality E. Wilke pipe of the company’s heyday, still is a lovely little piece. The contrast stain did a good job of concealing the blemishes that the pipe accumulated over the years of use. The stem polished up nicely and the glossy black accentuated the light and dark grain from the contrast dye. The thick walls and the cheekiness that they provide are even more pronounced with the finished pipe than they were when it arrived and I think it is far more attractive now. The dimensions of the Carlyle Oval Shank Dublin are:
Length: 5.00 in./ 127.00 mm.
Weight: 1.08 oz./ 30.62 g.
Bowl Height: 1.42 in./ 36.07 mm.
Chamber Depth: 1.06 in./ 26.92 mm.
Chamber Diameter: 0.72 in./ 18.29 mm.
Outside Diameter: 1.58 in./ 40.13 mm.
I do hope that you have found something here useful to your own pipe care, maintenance or restorations. If you like this sort of thing, please click the like and subscribe buttons. Thank you for reading the ramblings of an old pipe lover.
Below are some photos of the finished E Wilke Squat Apple.


 (
(


 The “Donegal Rocky” (in quotation marks), released in 1945 or so, was Kapp & Peterson’s first rusticated line. Not that K&P hadn’t rusticated pipes previously, they just that they hadn’t devoted an entire line to rustication. And they were apparently proud of it, because they gave it a sterling mount along with a black finish and white-stamped P on the mouthpiece.
 It was part of K&P’s “Product Line,” what I call gateway pipes and others might call an entry-level pipe, as you can see in this shape chart from the 1945 catalog. Like the Shamrock (European version) and “K,” it was originally a fishtail line.

 It’s worth remarking concerning the removable stinger. This spike-ended aluminum tube is easily removed, leaving the P-Lip mouthpiece strictly a graduated-bore regulation affair.


 well, it was not much to go on and it looked like a stretch but, follow it, I did. The link was to a French pipe maker LMB. The only text was the following and it appears roughly translated from French to English: “From Les Pipiers Français — Histoire et Tradition. Gilbert Guyot


 (
(


Leave a comment