During the 1950s-1970s many popular tobacco companies would include offers for pipes in the packages of their tobacco. These coupon pipes include some of my favorites like the Dr. Grabow Westbrooks. These were pipes that were only available by redeeming the coupon through the mail. Amphora did the same. Below is the text from pipedia.org in reference to Amphora pipes:
“Amphora pipes are made in Holland by the Jos. Gubbels organization, the same company which makes the very well known and loved Amphora Pipe Tobaccos. The pipes are produced in relatively small numbers to a high standard and not commonly found. They were used primarily in promotions and incentives for Amphora tobacco.
The Royal Dutch Pipe Factory Elbert Gubbels & Sons B.V. is the only manufacturer of briarroot tobacco pipes in the Benelux countries where pipes of high quality are made under the brands Big Ben, Hilson, Royal Dutch and Amphora. They also supply numerous smokers’ accessories of high quality.“ (Amphora – Pipedia)
To think that someone around 1970 picked-up a pack of Amphora pipe tobacco, discovered inside a coupon/order form, filled it out and waited (8-14 weeks, most likely) for their prize. I can imagine the joy and anticipation when they opened the box to find the above Amphora 725 smooth finish bent billiard. They probably felt that this was a pipe made specifically for them as they got to choose the specific shape and finish.
Enough imaginative silliness. Let’s get to the restoration of this darling that came to me as part of an estate lot purchase from eBay. Shen the lot arrived this Amphora was not in factory fresh condition. It appeared as the photos below show.
The term ”well used” came to mind. I also wondered about the pipedia.org quote about “The pipes are produced in relatively small numbers to a high standard and not commonly found.“ (Amphora – Pipedia). Wondered about the 8 fills that I would have to deal with, that is. The inner voice chimed in, “Oh well, you were the one who always wanted to work on an Amphora.” “Yes, I do”, was my reply to myself.
I figured that I would start with the usual tobacco chamber reaming. This “usual” proved to be slightly less usual. Part of the material to be removed from the chamber was of spider origin. Undaunted, I continued with the PipNet reaming tool and the Smokingpipes Low Country reaming knife and General triangular scraper. The thick cake succumbed to the scrapings of the tools wielded by their primate operator. The chamber was further sanded with 220 sandpaper wrapped around a wooden dowel. The interior of the chamber had been protected by this cake and had not received any damage from the smoking of innumerable packages of Amphora pipe tobacco.
The rim was also scraped of some of its lava before heading to the sink for the Murphy’s Oil Soap scrub.
The Murphy’s was used undiluted and scrubbed with a medium bristle toothbrush. Particular attention was paid to the rim in an attempt at removing all of the lava. After the scrub the stummel was rinsed with warm water and dried with a cotton dish towel.
Returning to the workbench I could now see the damage done to the rim. Hmm, topping this rim would take at least an ⅛ inch or 3–4 mm off the top. I decided to give the rim a slightly “canted” appearance by filing the front off the stummel then reestablishing the beveled rim by sanding with a 1 ½ in PVC pipe cap topped with sandpaper. The newly sanded rim was then stained with Maple colored furniture repair stain pen. This was blended in with an alcohol soaked make-up pad.
I failed to take any photos of how well this worked at this stage of the restoration. You can jump down to the finished photos of the rim if you can’t wait. I don’t want to spoil the surprise for those with patience.
Next was dealing with the fills. I used a fly tying bodkin to pick out any fill material or to clean out the pits. None of them were really large fills, just little sand pits that I found annoying.
The easiest way to deal with them was to forcefully press briar dust into the pit and place a small drop of cyanoacrylate (CA, super glue) onto the briar dust filled pit.
Immediately after the CA was added I would press additional briar dust down onto the CA. There was still a small damaged area at the front rim which I also placed a dab of CA and then applied a pinch of briar dust. After all of these fills had cured I smoothed the CA off with a needle file then sanded with 400 sandpaper.
Next I started cleaning out the airway. This proved to be more troublesome than I initially thought. I don’t know why, I had seen the cake in the tobacco chamber and knew this pipe had seen heavy use. I guess “de nile” isn’t only for African geography students. The shank was heavily tarred. The short
version is; many alcohol soaked cotton swabs, a few visits to the sink with alcohol poured into the bowl and scrubbed with a nylon shank brush and more cotton swabs later the airway was cleaned.
The stummel was ready for finish sanding but the stem needed to be attached for that. This meant that the stem needed to be the next focus. There were no deep dents from clenching nor any significant tooth chatter. Oxidation
and calcium deposits were the only issues. I started by scraping the button edges with a sharp knife. Then gave the stem an energetic rub with 0000 steel wool to remove the calcium and outer oxidation. After the steel wool, I started rubbing the stem with Soft Scrub with Oxy-Clean on make-up remover pads. These came back with the dark golden brown indicating that they were removing oxidized vulcanite. I continued this until I was satisfied with the color of the stem. Since there were no dents requiring sanding I thought that I’d just use white diamond buffing compound and the buffer to polish the stem. It looked good so I gave it a drop of Obsidian Oil rubbed in with my fingers.
The stem was reunited with the pipe. I knew that I would probably scratch the just polished surface of the stem with the micro-mesh pads but was not concerned since the shank and stem would be smoothed evenly in the process. I masked off the shank stampings with painter tape and began with the 1500 micro-mesh pad. I used the pads dry in succession through the 3600. Between each pad I would wipe the stummel with an alcohol moistened make-up pad and the stem with a drop of Obsidian Oil followed by a paper towel. After the 3600 micro-mesh pad I removed the painters tape and cleaned off any adhesive residue with alcohol. I continued with the 4000-12000 micro-mesh pads again wiping with alcohol pads and Obsidian oil, as before.
At this stage I had what appeared to be a few spots of uneven color due to the sanding of the CA fills. The light spots were not very noticeable with the photos. Trust me, they were there. To address this I poured about 5 ml of 95% ethyl alcohol into a medicine cup. I then made a dye applicator from a pipe cleaner. I dipped the pipe cleaner into Fiebing’s Light Brown Leather Dye. I then stirred the 5 ml of alcohol with the dye soaked pipe cleaner. This acted to dilute the dye significantly. After stirring I applied the dye onto the stummel. I used two coats, flamed after the second coat. This was then wiped with an alcohol dampened make-up pad to blend the dye. It worked as planned, unfortunately I did not photograph this part. Apparently it was late and I blame sleepiness for my neglect.
When finished with the micro-mesh pads I slathered on a healthy coat of Before and After Restoration Balm and let it dry overnight. Bed time.
The next morning I wiped off the pipe with the inside of an athletic sock. I am beginning to think this may be the purpose for the terry cloth inside of socks. The pipe was really looking good. I took it to the buffer for several coats of carnauba wax on both the stummel and stem.
Overall the Amphora turned out very well. She is quite photogenic. The rich browns of the briar contrast nicely with the ebony stem and the grain patterns of the sides are mostly symmetrical and show off the swirls and bird’s eyes at the front. I neglected to repaint the logo. That will need to be done in the future. I have noticed two different colors when looking at old Amphora photos so, I am unsure as to which color would be more appropriate. I hope that you have found this restoration useful or at least entertaining. If you like this sort of thing please click the like and or subscribe, below. Thank you for reading the ramblings of an old pipe lover.
Below are photos of the finished (sans logo repainting) Amphora bent billiard.
The bulldog, easily one of my favorite shapes. The other day I was discussing my favorite shapes and I joked that my top 3 list of pipe shapes had 5 contestants. This ridiculous statement indicates my inability to choose only 3 or that my math skills are subpar. Either way the Bulldog or Rhodesian is definitely on the list. The subject of this blog is a Marxman bent bulldog The shape comes directly from the Marxman catalog, circa 1945:
This Marxman bent bulldog was purchased individually on eBay. Yes, there are some people that purchase a Marxman pipe individually and not just one of an estate lot. I get the impression that there is a prevailing idea that Marxman pipes are pipes of lower quality. Let us examine some common claims:
Marxman pipes were cheap.
Marxman did not produce any $.50 to $1.00 pipes. Judging by the Marxman catalogs and print ads $2.50, $3.00, $5, $7.50, $10and $15 were the 1945 prices of Marxman pipes. $1 in 1945 = $17 today thus, $42-255 in today’s dollars. (https://www.bls.gov/data/inflation_calculator.htm)
Look at the time frame. Marxman started the company in 1934 and sold it to Mastercraft in 1953. Other than the first 5 and last 5 years, World War 2 affected the ability to access Mediterranean briar. (Marxman – Pipedia)
I have Marxman pipes with many fills and with no fills, indicating that they used the briar that they could obtain.
I have yet to find a Marxman pipe that has more fills than I have birthday candles on my cake. Yeah MasterCraft, that is aimed at you.
Marxman pipes are less than attractive (AKA Ugly). Okay, I’ll give you that one.
Marxman used those ugly worm trail carvings to hide cheap briar.
Perhaps those carvings are the best way to work the soft Algerian briar that smoke so well.
Algerian briar is of poor quality.
Now that is a loaded statement. Search any pipe smoker forum for “Algerian briar” and you will find opinions as to it being the “best” to “barely fit for pipe making”. I have examples of exceptionally smoking pipes made from Algerian briar.
As for this Marxman Super Grain Bent Bulldog I can say that it was made in New York City (Marxman Pipes Inc., was located at 27 West 24th St. New York 10, NY.) between the dates of 1934-1953. (Marxman – Pipedia).
When this Marxman arrived it looked like this:
Everything a guy who loves to restore old pipes would possibly want. It is going to need the following: Tobacco chamber reaming, rim topping, scratch removal, fill replacement, button reconstruction, figure out why the stem won’t go in all the way, general cleaning and surface restoration. Better get started, eh?
The first thing I addressed was the stem issue. Looking down the airway with a flashlight I could see lots of yuck. Yuck is the technical term for any unwanted smoking residue. I don’t think I had ever seen chunks of yuck
before but they were there. I used a dental scraper and a drill bit (slightly smaller than the mortise drilling) to clear the mega-yuck. Mega-yuck is a newer technical term used to describe large pieces of yuck. When the stem was reinserted there was still an undesirable gap. Hmm, I’ll check it again after the reaming and scrubbing.
That was a nice segway to the next task, the reaming of the tobacco chamber. I used the number two sized blade with the PipNet reaming tool to clear the
majority of the chamber. The Smokingpipes reaming knife and the General triangular scraper were also used to rid the chamber of the cake. This was followed by a sanding of the interior with 220 sandpaper wrapped around a wood dowel and sandpaper on my finger. When finished I could see no damage to the interior of the chamber. I also scraped the rim lightly with the General scraper to remove the worst of the lava.
Next stop on the tour is the sink, for a Murphy’s Oil Soap scrub. The Murphy’s is used undiluted while the scrub is done with a medium bristle toothbrush. This eliminated the years worth of accumulated dirt and grime from the exterior of the stummel. The rim still retained blackened areas. I was hoping that they were lava but I could now see some of it was charred briar from lighters and/or matches. The stummel was rinsed with warm water and dried with a cotton dish towel.
I returned to the workbench and gave the stummel a wipe with a make-up removal pad soaked in 95% ethyl alcohol. The pad removed very little, only showing a yellowish smudge after the wipe. This indicated that there was little to no finish remailing and that the stummel was natural, not dyed/stained. I allowed the stummel to dry while I turned my attention to the stem.
Earlier in the day I had given the reaming knives and pocket knife a diamond stone sharpening. I used the pocket knife to scrape the surface of the stem. I did this holding the blade 90 degrees to the surface of the stem. I very lightly brought the blade towards me. This works very similar to a woodworking card
scraper. An amazing device that allows a woodworker to remove very thin layers of material. I was able to scrape the calcium deposits and the outermost oxidation from the stem. I then used 0000 steel wool to further smooth the surface.
I wanted to deal with the charred rim next. I used a technique described to me by a Germain Facebook buddy, Sascha Mertens. He said to rub the charred area with petroleum jelly then lightly scrape it with a very sharp knife edge. By doing this very slowly and carefully I was able to remove a very thin layer of
charred wood. I would wipe the blade on a make-up pad and repeat. When additional petroleum jelly was needed I applied more. Once finished removing the charred areas I very lightly topped the rim using 400 sandpaper.
Next on the agenda was to clean out the airway. The stem was removed. The stinger was removed from the stem and dropped into a medicine cup with alcohol. While the stinger was soaking I dipped a pipe cleaner in the 95% ethyl alcohol and ran it through the stem. It came out very dirty. Where the alcohol touched my finger on the stem the surface felt slippery then tacky. Wait a minute! This is not vulcanite. As the alcohol evaporated I was left with a fingerprint on the stem where my finger had been. Okay, no more alcohol for you, stem. I switched to cleaning the stem with soap and water with the pipe cleaners. I am guessing that the stem was Bakelite or a bakelite-like material.
With the stem done I started cleaning the stummel airway. It too was rather filthy. Oh yeah, I remember the yuck and mega-yuck from earlier. Well, it hadn’t gotten andy better. I started with a cotton swab dipped in 95% ethyl alcohol. It returned dark brown. I figured that I could continue with a kajillion more cotton swabs or I could pour 3 ml of the alcohol into the bowl and use the nylon brush to scrub the yuck in an alcohol bath. I went with the alcohol bath and brush route. I scrubbed for a while, dumped the alcohol out, assessed the color and repeated with clean alcohol. I did this 4 times before the alcohol came back not looking like black coffee. Once it was more teacolored I switched over to the cotton swabs. After about 10 swabs the shank airway was clean.
The pipe was reassembled without the stinger, wiped with alcohol and photographed. The post-scrub Marxman was looking significantly better. As a bonus the stem now fit snugly with the stummel. Small victories are accepted without question.
Next, that ugly fill by the stem had to go. There is just something about
those pink fills that makes me a bit crazier than normal. I used a fly tying bodkin to see how securely attached the fill material was. Yay, I popped right out.
It was deeper than I thought but was not worried about the structural integrity of the proximity to the mortise edge. Wow, that sentence made me sound all kids of intelligent – I will stop that at once. Yes, it was close to the edge but the replacement fill of cyanoacrylate (CA, super glue) and briar dust would be far stronger and better bonded to the briar than the pink goo (goo, a technical term describing anything either black or pink in pipe restoration) ever had been.
To fill in this larger pit, I placed a large drop of brown CA onto a small plastic lid. I then placed a pinch of briar dust next to the CA. Using the fly tying bodkin I dragged some briar dust into the CA and stirred the dust into the CA. I repeated this until the CA/dust had a consistency of syrup. If you add too much dust the magic smoke will rise from the mixture and it will set up immediately. This requires you to start over. (So, I hear…). Upon starting over and repeating the mixing, I then applied the mixture to the area needing to be filled with the bodkin. The CA set-up very quickly and allowed filing and sanding within minutes.
Tape applied to the stem to protect it from filing.
Once filed flat the tape was removed.
Sanding with 400 sandpaper.
This little sand pit was filled by placing a small drop of brown CA in the hole. A small pinch of briar dust was placed onto the CA and pressure was applied to the dust, forcing it into the hole. The CA set-up immediately filled the pit and C.A. Filmore was born. The small fill was then carefully filed smooth and sanded.
Hello, my name is C.A. Filmore and I will be your tour guide. Hmm, you may want to use nitrile gloves.
To rebuild the button I used a technique that I have not seen other restorers use. I first smoothed the area below the button with 400 sandpaper.
Scotch tape applied to the stem immediately below the button.
Black CA applied to the button to build-up the area.
The CA was spritzed with accelerant and “cut” at the back of the button with an Exacto knife while the CA was still soft. You only have a few seconds between the spritzing and the curing of the CA. The “cut” needs to be made during these critical seconds when the CA is still soft.
Scotch tape removed along with the CA that was “cut”.
The new button is shaped with needle files and sandpaper.
With the fills filled and the button rebuilt, all that remained was the micro-meshing of the stummel and stem. I kept both pieces attached during this process in order to keep the hard angles of their juncture. The 1500 and 1800 micro-mesh pads were moistened with a drop of water. Between each pad I would wipe the stummel with a make-up pad moistened with alcohol and would apply a drop of Obsidian Oil to the stem, work it in with my finger and wipe it off with a paper towel. I would then move to the next micro-mesh pad. The finer micro-mesh pads were all used in sequence, dry, with the same wiping with alcohol and oil to the stummel and stem respectively.
Upon completing the micro-meshing I applied a slathering of Before and After Restoration Balm to the pipe (stummel and stem) and allowed it to marinate for 20 minutes.
After the Restoration Balm had done it’s thing for 20 minutes, I removed the excess with a clean cotton rag. The pipe was really looking good. I took it down to the buffer for several coats of carnauba wax.
This old Marxman Super Grain bent bulldog turned out amazingly well. I did give it a smoke and that too was amazing. I do not know what it is about Marxman pipes but, the pipes made in New York from Algerian briar are some of the finest smoking pipes I have ever used. They remain cool, require no break in and deliver a sweetness that is just amazing. I hope you have found some of the techniques used here helpful in your own restorations or were at least entertained. If you enjoy this sort of thing please hit the like and subscribe below. Thank you very much for reading the ramblings of an old pipe lover.
Here are some photos of the finished Marxman Super Grain Bent Bulldog:
I recently won an auction for 6 Kings Cross pipes. They are a mixture of 2-Made in England, 3-Made in France and 1-no Country of Manufacture (COM) just “ALGERIAN BRIAR”. I have chosen this billiard as the next restoration subject. Below are the photos of how it appeared as I removed it from the box:
This pipe needs many things done to bring her up to snuff: Reaming, rim topping and bevel, airway cleaning, stem sanding with button building, briar and stem refurbishing and a good waxing. I accept this mission.
In a previous pair of restorations (Kings Cross Kruger and Kings Cross Foursquare) I discussed the Chapuis-Comoy history and this pipe shares that heritage. This Kings Cross is of a French country of Origin (COM) as indicated by the stamp on the stem. It is unfortunate that this stamp is so faint. I know it will not survive the restoration thus any COM will be lost. I guess I can take some solace in knowing that her history will be preserved with this blog and I can pass that on to the next steward of this pipe.
As for the provenance of this pipe we can look at the shape number “185” and take a look at the Comoy shape chart from pipedia.org:
That looks like a match, to me. This is indeed a large billiard with a straight stem. Both Comoy and Chapuis used the same shapes when they consolidated their production in 1988. Which means that this old girls was a product of the Chapuis factory of Saint Claude (http://www.pipephil.eu/logos/en/infos/chapuiscomoy-en.html) .
On to the restoration. Other than the stem, which looks like some arseling tried to use a vice grip to see if he could squeeze the smoking residue from the stem rather than use a pipe cleaner, the pipe looks pretty good. There are two noticeable pits that will require filling and the damage to the rim from the previously mentioned arseling knocking the dottle from the pipe against pieces of broken concrete.
I began by reaming the tobacco chamber using the 3rd size blade on the PipNet, it is a “L” for large.
The Smokingpipes Low Country reaming knife and the General triangular scraper were also used after the PipNet. This was followed by 200 sandpaper wrapped around a wood dowel and with sandpaper on my finger. The interior of the chamber looked great. I used the edge of the knife to lightly scrape some of the lava from the rim.
Next the stummel went to the sink for the Murphy’s Oil Soap scrub. I used the Murphy’s undiluted with a medium bristle toothbrush. The stummel had years of dirt and grime attempting to hide the grain beneath. I spent a bit of extra time on the rim to address the lava remaining there. The stummel was then rinsed with warm water and dried with a cotton dish towel. Returning to the workbench I saw that there remained some stubborn lava on the rim. I worked on this with saliva and a cotton rag until I realized how dumb, I was behaving. “Hey dummy, you are going to top that whole rim.” Hmm, good thing I have a kind and loving internal voice. I returned to the sink, since that is where the counter I use for topping is. I used a piece of 200
sandpaper laid flat on the counter to top the stummel. As I sanded I rotated the stummel to maintain even pressure around the entire rim. After the topping I wanted to maintain the bevel on the inside of the rim. I used a
wooden sphere wrapped in 200 sandpaper to reestablish this bevel. Different sized spheres can be used for different angles. After the topping the new rim needed a bit of stain. I used the walnut furniture touch-up marker for the initial color match and blended it with an alcohol dipped make-up pad.
With the rim complete I turned my attention to the two spots requiring fills. They were both small but in positions that would require care to maintain
the original shape of the stummel. I chose to use cyaloacrylate (CA, super glue) and briar dust. I used a fly tying bodkin to apply a small drop of CA to the hole and placed a pinch of briar dust onto the CA. I then pushed the briar dust into the hole. This usually fills the cavity in one application and will give you a nice little CA fill spot on your index finger. The CA cures almost instantly with the briar dust and pressure. The remaining scab, for lack of a better term, was filed off using
needle files. I used the flat file for the flare area on the right fill and curved and rounded files for the shank/bowl transition. The area is then sanded with 400 sandpaper and touched-up with the furniture touch-up marker.
With the fills dealt with I started in on the roughest parts of the stem. I used the flat needle file to smooth the most egregious gouges on the stem then sanded them with 200 sandpaper wrapped around an emery board. I wanted the stiffness of the emery board to keep me from sanding the gouges into a curved shape. After the worst of the gouges were removed there remained a couple of depressions on both sides of the stem. I filled these with black CA. The CA was spritzed with a curing accelerator then filed smooth with the flat needle file. These areas were then smoothed with sandpaper.
At this point I decided to build up and shape the button of the stem. I again used the black CA for this reshaping. On previous restorations, I have neglected to photo document my process of button building. This is not to preserve my “secret technique”. It is merely because I get to working on this part and get so consumed in the process that I forget to document it. This time I made an effort to show what I do. I will typically shape and sand the area shank-ward of the button. Once smooth, I use a piece of scotch tape to keep the new CA only on the button.
I apply the black CA and spritz with accelerant. You have a few seconds when the CA is soft, before the accelerant cures the CA into it’s hardened form.
While it is still soft I use an exacto knife to cut the edge of the button giving it a sharp definition towards the stem. I then peel the scotch tape off, taking with it the area beyond the cut. I will then shape the new CA button. I will repeat this until I have the desired shape. I have not seen other restorers use this technique. I doubt I am the only one who has thought of this.
After the fills were smoothed with 400 sandpaper I prepped the pipe for micro-meshing. Since I had so much sanding of the stem to do, I left the stem and shank together for the sanding and micro-meshing. I knew that this would obliterate the “FRANCE” stamping on the stem but I did mask the stamping on the stummel to preserve them.
The micro-meshing was pretty standard from1500-1800 pad used wetted with a drop of water. The stummel was wiped with an alcohol dampened make-up removal pad while the stem was rubbed with mineral oil and wiped with a paper towel. The next micro-mesh pads were the 2200-3200 used dry with the above mentioned wiping done between each pad.
I removed the painters tape before using the 4000-12000 micromesh pads. I rubbed the areas taped with an alcohol pad to remove and tape adhesive residue and continued the micro-meshing with alternating wipes between pads.
At this stage the pipe was looking very nice. I gave the stummel a liberal coat of Before and After Restoration Balm and the stem a coat of Obsidian Oil and allowed them to while I attended to some laundry duty.
With the laundry folded an put away it was time to wipe off the balm and see how this old billiard is looking. I wiped the pipe with the inside of an athletic sock. Those little ankle high socks fit on my hand perfectly and have a wonderful terry cloth interior perfect for pipe rubbing. Oh, she is looking so much better. All that is left is a trip down stairs to the buffer for several coats of carnauba wax with the buffer.
Oh, dang it, I forgot about the stinger, again. It had been sitting in a medicine cup with some 99% isopropyl alcohol. The alcohol softed the tar-lacquer (not sure if that is a thing). I used the buffer with some white compound to polish it up then reinserted it into the stem.
This restoration was all very straight forward. It was a good way to spend the better part of an afternoon. The briar grain shows very nicely and sets off the ebony of the polished vulcanite well. Not too shabby for a factory made briar pipe. I am sure she will make a great companion for her next owner and provide years more of quality tobacco consumption. I hope that you found some of these techniques helpful for your own restorations or were entertained. If you liked this sort of thing, please hit the like and/or subscribe buttons down there. Thank you for reading the ramblings of an old pipe lover.
Here are some photos of the finished Kings Cross billiard:
This little gem came in an eBay estate lot from Bemidji, Minnesota. We spent several family vacations with friends on Leech Lake (sounds horrible but it is beautiful) and I remember the annual visits to Bemidji fondly. This was a well loved little pipe and saw more than it’s share of tobacco. It looks to be a restoration requiring several techniques.
In looking at the photos you can see that this London Royal is in need of; a cleaning, reaming, rim work, stem refurbishment, a button rebuild, general sanding/refinishing and maybe a dye job (to emphasize wood grain). This looks like a fun one.
“Who made this London Royal?” was one of my first questions. I turned first to pipedia.org, where I was met with 20 mentions of “London” with none of them having the “Royal” after London. Hmm, not a promising start. Next I turned to pipehil.eu. This returned the following:
Now I was getting somewhere. The “Royal London” name was there but the stamping style did not match and the absence of any logo on the stem was worrisome. I did have the “LHS” lead to follow. Okay, pipedia.org, time to redeem yourself. With a search of “LHS”, I had more information to work with.
“Ludwig Stern, a successful pipe manufacturer since 1893 and closing around 1960, reorganized his company along with his brother Hugo Stern, opening a factory in 1911. They named the company L&H Stern Smoking Pipes & Holders. The newly formed company was moved into a six story building on the corner of Pearl and Waters street Brooklyn, NY.” (LHS – Pipedia)
This little London Royal did not strike me as being a very old pipe. When I saw the closing date of 1960 I was a bit surprised. This led me to think that I did not have the correct maker. I continued reading the LHS information.
“Thoroughly organized in all departments, and housed in a well-lighted and ventilated modern office and manufacturing building, the firm of L&H Stern Inc. is located near the first arch of the Manhattan bridge, near the river and convenient to the Brooklyn bridge, which makes it accessible from all the hotels in the metropolis for visiting buyers. The structure is six stories with a seventeen-foot basement, with light on three sides through prismatic glass windows, the first floor being seven feet above the sidewalk. Light enters the upper floors from all four sides.
L&H Stern is known to every important wholesaler and jobber in the country. LHS manufactures a complete line of briar pipes. Ginmetto wood pipes are also made, as well as Redmanol goods, the man-made amber. The first substitute for amber. Everything, even down to the sterling silver and other metal trimmings are made under one roof.” (LHS – Pipedia)
Interesting, a company that produced all aspects of their product. In today’s world that is nearly unheard of. The “Redmanol” part especially caught my attention. Redmanol was an early plastic created by Lawrence Redman:
In 1922, the Redmanol company, the Condensite Company of America, and General Bakelite were consolidated into Bakelite Corporation.[1] Redman became vice president and director of research. He retired in 1939.
The reason this caught my attention was that the stem on this pipe did not have the appearance of vulcanite. It had a slightly different feel on my teeth and the texture just didn’t feel “right”. Also the fact that such a well used pipe with the button worn down yet did not display any noticeable indentations from being clenched seemed odd to me.
“Bakelite’s availability and ease and speed of molding helped to lower the costs and increase product availability so that telephones and radios became common household consumer goods.[8]: 116–117 [40][41] It was also very important to the developing automobile industry.[42] It was soon found in myriad other consumer products ranging from pipe stems and buttons to saxophone mouthpieces, cameras, early machine guns, and appliance casings.” (Bold added by me) (https://en.wikipedia.org/wiki/Bakelite)
The final piece to this pipes provenance came from a photograph on the pipedia.cog LHS site:
The tenon extension of the photo, right, is the exact same as the tenon extension of the London Royal. I own a couple of old Peterson pipes with bone tenon extensions. These extensions or “chimneys”, as they are known at the Peterson factory, change color with use. They change from their natural bone color to the deep brown, nearly black, that is seen both in this pipe and the photo, right. This leads to the question: “Is this a bone extension or is it a Bakelite/Redmanol extension?” I had not heard of plastics being used as tenon extensions. Another LHS – Pipedia photo shows the following and mentions “bone screw”:
I am assuming the “bone screw and Redmanol bit” were together in a single stem. This shows that LHS was using tooled bone as part of their manufacturing. It also indicated a very strong case for the heritage of the London Royal as an LHS product with manufacture dates between 1920s-1960.
With this bit of the history solved I turned my attention from the computer to the pipe. The first step was to get the tobacco chamber reamed and check for any damage. The cake was extensive and required the use of the Scotti and PipNet reaming tools, the Low Country and General knives followed by the 200 sandpaper wrapped dowell.
You can see from the photos that there was a bit of rim scraping done with the edge of the knife as well.
After the reaming and chamber sanding the stummel went to the sink for the Murphy’s Oil Soap and toothbrush scrub. The toothbrush is a medium stiff bristle and the Murphy’s is used undiluted. The stummel was rinsed with warm water after the scrub and dried with a cotton dish towel. I returned to the workbench for a good look at the condition of the stummel. The rim still had a few spots of lava after the Murphy scrub. These were worked on with saliva and a cotton rag until removed. The stummel was then rubbed with a 95% ethyl alcohol moistened make-up removal pad. The first pad came away with a bit of discoloration, indicating the removal of finish. This was probably a shellac. The second pad came away with less while the third was pretty much clean.
I was not looking forward to the next part of the cleaning. I figured if the tobacco chamber was that heavily caked the shank would be a tar filled wonderland (with extra sarcasm). I tried feeling around inside the airway with a dental pick but everything felt solid, not gummy. “Oh, this won’t be so bad”, I wishfully thought. I dipped cotton swab in alcohol and gave the airway a swirl. Dramatic pause. It came back brown, not black. The other end with more alcohol went in. Another dramatic pause. Umm, I think the first one just pissed off the tar. This end was BLACK. The first bit of alcohol had gone in and softened the dried residue and primed it for the second swabbing. Yeah, it was as bad as I had originally thought. To make matters more interesting the boring of the airway was done similar to a Peterson Straight System – in other words the mortise was drilled the length of the airway to the bowl-shank transition. At this point the draught hole was a short drilling from the bottom of the tobacco chamber to the enlarged airway. This diagram attempts to clarify:
I am the proud owner of several Peterson 31s and a pair of 120s that are all Peterson Straight System pipes. I absolutely love the way they smoke. Cleaning them is not as easy as a standard pipe. It is kind of like arguing with your child: You love the way your child uses logic and language to make a good point but dislike the fact that they are arguing with you. Anyway, this design allowed the smoke to enter the “chamber” (for lack of a better word) where it could cool and let the water and other stuff to condense, then the cooler drier smoke would pass through the stem to the smoker. All this other stuff had accumulated and dried in the chamber and created a less than easy cleaning.
I Started with cotton swabs. This proved inadequate for the job. I moved up to a piece of paper towel wrapped around a round needle file, dipped in alcohol. Also inadequate. I then graduated to pouring about 3-5 ml of alcohol into the tobacco chamber and using a nylon brush to scrub the airway while I held it at an angle to pool the alcohol in the bowl and shank while allowing it to dissolve the residues. Better but still not cutting the tar. Finally I got out the big gun – a .22 caliber brass bore cleaning brush. It was smaller in diameter than the chamber so I didn’t have to force it in. I refilled the bowl with 3-5 ml of fresh alcohol, held it at an angle and lightly scrubbed the interior with the .22 bore brush. This was finally able to cut through the residue. It still took a large number of cotton swabs but I was victorious.
Next was the stem. Remember how I said that the stem didn’t feel like vulcanite? Well, I dipped a pipe cleaner into 95% ethyl alcohol and started to run it through the stem. I quickly realized that the stem absolutely was not vulcanite. It became very slippery in my fingers with a drop of alcohol. Bakelite and Redmanol are soluble in alcohol and acetone. Fortunately the alcohol dries quickly and the Bakelite goes back to being hard plastic. Hmm, that would be an easy test to see if the tenon extension is Bakelite or bone! The alcohol had no effect on it. Verdict, the tenon extension is bone. Okay, alcohol is out. Water on vulcanite is not good unless you like discoloration and oxidation. Guess what? Water has no effect on Bakelite. Problem solved. I would just use hot soapy water to remove the yuck (the technical term) from the stem. That sounded great until I realized that all of my nylon brushes were too large to fit in the button or the bone tenon extension. I used bristle pipe cleaners with Dawn dish soap and hot water. The pipe cleaners worked at removing the yuck (the technical term) from the stem airway.
Returning to the stummel, I started with a 1500 micro-mesh pad used dry. There were no large scratches of surface blemished to address. I worked up through the 4000 micro-mesh pad. Between each pad I wiped the stummel off with an alcohol dampened make-up pad. It was here that I thought again about giving this pipe a dye and light sanding to try for a contrast stained finish. The wood grain was not terrible nor was it anything wonderful. A bit of contrast may be just what this old pipe needs.
I got the necessary dye gear ready. Fiebing’s light brown leather dye, a pipe cleaner, the official bowl plug, a lighter and the plastic bin to protect the counter, and since the heat gun was already out, the heat gun. I put the official bowl plug into the bowl. This amazing device not only keep the
dye from getting into the bowl, it also provides a handle. Okay, it’s really just a fishing bobber wrapped in duct tape. I hear some people use wine bottle corks. I then heated the stummel with the heat gun. This expands the pores in the briar allowing better penetration of the dye. Next I used the pipe cleaner as an applicator with the dye. After I was satisfied with the coverage I flames the dye burning off the alcohol in the dye and setting the dye into the briar. I allowed the dye to dry for a while while I did some chores that I had been busy neglecting.
Chores complete, I returned to the workbench and began lightly micro-meshing the stummel with the 2400 micro-mesh pad. I did this dry to remove the outermost stained briar. Hopefully the light touch would remove the outermost layer of stained briar. This allows the briar to show the grain that absorbed more of the dye as darker while the grain that absorbed less remains lighter. At least that is the theory. I think it looks better than it did. I continued to micro-mesh the stummel with the 4000 and 6000 pads. I did not use alcohol to wipe the stummel between pads as I did not want the stain to bleed from the darker to the lighter area.
I started to work on the stem. I was not sure how the Bakelite would handle sanding or micro-meshing so I started with the 2400 micro-mesh pad. It seemed to removed marks and teeth chatter well. I went down to a more coarse grit to speed the process along. I used the 1800 micro-mesh pad dry to smooth the chatter and smooth the stem. I did this with a very light touch. After 1800, I returned to the 2400-6000 micro-mesh pads. I wiped between each with a water moistened paper towel.
I needed to rebuild the button before I did any more work on the stem. To build up the button I was going to use black cyanoacrylate (CA, superglue). I wrapped a piece of scotch tape around the stem right up against where the button started. This gave me a clean sharp edge to build material. I also did not know how the Bakelite would react to the accelerant for setting the CA. I figured the scotch tape would allow me to protect the stem surface from any over spray. Like usual, I got into the groove of adding material, spritzing, filing, adding more material, filing, sanding, etc… and completely forgot to document/photograph the process. AGAIN. Apologies, I can show the finished product though.
After the button rebuild I finished with the 6000-12000 micro-mesh pads again with the wetted paper towel between pads.
The stummel was reunited with the step and both were taken to the buffer where I applied several coats of carnauba wax to the entire pipe. In looking at this pipe I see a unique bit of history. I can’t help but think this was an attempt to copy the Peterson straight system. Below is the London Royal and my Peterson 120 with a bone tenon extension:
Peterson stopped using bone in about 1960, which is also the year LHS ended as a company. The bone tenon extensions have a tendency to fuse with the vulcanite with age and cannot be removed without breaking the bone. The bone would then have to be drilled out and replaced with an aluminum tenon extension. These are available from Peterson or
Smokingpipes.eu for a reasonable €2.03, then there is the €15 for shipping. The Smokingpipes.com has had them as sold out for over 2 years. If one were to accidentally break a bone tenon extension this would be a viable replacement. There I go, rambling on about Petersons again. Anyway this little London Royal made in Brooklyn with some darn old materials turned out to be a pretty little pipe. I do not know how well she smokes but, judging by the cake build-up she had, she must be pretty good. I do hope that some of the techniques used here are helpful to your restorations or entertaining. If you like this sort of thing please hit the like and subscribe at the bottom. I thank you for reading the ramblings of an old pipe lover.
Here are the finished photos of the LHS London Royal.
Here we have another pipe from the curiosities rack. This is a pipe that I received years ago and didn’t do anything with since it was unsmoked. Well winter is nearly upon us and it seems like a good time to revisit some of these old pipes and breathe a bit of life into them. I do not recall when this pipe arrived nor from where. I can tell you that a certain granddaughter can use this pipe to raise a certain grandfather’s blood pressure quickly with her ability to take things apart. Given her saying, “Grandpa, I think I broke it” didn’t help. Let the record show that the metal wind-cap slides on and off easily.
You can see that the finish is darkened with age, the stem is oxidized and the metal has developed a patina yet the springs still function like new.
Who the heck is this Weber guy? Carl Weber according to pipedia.org:
“Carl B. Weber was a German from Bavaria. Aged 21 he emigrated to the USA in 1911. In 1938 he established Weber Briars Inc. in Jersey City, New Jersey. Later renamed in Weber Pipe Co..
The firm grew to be one of the giants of American pipe industry focusing itself in the middle price and quality zone. Trademark: “Weber” in an oval. Beside that Weber – especially in the years after 1950 – was a most important supplier for private label pipes that went to an immense number of pipe shops. Alone in New York, exactly the same pipes were found at Wilke’s, Barclay Rex, Trinity East, Joe Strano’s Northampton Tobacconist in Ridgewood, Queens, Don-Lou in Bensonhurst, Brooklyn… Nearly all pipes for Wilke were unstained and many models, for example the “Wilke Danish Bent”, could hardly deny originating of Weber.
Weber Pipe Co. owned and manufactured Jobey pipes – when mainly sold in the USA by the Tinder Box from 1970’s – 80’s. In addition Jobey / Weber bought Danish freehands from Karl Erik (Ottendahl). These pipes were offered as Jobey Dansk. Ottendahl discontinued exports to the United States in 1987 and in the very same year – obviously only as a ghost brand – Jobey was transferred to Saint-Claude, France to be manufactured by Butz-Choquin.” (Weber Pipe Co. – Pipedia)
In other words he was the epitome of the American dream. A true immigrant success story like so many in the history of our hobby. Unfortunately, he has slipped into the mists of history without much acknowledgement. A most poignant observation was written in a Smokers Forum of Pipesmagazine.com by a frjacob:
“I like Carl Weber Scoop pipes — the carved ones. I’ve seen short bios of him & his company online https://pipedia.org/wiki/Weber_Pipe_Co., but I’d really like to know more about him. Like, when did he/his company stop making pipes, and when did he die, for example; and pretty much anything else about him. He and his company were very prominent from the 40’s into the early 60’s. He also wrote two of the best pipe books ever written. I’ve never heard him mentioned at pipe shows or, unfortunately so far as I can discover, featured in the sorely lamented Pipe & Tobaccos magazine.” (Carl B. Weber – Pipe Maker :: Pipe Talk :: Pipe Smokers Forums of PipesMagazine.com)
There ore no responses to frjacobs. and all it says and the bottom is: ” Not open for further replies.” The two books mentioned are most likely Carl Weber’s
Weber’s Guide To Pipes And Pipe Smoking (ISBN-10 1438288514)
Carl Weber’s The Pleasures of Pipe Smoking (ISBN: B0013OOJQ8)
I have a 1962 paperback copy of the first book and can attest to the easy writing style and informative nature of Weber’s work. It is a lovely little book that you feel you must have a pipe in hand while reading. Topics include the history of smoking to selecting a pipe.
Regarding the provenance of the of this “Windpruf” pipe, sitting on the workbench, I can say next to nothing. It is a Weber pipe dating from 1938-1980s. I could find no Weber shape chart nor history. There are several Weber print ads which are fun to look and do have dates of “1940’s” and “1947” associated with them (Weber Pipe Co. – Pipedia). I will end this history with a quote from Weber himself, “A pipe to be smoked outdoors should be fitted with a cap. The cap will prevent flying ashes from starting small fires and keep the wind from burning the tobacco so rapidly as to cause a cracked bowl. Pipe caps come in various sizes, to fit any size bowl.” (p. 56)*. A generalized Weber quote for a generalized Weber pipe.
*Weber, Carl. Weber’s Guide To Pipes And Pipe Smoking. New York, Cornerstone Library, 1962.
My goals with this pipe were to remove the original finish (clearcoat) to emphasize what looked like pretty grain underneath, revitalize the vulcanite and polish the metalwork while retaining the patina. That sounds like a grand way to spend a winter afternoon. Far better than picking up the leaves that finally fell from the Red Oak tree out back.
This old girl didn’t need a trip to the sink and an introduction to Mr. Murphy. Instead I started by wiping the left side with a make-up removal pad dipped in 95% ethyl alcohol. If the finish is shellac, the ethyl will dissolve it in short order. The pad took off something but not very much.
Hmm, not shellac I guess.
I tried the same thing with acetone on the right side. This pad came back with more material removed but there was still finish left behind.
I tried the acetone on the bottom. Bright red finish and stain. Apparently, at the factory they sprayed the pipes and the finish dripped to the bottom surface and deposited a thicker coating there. Oh well, so much for removing the finish without sandpaper.
I first taped over the stampings with painters tape. Then I got a piece of 400 sandpaper and my small foam block and started sanding the stummel. The
sandpaper worked through the finish quickly. The flat surfaces of the pipe made this easier than I had thought it would be. The only problem was that the
finish clogged the sandpaper quickly and required me to clean the sandpaper frequently. This was done by dipping a toothbrush into alcohol and scrubbing the surface of the sandpaper then wiping the paper on a rag. The following photos show the sandpaper and foam block with the stummel.
At this point I thought I had better address the stem. The oxidation was fairly well developed. The entire stem appeared uniformly brown. I rubbed each side with
0000 steel wool to remove the outermost layer of oxidation. I could not get the stinger to come free of the stem so, I inserted a pipe cleaner into the stinger and placed the stem into the Deoxidizing solution. I figured that about an hour in the solution would be enough.
I returned to the stummel and started working the surface with the micro-mesh pads. I began with a wetted 1500 micro-mesh pad. I followed the micro-mesh pad with a wipe with an alcohol moistened make-up removal pad. I then went to ta wetted 1800 micro-mesh pad and repeated the alcohol wipe when finished with it. I continued with the pads in order to the 4000
micro-mesh pad. Here I removed the painters tape. I figured that the 6000, 8000 and 12000 micro-mesh pads would not remove enough material to affect the stampings and may blend the fresh briar with the old finish. The remaining micro-mesh pads were each used with an alcohol wipe between each. The stummel was then coated with a liberal coating of Before and After Restoration Balm and allowed to set while I worked on the stem.
I removed the stem from the Deoxidation Solution and allowed the excess to drip back into the jar. I then energetically rubbed the stem with a coarse shop rag. The rag absorbed the remaining solution and rubbed off some of the oxidized vulcanite. The stem looked like there was still some oxidation browning present. I used make-up pads and Soft Scrub to remove the remaining oxidation. The pads showed that there was indeed oxidation.
After the Soft Scrub I returned the stem to the workbench and gave the exterior a coating of mineral oil. It now looked nice and black. I ran two pipe cleaners through the stem, from the stinger end, through the stem to remove and deoxidation solution. I then dipped a clean pipe cleaner in the mineral oil and oiled the airway. The stem was ready for the micro-mesh pads. They were used in sequence from 1500-1800 wet, then 2400-12000 dry. In between each pad I would rub a drop of Obsidian Oil onto the stem and wipe the excess oil with a make-up pad.
After the stem was completed I wiped the excess balm from the stummel and reunited the two pieces. I was very glad that I decided to remove the finish here are before and after photos of the right side of the stummel and the
bottom. The grain is far too pretty to keep hidden under that coating of old finish.
I took the brass wind-cap to the buffer. I used a very light touch just allowing the loose fuzz of the buffing wheel to touch the brass. I did not actually allow the felt proper to come in contact with the brass. I lightly brushed the surfaces to clean and polish them. The corners were used the same way to reach the inside hinged areas. I was able to preserve the patina while still polishing the surfaces.
The wind-cap was slid back into position. I applied a thin coat of Johnson’s Paste Wax to the wooden rails on which the brass wind-cap slides. I then gave the entire pipe was given several coats of carnauba wax. This proved more difficult than a rounded pipe. I would get one side buffed and there would be a bit of non-buffed wax deposited on the adjacent surface. Buffing that surface would do the same thing to the next side, Eventually everything was evened out and made pretty.
Overall this restoration turned out very nicely. It was enjoyable not to have a bowl to ream, nor a dirty airway to clean. The new finish really shows off the grain of the briar. The stem polished up beautifully as well. I would like to say that this pipe is ready to return to duty but the poor thing never got any use, much less duty. Either way, she is clean, shiny and ready to be smoked. I hope you found this useful in your own restorations or entertaining. I thank you for reading the ramblings of an old pipe lover. Oh yeah, If you did like this please click the like and subscribe below.
Here are the photos of the finished Weber “Windpruf”. Ready to report to duty.
Wally Frank is a most enigmatic (AKA: crazy cool) figure in the history of pipes. A world traveler in search of briar, pipes, pipe making artists and craftsmen, a businessman, a marketer, all fascinating. This print ad illustrates what I mean. Here we see Castello pipes advertised with the Weber Guide to Pipes and Smoking and Wally Frank Natural Unvarnished pipes all on one page.
“Why is that so interesting?”, you ask. Frank “discovered” Carlo Scotti, founder of Castello and imported his pipes to America. Weber, one of the largest pipe manufacturers in America and Weber’s book telling you everything about how to smoke a pipe. Weber was also a major producer of Wally Frank pipes. And his own Wally Frank brand. All on one lovely Wally Frank ad page. Sounds like an empire builder to me.
One of the best stories of Wally Frank’s career is the “discovery” of Carlo Scotti. I quote from Hacker’s The Ultimate Pipe Book:
“In 1952 Wally Frank, the famous East Coast tobacconist, was on a buying trip in Italy and came across Scotti’s pipes. He liked them and wanted to import them into the U.S. Unfortunately, there was a problem:Scotti’s “white line” trademark looked almost identical to the trademark Frank was using for his “White Bar” line of pipes. The solution was obvious. Scottie would simply change his logo. The two men sat down in the warm Italian sun and came up with the idea of drilling a hole in the “near side” of the stem, interesting a small piece of crumpled silver foil, and sealing it over with clear Lucite. A legend was born and even today some collectors insist that every Catello pipe has a diamond in it… or at worst, a rhinestone. But perhaps it is best to leave both the clear Lucite and the image intact, for the superb craftsmanship and the smokability of the Castello is really what constitutes the true value of a pipe.” (pp. 255-256)
Hacker, Richard Carleton. The Ultimate Pipe Book. Autumngold Pub., 1984.
The date on the form is difficult to make out but, I think it is 1947. $1 in January of 1947 is equivalent to $13.91 in January of 2023 (https://www.bls.gov/data/inflation_calculator.htm). Who wouldn’t jump at the chance to get a new pipe every month for $14 dollars today?
The first paragraph about Wally Frank from Pipedia pretty much sums up Frank’s contributions to our hobby:
Wally Frank, Ltd. was one of America’s oldest and most respected names in pipes and tobaccos, beginning in the early 1930’s. Wally Frank operated a chain of tobacco stores in New York City (the flagship store was in Lexington Avenue) and had a vast catalog business for pipes and pipe tobaccos. Their numerous private-label pipes were made by many makers, including Charatan, Sasieni, Weber, and many others. Wally Frank, Ltd. also owned the Pioneer brand of meerschaum pipes, made from both Turkish and African meerschaum. In addition to importing pipes, he had many pipes made in his own name and also employed pipemakers like Peter Stokkebye, Svend Bang, and Ed Burak (who later became the owner of Connoisseur). As a result, each Wally Frank pipe must be individually evaluated on its own merit.
That brings me to the subject of this blog post. A unsmoked Briar Wind-cap Wally Frank Horn pipe. I have little idea as to when this pipe was produced. I gather from forum posts that the pipe of the month club died away in the early 1960’s yet, no one had any verifiable sources for that. I’d like to think that this pipe was a pipe of the month yet I also have no verification. I can say it is a unique looking pipe and my descriptions will be “individually evaluated on its own merit.”
I don’t remember exactly how or when this pipe came to me. It was most likely part of an estate lot which bid on and won via an ebay auction. I tried looking back through my “purchase history”. Unfortunately, the photos after about a year do not seem to be archived. Here are the photos of the dusty and dirty horn:
The pipe, though dusty, looked as though it had never been fired. The stem was oxidized and had no evidence of any contact with teeth. “This isn’t going to be a restoration”, I thought to myself, just a cleaning.
That is where I started. Cleaning. I took the horn to the sink and used undiluted Murphy’s Wood Cleaner on a medium stiff bristle toothbrush. The Murphy’s lather changed to a slight gray color as it removed the dirt and dust. The Murphy’s was rinsed with warm water and the stummel was dried with a cotton dish towel. I then wiped the surface with a cotton make-up removal pad moistened in 95% ethyl alcohol. I hoped that this would loosen and remove any dirt remaining as well as tell me more about the finish on the briar.
The pad became pink with the red dye that was used to stain the briar. The dirty spots on the pad are from me using it on the threads of the wind cap. The removal of stain with the pad indicated there was little finish to worry about.
The stem did not appear to have enough oxidation to warrant a bath in the Deoxidation Solution. I used Soft Scrub on a make-up removal pad and vigorously rubbed the stem.
After the scrubbing the stem was oiled with Obsidian Oil. I took both parts of the pipe to the bright light to assess the best course of action and for some photos.
In this photo you can still see the lathe chuck marks inside the tobacco chamber.
The stummel had one spot with an obvious fill. This fill was not a good color (too pink) match to the briar so it had to go. The stem looked like it had tiny pock marks all over the surface. I did know it was just from age, oxidation, poor quality vulcanite or a combination of those.
First thing I addressed was removing the old fill material. It was fairly soft and canme out with little effort. I used the dental pick and fly tying bodkin for most of the removal and scrubbed the hole with a brass wire brush.
With the old fill removed I started working on the stem. I reassembled the pipe and wrapped the shank with scotch tape to avoid scratching the briar with the sandpaper or micro-mesh pads. I worked the stem’s surfacewith 400 wet day sandpaper wrapped around a small foam block. I then used the 1500 micro-mesh pad dry. After the pad I wiped the stem with a dry make-up pad and applied a drop of Obsidian Oil with my fingers. I wiped the excess and used a wetted 1500 micro-mesh pad. After this pad I wiped, oiled and wiped the stem again. I then proceeded to the 1800 micro-mesh pad also wetted with water and then the 2400 pad dry. In between pads I continued to wipe, oil and wipe excess.
I then prepared to work of the fill. I used Brown cyanoacrylate (CA, super glue) and briar dust for the new fill material. I dipped the bodkin into the CA and got a small drop. I placed the drop into the hole, took a pinch of briar dust and pushed it into the glue wetted hole. I used the flat side of the dental broad dental pick to force the dust into the hole. It set-up nearly immediately.
I then used a flat needle file to remove the material new fill until it was smooth to the surface. I very light touch with 200 sandpaper revealed that I still had a couple of low spots in the new fill. I repeated the CA and briar dust. At this point I removed the scotch tape and cut two pieces of painters tape to cover the stampings. I figured that any sanding and micro-meshing from here out could be done to both the stem and the stummel.
The new fill was then filed and sanded to smooth. The sanding would be blended with the sanding and micro-meshing.
I did not need to use the 1500 nor 1800 micro-mesh pads on the stummel. I used the remaining series, 2400-12000 on the stem and stummel. Between pads I would wipe the briar with a make-up pad moistened with 99% isopropyl alcohol and the stem with a drop of Obsidian Oil on my fingers wiped with a dry make-up pad. When finished with the micro-mesh pad I applied a liberal coating of Before and After Restoration Balm to the briar and a coating of Obsidian Oil to the stem.
I let the balm and oil do their magic to the pipe for about an hour. After the hour had passed I wiped the entire pipe with an inside-out athletic sock to remove the remaining balm and oil. The pipe was looking very reshreshed. The last step was to take it to the buffer for several coats of carnauba wax.
This was a fun restoration of an unusual old pipe. I have no idea how the horn shape smokes. My fear would be that the top inside of the tobacco chamber would get too hot and be prone to the risk of heat damage. Or perhaps this shape is meant to be used while reclining in a hammock enjoying a pipe on a warm summer day. That is a delightful image. If you enjoyed this kind of thing please, click the like and subscribe. I thank you for reading the ramblings of an old pipe lover.
Below are photos of the finished Briar Wind-cap Wally Frank Horn:
You may recall from an earlier restoration that I had acquired an assortment of Kings Cross pipes. This is a continuation of that set of pipes. Here we have another “MADE IN ENGLAND” Kings Cross.
These were pipes made by the Chapuis-Comoy company in both their English and French factories. The “Made in England” being Comoy’s while the “France” indicates Chapuis. The pipe lovers of the world are indebted to the Comoy family for their contributions of bringing briar to the pipe making world. If you are interested in the Chapuis-Comoy family history, and it is amazing, take a look at the previously mentioned blog post or these links:
Shape 17 is a Kruger, after Paul Kruger* (typically referred to as an Oom Paul), ½ bent, medium size saddle stem. That sounds like our girl.
*Kruger, Paul according to the Kruger National Park site: “In 1882, the 57 year old Paul Kruger was elected president of Transvaal. He left for England in 1883 to revise the Pretoria Convention of 1881, an agreement which was reached between the Boers and the British that ended the first Anglo Boer War. Paul Kruger acquired many allies in Europe during this time.” (https://www.krugerpark.co.za/Krugerpark_History-travel/paul-kruger-history.html)
As for the date this Kruger was made, I have little idea. I thought I had some idea when I was researching the Kings Cross Foursquare but, I think I was reading too much into all of those sources. For the sake of positive determination of this pipe’s providence I can only say it is a Comoy’s make pipe. If you know more about the dates of these pipes please let me know in the comments.
To the restoration. First step ream the bowl. Initially it looked good but that was just to top ¼. There was significant cake built up on the lower portion of the chamber. Nothing that the PipNet and the reaming knives could take care of. Oh, I am trying out a new reaming knife. It is a General brand triangular scraper. I did have to round the tip with a grinder as it had a very sharp point. The edges are quite sharp and require care when using but it seems to be a very capable tool.
Next stop the sink for the ever popular Murphy’s Wood Cleaner and toothbrush scrubbing. The Murphy’s is used undiluted with a medium stiff bristle toothbrush. Extra time was spent at this stage due to the coarse nature of the rustication. The stummel was then rinsed with warm water and dried with a cotton dish towel. Since I was over at the sink, I figured this would be a good time to top the rim of the stummel. I thought that a smoothed rim would add a touch of class to this rusticated pipe. I did leave a few of the deeper rustications because I thought they added a unifying touch to the overall appearance. The topping was done with 200 sandpaper followed by 400 sandpaper laid flat on the countertop with the stummel rotated to achieve equal pressure and sanding across the rim.
This stummel had a finish coat that remained mostly intact after the scrub. I did not want this old finish. On a prior pipe restoration of another Kings Cross pipe I found that the finish was susceptible to acetone. I chose to do the same treatment with this pipe as I did with the previous pipe. I placed it into a jar filled with acetone and left it for about 30 minutes. After the 30 minutes I removed the pipe and scrubbed it with a brass brush dipped in the acetone. After a good scrub I would dip the stummel into the acetone as a rinse, allow it to dry and look so shiny spots where finish remained. I would then scrub those areas with acetone and the brass brush. Eventually, I no longer saw any shine.
Returning to the workbench I tried to scrape out the airway to get as much of the built up tars out before using the pipe cleaners with alcohol. The airway appeared clean and I was unable to scrape any significant material from it. I soaked the tip of a bristle pipe cleaner in 99% isopropyl alcohol and ran it through the airway – it came back black with smoking residue. Hmm, I looked down the mortise with a flashlight and saw that this pipe had a
reservoir that continued down past the airway. It looked like a Peterson System copy-cat. Very cool. Also, with a well used and seldom cleaned pipe, a pain to clean out. This was looking more like it was not going to be the straight forward restore that I thought. I poured about 5 ml of 99% isopropyl alcohol into the bowl and began scrubing the airway with a nylon brush. The brush came back filled with tar. I wiped it off on a paper towel and continued scrubbing. I had to wipe tar from the brush numerous times through this scrubbing. Occasionally I would pour the alcohol into a medicine cup and pour fresh alcohol into the bowl. Eventually the alcohol turned more of an amber color then dark brown. I then tried the bristle pipe cleaner soaked in alcohol. They came out brown but were not black. I repeated with the pipe cleaners until they came back clean.
During the above airway cleaning, the reservoir was soaking in alcohol as I was cleaning the airway. This allowed the tar there to soften. I did not keep track of the number of cotton swabs, soaked with alcohol, that it took to clean the reservoir. This was probably due to my inability to count that high. Needless to say, it was a lot.
The stummel still had the aroma of “Granny purse”. That is a term I use to describe the smell left by Lakeland blends. The floral fragrances remind me of the perfume that saturated my grandmother’s purses. To remedy this I packed the reservoir and tobacco chamber with cotton. I then started adding 95% ethyl alcohol by a pipette until it pooled slightly on both surfaces. The surfaces were held level to one another. I let this treatment set overnight.
In the morning I returned to the granny purse infused stummel to find that the cotton in the bowl looked pretty clean while the shank side cotton had discolored, proving that I had not cleaned the shank as well as I
thought I did. I removed the cotton and assessed the results. Yeah, the alcohol had removed some tar and stuff but had also further softened the remaining tars and stuff (stuff is another technical term used by restoreres).
Back to the workbench. More cotton swabs later I was still getting brown residue. I then tried a technique I’ve not seen other restorers use. I tore a piece of paper towel about 2 in2 (5 cm2) I rolled this paper towel around a
round needle file, dipped the tip into the alcohol and scrubbed the inside of the mortise/reservoir with it. After the end of the paper towel gets saturated
with yuck (yuck is another technical term used by restorers), you can unroll the paper and reroll the clean end, dip and repeat. This works well for tough jobs that need more pressure than is possible with a cotton swab. After a few pieces of paper towel I went back to the cotton swabs and was happy to see they were getting progressively cleaner. I finally got to the “clean” stage.
Here, I started working on the stem. I rubbed the surface with 0000 steel wool to remove the worst of the oxidation, inserted a pipe cleaner into the
tenon end of the stem and took it to the Deoxidation Solution jar. I placed the stem in the solution so it was submerged and put the lid back onto the jar. While the stem was soaking I figured I may as well treat the stummel with the cotton and alcohol a second time.
Normally I only leave a stem in deox for an hour or two, I got busy and returned after 4 hours. I checked the stummel first. The cotton came out clean. Next I removed the stem from the deox solution. I allowed most of the excess to drip back into the jar. I then used a coarse shop towel to vigorously rub the remaining solution from the stem. I ran two pipe cleaners through the stem to remove any remaining solution from inside. I then used a spot of Soft Scrub on a make-up removal pad to remove remaining oxidized vulcanite. The stem looked good.
I returned to the workbench and oiled the stem inside and out with mineral oil. The pipe cleaners cane out relatively clean. I thought this strange because the airway of the stummel had been filthy. I dipped the tip of a bristle pipe cleaner into the isopropyl alcohol and inserted it into the tenon end of the stem. It moved easily up the stem until it got close to the button. I pulled it free and saw what I expected – a very dirty pipe cleaner. I then tried to repeat the process from the button end. I was met with a great deal of resistance. After several bent pipe cleaners I finally pierced the layers of grime inside the stem and could get a pipe cleaner through. I then took a long churchwarden pipe cleaner, the stem and a pipette filled with alcohol to the vise. I clamped one end of the churchwarden pipe cleaner into the vice and threaded the stem onto the pipe cleaner. I used the pipette to wet the pipe cleaner above and below the stem with alcohol. I held the top end of the pipe cleaner with one hand and moved the stem up and down
the length of the pipe cleaner. This removed a good deal of the yuck from inside the stem. After this I returned to the workbench and started running pipe cleaner through the stem as normal. Well, I was shocked to see how filthy this stem was, no wonder a pipe cleaner had trouble getting through. You get the idea. Many pipe cleaners and much alcohol later the stem was clean. When placed back on the stummel there was no Granny purse remaining.
Next was sanding to address the tooth chatter and rebuilding the button. I wrapped 400 wet dry sandpaper around a small foam block to give it additional stiffness. I then sanded the area beyond the button to rid the stem of the dents from clenching. The dents were shallow so after a bit of sanding I tried to paint them with a light in hopes of raising them. This worked a little but I didn’t need much. Happy with the dent eradication I wrapped a piece of scotch tape up against the edge of the button. This would provide a straight edge for filing the black cyanoacrylate (CA, super glue). I applied a bead of glue along the top of the button. I quickly inverted it so the CA would be hanging down. I adjusted the drip by rotating the stem until it looked like it was filling the depression. I then spritzed the CA with an accelerant to speed the curing. I then used a flat needle file to reshape the button. I had to repeat the application of CA a few times to build-up material where I wanted it and file it off to regain the shape of a proper button. Once satisfied with the shape I used 400 sandpaper to smooth and polish the rough edges. One of these days I will actually remember to photograph this process rather than getting caught up in the moment.
The stem was then sanded with micro-mesh pads. The 1500 and 1800 pads were used with a drop of water on them. Between each pad I would apply a drop of Obsidian Oil, rub it in with my finger and wipe away the excess with a paper towel. After the first two pads, the remaining series was used dry with the application of oil and wiping the same. The stem was taken to the buffer where I applied several coats of carnauba wax.
I do not like applying carnauba wax to heavily rusticated stummels. I did apply a couple coats of carnauba wax to the flat surface of the stamp. The rest of the stummel received Dacatur No-Buff Wax applied with my fingers and a soft bristle baby toothbrush. This was allowed to dry for 15 minutes and rubbed off with a clean dry terry cloth towel.
I think this pipe turned out very nicely. It makes a fine companion for the Kings Cross Foursquare from a previous restoration. I wanted an easy
restoration and for the most part this was one. I think the smoothing of the rim really adds to the appearance of these pipes. I hope that you found
something that you can use in your own restorations or that you found this interesting/entertaining. Thank you for stopping by and reading the rambling of an old pipe lover.
Below are some photos of the finished Kings Cross Kruger:
I recently won an auction for 6 Kings Cross pipes. They are a mixture of 2-Made in England, 2-Made in France and 2- no Country of Manufacture (COM) just “ALGERIAN BRIAR”. They all looked like just what I needed after two recent restores that were rather difficult. Wonderfully dirty, oxidized old pipes WITHOUT major issues. I apologize if you are here for some nail biting cliff hanging drama like with the Pipe by Lee restoration that led to the restoration of the restoration (I linked those if your nails need biting). These, looked like a relaxing day on the lake fishing for crappies.
I chose to work on the rusticated paneled billiard first. Here are her arrival photos:
A little bit of history is one of those things that I love about these projects. Here is what we know:
I own a Kings Cross made in Italy by Savinelli
2. The Kings Cross I chose to start with is Made in England.
The stampings look nothing alike.
What do you deduce, my dear Watson?
Umm, Mr. Savinelli moved?
No, there obviously is mystery afoot, old chap.
The first search of “Kings Cross” led me to the following quote from Pipedia.org:
“Kings Cross is a brand made by both Chapuis-Comoy in France using Algerian Briar. Kings Cross is also a brand name used by Savinelli, which is more commonly seen in the U.S. market. Those pipes are made using Italian Briar”
No mention of “Kings Cross” as a second of Comoy. Strangely, there is no Comoy stamping on the pipe either. So, this Kings Cross is not a second of Comoy yet, they apparently didn’t want it known that she was a Comoy either. To verify the Comoy heritage I found a list of Comoy shapes and shape numbers on Pipedia.com. Sure enough, the 368 was there.
Now we know that the Kings Cross is definitely a member of the Comoy family with that specific shape fitting in with their listed shape chart. I returned to the Kings Cross page on Pipedia.org. For more information. And found nearly the exact stamping. They called it “Comoy’s version” of the Kings Cross and visually compared it to the Chapuis version.
What is the relationship between the two companies and their English and French COMs? It seems odd that two separate companies would both make the same line of pipes with the same name. The plot thickens.
Talk about your confusing family trees. The present day briar pipe owes a great deal to the Comoy family. Below is an abbreviated history.
Chapter One- “Francois Comoy and his brothers started making pipes (probably clays, boxwood and beech) in 1825 in the small monastic town of Saint-Claude in eastern France. Francois and his son Louis discovered that briar had vastly superior qualities and from 1848 made pipes only in this wood.” (Comoy’s – Pipedia)
Chapter 2- “In 1879 Francois’s son Henri, who was born in 1850, moved to London with a small bag of tools, but a great deal of experience. Henri set up a small factory in Seven Dials which is today known as Cambridge Circus. He was one of the prime movers in the establishment of the briar pipe trade in London and is credited with being the author of the appellation “London Made”.” (Comoy’s – Pipedia)
Chapter 3- “He was helped at first by some of his brothers and around 1891 was joined by his two nephews, Louis and Charles Chapuis. Louis took the name of his adoptive parents. By 1895 the business had outgrown the Seven Sisters site and a new factory was built in Newcastle Place, Clerkenwell. By 1905 markets were being sought in America and the extra business required a new factory to be built in 1913 at 72 Rosebury Avenue.” (Comoy’s – Pipedia)
Chapter 4- A couple of world wars, financial issues, mergers, independence from mergers and general corporate mayhem leads to the above family tree of chaos.
The below timeline allowed me to deduce a couple of dates of relative importance to the Kings Cross in question:
This date corresponds to the Chapuis-Comoy society establishment. But it is rooted in the end of the 19th century and its origin is indissociable from two branches of a unique family.
Henry Comoy (1870-1924) was a pipe maker established in Saint Claude prior emigrating to London where he started the “H. Comoy & Co Ltd”.
He convinced his Chapuis cousins to form a partnership with him and start a factory in Saint Claude. That’s how was born “Chapuis-Comoy & Cie”.
1932 Merger of La Bruyère and Chapuis-Comoy & Cie. The Chapuis-Comoy brand disappears.
1957 In view of the success encountered by the Chacom brand, La Bruyere takes back the “Chapuis-Comoy & Cie” society name.
1972 The society recovers its whole independence to London thanks to Yves Grenard, grand cousin of Pierre Comoy (Henry’s grand son) and manager of Chapuis-Comoy & Cie.
1988 Creation of the S.A. Cuty-Fort(2) bringing together Chapuis-Comoy, Emile Vuillard, Jeantet-David and Jean Lacroix. They have the production in common, but the different brands are preserved for the pipe’s distribution.
Antoine Grenard 2008
2012 Yves Grenard passed away on Feb 8, 2012. His son Antoine manages Chapuis-Comoy & Cie
Here we have, what I think would be the earliest date that the pipe would have been made: “In 1971, the London factory (see Comoy’s) became independent, and Yves Grenard, second cousin to Pierre, took over Saint-Claude” (Chapuis-Comoy – Pipedia) On another Comoy page in Pipedia.org they state that: “Comoy’s remained a family owned company until it was finally taken over by Cadogan Investments during the early 1980’s.” (Comoy’s – Pipedia) I added the bold to “1971”.
I think that the quote that best identifies the latest date of production would be 1988 when the Comoy pipe production joined the Chapuis production: ”They have the production in common, but the different brands are preserved for the pipe’s distribution.” Joint production at the Chapuis factory would mean the pipe could not have been “Made in England”.
With the beginning date of 1971 and end date of 1988, this would put the Kings Cross more recent than what I am used to restoring. Hah, I am older than you, pipe. I am not sure if Sherlock Holmes would agree with my deductions or not but, I could certainly convince Watson.
To the restoration. First thing I did was to ream the Kings Cross and rid it of the cake. There was a pretty healthy deposit that the
Smokingpipe Low Country Reamer scraped out quickly. I followed up with the number two blade of the PipNet and gave it a final scrape again with the Low Country. Next I sanded the interior of the bowl with 220 sandpaper wrapped around a wooden dowel.
Next stop the sink for a Murphy’s Wood Cleaner scrub. I use Murphy’s undiluted and scrub with a medium stiff toothbrush. This will usually remove the dirt and grime accumulated through years of use. The Murphy’s did its job quite well but there was a layer of some kind of clear finish that I did not want on this pipe.
“What kind of finish is it?” I wondered. Hopefully shellac and please don’t be some space-age-polymer. (Yeah Kaywoodie Magnum, I’m talking about
you. How they ever liquified diamonds and put them on a pipe I’ll never know) I wetted a make-up removal pad with 99% isopropyl alcohol and tried rubbing the flat surface of the stamp. A little bit of color came off but the surface remained shiny. I wetted the other side of the pad with 95% ethyl alcohol and tried again. This time a bit more color but the shine
remained. New pad, with acetone. This time more color and the shine was gone. We have a winner.
That meant that the stummel would have to take a bath in the acetone jar.
While the acetone was dissolving the finish I addressed the stem. Oh joy, a stinger. I am not a big fan of stingers, in general. I love the tenon extensions
or chimney in a Peterson pipe, tolerate them in a Kaywoodies and feel okay about them in a Dr. Grabow Westbrook but generally they are not my cuppa tea. I’d never go and deface a pipe by cutting one off but I have been known to remove them and forget where they have gone. This one looked like it was just a push fit aluminum type. The highly technical stinger extractor was used to try to pull it out. By the way, that’s just a pair of pliers with painters tape wrapped around each jaw. It doesn’t budge. Hmm, maybe it will become loosened with the airway cleaning? Spoiler, it didn’t.
The stem had a lot of small tooth chatter marks on both the top and bottom. The worst thing looked like a series of dents along the left top edge. I did not want to round the stem and change its original look.
I painted the chatter and the dents with the flame of a disposable lighter. That seemed to reduce the dents but did not remove them. Next I got out the 400 wet dry sandpaper. With a light hand and small circular rubbing I started to work on the chatter. For the sides I tried to keep the stem as flat as possible and work the stem on the sandpaper with the sandpaper flat on the bench surface. I still had to sand the edge to remove the dents but did so on each side to mask the rounding.
I hoped that the remaining dings would come out with the micro-meshing.
Time to check on the stummel. I removed the stummel from the acetone. I recommend nitrile gloves when handling a wet with acetone stummel. I completely ignored my own recommendation. I used a brass brush to work the finish free from the grooves of the stummel. Frequent dips of the brush were needed to fully saturate the air with acetone fumes. I recommend using a respirator classified for fumes. I also ignored this recommendation. I would rinse the stummel in the acetone, allow it to evaporate and check for shiny spots then repeat the scrubbing as needed. I did this until I saw no further shine or until I saw more stummels than I could count, from the acetone fumes.
Here is what I had after the acetone scrub:
Next on the agenda was to top that wire brushed rim. I know, do no harm, restore doesn’t mean remake but, I couldn’t help myself. This rustic look was screaming for a touch of class. I topped the rim with 220 sandpaper followed by 400. I left a couple of scratches on the rim because I thought the looked cool.
After that the stummel got a healthy dose of Before and After Restoration balm. I rubbed the balm in with my finger and thumb them worked over the whole surface with a soft bristled baby toothbrush to work the balm into all the nooks and crannies.
Here is what she looked like all slathered up:
I let the restoration balm sit all night for no other reason than I went to bed after taking those photos.
All that was left was the final micro-meshing of the stem, a quick visit to the buffer for a final polish and a few coats of wax. First the micro-mesh. Normally I would moisten the 1500 and 1800 pads with a drop of water but here I still wanted to see if I could remove those last marks. So I ran through the entire series of pad dry. I still applied a drop of Obsidian Oil between pads and wiped with a paper towel before proceeding to the next. When
finished I took the pipe to the buffer and gave it a light buff with white diamond compound. Just on the stem and careful of the circle K logo. I finished the stem by wiping and remaining white diamond compound off with a rag. I then applied a couple coats of carnauba wax. For the stummel I finished it with a liberal rub of Decatur No-Buff Wax. I allowed it to dry for 15 minutes before buffing with a dry polishing towel.
Overall I am pleased with how this restoration turned out. The old Kings Cross with all of its convoluted history looks good and will be a good companion pipe for someone for many years to come. Thank you for reading the ramblings of an old pipe lover. If you enjoy this kind of stuff please click the like and subscribe.
Here are the final photos of the Kings Cross Made in England Foursquare:
I know what you are thinking: “Wow! That pipe is gorgeous. I’m going to sell all my Savinellis and get a truckload of Greenwichs.” What, no one is thinking that? Oh yea of little faith, give it time. It may turn out pretty well.
I didn’t start out looking for a Greenwich pipe. Heck, I don’t think I’d ever even heard much about them. I was searching out a pipe with a trashed mouthpiece. Yes, I said that. The truth is that rather than practicing a new material/technique on an extra stem, I wanted to try it under fire with a real world example. Sure I could just take a crosscut saw to an extra stem but then I’d miss out on searching Ebay for a reprehensible miscreant pipe, bidding against the throng of others wanting the same hidden gem and waiting for 18 months for the arrival of said pipe from the far reaches of Bhutan. There I go again with my exaggerations, I never was “under fire”. “What is this new material?”, you ask. You are just going to have to wait for the big reveal.
The above Greenwich House pipe was indeed from an Ebay auction. I really did search out a pipe with a damaged stem. Here is the original listing of the darling:
Yes, I am quite the “Big Spender”, I did have to wait for the pipe to arrive from Alaska and there really were three other people who bid on the Greenwich. So, you see my exaggerations were not that great. When she did arrive her condition was what I had expected and hoped for. I’ll let the photos speak for themselves.
Okay, so now you have it, what are you going to do with it?
I am going to make her beautiful and return her to smoking glory.
What do you even know about her history? She could be some vagrant who will prison shank you while you sleep.
When researching this Greenwich House pipe I had very little to work with. There were only two words visible: “GREENWICH HOUSE”. That is where I started. The site, https://pipes.collectionhero.com/gallery.php?search=greenwich produced images of “Greenwich” pipes that had come up recently. The Thoor-Kleen brand seemed to have the greatest frequency of photos. The other Greenwich pipes appeared more random and diverse in their shapes. Nothing matched the pipe I had in hand.
Since Thoro-Kleens are metal pipes I went to http://www.smokingmetal.co.uk/. In the past I have found that the smokingmetal.co.uk website has very good information about all things pertaining to metal tobacco pipes. I thought they would certainly have more information about Greenwich. I was incorrect. There was more information about the Thor-Kleen pipe but nothing about the parent company. Here is th text on the page in its entirety:
GREENWICH HOUSE THORO KLEEN
Department : METAL OUTER BOWL
This family of pipes have been seen as Knowles Air Lite (believed to be Canadian version), Roybrooke, Comet, Original Gridiron. Seemingly sold in sets that comprised a normal briar bowl as well as the metal outer with a briar insert. The body of the pipe can be hexagonal, square ( Thoro Kleen only seen this shape) or circular in cross section. Regardless of variant all parts are interchangeable. The unmarked version tends to be regarded as the COMET, all the others being stamped with a name. See others on this site under their name
I returned to the restoringpipes.com website. Steve Laug was able to find more information on his pipe because he had much more information via stamps to work with. This old girl only had a stamp that read “GREENWICH HOUSE”. Now if we assume that it is indeed the same company that either produced or imported both Mr. Laug’s pipe and the Greenwich House I had, then we could say that “The pipes were sold by the Greenwich House Corporation, located in 1947 at 939-M 8th Avenue, N.Y. 19, N.Y…” (https://pipedia.org/wiki/Thoro-Kleen)
Also interesting from Mr. Laug’s research was that his pipe had stamping of the model – “ANTIQUE” as well as “Imported BRIAR”. He found that the Antiques were made from Algerian briar. (Laug, rebornpipes.com). I say interesting because my pipe looks very much like both the Marxman and Custom-bilt (or CustomBilt) pipes made at approximately the same time, 1947-1957. Both the Marxman and the CustomBilts were made from Algerian Briar. This briar is known to be relatively soft with less desirable grain, thus the heavily carved pipe shapes and textures. I think it is pretty safe to assume that since the Antique line of Greenwich was Algerian briar and this pipe has very similar characteristics to the Antique as well as the two other makes of pipes which were known to be Algerian briar we can say that this pipe is very likely to be made from Algerian briar in the decade after World War II.
That information satisfied my curiosity and made me want to get to the restoration. As usual I started with reaming the tobacco chamber. It was heavily caked. The PipNet reamer is the go-to tool for this job followed up with the SmokingPipes Low Country Reamer. I started with the Pipnet’s second size blade. It Made short work of the cake that it could reach. I switched out the 2nd for the 3rd as this was a wide bowl. The 3rd blade worked very well and scraped to the bottom of the bowl. The bowl was now wider than the 2nd and 3rd but the 4th was too large. This meant the Low Country would get some action. I reamed the interior edges of the bowl further with the Low Country Reamer and finished with 220 sandpaper wrapped around a wooden dowel along with sandpaper on my finger. The inside of the tobacco chamber looked very good. I guess that is what the layer of cake is for – to protect the briar.
Next was the old Murphy Wood Cleaner and a toothbrush routine. For this I took the stummel to the sink.
I use a medium stiff toothbrush with undiluted Murphy’s to scrub the exterior of the stummel. This stummel was great. The diameter was enough so that I could push my thumb into the bowl and keep the Murphy’s out while scrubbing. The photo show the lather change to a brown color as it
removes the years of accumulated dirt and whatever else it can. I rinsed the Murphy’s from the stummel with warm water. Since this stummel had so many carving grooves and smaller lines I applied the Murphy’s a second time and it sudsed up discolored again. Not as dark as the first time but colored just the same after a second rinse I dried the stummel with a cotton dish towel.
I returned to the workbench with the fresh scrubbed stummel and saw that my scrubbing had cleaned the grime away but this revealed a layer of finish that I did not want on the briar. The following photos show what I had.
To see what kind of finish I had to deal with I thought about finishes of the late 1940s. I hoped it was shellac, mainly because I am lazy.
Shellac: A solution of melted lac, a resinous excretion of the Lac insect (Coccus or Carteria lacca) dissolved in alcohol used as a sealant, adhesive, or insulating varnish. (sciencedirect.com)
Since shellac is dissolved in alcohol, that means it dissolves in alcohol. I don’t mind working with alcohol. I moistened a make-up removal pad in 95% ethyl alcohol and started rubbing the stummel. Yay! The pad started to turn a yellowish brown. That means that the finish was most likely shellac and it would be easy to remove. Shellac also will dissolve in acetone. I did that too for the photos below (left is ethyl alcohol, right is acetone).
I continued to rub the surface and found that the grooves and depressions held more finish than I was able to remove with the pad. That meant that I needed to give the stummel a soaking. Fortunately I keep canning jars with ethyl alcohol (EtOH) and acetone for this very purpose. Into the ethyl alcohol (ethanol/EtOH) bath it went.
Sidenote: The acetone bath looks cloudy because the last restoration I did had a very large area that was filled with some filler that only seemed susceptible to acetone. Check out the Waldorf Restoration if you want to see that mess.
Shellac does not take very long to dissolve, especially when it has already been softened by the wet pads. I figured that I wouldn’t need to leave it there for more than 30 minutes. That was plenty of time to get started on the stem.
I looked at the stem. I remember reading Steve Laug’s “Nightmare” blog about his Greenwich House Antique pipe. His
“Nightmare” began with the removing the stinger from his pipe. I tentatively prepared for the worst. I retrieved my stinger extracting tool, and did the “please don’t break dance”. A firm grip, little twist right, little twist left, wiggle, wiggle. Oh that was the motion I was using with the tape wrapped pliers, NOT the dance. I guess I should have made that more clear. The stinger in this pipe was wonderfully well behaved. Filthy and coated with yuck but well behaved. I placed it into a medicine cup with more ethanol to loosen up the yuck..
Next I used 0000 steel wool on the stem. I vigorously rubbed, trying to get the worst of the oxidation off the stem or at least get it mad so that it would come out and fight the deoxidizing solution.
I placed a pipe cleaner into the button of the stem to suspend the stem in the Deoxidizing Solution. This sem was heavily oxidized so, I figured it would have to be in the solution for two hours or overnight. I would check on it in an hour. A motto that I am rather fond of is: “Expect the worst, that way you are never disappointed.” The stem went into the deox bath.
Let’s go see how the stummel is doing. I returned to the EtOH jar and removed the lid. The alcohol is pretty dark from all the finishes that it has removed. I suppose it is about time for it to start a fire in the burn pit but it
was still working. After the EtOH bath I again rubbed the surface of the stummel with a moistened make-up pad and very little color came off – victory.
Now normally I would have to sand and then micro-mesh the stummel at this point. I didn’t want to do either of those things with this briar. It didn’t need that. The rugged look is what this old girl is all about. Well rugged except for those dings on the rim. Those have
got to go. I used two small wooden spheres wrapped in a small piece of 220 wet/dry sandpaper. The spheres only remove briar from the contact with the inside of the rim. This gives a nice even beveled appearance to the rim. I used two to make sure I got all of the deep dings with the smaller sphere and smoothed out the bevel with the larger sphere. I was mostly pleased with the ding removal.
At this point I slathered the stummel with Before and After Restoration Balm with my finger and thumb. Then I used a soft bristle baby toothbrush to work the balm into all of the nooks and crannies of the briar. I set the stummel aside and went to find something to do for a half hour. Oh yeah, I have laundry to attend to.
I returned after some chores and found that I’d left the stem soaking in the deox bath for about an hour and a half. If it looks like it needs more time, we’ll give it more time. I removed the stem and allowed most of the solution to drip off. I then placed it on a coarse shop rag and started to rub the solution from the pipe. The solution is viscous stuff that will absorb into the rag. The surface of the vulcanite seemed sticky. The vigorous rubbing removes the sticky surface and buffs it to a nice clean vulcanite. I ran two pipe cleaners through the airway to rid the internals of the solution. When I was finished I was surprised to see that most of the oxidation had been removed. I went to the workbench and applied a layer of mineral oil to the stem. I also dipped a pipe cleaner into the mineral oil and ran the oiled cleaner through the airway. This coating of oil should keep the vulcanite from further oxidizing.
I put the stem back on the stummel and took one photo with the still slathered balm and oiled stem.
I then wiped off the excess balm and took some photos to show the progress.
What is that? When did those become visible? I’ll be darned. There is another stamp, saying “IMPORTED BRIAR” just like on Steve Laug’s Greenwich. That is what his pipe said as well, although a slightly different stamp. Further evidence that this pipe is from the same location and time as his Greenwich.
At this point the stem had not received any sanding or micro-meshing. It also needs to have the stem and button rebuilt. That is the real reason I wanted this pipe. I saw the Ebay photos of a pipe with a chewed through mouthpiece. I wanted to try using black ultra violet (UV) resin to rebuild a mouthpiece (Big Reveal – as mentioned in paragraph 2). Thus the bidding, winning and restoring of this pipe.
You are insane. Why didn’t you just take a crosscut saw to an extra stem? You have bags of them. Then you could try your UV resin fixing that.
Yes, I could have. If I did it that way I would never have had the opportunity to meet this lovely old girl. Besides this gave me a reason to use the UV resin.
You’re an idiot.
An idiot with a purpose! I say.
If their arguing bothers any of you readers, let me know in the comments and I will try to shut them both up.
The real problem with the black UV resin is having to wait for it to arrive. I ordered the resin back on November 12. It is now November 27. I have this restoration write-up and the conclusion to the Pipe by Lee 3 star that I also want to use the resin on. I do hope that the readers are more patient than I am.
While waiting for the resin to arrive I decided to get as much done to the stem as I possibly could. The stem still had areas of brown peeking through. Stubborn patches that I tried treating with Soft Scrub on a make-up removal pad. The pad turned golden brown with rubbing. I continued with several pads and reapplications of Soft Scrub. I thought I was making progress until I returned the stem to the bright light of the workbench and could see that stubborn brown in places. I began thinking that perhaps another dunk in the Deoxidizing Solution would be the best course of action. I needed a break from trying to remove the oxidation from the stem.
I needed to develop a plan for the rebuilding of the button. Previously when rebuilding a stem I have used black cyanoacrylate (CA or super glue). I would fashion a dam out of a piece of thin plastic like a lid. I would then apply a thin coating of petroleum jelly to the plastic and insert the plastic into the stem. Sometimes I would have to shim the plastic dam with another piece of thin plastic. Once in place I would place a drop or two of the CA onto the dam, allow it to spread out and contact the vulcanite then I would spritz the wet CA with an accelerant to make it harden in seconds. I would repeat this until the CA was thick enough to begin shaping using files and sandpaper. My idea was to use the same process with the black UV resin. My hope is that the resin will be a little bit softer than the CA. The CA is much harder than the surrounding vulcanite and it does not have a pleasant feel to the teeth. I also do not like the seam where the CA meets the vulcanite. This seam, in my experience, will allow the buildup of oxidized vulcanite and will start to appear brown after a couple of years.
I have high hopes for the black UV resin even though I have not read anything about it being used for stem repair. I have used the clear UV resin in fly tying to make the heads of minnow imitation streamers. It works
wonderfully. It is tough and durable. In reading about the the product is also considered nontoxic and used frequently in jewelry making and for children’s toys. Here are a few streamers I have tied using clear UV resin. I also tried a stem repair on an old Peterson 312 where years of pipe cleaners had worn through the vulcanite from the inside in a stem. The clear UV resin sealed the hole but left a “window” through which you could see a pipe cleaner.
The below photos show the dam I made from a plastic lid for the Greenwich
House pipe. I used an Exacto knife and kitchen shears to fashion the plastic lid. As you can see in the photos each dam needs to be cut to fit the stem that you are working on. I have made generic dams but they usually cause me to do more filing and sanding than for a custom made dam for each specific pipe. I then tested the lid to see if the clear UV resin would adhere to the surface of the lid by applying a drop to the lid, curing it with the UV flashlight then applying pressure to the side to see if it moved.
I was very happy to find that the resin did not stick to the plastic lid. You can see from the photos that the cured drop moved on the surface of the lid freely and then moved to the pipe nail. This would eliminate the step of applying petroleum jelly to the plastic. I was feeling even more excited about using the black UV resin if only it would get here.
The stem was returned to the workbench and introduced to the sandpaper. I started with 400 wet/dry sandpaper to smooth the rough patches and to remove any remaining oxidation. Every time I thought I had gotten rid of the oxidation, I would apply a drop of Obsidian Oil and wipe – there would still be a touch of brown. Augh – the joys of old vulcanite. My thought was to get it as good as possible then when the black UV resin arrived I could paint a light coat over the button-ward third of the stem thus sealing the vulcanite and stopping oxygen from getting to the vulcanite. This would then be blended by sanding and micro-meshing to form a continuous flowing finish. Well, that was the imagined outcome, anyway.
The Black UV resin finally arrived (November 28). I tested it and found it wanting in regards to what I need it to do. If you would like to see what I did to test the Black UV resin please see the A Restoration of a Pipe by Lee Restoration. I was disappointed but I was not beaten. I had my old clear UV resin (and a new idea) and if that failed I had the fall back tried and true black CA.
The old clear UV resin has the problem of being clear. Before I discovered black CA glue, I used to mix carbon powder into the clear CA and build up layers of CA to fill dents or rebuild a button. I thought I might be able to do the same thing with the UV resin. I needed to test the carbon powder and clear UV resin. To do this I took an extra vulcanite stem and drilled a hole in it right behind the button.
Next I mixed carbon powder into the Thick Clear UV resin. I put the plastic dam cut earlier into the airway and applied a thin layer of the mixed UV resin into the hole. I then cured it with the UV flashlight.
It seemed to be working. The airway remained clear and the hole had been sealed eliminating the need for the dam in further applications. I continued with another this layer of the UV and carbon mixture. I curing this second layer as with the first.
After curing the second application I filed the high spots (light areas on the above photo). I then repeated the process with a third layer.
From the photo above, you can see that I filed the surface of the third layer. I repeated the process with a fourth layer.
The above layer had been filed smooth then sanded with 220 sandpaper. I was now sure that the UV resin mixed with carbon powder would work to fill the chewed-through area of the Greenwich stem. Test successful!
I inserted the dam and proceeded with the first layer on the Greenwich stem.
Apologies for the lighting. The workbench is not set up to be a very good photo studio. The UV resin and carbon were working. I had to use thin layers as the carbon powder absorbs the UV light from the flashlight and does not allow the light to pass as deeply into the resin as when it is clear. Slow and steady. Another layer.
This layering of the resin continued for several additional layers.
Eventually I got to the point where I was needing to build up the rise of the button. I continued building up the area, curing the resin, filing the result and applying additional layers.
The best part about the UV resin is that it is much easier to work then the black CA. I could file and sand it in less than ¼ of the time it would have taken me to do the same thing with CA. Now, how well the UV resin will hold up to extend clinching and cleanings is another question altogether. I have high hopes for this method of repair.
I worked through the sanding and micro-meshing of the stem. These shorter thick stems are easier to polish than the long bent stems of say a Peterson. The 200 and 400 sandpapers were used first (wetted) followed by the 1500 (wet) and 1800(wet) micro-mesh pads. In between each pad I would apply a light coat of Obsidian Oil and wipe it with a paper towel. I then worked through the set of micro-mesh pads (dry) from 2400-12000 with the Obsidian Oil between each pad. Once finished with those I used white diamond buffing compound on the buffing wheel to polish the entire stem. After the white diamond buffing, I rubbed any remaining compound off with a shop cloth and gave the stem a couple of coats of carnauba wax on the buffer.
The stem was then reunited with the stummel. Seeing them together nearly finished warmed my old heart. I returned them both to the buffer for their final coat of carnauba wax. After the wax I rubbed the whole pipe with a microfiber polishing cloth. It helped deepen the shine of the vulcanite but did little for the briar. The old girl then posed for some photos.
Overall, I am very pleased with this restoration. The disappointment of the black UV resin has mostly passed. I am now wondering about how the repair, using the UV resin and carbon powder will hold up to use. Another question I have been pondering is about the quality of the UV resin. The fly tying resin used in this restoration has proven to be insusceptible to alcohol while the new black UV resin was not. Perhaps I need to do some more product searching and testing. If you have had experience using UV resins or would like to know how this repair holds up please feel free to use the comments section. Thank you for reading the ramblings of an old pipe lover.
Waldorf you say. Isn’t that the brand that everyone has heard of? That great artisanal craftsman from way up in the mountains of the Danish Low Lands? Umm no, not that guy. Okay, I confess that my stock box of pipes to restore has dwindled as of late. I was focusing on specific brands and shapes and not picking up estate lots over the past couple of months. I still completely love descending down to my basement work area to diligently ignore my daily chores while restoring just about any old pipe. I also confess that I am not yet independently wealthy, something that is a bit difficult to obtain on a public school teacher’s salary and now pension. Regardless, the muse directed me to this abandoned and ignored little pipe. I have no recollection of when I got it nor from where. I am assuming it was part of an estate lot or perhaps a pipe in a grab bag from Steve Laug’s partner in restoration Kenneth. I did purchase a mystery bag from Kenneth once, great fun, that. They are occasionally available at https://rebornpipes.com/rebornpipes-store/pipe-restoration-grab-bags-tools/# If you want to give this restoration thing a go.
Here was what I pulled from the box.
Nice deep blast.
That’s odd. What kind of cheap briar did these poor Italians have to work with?
Some oxidation on the stem and a few tooth marks.
A little lava but no sign of charring.
Hey, I recognize that upside down triangle. That is the WIlliam Demuth and Company logo. A quick search on W-Wd — Pipes: Logos & Markings (pipephil.eu) confirmed my observation.
The Waldorf brand pipes appear to have been just a stamp that WDC would stamp on low end imported pipes from Italy and France. Here is another Waldorf stamp from a different pipe.
A little bit about WDC. William Demuth and Company was founded by William in 1862. According to Pipedia.org:
“(Wilhelm C. Demuth, 1835-1911), a native of Germany, entered the United States at the age of 16 as a penniless immigrant. After a series of odd jobs he found work as a clerk in the import business of a tobacco tradesman in New York City. In 1862 William established his own company. The William Demuth Company specialized in pipes, smoker’s requisites, cigar-store figures, canes and other carved objects.” (https://pipedia.org/wiki/William_Demuth_Company)
“The company went through a period of changeovers. David A. Schulte (Schulte Cigar Stores) purchased the company in 1927. As of 1929, Demuth and S.M. [Samuel Morris] Frank were two of the five companies that controlled the domestic briar pipe industry. In 1937, Frank became Demuth’s president by purchasing the factory in Queens—to combine Frank (Kaywoodie pipes) and Demuth pipe production—and Demuth became a subsidiary company. The Company officially disappeared in 1972, but Frank continued to produce Wellington pipes from the Demuth factory until 1976; in the 1980s, the Wellington was revived for a brief time.” (https://pipedia.org/wiki/A_Demuth%E2%80%94Dunhill_Connection%3F)
As for the little darling that this blog is about, I can safely say that she has been sandblasted. When did pipe makers start blasting? There is some contention around that. It can be be stated without much argument that Dunhill was the first to utilize and market the technique Again Pipedia.org states the following:
So, that brings in the dates 1920s -1972. Narrowing it down further would be conjecture. I can imagine that it would take several years for the industrial equipment and the capital to acquire it would reach smaller pipe makers throughout the pipe production area of southern France and Italy. Then you have the war years to contend with. With those factors in mind I think it would be safe to assume that this little Waldorf was likely made between 1950 and 1972.
Whatever became of the pipe manufacturing factory that WDC and S.M. Frank had built? Well there are still remnants of their past glory.
“In early 1937, the City of New York notified S.M. Frank & Co. of their intent to take by eminent domain, part of the land on which the companies pipe factory was located. This was being done to widen two of the adjacent streets. As a result of this, Frank entered into negotiations to purchase the Wm. Demuth Co.’s pipe factory in the Richmond Hill section of Queens. It was agreed upon that Demuth would become a subsidiary of S.M. Frank and all pipe production of the two companies would be moved to DeMuth factory. New Corporate offices were located at 133 Fifth Avenue, NYC.
Demuth pipes continued to be made at the Richmond Hill plant till December 31. 1972. Then the Wm. Demuth Company met its official end as a subsidiary company by liquidation.” (https://pipedia.org/wiki/William_Demuth_Company)
“Initially located downtown on Pearl St. and on Broadway near Duane St., S. M. Frank & Co. moved uptown to 17th St. in 1904, then to this building with entrances on both 21st St. and Broadway in 1912, where they remained for about 10 years. The sign, then, dates from this period, possibly as early as 1912 and no later than 1922.” (https://www.14to42.net/21street.html)
“The factory building in Queens became apartments, some of which have a magnificent view of Forest Park. The complex was converted into apartments in 1987, and is called the Park Lane South Condominiums.”
Imagine the owners of one of those condominiums surprise when asked:. “Do realize that you live in the same place where most of the tobacco pipes made in the 1920s-30s were produced?” I’m sure their reaction would be a “so?” I’d like to think some people would say, “cool”.
To the restoration. As you can see from the photos the Waldorf was not in bad shape. It did have a weird looking patch of briar on the left side from the
stummel to the heel. It also had what looked like a thick coat of lacquer applied over the entire stummel. I removed the stem and set it aside. I began working on the tobacco chamber. I grabbed the PipNet reaming tool only to
find that the chamber was too large for the second size reaming blade and too small for the third size. This meant that the Scotte tool was the tool for this job.
The Scotte kind of worked. This bowl was slightly larger than the Scotte tool as well. I was able to use the Scotte by pushing it to one side of the bowl as I rotated the stummel. The remaining
cake had to be scraped with the SmokingPipes Low Country Knife. After the reaming I sanded the interior with 220 sandpaper wrapped around a wooden dowel.
Next stop on the restoration express was the sink for the Murphy Wood Cleaner and a toothbrush routine. The Murphy’s is used undiluted and the
toothbrush is a medium stiff bristle brush. The Murphy’s is rinsed with Warm water. While I was at the sink I put a little bit of Dawn dish soap on a nylon shank brush and worked it through the airway. I figured that since the tobacco chamber was not very badly caked that the shank might also be lightly coated with tar. The brush foamed up white then it quickly changed to brown. I worked the brush in and out and then spun in to have the bristles working in both directions. This was then rinsed with warm water and repeated. The third time the foam did not change color to the “chocolate milk” color so I assumed I was making progress. The final dish soap was again rinsed with warm water. The whole stummel was dried with a cotton dish towel with the tobacco chamber dried with a paper towel.
I returned to the workbench and poured about 3 ml of 99% isopropyl alcohol into the tobacco chamber. I let the alcohol slosh around in the chamber and move into the shank. I plugged the mortise end with a finger to keep the alcohol inside the stummel. I do this to allow the alcohol to pull some of the water out of the briar. 99% isopropyl or the 95% ethyl are very hydrophilic solutions. That means the water will readily leave the wood and dissolve into the alcohol. I think this speeds up the drying process significantly. I finished cleaning the airway and shank with alcohol soaked cotton swabs and pipe cleaners until they came out clean.
This brings us to the stem. The tooth marks were small and not too deep so I tried to lift them by “painting” them with the flame from a disposable lighter. It helped but they might still require light filing and sanding.
I rubbed the entire stem with 0000 Steel wool to remove the surface oxidation and some of the rough area. Next I pushed a pipe cleaner into the stem from the tenon. This would be the hook from which I would hang the stem into the jar of Before and After Deoxidizing Solution.
I figured that I would leave the stem in the solution for an hour.
While the stem was in deox (like detox for people) I returned my attention to the stummel. I wanted to see what solvent would have the best effect at removing the layer of varnish that still covered the stummel. The 99% Isopropyl didn’t seem to do much to it so, I went for the acetone. I moistened a make-up removal pad with acetone and was very surprised at what came off of the stummel. I was like I was wiping off a layer of dark mud. The acetone would evaporate quickly from the pad, as acetone does but, while moist it removed something from the stummel. It was crazy. Where is this stuff coming from?
I thought “I’ve never seen this before.” I figured I’d just let the whole thing soak in acetone. I have canning jars with ethyl alcohol and acetone (EtOH
organic chemistry abbreviation for ethyl). I was still thinking that this was the lacquer finish. I thought, “Maybe back when this pipe was made they mixed the dye in the lacquer and killed two birds with one stone or spray.” I let the pipe soak and occupied myself with some of the chores I had been neglecting. After about 30 minutes I returned and pulled the stummel from the acetone jar. I put on a nitrile glove on my left hand. And started rubbing with the an acetone moistened make-up pad. “What the heck?” is all I could think. It was like the stummel was dissolving in my hand. I gave up on the pad and grabbed the brass wire brush (AKA 20 gauge shotgun bore brush), dipped it in the acetone and started scrubbing. “What is happening?” I
wondered. I was holding the stummel in my nitrile gloved hand with a paper towel to catch the liquid and solids that were coming off the stummel. The phot left shows the paper towel.
I let the whole mess evaporate and started to look closely at the stummel. Large areas that previously had no ring grain from sandblasting now had ring grain. “That can’t all be a fill?” I pondered. “Oh yes it can and it is!” I replied. I think the acetone fumes were making me loopy. I had to break up two altercations that were happening with the voices in my head.
I took the dental pick to the fill. Again, remember the photo with the circle?
The whole area was a fill. And it was not just a little surface fill of a mm or two deep. Oh no, it was at least 6 mm at the deepest. The filler that was used had either been mixed with the lacquer or the lacquer had penetrated into the putty, all the way down to the briar. It was only soft when wet with acetone. Once the acetone evaporated it returned to hard putty/fill. I soaked the stummel again for 15 minutes. After removing it from the acetone I went quickly with the brass brush trying to maximize my time before the putty hardened back up. The next three photos I called “Scrub 1” as I was labeling them.
You can still see places where the lighter pink colored fill is still present in some of the depressions. I repeated this another two times. The later times I also used the dental pick to loosen larger area, I would get pieces off that
were 2-3 mm in size. I did not know how to proceed. These were uncharted waters, for me. I took the stummel to the sink, thinking,
“Maybe some Murphy’s and a toothbrush would help”. I started arguing with myself again,
“What are you doing, dummy?”
“I’m trying to use soap.”
“Yeah, did it do anything different THIS TIME? You already did that, dummy.” I blame the acetone fumes.
I went back to the workbench and tried ethyl alcohol instead of isopropyl. That seemed to work about as well as the acetone. Good thing I did not have any methyl alcohol. I probably would have forgotten the glove and absorbed just enough to blind one eye.
There were many dippings on the brass brush in acetone and scrubbings. There were many pickings with the dental pick. There were probably more arguments with myself. In the end. I called these next two photos “Scrub 2” when labeling them:
Oh no, the stem is still in deox! It had been in there for over two hours. In my acetone crazed state I had completely forgotten about it. I went to retrieve the stem from the solution. I was still there. It had not completely dissolved. Whew.
I lifted the stem by it’s hook and let it drip off most of the solution. I placed the wet stem on the coarse shop rag used for deoxidation solution removal. I then rubbed vigorously until the stem no longer had any solution on it. I then place two pipe cleaners through the stem moving them side to side and the button to get all the solution from the button.
The stem looked good but I could still see a few places that had the tinge of brown rather than the black of non-oxidized vulcanite. I took two make-up removal pads and dosed one with a dollop of Soft Scrub. I rubbed the stem in a non friendly fashion trying to scrub off the remaining oxidation. After the Soft Scrub scrub, I coated the whole stem with mineral oil. I also ran a mineral oil wetted pipe cleaner through the airway.
The stem was at a place where I could leave it and get back to the stummel. I had soaked and scrubbed, soaked and picked, soaked and scrubbed some more all for a pipe that I would never sell to someone.
I had visions of what had happened in that little pipe workshop in Italy. The father was showing his son how to use the new sandblaster. He explained about the pressure, nozzles, and blast medium. He diligently went over all of the safety equipment and features.
“Stop, wait a minute. Next you are going to tell them he discussed the material safety data sheet. There were no MSDS in 1950.”
“Stop arguing with me, this is my vision.”
“Yeah, your stupid vision.”
Hmm, I wonder if acetone poisoning causes permanent brain damage.
“You already got brain damage, dummy.”
And the son, being the fine young man that he was, paid apt attention to it all. His father said, “Son, your mother needs an expensive operation that we can only afford if we sell all of the pipes.” “Yes, Pappa” replied the son.
“Hey why did everybodys’ mom need expensive surgeries in 1950?”
“I don’t know, but they did.”
“OK, go on with your story then.”
There was Sonny, blasting away with the new equipment, feeling like a responsible real young man. When Ophilia walked by the large front shop window or, should I say sauntered by the front window. Sonny’s eyes couldn’t help but follow that seductive swaying form. In that moment of distraction, the blast had cut too deep for the accepted norms of those times. Father shrieked in terror and fell to his knees. “Oh my wife, I cannot go on raising this boy without you” he wailed. The son grabbed the filler putty and screamed “No Pappa, I can fix it. See, Mamma, will get the operation and live.”
Good story, eh?
“Yeah, you got the brain damage.”
I decided to lightly top the rim of the pipe. I did this using a piece of 400 wet/dry sandpaper on the counter top. I moved the stummel in a circular path rotating my grip on the stummel to evenly distribute the force of the sanding. After that I thought about filling the numerous sand pits. Then I thought “The last thing this pipe will ever need is more fills. Leave it.” So I did.
I started thinking about what shade of brown to use. I thought of a nice dark brown Fiebing’s Leather Dye as a base color with maybe a light brown for the high areas after I sanded away the dark brown from the high spots. It sounded good. I assembled the staining gear. Nitrile gloves, a lighter, a folded
pipe cleaner for an applicator, the dye and my make-shift duct tape wrapped fishing bobber to plug the tobacco chamber and act as a handle. All of this was placed on an upside down plastic container to protect my counter top from spills.
The Process of staining a stummel is pretty straightforward:
Place a wine cork (or bobber in my case) into the tobacco chamber to keep the dye from getting in there and to act as a handle.
Fold a pipe cleaner in half as the dye applicator.
Put on nitrile gloves. (Trust me on this one)
Dip the folded part of the applicator into the dye and apply liberally to the stummel.
After all the exterior of the stummel is wet with dye, Strike a flame with the lighter or a lit candle and light the wet dye on fire.
Avoid running around with the blue flaming stummel trying to show someone how cool it looks.
Repeat steps 1-6 as desired.
Well, at least that is what I did. Here are some photos:
I neglected to get a photo of the flames as I was busy running around looking for someone to show how cool it looks. I set the stummel aside to let the dye do what it does to the briar for about an hour.
After the dye had dried and set, I dampened a make-up pad with 99% isopropyl alcohol to wipe away any dye then was still on the surface of the stummel. I did not want any dye to pass from the stummel to a person’s hands while they were handling the pipe. The pad came back very well stained with excess dye, so I repeated it with another pad.
Here are some photos of the stained stummel:
I tried to lightly sand the high spots and expose unstained wood underneath. This met with complete failure. The high areas seemed to have absorbed the dye deeply into the wood. I scrapped the idea of highlighting with another color and called this shade of brown “perfect”. I vigorously rubbed the entire stummel with a clean dish towel to make sure that no dye remained. I then used my fingers to apply a relatively thick coat of Before and After Restoration Balm to the stummel. I used a soft bristle toothbrush to work the balm into all of the low spots. I let the balm do it’s magic on the stained briar for 20-30 minutes. After this time I used an inside out athletic sock to buff away the extra balm. Below are the photos of the stummel at this point.
I took two additional photos of the stummel in the sunlight.
The last task was to rid the stem of the tooth chatter and micro-mesh and polish it. All of my diligent photography fell short of documenting this stage of the restoration. “Hey, claim the brain damage made you do it. Or, not do it.” The mineral oil was wiped off the stem. I had already painted the tooth chatter with a lighterearlier. I did not think that the remaining tooth chatter was deep enough to require rebuilding the stem or filling of the dents with cyanoacrylate. I used an emery board to remove material around the dents
on both sided of the stem. I moved the board in a circular motion rather than in straight lines. After reshaping the area around the dents I used a finer grit emery board to start removing the scratches from the coarser grit again using small circles. I then turned to the 220 sanding pad and sanded the area. The button also needed to be slightly reshaped to define it’s edges. I used the emery board here as well followed by sanding with the 22 sanding pad.
Happy with the dent removal and button redefining, I moved on to the micro-mesh pads. I started with the 1500 and 1800 pads wet. In between
each pad I would apply a drop of Obsidian oil, rub it around with my fingers and wipe it with a clean make-up pad. I used the pads in order from the 2400-
12000 dry. Again repeat the the Obsidian Oil rub between each micro-mesh pad. I took the stem to the buffer and buffed it with white diamond buffing compound. Normally I use the Before and After Fine followed by the Extra Fine polish. I wanted to see if there was a noticeable difference between the two methods. I could not determine a difference. After buffing I used a cloth to wipe any buffing compound from the stem. I reattached the stem and gave the entire pipe a couple of coats of carnauba wax with the buffer.
This was a fun and surprising restoration. I had never come across fills of this magnitude and extent. I In the end I have a pipe that I will probably give to someone who has a real love for the deep sandblast finishes. Thank you for reading the ramblings of this old pipe lover. If you like this content please hit the “like” and or “subscribe” buttons. You will be alerted when a new post is published and be the first to read another ramble.

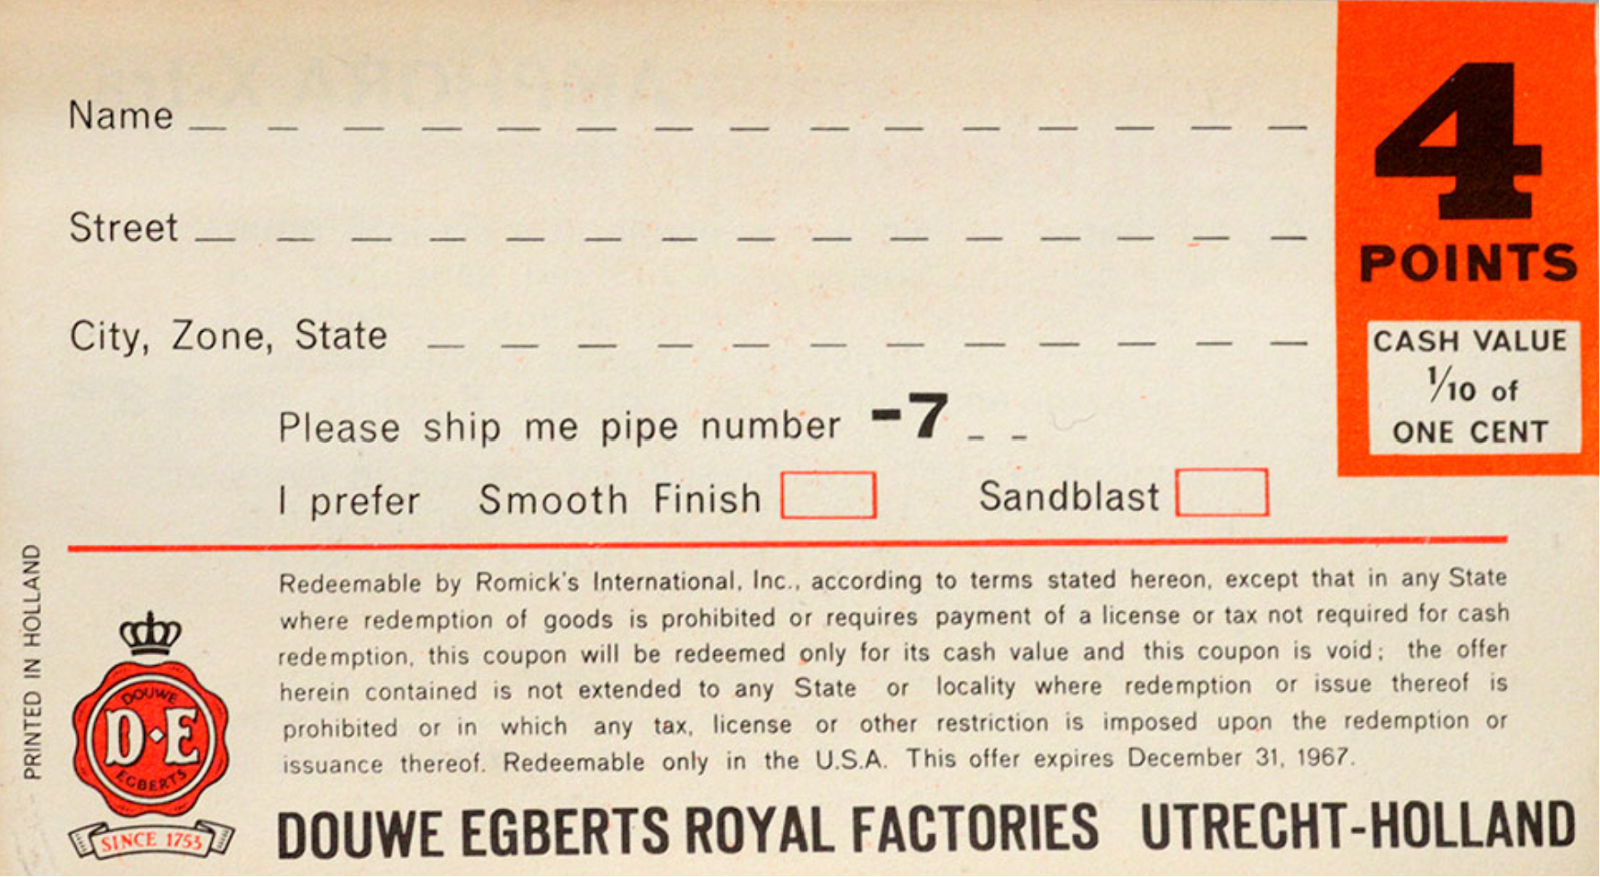
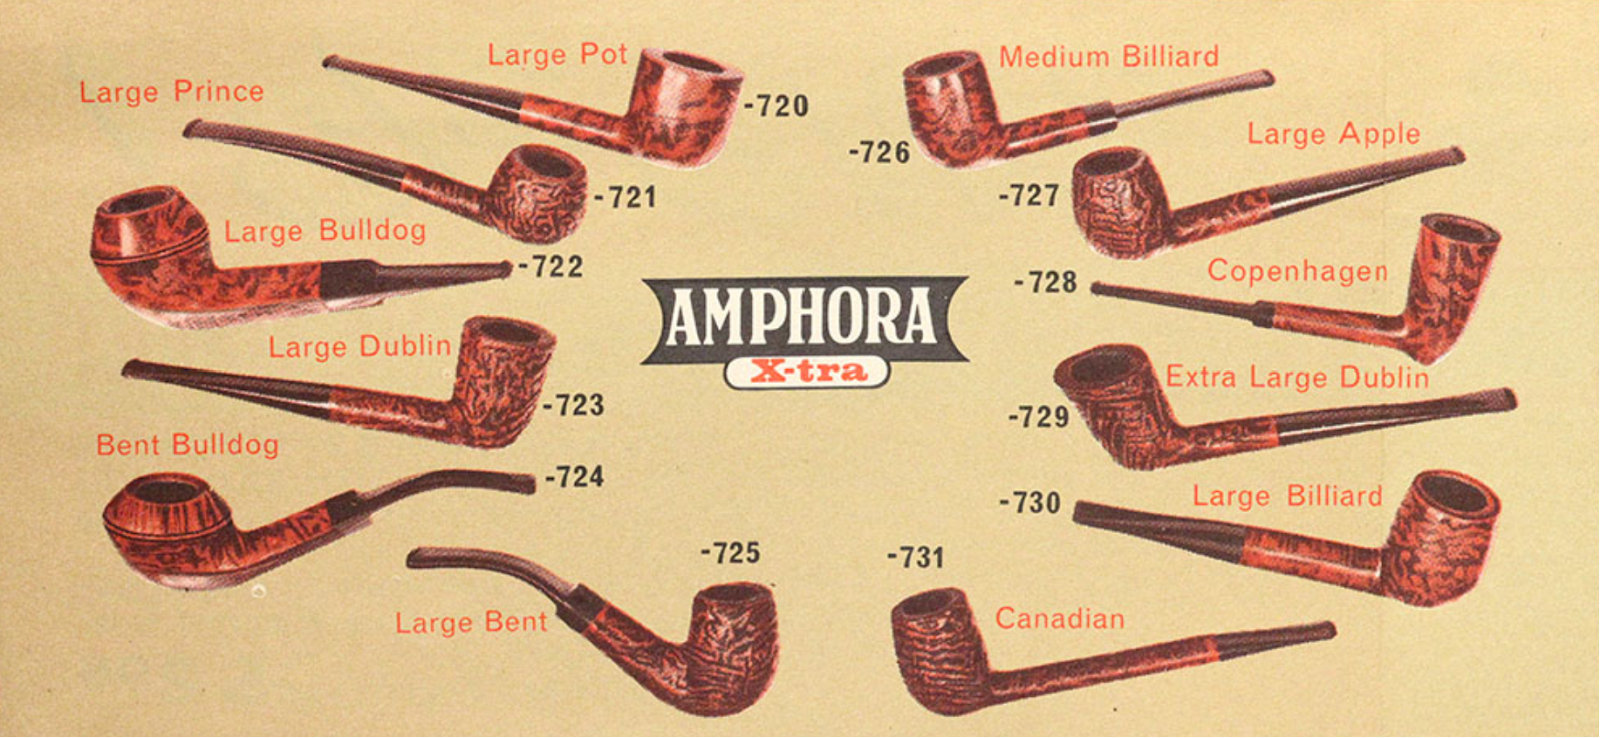

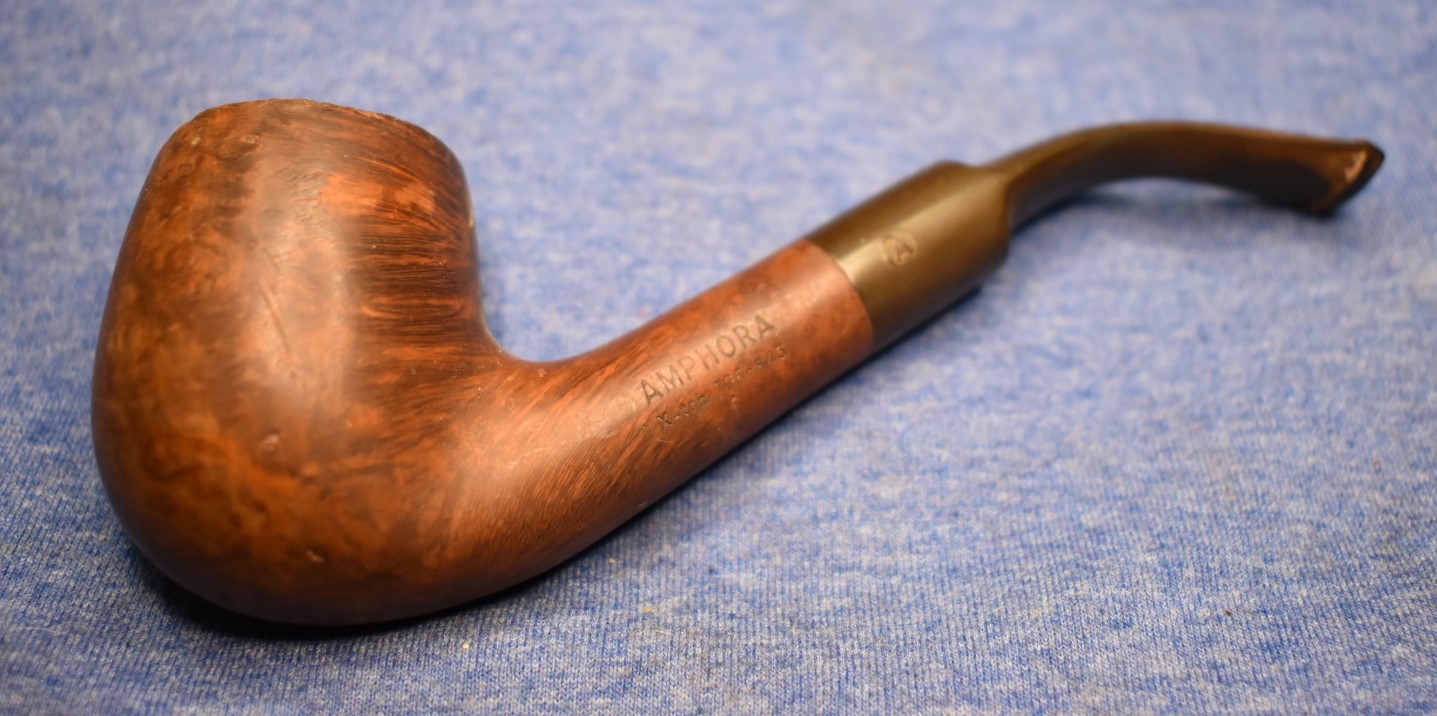

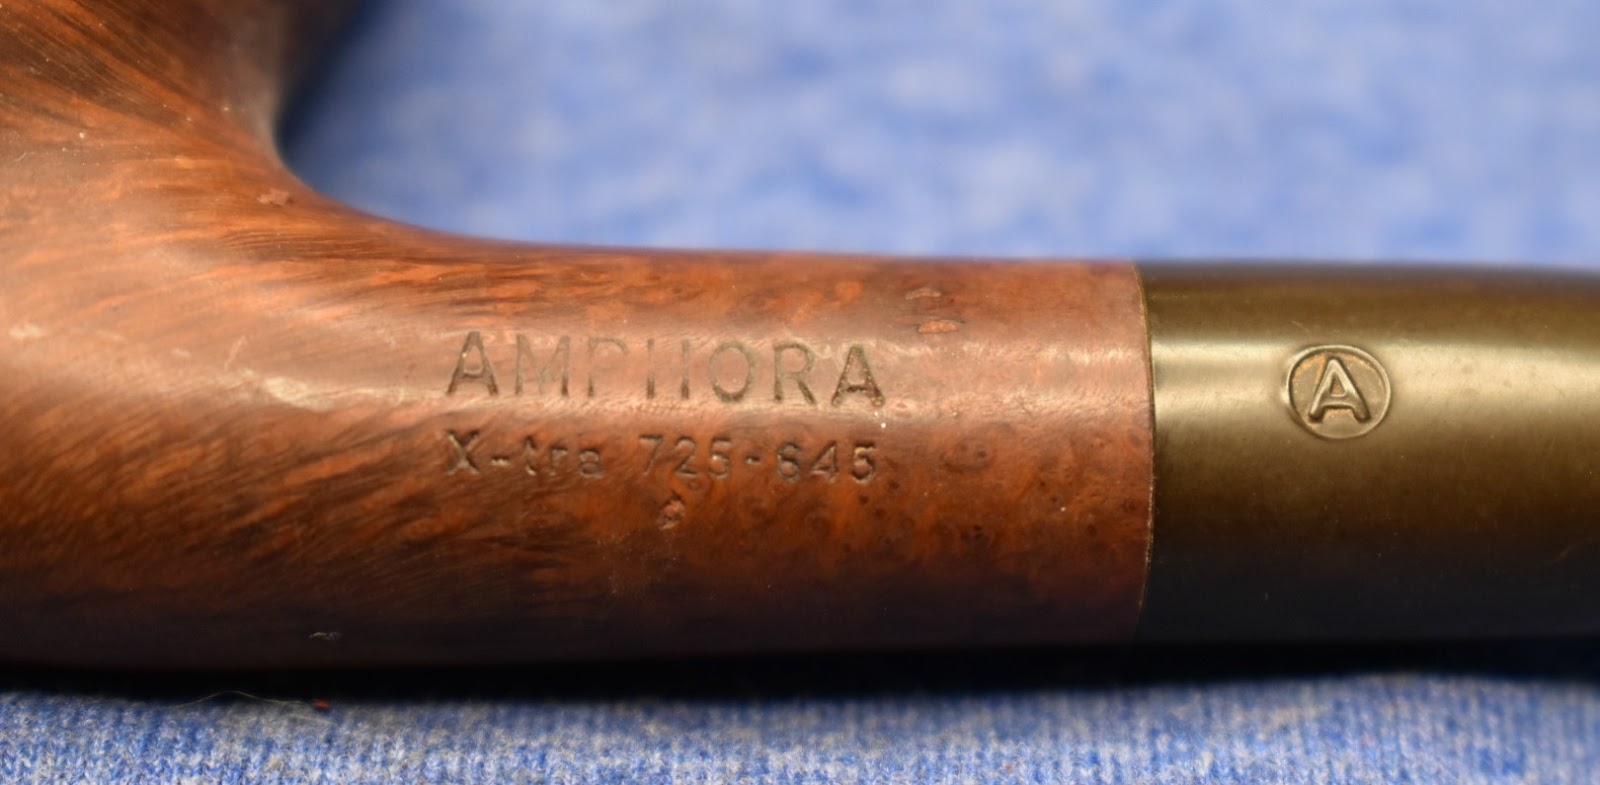

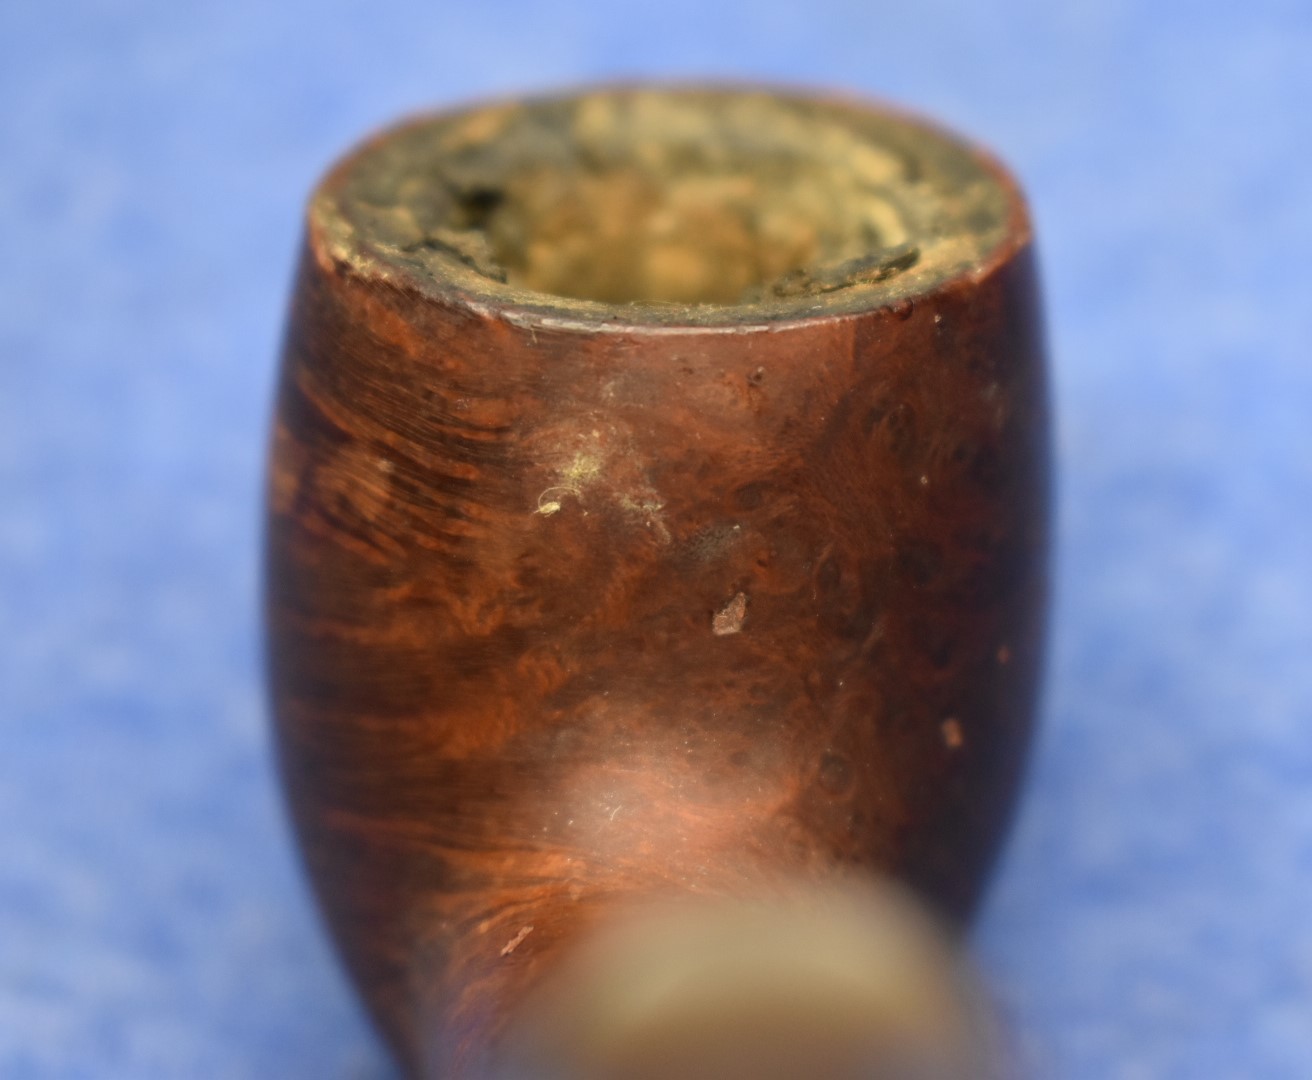
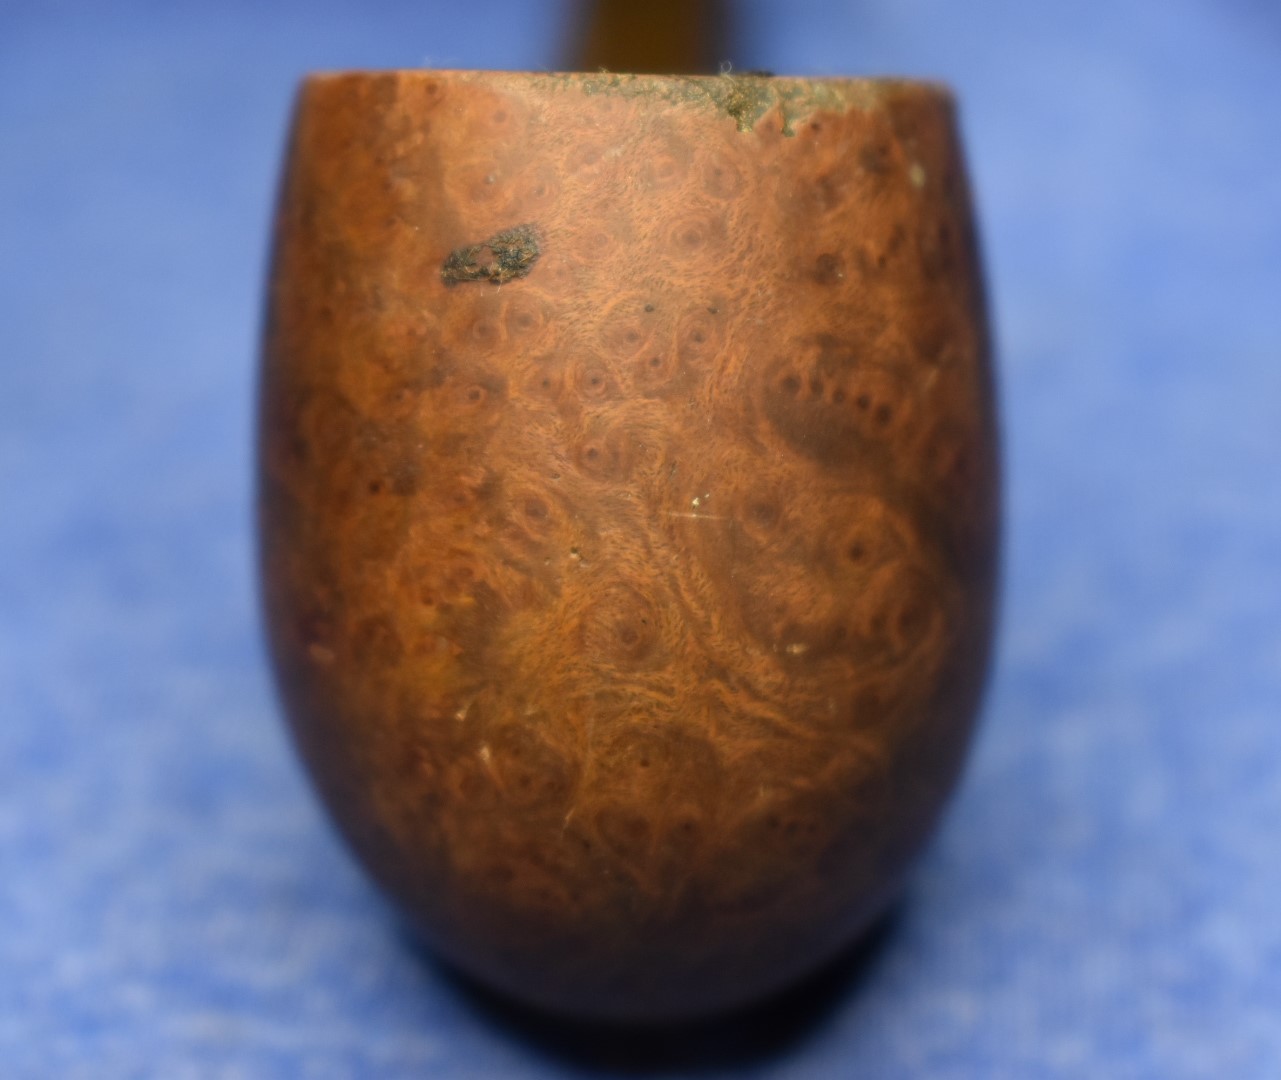

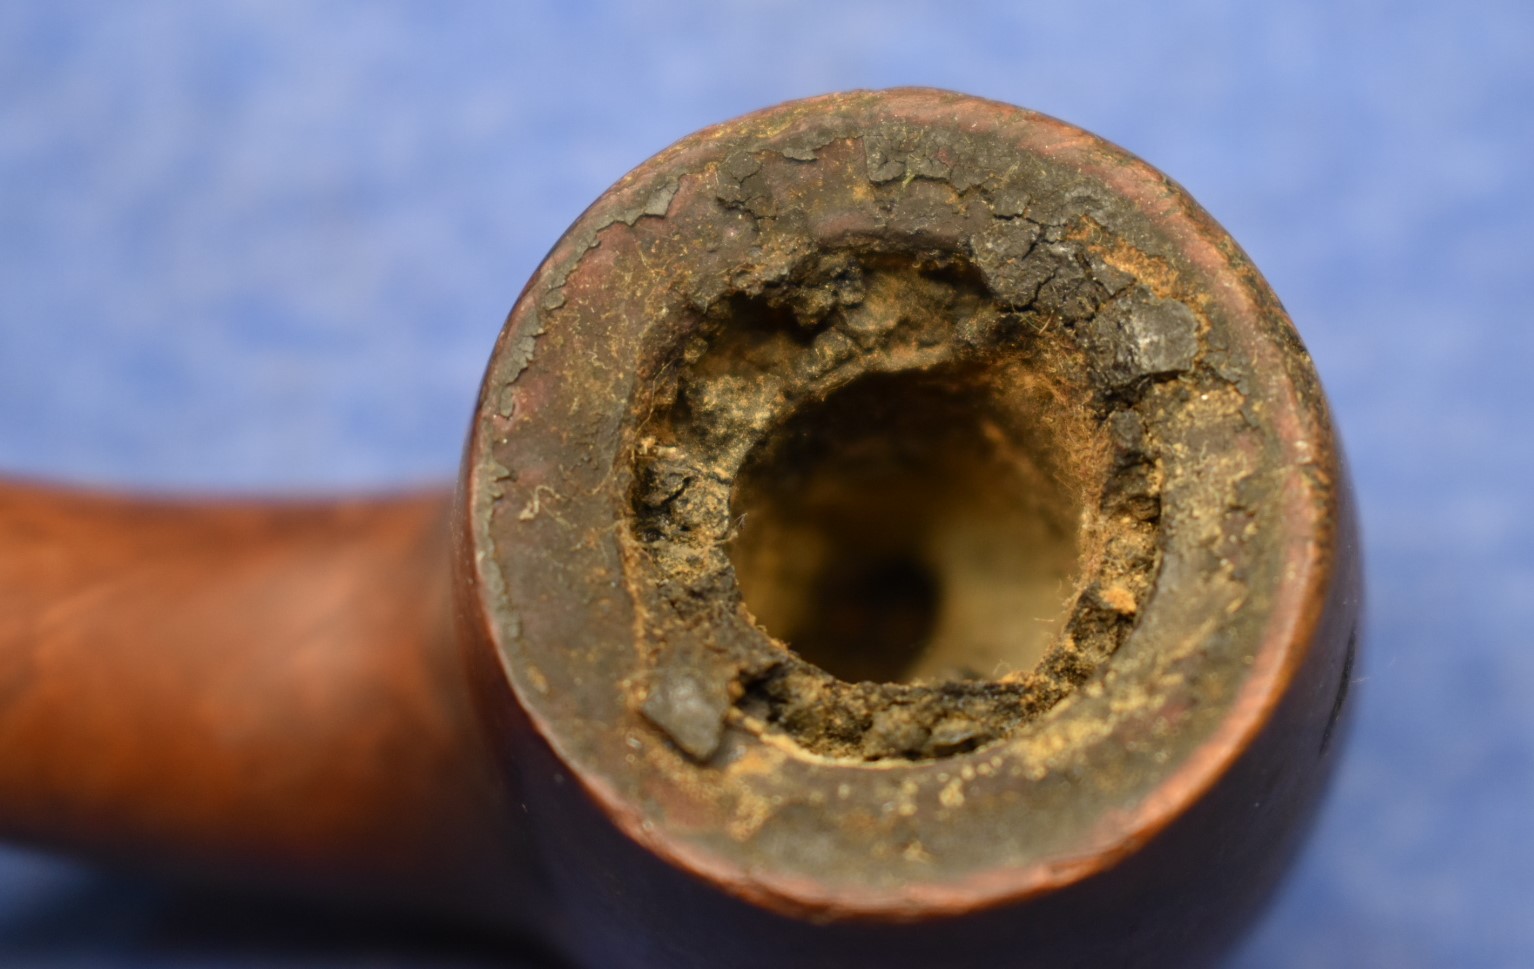
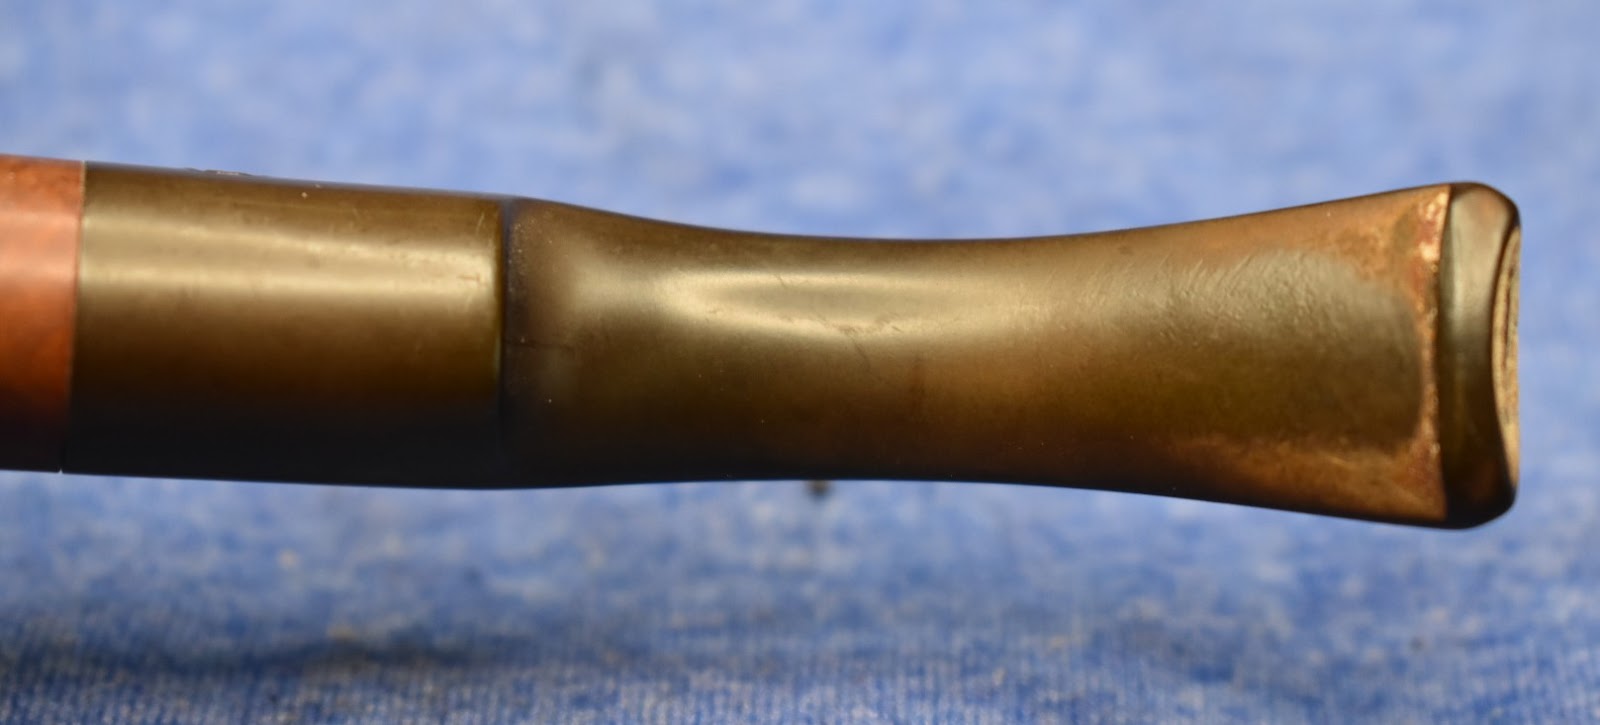


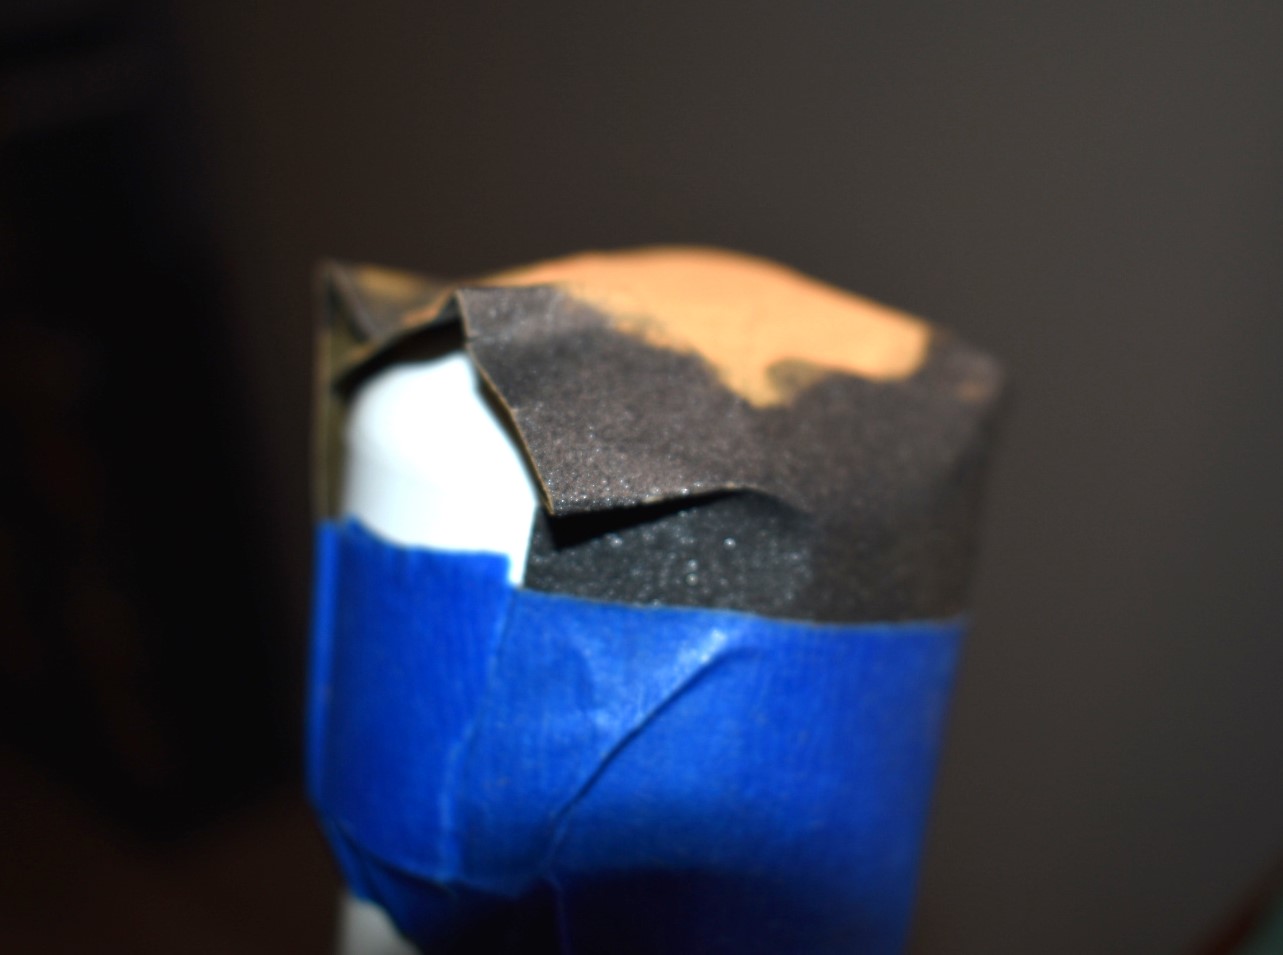


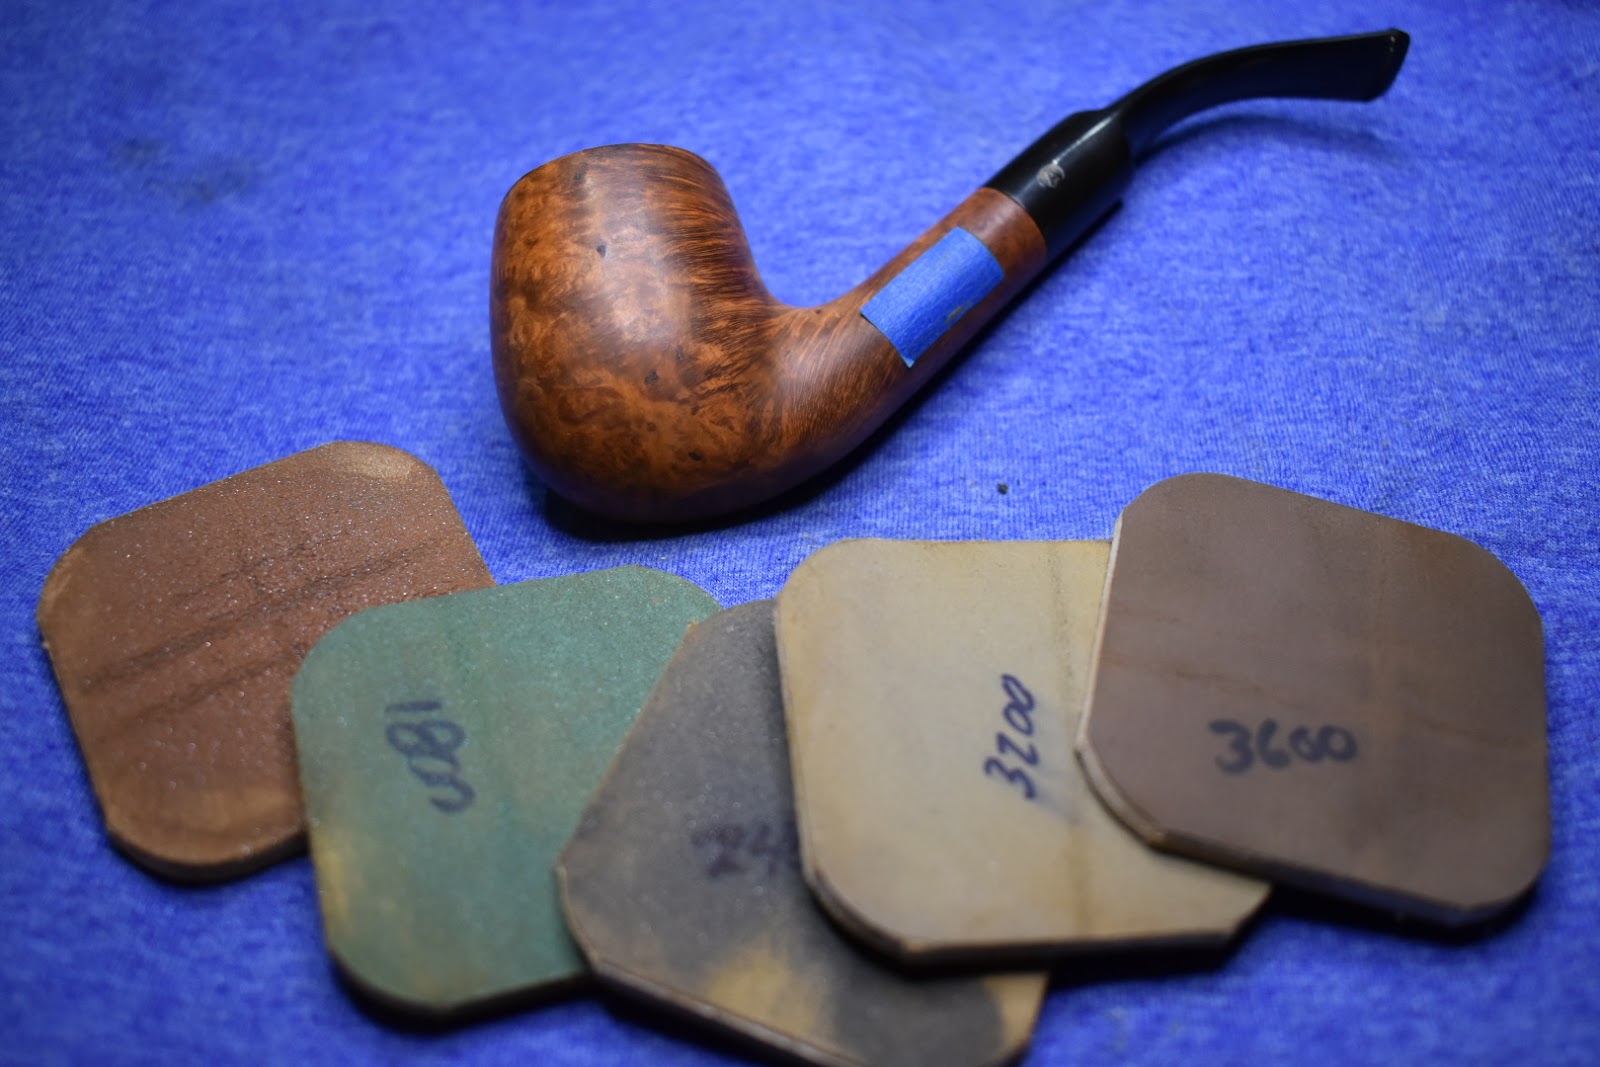
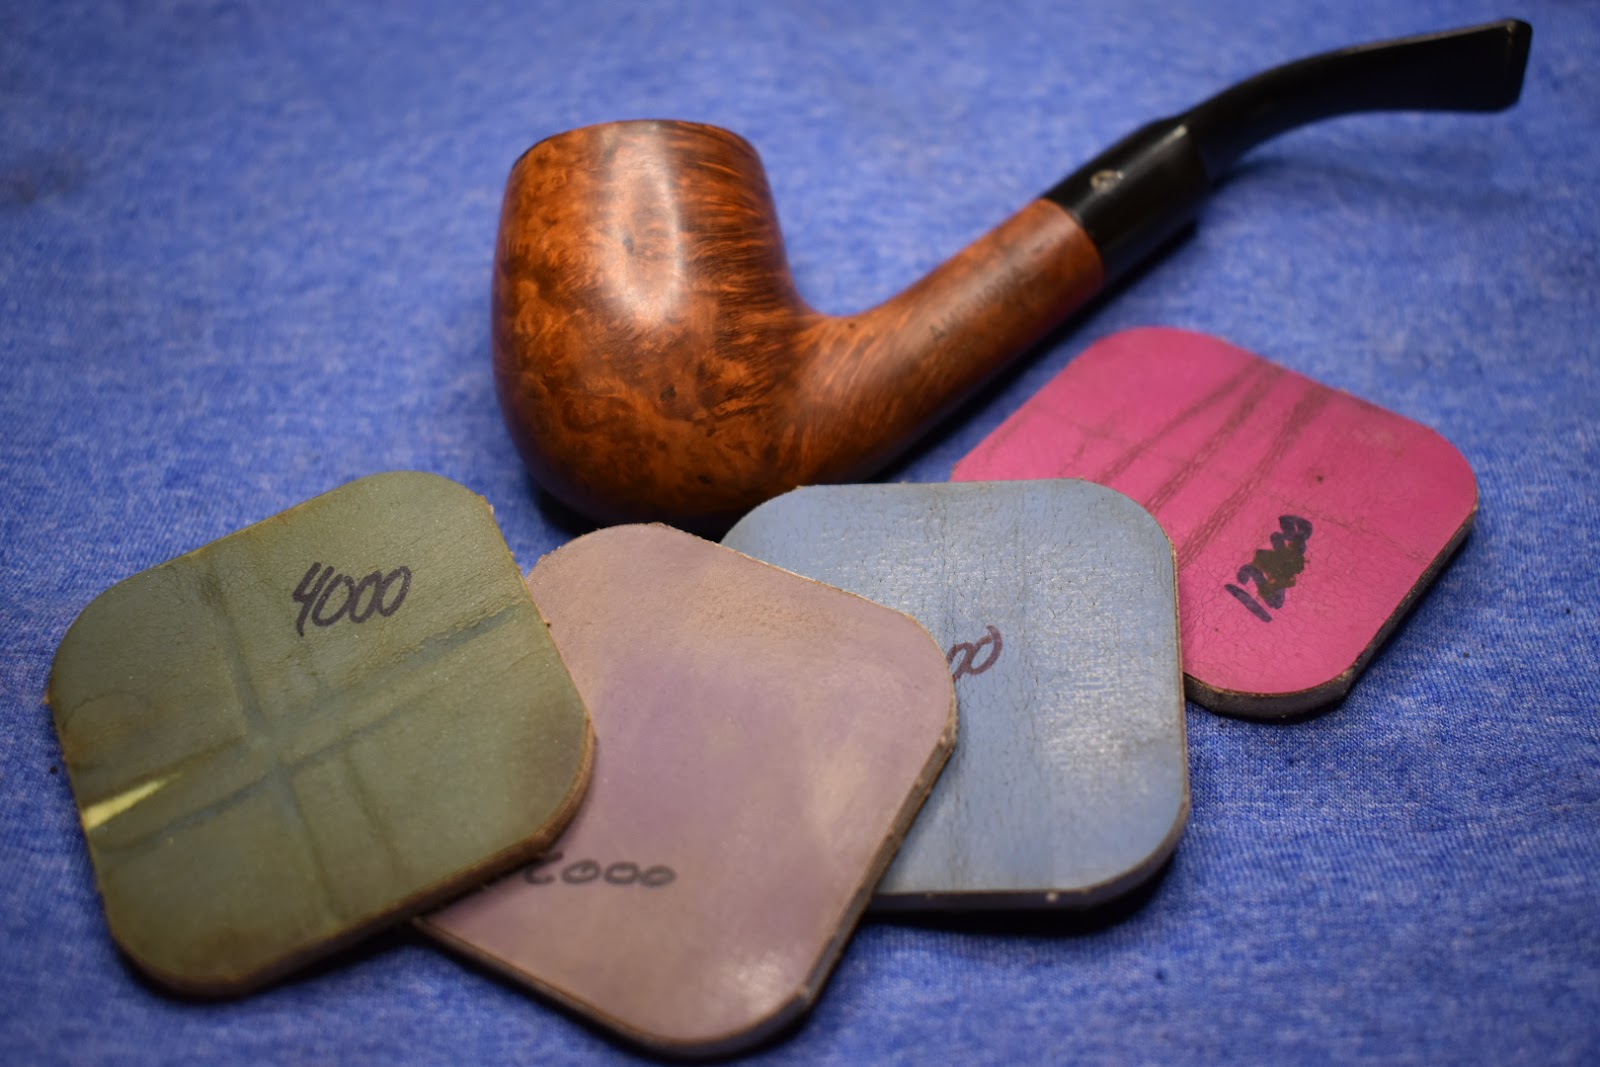
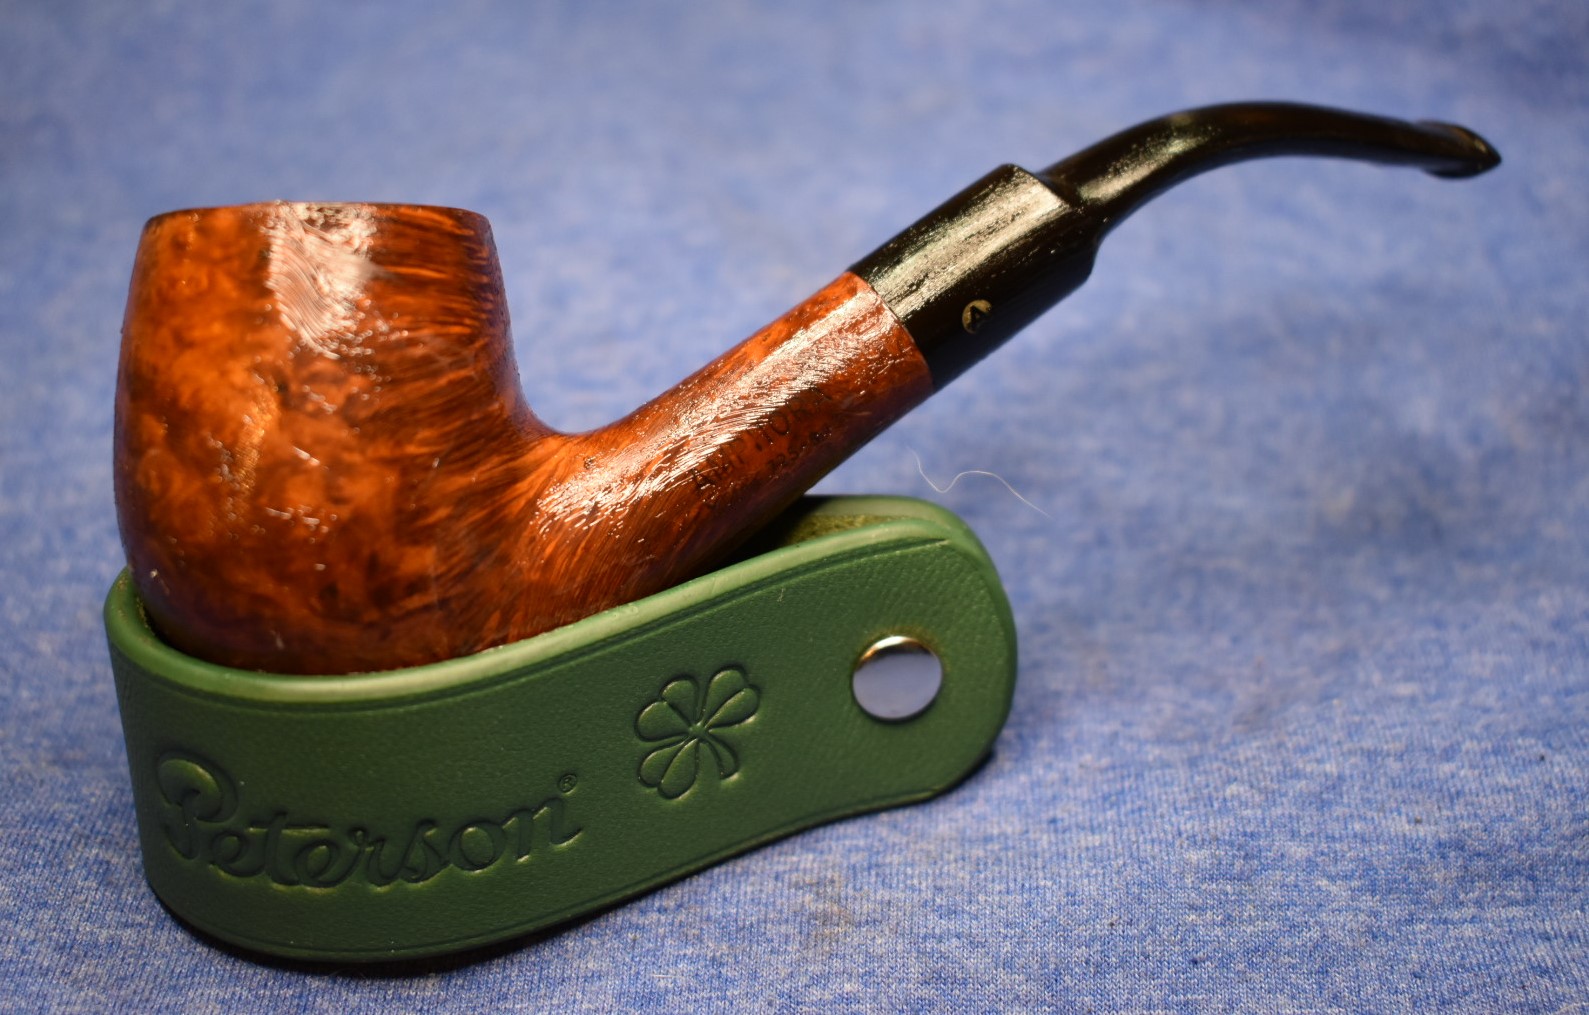


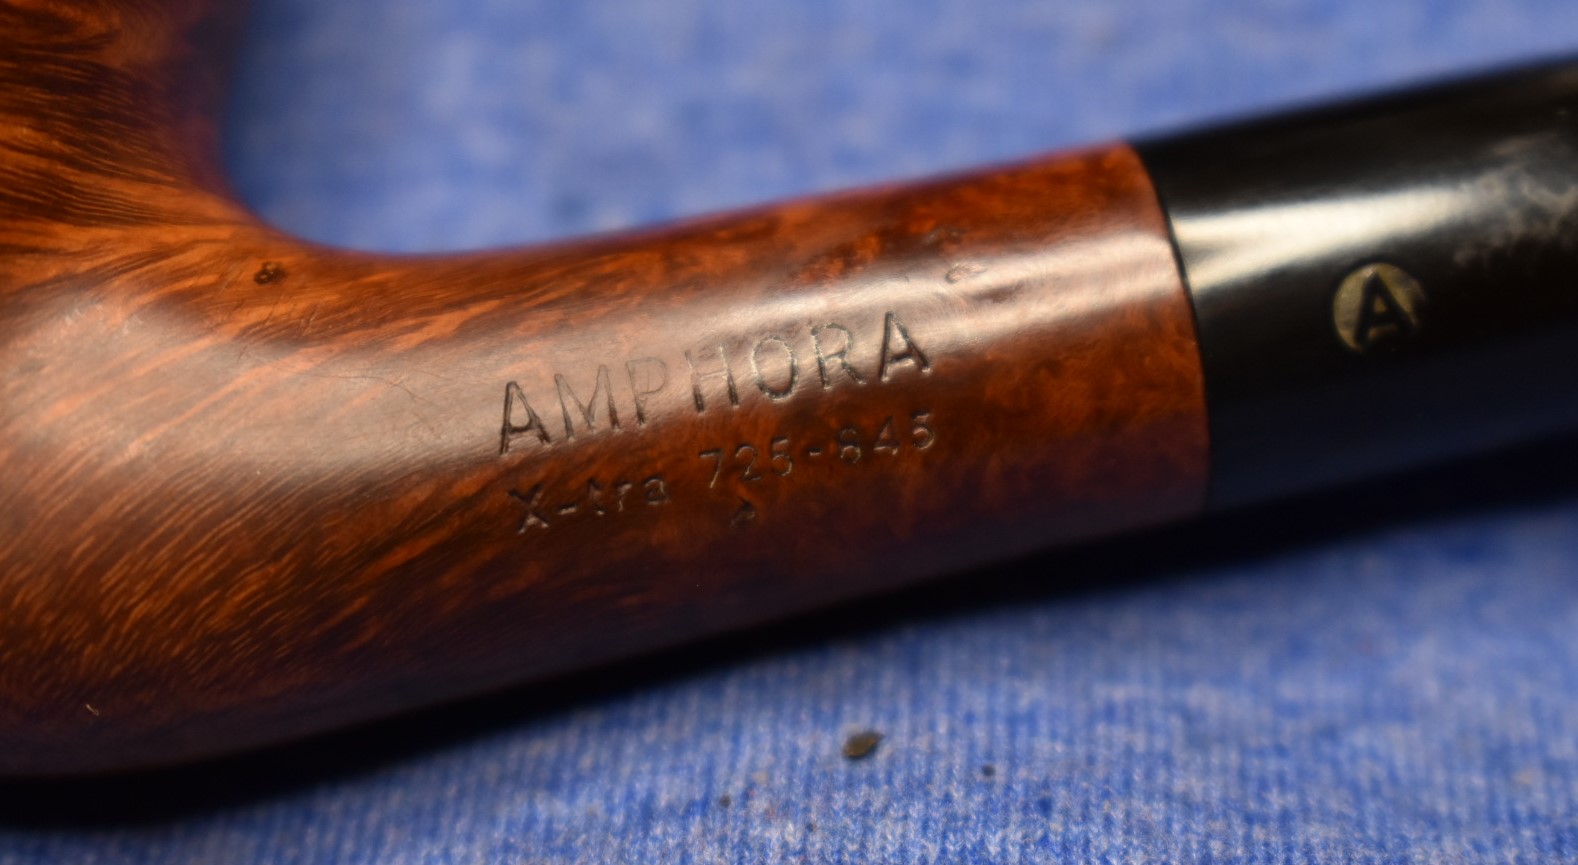


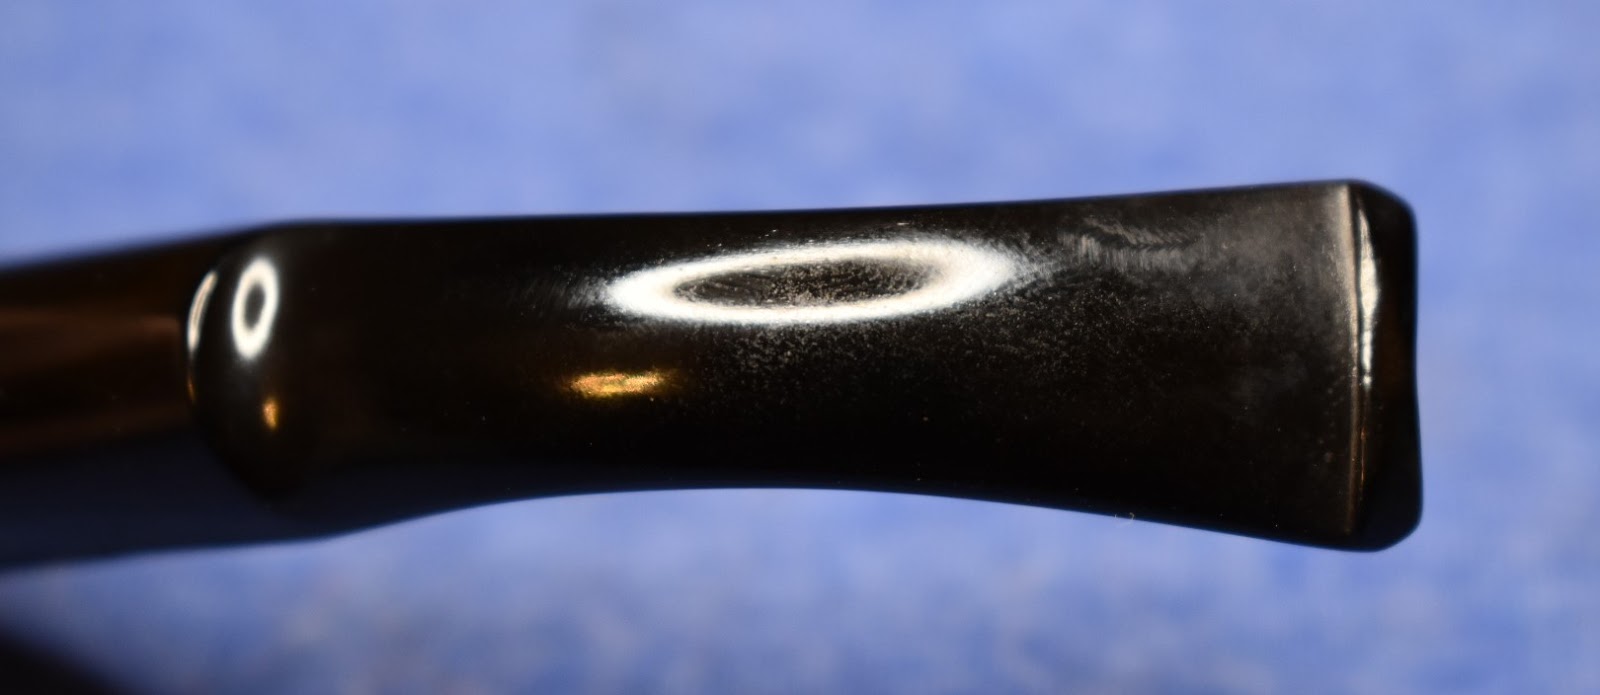
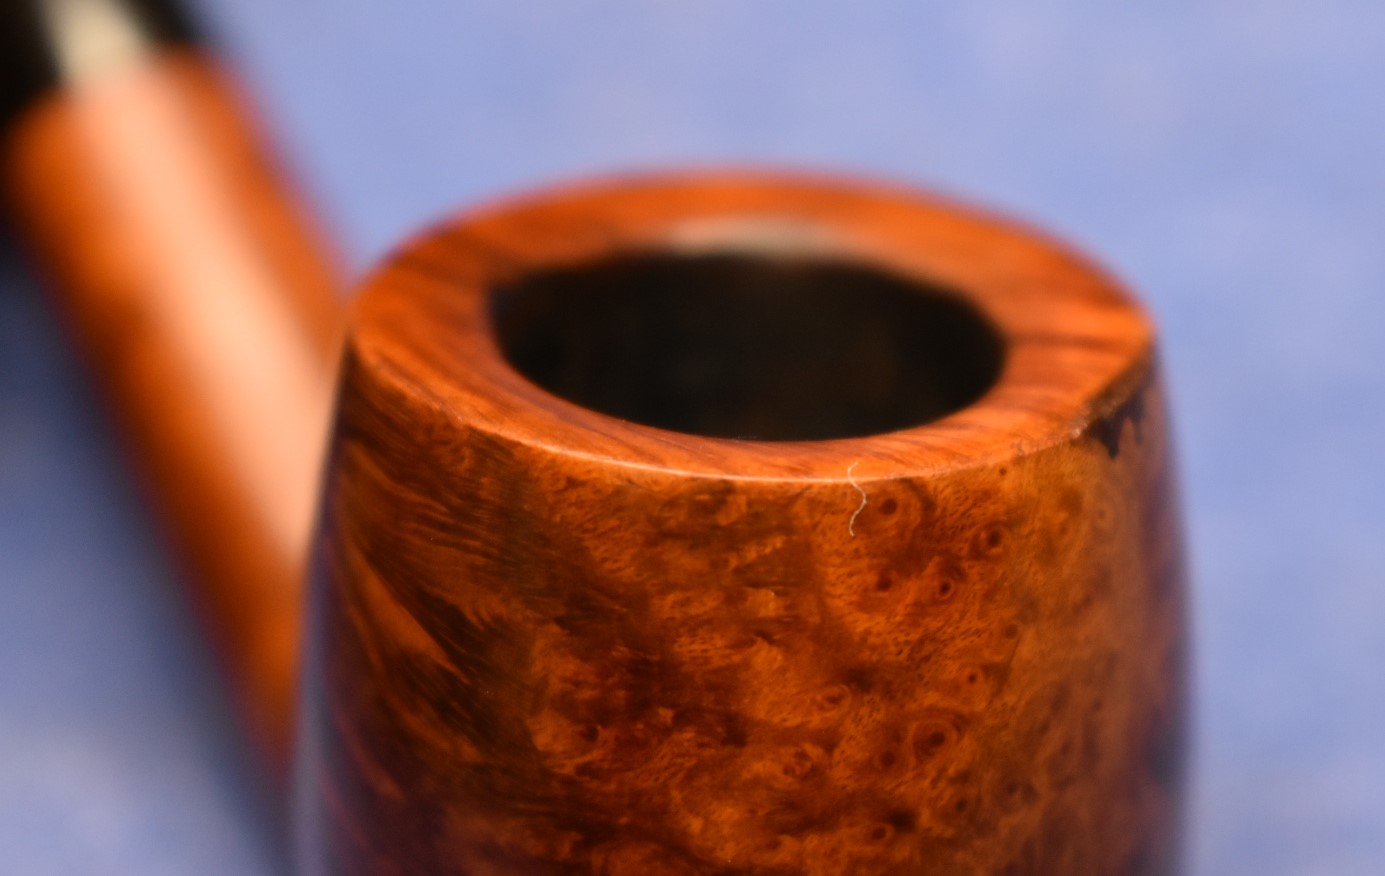
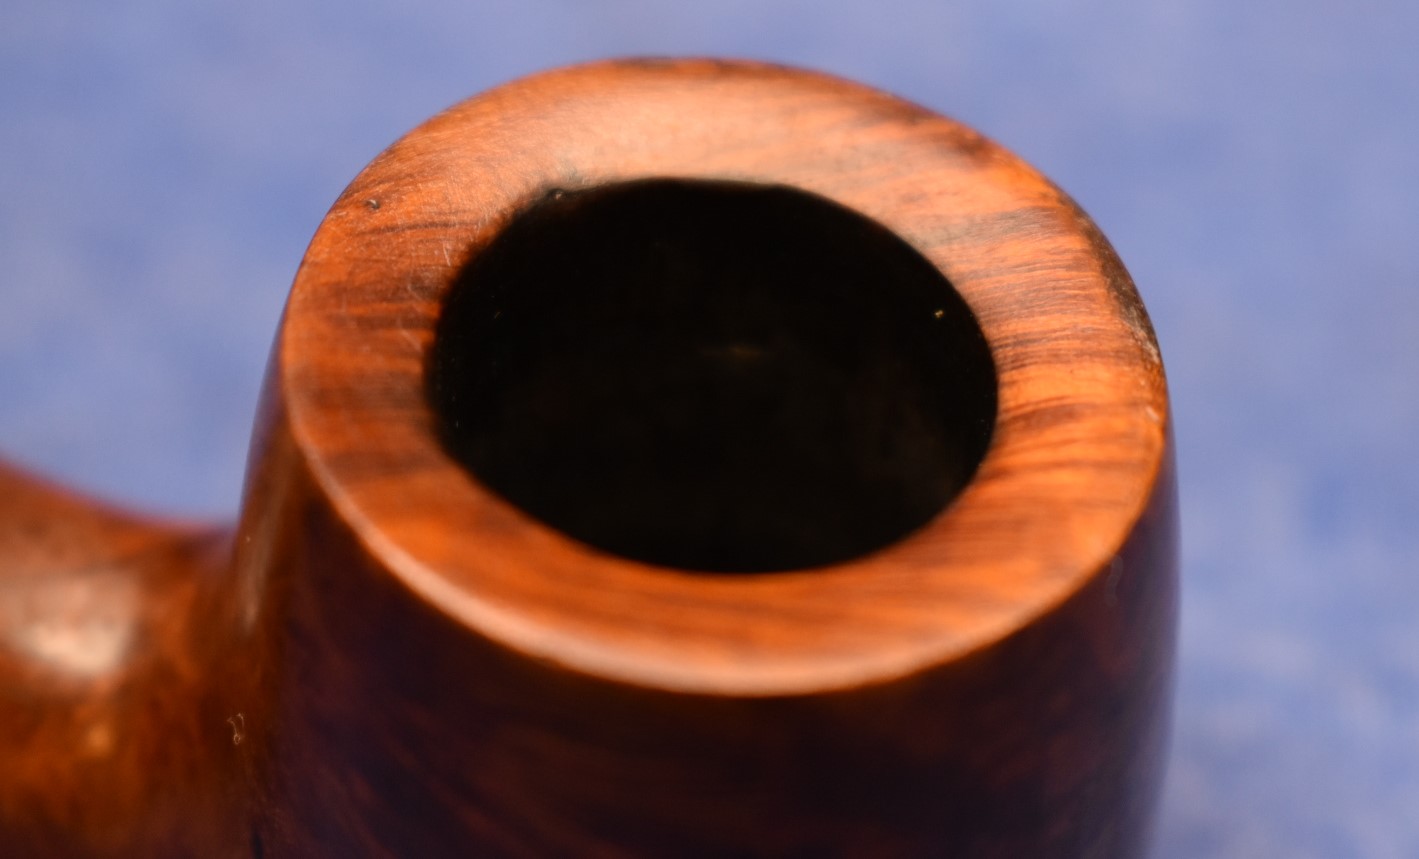


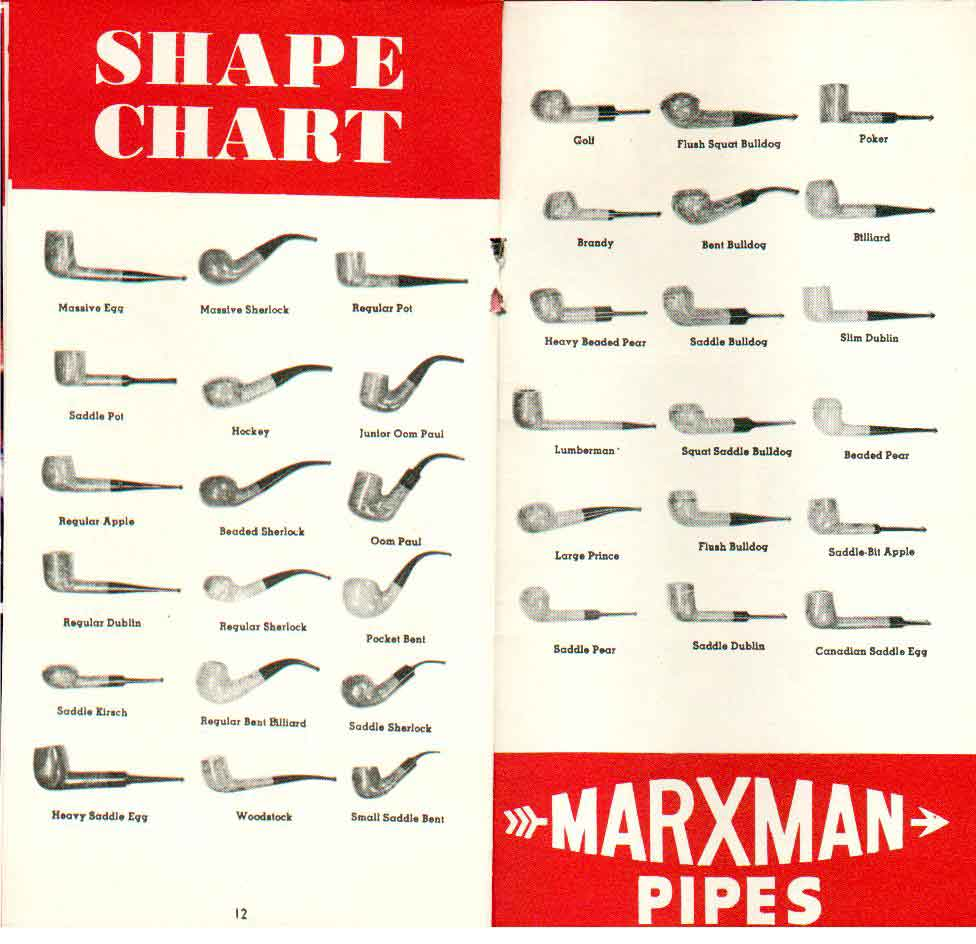


 Okay, I’ll give you that one.
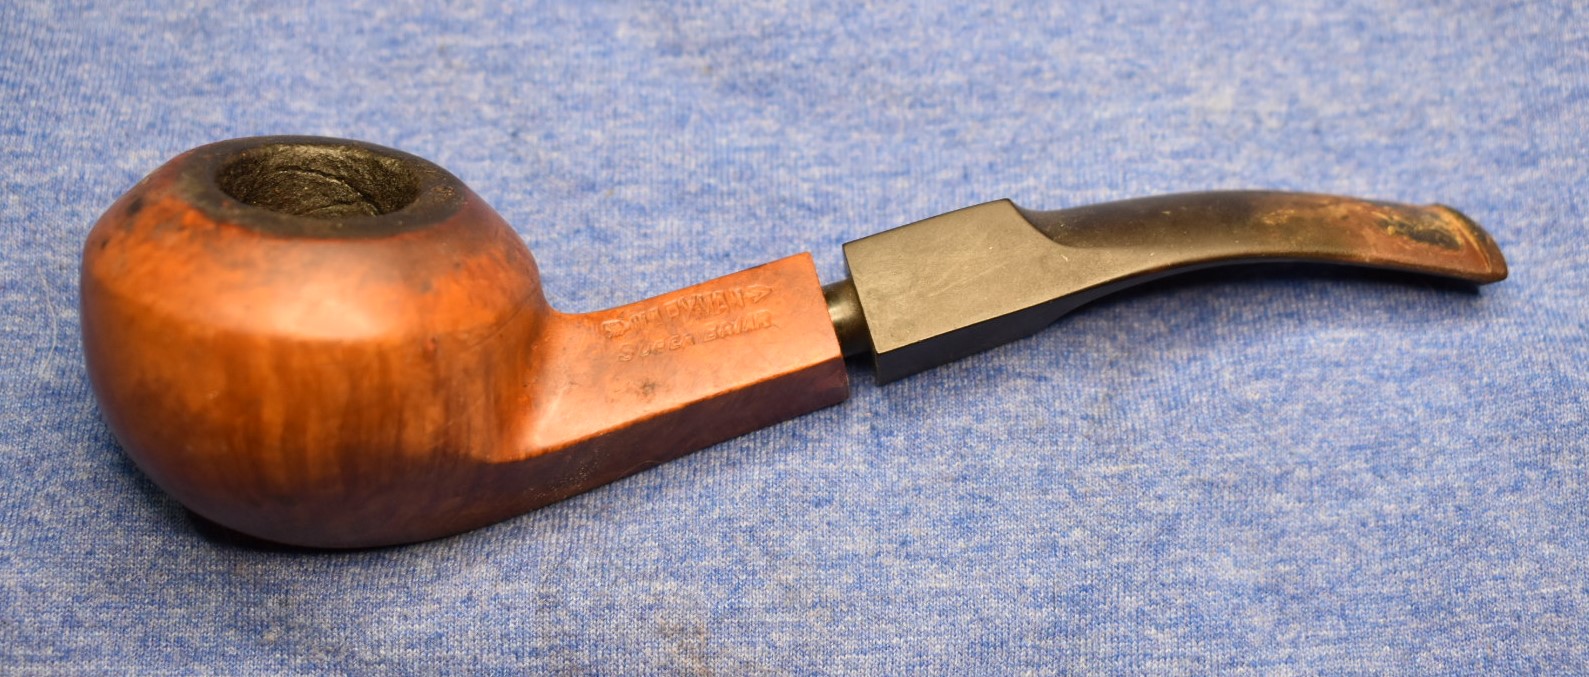
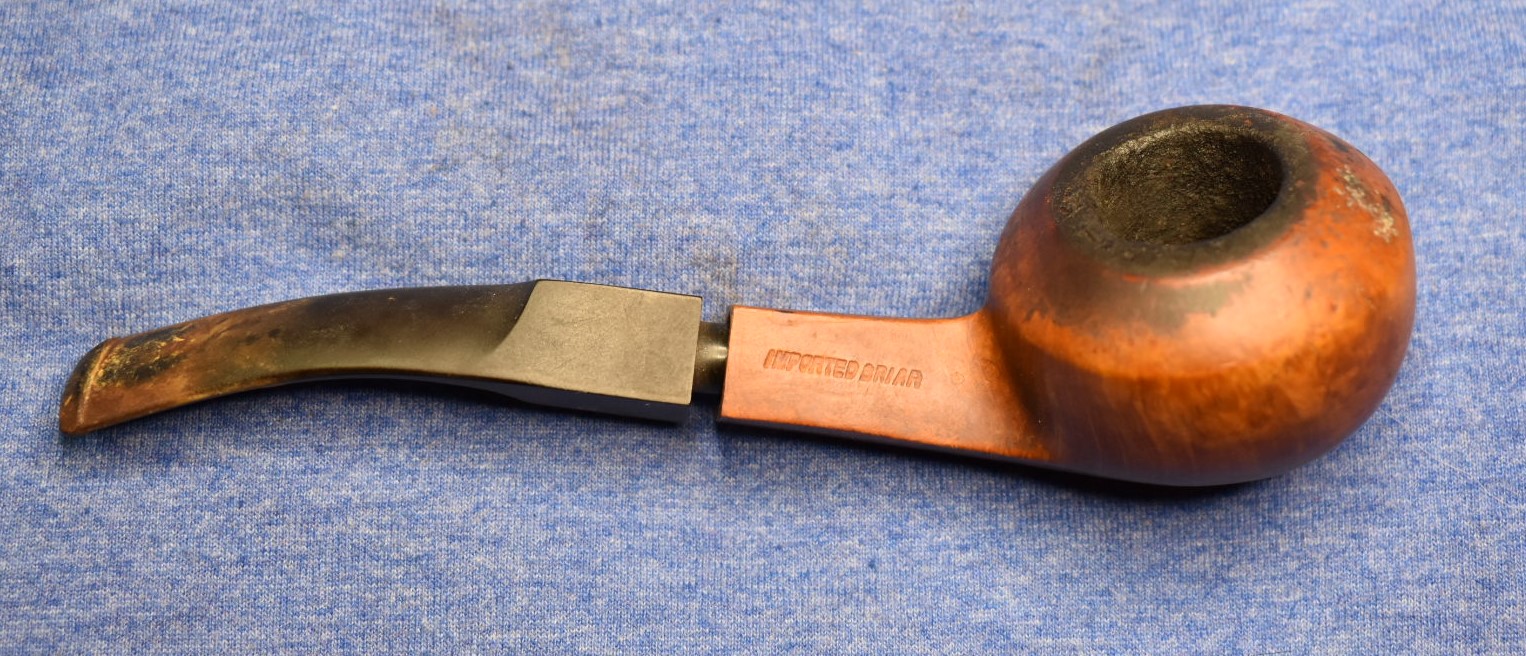
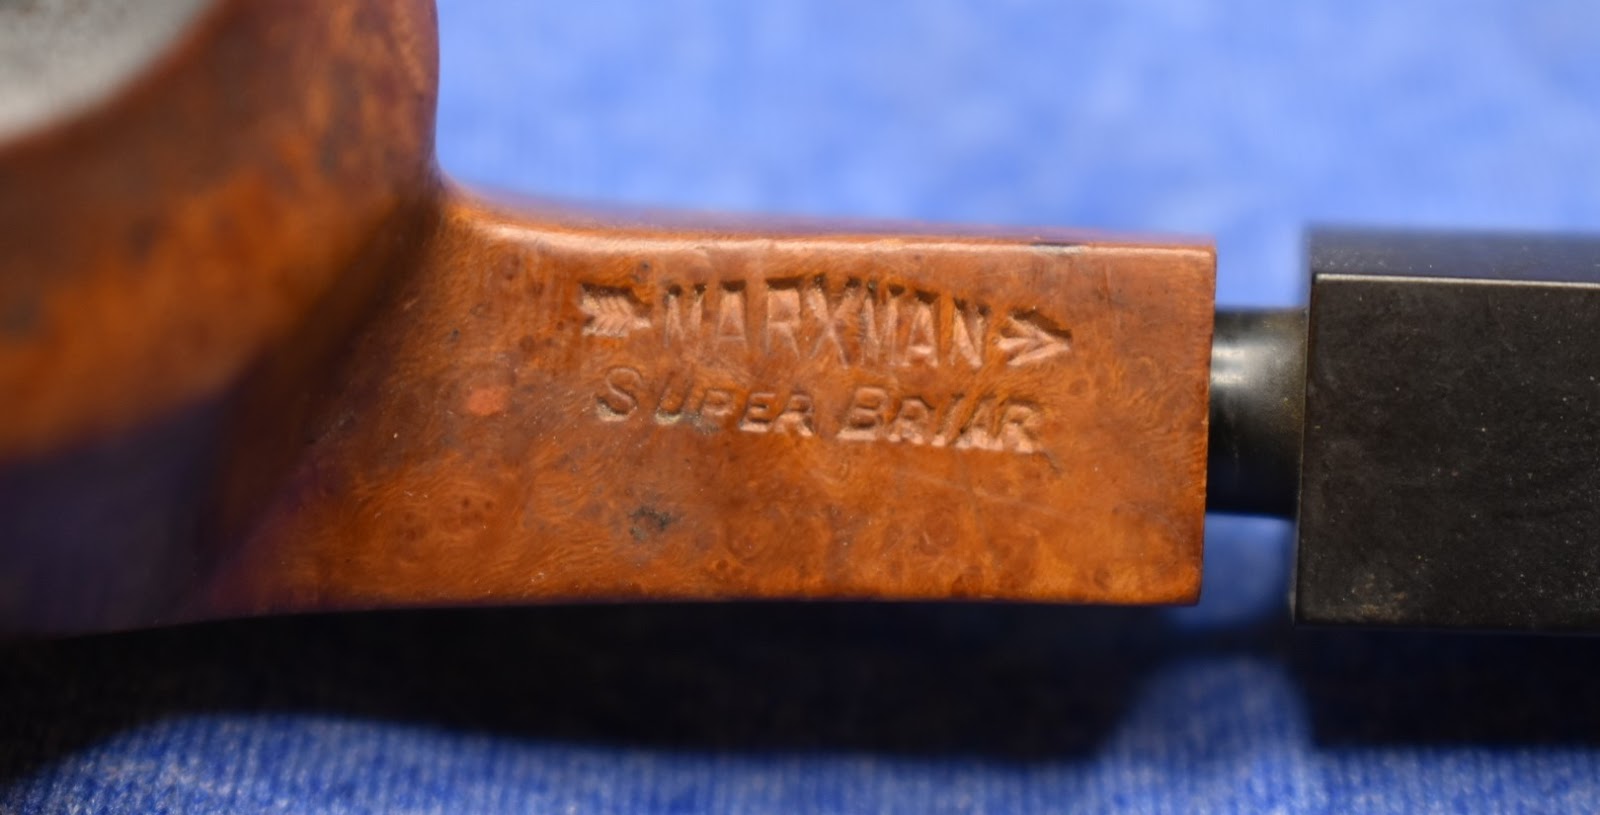
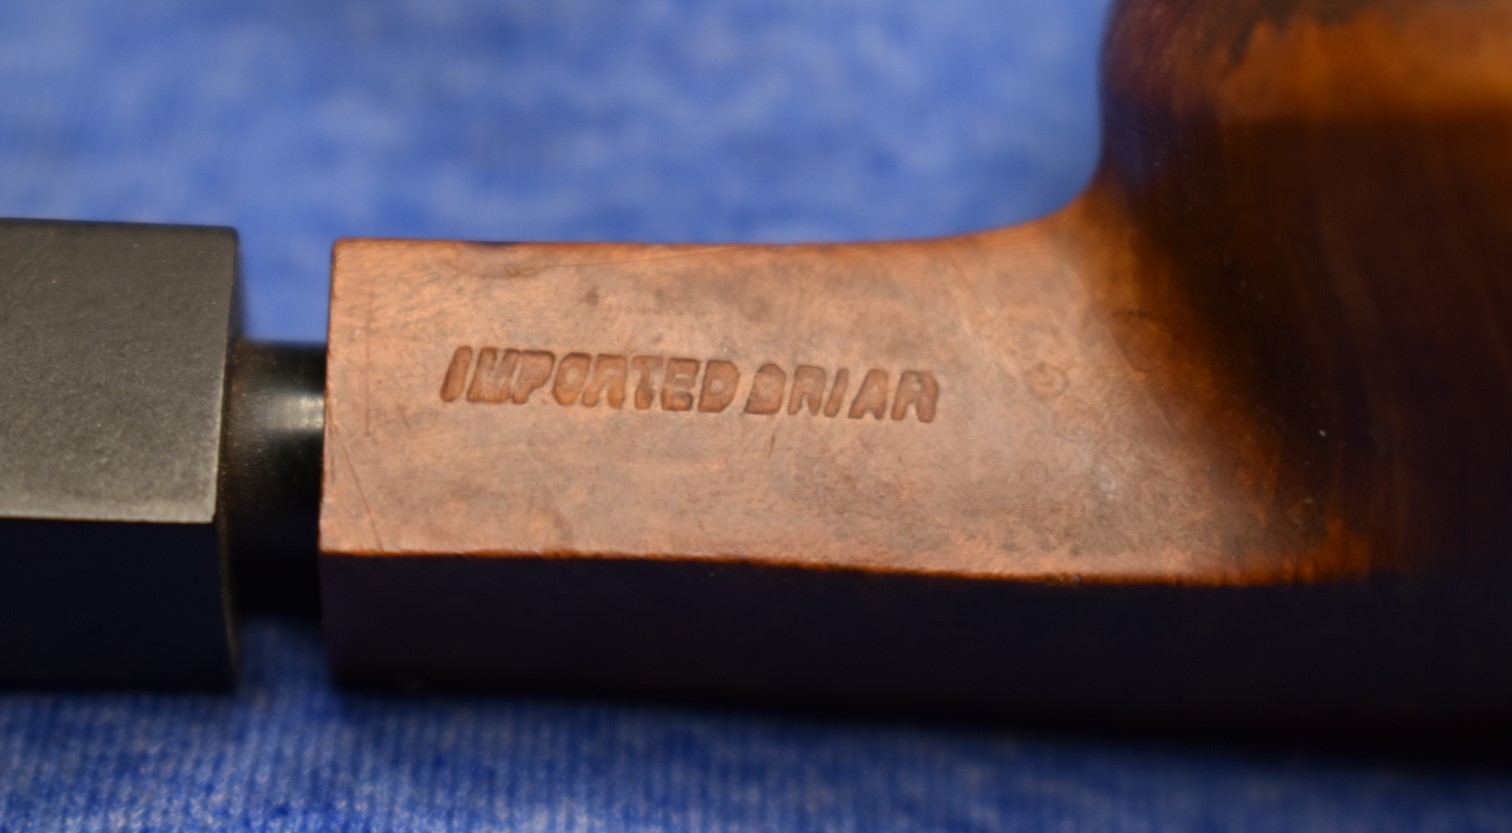

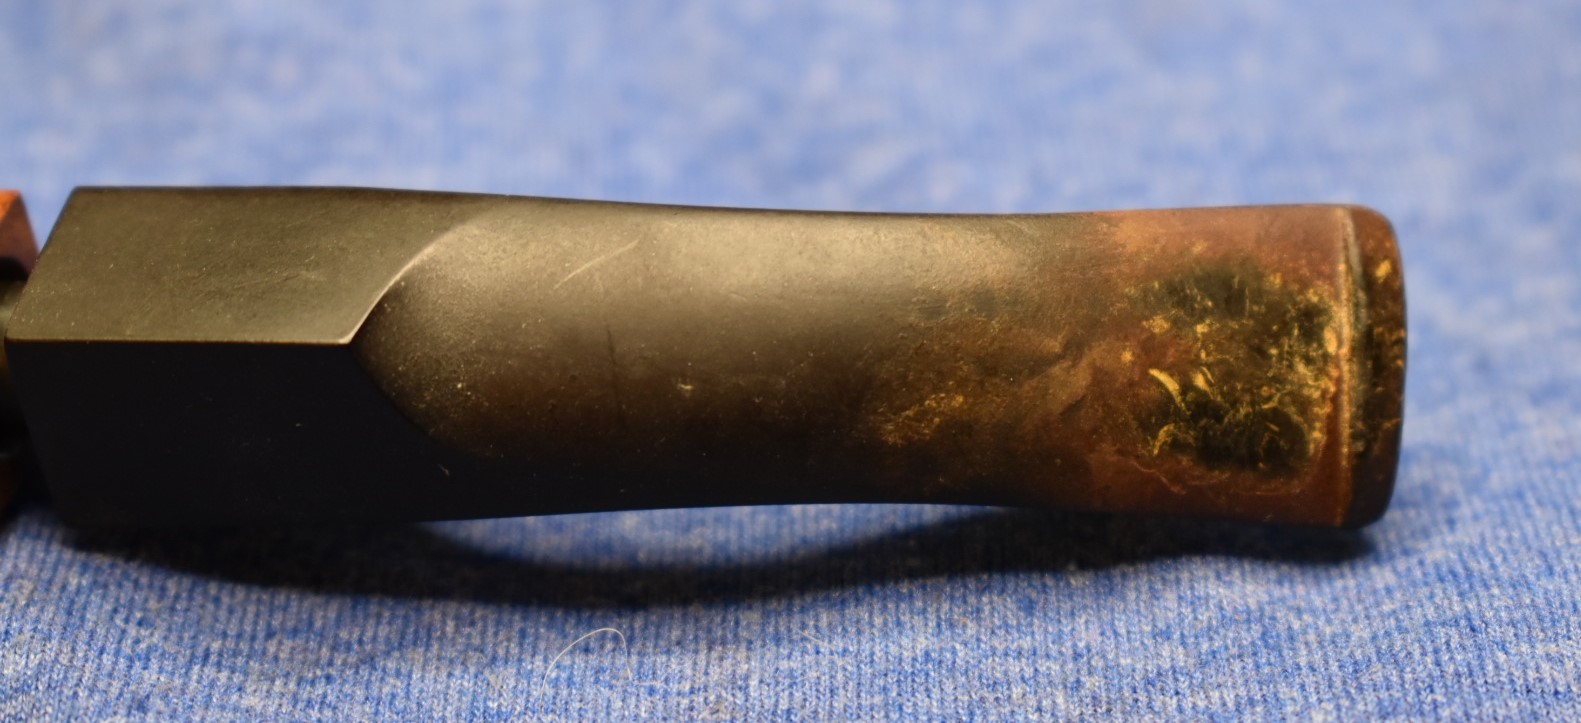


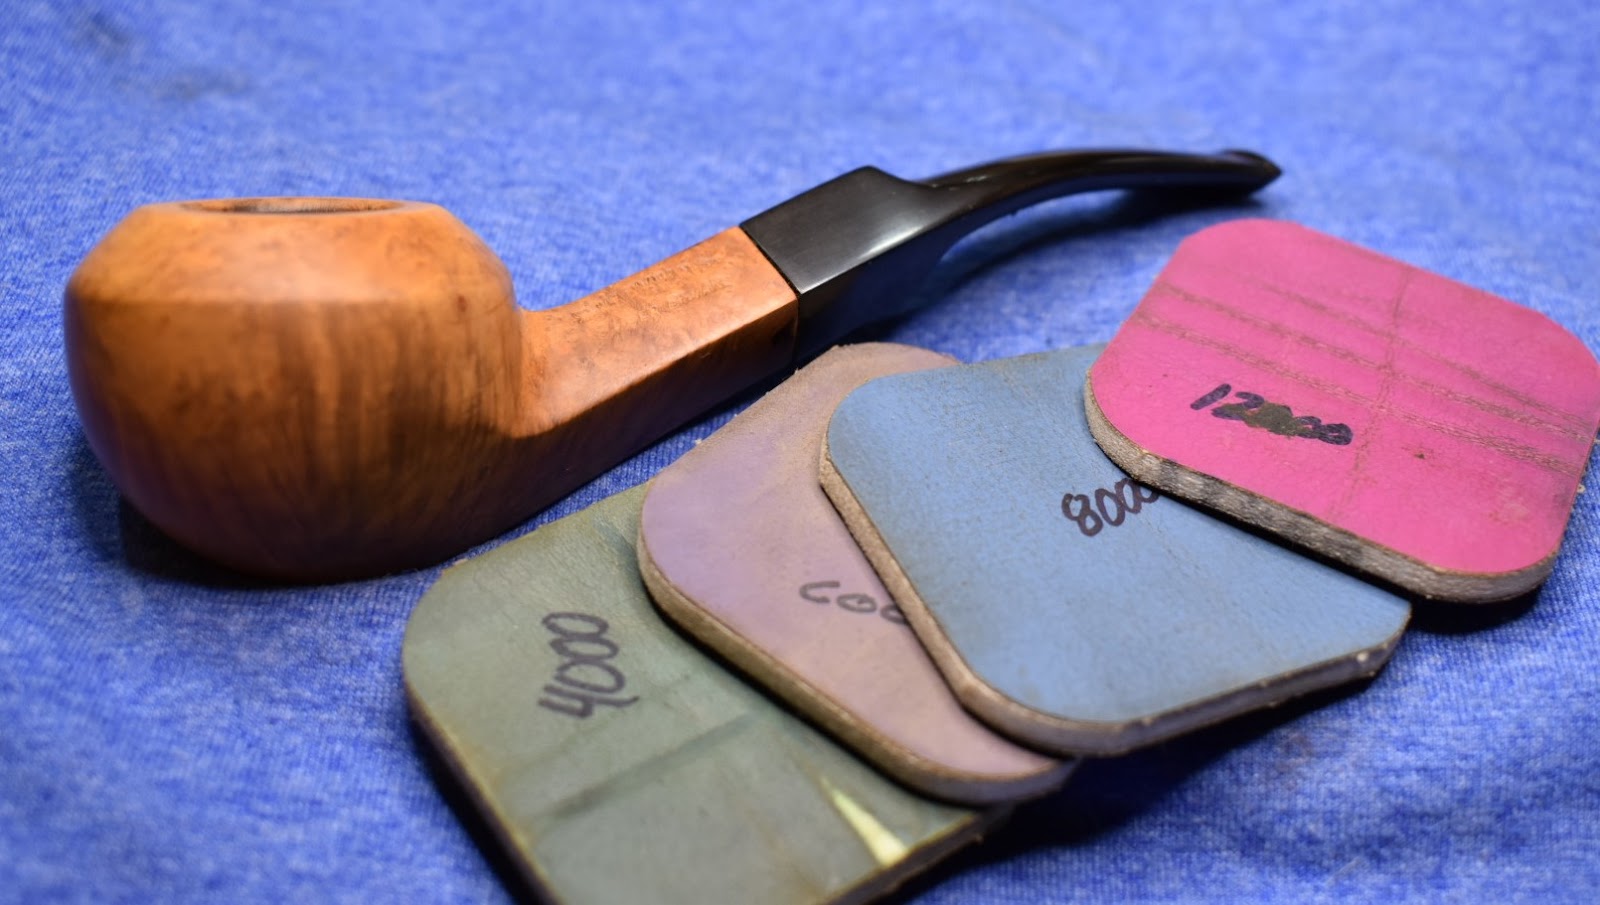


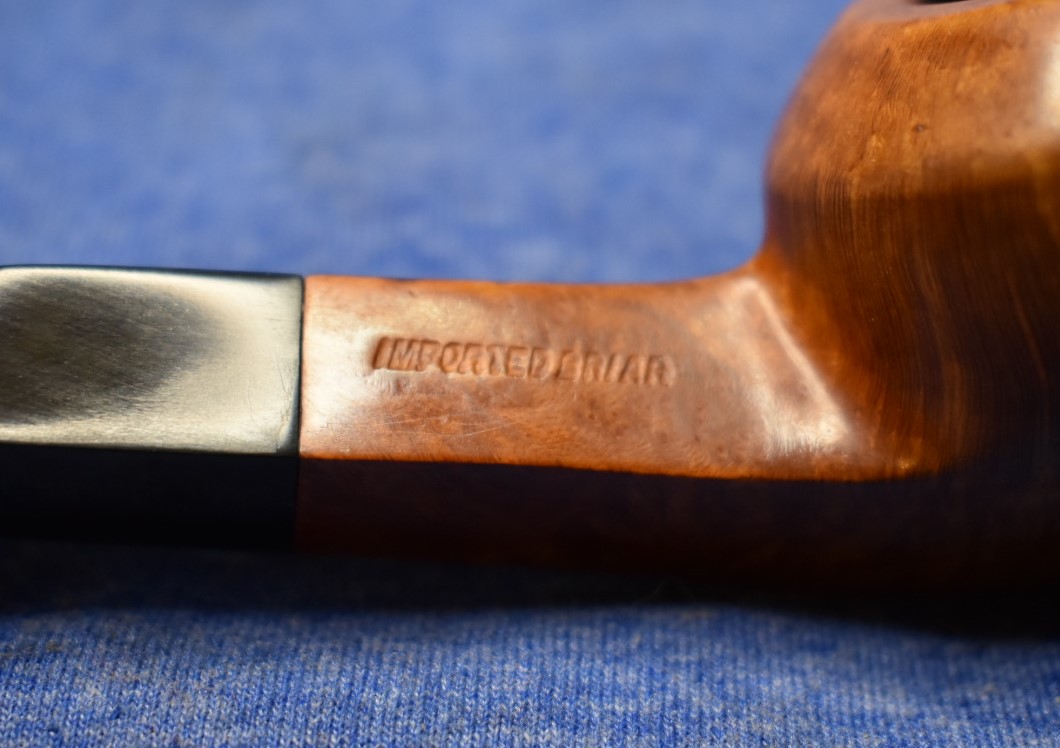
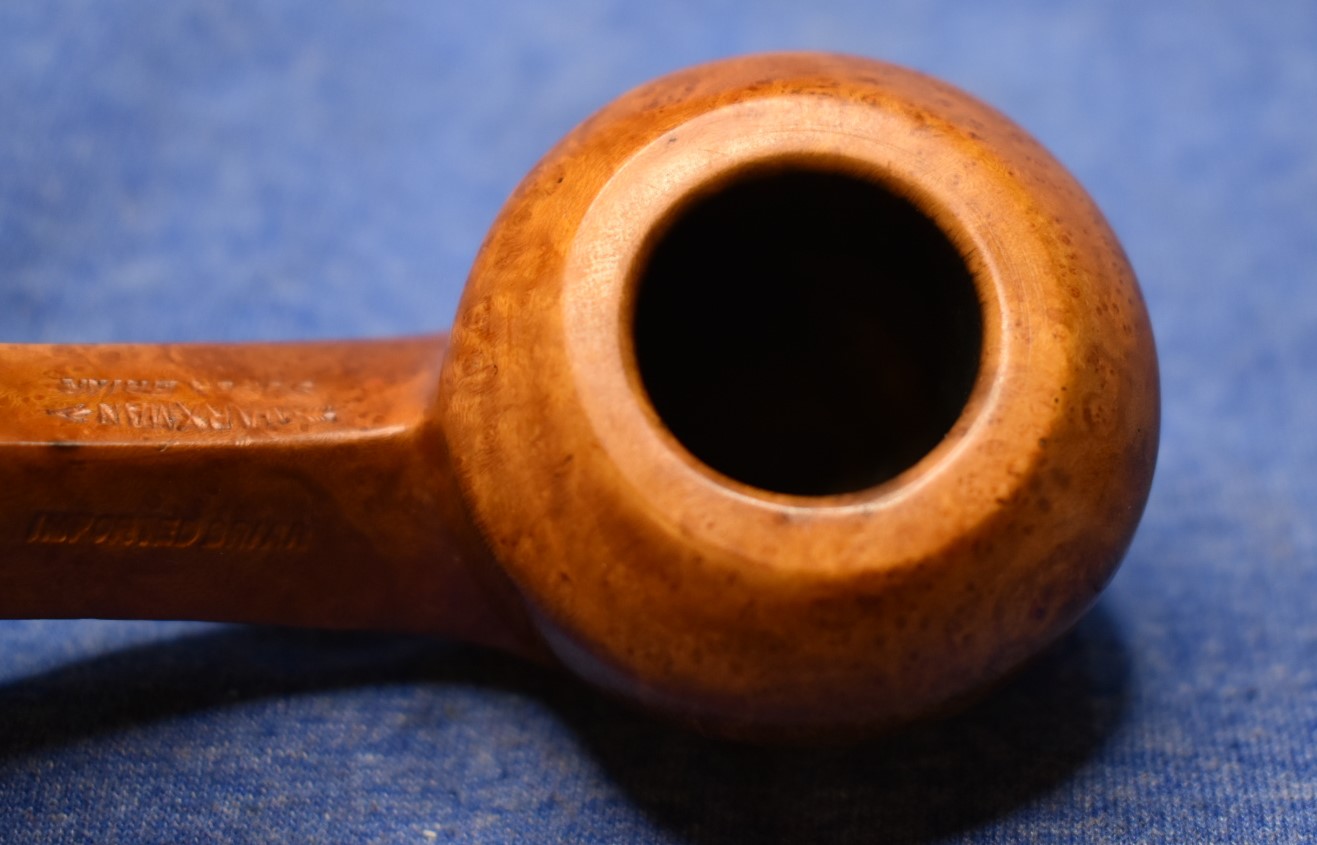


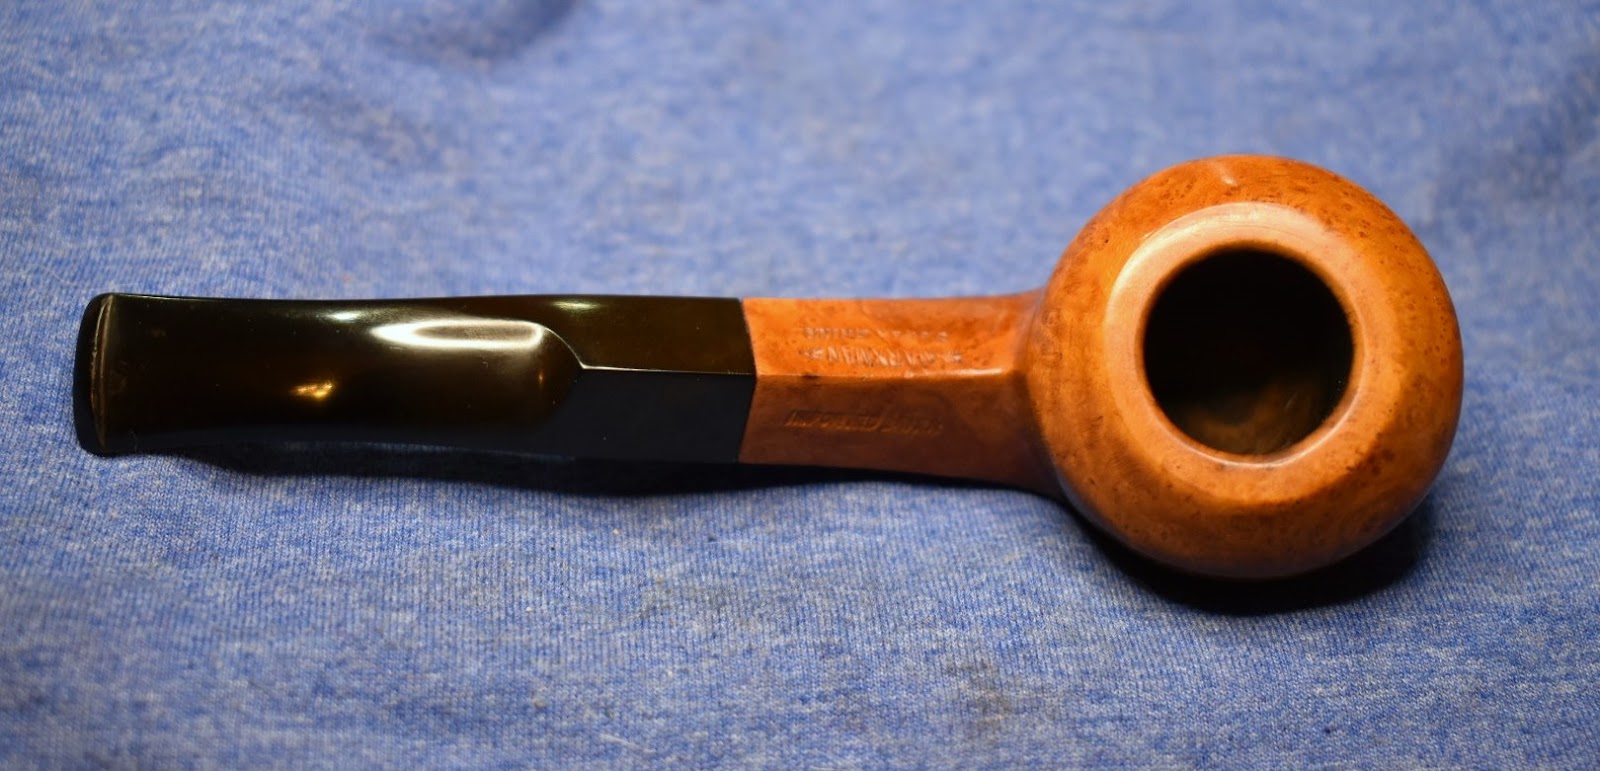

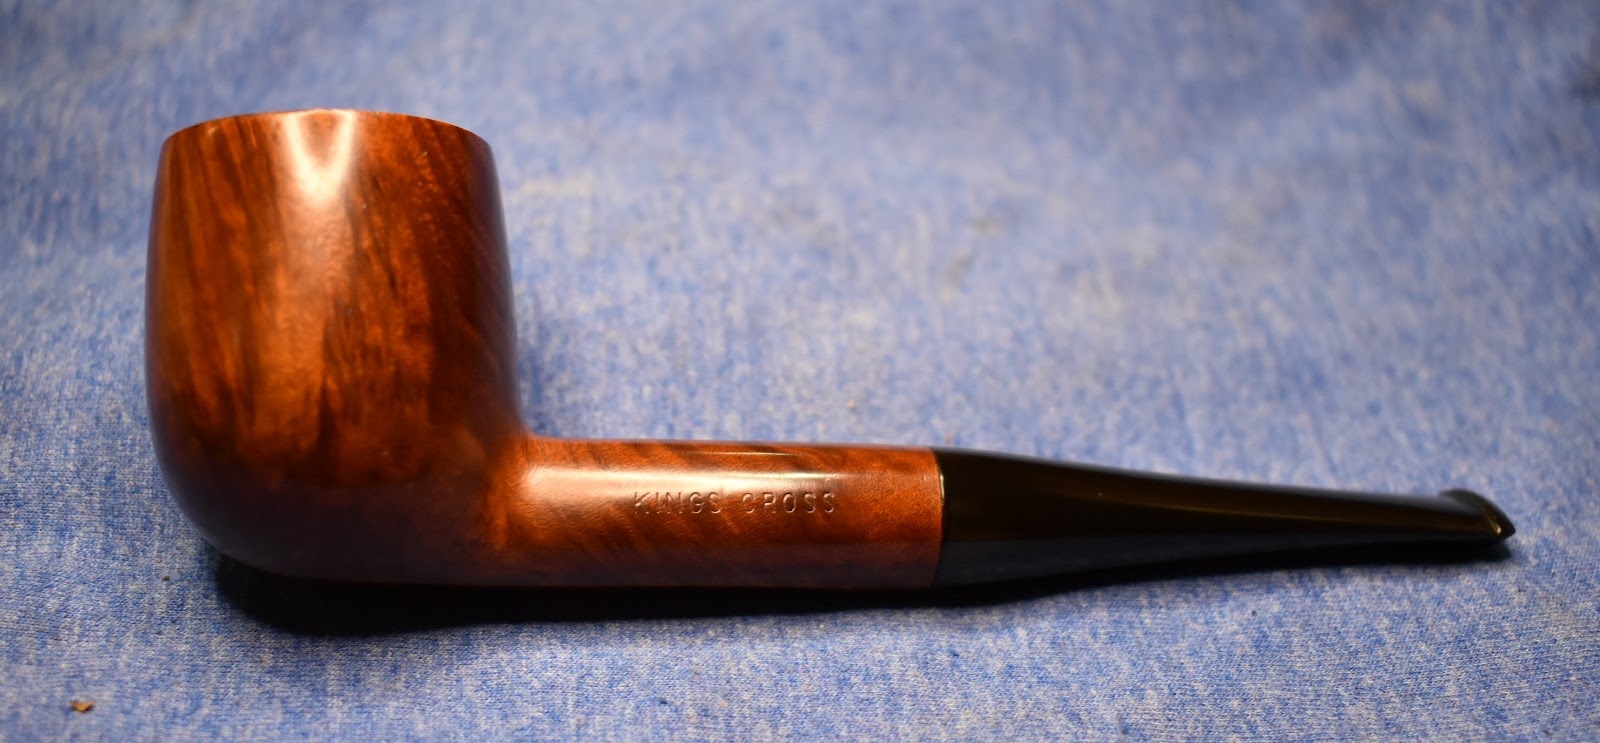


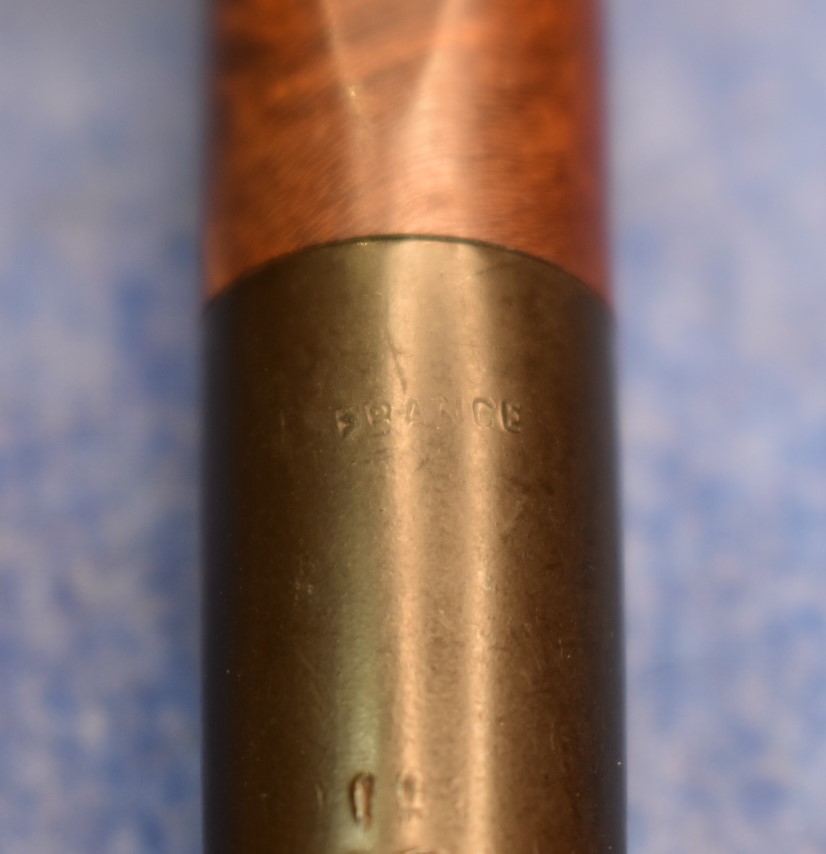
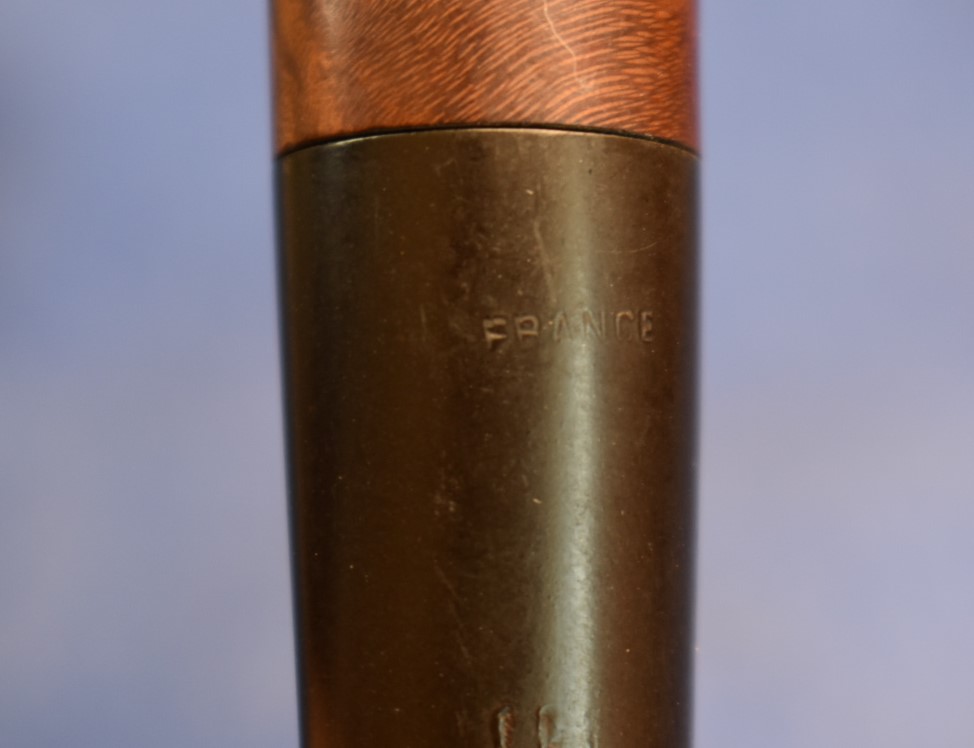


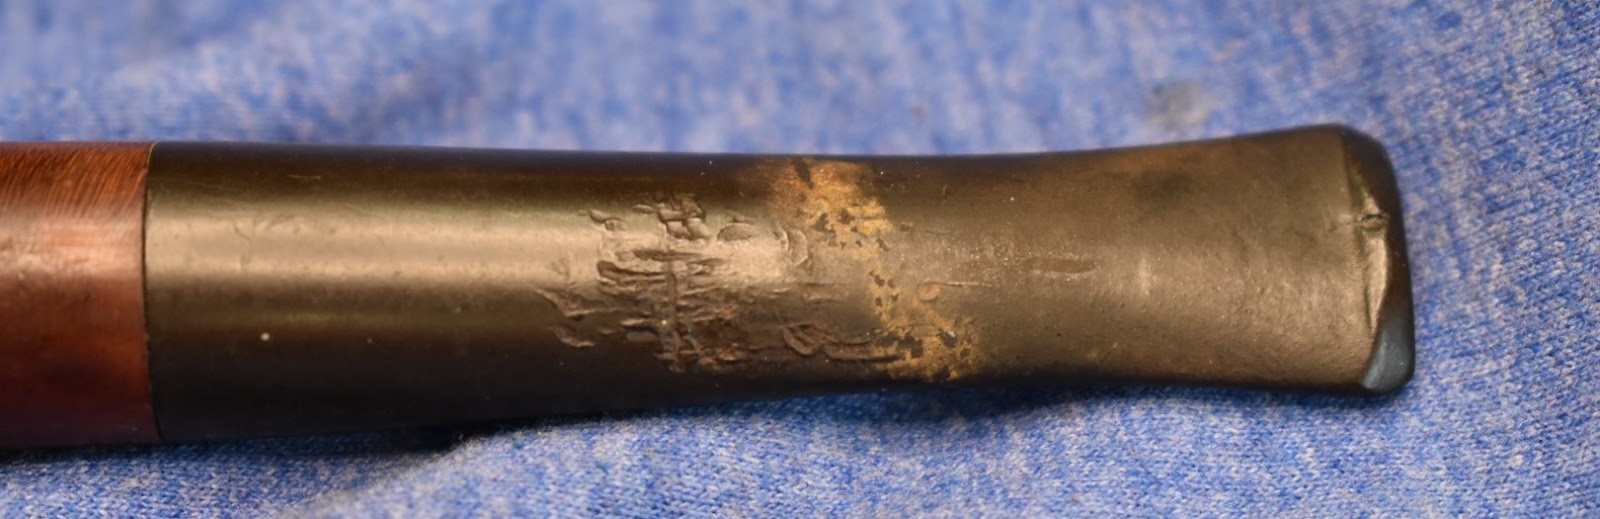


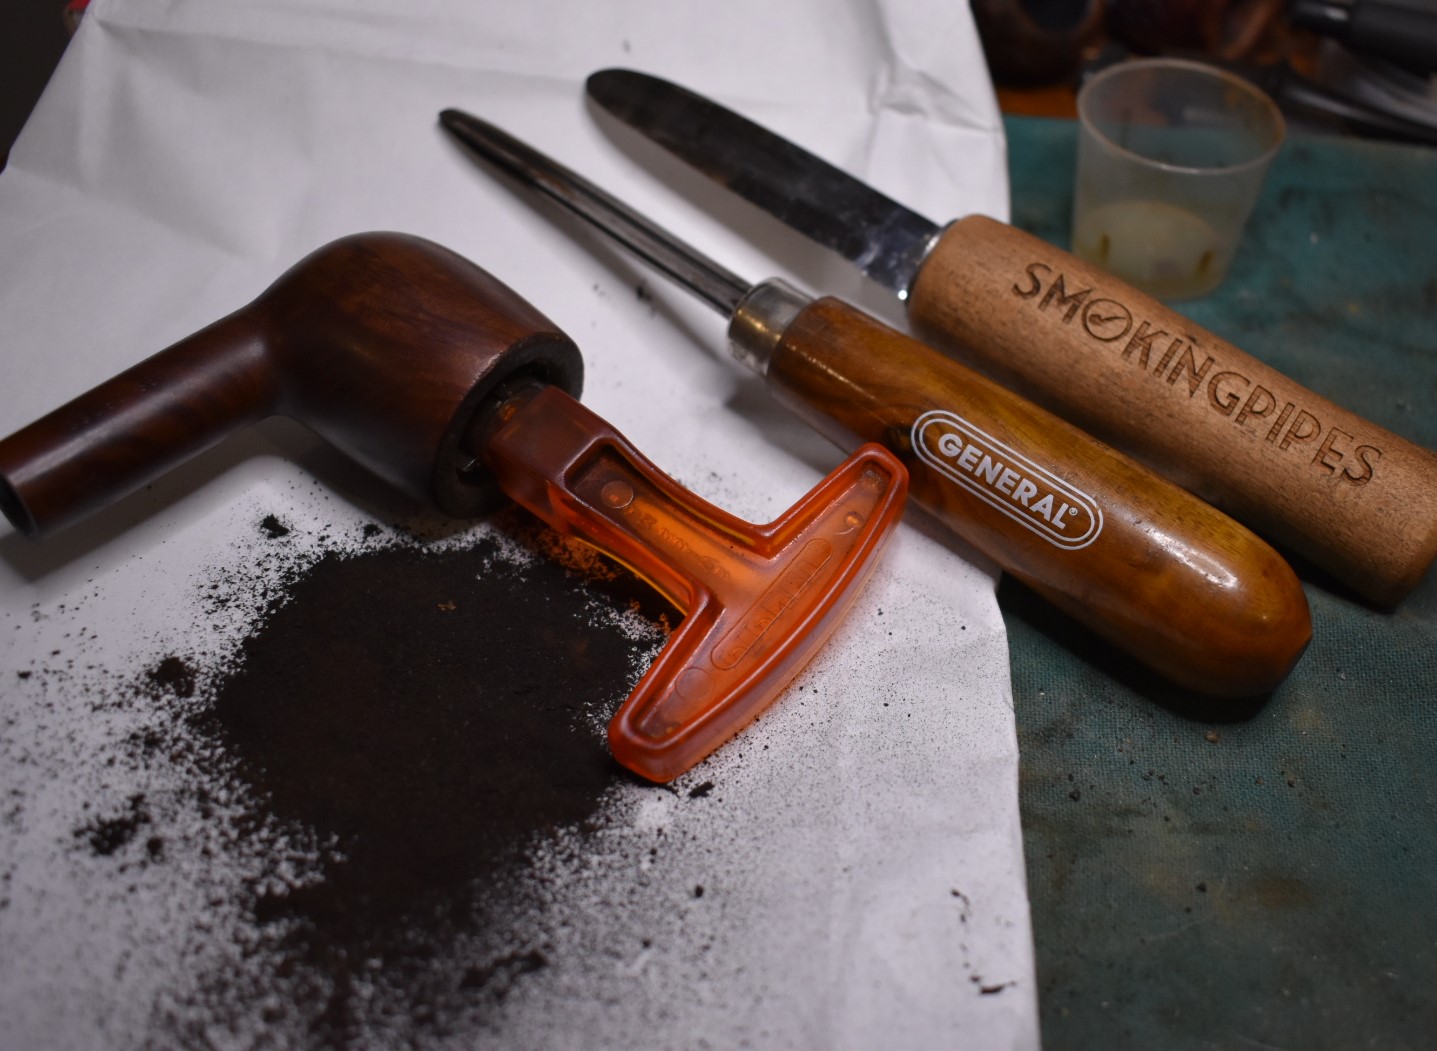


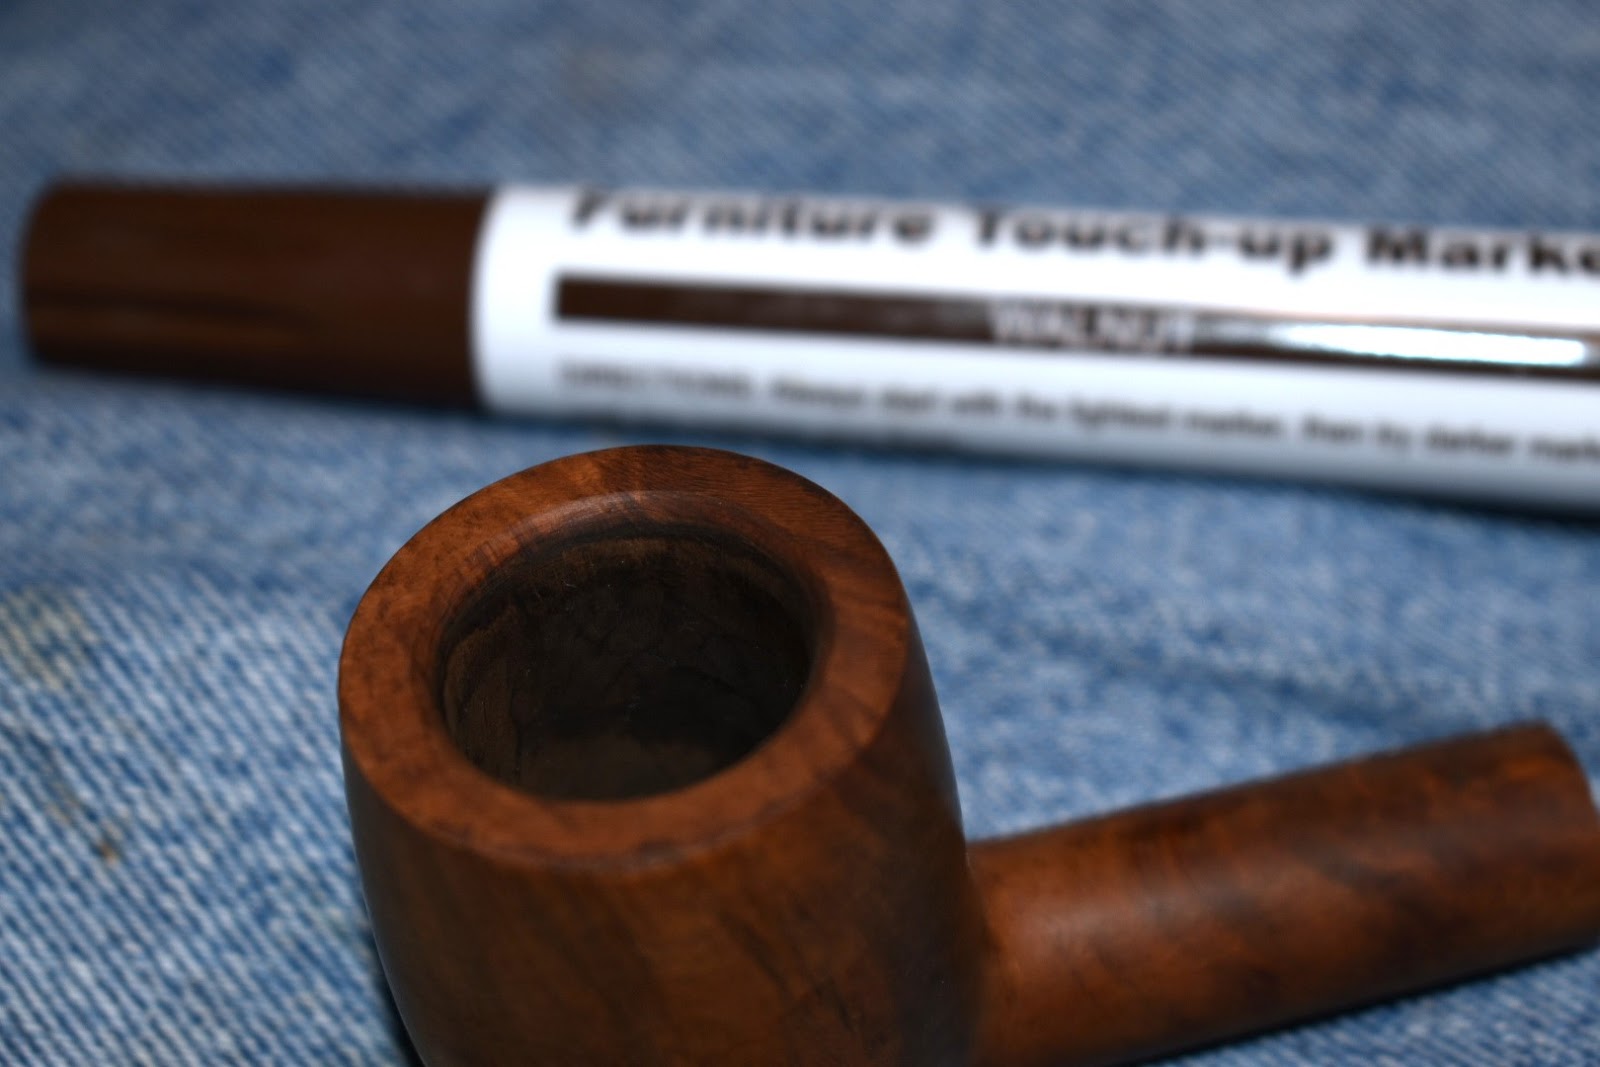
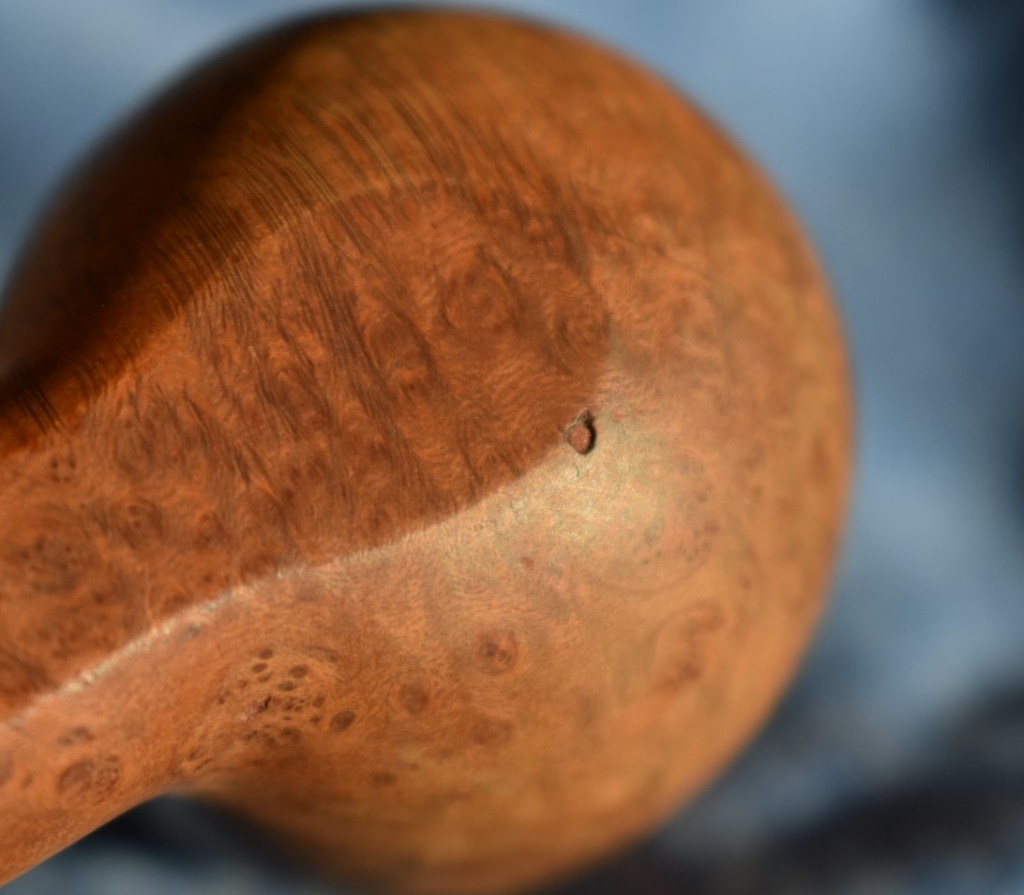
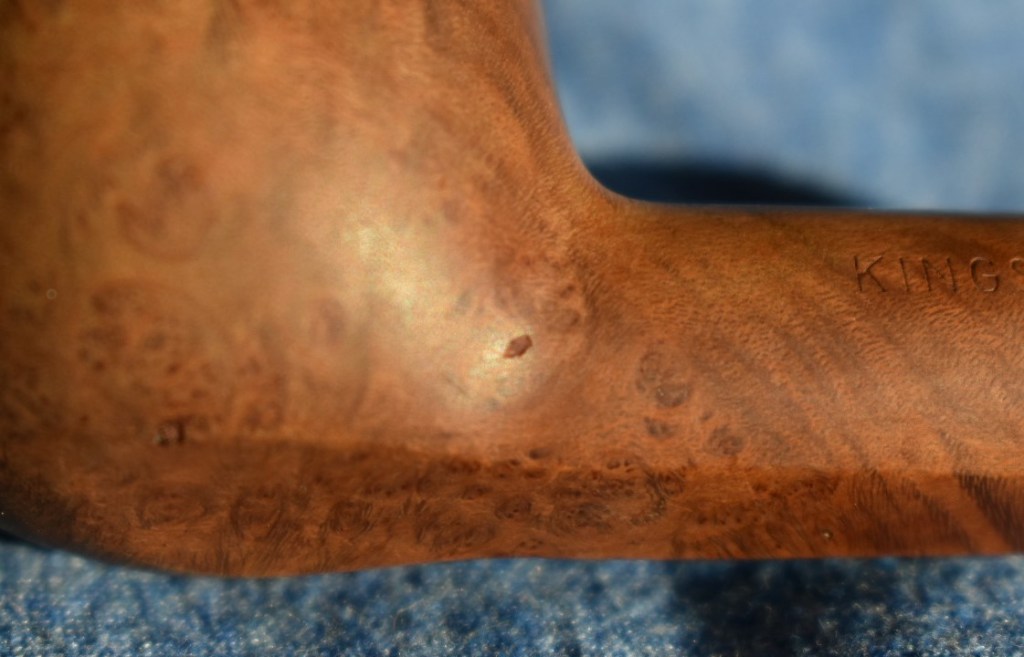


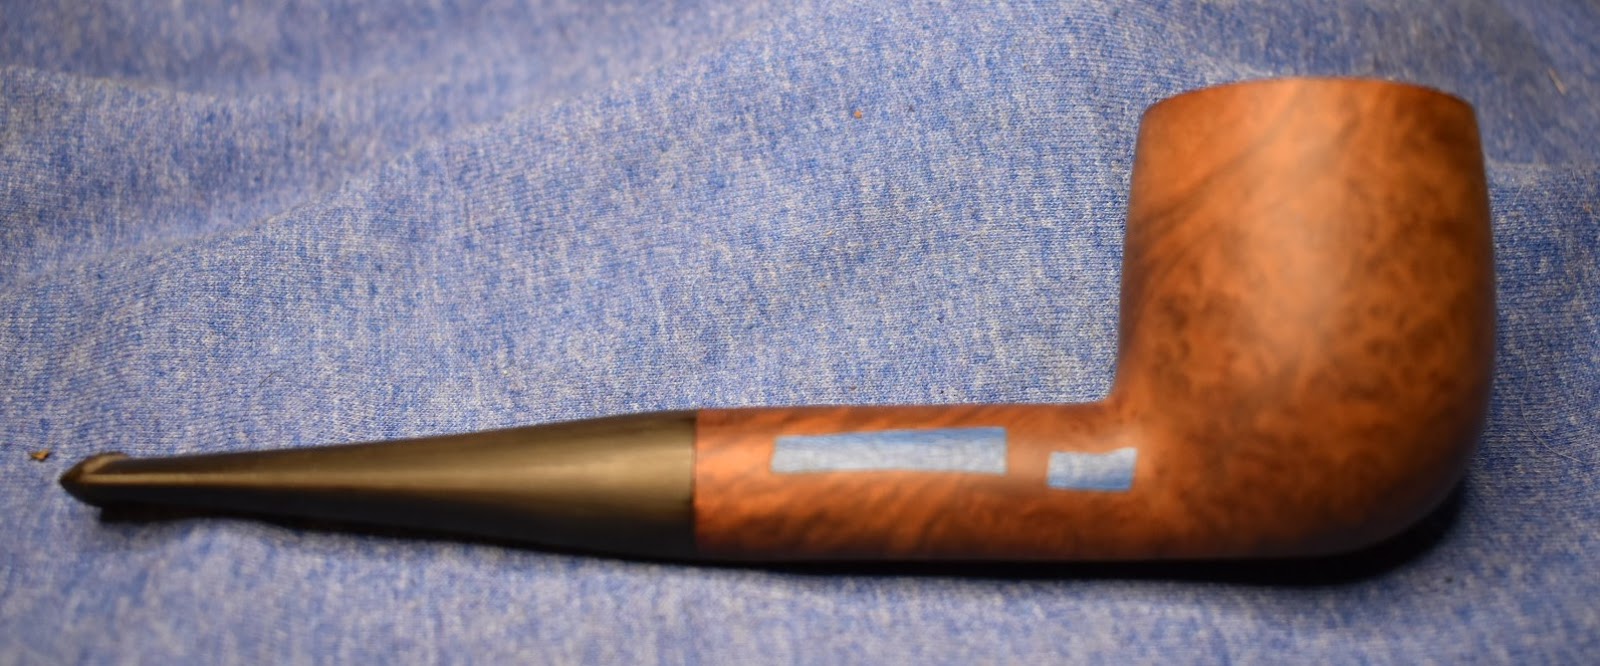


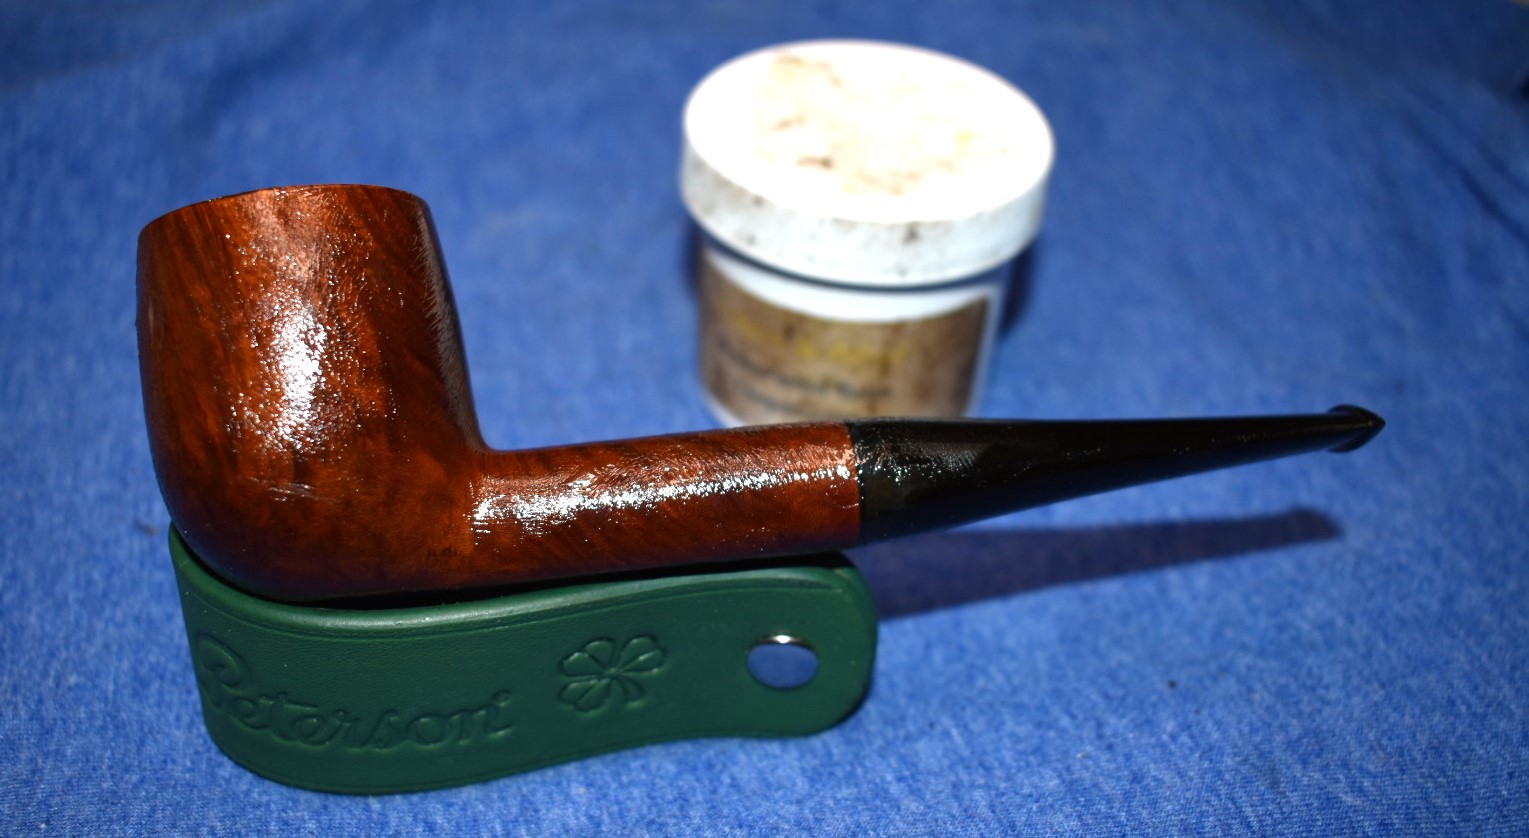


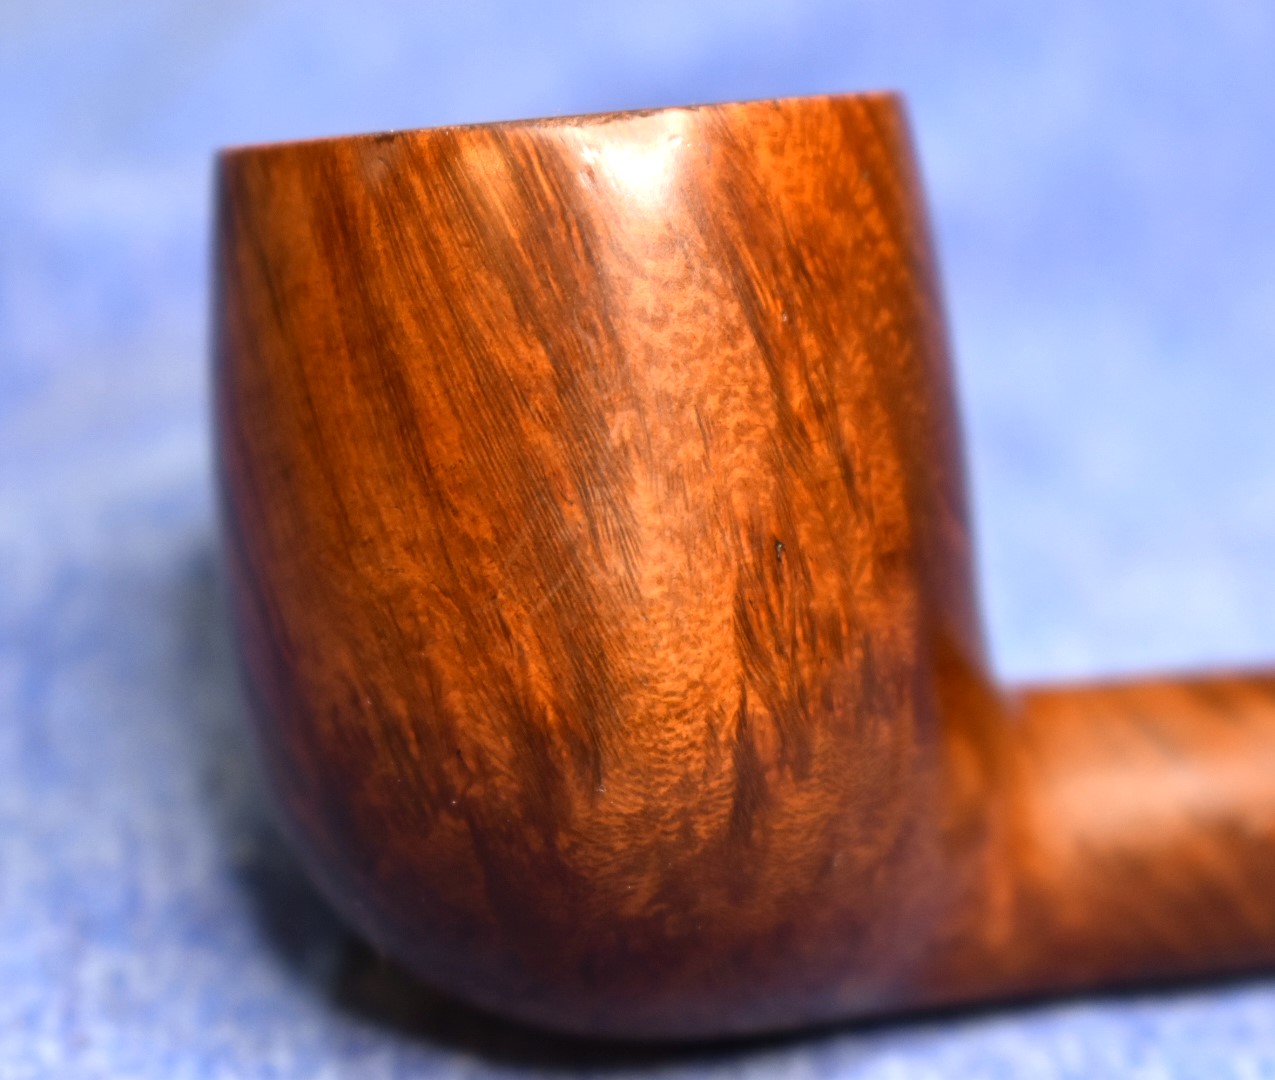
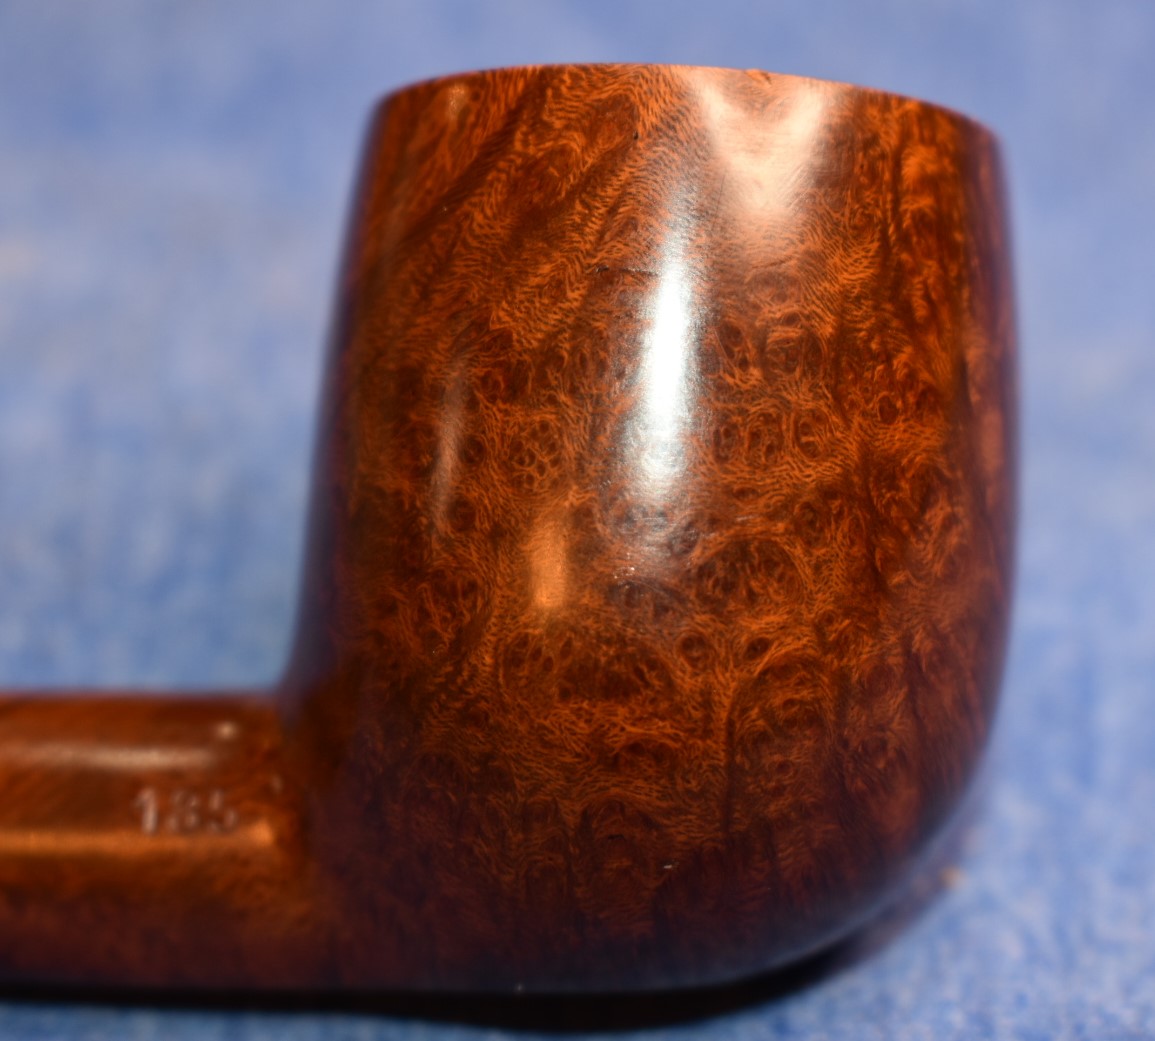
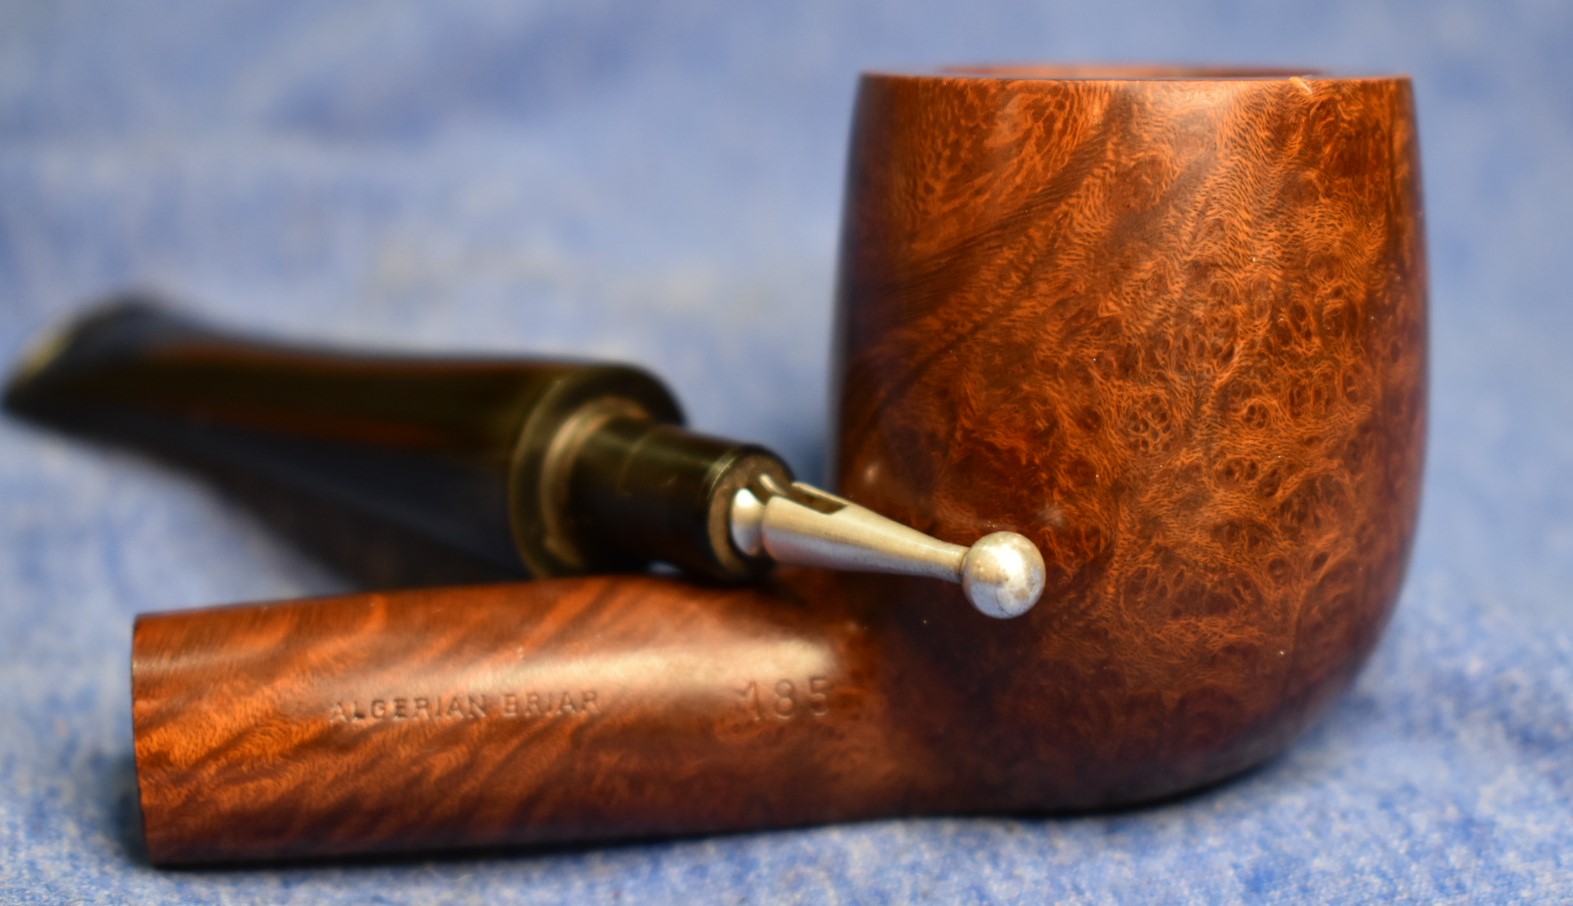
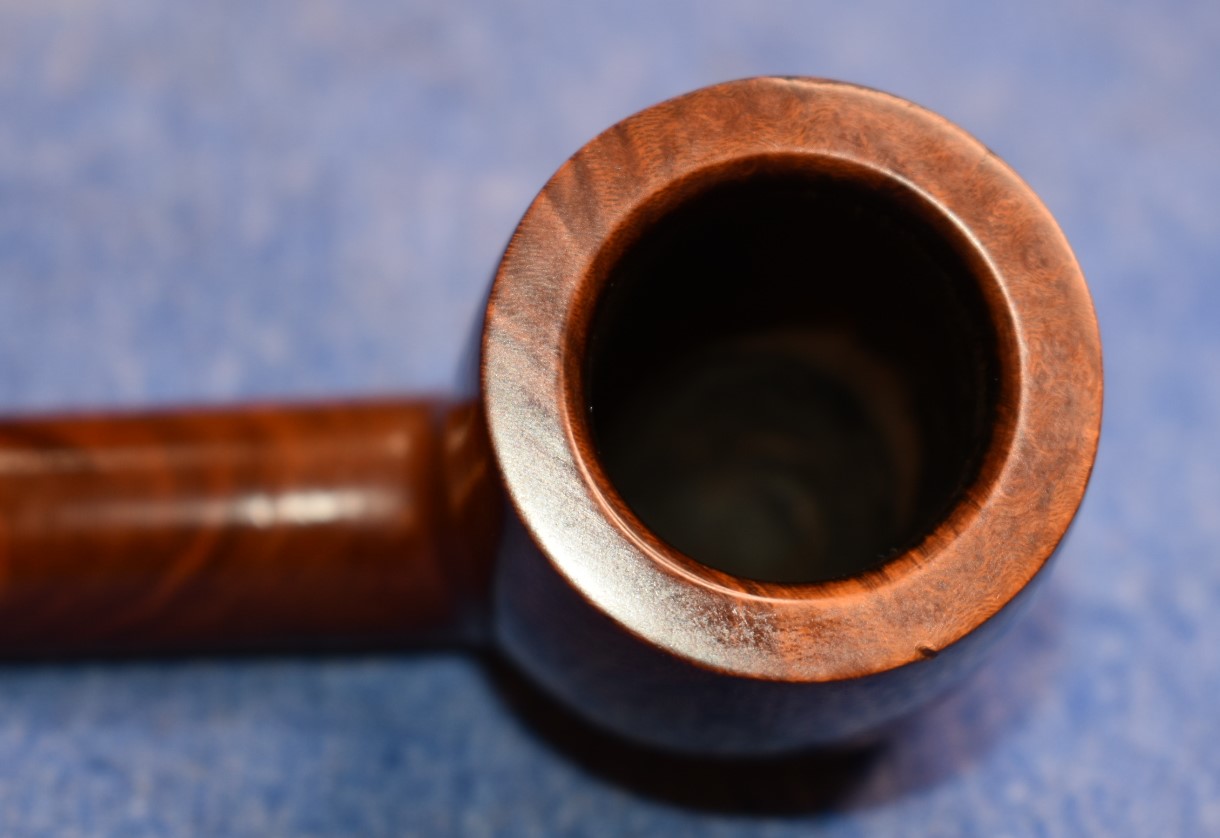


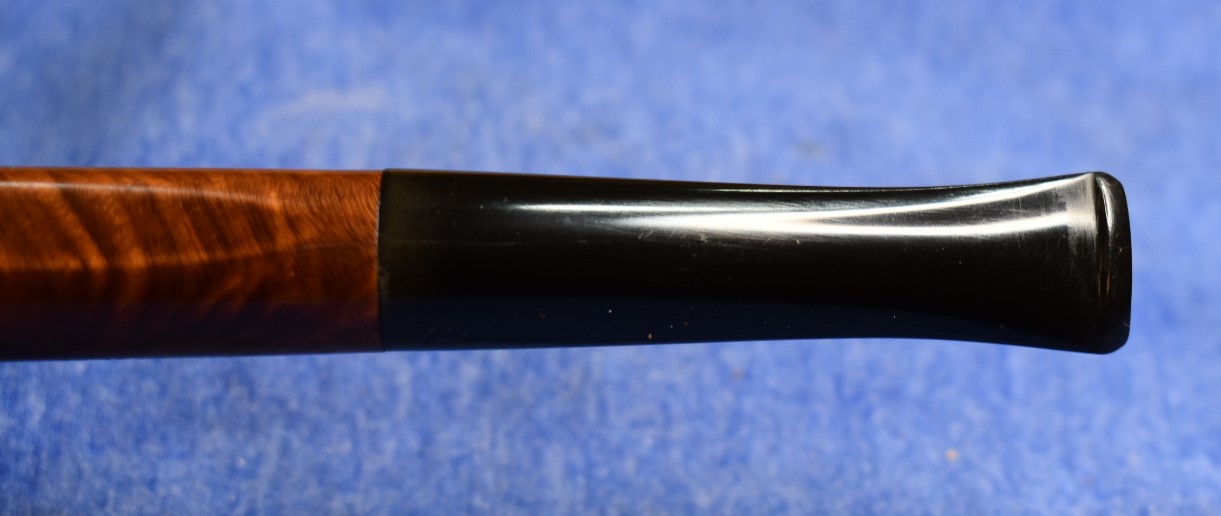

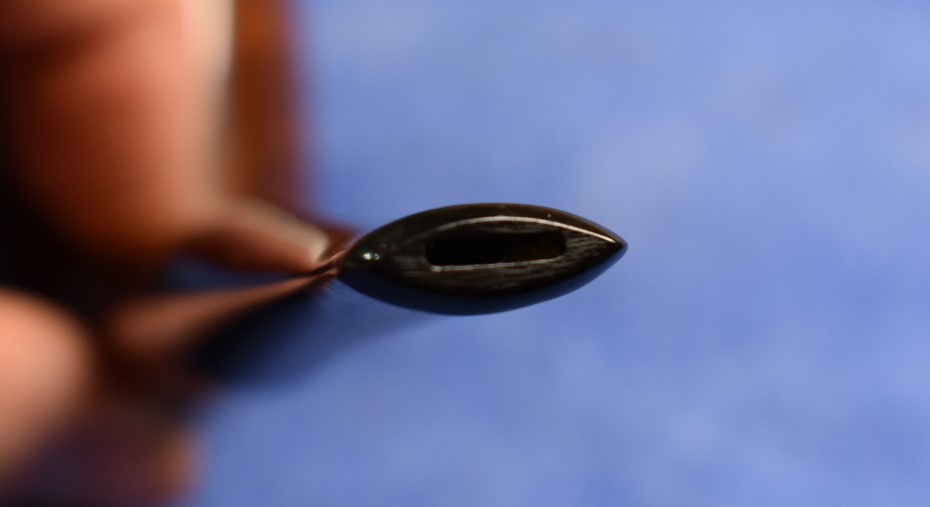


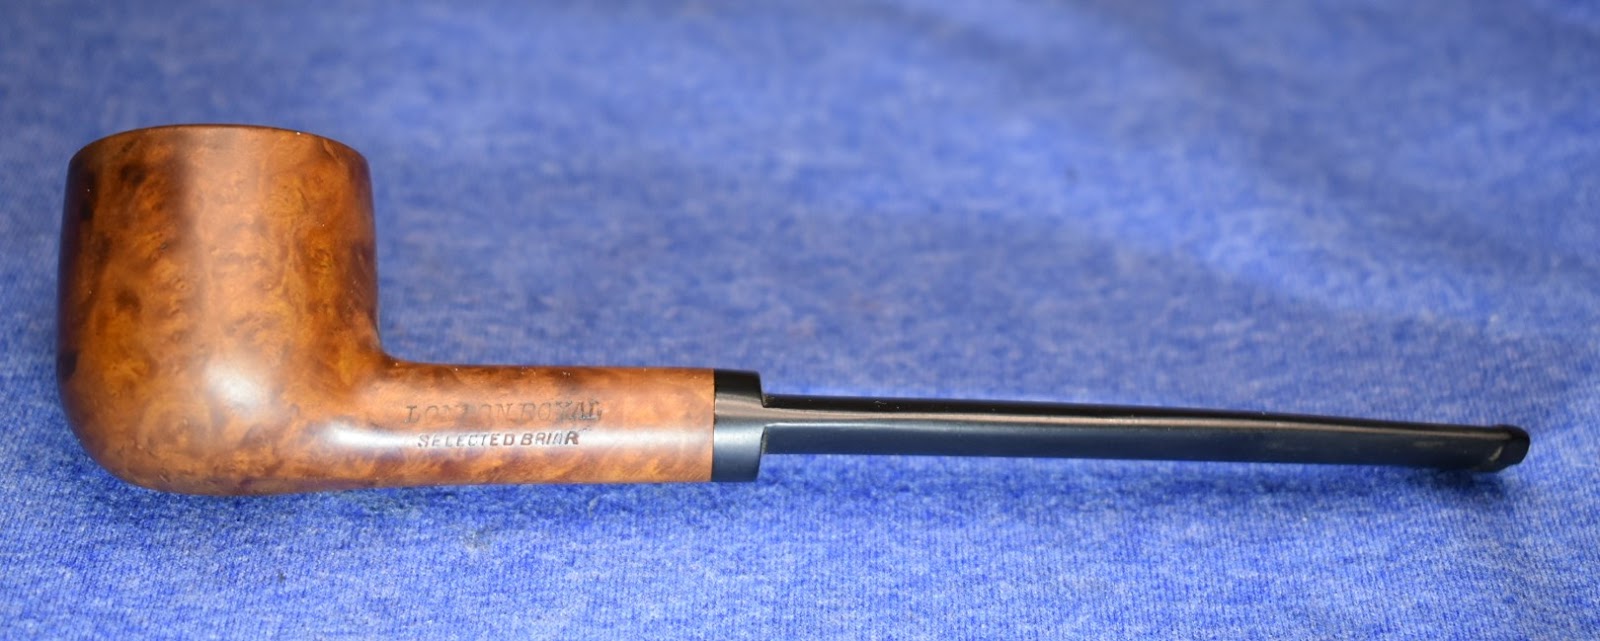


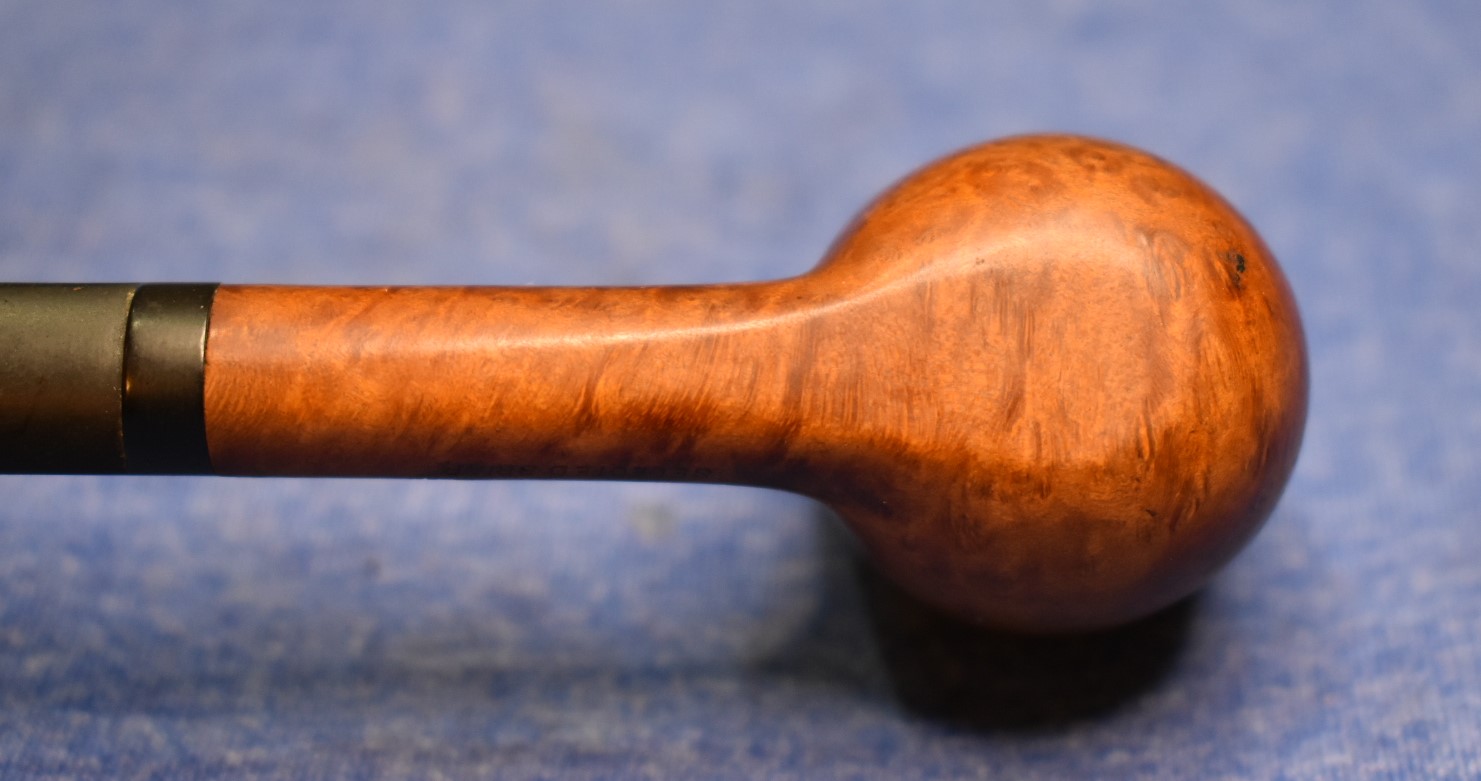

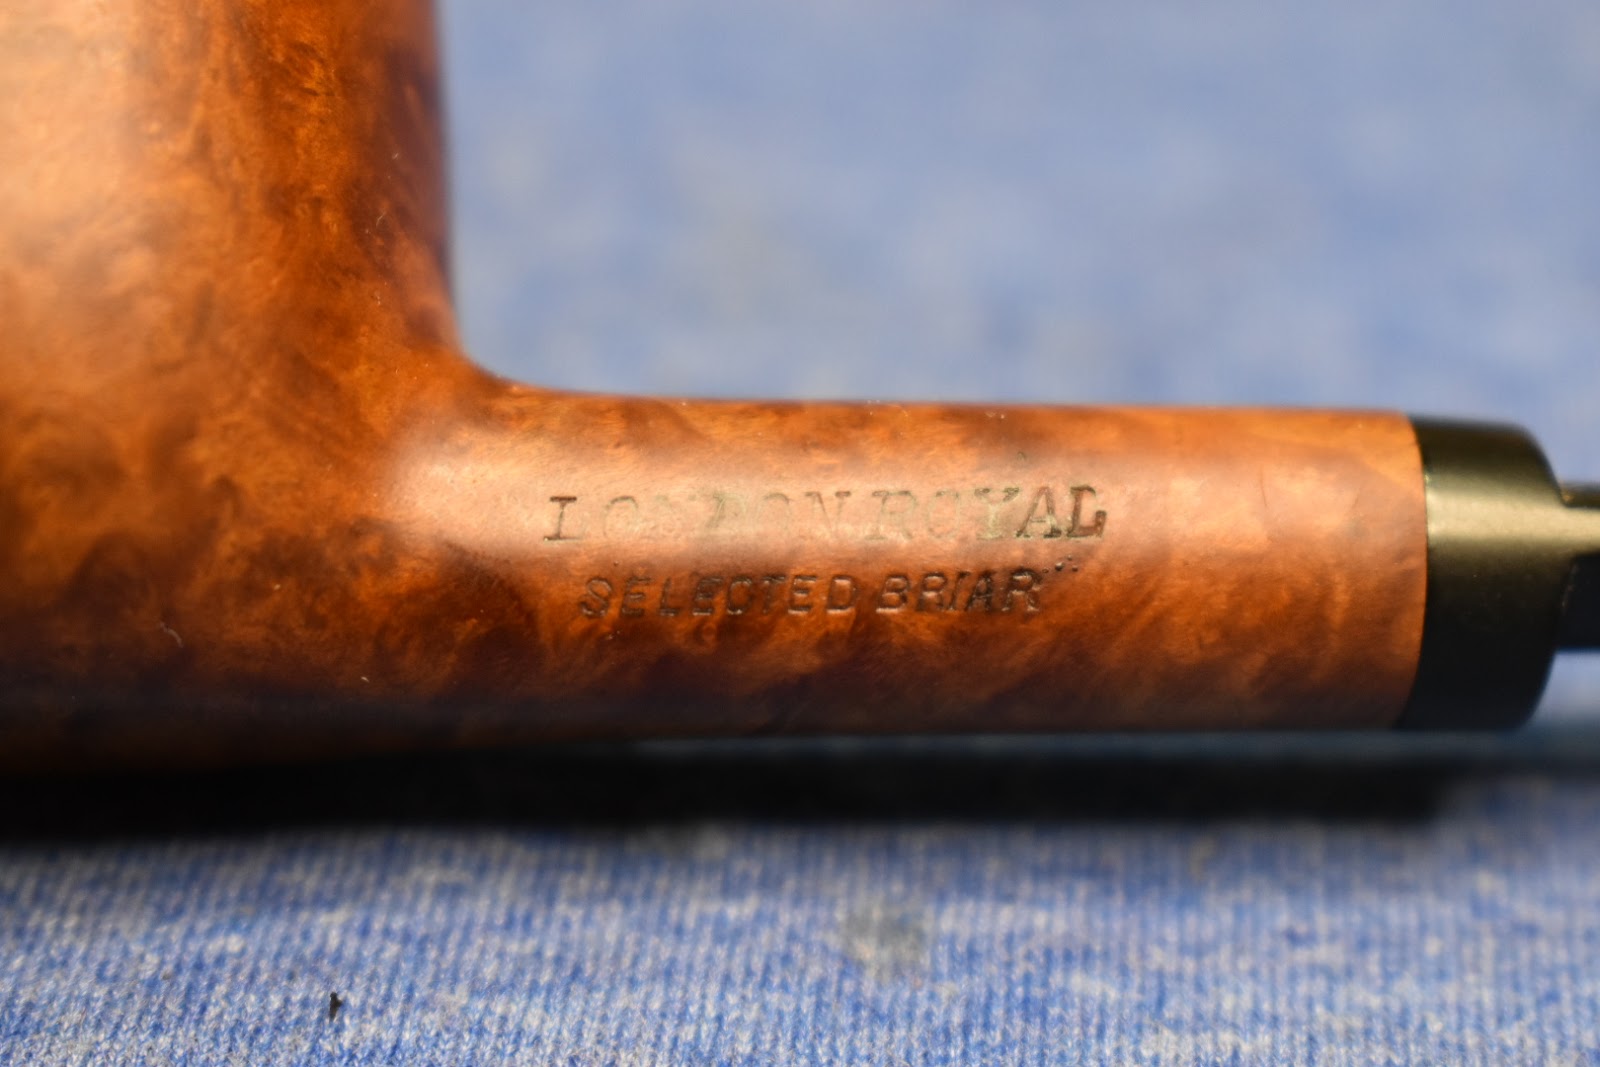
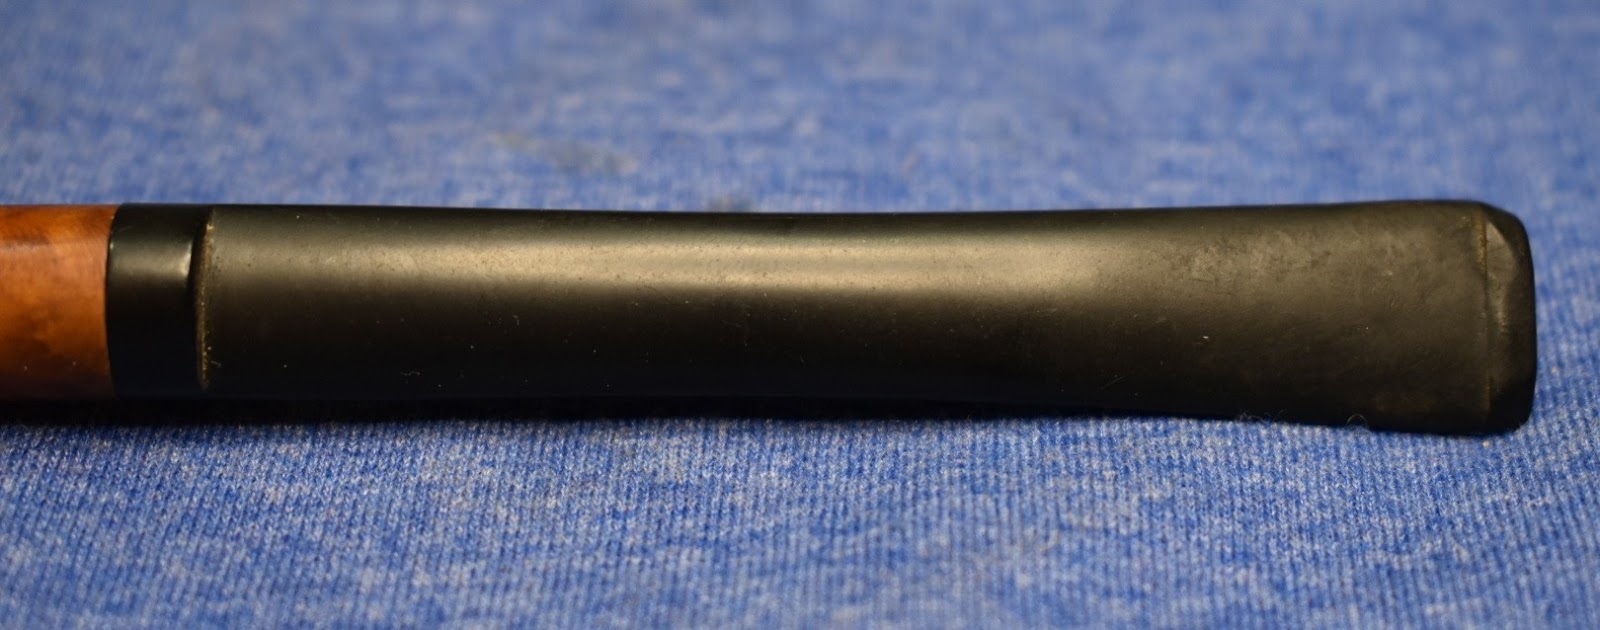


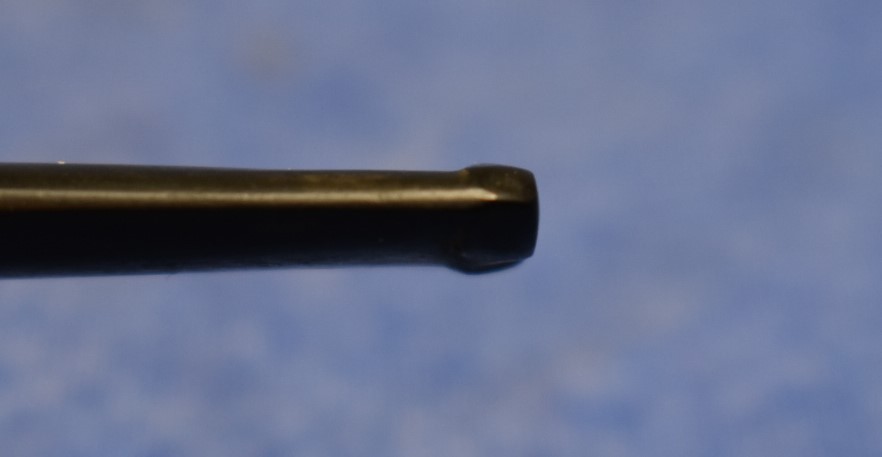
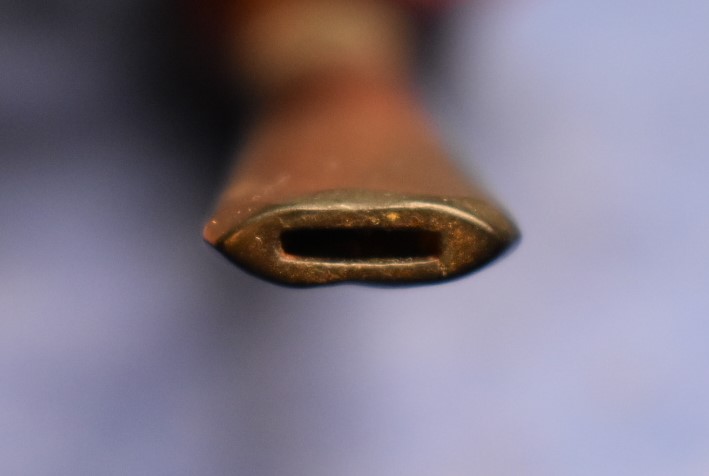

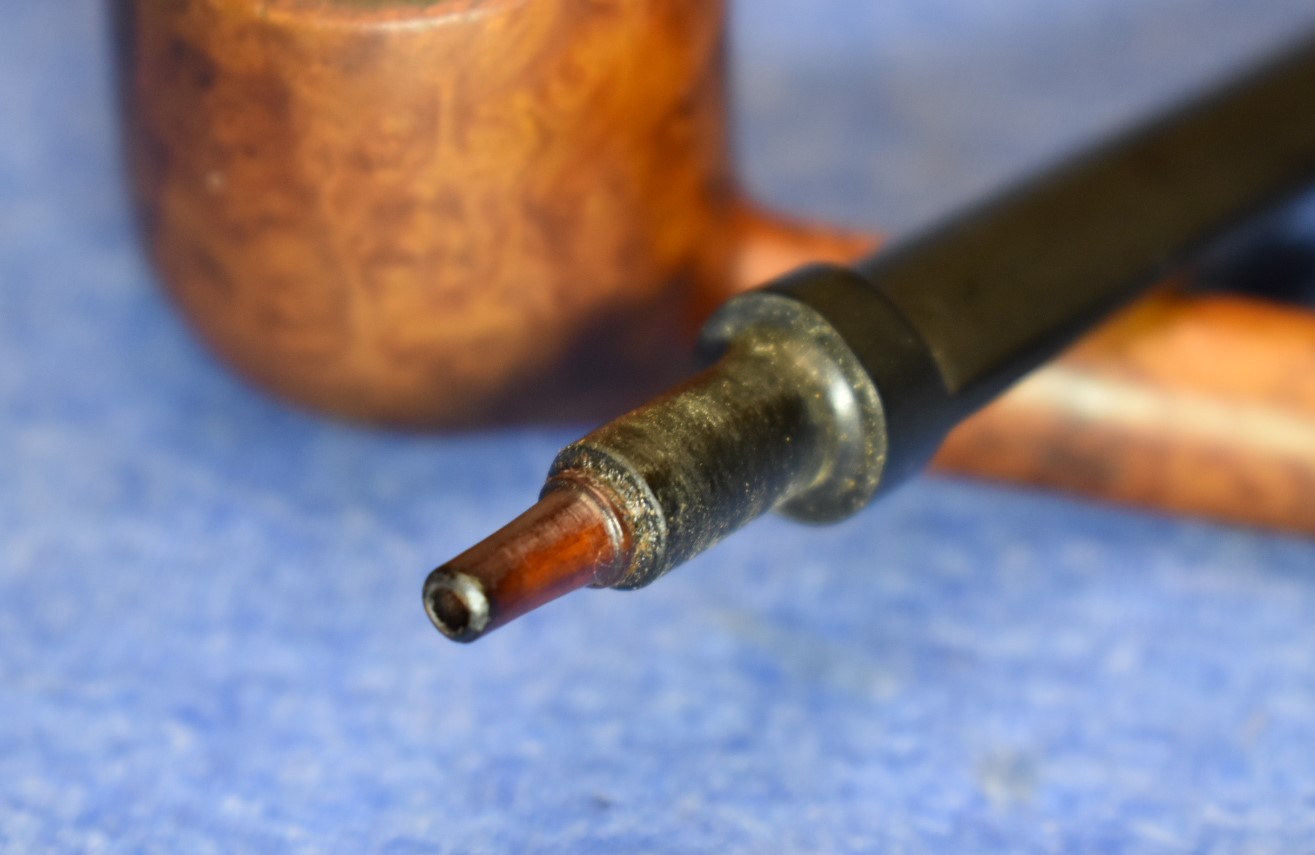


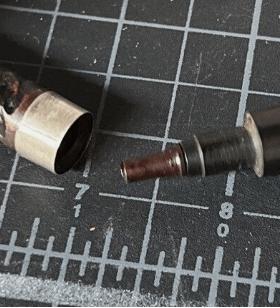
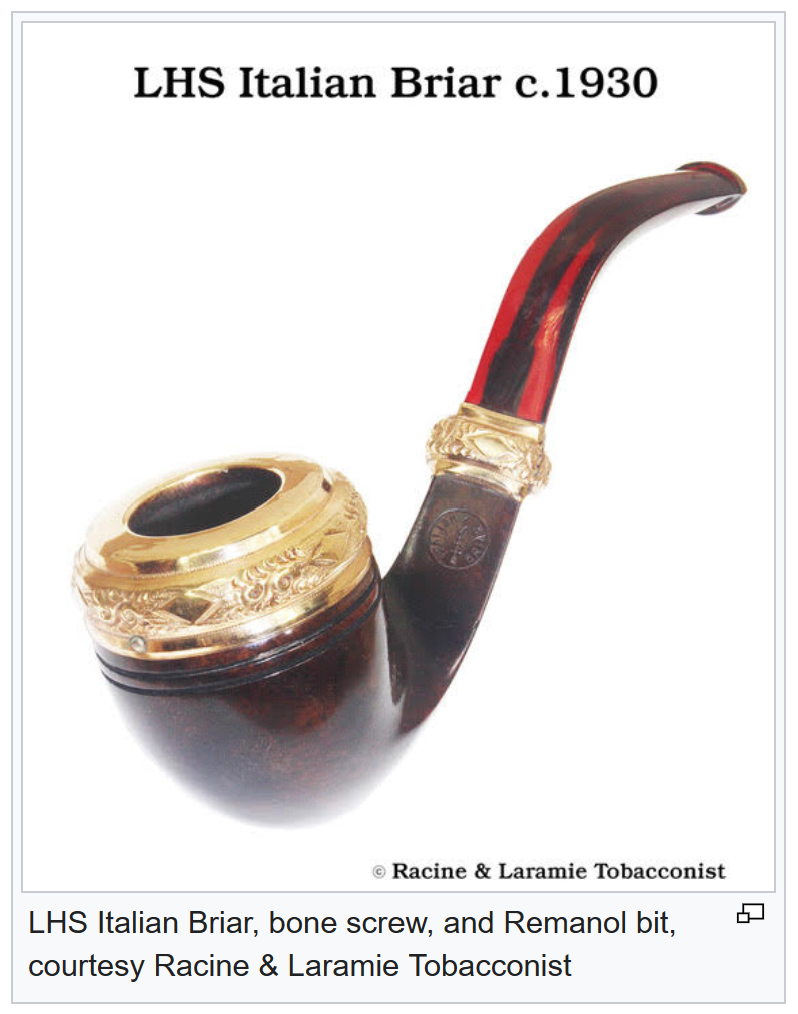


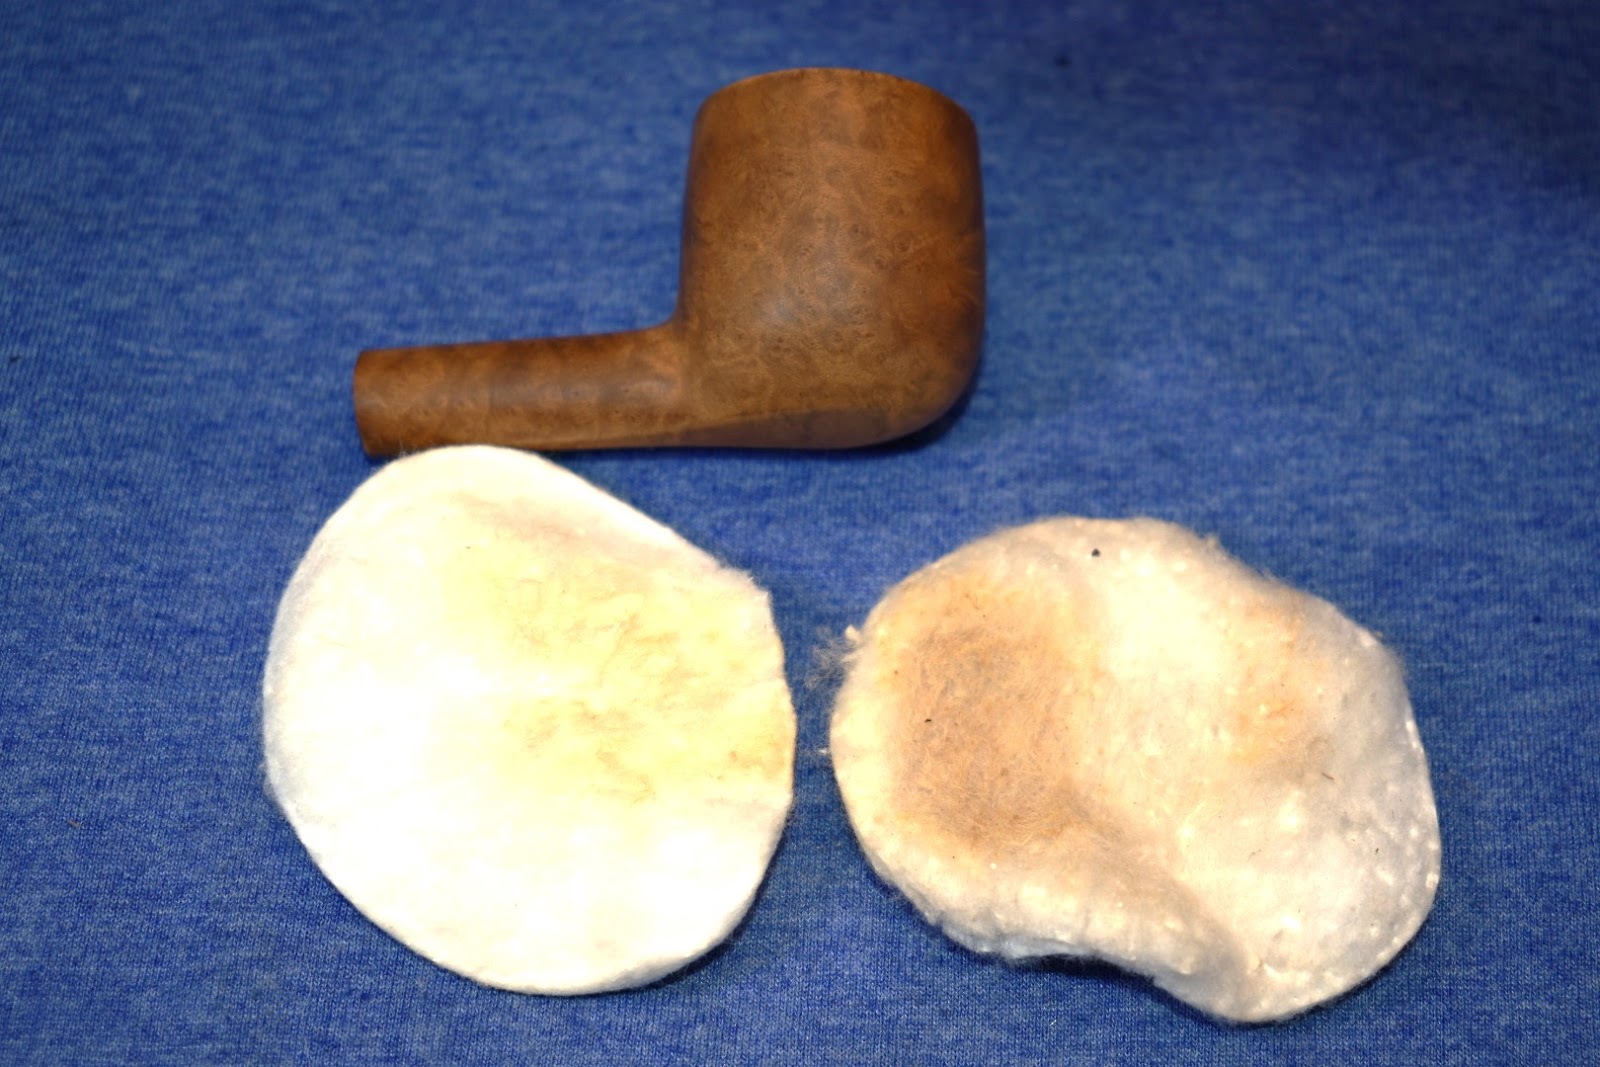
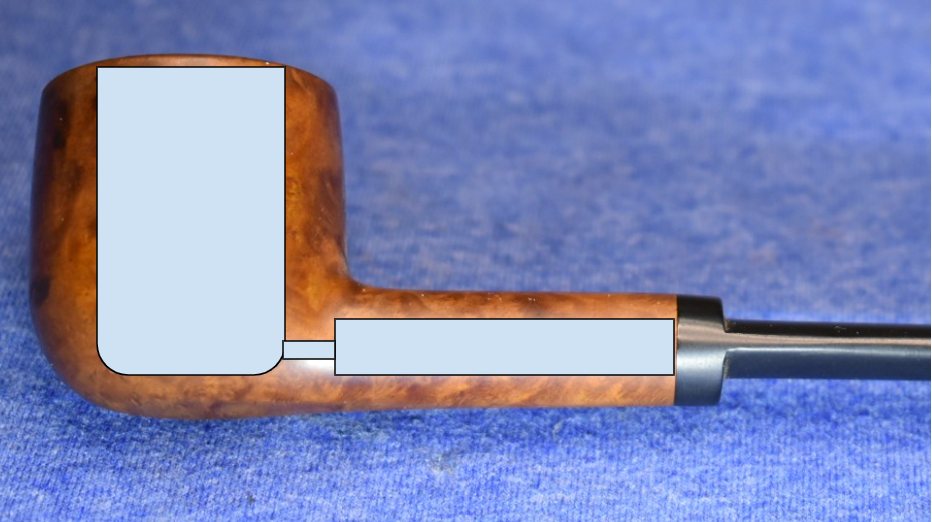


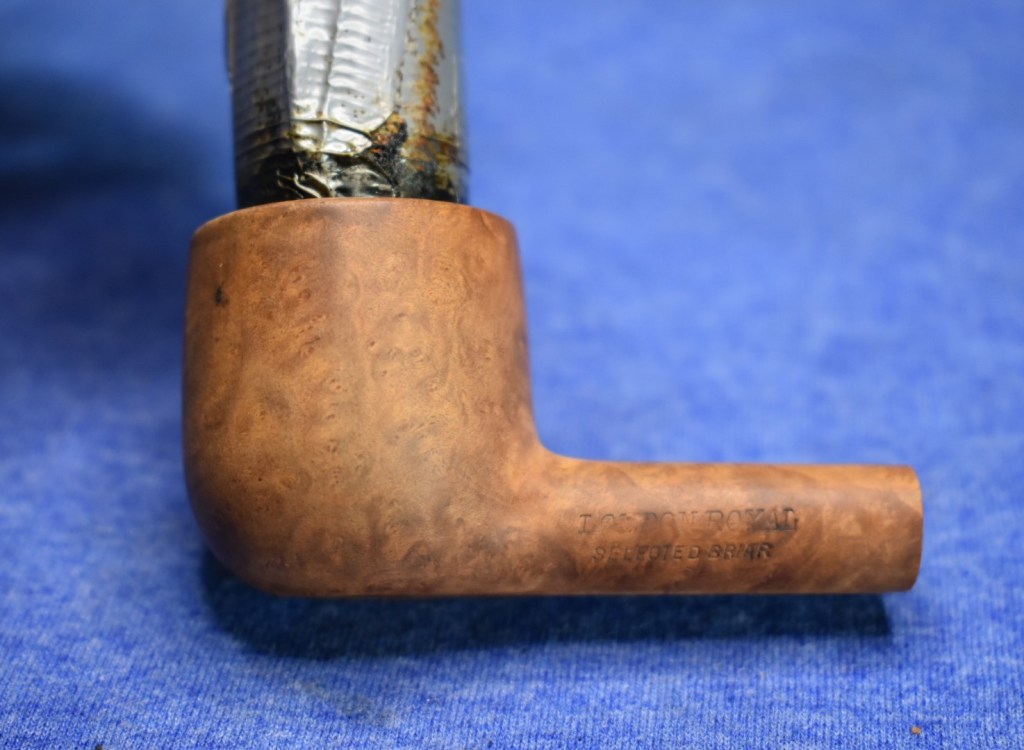


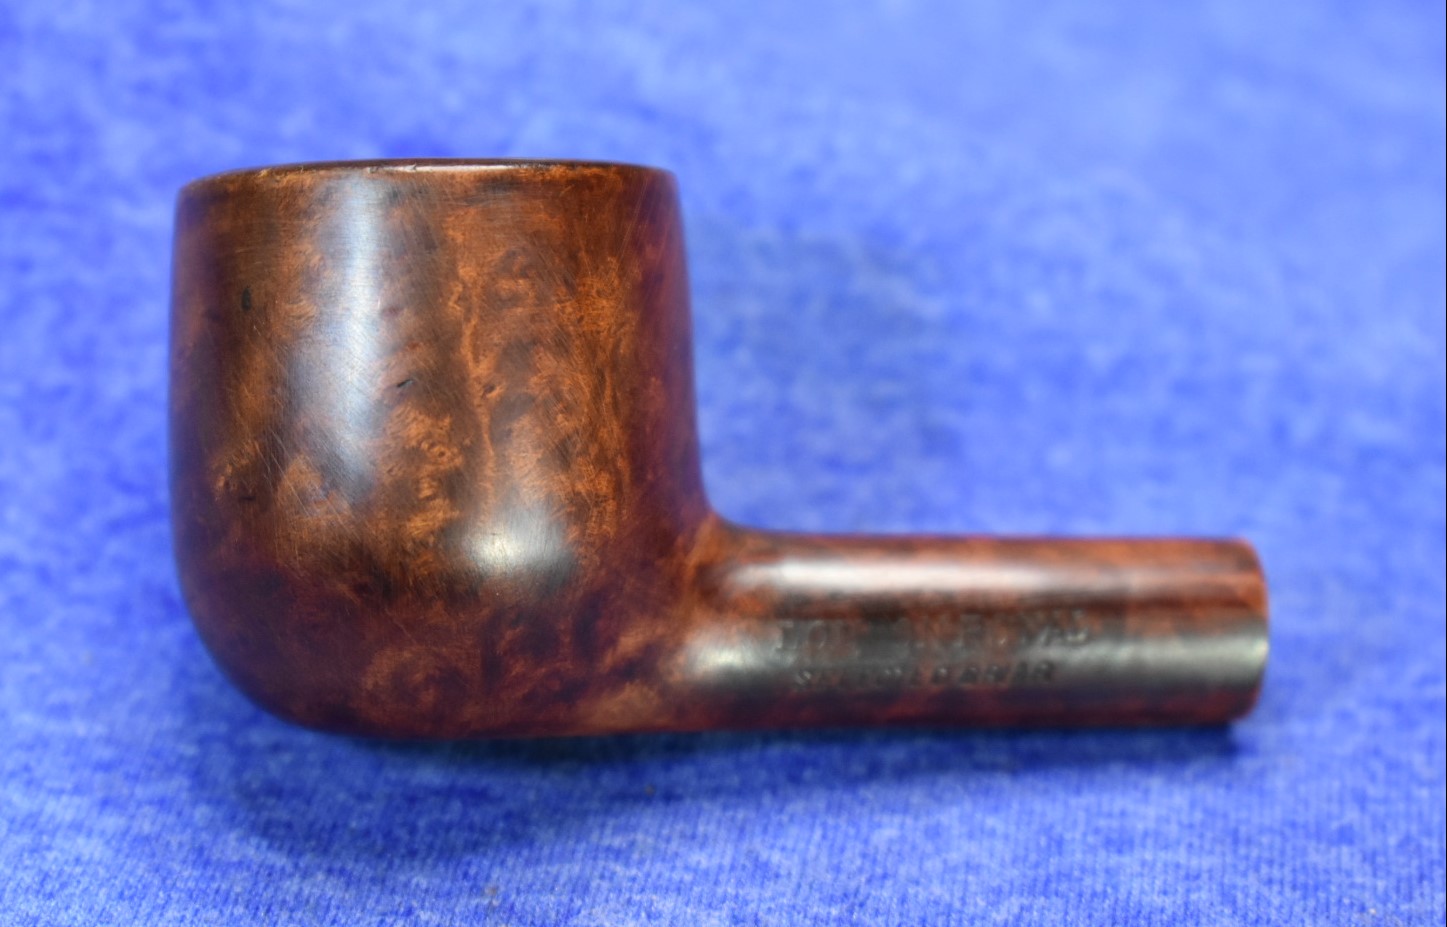
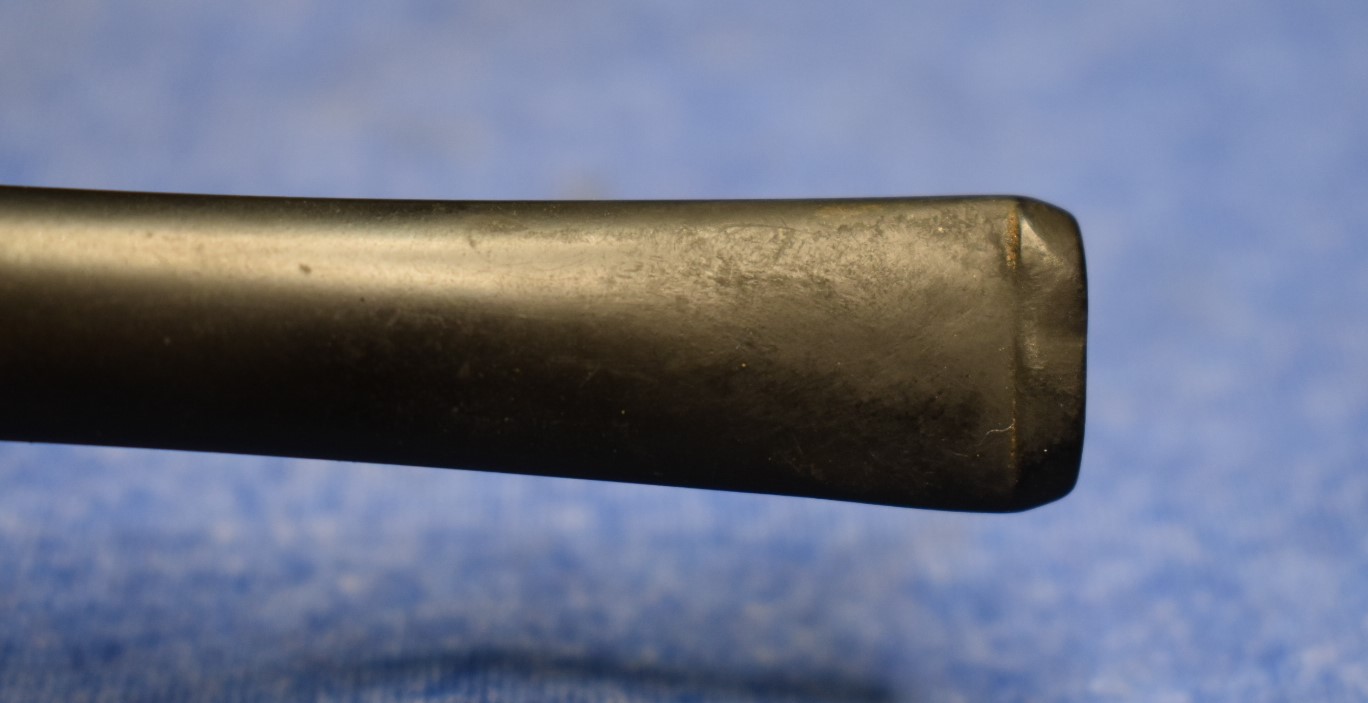
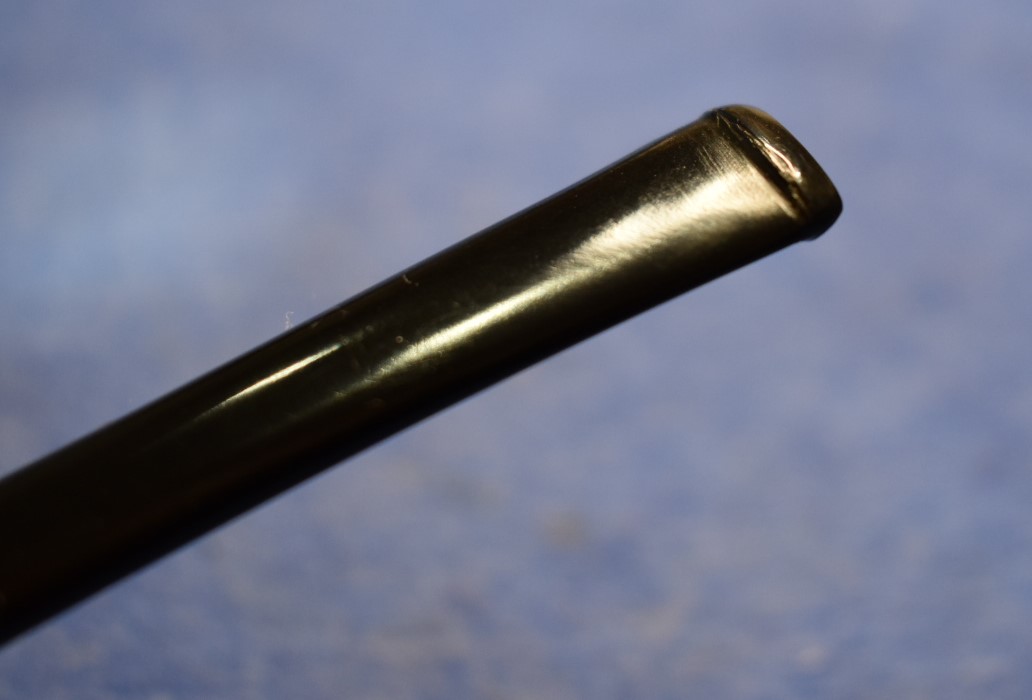


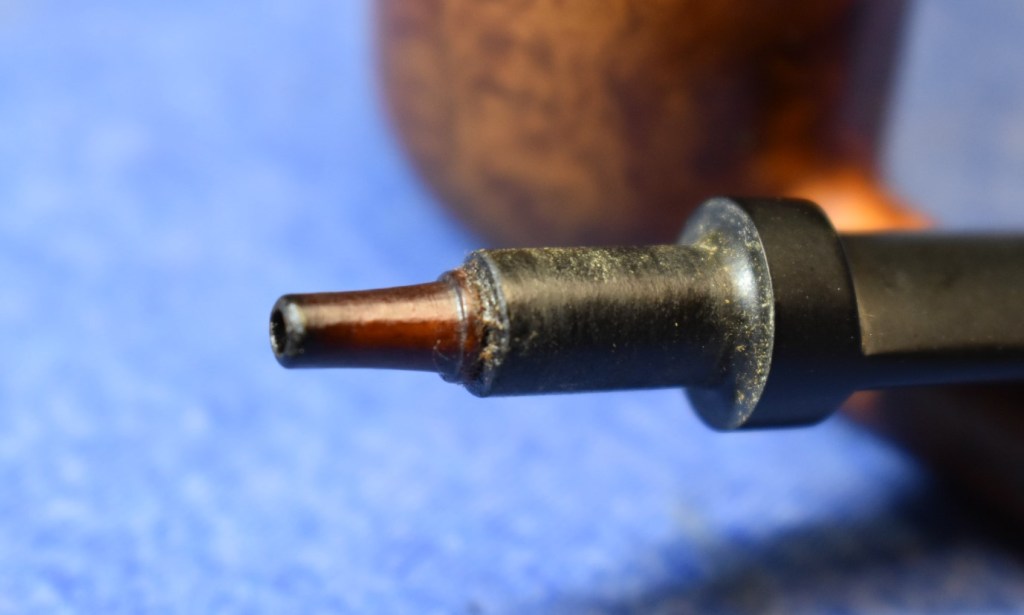


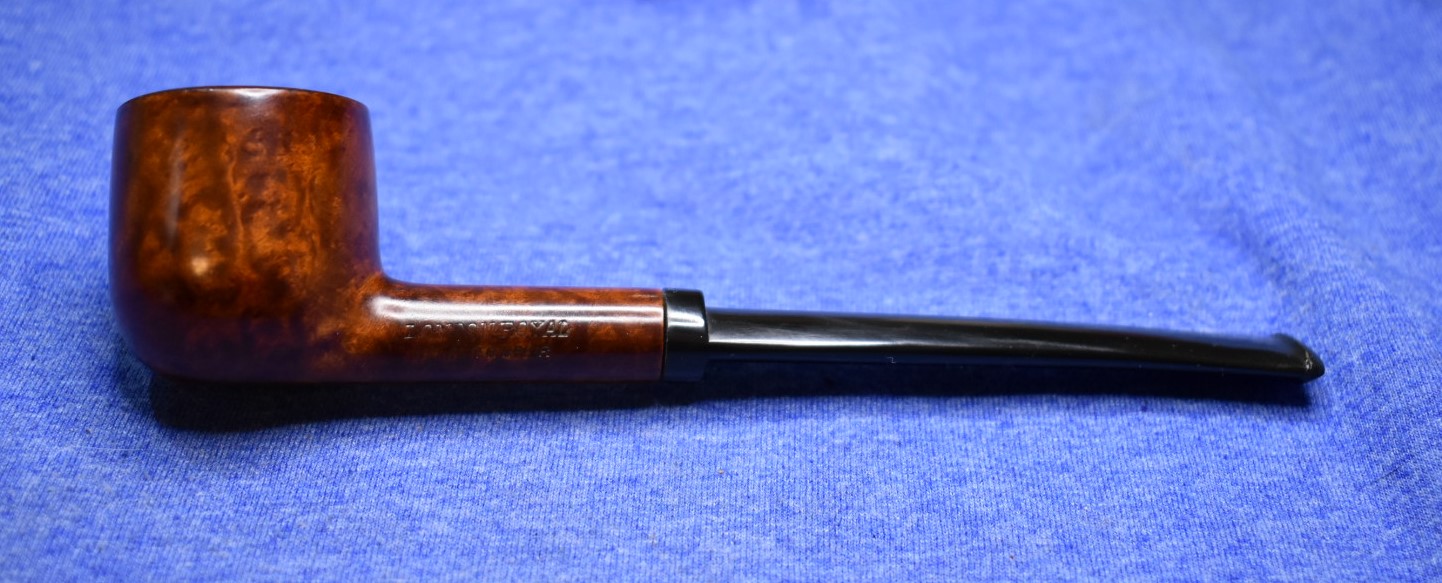
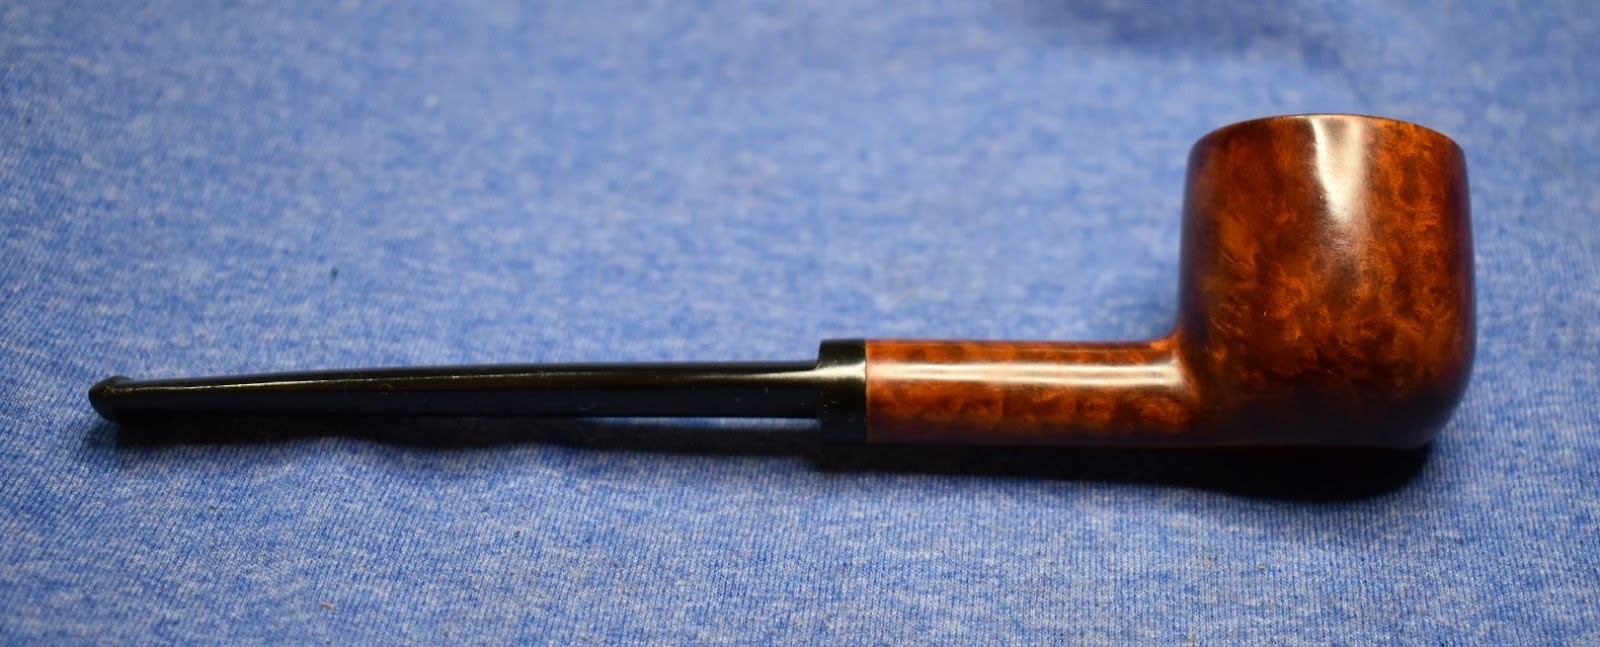
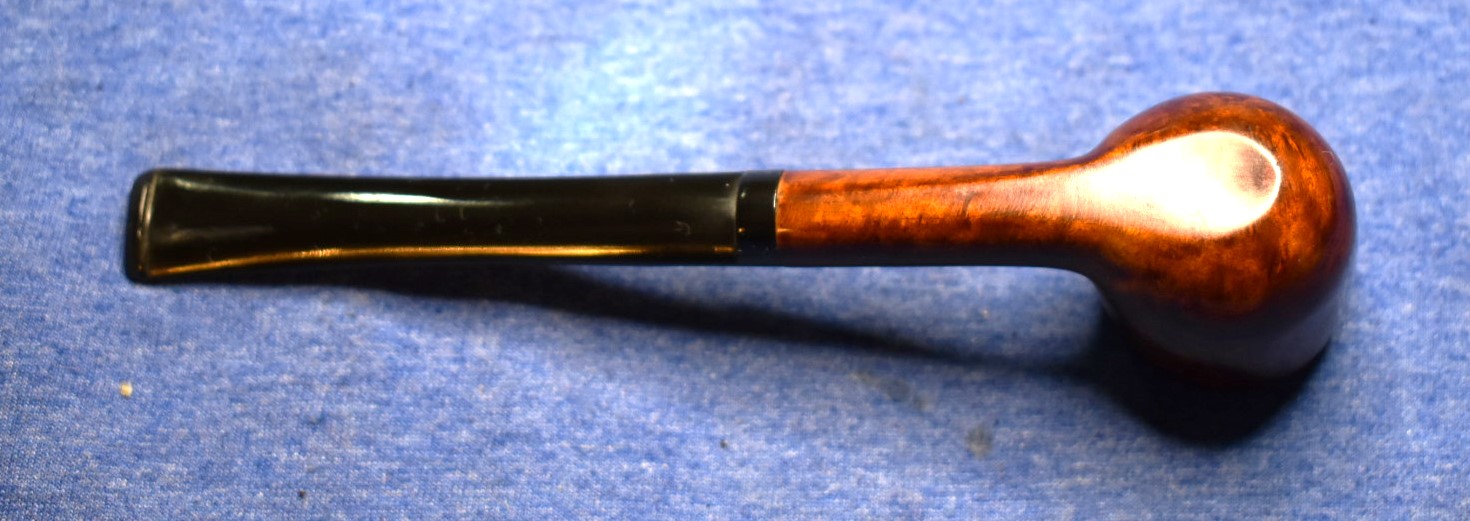


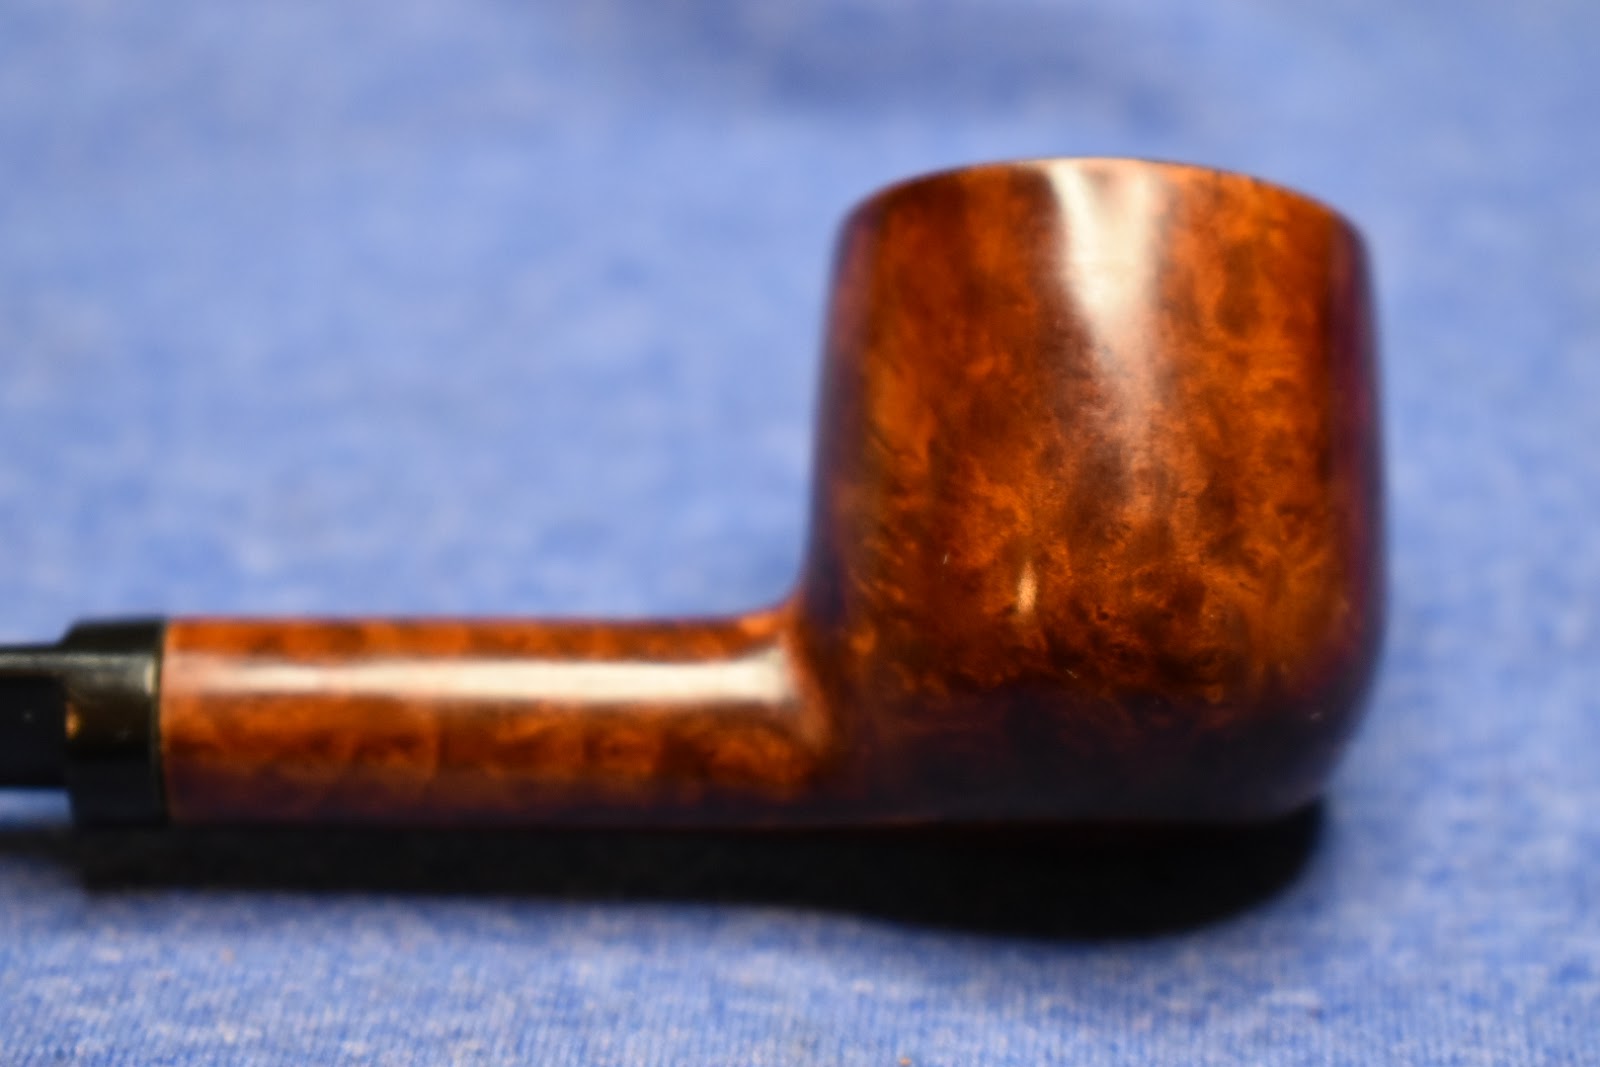


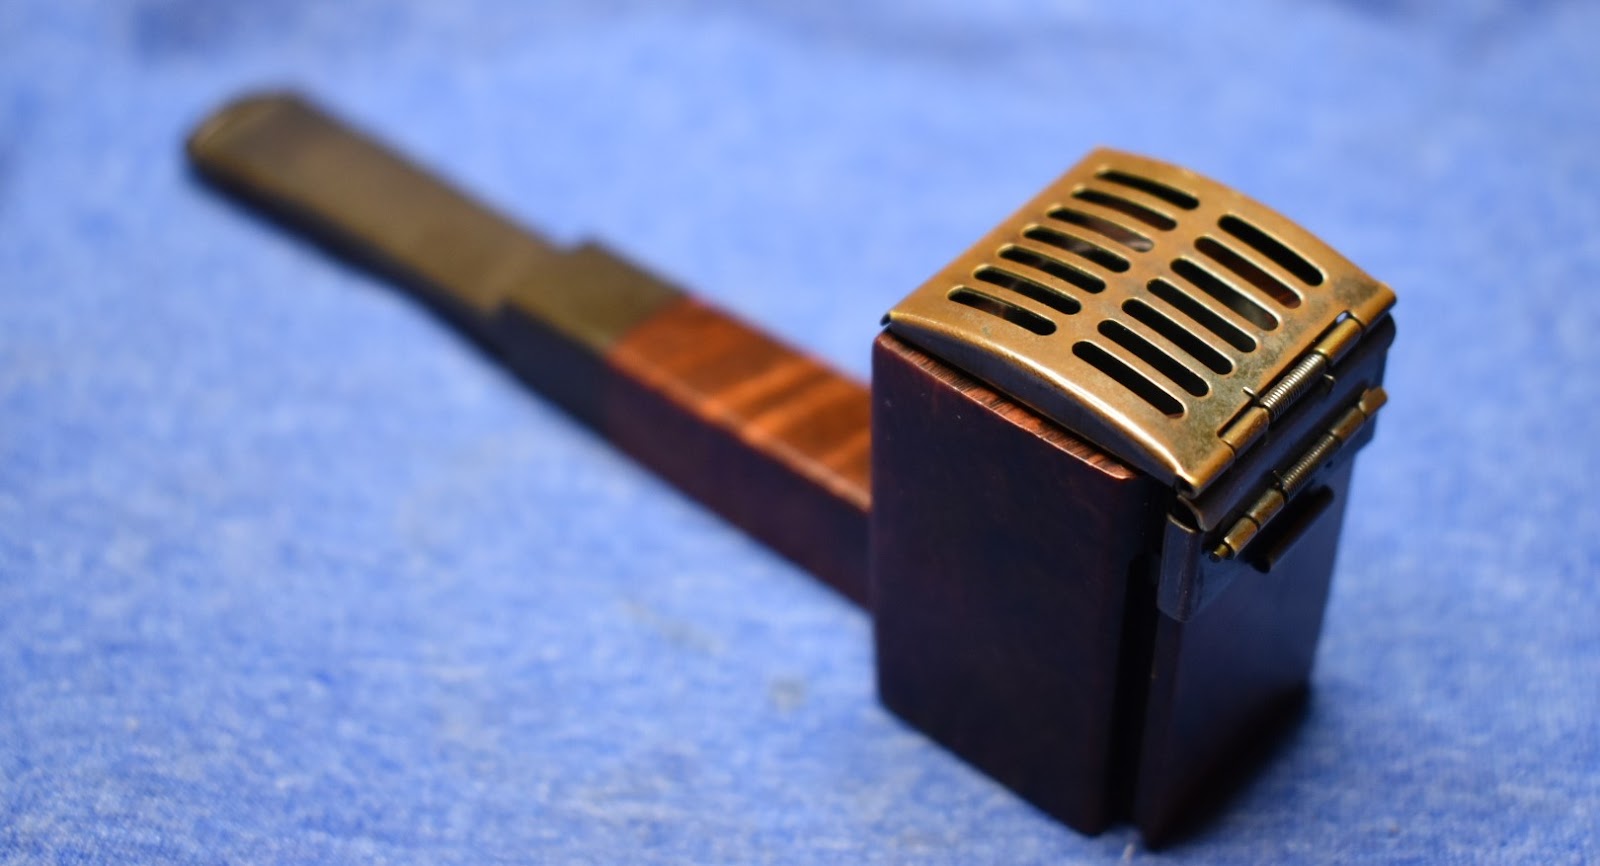


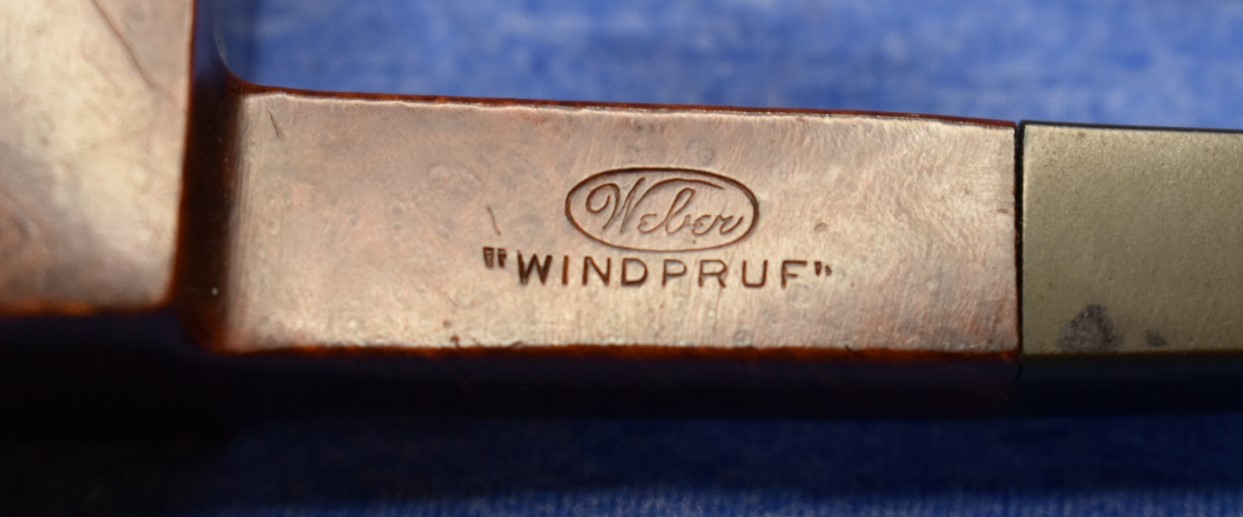

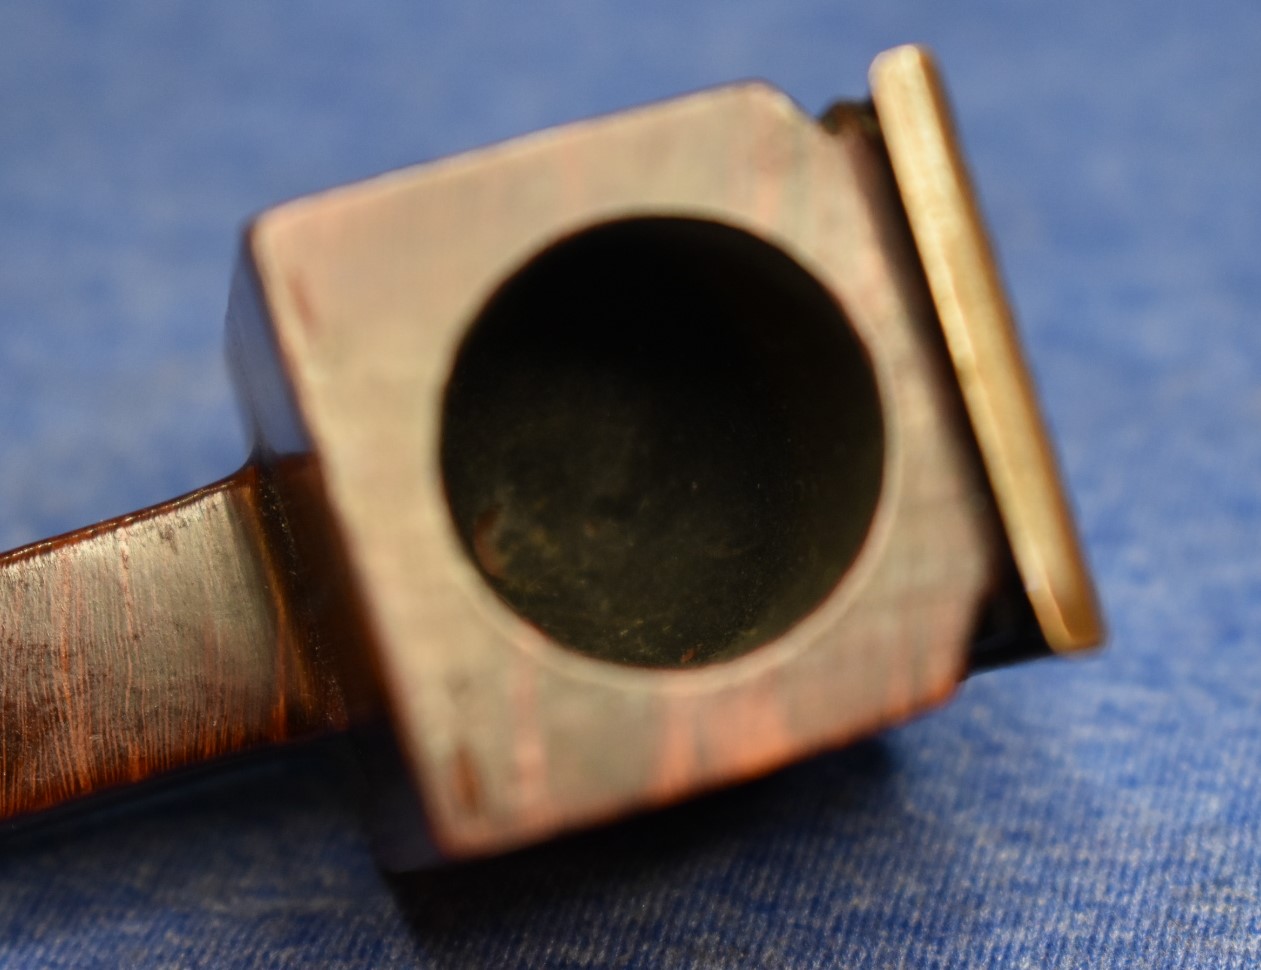


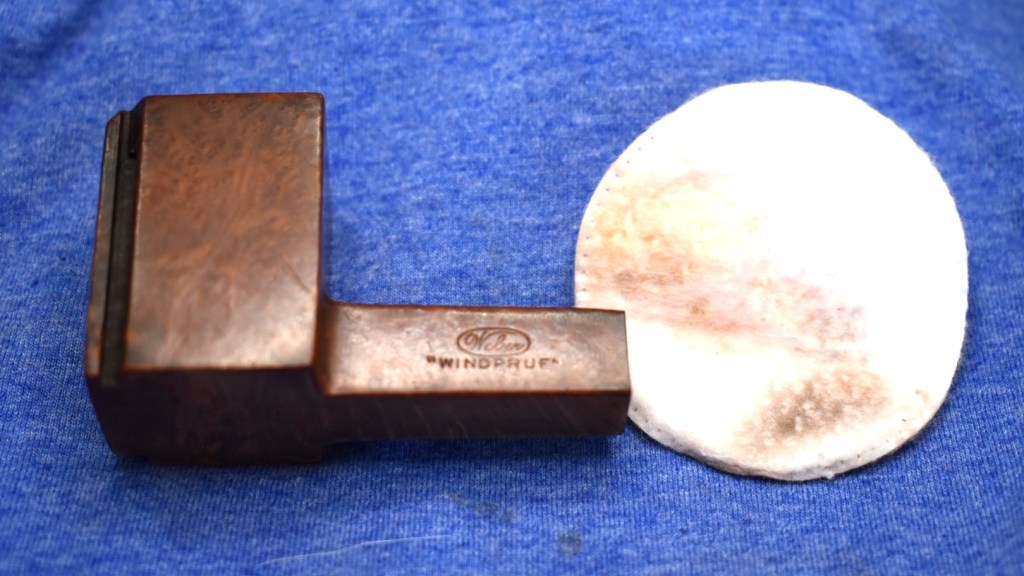

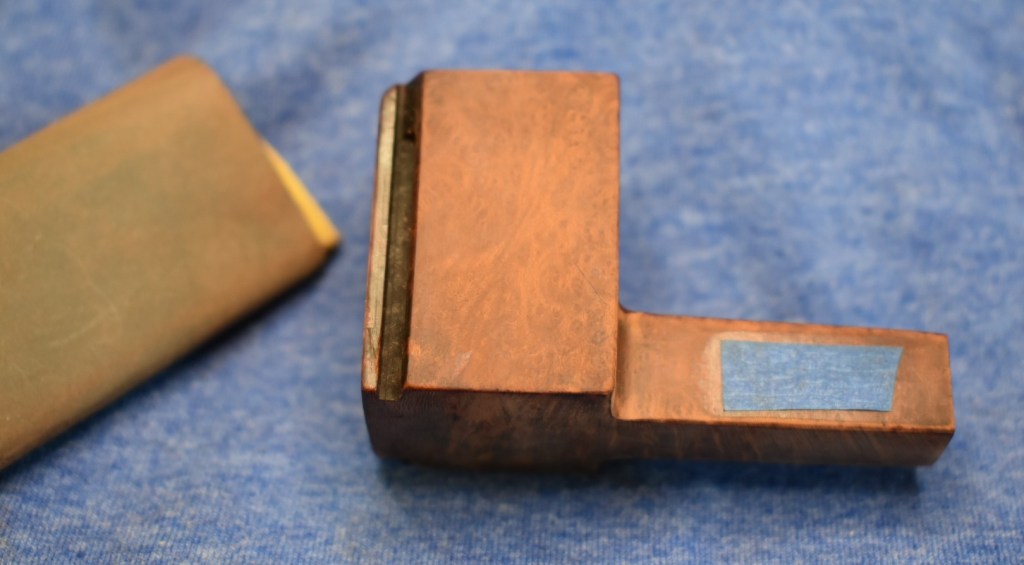
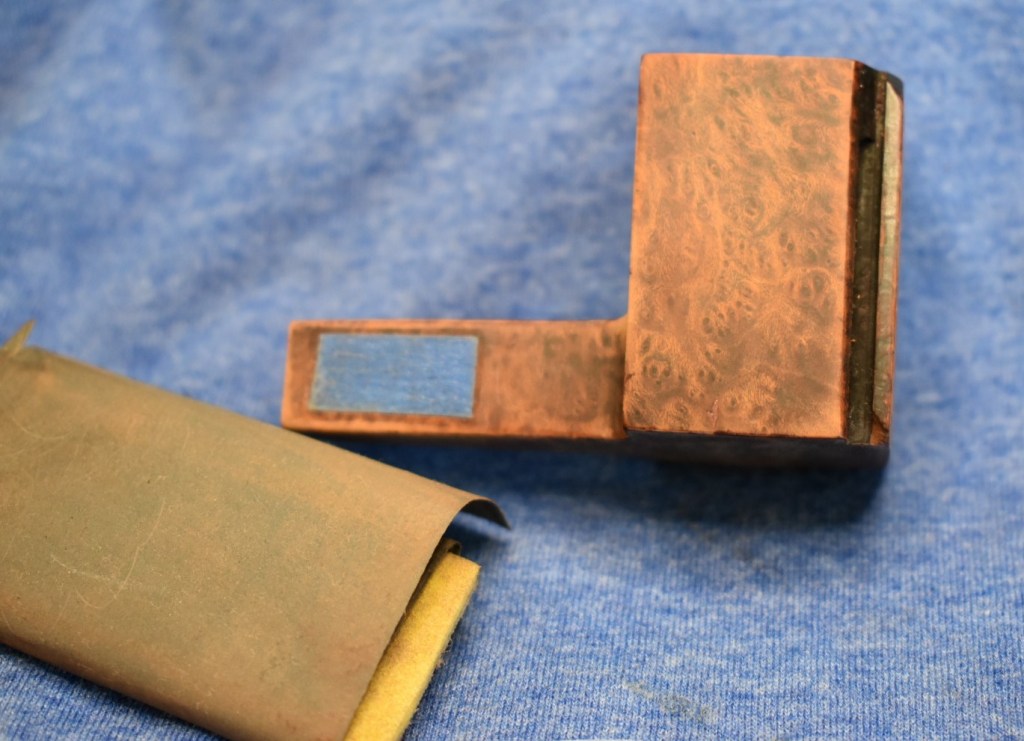


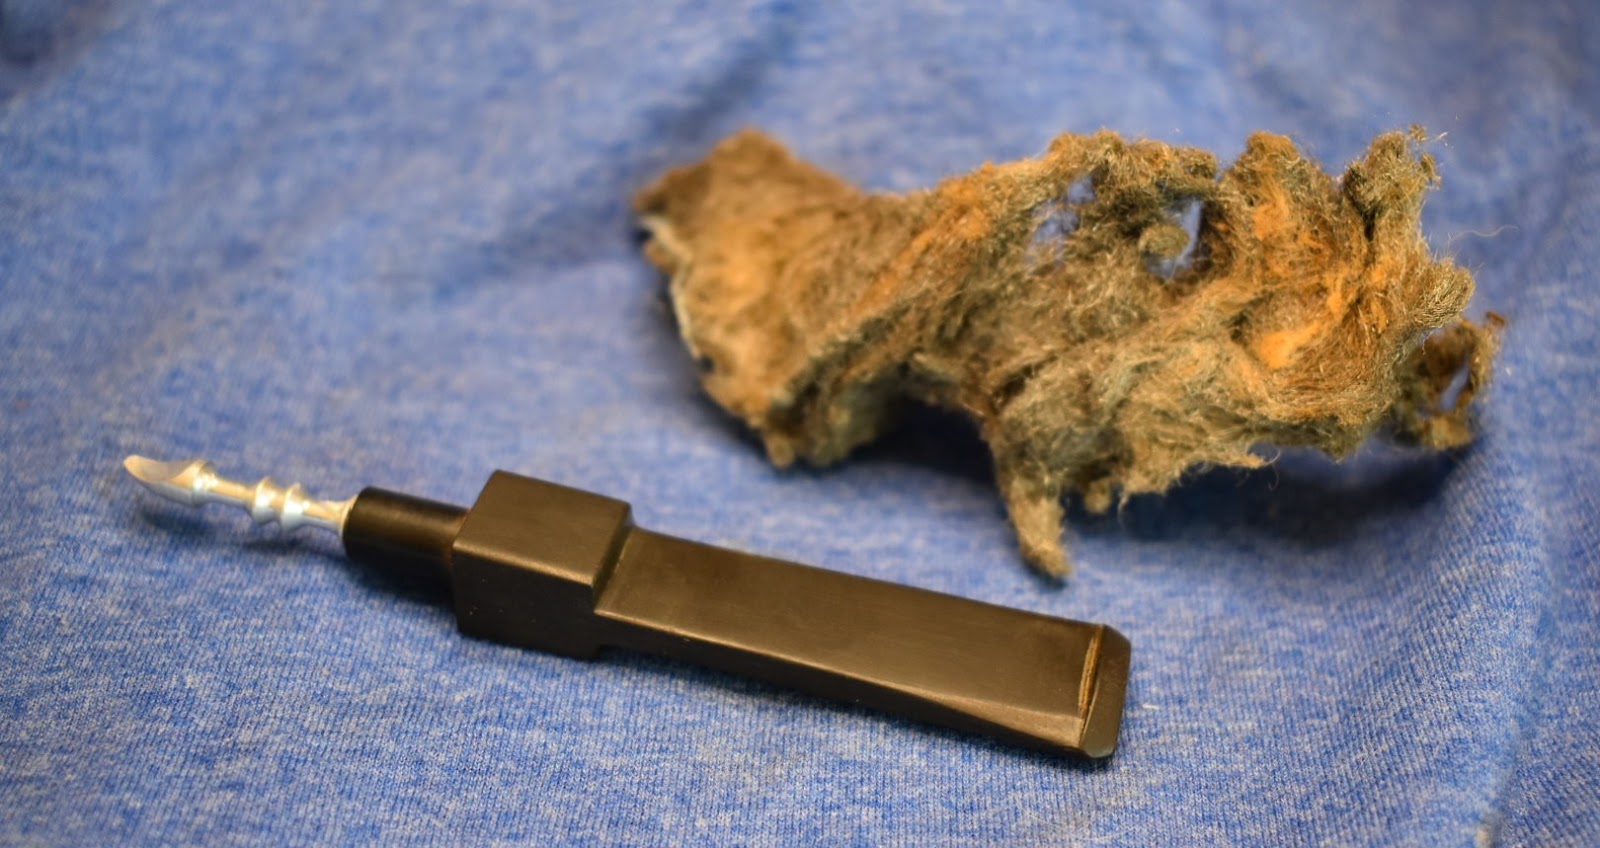


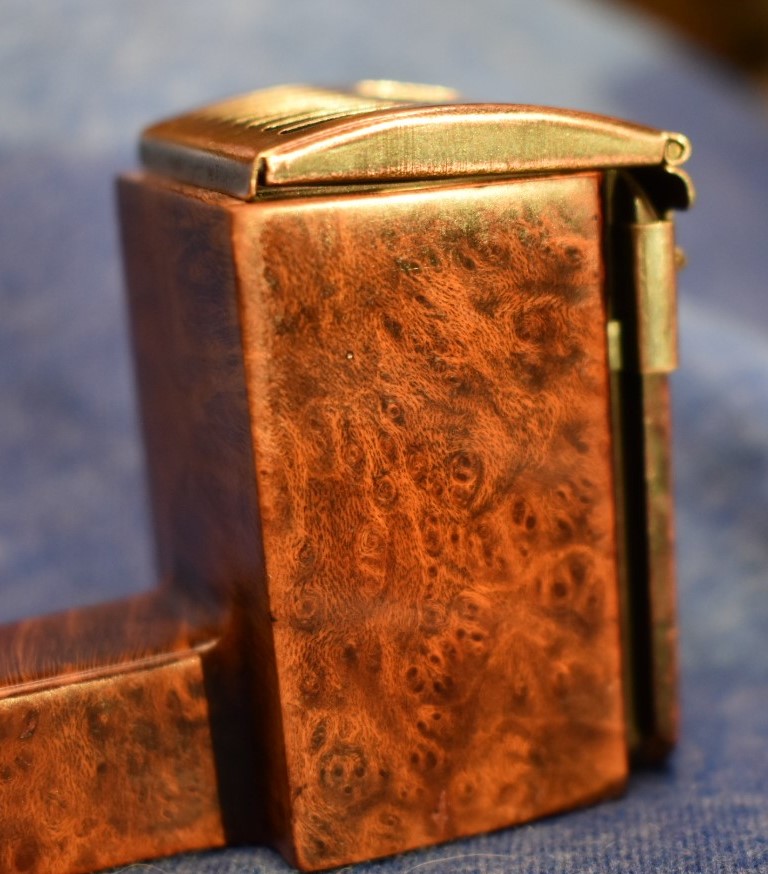
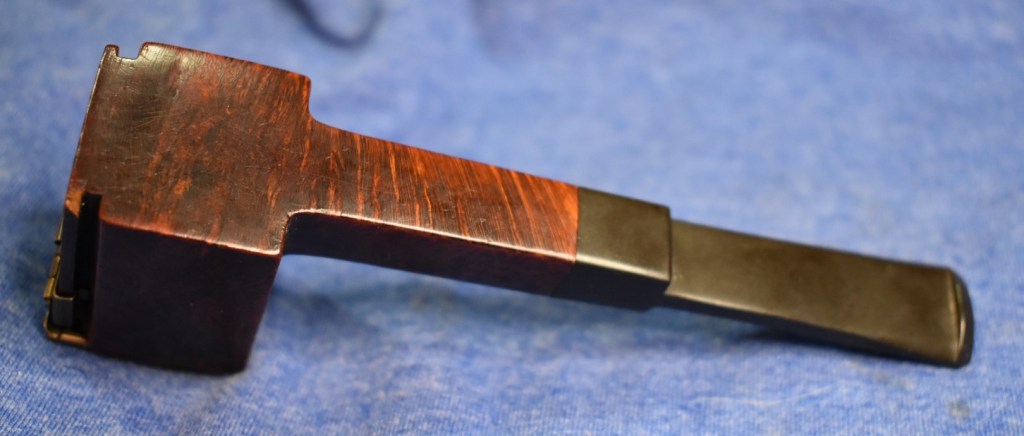


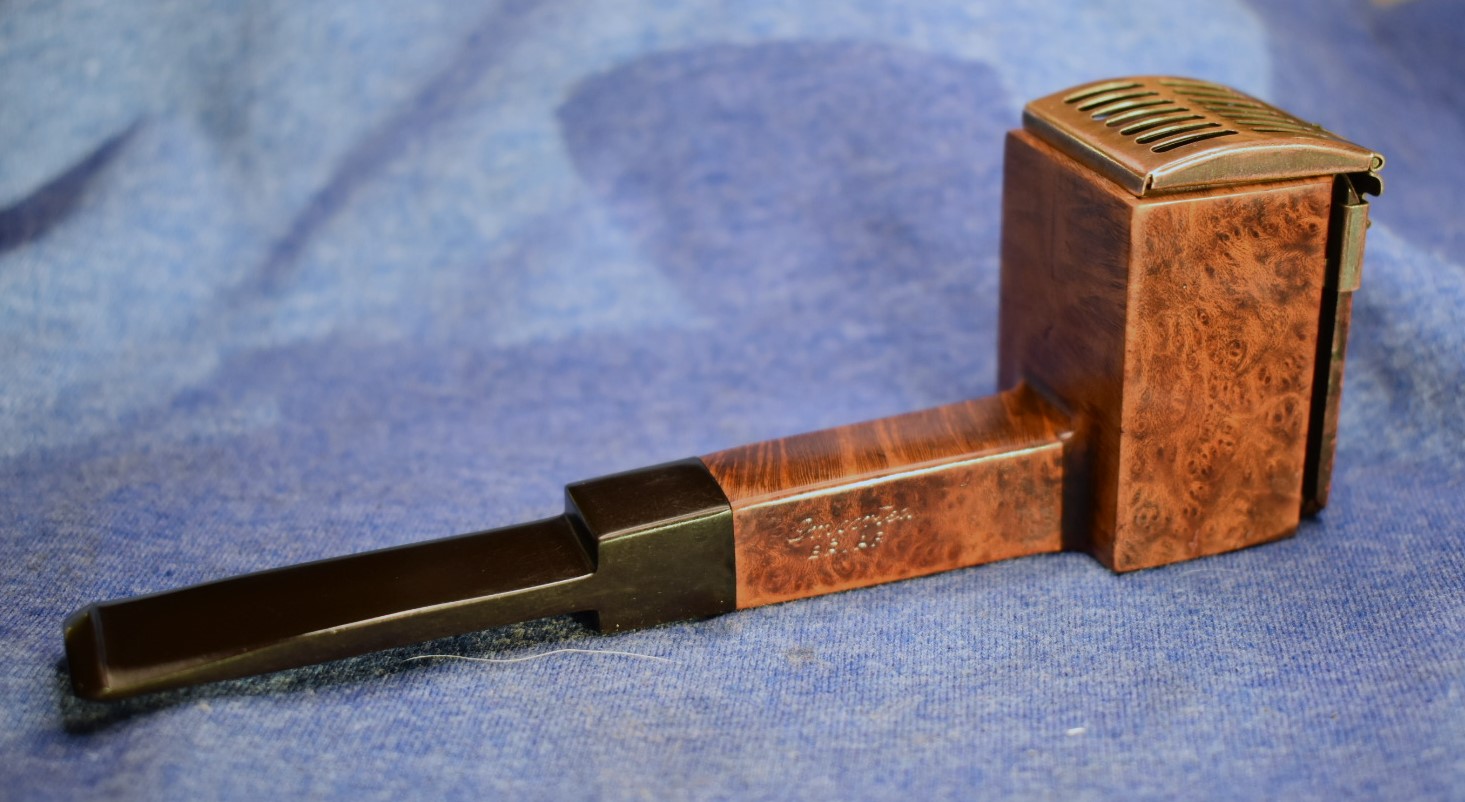


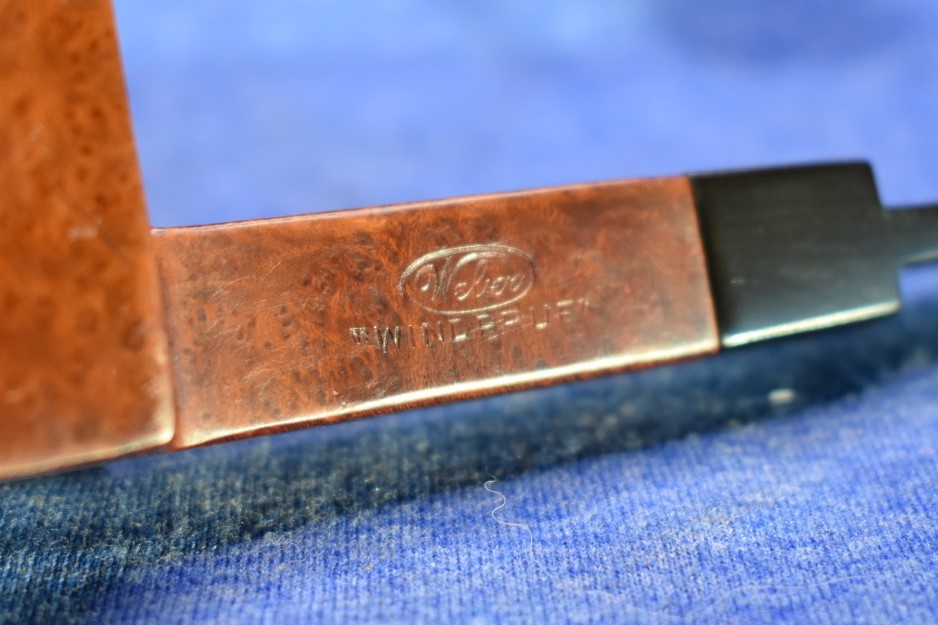


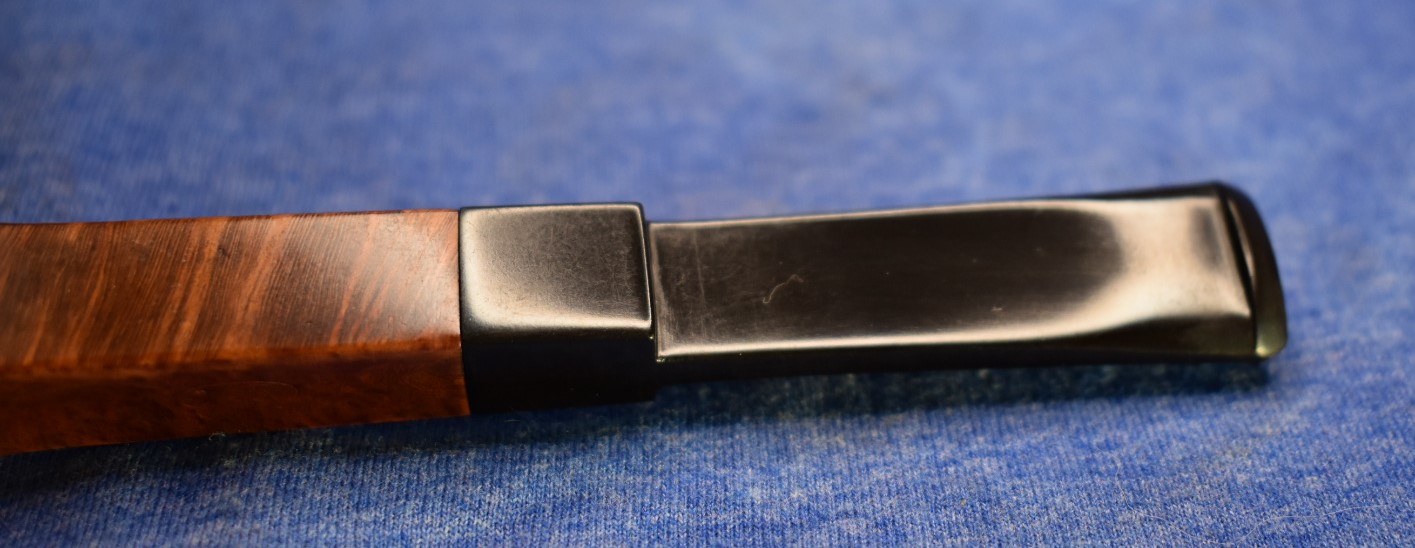


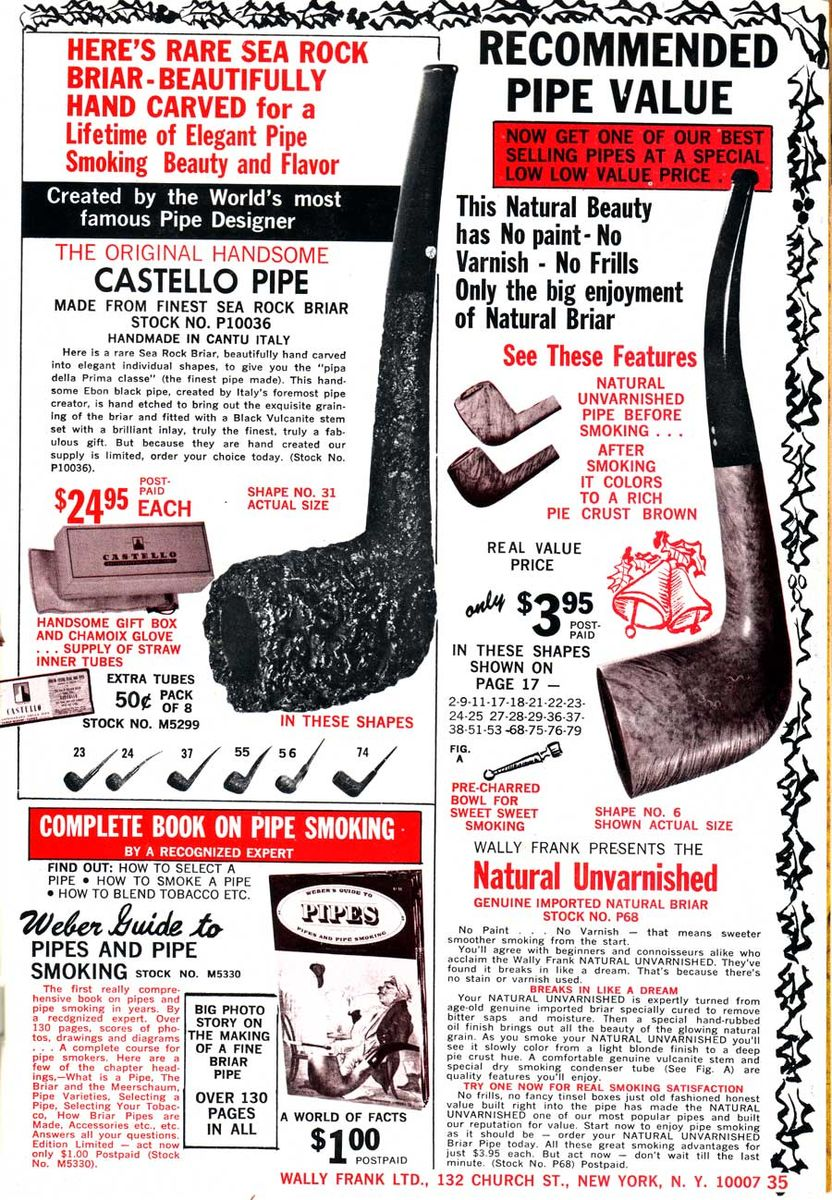

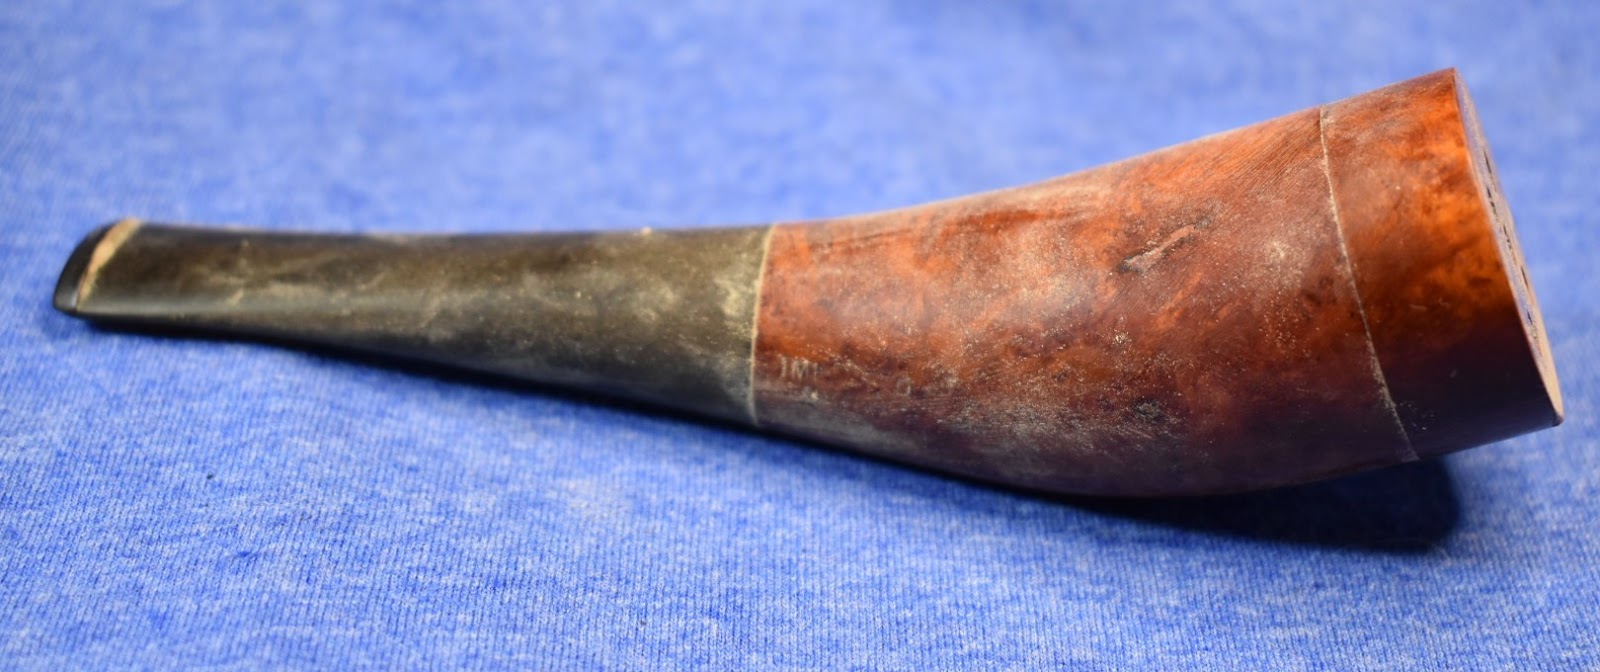


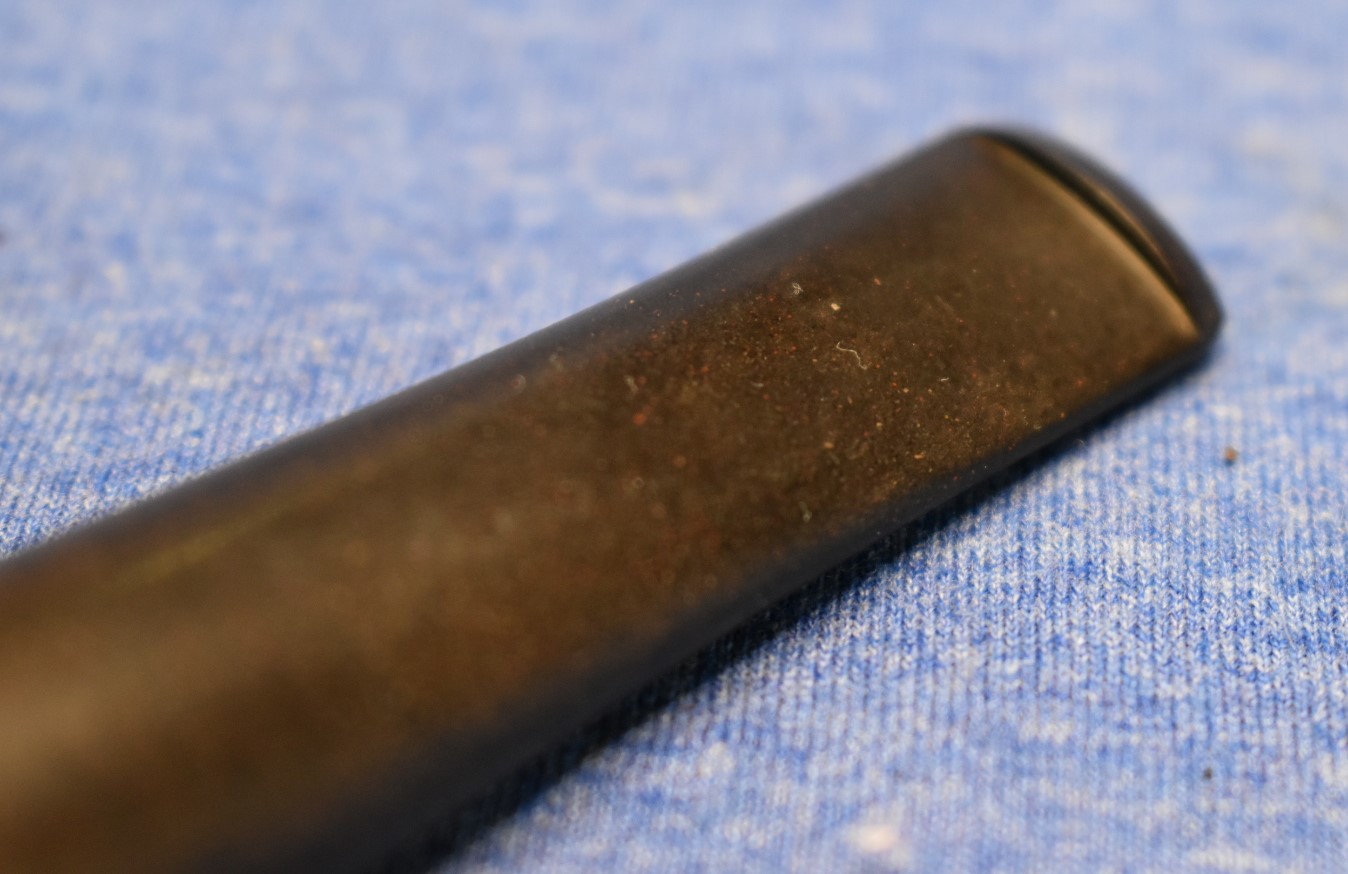

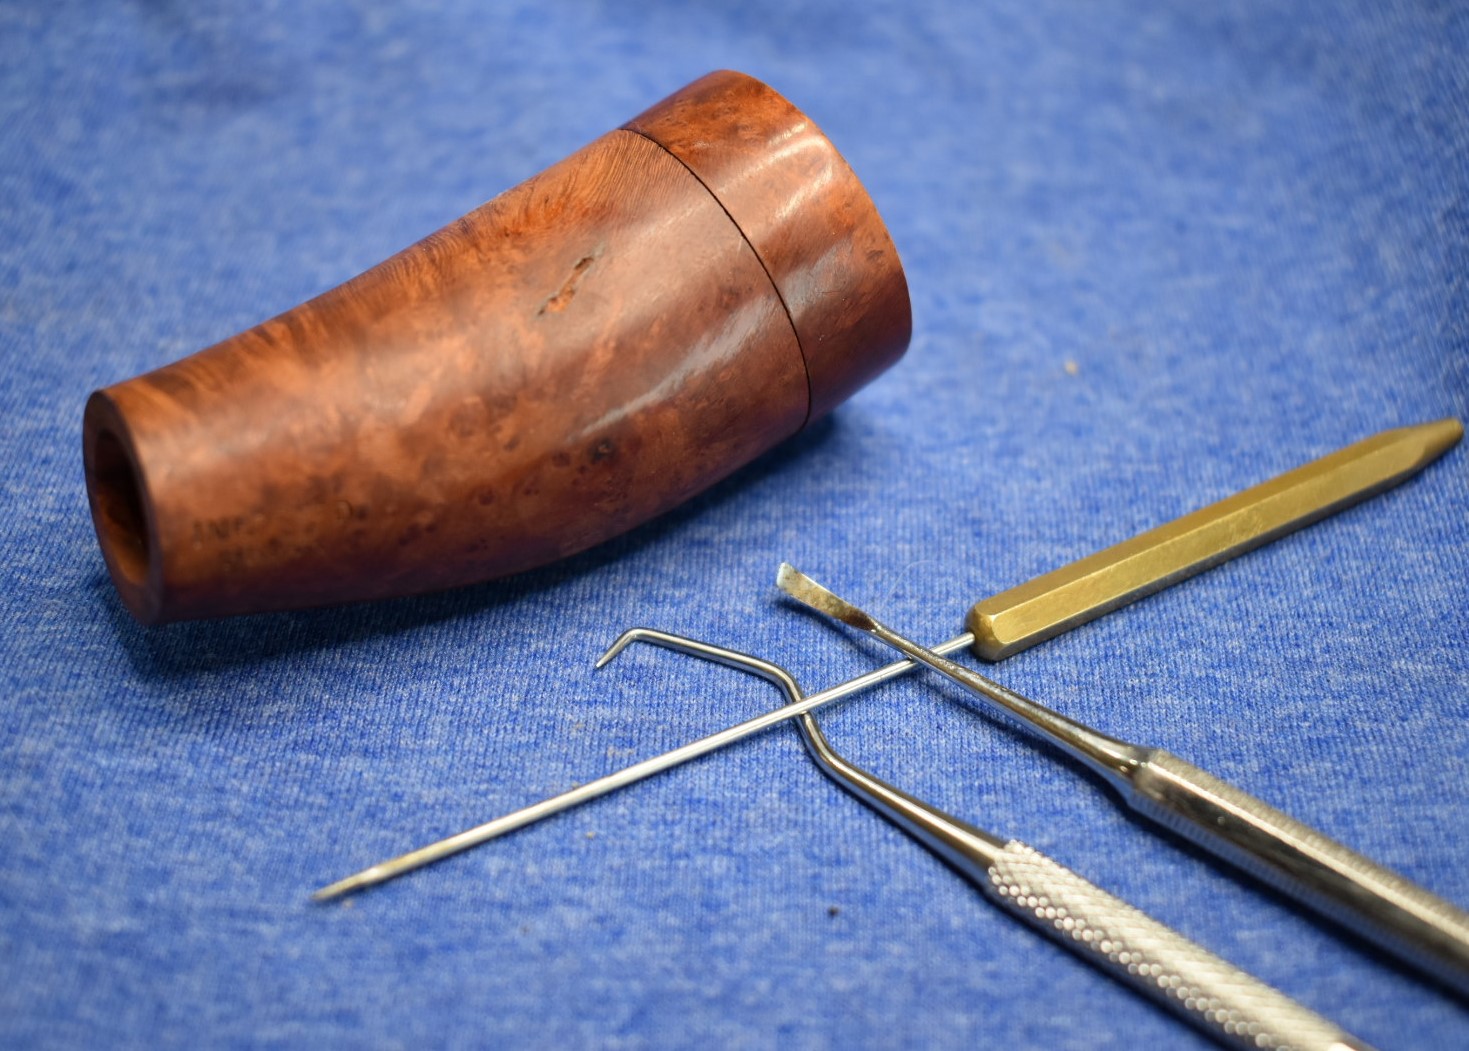


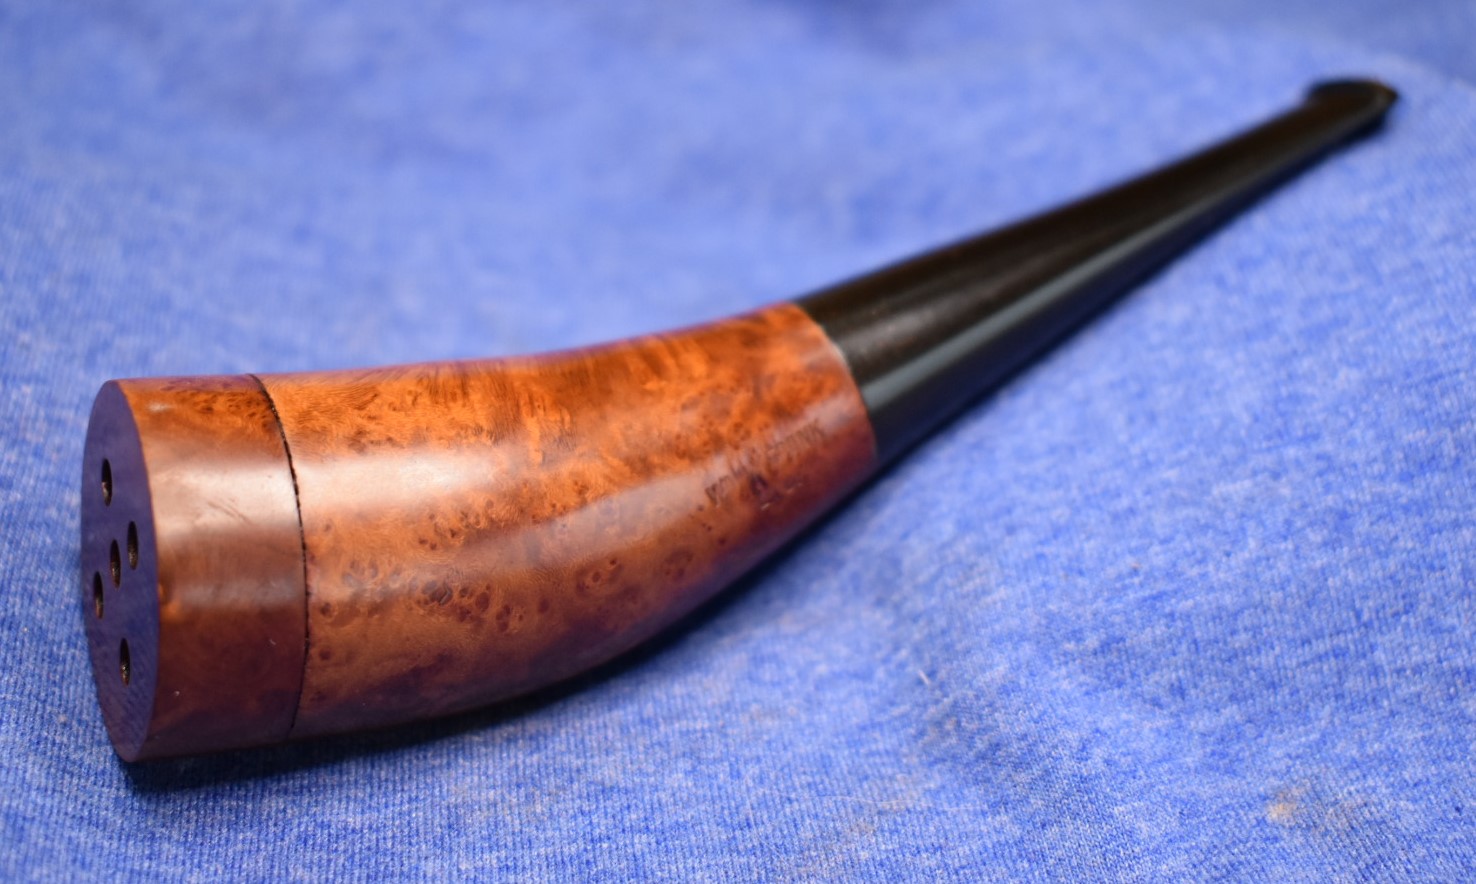
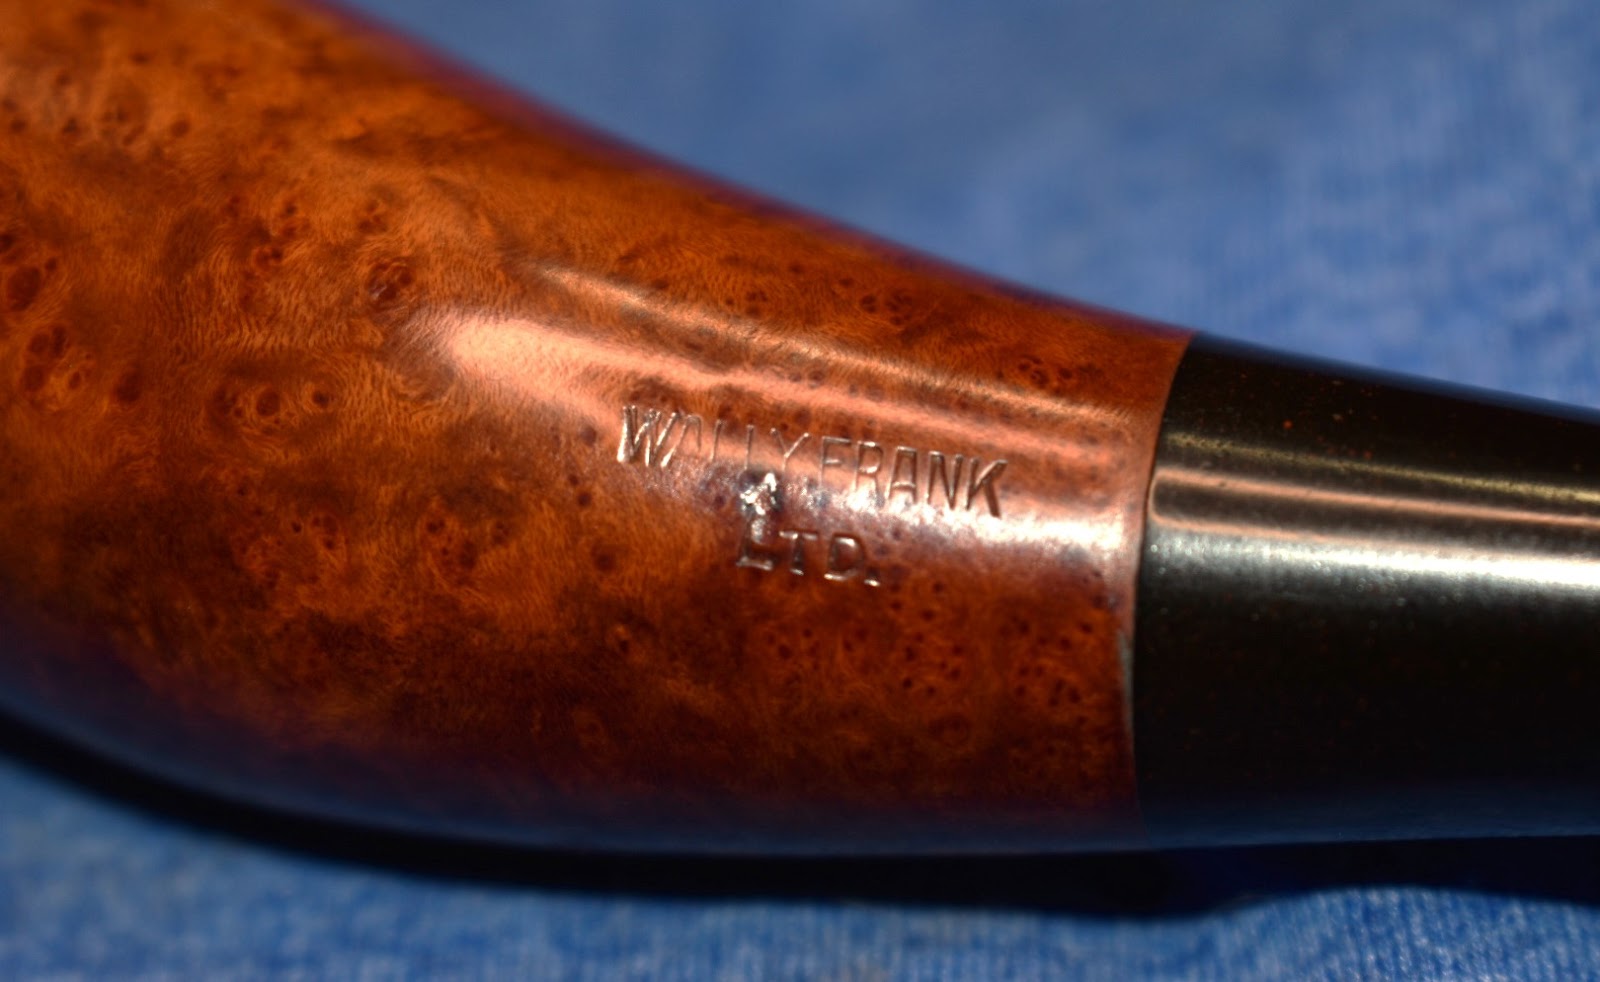

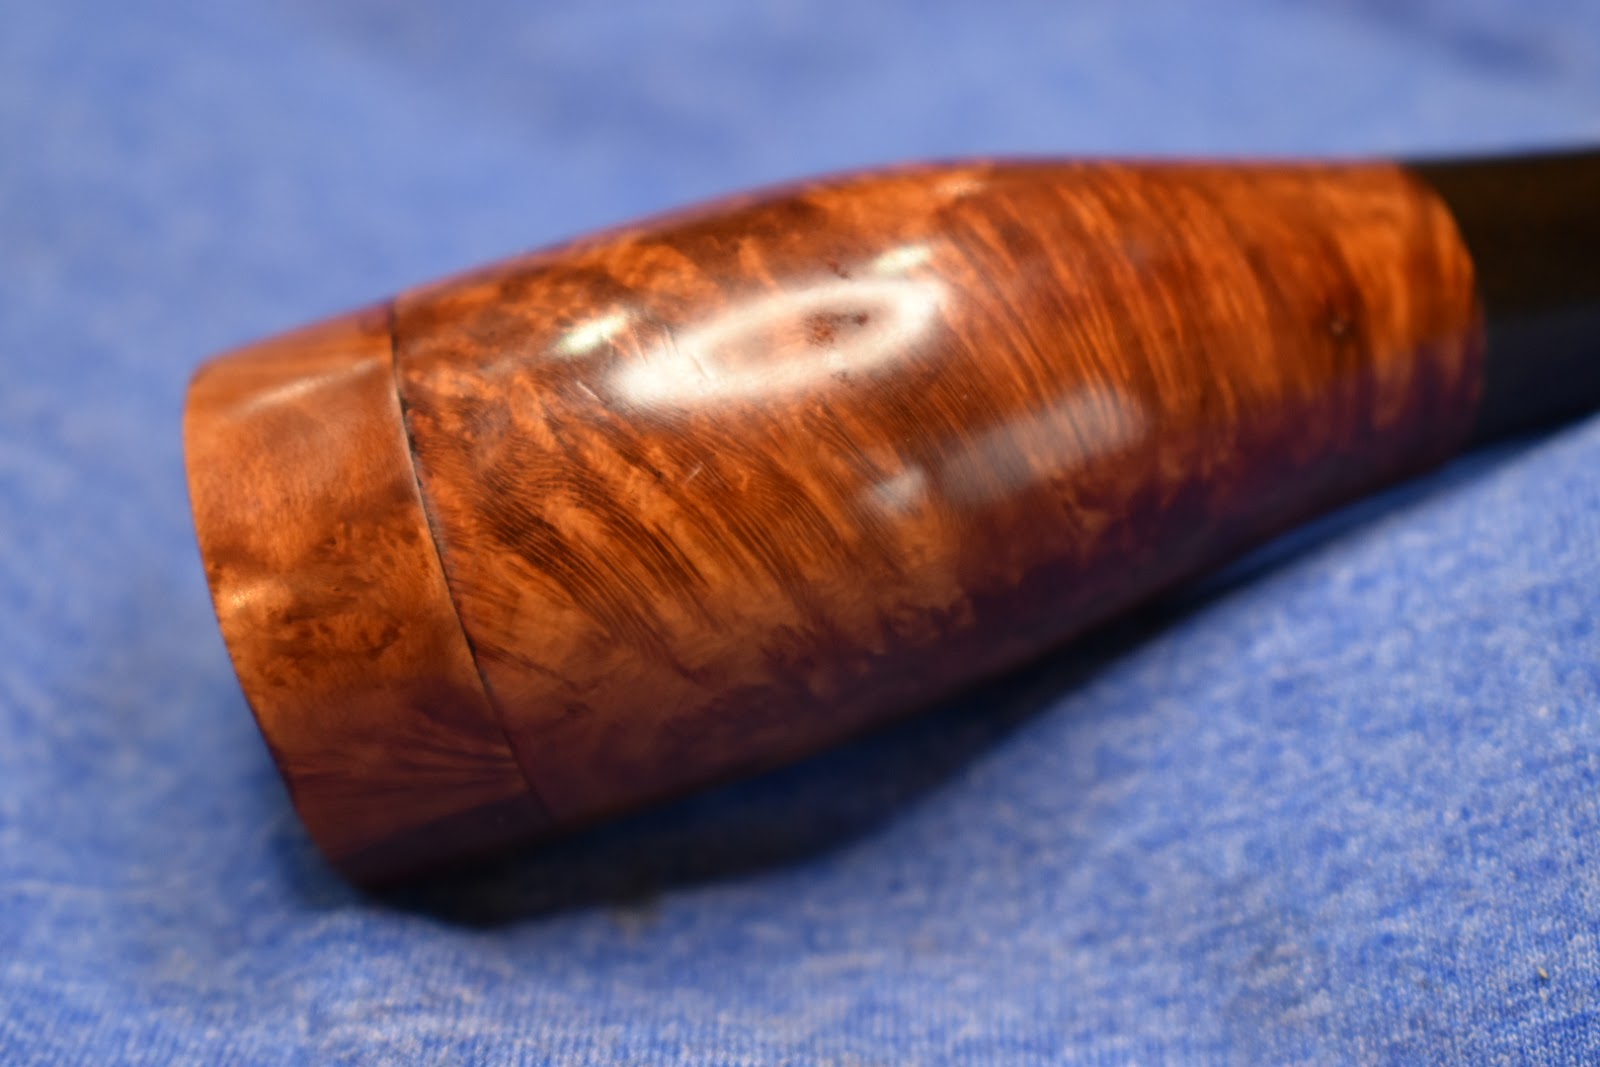


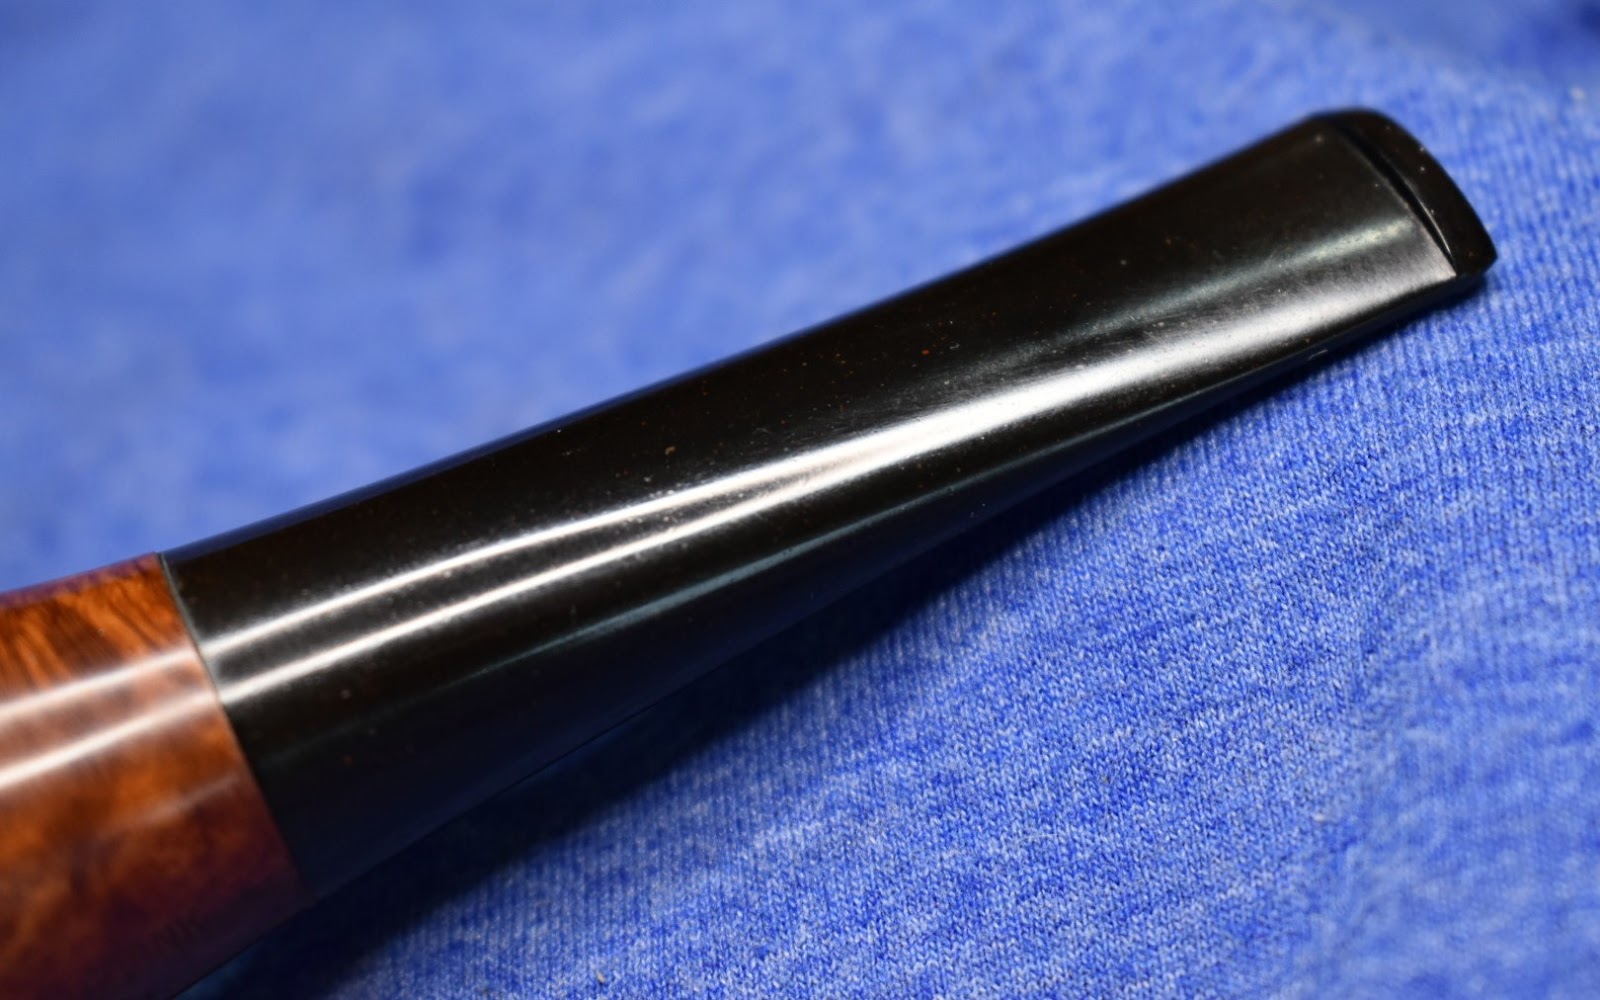
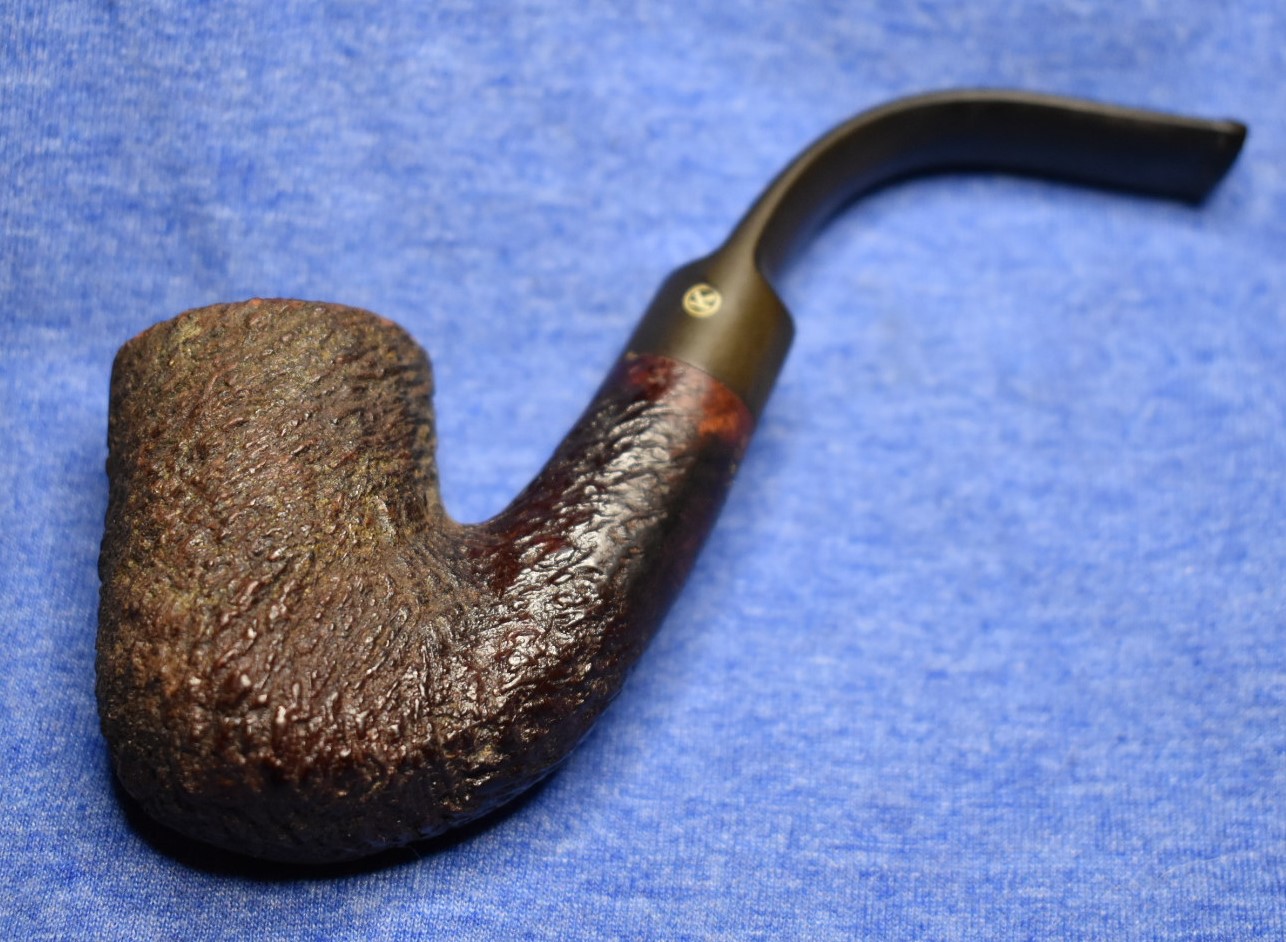
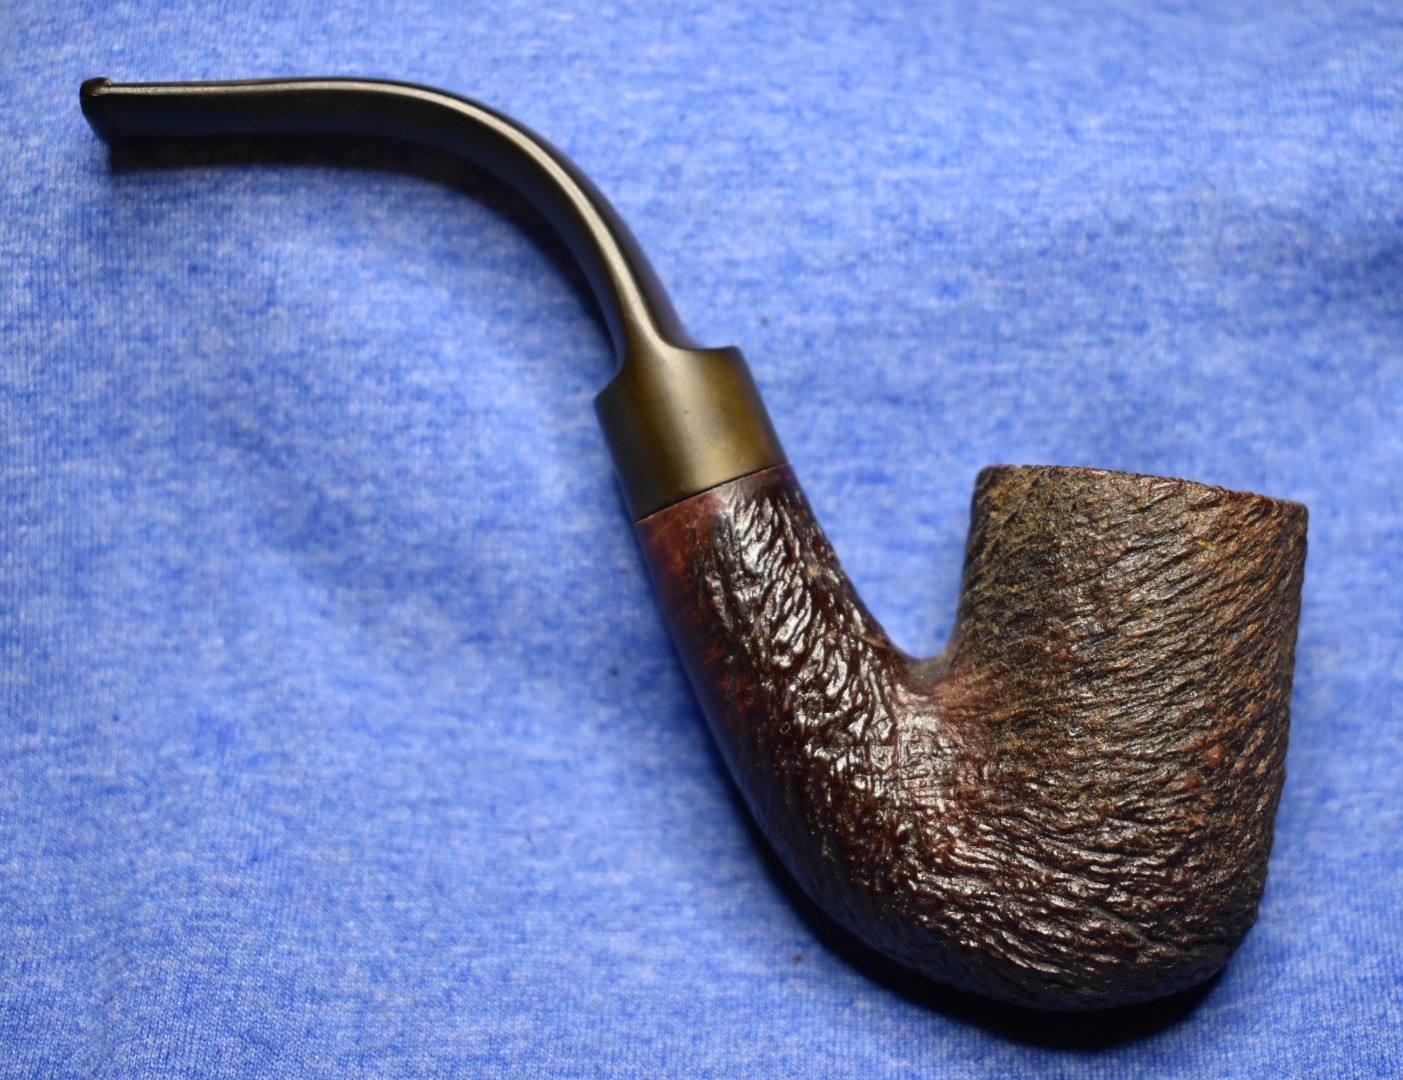


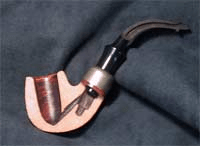

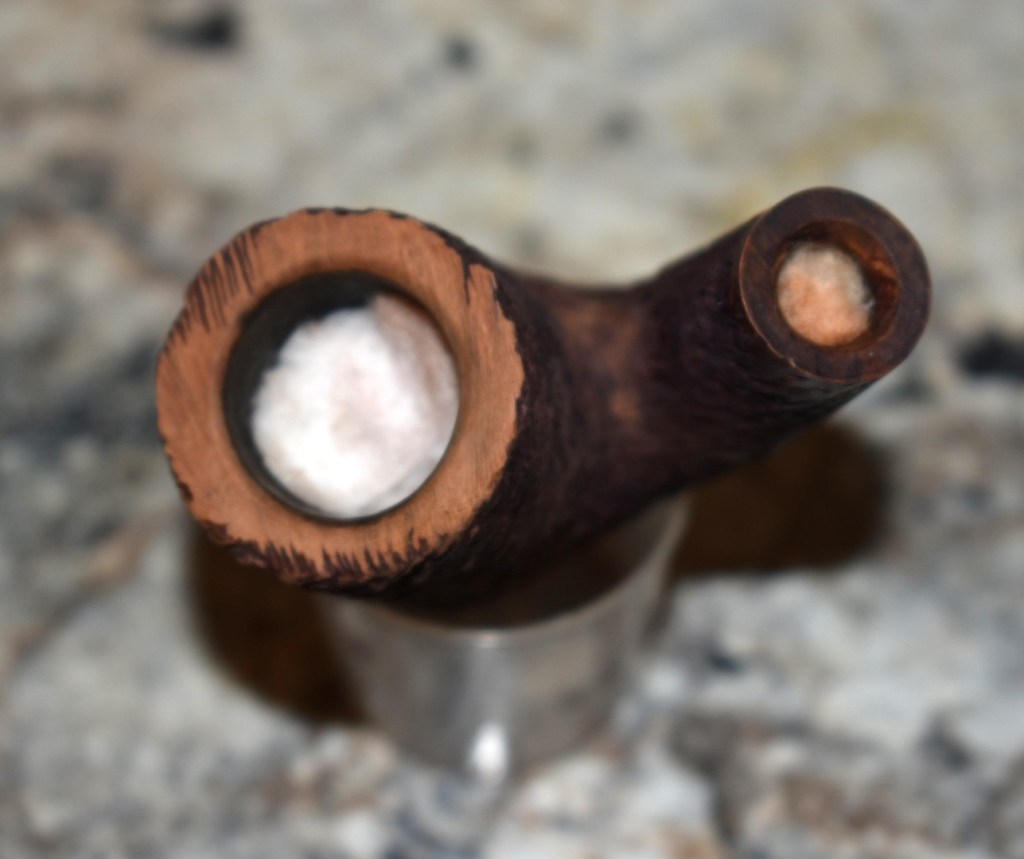

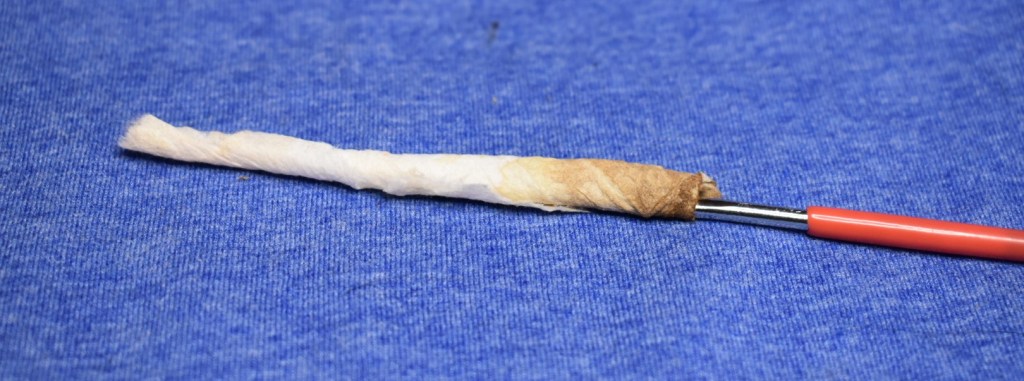


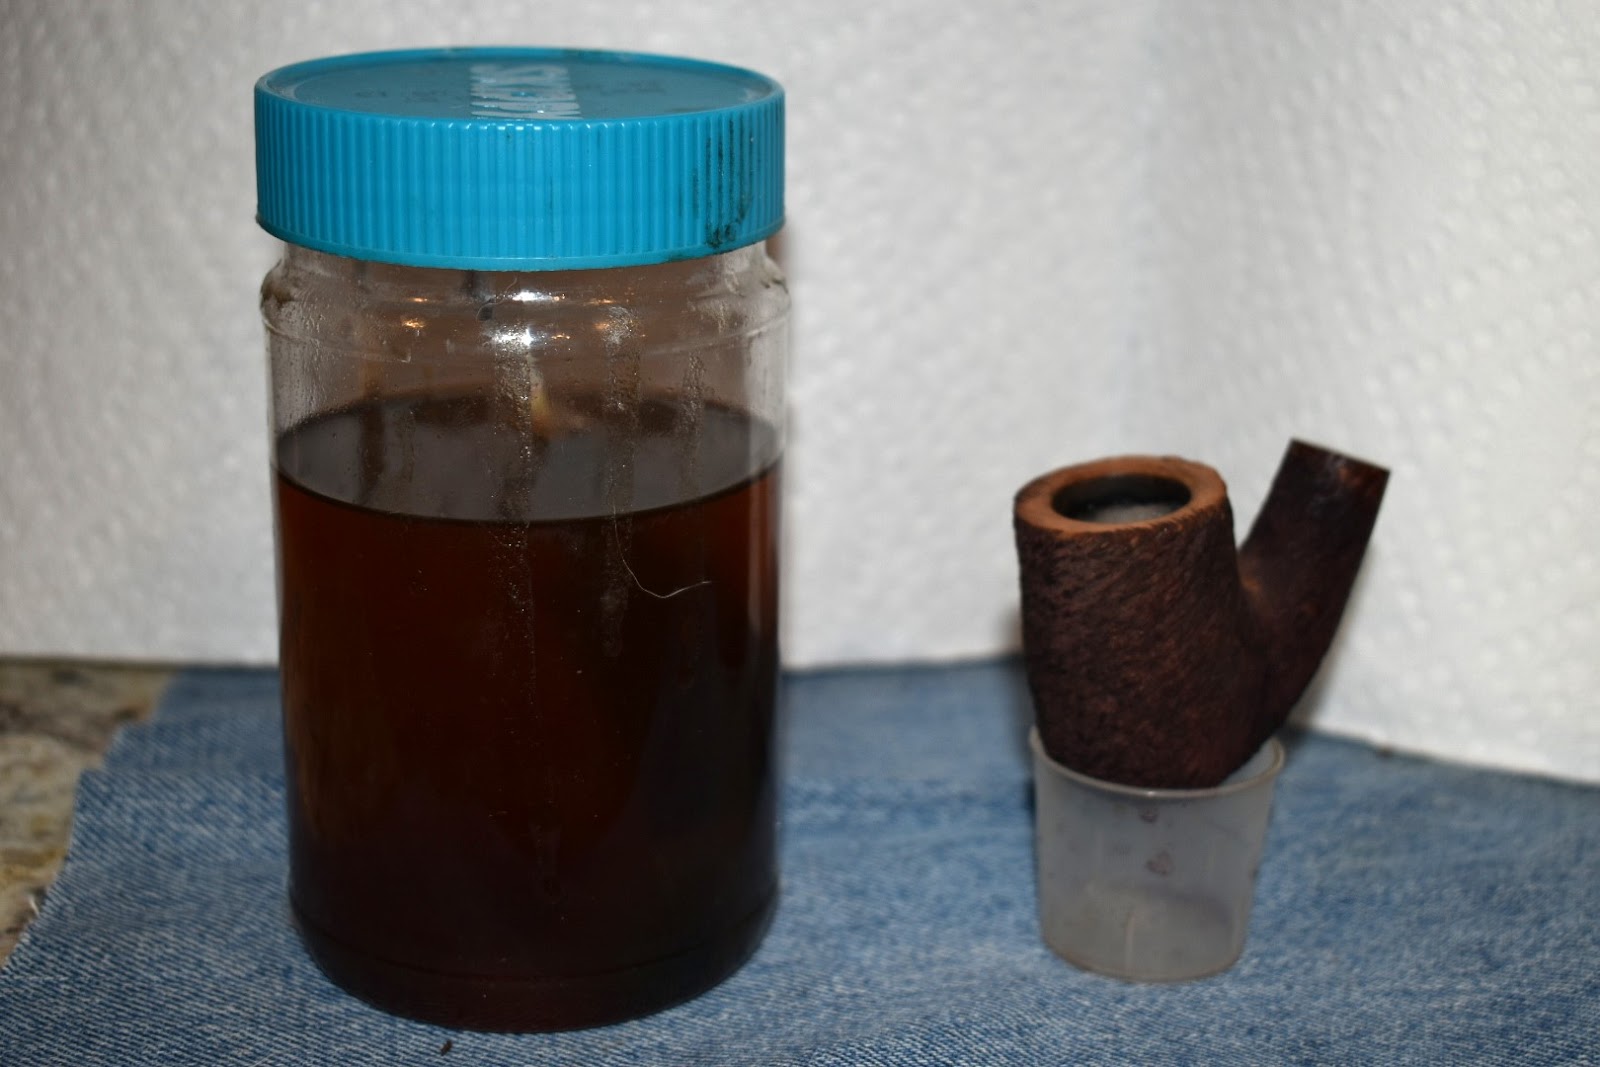


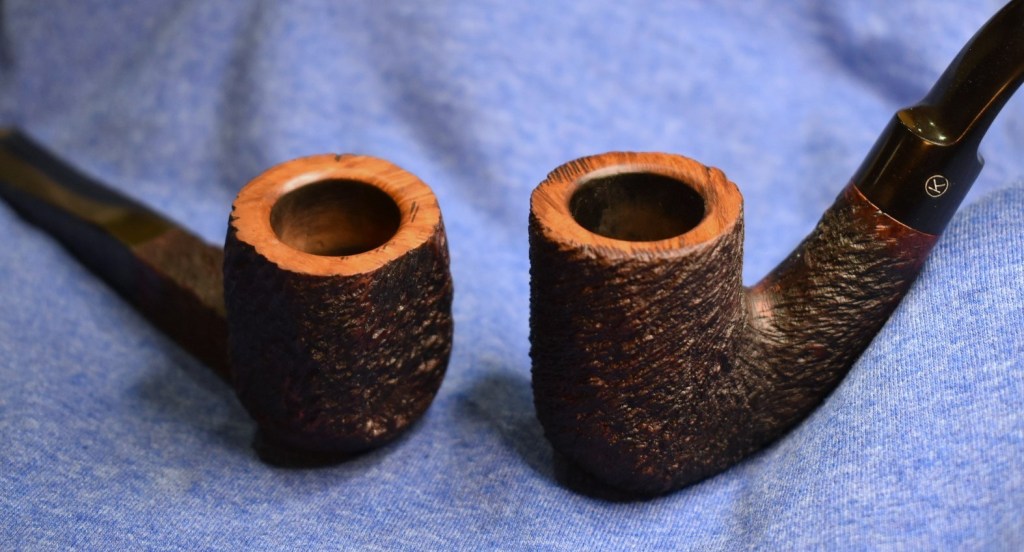

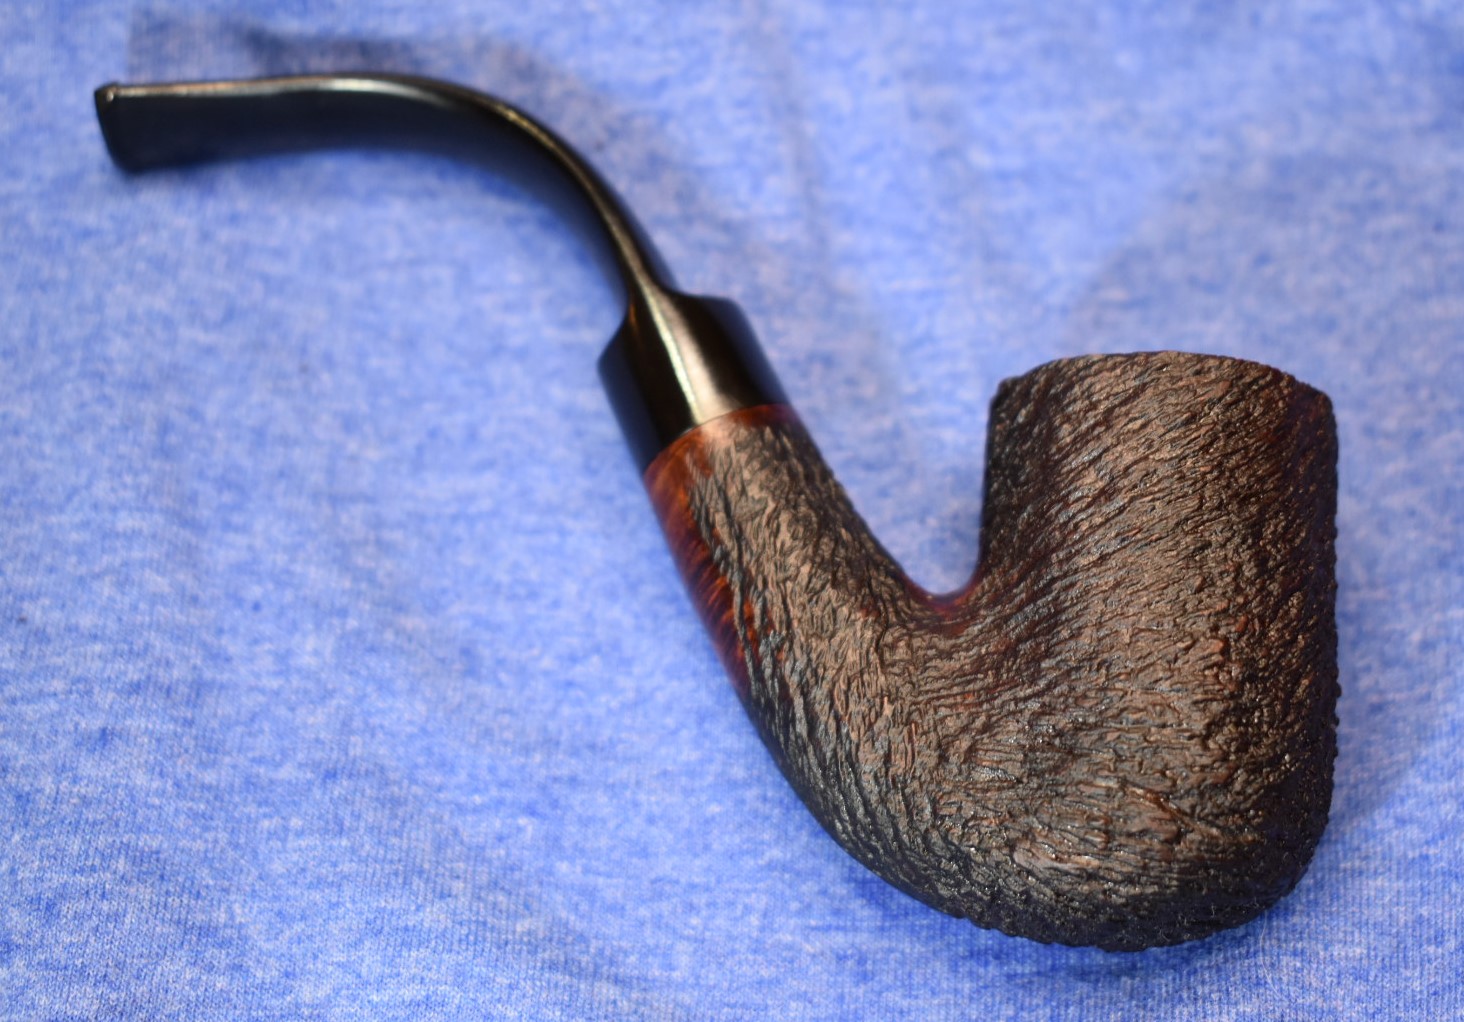

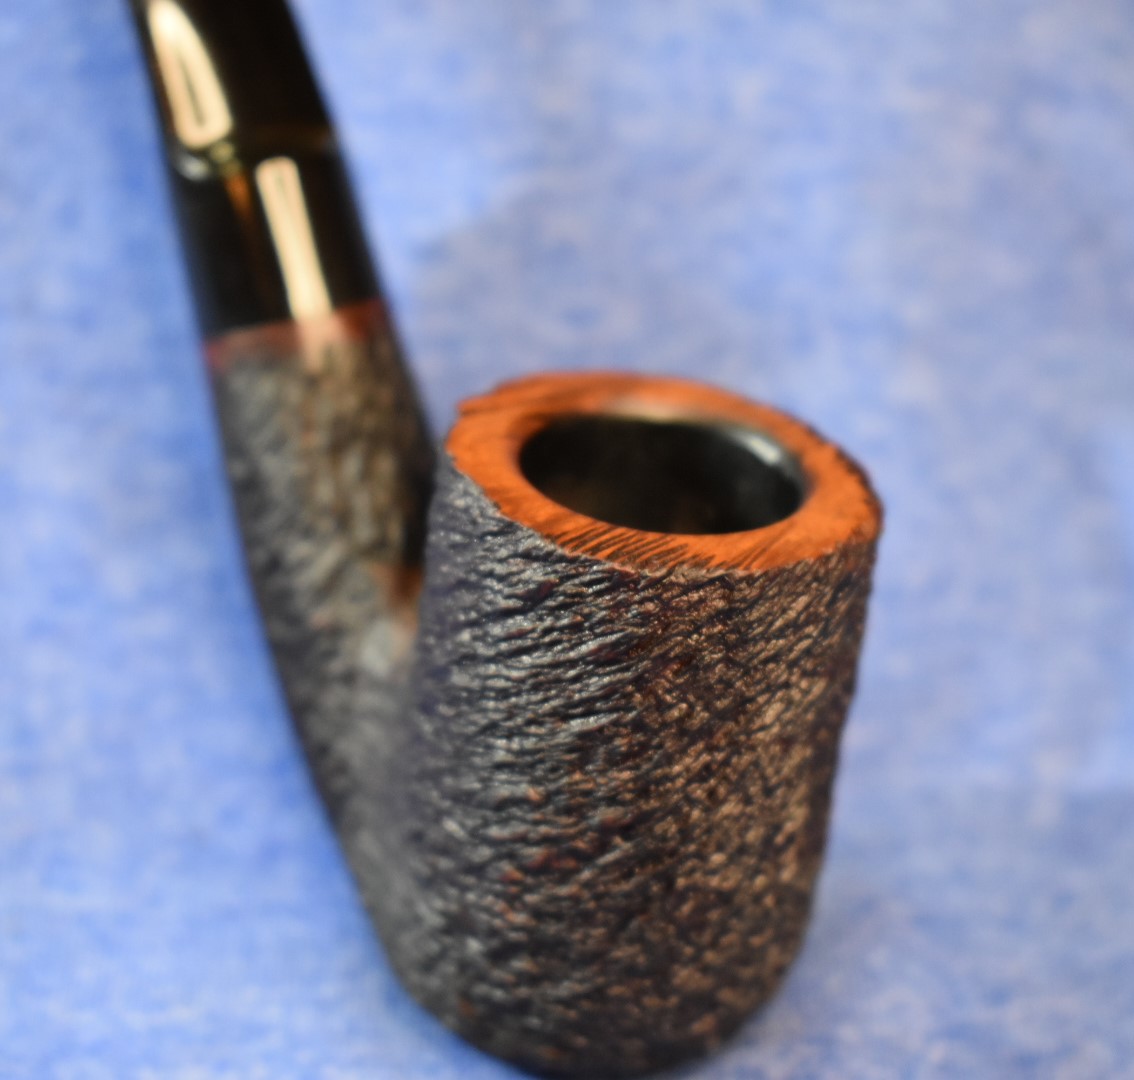

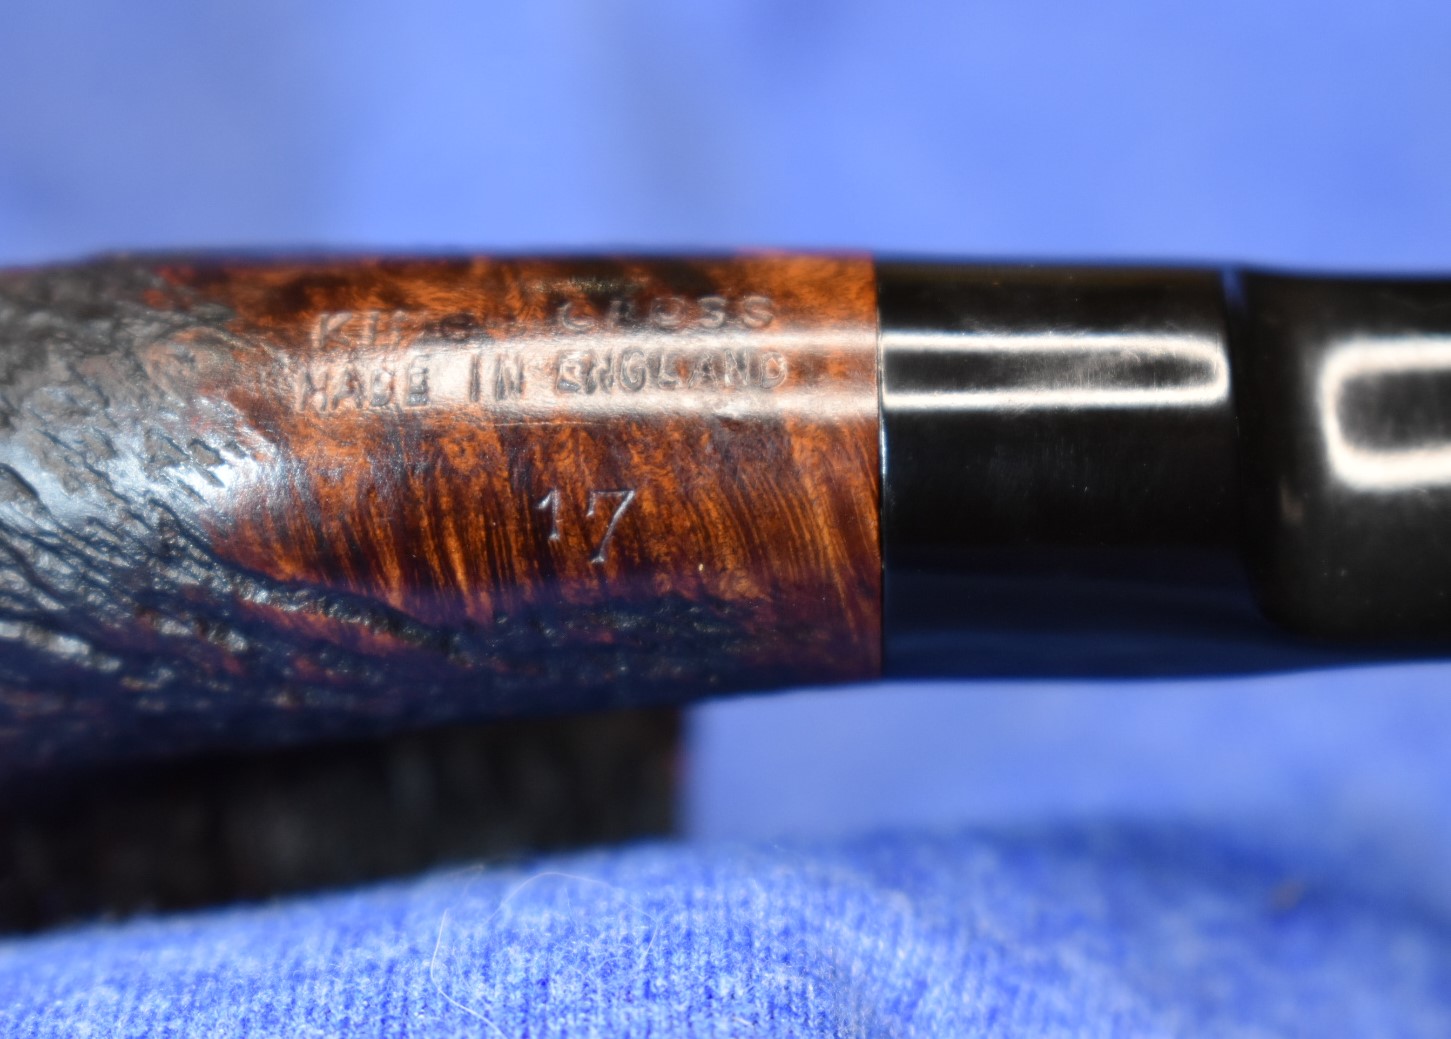


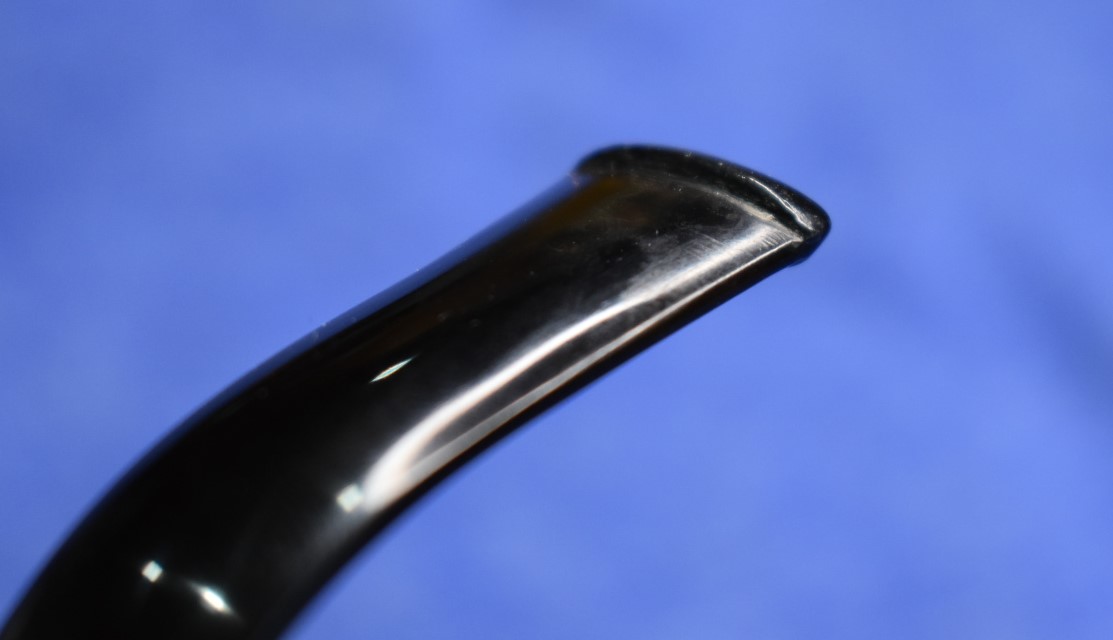

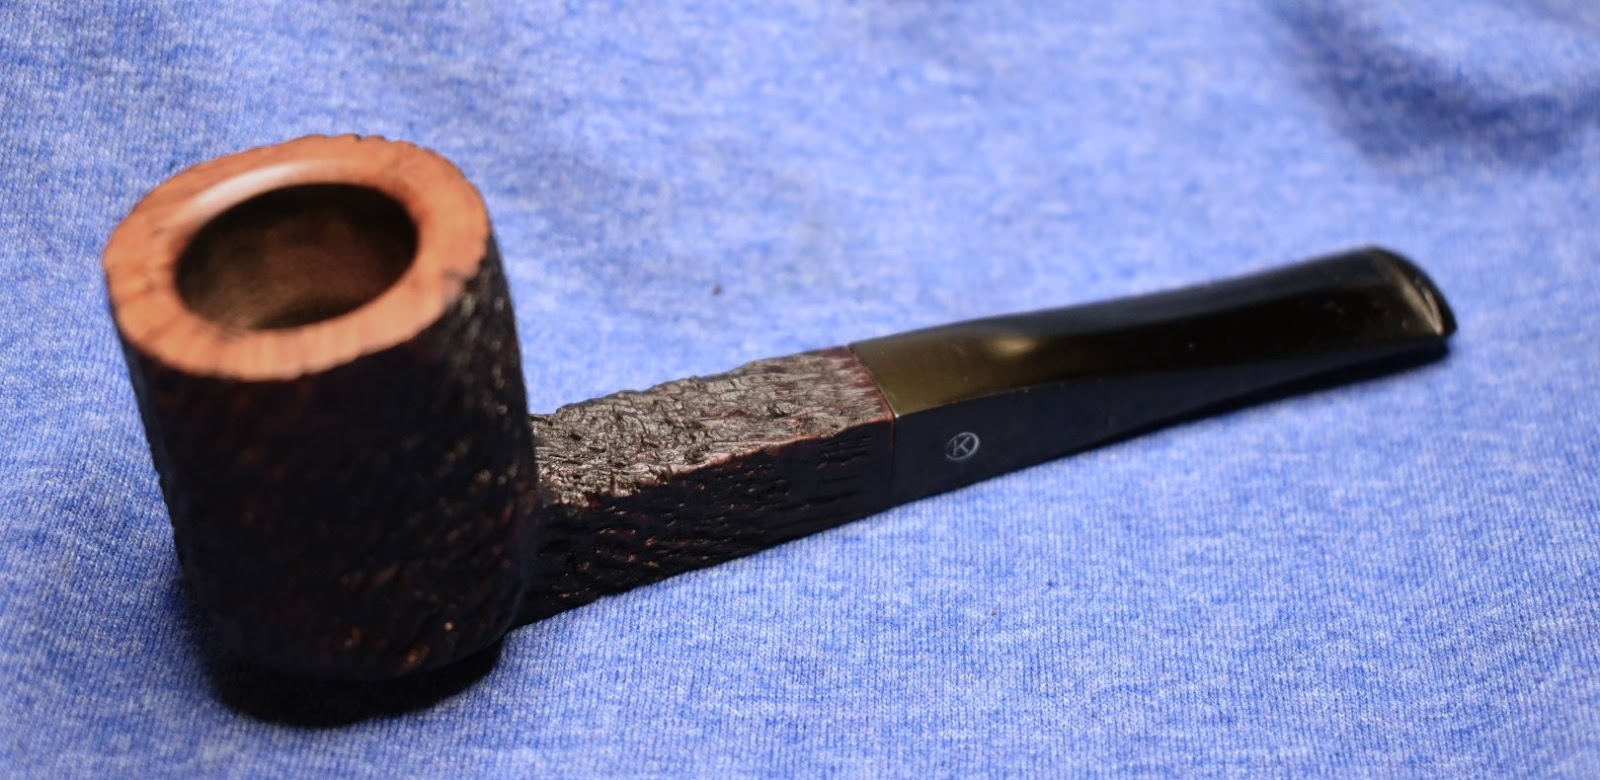

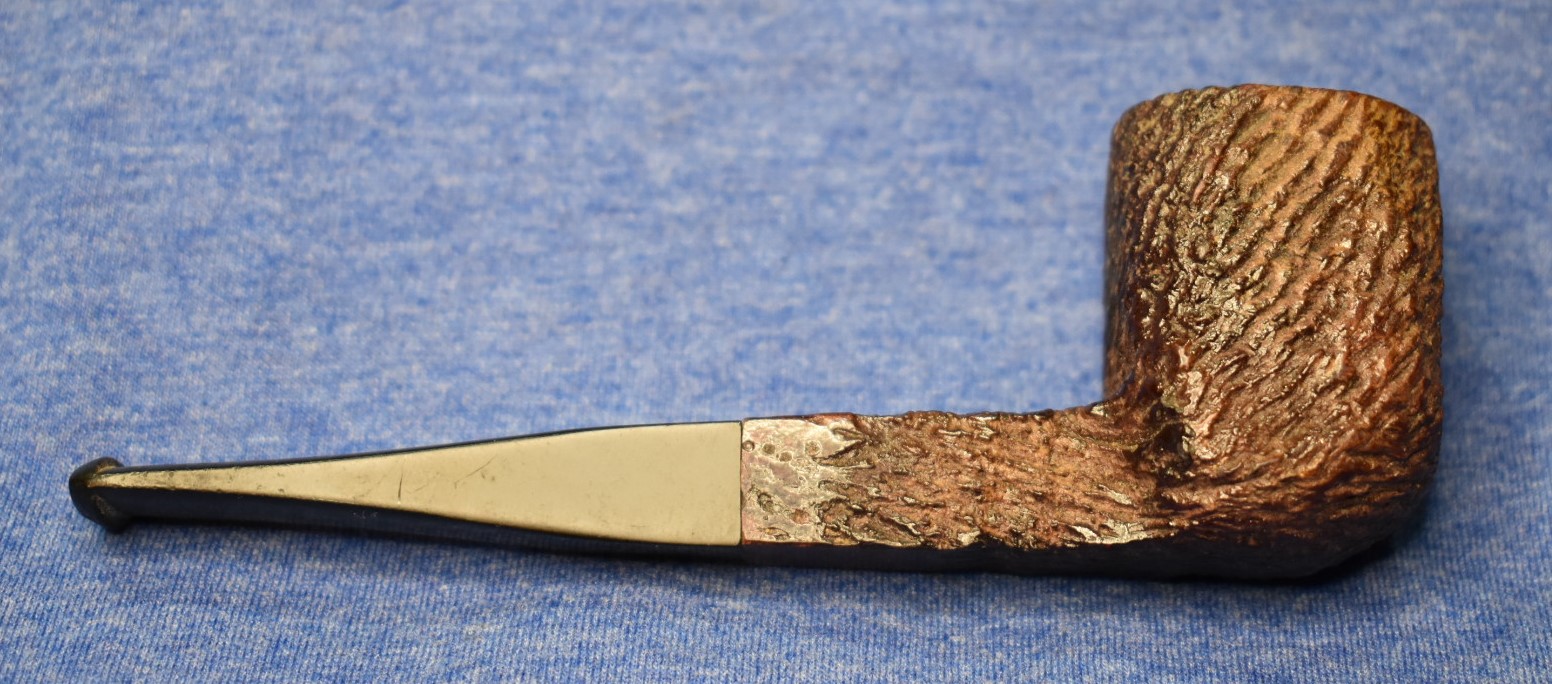


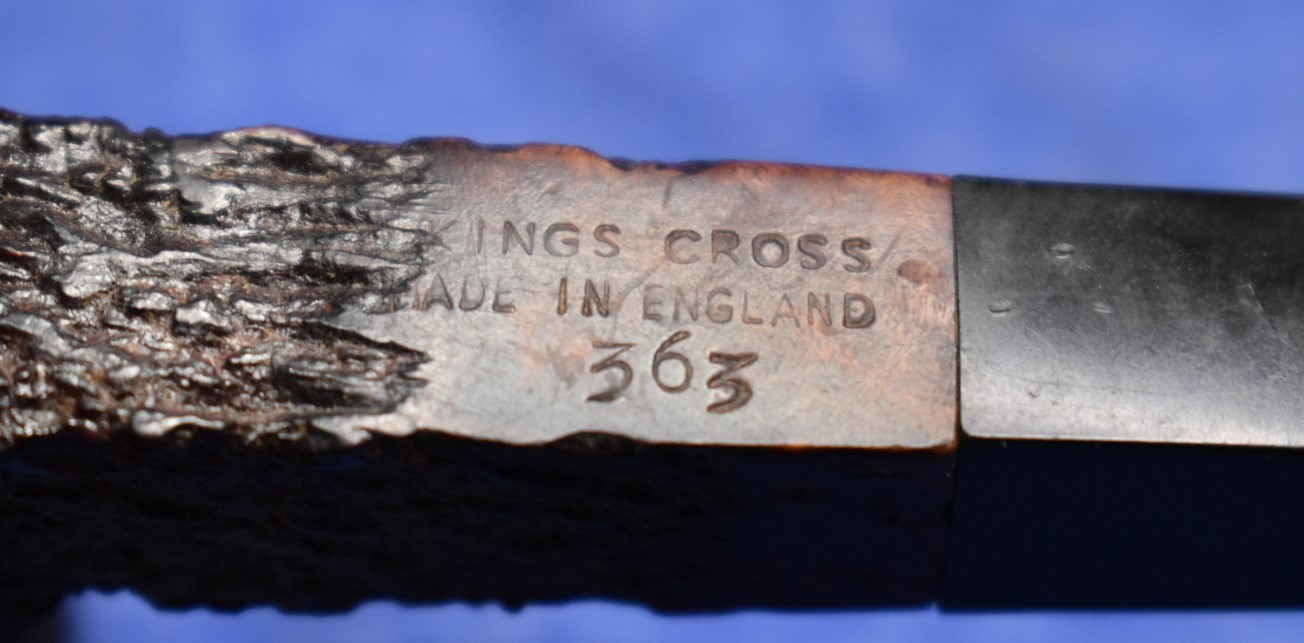


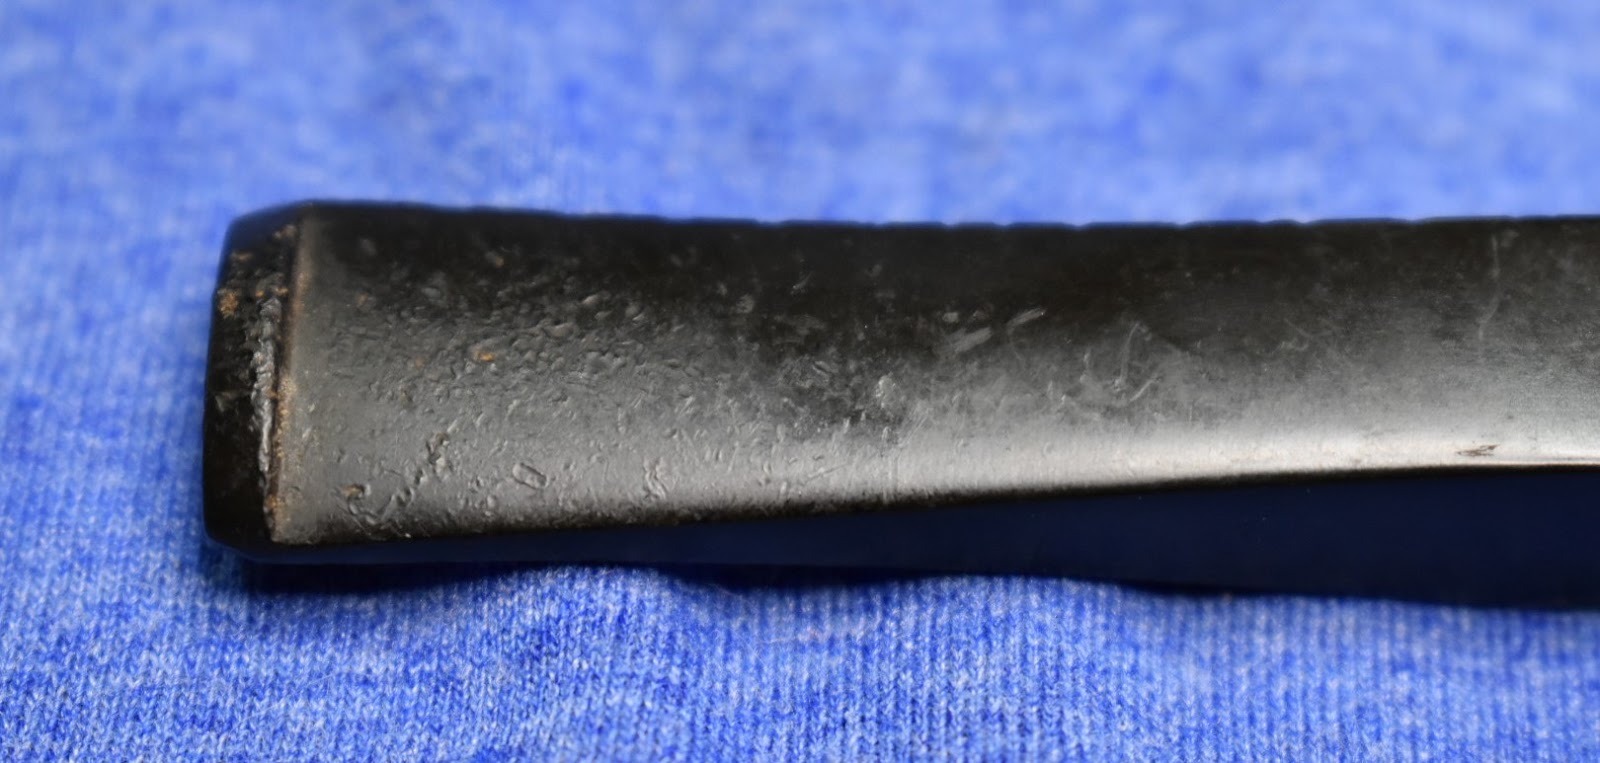

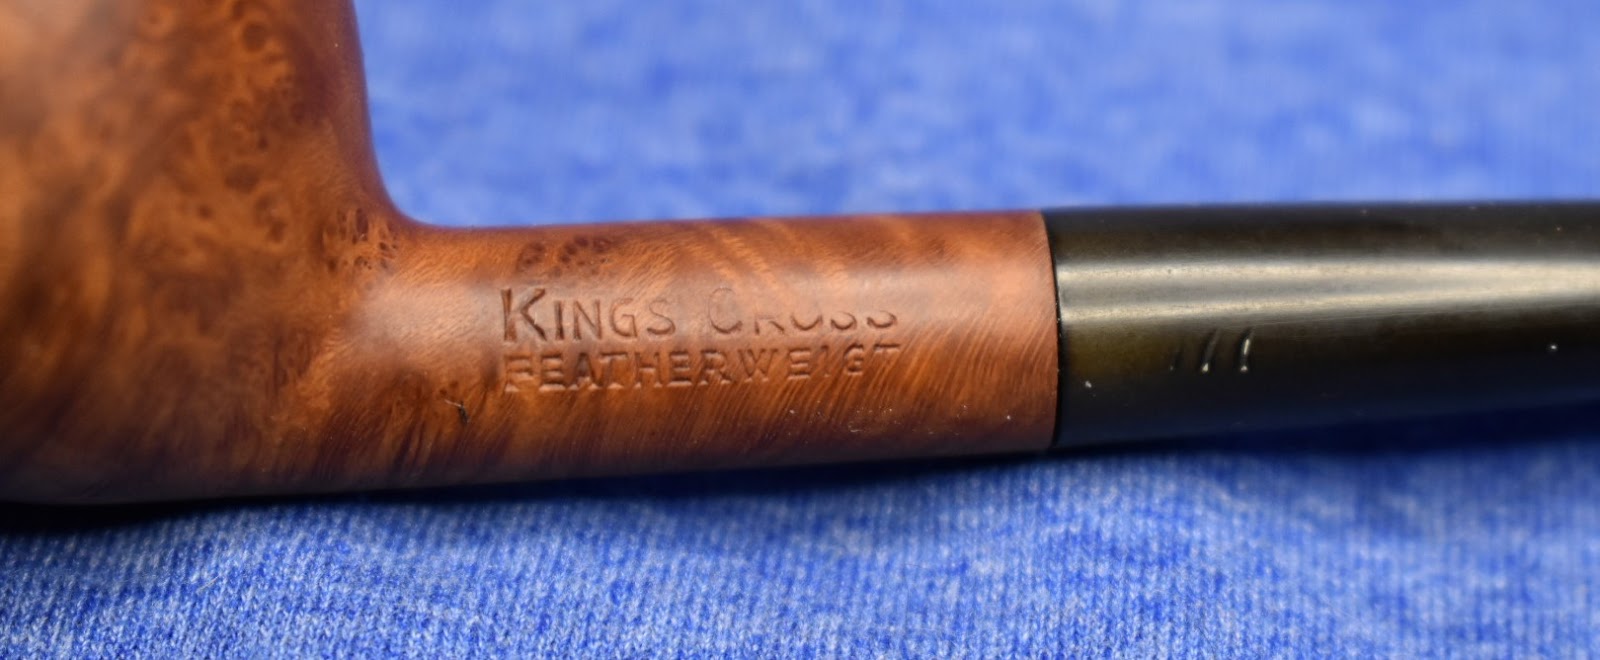


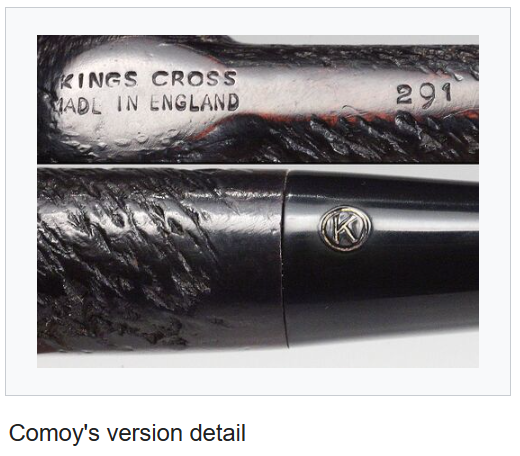


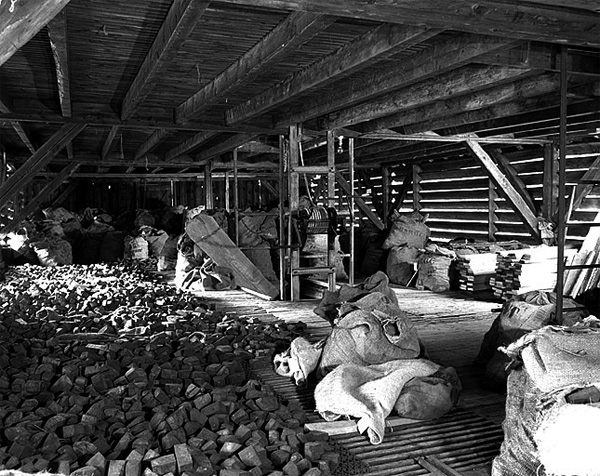
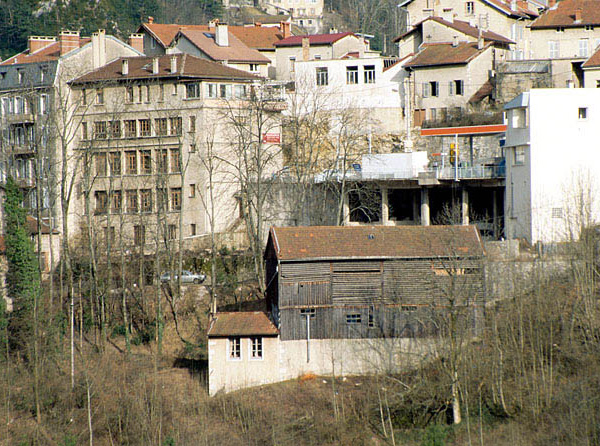

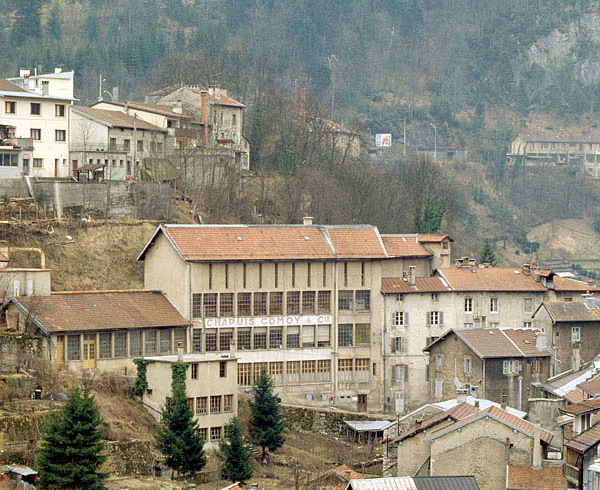

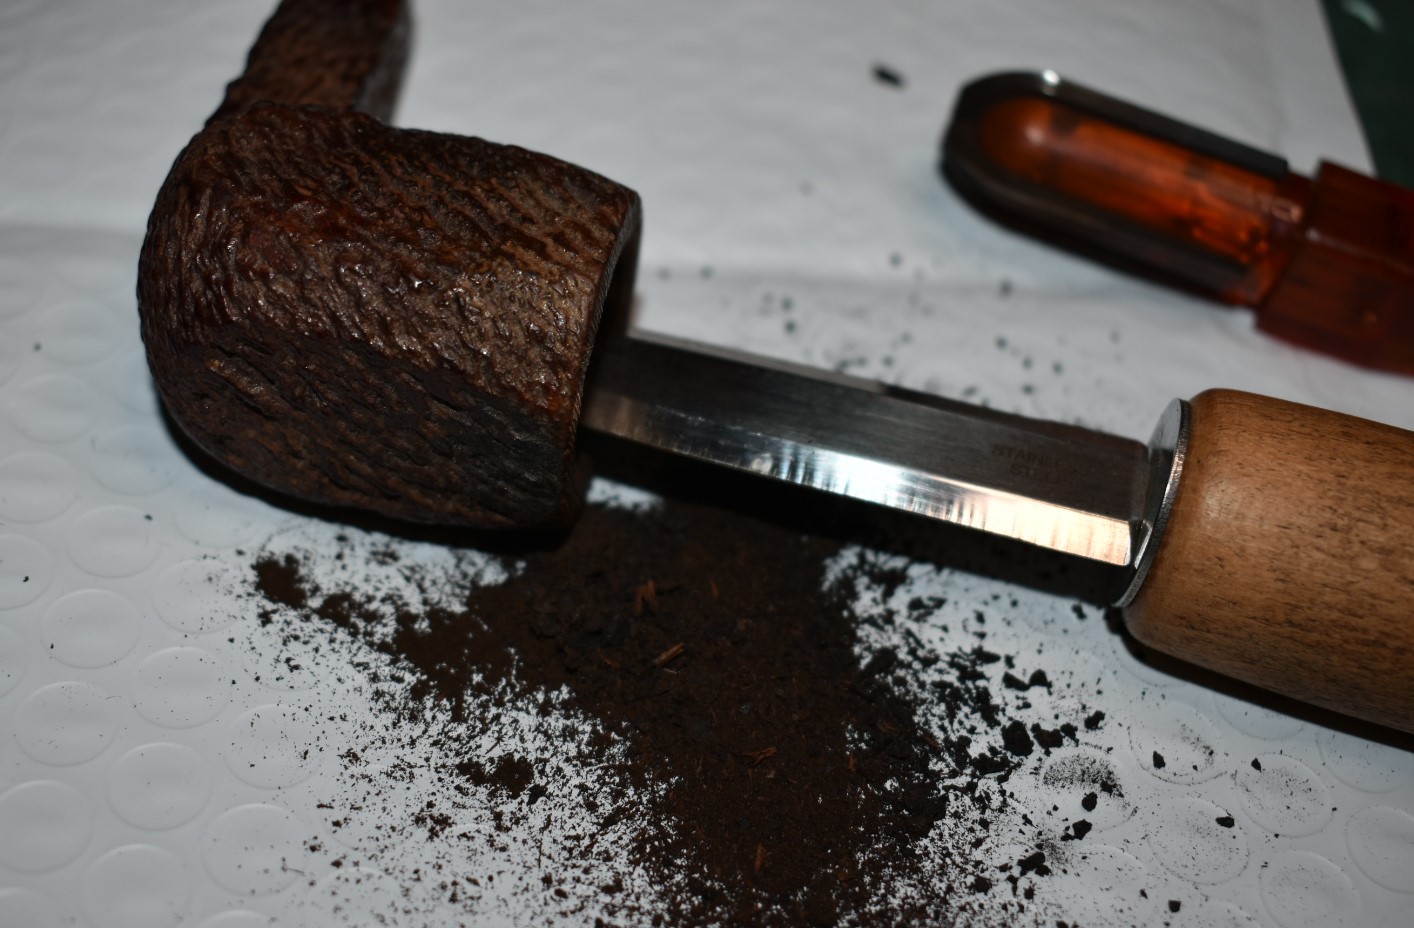


 bottom. The worst thing looked like a series of dents along the left top edge. I did not want to round the stem and change its original look.
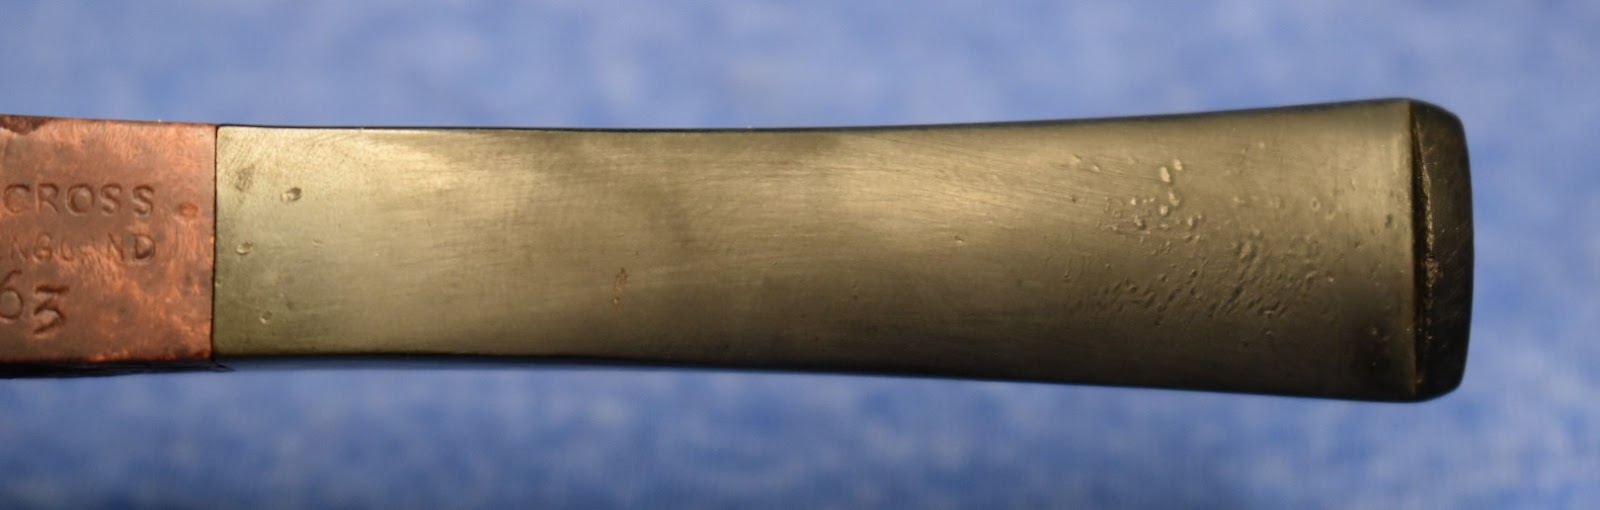


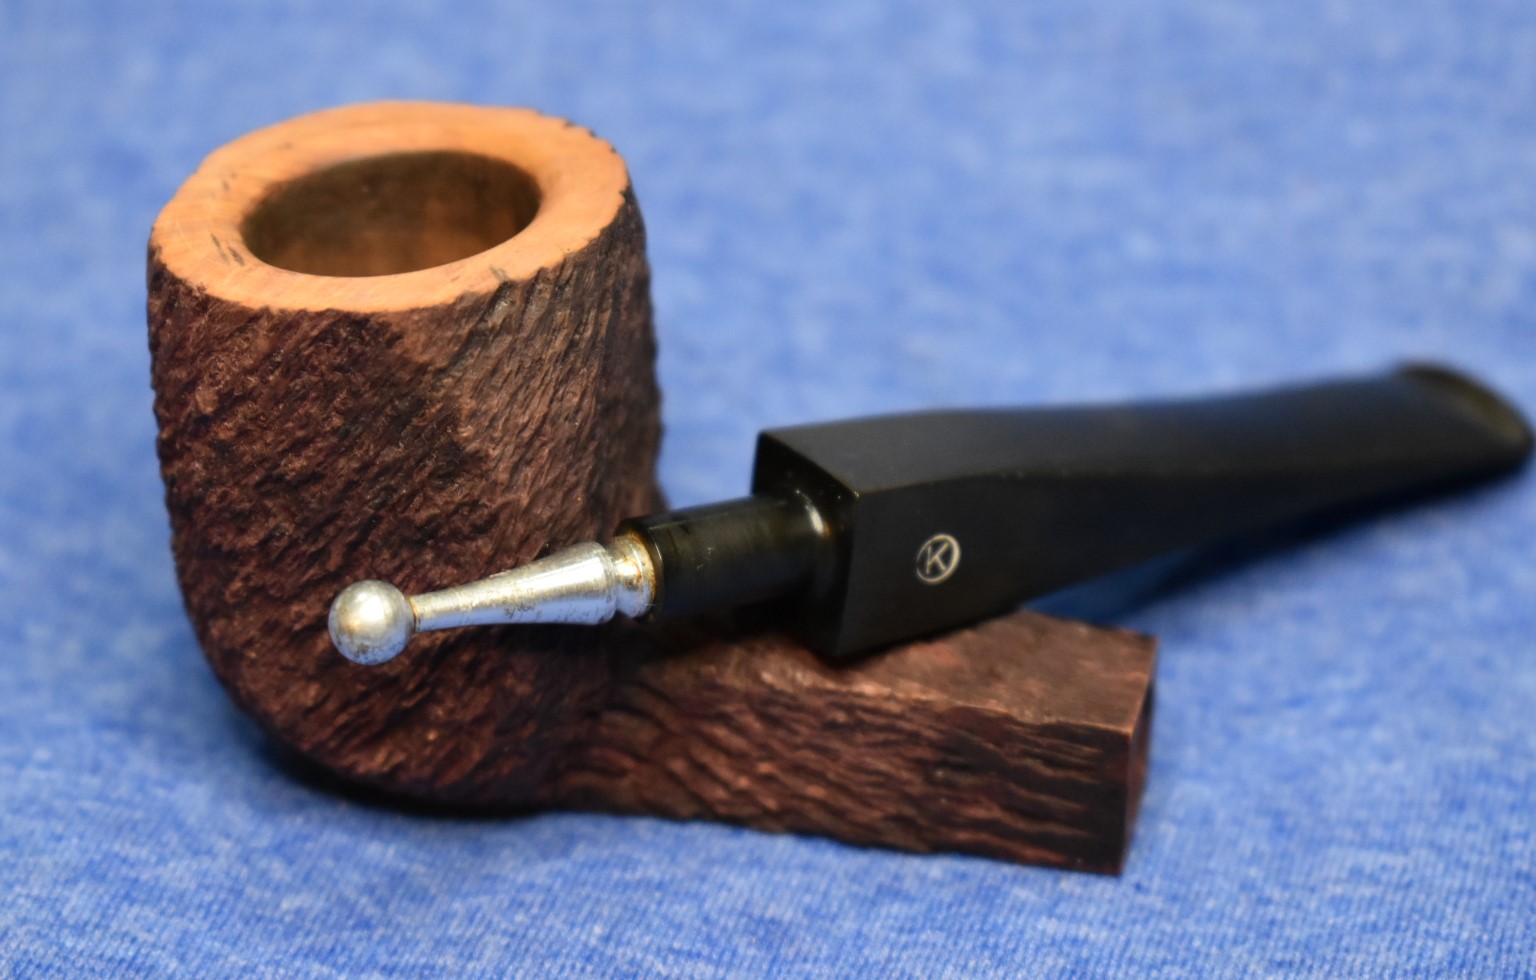


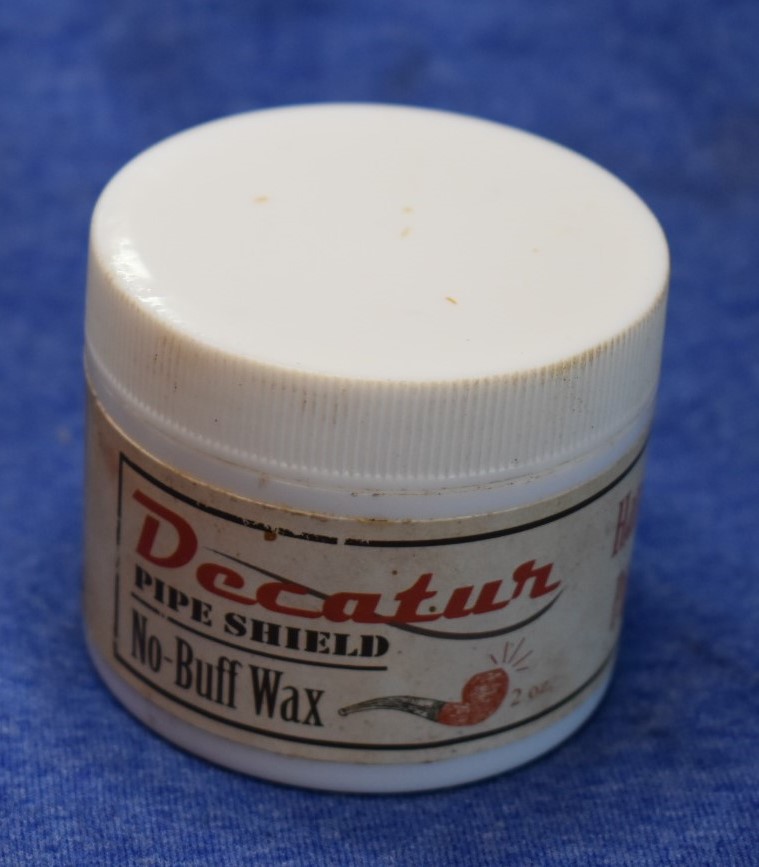


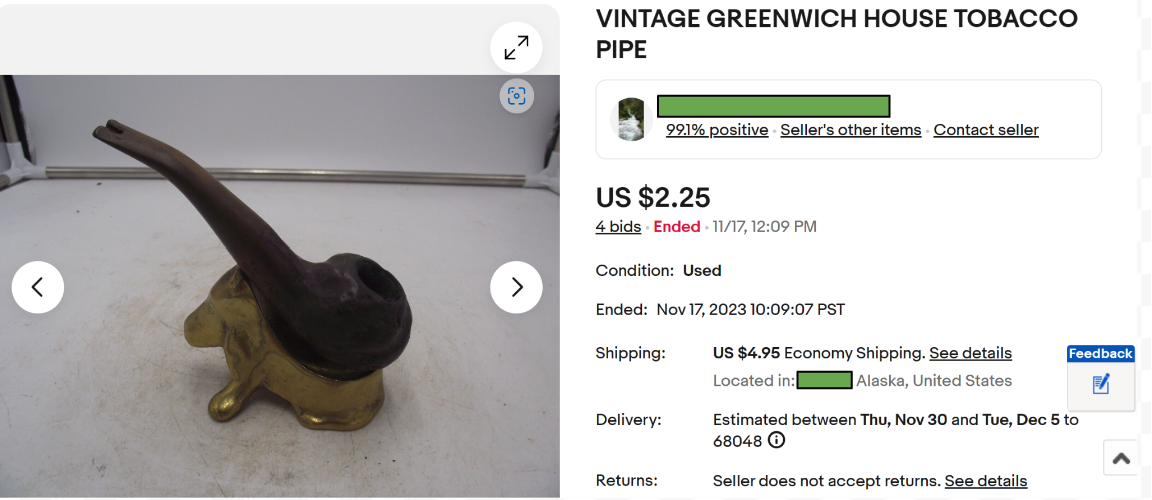


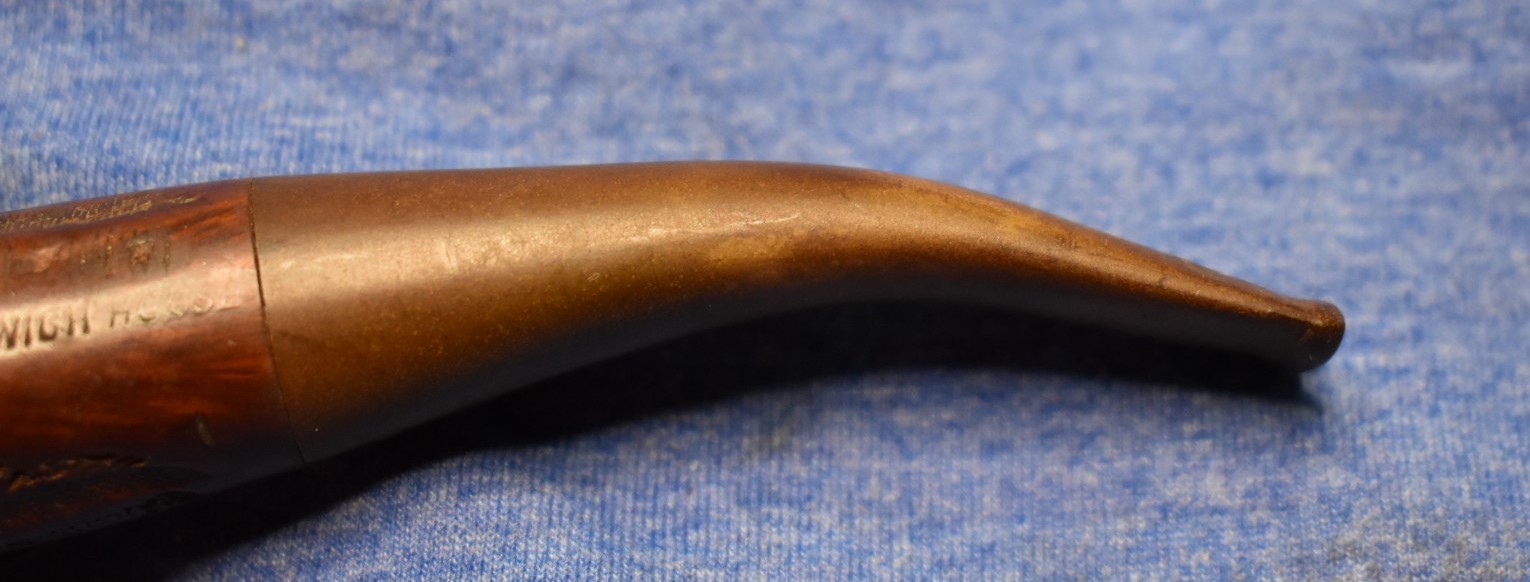


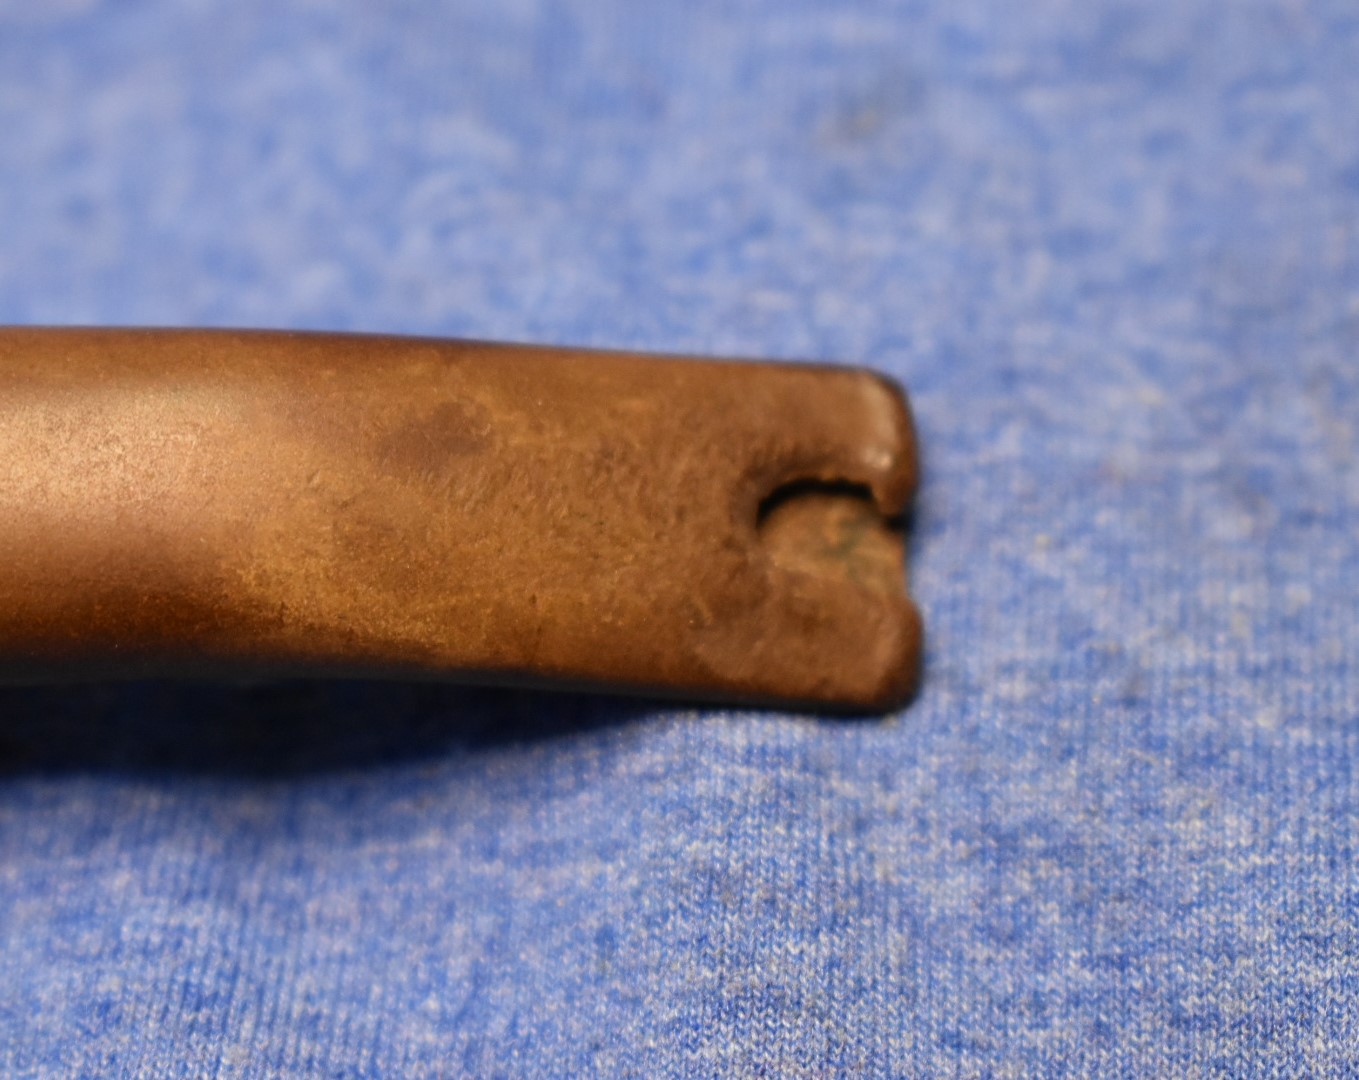


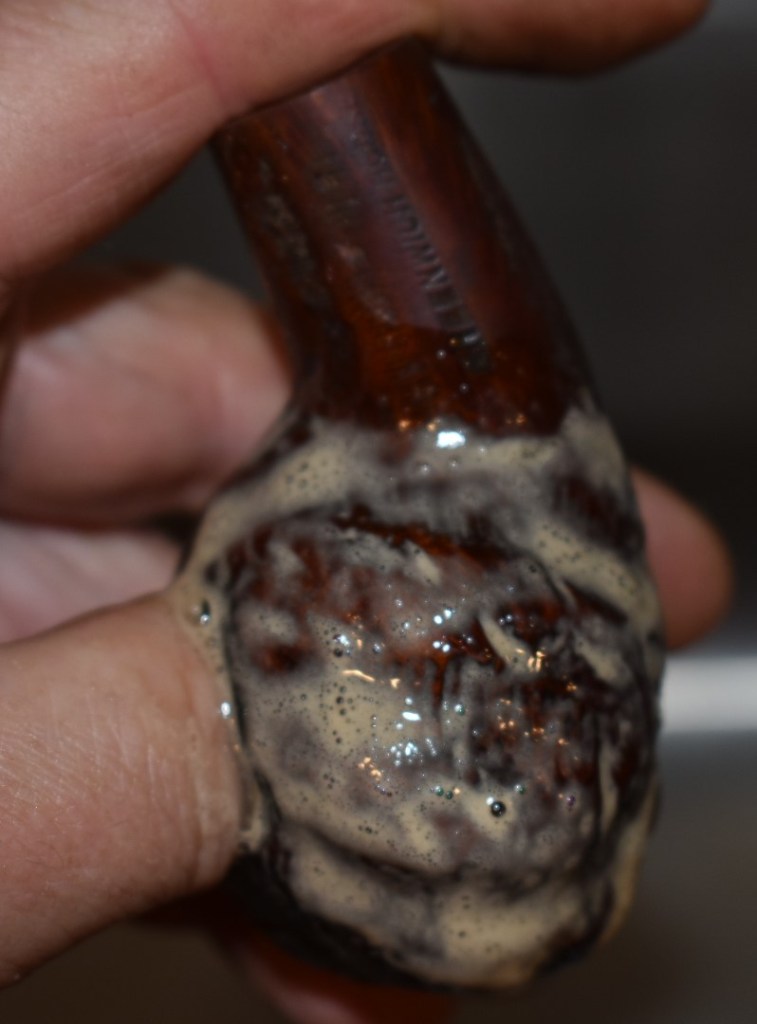
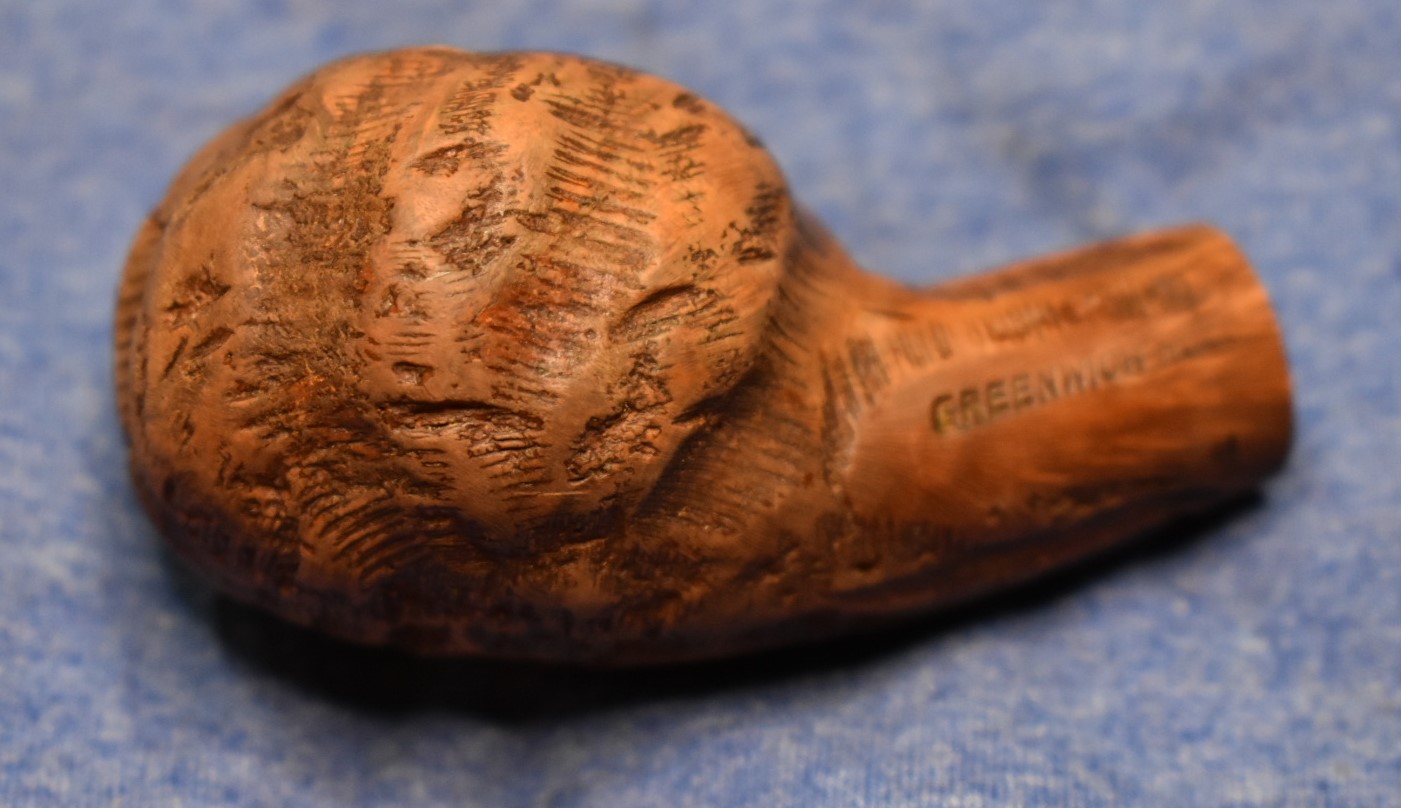


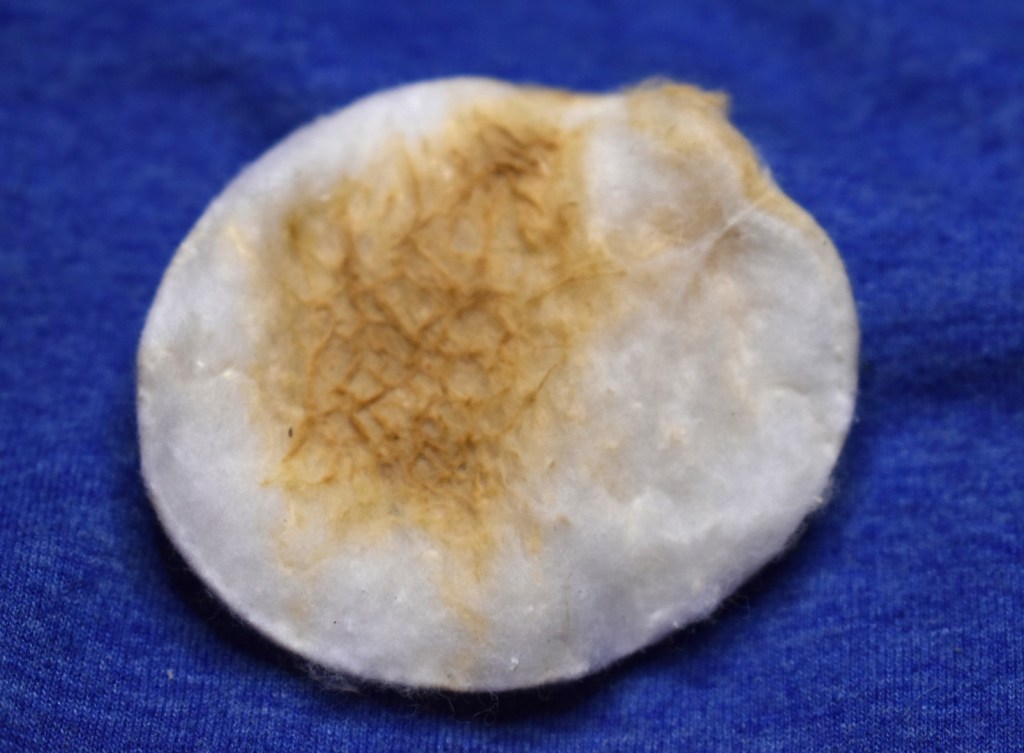
 needed to give the stummel a soaking. Fortunately I keep canning jars with ethyl alcohol (EtOH) and acetone for this very purpose. Into the ethyl alcohol (ethanol/EtOH) bath it went.

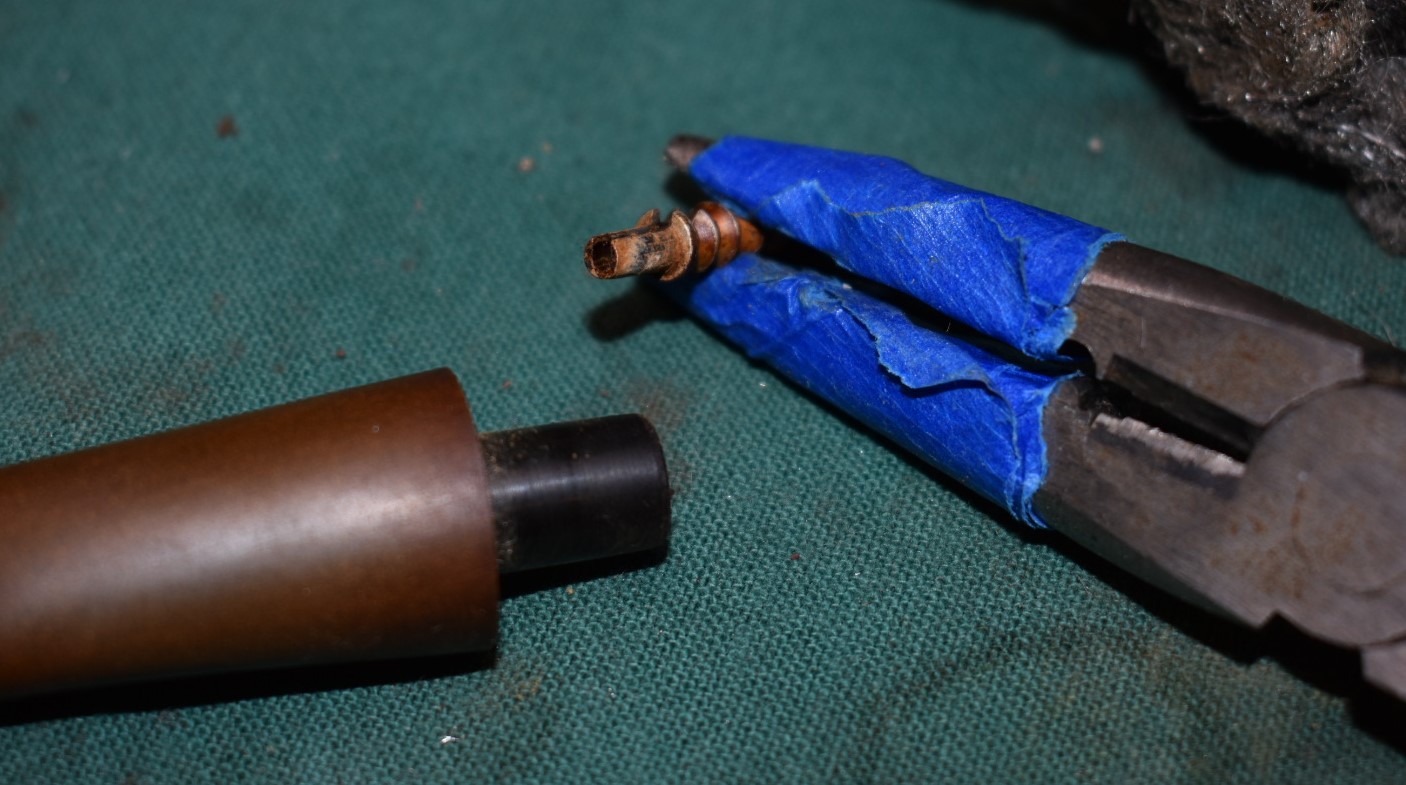
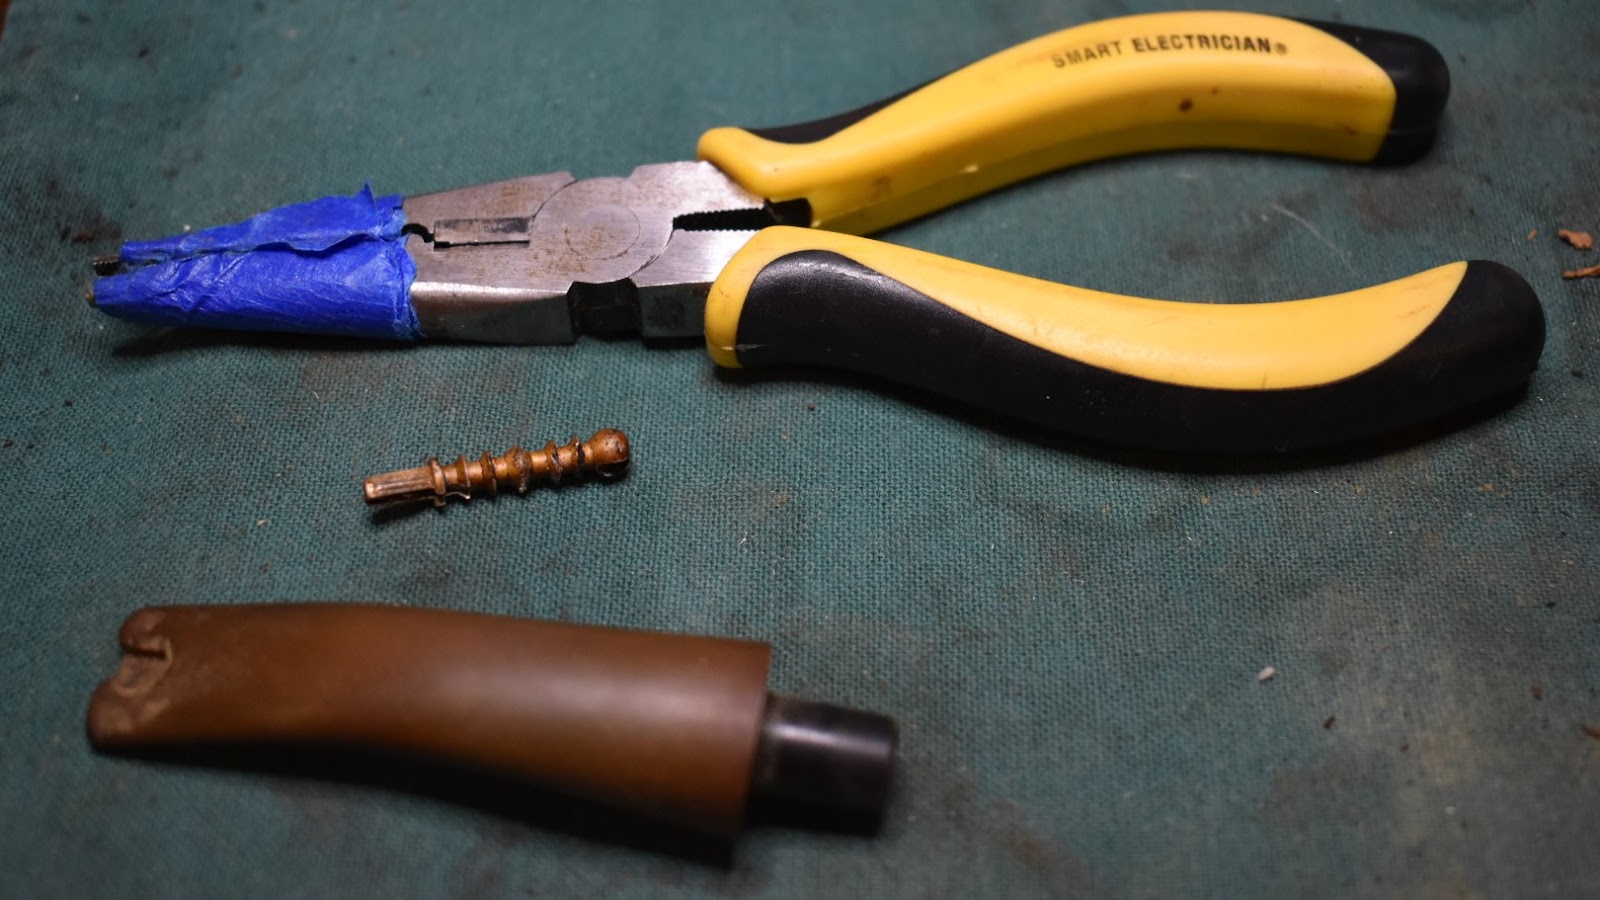
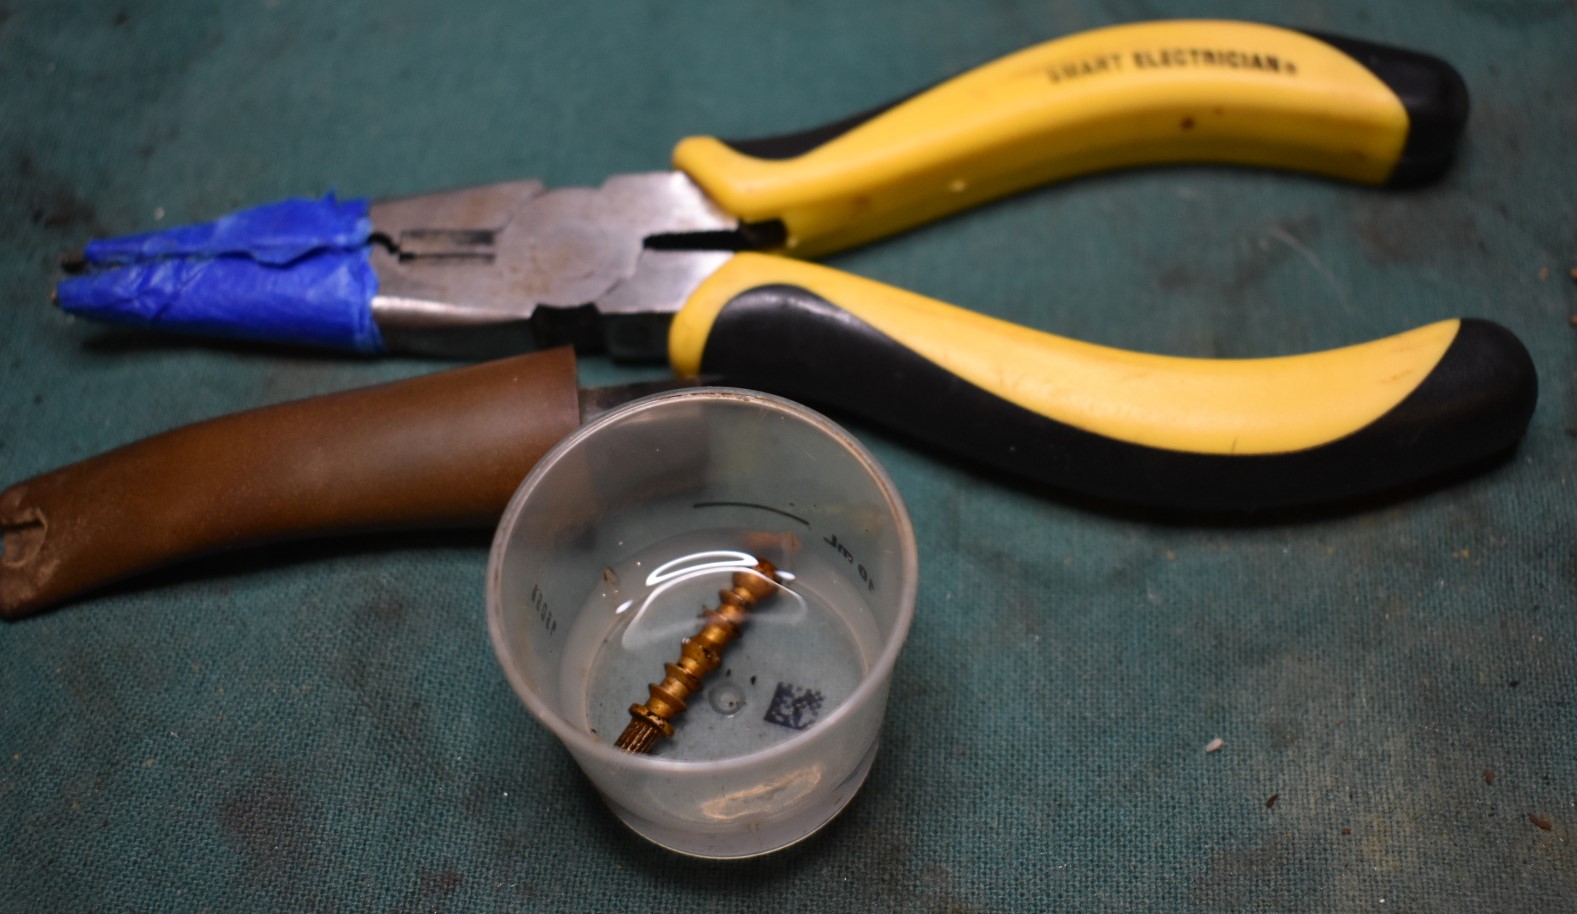


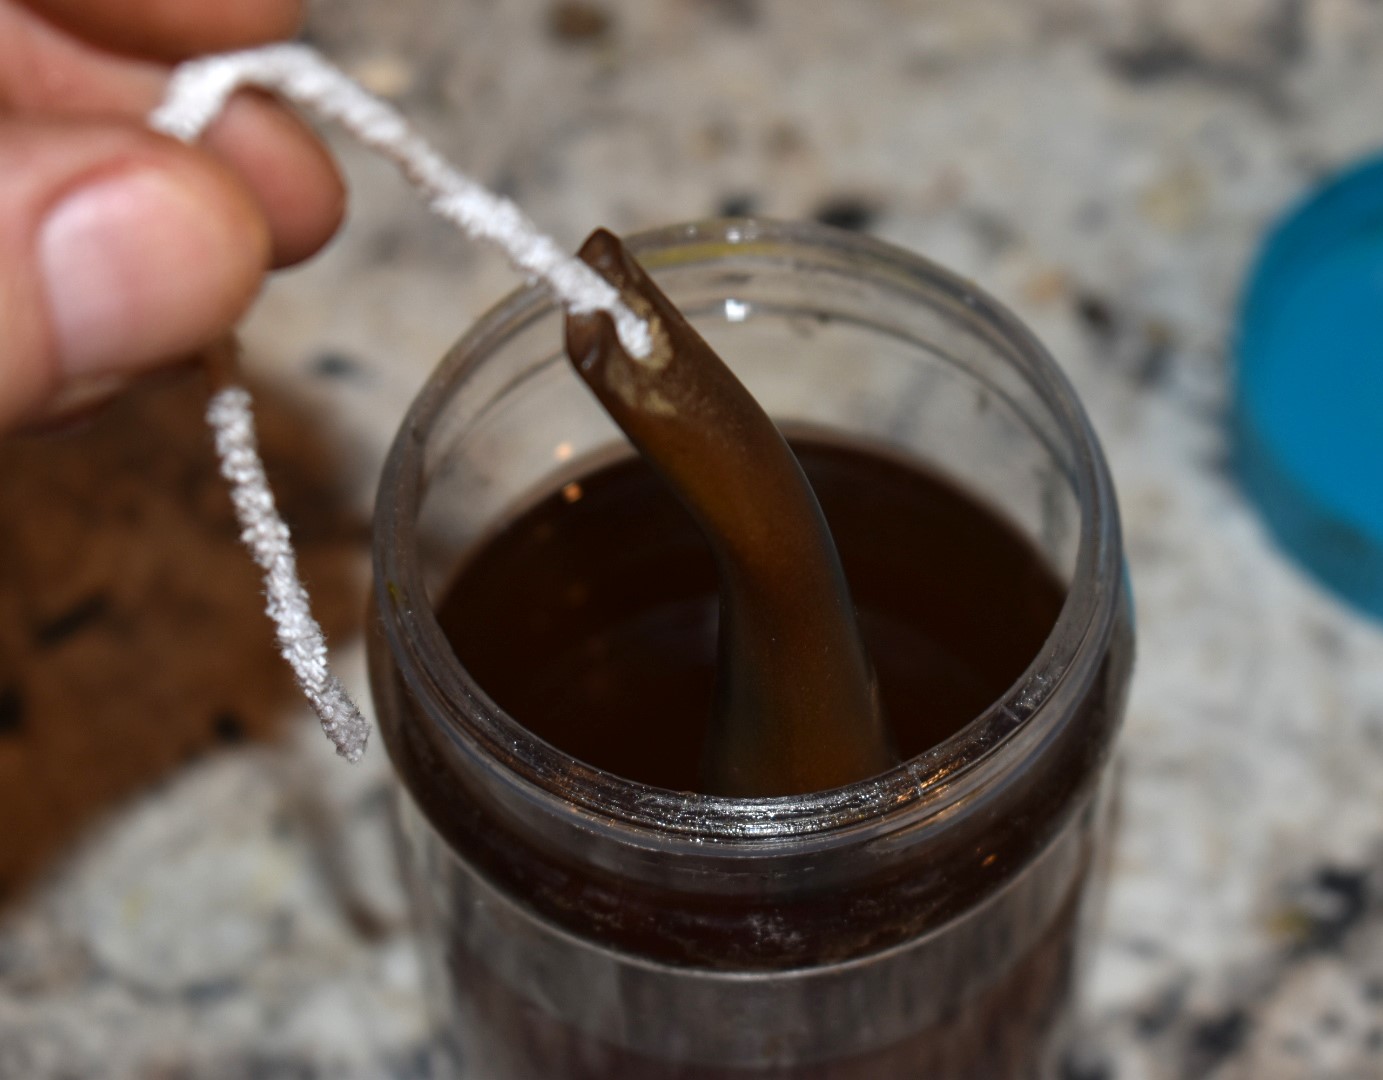

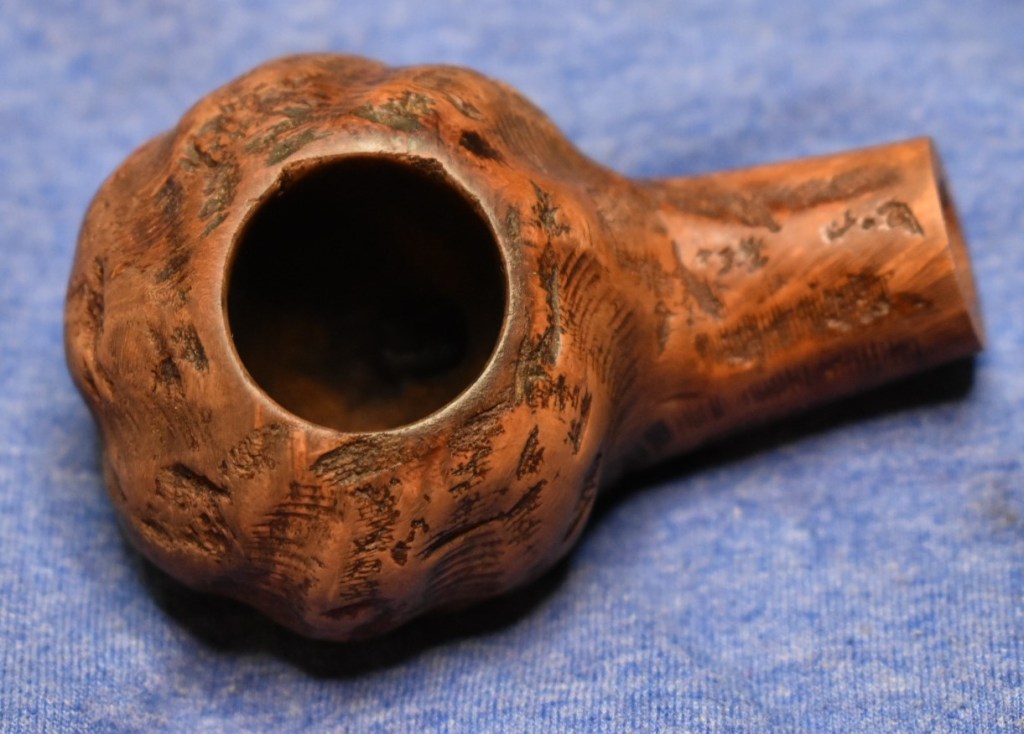


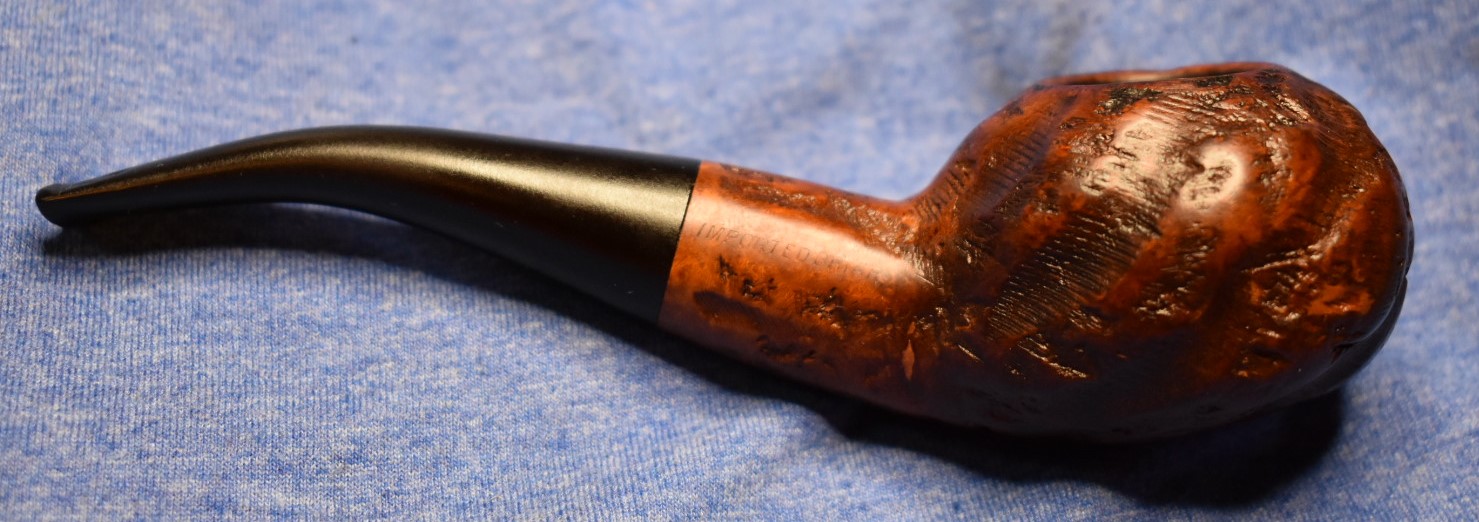
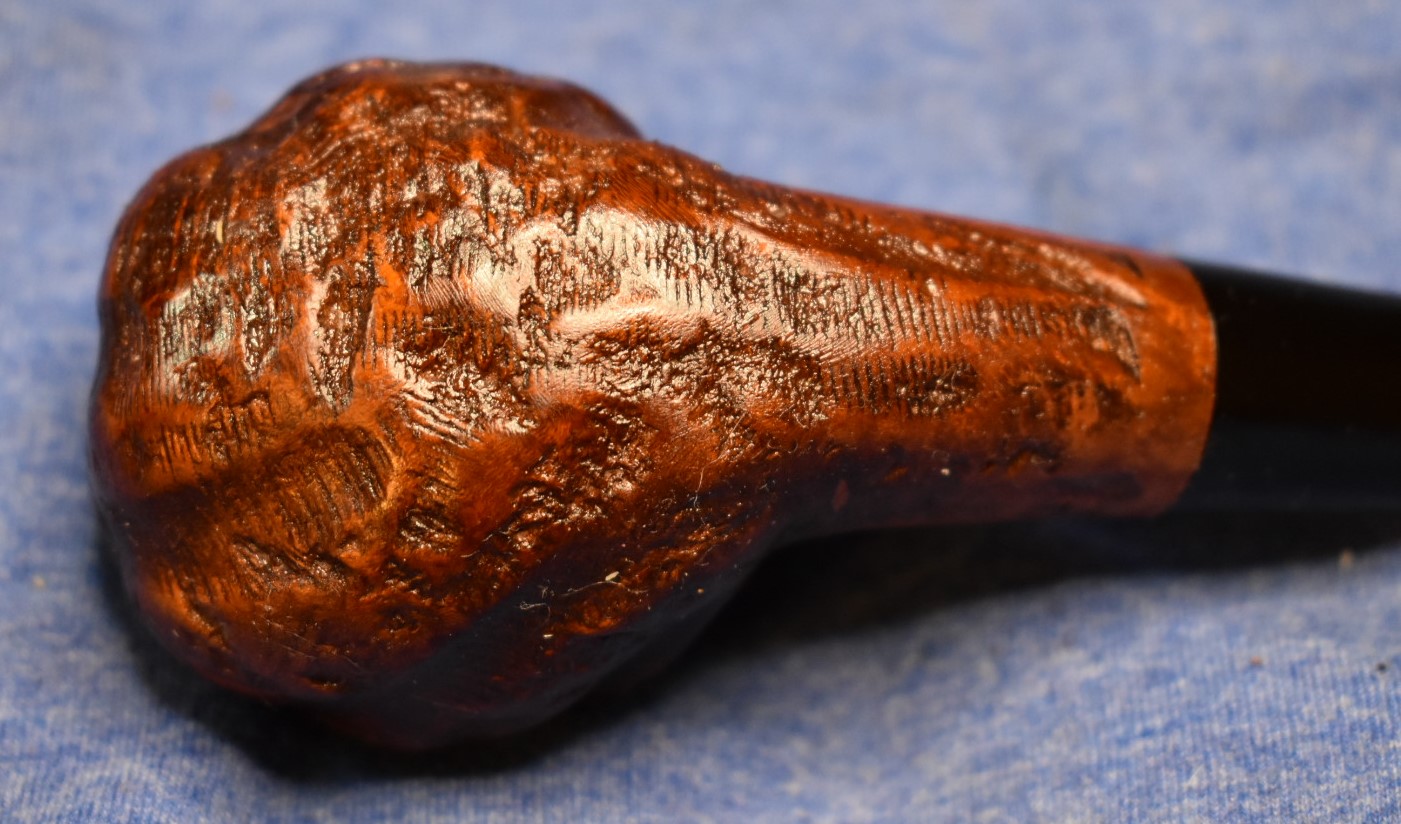


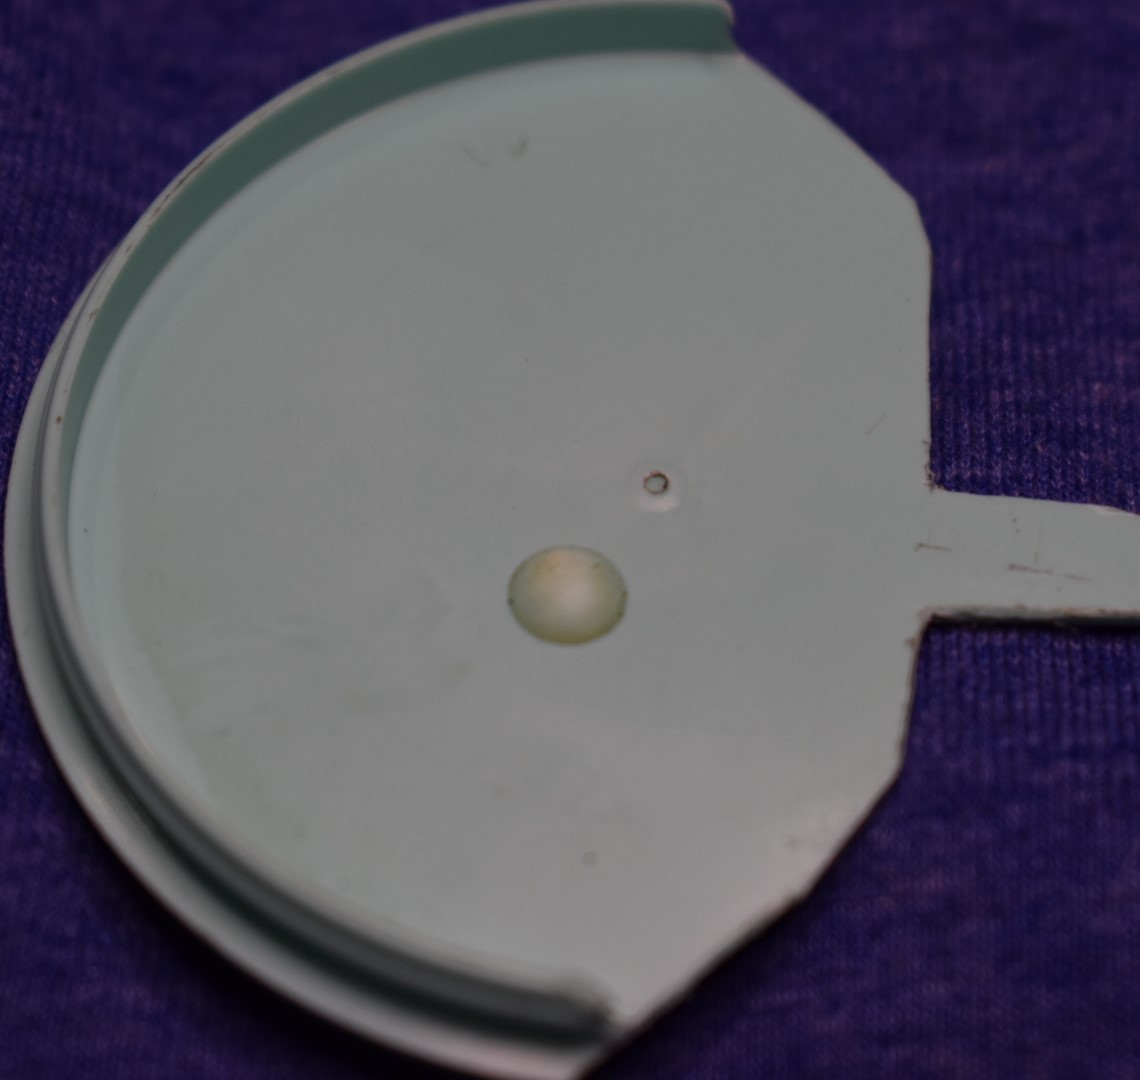


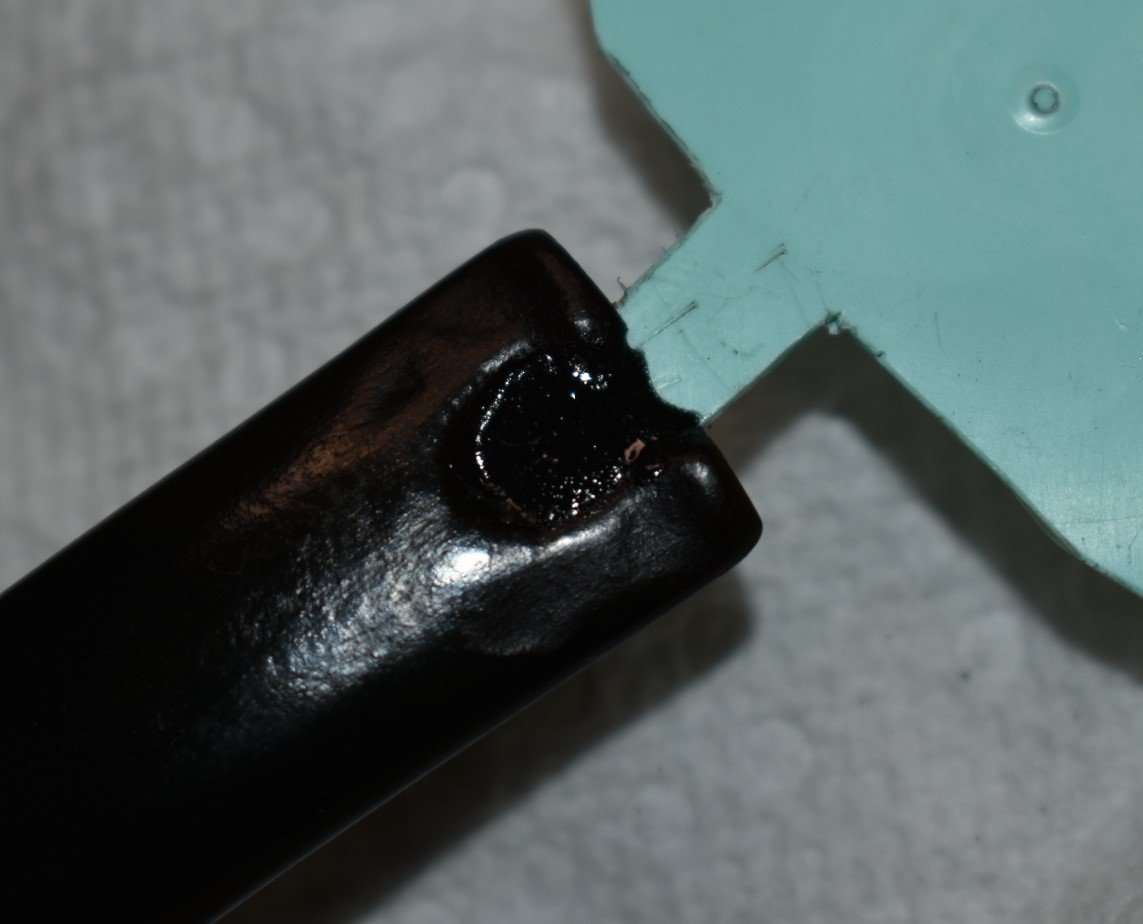
 Eventually I got to the point where I was needing to build up the rise of the button. I continued building up the area, curing the resin, filing the result and applying additional layers.


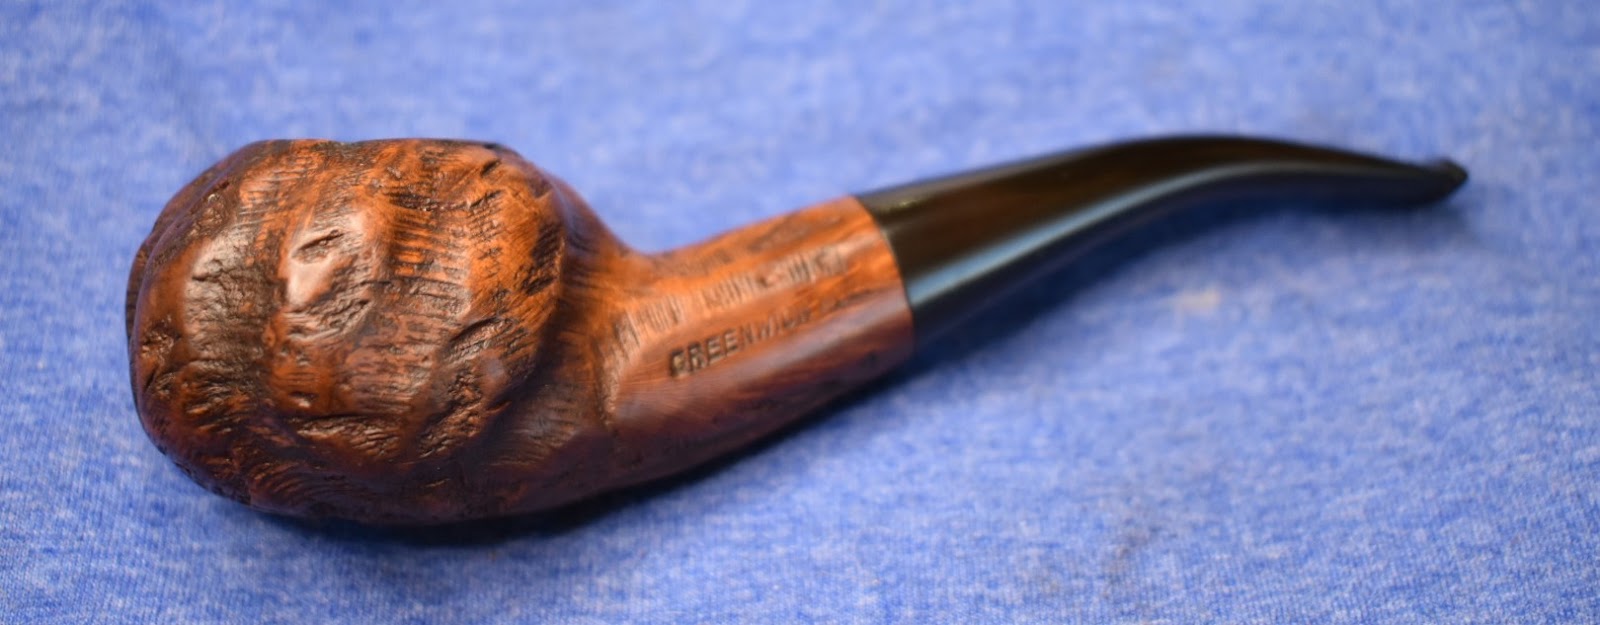
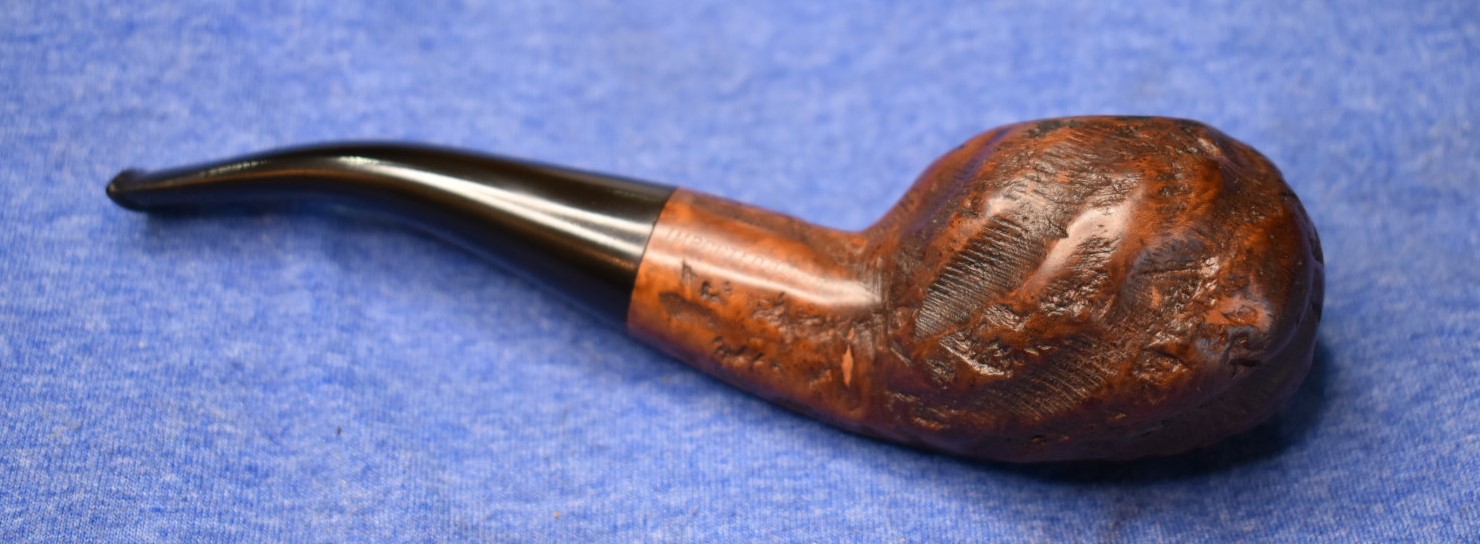
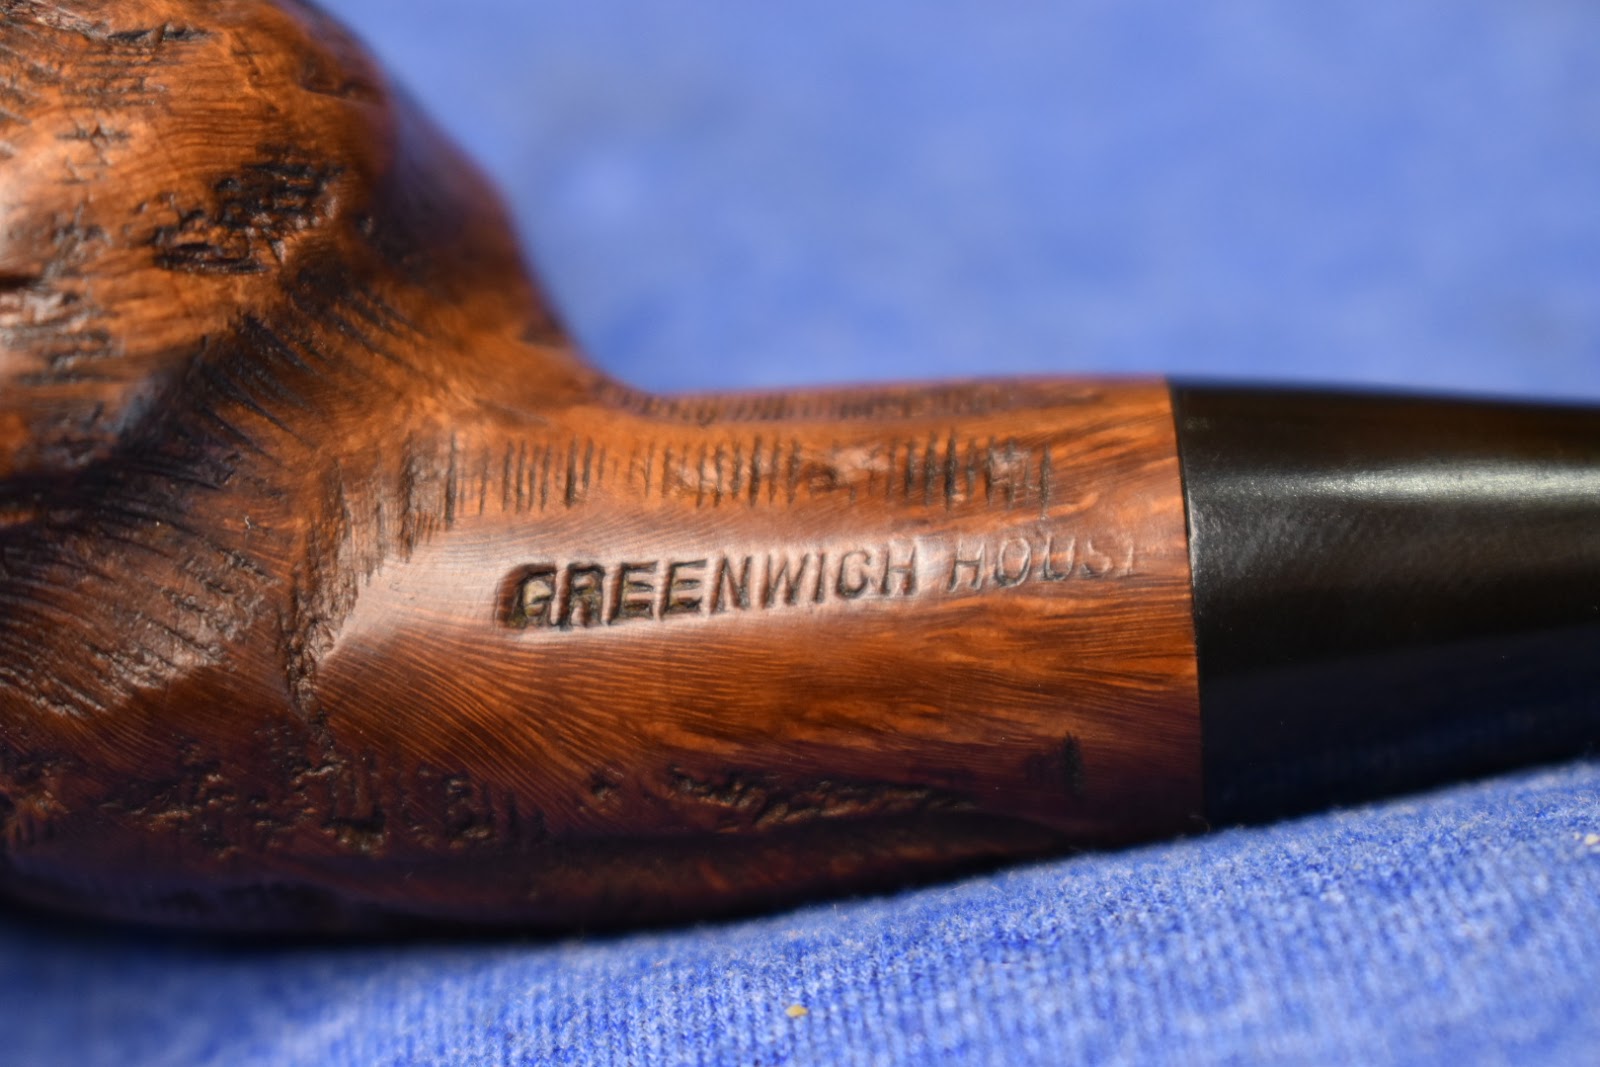


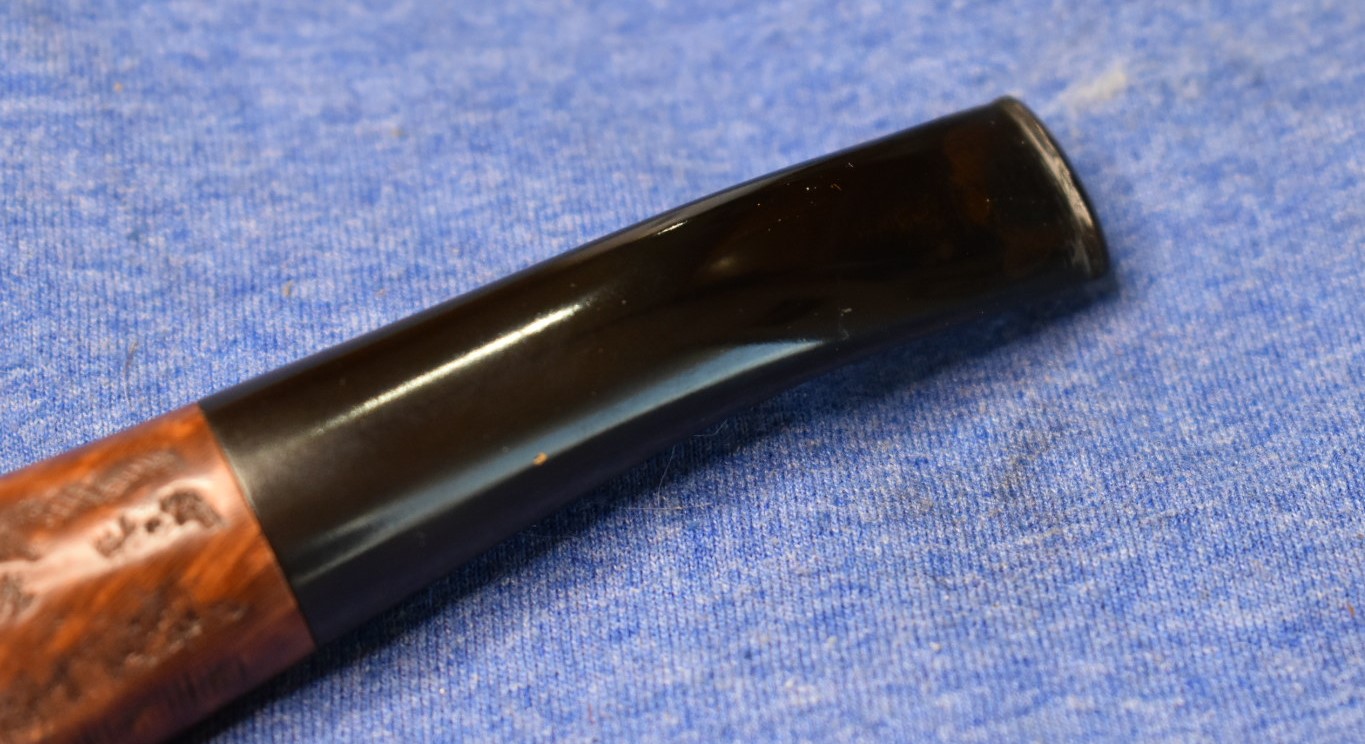

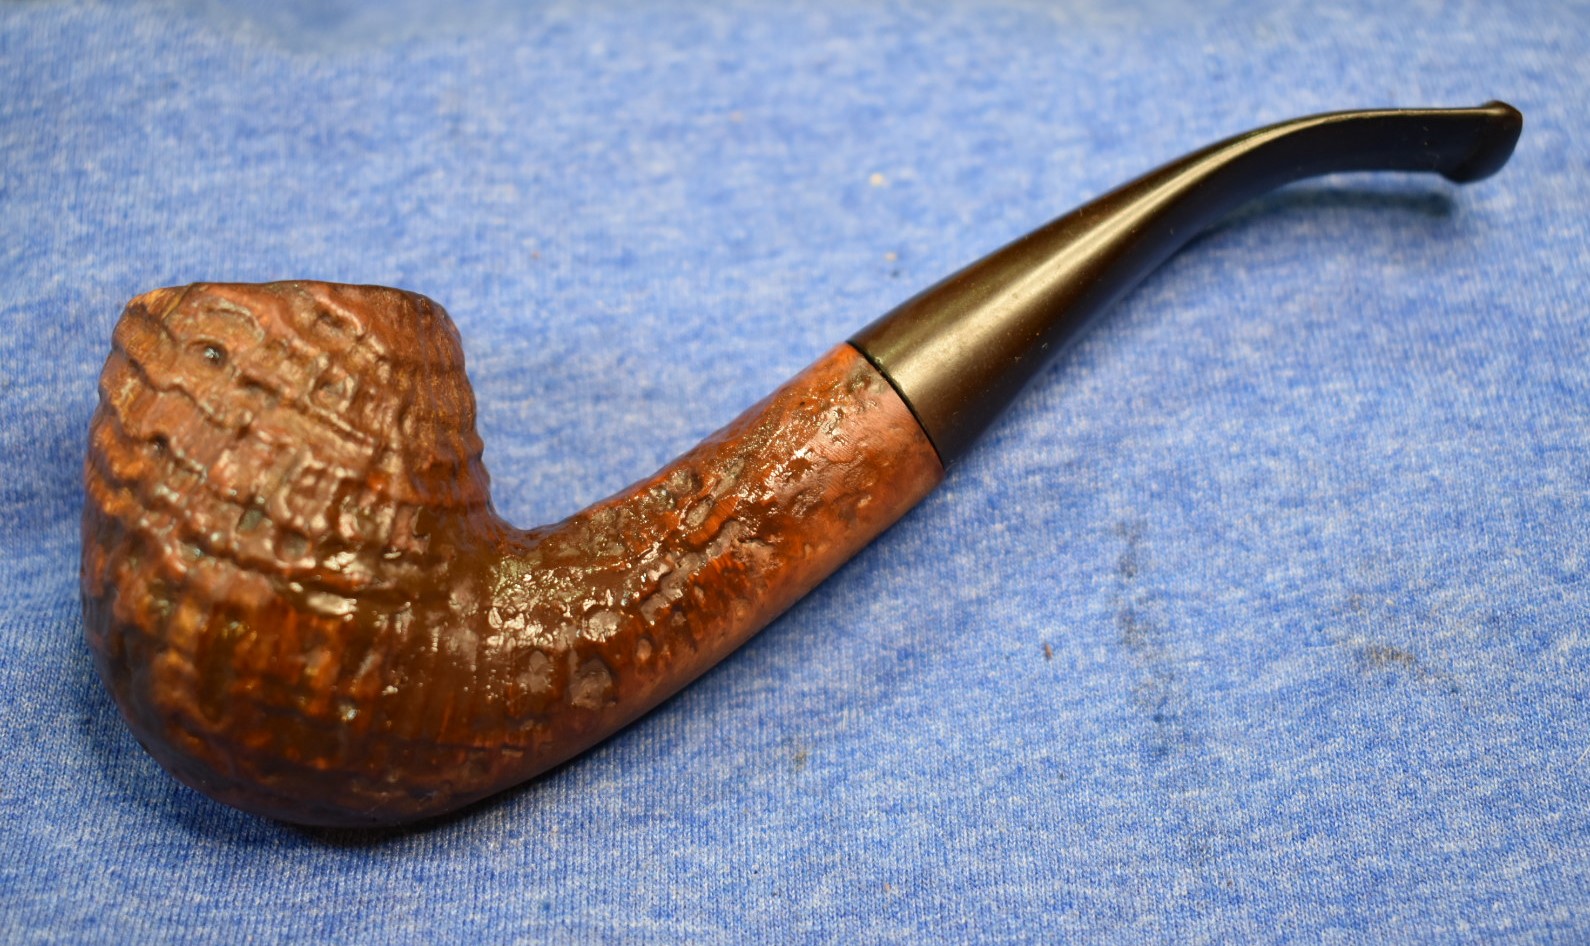


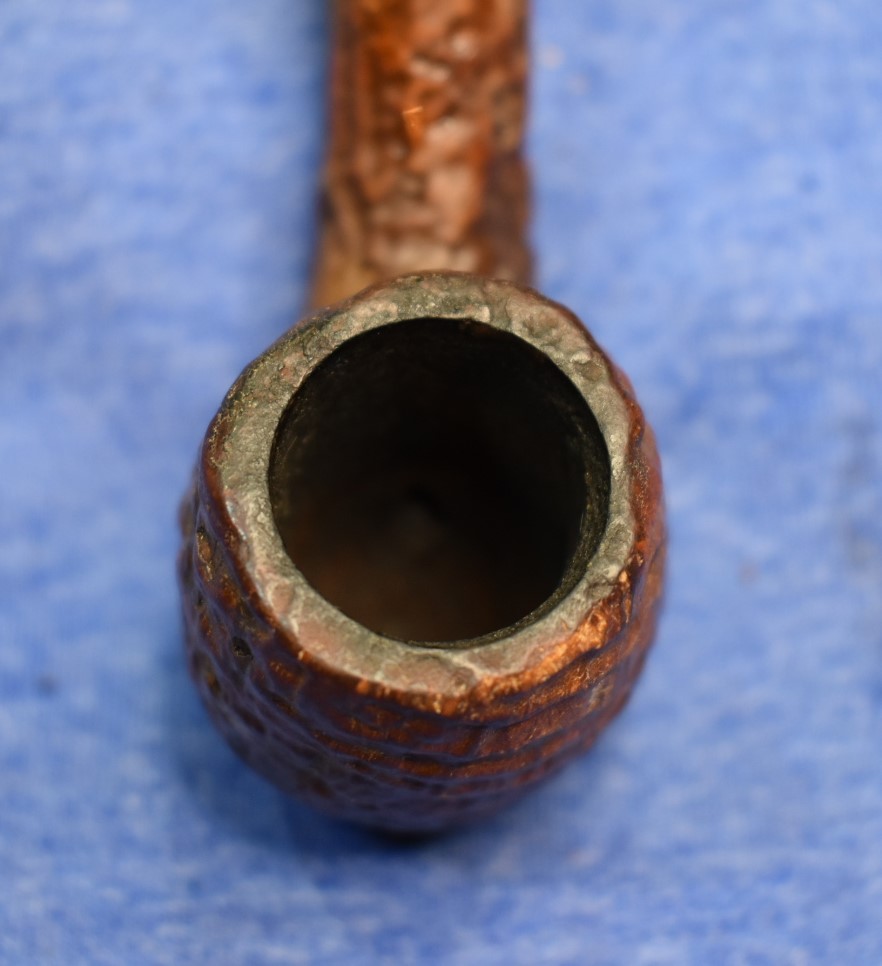


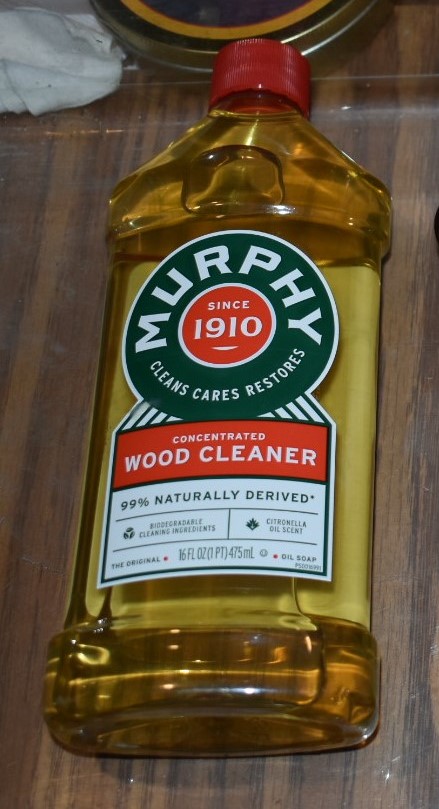


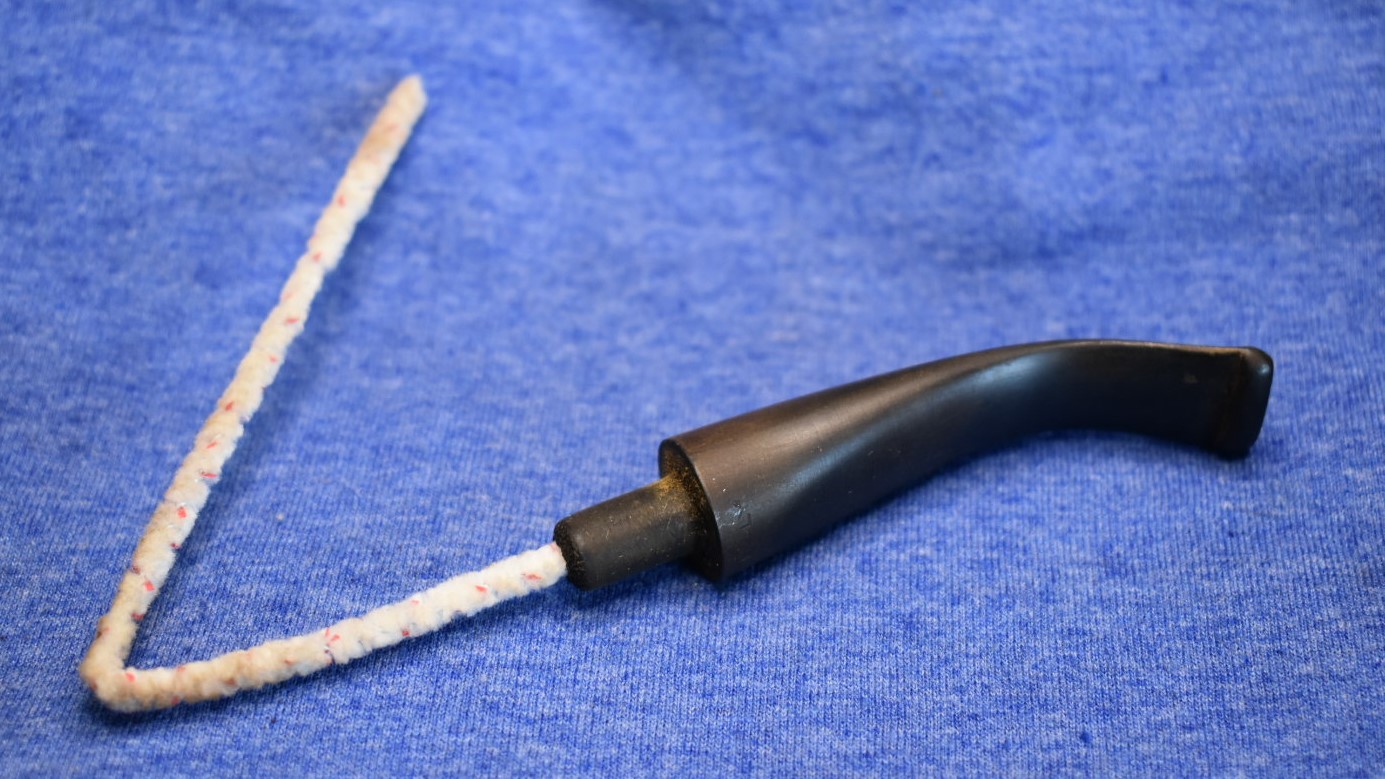

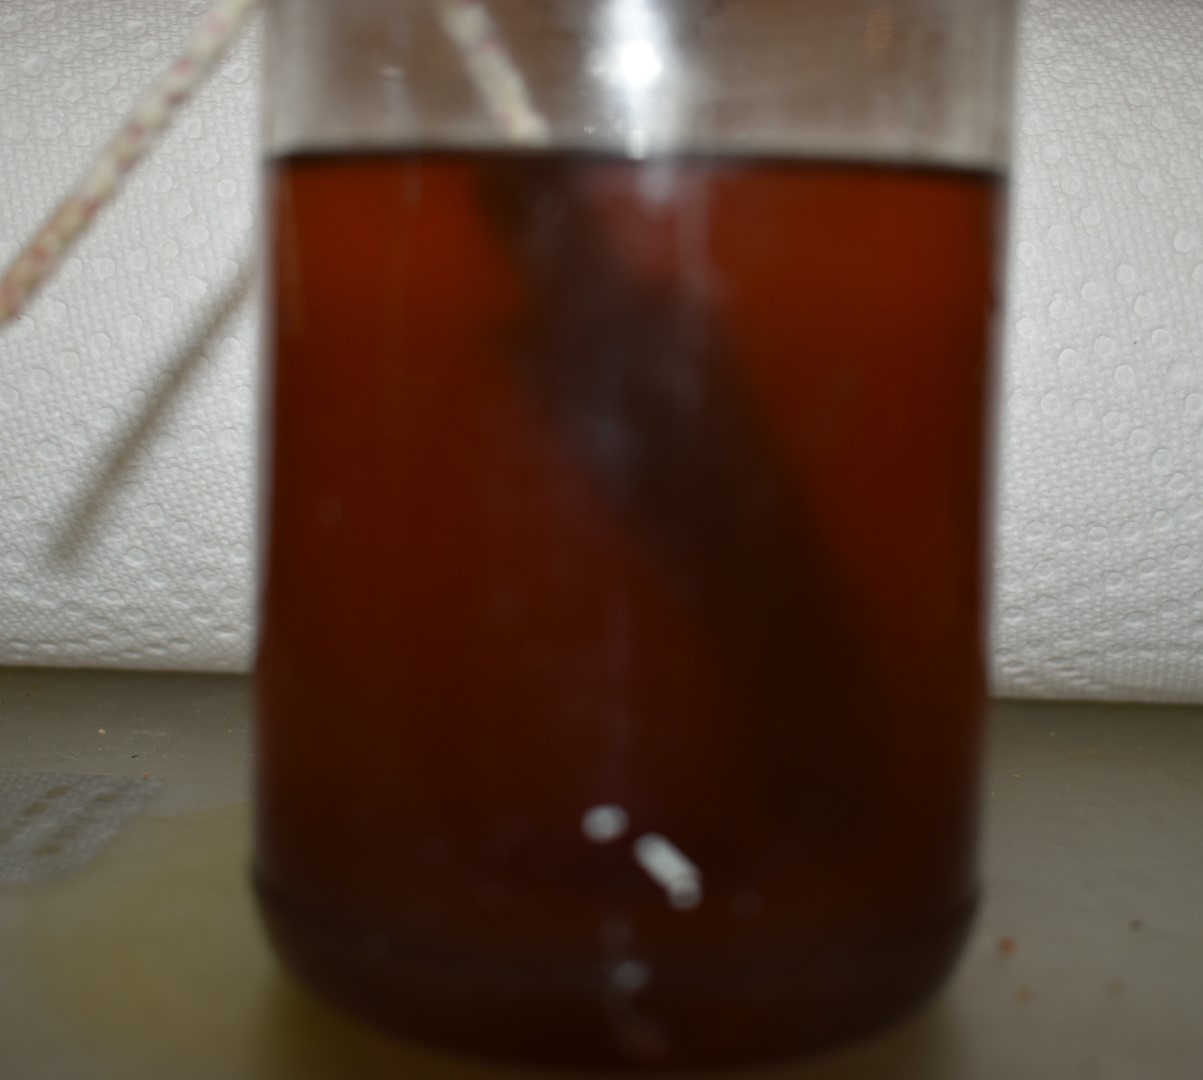
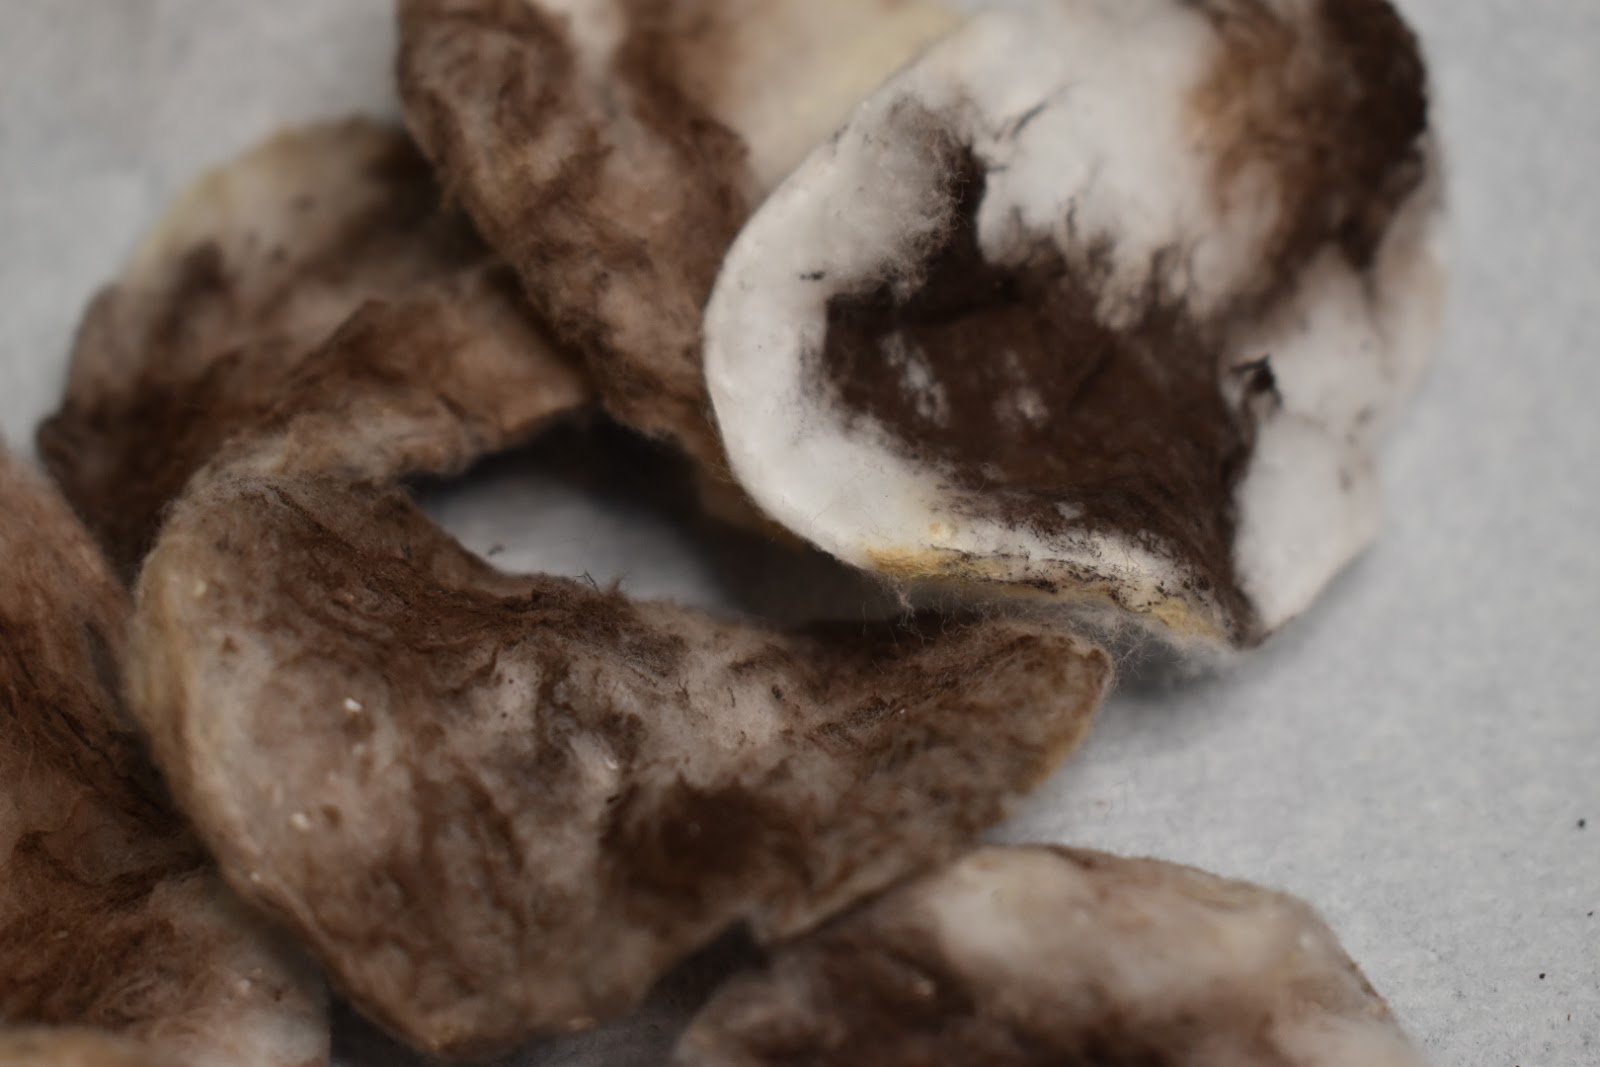


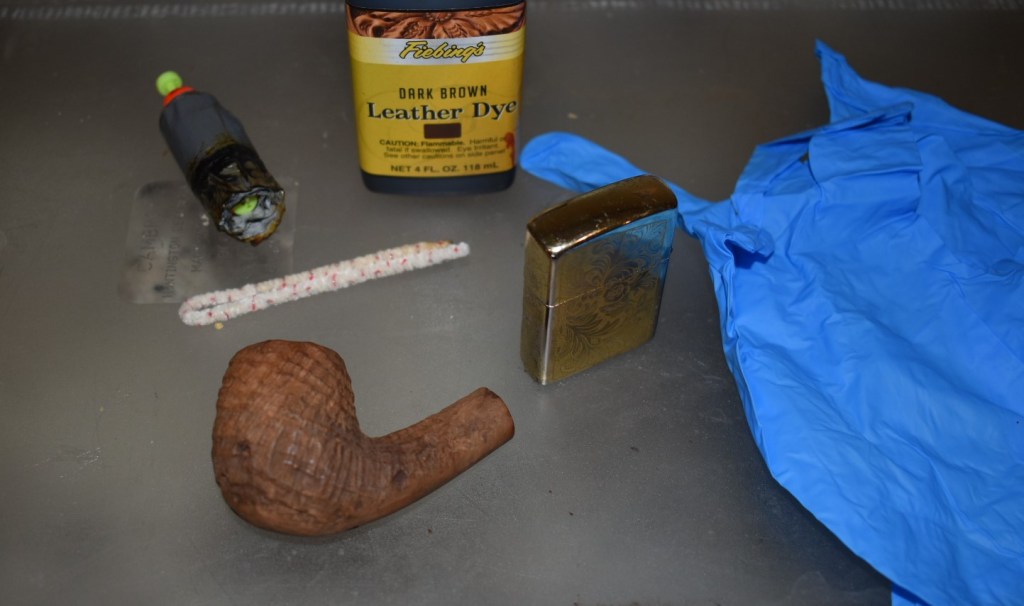

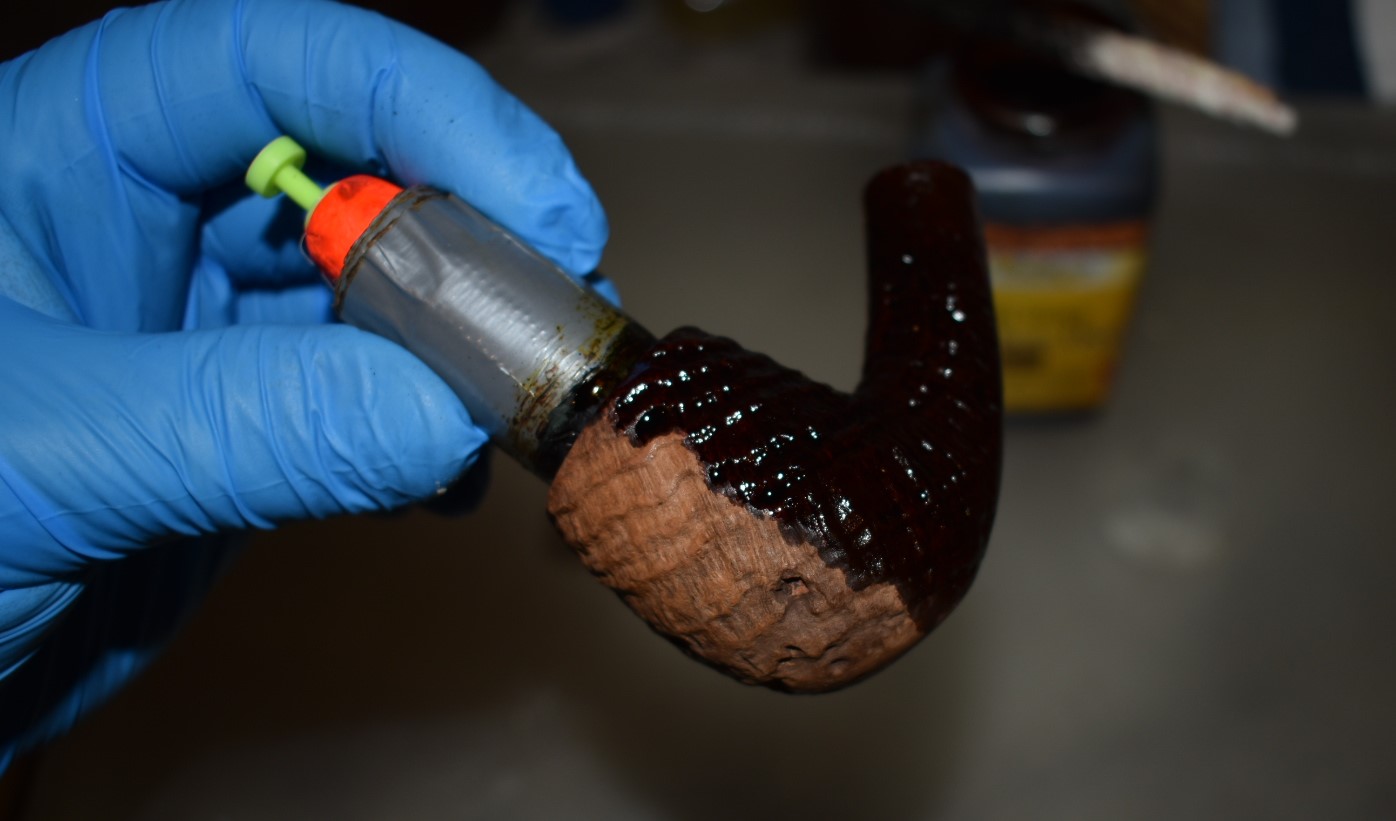


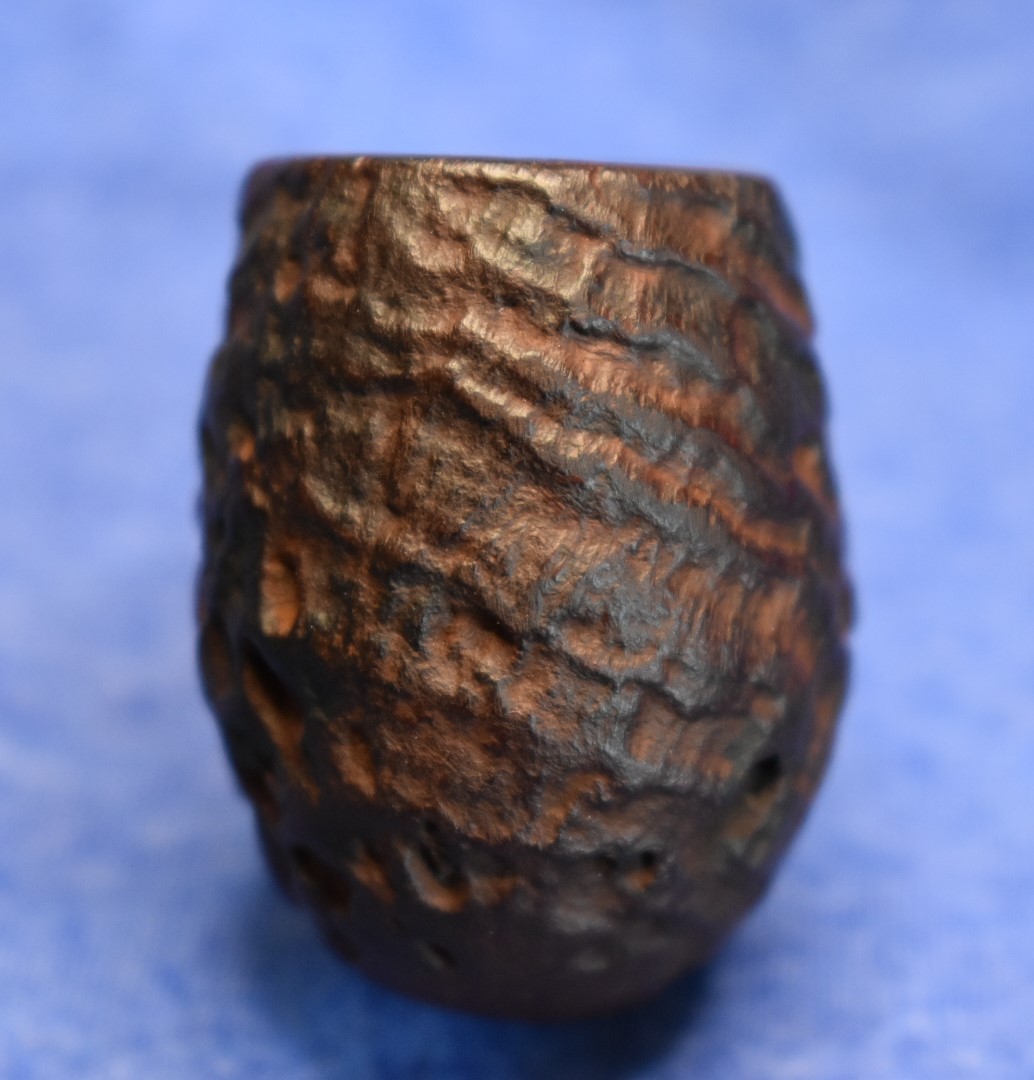

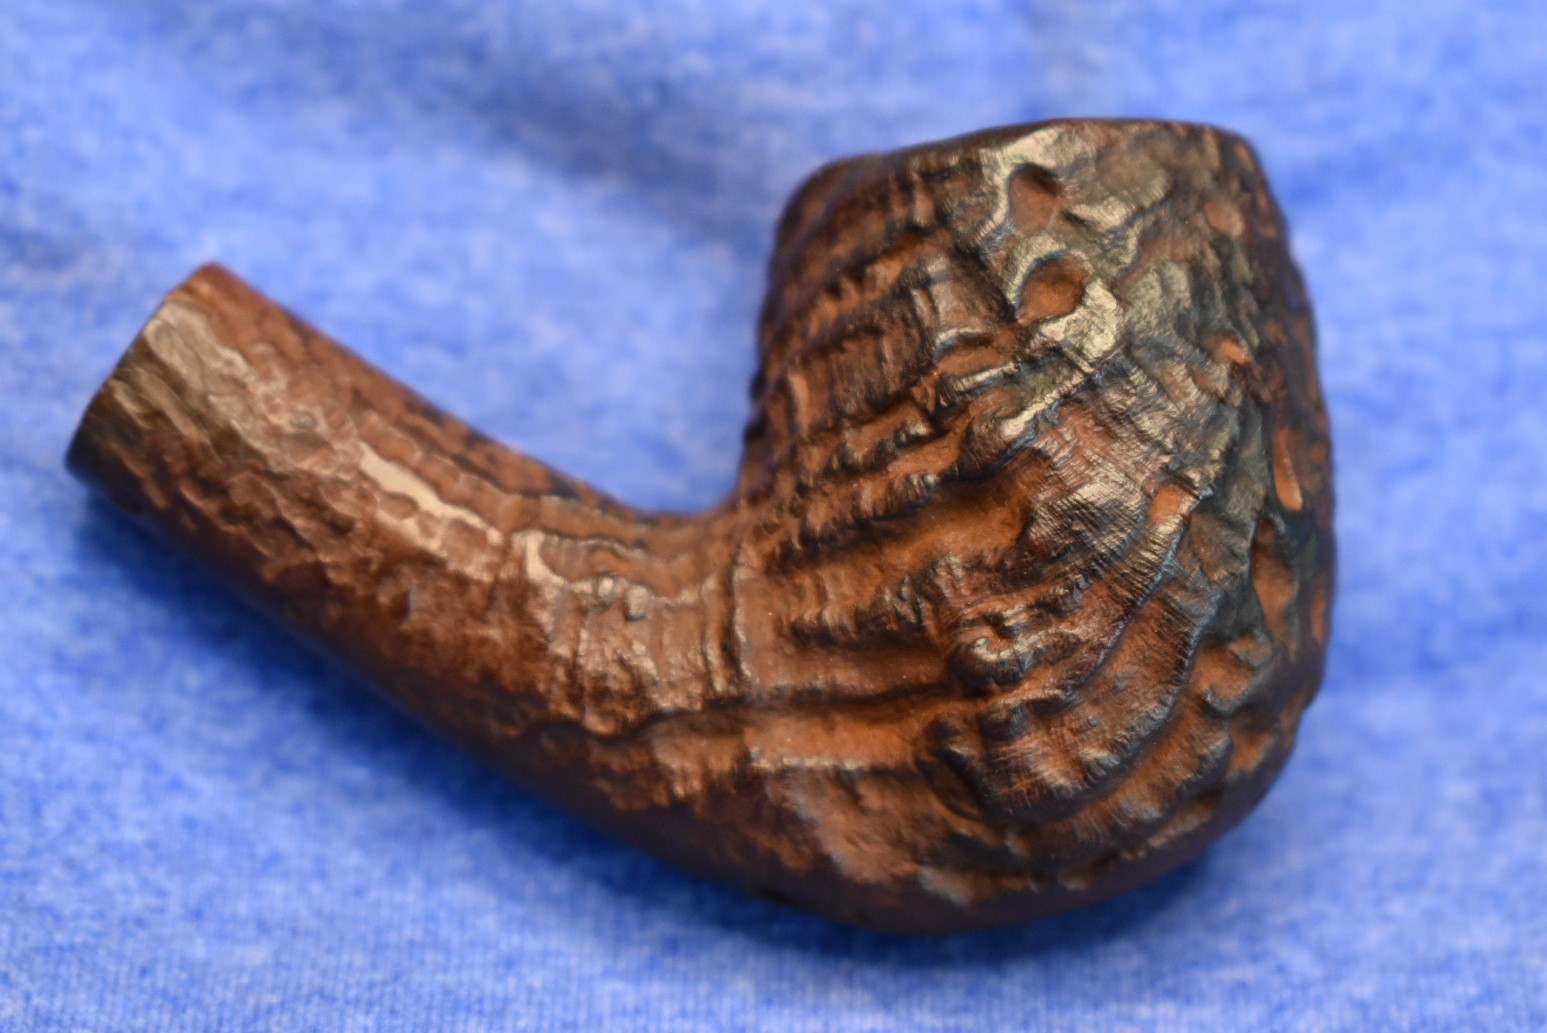


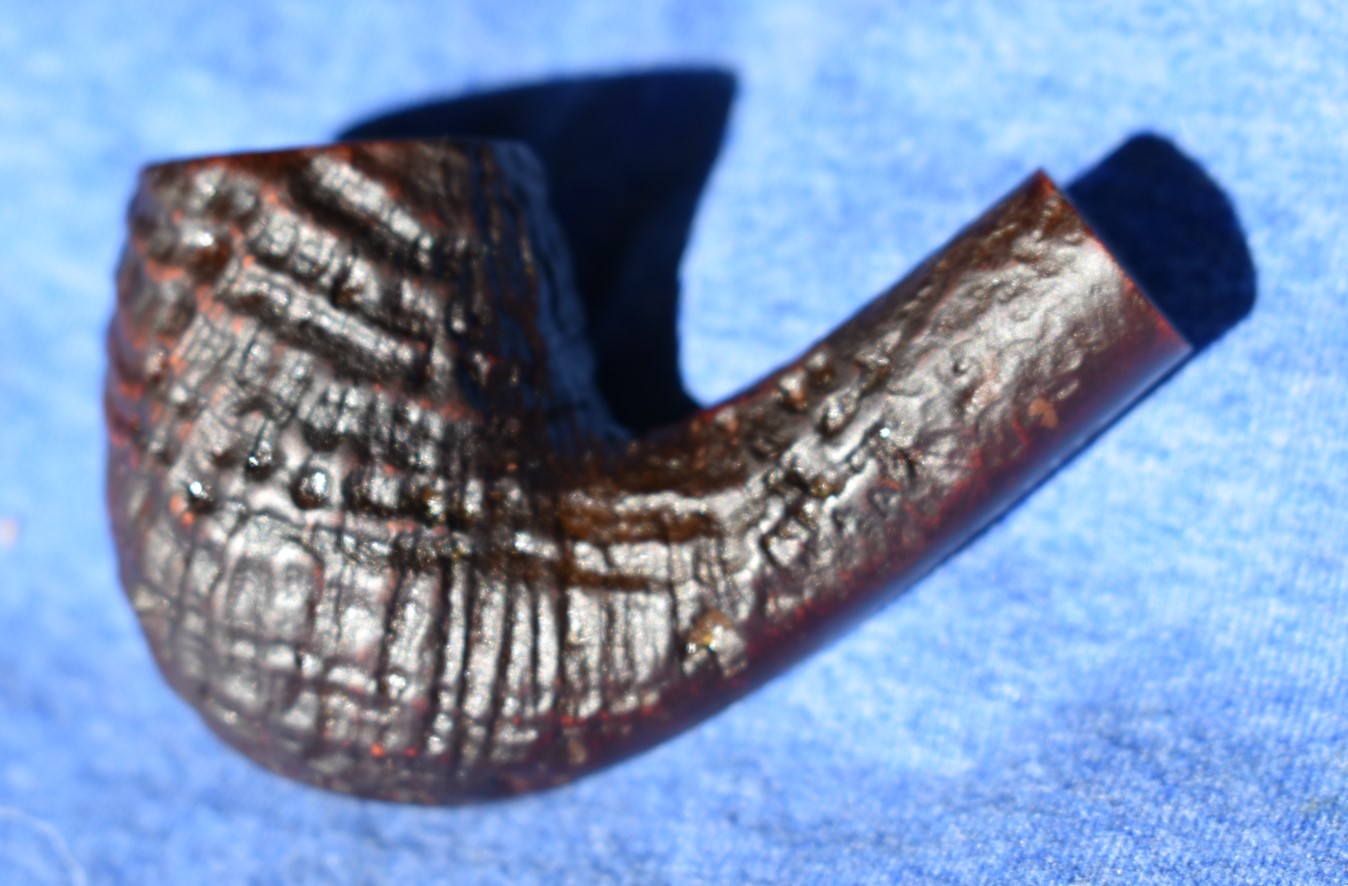
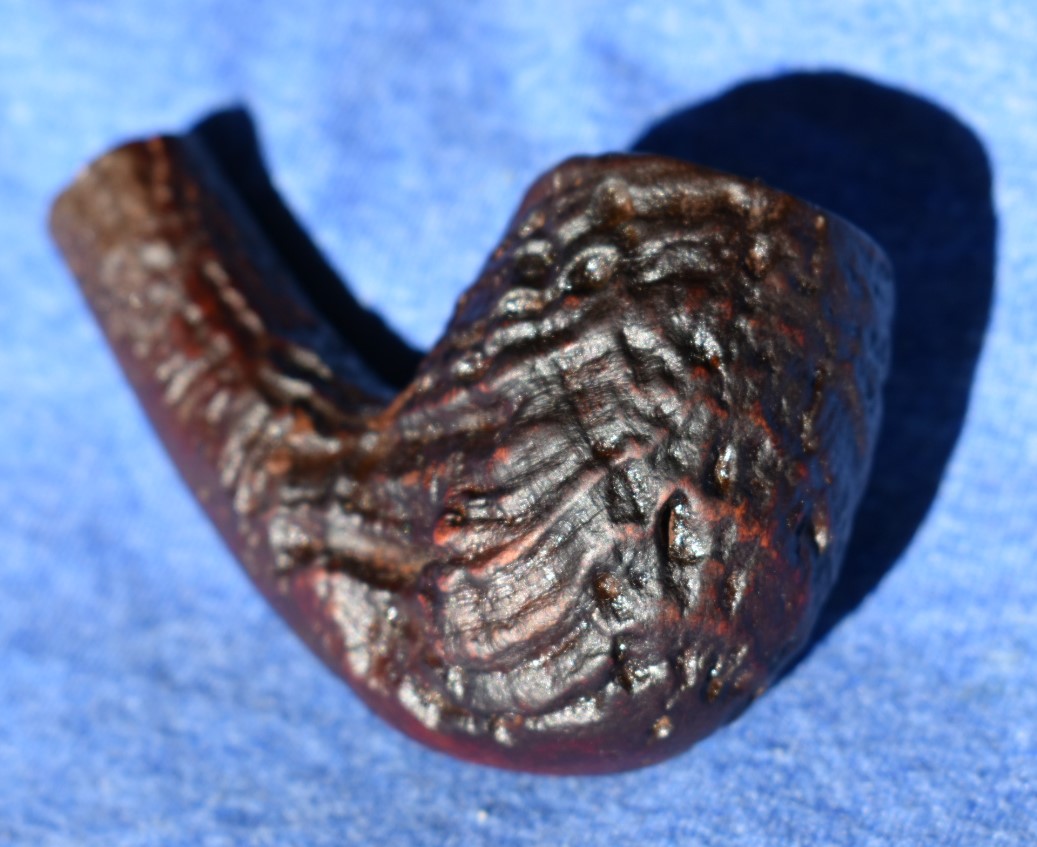


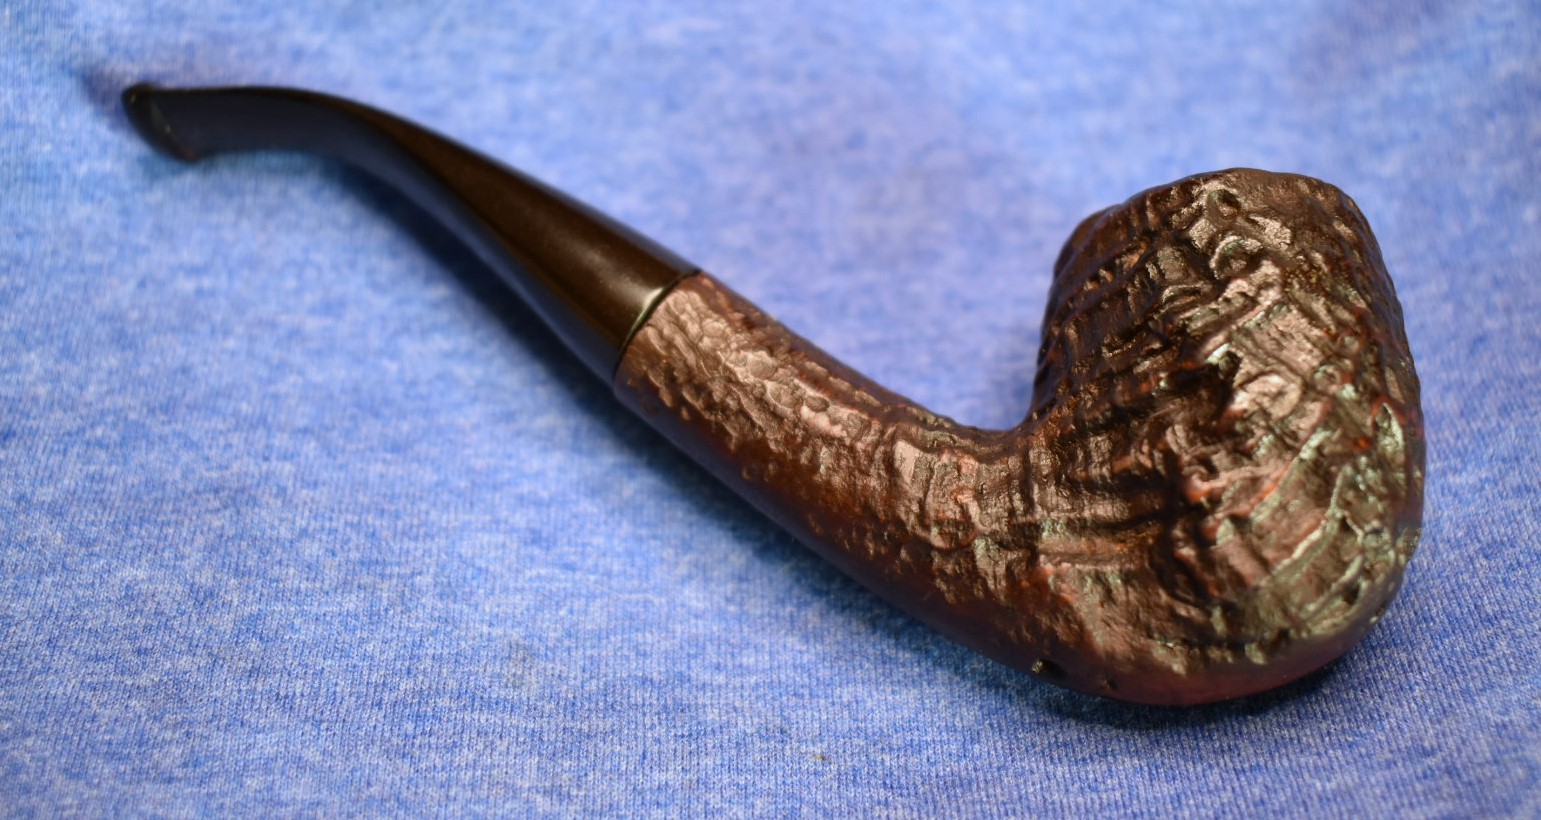


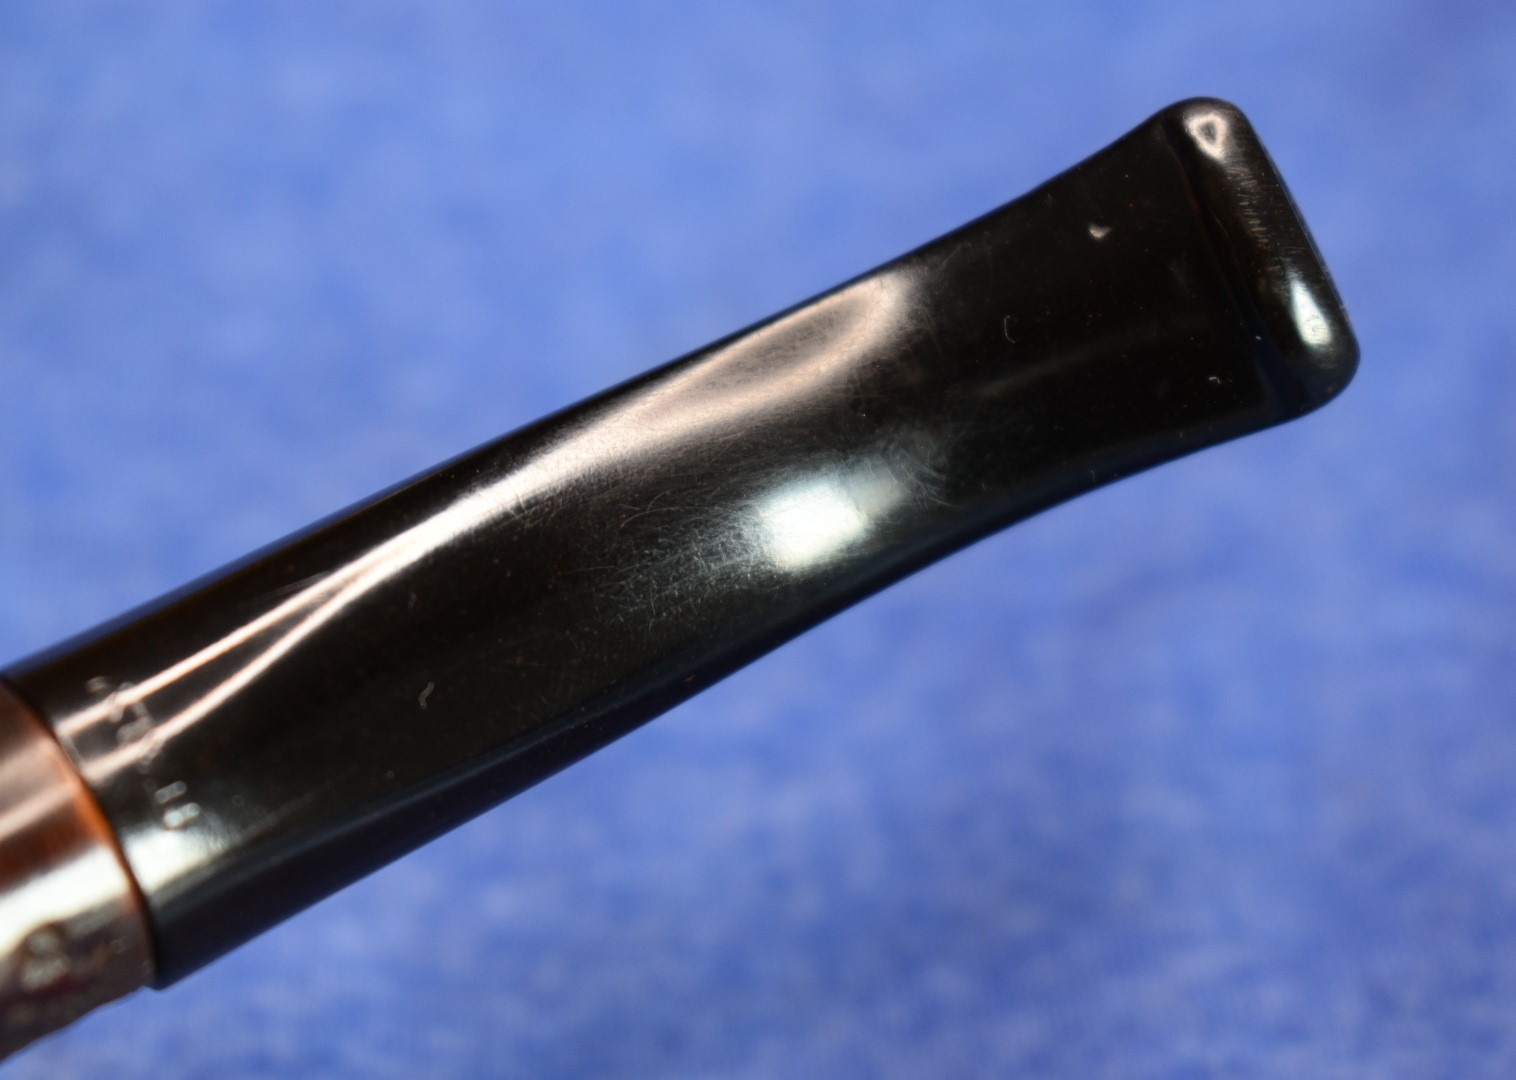
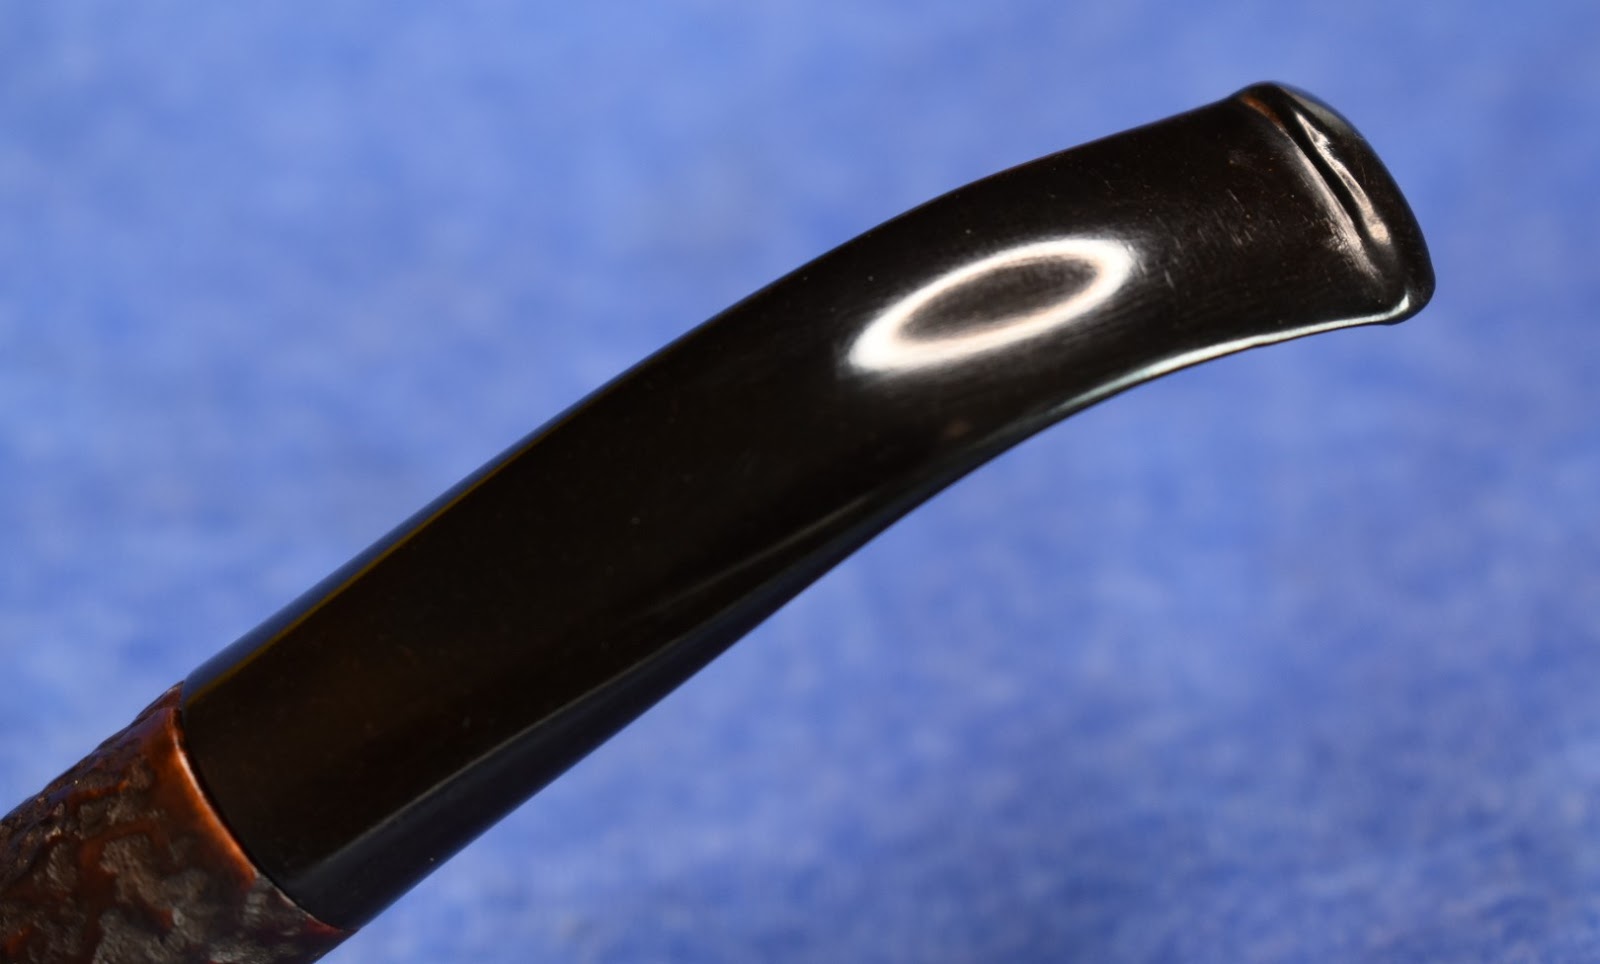

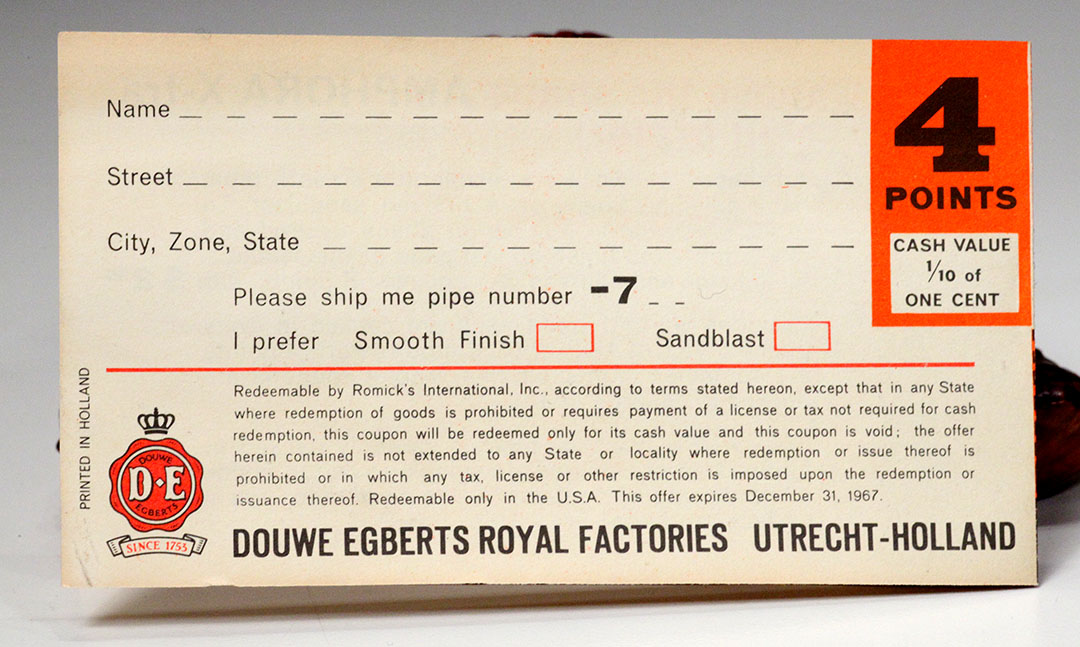