Written and photographed by John M. Young

The first time I ever publicly wrote anything about pipe restoration was in a forum at SmokingPipes.com back on October 21 2022. I guess I was feeling pretty proud of myself and wanted to brag a little. I titled the post “You did what to a what with a what?” The following is that post in its entirety:
It was bound to happen: I finally got a Ropp cherry wood branch with an auction and no, that was not the pipe in the lot I wanted. Anyway, the old Cherry was kind of cute. I felt obliged to give her a little bit of love. A little bowl reaming followed by the old Murphy’s oil soap with a toothbrush routine and the obligatory removal of the electrician tape in front of the mouthpiece revealed a – dramatic pause – a cracked shank. Who saw that one coming? Hmm, how much obligation do I really have for this old girl? I mean, we just met…
Well, lets see how bad the crack is. Hmm, half an inch. Internet search for a ring shows that the Vermont Freehand boys are going to be in Las Vegas for a few days and this old Cherry needs a doctor “stat”. What else could I use? Hey, what is that old .357 cartridge doing in my pipe cleaning tool box? The caliper says that .375 would require a whole bunch of file work and sanding to make a ring. Hmm, last time I checked a .44 Mag case is wider than a .357. Wheels turning, let’s visit the reloading bench. Sure enough, a .44 is bigger than a .375 and would only require a little bit of filing and sanding. Hmm, now all I need is a son-in-law who is a plumber with a pipe cutter. Oh yeah, he’ll be home at 4:30. Snippity snap I have a .44 cal, I mean a brass ring for the patient. Doctor, I think she is going to pull through.

I hope you had as much fun reading as I did restoring this old Cherry. And for the record, she smokes pretty well.
From south east NE,
John
I am guessing that you can relate if you have purchased an estate lot or two. You get that pipe with tape around the shank right there at the mortise. You think to yourself, “I bet the previous owner just liked tape.” Yup, da Nile is a river in Africa. Then you carefully peel the tape off, certain that if you go slowly the crack will have healed over time, you continue, slowly, slowly.

Visions of Brad Pitt pop into your head. You continue undaunted, a little more. Then there it is in all of its eldritch horror. – a shank crack. You are sure that the crack is so large the previous owner probably fell into it and may still be trapped down there.
Okay, maybe I have a tendency to over exaggerate – the Nile is mainly in Egypt. But, the rest is exactly how I felt the first time I discovered a shank crack. Learning to deal with them allows our darlings to live again regaining some of their smokey glory. After having glued and clamped one successfully. I thought, “this isn’t so bad”. That first glue job is still together after well over 2 years.
Then you find another crack and try to fashion a band and that works out pretty well too. You try a few more and sure enough, shank cracks are just another little thing that we have to deal with. I still recommend checking to make sure the previous owner isn’t trapped in there before you glue and clamp it up.


That brings us to the pipe of the day, a lovely old KB&B churchwarden (?) with a metallic tape shank. Not just scotch tape for this girl, no sir. Real duct

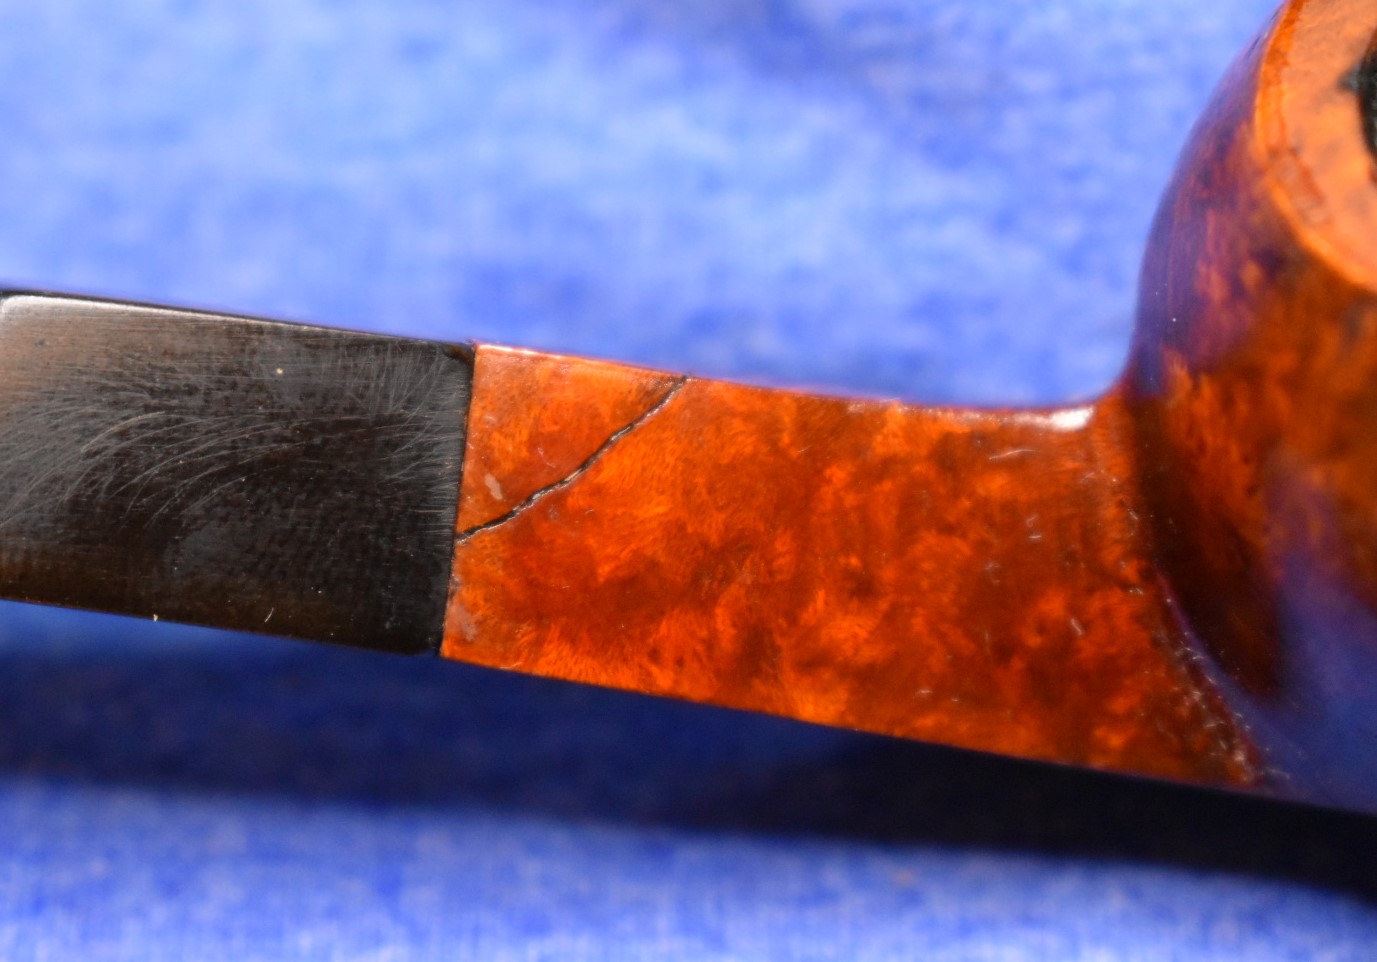
tape. And under that tape, you guessed it – a shank crack. I failed to take a picture of just the crack so you get to see what I did to the end of the crack.

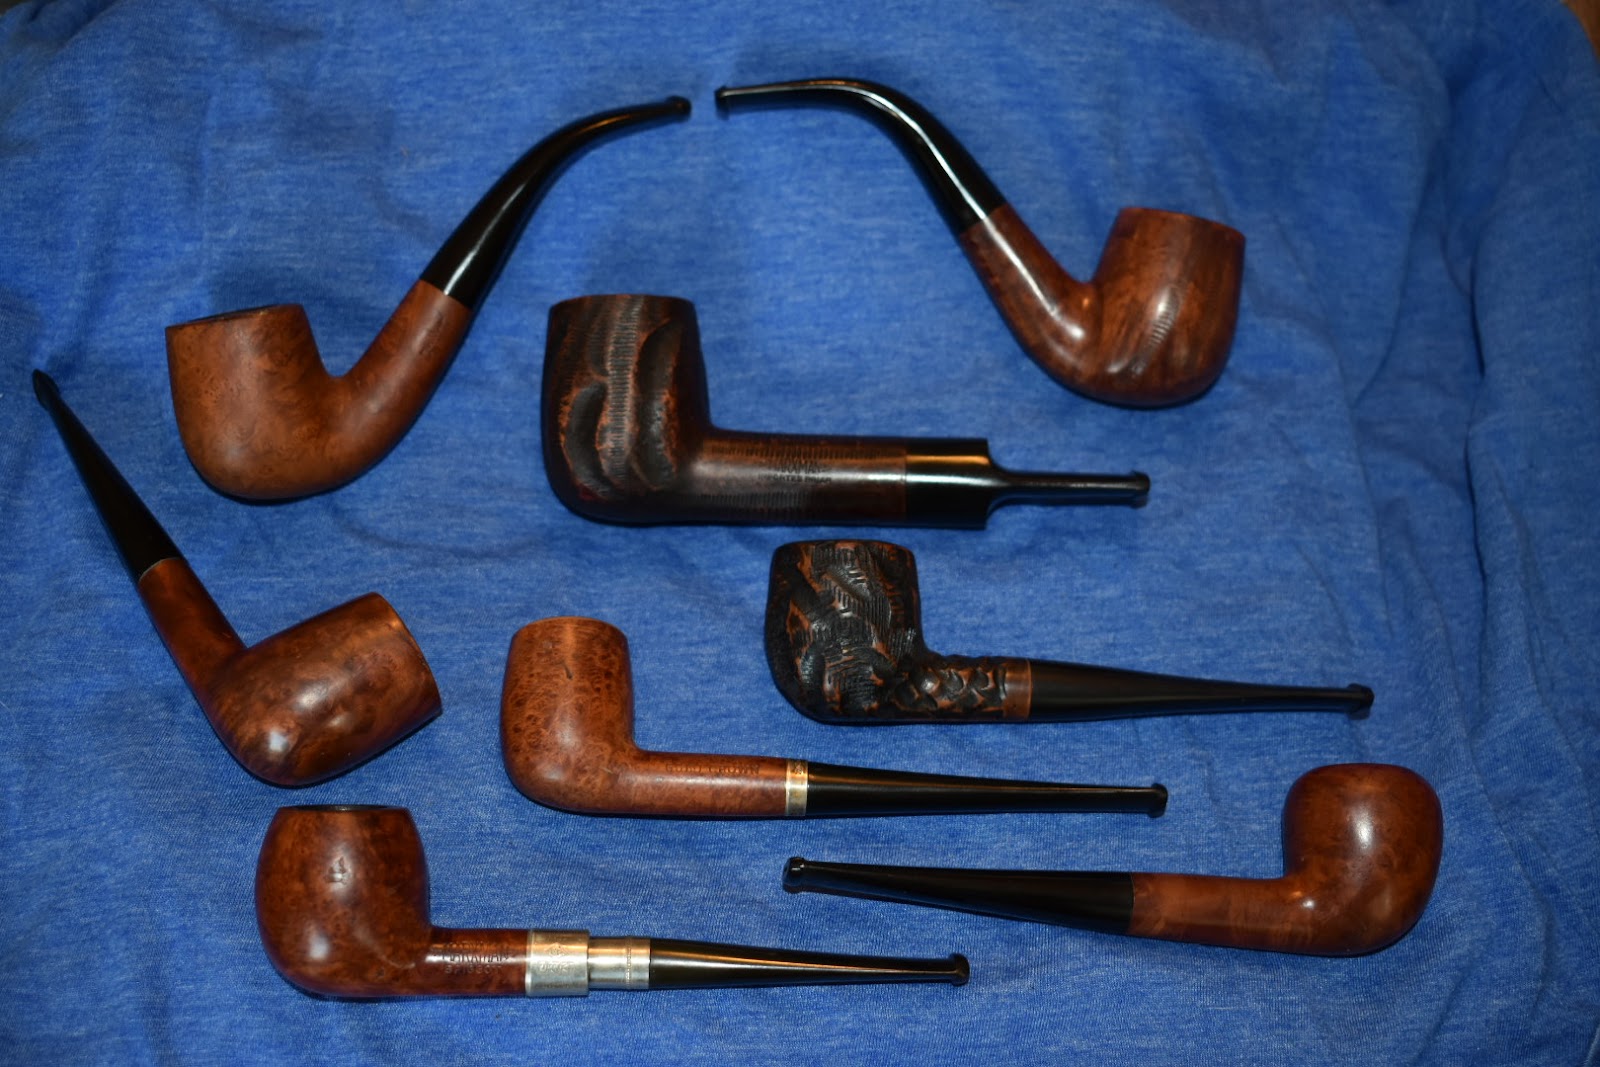
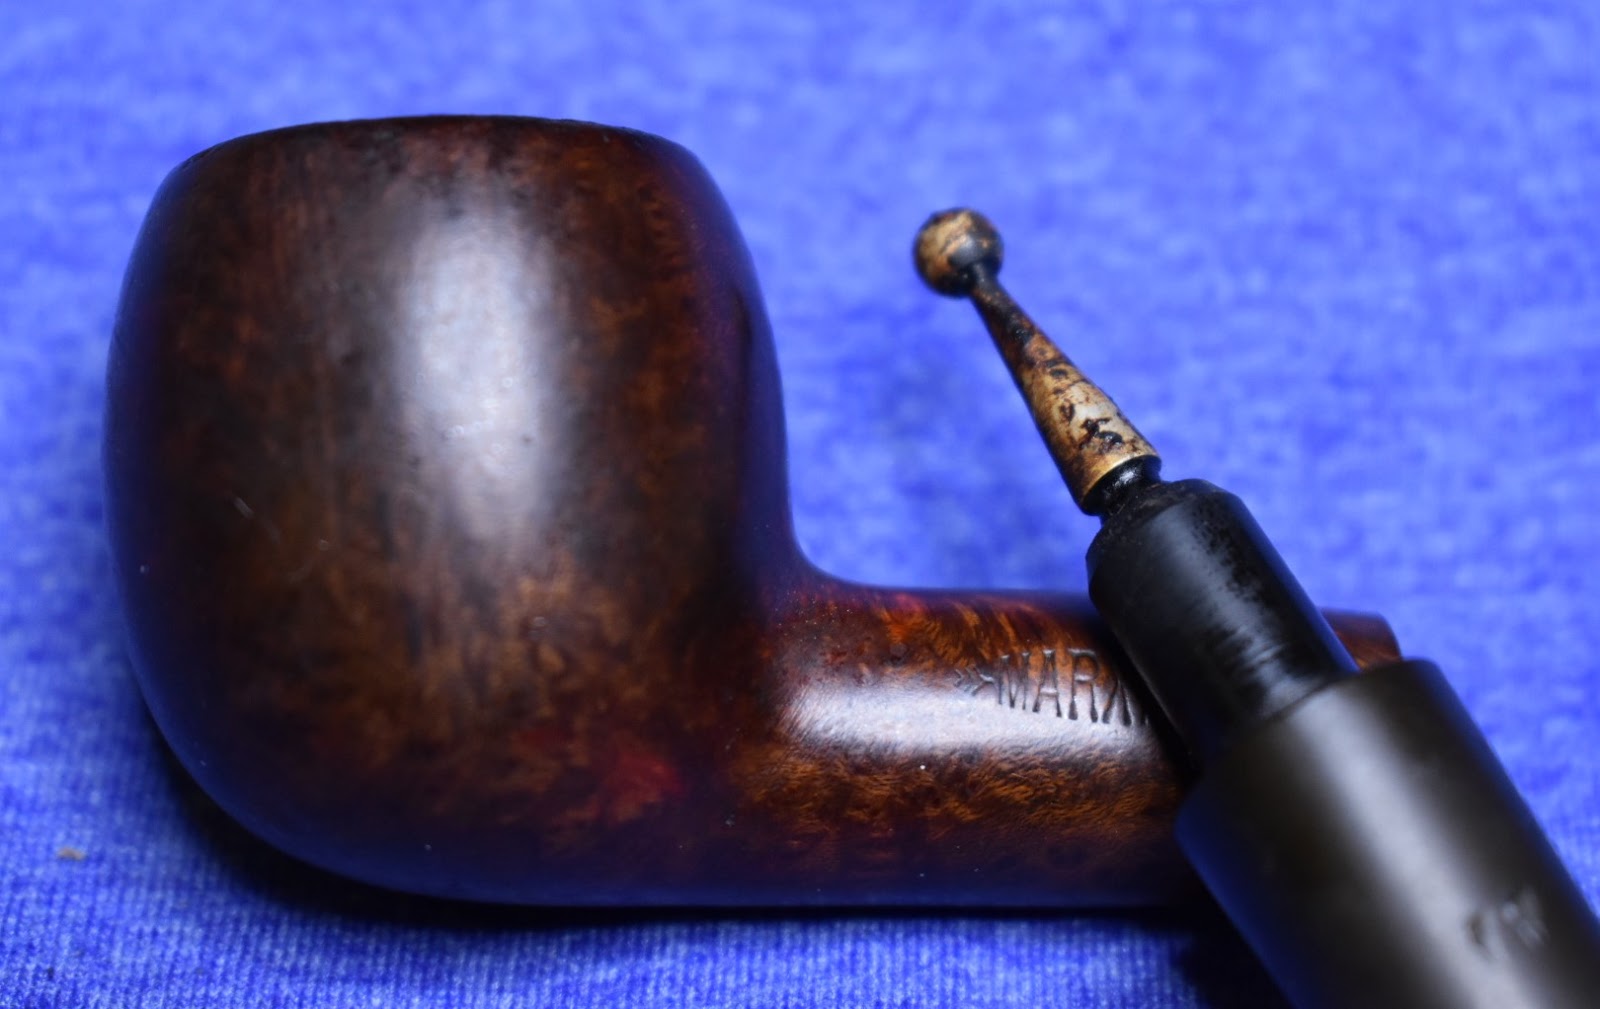
Sorry if that kind of ruined the surprise. I am getting ahead of myself. Let me start with the photos of the pipe when she arrived:


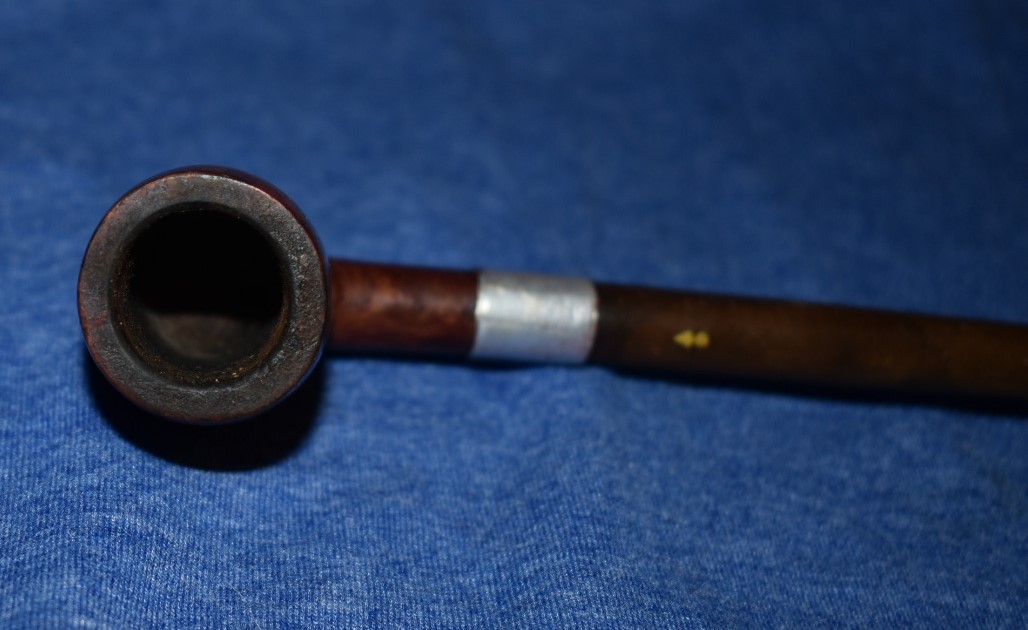
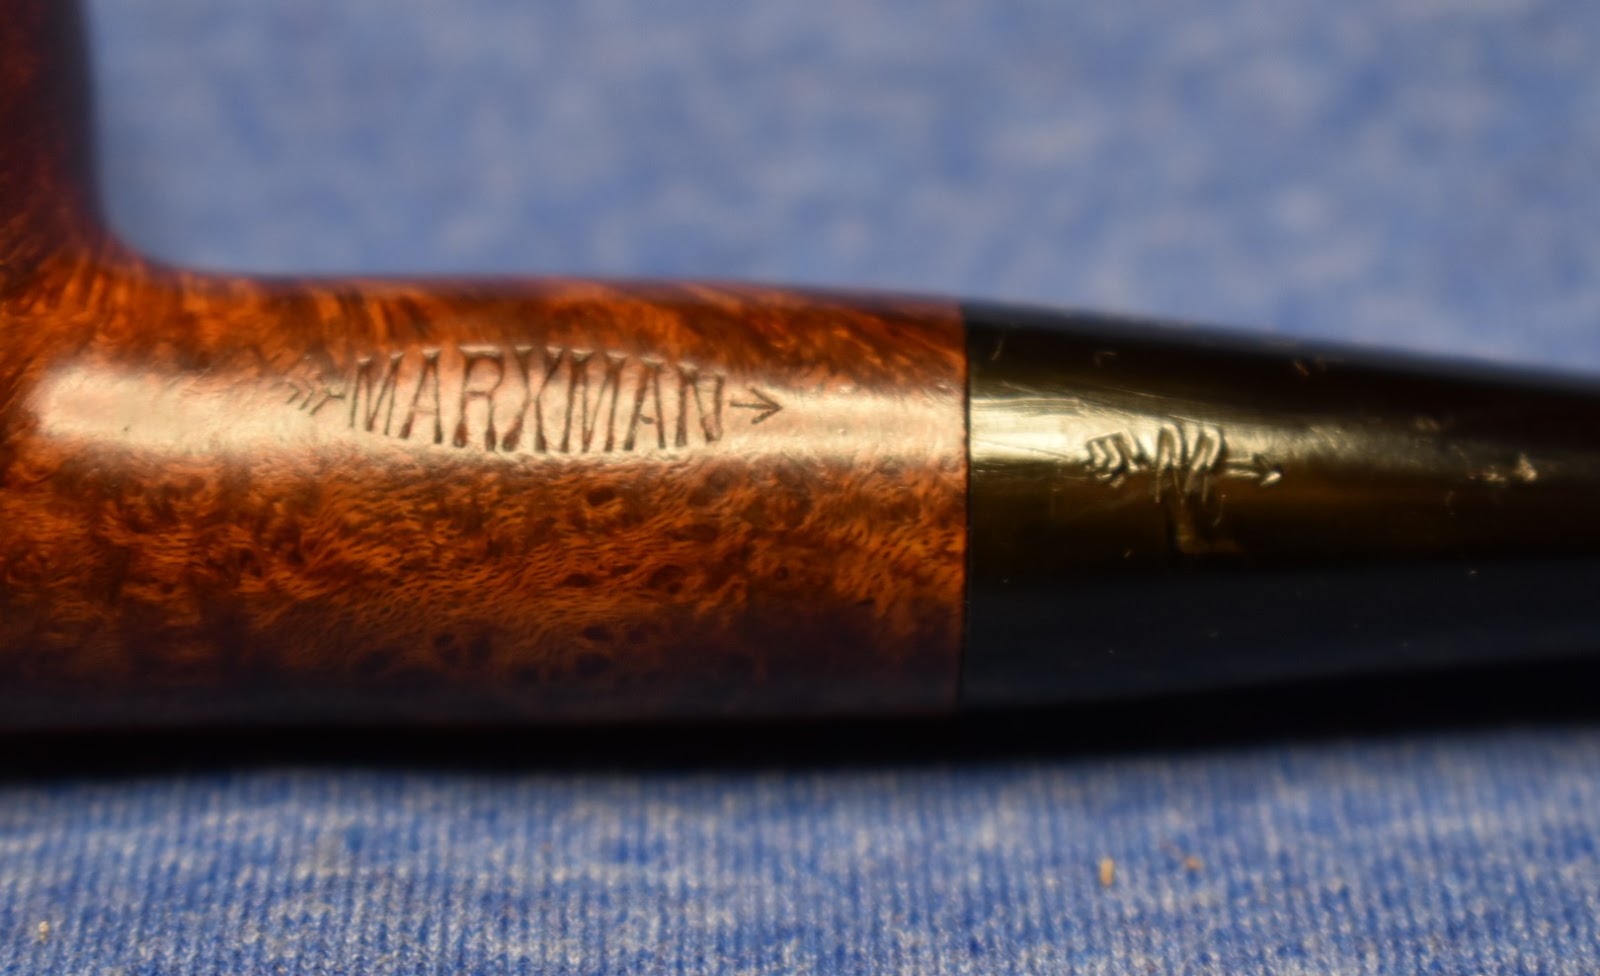
She’s a long one, coming in at just under 12 inches (30ish cm)an she had all of the things that you expect from an old pipe: Dirt and grime, a caked bowl, lava on the rim, an oxidized stem, dents and dings, dirty internals and a cracked shank. Now the title of this blog contains a question mark because the stummel is not stamped with the KB&B clover nor with KB&B anywhere. The only stamping on the stummel is the “CHURCHWARDEN”. There is no country of manufacture (COM) nor any shape number. So, “why are you calling her a KB&B?”, you rightfully ask. Because the logo on the stem matches the logo for Kaufman Bros. & Bondy from their pre Kaywoodie days.

(https://pipedia.org/wiki/Kaufmann_Bros._%26_Bondy)
It is also true that there were two KB&B seconds brands which also used this logo. The first is Dorset. Here you can see the same logo but in light blue.

(Do-Dq — Pipes : Logos & Markings (pipephil.eu))
The second is the Hamilton, here the logo is in yellow. The yellow looks to be the same as the first emblem pictured.

(H-Hd — Pipes : Logos & Markings (pipephil.eu))
Both the Dorset and the Hamilton are stamped with the KB&B cloverleaf. It does bother me that there are no other stampings on this churchwarden to verify this claim. According to the KB&B page at Piedia,
“The trademarks, for the inlaid cloverleaf and the cloverleaf with the KB&B initials inside, were issued in 1881.” (https://pipedia.org/wiki/Kaufmann_Bros._%26_Bondy)
KB&B had used the cloverleaf logo for many years prior to the origination of Kaywoodie and Yello-Bole.
This could have been an old stem that was slapped onto some no name stummel at any point in the previous century. I am not claiming that this is a true Pre-WWI or WWII KB&B and listing it up for auction. This is a pipe that I enjoyed working on and continue to enjoy smoking. As for the history of the piece, It may be lost to the mists of time.
To the restoration. I apologize in advance for the lack of step by step photos. This was another of my earlier restorations before I started proper documentation.
The first thing that I did was to remove the tape. I think I covered that ordeal pretty well earlier. The crack was approximately one half an inch (1.25 cm) long. Normally I will ream the tobacco chamber first but, I wanted to see to this crack. The tape must have been applied shortly after the shank had cracked and the owner applied a good amount of force when taping the shank back together. They had obviously enjoyed smoking this pipe and tried to the best of their ability to fix her up and get her back into the game. There was very little debris in the crack.
I started cleaning out the airway with cotton swabs dipped in 99% isopropyl alcohol. They were pretty dirty. I then poured about 3 ml of the alcohol into the bowl and held the pipe at an angle that would not dump the alcohol all over the workbench. I retrieved a small nylon shank brush. With the alcohol pooled up in the shank, I started scrubbing with the brush. You could feel the alcohol doing its job as the brush became more and more easy to move back and forth. I dumped the alcohol into a medicine cup knowing the color would be dark, it was. I poured another 3 ml of alcohol in and repeated the airway scrub. This time the alcohol came out more brown than black. I repeated the process again and the alcohol was more golden. Progress. After the third alcohol shank scrub I then was able to use the cotton swabs to finish cleaning out the airway. I figured that all of this alcohol would also be cleaning out and rinsing the crack as I was cleaning the airway. I used a longer bristle brush to work alcohol into the crack and clean it out as well as I could. I used the fine dental pick to see if there was anything else that could be removed. The crack appeared clean.
I started on the tobacco chamber next. I used the PipNet reamer. All the alcohol had softened up the cake nicely and the reaming went without any

issues. I gave everything a final scrape with the SmokingPipes Low Country Reamer. The final step was to use 220 sandpaper wrapped around a wooden dowel to return the chamber to bare briar and inspect for any damage. The interior of the chamber looked good and showed no signs of damage.
I then took the stummel to the sink for its bath. The bath is a serious scrub with undiluted Murphy Wood Cleaner and a medium stiff toothbrush. This

will usually remove the years worth of dirt and accumulated grime. Again the lava on the rim had also been softened by all the alcohol from earlier and it too scrubbed off nicely. The rim did look like it was in need of a topping as the years of use had given it a charred taper rather than a nice sharp edge. After the Murphy’s scrub the stummel was rinsed with warm water and dried with a cotton dish towel.
The stummel returned to the workbench looking clean and finish free. I started to rub down the stummel with cotton make-up removal pads soaked in 99% isopropyl alcohol. There did not appear to be any finish remaining on the briar. I wanted the wood to be completely dry before addressing the crack so, I set it aside and turned my attention to the long churchwarden stem.
Typically I would rub the length of a stem with 0000 steel wool and give it a soak for an hour or so in the Before and After Deoxidizing Solution. This stem was far to long to fit in the jar. Which meant that it would have to be done with Soft Scrub and cotton pads. The thought that made my finger start cramping in anticipation. I decided to make an OxyClean solution in a large ZipLock bag and soak the stem in the solution in an attempt at softening up the oxidized vulcanite. I put about a heaping tablespoon of OxyClean in about ¾ cup of warm water. Yes, I know, exact measurements are helpful. I figured that I’d let it soak for an hour then see how it was progressing.
The OxyClean soak did work at softening the oxidation. I set to work with the make-up removal pads and the Soft Scrub. Many pads later and a couple breaks, not of the stem but breaks for my hands, the stem was looking much better. I oiled the stem thoroughly with mineral oil and mentally prepared myself for the stem airway. Knowing how grimy the shank was I had kind of

been putting off the stem airway cleaning. I did hope that the OxyClean solution would have been like the scrubbing bubbles on the old commercials.
I got a medicine cup filled with about 5 ml of alcohol, a pipette for dropping more alcohol on the length of the pipe cleaner and a new bag of churchwarden bristle pipe cleaners. Long pipe cleaners work well if they do not get a bend in them. This means the you are pushing less than one centimeter at a time into the stem. It was a long and tedious process with many bent stems and additional drops of alcohol but I finally got one pipe cleaner through. I remembered seeing a

video somewhere about clamping the end of a pipe cleaner in a vice while holding the other end of the clamped cleaner and moving the stem up and down along the pipe cleaner. If I recall correctly the guy in the video was talking about polishing the airway. I did this with the churchwarden stem. I added additional alcohol to the top and slid the stem up and down on the clamped pipe cleaner. Several pipe cleaners later the airway was clean. The next job was to micromesh the stem. I started with the 1500 followed by the 1800 micro-mesh pads. These were both wetted with a couple of drops of water. After the 1500 I wiped the stem with Obsidian Oil before proceeding to the 1800. After the 1800 micro-mesh the Obsidian Oil was used again. The remaining pads were used in increasing numbers with Obsidian Oil applied between each pad.
The following day, after the stummel had dried overnight it was time to address that crack. To keep the crack from spreading I used the smallest drill bit I had and my Dremel rotary tool. I drilled a small hole at the end of the crack. This crack was wide enough that I thought J.B. Weld would be a better glue to use that cyanoacrylate (super glue). I then mixed the two part epoxy on a small plastic tray with a toothpick. I then worked the epoxy into the crack flexing it open and closed to allow the glue to penetrate the entire crack. Once i was satisfied with the coverage I used a small clamp to squeeze the sides together. To make sure there was no epoxy on the inside of the airway I used a couple of cotton swabs slightly moistened with acetone to wipe the excess glue from the airway. This was set aside to allow the epoxy to cure.

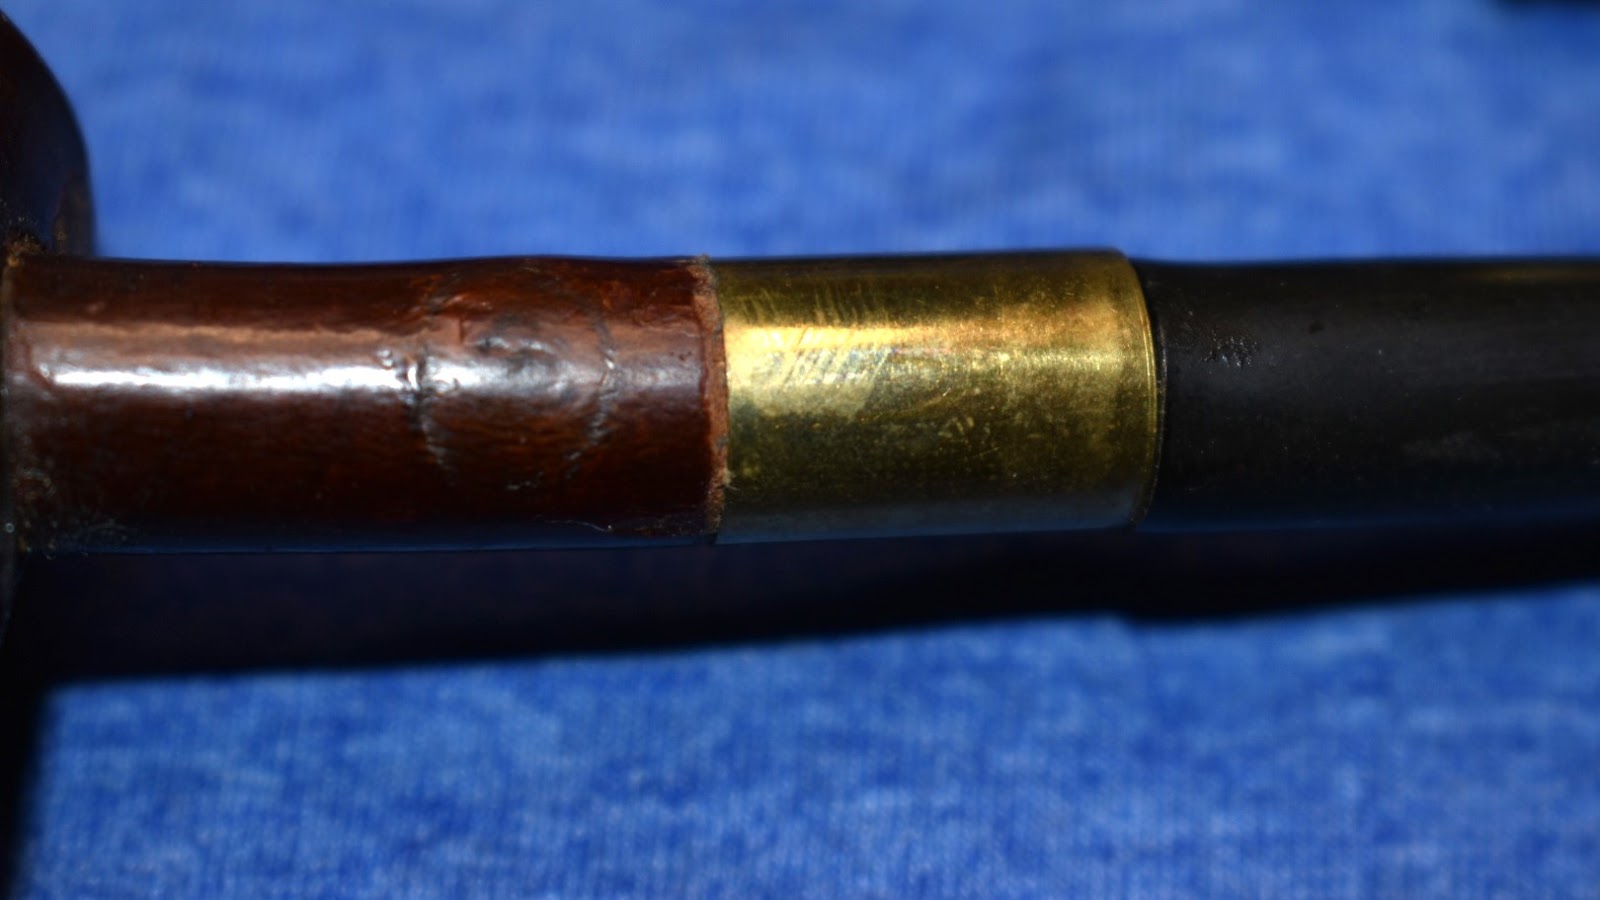
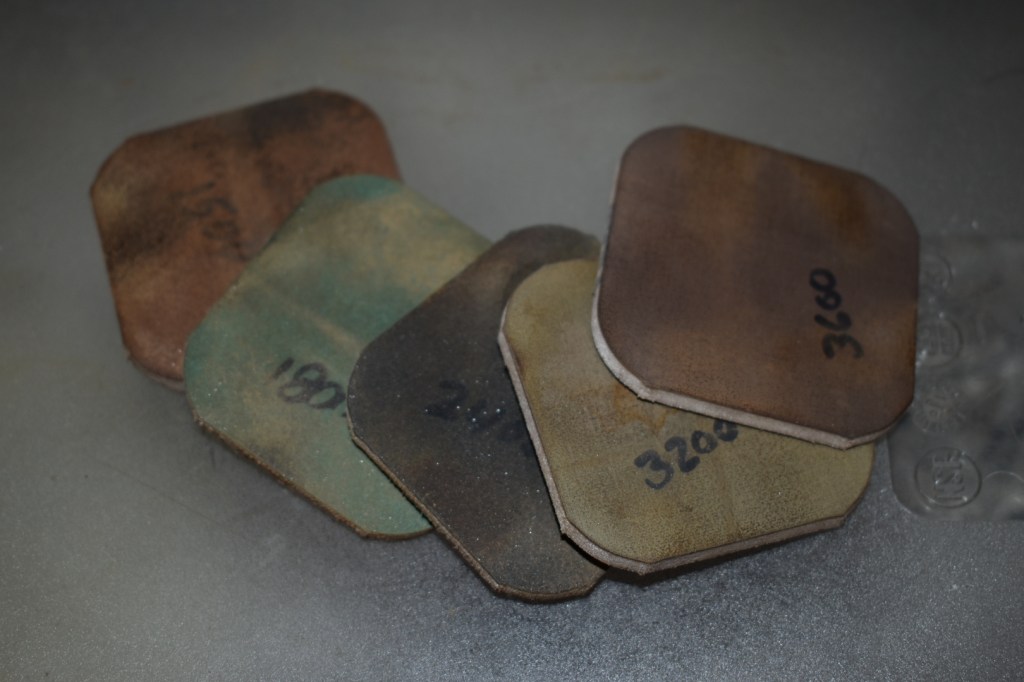
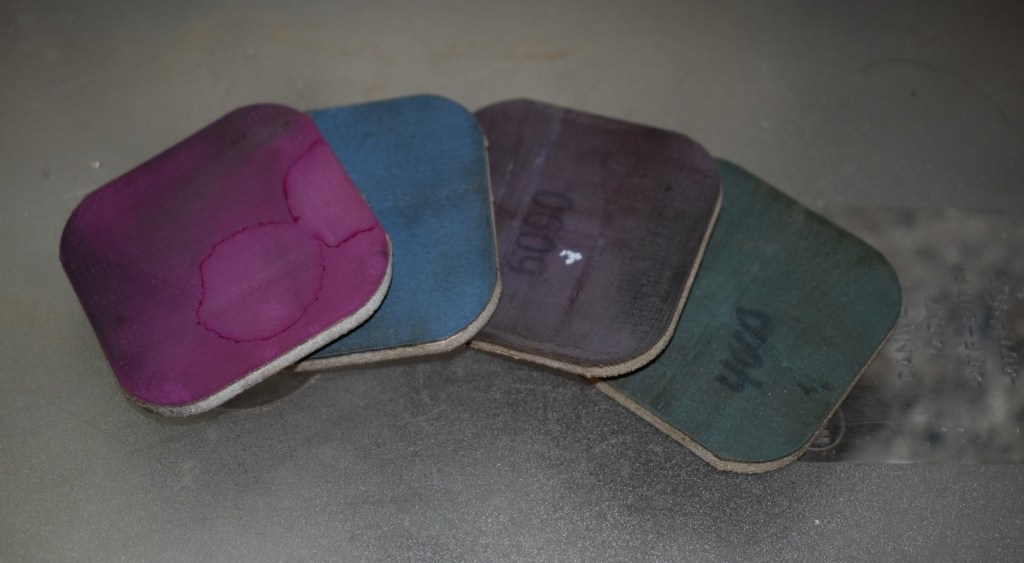
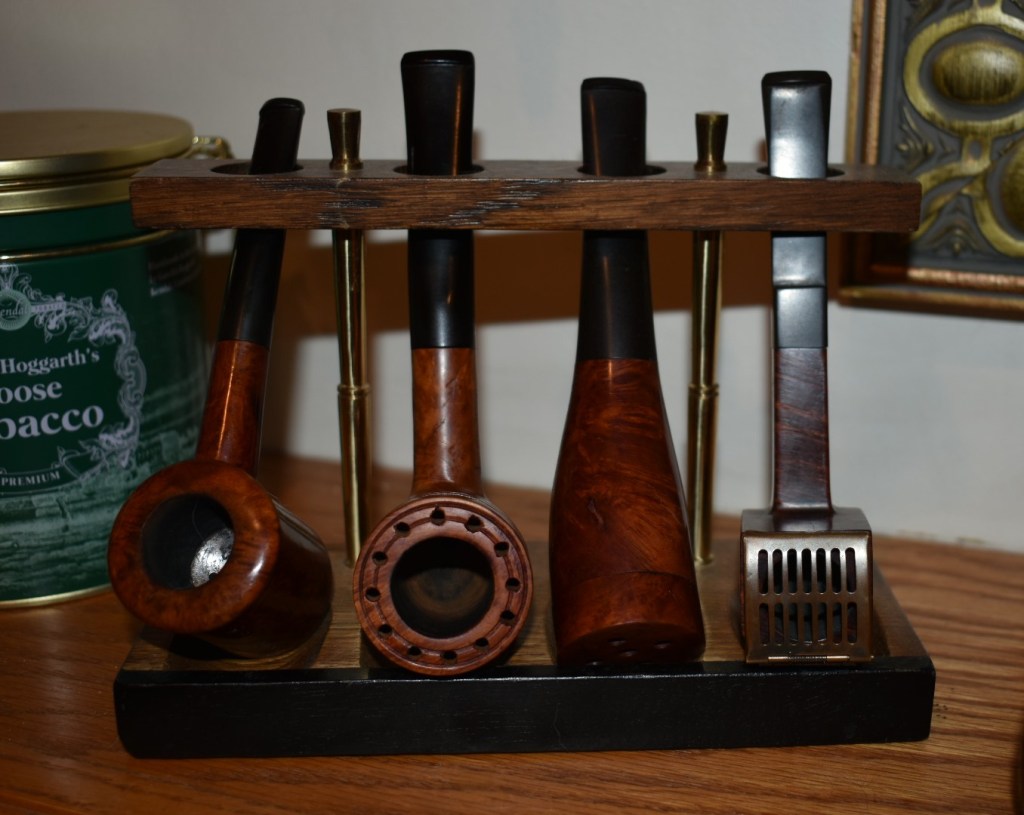
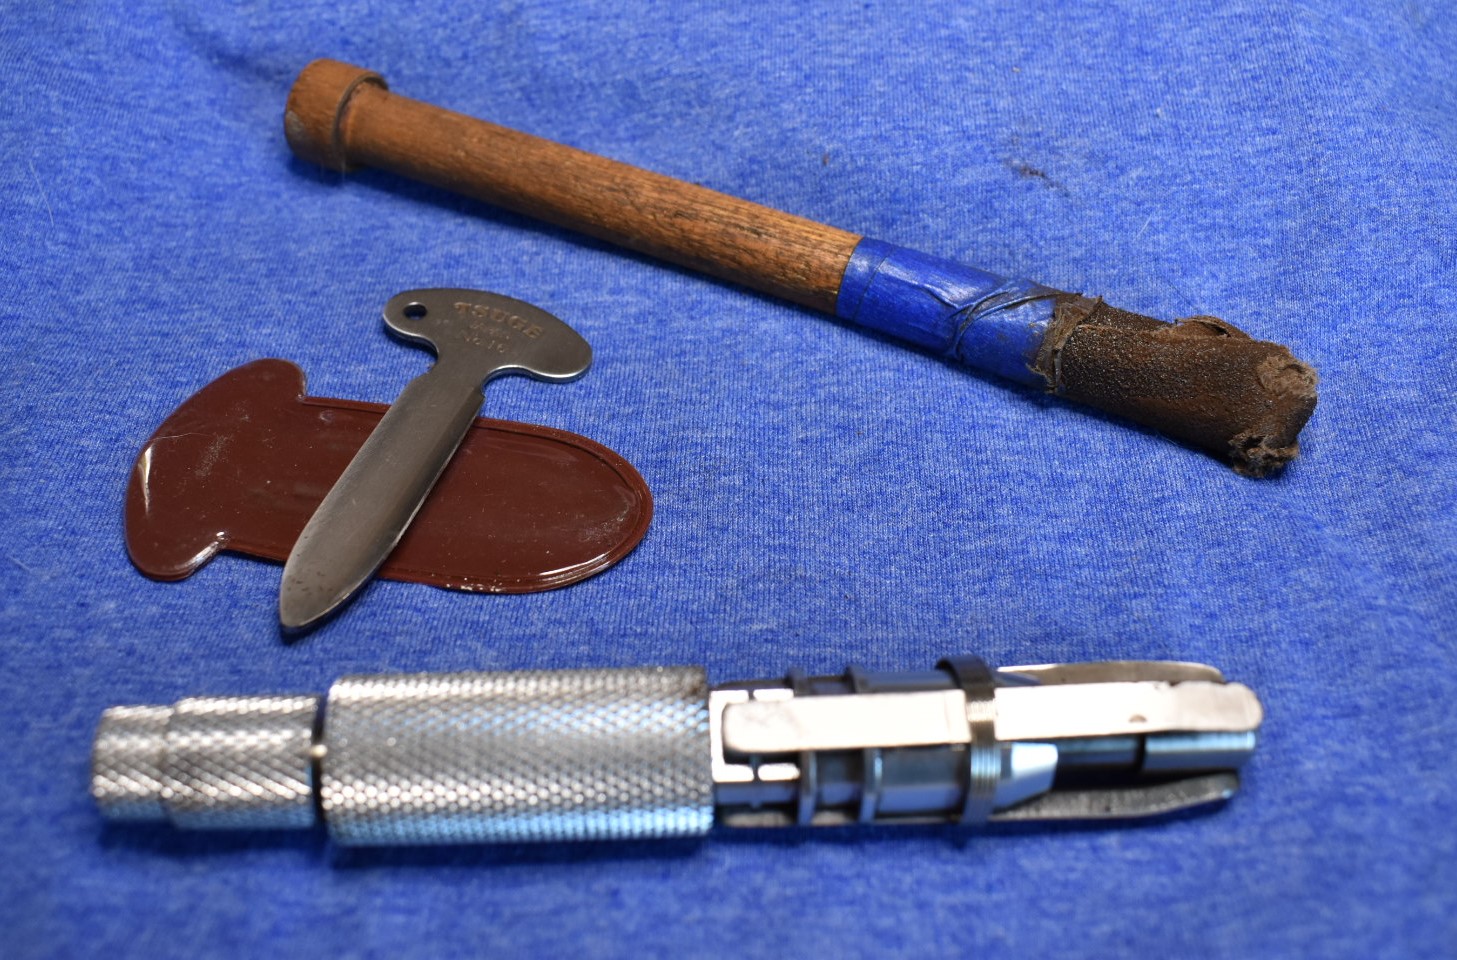
My next task was to cut a brass band. I thought that brass would look slightly better that the aluminum tape band that the pipe had on arrival. You my have noticed from the earlier photo of a few of my band projects they are made from spent cartridge brass. That was the source of my brass bands

prior to me actually buying several different diameters of brass tubing. In the case of this KB&B (?) I used a 44 Remingth Magnum spent cartridge (pun intended) as the donor. A pipe cutter was used to cut a piece that would cover the crack. The cutter is nice as it gives the brass a little bend to the cut end and softens the edge.
I allowed the epoxy to cure overnight before removing the clamp. The instructions say that the glue sets-up after 15 minutes but I wanted to make sure the the stress of the wood would not spread the still soft glue and widen the crack. The next day I removed the clamp and took a look at the glue seam.
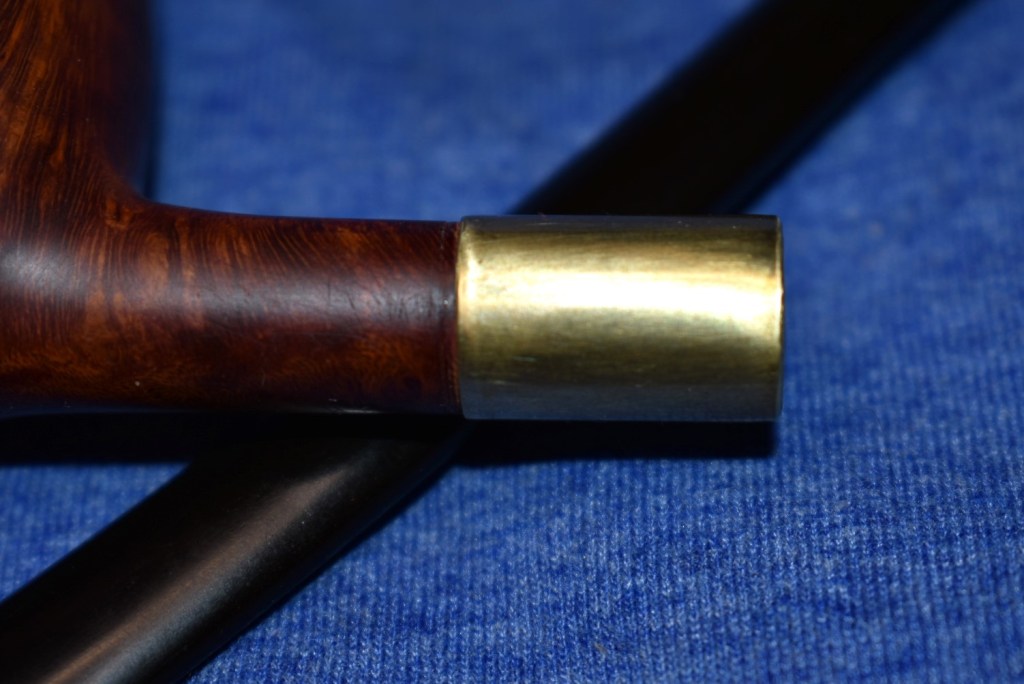
It looked good. I sanded the excess glue on the outside of the stummel then sanded the area that would be under the band for a better fit. The band went on without glue as it was a very tight fit. I used a scrap wood block to press the band the final millimeters and t make it flush with the shank.
With the band seated all that remained was the final micro-meshing of the stummel. This process nearly the same as with the micro-meshing of the stem.. The difference was that rather than using Obsidian Oil between the micro-mesh pads I wipe the stummel with a make-up pad moistened with
99% isopropyl alcohol. After the 12000 micro-mesh pad and alcohol wipe I gave the stummel a liberal coating of Before and After Restoration Balm. The balm was allowed to sit for 30 minutes.
After the wait time I rubbed the remaining Restoration Balm off with an inside-out athletic sock. I did not have a buffer at the time of this restoration. I did have Renaissance Microcrystalline Wax. The wax was applied and allied to dry to 10 minutes. The wax was then hand buffed with a buffing pad. This was repeated two additional times.
I have enjoyed smoking the this old pipe many times. I certainly understand why the Germans call churchwardens “lesepfeife”, which means reading pipe. They do make wonderful reading companions. Other benefits include not getting smoke into your eyes when reading, not having to reach all the way to your face for a pipe and looking wizardly. No, not like Gandalf. In the J.R.R. Tolkien’s Middle-earth books Gandalf did not use a long stemmed pipe. He had a small clay pipe that he tucked into his robe. We can thank Peter Jackson for the image of Gandalf with a long stem pipe. I don’t think I will ever be certain as to the pedigree of this churchwarden. KB&B or not? I don’t think it matters one bit to the pipe nor the tobacco and guess not me either. Thank you for reading the rambling of this old pipe lover. If you have any insights to the origin of this churchwarden please feel free to leave a comment. If you like this sort of thing please click the “like” and or “subscribe” buttons.
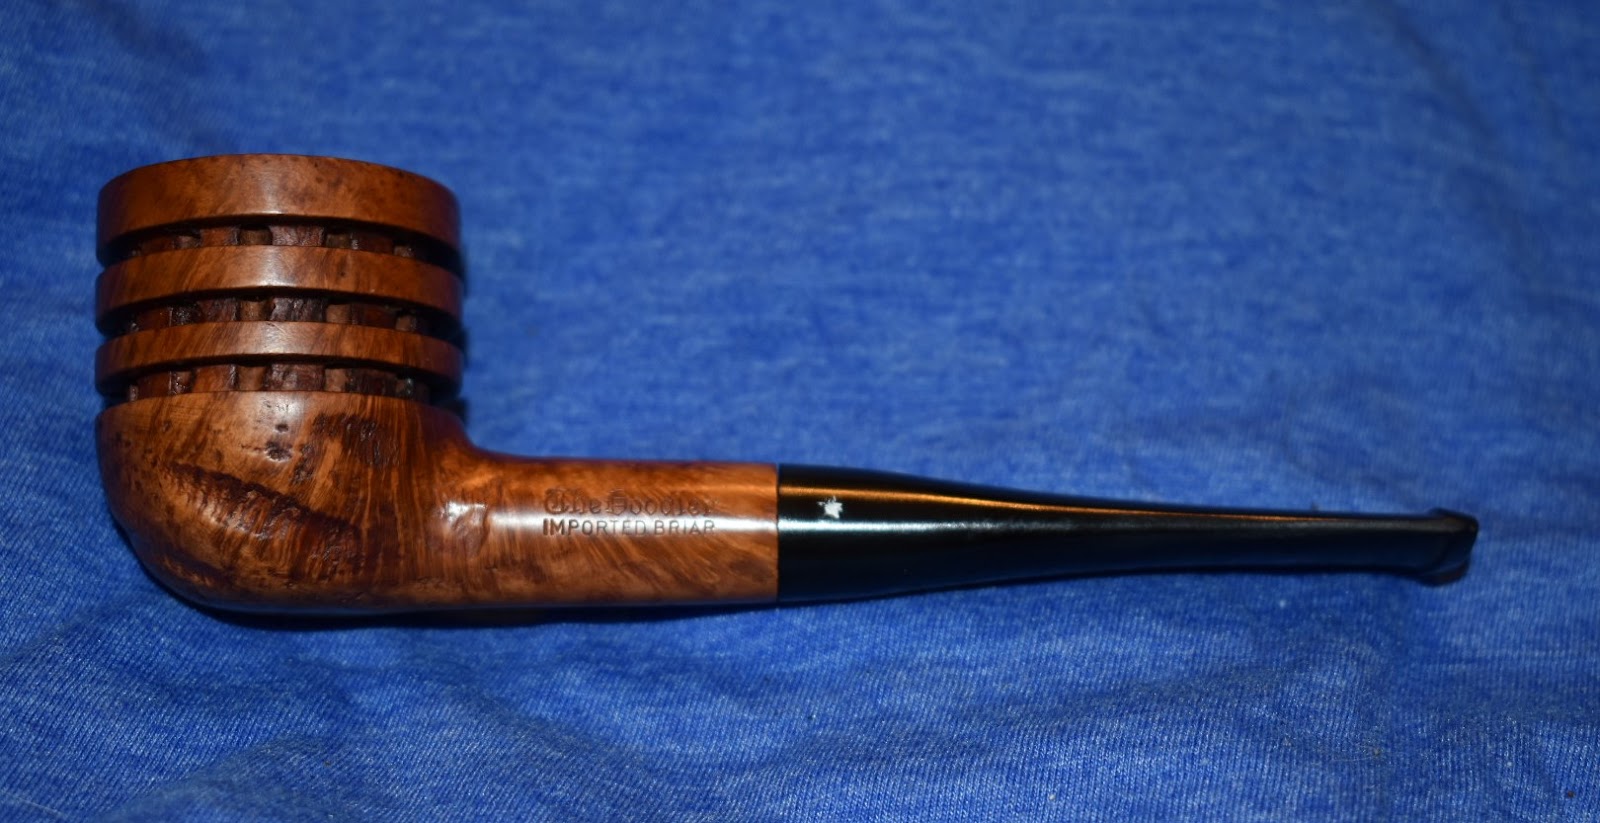
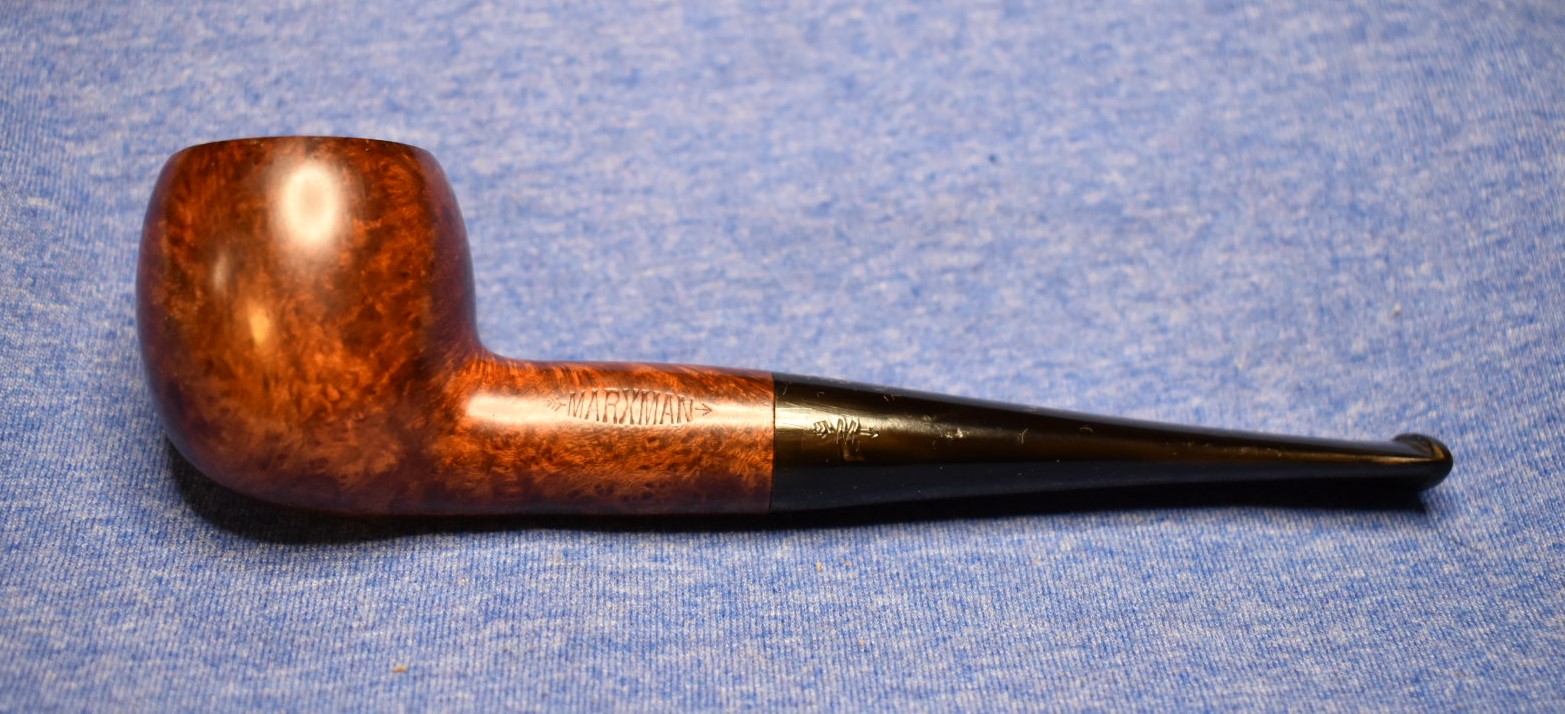
Below are photos of the finished KB&B (?) Churchwarden.


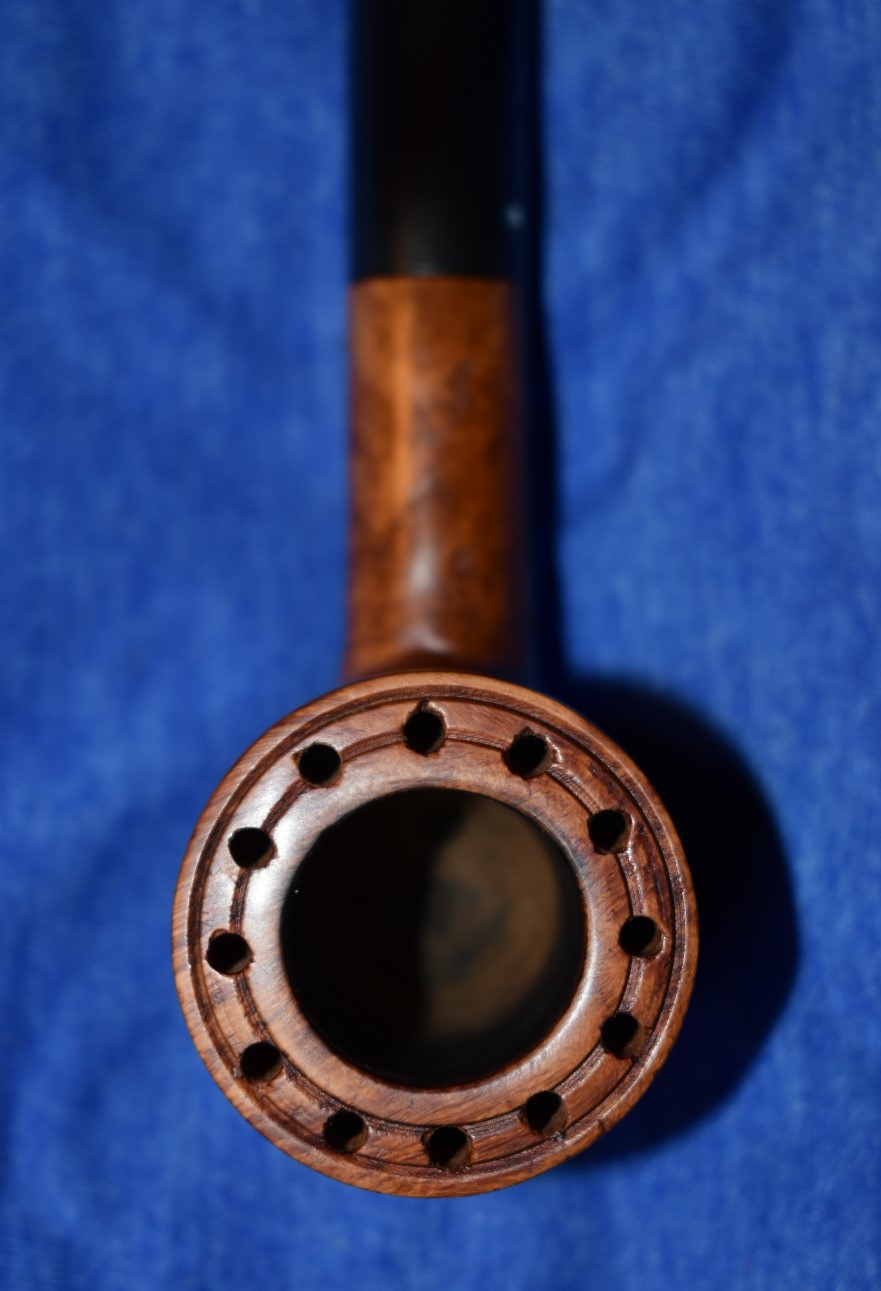


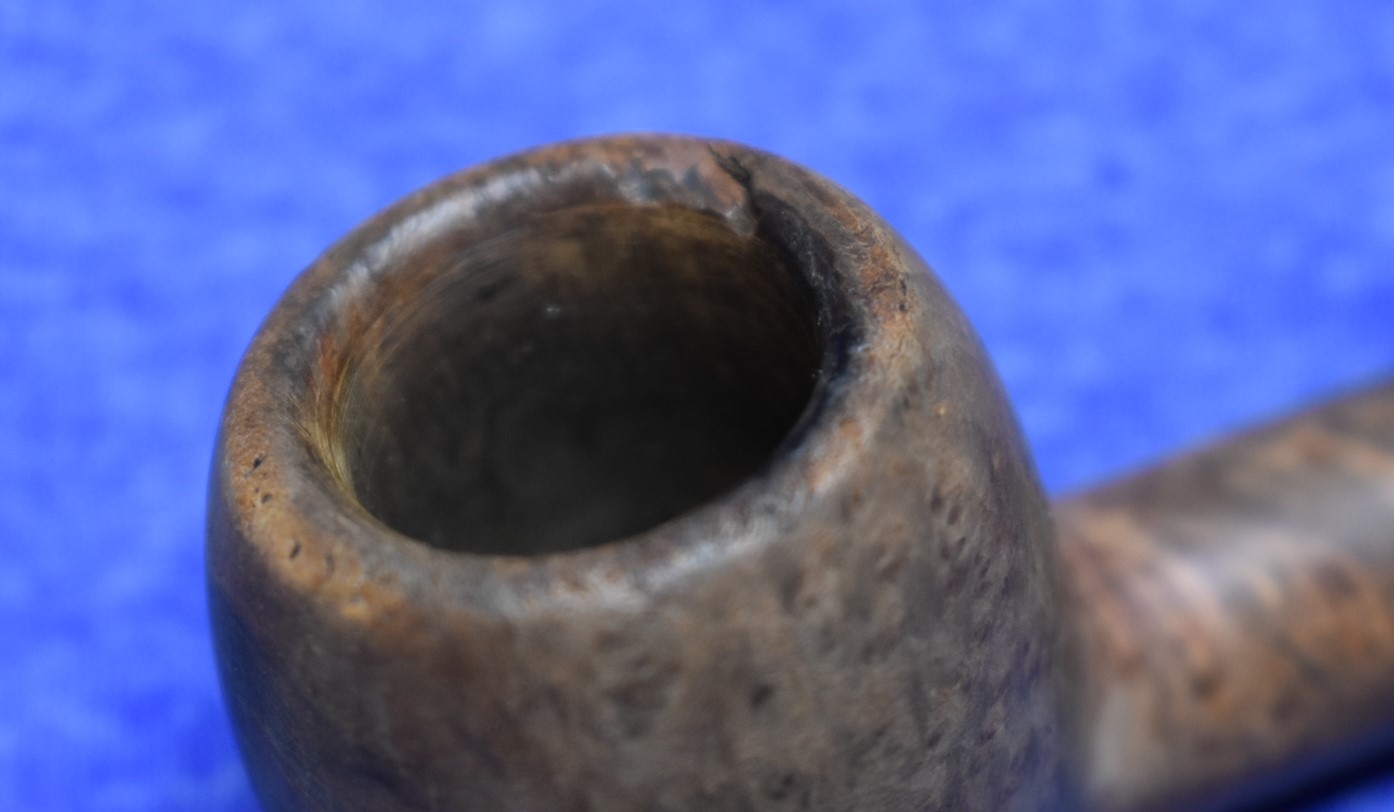


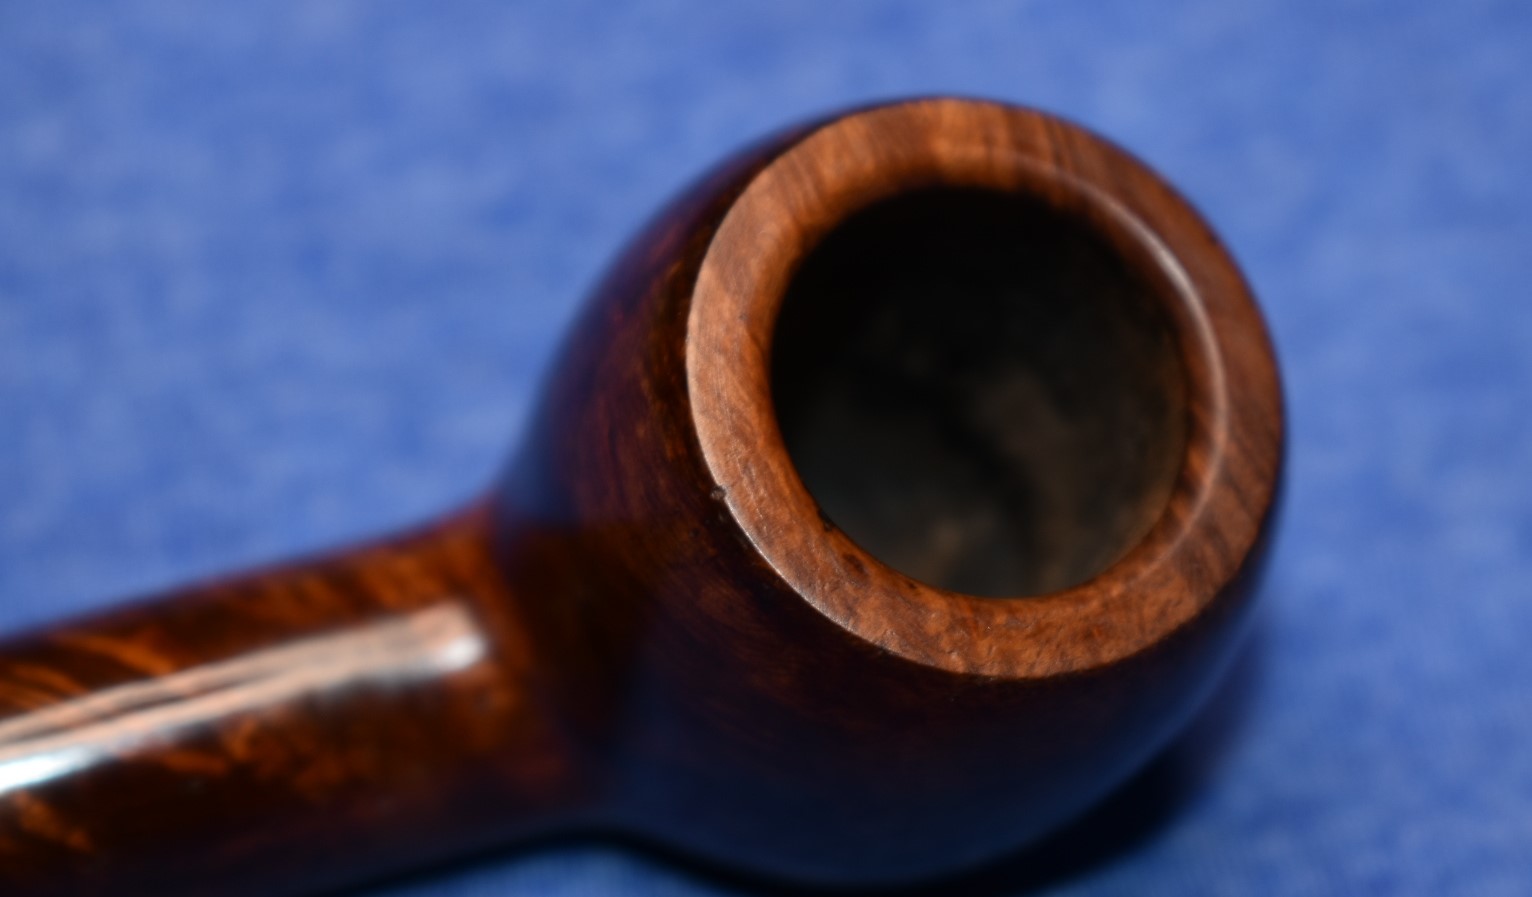


 The following two photos show the hole after the pipe was cleaned and reamed.


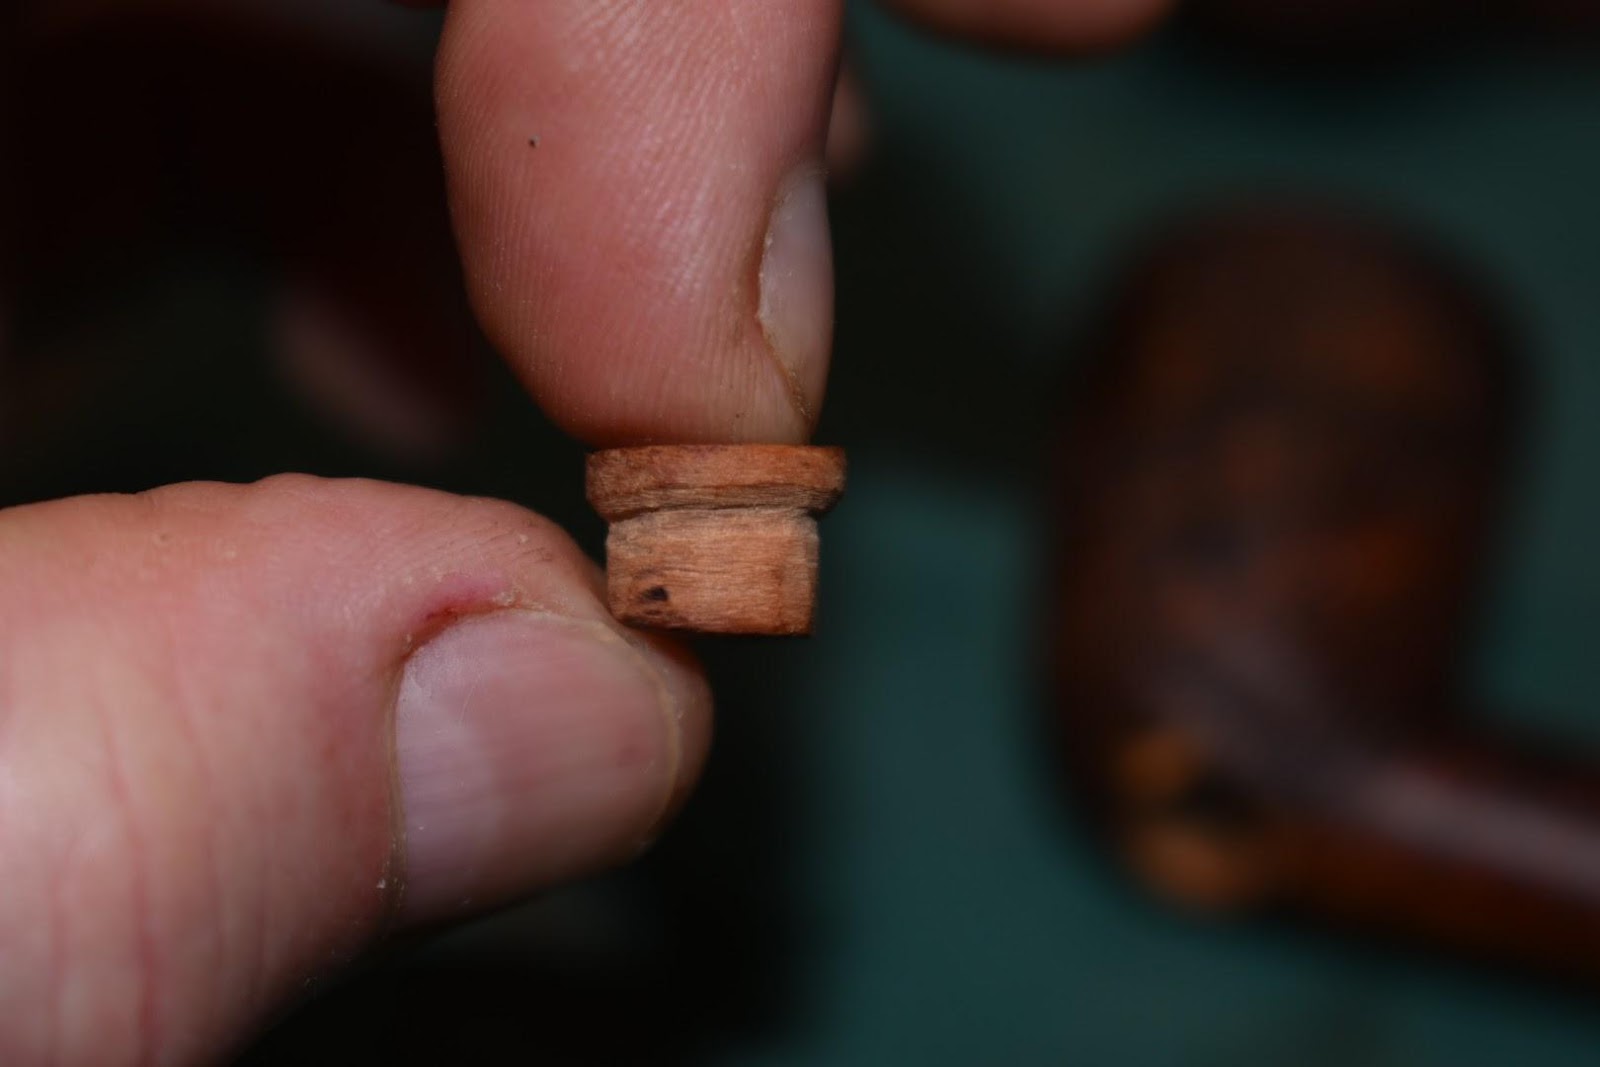

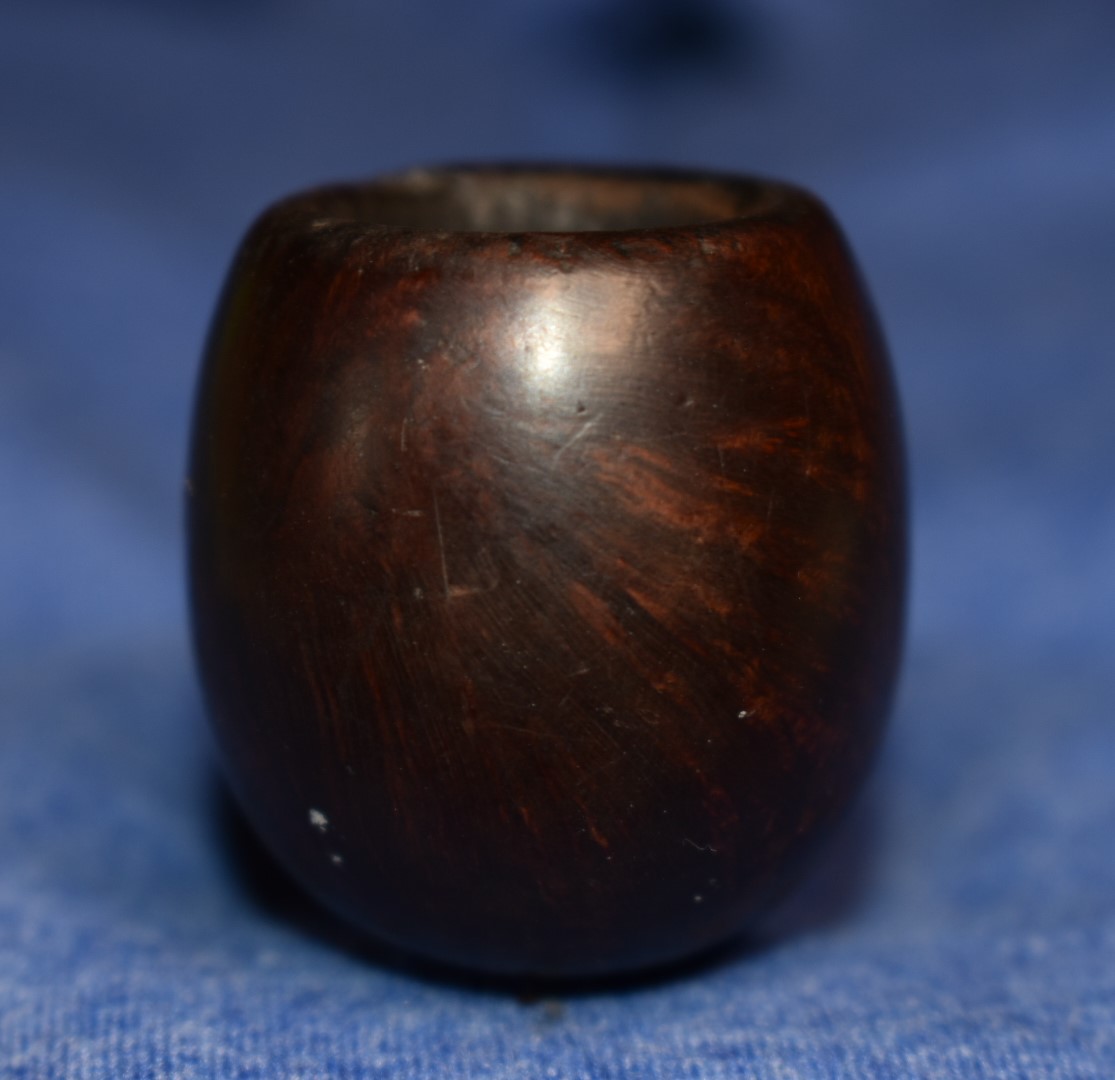
 It turned out that the plug was not quite thick enough to completely fill the hole on the bottom of the pipe. This led me to do some creative fill work.


