I realize it is Christmas season and Saint Patrick’s Day is a few months away but this Peterson Shamrock was demanding some attention. As you may have surmised, I am a Peterson Pipe lover, also known as a Pete Geek and thus rarely turn away a poor Irish briar in need of attention. This pipe came to me as part of an estate lot from Canada last September. I failed to record or remember precisely from where. The stamps are clear and well defined reading, SHAMROCK on the left shank and “A PETERSON (over) PROCUCT” over MADE IN IRELAND next to a 5 on the right shank. The nickel band has the faux hallmarks of a shamrock, an Irish wolfhound and a round tower. Below are some photographs of the pipe taken prior to any work done.
The plan for the restoration of the Shamrock looked to be straightforward and included the usual cleaning, refinishing and stem oxidation removal. There were a couple of fills of both the briar and the stem but that too would be typical for a used pipe of this age.
Background
I have said it before will likely say it again, I am a slacker, and as such, I will use my own quote to provide the dear reader with additional information regarding Peterson pipes:
“I have written about the restorations of several Peterson pipes over the past 13 months. I will include here good sources of Peterson history for those who would like additional information:
For a great history Mark Irwin and Gary Marlburg’s book is a must read for a Pete Geek.
The definitive source of “all things Peterson” is The Peterson Pipe written by Mark Irwin and Gary Malmberg. According to Irwin and Malmberg,
“Shamrock (c.1941-2009) Originally stamped SHAMROCK with no brand name, an inexpensive line first described in George Yale (New York) mail order booklet in 1941, imported by Roger Imports. The line was actively promoted beginning in ‘45, aggressively promoted in US by Rogers from early ‘50s when they registered the Shamrock logo with US Patent Office, claiming propriety since ‘38. Over the years offered with P-lip or fishtail mouthpiece, with or without nickel band, with or without shamrock logo on band, with or without S stamped in white or later in gold on mouthpiece. Appearing in 2008 as unstained smooth and rustic, fishtail mouthpiece with gold impressed P on stem. COMS of MADE IN over IRELAND (c. 1945-c.1965), MADE IN IRELAND forming a circle (c.1945-c. 1965), “A PETERSON”S PRODUCT” over MADE IN IRELAND (c. 1945-c. 1965), MADE IN THE over REPUBLIC OVER OF IRELAND (c. 1948-98) or “A PETERSON”S PRODUCT over MADE IN THE REPUBLIC OF IRELAND (c. 1948-98). Model is always difficult or impossible to date. (Irwin, Mark and Malmberg, Gary (2018). The Peterson Pipe The Story of Kapp & Peterson, First edition, second printing 2021. Briar Books Press, Canada. p. 312).
The dates of 1945-1965 can be slightly narrowed with the faux hallmarked nickel band. Again I turn to The Peterson Pipe book, “The stamp was used until about 1963, when hand soldered nickel bands and ferrules were replaced by pressed ferrules and premade bands.” (Irwin, Mark and Malmberg, Gary (2018). The Peterson Pipe The Story of Kapp & Peterson, First edition, second printing 2021. Briar Books Press, Canada. p. 302). In keeping with the author’s terms, this may or may not reduce the production years by 2 to 1945-1963.
The Restoration
The Shamrock restoration began with a clean denim place setting. The stem being the part in most need of attention was the starting point.
I rubbed the stem with 0000 steel wool to remove the outermost oxidation.
Then cleaned the airway. It was surprisingly clean.
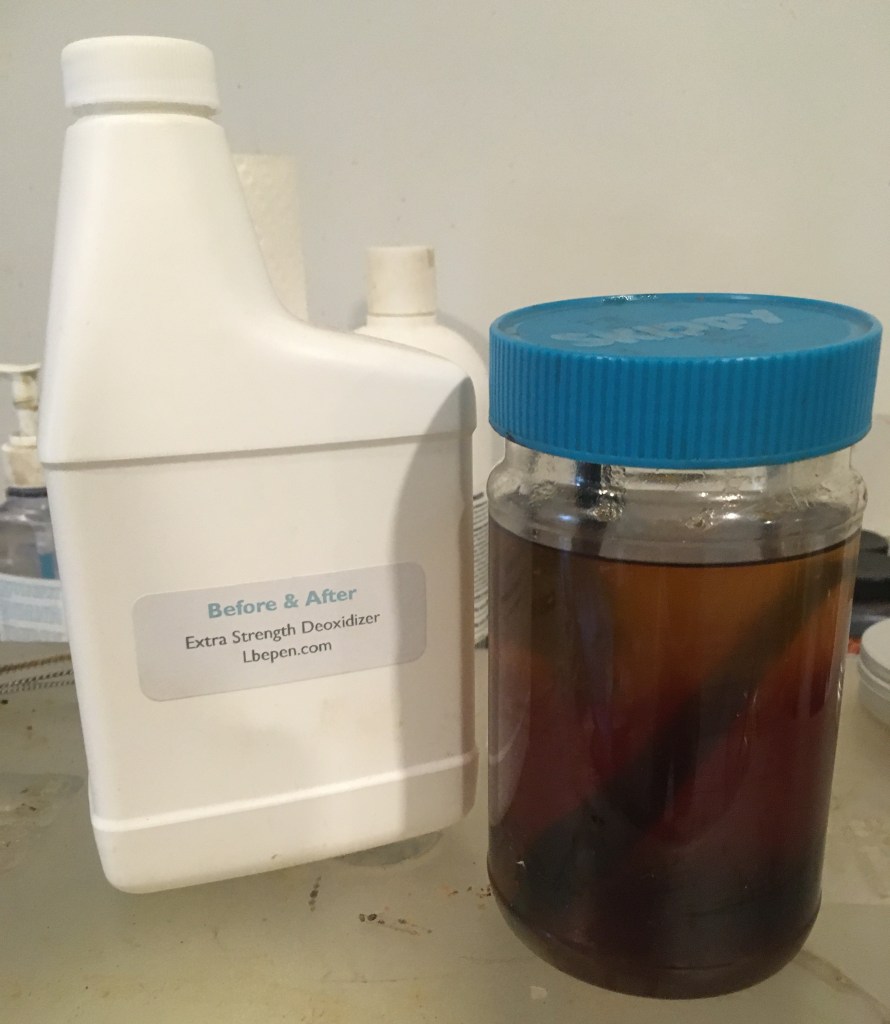
Next, I inserted a pipe cleaner into the stem to act as a hanger for its time in the Before and After Extra Strength Deoxidizer or deox as I like to call it.
Suspending the stem in the deox enables the solution better access to every bit of the surface.
I had all day plans so the stem sat in the solution for about 8 hours until I returned to working on it. The stem was removed from deox and allowed to drip excess solution back into the jar.
I like wiping stems with a rough cotton rag after the deox bath.
The coarse material absorbs the remaining solution and helps to remove some of the oxidized vulcanite as well.
Back at the workbench the stem was given a liberal coating of mineral oil and allowed to sit for 15 minutes.
I wrapped the shank with painters tape in preparation for the sanding that was in the stem’s future. The stem was scrubbed with Soft Scrub cleanser applied to make-up pads.
I then turned my attention to reaming the tobacco chamber.
The #1 blades of the PiNet did most of the work with the reaming.
The General and the Smokingpipes Low Country reamer were used for some final scraping.
The chamber was sanded with 320 sandpaper wrapped around a wood dowel. The briar of the chamber looked good and showed no signs of heat damage.
The cleaning out of the airway of the shank was next. This was done with several cotton swabs and bristle pipe cleaners dipped in 95% ethyl alcohol. There was also some drilling with the Kleen-Reem shank drill, scraping with a dental scraper and scrubbing with a nylon shank brush.
The lava on the rim was softened with saliva and scraped with a sharp pocket knife.
The rim showed a bit of a charring around the inside rim edges.
The stummel was taken to the sink for a scrubbing with undiluted Murphy Oil Soap and a nylon scrub brush. The soap was rinsed with warm water and the stummel dried with a cotton hand towel.
The scrubbed stummel looked much better without its accumulated dirt. The alcohol on a make-up pad wiping produced very little color indicating that this stummel was not stained.
Curious to see how well the band would polish-up, I wrapped the shank with masking tape and took the stummel to the buffer. There I buffed the band with rogue compound. The results can be seen below.
The masking tape on the shank was removed and new tape was applied to the band. I also taped over the stamps to protect them from sanding.
There were two fills which needed to be done prior to sanding. The first was on top of the shank.
The second was on the bottom adjacent to the band.
I used brown cyanoacrylate (CA, super glue) and briar dust for the fills. I first applied a small drop of CA to the pit then pressed briar dust into the CA wetted pit. The fills were then filed smooth.
A second application of CA was done on each fill and left to dry on its own accord.
Once dried these were also filed smooth.
There was one dent in the stem that received filling very similar to the above briar fills except this was done with black CA. The photo below attempts to show the dent but the focus is poor.
The stem was sanded with a series of sanding sponges from 400-3500 grit. Between each sponge I rubbed the stem with mineral oil and wiped it with a paper towel.
The stem was then worked with a series of micro-mesh pads from 4000-12000. Between each pad I rubbed the stem with Obsidian Oil and wiped it with a paper towel.
The briar was coated in Before and After Restoration Balm and allowed to sit for 20 minutes.
The Restoration Balm was wiped from the pipe with an inside out athletic sock.
The pipe was then taken to the buffer for a few coats of carnauba wax.
The final step was a hand buffing with a microfiber polishing cloth to raise the shine.
Overall this Peterson Peterson Shamrock 5 Billiard turned out very nicely. The natural briar grain is both straight on the sides and flamed in the front. The band polished up better than I thought possible. The vulcanite lost the oxidation and revealed a lovely high gloss black that accentuates the glow of the briar and the shine of the nickel band. The dimensions of the Peterson Peterson Shamrock 5 Billiard are:
Length: 5.89 in./ 149.61 mm.
Weight: 1.31 oz./ 37.14 g.
Bowl Height: 1.81 in./ 45.97 mm.
Chamber Depth: 1.52 in./ 38.61 mm.
Chamber Diameter: 0.69 in./ 17.53 mm.
Outside Diameter: 1.35 in./ 34.29 mm.
I do hope that you have found something here useful to your own pipe care, maintenance or restorations. If you like this sort of thing, please click the like and subscribe buttons. Thank you for reading the ramblings of an old pipe lover.
Loading…
Below are some photos of the completed Peterson Shamrock 5 Billiard.
I probably do not need to tell you that with a nickname like Nebraska Pete Geek, I have a love for Peterson pipes. I also have a love affair with the Dublin shape in pipes. I know, I’ve said in the past that apples are my favorite but in checking my top 3 list of favorite shapes, I noticed that there are 5 on the list. Hmm, math was never my thing. Anyway, this dainty darling caught my eye from the auction block as it had a definite Dublin shape but a shaper number (417) that I was unfamiliar with. Winning the auction was surprisingly easy as I was the only person to bid. A few days later the demure Dublin Damselle arrived here in the wilds of southeast Nebraska. The stamps on the shank are crisp and clear except for the “1” in “417” and read as follows: PETERSON’S over DE LUXE over FOR SHANNON AIRPORT on the left shank. MADE IN THE over REPUBLIC over OF IRELAND and 417 on the right shank. The stem had a stamped Peterson’s script P with the paint completely worn away. Below are some photographs taken of the pipe prior to any work done.
Looking at that rim made me want to cry. The charing was going to be a tough one to remedy. Then there is that oh so cute bone tenon extension (chimney in Pete Geek speak). It too would need some restorative love. The stem was not in bad shape, old and pitted but not heavily oxidized. The briar looked wonderful with not a fill to be seen. This looked to be an interesting restoration.
Background
I have written about the restorations of several Peterson pipes over the past 13 months. I will include here good sources of Peterson history for those who would like additional information:
For a great history Mark Irwin and Gary Marlburg’s book is a must read for a Pete Geek.
This portion of the blog is only regarding the history of Peterson Dublins and this Peterson 417 in particular. I began with the research of Dublin shapes by Peterson with a wonderful history in Mark Irwin’s Peterson Pipe Notes #172 titled, “A Catalog of Peterson’s Dublin Shapes, 1896–2020”. I’ll not go into the details that Mark does due to a general lack of both knowledge and writing ability. Combined with the fact that I am a Generation -X slacker, I’ll just give you the link and Mark all the credit for this great history lesson. (https://petersonpipenotes.org/tag/peterson-dublin-shapes/).
I will pick up the story of the 417 shape from within Mark’s teatease,
The IFS-Era added two new straight dublins to the 120, 121, and 122: the 120F (“Flat” or oval shank) and slender 417. The System straights seem to have disappeared by this time. The 120 “Flat” is a natural thought in Peterson’s design language, which always comes back to comfort and practicality, and I can imagine someone in bowl-turning or even a customer thinking how great it would be to set his straight dublin down in order to emphasize a point over a pint or a cuppa.
The first illustration of the 120F seems to be in the1937 “A Chat with the Smoker” pipe-box brochure issued not long after Peterson opened its London factory on White Lion Street. (It may well have been in production before then.) Examples of the shape appear as late as the 1965 catalog and may have been made for several years beyond that.
A 417 Donegal Rocky Sterling Band
The 417, a small-bowled Dublin with a long shank, first appeared in the 1937 catalog, but with two shape numbers: 417 for the Kapet and DeLuxe and 2022 for the “K” and 1st quality. The 2022 number would be dropped by 1945. Like the 120F, the last sighting of the 417 was in the 1965 catalog. The bowl seems bit more forward in its cant than the 120F.” (https://petersonpipenotes.org/tag/peterson-dublin-shapes/)
In the introduction of this blog I referred to this 417 as both a “dainty darling” and a “demure Dublin damselle”. Why?, you ask. To illustrate the size difference of the 417 and the more standard 120, I compiled the below with data From Mark Irwin’s PPN 172. The differences, though slight, are definite. Our darling dainty demure Dublin damselle is indeed a bit longer while a slighter in overall build than her more robust siblings.
The date two of production for this pipe is allowed by two particular pieces of information; the FOR SHANNON AIRPORT stamp and the bone chimney. According to Irwin in the Peterson Pipe,
““FOR SHANNON AIRPORT” (c.1947-c. 1983) Stamp on shank of pipes in several grades, indicates pipe was designated to be sold by duty free shops at Shannon Airport.” (Irwin, Mark and Malmberg, Gary (2018). The Peterson Pipe The Story of Kapp & Peterson, First edition, second printing 2021. Briar Books Press, Canada. p. 299)
This gives a fairly definitive time period for the production of this pipe. These dates can be further narrowed by the existence of the bone chimney or tenon extension. Again referring to The Peterson Pipe, “Vintage De Luxe or Premier Systems, those produced before about 1960, featured a bone extension, which will be white on an unsmoked pipe and gunmetal or dark brown on a smoked one. Nearly all of these seen on the estate market will have fused to their vulcanite stems, and many will have splits or cracks in them.” (p. 259). This fine tuning of production dates places this pipe as a product of the Dublin factory between 1947-1960.
The Restoration
First off, let me thank Canada for the gift of cold air. Yesterday’s cold front dropped the temperature 30 degrees Fahrenheit and yes, it came with 24 mile per hour winds (gusts over 40mph). This did drive me into the basement for cover and allowed me to work on this lovely old pipe, thus the thank you. I began with a clean denim piece to protect the work surface.
The reaming tools came out to play. These included the PipNet, SmokingpipesLow Country reamer, General triangular scraper (with the tip ground round) and a wood dowel wrapped in 220 sandpaper.
Reaming round one went to the PipNet with the #1 blades.
Round two, PipNet with #2 blades.
The tobacco chamber was drilled with a more conical drill, as appropriate for a Dublin. The reaming was finished with the Klee-Reem tool, for round three. The other scrapers wrapped up the scraping with the sandpaper finishing up.
I used the airway drill from the Kleen-Reem to clear the airway.
The bowl was wiped with a paper towel and scrubbed with a few cotton swabs dipped in 95% ethyl alcohol, shown below. No evidence of heat damage was observed within the bowl.
The shank cleaning went quickly after the Klee-Reem and only required a few folded bristle pipe cleaners and cotton swabs dipped in the ethyl alcohol.
The rim received a coating of Vaseline petroleum jelly and was scraped with a sharp pocket knife to remove both lava and charred briar.
After scraping the rim looked better but not nearly acceptable.
Topping the rim was required. I did this with 320 sandpaper laid flat on the countertop. The 320 paper was followed by a sheet of 400.
The topped rim can be seen in the photo below. It was getting more acceptable.
To sand and give the inner rim a bevel I used a 2 inch polyvinyl chloride (PVC) pipe cap wrapped with 320 sandpaper. The photo below shows two of these caps, one with sandpaper the other without.
The inner rin was sanded with the sandpaper wrapped cap, if you were wondering. Below is the resultant bevel.
There remained some charring on the outside rim edge. I did not want to remove too much material during the topping and risk changing the overall shape of the pipe. I returned to the sharp pocket knife and tried to scrape the edge and the side of the stummel to avoid a curved rim.
By scraping along the side, I was able to retain the sharp edge of the rim while still removing some of the char.
Next the stummel was taken to the sink for a scrub. This was done with undiluted Murphy Oil soap and a nylon scrub brush. The soap was rinsed with warm water and the stummel dried with a cotton hand towel.
Back at the workbench the stummel was wiped with a make-up pad dipped in 95% ethyl alcohol. Very little color came off the pipe and there did not appear to be any finish remaining on the briar.
The stamps on the shank and the logo were taped with painters tape to protect them from sanding. The pipe was then sanded with a series of sanding sponges from 320-3500 grit. Between each sponge the stummel was wiped with a make-up pad wetted with ethyl alcohol. The stem was rubbed with mineral oil, applied by fingertip and wiped with a paper towel.
The pipe was then worked with micro-mesh pads 4000-12000. The stummel and stem wiping was done as with the sanding sponges except that Obsidian Oil was used in place of mineral oil.
I cleaned the stem logo with a cotton swab dipped in 95% ethyl alcohol to clear out debris and oil from the logo. I then painted the logo with a water based white acrylic paint. This paint is intended for miniatures used in gaming. The paint dries quickly and I scraped the excess from the logo using a plastic card. The logo surface was then lightly worked with the 8000 and 12000 micro-mesh pads.
The stummel received a coating of Before and After Restoration Balm and was allowed to sit for 20 minutes.
After the 20 minute timer beeped, I wiped the balm away with an inside out athletic sock. ANd finally got a look at the glory of the briar.
Next, I turned my attention to the bone tenon extension or as the Peterson factory folks call it, the chimney. This 65+ year old piece of bone had the tip and a bit of the side chipped. It also had a slight bulge at the tip back about 4 mm. The photos don’t show either of these pre-existing conditions very well. I decided to file it flat to remove the chipped area.
I used a small flat file to round the entire chimney. I then filed the tip down a bit removing about 1 mm of material. Instead of removing the entire chipped part and shortening the chimney, I opted to build up the tip using brown Cyanoacrylate (CA, super glue). The glue seemed to penetrate into the pores of the bone. I thought this would be good for strengthening the entire piece. The CA was spritzed with a drying accelerator. Then filed. The draft hole was opened up with a diamond needle file and the edges of the tip were slightly rounded with the flat file. The below two photos show the finished shape of the chimney.
I was still not happy with the dark spots on the rim of the stummel. I thought that maybe a treatment of the spots with a saturated oxalic acid solution would effectively bleach the dark spots. I have a jar of saturated oxalic acid which I had mixed several months ago.
The solution was applied with a cotton swab to the darkened areas. It dried quickly so I continued to apply additional solution.
More solution was added as the already applied liquid dried. I did this several times over a span of 15 minutes. I then allowed the oxalic acid to sit for 30 minutes.
After 30 minutes I took the stummel to the sink and rinsed the briar with liberal amounts of water. I dabbed a bit of Dawn dish soap on my finger and worked that around the acid wetted areas also. My thought here was that the basic nature of soap would neutralize any remaining acid. The soap was also thoroughly rinsed. The photo below shows the dried rim. Much improved over the initial appearance.
The pipe was taken to the buffer where it received several coats of carnauba wax. The final step was a hand buffing with a microfiber polishing cloth.
The Peterson De Luxe 417 Straight Dublin For Shannon Airport looks amazingly better than it did originally. I was finally happy with how the rim repair went. The oxalic acid treatment allowed me to remove nearly all signs of the charring without severely changing the shape of this wonderful old pipe. The briar grain of a Peterson De Luxe is on full display with this pipe. Beautiful bird’s eyes on both sides and lovely cross grain on the front and back. Though the cross grain is not quite centered it remains attractive. The stem was not severely oxidized leading me to believe this pipe was stored in a drawer and out of the light for a long time. The vulcanite polished up very well and the gloss black accentuates the briar grain. The dimensions of the Peterson De Luxe 417 Straight Dublin For Shannon Airport are:
Length: 6.45 in./ 163.83 mm.
Weight: 1.11 oz./ 31.47 g.
Bowl Height: 1.81 in./ 45.97 mm.
Chamber Depth: 1.54 in./ 39.12 mm.
Chamber Diameter: 0.72 in./ 18.29 mm.
Outside Diameter: 1.28 in./ 32.51 mm.
I do hope that you have found something here useful to your own pipe care, maintenance or restorations. If you like this sort of thing, please click the like and subscribe buttons. Thank you for reading the ramblings of an old pipe lover.
Loading…
Below are some photos of the completed Peterson De Luxe 417 Straight Dublin For Shannon Airport.
This blog was originally posted on 12/01/2024 on Mark Irwin’s Peterson Pipe Notes 432. It is reposted here as part of my ongoing saga. It appears here with permission of the author, me. Also, this pipe is not available for sale.
There are a few searches that I run on eBay frequently and Peterson Dunmore pipes are one of them. When I first saw this rusticated rascal I thought about my budget and decided to give it a go. The recent prices for estate pipes have been volatile to say the least. I’ve watched auctions increase in price significantly over the past several years, sometimes going for far more than what I think something is worth and other times nowhere near the item’s value, in my mind. This one would have been a hard pass 3 years ago but with inflation it fell within acceptable limits. Besides, it was gorgeous. The auction was won and after a Midwest adventure from Deerfield, Illinois to the wilds of southeast Nebraska it was home. The pipe came with what I thought was the original box and ephemera. At least that what they looked like in the eBay listing:
The box looked correct in style for the early 1970s. Upon examination I saw the following:
Well, this sure as heck is not a 313 and it certainly is not smooth. I messaged the seller explaining my disappointment. They sounded sincere in their explanation that the pipe arrived to them in this box and that they did not intend to mislead. I call this a learning moment for myself and was reminded to avoid getting caught up in emotion. I nevertheless provided very objective and honest feedback on eBay regarding the seller’s inaccurate item description. Live and learn, I guess.
Below are some photos of the pipe prior to doing any work on it. I also photographed the pamphlet and pipe sock and include those below as well.
Background
On June 25, 2024 I posted a blog about the restoration of a Peterson Dunmore 606. Being a proud Generation X member, also known as a total slacker, I will include the background from that post in its near entirety (Original post: Peterson Dunmore 606 Pot).
“As much as I love the history of the Kapp and Peterson company and Peterson pipes, I will not get into that other than give you resources to read the history for yourself. I will delve into the Dunmore, or Dunmoor line of pipes at greater depth.
For a great history Mark Irwin and Gary Marlburg’s book is a must read for a Pete Geek.
Now to the stuff regarding this pipe: A Peterson Dunmore. I refer to Mark Irwin again here and his blog, Peterson Pipe Notes. I can wholeheartedly recommend the free at
I will include the text here in its entirety but recommend the link for the photos. This is used with permission of the author (thank you Mark).
“226. Documenting the Dunmore System and Classic Lines
Milos “Mike” Bera at PipesPens&More.com on eBay recently wrote me to say that he’d run across two examples of a Peterson Dunmore Classic line he’d never seen before—a higher-grade line with a briar-in-brass sandwich band. As I thought they were not only gorgeous but undocumented, the time seemed right to take a look back at the history of the Dunmore System and Classic lines.
I’ve been a fan of the Dunmore lines since I first saw them through the case back in the late 1980s and had to have one, a fat-bottom 72 (the 302 equivalent). Like everyone else, I thought there was some kind of mistake—“Where’s the nickel mount?” I remember asking. But the Dunmore System set out to be something a little different, yet within the classic Kapp & Peterson house style.
The line originated in collaboration with Iwan Reis in 1971. How it came about is anyone’s guess at this point. Chuck Levi, the man who more than any other was responsible for bringing the great Danish artisan pipes to the US, was working with the creative minds at K&P to bring something new to the IRC catalog, and this was one of about a dozen K&P lines that debuted as exclusives in the Iwan Reis catalogs of that era.
The concept was to modernize the System pipe by removing what was perceived as the old-fashioned nickel mount. And old-fashioned it was—if you look at pipe catalogs from the 1940s on through most of the rest of the 20th century, nickel ferrules and even bands were almost non-existent. K&P was virtually the only hold out, using sterling bands on the Sterling Silver Classic line and on the Premier & De Luxe Systems. A bead was then carved around the stummel at the mortise end. As you can see from the IRC detail, sometimes the contrast stain made the beads stand out, and sometimes not.
But there were two more ingredients to the original Dunmore aesthetic which can be seen the photo below. Paddy Larrigan, K&P’s master-craftsman, was always striving to push the envelope in pipe engineering, and one of the things he dearly loved was a pipe that would sit, so he shaved off the bottom of the shank to allow the Dunmore System to sit on its shank and button, which gives it its uniqueness in the catalog. The downside of this is that I am not convinced that all the Dunmore reservoirs, being slightly smaller than the traditional System, are quite as effective.
The third distinguishing mark of the original Dunmore lines is the stem. Both the System and Classic versions utilized the wide-shoulder “Comfort Lip,” with a painted gold P on the stem. This doubtless helps the System sit as well as giving it a more muscular visual balance, strength being a long-standing concept in the design language of the company. While it gives the illusion of being an army “push” mount, of course it isn’t, but is a traditional tenon-mortise or “navy mount” as the old hands at K&P used to call it.
The 1971 IRC catalog description reads, “dunmoor briar IRC ’71 modern system without sterling band, natural $12.00.” This intentional misspelling of “Dunmore” would persist through subsequent IRC catalogs, the copy-writer evidently under the spell of e.e. cummings and favoring an English flavor to his pipes. The name, like almost all K&P line names, is taken from the Irish landscape, in this case the town in County Galway famous for Dunmore Castle.
The 1975 Orange Catalog shows the initial Dunmore System release was in only seven shapes:
This was later expanded to include both the original bent dublin shape 5 (75) and XL5 (XL75) and the replacement calabash shape 5 and XL5. The remaining “new” System shapes were also added to the Dunmore lineup, the 01 becoming the Dunmore 73, the 02 the 70 and the 03 the 76. The fact that the 304 and 306 “setters” introduced in 1984 never entered the Dunmore System lineup adds the probability that the line had been discontinued by then.
The smooth Dunmore System features a light brown natural finish, sometimes occurring with broad flames, as can be seen in these photos of an unsmoked 77 System:
The rusticated version of the Dunmore System seems to have been finished in at least two techniques or versions. Neither is as deep as the Pebble Rustic finish but they still feel very therapeutic under thumb and finger.
Even when we were beginning our research on the Peterson book (due out in reprint later this year), most Pete fans had no idea there was also a Dunmore Classics line featuring the same beading at the mortise and wide Comfort Lip mouthpiece. Documentary proof was found in the rare 1978-79 Peterson-Glass catalog:
The Dunmore System and Classic Lines from the 1978-79 Peterson-Glass Catalog
I don’t know whether the Dunmore Classics was a short-lived line or whether it was primarily available in Europe, but it almost never appears on the estate market here in the US. As you can see from the catalog and the 406 pictured above, the same aesthetic was followed for the Classic line—light brown, nearly natural, higher-quality smooth bowl (or dark rustic) and faux army mount with gold-painted P, wide saddle and P-Lip stem. Only the Dunmore System, as far as I have been able to document, had the flattened stummel allowing it to set.
I have always hoped to run across an unsmoked rustic Dunmore System with the dark contrast stains seen in the Peterson-Glass catalog. I wonder if this finish actually went into production, because the ones I’ve seen all look more-or-less like the XL75 shown above.
The original Dunmore lines seemed to have been dropped at about the time the company went through its worst redundancy in 1984, as there are no more traces of it in the company’s ephemera from 1983 on. I remember the proprietor of my B&M, Cavalier Pipe & Tobacco in Barracks Road Shopping Center in Charlottesville, telling me when I bought my shape 73 Dunmore that the line was out of production, so I’d better get it if I wanted it (don’t you miss high-pressure salesmen?)—and that would have been 1986 or ’87.
The second iteration of the Dunmore Classics line is that recently discovered by Mike at PipesPens&More on eBay. I would tentatively date it to c. 1995, well after K&P had gotten on its feet again and was doing some new and fascinating things. It seems to belong with three other briar adornment lines from the same period: Paddy Larrigan’s Briar in a Circle Systems and the Galway and Kapp-Royal higher-grade lines with their wonderful inset briar rings.
Mike’s Dunmore Classics line is certainly on a par, from the two examples he’s found, with the Galway and Kapp Royal briars and maybe better, although probably not as fine as the Briar in a Circle Systems. Take a closer look at this 80S, which Mike sold within 24 hours of posting it on eBay:
The last Dunmore Classics line made a brief appearance in the Dublin era’s second decade, somewhere in the 2000s, probably around 2005 or so. Jim Lilley’s old blog site made a reference to them, and I remember seeing them for sale at internet shops.
I know it appeared well before I got interested in writing the Peterson book, because I don’t have any internet images of it in my files. These photos of the B5 and B11 give a good idea of what the line was like, although it appears to have begun in a higher range and then slipped to a lower.
Updated Identification Guide
Dunmore (1971–c. 1984; c. 1995; 2006–2010) Appeared in 1971 as Iwan Reis & Co. exclusive line “Dunmoor,” Premier-grade unmounted System in smooth natural or rustic dark chocolate contrast in all shapes, with beading at the shank, faux wide-saddle P-Lip with gold paint P. Documented in Associated Imports catalog from 1973. Classic Range line from 1978 with same faux army mount and finishes. Second scarce Classic Range line, c. 1990, higher-grade smooth bowl with brass sandwich and briar band, P-Lip. A third Classic Range line, 2006–2010, mid-grade, featured standard and some B shapes, with beading around bowl instead of shank-face, for European market.
From the above documentation I think that I can safely assume that this Dunsmore 79 is of the original 1971-1978 time period.
Interesting side note here: In the above Mark Irwin says, “I have always hoped to run across an unsmoked rustic Dunmore System with the dark contrast stains seen in the Peterson-Glass catalog. I wonder if this finish actually went into production, because the ones I’ve seen all look more-or-less like the XL75 shown above.“ I emailed Mark and asked him if the Dunmore 79 in hand was what he was looking for. I included some of the before and after photos from this restoration. He replied, “Yup, that’s it!!” (Mark Irwin, personal email).
The Restoration
As boringly typical of my restorations, I began with a clean denim piece to protect the work surface. Yeah, I know, the term “clean” doesn’t really describe the stained denim.
The new to me PipNet came out and I had high hopes that it would be useful. The standard ream team consisting of the Smoking pipes Low Country reamer, General triangular scraper and 220 sandpaper wrapped wood dowel were along for clean-up duties. Low and behold the Dunmore 79 had precisely the wrong size bowl for either the #1 or #2 PipNet blades.
With the #1 blades too small and the #2 blades too large, plan B was put in motion. The adjustable Kleen-Reem tool was called in to remove the minimal cake in the tobacco chamber. The other two reamers were used then the chamber was sanded with the 220 on a stick. Once down to the bare briar I could see that there was no damage to the briar and that this pipe looked like it had only been smoked a hand-full of times.
Next was the cleaning of the shank. Typically with Peterson System pipes this can be a chore. Owners frequently fail to clean out the reservoir after a smoke which creates rather difficult tar deposits. This pipe’s tar was quickly removed and revealed the stain used at the Peterson factory. A surprisingly reddish-pink stain at that.
The stummel was taken to the sink for a scrub. Murphy Oil Soap and a nylon scrub brush were used to remove the age and grime from the stummel. Once scrubbed the soap was rinsed with warm water and the stummel dried with a cotton hand towel.
Back at the workbench the stummel received a wiping with a make-up pad dipped in 95% ethyl alcohol. The alcohol removed a bit more of the reddish-pink stain
The stem was the next victim of my cleaning activities. I used both bristle and fluffy pipe cleaners dipped in 95% ethyl alcohol to remove the slight smoking residue in the airway.
The stummel was given a coat of Before and After Restoration Balm and allowed to sit for about 30 minutes.
During this time I taped over the stem logo with a piece of Scotch tape. The stem was in very good condition and did not have a heavy layer of oxidation. There were some tooth marks near the button and those were filed and sanded with 320 then 400 grit sanding sponges.
The stummel was wiped with an inside out athletic sock to remove the excess Restoration Balm.
At this stage I couldn’t help but admire the beauty of the rustication and contrast staining of the Peterson workmen. I wondered if Paddy Larrigan himself had a hand in the crafting of this piece.
The stem was sanded with a series of sanding sponges in grits of 320-3500. Between each sponge I rubbed the stem with mineral oil and wiped it with a paper towel to remove sanding debris.
I then taped the shank with painters tape to protect it from the buffing I was about to do. The stem was mounted to the stummel as a handle and buffed with Red Rouge compound (I remain confused as to why the product had both “Red” and “Rouge” on the label).
The stem was then worked with micro-mesh pads in grits of 3600-12000. Between each of the pads I rubbed the stem with Obsidian Oil and wiped it with a paper towel.
The stem was polished with both Before and After Fine Polish and Extra Fine Polish. These polishes were applied with a fingertip and hand buffed with a soft cotton rag.
The next step in the stem restoration was to pick out the old gold paint and to re-do the logo with Rub’nBuff Gold Leaf. The old gold was picked out using a fly tying bodkin then scrubbed with 95% ethyl alcohol on a cotton swab.
The new gold leaf was applied with the tip of the bodkin and allowed to dry.
The excess gold was scraped from the logo with my fingernail and hand buffed with a paper towel. I applied two coats. The photo below is after the first but before the second.
The stummel was given a coating of Renaissance Micro-Crystalline Wax applied with a baby toothbrush. This was allowed to dry for a few minutes then hand buffed with a clean cotton terry cloth towel.
The stem returned to the buffer for several coats of carnauba wax.
The final stem was to hand buff the pipe with a microfiber polishing cloth.
This Peterson Dunmore System 79 Rustic has returned to the world in all of it’s original glory. The 309 shape, 79 in the Dunmore line, is a favorite of mine and I can’t help wondering why it was ever discontinued. The contrast stain on this pipe is lovely with the reddish highlights and the dark brown-black in the rustications. The stem polished up very nicely and contrasted the smooth shank-end briar in a unique and subtle way. The flat heel of the pipe does provide it with a “sitting” platform though not a terribly stable one. Fortunately Nebraska is not prone to earthquakes and I no longer have any little ones in the house to provide anthropogenic tremors. The dimensions of the Dunmore 79 are:
Length: 6.31 in./ 160.27 mm.
Weight: 1.80 oz./ 51.03 g.
Bowl Height: 2.09 in./ 53.09 mm.
Chamber Depth: 1.62 in./ 41.15 mm.
Chamber Diameter: 0.76 in./19.30 mm.
Outside Diameter: 1.26 in./ 32.00 mm.
I do hope that you have found something here useful to your own pipe care, maintenance or restorations. If you like this sort of thing, please click the like and subscribe buttons. Thank you for reading the ramblings of an old pipe lover.
Loading…
Below are some photos of the finished Peterson Dunmore System 79 Rustic.
It seems fitting to post this pipe today, October 31, 2024, for a few reasons. The first of which is the name, Nebraska Pete Geek. Secondly an Irish Seconds sounds like the pipe is being given a second chance which is exactly what restoring does for these old darlings. Third, today is the one year anniversary of this blog. I really didn’t think that I’d be able to successfully do this for an entire year. As of this writing, 3133 visitors have viewed my blogs 5138 times. I taught secondary school science for 32 years and a rough calculation had me at 3600 students over those years. I have achieved nearly that many viewers in a single year. All I can say is thank you all. Your support, comments, and encouragement have been wonderful. I know, “shut up and get on with the restoration.”
This pipe came to me as part of an estate lot back in early July. This pipe wears the stamp IRISH SECONDS on the left and MADE IN THE over REPUBLIC over OF IRELAND on the right. There is no shape number but the shape corresponds to the Peterson Classic Shape XL90 which is the same shape as the 307 Extra Large Billiard. Below are some photographs of the pipe as it appeared prior to any work.
The Irish Seconds looked like a very straightforward restoration. Reaming, cleaning some scratch mitigation and deoxidizing the stem. The rather blocky button would have to be made more comfortable, I know this is not restoring it to factory new condition but whoever gets this pipe will be quite grateful.
Background
I’ve said it before and here it is again: “If you have been following this blog for a length of time you know I have done a few Peterson restorations in the past. If you are new here, welcome and I’ve done a few Peterson restorations in the past. I’m not going to go on and on about the history of the oldest continually operating pipe manufacturer in the world and arguably the best. I will however lead you to The Peterson Pipe book. Mark Irwin and Gary Marlburg’s book is a must read for a Pete Geek.
“If you’ve ever been to any kind of “outlet” store, you’re already more or less familiar with what seconds are. Products that — due to some minor cosmetic flaw — just don’t pass a manufacturer’s quality control process. When these cosmetic flaws don’t affect the function or durability, they generally get sold at a deep discount. Not ideal for the manufacturer, but it’s great news for you, the customer.
And that’s exactly what we have here — pipes produced right here in Ireland, fully functional, eminently smokeable, and heavily discounted due to some superficial blemish. Irish Seconds are graded from 1 to 3, with 1 being the highest quality, and 3 being the deepest discount. If you’re in the market for a shop pipe, just getting into pipes, or are generally more budget minded, these are hard to go past.
(https://www.smokingpipes.eu/pipes/new/irish-seconds/) I have to admit that I am happy not to be geographically closer to Dublin. The reasons for my happiness are that I would most likely be considered furniture at the Nassua Street shop and would convert the entirety of my daughter’s inheritance to Petersons and Irish Seconds. Though neither of these things are terrible, both would become annoying by those involved.
In listening to my own advice I quote from Irwin’s big Peterson Pipe book: “See Seconds” (p. 304). Just kidding, it really does say that though. The real information is as follows:
“Seconds Peterson seconds are pipes of all shapes with briar flaws deemed unacceptable for ordinary models and sold at reduced prices, sometimes unstained, fit with fishtail or round button mouthpieces. Since the early 1990s they have only been available in Ireland. Occasionally they are described in Peterson catalogs under different names, and documented specimens have various stampings. In roughly chronological order these include:
Stamped arched KAPP & over straight PETERSON”S over arched DUMMIES An early specimen preserved at the Peterson museum with this stamp has a round-button mouthpiece.
IRISH FREE STATE stamp (1922-37) COM stamp with no brand or model name. Documented with or without nickel bands.
System Reject (1968-) Noted first in the Price List for January 1968 as being available in all six system shapes. Also found in the ‘80 Peterson-Glass Price List.
Erica System Reject (1987-98)Noted in two US distributor catalogs. Fishtail mouthpiece, unstamped nickel band, with COM of MADE IN THE over REP. IRELAND or with no COM.
Irish Seconds (1982-98) Classic Range shapes stamped with no brand name , fishtail mouthpiece, in unstained, black rustic or dark brown finishes, no band. (Irwin, Mark and Malmberg, Gary (2018). The Peterson Pipe The Story of Kapp & Peterson, First edition, second printing 2021. Briar Books Press, Canada. p312).
The last line of the Irwin quote above describes this pipe nicely. It is indeed not stamped with a brand, unstained, it is of the Classic Range and matches the dimensions of an XL90 (used from 1980-) and has no band. With this information I can safely say that this pipe is a Peterson product produced between 1982-98 and though deemed unworthy of the Peterson name, it remains a fine briar pipe.
The Restoration
The chubby darling got a clean denim piece to sit on.
The stem was heavily oxidized. I lightly sanded it with a 320 sanding sponge in preparation of the Before and After Extra Strength Deoxidizer (deox) bath.
I inserted a pipe cleaner into the button to act as a hanger, suspending the stem in the deox.
I figured at least 4 hours in deox would be required.
I gathered the reaming gear: The PipNet with #2 blades, the General triangular scraper, Smokingpipes Low Country reaming knife and wood dowel wrapped with 220 sandpaper.
The reaming went smoothly as the cake was not terribly thick. The top of the bowl had some scratches that appeared to be from a previous owner scraping the bowl with a pocket knife. Also the lave on the rim was not bad and did not appear to be hiding any charring of the rim.
The interior of the bowl did not have any heat damage.
The shank was cleaned by scraping with a dental scraper and with cotton swabs dipped in 95% ethyl alcohol.
Folded bristle pipe cleaners, also dipped in alcohol, were also used to clean the airway.
After 4 hours the stem was removed from the deox and allowed to drip excess solution back into the jar.
The stem was vigorously rubbed with a coarse shop rag to remove the remaining deox solution and abbrade additional oxidized vulcanite.
Below you can see the oxidized rubber removed by the rubbing.
The stem was then scrubbed with several make-up pads drizzled with Soft Scrub cleanser.
The button was reshaped to make it far more comfortable for a smoker. A couple of flat files were used for the reshaping.
The worst of the stummel dents were at the bottom front of the stummel. It looked like it had been dropped on concrete.
The other dents and dings were less severe but were on both sides.
I decided to try raising the dents with steam. I set an iron to high and moistened a washcloth with tap water. Below you can see the set up and the protective tape on the stamps in anticipation of the sanding that would follow.
The steam did raise the dents but they would still require filling with cyanoacrylate (CA, super glue).
Below is a close up of the dents after a couple of steaming episodes.
The area was covered with brown CA applied with a fly tying bodkin and allowed to cure/dry without the use of a CA drying accelerator.
Once dry, the area was filed smooth and sanded with a 400 grit sanding sponge.
The pipe was sanded with a series of sanding sponges from 400-3500 grit. The pipe was sanded intact to avoid the rounding of the shank/stem joint. Between each sponge the stummel was wiped with a make-up pad moistened with ethyl alcohol. The stem was rubbed with mineral oil and wiped with a paper towel between sponges.
The pipe was then worked with micro-mesh pads 4000-12000. The wiping after each pad was as above except that the mineral oil was replaced with Obsidian Oil for the stem.
The pipe was given a coating of Before and After Restoration Balm and allowed to sit for 20 minutes.
20 minutes later the balm had done it’s magic and the excess balm was wiped from the pie using an inside out athletic sock.
The pipe was taken to the buffer where it received several coats of carnauba wax applied by the buffer. The final step was a hand buffing with a microfiber polishing cloth to raise the shine.
I think this Peterson Irish Seconds turned out very nicely. The reservoir is drilled out in typical Peterson System fashion and though the stem lacks a tenon extension and the P-lip, I am sure that this will be a fine smoking pipe. The briar grain is pretty with the cross-grain at the front and rear. The bird’s eyes are small and very numerous. I can’t help but wonder how the pipe would look with a contrast dye accentuating the briar grain. That would violate the description of the Irish Second though. The stem polished up very nicely revealing the glossy black vulcanite under all that oxidation. The dimensions of the Peterson Irish Seconds are:
Length: 5.18 in./ 131.57 mm.
Weight: 1.96 oz./ 54.88 g.
Bowl Height: 1.91 in./ 48.51 mm.
Chamber Depth: 1.46 in./ 37.08 mm.
Chamber Diameter: 0.79 in./ 20.07 mm.
Outside Diameter: 1.57 in./ 39.88 mm.
I do hope that you have found something here useful to your own pipe care, maintenance or restorations. If you like this sort of thing, please click the like and subscribe buttons. Thank you for reading the ramblings of an old pipe lover.
Loading…
Below are some photos of the finished Peterson Irish Seconds.
Being asked to restore a family heirloom is a flattering and frightening request. Flattered because the owner of the piece thinks highly of your ability to restore the item yet frightening because ethos is a one of a kind item that carries significant personal meaning. In this case personal and historical family meaning as well.
Background
Earlier this month I was contacted via email by a gentleman who had seen a link to my blog on Mark Irwin’s Peterson Pipe Notes. Below is an excerpt from an early email:
“I’m wondering if you do restoration work for others as well as for yourself?
I have an old Peterson System pipe that had belonged to my father’s Uncle, Richard McNamara. He would have bought the pipe while stationed in Northern Ireland as a technician with Lockheed Aircraft. He died unexpectedly in 1943 while still in Northern Ireland.
I intend to pass the pipe along to my nephew. I had sent it to Peterson’s for their assessment to date it and to clean it up a bit. I received a nice note from Glen Whelan, who set the pipe in the 1930’s/1940’s.
So, if you do restorations of this sort, I be happy to have you restore this pipe.”
I asked if it was possible to see some photos of the pipe in question to assess what I would recommend for the restoration. The following five photos were sent by the owner.
The pipe looked to be in very good condition. I replied,
“That is a beauty. I am assuming the Peterson boys told you that the pipe was probably from 1937-1945ish. That would be my guess anyway. Here is what I see that you may want to have restored:
The stem – Looks great. There are some very small scratches around the ferrule. Micro-meshing and a white diamond buff should make it like new.
The Cap – I saw a couple of small dents. The cap can be removed and the dents pressed/tapped out. Then polished and reglued into the original position.
The Stummel – The dings from contact with a rough surface can be 1) filled with cyanoacrylate and briar dust. This will smooth them but will also make for dark spots where each dent is. Or, 2) The dents can be steamed to see if the briar can rebound back. This may lessen the dent but probably not remove it.
The Internals – a general cleaning and yuck removal. “Yuck” is a highly technical restoration term referring to smoking residue. When in abundance, it can be called “yucky”.”
The owner replied,
“Thanks, it is a nice pipe with a special heritage.
All I got from Peterson’s was that it was from the 1930/40’s. But from further investigation I have learned that the 1937-1945 span is correct. Now, I’m assuming that my Uncle bought the pipe new as he was in Northern Ireland from about 1939 to 1943. I have photos of his travels to Dublin, so I’ll further my assumption that he bought it from Peterson’s.
Anyway, i agree with your suggestions about the stem and cap. I saw some crud around the button and the dents on the cap. As for the Stummel, I think I’d just as soon leave the dents as they are. After all, as far as I am aware, only my uncle Richard and I have used the pipe in it’s 80ish years, so, in my mind, it adds a touch of being authentic with continuity. The internals will need a cleaning. I don’t have the pipe in front of me now, it’s packed away in my pipe bin in our RV basement. I’ll pull it out in a day or two and check the bowl etc., but I don’t think it’s too bad.”
We agreed on the work to be done and arranged for shipping. A few days later the pipe arrived and was photographed prior to any work.
Though there was no sign of a shape number stamp, I think this is a 307 shape.
“The 307 is an original Patent bent billiard-shape, shown in the 1896 catalog as shape 9. It has retained its original shape number in the De Luxe version, but was issued in the 1937 catalog as the 307 (2nd quality) / 357 (3rd quality). Since then, it has also appeared as the 9S and 9B (De Luxe), Dunmore System 78 (1978-1983), and the Classic Range 9BC (1940s-1950s) / XL90 (1980s-Present). The 9B dating from the 1940s-1960s (the De Luxe System with a tapered rather than saddle bit) is rarely seen on the estate market. There have been changes in the shape since the 1960s, all toward less “cheeking,” making earlier versions, when available, preferable to those wishing to get back to the first, classic iteration of the shape.” (https://petersonpipenotes.org/146-a-guide-to-system-shapes-1896-2019-part-1-the-300-shape-group/). The 1937 issue of the SYSTEM 2 coincides precisely with the provenance of the pipe.
When I first received the pipe I thought that something had gone wrong like the wrong pipe was shipped. There were no dents on the left side of the stummel. Adding further to my confusion, which is pretty easy to do by the way, was the stem. A Peterson System 2 should have a bone tenon extension or “chimney”, as the Peterson factory folks call them. This tenon was smooth, without threads, and looked to be about 9mm. A closer examination of the pipe and comparison to the photos indicated that it was the same pipe pipe from the initial photos based on briar grain patterns. I could make out well done fills where the dents were supposed to be and there were slight bumps in a newly acquired finish. The finish looked like a lacquer and stain combo which had been sprayed on or maybe a lacquer sprayed onto a still damp stain. It also looked like the stem had received some of the lacquer then had been buffed with carnauba wax.
I emailed the owner with my questions. While awaiting a response I began working on the pipe.
The Restoration
As usual the pipe was taken to the workbench where it was placed on a relatively clean denim piece.
Next the tobacco chamber was reamed using the PipNet and #2 blades. The General triangular scraper and Smokingpipes Low Country Reamers also saw limited action. The chamber was then sanded with 220 sandpaper wrapped around a wood dowel. The sanding resulted in seeing the condition of the briar within the chamber which showed no signs of any damage from excessive heating or charring.
The stummel was then taken to the sink for a scrubbing with Murphy Oil Soap with a nylon scrub brush. The soap was rinsed with warm water and the stummel dried with a cotton hand towel.
Back at the workbench the stummel was wiped with a make-up pad dipped in 95% ethyl alcohol. This removed a good deal of color. Apparently the pipe had received a clear coat of some kind and a recent dye or stain. I could not believe that this was the original stain from the 1930’s or early 1940.
The stem was cleaned out with bristle pipe cleaners and ethyl alcohol and showed that the pipe was being well cared for and cleaned after use.
Oxidation, however, does not care how well a pipe is cared for and attacks at every chance it gets. This stem showed signs of oxidation though not very severe. I decided to remove the oxidation with Before and After Extra Strength Deoxidizer. The stem had a pipe cleaner inserted into the mouthpiece to act as a hanger and entered the deoxidizer solution.
During the reaming, I noticed an off smell from the removed cake. It was not a foul smell, just a slightly sour hint. I decided to give the stummel an alcohol treatment to remove any traces of old smoking and tobacco residue. I packed the tobacco chamber and shank with cotton and filled the respective volumes with 95% ethyl alcohol. The stummel was propped up to allow the alcohol levels to remain level while filled.
The below photo is after two hours of the alcohol treatment. The shank was discoloring far more than the tobacco chamber.
During this waiting time I was able to check emails. Yeah I know, a phone can be used to check emails but I’m old and stubborn. Phones are for calling, texting and photos. Typing is done on a computer. Anyway, the owner had gotten back to me regarding my questions about the condition of the pipe. He had said that he had sent the pipe to Peterson in Dublin.
“Perhaps the boys at Peterson’s did more than I realized. Good on them.”
“I just checked the box in which the pipe was returned from Peterson’s and the extra stem they sent does not match the curvature of the stem in my pictures. So, the stem you have is likely the original.
As for the 9mm part, perhaps that allowed for a bone extension rather a filter, but it’s just a guess.”
The timeline was making sense to my old brain now:
1) Original photos were taken.
2) The pipe was sent to Peterson’s in Dublin. While there the stummel fills were done and a new finish was applied.
3)The pipe was sent to me.
The tenon still was giving me confusion. There were no threads for a bone extension. I knew that Peterson did have a line of Filter pipes which were described in the 1947 catalog but this pipe pre-dated that by several years. I emailed the owner that I’d like to reachout to Mark Irwin for his thoughts. The owner agreed.
Below is the correspondence between me and Mark Irwin:
Subject: Hate to bother you
Hi Mark,
You know those four words in the subject line are going to be followed by “but…” right?
I got a commission to restore an old Pete for a gentleman whose granduncle picked it up while stationed in northern Ireland around 1940, just prior to his unexpected passing in 1943. I figured the pipe was from 1937-1945. My question is why in the world does it have what appears to be a 9mm (though it is smaller than 9mm) filter type stem? There are no threads for a bone tenon. Any idea or just rack it up to “it’s probably a replacement stem”.
“Hey John,
My best guess is that this pipe was drilled for a “Good Health” K&P 6mm filter. You can see a photo of the filter box in the identification guide at the back of the big Pete book, as these still sometimes appear on eBay. Try measuring it with your micrometer and seeing if you think a 6mm would fit!” (Mark Irwin, personal email)
Another potential piece of the puzzle – The stem appeared to have been drilled for one of the early GOOD HEALTH stems. Since it was already a Peterson System 2, today’s equivalent of a “Deluxe”, it was also not stamped as a GOOD HEALTH though it did receive a GOOD HEALTH stem. I notified the owner and he was pleased with the new information.
Time to get back to work. After 3 hours the stem was removed from deox. That is my term for the Before and After Extra Strength Deoxidizing solution. Kind of a play on the idea of detoxification or detox used for drug and alcohol abuse patients in rehab. The stem was hung by its pipe cleaner on a tall bottle and allowed to drip excess solution back into the jar.
After dripping, I hand buffed the stem with a coarse shop rag. The coarse material both absorbs the excess solution and helps abbrade some of the oxidized rubber from the stem.
The next step was to scrub the stem with Soft Scrub applied to make-up pads. This mild abrasive cleanser further removes oxidized surface material from the stem.
After the Soft Scrub scrub, that’s just fun to say, the stem was worked with a series of sanding sponges from 400-3500 grits. Between each sponge I rubbed the stem with mineral oils and wiped it with a clean dry paper towel.
The sanding was followed by micro-meshing with pads 4000-12000. Between each of the pads the stem was rubbed with Obsidian Oil and wiped with a paper towel.
At this point the stummel was still having the yuck removed the the ethyl alcohol as it slowly evaporated pulling the yuck from the briar and depositing it in the cotton. That continued overnight. In the morning I removed the cotton. It had done a fine job at removing any trace of smell from the tobacco chamber, reservoir and shank.
The stummel was then worked with micro-mesh pads from 2400-12000. The 2400 pad removed the finish which can be seen wiped onto the denim and on the two alcohol dampened make-up pads in the photo below. Between each pad the stummel was wiped with a make-up pad for removing debris from the micro-meshing.
After the micro-meshing the stummel received a coat of Before and After Restoration Balm and was allowed to sit for 20 minutes.
After 20 minutes the balm was wiped from the stummel using an inside out athletic sock.
The briar of the shank was covered with painters tape to protect the wood and the silver ferrule was lightly polished with the micro-mesh pads. After the peds I polished the silver with Before and After Fine and Extra Fine Polish. I failed to photograph the earlier steps of this process but did capture the final step.
The stem and stummel were taken to the buffer where they were buffed with Blue Diamond Polishing compound on a flannel wheel. Reunited with the stummel, both then received several coats of carnauba wax. The pipe was finally hand buffed with a microfiber polishing cloth to further raise the shine.
I can’t say what my favorite part of this restoration was. The pipe was a beautiful example of Irish craftsmanship by Peterson. The family history and the story of the great uncle were the things that I always wish I could know about these old pipes. The mysterious details of the pipe stem and the path that the pipe took, both geographically and through time, to get to me were a fun exploration. The happiness and gratitude of the owner upon receiving the restored piped was also fulfilling. Being honored and trusted to work on a family heirloom is daunting but exciting. All of these were part of this restoration and all of them were unique and unforgettable. The pipe turned out beautifully. I don’t mean to speak disparagingly about the clean-up that the Peterson crew did. Their fills were impressive but a custom hand polishing and finish is something that a manufacturing shop cannot take the time to do. I failed to mention in the above blog that I could not remove the silver ferrule. I tried seeping both ethyl alcohol and acetone into the glue to loosen it. I tried heating with a heat gun and even speaking softly and gently but I could not get the silver to budge. In the end I emailed the owner and admitted failure. He was understanding and we both agreed that the dents added to the history of the pipe.
I do hope that you have found something here useful to your own pipe care, maintenance or restorations. If you like this sort of thing, please click the like and subscribe buttons. Thank you for reading the ramblings of an old pipe lover.
Below are some photos of the finished Peterson System 2.
Yep, it’s another Peterson. What do you expect from a guy that is also known as NebraksaPeteGeek? This pipe only had to cross the Missouri River to get here. The seller was from just east of Council Bluffs Iowa. I didn’t notice until the tracking said I could expect the pipe to arrive in two days. That’s when I looked at the seller’s location. I felt kind of dumb. Well maybe, dumber. I could have picked the pipe up on the way to visit my sister, east of Council Bluffs and finagle a free dinner out of the trip. Oh well, postal workers need posts just like dogs need head pats and I need more pipes to restore. Everybody is a winner.
The 306 was actually a shape which I did not own. The final 300 shape of the series void is no longer a void. The best part is that the pipe is a sitter and doesn’t really require a slot in a pipe rack. It can just sit in the cabinet next to the rack and look majestic and self-sufficient. This 306 bore the following stamps all immediately below the nickel collar on the left shank: Peterson (arched in the traditional script) over OF DUBLIN (also arched) over SYSTEM over STANDARD 306. The nickel ferrule dome was stamped with the expected K&P over PETERSON. Since this is a standard there were no hallmarks. Below are some photos of the 306 prior to it being worked on.
The briar was in great shape. A little bit of cake in the bowl and a smidge of lava overflowed onto the rim. The stem had seen some chomping and wore the scars. Looking at the indentations it appeared the chomper clenched on his right. Either way, those would need repairs. The whole restoration looked like it would be a relaxing endeavor.
Background
If you have been following this blog for a length of time you know I have done a few Peterson restorations in the past. If you are new here, welcome and I’ve done a few Peterson restorations in the past. I’m not going to go on and on about the history of the oldest continually operating pipe manufacturer in the world and arguably the best. I will however lead you to The Peterson Pipe book. Mark Irwin and Gary Marlburg’s book is a must read for a Pete Geek.
As a summary of the 306,, I am quoting the Peterson.ie site below. I figured that since this pipe is currently in production why not let the makers speak for themselves.
“About the Shape
Combining the sturdy stability of a Poker with convenient jaw-hanging balance, our flat-bottomed Oom Paul is a versatile design, able to sit stably on a desk or be easily clenched in the teeth. Its bold, muscular proportions resonate with our iconic House Style.”
“About the Series
Our flagship line, the System Standard stamp first appeared in 1945, but the entry-level design has been a staple in our catalogues since Charles Peterson secured his final patent in 1898. Designed to provide a cooler, drier smoke, each pipe features a deep reservoir within the shank to collect excess moisture; a graduated bore mouthpiece that funnels the smoke and allows moisture to collect within the reservoir; a sturdy nickel military mount, which allows the pipe to be broken down and cleaned without damage or warping; and our patented P-Lip bit, which draws the smoke upward, thus reducing tongue bite. While the P-Lip bit is the traditional choice, we also offer System Standard pipes with fishtail stems. Available here in the traditional walnut stain of the Smooth finish.”
“About the Range
In 1890, after 15 years of handling and repairing pipes while working for the Kapps, Charles Peterson secured a patent in his own name, titled “A certain new and useful improvement in Tobacco-Pipes,” which introduced a unique system comprised of a higher draft hole and a moisture reservoir bored into the shank and transition of a briar pipe. Over the next eight years, Charles continued to refine his System, applying for and securing patents for a graduated bore mouthpiece (1891), and a unique button design known today as the P-Lip (1894-1898). Designed to wick moisture away from the smoke, reduce tongue bite, and increase the longevity of the pipe, Peterson’s complete System patent sparked a tradition of innovation, one we continue to uphold to this day. The System Pipe is the invisible source behind our unique House Style: our pipes’ muscular shanks and transitions, tubular profile, and generous bends. Our overall shaping style has a distinctly antique form because it has remained largely unchanged for over 120 years.
In our System range, you’ll find a variety of shapes in myriad finishes, each featuring Charles Peterson’s groundbreaking improvements in the realm of tobacco pipes. Whether you’re looking for your first pipe or to enhance a robust collection, here you’ll find numerous options to suit any taste, all backed by our legacy of craftsmanship.”
Now, I would never think to tell Peterson how to do their business nor how to engage in marketing but the above blurb “About The Shape” is lacking a certain bit which I find necessary. According to Irwin and Marlberg, “System shapes 304/20FB De Luxe and 306/11FB created by Paddy Larrigan and introduced in 1992” (Irwin, Mark and Malmberg, Gary (2018). The Peterson Pipe The Story of Kapp & Peterson, First edition, second printing 2021. Briar Books Press, Canada. p215). Paddy Larrigan was a third generation Peterson factory worker who was also responsible for the Dunmore line of pipes. His footprint in the history of Peterson should be glossed over. For more information on the Peterson Dunmore line check out my last Dunmore blog: https://wordpress.com/post/scimansays1787.com/6410. That means that this pipe’s origin story could have begun as early as 1992. The Standard line of pipes are difficult to date as they do not have any defining characteristics like hallmarks of silver mounted pipes. I did check the current stampings to see if they offered any notable changes and they appear the same today as this pipe’s stamps.
In typical “me” fashion I began with a laundered denim piece. I cannot use the term clean as the stains from previous restorations are taking a toll on that term.
The reaming crew was called forth.
The PipNet with the #2 blades did most of the work clearing the cake from the tobacco chamber. Further scraping was done with both the Smokingpipes Low Country reaming knife and the General triangular scraper. The interior of the chamber was then sanded with 220 sandpaper wrapped around a wood dowel.
The interior of the tobacco chamber had some charring and heat damage. This was scraped and sanded as smooth as possible without drastically changing the interior shape. The damage was not severe nor very deep. I thought the best remediation would be a bowl coating and the end of the restoration.
The stem was next on the schedule. I place it into a fresh solution of Oxiclean and water. And allowed it to soak for 2 hours.
I returned attention to the stummel and took it to the sink for a scrubbing with undiluted Murphy Oil Soap and a nylon scrub brush. The soap was rinsed with warm water and the stummel was dried with a cotton hand towel.
Back at the workbench the stummel looked more clean but there remained some areas with more “shine” than others. I wiped the stummel with a make-up pad dipped in 95% ethyl alcohol. This worked at removing the shine and left the stummel looking more like flat unfinished briar.
The stamps were covered with painters tape to protect them from the upcoming sanding.
The shank and reservoir were then cleaned out with many cotton swabs, folded bristle pipe cleaners, a shank british and scrapings with a dental scraper. The Peterson System does work very well but when neglected it is far from an easy thing to clean.
The stummel was then sanded with a series of sanding sponges with grits of 320-3500. Between each sponge the stummel was wiped with a make-up pad wetted with 95% ethyl alcohol.
The stem was removed from the Oxiclean solution and scrubbed with a couple of Soft Scrub cleanser treated make-up pads. A good deal of oxidized material came off but not as much as I was expecting.
The airway was cleaned with cotton swabs and bristle pipe cleaners dipped in ethyl alcohol. I could still see brown oxidized vulcanite on the stem and decided to give it a dip in the Before and After Extra Strength Deoxidizer. I inserted a pipe cleaner into the P-lip to act as a hanger in the Deoxidizer.
Below, the stem entered the Deoxidizer and was left overnight.
The following morning I removed the stem and allowed it to drip excess solution back into the jar.
The stummel had been sanded. Now it was time for the micro-mesh pads. I micro-meshed the stummel with the 4000-12000 pads. Again between each pad I wiped the stummel with a make-up moistened with ethyl alcohol.
The stummel then received a coating of Before and After Restoration Balm and was allowed to sit for as long as it took for the stem repair, sanding and micro-meshing.
Back to the drip dried stem. I used a coarse shop rag to wipe/scrub the remaining Deoxidizer from the stem. The air way had 2 pipe cleaners run through it to remove the solution.
At last the stem was looking brilliantly black. A bit pitted but the pits were black too.
I again used Soft Scrub cleanser on make-up pads on the stem. Much less oxidized rubber came off. The inside of the tenon and airway were again cleaned making sure that any remaining Deoxidizer was removed.
I sanded the Chomped areas with a 600 grit sanding sponge to ensure fresh vulcanite to work with. By “work with”, I mean to fill with black cyanoacrylate (CA, super glue). Below you can see the button top and bottom areas to repair.
The CA I was using has carbon and rubber in the formula making the fills more vulcanite-like. In other words, rubberizing the CA rather than the more hard and brittle black CA I used last winter. Small dabs of CA were placed onto the indentations.
The wet CA was then spritzed with a CA drying accelerator. This cures the CA in seconds as the accelerator evaporates.
The cured CA was then filed level with the surrounding vulcanite. The dark spots in the photo below indicate areas where additional CA needs to accumulate. I use several small applications rather than one large one.
The same for the bottom side of the stem.
Eventually with additional applications and filings the stem was sanded smooth.
With the fills completed the whole stem was sanded with the series of sanding sponges 400-3500. Between each sponge I applied a fingertip of mineral oil to the stem, rubbed it in and wiped the stem with a dry paper towel.
After the sanding the stem was micro-meshed with the 4000-12000 pads. Between each pad I applied a small drop of Obsidian Oil to the stem, rubbed it in and wiped with a paper towel.
The stem was polished using Before and After Fine Polish rubbed with a soft cotton cloth.
The Fine Polish was followed by the Before and After Extra Fine Polish with the same cloth.
The stummel was wiped of the Restoration Balm with an inside out athletic sock.
The pipe was then taken to the buffer for several coats of carnauba wax. This is where my forgetfulness comes to light. I photographed the “finished” pipe at this time. Upon completing the photo shoot, I realized that I still needed to coat the bowl. Darn old people… I was out of pure maple syrup but I did have a jar of German organic honey, a gift from a Europe traveling niece. I lightly coated the inside of the bowl with honey. I then plugged the draft hole with a pipe cleaner. I used half a capsule of carbon powder poured into the bowl, covered the rim with my hand and shook the stummel for several seconds. I ended up with a very nice circle of carbon powder on the thick part of my thumb and a well coated tobacco chamber. That is the last photo in the “finished” section below.
That is it, the relaxing restoration of a Peterson System Standard 306. I am very pleased with how well this Pete looks. At least on the outside. As with any damaged interior I will have to smoke it and monitor it closely. I can say that the inaugural smoke was with a lightly packed Five Brothers shag cut Burley. I didn’t want to scrape any of the coating off so a very soft cut tobacco was used. Everything went as planned, the honey baked in nicely with the carbon powder and it appears to be on its way to a solid carbon coating. Back to the restoration. The vulcanite was rid of the oxidation and it looks great. The briar with its bird’s eyes on the left and flame grain on the right are beautiful. I am sure this pipe will continue to be used many times while contemplating my next restoration. The dimensions of this Peterson System Standard 306 are:
Length: 6.63 in./ 168.28 mm.
Weight: 2.08 oz./ 59.20 g.
Bowl Height: 1.91 in./ 48.51 mm.
Chamber Depth: 1.61 in./ 40.89 mm.
Chamber Diameter: 0.77 in./ 19.56 mm.
Outside Diameter: 1.46 in./ 37.08 mm.
I do hope that you have found something here useful to your own pipe care, maintenance or restorations. If you like this sort of thing, please click the like and subscribe buttons. Thank you for reading the ramblings of an old pipe lover.
Below are some photos of the finished Peterson System Standard 306.
Back in the 1990s I worked with a fellow teacher and Nebraska Air Guard F4 pilot who often said, “Better lucky than good, any day.” That phrase has stuck with me over the years and applies to so very many daily occurrences. The acquisition of this pipe for instance. It was part of a lot of 12 pipes. The other 12 were nothing to be too excited about; Yello-Boles, Dr Grabows, a split seam leather Longchamp, etc… and what appeared to be a Peterson Meerschaum hiding in the background ashamed at it’s lot in life. The photos of the lot were as usual, less than perfect yet, I knew what I thought I was seeing. I was sure that someone else would see the same thing and the lot would sell quickly. It didn’t. The auction closed with no sale and was relisted. I cannot remember how many times this relisting occurred. I finally couldn’t take the thought of a Peterson meerschaum going unloved and messaged the seller with an offer. The auction was not set as a “Make Best Offer” but I figured it was worth a shot. The seller messaged me back saying that he reduced the price to my offer. Well, that was easy.
Needless to say, after a few days of waiting the package arrived here in the wilds of southeast Nebraska. The anticipation was palpable as I tore through the packaging. I eventually unwrapped a P-lip stem with the unmistakable P stamped clearly. I knew it! Next the stummel emerged from it’s protective tissue paper. The seller knew how to package and ship pipes and not just for dramatic effect. The stem and stummel were reunited and I saw my latest prize. As typical, the only stamp was the Peterson stem logo but the shape was unmistakable a 120 Dublin. Below are some photos of the pipe prior to doing any work on it.
Background
Earlier this year I restored a Peterson meerschaum 406 Prince. I will use a good deal of the “Background” from that blog here again:
I included a few links concerning the history of Peterson pipes. I will include those here also. “For a great history Mark Irwin and Gary Marlburg’s book is a must read for a Pete Geek.
For the history of Peterson Meerschaums I will mainly be citing Irwin and Marlberg’s The Peterson Pipe book. Peterson has a long history of meerschaum pipe making dating back to the 1870s (Irwin, 2018 p. 15). At the time when Charles Peterson began working for the Kapp brothers in Dublin, meerschaum was the old traditional material while briar was a new innovation destined to become more popular in the next century. It was with briar that Charles Peterson created his original patents for the reservoir in 1890 and for the graduated-bore mouthpiece with what we call the “Patent-Lip” (P-Lip) today, in 1894. 1893 was the year that Charles Peterson and Henry Kapp bought out the shares of Christian Kapp of the Family business, which the brothers had run together. “Christian was evidently not happy with this arrangement and disliked Dublin. He trained to become a doctor, and on 12 June 1893 he sold his share of the business to his brother and Charles Peterson” (Irwin, 2018 p. 48). The Kapp & Peterson company was born and the Peterson System has continued for over 130 years.
Now obviously the lovely Peterson meerschaum pipe in hand is not something made at the turn of the century. According to Irwin and Malmberg, “ In 1968, Peterson returned to making block-meerschaum pipes after forty years. They had made block meerschaums in all Patent Systems and many Classic Range shapes from 1896 until about 1929. The scarcity and rising cost of amber, fragility of meerschaum and popularity of briar all contributed to the end of meerschaum production.” (Irwin, 2018 p. 158). The authors go on to state that, “These Republic-era meerschaums were first made in partnership with Manxman Pipes, Ltd., on the Isle of Man, a company Peterson bought outright in the early 1970’s (Irwin, 2018 p. 158).
I am not quite sure how the purchase of Manxman pipes worked. Manxman was an apparent subsidiary of Laxey Pipes Ltd. According to pipedia.org:
“Laxey Pipes Ltd. resided in a historical 19th century four-storey Man stone building at The Quay, Old Laxey, Isle of Man, which thankfully has been preserved.
The company specialised in the production of meerschaum pipes using the Meerschaum mined by the Tanganyika Meerschaum Corporation in the Amboseli basin in Tanganyika (since 1964 part of the United Republic of Tanzania).
Please note: you may often find names like “Manx Pipes Ltd.”, “Man Pipe Co.” and others more, but there is no indication of another Isle of Man pipe producer other than Laxey Pipe Ltd. at any time!
Laxey Pipes Ltd. marketed own brands like “Manxpipe”, “Manxman”, “Manxland” e.c. Names like “John Bull”, “White Knight” (unwaxed), “Domino” (black, or lined) indicated some shapes / colours of Laxey’s own series. The stems either showed the astronomical sign for “male” or “man” (circle + arrow), or the crest of the Isle of Man, the 3-legged X in a circle. Manxpipes and Laxey’s other brands were available through pipe retailers in general, but also were sold (mainly) to tourists through their own shop in Laxey.
Furthermore Laxey Pipes Ltd. manufactured the meer bowls for Peterson, Barling, Nørding and others from the later 1960’s until 2001. Man Pipe e.g. was a brand distibuted by Comoy’s. The bowls usually showed no nomenclature indicating the orderer. “Genuine Block Meerschaum” was engraved frequently. Often, just the stems were different, while bowls were the same.
Supply of meerschaum from East Africa run out (Kenya / Tanzania exhausted, Somalia inaccessible), and thus the last Laxey meers were supplied to trade in May, 2001. Laxey Pipes Ltd. tried to survive continuing with briar pipes – mainly in the Danish style -, but to no success. It closed down business in July, 2002.”
As for the age of this 120 Dublin, the first documented 120 shape I found in The Peterson Pipe book was on the 1947 shape chart (Irwin, 2018 pp. 156-157). During the Free State Era ( 1922-1937 the Dublin looking shape had an R413 number. The Patent Pipes from 1890-1921 had a Dublin-esque shape named the “Kaffir” and did not have shape numbers (Irwin, 2018 p. 122, 124).
In the “A New Leaf” meerschaum brochure from 1968 there appear photos of the Peterson meerschaums offered (Irwin, 2018 p. 105). The 120 shape is represented however the stem/shank joint is very flush and smooth with a continuous taper. This 120 has a rounded shank end at the stem shank joint. The 1975 catalog photos show meerschaum pipes with stem/shank joints like this pipe (Irwin, 2018 p. 164, 166). This leads me to believe that this Peterson Meerschaum was made in the mid1970s-early 1980s.
The Restoration
Like I usually do, I began with a clean denim piece to work on.
My old Oxiclean solution was getting discolored and was not smelling very good so a new solution was made. 1 ½ tablespoons of Oxiclean powder in about 500 ml of tap water.
The stem of the Peterson was placed in the solution for a soak in the oxy.
Reaming with a reaming tool like the PipNet is not recommended for meerschaum due to it’s brittle nature and the torque generated with a tool like the PipNet would probably not be a good thing. Instead I used the Smokingpipes Low Country reaming knife and the General triangular scraper. The tip of the General had been ground from the original sharp point to a more rounded tip with a grinding wheel. A wood dowel wrapped in 220 sandpaper joined in.
The scraping did not produce a great deal of removed cake but it did clear the tobacco chamber.
When cleaning the rim I noticed what appeared to be filled cracks. I saw no evidence that these cracks joined together and actually represented a large piece of the pipe that had been broken off and later repaired. Though looking at the outer stummel surface the finish is smoothed (without rustication) between the two cracks. The area between the crack also looked thinner than the rest of the stummel. I think this was evidence of a repair by a previous owner or an attempt by the factory to salvage a flawed stummel. Either way the stummel looked and felt structurally sound.
Scraping the tobacco chamber was difficult as the cake was very hard and held firmly to the walls of the chamber. Sanding was slow and exposed fresh meerschaum at the rim of the chamber.
After the chamber was sanded I scrubbed the stummel with warm water and a medium toothbrush. The traditional Murphy Oil Soap was not used, only warm water. The water and toothbrush did appear to remove some of the accumulated grime making the stummel look a bit more clean than previously.
To unify the staining of the pipe’s rim, I used furniture touch-up stain markers.
I started with black around the rim.
I then used the mahogany immediately below the black. Sorry about the blurriness of the photo.
After the stain had dried a few minutes I used a make-up pad wetted with 95% ethyl alcohol to blend the two lines of stain together. Below you can see the results of my blending.
The stem was removed from the oxi bath after 2 hours and was wiped vigorously with a dry cotton make-up pad. A good deal of oxidized vulcanite was removed.
I cleaned the shank airway with folded over bristle pipe cleaners, a nylon shank brush and cotton swabs dipped in 95% ethyl alcohol.
The stem was then scrubbed with Soft Scrub cleanser applied to make-up pads. After scrubbing I applied a layer of mineral oil to the stem.
The airway of the stem was cleaned with bristle pipe cleaners dipped in 95% ethyl alcohol.
The pipe sat neglected for a whole day due to the incredibly busy schedule of a retired slacker, I mean teacher. When I returned to work on the stem I wiped the excess mineral oil and lightly sanded with the 320 sanding sponge.
There were a few deep dents in the stem that would require filling with black cyanoacrylate (CA, super glue). Small drops of CA were placed onto each of the dents.
The CA was then spritzed with a CA drying accelerator. This allows the CA to cure almost instantly.
The cured CA was then lightly filed with a small flat file. This removes the top of the CA fill, getting it smooth with the surrounding vulcanite.
The new fill was then sanded with 320 and 400 grit sanding sponges. The logo was covered with a piece of painters tape to protect the logo from further sanding. The stem was then sanded with a series of sanding sponges from 600-3500. Between each sponge the stem was rubbed with a dab of mineral oil by fingertip and wiped with a dry paper towel.
The flaws on the surface of the rim were filled with a different black CA. The product I use for the stem is “rubberized”. I wanted a hader CA fill for the rim so I used a non-rubberized black CA. I placed a drop of the black CA on the bottom of an upside down medicine cup. I dabbed a fly tying bodkin into the drop to get some CA onto the bodkin then applied it to the flaws. This allowed me to have precise placement of the CA limiting the sanding of excess CA fill.
I allowed the CA to cure on its own without any accelerator. This was a slow process with a good deal of waiting between applications. Once cured, I very lightly sanded the rim with a 400 and 600 sanding sponge to remove the excess CA.
Several applications and sandings later I was pleased with the result. You can see that the sanding was very light leaving most of the previously dyed rim black or, mostly so.
The rim was then re-dyed with the black stain touch-up marker. And allowed to dry.
The finished rim has imperfections which I purposely left. I thought that a pristine smooth finish would look out of place with the rustication of the stummel.
Next I cleaned the logo of any Obsidian Oil with a cotton swab dipped in 95% ethyl alcohol.
Using white acrylic model paint and a fine detail paint brush I applied white paint to the logo. This acrylic paint is water based and dries quickly.
The 4000 grit micro-mesh dam was used to remove the excess white paint.
I worked the stem with micro-mesh pads 4000-12000. Between each pad I applied a small drop of Obsidian Oil, rubbed it onto the stem and wiped with a dry paper towel.
Before and After Fine Polish was used with a soft cotton cloth on the stem to increase the level of polish.
The Fine Polish was followed with Before and After Extra Fine Polish applied and hand buffed with the same soft cotton cloth.
To finish the stummel I needed to prepare for a beeswax coating. I gathered the heat gun, canning jar with beeswax & brush, a catch tin for wax drips and a shallow pan with water. The pan and water help to heat/melt the wax and keep it melted while I work.
The canning jar with beeswax was placed into the water in the pad and the stove lit. The boiling water will melt the wax.
WHile I was waiting for the wax to liquify, I waxed the Peterson stem at the buffer with carnauba wax.
The hot water bath melted the wax. I heated the stummel with the heat gut. I have to admit I was a bit worried about heating the mortise and tenon too much.
With the stummel hot and the beeswax melted I started painting the liquid wax onto the stummel. I painted the top 1.3 and the entirety of the shank. As I painted the accumulating wax was cooling making a lumpy looking mess.
The heat gun was again turned on and the stummel was rotated in all directions in the flow of hot air. The wax remelted and flowed over the surface of the stummel. I herded the wax around with the paint brush to make sure that everything was getting it’s fair share of melted wax. The excess wax drips were accumulating in the catch tin.
With every part of the stummel well coated with hot liquid wax I used a paper towel to absorb the remaining excess wax from the stummel.
The pipe was hot to the touch so I laced it onto the workbench to cool.
There you have it, the restoration of a Peterson Meerschaum 120 Dublin. This old girl turned out pretty well. I still wonder what happened to the Dublin Darling from the Isle of Man regarding the cracks in the bowl. I believe that the whole rear of the bowl was chipped out at some time and repaired with a pretty darn good glue job. The crack seems can kind of be made out in the photo below of the back/shank side of the pipe. Whatever happened she should continue being a grand little pipe for many years. The fresh beeswax looks good and the stem polished up very well. The dimensions of this 120 Dublin are:
Length: 6.00 in./ 152.40 mm.
Weight: 1.28 oz./ 36.50 g.
Bowl Height: 1.71 in./ 43.43 mm.
Chamber Depth: 1.47 in./ 37.34 mm.
Chamber Diameter: 0.74 in./ 18.80 mm.
Outside Diameter: 1.33 in./ 33.53 mm.
I do hope that you have found something here useful to your own pipe care, maintenance or restorations. If you like this sort of thing, please click the like and subscribe buttons. Thank you for reading the ramblings of an old pipe lover.
Below are some photos of the finished Peterson Meerschaum 120 Dublin.
The Peterson System Pipes are a well known feature of pipe smokers and pipe collectors worldwide. They were originally designed and patented by Charles Peterson while working for the Kapp Brothers in 1890, 1894 and a third in 1898. In 1894 Charles Peterson and Henry Kapp bought out the shares of Christian Kapp of the Family business, which the brothers had run together.
Most pipe-people are familiar with the Peterson System pipes of the bent variety. Fewer folks know about the Straight System pipes. I am not sure of the reason for this. One can occasionally come across a Straight System pipe on eBay as an estate pipe though new specimens can be found as older stock in pipe shops in the UK. Shops like The Black Swan (https://www.thebackyshop.co.uk/) and Miss morans (https://missmoran.co.uk/) show that they have Peterson System 31s in stock yet when I try to order to order one I get the following messages,
Just when you think that everyone wants your money you find that due to unknown reasons the above companies cannot deliver to the US from the UK. This brings me to where this pipe came from. It was an estate pipe from eBay and made the journey from Cedar Park, Texas to the wilds of southeast Nebraska in June 2024. The pipe is a lovely smooth finished Peterson 31 and sports the following stamps PETERSON”S over SYSTEM (arched) on the left side and MADE IN THE over REPUBLIC over IRELAND and 31 on the right side. The below photos of the Peterson 31 show its condition upon arrival.
This Peterson 31 arrived without the aluminum tenon extension which is a vital part of it being a true “Peterson System” pipe. Fortunately I have been accumulating extra extensions from Smokingpipes.eu for this very situation.
I would like to say that I am a genius but I know better. I am just someone who plans for the worst to avoid disappointment. This looked to be a very stress free restoration. The pipe was in great shape with the stummel needing minimal cleaning and only a couple of fills. The stem was not severely oxidized and looked like all it needed was a bit of sanding, polish and a new chimney. That is what the Peterson factory workers call the aluminum tenon extension.
Background
The history of Kapp and Peterson (K&P) is long and eventful. In the past couple of weeks I have restored and blogged about several Peterson pipes. I previously wrote the following and it is still relevant: “For a great history Mark Irwin and Gary Marlburg’s book is a must read for a Pete Geek.
As for the specific background on the straight system pipes and this Peterson 31, I will be using the The Peterson Pipe book. According to Mark Irwin and Gary Malmberg,
“The only straight System pipe in current production is the little shape 31 billiard. This was not always the case. Charles Peterson offered four straight Patent Systems in the 1896 catalog: a billiard, a straight-sided, a heel bowl and a bulldog. To these were added three half-bents in the same shapes. Each of the straights was offered in four sizes; the half-bents in one or two sizes each. By the 1906 catalog the half-bents had disappeared, and the original four straight Patents were reduced to two sizes each, making for four shapes and eight pipes.
The straight Systems were produced at least through the mid-1920s, as some of them appear in a Phillip Weiss & Söhne trifold brochure from that era. There is no indication of a straight System in the ‘37 Peterson catalog, and since ‘45 only shape 31 has routinely appeared in the catalogs. The 120 and 87 apple appeared at some point before ‘63, but are only documented in an Associated Imports brochure from ‘76.
The contemporary pipe smoker may also run across a straight 1890-1990 Patent System Commemorative on the estate market. This elongated, short stack billiard was actually a new design and not a reproduction.
The demise of the straight System is a bit of a mystery, because while its smoking properties and maintenance issues vary a bit from the best System, it works at least as well, if not better. As a cutaway demonstrator from the 1896 catalog reveals, the design of the straight System depends on the bore running under the tobacco chamber, necessitating a shallow-bowl geometry. In the case of the System 31, the bowl typically runs 18.5 mm wide by 26 mm deep (0.695 in. by 1.02 in.). But even the large-bowled Patent System Commemorative only has a chamber depth of 34 mm (1.34 in.). The small chamber of these pipes probably accounts for their disappearance, although they are excellent for especially strong or flavorful tobaccos like Gawith’s 1792 Flake, a dark-fired powerful virginia with tonquin flavoring.
Cleaning a straight System is also more complicated than the bent System, as the bore is really a small calabash chamber, not a reservoir, with the aluminum-tenon extension going down the center of its length and extending under the draft hole. After use, a straight System’s chamber should be swabbed out with a tissue twist, followed by a fluffy cleaner with its tip dipped in isopropyl or Everclear. This must be done carefully to avoid spilling the alcohol on the outside of the bowl and possibly damaging the stain. It is probably not necessary to clean it with alcohol after every smoke, but the straight System is extremely susceptible to ghosting.
The draft hole in the straight Systems is larger than in the bent Systems, going through the bottom of the bowl down into the chamber beneath it. This design requires a bit of vigilance to insure the draft hole doesn’t get clogged up or swollen with carbon-cake. The use of a bristle cleaner is therefore a good idea after each smoke.
As for the smoking qualities, the straight System smokes drier than the best System and could be argued to be the drest smoking briar pipe ever made – which may or may not be a good thing, according to each pipeman’s taste. The size and shape of the bore, as some pipe smokers have noticed concerning today’s artisan reverse-calabash briars, promotes the ghosting of tobacco flavors if bothe the chimney and the chamber aren’t cleaned on a regular basis. Many pipe smokers devote a single style of tobaccos (english, virginia, aromatic) to specific pipes in their rotation to avoid this kind of problem, and it’s a good rule to follow with the straight System as well. (The Peterson Pipe The Story of Kapp & Peterson, First edition, second printing 2021. Briar Books Press, Canada. Pp. 264-265)
It must be mentioned that Irwin and Malmberg wrote that in 2018. Since the original publication the Peterson System 31, the last straight System pipe, had been discontinued. This means that the only way you can now have a 31 of your own is to find either new old stock (NOS) from a dealer or to find one on the estate market. How old is the little darling I have in hand? I cannot say. I do have 4 31s and regretfully, I can say little about any of them. I can attest to them being wonderful smoking little pipes. Regarding their age I can only say that the upper left pipe in the photo below is very recent as it has an acrylic stem and was made shortly prior to the discontinuation of the line – approximately 2020.
The Restoration
This little billiard was worthy of a clean denim piece and it got one.
The reaming tools were gathered. No PipNet for this reaming due to the fact that the #1 PipNet blades suffered a break several months ago. So the Scotte Stainless Steel Reamer Tool stepped up as a replacement along with the Smokingpipes Low Country Reamer. The tobacco chamber also received a sanding with 220 sandpaper wrapped around a wood dowel to take it down to bare briar. There was no heat damage observed in the chamber.
The shank’s airway was then cleaned using many cotton swabs dipped in 95% ethyl alcohol, a dental scraper, a nylon shank brush and pipe cleaners doubled over.
With the airway cleaned it was time for the exterior of the stummel to be scrubbed. Murphy Oil Soap was used undiluted with a medium bristle toothbrush. The soap was rinsed with warm water and the stummel dried with a cotton hand towel.
Back at the workbench the stummel was wiped with a make-up pad dipped in 95% ethyl alcohol. As you can see very little old wax and stain were removed.
There were 3 pits which I scraped the old fill material from to prepare them for new fill material. The new fills would be done with brown cyanoacrylate (CA, super glue) and briar dust.
A small drop of brown CA was applied to the pits using a fly tying bodkin. A small scoop of briar dust was then pressed into the CA filled pit.
The excess briar dust was brushed away and the new fill was smoothed with a flat needle file then sanded with a 320 grit sanding sponge. In areas where additional fill was needed a second small drop of CA was added onto the new fill and then was sanded with the sanding sponge. The sanding sponge provided the briar dust this time. The stummel was further smoothed using the 400 sanding sponge.
In preparation for sanding the stamps were taped with painters tape for their protection. I like to use irregular cuts of tape to avoid the “censored” box look, to the area under the tape.
The stummel was then sanded using a series of sanding sponges from 600-3500 grit. In between each sponge the stummel was wiped with a make-up pad wetted with 95% ethyl alcohol.
The protective tape was removed and the stamp areas were wiped with alcohol to remove any residual adhesive from the tape. The stummel was then micro-meshed with pads 4000-12000. Again between the pads I wiped the stummel sith the alcohol and make-up pad.
The stummel was given a liberal coat of Before and After Restoration Balm and allowed to sit while I worked on the stem.
The stem cleaning was a breeze compared to the shank and only required a couple of alcohol dipped bristle pipe cleaners.
The exterior of the stem was given a light sanding with a 400 grit sanding sponge.
I then used SoftScrub on a couple of make-up pads to scrub the stem in an attempt to remove any oxidation on the vulcanite.
The stem was then sanded with a series of sanding sponges 600-3500. There was no P logo on this stem thus no need to protect it with painters tape. Between sponges wiped the sanding dust from the stem by using my finger tip dipped in mineral oil, rubbed on the stem then wiped with a dry paper towel.
The stem was then micro-meshed with the 4000-12000 pads. Between each pad I applied a small drop of Obsidian Oil, rubbed that in and wiped the stem with a dry paper towel.
The stem was then polished by hand buffing Before and After Fine Polish with a soft cotton cloth.
The polishing was completed with Before and After Extra Fine Polish as with the Fine Polish.
The excess Restoration Balm was wiped from the stummel using an inside out athletic sock.
The pipe was then taken to the buffer where it received several coats of carnauba wax.
This was the fourth Peterson System 31 billiard that I have had the pleasure of restoring. As with the others the most trying task was the cleaning of the shank. The chamber within the shank is what makes these little pipes such amazing smokers but it does require a bit of extra work keeping it clean. Something that all previous owners had not been as serious about doing. The briar on this 31 is lovely and typical of Peterson pipes. The vulcanite polished very nicely and accents the briar very well. The nickel ferrule gives the pipe that classical Pterson look. The dimensions of the Peterson System 31 are as follows:
Length: 5.65 in./ 143.51 mm.
Weight: 1.20 oz./ 34.20 g.
Bowl Height: 1.70 in./ 43.18 mm.
Chamber Depth: 1.02 in./ 26.00 mm.
Chamber Diameter: 0.71 in./ 18.03 mm.
Outside Diameter: 1.27 in./ 32.26 mm.
I do hope that you have found something here useful to your own pipe care, maintenance or restorations. If you like this sort of thing, please click the like and subscribe buttons. Thank you for reading the ramblings of an old pipe lover and admitted Pete Geek.
Below are some photos of the finished Peterson System 31 Billiard.
I had never had a Peterson Donegal pipe prior to the arrival of this 106. I know, crazy right? I mean the Donegal Rocky has been a staple of the Peterson line since 1945. I love the look of the texture with it’s craggy appearance and contrast stained briar. I could not speak to the “feel in the hand” until I actually laid hands on this pipe. Let me say, it is very nice. My neglect of the line was not due to purposeful malice, just an unwillingness to spend as much money as the pipes were commanding. Also, the fact that rustication has changed dramatically over the years. I’ll get into that more in the “Background” but let’s just say the “pineapple” years were not pretty. This rustication is what I think of when I think Donegal Rocky.
This pipe is stamped Peterson’s (the top portion of this stamp is weak) over “DONEGAL” ROCKY. Offset to the left is 106 with MADE IN THE over REPUBLIC over OF IRELAND to the right side of the stamping area. The stem was a very tight fit upon arrival from Brooksville, Florida. Maybe the humidity of that southern state was the cause. Below are some photos of the pipe upon arrival. Well, not quite as “upon arrival”. When the pipe arrived the stem was very much stuck in the mortise. A visit to my freezer for an hour allowed me to extract the stem easily. Once warmed it was a very tight fit. I did not completely reinsert the stem into the shank for fear of damaging the pipe.
The pipe looked like it was generally in good shape. The stem was heavily oxidized and had a pattern to the oxidation that I found amusing. As if the previous smoker had antioxidant saliva. The stummel was dirty with about 50 years worth of grime. The tobacco chamber was well caked but not to excess, just definitely smoked. The rim had a fair amount of lava, again indicative of a well used and loved pipe. This looked like a nice straight forward restoration.
Background
I recently restored a Peterson Dunmore 606 Pot and wrote the following in that blog: “As much as I love the history of the Kapp and Peterson company and Peterson pipes, I will not get into that other than give you resources to read the history for yourself. I will delve into the Dunmore, or Dunmoor line of pipes at greater depth.
For a great history Mark Irwin and Gary Marlburg’s book is a must read for a Pete Geek.
Now to the stuff regarding this pipe: A Peterson Dunmore. I refer to Mark Irwin again here and his blog, Peterson Pipe Notes. I can wholeheartedly recommend the free at
I will include the text here in its entirety but recommend the link for the photos. This is used with permission of the author (thank you Mark).”
The above holds true for this blog as well except take out the “Dunmore” and add “Donegal Rock” in it’s place.
Once again I use Mark Irwin’s Peterson Pipe Notes as a primary source for this pipe. His Blog “148. The “Rocky” History of the Donegal Line” (https://petersonpipenotes.org/tag/peterson-donegal-rocky/) is a wonderful explanation of how the line originated and changed over the years. I include it here in it’s entirety, with permission of the author (personal email).
I recently acquired for study an amazing NOS (new/old stock) Donegal Rocky 01s with its box, sleeve and brochure. Hallmarked with a Celtic lower-case n for 1979, it’s a first-year release of this marvelous ‘short dutch’ bowl shape and convenient reason to take a look back at the long history of Peterson’s iconic “Donegal Rocky” line.
The “Donegal Rocky” (in quotation marks), released in 1945 or so, was Kapp & Peterson’s first rusticated line. Not that K&P hadn’t rusticated pipes previously, they just that they hadn’t devoted an entire line to rustication. And they were apparently proud of it, because they gave it a sterling mount along with a black finish and white-stamped P on the mouthpiece.
It was part of K&P’s “Product Line,” what I call gateway pipes and others might call an entry-level pipe, as you can see in this shape chart from the 1945 catalog. Like the Shamrock (European version) and “K,” it was originally a fishtail line.
For nearly thirty years, from 1947 until 1975, the line continued uninterrupted, black rusticated finish with fishtail mouthpiece and sterling band.
from the 1976 Associated Imports Point-of-Sale Brochure
Then in 1976, just a year out from their Centennial celebration, Peterson (in an expansive mood) pushed the Donegal up a notch, giving the line a P-Lip. The 1976 engraving doesn’t show it, but you can just glimpse a new, deeper rustication in the (still black) 1978 Associated Imports chart:
This rustication was done by a carver in Dublin, Paddy Larrigan told me this past June in Sallynoggin. The artisan did all of Peterson’s fantastic rustications from the period: the classic “Pebble Rustics,” the early Sherlock Holmes rustics, the Bond Street of Oxford Premier Systems, and the sterling-band P-Lip Donegals.
And that’s where this 1979 01s comes in handy, because we can see with much greater clarity the rustication as well as the details of a “Donegal Rocky” at its pinnacle of engineering and finish:
It’s worth remarking concerning the removable stinger. This spike-ended aluminum tube is easily removed, leaving the P-Lip mouthpiece strictly a graduated-bore regulation affair.
If I were more dedicated, I’d smoke this pipe a few dozen times with and without the stinger and give you a report on what purpose it serves. I wonder if the craftsmen at the factory installed the stinger to approximate the effect of the older bone tenon extensions routinely attached to Classic Range Dublin & London, Classic and Premier lines? With or without the stinger, the pipe smoker should enjoy the benefits of the “Sub-System,” which I talk about at length in The Peterson Pipe. As it is, I’ll leave that to someone else, and happily report their findings.*
Here’s the COM stamp, showing Peterson’s love of quotation marks (seen also in the “SPORTS” line) as well as a closer look at the stain and rustication technique:
Sometime between 1978 and 1980 the sterling band was dropped to a nickel band and the P-Lip abandoned in favor of the Donegal’s traditional fishtail, all of which may (or may not) indicate a lessening in the quality of the rustication.
Seen above from the 1981 Mark Twain brochure, the sterling band resurfaced, this time with the line’s first change in stain color to what some of us have in our rotations or remember: the contrast brown over black (seen in the dutch 339 hallmarked for ’81 below). The catalogs indicate some fluctuation from sterling to nickel bands on through the Late Republic era (1969-90) into the Dublin era (1991-2018), with the sterling being used (as happens so often with Peterson lines) in conjunction with a P-Lip in the 1997 catalog, but also in that year available with a nickel band and fishtail.
The dublin 120 seen above is from ’94, and as you can see, while the rustication technique is nearly identical to that of the ’81 dutch billiard, the stain color has changed for a third time to burgundy-over-black, which seems to have been the standard during most of the early Dublin era.
Sometime near the beginning of this century the Donegal was down-graded again to its original “Product” or gateway status by a nickel band and fishtail mouthpiece as seen in this B7, and while the stain remains the same, it looks less craggy:
Things would grow steadily worse in the following years, however, as the gawdawful pineapple rustication took hold, so that by around 2010 the Donegal was reduced to the etchings seen on this B39:
With the return of in-house rustication earlier this year, things are looking up for the Donegal, at least just a little, as you can see in this current 80s:
The finish and the rustication are, so nearly as I can tell, identical with that used on current rusticated SH pipes, so that’s something, right? I don’t think I’d call it a Rocky anymore, but at least it still has a vulcanite mouthpiece, a plus.
As for the future of the line—or the name—I couldn’t hazard any guesses. In the ideal Peterson of my imagination, the line would assume the craggiest crags, sharp textures and brilliant obsidian finish of the last batch of Rosslare Rusticated pipes, along with—of course—a vulcanite P-Lip. In the meantime, just to have it around, as one of the bedrock Peterson lines for almost 75 years, will do.
According to Mark’s well documented history of the Donegal Rocky line this pipe shouldn’t have the contrast stained black/brown that I see as that didn’t come about until the later 1970s. I emailed Mark asking him what he thought about my restoration of this pipe and at publication I have not heard back. I assume he and his wife are shipping out the most recent Peterson Pipe Notes pipe stand, so I understand his busy schedule. That is if my interpretation of the worn silver hallmark is correct.
The silver hallmark that I see on this pipe is a lowercase e as seen in this photograph:
Now an argument could be made for either an e, c or o. Respective dates would be 1972, 1970 and 1980. The o would move the pipe closer to the black/brown stain age range of 1981 as mentioned in the Mark Irwin blog above.
The Restoration
The restoration began as normal with a clean denim piece. I then started work on the stem.
The first job was to buff the stem with 0000 steel wool to remove the hard shiny oxidized coating.
This allowed the OxyClean solution easier and faster action at softening the oxidation. The stem was left to soak in the Oxy for an hour or so.
Next came the reaming and the reaming tools were gathered.
The lion’s share of the work was done with the PipNet reaming tool with its #2 and #3 blades. This cake was very hard and dry and the tobacco chamber size was a very tight fit for the #3 blade so scraping was required to allow easier reaming with the PipNet.
Eventually the chamber looked mostly cake free.
I was pretty sure that I should be receiving some sort of tax subsidy for the carbon sequestration I would be responsible for by sending this pile to a landfill.
Upon sanding the tobacco chamber I discovered that the cake had not protected the chamber as well as I would have thought that the previous owner was a puffing madman. The inside of the chamber had light spiderwebs due to heat damage both to the left and right front. Further sanding made it so that I could not feel anh roughness but I could still see the spiderwebs. A quick message and photos were sent to Steve Laug for a bit of advice. I wasn’t sure that this would need a waterglass, J.B.Weld of just a bowl coating. Steve got back to me quickly and said a bowl coating would probably be sufficient.
I proceeded to the scrubbing. This was done with undiluted Murphy Oil Soap and a medium toothbrush.
After the exterior was scrubbed I used a bit of Dawn dish soap with a nylon shank brush to see how bad the airway of the shank was. It was pretty bad. The stummel was thoroughly rinsed inside and out with warm water and dried with a cotton hand towel.
Back at the workbench I poured 3-4 ml of 95% ethyl alcohol into the bowl and allowed it to flow into the shank. I scrubbed with a nylon shank brush and the alcohol then poured the alcohol into a medicine cup. Yeah, there may be North American megafauna stuck in that tar pit.
I scraped the airway with a dental scraper to remove as much of the tar as I could get out. Repeated alcohol and shank brush scrubbings yielded more dissolved tar.
Eventually the airway was cleaned and the smell of old smoking residue disappeared.
The stem was retrieved from the Oxy and I began cleaning it with SoftScrub on make-up pads.
It eventually was rid of the majority of the oxidation at least from the button. Which was the area I needed to work on. The button area was filed and sanded with a 320 grit sanding sponge.
I moved on to a 400 and 600 grit sponge to further smooth the stem surface. There would need to be some filling of dents with black cyanoacrylate (CA, super glue).
The CA was applied then spritzed with a CA drying accelerator. The quickly cured CA was then filed and sanded with the above mentioned sanding sponges.
This was repeated until the fills were smooth.
With the button reshaped and filled I cleaned the airwair of the stem. The previous owner did apparently use a pipe cleaner through the stem as it was not nearly as fouled as the shank had been.
Next came the polishing of the silver. I used a Cape Cod Metal Polishing Cloth on the silver band. I love the smell of this product and it works well too.
The silver had a respectable shine but there appeared to be a film of surface flaw to the finish. I figured that I would spend more time with that later.
There was little to do with the stummel other than to clean it thoroughly. I used a baby toothbrush to work Before and After Restoration Balm into all of the craggy texture and let the balm work it’s magic.
I prepped the shank by wrapping it in painters tape to avoid stray sanding. The stem was sanded with a series of sanding sponges from 1000-3500. In between each sponge I dabbed a finger tip’s worth of mineral oil onto the stem and rubber it in. I then wiped the stem with a dry paper towel.
After about 20-30 minutes the Restoration Balm was wiped from the stummel using an inside out athletic sock.
I wasn’t sure which wax to use on such a wonderfully rough textured stummel. I opted to use the Decatur Pipe Shield No-Buff Wax. I cleaned the Restoration Balm from the baby toothbrush with 95% ethyl alcohol. I used the baby toothbrush to work the Decatur wax into the crags and let it dry for the recommended 10-20 minutes, as per the instructions on the label.
I then took the stummel to the buffer and swapped out the carnauba waxing wheel for a clean flannel wheel. I used the clean wheel to buff the N0-Buff wax. Yeah, I know…
Now to review: The stem before.
The stem after I had worked on it. There remained a serious amount of discoloration on the tenon end. This stubborn stuff required a less chemically subtle approach.
I went with a dip into the Before and After Extra Strength Deoxidizer. A pipe cleaner was inserted into the button end of the stem to suspend it from the jar top. I allowed the stem to soak in the solution for 2 hours.
After the 2 hours I removed the stem from the solution and let the excess solution drip back into the jar.
With the stem all drip dried, well not really dry, I wiped the stem with a coarse shop rag and ran several pipe cleaners through the airway. I then micro-meshed the stem with a series of 4000-12000 pads. Between each pad I applied a small drop of Obsidian Oil to the stem, rubbed it in with my finger tip and wiped the stem with a dry paper towel. I failed to photograph the micro-meshing. Darn old people.
The stem looked much better. If you can’t wait to see it, feel free to jump down a bit.
The spider webbing heat damage still needed to be addressed. I retrieved the maple syrup and applied a big drop to my finger tip. I rubbed this onto the surface of the tobacco chamber.
I then opened up a capsule of activated charcoal. I dumped the charcoal into the chamber, placed my palm over the rim and egan shaking the stummel distributing the charcoal powder and covering the sticky syrup. You can see the charcoal also left a very symmetrical spot on my palm. Having forgotten to plug the airway with a pipe cleaner I also got a nice coating of carbon powder all over the shank’s airway. Yay, more shank cleaning.
Below are the photos of the bowl coating.
I would say that my first Peterson Donegal Rocky restoration was a success. I think it turned out very well. I like the craggy appearance and feel of the pipe. The shape is a favorite of mine.The brown and black contrast stain was left intact and I think it still works . I was quite happy with the oxidation removal from the stem and the black vulcanite polished up nicely. The silverband looks as if it has experienced some trouble and I cannot get it to look bright and well, silver all around. I am sure this will be a great smoking pipe but will have to wait a couple of days for the coat coating to thoroughly dry. The dimensions of the Peterson Donegal Rocky 106 Billiard are as follows:
Length: 5.95 in./ 151.13 mm.
Weight: 1.54 oz./ 43.60 g.
Bowl Height: 1.96 in./ 49.78 mm.
Chamber Depth: 1.70 in./ 43.18 mm.
Chamber Diameter: 0.83 in./ 20.8 mm.
Outside Diameter: 1.58 in./ 40.13 mm.
I do hope that you have found something here useful to your own pipe care, maintenance or restorations. If you like this sort of thing, please click the like and subscribe buttons. Thank you for reading the ramblings of an old pipe lover.
Below are some photos of the finished Peterson Donegal Rocky 106 Billiard.
Some of the above “finished” photos were taken slightly out of sequence. Example: the bowl coating was added after some of the shots.
In the last restoration I discussed my Peterson Pipe Acquisition Disorder had ended its remission. Well, I neglected to say how severe the return to activity the PPAD had actually become. Please do not grieve for me. Your sympathy would be far better applied to another, for this is a disorder which I have brought upon myself.
This restoration deals with a lovely Peterson meerschaum pipe which came to me as part of an estate lot. I spied this Pete meer in the photos of the lot and couldn’t believe what I was seeing. It was as if the Peterson was hiding amongst the other old pipes. Apparently
it’s camouflage was good because there were only 6 other bidders. A few days later the goal and gem of the entire lot arrived here in the wilds of southeast Nebraska. Below are some photos showing the Peterson meerschaum prior to any work being done.
I had only worked on a handful of old meerschaum pipes. I figured that I should probably read a couple of Steve Laug’s rebornpipes.com concerning meerschaum. I have found that there are two main ways to learn; 1, from your own mistakes and 2, from listening to the wisdom of others who have made mistakes. One of these is free and painless, the other, not so much. I did know that I would be using far more soap and water than alcohol on this restoration. I also knew that I wanted to keep the P logo on the stem at all costs since that was the only indication of this pipe’s maker.
Background
In the last restoration I did a Peterson Dunmore 606 Pot (linked for those who are interested). I included a few links concerning the history of Peterson pipes. I will include those here also. “For a great history Mark Irwin and Gary Marlburg’s book is a must read for a Pete Geek.
For the history of Peterson Meerschaums I will mainly be citing Irwin and Marlberg’s The Peterson Pipe book. Peterson has a long history of meerschaum pipe making dating back to the 1870s (Irwin, 2018 p. 15). At the time when Charles Peterson began working for the Kapp brothers in Dublin, meerschaum was the old traditional material while briar was a new innovation destined to become more popular in the next century. It was with briar that Charles Peterson created his original patents for the reservoir in 1890 and for the graduated-bore mouthpiece with what we call the “Patent-Lip” (P-Lip) today, in 1894. 1893 was the year that Charles Peterson and Henry Kapp bought out the shares of Christian Kapp of the Family business, which the brothers had run together. “Christian was evidently not happy with this arrangement and disliked Dublin. He trained to become a doctor, and on 12 June 1893 he sold his share of the business to his brother and Charles Peterson” (Irwin, 2018 p. 48). The Kapp & Peterson company was born and the Peterson System has continued for over 130 years.
Now obviously the lovely Peterson meerschaum pipe in hand is not something made at the turn of the century. According to Irwin and Malmberg, “ In 1968, Peterson returned to making block-meerschaum pipes after forty years. They had made block meerschaums in all Patent Systems and many Classic Range shapes from 1896 until about 1929. The scarcity and rising cost of amber, fragility of meerschaum and popularity of briar all contributed to the end of meerschaum production.” (Irwin, 2018 p. 158). The authors go on to state that, “These Republic-era meerschaums were first made in partnership with Manxman Pipes, Ltd., on the Isle of Man, a company Peterson bought outright in the early 1970’s (Irwin, 2018 p. 158).
I am not quite sure how the purchase of Manxman pipes worked. Manxman was an apparent subsidiary of Laxey Pipes Ltd. According to pipedia.org:
“Laxey Pipes Ltd. resided in a historical 19th century four-storey Man stone building at The Quay, Old Laxey, Isle of Man, which thankfully has been preserved.
The company specialised in the production of meerschaum pipes using the Meerschaum mined by the Tanganyika Meerschaum Corporation in the Amboseli basin in Tanganyika (since 1964 part of the United Republic of Tanzania).
Please note: you may often find names like “Manx Pipes Ltd.”, “Man Pipe Co.” and others more, but there is no indication of another Isle of Man pipe producer other than Laxey Pipe Ltd. at any time!
Laxey Pipes Ltd. marketed own brands like “Manxpipe”, “Manxman”, “Manxland” e.c. Names like “John Bull”, “White Knight” (unwaxed), “Domino” (black, or lined) indicated some shapes / colours of Laxey’s own series. The stems either showed the astronomical sign for “male” or “man” (circle + arrow), or the crest of the Isle of Man, the 3-legged X in a circle. Manxpipes and Laxey’s other brands were available through pipe retailers in general, but also were sold (mainly) to tourists through their own shop in Laxey.
Furthermore Laxey Pipes Ltd. manufactured the meer bowls for Peterson, Barling, Nørding and others from the later 1960’s until 2001. Man Pipe e.g. was a brand distibuted by Comoy’s. The bowls usually showed no nomenclature indicating the orderer. “Genuine Block Meerschaum” was engraved frequently. Often, just the stems were different, while bowls were the same.
Supply of meerschaum from East Africa run out (Kenya / Tanzania exhausted, Somalia inaccessible), and thus the last Laxey meers were supplied to trade in May, 2001. Laxey Pipes Ltd. tried to survive continuing with briar pipes – mainly in the Danish style -, but to no success. It closed down business in July, 2002.”
Tracing the 406 shape through the pipe charts from the early 1900’s to 1984 was interesting and made me realize it is time to visit the eye doctor again and get a new prescription for glasses. The first iterations of the prince shape are found in the 1947 shape chart. There are 4 prince varieties: “Sports” 4 Large Prince, 407 Prince (straight stem), 407 Prince semi-bent and the 406 Large Prince. The next catalog occurrence is in 1965. Here the Peterson 406 is a prince with a slight bend. The shape matches the pipe in hand very well. The next occurrence is in the Peterson-Glass 1978-79 catalog. This catalog shows the full range of Peterson’s meerschaum offerings and here the 406 prince has a slight bend. The last catalog tracing the prince is the shape charts from the 1983 issue. Here the 406 is shown with a slight bent stem and labeled as “406. Large Prince” (Irwin, 2018 p. 171). The 406 also has an asterisk denoting that this shape is also “Available in Meerschaum”. The 407 reappears as a prince with a straight stem and is not available in meerschaum.
The Peterson-Glass 1978-79 catalog also lists and discusses the available meerschaum finishes. These included: Golden Supreme, Tawny De Luxe, Golden Princess, Yellow Aboriginal, Red/Black Premier and Kapmeer. Now this may be taken with a grain of salt but I believe this to be a 406 Large Prince from the 1983 catalog but with the red staining of the Peterson-Glass 1978-79 catalog. Either way, I think this pipe is a late 1970s-early 1980s product.
The Restoration
In typical “me” fashion I began with a cleanish piece of denim for the work surface. I think I may need to visit the local thrift stores and see if I can pick up a couple pairs of jeans to turn into new denim pieces. The laundry guy here at this house has much to be desired when it comes to stain removal.
I removed the stem and gave it a light buffing with 0000 steel wool prior to a dunk in the OxyClean solution.
I figured I would start with an hour in the Oxy then reassess if more time would be needed.
The reaming was done with only scrapers. I heeded the warnings of others who said to avoid reaming tools that would apply torque to the meerschaum.
The previous owner either hadn’t smoked this darling very much or had taken care not to allow the build-up of a cake. Well done, unknown guy or gal (keeping it inclusive).
After sanding the tobacco chamber with 220 sandpaper wrapped around a wood dowel I finish sanded it with 320 sandpaper and my finger. Next stop was the sink. Here I scrubbed the stummel with undiluted Murphy Oil Soap and a medium stiff toothbrush. The lather turned bright pink indicating that I was correct in identifying this pipe as a Red Premier from the Peterson-Glass 1978-79 catalog. The soap was rinsed with warm water. I also scrubbed the airway with a nylon shank brush and Dawn dish soap. This produced slightly brown tinted lather and was also rinsed with warm water. The stummel was then dried with a cotton hand towel.
Back at the workbench the stummel’s striped colors were more pronounced. I wasn’t sure what to do about that. Do I try to stain it with a red Fiebing’s Leather Dye or leave it alone and see how it looks after the molten beeswax? I opted for the latter.
I ran a bristle pipe cleaner dipped in 95% ethyl alcohol through the airway to judge how effective my scrubbing had been. It came out pretty clean. I proceeded to do this a few more times until no color was seen.
To make sure there was no wax or excess dye remaining on the stummel exterior I used a medium toothbrush dipped in ethyl alcohol to scrub the stummel. You can see that a little bit more red dye came off into the alcohol in the medicine cup and onto the toothbrush.
There were small brown clouds of oxidized rubber around the stem in the Oxy solution. I assumed this to mean it was working at loosening up that darn oxidation.
Upon removing the stem from the solution I wiped it vigorously with a dry cotton make-up pad. A significant amount of oxidized rubber came off on the pad.
I then proceeded to use several more pads with SoftScrub to attempt to rid the stem of the oxidized material. I was glad to see a general lightening of the pads but the oxidation was stubborn and remained difficult.
I then tried using a piece of a Magic Eraser with SoftScrub. I ended up taking the stem to the sink where I could rinse the Magic Eraser with water more effectively.
Once again, I forgot to take any photos of the sanding and micro-meshing of the stem. I get focussed or “in the zone” and kind of lose myself sometimes. Sorry, if it’s any consolation you can see the brown oxidized rubber dust from wiping the dust from the sanding sponges on the denim.
I cleaned the airway of the stem and found it was also fairly clean. Alcohol dipped bristle pipe cleaners were the weapon of choice, here. The stem then received a coat of mineral oil.
I checked the photos to make sure that the P logo was painted white. I didn’t want to make the same mistake that I did on the last restoration and have to go back and repaint the logo. If you enjoy learning from the mistakes of others check out the Peterson Dunhill 606 restoration. The logo area was cleaned and de-oiled with a cotton swab and 95% ethyl alcohol.
I used the plastic tube of a cotton swab to form a plastic scraper. This was done with a lighter and pressed flat with a knife blade. It was then trimmed to shape with scissors. The white acrylic model paint was applied and allowed to mostly dry.
The paint was then scraped off using the freshly made plastic scraper.
I was ready to apply the beeswax. I think this is what I was planning out in my head when I failed to photograph the stem sanding. I wanted a fairly easy to apply and cleanup method to apply a layer of beeswax to the stummel. I came up with the following plan:
Melt the beeswax in a glass canning jar in a pan of boiling water.
Place the stummel in an empty metal snuff can. This is to catch the wax drippings.
While the wax is melting, heat the stummel with a heat gun.
Move the wax close to the stummel and paint the wax onto the surface of the stummel.
Use the heat gun to evenly melt/distribute the wax over the entire stummel.
Absorb the excess liquid wax onto a paper towel.
That sounded like a good plan based only on having done this two other times. And those were a couple of years ago.
The double boiler wax melter.
The empty snuff can wax catcher.
The heat gun
It’s “Go time”.
The nearly constant heating and making sure everything was evenly coated.
Absorbing the wax. Hot, hot, hot.
Ahhh, that’s better. Using a cotton glove to absorb the liquid wax was much more comfortable than the paper towel.
Here is what the pipe looked like back at the workbench.
All that remained was to give the stem a couple of coats of carnauba wax with the buffer and take some “finished” photos.
Overall this Peterson Meerschaum 406 Prince turned out quite nicely. I admit to not being totally comfortable working with meerschaum. At least not as comfortable as I am with briar. Nevertheless, I think the pipe cleaned-up well. I love the shape of the Peterson 406, the slightly bent stem gives it a graceful elegance not quite typical for the normal Peterson aesthetic of a more heavy shank. With it’s wide bowl it should make a grand English blend smoker. The stem polished up pretty well except for the tenon end which still retained some discoloration from oxidation. I feared being too aggressive here and risking the loss of the stem logo. The red stain of the meerschaum is attractive with the black rim and the stripe around the middle giving character. The dimensions of the Peterson Meerschaum 406 Prince are:
Length: 6.58 in./ 167.13 mm.
Weight: 1.63 oz./ 45.75 g.
Bowl Height: 1.46 in./ 37.08 mm.
Chamber Depth: 1.17 in./ 29.72 mm.
Chamber Diameter: 0.78 in./ 19.81mm.
Outside Diameter: 1.65 in./ 41.91 mm.
I do hope that you have found something here useful to your own pipe care, maintenance or restorations. If you like this sort of thing, please click the like and subscribe buttons. Thank you for reading the ramblings of an old pipe lover.
Below are some photos of the finished Peterson Meerschaum 406 Prince.
Addendum: Additional work done on stem. I was not happy with my work on removing the oxidation from this stem. I mentioned that I did not want to risk losing the stem logo with a more aggressive deoxidation treatment using Before and After Deoxidation Solution. Mark Hoover, of Before and After products, reached out to me via Facebook personal messaging and stated, “I have never had loss so I am a bit perplexed. You should not have any loss as there is no abrasive. If the stamp is faint or heavily oxidized it was likely not strong under the oxidation so when you clean it it may just seem that way. I promise you will not have this issue with a deep stamp like the Peterson you just did.” I have had the loss of a stamp using the Before and After Deoxidizing solution when the stamp was weak. The Key point to Mark Hoover’s statement is “not strong under the oxidation”. With a weak stamp, removal of oxidized material can remove a faint stamp as the stamp has been oxidized as well.
With Mark’s assurance giving me more confidence, I returned the Peterson Prince to the workbench. I wiped the stem of 95% ethyl alcohol on a make-up pad to remove the carnauba wax. I then placed a pipe cleaner into the button as a hanger. The stem was then suspended into the Before and After Extra Strength Deoxidizer solution.
I allowed the solution to work on the stem for 90 minutes. After 90 minutes I allowed the stem to drip excess solution back into the jar.
After dripping I wiped the remaining solution from the stem with a coarse cotton shop rag. I ran several pipe cleaners through the airway to remove any solution from the airway as well. The oxidation was greatly reduced but there was still some discoloration. I returned the stem to the workbench and used SoftScrub on a make-up pad. SoftScrub is an abrasive and will wear away a stamp though it is far less abrasive than sanding.
The stem was micro-meshed using the 4000-12000 micro-mesh pads. I then polished the stem with the Before and After Fine Polish followed by the Extra Fine Polish. The stem logo was again repainted as earlier. The stem was finally given a couple of coats of carnauba wax at the buffer.
The below photos are of the Peterson meerschaum 406 Prince after readdressing the oxidation.


 A 120F for “Flat” with an oval shank
 A 417 Donegal Rocky Sterling Band


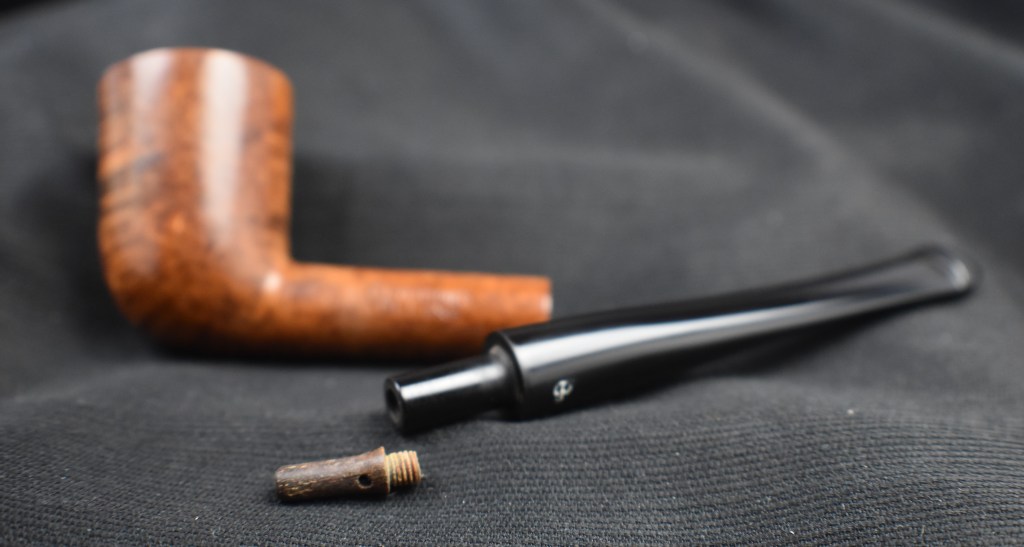
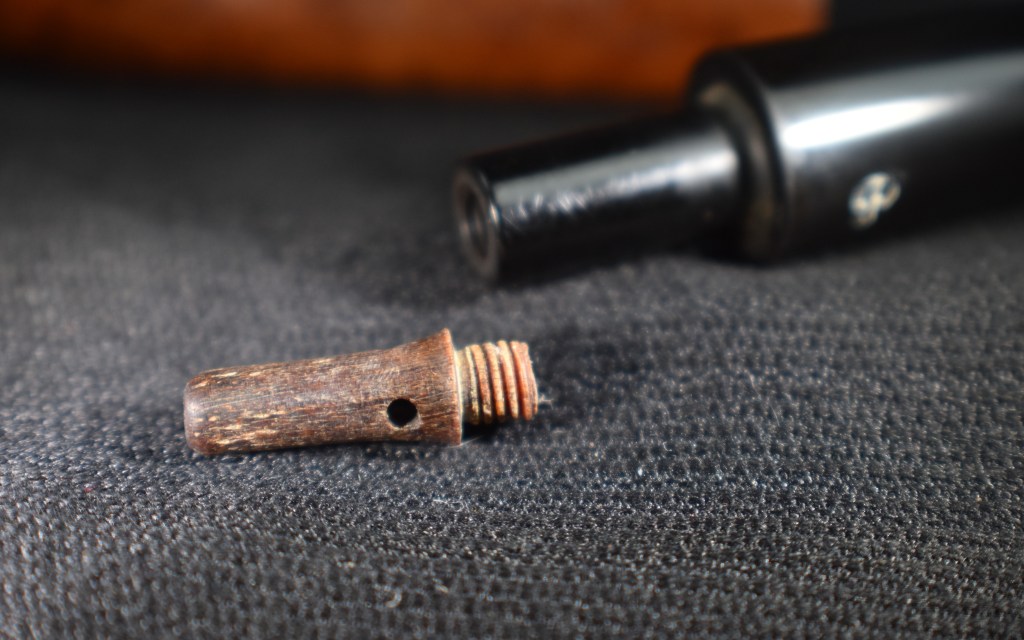


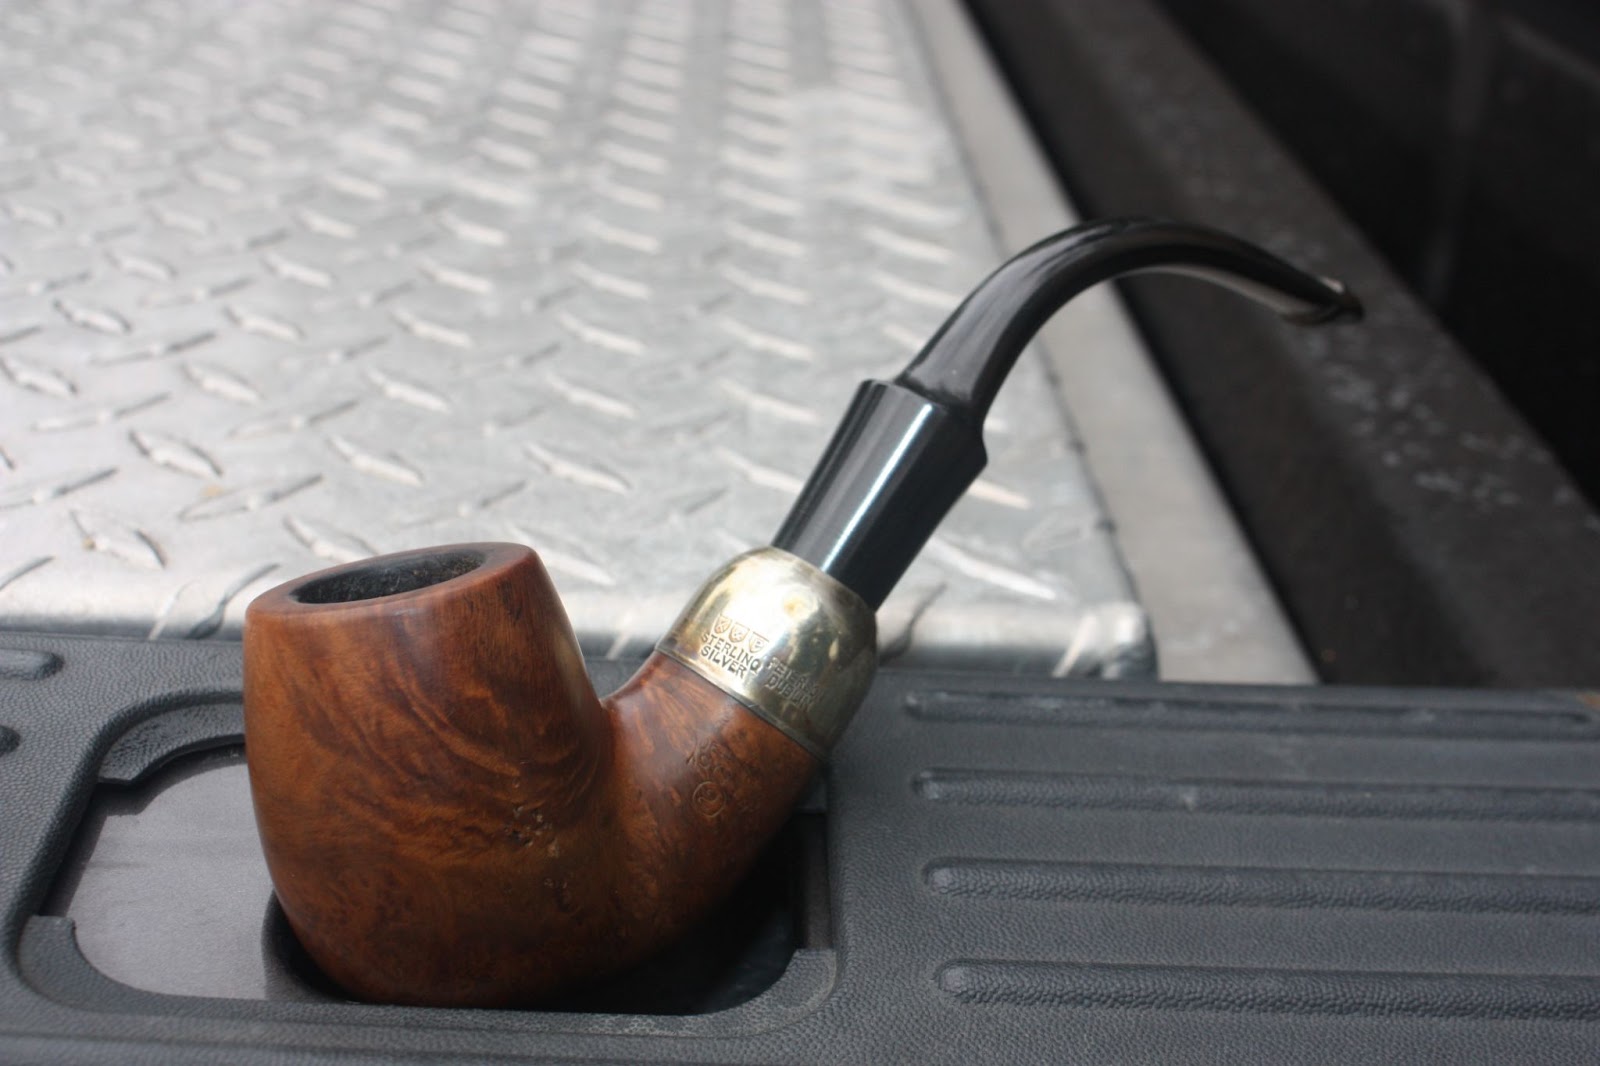


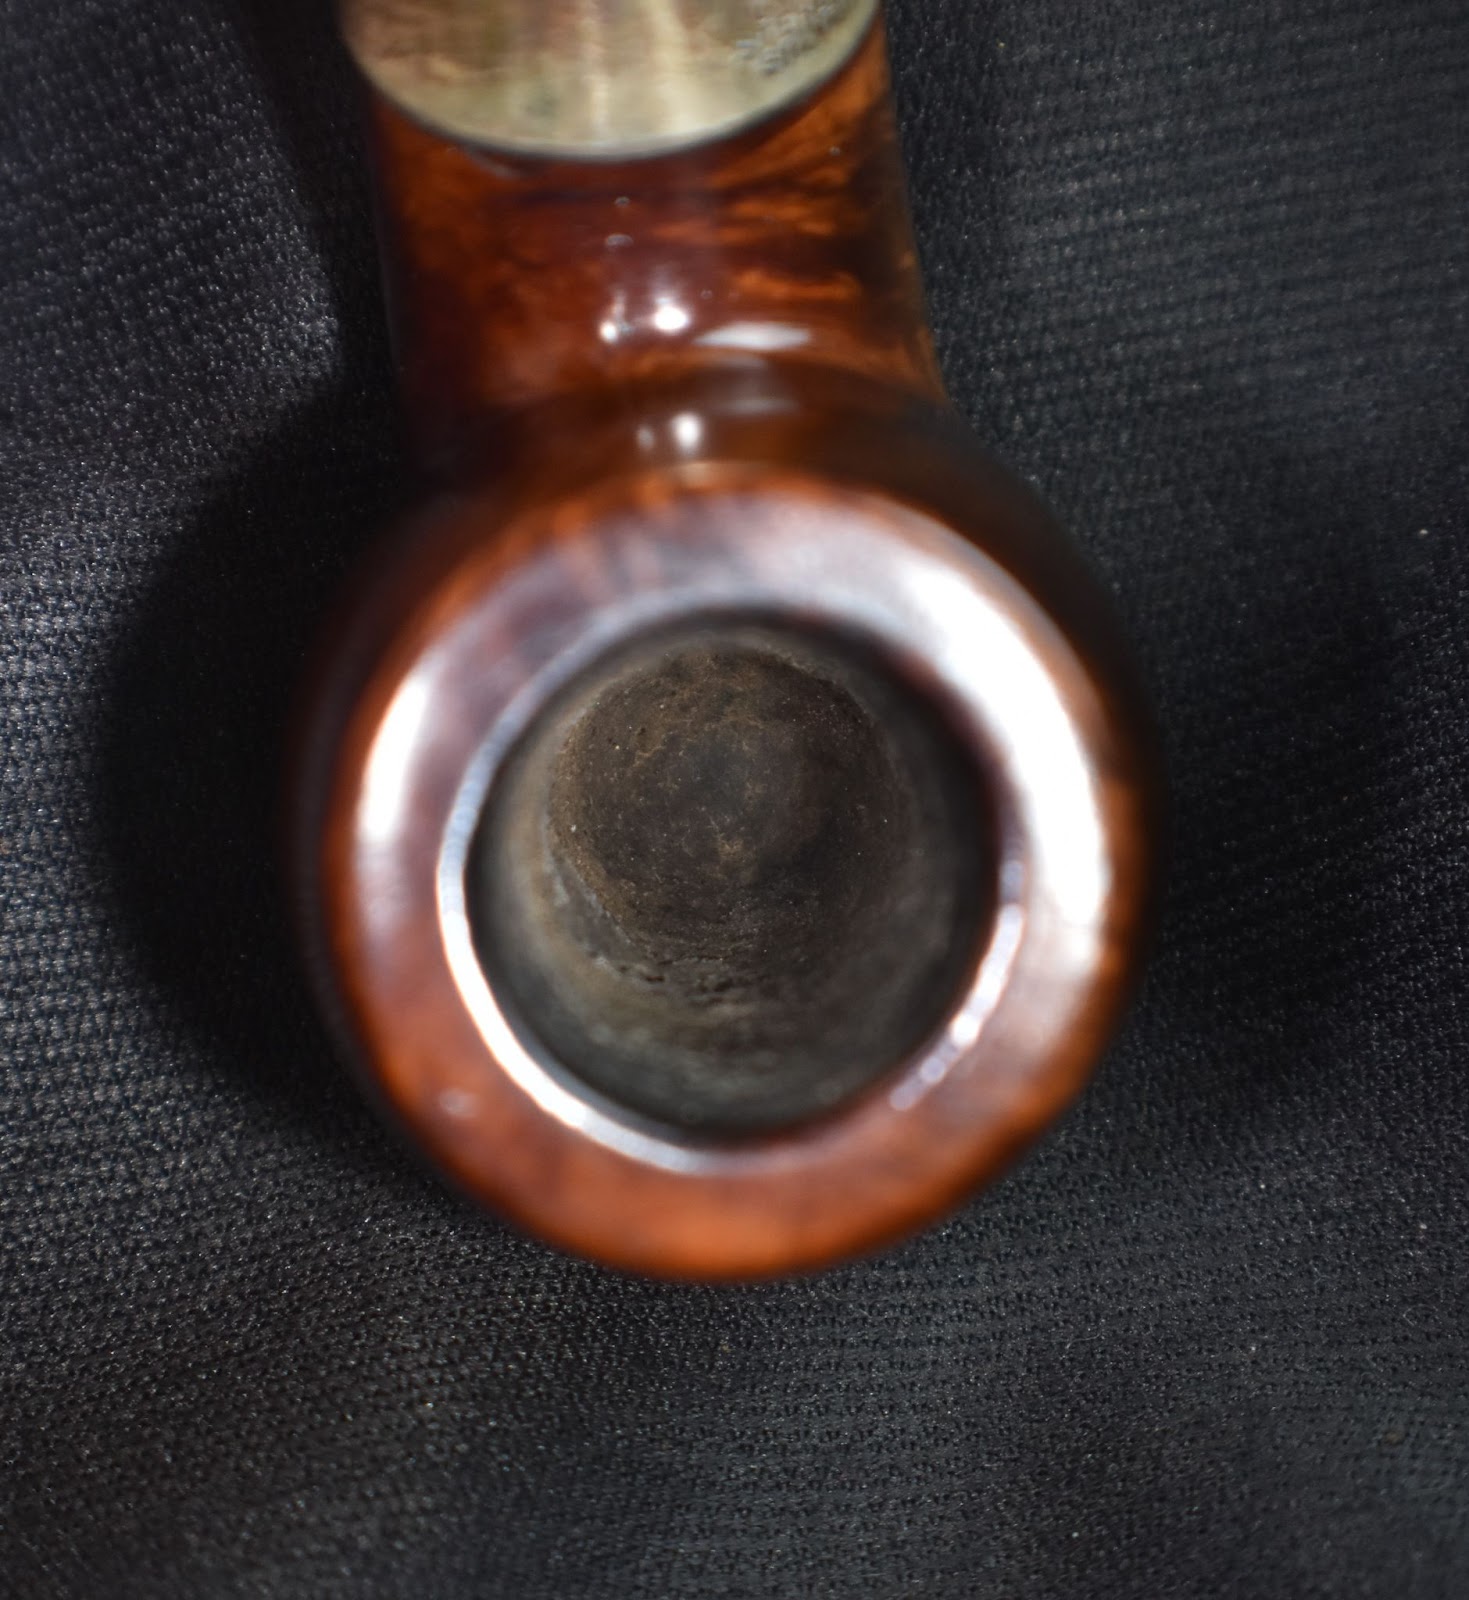

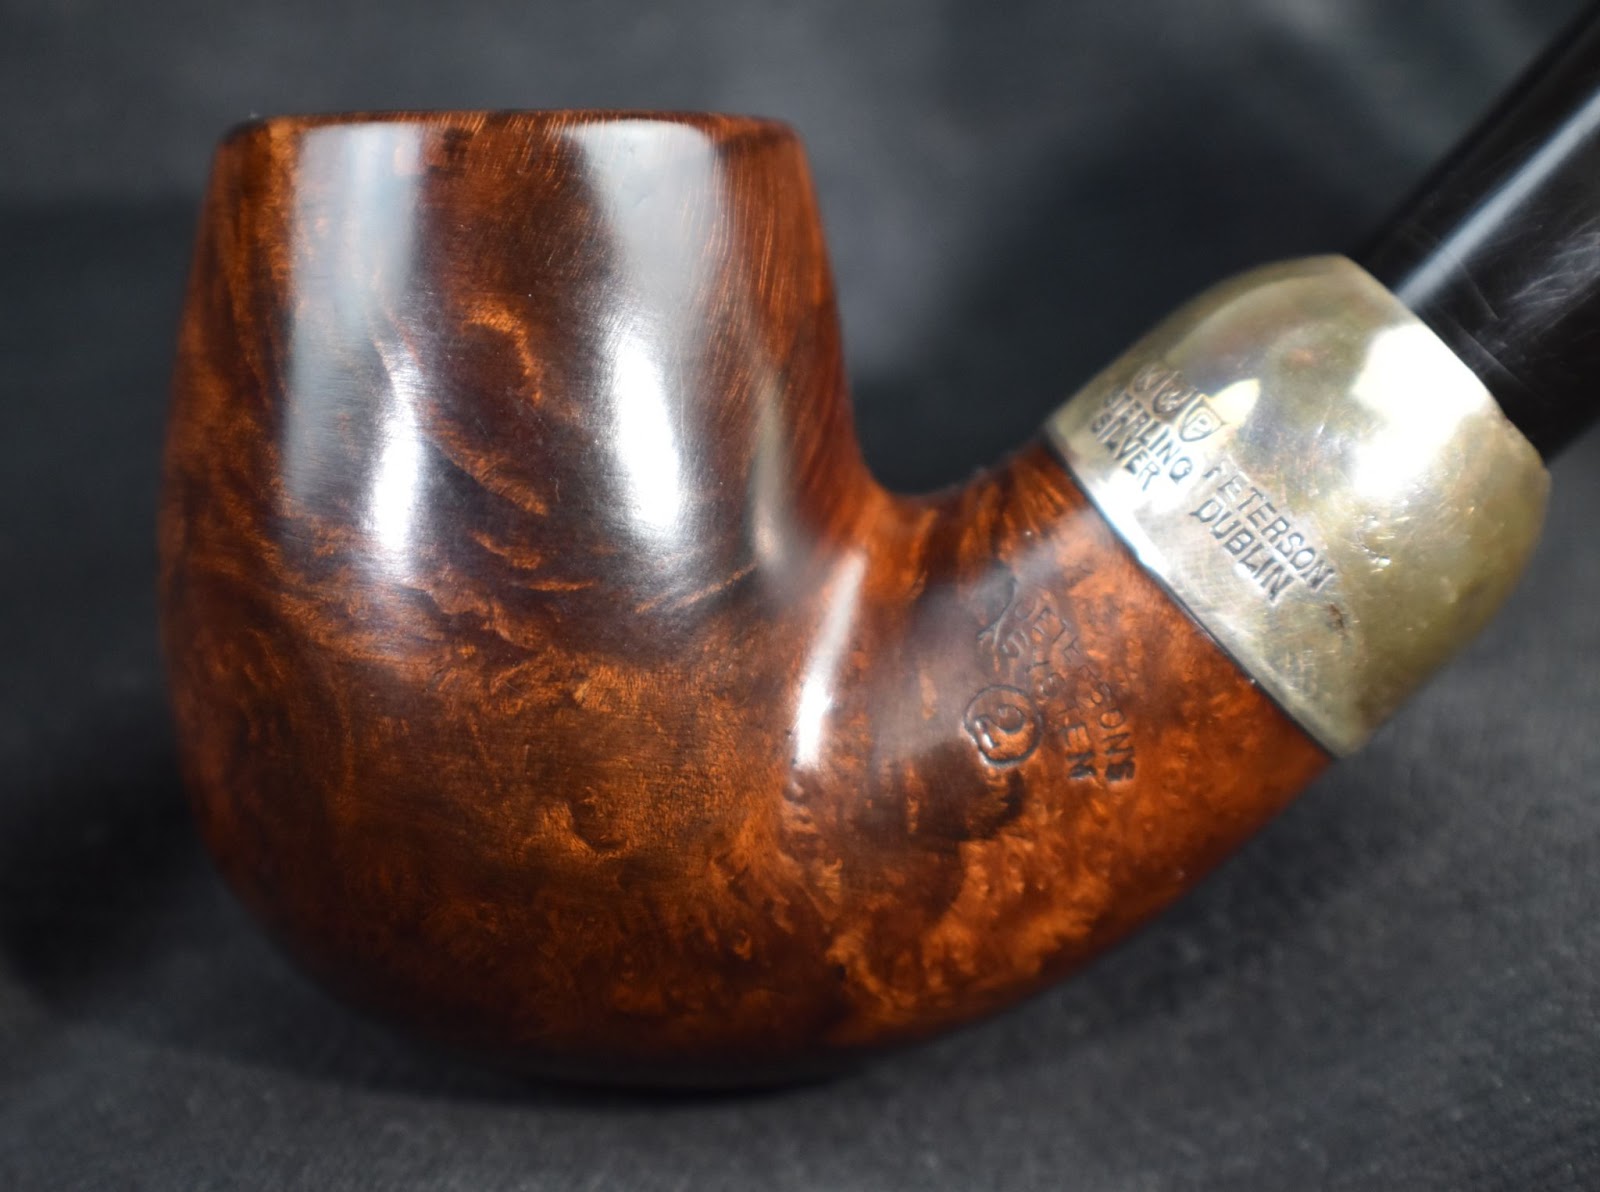
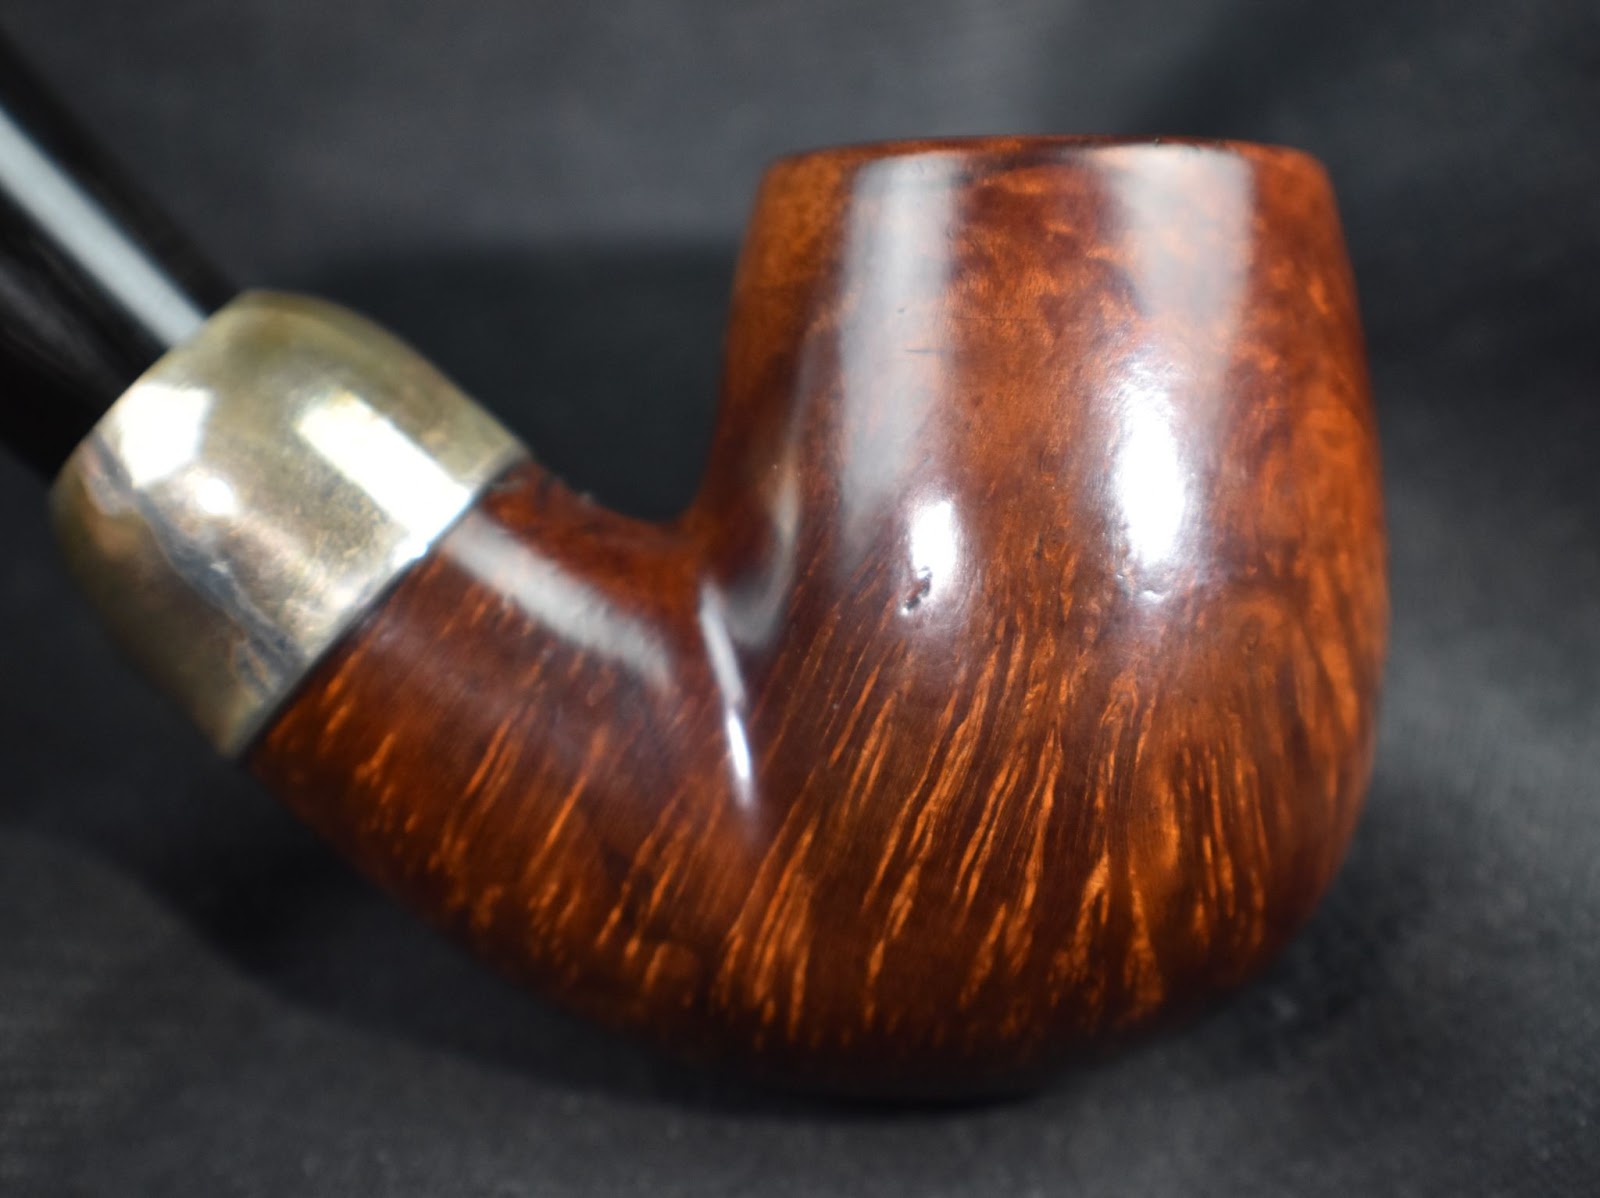


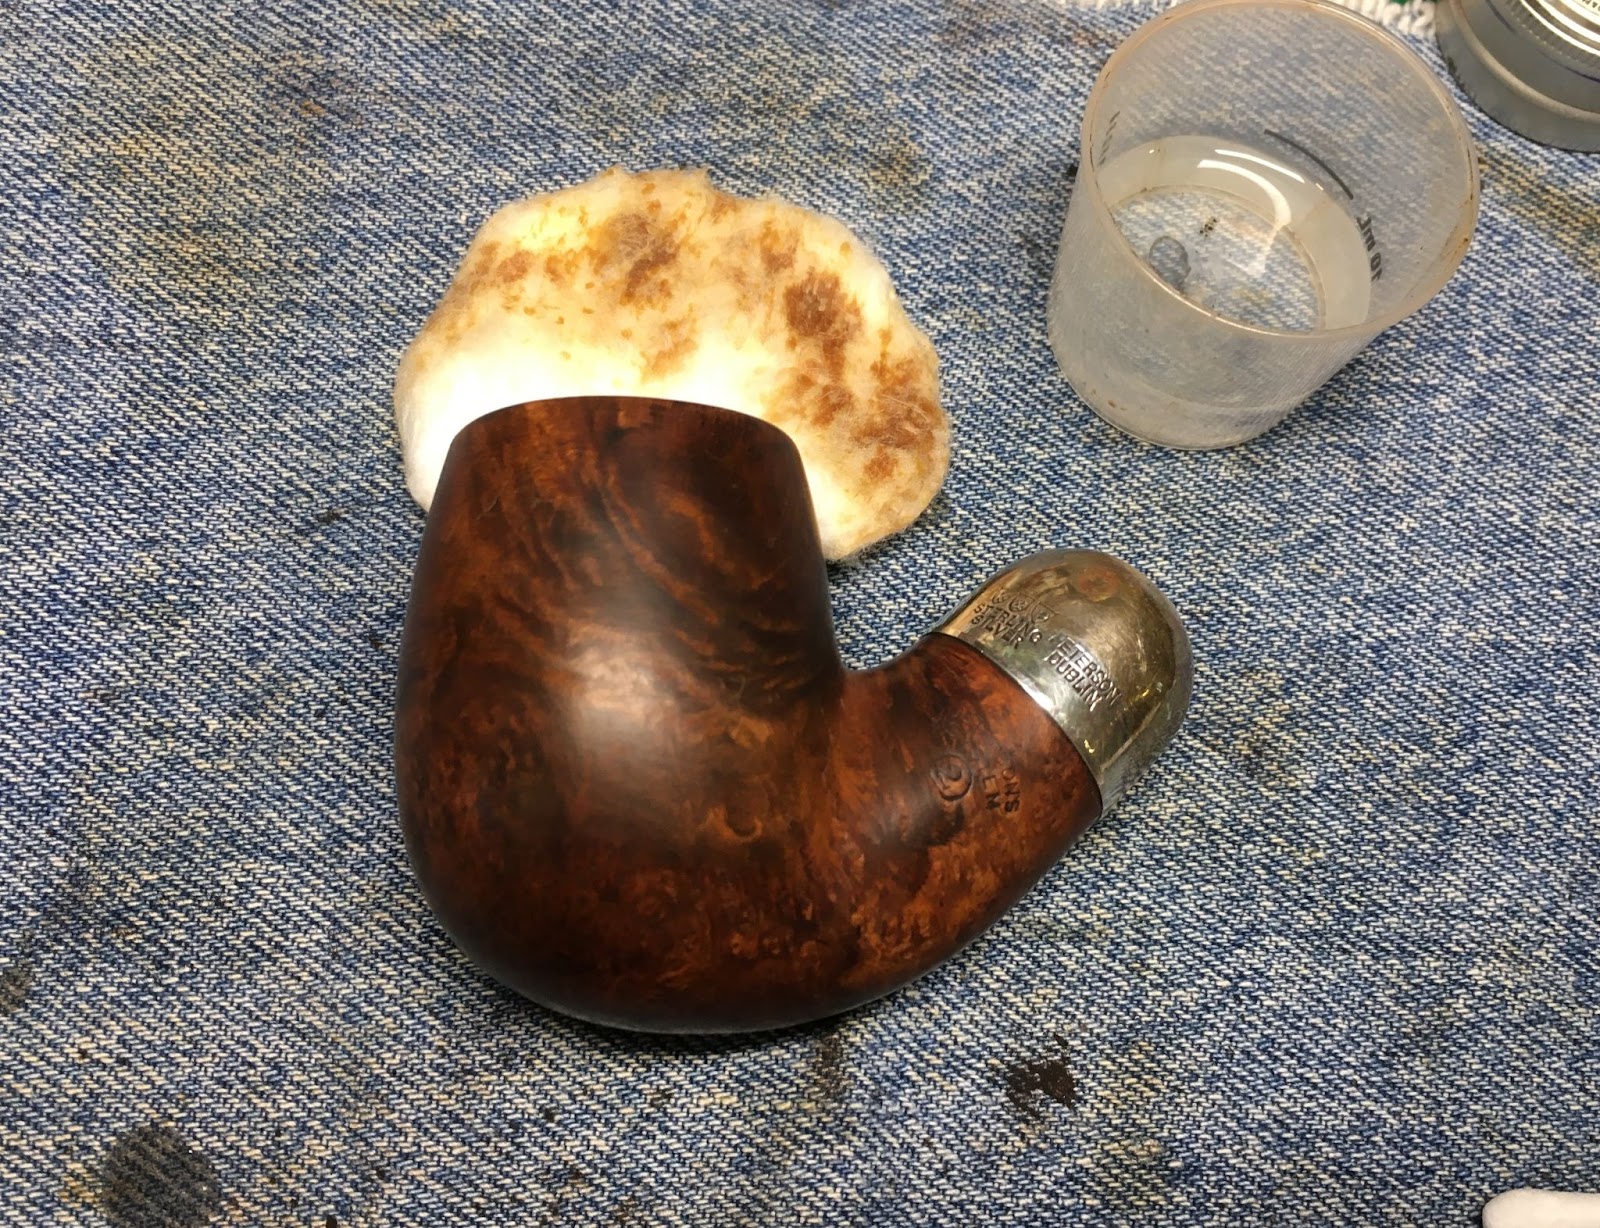
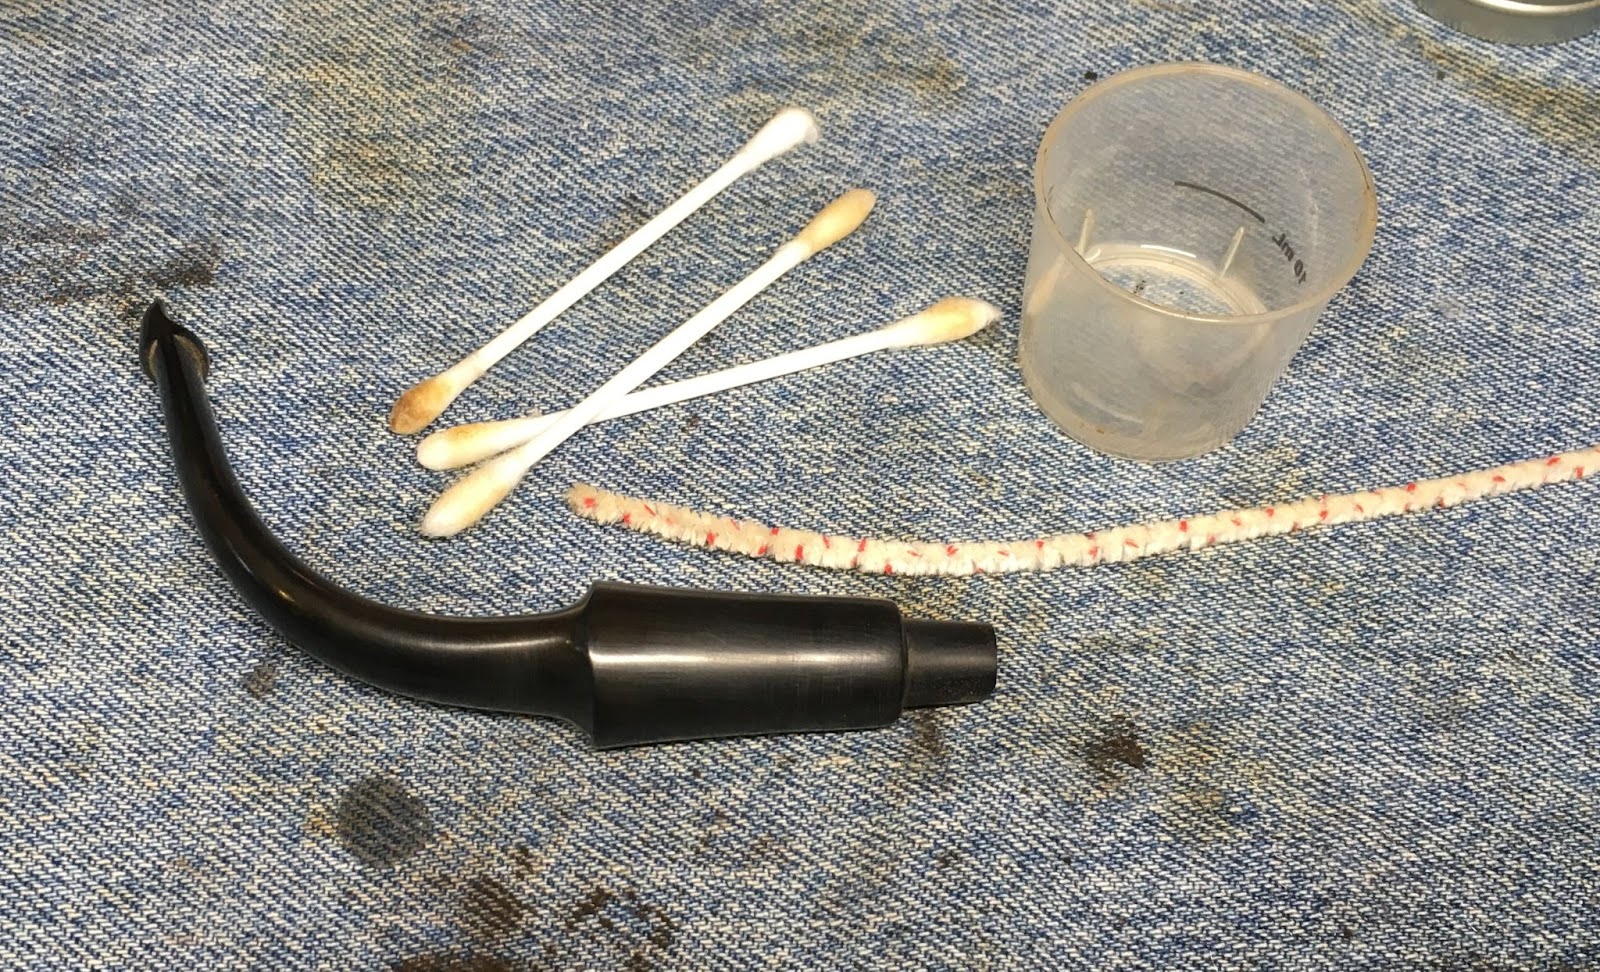
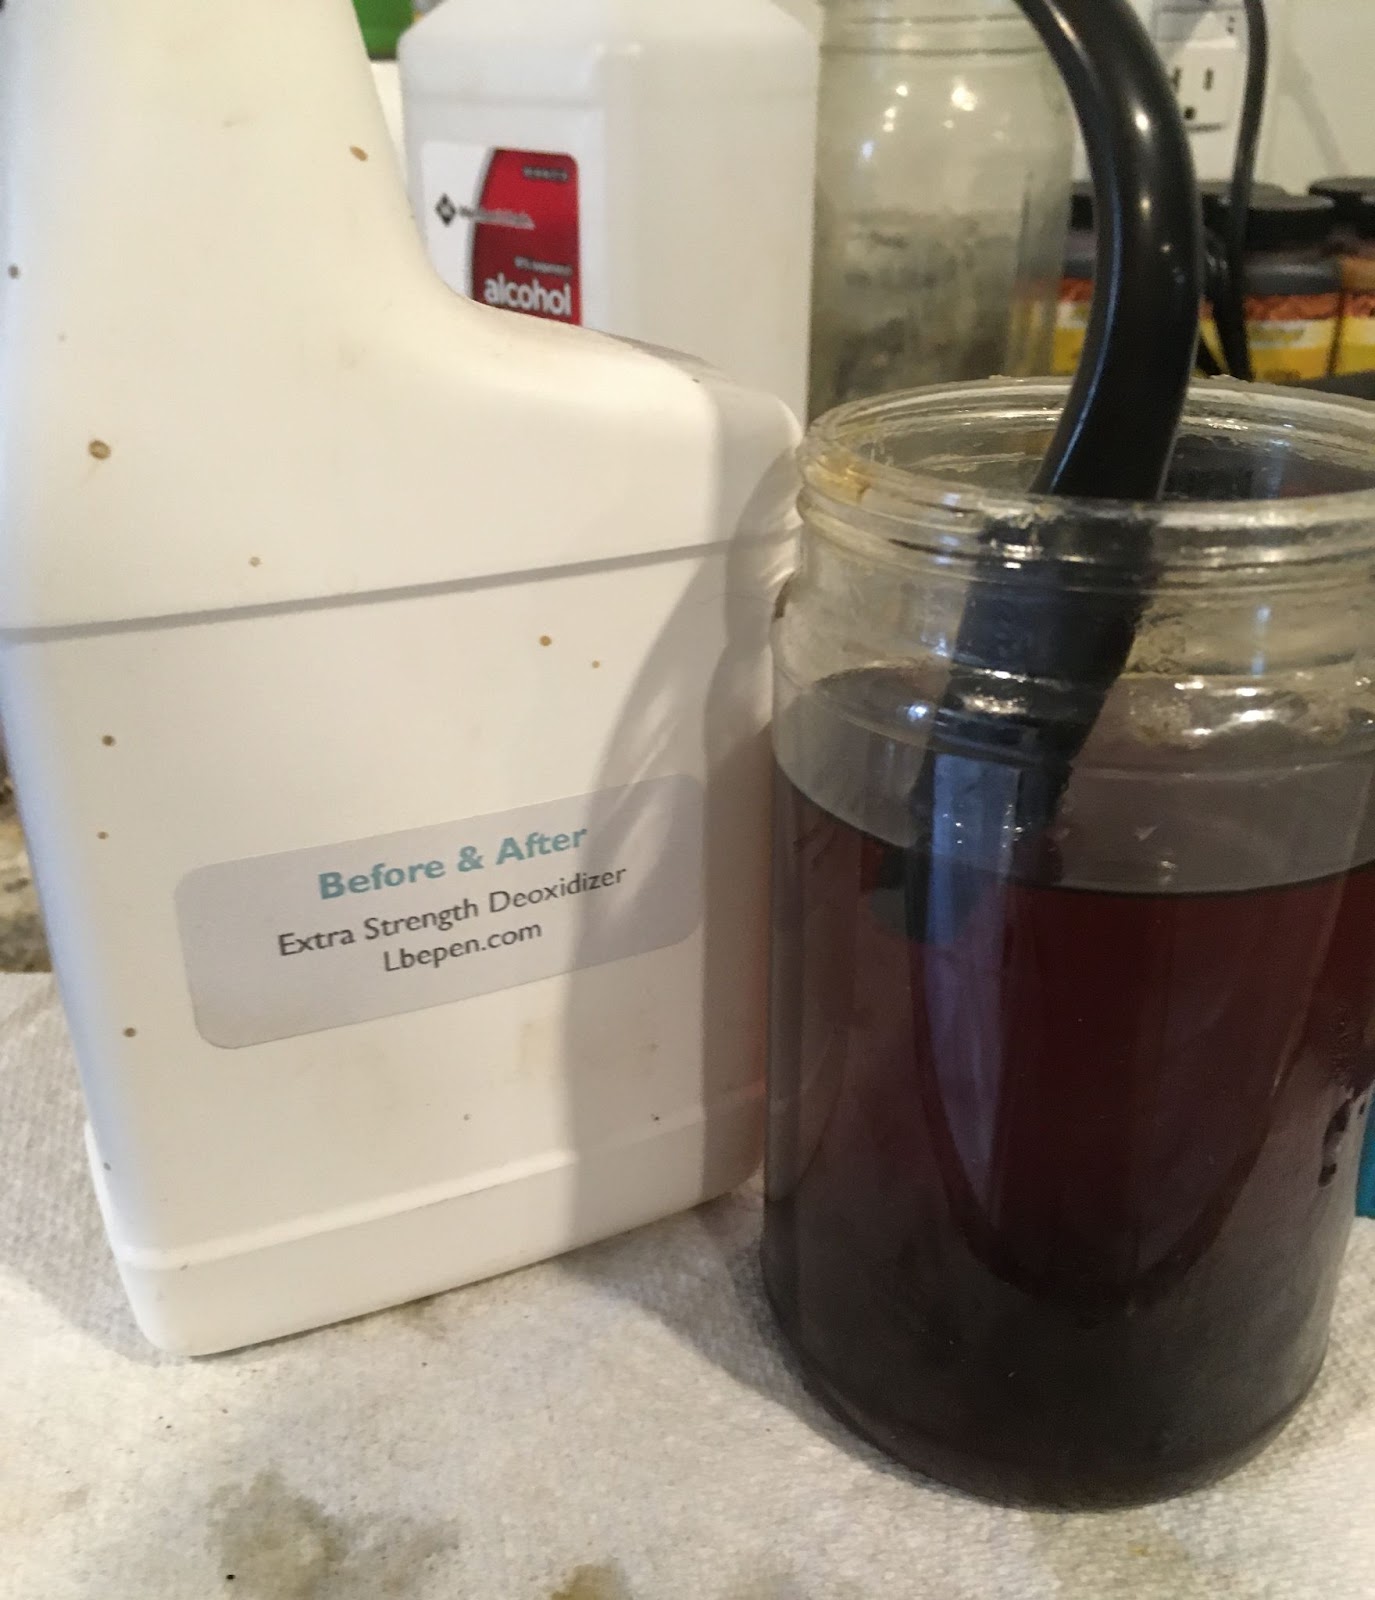
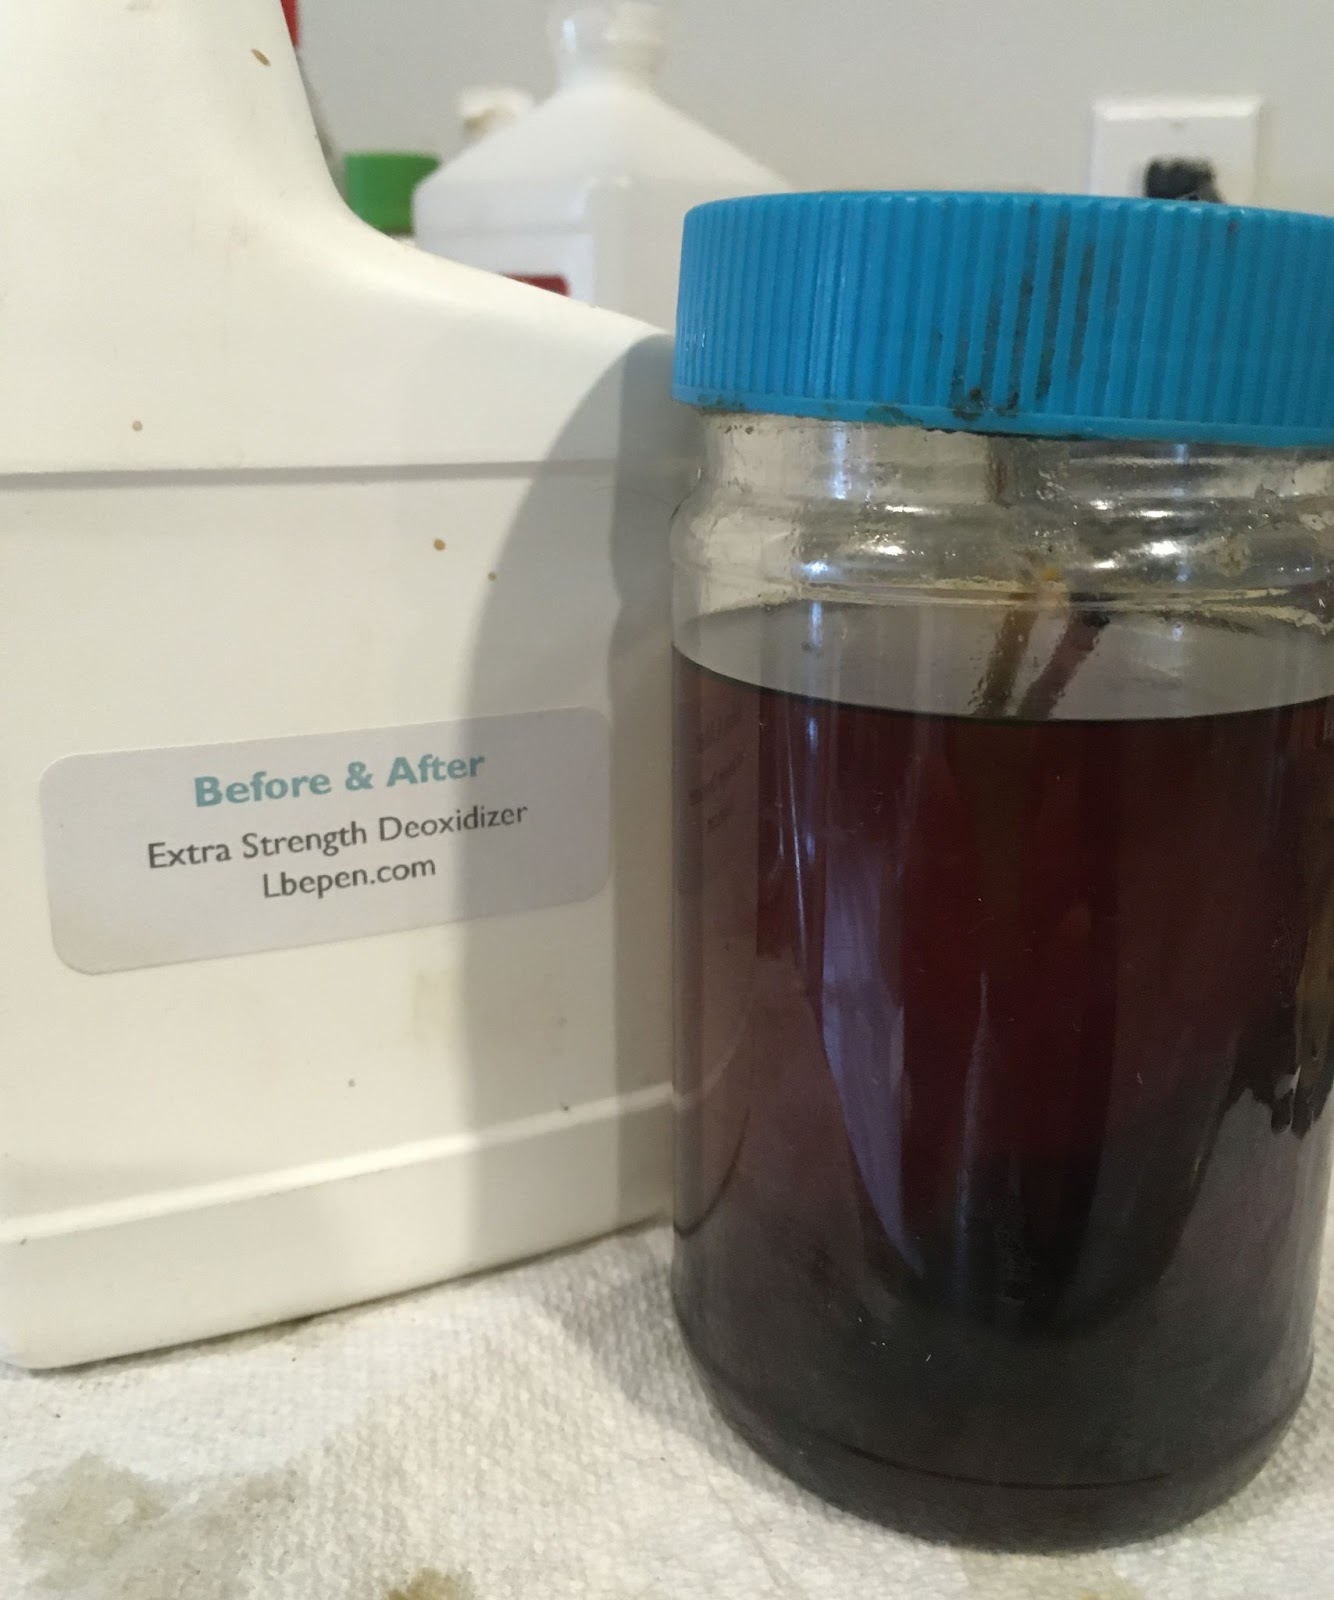


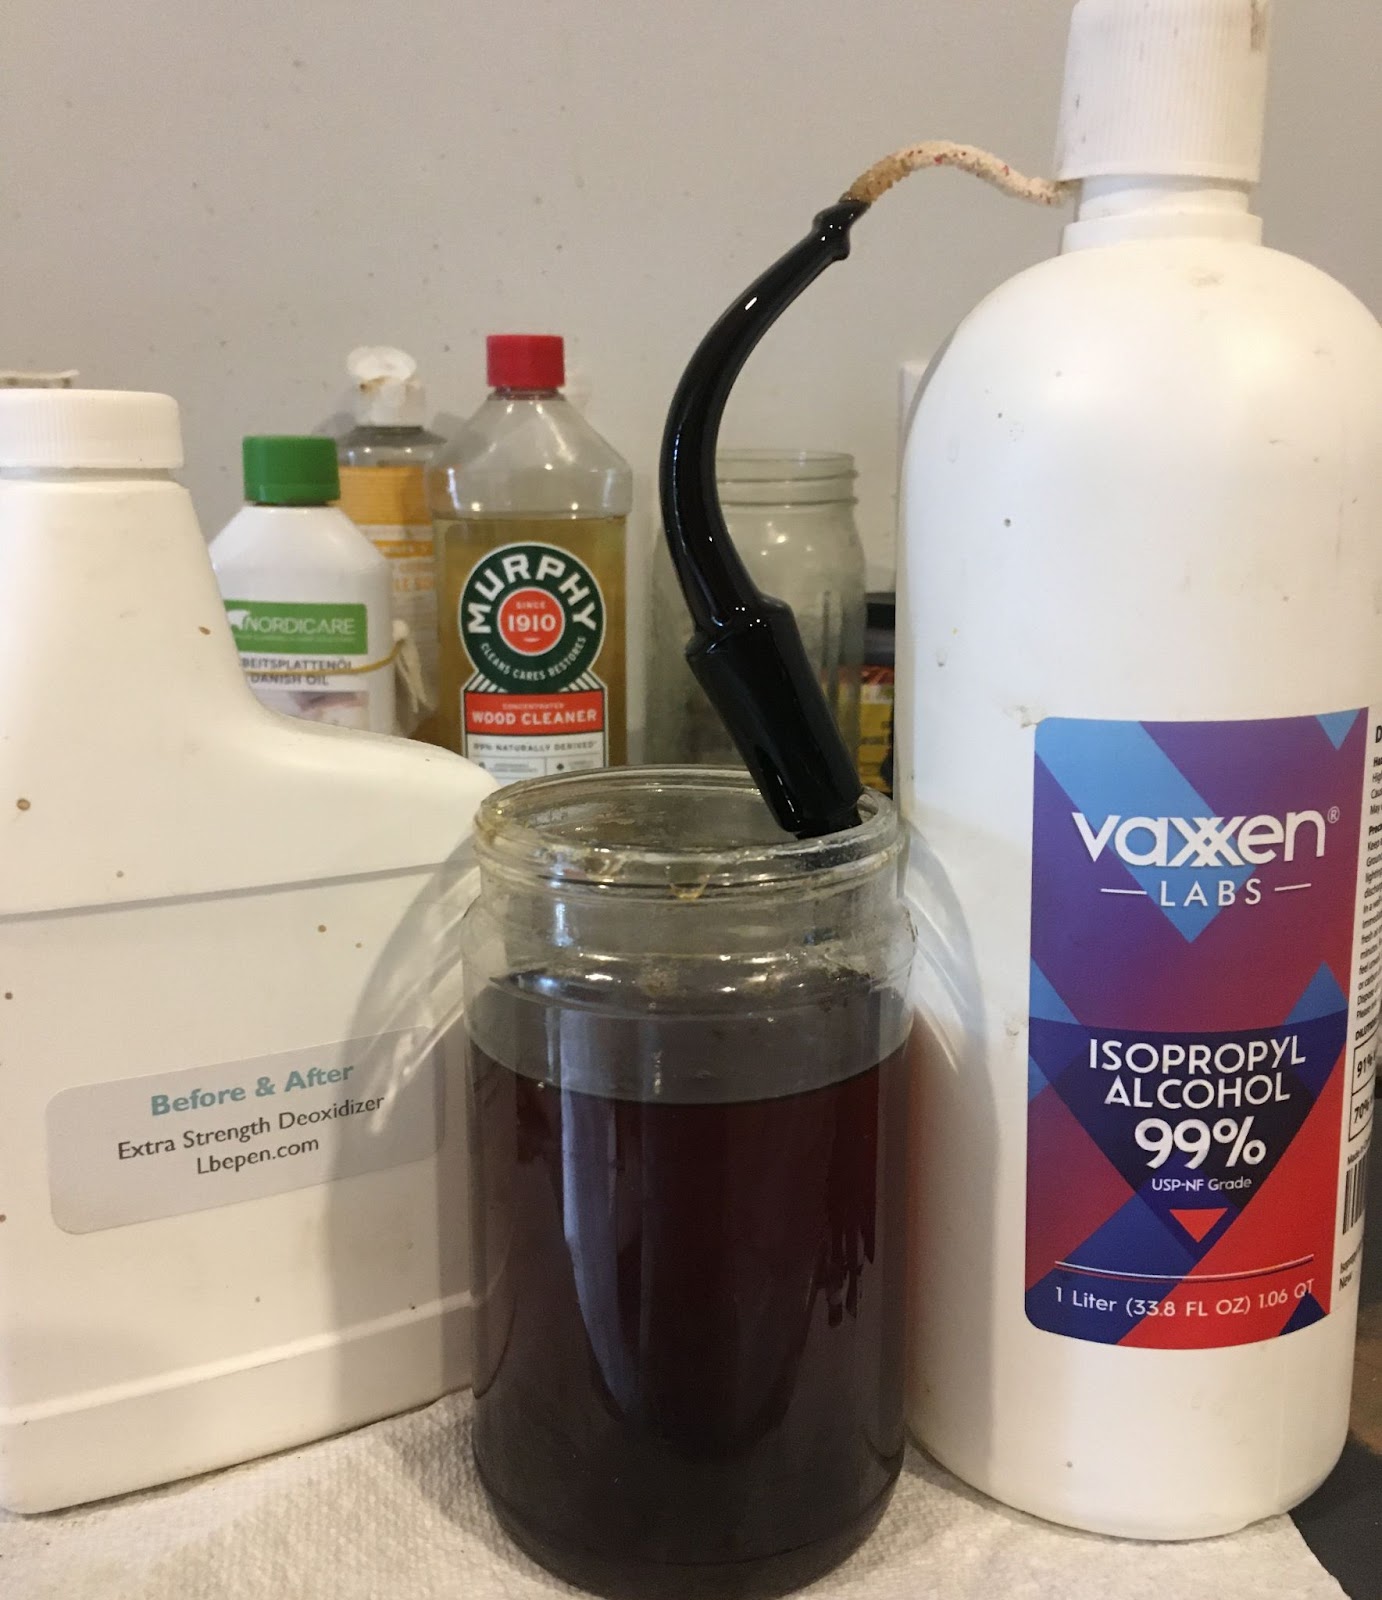


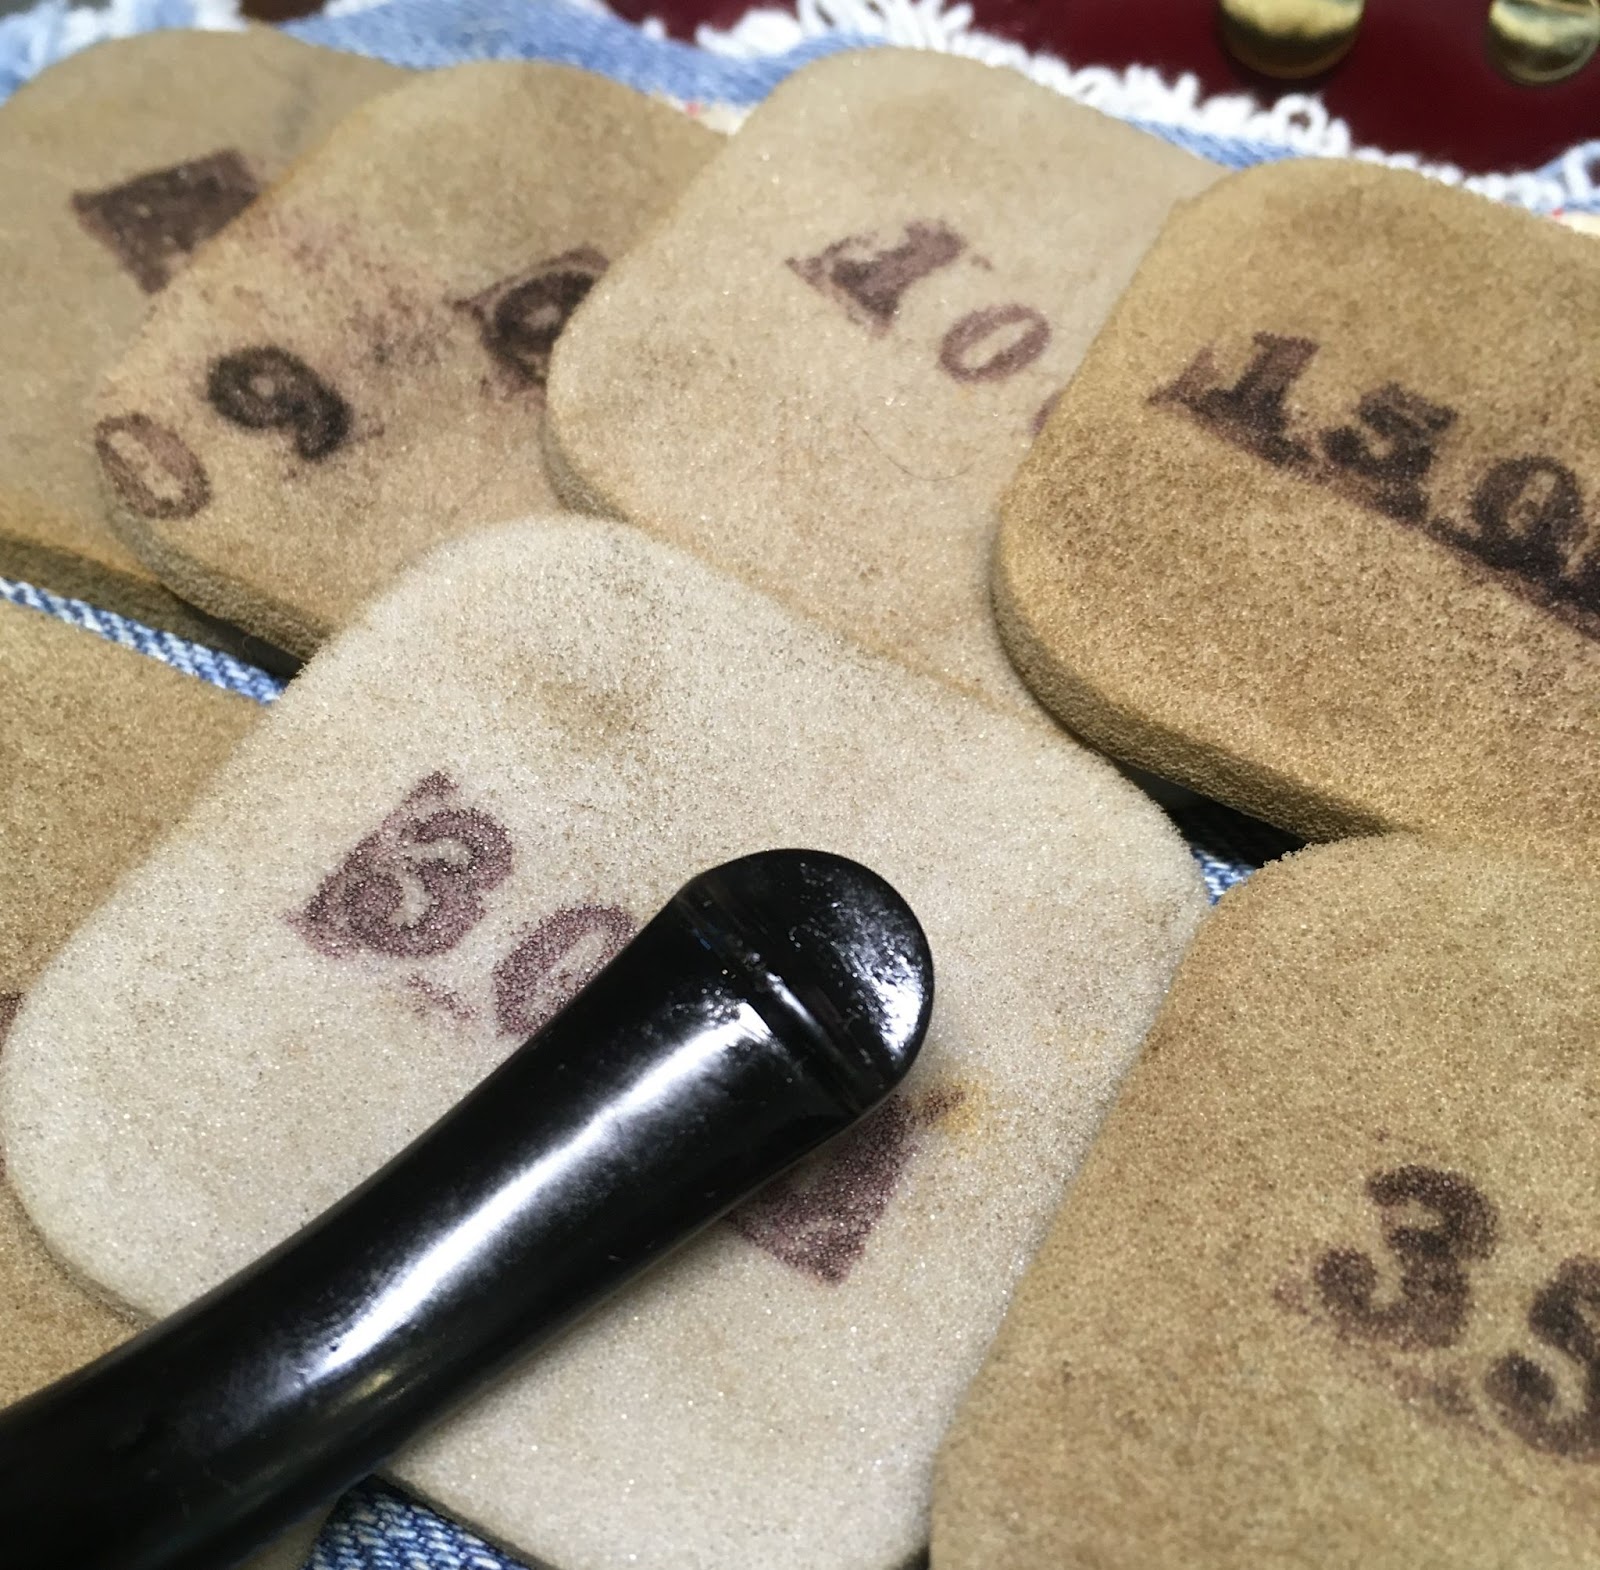

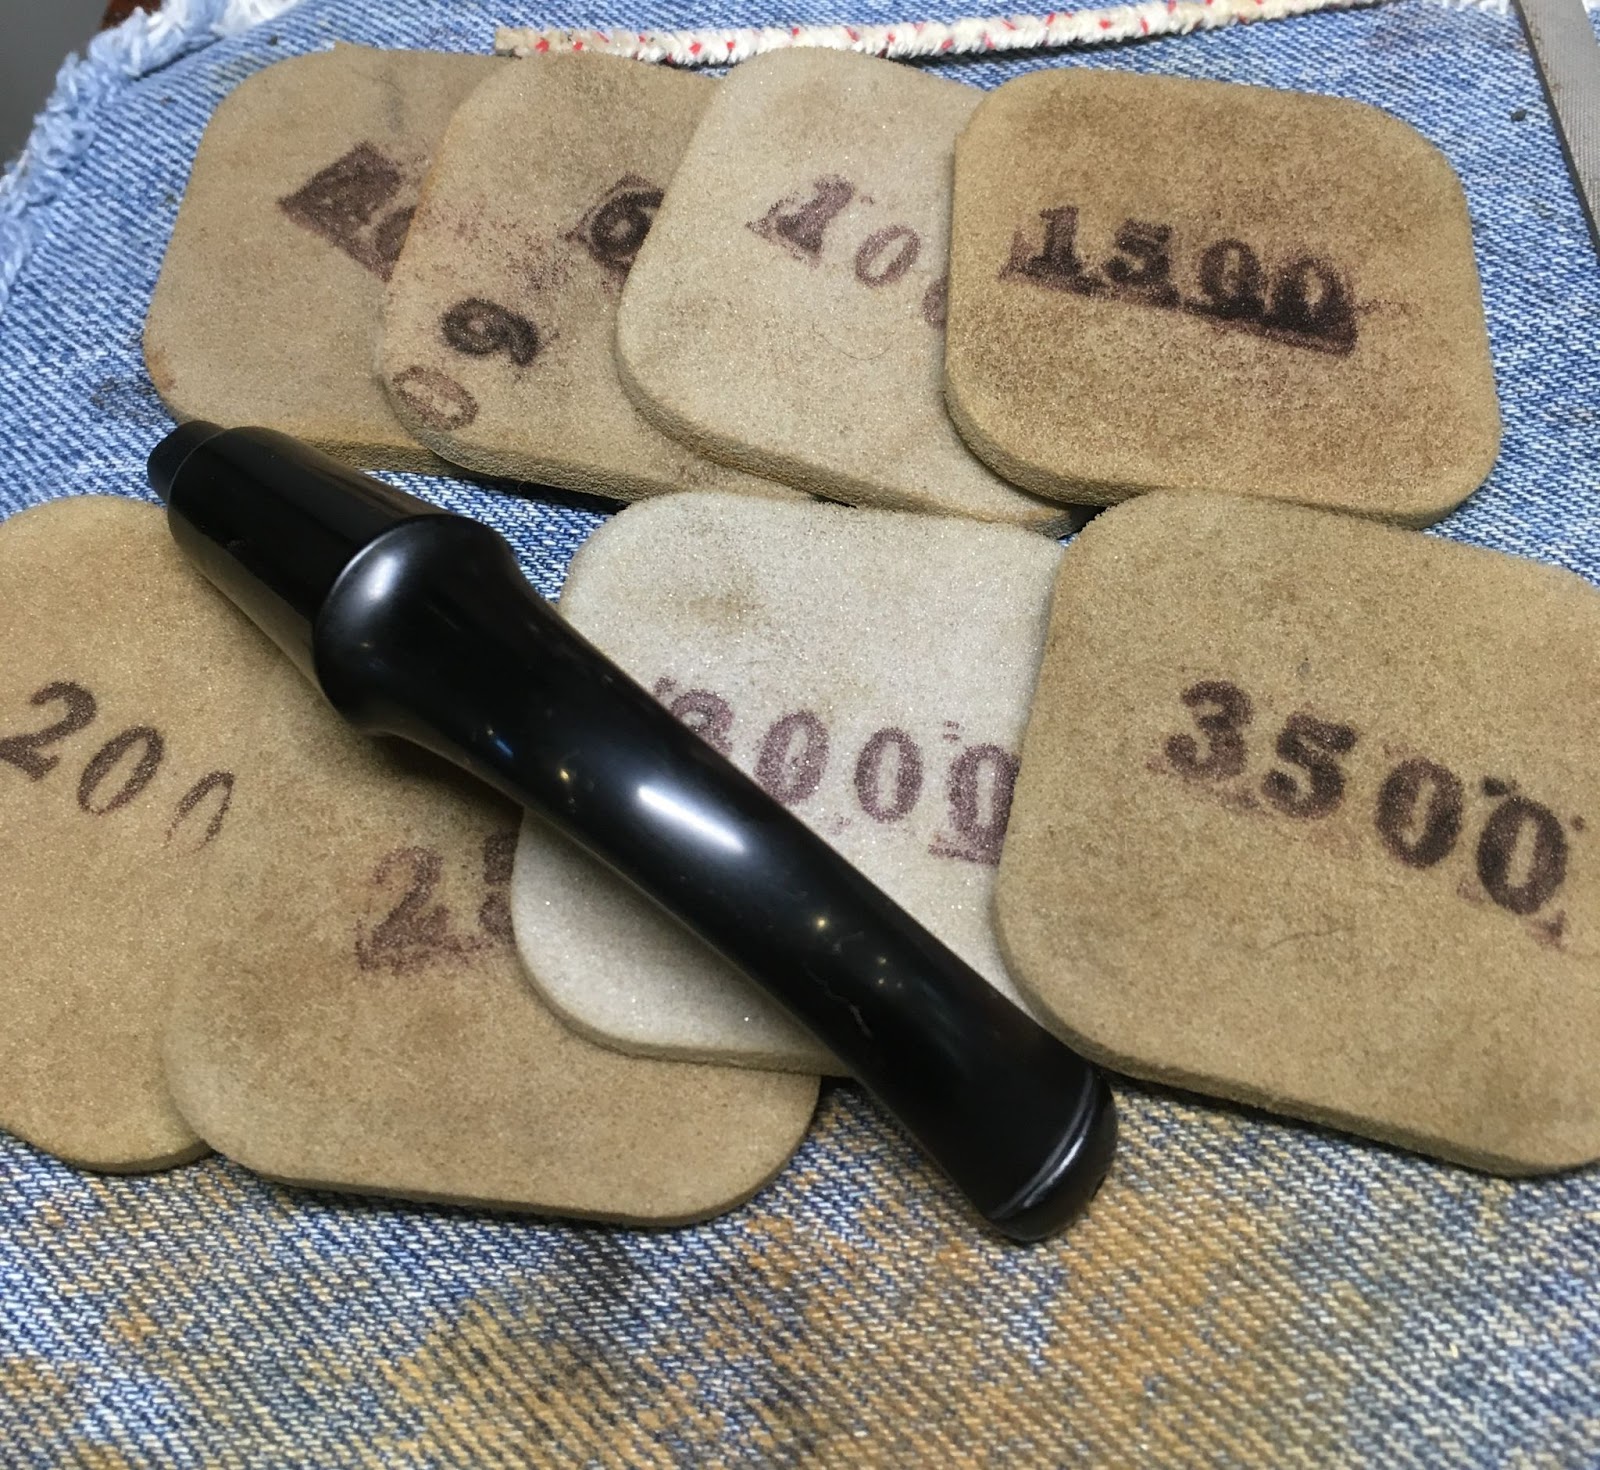

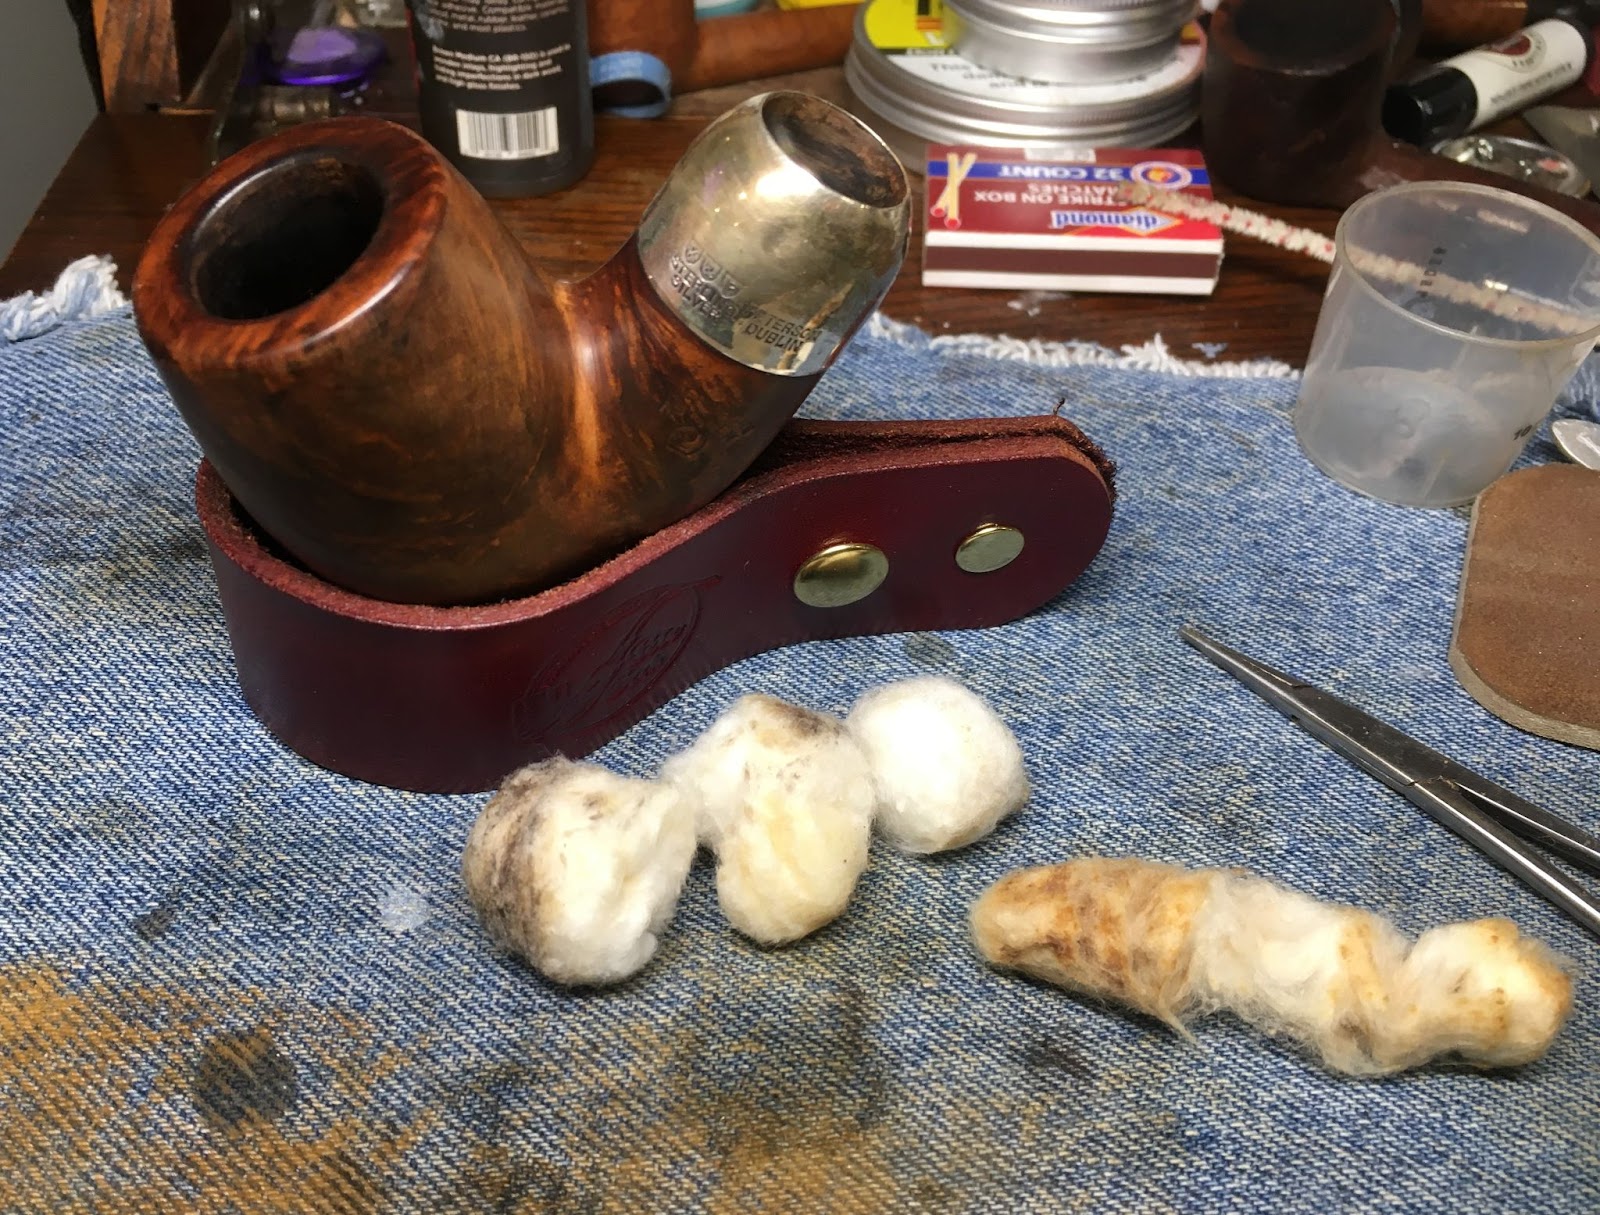


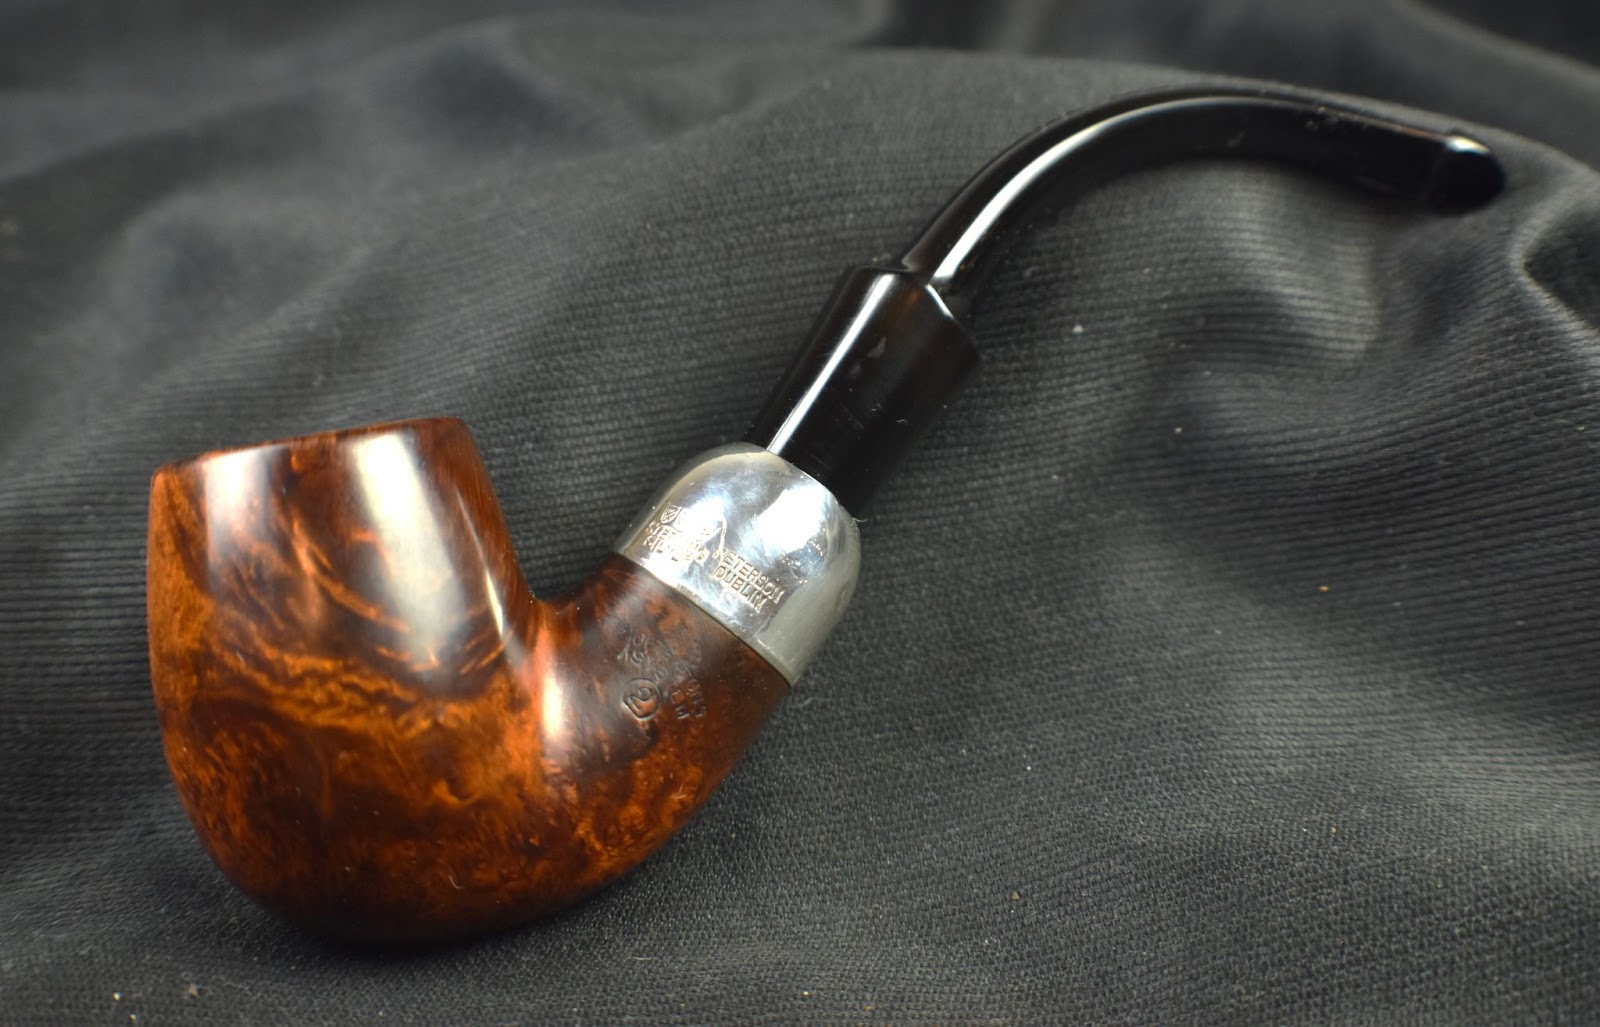
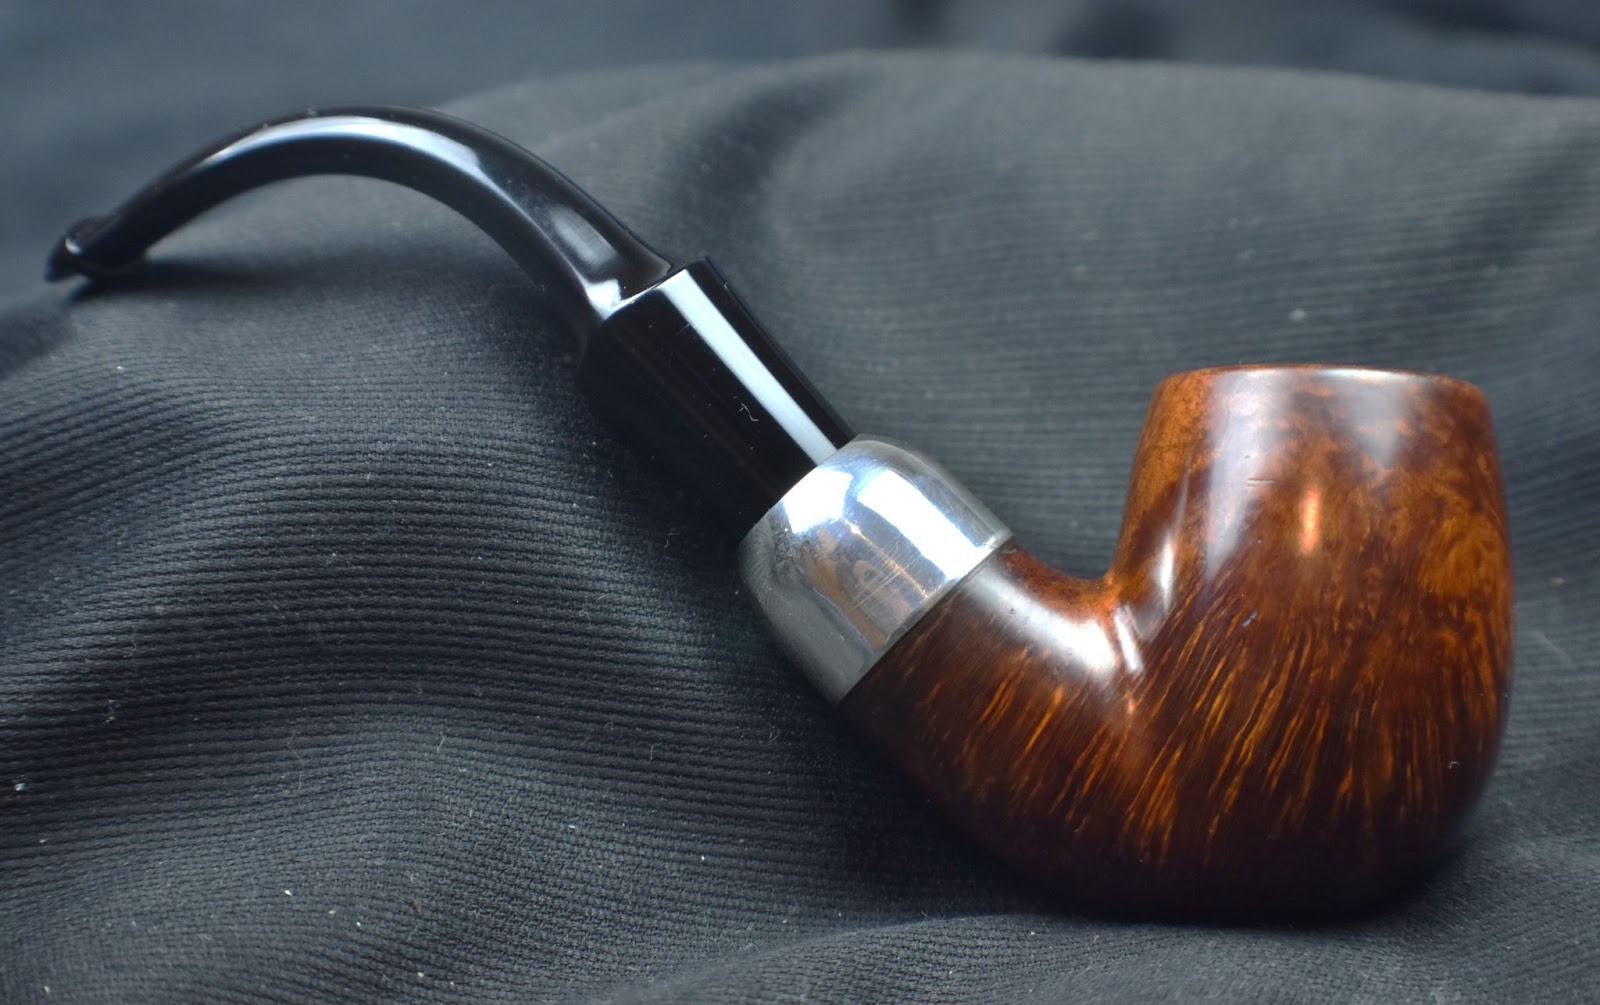


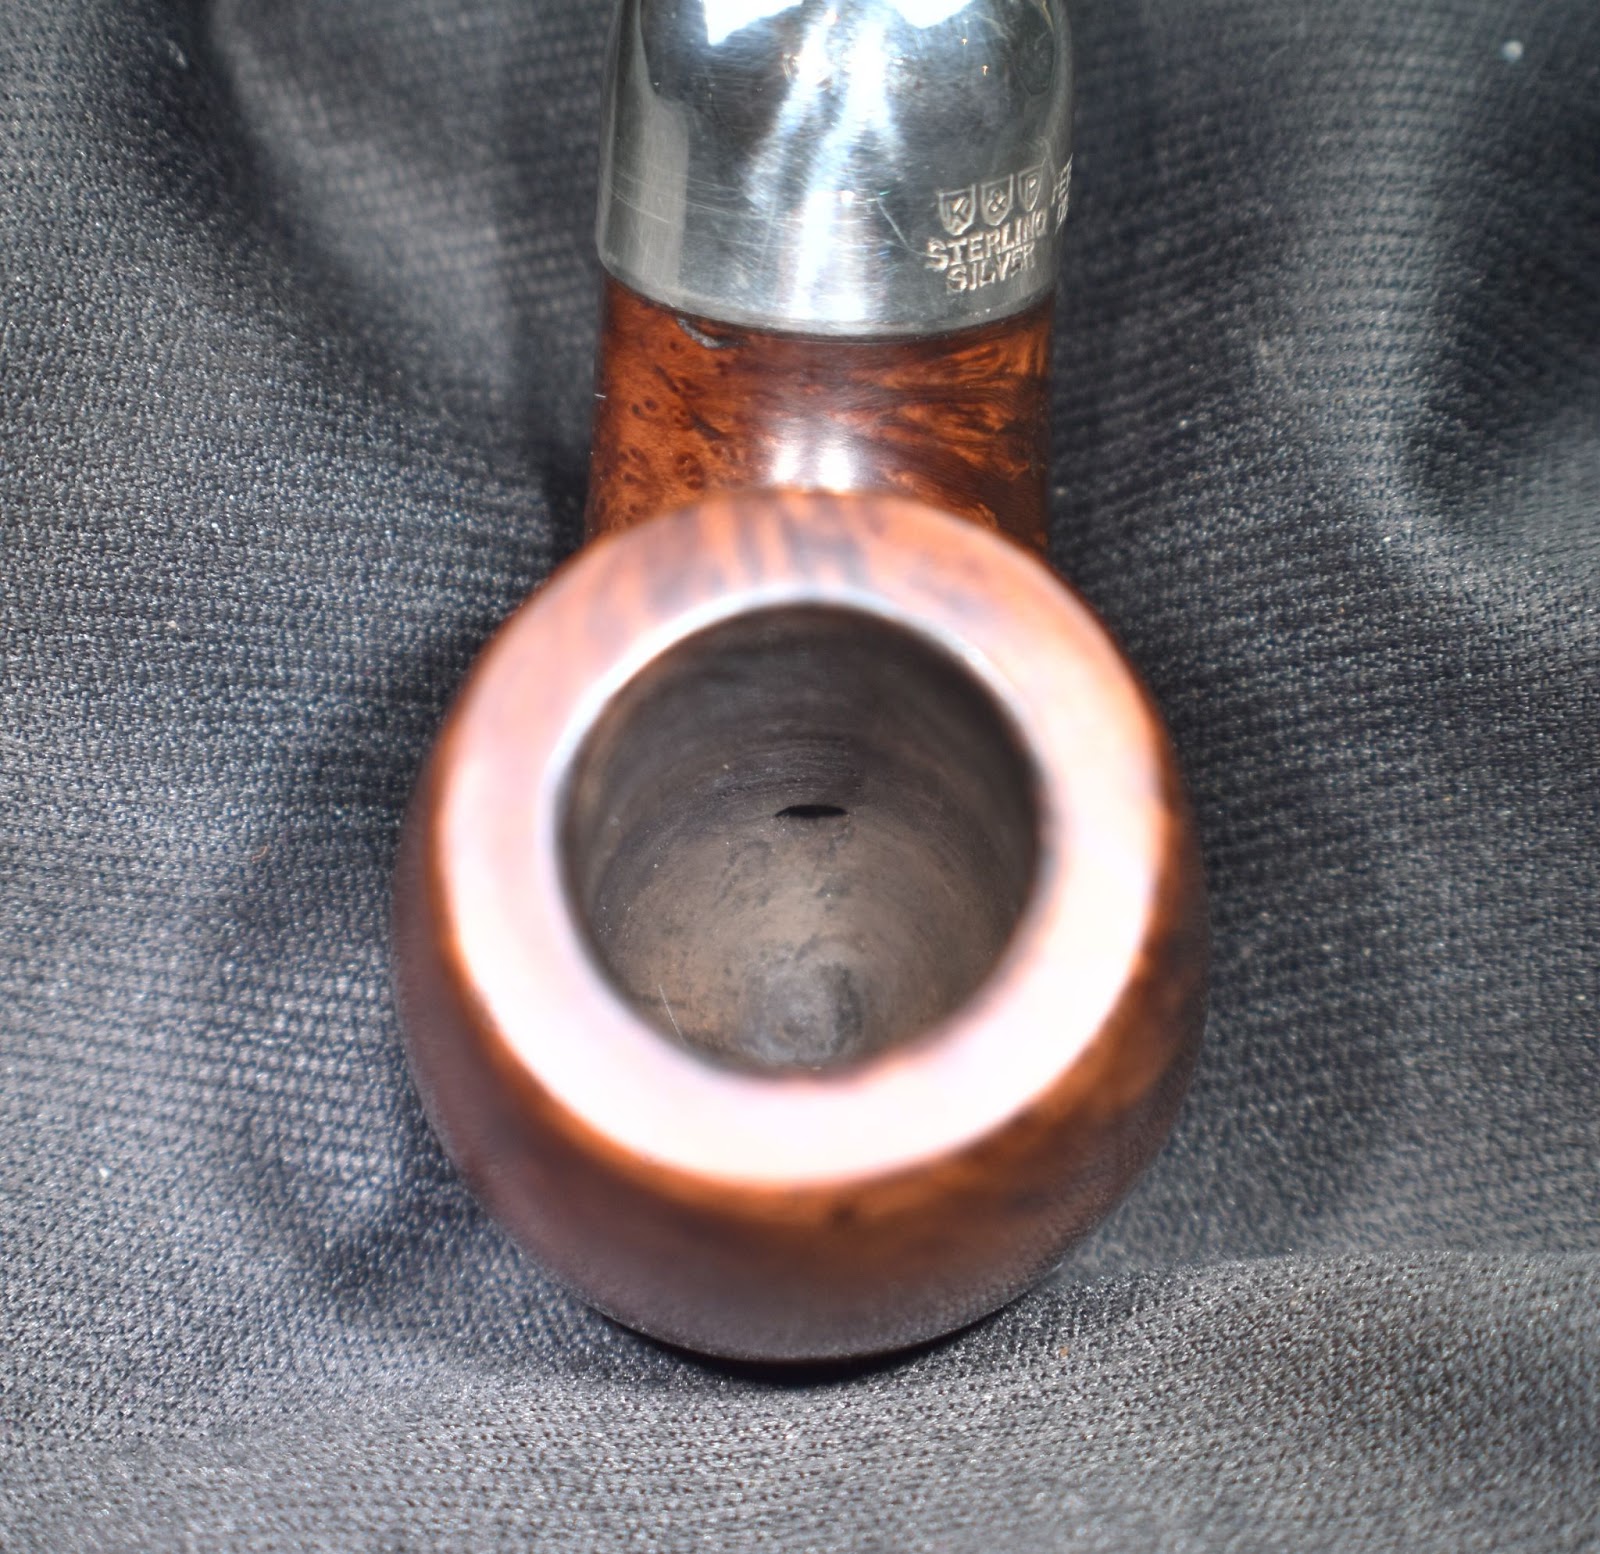
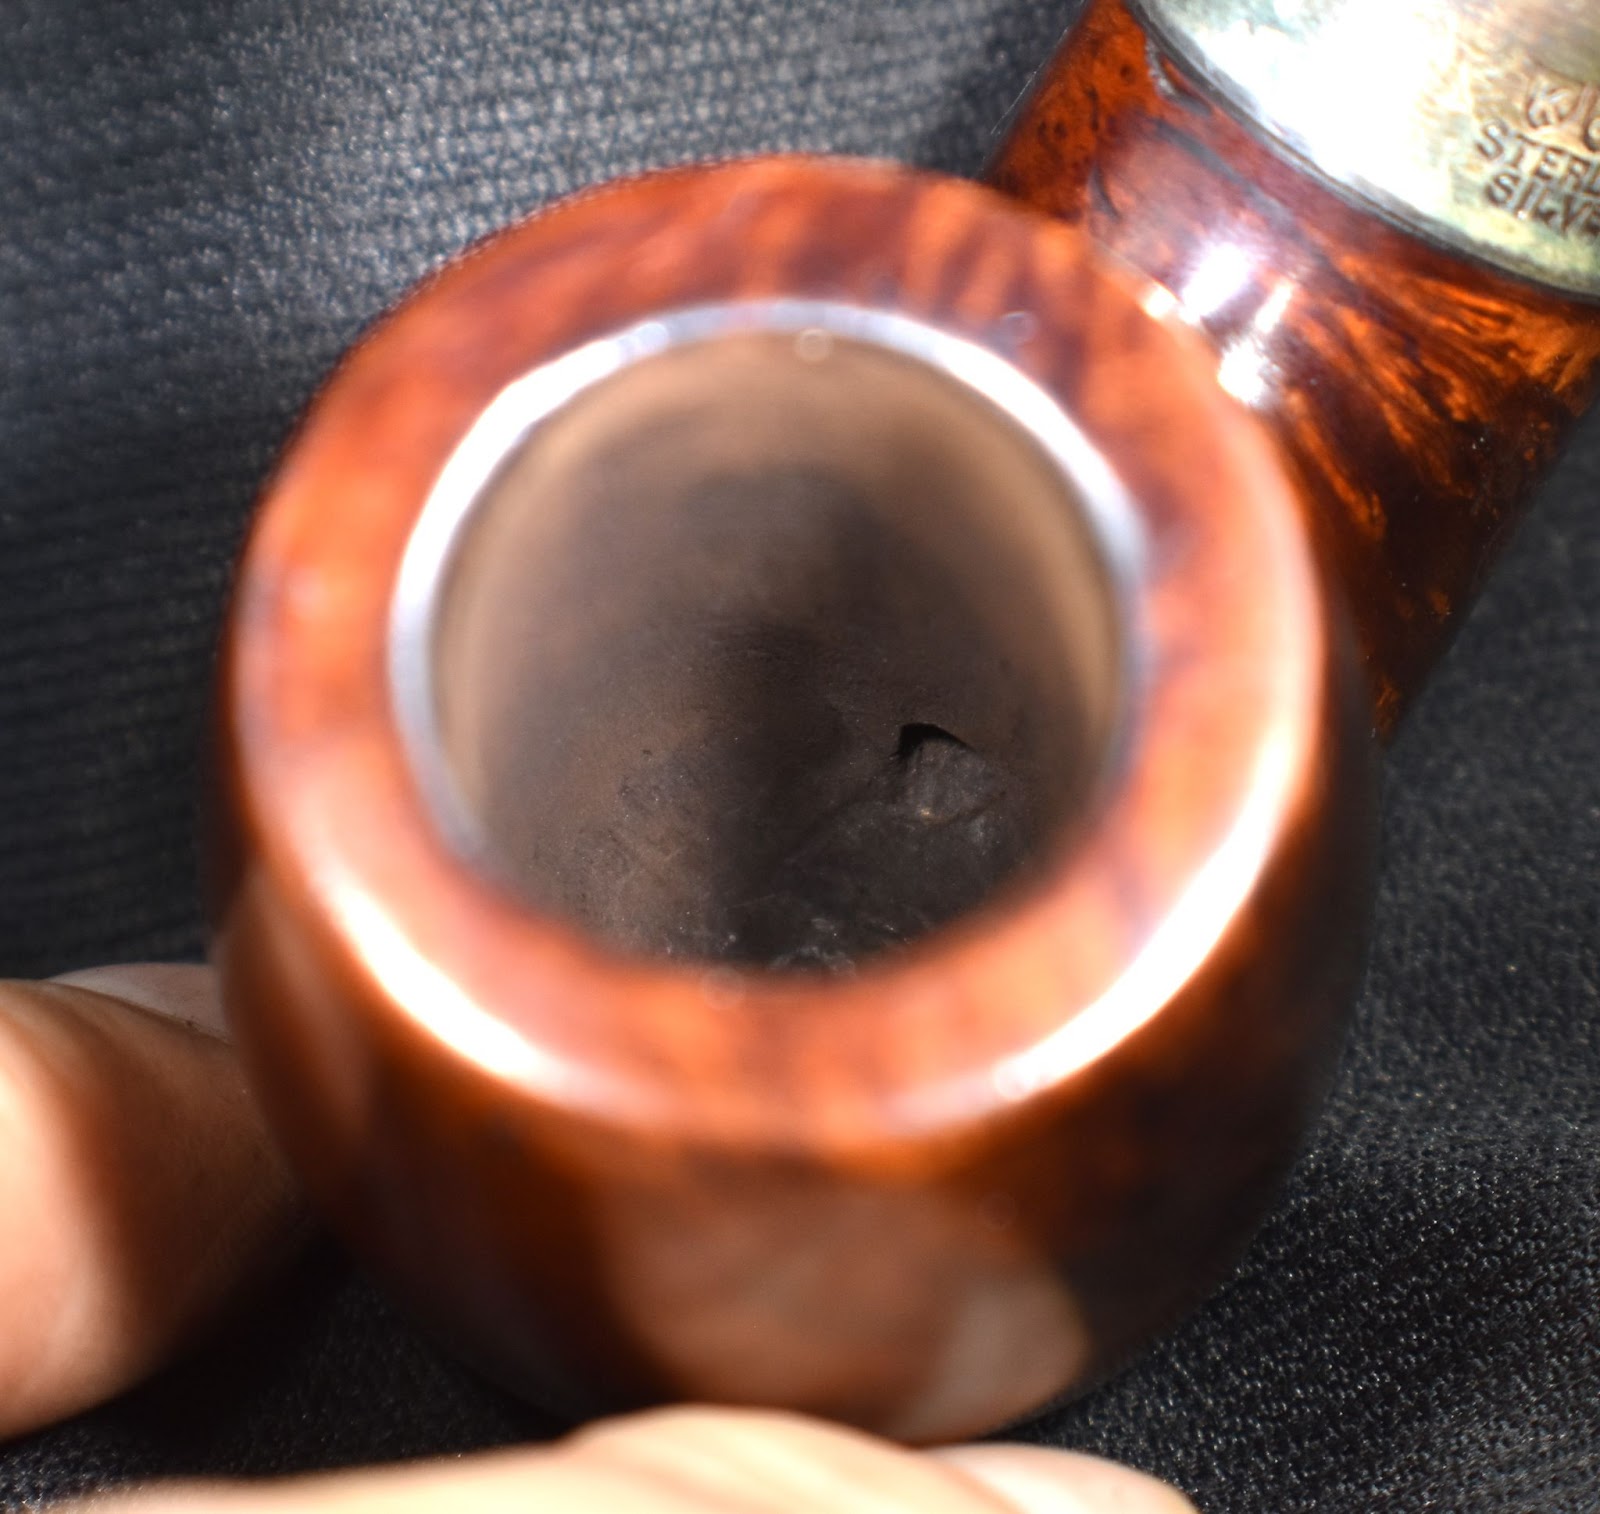


 (
(


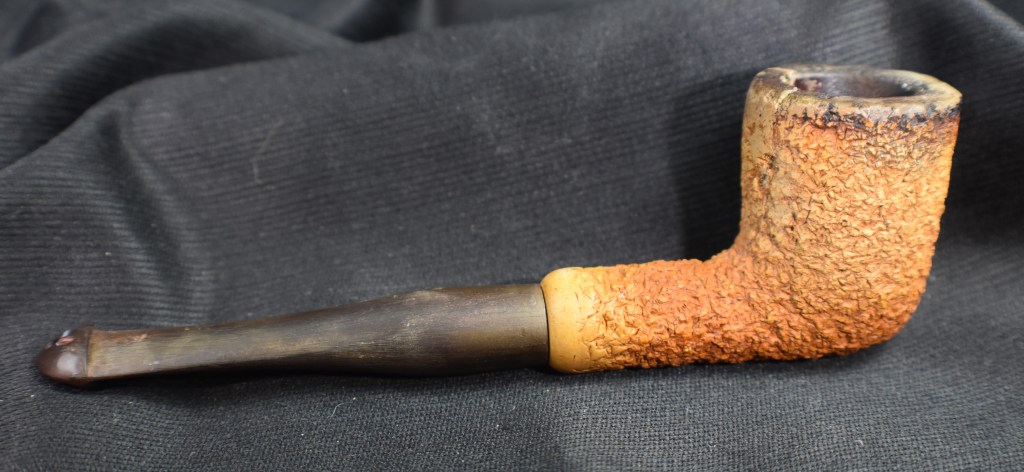


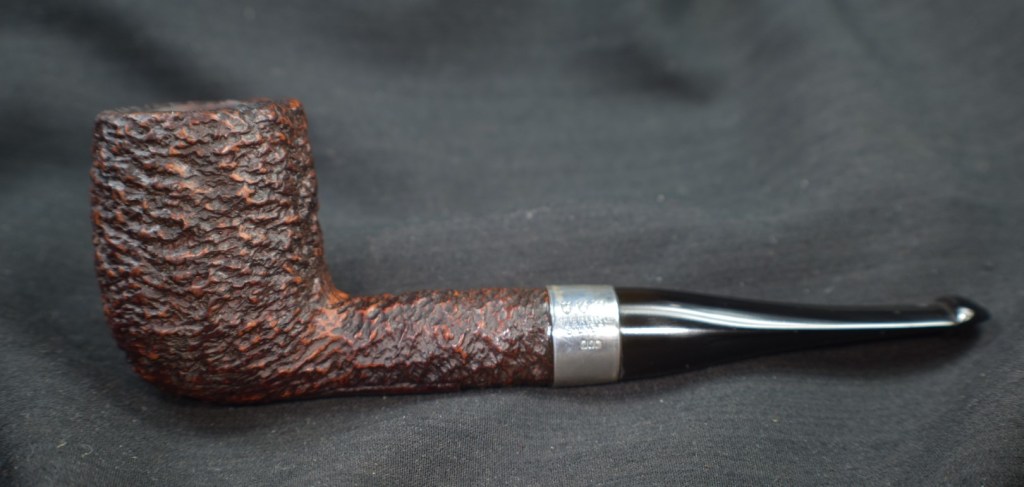


 The “Donegal Rocky” (in quotation marks), released in 1945 or so, was Kapp & Peterson’s first rusticated line. Not that K&P hadn’t rusticated pipes previously, they just that they hadn’t devoted an entire line to rustication. And they were apparently proud of it, because they gave it a sterling mount along with a black finish and white-stamped P on the mouthpiece.
 It was part of K&P’s “Product Line,” what I call gateway pipes and others might call an entry-level pipe, as you can see in this shape chart from the 1945 catalog. Like the Shamrock (European version) and “K,” it was originally a fishtail line.

 It’s worth remarking concerning the removable stinger. This spike-ended aluminum tube is easily removed, leaving the P-Lip mouthpiece strictly a graduated-bore regulation affair.


 Now an argument could be made for either an e, c or o. Respective dates would be 1972, 1970 and 1980. The o would move the pipe closer to the black/brown stain age range of 1981 as mentioned in the Mark Irwin blog above.