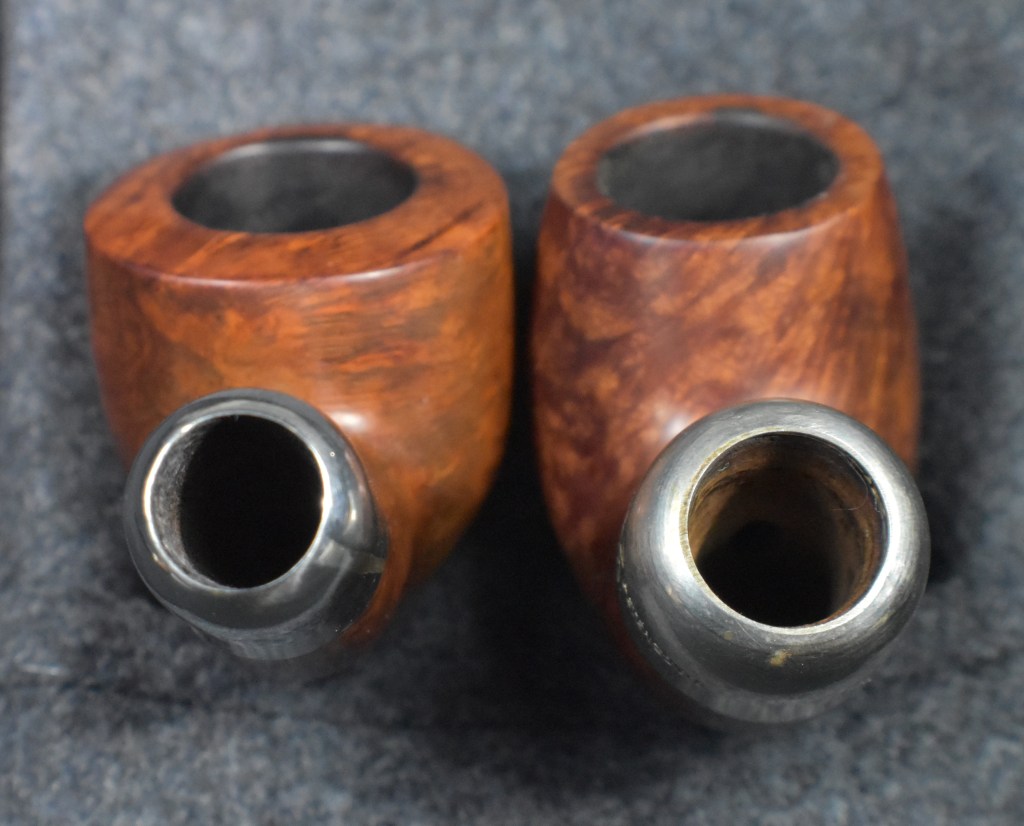
This is another “tag-along” pipe, one of those unintended-though-not-unwanted but part of the estate lot. This one is a Medico Medalist in the author shape. I have to say that Medico makes a very attractive author. The pipe arrived here last May and has been patiently waiting for restoration in the queue. The pipe is stamped MEDICO over Medalist (in script) over IMPORTED BRIAR on the left shank. No shape number nor country of manufacture (COM). There was also a stamped and painted M in between two aluminum rings on the stem. Below are some photos I took prior to beginning work.
Background
Medico pipes have a long history all the way back to SM Frank around 1900. According to TobaccoPipes.com,
“When you trace the Medico tobacco pipes history, you have to trace it back to the origins of the company that created it. The company that originated the Medico brand is the S.M Frank & Co. This company dates back to the year 1900. In that year, a man named Sam Frank began selling pipes and related tobacco products. Eventually, the company began making its own line of pipes. With the help of an experienced pipe manufacturer, Ferdinand Feuerbach, the company produced the popular Royal DeMuth and Hesson Guard Milano tobacco pipes. The company continued to grow well into the early part of the 1930s.
By the early 1930s, there were some concerns about the tars and nicotine found in tobacco smoke. In order to mellow out the flavor of hot tobacco smoke as well as to capture the tars and nicotine, the S.M. Frank & Co. introduced the Medico pipe filter. This is an absorbent paper filter that many people still use to this day. In order to accommodate the new filter, the company developed an accompanying brand of pipes known as Medico. That line of pipes continues in production today.
The company ended up buying some of their main competition in 1955. That year the Kaywoodie brands came under the S.M. Frank Company. The Medico brand continued production through this transition without many changes. The next big change for the brand came in the late 1960s. In 1966, the company developed a synthetic material that combined the traditional briar wood with resins. It is known as Brylon. At that time, all Medico pipes were made from imported briar wood. In order to keep production costs down, the company began offering some lines with Brylon. Today, that is still true.
Today, the Medico brand of pipes is still a top selling one for the S.M Frank & Co. This line of pipes comes in thirteen different finishes with five made of briar wood and the rest from Brylon. All come with the push bit with a filter inside. The filter is easily changed out when the smoker desires. In the briar wood finishes, this line includes the Silver Crest, Premier, Bold Rebel, Kensington, and Windsor. In the Brylon, the line includes the Lancer, Apollo, Standard, Varsity, Conqueror, Medalist, Cavalier, and V.E.Q. As far as price, the briar wood pipes tend to be higher in cost that the Brylon ones.” (Medico Pipes History | TobaccoPipes.com)
The days of “drug store pipes” are apparently over. I typed in the following question:
“Are Medico tobacco pipes sold at physical Walmart, Walgreen’s or drug stores anymore?”
Next I typed in, “Where can I buy a new Medico tobacco pipe?” into Google and got this:
Clicking the first link, Medico Pipes Exclusive Full Line Retailer!!!, took me to a remarkably blank page where not a single pipe was listed. Now please do not think that I am speaking ill of WVSmokshop.com, I have ordered from them and will continue to order from them. They are the only retailer where I can find Captain Black Copper which is a favorite aromatic of mine. The fact remains, Medico pipes are not readily available outside of the used or estate market. As for when this particular Medico Medalist was produced, I cannot say with certainty. I would hazard a guess between 1960-1980.
The Restoration
The Medalist made it from the photo table to the workbench minus the used filter from the stem.
I started with the stem. There was tooth chatter on both the top and bottom surface of the bite zone.
The interior of the stem was cleaned with 99% ethyl alcohol on cotton swabs and bristle pipe cleaners.
The tooth chatter was filed with a small flat file.
I scrubbed the stem with Soft Scrub cleanser on make-up pads. Usually I do this after soaking a stem in a deoxidizing solution, I do not know why I’d always used that order, deox first the scrubbing.
After the Soft Scrub I suspended the stem into Before and After Extra Strength Deoxidizer. I left the stem in the solution for 2-3 hours.
I turned my attention to the reaming of the tobacco chamber.
The PipNet and the #2 blade did this quickly with the Smokingpipes Low Country reamer doing some cleanup.
The chamber looked good. Next, I sanded the tobacco chamber with 320 sandpaper wrapped around a wood dowel. There was no damage to the chamber from heat.
I cleaned the shank with alcohol, cotton swabs and bristle pipe cleaners along with some scraping with a dental scraper.
I scrubbed the stummel with undiluted Murphy Oil Soap and a nylon brush over the sink. The soap was rinsed with warm water and the stummel dried with a cotton hand towel.
Back at the workbench the stummel looked clean but was coated with a clear coat finish. I am not a fan of clear coat finishes, so it had to go.
Having already used 99% ethyl alcohol, I knew the finish was impervious to that solvent. I tried acetone on a cotton swab to see if it would dissolve the finish. I did.
To save myself time, I placed the stummel into a jar with acetone and let it soak for 20 minutes.
The stummel was removed and wiped with a paper towel. The vast majority of the finish had been removed.
I used acetone on make-up pads to scrub most of the remaining finish from the briar.
The acetone had softened the worst of the fills. I used a fly tying bodkin to pick the old fill material from the stummel.
A light sanding with a 320 sanding sponge and another wiping with acetone and the clear coat was gone.
In preparation for the sanding, I covered the stamping with masking tape.
The finish free rim looked like it could use a light topping.
A few figure eights on a piece of 400 grit sandpaper laid on the countertop.
The one fill to rework was refilled and packed with briar dust.
To this dust , I added a tiny drop of Thin cyanoacrylate (CA, super glue). The thin mixture penetrates and bonds the dust to the briar.
The new fill was filed then sanded smooth.
After a couple of hours’ish, I pulled the stem from the deox and let the excess solution drip back into the jar for a few minutes.
The stem was then vigorously rubbed with a coarse shop rag to absorb the remaining solution and abrade the softened oxidized rubber. This scrubbing the stem with Soft Scrub before the deox, will need more experimentation, but it seemed to work better.
The stem was lightly sanded then rubbed with mineral oil. It looked pretty darn good.
The pipe was reassembled and sanded, intact, with a series of sanding sponges 320-1500 grit. The stummel was wiped with a make-up pad wetted with alcohol between sponges while the stem was rubbed with mineral oil and wiped with a paper towel. Both wipings were to remove sanding debris.
The sanding continued with 2000-3500 grit sponges and repeated wipings between each sponge.
The pipe was then worked with micro-mesh pads 4000-12000, again the whipping between pads. I will add that instead of mineral oil I used Obsidian Oil on the stem.
A coating of Before and After Restoration Balm was applied to the briar and allowed to sit for 20 minutes.
An inside out athletic sock was used to hand buff the stummel and remove excess balm.
The stamps were re-masked with fresh masking tape to protect the stamps from buffing.
The pipe was then buffed using white buffing compound.
The M logo on the stem had lost it’s paint and some of detail during the deoxidation. I used a white acrylic model paint to repaint the logo.
The results were not as good as the original but the loss of detail was the price of deoxidation.
The pipe then received several coats of carnauba wax from the buffer.
The final step was hand buffing with a microfiber polishing cloth.
I think this Medico Medalist turned out quite well. I love the author shape and am reminded to use an author off the rack when writing blogs. The briar grain of this pipe is pretty but I wonder if I should have given it a contrast dye. That might have made the existing bird’s eyes stand out better. The grain is still very nice for a drug store pipe. The stem polished up very well and the glossy black does accentuate the existing briar grain well. The dimensions of this Medico Gold Crest meerschaum apple are:
Length: 6.30 in./ 160.02 mm.
Weight: 0.96 oz./ 27.22 g.
Bowl Height: 1.29 in./ 32.77 mm.
Chamber Depth: 1.07 in./ 27.18 mm.
Chamber Diameter: 0.71 in./ 18.03 mm.
Outside Diameter: 1.53 in./ 38.86 mm.
I do hope that you have found something here useful to your own pipe care, maintenance or restorations. If you like this sort of thing, please click the like and subscribe buttons. Thank you for reading the ramblings of an old pipe lover.
Loading…
Below are some photos of the finished Medico Medalist Author.
I first laid eyes and hands on a Rettke pipe in July of 2025. You can see that entire restoration here. I was taken by the rather nontraditional, double drilled shank, of the pipe. These pipes are what I call “gimmick pipes”. Now, not all gimmicks are equal. I am sure that Charles Peterson was considered a gimmick pipe maker with his three patents for the Peterson system back in the late 1890s. That gimmick has been used to great result and success for well over 125 years.I made an offer to the seller and was turned down. The pipe sat through several auction cycles and remained unsold. I made a lesser offer and it was accepted. The virtue of patience strikes again. The pipe did not have far to travel after the purchase, merely from Washington, Missouri to the wilds of southeast Nebraska. Yes, the same Washington, Missouri as both the home of J. Rettke and Missouri Meerschaum pipes. Below are some photos taken before I began working on the pipe.
Overall a pretty clean specimen with no glaring issues. The stem had oxidation expected of a 60+ year old pipe. The internals looked clean. There were no obvious fills, indicating a good quality briar. The grain of this pipe was not as distinctive as the first Rettke I restored and I thought that maybe a contrast dye would bring out the existing grain. The rubber seal/end of the “whirler” ( J. Rettke’s term for the spiral aluminum condenser) showed signs of drying and oxidation and may need to be addressed or replaced. Otherwise a thorough cleaning was in order.
Background
I will use the same Background information that I used for the first Rettke restoration and include it here in its entirety:
“I started my research on Rettke pipes with a pipedia.org search on “rettke”. Below is the short entry from that site.
“J. Rettke, Washington MO, PAT. June 12 1962. The silver colored thumbscrew below the stem unscrews and is a 2⅜” corkscrew like device. The company is now gone having been purchased by Missouri Meerschaum. This odd looking pipe is made of briar and has a lower chamber with a metal condenser and an upper chamber that contains a filter. The smoke leaves the bowl thru the lower chamber then into the upper and out the stem. It smokes dry and cool. It has a large bowl.”
(Rettke – Pipedia) I could not read the above newspaper article even by zooming in.
The next search was using Google patent and searching for “Rettke 1962”. This search turned up the original patent diagrams:
My next search was for Steve Laug’s Rebornpipes.com. Steve Laug did a Rettke restoration back in 2017 and contained links to the State Historical Society of Missouri. I could not get this site to produce the same document or to even display the link Mr. Laug has in his blog post. I will link Steve Laug’s blog here: Restoring a J. Rettke Patent Pipe from Washington, Missouri | rebornpipes. It is a very well written and researched piece that does contain a transcript of the newspaper article as well as several photographs of Julius Rettke and the pipe making process.
My favorite quotes from the newspaper article are,
“The work is done in Mr. Rettke’s basement of his home at Third and Market streets. He doesn’t work at it every day only when he feels like it. He likes to fish and that comes before his pipes in the summer.”
I can completely understand the lack of enthusiasm for pipe work when fishing is taking a priority.
And this quote:
“Mr. Rettke received his patent on his pipe in 1962. What makes his pipe different from others on the market is the path the smoke takes from the bowl, and the passage of smoke through a twisted piece of aluminum, or a “whirler.” The smoke also travels through a standard filter in a standard hard-rubber stem. The “whirler” has a rubber tip that shows on the outside of the pipe under the stem. The “whirler” also can be used as a pipe cleaning tool. It pulls out easily for cleaning purposes.” Here the newspaper article talks about a rubber tipped “whirler”. That is how the whirler of my pipe is made. The other Rettke pipes I saw in photos all had a knurled aluminum tip. This little fact is mostly non-important, I just found it interesting.
Now for the fun part: How does this pipe work? In the news article transcript it said, “four holes are bored.” under the photo of J. Rettke at the drill press. I read that after I had done my exploration of the stummel and it was in near complete agreement of what I observed.
Using the above photo, I overlaid some image features to indicate the “four” drillings.
This pipe landed on the workbench and a cleaned denim piece.
I decided to work on the whirler first.
The rubber was dried and cracked. I hoped this was only on the surface.
The rubber was coated with Mark Hoover’s Before and After Hard Rubber Balm. Mark was kind enough to send me a bottle of this product to test. I doubt that he ever imagined it to be used on a Rettke whirler but hey, it is rubber. The whirler was set aside to allow the balm to work it’s magic.
The stem was cleaned with several cotton swabs and pipe cleaners dipped in 99% ethyl alcohol. The stem appeared to have been used without a Medico filter.
After numerous cotton swabs, I took the stem to the sink for a scrubbing with Castile soap and a nylon brush. The soap was used undiluted and as the photo below shows the brush came back with a good deal of smoking residue.
After the stem was rinsed with warm water, I returned to the workbench and found the cotton swab dipped in alcohol started coming back with far less color. Victory!
Once clean, the stem was suspended into a solution of Before and After Extra Strength Deoxidizer. I ended up leaving the stem in the solution for a bit over 24 hours. The following day was Christmas Eve and I was away from home for the day.
The reaming gear was gathered.
The PipNet with the #2 and #3 blades did most of the reaming.
Some light clean-up scraping was done with the General triangular scraper.
The below photo is of the reamed tobacco chamber.
The chamber was sanded with 320 sandpaper wrapped around a wood dowel. The bare briar showed no signs of any damage from heat.
The shank cleaning was twice as much work as a normal pipe due to it having twice as many shank draft holes. Weird, eh? Again alcohol dipped cotton swabs and bristle pipe cleaners were used along with a bit of scraping with a dental scraper. The upper chamber returned swabs with less charred residue than the lower chamber.
I thought that an alcohol cotton treatment would be a good idea to fully clean and de-ghost the draft of this pipe. Not that the previous user had used a foul smelling tobacco, it actually was a pleasant burley based aromatic from what my nose could tell. The chambers and passageway was packed with cotton.
Usually a pipe holds around 10 ml of 99% ethyl alcohol. I figured this one might hold a bit more. The alcohol would be applied with a disposable pipette.
The saturated alcohol would be allowed to evaporate overnight. This would dissolve the remaining smoking residues and tar and move them into the cotton as the alcohol evaporated.
With the stem and stummel now occupied with long term waiting procedures, I cleaned up the aluminum of the whirler with 99% ethyl alcohol and cotton swabs.
The next morning I returned to the workbench for a few minutes before heading to the Christmas Eve celebrations. The cotton had picked up the color of deposited tars.
The cotton was removed with tweezers. I again used alcohol dipped cotton swabs and bristle pipe cleaners to repeat the airway cleaning to remove any remaining, now softened, residues.
The next evening, I removed the stem from the deoxidizing solution and used the patented Drip-Dry-O-Matic, okay, it’s not patented. Yet!
The stem was vigorously rubbed with a coarse shop rag to remove remaining solution and some of the softened oxidized rubber.
Back at the workbench the stem looked kind of rough but black.
I used some Soft Scrub cleanser of make-up pads to clean off additional oxidized vulcanite.
The stem was then sanded, with more attention on the tooth chatter above the button, with 320-600 grit sanding sponges. Between each sponge the stem was rubbed with mineral oil and wiped with a dry paper towel to remove sanding debris.
It was time to see how a contrast dye would enhance the briar grain. I thought that a base of black with a top coat of Mahogany would look very nice. Both dyes were Fiebing’s Leather Dye applied with a pipe cleaner, flamed with a flighter.
Below you can see the stummel after a coating of the black Fiebing’s. The cork was placed in the tobacco chamber to keep the dye out.
I only wanted the black dye to be absorbed more deeply by the softer grain. I then rinsed the dye from the stummel using 91% isopropyl alcohol over the sink then wiped the stummel with a paper towel.
When sanded with a 400 grit sanding sponge, both harder and softer grain was removed. The dye had penetrated the softer grain deeper than the harder grain.
Next came the mahogany applied with a pipe cleaner.
I again rinsed the dye from the stummel with 91% isopropyl and wiped with a paper towel. Returning to the workbench I sanded the stummel with 400 then 600 grit sanding sponges. Below you can see how the black accentuated the grain and how the mahogany added warmth to the non-blackened areas.
After a drying time of about 30 minutes I applied a coating of Before and After Restoration Balm to the briar and a coating of Before and After Hard rubber Balm to the stem and rubber of the whirler. This was allowed to sit for about an hour.
The balms were hand buffed from the pipe with an inside out athletic sock.
The pipe, both stem and stummel were then buffed with rogue buffing compound at the buffer. The pipe was wiped with an alcohol wetted make-up pad to remove any remaining buffing compound then returned to the buffer for several coats of carnauba wax.
The final step was to hand buff the pipe with a microfiber polish cloth.
After restoring the first J. Rettke pipe, I wrote this sentence in the conclusion. “Of the many gimmick pipes I’ve had the pleasure of working on, I think this one would actually be an effective system for condensing steam. It just makes sense.” I could not have said it better, myself. Wait, I did say it. Anyway, this pipe turned out very well. The contrast dye is what I hope it would look like – greater definition of the briar grain. The stem polished up nicely. I tried the draw both with and without Medico filters and the draw was very good either way. With the first J. Rettke, I ended the conclusion by typing, “I would consider this an artisanal pipe from a time before artisanal was cool.” I couldn’t have said that better, myself. Now for the part I had been looking forward to since I saw the first Rettke, smoking it and seeing firsthand if J. Rettke’s patent was effective or another gimmick. The dimensions of the J. Rettke are:
Length: 5.88 in./ 149.35 mm.
Weight: 1.46 oz./ 41.39 g.
Bowl Height: 1.92 in./ 48.77 mm.
Chamber Depth: 1.42 in./ 36.07 mm.
Chamber Diameter: 0.71 in./ 18.03 mm.
Outside Diameter: 1.41 in./ 35.81 mm.
I do hope that you have found something here useful to your own pipe care, maintenance or restorations. If you like this sort of thing, please click the like and subscribe buttons. Thank you for reading the ramblings of an old pipe lover.
Loading…
Below are some photos of the finished J. Rettke pipe.
If you have read a few of my blogs you know I have a thing for Peterson pipes. Oh yeah, the name NebraskaPeteGeek may also provide a clue. Anyway, I have returned to Peterson restoration. This particular pipe was a line unfamiliar to me, Brymeer. I found it strange that there were only 3 others bidding on this pipe and when I won it for less than $20 I was even more surprised. Given, it was in rough and dirty shape. After a journey from Lowell, Indiana to the wilds of southeast Nebraska the pipe arrived. Below are some photos taken before I began work on the pipe.
Hmm, where to start with this one? The stem was severely oxidized with a couple of deeper tooth dents. I feared losing the GREAT BRITAIN COM stamp with oxidation removal.The stummel was quite dirty but looked good otherwise. The rim was a mess with chips in the meerschaum liner. The tobacco chamber was carbon caked, who knows what lies under that? I do like a challenge.
Background
I have said it before and likely will again, “For a great history Mark Irwin and Gary Marlburg’s book is a must read for a Pete Geek.
Another amazing site full of Peterson information is, Peterson Pipe Notes. I can wholeheartedly recommend the free at
https://petersonpipenotes.org/ Yes, you will get emails but only for things like the weekly blog post and occasional Peterson pipe drops (like the Peterson Pipe Notes Pipe of the Year) or offers for cool Pete Geek merchandise.
According to the Big Book, also known as The Peterson Pipe,
“Brymeer (1971-75) Offered only in Iwan Ries catalogs, meerschaum-lined black sandblast briar and P-lip of fishtail mouthpiece. Produced by Peterson-Manxman factory” (The Peterson Pipe Irwin, Mark and Malmberg, Gary. The Peterson Pipe; The Story of Kapp and Peterson. 2018, Briar Books Press, Canada. First edition, second printing. p. 308)
“What is this Peterson-Manxman Factory?”, you ask. Pipedia.org to the rescue.
“Laxey Pipes Ltd. resided in a historical 19th century four-storey Man stone building at The Quay, Old Laxey, Isle of Man, which thankfully has been preserved.
The company specialised in the production of meerschaum pipes using the Meerschaum mined by the Tanganyika Meerschaum Corporation in the Amboseli basin in Tanganyika (since 1964 part of the United Republic of Tanzania).
Please note: you may often find names like “Manx Pipes Ltd.”, “Man Pipe Co.” and others more, but there is no indication of another Isle of Man pipe producer other than Laxey Pipe Ltd. at any time!
Laxey Pipes Ltd. marketed own brands like “Manxpipe”, “Manxman”, “Manxland” e.c. Names like “John Bull”, “White Knight” (unwaxed), “Domino” (black, or lined) indicated some shapes / colours of Laxey’s own series. The stems either showed the astronomical sign for “male” or “man” (circle + arrow), or the crest of the Isle of Man, the 3-legged X in a circle. Manxpipes and Laxey’s other brands were available through pipe retailers in general, but also were sold (mainly) to tourists through their own shop in Laxey.
Furthermore Laxey Pipes Ltd. manufactured the meer bowls for Peterson, Barling, Nørding and others from the later 1960’s until 2001. Man Pipe e.g. was a brand distibuted by Comoy’s. The bowls usually showed no nomenclature indicating the orderer. “Genuine Block Meerschaum” was engraved frequently. Often, just the stems were different, while bowls were the same.
Supply of meerschaum from East Africa run out (Kenya / Tanzania exhausted, Somalia inaccessible), and thus the last Laxey meers were supplied to trade in May, 2001. Laxey Pipes Ltd. tried to survive continuing with briar pipes – mainly in the Danish style -, but to no success. It closed down business in July, 2002.” (Laxey Pipes Ltd. – Pipedia)
There we have it, this pipe was made between 1971-1975 in the Peterson-Manxman factory on the Isle of Man. That is a darn definitive piece of provenance if ever there was one.
The Restoration
The slightly battered dirty girl made her way to the workbench and a clean denim piece.
The first order of business was to clear the accumulated cake from the tobacco chamber. This proved to be a much more difficult job that I imagined. I did not use a reamer like the Kleen-Reem or the PipNet due to the threat of cracking the meerschaum liner with additional torque, instead the Smokingpipe Low Country reamer and the very sharp pocket knife were deployed.
Let me assure you that both diamonds and cake on meerschaum have a similar hardness. The scraping continued.
Eventually I moved to the wood dowel wrapped in 320 grit sandpaper.
Next, came the cleaning of the stem. This was done with 99% ethyl alcohol and bristle pipe cleaners.
The stem was then hung, suspended, in Before and After Extra Strength Deoxidizer. I had not used this wonderful product for a few months because the fine folks at Briarville had sent me a complimentary bottle of their Pipe Ste Oxidation Remover. That bottle had finally started giving less and less desired results after about 9 months and approximately 30 pipe stems. Mark Hoover’s Before and After product seems to last longer, doing more pipes, and though a bit more difficult to remove the solution after deoxidizing, I think it works slightly better overall. Since this stem was quite oxidized, I figured 24 hours in the solution would be adequate.
With the stem out of the picture for a day, I switched to the stummel. It was scrubbed with undiluted Murphy Oil Soap and a nylon brush over the sink. The soap was rinsed with warm water and the stummel dried with a cotton hand towel.
The stummel looked much better once cleaned.
I wiped the stummel with a cotton ball wetted with 99% ethyl alcohol and it only removed a slight bit of dirt and no dye.
Still unimpressed with my removal of the cake from the tobacco chamber, I returned to scraping it with the General triangular scraper, the pocket knife and a rotary tool grinder mounted to a hand drill. This combination helped free the caked carbon from the bowl better but still not to my satisfaction. I feared marring the meerschaum with more aggressive methods.
The next evening, I removed the stem from the Before and After Extra Strength Deoxidizer and let it drip excess solution back into the jar.
After drip drying the stem was vigorously rubbed with a coarse shop rag to remove some of the oxidized vulcanite.
The shop rag shows the removed oxidized rubber.
Another of my fears with this pipe was the obliteration of the stem stamps from the deoxidation. I was glad to see that the stamps remained legible, though faint.
The tooth dents above the button were addressed with rubberized cyanoacrylate (CA, super glue). These were filed smooth and sanded.
The stem was then sanded with 320-600 grit sanding sponges. The ste log and Country of manufacture (COM) stamps were masked with masking tape to protect them during the sanding.
The stem was then worked with a series of sanding sponges. Between each sponge the stem was rubbed with mineral oil and wiped with a clean dry paper towel to remove sanding debris.
The chip on the rim of the meerschaum bowl liner had me thinking of ways to repair it. The area was rough enough and the meerschaum porous, so I thought that I could use the old technique of egg white and meerschaum dust to fill the chipped area.
I made a paste with the egg white and meerschaum dust and applied it with a snuff spoon.
The chip looked better and I thought it would lighten as it dried. It did lighten then fell out. I repeated the attempt with the same results. I could not get the eggwhite-meerschaum dust paste to adhere to the existing meerschaum. Strike one and two.
With my brain engaged with chip solutions, I turned to a more repetitive task while I thought. I micro-meshed the stem with 4000-12000 micro-mesh pads. Between each pad I rubbed the stem with Obsidian Oil and wiped it with a dry paper towel. I then repainted the Stem logo with a white acrylic modeling paint.
I used the Before and After Fine Polish then the Extra Fine Polish on a soft cotton cloth and hand buffed each.
The stem was then buffed with carnauba wax on the buffer.
The stummel received a coating of Renaissance Micro-Crystalline Wax applied with a baby toothbrush.
In the above photo you can see the repaired chip loosening in preparation to fall out. The stummel was then worked with a shoeshine brush to polish the Renaissance Wax.
I was at two strikes for chip repair. My thought process was working out other potential solutions I had two other ideas for repairing the chip:
Cut a and shape a replacement chip from stock meerschaum and gluing it in place with clear JB Weld. This product was preferred due to its ability to withstand high temperatures.
Mixing some clear JB Weld epoxy and meerschaum dust. Then applying the epoxy-meerschaum to the chip, allow it to cure then sand to blend.
Both ideas relied on the ability of the epoxy to adhere to the meerschaum and I hoped the heating and cooling or expansion and contraction of the materials would be compatible.
I opted to try the chip replacement with a new meerschaum chip, first.
The first part of this idea required a fairly accurately measured replacement piece of meerschaum. My father, a Geography and Industrial Technology (shop) teacher by original training, frequently said, “Measure twice and cut once.” Cautious measurements were taken and transferred to the piece of block meerschaum. The only meerschaum I had was of Turkish origin and not the more off-white African version as with the bowl liner.
Below you can see a better view of the proposed chip replacement.
To cut this delicate material, I used a Dremel rotary tool with a thin cut-off bit.
Below is a photo of the replacement chip.
With some fine tuning of the replacement chip’s edges a good fit was eventually found.
As previously mentioned JB Weld clear epoxy was the adhesive of choice. Equal parts were measured and mixed according to packaging directions.
The epoxy was applied to both surfaces and the replacement chip fitted to the gap. I thought that I could come back to trim the excess epoxy after it had set-up for about an hour. It would still be soft enough to cut away from the meerschaum with an Exacto knife.
After the epoxy had set up for about 6 hours I applied a piece of masking tape and cut out for the replacement chip. This allowed me to remove the excess material using an emery board without marring the rim.
The emery board made short work of the soft meerschaum.
Additional sanding was done using a wood sphere wrapped in 320 sandpaper and a piece of 400 sandpaper by hand.
Below is a view of the replacement chip immediately before final sanding with the 400 sandpaper.
Since I had already waxed the stem and stummel , all that remained was a hand polish with a microfiber polishing cloth and a stop at the photo table.
I think this Peterson Brymeer Dublin turned out quite well compared to how she looked originally. The briar’s sandblast cleaned-up very nicely. With the dark original stain of the stummel there is a lovely contrast to the slightly off-white meerschaum lining. The stem deoxidized remarkably well. I was able to retain both the COM and the P logo on the stem. The fresh vulcanite looks great with the black of the briar. The chipped rim repair turned out about as well as I could have hoped. Yes, it is noticeable but with a few smokes, I think the meerschaum will color and conceal the repair almost completely. The tobacco chamber cake was very resistant to removal. I guess there is a reason that diamonds are so tough. This carbon was nearly diamond-like in its resistance to removal, but in the end most of it was cleared. The dimensions of the Peterson Byrmeer Dublin are as follows:
Length: 6.06 in./ 153.92 mm.
Weight: 1.22 oz./ 34.59 g.
Bowl Height: 1.89 in./ 48.01 mm.
Chamber Depth: 1.55 in./ 39.37 mm.
Chamber Diameter: 0.71 in./ 18.03 mm.
Outside Diameter: 1.38 in./ 35.05 mm.
I do hope that you have found something here useful to your own pipe care, maintenance or restorations. If you like this sort of thing, please click the like and subscribe buttons. Thank you for reading the ramblings of an old pipe lover.
Loading…
Below are some photos of the finished Peterson Byrmeer Dublin.
I remember reading my first Sherlock Holmes in middle school, The Hound of the Baskervilles by Sir Arthur Conan Doyle. I loved the idea of a mystery, even though I knew about the great detective, the solution to the mystery was all new to me. I feel that way about this pipe, a Peterson Croydon Square 42. I had above average knowledge of Peterson pipes but had not heard of the Croydon Square line. Where would this mystery lead me?
The pipe was another single target eBay acquisition. I paid more than I really wanted to but it was a specimen that I had not seen before and I wanted to work on it. After a quick trip from LaGrange, Georgia to the wilds of southeast Nebraska, I had my prize. The photos below show the pipe prior to any work.
The Croydon Square looked like a well loved and used pipe. The restoration looked straight forward; cleaning, reaming, sanding of the stummel, deoxidation of the stem with sanding and polish. There did not appear to be any glaring issues with this old pipe, just use and time.
Background
Being unfamiliar with London, I’d not heard of Croydon nor of Croydon Square. I am familiar with Peterson pipes though, yet Croydon was an unfamiliar line of Petersons to me. I first wanted some information about the geography.
With my curiosity settled on that account, I turned my gerbil-like attention to the pipe. I cannot give Kapp and Peterson the credit they are due. In the most comprehensive guide to the history of Peterson Mark Irwin and Gary Malmberg wrote a wonderful book The Peterson Pipe (Irwin, Mark and Malmberg, Gary. The Peterson Pipe; The Story of Kapp and Peterson. 2018, Briar Books Press, Canada. First edition, second printing.). According to Irwin and Malmberg, the legacy of Peterson as “the world’s oldest continuously operating briar pipe maker” (Irwin, p. 3). This is a treasure trove of information for those interested in Peterson pipes. It is currently “sold out” from The Peterson Pipe Book (Softcover) | Smokingpipes.com.
“I’m also happy to report that a few revisions of the book are now in order. That didn’t take long, did it? So get out your pencil, it’s time to annotate your copy: (1) The Croydon Square origin date is given as 1949 in the book, as we only had an RDTA Almanac an unhallmarked specimen to go by. But now—surprise!—it’s clear that the line was being made as early as ’39. (The similarity between the name of Croydon Square and Trafalgar Square also has me wondering if the latter didn’t replace the former at some point.) (2) We can also pencil in ’39 as the earliest documented date (so far) for the Captain Pete. (3) The ad copy in the catalog also suggests that, at this date, the line was made exclusively at the London factory. (4) And if that’s not enough, at the beginning of the “N” section in the Information Guide, you can write, “An N prefacing two-digit shape numbers of English-made pipes refers to a natural finish.”” (136. Filling the Gap: The 1939 Rogers Import Peterson Catalog & Download – Peterson Pipe Notes)
In the above quote from Mark Irwin, the “RDTA” refers to “Retail Tobacco Dealers of America. The forerunner of the current Premium Cigar Association with a few name changes in between.” (Mark Irwin, personal communication. September 22, 2025). Don’t worry, I had no idea what it meant either. I emailed Mark and got a quick reply. The PPN blog also had the following page from a 1939 Roger’s catalog:
AHA, specific historical information about the Croydon Square pipe was at hand. This put the pipe’s provenance from at least 1939 to ? and also the shape 42. Although this information led to more questions. There is no mention or illustration of fishtail stems, only P-lips. The pipe in hand had been smoked quite a bit leading me to the thought that the stem of this pipe may be a replacement.
In The Peterson Pipe, where the London production of pipes is discussed at length, was another interesting piece of information. Here, Irwin and Malmberg say, “Apparently, the London factory did not order a MADE IN ENGLAND die until after the war. Any Peterson stamped with an English COM must be no older than the later 1940s” (Irwin, p.150). If it is assumed that this pipe was not stamped due to there not being a stamp available then it would date from 1939-late 1940s. If it was merely not stamped with a COM then it is assumed to be made during the years of pipe production at the London factory 1936-1962. I prefer to think that it is due to the former. This is actually a selfish desire to have the dates of production to be a more definitive late 1930s-late 1940s. I know, too much conjecture…
The Restoration
The restoration began with a clean denim piece protecting both the work surface and the pipe.
I began with the stem. This was cleaned with bristle pipe cleaners and 99% ethyl alcohol.
The stem was then submerged in Briarville’s Pipe Stem Oxidation Remover (deox). It bathed for 18 hours.
In the meantime, I worked on the stummel. The ream team was gathered.
The PipNet #1 and #2 blades were both put to use. The General triangular scarper was also used to do some cleanup of the tobacco chamber and the rim.
Below is a photo of the tobacco chamber after the reaming.
The chamber was then sanded with 320 sandpaper wrapped around a wood dowel. No damage to the chamber was observed.
The rim however was encased in a layer of lava.
The lava was softened with saliva and scraped with the blade of a sharp pocket knife.
Next came the shank airway cleaning. Again the 99% ethyl alcohol and bristle pipe cleaners were used. There was also a good deal of scraping with a dental scraper and use of a nylon shank brush.
I was not completely happy with my efforts to rid the airway of the residue of tar and general yuck. I thought an alcohol and cotton treatment would do the airway some good. The tobacco chamber and the airway were stuffed with cotton.
99% ethyl alcohol was applied via a disposable pipette to the cotton until it was saturated. This took about 10 ml of alcohol.
The alcohol was allowed to evaporate overnight. This allowed the alcohol to dissolve the tars and transfer them to the cotton as the alcohol evaporated. The next day the cotton was stained, telling me the process worked.
The cotton was removed and the airway was cleaned again. The below photo shows the 2nd cleaning and the tars that were removed after the overnight cotton alcohol treatment.
The stummel was then taken to the sink for a scrubbing with a nylon brush and undiluted Murphy Oil Soap. The soap was rinsed with warm water and the stummel dried with a cotton hand towel.
Returning to the workbench, the stummel was wiped with a make-up pad dipped in ethyl alcohol.
The stem was removed from deox and rubbed with a coarse shop rag. This removed a good deal of the oxidized rubber from the stem.
The stem was then worked with Soft Scrub cleanser on make-up pads to remove more of the oxidation.
I then oiled the stem with a liberal coating of mineral oil and let the stem sit for several hours. Oh yeah, I also ran a pipe cleaner through the stem and oiled the interior as well.
The rim looked far better but still rather rough. I thought that a light topping was in order.
The topping was done with 320 sandpaper laid on a flat counter top followed by a piece of 400 sandpaper. This revealed two additional areas of concern. A deeper dent or ding in the inner rim (about 5:00) and a hairline crack (at about 7:00).
I used a wood sphere wrapped in sandpaper to reestablish the inner rim bevel and smooth the rim.
I deemed the crack to be superficial and not structurally important. It was given a dab of Thin cyanoacrylate (CAl super glue) to seal it and was topped a second time with the 400 sandpaper. The ding was filled by packing it with briar dust and then applying a small drop of CA. This was repeated a second time. The wooden sphere and sandpaper was used to smooth the fill and the rim was topped again with the 400 sandpaper.
The stamps were taped off with masking tape to protect them from sanding.
I prefer asymmetrical pieces of tape because they leave a less noticeable mark on the briar where sanding was not done.
The first two sanding sponges used were the 320 and 400 grit. Sanding with these two showed me where several dents and pits were. All of these blemishes were small so they were filled by placing a tiny drop of Thin CA on the spot and sanding it with a very dirty sanding sponge. By dirty, I mean a sponge that has a large amount of briar dust on it. Even with the extra briar dust sometimes the CA gets onto the sanding sponge. This can be seen below as the dark spots on the sponges.
The small fills were sanded with 324 and 400grit sponges.
Below are some photos of the fills after they’d been filled.
The pipe was then sanded with the full series of sanding sponges from 320 -3500 grit. Between each sponge the stummel was wiped with a make-up pad wetted with alcohol. The stem was rubbed with mineral oil and wiped with a dry paper towel.
The pipe was then worked with micro-mesh pads 4000-12000. The wiping of the stem and stummel was done as with the sanding sponges except the stem was rubbed with Obsidian Oil.
I took the pipe to the buffer and buffed it with blue buffing compound.
After wiping any remaining buffing compound from the pipe it was given a coating of Before and After Restoration Balm and allowed to sit for an hour. Why an hour? Because I got side-tracked with another project.
The excess balm was wiped away using an inside out athletic sock.
The pipe was then taken to the buffer for several coats of carnauba wax.
The final step was another hand buff with the microfiber polishing cloth then off to the final photo shoot.
This beautiful Peterson’s Croydon Square 42 is a great example of Peterson’s English workmanship. The stain of the original pipe was maintained and gives the pipe a slight contrast-dye look. It was finished with careful sanding and just carnauba wax. The stem sanded and polished to a gorgeous glossy luster. Though lacking any stunning briar grain there is some nice flame grain on the rear left. The dimensions of the Peterson’s Croydon Square 42 are:
Length: 5.67 in./ 144.02 mm.
Weight: 0.95 oz./ 26.93 g.
Bowl Height: 1.43 in./ 36.32 mm.
Chamber Depth: 1.25 in./ 31.75 mm.
Chamber Diameter: 0.71 in./ 18.03 mm.
Outside Diameter: 1.37 in./ 34.80 mm.
I do hope that you have found something here useful to your own pipe care, maintenance or restorations. If you like this sort of thing, please click the like and subscribe buttons. Thank you for reading the ramblings of an old pipe lover.
Loading…
Below are some photos of the finished Peterson Croydon Square 42.
The story of the Ugly Duckling seems to come to my mind when I think of Peterson Irish Seconds. Though in the case of this pipe it’s more like an ugly duckling that got chewed on by a snapping turtle down at the pond.
Well, this looks like it might be another tough restoration. The reason this pipe didn’t make it as a “real” Peterson might have been the deeper than normal blastings at the front left of the pipe. In a couple of places the briar looks like the blasting cut deeper into the briar. I am no expert on Peterson quality control but that did seem suspect. As for what I planned to do was the following: A thorough cleaning of the pipe inside and out, a refinishing of the briar, and a rebuilding of the stem. This rebuilding would allow me to try to weld vulcanite kind of like I welded acrylic on a previous restoration (A Commissioned Stanwell 32 Button Repair – acrylic welding – NebraskaPeteGeek).
Background
Being a rather typical member of Generation-X, sometimes called lazy slackers, I will refer you to what I wrote about Peterson Irish Seconds in a previous blog,
I cannot begin to describe the history nor impact of the Peterson pipe company. I can tell you what I think is the best source of information on the subjects and that is Mark Irwin and Gary Malmberg’s book, The Peterson Pipe The Story of Kapp & Peterson. According to the authors,Peterson’s seconds are as follows,
“Seconds Peterson seconds are pipes of all shapes with briar flaws deemed unacceptable for ordinary models and sold at reduced prices, sometimes unstained, fit with fishtail or round button mouthpieces. Since the early 1990s they have only been available in Ireland. Occasionally they are described in Peterson catalogs under different names, and documented specimens have various stampings. In roughly chronological order these include:
Stamped arched KAPP & over straight PETERSON”S over arched DUMMIES An early specimen preserved at the Peterson museum with this stamp has a round-button mouthpiece.
IRISH FREE STATE stamp (1922-37) COM stamp with no brand or model name. Documented with or without nickel bands.
System Reject (1968-) Noted first in the Price List for January 1968 as being available in all six system shapes. Also found in the ‘80 Peterson-Glass Price List.
Erica System Reject (1987-98)Noted in two US distributor catalogs. Fishtail mouthpiece, unstamped nickel band, with COM of MADE IN THE over REP. IRELAND or with no COM.
Irish Seconds (1982-98) Classic Range shapes stamped with no brand name , fishtail mouthpiece, in unstained, black rustic or dark brown finishes, no band. (Irwin, Mark and Malmberg, Gary (2018). The Peterson Pipe The Story of Kapp & Peterson, First edition, second printing 2021. Briar Books Press, Canada. p312).
Mark also writes a weekly blog titled Peterson Pipe Notes. If you have not already subscribed I highly recommend it. It will be one of the best $0 purchases you can make and is a vault of information on all things Peterson and various other topics. I am not just saying that because Mark has posted a few of my restorations either. His blog concerning the Irish Seconds is very well researched, written and can be found here: https://petersonpipenotes.org/tag/irish-seconds/. (Young, John. An Irish Seconds Oom Paul (Peterson 02) Restoration – NebraskaPeteGeek).
As for this pipe, I believe it to be a Peterson 312 shape. The dimensions and shape match the 312 Bent Billiard. According to the official Peterson website,
“One of our largest and most robust variations on the classic, this bent Billiard offers a generous fire hole with thick insulating walls, as well as a more tubular transition and muscular shank that capture our House Style. Though bold and substantial, its half-bend lends it a natural impression when clenched in the teeth.” (Peterson Pipes: System Standard Heritage (312) P-Lip).
The shank is drilled with a reservoir making me think that the pipe was not intended as an Irish Seconds but as a 312 but it just didn’t make the quality control cut after the blast. That is all conjecture on my part though.
The Restoration
As much as I do not like to work on more than one pipe at a time, due to old brain issues, I did indeed do these two pipes simultaneously.
Stem cleaning was the first priority as I wanted to get this stem into the Briarville’s oxidation remover solution. I was looking forward to trying the vulcanite welding.
The exterior was lightly rubbed with 0000 steel wool to remove the outermost oxidation.
The stem then was placed into the Briarville Pipe Stem Oxidation Remover, or Deox, as I like to call it. I planned to leave it in the solution overnight.
I then turned to gathering the ream team.
The PipNet’s #1 and #2 blades did most of the work with the General triangular scraper doing clean-up.
The rim had lava deposits, but with its rusticated rim, it would be tough to scrape clean.
The scraping of the rim, once softened with a bit of saliva, was partially productive.
The tobacco chamber was sanded with 320 sandpaper wrapped around a wood dowel. The sanding revealed the briar and no damage due to heat.
No damage is always welcome.
Next came the cleaning of the air way within the shank. This was more difficult. Peterson pipes with their reservoirs are frequently difficult to clean. I do wish that their owners would have taken a few minutes to swab out the reservoir with a tissue or napkin as recommended, but I too have neglected to do this after a smoke. The airway was cleaned with a dental scraper, nylon shank brush, bristle pipe cleaners and cotton swabs all doused with liberal amounts of 99% ethyl alcohol.
The stummel was then taken to the sink for a scrub with a nylon brush and Murphy Oil Soap, undiluted. The soap was rinsed with warm water and the stummel dried with a cotton hand towel.
The deeper parts of the sandblast and the rim did not look like they were as clean as I would have liked so a second scrub was done with a brass brush and the Murphy’s. The rinsing and drying remained the same.
Back at the workbench the stummel was wiped with a make-up pad dipped in 99% ethyl alcohol. This did remove some of the black stain from the briar.
Still not happy with the cleanliness of the airway, I thought maybe a cotton and alcohol treatment would soften and draw out remaining tars from the briar.
The bowl, airway and shank were stuffed with cotton. The cotton was then saturated with about 10 ml of 95% ethyl alcohol and allowed to sit overnight. With the stem and stummel both soaking overnight with their treatments, I called it a night.
Remember I said that I was working on two pipes at the same time? Well, I continued the next morning. The cotton had done its job of absorbing the tars dissolved by the alcohol as it did its job of dissolving the tars and moving them to the cotton as it evaporated.
The cotton was removed.
I then cleaned the airway as before and was pleased that it took little effort.
The stem was retrieved from deox and placed on a coarse shop rag where it was rubbed vigorously. This helped remove some of the oxidation loosened by the deox solution.
The stem was filed and sanded exposing a cleaned surface to work with.
The same filing and sanding was done to the underside.
I cut a “dam” from a plastic lid to fit into the slot and block off the airway from unwanted welding material.
Below you can see the airway filled with the dam.
I selected a vulcanite stem from my extras.
The surface material was filed and sanded from the stem to expose clean fresh vulcanite.
I tried melting the vulcanite with a soldering iron, as I had successfully done with the acrylic. It did not work. I then tried to heat the vulcanite with a heat gun to soften it before using the soldering iron. This too met with failure.
All that it did was to make the surface of the vulcanite surface get rough, as if it were bubbling up. I could not get any material to melt off the stem for use as welding material for the Peterson’s stem.
Plan B began to form in my Multiple Sclerosis damaged brain. What if I cut a piece of vulcanite from an existing stem and welded it in place with rubberized cyanoacrylate (CA, super glue)? Hmm, the damaged brain thought this might work. I set off to find an appropriate donor stem. The donor’s button was removed with a cut-off tool with the dremel rotary tool. This also gave me a feel for cutting vulcanite.
I measured and drew out the piece which I wanted the donor to donate.
Except for a small chip off the donor piece where I tried to hold it in a forceps, it looked good and fit well. Okay, there was actually a lot of trimming and shaping with the dremel.
The Bob Smith rubberized CA was the glue of choice.
The CA was applied to the seam around the donor piece. The dam would hopefully keep the CA from dripping into the airway. Also from previous experiences the CA does not stick to this plastic.
After about 30 minutes I couldn’t wait anymore so I spritzed the CA with a drying accelerator. This hardened up the CA in moments. The plastic dam was pulled free.
I filed the repair with a small flat file and checked the airway. Everything was going according to the imagined plan.
A second application of black CA was applied to fill and blend the repair. I also added a line of CA to the back side of the button to re-establish its shape.
The underside of the stem was also coated with a thin layer of CA to fill the multitude of dents caused by the snapping turtle attack.
After the CA had cured it was again filed and sanded with 320 and 400 grit sanding sponges. The repair looked better than I had thought it would.
The underside was also filed and sanded.
WIth the stem issues resolved, I turned my attention to the refinishing of the briar. This pipe had some serious wear issues. The black stain had been worn away completely from the left rear side of the stummel.
I used Fiebing’s black Leather Dye diluted about 50% with ethyl alcohol.
I initially thought to just apply the dye to the areas where the finish had been worn away but as I did this I realized that blending the old and new finishes would be impossible. The best solution was to apply the black dye to the whole stummel.
Well, the whole stummel minus the lighter shank end. The dye was flamed with a lighter to burn off remaining alcohol and to help set the dye into the briar. After the flaming I wiped the surface with a make-up pad wetted with ethyl alcohol. I was not concerned with the dye drying because I wanted to remove the dye from the high spots of the blast. The lower spots would dry on their own accord.
After the stummel had dried, I lightly sanded the high spots and contours with a 400 grit sanding sponge.
This light sanding removed the black dyed briar from the surface revealing the lighter briar underneath.
The worn briar of the left side of the stummel looked much better.
The stem was then sanded with a series of sanding sponges. I did not worry about taping the shank as the sanding there would improve the lightening of the briar at the shank end. Between each sponge I rubbed the stem with mineral oil and wiped it with a dry paper towel.
The sanding continued through the finest grit sanding sponge, 3500. The oiling and wiping also continued between sponges.
I buffed the stem with white buffing compound to further polish the vulcanite.
The stummel was coated with a layer of Before and After Restoration Balm and allowed to sit for 30 minutes.
The remaining Restoration Balm was hand rubbed with an inside out athletic sock to remove the excess.
The stem was waxed with several coats of carnauba wax applied with the buffer.
I did not want to wax the stummel with carnauba due to the deeper recesses of the blast. I opted to use Renaissance Micro-Crystaline Wax. This product was applied with a baby toothbrush.
I used a shoe buffing pad to hand polish the Renaissance.
As a further buffing attempt, I used shoe buffing brushes to work the wax and raise the shine.
The final touch was to hand buff the entire pipe with a microfiber polishing cloth.
My struggle to repair the damage caused by the snapping turtle attack on this poor Peterson was complete. Overall I think it turned out very nicely. Given, I will probably not sell this specimen as the stem repair was a technique that I have not tried before and have not tested sufficiently. I was disappointed by my failure to weld the damage with vulcanite but will probably do more research and attempt it again. The stem did polish-up very well and looks dramatically better than it did. I am sure the repair will hold and should be strong enough to combat the forces of extended clenching. The refinishing of the stummel also turned out very nicely. The definite deep blast is a feature that I really like the look of. Though this may have been the reason for this pipe being classified as an Irish Second. The dimensions of this Peterson Irish Seconds Bent Billiard are:
Length: 5.50 in./ 139.70 mm.
Weight: 1.83 oz./ 51.88 g.
Bowl Height: 1.75 in./ 44.45 mm.
Chamber Depth: 1.54 in./ 39.12 mm.
Chamber Diameter: 0.72 in./ 18.29 mm.
Outside Diameter: 1.32 in./ 33.53 mm.
I do hope that you have found something here useful to your own pipe care, maintenance or restorations. If you like this sort of thing, please click the like and subscribe buttons. Thank you for reading the ramblings of an old pipe lover.
Loading…
Below are some photos of the finished Peterson Irish Seconds Bent Billiard.
I always feel humbled when someone reaches out to me to restore an old pipe. I should say I’m humbled and nervous. It is an honor to be asked but there is always the nagging feeling or insecurity of damaging someone’s favorite pipe or worse a family heirloom. Today’s restoration emphasizes that very well. The pipe was made by Peterson, I think everyone knows my feelings toward Peterson pipes. If not, the handle Nebraska Pete Geek may give you a clue. This example was a Captain Pete, an all time favorite line. The owner reached out to me via email and lives only about 25 miles away. Crazy small world, eh? The Owner, let’s call him William to protect his identity (or less dramatic, privacy) had subjected himself to reading one of my restoration blogs. The poor guy survived the ordeal and still wanted me to take a look at this pipe. Descriptions and photos were sent and I gave an estimate of what I thought I could do for the old Captain Pete. A few weeks later the pip arrived in the mail. Below are some photos I took before starting work on the pipe.
The old Captain had seen some years in the service of a pipe smoker. The most obvious issues were the pits where the old fills had failed. The stem showed signs of oxidation and a bit of chomping. Structurally the pipe was solid and in good shape the restoration would be more aesthetic. William had said that he would like the stamping preserved as much as possible. This would be a challenge due to the faint stamps, in general and specifically for the fills on the left shank amidst the stamps.
Background
I blogged about a Captain Pete back on December 31, 2023. You can see that restoration HERE, if you are interested. That was about the second month of my blogging. Anyway, I wrote the following:
“Peterson pipes have a long and storied history which is rich and fascinating. I highly recommend the book The Peterson Pipe, by authors Mark Irwin and Gary Malmberg as well as a reading of pipedia.com’s Peterson pages. According to Mark Irwin and Gary Malmberg, the Captain Pete:
“This line’s name was derived from the nickname of Charles Peterson, known affectionately as “Captain Peterson.” The first issue, c. 1940-62, was in a smooth finish produced for Rogers Imports with a white stamped P inside C, or a circled P on the mouthpiece. CAPTAIN over PETE on shank, and a MADE IN IRELAND in a circle. English made versions show CAPTAIN over PETE on shank or “CAPTAIN PETERSON” and A PETERSON PRODUCT over MADE IN ENGLAND or LONDON MADE over ENGLAND. The second issue (1998-), features an XL bowl with Sherlock Holmes shapes and compact stems, in rustic or combination of smooth and rustic, with a nickel band between two narrow brass bands.” (Irwin and Malmberg p.295)”
(A Peterson Captain Pete Restoration – NebraskaPeteGeek) I apparently was not concerned with notating Irwin and Malmberg’s work correctly so I will make amends and do that here, (Irwin, Mark and Malmberg, Gary (2018). The Peterson Pipe The Story of Kapp & Peterson, First edition, second printing 2021. Briar Books Press, Canada.).
This Captain Pete was certainly a first issue dating from 1940-62 made in Ireland.
The Restoration
As usual after the initial photo shoot the pipe made it to the workbench and a clean piece of denim.
The first thing I did was to use a fly tying bodkin too scratch the old wax from the beading around the bowl.
Next the ream team was assembled. There didn’t appear to be a tremendous cake build up but the pipe had obviously been smoked.
The #2 blades of the PipNet did the majority of the reaming with both the Smokingpipes Low Country reamer and the General triangular scraper used for clean-up.
The shank was dirty but considering the amount of cake present I thought the previous owner had used pipe cleaners on a daily regular basis. The dental scraper was used to scrape the airway and did not produce as much tar as I was expecting.
Overall the shank cleaned out well with only alcohol dipped cotton swabs.
The stem also cleaned up fairly quickly with bristle pipe cleaners dipped in 95% ethyl alcohol.
After a light sanding of the stem with a 320 grit sanding sponge I tried to paint the tooth dents with a flame from a lighter. This helped raise the vulcanite a little bit.
The stem was then placed in a bath of Briarville’s Pipe Stem Oxidation Remover and let sit overnight.
I continued working on the stummel. Below is a photo of the rim with a light lava coating in places.
I moistened the rim with saliva to soften the lava. The rim was then scraped with a sharp pocket knife.
I used a round polyvinyl chloride (PVC) end cap wrapped in 320 sandpaper to re-establish a good bevel on the inner rim.
The stummel was then scrubbed with undiluted Murphy Oil Soap and a nylon brush. The soap was rinsed with warm water and the stummel dried with a cotton hand towel.
BAck at the workbench, the stummel was looking clean.
I gave the surface a wipe with a make-up pad dipped in 95% ethyl alcohol . Little color came off the pipe indicating that there was no wax or finish remaining on the stummel. The alcohol also helped soften the old fills allowing me to remove as much of the fill material as possible. With the stem in the oxidation remover and the stummel drying, I called it quits for the night.
The next day I removed the stem from the Briarville solution and wiped it with a coarse shop rag. This absorbed the excess solution and removed some of the oxidized vulcanite.
There remained some brown oxidation on the surface. I could not make out the stem logo that had been stamped 60+ years ago but could see the circle and imagined the P within.
The below photo shows two of the most exasperating details of this restoration: How to preserve the remaining stamps while bringing the stamped material back to life. I needed some serious thinking for this one.
I tried spot cleaning the remnant stem logo with Briarville Pipe Stem Oxidation Remover on a cotton swab. I was not impressed with the results.
Maybe if I do it some more… Still not impressed.
OK, more thinking time while I worked on repairing old fills. This was done by placing a small dab of brown cyanoacrylate (CA, super glue) into the pits using a fly tying bodkin.
More CA in pits.
A small scoop of briar dust was then pressed into the wet CA. This causes the CA to cure nearly immediately.
The rough top of the new fills were filed off with a small flat file. The fills then got another dab of brown CA to top-off the new fills. This was allowed to cure over about an hour.
The cured CA/briar dust fills were then filed smooth with a small flat or ½ round file
When finished I realized that I wasn’t finished and that I’d missed two fills. DOH! Repeating the above process except this time I ran a paper business card through the lower bead groove to remove excess CA before pressing the briar dust in and scraping the groove with a fly tying bodkin before the CA briar dust could cure.
The spot treatment of the logo area with Briarville Pipe Stem Oxidation Remover was less satisfactory than I hoped. Perhaps my solution is losing potency due to the number of stems that I have bathed in the juice? I turned to a tried and true method of removing the oxidation, SOFT Scrub on a make-up pad.
The stem was rubbed with a heavy coat of mineral oil and allowed to sit for a few minutes before I wiped the excess off with a paper towel.
Next would be the sanding. To protect those faint stamps I covered them with painters tape. The pipe was then sanded with a series of sanding sponges from grits 320-3500. Between each sponge the stummel was wiped with a make-up pad wetted with 95% ethyl alcohol. The stem was rubbed with mineral oil then wiped with a paper towel.
After the sanding sponges I worked the pipe with micro-mesh pads 4000-12000. The wiping between pads was repeated as with the sanding sponges but between pads I used Obsidian Oil rather than mineral oil.
The stummel was given a liberal coating of Before and After Restoration Balm and allowed to sit for 30 minutes.
An inside out athletic sock was used to hand buff away the remaining balm.
The pipe was then taken to the buffer for several coats of carnauba wax.
After the waxing I used a fly tying bodkin to clear the beading grooves of excess wax.
The pipe was hand buffed with a microfiber polishing cloth to raise the shine.
I gave this old Pete a bowl coating not because the tobacco chamber had any damage but because the owner had requested it and it gave me a little more time with the old Captain Pete. I used 100% maple syrup and activated charcoal powder.
The airway was plugged with a cotton swab. Another cotton swab was used to paint the chamber with a light coating of syrup. The capsule was dumped into the chamber and sealed off with painters tape over the rim. The stummel was then shaken vigorously for over a minute to evenly distribute the charcoal powder.
The tape was removed and the powder dumped.
The final step was another hand buff with the microfiber polishing cloth then off to the final photo shoot.
It is always fun to work on a Peterson pipe and working on someone else’s Peterson is like catch and release fishing. Although in all honesty, my days of collecting Peterson pipes are pretty much over. I am releasing more than I am catching today. This old pipe was a fun challenge. Yeah, I couldn’t restore it to how it looked when it came out of the factory in Dublin. The stampings and logos were just too worn and those two pits by the stamps were just taunting me to obliterate the Stamps. In the end I am happy with how the pipe turned out. The overall finish is superior to how it would have looked coming out of the factory. I do not want to be critical of Peterson but they typically only sand a pipe to 400 grit. I am pretty certain that the owner will be as happy with the pipe as I am. The dimensions of the Peterson Captain Pete bulldog are:
Length: 5.70 in./ 43.18 mm.
Weight: 1.21 oz./ 34.30 g.
Bowl Height: 1.80 in./ 45.72 mm.
Chamber Depth: 1.50 in./ 38.10 mm.
Chamber Diameter: 0.72 in./ 18.29 mm.
Outside Diameter: 1.51 in./ 38.35 mm.
I do hope that you have found something here useful to your own pipe care, maintenance or restorations. If you like this sort of thing, please click the like and subscribe buttons. Thank you for reading the ramblings of an old pipe lover.
Loading…
Below are some photos of the finished Peterson Captain Pete 155 bulldog.
Just when you thought that I could not get any more lazy, I throw this at you. Okay, this is really more of a show and tell. The esteemed Sascha Mertens from the great country of Germany recently sent me this Schowa pipe and a tin of Dan Tobacco’s, Mike’s Ready Rubbed blend. A fine gift by any measure but, to me it was extra fine. I have always wanted to lay hands on a German style hunter’s pipe. As much as I love to look at an old patent diagram or a schematic I much prefer to hold an item and see how it works or how it was made as compared to just examining a drawing. Well, Sascha’s gift allowed that and then some.
Background
When researching the German hunter’s pipe I was surprised to find that it is not considered a “normal” pipe shape. I started looking at pipe charts and found no mention or matches to the German Hunter’s pipe. I then went to a fairly exhaustive list of shapes from smokingpipes.com and found shapes that I don’t remember ever seeing before, like a Ramses but no no hunter’s pipes.
Now, you may be wondering, “John, you are a Certified Pete Geek, what does this have to do with Peterson pipes?” That is a good and reasonable question and I have an answer. Well, again being lazy, I can show you the answer. Mark Irwin’s Peterson Pipe Notes 366 is a wonderful blog on how Peterson took the component nature of the old hunter’s pipes and made it their own:
Now for this particular pipe, a Schowa on an attached tag, BRUYE above a line then GARANT was stamped on the left shank. Now the usually meticulous German production may have had a brief lapse in stamp quality control or the technician that day is a worse speller than myself. I believe the stamp should have read BRUYERE over GARANTE. The Schowa company is relatively ill represented in websites. The source pipedi.org had the following to say,
“In 1988 the last large tobacco pipe factory in Bad König, the Schowa company, was closed.[1] Schowa (A. Schum Söhne) was in operation from approximately 1919 to 2003. Based on its letterhead, it was founded in 1877.” (Schowa – Pipedia). Pipephil.eu, my other “go-to” source had a bit more but also was lacking in detail.
This lovely little German Hunter’s pipe was likely made by Schowa prior to the closing of the company in 1988.
Thank you Captain Obvious! What do you expect from a retired smart-ass Gen-X slacker?
The Non-Restoration
This pipe had never been smoked and I saw little reason to restore it to its previous glory since it looked pretty glorious already. I did take some photos to show you how this pipe works. The stem is connected to the metal rim cover with a lanyard. Apparently German Hunters have a fear of losing their pipe stems during the hunt or later in the pub. German beer has been known to make all sorts of things disappear. Think back to that German classic film: Ey Mann, wo is mein Auto? Oh wait, that was Ashton Kutcher in Dude where’s my car. I’m pretty sure Kutcher is a German name so the analogy still works.
The metal rim cover also has a hinged lid. German hunters being a hardy lot and like the Boy Scouts, always prepared for any foul weather or, flying German beer foam while in the pub.
The pipe disassembled into its component parts. The large base screws onto the briar stummel providing stability for when a German hunter needs to set down his pipe to focus on tracking his elusive quarry or to use the restroom in the pub.
This drilling surprised me. The lower hole is exiting the bottom of the bowl. The smoke leaving the bowl would then circulate in the plastic base before flowing up the top hole into the shank portion of the stummel.
Another surprise! Below you can see the hole at the top is leading from the space between the bottom of the bowl and the plastic base. The smoke then enters a small chamber very reminiscent of Peterson pipes, with a reservoir. The bottom hole is what I presume to be the reservoir. Personally I think this whole chamber is far too small to have any real effect of the smoke as it is only approximately .33 inches (8.3 mm) from the draft hole in the shank to the draft hole in the stem.
Below is a slightly better view of the holes in the mortise.
The tenon is aluminum and seated into a black plastic stem extension. This aluminum tenon fits nicely into the briar of the mortise.
The mouthpiece is a separate piece which is threaded and screwed into the black plastic stem extension. The mouthpiece appears to be made of horn. The traditional round bit is not as comfortable as a modern button but it is far from uncomfortable. The word utilitarian comes to mind.
So the question arrives: How does the pipe smoke?
Answer: Very nicely. I opened the German Dan Tobacco Mike’s Ready Rubbed and gave it a go. The blend was an interesting aromatic with a tin note of undefined berries. The aroma faded significantly as I allowed the tin to air out. The tobacco felt like it needed little drying and I packed it as I would normally. The room note was very nice, certainly not offensive to all but the most self centered and dictatorial Karens. The taste was of yeasty pastries with ample berry (still undefinable) jelly. The retrohale was a pleasant virginia with fruit, while the after taste reminded me distinctly of Paladin Black Cherry. The after taste faded after the halfway point of the bowl and turned more toward a typical Virginia blend. The pipe performed well. The briar warmed quite a bit. It was not painfully hot but was noticeably hot. Afterwards I measured the outside diameter at 1.32 inches (33.53 mm.) and the chamber diameter of 0.67 inches (17.02 mm). This means that the walls of the stummel are slightly less than ⅓ inch thick (8.3 mm), a bit thinner than I like but about the average for factory produced pipes.
After the pipe had cooled I disassembled it to see how the components fared.
In the photo below you can see that the plastic base did lead to the condensation of some moisture from the smoke. The small reservoir, if that is what it is, looked exactly as it did from the first photos. Like I had thought, it appeared to do nothing. I ran a pipe cleaner through the stem and found that it was quite clean with only a trace of moisture. I conclude that the plastic base does a fine job at cooling the smoke, condensing moisture and trapping it in the base.
Below is a diagram overlaid on a photo of the Schowa. I think this makes things more clear. Now everything is not quite to scale but the general idea can be envisioned. The lower “cooling chamber” works as designed. Based on my smoking of the pipe, moisture from the smoke was condensed and trapped here. The “upper chamber” served no purpose from my test as it appeared no different before or after the smoke. The “drilled reservoir” seemed pointless, though reasonable. None of the moisture from the smoke remained to condense in the upper chamber and accumulate in the reservoir. Perhaps with a much wetter tobacco this second chamber would be of use.
Conclusion: This was a great gift by a great guy. Thank you very much Herr Sascha Mertens. The pipe performed well and is a wonderful addition to my collection and the tobacco was delightful. The dimensions of the Schowa Hunter’s Pipe are:
Length: 6.08 in./ 154.43 mm.
Weight: 2.02 oz./ 57.27 g.
Bowl Height: 2.17 in./ 505.12 mm.
Chamber Depth: 1.17 in./ 29.72 mm.
Chamber Diameter: 0.67 in./ 17.02 mm.
Outside Diameter: 1.32 in./ 33.53 mm.
I do hope that you have found something here useful to your own pipe care, maintenance or restorations. If you like this sort of thing, please click the like and subscribe buttons. Thank you for reading the ramblings of an old pipe lover.
I think this totally counts as a Peterson. Given the poor darling didn’t make the quality assurance cut to the “big leagues” but the 02 shape is more of a rarity for Pete Geeks. I remember three years ago when I started to get more serious about restoring old pipes, that you could pick up a Peterson System Standard on the estate market for around $45. Over the past few years this has increased significantly. Perhaps another indicator of inflation or maybe just a growing interest in our beloved hobby. When I saw this pipe on eBay, I knew I had to try for it. I was surprised that I won the auction and soon had the Irish Lassie in hand. Below are a few photos or the pipe prior to any work done.
From what I could see the issues with this pipe’s briar were only cosmetic and would be dealt with accordingly. The pipe looked like it had only been smoked a few times. I think I could imagine why that button was horrible. It felt thick and chunky, like something made of Legos. Clenching that would be like getting X-rays at the dentist.
Background
I cannot begin to describe the history nor impact of the Peterson pipe company. I can tell you what I think is the best source of information on the subjects and that is Mark Irwin and Gary Malmberg’s book, The Peterson Pipe The Story of Kapp & Peterson. According to the authors,Peterson’s seconds are as follows,
“Seconds Peterson seconds are pipes of all shapes with briar flaws deemed unacceptable for ordinary models and sold at reduced prices, sometimes unstained, fit with fishtail or round button mouthpieces. Since the early 1990s they have only been available in Ireland. Occasionally they are described in Peterson catalogs under different names, and documented specimens have various stampings. In roughly chronological order these include:
Stamped arched KAPP & over straight PETERSON”S over arched DUMMIES An early specimen preserved at the Peterson museum with this stamp has a round-button mouthpiece.
IRISH FREE STATE stamp (1922-37) COM stamp with no brand or model name. Documented with or without nickel bands.
System Reject (1968-) Noted first in the Price List for January 1968 as being available in all six system shapes. Also found in the ‘80 Peterson-Glass Price List.
Erica System Reject (1987-98)Noted in two US distributor catalogs. Fishtail mouthpiece, unstamped nickel band, with COM of MADE IN THE over REP. IRELAND or with no COM.
Irish Seconds (1982-98) Classic Range shapes stamped with no brand name , fishtail mouthpiece, in unstained, black rustic or dark brown finishes, no band. (Irwin, Mark and Malmberg, Gary (2018). The Peterson Pipe The Story of Kapp & Peterson, First edition, second printing 2021. Briar Books Press, Canada. p312).
Mark also writes a weekly blog titled Peterson Pipe Notes. If you have not already subscribed I highly recommend it. It will be one of the best $0 purchases you can make and is a vault of information on all things Peterson and various other topics. I am not just saying that because Mark has posted a few of my restorations either. His blog concerning the Irish Seconds is very well researched, written and can be found here: https://petersonpipenotes.org/tag/irish-seconds/.
Now for the Oom Paul shape. Here I’ll let Mark sing the praises of the history of the shape and the Peterson pipes of note:
So, when was this particular Peterson Oon Paul made? I really didn’t know. The 1976 catalog mention might be useful but it precedes the use of the IRISH SECONDS stamp by 16 years. I reached out to Mark Irwin and provided him with photos. Here is what he had to say, “This appears to me to be the 1988 Dublin Millennium edition. That would fit with the IRISH SECONDS stamp and the shank bend. The IS would have been sold in Ireland, almost entirely, but perhaps some escaped their island prison. We can confirm that with a quick measurement of the chamber diameter and the bowl diameter if you like, but I’m 99% positive.” (Mark Irwin, personal email). I replied to Mark by sending him the dimensions. His reply to those was, “That’s it!” This concltudes the search, in my book. THis is a 1988 Dublin Millennium edition Peterson 02 that didn’t meet the quality standards of Peterson and was thus labeled an Irish Seconds by the good folks in Dublin Ireland.
The Restoration
The restoration began with a clean denim piece for workbench protection.
Augh, the terrible button would be the first issue addressed with this pipe.
Apparently the previous owner tried to customize the button using their teeth and jaw power.
Impressive as their chomping was, I thought a file would be a better tool than my teeth.
I used large and small flat files to reduce the size of the button and soften the edges.
Below are photos of the top and bottom after filing.
An emery board, for filing fingernails was also used for more final shaping.
The shank was then taped using panthers tape to protect it from the stem sanding. The stem was initially sanded with a 320 grit sanding sponge.
Airway cleaning was done with bristle pipe cleaners dipped in 95% ethyl alcohol.
The stemm was then placed in Briarville Pipe Stem Oxidation Remover (deox) and allowed to sit overnight.
I turned my attention to reaming the stummel. I gathered the ream team: PipNet with #2 blades, General triangular scraper (with the tip ground round) and the Smokingpipes Low Country reaming knife.
This pipe had not been heavily smoked so the reaming was quickly handled.
Below is a photo of the reamed tobacco chamber.
The chamber was sanded with 320 sandpaper wrapped around a wood dowel. The sanded chamber showed no signs of any damage from heat save the small charred spot on the rim.
A better view of the sanded tobacco chamber can be seen below.
The stummel was taken to the sink for a scrub with undiluted Murphy Oil Soap and a nylon brush. The soap was rinsed with warm water and the stummel dried with a cotton hand towel.
I believe this to below photo best describes why this pipe was considered to be an Irish Seconds, the number of flaws leading to fills in the briar. I counted 11 on the left side alone. The old fill was picked from the briar using a fly tying bodkin.
The front only had two spots to pick then fill.
The right side with its birdseyes also had a couple of spots.
The rim had fills and a couple of cosmetic cracks. These were not deep structural cracks.
I used brown cyanoacrylate (CA, super glue) placed into the pits. I then pressed briar dust into the wet CA. This new fill sets up quickly. The excess briar dust was brushed off using a wire brush.
The same process was used on the other fills.
Once cured the new fills were filed with a small flat file to smooth them.
This was repeated on each side.
The fills of the cosmetic cracks on the rim were done with brown CA alone, no briar dust though, briar dust was used in filing the pits. The entire stummel was then lightly sanded with 320 and 400 grit sanding sponges taking care to avoid the stamps on either side of the shank.
The next day I removed the stem from the Briarville deox.
The Briarville solution evaporates quickly. While still wet I vigorously rubbed the stummel with a coarse shop rag to remove some of the softened oxidized vulcanite.
Back at the workbench the oxidized vulcanite was easily seen as a buff colored coating on the stem.
The stem also showed another aspect of Irish Seconds that I’ve not seen in Peterson pipes, poor finish sanding of a stem. I could still see the marks from the molding of the stem.
The fit of the stem to shank was very good with a fine tight fit and no gaps.
I again taped the shank, this time with masking tape. Masking tape is thinner and is less likely to produce a step from the stem to the shank.
The stem was sanded using a series of sanding sponges from 320-3500. Between each sponge the stem was rubbed with mineral oil and wiped with a paper towel.
I masked the stampings on both sides of the shank with masking tape.
The stummel was then sanded with a series of sanding sponges from 32-3500. Between each sponge the stummel was wiped with a make-up pad wetted with alcohol to remove sanding debris.
The tasking tape was removed and the adhesive wiped clean with alcohol. The pipe was then worked with micro-mesh pads 4000-12000. Again the stummel was wiped with an alcoholic make-up pad (I think that’s funny).
The stem was rubbed with Obsidian Oil and wiped with a paper towel between micro-mesh pads.
I coated the stummel with Before and After Restoration Balm and allowed it to do what it does for 20 minutes. The excess balm was wiped from the stummel using an inside out athletic sock.
The pipe was then taken to the buffer where it received several coats of carnauba wax.
The final step was a hand buffing with a microfiber polishing cloth further deepening the shine.
This not so typical Peterson shape, I mean, Irish Second, turned out very nicely. The fills are far less noticeable and the stem far more comfortable than when I started. Weight of the pipe is inconsequential hanging from the lower jaw and it would be an exceptional clencher. I was very happy with how well the stem turned out. The high gloss black looks outstanding with the more natural Briar and the briar grain, though not fantastic, is quite lovely. This old pipe may never win a beauty contest but it will serve very well as a useful pipe in someone’s rotation. The dimensions of the Irish Seconds Oom Paul are:
Length: 6.00 in./ 152.40 mm.
Weight: 2.39 oz./ 67.76 g.
Bowl Height: 2.25 in./ 57.15 mm.
Chamber Depth: 1.95 in./ 49.53 mm.
Chamber Diameter: 0.74 in./ 18.80 mm.
Outside Diameter: 1.38 in./ 35.05 mm.
I do hope that you have found something here useful to your own pipe care, maintenance or restorations. If you like this sort of thing, please click the like and subscribe buttons. Thank you for reading the ramblings of an old pipe lover.
Loading…
Below are some photos of the finished Irish Seconds Oom Paul.
I have always thought that rooting for the underdog was an American characteristic. This is probably a very flawed thought as I am an American and the vast majority of my life experiences are with other Americans. Given, I taught English as a Second Language (ESL) science in a large urban school and had students from many different countries. The fact remains that most of my life was spent with American culture and Americans. Well, it turns out that psychologists have studied this rooting for the underdog and actually have theories for it. One article I read, Decision Affect Theory: Emotional Reactions to the Outcomes of Risky Options, by Barbara A. Mellers, Alan Schwartz, Katty Ho and Ilana Ritov found that;
“Emotional responses also depend on probabilities and unobtained outcomes. Unexpected outcomes have greater emotional impact than expected outcomes” (https://www.jstor.org/stable/40063228). So what does all this nonsense have to do with a pipe? The subject of this restoration is a terribly beaten up Peterson Donegal Rocky which I thought to be barely salvageable. In other words, this poor Pete was a major underdog. Below are some photos of the Donegal Rocky prior to work done:
I think you can see what I mean by an underdog. This pipe was a mess. The rim was severely charred and had extensive lava deposits on the remaining rim. There also appeared to be lava on the mortise. The rustications were filled with dirt and grime. The tobacco chamber still had tobacco in its cake constricted chamber. The stem was oxidized, calcium deposited and chewed on. The stem also wouldn’t correctly seat. All of these factors made me consider just depositing the old pipe in the trash then I thought why not root for the underdog and see what I could do with what I had.
Background
In a previous restoration blog I used the following: “As much as I love the history of the Kapp and Peterson company and Peterson pipes, I will not get into that other than give you resources to read the history for yourself. I will delve into the Dunmore, or Dunmoor line of pipes at greater depth.
For a great history Mark Irwin and Gary Marlburg’s book is a must read for a Pete Geek.
Now to the stuff regarding this pipe: A Peterson Dunmore. I refer to Mark Irwin again here and his blog, Peterson Pipe Notes. I can wholeheartedly recommend the free at
https://petersonpipenotes.org/ Yes, you will get emails but only for things like the weekly blog post and occasional Peterson pipe drops (like the Peterson Pipe Notes Pipe of the Year) or offers for cool Pete Geek merchandise.
I recently acquired for study an amazing NOS (new/old stock) Donegal Rocky 01s with its box, sleeve and brochure. Hallmarked with a Celtic lower-case n for 1979, it’s a first-year release of this marvelous ‘short dutch’ bowl shape and convenient reason to take a look back at the long history of Peterson’s iconic “Donegal Rocky” line.
The “Donegal Rocky” (in quotation marks), released in 1945 or so, was Kapp & Peterson’s first rusticated line. Not that K&P hadn’t rusticated pipes previously, they just that they hadn’t devoted an entire line to rustication. And they were apparently proud of it, because they gave it a sterling mount along with a black finish and white-stamped P on the mouthpiece.
It was part of K&P’s “Product Line,” what I call gateway pipes and others might call an entry-level pipe, as you can see in this shape chart from the 1945 catalog. Like the Shamrock (European version) and “K,” it was originally a fishtail line.
For nearly thirty years, from 1947 until 1975, the line continued uninterrupted, black rusticated finish with fishtail mouthpiece and sterling band.
from the 1976 Associated Imports Point-of-Sale Brochure
Then in 1976, just a year out from their Centennial celebration, Peterson (in an expansive mood) pushed the Donegal up a notch, giving the line a P-Lip. The 1976 engraving doesn’t show it, but you can just glimpse a new, deeper rustication in the (still black) 1978 Associated Imports chart:
This rustication was done by a carver in Dublin, Paddy Larrigan told me this past June in Sallynoggin. The artisan did all of Peterson’s fantastic rustications from the period: the classic “Pebble Rustics,” the early Sherlock Holmes rustics, the Bond Street of Oxford Premier Systems, and the sterling-band P-Lip Donegals.
And that’s where this 1979 01s comes in handy, because we can see with much greater clarity the rustication as well as the details of a “Donegal Rocky” at its pinnacle of engineering and finish:
It’s worth remarking concerning the removable stinger. This spike-ended aluminum tube is easily removed, leaving the P-Lip mouthpiece strictly a graduated-bore regulation affair.
If I were more dedicated, I’d smoke this pipe a few dozen times with and without the stinger and give you a report on what purpose it serves. I wonder if the craftsmen at the factory installed the stinger to approximate the effect of the older bone tenon extensions routinely attached to Classic Range Dublin & London, Classic and Premier lines? With or without the stinger, the pipe smoker should enjoy the benefits of the “Sub-System,” which I talk about at length in The Peterson Pipe. As it is, I’ll leave that to someone else, and happily report their findings.*
Here’s the COM stamp, showing Peterson’s love of quotation marks (seen also in the “SPORTS” line) as well as a closer look at the stain and rustication technique:
Sometime between 1978 and 1980 the sterling band was dropped to a nickel band and the P-Lip abandoned in favor of the Donegal’s traditional fishtail, all of which may (or may not) indicate a lessening in the quality of the rustication.
Seen above from the 1981 Mark Twain brochure, the sterling band resurfaced, this time with the line’s first change in stain color to what some of us have in our rotations or remember: the contrast brown over black (seen in the dutch 339 hallmarked for ’81 below). The catalogs indicate some fluctuation from sterling to nickel bands on through the Late Republic era (1969-90) into the Dublin era (1991-2018), with the sterling being used (as happens so often with Peterson lines) in conjunction with a P-Lip in the 1997 catalog, but also in that year available with a nickel band and fishtail.
The dublin 120 seen above is from ’94, and as you can see, while the rustication technique is nearly identical to that of the ’81 dutch billiard, the stain color has changed for a third time to burgundy-over-black, which seems to have been the standard during most of the early Dublin era.
Sometime near the beginning of this century the Donegal was down-graded again to its original “Product” or gateway status by a nickel band and fishtail mouthpiece as seen in this B7, and while the stain remains the same, it looks less craggy:
Things would grow steadily worse in the following years, however, as the gawdawful pineapple rustication took hold, so that by around 2010 the Donegal was reduced to the etchings seen on this B39:
With the return of in-house rustication earlier this year, things are looking up for the Donegal, at least just a little, as you can see in this current 80s:
The finish and the rustication are, so nearly as I can tell, identical with that used on current rusticated SH pipes, so that’s something, right? I don’t think I’d call it a Rocky anymore, but at least it still has a vulcanite mouthpiece, a plus.
As for the future of the line—or the name—I couldn’t hazard any guesses. In the ideal Peterson of my imagination, the line would assume the craggiest crags, sharp textures and brilliant obsidian finish of the last batch of Rosslare Rusticated pipes, along with—of course—a vulcanite P-Lip. In the meantime, just to have it around, as one of the bedrock Peterson lines for almost 75 years, will do.
Thanks go out to Mark again. Now, as for this Donegal Rock; the rustication and the color fit the late 1990s-2010, pre-”gawdawful pineapple” phase. The quote describing it best is “Sometime near the beginning of this century the Donegal was down-graded again to its original “Product” or gateway status by a nickel band and fishtail mouthpiece as seen in this B7, and while the stain remains the same, it looks less craggy:” This included the burgundy-over-black dye, the nickel band and the fishtail mouthpiece. The rustication is difficult to describe due to the worn nature of the pipe but it is definitely of a hand carved nature and not that of machine made look. Overall, I guesstimate this pipe to be from the 1990s-early 2000s. This makes it a more recent pipe but one that has seen a great amount of use and abuse.
The Restoration
Vivid mental images of how this pipe might turn out filled my head as I placed it on the clean denim piece.
I began with an initial sanding of the stem to remove the surface oxidation. TO maintain the crisp edges of the stem I wanted to keep it attached so the shank was wrapped in masking tape, protecting it from the sanding.
Once sanded, I removed the stem and examined the tenon. The below photo doesn’t do the layer of grime justice. The tenon was encrusted with smoking residue and tar.
I used a sharp pocket knife to scrape the end of the tenon and started cleaning it with a 95% ethyl alcohol dipped bristle pipe cleaner.
Several additional alcohol dipped pipe cleaners and a good deal of nylon brush scrubbing the stem airway was clean.
A pipe cleaner was inserted into the tenon to act as a hanger suspending the stem in Before and After Extra Strength Deoxidizer (lovingly referred to as deox).
The edge of the mortise was as crusty as the tenon had been. I have seen thick lava deposits on a rim but not on a rim this bad before. I softened the crust with saliva and let it soak for a couple of minutes and scraped the surface with a sharp pocket knife.
I gathered the reaming kit; PipNet, Smokingpipes Low Country Reamer and General triangular scraper.
I initially thought that one the #2 and #3 blades of the PipNet would be needed. Wrong. The #4 blade was also put to work.
After the #4 blade there was still scraping to be done with the General.
The tobacco chamber was sanded with 220 sandpaper to bare briar. There was some slight charring of the interior of the chamber. This was not severe and I thought that a bowl coating would suffice to protect the briar.
Next came the shank cleaning. I began with scraping the walls of the mortise with a dental scraper. The scrapings were thick and filled with cotton fluff from pipe cleaners. Well, I assumed that was the source of the cotton even though this pipe looked like it had never seen a cleaning nor a pipe cleaner.
The stummel was taken to the sink for a scrub with undiluted Murphy Oil Soap and a nylon scrub brush. The amount of grime scrubbed from the stummel was impressive. The soap was rinsed with warm water and the stumel dried with a cotton hand towel.
Looking at the freshly scrubbed and dried stummel I could see quite a bit of grime remaining on the mortise, within the rustications and on the rim. Another scrubbing was done with undiluted Murphy’s and a brass brush. The rinsing and drying were done as before.
Back at the workbench the stummel was wiped with a make-up pad dipped in 95% ethyl alcohol. The alcohol lifted a red dye from the briar.
The scrubbing revealed the damage to the rim much more clearly.
Possible remedies came to mind. Plan A – was to cut a wedge of briar from another pipe. I had one of nearly equal chamber diameter.
This idea would glue the edge onto the existing rim, fill the seams with cyanoacrylate and briar dust, shape the wedge to match the lines of the 999 shape, carve the new briar to match the pattern of the existing briar then dye the stummel. This plan would produce a finished product that was a true restoration. The plan was also drought with issues. My greatest concern was with the gluing of new briar to the old briar. I thought that I could pin this briar patch in place to make it more secure. This plan sounded like it would take many hours of tedious work, though fun.
Plan B – cut the rim on both sides to match. This would give the stummel a forward canted look. The new rim would require re-texturing. This plan also completely changes the original shape of the pipe and would make this a salvage rather than a restoration. This plan would only take a fraction of the time of the previous plan as well.
I went with Plan B. If this worked it would produce a fine working pipe, one that would be perfect for knocking around while changing the oil in the truck, fishing or doing yard work and I’m lazy.
I used a Dremel with an abrasive sided cutoff wheel to cut the non-charred side of the stummel.
I tried to match both sides and used the abrasive side of the wheel to flatten the rim.
This did accentuate the out-of-round tobacco chamber. I then started cleaning the shank with numerous cotton swabs dipped in ethyl alcohol and more scraping with the dental scraper.
The draft hole was scrubbed with a nylon brush and numerous bristle pipe cleaners.
The tars of the airway were persistent and I thought maybe an alcohol cotton treatment would better soften and remove them. The tobacco chamber and shank were stuffed with cotton and 95% ethyl alcohol was added with a pipette until the cotton was saturated.
Below is a photo of the saturated cotton. This was allowed to evaporate overnight. As the alcohol evaporated it would hopefully dissolve some of the tar and deposit it into the cotton thus removing it from the walls of the airway.
The stem sat in deox for 4 hours. I removed the stem and allowed it to drip some of the excess solution back into the jar.
Below you can see the stem on a coarse cotton shop rag.
The shop rag was used to vigorously rub the remaining solution from the stem. This rubbing removed the solution and a good deal of oxidized vulcanite.
I then scrubbed the stem with several cotton make-up pads sprinkled with Soft Scrub cleanser. The below photo shows a general progression of reduced oxidized rubber removal. The stem looked much better. I had talked to Doug Bisbee of dk Metal Pipes (https://www.dkmetalpipes.com/dkmetalpipe) earlier in the week. Doug does amazing work restoring Kirsten pipes. We discussed how he restores the vulcanite stems using only a buffer rather than the sanding and micro-meshing that I had always used. I thought this would be a good time to attempt a similar technique with my existing equipment. Doug uses Airway buffing wheels rather than the felt wheels I have. I have not invested in these wheels yet but am considering trying them out. An issue is that I would need to get a new ¾-1 horsepower variable speed buffer as well as the wheels to properly use them.
Using what I already have I worked the stem with my buffer and the red abrasive.
I followed this with the white compound on the dedicated white wheel and produced a nice finish on the stem.
The next morning I returned to the stummel. The cotton was stained with smoking residue removed from the briar.
The cotton was removed and I continued cleaning the airway/mortise with alcohol dipped cotton swabs. This process started out similarly to the day before but quickly improved dramatically. The discoloration of the cotton swabs below show that the remaining tars were much more easily removed after the alcohol and cotton treatment.
The bristle pipe cleaners in the draft hole showed a similar result.
I used a couple different carving bits in the Dremel rotary tool to get the texture to match the Donegal Rocky rustication.
It was time to try matching the Peterson dye. I thought that I would start with a black undercoat topped with a dark red. Fiebing’s Leather Dye was the product of choice. Folded pipe cleaners acted as my applicators while a wine cork wrapped in several coats of masking tape provided a plug to keep the dye from the tobacco chamber and a handle.
The black Fiebing’s was applied and flamed with a lighter.
The black was wiped with a paper towel and allowed to dry for about 10 minutes. It was then taken to the buffer and buffed from the highspots.
The remaining buffing compound was wiped from the stummel using an alcohol wetted make-up pad. Below is a photo of the black dyed , buffed and wiped stummel.
Next, the stummel was dyed with the dark red Fiebing’s.
This was flamed and allowed to dry for an hour.
The pipe was starting to look more finished.
I wrapped the shank with masking tape to protect it during the nickel band polishing. The band was polished at the buffer with white compound.
The stem looked good but I wanted it to really look good. I hand buffed it with Before and After Fine Polish on a soft cotton rag.
The Fine Polish was followed by the Before and After Extra Fine Polish buffed by hand with the same but a clean spot with the same soft cotton cloth.
For the bowl coating I used maple syrup applied with my fingertip to the interior of the bowl. Before starting a thick pipe cleaner was inserted into the draft hole to keep the syrup and carbon out of the hole. Once the syrup was applied I opened a capsule of carbon powder and dumped it into the bowl. The bowl was covered with a 2 inch wide piece of painters tape and shaken vigorously for several seconds to distribute the carbon powder.
The tape was removed and the remaining powder dumped. Below is a photo of the new bowl coating.
The bowl coating would take a couple days to dry completely. The rustications of this pipe were worn fairly smooth with use. This allowed me to use the buffer to apply several coats of carnauba wax to the stummel and to the stem. The final step was to hand buff the pipe with a microfiber polishing cloth.
This is not my first Peterson Donegal Rocky restoration but it was the first time I attempted a white background for the before and after photos. I am still learning camera settings and photo editing for the white. Feel free to comment on background preferences. As for the pipe, I think it turned out about as well as it could have. I like the craggy appearance and feel of the pipe and the rim re-rustication. The 999 shape is a favorite of mine. The burgundy and black contrast stain does come close to matching the original dye and I think it still works . I was quite happy with the oxidation removal from the stem and the black vulcanite polished up nicely. The nickel band looks bright and well polished. I am sure this will be a great smoking pipe but will have to wait a couple of days for the coat coating to thoroughly dry. The dimensions of the Peterson Donegal Rocky 999 areas follows:
Length: 5.66 in./ 143.76 mm.
Weight: 1.58 oz./ 44.79 g.
Bowl Height: 1.42 in./ 36.07 mm.
Chamber Depth: 1.17 in./ 29.72 mm.
Chamber Diameter: 0.90 in./ 22.86 mm.
Outside Diameter: 1.65 in./ 41.91 mm.
I do hope that you have found something here useful to your own pipe care, maintenance or restorations. If you like this sort of thing, please click the like and subscribe buttons. Thank you for reading the ramblings of an old pipe lover.
Loading…
Below are some photos of the finished Peterson Donegal Rocky 999.
Christmas is in the rearview mirror and fading away quickly. This pipe made me think of the 1964 Rudolph the Red-Nosed Reindeer and the Isle of Misfit Toys or, in this case Misfit Pipes. I couldn’t tell for sure what the model was because it had been, shortened? The size was smaller in shape, more like a Peterson System Standard 314 or 317. Looking at the stampings I was a bit surprised to see a faint PETERSON’s arched over an even more faint DUBLIN with a definitive 3. The opposite side had the real flummoxer: There, a 3000 appeared to be stamped.
Below are some photos of the Peterson 3000 before work was done. There are more than usual to document the poor condition.
“Doctor Young to the ER stat!” Wait a minute, I have no cool title like that and can’t claim one. My dad had a PhD, not me. “Medic!”, okay, I can work with that. This pipe was certainly in need of some kind of intervention. The oxidation on the stem looked terminal. The stummel looked as if it had been shortened with a chainsaw or some other homicidal garden implement. The shank had two cracks under the ferrule that small children could fall into. The cake in the bowl would be enough to serve a medium sized wedding party. The lava flow on the rim made Mount Kilauea look wimpy. Even without all my excessively dramatic exaggeration, the pipe was one hurting unit. This would not be one of those relaxing restorations.
Background
For those who would like more information on Peterson pipes, I’ll start with a bit I have said before:
“For a great history Mark Irwin and Gary Marlburg’s book is a must read for a Pete Geek.
Now for the pipe in hand. PETERSON over Dublin 3 indicates this is an older pipe. According to Irwin,
“3RD Quality or Third Grade (the later Standard System) was issued with a “3” stamped under the Patent stampand a domed-nickel mount. Like the 2nd Quality, it was only available with the AB- or A-molded mouthpieces.
The numbers on the 2nd and 3rd Quality pipes would appear either within a small circle or not, and would continue well into the 1930s.” (Irwin, Mark and Malmberg, Gary (2018). The Peterson Pipe The Story of Kapp & Peterson, First edition, second printing 2021. Briar Books Press, Canada. p. 119).
In a personal email with Mark Irwin concerning this pipe, I sent him these three photos and asked him “What have I got?”
His response was the following: “Doesn’t that 2nd number look like an “8” to you? But a “3800”? Nothing I can think of. Notice it’s a Grade 3—after the “Peterson’s /over/Dublin3”. That in itself is unusual, along with the nickel-mount marks. Notice also how very long the ferrule is. And the “B” or tapered stem. The Grade 3 in that “Dublin3” with everything else leads me to believe this is a very early pipe—easily IFS or maybe EIRE.” (Irwin, personal communication).
To clarify some of the Pete Geek-speak:
*Mouthpiece or stem staples of Peterson pipes as from the 1937 catalog. I believe Mark meant the AB stem.
*IFS stands for Irish Free State. This was a country of manufacture (COM) stamp used from 1922-1937.
*ERIE was a COM stamp used from 1938-1948.
Staying with the stem in an attempt to gain a better grasp of the approximate date of manufacture I focused on the tenon. Notice in the photo from the 1937 catalog, above, that the end of the tenon has a distinct taper. This was a feature of Charles Peterson’s initial design.
Irwin states the following in the same Peterson Pipe Notes entry with photos, “The first change in the molded vulcanite System mouthpieces apparently occurred later on in the Éire era, as documented by this unsmoked mouthpiece which can be accurately dated to 1937–45:”
(https://petersonpipenotes.org/tag/peterson-system-mouthpiece/). Notice the distinct step down from the push fit taper to the end of the tenon. The taper is no longer present. This is the same style of tenon as the Peterson Dublin 3 3000 pipe in hand. The below photo is of the 3000’s tenon.
Using the dates from the stem information the pipe could be dated from 1938 to present. Considering the stamping information stating that the Dublin 3 was used “Well into the 30s” that would eliminate from 1940-present. These two pieces together make for an argument that the pip is from the late 1930s. It also would coincide with Mark Irwin’s observation, “easily IFS or maybe EIRE.”
The 3000 worn by this pipe is an anomaly. Even if my interpretation were to be changed to Mark Irwin’s observation of a 3800, it would still not match any pipe in Peterson’s production history. When comparing this pipe to contemporary Petersons in my collection the much narrower shank of the 3000 is obvious.
Above are a COM England 317 (top left), a System 0 (top right)with no shape number but it’s a 317 and the 3000.
Above are a Peterson System 0 and the 3000. Notice the narrow shank of the 3000.
The bowl dimensions are nearly identical to the 317 or a 12 ½ that I have. The shank is narrow to the point that it would be nigh impossible for this pipe to have been drilled as a System pipe at all.
Guess what. It is not drilled as a System pipe. That does explain the absence of the PATENT under the PETERSON’S stamp, doesn’t it?
So, there we have it. An 87 year old Mysterious Peterson Dublin 3000. I wish I could say, “I’m glad that’s settled”. I can’t nor can I explain why the top quarter inch was cut from the stummel. At least that one I can imagine was due to a severely charred top. The shape, however, is a mystery.
The Restoration
The beginning is always so easy. Lay down a freshly laundered piece of denim. That was about the last easy thing that this pipe allowed for.
Okay, another exaggeration, the collar came off pretty easily.
The collar was placed in a medicine cup and covered with 95% ethyl alcohol. The airway of the stem then received numerous tapered bristle pipe cleaners dipped in the alcohol. The photo shows a nice progression from not-so-clean to much better.
The exterior of the stem was then worked over with 0000 steel wool in preparation of the imminent deoxidation bath.
I used Before and After Extra Strength Deoxidizer (deox) to soften the oxidized exterior of the stem. A Pipe cleaner was inserted into the tenon to act as a hanger to suspend the stem in the solution.
For the condition of this stem, I thought that 4 hours, minimum, would be required.
The collar was removed from the ethyl alcohol. I tried to clean the hardened glue with a cotton swab from the inside of the collar. I think the alcohol just made the glue angry. I then placed it into another cup and covered it with acetone.
The stummel was next up. The reaming tools were assembled. The PipNet, General triangular scraper, Smokingpipes Low Country Reamer and the 220 sandpaper wrapped wood dowel were readied.
The PipNet with #2 blades did the majority of the work.
The bowl, however, was the sizes of the 2 and 3 blades. The #2 blades did great until it couldn’t reach across the bowl. The #3 was just too big.
This required scraping with the General and Smokingpipes blades.
The tobacco chamber was sanded with the 220 sandpaper on a stick. The chamber appeared free of any damage. This surprised me a bit. I thought that surely a pipe used as much as this would have some damage.
It did have plenty of over damage though. I moistened the lava with saliva, Then scraped some of the glue from the shank end while the saliva soaked a bit. The rim was then scraped with a sharp pocket knife.
I tried running the Kleen-Reem shank drill through the draft hole from the shank into the tobacco chamber but it was too large in diameter. Instead I used a 3/32 inch drill bit. This removed some of the accumulated smoking residue. While looking down the mortise I was struck by the complete lack of a reservoir. This was certainly not drilled as a Peterson System pipe.
I used several tapered bristle pipe cleaners to further clean the draft hole first the narrow tips then the thicker ends. The shank itself was not cleaned at this time. All that was just from the draft hole leading to the wider bored shank/mortise.
I took the stummel to the sink for a scrub with undiluted Murphy Oil Soap and a nylon brush. In the photo below the filthy nature of the stummel came bee gauged. The soap was rinsed with warm water and the stummel dried with a cotton hand towel.
A second scrubbing with undiluted Murphy’s and the nylon brush were done and still more grime was removed. The stummel was rinsed and dried a second time. Notice the brush color in the two photos – it is the same brush.
Back at the workbench the stummel was looking clearer. I wiped it with a make-up pad dipped in 95% ethyl alcohol.
The glue on the shank end resisted the alcohol so a second make-up pad was wetted with acetone. The stummel was wiped and additional time spent on cleaning the shank end.
It was time to work on the shank, proper. “Yikes!”, came to mind after the first couple of cotton swabs dipped in alcohol. The shank was scraped with a dental scraper and scrubbed with more cotton swabs. I concluded with, “this shank is going to need a cotton and alcohol treatment” to help soften the smoking residues in there.
I switched gears and started to file the rim top to minimize the cut-off marks where the bowl top had been removed. A large and small file were used to accomplish this. I stopped at about where the below photo shows out of not wanting to remove any more bowl height.
To address the shank cracks, I knew I needed to drill holes at their terminal end to keep the cracks from progressing. I used a 2 mm drill bit for this.
Terminal hole one.
Terminal hole 2.
I needed a medicine cup to set the stummel on while the cotton alcohol treatment was doing its thing so, I removed the collar from its cup. The acetone had softened the remaining glue nicely.
The tobacco chamber, draft hole and shank were stuffed with cotton. I used a disposable pipette to add about 10 ml of 95% ethyl alcohol to the bowl and shank.
Alcohol was added until the cotton was saturated. The alcohol would evaporate overnight and hopefully pull a large amount of the smoking resiue with it depositing it into the cotton.
After about 4 hours the stem was removed from the Before and After deox and allowed to drip excess solution back into the jar.
I used a coarse shop rag to vigorously rub the stem, absorbing the remaining solution and removing some of the oxidized vulcanite.
At the workbench the stem was further scrubbed with several make-up pds sprinkled with Soft Scrub cleanser. The amount of oxidized material they were removing was amazing.
Even after all the scrubbing and cleanser, the stem looked as if little had been done to it. Back into deox. I left the stem in there overnight
The following day, I again removed the stem from deox. Back onto the coarse shop rag.
More vigorous rubbing produced a stained shop rag. Well the oxidized material is coming off, I thought.
At the workbench another round of Soft Scrub drizzled make-up pads did their thing and removed more of the oxidized vulcanite.
The cramping hands needed a break so I removed the cotton from the stummel. It came out stained with tar and yuck.
The cleaning of the shank went much better after the cotton and alcohol treatment.
It was time to reconstruct, fill the cracks and re-glue the collar. I opted to use JB Weld 2 part epoxy for this task. The epoxy was mixed according to product directions. The glue was applied to the crack filling them then additional glue spread around the shank end. The collar was slipped into position. Acetone dipped cotton swabs were used to wipe away any excess epoxy.
To keep the epoxy in the cracks I applied a thin coating of petroleum jelly to the tenon. This was inserted into the mortise and forced the epoxy to stay where I wanted it.
After about 30 minutes of curingI began to work on filling the flaws or pits on the stummel. Along the rim, I used brown cyanoacrylate (CA, super glue) to fill the shallow depressions. This was spritzed with a CA drying accelerator.
The pits on the stummel were deeper and required CA and briar dust. The CA was applied into the pit with a fly tying bodkin and briar dust was pressed into the wet CA. The fills were then filed with a small flat file then sanded with a 400 grit sanding sponge.
The stamps on both sides of the stummel were covered with masking tape to protect them from sanding. The stem and stummel were sanded with a sequence of sanding sponges from 400-3500. Between each sponge I wiped the stummel with a make-up pad dampened with alcohol. The stem was rubbed with mineral oil and wiped with a paper towel.
The stem and stummel were then worked with micro-mesh pads in grits of 4000-12000. Again the stummel was wiped with an alcohol wetted make-up pad between micro-mesh pads while the stem was rubbed with Obsidian Oil and wiped with a paper towel.
The stem was then polished with Before and After Fine and Extra Fine Polish on a soft cotton cloth.
The stummel was coated with Before and After Restoration Balm and allowed to sit overnight. This is longer than I would normally allow but it was time for bed.
The next day, the Restoration Balm was wiped from the stummel using an inside out athletic sock.
The pipe was taken to the buffer for several coats of carnauba wax.
After waxing the pipe was hand polished with a microfiber polishing cloth.
I still do not know what to think of this Peterson Dublin 3 3000. I Feel funny calling it a 3000 as that never appears to be something that Peterson made yet, here is it. It is not a System pipe though it’s shaped like one and has a P-lip yet, here it is. It is not intact, as it is missing what I think is about ¼ inch of top yet, here it is. It has a collar like nothing I’ve ever seen yet, here it is. I can say that it is a pretty little pipe and I much prefer the AB taper stem over the saddle. I guess I’ll just have to keep it and take it fishing once global warming eliminates the hard water situation brought on by winter.
The dimensions of the Peterson 3000 (?) are:
Length: 5.33 in./ 135.38 mm.
Weight: 1.10 oz./ 31.19 g.
Bowl Height: 1.43 in./ 36.32 mm.
Chamber Depth: 1.08 in./ 27.43 mm.
Chamber Diameter: 0.60 in./ 17.53 mm. (Conically bored diameter is at the top)
Outside Diameter: 1.32 in./ 33.53 mm.
I do hope that you have found something here useful to your own pipe care, maintenance or restorations. If you like this sort of thing, please click the like and subscribe buttons. Thank you for reading the ramblings of an old pipe lover.
Loading…
Below are some photos of the finished Peterson 3000 (if that is what it really is) pipe.
I was not really pleased with the level of polish on the collar so it went back under the buffer with some white jeweler’s rouge, which is really a silly name as it is white not rouge. Anyway here is what it looked like after the extra buffing:

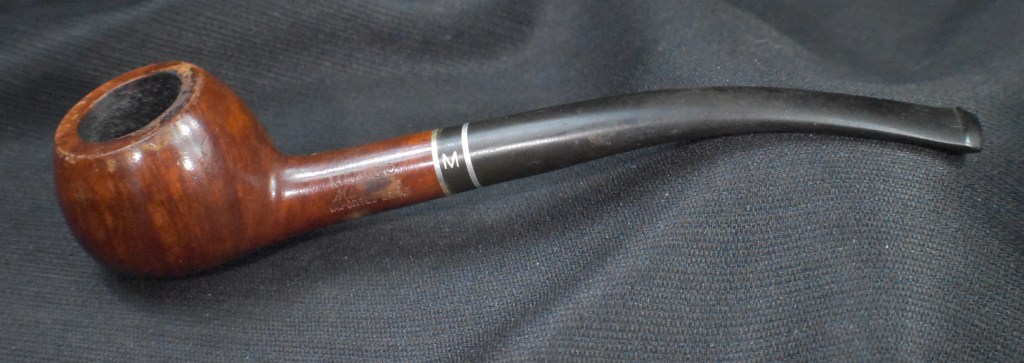
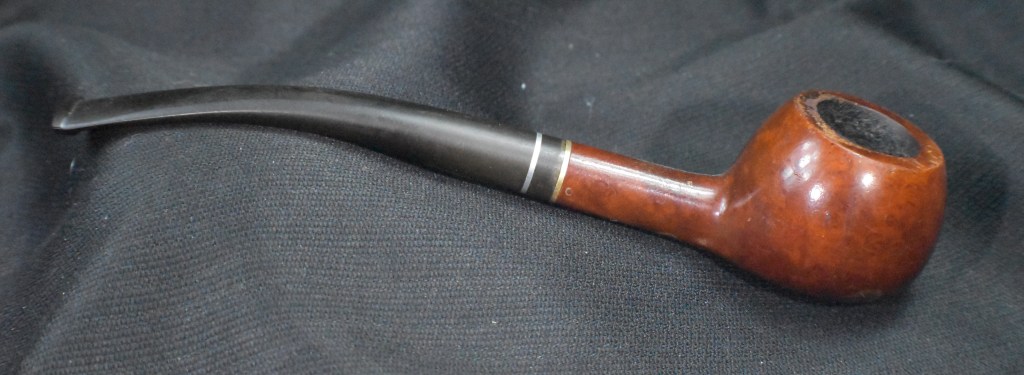
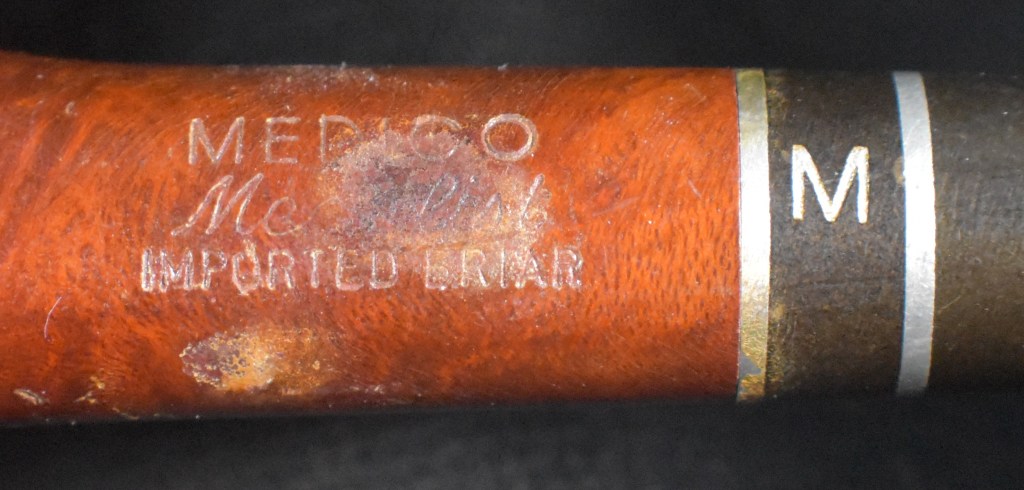
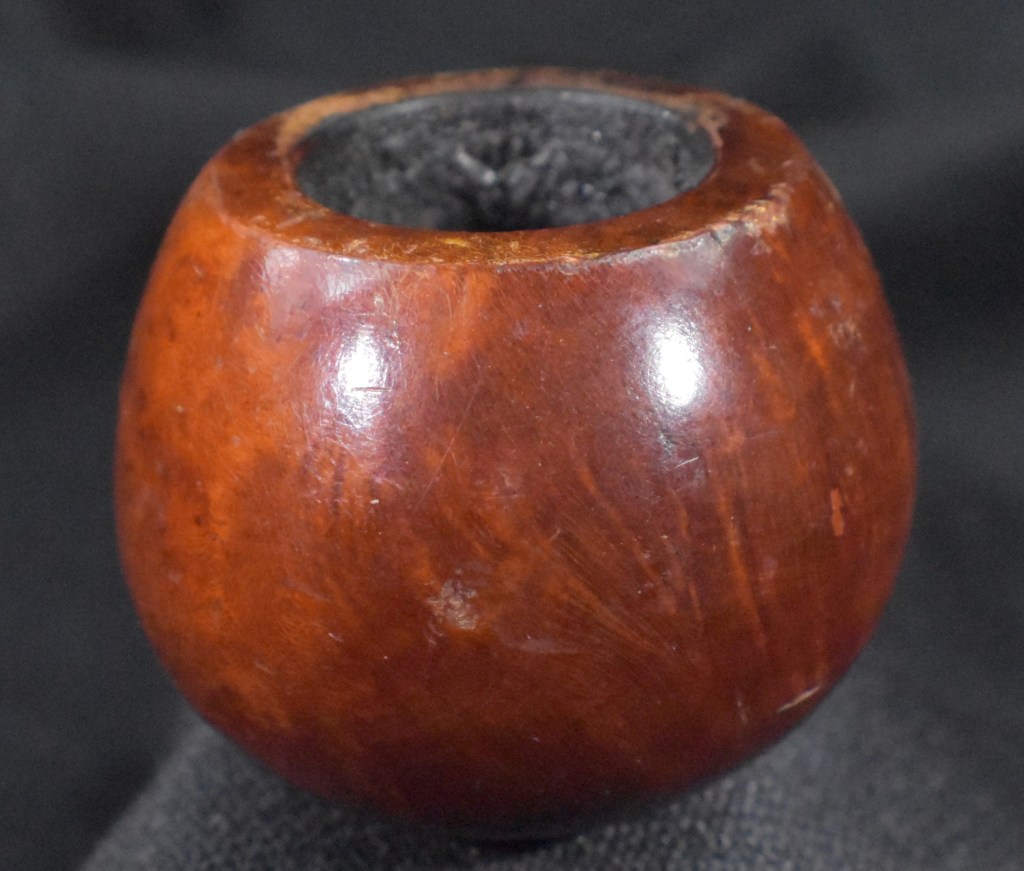
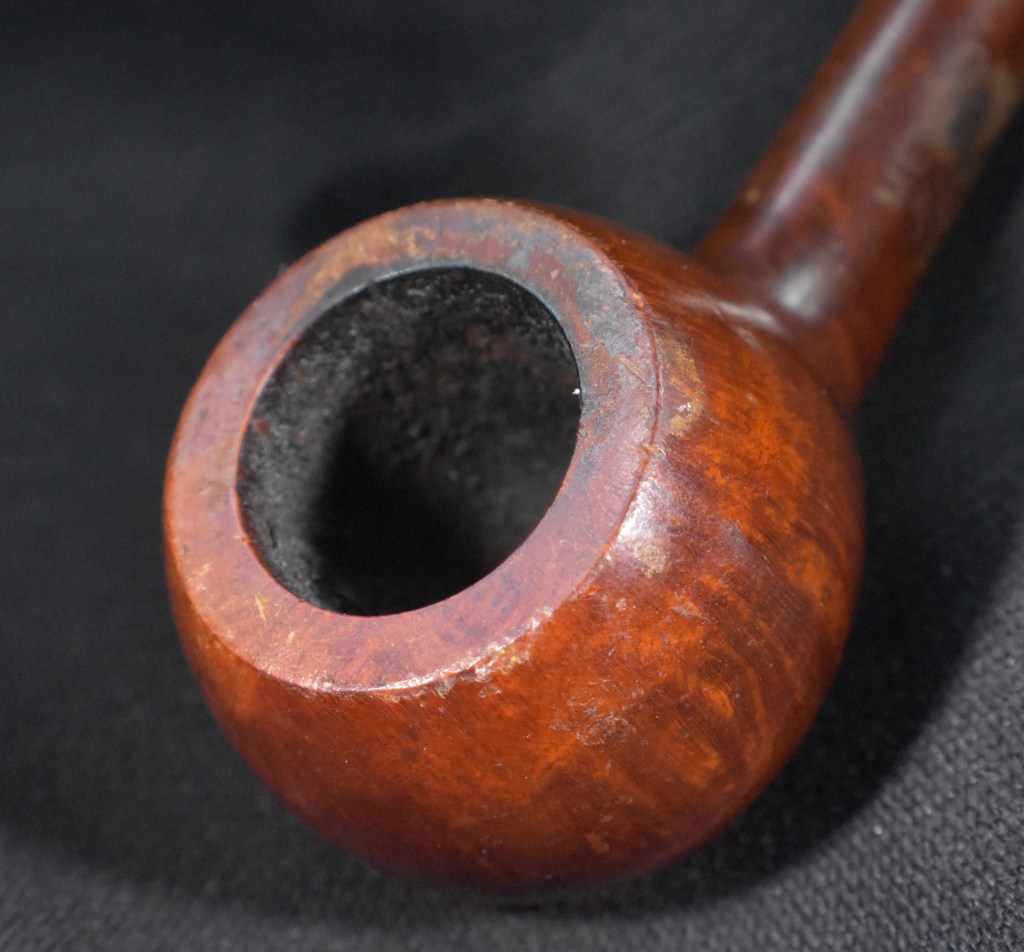
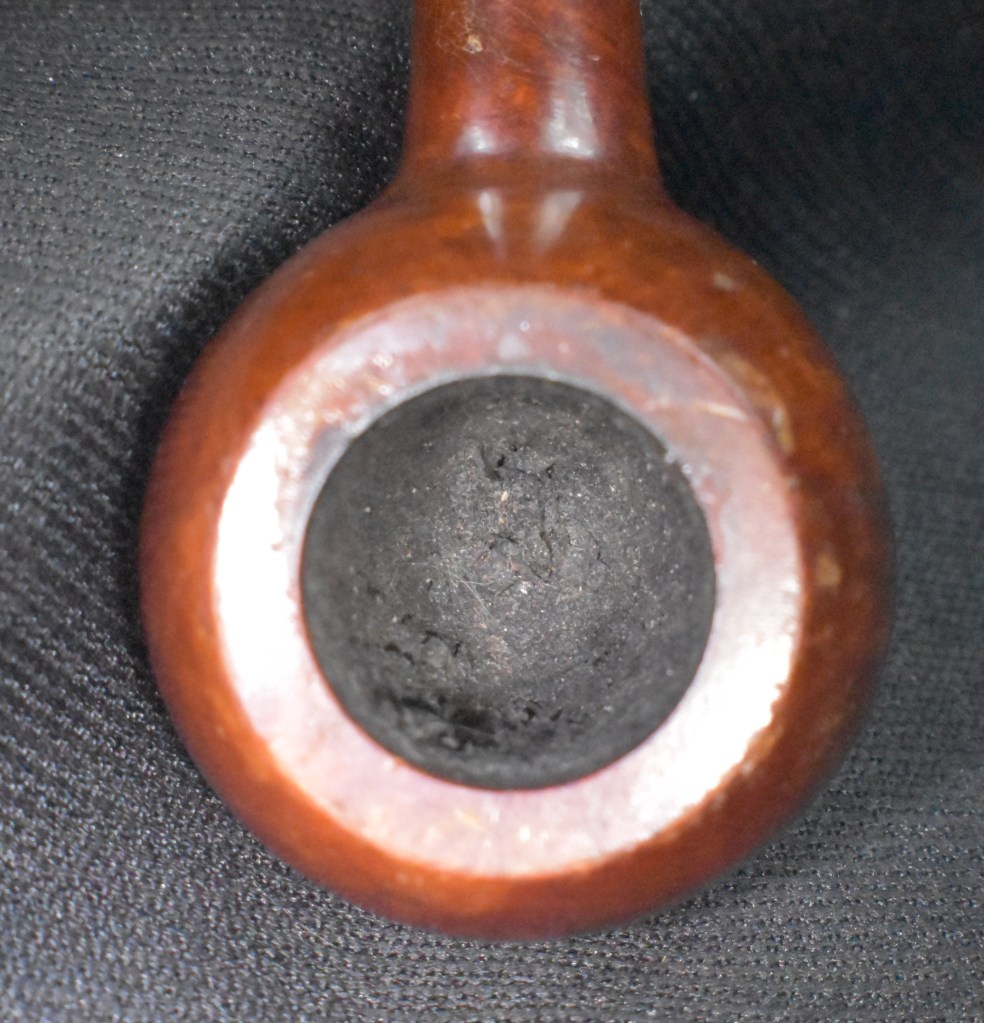
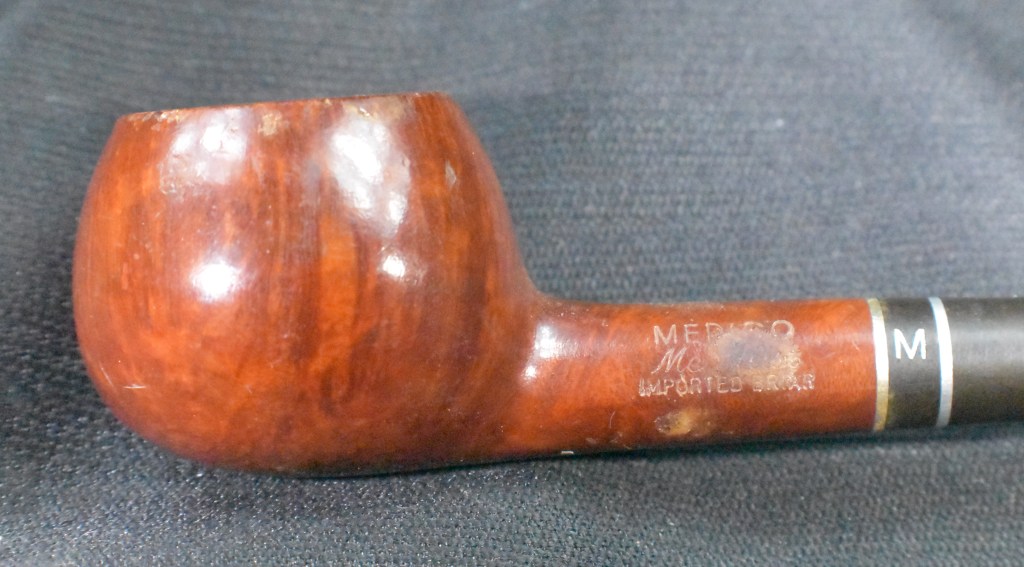

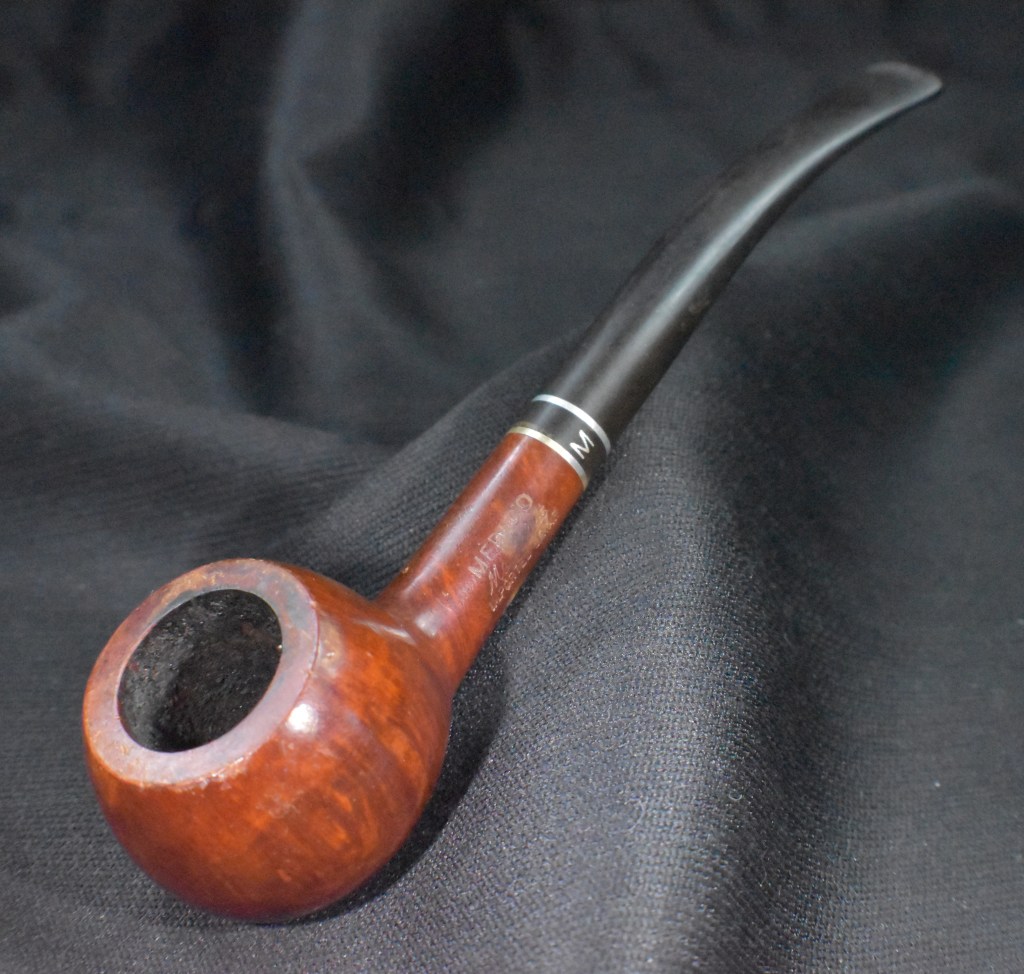
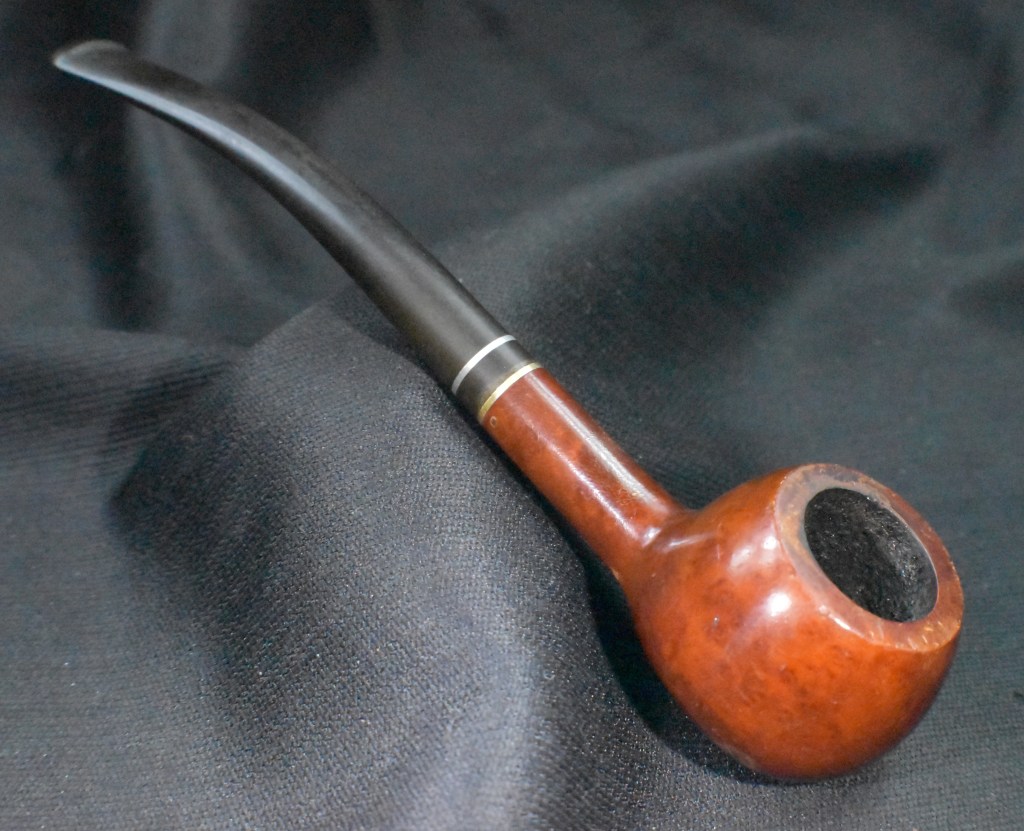
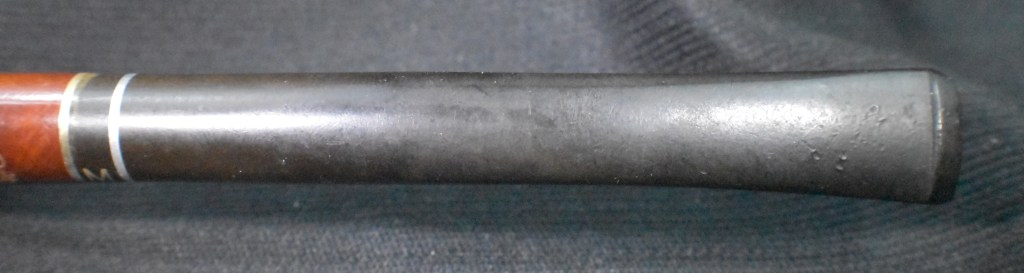
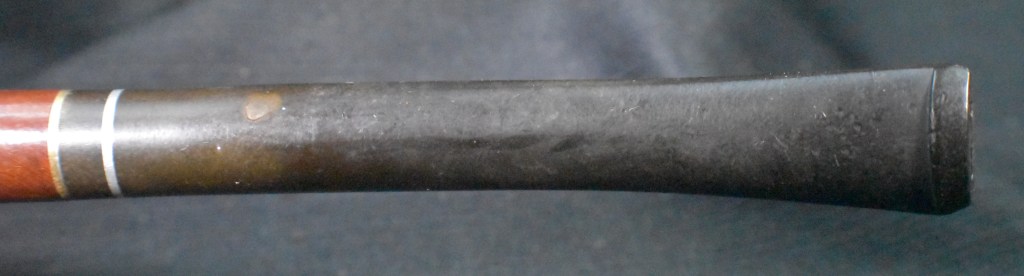
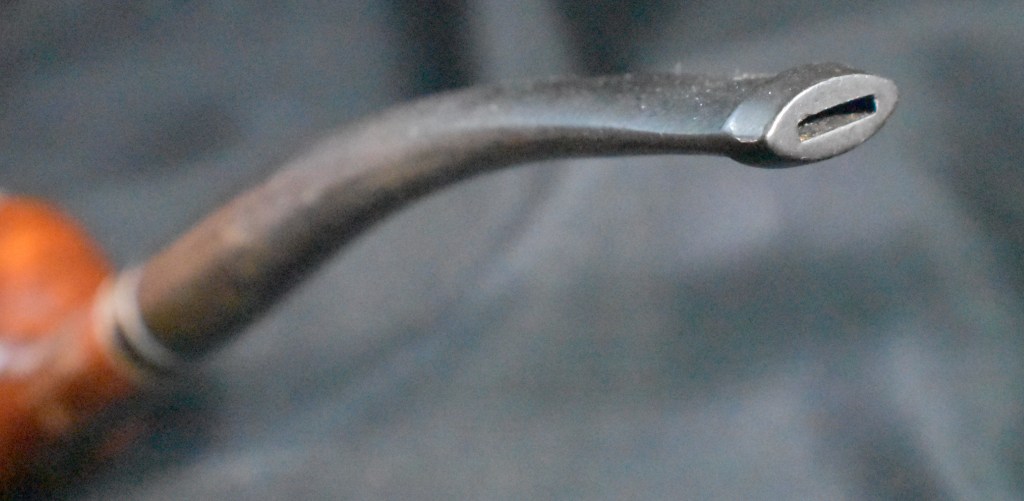
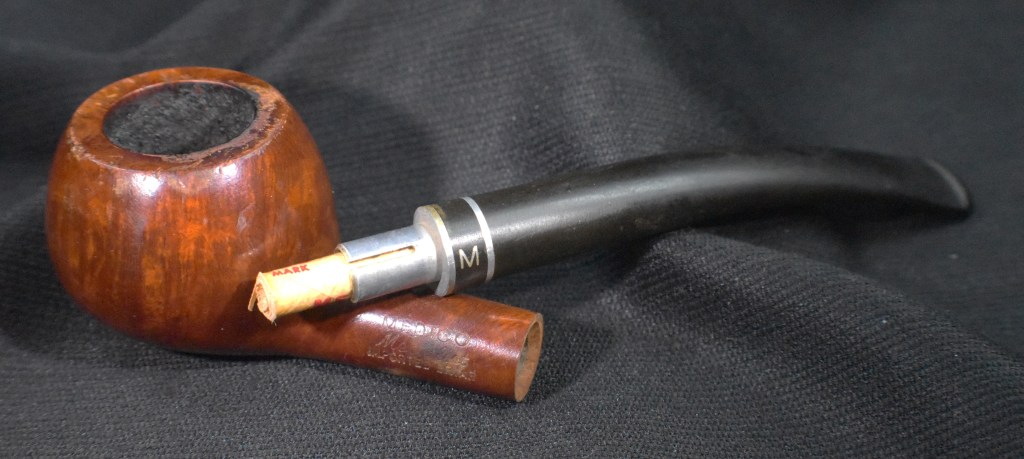

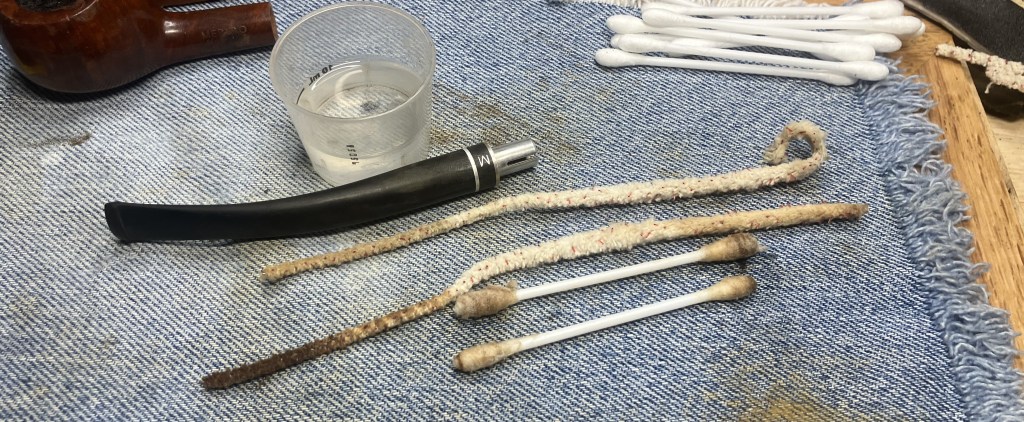
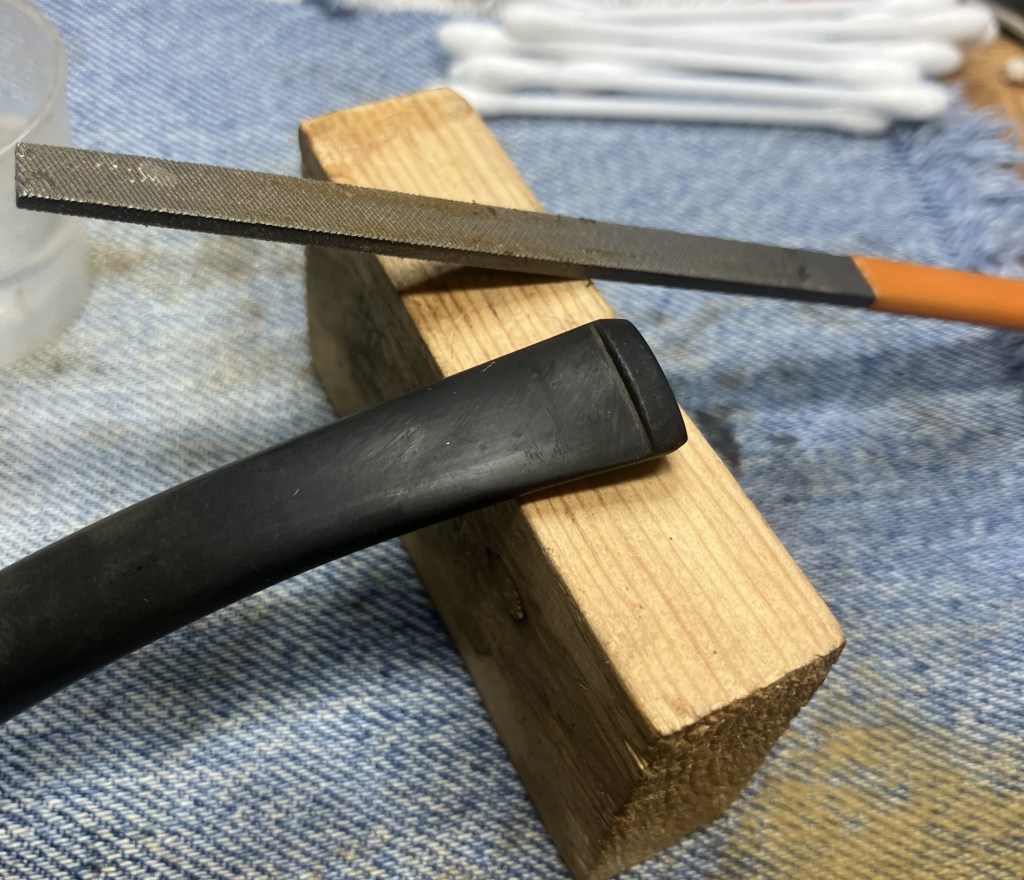
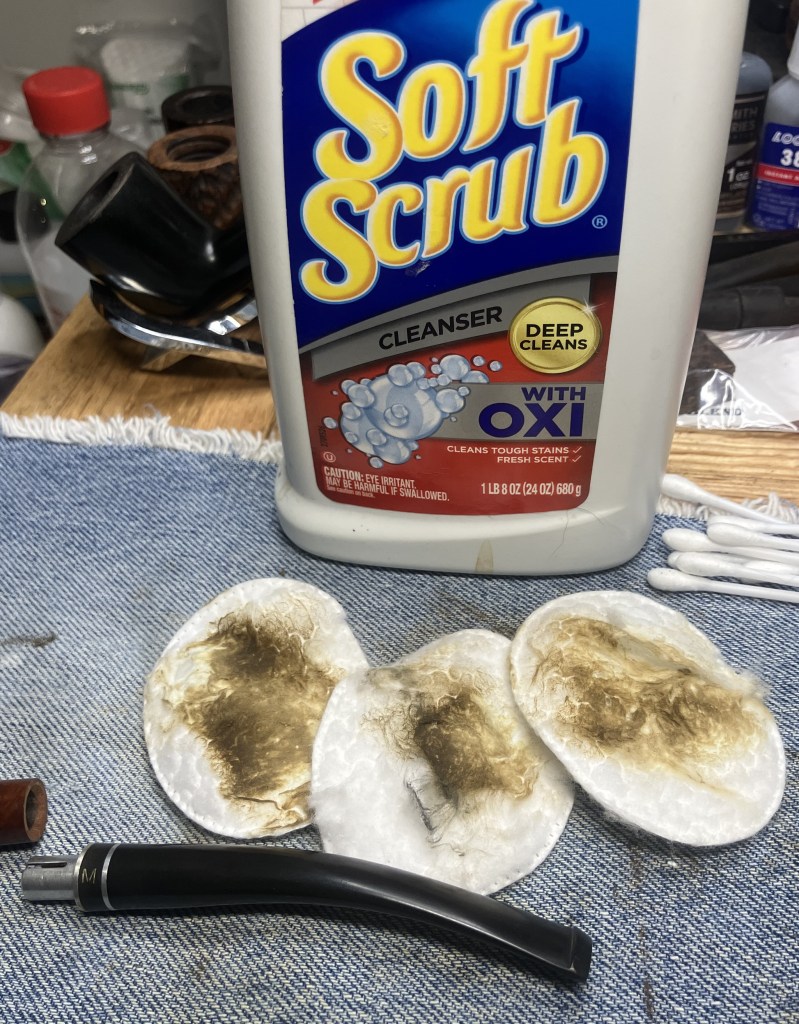
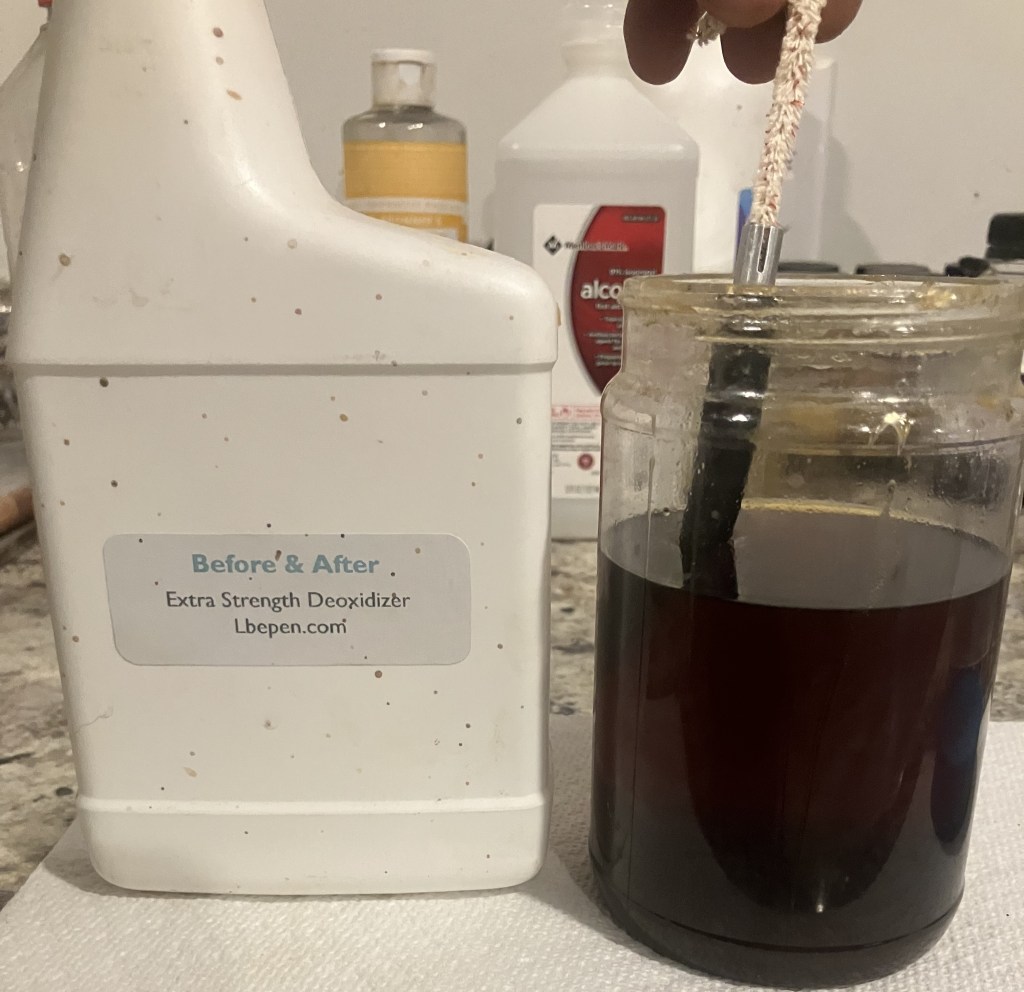
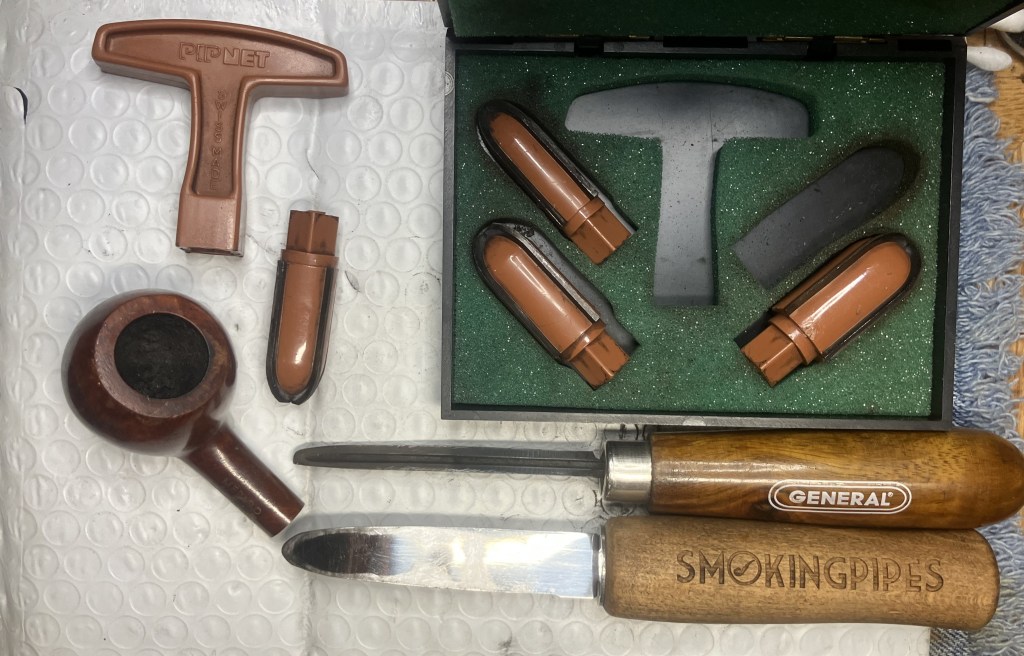
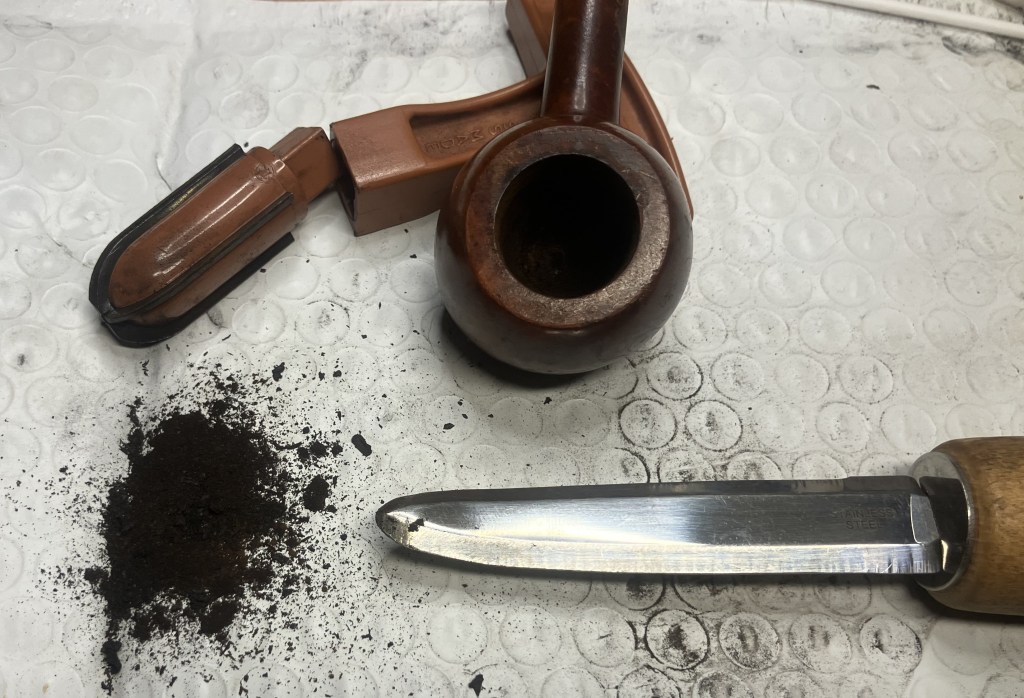
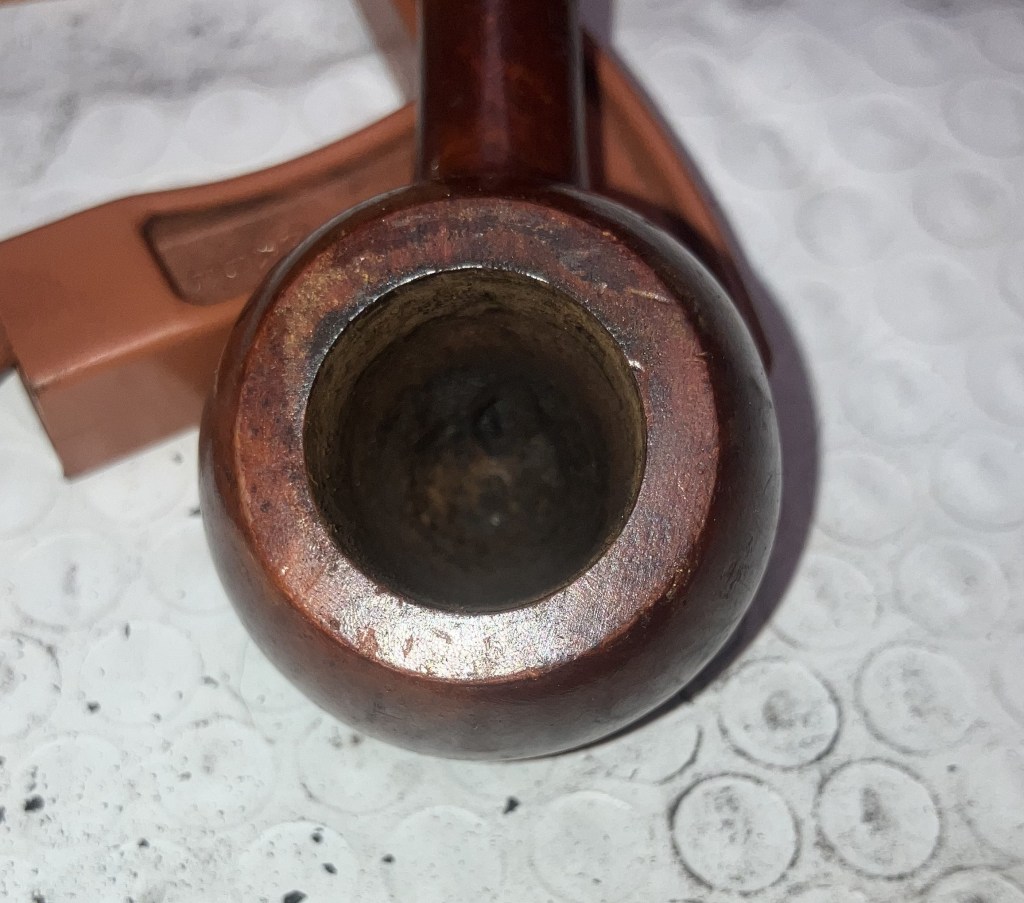
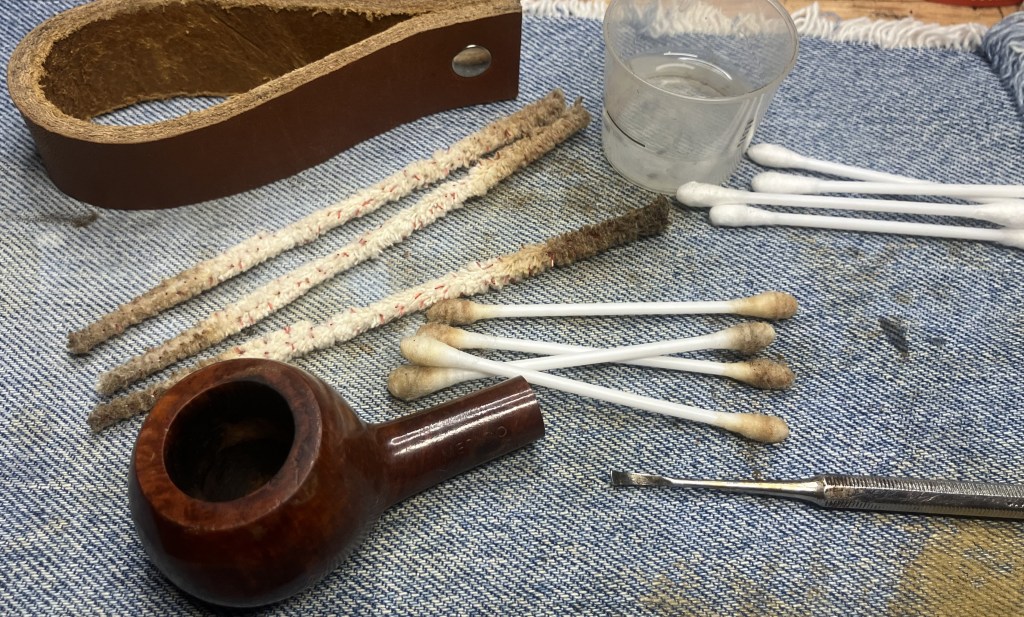
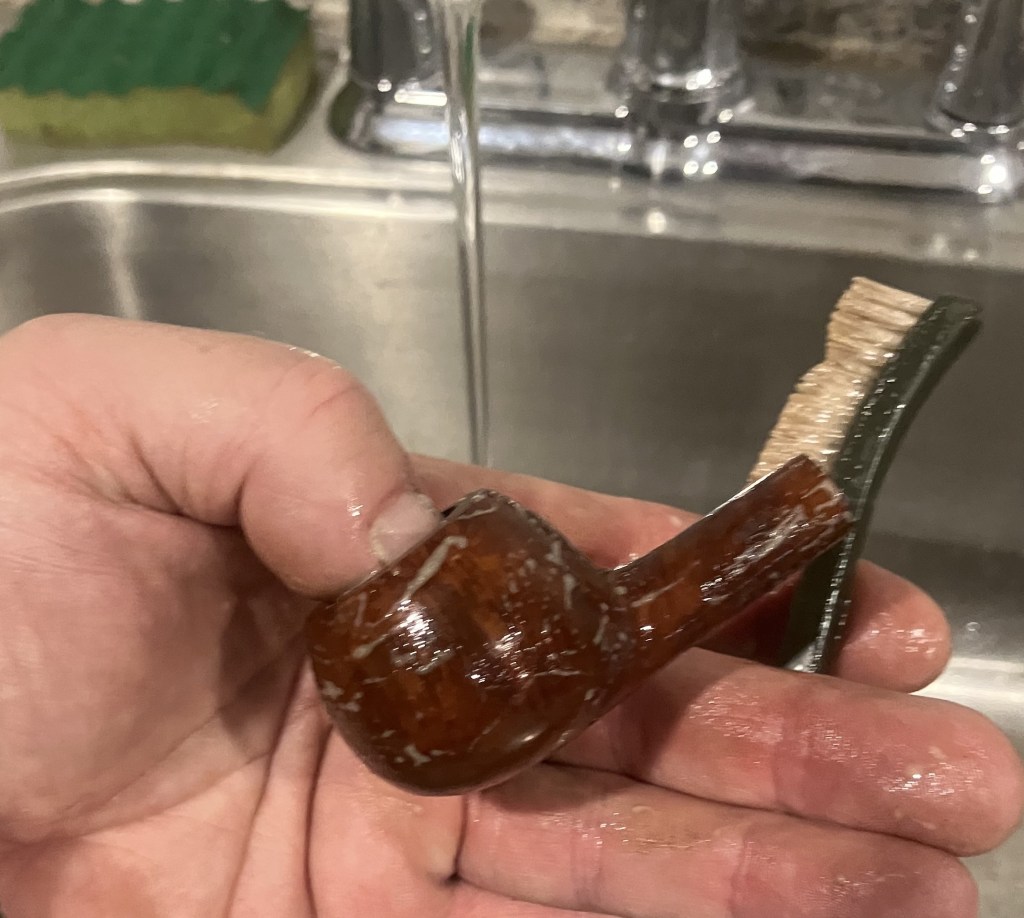
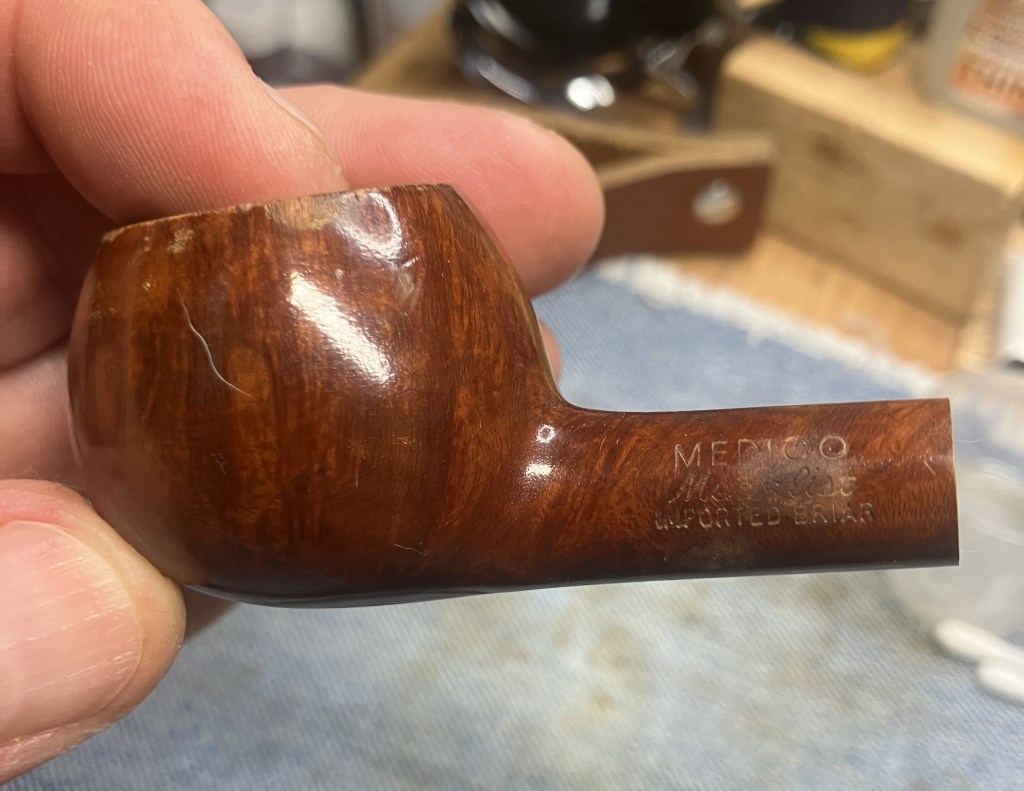
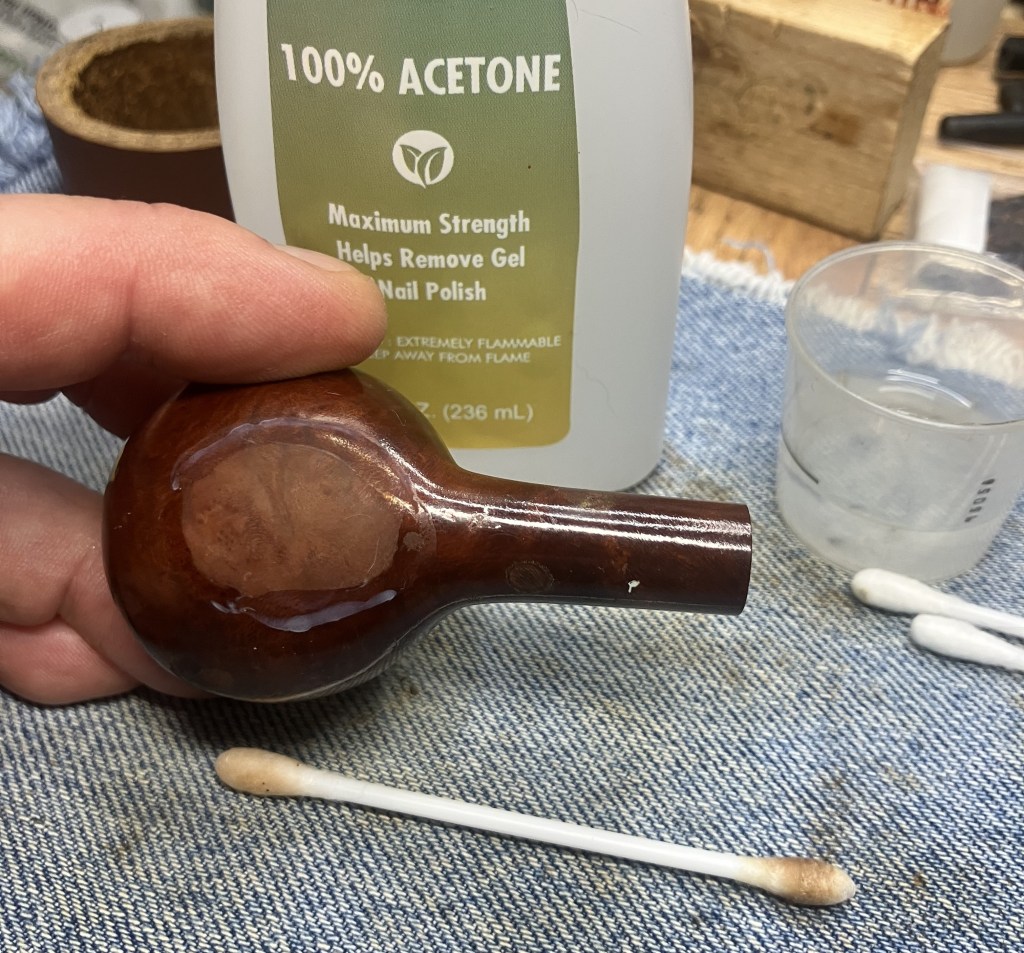
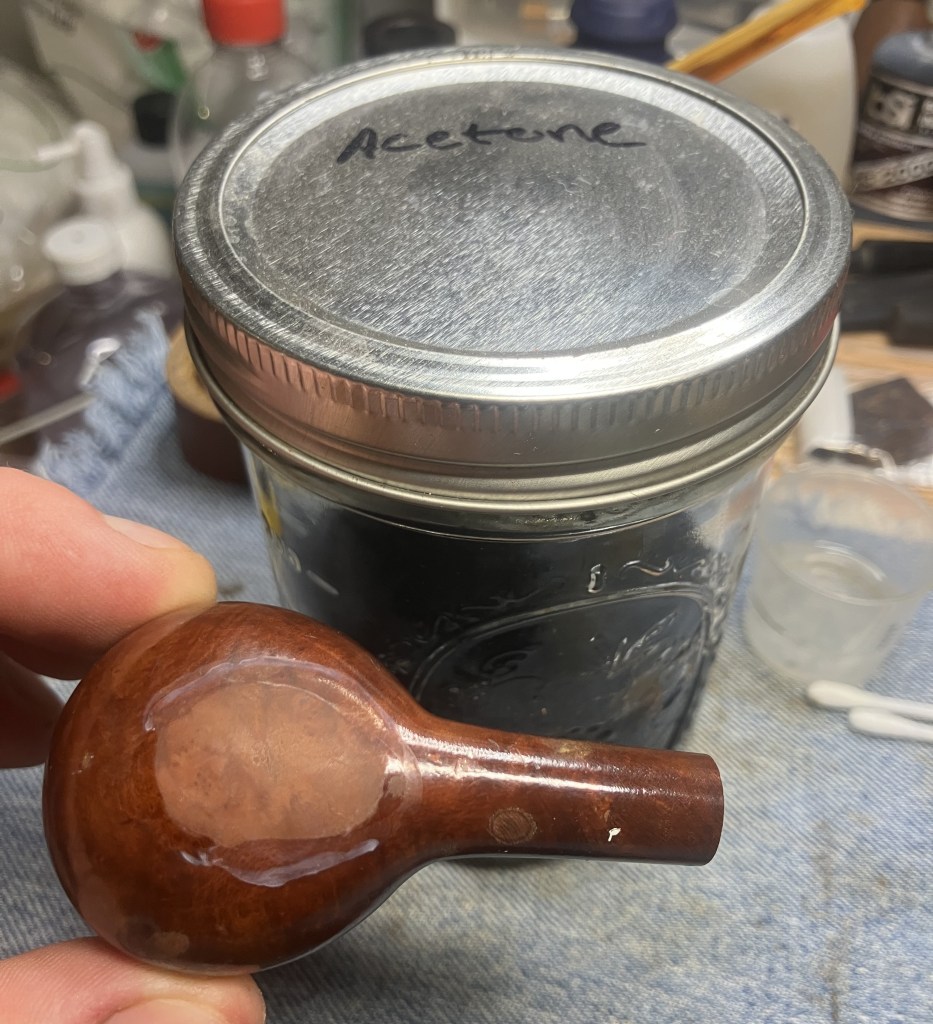
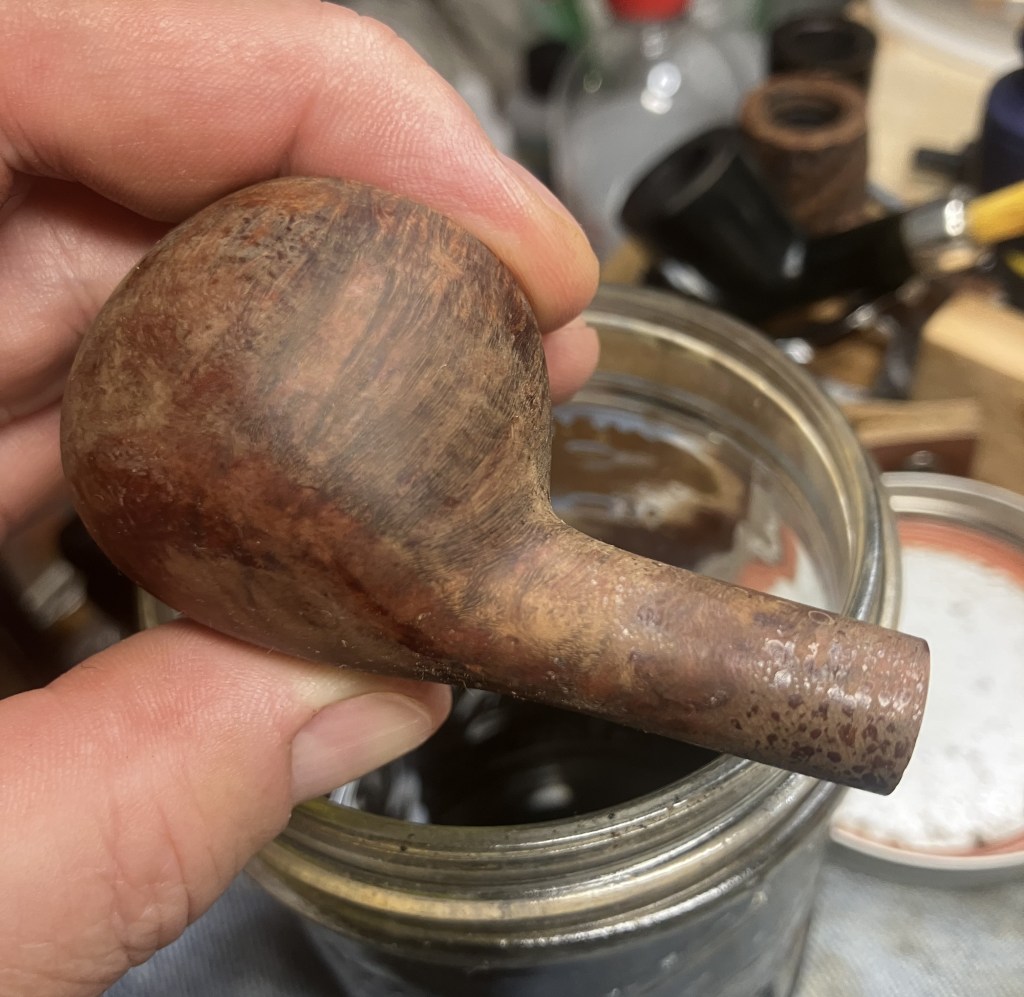
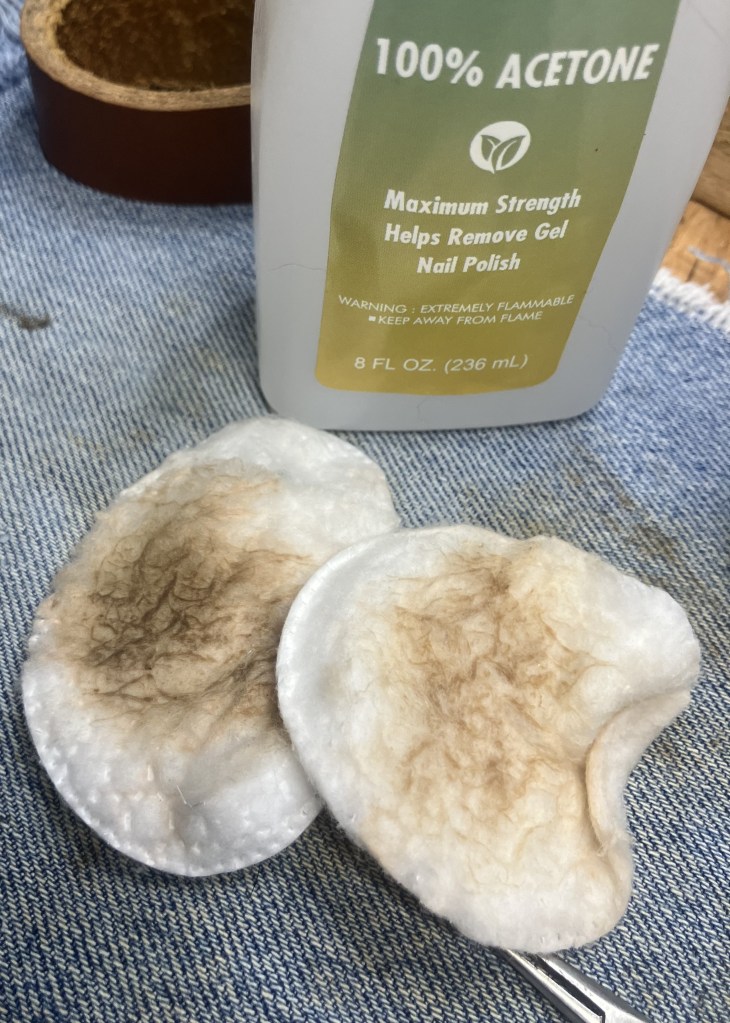
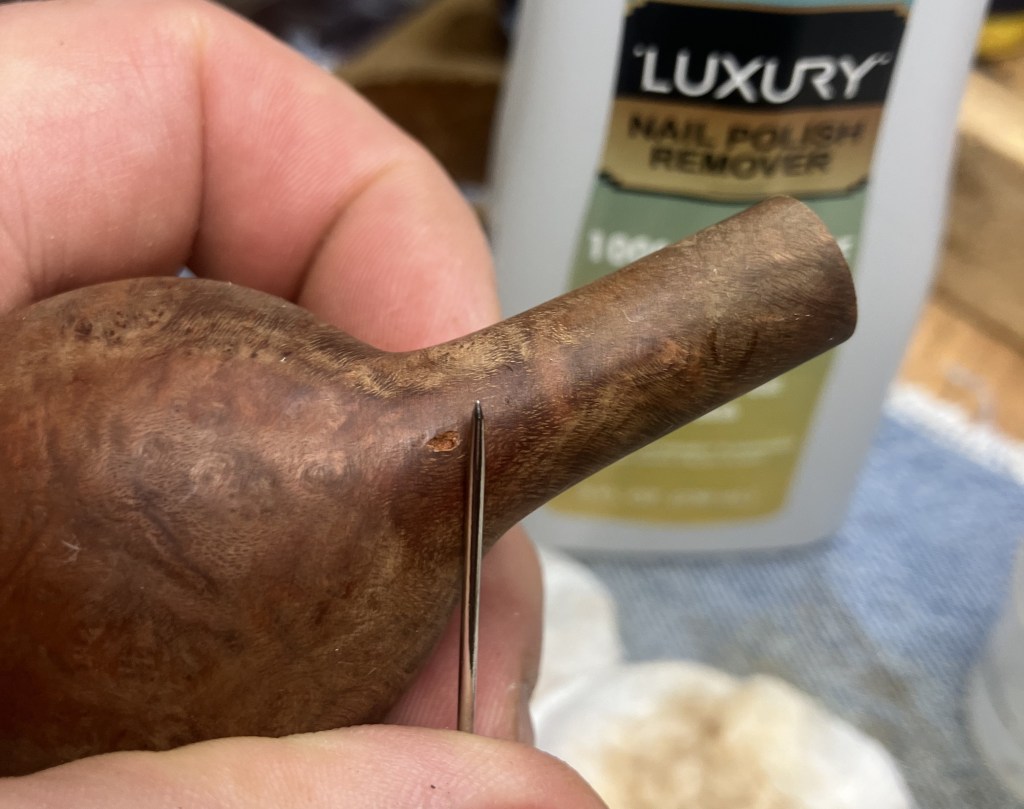
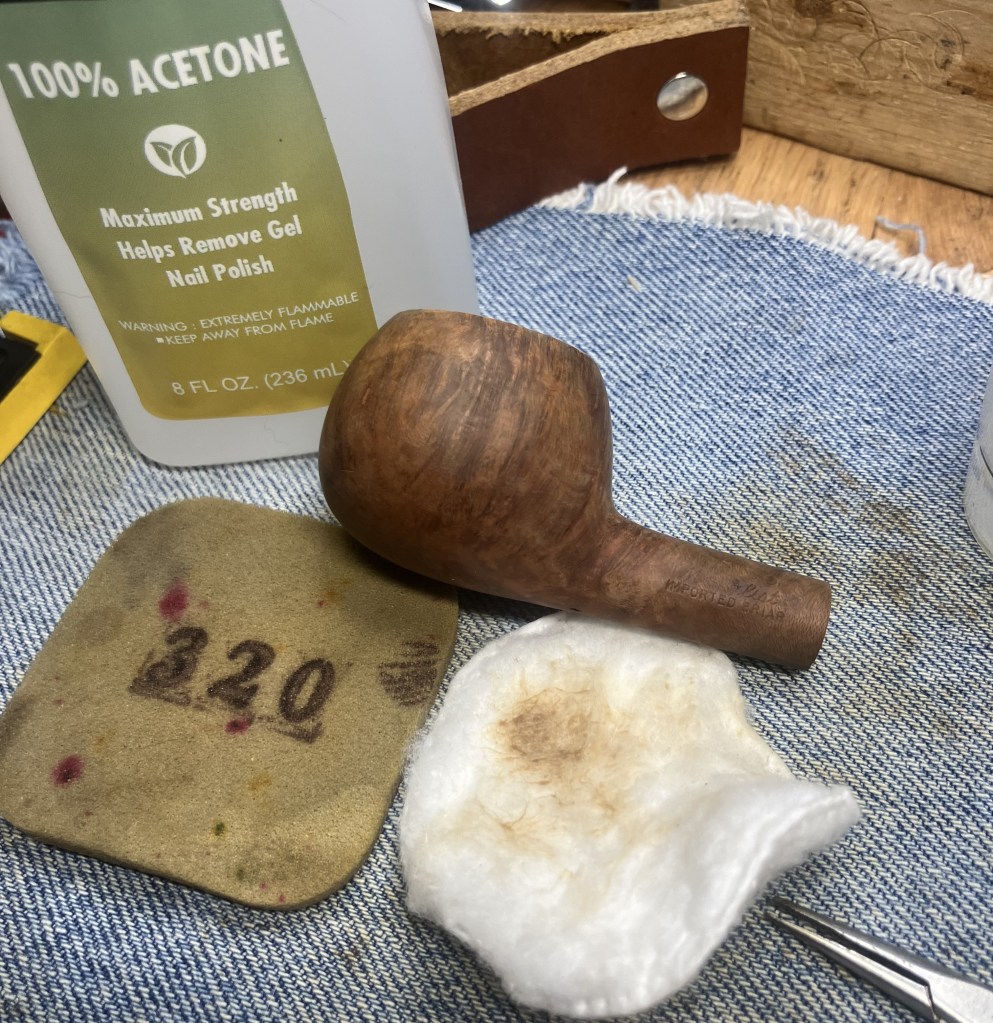

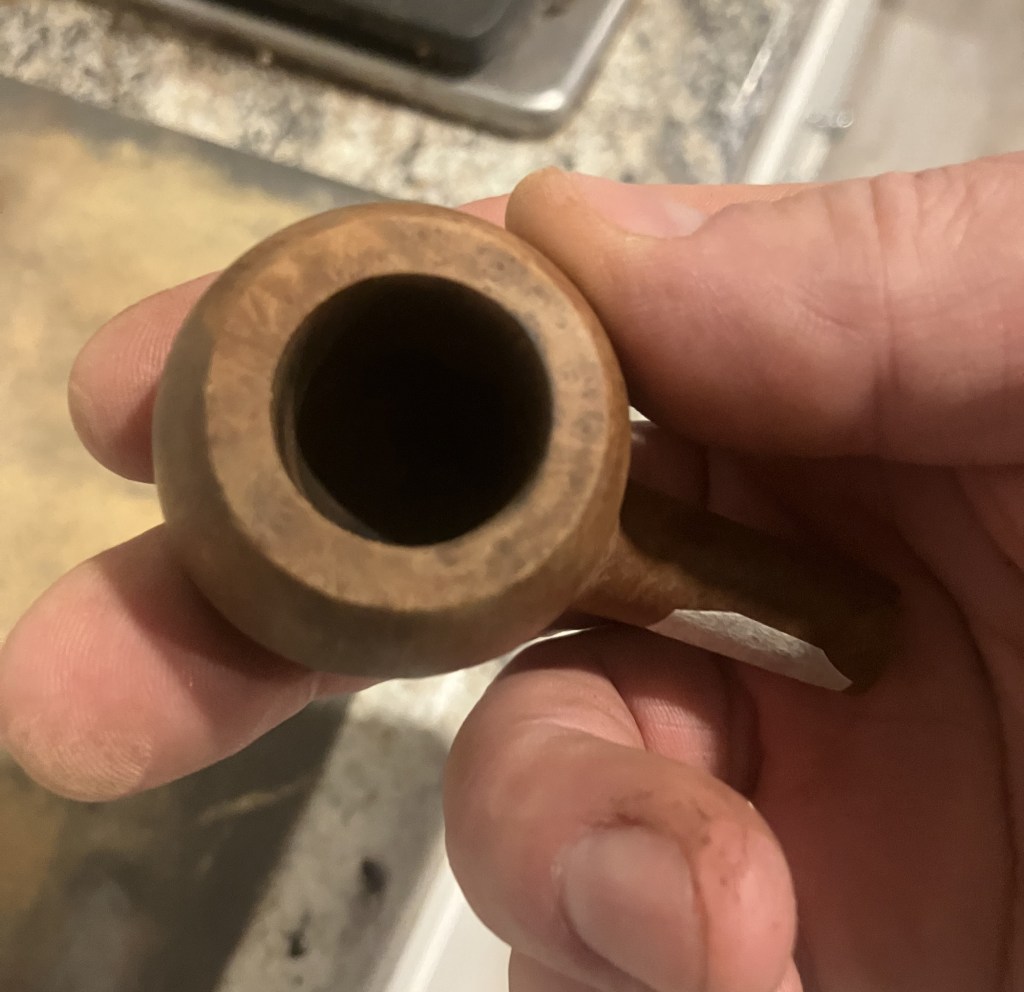
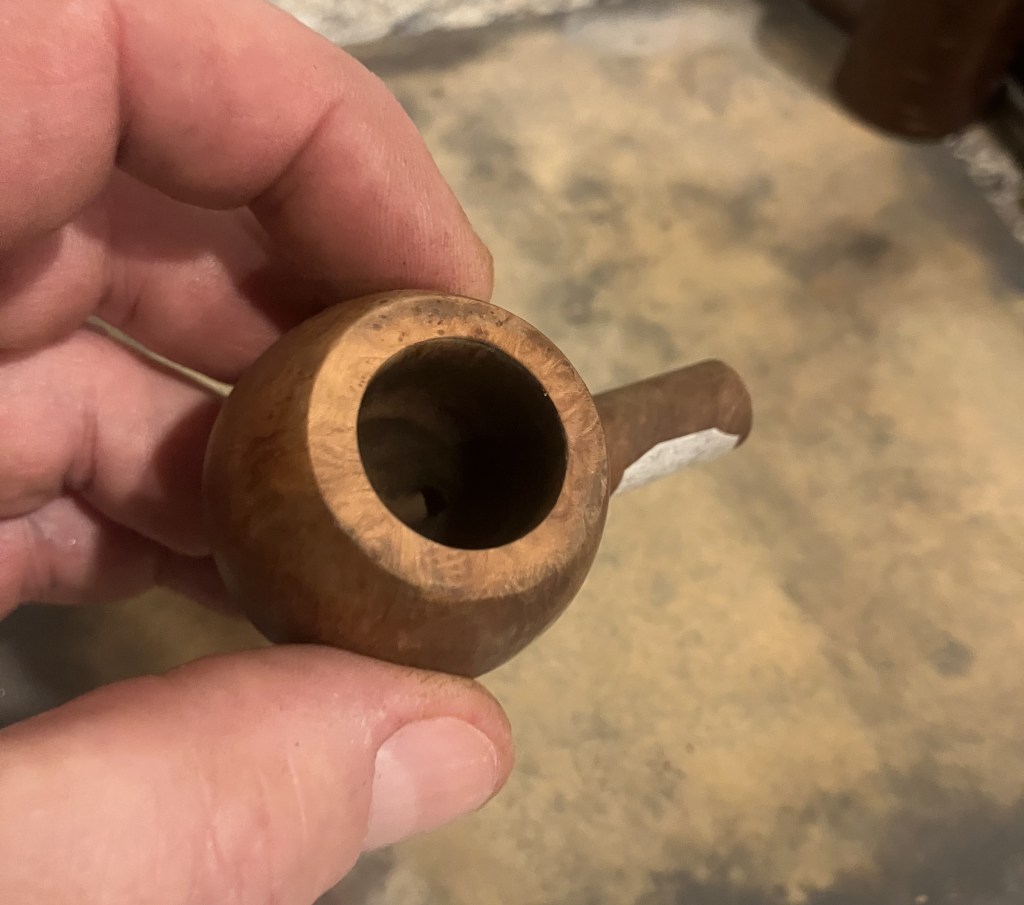
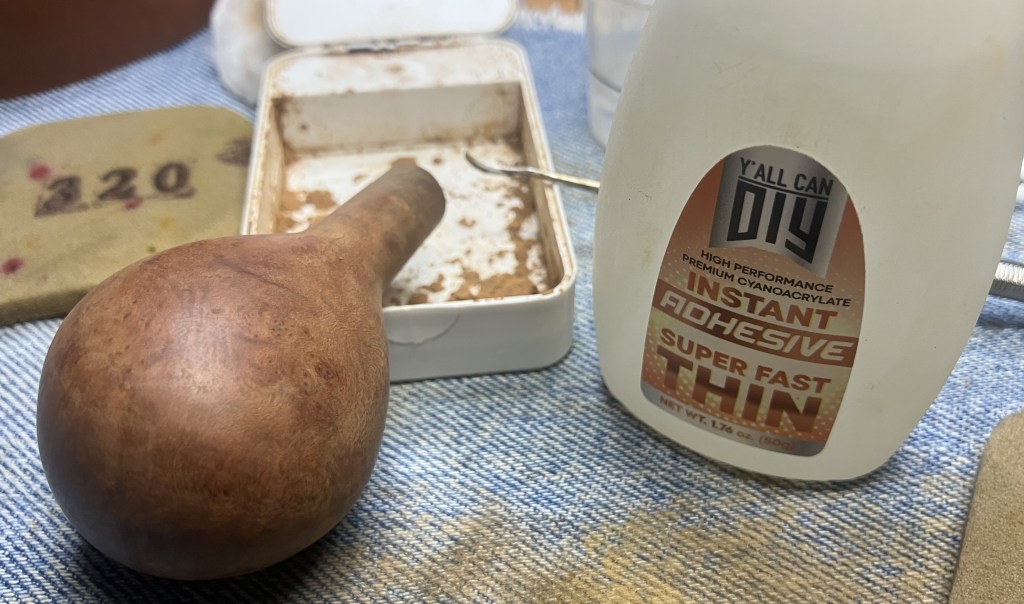
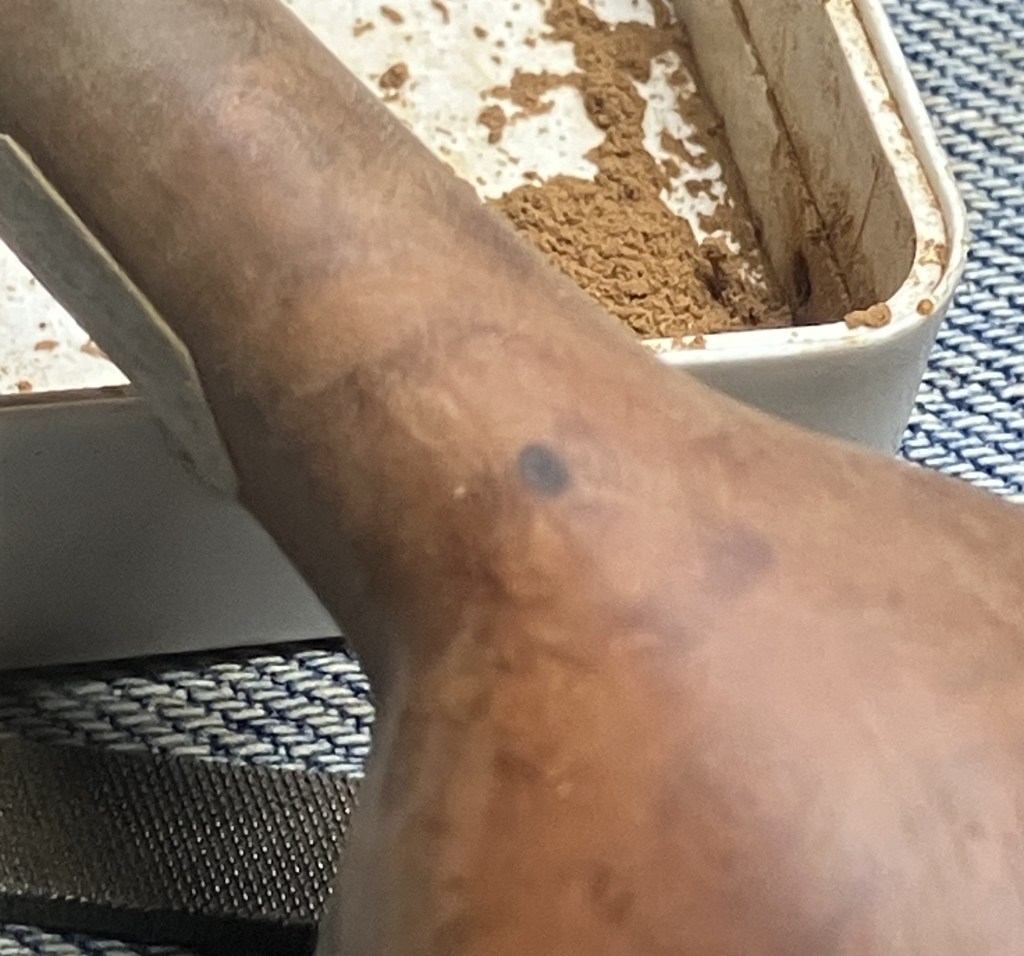
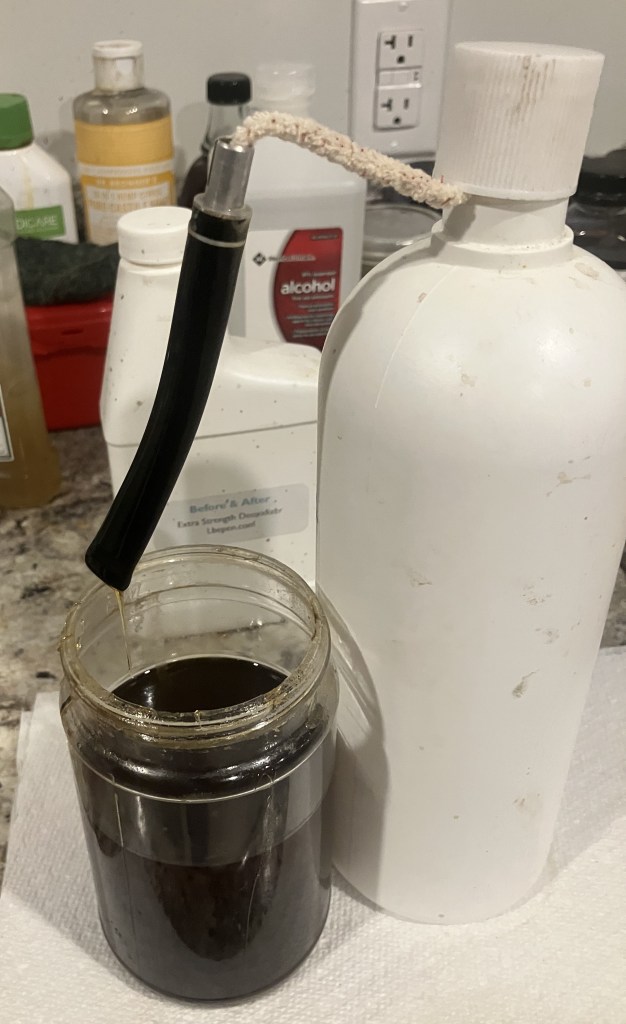
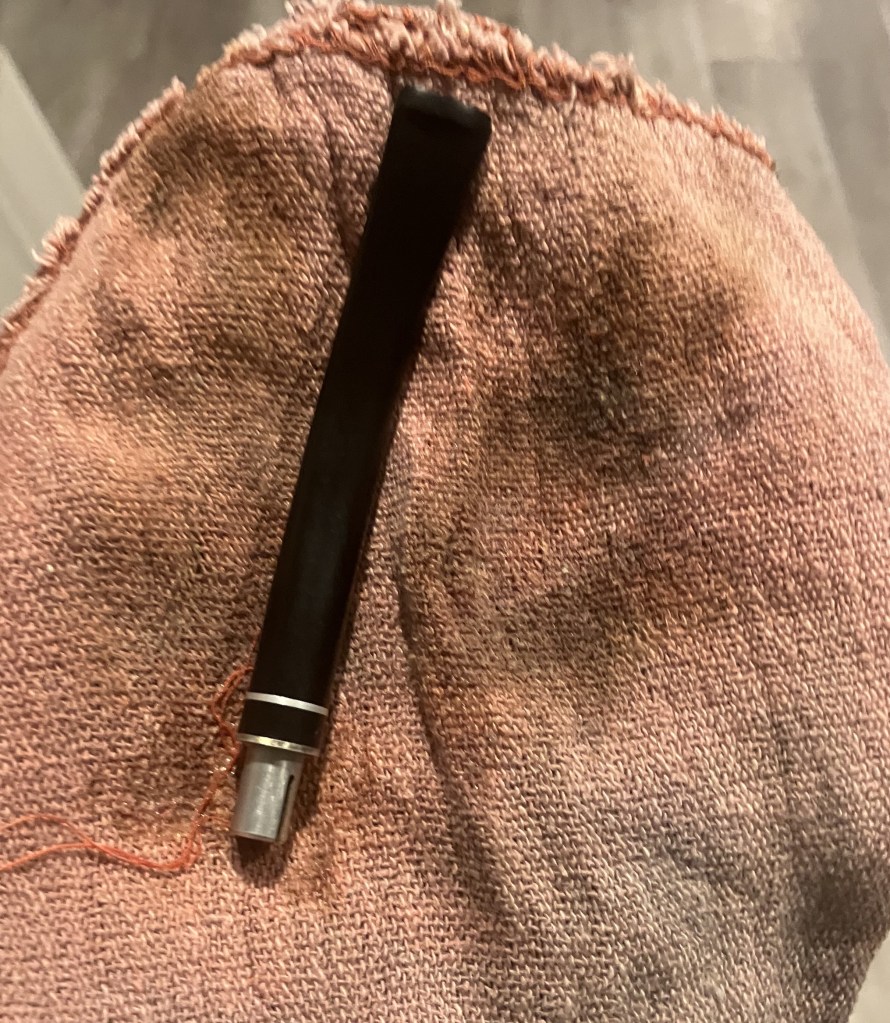
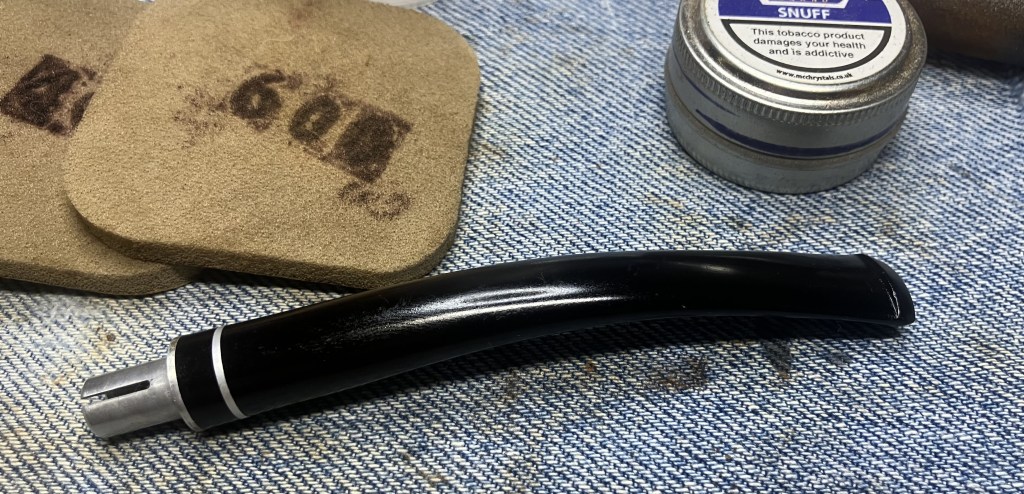
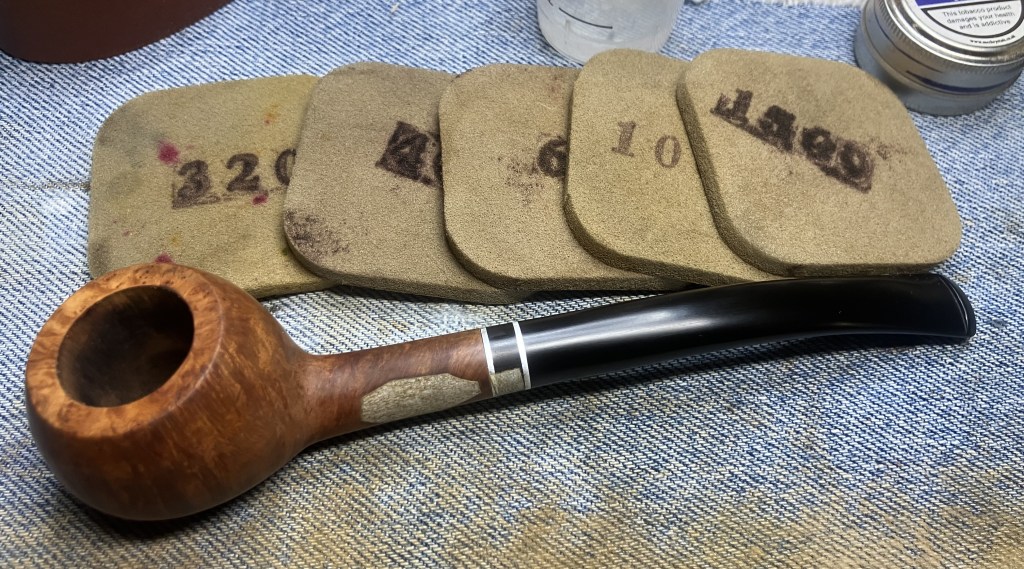
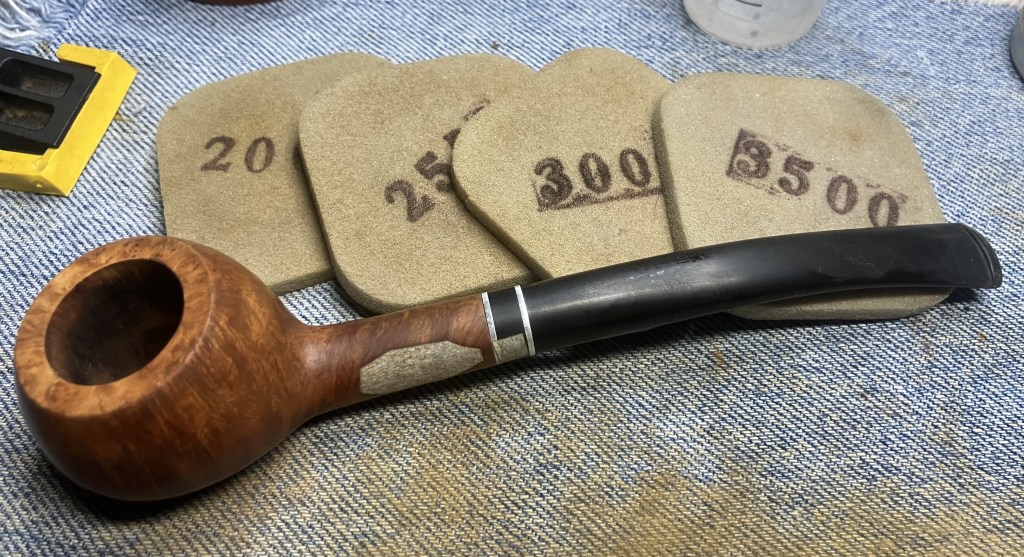
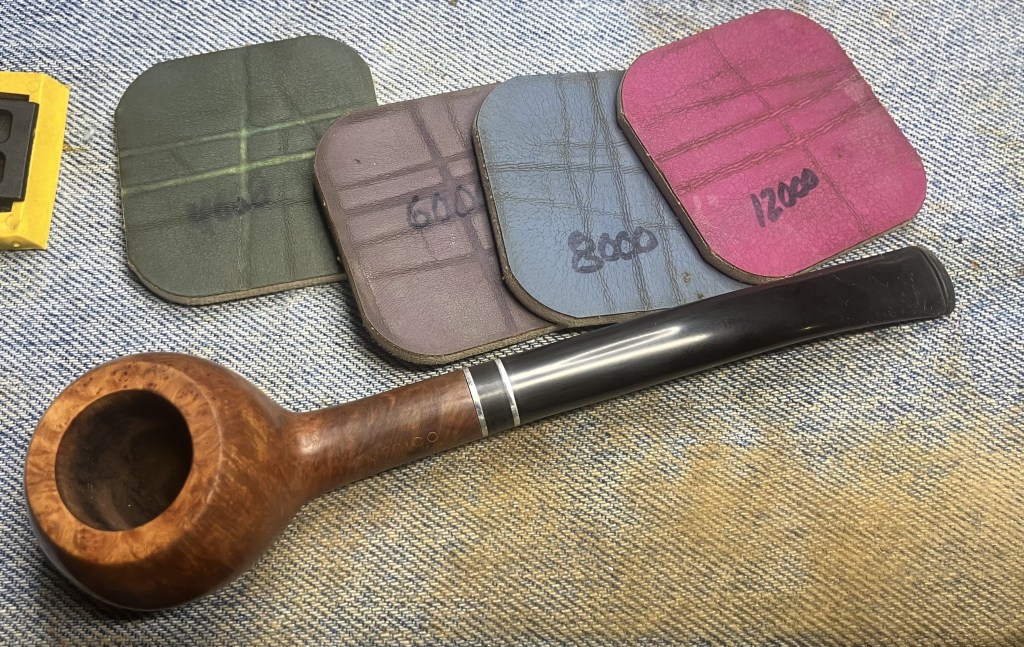
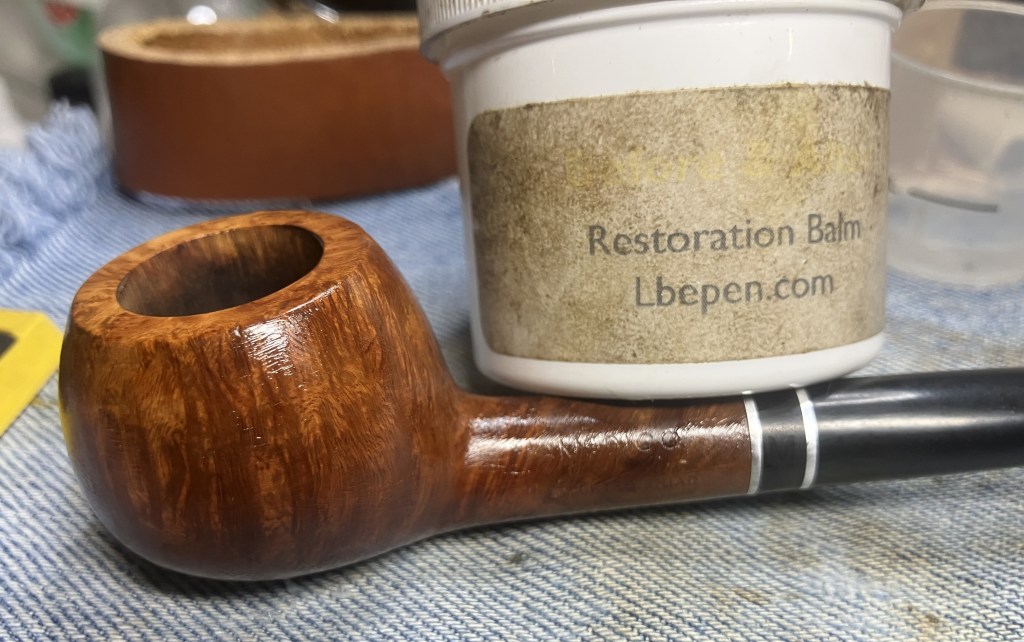
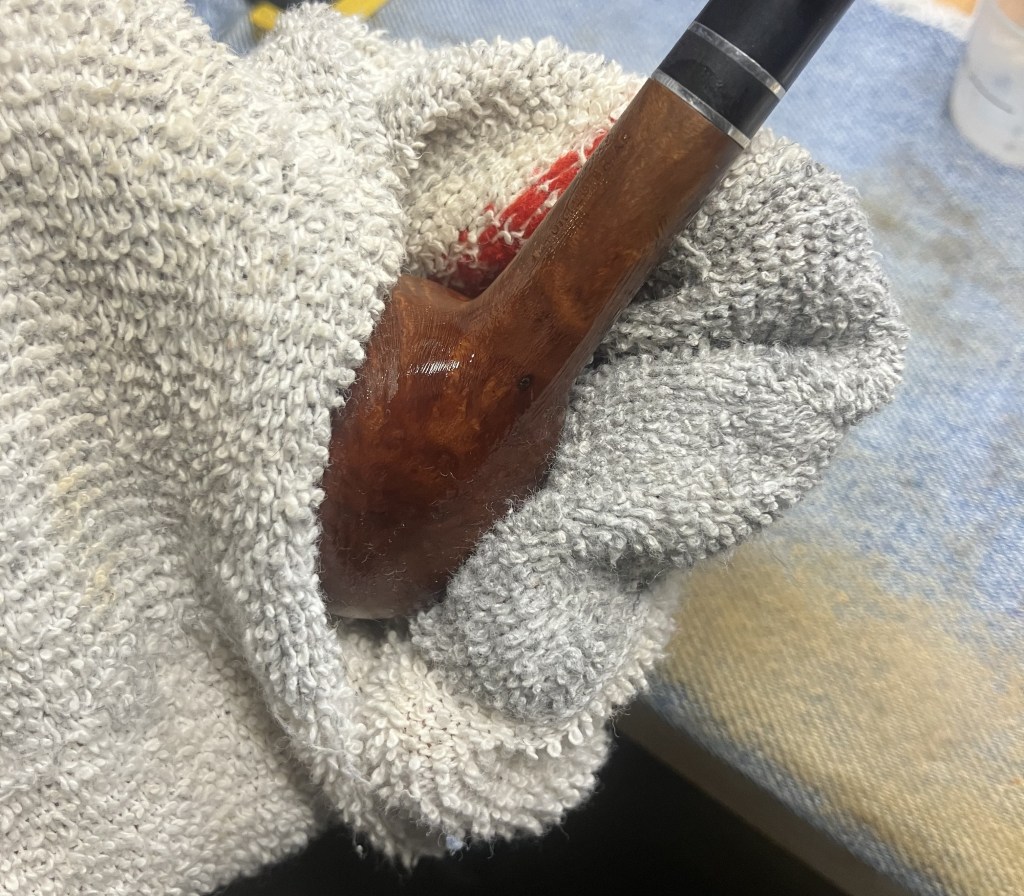
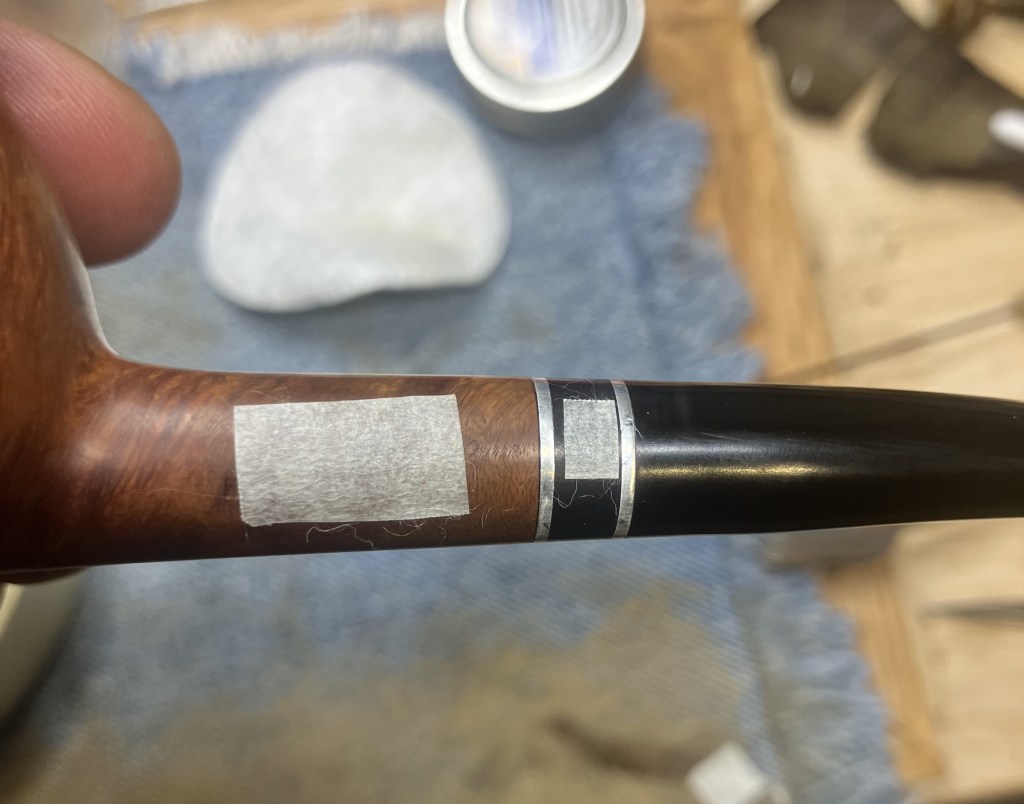
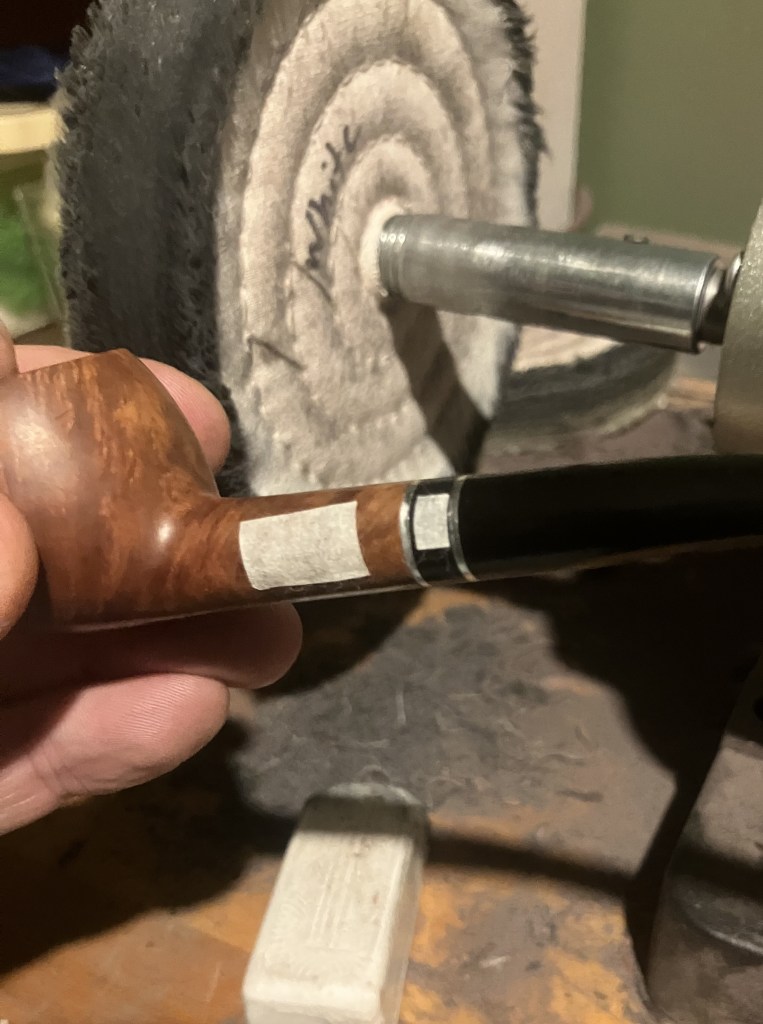

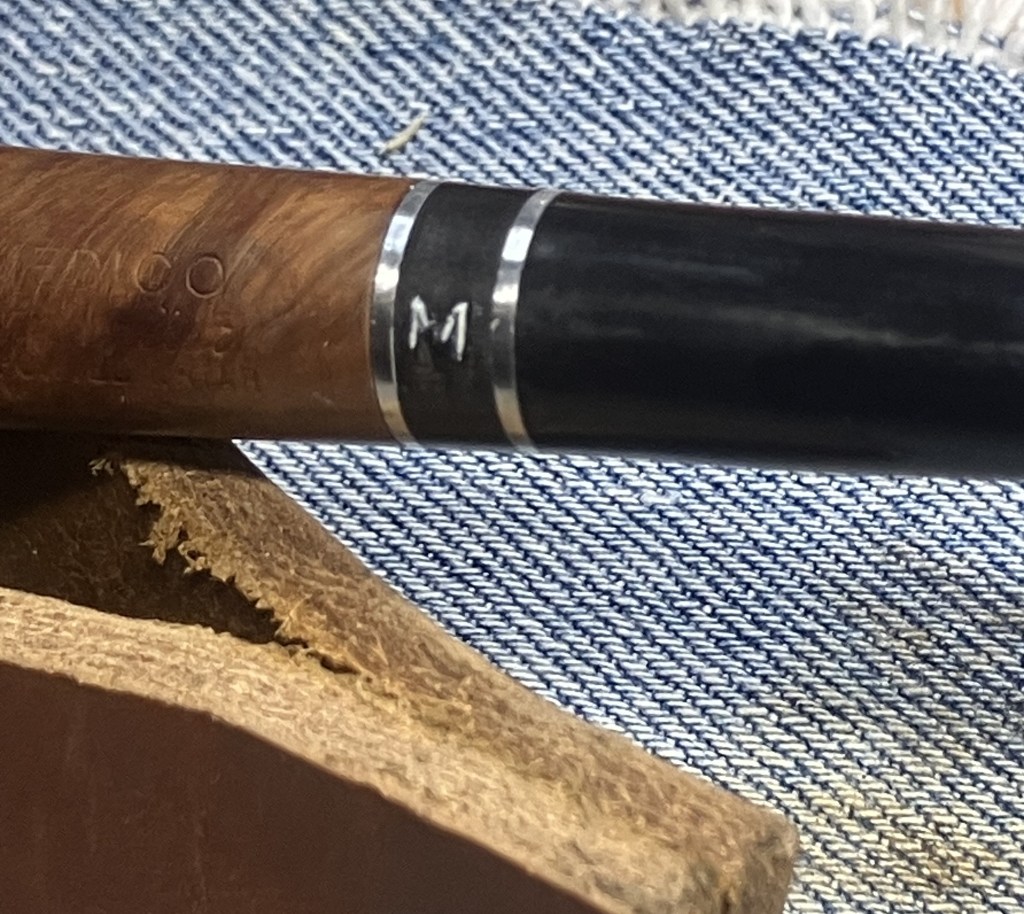
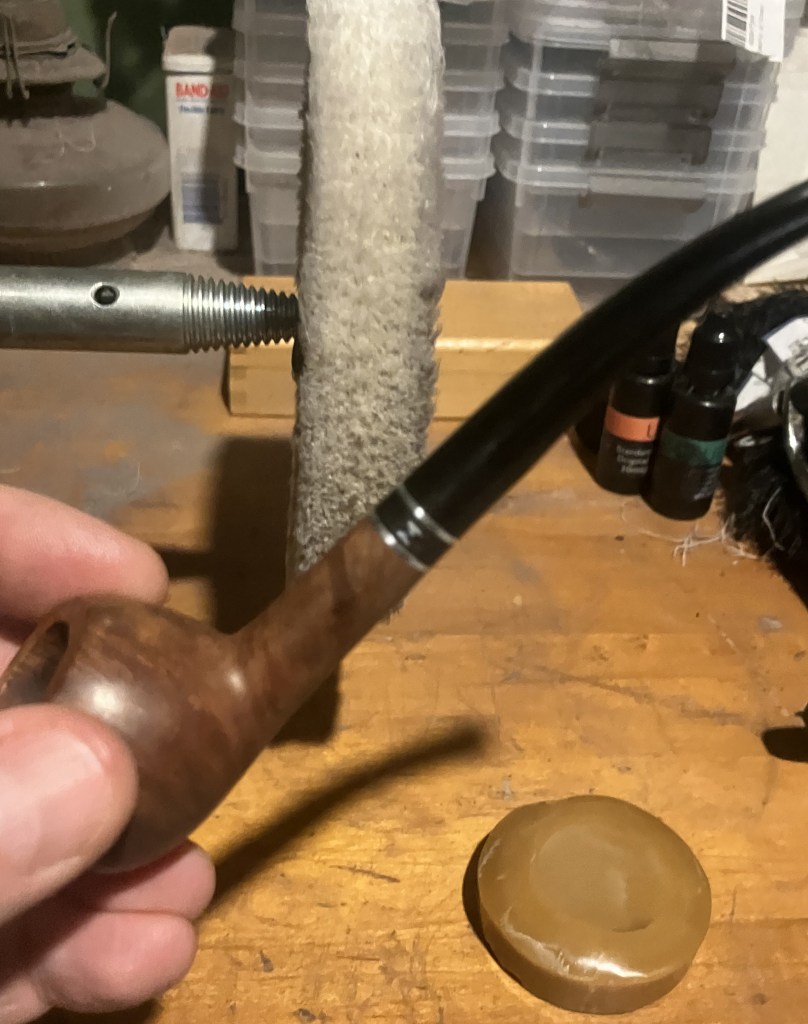
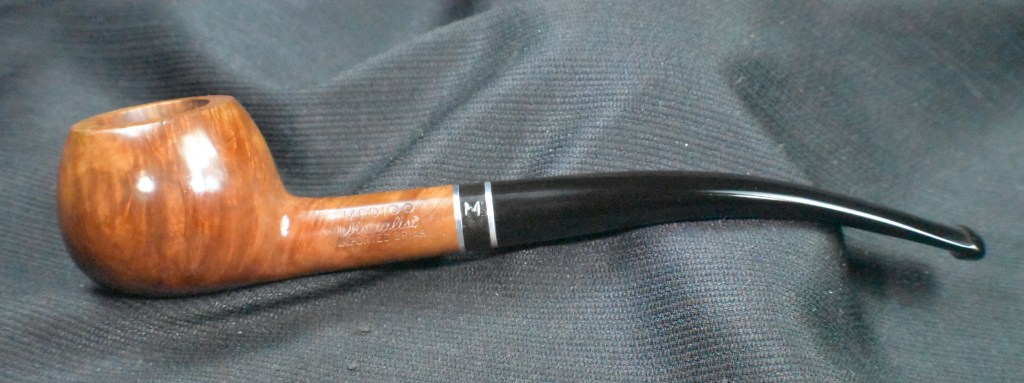
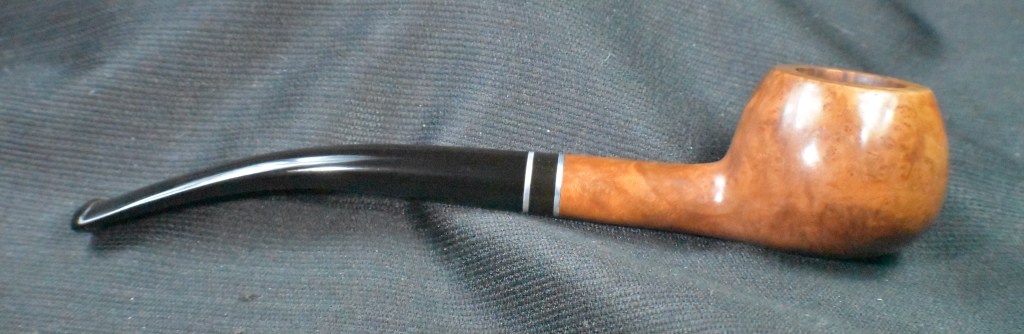
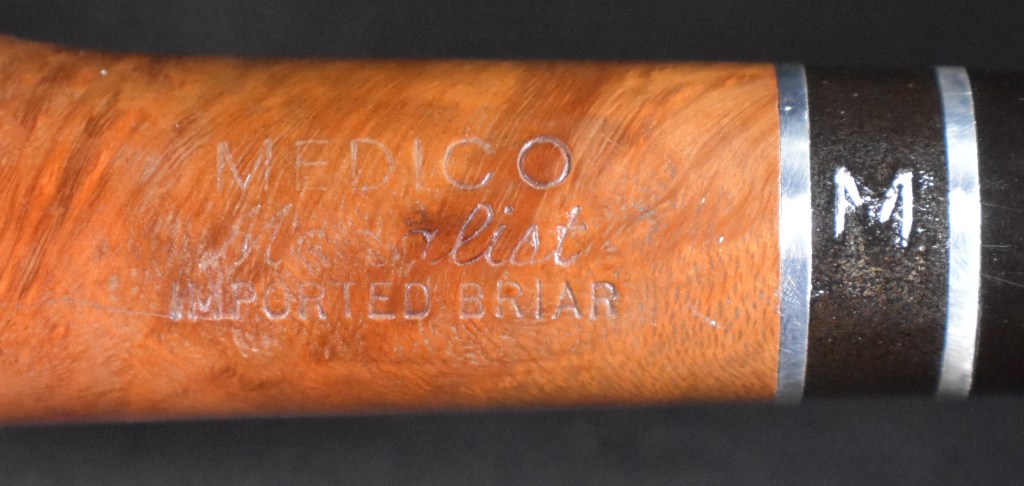
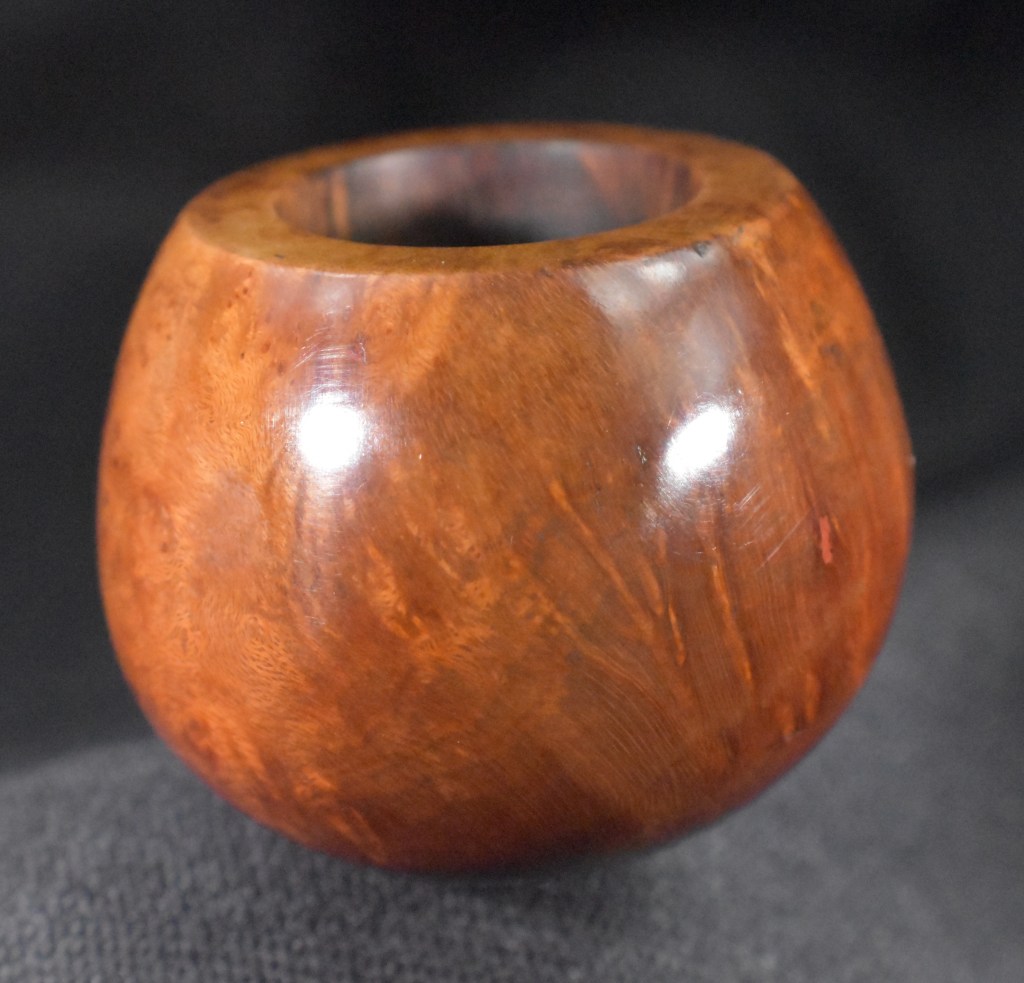
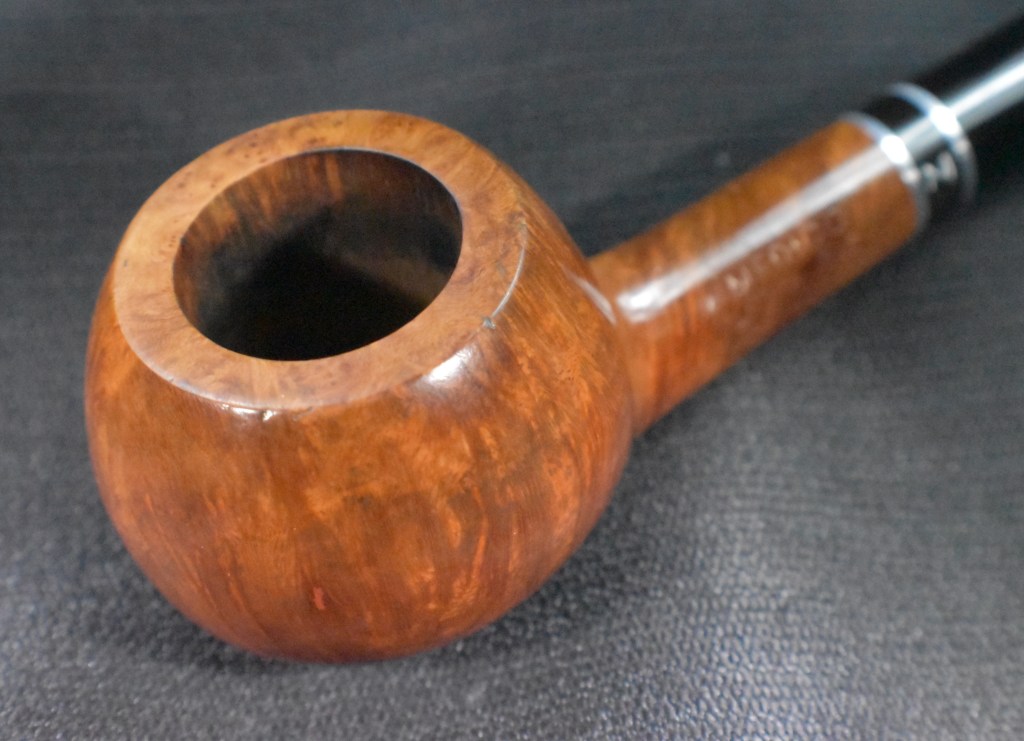
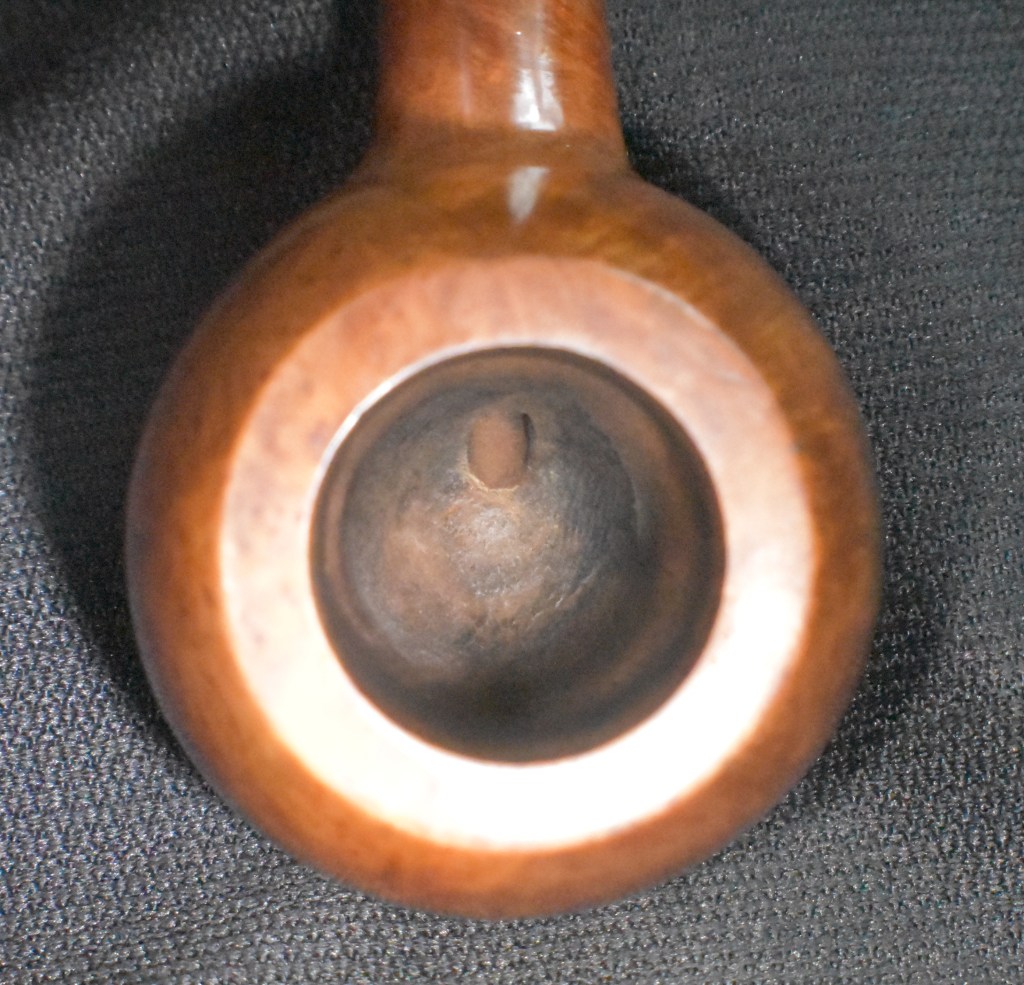
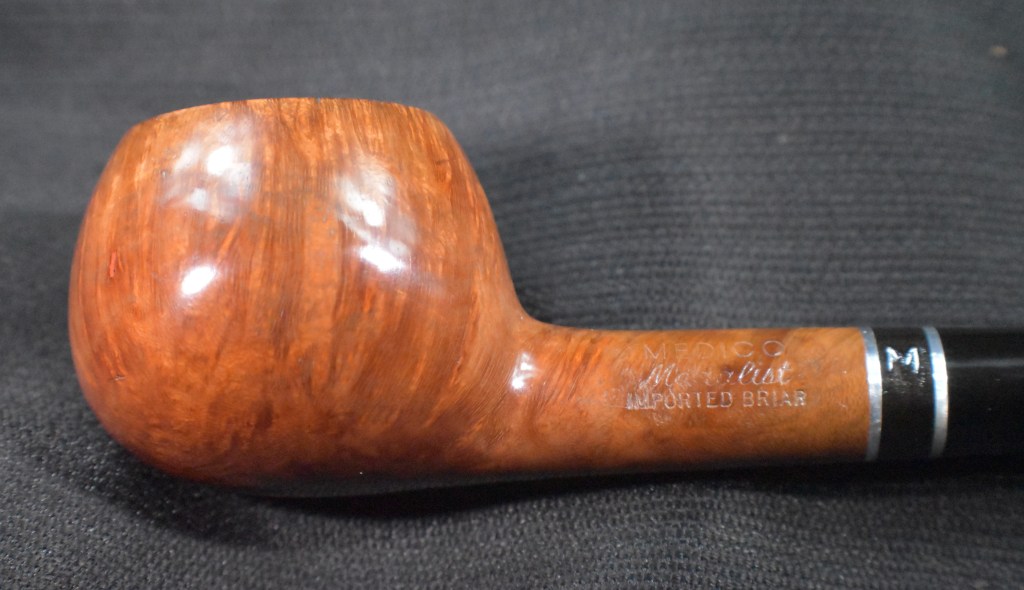
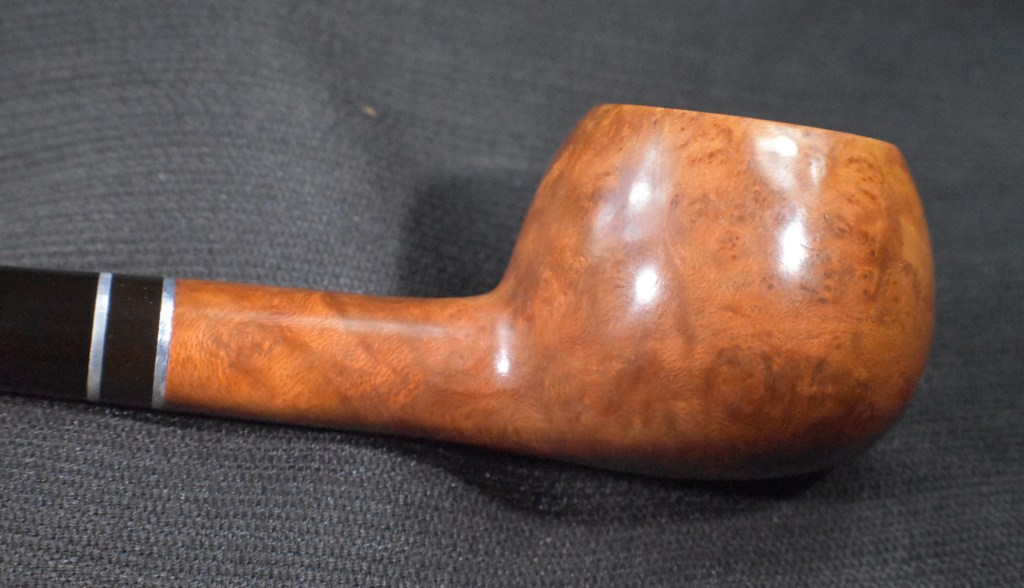
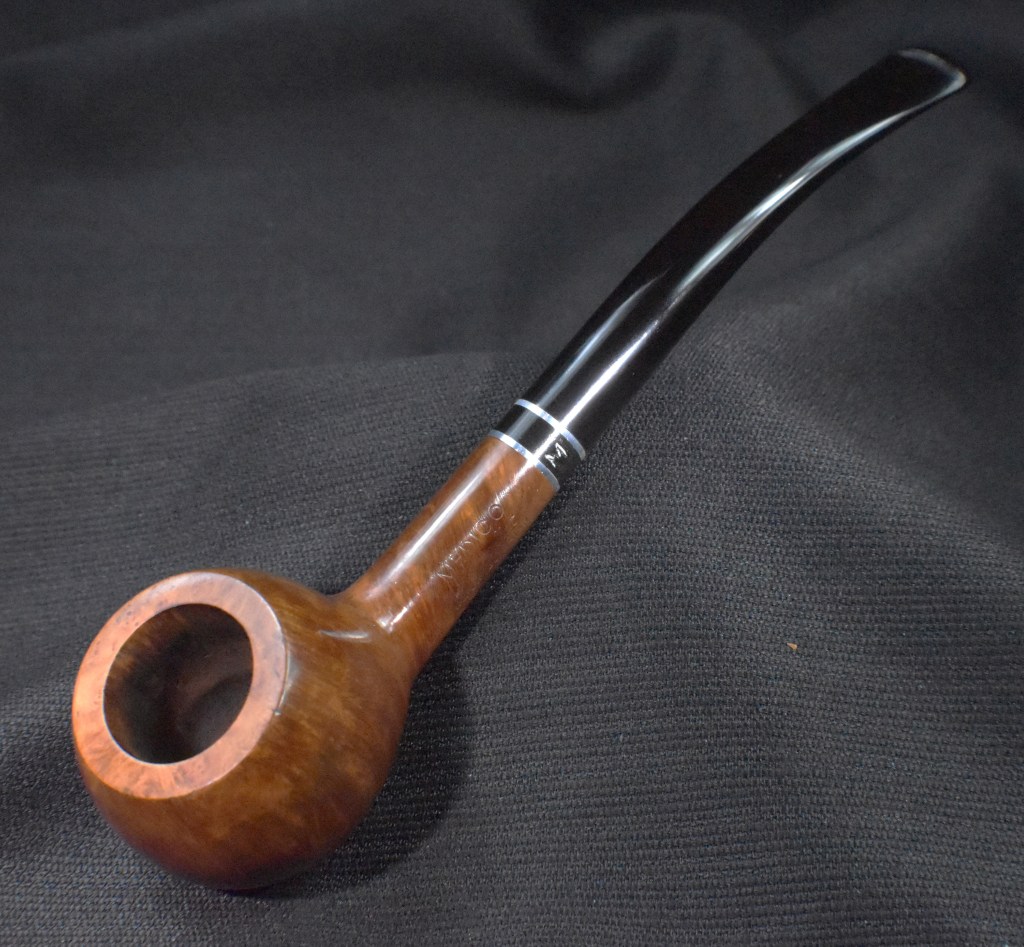
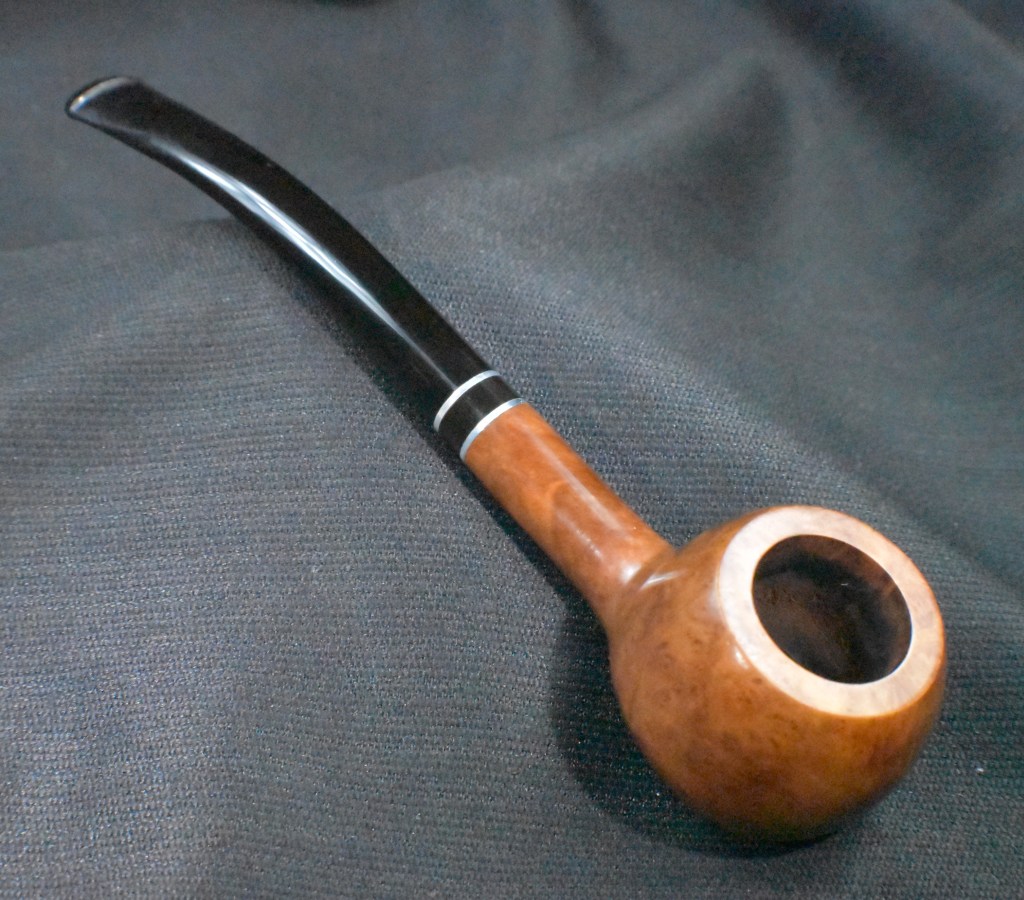

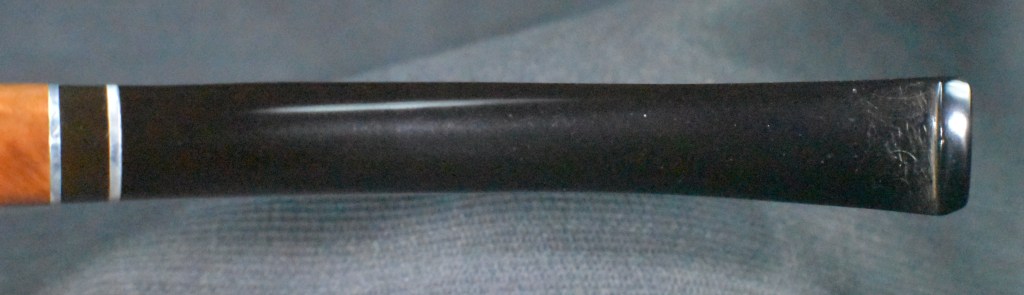
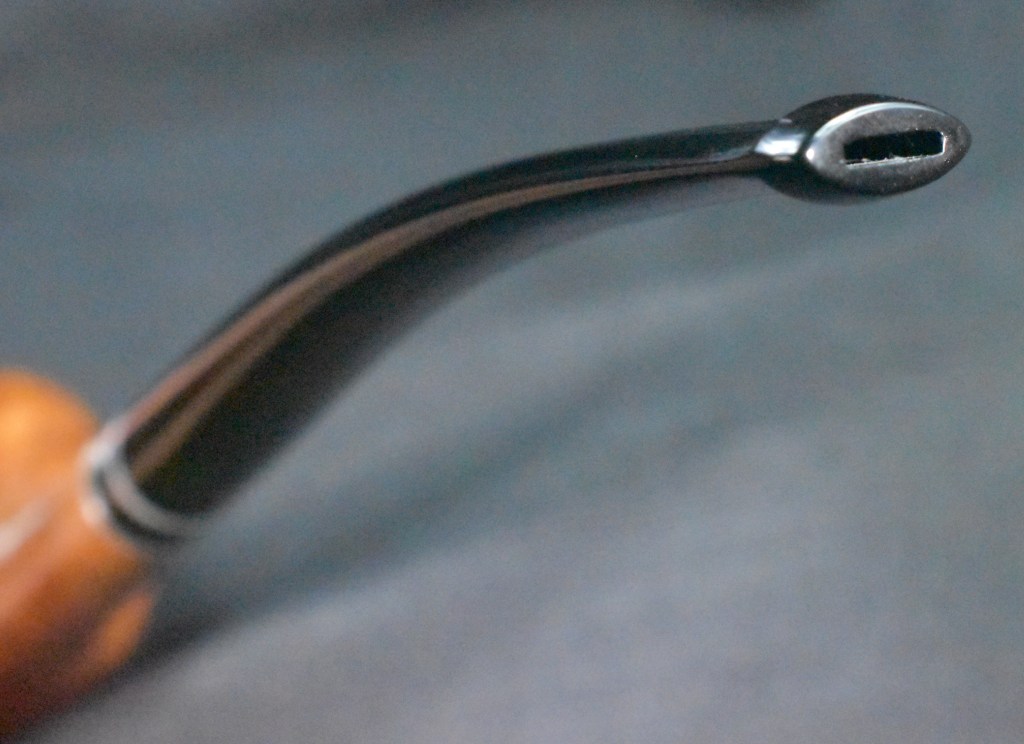
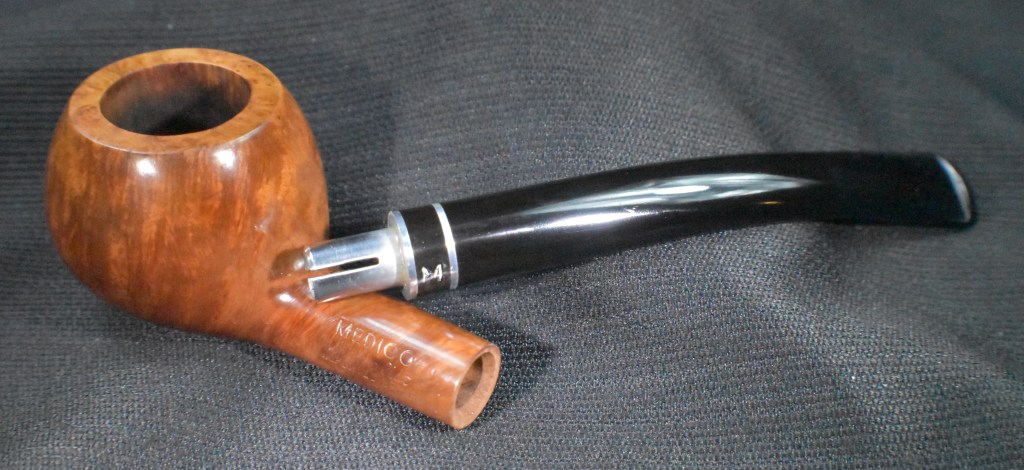

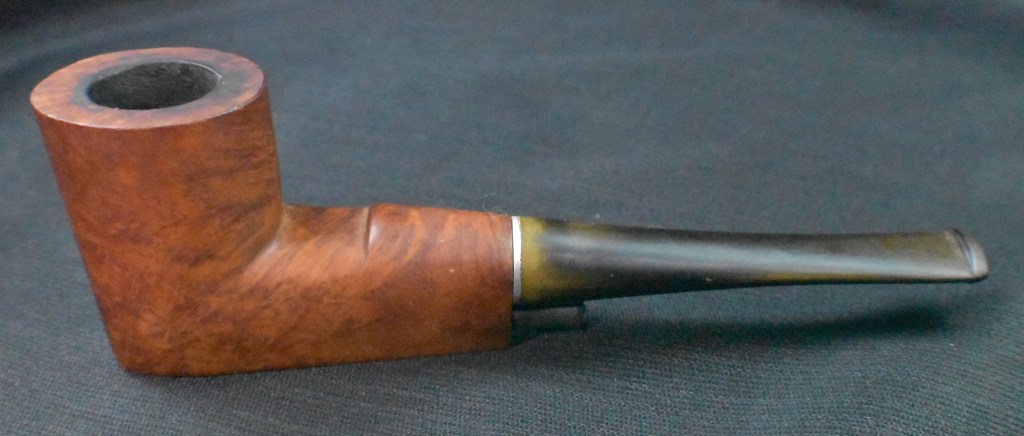

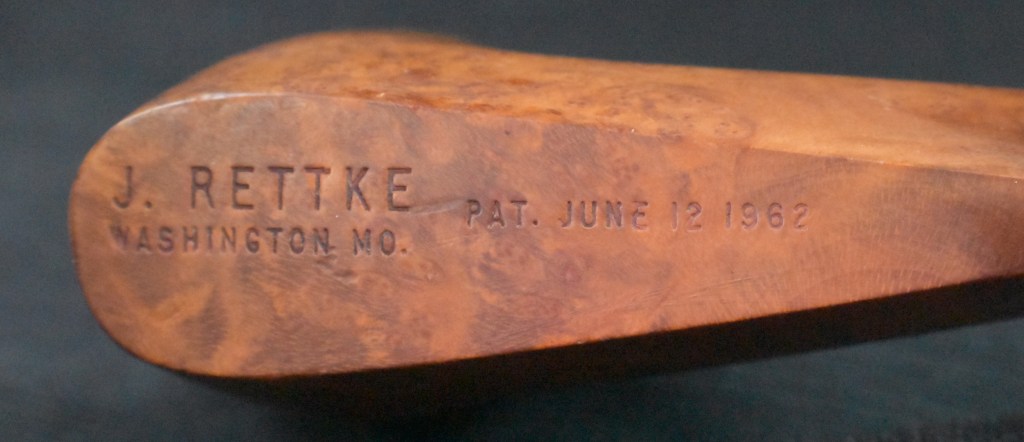

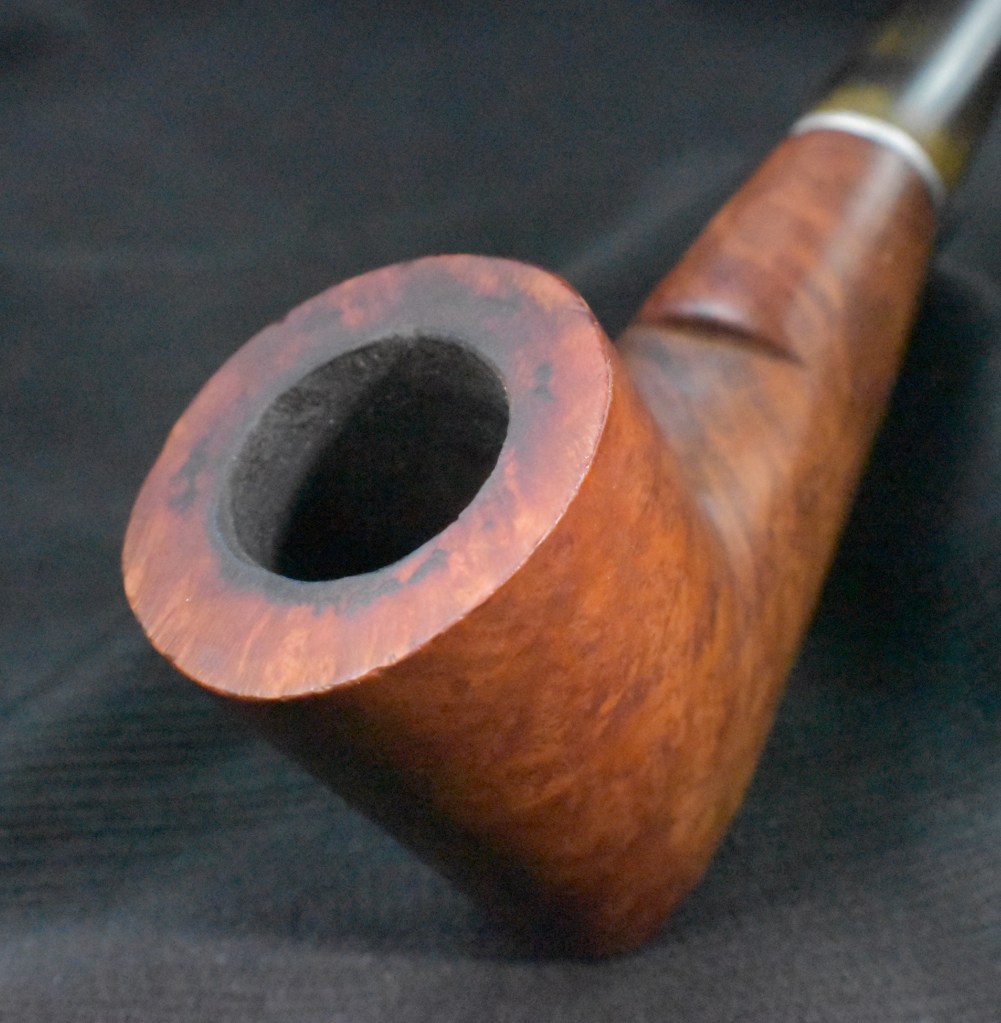
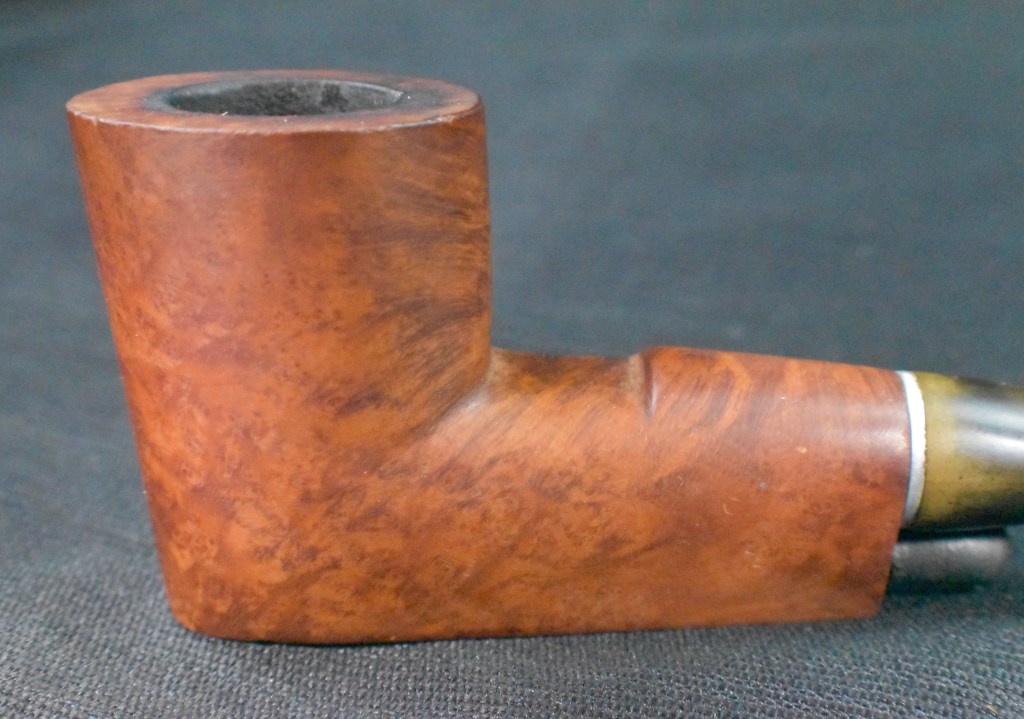

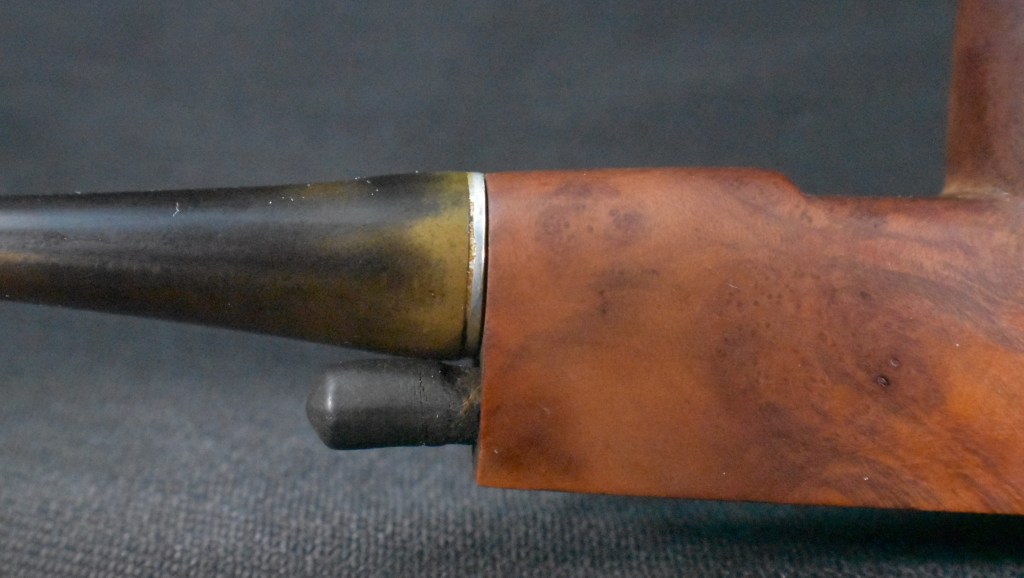
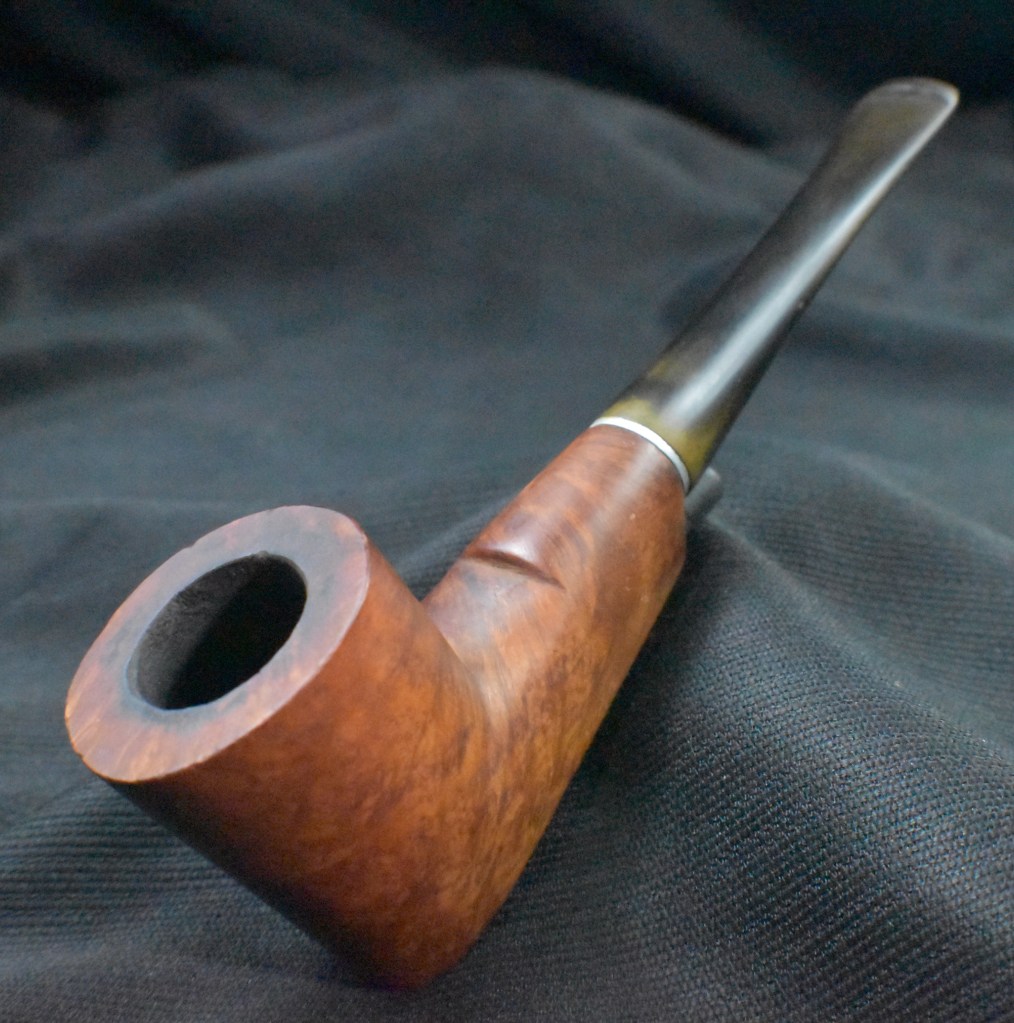


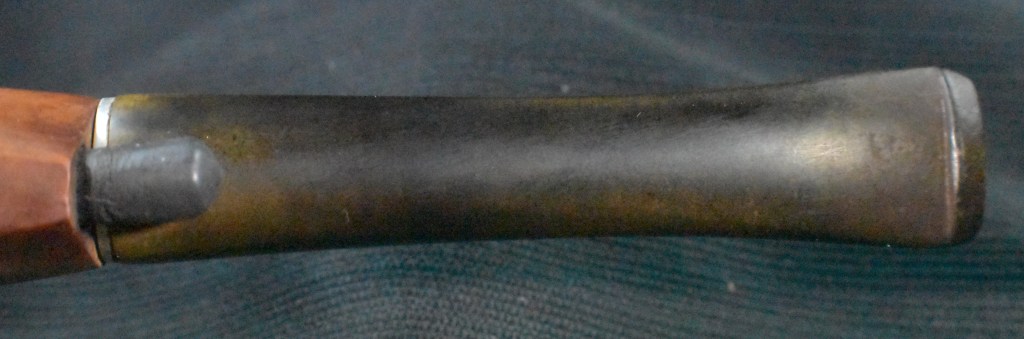
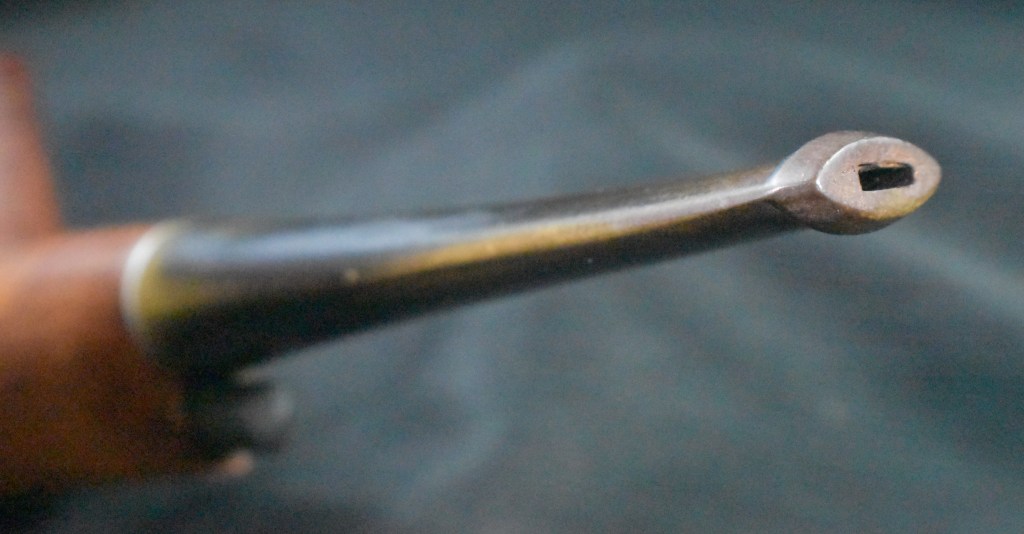
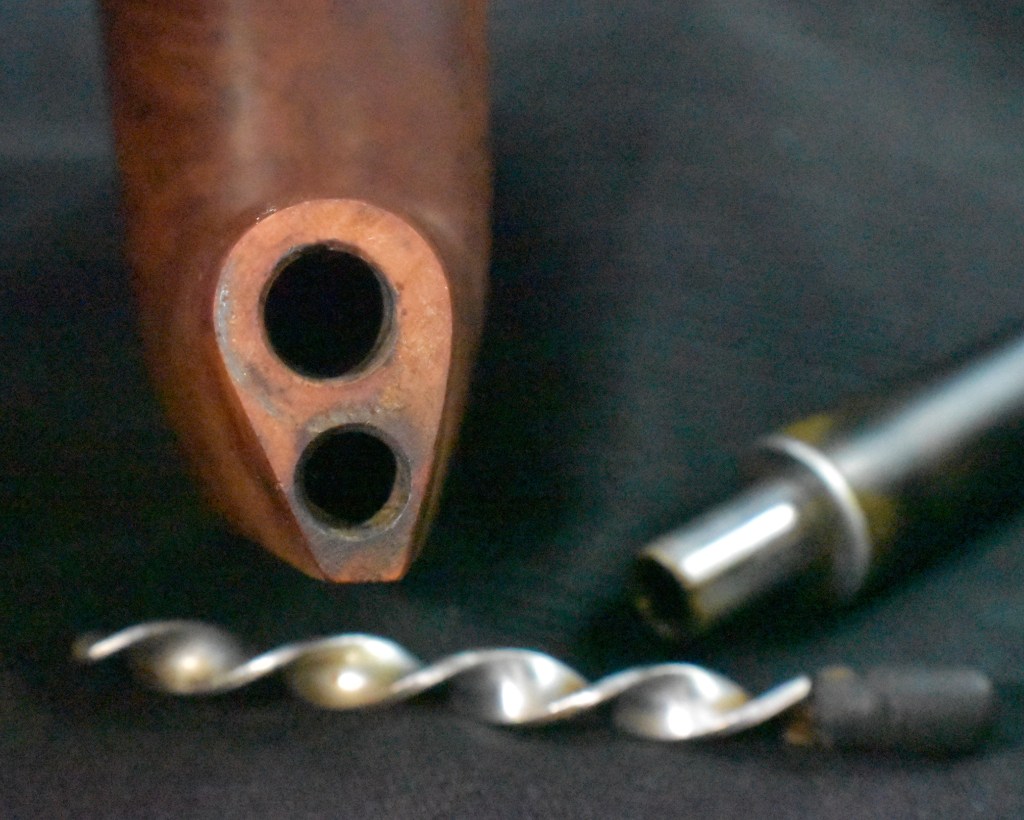
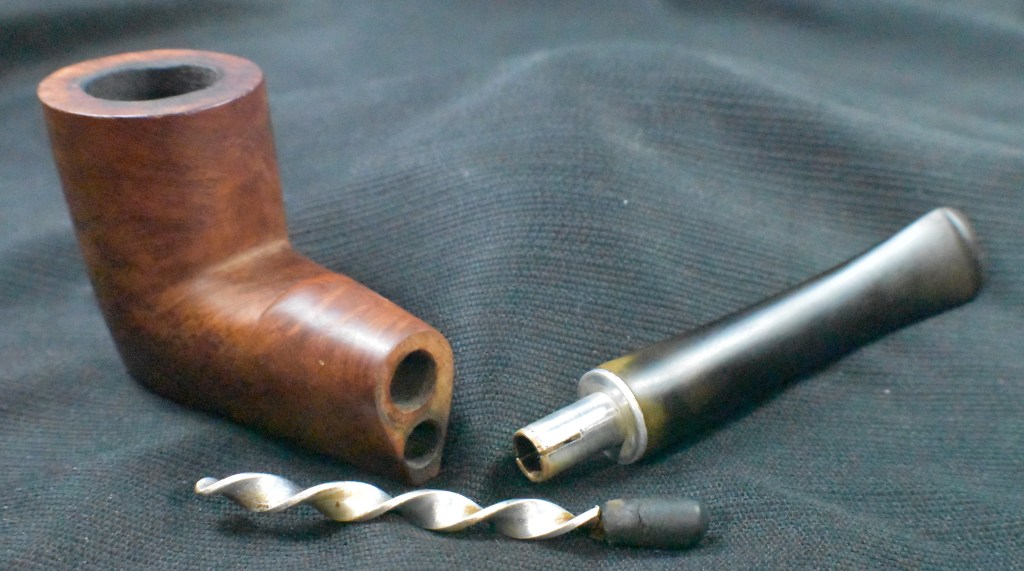
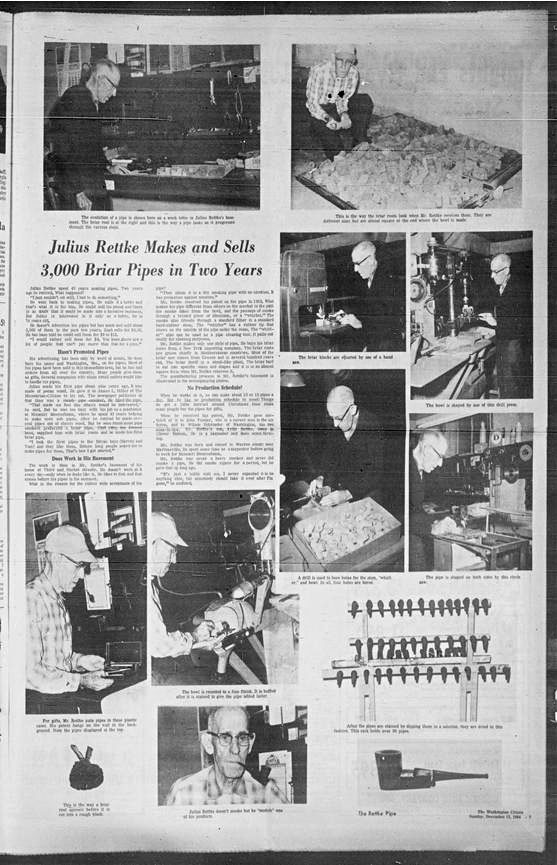
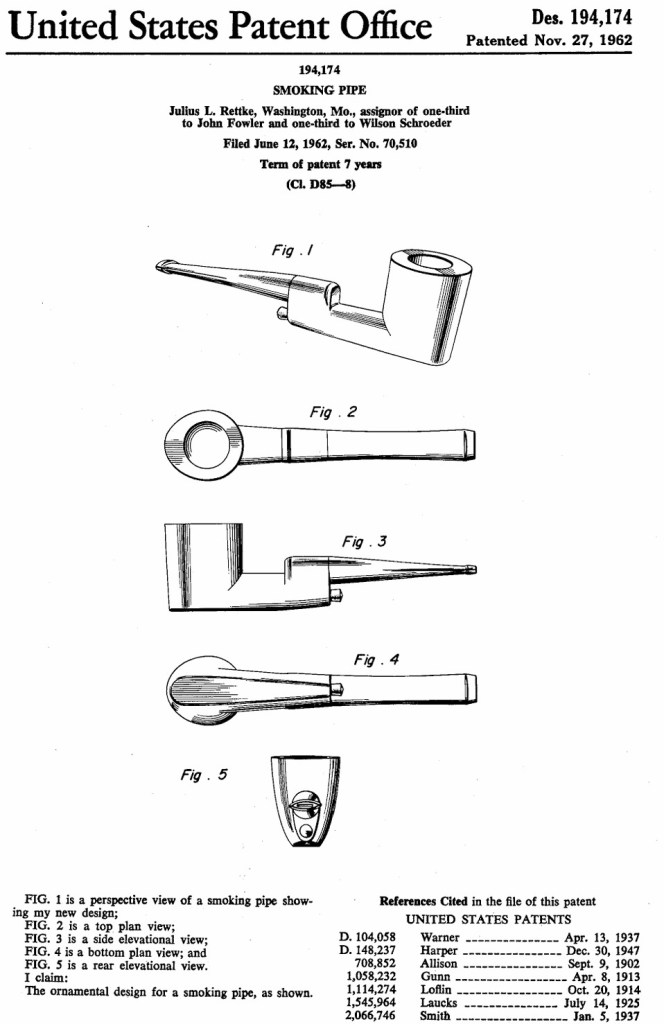
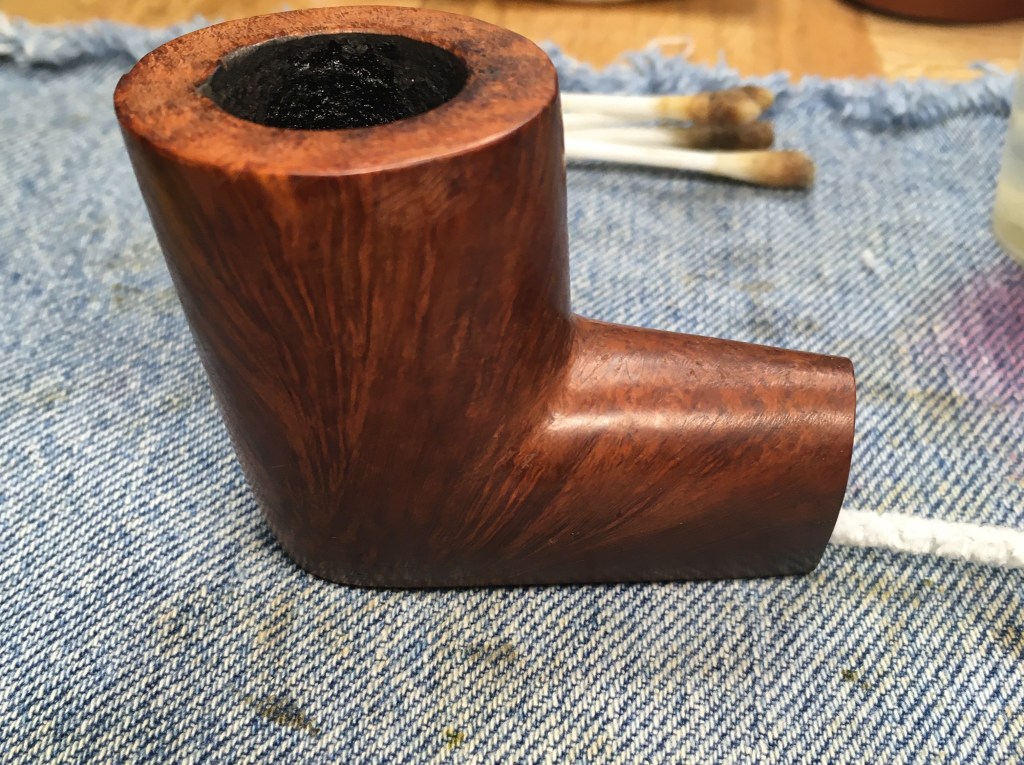
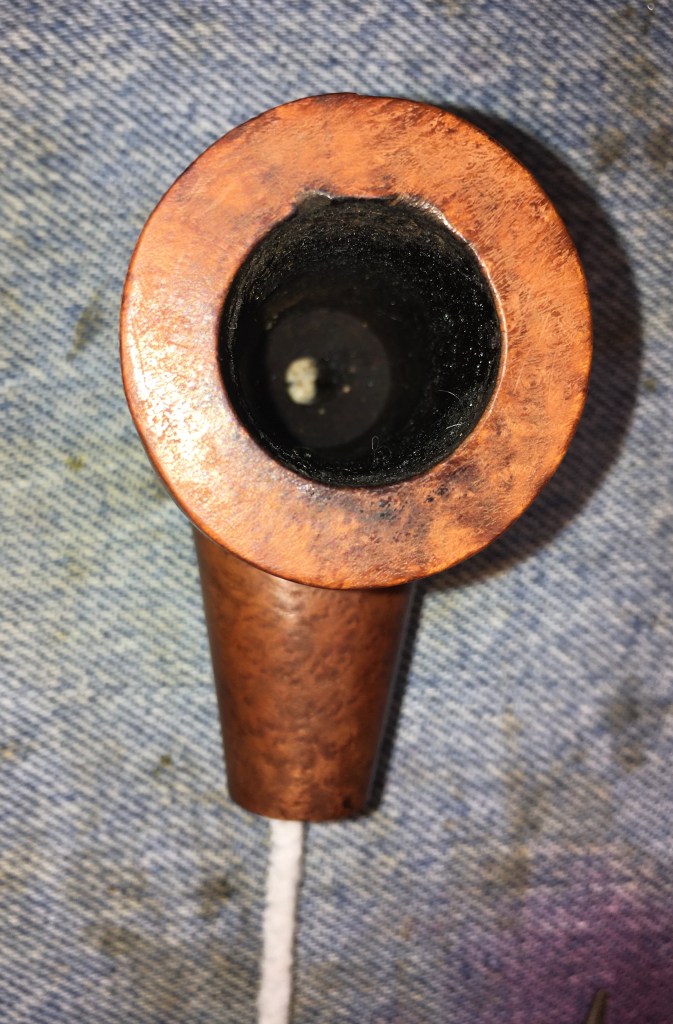
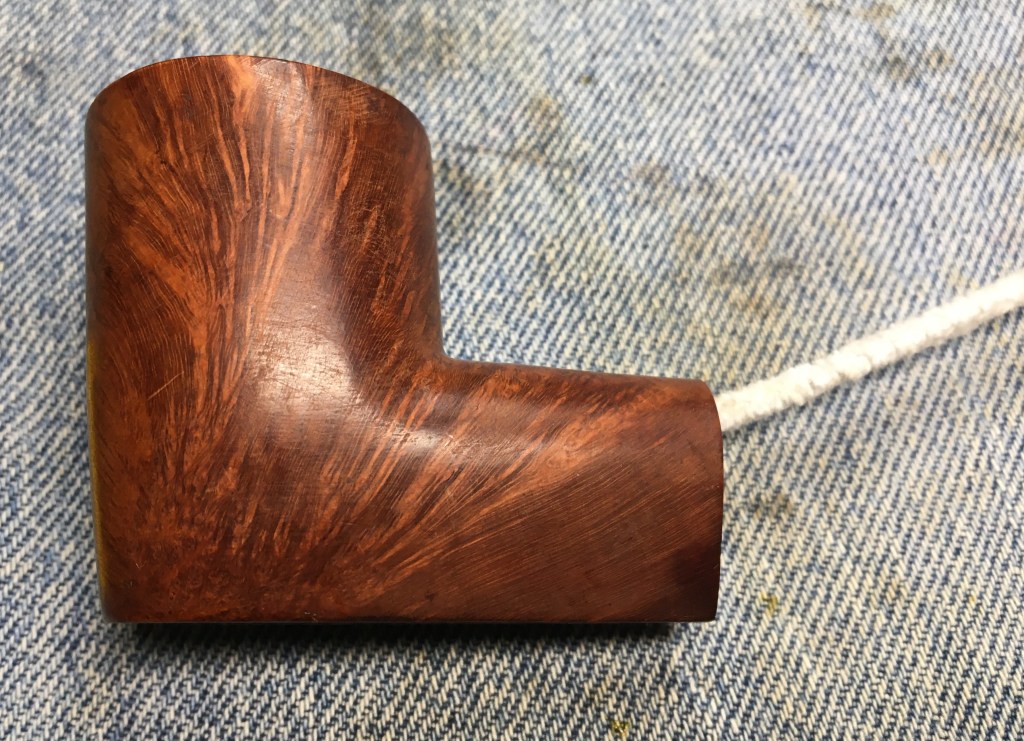
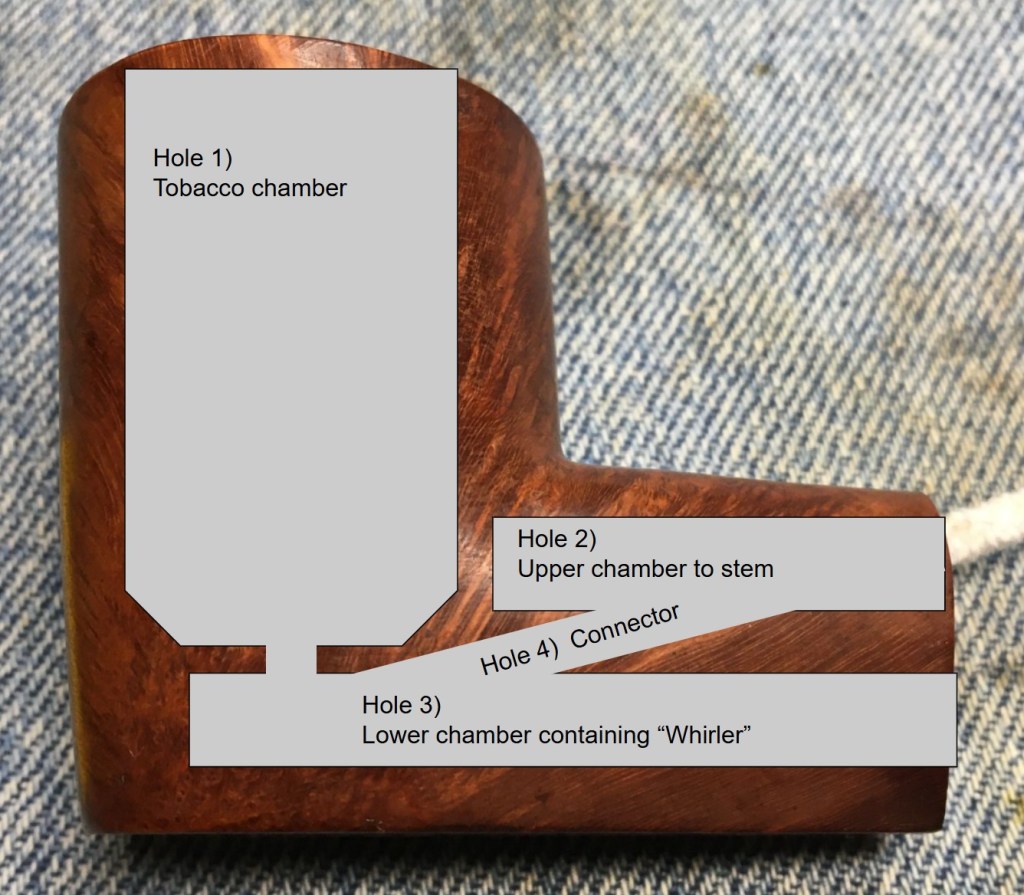
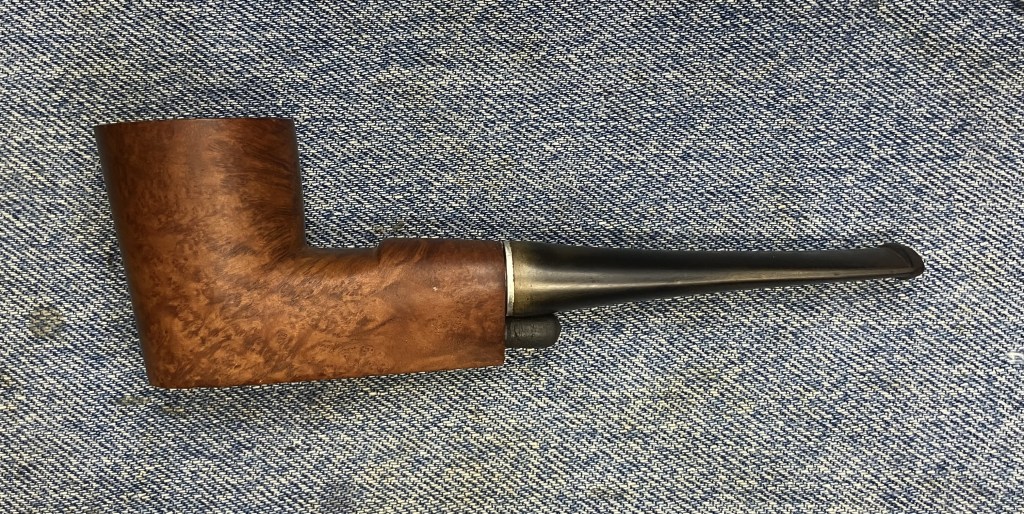
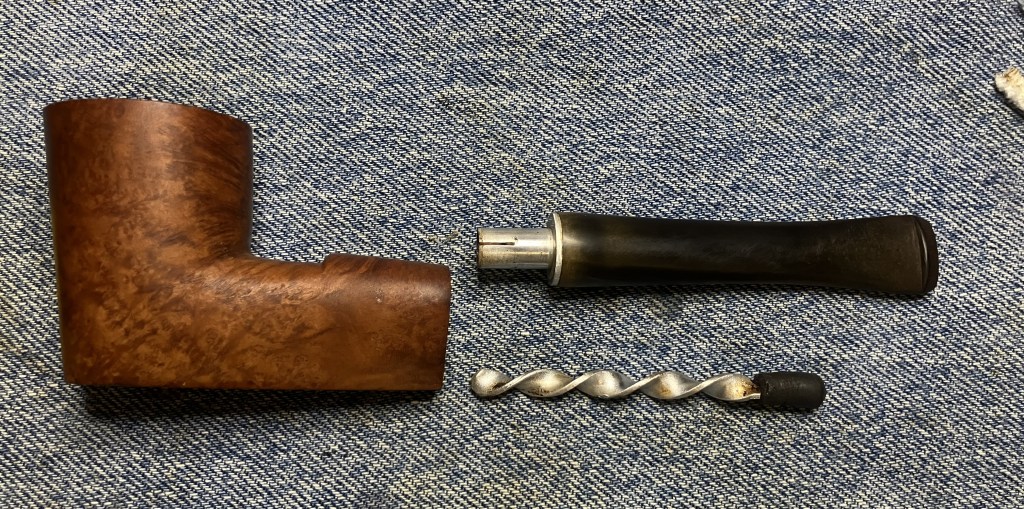
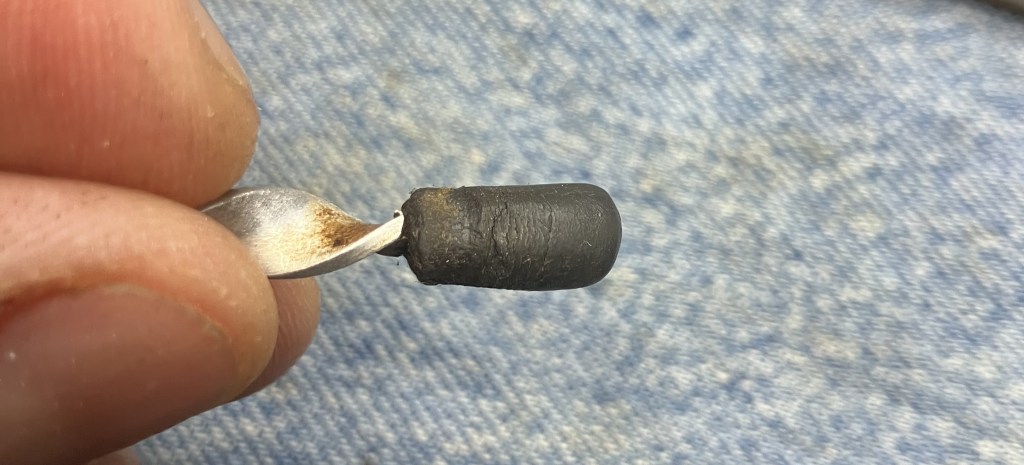

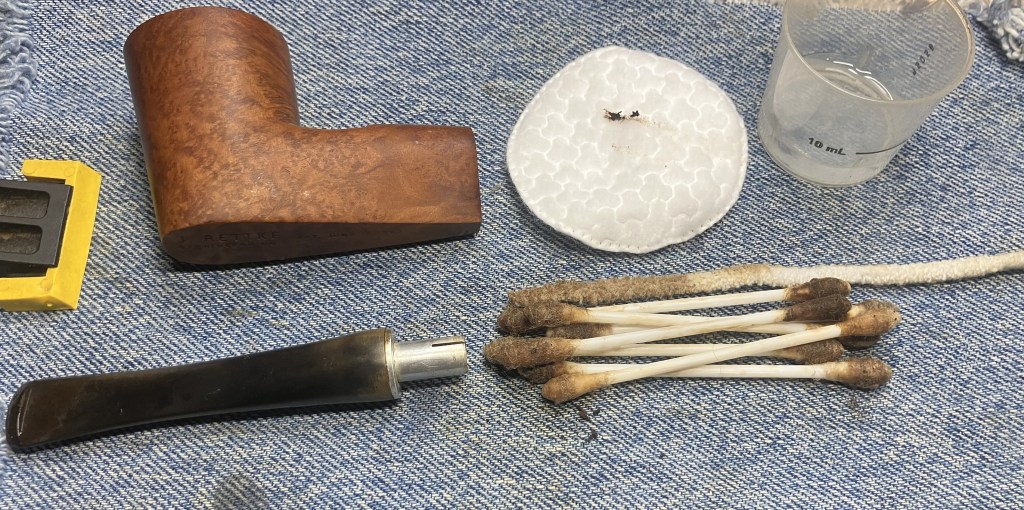
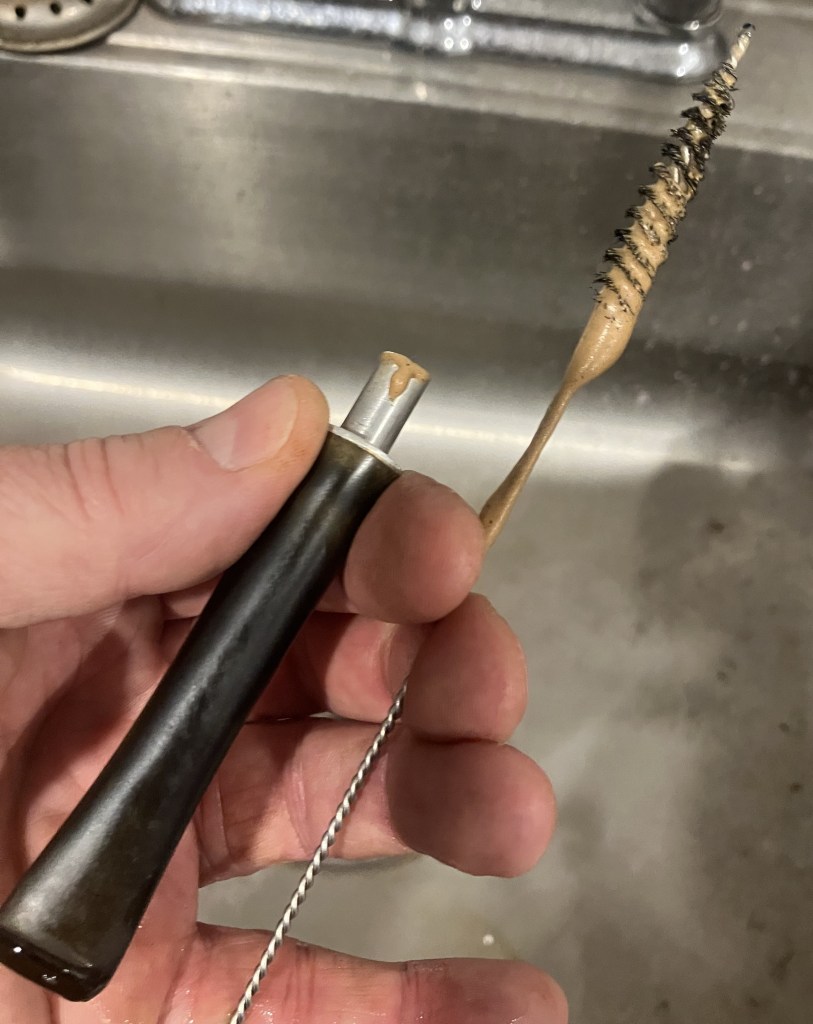

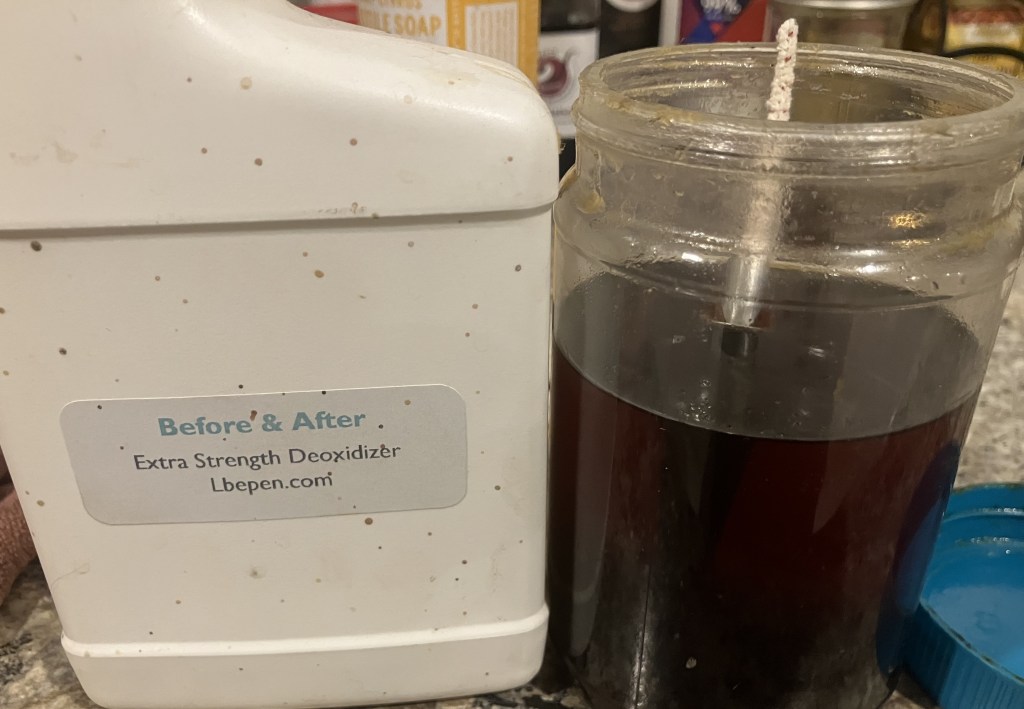
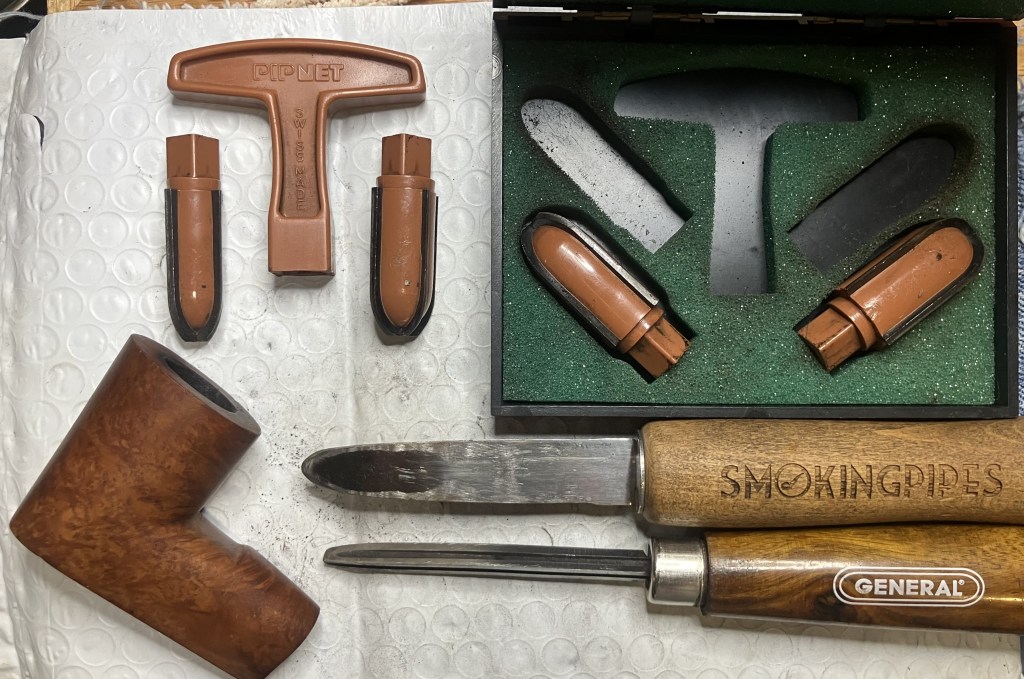
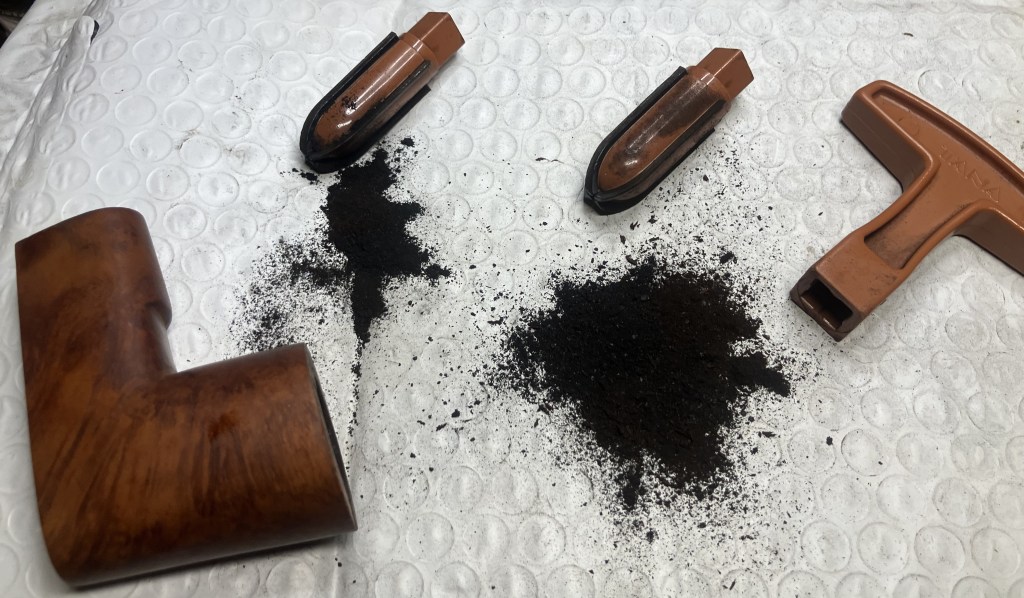
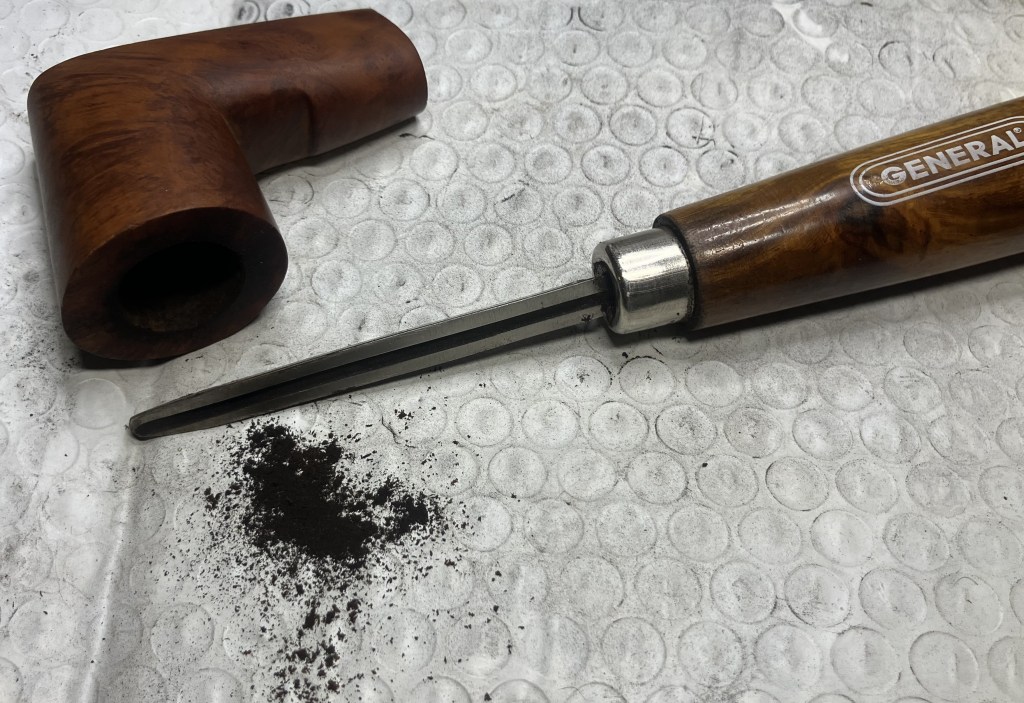
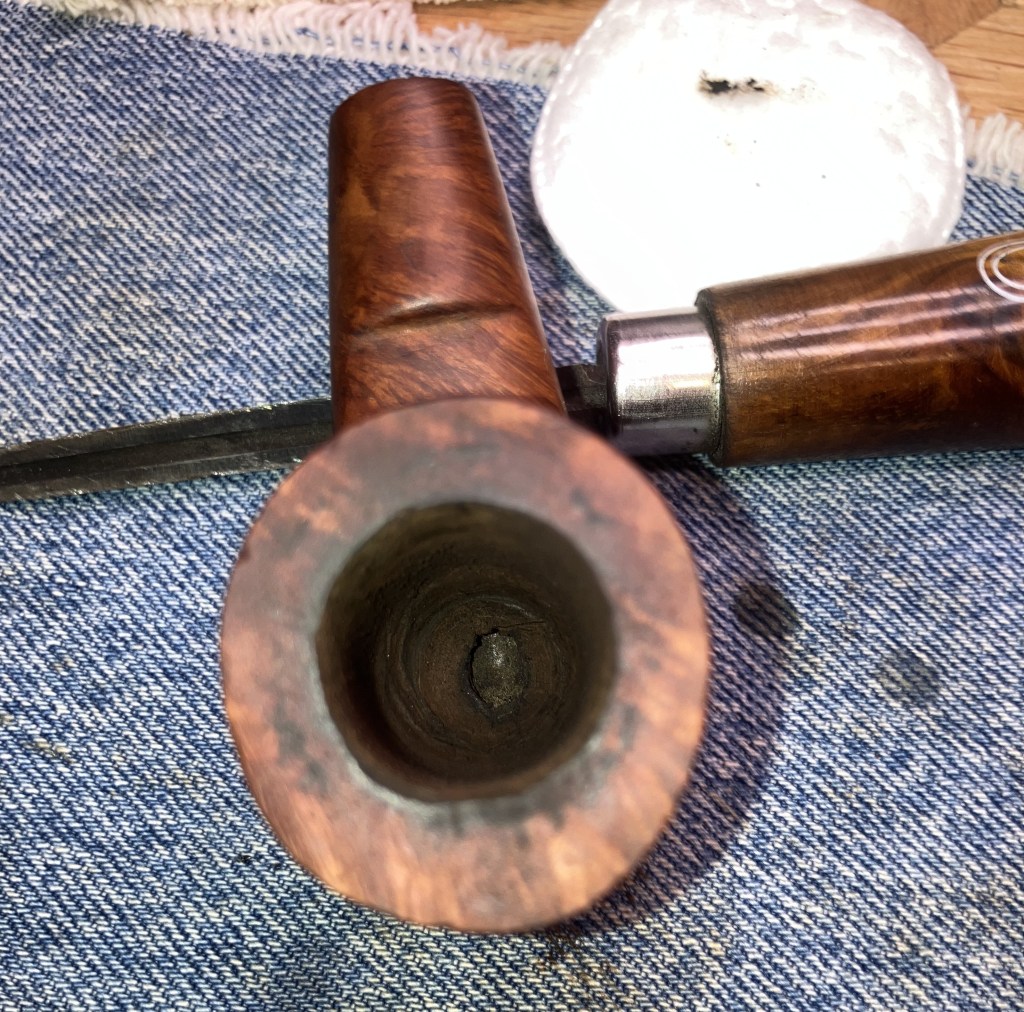
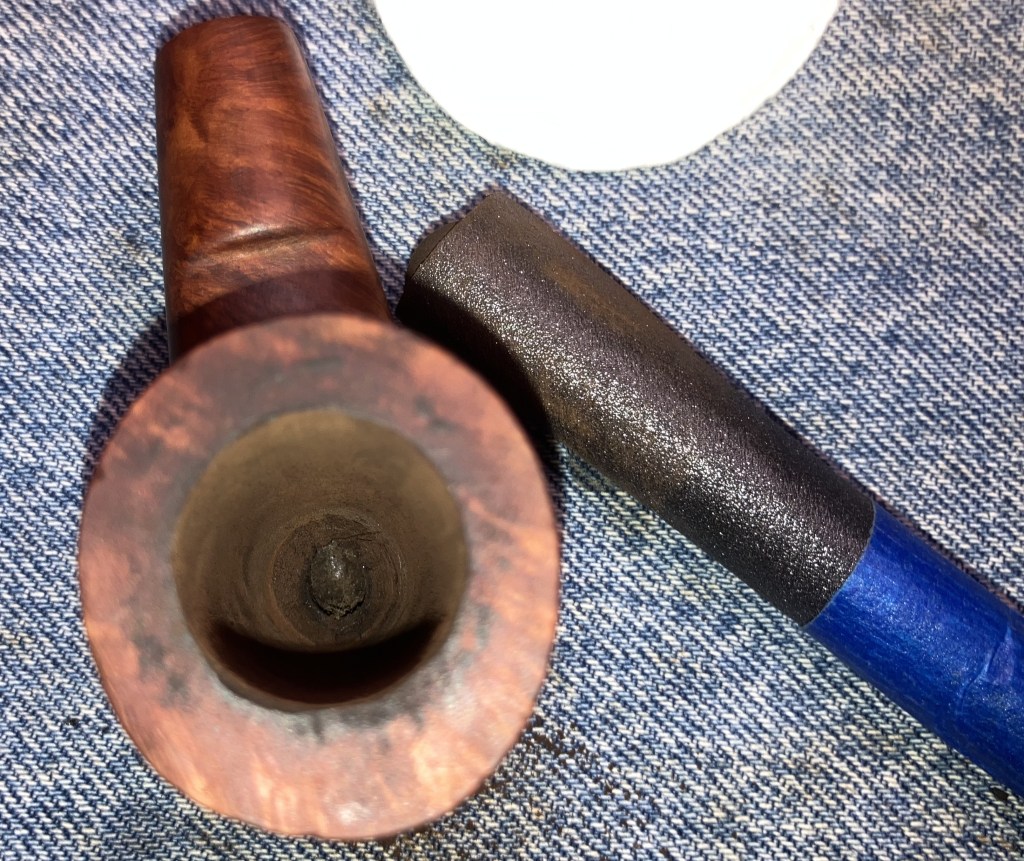
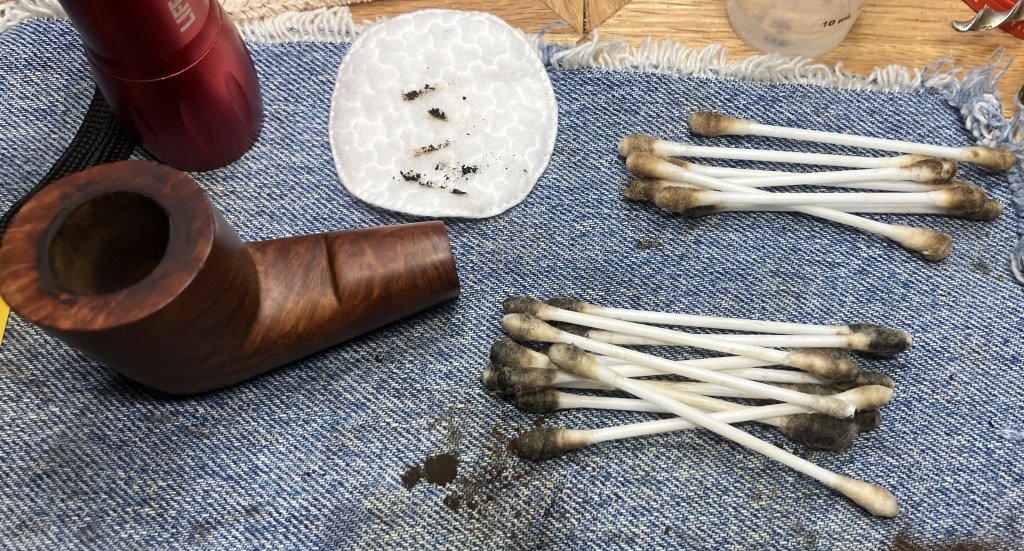

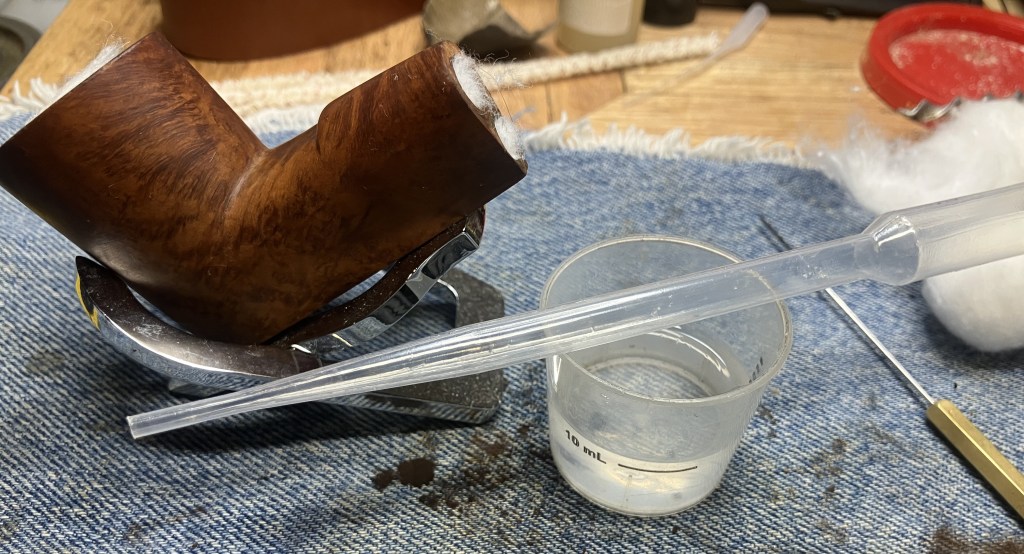

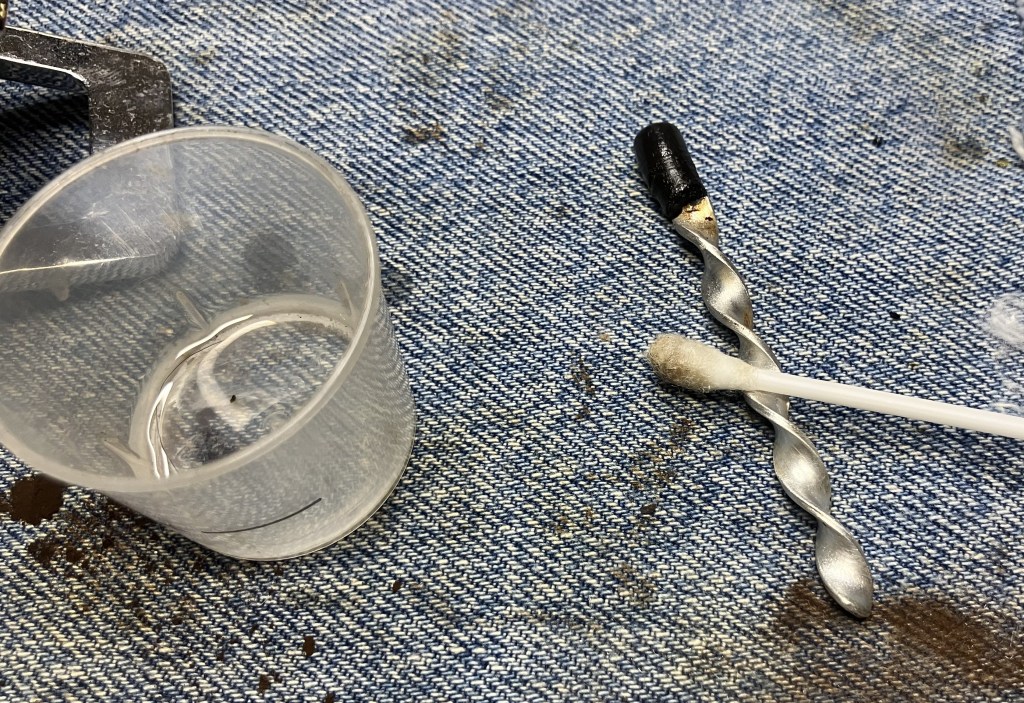


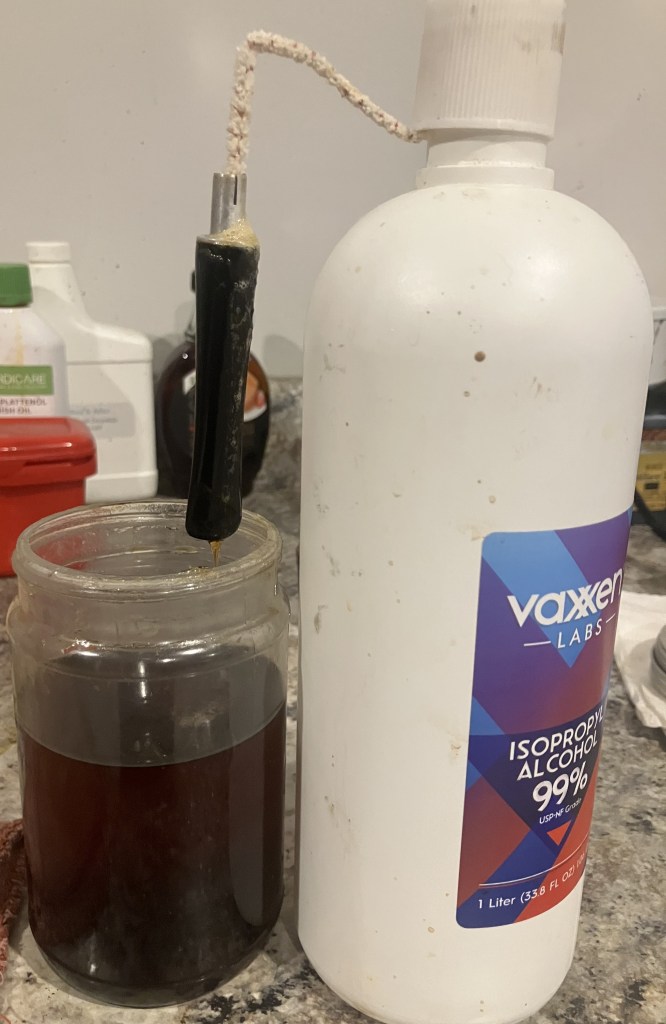
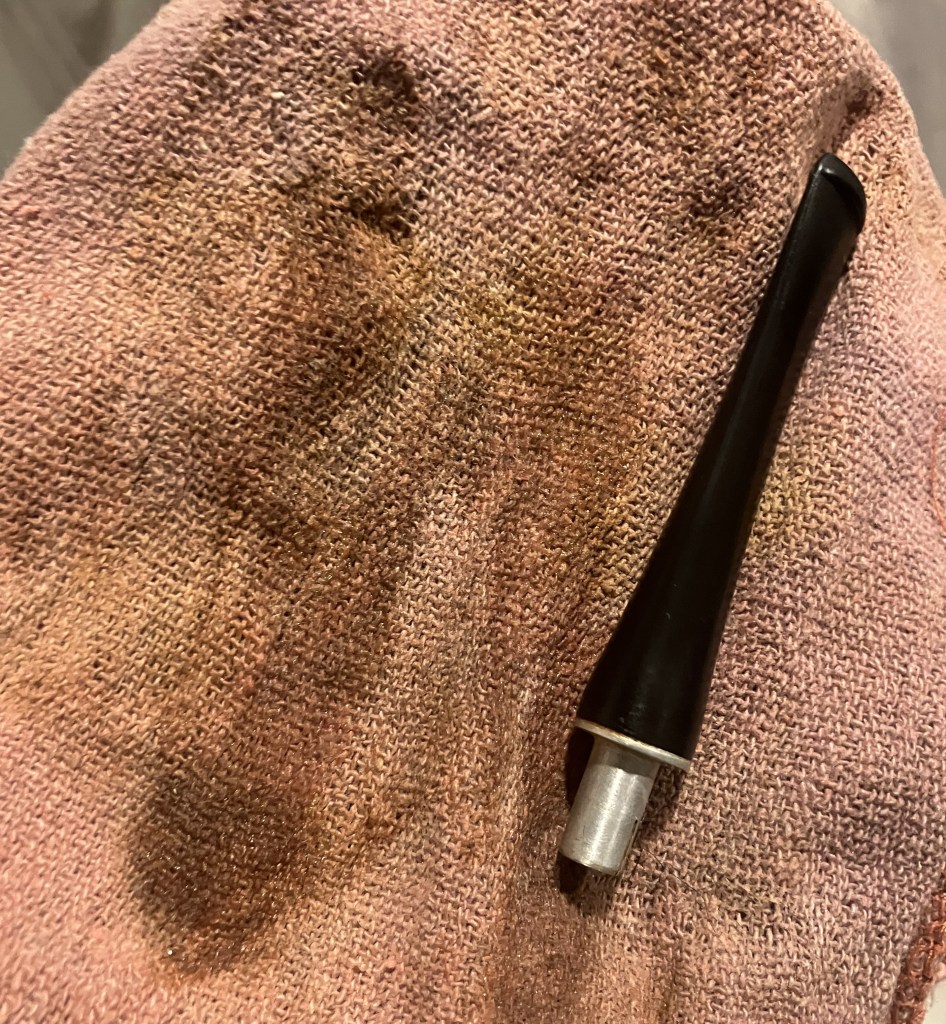
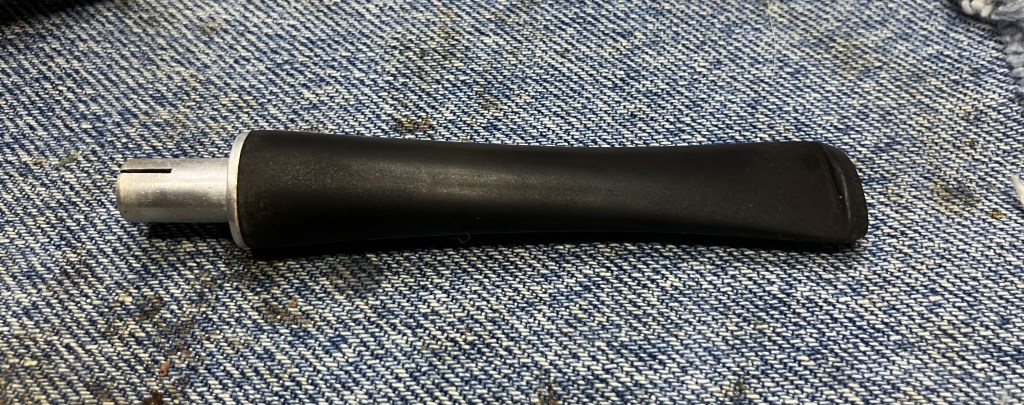
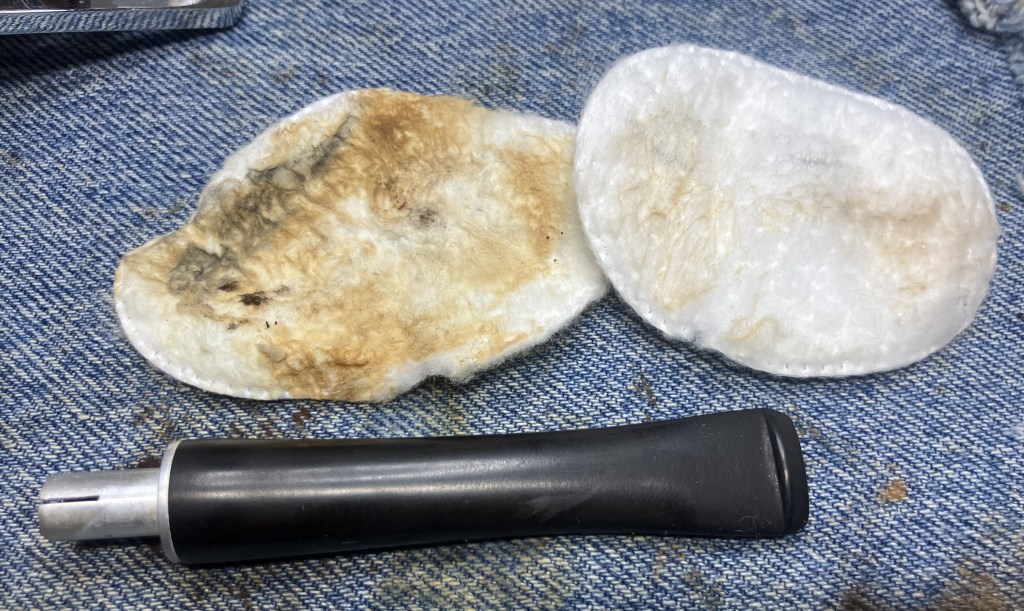

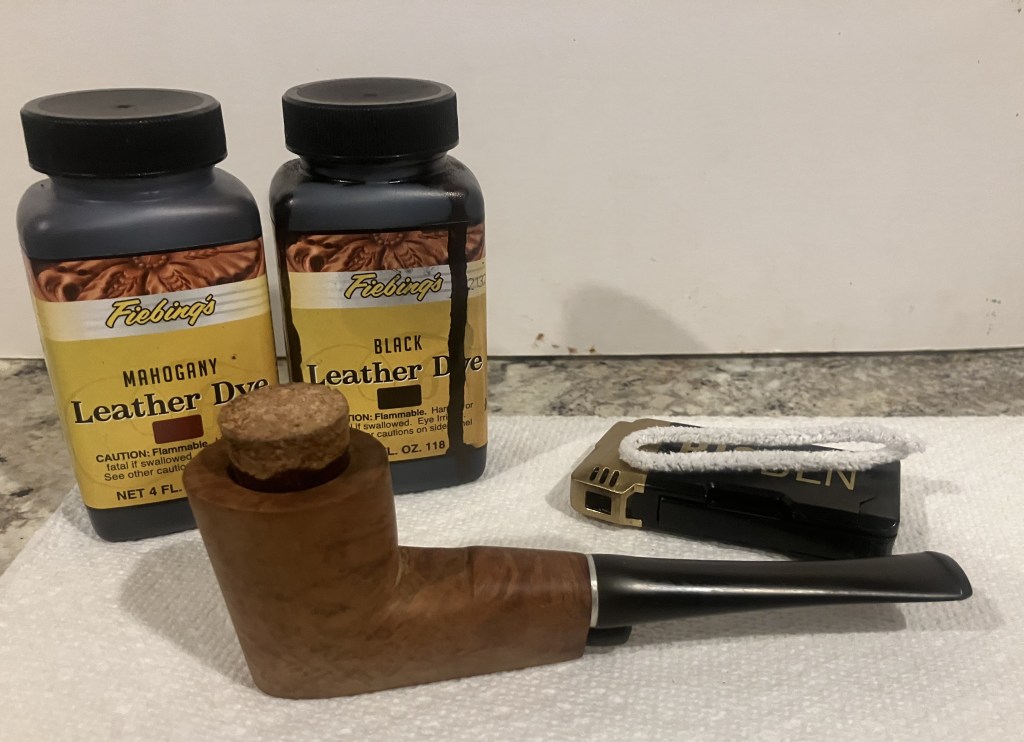

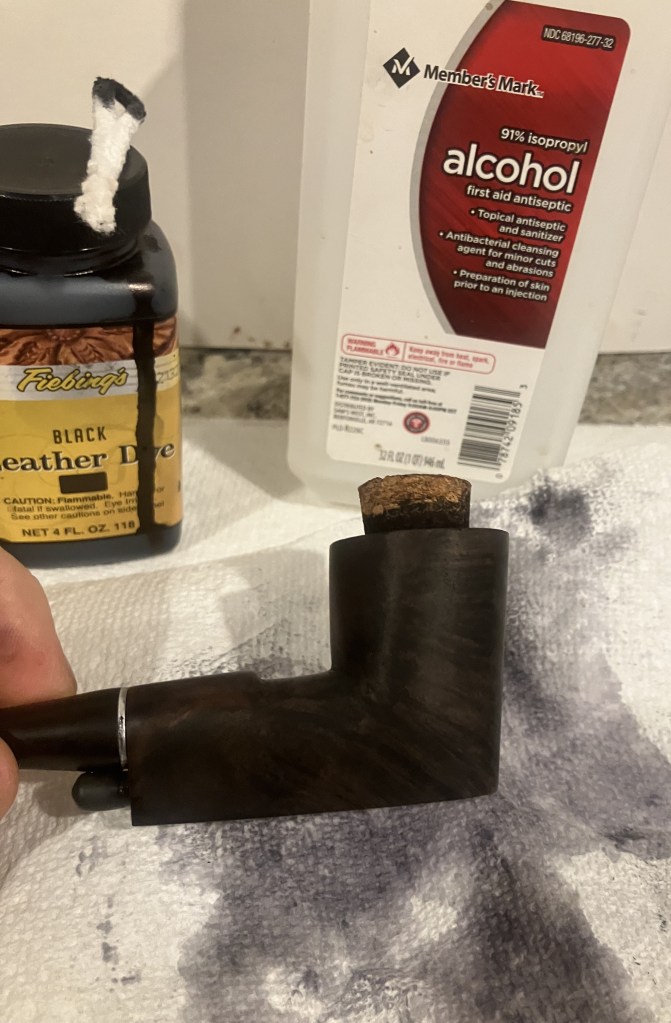

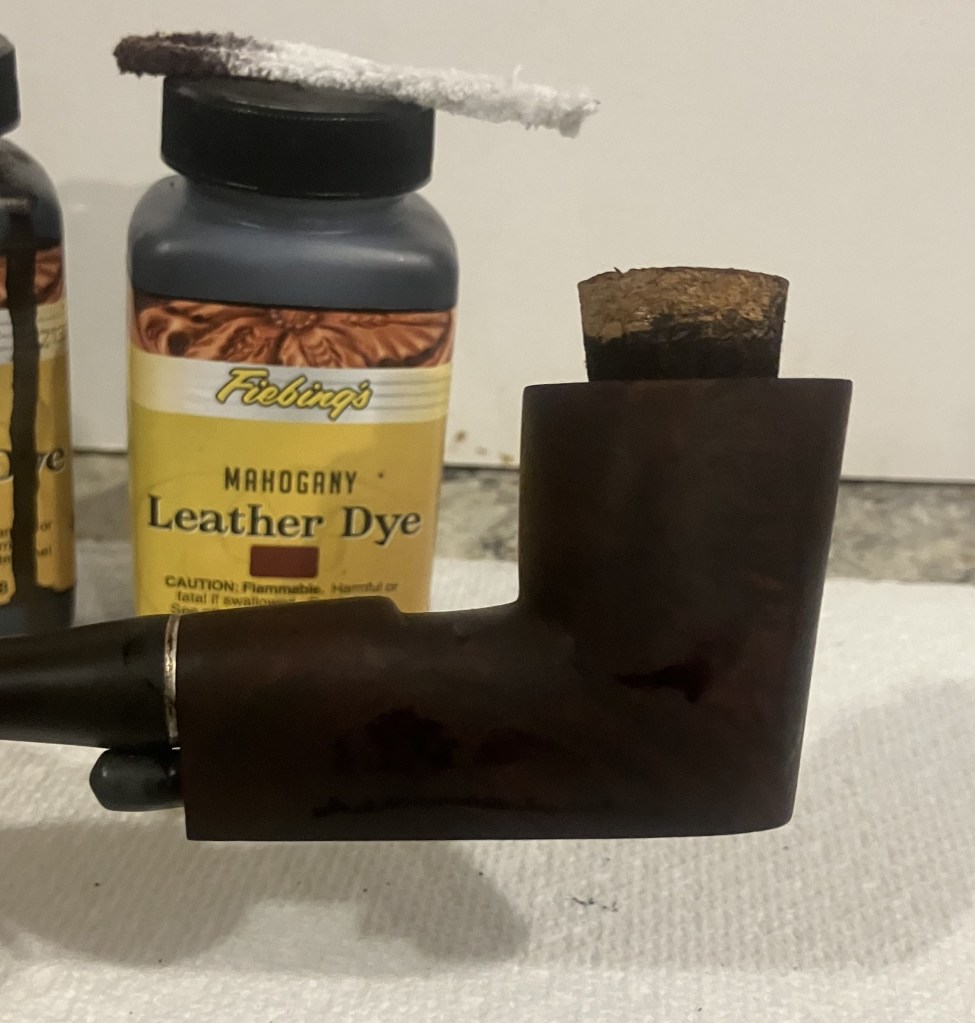
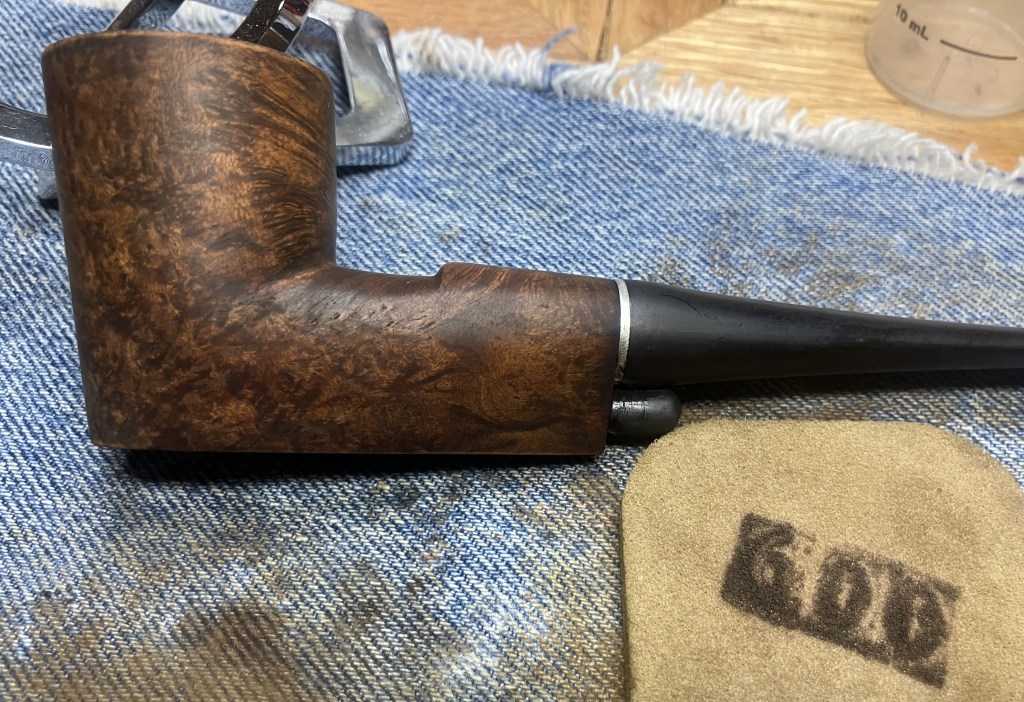
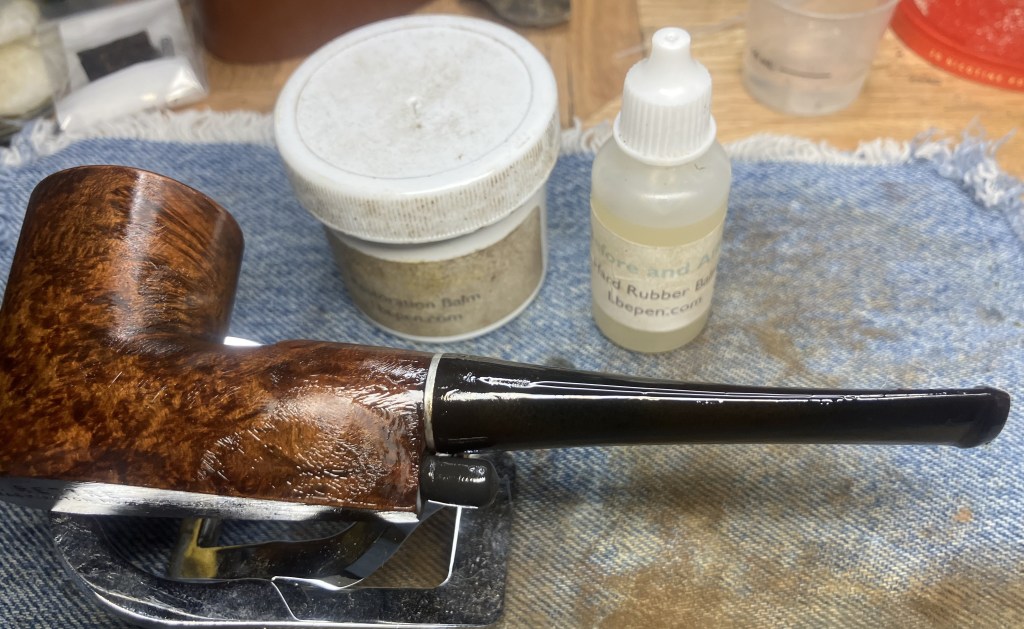

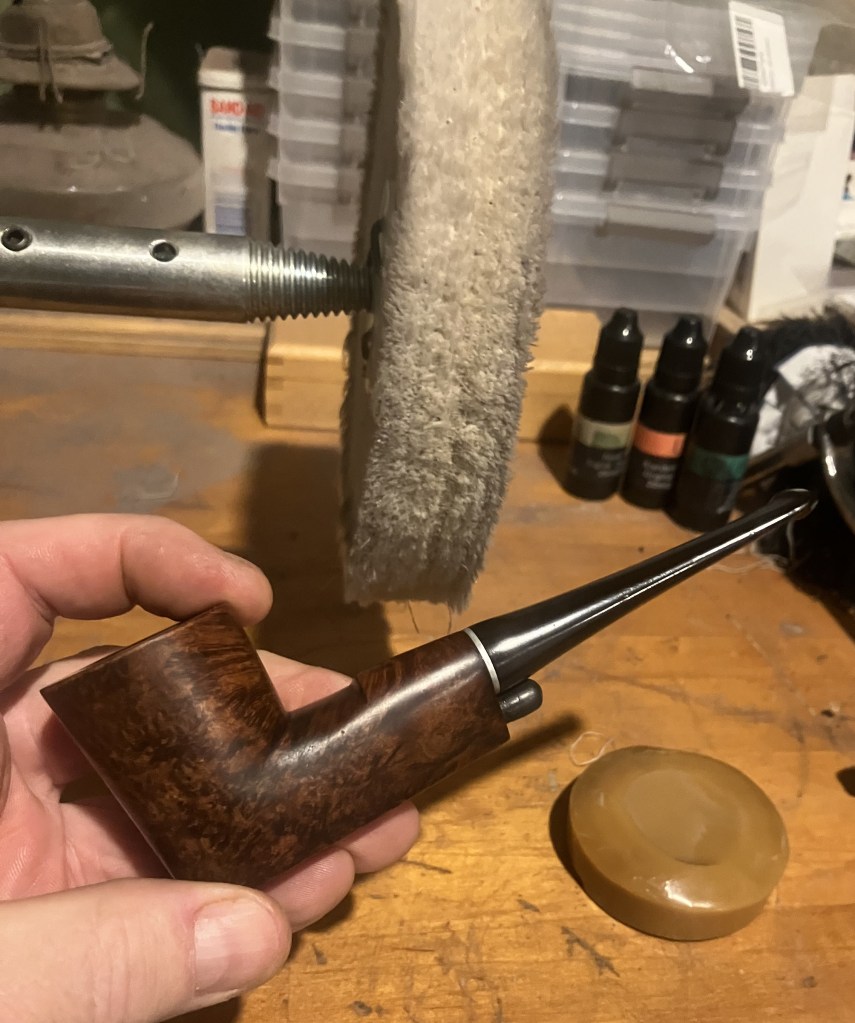
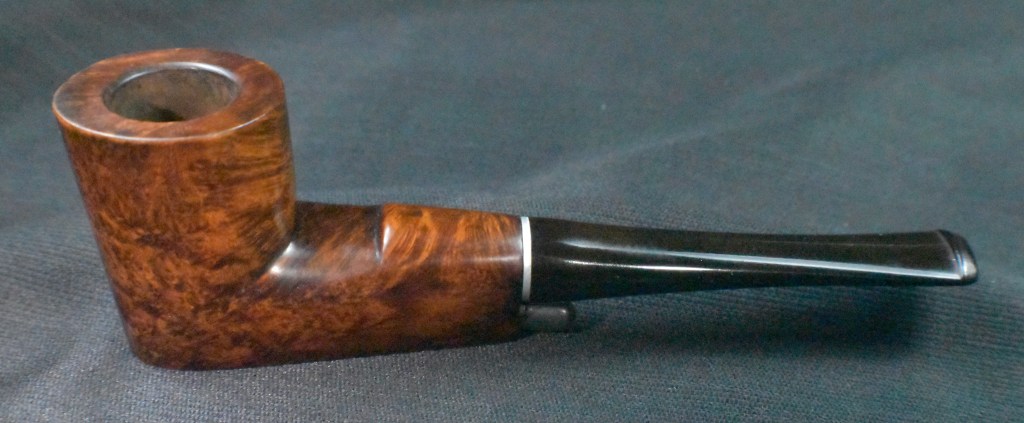
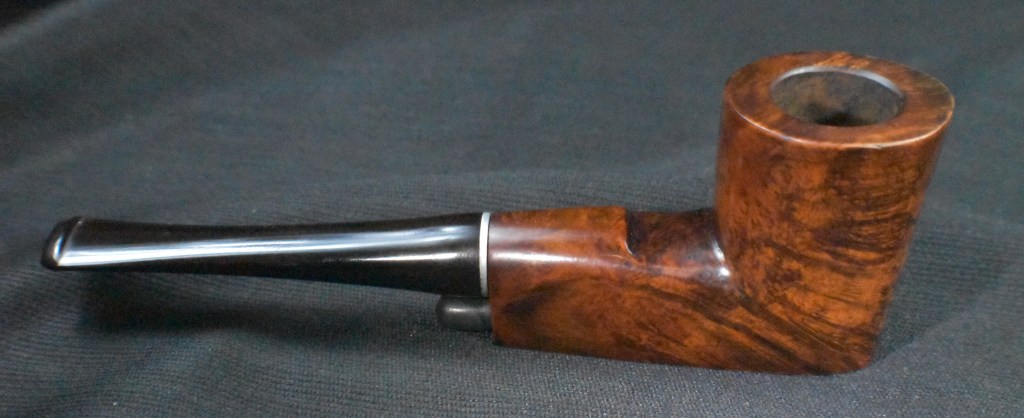
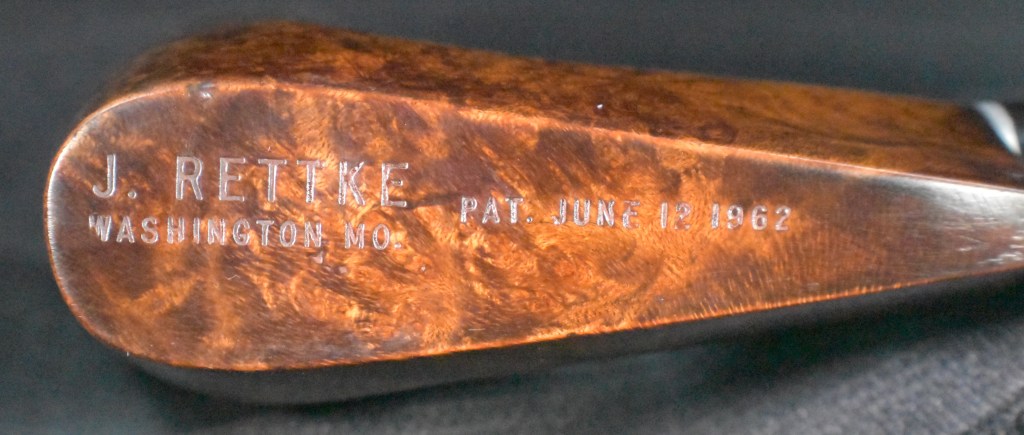
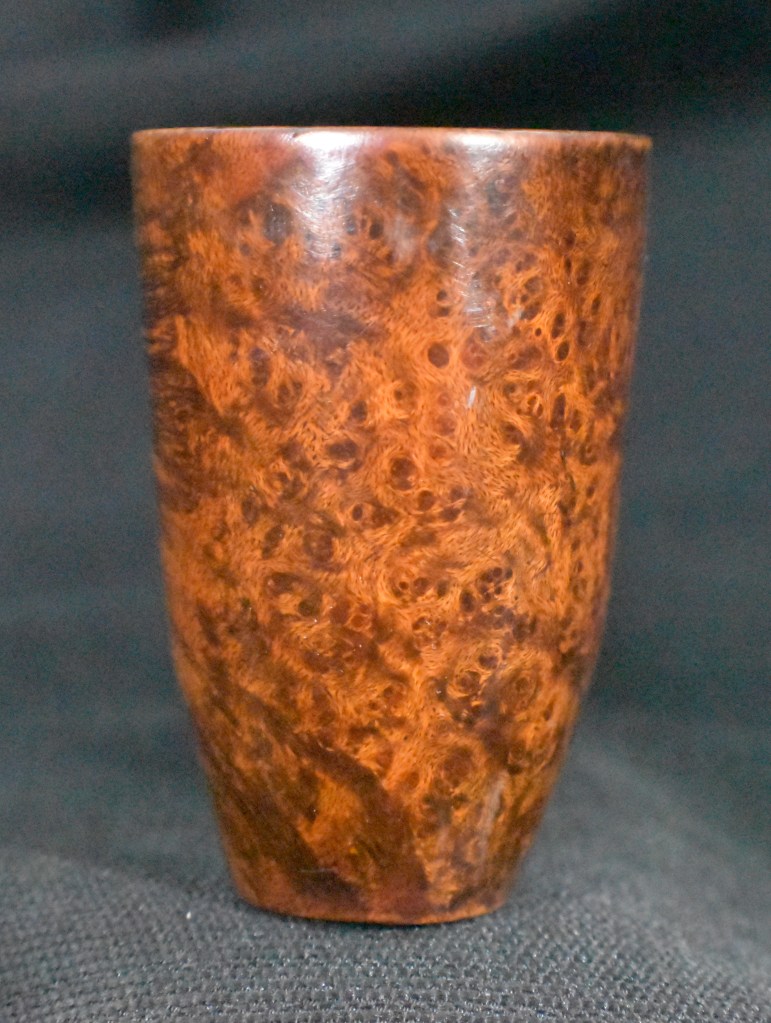

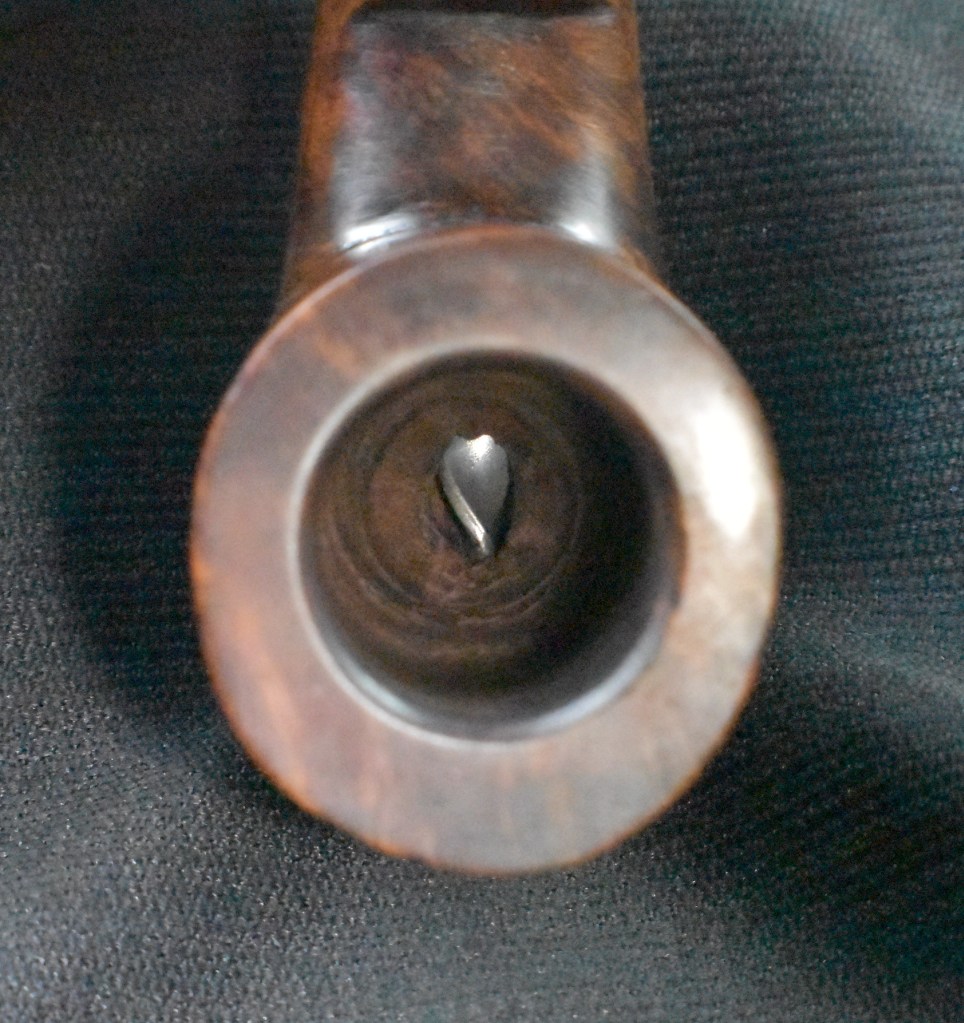
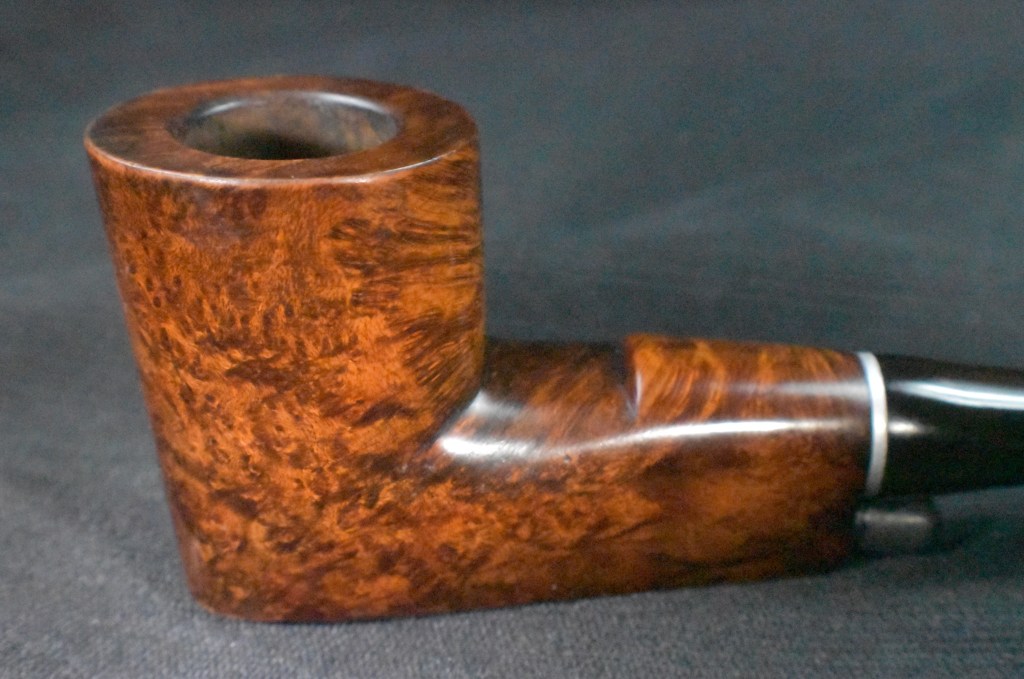
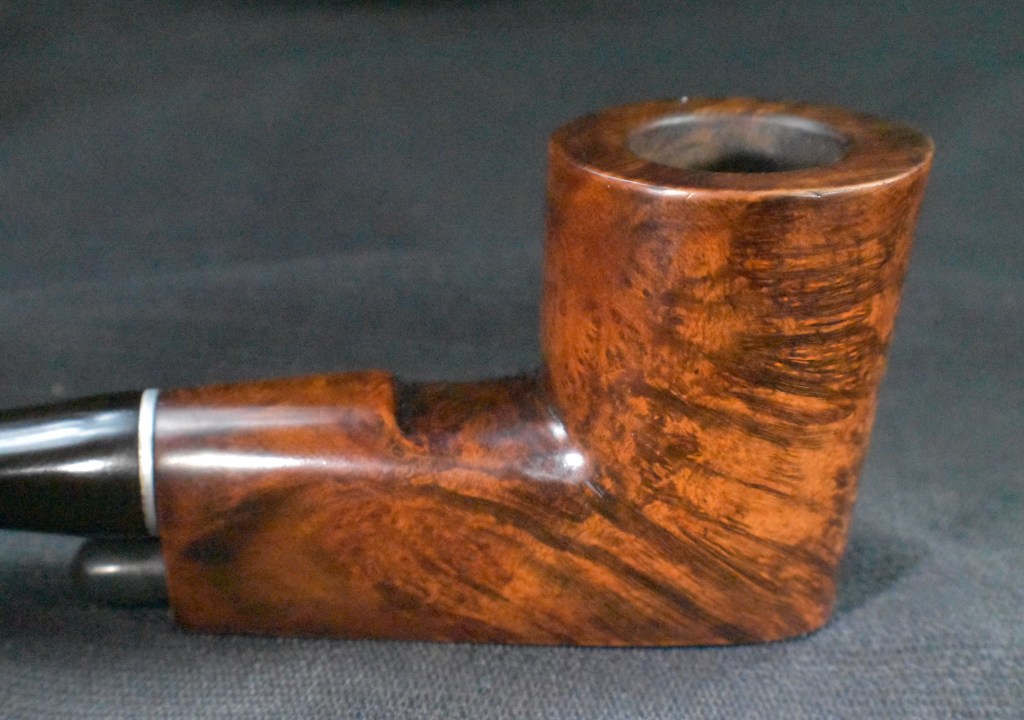
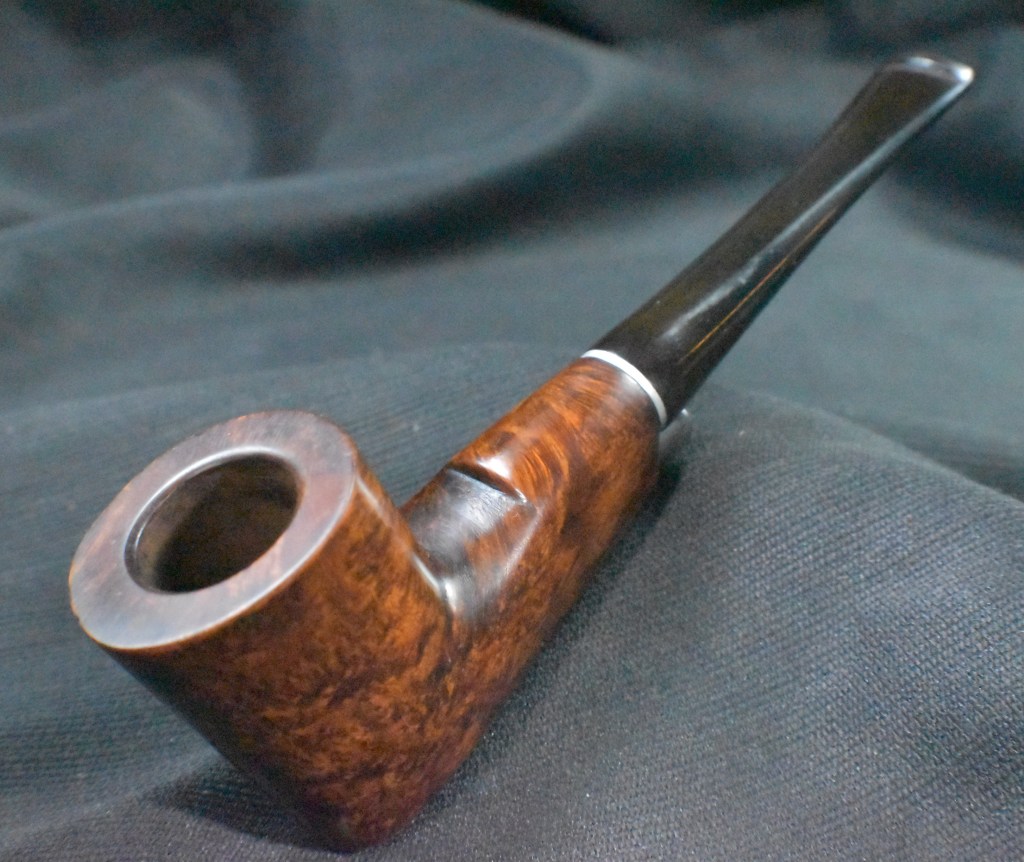
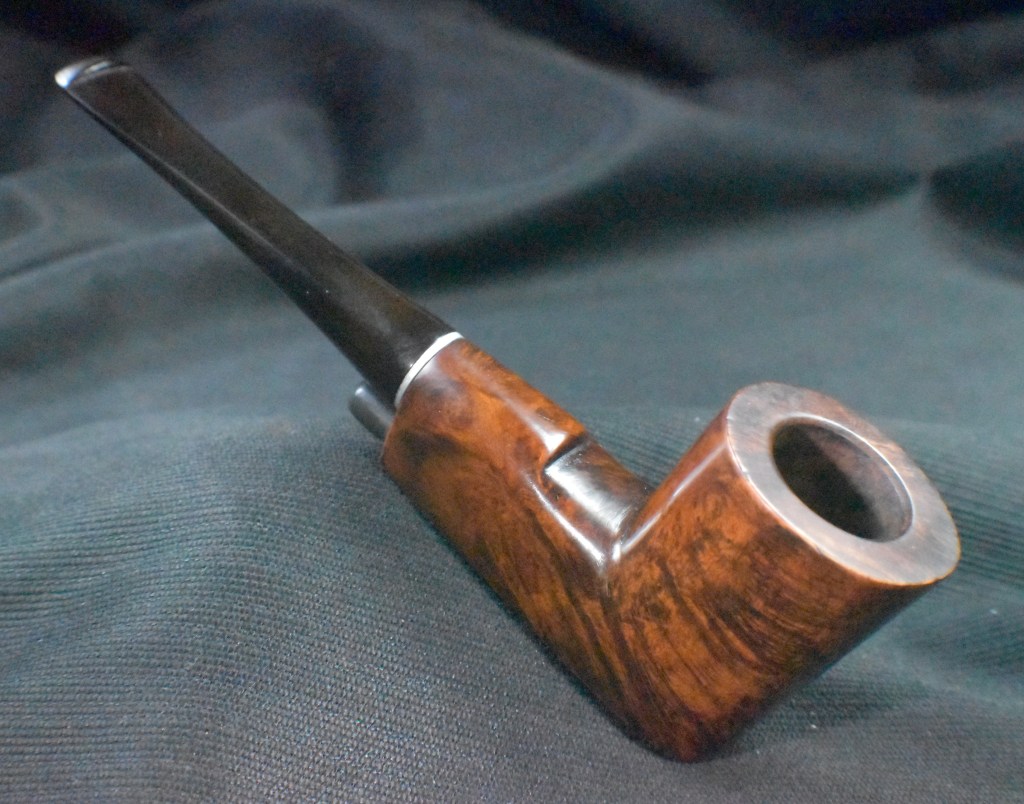


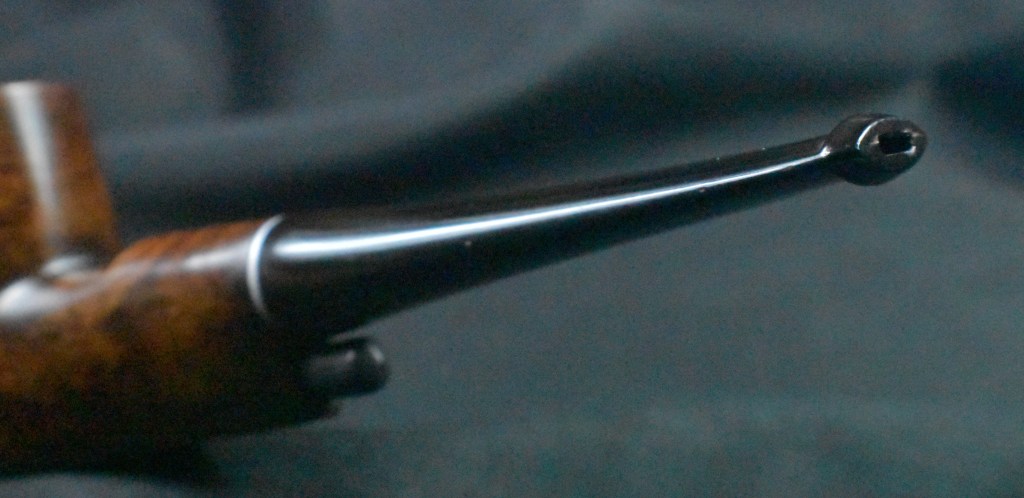
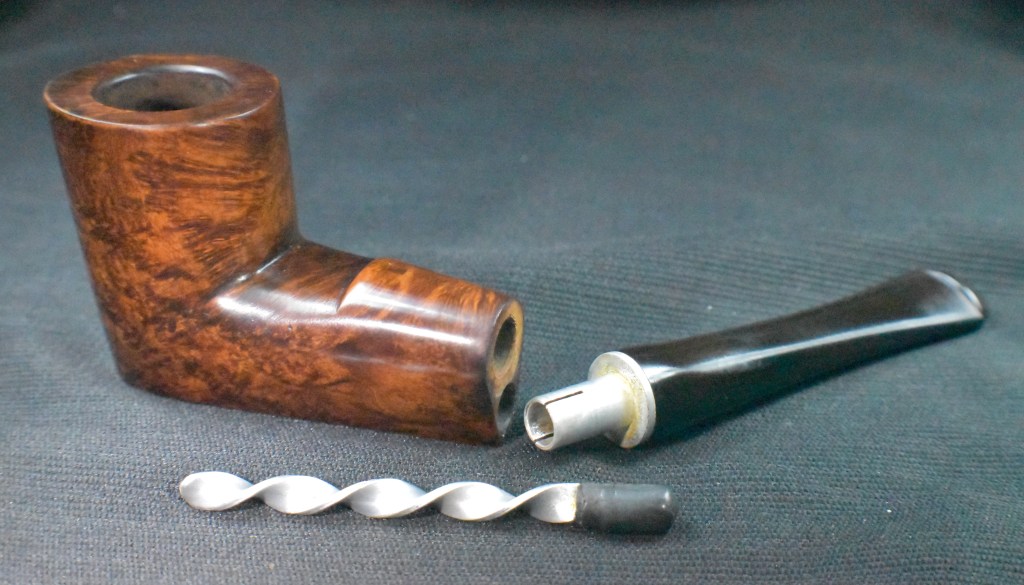

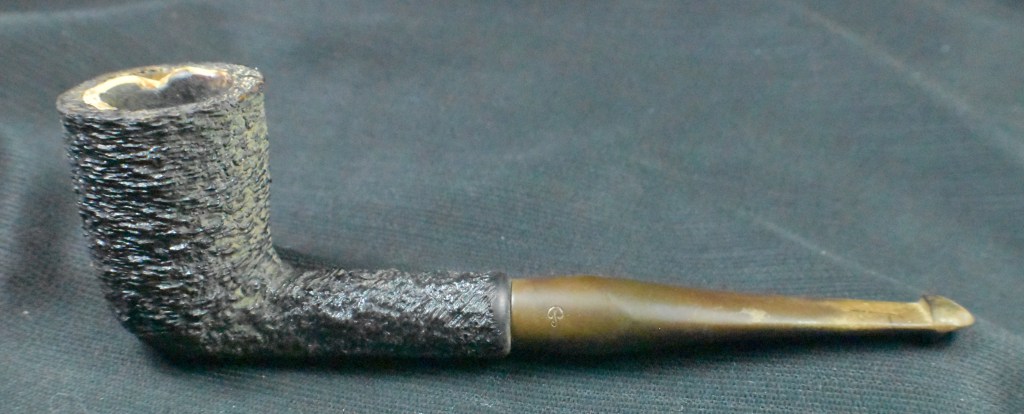


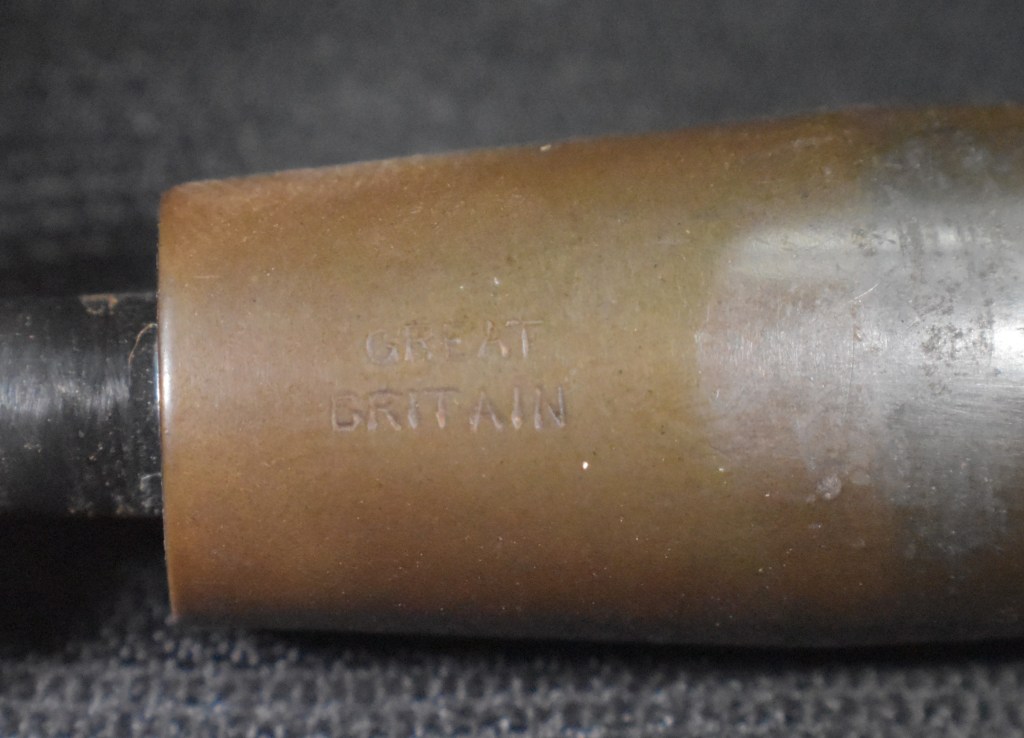
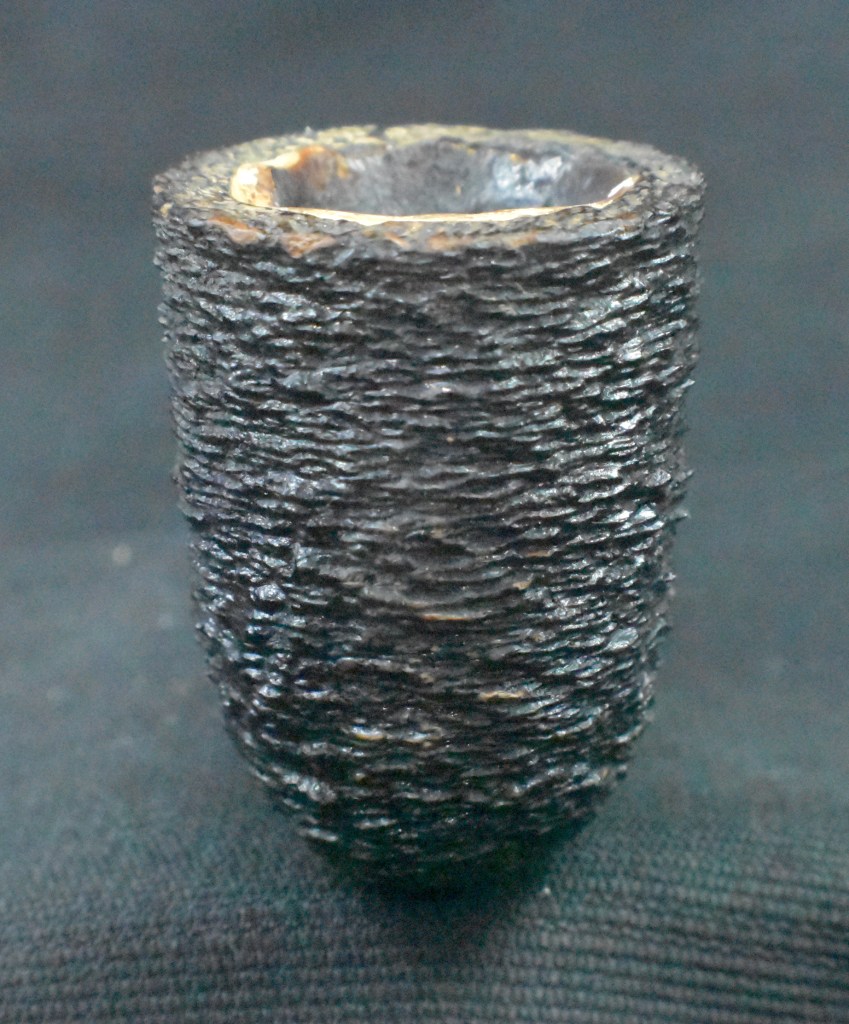
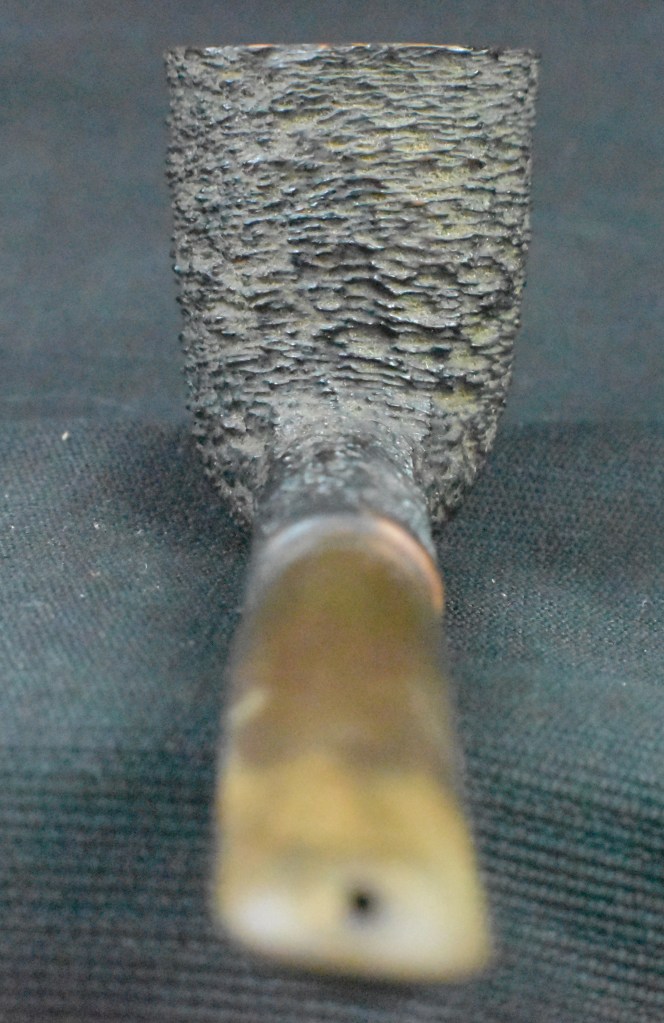
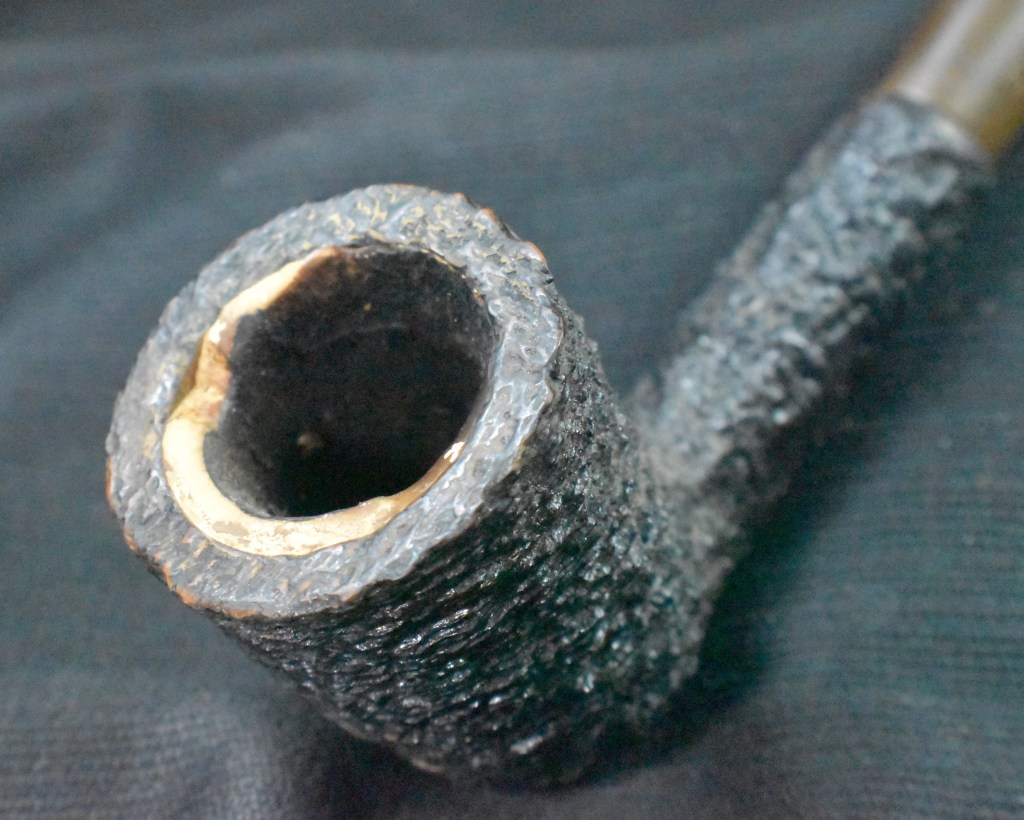
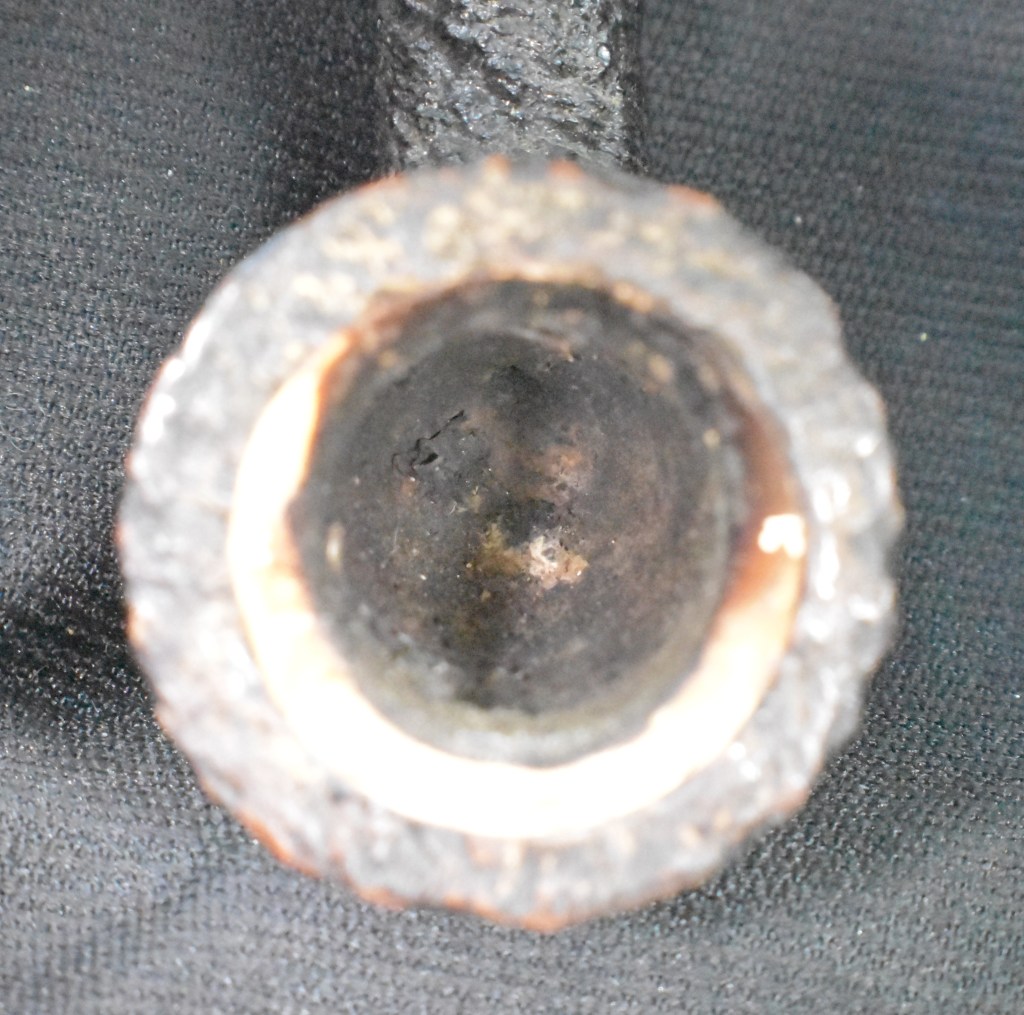
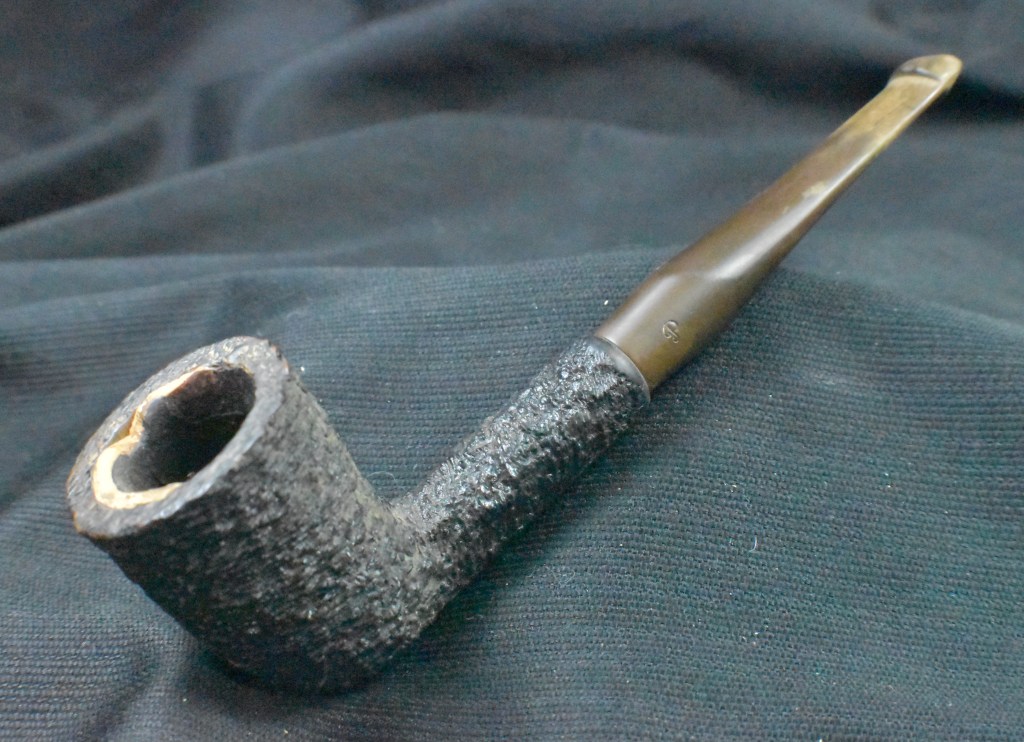
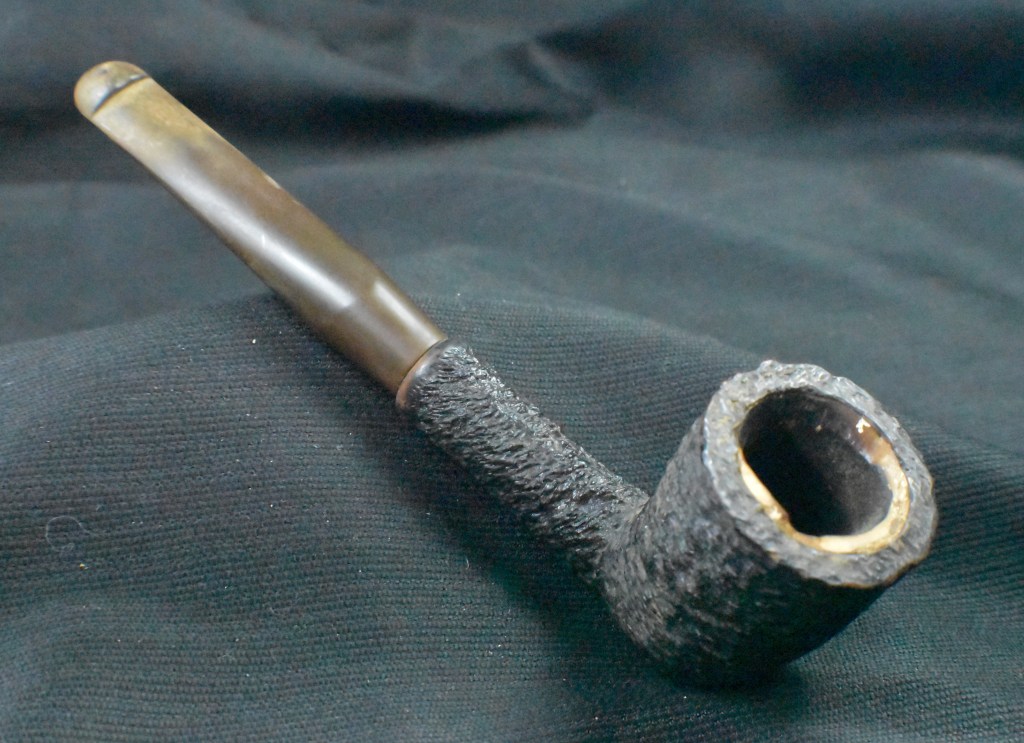
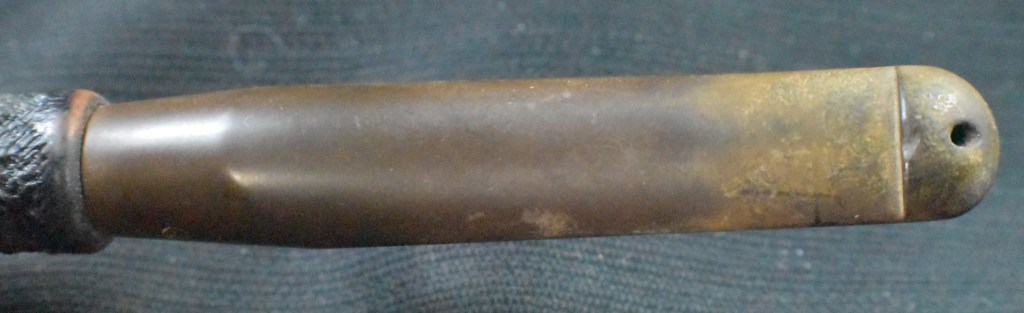
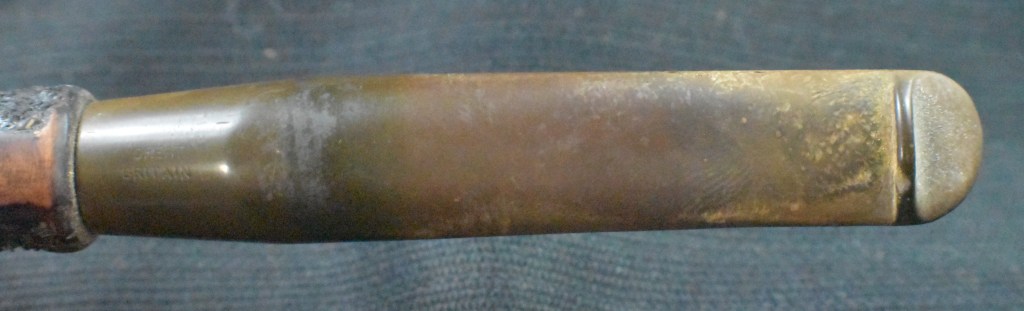
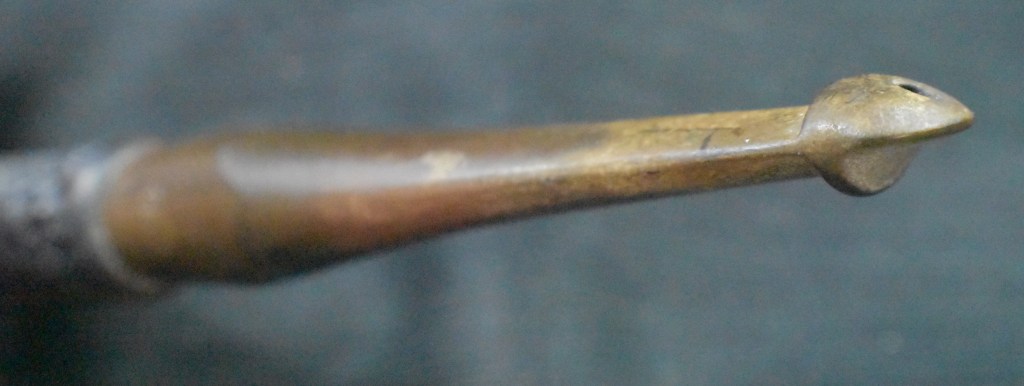
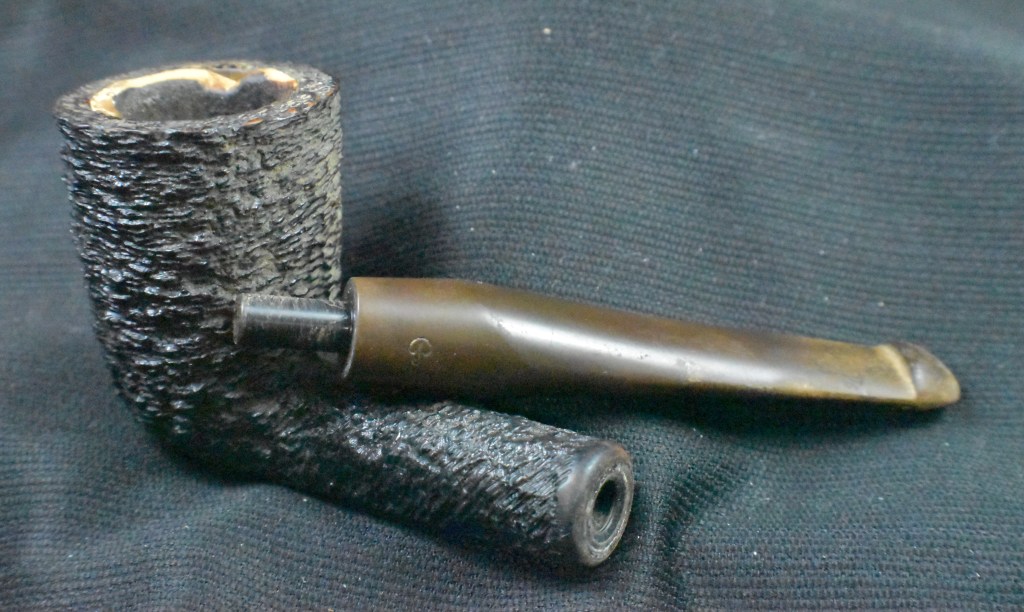


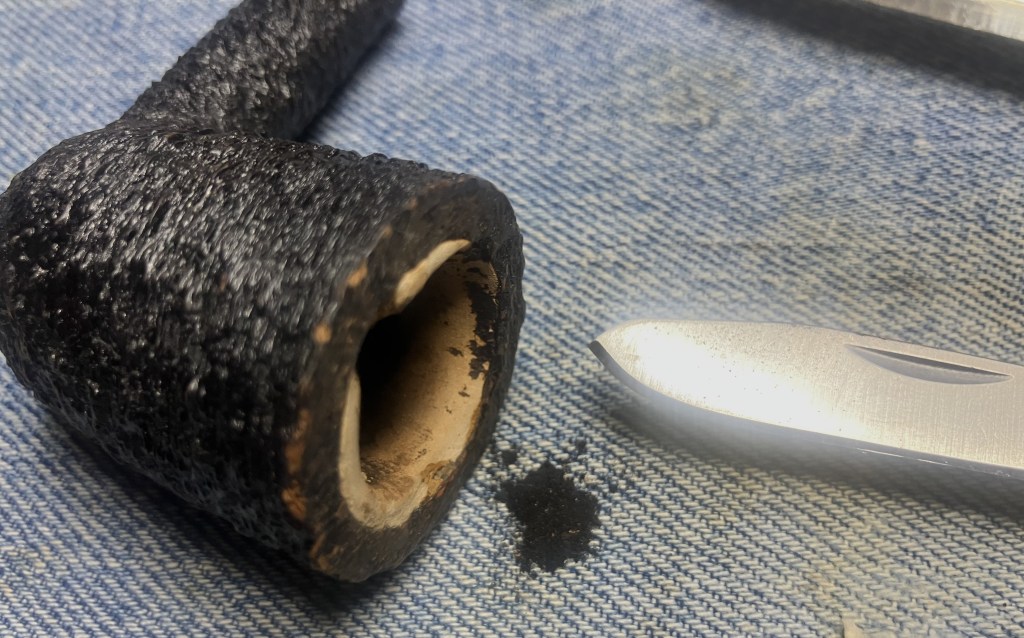

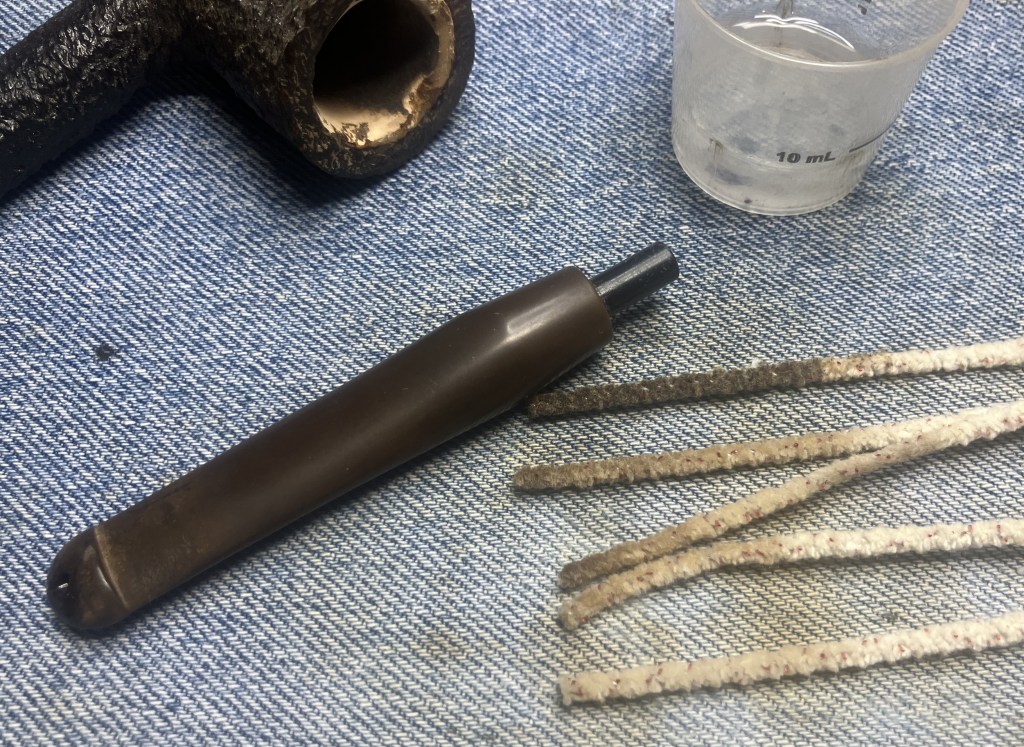

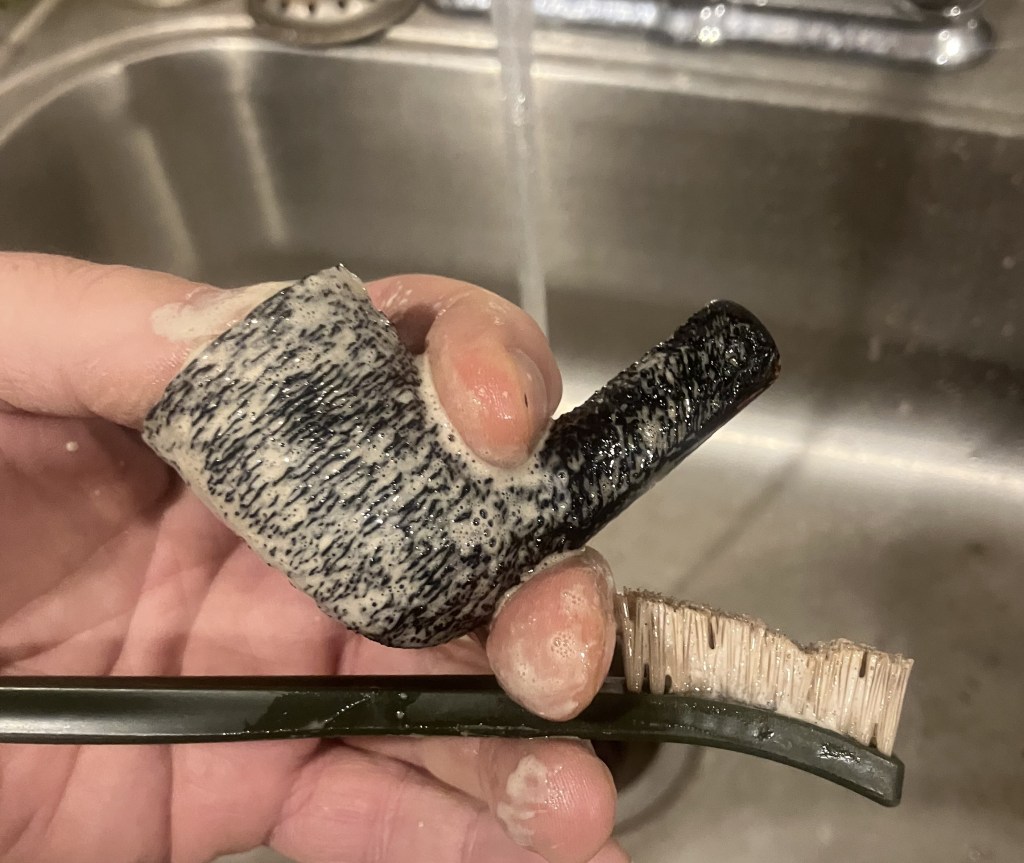
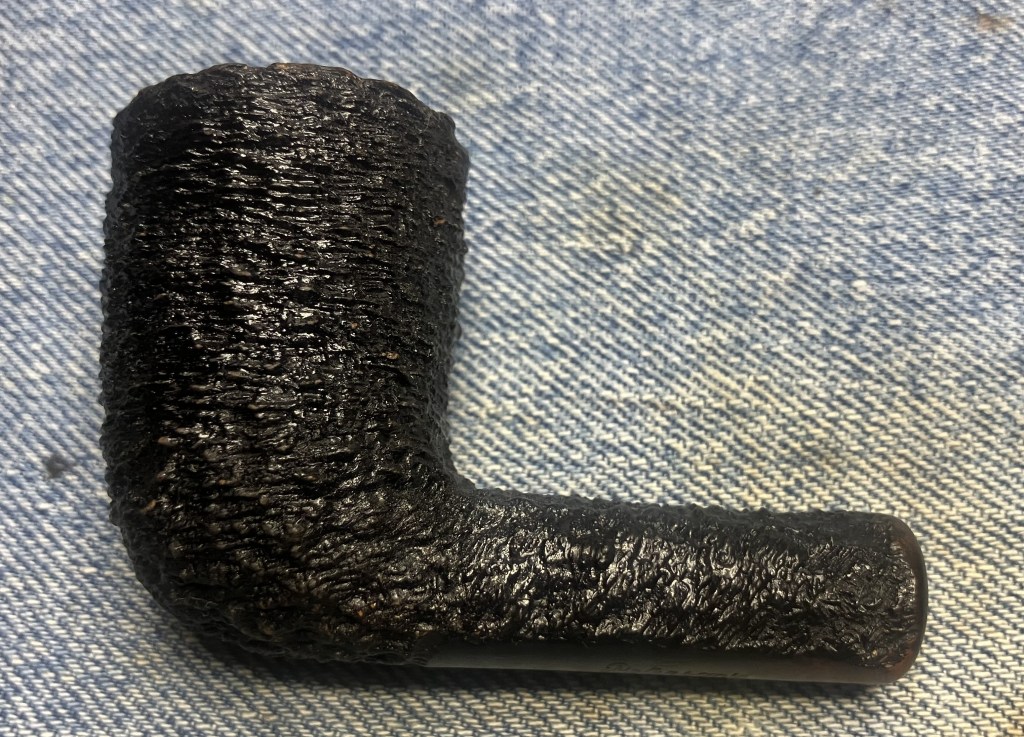
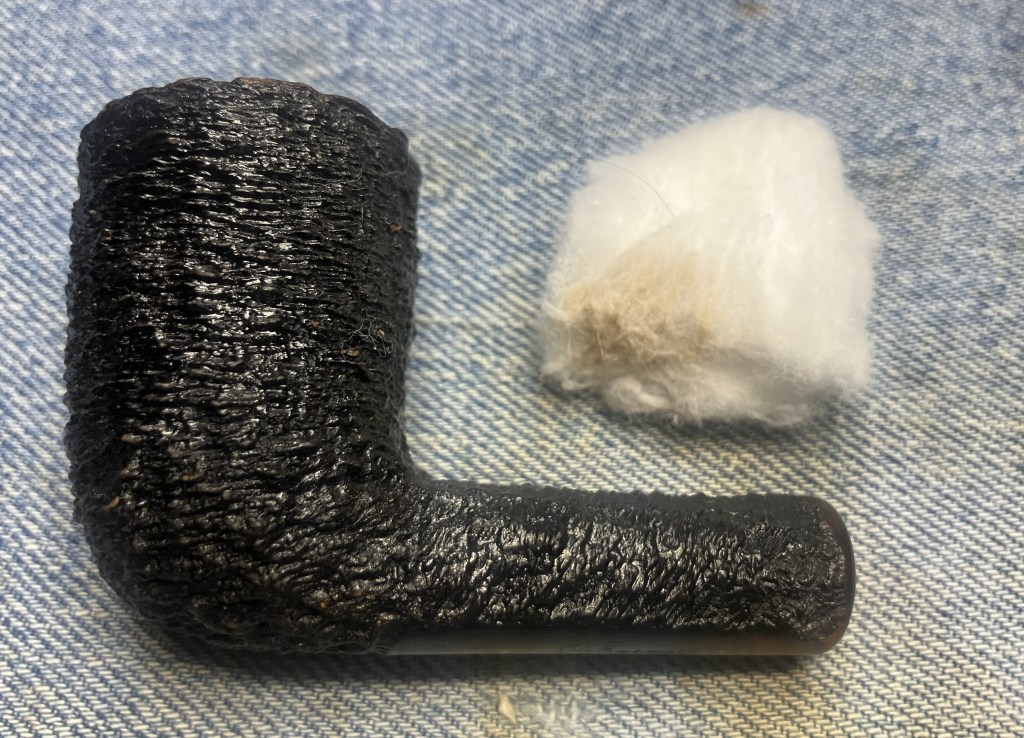


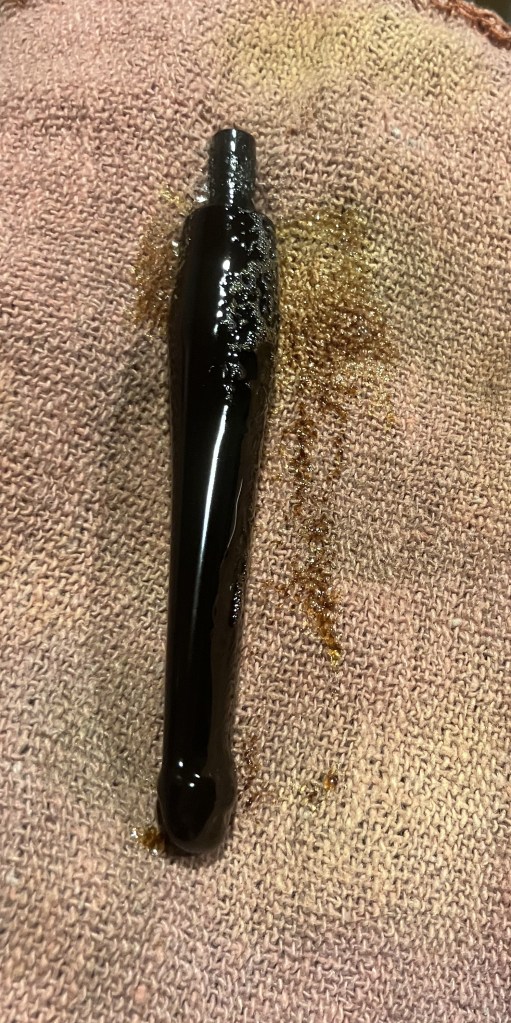
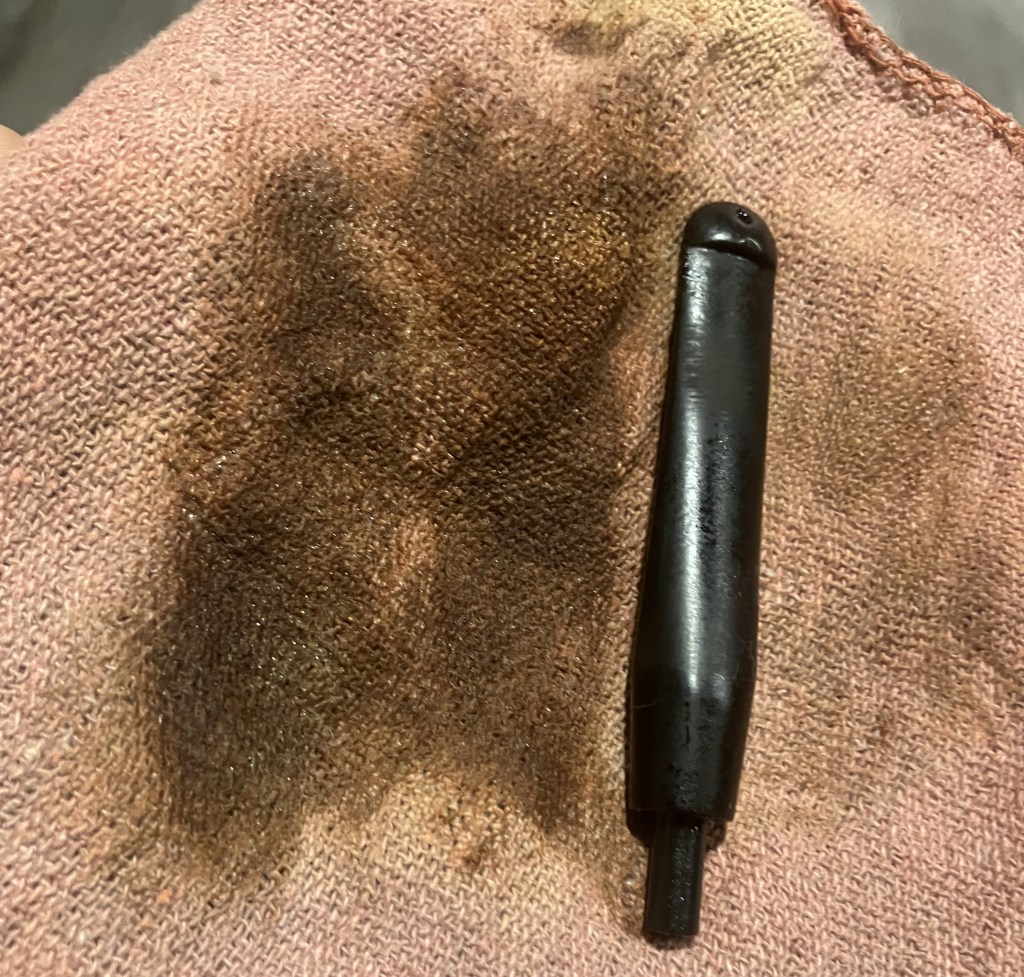
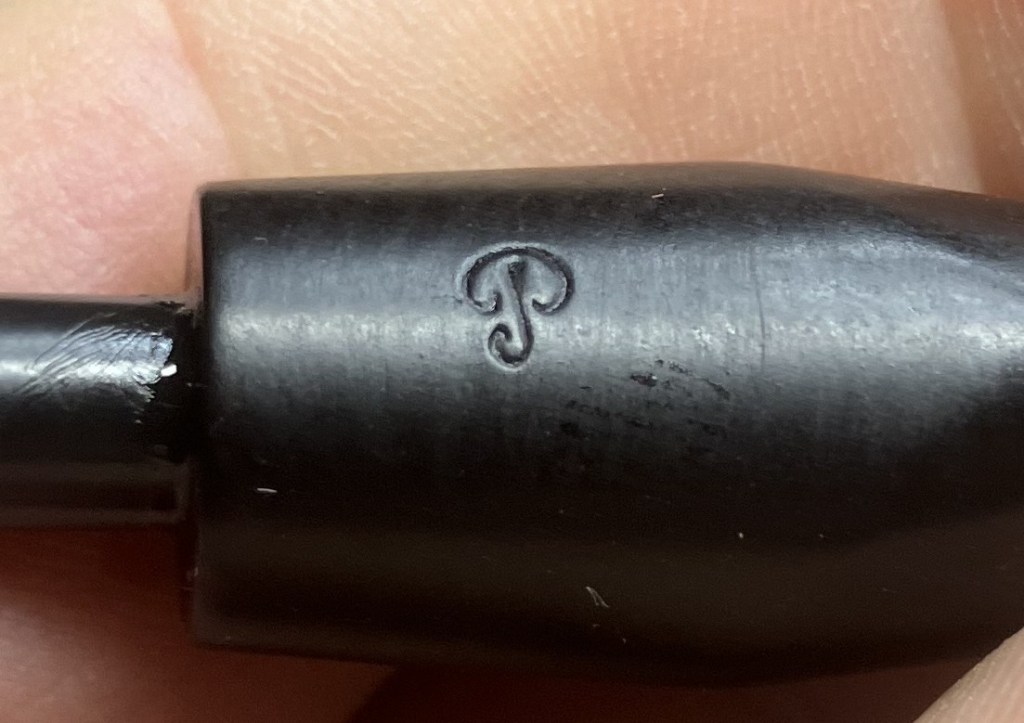
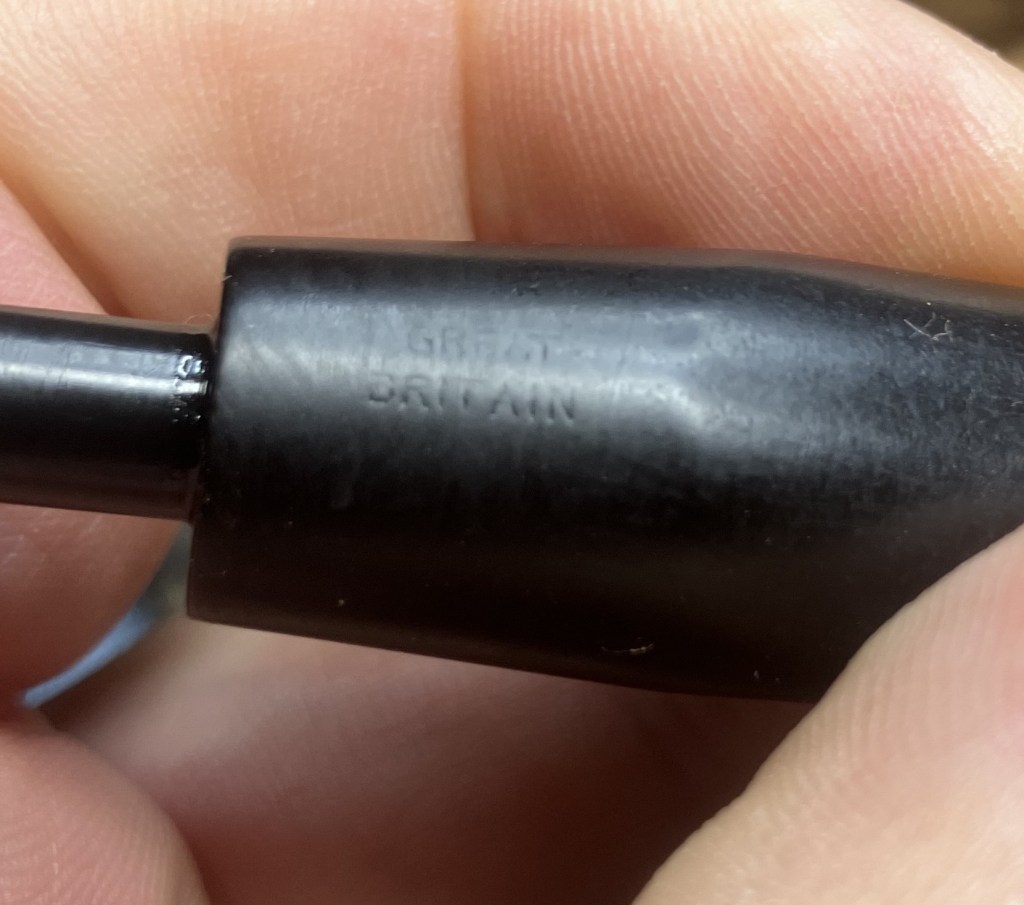
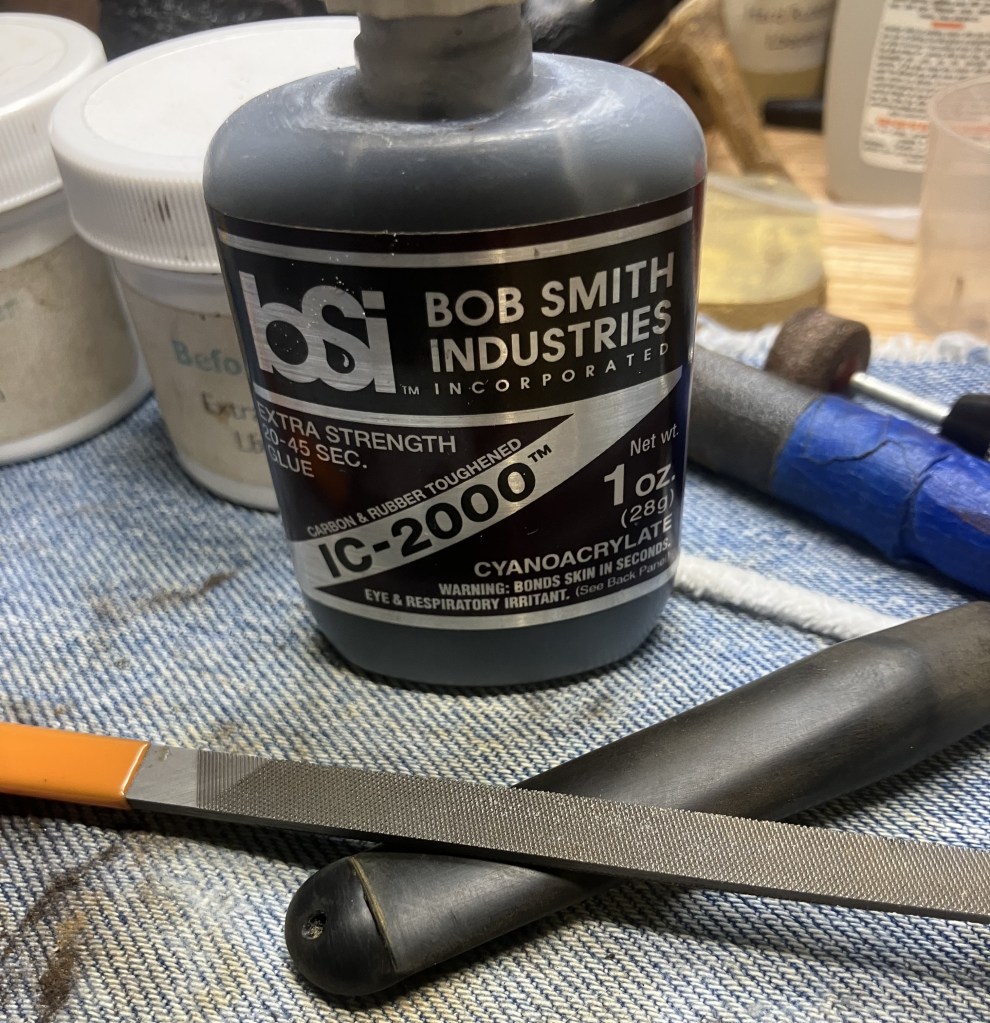
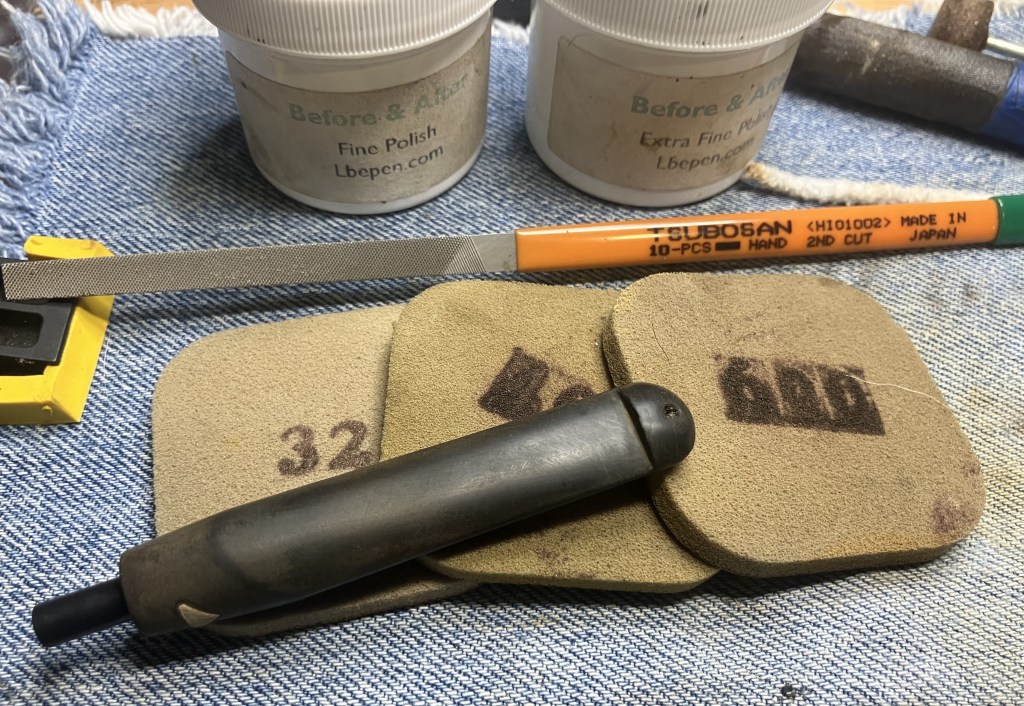
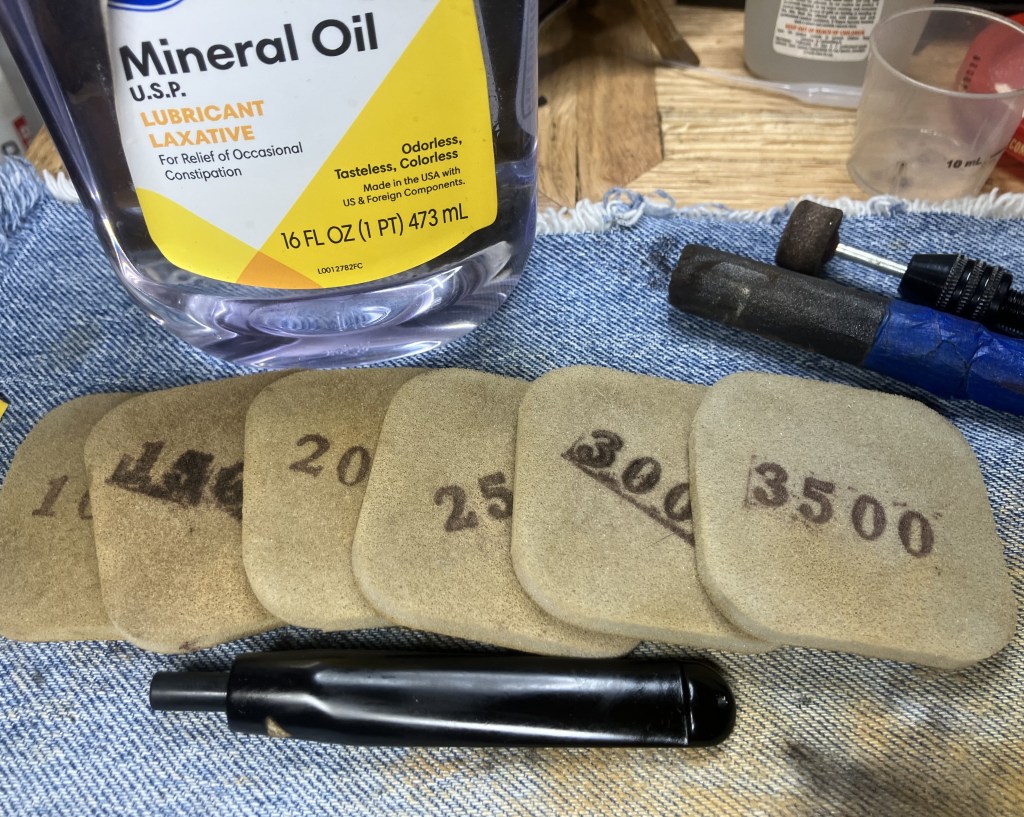

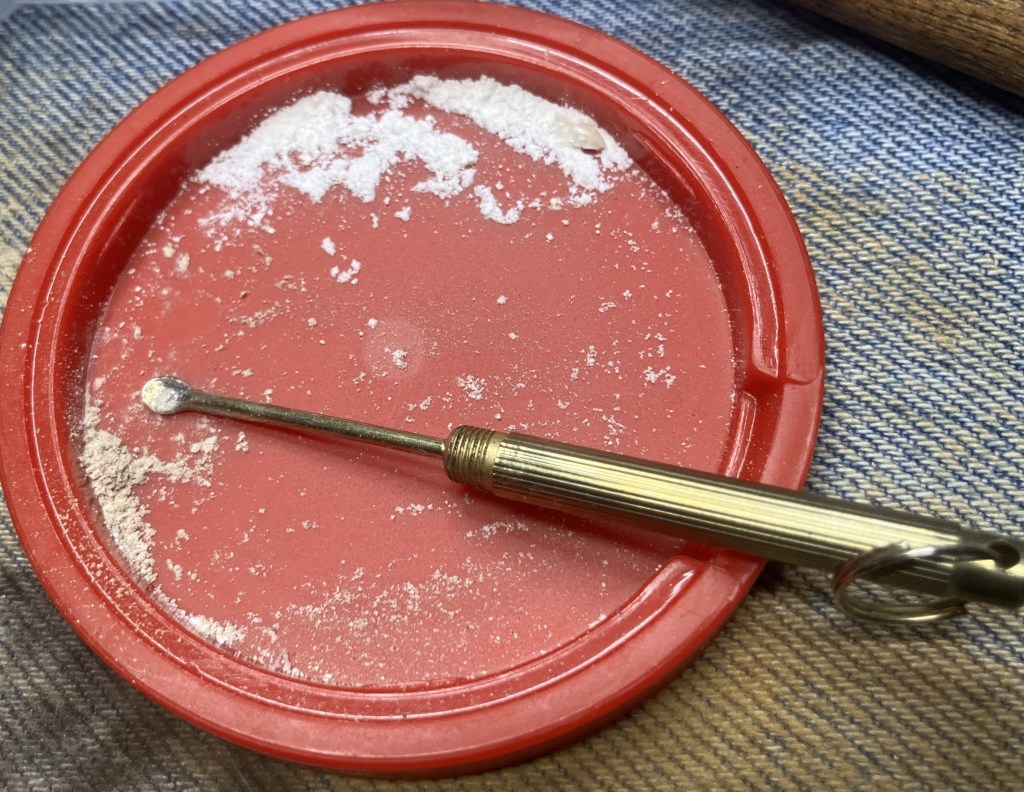
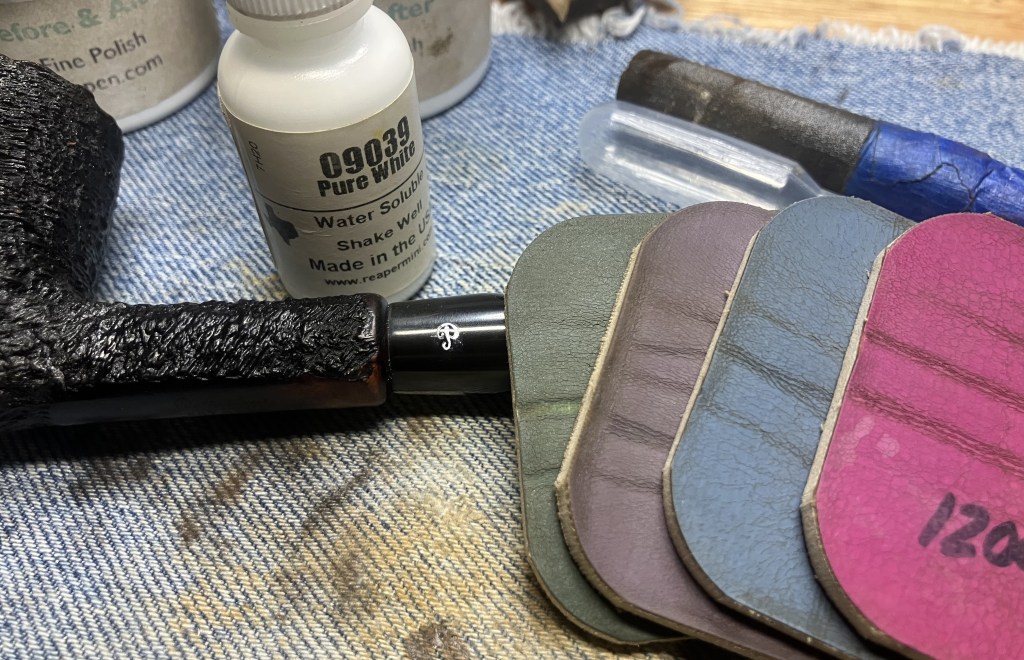
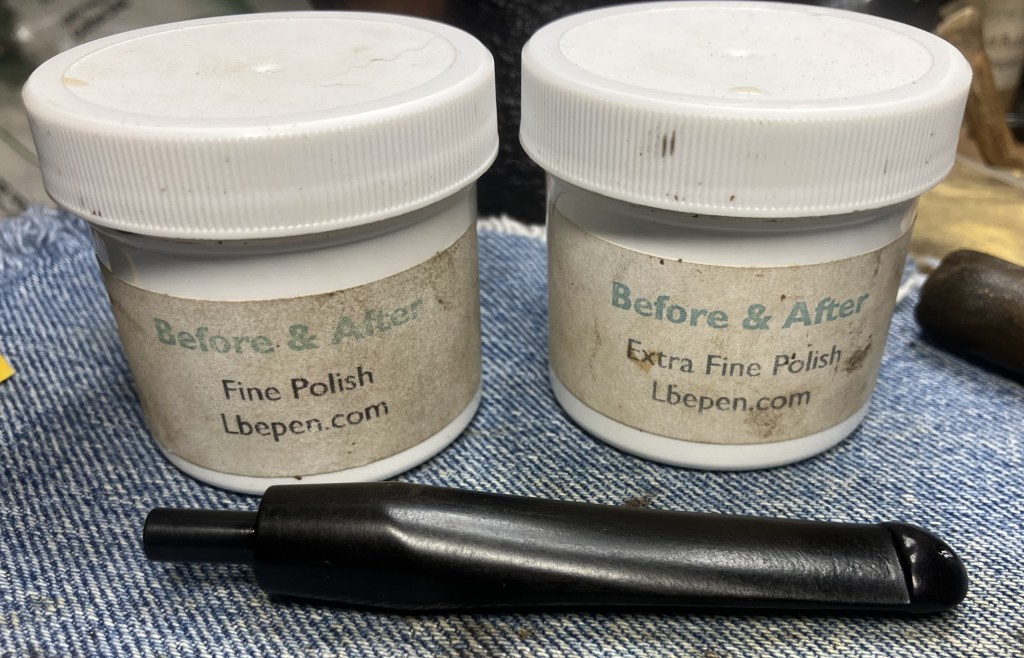
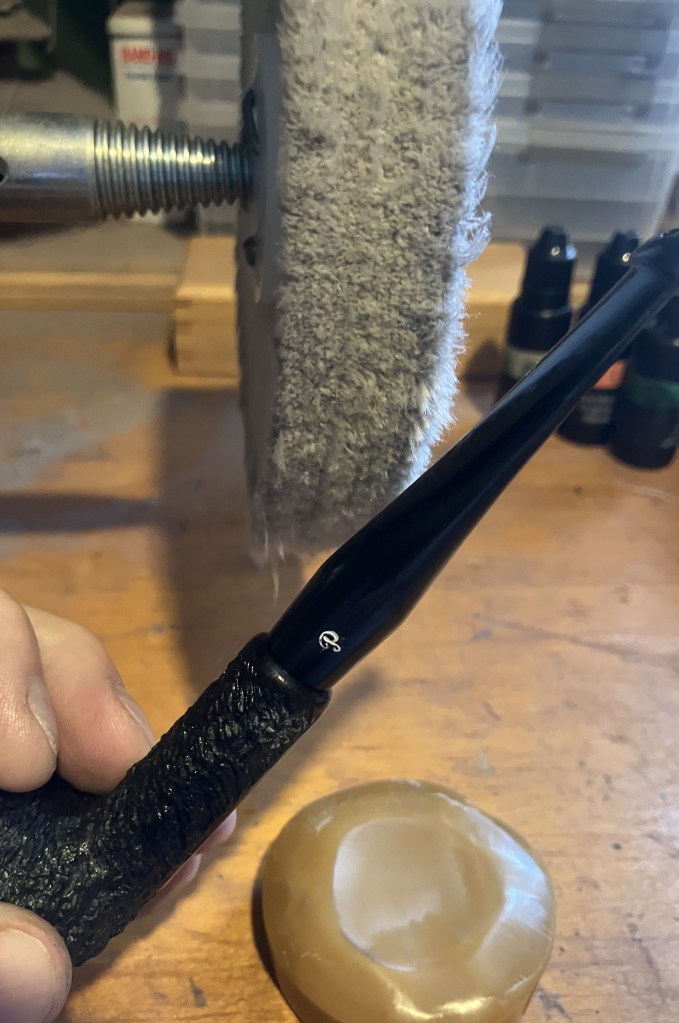
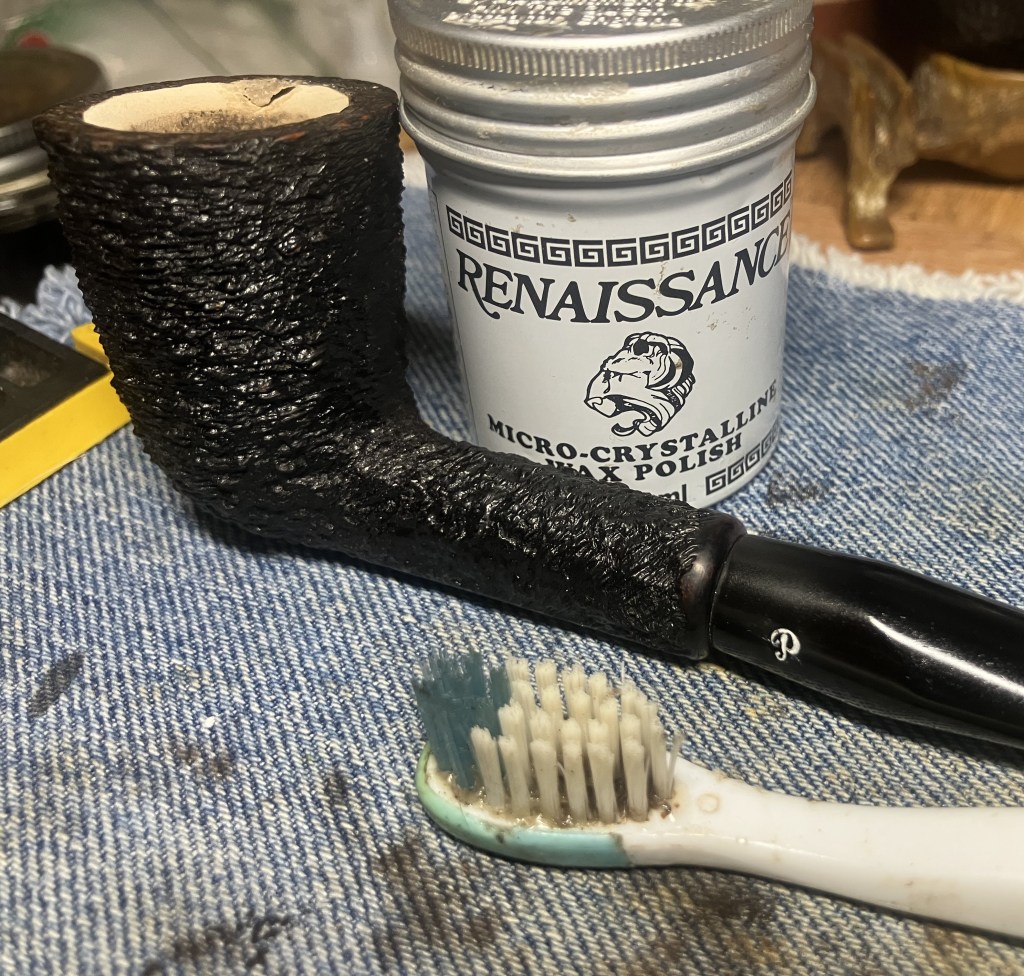
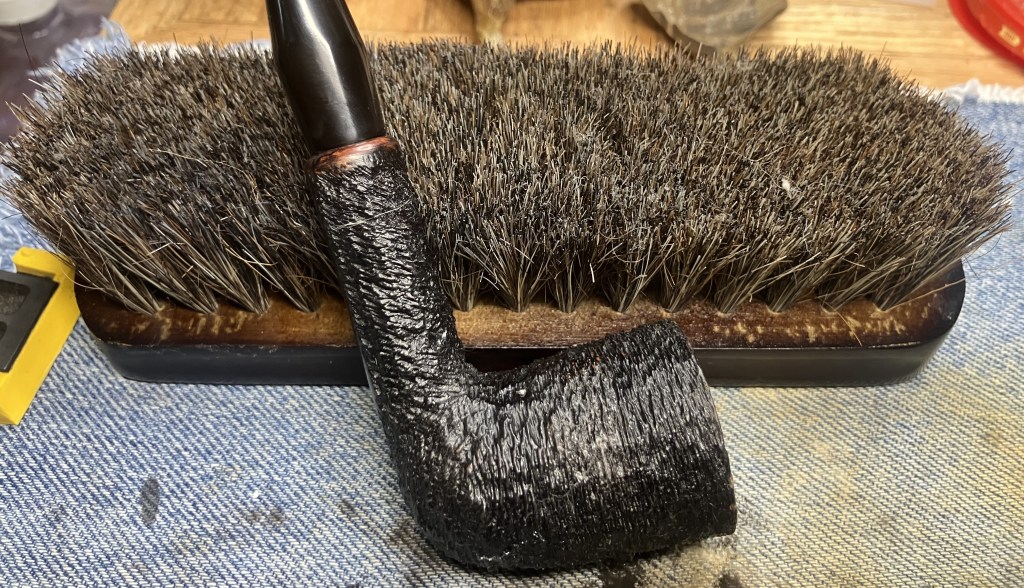
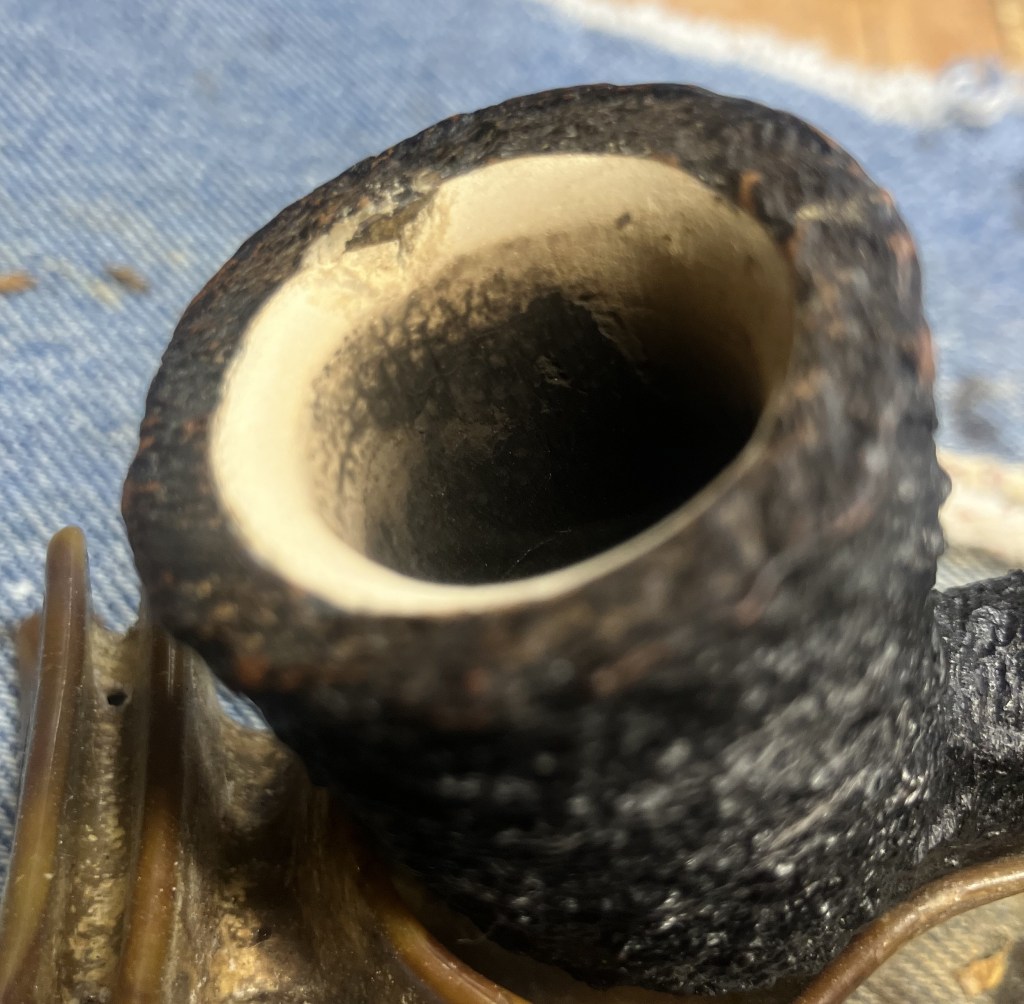
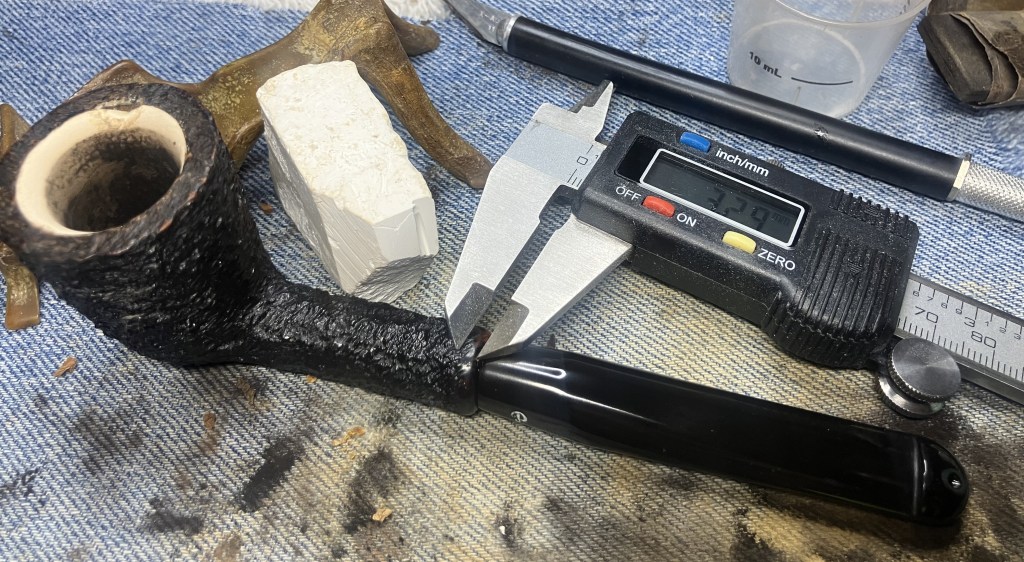
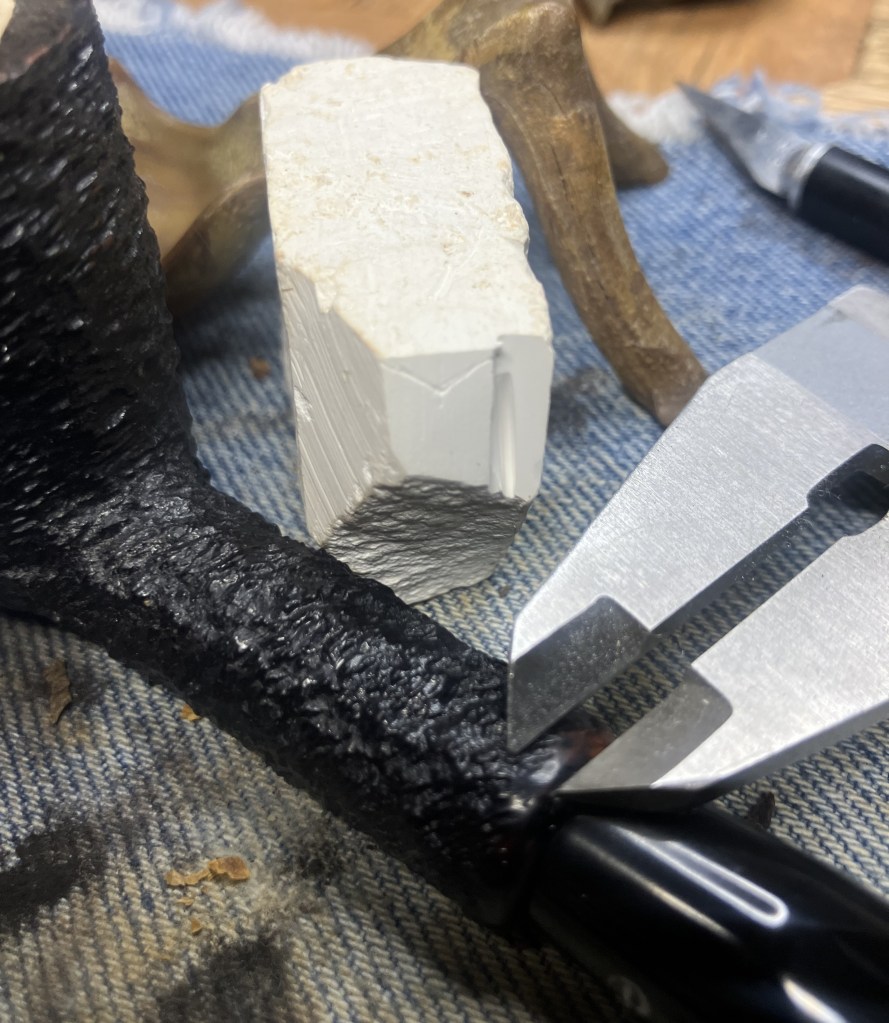
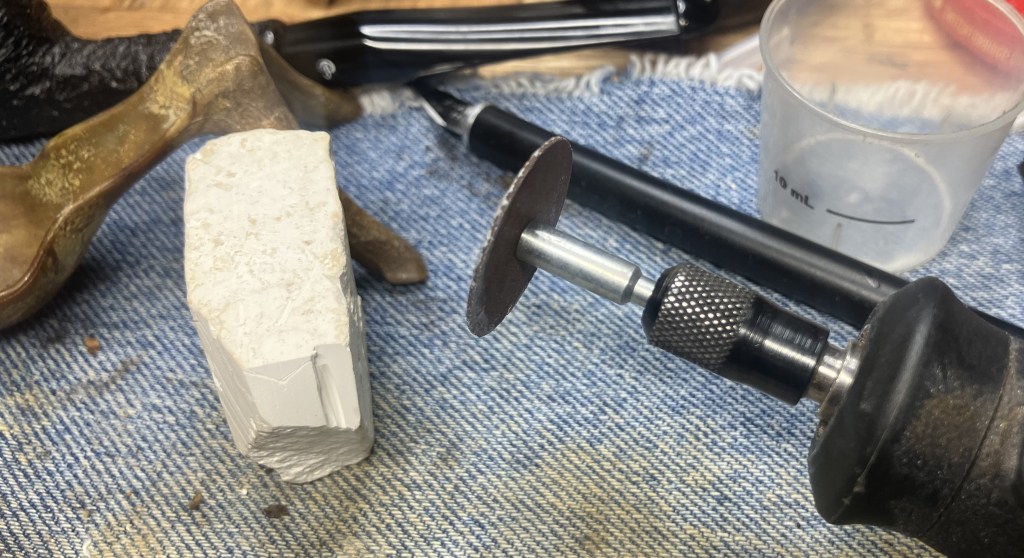
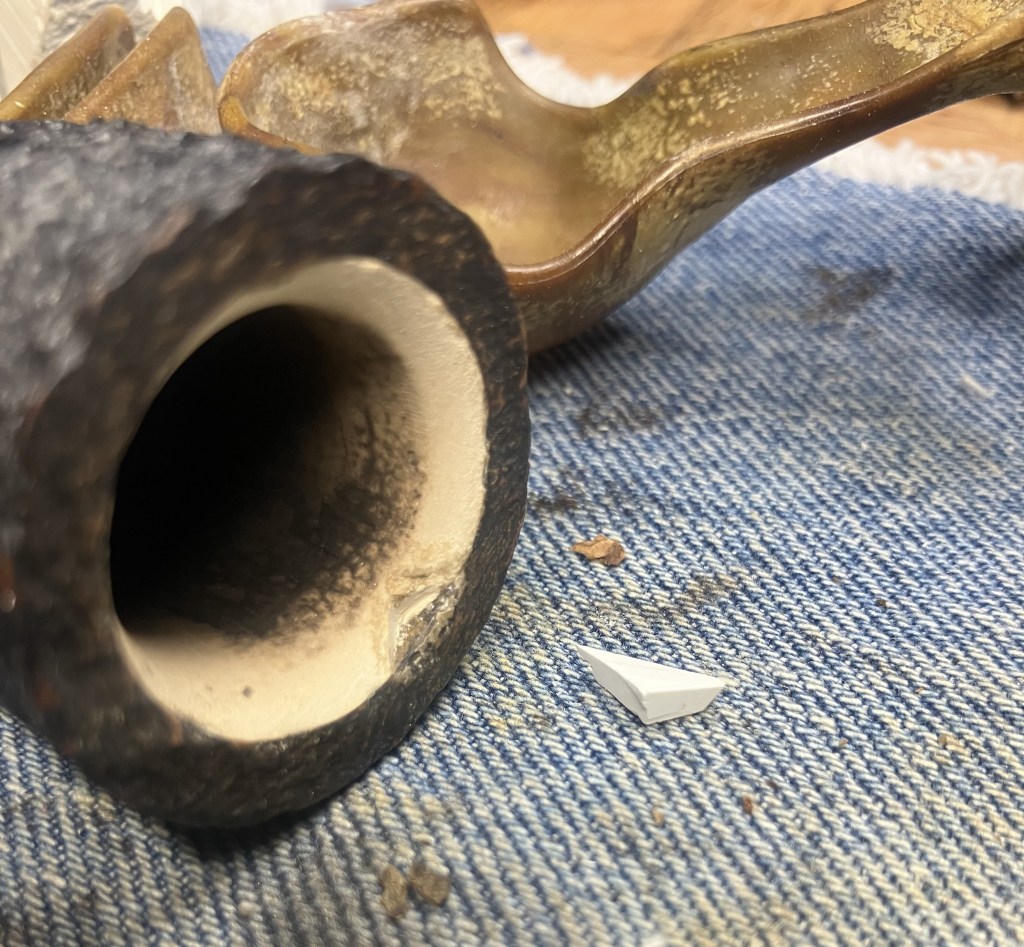
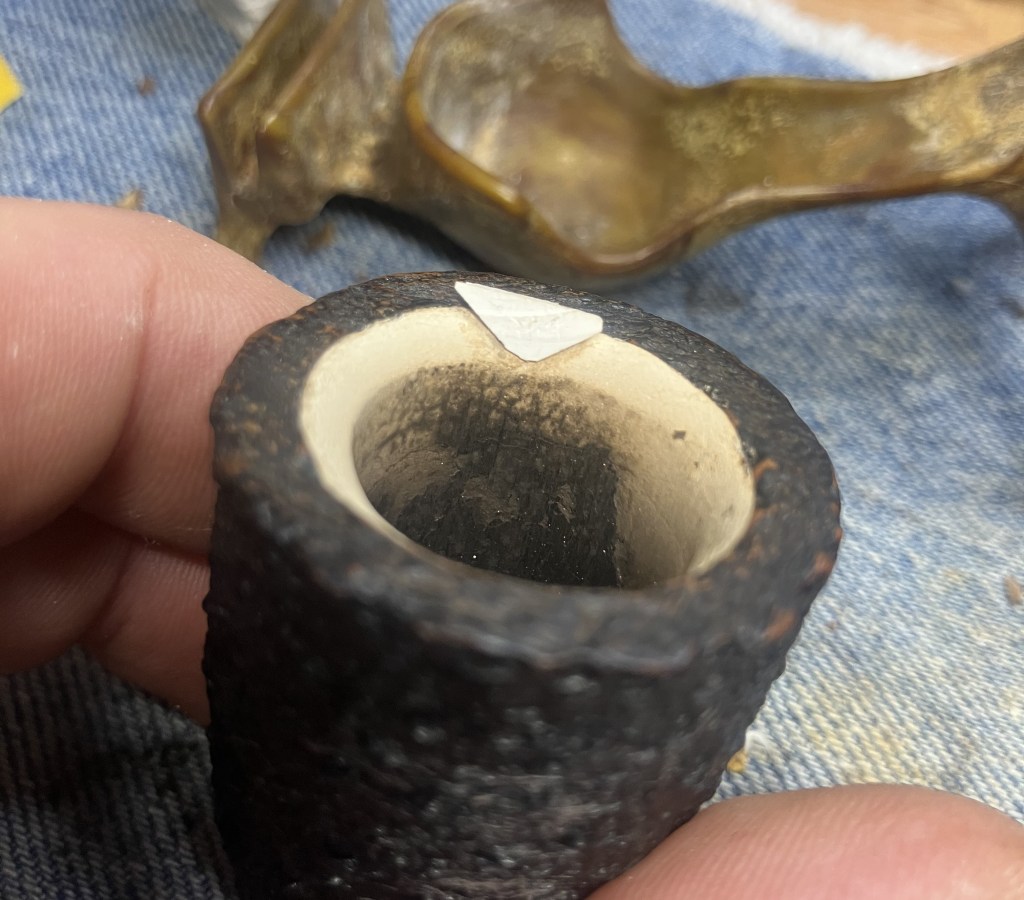

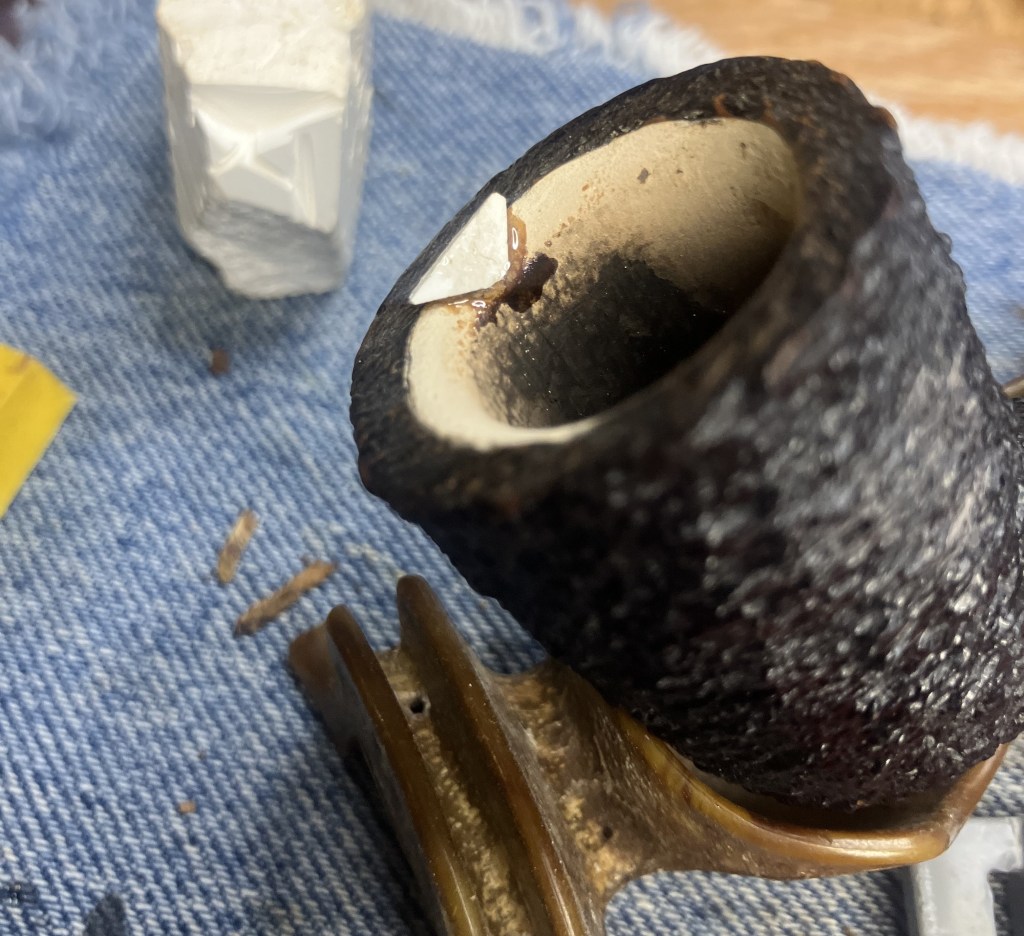
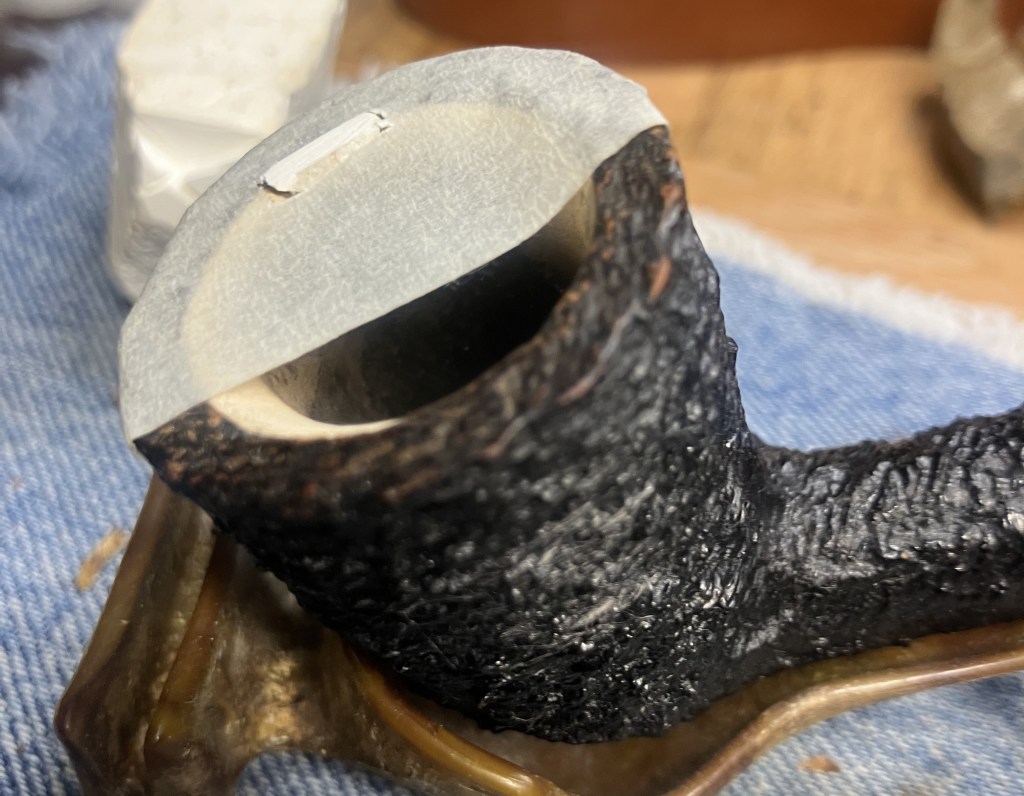
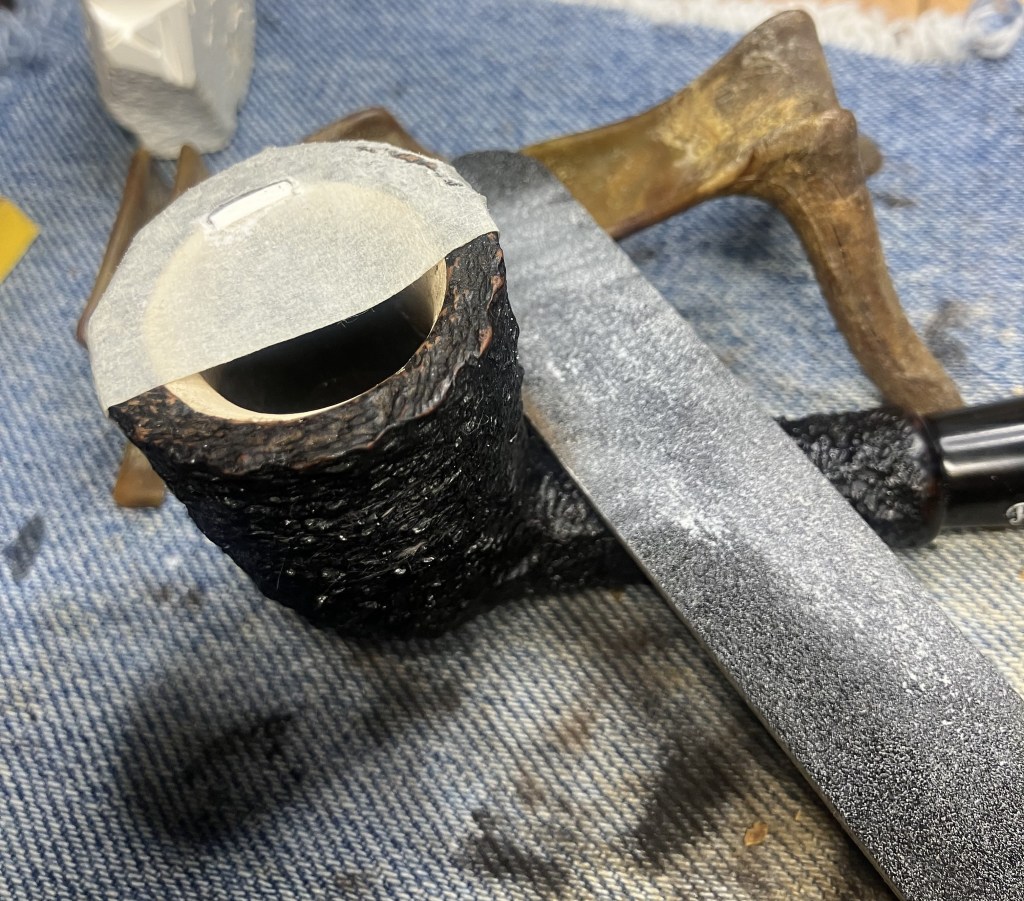
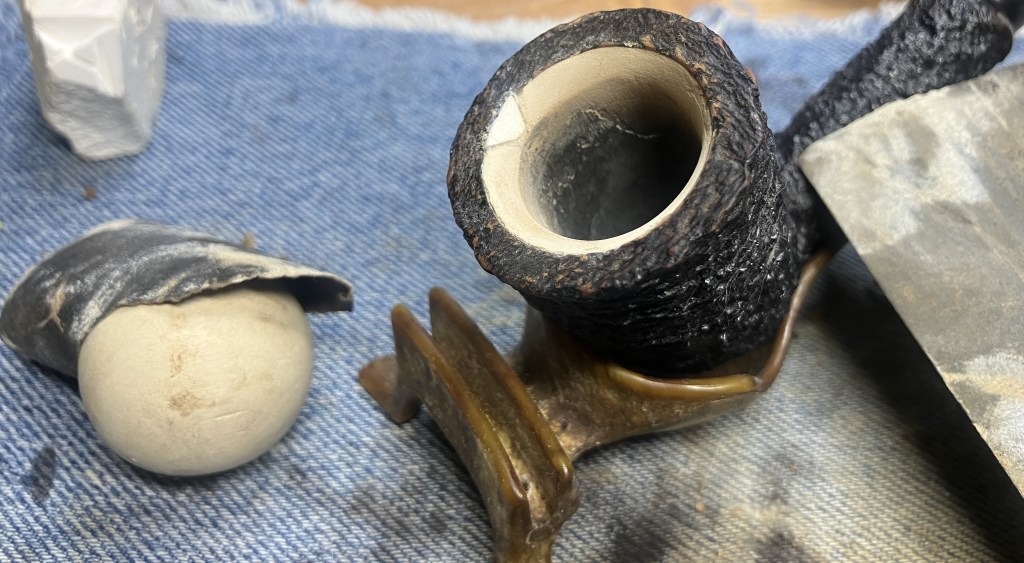

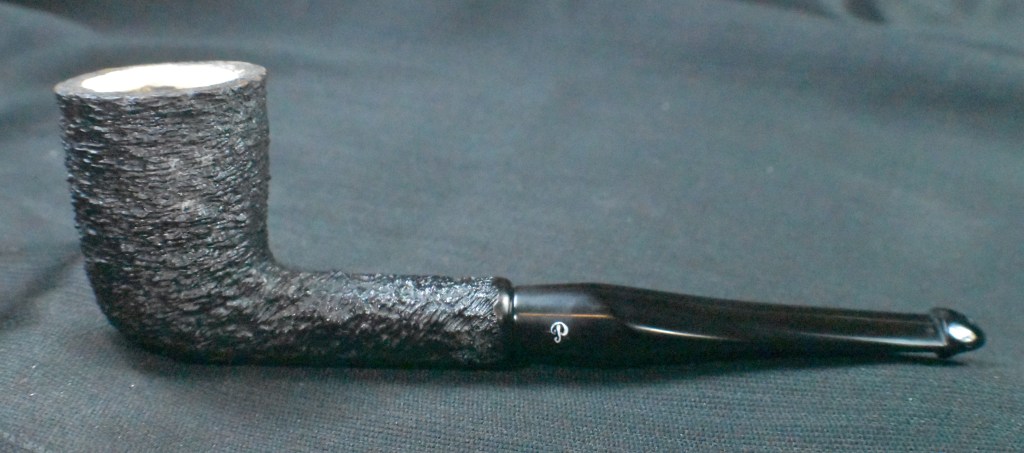
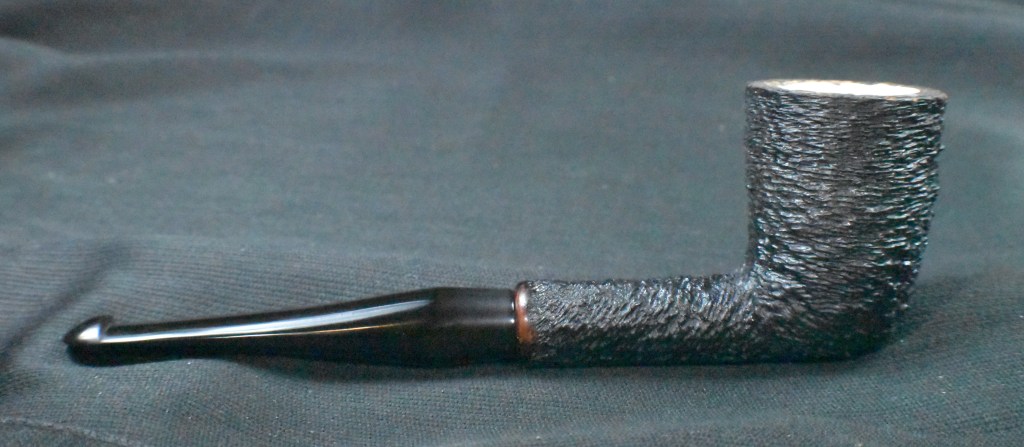
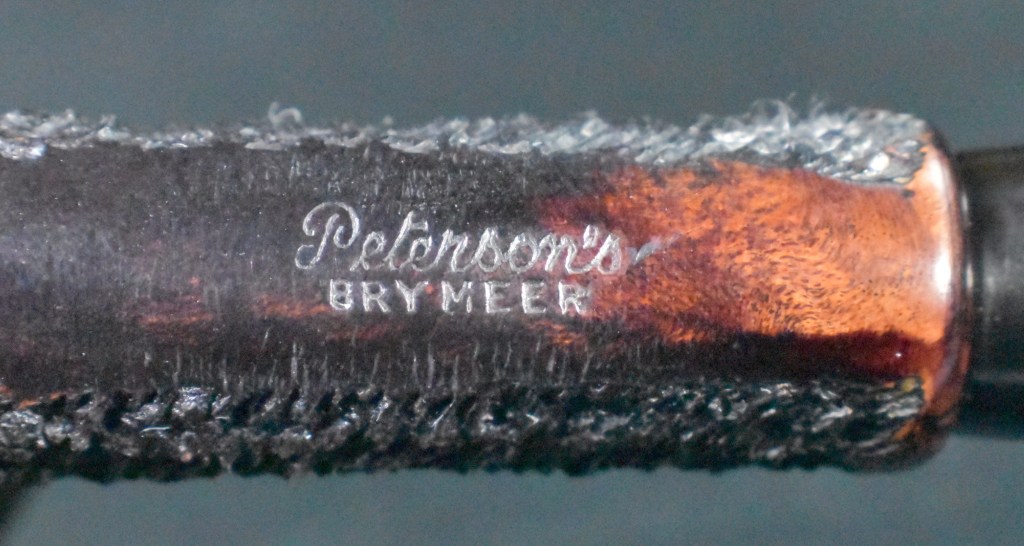
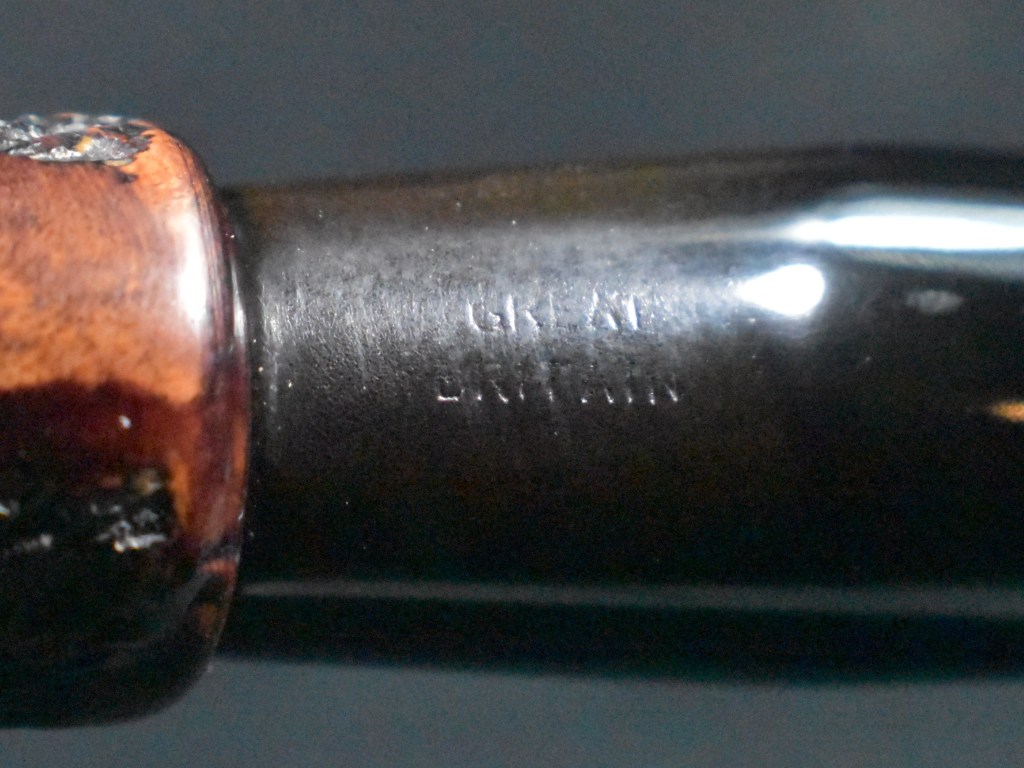
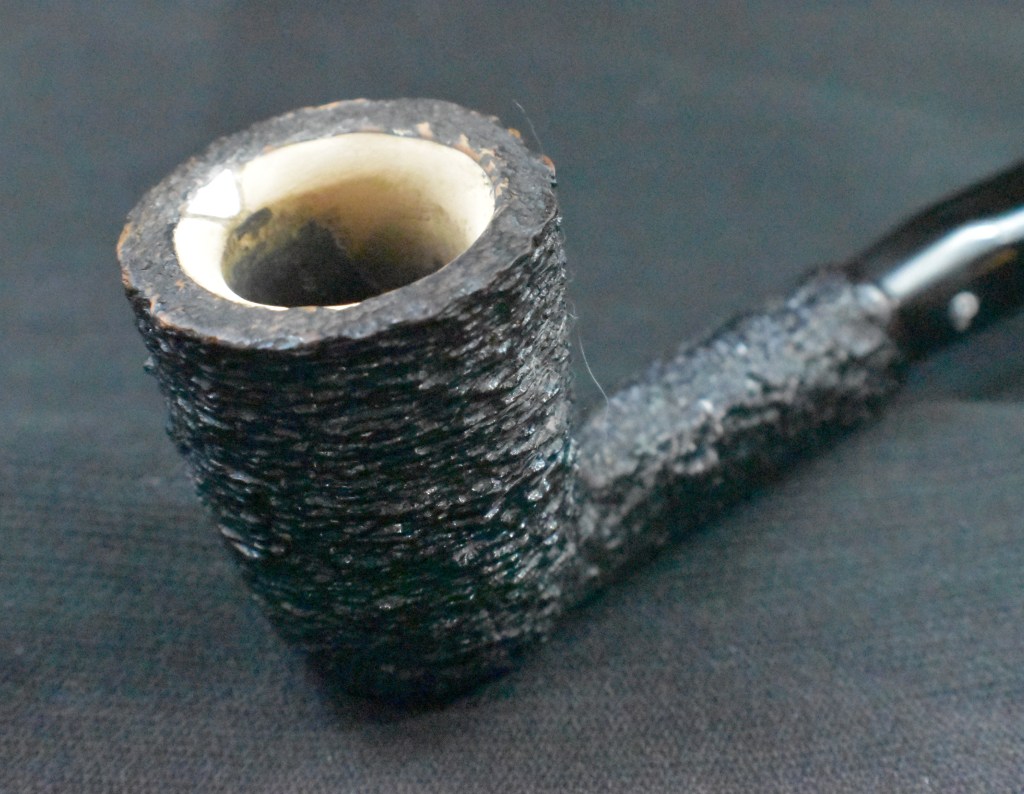
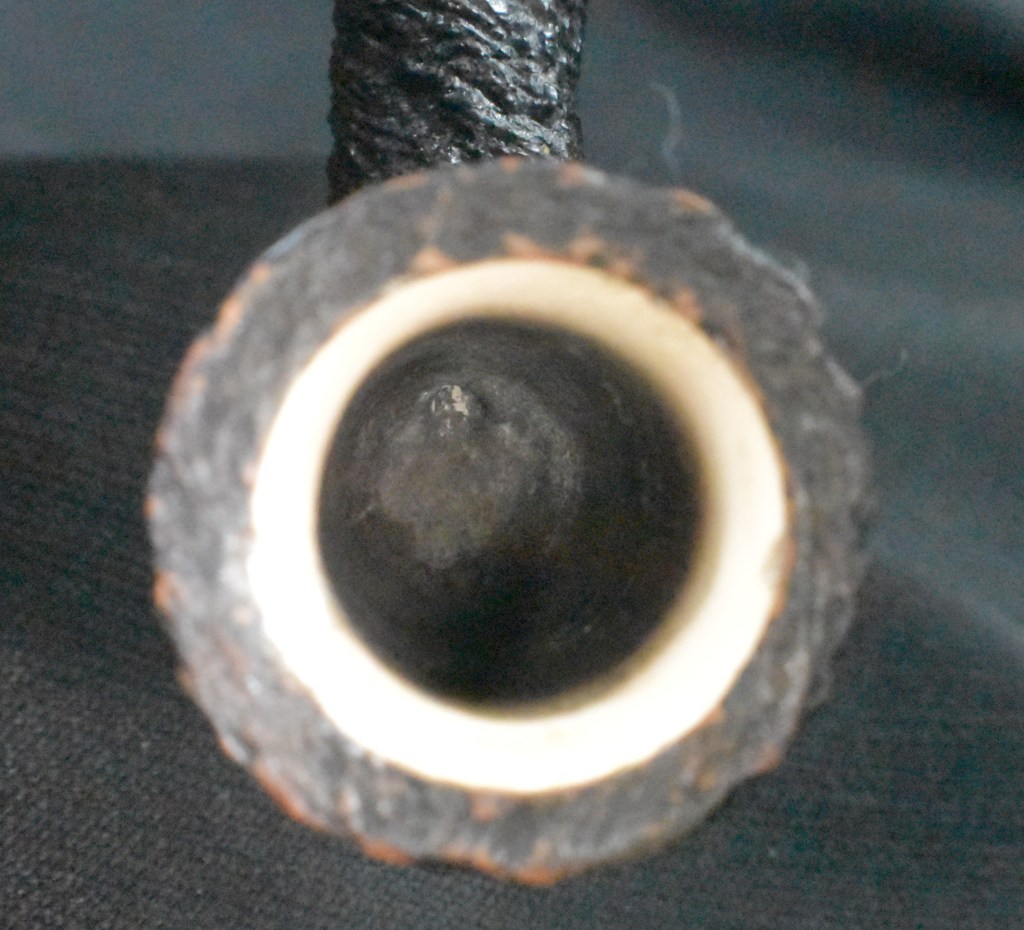
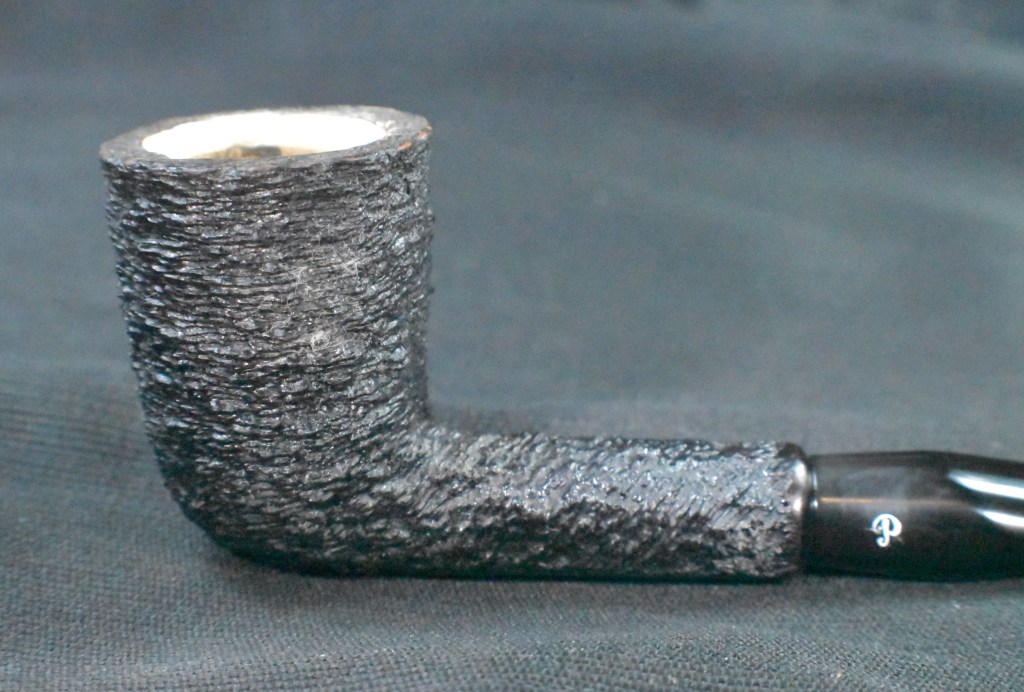
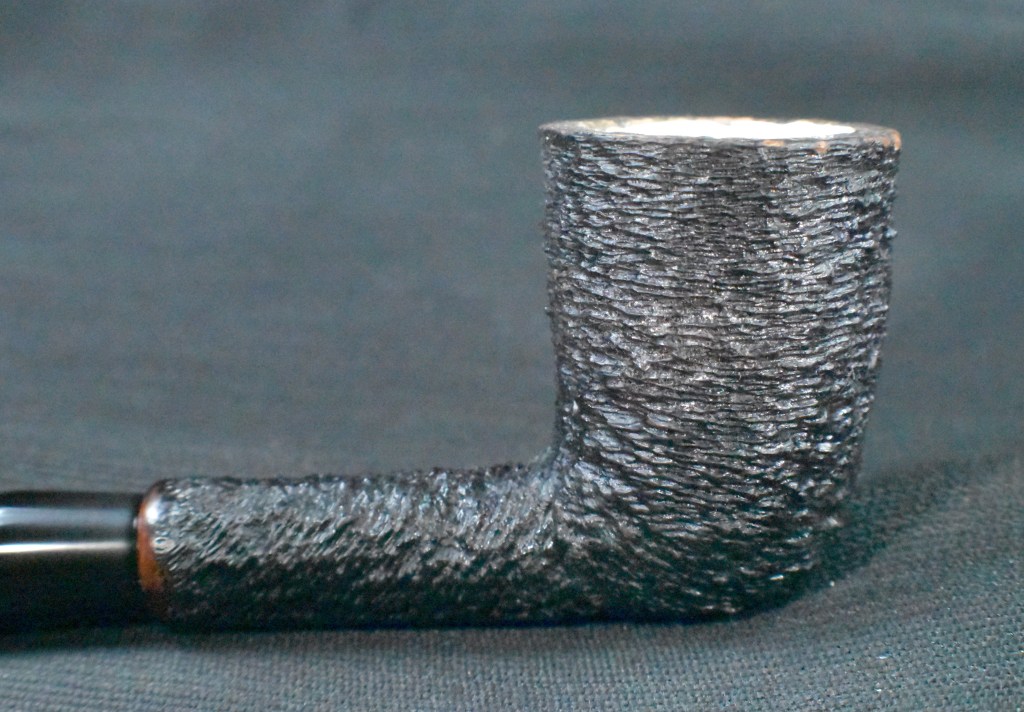
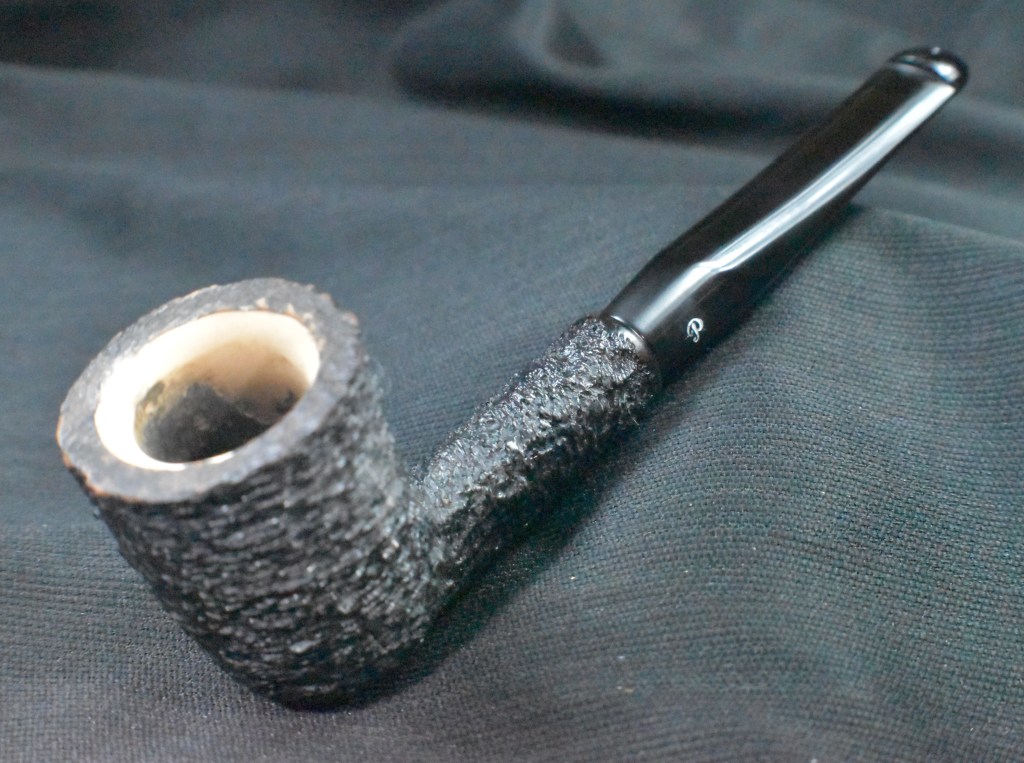
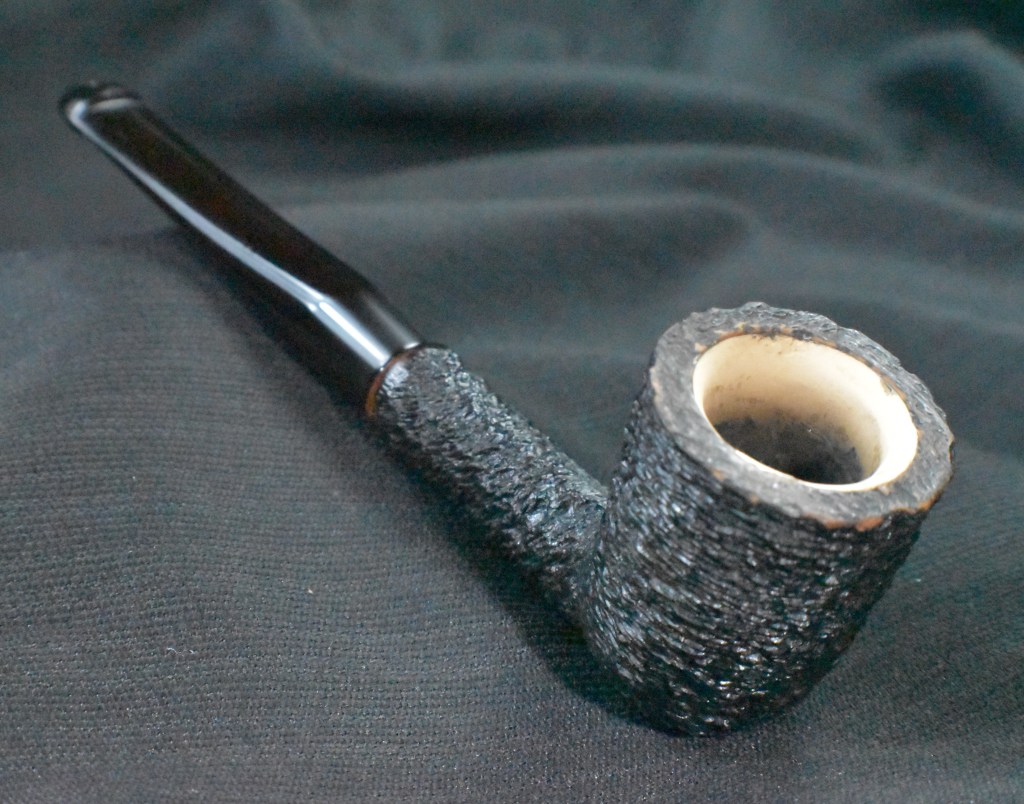
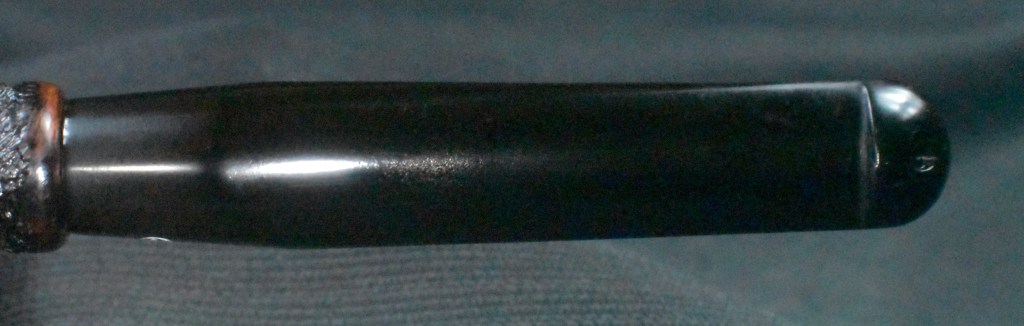

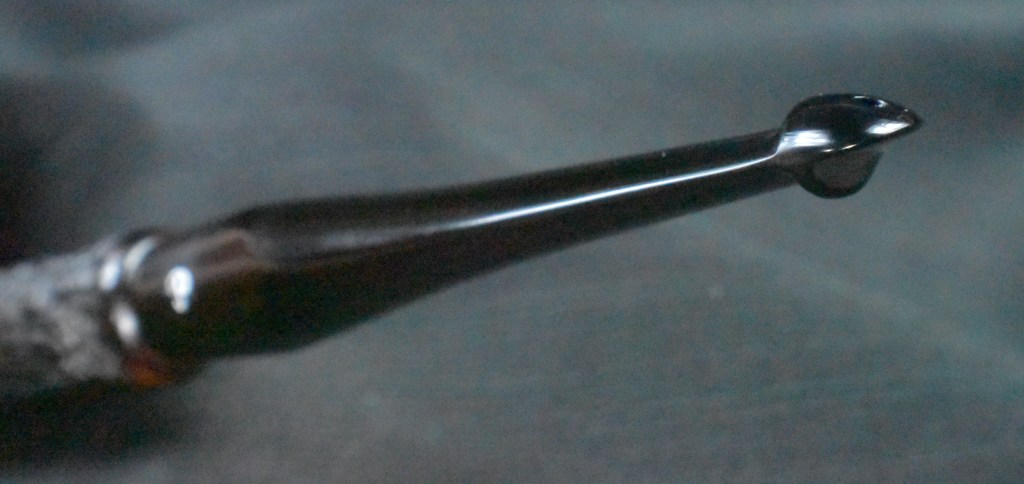
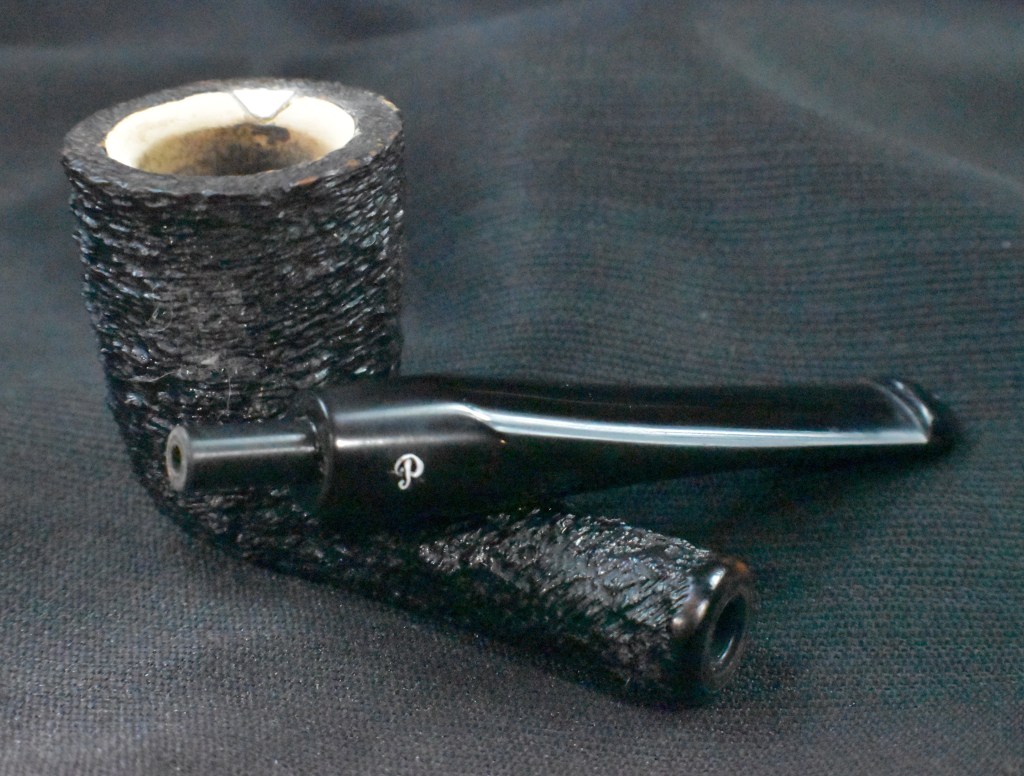


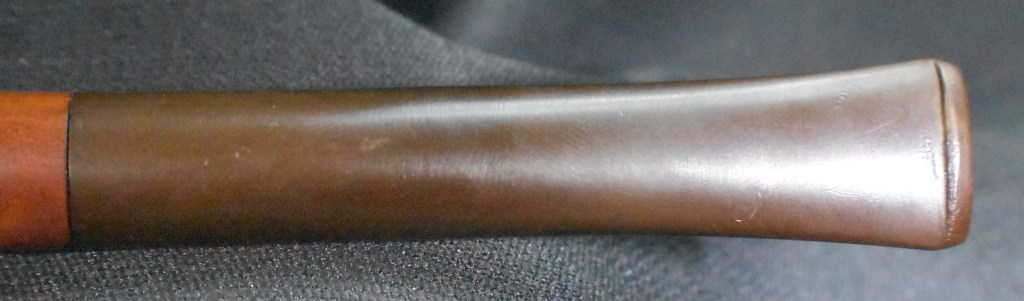


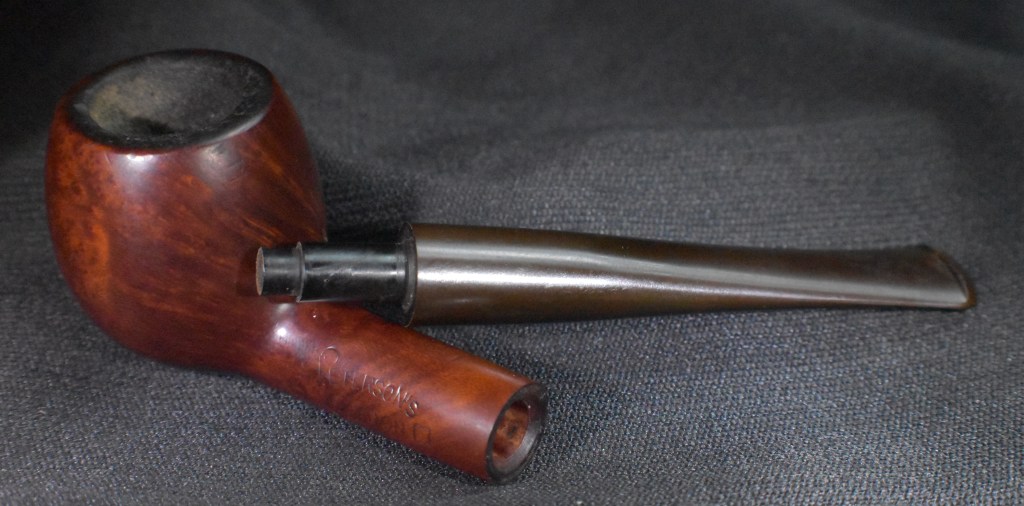


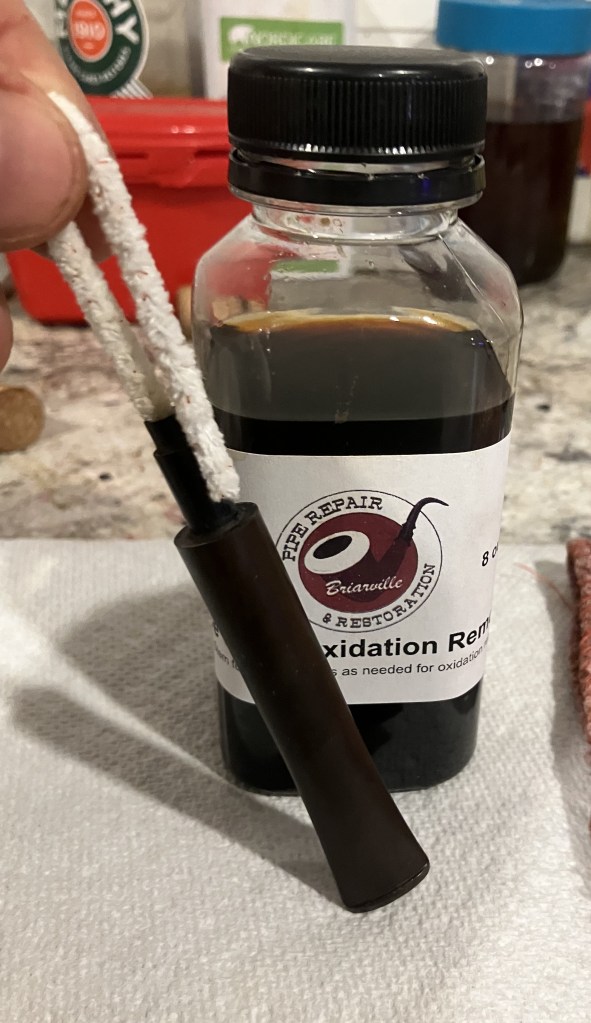


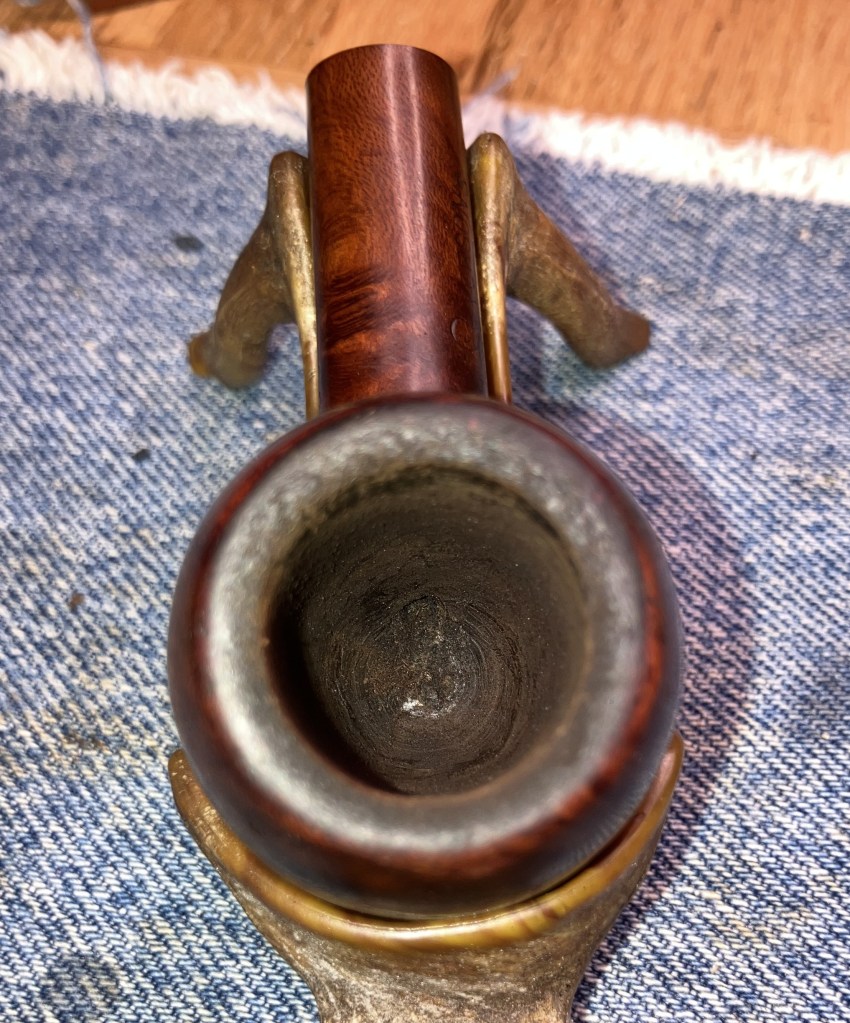
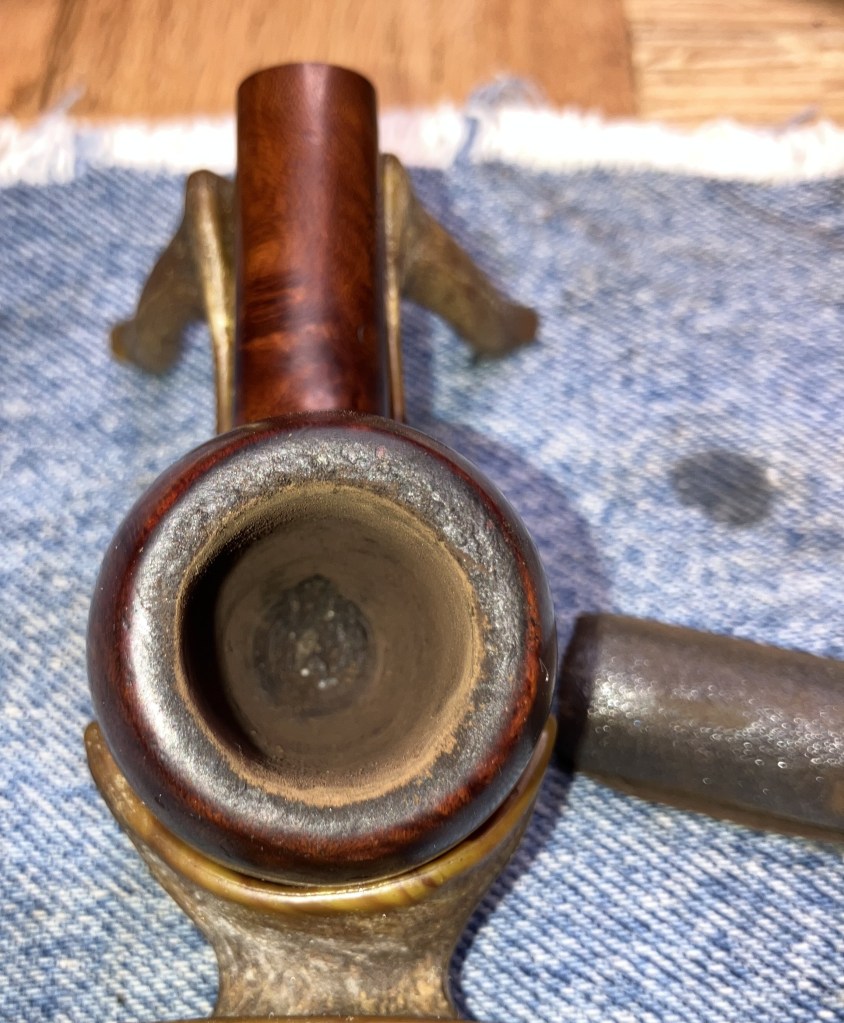
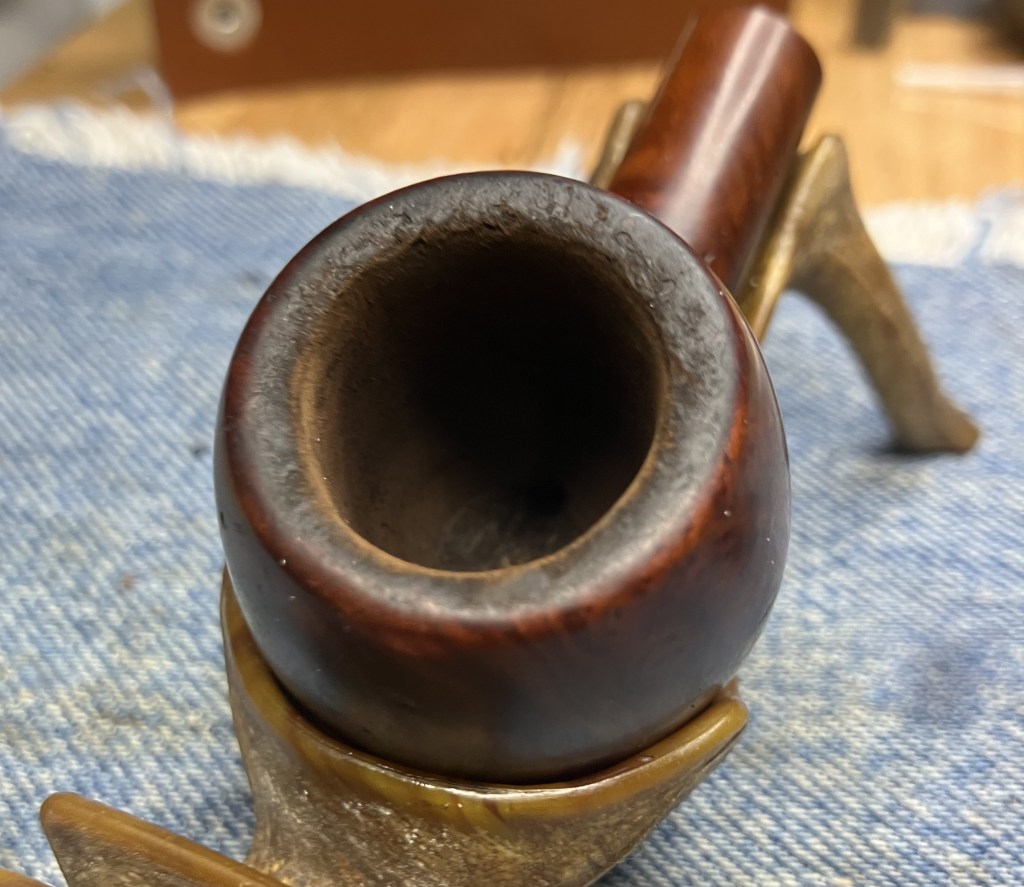

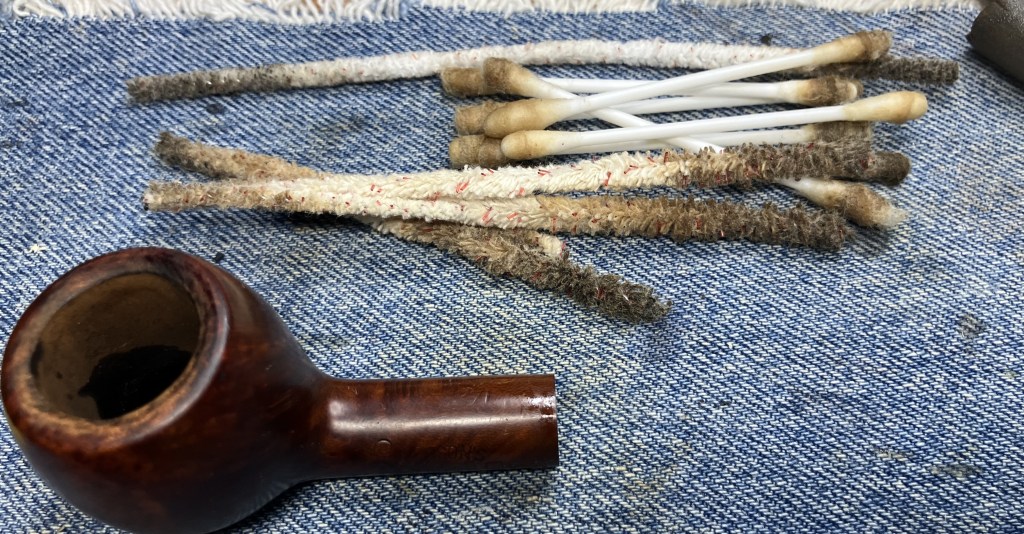

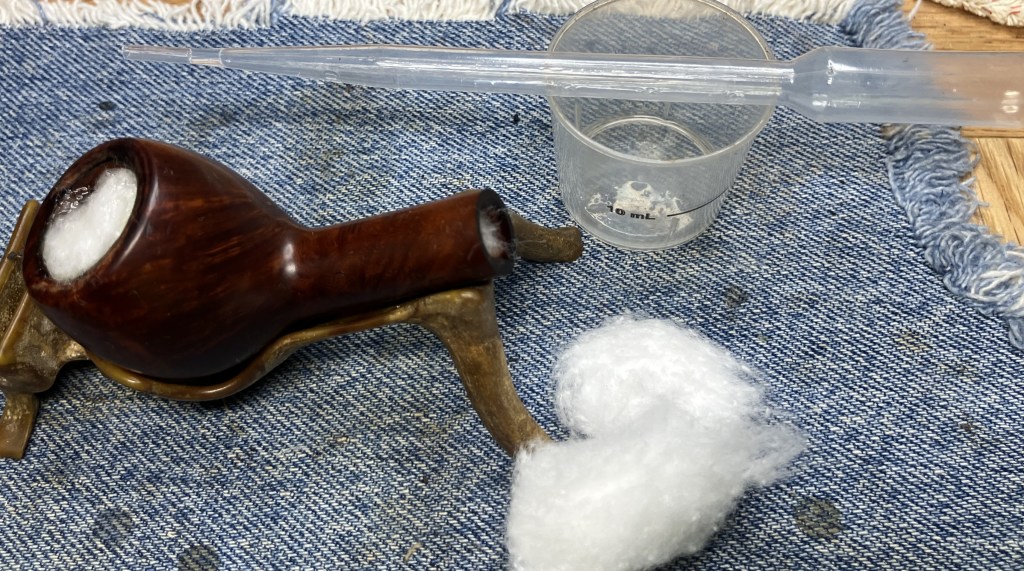

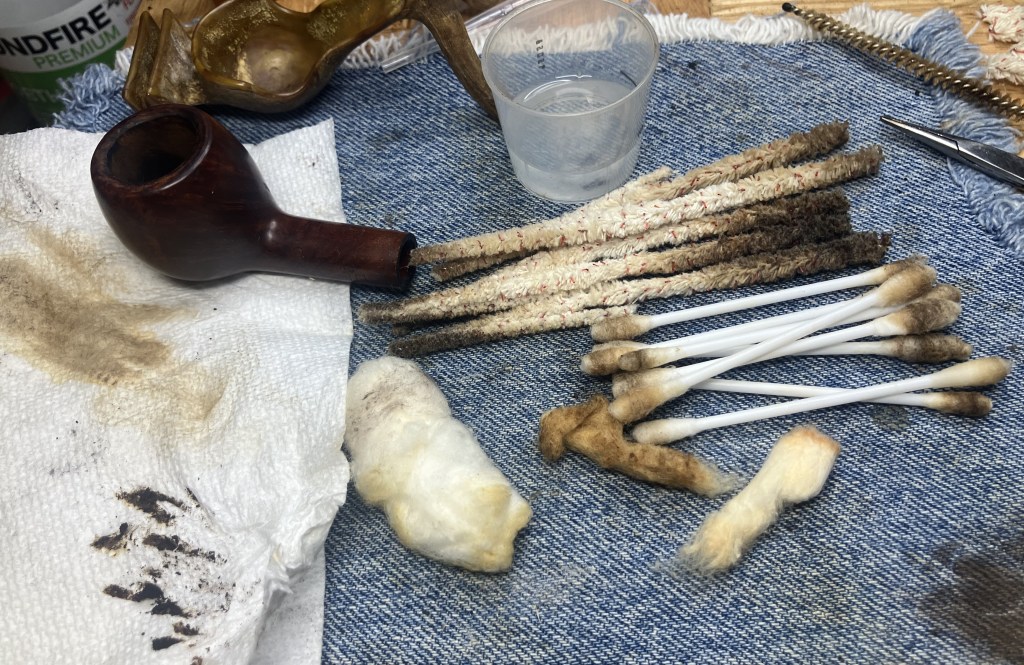
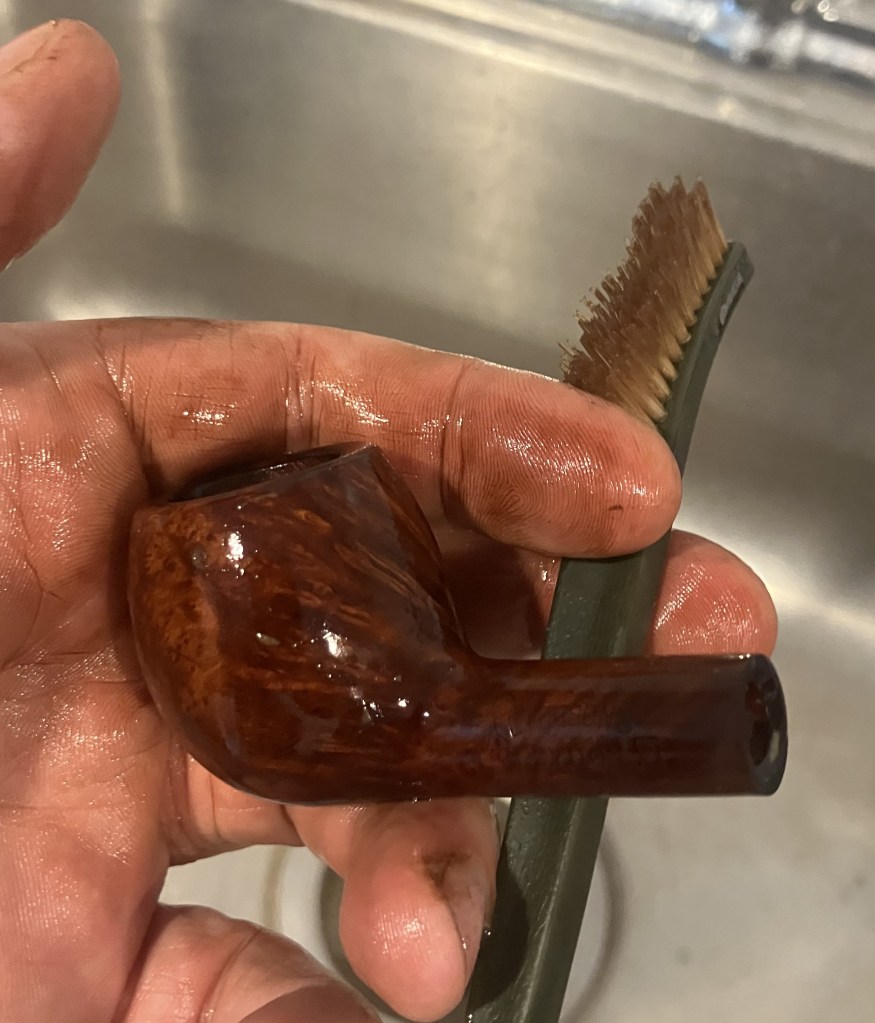

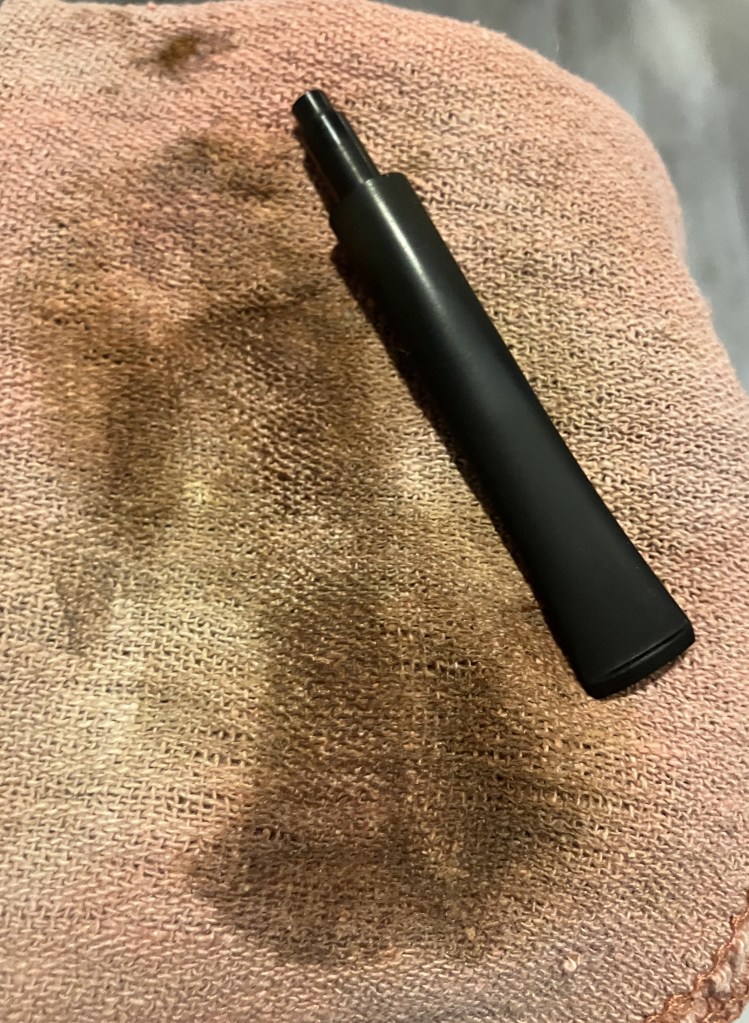
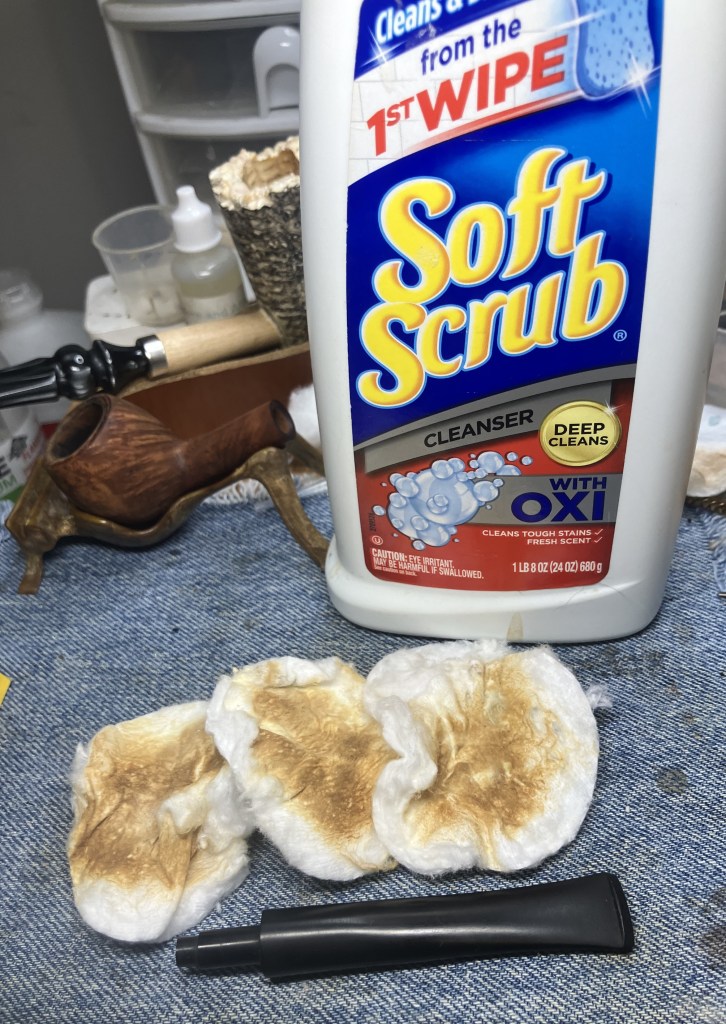
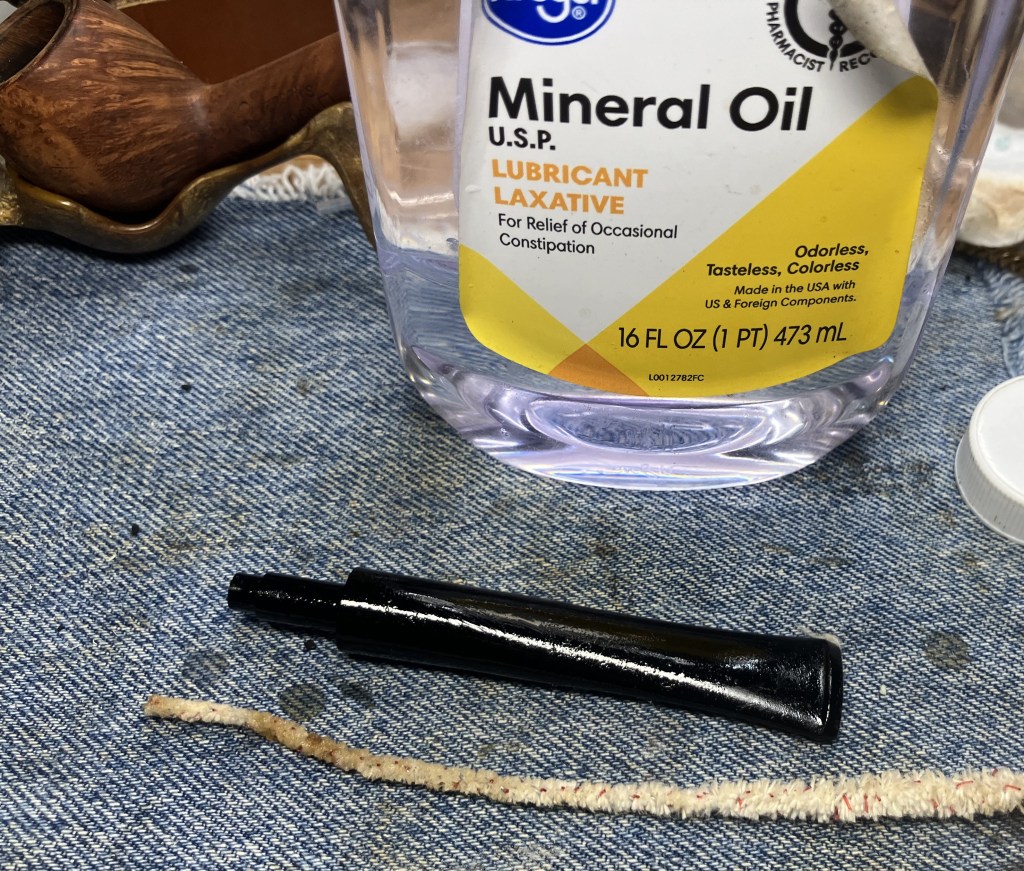


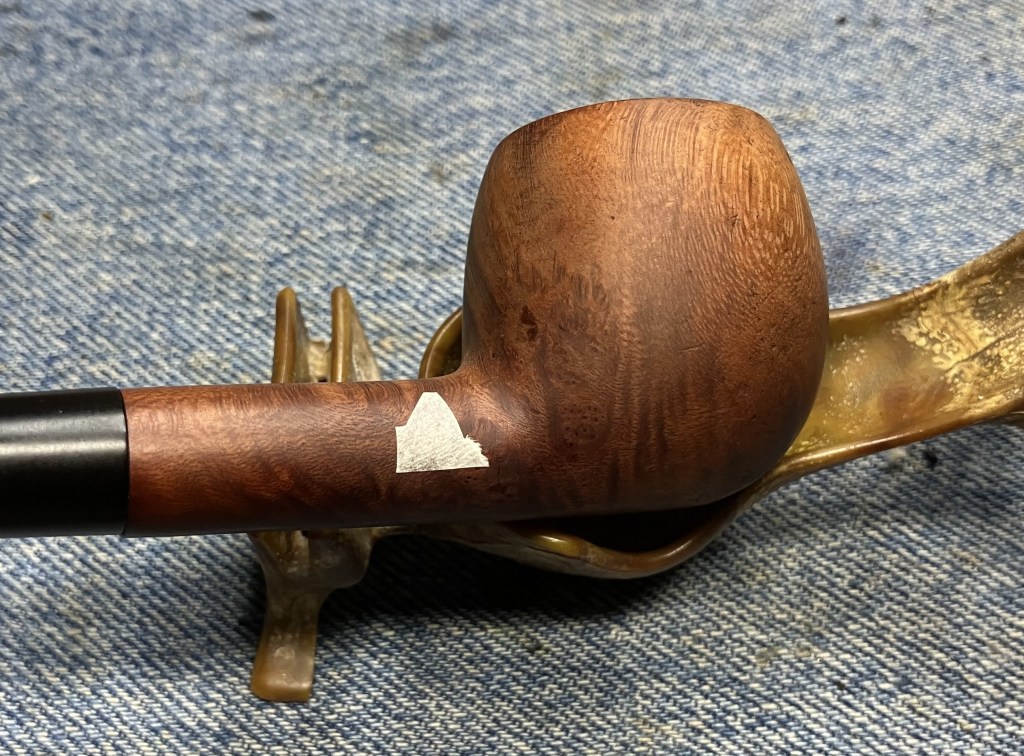


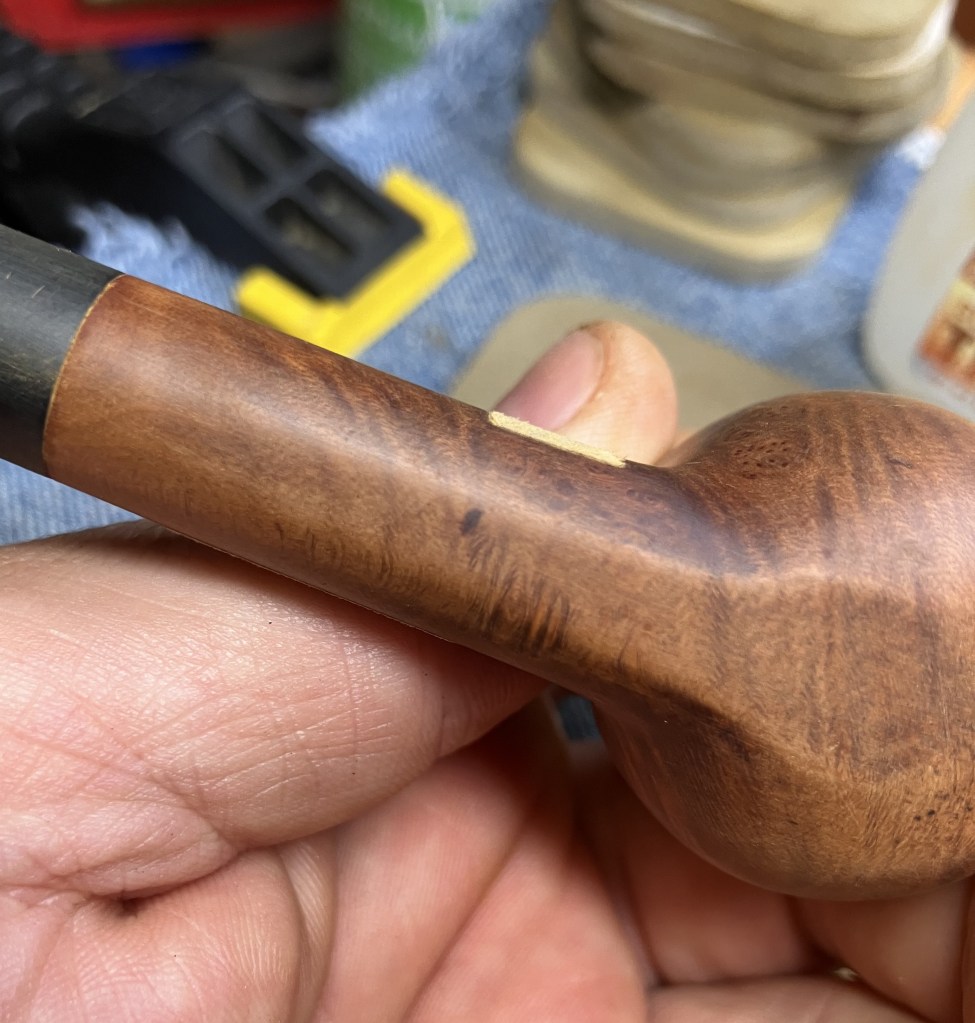


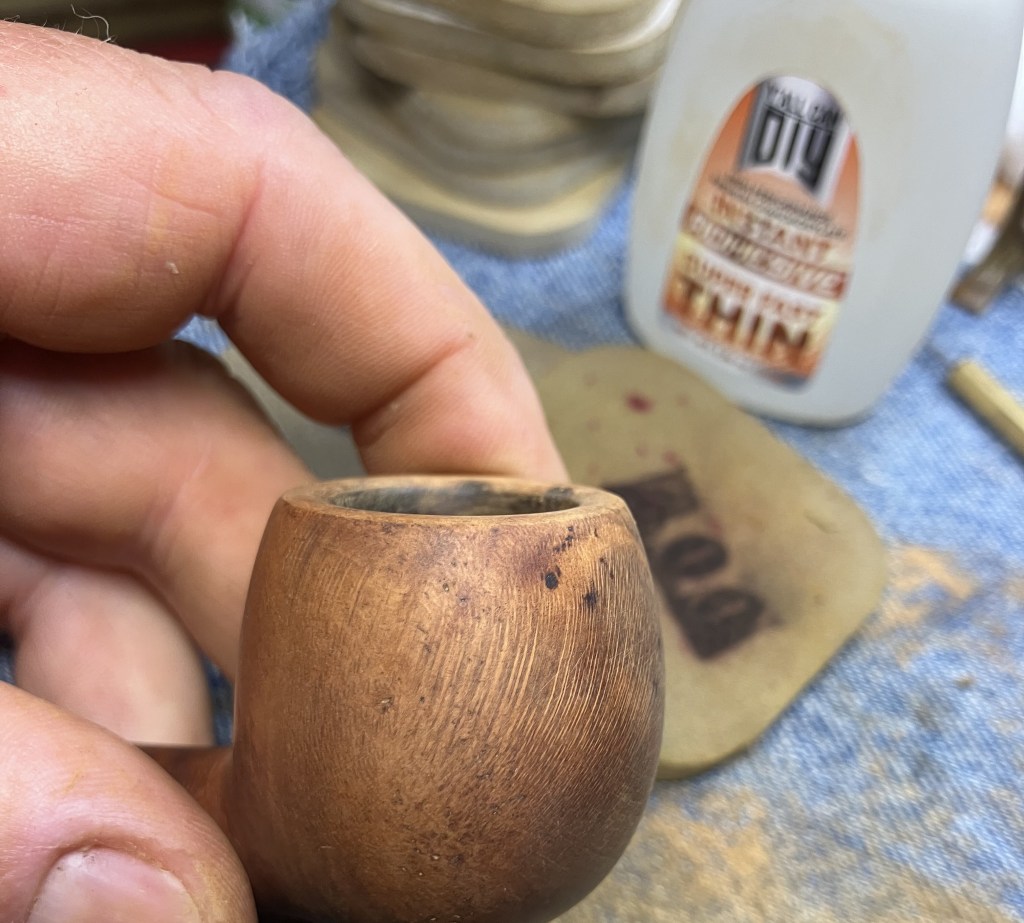


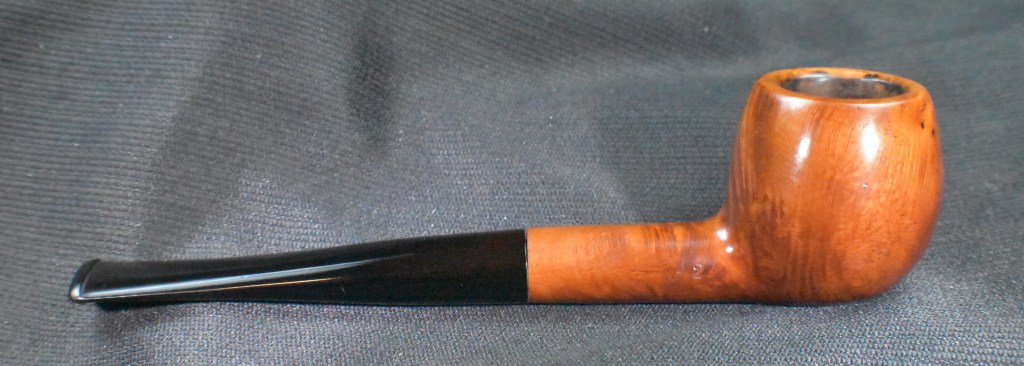


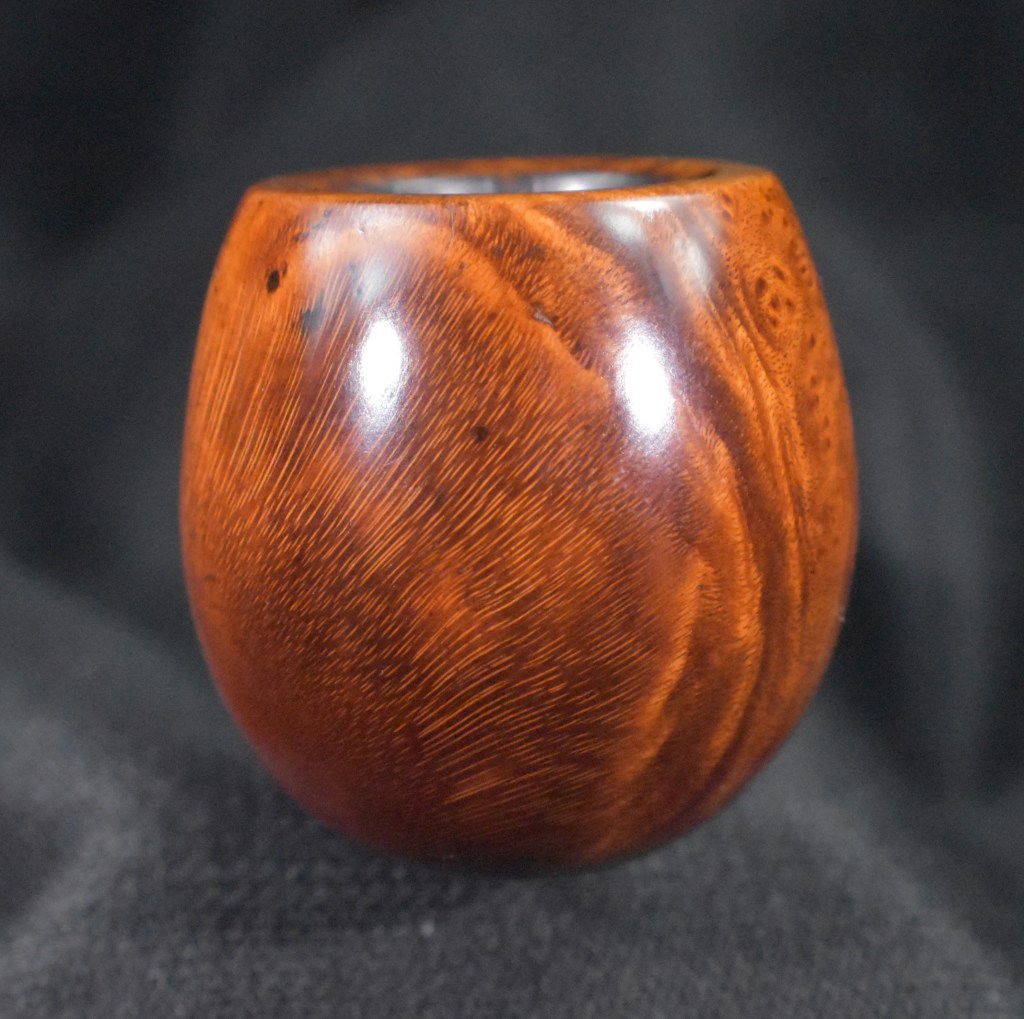


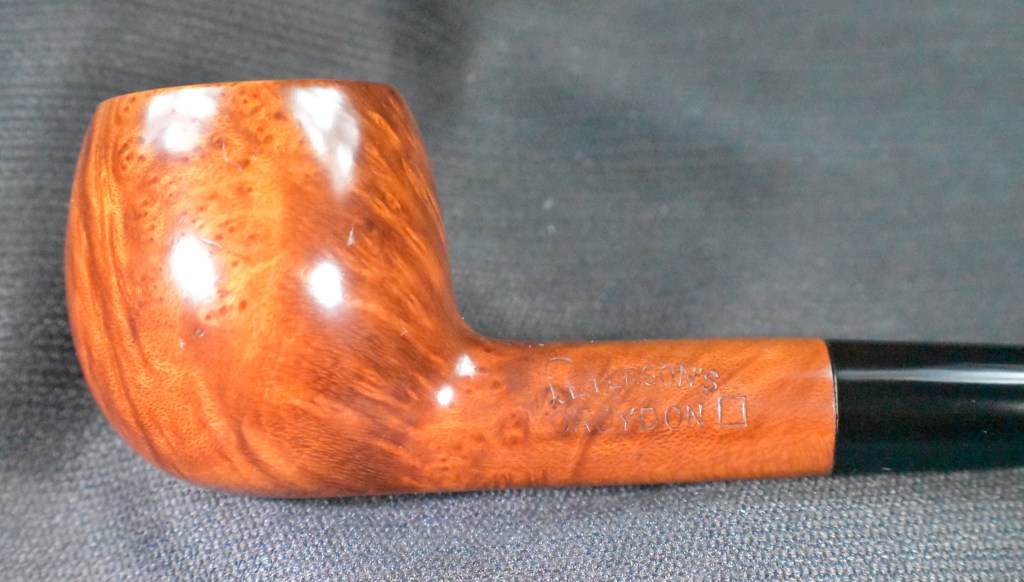


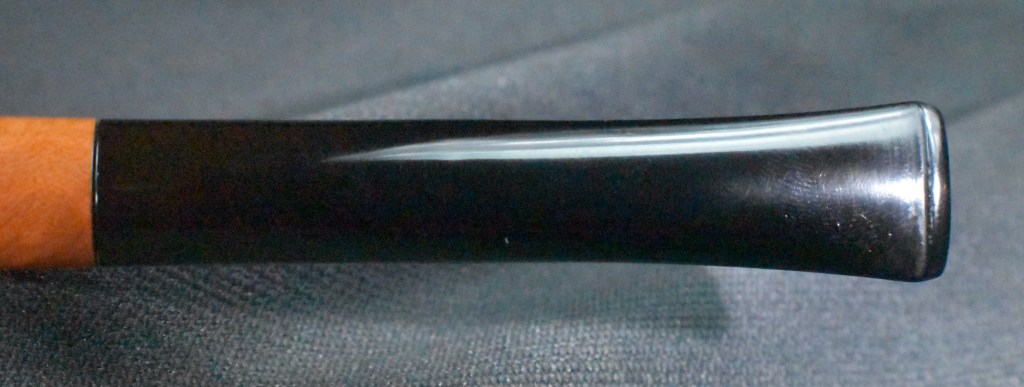


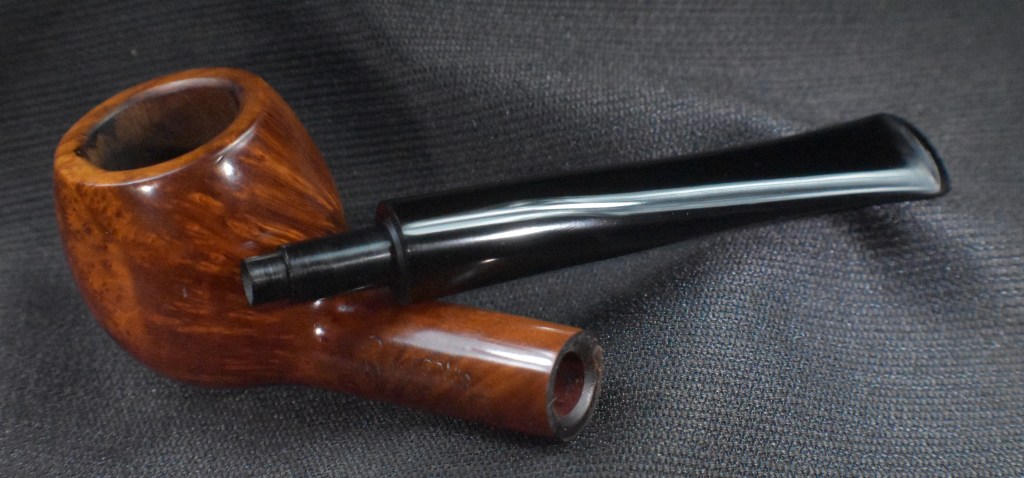


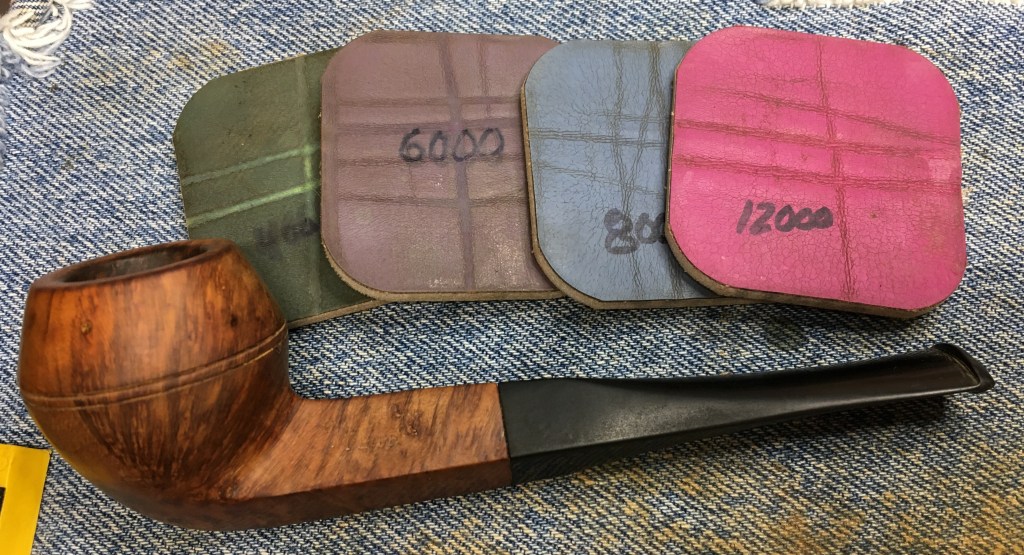


 (
(


 The “Donegal Rocky” (in quotation marks), released in 1945 or so, was Kapp & Peterson’s first rusticated line. Not that K&P hadn’t rusticated pipes previously, they just that they hadn’t devoted an entire line to rustication. And they were apparently proud of it, because they gave it a sterling mount along with a black finish and white-stamped P on the mouthpiece.
 It was part of K&P’s “Product Line,” what I call gateway pipes and others might call an entry-level pipe, as you can see in this shape chart from the 1945 catalog. Like the Shamrock (European version) and “K,” it was originally a fishtail line.

 It’s worth remarking concerning the removable stinger. This spike-ended aluminum tube is easily removed, leaving the P-Lip mouthpiece strictly a graduated-bore regulation affair.