Photographed and written by
John M. Young
As a child of the 1970s I grew up with the series The Six Million Dollar Man. For those who never heard of this, it was a TV series where an astronaut crashes his ship and is badly damaged. He is rebuilt using “bionic” parts allowing him superhuman abilities. During the title sequence a narrator explains, “”We can rebuild him. We have the technology. We can make him better than he was. Better . . . stronger . . . faster.” For some reason this line kept going through my head during this restoration. Given the “faster” doesn’t work but the other two, most definitely. The pipe was one of 13 pipes won in an eBay auction from Germany. I was hoping to acquire some lesser known makers or lines of pipes to the US market.
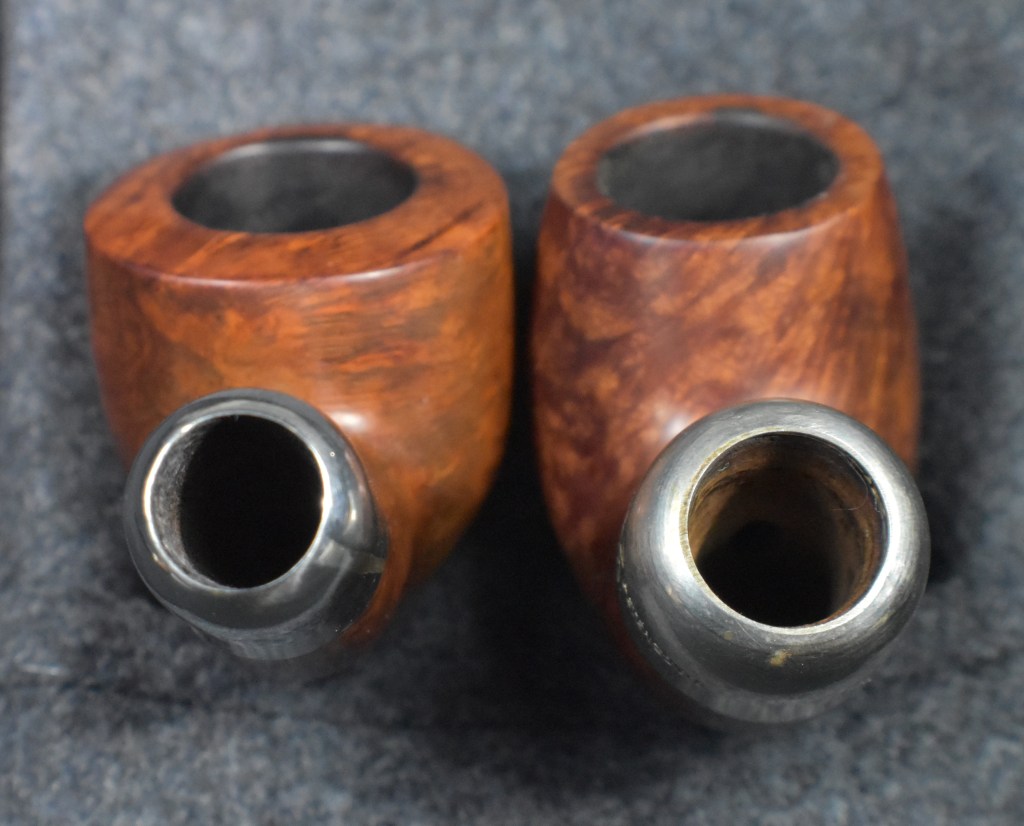
The shape of this pipe is a tough one for me, it is a dainty pipe with a curved bowl. Is it a bent tulip, a chimney, a billiard? Heck, I don’t know, I’ll just use the 8497 stamped on the shank to identify the shape. As for the other stamps there was “Spitfire” in a flowing cursive script and GENUINE over BRIAR as a circle on the underside of the shank. Below is a screenshot of this pipe from the original eBay listing. It shows a repaired stem from a break, a chipped shank end and a good deal of excess glue, perhaps a failed clenching experience while mowing the lawn.

Below are some photos of the Spitfire before work had begun. Well, that is not entirely true. The break was held together by the glue until I tried to remove the stem. The stem was quite stuck. Unaware of my incredible strength, the glue broke while I tried to free the stem. Umm, there may have been a slight exaggeration there about my strength. The stem remained stuck within the shank piece as seen in the photos below.


Ok, you can see there are some issues here that will have to be addressed; the stem stuck in the broken shank and the broken shank being the greatest. The lesser issues include general dirtiness, stem oxidation, excess glue removal, tobacco chamber reaming and other typical restoration stuff. This is going to be a fun project.
Background
The first place that I searched was pipephil.eu for the name “Spitfire”. There I found the following:

(Sn-Ss — Pipes: Logos & Markings). Here you can see the same script style in the “Spitfire” stamping. The GENUINE BRIAR stamp is not represented but the four digit shape number is present. There is also a slight difference in the logo coloration of the bottom image from pipephil.eu. The bullseye shown is more indicative of the colors used by the British Spitfire fighter aircraft in World War Two.

I assume that the blue coloration of the logo in this Spitfire had merely faded over the years.
The next search site was pipedia.org. There “Spitfire” resulted in:

(Italian Pipe Brands & Makers R – S – Pipedia). The Lorenzo link took me to a nice bit on the history of the predecessors of and the formation of Lorenzo Pipes in 1969. Also, there was the following quote specific to the Spitfire line:
“A somewhat more bargain series was given its own brand name: Spitfire. Spitfires displayed 1:1 transferred Lorenzo models (mainly for 9mm filter) as well as smaller, more classically shaped pipes. These were also extremely popular.” (Lorenzo – Pipedia). The store takes a more tragic turn in 1983,
“In 1983 Lorenzo Tagliabue came to bitter grief: his little daughter, the only child, died of cancer. He lost all interest in the business and retired still in 1983, leaving no heirs who wished to continue the business. Lorenzo Pipes was licensed for and continued for a shorter period by Comoy’s of London (Cadogan / Oppenheimer Group). Then Lorenzo Pipes almost disappeared and Lorenzo Tagliabue passed away in 1987.
But this wasn’t the end. In 1988 Riccardo Aliverti and his wife Gabriella purchased all rights to the Lorenzo trademark from the Tagliabue family and production of the renown Lorenzo Pipes resumed.
The Aliverti family is involved in pipemaking since Romolo Aliverti, the father of the current owners, joined the Lana Brothers in 1920. He later reached the rank of technical director. No wonder that his son Riccardo showed an interest in pipe making. Riccardo began learning the pipemaking trade in 1954 at the age of fourteen under his father’s watchful eyes and succeeded him as technical director upon his father’s retirement in 1973.
Today the third generation of the Aliverti family is working for the company. Massimo Aliverti, Riccardo’s son, has been with the company as sales director since 1991. He works closely with his father and knows all phases of production. Massimo has established a broad customer base for Lorenzo around the world.
As far as the informations are reliable, Lorenzo’s better lines (One Star, Two Star, Three Star, Moscato, Spumante and the Grand Canadian) are made in Italy while the cheaper ones (New Era – Riesling, New Era – Poggio, Angera, Angera Satinato, Cadry, Churchwarden, Filtro, Arena, Cadore, Sport PS and Garden) are made in Albania by Tomori to benefit from the rich deposit of briar in Albania.
The website of Lorenzo’s American distributor SMS Pipes gives a good impression of today’s Lorenzo Pipes. SMS also offers a wide range of Meers.” (Lorenzo – Pipedia).
I think that it is safe to say that this pipe was made in Italy by Lorenzo most likely between the early 1970s-1983.
The Restoration
Breaking a pipe is seldom fun and breaking one while removing a stem is less fun than that. I suppose I could take some consolation in the fact that it had already been broken and the attempted repair was what had actually broken. Regardless, the pipe made it to the workbench. I immediately dropped the shank piece and tenon end into a small medicine cup with 95% ethyl alcohol. Apologies for not photographing that step. The alcohol worked quickly in freeing the stem from the broken piece of shank. The below photo has the broken piece of shank pressed in place though not glued, for the photograph.

I began with reaming the tobacco chamber. I thought the PipNet and the #1 blade would be narrow enough for this petit chamber. It was for the first 1- 1.5 cm then the chamber tapered.

I used a Tsuge reaming tool for this narrow chamber. This was followed up with the General triangular scraper.

I remember picking up the Tsuge tool after my first PipNet set lost the #1 blade to breakage. The chamber was then sanded with 220 and 320 sandpaper wrapped around a wood dowel and a Sharpie marker, respectively. There was no damage from heat or charring in the chamber but there were a couple of places where the chamber had experienced small dings, likely from previous clumsy reaming/scraping.

The shank was cleaned with cotton swabs and bristle pipe cleaners dipped in 95% ethyl alcohol.

The stummel was then taken to the sink for a scrubbing with undiluted Murphy Oil Soap and both a nylon brush and a brass wire brush. The soap was rinsed with warm water and the stummel dried with a cotton hand towel.

Back at the workbench the stummel was wiped with 95% ethyl alcohol on a make-up pad. This removed some stain from the briar.

The plan to repair the shank was this:
- Glue a ¼ inch or 6.5 mm brass tube into the mortise well past the break.
- Glue the broken shank end into place.
- Fill the seams with cyanoacrylate (CA, super glue) and briar dust.
- Recarve the rustication and redye the shank.
The mortise of the Spitfire was drilled at ¼ inch or 6.5 mm. I needed to deepen the mortise to implement my fix. I used a Brad Point Drill Bits 1/4-Inch Hex Shank Stubby Drill Bit in a screwdriver handle to extend the mortise approximately 1.4 inch (6.5 mm) past the furthest edge of the break.

The brass tube was slid into position to test the fit. So far, so good.

The pieces of briar refused to align precisely. Bah! Hmm, there was a layer of glue from the previous fix on the briar which kept the broken pieces from aligning correctly.

I began soaking the broken edges with acetone to soften the old glue.

While the glue was soft I worked it with a nylon brush. This helped peel the edges of the glue from the briar. The acetone would evaporate quickly so I had to soften and scrub quickly. Eventually the glue was removed.

The brass tubing was cut to length using a tubing or pipe cutter.

The brass tube was scratched up with 80 grit emery paper to increase the surface area for the glue to adhere to. The tube was pressed into place without the broken shank piece and Thin CA was allowed to seep into the joint. The broken shank piece was slid over the brass tube and situated correctly. Additional Thin CA was applied to these seams. The two pieces of briar were then clamped and allowed to cure.

As the CA was curing I began cutting the tenon to fit into the brass tube. This required the use of the VermontFreehand Adjustable Tenon Turning Tool. I made several cutts adjusting the cutter very slightly (approximately 1/8th turn of the adjustment screw). I feared taking too much material off and shattering the thin tenon. Once the tenon was close to the right size I began filing the new tenon and smoothing it with 400 grit sandpaper.


When the CA that set, I used a countersink bit to hand bevel the inner edge of the mortise.

The stem was pressed into place and the fit was not too bad. I had to file the top of the stem to fit the shank. This was done by wrapping the shank with a layer of masking tape and filing the stem with a small flat file. The lower edge of the joint would have to wait until I had the chip filled before I could fit it to the stem.

Since the seam where the two shank pieces joined was adjacent to the stamps care had to be taken to keep from damaging the stamp. I applied brown CA with the tip of a fly tying bodkin to the seam. Briar dust was then pressed into the wet CA. The briar dust caused the CA to cure almost immediately. The excess dust was brushed off with a brass brush. This was repeated to fill the seam in very small increments.

The same process was used on the carved surface seams.

To fill the chipped shank end, I applied a bead of brown CA to the area that I wanted filled. This wet CA was then pressed into the box of briar dust. The excess dust was brushed off with a nylon brush and another thin layer of CA was applied. This wet CA was again pressed into the briar dust. Once the chip in the shank end was filled with CA and briar dust the end was filed with a small flat file. The final fill was topped with a coating of Thin CA to seal the layers of brown CA and briar dust.

At this point I was getting impatient to get a look at the finished pipe. I opted to try buffing the stem’s oxidation into submission. In hindsight, this was a mistake. I describe it here so that you can avoid being as dumb as me.
I wrapped the shank with masking tape to protect it from the buffing.

Using a rouge compound I buffed the stem until I thought I’d removed the oxidation.

The problem was, the stem looked shiny but shiny brown. I wanted shiny black. I wetted a few make-up pads with Soft Scrub cleanser and scrubbed the stem. They removed a great deal of oxidation.

“Okay, I’ll quit being in a hurry and do it right,” I said to myself. I suspended the stem into the Before and After Extra Strength Deoxidizer (I refer to this as deox). It was allowed to soak overnight.

The next day I removed the stem and allowed it to drip excess solution back into the jar.

I like to scrub the remaining deox from the stem with vigorous use of a coarse shop rag.

The coarse texture of the rag absorbs the solution and removes more of the oxidized rubber as can be seen below.

The stem was certainly looking more black this time. There remained brown areas especially on the top side of the stem. I sanded the stem with a series of sanding sponges from 400-1000 grit. The zone immediately (1 cm) below the button was filed using the small flat file and further sanded. Once sanded I returned to the buffer and buffed the stem with white compound.

Pleased with the stem, I turned my attention to recarving the rustications on top of the fills. I used the Dremel rotary tool and a sharp carving bit.

I tried to keep the lines pretty much the same but to carve through the fill material. I very much wanted to eliminate any shiny CA spots.

The newly carved textures looked good but their color was off when compared to the rest of the shank.

I used a Mahogany Furniture Touch-up Marker to re-stain the briar to match the existing color.

Not bad.

Not bad, at all.

The stummel was given a coat of Before and After Restoration Balm, applied with a baby toothbrush and allowed to sit for 20 minutes.

20 Minutes later the Restoration Balm was hand buffed from the stummel using an inside out athletic sock.

The baby toothbrush was cleaned using 95% ethyl alcohol. Renaissance Micro-Crystalline Wax was applied to the stummel using the baby toothbrush. I applied two coats of wax allowing 10 minutes between coats.

The stummel was taken to the buffer where it was buffed using a clean flannel wheel. While there I applied several coats of carnauba wax to the stem and the stampings on the underside of the shank.
To address those two rough spots from previous reaming/scraping inside the tobacco chamber, I opted to use a maple syrup and charcoal bowl coating. I applied a very thin coating of syrup to the chamber using a cotton swab.

I then used a capsule of Activated Charcoal dumped into the chamber. Oh, note the pipe cleaner in the shank. This keeps the charcoal from getting into the airway. I covered the rim with a piece of masking tape and vigorously shook the stummel for several seconds to distribute the charcoal powder evenly onto the wet syrup.

After removing the tape, dumping the excess charcoal and giving the stem a good blow, don’t draw in, you’ll get a mouthful of charcoal. The final step was a hand buffing done with a microfiber polishing cloth.
This was a long and troublesome restoration. Little things like; not having the ¼ inch brass tubing and waiting for it to arrive, the old glue removal, fitting the brass reinforcement tube, cutting the tenon, and being dumb and skipping steps, made the whole process last for many days. In the end, I think the pipe turned out well. Yeah, like the pipedia.org article says, “A somewhat more bargain series”, it is a cheaper pipe. I enjoy the challenge of returning a pipe like this to working condition. The re-carvings turned out very nicely as did the re-staining. I think you would be hard pressed to notice the break repair if you could not see the seam on the smooth stamp surface. The stem also did polish up fairly well. The brass reinforcement will certainly add strength to the pipe and should keep it from having another break. It is still a dainty little pipe which would probably be a great addition to someone who loves Virginia flake tobacco in a tall narrow bowl. The dimensions of the Lorenzo Spitfire Bent Billiard 849 are as follows:
Length: 5.37 in./ 136.40 mm.
Weight: 0.87 oz./ 24.66 g.
Bowl Height: 2.02 in./ 51.31 mm.
Chamber Depth: 1.75 in./ 44.45 mm.
Chamber Diameter: 0.61 in./ 15.49 mm.
Outside Diameter: 1.24 in./ 31.50 mm.
I do hope that you have found something here useful to your own pipe care, maintenance or restorations. If you like this sort of thing, please click the like and subscribe buttons. Thank you for reading the ramblings of an old pipe lover.
Below are some photos of the finished Lorenzo Spitfire Bent Billiard 8497.


 The “Donegal Rocky” (in quotation marks), released in 1945 or so, was Kapp & Peterson’s first rusticated line. Not that K&P hadn’t rusticated pipes previously, they just that they hadn’t devoted an entire line to rustication. And they were apparently proud of it, because they gave it a sterling mount along with a black finish and white-stamped P on the mouthpiece.
 It was part of K&P’s “Product Line,” what I call gateway pipes and others might call an entry-level pipe, as you can see in this shape chart from the 1945 catalog. Like the Shamrock (European version) and “K,” it was originally a fishtail line.

 It’s worth remarking concerning the removable stinger. This spike-ended aluminum tube is easily removed, leaving the P-Lip mouthpiece strictly a graduated-bore regulation affair.