I’m back into Marxman mode. This one has sat neglected in the queue for several months. Everytime I looked over at the pipes waiting to be restored I thought about doing this one, then I got distracted like a dog whose owner yells, “squirrel!” Speaking of dogs, I frequently call my 85 pound four-legged tongue a “big headed freak”. This bulldog is kind of like that except it’s a big bowled freak with a lovely forward cant. I ordered this pipe from Judds Pen and Pipes, a well known seller of eBay, back in May of 2024. I told you it had been waiting in the queue for a while… Below are some photos I took before starting work on this pipe.
This pipe was in very good condition with grain that looked very promising under the accumulated wax/finish and did not look like it would require a tremendous amount of work. I did not like the overly glossy appearance of the pipe in general. Either it had a very thick layer of carnauba or there was an evil clearcoat finish lurking. The stem fit was not very tight, that would have to be addressed. The tobacco chamber had some cake and hopefully no damage beneath it. The stem showed almost no browning from oxidation. This was strange for a pipe over 75 years old but I wasn’t complaining. There was some tooth chatter and dents in the stem to be restored.
Background
Believe it or not this would be the 20th Marxman pipe which I have restored and blogged about. There are also a few that I didn’t write up as well. I would like to think Robert Marx would approve. In each of the Marxman restorations I have done, I have included a background section. I think the most complete history is from “A Marxman Jumbo C Restoration” ‹ NebraskaPeteGeek — WordPress. Rather than copy-paste it here, I will let those interested pursue that link.
There is a shorter history of Robert Marx and the Marxman company here, at pipedia.org.
The Dunsboro name can be found in a catalog image on pipedia.org. The site lists the catalog as “circa 1950s” but Robert Marx sold the company to MasterCraft in 1953, making the catalog likely from the early 1950s.
Once on the workbench and underlain with the required denim, I again wondered about the finish.
I began with rubbing the pipe with a make-up pad wetted with 99% ethyl alcohol.
This came back with dark stains of dirt and old wax. Well, I assumed it to be old wax. The stamping immediately became more clear and easier to read.
The stem fit was an issue.
With a closer examination of the tenon, I saw why this tenon was either abused to this was a poor attempt at restemming using a chainsaw as a tool for fine-tuning the fit of the tenon.
I started by attempting to re-face the edge of the stem with the tenon.
The refacing was done using a wooden block with holes cut to fit various diameter tenons and some 400 sandpaper.
The end of the mortise was far from straight.
I filed it flat with a small flat file.
I then used a ½ inch counterboring bit to give the airway a slight bevel.
The tenon was restored to cylindrical shape by applying several light coats of Thin cyanoacrylate (CA, super glue). These were lightly filed and sanded between coats of CA.
I had to test to make sure gravity was still affecting liquids, it was. No really, I didn’t spill the alcohol while cleaning the stem with bristle pip cleaners.
I filed the top and bottom surface of the bite zone with a small flat file to remove most of the tooth chatter.
The reaming tools were gathered.
To ream the tobacco chamber the #2 and #3 PipNet blades were used. A small amount of clean-up was done with the General triangular scraper.
After sanding the chamber with 320 sandpaper wrapped around a wood dowel the chamber looked good with no signs of heat damage, though there was some scratching of the wall by a previous owner.
The shank went well using cotton swabs and bristle pipe cleaners dipped in ethyl alcohol. There was also a bit of scraping done with a dental scraper and boring of the airway with the Scotte stainless steel pipe reaming tool – shank drill.
Next, the stummel was scrubbed with a nylon brush and undiluted Murphy Oil Soap. The soap was rinsed with warm water and then dried with a cotton hand towel.
I packed the tobacco chamber, airway and shank with cotton.
I then applied 99% ethyl alcohol with a disposable pipette to the cotton until it was saturated. The alcohol would be allowed to evaporate overnight. This softened and dissolved some of the accumulated tars in the airway, moved them from the briar into the cotton as the alcohol evaporated.
The next day the cotton showed signs of the successful removal of tars from the briar.
The cotton was removed using a forceps.
Recleaning of the airway indicated that the initial cleaning and the cotton/alcohol treatment were successful.
The shank stamps were masked with masking tape for their protection during the upcoming sanding.
I nearly forgot to fill the tooth chatter on the stem beforeI started sanding. Black rubberized CA was used for the fills. This was allowed to cure for about an hour before filing and sanding it.
A small flat file and 400 sandpaper were used to smooth the new fills.
I wanted to keep the pipe intact during the sanding avoids the rounding of the edges of both the shank and the stem, though some rounding of these edges had occurred by previous Keeping owners. The sanding was done with a series of sanding sponges from 320-1500 grits. Between each sponge the stummel was wiped with an alcohol dampened make-up pad and the stem rubbed with mineral oil then wiped with a paper towel. The wiping was done to remove sanding debris.
The sanding progressed with the 2000-3500 sanding sponges with the above wiping after each sponge.
Eventually the pipe was worked with micro-mesh pads 4000-12000. Here the wiping was done similarly to the sanding stems except instead of mineral oil I used Obsidian Oil on the stem.
The pipe was then taken to the buffer and buffed with white buffing compound on both the stem and stummel. The excess buffing compound was wiped off with a cotton hand towel then the pipe was cleaned with a make-up pad dipped in 99% ethyl alcohol to remove any remaining buffing compound.
I returned the pipe to the buffer for several coats of carnauba wax.
The final step was a hand buffing of the carnauba wax with a microfiber polishing cloth.
This Marxman Dunsboro turned out quite nicely. The briar grain is exceptional, for a Marxman. I added that disclaimer since Marxman pipes are kind of known for their rougher textures. The stem material is not of the highest quality vulcanite and even when polished it retains a less glossy finish. The repair of the tenon went better than expected producing a nice cylindrical tenon. Unfortunately, the mortise had become worn by the old uneven tenon and a rigid tight fit was near impossible to achieve. It is far better than it was though. Overall, this pipe will make a great smoking pipe and shows some of the characteristics of the better-quality WWII era Marxman pipes. The dimensions of the Marxman Dunsboro Saddle Bulldog are:
Length: 5.47 in./ 138.94 mm.
Weight: 1.45 oz./ 41.11 g.
Bowl Height: 1.82 in./ 49.78 mm.
Chamber Depth: 1.56 in./ 39.62 mm.
Chamber Diameter: 0.76 in./ 19.30 mm.
Outside Diameter: 1.62 in./ 41.15 mm.
I do hope that you have found something here useful to your own pipe care, maintenance or restorations. If you like this sort of thing, please click the like and subscribe buttons. Thank you for reading the ramblings of an old pipe lover.
Loading…
Below are some photos of the finished Marxman Dunsboro Saddle Bulldog.
I am not a big fan of figural pipes in general. However, as a Marxman fan, I cannot help but try my hand at bidding when one comes up on eBay for a reasonable price. That was the case with this charming cherub. This little cheeky monk showed up with three other pipes. The Marxman was the obvious target of the acquisition but the other two also looked interesting.
I won’t say what I ended up paying for the trio but it was far less than I was willing to pay for the funky monk. A road trip from Decatur, Georgia to the wilds of southeast Nebraska later the pipes arrived. I also like to think this freewheeling friar made a detour through Sherwood Forest to visit a certain hooded robbing Robin. Now my imagination is running rampant. The stampings on the bottom of the pipe were a nice sharp MARXM with the fletchings of an arrow on the left. The last couple letters of MARXMAN and the arrow tip looked to be the victim of an incomplete stamp. Below this was IMPORTED BRIAR. Anyway, below are some photos of the chubby cheeked monk before he had any work done.
Yeah, this one had some issues. The stem was obviously not the original. There was a visible crack in the shank, likely the reason for the also not original band. The pipe had been smoked as indicated by both the cake in the bowl and the lava on the rim. There also appeared to be a cigarette burn on the right side of the stummel. The carving itself looked good although the small hole exiting the monk’s lips gave me concern. I worried that this irregularity in the tobacco chamber might lead to charring around the hole. Well, I’d cross that stream, without crossing quarter staves with Little John, during the reaming. See that? Another Robing Hood tidbit. I wonder if there will be more.
Background
I keep hoping that an author will write a comprehensive history of Robert Marx and Marxman Pipes, similar to:
Until then I will have to use less glamorous means of documentation. Heck, I’ll even quote myself, how is that for less-than-glamorous? Below are links to previously written blogs with more complete histories of Marxman pipes, for those interested in reading more about Robert Marx and his company.
As for this particular pipe, I’ll refer to a c. 1950 Marxman catalog,
(File:MarxmanCatalog4.jpg – Pipedia). This is why I titled this blog “A Marxman Carved Head – Monk Restoration”. The catalog calls these pipes “CARVED HEADS” rather than figural pipes and I used that nomenclature. I am assuming that this pipe is from around the 1950 date, prior to the acquisition of Marxman by Mastercraft in 1953. After the acquisition Marxman pipes were manufactured in France and Italy and bear a country of manufacture (COM) stamp indicating the COM. Since this pipe is lacking a COM, I assumed that it was carved in New York City.
The Restoration
The Monk made its way from the photo table to the workbench and received a cleared denim piece.
The first thing I did was look through my limited stock of pipe stems for suitable replacement stems. The stem that was on the pipe was already a replacement stem likely from a Comoy pipe. Comoy had several brands or seconds that used three bars on their stems. I found two then fit the mortise and would require less work on my part to fit the stem to the pipe.
The first was a black hard rubber, non-vulcanite, saddle stem. All of the Carved Heads had a taper stem, according to the photos from the catalog, though some of the animal versions appeared to have saddle stems. This stem would provide a more original look to the piece.
The second was a short briar wood stem. This stem was interesting and would make the pipe into a cute nose-warmer.A very non-traditional look, but one that was intriguing.
Below is a photo of the briar stem from the rear.
I asked the monk which he preferred and got the silent treatment. Not even a, “To Nottingham.” Perhaps he’d taken a vow of silence…
I tried both stems for size and feel.
The nosewarmer version was OK to clench with its short, less leverage physics. The Saddle stem also clenched well and did maintain the standard look of a Marxman. I was still undecided.
Maybe some reaming would cure my indecision.
The reaming was done with the PipNet #1 and #2 blades. The Smokingpipes Low Country reamer and the General triangular scraper.
The reamed tobacco chamber looked pretty good. Just some lateral rings had been lightly cut into the briar.
Sanding the tobacco chamber with 320 sandpaper wrapped around a wood dowel took the briar to bare wood and revealed no damage to the chamber from heat. Also, the small hole leading to the monk’s mouth seemed completely fine.
I turned to cleaning the airway of the shank. This was done with several bristle pipe cleaners, a nylon shank brush, several cotton swabs all dipped in 99% ethyl alcohol. There was also some scraping of the airway with a dental scraper. The alcohol softened the glue holding the band. This was removed and dropped into the alcohol.
After soaking in alcohol, the band was cleaned with a cotton swab and a light rubbing with 0000 steel wool.
I wondered how the band would look buffed, so I took it to the buffer and lightly worked it with white buffing compound. It shined up nicely.
I tried both stems with the polished band.
I had decided. The replacement of the replacement stem would be the saddle stem. It would require some file work though.
I thought to myself, “Hi self, You know that band would look much better if it were brass.” I couldn’t help but agree. I went through the bras tube stock and found a piece that would fit with minimal shank filing. I used a pipe cutter to cut off a section to fit the monk’s shank.
The new band was too tight to allow a good fit, Some cleaning and then filing and sanding would be required.
The monk still needed a tiny bit of dental work. The small hole in between the lips would not pass a pipe cleaner through to the inside of the tobacco chamber. I used a couple of alcohol dipped pipe cleaners then used a Vermont Freehand slot tool (Slot Tool (with handle) – Vermont Freehand). To clean-up the inside of the hole.
The stummel was taken to the sink for a scrubbing with Murphy Oil Soap and a nylon brush. The soap was rinsed with warm water and the stummel dried with a cotton hand towel.
Returning to the workbench, I wiped the stummel with a cotton make-up pad dipped in 99% ethyl alcohol.
I was not happy with how the shank cleaned up so I thought that a cotton alcohol treatment would loosen up the tar deposits in the airway. The tobacco chamber and the airway were packed with cotton from a few make-up pads. I thought that 10 ml of alcohol would suffice. The alcohol was transferred via a disposable pipette.
I used a pipe stand to elevate the shank end to be about the same level as the rim as the pipe was now filled with alcohol saturated cotton.
Usually I allow the alcohol to evaporate overnight. This pipe sat for seven hours until I returned to it. The monk, not like Friar Tuck from the stories, didn’t seem to be able to handle his alcohol and was face down.
Upon returning I could see that the evaporating alcohol had done its job of liberating the tars from the briar and moving them to the cotton as the alcohol evaporated.
The shank too, looked like the treatment had been successful.
The cotton was removed and with it a good deal of tar and smoking residue. I again cleaned the shank with alcohol dipped cotton swabs and bristle pipe cleaners.
I masked the shank and band for their protection. The replacement stem was fitted using a small flat file.
Once filed to fit I smoothed the saddle with 320 and 400 grit sanding sponges. The stem was rubbed with mineral oil and wiped with a paper towel to remove sanding debris.
It was time to glue the new band in place. The fit was tight and required me to place a wood block against the end and tap the band into place with a hammer. I decided to go with brown cyanoacrylate (CA, super glue).
My brown CA is getting old and it is like applying warm tar. I used a fly tying bodkin to apply the CA around the end of the shank leaving a couple mm for the CA to move when the band was pressed on.
The seating of the band went well. After allowing it to set-up for an hour I wetted a soft cloth with acetone and wiped the band and shank. Acetone will dissolve CA, especially before it is completely hardened.
The replacement stem was sanded with a series of sanding sponges. The first were 320-600 grits. Again between each sponge I rubbed the stem with mineral oil and wiped the stem with a paper towel.
The next set of sponges were 1000-2500 grits. Again the oil and wiping was done between each sponge.
The final sanding was done with 3000 and 3500 grit sanding sponges with the same oiling and wiping.
I worked the stem with micro-mesh pads 4000-12000. In between each pad I rubbed the stem with Obsidian oil and wiped it with a paper towel.
The stem and band were then buffed with white buffing compound.
The buffing compound was removed with vigorous hand buffing with a cotton cloth. The stummel then received a coating of Before and After Restoration Balm applied with a baby toothbrush to get the balm into all of the nooks and crannies. This sat overnight.
The next day, I used an inside out athletic sock to remove the remaining Restoration Balm.
The pipe was then taken to the buffer for several coats of carnauba wax.
The final step was a hand buffing with a microfiber polishing cloth.
As always, I enjoyed working on this Marxman pipe. The figurals, though not my favorite, were fun and kind of whimsical. I couldn’t help but think about all the adventures of Robin Hood while I was working on this pipe. I know it is not made in the image of Friar Tuck from the Robin Hood tales but, that is what was running through my mind. The carvings are of good quality with well defined cuts and contours. The briar is of good quality and was generally free of pits and fills. The replacement stem polished up nicely and does look like it belongs with this pipe. The band also turned out well and should provide years of beauty and security from further cracking. The dimensions of this Marxman Carved Head – Monk are:
Length: 4.99 in./ 126.75 mm.
Weight: 1.64 oz./ 36.49 g.
Bowl Height: 1.75 in./ 44.45 mm.
Chamber Depth: 1.51 in./ 38.35 mm.
Chamber Diameter: 0.72 in./ 18.29 mm.
Outside Diameter: 1.56 in./ 39.62 mm.
I do hope that you have found something here useful to your own pipe care, maintenance or restorations. If you like this sort of thing, please click the like and subscribe buttons. Thank you for reading the ramblings of an old pipe lover.
Loading…
Below are some photos of the finished commissioned Stanwell 32.
By my count this is Marxman restoration 14 since I started blogging pipe restorations. I know judging by the name I run withI should focus on Peterson pipes but Marxmans hold a special place in my heart. Besides I just counted Peterson restorations, including the James Fox pipe (which I think is a Peterson product) and the total is 22. Thus securing my name and title: Nebraska Pete Geek.
This Marxman arrived here back in August of 2024 and has been languishing in the queue for nearly a year. I alway thought it looked interesting but something else seemed to catch my attention. The shape is kind of like a forward canted Dublin or cutty but with a bent shank. I wondered what to call it or if the stem had been replaced. More on that in the “Background” section. The stapings are well defined with MARXMAN with the arrow over BENCHMADE over IMPORTED BRIAR.
The pipe was in pretty good shape. The funky stem was oxidized but not chewed on. The oval shank matched up very well with the stem alleviating my earlier worries about it not being an original stem. There were some obvious fills that would be a challenge to rework. Also the rim was heavily caked with lava. I hoped that there was not a severely charred rim below the lava flows.
Background
Looking through my digital collection of Marxman shapes I found this shape.
There it was right column 4th pipe down, a Quarter Bent Dublin. Huh, it’s supposed to look like that. Well good thing it does, then. I guess I am kind of getting ahead of myself with this pipe. If you are interested in a brief history of Marxman pipes I will refer to previous blog posts and steal what I wrote about then (wait, can you steal/plagiarize from yourself?):
On January 11, 2024 I blogged about a Marxman Gold banded Dublin (linked if you are interested) and wrote the following about Robert Marxman and Marxman pipes:
“My recent fascination with the post-World War Two (WWII, to properly use an acronym) led me to further appreciation of the Marketing genius of Robert Marx, the founder of Marxman Pipes Inc. Allow me to illustrate:
Those are the back covers of Pipe Lovers Magazine for each month of 1946. That represents a substantial investment in building and maintaining one’s brand name.
Here is a quick review of Marxman pipes from pipedia.org:
“Marxman (Marxman Pipe Company) was created by Robert (Bob) L. Marx in 1934, when he was 29, and after he had worked for the William Demuth Company. His pipes were not outstanding because of the quality of their wood (probably Algerian), but Bob started making unique sculpted pieces, which brought the brand fame in the World of Hollywood cinema. Actors like Zachery Scott, Dennis Morgan, Jack Carson, Alan Hale, Joel McRae, and Ronald Reagan were some of the faces that appeared on the bowls.
Bob knew how to innovate and took full advantage of marketing and press advertising in order to sell the brand–one of his slogans being “Relax with a Marxman”.
In a recent forum post on Pipesmagazine.com, contributor jguss posted the following from the February 2, 1935 issue of the UnitedStatesTobaccoJournal:
A remarkable article showing the business acumen as well as a photo of the man himself. Thank you, jguss.
This is one of my favorite quotes about Rober Marx:
“Ted also said: Several years before UST bought Mastercraft, M/C had aquired Marxman Pipes. A wonderful kind man, Bob Marx was still working as a salesman in NYC, and I was fortunate to make a few sales calls with him. You all remember Charles Atlas? Bob Marx was about 76 and had just been awarded the (I think) Atlas Award for being the finest speciman of manhood over 70 years old in NYC, or maybe the state.
M/C had some inventory of Marxman stuff, but not a lot. I know very little about Marxman. Did they make, import, or both?” (Mastercraft – Pipedia)
The “Ted”, who is being quoted above, was the nickname of Tom Douglas. Here is an announcement of Mr. Douglas’ passing from Pipesmagazine forum November 26, 2018:
“Tom Douglas passed away at 71 years of age, this past Saturday, in Florida. It seems he had an infection in his stomach, but I don’t know much more than that, regarding what actually contributed to his death. He did have a history of heart and other health complications. I just spoke very briefly with his wife Joyce; you can imagine how she’s doing.
The impact Tom had on the pipe community is huge…beginning with an immense library of pipe knowledge through the pages of the Dr. Grabow Collectors Forum….his 25 years of service at the Grabow / Sparta pipe factory (where he retired in 1991)….his executive leadership over Mastercraft distribution for many years…”
So, at 76 years old Robert Marx was still involved in the business that he must have loved. This would have been around 1980.”
Then last winter, Mark Irwin, of Peterson Pipe Notes and author of The Peterson Pipe book, sent me a c. 1945 Marxman Brochure. I photographed the pages of the brochure and included them below.
One of the easiest things to date is a Marxman pipe. The company was formed in 1939 and sold in 1953 to MasterCraft. Though the Marxman name continued after 1953 the pipes were made in France or Italy and stamped as such with Country of Manufacture (COM) stamps. This means that a non COM stamped Marxman pipe was made in New York City between 1939-1953.
As for dating this Marxman Quarter Bent Dublin, all I can say with certainty is that it was made between 1939-1953 in New York City.
The Restoration
Showing its best side, the Marxman posed on a cleaned piece of denim.
The ream team was gathered
The number 2 blades of the PipNet did the majority of the work here, with the General triangular scraper just cleaning up a little bit.
The interior of the tobacco chamber looked good except for some strange gouges at the bottom of the chamber.
Sanding the interior was done with 32o sandpaper wrapped around a wood dowel. The walls of the chamber showed no signs of any charring or heat damage.
The stinger was well painted with dried smoking residue and resisted efforts to remove it by hand.
The underside of the stinger looked significantly worse than the top. Indicating that it had been smoked in this position and had probably not been frequently, if ever, cleaned.
My go to method for removing a stuck stinger is thick leather and a channel lock pliers. I have tried wrapping the jaws of the pliers with tape but that typically wears through and scars the aluminum of the stinger. The thich leather has yet to scar aluminum. It worked very well with this stinger.
Product placement photo. Hey Craftsman guys, I am open to sponsorship.
The stinger was placed in a medicine cup with 95% ethyl alcohol while I cleaned the airway of the stem with bristle pipe cleaners and some of the same alcohol. I also lightly sanded the stem to prepare it for the next step.
And here is that next step: An overnight bath in Briarville Pipe Stem Oxidation Remover. The pipe cleaner inserted into the stem is just there to act as a handle.
The stinger had soaked for several minutes softening the smoking residue. I scrubbed it with a brass brush and more alcohol.
The stinger cleaned up very nicely.
Next was the cleaning of the airway in the shank. This was a tar filled mess requiring alternating cotton swabbings, bristle pipe cleaners, a nylon shank brushings and a good deal of scraping with a dental scraper. It did eventually get clean though.
Then came the rim. What horrors were entombed within the foul eldritch encrustations? Oh sorry, I think I was channeling H.P. Lovecraft for a second there.
I softened the lava with saliva then scraped the rim with a sharp pocket knife. The lava did conceal a horror – the horror of a charred rim.
The stummel was then taken to the sink for a scrubbing with undiluted Murphy Oil Soap and a nylon brush. The soap was rinsed with warm water and the stummel dried with a cotton hand towel.
Back at the workbench the stummel was wiped with a make-up pad dipped in 95% ethyl alcohol. Very little was removed by the alcohol.
The scrubbing did reveal a couple of old fills within the rusticated carvings. The old fill material had an unpleasant pinkish color that stood out against the briar.
Yuck, there’s another one.
Ew, gross there’s one on the rim too. I tried picking the old fills out but they were very hard and refused my efforts. I was going to have to do some pondering on the best way to address the char and the fills.
I remember Sascha Mertens telling me about soaking a charred rim in the German equivalent of Murphy’s Oil Soap then scraping it. I thought, “what the heck, I’m ready to go to bed anyway.” I poured a little soap into a plastic container.
I set the rim in the soap and went to bed.
The next day when I returned to the pipe, I saw that the soap had done something. It was brown. I scraped the rim again with the sharp pocket knife, then scrubbed the soap from the briar.
The results were an improvement but the char remained. I did not want to top the bowl with sandpaper to remove the entire charred area as I feared that would change the shape of the pipe. Hmm, more pondering was needed.
I did top the rim lightly and all that did was to make the rustications on the rim less noticeable.
I tried beveling the inner rim using a wooden sphere and sandpaper. This helped but the char was still obvious. More pondering was needed.
The stem was removed from the Briaville solution and scrubbed with a coarse shop rag.
The stem was returned to the workbench where it was cleaned both inside and out then given a coating of Mineral oil.
Below you can see the tiny pits on the surface of the vulcanite from the deoxidizing.
The rim topped and beveled and still showing the charred area needed to have the carvings reworked to make them more like they were before the topping. I used a Dremel rotary tool and a carving bit to re-carve the two areas.
Below is a poor photo of the new carvings. I was able to get most of the old fill material out though so I considered that a victory in itself.
I lightly sanded the stummel, avoiding the stampings, with a 320 grit sanding sponge. This usually helps me see if there are other pits which will need filling. I saw nothing other than the big old fills.
I taped the stampings with painters tape to protect them from the upcoming sanding.
The pipe was sanded with a series of sanding sponges from 320-3500. Between each sponge I wiped the stummel with a make-up pad wetted with alcohol. The stem was rubbed with mineral oil and wiped with a paper towel between sponges.
At this point, my pondering thought that maybe oxalic acid might bleach the charred area and lighten it.
I applied the saturated solution of oxalic acid to the briar with a cotton swab. I allowed this to sit for 30 minutes. I then rinsed and scrubbed the stummel with a nylon brush and copious flowing tap water.
The char remained and the pondering organ was exhausted. I did think the little bit of old fill that I couldn’t remove might be concealed with a touch of stain. I used a maple Furniture Touch-up marker in the carved surfaces.
The pipe was then worked with micro-mesh pads in grits of 4000-12000. As with the sanding sponges the stummel was wiped with alcohol and a make-up pad between pads while the stem was rubbed with obsidian oil and wiped with a paper towel.
The stummel was then given a coating of Before and After Restoration Balm and allowed to sit for 20 minutes.
The excess balm was wiped from the briar with an inside out athletic sock.
The stem was buffed with rouge compound to see how it would look. I looked good.
The stem and stummel were both given several coats of carnauba wax applied with the buffer.
The final step was to hand buff the pipe with a microfiber polishing cloth.
This very intriguing shaped Marxman Quarter Bent Dublin is a real beauty with its natural briar color and carved rustications. The vulcanite stem sanded and polished very nicely to a glossy black. The difference in color adds to the attractiveness. I really appreciate the sleek forward cant of the bowl which is accentuated with the bend of the stem. It will be fun to see how this pipe smokes especially for the first bowl as I expect the “Imported Briar” is Algerian and it likely will have that unmistakable cinnamon cardamom taste that most Marxman pipes have with a freshly sanded tobacco chamber. The dimensions of the Marxman Benchmade Quarter Bent Dublin are:
Length: 6.02 in./ 152.91 mm.
Weight: 0.97 oz./ 27.50 g.
Bowl Height: 1.70 in./ 43.18 mm.
Chamber Depth: 1.47 in./ 37.34 mm.
Chamber Diameter: 0.74 in./ 18.80 mm.
Outside Diameter: 1.26 in./ 32.00 mm.
I do hope that you have found something here useful to your own pipe care, maintenance or restorations. If you like this sort of thing, please click the like and subscribe buttons. Thank you for reading the ramblings of an old pipe lover.
Loading…
Below are some photos of the finished Marxman Benchmade Quarter Bent Dublin.
The white whale of the Marxman world resurfaced the other day on eBay. The elusive The Four Hundred. This sighting was of an abused stummel. Some bugger had raided the poor pipe for both it’s stem and 14K gold band. I had vivid mental images of a young man disassembling grand dad’s old pipe to abscond with the band and use it as an engagement ring for a high school sweetheart. I can only hope that it worked and that he and the 20 mm fingered bride-to-be are still together. Yeah, an imagination can be a terrible thing.
Of course, I bid on the stummel and actually won it for less than $40 with shipping. I guess there is a fool born every minute. The stummel travelled from Waynesville, Georgia to the frigid wilds of southeast Nebraska. Upon arrival the stummel appeared as the photos below indicate.
She looked a bit rough, far worse off than the first Four Hundred appeared. Here is a link to that restoration if you are interested. The first Four Hundred was also missing the original stem and band. Coincidence or global conspiracy? Hmm, I do love a good conspiracy theory. Unfortunately, my imagination is all tired out from the previous vivid mental image. This stummel would need a new band and stem. It had numerous areas where the old fills were showing through in a less than attractive fashion. There was an ugly dark stain on the heel, right on the stamp. That would also have to go. Dents and dings from use were also scattered about the briar. The good news was that the stummel appeared to be very structurally sound. The damage was all cosmetic.
Background
Being a proud member of Generation X, also known as a Slacker, I will reuse the background section from the first Marksman The Four Hundred restoration below. Heck, I’ll even give myself credit for the quote.
“According to pipedia.org: “The Four Hundred was Marxman’s best series, characterized by very large pipes. Similarly famous was the Marxman Heirloom Pipes series, with around 80 pieces produced by well-known North American sculptors, such as Jo Davidson, Cecil Howard, Charles Kopp, and RD Lewis, contracted by Bob in 1947. Today these pipes are genuine collector’s items. The series included animal and human figures, selling at extremely high prices for the time.” (https://pipedia.org/wiki/Marxman)
I have restored and blogged about several Marxman pipes over the past year. I will include a few of them here if you are interested in more of the history of the brand.
I do have to add a little bit more information about Robert Marx. While sharing the previously mentioned restoration blog with another Marxman aficionado, they (pipesmagazine.com forum member: telescopes) brought a little known fact to my attention. The legendary Robert Marx created the first slow smoking competition. According to the Club History of the International Association of Pipe Smokers’ Clubs,
“The International Association of Pipe Smokers’ Clubs, Inc. was founded in October of 1949 and incorporated in the State of New York, City of Schenectady, County of Schenectady, on July 15, 1952.
Mr. Robert Marx, founder of the famous Marxman Pipe, was the first man to put on a Pipe Smoking Contest. He owns the world’s most famous pipe, sculpted by Joe Davidson, that is insured for $7,500.” (https://www.iapsc.net/history.html).
Just when I thought that Robert Marx’s marketing genius couldn’t be improved, I learned something new about the guy.
The Restoration
In breaking with tradition I did not first place a denim piece on the workbench. I admit to being rather excited to start this project so much so that I began it before I had even received the gold band from the Vermont Freehand boys (https://vermontfreehand.com/). My first task was to look through the stock of stems to see if I had something that would be a good fit, preferably for as little work as possible. Yeah, I’m honest and lazy. I had an acrylic stem that was a very good fit for the diameter and length. As a bonus the tenon was too large. I felt blessed or lucky and didn’t care which. The stem was also an acrylic. I know the original Marxman stems were vulcanite but as I get older I am really learning the benefits of acrylic stems. They do not have the issues with oxidation and do not require the constant oxidation removal. Yeah, my laziness appears to be increasing.
The fit was nice. There was some misalignment and a very slight gap but I would take care of that by heating the stem, pressing the stem into place and allowing it to cool stating the exact tenon fit as the acrylic cooled.
The slot of this stem needed some work. It was an unused replacement stem but it only had a draft hole bored through and a basic slot cut into the button. I used a Dremel and a circular cutting bit to cut the slot and angle the draft hole more smoothly.
This improved slot was further opened and filed into a “Y” with small files.
With the stem drawing nicely, I turned my attention to the stummel. The reaming tools were gathered.
The tobacco chamber of the Four Hundred was very large and fit the #4 blades of the PipNet easily. I had to press into the sides to get the PipNet to contact them.
There was minimal cake accumulated and what was present was quickly removed.
The tobacco chamber was sanded with 220 sandpaper wrapped around a wood dowel and a piece of sandpaper.
The chamber showed no signs of any heat damage or charring.
The next several photographs show the old fill material used by Marxman at the factory. The fill material is the light colored bits.
The removal of the old fills was a tedious process of softening the fill with acetone and picking it out with a dental scraper and the fly tying bodkin.
There dark stain on the bottom of the stummel was also a feature which I did not want.
I tried soaking the stain with a solution of saturated oxalic acid solution. The solution was applied with a cotton swab.
I allowed the oxalic acid to dry and sit for 30 minutes before rinsing it with copious amounts of water and a light scrubbing.
Once dried the stain had disappeared completely.
The shank cleaning was the next task. This was done with several cotton swabs and bristle pipe cleaners dipped in 95% ethyl alcohol.
see
The acrylic stem was in good shape but I was eager to see how it would look with the cleaned stummel. I used white buffing compound on the buffer with the appropriate white compound wheel.
The shank of the pipe was taped with masking tape to protect it from the buffing.
The acrylic polished up very nicely.
Back at the bench the replacing of the old fills was about to commence. I planned on using brown cyanoacrylate (CA, super glue) and briar dust to fill the gaps in the briar. The CA would be applied with a fly tying bodkin and the briar dust would be pressed into the wet CA. This combination cured almost immediately and could be shaped with a file or sandpaper with subsequent layers building up the depressions.
Below you can see the wet CA applied to a gap.
There were plenty of gaps in this old pipe to be filled. The briar dust was then pressed into the wet CA. This produces the equivalent of a chunky scra on the surface of the briar. I use a brass brush to brush the surface removing the dry briar dust that doesn’t come into contact with the wet CA.
Once all the flaws were filled the texture of the carvings needed to be reestablished. I used a Dremel rotary tool with a small carving bit to re-carve the surface.
I prefer to keep the bit more stationary and move the stummel into the rotating bit. I propped the Dremel up on a piece of 2×4 .
The recarving process is slow and requires eyes that are capable of fine focus, something that my old eyes have trouble with. Below you can see the carving of the texture as it progresses.
Eventually the CAA is reshaped to be similar to the original.
Noticing the great success of the oxalic acid on the old stain, I thought that perhaps the entire stummel would benefit from a light bleaching. I used oxalic acid on the entire stummel.
The wet stummel looked very nice with a coating of oxalic acid. The acid was allowed to dry and sit on the briar for 30 minutes.
Below are a couple of photos of the bleached briar prior to rinsing and scrubbing the oxalic acid from the stummel.
The rinsing was done with copious amounts of water and a Scotch Bright pad that I applied Castile soap to. I figured that the basic nature of the soap would also neutralize any remaining acid during the rinsing. Upon drying the stummel received a coating of Befoer and After Restoration Balm. I was impatient and wanted to see the color of the briar. In insight I should have sanded and micromeshed the briar prior to the balm but impatience got the best of me.
After allowing the Restoration Balm to work its magic for 20 minutes I hand buffed the stummel with an inside out athletic sock to reveal a lovely dark briar.
I couldn’t help myself and had to take the pipe upstairs and into the sunlight for a couple of photographs.
It took 2 weeks for the gold band and a new drill bit to arrive from the Vermont Freehand boys. It was not their fault as the winter weather in the east has been tough this year. Still, it was an excruciating wait.
The band was far too wide for this pipe but it was the only one available in a 20 mm diameter. I seated the band to show how much material I would have to remove. Yes I could have used the entire 20 mm but that would have covered up an unacceptable amount of the Marxman stamp on the left shank.
The band glueing kit was gathered. The plan here was to use acetone to clean the band and shank end of any oils that may be present, slightly rough up the band interiors and shank with sandpaper, and apply a thin coat of J.B. Weld 2 part epoxy to the interior of the band and the shank end and fit the band.
The surfaces were cleaned with acetone and the epoxy thoroughly mixed.
The band was fitted and adjusted. The reason I used epoxy and not CA was to allow me additional time to adjust the fit of the band. CA would have given me seconds to adjust and I wanted to take my time. With everything in place the 24 hour wait began. Sure, the package says that the .B. Weld cures in 15 minutes but that is a soft cure. I wanted everything to be solid. In discussing this project with fellow pipe restorer Donald Cole, he suggested that I used sandpaper to remove the excess band width. His recommendations were the following, “Sandpaper on a flat surface. Like glass.
It’s thin and won’t take long with low grit. Use a figure 8 motion and it’ll keep it even.” (Cole, Donald, Personal communication). That sounded like a very good idea.
When the time came, I started sanding as Donal had suggested. It was working but oh, so slow. My impatience attacked again. I returned to the workbench and selected a flat file. I filed the excess band material caterfull to about 2 mm above the shank. Frequently rotating the stummel to keep the filing reduction even. The below photo shows my filing.
After I filed to about 2 mm I returned to the Donald Cole technique of sanding with the figure 8. I am sure patience is a virtue but I also like my steaks on the rare side of medium rare. Perhaps my impatience is a flaw that extends beyond just pipe restoration. Below is a photo of the sanded band and shank end.
There is is, the trimmed band on the Four Hundred.
And a close up showing the fit.
The smooth surfaces of the stummel were sanded using a series of sanding sponges from 400-250. I neglected to photograph and on that, apologies. The next step was a light coating of Danish oil applied to the stummel. This was rubbed in with a gun cleaning patch as they tend to be lint free.
The stummel was set into my mini bench vice to dry.
After several hours of dry time I worked the stummel with micro-mesh pads in grits from 4000-12000. Between each pad I wiped the stummel with a make-up pad wetted with 95% ethyl alcohol to remove mehsing debris.
The last major step was to apply several coats of carnauba wax. Since the rustications were shallow and general wide I opted to carefully work the wax into the carvings with the buffing wheel. It took quite a while to get into all of the nooks and crannies but I think the result was worth it. The smooth panels took the wax easily as did the stem.
ha
The final step was a hand buffing with a microfiber polishing cloth.
There is it,The Four Hundred by Marxman, number two. I sure would love to see an original that had been taken care of rather than the dilapidated darlings that I have come across. Not that I am complaining. I have thoroughly enjoyed spending time with the two that I’ve acquired. They are both large handfuls. Another interesting thing about the two I have is that one is quite comfortably held in the right hand while the other feels more like it belongs in the right. This Marxman is a beautiful example of a large FourHundred and though it now sports a replacement gold plated band and a replacement acrylic stem it retains all the charm of a Four Hundred. The impressive dimensions of The Four Hundred are:
Length: 5.97 in. / 151.64 mm.
Weight: 3.31 oz./ 93.84 g.
Bowl Height: 2.30 in./ 58.42 mm.
Chamber Depth: 1.84 in./ 46.74 mm.
Chamber Diameter: 0.92 in./ 23.3 mm.
Outside Diameter: 2.39 in./ 60.71 mm. (At it’s widest)
I do hope that you have found something here useful to your own pipe care, maintenance or restorations. If you like this sort of thing, please click the like and subscribe buttons. Thank you for reading the ramblings of an old pipe lover.
Loading…
Below are some photos of the finished Marxman The Four Hundred.
There it is, the apex of the Marxman line. Well in this case what is left of the apex. All that remains of this Four Hundred is the stummel. The 14 karat gold band and original stem have been lost to the ravages of time. The briar lives on clinging to her past glory. I am going to do my best to restore this former queen to her proud majesty.
Over the past three years I have only seen 3 Marxman Four Hundreds come to auction. There was one on Etsy a couple of years ago and I still kick myself for not buying it. This one and another on eBay listing for north of $200, if I recall correctly.
This pipe wears the stamp “The Four Hundred” in an Old English script on the bottom of the pipe, also on the bottom is “E152”. On the left shank is stamped MARXMAN within the arrow above IMPORTED BRIAR. As previously mentioned the gold band and original stem are missing. The replacement stem is stamped FRANCE around the tenon end. Below are some photos of the Marxman Four Hundred before I had done any work to the pipe.
The pipe was quite dirty with years of grime on the stummel. The rim had a significant lava deposit. There was a slight superficial crack running along the front of the briar. The tobacco chamber had a substantial cake build up present and of course the ill fitting replacement stem would have to be worked on. My Four Hundred was in need of a good deal of work.
Background
According to pipedia.org: “The Four Hundred was Marxman’s best series, characterized by very large pipes. Similarly famous was the Marxman Heirloom Pipes series, with around 80 pieces produced by well-known North American sculptors, such as Jo Davidson, Cecil Howard, Charles Kopp, and RD Lewis, contracted by Bob in 1947. Today these pipes are genuine collector’s items. The series included animal and human figures, selling at extremely high prices for the time.” (https://pipedia.org/wiki/Marxman)
I have restored and blogged about several Marxman pipes over the past year. I will include a few of them here if you are interested in more of the history of the brand.
This restoration began on September 29, 2024. It is now October 29, 2024. Thank goodness for time stamps on photos. I remember the process and with the correct sequence of photos describe the restoration in detail. As usual the pipe got a clean denim piece as a work surface.
Next, the ream team was assembled. This tobacco chamber was large enough to require the large, size #4 PipNet blades along with the General triangular scraper, the Smokingpipes Low Country Reaming Knife.
I started with the PipNet and the #2 blades.
Progressing through the blades, #3 was next up.
The #4 blade was the last of the progression.
The chamber was reamed but still required sanding. This was done with 220 sandpaper wrapped around a wood dowel. You can also see from the photo below the extent of the lava on the rim.
The chamber was looking far better and showed no damage from excessive heat from smoking. This surprised me, in a good way.
The mountainous pile of cake is not done justice by the below photo.
To provide a better representation of the cake it was placed into an empty snus can.
The snus can was then dumped in preparation of it’s next task – to hold some undiluted Murphy Oil Soap.
Tha stummel was placed rim down in contact with the Murphy’s to soften the lava while preserving the rim from an accidental heavy handed scraping.
After about 30 minutes I checked the condition of the lava. It had softened dramatically and was scraped away with a very light scraping with a sharp pocket knife.
The stummel was then taken to the sink for a scrubbing with undiluted Murphy Oil Soap and a nylon scrub brush. The soap was rinsed with warm water and the stummel dried with a cotton hand towel.
Back at the workbench the stummel was beginning to show the previous glory which it had been robbed of.
The rim, now cleaned of most of the lava, did not have any damage from doddle knocking. I had feared what was under the lava. Relief.
I used the shank boring drill from the Kleen-Reem tool to drill out the airway of the shank.
The shank was quite filthy and drilling it out helped remove a good deal of the accumulated tar.
The shank cleaning proceeded with drilling, scraping with a dental scraper and many alcohol dipped pipe cleaners.
The cotton swab brigade also came around with 95% ethyl alcohol to further clear out the shank.
The stem was filed to a much better fit. This took considerable time and removed the FRANCE stamping completely.
The airway of the stem was surprisingly clean. Apparently the previous owner was aware of pipe cleaners and stems at least or, the old stem was just thrown out due to being as filthy as the shank.
The stem was lightly buffed with 0000 steel wool in preparation of the Before and After Extra Strength Deoxidizer bath.
Below you can see the stem entering the Before and After Extra Strength Deoxidizer bath.
The stem was allowed to soak in the deoxidizer solution for four hours.
Once removed from the solution I allowed it to drip excess solution back into the jar for several minutes using the patented Drip-O-Matic. Available at fine retailers near you.
The stem was then rubbed with a coarse shop rag to remove the remaining solution and to abrade more of the surface oxidation which the solution had loosened.
The stem was returned to the workbench for a scrubbing with make-up pads and Soft Scrub cleanser.
At this point I paused the restoration of the Marxman for several days. I needed to find a replacement gold band. The original was a 14 karat gold band not plated, filed nor rolled but true 14K gold. With the current price of gold and over $2700/ounce I opted against this option. I reached out and called Tim West at J. H. Lowe & Co (https://jhlowe.com/). Tim is always very helpful with products and advice for restorations. He did not have anything in the 16 mm diameter that I needed. He did suggest Vermont Freehand (https://vermontfreehand.com/). Steve Norse at Vermont Freehand was very helpful and through a series of emails I was steered to their gold plated 16 mm band. Now we come to another problem with restoring pipes in October – The Las Vega Pipe Show. The entire Vermont crew was apparently in attendance at the Las Vegas show and the order had to wait until they returned back to work. Also during this break in working on the Marxman, I restored several other pipes. In the process I neglected to photograph the sanding and polishing of the Marxman stem and stummel. I normally do not like to work on more than one pipe at a time for this very reason. I am very easily distracted, undiagnosed Attention-deficit/hyperactivity disorder (ADHD) can play havoc with my ability to remain on task if allowed. And this break not only allowed it but promoted it. Long story short, The band arrived from The Vermont boys and work resumed.
The below photo shows that the original band was about 4 mm thick and the new band 7 mm. I thought about cutting the new band down but thought I should try it on first.
I immediately liked the way the wider band looked. The reshaped stem was a pretty good match of the original saddle stem. I admit to assuming the original stem was a saddle as many of the photos of other Four Hundreds appear with saddle stems. I have a couple of tapered stems of proper size, maybe someday I’ll be good enough at cutting a tenon to try making one for this pipe.
The gold band was affixed using white all purpose glue. Vermont and I had equally accurate measurements for this band making for a fit which was snug enough that I did not have to heat the band and force a fit.
The pipe was given a coating of Before and After Restoration Balm. The Balm was applied with a baby toothbrush to work the stuff and it’s magic into the carvings. It was allowed to sit for 30 minutes.
The brush was cleaned with dips into 95% ethyl alcohol and rubbing the bristles on the denim a couple of times.
After 30 minutes, the Restoration Bal was wiped from the pipe with an inside out athletic sock.
The pipe was taken to the buffer for several coats of carnauba wax. The rustications were wide and shallow enough that I felt comfortable using carnauba wax on them. It took considerably longer working the wheel edge into the carvings but the result looked great.
The final step was to hand buff the pipe with a microfiber polishing cloth to further raise the shine.
The dimensions of this Marxman Four Hundred are:
Length: 7.36 in./ 186.94 mm.
Weight: 2.48 oz./ 70.30g.
Bowl Height: 2.21 in./ 56.13 mm.
Chamber Depth: 1.77 in./ 44.96 mm.
Chamber Diameter: 0.82 in./ 20,82 mm.
Outside Diameter: 1.80 in./ 446.37 mm.
I do hope that you have found something here useful to your own pipe care, maintenance or restorations. If you like this sort of thing, please click the like and subscribe buttons. Thank you for reading the ramblings of an old pipe lover.
Loading…
Below are some photos of the finished Marxman Four Hundred.
I remember an old advertisement for Camel cigarettes where the main actor walks a mile for a Camel cigarette. That commercial was made about thirty years after this pipe while the advertisement campaign by Camel was actually started in 1920. (https://tobacco-img.stanford.edu/wp-content/uploads/2020/03/06212512/camel_creativehistory.pdf) I still associate camels with tobacco. If you have followed my blog for any time you have seen me restore several Marxman pipes. I admit to being a Marxman fanboy. Having read about and seen images of Robert Marx’s figural pipes I knew I wanted to have one in hand. That is where this camel enters the story. I saw the photo from the eBay listing:
Background
As I said earlier, I have restored several Marxman pipes this year. I will link a couple which I think did a fair job at documenting the company history: Marxman Jumbo and Marxman Mel~O for those who are interested in reading about this amazing company.
Back to the pipe in hand, The eBay listing photo was not a great photo and the others were no better.
I could tell, kind of, that this was a similar camel from the 1950 Marxman catalog.
Image above is from pipedia.org circa 1950s catalog. Now, I know that the above image is not stellar quality but I think the camel in hand looks to be of better quality than the quality of the carved pipe in the catalog image. There seems to be a great difference in the carving quality of some of the Marxman carved figural pipes which I have seen photos of. I can’t help but wonder if the figurals from the early 1940s were of a higher quality than those of the 1950s. Allow me to show a couple of screen captures from Etsy and eBay of recent auctions to make this point.
The first two images below appear to be rather good quality carvings and I realize that image quality plays a major role in assessing the apparent quality of a piece.
While the next two images show carvings of a lower quality or lesser detail:
All of the pipes are listed as “Marxman” but stampings of the shank can only be verified on the Ubangy Male and the parrot pipes.
MasterCraft purchased Marxman in 1953 and started importing pipes from France and Italy. These foreign made Marxman pipes do not have the “magic” of the Marxmans made in New York. I cannot quantify the magic and I do have a French made Marxman spigot that is a truly wonderful smoking pipe but there is just something missing from the Marxmans after the sale to Mastercraft.
The Restoration
The Camel got itself a nice soft piece of denim to rest upon.
The first stem was the reaming of the tobacco chamber.
The very deep tobacco chamber. The Kleen-Reem was used for this due to its reach. The chamber was also scraped with the Smokingpipes Low Country reaming knife and sanded with 220 sandpaper wrapped around a wood dowel.
The stummel was then taken to the sink for a scrub with undiluted Murphy Oil Soap and a nylon scrub brush. The soap was rinsed with warm water and the stummel dried with a cotton hand towel.
Back at the workbench the briar was looking better without the years of accumulated dirt and grime. Fortunately it did not smell like a wet camel.
There was still some lava present in the carvings on the rim. I cleaned this with 95% ethyl alcohol and a brass brush.
I failed to photograph the cleaning of the shank. I guess I was so excited to be working on a Marxman figural that I lost myself in the task.
I did regain my composure while cleaning the stem. This was done with 95% ethyl alcohol and bristle pipe cleaners. You can see from the pipe cleaners, in the photo below, that the stem was in need of a cleaning. I assure you that the shank was also quite dirty and required many scrubbings with a nylon shank brush, alcohol dipped cotton swabs and folded pipe cleaners.
The stem exterior was in far better shape than the interior. It had slight tooth chatter but no deep dents.
I filed the tooth chatter with a small flat file on both the top and bottom of the stem.
I wrapped the shank in painters tape to protect it during the sanding. Oh, below you can see how the lava cleaned up from the rim too. Sorry for not photographing that cleaning.
The stem was sanded with a series of sanding sponges from 400-3500 grit. Between each sponge I rubbed the stem with mineral oil and wiped it with a paper towel.
The stem was then worked with micro-mesh pads from 4000-12000. Between each pad the stem was rubbed with Obsidian Oil and wiped with a paper towel.
The stummel had a coating of Before and After Restoration Balm rubbed into the carvings by a baby toothbrush.
The Restoration Balm was allowed to work it’s magic for 20 minutes. It was then vigorously hand buffed with an inside out athletic sock to remove the excess balm.
I cleaned the baby toothbrush by dipping it into 95% ethyl alcohol and rubbing the brush on the denim piece. This was repeated several times to remove all of the Restoration Balm on the brush bristles. I then used the baby toothbrush to apply Renaissance Micro-Crystalline Wax to the stummel. I buffed the stummel with a shoeshine brush then with a fluffy microfiber polishing cloth.
The pipe was taken to the buffer where I applied several coats of carnauba wax to the stem and to the smooth heel where the briar was stamped. I did not apply carnauba to the carved surfaces of the stummel. The stem was hand buffed with the microfiber polishing cloth to further raise the level of shine.
There you have it, the 1940s Marxman Camel restoration. Although I am sure my oldest granddaughter will declare this is a llama not a camel. She has a thing for llamas and rearranging the pipes in my pipe racks. I am very pleased with how this restoration turned out. I’d always wanted to lay hands on a Marxman figural and this one was a beauty. The briar looks great, cleaned and conditioned. The stem polished-up wonderfully and together they are quite stunning. Filling the entire cavernous bowl would provide lengthy smoke. I am thinking at least a couple of hours. Certainly enough time to walk a mile.
The dimensions of this Marxman Jumbo C are:
Length: 6.08 in./ 154.65 mm.
Weight: 2.67 oz./ 75.60g.
Bowl Height: 3.5 in./ 80.00 mm.
Chamber Depth: 2.24 in./ 57.00 mm.
Chamber Diameter: 0.79 in./ 20.07 mm.
Outside Diameter: 1.57 in./ 39.88 mm.
I do hope that you have found something here useful to your own pipe care, maintenance or restorations. If you like this sort of thing, please click the like and subscribe buttons. Thank you for reading the ramblings of an old pipe lover.
Loading…
Below are some photos of the finished Marxman Camel.
This may just be the longest restoration yet. Trust me when I say this project has been ongoing since August 15 and today is September 10. For context a normal restoration takes me 2-4 hours not including drying or soaking time. Let me start in the beginning which normally is where stories begin. This pipe was purchased on August 6. I knew it had issues, which you will see shortly, and would allow me to practice several techniques that I wanted to become better at. The pipe was listed on eBay as a “Buy now” for $20 or best offer. I offered the seller $16 and they accepted. In a few minutes you will think I am losing my cognitive faculties or that I probably never had that large of a faculty to start with.
The pipe was sent from Hudson, New York to the wilds of southeast Nebrask and arrived after 6 days, August 12. Upon opening the package I was a bit surprised at the severity of the issues which I had willingly adopted. I’ll let the photos speak for themselves. Here is the pipe prior to any work done.
Remember, I said it had issues. I can hear folks saying, “What kind of masochistic idiot are you?” and probably some comments about wanting to sell me fine swamp land in Louisiana or perhaps a bridge in Brooklyn. I wanted to practice the cracked bowl pinning technique by Charles Lemon (you can see that here), repairing cracked shanks and I am continuously working on different ways to repair chewed up mouthpieces (this time with black epoxy resin). So, now you see I thought I could do all of those things with one pipe. There was madness to my madness. No wait, that’s supposed to be, there was a method to my madness.
Background
Over the past almost a year, I have restored 7 Marxman pipes. This will be the 8th. And you say, “I thought you went by the name Nebraska Pete Geek?” Well, I just counted and I have done 12 Petersons so, the name is well founded. I do love an old Marxman pipe though. The amazing history of Robert Marx was summarized by me in an earlier blog which I will include again here:
On January 11, 2024 I blogged about a Marxman Gold banded Dublin (linked if you are interested) and wrote the following about Robert Marxman and Marxman pipes:
“My recent fascination with the post-World War Two (WWII, to properly use an acronym) led me to further appreciation of the Marketing genius of Robert Marx, the founder of Marxman Pipes Inc. Allow me to illustrate:
Those are the back covers of Pipe Lovers Magazine for each month of 1946. That represents a substantial investment in building and maintaining one’s brand name.
Here is a quick review of Marxman pipes from pipedia.org:
“Marxman (Marxman Pipe Company) was created by Robert (Bob) L. Marx in 1934, when he was 29, and after he had worked for the William Demuth Company. His pipes were not outstanding because of the quality of their wood (probably Algerian), but Bob started making unique sculpted pieces, which brought the brand fame in the World of Hollywood cinema. Actors like Zachery Scott, Dennis Morgan, Jack Carson, Alan Hale, Joel McRae, and Ronald Reagan were some of the faces that appeared on the bowls.
Bob knew how to innovate and took full advantage of marketing and press advertising in order to sell the brand–one of his slogans being “Relax with a Marxman”.
In a recent forum post on Pipesmagazine.com, contributor jguss posted the following from the February 2, 1935 issue of the UnitedStatesTobaccoJournal:
A remarkable article showing the business acumen as well as a photo of the man himself. Thank you, jguss.
This is one of my favorite quotes about Rober Marx:
“Ted also said: Several years before UST bought Mastercraft, M/C had aquired Marxman Pipes. A wonderful kind man, Bob Marx was still working as a salesman in NYC, and I was fortunate to make a few sales calls with him. You all remember Charles Atlas? Bob Marx was about 76 and had just been awarded the (I think) Atlas Award for being the finest speciman of manhood over 70 years old in NYC, or maybe the state.
M/C had some inventory of Marxman stuff, but not a lot. I know very little about Marxman. Did they make, import, or both?” (Mastercraft – Pipedia)
The “Ted”, who is being quoted above, was the nickname of Tom Douglas. Here is an announcement of Mr. Douglas’ passing from Pipesmagazine forum November 26, 2018:
“Tom Douglas passed away at 71 years of age, this past Saturday, in Florida. It seems he had an infection in his stomach, but I don’t know much more than that, regarding what actually contributed to his death. He did have a history of heart and other health complications. I just spoke very briefly with his wife Joyce; you can imagine how she’s doing.
The impact Tom had on the pipe community is huge…beginning with an immense library of pipe knowledge through the pages of the Dr. Grabow Collectors Forum….his 25 years of service at the Grabow / Sparta pipe factory (where he retired in 1991)….his executive leadership over Mastercraft distribution for many years…”
So, at 76 years old Robert Marx was still involved in the business that he must have loved. This would have been around 1980.”
Then last winter, Mark Irwin, of Peterson Pipe Notes and author of The Peterson Pipe book, sent me a c. 1945 Marxman Brochure. I photographed the pages of the brochure and included them below.
One of the easiest things to date is a Marxman pipe. The company was formed in 1939 and sold in 1953 to MasterCraft. Though the Marxman name continued after 1953 the pipes were made in France or Italy and stamped as such with Country of Manufacture (COM) stamps. This means that a non COM stamped Marxman pipe was made in New York City between 1939-1953.
This pipe is undoubtedly a Marxman Jumbo as seen on page six of the above brochure. As a “C” size this pipe would have commanded a price of $10 in 1945. According to the Consumer Price Index inflation calculator that would equate to $173.78 today (July 1945 to July 2024). (https://data.bls.gov/cgi-bin/cpicalc.pl?cost1=10&year1=194507&year2=202407)
The Restoration
Oh no, the poor battered beauty can’t even get an unstained denim piece to rest upon. The bright side is that it will look significantly worse shortly.
I started with the reaming of the tobacco chamber using a PipNet with the size 3 and 4 blades. The #4 rarely gets to come out and play.
Typical of Marxman pipe the reaming was very easy with the cake coming easily off the briar. The chamber was sanded with 320 sandpaper wrapped around a wood dowel and taken to bare wood. No heat damage was observed.
The shank was a dirty mess. For as easily as the tobacco chamber gave up it’s accumulated cake the airway clung to it’s smoking residues tenaciously. Several scrubs with 95% ethyl alcohol and a shank brush followed by alcohol dipped cotton swabs were used. I was getting frustrated and my thoughts turned to the next steps.
It was during the repetitions of scrubbing that my mind started to process ways to repair the cracked shank. The first thought was merely a brass band. I did this with a Marxman Mel-O and that restoration turned out very well as the below photo illustrates:
My thoughts shifted to considering an internal band. I had seen a video on how to make a pipe with a military mount by J. Alan of jalanpipes.com a few years ago. Here is that video. In the video he used a piece of brass and filed teeth into the brass tube. He then used the tube to cut a circular slot or hole just outside of the mortise on the shank. A piece of brass tube was inserted into this circular slot and the shank had a reinforcement that could take significant abuse. I filed that away in the back of my mind. For whatever reason the thought of a brass reinforcing band inside the shank of this pipe seemed like a good idea. The shank was thick and could easily accommodate a band and what the heck, it was already cracked. How badly could I screw this pipe up? In hindsight, I should have watched the video again or researched this technique more but I was in “problem solving” mode.
I looked through the stock of brass tubing that I had and found a piece which looked to be the perfect diameter. It was 5/8th inch outside diameter tubing. Next I started filing teeth on the edge of the tube. I couldn’t remember how many teeth were used in the video and couldn’t be bothered to rewatch it. As you may have guessed by my complete lack of video that I really do not like videos. I think it comes from being a teacher for 32 years. Rather than read, research and learn things like I did as a student, all students ever wanted to do was “watch a video”. This is fine and dandy for seeing how to replace the gas cap door on a 2004 Ford F150 (yeah, I just did that) but there isn’t a video on the life of Robert Marx. Videos are a great tool for some things but they are not the sole source of learning. Anyway, I filed some teeth.
They looked like they would cut briar. They also looked like they would have to be brought out of the hole and have the saw dust blown off of them frequently. I was in uncharted territory and expected some learning by trial and error.
In my imagination the brass tube/cutter would be clamped into a chuck of some type and spun at some speed, probably slow and lowered or slid into the shank which would be clamped somehow. Yeah, there was a lot of “some” in my thought process at this time. I do not have a drill press nor a lathe. The thought of using hand tools for this operation seemed ridiculous. I then contacted my son-in-law’s brother who is a machinist extraordinaire. The date was August 15, 2024. He replied the next day and was worried about brass being able to cut the briar. I then realized that he spent his days cutting far tougher material like steel, stainless steel, titanium and cobalt-chromium alloys. Yeah, he works in a prosthetics lab. He had the experience, tools and know-how needed to help with this endeavor. More on this later.
I had a rim to clean up and a stummel to scrub and a whole bunch of clean cotton swabs which were demanding to be filthy..
So that is what I did. The stummel was taken to the sink and scrubbed with Murphy Oil Soap, undiluted , and a nylon scrub brush. The years of dirt and the lava came off quickly. The soap was rinsed with warm water and the stummel dried with a cotton hand towel.
Back at the bench things were looking good both in the reality of the drying stummel and in the realm of my imagination of how the shank repair would proceed.
I certainly was back in reality, with a really dirty shank.
That brought me to the next new idea I wanted to try. In one of the Facebook groups that I am in, someone mentioned using two part epoxy to repair and reconstruct buttons. I wish I could remember what group or who the person was who had sown this seed in my brain. I thought that I needed to try it out and this stem was a perfect subject. The stem was cleaned using 95% ethyl alcohol and bristle pipe cleaners then lightly sanded to remove some of the surface oxidation and allow the Before and After Extra Strength Deoxidizer access to the vulcanite.
A pipe cleaner was inserted into the remaining button, to act as a hanger suspending the stem in the deoxidizer, and it was lowered into the deox ( my term for the liquid).
According to the time stamp on the photos the stem was in deox for 7.5 hours.
That gave me plenty of time to soil another stack of cotton swabs in an attempt to exorcize the tar demons from the airwair. Finally, I was victorious and the airway was clean.
The seemingly unending airway scrub did allow me time to ponder the next step and the next technique that I wanted practice with. That is the repair of a cracked bowl using strategically placed brass pins. I first saw this technique in a post by Charles Lemon of Dads Pipes. Charles is a real restorer, unlike me, and actually does this for a living bringing back family heirlooms and working magic with his impressive skills. You can find Charles’ pinning tutorial blog here. I had used pins to repair a cracked shank as a first time practice ordeal and again with a cracked bowl, both blogs are linked if you care to make fun of my attempts. This cracked bowl was more of a cosmetic crack in the briar. It did not extend through the wall of the tobacco chamber and looked more like it was from an improperly cured piece of briar rather than a case of excessive cake. Either way, I was going to repair it with brass pins. I first filled the crack with brown cyanoacrylate (CA, super glue) pushed into the crack with a fly tying bodkin. The CA was allowed to cure in it’s own time and was not accelerated by a CA drying accelerator.
Once cured the surface of the CA was roughened up a little bit to better blend it with the carving on the stummel. I used a round rat tail file and a diamond needle rat tail file for the roughening.
My jumping around from task to task with this restoration shows my desire to plan and think through each of the multi-step procedures used with each technique. I use the time stamps from the photos to sequence the restoration process that I present to you. I apologize if this makes it hard to follow while reading. This is the way it all happened though
I wanted to give the CA adequate time to cure so I busied myself with the repair/rebuilding of the stem. Someday I’ll get a drill press or a lathe and that cool tenon turning tool and I’ll just make stems rather than try to reconstruct them. There’s that imagination again. Anyway, the stem was removed from deox and wiped with a coarse shop rag. This more abrasive material is great for absorbing the excess deoxidizer and abrading away some of the oxidized vulcanite.
Aug. 15 (I’m using the dates here to show the curing times of the epoxy.)
To rebuild the button, I first cut a dam from a plastic lid. This dam was coated with petroleum jelly and inserted into the airway in an attempt to keep the epoxy for sealing it off. I mixed the two part J. B. Weld black epoxy as per product instructions.
I used a piece of Scotch tape around the bottom of the stem to aid in keeping the epoxy on the top then applied the epoxy to the fill area with a fly tying bodkin. The stem was set aside for 24 hours to cure.
Aug. 16
The next day, I checked on the epoxy to see how well it was working as a fill material.
The dam was removed easily and appeared to have work at keeping the epoxy from the airway.
I took the stem to the photography bench for some better than the phone photos.
The surface was roughed up with a 320 grit sanding sponge to give the next application of J.B. Weld something to bond to and the dam was reinserted.
Another batch of epoxy was mixed then applied to the area to build up the missing material for a proper button. This application was again set aside for 24 hours.
Aug. 17
This was nowhere near as quick as using a black cyanoacrylate (CA, super glue) to fill an area but I was still curious as to its effectiveness. I filed the 2nd application and reformed the button.
The epoxy filed and sanded more easily than CA would have. I was sure that it would cure to a harder consistency in a couple of days.
Aug. 18, 8:30am
A third application of J.B. Weld was applied to the stem. This time to a larger area. I wanted a wider area to use for blending the original stem to the new patch. This application also was spread on the top and bottom of the stem.
A pipe cleaner was inserted to act as a hanger and the stem was hung to cure.
Aug. 18, 9:50pm
13 hours later, I checked on the curing of the epoxy. The surface was rough rather than smooth, as it had been with the previous two applications. I did like the way tha material built up though.
Aug. 19, 1:00pm
Another 15 hours later and I returned to the cured epoxy on the stem. The rough texture remained and the epoxy felt more tacky than the previous iterations. The new material pulled away from the second application as I was filing it. Bah, that won’t do. I peeled the 3rd application off the stem. I was not sure if it was a bad mix or what had happened. One thing that I was certain about was that I preferred to use black CA for rebuilding buttons.
All this time between sessions with the pipe did allow me to thoroughly plan how I wanted the pinning to go. I drilled 3 holes with a 2mm drill bit. Each hole was drilled at a different angle and each transected the crack. The below photo shows each hole with a piece of 2mm brass rod. I had gotten better with my drilling and none of the holes had emerged all the way through the stummel.
The hole depths were measured with their respective rods. Each rod was cut slightly shorter than the depth of the hole.
I applied a small drop of brown CA to a hole and quickly pushed the corresponding rod into it to a point below the briar surface. The below photo shows all three rods pressed into place. You can still see the brass peeking from the holes.
The holes were then filled with another application of brown CA and topped with a small scoop of briar dust. The dust was pressing into the wet CA. The fill was then sanded smooth on the rim and slightly smoothed in the carved areas. This project took an intermission while I waited to schedule a visit to the machine shop of my fellow conspirator.
Sept. 9
A date had been set for the machine shop visit. This was a clandestine operation after hours. In preparation for the event, I needed to glue the shank crack with CA. I used a thin clear CA to penetrate the crack as deeply as possible. This was applied with the ever popular fly tying bodkin and quickly clamped.
The clamping provided no visual compression of the crack but it made me feel like I accomplished something. I then applied a thin line of brown CA to the crack to fill it with the fly tying bodkin.
Sept. 10
Now to protect my fellow conspirator’s identity, since we were infiltrating his shop after hours and without the knowledge of his overlord, I will refer to him as Christian. A fitting name and perhaps title. I explained what I thought we could do and how I imagined it happening. Christian immediately understood and dashed my imagined process with a healthy dose of reality. He said that this was a job for the milling machine. The first order of the new reality based procedure was to shorten my brass cutter to fit into a collar which could be mounted into the chuck of the milling machine.
Next we needed to clamp the stummel into position in a way that limited movement without marring the briar. This was done with a couple of scraps of a clear soft plastic between the vise jaws and the stummel.
The cutter was aligned with the shank.
Turtle speed was selected on the milling machine.
And the cutting was begun, very slowly, maybe 0.5 mm then I’d blow the dust away with the compressor.
This continued and was looking very promising. I hadn’t really thought about how deep to make the slot. It was determined that 5 mm would probably be sufficient.
The depth gauge was set to the 5 mm goal and the cutting proceeded.
Once achieved, the slot looked as good as I had imagined.
The next task was to cut a 4.7 mm wide brass band from the same tube the cutter was made with. This would ensure a perfect fit. We moved to the lathe to square up the end of the brass tube.
The lathe was set to cut a precise 4.7 mm wide band. We thought that this would allow me to press the band into the slot so that it would be flush with the face of the mortise and would require no sanding of the brass band. The no sanding was important for a proper fit with the stem to maintain the shank to stem joint.
The band cutting proceeded successfully on the second attempt after Christian had sharpened the cutter. The first attempt met with a hot mess. Literally, the dull cutter made an out of round band that was very hot.
The band seemed to fit beautifully. It was not pressed in fully as there was no way to extract it once it was in there. Also, my crack glue-job seemed to be holding without the reinforcing band.
After many thank-yous, a Mission Impossible like extraction from the machine shop and a drive back home the Marxman was back to the home workbench.
I thought about which glue to use, CA or epoxy for gluing in the band. I settled on epoxy due to my fear of not being able to move fast enough for the CA and having the CA set-up before I had the band fully pressed into place.
I applied a bead of epoxy to the slot.
Surprisingly, I remembered to roughen the inside and outside of the brass band with a sanding sponge.
The band was then pressed into position.
The excess epoxy was cleaned up with a cotton swab dipped in acetone and… (dramatic pause). OH CARP! There was about 0.2-0.5 mm of brass band sticking up above the surface of the mortise. What had gone wrong? I texted Christian, if that is his real name, and explained what I was seeing. We had both noticed that my brass cutter was significantly more dull when we finished cutting, back at the shop. He thought that the dulled teeth would have given a false 5 mm depth to the cut. I agreed and thought that maybe the epoxy would have added another fraction of a mm. In hindsight, the band would have been better cut at 4.5 mm to ensure greater clearance.
I used a small flat file to remove as much of the brass as I felt comfortable removing. I had to go very slowly and with great care to avoid filing any briar. I then took the stummel to the topping board there. I very slowly sanded the brass to flush with the briar. I failed to photograph any of this, apologies. I did photograph the resulting fit though.
Below is a photo of the internal brass band in all of it’s glory.
Now to finish this stem. I thought I could go over the patch on the bottom of the stem with black CA and that it would make the difference in the vulcanite and the black epoxy disappear. Once again the imagination was working beautifully and all of the imagined repairs were equally as beautiful.
I painted the bottom of the stem with the black CA.
The CA was then spritzed with a CA drying accelerator. The subsequent area was filed and sanded to blend the vulcanite with the patch. You’ll have to wait or jump to the end to see how reality dealt with my imagined results. This is mainly because I failed to photograph it. Umm, I mean, that I want to build anticipation. Yean, that’s the ticket.
To rebuild the button proper, I Scotch taped the stem right against the button This kept me from having to re sand the blended stem patch. It also allowed me to file and sand the button without scratching up the already smoothed stem. I applied layers of black CA to the button, spitzed with the drying accelerator and while the CA was still soft, I made a straight cut through the still pliable CA giving the button a more defined seam where it met the stem.
The above was done for both the top and bottom. Both sides were filed then sanded to a proper shape.
Here you can see the progress from the side.
Eventually the stem was sanded with a series of sanding sponges from 400-3500 grit. Between the sponges the stem was rubbed with mineral oil and wiped with a dry paper towel.
I was apparently getting tired and failed to photograph the micro-meshing of the stem. The next step was to coat the stummel with Before and After Restoration Balm and let it sit for 30 minutes.
After 30 minutes the Restoration Balm was wiped off with an inside out athletic sock.
It was at this point that I decided to try another novel technique on this pipe. I had not worked with a shellac finish on a pipe in a long time, perhaps even before I started blogging back in October of 2023. I slid the stem out about ¼ inch or ½ cm to provide a handle but not get any shellac on it. I used a disposable foam brush to apply a very thin coat of shellac to the stummel. The briar absorbed the shellac quickly and it dried as the alcohol solvent evaporated. Now for the weird part – I slightly wetted a paper towel with 99% isopropyl alcohol and wiped the stummel with the paper towel. This smoothed the shellac remaining on the surface of the panels. I only applied the single coat of shellac as I don’t really like the look of a clear coat on pipes. This wasn’t really a clear coat, more of a sanding sealer and a layer of protection of the carved surfaces from dirt and hand oils. I let the stummel dry for about 15 minutes then took it to the buffer for a polish with white diamond compound. The entire pipe was then wiped with a clean dry cotton cloth to remove any remaining buffing compound. The stem and stummel then received several coats of carnauba wax with the buffer. A quick hand buffing with a microfiber polishing cloth and she was finally finished.
I would like to thank you for making it this far into this dissertation. It is actually longer than many Masters Degree dissertations that I’ve read. Perhaps I’ll be awarded an honorary masters from some pipe restoration university. That’s a thing, isn’t it? A special thanks goes out to the machinist Christian, who may or may not actually go by that name. I had now successfully turned the $16 pipe into a $25 pipe, which equated to about $0.50/hour. Good thing I’m retired or the U.S. The Department of Labor would be filing suit for unfair pay. In all honesty, this pipe provided me with some new challenges and did exactly what I wanted it to do, allowed me to practice doing what I love to do – learn new and hone existing techniques. The pipe turned out amazingly well. This one will be joining my personal collection. The dimensions of this Marxman Jumbo C are:
Length: 6.01 in./ 152.65 mm.
Bowl Height: 1.73 in./ 43.94 mm.
Weight: 2.13 oz./ 60.60g.
Chamber Depth: 1.32 in./ 33.53 mm.
Chamber Diameter: 0.91 in./ 23.11 mm.
Outside Diameter: 1.76 in./ 44.70 mm.
I do hope that you have found something here useful to your own pipe care, maintenance or restorations. If you like this sort of thing, please click the like and subscribe buttons. Thank you for reading the ramblings of an old pipe lover.
Loading…
Below are some photos of the finished Marxman Jumbo C.

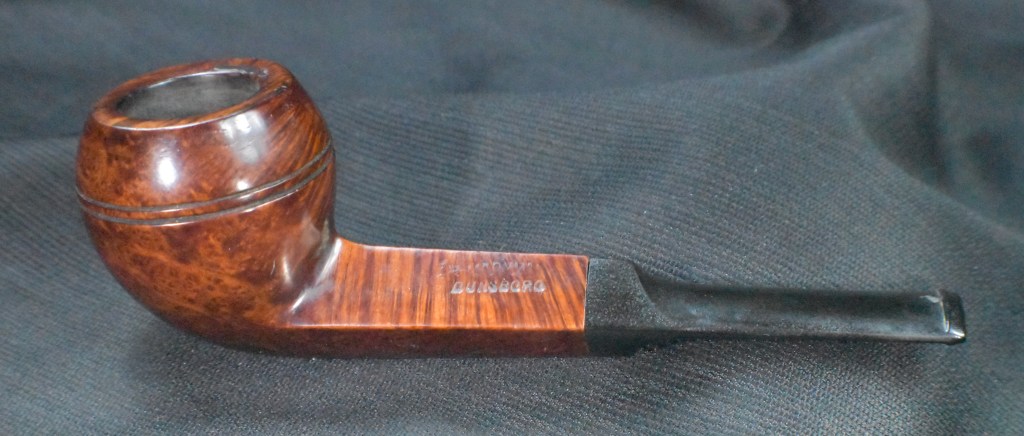
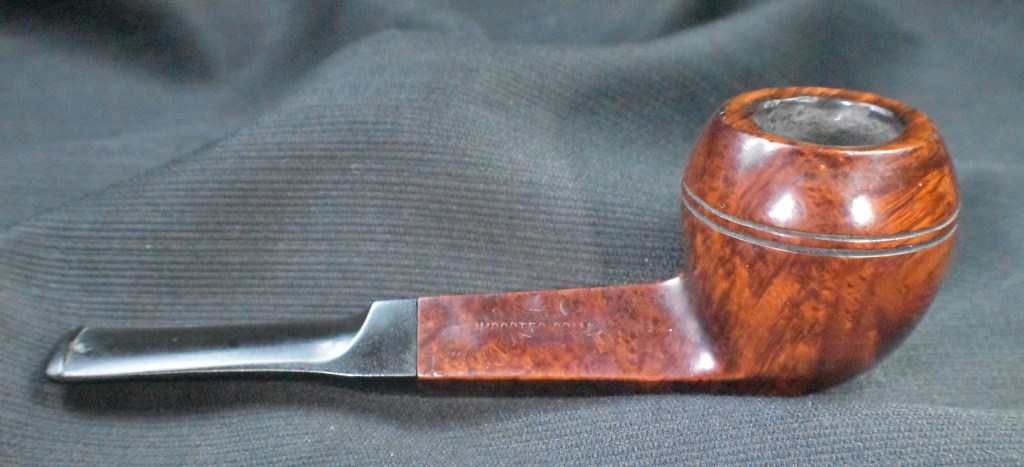
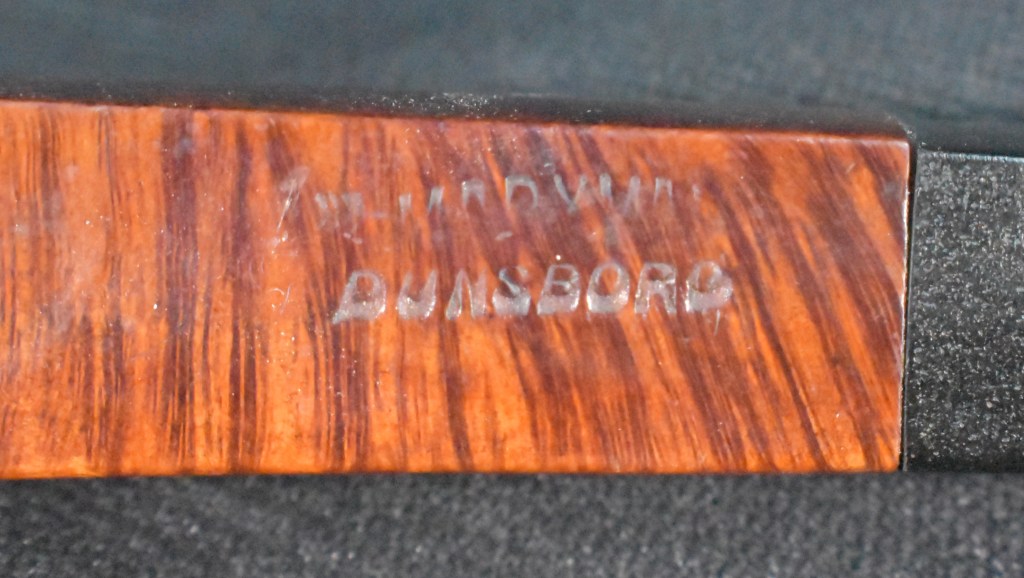


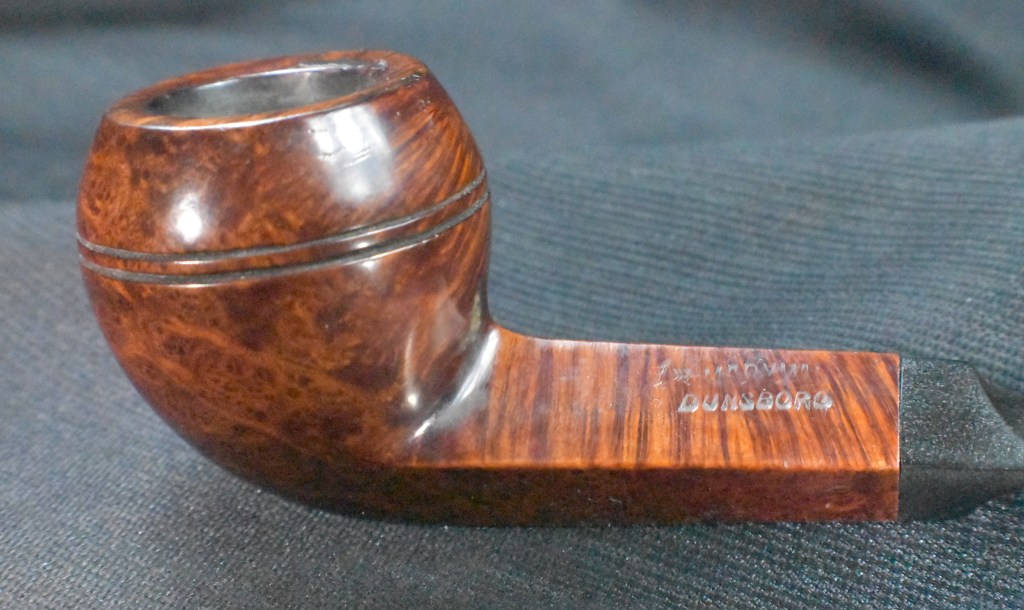

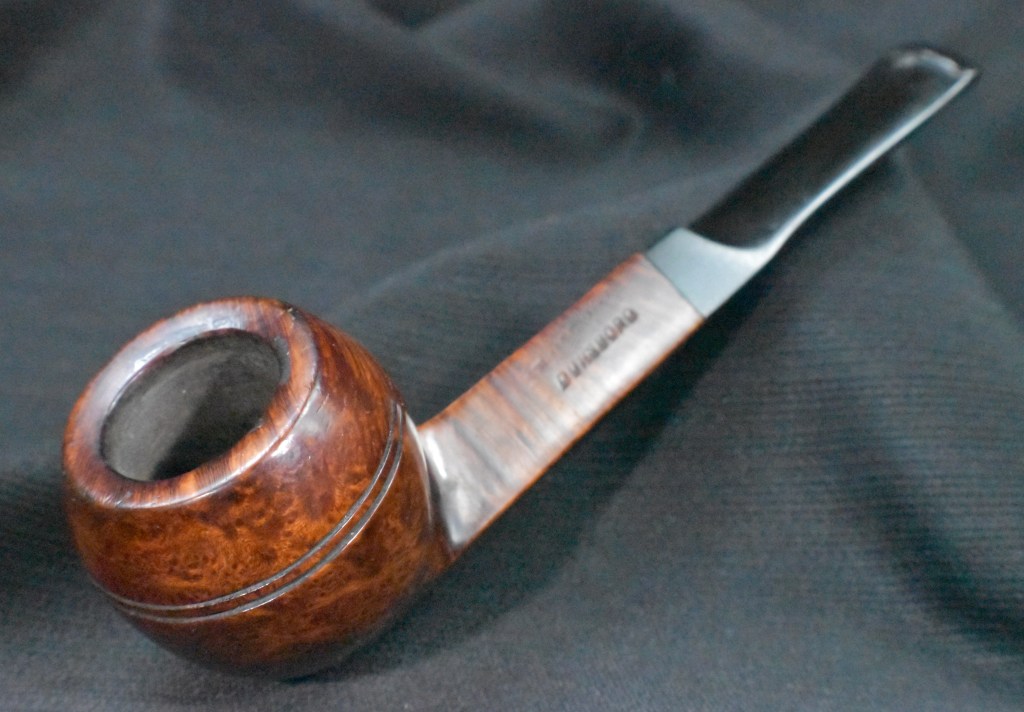
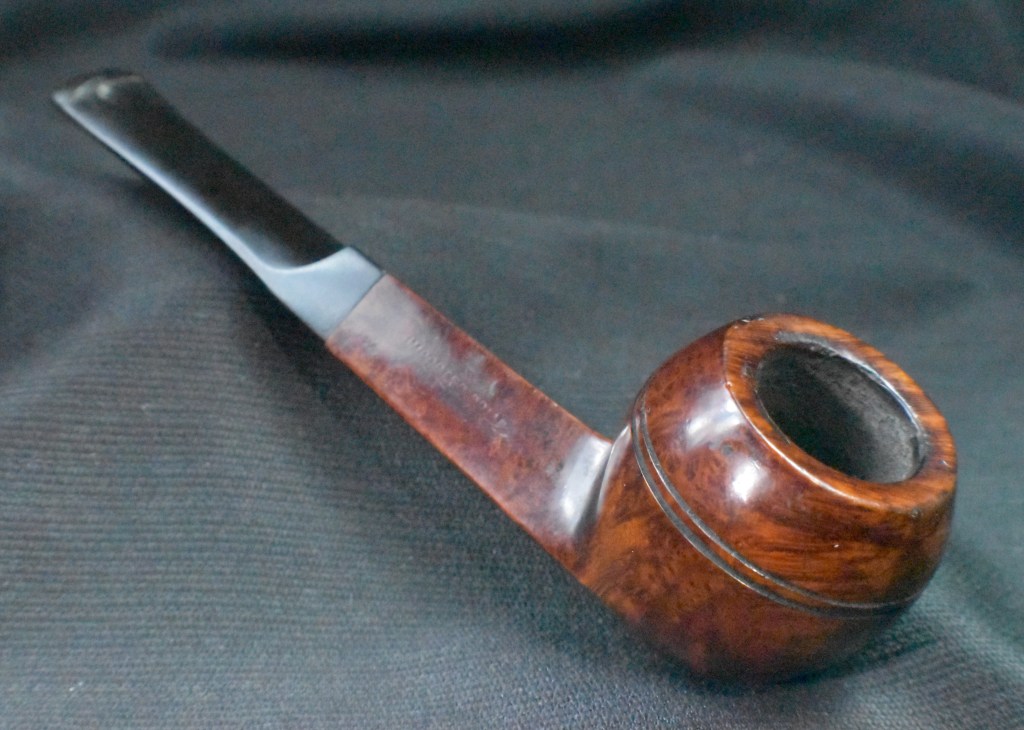
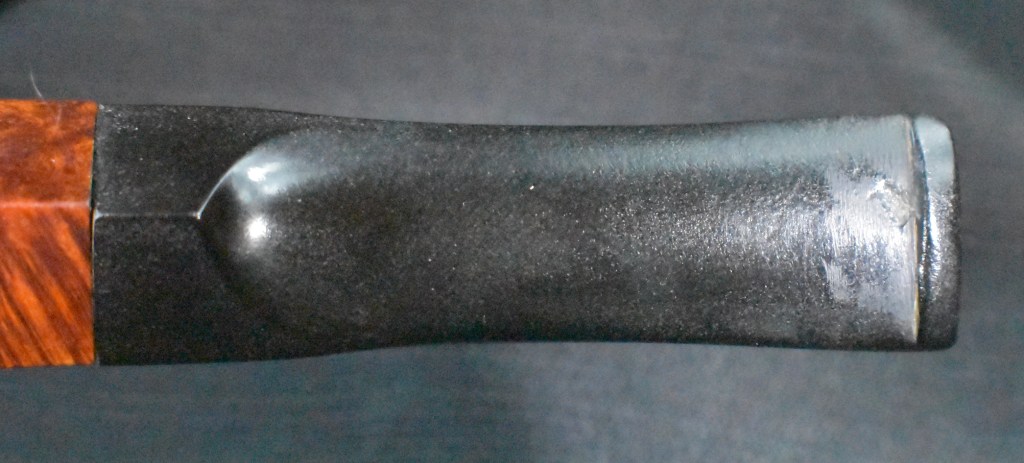
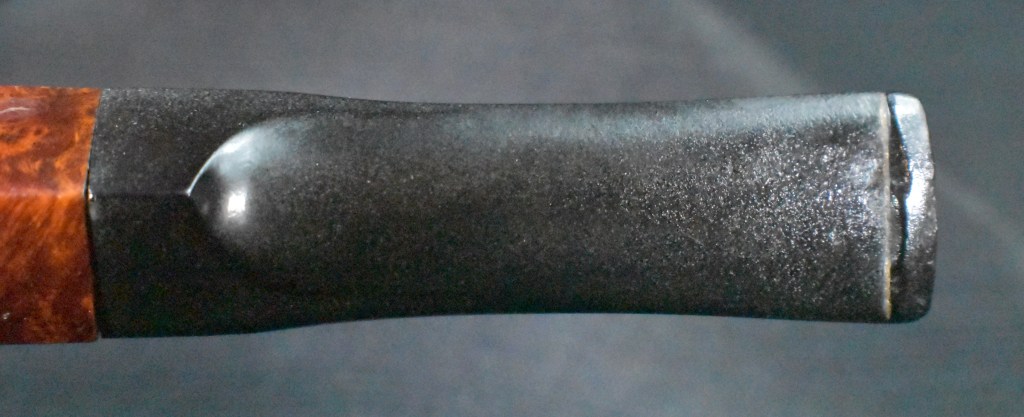
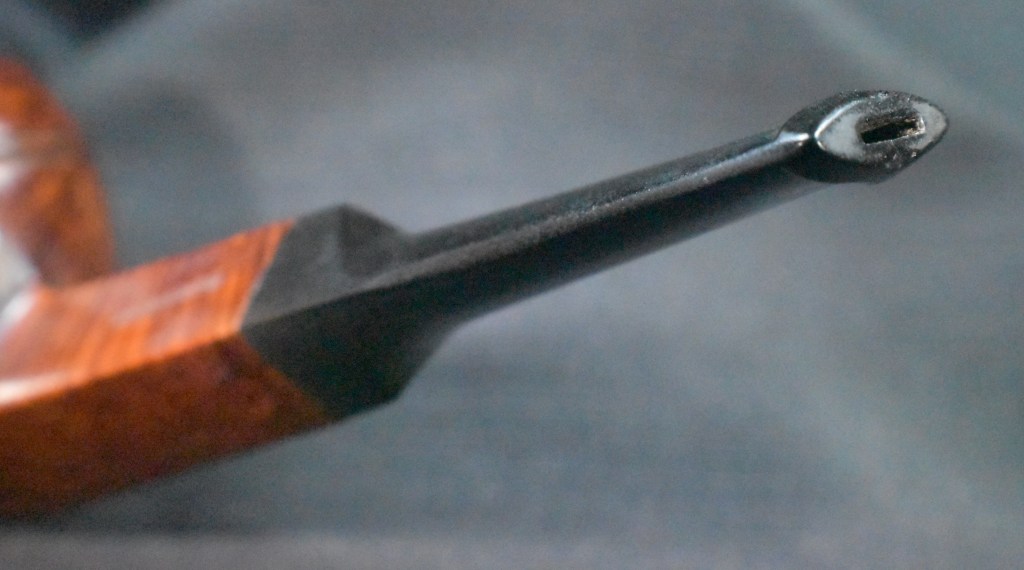
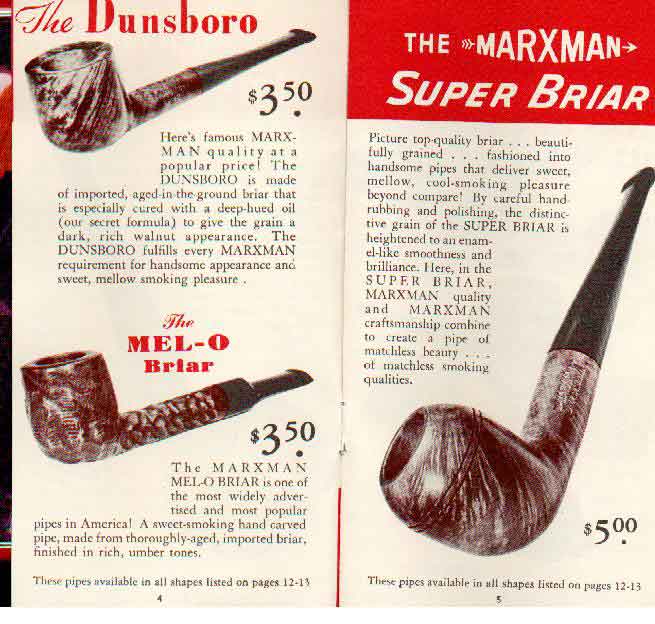
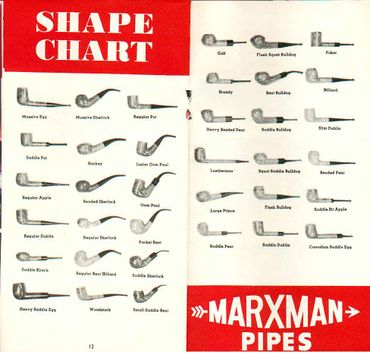
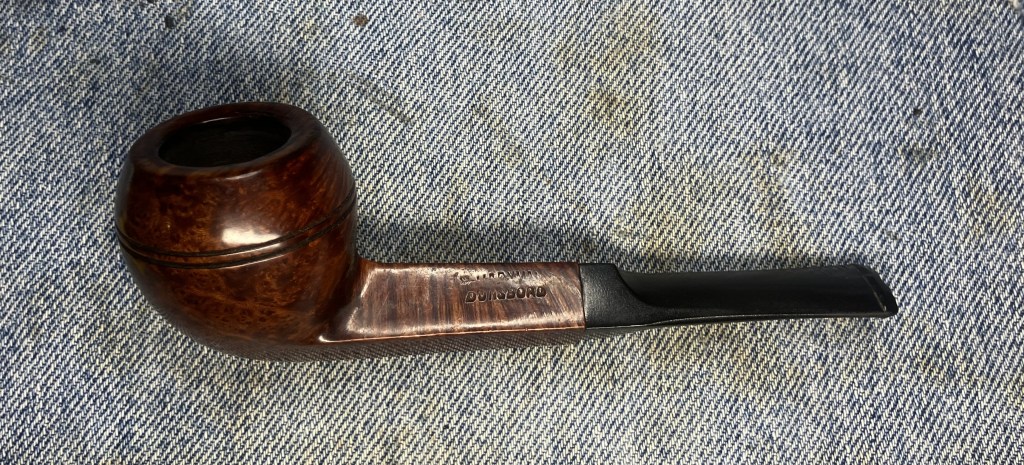
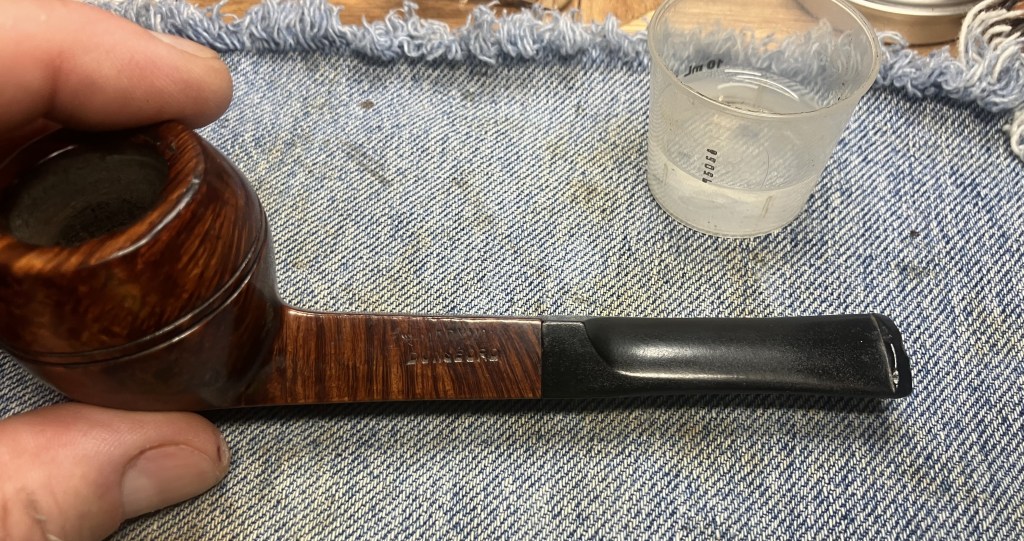
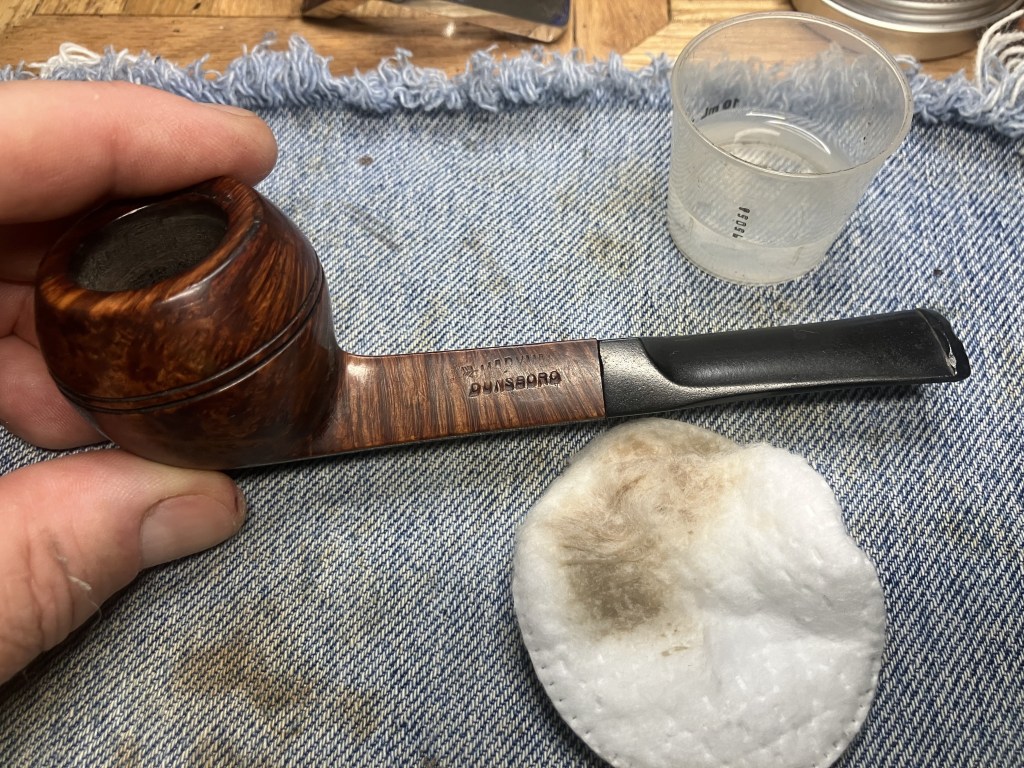


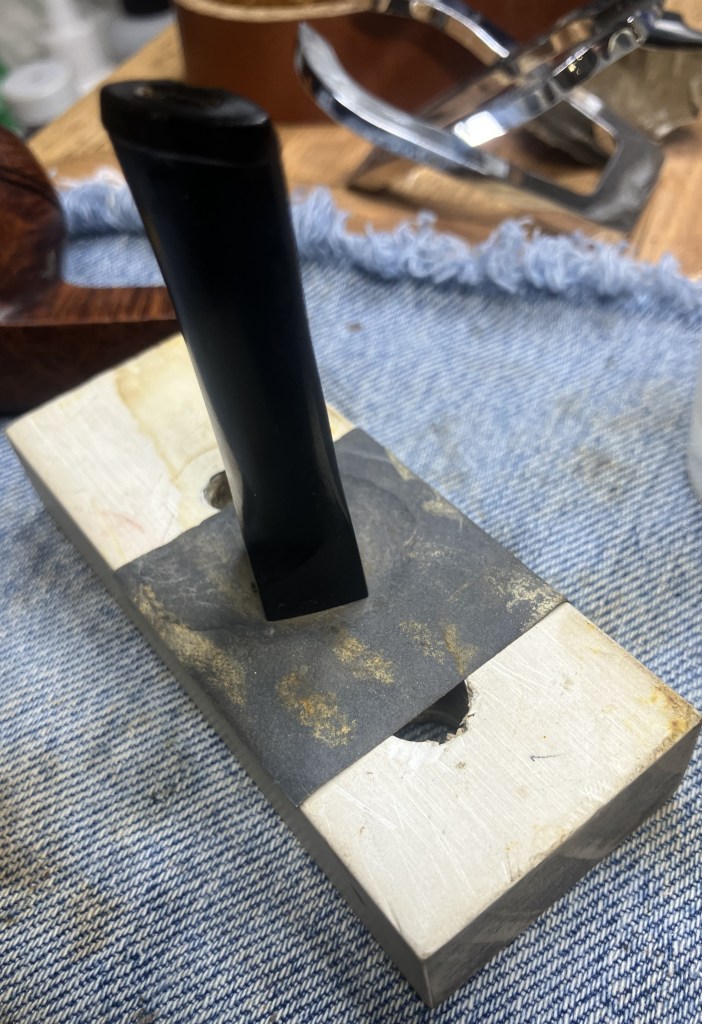
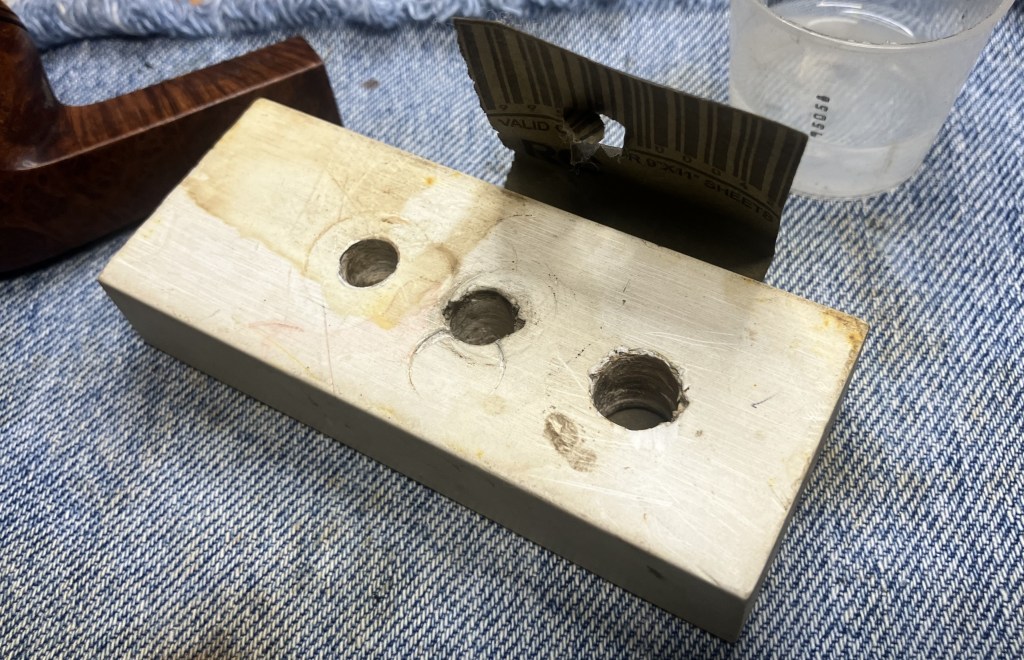


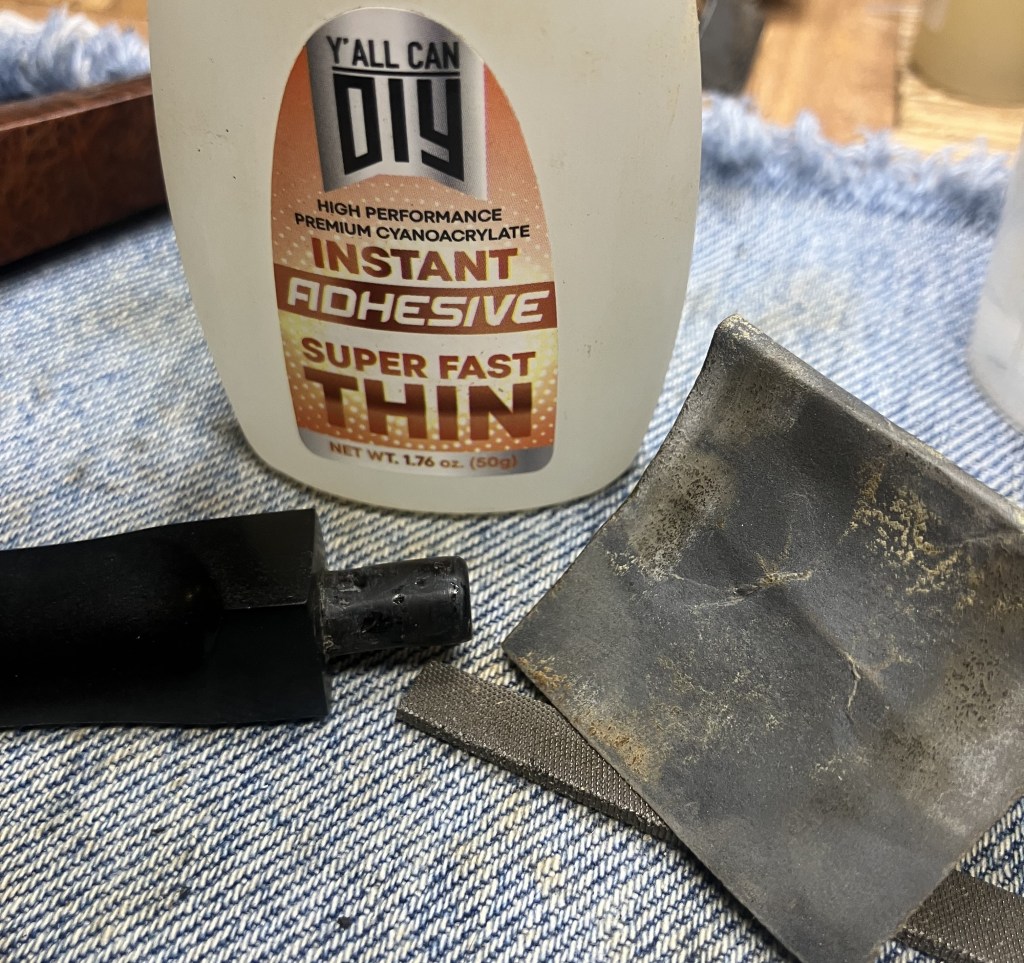

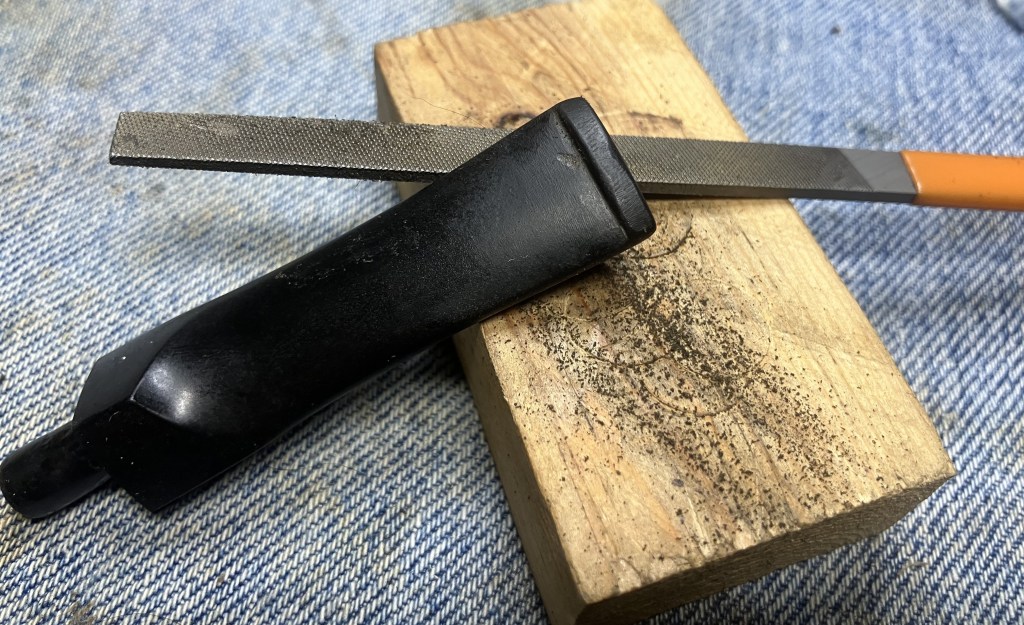


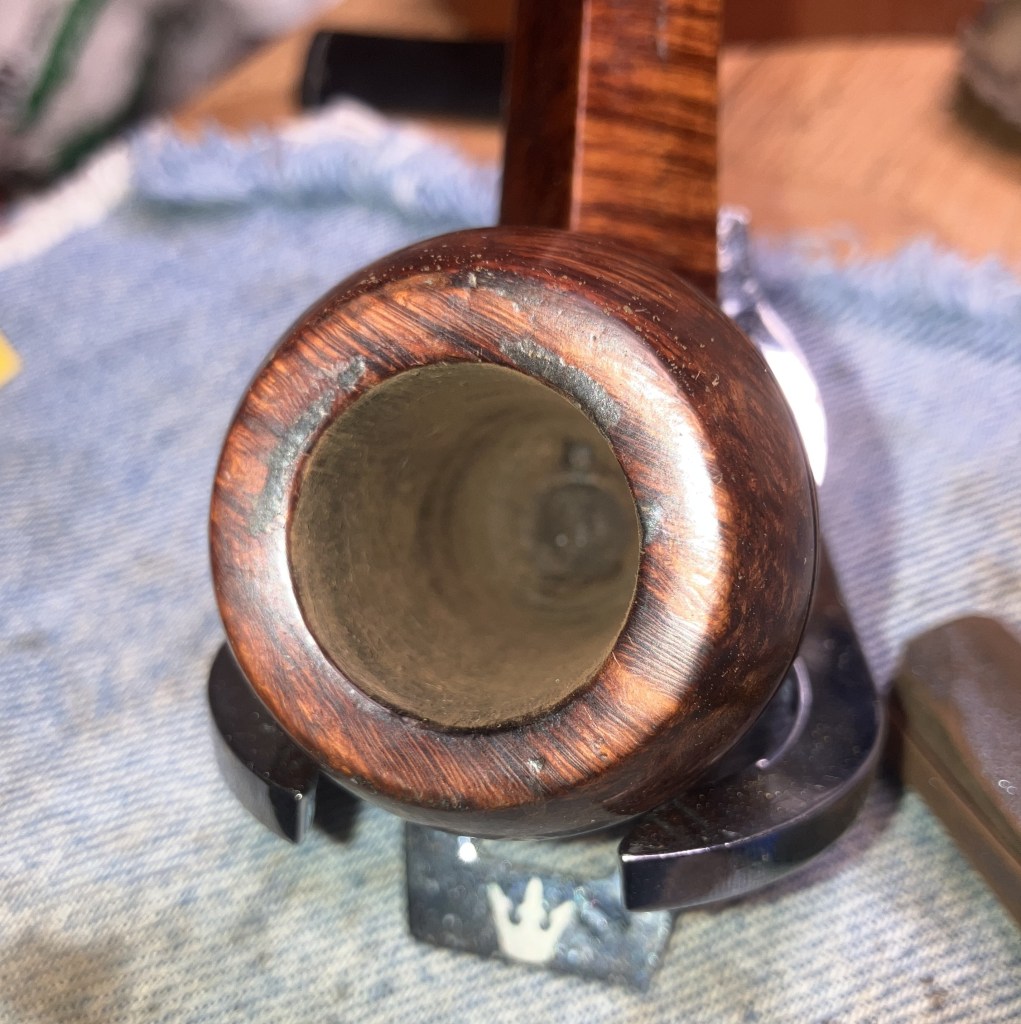
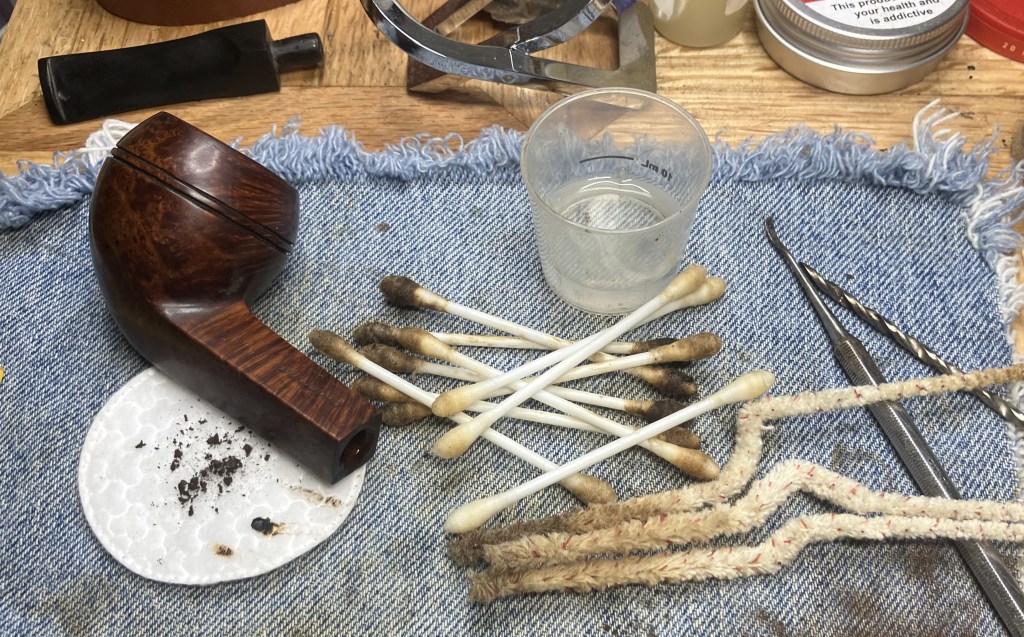
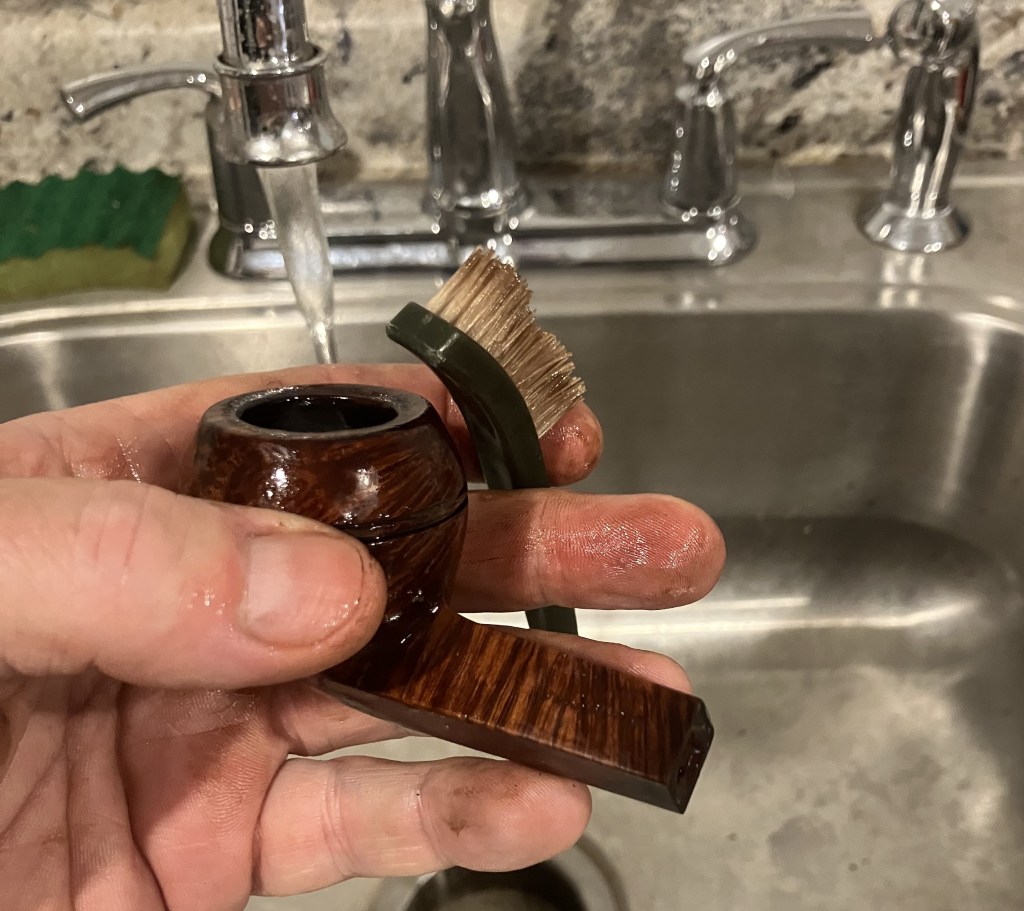
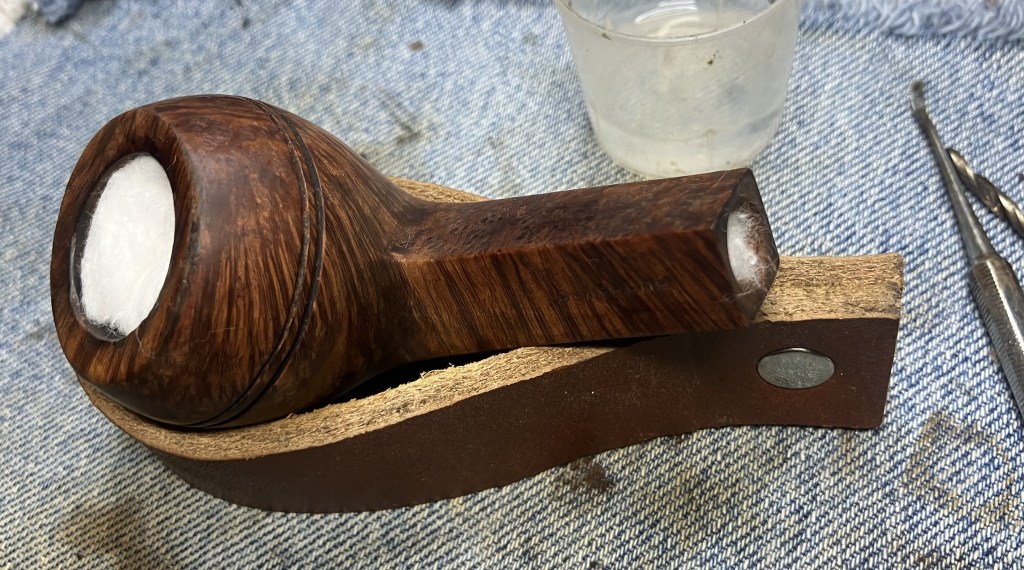

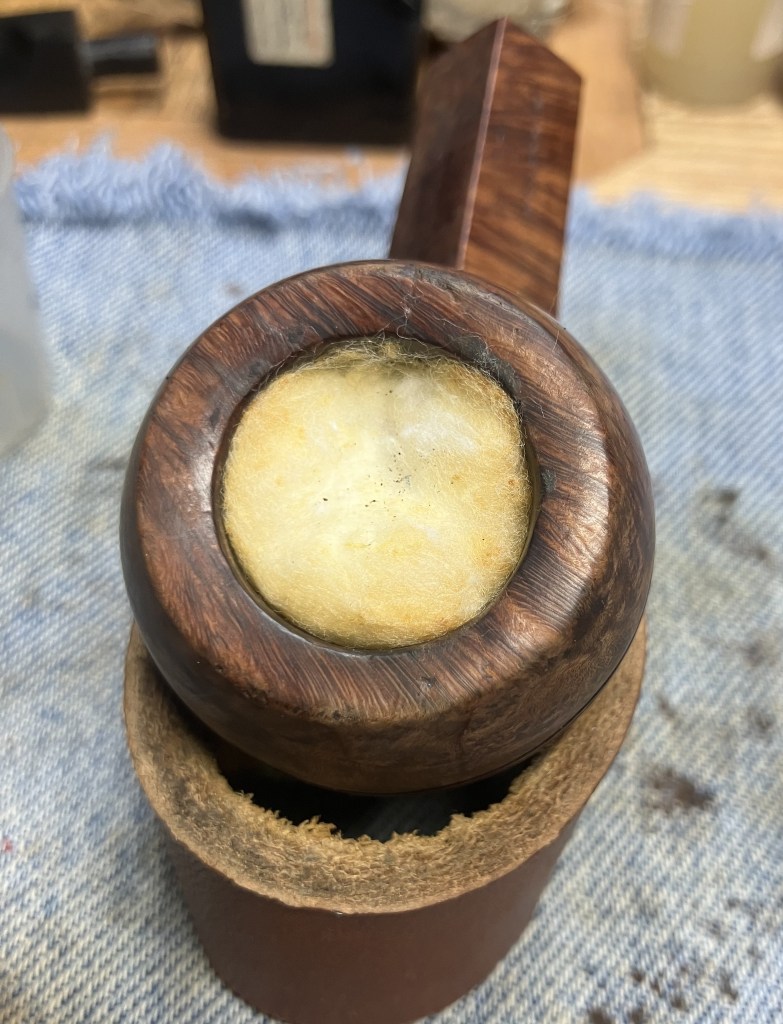


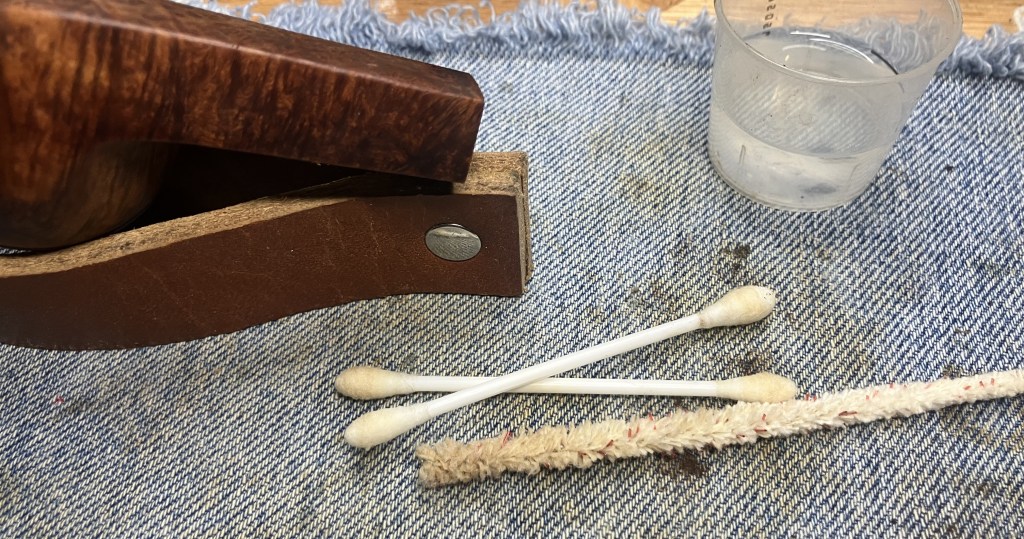
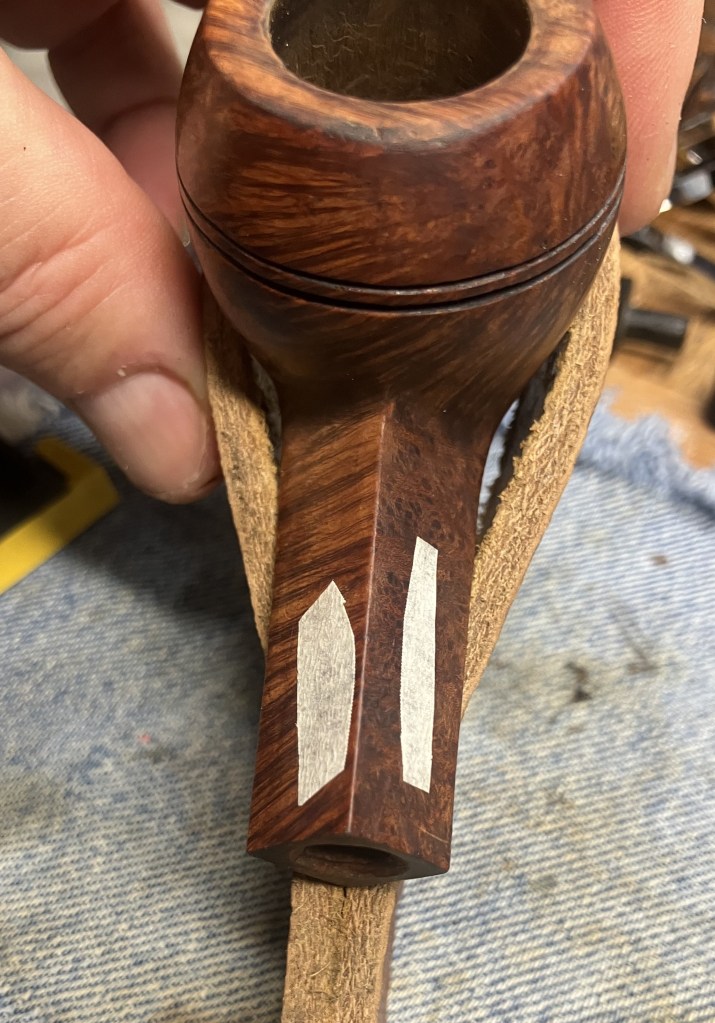


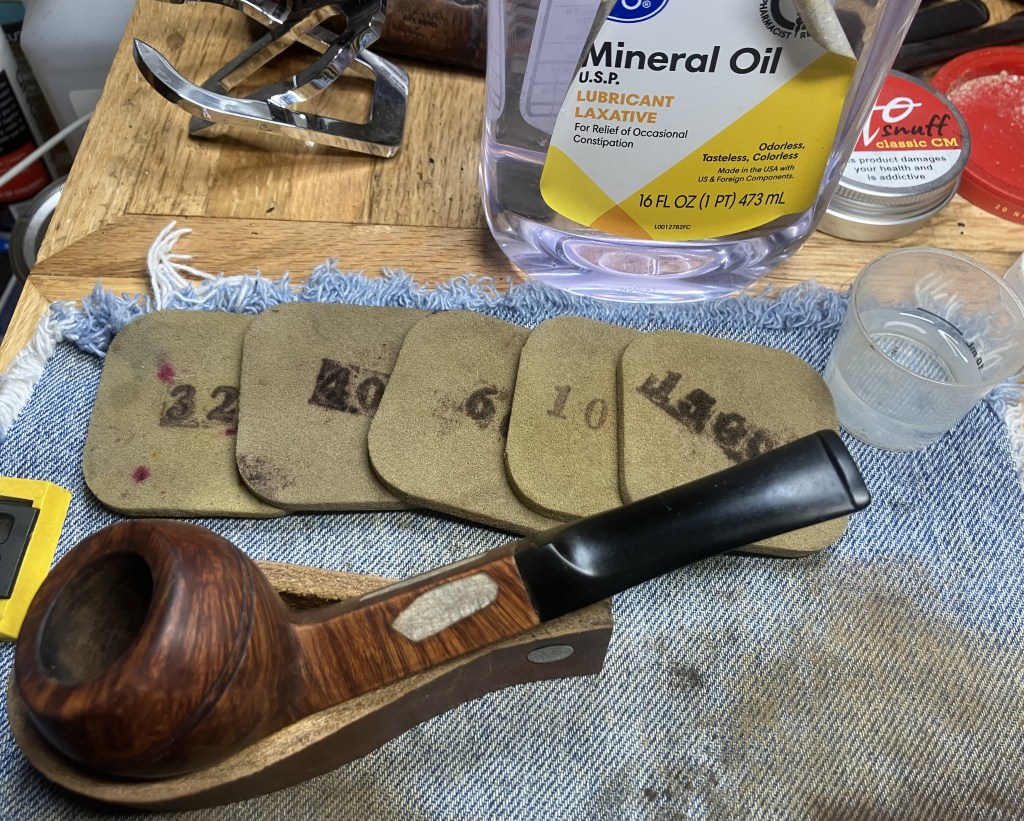
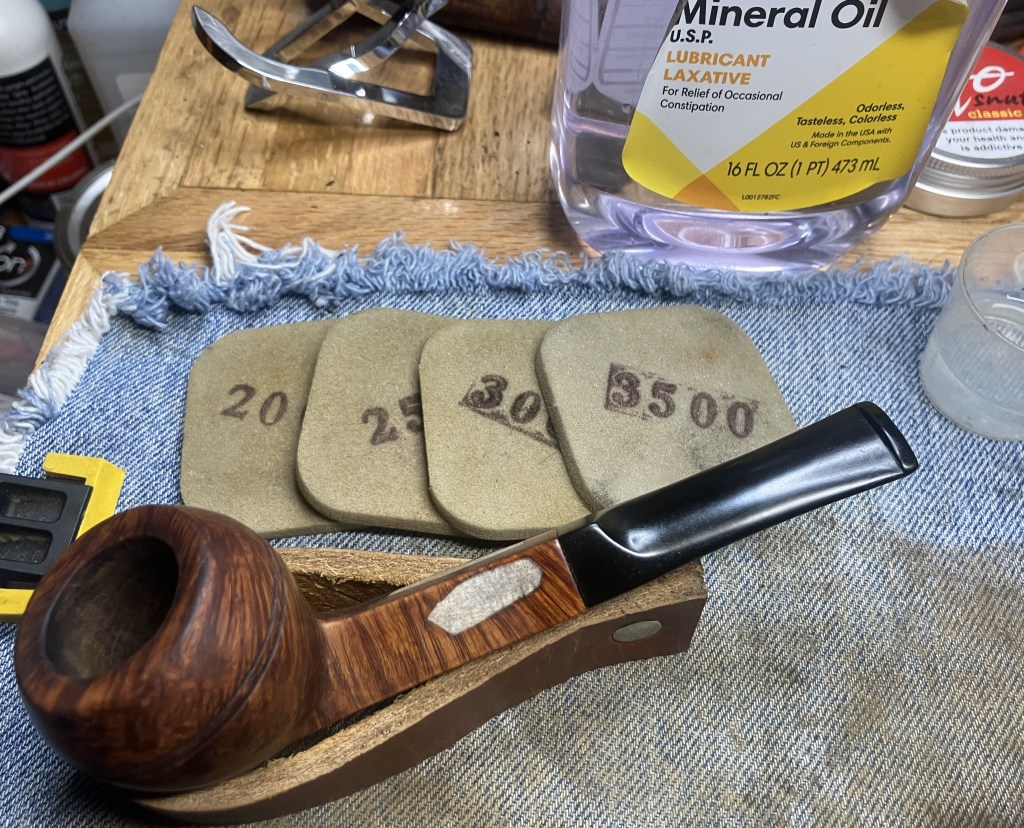
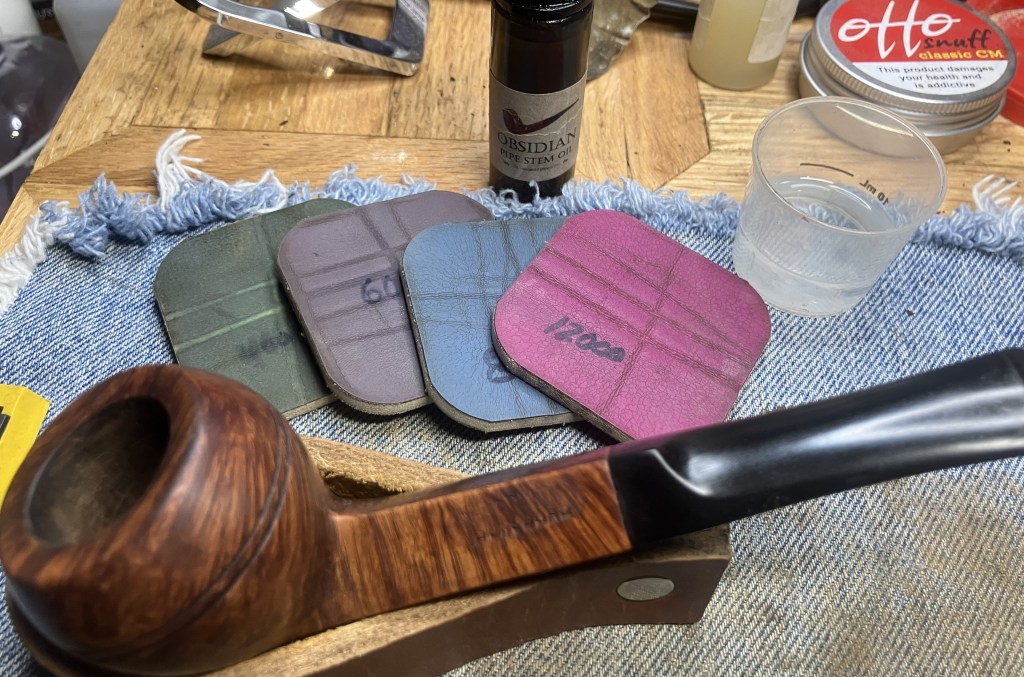
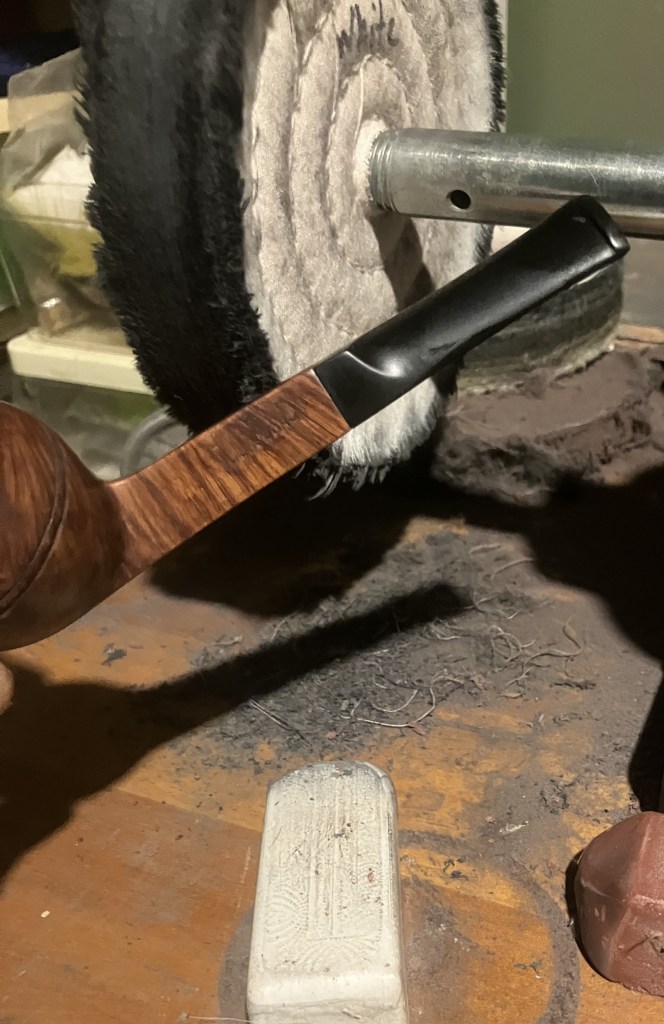

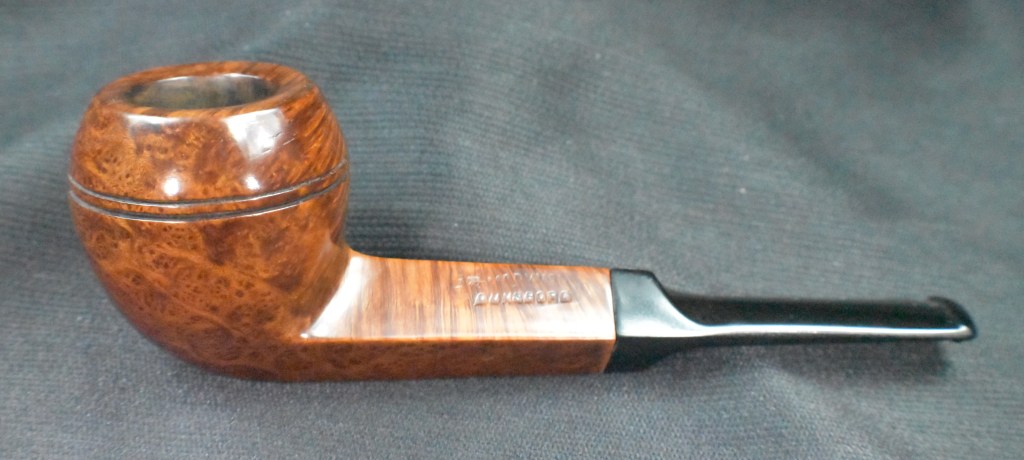

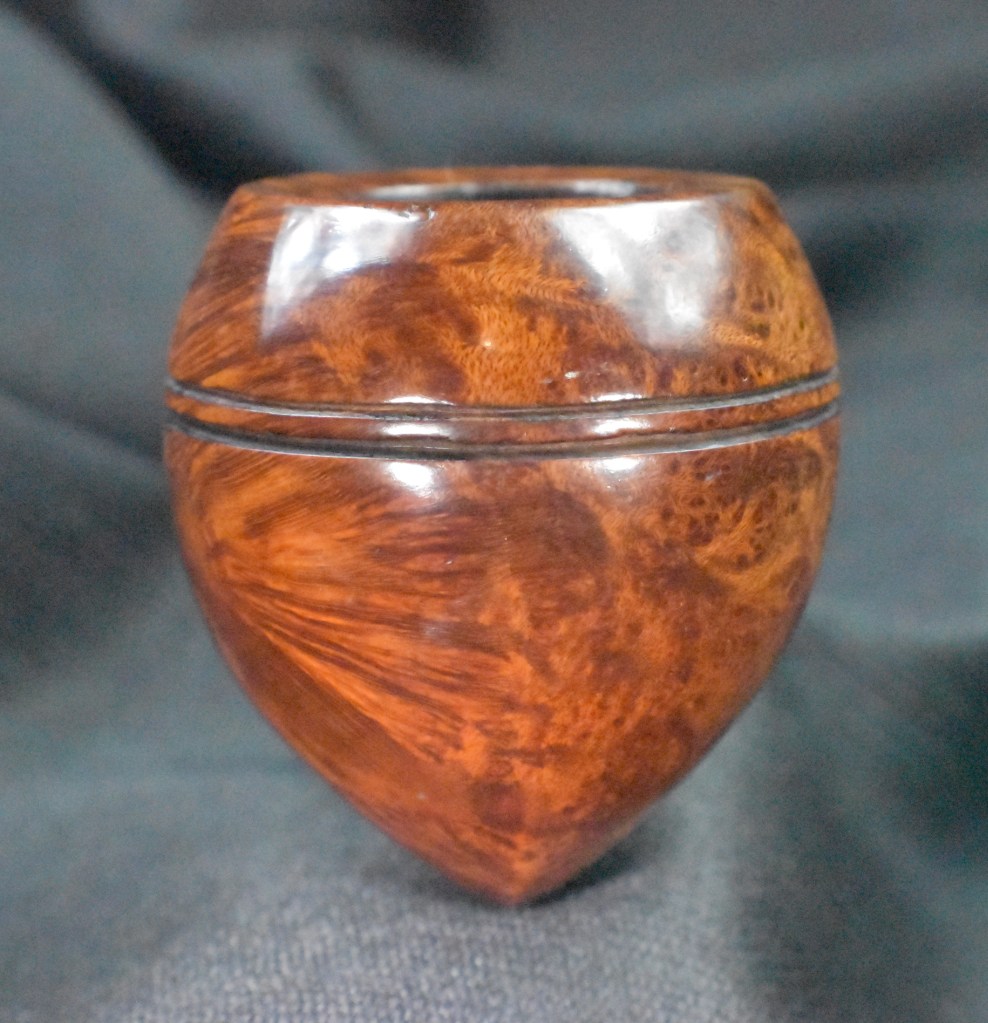


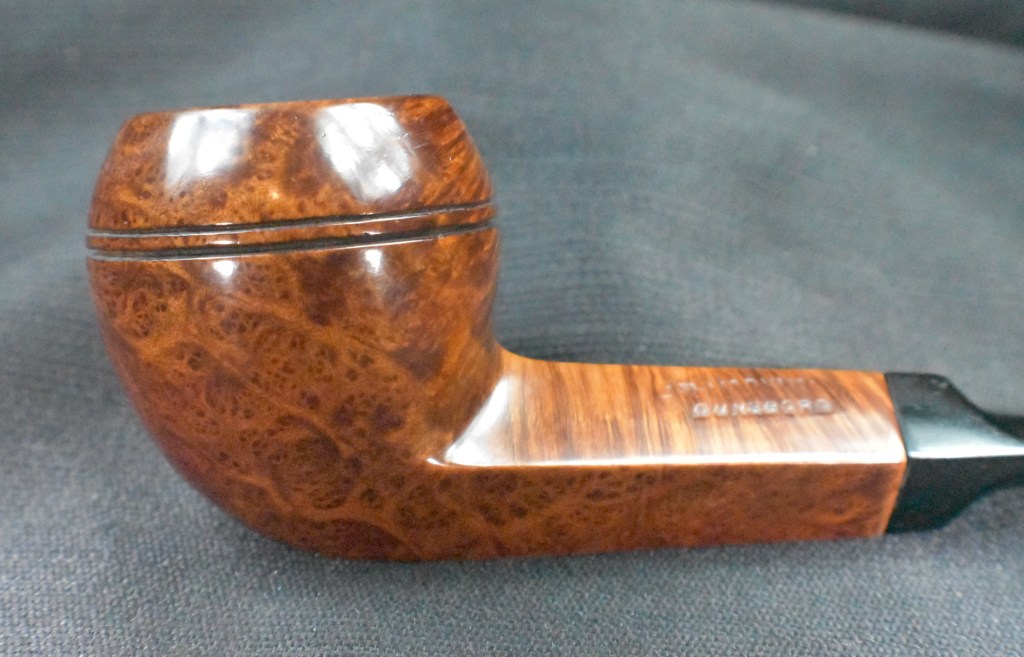

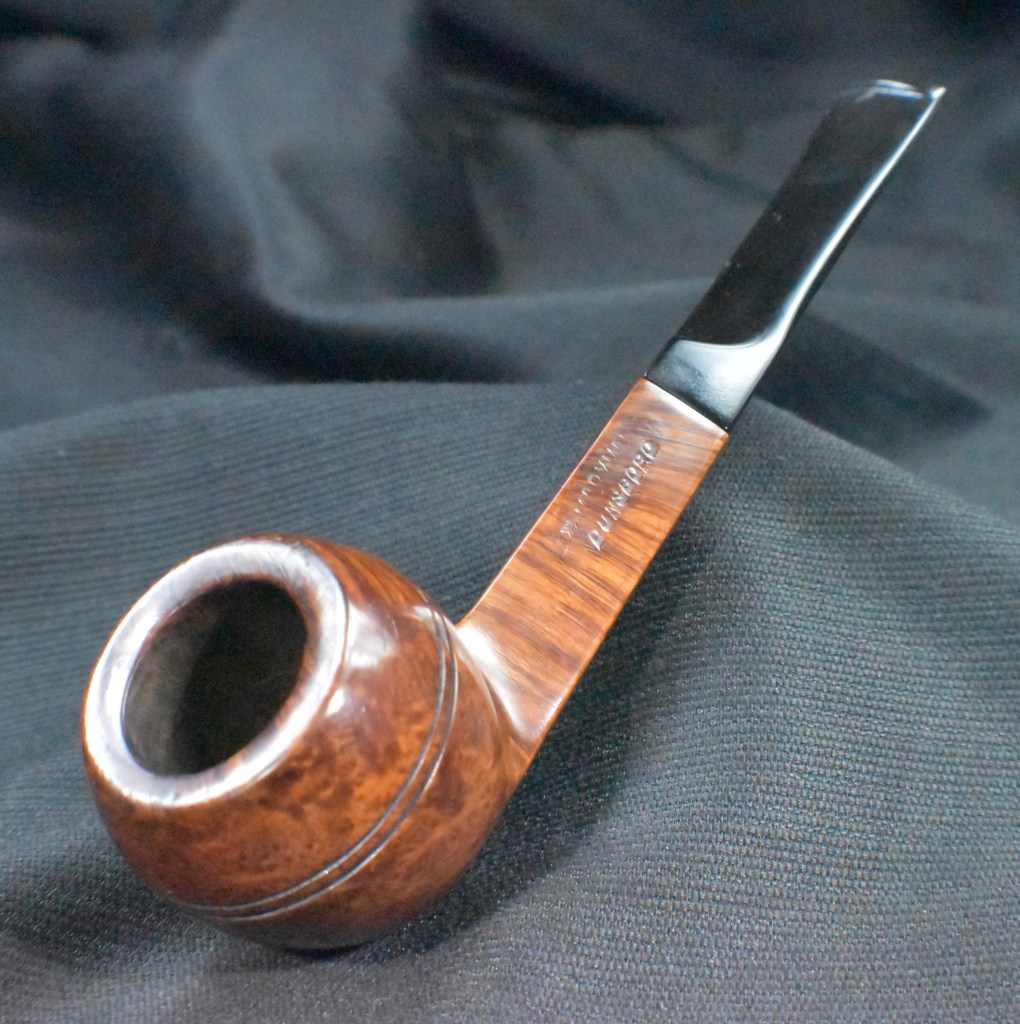

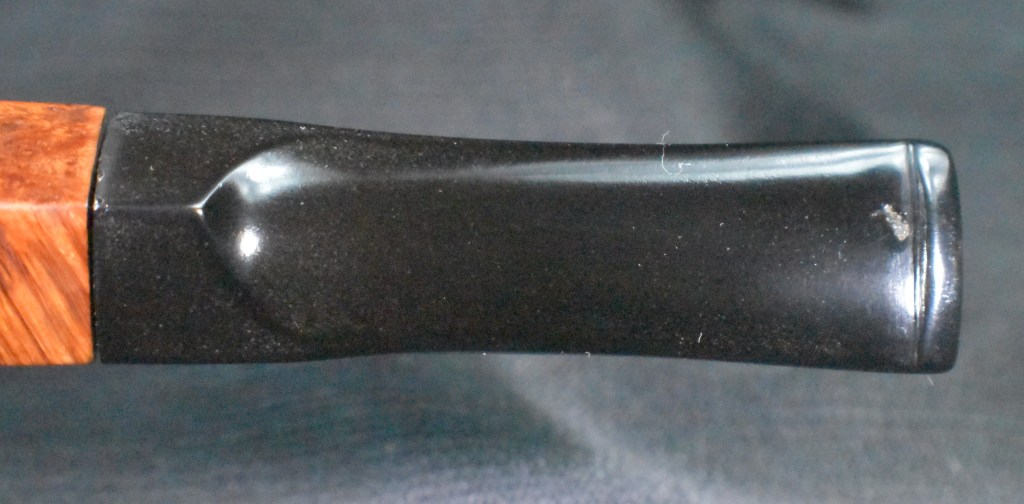
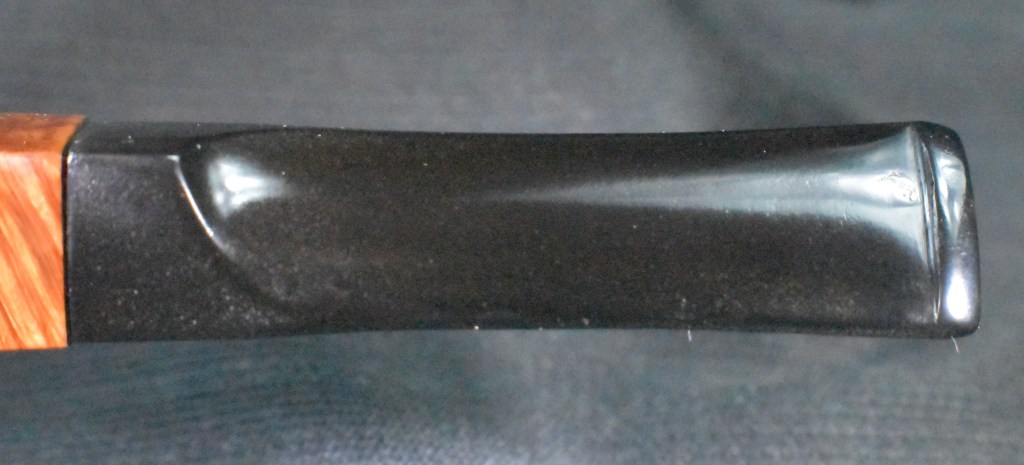

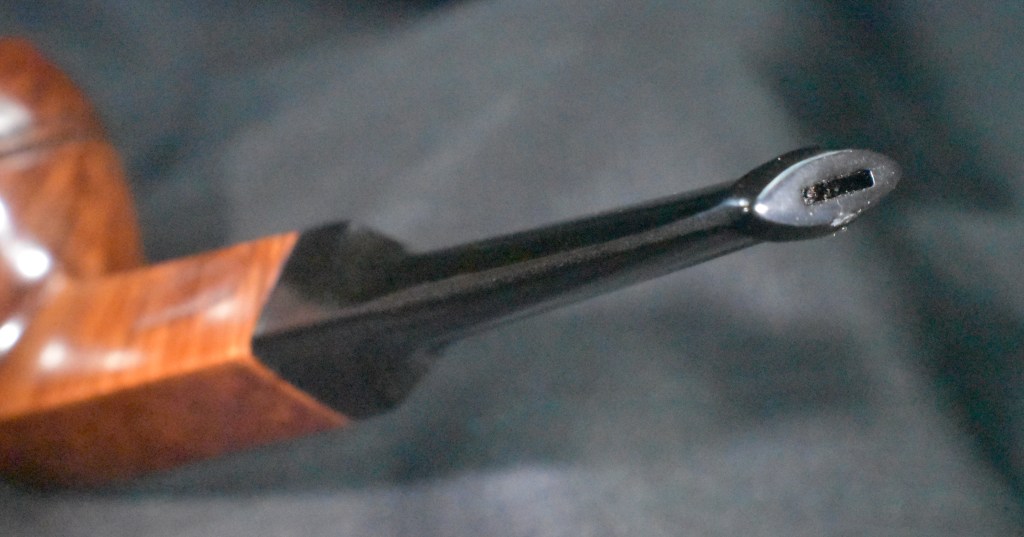


 were no better.


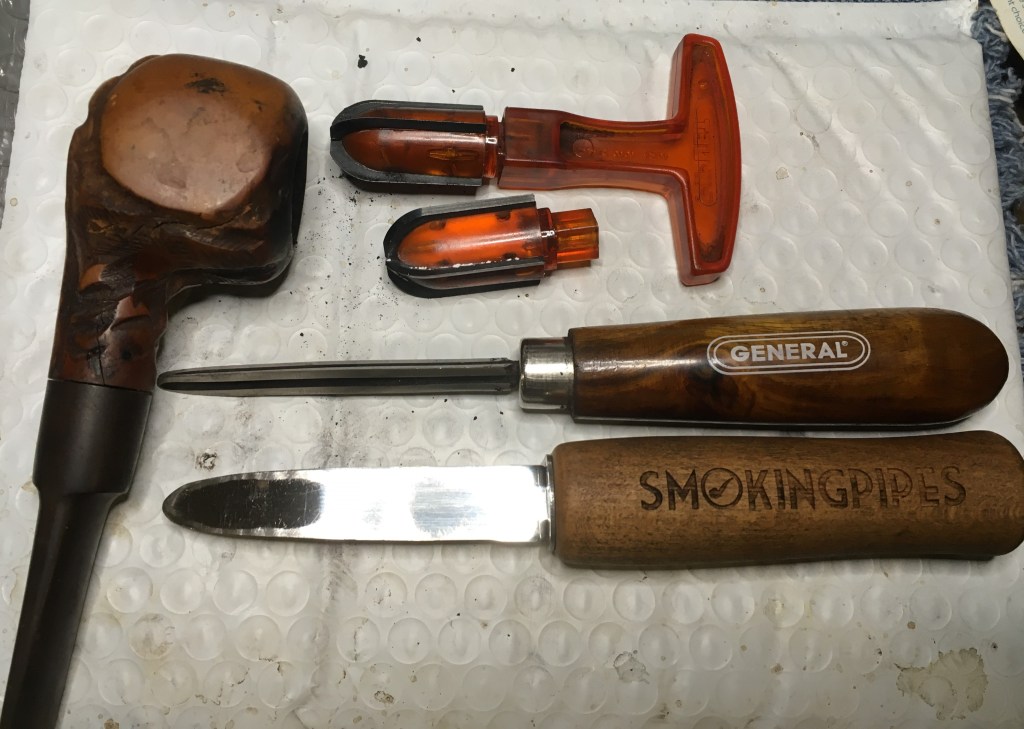


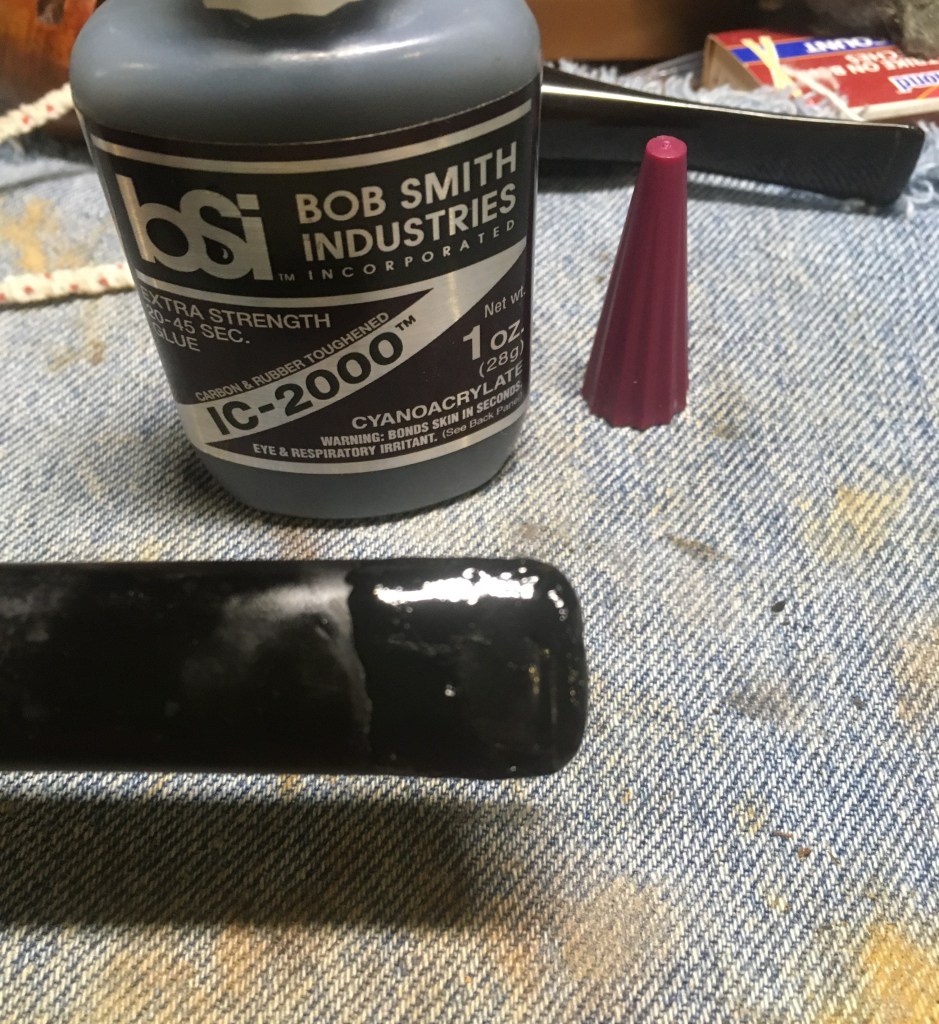


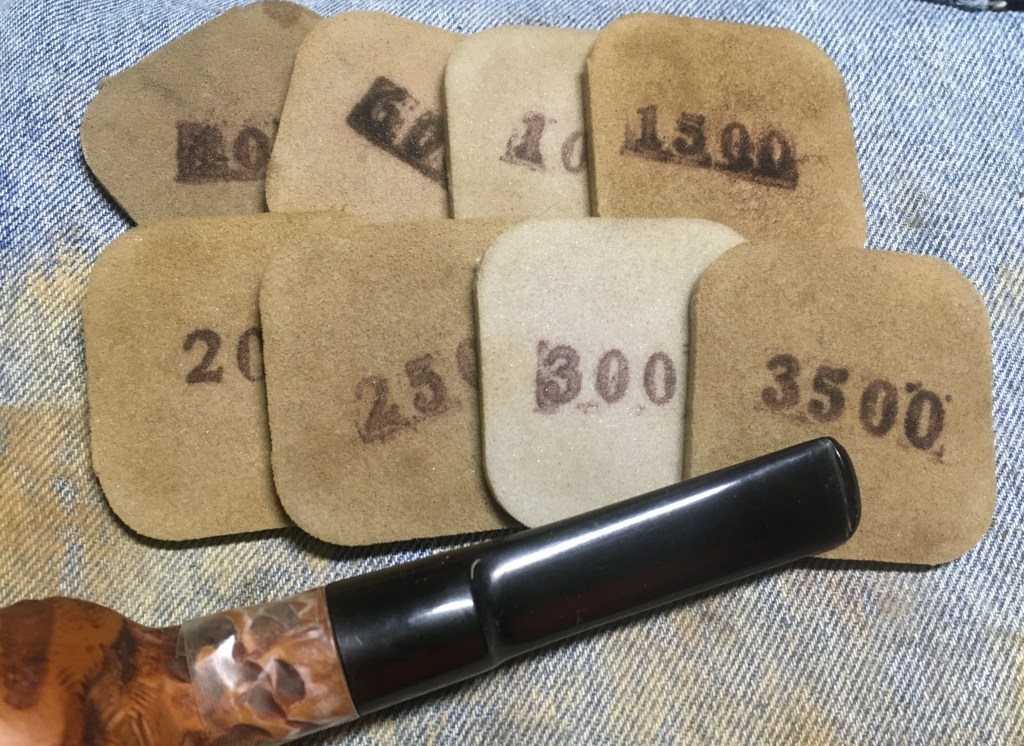


