
Photographed and Written by
John M. Young
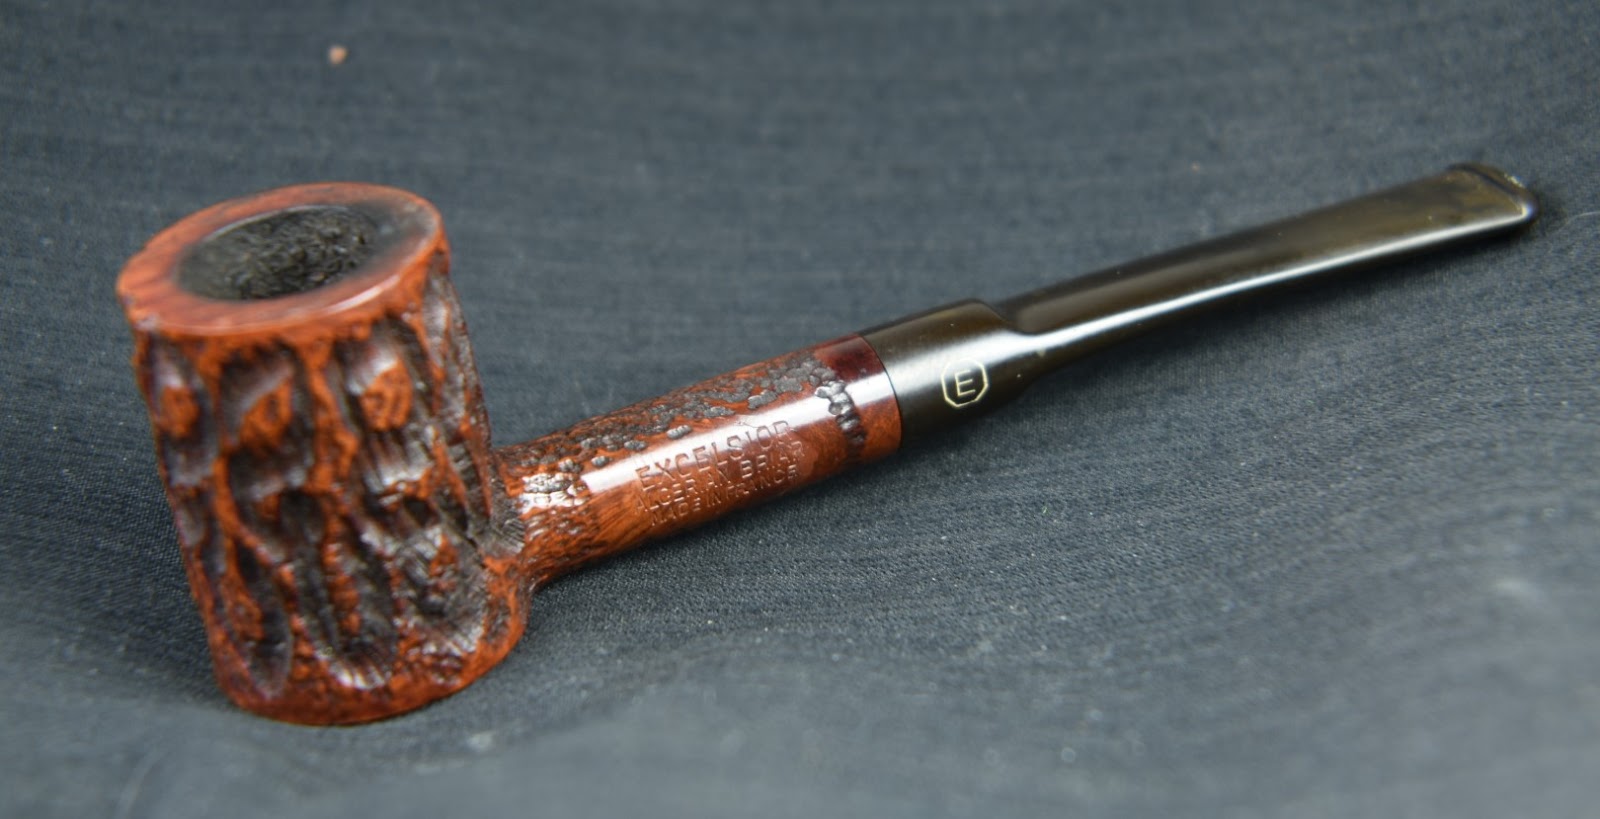
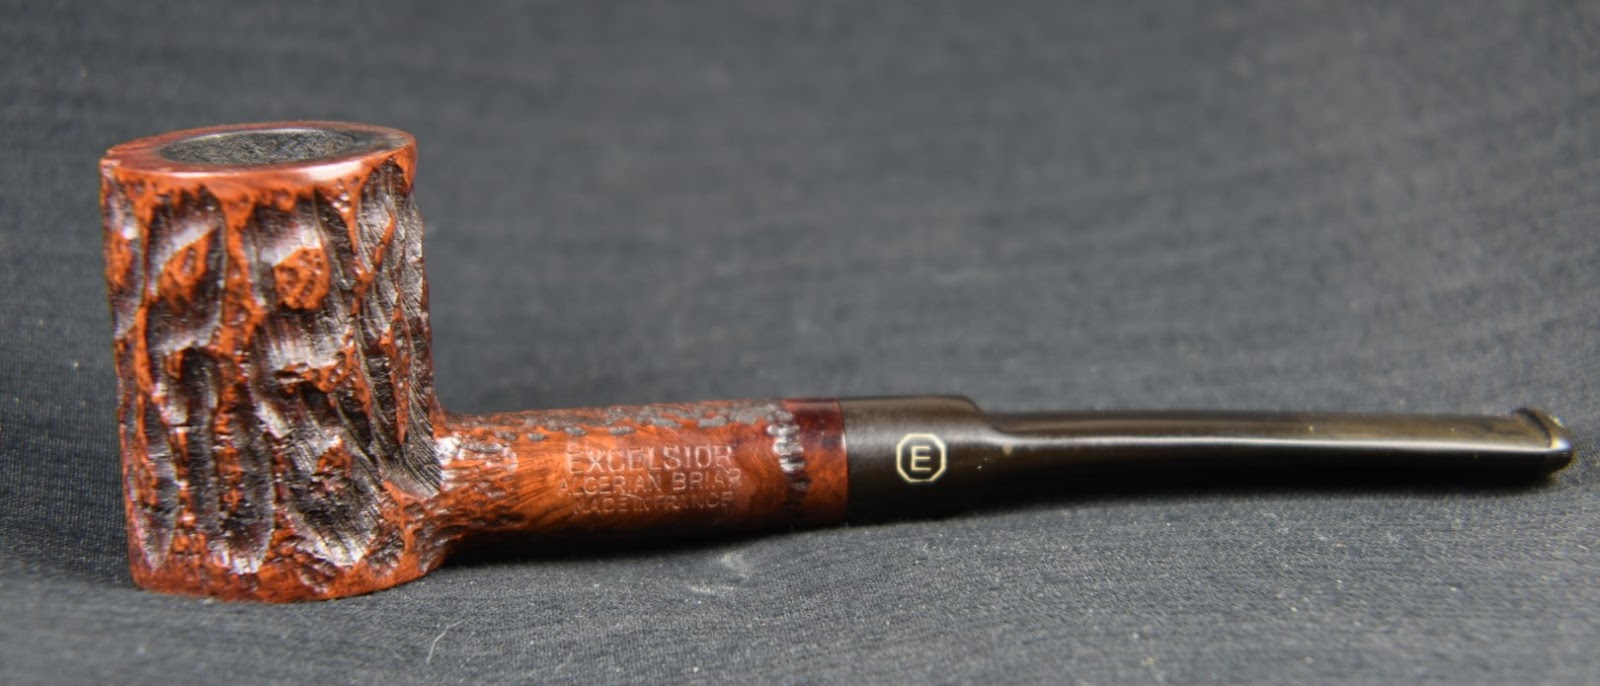
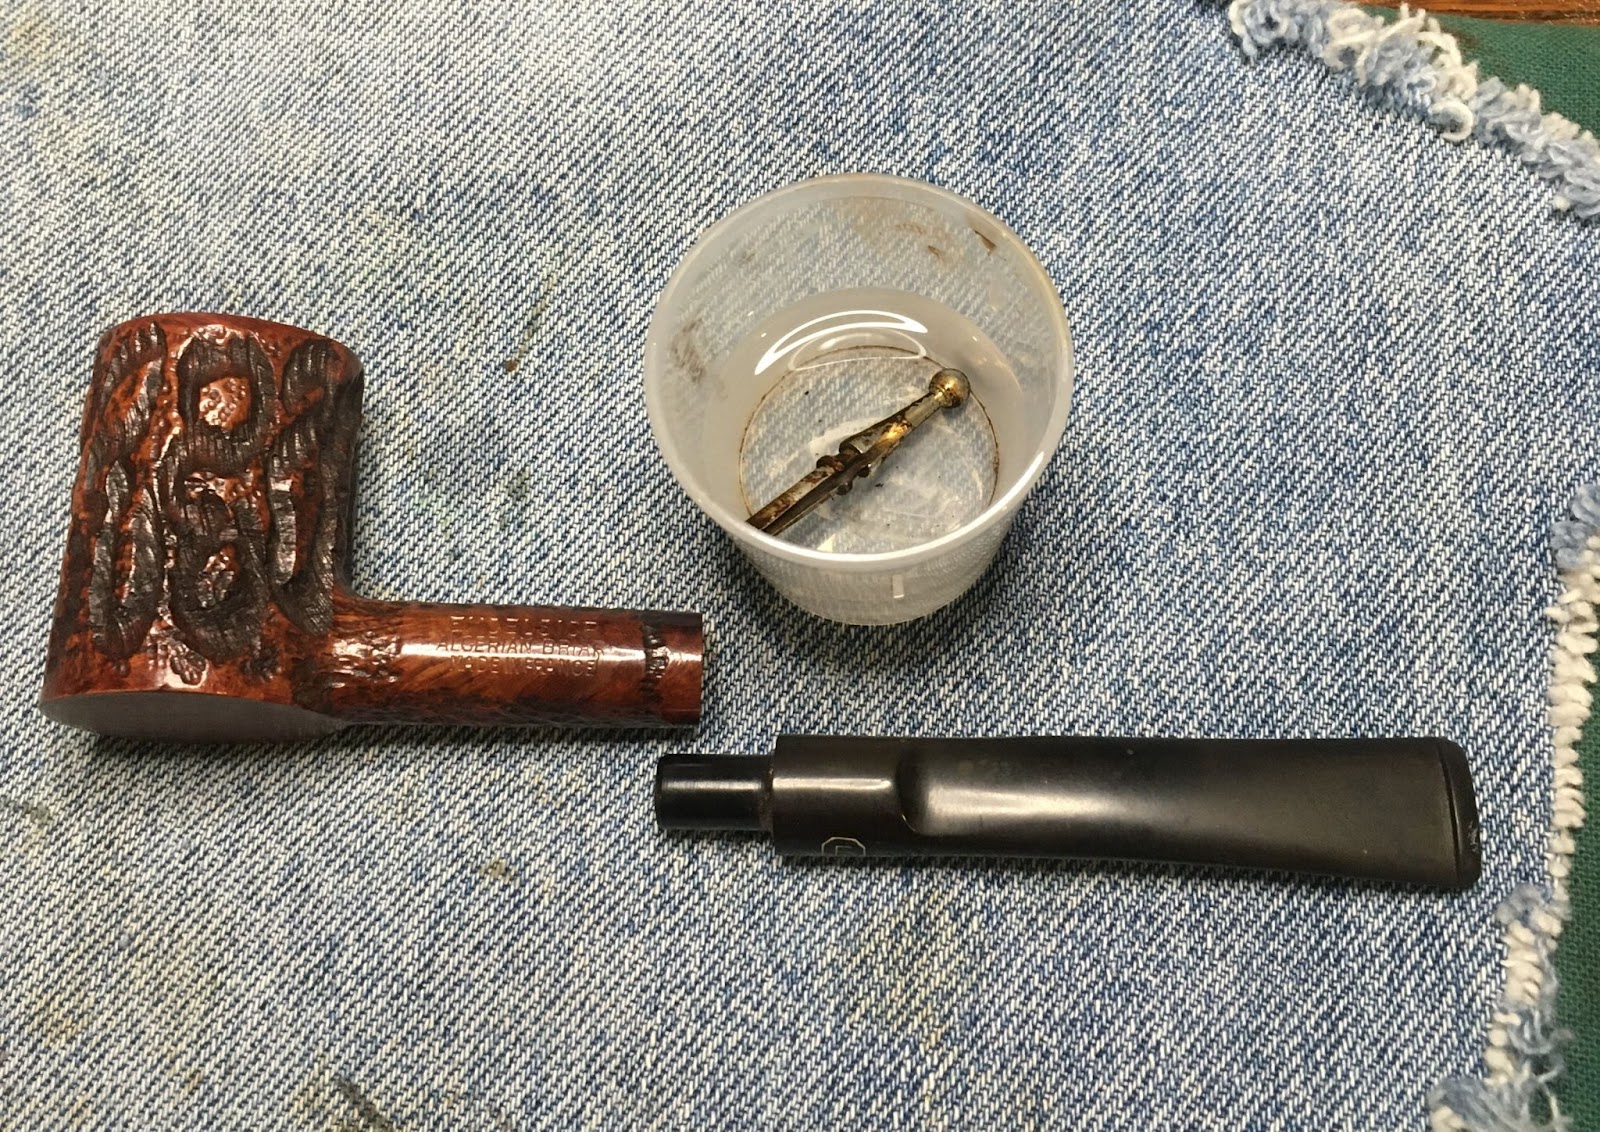
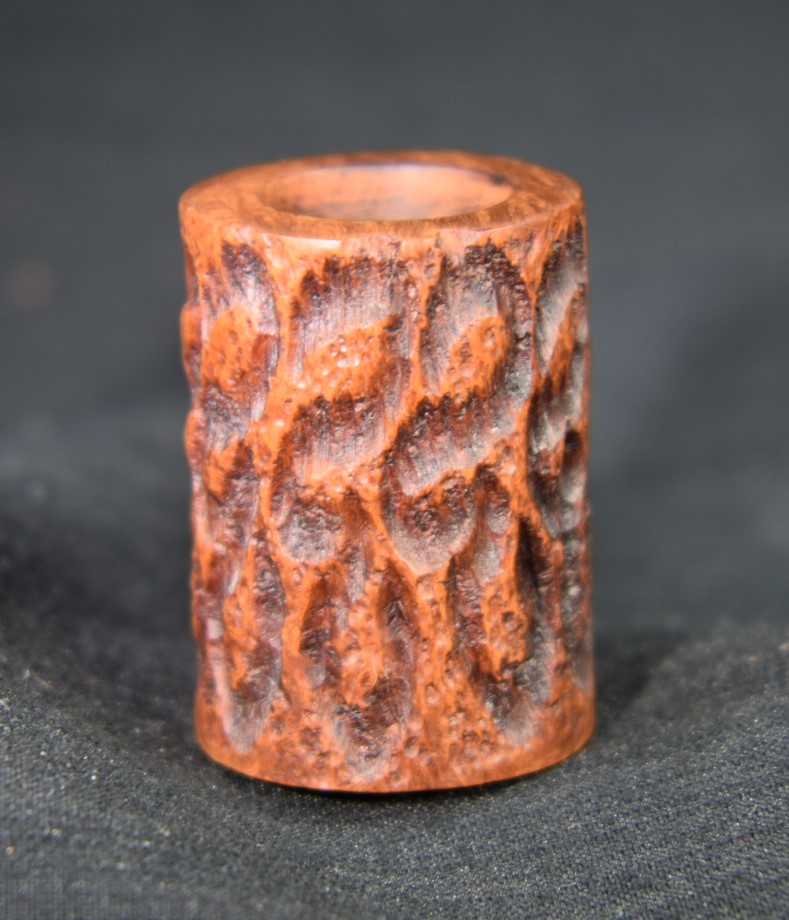
Now there is a cute little pipe. Great traditional poker lines, pretty stain, interesting carvings, comfortable bit, clear stampings, beautiful clear coat – Screeerttttttt (that was the sound of an old needle scratched across a vinyl record). There will be NO clear coat! Yes my nemesis, the dreaded clear coat, more annoying than little sisters when you bring a date home to meet the parents. More annoying than Northwoods mosquitoes. More annoying than flat tires on the highway, in the freezing rain when you are in a hurry to get to work. I know what you are thinking, “Hmm, I don’t think this guy likes clearcoat, sisters, mosquitoes or going to work. I also wonder about his mental stability.” I say, “Hah, I love my sister (most of the time), I love teaching (though retirement is far more enjoyable), I love the Mesabi Iron Range AKA Northwoods (Hi, Tomassoni family), the flat tires and the clear coat, not so much.
This darling Excelsior came to me as a member of an estate lot purchased in January of this year. It was not the item of interest of the lot. I was after the 3 Senlar pipes of that lot. If you are wondering what a Senlar pipe is here are links to those restorations: Billiard, Canadian 1 and Canadian 2. I had been smitten by the little Excelsior poker but it had to wait it’s turn at the bench until last night. Let me show you what it looked like.


Not quite sure how the White German Shepard got her hair in there.


The pipe was in excellent shape. I figured the restoration would be a quick and easy affair with the usual reaming, cleaning, deoxidizing and a bit of finish removal and refinishing. The term “figured” can be replaced with assumed and we all know what happens when one assumes. You make an “ass” of “u” and “me”.
Background of Excelsior pipes
This section proved more difficult than I originally thought. I came across an entry for octagonal logo outlines a few weeks back on pipephil.eu. Fortunately I took a screenshot and saved it into a folder for the Excelsior poker. I knew that I would eventually get around to restoring the poker. I then forgot about the screenshot. When I started researching Excelsior, I remembered seeing the octagonal logo outline but I couldn’t find it again. When saving the photos for this restoration I saw the screenshot and felt lucky that I had the foresight to save it weeks ago.
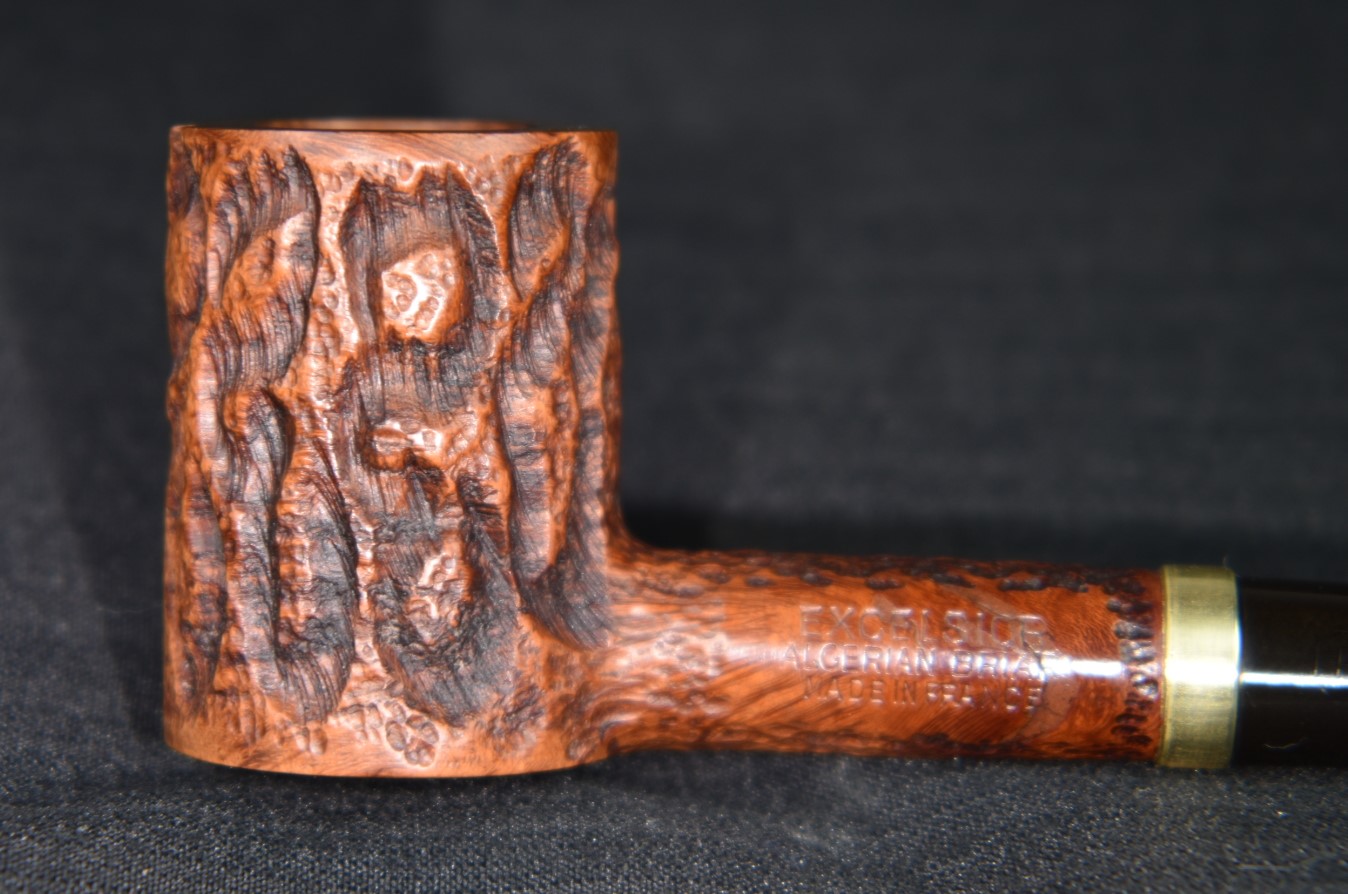
The Excelsior has an “E” rather than the “D” as shown in the image below.
(Dra-Duk — Pipes : Logos & Markings (pipephil.eu))

The EXCELSIOR over ALGERIAN BRIAR over MADE IN FRANCE is the same naming sequence that Jeantet used but, that is more circumstantial evidence and block letters pretty much all look alike, making positive identification of the maker inconclusive.
Jeantet has a long history of pipe making. According to Pipedia.org:
“The firm of the Jeantet family in Saint-Claude is first mentioned as early as 1775. By 1807 the Jeantets operated a turnery producing in particular wooden shanks for porcelain pipes and wild cherry wood pipes. The firm was named Jeantet-David in 1816, and in 1837 the enterprise was transformed into a corporation as collective name for numerous workshops scattered all over the city. The manufacturing of briar pipes and began in 1858. 51 persons were employed by 1890. Desirous to concentrate the workers at a single site, the corporation began to construct a factory edifying integrated buildings about 1891 at Rue de Bonneville 12 – 14. This took several years. In 1898 Maurice Jeantet restructured the business. He is also presumed to enlarge Jeantet factory purchasing a workshop adjoining southerly. It belonged to the family Genoud, who were specialized in rough shaping of stummels and polishing finished pipes. (In these times it was a most common procedure to carry goods from here to there and back again often for certain steps of the production executed by dependant family based subcontractors. Manpower was cheap.)
Jeantet was transformed to a corporation with limited liability in 1938. By that time a branch workshop was operated in Montréal-la-Cluse (Ain), where mainly the less expensive pipes were finished. 107 employees – 26 of them working from their homes – were counted in Saint-Claude in 1948 and 18 in the Ain facility.
The Saint-Claude factory was considerably modernized by ca. 1950 installing (e.g.) freight elevators. In 1952 the southern workshop was elevated. 80 workers were employed in 1958. The factory covered an area of 2831 m²; 1447 m² of the surface were buildings.
The climax of the pipe production was reached around 1969, when thirty to thirtyfive thousand dozens of pipes were made by 72 workers (1969). But then the production continously dwindled to only six or seven thousand dozens in 1987 and only 22 workers were still there. Eventhough, around 1979 a very modern steam powered facility for drying the briar had been installed in the factory’s roofed yard.
Yves Grenard, formerly Jeantet’s chief designer and a great cousin of Pierre Comoy, had taken over the management of Chapuis-Comoy in 1971. Now, to preserve the brand, the Jeantet family went into negotiations with him, and resulting from that Jeantet was merged in the Cuty Fort Group (est. 1987 and headed by Chacom) in 1988 along with the pipe brands of John Lacroix and Emile Vuillard. Chacom closed the Jeantet plant, and the City of Saint-Claude purchased it in 1989. After alternative plans failed, the buildings were devoted to wrecking. The southerly workshop was wrecked before 1992.
Today Jeantet pipes were produced as a sub-brand by Chapuis-Comoy who’s mainstay is Chacom of course.” (Jeantet – Pipedia)
The pipedia.org article also had an image of the 1980 Jeantet catalog.

(File:Jeantet 1980 cat.jpg – Pipedia)
From the catalog image we can see that Jeantet is using the octagonal logo outline around the letter “J”. Likely for Jeantet. I do not think it is too large of a leap to think that Jeantet used the octagonal logo outline around an “E” for the Excelsior pipe in hand. With this in mind I conclude that the Excelsior poker is a Jeantet product with an undetermined year of production.
The Restoration
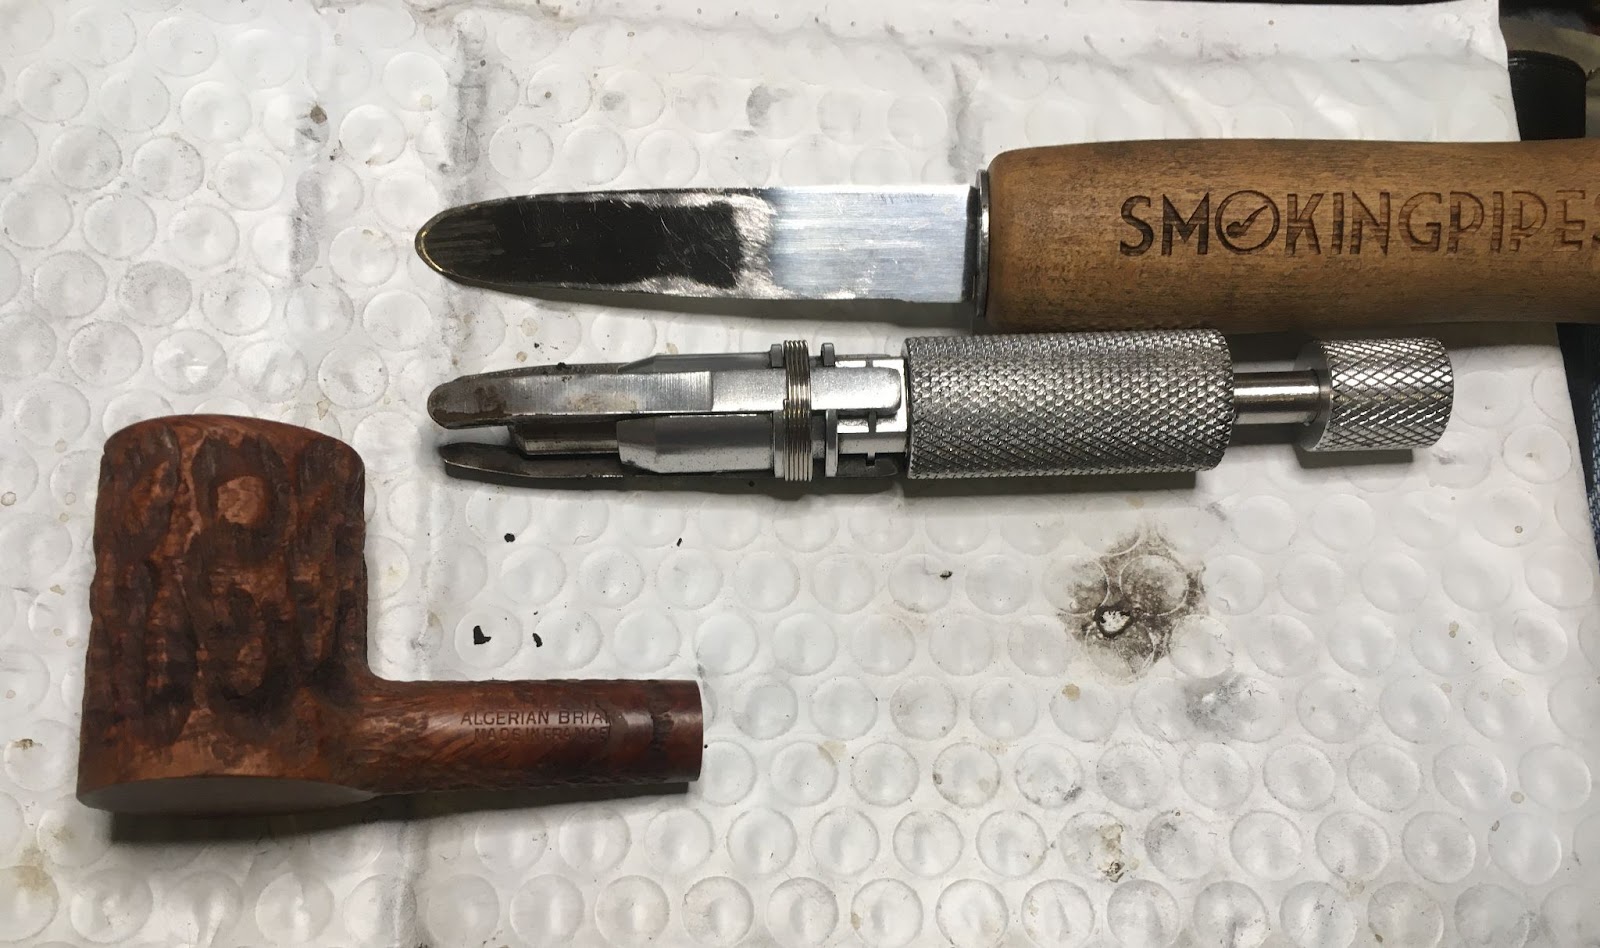
The restoration began as do most with a clean denim piece on the workbench. This pipe needed to have that stinger soaked for a bit in 95% ethyl alcohol so, that was job #1.
Job #2, see what solvent will remove this clear coat. First attempt 95% ethyl alcohol on a cotton swab. Mostly negative.

Attempt two, acetone on a cotton swab. Success.

That means that the stummel needed to take an acetone bath for 30 minutes.

While the acetone was doing what it does, I started on the stem. The initial sanding was done with a 6000 grit sanding sponge to remove the light tooth chatter and oxidation. Care was taken to avoid the logo.

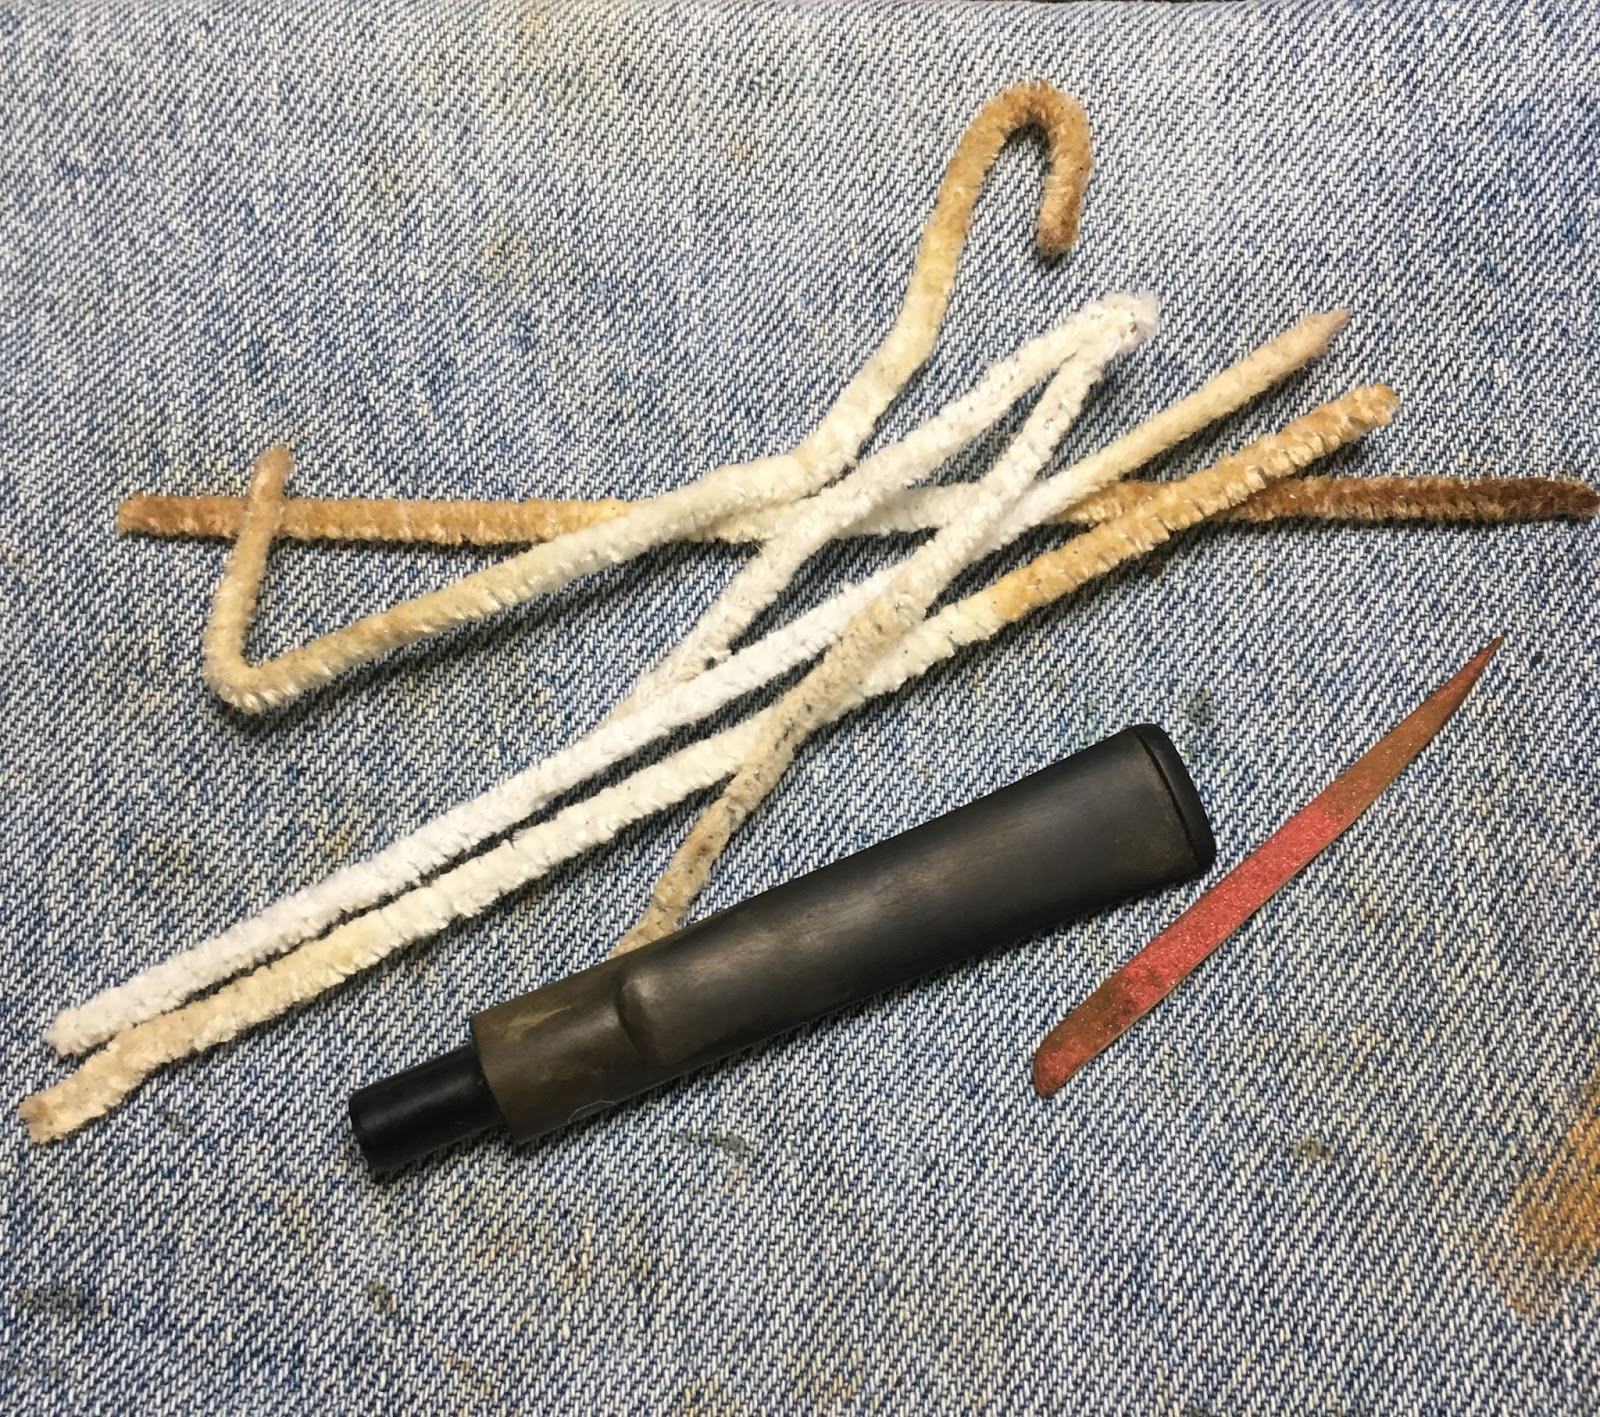
The interior of the stem was then cleaned out using bristle pipe cleaners dipped in 95% ethyl alcohol. The button of this pipe seemed very constricted. Not from damage or accumulated yuck (the technical term for smoking residue). It was just a slightly smaller daft hole than would fit a bristle pipe cleaner. I had to use Falcon Thin Pipe Cleaners to get through it. As a remedy I cut an angular piece from an emery board, nail file, and used that to enlarge the airway.
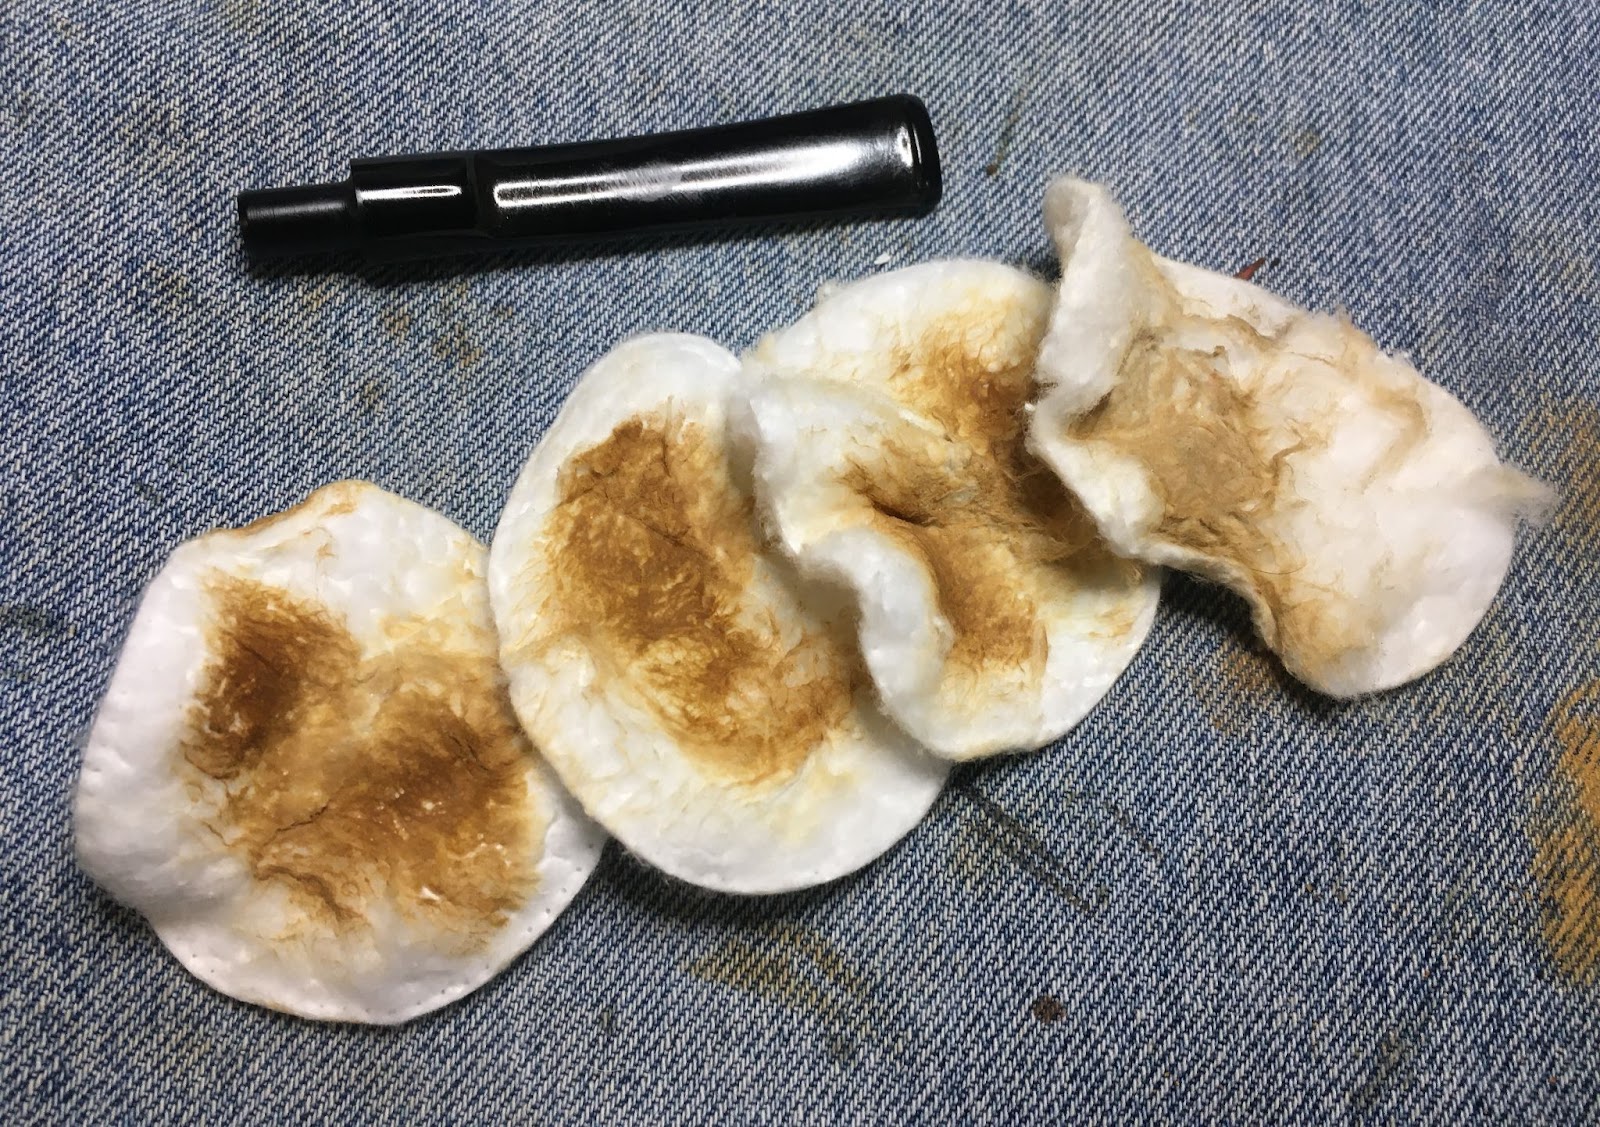
The stem was then scrubbed with several make-up pads with Soft Scrub applied. I had not noticed how light the stamp was for the logo. Once the Soft Scrub was not producing oxidized rubber the stem was oiled with a coat of mineral oil and allowed to sit. The Soft Scrub was abrasive enough to remove the paint and most of the logo indentation. I hoped that it would be deep enough for some fresh white paint.
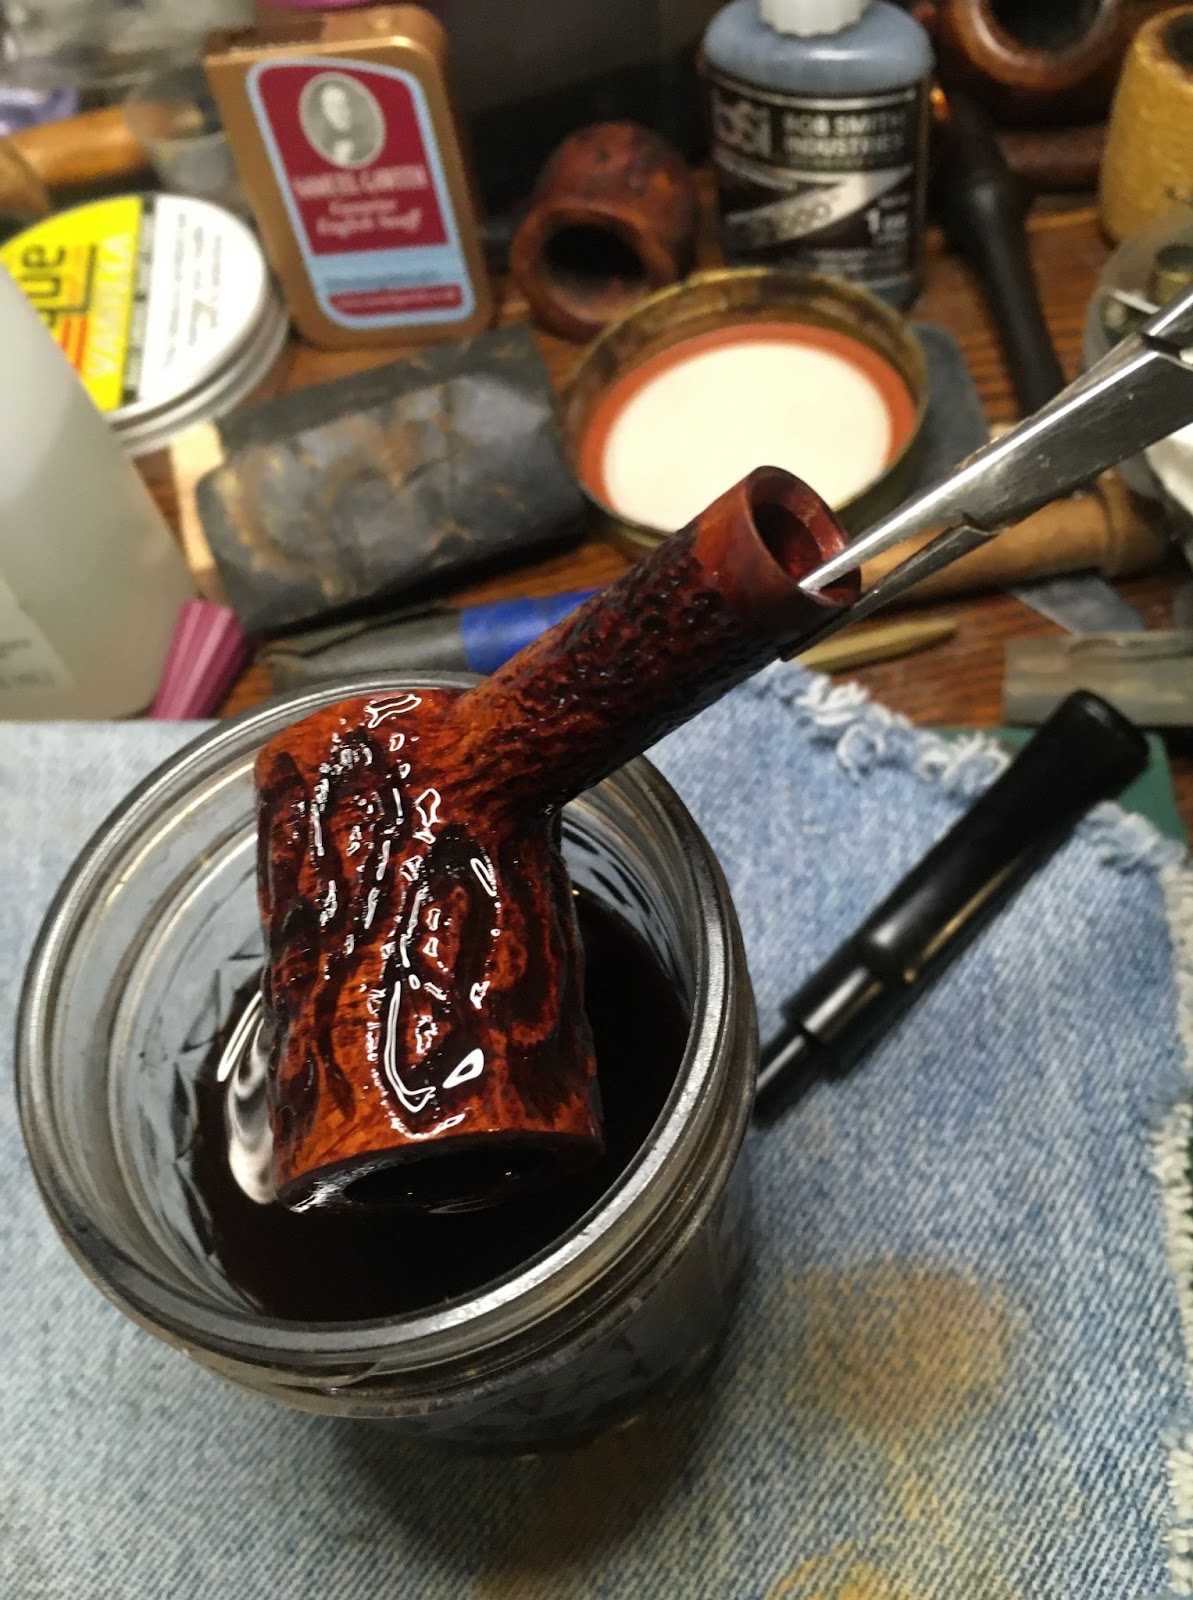
The stummel was retrieved from the acetone bath.and scrubbed with an acetone dipped toothbrush then wiped with acetone dipped make-up pads to make sure all the clear coat was dissolved and removed from the briar.
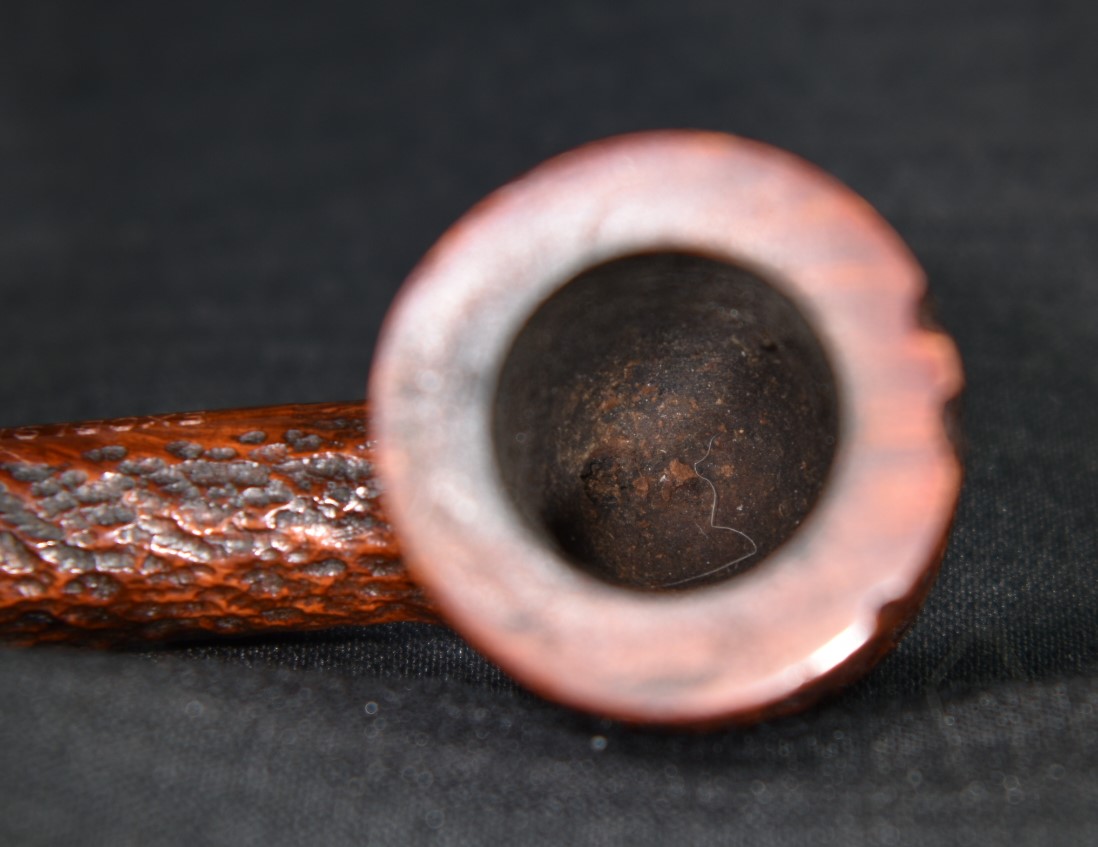
I then worked on reaming the tobacco chamber. Since the chamber was small I used the Scotte Stainless Steel Tool and the Smokingpipes Low Country Reamer.
The reaming was followed by sanding the chamber with 320 sandpaper wrapped around a wood dowel.

The removal of the clear coat allowed me to discover three things I had not previously noticed. One, a lage fill at the end of the stamp and two, a small pit on the base of the stummel and three a 6-7 mm long shank crack. I decided that there was little I could do for the fill without damaging the stamp and the old fill was secure, so I left it alone.

The pit on the base was small and probably could have been ignored. It wasn’t.
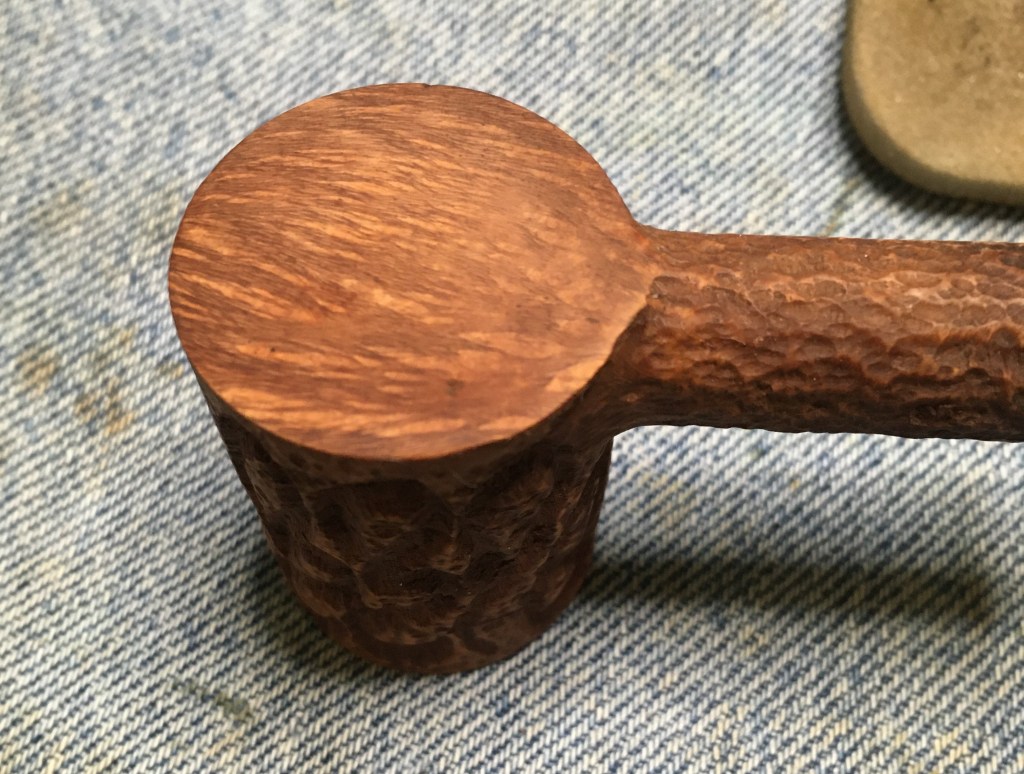
I used thin cyanoacrylate (CA, super glue) and briar dust to fill the pit. A small drop of CA was applied then sanded with the 600 sanding sponge. The briar dust on the sponge and the newly created dust from sanding combined with the wet CA to fill the pit.

The top, rim, and the bottom of the stummel were sanded with the sequence of sanding sponges 100-3500. Between each sponge the stummel was wiped off with a make-up pad moistened with 95% ethyl alcohol.

I stayed in stummel mode and cleaned out the shank next. This was done by pouring about 5 ml of 95% ethyl alcohol into the bowl and allowing it to flow up the shank but not out. I then used a nylon shank brush to scrub the shank interior with the alcohol in place dissolving the yuck from the airway. The alcohol was then poured into a medicine cup and the shank scrubbed with cotton swabs. This alcohol shank brush scrubbing was repeated until the cotton swabs came back clean.

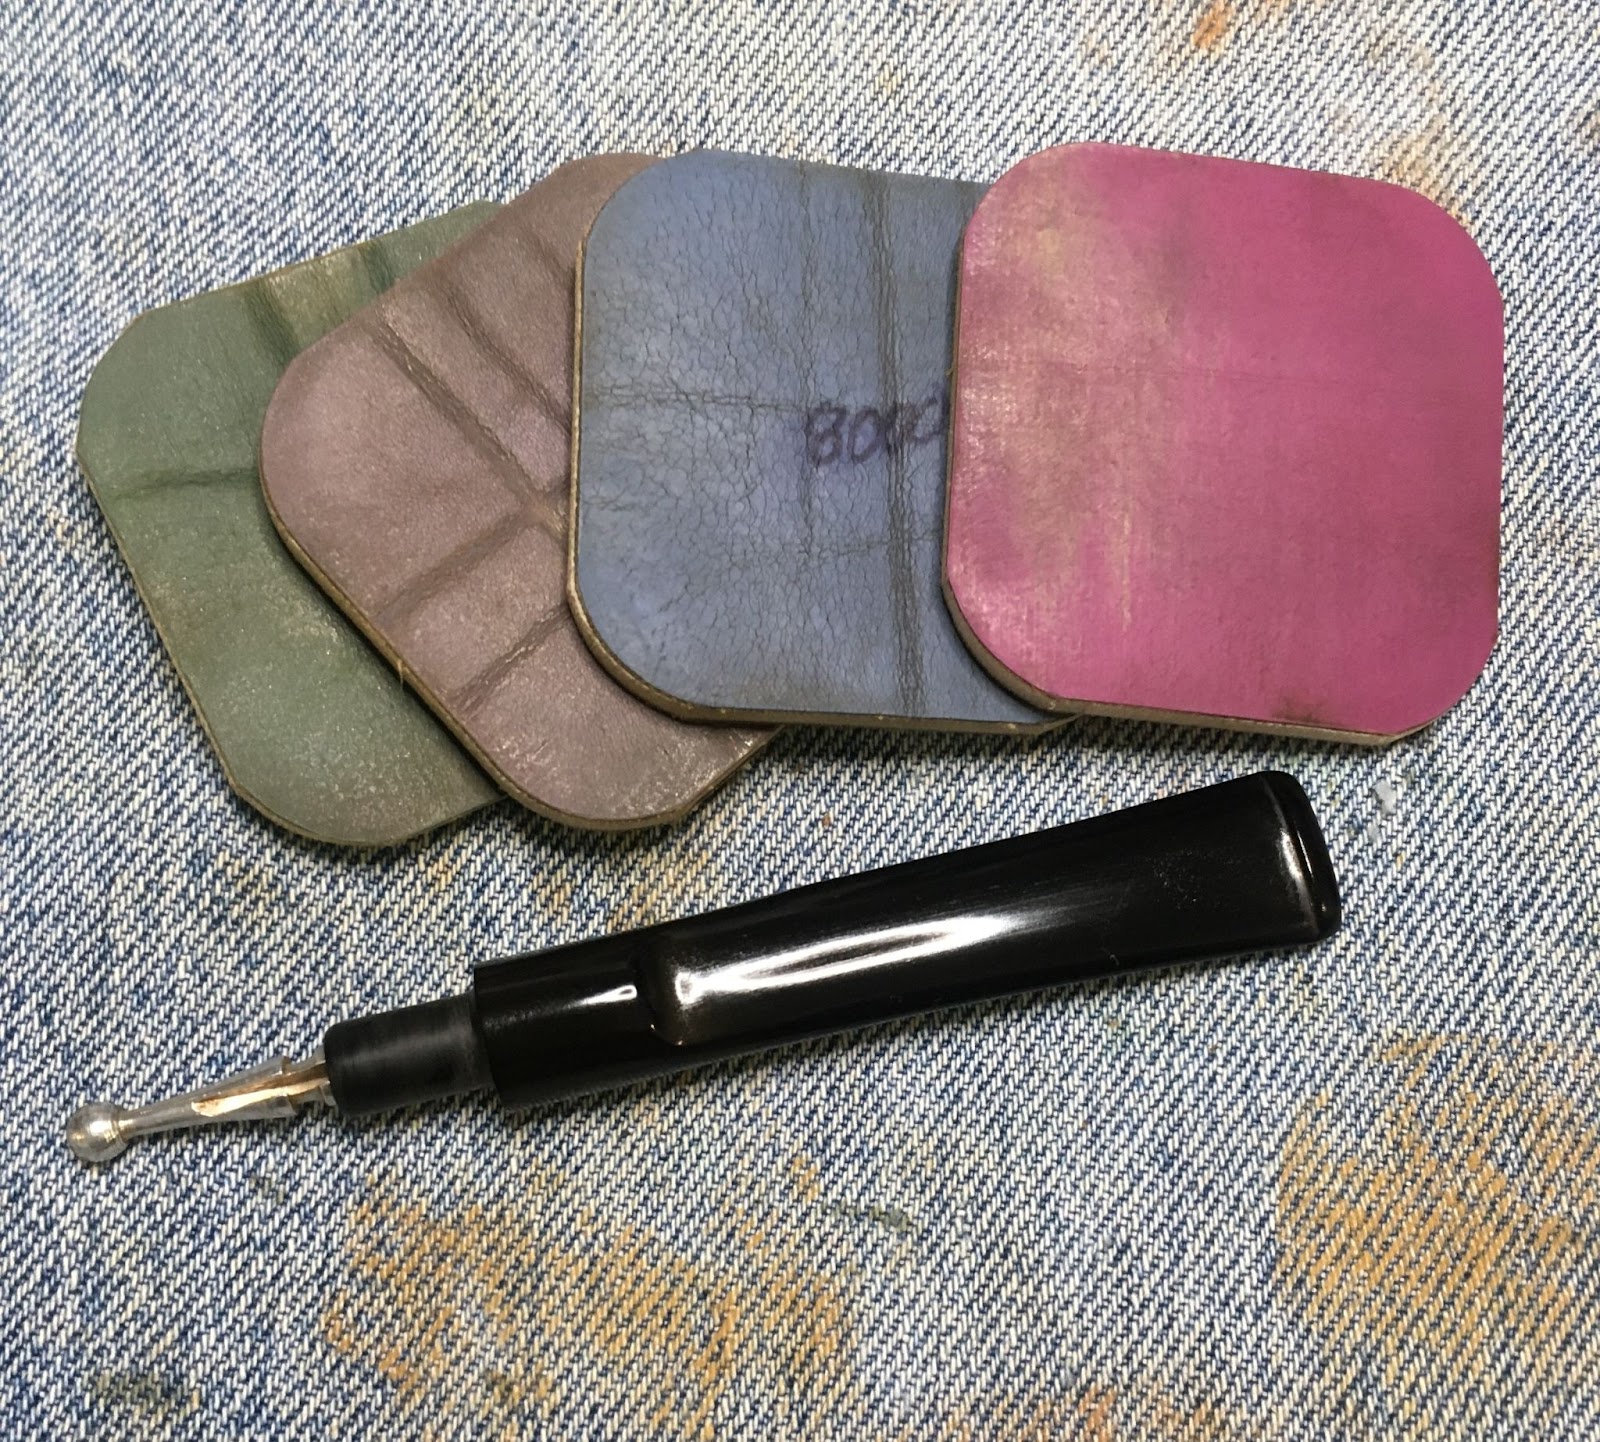
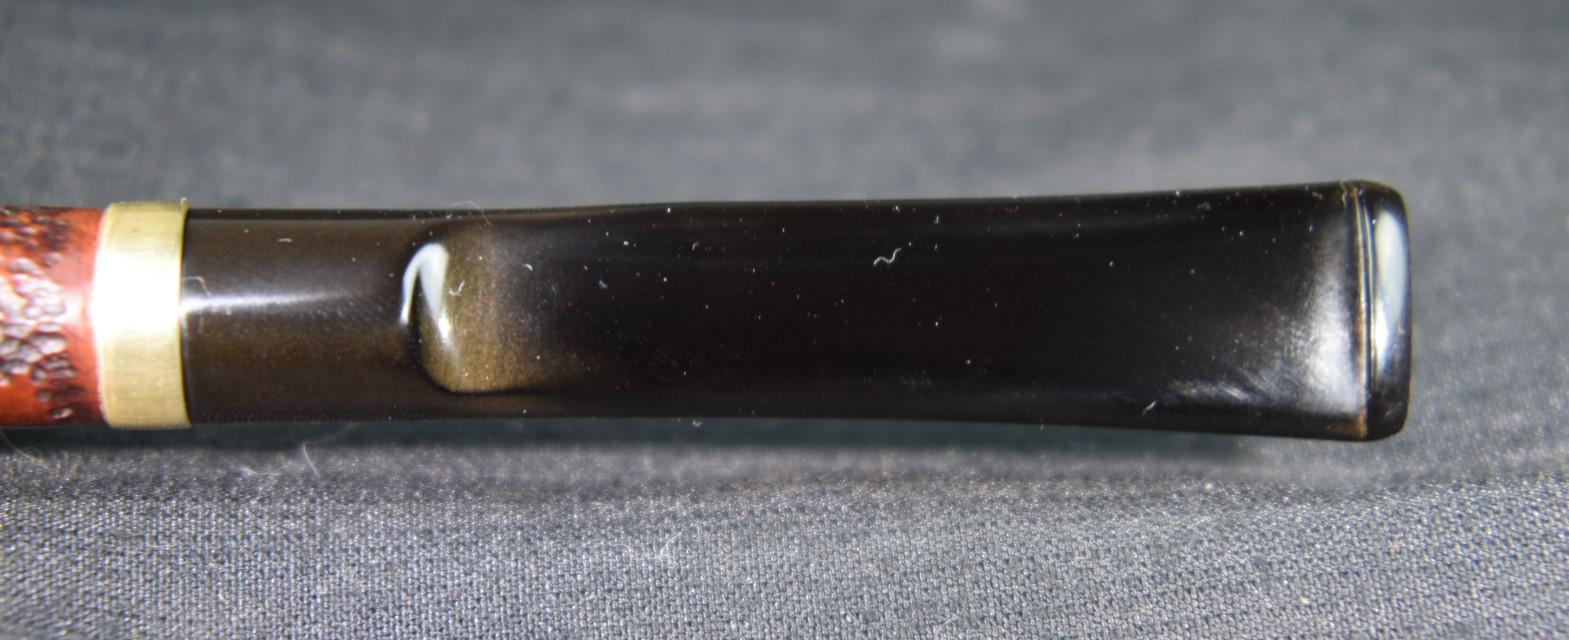
Before I started the new band, I wanted to get the stem sanded and micromeshed to ensure a perfect fit with the band. I wiped the mineral oil from the stem and started lightly sanding with the 1000 sanding sponge. I was careful to avoid the logo. I continued with the sponges through the 3500 sponge. Between each sponge I dipped my finger into the mineral oil, rubbed this onto the stem and wiped it with a paper towel.

I then proceeded to the 4000-12000 micro-mesh pads. Between each pad I applied a drop of Obsidian Oil, rubbed it with my finger and wiped it with a paper towel.
The dreaded shank crack. I am pretty sure there is no such thing as a good shank crack.

This crack needed a band. I checked my stock of brass tubing. The 17/32 inch outside diameter (O.D.) brass tube was nearly a perfect fit. A pipe cutter was used to cut the brass to 0.2 inches or 5 mm.
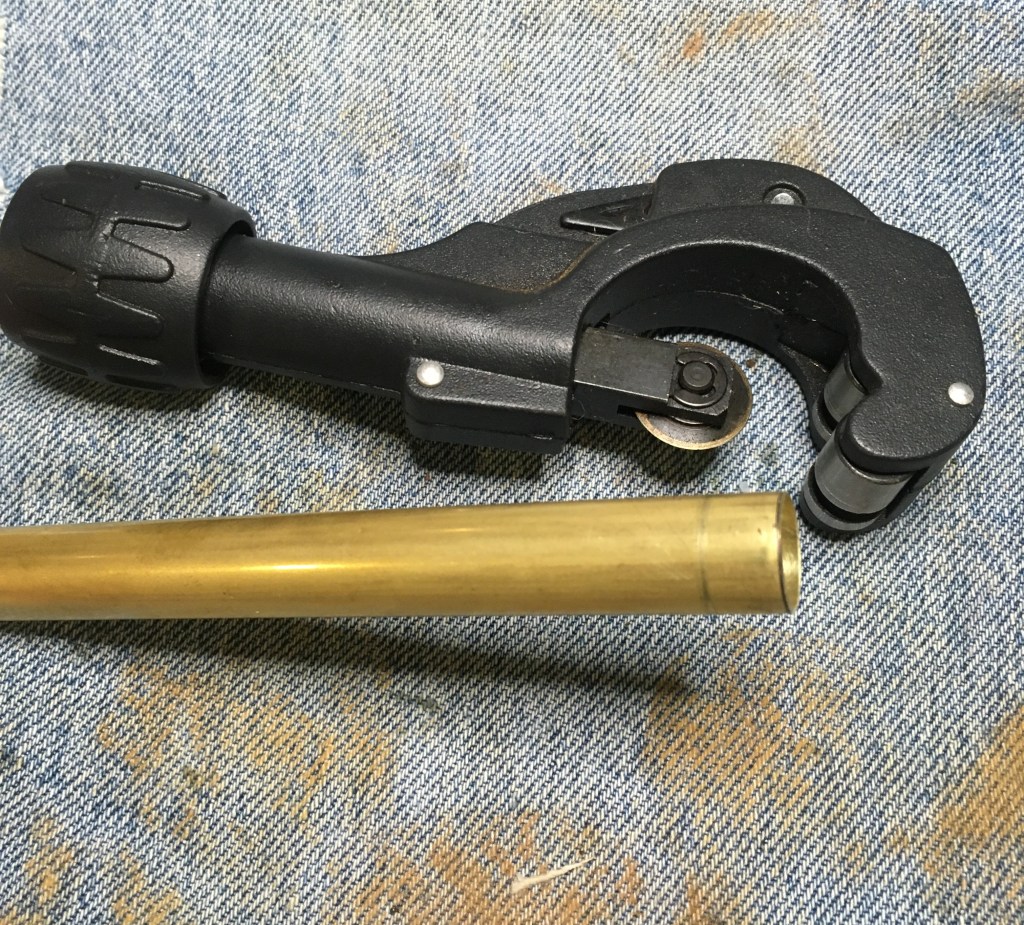
Nearly meaning that I had to file and sand a small amount of material from the shank. This actually made for a smoother fit for the band. I had to tap rather hard to get it to seat as far back as I wanted it. I replaced the stem and it too was tight, too tight (I’ll come back to that in a minute). Normally I would have used a tiny drill bit to drill a hole at the end of the crack to assure that it would not continue but that would have required a fill immediately beyond the band and into the rustication. I could not see the crack opening at all with the band on and the stem inserted. Both edges of the new band were sanded to give them a slight bevel to make them less obvious to the touch. I applied a bit of thin CA which seeped into the crack then forced the band into place. Using a flat piece of steel and a hammer I tapped the band into place.

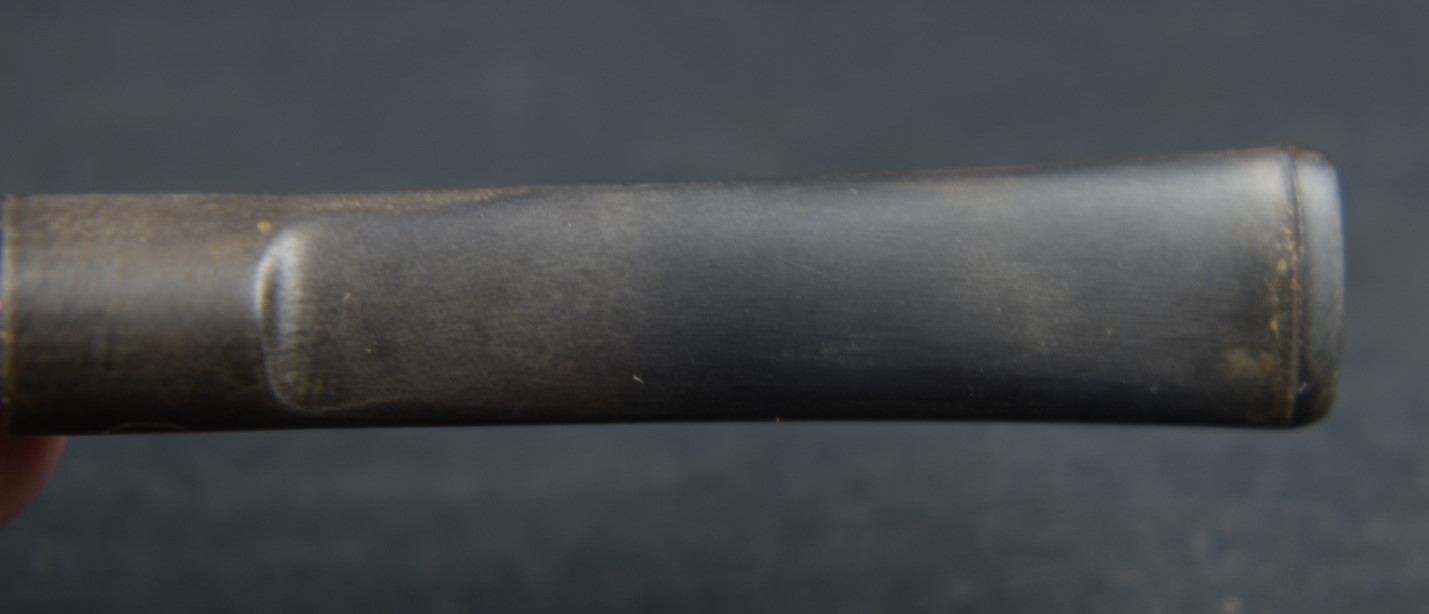
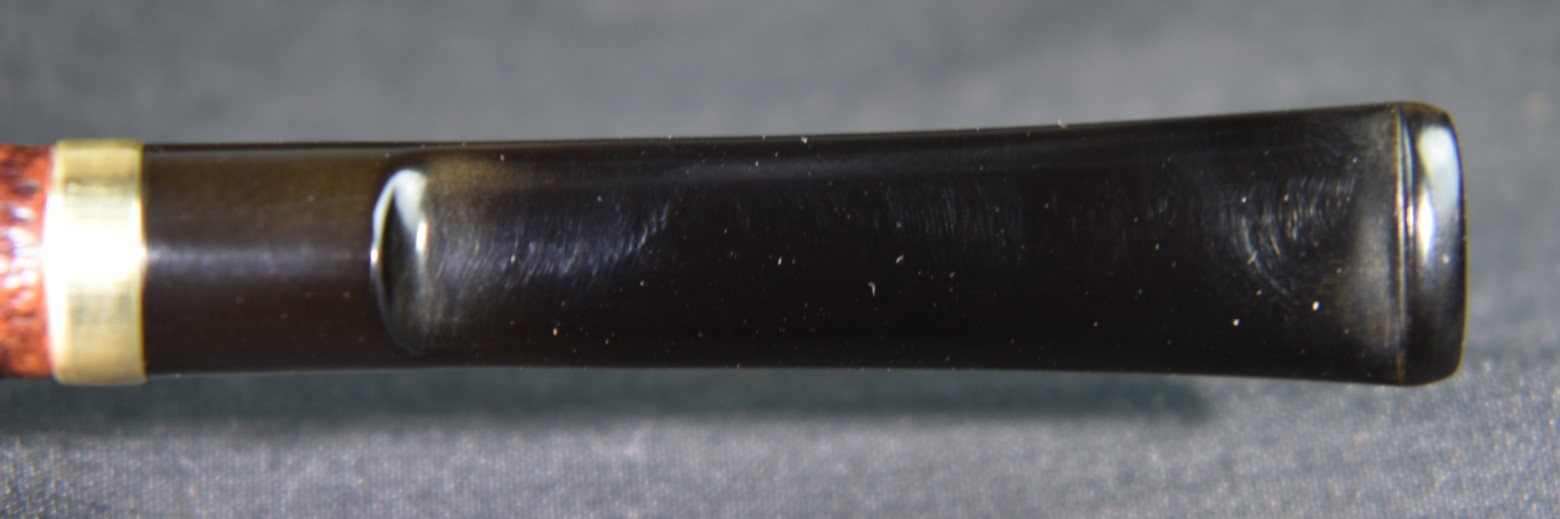
Below, you can see there is a slight overhang of the band. This allowed the stem to slip under the band almost like a double mortise. The full fit was pleasing to both the eyes and the fingers. Now, remember when I said I’d come back to the tight fitting stem? I used a 600 grit sanding sponge to sand the tenon by pinching the sanding sponge around the tenon. The stem was then rotated. I checked for fit every few rotations until I got a perfect snug fit.

The logo had been near completely obliterated. I tried to clean the area of any oil with a cotton swab and alcohol before painting it.

I applied a white acrylic model paint and allowed it to dry.

Using a rigid piece of plastic I tried to scrape the paint from the area above the stamp indentations. It was no use. I tried a couple of times to no avail, the stamp was just too light. I then used the Before and After Fine Polish with a soft cotton cloth.

I followed the Fine Polish with the Before and After Extra Fine Polish again with a soft cotton cloth.

The final steps were to apply a couple of coats of Renaissance Microcrystalline wax to the stummel.

The label said to apply and wipe off with a soft cloth. Instead I applied it with a baby toothbrush and buffed it with a clean flannel wheel on the buffer. I changed wheels and buffed the stem and, staping, top and bottom with several coats of carnauba wax.
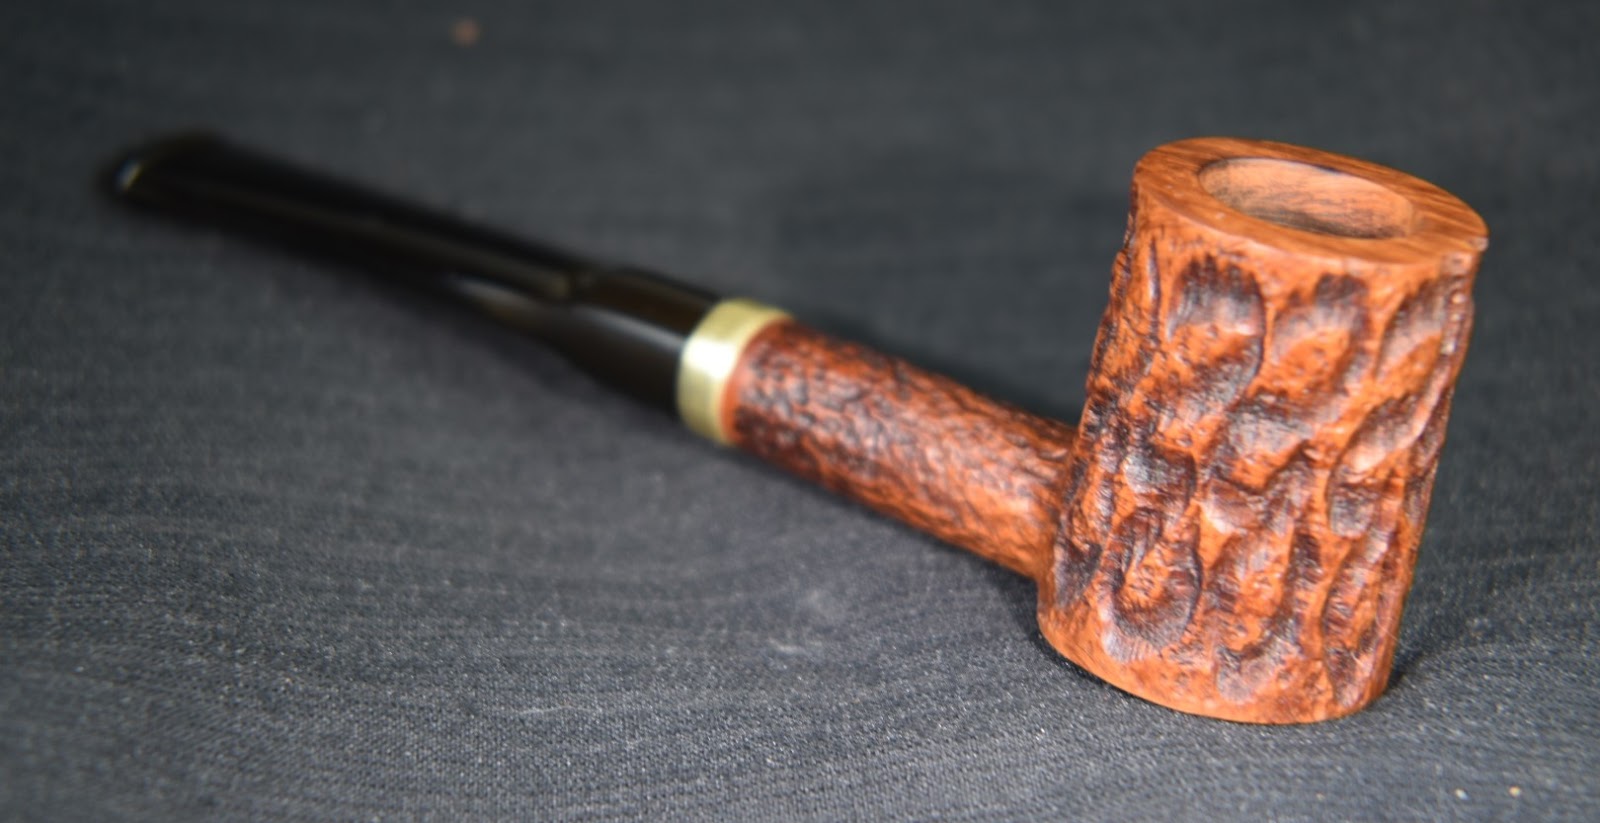
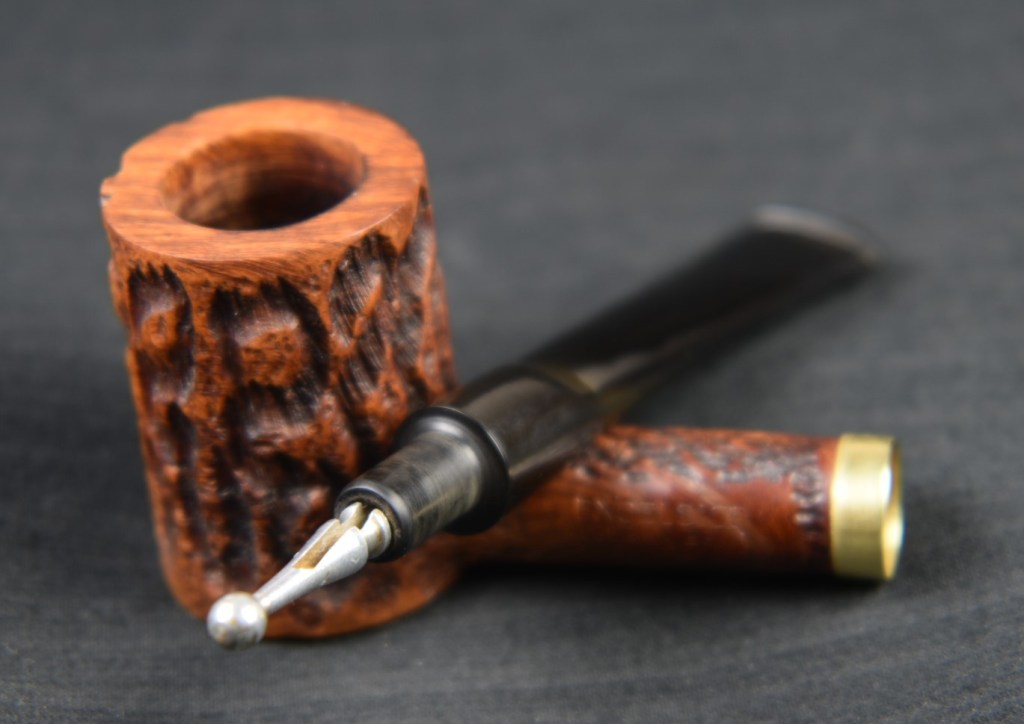
Overall I am pleased with how well this Excelsior Poker turned out. The clear coat was gone and the underlying briar looked great. The step polished to a very nice high gloss.The new band accentuated the look of the pipe overall all adds a touch of class to the rustic carvings. The sligh bent to the stem gives the pipe a comfortable balance for clenching along with the light weight. I am sure that it will be a nice smoking little pipe.
The dimensions of this little beauty are:
- Length: 5.64 in./ mm.
- Weight: 1.04 oz./ 29.50 g.
- Bowl Height: 1.64 in./ 41.66 mm.
- Chamber Depth: 1.52 in./ 38.61 mm.
- Chamber Diameter: 0.69 in./ 17.5 mm.
- Outside Diameter: 1.19 in./ 30.23mm.
I do hope that you have found something here useful to your own pipe care, maintenance or restorations. If you like this sort of thing, please click the like and subscribe buttons. Thank you for reading the ramblings of an old pipe lover.
Below are some photos of the finished Excelsior Poker.


