

Photographed and written by
John M. Young
The question “Why do I do this?” comes to mind with this Nameless pipe. I had written the title and previous sentence before I discovered what this pipe was. With some help and a phone call from Steve Laug this pipe’s Identity has been discerned and a Medico Guardsman. This pipe had been used frequently. The owner must have gained some enjoyment out of it or they would have surely just smoked another pipe. Perhaps it was their only pipe. There was no distinctive aroma other than old tobacco so the blend of choice was probably a common blend like Kentucky Club or Half and Half. The finish on the pipe had long ago faded, cracked and peeled. I couldn’t really see any distinguishing grain. The stem had pretty significant dents from clenching, further proof that this pipe had been someone’s long term companion. It also appeared to have a reverse tenon (more on this later).
Back to the initial question, “Why do I do this?” I could wax philosophically and throw together some word salad of jiberish or I could just say, “because I enjoy it.” Perhaps in the same way that the previous owner enjoyed this pipe. I find peace in working with my hands in a relaxing stress free fashion. There is no timeline, no customer to please upon finishing this pipe, no expectation of having it turn out flawlessly, just me in the cool quiet of my basement with a couple of dogs lounging on the couch and an old pipe. The motions of cleaning, sanding, refinishing are repetitive and require little thought. This is my hobby and I do it because I like to. The product of the hobby may be sold or given away. It doesn’t really matter, either way someone will get a new-to-them pipe that they can enjoy in their future.
Back to the pipe. I kind of have to write this thoughtfully breaking it into two sections:
- I had it pretty much finished and ready to write-up when I started chatting with Steve Laug.
- Back to the workbench with it in an attempt to fix what we had decided was previous “repair”.
I guess I’ll start with the pipe as it appeared upon arrival.


The word “rough” comes to mind. My dad would have called it “rode hard and put away wet”. Anyway you look at it this one definitely needed some work or a trash can. I went with the first option. With a cursory inspection I immediately thought this pipe to be a Medico due to the tenon with the space for Medico or Dr Grabow filters. I could not make out any definitive stampings though. Usually Medico stamps are good. Even now, knowing what the pipe is, I could not clearly make-out the stamp.

The G on the stem was also worn and didn’t register in my mind. I thought that maybe if I removed the finish the stamp would be more clear. I started a mental list of tasks for this restoration; reaming and cleaning the tobacco chamber, cleaning the airways of the shank and stem, stripping off the old finish and maybe dying the stummel, repairing the bite marks and tooth chatter, sanding, micro-meshing and polishing. It all sounded daily typical.
Now is the time I would normally discuss the background of the pipe. With this pipe I was unsure of it’s name and provenance. I’ll revisit this later.
The Restoration
This restore began like most others with a clean denim on the work surface.

The reaming tools were assembled.

The reaming progressed as normally except that darn grate was in the way.

Eventually the chamber was cleaned. A dental scraper was used to scrape around the aluminum grate.

The rim had some minor lava deposits which required a bit of scraping with a sharp pocket knife.

Below is the scraped rim.

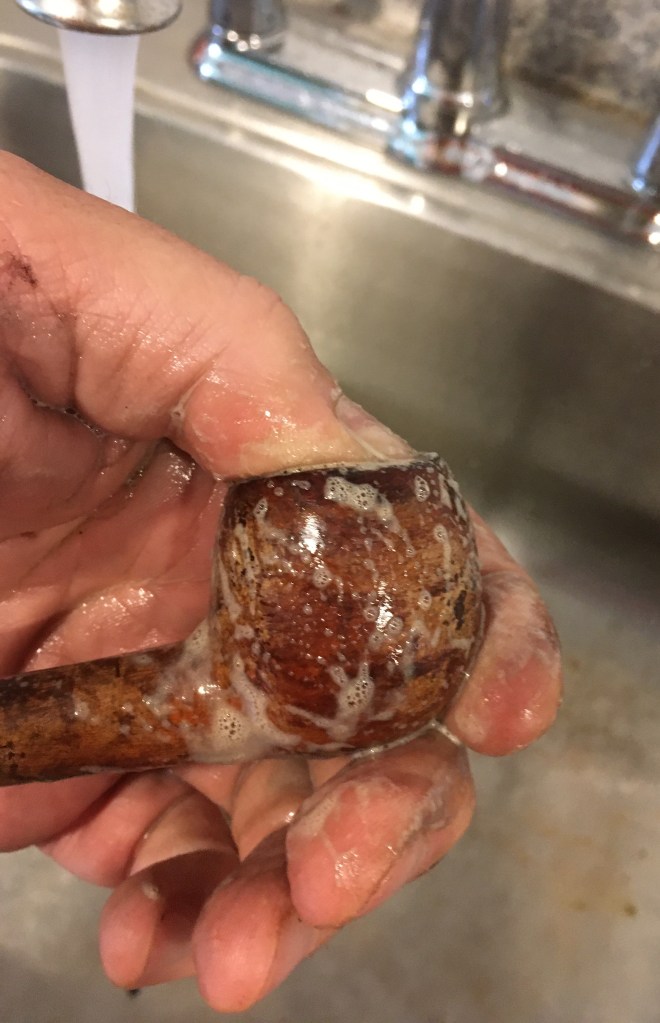
To the sink. Here the stummel was scrubbed with a medium bristle toothbrush and undiluted Murphy Oil Soap. The soap was rinsed with warm water and the stummel was dried with a cotton hand towel.
I returned to the workbench and assessed the stummel. There were remnants of a clear coat finish on the briar, this had to go. Still no clear stamps.

I first tried 95% alcohol on a make-up pad to remove the finish. This did little.
Next I tried acetone on a make-up sponge. This worked well in dissolving the lacquer and removing some stain.

Below you can see the right side of the stummel prior to a wiping with acetone on a make-up pad.

Here is the same side after wiping with the acetone.

Several acetone dipped pads later the finish was removed and the briar was accessible.

The briar was in good shape and showed little signs of old fills or damage. There was an ashtray scar where a cigarette probably charred the briar on the front of the stummel. The stummel was sanded with 400 grit sanding sponges to see if there was damage that I had overlooked. The stummel was then wiped with a make-up pad wetted with 95% ethyl alcohol.

Below you can see the cigarette burn.

I then started scrubbing the airway of the shank. Bristle pipe cleaners, cotton swabs, a .33 caliber brass bore brush and a nylon bore brush were all used with copious amounts of 95% ethyl alcohol. The airway was eventually cleaned but the end of the shank under the grate was difficult to access and continued to return tools stained with tar.

To help conceal the ashtray scar and bring out the briar grain I decided that I would attempt a contrast stain.dye with black Fiebing’s Leather Dye.

The black dye was applied with a folded pipe cleaner and flamed with a disposable lighter.

I returned to the workbench to sand away the outer surface of black stained briar. I hoped that this would leave the softer grained briar which had absorbed more of the black dye. I allowed the black dye to dry for a while and turned my attention to cleaning out the airway of the stem. Again bristle pipe cleaners, cotton swabs, a shank brush and ethyl alcohol were used.

Once the stem was cleaned I returned to sanding the outer surface of the stummel with both a 320 and 400 grit sanding sponge. The stummel was wiped with make-up pads dipped in 95% ethyl alcohol. Below is how the stummel looked after sanding. The dye had defined the grain nicely.

I thought the stummel needed a bit more color so I decided to give it a wash in a diluted red Fiebing’s Leather Dye. I diluted the red dye with about 50% ethyl alcohol and applied it with a cotton swab.

I thought that this combination of dyes looked about right, I also knew that quite a bit of the red would end up being removed by sanding and micro-meshing but it should retain a light reddish hue.

The stummel was then sanded using the sequence of sanding sponges from 600-3500 grit. I very lightly wiped the stummel between pads with a very lightly alcohol dampened make-up pad. I did not want to remove too much of the red dye.

At this point I switched gears and started working on the stem.


Okay, here is where it gets a little weird. I had sent Steve Laug a private message on Facebook asking if his memory about the aluminum grate in the bowl was any better than mine. He replied, “I have seen it in pipes here but also don’t remember the brand . It is a stinger apparatus if I remember right. With the carb it is like a barbecue grate” he then said, “Let me do some digging”. I continued working on another pipe.
He messaged me a few minutes later saying, “Looks like a Medico Guardsman”. He included a link. Below are some photos from the link.


That served as a very definitive identification to me. I still wondered about the slightly different grate in the bowl on my pipe. Perhaps the previous owner lost a couple of holes? I’d heard of losing a button. Why not a buttonhole?

Anyway, the G on the stem also looked like the worn G on the pipe in hand.

I think we are now ready for, dramatic pause, “The Background section. Yay.
Background of Medico
Pipephil.eu has the following photo of Medico Guardsman logos:

(Medico — Pipes: Logos & Markings (pipephil.eu)). I am not sure why I couldn’t connect the dots there. It looks completely obvious in hindsight.
A quick search of Medico of pipedia.org supplies the following.
“When you trace the Medico tobacco pipes history, you have to trace it back to the origins of the company that created it. The company that originated the Medico brand is the S.M. Frank & Co. This company dates back to the year 1900. In that year, a man named Sam Frank began selling pipes and related tobacco products. Eventually, the company began making its own line of pipes. With the help of an experienced pipe manufacturer, Ferdinand Feuerbach, the company produced the popular Royal DeMuth and Hesson Guard Milano tobacco pipes. The company continued to grow well into the early part of the 1930s.
By the early 1930s, there were some concerns about the tars and nicotine found in tobacco smoke. In order to mellow out the flavor of hot tobacco smoke as well as to capture the tars and nicotine, the S.M. Frank & Co. introduced the Medico pipe filter. This is an absorbent paper filter that many people still use to this day. In order to accommodate the new filter, the company developed an accompanying brand of pipes known as Medico. That line of pipes continues in production today.
- 1934 Medico Absorbent Filter Patent 1,967,585, courtesy Doug Valitchka


“The company ended up buying some of their main competition in 1955. That year the Kaywoodie brands came under the S.M. Frank Company. The Medico brand continued production through this transition without many changes. The next big change for the brand came in the late 1960s. In 1966, the company developed a synthetic material that combined the traditional briar wood with resins. It is known as Brylon. At that time, all Medico pipes were made from imported briar wood. In order to keep production costs down, the company began offering some lines with Brylon. Today, that is still true.
Today, the Medico brand of pipes is still a top selling one for the S.M Frank & Co. This line of pipes comes in thirteen different finishes with five made of briar wood and the rest from Brylon. All come with the push bit with a filter inside. The filter is easily changed out when the smoker desires. In the briar wood finishes, this line includes the Silver Crest, Premier, Bold Rebel, Kensington, and Windsor. In the Brylon, the line includes the Lancer, Apollo, Standard, Varsity, Conqueror, Medalist, Cavalier, and V.F.Q. As far as price, the briar wood pipes tend to be higher in cost that the Brylon ones. Courtesy TobaccoPipes.com”
And a 1962 Medico print ad showing a Guardsman.

The Restoration Part Two
The chatting in Facebook was becoming annoying for both Steve and I so a phone call was made and we were able to discuss this pipe. Steve agreed with me in never having seen a Medico pipe with a reverse tenon. He had seen a tenon where a previous owner had removed the aluminum from the stem and glued it into the shank thus making the pipe into a reverse tenon. He thought that this is what may have occurred with this pipe as well. I decided that the pipe needed to be restored to it’s original configuration. This meant that I too would free the reversed tenon from the shank and glue it where it belonged, in the stem. Both Steve and I agreed that the stem’s mortise appeared to have been roughened with sandpaper to allow the adhesive to better hold the aluminum. So I set out to right perceived wrongs.
Our discussion also included using heat to soften the glue holding the aluminum in the shank, where we have lived in the US and Canada, our previous and current jobs, and turtles. Yes, you read that correctly, turtles. And no, there was no mention of using heat to remove a turtle from it’s shell.
Anyway, back to the restoration part two. A new plan was formulating in my mind:
- Heat the aluminum to free it from the glue holding the “reversed tenon” in the shank.
- Reclean the shank.
- Glue the aluminum into the stem, where it belonged.
- Polish and wax for the final time.
That sounded like a good plan.
The aluminum was heated with a disposable lighter for a count of 20. I then used a very high tech aluminum tenon extraction device to apply force to the aluminum. Oh, I suppose you are wondering exactly what a “very high tech aluminum tenon extraction device” is. Well you take a smaller size channel lock and wrap the jaws with painters tape, tadah! Your very own very high tech aluminum tenon extraction device. Let’s just call it a VHTATED or pliers from here on out. The heating and pliers seemed to have no effect on the tenon. It probably needed more heat so, another 20 count of flame was applied. At this point I will warn you to keep your fingers away from the little metal carburetor. I have heard that they become very hot when exposed to a couple of 20 counts. Yeah, I burned myself on that. Twice. Maybe three times but who’s counting? Still nothing was moving. Perhaps a change in the direction of applied force was needed. Instead of a twisting motion with the pliers on the tenon maybe a straight line pull would be better. I used a knife blade to press down between the shank end and the aluminum tenon. I figured that the ring was all part of the tenon and it would pull the tenon free. The knife blade slid the aluminum out away from the shank. Victory, I thought!

Then I realized that the aluminum was just a spacer ring. I removed it.

Hmm, change of strategy. Using a disposable pipette I drew up a little bit of acetone in the pipette and applied it around the aluminum/briar contact. It seeped in quickly. I figured that the acetone would certainly help dissolve the heated glue and help free the aluminum. Nope.
Okay, if a little acetone didn’t work more certainly would. I dunked the stummel into my jar of acetone and let it soak for 2 hours. Below you can see the liberated spacer ring lying below the stummel.

Two hours later I removed the stummel and dried it of acetone. The acetone did not appear to have removed my dye. This was welcomed as a small victory. I again tried to wiggle the tenon while gripping in with the pliers and rotating the stummel. It moved. Maybe only a mm but it moved. I wiggled it some more. I could get it to rotate 1-2 mm. Okay, if a two hour soak was good and longer soak might completely free the aluminum from the shank. Back into the acetone jar went the stummel. I went fishing.
The next morning I retrieved the stummel from the jar. I fully expected the rotation to be free and for the aluminum to slide free. Nope. I started thinking that if the aluminum carburetor had gotten hot enough to cause me pain then it had to be in contact with the aluminum of the tenon. What if they were all in contact with each other? That would mean that the grate was not a separate piece, which is what I had assumed. I rotated the tenon back and forth with it’s 1-2 mm rotation and sure enough, the grate was moving 1-2 mm also. They were the same piece of metal. Moving the stummel around I could see light coming through the hole in the carburetor through a hole in the grate. What if I could push the carburetor out with a punch from the top? I got the fly tying bodkin. It was small enough to go through the grate holes but large enough not to pass through the carburetor. I placed the tip through the hole and into the carburetor. Then tapped it with the pliers. At first nothing happened. I tapped harder and the carburetor started to emerge. I grabbed it with a needle nose pliers and removed it. I then gripped the aluminum tenon and sure enough, it rotated and was pulled free.

The case of the Medico reverse tenon was solved. The hole in the aluminum tube, visible in the photo above, was the hole that the carburetor fit into. It had locked the whole aluminum grate-tenon-tube in place. Below is a photo of the carburetor and the aluminum tube.

Here is the tube with the carburetor hole facing up.

Here is the tube with the grate holes facing up.

The end of the tube was plugged completely with tar and yuck.

The tar plug was removed and the whole piece thoroughly cleaned.


With the removal of the grate the tobacco chamber could now be properly cleaned as well.


With all that finished it was time to see if the pipe could be reassembled. The pieces were all gathered.

The aluminum tube was reinserted and tapped into place.

The holes aligned and the carburetor was reinserted and tapped into place.

The spacer was the most difficult piece to reattach. Once it was nearly in place a thin bead of brown CA was applied to the shank using the fly tying bodkin. The spacer was then pressed into position. This was the only glue used during reassembly.


The stummel then received a coating of Before and After Restoration Balm ti try to rejuvenate the briar after the extended time in the acetone.

Even after the restoration balm tha acetone had done some bad things to the briar. IT was dull and no longer smooth. I resanded the stummel with the sanding sponges from the 1000-3500 sponges. Then micro-meshed again with the 4000-12000 micro-mesh pads. I did not bother to photograph this as you have seen it all before and this blog is getting entirely too long. The Before and After Restoration Balm was applied again and allowed to sit for 30 minutes. It was then wiped away with an inside out athletic sock. The pipe was again waxed with several coats of carnauba wax with the buffer.
This restoration proved to take far longer than what I thought it should have. Although to be honest it kind of was two restorations in one. I have to say that I think it turned out pretty nicely. I also have to admit to having learned a great deal from the process. A big thanks to Steve Laug and his extensive experience. I am actually quite impressed with the Medico Guardsman pipe and am considering picking up a couple more to see if this was a common structure in all of them. The dimensions of this Medico Guardsman Apple are:
Length: 5.46 in./ 138.68 mm.
Weight: 1.11 oz./ 31.70 g.
Bowl Height: 1.54 in./ 39.12 mm.
Chamber Depth: 1.06 in./ 26.92 mm.
Chamber Diameter: 0.73 in./ 18.54 mm.
Outside Diameter: 1.44 in./ 36.58 mm.
I do hope that you have found something here useful to your own pipe care, maintenance or restorations. If you like this sort of thing, please click the like and subscribe buttons. Thank you for reading the ramblings of an old pipe lover.
Below are some photos of the finished Medico Guardsman Apple.


