
Photographed and written by
John M. Young
I’ve probably used this line before and will likely use it again, “An apple a day keeps the doctor away.” Yeah, I know those pesky docs are not likely referring to the wonderful apple shape of a pipe but I am. This lovely apple is a French made Earl of Essex. I have no idea when it arrived nor where it came from though it has been waiting for some attention for well over six months. I was looking for a restoration where I could just relax and kind of let my mind wander and hands work on muscle memory. This pipe looked like the perfect project. The pipe had EARL OF ESSEX stamped clearly on the left shank with ALGERIAN BRIAR over FRANCE on the right shank. The lower part of FRANCE was faint due to a slightly misplaced stamp, so I thought. The band read 12K over GOLDPLATE. Finally the stem had a circle logo pressed into the rubber. This circle appeared to have a light yellow or white (stained with age) paint in the depression of the stamp. Below are some photographs taken prior to working on the pipe.


Even through the dirt and grime I could make out a lovely contrast stain. The pipe looked like it had not been used too heavily, indicated by the lack of cake in the tobacco chamber and general cleanliness of the stinger. The stem was not oxidized and showed no signs of teeth marks. There were several old fills that were either failing or were never done very well. The 12K gold plate was worn on the edges yet I thought it might buff out nicely.
Background
I would love to tell you that there was a wonderful amount of information about this pipe maker and date of production. Alas, all I could find is a couple of pictures from pipephil.eu.

The stamping of the top pipe from pipephil.eu was a definite match to the stamping on the pipe in hand. The part that bothered me was the stem logo. Both of the images above had crowns on their stem logos. The top photo is even described as having “12K Goldplate” on the band. Now I could imagine a heavily used pipe needing to have a stem replaced and the new stem could have a circle logo on it rather than a crown. This is certainly a possibility. This pipe had not been heavily used. The term barely used would be more appropriate. I highly doubt this is a replacement stem. As for the age of this pipe, I cannot be certain but a couple of world events can be used for guessing the production years.
- During World War 2 the briar from Algeria was not available nor was the aluminum.
- The Algerian civil war waged from 1954-1962. During that time briar harvest and exports were non-existent.
This would indicate that the pipe was either produced pre-WWII or sometime after the French Algerian war.
The Restoration
The Earl of Essex made it to the workbench and a denim piece after the photo shoot.

The ream team was gathered.

PipNet with #2 size blades did the majority of the work with the Smokingpipes Low Country reamer doing some clean-up.

I sanded the tobacco chamber with 320 sandpaper wrapped around a wood dowel and with my ring finger. The chamber looked great with no signs of any damage from heat.

The rim had some light lava deposits.

I moistened the lava with saliva and scraped the rim with a sharp pocket knife. The rim was then wiped with a make-up pad dipped in alcohol.

The shank cleaning was uneventful and reinforced my belief that this pipe had not seen a great deal of use. The airway was cleaned using cotton swabs and folded bristle pipe cleaners both dripped in 95% ethyl alcohol.

The stem cleaning was equally easy. The first pipe cleaner was stained with residue but subsequent cleaners eliminated the tars quickly.

The stem was lightly sanded with a 400 grit sanding sponge to remove any wax and surface oxidation before the stem was submerged in Briarville Pipe Stem Oxidation Remover.

I hung the stem in the solution using a pipe cleaner inserted into the stinger. It didn’t want the aluminum stinger in the solution. The stem remained in the bath for about 4 hours.

While the stem was soaking, I turned back to the stummel and gave it a scrub with undiluted Murphy Oil Soap and a nylon brush. The soap was rinsed with warm water and the stummel dried with a cotton hand towel.

The stummel still felt like it had wax remaining on the surface. I used a couple of make-up pads dipped in 95% ethyl alcohol to wipe the surface. This worked at removing the was and some of the black stain.

All the scrubbing made the old fills soft and easy to pick free from the briar.

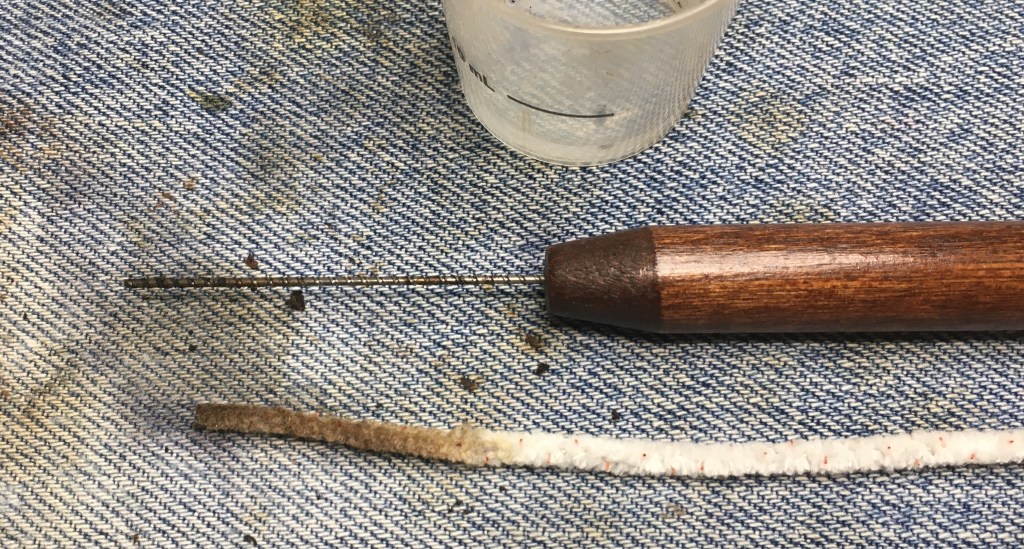
There were several larger and smaller fills that would need cyanoacrylate (CA, super glue) and briar dust.

My brown CA is starting to get a bit thick. This is good and bad. Good because it stays where you place it bad because it leaves little strings of CA, like melted mozzarella. Anyway, the brown CA was placed into the pits with a fly tying bodkin. A small scoop of briar dust was then placed on the dab CA. Pressing the briar dust into the wet CA fills the pit.

This method does have a tendency to leave a CA-briar dust crust on the pressing finger. No really, it’s CA and briar dust and not that I’ve been picking snuff boogers…

The above fill method had to be repeated in a couple of the larger pits. Eventually a dab of either brown CA or thin CA was used as a top coat for the fills.

Once filled a small flat file was used to smooth the new fill then they were sanded with a 400 grit sanding sponge.

With the fill finished, I wanted to see what I could do with the gold plated band. I first tried Cape Cod Metal Polishing Cloths. I like this product for how well it works on silver and the smell is absolutely amazing.

It helped but the gold plate on the edges were worn through the thin layer of gold. I think the underlying metal was copper. Yeah, it was still pretty but lacked the luster of the gold.

The stamps and band were taped over with painters tape for their protection.

Better safe than sorry, eh?

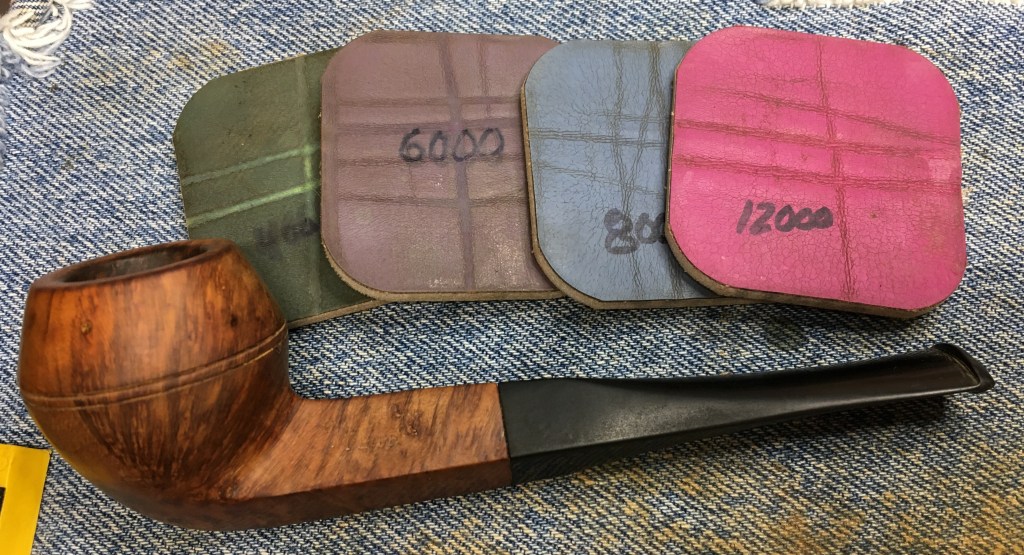
The stummel was sanded with a series of sanding sponges from 400-2500 grit. Between each sponge the stummel was wiped with a make-up pad moistened with alcohol to remove sanding debris.

The stummel was then worked with micro-mesh pads 4000-12000 with wipings between pads as with the sponges.

I then gave the stummel a coating of Before and After Restoration Balm. This magic elixir was allowed to work its magic for 20 minutes before being wiped off.

For the wiping off of excess balm I used an inside out athletic sock.

Once the stem had soaked for the allotted time it was removed and vigorously rubbed with a coarse shop rag. Quite a bit of oxidized rubber came off onto the rag.

The logo stamp remained well defined. Apologies for the poor focus.

This stem did appear very grainy with tiny pores on the surface.

I cleaned the logo stamp with alcohol on a cotton swab and covered it with a painters tape mask.

Then covered the band with painters tape as well.

I sanded the stem with a series of sanding sponges from 320-1500 oiling the stem with mineral oil and wiping it between sponges. This tends to clog the sanding surface of the sponges quickly.

Pleased with the results from the first several sponges, I continued with the finer grits to 3500. Again oiling and wiping the stem between sponges.

I removed the mask from the logo and micro-meshed the stem with 4000-12000 micro-mesh pads. Between these pads I oiled the stem with Obsidian Oil and wiped it with a paper towel.

For the final stem polishing I used a blue buffing compound to polish the stem.

I was not sure of the original color of the paint in the logo but thought that a gold would accentuate the gold band. I opted to use Gold Leaf Rub’nBuff. This product settles into stamped surfaces nicely and provides a great gold color.

The wax was applied to the indentations with a fly tying bodkin and hand buffed with a soft cotton cloth.

The last bit of polishing was done with the buffer applying carnauba wax.

The final step was another hand buff with the microfiber polishing cloth.
This very pretty apple is now ready for a new owner. I think the pipe looks very good. The contrast stain from the factory was preserved. The gold band now looks better but the oxidation or worn-off gold plating could not be improved any more. The stem restored exceptionally well and really accentuates the contrast stain of the briar. Overall I was very pleased with the restoration. The dimensions of the Earl of Essex Apple are:
Length: 5.89 in./ 149.61 mm.
Weight: 1.57 oz./ 44.51 g.
Bowl Height: 1.79 in./ 45.47 mm.
Chamber Depth: 1.45 in./ 36.83 mm.
Chamber Diameter: 0.73 in./ 18.54 mm.
Outside Diameter: 1.51 in./ 38.35 mm.
I do hope that you have found something here useful to your own pipe care, maintenance or restorations. If you like this sort of thing, please click the like and subscribe buttons. Thank you for reading the ramblings of an old pipe lover.
Below are some photos of the finished Earl of Essex Apple.


 The pipes upon arrival were even more interesting than the photo indicated. This will be the second pipe of the lot that I’ve worked on. The first was the


 (
(


