In all honesty, this is hardly a restoration. It is more of a cleaning and polishing. The pipe had never been fired. Why someone would do that is beyond me but after the last restoration I appreciate something that is more like pushing the easy button. I am not really sure when this pipe arrived other than it was at least a year ago. My record keeping started out very good when I began restoring pipes then went downhill quickly. Below are some photos of the Brigham billiard prior to starting work.
I am sure you noticed that the stem was not completely seated in the above photos. That is because it wouldn’t press into place without excessive force. The aluminum tenon was oxidized and I thought it best not to force it. The only other issue was the slight oxidation of the stem which made it look rather dull. Those were the only real things this pipe needed; aluminum polishing/oxidation removal and a stem polishing. Yay!
Background
Back on August 7, 2025 I wrote about a Brigham 202 Billiard with a dental bit. It is linked for those interested in that restoration. Anyway, I discussed The ultimate guide to Brigham pipes, a book by Charles Lemon. Here is a quote from that blog:
“The ultimate source of information on Brigham pipes is Charles Lemon, the author of Brigham Pipes – A Century of Canadian Briar. This wonderful book is available from Mr. Lemon on his website, Books, or from smokingpipes.com (Brigham Pipes – A Century of Canadian Briar | Smokingpipes) if you need to increase the total of your purchase to get the ever popular free shipping, and other various sources. I am unsure about Canadian immigration rules but I think this book should be required reading for prospective immigrants to Canada, especially if they are pipe smokers. ” (A Brigham 202 Billiard Restoration – NebraskaPeteGeek)
I once again found myself rereading Mr. Lemon’s work. My mind is far better at relearning than it is at remembering, Though I admit to being able to find the information much faster this time. The 1990s to early 2000s brought unique challenges and opportunities to Brigham. According to Charles Lemon, “ The company rounded the decade with two major introductions. The first, in response to demand for a lower-priced pipe, was the Italian-made Brigham System Pipe”, the first Brigham pipe made completely outside of Canada. The second and more far-reaching change was the development of the composite tenon, still in use today.” (Lemon, Charles. Brigham Pipe – A Century of Canadian Briar. Copywell, Woodbridge ON. Second Printing, October 2023. Page p. 51). So this dates the Brigham System pipe to the late 1990s. The next page narrows the latest possible production date to 2001.
Again referring to Lemon, “In all, Brigham tested ten different composite formulas before landing on a material that was less expensive than aluminum, strong, lightweight and tolerant of high heat levels. The new composite tenons generated quite a stir among Canadian pipe smokers when introduced in 2001, but the benefits, especially the much lower risk of a cracked shank, outweighed the initial resistance from Brigham pipe fans” (Lemon, p.52). One other dating quote from Mr. Lemon is in regards to the stem logo:
“”Brigham System” Pipes (late 1990s to early 2000s) were the first Brigham pipes made entirely in Italy. These were entry-level pipes available in 12 shape sand marked first with a yellow star on the stem, which later changed after 2001 to a maple leaf.” (Lemon, p. 55)
Since this pipe is clearly stamped as a Brigham System with a country of manufacture (COM) of Italy, a yellow star stem logo and an aluminum tenon it must have been made in the late 1990s to 2001.
The Restoration
From the photo table to the workbench, a scenic journey of about 15 feet, the pipe made it without incident.
I chose to work on the oxidized tenon first.
Using 0000 steel wool the oxidized aluminum was cleaned up and polished.
The mortise showed signs of some oxidized aluminum residue within.
I used a .22 caliber rifle brass bore brush to clean the mortise.
The shank was then cleaned with cotton swabs dipped in 95% isopropyl alcohol.
Once the mortise and tenon were cleaned up the two joined as they should.
I wanted to revitalize the stem with some buffing. I did not want to affect the finish on the shank, so I taped the end of the shank with masking tape.
Being the lazy bum that I am, I didn’t replace the buffing wheel and just used the white wheel and white buffing compound on the stem.
The yellow painted stem logo did take a slight beating from the buffing. I used some Pale Saffron acrylic modeling paint to refresh the logo. This color was a nearly perfect match to the original color. The acrylic paint was allowed to dry for a few minutes.
The excess paint was removed using micro-mesh pads. These were fine enough that the finish from the buffing was not noticeable.
The stem then received several coats of carnauba wax at the buffer. The stummel also was waxed with carnauba but very lightly as I did not want to fill the rustications with wax deposits.
The final step was to hand buff the pipe with a microfiber polish cloth.
This Brigham System pipe is one of the last Brighams made using the aluminum tenon. With its traditional internals and a very traditional billiard shape it is a very well balanced pipe with great hand feel. The texture does not show any real briar grain and the dye is rather artificial in appearance; it would certainly make an excellent working pipe for those projects in the yard or garage. I have had experience with the Brigham maple inserts and found that they do remove liquids and tar from the smoke effectively. The stem of this pipe polished-up very nickel and overall it looks like a brand new pipe. Which, never having been smoked, it really is. The dimensions of this Brigham System are:
Length: 5.95 in./ 151.13 mm.
Weight: 1.42 oz./ 40.26 g.
Bowl Height: 1.85 in./ 46.99 mm.
Chamber Depth: 1.66 in./ 42.16 mm.
Chamber Diameter: 0.84 in./ 21.34 mm.
Outside Diameter: 1.44 in./ 36.58 mm.
I do hope that you have found something here useful to your own pipe care, maintenance or restorations. If you like this sort of thing, please click the like and subscribe buttons. Thank you for reading the ramblings of an old pipe lover.
Loading…
Below are some photos of the finished Brigham System Billiard.
I first laid eyes and hands on a Rettke pipe in July of 2025. You can see that entire restoration here. I was taken by the rather nontraditional, double drilled shank, of the pipe. These pipes are what I call “gimmick pipes”. Now, not all gimmicks are equal. I am sure that Charles Peterson was considered a gimmick pipe maker with his three patents for the Peterson system back in the late 1890s. That gimmick has been used to great result and success for well over 125 years.I made an offer to the seller and was turned down. The pipe sat through several auction cycles and remained unsold. I made a lesser offer and it was accepted. The virtue of patience strikes again. The pipe did not have far to travel after the purchase, merely from Washington, Missouri to the wilds of southeast Nebraska. Yes, the same Washington, Missouri as both the home of J. Rettke and Missouri Meerschaum pipes. Below are some photos taken before I began working on the pipe.
Overall a pretty clean specimen with no glaring issues. The stem had oxidation expected of a 60+ year old pipe. The internals looked clean. There were no obvious fills, indicating a good quality briar. The grain of this pipe was not as distinctive as the first Rettke I restored and I thought that maybe a contrast dye would bring out the existing grain. The rubber seal/end of the “whirler” ( J. Rettke’s term for the spiral aluminum condenser) showed signs of drying and oxidation and may need to be addressed or replaced. Otherwise a thorough cleaning was in order.
Background
I will use the same Background information that I used for the first Rettke restoration and include it here in its entirety:
“I started my research on Rettke pipes with a pipedia.org search on “rettke”. Below is the short entry from that site.
“J. Rettke, Washington MO, PAT. June 12 1962. The silver colored thumbscrew below the stem unscrews and is a 2⅜” corkscrew like device. The company is now gone having been purchased by Missouri Meerschaum. This odd looking pipe is made of briar and has a lower chamber with a metal condenser and an upper chamber that contains a filter. The smoke leaves the bowl thru the lower chamber then into the upper and out the stem. It smokes dry and cool. It has a large bowl.”
(Rettke – Pipedia) I could not read the above newspaper article even by zooming in.
The next search was using Google patent and searching for “Rettke 1962”. This search turned up the original patent diagrams:
My next search was for Steve Laug’s Rebornpipes.com. Steve Laug did a Rettke restoration back in 2017 and contained links to the State Historical Society of Missouri. I could not get this site to produce the same document or to even display the link Mr. Laug has in his blog post. I will link Steve Laug’s blog here: Restoring a J. Rettke Patent Pipe from Washington, Missouri | rebornpipes. It is a very well written and researched piece that does contain a transcript of the newspaper article as well as several photographs of Julius Rettke and the pipe making process.
My favorite quotes from the newspaper article are,
“The work is done in Mr. Rettke’s basement of his home at Third and Market streets. He doesn’t work at it every day only when he feels like it. He likes to fish and that comes before his pipes in the summer.”
I can completely understand the lack of enthusiasm for pipe work when fishing is taking a priority.
And this quote:
“Mr. Rettke received his patent on his pipe in 1962. What makes his pipe different from others on the market is the path the smoke takes from the bowl, and the passage of smoke through a twisted piece of aluminum, or a “whirler.” The smoke also travels through a standard filter in a standard hard-rubber stem. The “whirler” has a rubber tip that shows on the outside of the pipe under the stem. The “whirler” also can be used as a pipe cleaning tool. It pulls out easily for cleaning purposes.” Here the newspaper article talks about a rubber tipped “whirler”. That is how the whirler of my pipe is made. The other Rettke pipes I saw in photos all had a knurled aluminum tip. This little fact is mostly non-important, I just found it interesting.
Now for the fun part: How does this pipe work? In the news article transcript it said, “four holes are bored.” under the photo of J. Rettke at the drill press. I read that after I had done my exploration of the stummel and it was in near complete agreement of what I observed.
Using the above photo, I overlaid some image features to indicate the “four” drillings.
This pipe landed on the workbench and a cleaned denim piece.
I decided to work on the whirler first.
The rubber was dried and cracked. I hoped this was only on the surface.
The rubber was coated with Mark Hoover’s Before and After Hard Rubber Balm. Mark was kind enough to send me a bottle of this product to test. I doubt that he ever imagined it to be used on a Rettke whirler but hey, it is rubber. The whirler was set aside to allow the balm to work it’s magic.
The stem was cleaned with several cotton swabs and pipe cleaners dipped in 99% ethyl alcohol. The stem appeared to have been used without a Medico filter.
After numerous cotton swabs, I took the stem to the sink for a scrubbing with Castile soap and a nylon brush. The soap was used undiluted and as the photo below shows the brush came back with a good deal of smoking residue.
After the stem was rinsed with warm water, I returned to the workbench and found the cotton swab dipped in alcohol started coming back with far less color. Victory!
Once clean, the stem was suspended into a solution of Before and After Extra Strength Deoxidizer. I ended up leaving the stem in the solution for a bit over 24 hours. The following day was Christmas Eve and I was away from home for the day.
The reaming gear was gathered.
The PipNet with the #2 and #3 blades did most of the reaming.
Some light clean-up scraping was done with the General triangular scraper.
The below photo is of the reamed tobacco chamber.
The chamber was sanded with 320 sandpaper wrapped around a wood dowel. The bare briar showed no signs of any damage from heat.
The shank cleaning was twice as much work as a normal pipe due to it having twice as many shank draft holes. Weird, eh? Again alcohol dipped cotton swabs and bristle pipe cleaners were used along with a bit of scraping with a dental scraper. The upper chamber returned swabs with less charred residue than the lower chamber.
I thought that an alcohol cotton treatment would be a good idea to fully clean and de-ghost the draft of this pipe. Not that the previous user had used a foul smelling tobacco, it actually was a pleasant burley based aromatic from what my nose could tell. The chambers and passageway was packed with cotton.
Usually a pipe holds around 10 ml of 99% ethyl alcohol. I figured this one might hold a bit more. The alcohol would be applied with a disposable pipette.
The saturated alcohol would be allowed to evaporate overnight. This would dissolve the remaining smoking residues and tar and move them into the cotton as the alcohol evaporated.
With the stem and stummel now occupied with long term waiting procedures, I cleaned up the aluminum of the whirler with 99% ethyl alcohol and cotton swabs.
The next morning I returned to the workbench for a few minutes before heading to the Christmas Eve celebrations. The cotton had picked up the color of deposited tars.
The cotton was removed with tweezers. I again used alcohol dipped cotton swabs and bristle pipe cleaners to repeat the airway cleaning to remove any remaining, now softened, residues.
The next evening, I removed the stem from the deoxidizing solution and used the patented Drip-Dry-O-Matic, okay, it’s not patented. Yet!
The stem was vigorously rubbed with a coarse shop rag to remove remaining solution and some of the softened oxidized rubber.
Back at the workbench the stem looked kind of rough but black.
I used some Soft Scrub cleanser of make-up pads to clean off additional oxidized vulcanite.
The stem was then sanded, with more attention on the tooth chatter above the button, with 320-600 grit sanding sponges. Between each sponge the stem was rubbed with mineral oil and wiped with a dry paper towel to remove sanding debris.
It was time to see how a contrast dye would enhance the briar grain. I thought that a base of black with a top coat of Mahogany would look very nice. Both dyes were Fiebing’s Leather Dye applied with a pipe cleaner, flamed with a flighter.
Below you can see the stummel after a coating of the black Fiebing’s. The cork was placed in the tobacco chamber to keep the dye out.
I only wanted the black dye to be absorbed more deeply by the softer grain. I then rinsed the dye from the stummel using 91% isopropyl alcohol over the sink then wiped the stummel with a paper towel.
When sanded with a 400 grit sanding sponge, both harder and softer grain was removed. The dye had penetrated the softer grain deeper than the harder grain.
Next came the mahogany applied with a pipe cleaner.
I again rinsed the dye from the stummel with 91% isopropyl and wiped with a paper towel. Returning to the workbench I sanded the stummel with 400 then 600 grit sanding sponges. Below you can see how the black accentuated the grain and how the mahogany added warmth to the non-blackened areas.
After a drying time of about 30 minutes I applied a coating of Before and After Restoration Balm to the briar and a coating of Before and After Hard rubber Balm to the stem and rubber of the whirler. This was allowed to sit for about an hour.
The balms were hand buffed from the pipe with an inside out athletic sock.
The pipe, both stem and stummel were then buffed with rogue buffing compound at the buffer. The pipe was wiped with an alcohol wetted make-up pad to remove any remaining buffing compound then returned to the buffer for several coats of carnauba wax.
The final step was to hand buff the pipe with a microfiber polish cloth.
After restoring the first J. Rettke pipe, I wrote this sentence in the conclusion. “Of the many gimmick pipes I’ve had the pleasure of working on, I think this one would actually be an effective system for condensing steam. It just makes sense.” I could not have said it better, myself. Wait, I did say it. Anyway, this pipe turned out very well. The contrast dye is what I hope it would look like – greater definition of the briar grain. The stem polished up nicely. I tried the draw both with and without Medico filters and the draw was very good either way. With the first J. Rettke, I ended the conclusion by typing, “I would consider this an artisanal pipe from a time before artisanal was cool.” I couldn’t have said that better, myself. Now for the part I had been looking forward to since I saw the first Rettke, smoking it and seeing firsthand if J. Rettke’s patent was effective or another gimmick. The dimensions of the J. Rettke are:
Length: 5.88 in./ 149.35 mm.
Weight: 1.46 oz./ 41.39 g.
Bowl Height: 1.92 in./ 48.77 mm.
Chamber Depth: 1.42 in./ 36.07 mm.
Chamber Diameter: 0.71 in./ 18.03 mm.
Outside Diameter: 1.41 in./ 35.81 mm.
I do hope that you have found something here useful to your own pipe care, maintenance or restorations. If you like this sort of thing, please click the like and subscribe buttons. Thank you for reading the ramblings of an old pipe lover.
Loading…
Below are some photos of the finished J. Rettke pipe.
If you have read a few of my blogs you know I have a thing for Peterson pipes. Oh yeah, the name NebraskaPeteGeek may also provide a clue. Anyway, I have returned to Peterson restoration. This particular pipe was a line unfamiliar to me, Brymeer. I found it strange that there were only 3 others bidding on this pipe and when I won it for less than $20 I was even more surprised. Given, it was in rough and dirty shape. After a journey from Lowell, Indiana to the wilds of southeast Nebraska the pipe arrived. Below are some photos taken before I began work on the pipe.
Hmm, where to start with this one? The stem was severely oxidized with a couple of deeper tooth dents. I feared losing the GREAT BRITAIN COM stamp with oxidation removal.The stummel was quite dirty but looked good otherwise. The rim was a mess with chips in the meerschaum liner. The tobacco chamber was carbon caked, who knows what lies under that? I do like a challenge.
Background
I have said it before and likely will again, “For a great history Mark Irwin and Gary Marlburg’s book is a must read for a Pete Geek.
Another amazing site full of Peterson information is, Peterson Pipe Notes. I can wholeheartedly recommend the free at
https://petersonpipenotes.org/ Yes, you will get emails but only for things like the weekly blog post and occasional Peterson pipe drops (like the Peterson Pipe Notes Pipe of the Year) or offers for cool Pete Geek merchandise.
According to the Big Book, also known as The Peterson Pipe,
“Brymeer (1971-75) Offered only in Iwan Ries catalogs, meerschaum-lined black sandblast briar and P-lip of fishtail mouthpiece. Produced by Peterson-Manxman factory” (The Peterson Pipe Irwin, Mark and Malmberg, Gary. The Peterson Pipe; The Story of Kapp and Peterson. 2018, Briar Books Press, Canada. First edition, second printing. p. 308)
“What is this Peterson-Manxman Factory?”, you ask. Pipedia.org to the rescue.
“Laxey Pipes Ltd. resided in a historical 19th century four-storey Man stone building at The Quay, Old Laxey, Isle of Man, which thankfully has been preserved.
The company specialised in the production of meerschaum pipes using the Meerschaum mined by the Tanganyika Meerschaum Corporation in the Amboseli basin in Tanganyika (since 1964 part of the United Republic of Tanzania).
Please note: you may often find names like “Manx Pipes Ltd.”, “Man Pipe Co.” and others more, but there is no indication of another Isle of Man pipe producer other than Laxey Pipe Ltd. at any time!
Laxey Pipes Ltd. marketed own brands like “Manxpipe”, “Manxman”, “Manxland” e.c. Names like “John Bull”, “White Knight” (unwaxed), “Domino” (black, or lined) indicated some shapes / colours of Laxey’s own series. The stems either showed the astronomical sign for “male” or “man” (circle + arrow), or the crest of the Isle of Man, the 3-legged X in a circle. Manxpipes and Laxey’s other brands were available through pipe retailers in general, but also were sold (mainly) to tourists through their own shop in Laxey.
Furthermore Laxey Pipes Ltd. manufactured the meer bowls for Peterson, Barling, Nørding and others from the later 1960’s until 2001. Man Pipe e.g. was a brand distibuted by Comoy’s. The bowls usually showed no nomenclature indicating the orderer. “Genuine Block Meerschaum” was engraved frequently. Often, just the stems were different, while bowls were the same.
Supply of meerschaum from East Africa run out (Kenya / Tanzania exhausted, Somalia inaccessible), and thus the last Laxey meers were supplied to trade in May, 2001. Laxey Pipes Ltd. tried to survive continuing with briar pipes – mainly in the Danish style -, but to no success. It closed down business in July, 2002.” (Laxey Pipes Ltd. – Pipedia)
There we have it, this pipe was made between 1971-1975 in the Peterson-Manxman factory on the Isle of Man. That is a darn definitive piece of provenance if ever there was one.
The Restoration
The slightly battered dirty girl made her way to the workbench and a clean denim piece.
The first order of business was to clear the accumulated cake from the tobacco chamber. This proved to be a much more difficult job that I imagined. I did not use a reamer like the Kleen-Reem or the PipNet due to the threat of cracking the meerschaum liner with additional torque, instead the Smokingpipe Low Country reamer and the very sharp pocket knife were deployed.
Let me assure you that both diamonds and cake on meerschaum have a similar hardness. The scraping continued.
Eventually I moved to the wood dowel wrapped in 320 grit sandpaper.
Next, came the cleaning of the stem. This was done with 99% ethyl alcohol and bristle pipe cleaners.
The stem was then hung, suspended, in Before and After Extra Strength Deoxidizer. I had not used this wonderful product for a few months because the fine folks at Briarville had sent me a complimentary bottle of their Pipe Ste Oxidation Remover. That bottle had finally started giving less and less desired results after about 9 months and approximately 30 pipe stems. Mark Hoover’s Before and After product seems to last longer, doing more pipes, and though a bit more difficult to remove the solution after deoxidizing, I think it works slightly better overall. Since this stem was quite oxidized, I figured 24 hours in the solution would be adequate.
With the stem out of the picture for a day, I switched to the stummel. It was scrubbed with undiluted Murphy Oil Soap and a nylon brush over the sink. The soap was rinsed with warm water and the stummel dried with a cotton hand towel.
The stummel looked much better once cleaned.
I wiped the stummel with a cotton ball wetted with 99% ethyl alcohol and it only removed a slight bit of dirt and no dye.
Still unimpressed with my removal of the cake from the tobacco chamber, I returned to scraping it with the General triangular scraper, the pocket knife and a rotary tool grinder mounted to a hand drill. This combination helped free the caked carbon from the bowl better but still not to my satisfaction. I feared marring the meerschaum with more aggressive methods.
The next evening, I removed the stem from the Before and After Extra Strength Deoxidizer and let it drip excess solution back into the jar.
After drip drying the stem was vigorously rubbed with a coarse shop rag to remove some of the oxidized vulcanite.
The shop rag shows the removed oxidized rubber.
Another of my fears with this pipe was the obliteration of the stem stamps from the deoxidation. I was glad to see that the stamps remained legible, though faint.
The tooth dents above the button were addressed with rubberized cyanoacrylate (CA, super glue). These were filed smooth and sanded.
The stem was then sanded with 320-600 grit sanding sponges. The ste log and Country of manufacture (COM) stamps were masked with masking tape to protect them during the sanding.
The stem was then worked with a series of sanding sponges. Between each sponge the stem was rubbed with mineral oil and wiped with a clean dry paper towel to remove sanding debris.
The chip on the rim of the meerschaum bowl liner had me thinking of ways to repair it. The area was rough enough and the meerschaum porous, so I thought that I could use the old technique of egg white and meerschaum dust to fill the chipped area.
I made a paste with the egg white and meerschaum dust and applied it with a snuff spoon.
The chip looked better and I thought it would lighten as it dried. It did lighten then fell out. I repeated the attempt with the same results. I could not get the eggwhite-meerschaum dust paste to adhere to the existing meerschaum. Strike one and two.
With my brain engaged with chip solutions, I turned to a more repetitive task while I thought. I micro-meshed the stem with 4000-12000 micro-mesh pads. Between each pad I rubbed the stem with Obsidian Oil and wiped it with a dry paper towel. I then repainted the Stem logo with a white acrylic modeling paint.
I used the Before and After Fine Polish then the Extra Fine Polish on a soft cotton cloth and hand buffed each.
The stem was then buffed with carnauba wax on the buffer.
The stummel received a coating of Renaissance Micro-Crystalline Wax applied with a baby toothbrush.
In the above photo you can see the repaired chip loosening in preparation to fall out. The stummel was then worked with a shoeshine brush to polish the Renaissance Wax.
I was at two strikes for chip repair. My thought process was working out other potential solutions I had two other ideas for repairing the chip:
Cut a and shape a replacement chip from stock meerschaum and gluing it in place with clear JB Weld. This product was preferred due to its ability to withstand high temperatures.
Mixing some clear JB Weld epoxy and meerschaum dust. Then applying the epoxy-meerschaum to the chip, allow it to cure then sand to blend.
Both ideas relied on the ability of the epoxy to adhere to the meerschaum and I hoped the heating and cooling or expansion and contraction of the materials would be compatible.
I opted to try the chip replacement with a new meerschaum chip, first.
The first part of this idea required a fairly accurately measured replacement piece of meerschaum. My father, a Geography and Industrial Technology (shop) teacher by original training, frequently said, “Measure twice and cut once.” Cautious measurements were taken and transferred to the piece of block meerschaum. The only meerschaum I had was of Turkish origin and not the more off-white African version as with the bowl liner.
Below you can see a better view of the proposed chip replacement.
To cut this delicate material, I used a Dremel rotary tool with a thin cut-off bit.
Below is a photo of the replacement chip.
With some fine tuning of the replacement chip’s edges a good fit was eventually found.
As previously mentioned JB Weld clear epoxy was the adhesive of choice. Equal parts were measured and mixed according to packaging directions.
The epoxy was applied to both surfaces and the replacement chip fitted to the gap. I thought that I could come back to trim the excess epoxy after it had set-up for about an hour. It would still be soft enough to cut away from the meerschaum with an Exacto knife.
After the epoxy had set up for about 6 hours I applied a piece of masking tape and cut out for the replacement chip. This allowed me to remove the excess material using an emery board without marring the rim.
The emery board made short work of the soft meerschaum.
Additional sanding was done using a wood sphere wrapped in 320 sandpaper and a piece of 400 sandpaper by hand.
Below is a view of the replacement chip immediately before final sanding with the 400 sandpaper.
Since I had already waxed the stem and stummel , all that remained was a hand polish with a microfiber polishing cloth and a stop at the photo table.
I think this Peterson Brymeer Dublin turned out quite well compared to how she looked originally. The briar’s sandblast cleaned-up very nicely. With the dark original stain of the stummel there is a lovely contrast to the slightly off-white meerschaum lining. The stem deoxidized remarkably well. I was able to retain both the COM and the P logo on the stem. The fresh vulcanite looks great with the black of the briar. The chipped rim repair turned out about as well as I could have hoped. Yes, it is noticeable but with a few smokes, I think the meerschaum will color and conceal the repair almost completely. The tobacco chamber cake was very resistant to removal. I guess there is a reason that diamonds are so tough. This carbon was nearly diamond-like in its resistance to removal, but in the end most of it was cleared. The dimensions of the Peterson Byrmeer Dublin are as follows:
Length: 6.06 in./ 153.92 mm.
Weight: 1.22 oz./ 34.59 g.
Bowl Height: 1.89 in./ 48.01 mm.
Chamber Depth: 1.55 in./ 39.37 mm.
Chamber Diameter: 0.71 in./ 18.03 mm.
Outside Diameter: 1.38 in./ 35.05 mm.
I do hope that you have found something here useful to your own pipe care, maintenance or restorations. If you like this sort of thing, please click the like and subscribe buttons. Thank you for reading the ramblings of an old pipe lover.
Loading…
Below are some photos of the finished Peterson Byrmeer Dublin.
This is the third Kaywoodie Tuckaway that I have come across. The previous two were purchased and restored before I started blogging restorations, prior to October 31, 2023. They are two of my favorite pipes and have places in a three-pipe rack on my mantleplace. Below is a photo of the three amigos.
The stamping of my original two, the first has KAYWOODIE over Super Grain (in script) over IMPORTED BRIAR (on the shank bottom), a 042 on the right side shank and a logo-less stem. The second pipe has KAYWOODIE over Standard (in script) over IMPORTED BRIAR on the left shank with 022 on the right and a Kaywoodie clover logo stem. I identified the newest pipe from what appeared to be an assortment of pipe parts on eBay. Apparently no one else thought this mess was worth the $9.99 opening bid.
The newest pipe has no discernable stampings but it does have a Kaywoodie clover logo stem. The stems of all three pipes are interchangeable. Below are some photos of the pipe prior to starting work on it.
No stamping bottom, left nor right.
The only distinguishing feature is the stem logo.
The pipe was in relatively good shape. It had a moderate cake in the tobacco chamber and some lava on the rim. The stem showed signs of tooth chatter but without any deep dents or wear. The fit of the stem in the mortise was snug and proper. The grime on the stummel made it a bit difficult to see the grain of the briar but there were hints of beauty under the accumulated dirtiness. As for the slightly off colored clover logo, I thought it would brighten to the original white once sanded. Overall, this looked like a nice and easy restoration.
Background
Kaywoodie has a long and colorful history dating back to their origins, “Kaywoodie name first appearing in February of 1919.” (Kaywoodie History – Greywoodie LLC) The history of Kaywoodie pipes is fortunately well documented thus, allowing rather precise dates for a Kaywoodie collector to declare the provenance of their charges. Rather than deposit it here, I will link the two outstanding histories of KB&B/Kaywoodie – Greywoodie’s site has a well written history of the company (Kaywoodie History – Greywoodie LLC) and pipedia.org has pretty much the same written history with a rich library of Kaywoodie catalogs, photos and images of old print advertisements, (https://pipedia.org/wiki/Kaywoodie). I can’t recommend them enough for those interested in reading more about the company and the products. There is a third document which provides information more specific for tracing the providence of a specific pipe or model of pipes and that is he Collector’s Guide to Kaywoodie Pipes (https://pipedia.org/wiki/Collector%27s_Guide_to_Kaywoodie_Pipes).
Tuckaway. The 1955 catalog shows a Drinkless Tuckaway that was simply a smaller version of other Kaywoodie styles. The Tuckaways of the 1955-1968 period had military mountings, filter-free see-thru bits, and were packaged in a leatherette case. Available in Standard, Relief Grain, and Super Grain grades ($6-$8, depending on grade). Miniatures. Two-inch miniature replicas of “their big brother”, complete with the Drinkless fitment and Synchro Stem. The catalogs show these as individually-cased pipes but multiple pipe sets were apparently available. Price: $5.00 (Collector’s Guide to Kaywoodie Pipes – Pipedia)
Back in October, 2025 Dal Stanton published a restoration blog about a Kaywoodie Tuck away that he did New Life for a Rare, Early 1960s Kaywoodie ‘Tuckaway’ Standard 050B – The Pipe Steward. This well researched and written post does a fine job at documenting the Kaywoodie Tuckaway far better than I have done. Dal’s pipe also has the “filter-free see-through bits” alluded to in the Collector’s Guide quoted above. This forces the question of when did Kaywoodie produce the three examples which I have come across? Well the only thing which I state is the above quote, “The Tuckaways of the 1955-1968 period had military mountings” (Collector’s Guide to Kaywoodie Pipes – Pipedia). The bits associated with these three pipes are not exactly vulcanite, nor are they nylon. They are apparently some different plastics. They do not oxidize like vulcanite but they are softer than acrylic. They dent from tooth chatter more like nylon but they are easier to sand file and sand than the nylon bits of Medico or Falcon pipes. The white clover logo does show a yellowing with age which was refreshed to the white with sanding.
The Restoration
After the “Before” photos the pipe made its way to the workbench.
Reaming was the first task. The PipNet with #1 and #2 blades, the Smokingipes Low Country reamer and the General triangular scraper were recruited for the task.
The PipNet blades did most of the work.
This Tobacco chamber was drilled with a more conical bit, as is traditional for a Dublin shape pipe. The Kleen-Reem fit this chamber better that the PipNet and was used as well.
There was little for the General to do, but for a bit of clean-up.
Below is a down chamber photo of the reaming results.
The chamber was sanded with 320 sandpaper wrapped around a wood dowel. The exposed bare briar showed no signs of any heat damage.
The rim had a layer of lava on the back half. I hoped there wouldn’t be any charring underneath.
The rim was moistened with saliva. I then took the knife upstairs for a resharpening on the sharpening stone. A few minutes later the rim was scraped with a very sharp blade.
I was surprised at how clean, relatively, the airway of the shank was.Some scraping with a dental scraper was done followed by an alcohol soaked shank brush and several bristle pipe cleaners and cotton swabs also dipped in the 99% ethyl alcohol.
Below are two close-ups of the tooth chatter on the top and bottom sides of the bit. Notice how it looks more like the nylon of a Medico pipe.
I was able to file the bite zone to eliminate most of the chatter on both the top and bottom surfaces.
After the file, I moved to an emery board, like for filing fingernails.
The emery board was also used to reestablish and redefine the button.
There were still some minimal dents which were being difficult. I thought, “maybe a flame painting”. This is where the flame from a lighter is moved along the dented surface. In my experience this is usually to minimal effect but it did seem to work.
The stummel was then taken to the sink for a scrub with undiluted Murphy Oil Soap and a nylon brush. The soap was rinsed with warm water and the stummel hand dried with a cotton hand towel.
Back at the workbench I rubbed the stummel with a make-up pad wetted with 99% ethyl alcohol. This produced some color on the pad as dye or stain was removed from the briar.
I wanted this pipe to be lighter in color to show off the briar grain. I first started a light sanding with a 320 grit sanding sponge.
The sanding helped but not as much as I had hoped. Hmm, plan-B: An application of oxalic acid was the remedy that came to mind.
The crystals present at the bottom of the jar indicate the solution is fully saturated. Oxalic acid is known to bleach stains in woods. My hope was to lighten the color of the briar. Previous attempts at this have met with varying degrees of success.
I applied the first coating of oxalic acid to the stummel with a cotton swab.
This was allowed to sit for 30 minutes while I finished watching an episode of Homeland (glad that it finally made it’s way to NetFlix).
After 30 minutes I recoated the stummel with a second application of the oxalic acid solution.
This one sat for another 20 minutes. The photo below shows what it looked like dried.
The stummel was returned to the sink for rinsing with copious amounts of water. To make sure the oxalic acid was completely rinsed and neutralized I scrubbed the stummel with Castile soap and a nylon brush. I figured that the basic nature of the soap would neutralize the remaining acid.
More rinsing and then some more rinsing, oxalic acid can continue the bleaching if not completely removed.
Once dried I wiped the stummel with 99% ethyl alcohol on a make-up pad again. Far less color came off on the pad and the stummel did appear lighter, though not to the extent I was hoping for.
The only fills that I thought necessary were two on the lower left of the stummel.
The pits were filled with briar dust which was pressed into the pit. The dust then received a small drop of thin cyanoacrylate (CA, super glue). The CA was absorbed into the briar dust and bonded the dust to the stummel nearly instantly.
The fill was then sanded smooth with a 400 grit sanding sponge.
The aluminum collar was covered with masking tape, then the stummel was sanded with a series of sanding sponges from 400-3500 grit. Between sponges the stummel was wiped with an alcohol moistened make-up pad to remove sanding debris.
The stem was sanded with a series of sanding sponges from 400-3500 grit. The masking tape remained on the collar for this sanding. Between sponges the stem was rubbed with mineral oil and wiped with a paper towel. This wiping was to remove any sanding debris. Once the sanding was finished the masking tape was removed and the stem oiled with Before and After Hard Rubber Balm.
I thought that the entire pipe would look better with a buffing with white buffing compound.
After cleaning the buffing compound residue from the pipe I was happy with the briar and the collar but not with the stem. I worked the stem with a series of micro-mesh pads from 4000-12000 grit. Between each pad I rubbed the stem with Obsidian oil and wiped it with a paper towel. The stem looked better but not as well as I thought it could look.
I got out the Before and After Fine and Extra Fine polish and worked the stem, especially the bite zone with these and a soft cloth.
That did the trick, the stem looked good. Next I returned to the buffer and applied several coats of carnauba wax with the buffer.
The final step was to hand polish the pipe with a microfiber polishing cloth.
This Kaywoodie Tuckaway turned out beautifully. I was pleased with the way that the briar lightened with the oxalic acid and subsequent sanding. The briar needed no additional stain or dye and has a lovely warm brown appearance. The stem did turn-out nicely. I cannot say that I like working with whatever plastic it is made of but the end result is attractive. I do wish that this pipe had some official Kaywoodie stampings though. I know they would not affect the pipe’s performance and I am certain of this pipe’s provenance, still I do miss the stampings. The dimensions of this Kaywoodie are:
The dimensions of this Kaywoodie are:
Length: 5.54 in./ 140.72mm.
Weight: 1.03 oz./ 29.20 g.
Bowl Height: 1.74 in./ 44.20 mm.
Chamber Depth: 1.51 in./ 38.35 mm.
Chamber Diameter: 0.72 in./ 18.29 mm.
Outside Diameter: 1.32 in./ 33.53 mm.
I do hope that you have found something here useful to your own pipe care, maintenance or restorations. If you like this sort of thing, please click the like and subscribe buttons. Thank you for reading the ramblings of an old pipe lover.
Loading…
Below are some photos of the finished Kaywoodie Tuckaway.
For some reason the Warren Zevon Werewolves of London was playing in my mind while I was restoring this pipe. In the mental soundtrack the line “He’s the heavy handed gent, ran amok in Kent” was substituted for “He’s the hairy handed gent gent, ran amok in Kent” (Warren Zevon – Werewolves of London Lyrics | Genius Lyrics). This pipe is large and would indeed fit well in the heavy hands of a gent from Kent. I have an affinity for panel pipes of various shapes. I do not recall how this one came into my possession but it was undoubtedly part of an estate lot. The pipe has no maker’s mark nor name, only the stampings MADEINLONDON over ENGLAND on the right shank. Below are some photos of the pipe prior to work.
The pipe was solidly built with good drillings. The fit of the stem to the shank was pretty good but only well fit in a single position. The stem was quite oxidized, calcium deposits around the bite zone and several deep tooth dents both top and bottom. The stummel was dirty with old grime. There were also moderate lava deposits on the rim and several old fills with their less than appealing pink spots. Overall a fairly straightforward restoration of a well used pipe.
Background
In researching the possible history of this pipe, I was limited to only the country of manufacture (COM) stamp. This led me to pipephil.eu for makers who used MADE IN LONDON over ENGLAND. The best I hoped for would be to find a stamp which matched. My first thought was a maker like Comoy, a large factory with numerous seconds brands. Most of Comoy’s lines of seconds used MADE IN LONDON in a circle with the ENGLAND offset. The below photo is a good example of this:
There were some examples of Comoy seconds which did use the MADE IN LONDON over ENGLAND.
(Gr-Gt — Pipes: Logos & Markings). In the Comoy’s examples the stamped words are clearly separated with a space. The No Name Billiard does not have these spaces. It is a single stamped word, “MAEDINLONDON”, without spaces.
The next contestant on, “Who Made That Pipe?” is a Conway. The
(Mas — Pipes: Logos & Markings). Mason House is a maker which I could not find any information about. The only thing that did turn up was another Mason House pipe listed as sold on WorthPoint. I captured the stampings from that pipe.
I was unable to make little conclusion other than the stamps were similar in their lack of spacing between the words and the ENGLAND did line up pretty much the same. Maybe I don’t have a discerning enough eye, but I other than those two things I couldn’t tell if they were the same stamp.
The final contestant was Parker. This one I discounted immediately due to spacing between the words and additional information in the form of a date suffix.
My conclusion is that the No Name Panel Billiard share a similar stamp to that of Mason House. This could indicate a possible origin or merely show that both makers used the same lazy stamp maker. As for the age of this pipe, that too is only a guess. I would say that a large block of briar like this would have to be from post World War Two. The Briar is not as soft as the Algerian briar pieces I have worked with so another assumption is that it is likely from the south of France or Italy.
The Restoration
The pipe found its way to the workbench and a cleaned piece of denim.
I began work with the stem. It was cleaned with bristle pipe cleaners and 99% ethyl alcohol. I was surprised that it did not take much to clean the stem.
The bite zone was filed with a small flat file to reestablish the button and eliminate most of the tooth denting.
Both the top and bottom of the stem were flame painted with a lighter in hopes of lifting some of the dents by causing the vulcanite to expand and contract with heat. This may have helped a little bit.
The stem was then placed into a bath of Briarville Pipe Stem Oxidation Remover (deox) for just shy of 4 hours (based on the time stamps from the photos). A pipe cleaner was inserted into the stem to act as a handle for easy removal from the deox.
While the deox solution did the magic that it does, I turned to reaming the tobacco chamber. The ream team was assembled and included the PipNet with the big blades, #3 and #4, along with the Smokingpipes Low Country reamer and the General triangular scraper.
The #3 and #4 blades of the PipNet did the majority of the work.
The tobacco chamber was sanded with 180 and 320 grit sandpaper via my finger. I do like the larger diameter chambers for this task.
Below is the sanded chamber showing no signs of any heat damage to the bowl.
The rim remained lava encrusted. I was hoping not to find any charring under the lava.
The lava was moistened with saliva and allowed to soften for a few minutes.
Scraping was done with a sharp pocket knife. Yay, the rim was free of charring except around the inner rim edge. Good job, previous owner.
Next came the shank cleaning. Bristle pipe cleaners dipped in 99% ethyl alcohol were used for the initial passes through the airway. Once the smoking residues had softened I was able to scrape the airway with a dental scraper. Every little bit of tar and yuck scraped is worth several pipe cleaners. I also used the shank drill from the KleenReem reaming tool to drill its way through the stem. This further removed some of the yuck. Eventually the airway returned unstained pipe cleaners.
The stummel was then taken to the sink for a scrub with undiluted Murphy Oil Soap and a nylon brush. If you are playing along at home, feel free to use an old toothbrush. This stummel was pretty filthy with years of accumulated grime, testifying to a well loved and used pipe. The soap was rinsed with warm water and the stummel dried with a cotton hand towel.
Back at the workbench the stummel was wiped with 995 ethyl alcohol on a make-up pad. This produced little color indicating that I had pretty much clean briar.
Those nasty pink fills stood out even more with the cleaned briar.
My idea was to pick the old fills out with the use of my trusty fly tying bodkin. This proved to be far more difficult than I planned. The fills were very hard and resisted my bodkin picking. Ethyl alcohol did not seem to soften the fills, so I tried dabbing the fills with acetone on a cotton swab. This did work though it took numerous applications and about 10 minutes. The acetone evaporated quickly and allowed the fills to reharden. I had to constantly dab to keep them moist while watching TV. I don’t think the TV was necessary for the process.
Eventually the fills released their grip and were removed revealing rather deep pits.
These pits were filled with briar dust pressed into the pit then a small drop of This cyanoacrylate (CA, superglue) was dabbed onto the briar dust. The CA soaked into the dust and bonds to the briar. This sets up nearly instantaneously. The rough surface was then filed smooth with a small flat file and additional briar dust was pressed into the remaining pit, with another dab of CA. I find that small layers work better than trying to fill large pits all at once.
The stummel was then sanded with both 320 and 400 grit sanding sponges. I wiped the surface of the stummel with a make-up pad wetted with alcohol between sponges to remove sanding debris.
I thought that this pipe would look better with a contrast dye. My reasoning was that it would both bring out the briar’s grain and help conceal the new fills. Black Fiebing’s Leather Dye was used for the base coat. The tobacco chamber was plugged with a wine bottle cork and the dye applied with a folded pipe cleaner. I only used a single coat and did not flame off the alcohol solvent as it evaporated quickly with this large stummel.
I avoided the rim with the black dye. The stummel was allowed to dry for a few minutes then wiped with a dry paper towel.
Once dry, the stummel was buffed with rouge buffing compound to remove the black from the surface of the pipe. The dye penetrates the soft grained briar deeper than the hard grained wood.
Back at the workbench you can see the grain of the briar was accentuated with the black dye. I sanded the stummel lightly with the 400 grit sanding sponge and wiped the stummel with a make-up pad dipped in alcohol to remove a bit more of the black.
The stummel was then given a coating of Light Brown Fiebing’s Leather Dye. This was applied in similar fashion to the black except I did not avoid the rim.
After the Light Brown dye had dried for about 30 minutes I wiped it with an alcohol wetted make-up pad. Below are a couple of photos of the resulting dyes.
The stem was removed from deox and I was not pleased to see that it had a light-colored coating over the surface. I used a coarse shop rag to hand buff the stem. Some of the light coating came off onto the rag.
I hoped that Soft Scrub cleaner on make-up pads would remove the light film and oxidized vulcanite.
It did, but it took many more cleanser wetted pads, more than shown below.
I hadn’t seen a light film like that before so I was curious to see how the stem would look buffed. I used the rouge compound and the rouge wheel. I looked OK after buffing so I continued as I would normally.
I wanted to fill the remaining tooth dents. I first roughed up the freshly buffed surface with a 320 grit sanding sponge to allow the black CA more surface area to bond to. I then applied small dabs of black CA to the dents. These dabs were spritzed with a CA drying accelerator. The photos below show the top and bottom surfaces.
Both surfaces were filed with a small flat file then sanded with 320 and 400 grit sanding sponges.
WIth the shank still masked I sanded the entire stem with a series of sanding sponges from 320-3500 grit. Between sponges I rubbed the stem with mineral oil and wiped it with a dry paper towel.
I returned to the buffer, this time using white buffing compound and the dedicated white wheel.
The stem looked much better.
I failed to photo-document the stummel sanding, so you will have to trust me. It was sanded with the same sanding sponges from 320-3500. I did wipe the stummel with a make-up pad wetted with alcohol between sanding sponges to remove debris. The stummel was coated with Before and After Restoration Balm and allowed to sit for 30 minutes. During this time I returned to watching TV. Again, I do not think the TV was necessary.
The stummel was then hand buffed with an inside out athletic sock to remove excess Restoration Balm.
The pipe was taken back to the buffer for several coats of carnauba wax.
The final step was a hand buffing with a microfiber polishing cloth then finished photo shoot.
This Made in London, England No Name Panel Billiard has been restored to a condition likely better than it’s factory original. The new contrast dye accentuates the briar grain and adds a warmth lacking in the original. The replaced fills blend with the new contrast dye and are so much better than the pink plague of the original. The stem is far better than it was but try as I did, I could not get the vulcanite to return to the black. The dark brown is really only noticeable under very bright lights or sunlight. The finish of the stem did turn out well with the previous tooth dents only noticeable under close scrutiny. This pipe is a large billiard and it has a hand feel that only a large pipe has. For those who love large billiards this pipe calls out to you. The dimensions of the No Name Panel Billiard are:
Length: 6.02 in./ 152.91 mm.
Weight: 2.22 oz./ 62.94 g.
Bowl Height: 2.11 in./ 53.59 mm.
Chamber Depth: 1.88 in./ 47.75 mm.
Chamber Diameter: 0.89 in./ 22.61 mm.
Outside Diameter: 1.55 in./ 39.37 mm.
I do hope that you have found something here useful to your own pipe care, maintenance or restorations. If you like this sort of thing, please click the like and subscribe buttons. Thank you for reading the ramblings of an old pipe lover. If you are interested in purchasing this pipe or any other from previous blogs please feel free to contact me at scimansays1787@gmail.com.
Loading…
Below are some photos of the finished Made in London, England No Name Panel Billiard.
I don’t know if freehand is the correct term for this pipe. I’m not even sure if burl is, either. All I know is that I came across one several years ago just as a stummel and decided that the weird little thing needed me as an owner. I restemmed it and we have been getting along quite well.
I have seen one other pipe similar to this and it was stamped “Wally Frank”. Of course, I didn’t collect a photo of that example. The subject of this blog was seen on eBay back in August of 2025 and was quickly purchased. The fact that it was from Sioux City, Iowa, a mere 125 miles from my home was interesting, support local businesses, eh? The similarities between the two pipes was stunning. Both were formed from what appeared to be small briar burls. Having seen photos of briar burls which are large enough to be cut into numerous blocks for pipe making is the norm. I wondered if these small burls were not small individual plants which were dug up while the digger was excavating a larger “target” burl. Both of the burl pipes had the same general shape with the shank forming the trunk of the shrub and a “V” shaped cut to remove, what I thought was, the more spindly root. The only stamping on the newly acquired pipe was HOUSE OF WESTMINSTER in a single line on a panel of the shank. Below are some photos of the burl pipe prior to work.
The first thing I noticed was the thick clear coating applied to the pipe. It looked as though it had been sprayed or dipped several times into a finish. The briar was also heavily stained masking any of the wood’s natural color. There was a crack on the cut V at the front of the pipe. The stampings were crisp and well defined leading me to think the stamp was pressed prior to the application of the finish. The stem was oxidized with some slight tooth chatter near the button. Overall it looked to be a simple restoration.
Background
As I discussed earlier this appeared to be an entire, very small briar root. Perhaps something dug-up with a larger burl. Not wanting to waste a little bit of briar, I could imagine the diggers throwing it in with the larger burl and sending it off to the cutters for sale. Of course this is all just conjecture but it was a fun pursuit. Speaking of “fun”, not knowing what to call this pipe allowed me to reach out to Steve Laug (rebornpipes.com) and ask what he thought the shape might be called. His reply was amazing, “never seen anything like it…that is wild.” (Laug, Steve. Personal message). I have never stumped Steve before. With that in mind, I said that I’d call it a “Burl”. He replied, “I think that is good”, and so it was.
Normally a briar burl is a large mass below ground, photo below.
(Sybarite pipe). That makes four that I recall seeing either in the flesh or online. I am sure there are more but being lazy has its limitations.
I next did a search of the “House of Westminster” for pipe related sites/information. Nothing was found on the traditionally useful sites pipedia.org and pipephil.eu. I did get a hit from WorthPoint.com of an old auction listing:
“Gorgeous 1940s House of Westminster Ltd Real Briar Paneled Prince Tobacco pipe Made in France House of Westminster Ltd. Was a Tobacco company that sold Tobacco and tobacco Pipes from their Store in New York NY.The Use of “Real Briar” was a commonly used Nomenclature during WWII when Briar was Hard to come by and nearly impossible to import, and less desirable alternatives were often used, so to reassure the buyer that thier pipe was indeed The real deal, makers would often stamp “Real Briar”” (1940s House of Westminster Ltd. Paneled Prince Real Briar tobacco Pipe France | #4810546746). This pipe looked nothing like the burl in hand, though. The information included was quite vague and contained little detail.
I then came across a discussion of the House of Westminster on the Brothers of Briar forum. Below is the original post requesting any information on the House of Westminster and a forum member reply.
“Ludwig Stern, a successful pipe manufacturer since 1893 and closing around 1960, reorganized his company along with his brother Hugo Stern, opening a factory in 1911. They named the company L&H Stern Smoking Pipes & Holders. The newly formed company was moved into a six story building on the corner of Pearl and Waters street Brooklyn, NY.” (LHS – Pipedia)
Continuing with that lead, I searched through all of the photos on the pipedia.org LHS page. I did not find any mentions of House of Westminster nor any photos of a burl pipe, but I did find an exact match of the stinger. This was not some ordinary aluminum tube, it was very unique. Below is the photo from pipedia.org:
And here is a photo of the stinger from the House of Westminster burl pipe, I tried to match the color and positioning of the burl stem to the previous photo:
For me, that settled who the maker was. House of Westminster was a L&H Stern product likely produced after the second world war and before the company closed down in 1960.
The Restoration
After the before photo shoot I took the Burl to the workbench where I placed it on a cleaned denim piece.
I was able to pull the stinger from the stem without much difficulty. I placed it in a medicine cup with 10 ml of 99% ethyl alcohol.
The stem was cleaned with ethyl alcohol and bristle pipe cleaners. The airway on the button end seemed rough and a bit constricted. I opened the airway with a Vermont Freehand Slot Tool (Slot Tool (with handle) – Vermont Freehand) and emery boards cut at an angle.
The bite zone above the button was filed with a small flat file to remove the tooth dents and chatter.
Sanding the stem lightly with a 400 grit sanding sponge was then done to prepare the stem for a bath in Briarviles’ Pip Stem Oxidation Remover (deox, as I like to call it).
A pipe cleaner was inserted into the stem to act as a handle for easy removal after the 2 hour deox bath.
With the stem soaking, I turned my attention to the reaming of the stummel. The ream team was gathered; PipNet with the #2 and #3 blades, General triangular scraper and the Smokingpipes Low Country reamer.
The PipNet and #3 blades did the majority of the cake removal.
The reamed tobacco chamber looked much better.
The chamber was then sanded with 320 sandpaper wrapped around a wood dowel. The sanded chamber showed no signs of heat damage.
I then cleaned the airway of the shank. This was done by softening the accumulated smoking residue with ethyl alcohol on cotton swabs as I cleaned the mortise. The softened yuck was then scraped using a dental scraper. Alcohol dipped bristle pipe cleaners and alcohol dipped cotton swabs were also used.
The stummel was then taken to the sink for a scrub with undiluted Murphy Oil Soap and a nylon brush. The soap was rinsed with warm water and the stummel dried with a cotton hand towel.
Back at the workbench, I wiped the stummel’s stamp panel with 99% ethyl alcohol on a make-up pad. This removed a lot of the shellac and some of the stain/dye. You can see in the photo below that the shellac had filled in the scratched on the panel. This layer of finish was quite thick.
I wanted to get rid of the old finish to see the briar detail more clearly and maybe some of the color of the wood. Shellac is soluble in ethyl alcohol (EtOH, an old organic chemistry abbreviation), so I gave the stummel an hour long bath in a jar of EtOH.
This allowed me some time to clean and polish the stinger. It was removed from the 10 ml of EtOH and scrubbed with a bristle pipe cleaner. I used another pipe stem to hold the stinger while I work.
The stinger was then buffed with white buffing compound on the white compound wheel.
After cleaning off any remaining buffing compound the stinger looked great.
After the hour-long soak in EtOH I scrubbed the stummel again but this time using the EtOH rather than Murphy’s. You can see from the photo below that there was a great deal of dye and shellac liberated from the stummel.
Again, back at the workbench the burl was looking less finish coated but it still had spots of shiny shellac in the low spots and a whole lot of purple.
With the airway residues further softened, I cleaned this out again with cotton swabs and EtOH.
I tried wiping the stamp panel again, as a test, with acetone on a make-up pad. I was amazed at how much color came off.
I decided to give the stummel a 30 minute bath in acetone.
After 30 minutes I removed the stummel.
The stummel was then taken to the sink where I scrubbed it with a nylon brush and additional acetone.
I used Castile soap and the nylon brush to scrub away acetone from the surface of the pipe. This was rinsed with water. I then placed the stummel outside in the sun to allow the acetone to evaporate from the briar. The stummel was left in the sun for over an hour.
I retrieved the stem from deox and vigorously rubbed it with a coarse shop rag. This removes some of the oxidized vulcanite softened by the deox solution.
The stem looked much better with minimal pitting.
Soft Scrub cleanser was used on make-up pads to scrub the stem.
The first pad removed a good deal of oxidized vulcanite.
The second make-up pad removed significantly less material.
Since the stummel was drying in the sun, I used a wood block with holes drilled for different diameters to hold the stem while I sanded it. I like to either have the stem connected to the stummel of a block like this to keep from rounding off the joint where the stem meets the shank.
After sanding with a 320 and a 400 grit sponge the stem was rubbed with mineral oil.
I checked back with the stummel after an hour. It still had a slight acetone smell so I knew it was not thoroughly dry. I did take a few photos of the stummel in the sun to show how much finish had been removed. Sorry, these shots were taken on the side-wall of my truck, not the best backdrop.
I was glad to see that I could tell this was wood and not some weird plastic or space-age-epoxy-resin. Still I wanted to lighten the briar further. I thought about my successful (and some unsuccessful) uses of oxalic acid to bleach stained wood. I thought that it might work here.
The saturated oxalic acid solution was applied with a cotton swab. This was allowed to sit for 30 minutes. After the 30 minutes I again scrubbed the stummel with warm water then an additional scrub with Castile Soap and a final rinse with warm water.
I returned to the workbench and wiped the stummel with 99% EtOH on a make-up pad. The pad in the photo below is after the entire stummel was wiped. There was still a lot of dye coming off. I declared defeat, the remaining dye would remain. The oxalic acid treatment seemed to do little. I had been defeated by the purple plague.
All of these baths had made the slight crack in the front of the pipe to expand. I used a fly tying bodkin to pick the old fill from the crack.
The crack could not be compressed and it appeared to be superficial and not structural. I decided to just refill it using briar dust and cyanoacrylate (CA, super glue). I pressed briar dust into the crack and tamped it with the bodkin.
Thin Ca was applied with a very narrow plastic tip.
The Thin CA soaked into the briar dust and bonded it to the existing briar. I repeated the filling of the crack with a second coating of briar dust and another drop of Thin CA. The excess new-fill was filed with a small flat file and sanded with a 400 grit sanding sponge.
Below is the fill as seen from head-on.
And from the side with poor focus.
It was time to sand the stem and the shank-end. The area that I did not want sanded was taped with masking tape.
A series of sanding sponges were used in grits 320-3500. Between each sponge the stem was rubbed with mineral oil and wiped with a paper towel.
After the 3500 sponge the stem was taken to the buffer and the shank-end and stem were buffed with rouge buffing compound followed by a buffing with white buffing compound. I returned to the workbench and wiped the remaining buffing compound from the pipe. The stummel was then coated with Before and After Restoration Balm applied with a baby toothbrush. This was allowed to sit for 30 minutes.
The stummel was hand buffed with an inside out athletic sock to remove the remaining balm.
The pipe was then returned to the buffer where several coats of carnauba wax were applied. Care was taken to work the carnauba into and out of the rough texture of the briar. The final step was a hand buffing with a microfiber polishing cloth then off to the photo table.
This House of Westminster burl turned out well. I do wish it had a more natural color rather than purplish brown, but at least the clear coat is gone.The texture of the pipe is amazing to hold. It is like a natural rustication and has a wonderful hand feel. The smooth organic texture gives way to the polished stem, which turned out very nicely. Overall this pipe is a unique piece which will undoubtedly provide years of enjoyment to the next owner. The dimensions of the House of Westminster Burl are:
Length: 6.72 in./ 170.69 mm.
Weight: 2.40 oz./ 68.04 g.
Bowl Height: 1.51 in./ 38.35 mm.
Chamber Depth: 1.28 in./ 32.51 mm.
Chamber Diameter: 0.80 in./ 20.32 mm.
Outside Diameter: 1.90 in./ 48.26 mm.
I do hope that you have found something here useful to your own pipe care, maintenance or restorations. If you like this sort of thing, please click the like and subscribe buttons. Thank you for reading the ramblings of an old pipe lover. If you are interested in purchasing this pipe or any other from previous blogs please feel free to contact me at scimansays1787@gmail.com.
Loading…
Below are some photos of the finished House of Westminster Burl.
You may have noticed that I have begun to only post one restoration blog per week. I am sure that you are thinking that the writing quality will certainly improve with more time spent on each individual post. Or, that I will make fewer mistakes because I have more time for perfection. Yeah right, like either of those are going to happen. Anyway, we are gathered together today for a pipe restoration, so here it is: A Mountbatten that came in with an estate lot back on February 6th, 2025. The pipe was stamped MOUNTBATTEN over MADE IN ENGLAND. There was another stamp but I didn’t notice it until after I’d started the restoration. See, I’ve already proven that I continue to make mistakes. Here are some photos of the pipe before work was started.
The pipe had obviously been smoked as evidenced by the lava deposits on the rim and the cake built up in the tobacco chamber. The stem was oxidized with some tooth chatter, more dents actually. The finish looked rather drab, which seemed strange because the sandblast texture was very nice with numerous bird’s eyes on both sides and straight grain on the front and back. I thought that some contrast dye would improve the look dramatically. Overall, this appeared to be a rather straightforward restoration.
Background
For some reason I always associated Mountbatten with Blatter of Montreal. Perhaps it is due to my lysdexic (or is that dyslexic?) brain wanting to see a pattern with pipe names and “tt”. This was the first Mountbatten that I recall working on. The pipe was well crafted with the fit of the stem to the shank excellent. I started with a search on pipedia.org for “Mountbatten”. Here I found the following:
“Mountbatten is often referred to as a Charatan second, but apparently the Mountbatten pipes were made by Charatan apprentices. So while they are not Charatans, they are perhaps on their way to becoming Charatans. A second would tend to be a pipe with a deficiency (in material or workmanship), a Mountbatten would perhaps be closer to a Charatan in quality.
The following is originally from a pipes.org forum post by Bill Ramsey.
“Friends, after 40 years of nosing around pipes, what I have gleaned is this: Charatan sold its seconds under private labels and later acquired the English rights for Ben Wade for just this purpose. Mountbatten, on the other hand was not a “second”(in that there was some physical deformity in the pipe) but rather a first line production from Charatan’s apprentice program. Each Charatan carver might have four or six apprentices at any one time of various skill levels. As they improved and started cutting pipes themselves, these pipes had to move… thus the Mountbatten. These were made on Charatan tooling with Charatan materials and teaching. Bear in mind that there was a high attrition rate and , perhaps, one apprentice in nine or ten made it to cutting their own bowls much less a Charatan carver. This is why you see more Charatans than Mountbattens on the market. You’re never going to put your kid through college by selling one but you’ve got a day to day workhorse of the first order. Good luck and happy puffing.”
Pretty interesting! This is information comes to us from an interesting post on rebornpipes.com about restoring the pips bellow” (Mountbatten – Pipedia).
So, I apparently had a pipe made by an apprentice that had mastered the fitting of stems to a shank and had advanced to blasting, which they were quite good at, then attempted finishishing blasts, which they were not quite as good at, yet. I merely say that because I was not impressed by the finish of this pipe. It looked kind of Play-doughy – unicolor and lacked definition.
I still wasn’t sure when the pipe was made. Reading through the pipedia content on Charatan led me to a convoluted history with several “eras” for Charatan pipes but little to no information of Mountbatten. If I assume the shape numbers remained the same for Chatatan and Mountbatten which I thought was a reasonable assumption, then they would be consistent. Hmm, I was wrong about that. 818 was never a Charatan shape. The pipedia.org does have a single photo of a Mountbatten with a very similar shape number and finish:
As per tradition, I placed a relatively clean denim piece on the work surface.
The ream team was gathered and included the following: PipNet with the #2 & #3 blades, the General triangular scraper with the tip ground round and the Smokingpipes Low Country reamer.
The PipNet’s #2 and #3 blades did the majority of the reaming.
The clean-up was done with the other two scrapers.
After Reaming the tobacco chamber was sanded with 320 sandpaper wrapped around a wood dowel. There were a couple of gouges on the walls of the tobacco chamber from previous scraping/reaming but no signs of heat damage. I thought that a bowl coating may be beneficial and hoped that I’d remember to do it. The below photo also shows the lava deposits that I hoped the stummel scrubbing would eliminate.
The stem was cleaned with bristle pipe cleaners and 99% ethyl alcohol. The stem was surprisingly clean.
A pipe cleaner was inserted into the stem to act as a handle for removing the stem from the Briarville Pipe Stem Oxidation Remover (lovingly called deox).
The shank proved to be a bit more difficult to clean than the stem. This cleaning was done in similar fashion to the stem but with a nylon shank brush joining the assault.
Once the shank was cleaned the stummel was taken to the sink for a scrub. Here I used a nylon brush with Murphy Oil Soap, undiluted. The soap was rinsed with warm water.
Not being completely satisfied with the scrubbing, I upgraded to a brass brush and repeated the process. After the rinse I dried the stummel with a cotton hand towel.
Back at the workbench the stummel was wiped with 99% ethyl alcohol on a make-up pad. This removed a little bit of color, perhaps a stain or wax residue.
I wanted to give this pipe an alcohol-cotton treatment to eliminate any remaining smoking residue from the airway/tobacco chamber. The tobacco chamber was packed with cotton along with the shank. I figured that 10 ml of alcohol would be the right amount.
The 10 ml of alcohol was applied with a disposable pipette. It saturated the cotton completely and would dissolve the smoking residues and deposit them onto the cotton as the alcohol evaporated overnight.
The next day I saw a purple color on the cotton packed into the shank. This purple was usually from potassium permanganate (KMnO₄). KMnO₄ is an oxidizing agent that is/was used as a stain for wood. Maybe the shank end had been stained this way, certainly the whole stummel had not been.
The cotton in the tobacco chamber did not have any of the purple coloring.
The cotton was removed and the stem cleaned again to remove any of the remaining residues that the alcohol may have softened but not liberated from the airway.
I removed the stem from deox. It was placed on a coarse shop rag where I vigorously hand buffed it. This removed some of the oxidized rubber which had been softened by the deox process.
Bah! The deox had removed some of the definition of the logo. This occurs when the oxidation is deeper than the stamping. The stem was returned to the workbench where it received a coating of mineral oil to keep it from further oxidizing.
I thought that this stummel would look better if the low spots of the blast were darker than the high spots. To achieve this I thought a base coat of Fiebing’s Dark Brown Leather Dye would work nicely. The tobacco chamber was sealed off with a wine bottle cork. A folded pipe cleaner acted as my applicator for the dye and a lighter provided a flame to burn away the solvent portion of the alcohol based dye.
A single coat of dye was applied and flamed.
I allowed the dye to dry then took it to the buffer. I only wanted to remove the dye from the high spots so a light touch was used when buffing with rouge buffing compound.
TO give the pipe more definition I lightly sanded the high spots with a 400 grit sanding sponge.
The stummel was wiped with a make-up pad dipped in alcohol to remove buffing compound and sanding debris then a coating of Before and After Restoration Balm was applied and worked into the briar with a baby toothbrush.
After about 15 minutes the Restoration Balm was hand buffed with an inside out athletic sock to remove the remaining balm.
I covered the stem logo with a piece of masking tape to preserve the remaining logo.
The shank was covered with a layer of masking tape to avoid sanding a well.
The stem was sanded with a series of sanding sponges from 400-3500 grits. Between each sponge, I rubbed the stem with mineral oil and wiped it with a paper towel.
The stem was then micro-meshed with the 4000-12000 pads. Between each pad, I rubbed the stem with Obsidian Oil and wiped it with a paper towel.
I buffed the stem with a blue compound on the dedicated blue compound buffing wheel.
After buffing the stem, I removed the tape from the shank and the stem logo. The logo was still slightly degraded by the deox process. Hmm, I had hoped it would heal. Yeah, unreasonable and foolish but still a hope. It didn’t.
To bend the unsanded/micor-meshed/buffed logo area, I tried to polish it with Before and After Fine Polish applied and hand buffed with a soft cloth.
I chose this white acrylic paint because I had it available, it’s water soluble, dries quickly and it reminds me that I need to paint a few miniatures for gaming.
I worked the white acrylic paint into the stampings of the logo with a cotton swab.
The excess white acrylic was buffed off with a soft cotton cloth then re-micro-meshed the logo with a 12000 pad.
I reassembled the pipe and thought back to the before photo.
And compared it to the after. I think the contrast dye brought out the texture of the blast better and added depth and character to the pipe.
The pipe was then returned to the buffer for several coats of carnauba wax.
The final step was a hand buffing with a microfiber polishing cloth.
Well, I thought I was finished then I saw the bowl when I was going to take the finished photos of the pipe. DOH! I forgot that I wanted to give this pipe a bowl coating. I coated the interior of the chamber with 100% applied with a cotton swab. A capsule of carbon powder was poured into the chamber after I had blocked the airway with a pipe cleaner.
The rim was covered with a piece of painters tape. The stummel was shaken for about one minute. I removed the tape, pipe cleaner, dumped the excess carbon powder and blew through the airway to clear the remaining powder.
The final step was a hand buffing with a microfiber polishing cloth (the real final step).
This Mountbatten Billiard turned out very nicely. The contrast dye helped eliminate the unicolor of the original finish. The stem polished-up nicely even though I did lose some of the detail on the logo. I went with a bowl coating to address a couple of gouges in the tobacco chamber from overexuberant scraping. The blast texture is very pleasant in hand and brings out the lovely grain to this pipe. Overall this pipe looks well made and of quality briar that should provide years of enjoyment for the next owner. The dimensions of the Mountbatten Billiard are:
Length: 5.61 in./ 142.49 mm.
Weight: 1.41 oz./ 39.97 g.
Bowl Height: 1.92 in./ 48.77 mm.
Chamber Depth: 1.63 in./ 41.40 mm.
Chamber Diameter: 0.74 in./ 18.80 mm.
Outside Diameter: 1.48 in./ 37.59 mm. (from cheek to cheek)
I do hope that you have found something here useful to your own pipe care, maintenance or restorations. If you like this sort of thing, please click the like and subscribe buttons. Thank you for reading the ramblings of an old pipe lover.
Loading…
Below are some photos of the finished Mountbatten Billiard.
The other day a friend was showing me the wonders of ChatGPT and how I could use it to write these blogs. NEVER! I do not think that any artificial intelligence will ever understand the feeling of satisfaction of restoring something as simple and inconsequential yet personally important as a tobacco pipe. I fully intended this restoration to be a short and simple project. I’ve restored many Marxman pipes so the research could be recycled and referred to and the pipe was in great shape. Until it became like the “stinky car” episode from Seinfeld. I’ll let you read about that later.
And you’re a good dog. Oh sorry, I forgot who my audience was. The Marxman was in pretty good shape and had not appeared to be heavily used. Judging by the lack of tooth chatter on the stem and the relatively clean stinger and bowl it looked as though it had not been smoked more than a dozen times. There was some oxidation on the stem and a fill in the dog’s right ear that I did not like the look of but overall this looked like a straight forward restoration. This pipe was very large, I feel like I should mention that.
Background
Due to a level of laziness that impresses even myself, I will use the following from the restoration on a Marxman Rattlesnake figural pipe that I finished recently:
“I have done a lot of Marxman restorations. Next to Peterson pipes I am sure Marxman pipes come close as to numbers. I have also written about the history of Robert Marx and how he formed and built up the company during World War Two, not an easy task considering the main material of his production was nearly inaccessible during the war years. If you would like more information I think I did an acceptable job on Marxman history in the following blog: A Marxman Dublin Gold Band Restoration – NebraskaPeteGeek. Yeah it’s still written by me, but it’s pretty good for a change.
This pipe shows a carving skill that I think surpasses the carvings of the previous Marxman figural pipe that I have done. Though the camel pipe is also of high quality. The briar used must have been a very substantial piece of wood for the time. I would place this pipe also within the late 1940s-1953 time frame. All of the Marxman pipes from this period were carved in New York City.
The Restoration
After the “before” photos the pipe was taken to the workbench where it got to sit on the Barely used denim piece. I say barely used since the last restoration (I linked it if you are curious) was so darn clean I had little chance to dirty the denim.
I was able to pull the stinger from the stem with little effort.
I place the stinger into a medicine cup with 10ml of 99% ethyl alcohol to start it’s cleaning.
While the stinger soaked I cleaned the airway of the stem with alcohol and bristle pipe cleaners.
A look down the mortise showed little smoking residue.
The ream team was gathered and included the PipNet and the General triangular scraper.
There was a surprising amount of cake removed with the PipNet and the #2 blades.
The reamed tobacco chamber looked better but would need sanding to check for any damage to the chamber walls.
Sure enough, sanding did show some light heat fissures. These would be addressed with a bowl coating.
The shank cleaning was done with cotton swabs and bristle pipe cleaners dipped in 95% ethyl alcohol.
The stem was lightly sanded in preparation for a soaking in Briarville Pipe Stem Oxidation Remover, also known as deox.
A pipe cleaner was inserted into the tenon to act as a handle for retrieving the stem after a 6 hour soak.
The stummel was scrubbed with Murphy Oil Soap and a nylon brush. The soap was rinsed with warm water and the stummel dried with a cotton hand towel.
Back at the workbench the stummel was wiped with 95% ethyl alcohol on a make-up pad. The briar looked bare of any finish except for a few places in the depressions of the carvings.
In the photo below, you can see a pit and a small patch of a clear coat or lacquer.
The left ear of the bulldog must have also had a pit which was filled with the dreaded pink goo used as a filler. I was thinking of methods to smooth out that lump of goo.
This pipe had an aroma which I refer to as “granny purse”. It is that smell that my grandmother’s purse had, kind of like something which had been repeatedly exposed to perfume where the perfume smell lingers long after it should. I thought that it was due to the previous owner smoking a Lakeland blend containing geranium oil. I figured that an alcohol and cotton treatment would rid the pipe of the floral ghost and allow me some time to think of ways to fix that ear. The tobacco chamber and shank were packed with cotton.
95% ethyl alcohol was added to the cotton with a disposable pipette until the cotton was saturated.
The alcohol cotton treatment would take an overnight wait so I turned to cleaning the stinger.
Since the pipe’s stem was still soaking in deox, I found an extra stem which fit the stinger. This stem would provide me with a handle for buffing/polishing the stinger on the buffer.
The stinger was buffed using a blue compound and looked much better.
After the buffing and the removal of any remaining blue compound the stinger looked great.
Below is a photo of the saturated cotton as I headed to bed.
The next day the majority of the alcohol had evaporated. This evaporation allows the alcohol to dissolve smoking residues and draw them into the cotton where they are deposited.
I removed the cotton. The cotton in the shank had a strange pick color. The briar did not stain the make-up pad with alcohol pink as it would if a red dye had been used to stain the briar. What is this? I wondered.
I used a couple of cotton swabs to re-clean the shank.
To address the pit, I used briar dust and thin cyanoacrylate (CA, super glue). The pit received a tiny drop of CA which then had briar dust pressed into it. The briar dust then received another drop of CA.
The fill was then filed with a small flat file and smoothed with a 400 grit sanding sponge.
My thinking of ways to fix the pink-goo-ear-fill was to re-carve it using a Dremel rotary tool. The first bit I used was the pointy bit, below.
The second bit used was more rounded to allow for a smoother finish.
Below is a photo of the re-carved ear. I could only see a tiny pit which I did not think required all that pink-goo.
The stummel was sanded with 400 then 600 grit sanding sponges. I did not want to over-sand and remove any detail of the carving.
The stummel was then coated in Before and After Restoration Balm, applied with a baby toothbrush, and allowed to sit for 30 minutes.
The stem was removed from deox. What was supposed to be a six hour soak turned into an 18 hour soak. The stem was vigorously rubbed with a coarse shop rag. This allows for the absorption of excess solution and removes some oxidized rubber.
The stem appeared to be pitted from the deox removing oxidized rubber.
I applied a coating of Mark Hoover’s Before and After Hard Rubber Balm. I thought that this might help condition the vulcanite, this was allowed to rest for 6 hours.
The Restoration Balm was wiped from the stummel using an inside out athletic sock.
When I returned to the stem, I wiped the remaining Hard Rubber Balm off with a dry paper towel. The shank of the pipe was wrapped in masking tape to protect the shank from the sanding. I then started sanding the stem with a series of sanding sponges from 320-1000 grit. Between each sponge I rubbed the stem with mineral oil and wiped it with a dry paper towel.
There was still a lingering granny purse smell to this pipe. I thought another alcohol cotton treatment might remedy that.
The cotton was removed the next day and it was still pulling some of that pink color from the airway of the shank. Was this the source of the granny purse aroma?
The tape was removed and cleaned with alcohol to rid the shank of any residual adhesive. I then worked a bit of the Before and After Restoration Balm into the briar there and around the rim. After that sat for 10 minutes I again wiped it with the athletic sock and took the pipe to the buffer for a few coats of carnauba wax.
The final step was a hand buffing with a microfiber polishing cloth.
This Marxman Figural Bulldog is a true beauty. It is a handful of a pipe and weighs in at over 3 ounces (88.45 g). The amazing thing is that it clenches very well and does not feel nearly that heavy. The expressive eyes of the carving are an indication of the skill of the carver and the quality of the carving. The fill and the recarving of the ear that I did, were small touches which I think added to the pipe. The briar itself must have been huge for this time period, just based on the size of the block, I am thinking this pipe was made after World War Two. The dimensions of the Marman Figural Bulldog pipe are:
Length: 7 in./178 mm.
Weight: 3.12 oz./ 88.45 g.
Bowl Height: 2.00 in./ 50.80 mm.
Chamber Depth: 1.44 in./ 36.58 mm.
Chamber Diameter: 0.72 in./ 18.29 mm.
Outside Diameter: 1.77 in./ 44.96 mm. (from cheek to cheek)
Oh, I almost forgot. Did the second alcohol cotton treatment exorcise the “granny purse” ghost? Mostly. There still remains a very slight hint of the geranium oil. I think that it should disappear with a couple of bowls of pipe tobacco.
I do hope that you have found something here useful to your own pipe care, maintenance or restorations. If you like this sort of thing, please click the like and subscribe buttons. Thank you for reading the ramblings of an old pipe lover.
Loading…
Below are some photos of the finished Marman Figural Bulldog.
Have you ever wondered how to use the terms Dutch, Holland or the Netherlands? Well, this pipe may help. The pipe was made in Holland, two of twelve provinces of the country known as the Netherlands. Yeah, there are two Hollands, a north and a south. The makers of the pipe were Dutch, referring to the culture and language of the region. Okay, I have shown off my undergraduate geography major for four years quite enough for one day.
This pipe caught my eye on eBay recently. I was taken by both the shape and the price. I immediately sent Sascha Mertens a private message via Facebook, asking if it was a good deal. He replied quickly, as usual, saying that it was indeed a good deal for a relatively rare and desirable shape. He had me at “good deal”. I can’t say I place too much emphasis on popular things, I know what I like. While we are talking about Sascha, he keeps me laughing with his complaints of purchasing pipes that are very clean. Yeah, he complains when a pipe is too clean and does not provide him with the opportunity or challenge of cleaning them up himself. This pipe is a wonderful example of that. I think it had only been smoked once. I now completely understand Sascha’s disappointment. Below are some photos of the Big Ben 702 before I did any work, if you can call it that, on it.
The pipe was nearly brand new. There was some unsmoked tobacco remnants in the bowl and a very minimal residue on the rim. I cannot even call it lava. The stem was slightly oxidized due to age with maybe a few light tooth marks. The only other thing to complain about was a slight wax build-up in the beading. This was going to be an “easy button” restoration.
The next search was on pipedia.org. Here too, the entry was lacking specificity for the Classic Line. Well actually it was lacking pretty much everything stating only, “The brand name Big Ben was originally owned by a small trade company in Amsterdam which was already well established in several countries selling pipes among other goods. The firm was bought by Elbert Gubbels & Zonen B.V. – see Gubbels – who were in search for a suitable brand name to further expansion on international markets.
I did follow the link from pipedia.org to the Gubbbels’ website: Want to buy a Big Ben pipe? The best tobacco pipes since 1870 – bigben. This site was a nice shopping and informational site. I found the most impressive thing was that they opened the workshop up to the public every Friday from 10:00am-4:00pm. Here in the US, that would likely meet with stern warnings from Occupational Safety and Health Administration (OSHA).
“Our store is open every Friday! We cordially invite you to take a look at our production workshop. In our store you will find a wide range of Big Ben pipes in all shapes and colors. If your ideal pipe is not listed, we may be able to manufacture a pipe especially for you! Light maintenance of your beloved old pipe can usually be done on site.
Making a pipe requires craftsmanship, a lot of fingerspitzengefühl and experience in working with the unpredictable and capricious material: the root of the Erica Arborea, better known as briar wood. Formed by the rocky bottom of the Mediterranean region, this noble and beautifully textured wood contributes its 50 to 80 years of growth to the value of the pipe. We are proud to be able to tell you the whole story – from carrot to tobacco pipe!
We are open every Friday from 10:00 am to 4:00 pm. On all other days you can visit us by appointment.
There was also a very nice history of the company and a look into their future. It is quite detailed so I will not include it here but this link will take you there if you are interested in a very interesting history.
The Restoration
The restoration began with a clean denim piece which I felt certain would remain clean upon finishing.
I lexamined the tobacco chamber more closely under the bright lights of the workbench. Only smoked once or twice, was my conclusion.
The look down the mortise reaffirmed my thinking.
The reaming of this tobacco chamber only required a brass bore brush, from a 20 guage shotgun and a light scrape from the Smokingpipes Low Country reamer.
I swabbed out the chamber with an alcohol dipped cotton swab. Below you can see that the reaming only produced a tiny bit of carbon and a few flakes of tobacco.
The shank was cleaned out using 99% ethyl alcohol on cotton swabs. These too, came back with little grime.
The stem was cleaned with alcohol and a bristle pipe cleaner.
I used a dental scraper to clear the majority of the wax that was built-up in the bead around the bowl.
The light residue on the rim was removed with saliva and a cotton make-up pad.
I took the stummel to the sink for what was probably an unnecessary scrubbing with undiluted Murphy Oil Soap and a nylon brush. Some habits are hard to break. The soap was rinsed with warm water and the stummel dried with a cotton hand towel.
Back at the workbench, the stem had a slight residue, likely from the airway cleaning.
I rubbed the stem with alcohol on a make-up pad and did get some oxidized vulcanite from the surface.
The stem was taken to the buffer where it was buffed with a blue buffing compound. This removed any additional oxidation along with the slight tooth chatter. It also dulled the bright silver of the stem logo.
To replace the silver, I used Silver Leaf Rub’nBuff. Before applying the fresh silver, I cleaned the logo with a cotton swab dipped in alcohol.
The silver leaf was applied and hand-buffed with a soft cotton cloth.
The resulting fresh silver was back to its original bright finish.
The pipe was given several coats of carnauba wax with the buffer.
The final step was another hand buff with the microfiber polishing cloth.
This beautiful Big Ben Classic Line 702 did not need very much work. I love the shape and the balance of this pipe. It fits my hand well and clenches like a dream. The contrast dye was well done at the factory and really accentuates the briar. THe bright nickel accent on the stem goes very nicely with the silver stem logo. This is just a classy comfortable pipe that I am glad to add to my personal collection. The dimensions of the Big Ben Classic Line 702 are:
Length: 4.74 in./ 120.40 mm.
Weight: 1.48 oz./ 41.96 g.
Bowl Height: 1.97 in./ 50.04 mm.
Chamber Depth: 1.57 in./ 39.88 mm.
Chamber Diameter: 0.68 in./ 17.27 mm.
Outside Diameter: 1.63 in./ 41.40 mm.
I do hope that you have found something here useful to your own pipe care, maintenance or restorations. If you like this sort of thing, please click the like and subscribe buttons. Thank you for reading the ramblings of an old pipe lover.
Loading…
Below are some photos of the finished Big Ben Classic Line 702.
I have thought, “a billiard is a billiard”. I’ll admit that it is not my favorite shape for a pipe. Sure it is a classic and probably the most popular of pipe shapes, with its cylindrical bowl perpendicular to a round shank. Symmetrically, the shank and bowl are proportional, giving the pipe a look of balanced elegance. This Thompson billiard has all of those characteristics though its shank is more stout or substantial than a typical billiard. This trait reminded me of a Peterson pipe, renowned for their more substantial shanks. Perhaps that is what drew me to this particular pipe. That and the fact that I was able to get a high quality British-made block meerschaum pipe for quite a reasonable bid. Below are some photos taken of the pipe prior to any work done.
The pipe was in great shape, sure there were a couple of chips on the stummel but that added character to the pipe. The bowl had a light cake built up which would have to be carefully reamed but the rim looked pristine. The stem appeared slightly pitted. I do not know if that was the intended look or if that was a product of aging. Either way it would be sanded and polished. The shank end appeared to be very clean and the stem had no tooth chatter. This looked like an easy restoration.
“My research on the origins of the Thompson Block Meerschaum name can be summarized like this: It was made with African Meerschaum from the Tanganyika Meerschaum Corporation (Tanganyika Meerschaum Corporation – Pipedia) and produced by Laxey Pipe Ltd. on the Isle of Man. This conclusion was deduced from comments made about Thompson from various pipe forum threads. Here is one example from Pipesmagazine.com (2012) among several that I found that demonstrates what I have found generally:
@tschiraldi – Thanks! It’s my understanding that the Thompson Meerschaum pipes were made by the Manx Meerschaum Company on the Isle of Mann (Great Britain). Back story is that my 3x Great Grandfather was Sir Hall Caine who was a famous author known as the Manx Man and lived on the Isle of Mann. I thought it would be cool to own a pipe made by the Manx Meerschaum Company which was made on the Isle of Mann. Just thought it was interesting.
“It’s my understanding…” is the key idea. I found several comments with the assumption that Thompson Block Meerschaum pipes were produced by ‘Manx’ or ‘Laxey’ – the same producer. When doing the research on James’ first commission, I discovered that the Laxey Co. produced the Peterson’s Meerschaum. Here is the Pipedia information on Laxey Pipes Ltd.:
Laxey Pipes Ltd. resided in a historical 19th century four-storey Man stone building at The Quay, Old Laxey, Isle of Man, which thankfully has been preserved.
The company specialized in the production of meerschaum pipes using the Meerschaum mined by the Tanganyika Meerschaum Corporation in the Amboseli basin in Tanganyika (since 1964 part of the United Republic of Tanzania).
Please note: you may often find names like “Manx Pipes Ltd.”, “Man Pipe Co.” and others more, but there is no indication of another Isle of Man pipe producer other than Laxey Pipe Ltd. at any time!
Laxey Pipes Ltd. marketed their own brands like “Manxpipe”, “Manxman”, “Manxland” e.c. Names like “John Bull”, “White Knight” (unwaxed), “Domino” (black, or lined) indicated some shapes / colours of Laxey’s own series. The stems either showed the astronomical sign for “male” or “man” (circle + arrow), or the crest of the Isle of Man, the 3-legged X in a circle. Manxpipes and Laxey’s other brands were available through pipe retailers in general, but also were sold (mainly) to tourists through their own shop in Laxey.
Furthermore Laxey Pipes Ltd. manufactured the meer bowls for Peterson, Barling, Nørding and others from the later 1960’s until 2001. Man Pipe e.g. was a brand distributed by Comoy’s. The bowls usually showed no nomenclature indicating the orderer. “Genuine Block Meerschaum” was engraved frequently. Often, just the stems were different, while bowls were the same.
Supply of meerschaum from East Africa ran out (Kenya / Tanzania exhausted, Somalia inaccessible), and thus the last Laxey meers were supplied to trade in May, 2001. Laxey Pipes Ltd. tried to survive continuing with briar pipes – mainly in the Danish style -, but to no success. It closed down business in July 2002.
In this article from Pipedia, there is no direct mention of Thompson Block Meerschaum however, it was left open that there were other brands produced from the 1960s until 2001 beyond those mentioned – Peterson, Barling, and Nording.
I tend to agree with the sentiments of the Thompson Block Meerschaum pipes being produced by Laxey. Why? First, with the COM being ‘GT. Britain’ leaves few options (if any) of a Meer block being produced other than on the Isle of Man. Secondly, the Thompson on the worktable resembles other products of Laxey with the smokestack coloring and the usual stamping: “Genuine Block Meerschaum”. Here are examples of Laxey pipes including our Thompson.” (Diving into the Provenance of a Thompson Genuine Block Meerschaum GT. Britain Brandy – The Pipe Steward)
Thank you Dal for doing a bang-up job on the research for the Thompson Genuine Block Meerschaum pipes.
The Restoration
As usual the pipe received a cleaned denim piece for protecting it and the workbench.
The threads cut into the meerschaum were far from smooth but they looked remarkably clean. I figured after a thorough cleaning I would use a light coating of petroleum jelly to ease the threading of the tenon.
Below you can see the finish of the stem. It almost had a sandblast-like fishing, not unattractive but I thought a gloss would look more elegant.
The reaming was done with only the Smokingpipes Low Country reamer and the General triangular scraper.
The tobacco chamber was sanded with 320 sandpaper wrapped around a wood dowel.
The stummel was scrubbed with Murphy Oil Soap and a nylon brush. The soap was rinsed with warm water and dried with a cotton hand towel. It was set in a pipe stand and allowed to dry for an hour after the scrub.
I did not want to round the edges of the stem nor did I was to handle the stummel until it had been given a fresh beeswax coating so I used a wood block with a hole drilled for sanding.
The stem was sanded with a series of sanding sponges from 320-1500 grits. Between sponges the stem was rubbed with mineral oil and wiped with a paper towel.
After an hour I started prepping the beeswax. I use a water bath on the stovetop to heat the beeswax. The hot water keeps the wax liquified for a longer period of time and I don’t have to worry about overheating the wax as it never gets above 212F or 100 c.
The stummel was heated using a heat gun. The metal tin in the photo below is used to catch wax that drips from the stummel as it is applied with a small paintbrush.
The tobacco chamber was plugged using a cork and the shank plugged with the stem. The hot beeswax was applied with several coats and the stummel rotated around the heat gun constantly. Upon finishing, I wiped the stummel with a clean dry paper towel. The stummel was then allowed to cool over about 15 minutes.
Once cooled, I wrapped the shank in masking tape to protect it from sanding. I continued with the series of sanding sponges from 2000-3500 grits with oiling and wiping as above.
The stem was then micro-meshed with pads 4000-12000. I rubbed the stem with Obsidian Oil between pads and wiped with a paper towel.
The stem was then buffed with a blue buffing compound.
After the remaining buffing compound had been wiped from the pipe and the tape removed the pipe received several coats of carnauba wax on the stem and a light buffing of the stummel.
The final step was another hand buff with the microfiber polishing cloth.
This lovely Thompson Block Meerschaum Billiard is a fine example of Tanganyika African meerschaum. The mineral does not have the same fine grain and brilliant white of the Turkish meerschaum but it does have a character all its own, almost like a rustic version of the Turkish mineral. The fumed rim gives way to a buttery cream color which will change with use and form a truly individual pipe. The stem started out with a more rough texture. This was sanded and finished to a high gloss black which stands out against the light meerschaum. The dimensions of the Thompson Block Meerschaum Billiard are:
Length: 6.00 in./ 152.40 mm.
Weight: 1.72 oz./ 48.76 g.
Bowl Height: 1.90 in./ 48.26 mm.
Chamber Depth: 1.54 in./ 39.12 mm.
Chamber Diameter: 0.74 in./ 18.80 mm.
Outside Diameter: 1.44 in./ 36.58 mm.
I do hope that you have found something here useful to your own pipe care, maintenance or restorations. If you like this sort of thing, please click the like and subscribe buttons. Thank you for reading the ramblings of an old pipe lover.
Loading…
Below are some photos of the finished Thompson Block Meerschaum Billiard.

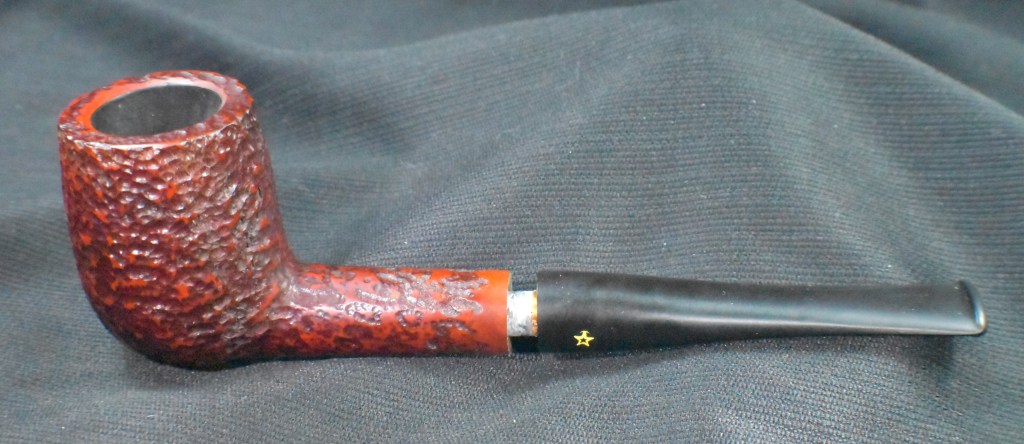
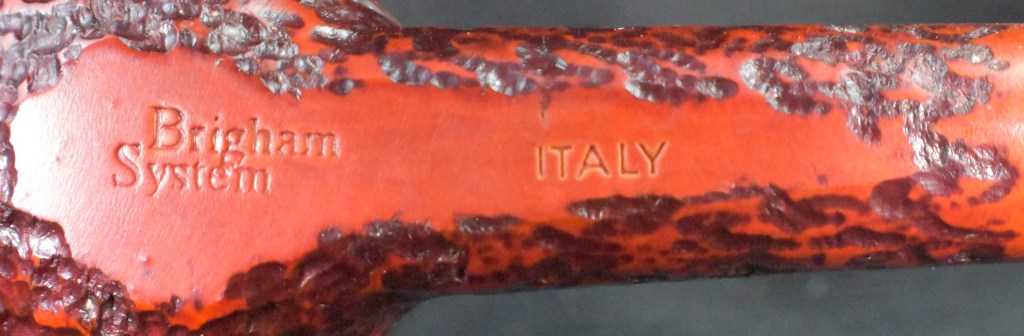

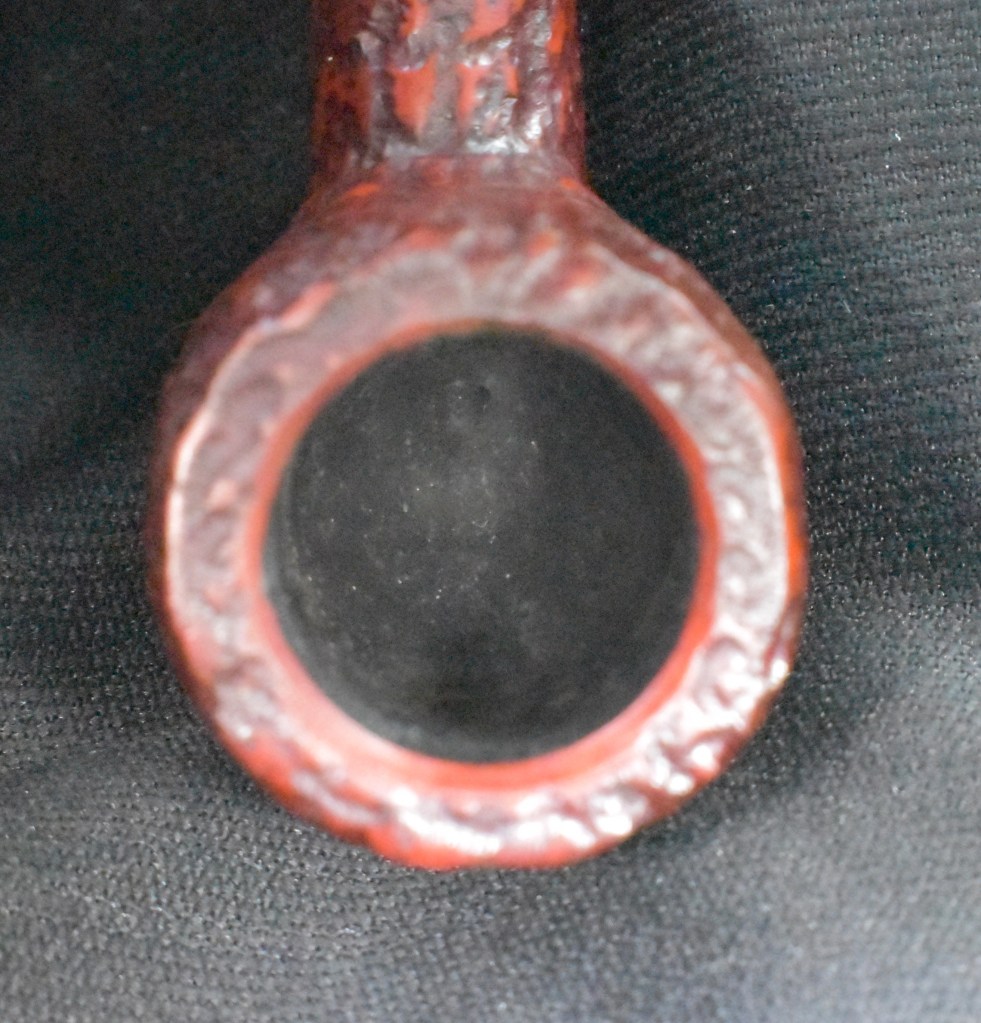
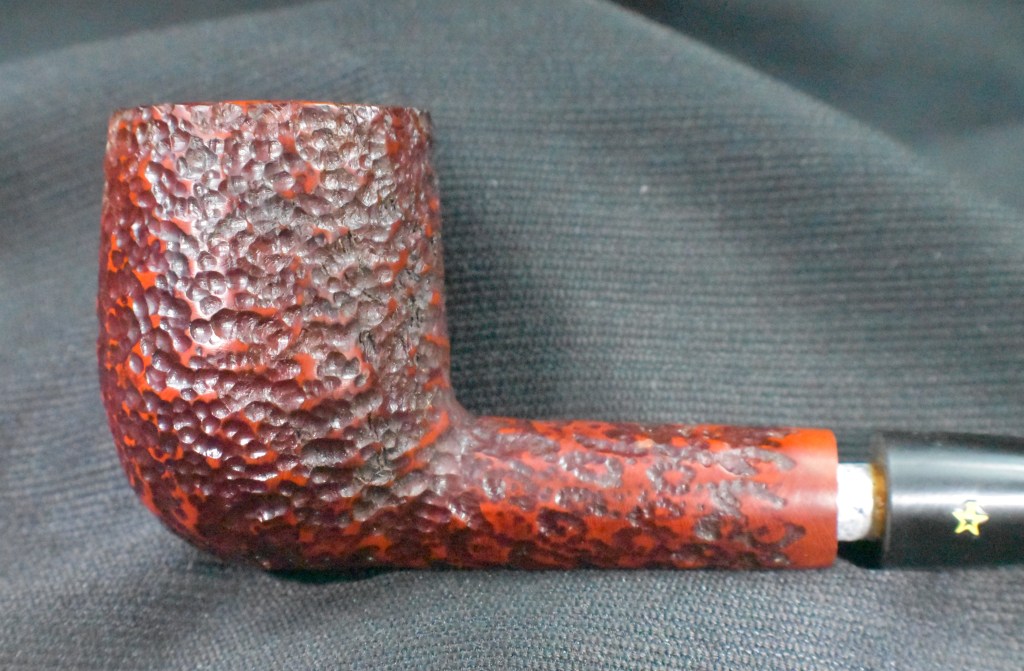

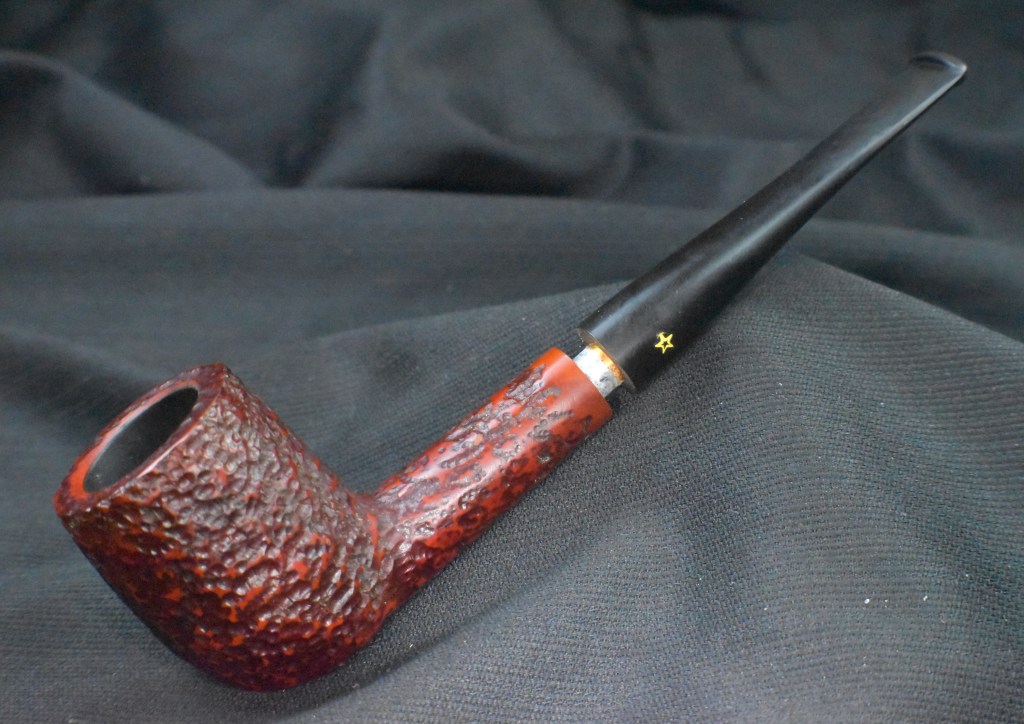
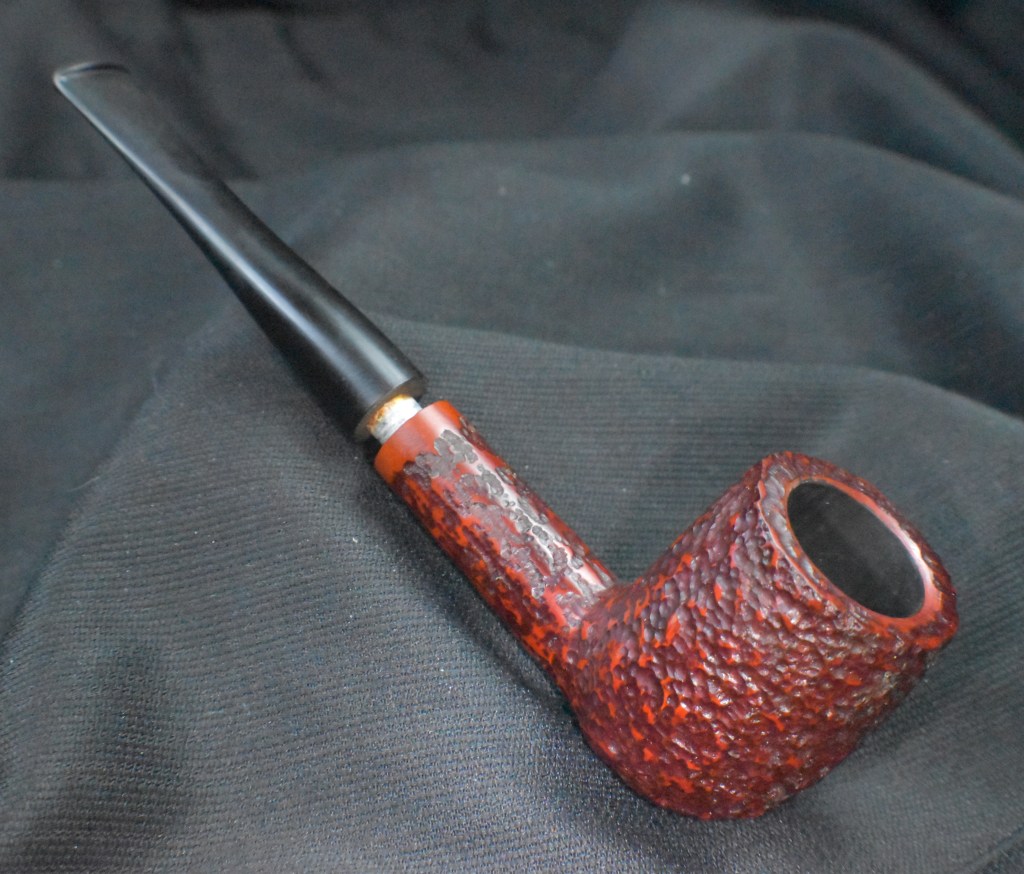
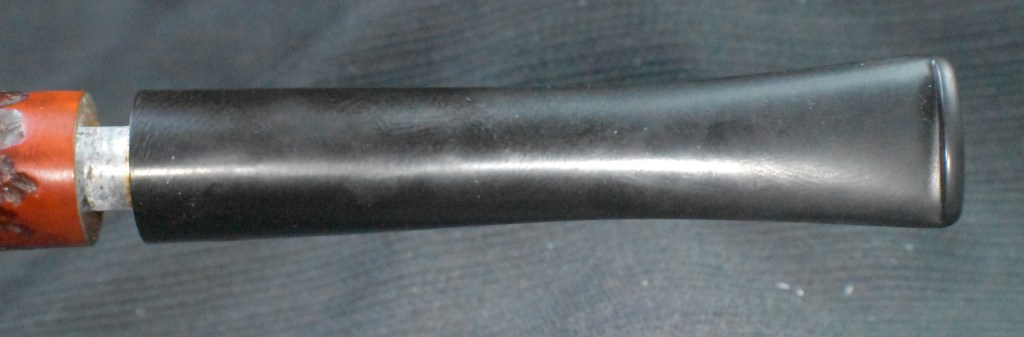
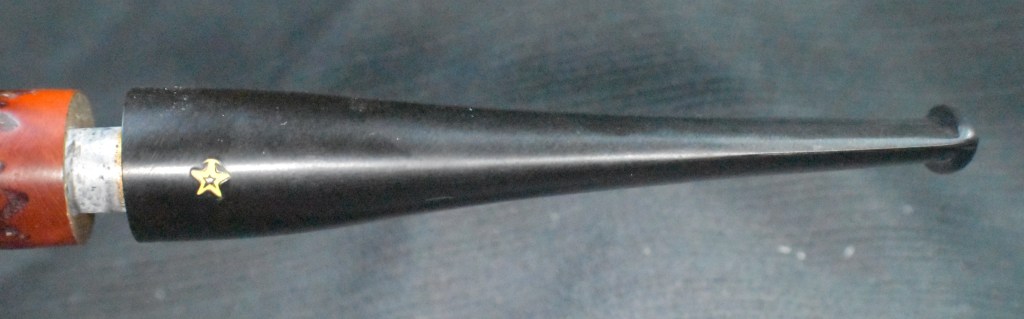
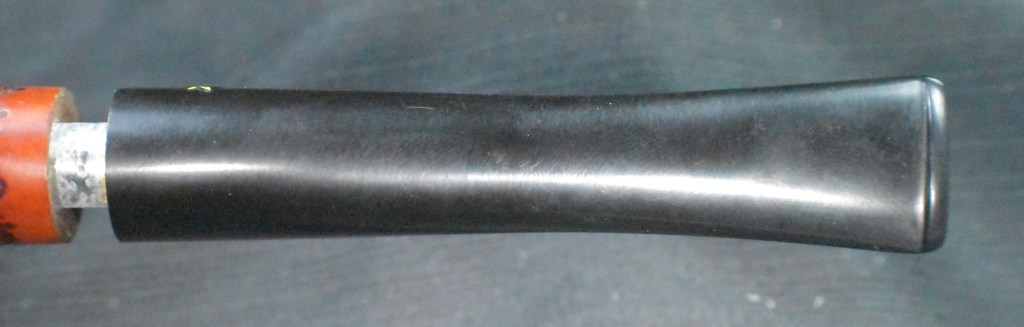
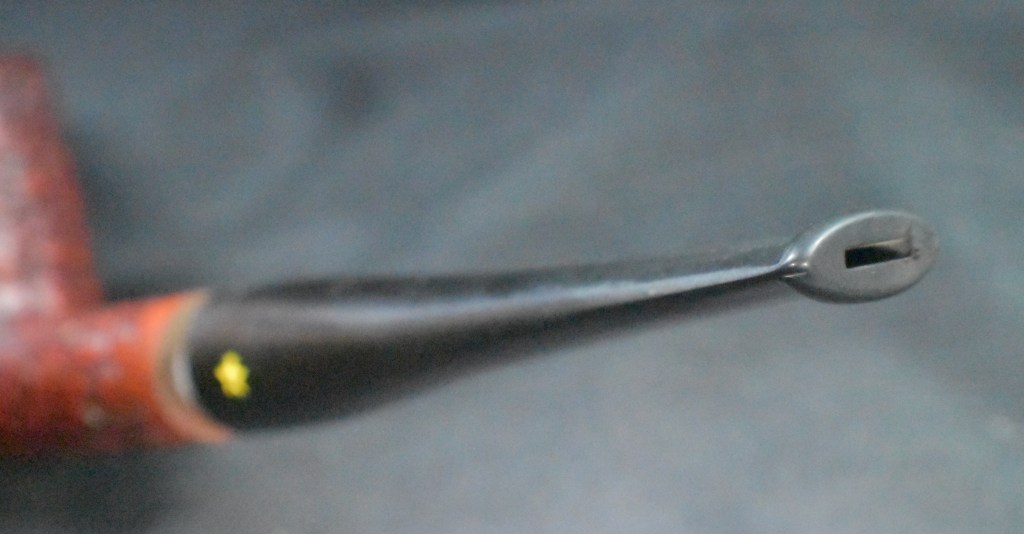
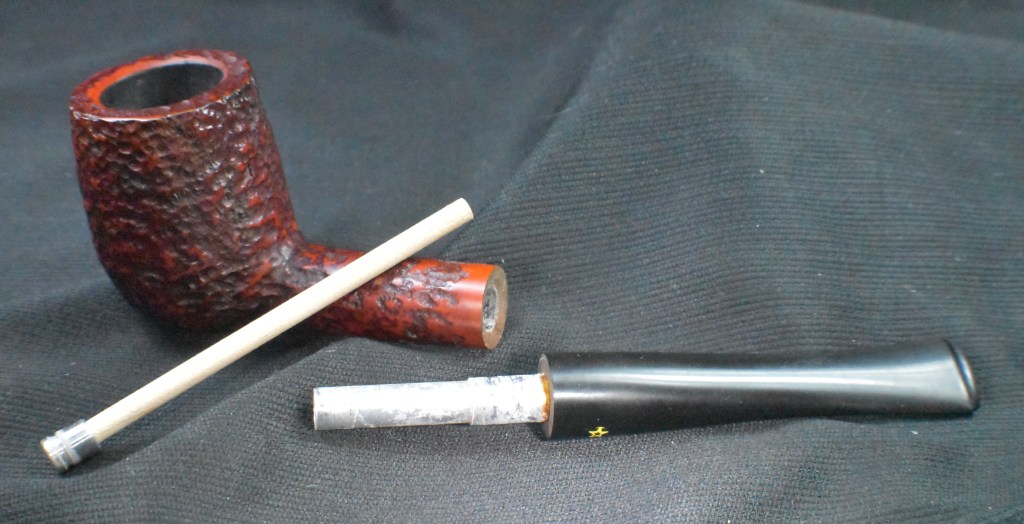

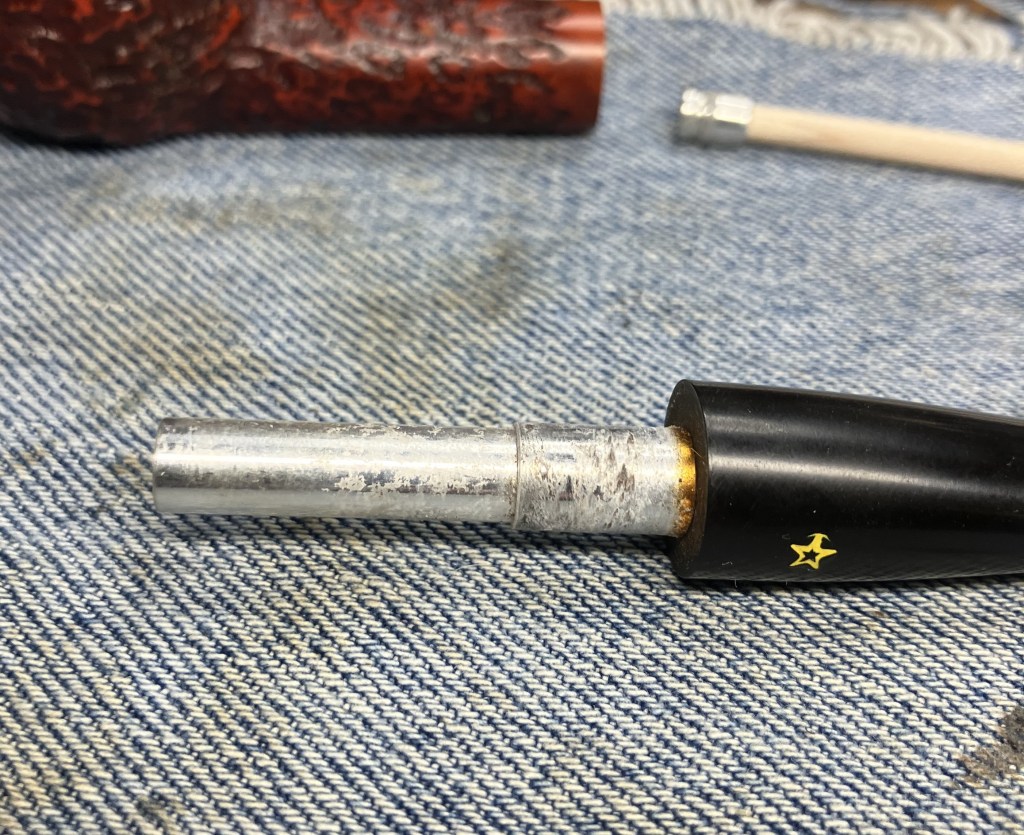

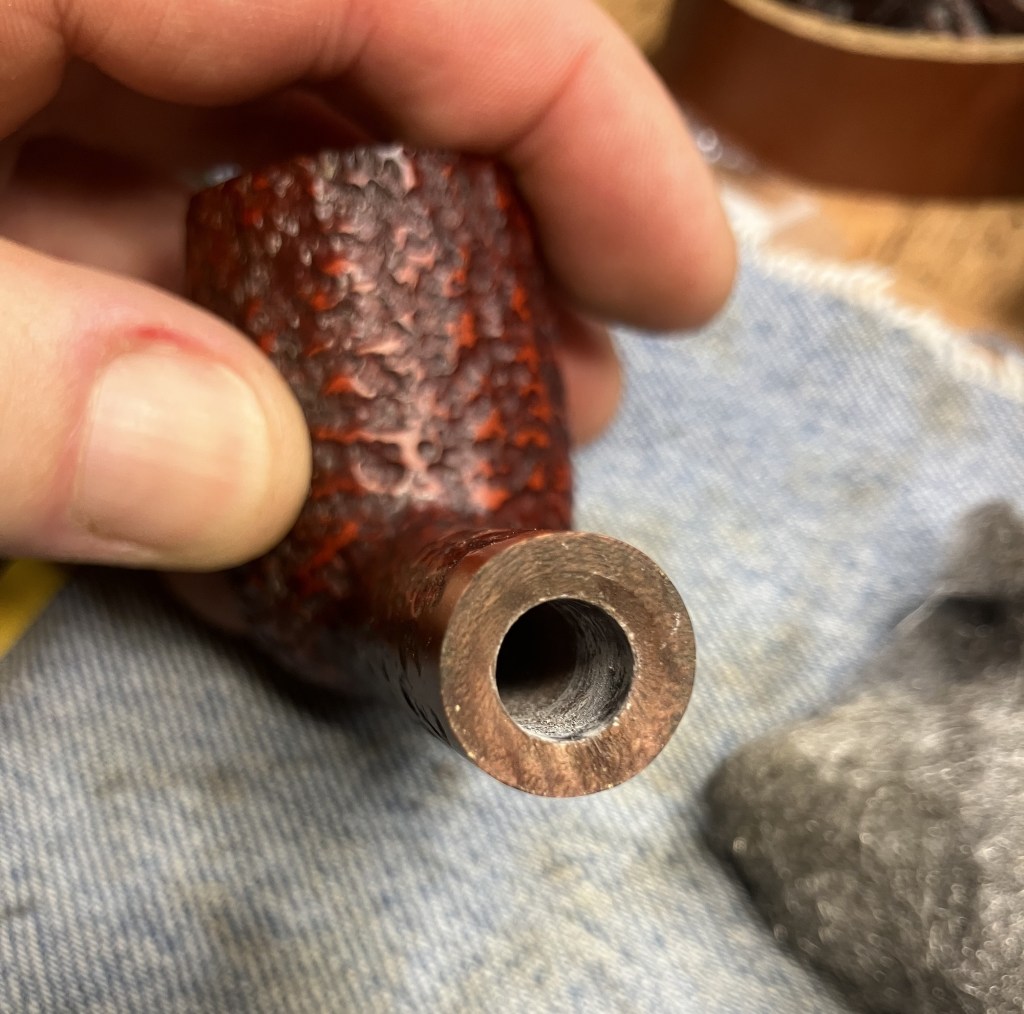

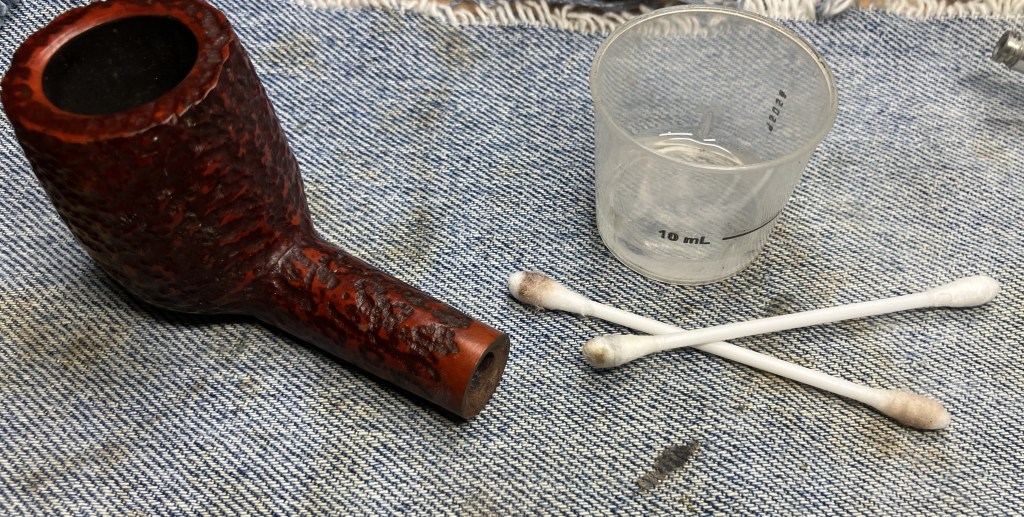
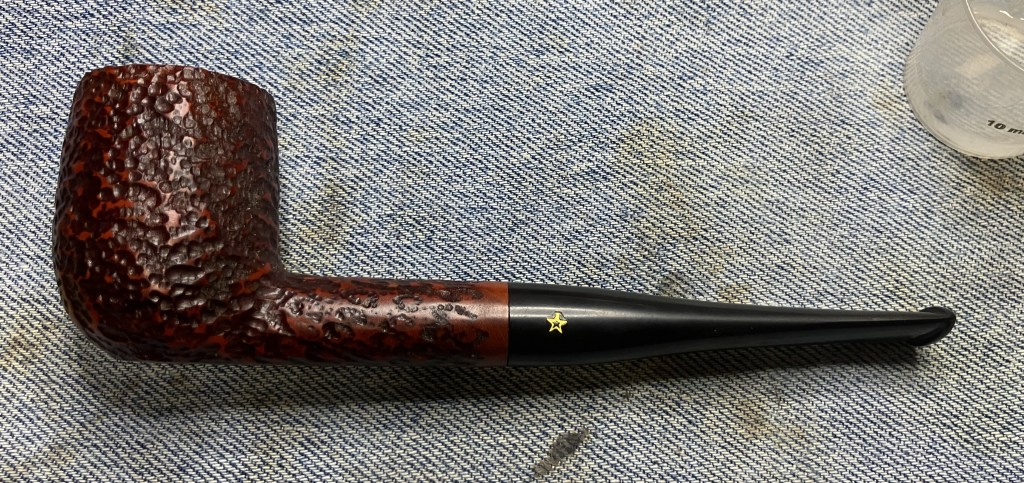
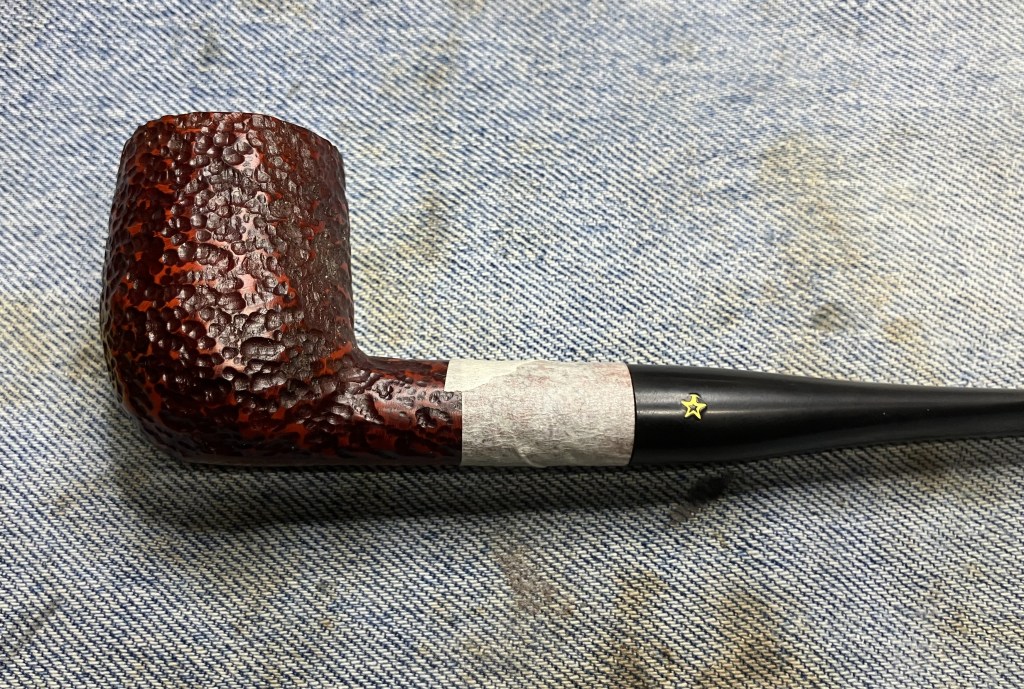
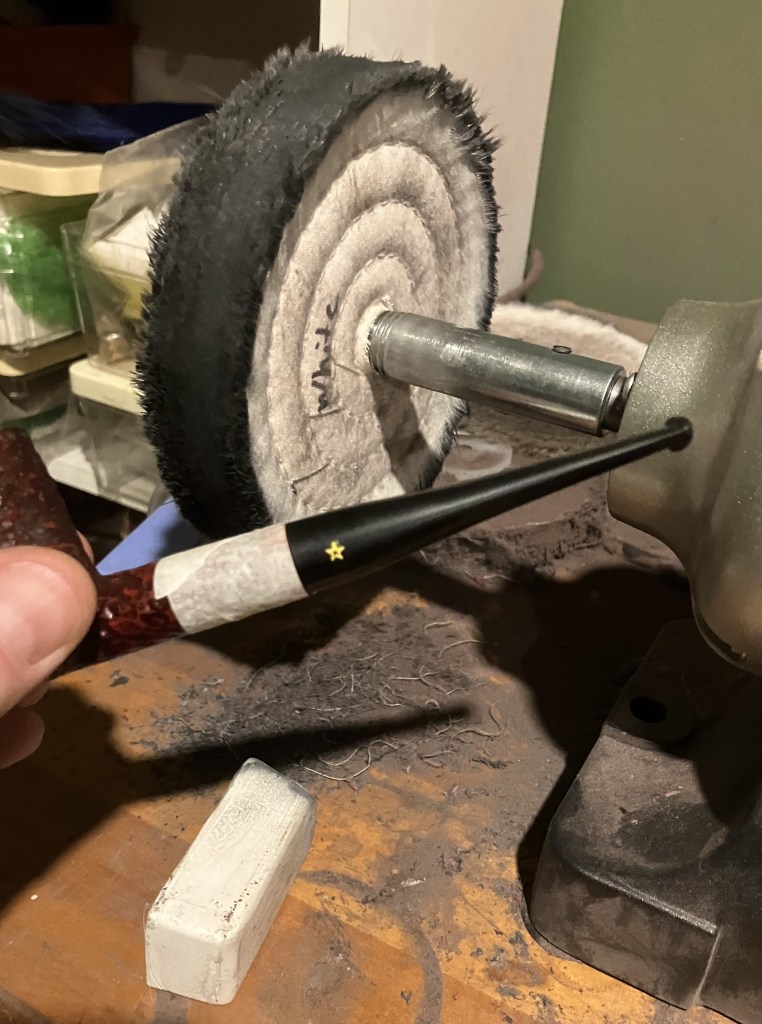
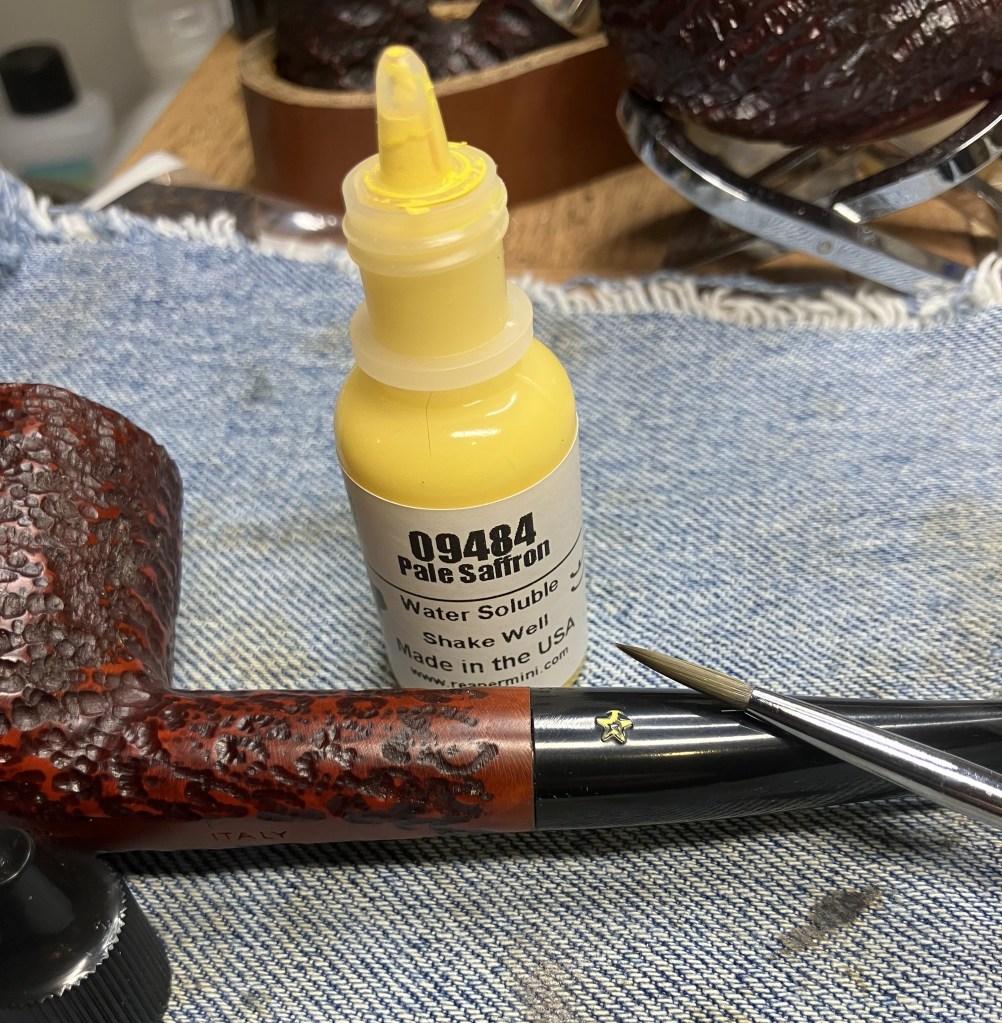
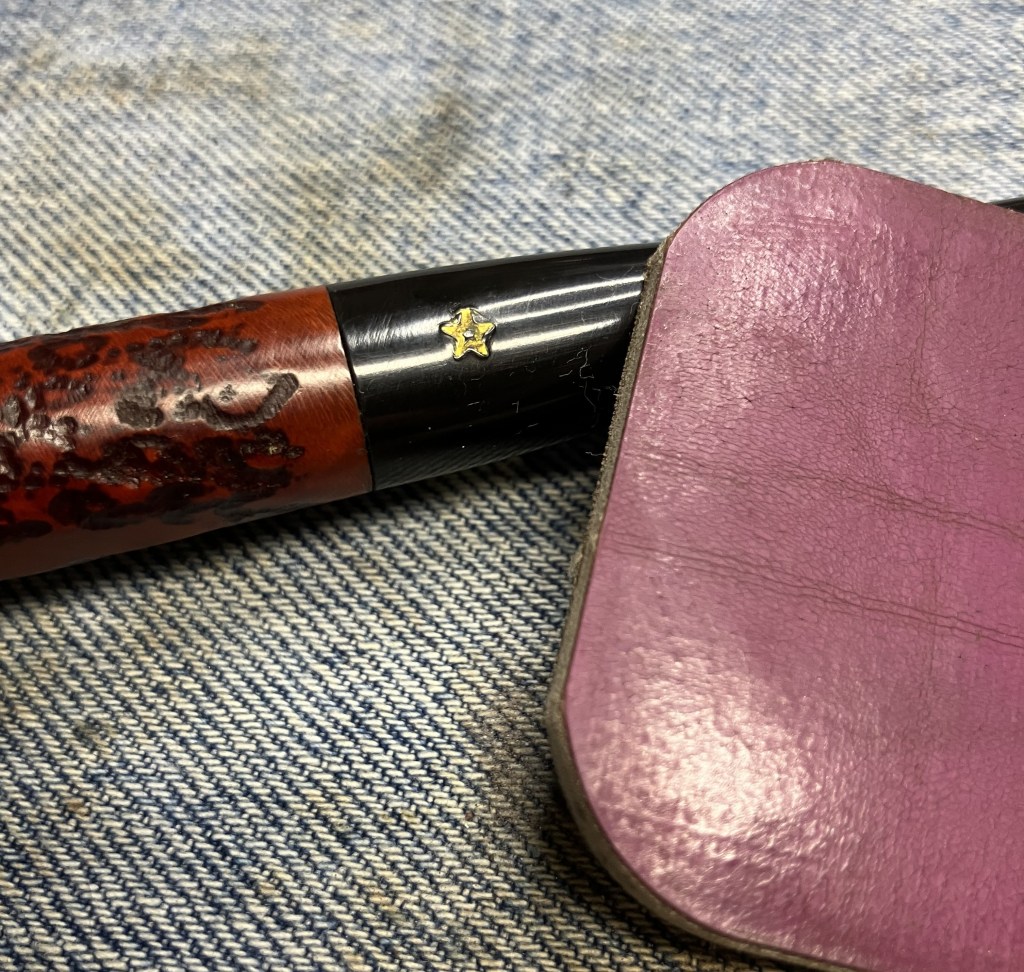
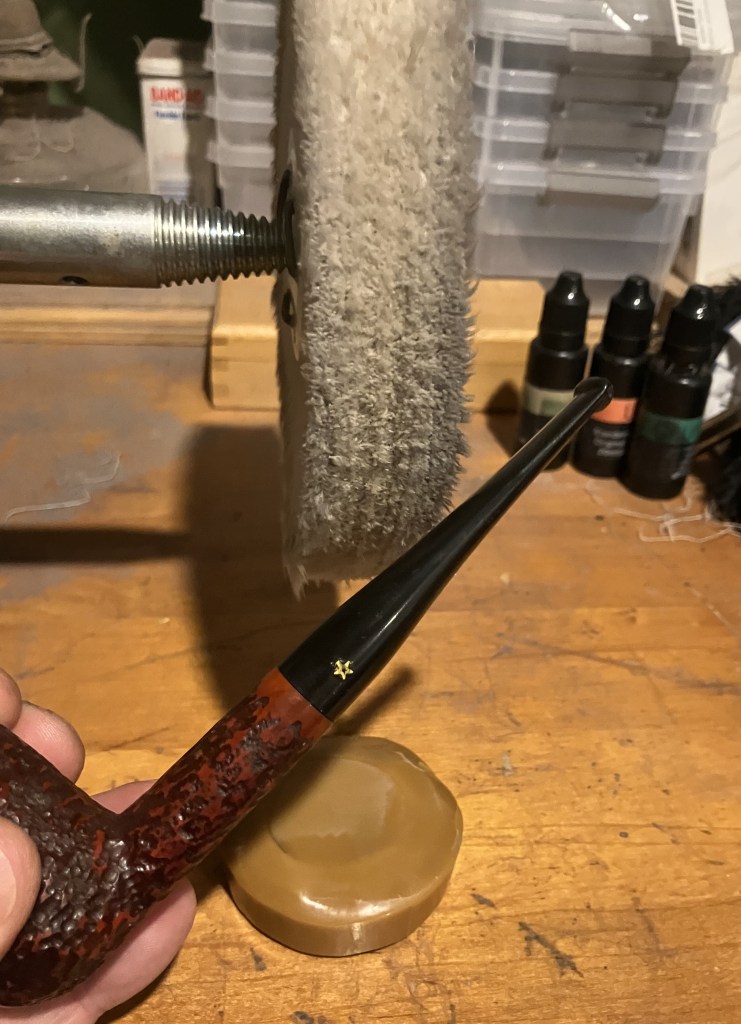
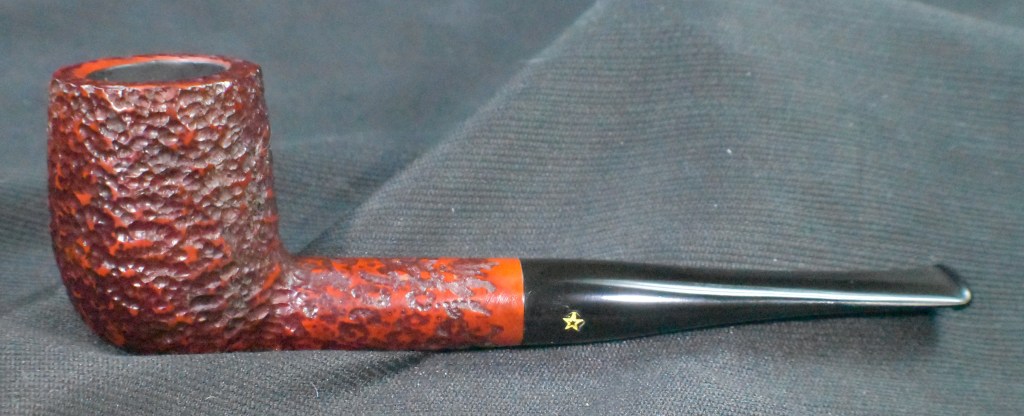
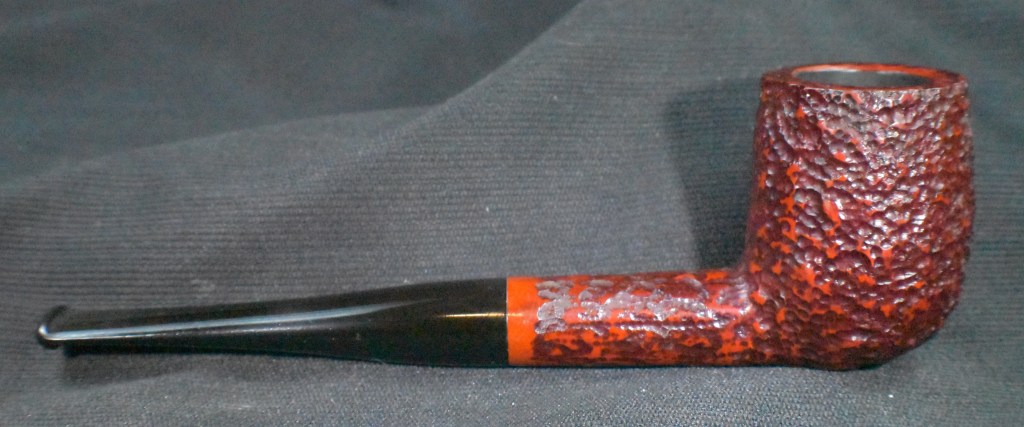
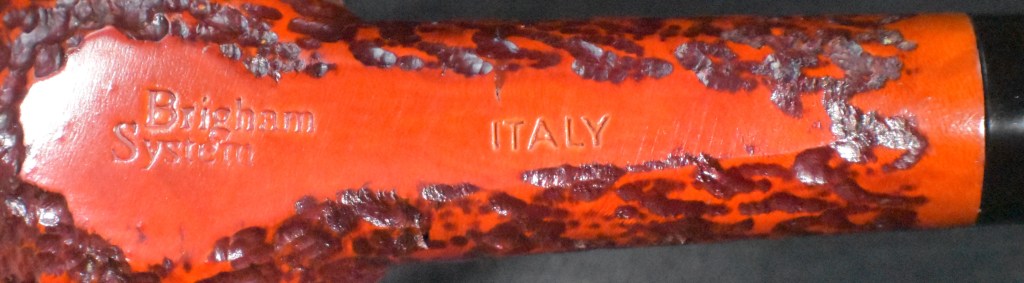
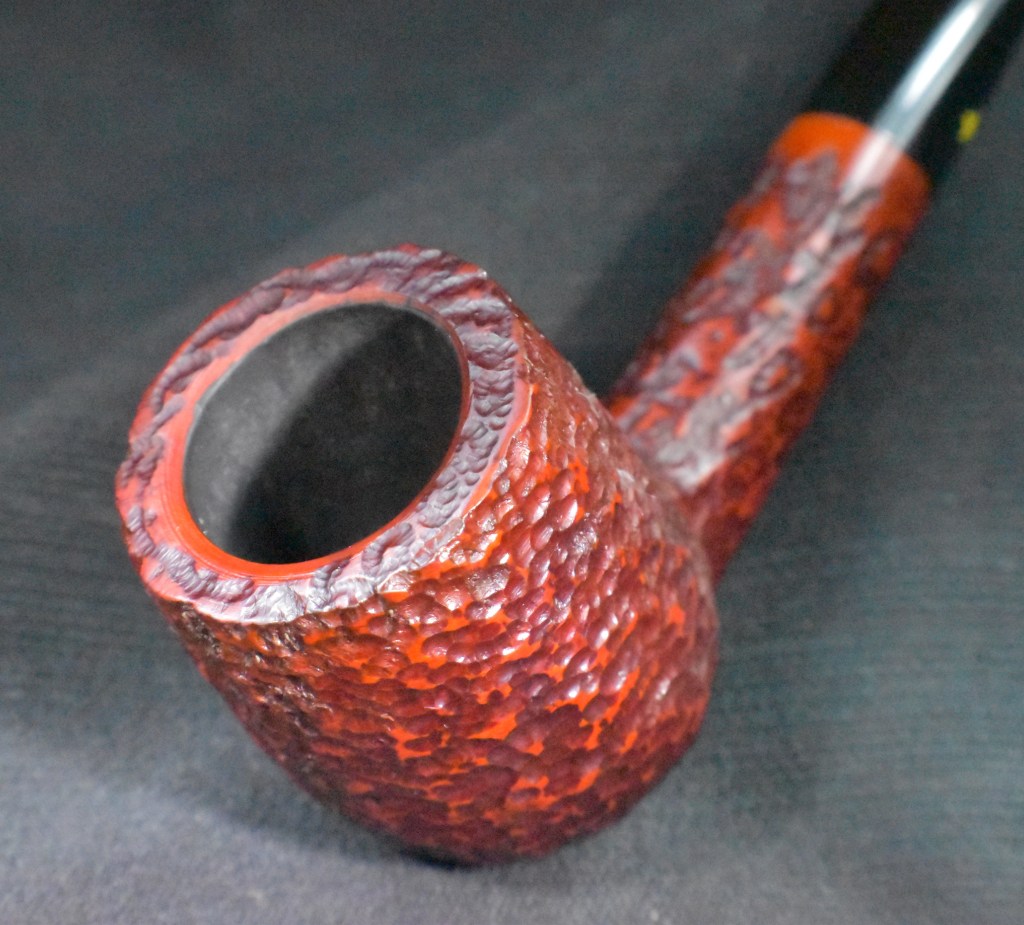

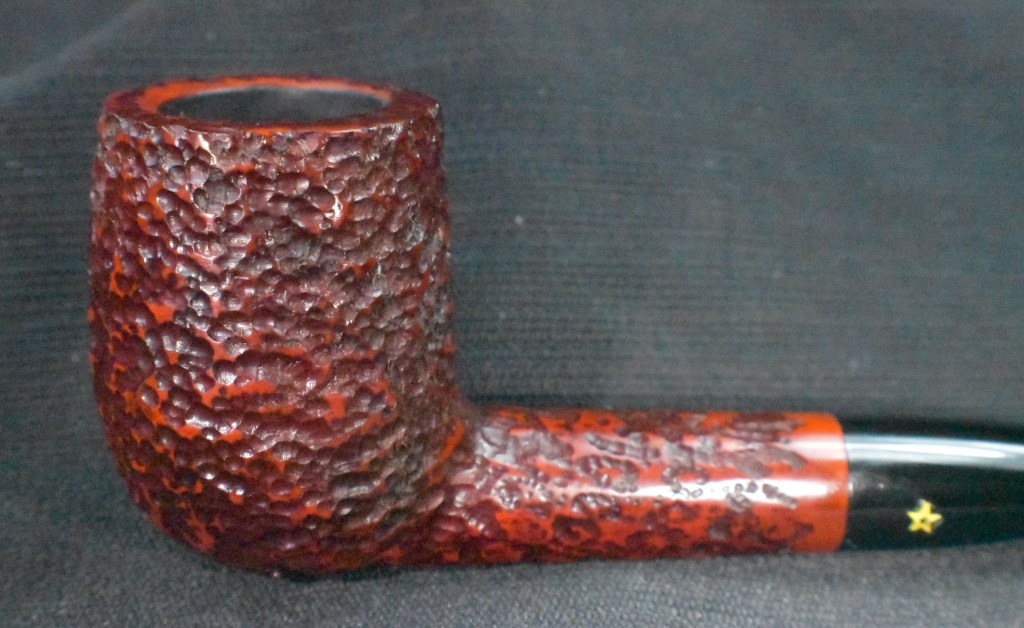
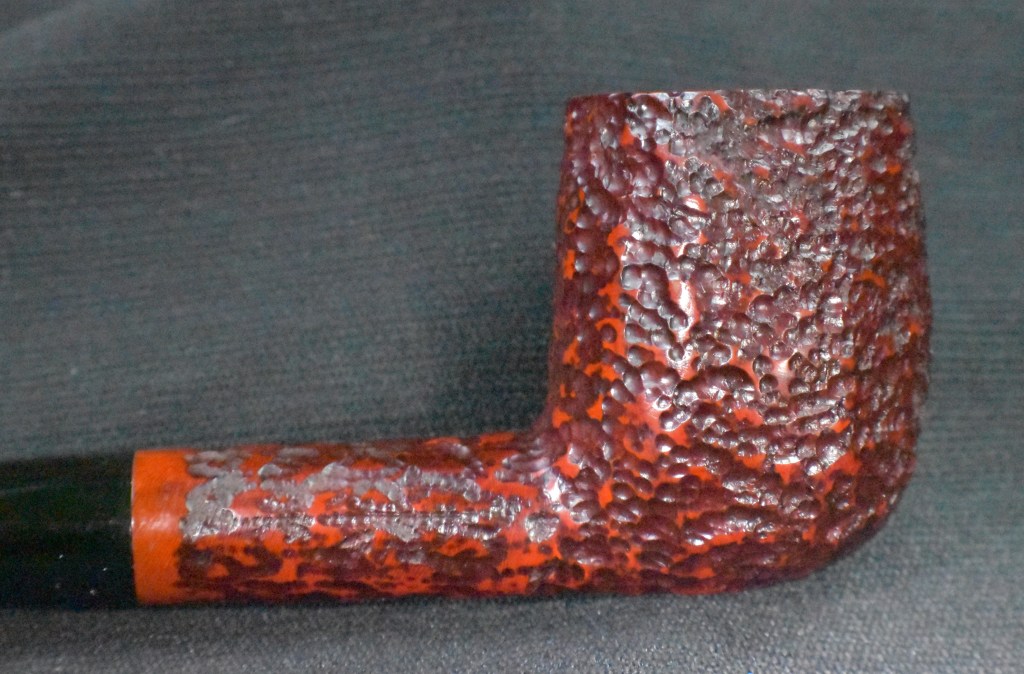
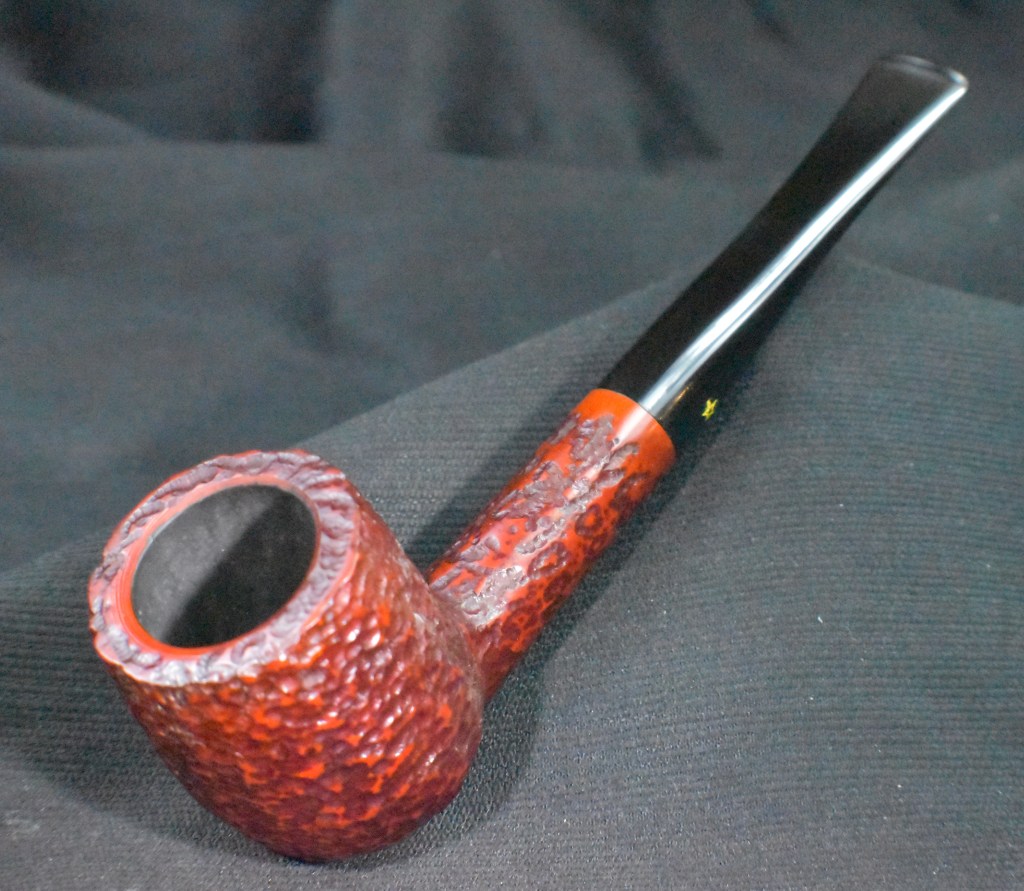
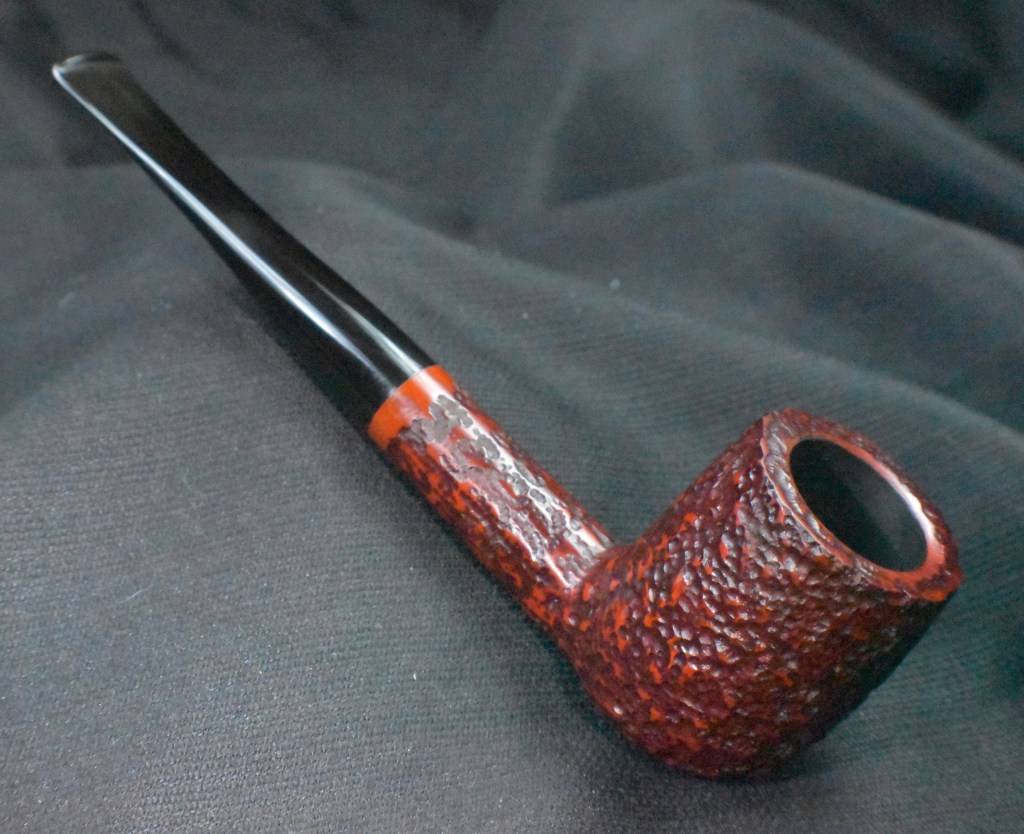

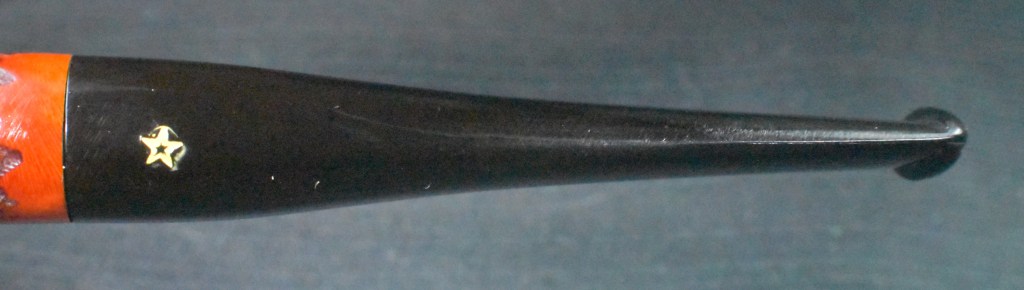

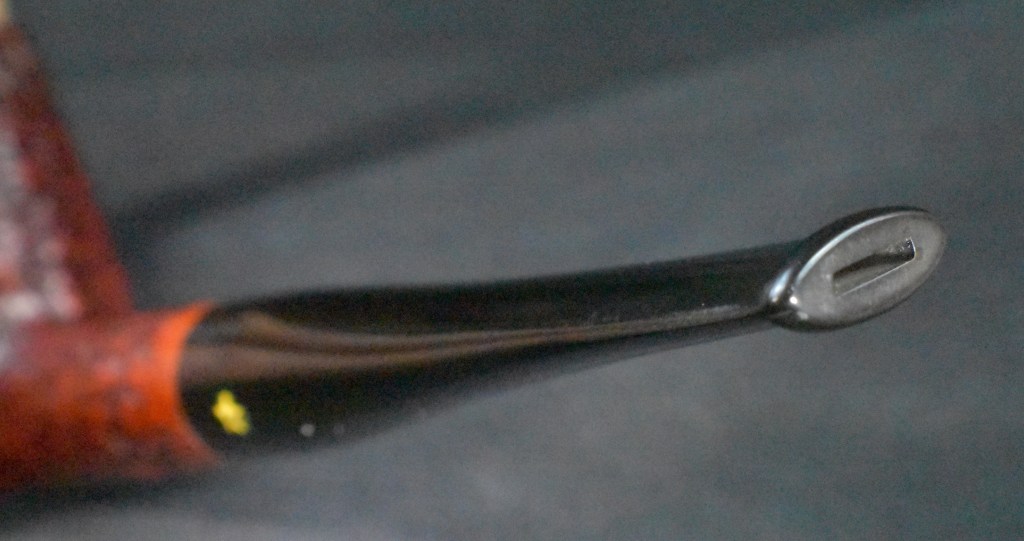


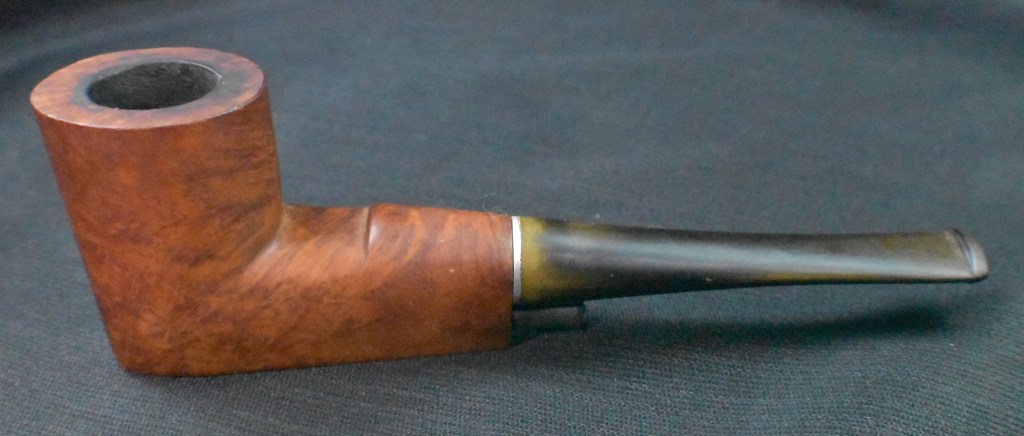

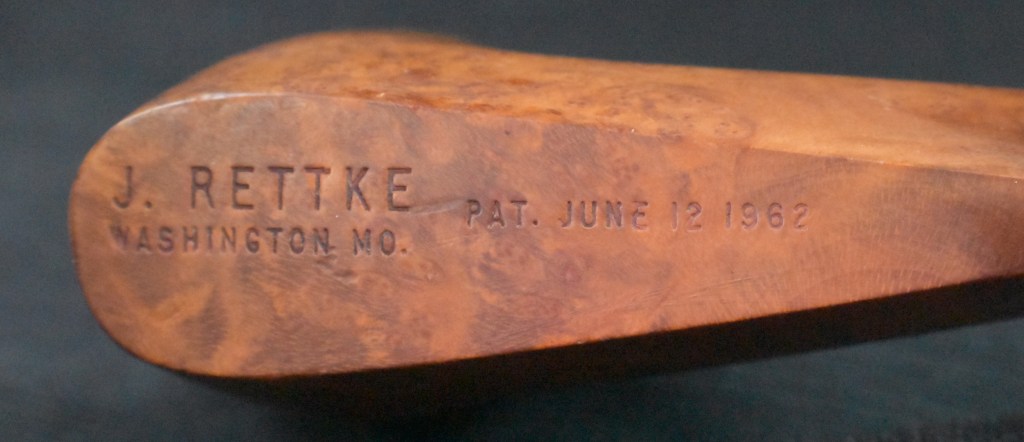

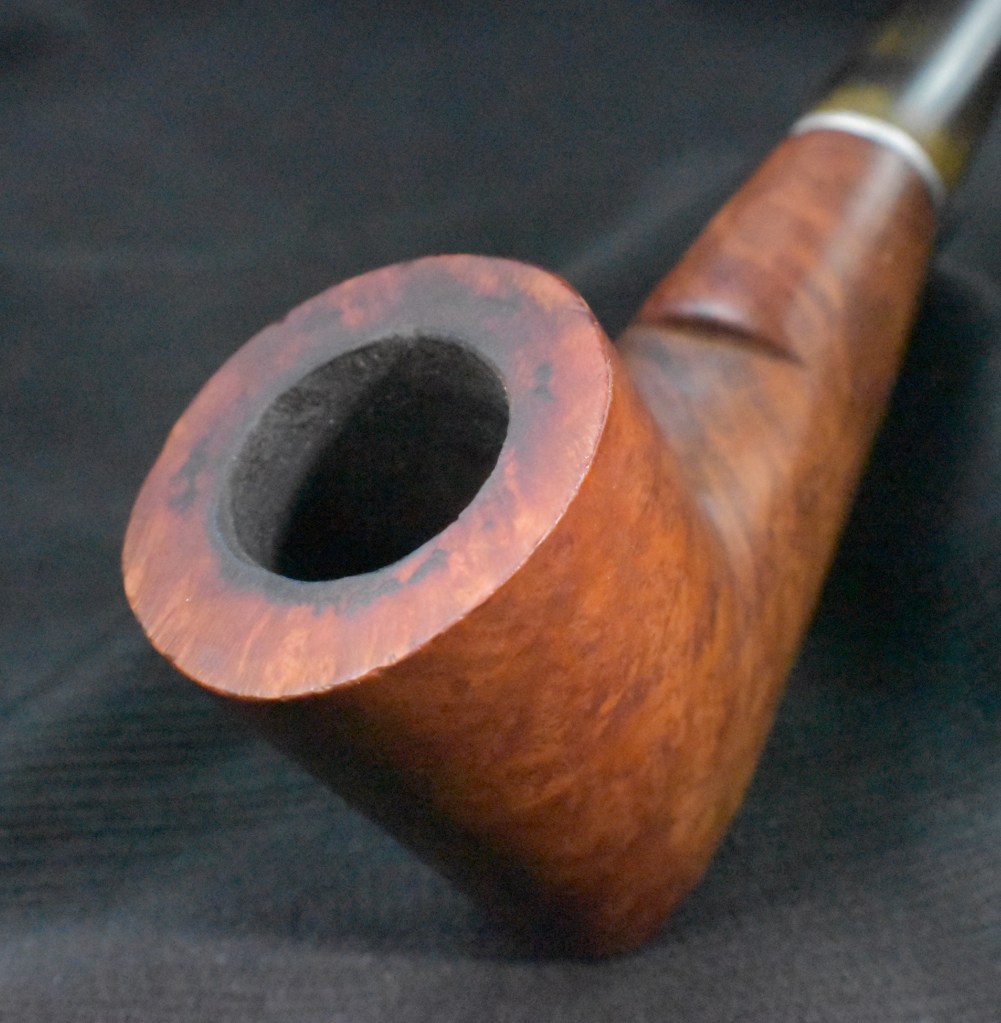
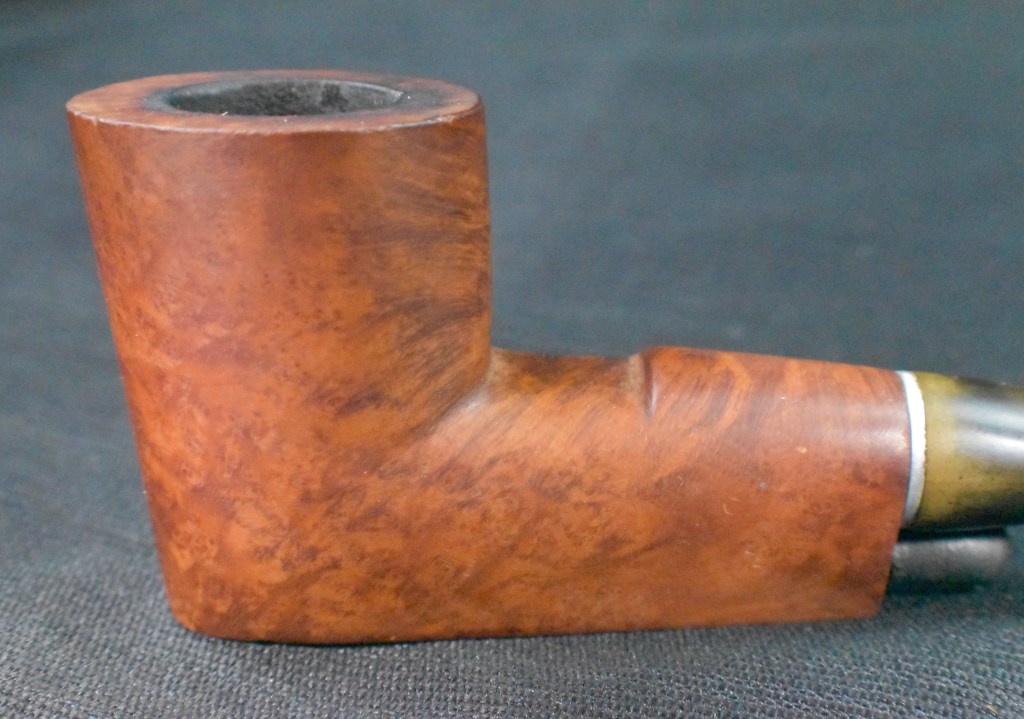

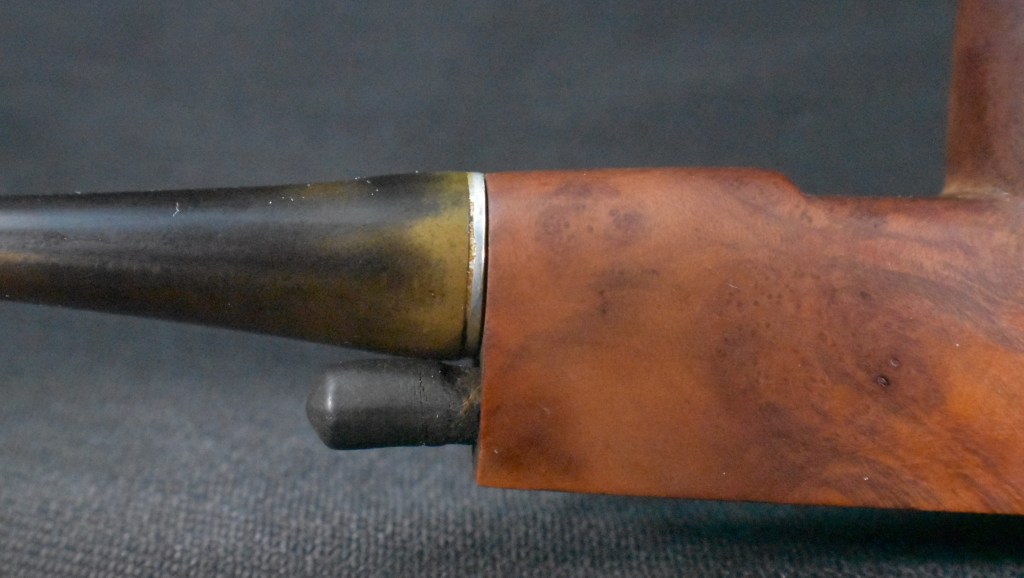
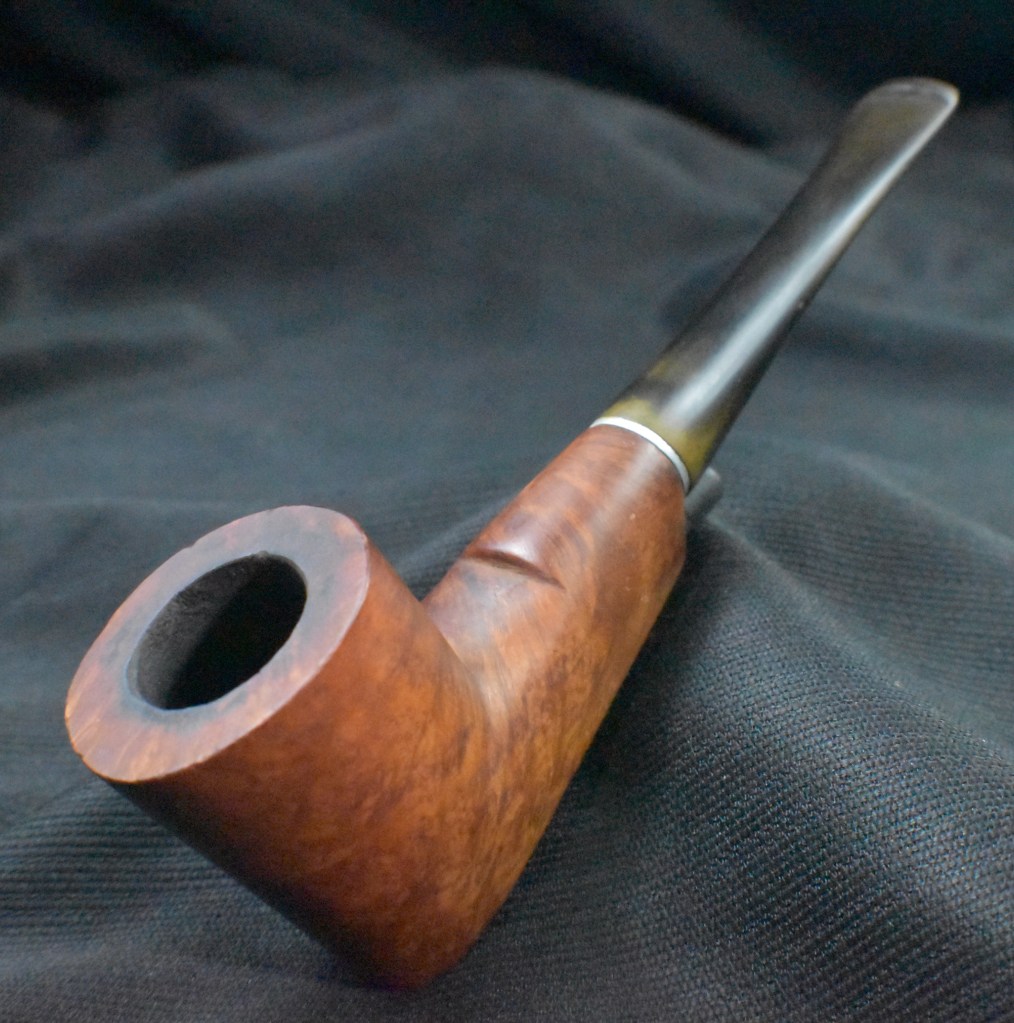


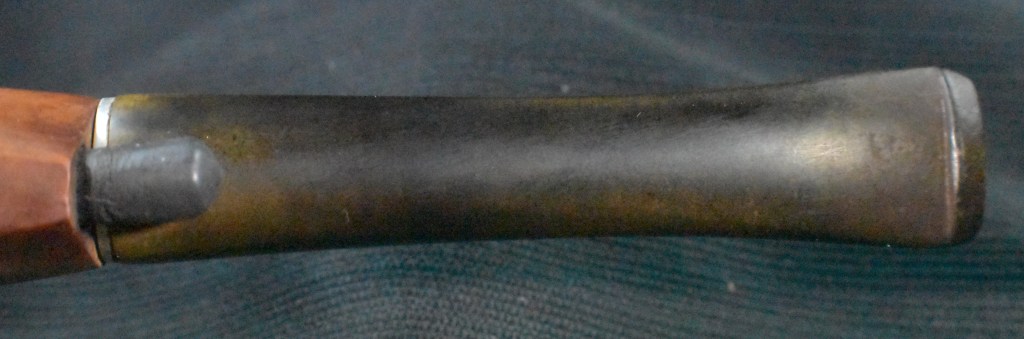
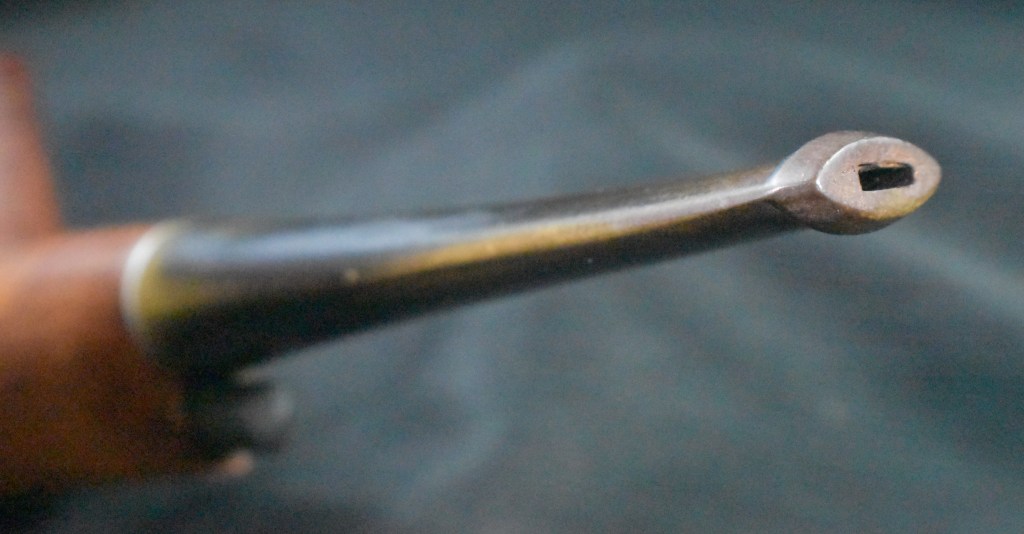
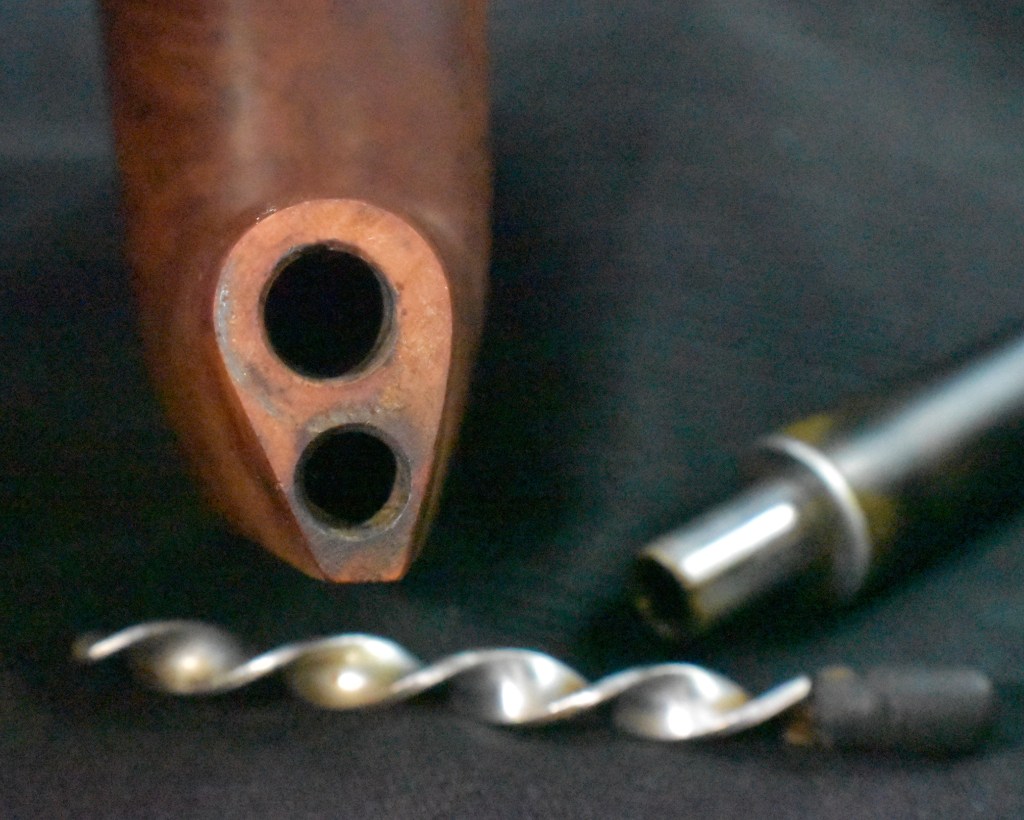
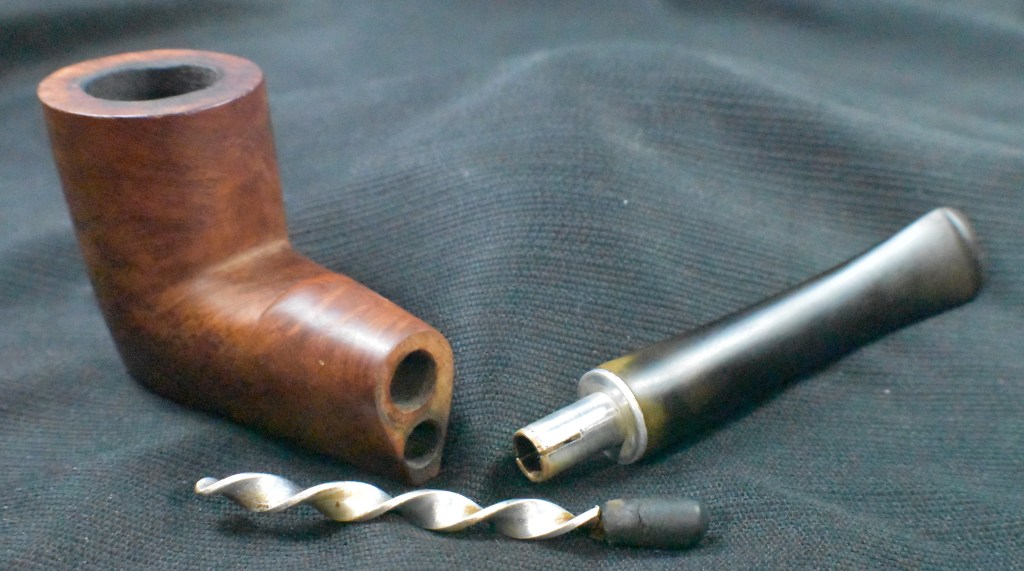
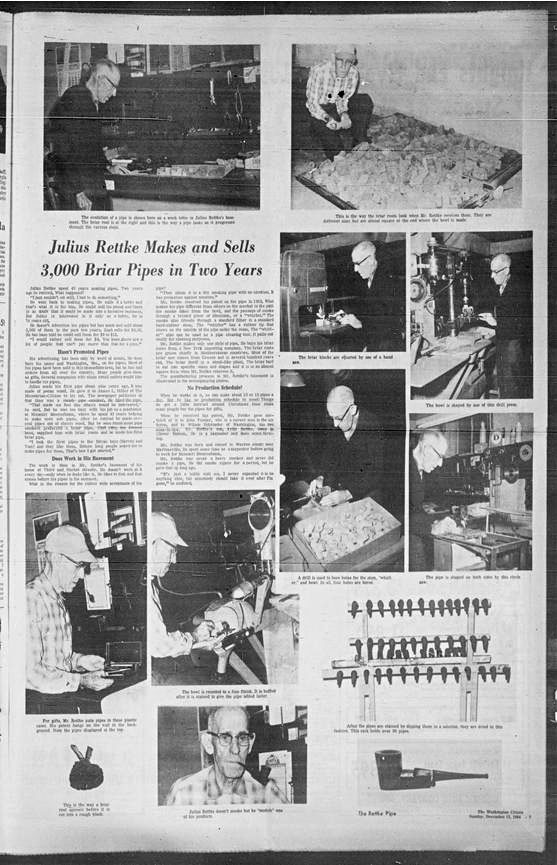
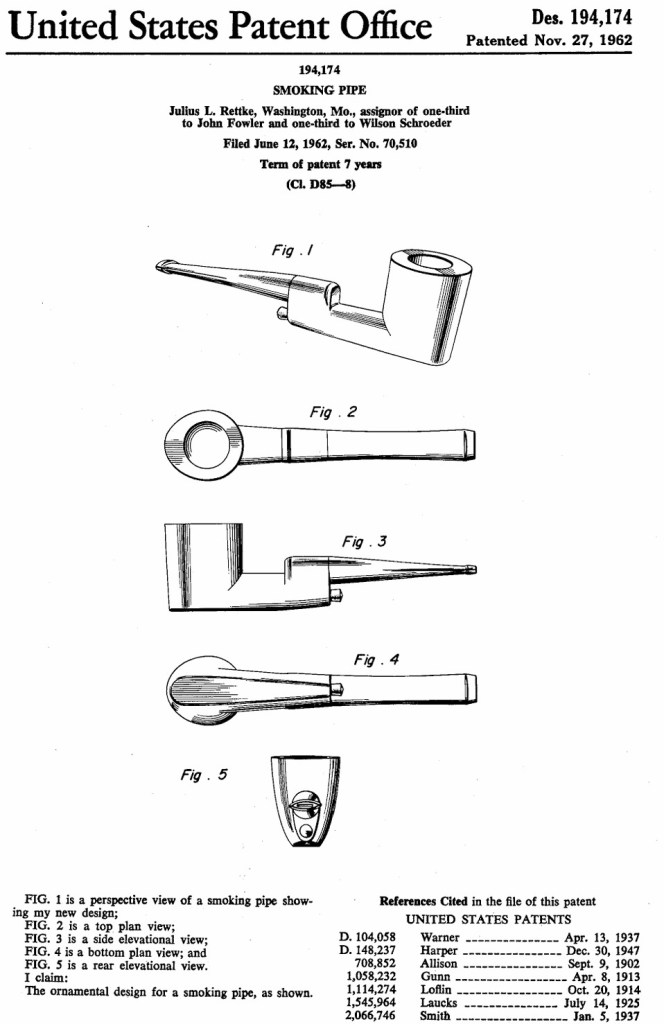
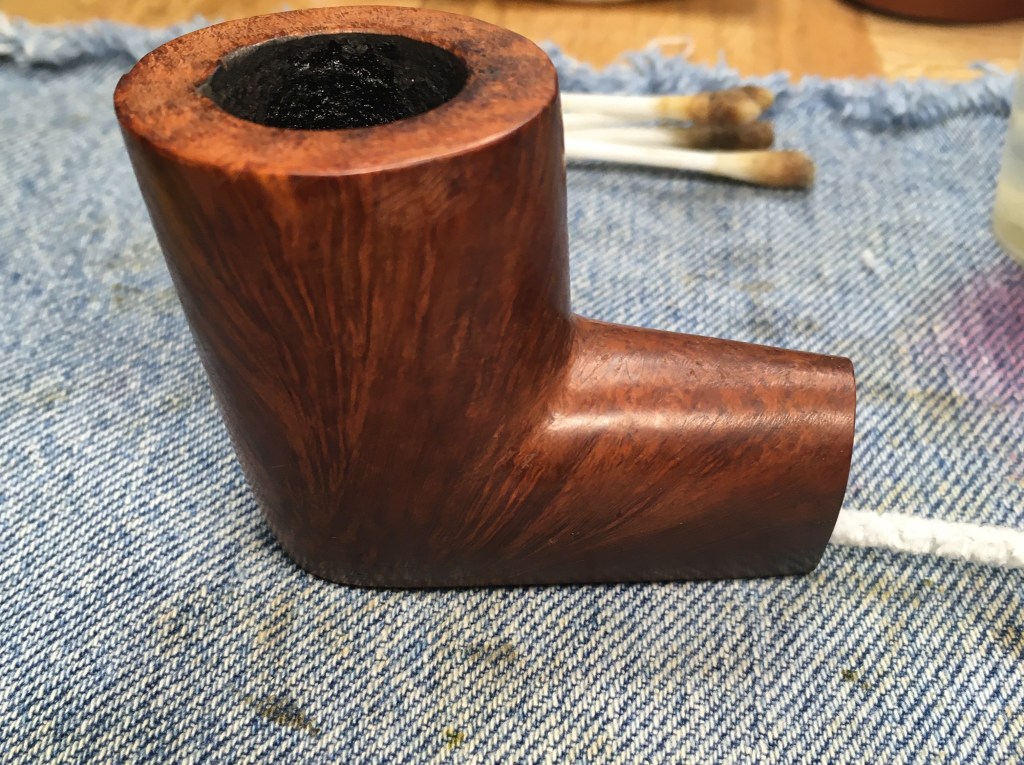
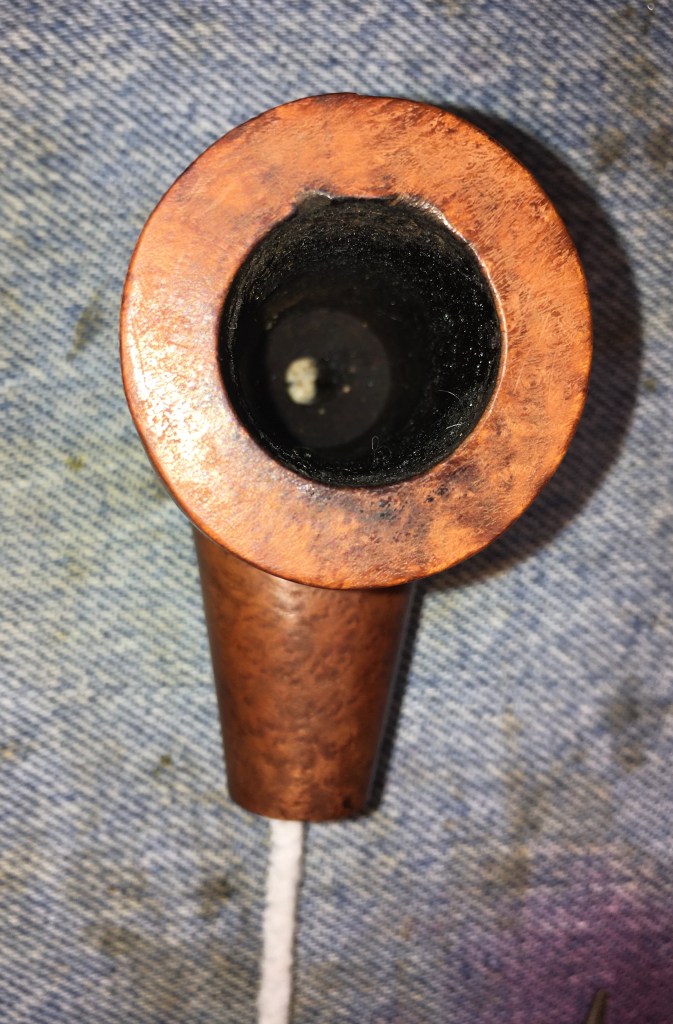
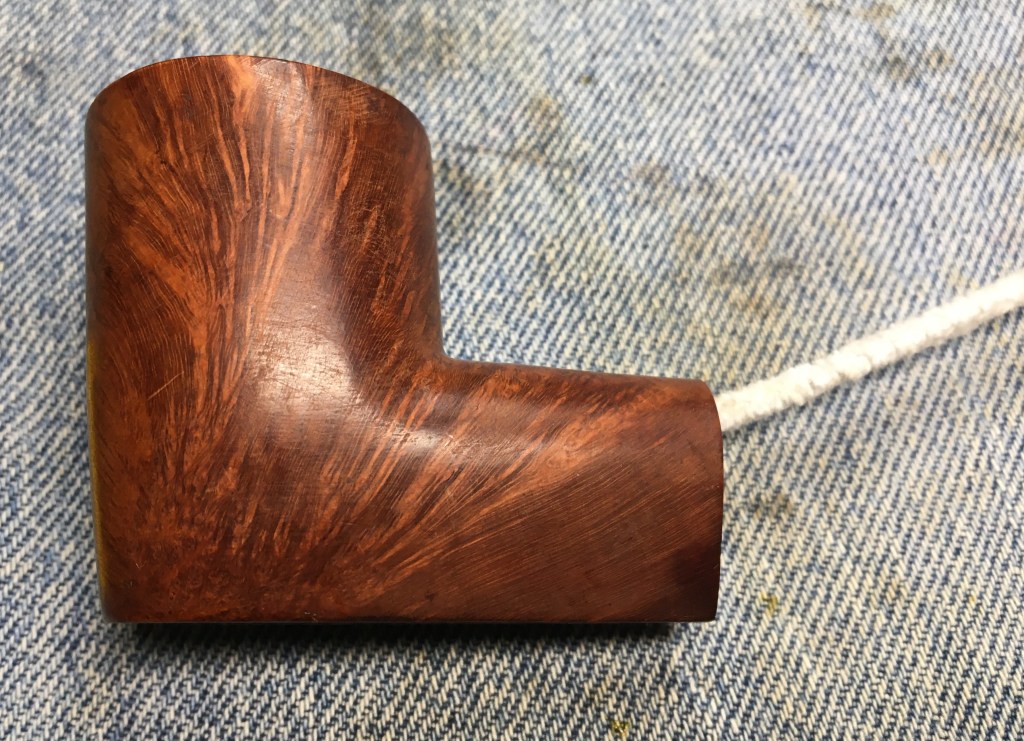
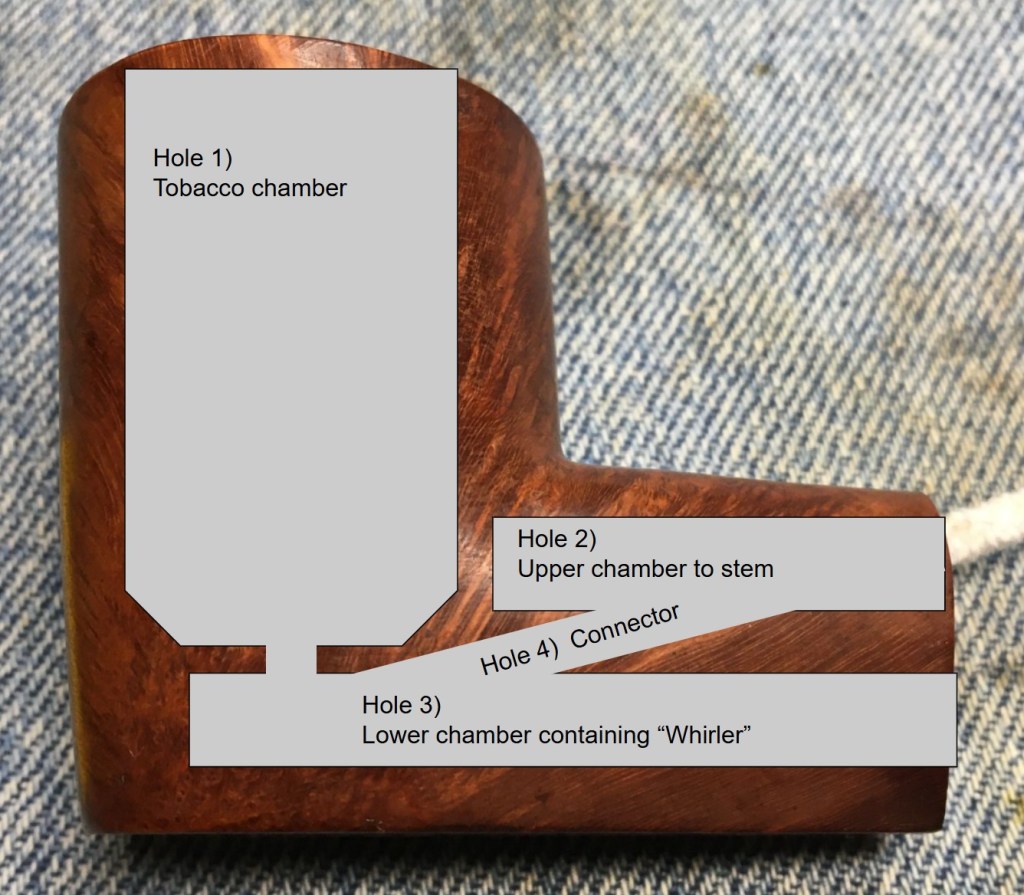
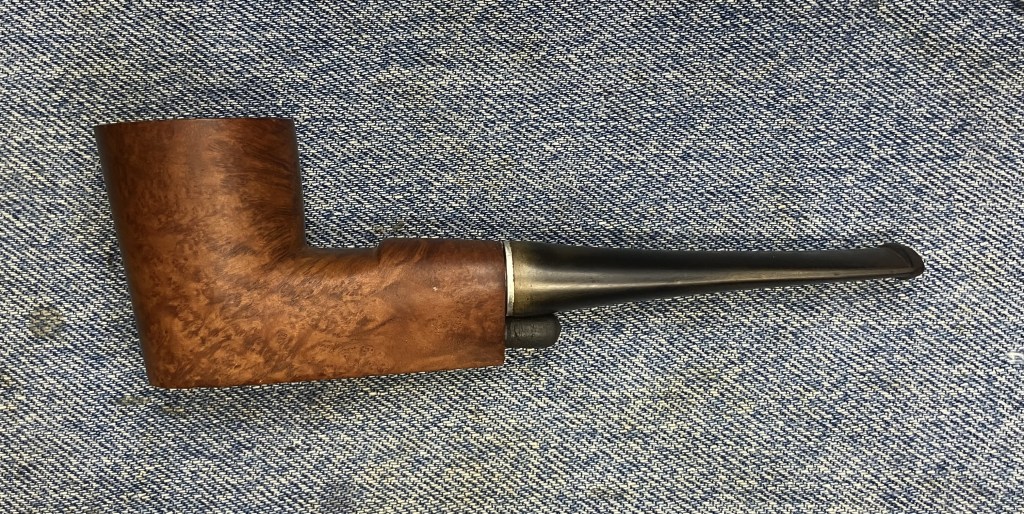
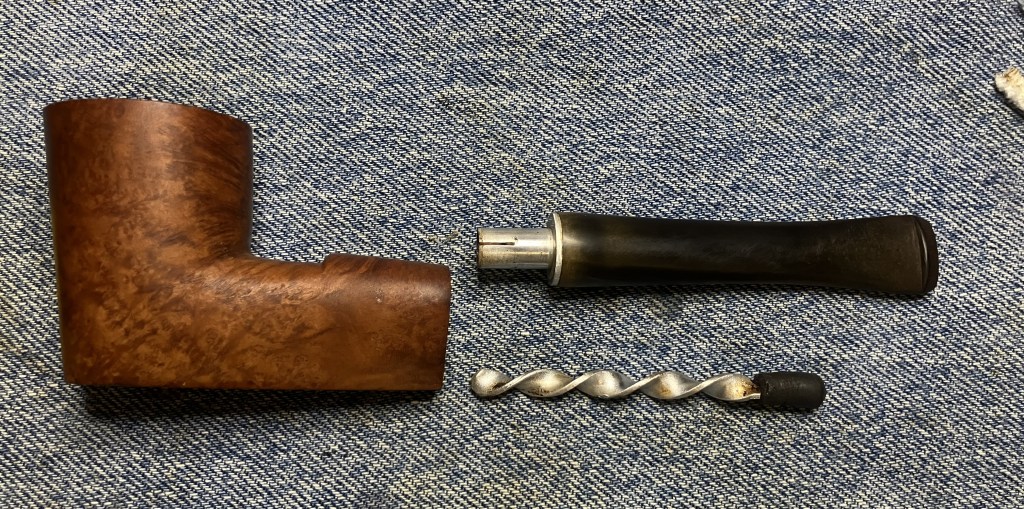
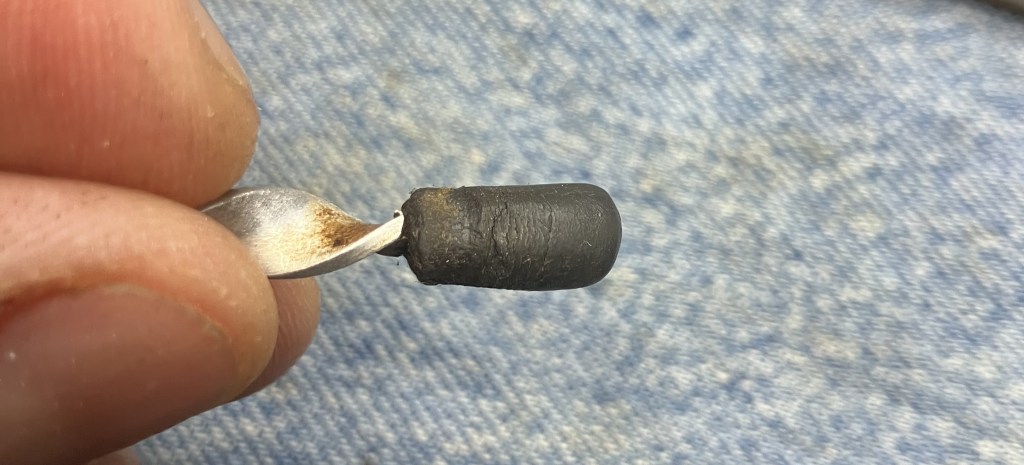

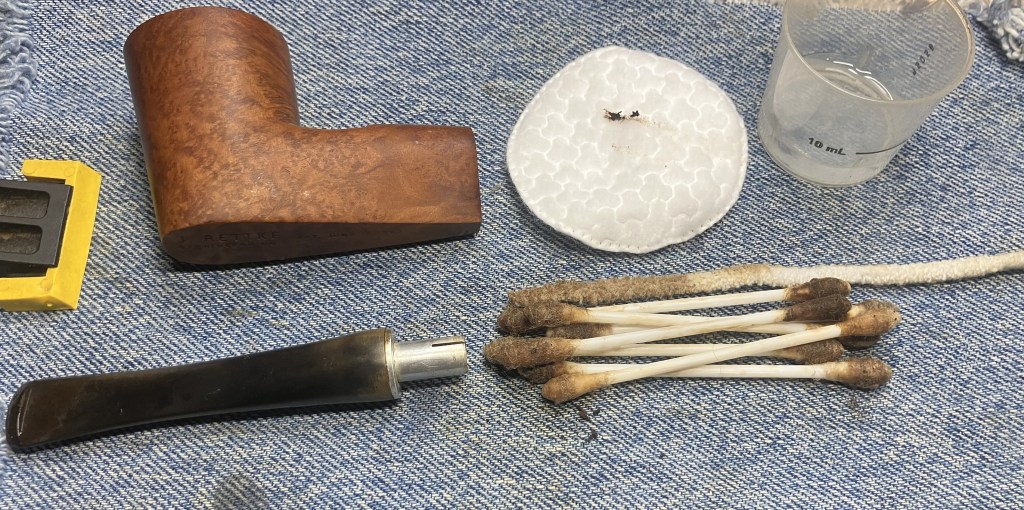
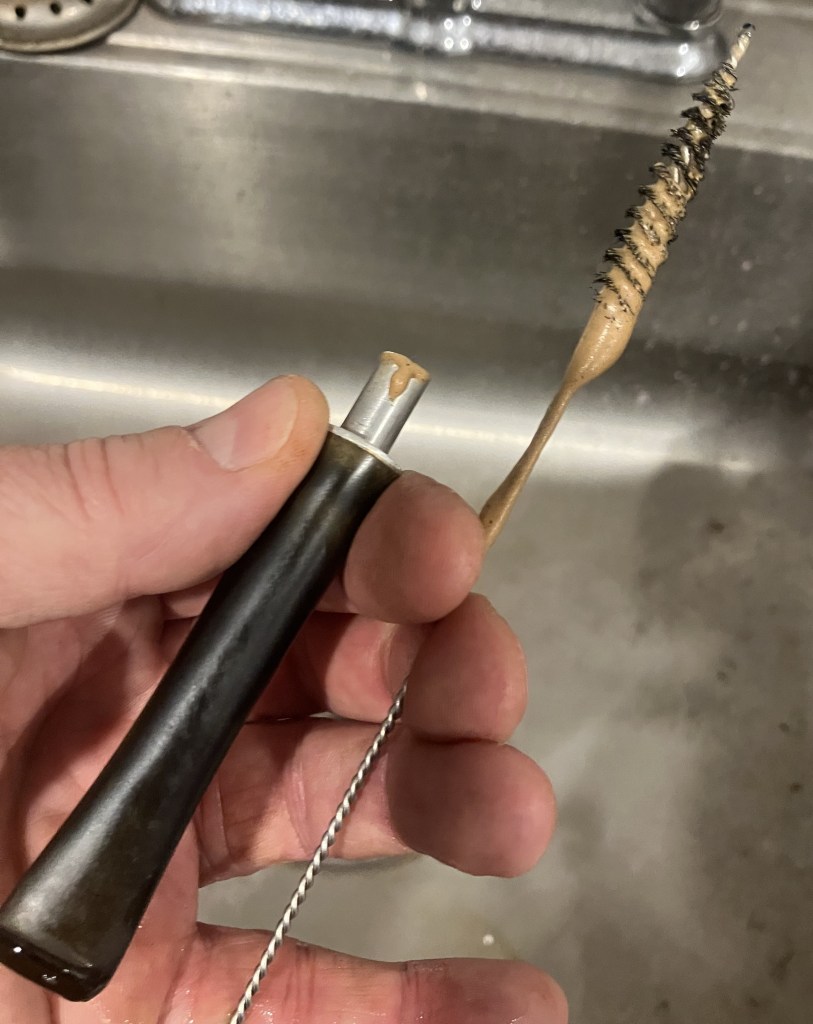

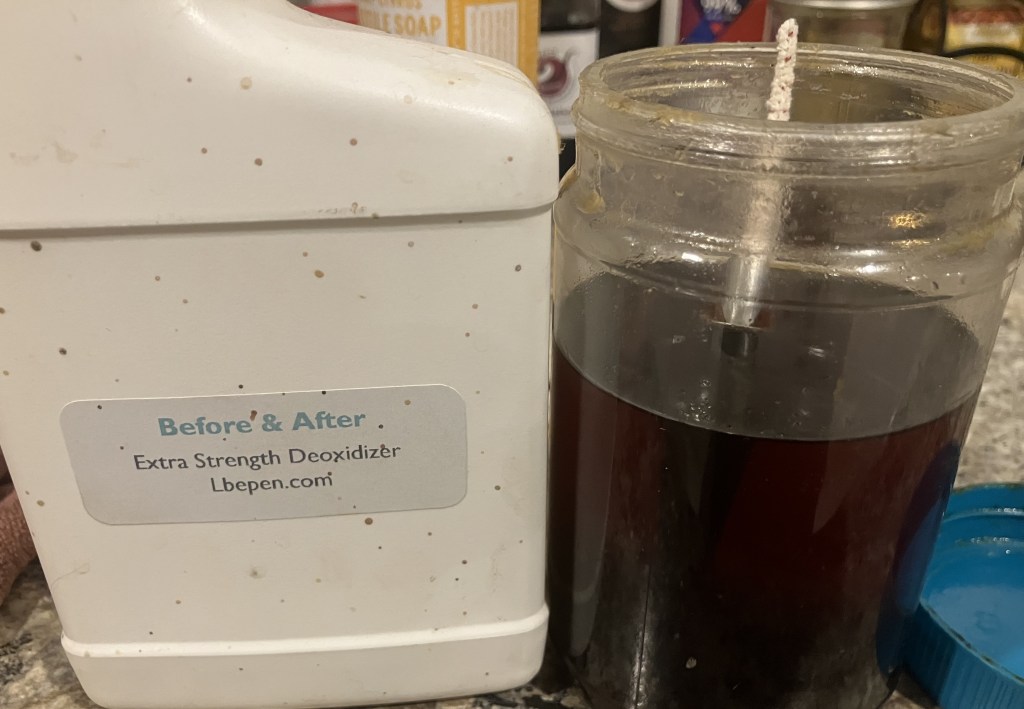
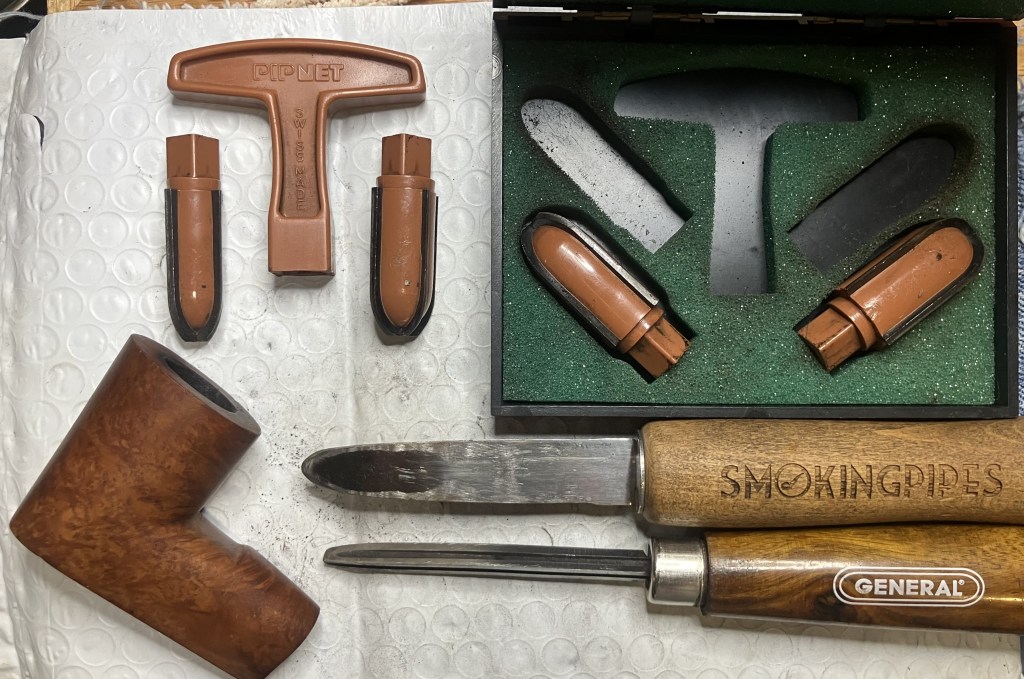
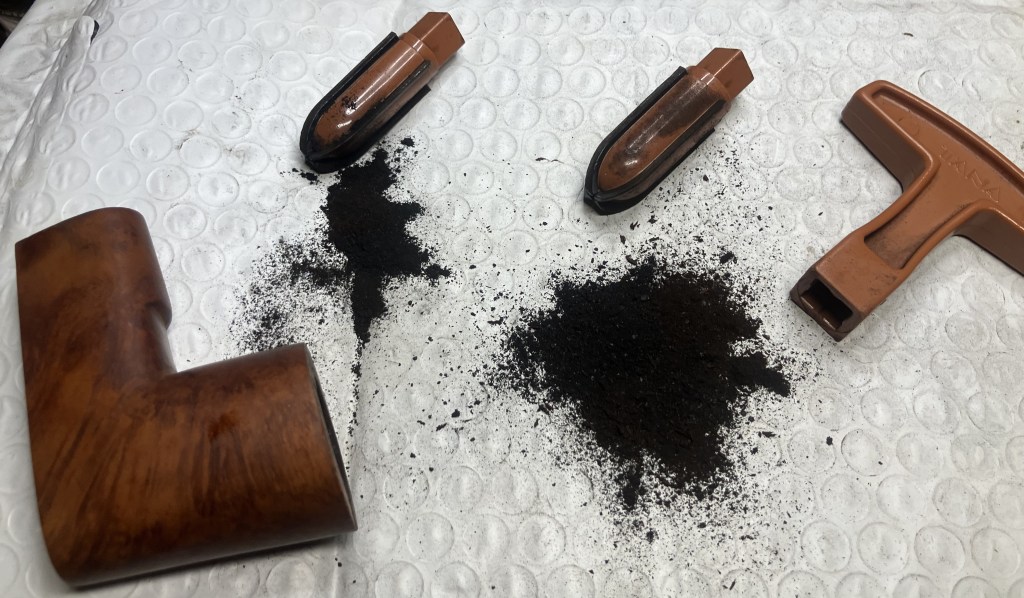
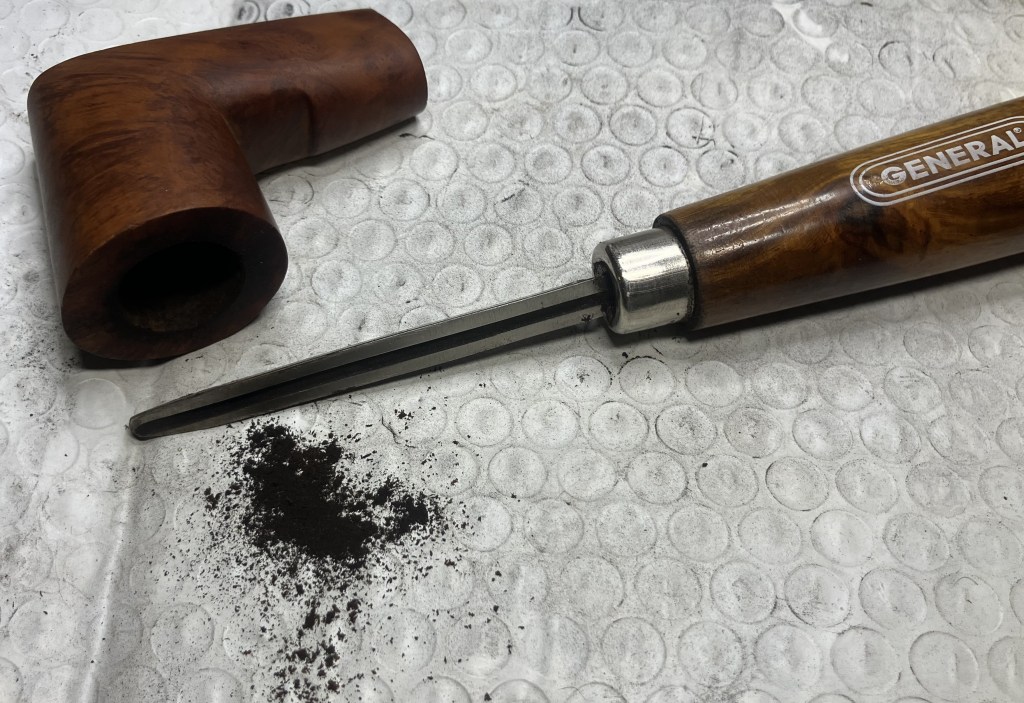
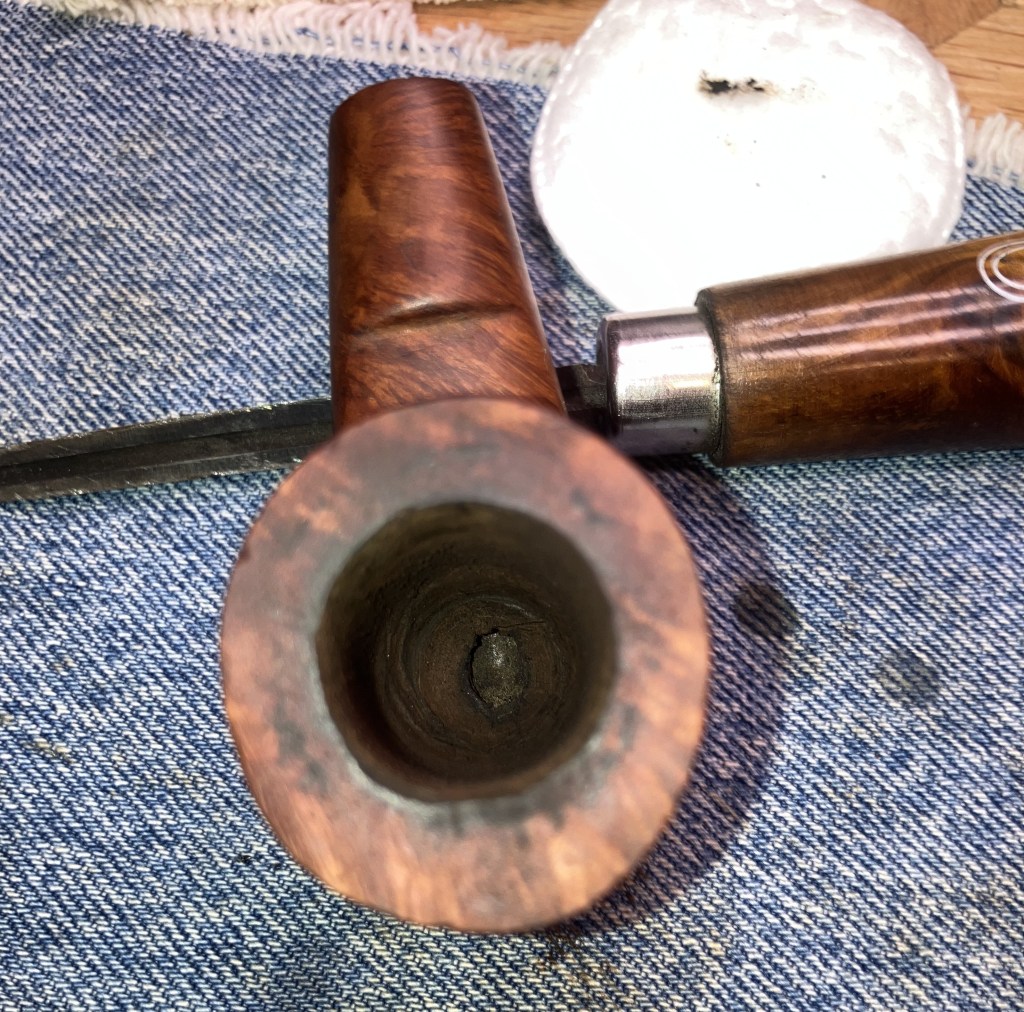
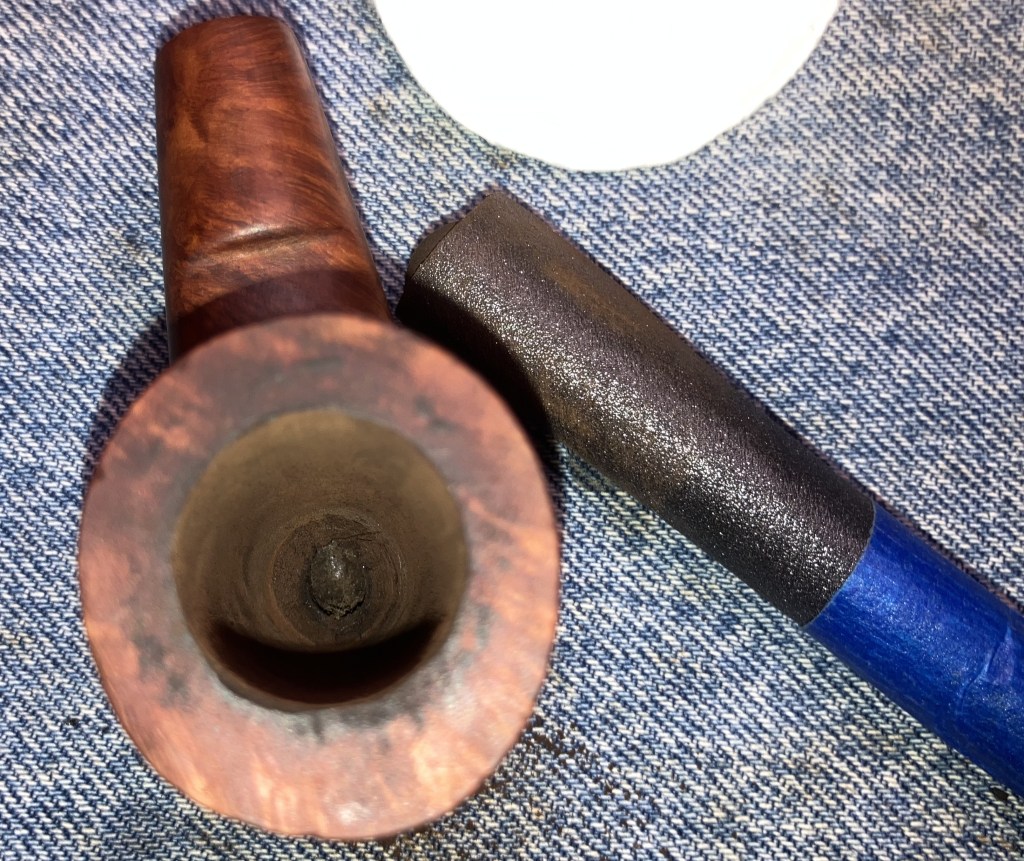
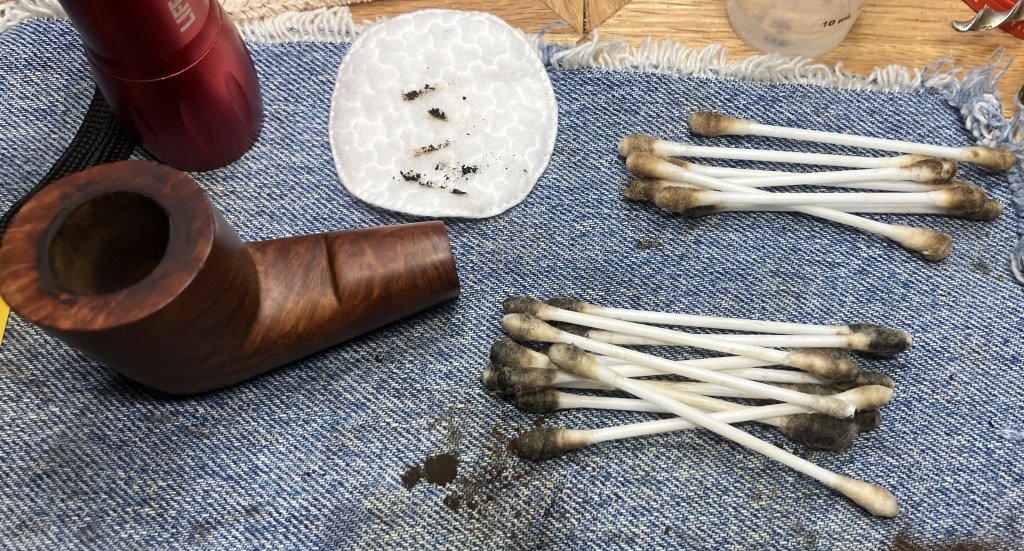

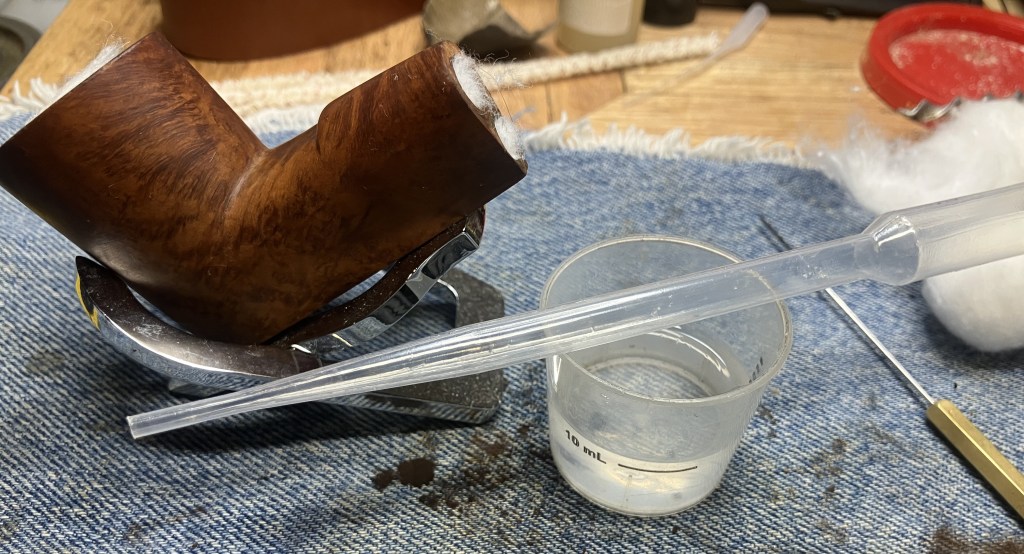

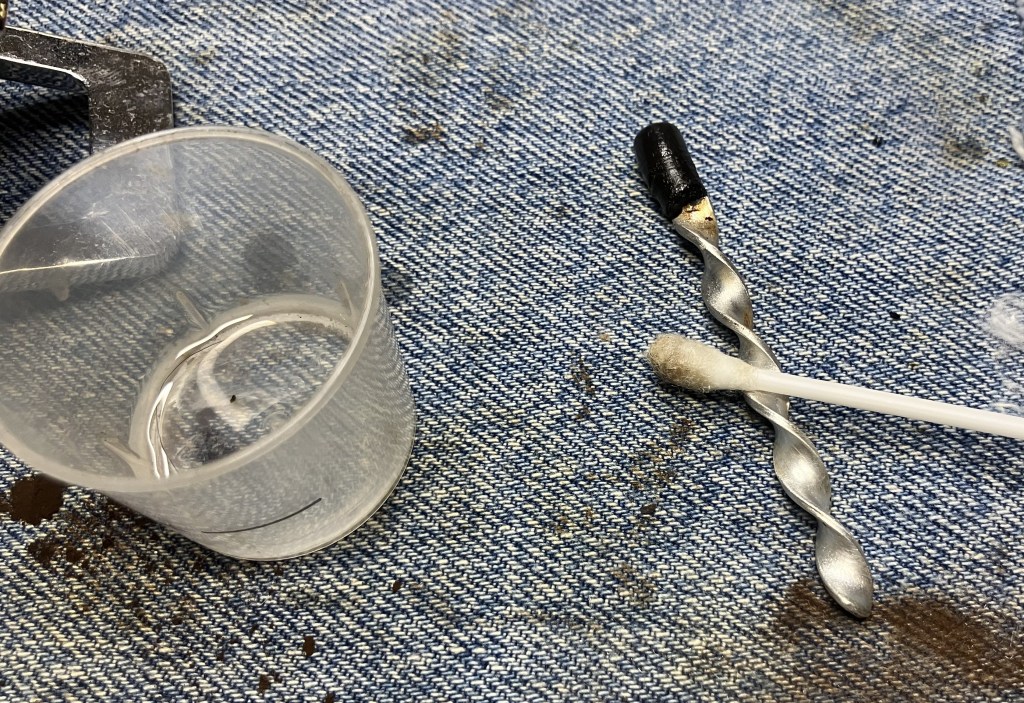


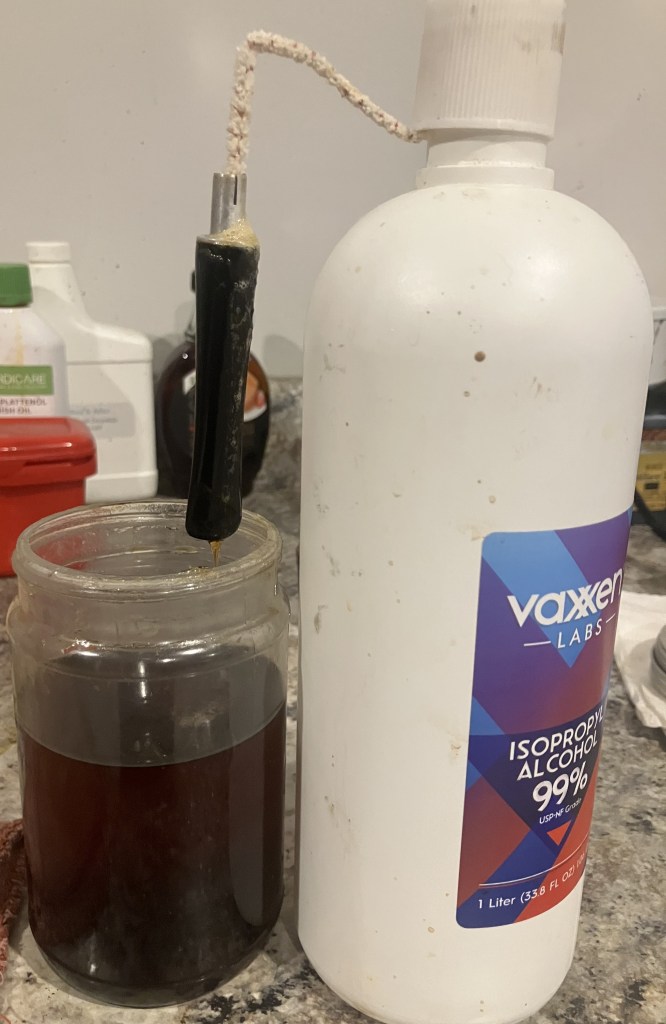
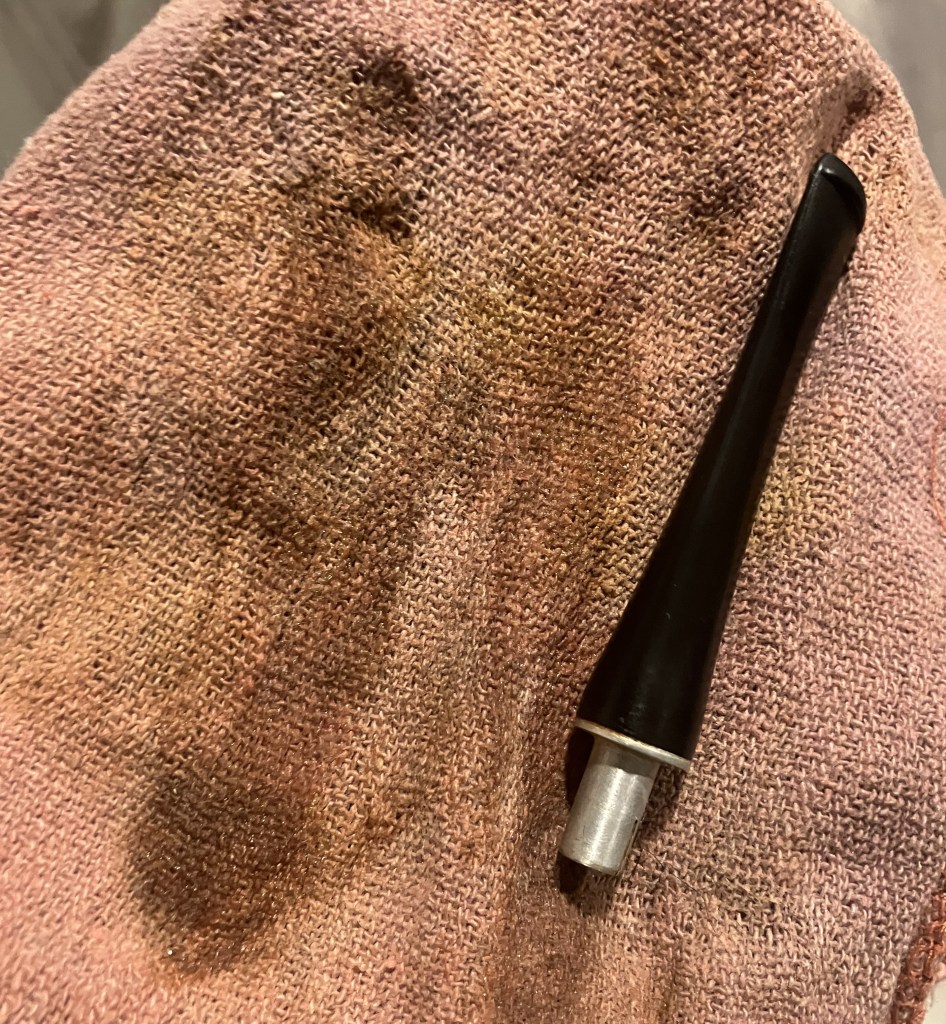
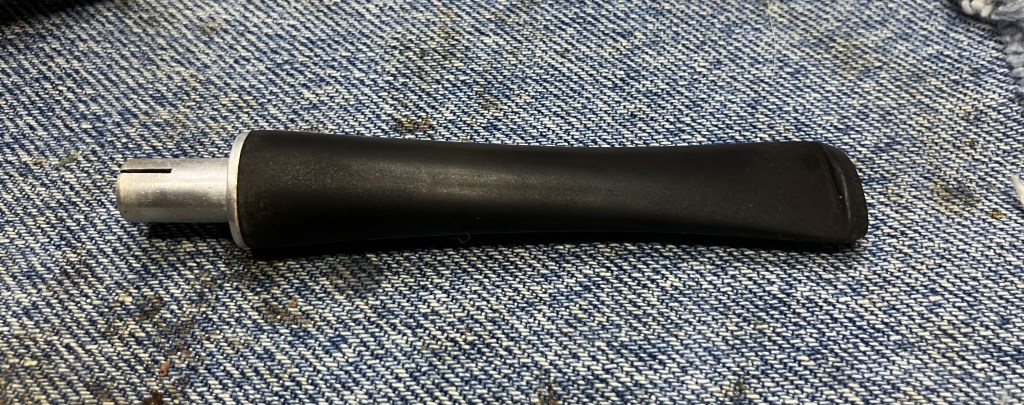
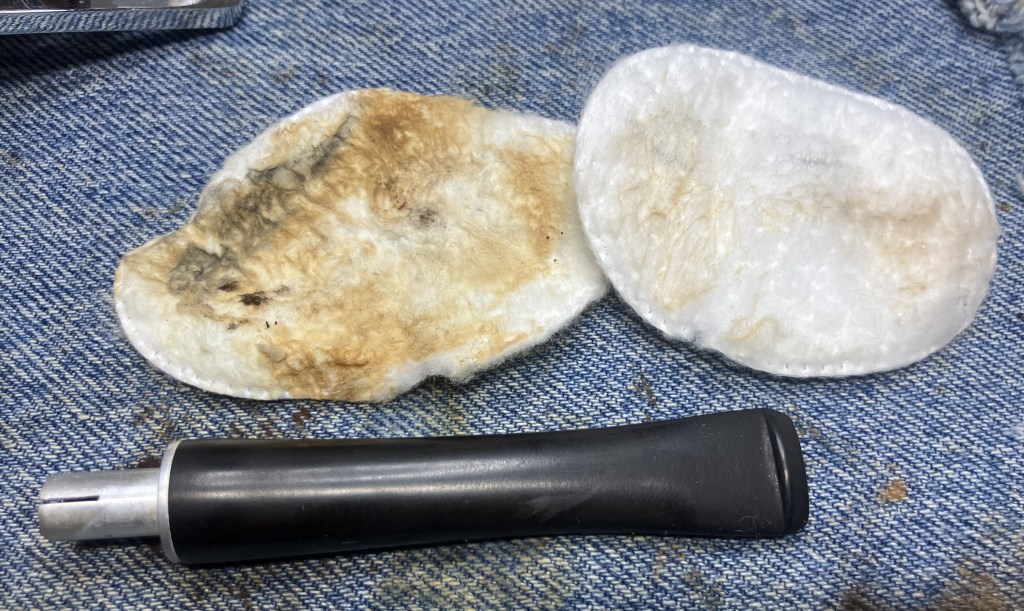

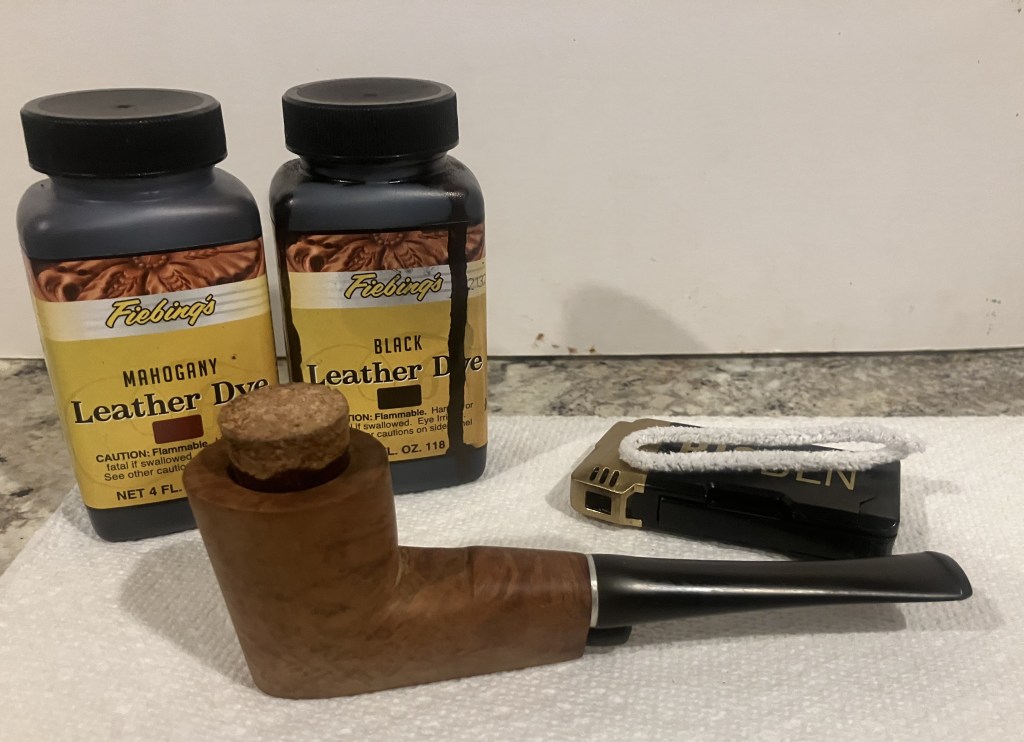

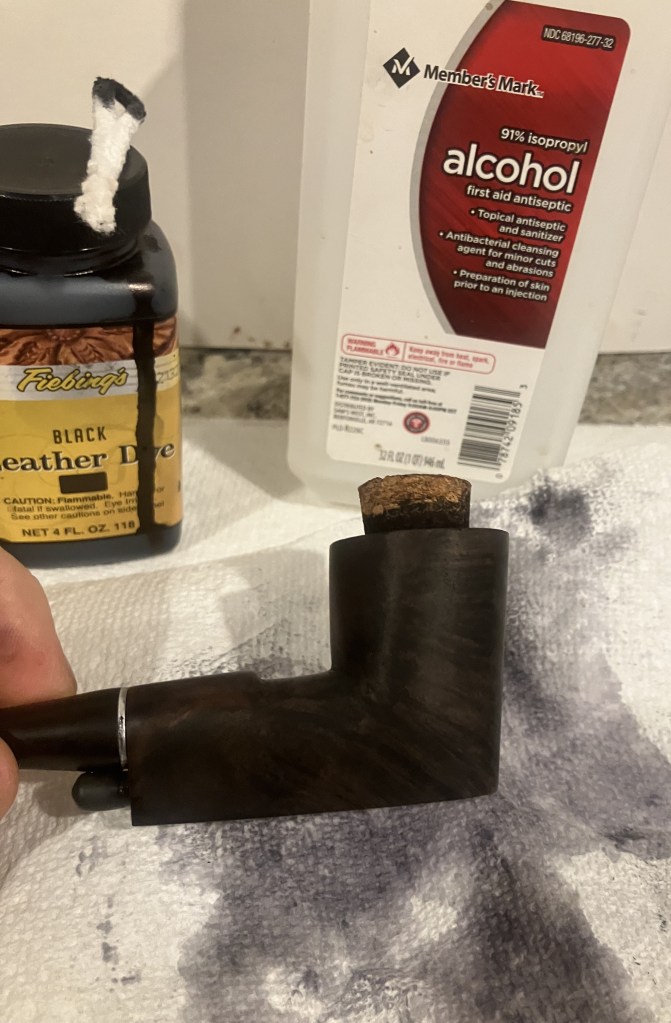

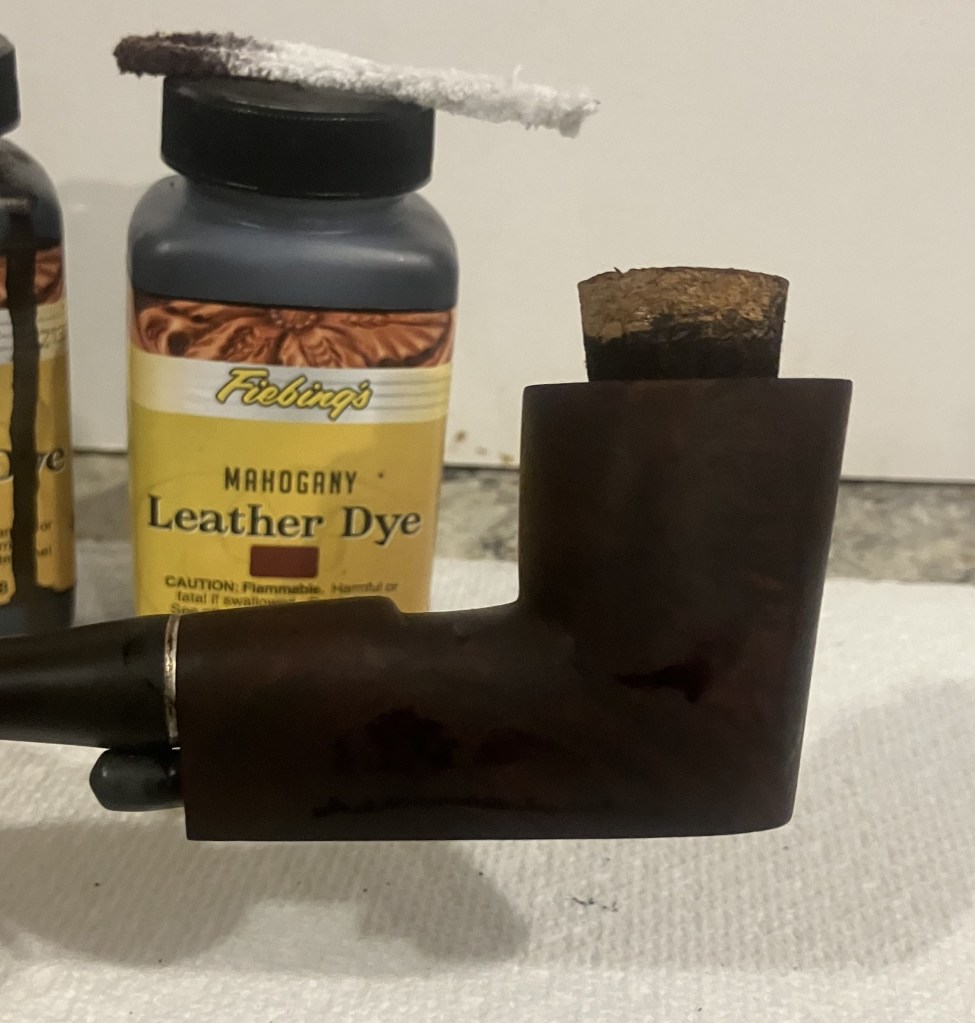
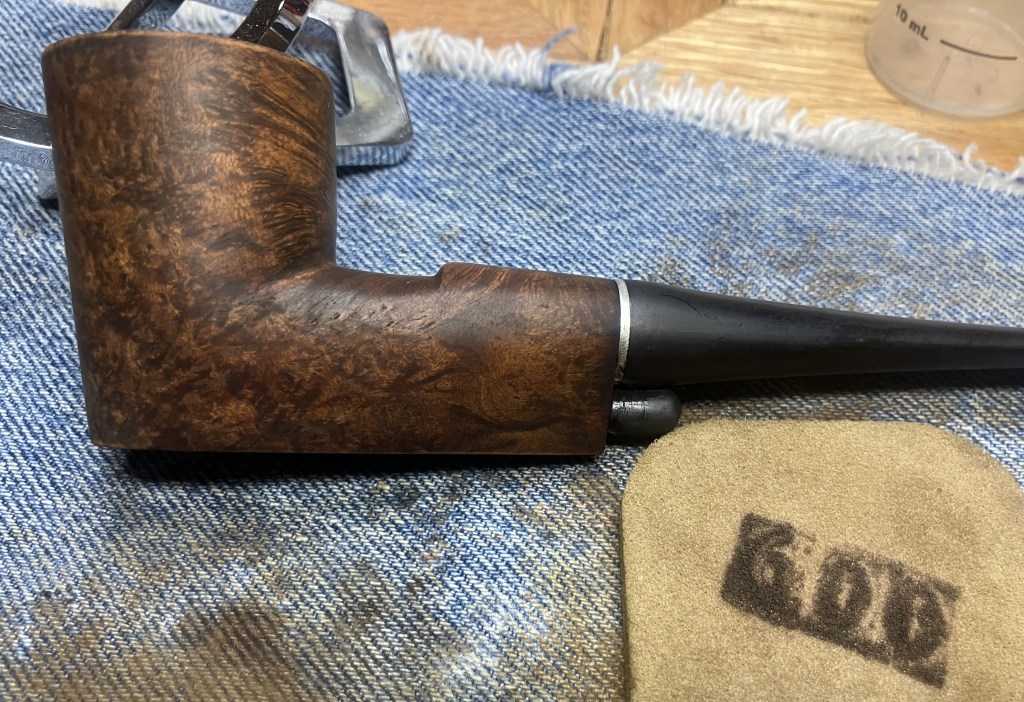
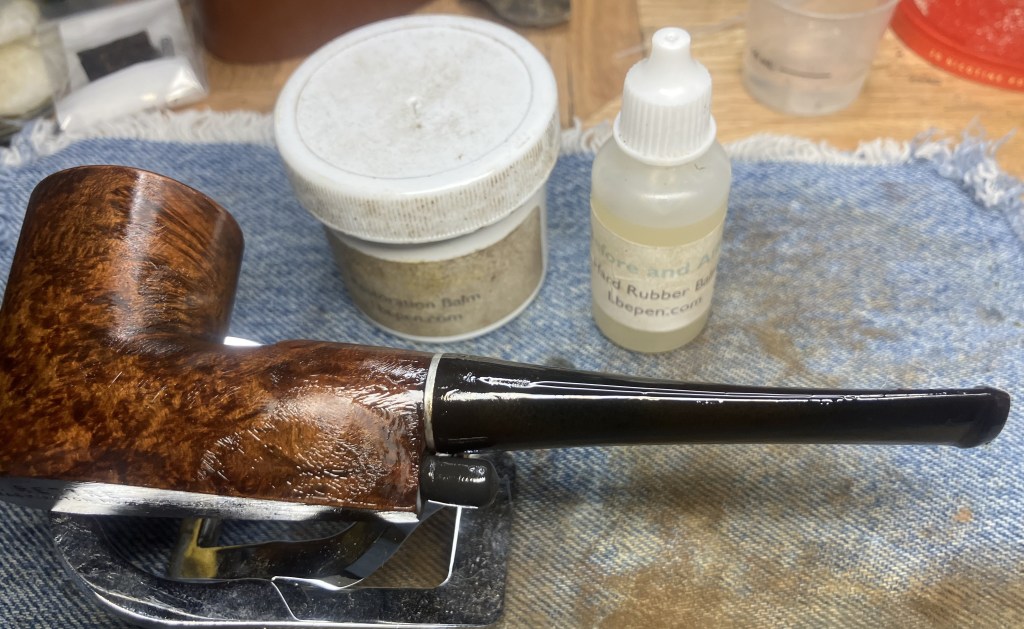

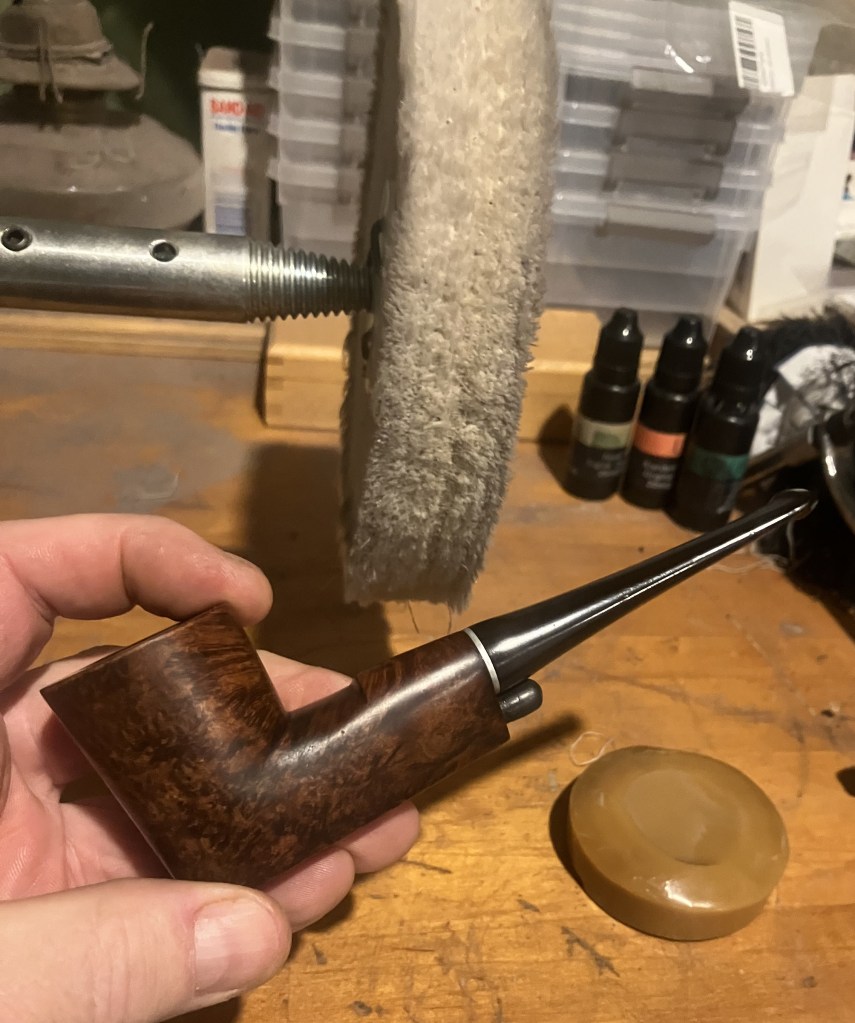
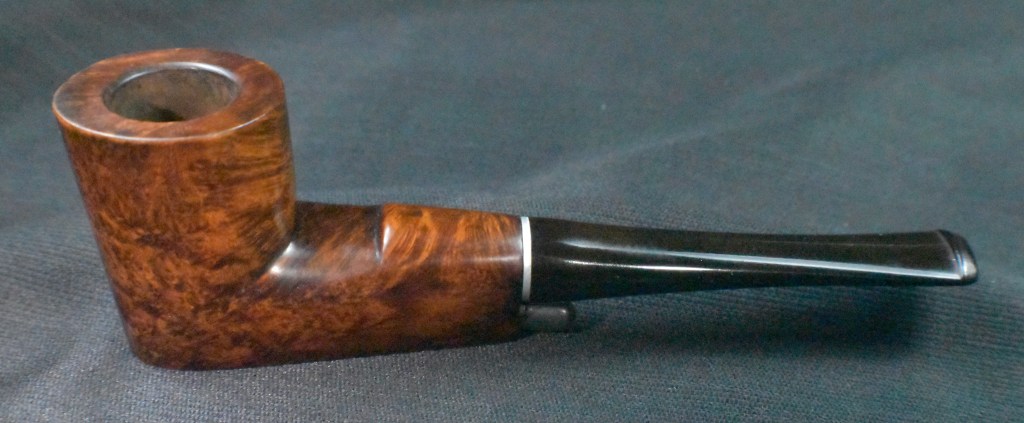
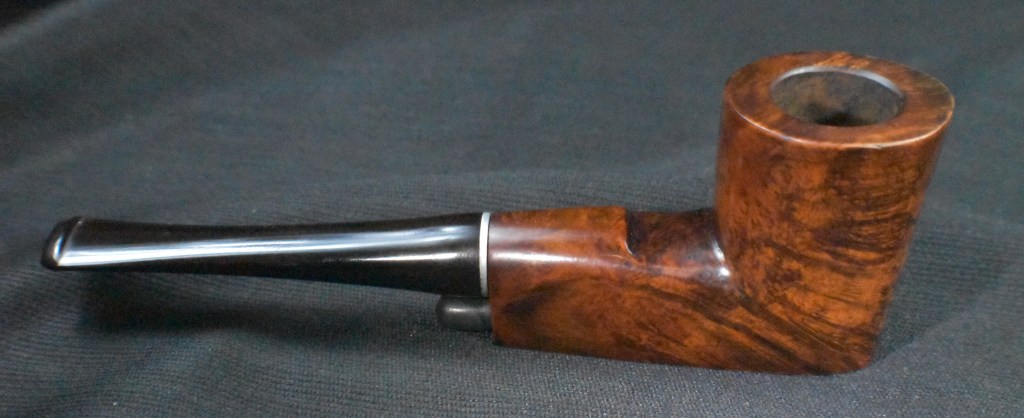
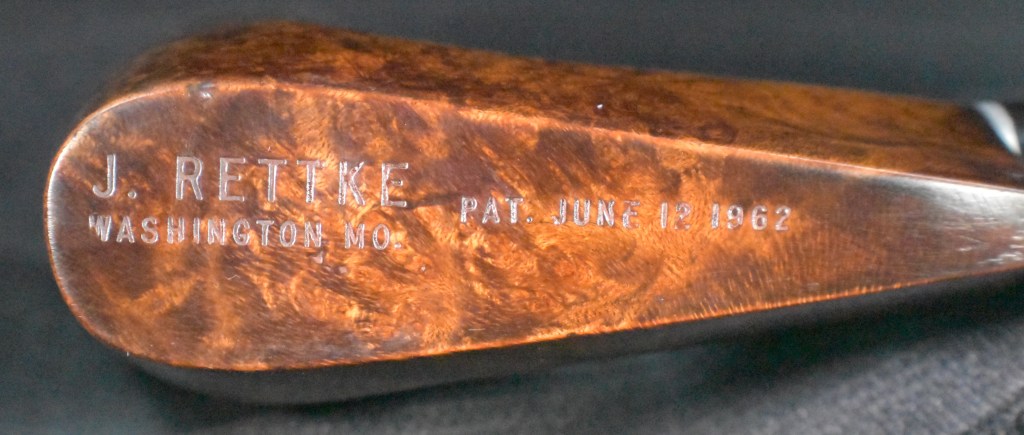
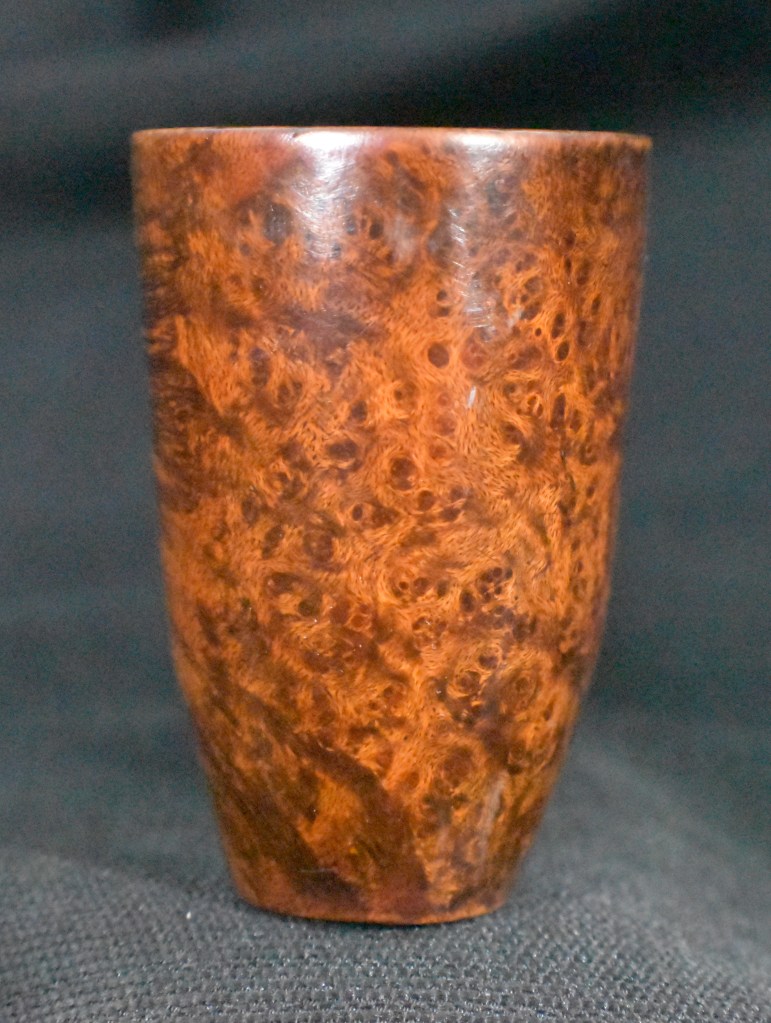

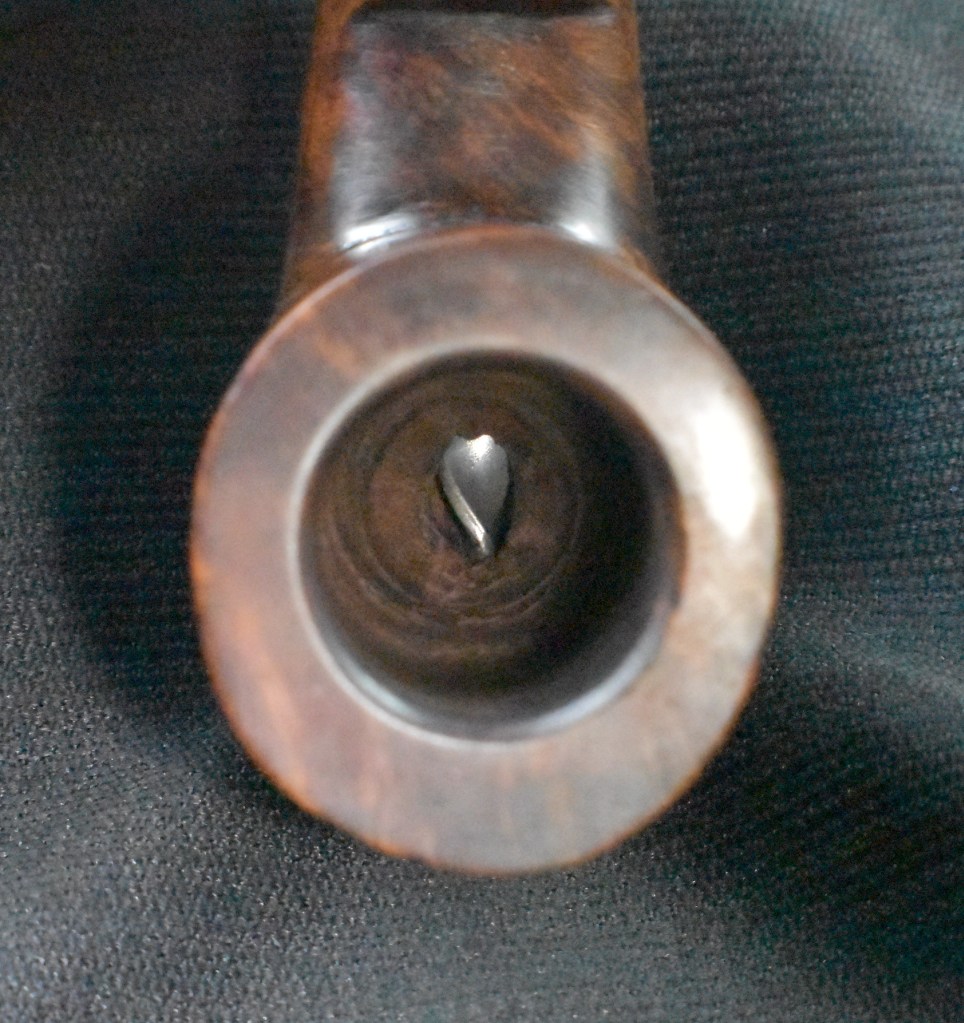
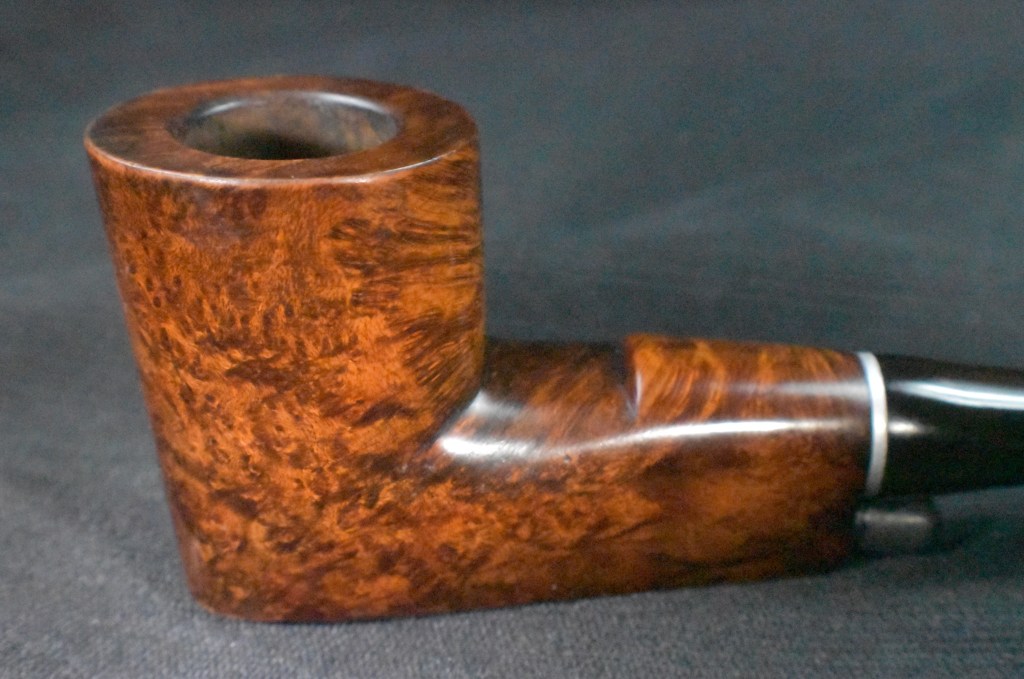
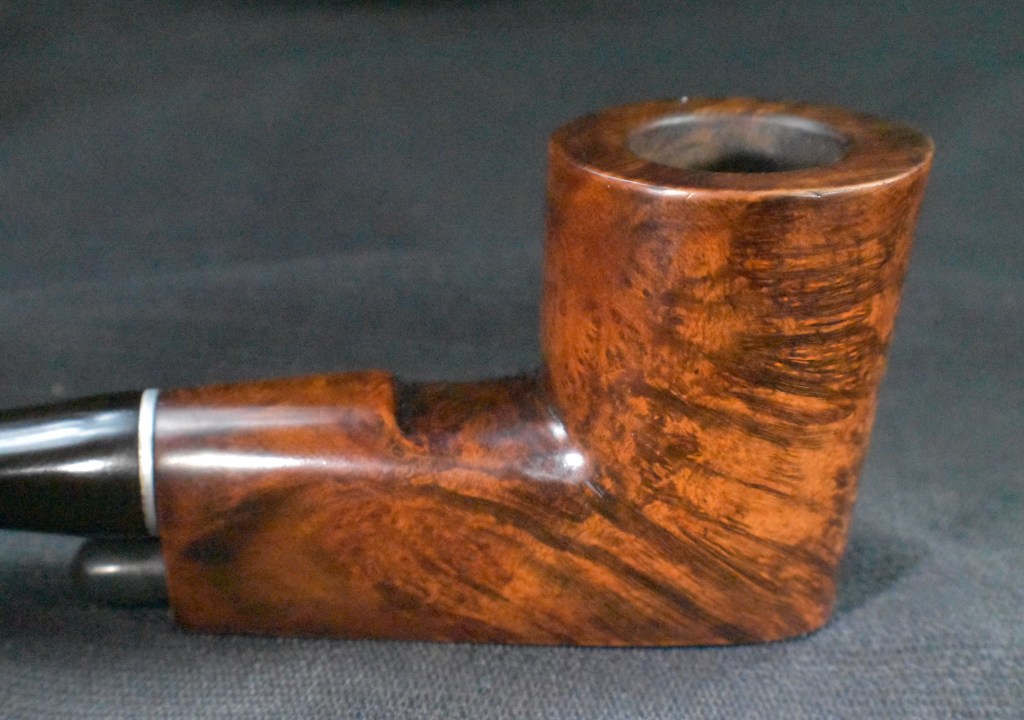
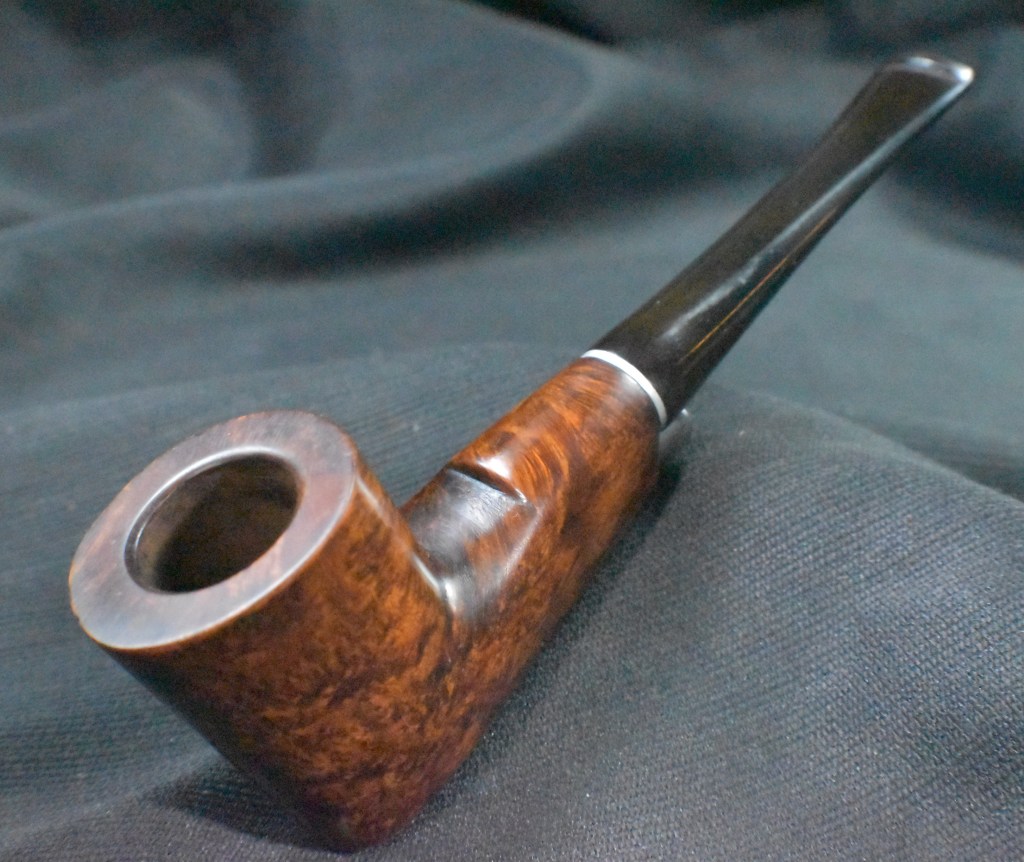
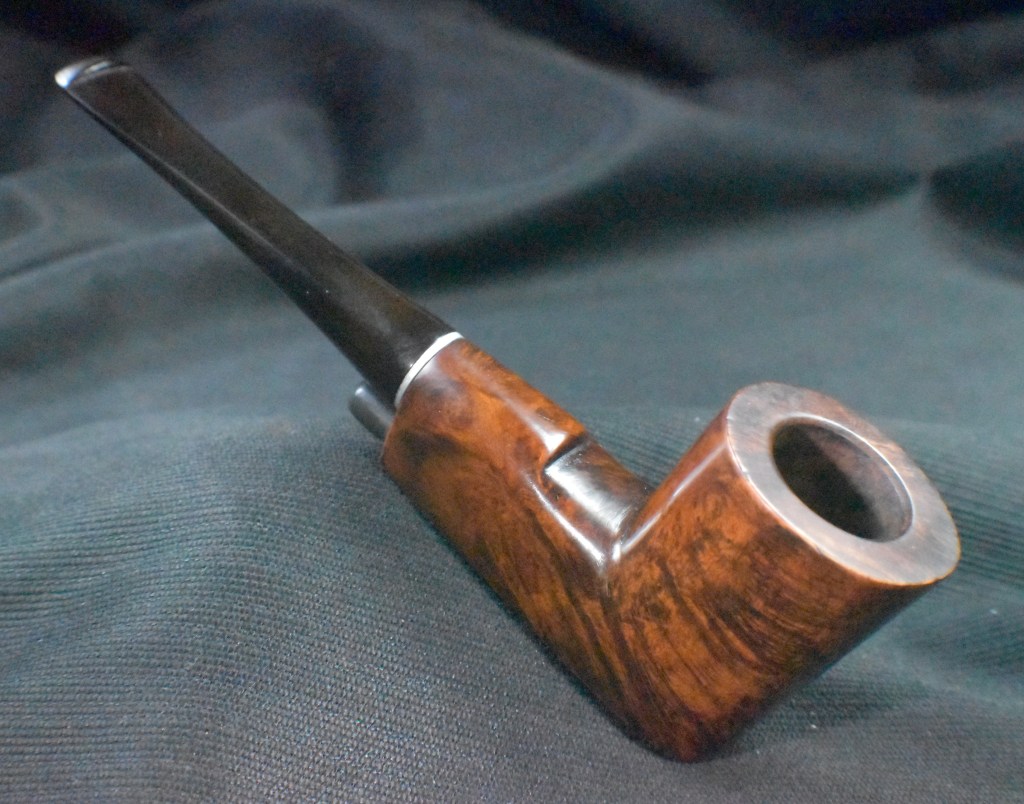


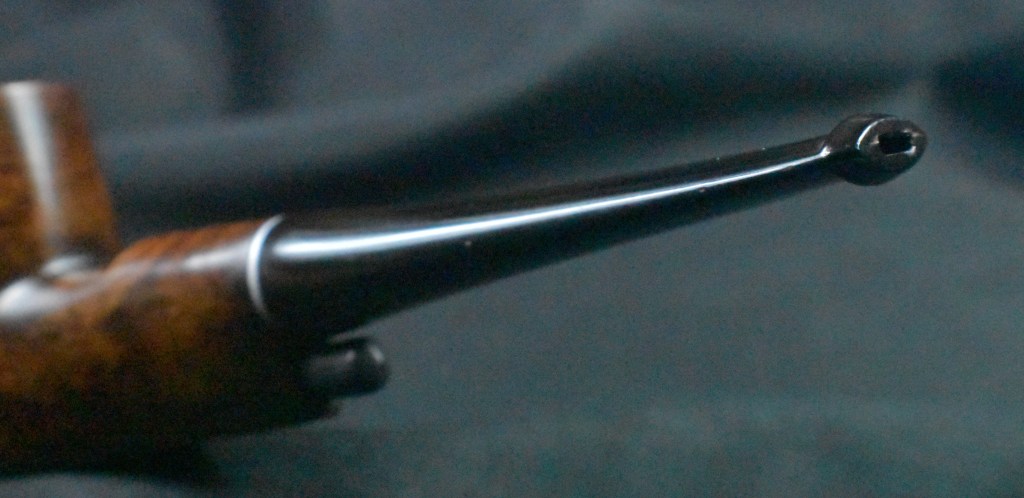
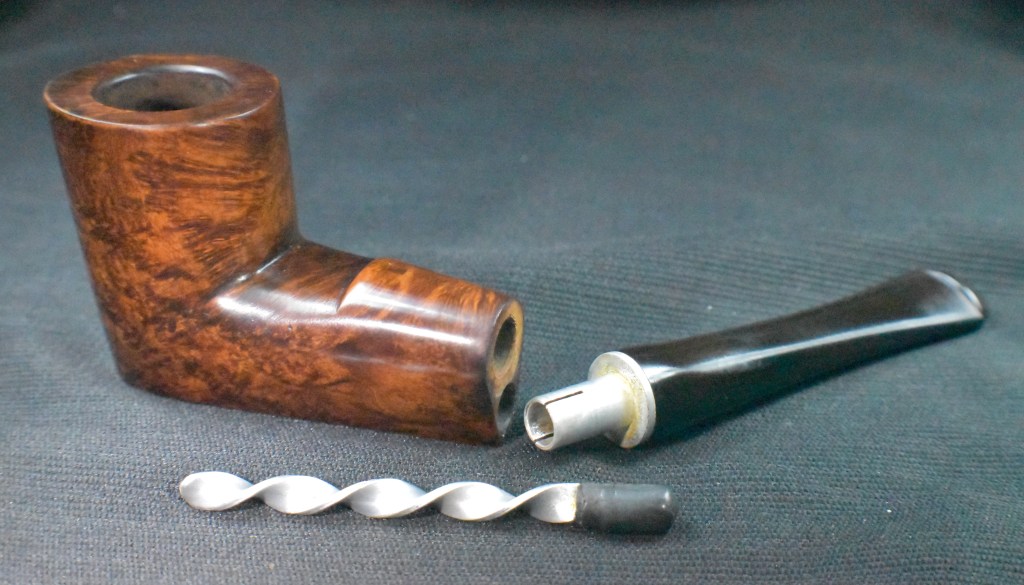

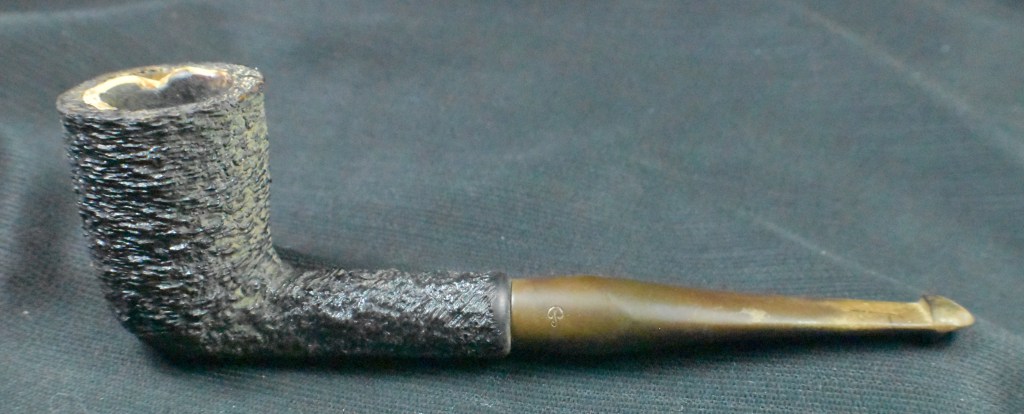


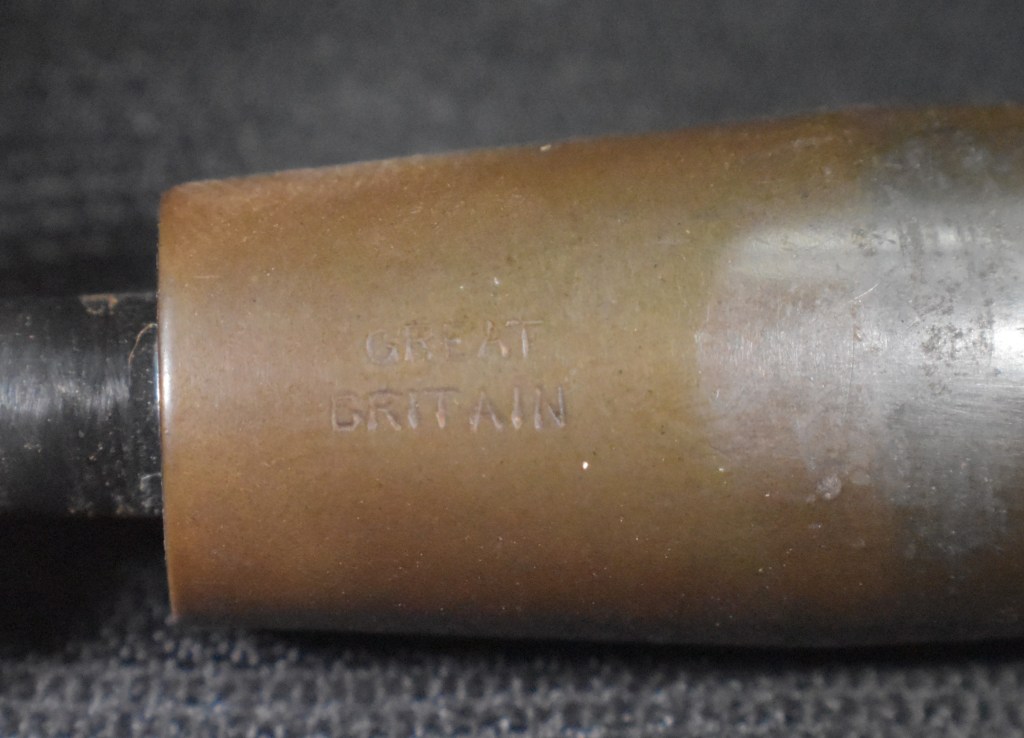
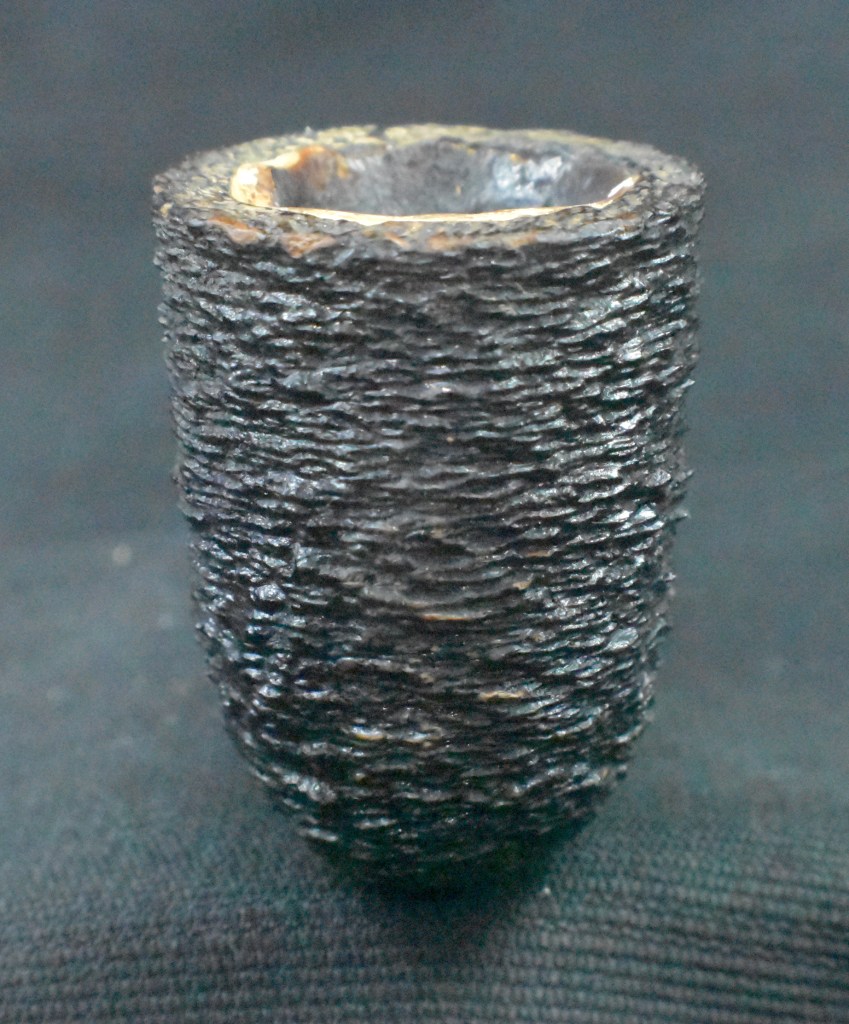
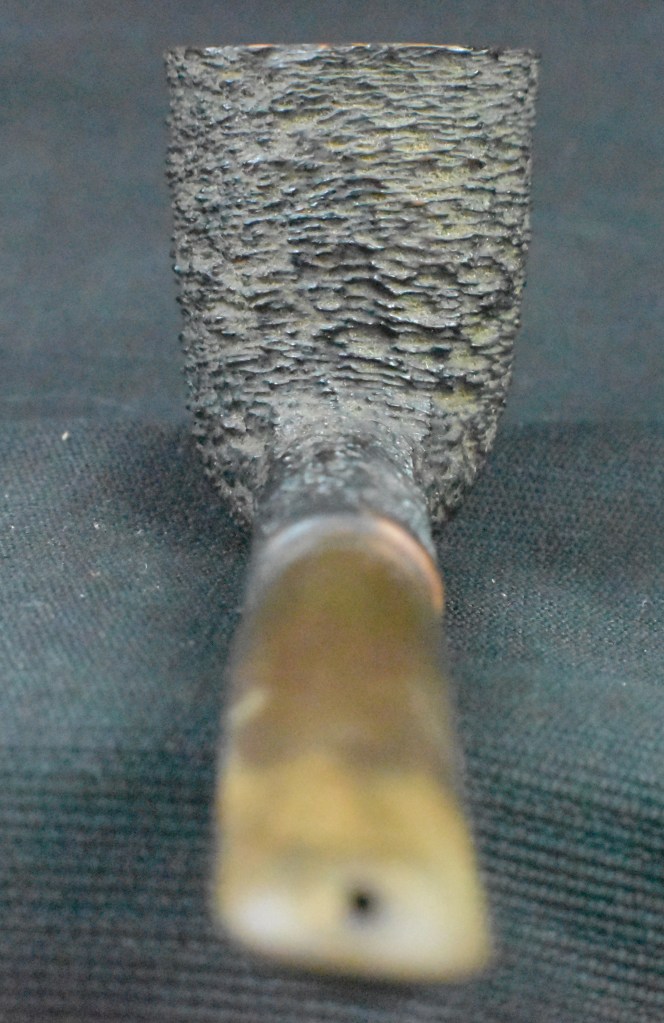
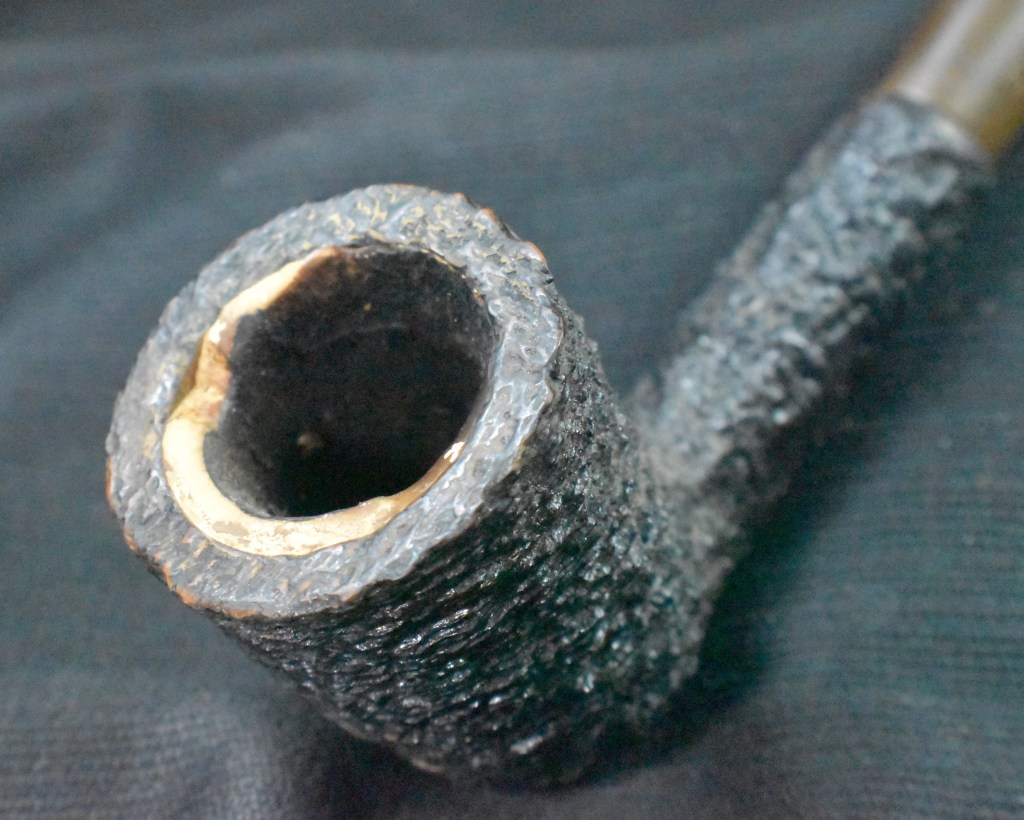
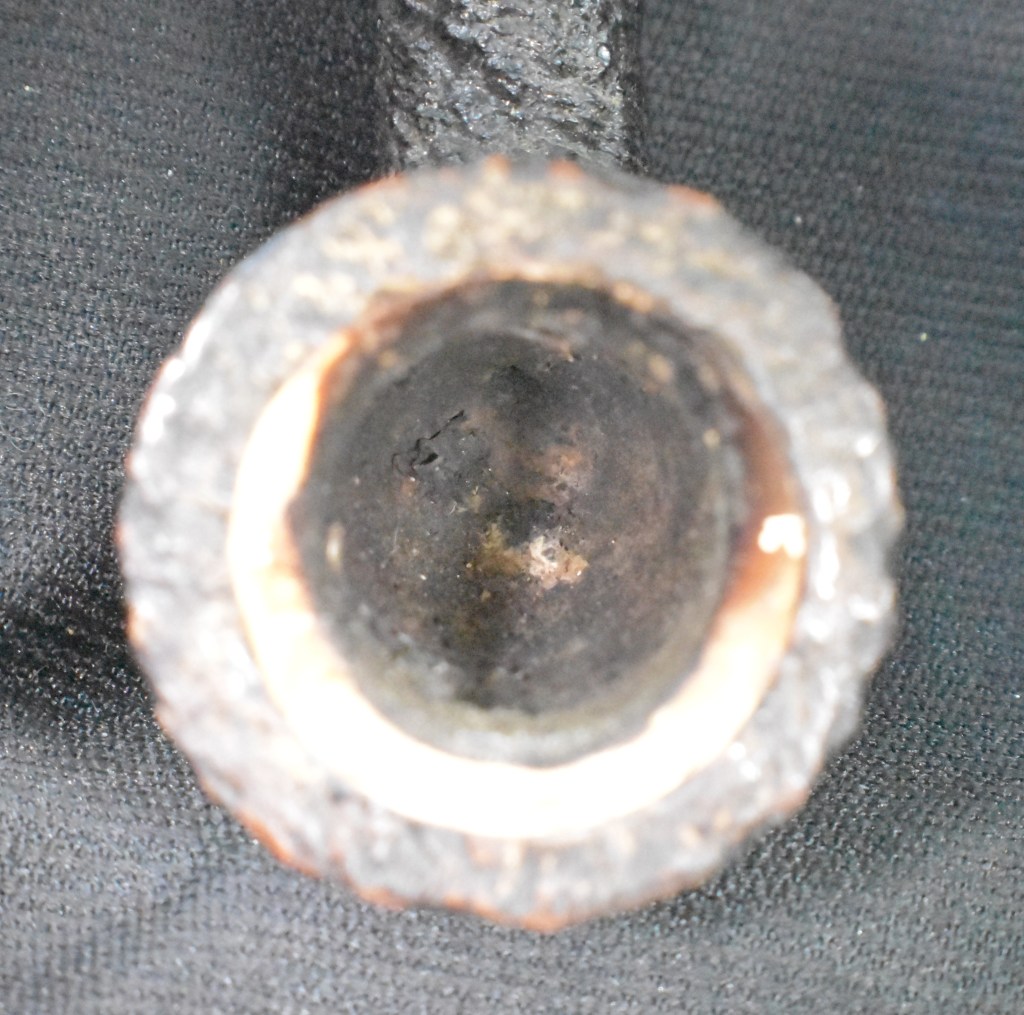
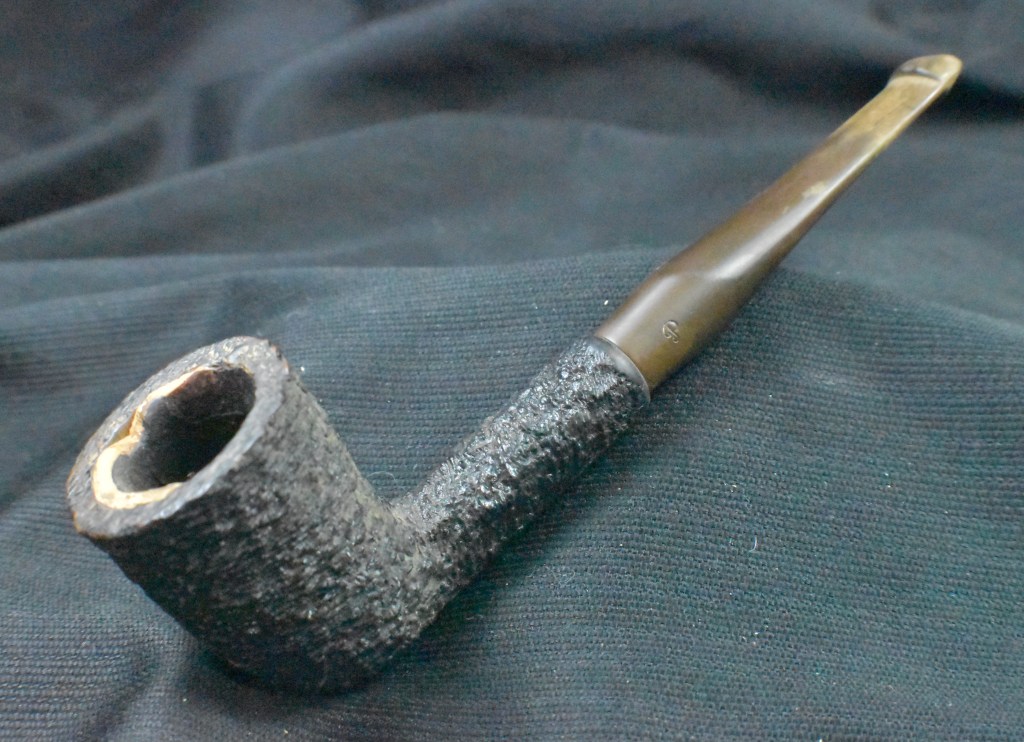
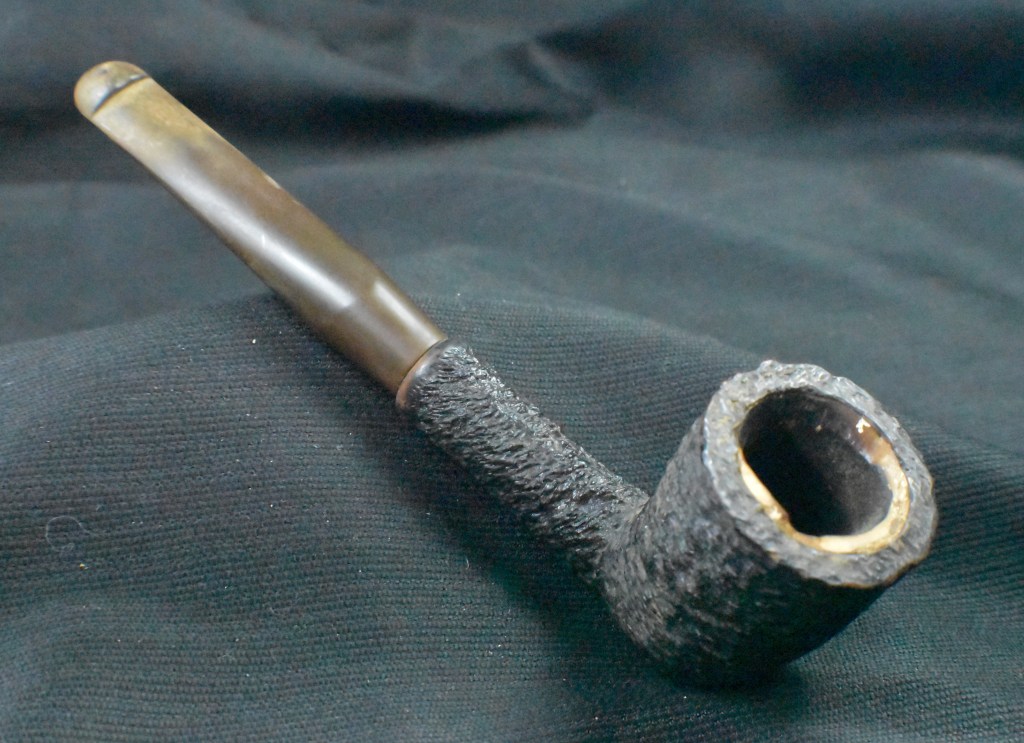
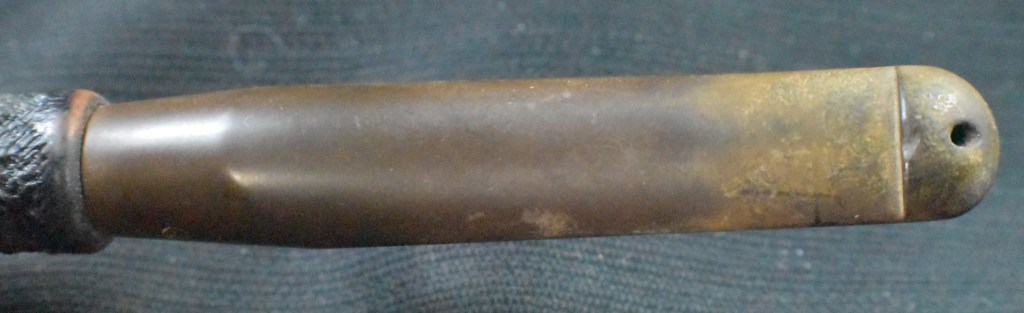
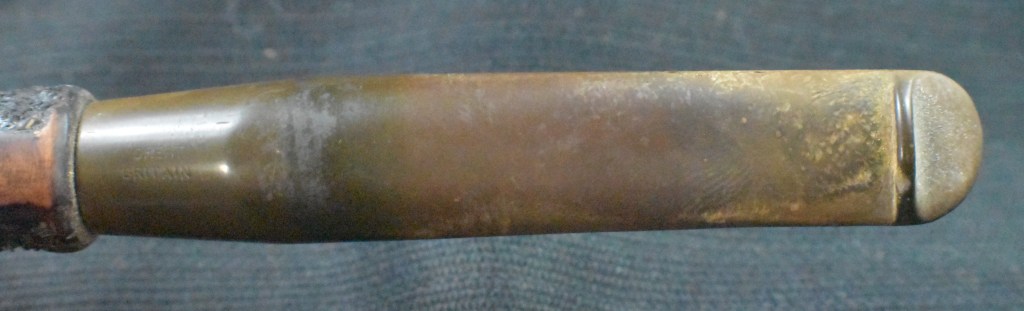
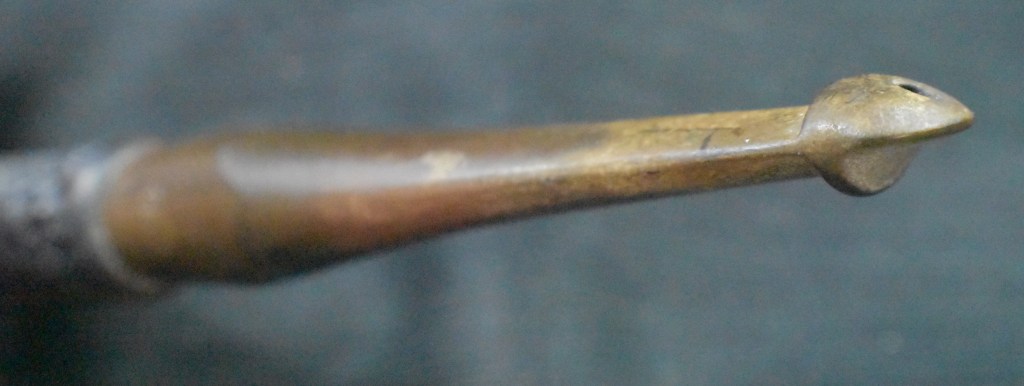
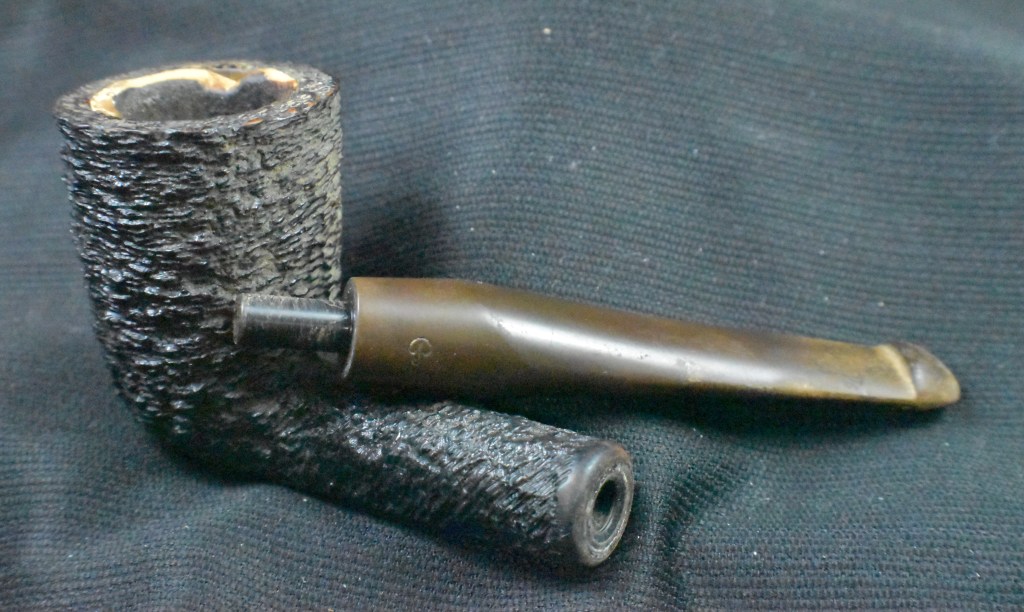


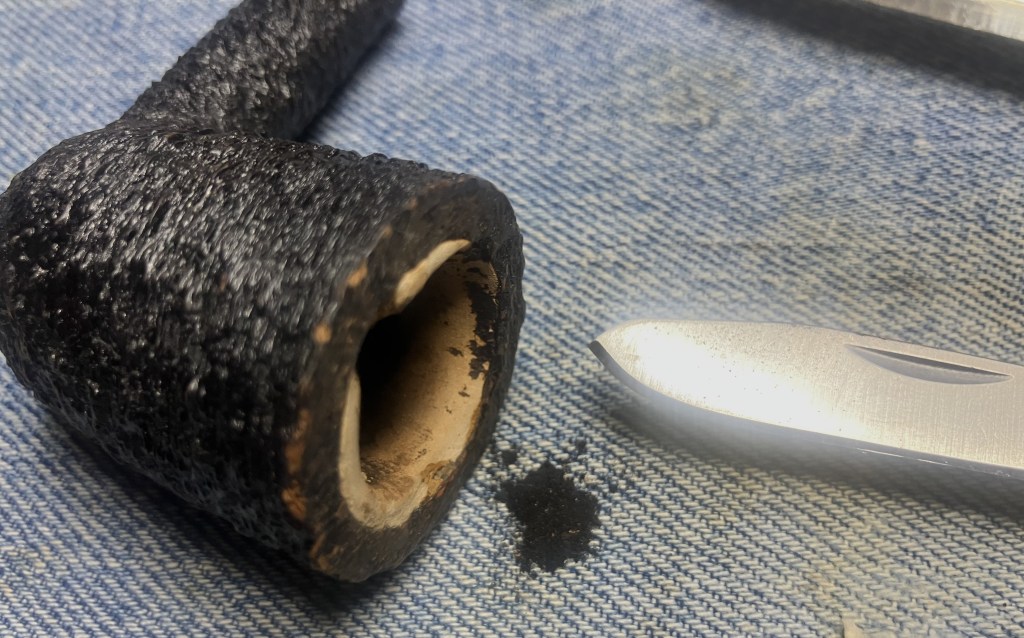

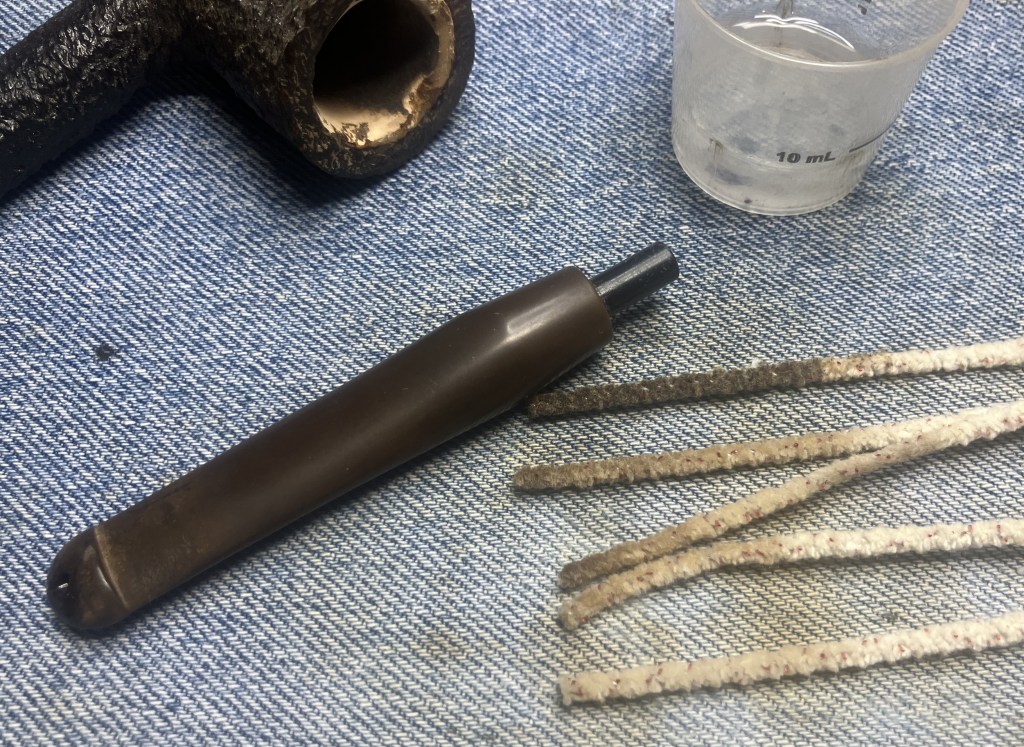

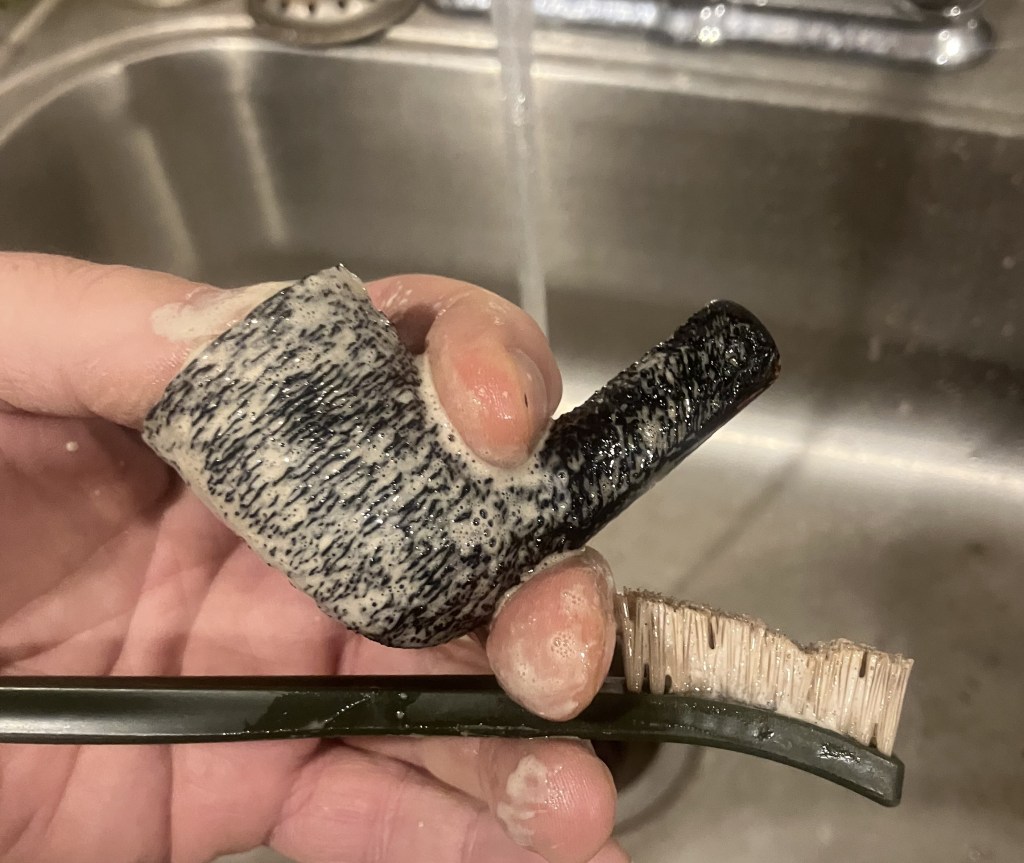
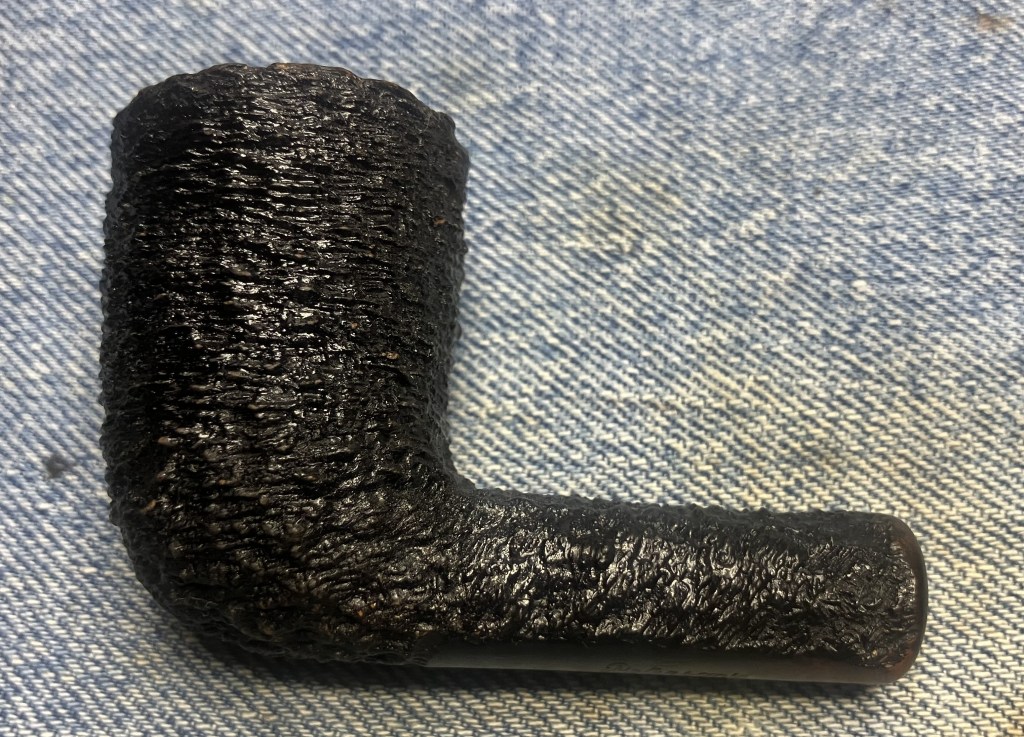
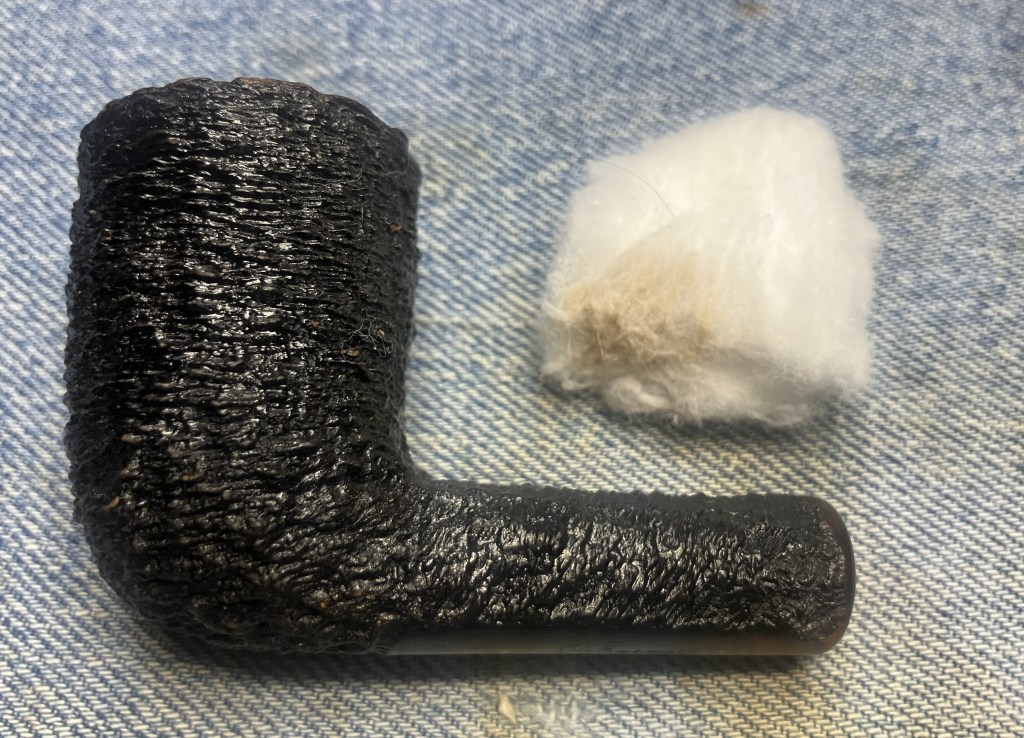


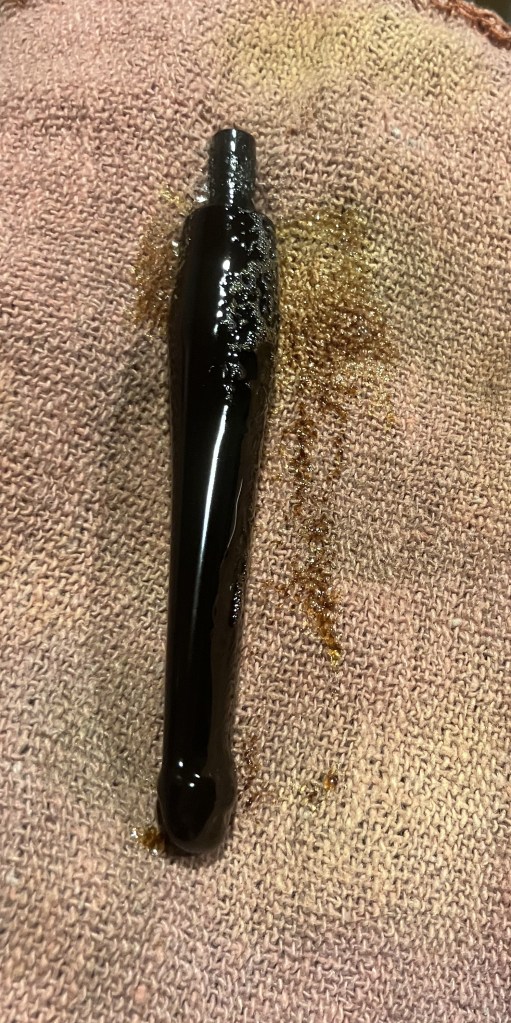
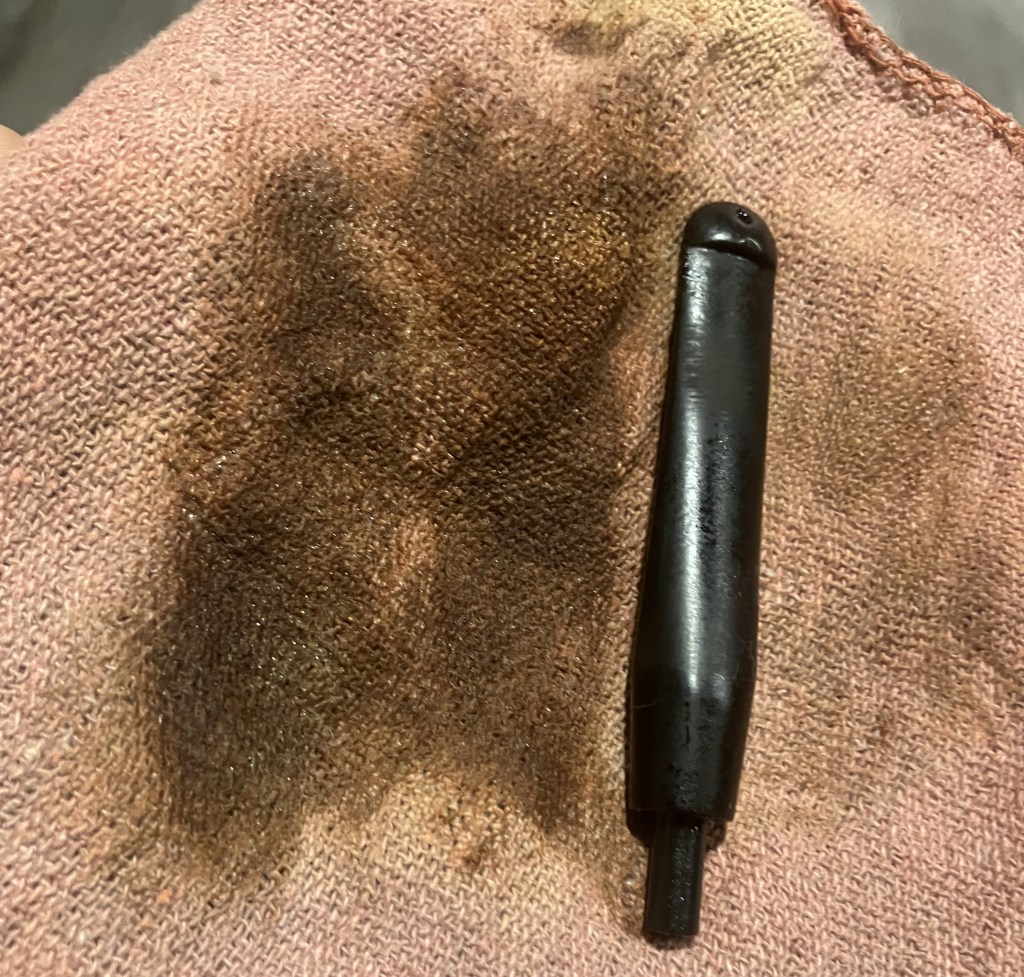
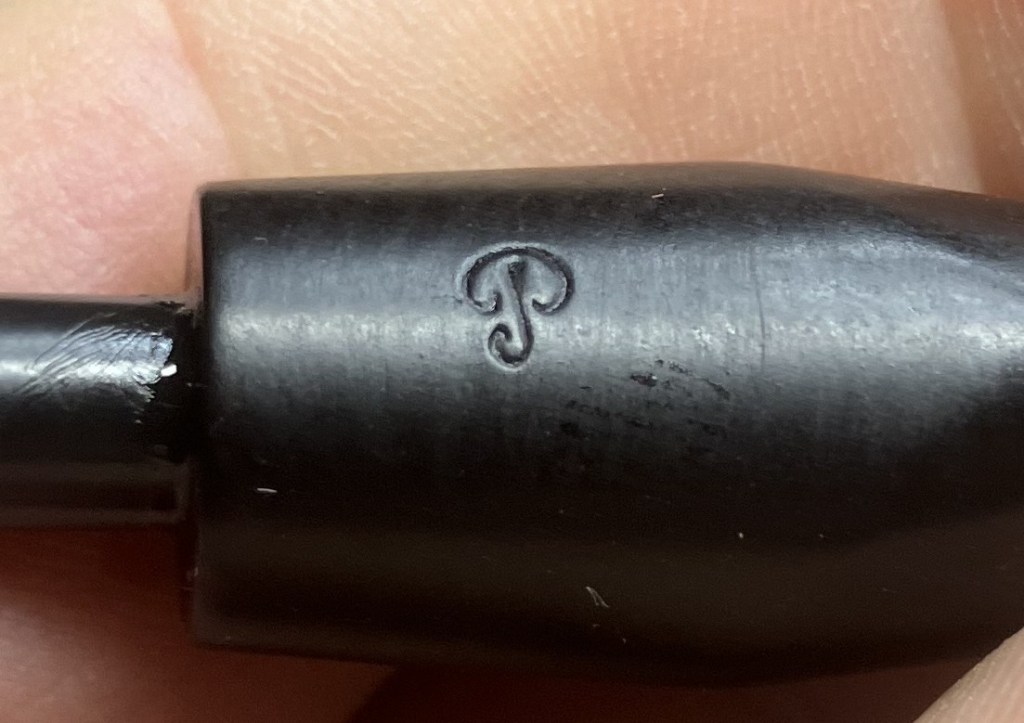
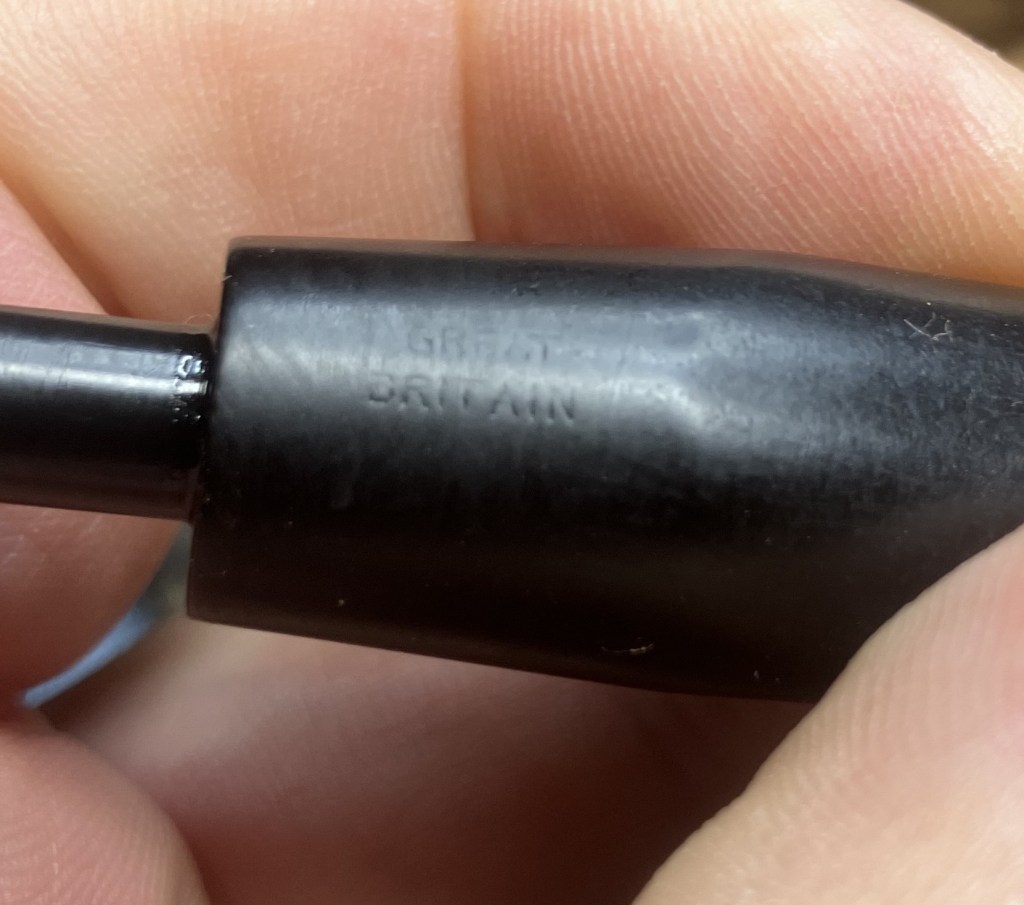
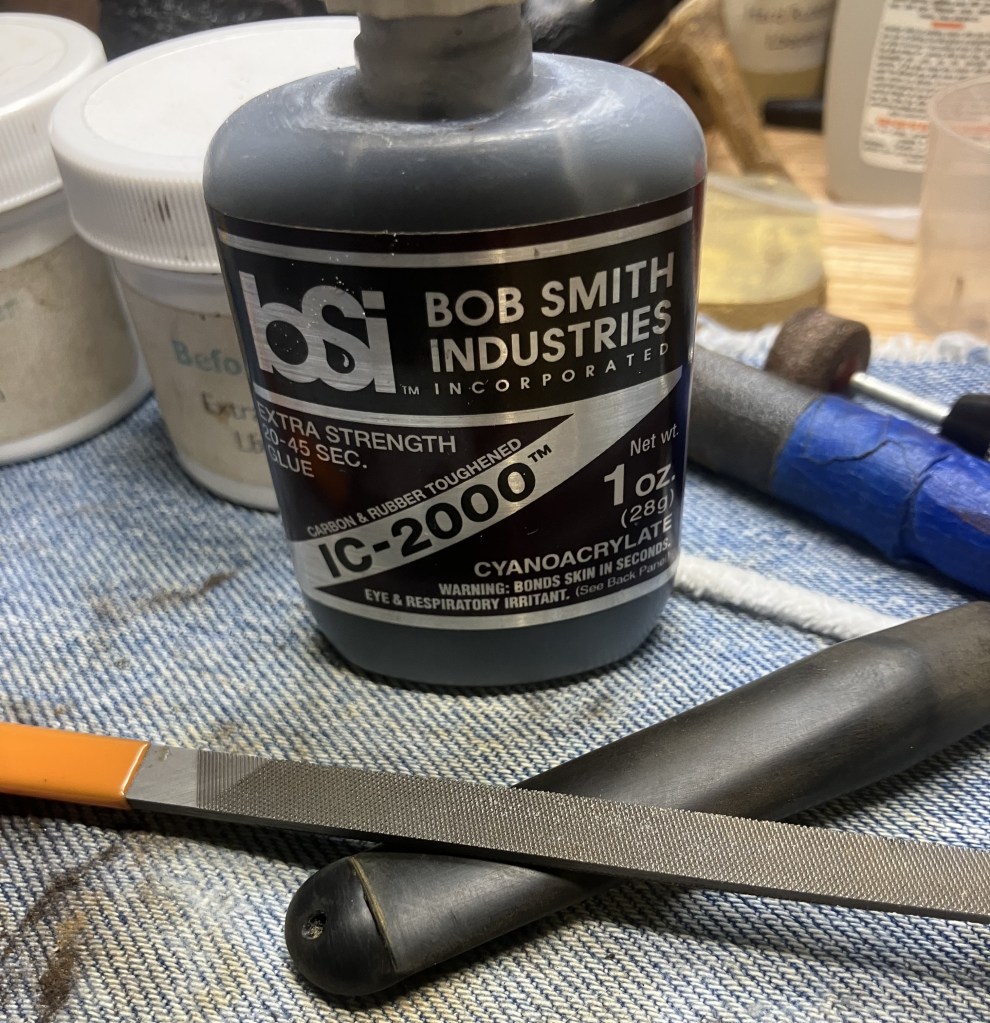
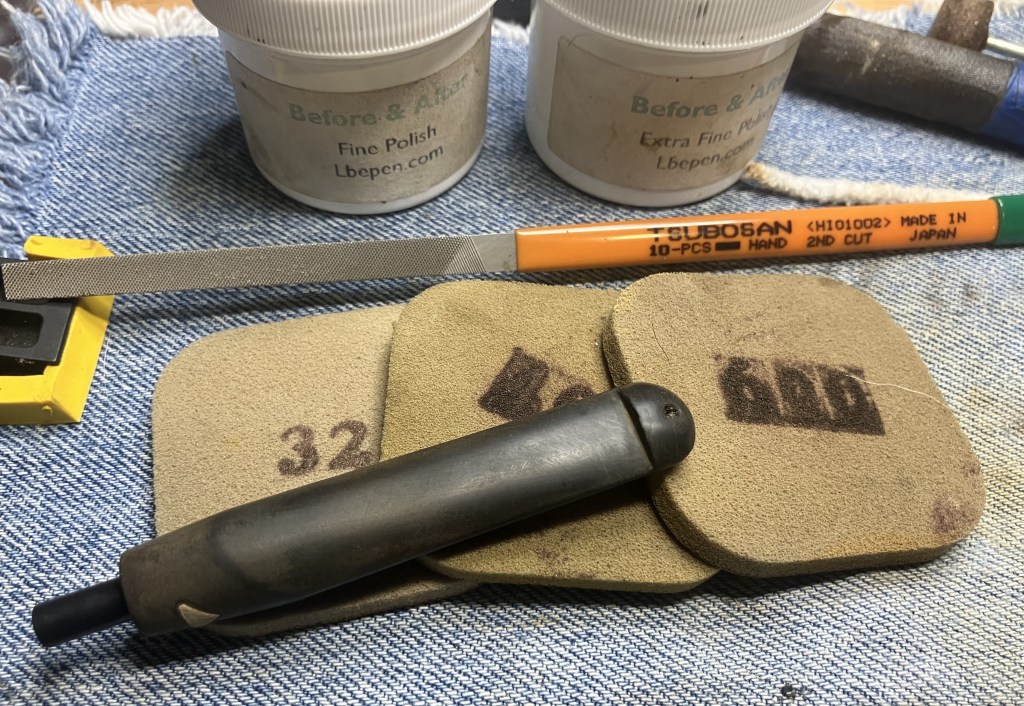
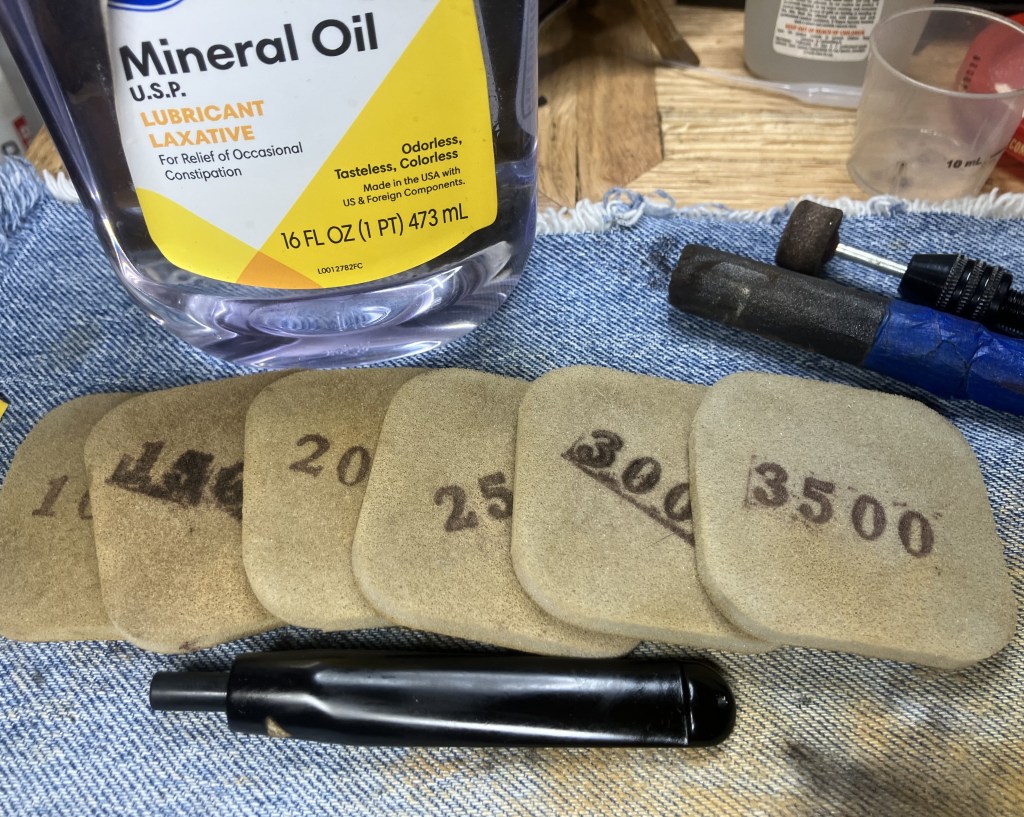

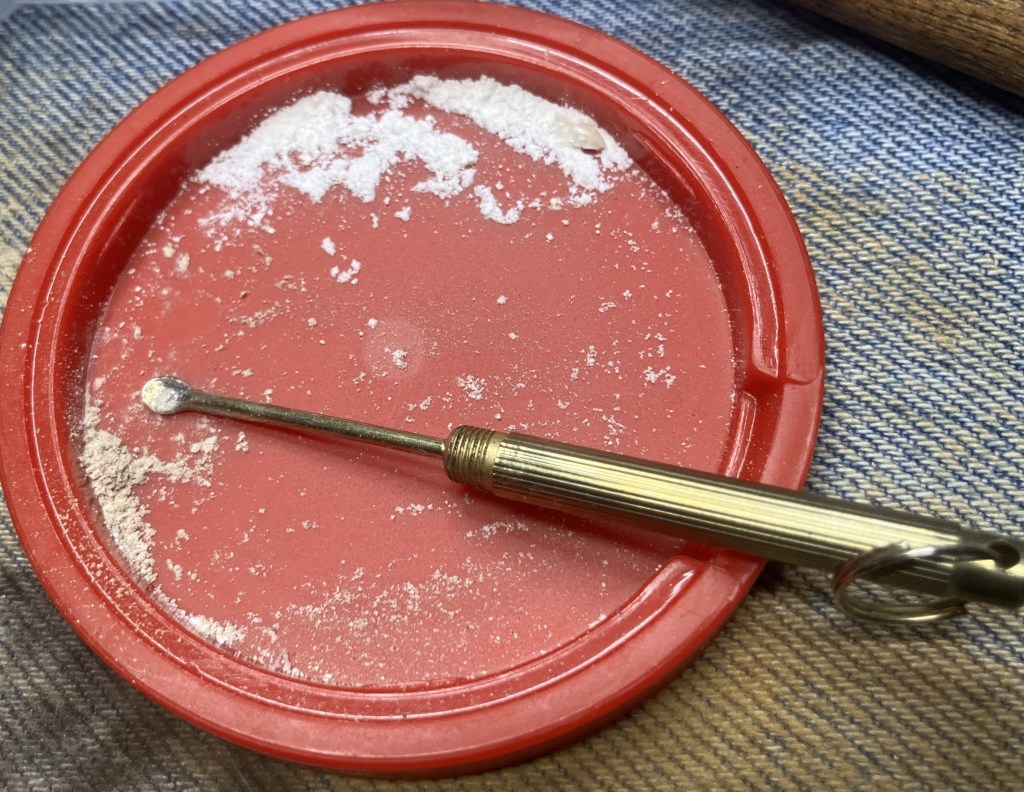
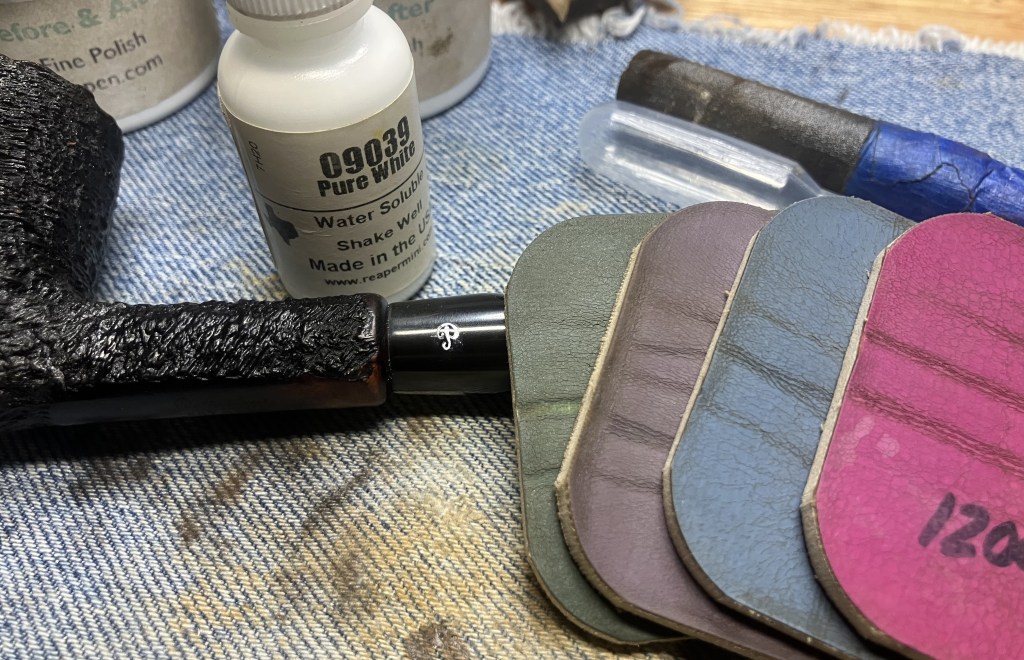
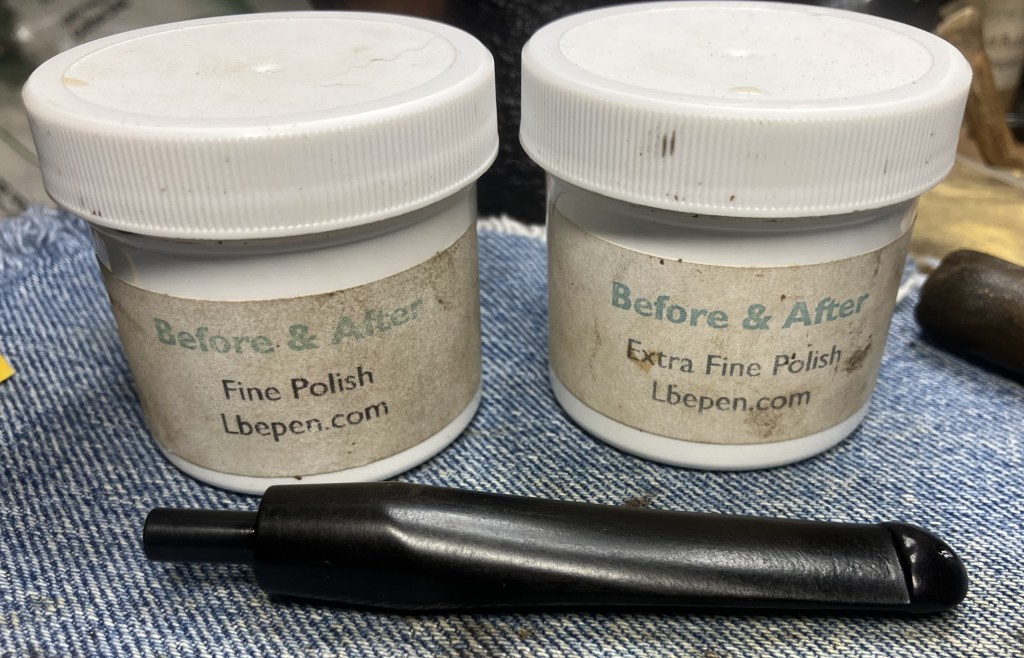
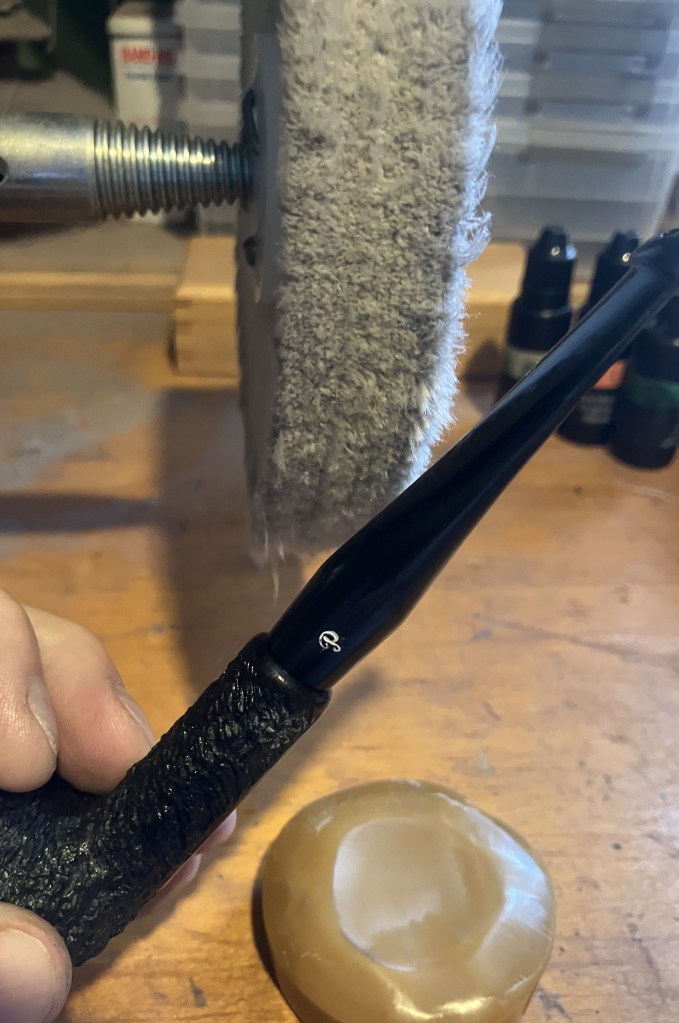
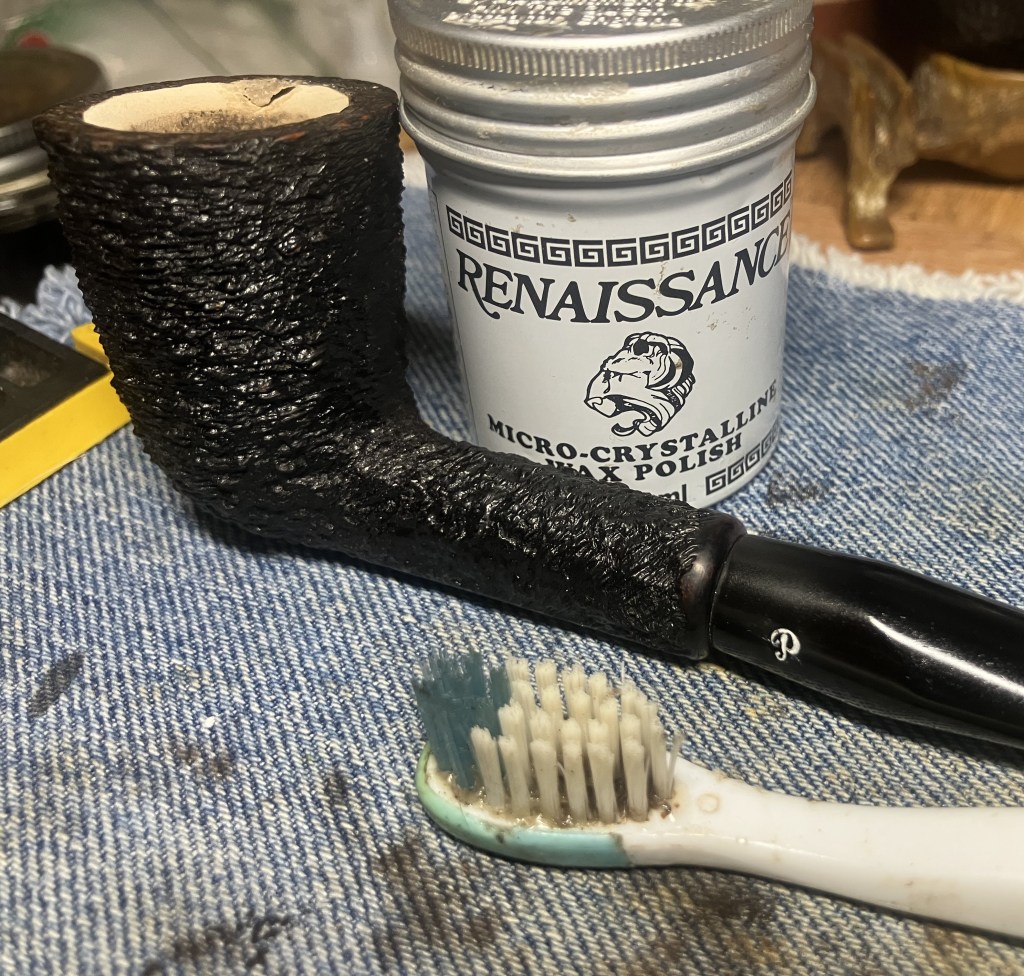
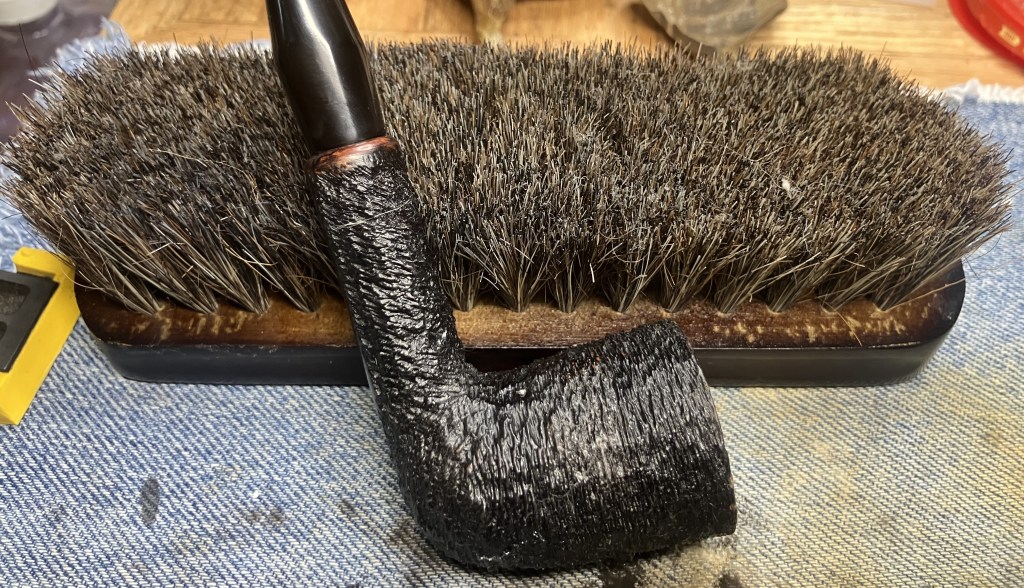
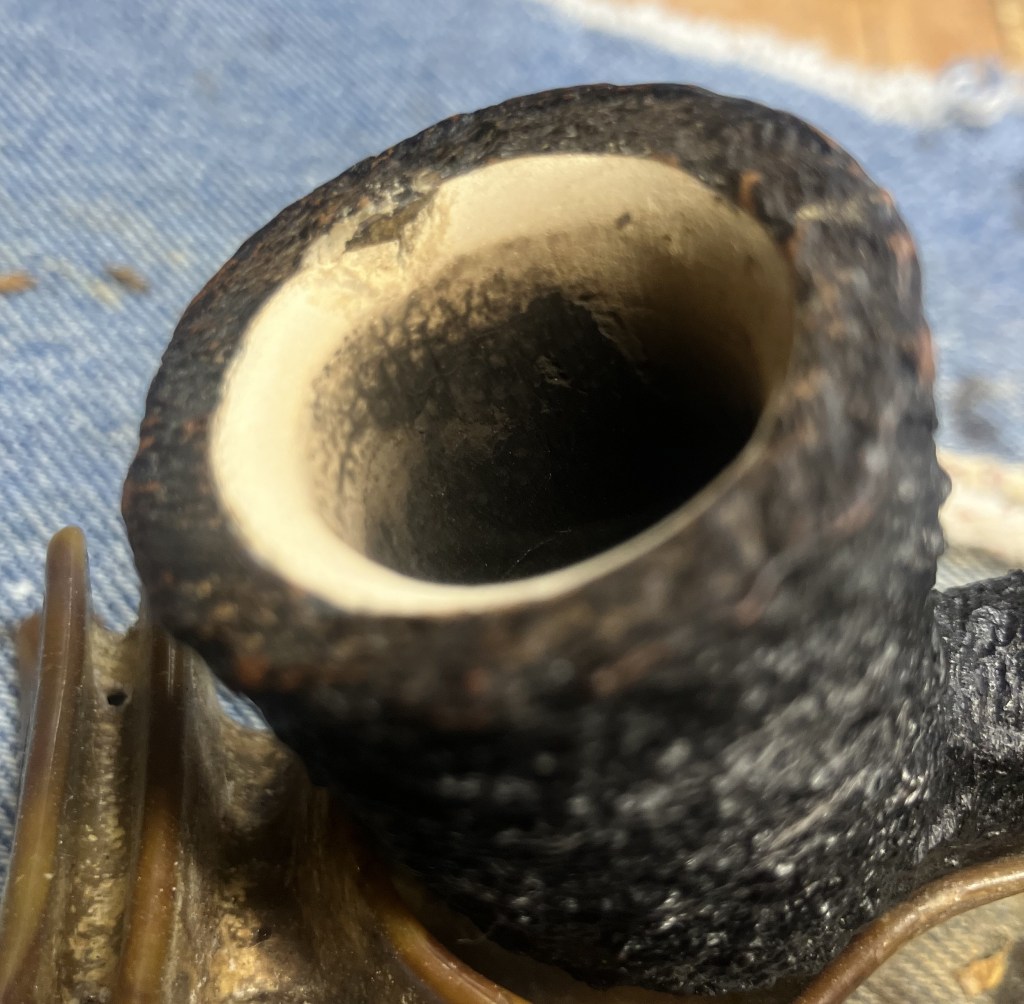
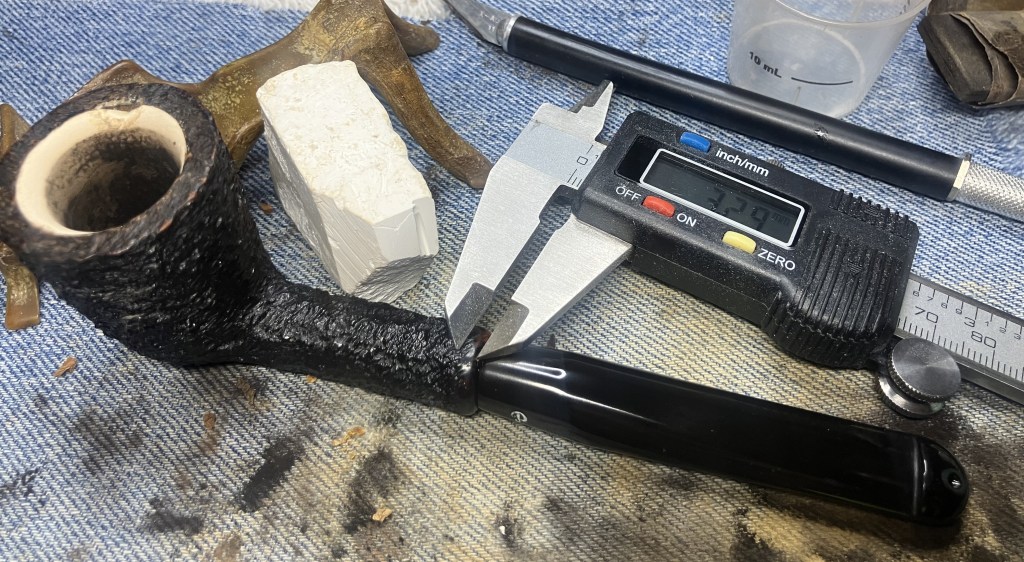
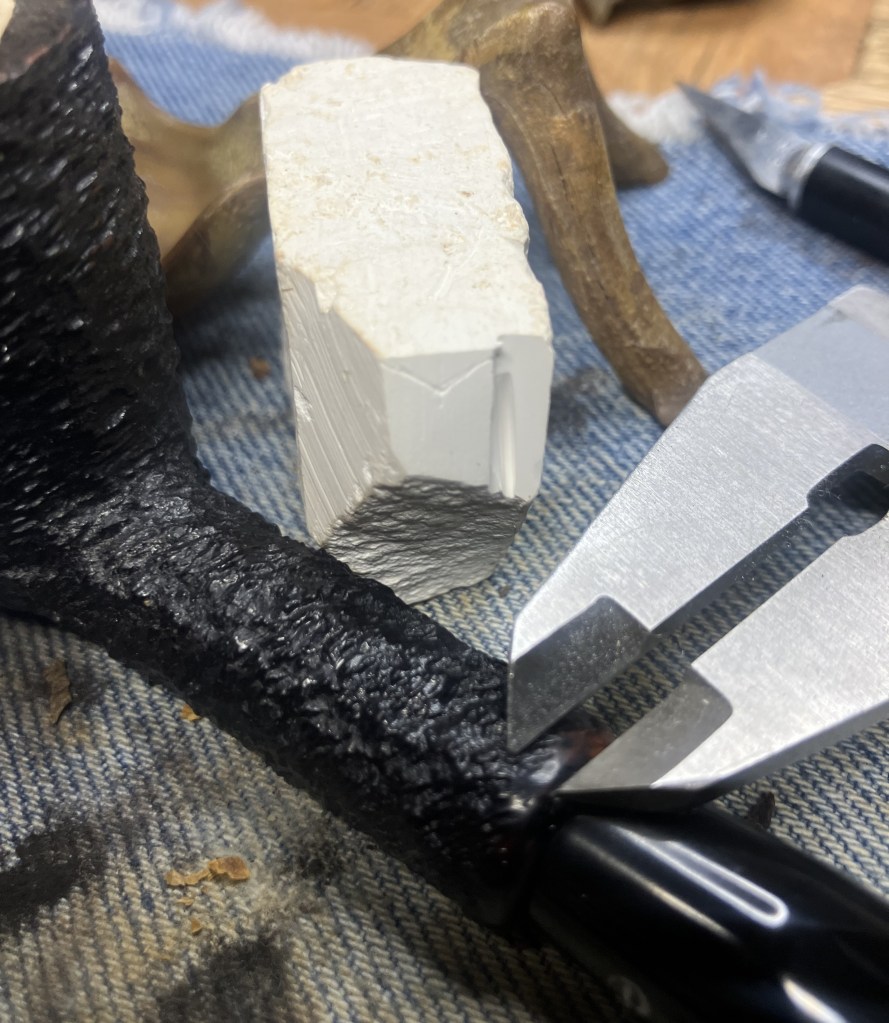
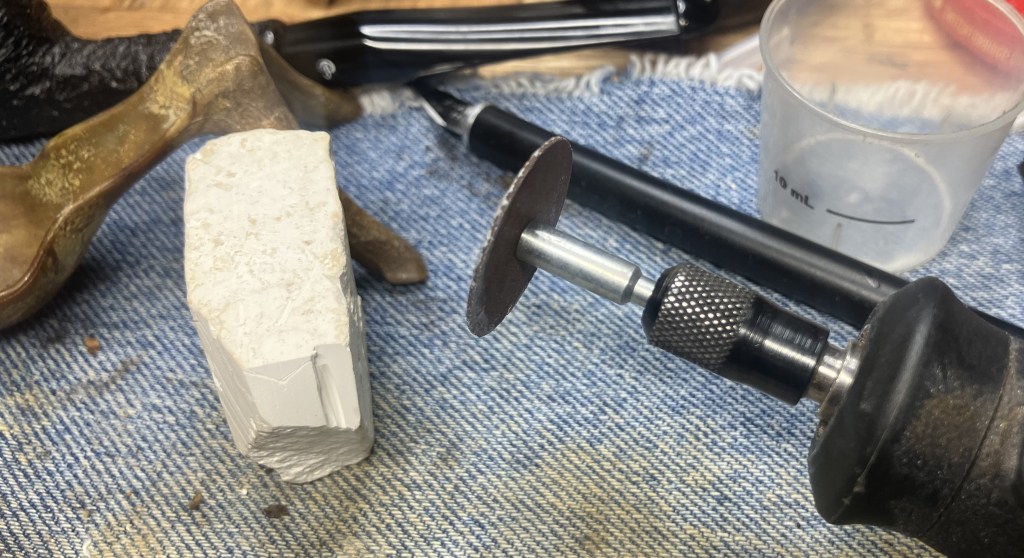
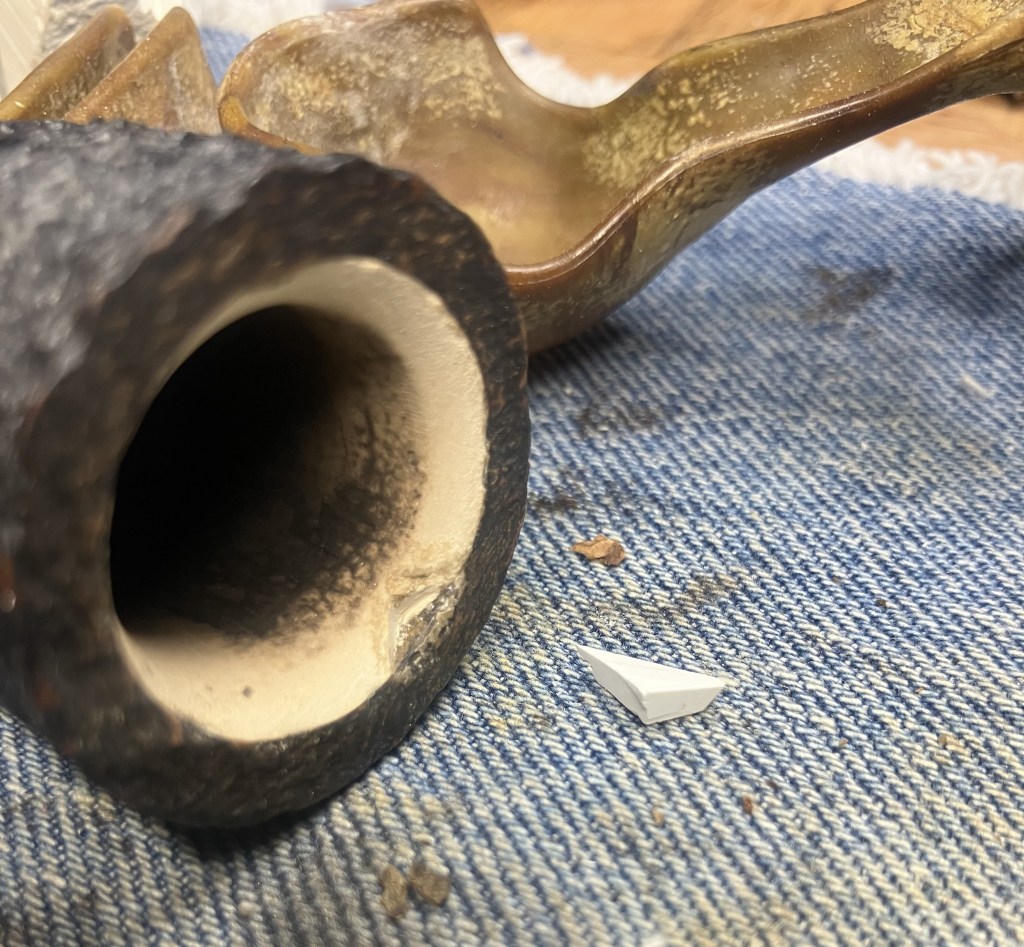
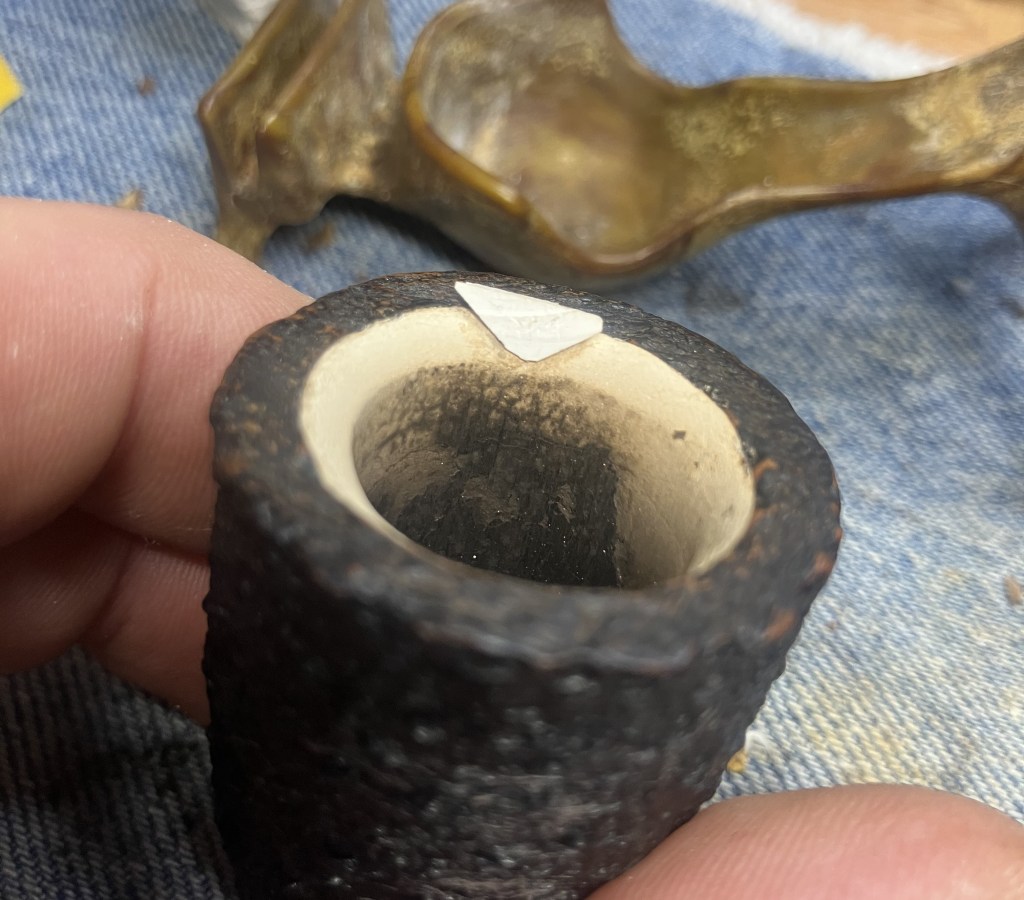

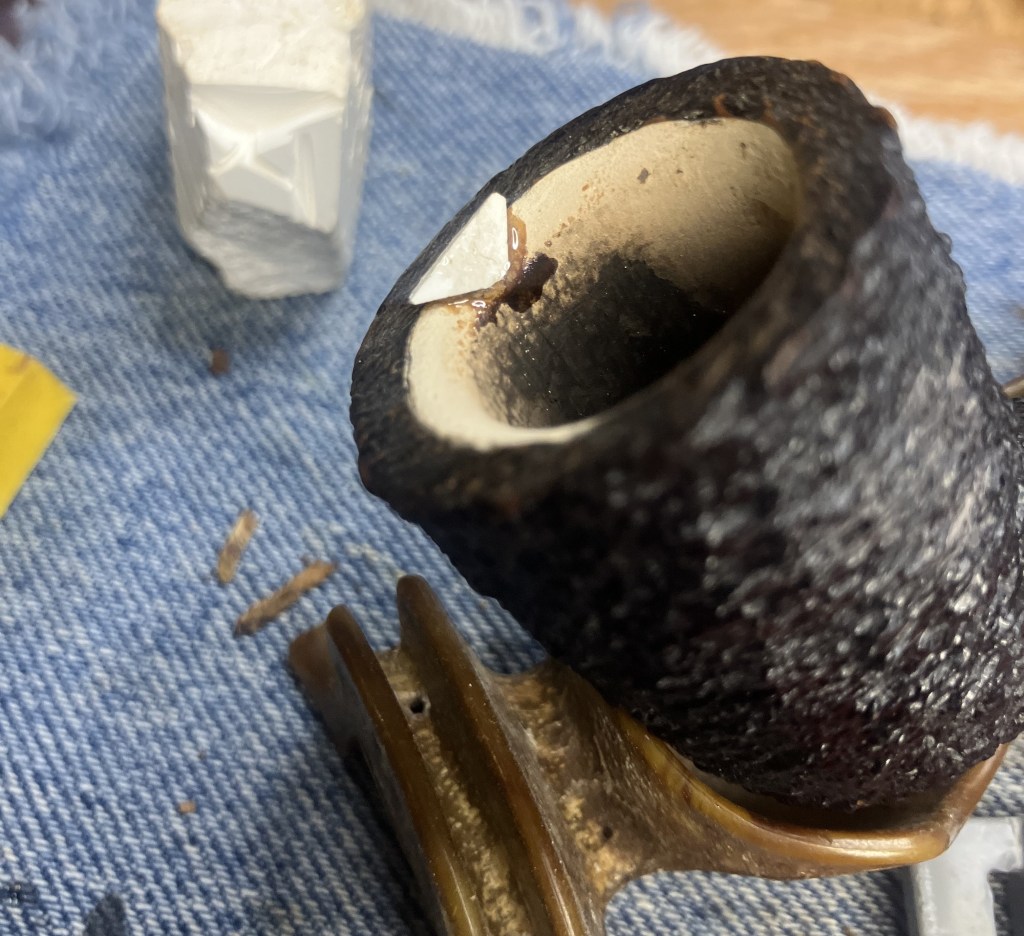
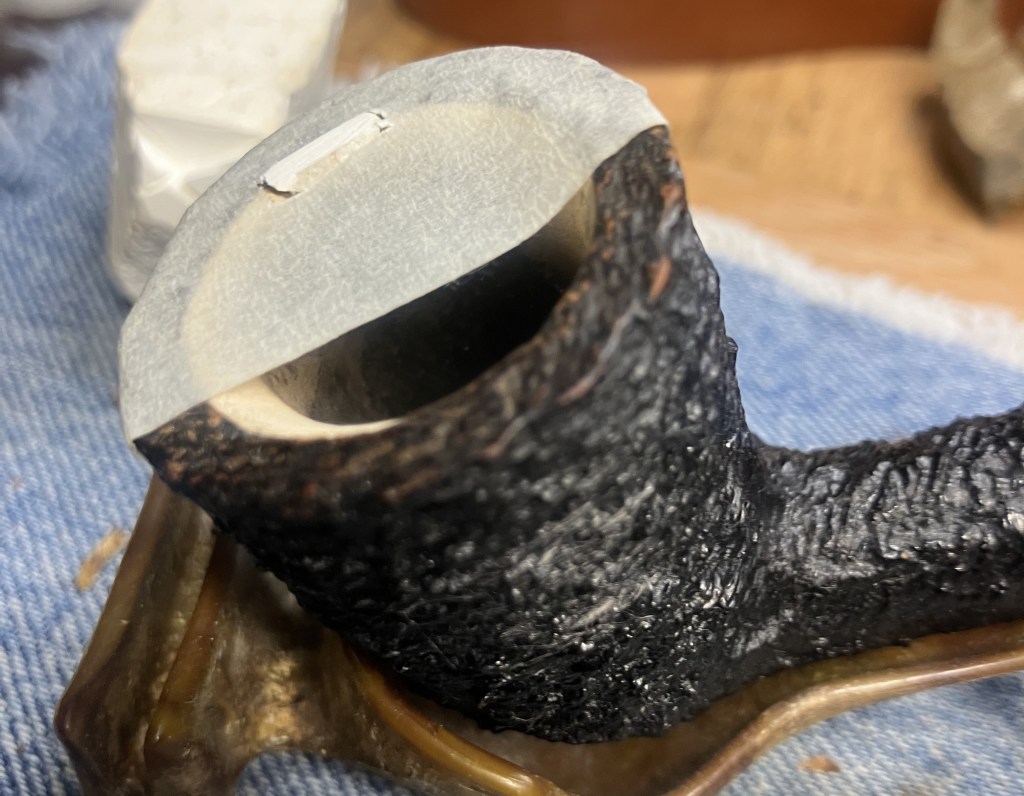
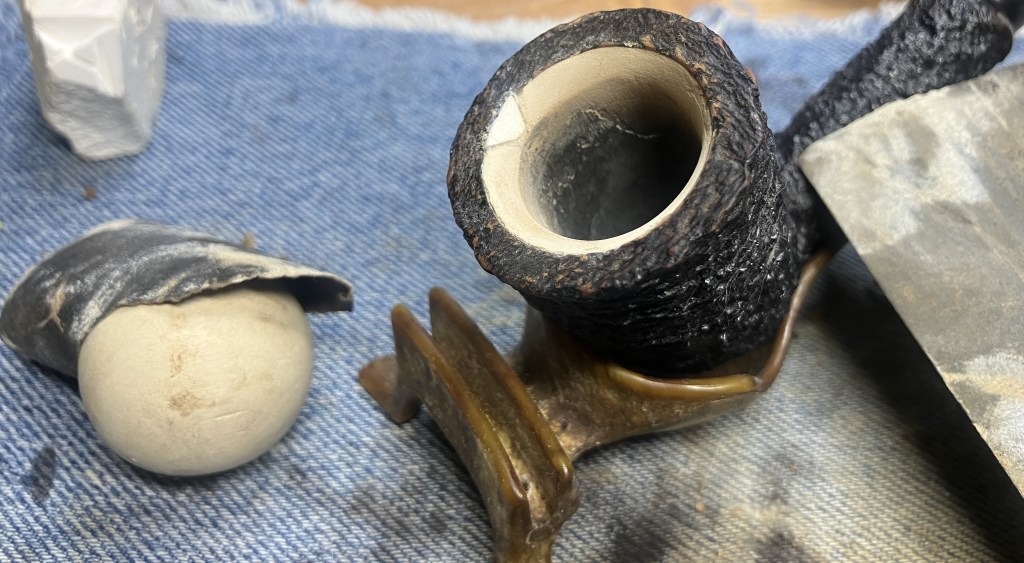

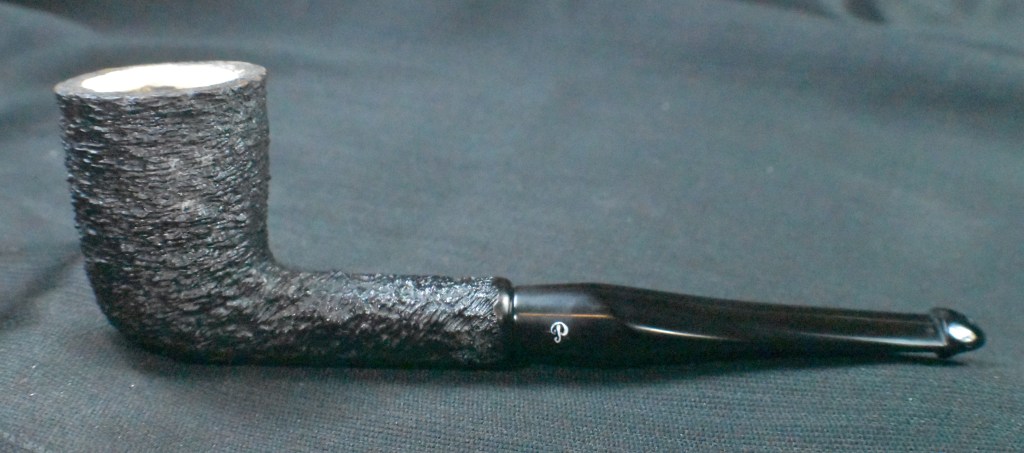
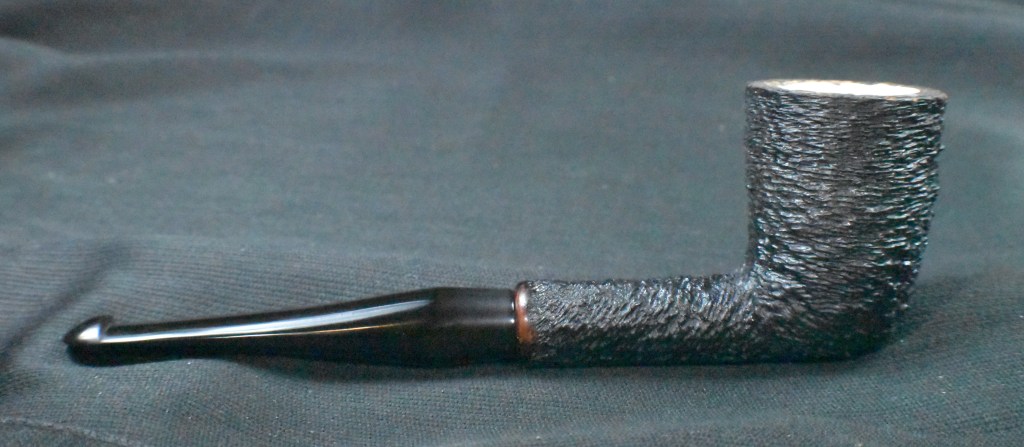
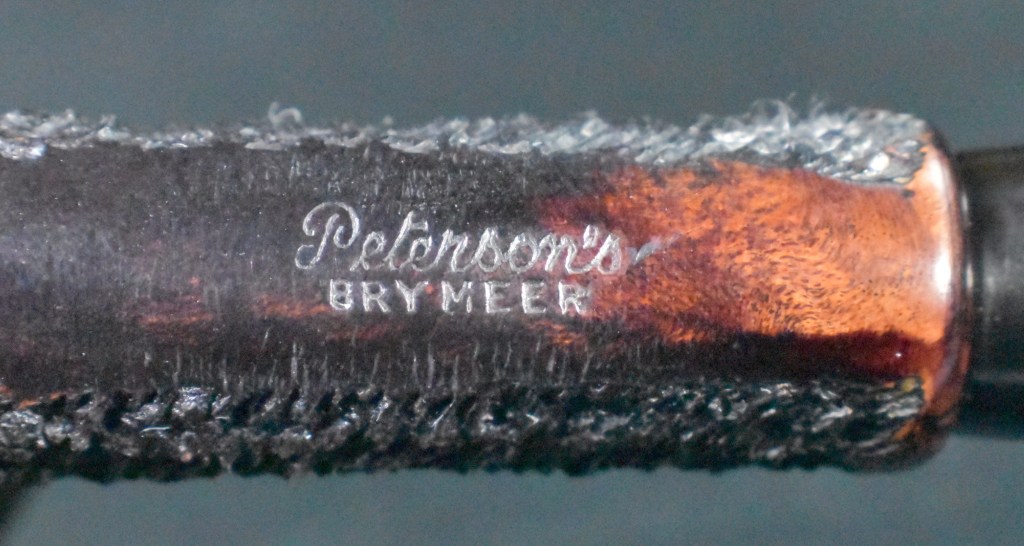
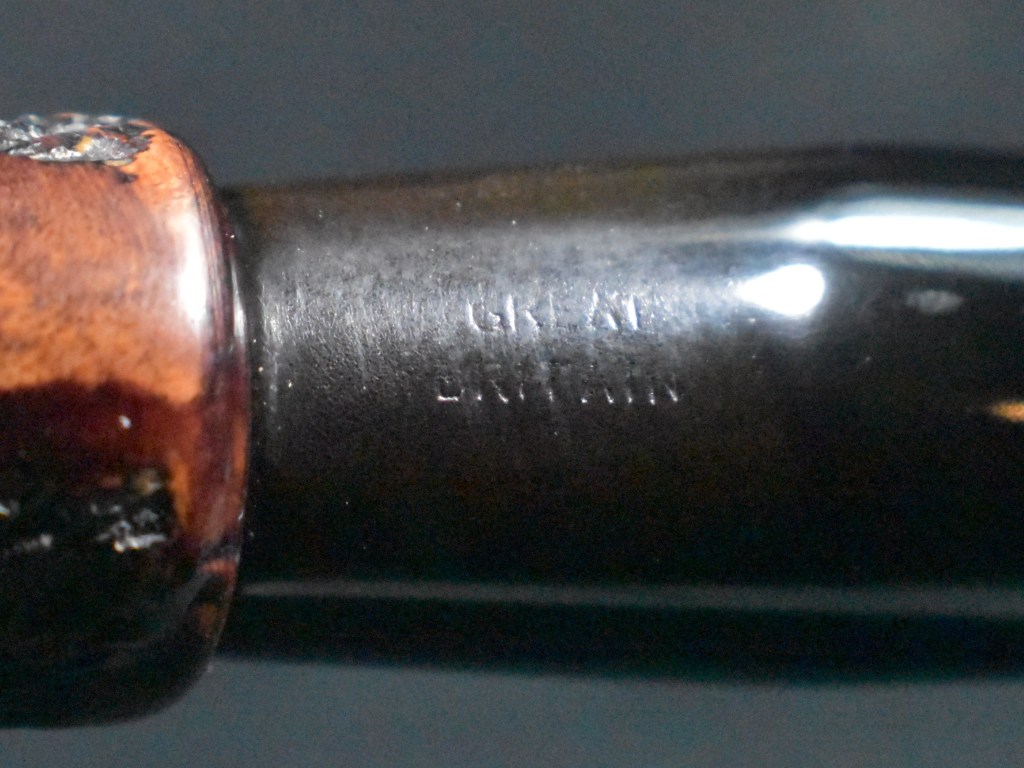
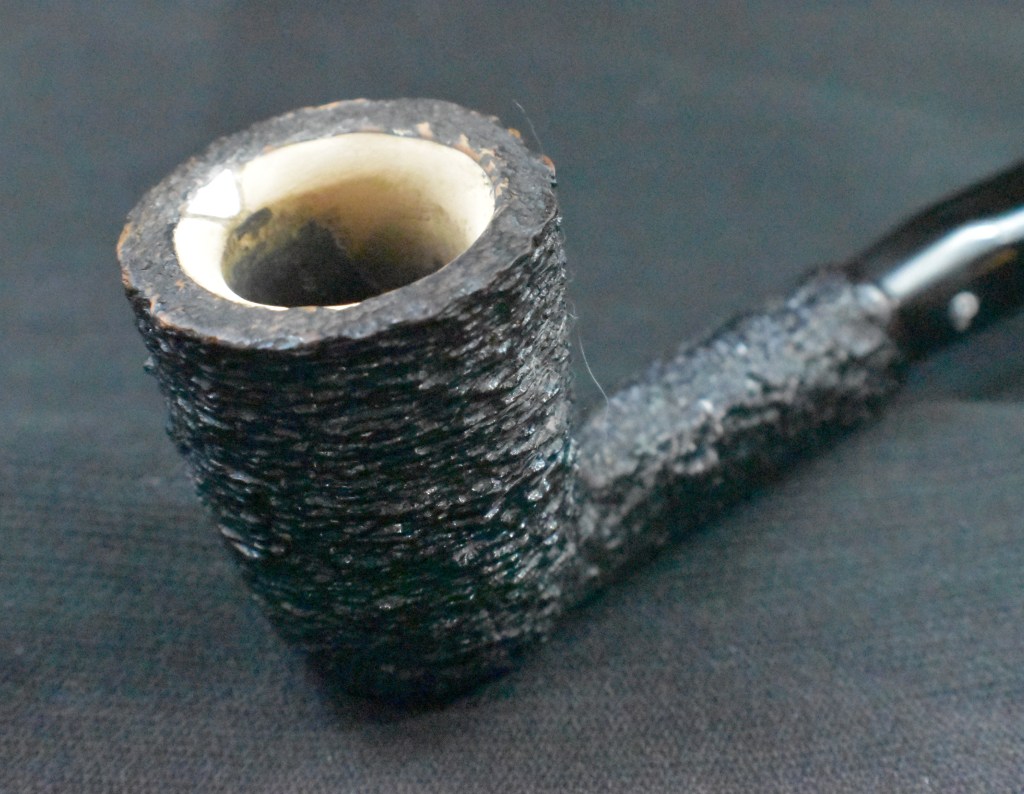
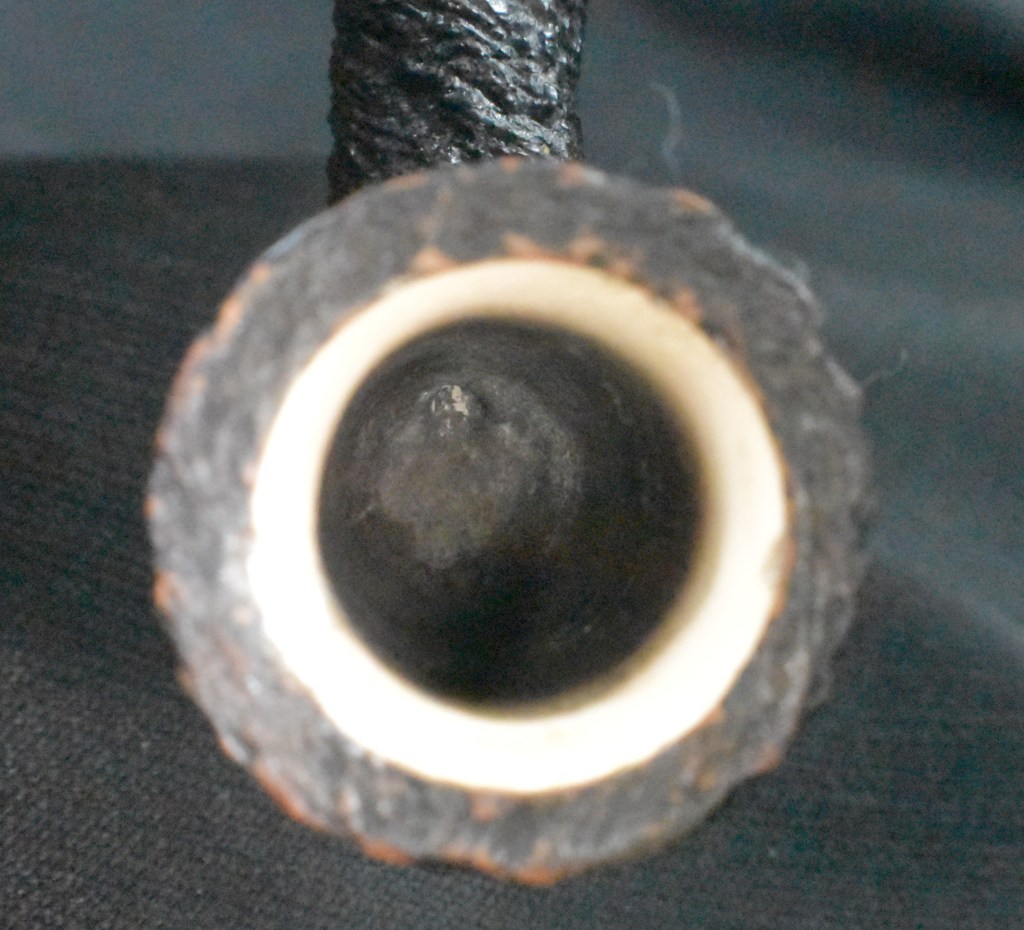
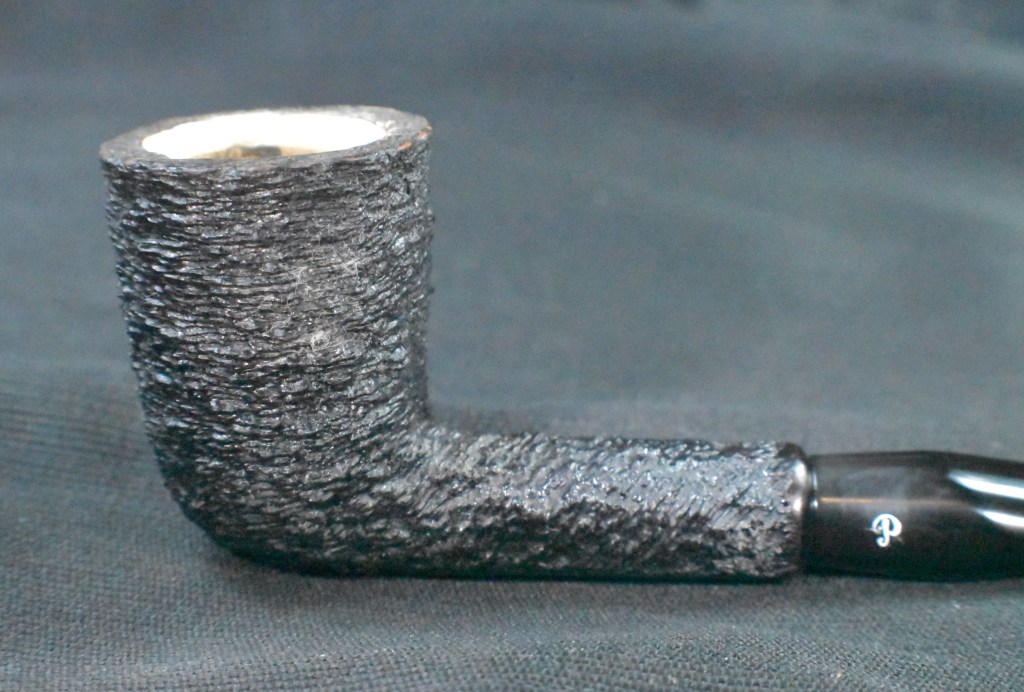
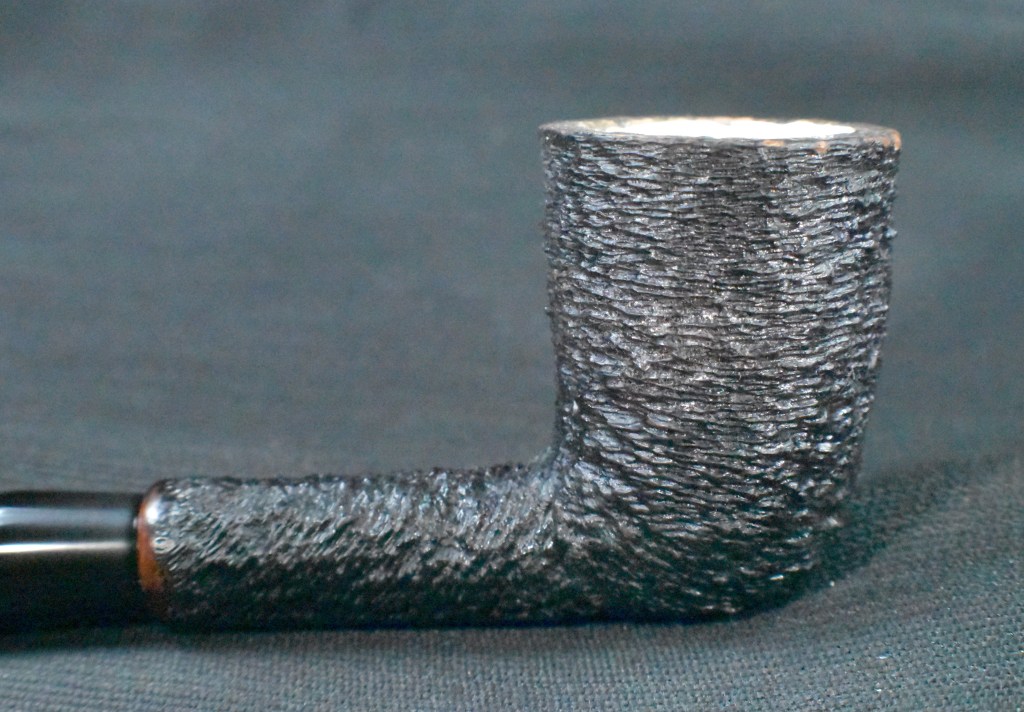
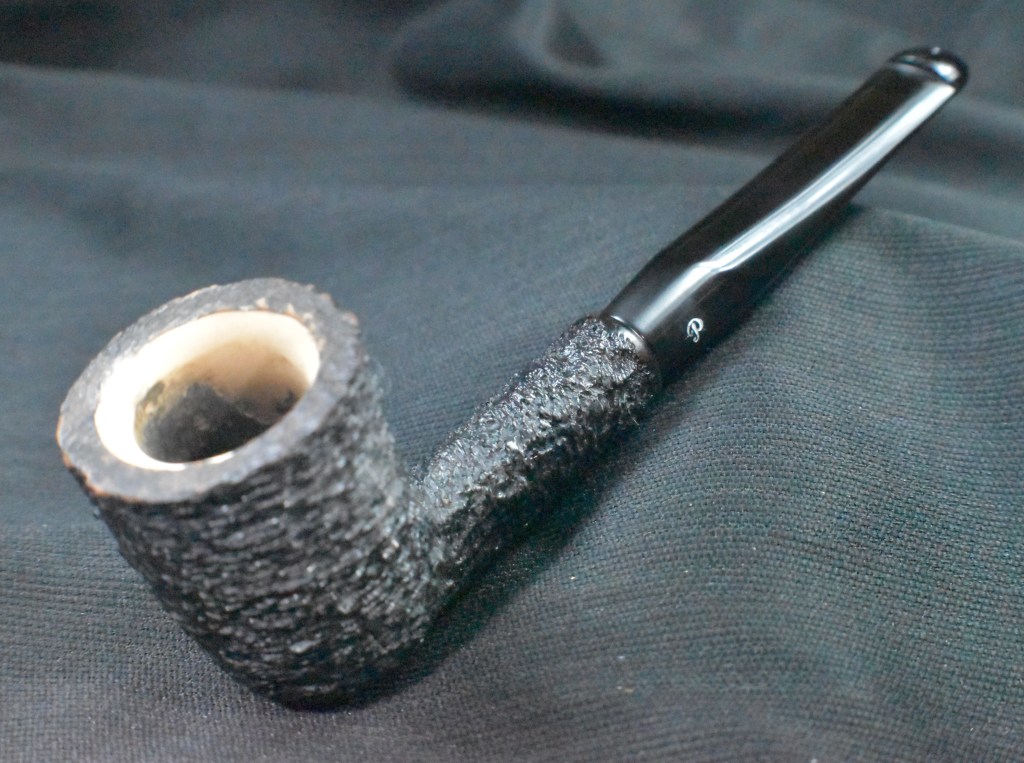
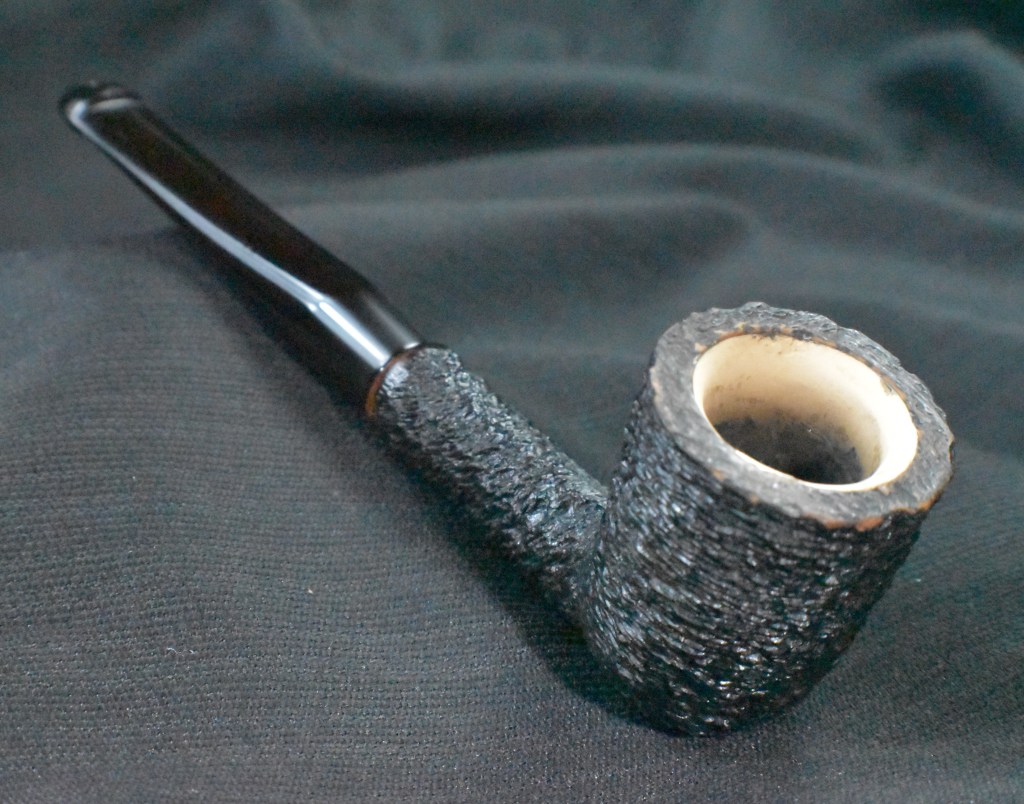
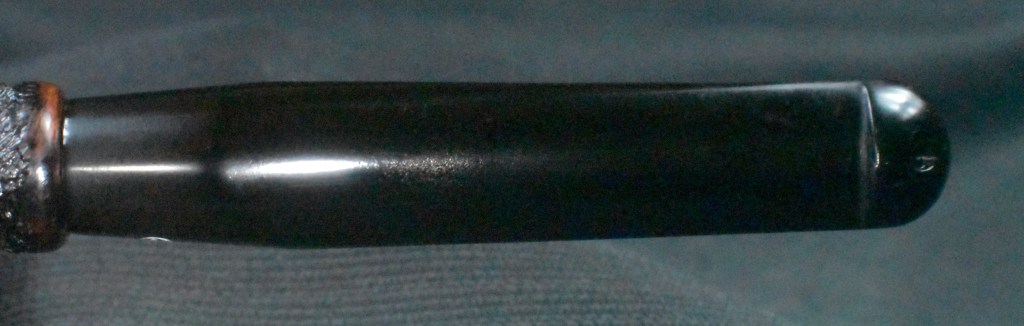

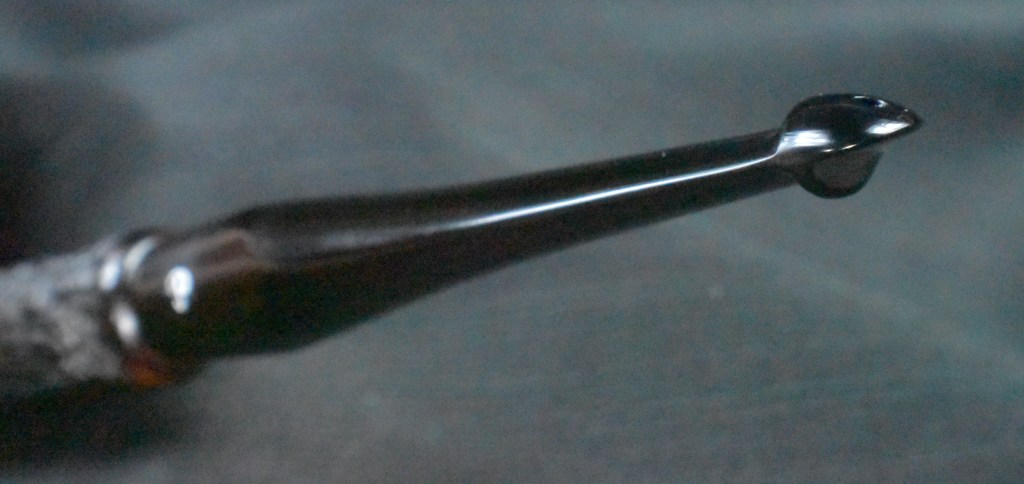
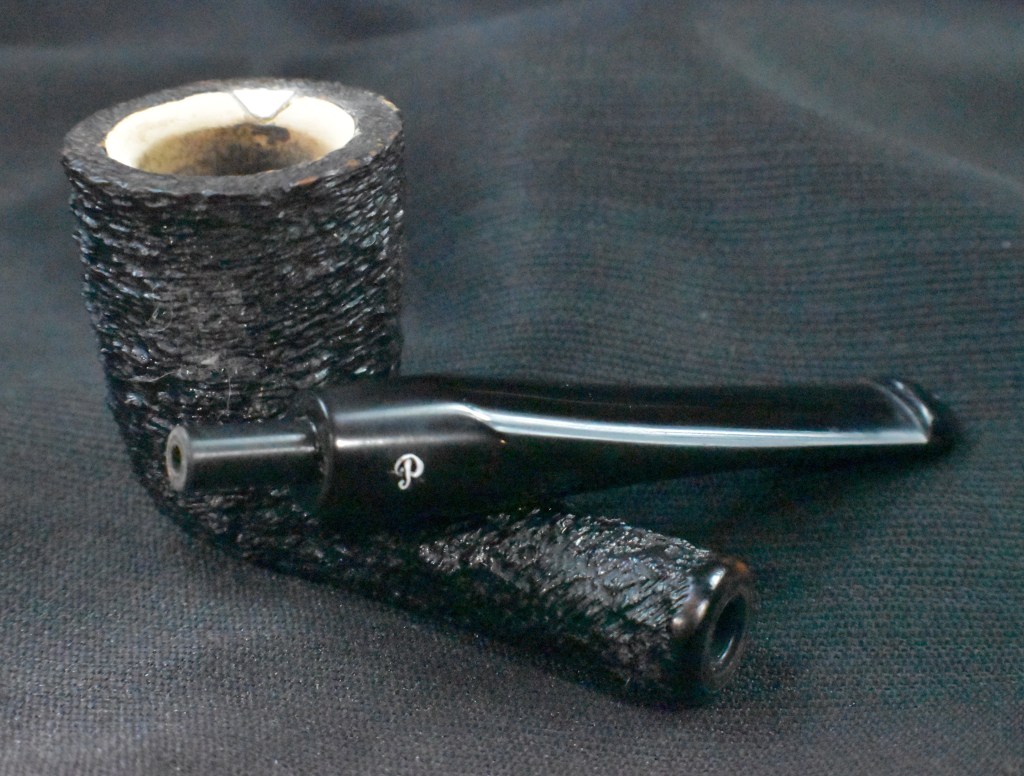


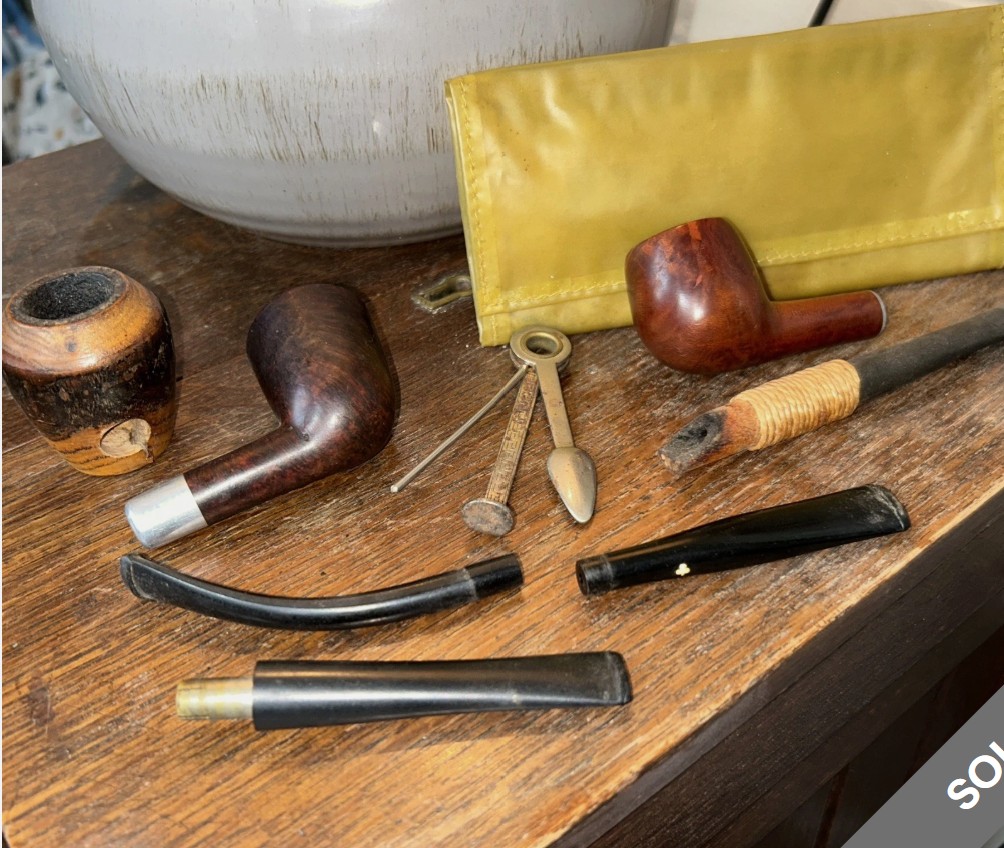
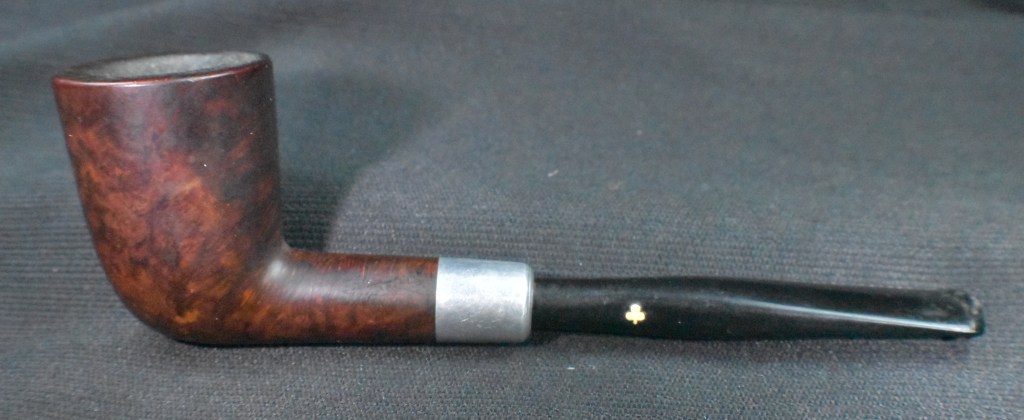

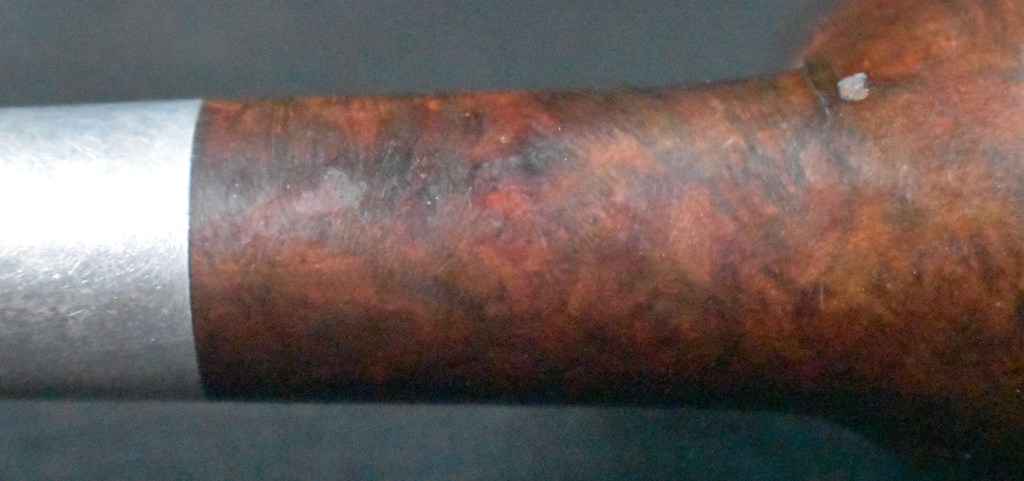


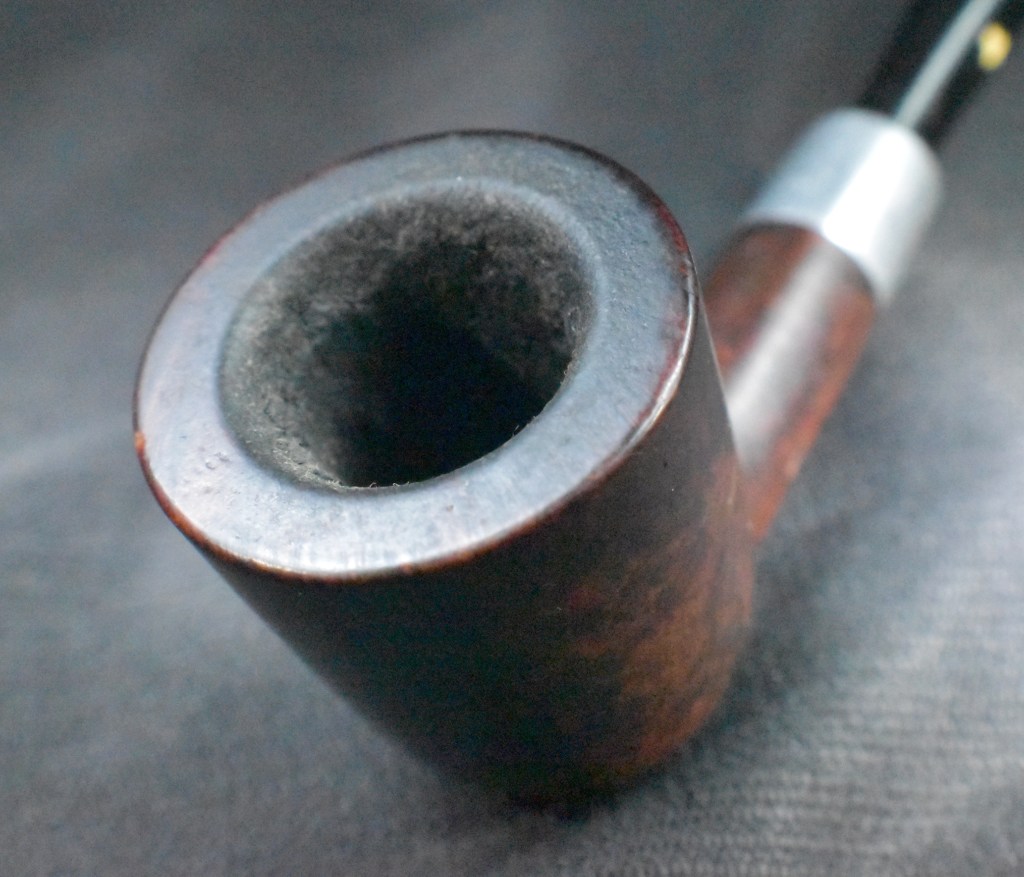


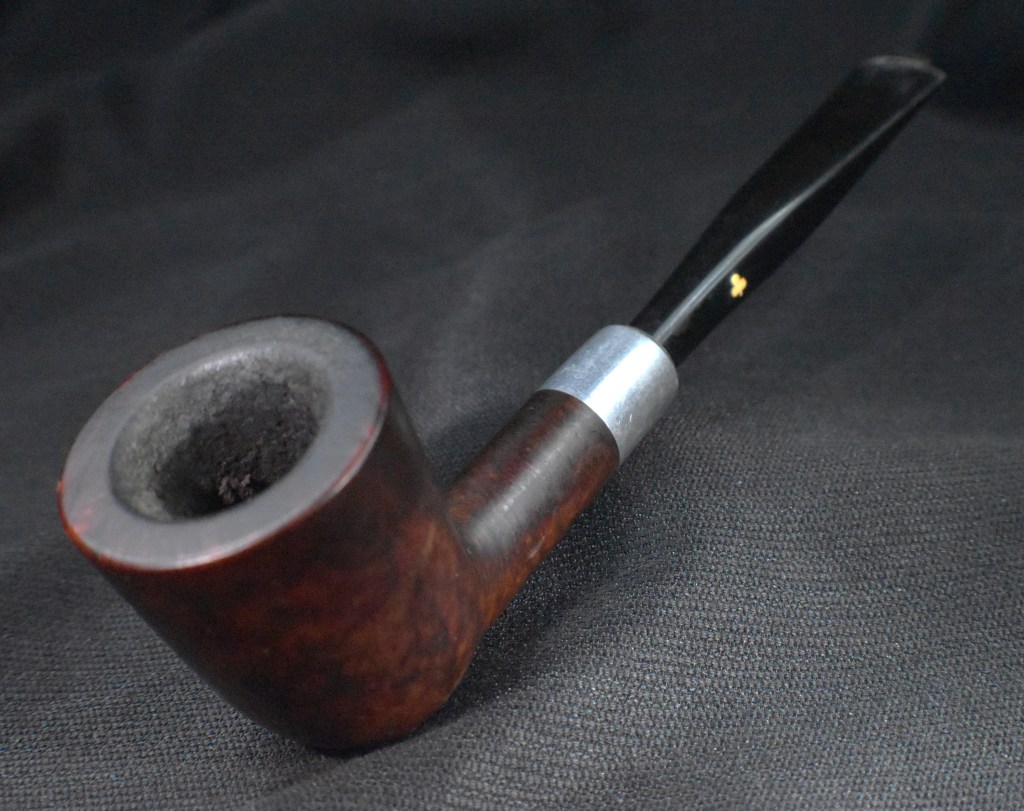
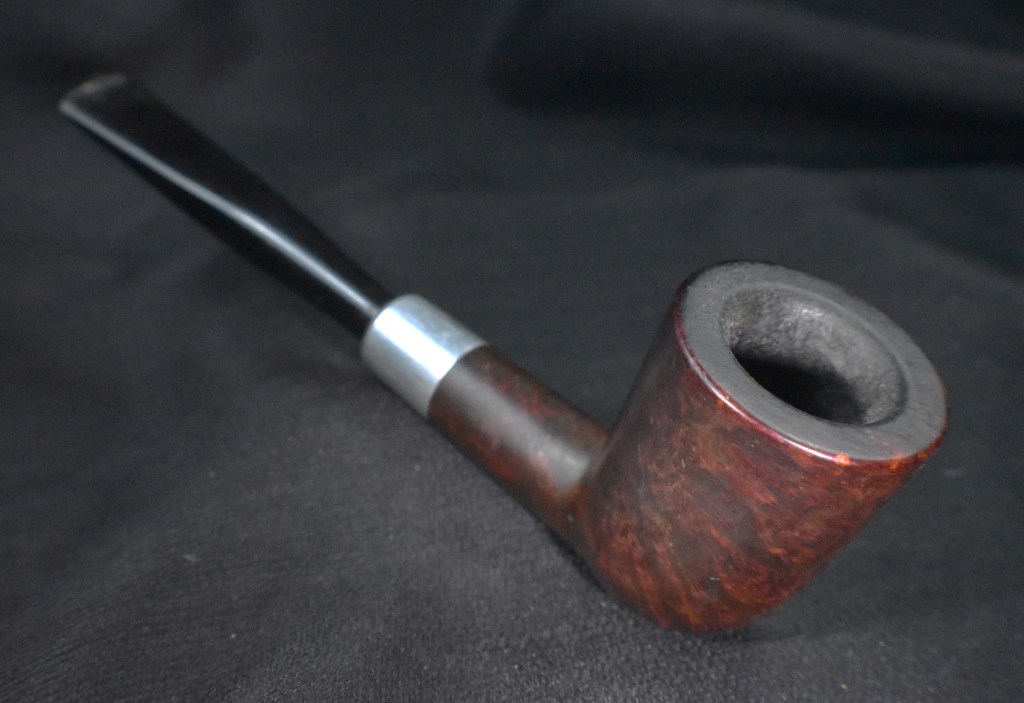


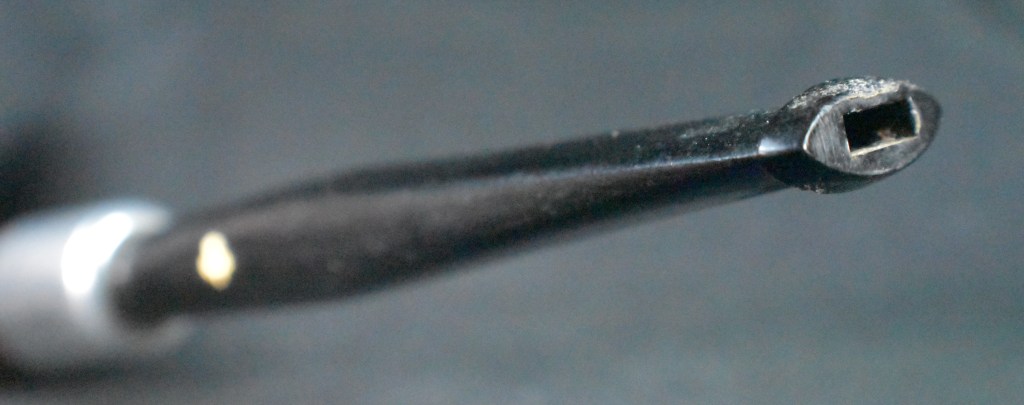


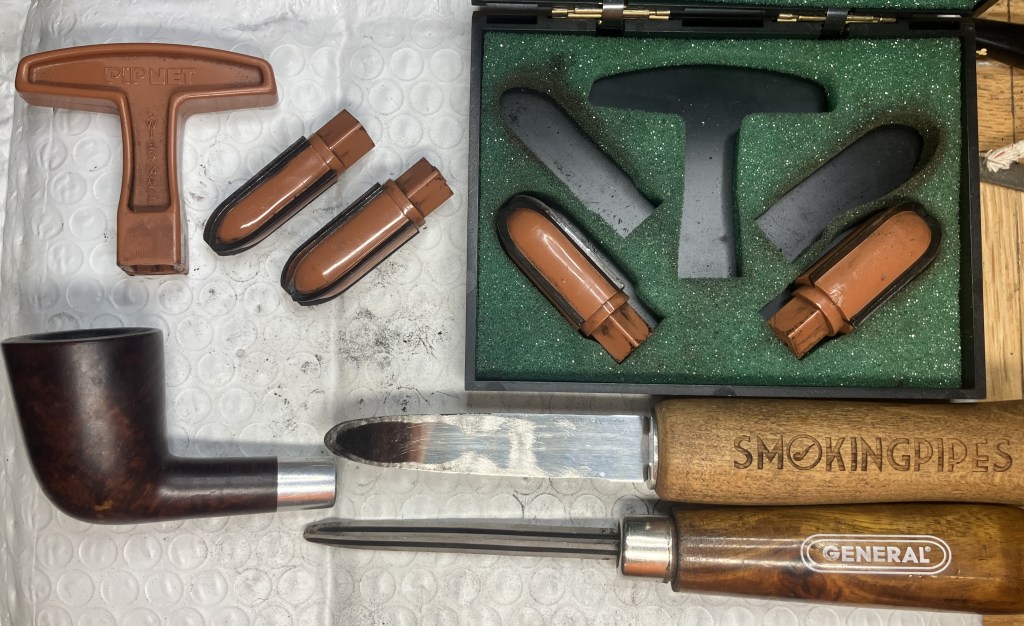

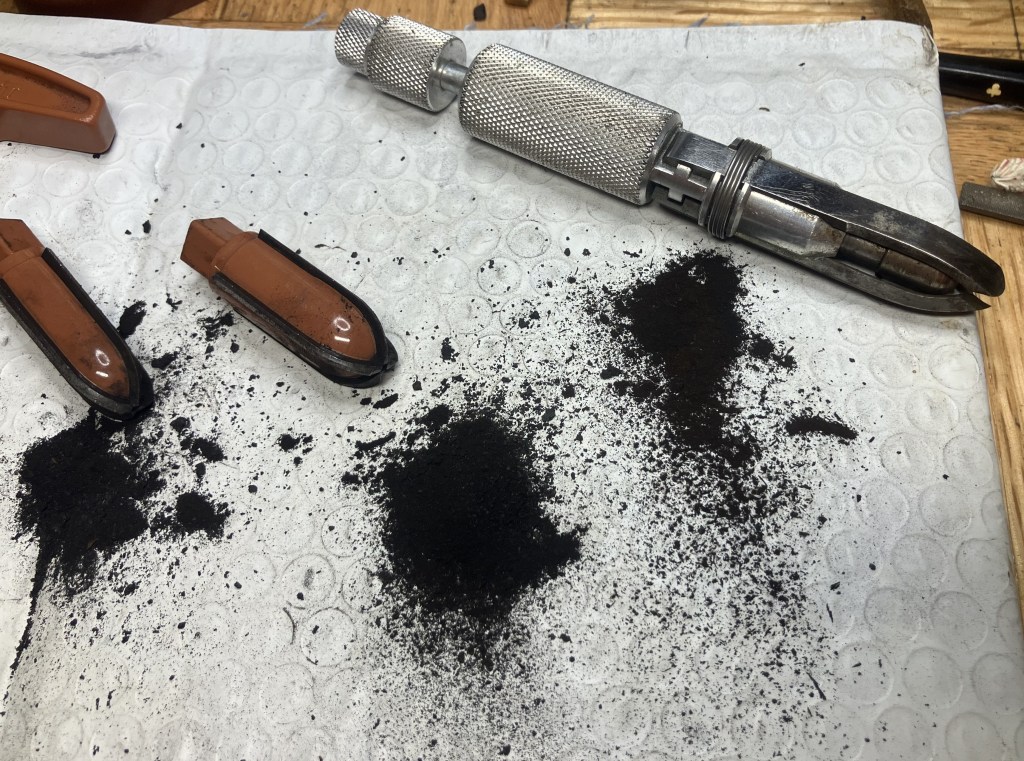


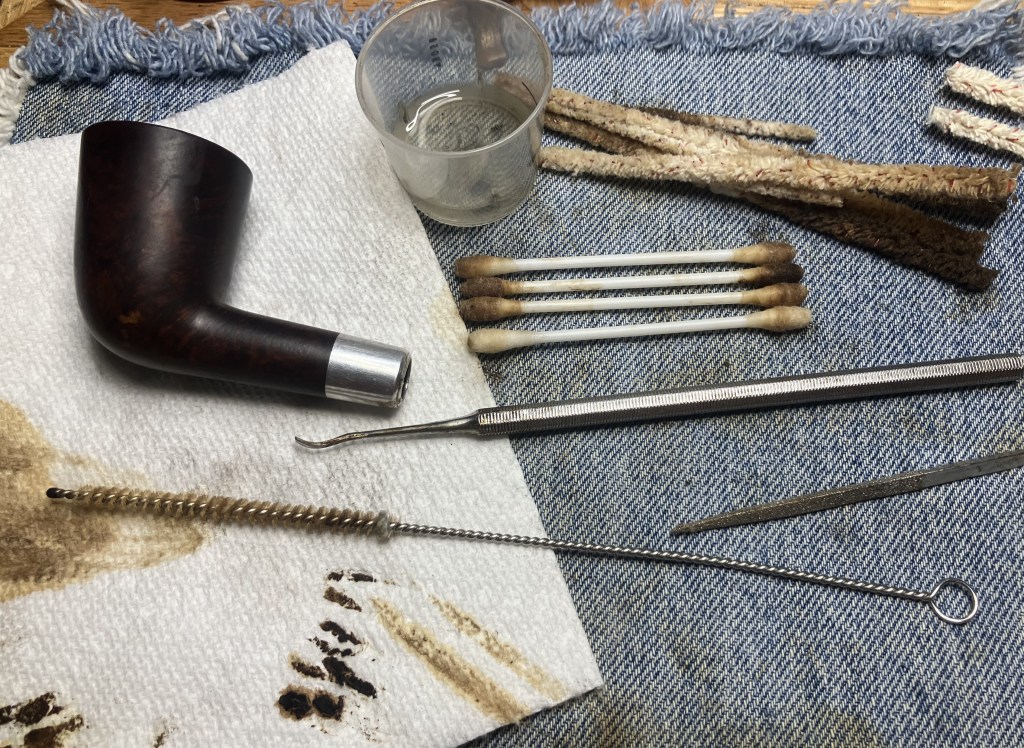


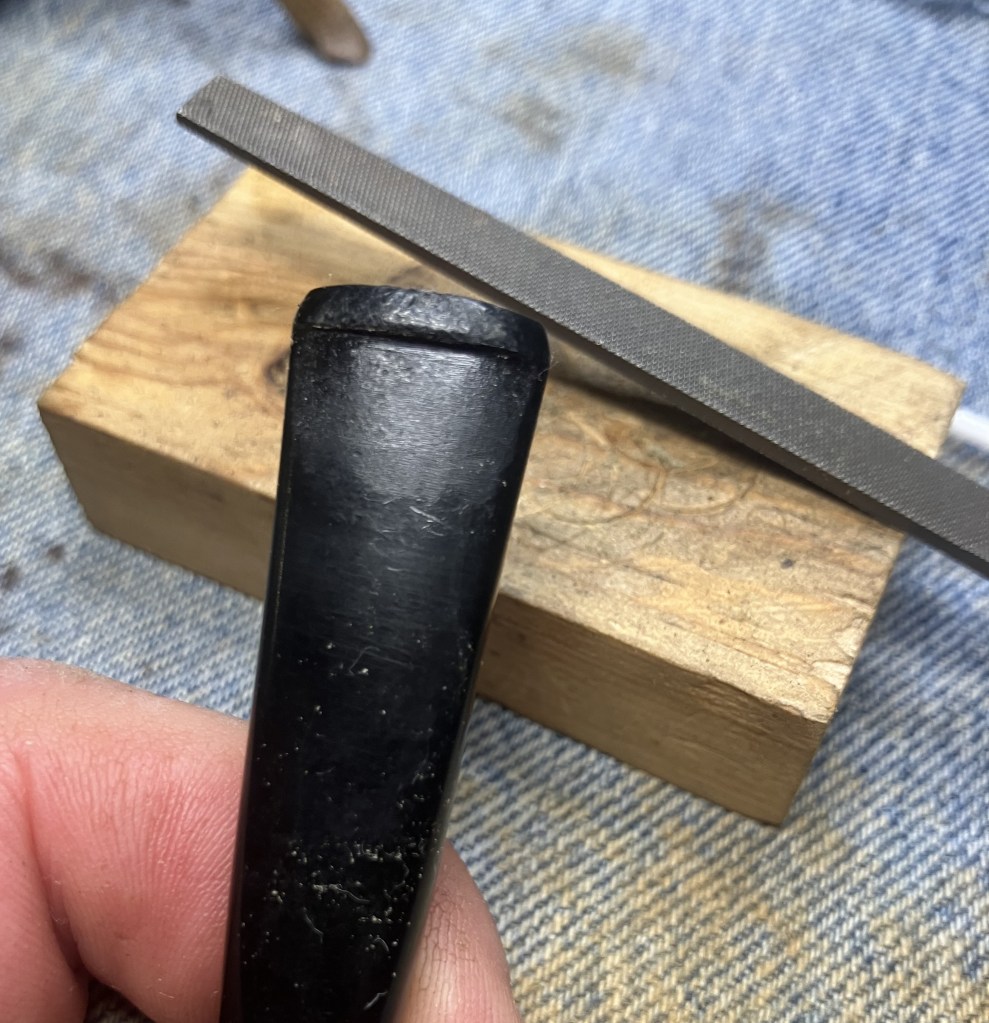


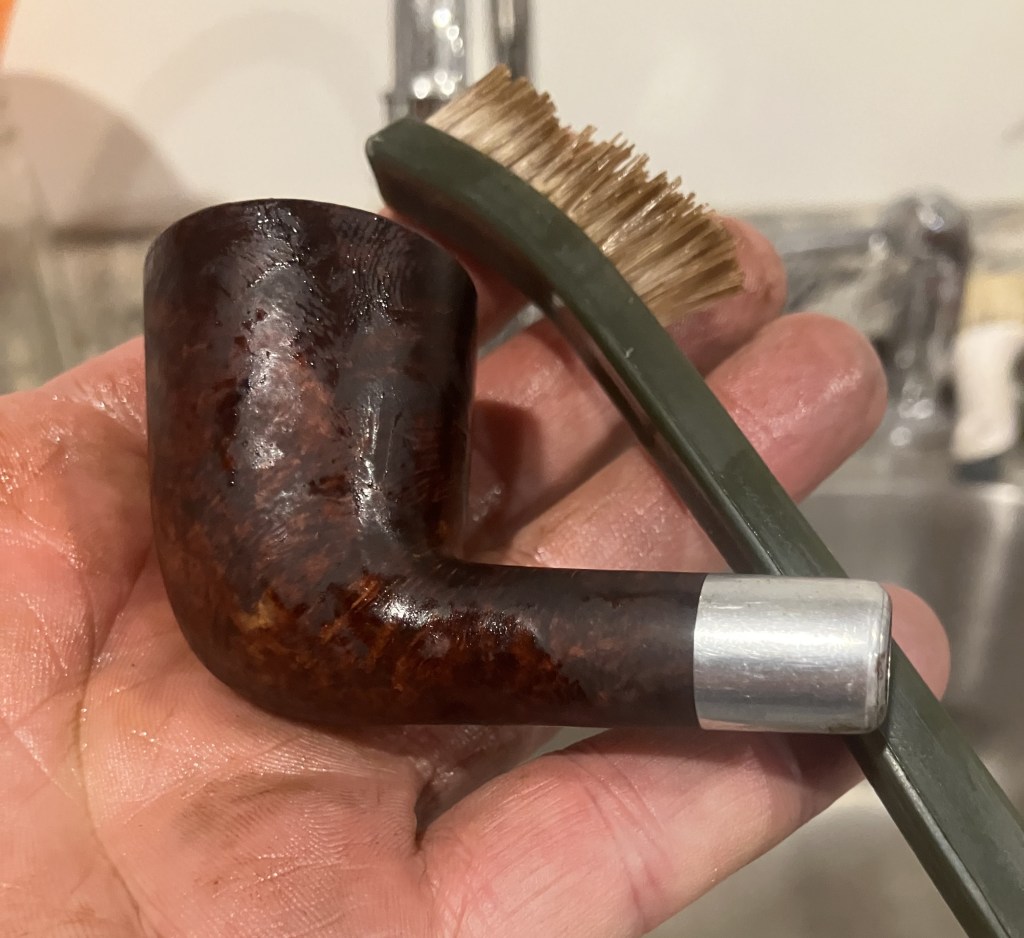


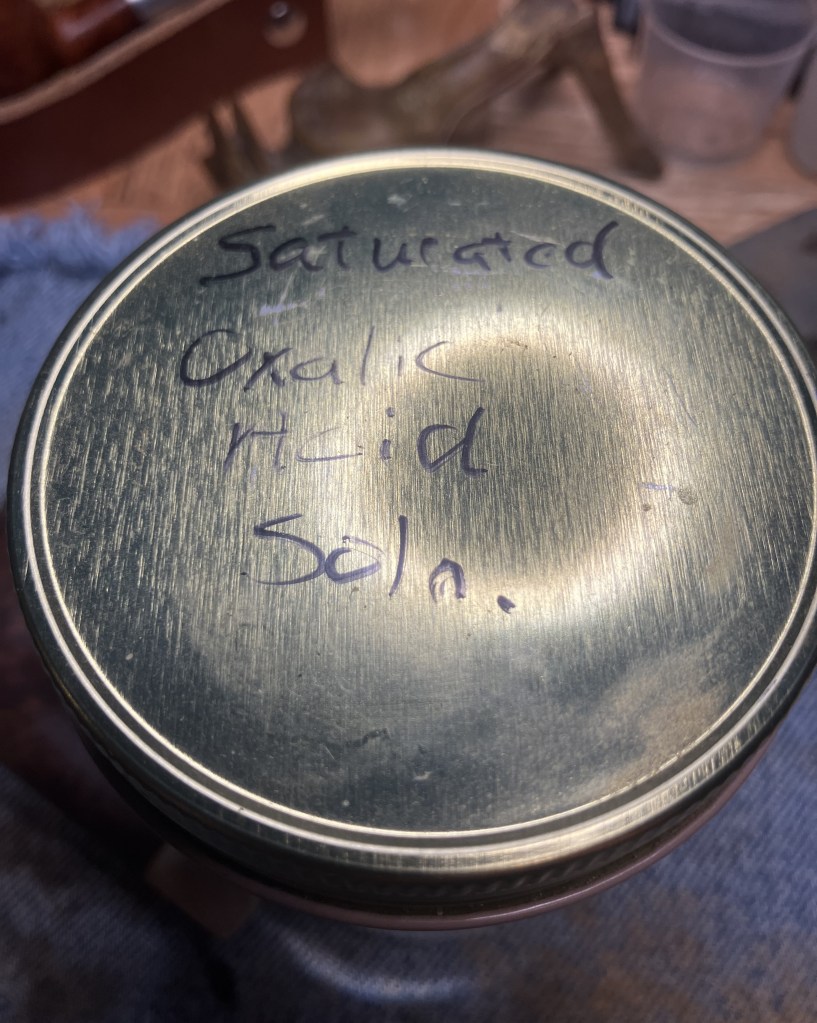
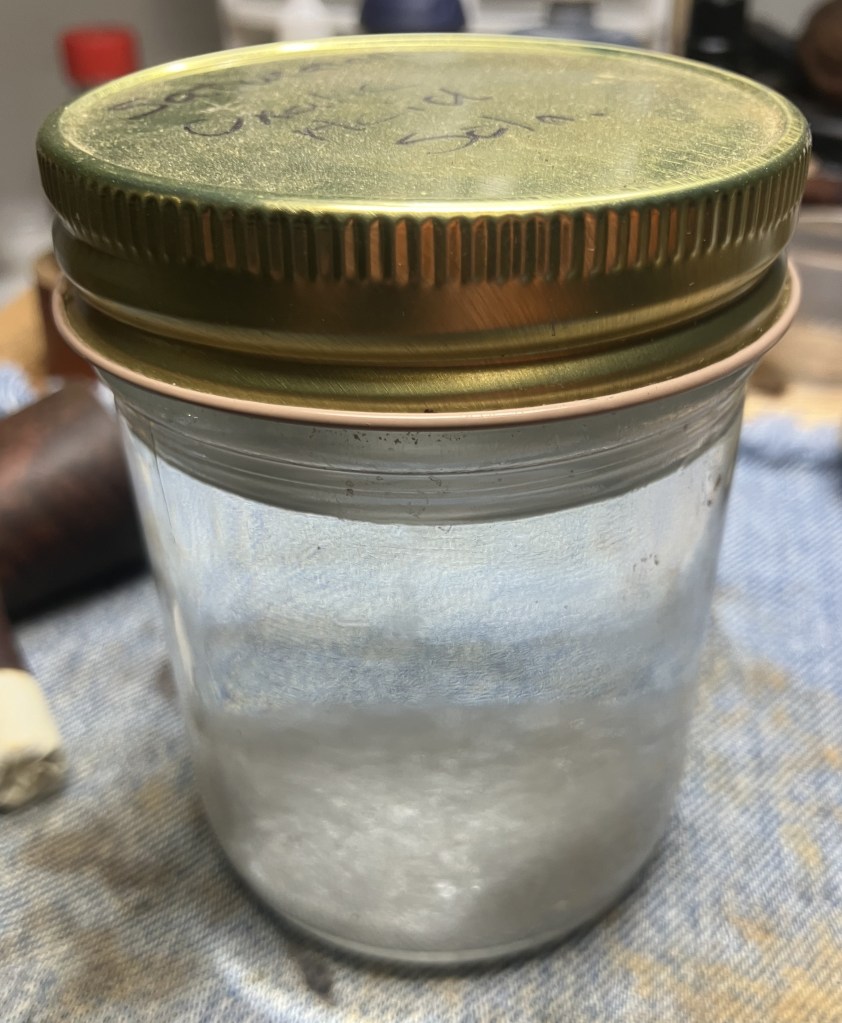
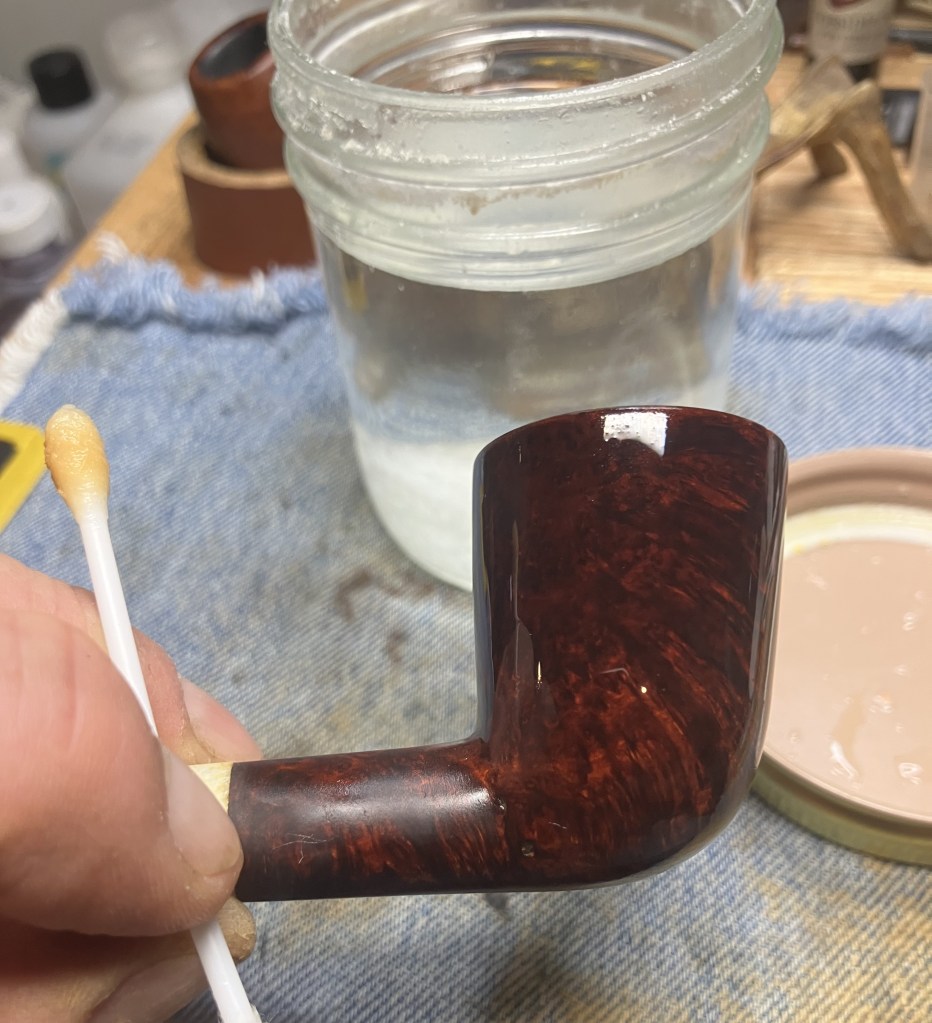

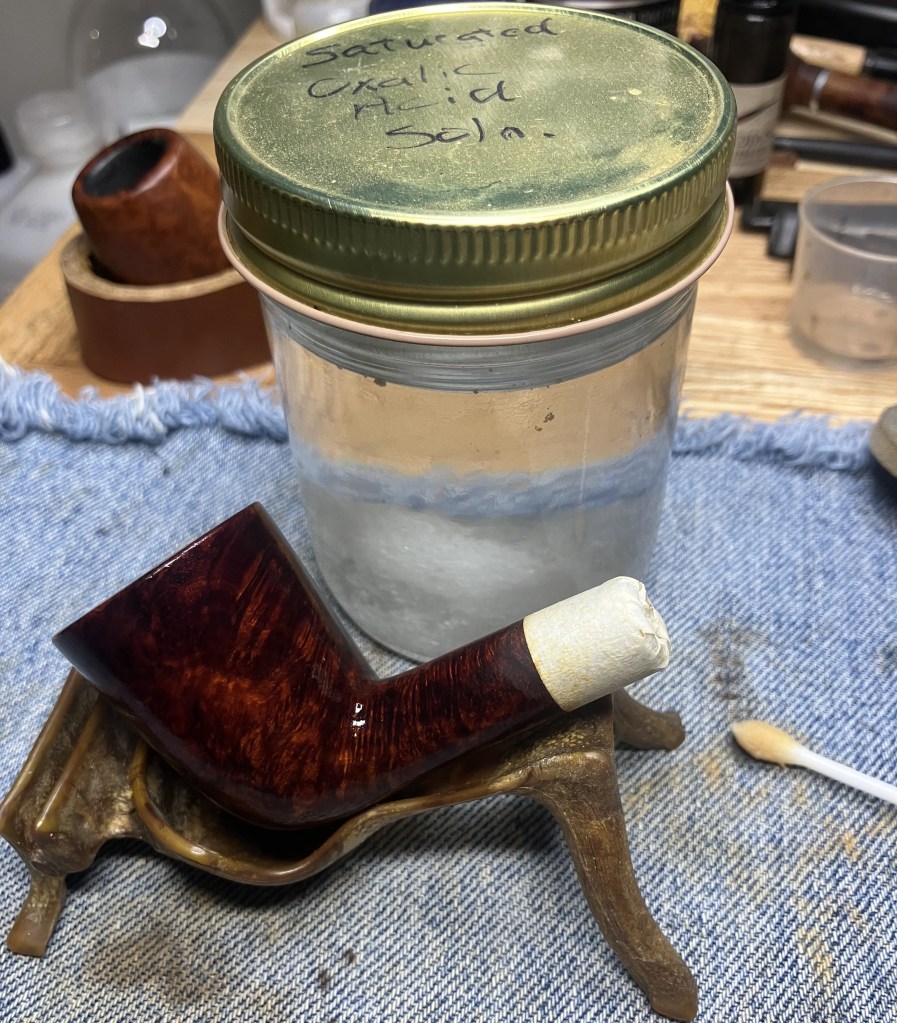


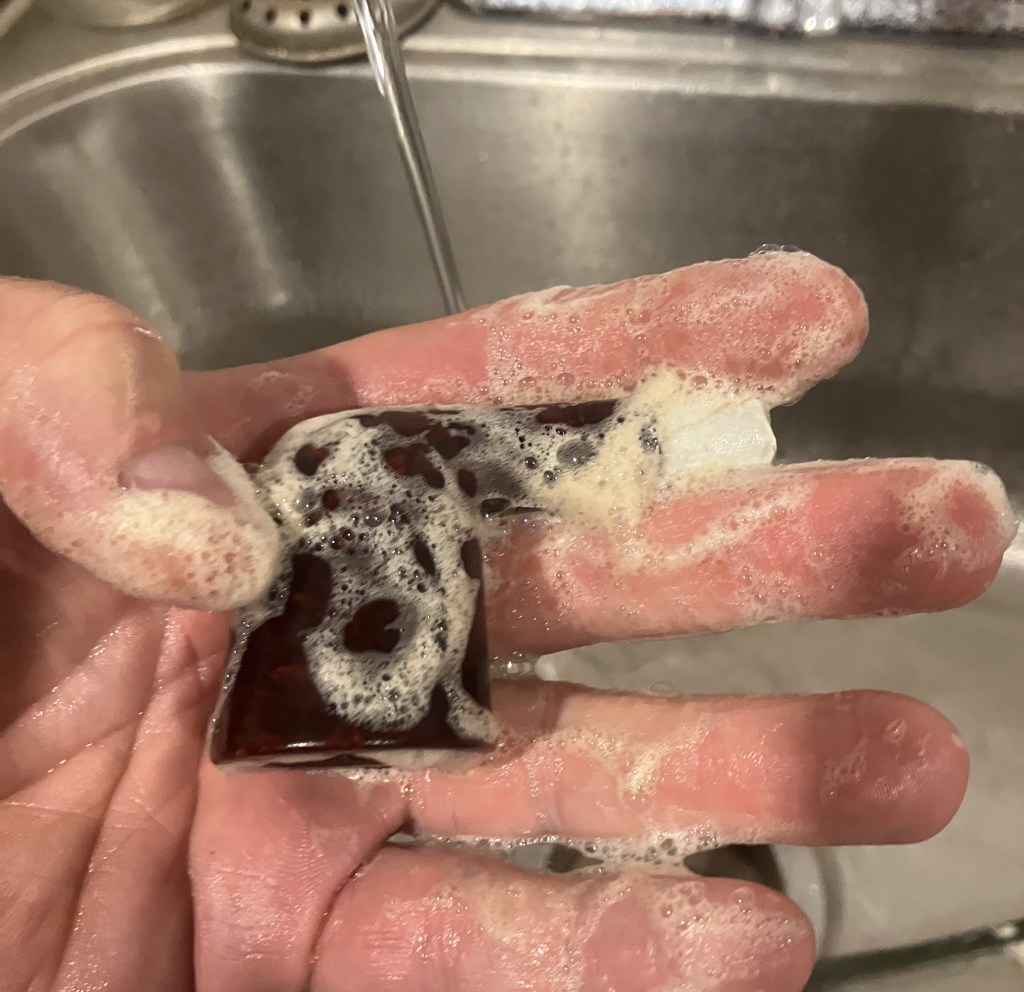
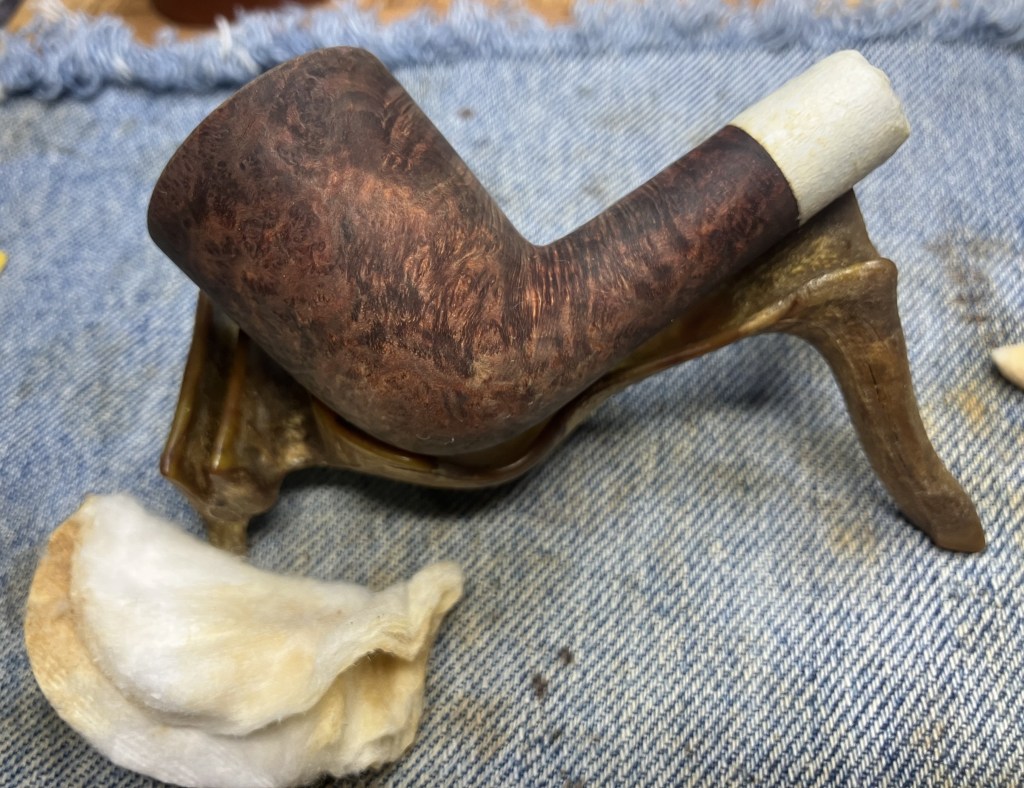
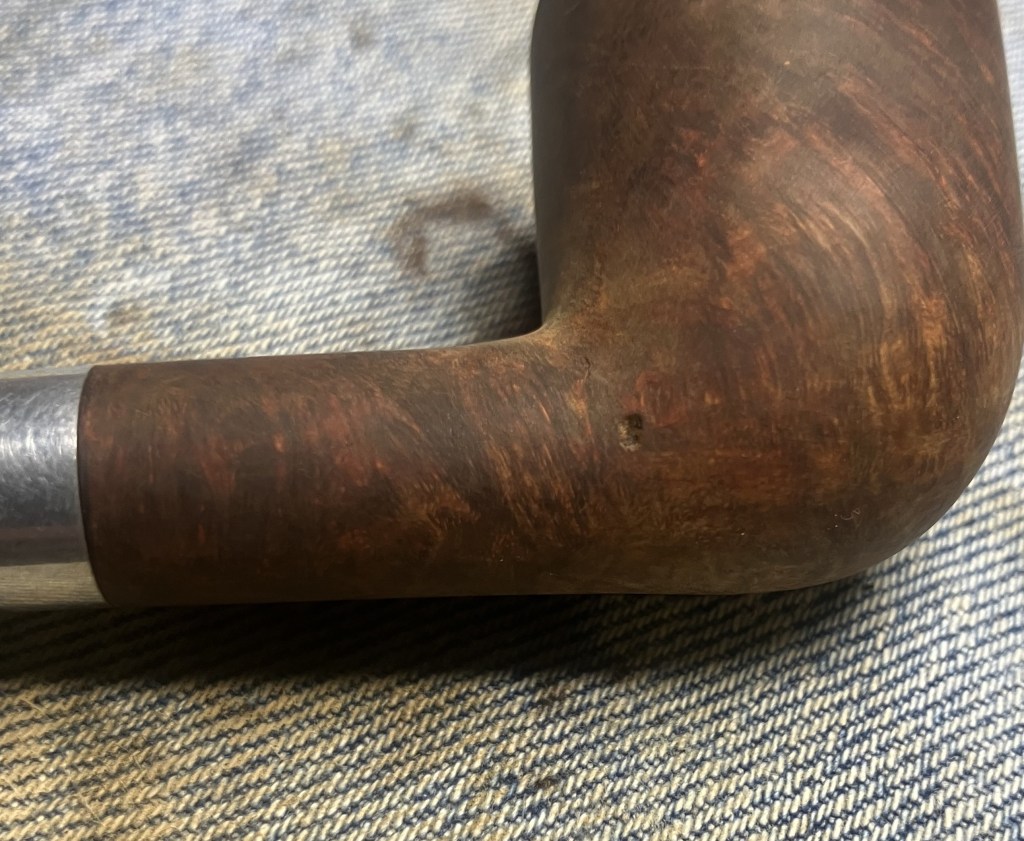


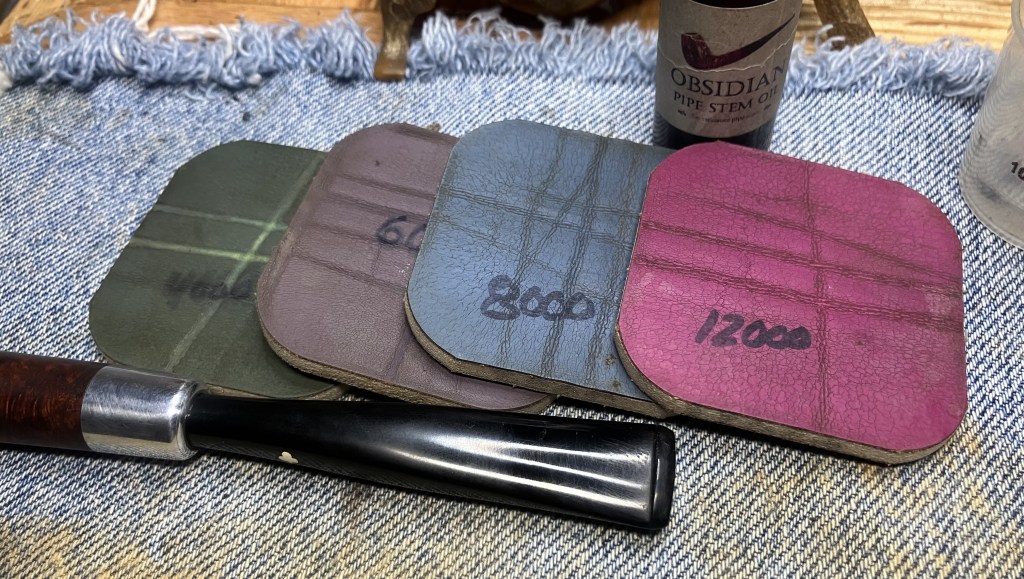


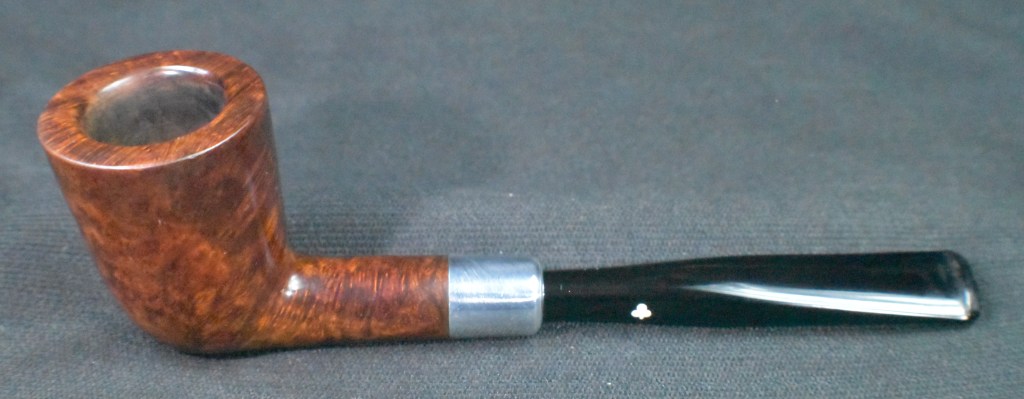


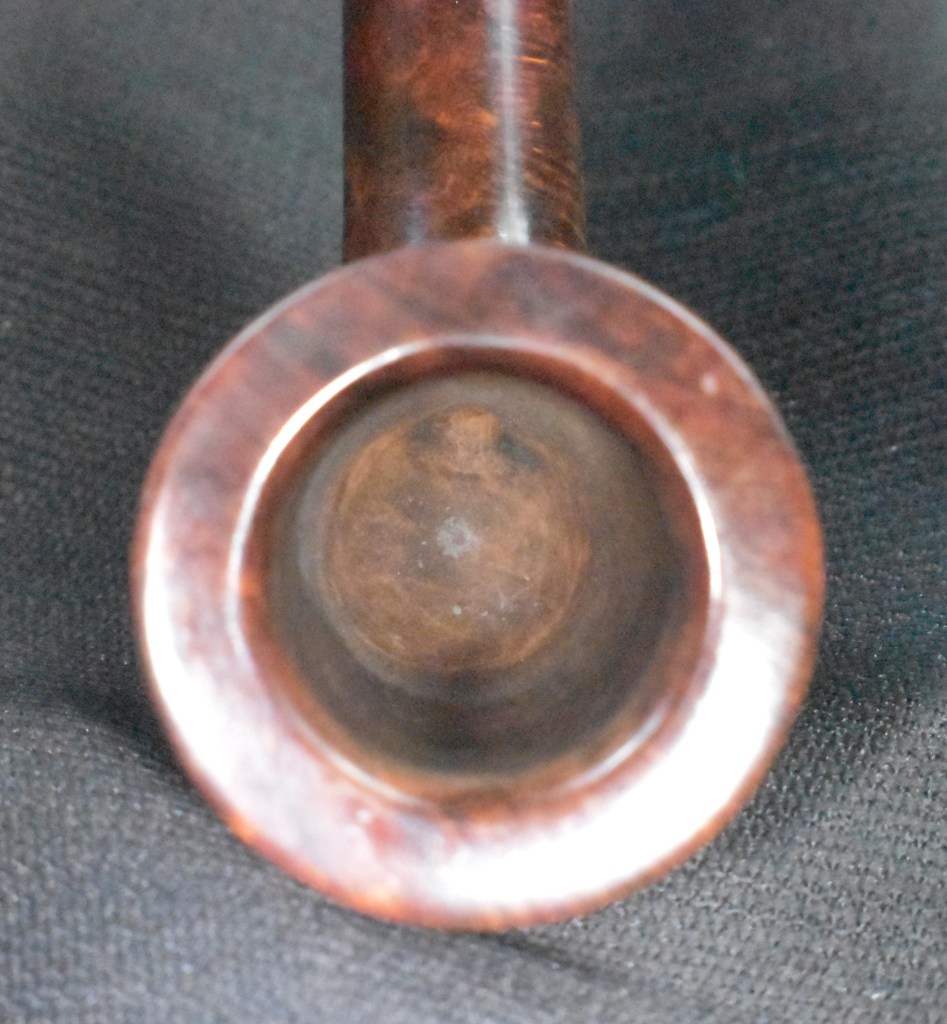


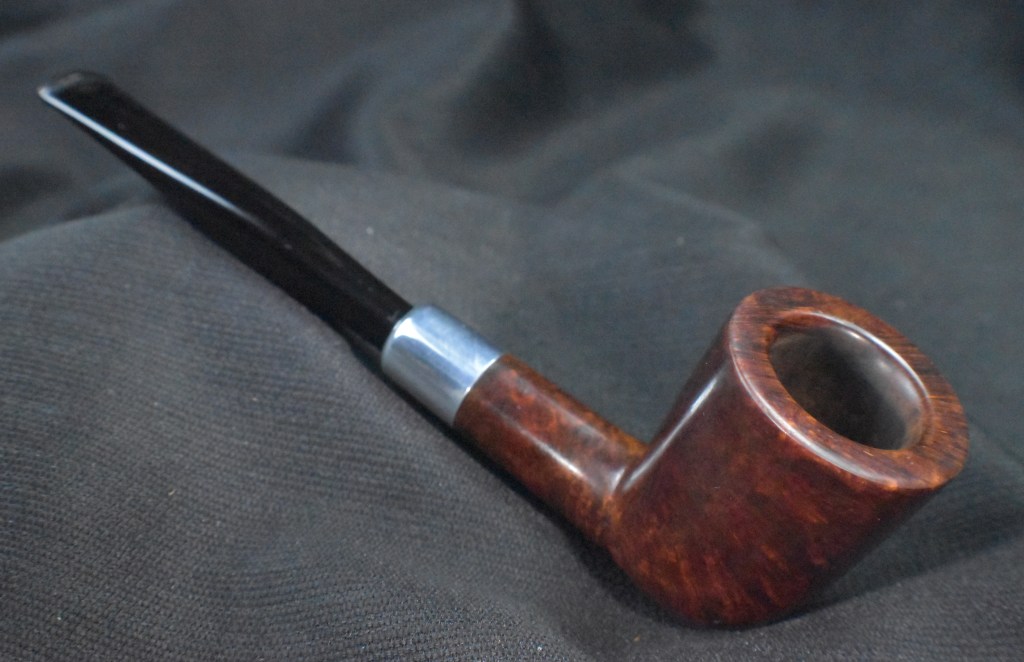
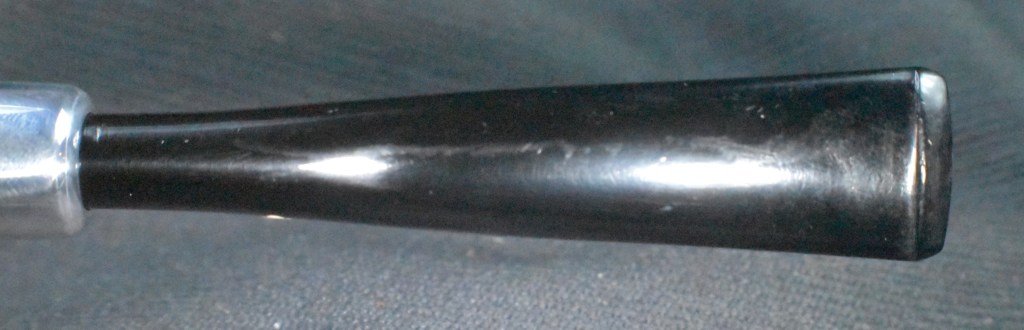

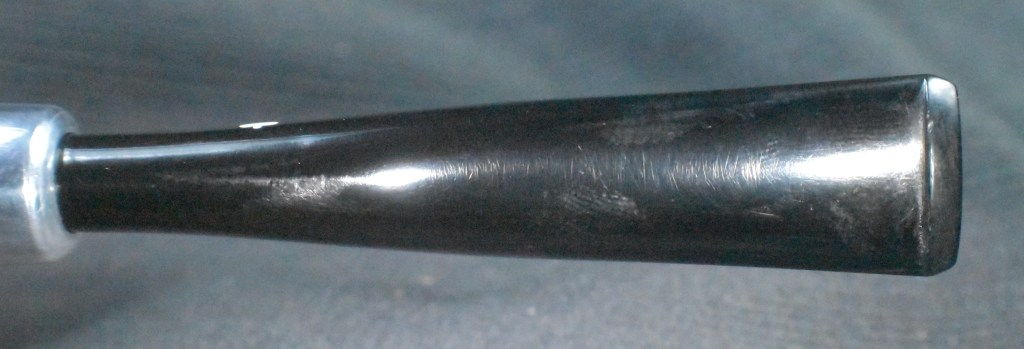


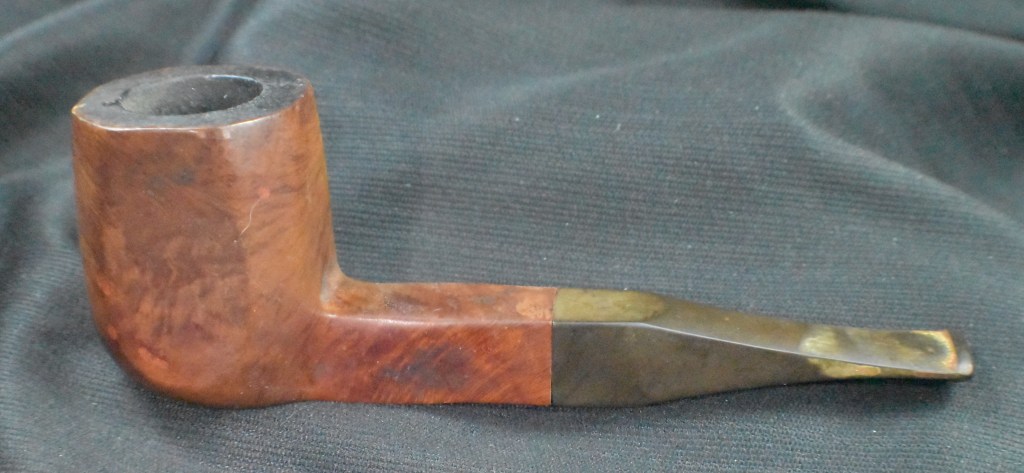


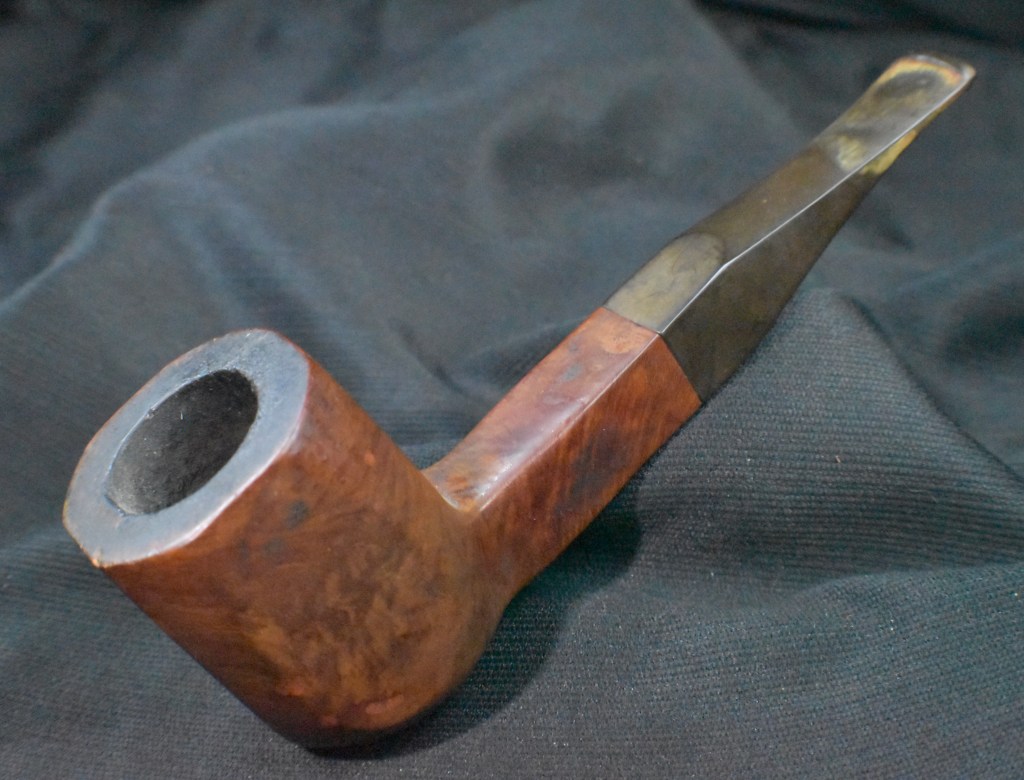


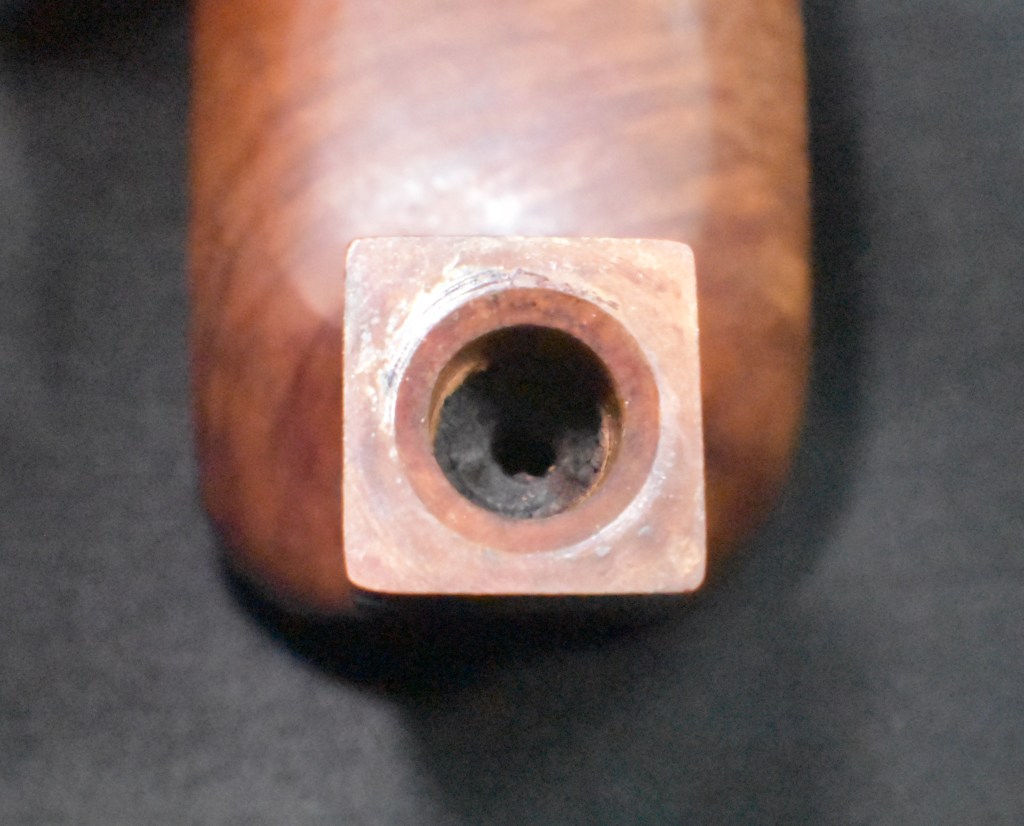
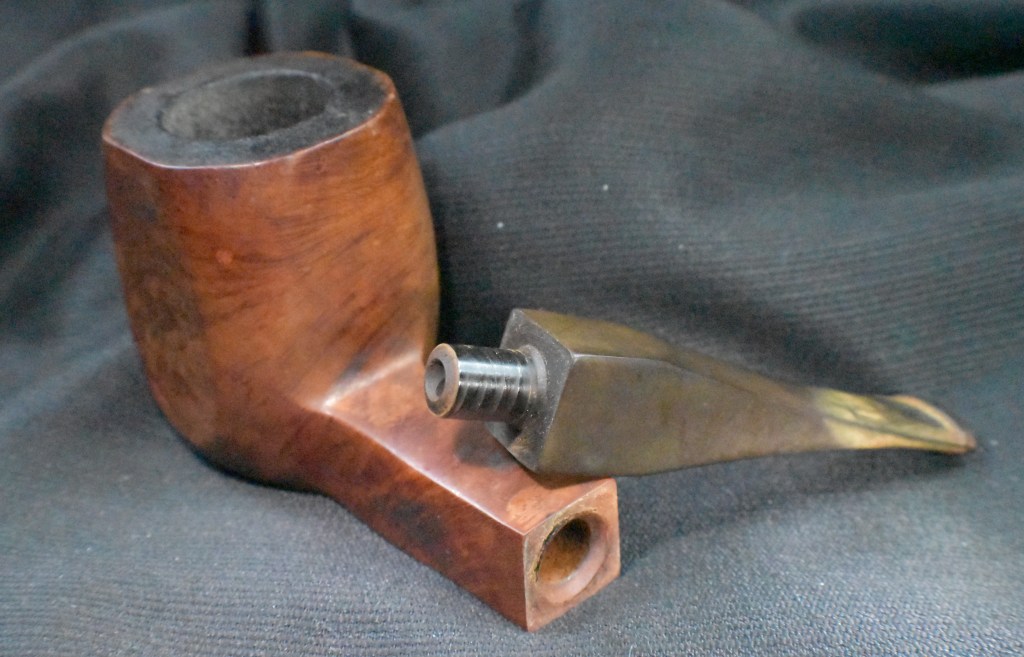


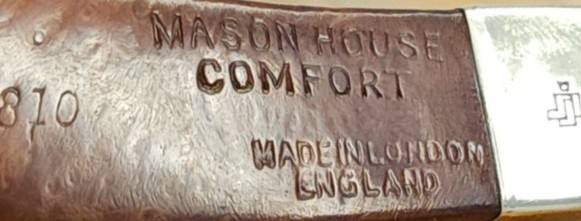
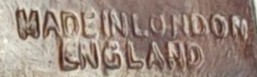


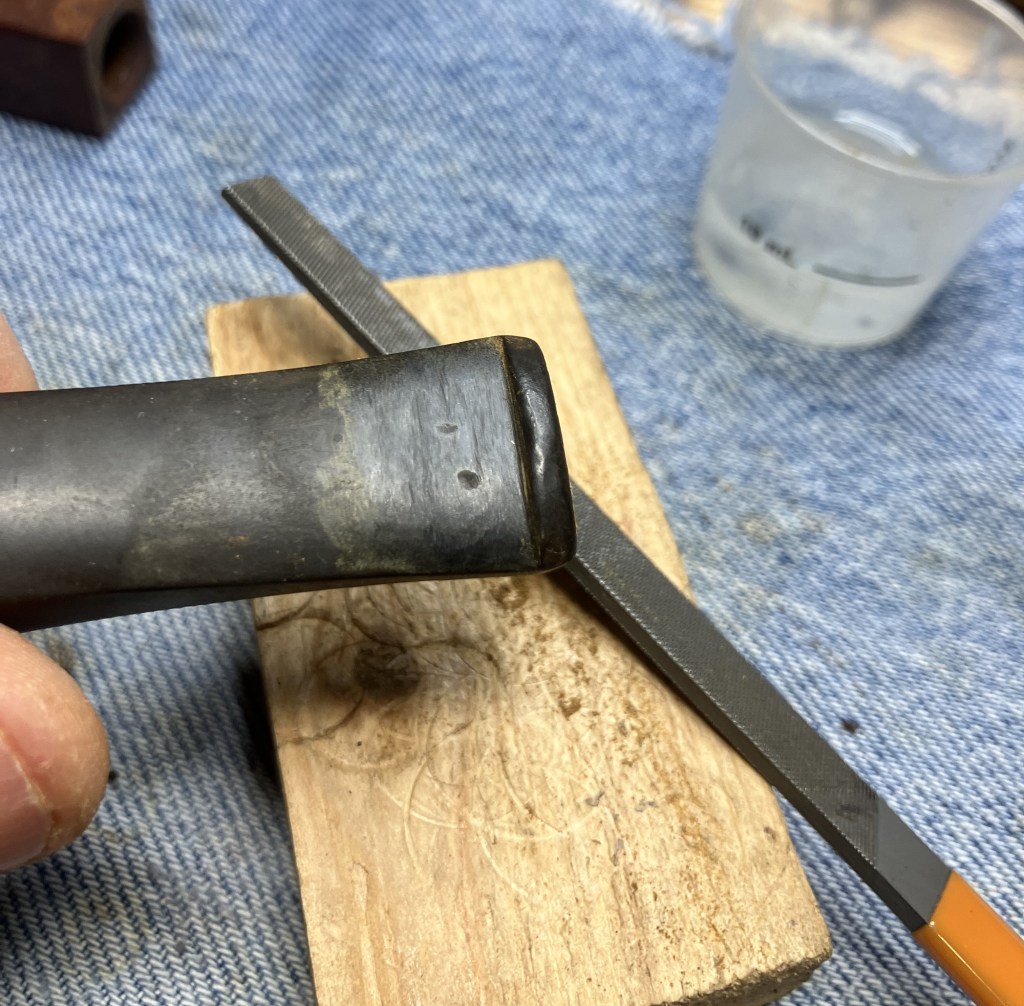


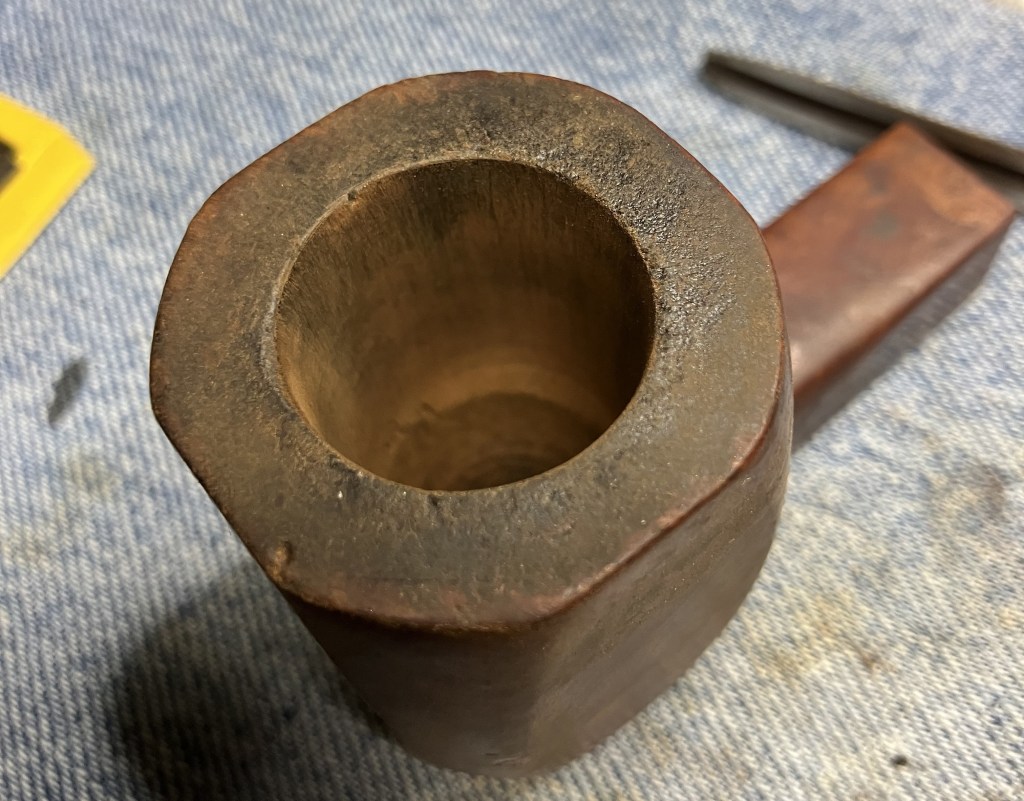
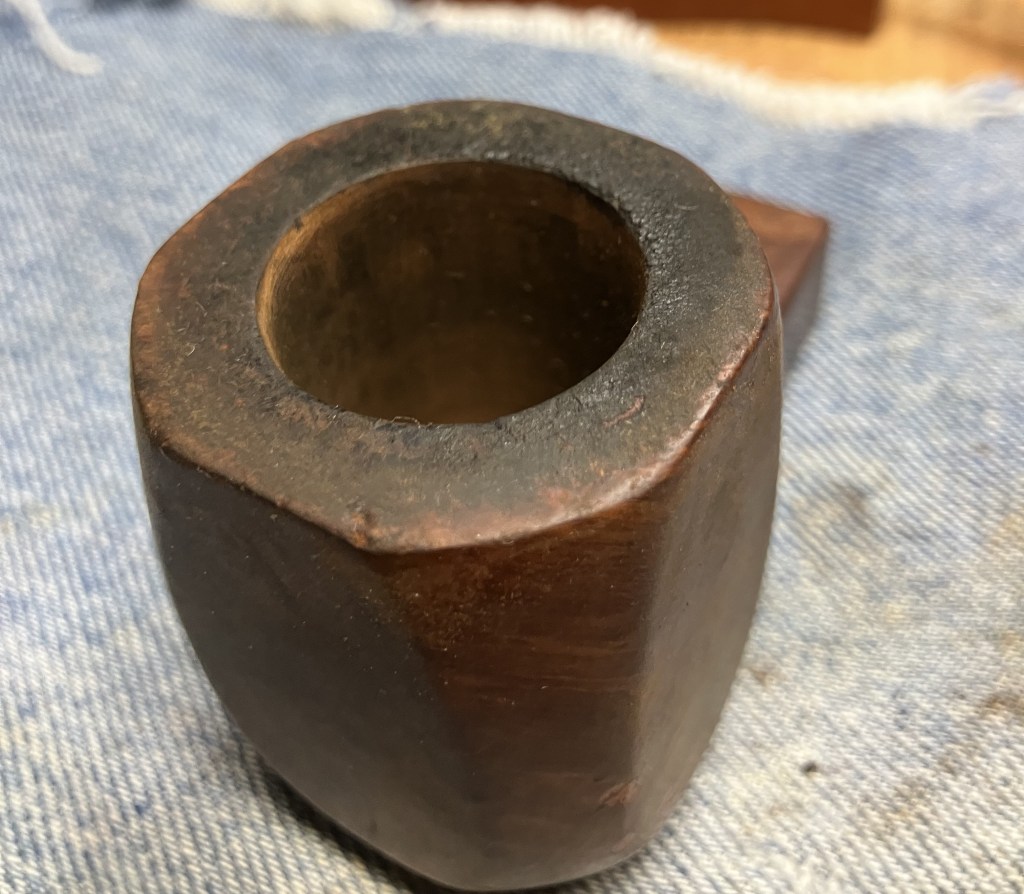
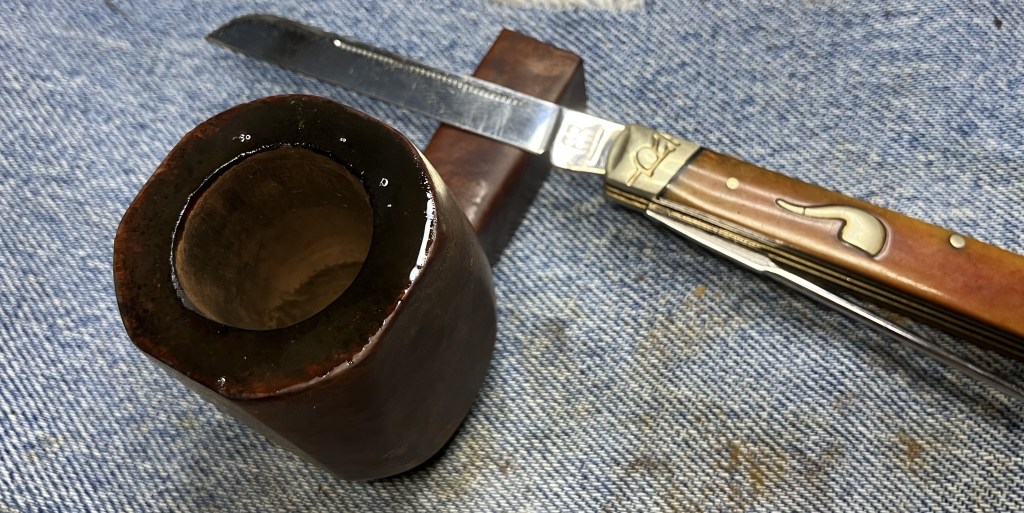
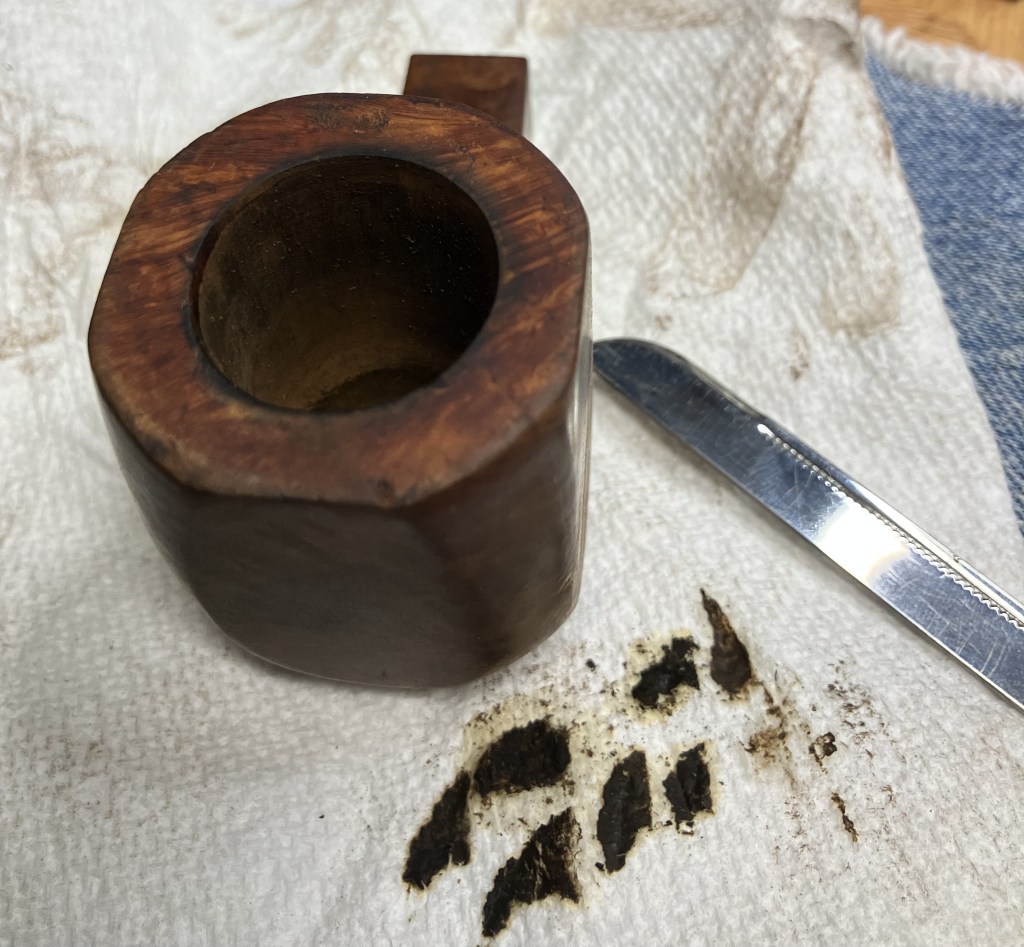


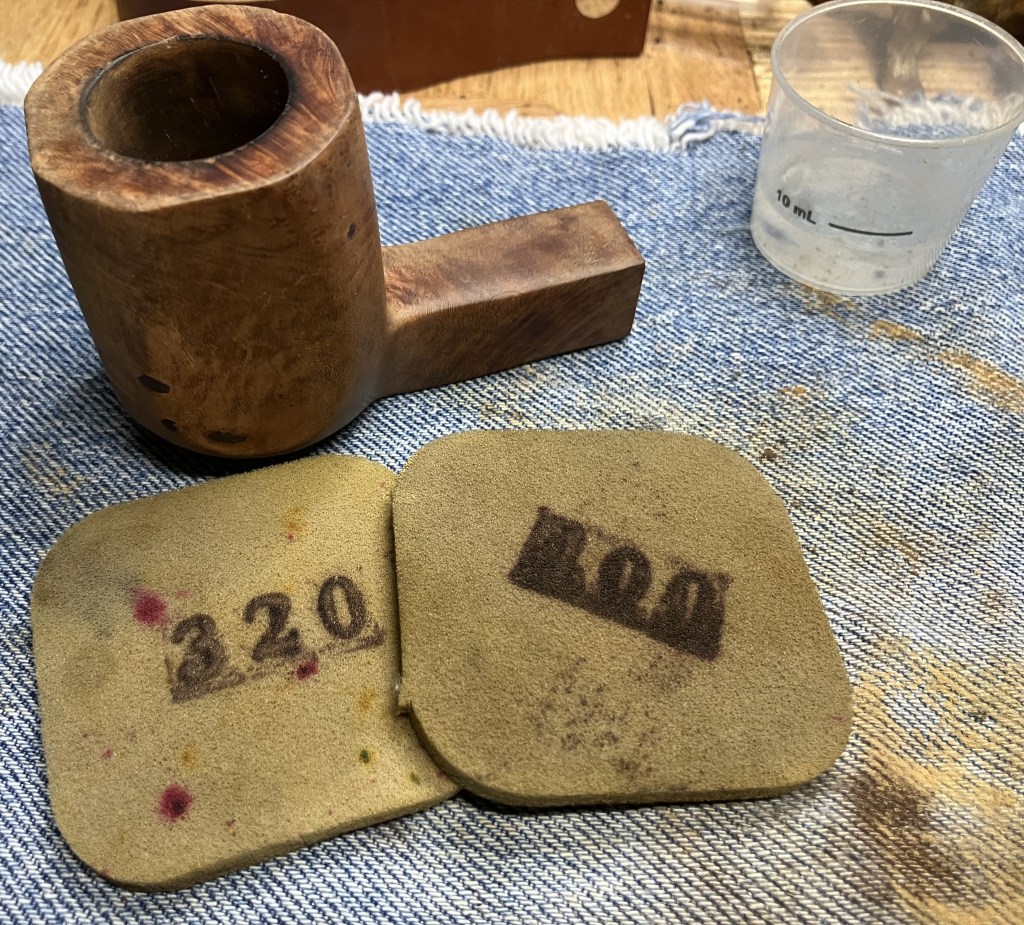


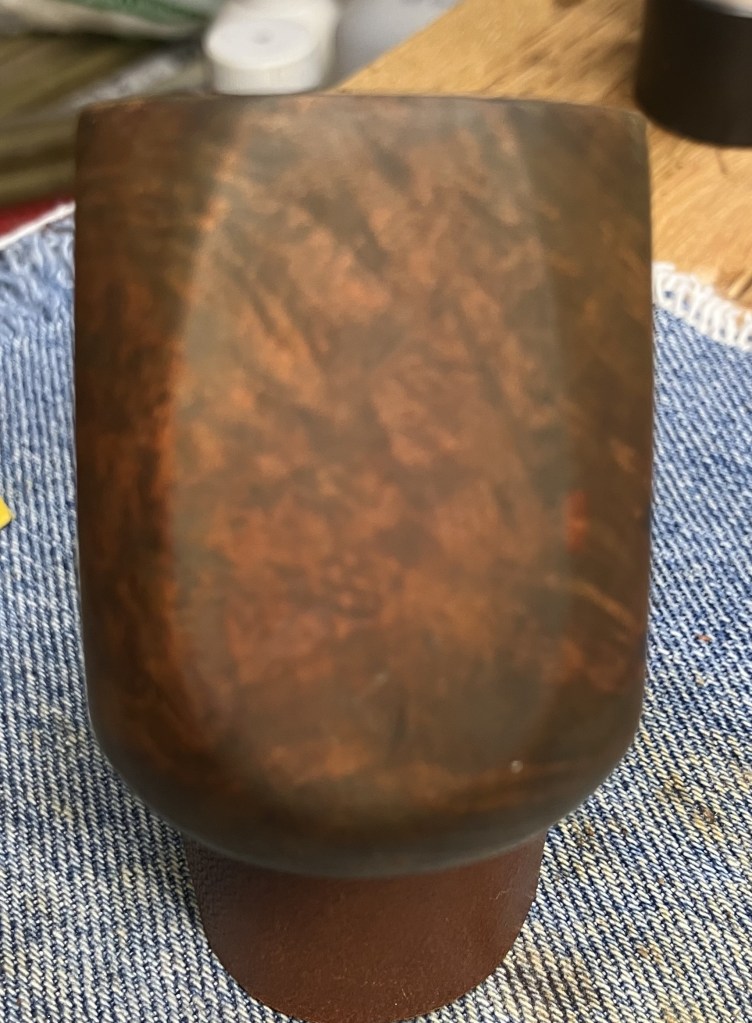


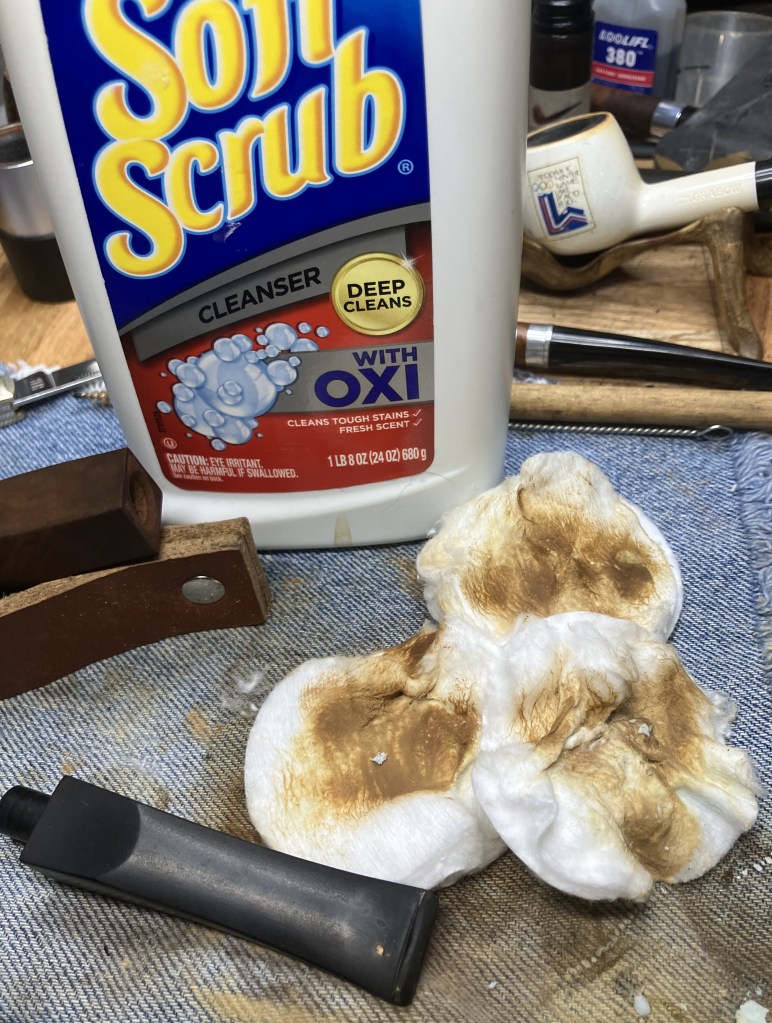


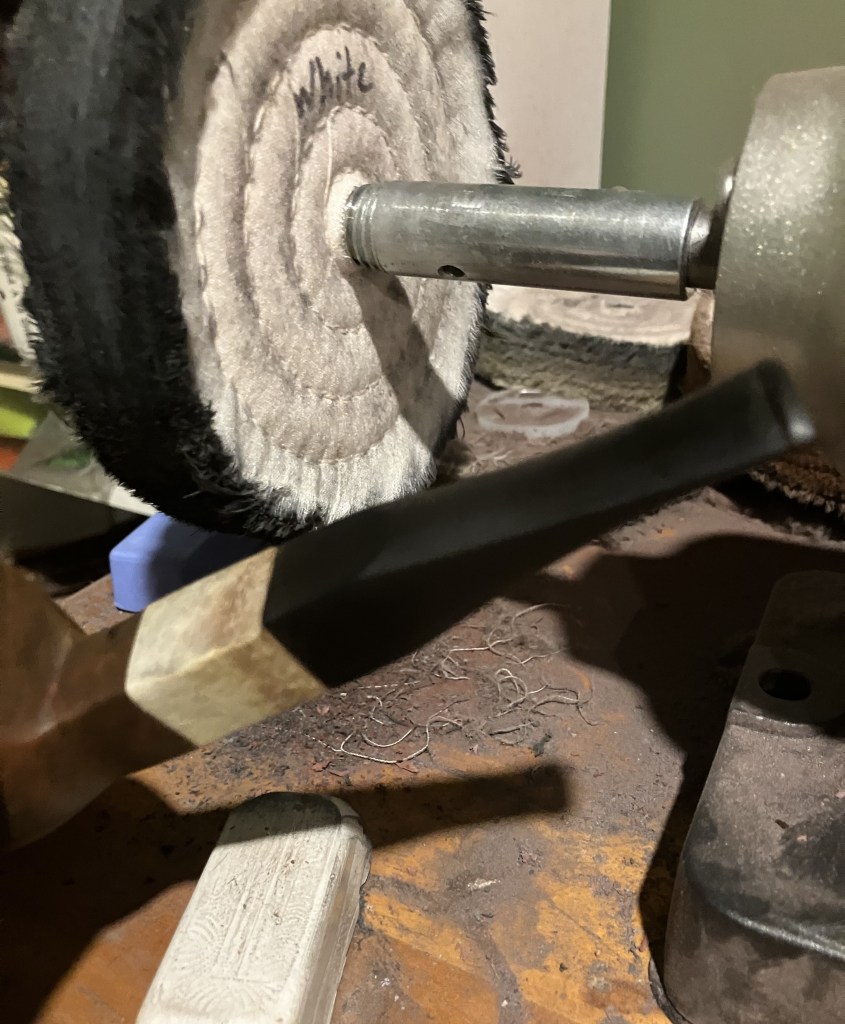


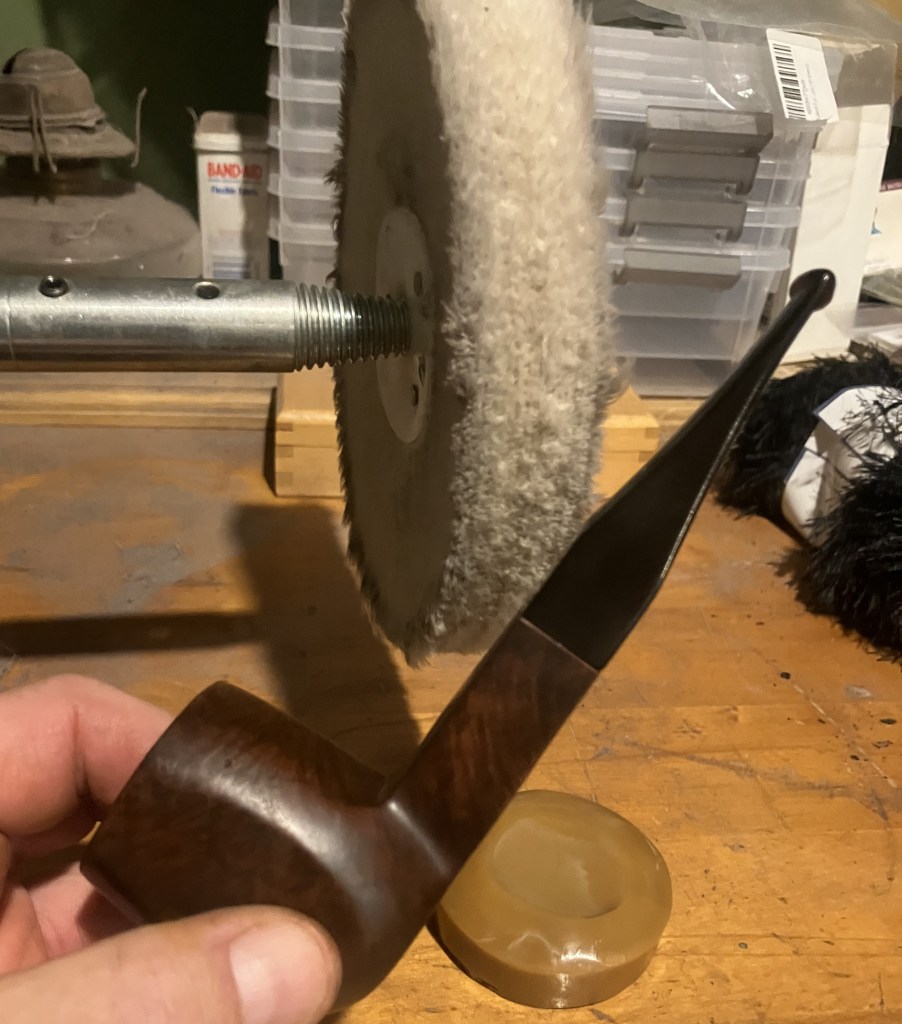
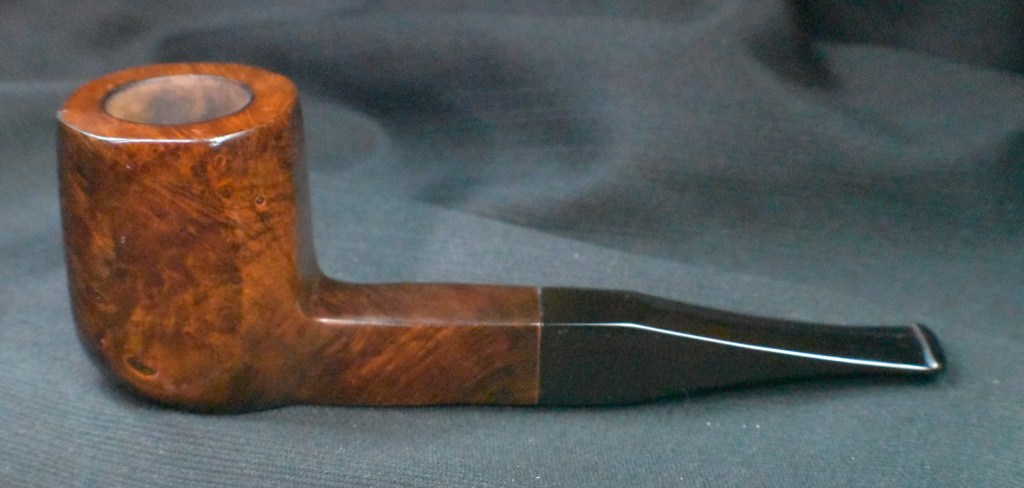
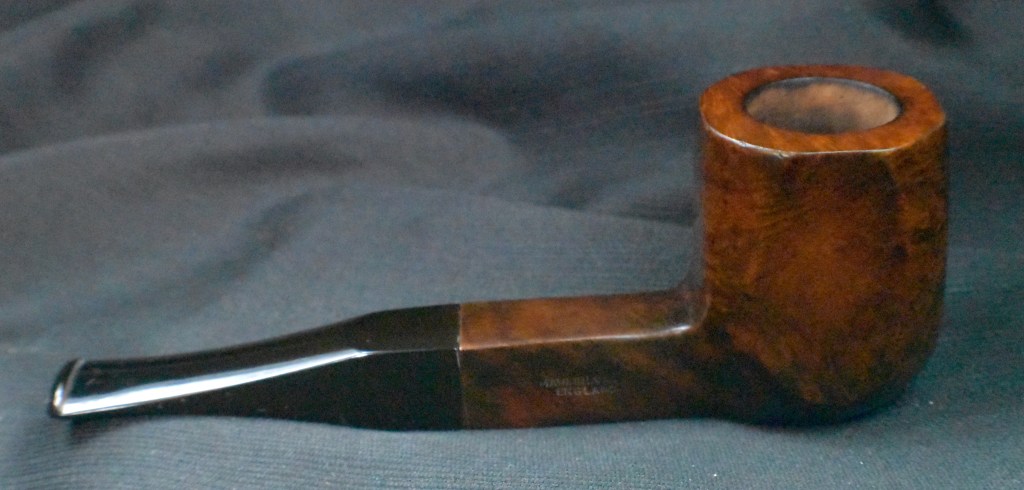


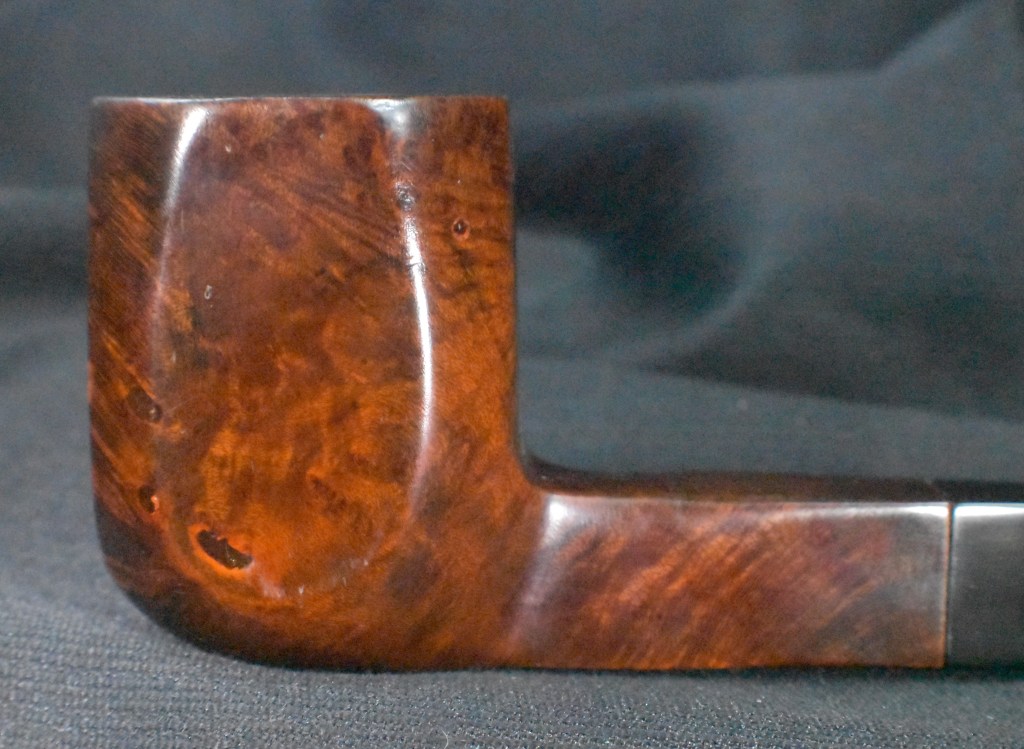
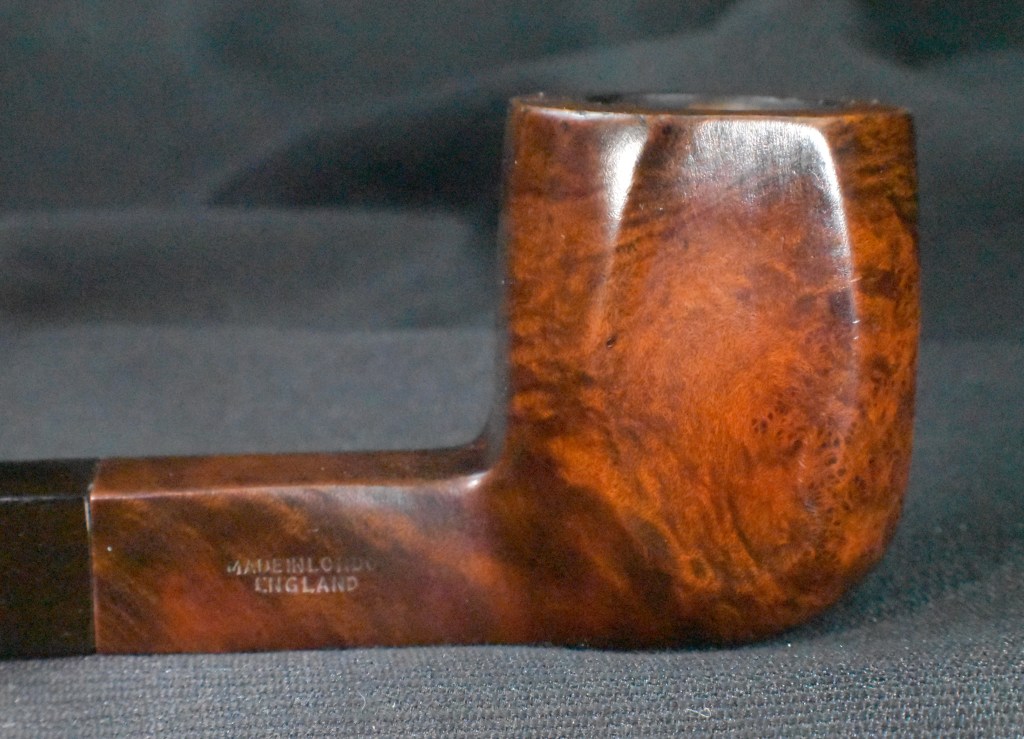


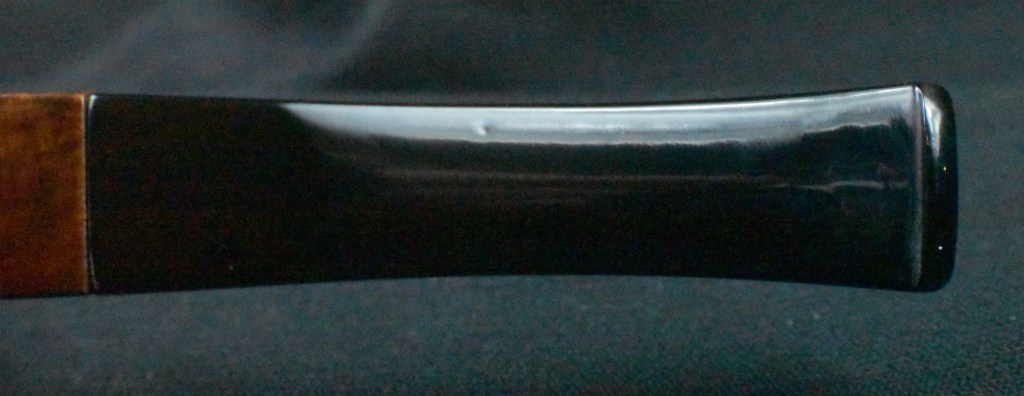
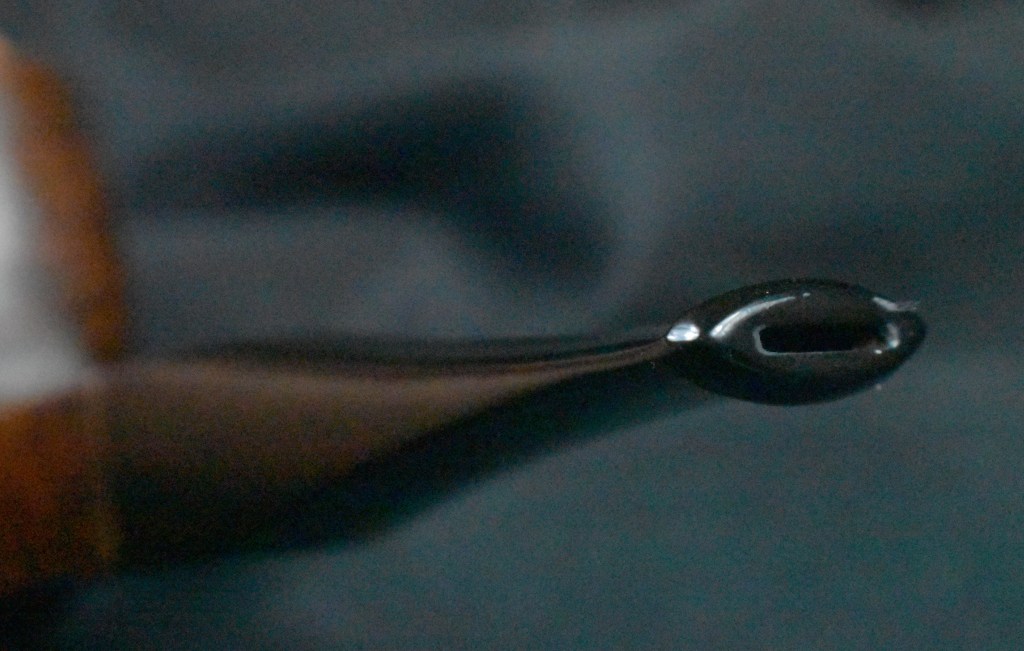

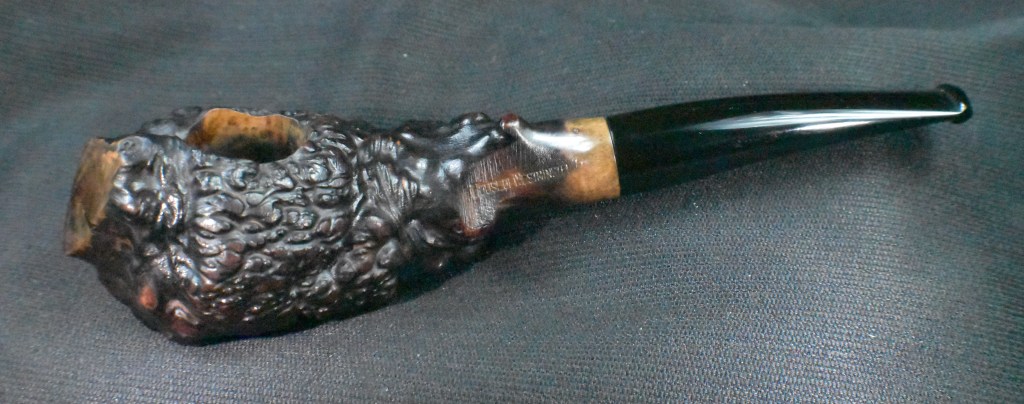
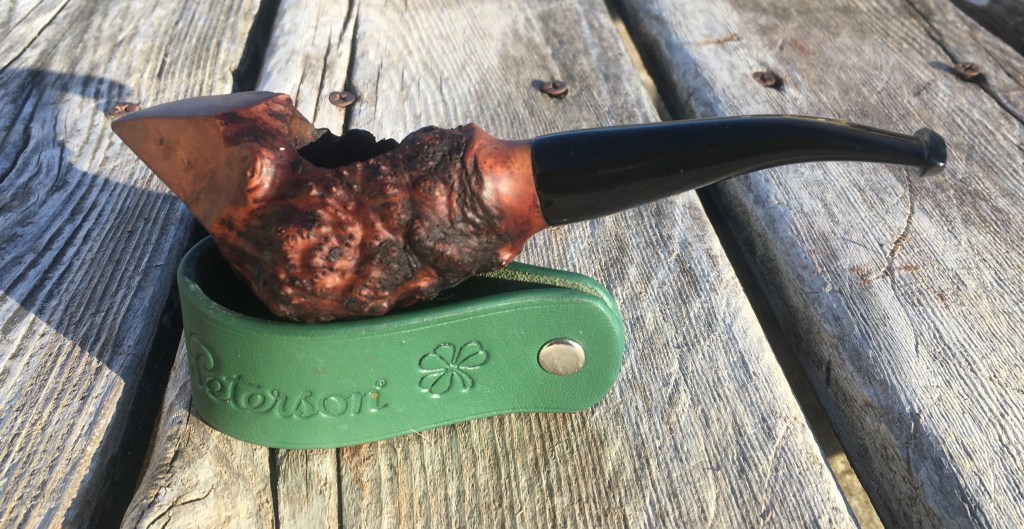
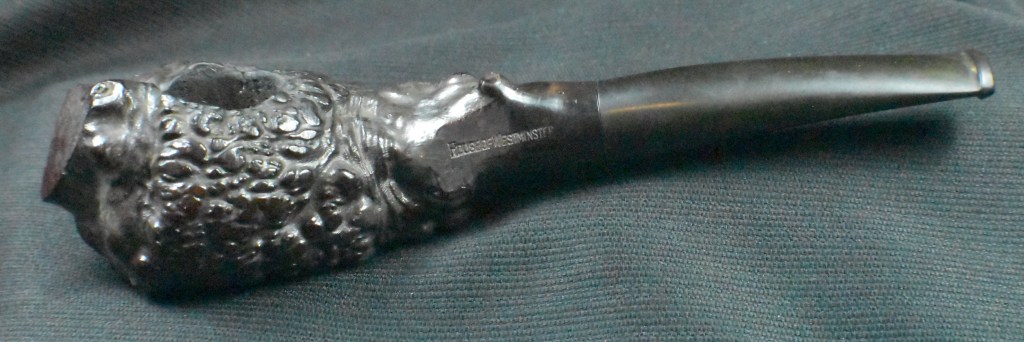

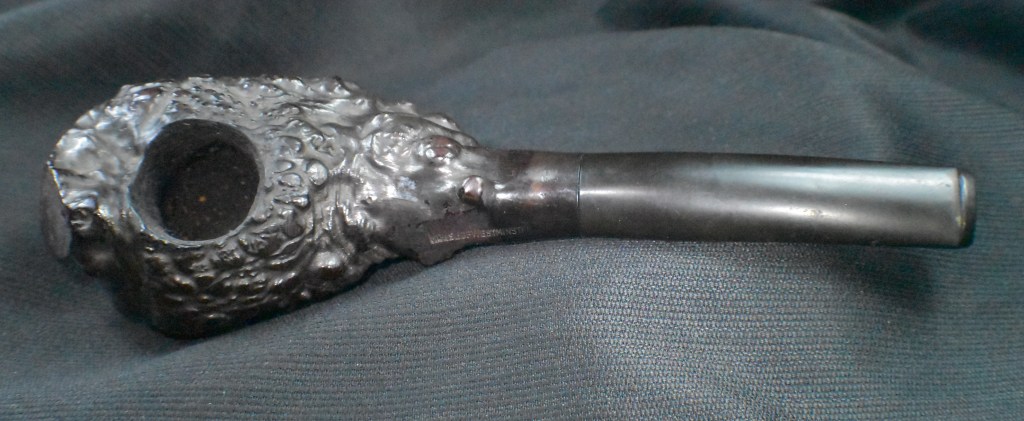
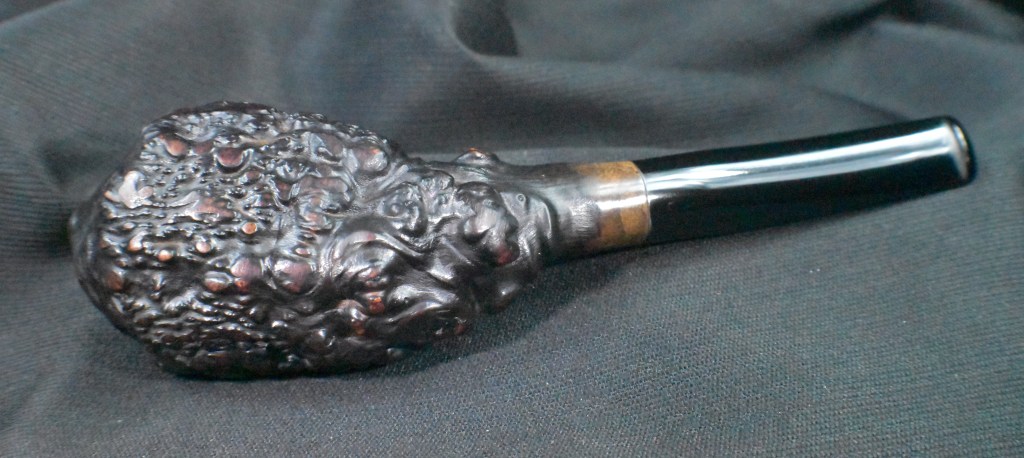

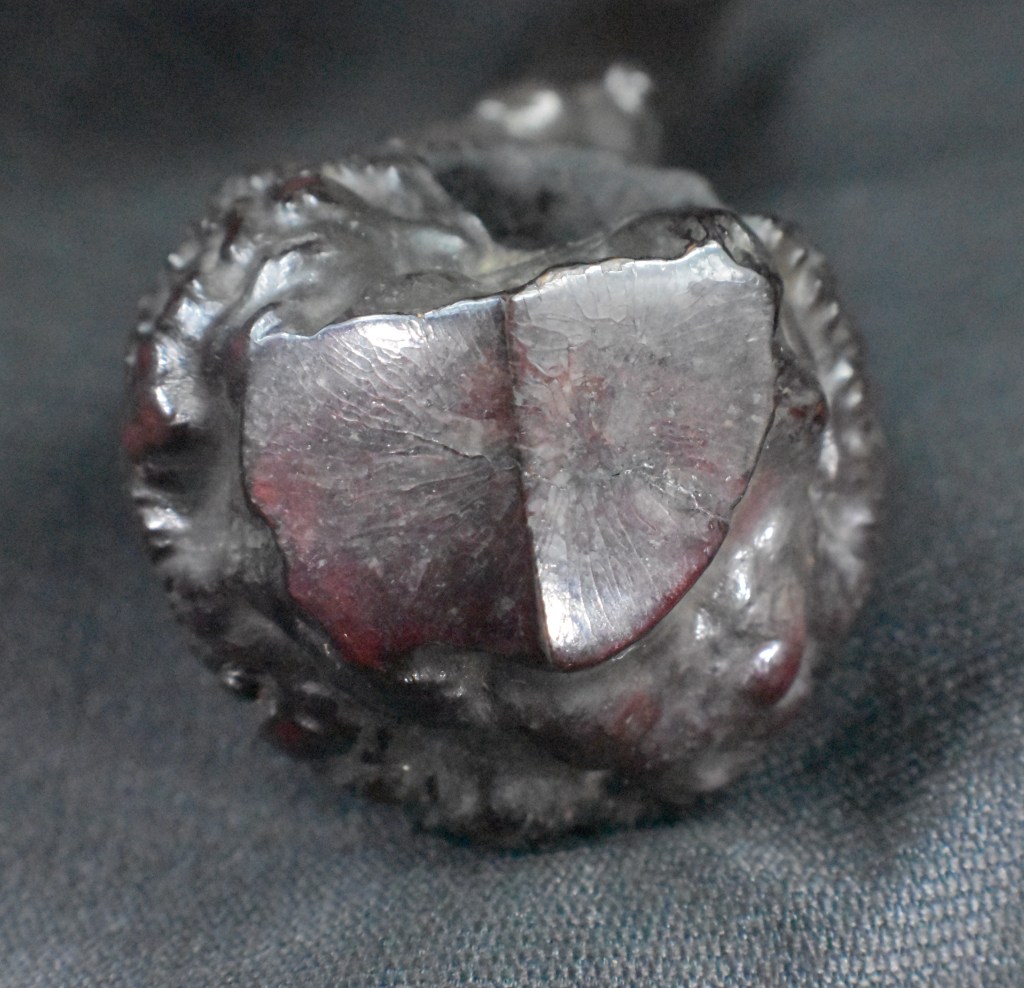

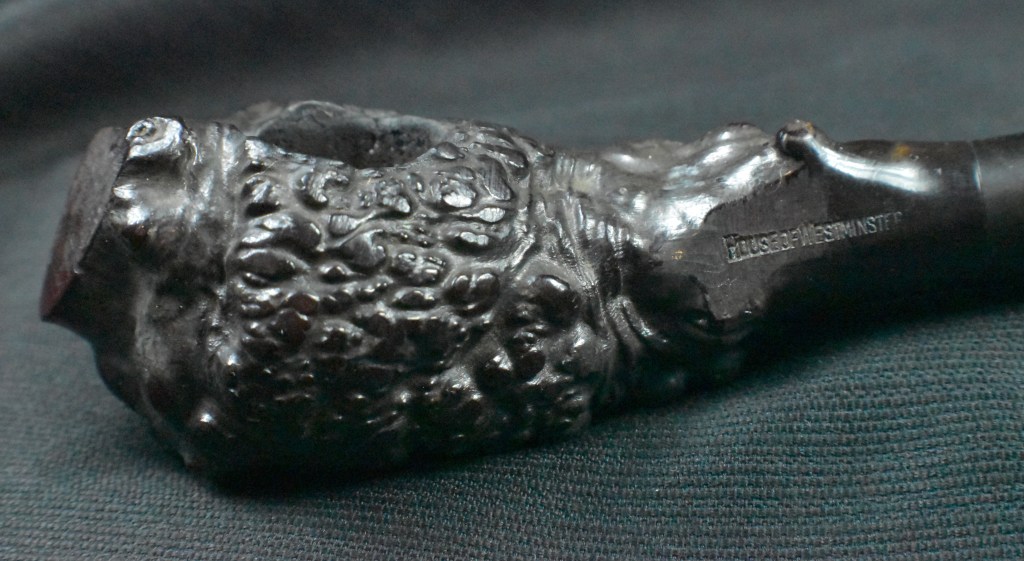
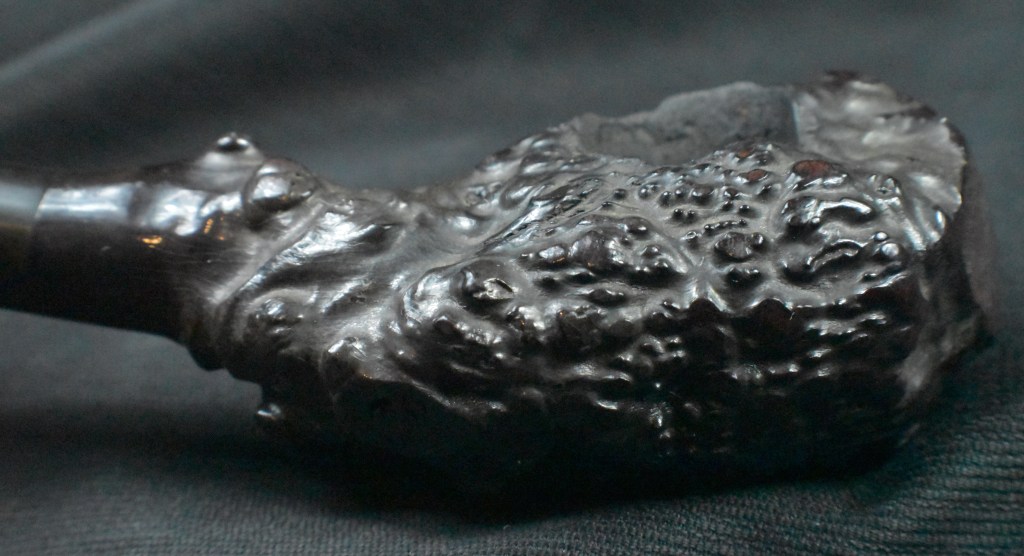


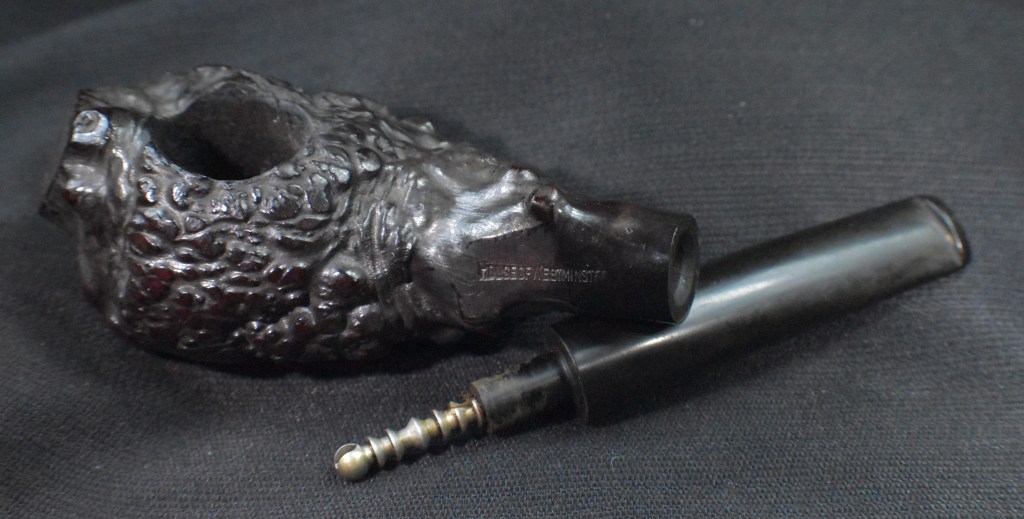


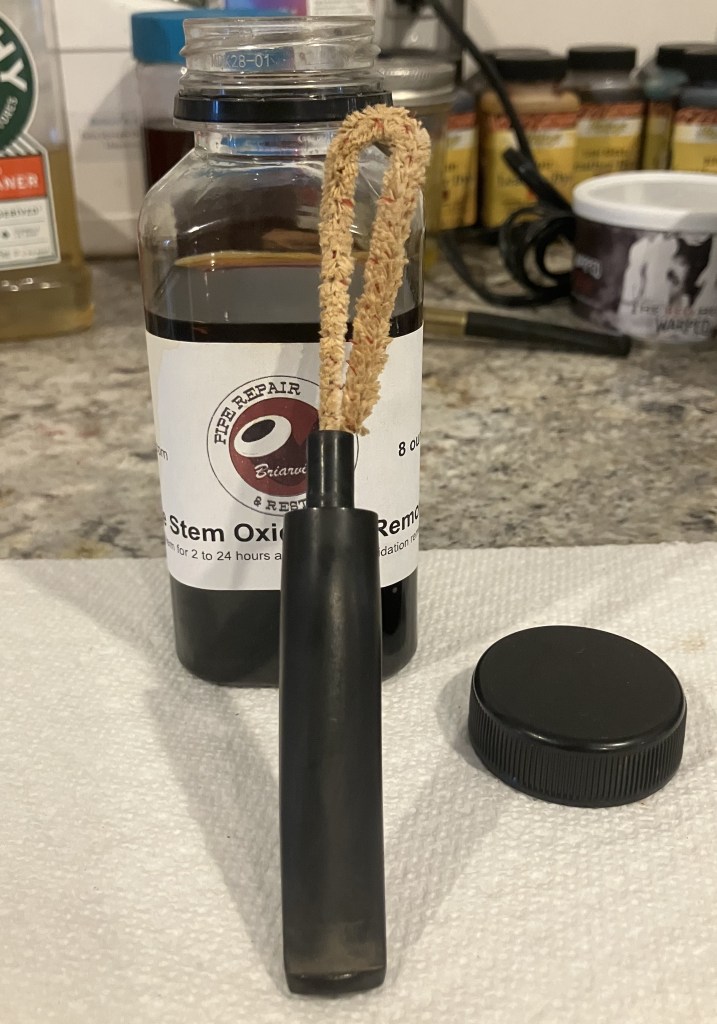

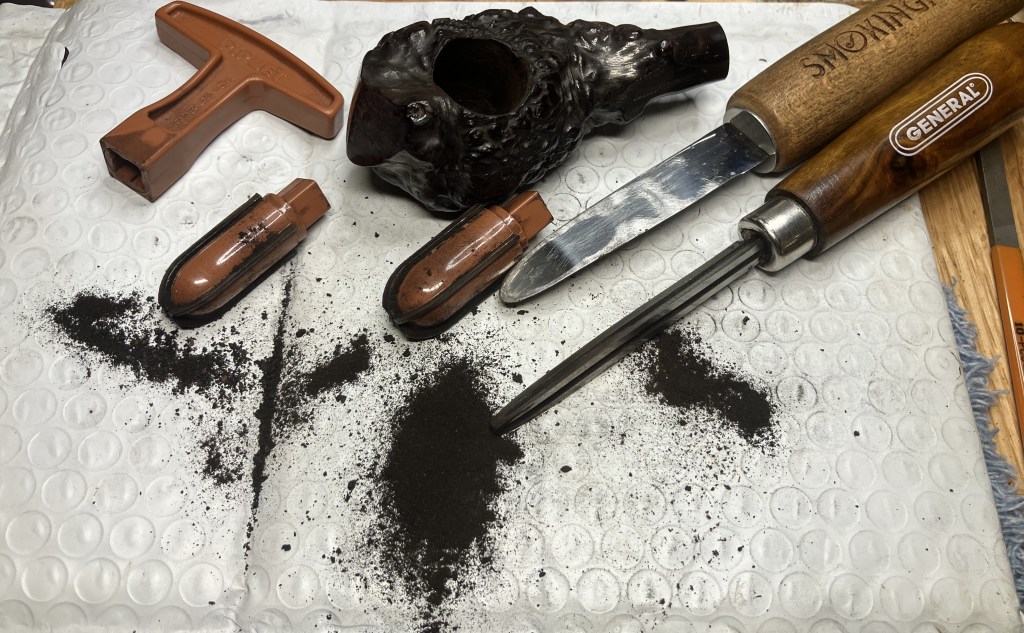


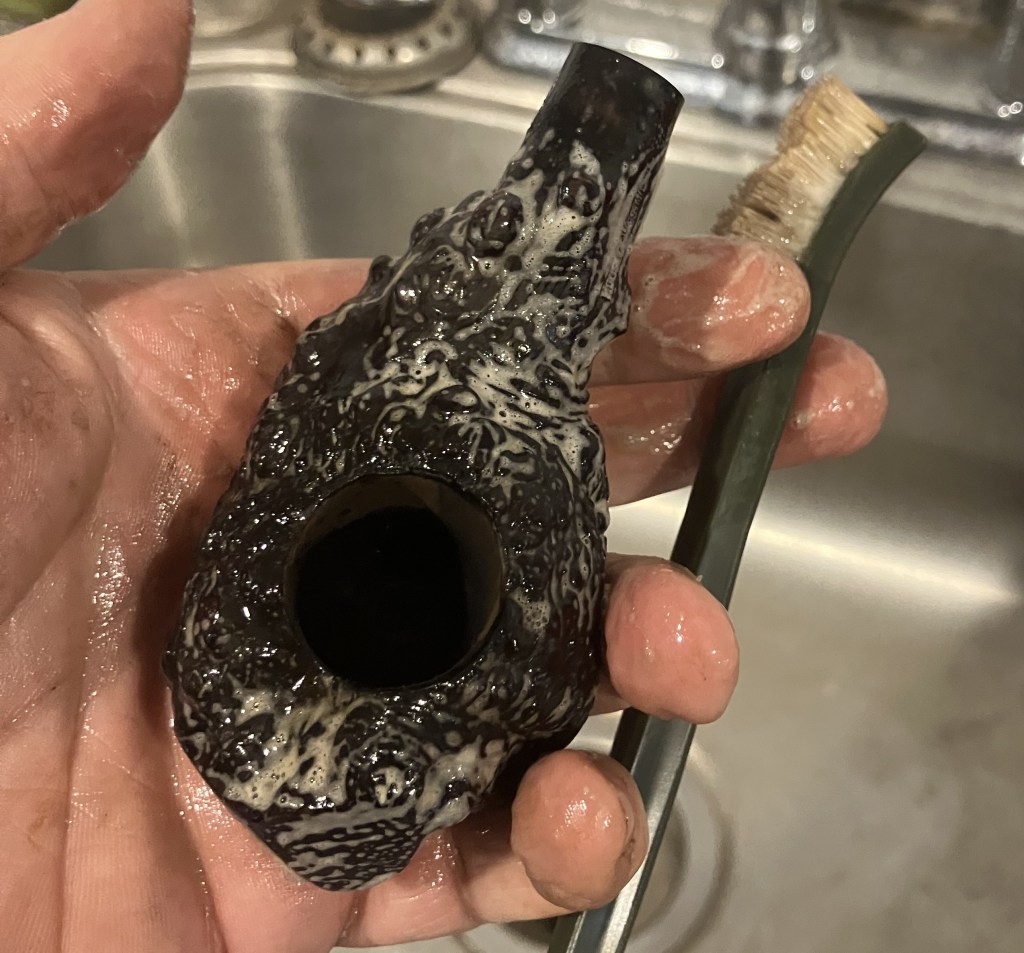

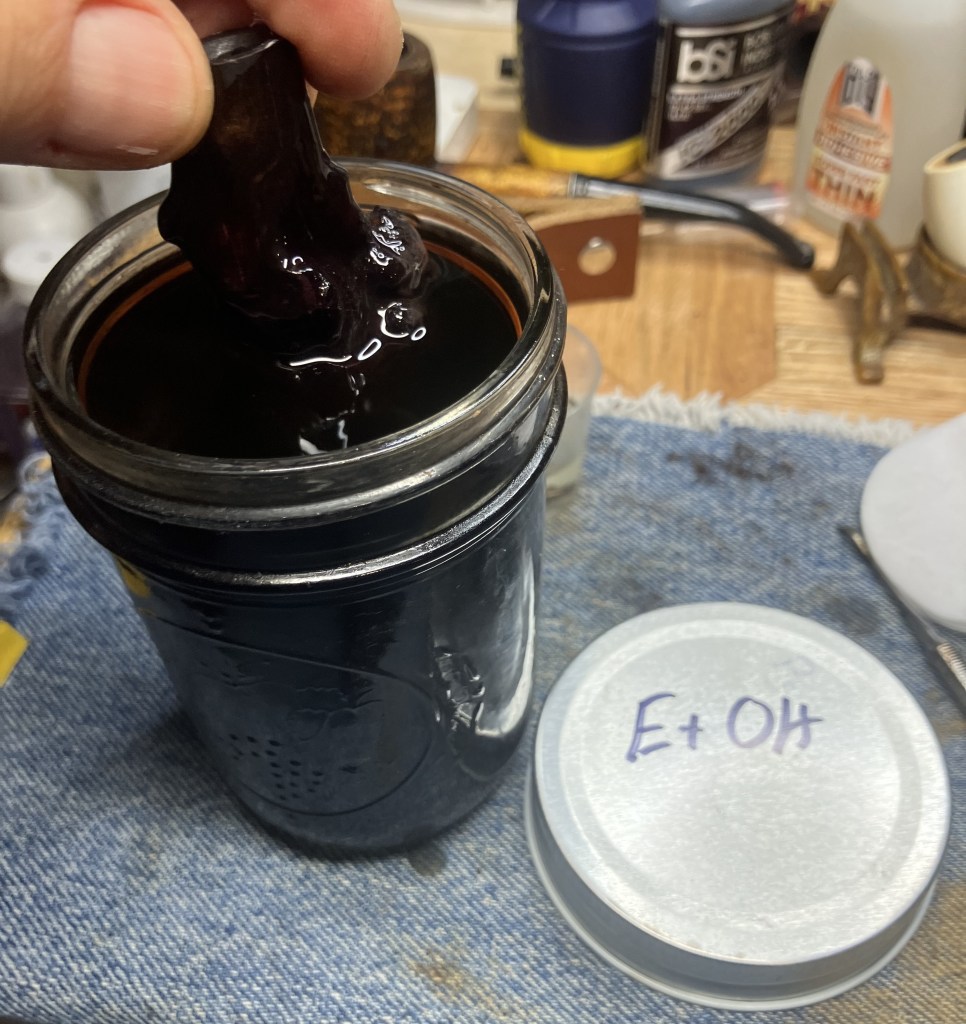


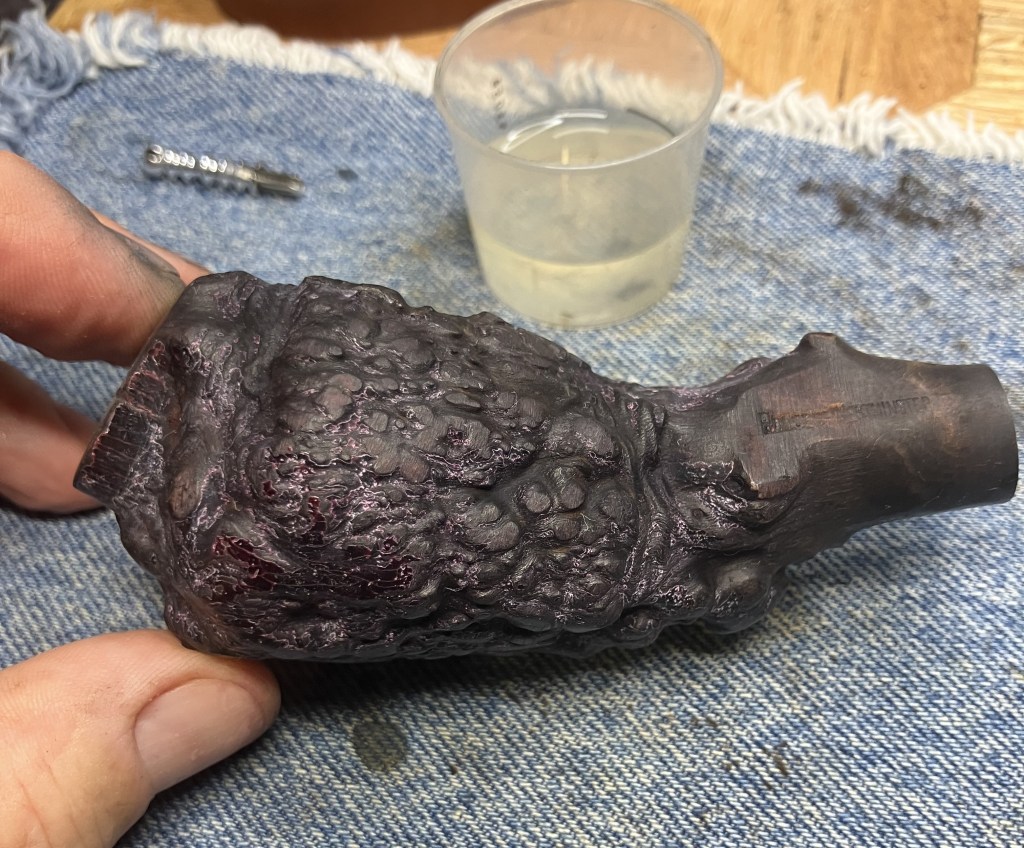


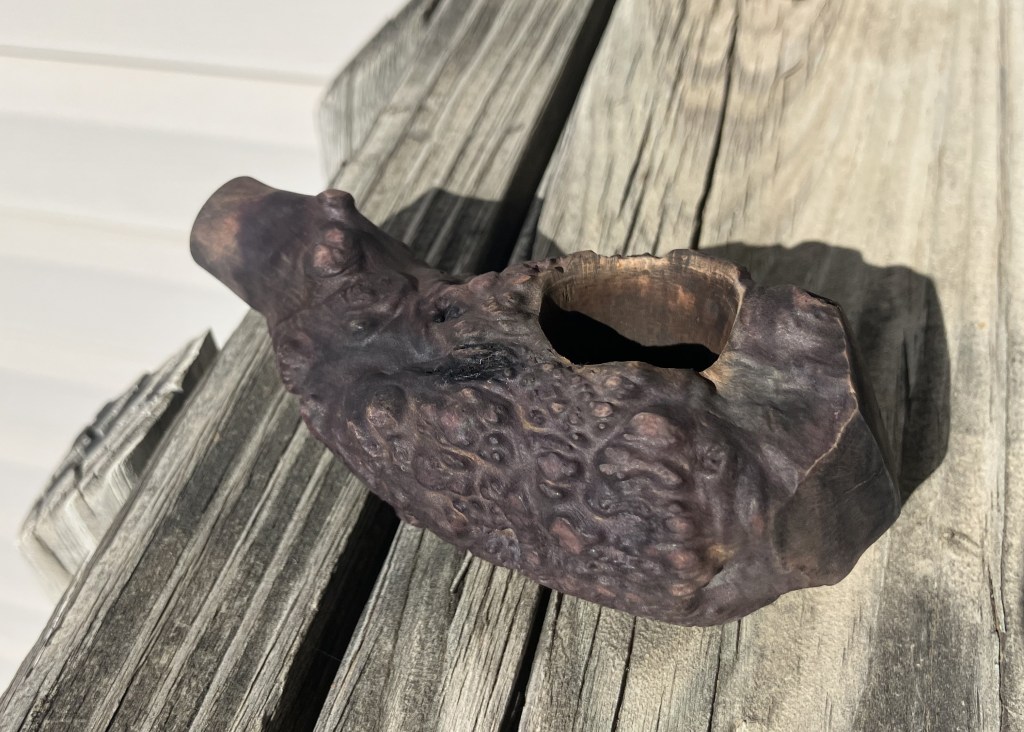


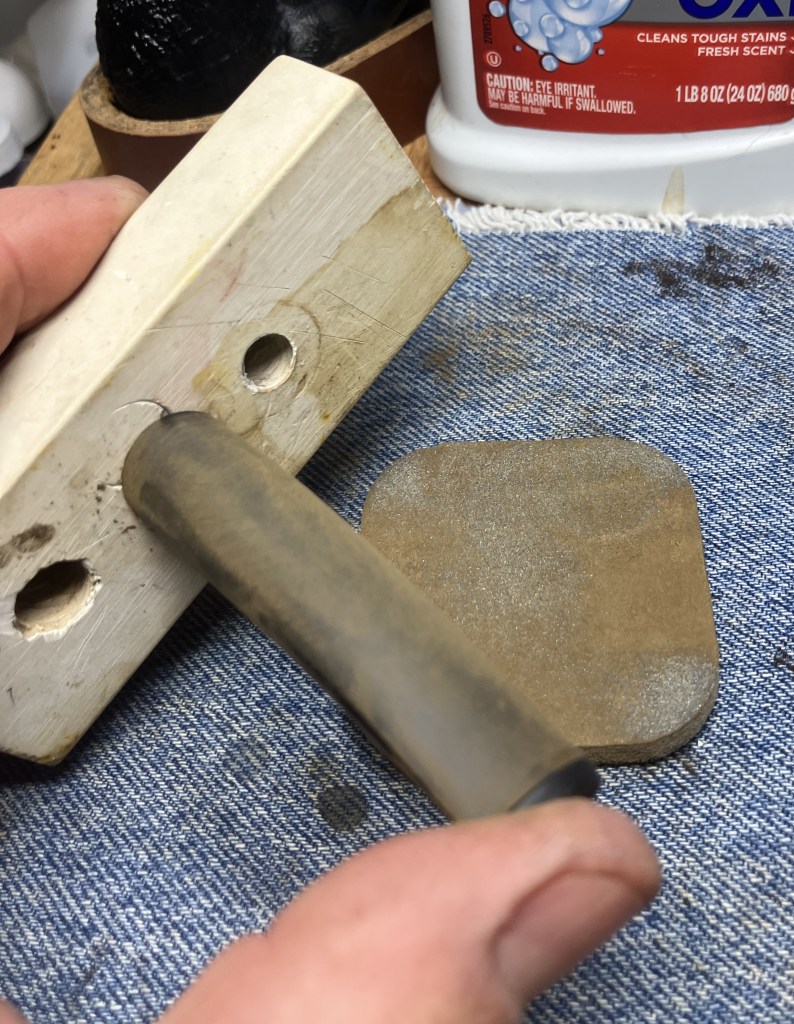
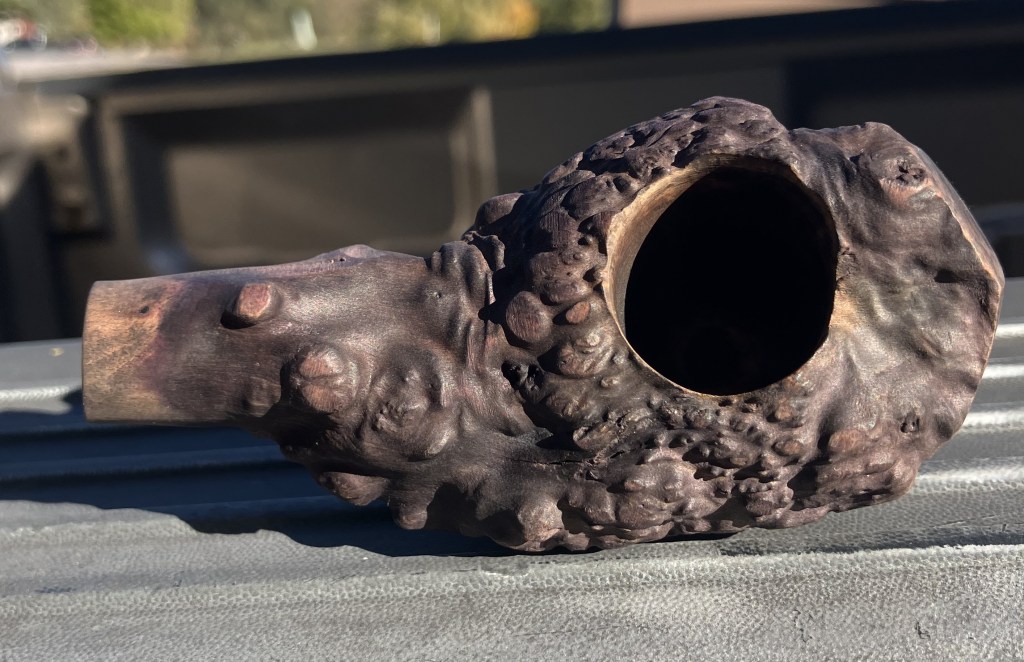

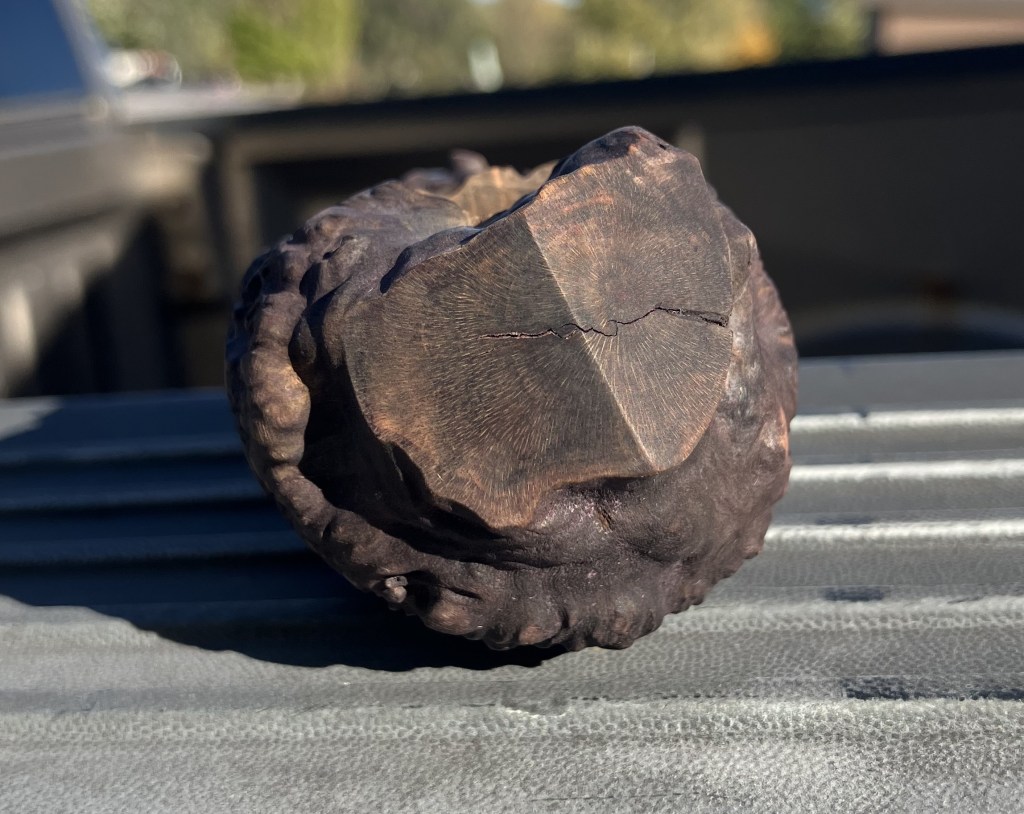


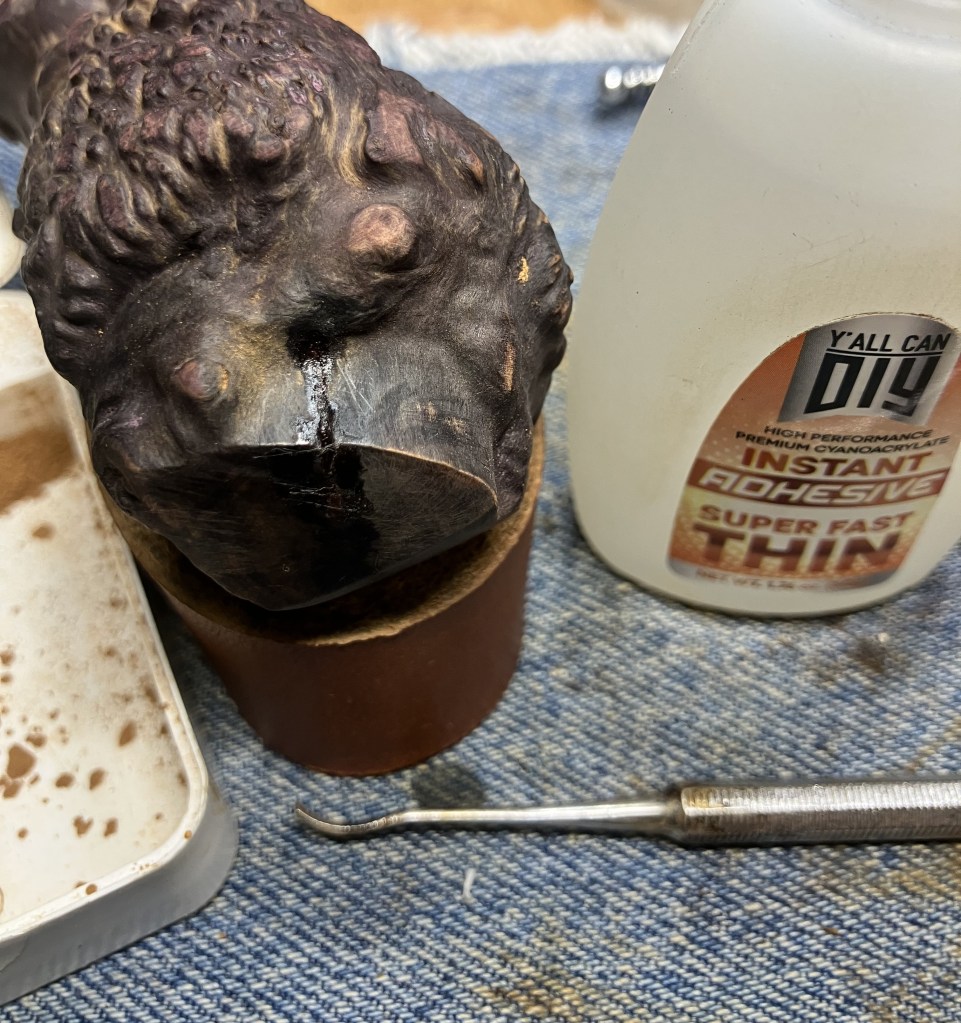


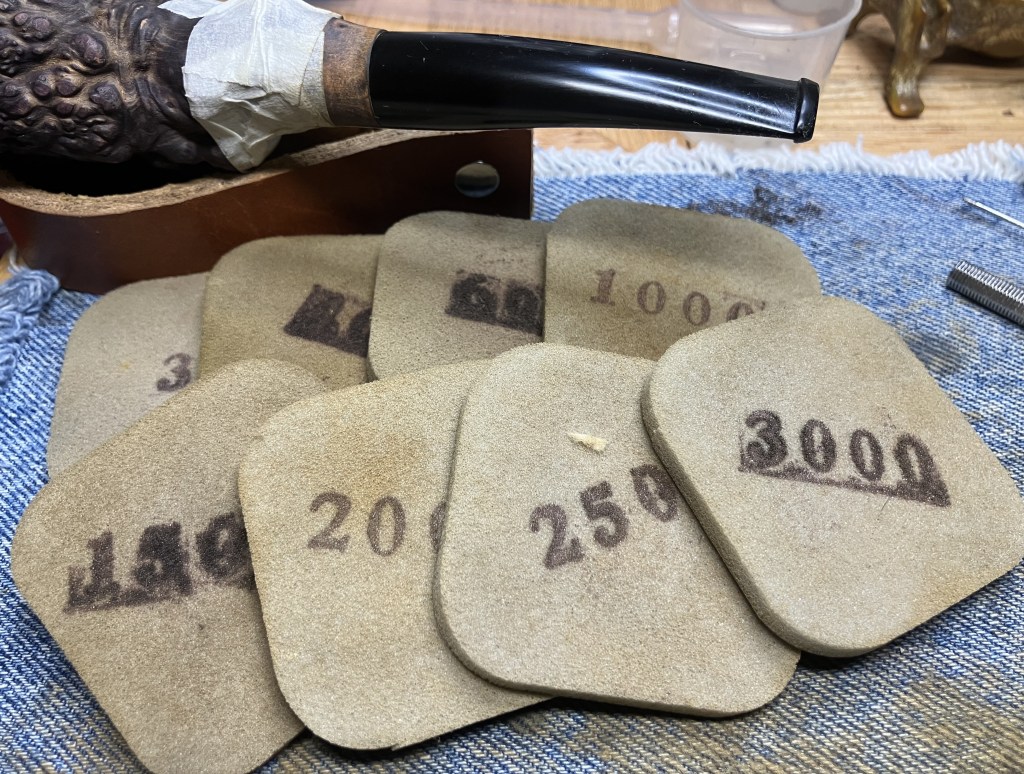
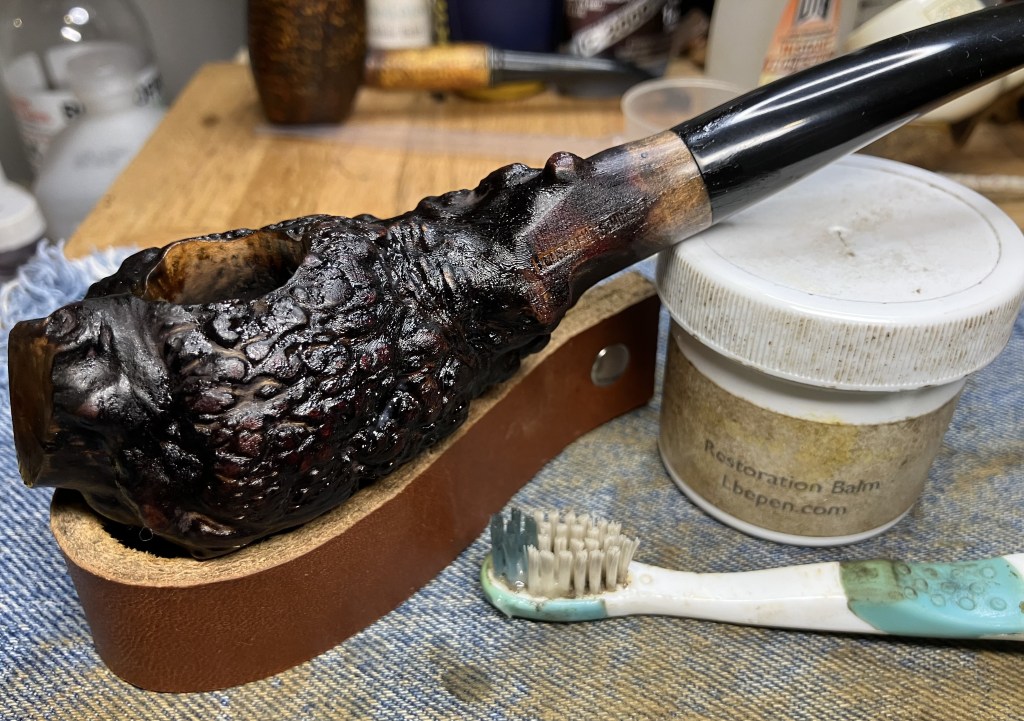


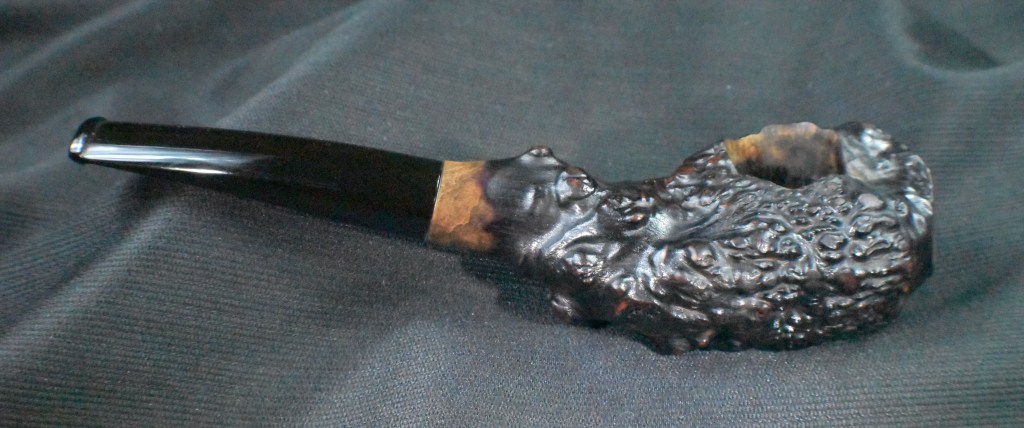

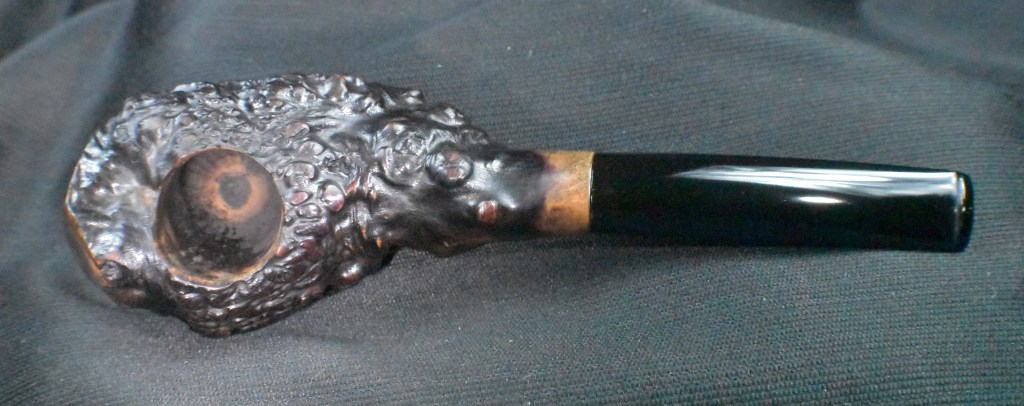
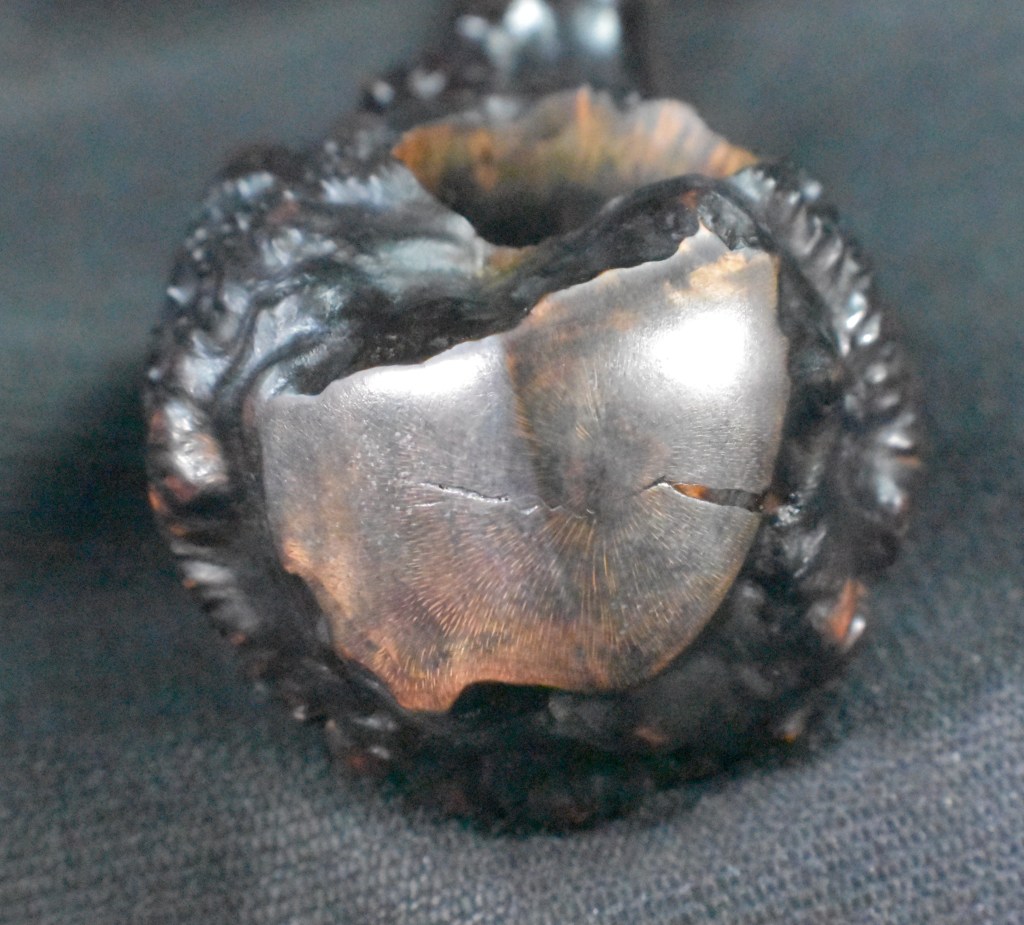

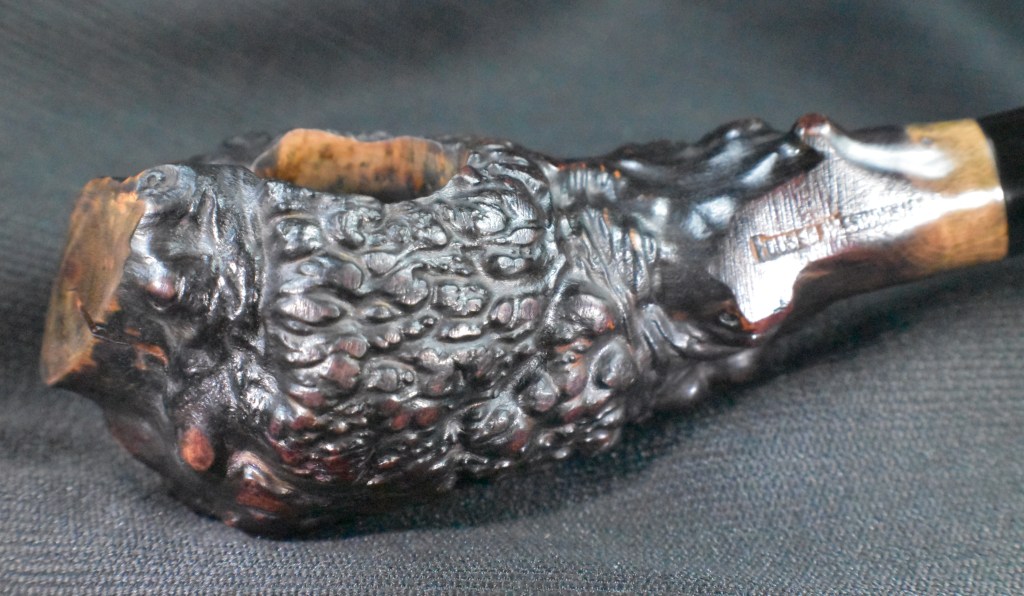
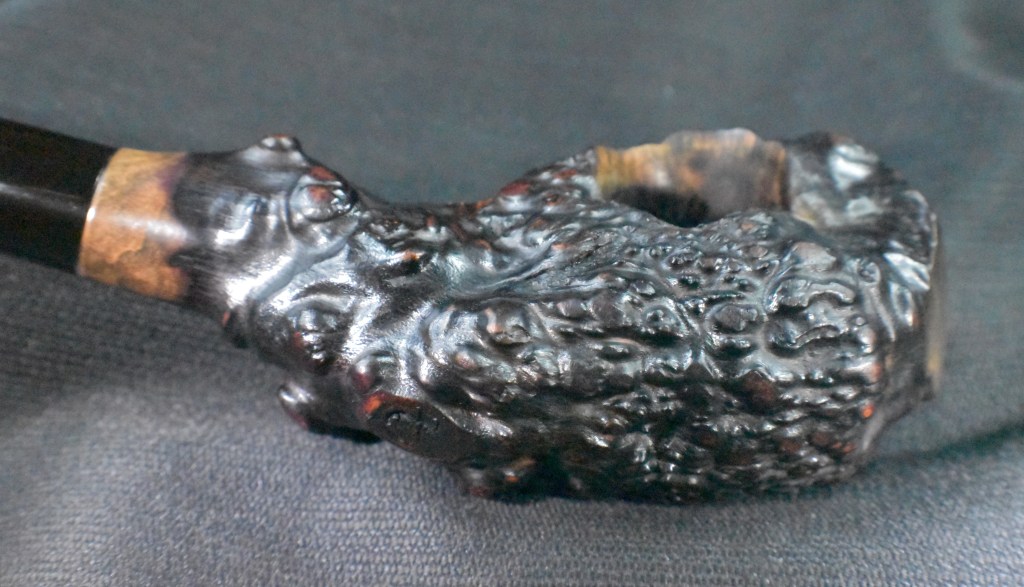


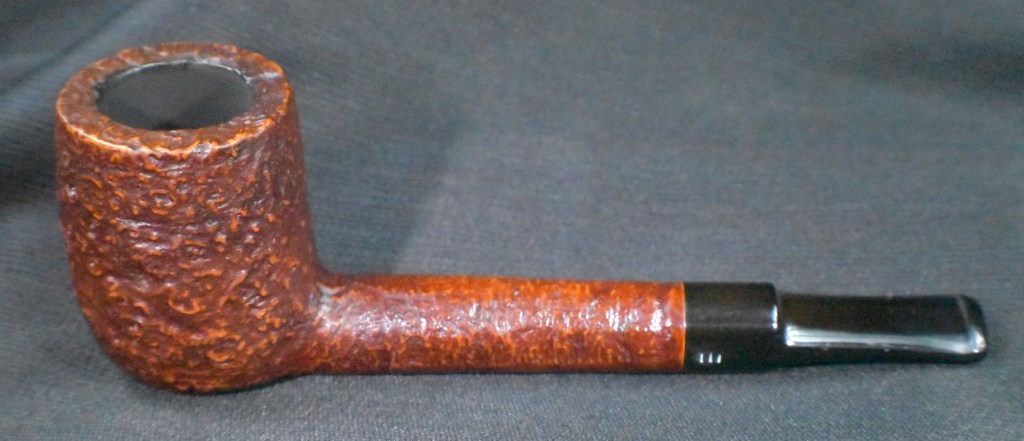

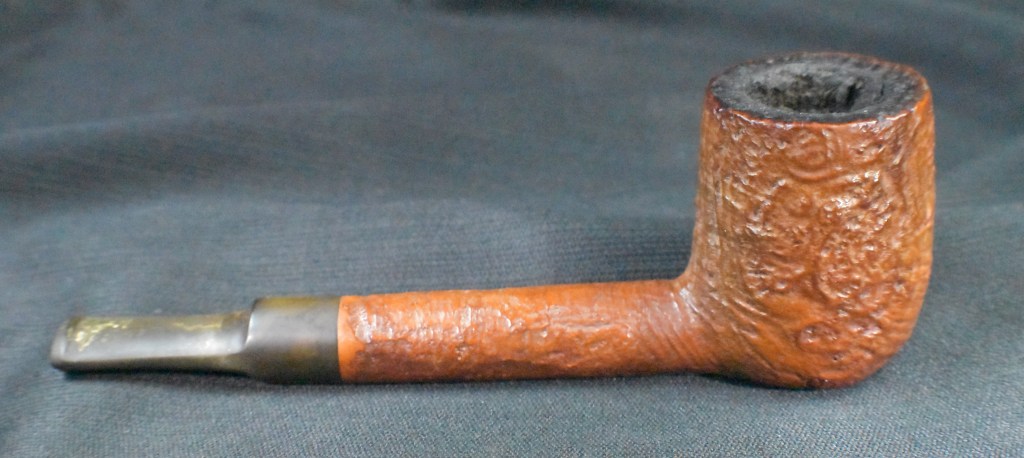

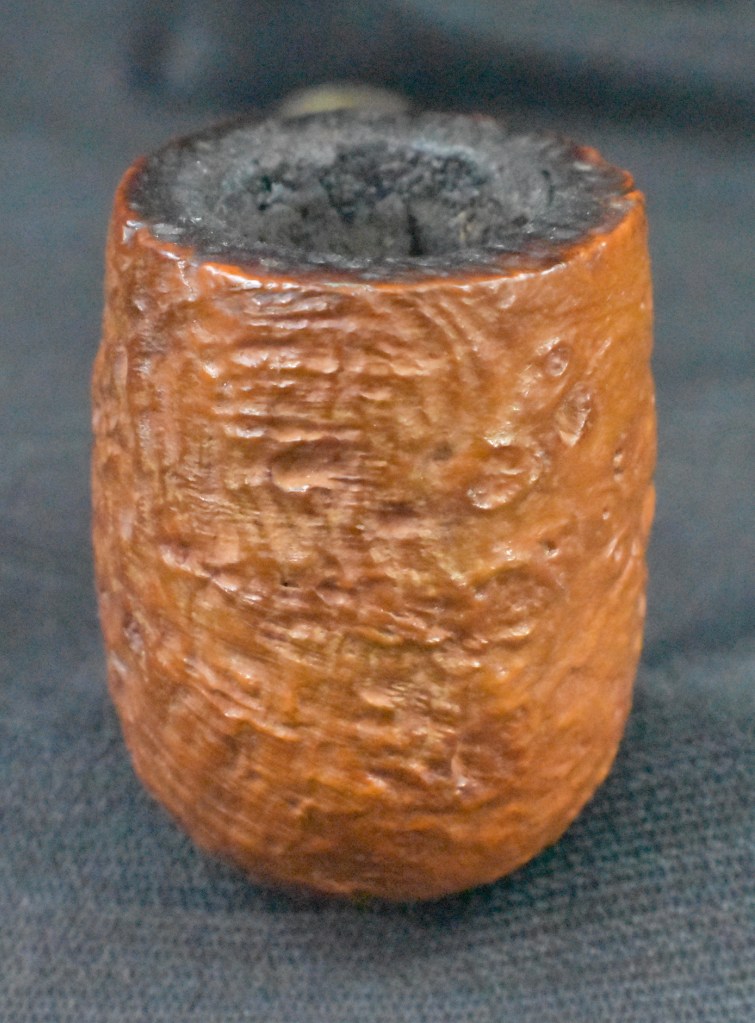


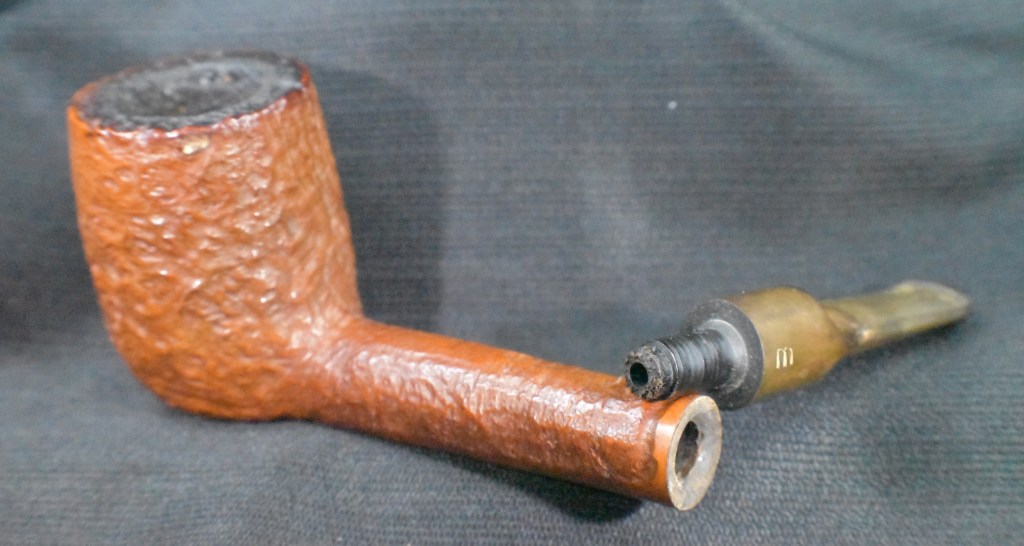


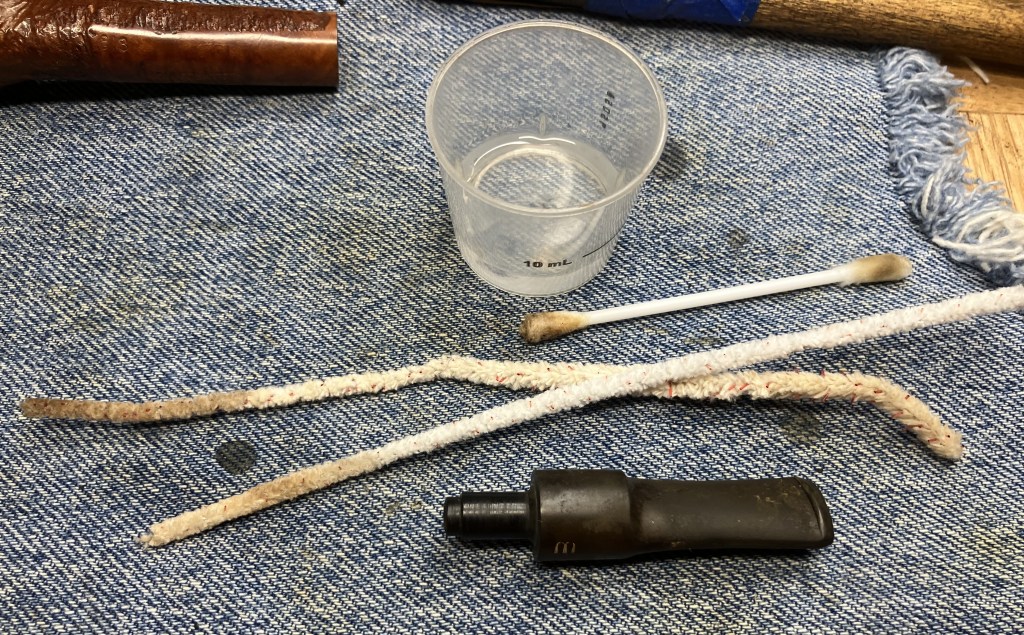

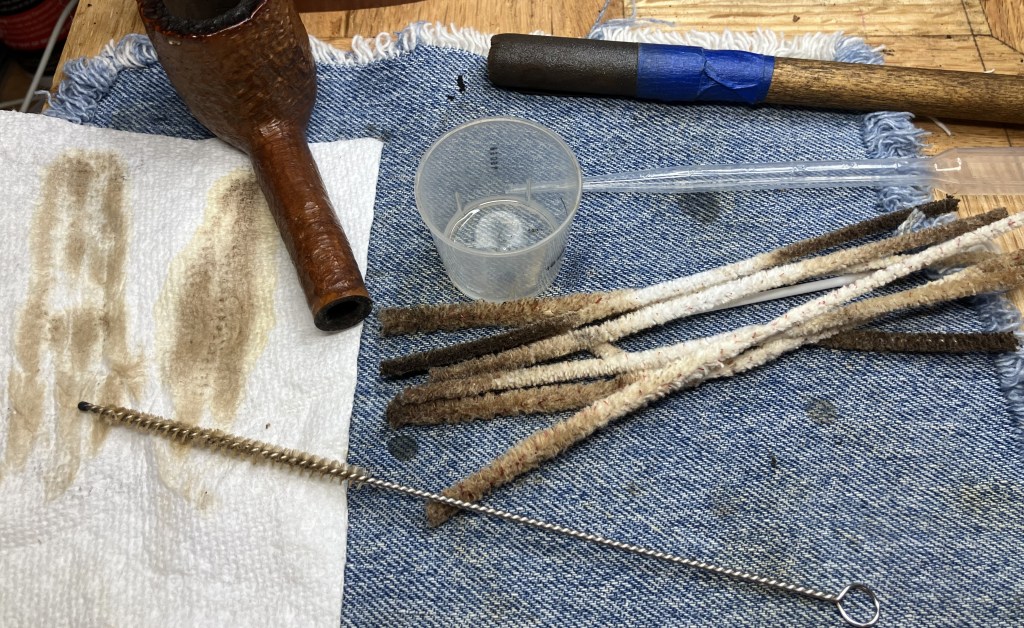

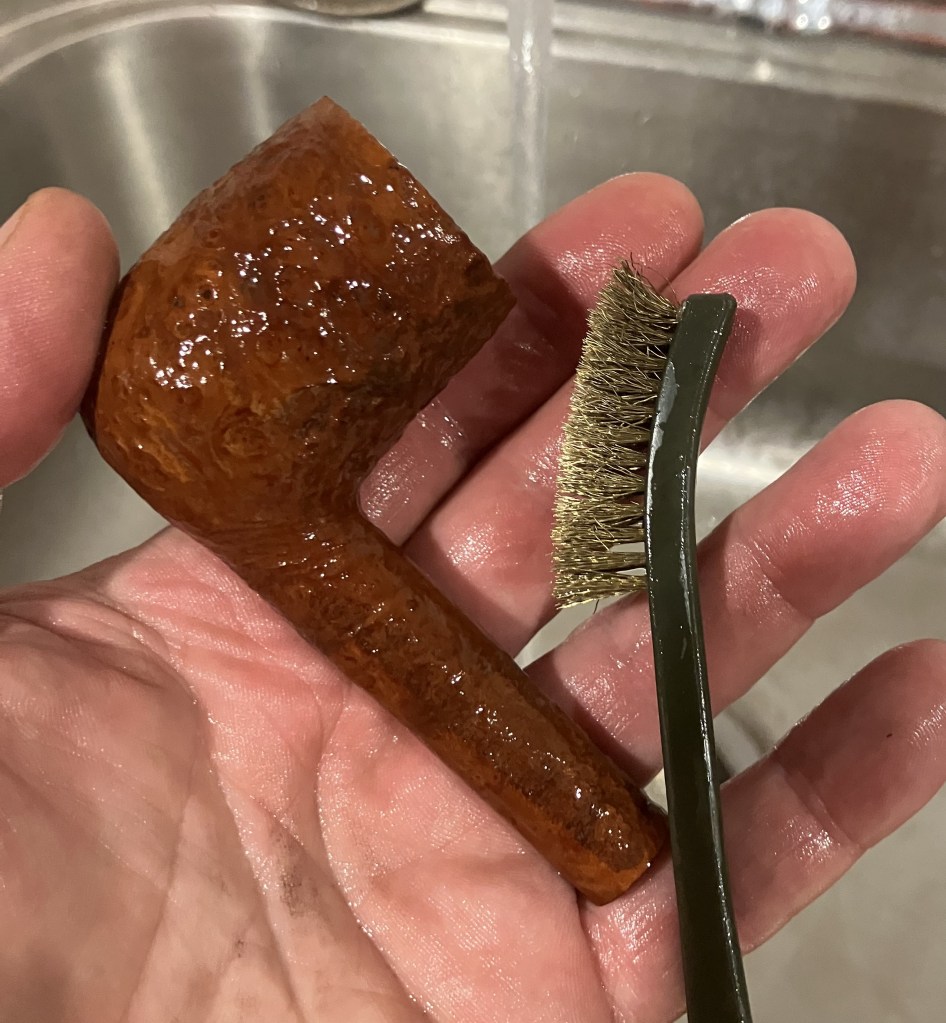


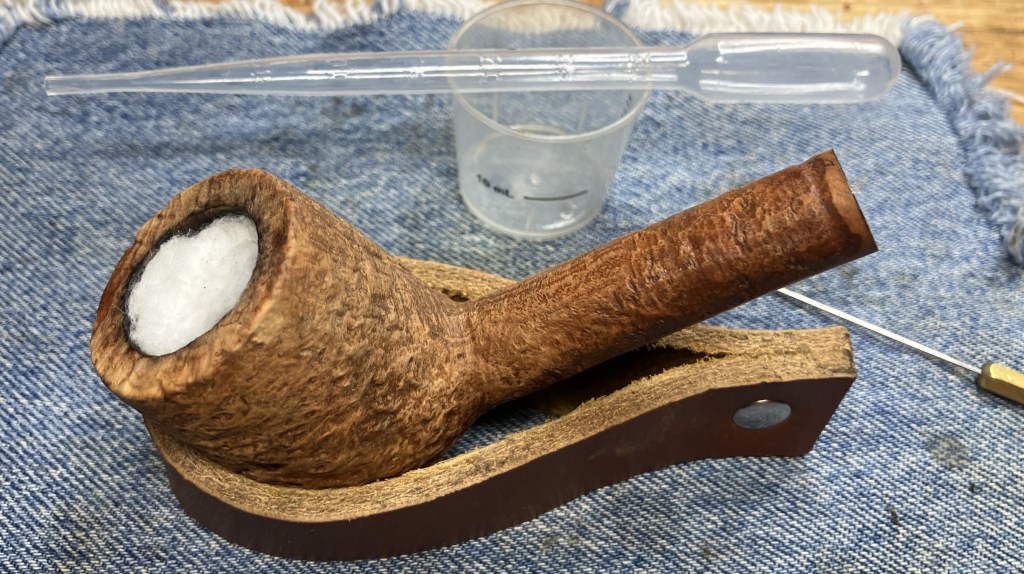


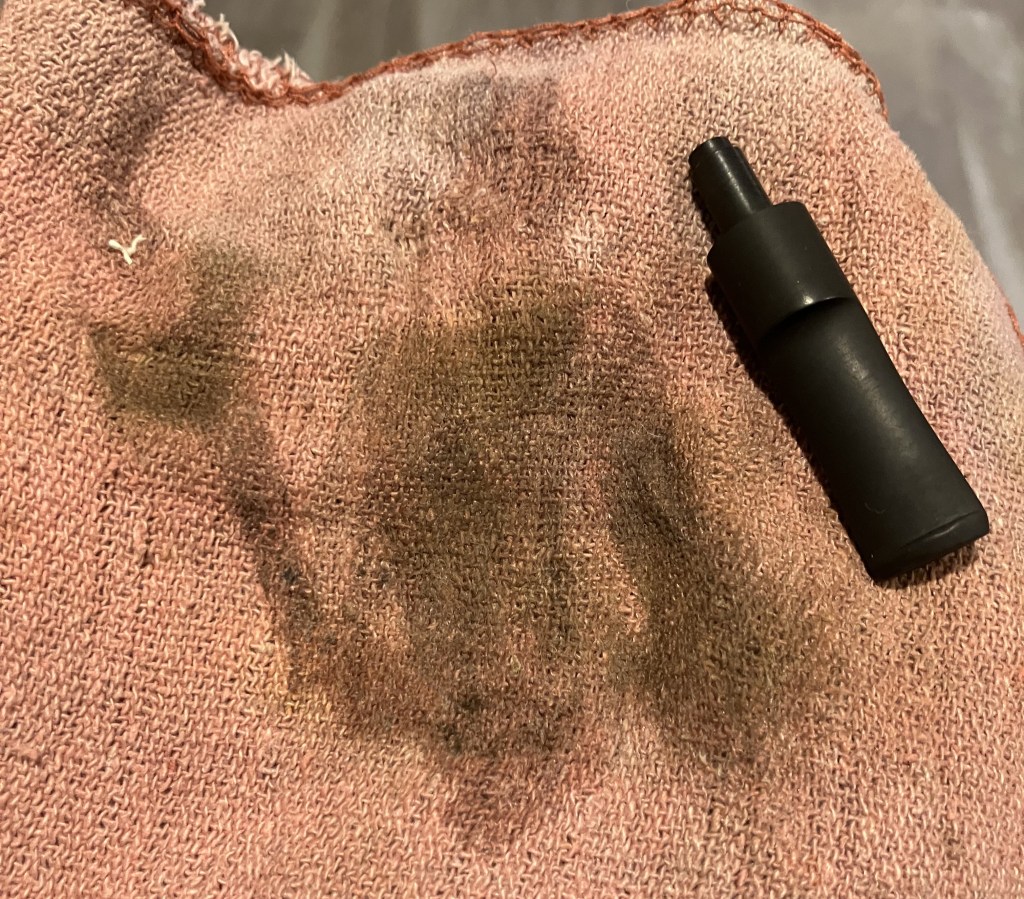
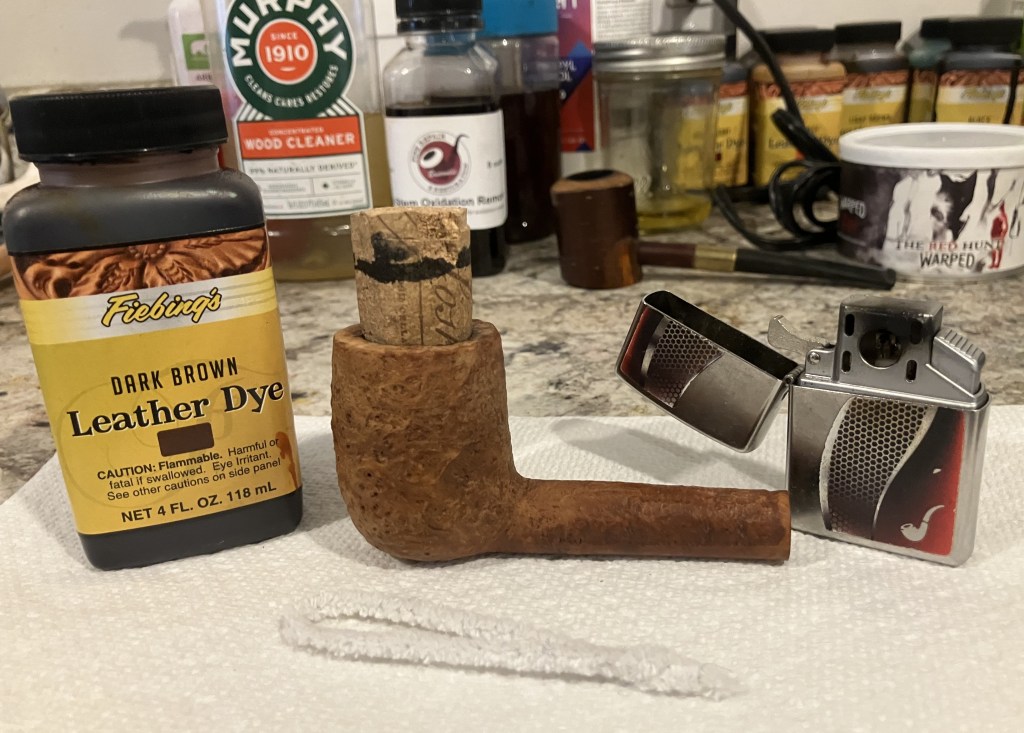


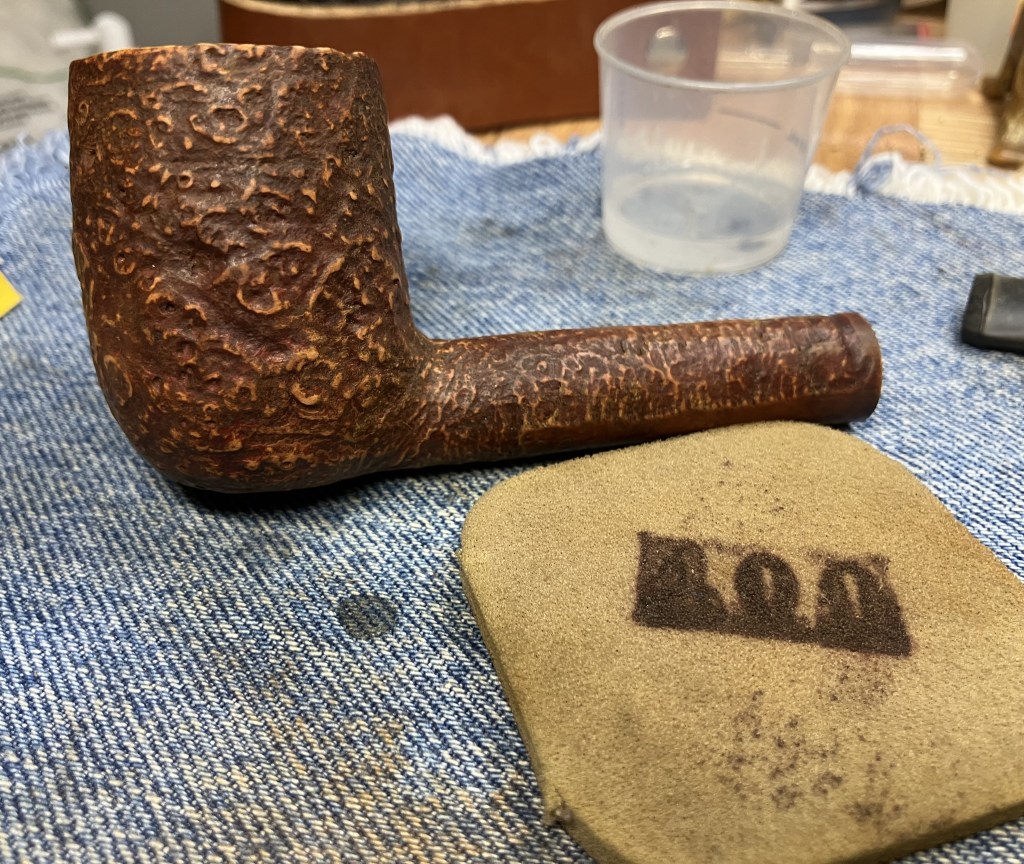
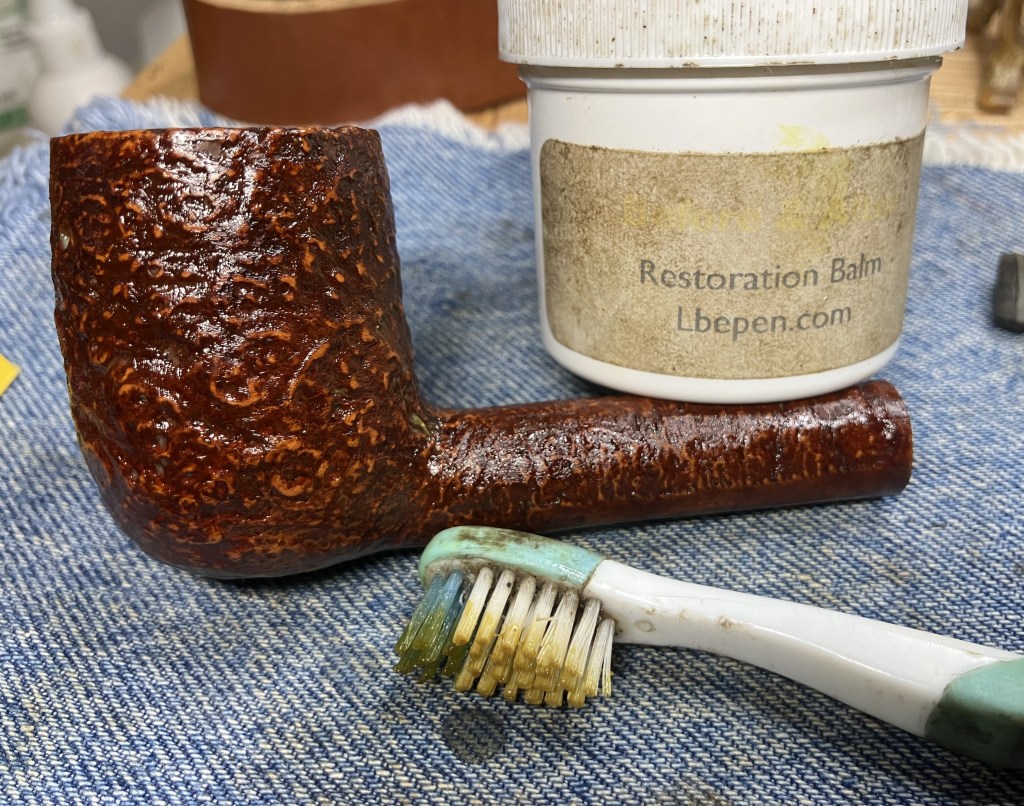
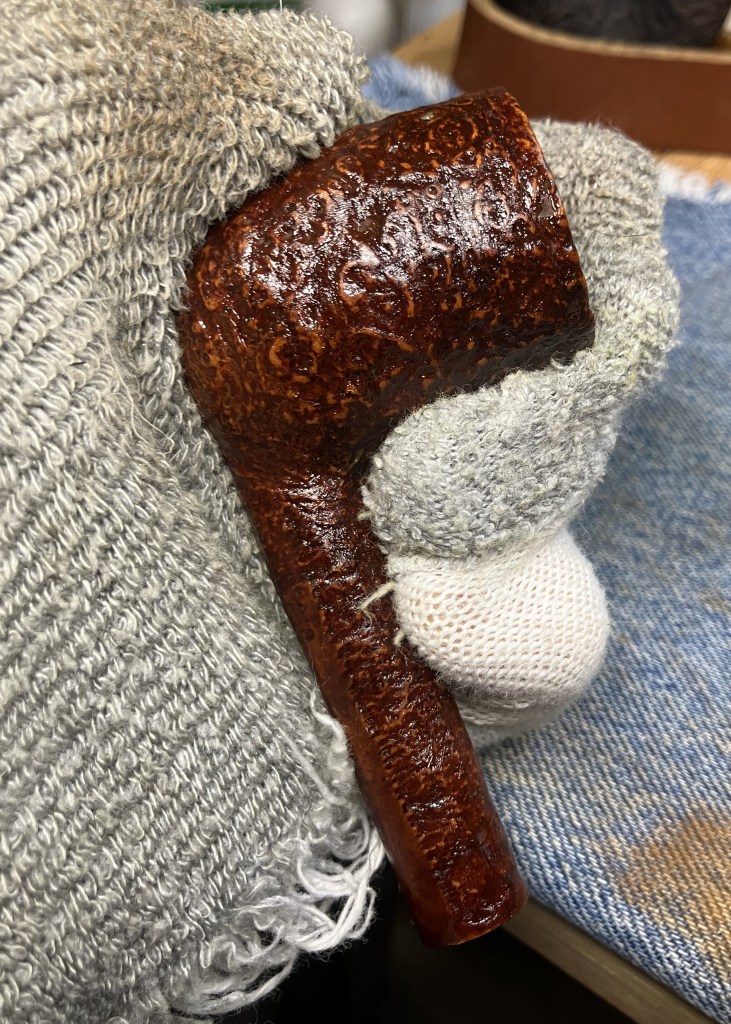
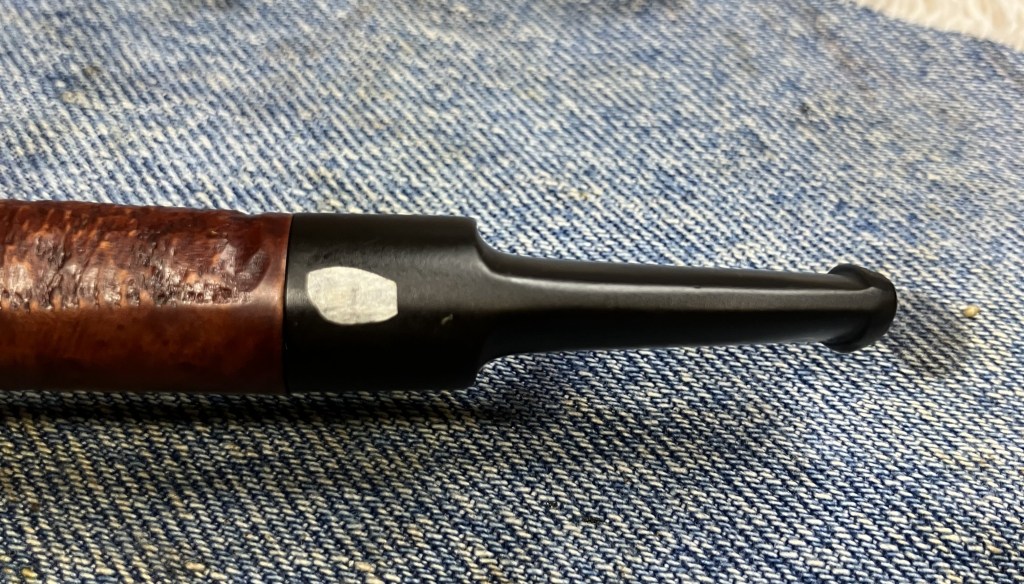


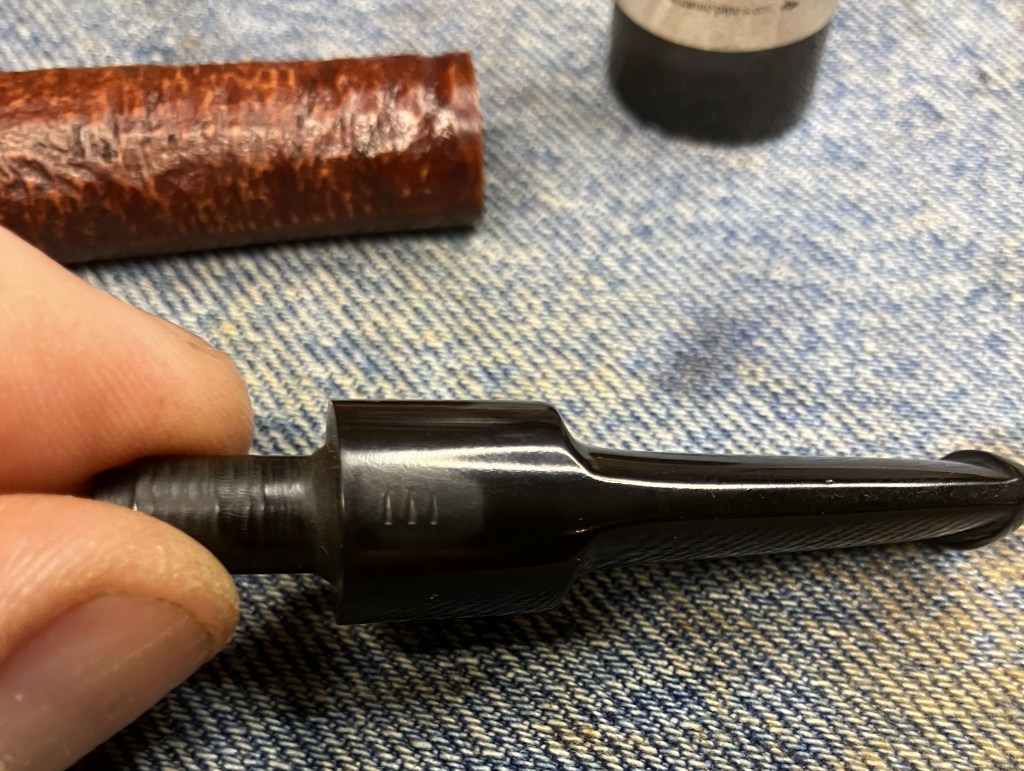
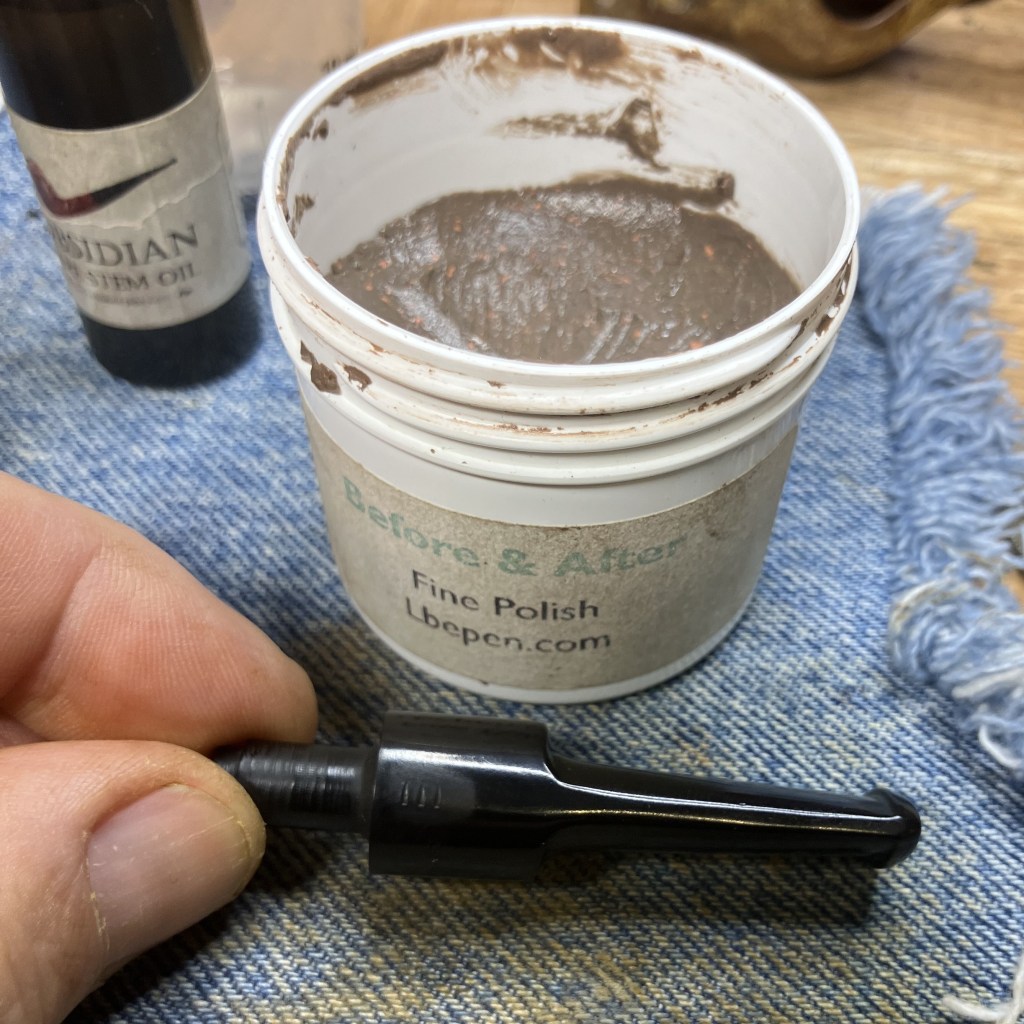


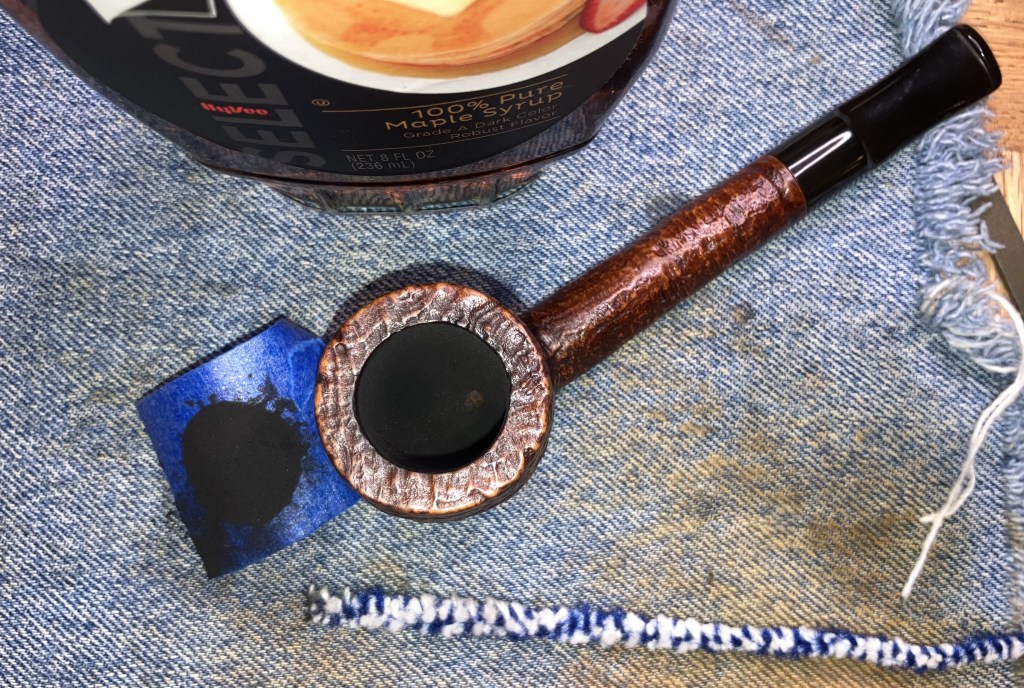


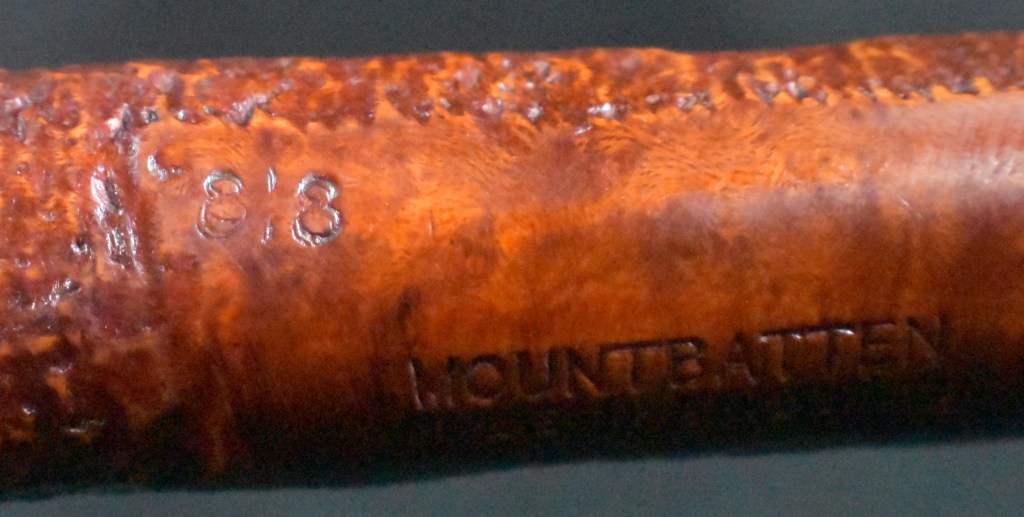
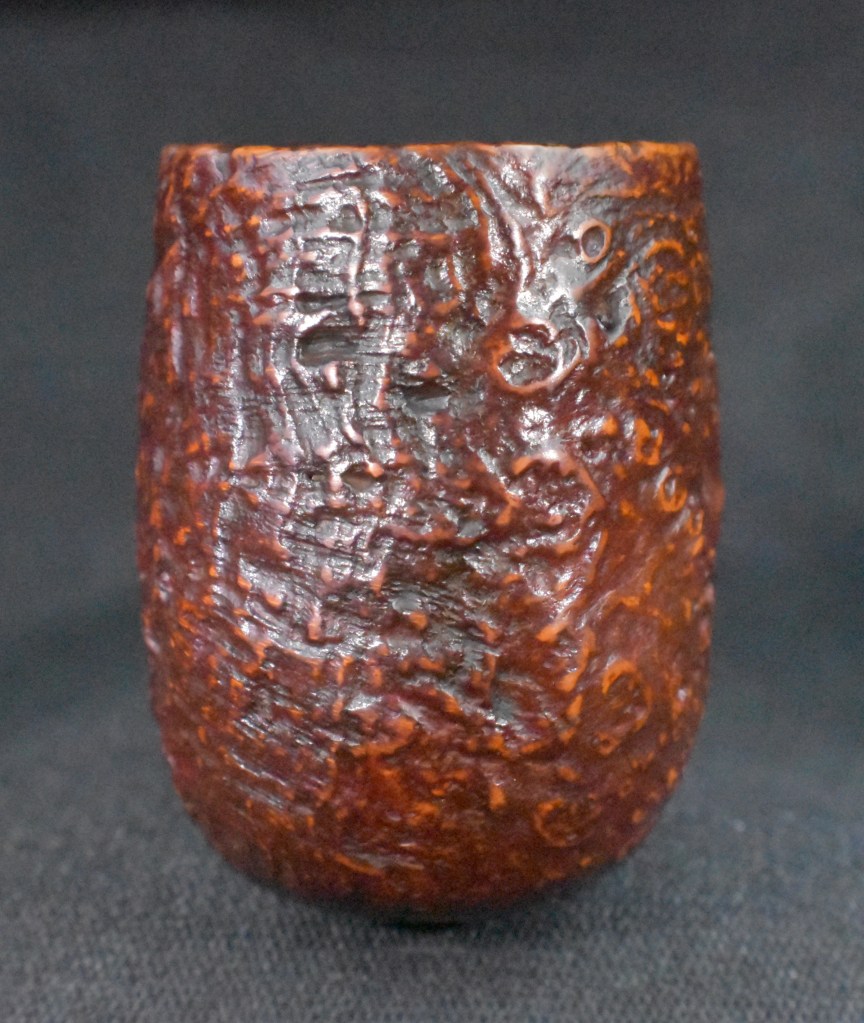


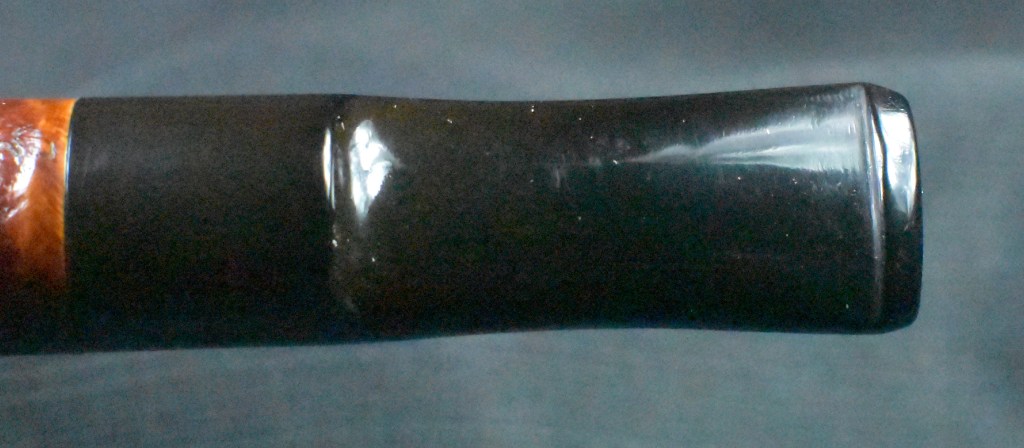


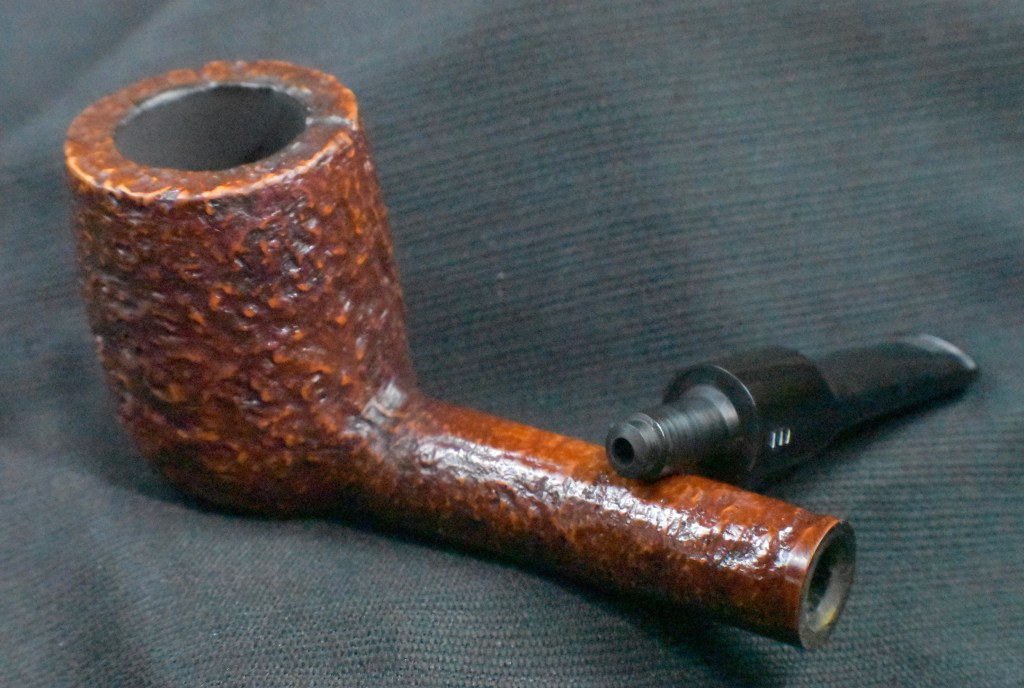


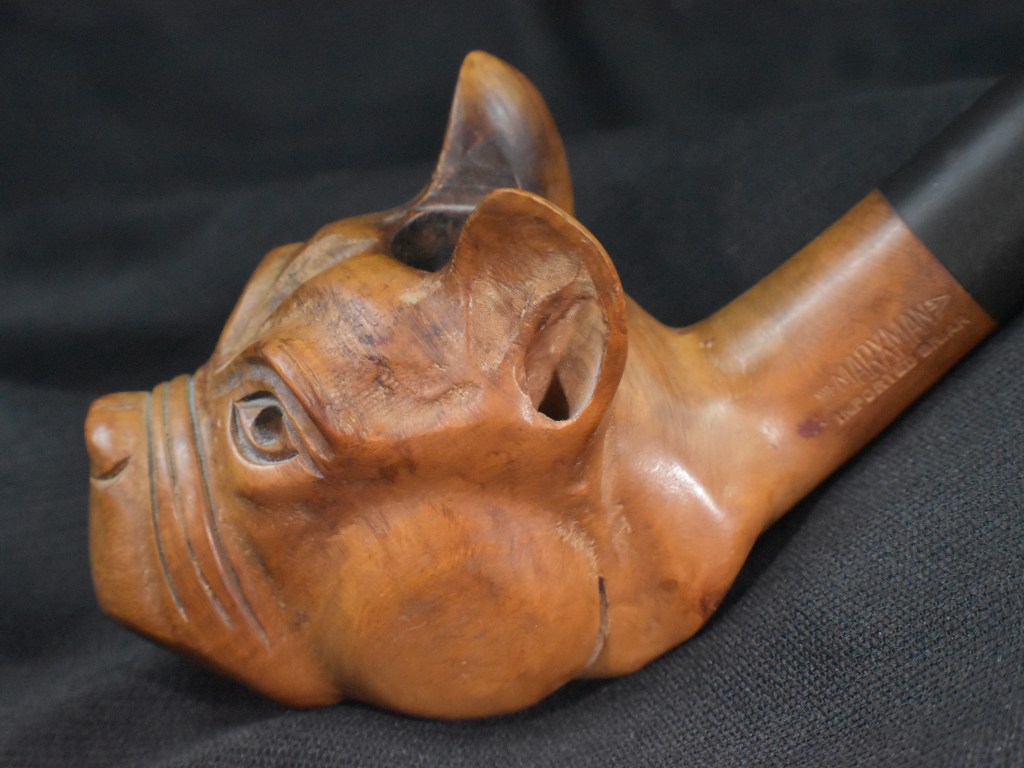


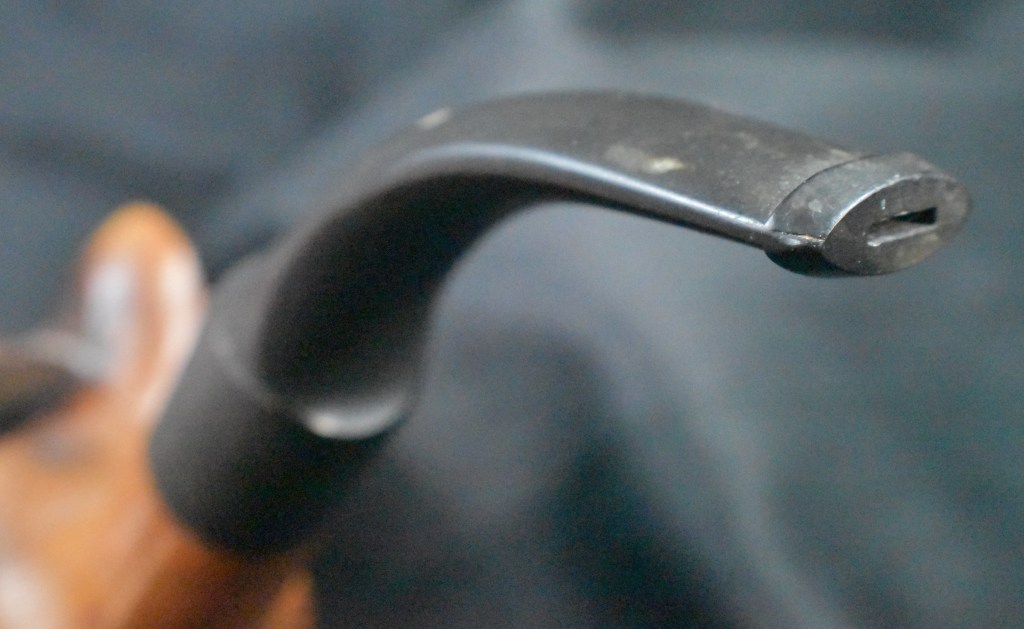


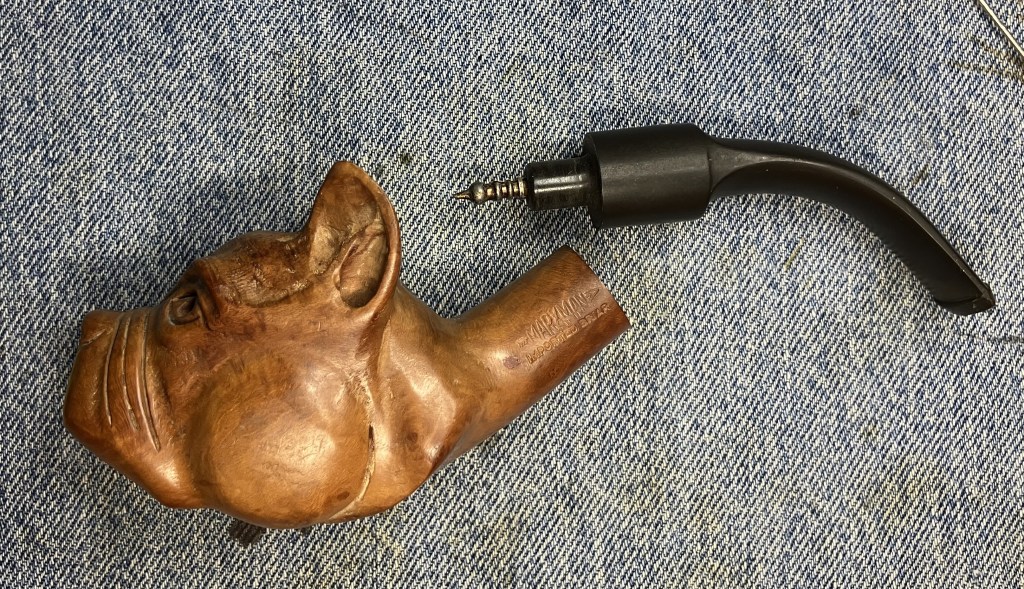


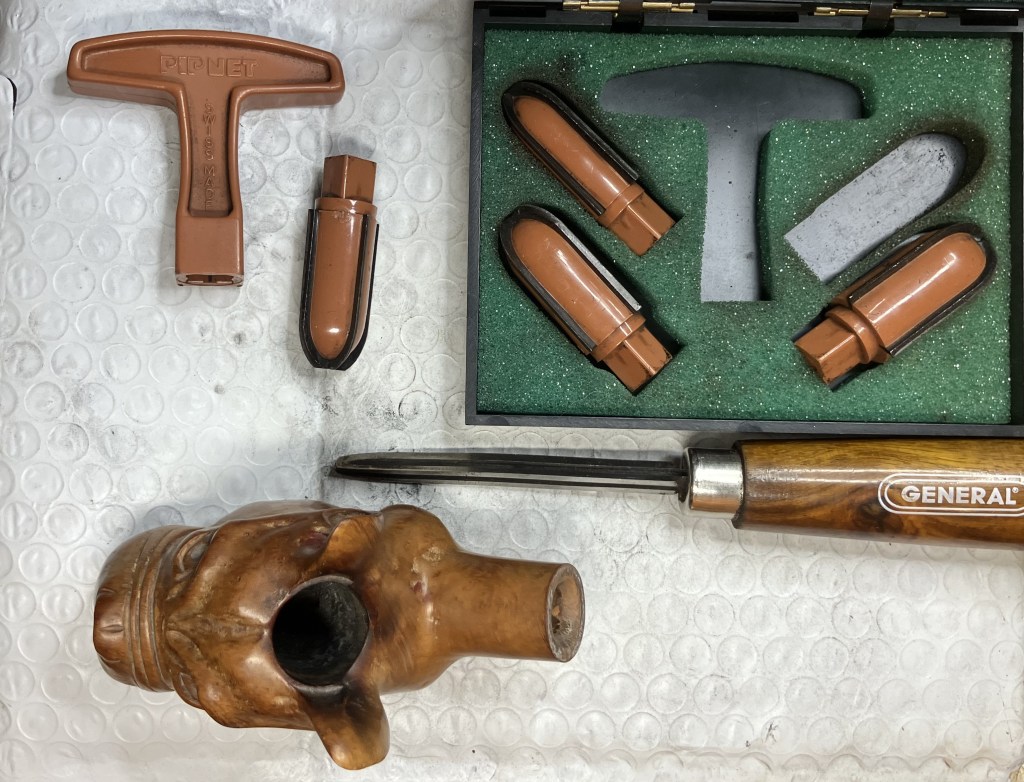
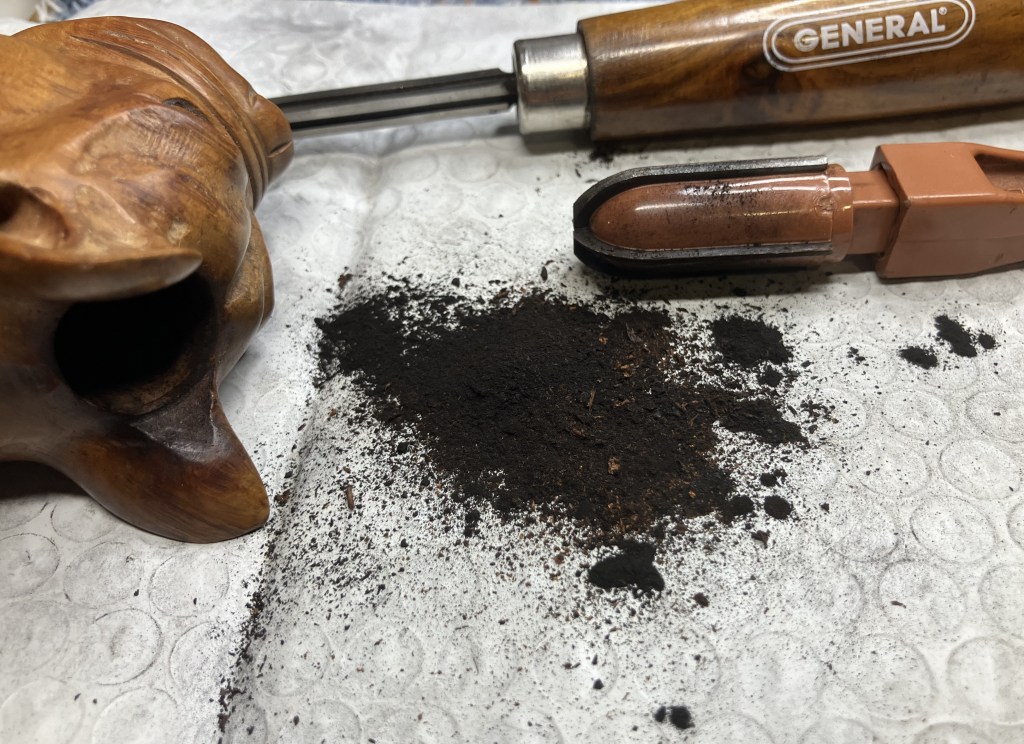


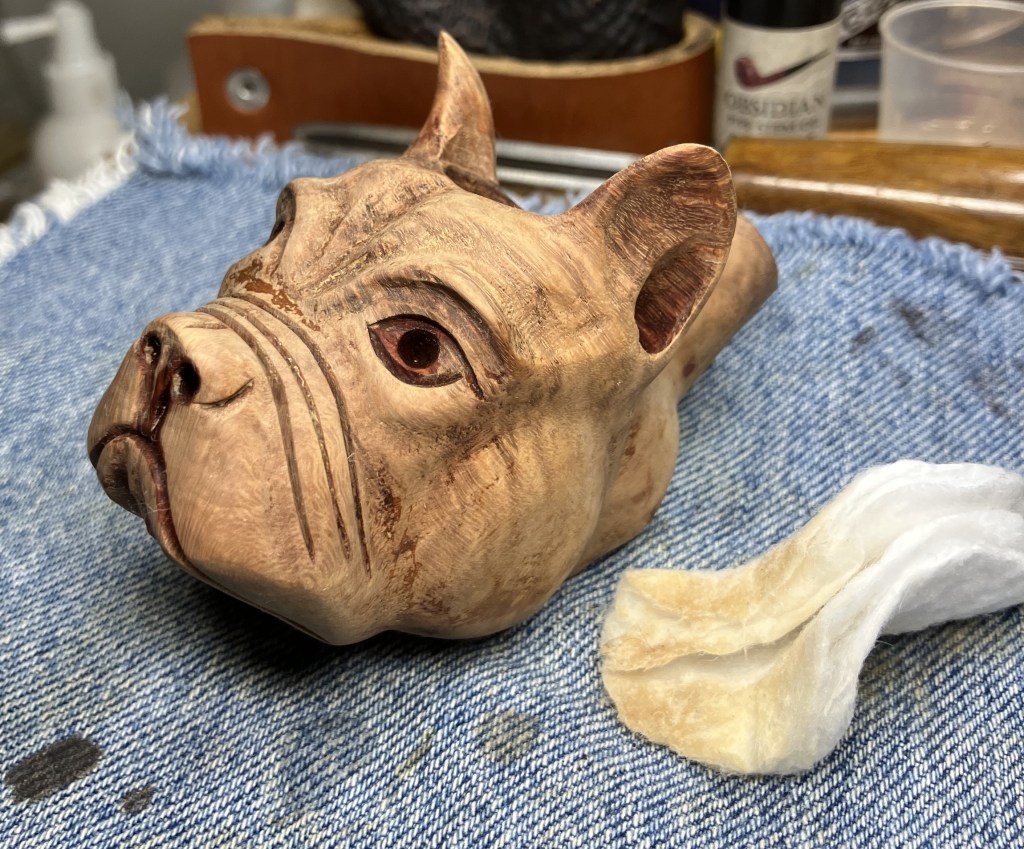


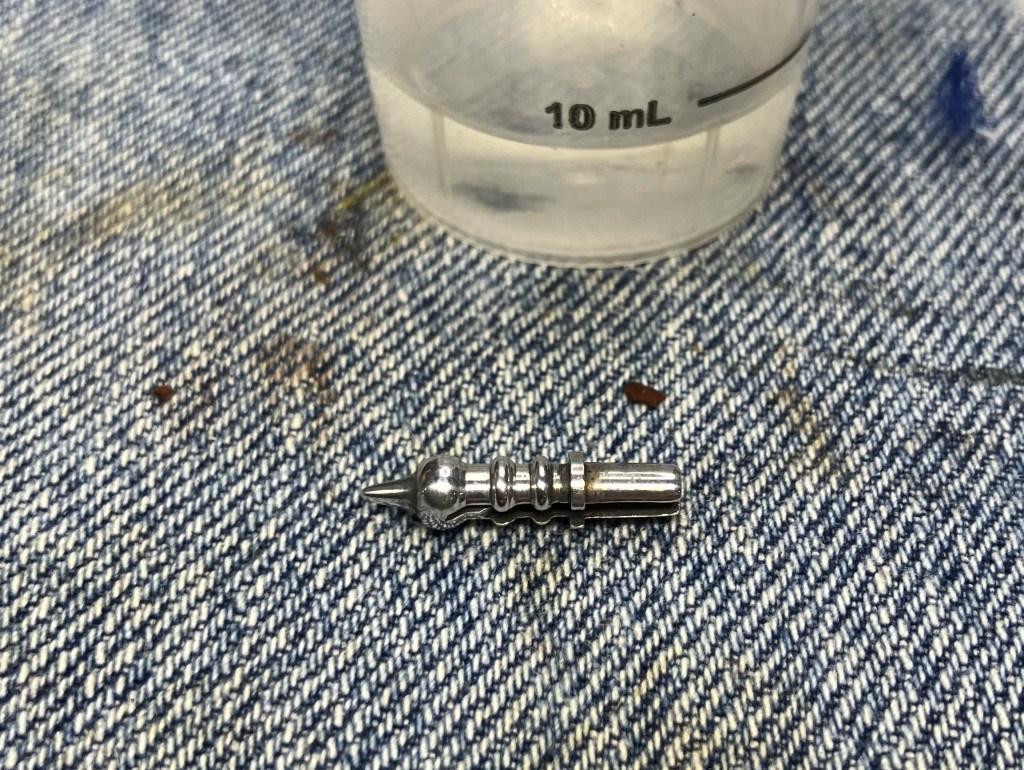

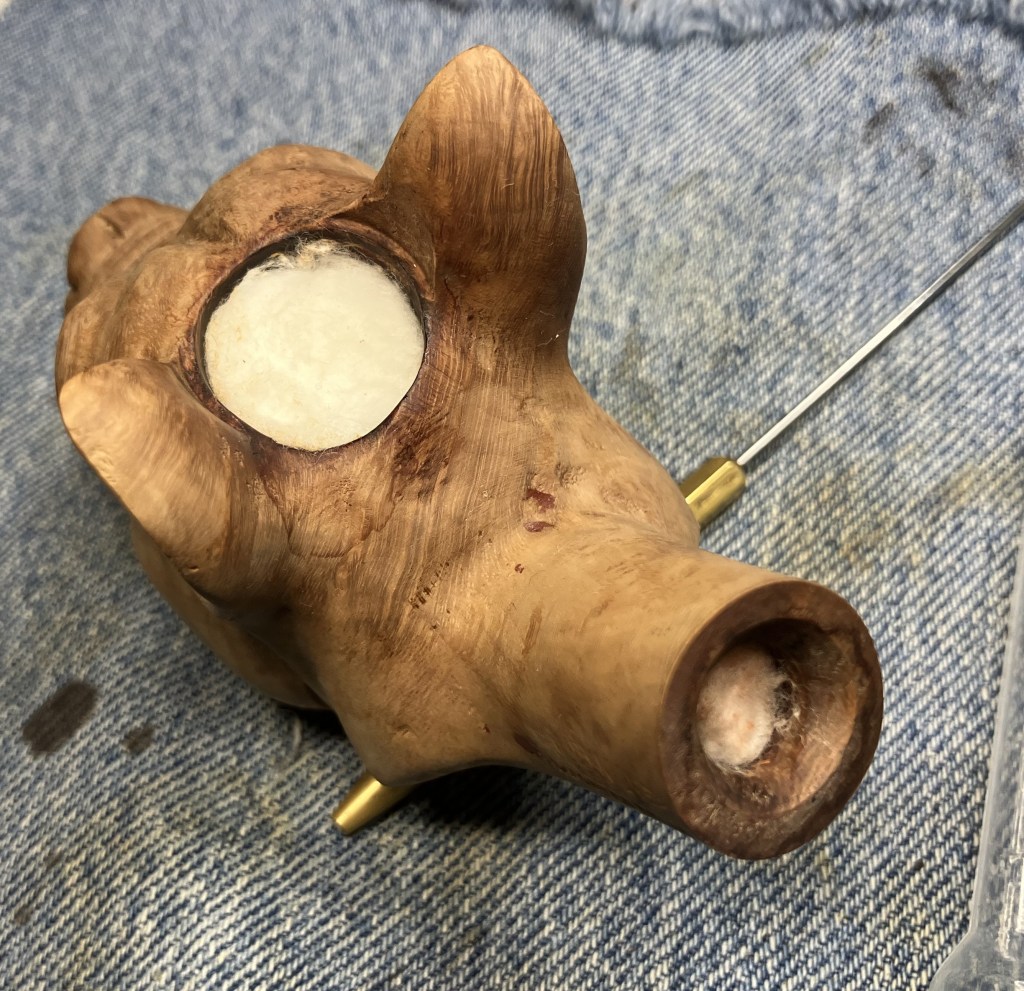

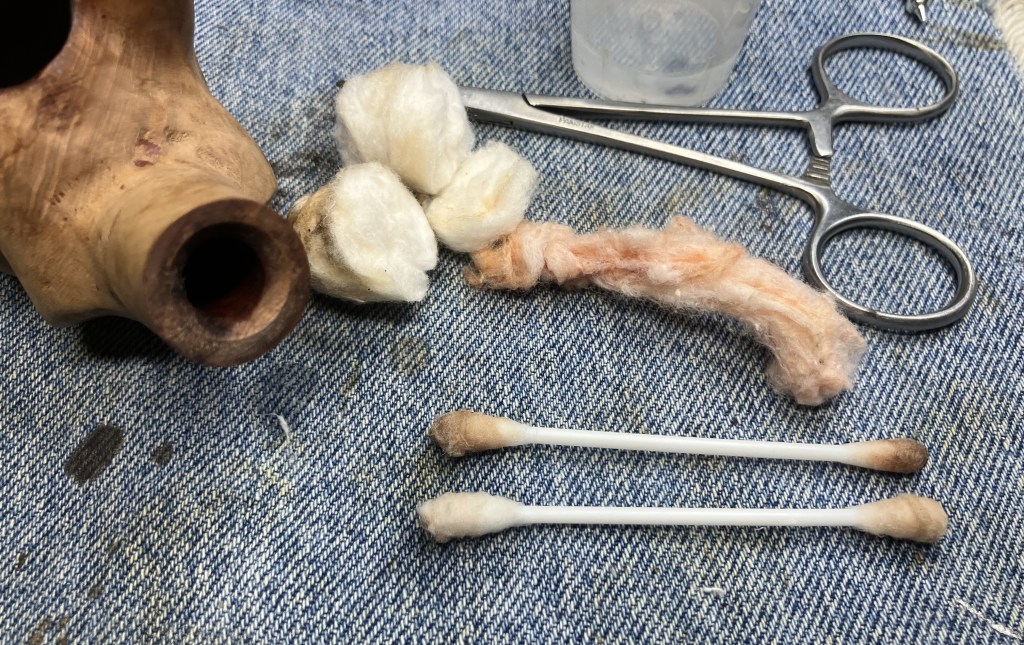
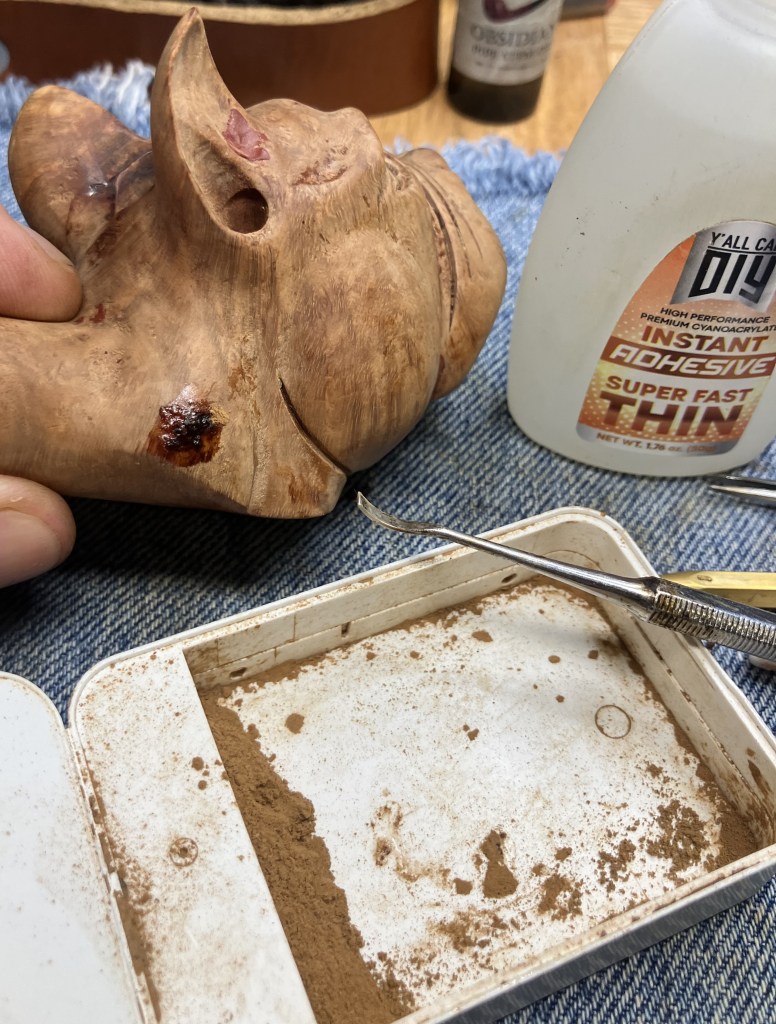


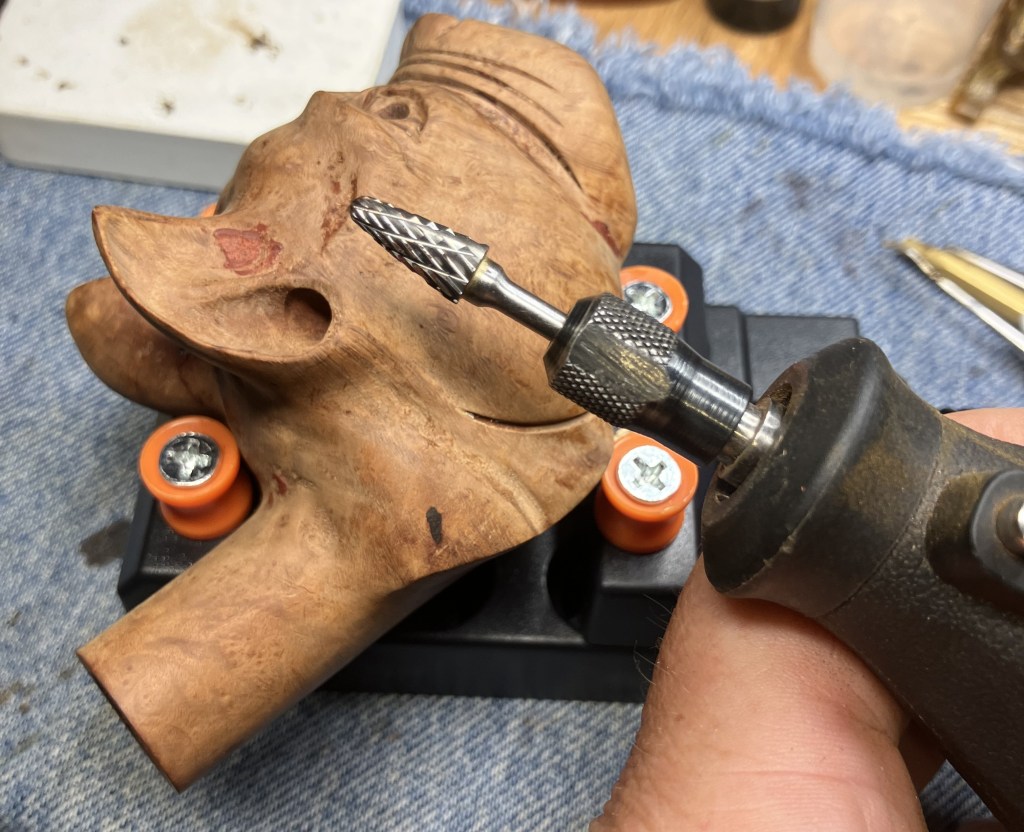


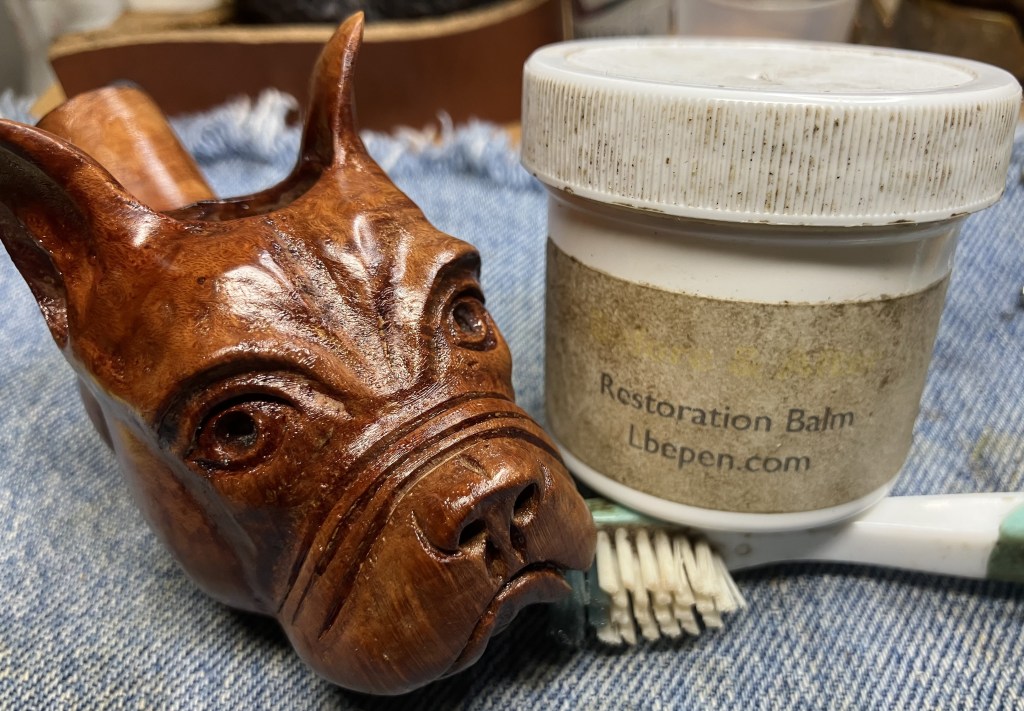


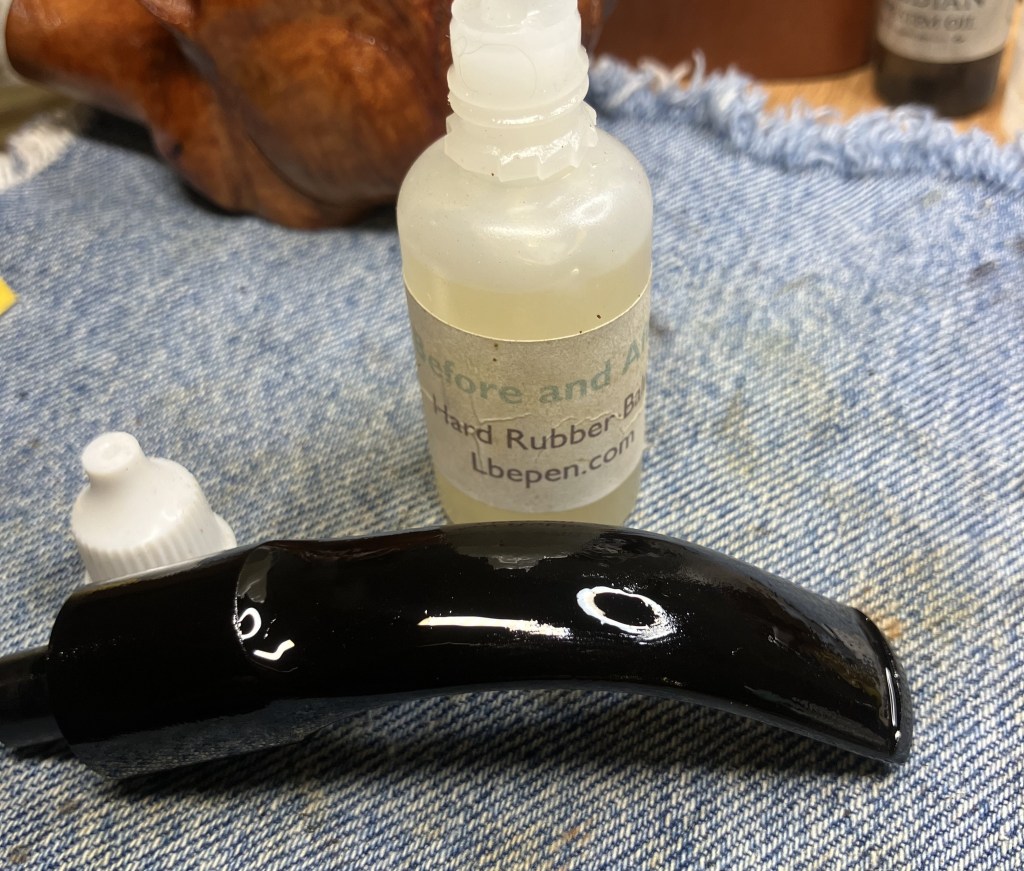

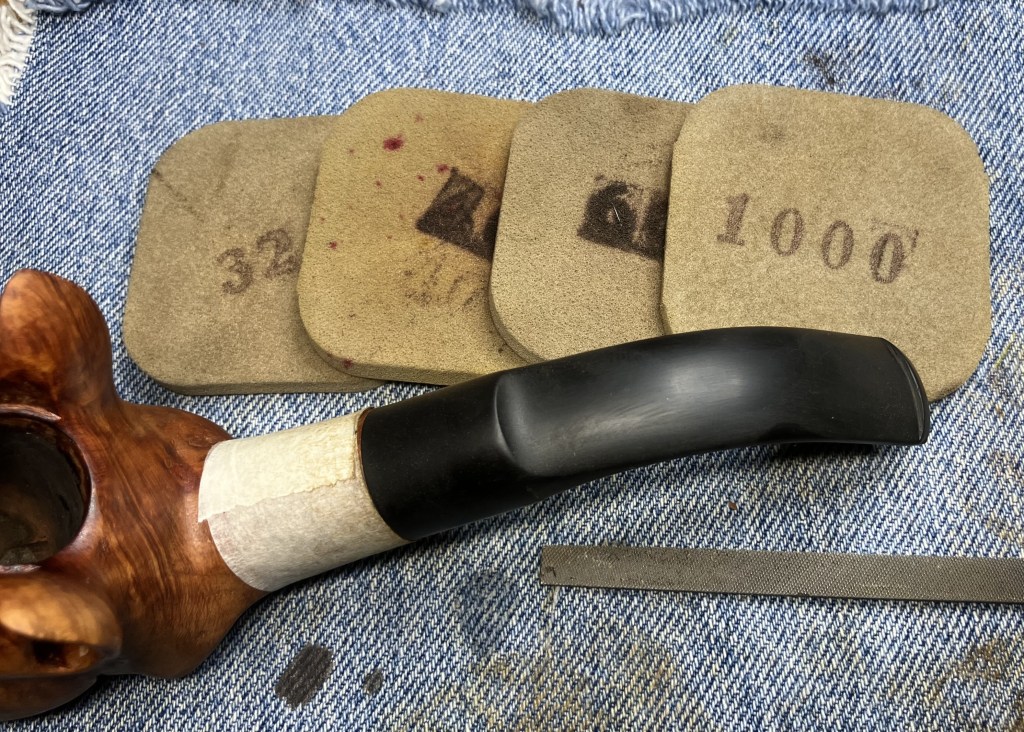


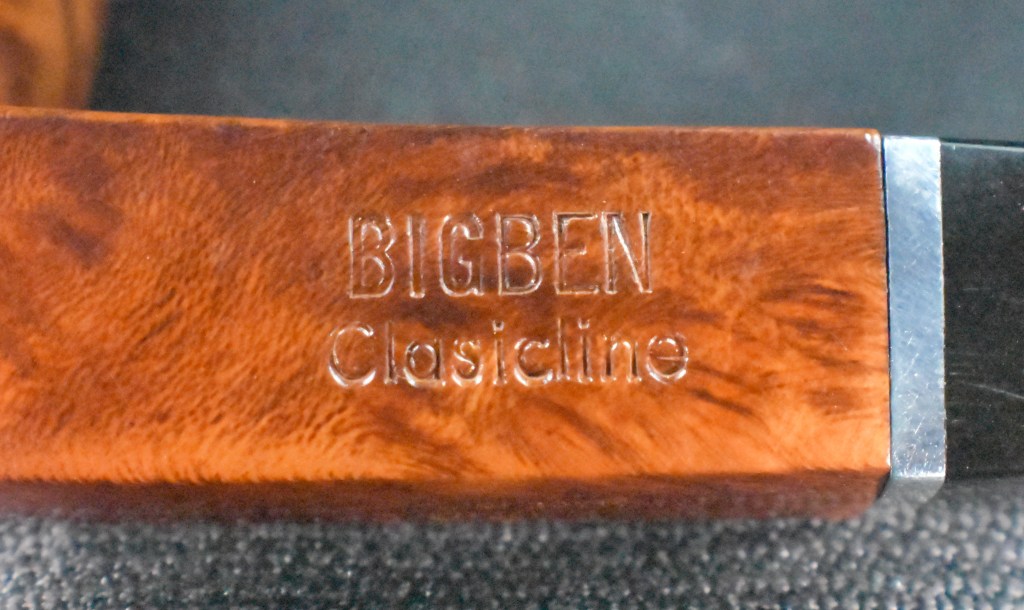


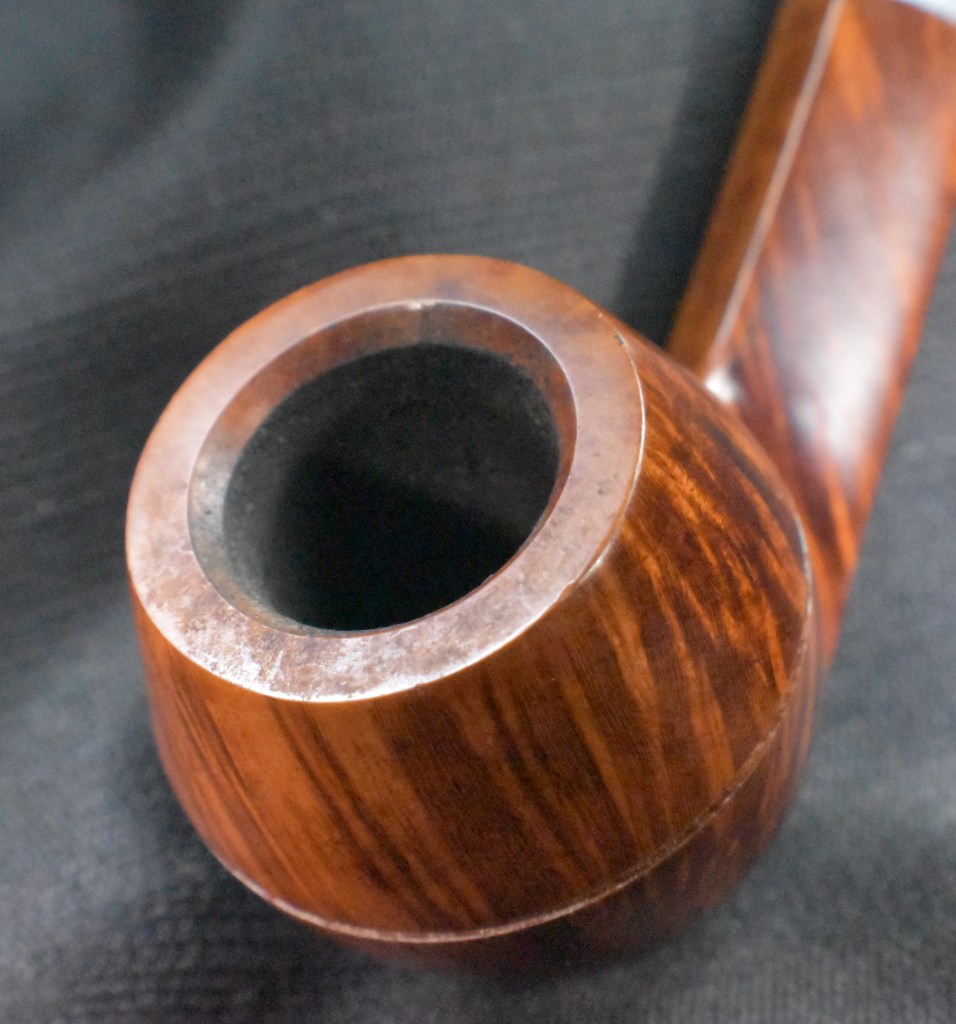
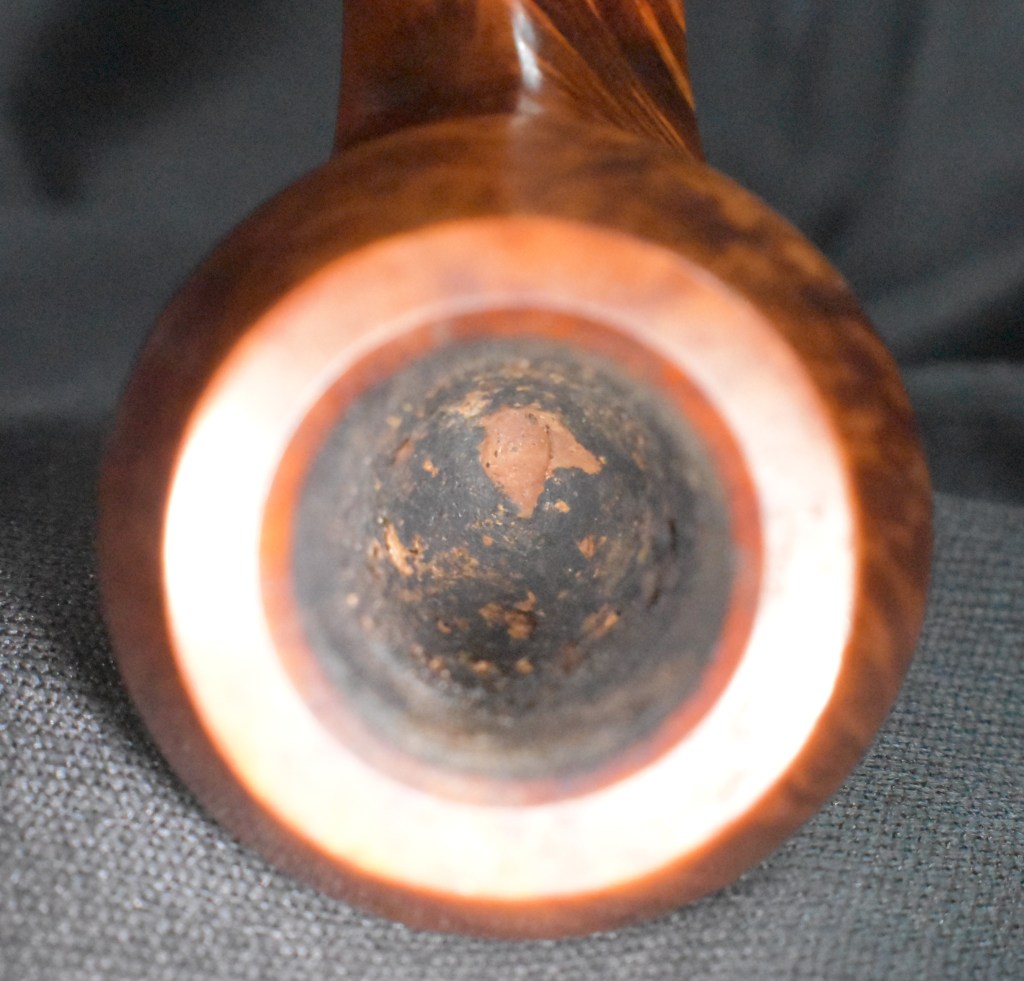
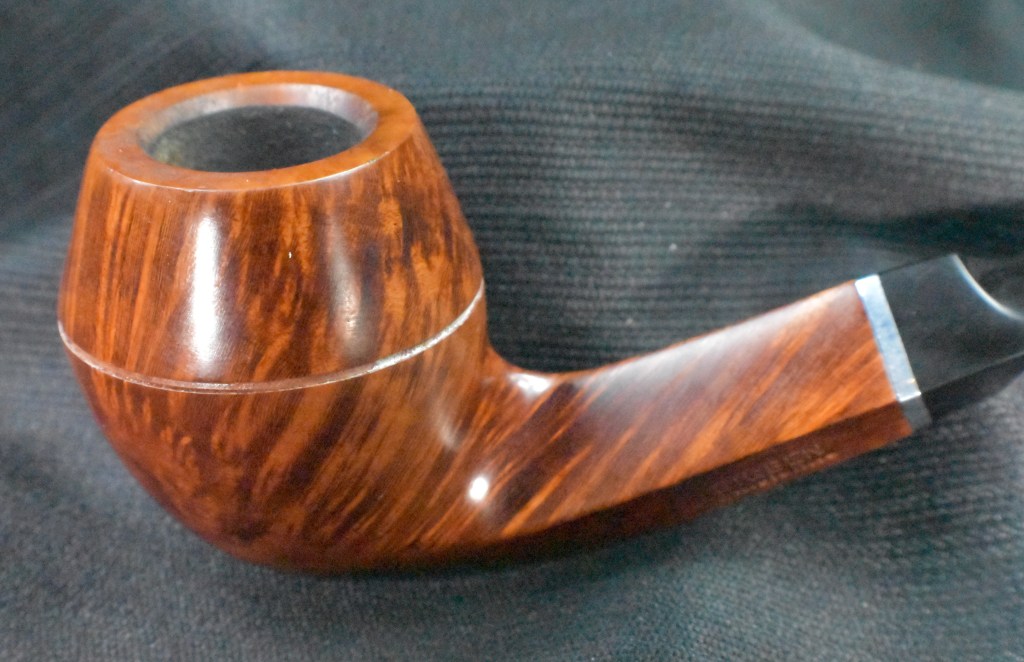
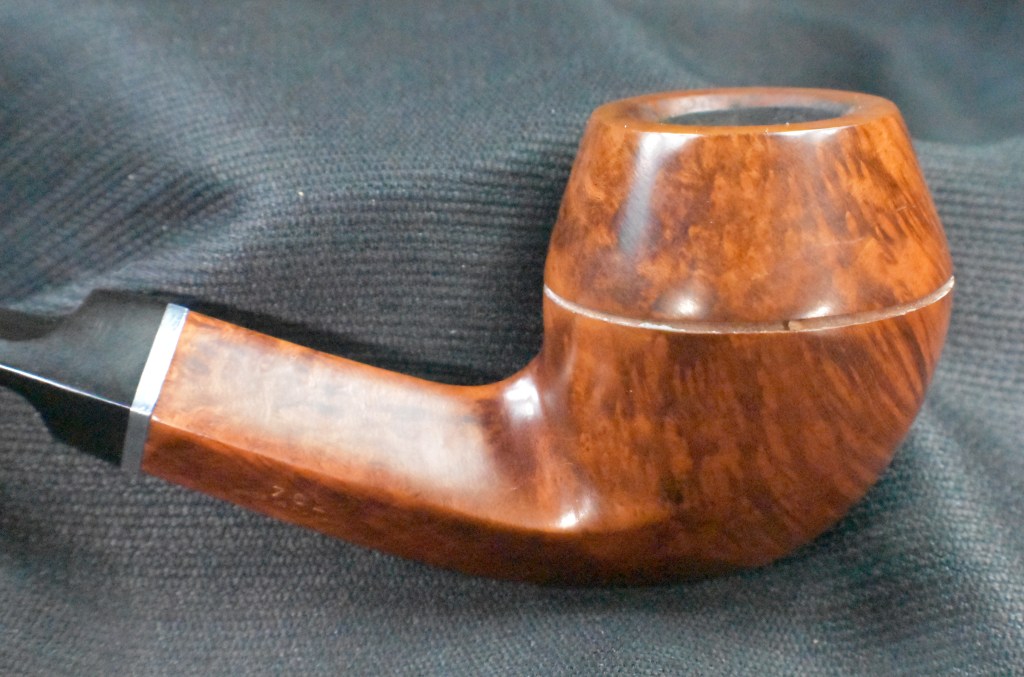

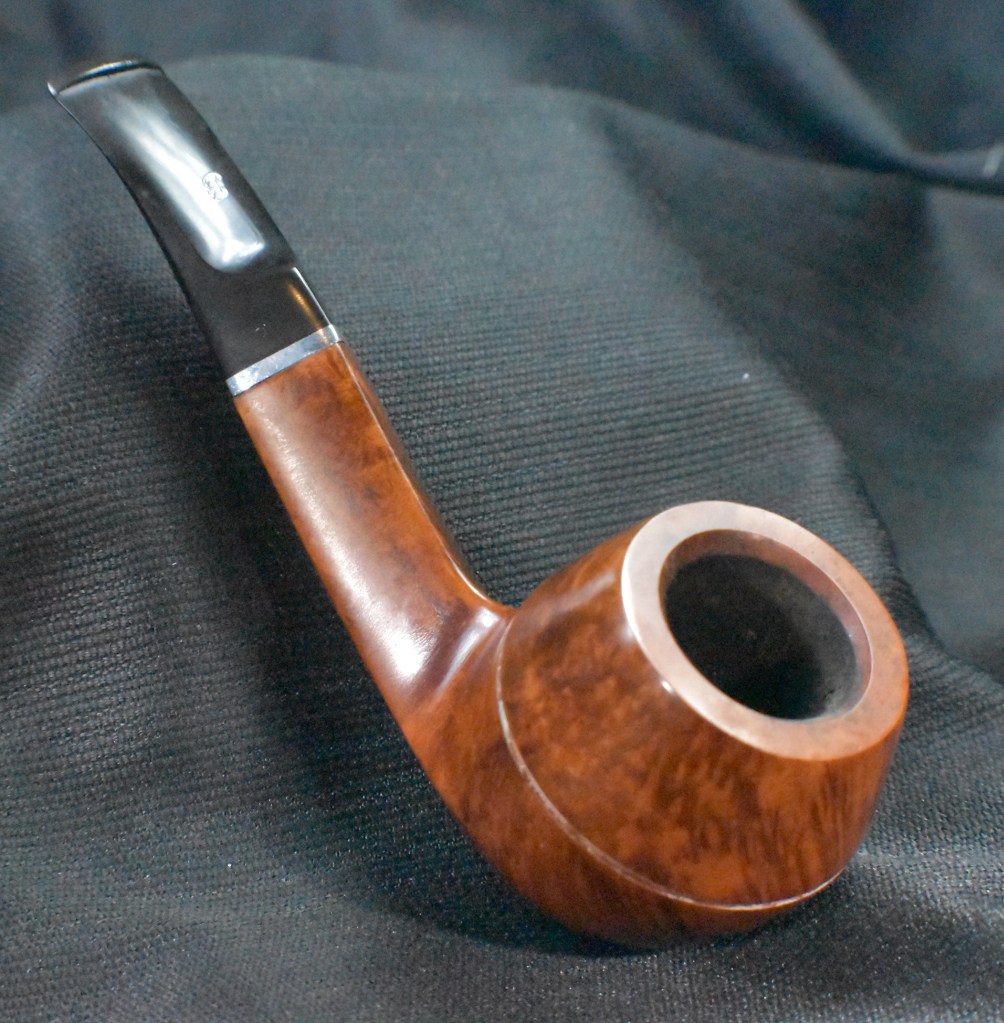


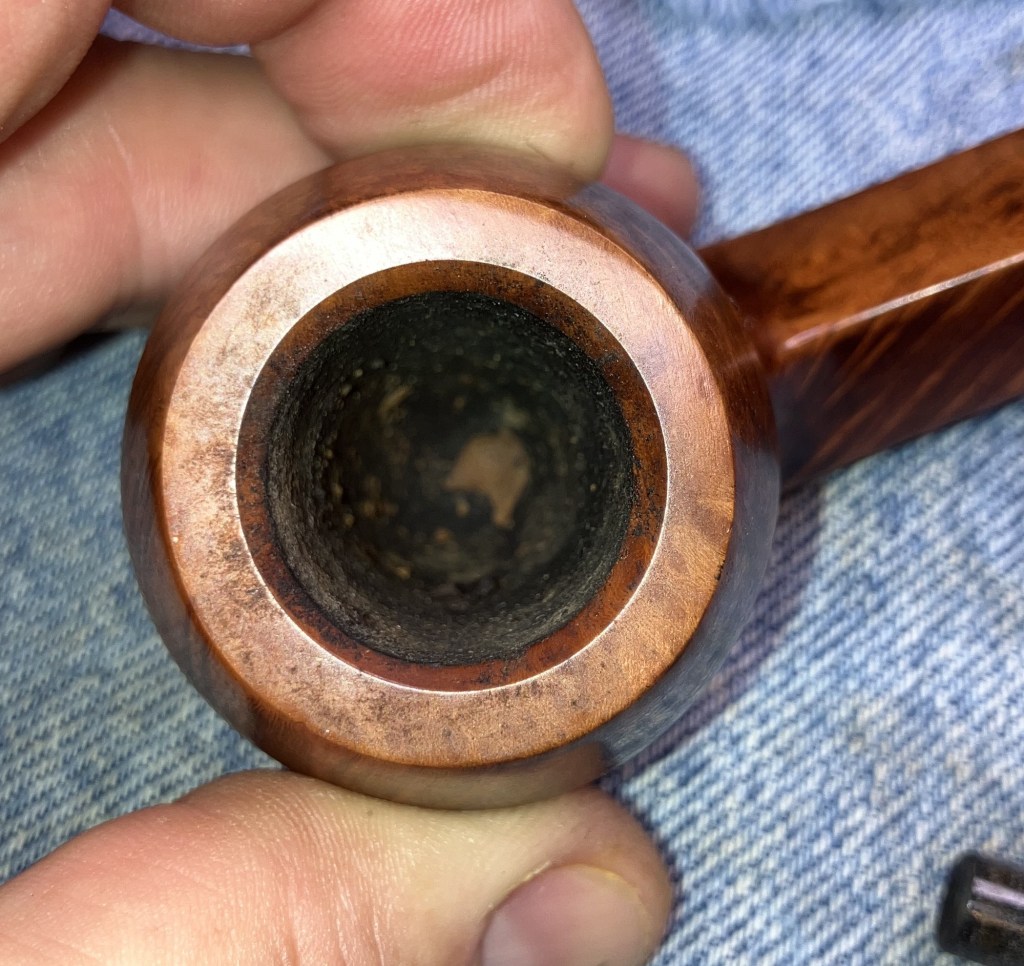

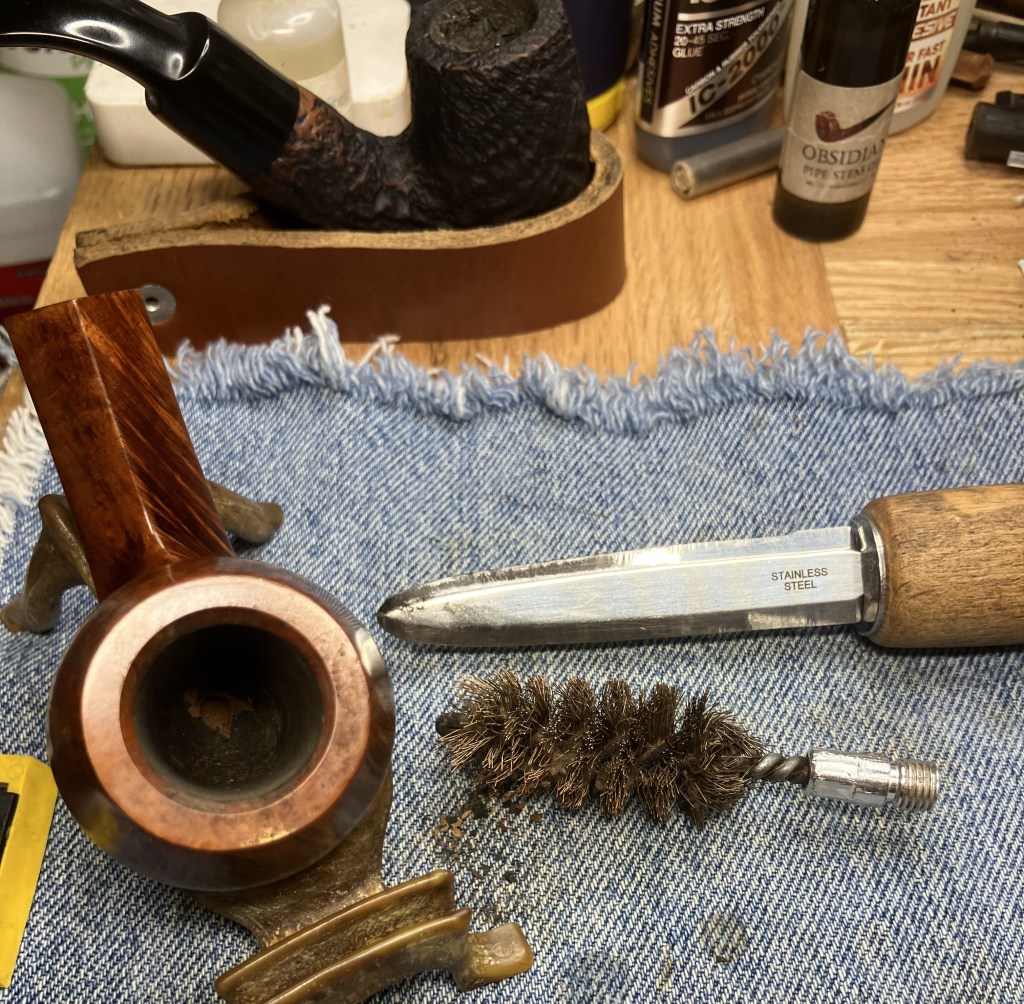
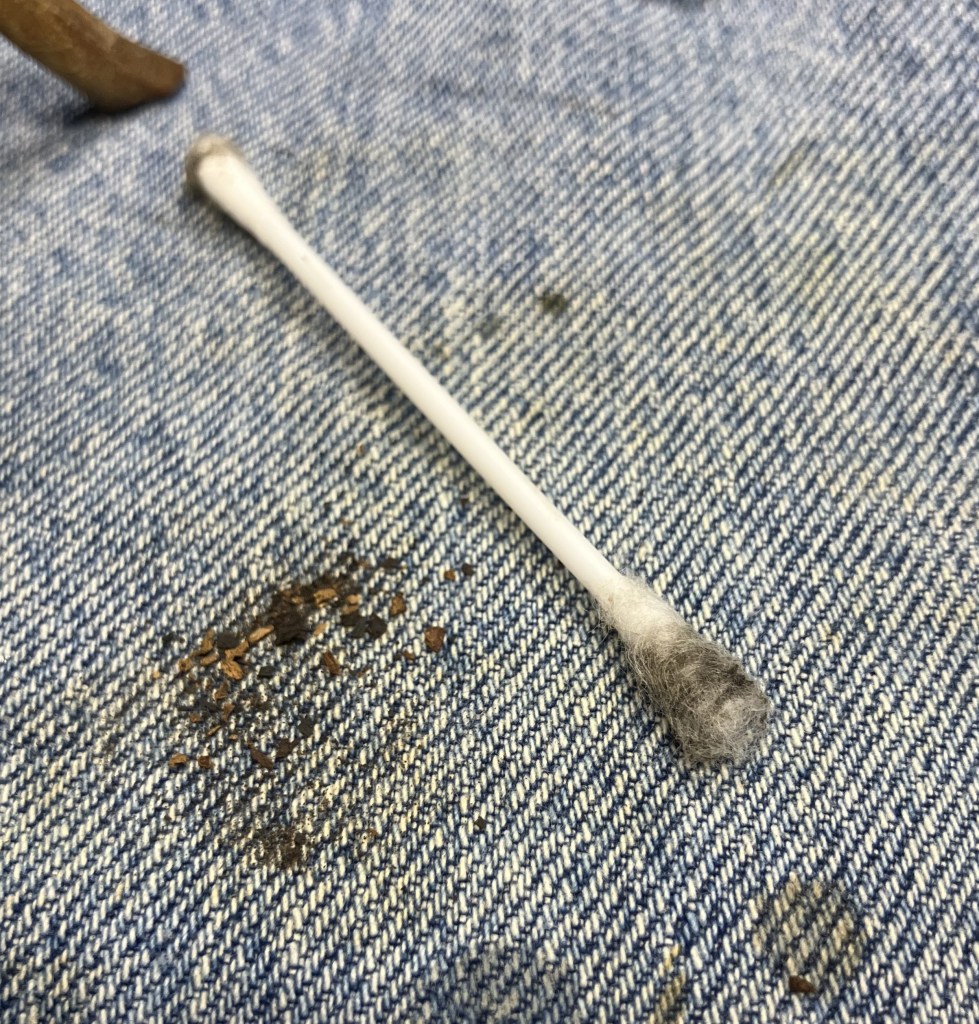


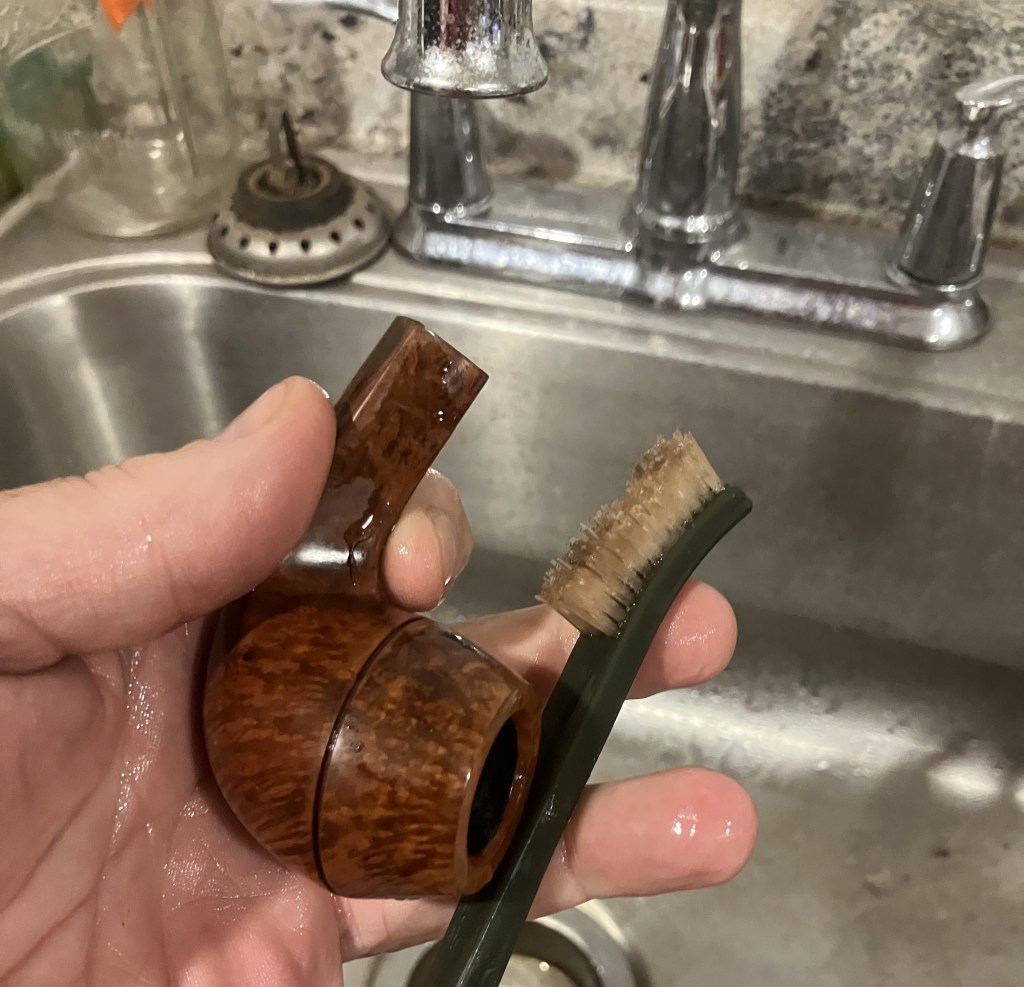
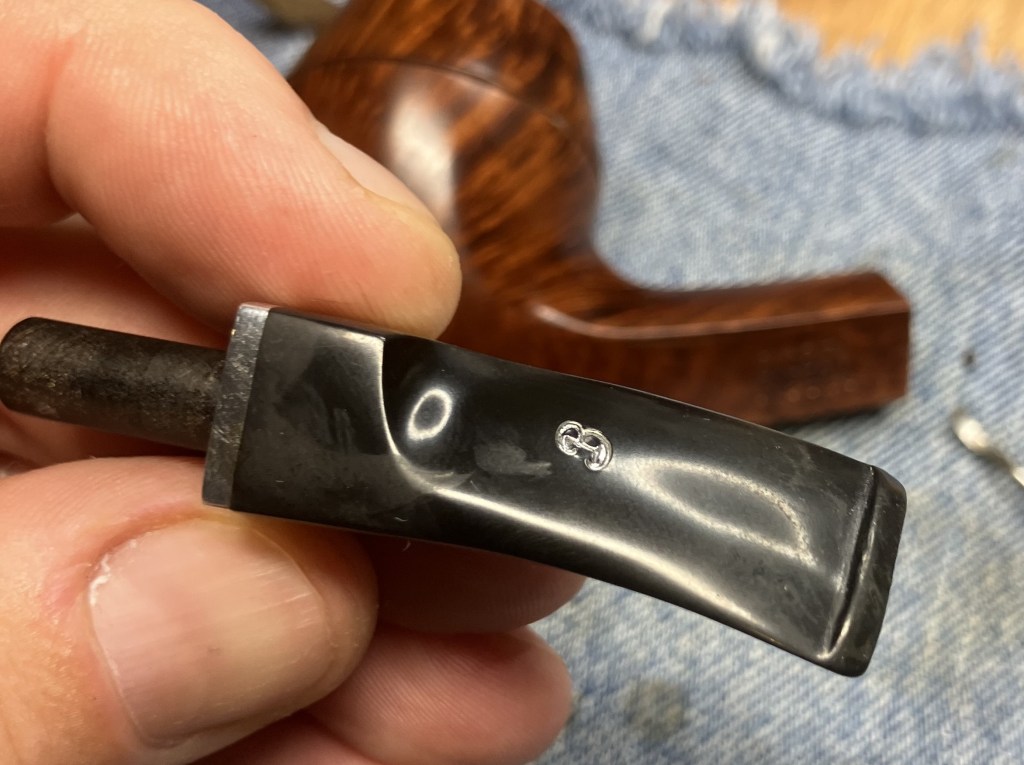
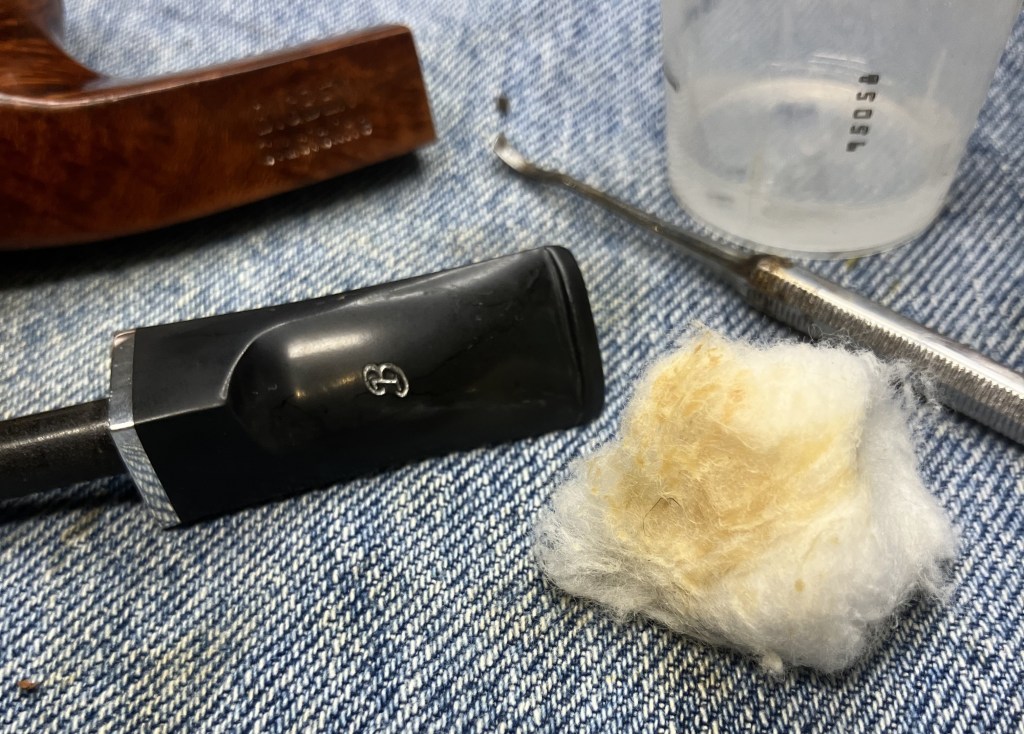
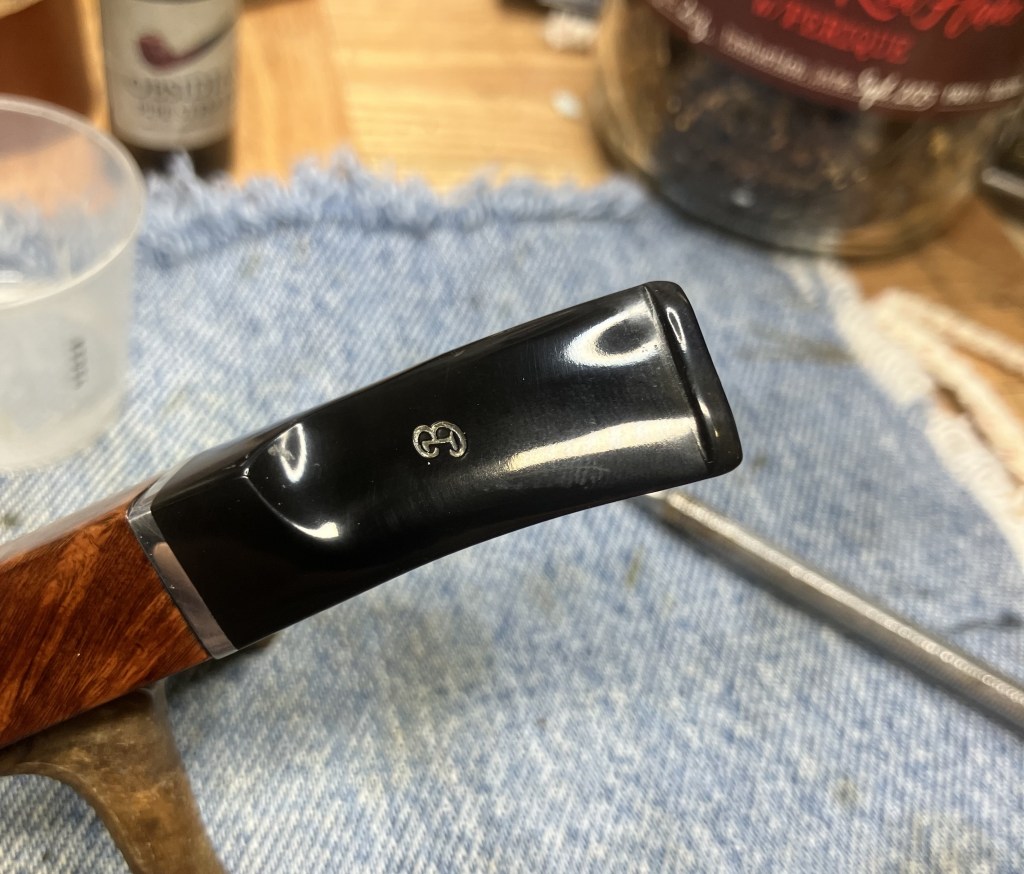

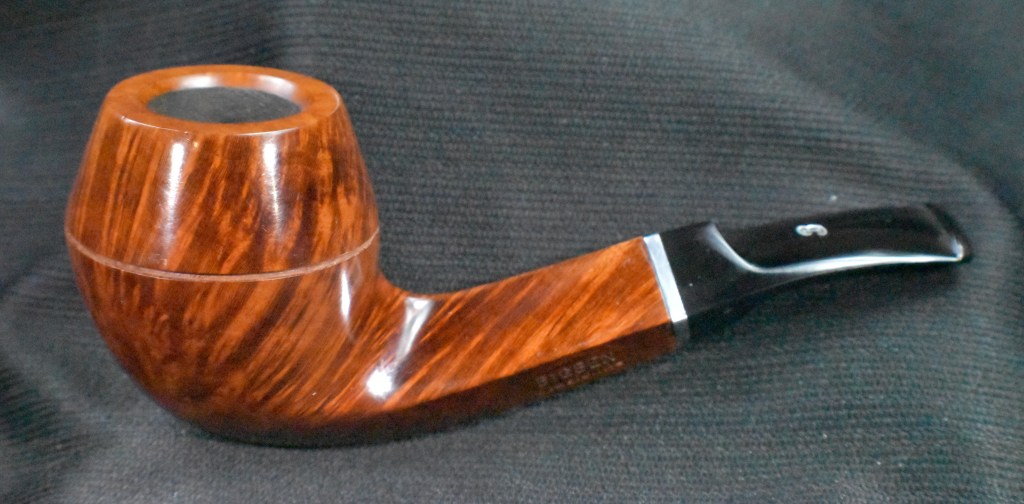


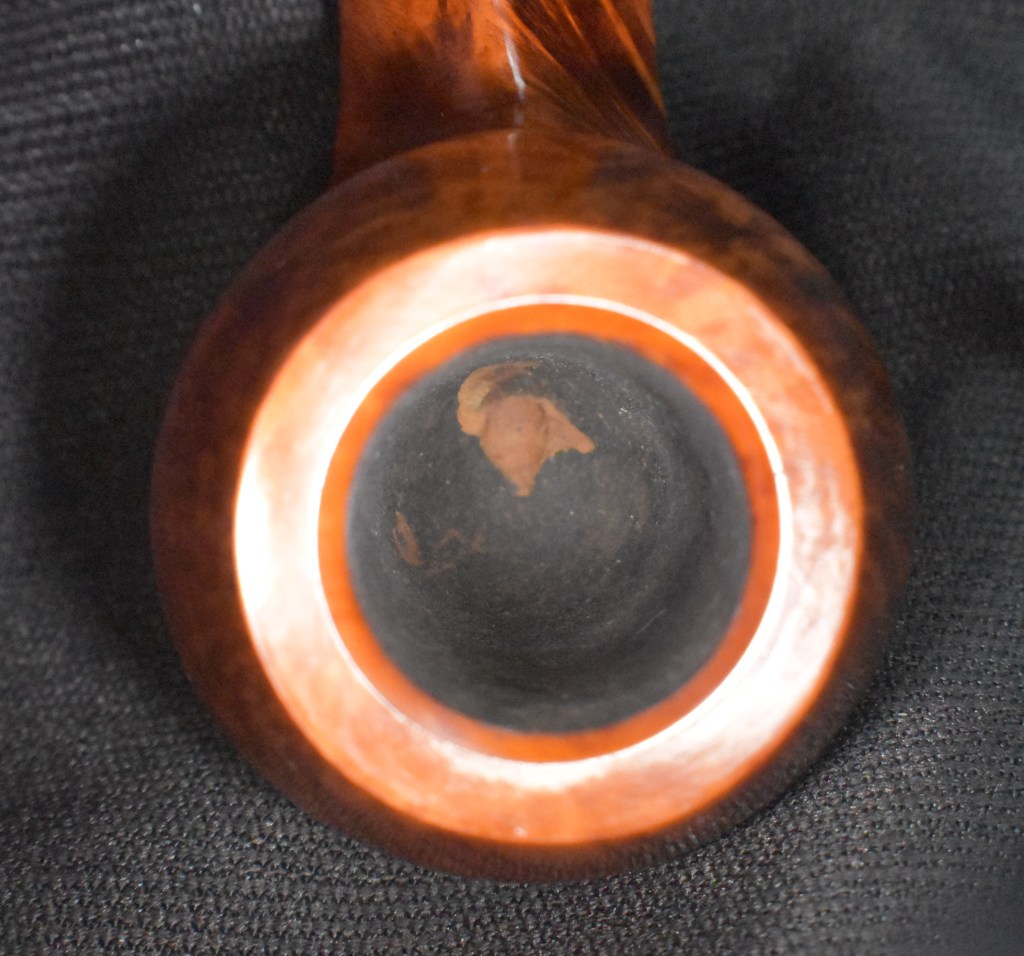
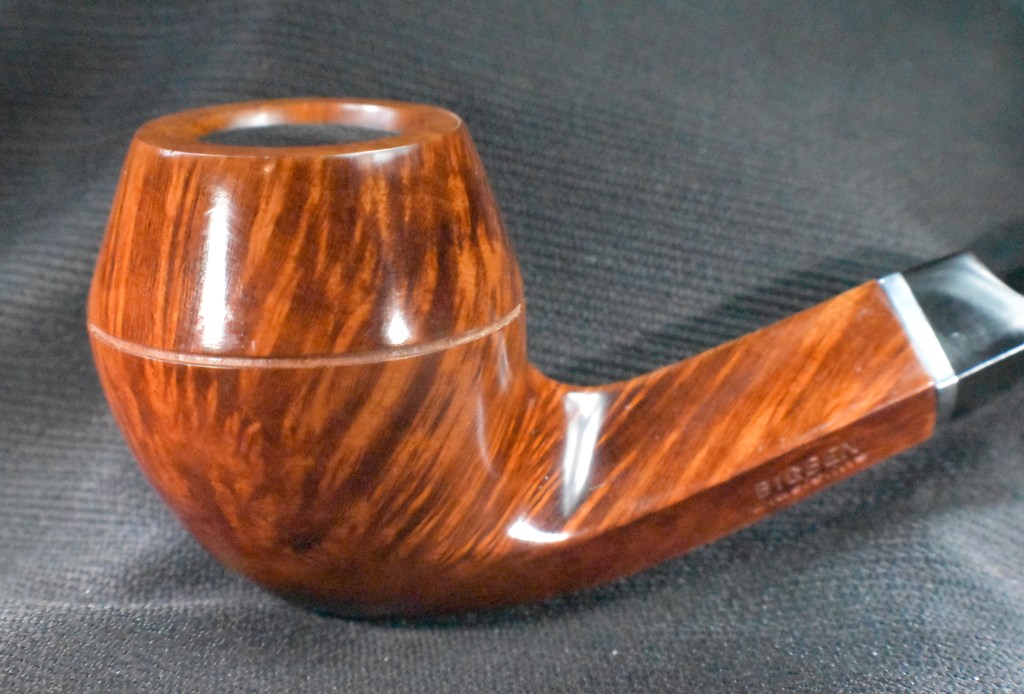
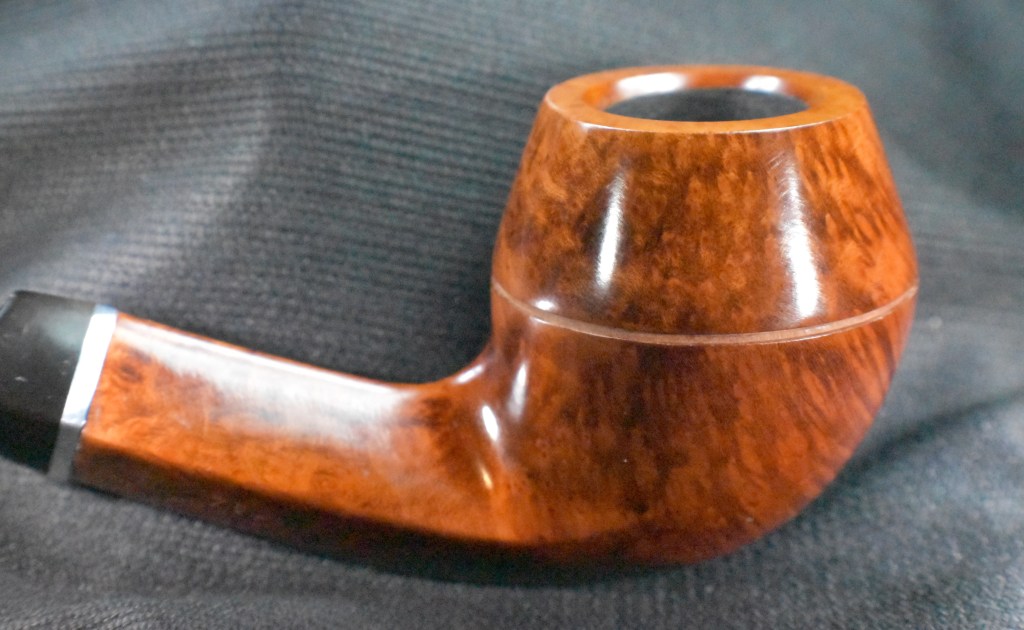

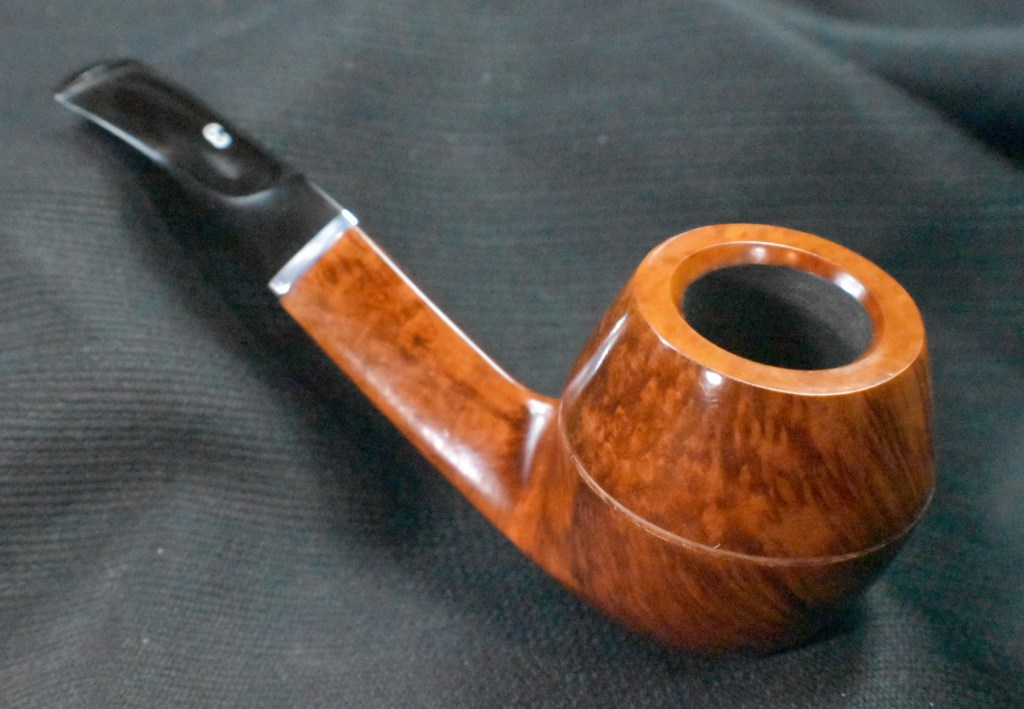

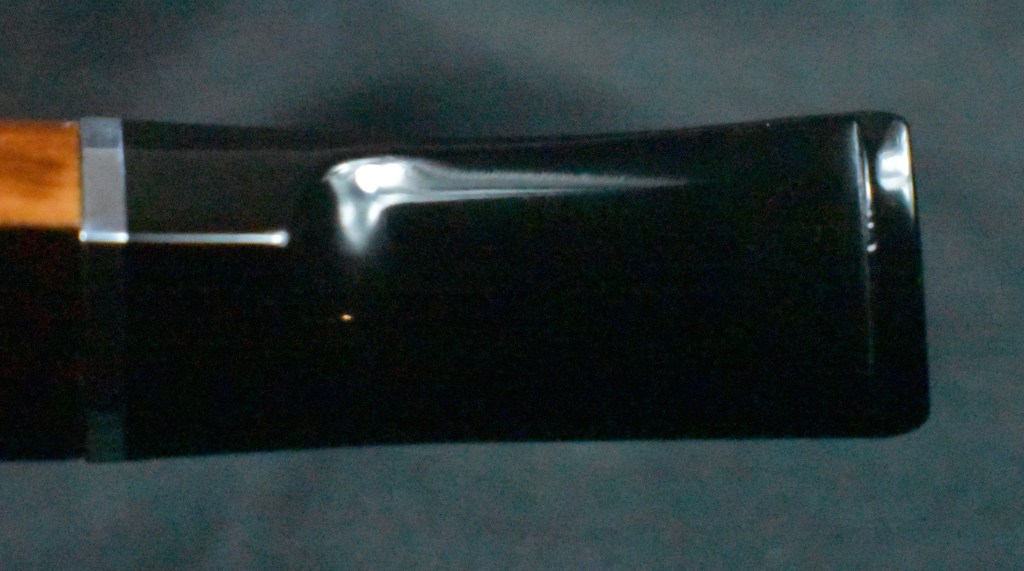


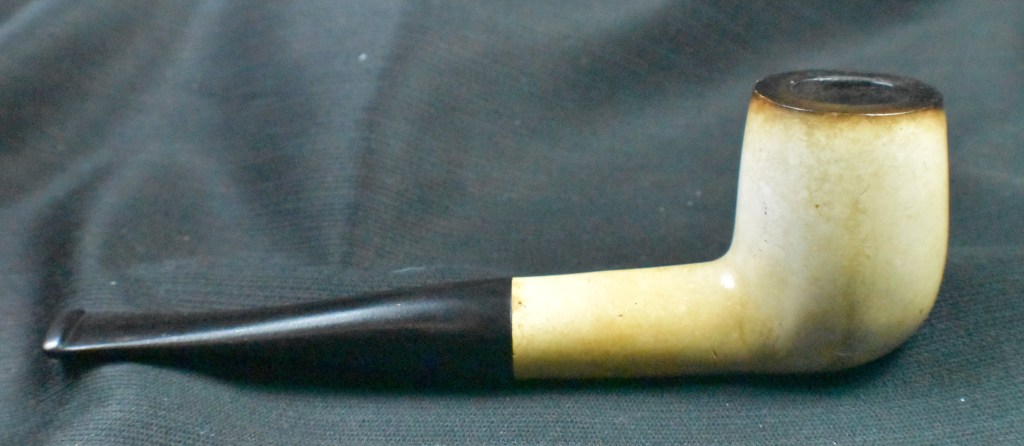


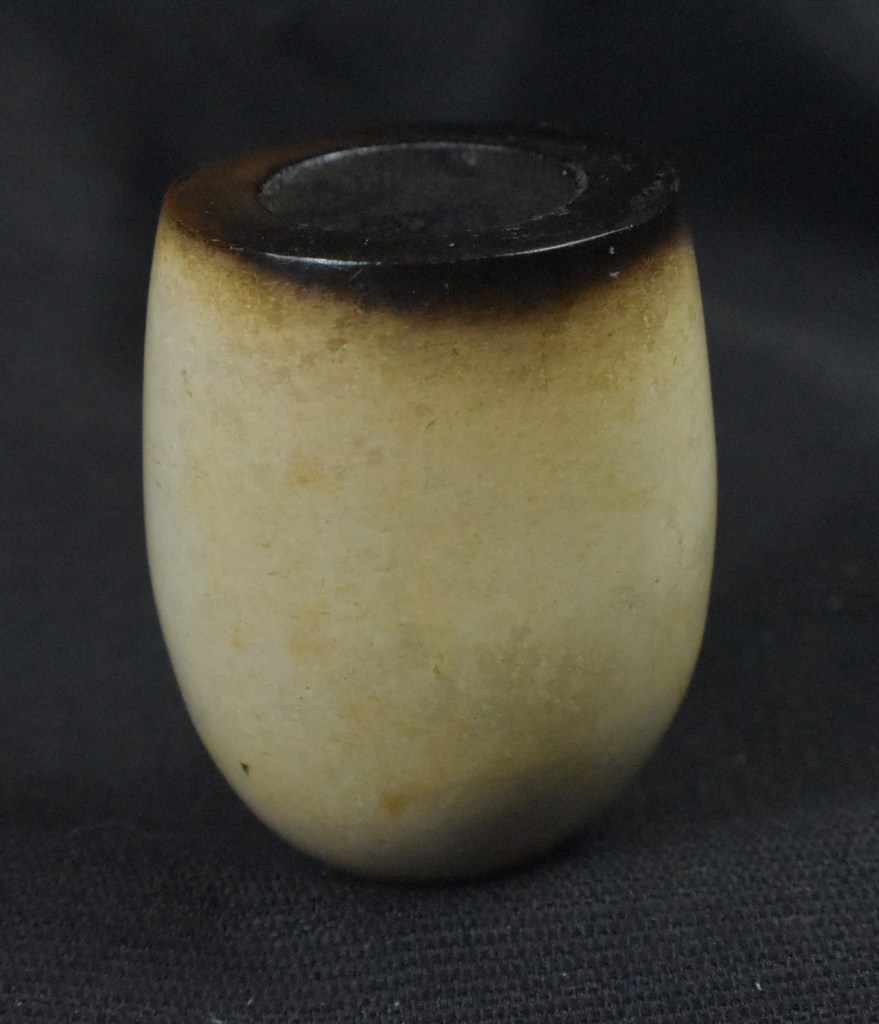

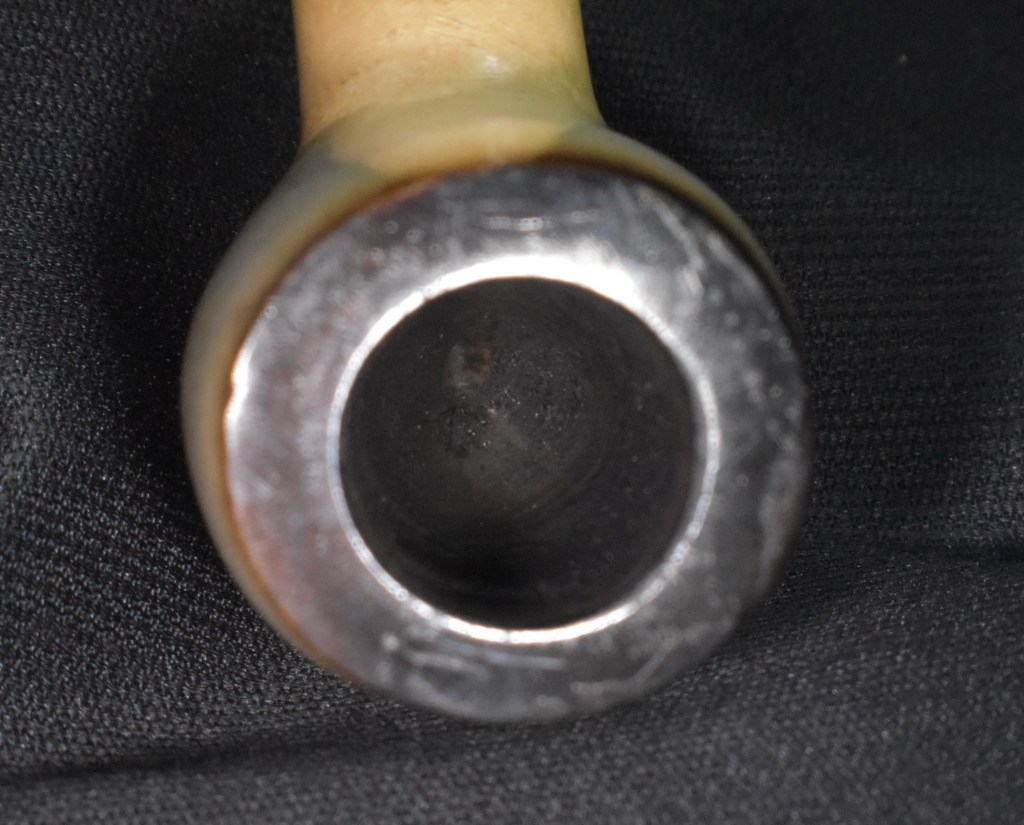
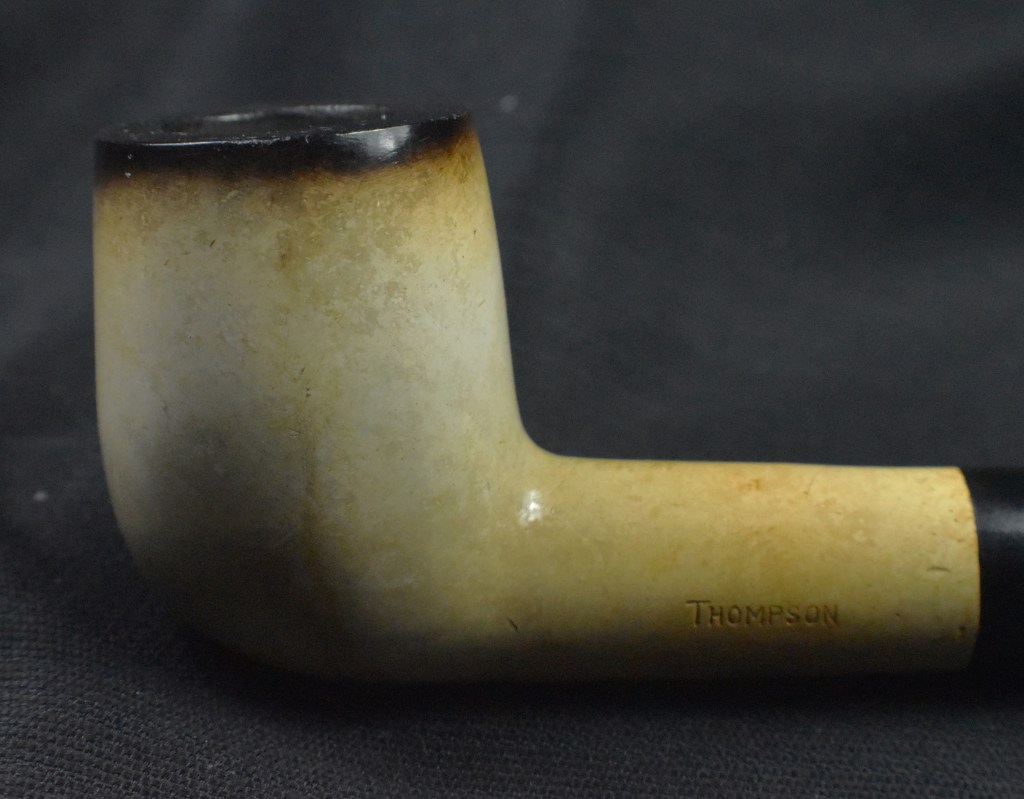
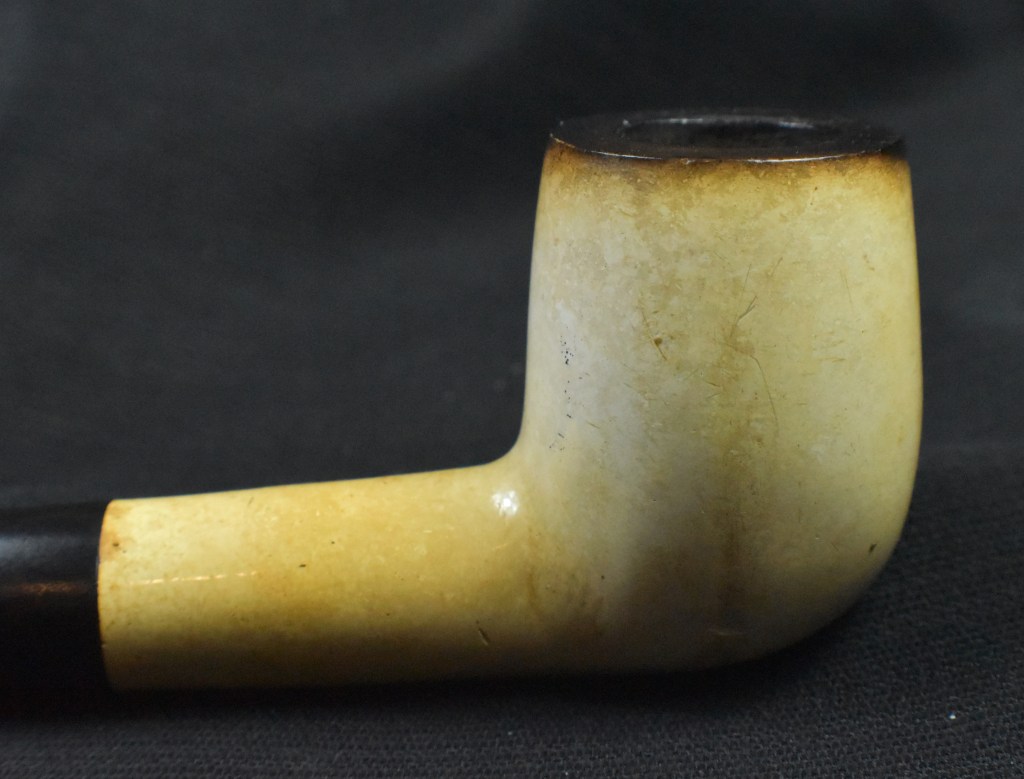
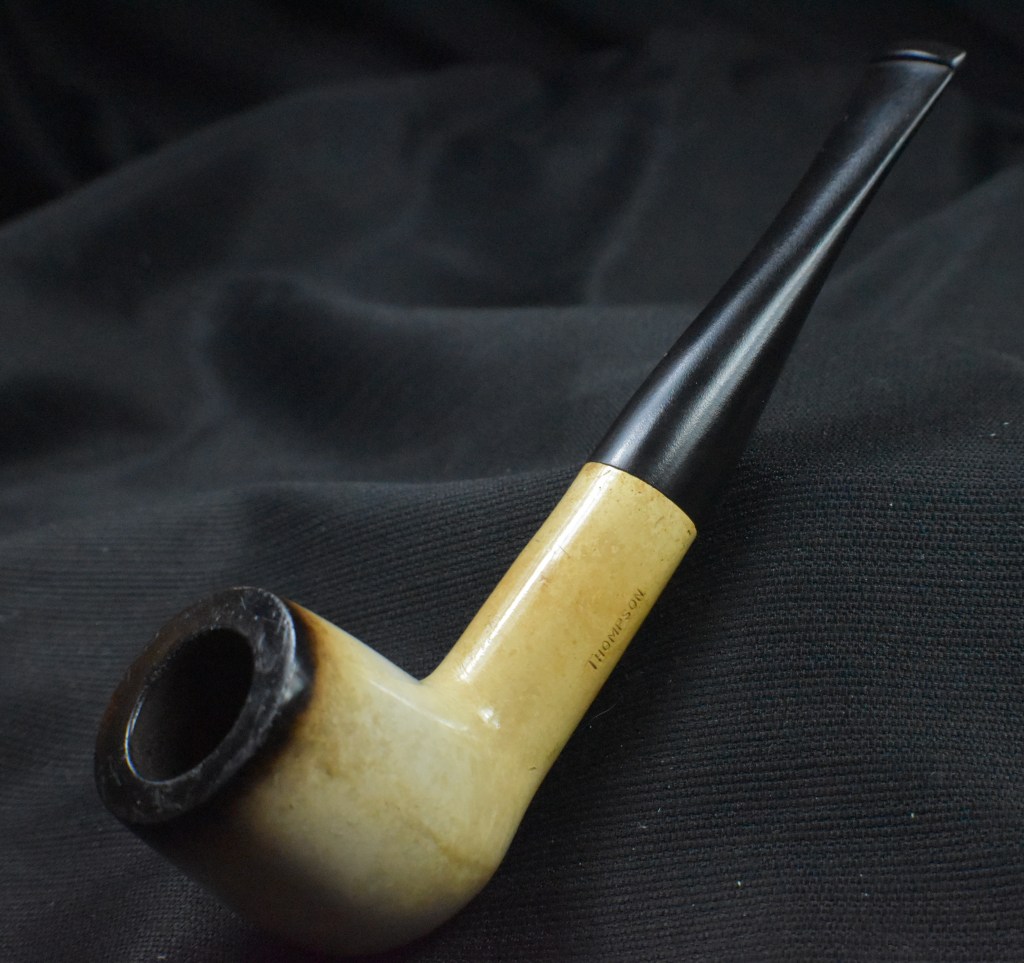
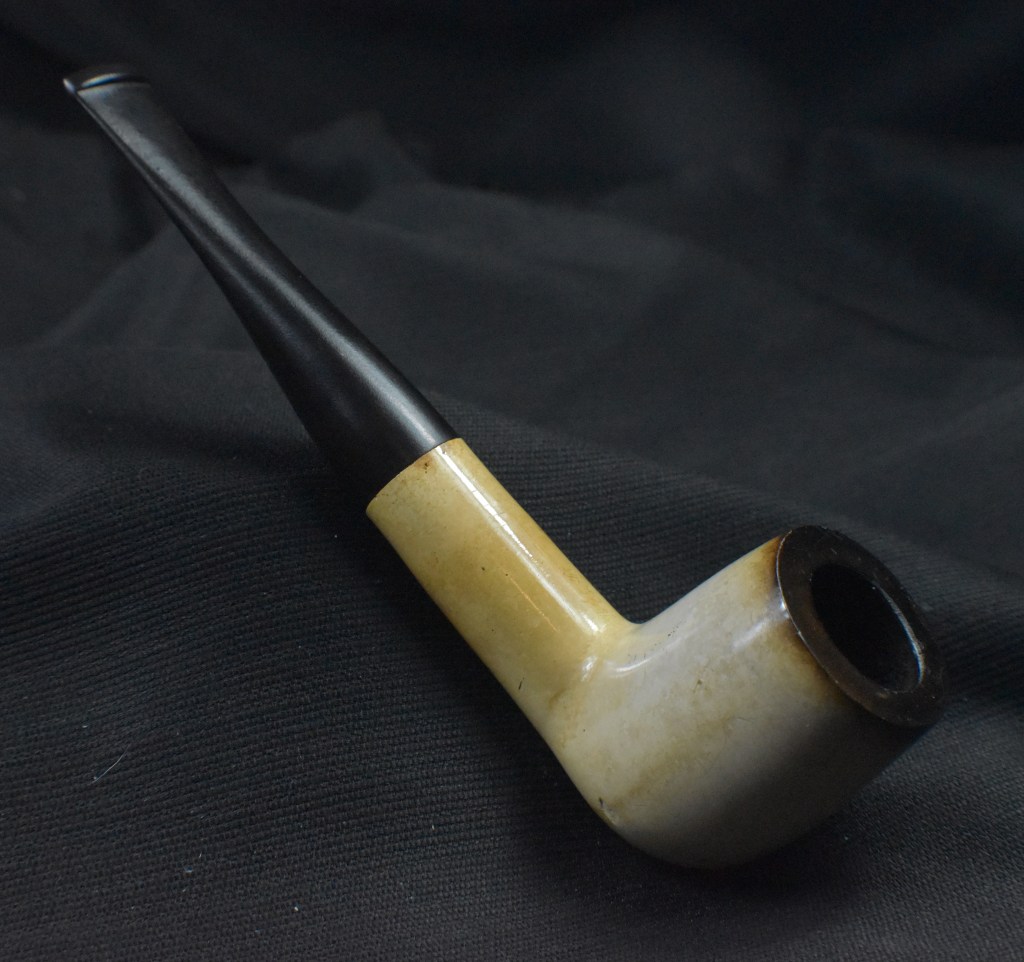
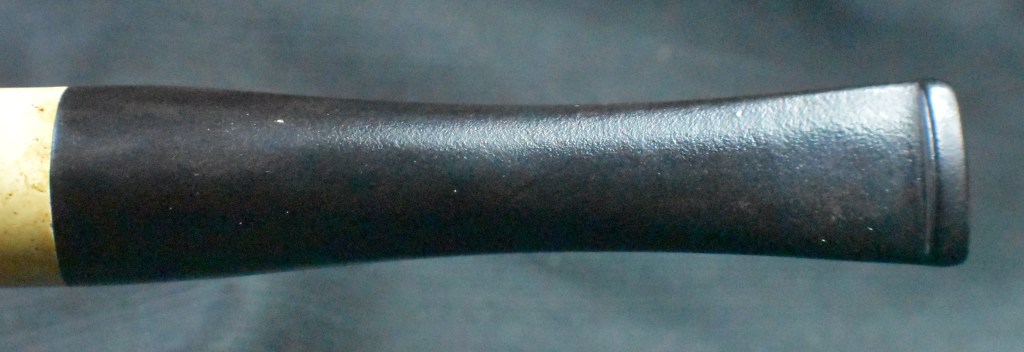


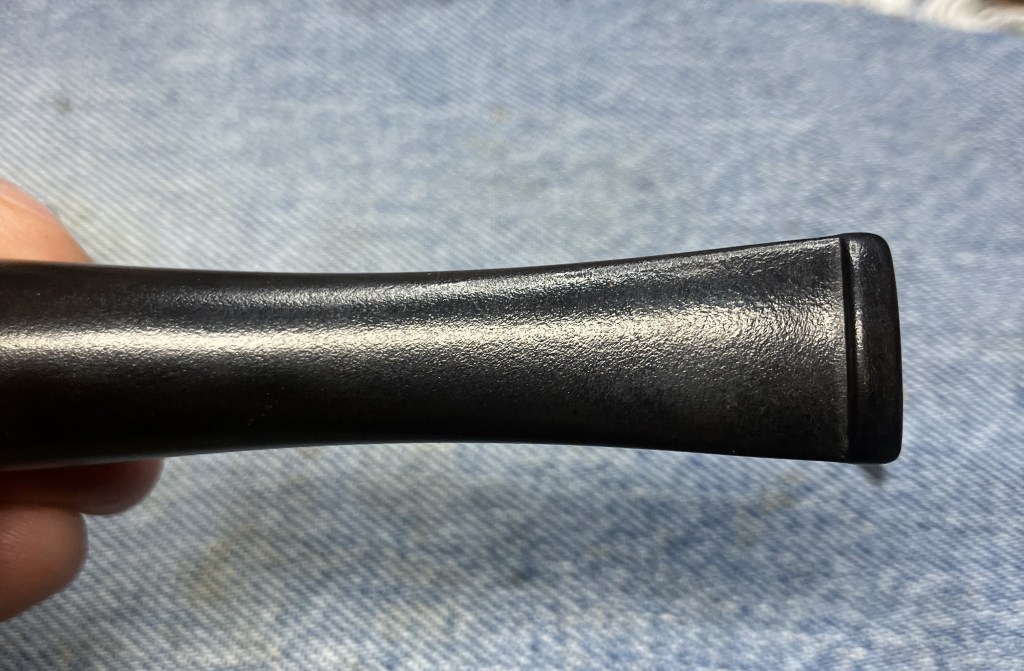


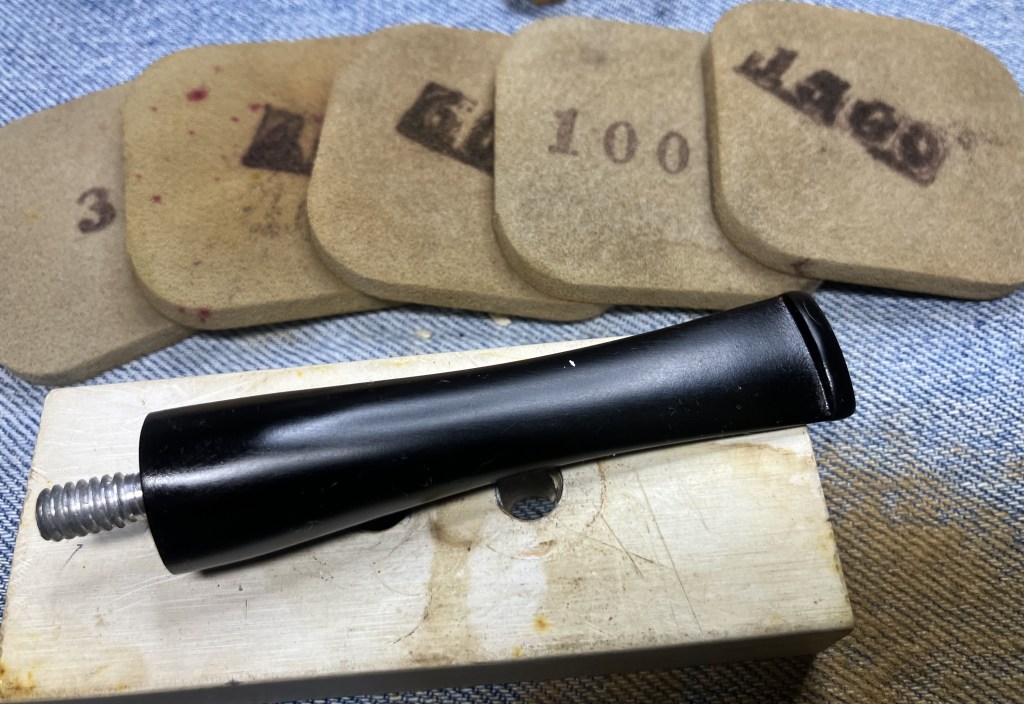

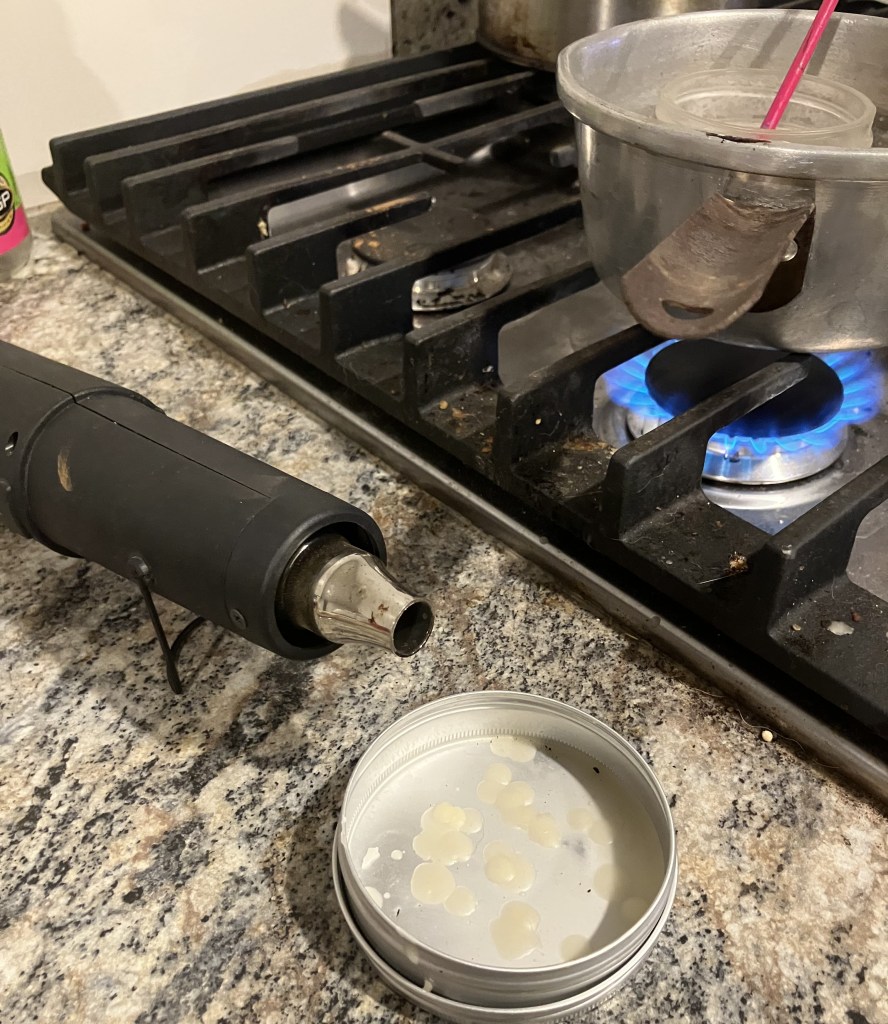


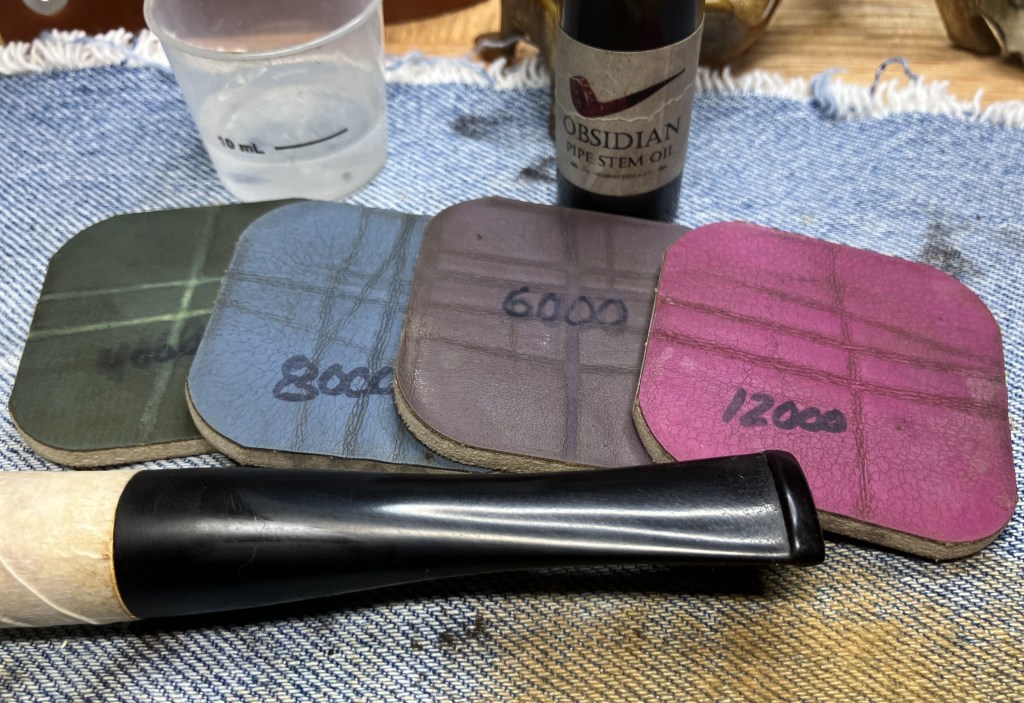

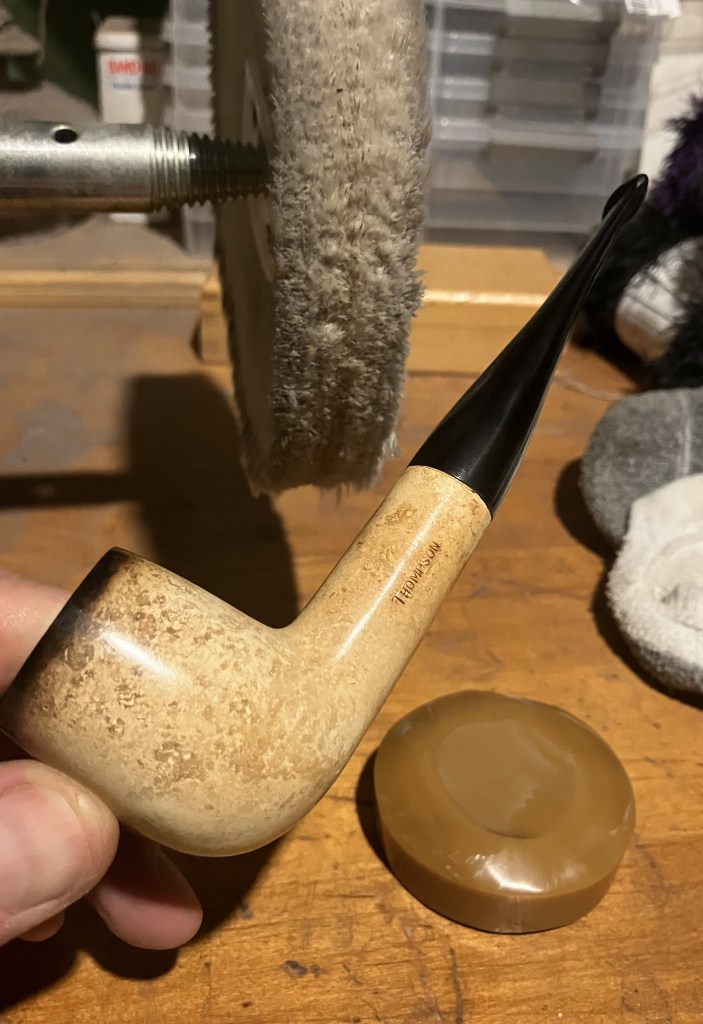


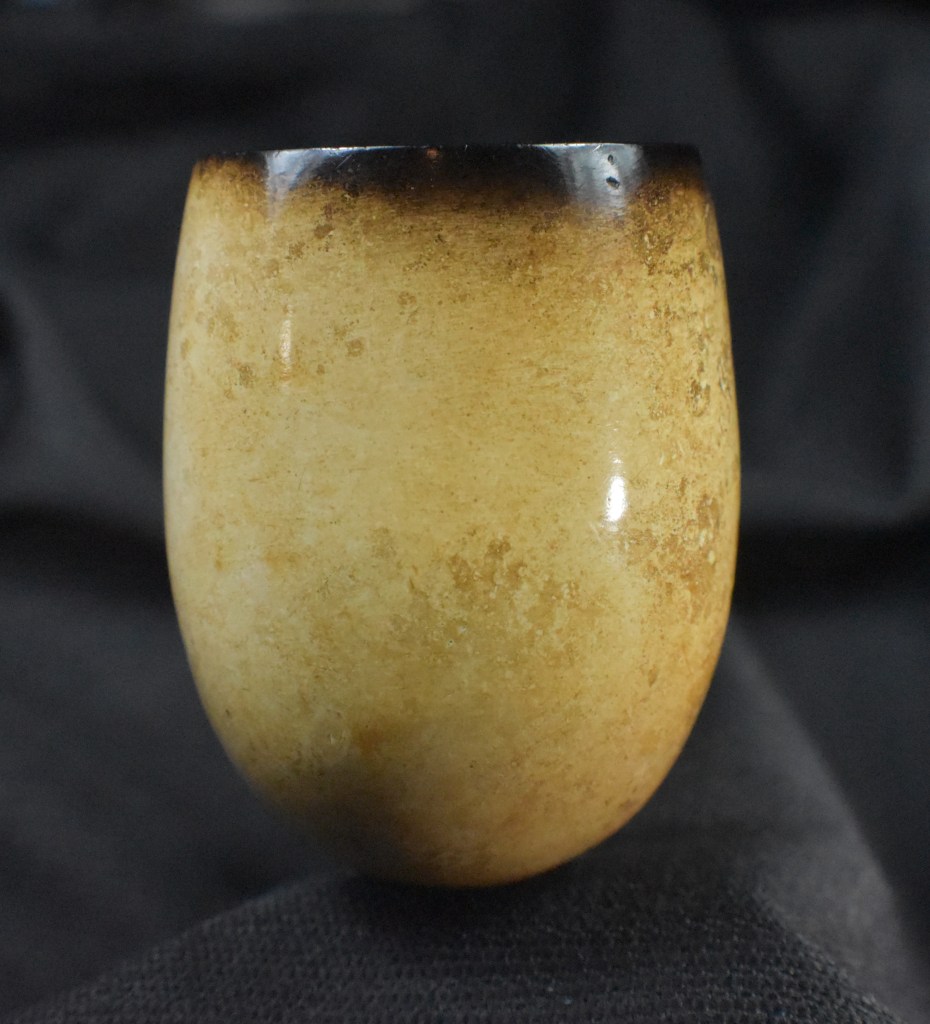
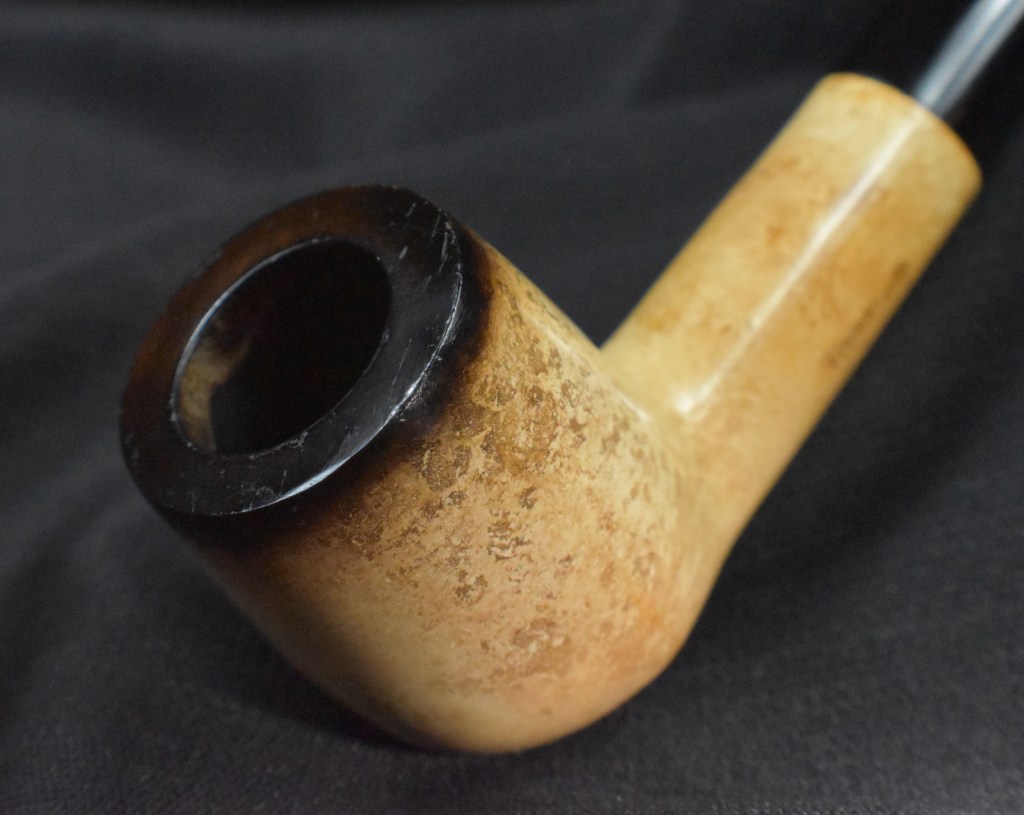

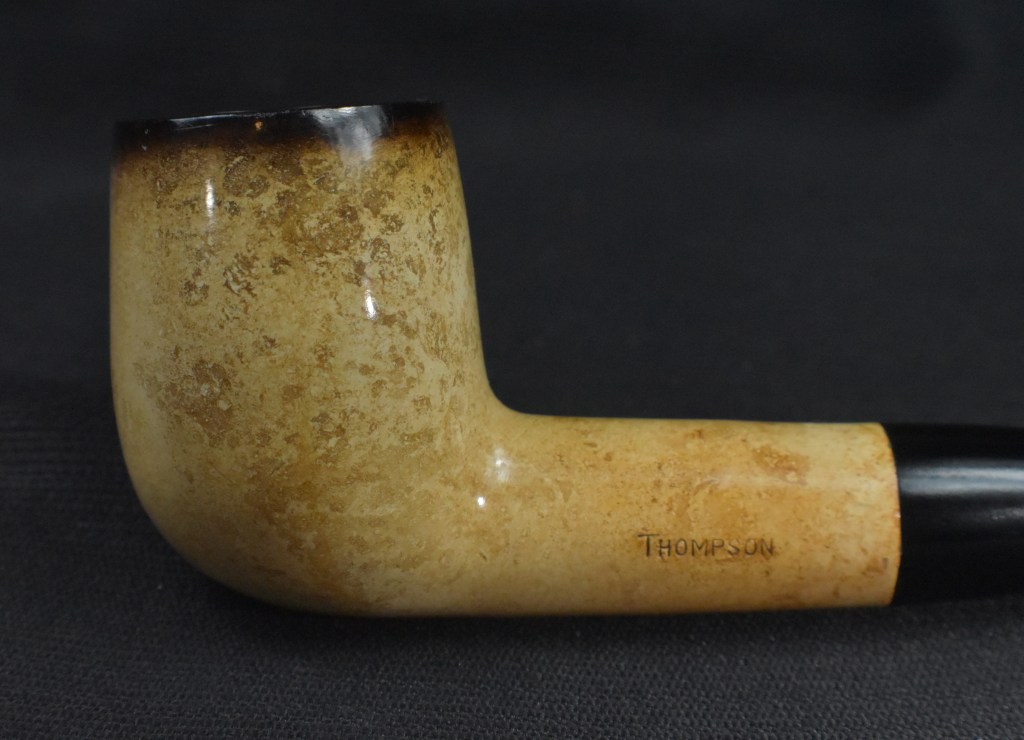
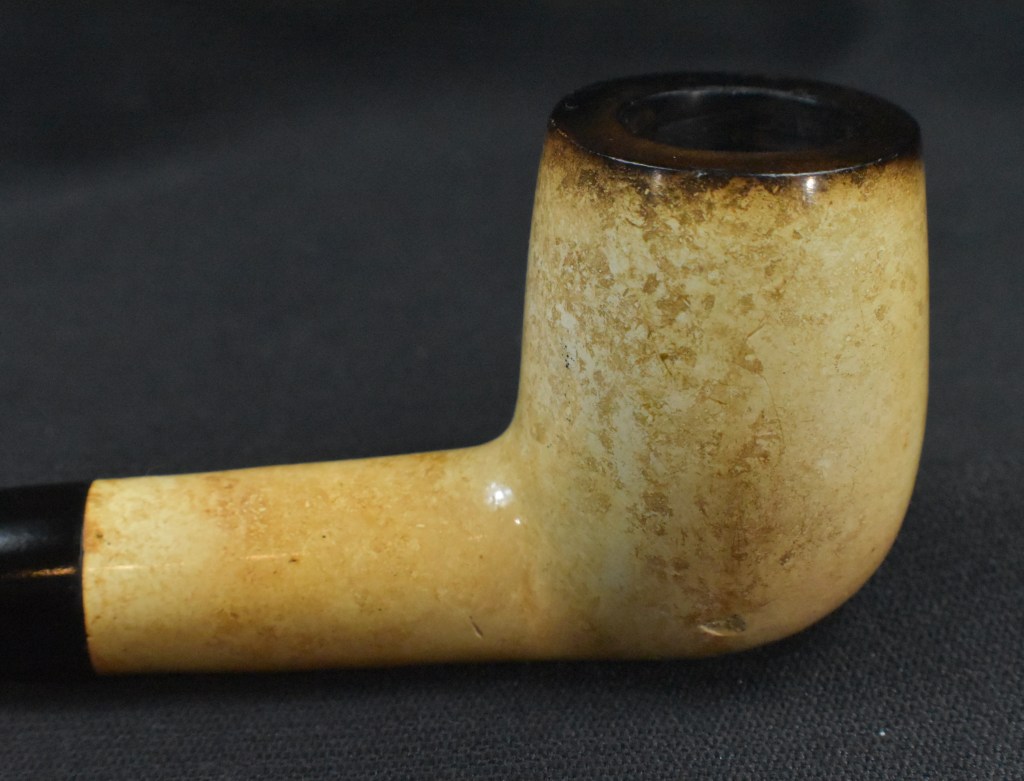


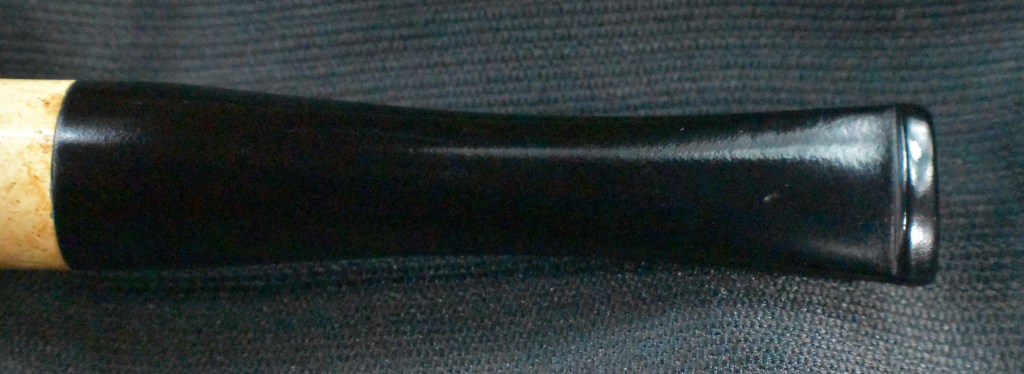
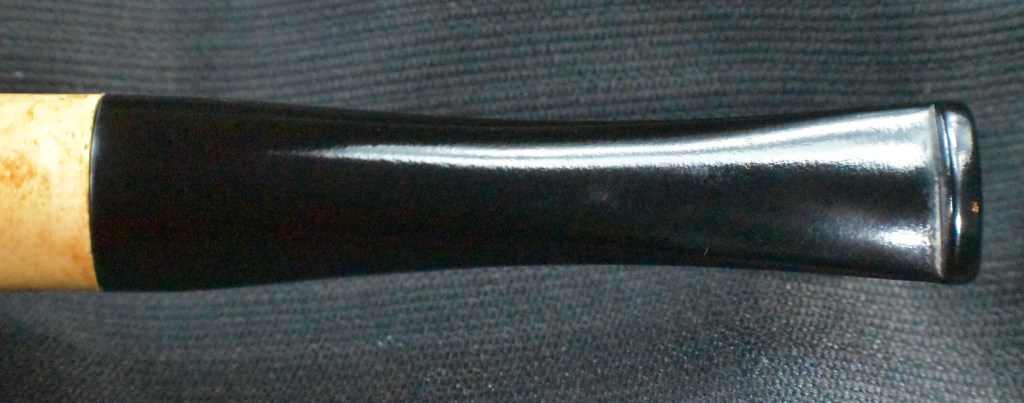

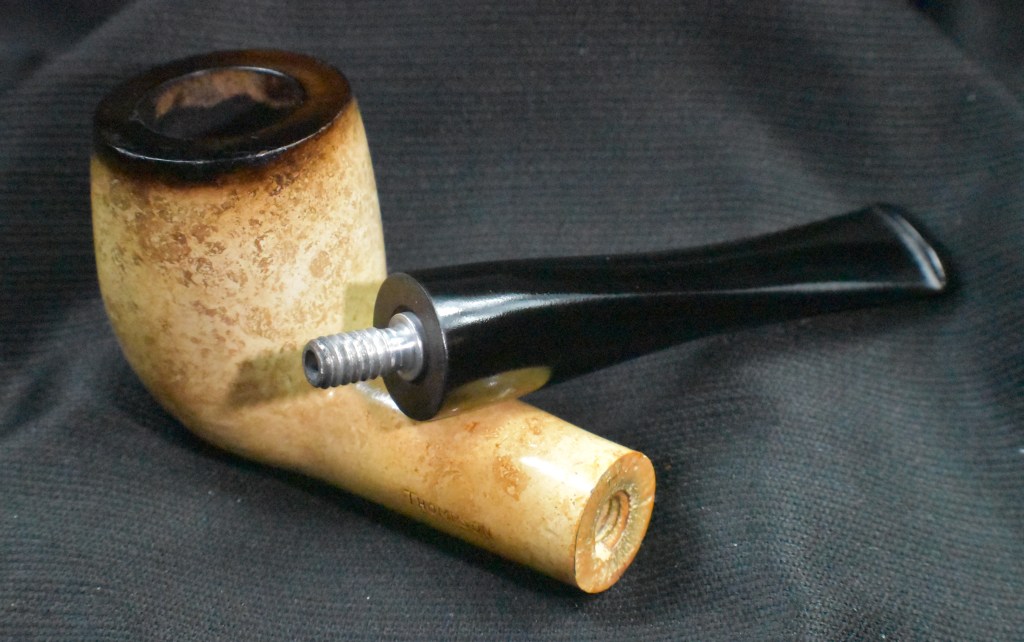
